Genshin Impact Fontaine All Luxurious Chest Locations
In guide will show you where to find every Luxurious Chest in the Fontaine region (version 4.0) in Genshin Impact.
🎮 Find more Genshin Impact 4.0 guides here.
There are a total of 17 new Luxurious chests to find in the Fontaine Region in Version 4.0 of Genshin Impact. Here are the locations.
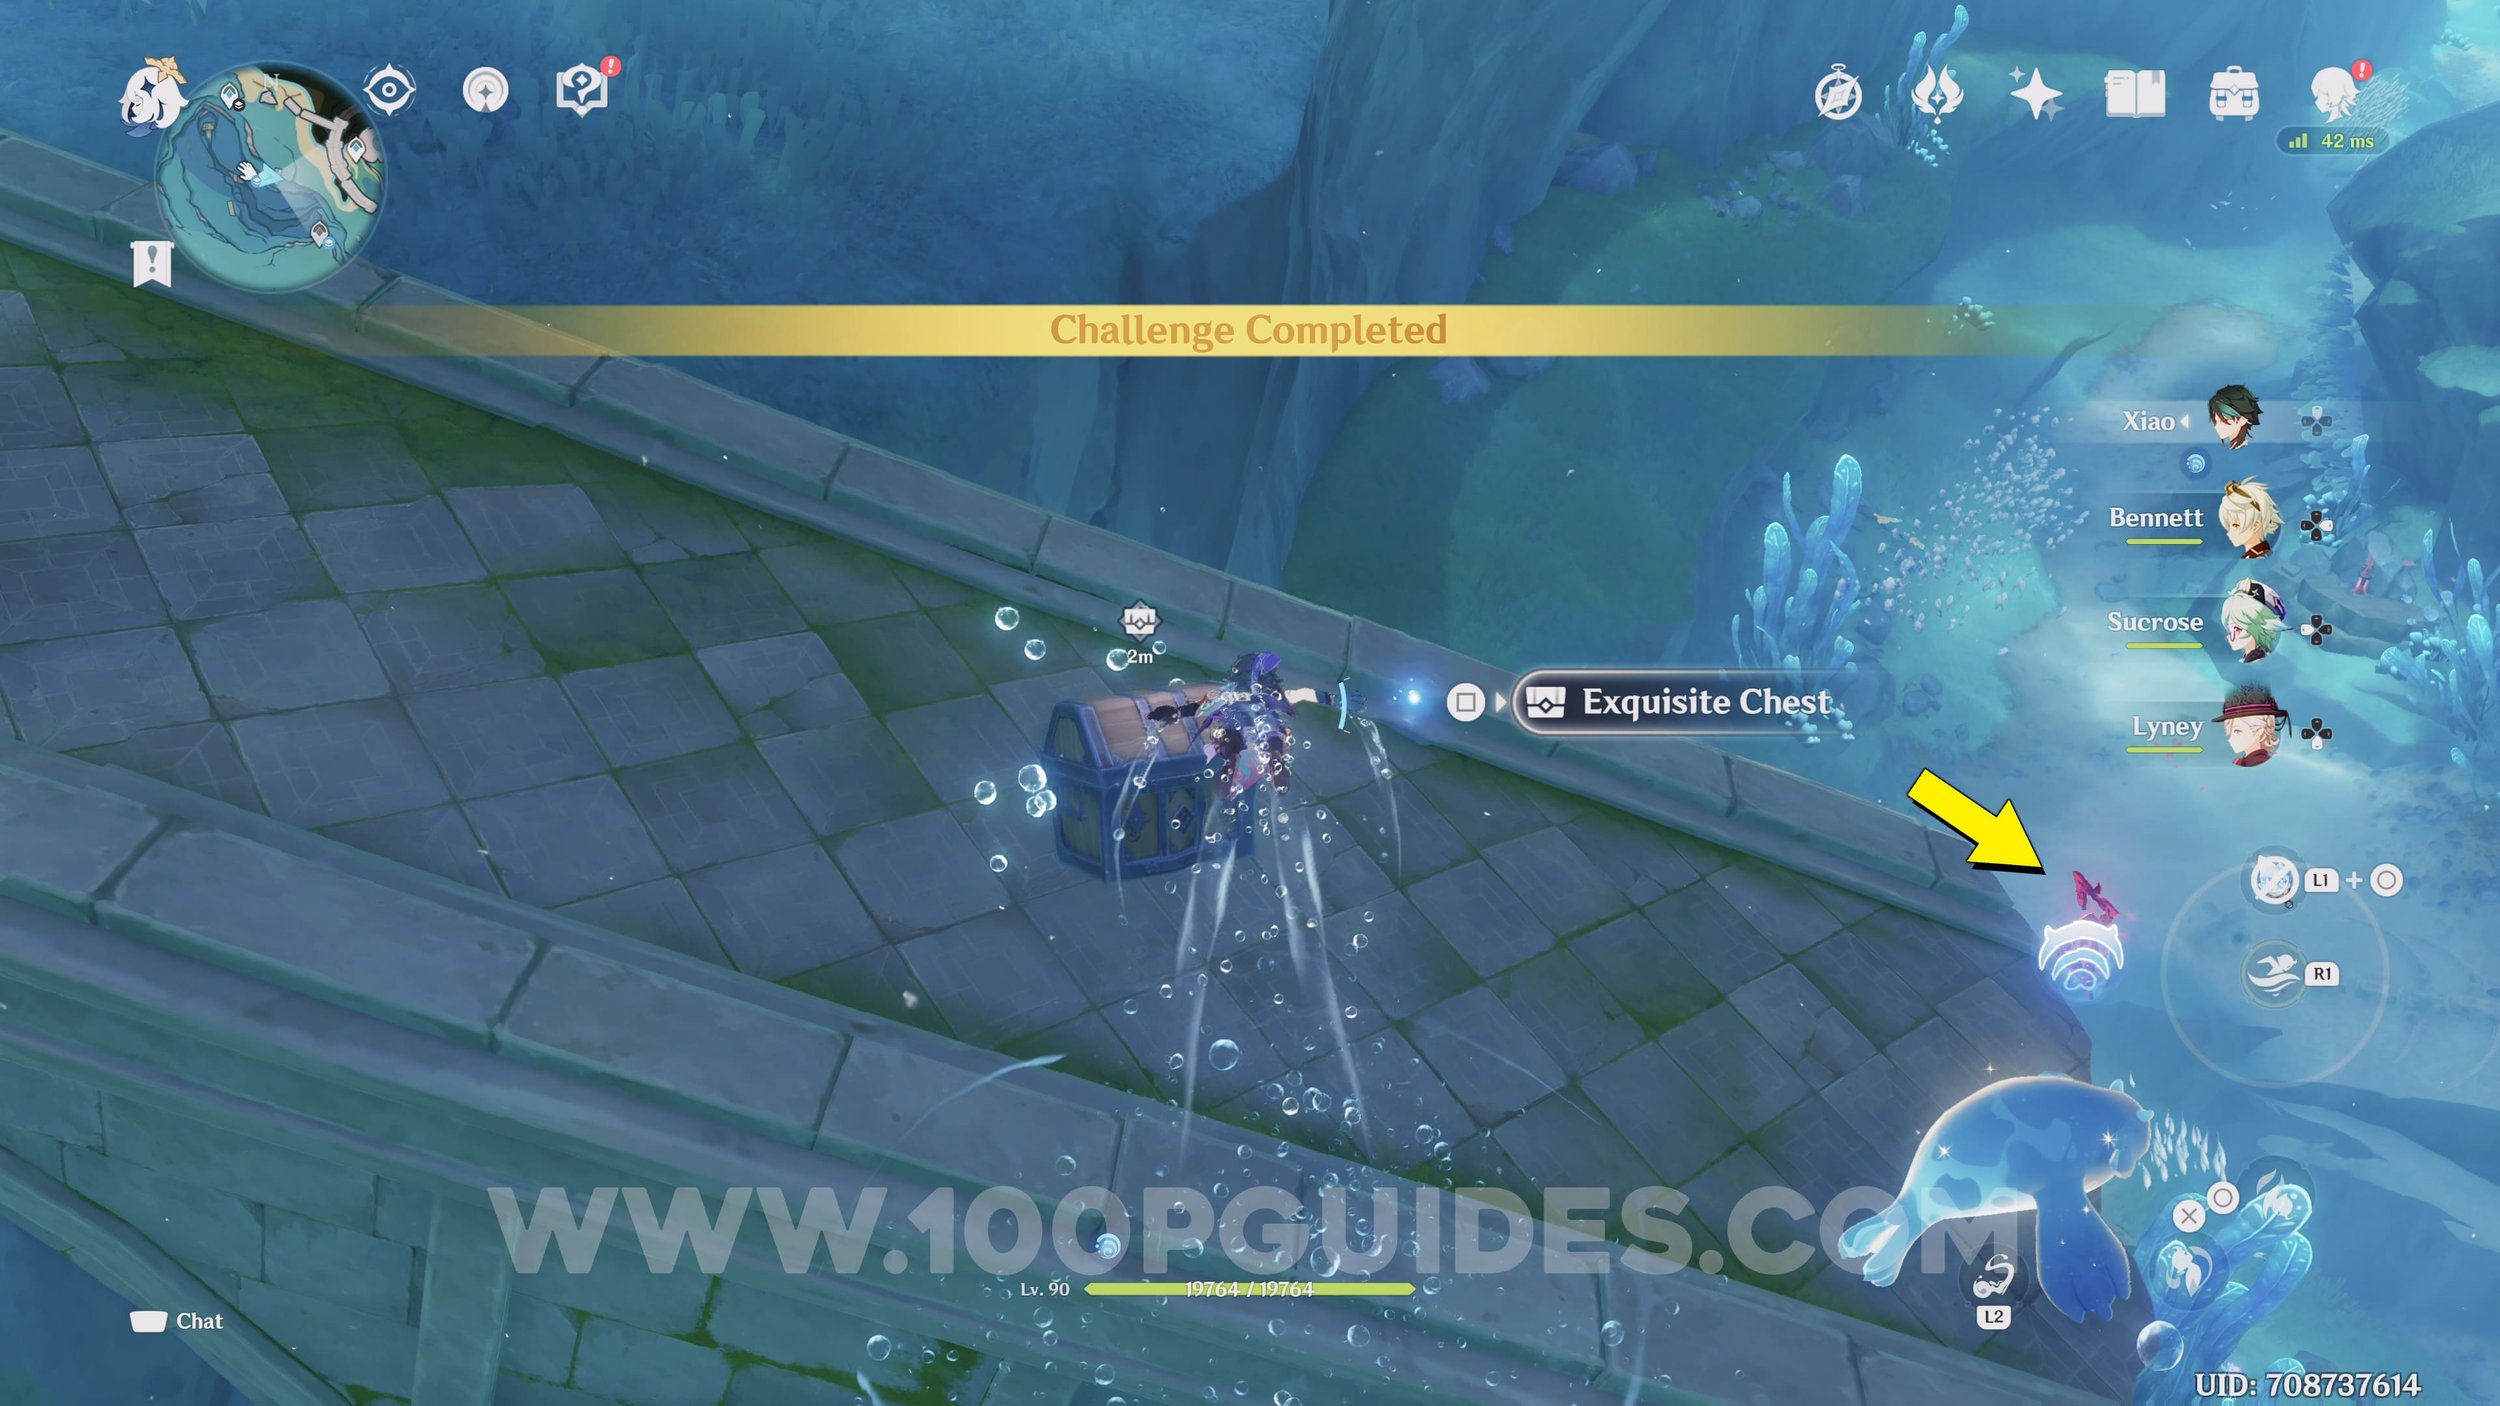
Luxurious Chest #1. This Luxurious chest can be found near the south west coast of the Berly region in Fontaine. To open it you will first have to guide the 3 seelies in the area back to the Exquisite chest.
The first can be found in the ruins to the west. As you get close to the gate it will shut. To enter the ruin, just climb to the top and drop inside.

The next seelie can be found in the ruins to the north east. Climb to the top, grab an orb and hit the opposite colored totem at the gate. Do this to both totems to find the seelie inside.


The final seelie can be found in the ruins to the south east of the chest. Here, pick up the 3 water particles (2 near the hydro lamps and 1 in the room at the back). With all 3, stand in the middle of the 3 lamps to open the metal grate. The seelie can be found below.


After opening the Exquisite chest, you will get teleported to some platforms in the sky. Jump on these platforms to reach the Luxurious chest above.
Luxurious Chest #2. To get the Luxurious chest from the hot springs on the western island of Fontaine you will have to solve 2 puzzles. The first of the puzzles will be on the surface around the hot spring. Here, you will have to get the 3 Hydro Lamps to the middle of the hot springs.
The first can be found by getting the dark orb and hitting the rock with the light on top.


The second can be found by defeating the enemies on the side of the hot spring.
The final lamp can be found behind some roots you can burn on the west of the hot spring.
Once all lamps are in the middle, grab the hydro particle from the rock in the center of the hot springs to light the 3 lamps.
After opening the chest you will be transported to an underground area where you will find the 2nd puzzle. To solve it you will have to put out all 3 fires at the same time. For the first one, hit the hydro stone and place the hydro core near the fire at the entrance of the cave.


Next, destroy the 3 blue barrels to reveal another 3 particles. Take them and place the hydro core near the second fire.


Finally, go to the end and put the 3rd fire out with any hydro attack. You will now be able to activate the hydro totem in the cave to cool the hot spring allowing you to get the underwater luxurious chest.


Luxurious Chest #3. This chest can be found during the “Book Of Esoteric Revelations”. You can start this quest by talking to the Merusea near the small waterfall in Merusea Village after finishing the “Ancient Colors” questline.


Close to the end of this quest you will get teleported to a “dream” area after deciphering the pages of the book. In this area exists an optional Luxurious Chest that can be obtained by finishing the 4 challenges in the area (if you have already done this quest, you can return by going back to the book and selecting “Read” and then “Meditate”).
The first challenge can be found by dropping off to your left right next to the first quest marker.


For the second challenge, glide over to the path on your left just before the next quest marker. Then, go to the top of the ramp.


The 3rd challenge can be found on the paths below the previous challenge.
The final challenge can be found close to the end of the area. After defeating to enemies and jumping a gap, you will soon see the challenge on your left.
The Luxurious chest can be found near the end of the area. After reading a book (quest marker) you will go through a portal. As you are going through the air you will see it. Just drop down and open it.
Luxurious Chest #4. To get this Luxurious chest, bring the 9 additional pages to the book that you unlocked during the “Book Of Esoteric Revelations” and deciphering them. You can find a guide on where to find these pages HERE.
Luxurious Chest #5. Found near the northern area of the western island. Here follow the hydro rings to the Luxurious chest.


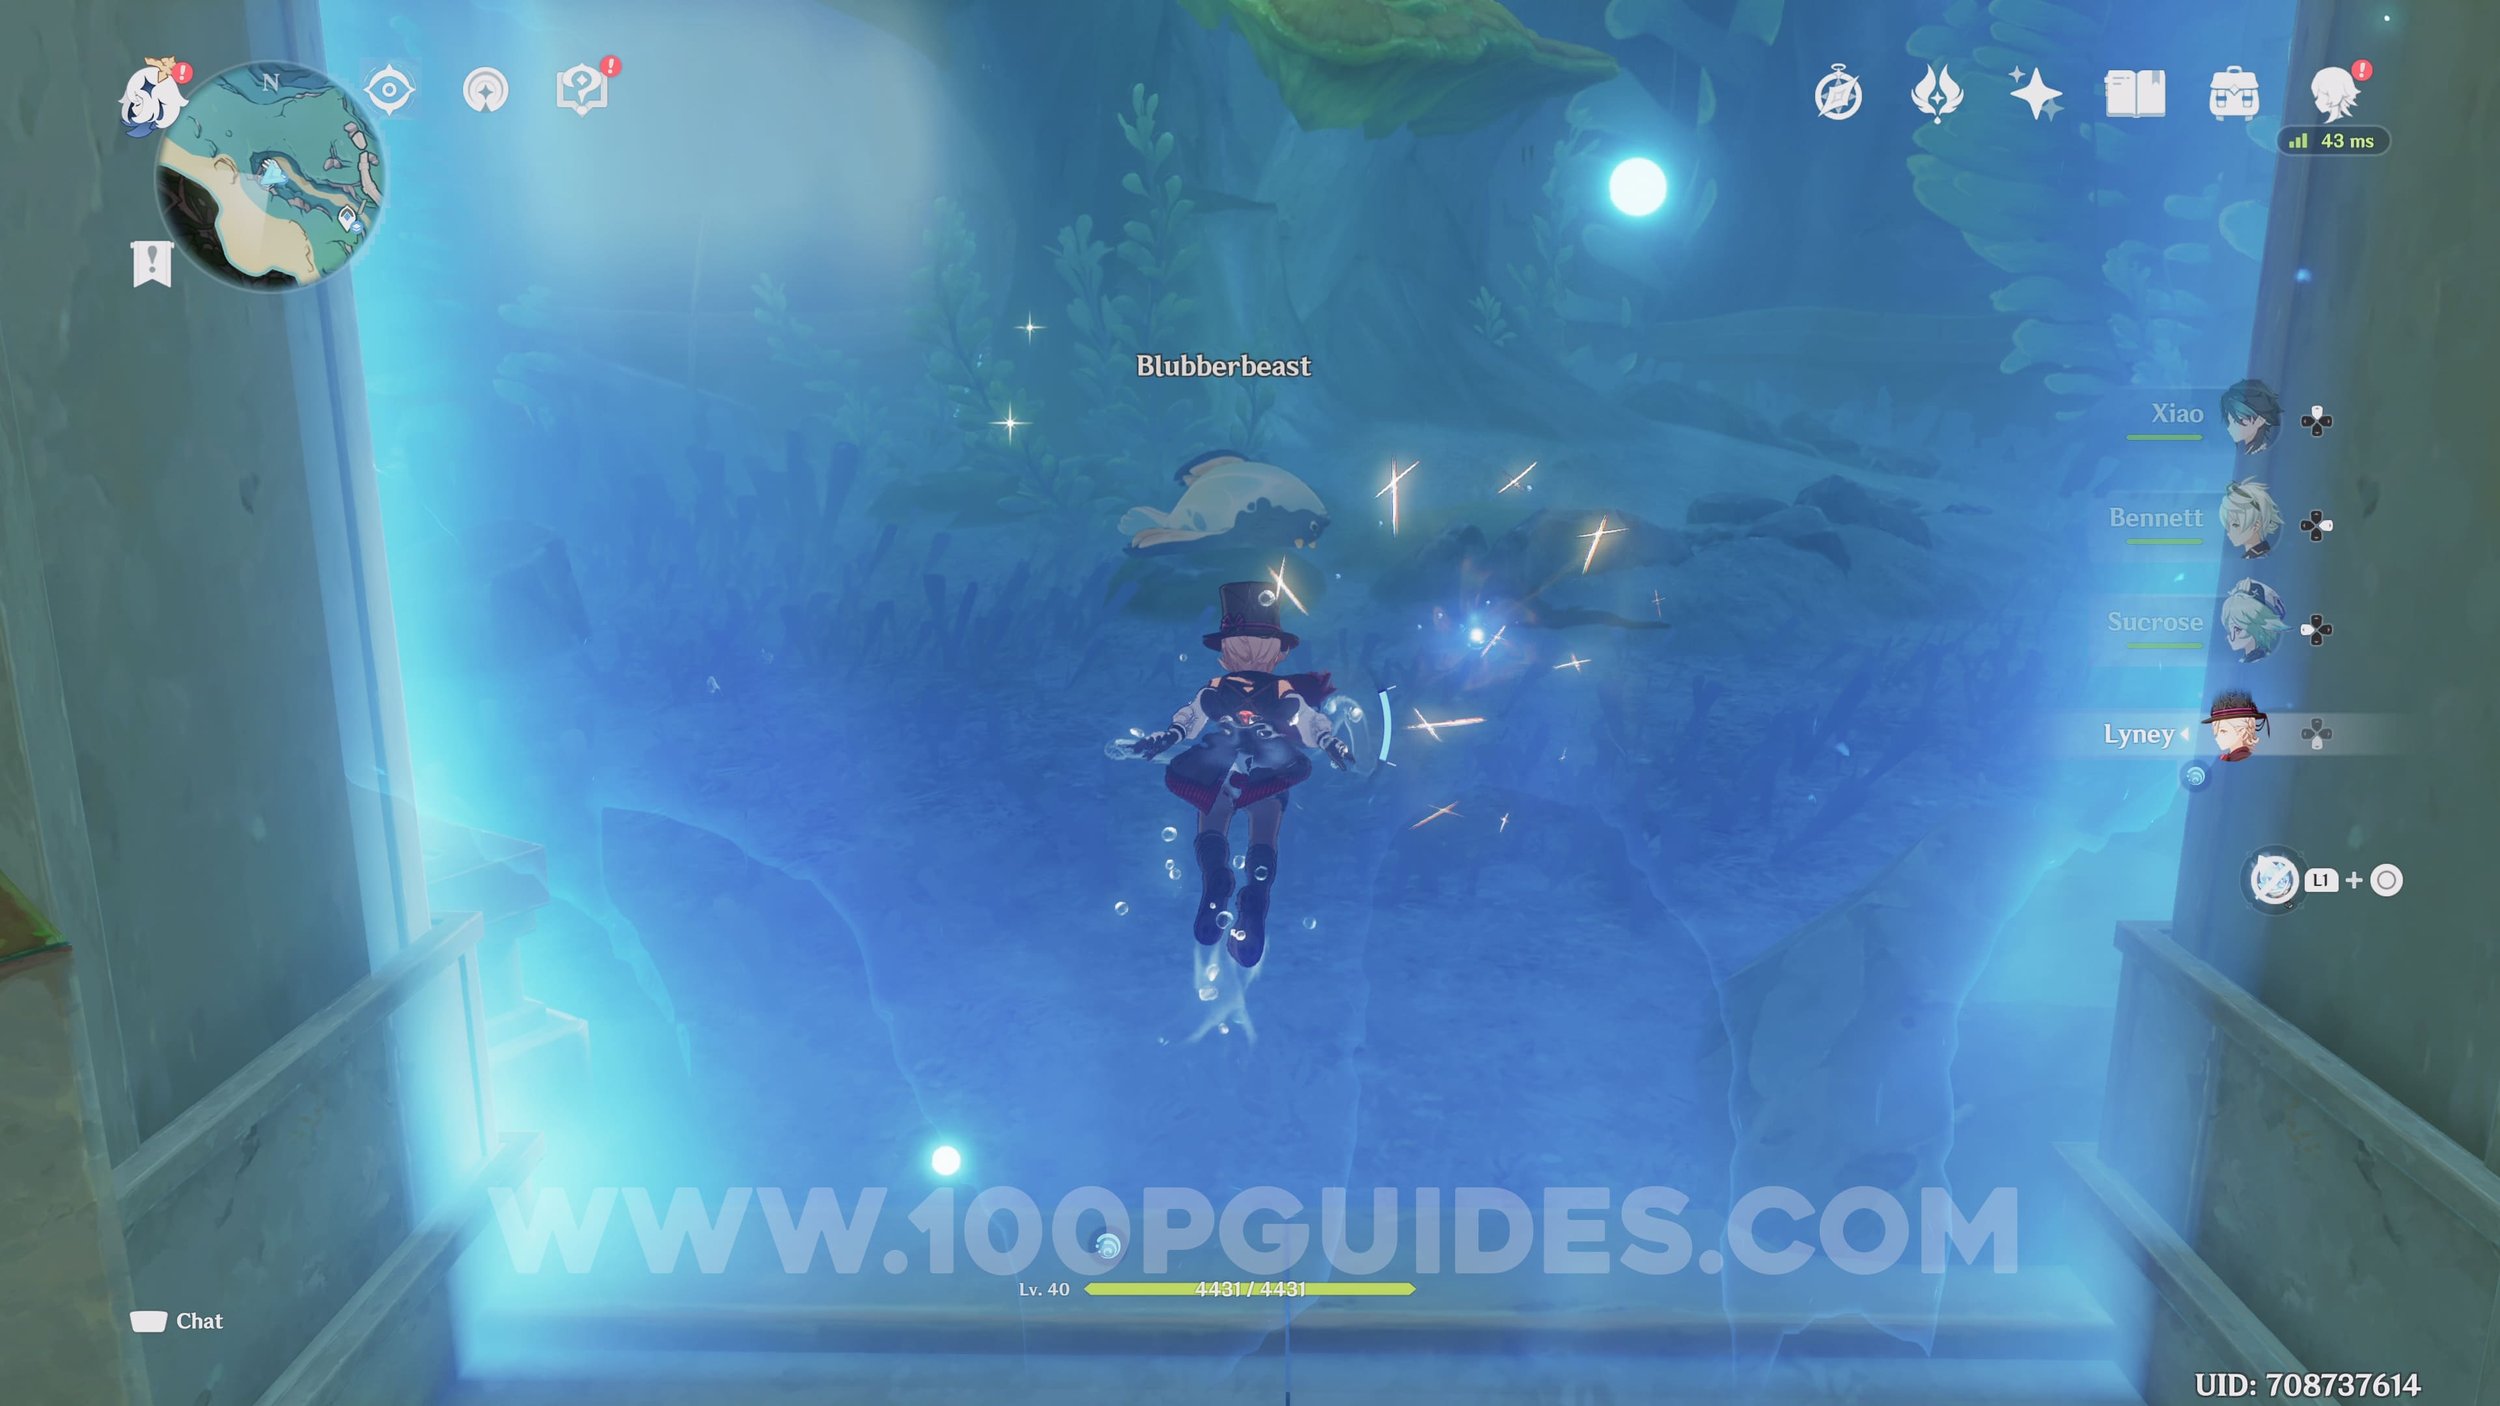
Luxurious Chest #6. Feed the Blubberbeast some fish in the underwater building. Keep coming back to help him every few hours until the hearts are full. You will then be rewarded find a Luxurious Chest.

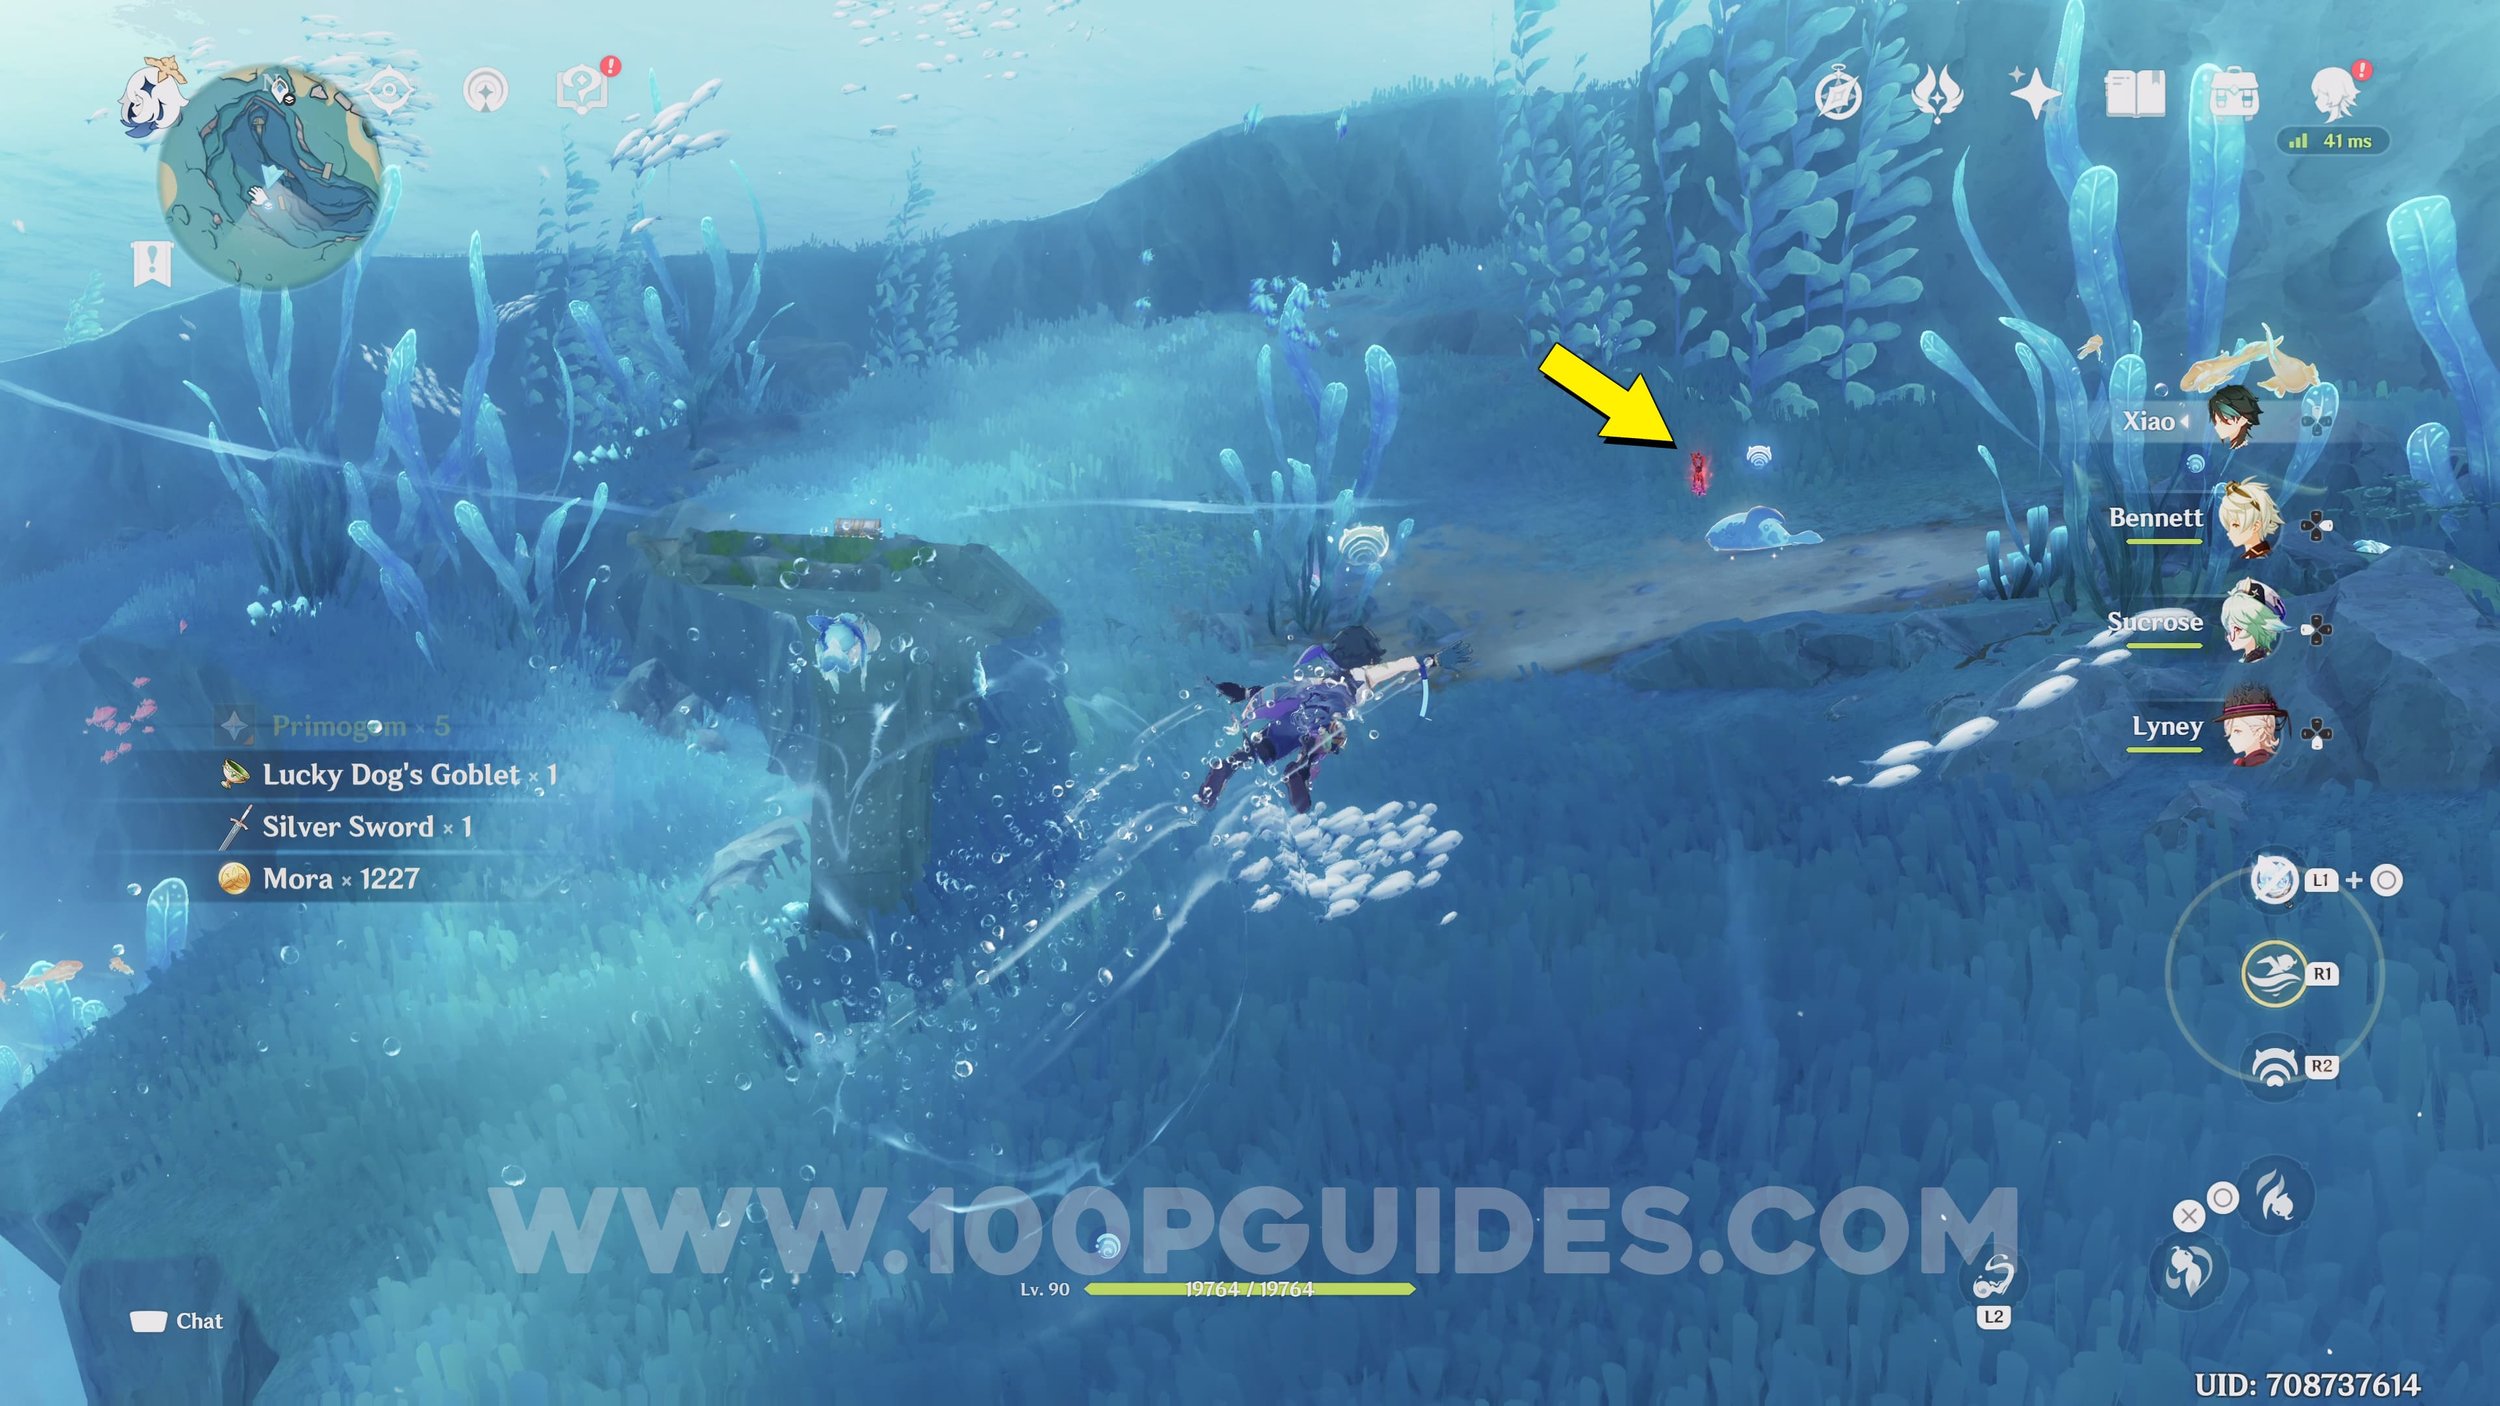
Luxurious Chest #7. Finish the 3 underwater challenges found around the luxurious chest.


Luxurious Chest #8. To get the underwater Luxurious chest to the south east of Court Of Fontaine you will have to guide the 3 seelies back to the conch.
The first seelie can be found by destroying the light totem to the south. First go past the totem to find the dark orb on the other side of the destroyed ship. Grab it and hit the totem to find the seelie.


For the second seelie, absorb the ability from the crab and destroy the rock behind the ship to the north.


You will find the 3rd seelie above the destroyed ship to the north west.
After guiding all seelies back to the conch, activate it to find the luxurious chest in side the large group of fish.
Luxurious Chest #9. To open this underwater Luxurious chest you will have to follow the 3 energy strands and finish the “challenges” to dispel the barrier around the chest.
Let’s start off with saving the seel from the invisible cage. To do this, absorb their powers and use it to detect a hidden buried in the area. Dig it up and activate it to save the seel.


To finish the next challenge, hold down the sonar ability and activate all shells.


For the final challenge, hold down the ability to destroy the pufferfruit (you will only be able to use it 3 times).


After finishing all 3 challenges you will be able to open the Luxurious chest!
Luxurious Chest #10. Found at the end of the “Aqueous Trademarks” world quest.


Luxurious Chest #11. To open the Luxurious Chest to the east of Court Of Fontaine you will have to guide 4 Seelies back to the chest. The first 2 can be found to the south of the chest. Here, pick up 3 hydro particles to make a core, then place it between the 2 hydro lamps. Finally, go up to the seelie on the right first and then to the one of the left so they get to the lamps at the same time. From here they will return to the chest.


For the next Seelie, grab 3 hydro particles to form another hydro core. Then, guide the 2 hydro lamps to the north east of the Luxurious chest to the shore. Here, follow the lamps across the path, open the chest to reveal the 3rd seelie.
The final seelie can be found in the chest to the north. Defeat the enemies to open it.
Luxurious #12. Go around the left side of the eastern round building in Court Of Fontaine to find the chest.


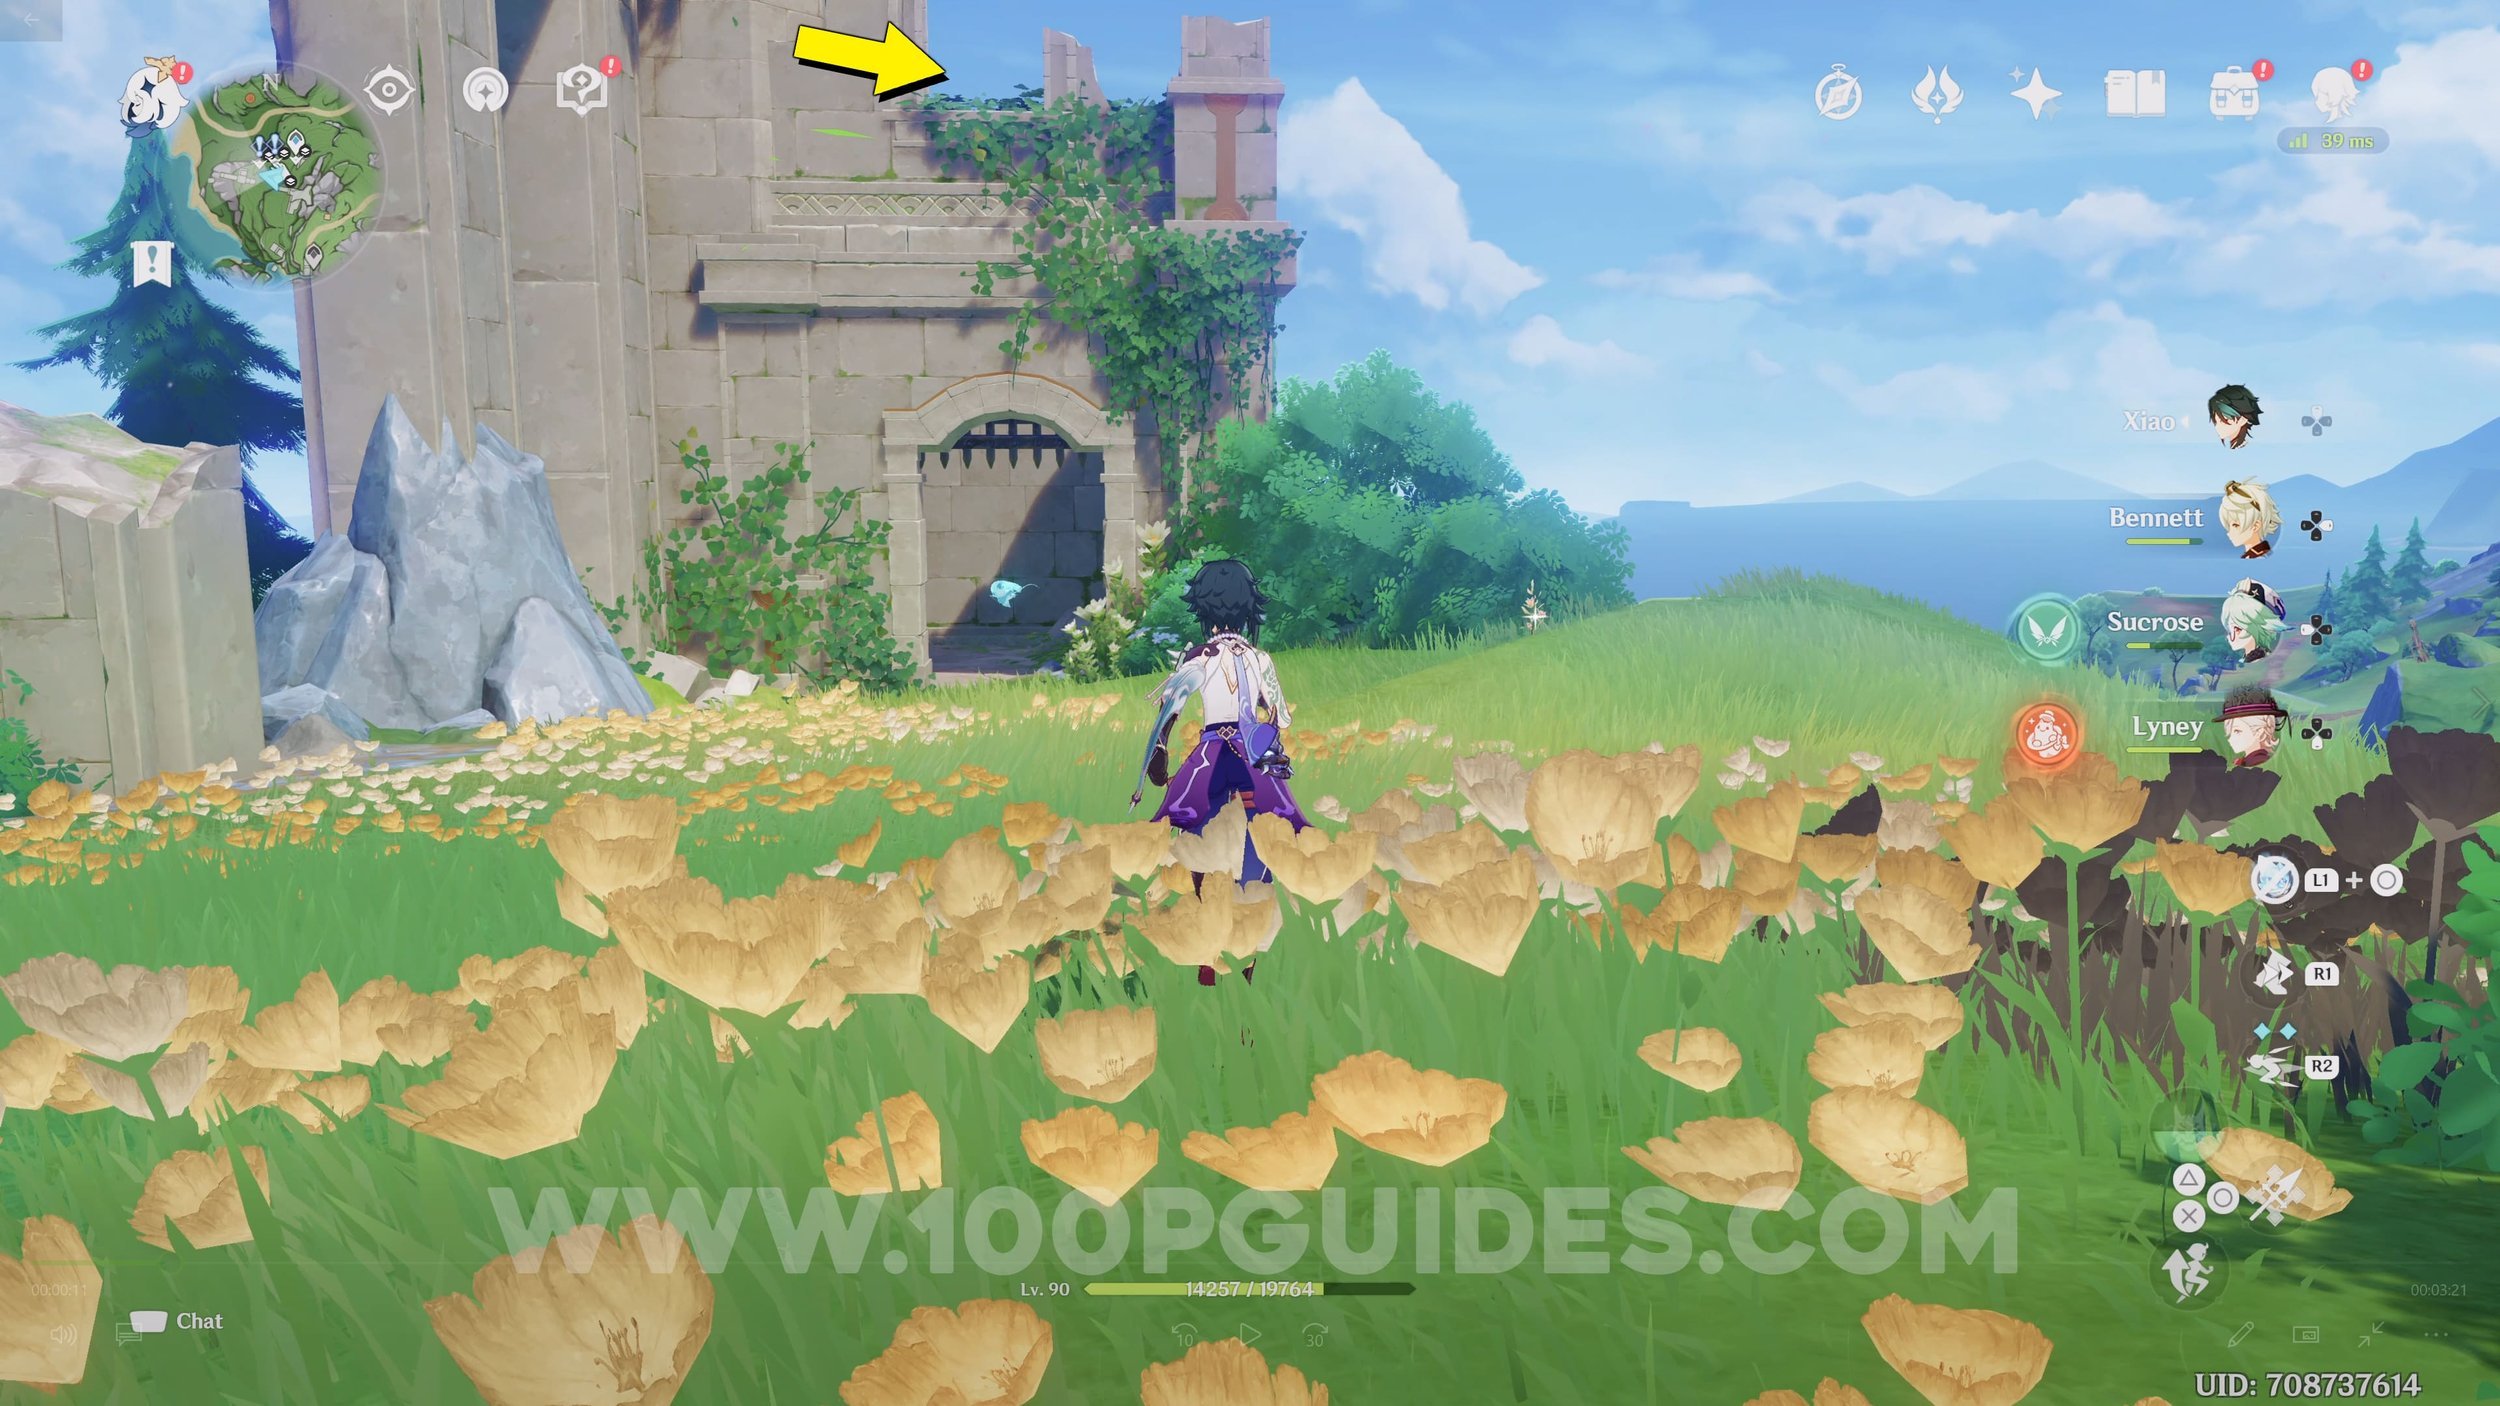
Luxurious Chest #13. Found near the top of the tall building to the north of Court Of Fontaine.

Luxurious Chest #14. Interact with the 3 hydro circles and complete the challenges to unlock the chest to the north west of Court Of Fontaine.

Luxurious Chest #15-17. You will obtaine these 3 Luxurious Chests automatically during the “Ann Of The Narzissenkreuz” questline. You can start this questline by entering the underwater ruins to the west of Court Of Fontaine.


Video Guide