Genshin Impact All Hydroculus Locations In Version 4.2
This guide will show you where to find every Hydroculus in Version 4.2 of Genshin Impact.
🎮 Find more Genshin Impact 4.2 guides here.
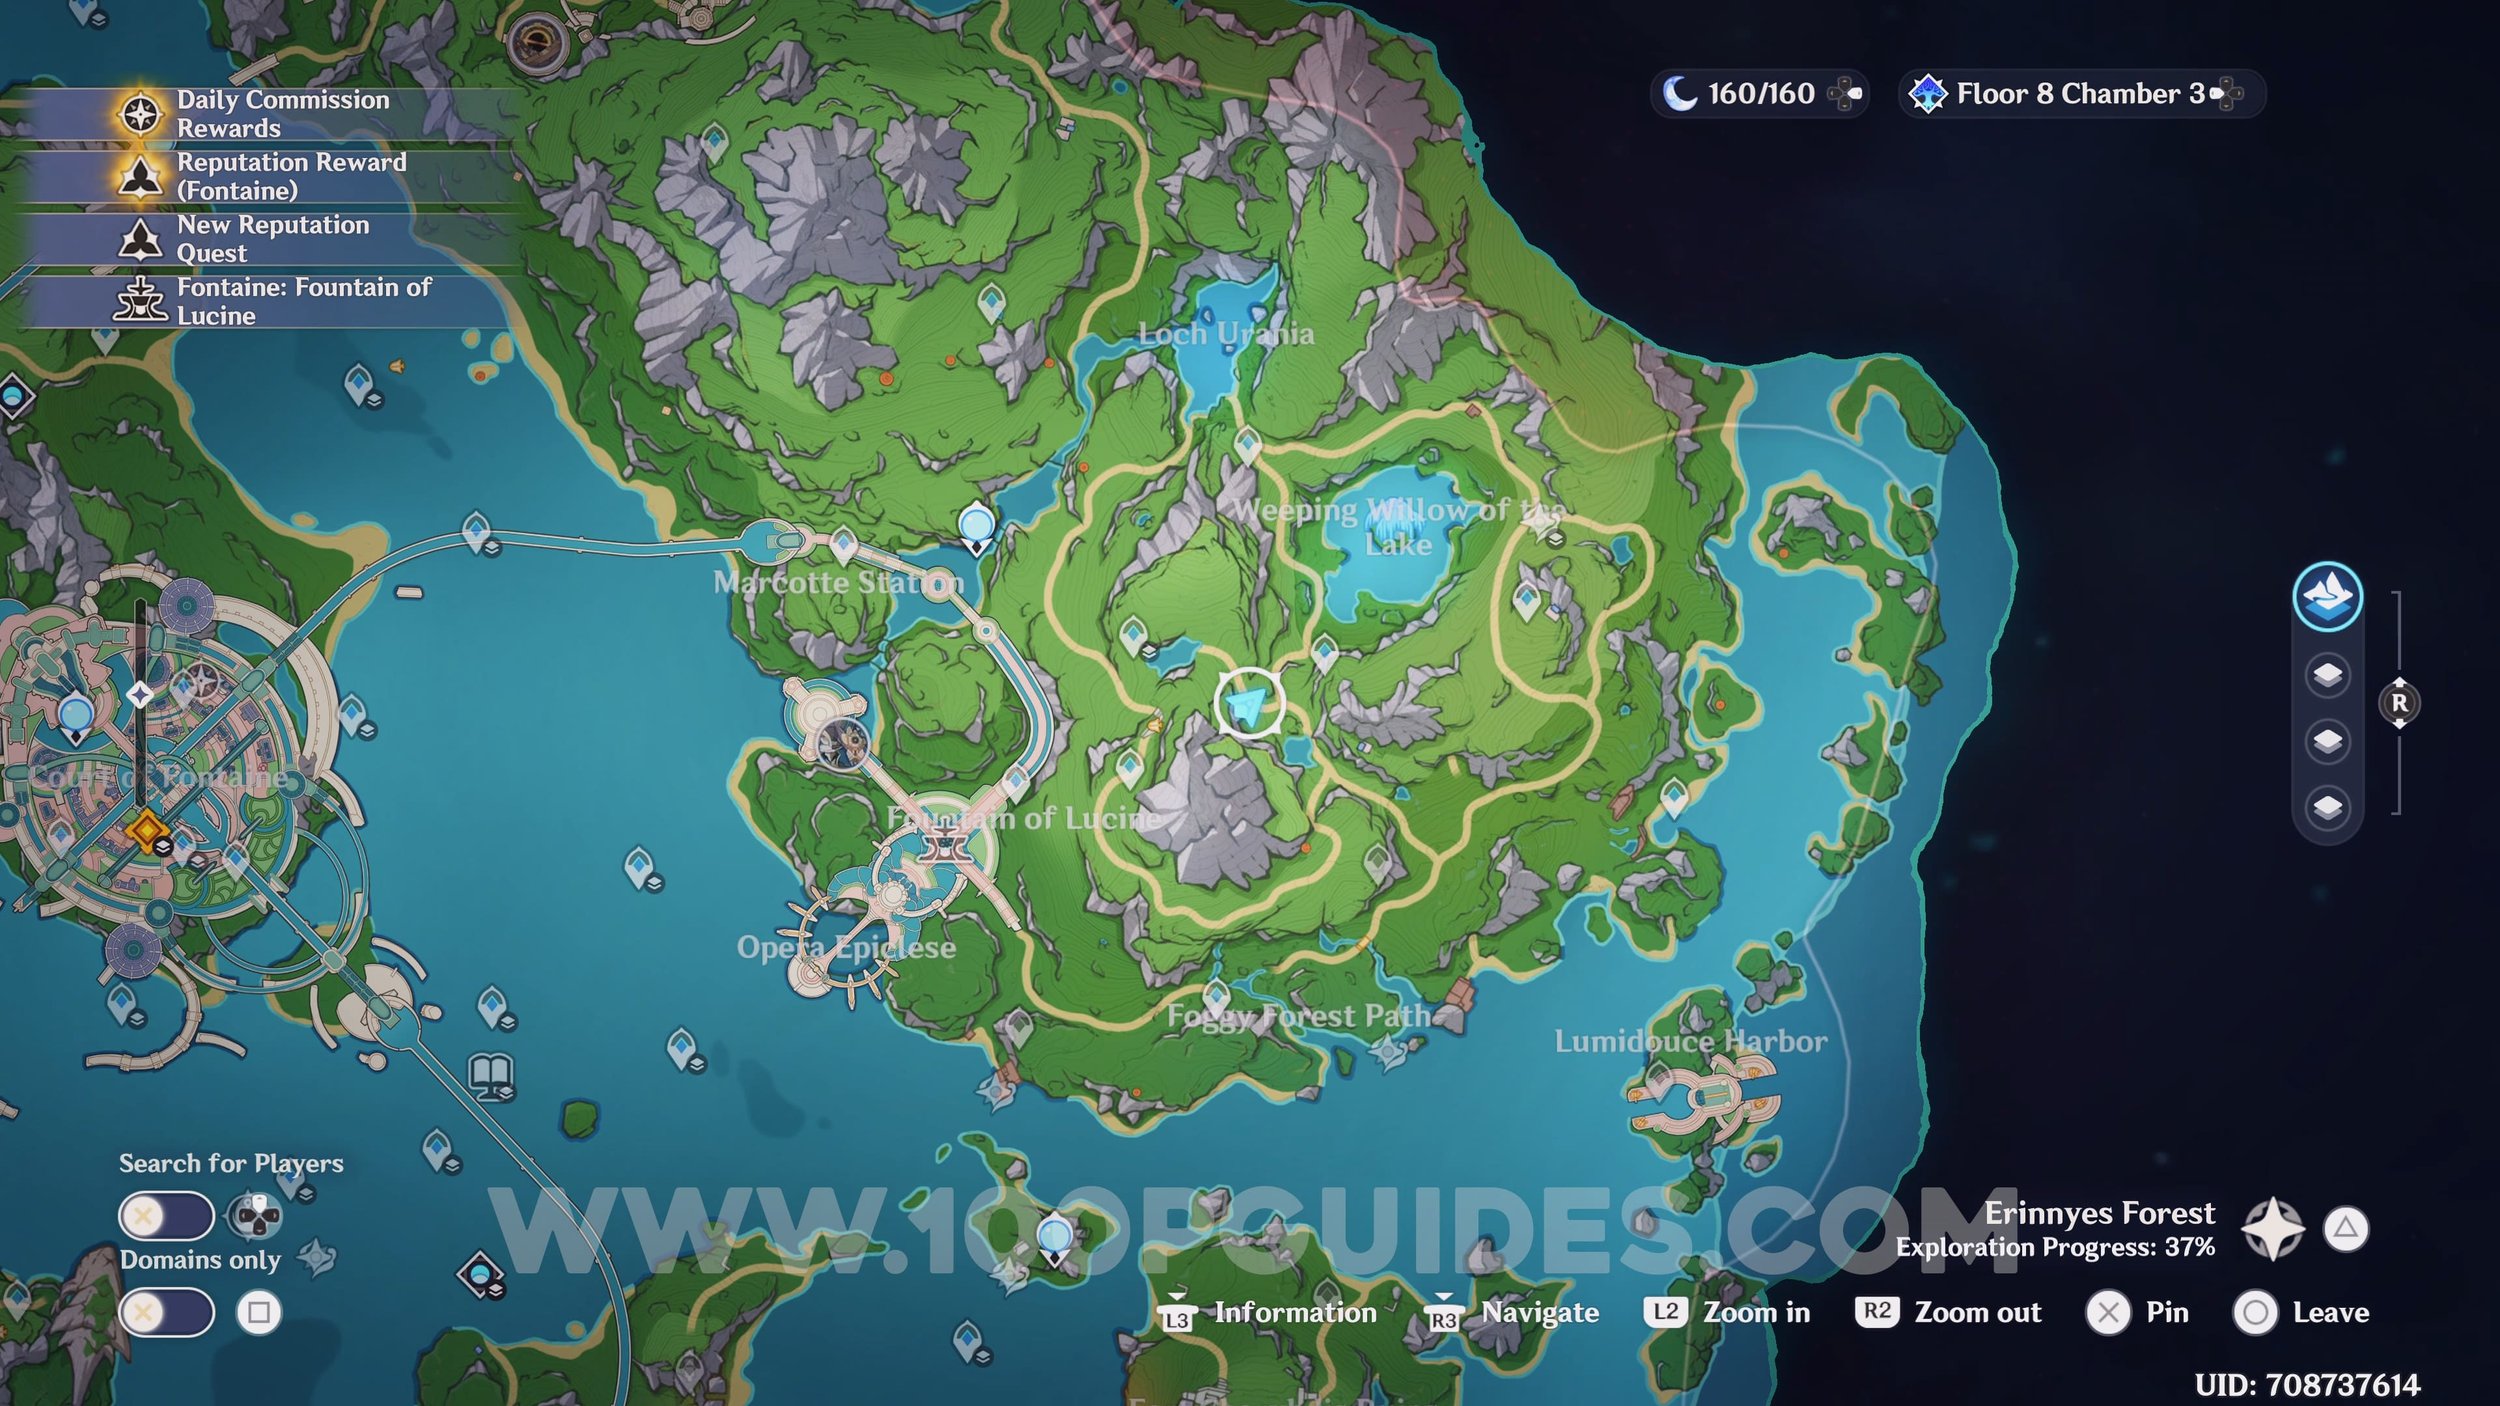
Here you can find the location of all 66 Hydroculus added to the Fontaine region in version 4.2.
Hydroculus #1


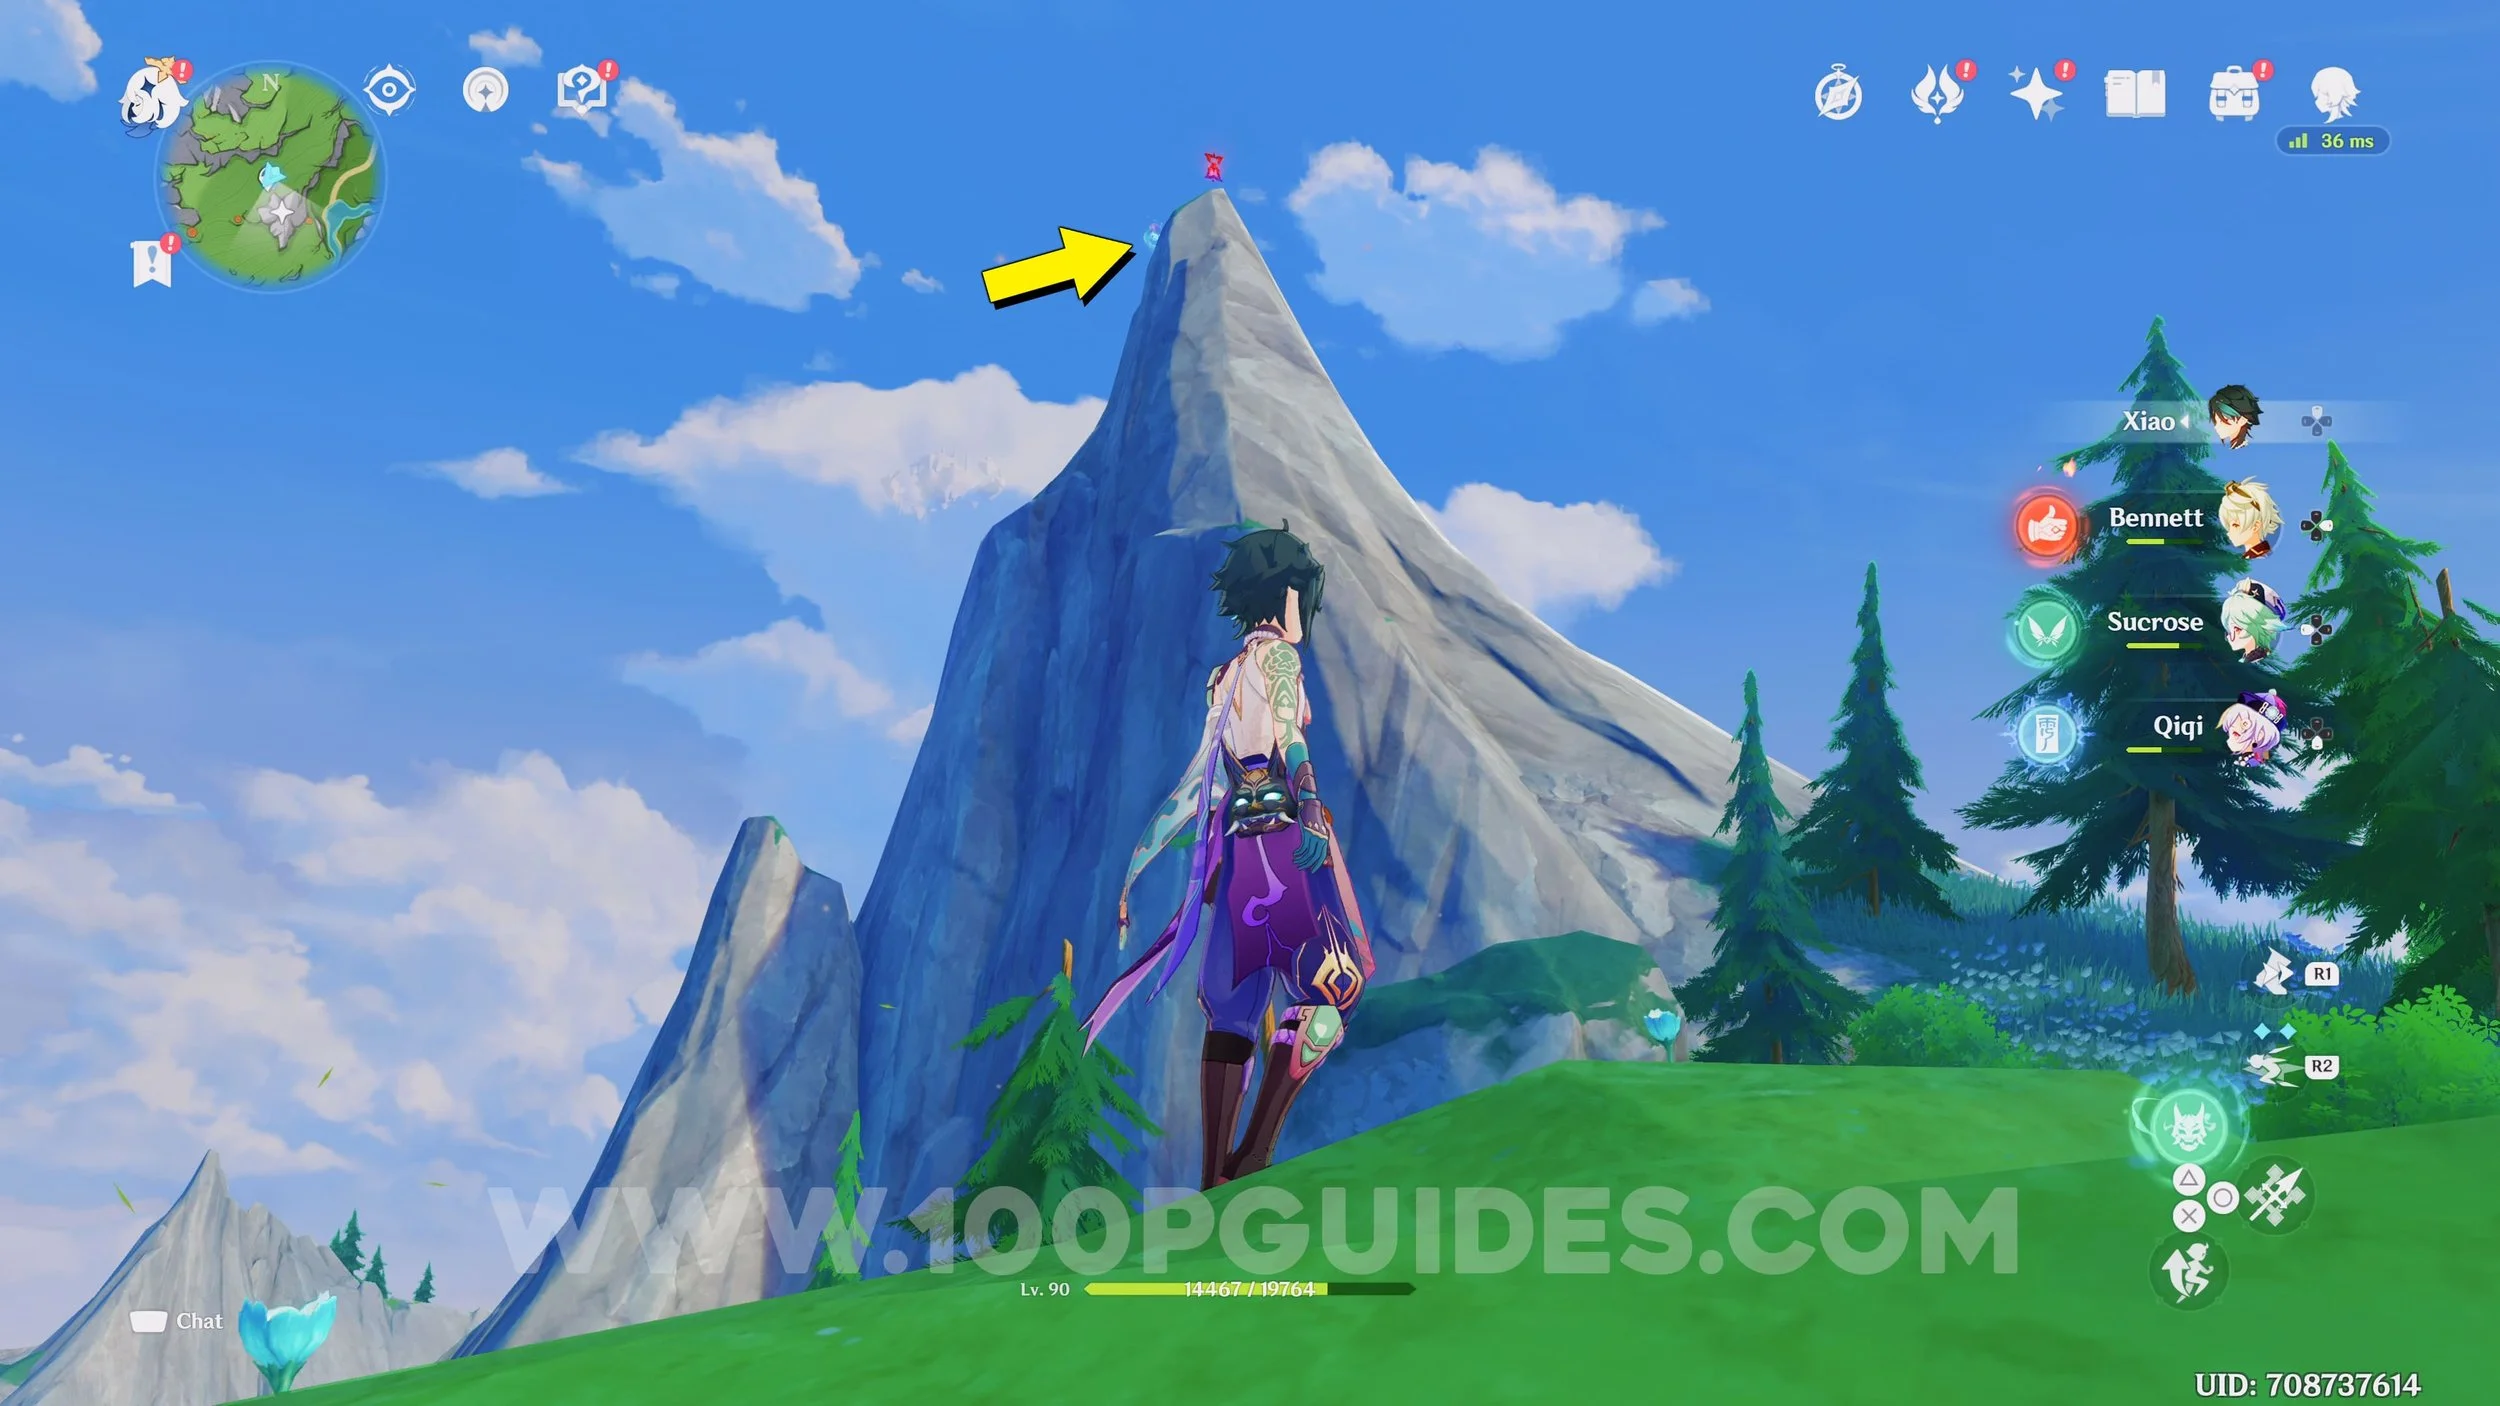
Hydroculus #2. Climb the mountain on the left and glide to the Hydroculus.


Hydroculus #3

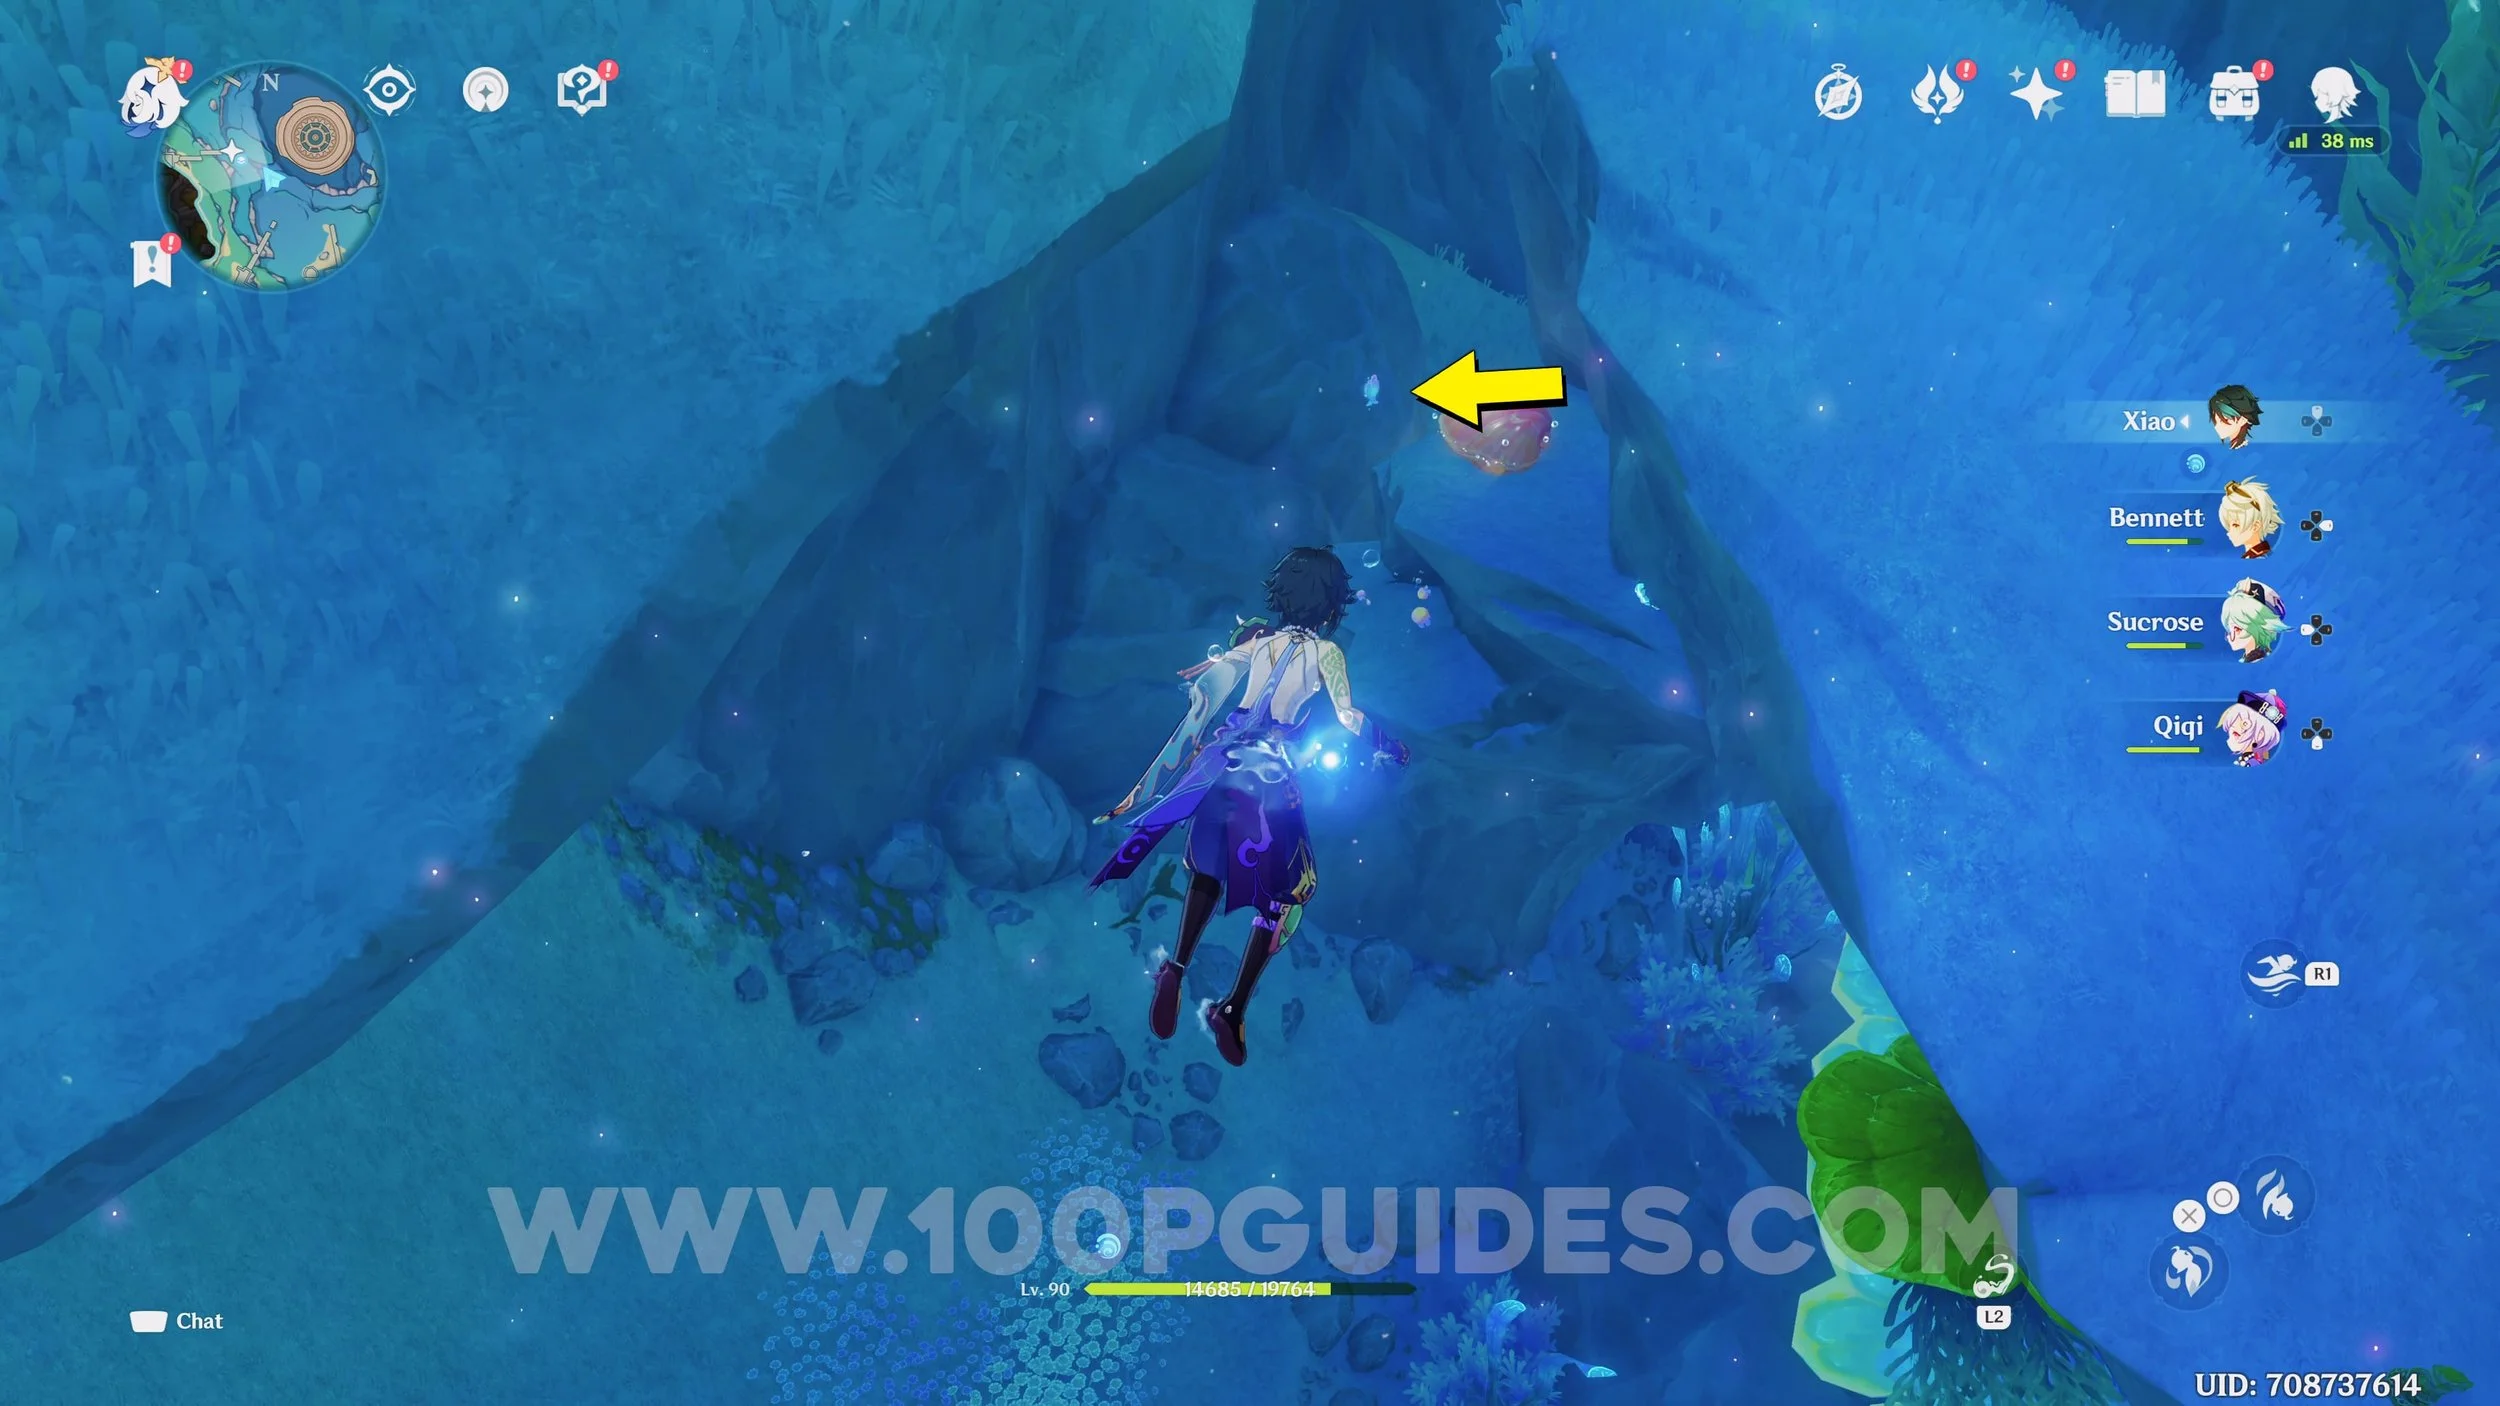
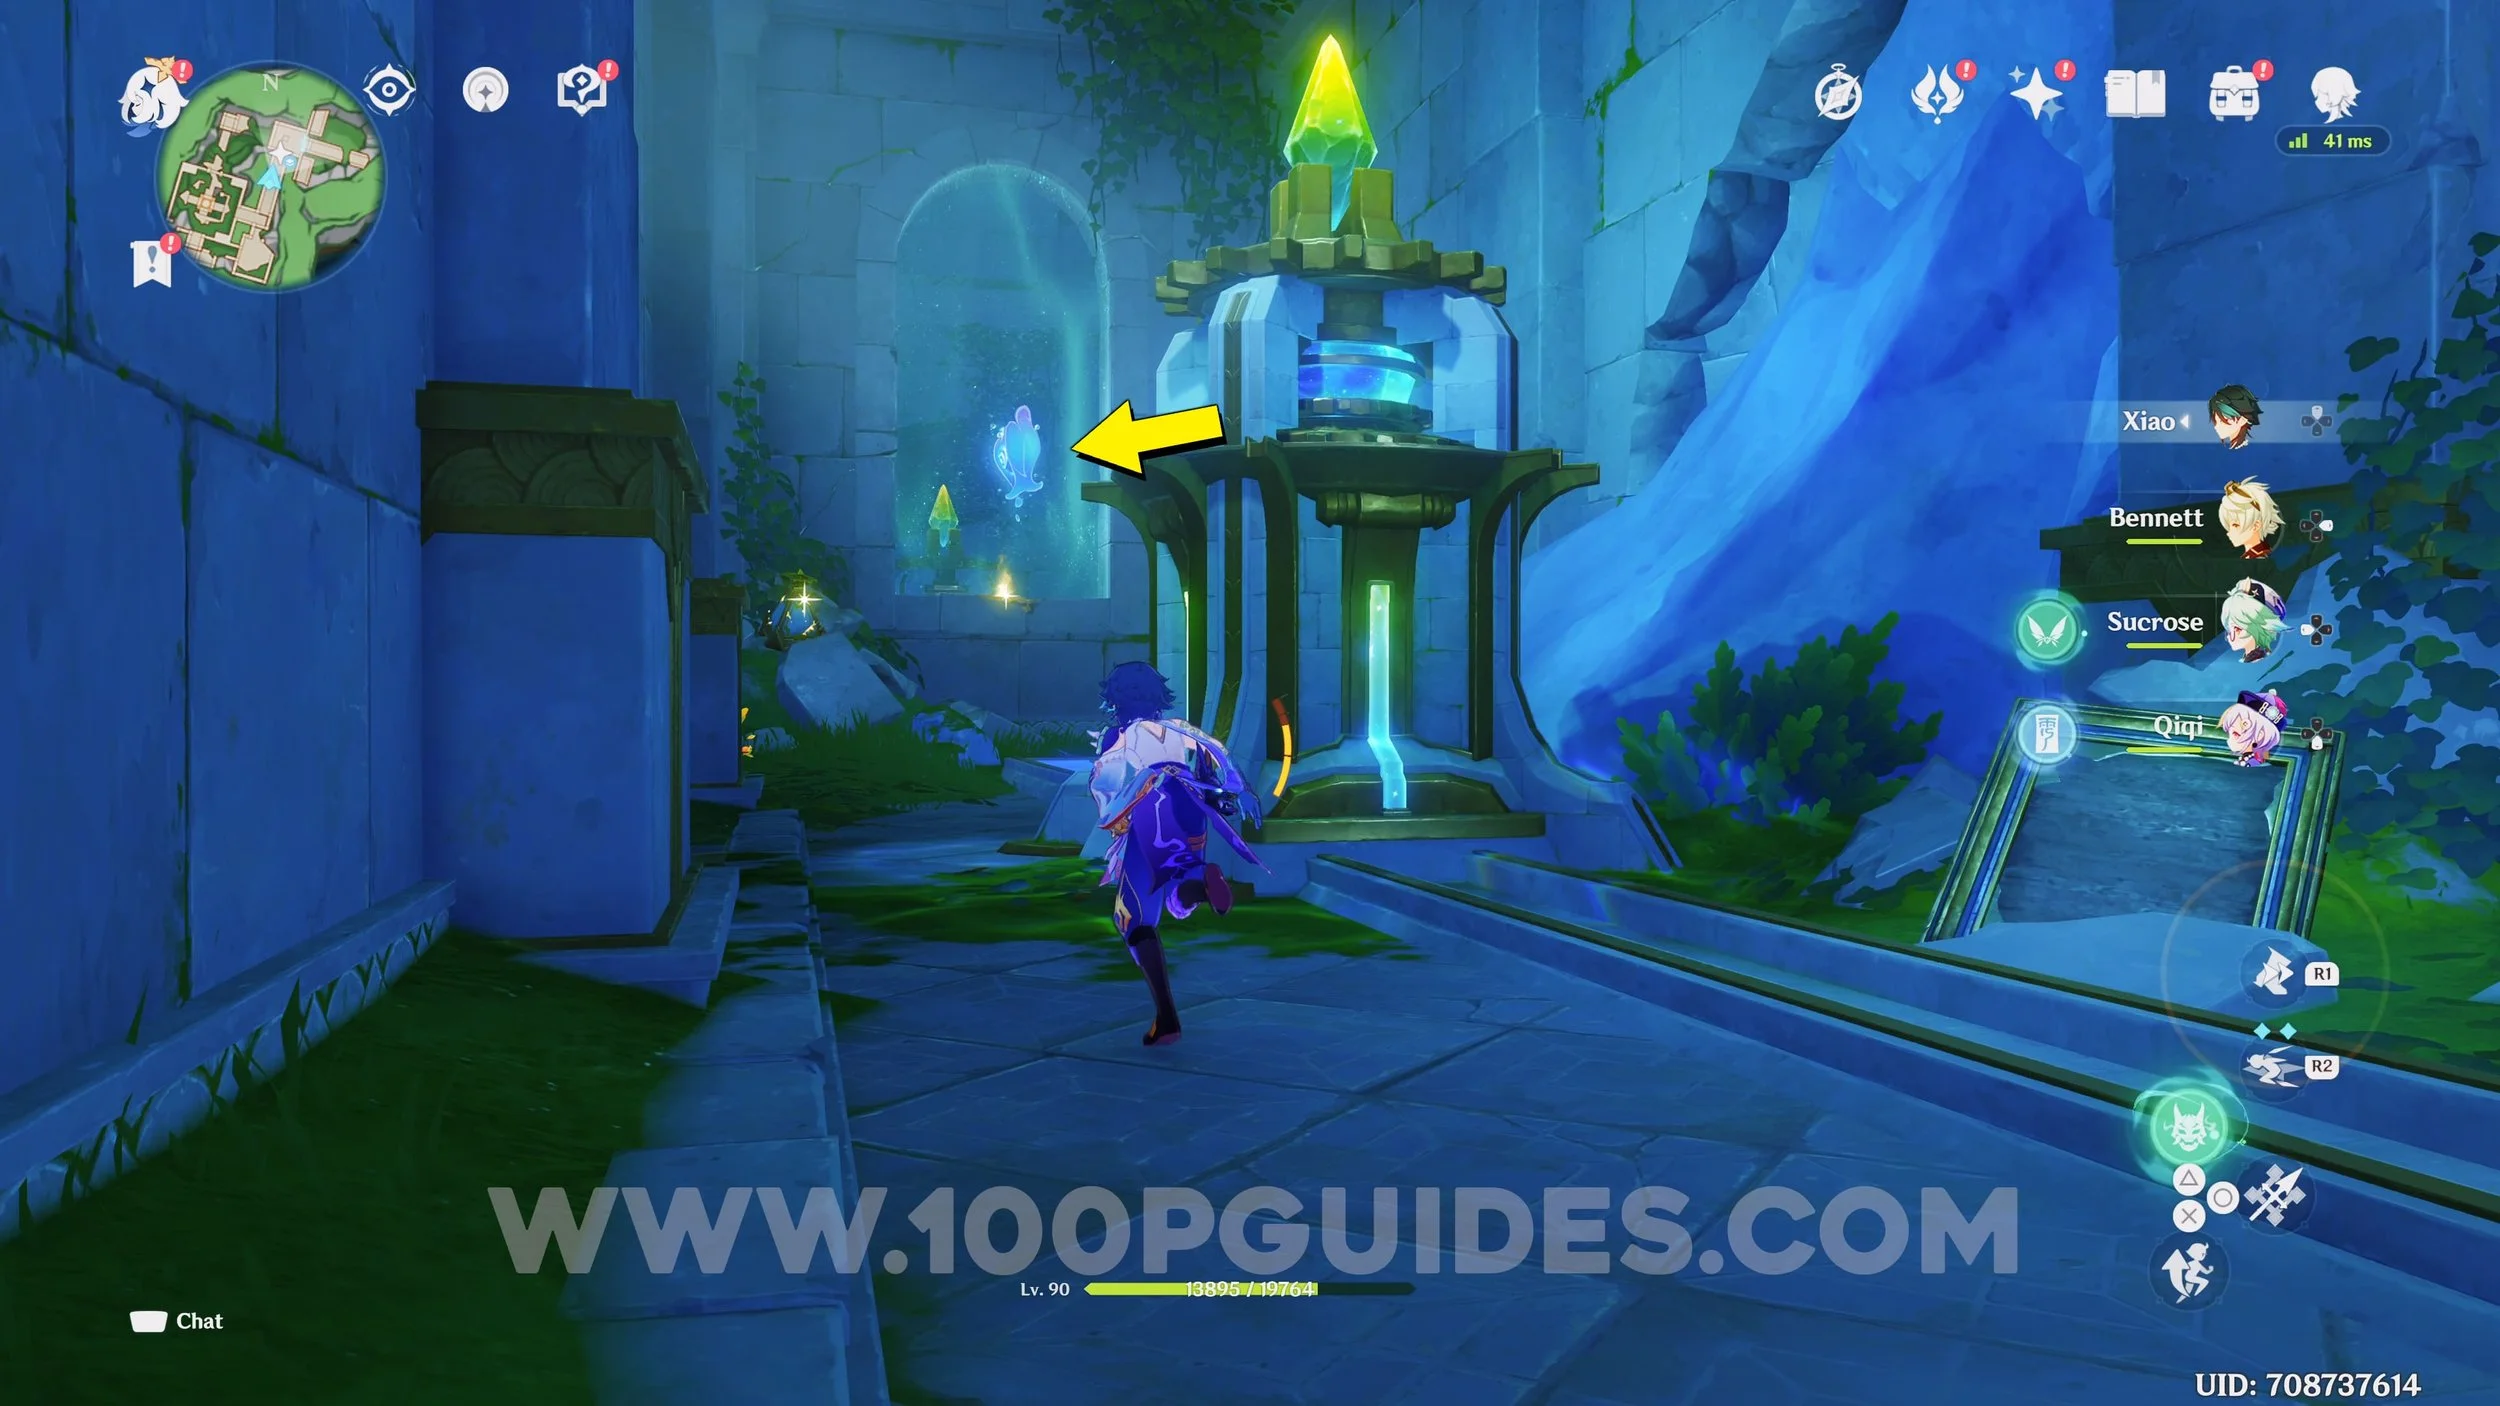
Hydroculus #4. Interact with the totem and push the jellyfish so that it’s below the hydroculus. Use it to reach it.


Hydroculus #5. Glide to the top of the water spout after clearing the storm.


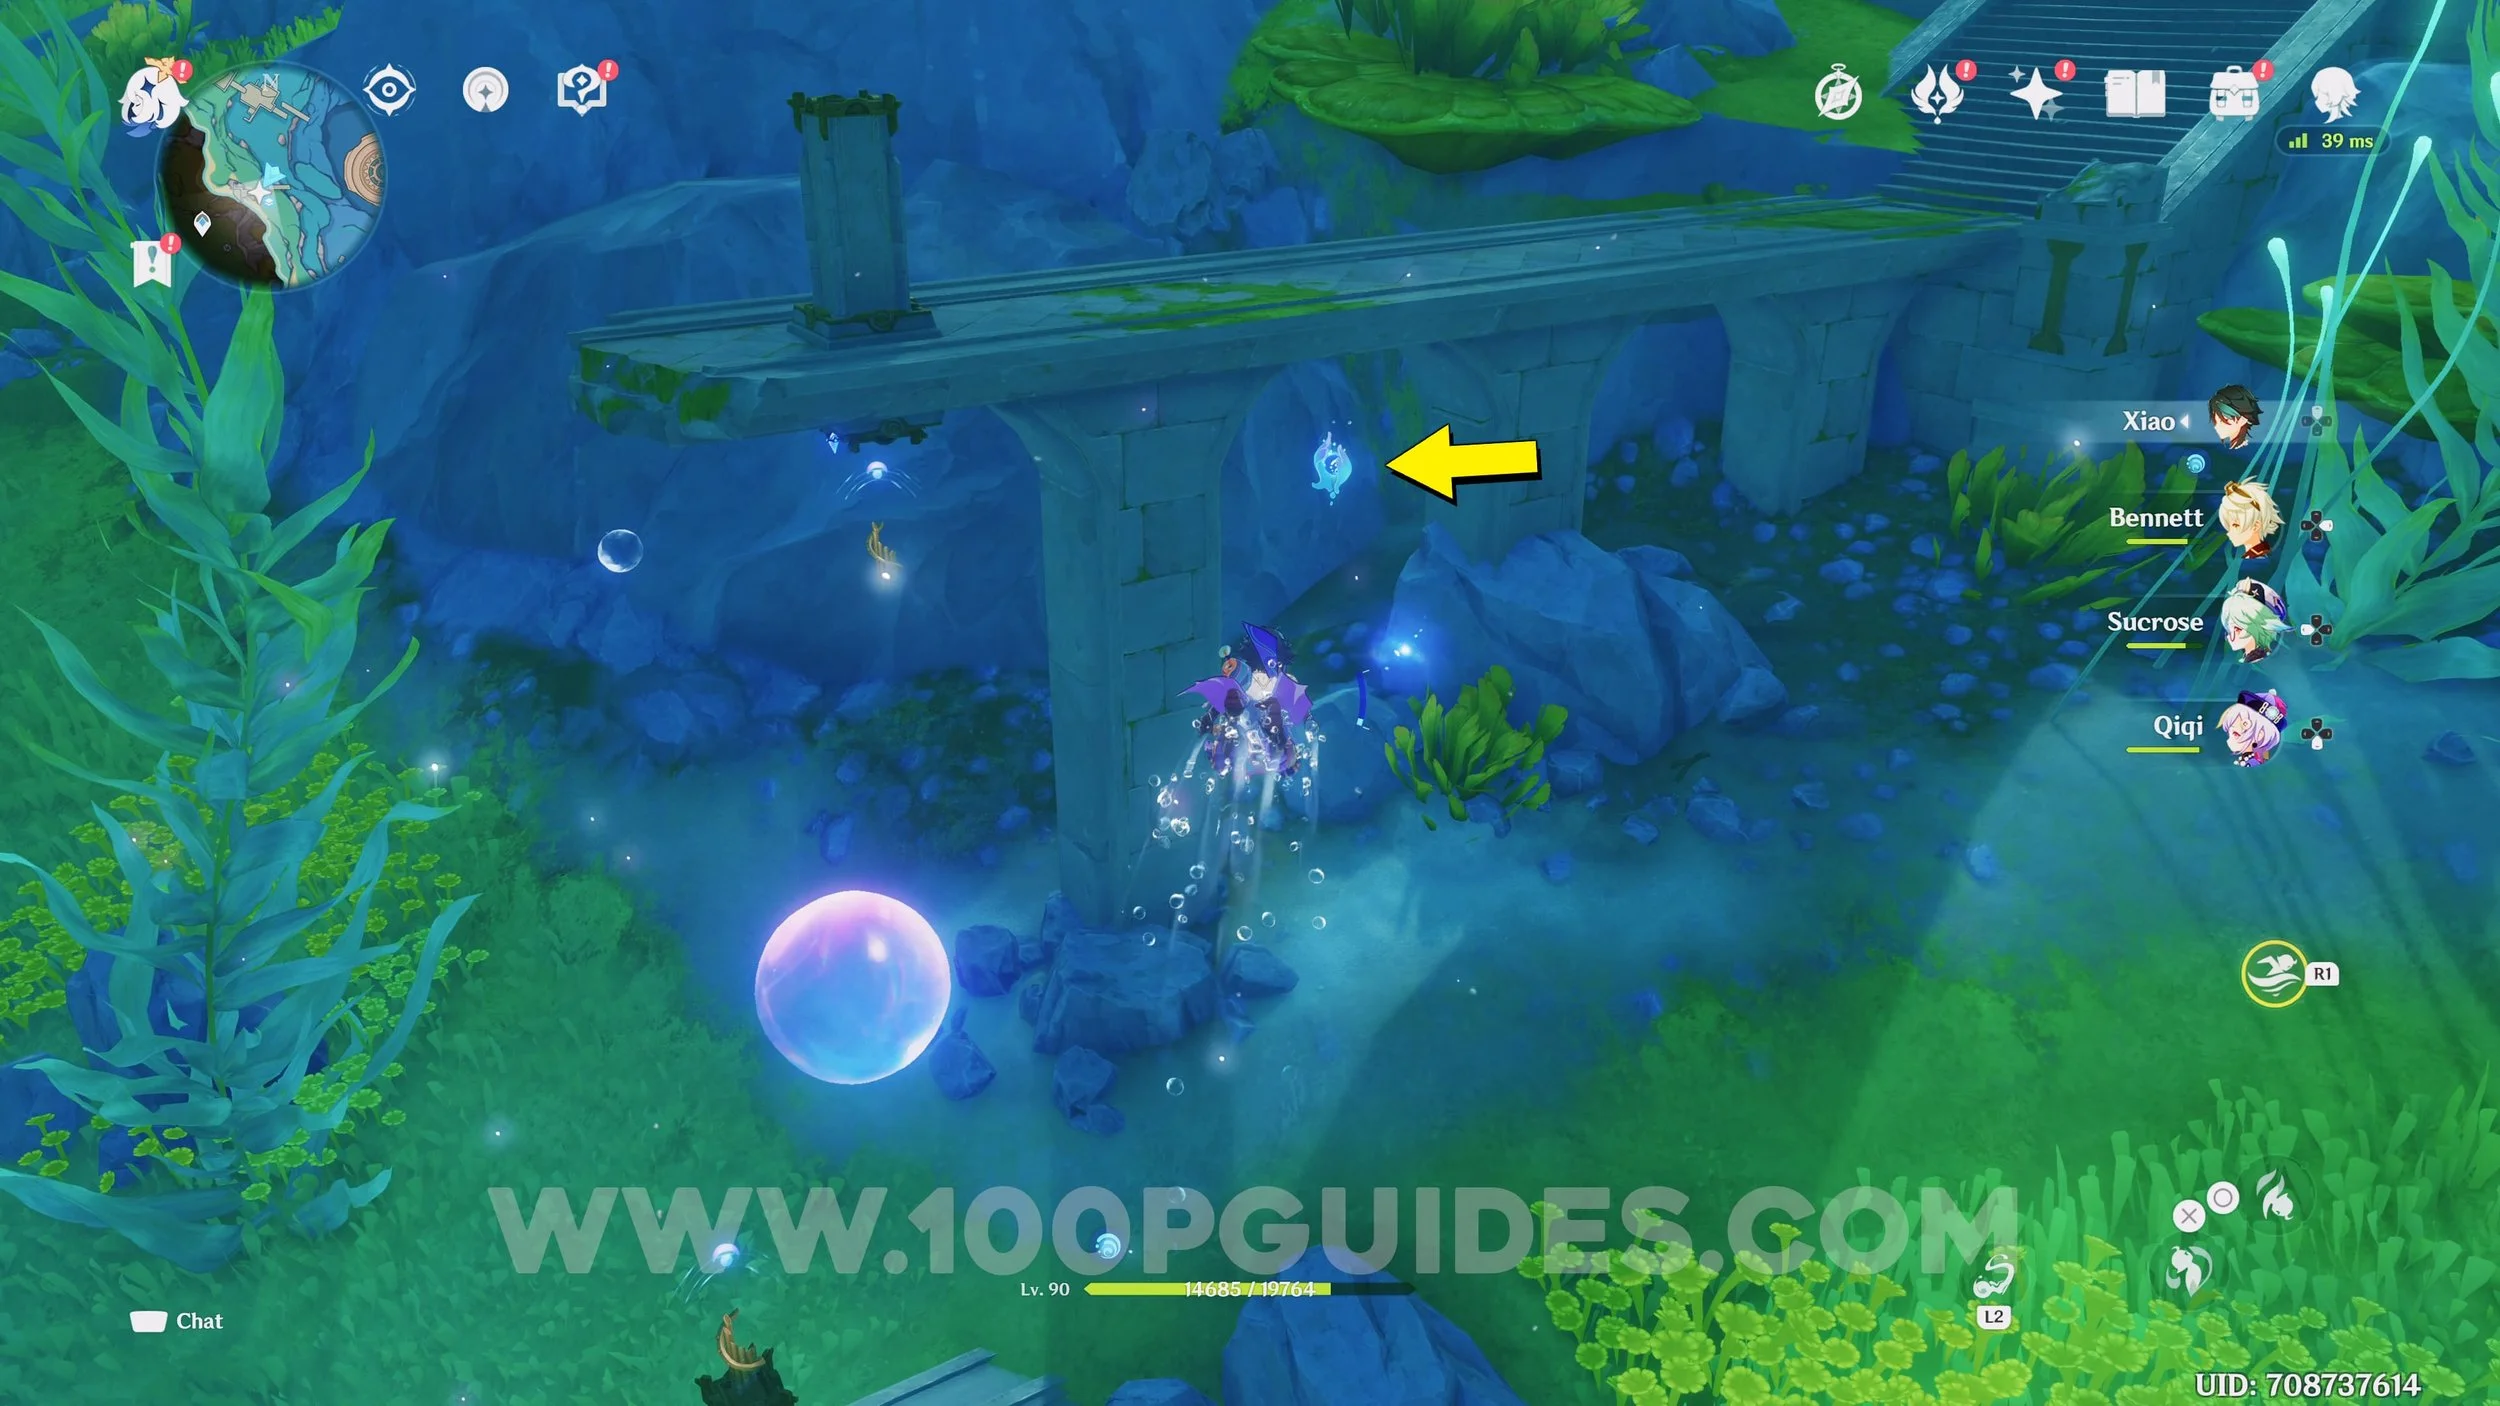
Hydroculus #6. Hit the shell and grab the orb. Swim to the totem and then destroy it to get the hydroculus.


Hydroculus #7. Damage the wind mini boss until it makes a wind current to the hydroculus.
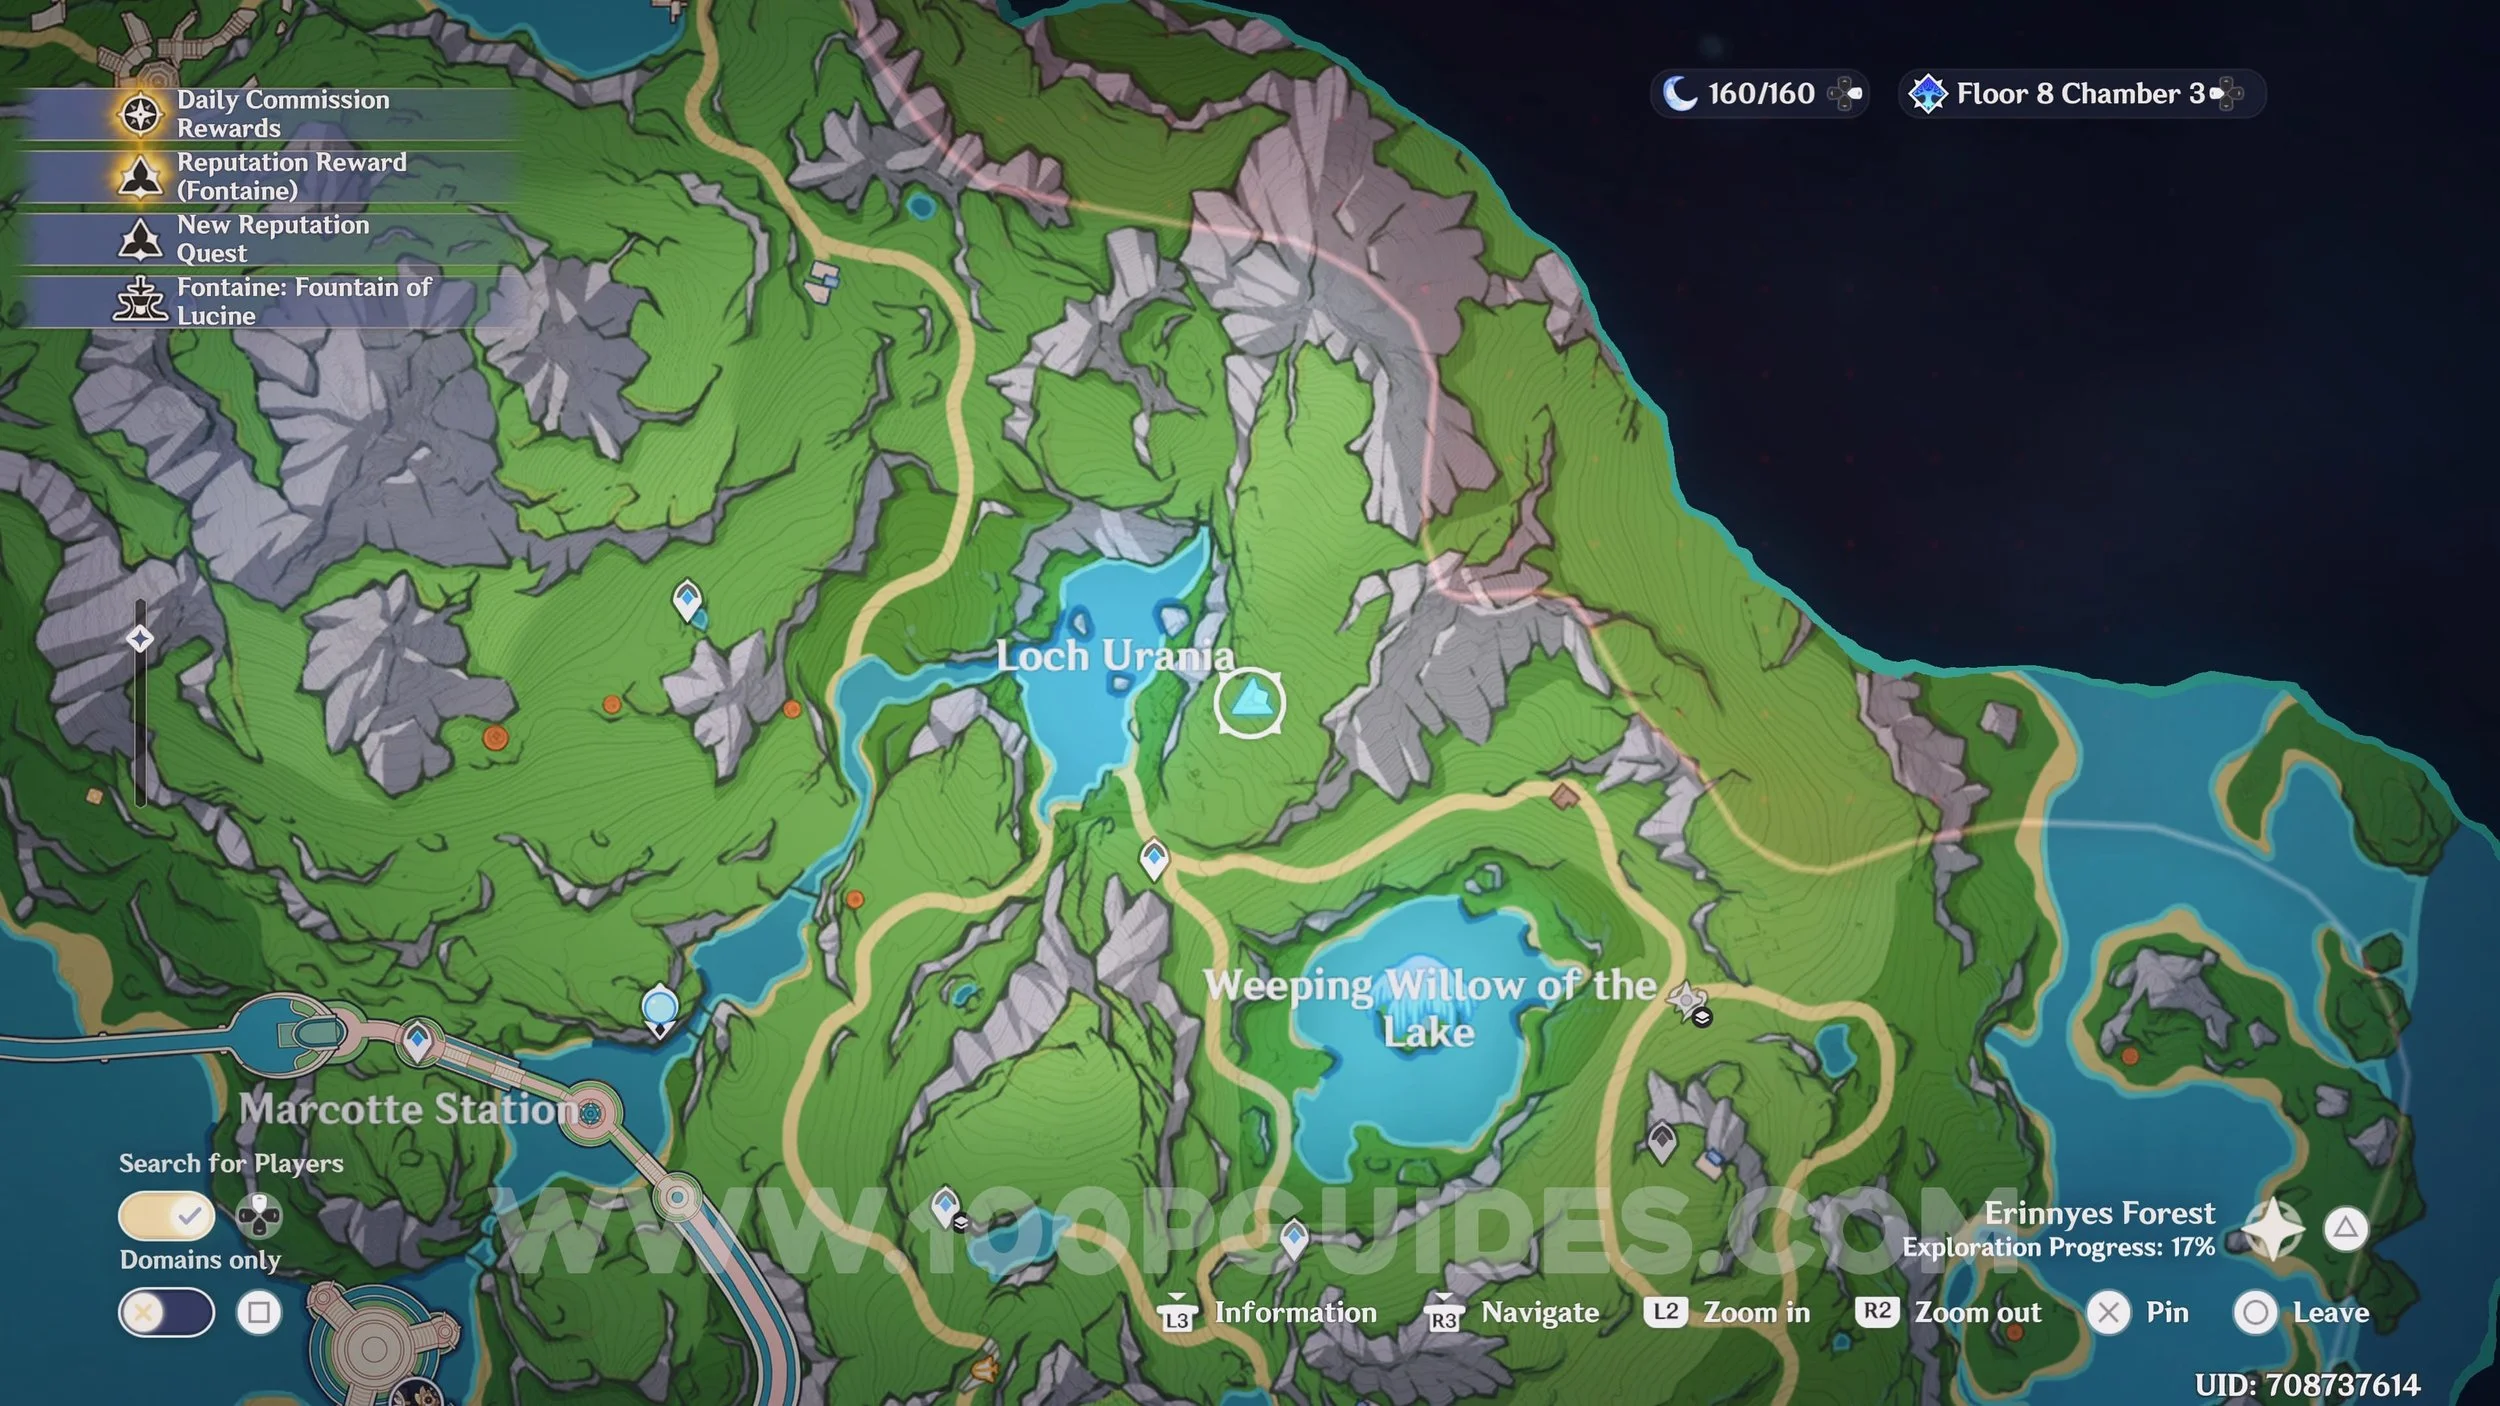

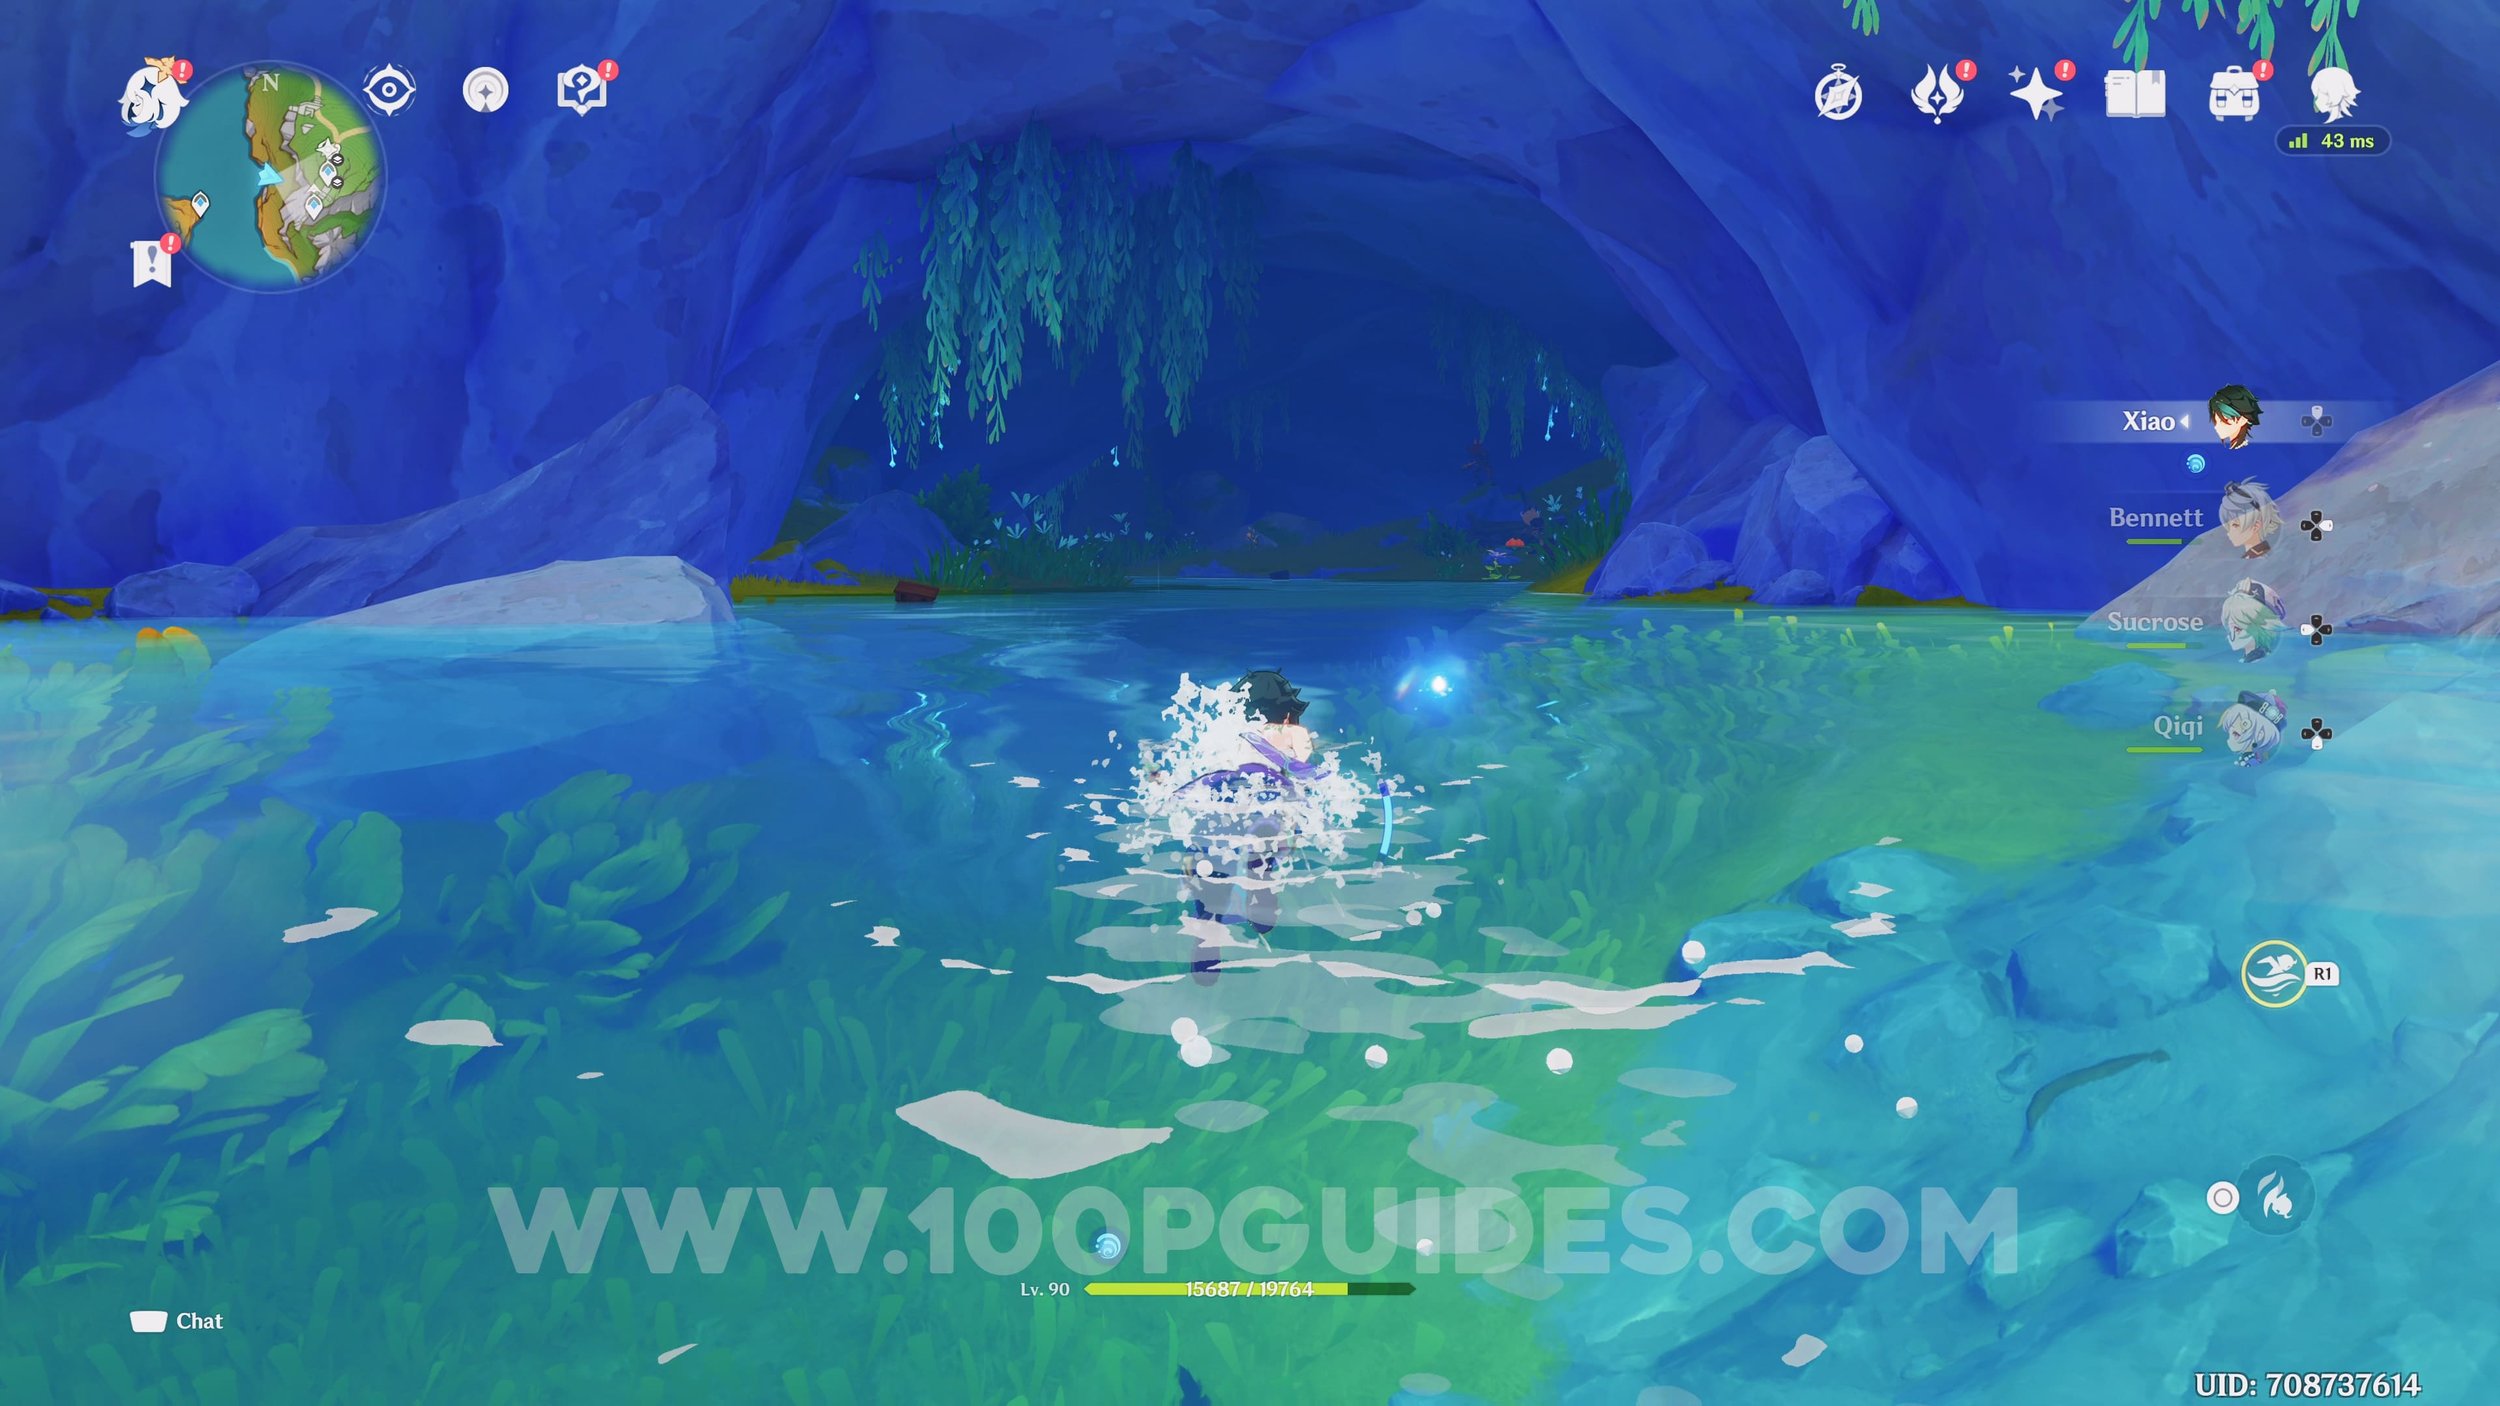
Hydroculus #8. Inside the cave in the northeast corner of Loch Urana.


Hydroculus #9


Hydroculus #10. Under the tree.


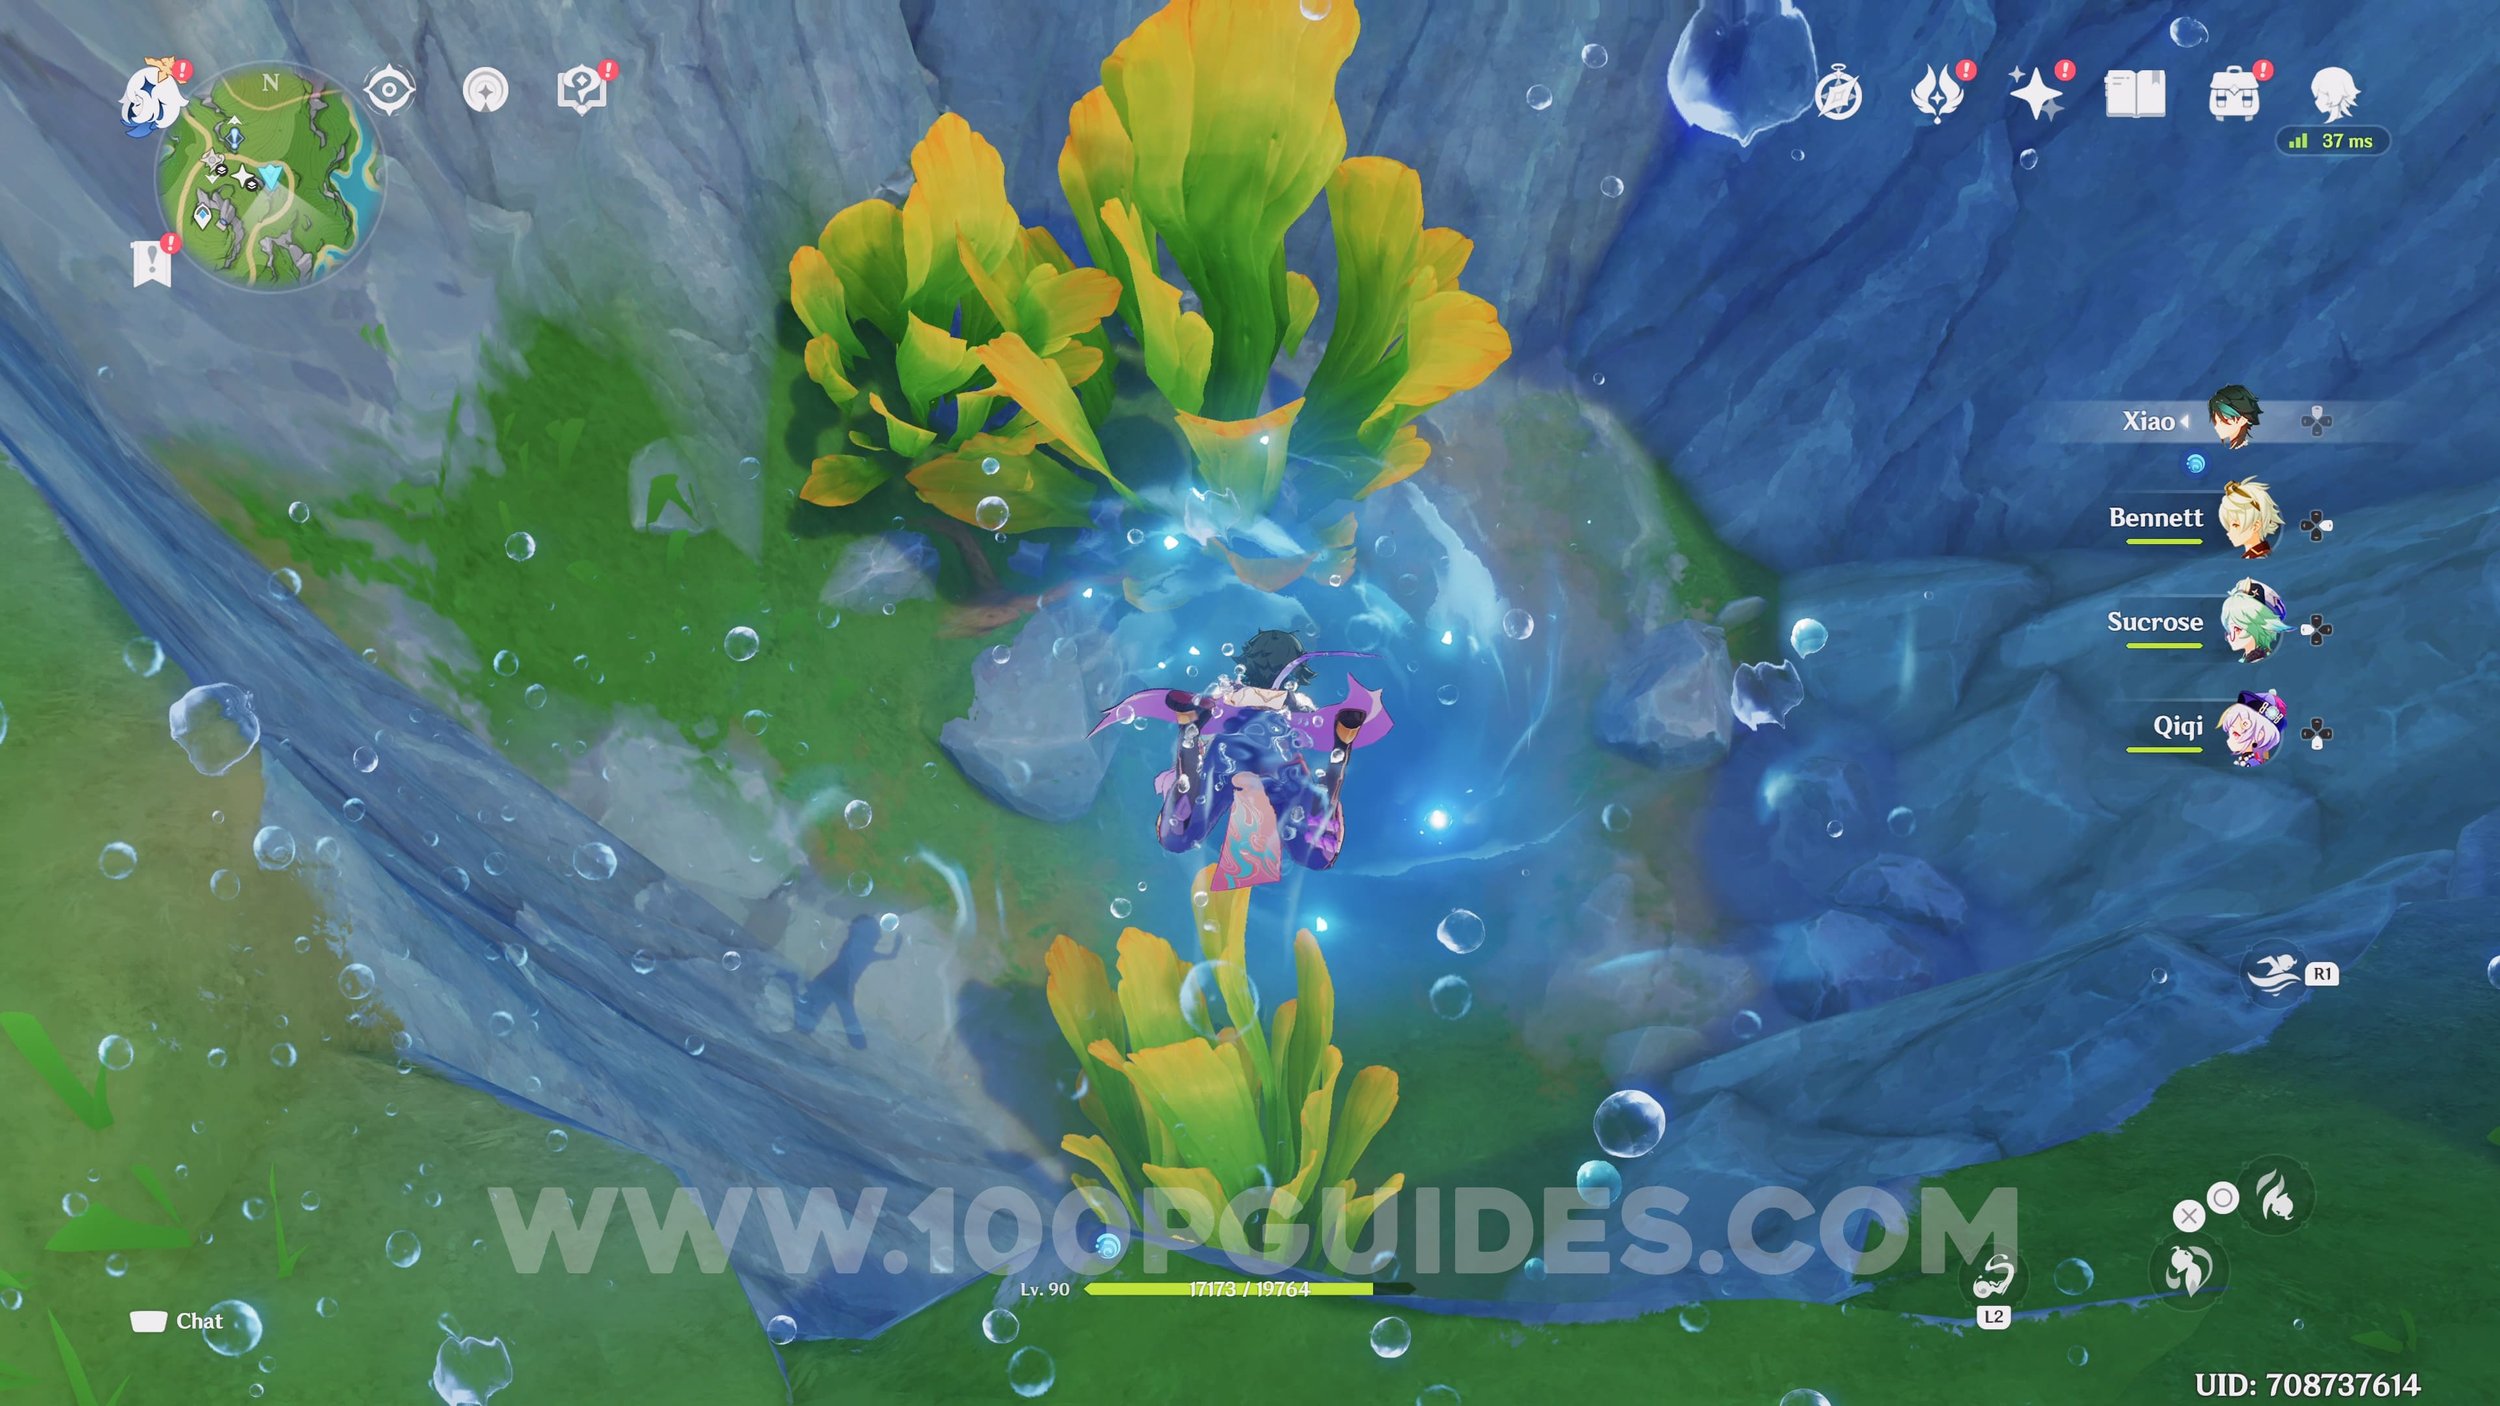
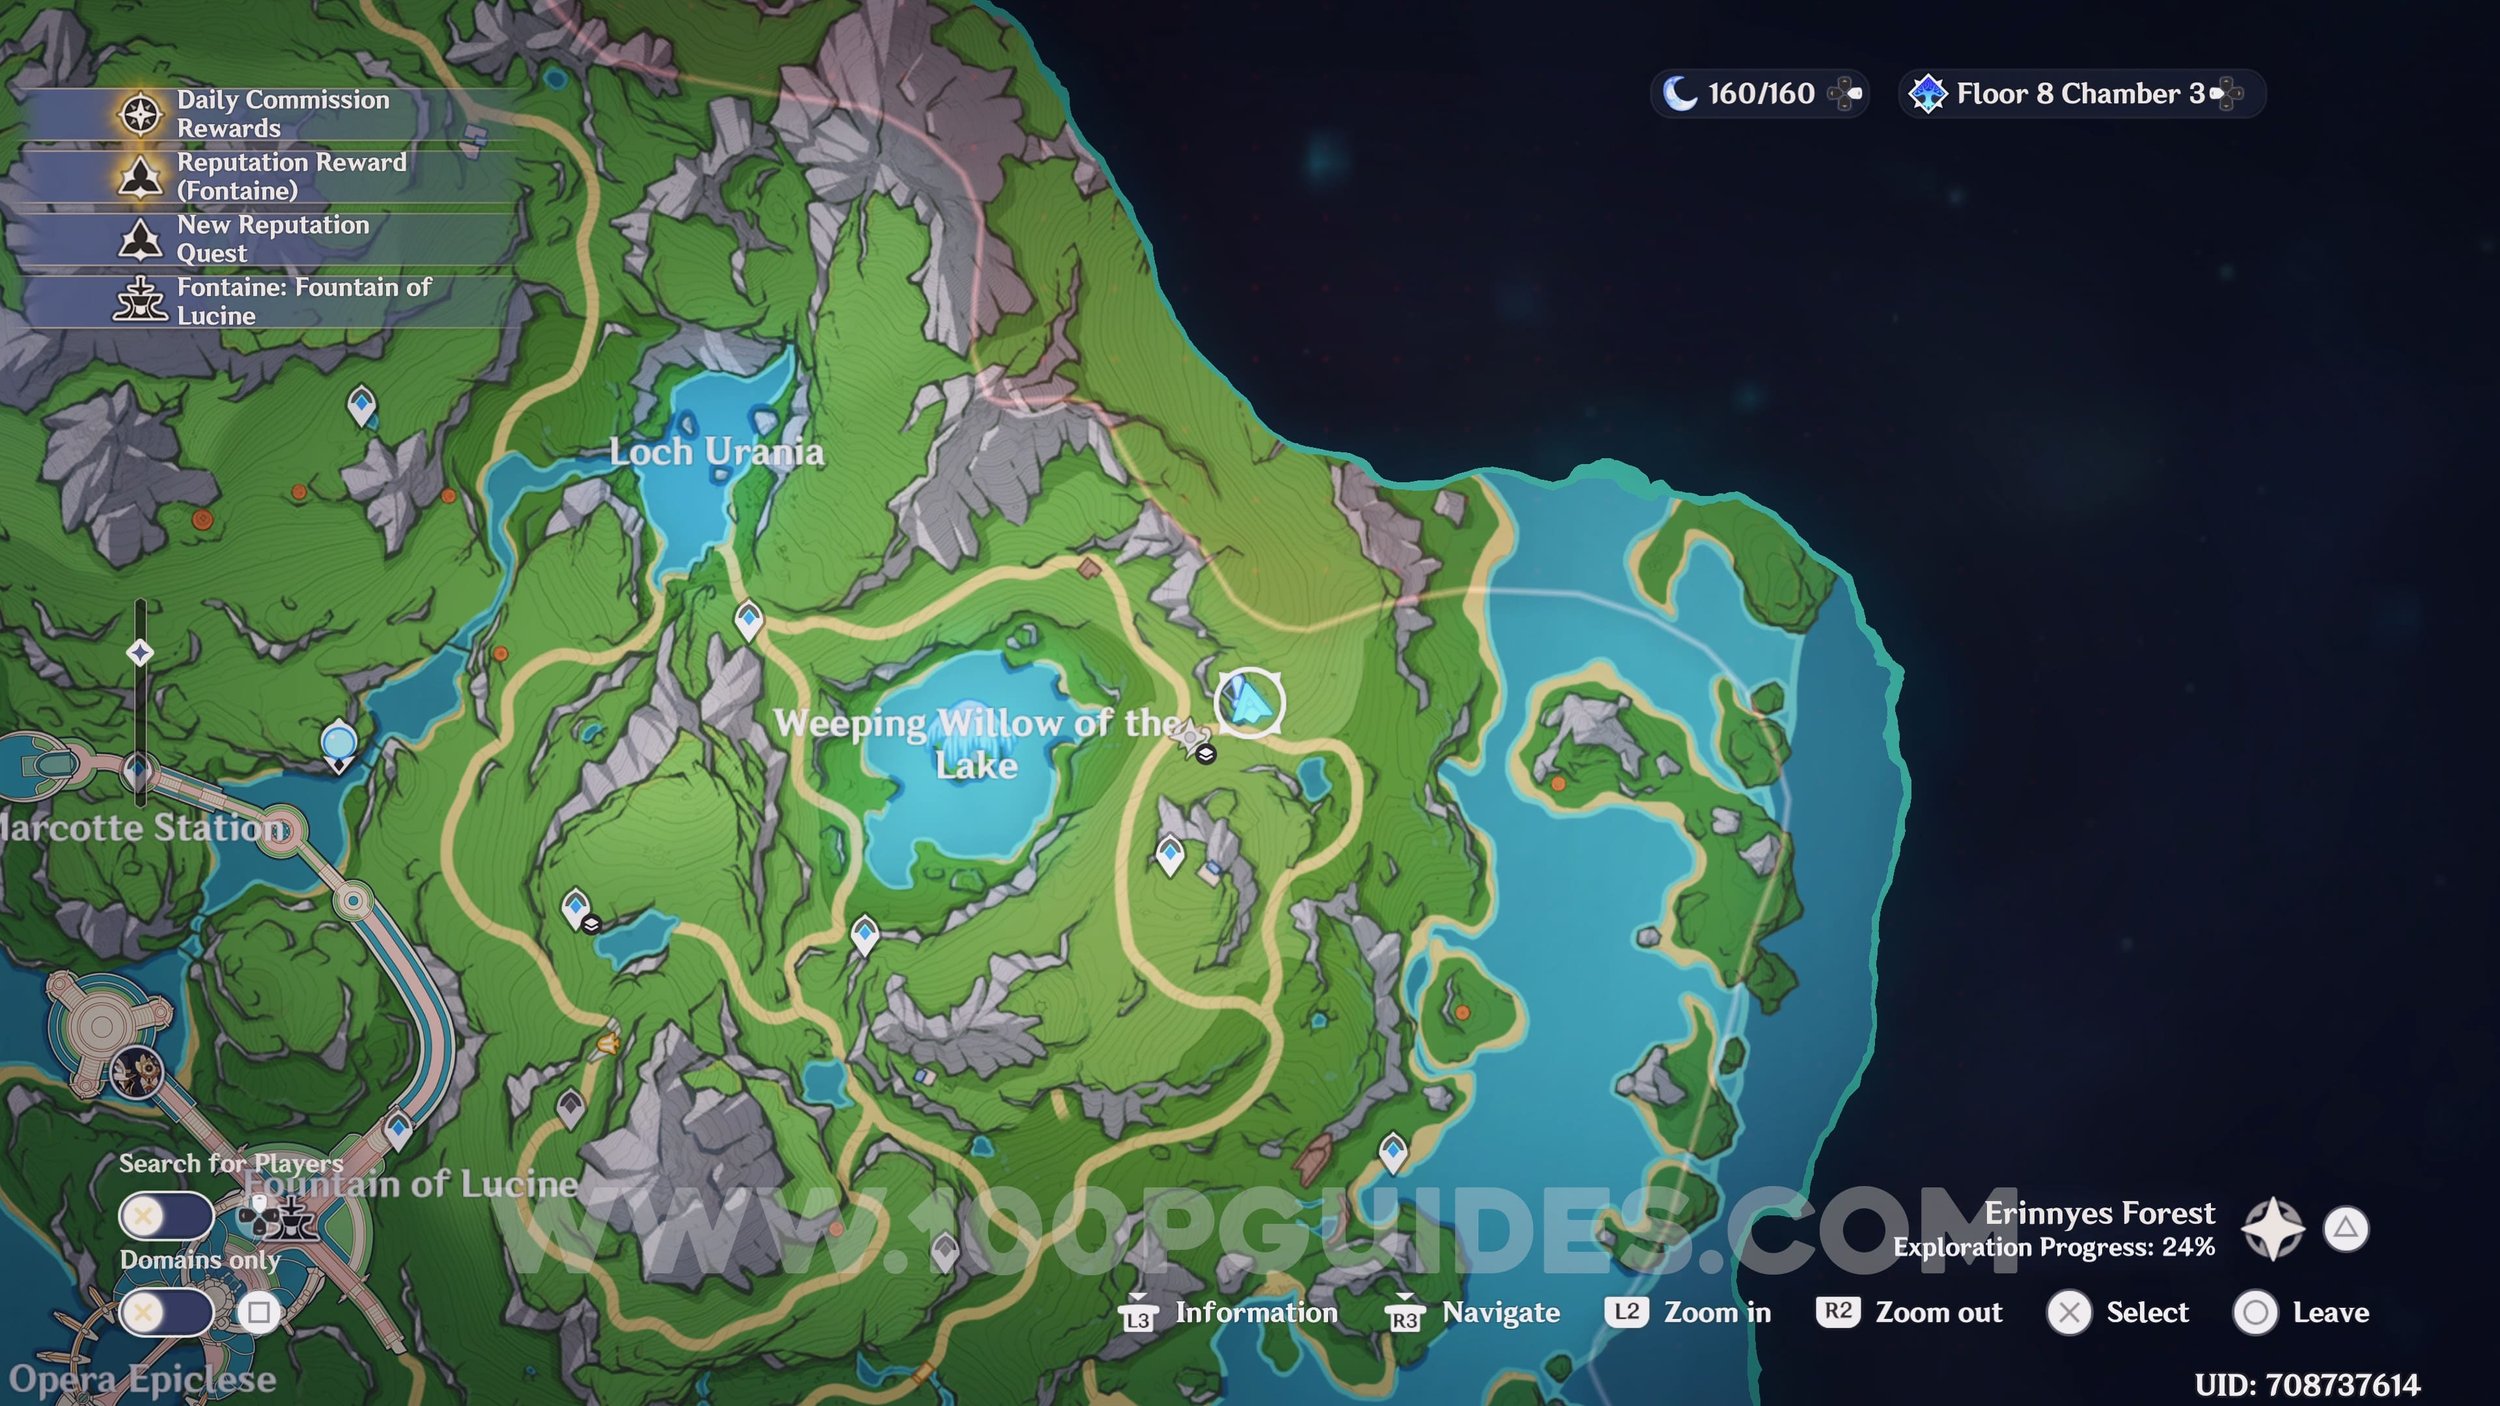
Hydroculus #11. Get the power from the totem and purify the water. Then, take the portal in the water to get the hydroculus.


Hydroculus #12

Hydroculus #13. Use the cannon in the cave to reveal the area with the hydroculus.


Hydroculus #14


Hydroculus #15


Hydroculus #16. Get the power from the totem and charge it on the ball push the ball to the pond.


Hydroculus #17. First, light the 4 hydro totems in the correct order (from the one that has 1 cut tree trunk to the one that has 4). Then, extinguish the 3 torches. Finally, kill the pyro slimes to move the 3 jellyfish. Use them to get to the hydroculus.


Hydroculus #18. Finish the time trial to get to the hydroculus.


Hydroculus #19. In the pond, absorb the manta’s ability to free the crab from the vines, then us it’s ability to break the rock and grab the hydroculus.


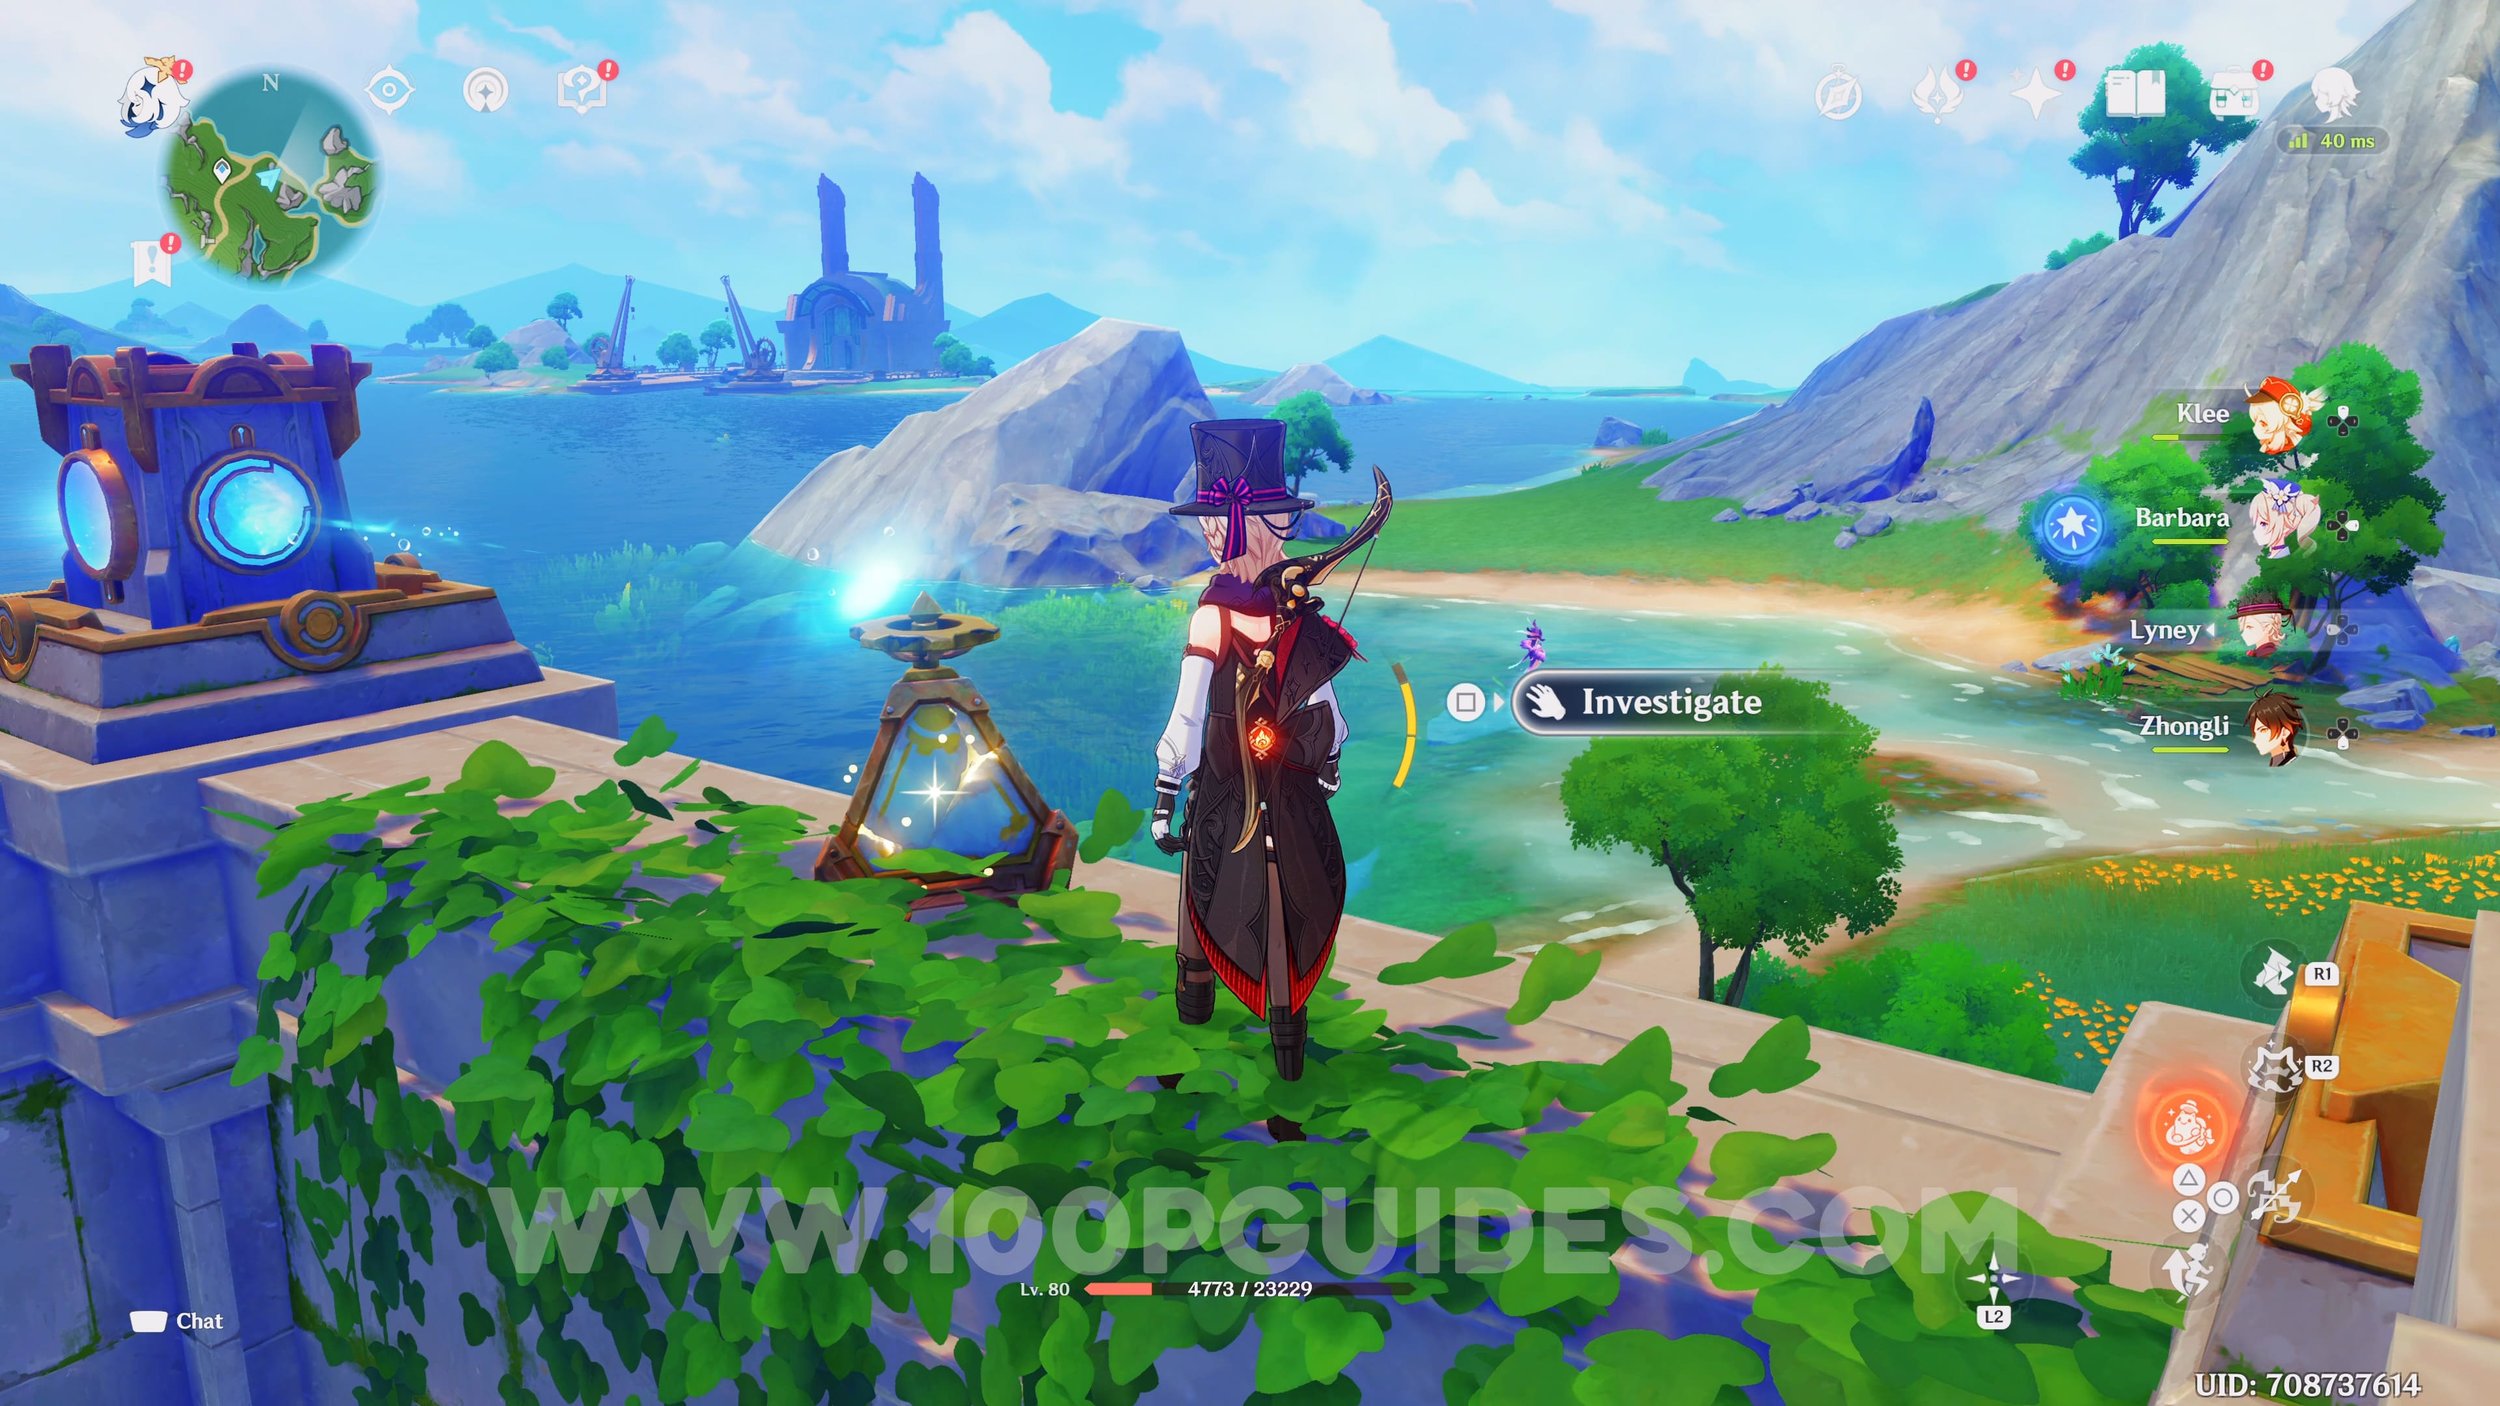
Hydroculus #20. Grab the black orb and then use it to activate the flying ship. Complete the challanges on the ship to find a jellyfish at the top. Use to to get to the hydroculus.


Hydroculus #21

Hydroculus #22


Hydroculus #23


Hydroculus #24. Hit the shell.


Hydroculus #25


Hydroculus #26. In the well. This are will only become available after finishing the “The Wild Fairy Of Erinnyes” side quest.


Hydroculus #27. Get the orb and hit the totem.


Hydroculus #28. Interact with the totem and use the power to move the jellyfish so that it is places below the hydroculus. Then, use it to reach it.


Hydroculus #29. Same as the previous hydroculus. Move the jellyfish with the totem’s power.


Hydroculus #30


Hydroculus #31. Use the power from the totem to destroy the 2 corrupt orbs. Then, use the jellyfish to get to the hysdroculus.


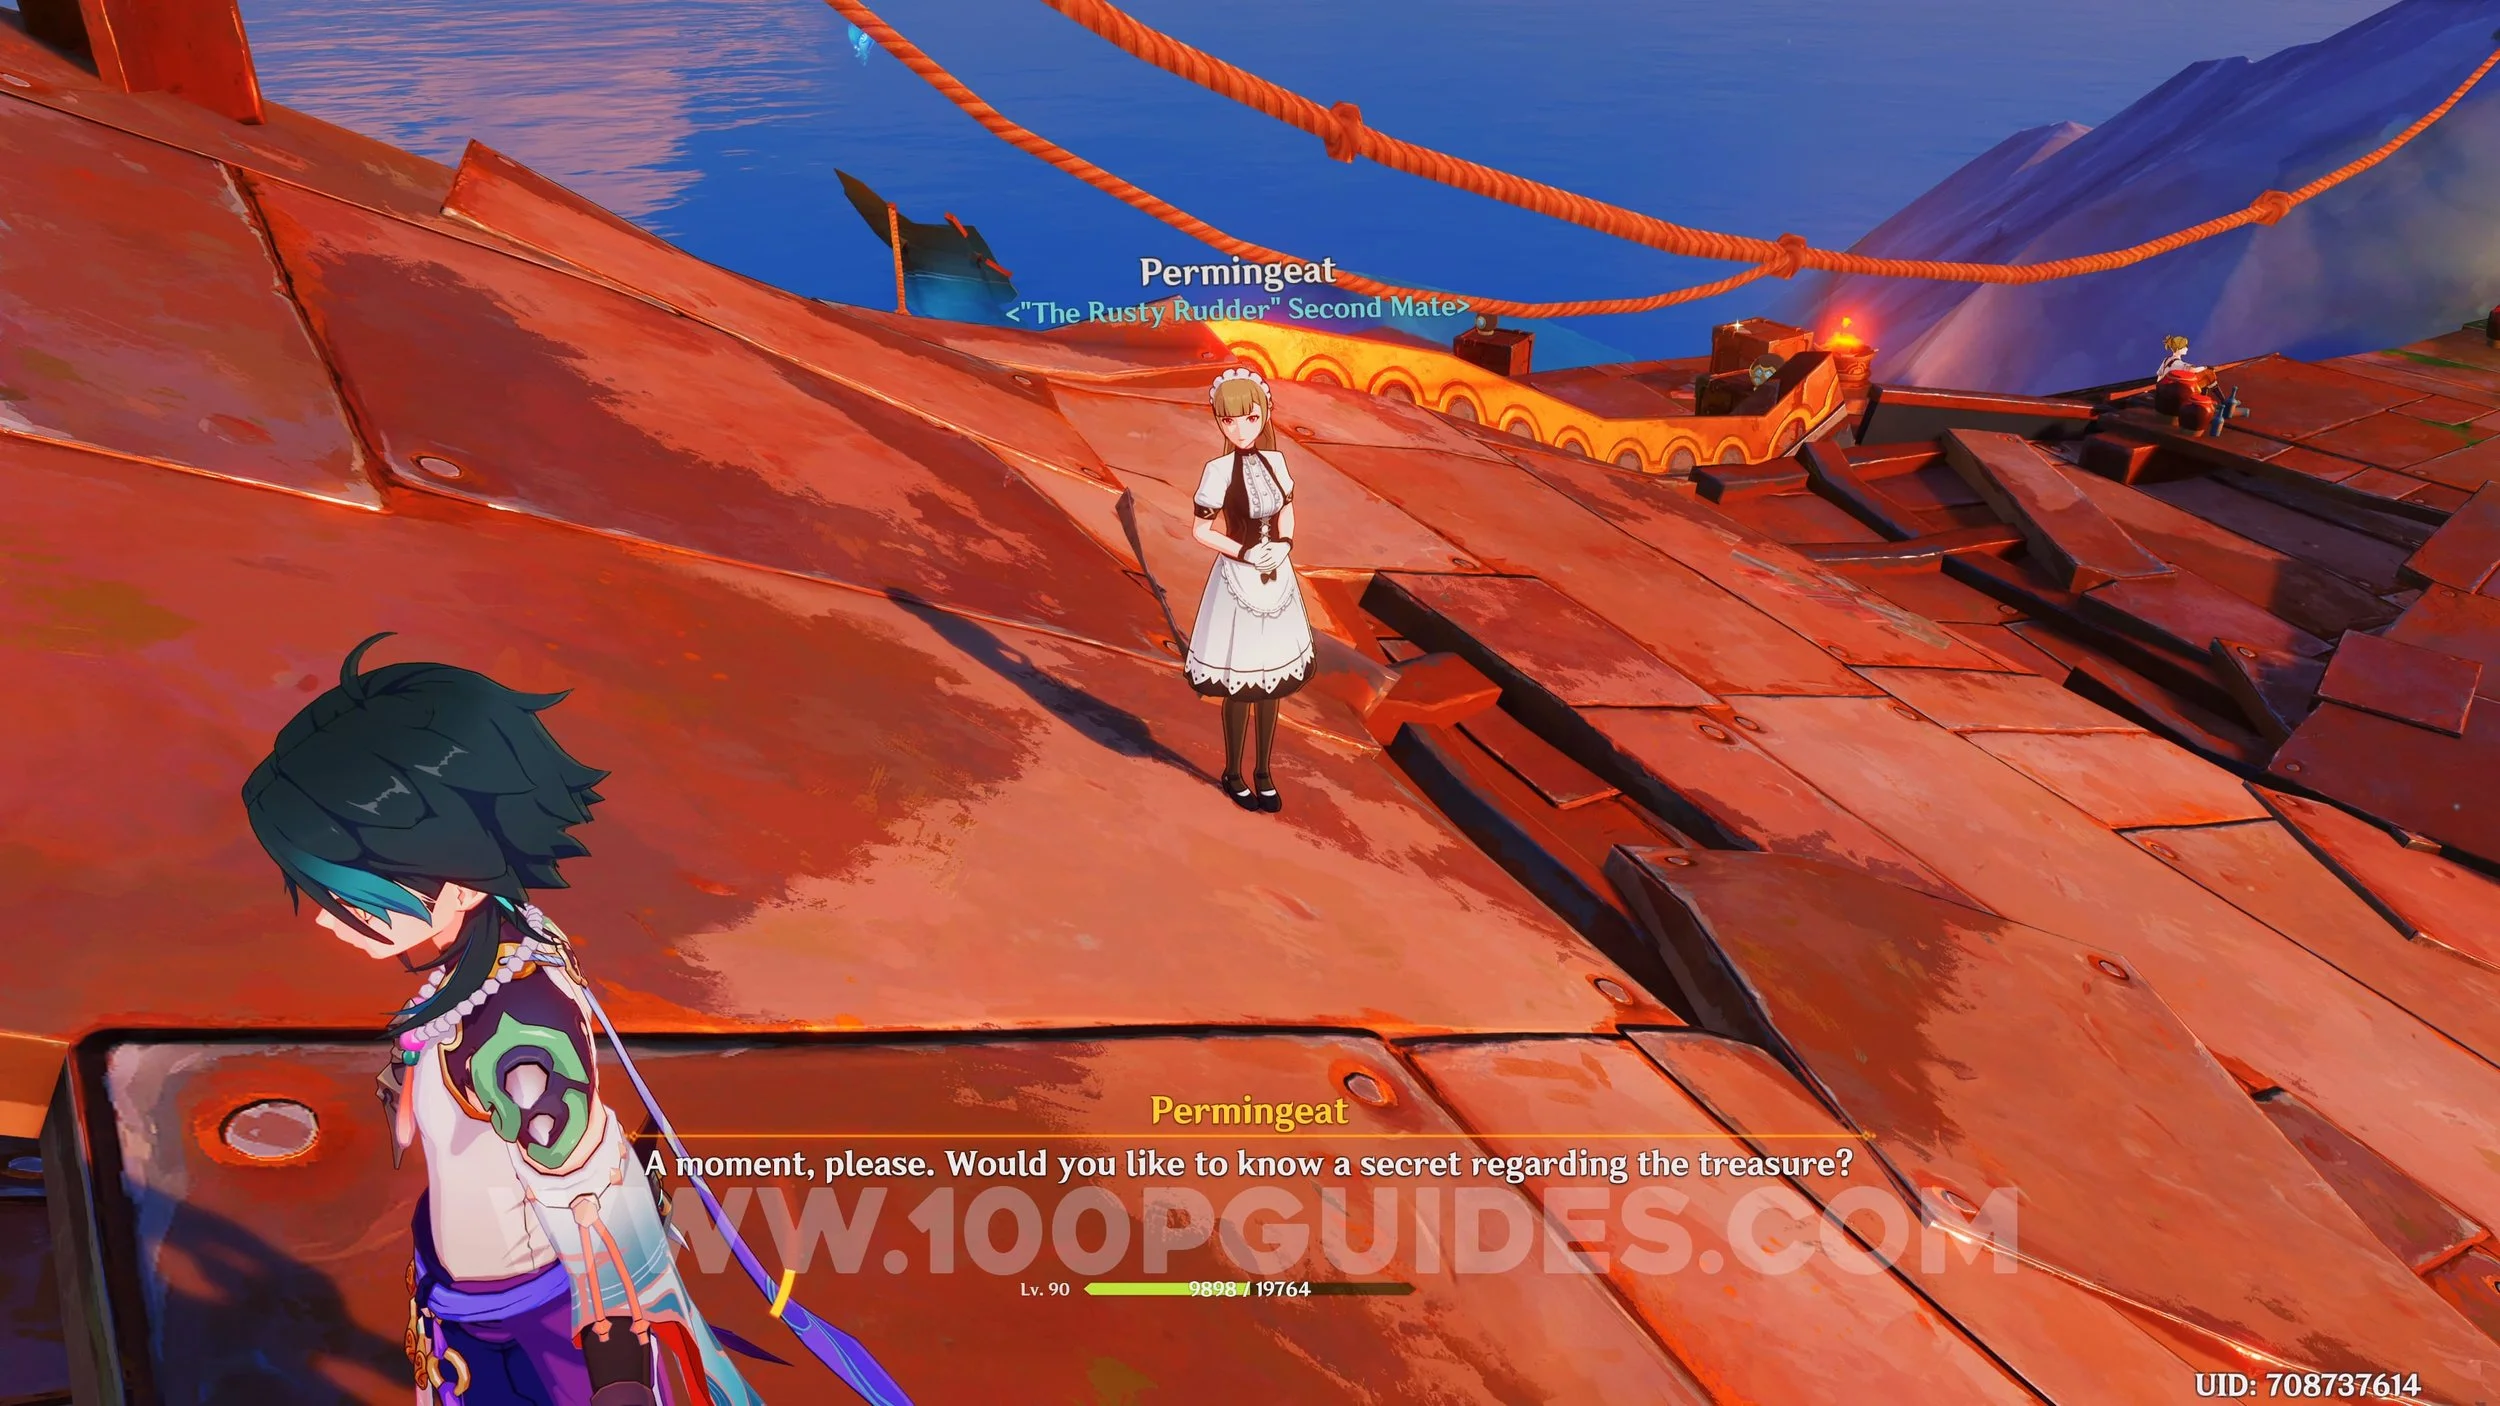
Hydroculus #32-33. Go to the boat and talk to the NPC. Answer with 3,3 and Romaritime Flowers to activate the cannon. Then use it to open the cave where you will then find 2 hydroculus inside.


Hydroculus #34. Use the waverider to jump and get the hydroculus.


Hydroculus #35


Hydroculus #36. Get the 3 keys to open the gate below the destroyed ship. The first one is in the chest on the ship, the 2nd is in the nest at the very top of the ship and the final key is near the buried half of the ship.


Hydroculus #37


Hydroculus #38. Use the power from the totem to activate the pink flower. This will spawn a path to the jellyfish that will let you get the hydroculus.


Hydroculus #39. Inside the destroyed ship underwater.


Hydroculus #40. Use the power from the totem to spin the laser so that it faces the first orb on the column. Then, destroy the barrels and interact with the triangular chest on the wall. This will allow the laser to get all the way to the end and activate the wind current that will allow you to get the hydroculus.


Hydroculus #41-42. Finish the challenge to spawn a water booster. Use it to get the first hydroculus. Then, follow the path to the end to get the 2nd.


Hydroculus #43


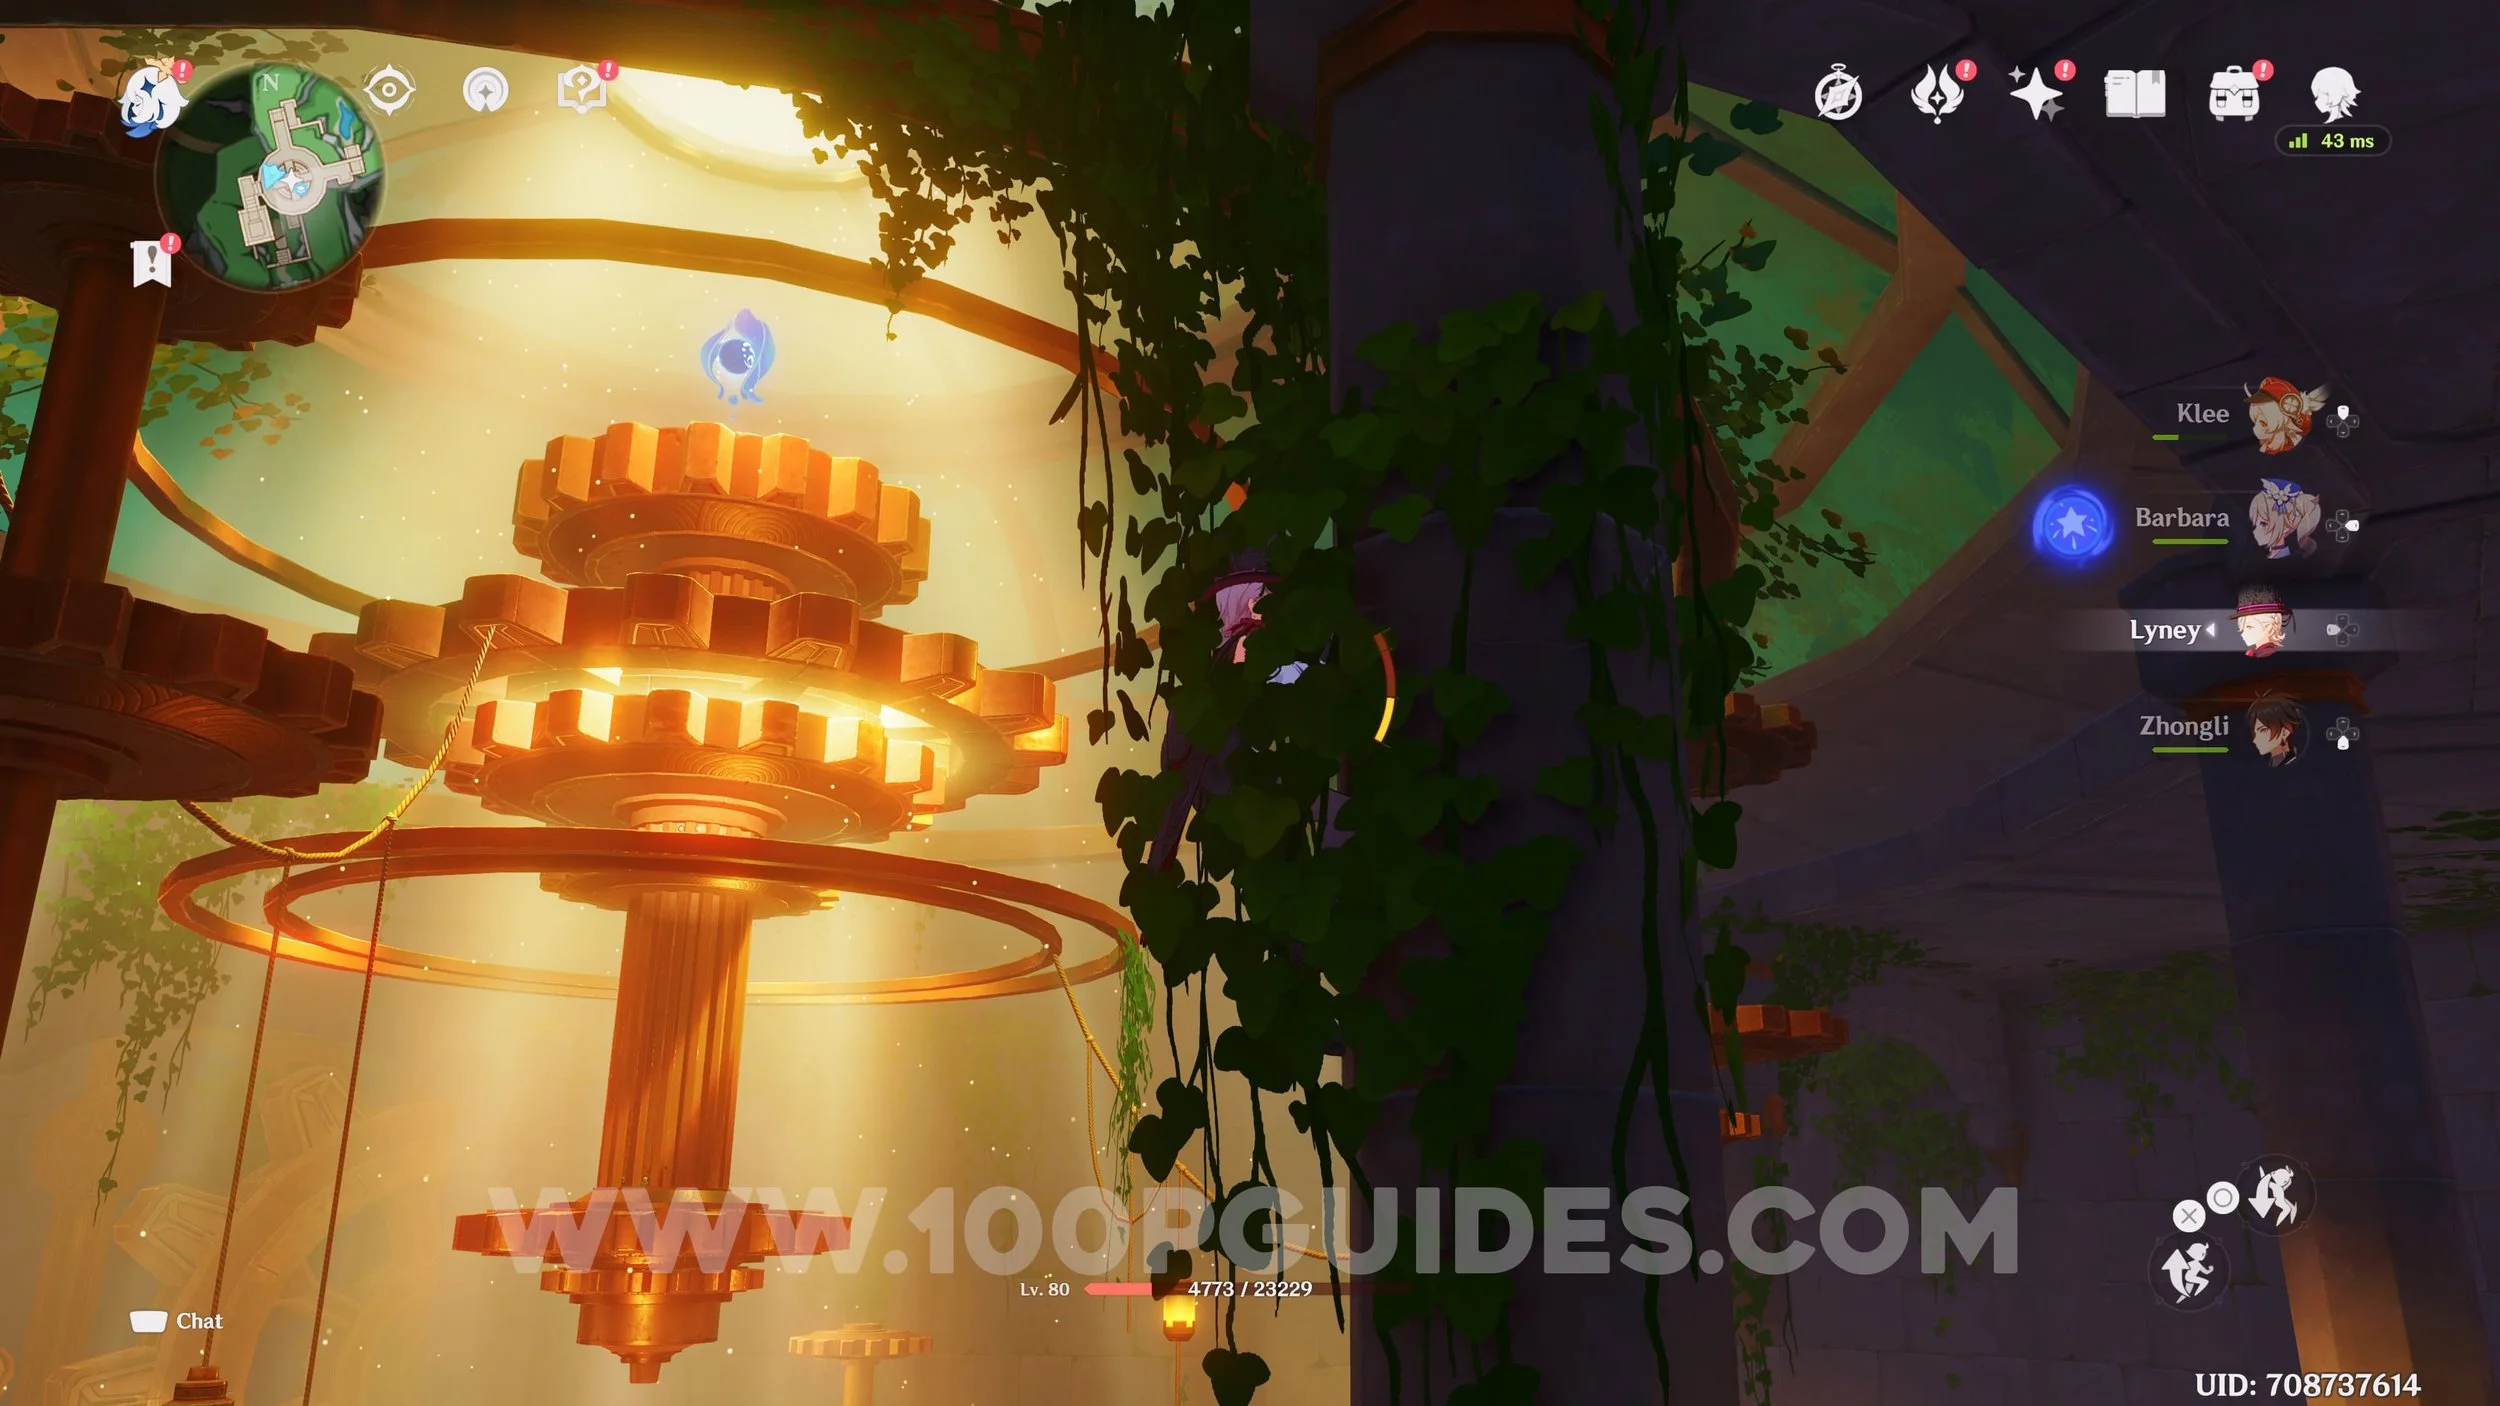
Hydroculus #44. In the cave on top of the middle cog. Use the cog that goes up and down to reach it.

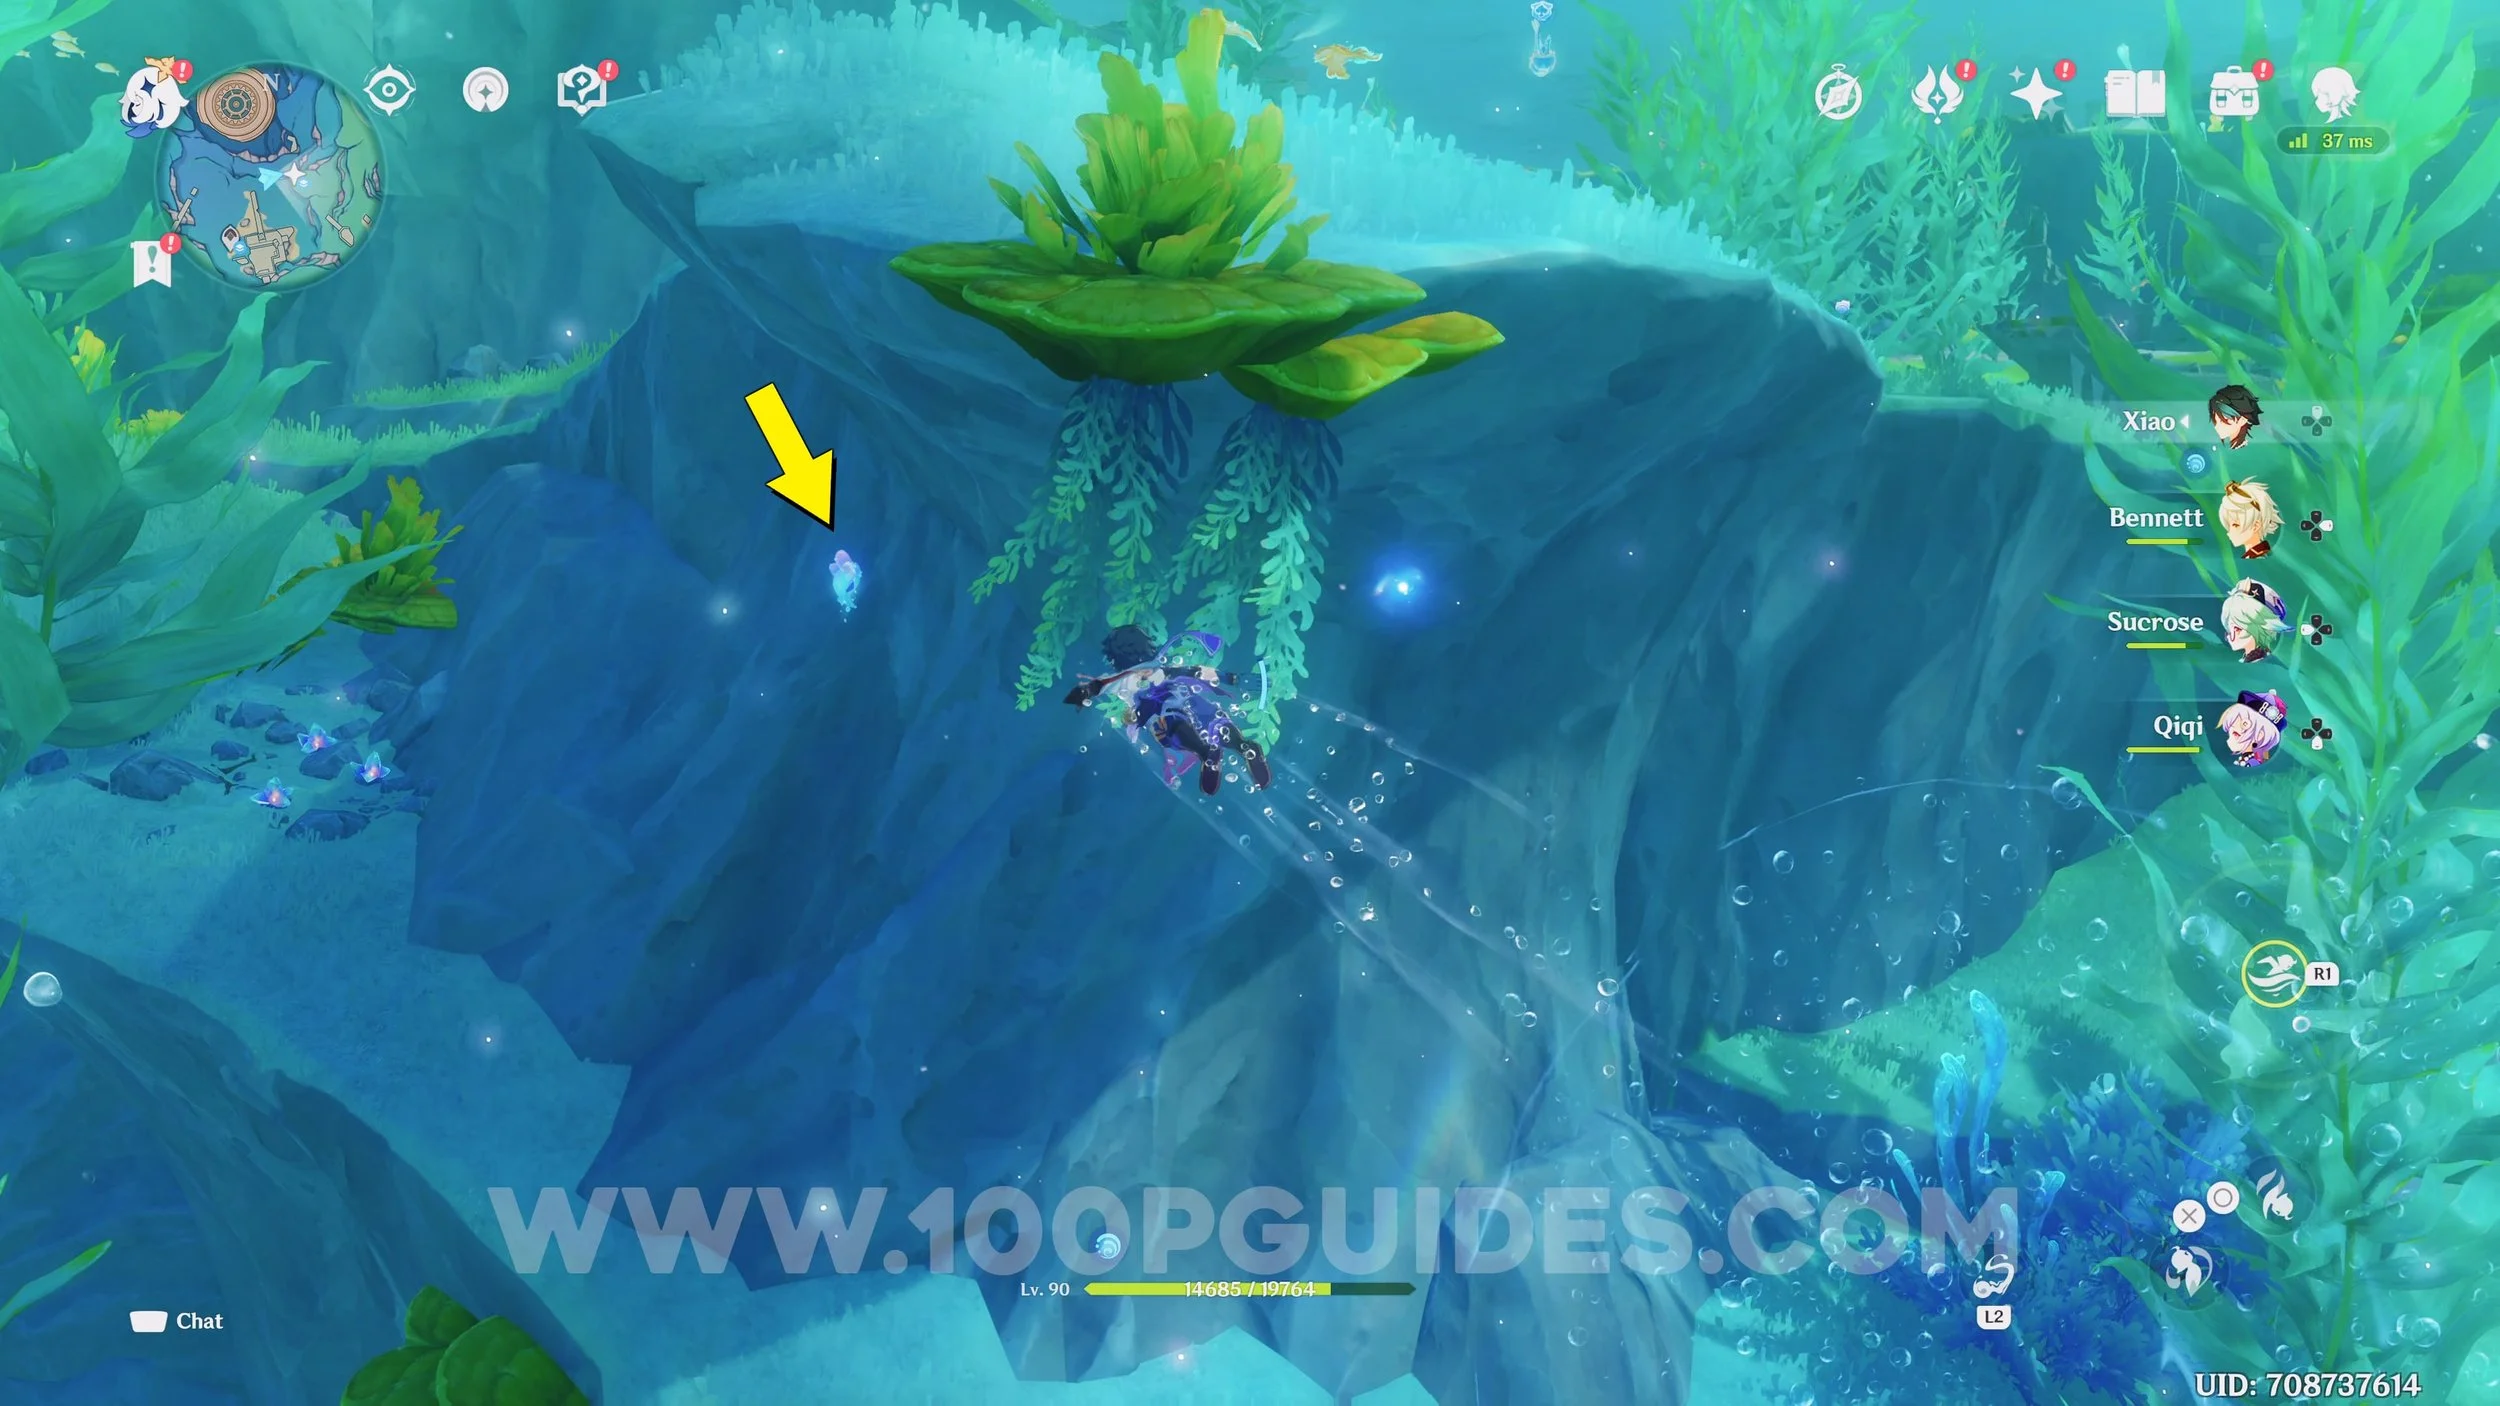
Hydroculus #45. In the same area as the previous hydroculus, finish the puzzle and guide the seelie back to it’s totem. Then, dive down to the area below the cogs to find the hydroculus.


Hydroculus #46


Hydroculus #47


Hydroculus #48. Use the jellyfish to reach the hydroculus.


Hydroculus #49


Hydroculus #50

Hydroculus #51


Hydroculus #52


Hydroculus #53. On top of the tower. Use the water booster to get there.


Hydroculus #54
Hydroculus #55

Hydroculus #56


Hydroculus #57


Hydroculus #58. Get the power from the crab and use it to broke the rock.


Hydroculus #59.Inside the underwater building.


Hydroculus #60


Hydroculus #61


Hydroculus #62. Go down the stairs where the previous Hydroculus was and open the metal grates. Inside, solve the water puzzle. You will then find the hydroculus behind the northern water fountain.


Hydroculus #63. In the same room as the previous hydroculus, swim up and use the mirror to find the hydroculus on the other side (will only be available after finishing the Book of Esoteric Revelations - Enigmatic Pages side quest.


Hydroculus #64. Under the path at the end.


Hydroculus #65. Use the jellyfish to reach the Hydroculus.


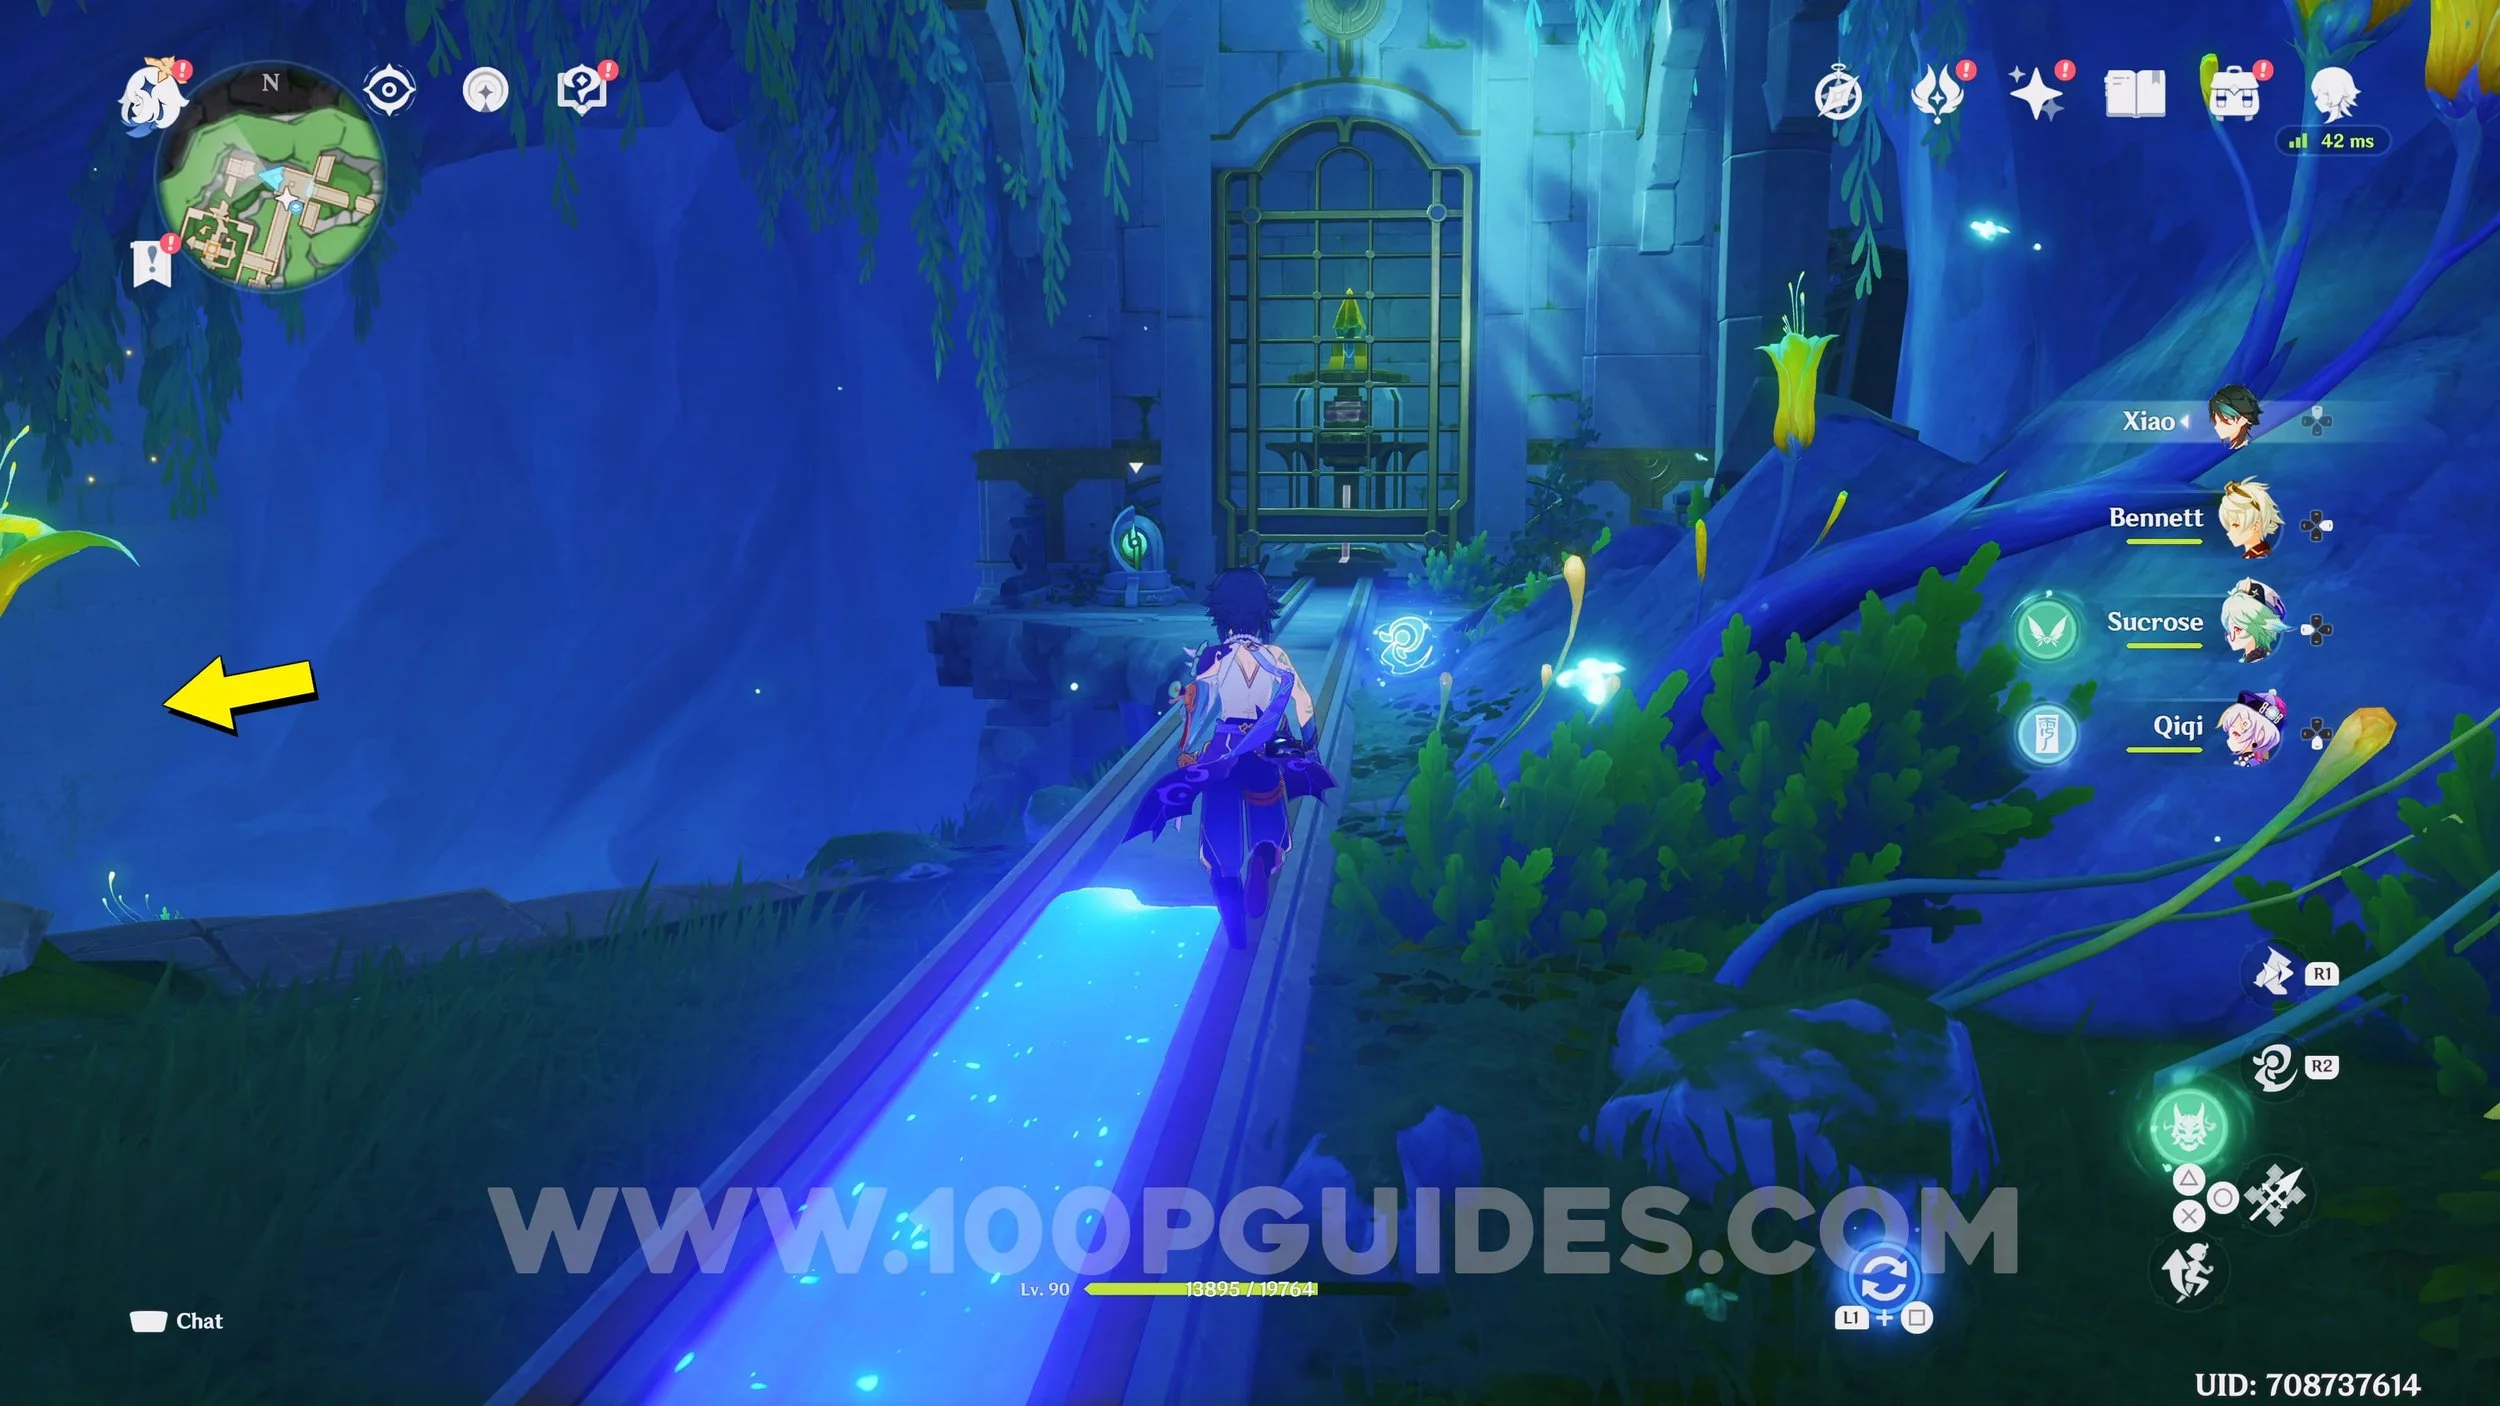
Hydroculus #66. Enter the cave and solve the 2 fountains to open the barrier. Then, go left at the gate and take the lift up to find the hydroculus at the top on the other side of the fountain.


Video Guide