Styx: Blades Of Greed All Thief Emblem Locations
This guide will show the location of all Thief Emblems in Styx: Blades of Greed.
Thief Emblems are one of the main collectibles in Styx: Blades of Greed. Collecting them all unlocks the Emblem Collector trophy.
Important: Styx: Blades of Greed does not include a map that shows collectible locations. To make things much easier, you should first obtain the Raven Rune before going for all emblems. This rune lets you see Thief Emblems through walls, allowing you to track them down far more efficiently.
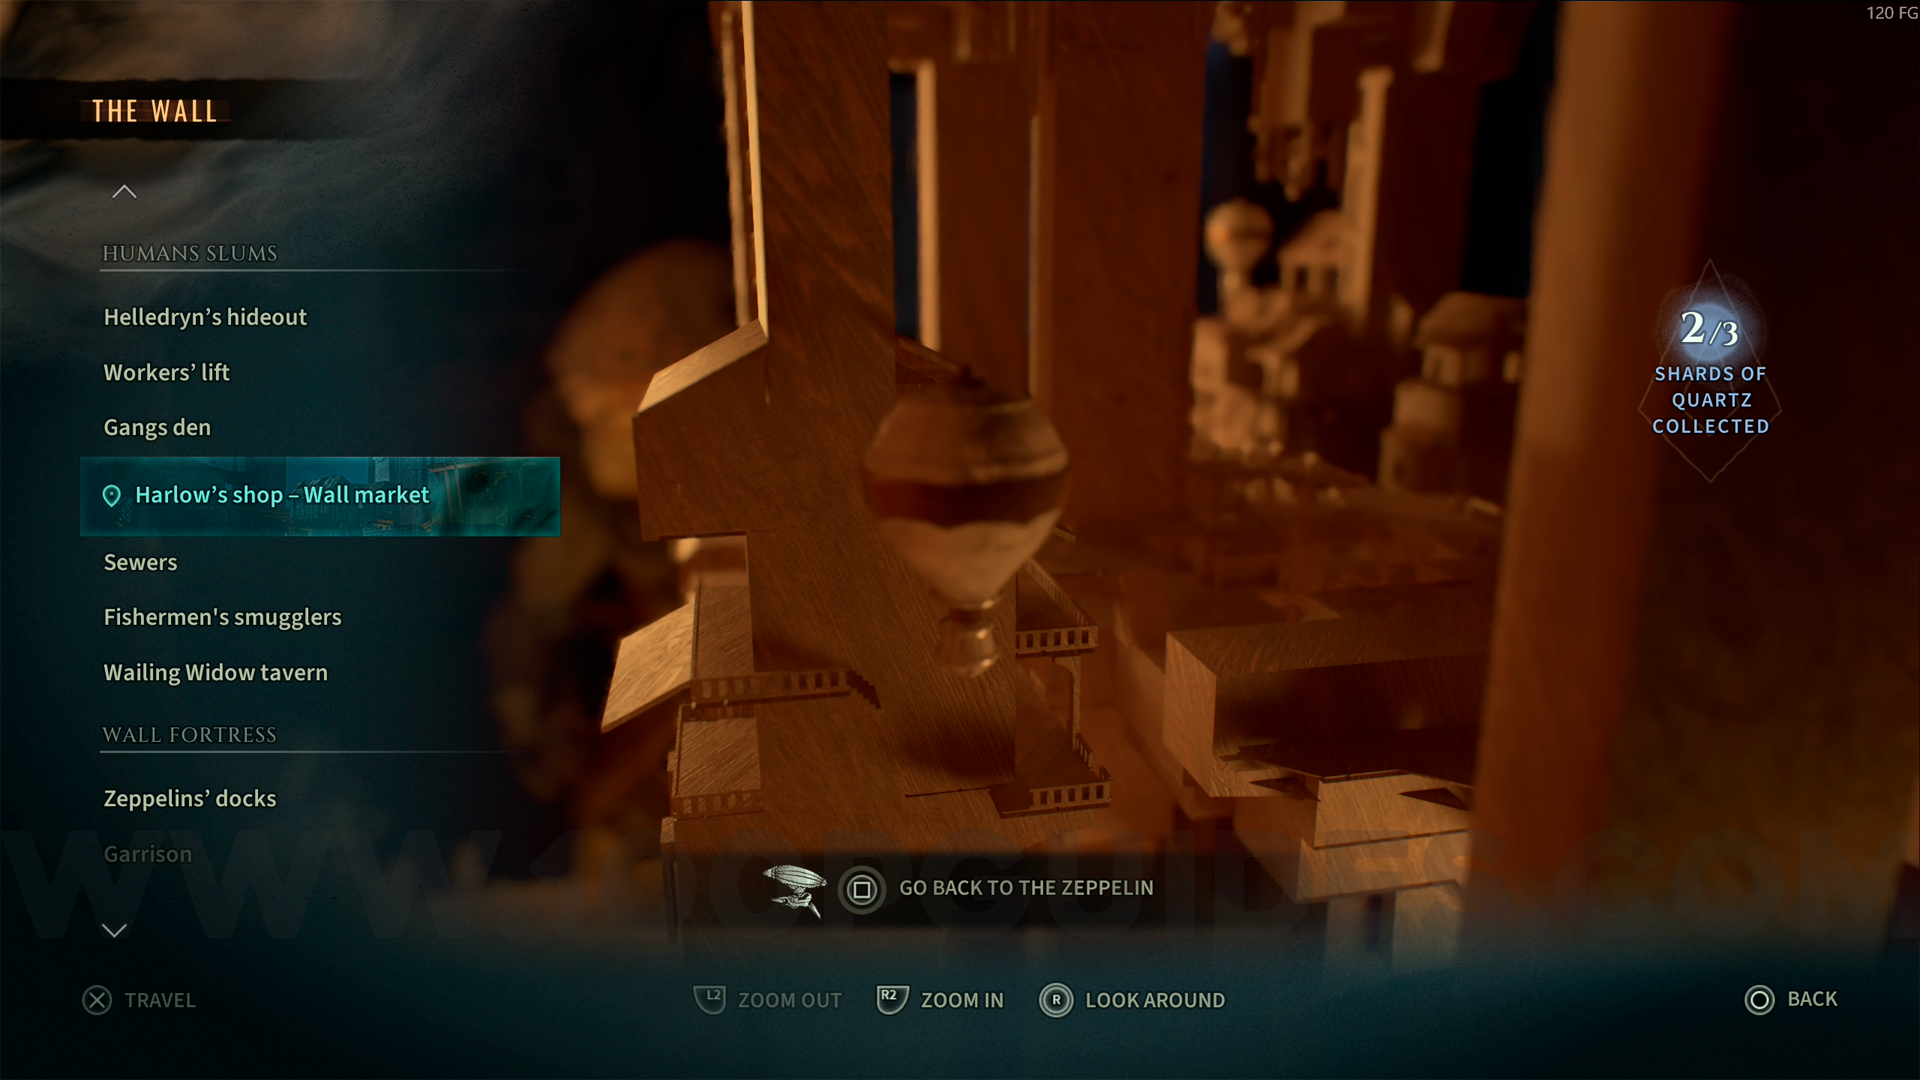
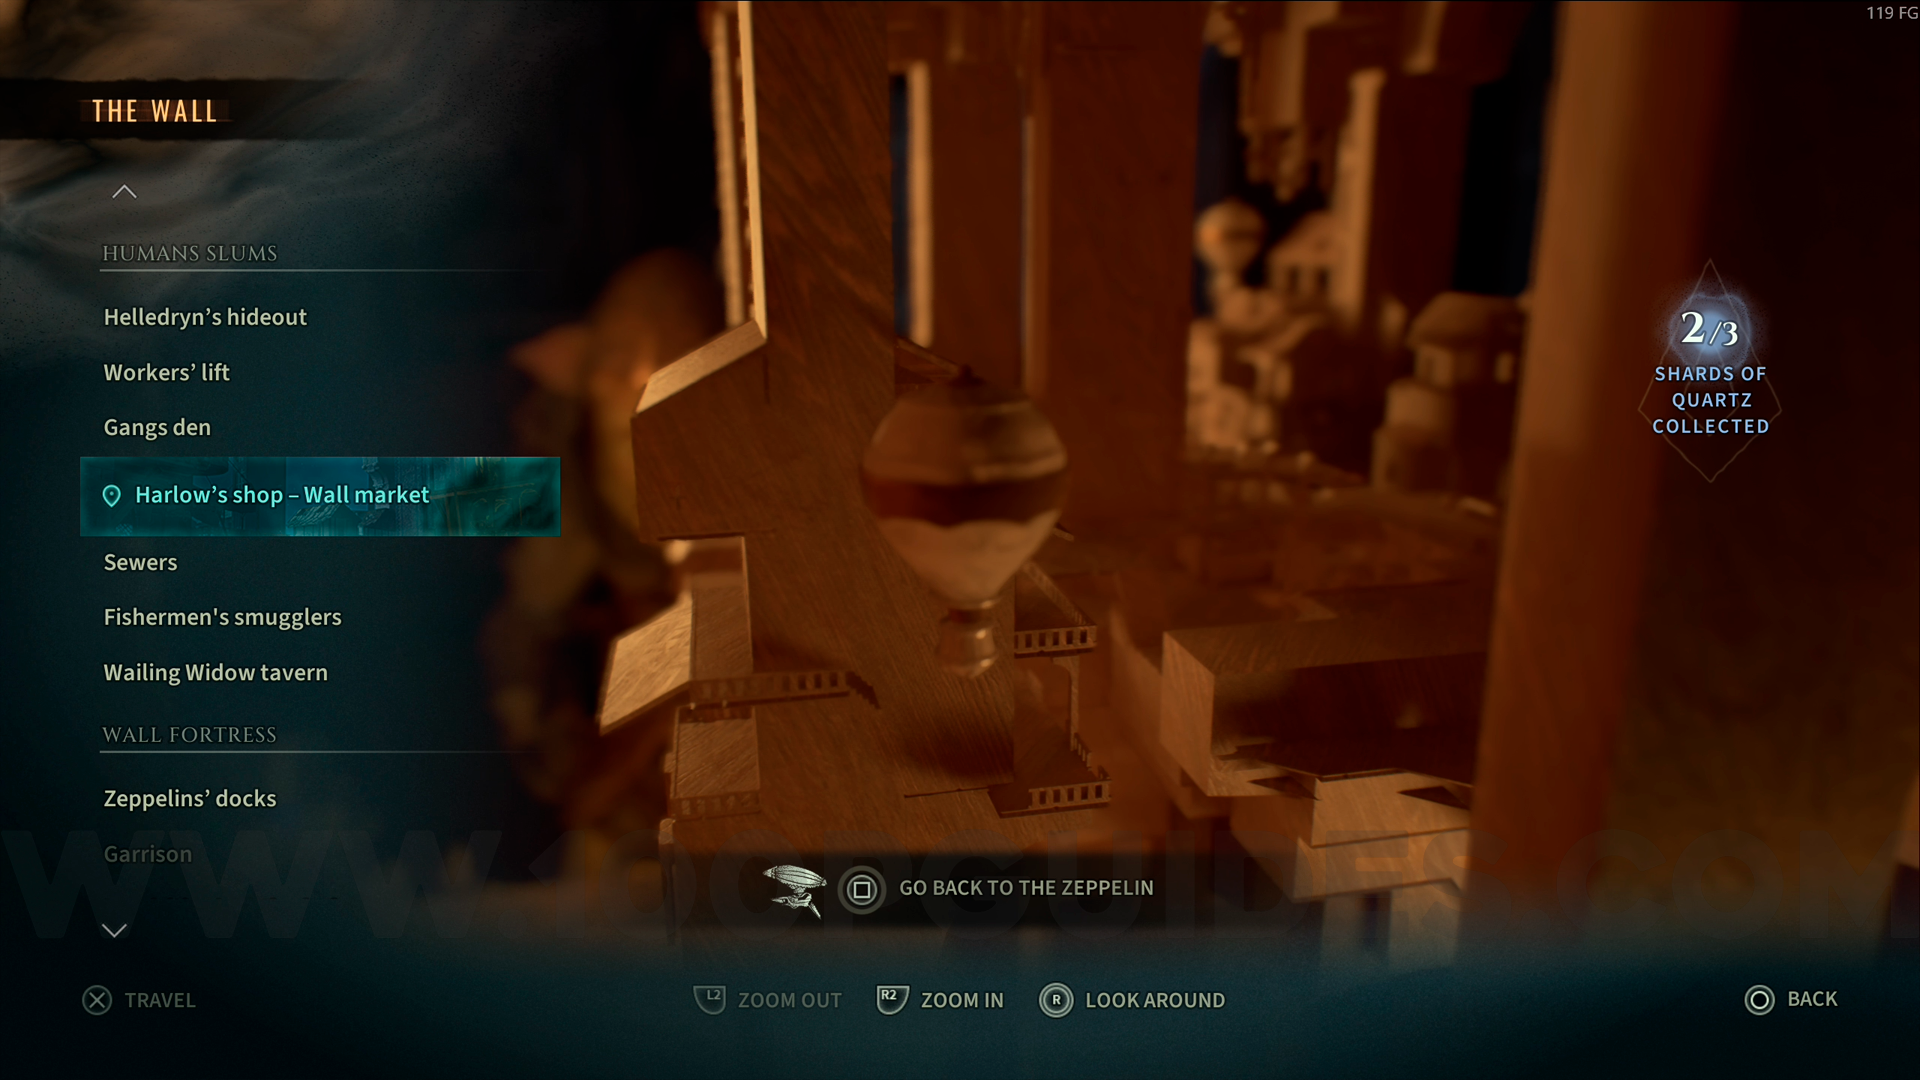
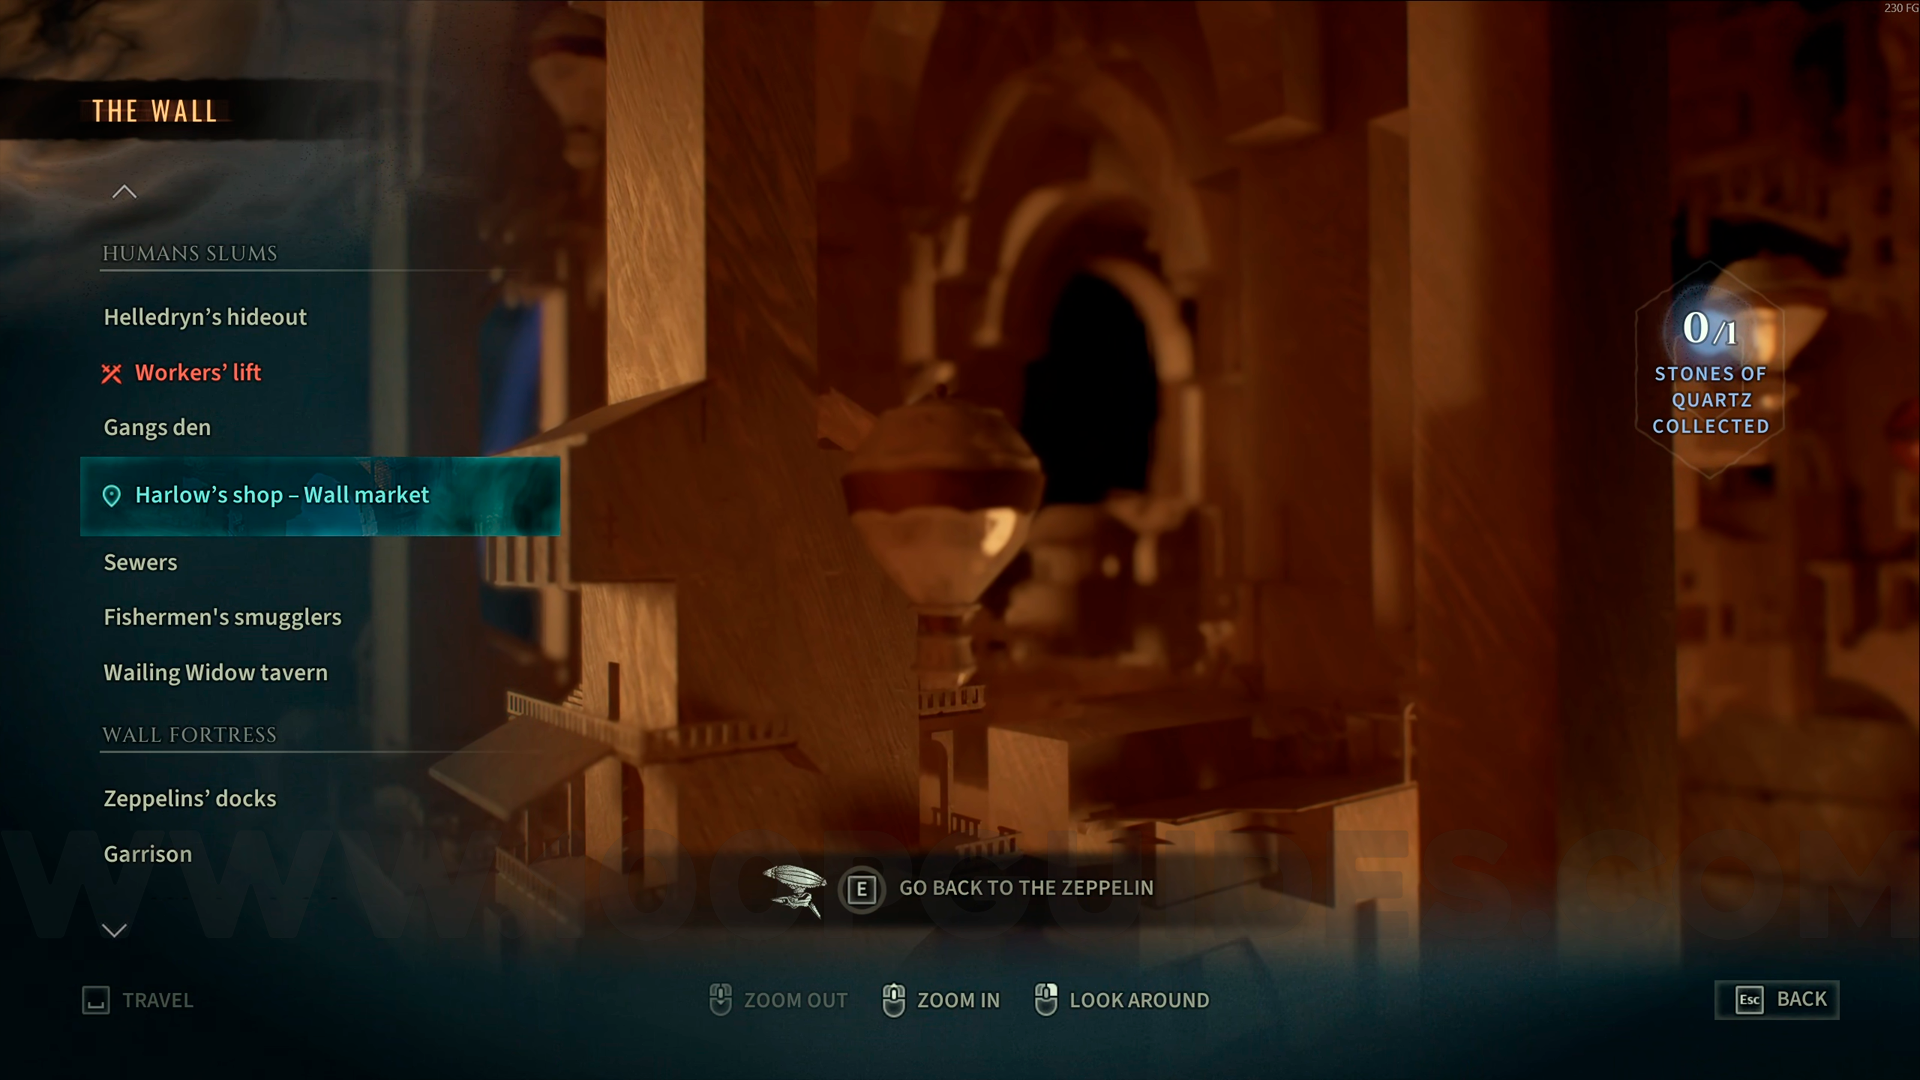
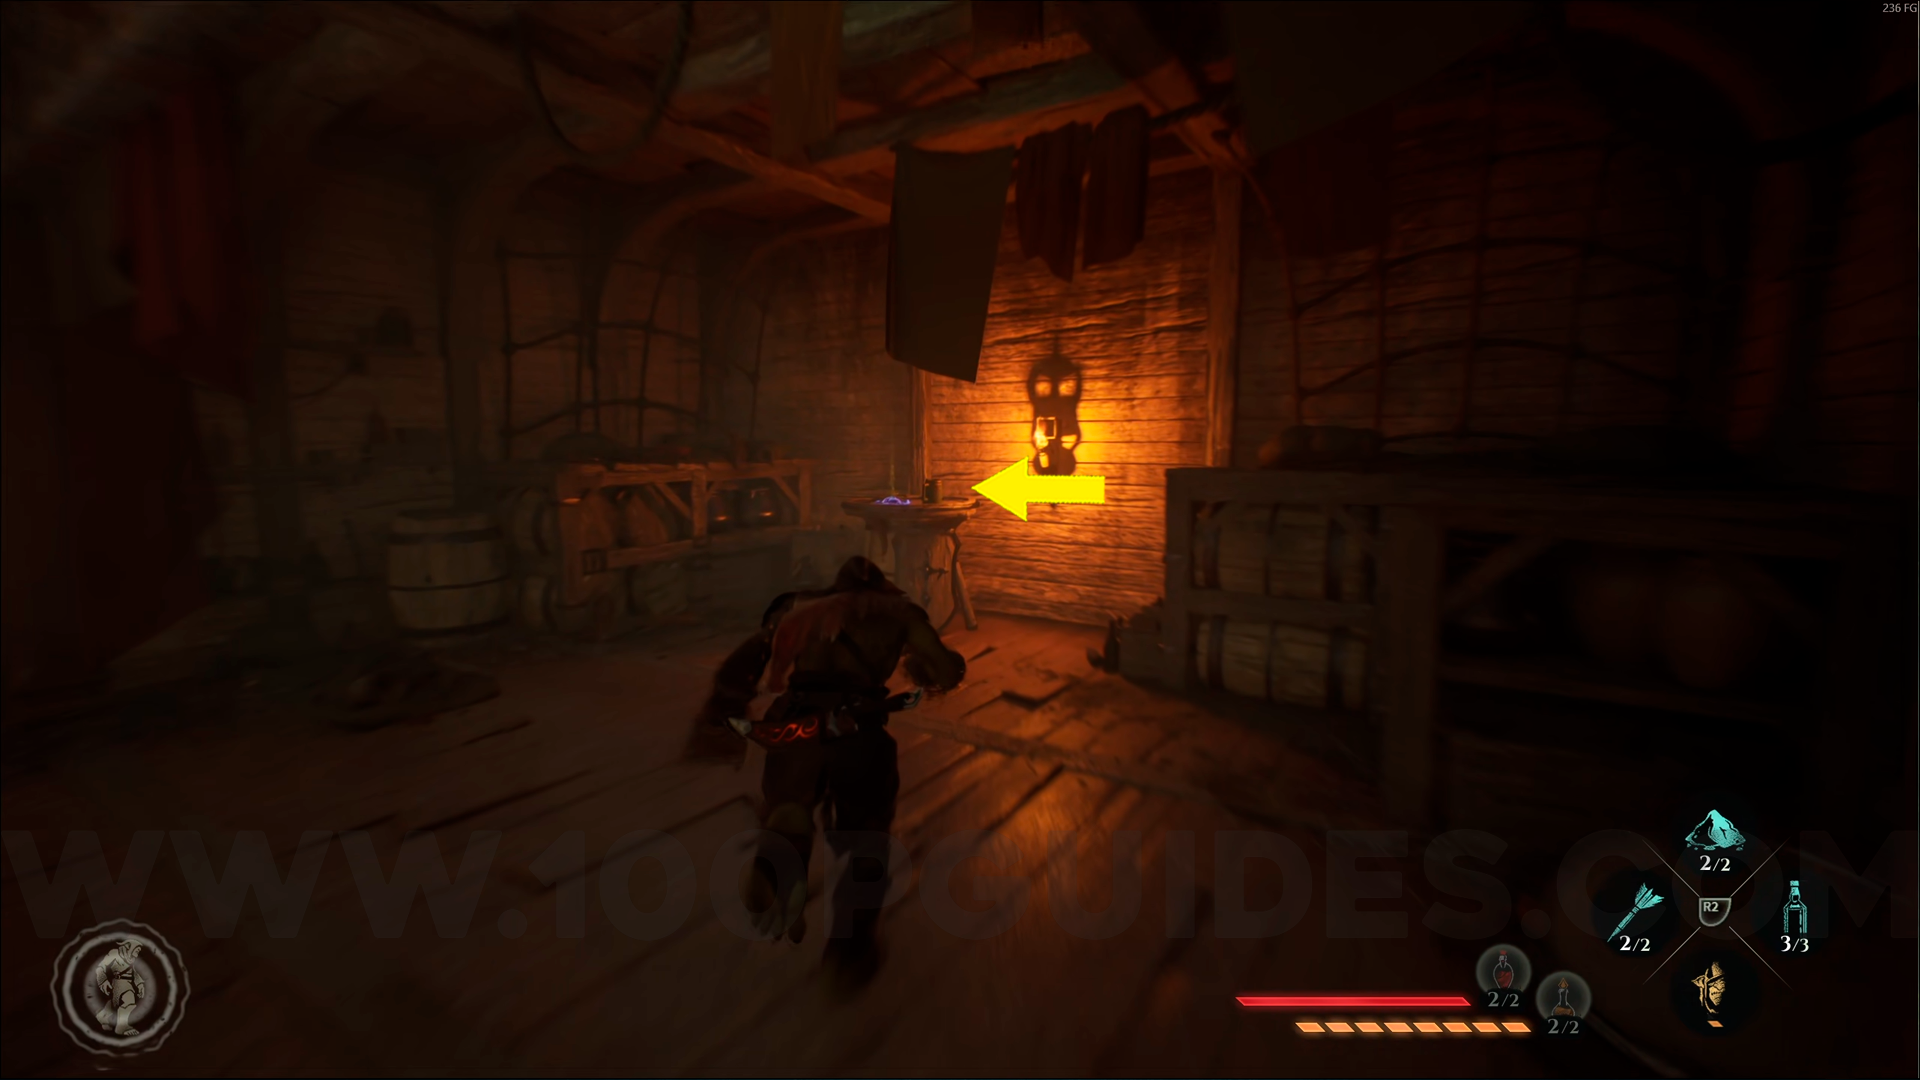
To get the Raven Rune, go to the Harlow’s Shop checkpoint in Wall Market. The rune is sitting on top of the table, right next to the checkpoint. Pick it up, then equip it from the menu.
You’ll also need to unlock all abilities, as some emblems require specific powers to reach.
Now that you have the Raven Rune, you'll be able to see Thief Emblems through walls using Amber Vision when you get close to them. The range is quite generous. Below, you'll find the approximate locations of all Thief Emblems, grouped by Wood, Bronze, Silver, Gold, and Emerald.
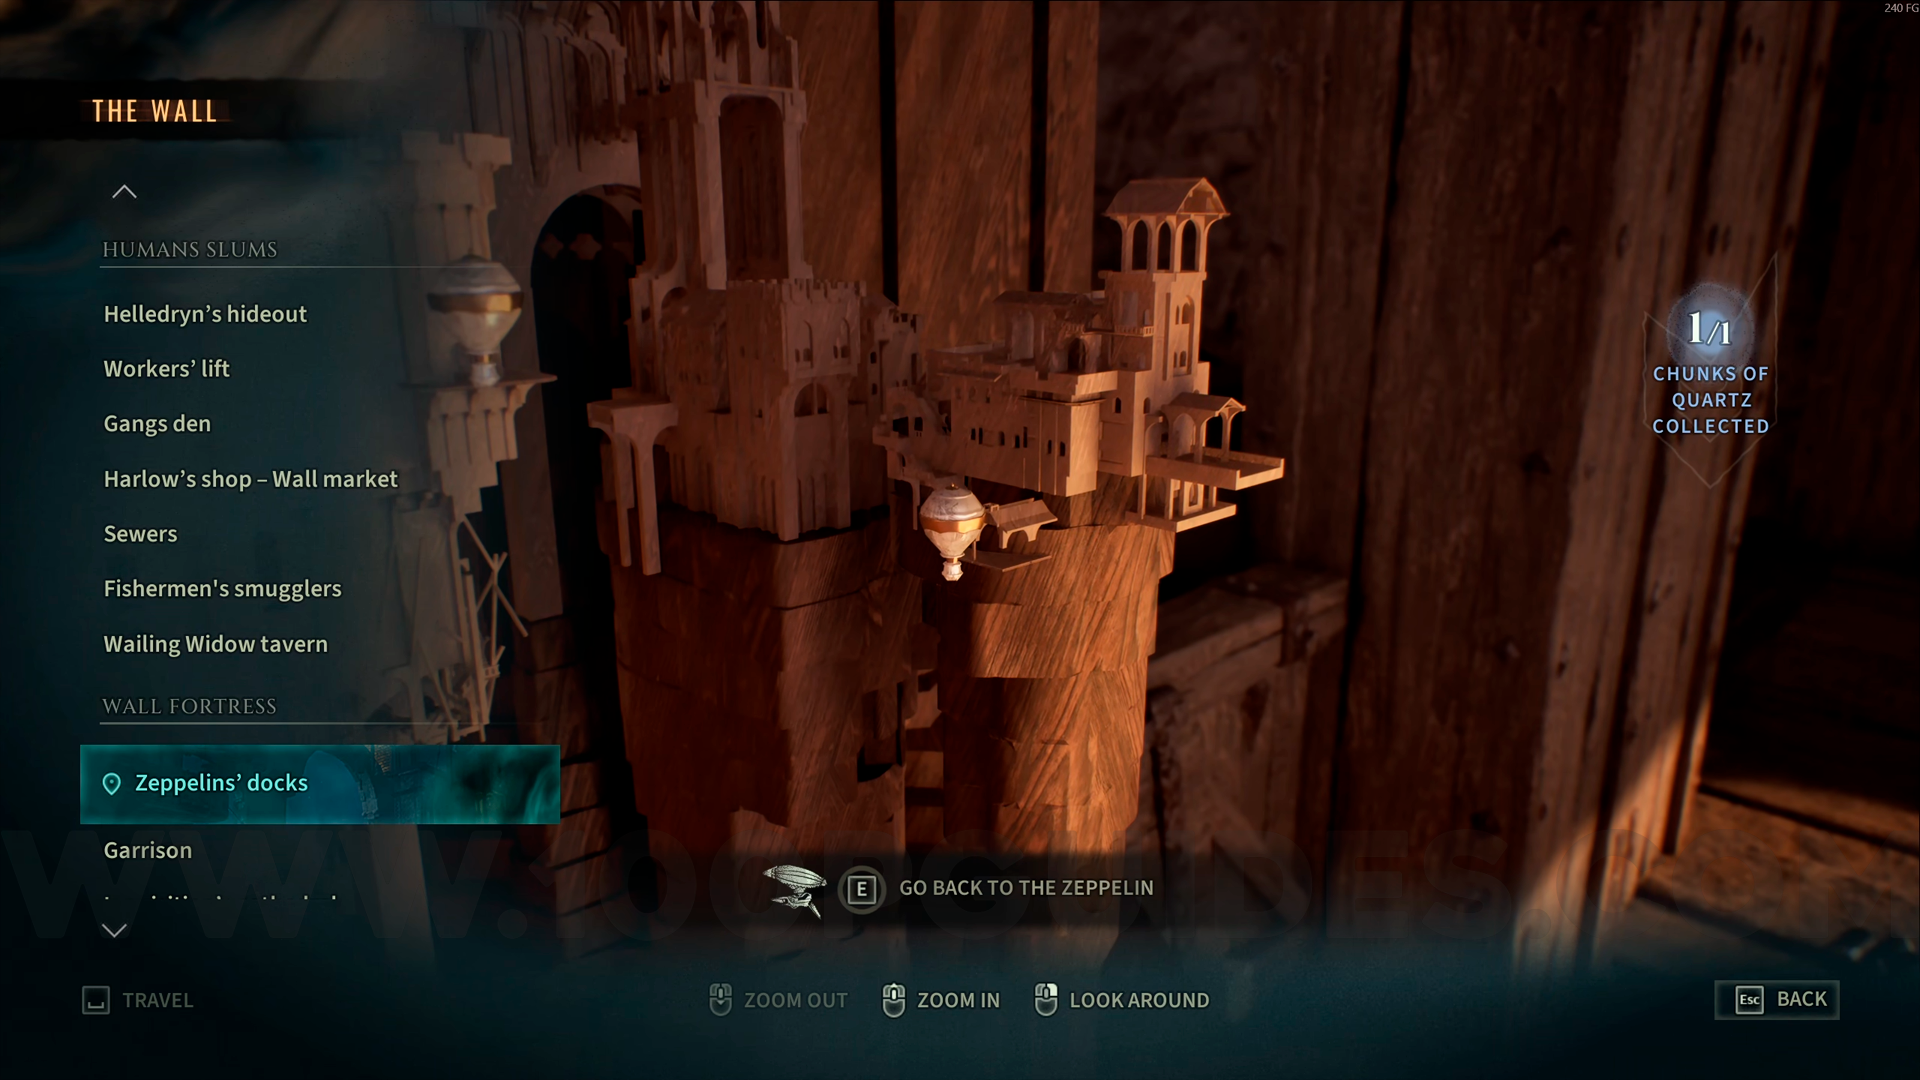
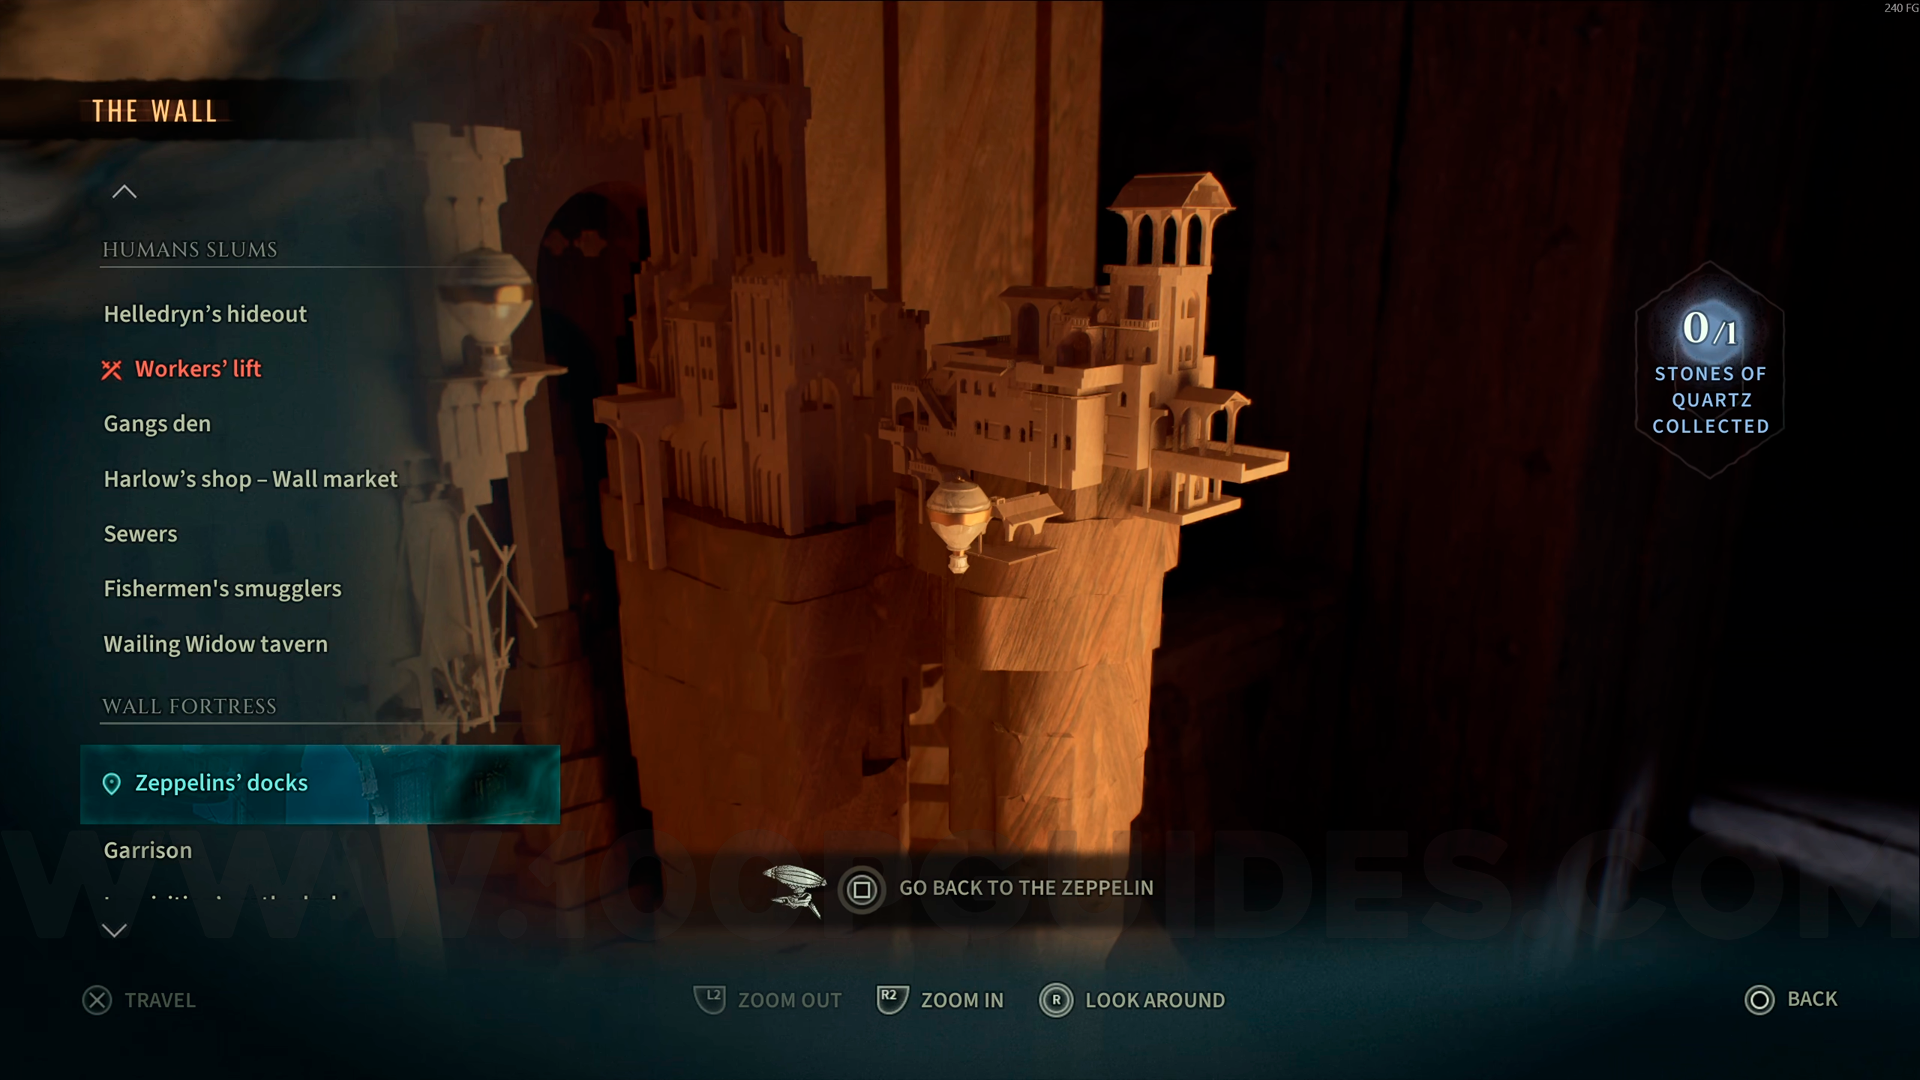
The Wall
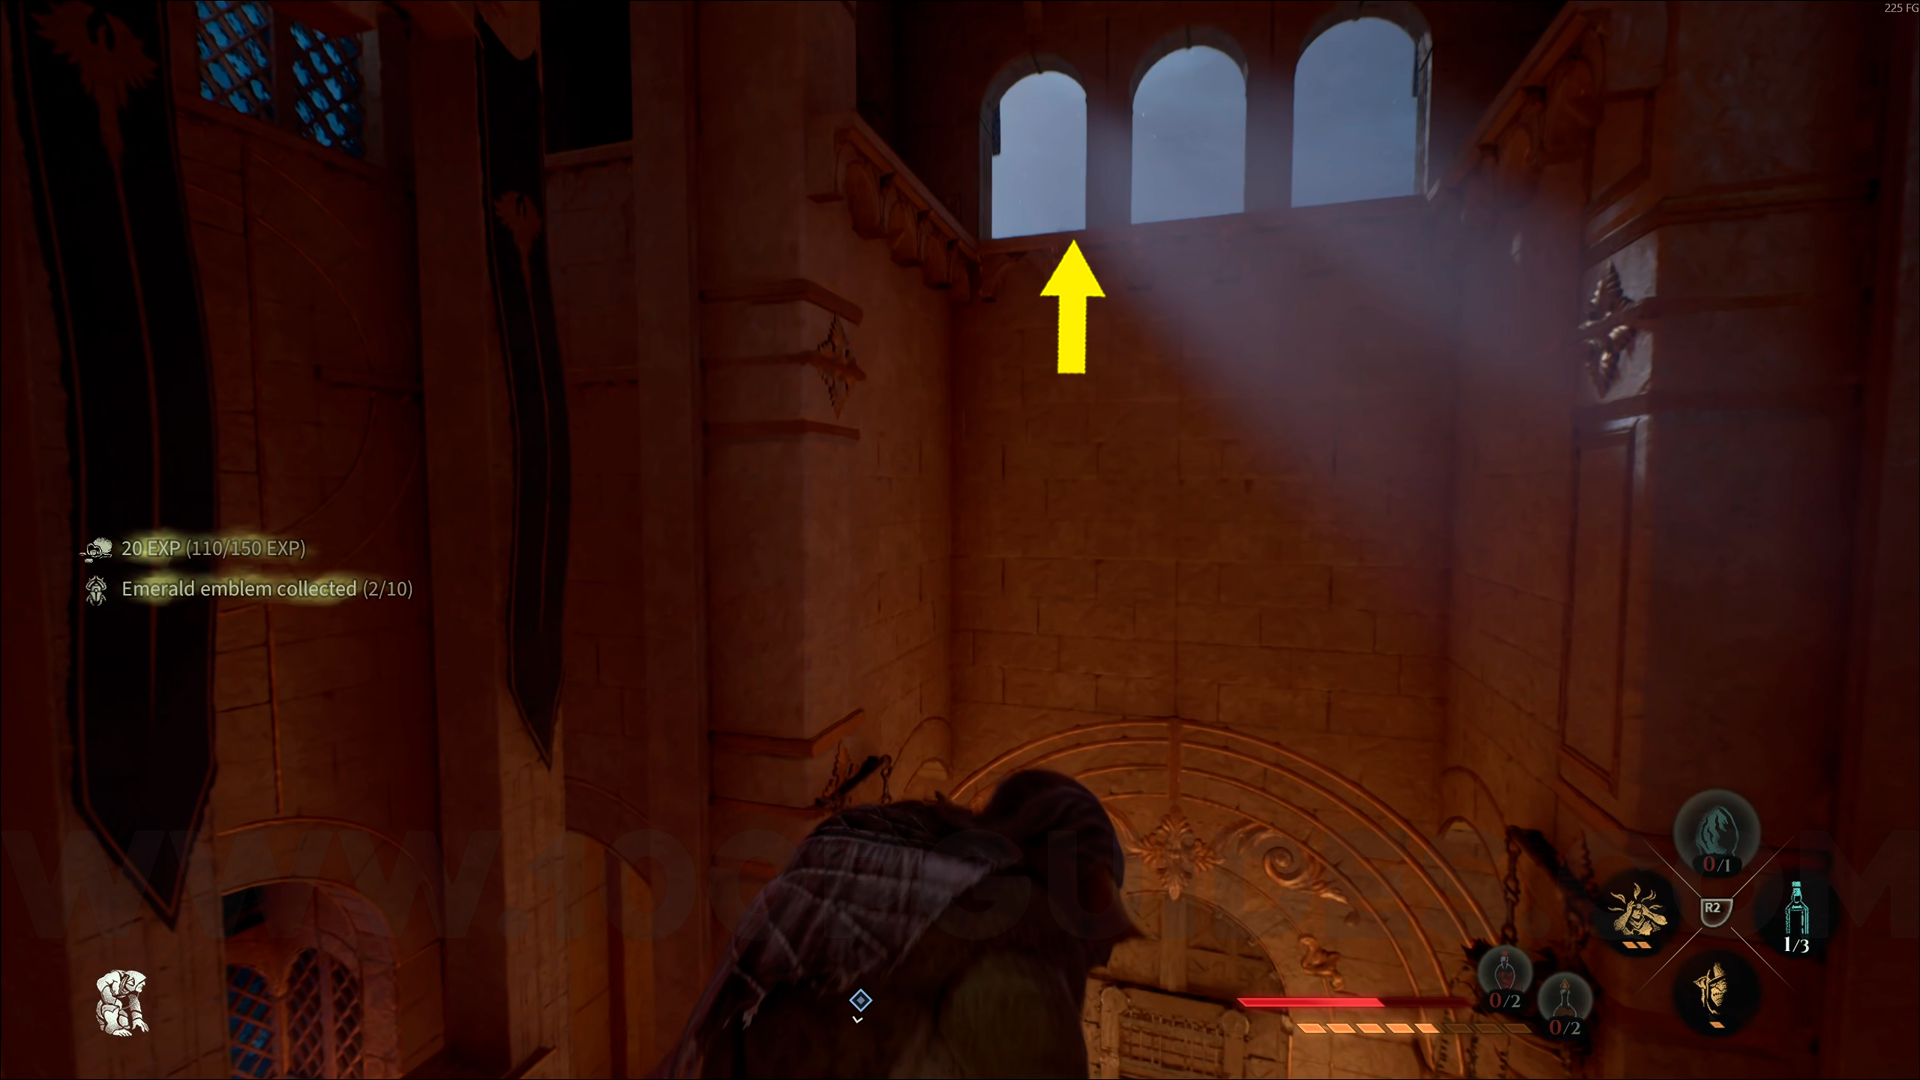
Wood Emblem #1. From the Helledryn's Hideout checkpoint, open the door on your left and go all the way to the top. This emblem will be on the windowsill.

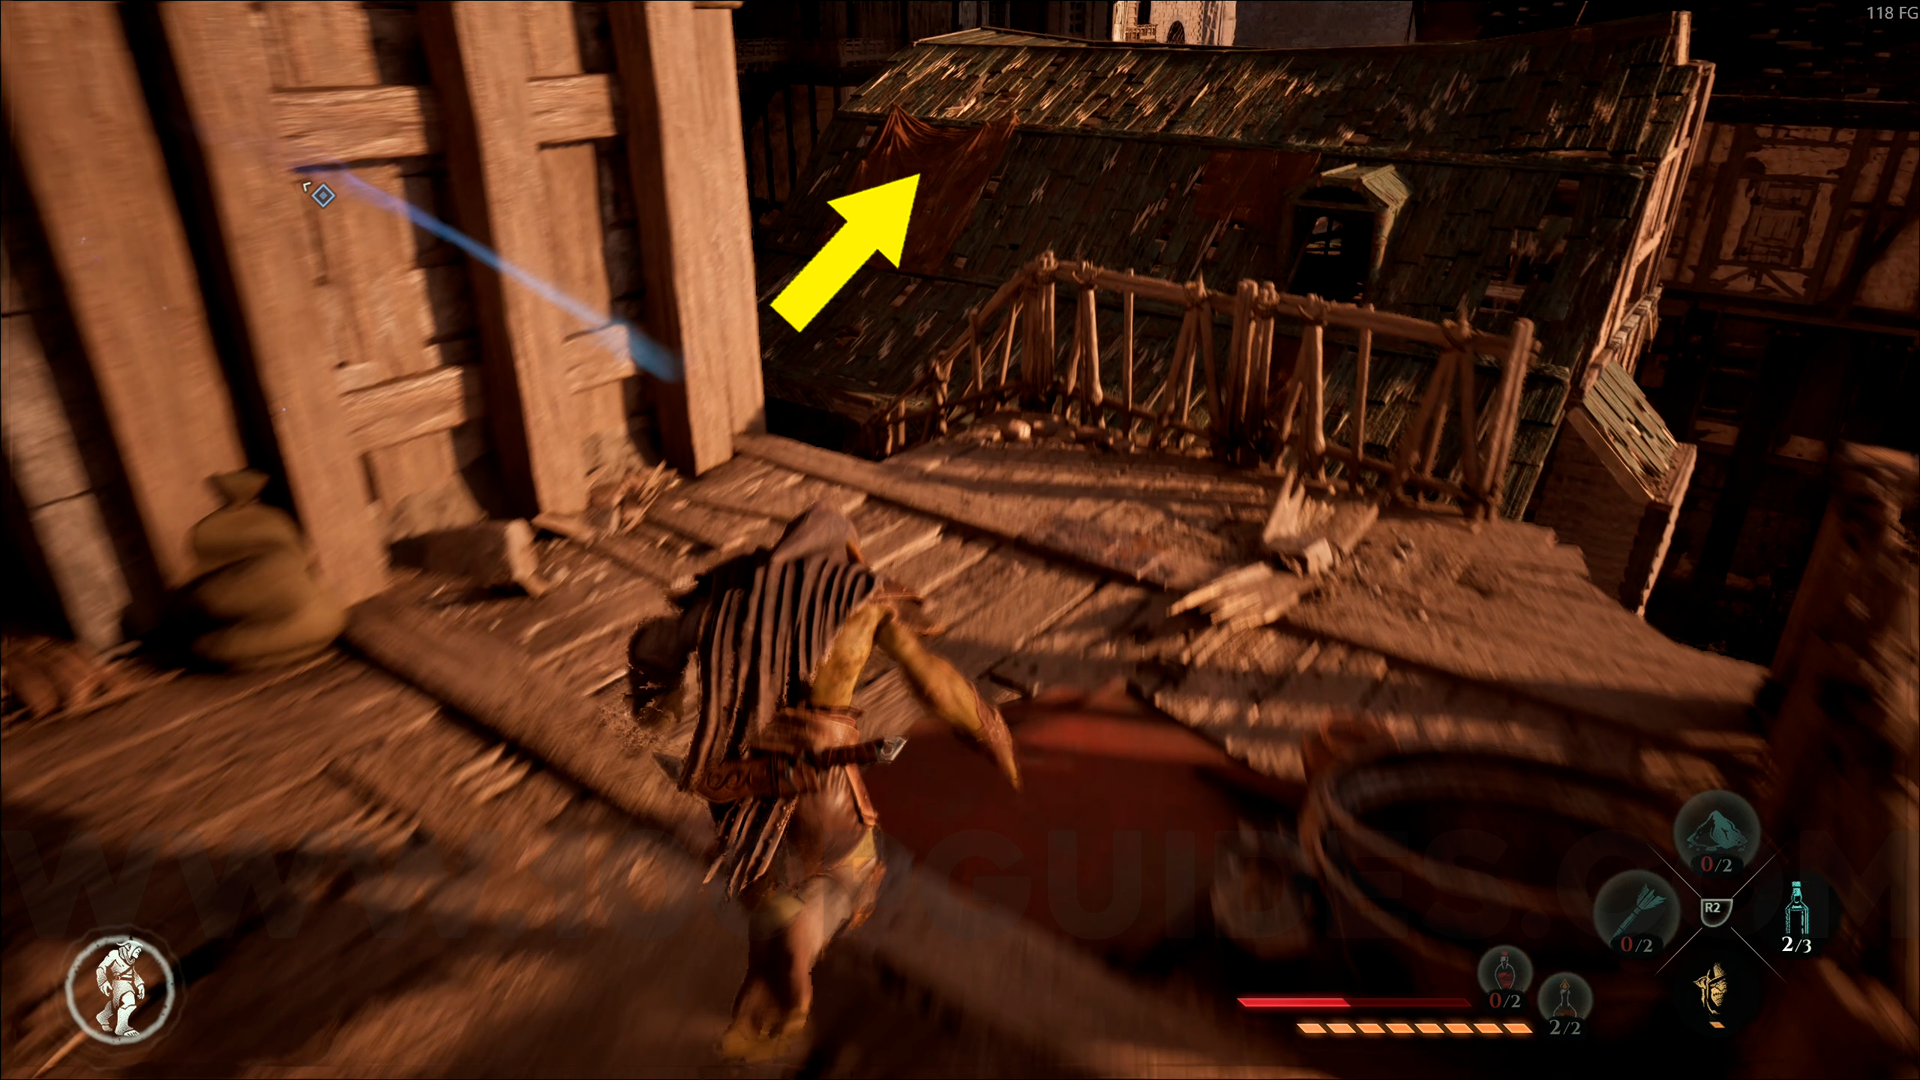
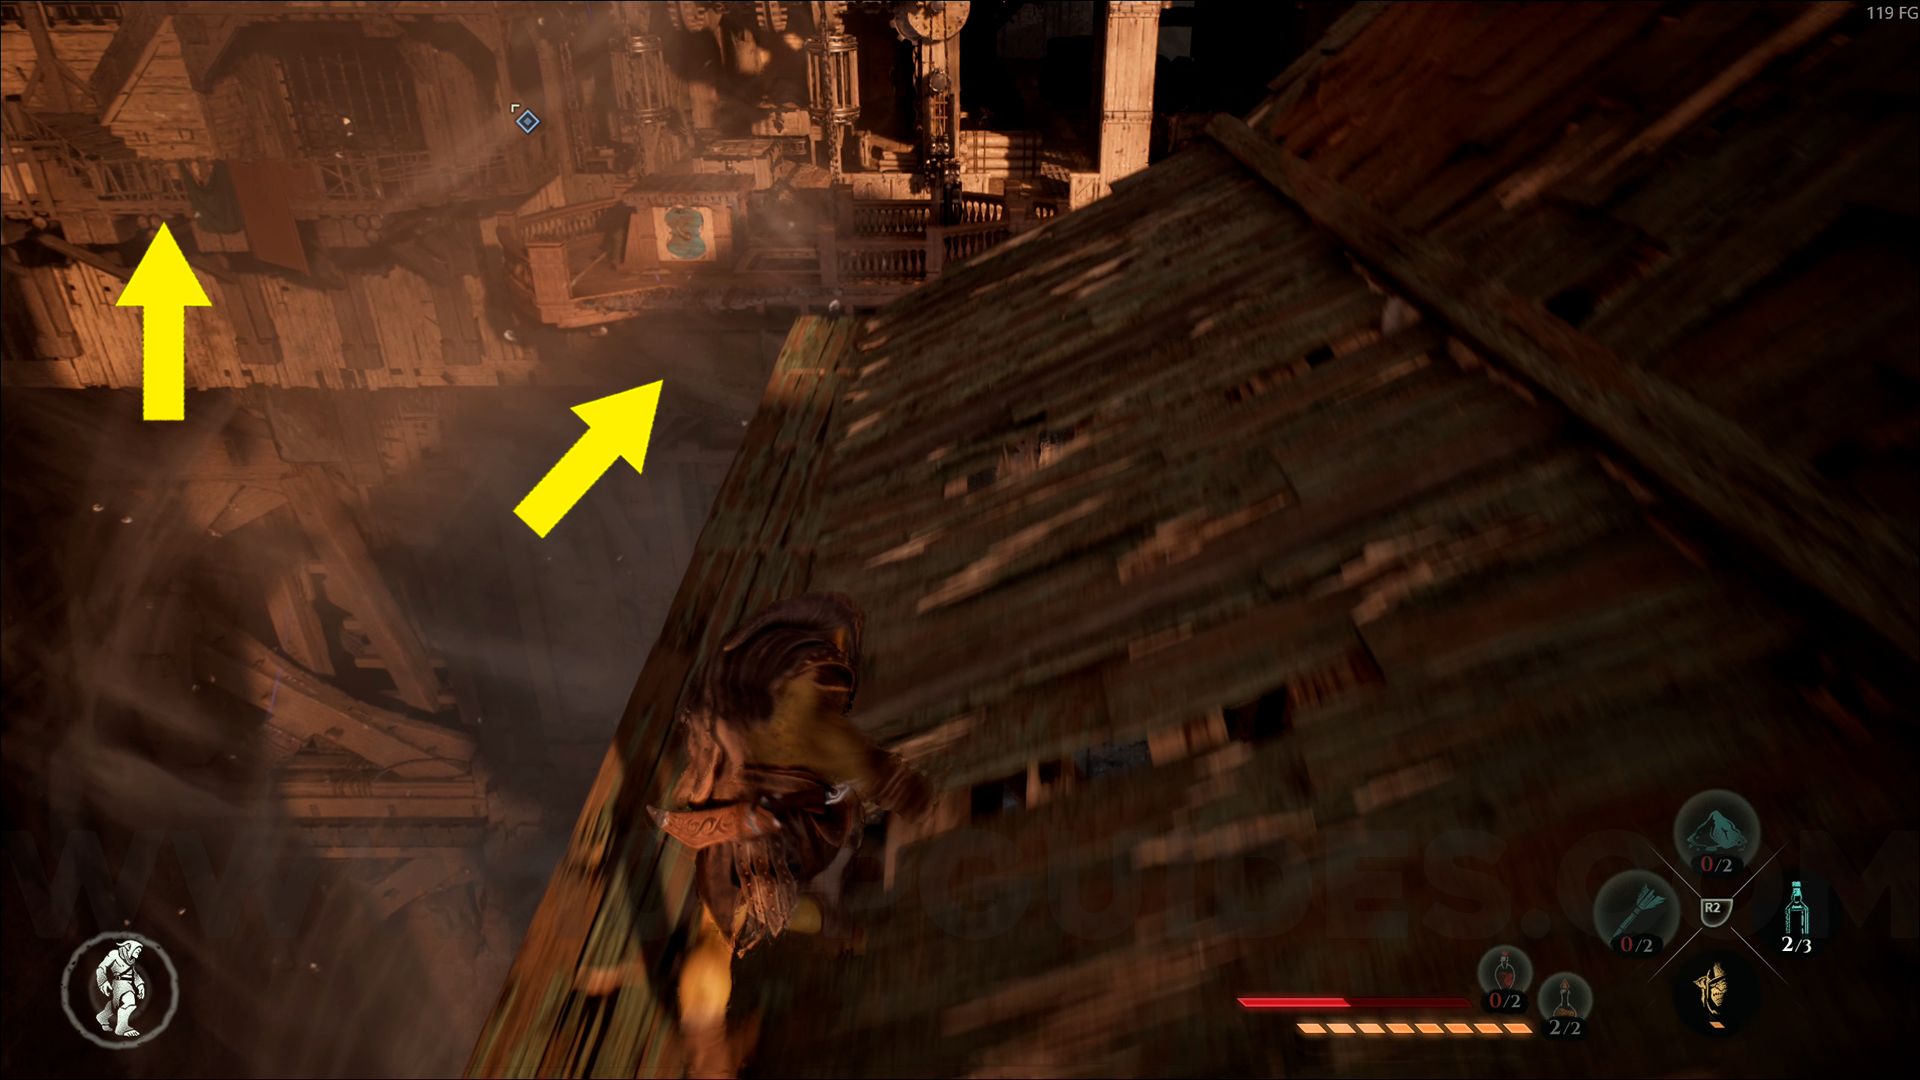
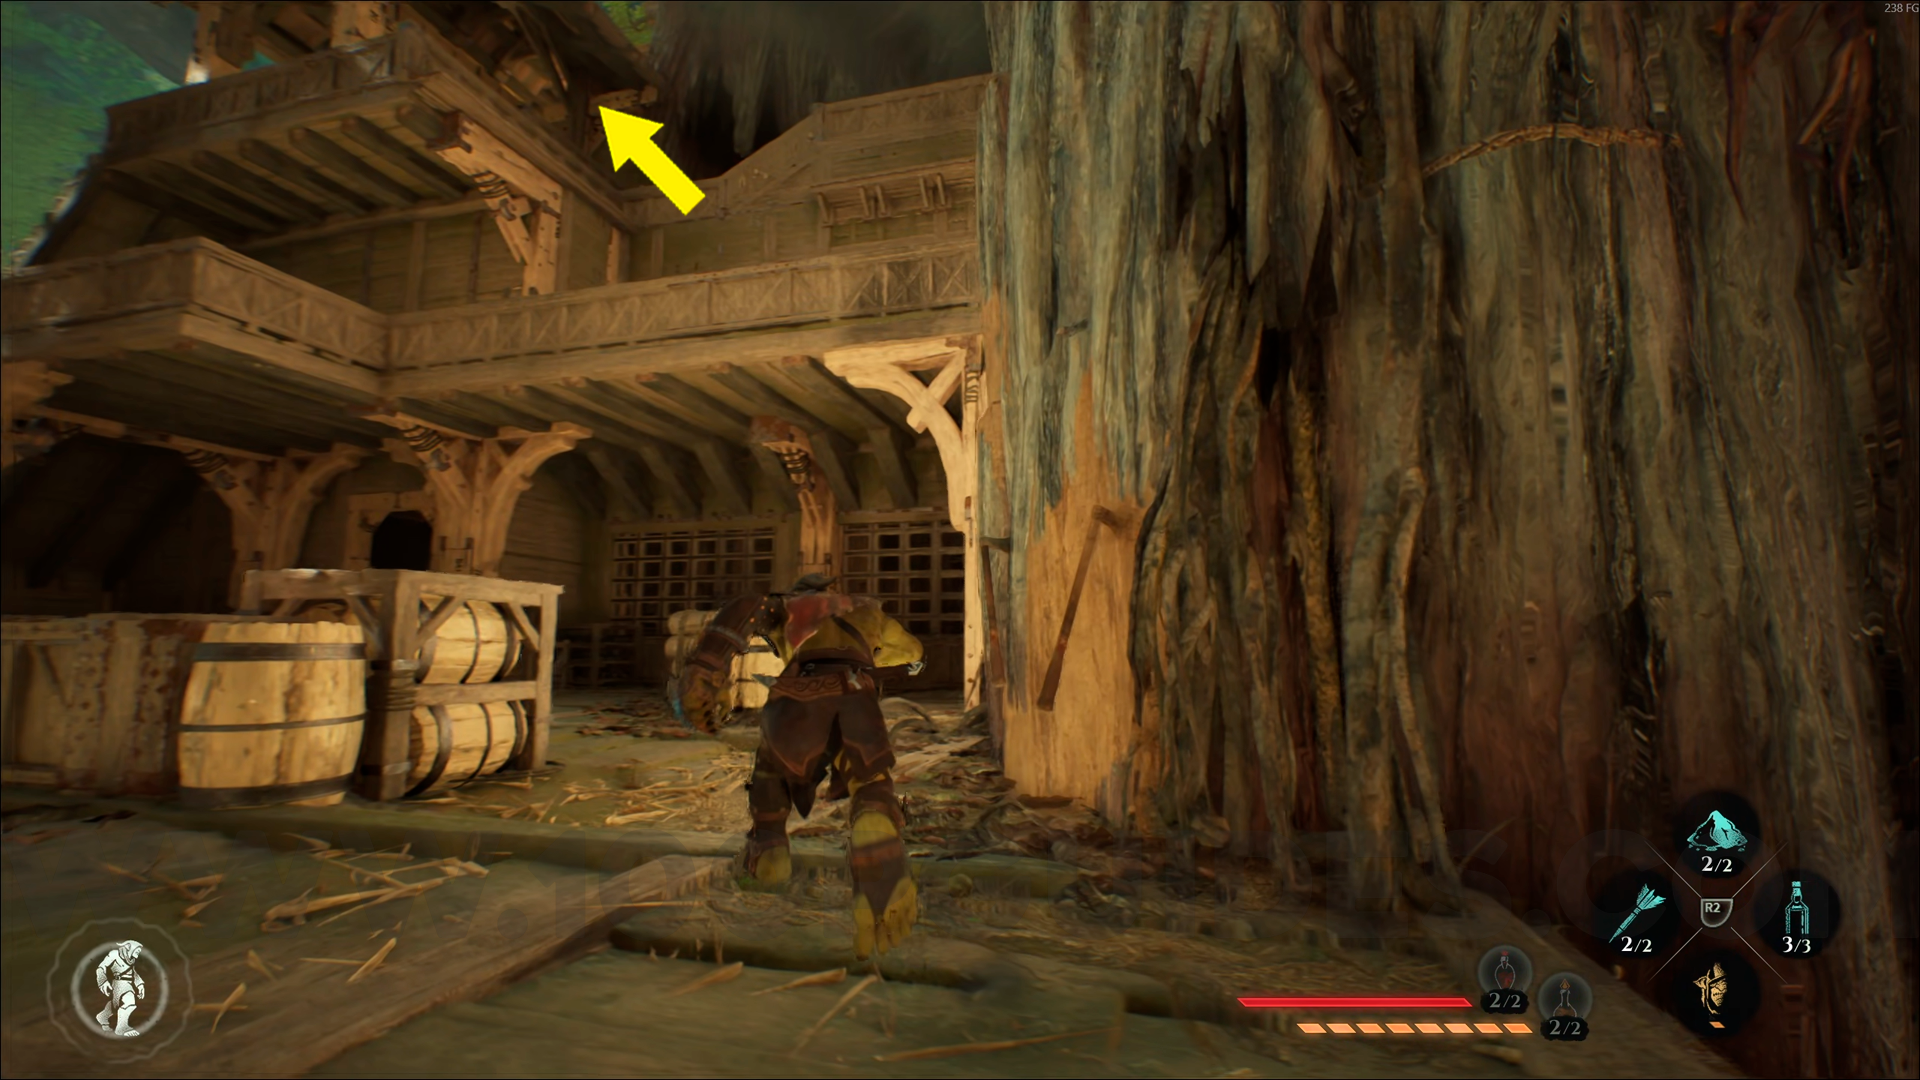
Wood Emblem #2. From the Helledryn's Hideout checkpoint, head right and go down the stairs. Then climb onto the roof of the house in front of you and enter the door next to the crane. Inside, you'll find the emblem. Use Amber Vision to help you spot it.
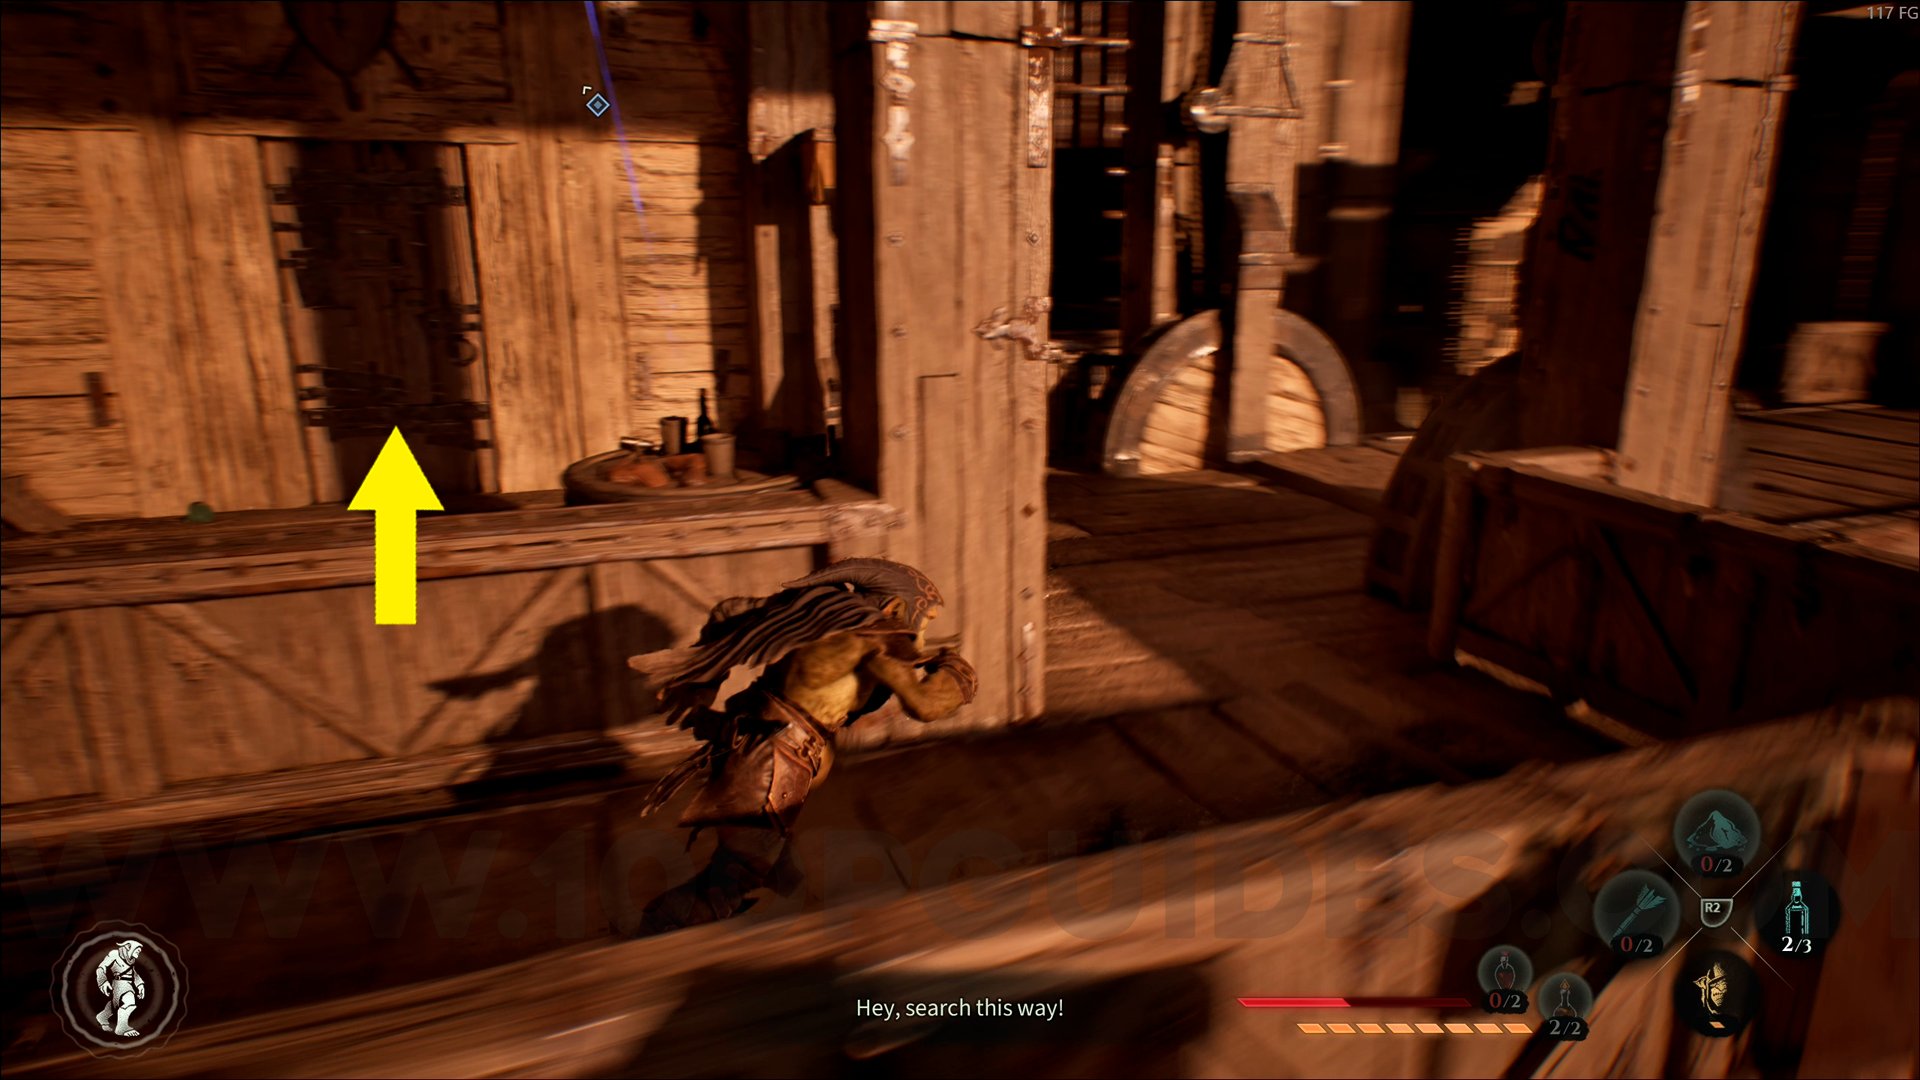
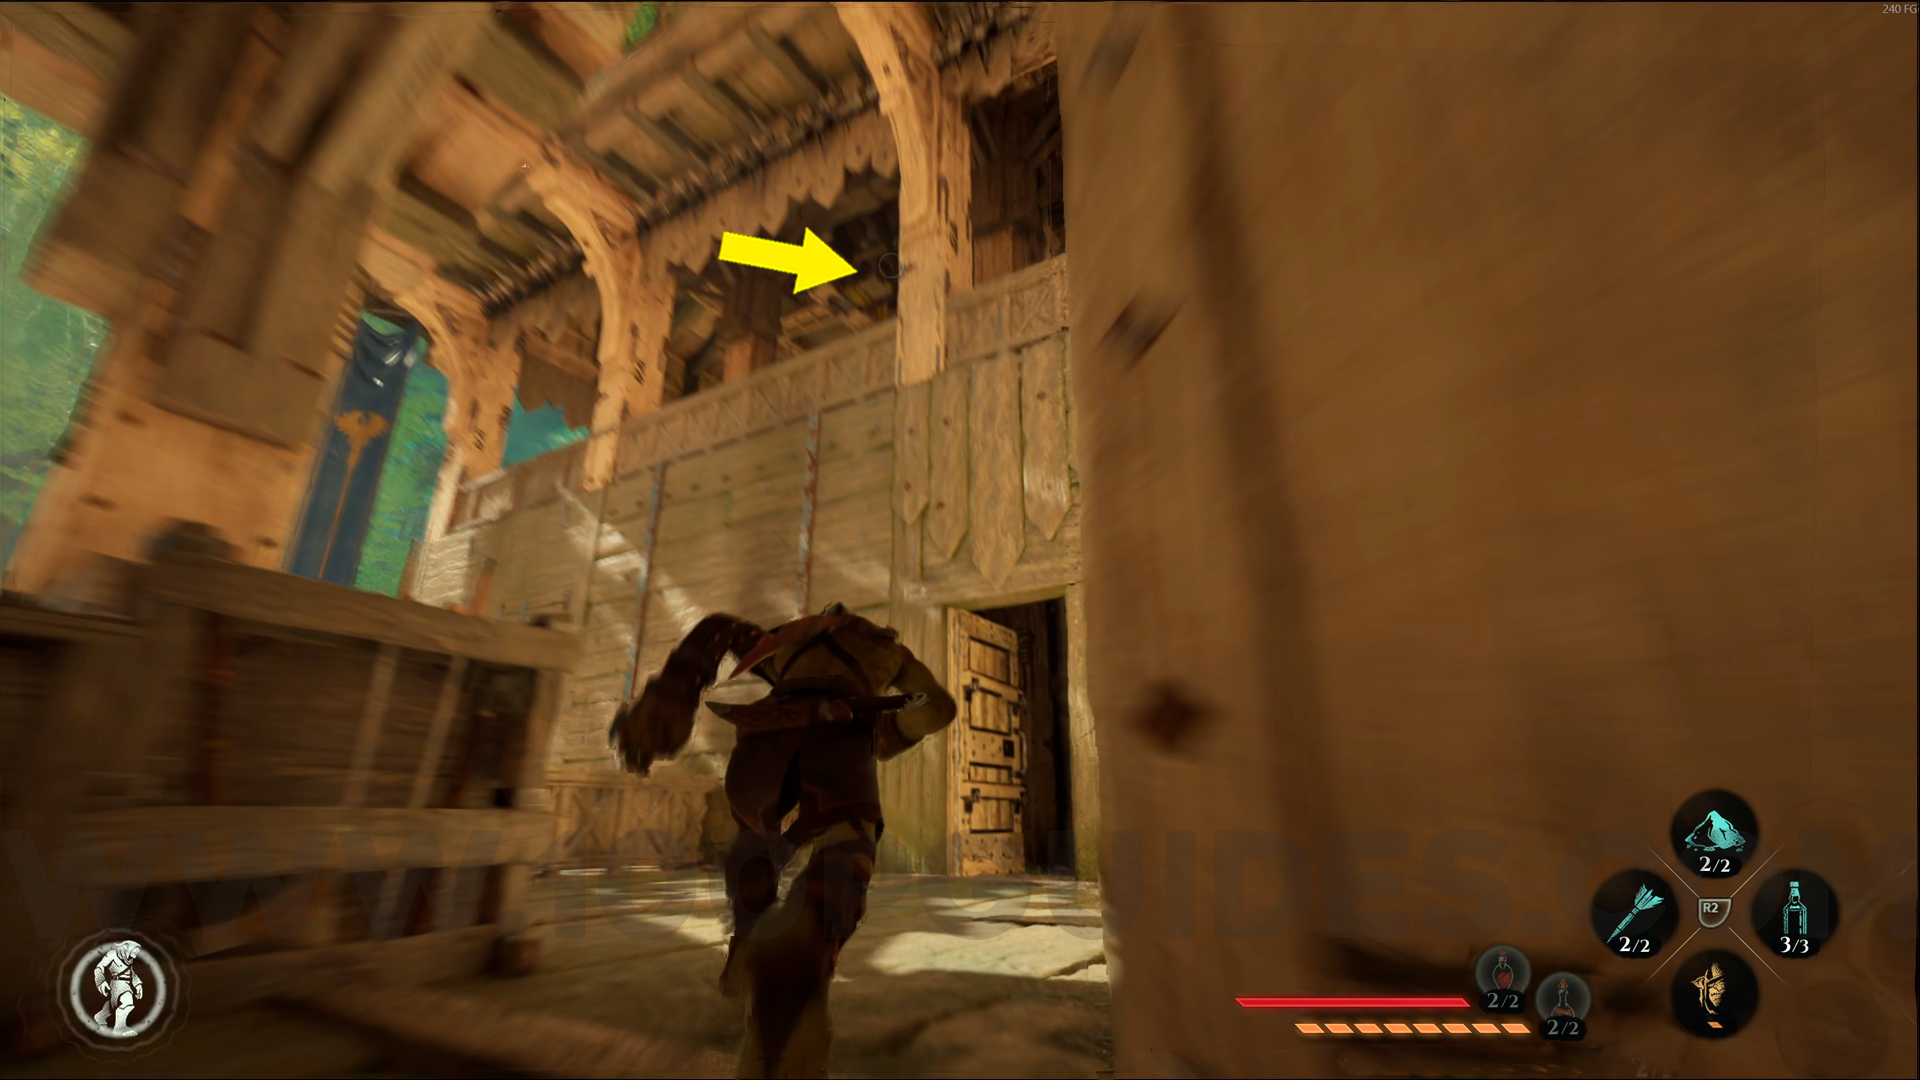
Wood Emblem #3. From the previous collectible, go up both flights of stairs and pass through the two holes in the wall. This emblem will be directly in front of you.

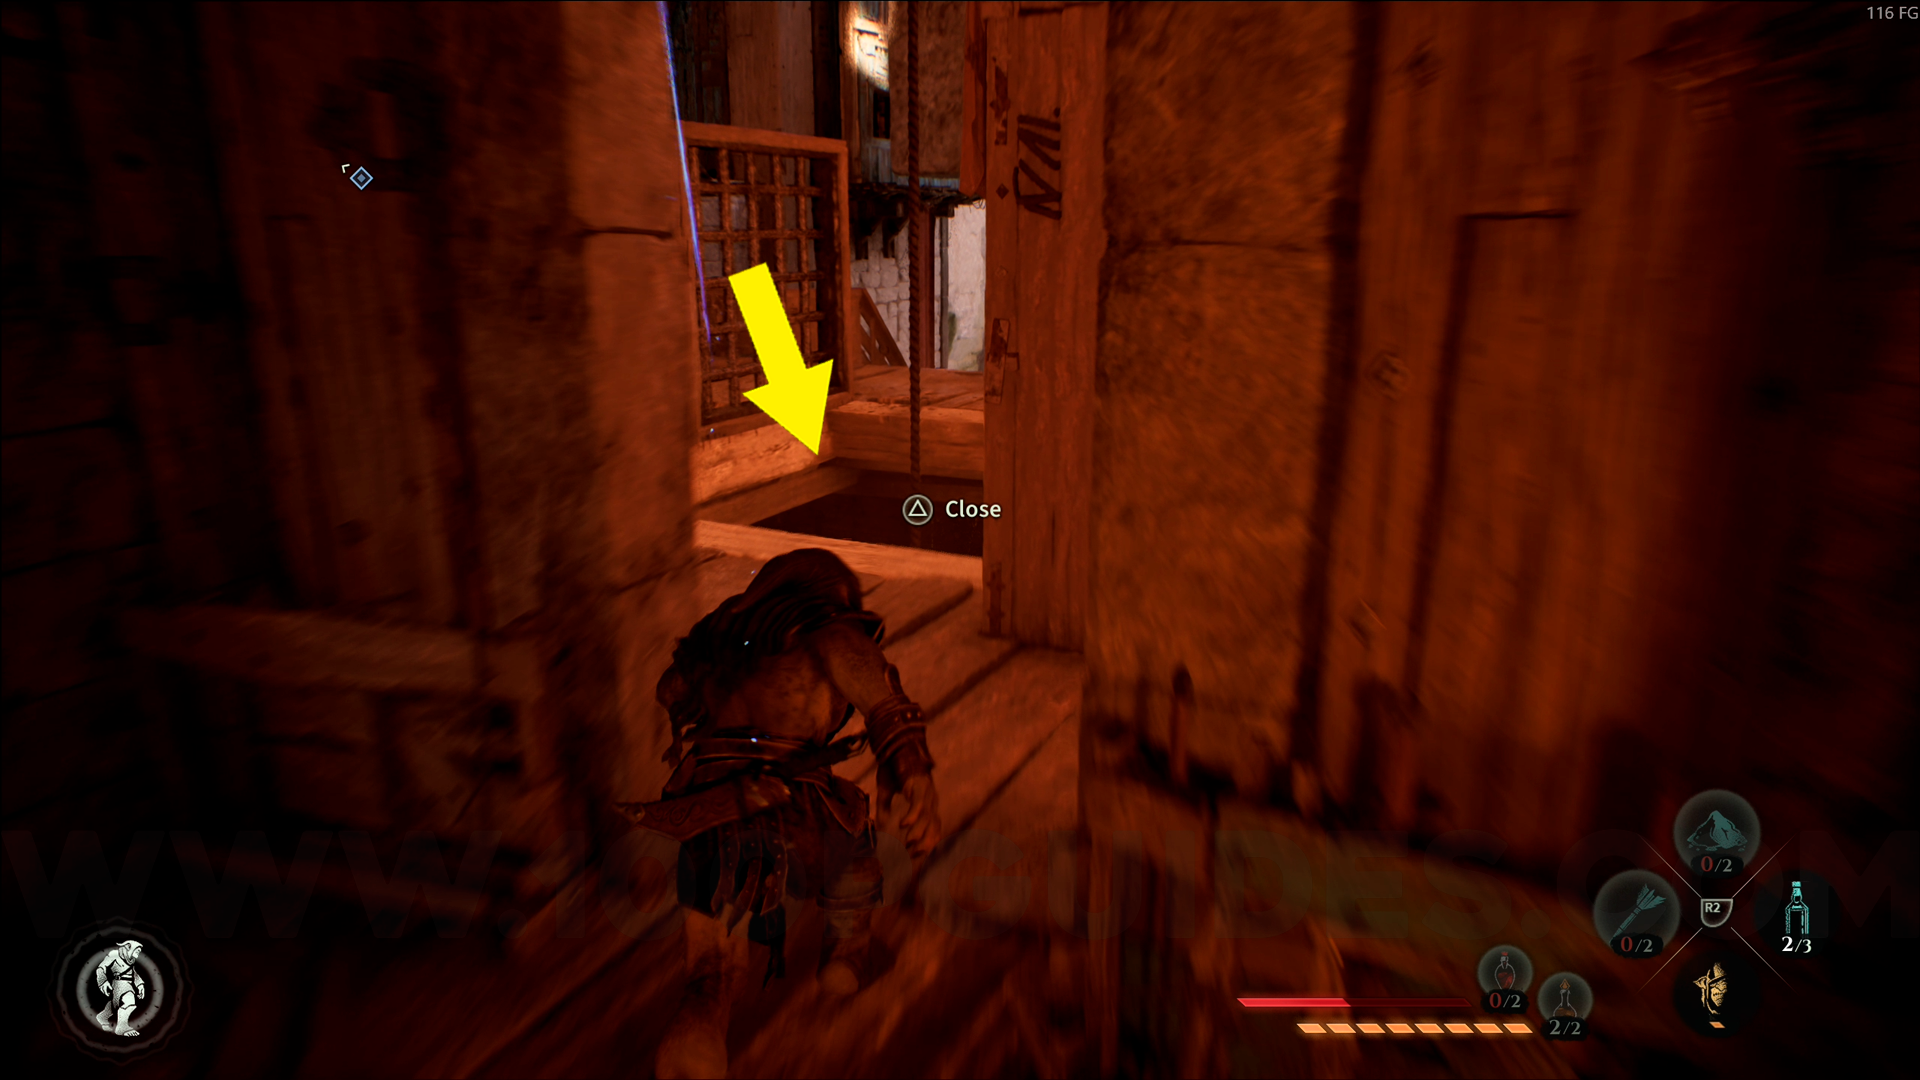
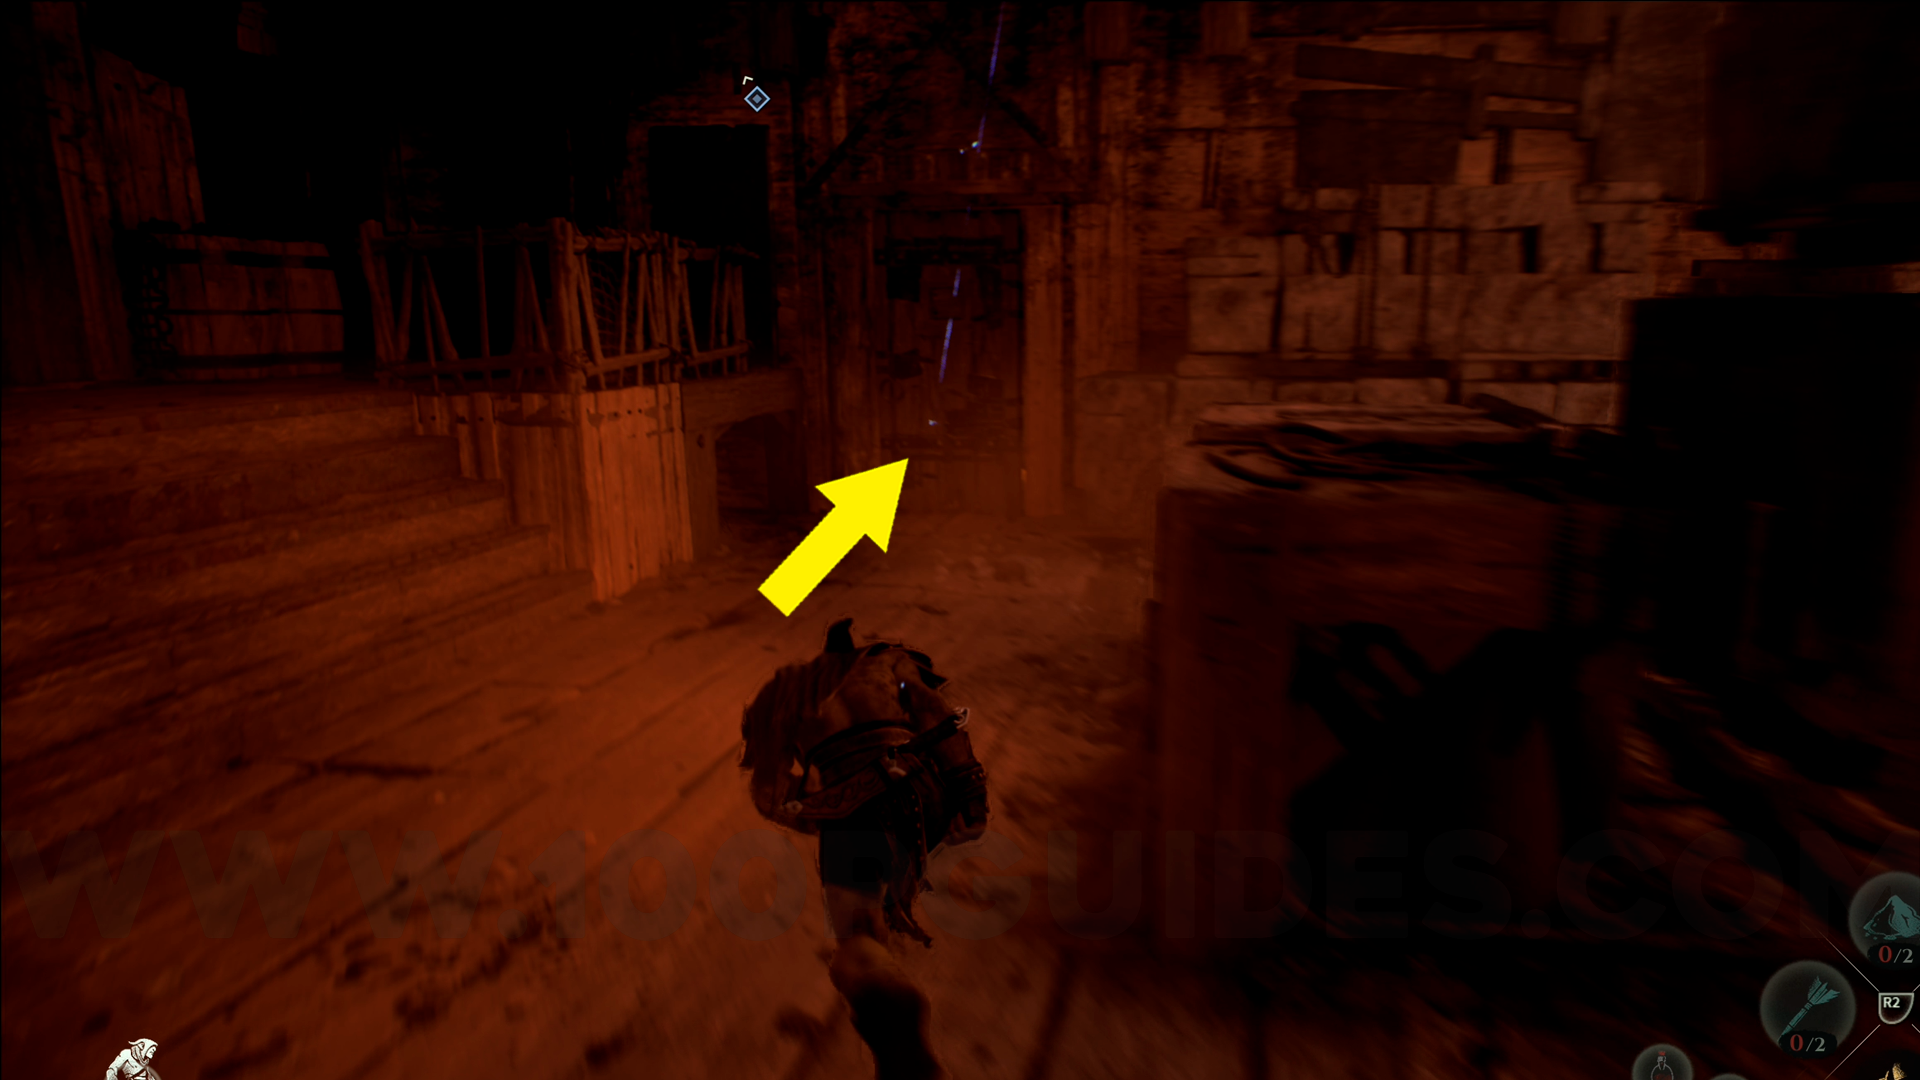
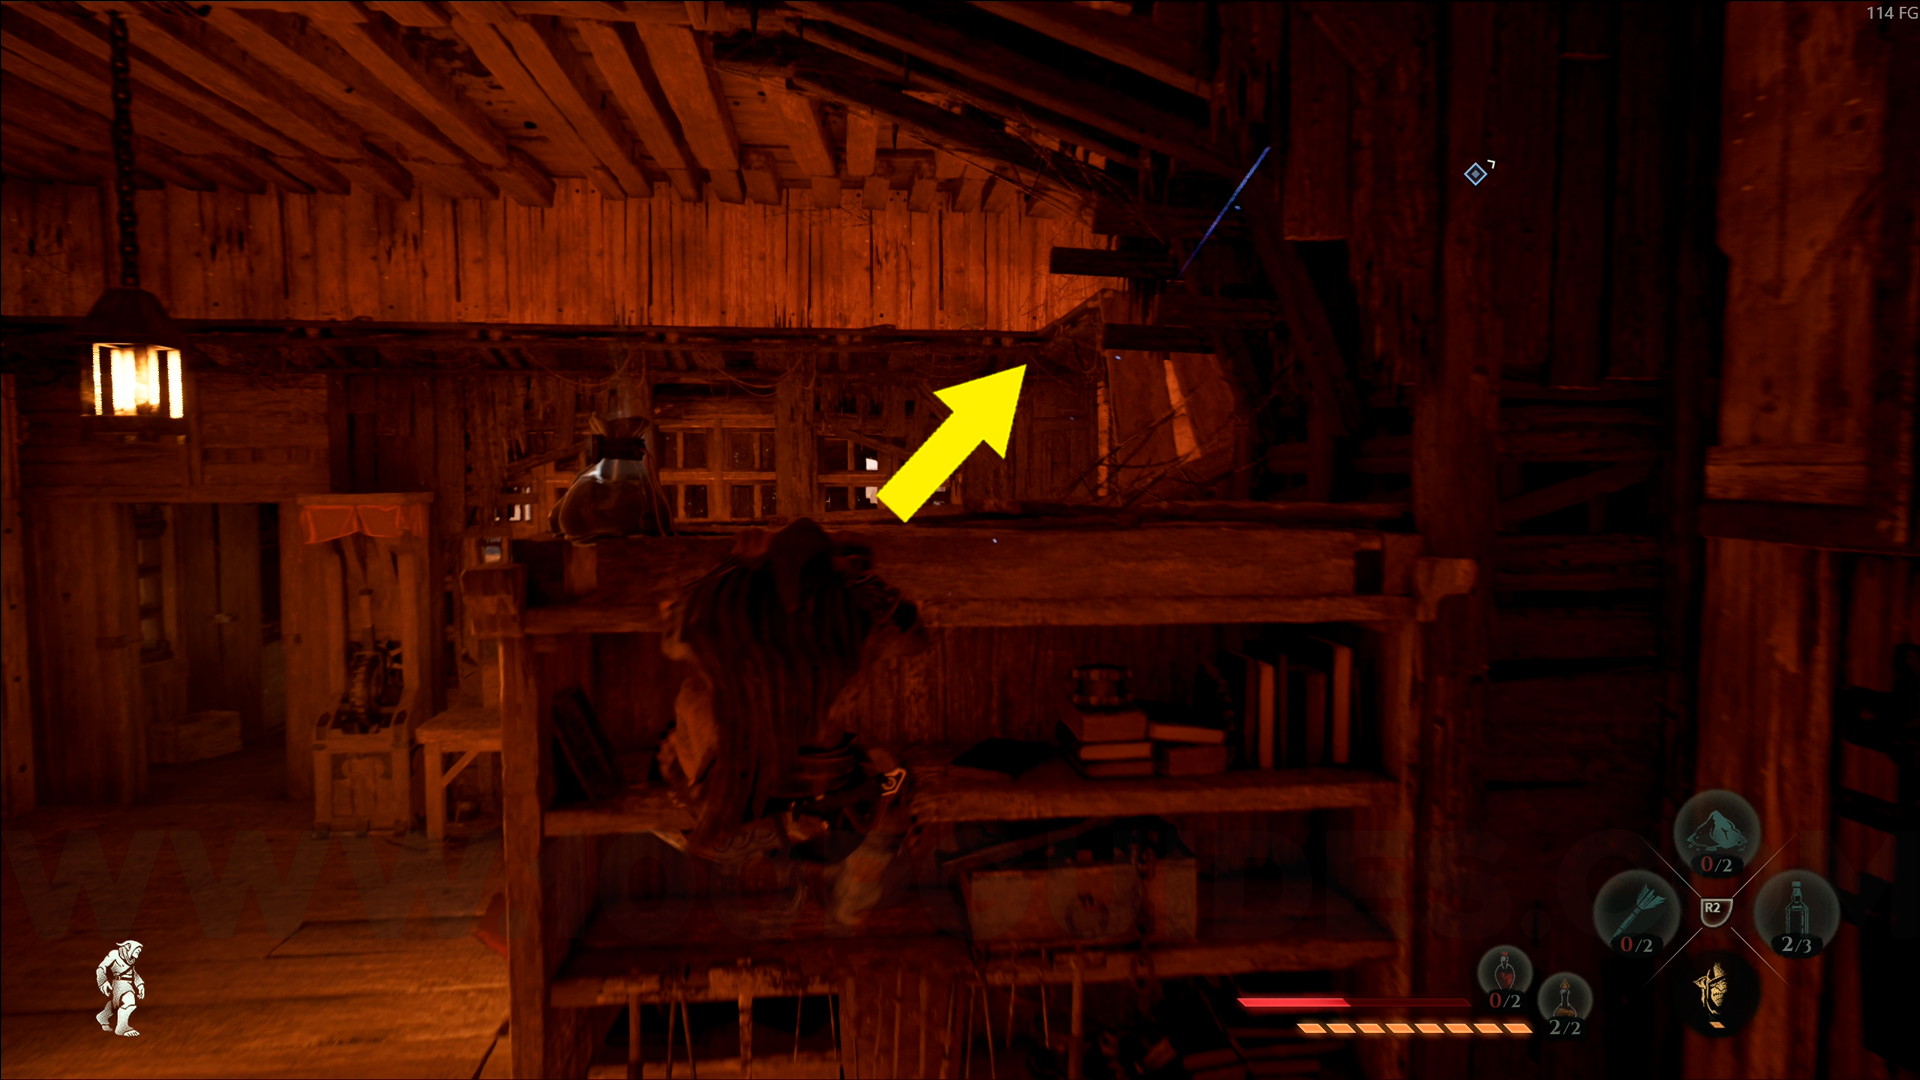
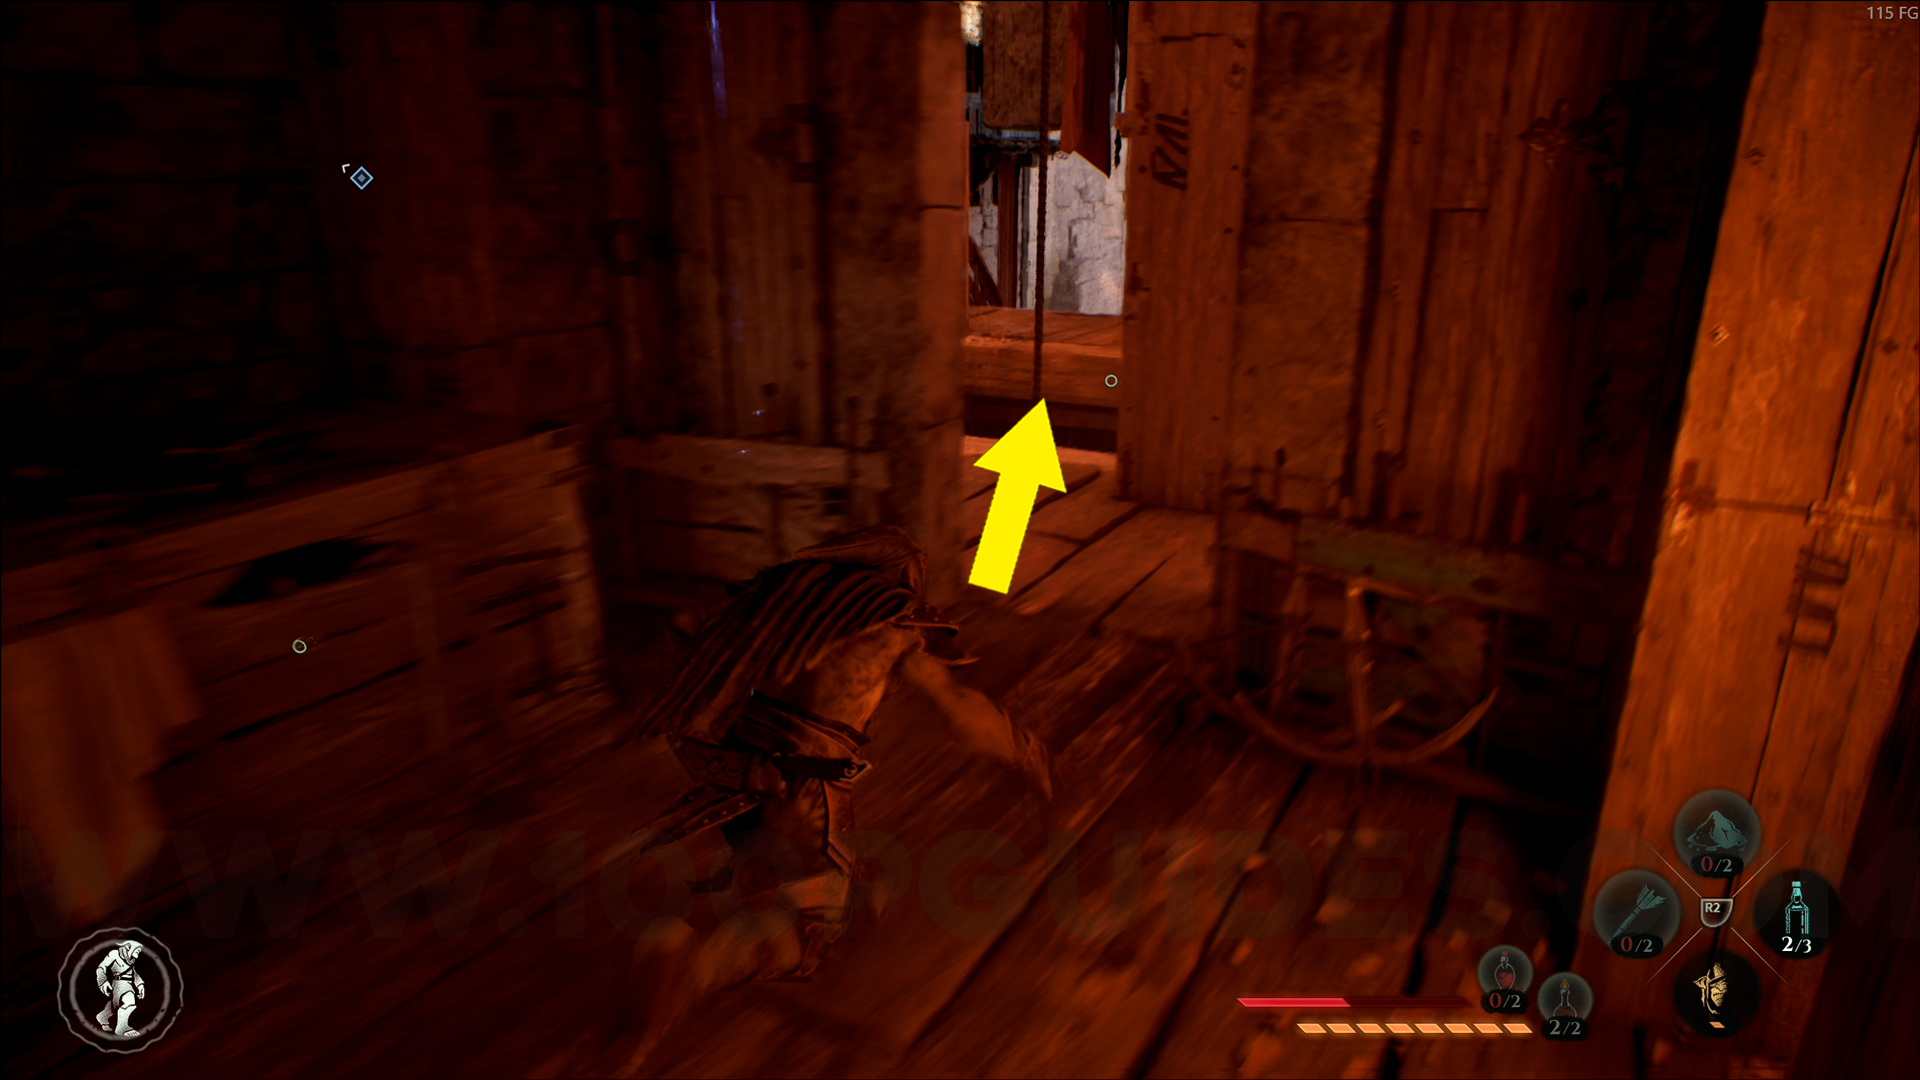
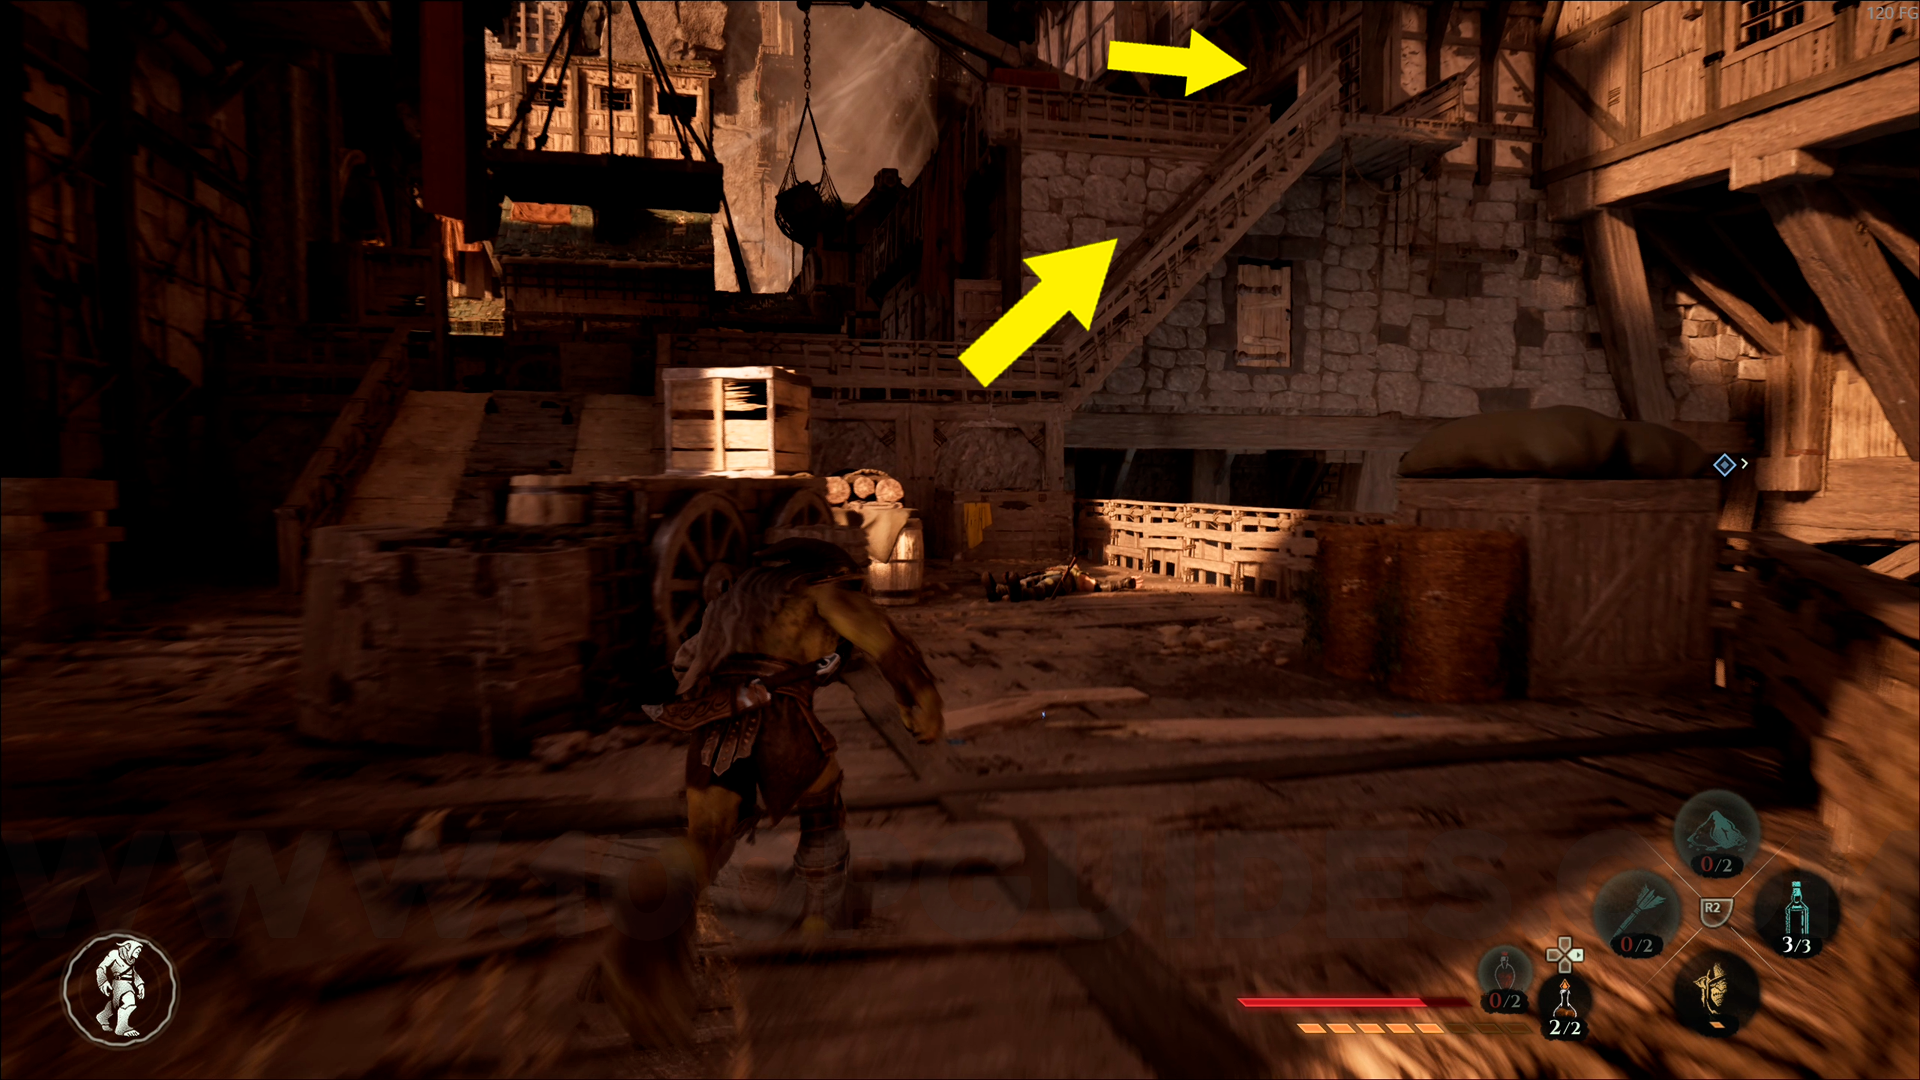
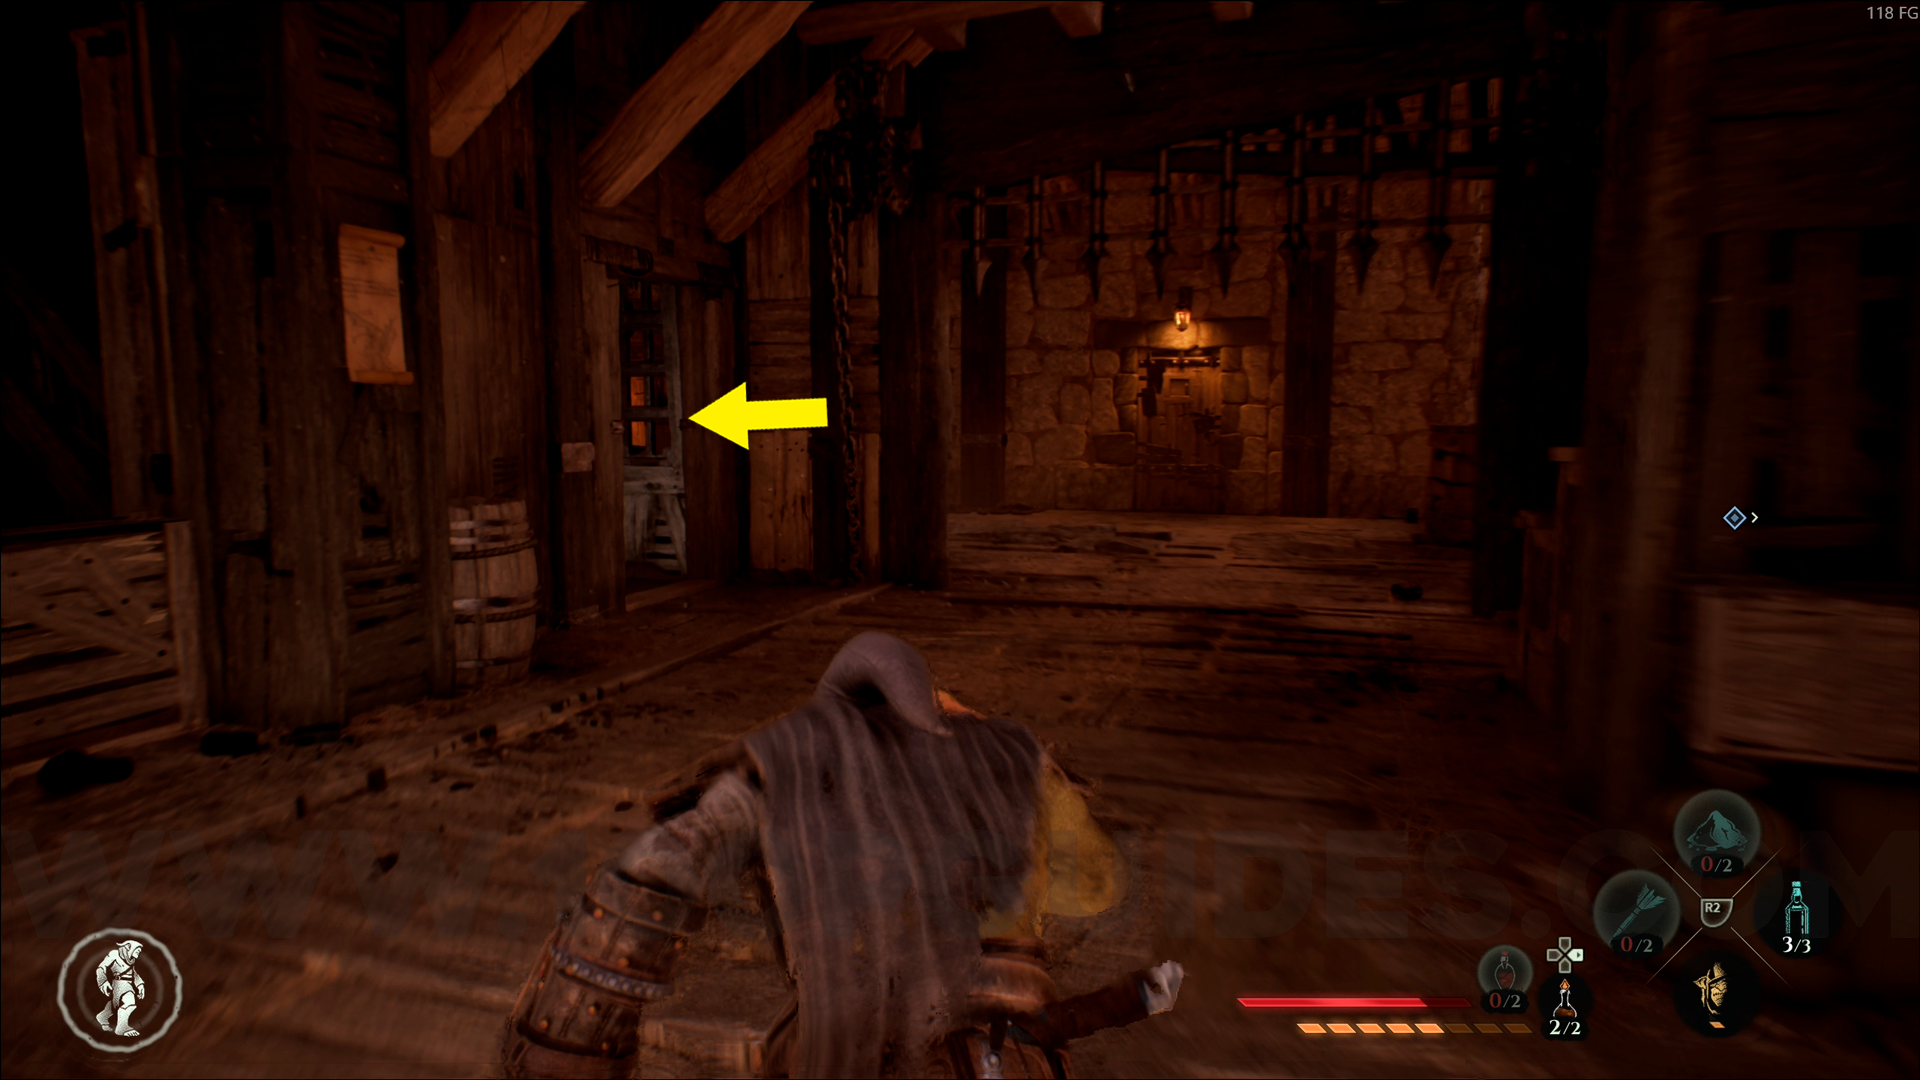
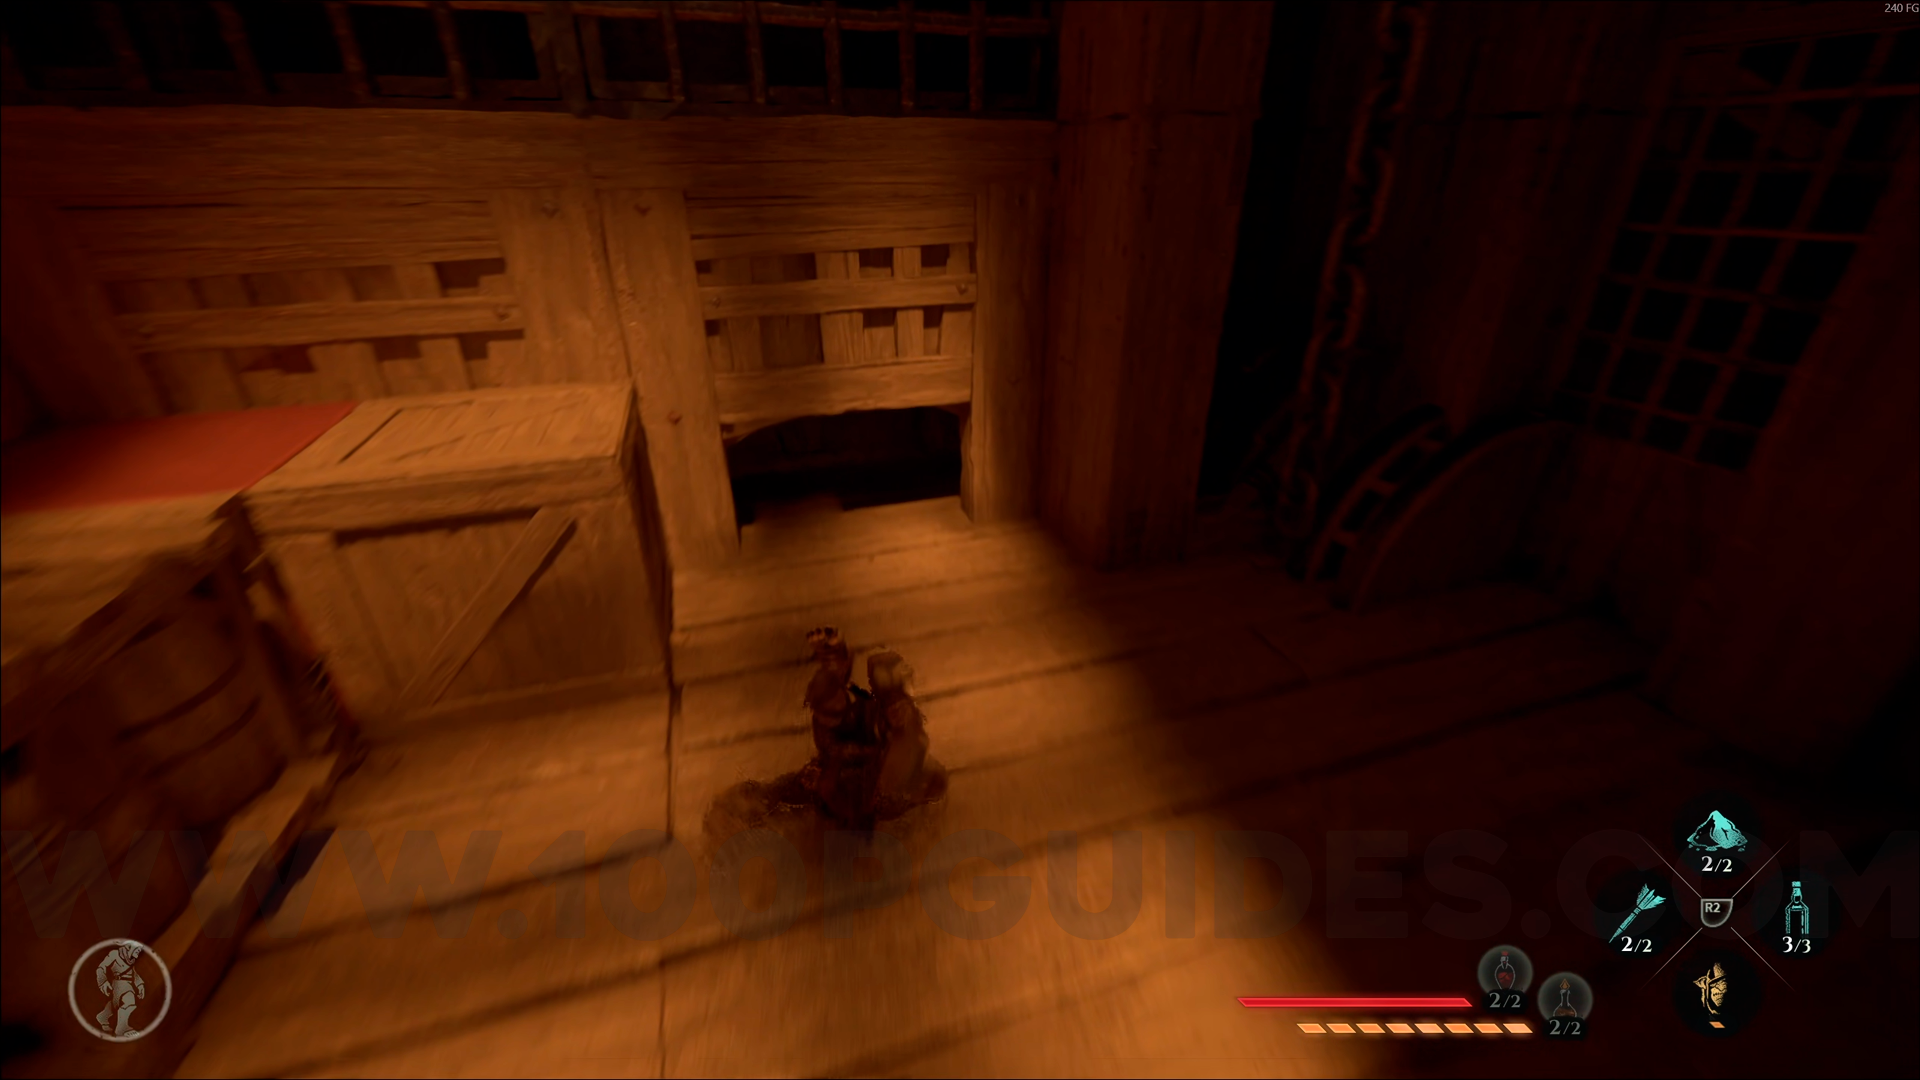
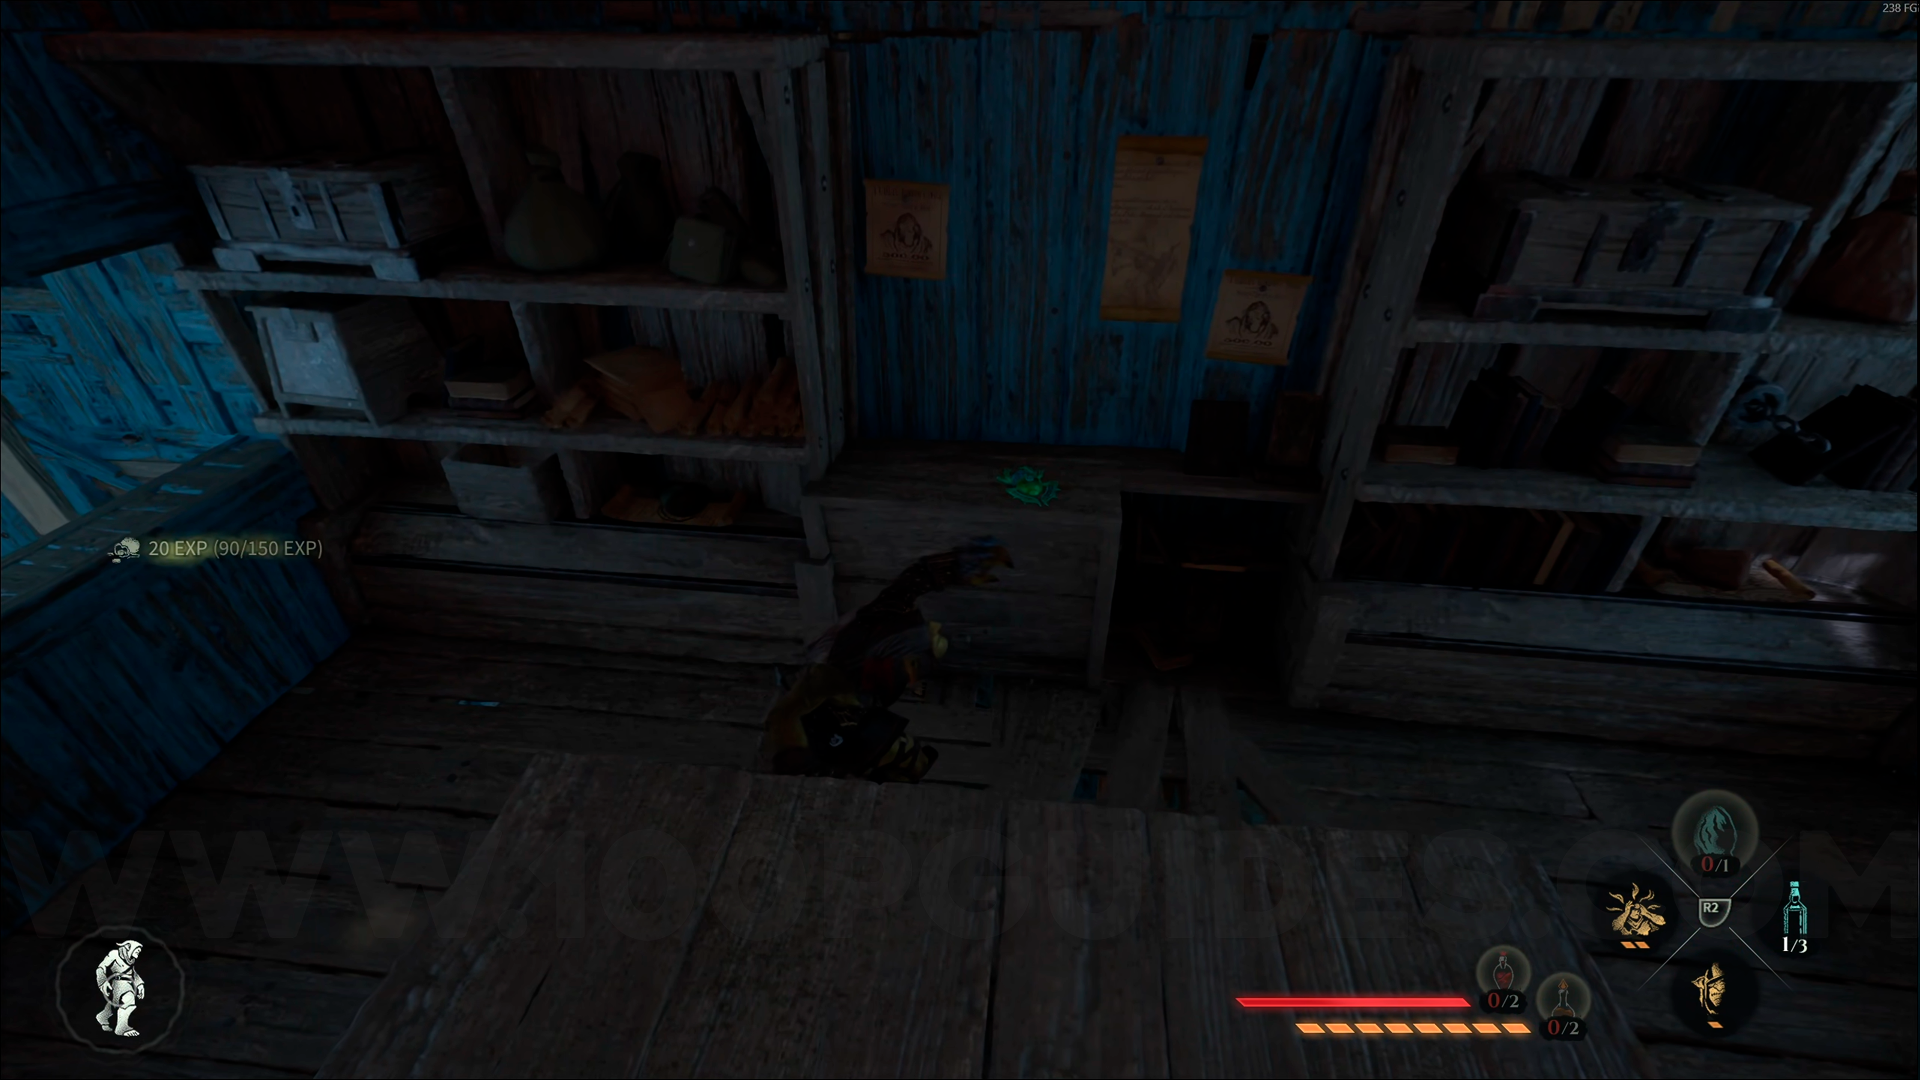
Wood Emblem #4. From the Helledryn's Hideout checkpoint, head right and climb onto the house in front of you. Then turn left, pass by the boat, and go up the stairs on the left. Enter the first door in front of you, then go through the next one. You'll see a hole with a rope. Jump into the hole, and once you're down below, go through the door ahead.
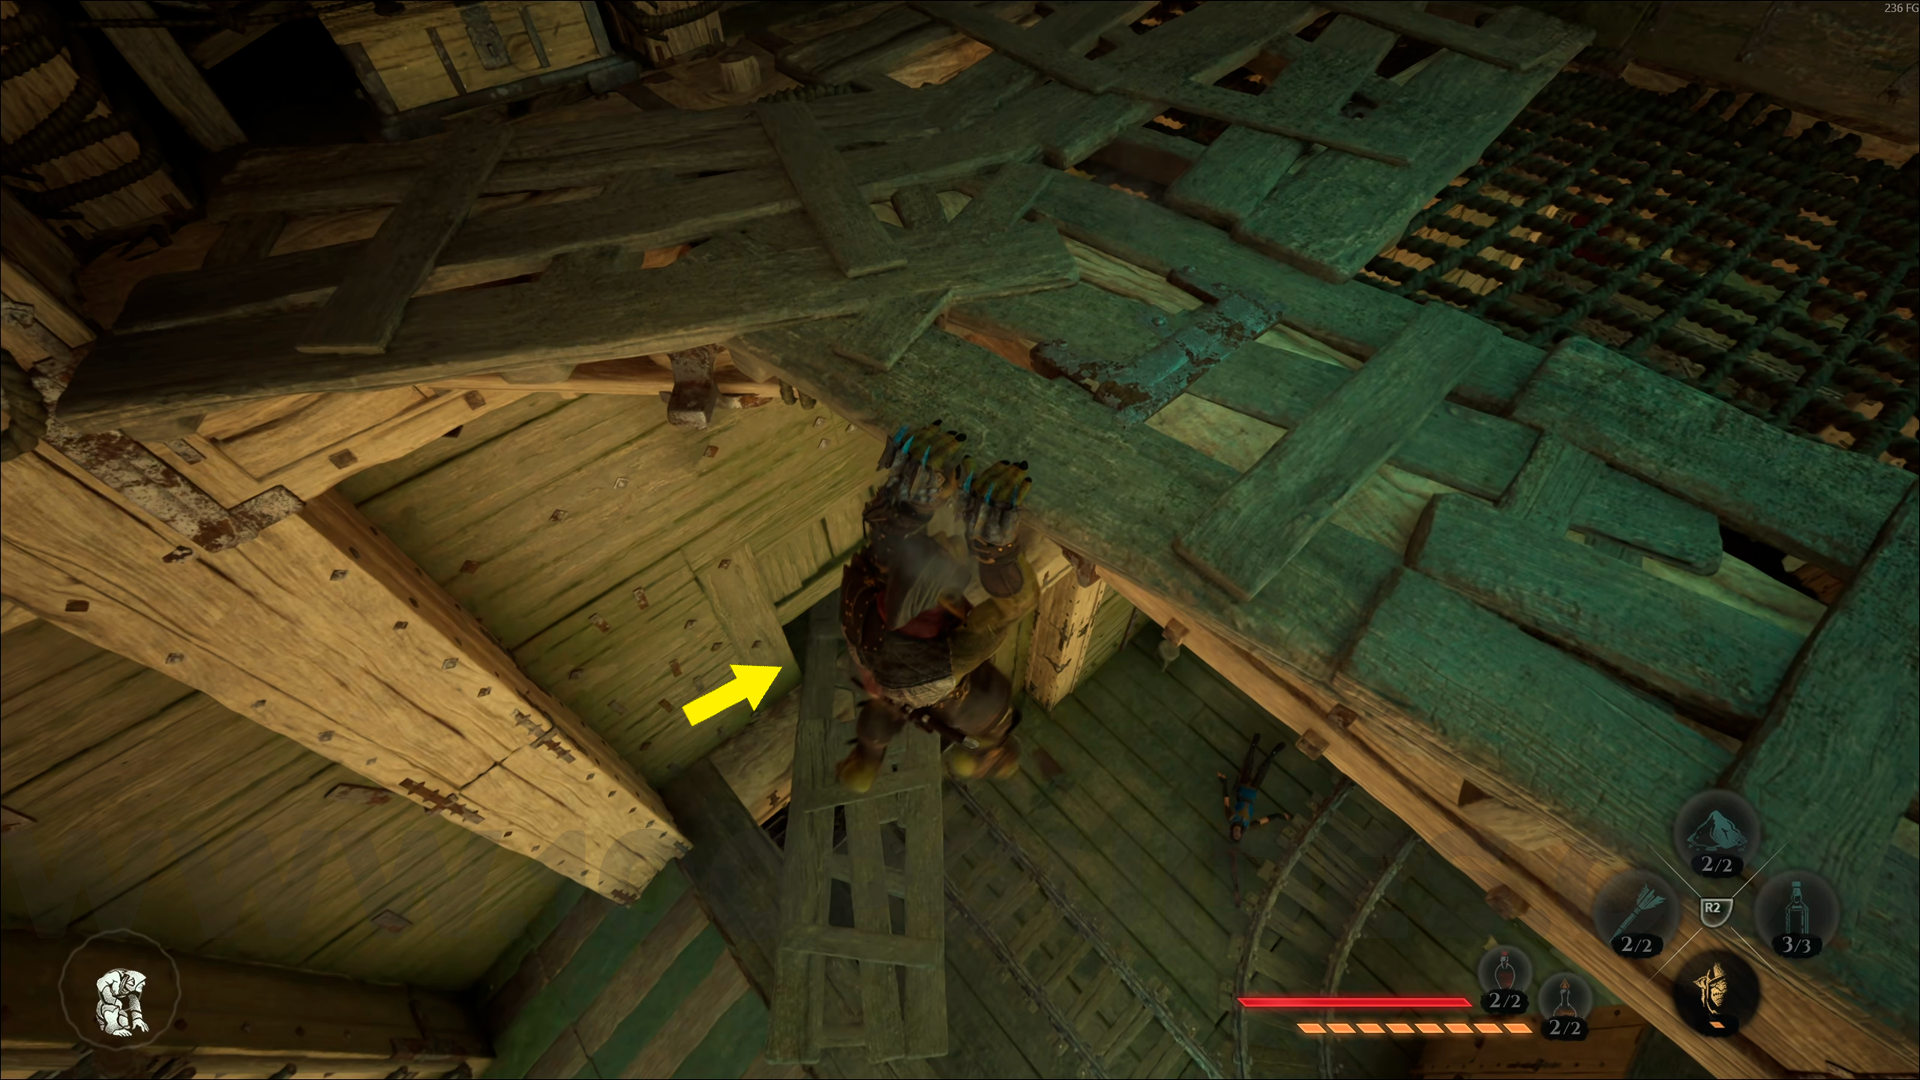
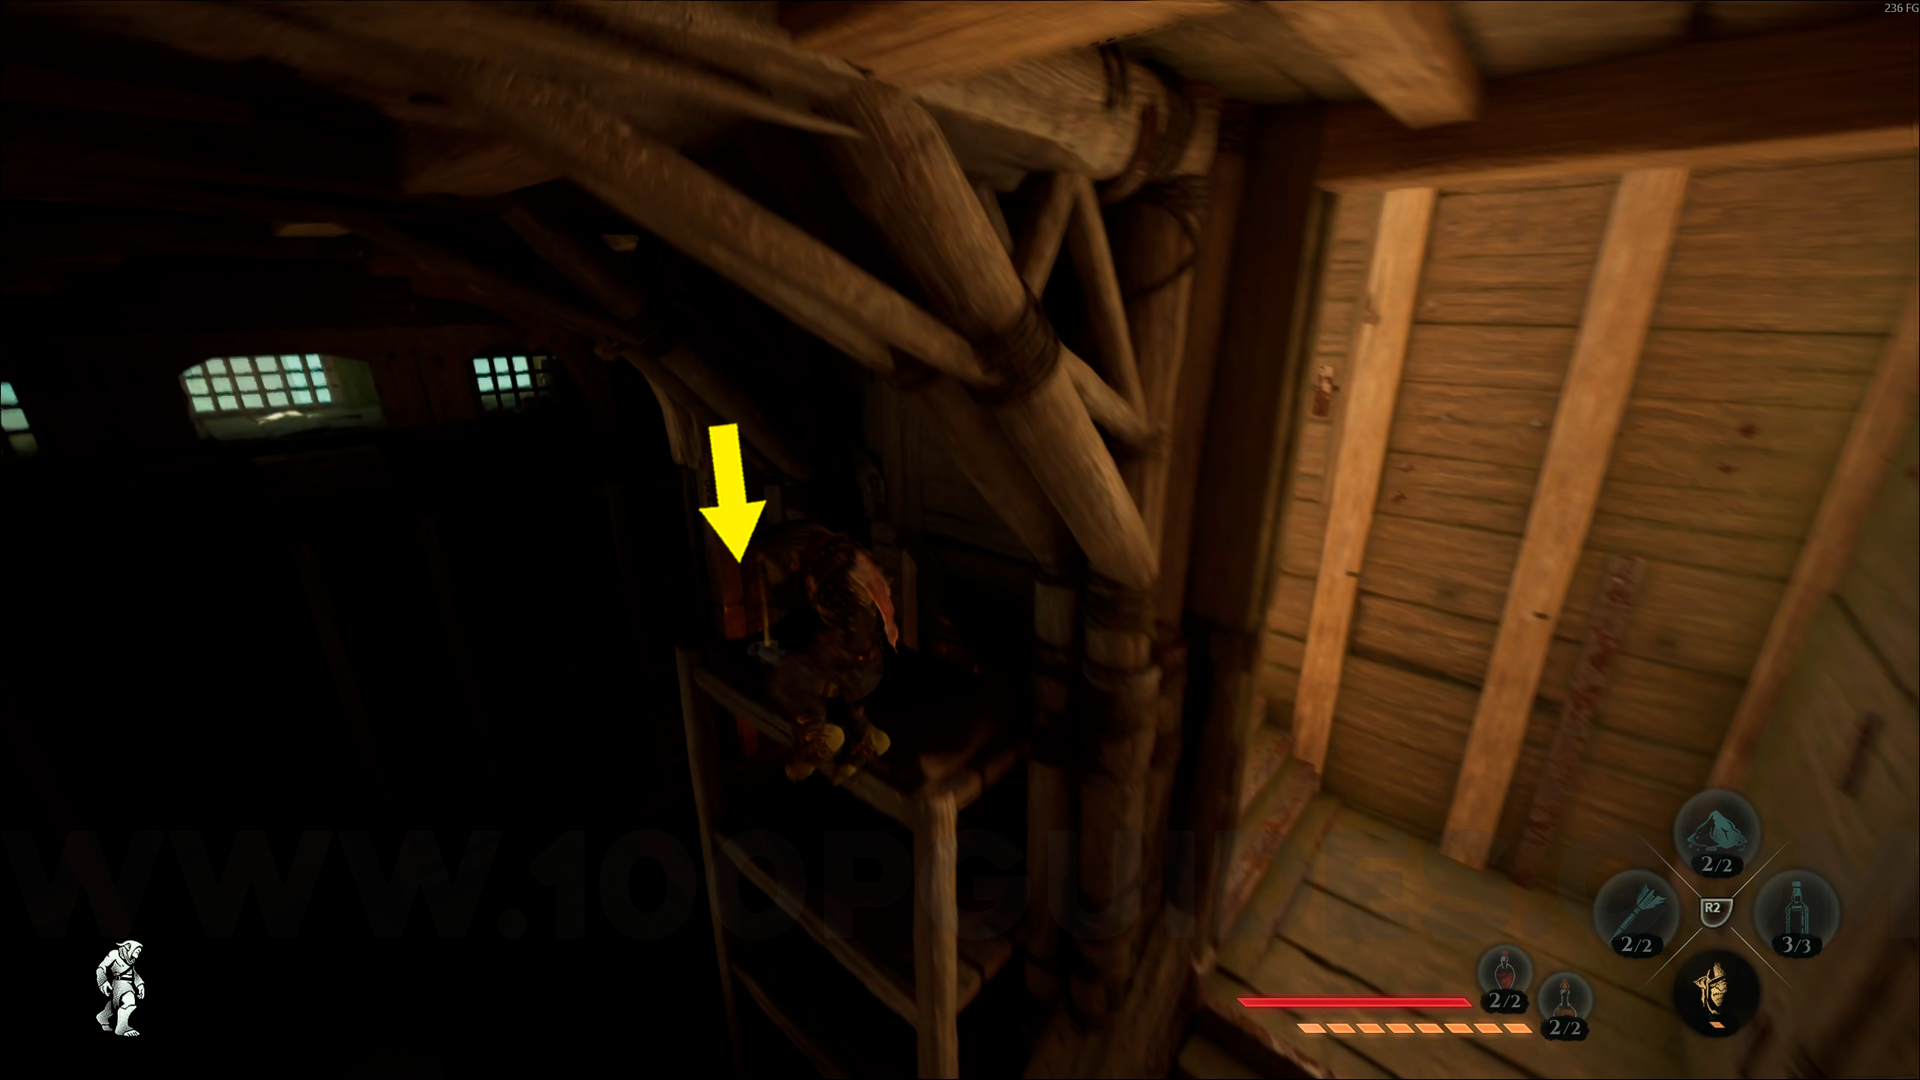
Climb up the bookshelf and shimmy your way to the top of the small wooden platform to find this emblem.
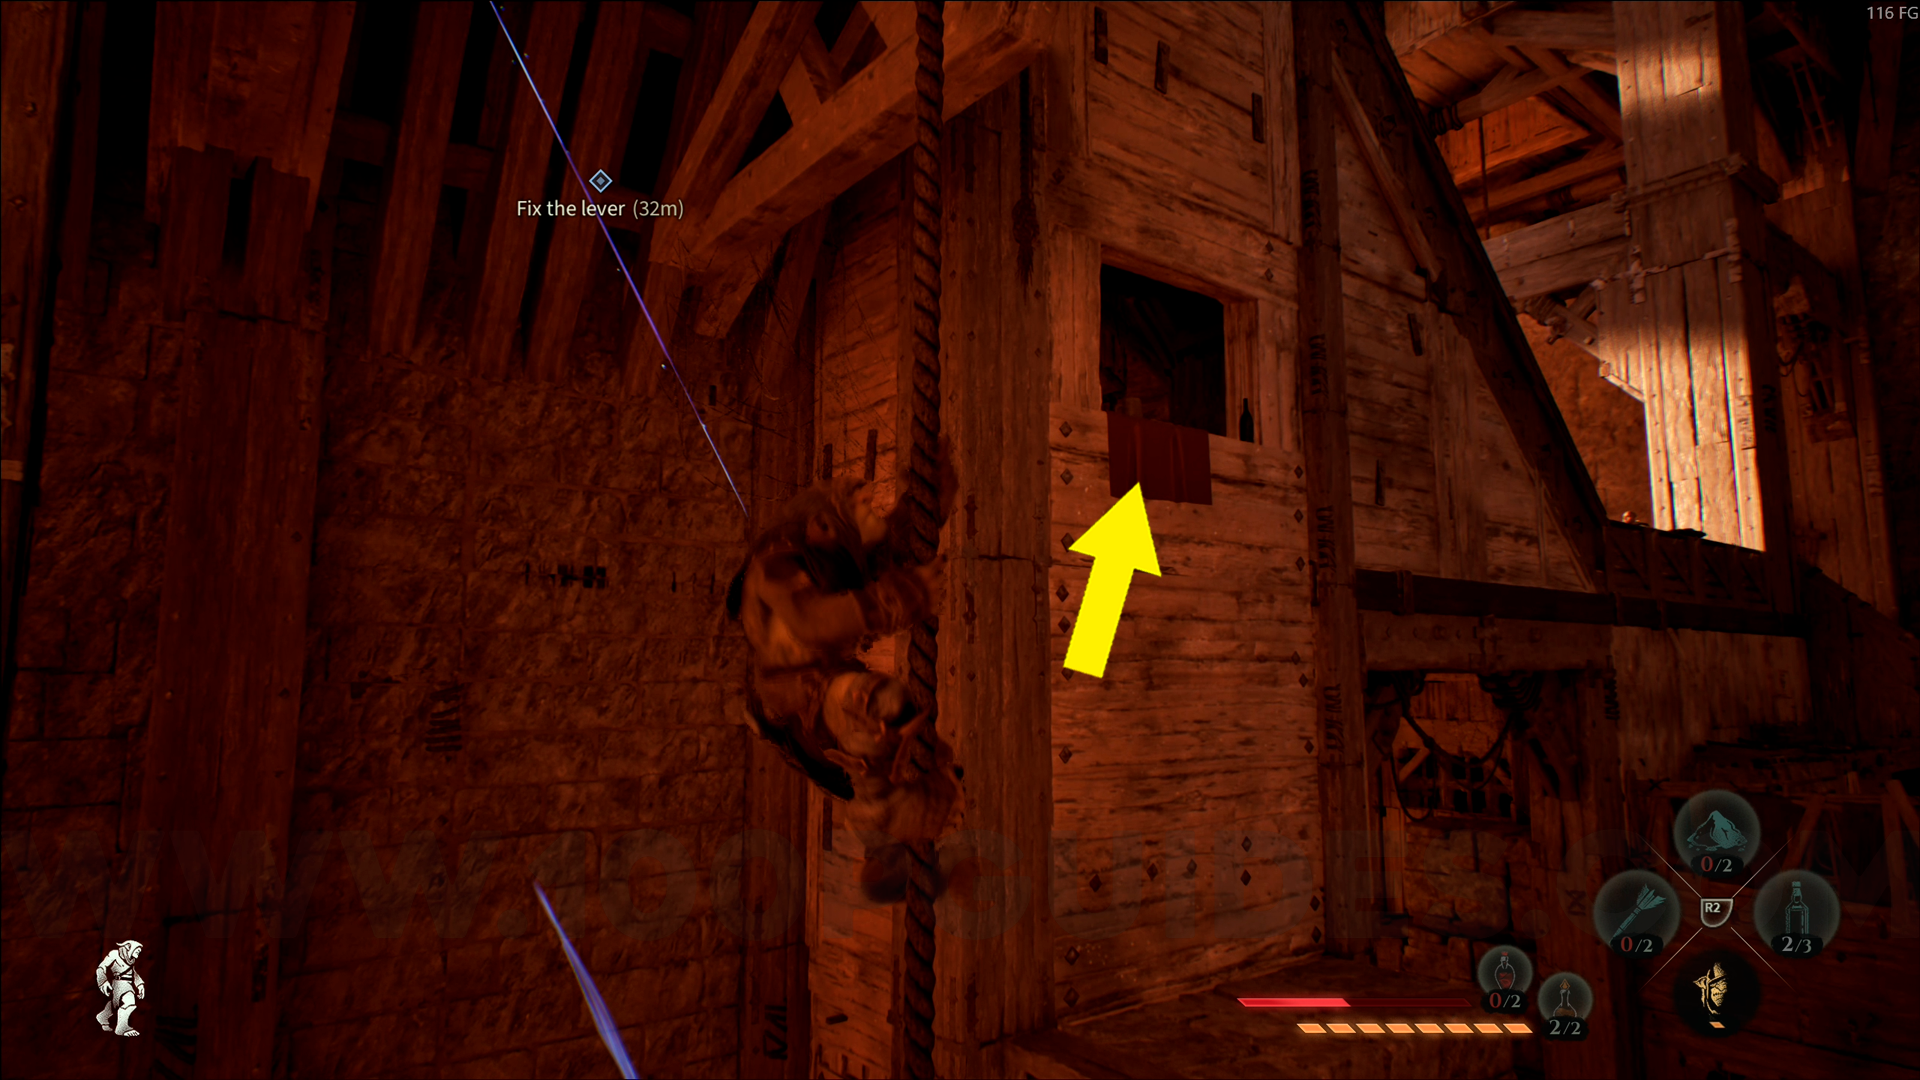
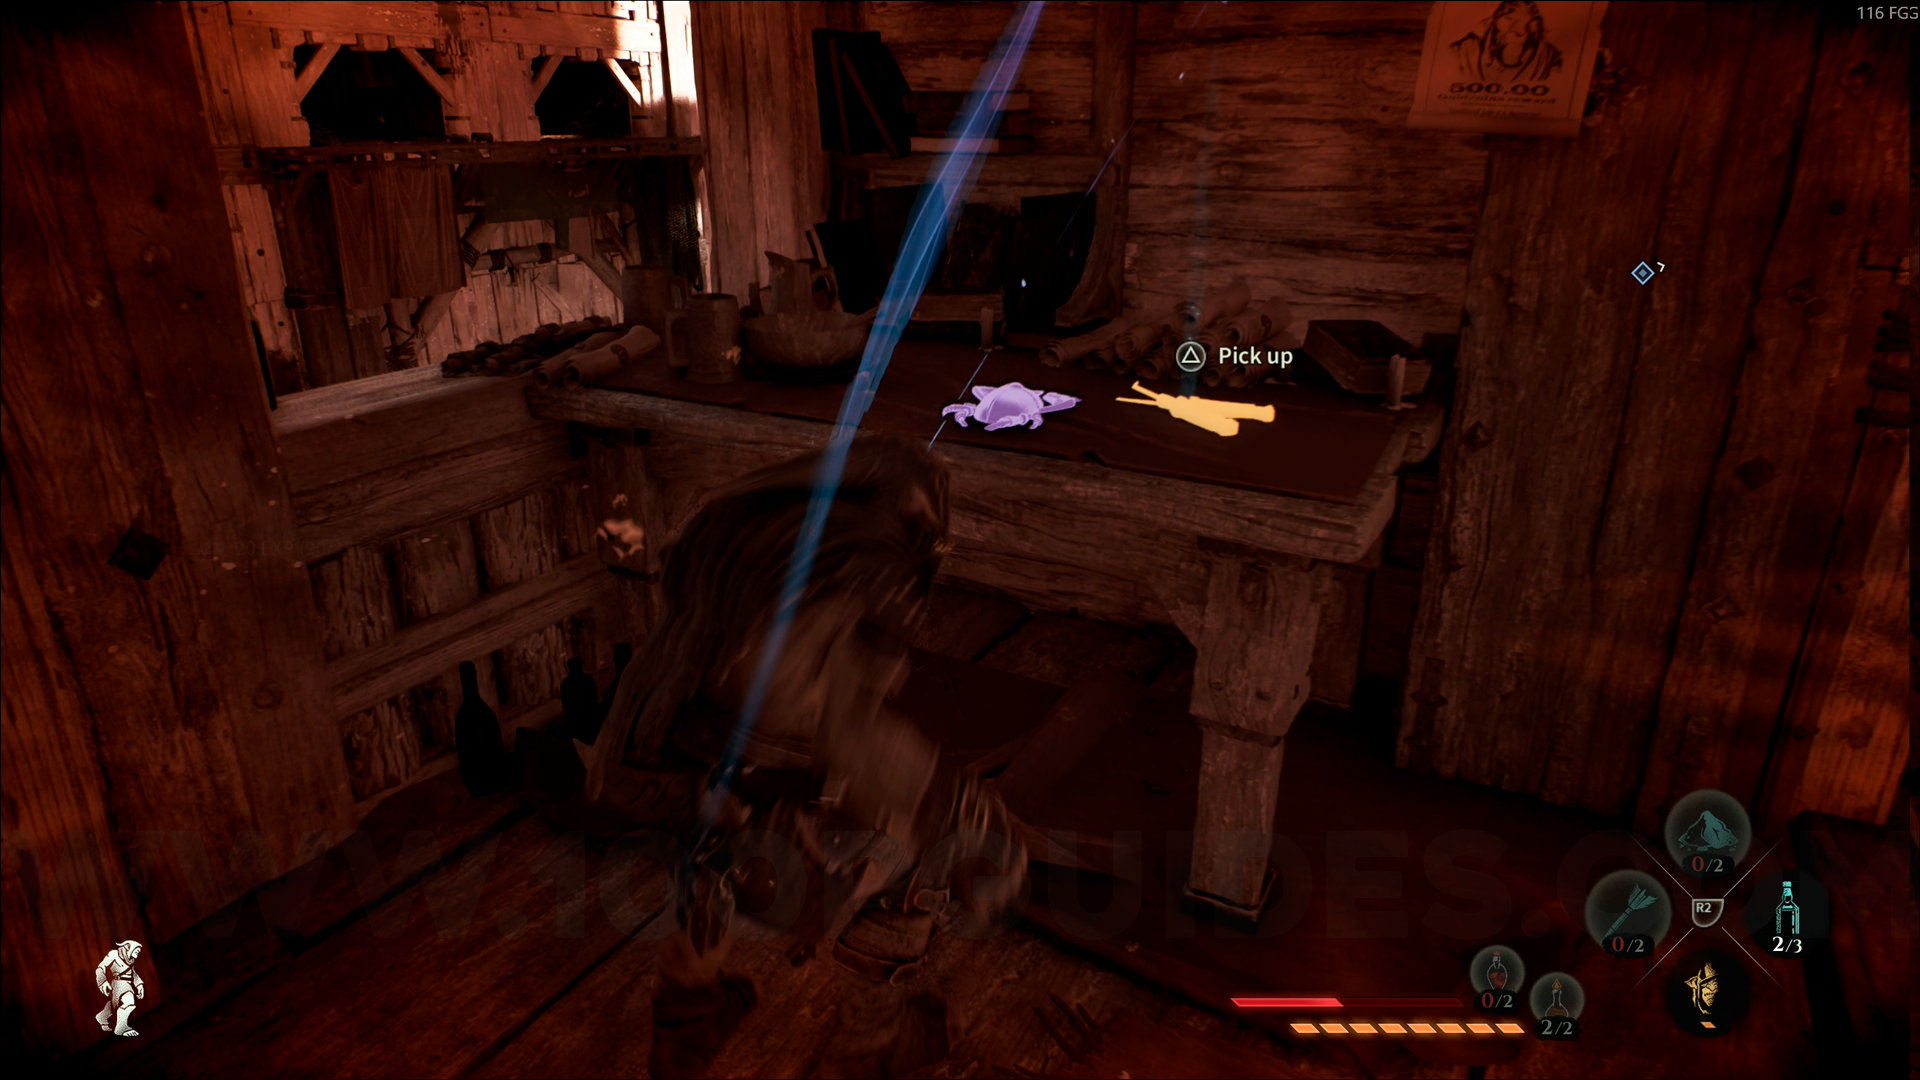
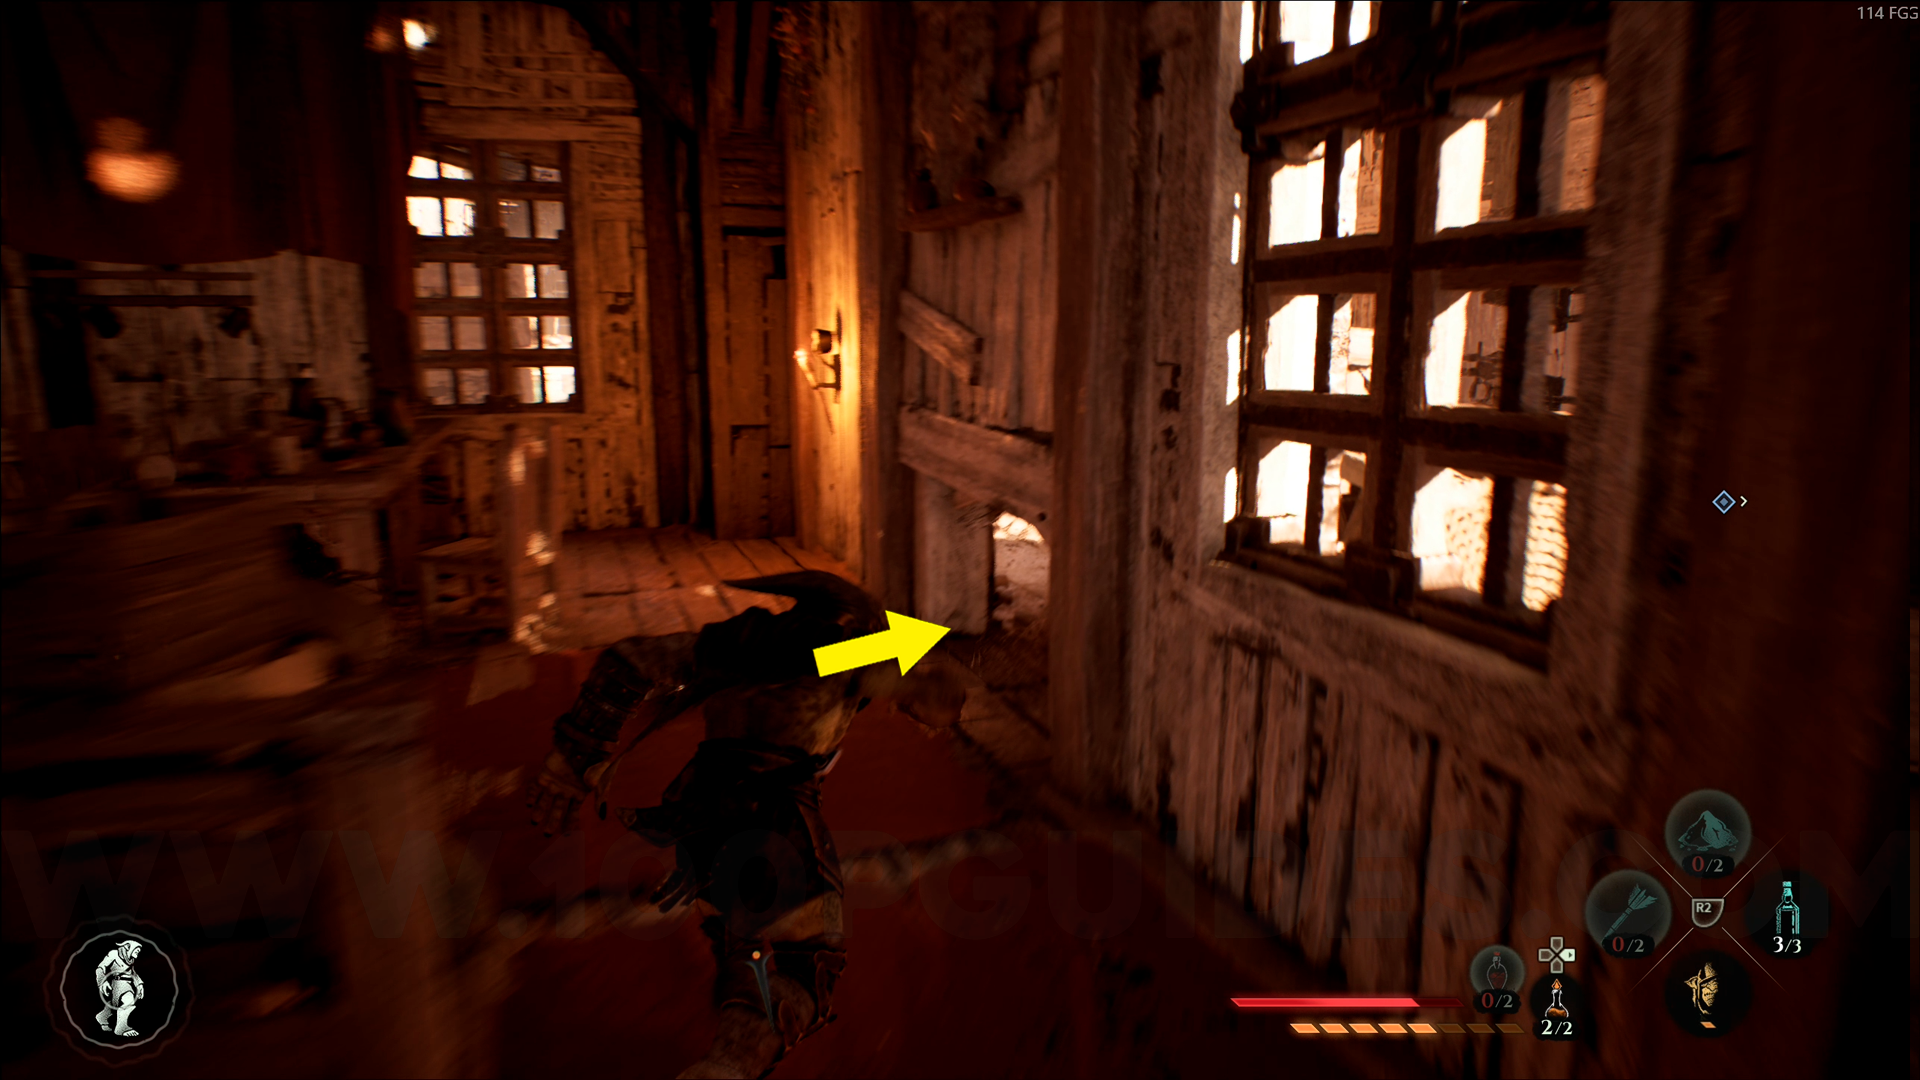
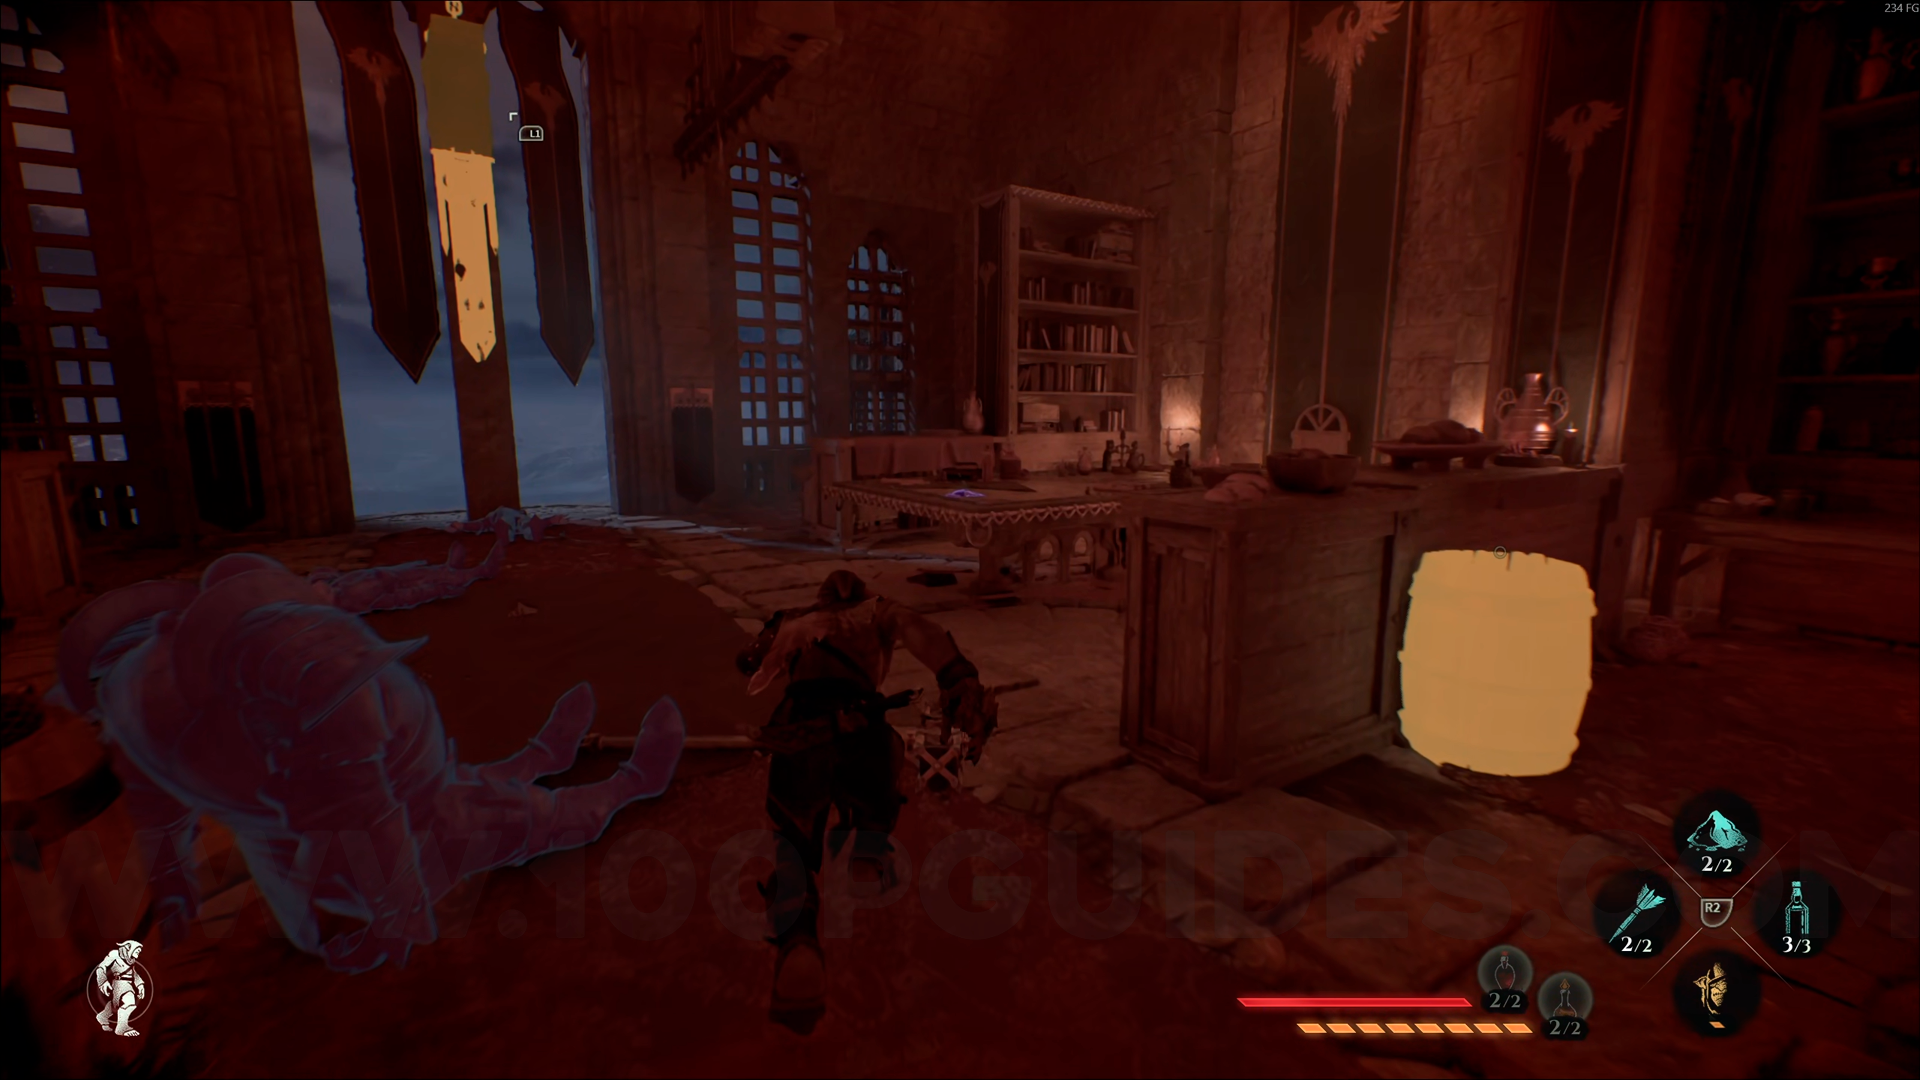
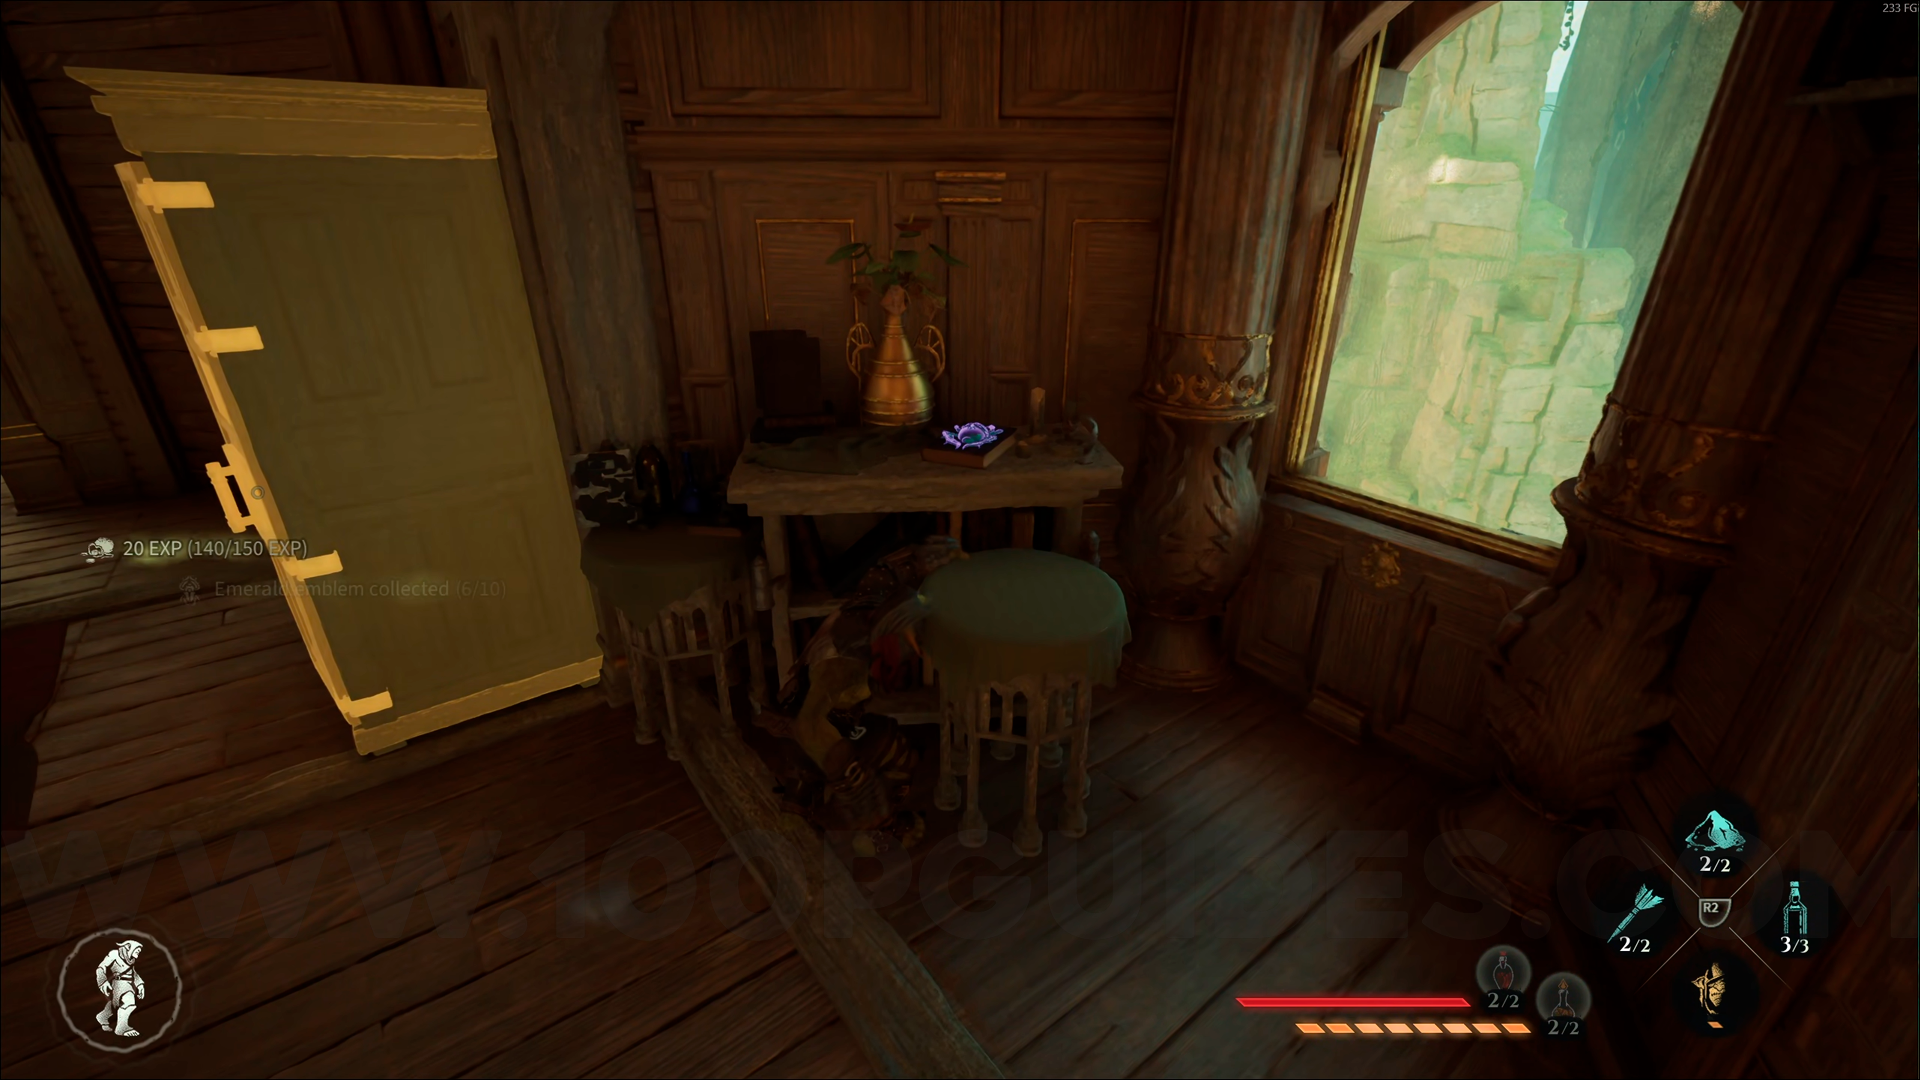
Wood Emblem #5. From the previous collectible, go back up to the top (before you dropped into the hole with the rope). This time, grab the rope and swing through the window. You'll find this emblem on top of the table. Use Amber Vision if you're having trouble spotting it.
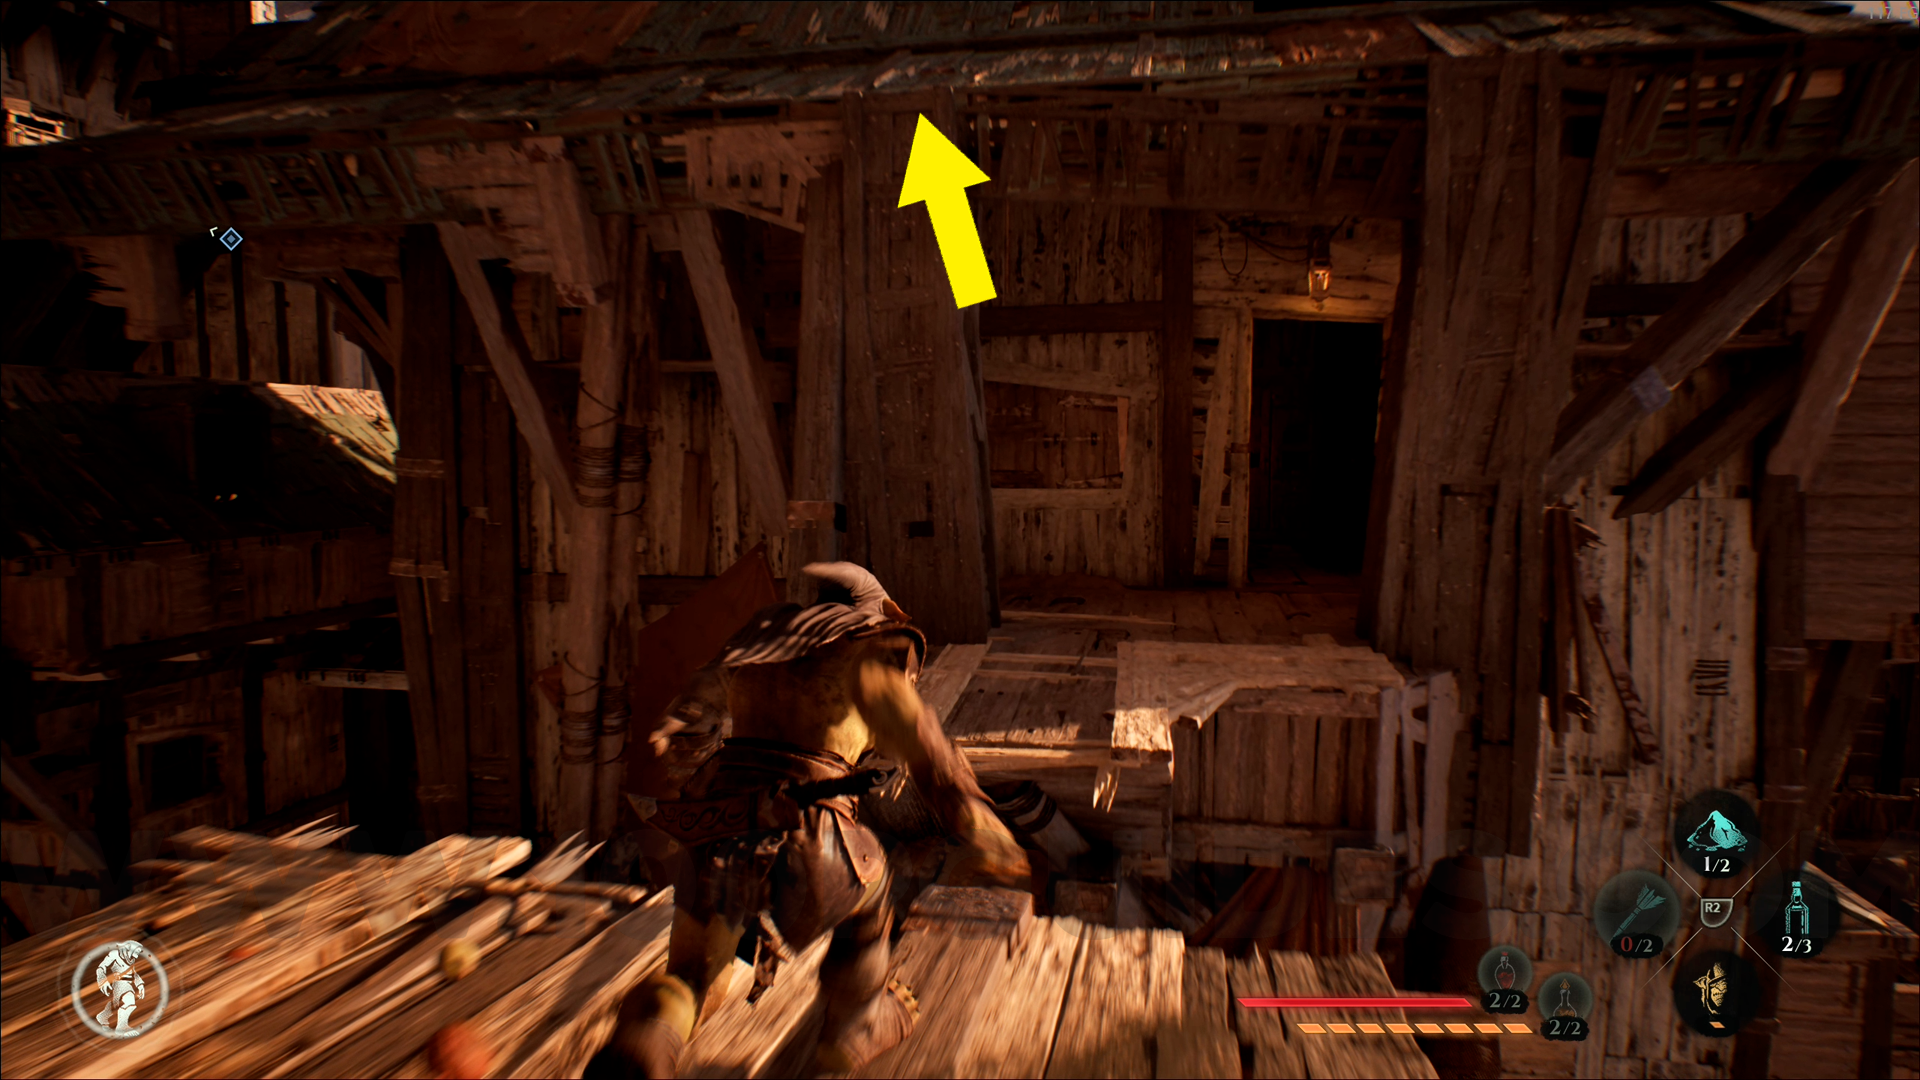
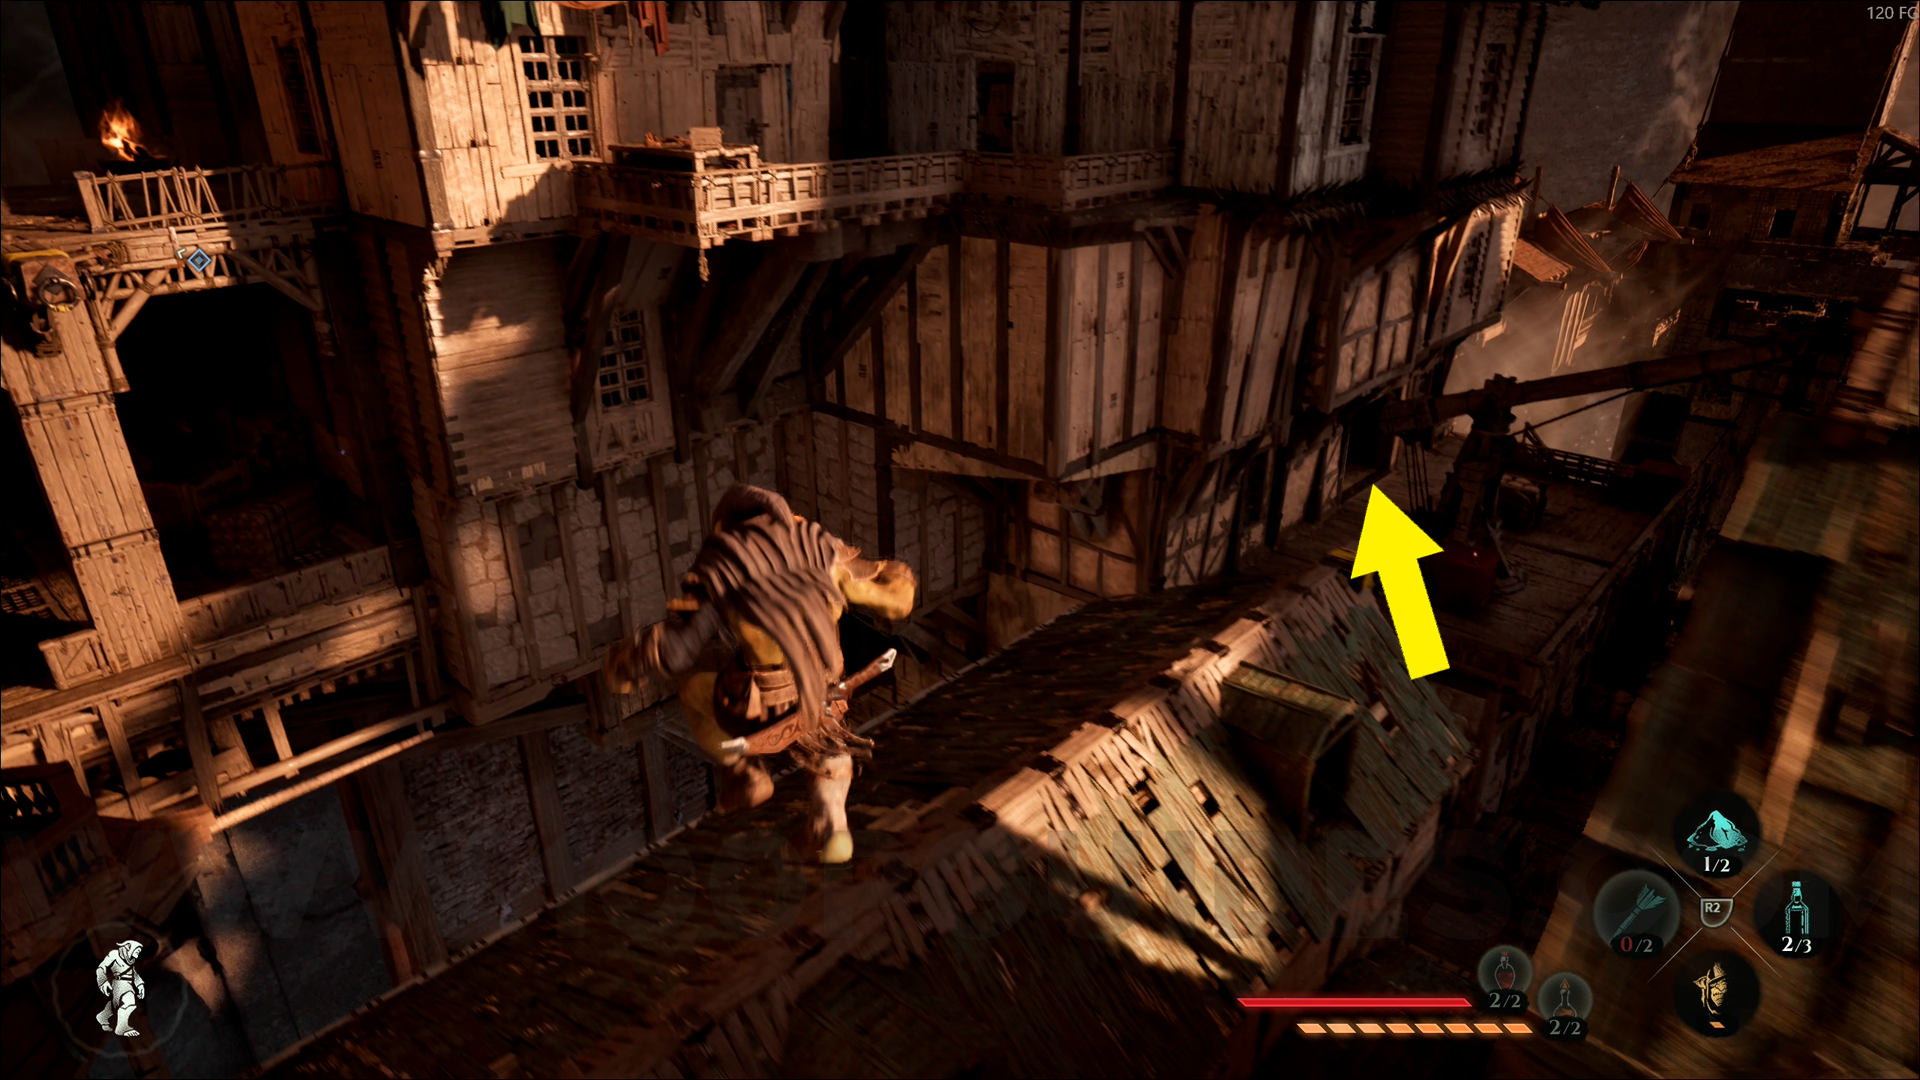
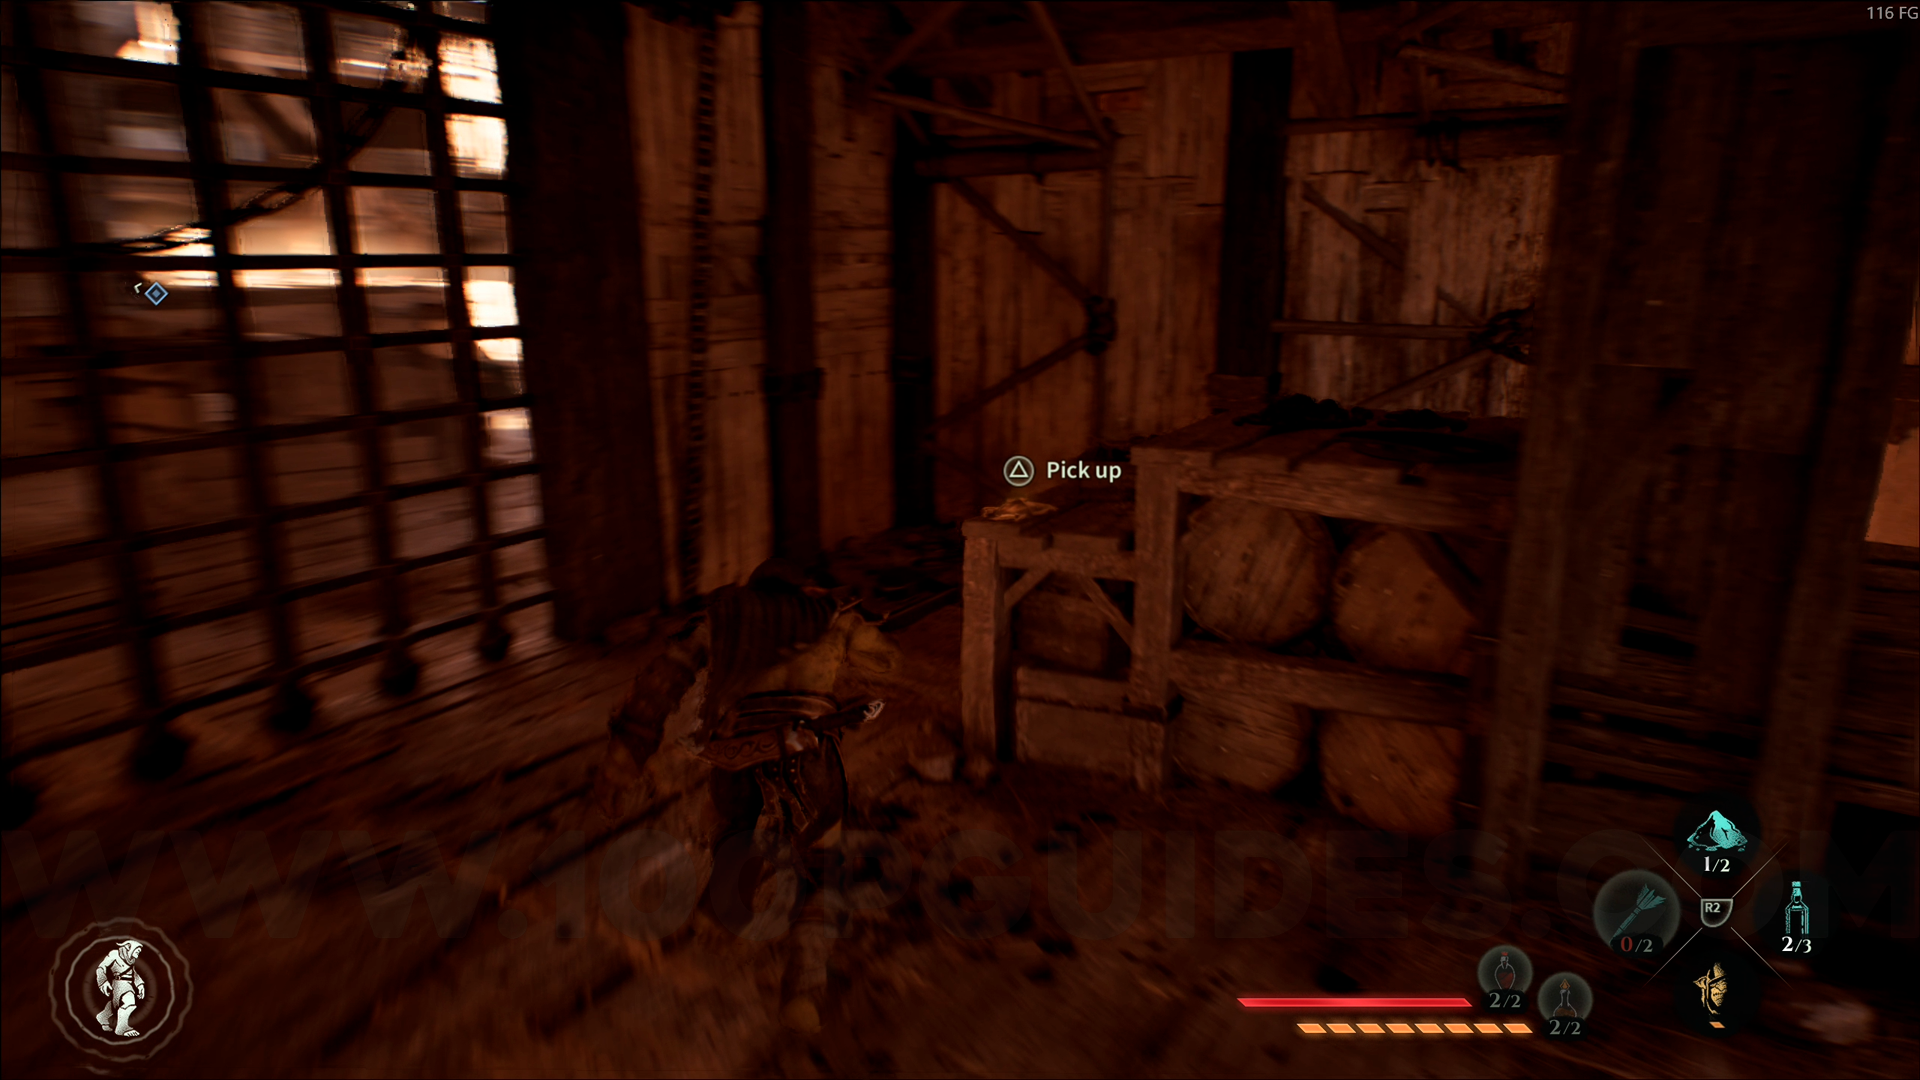
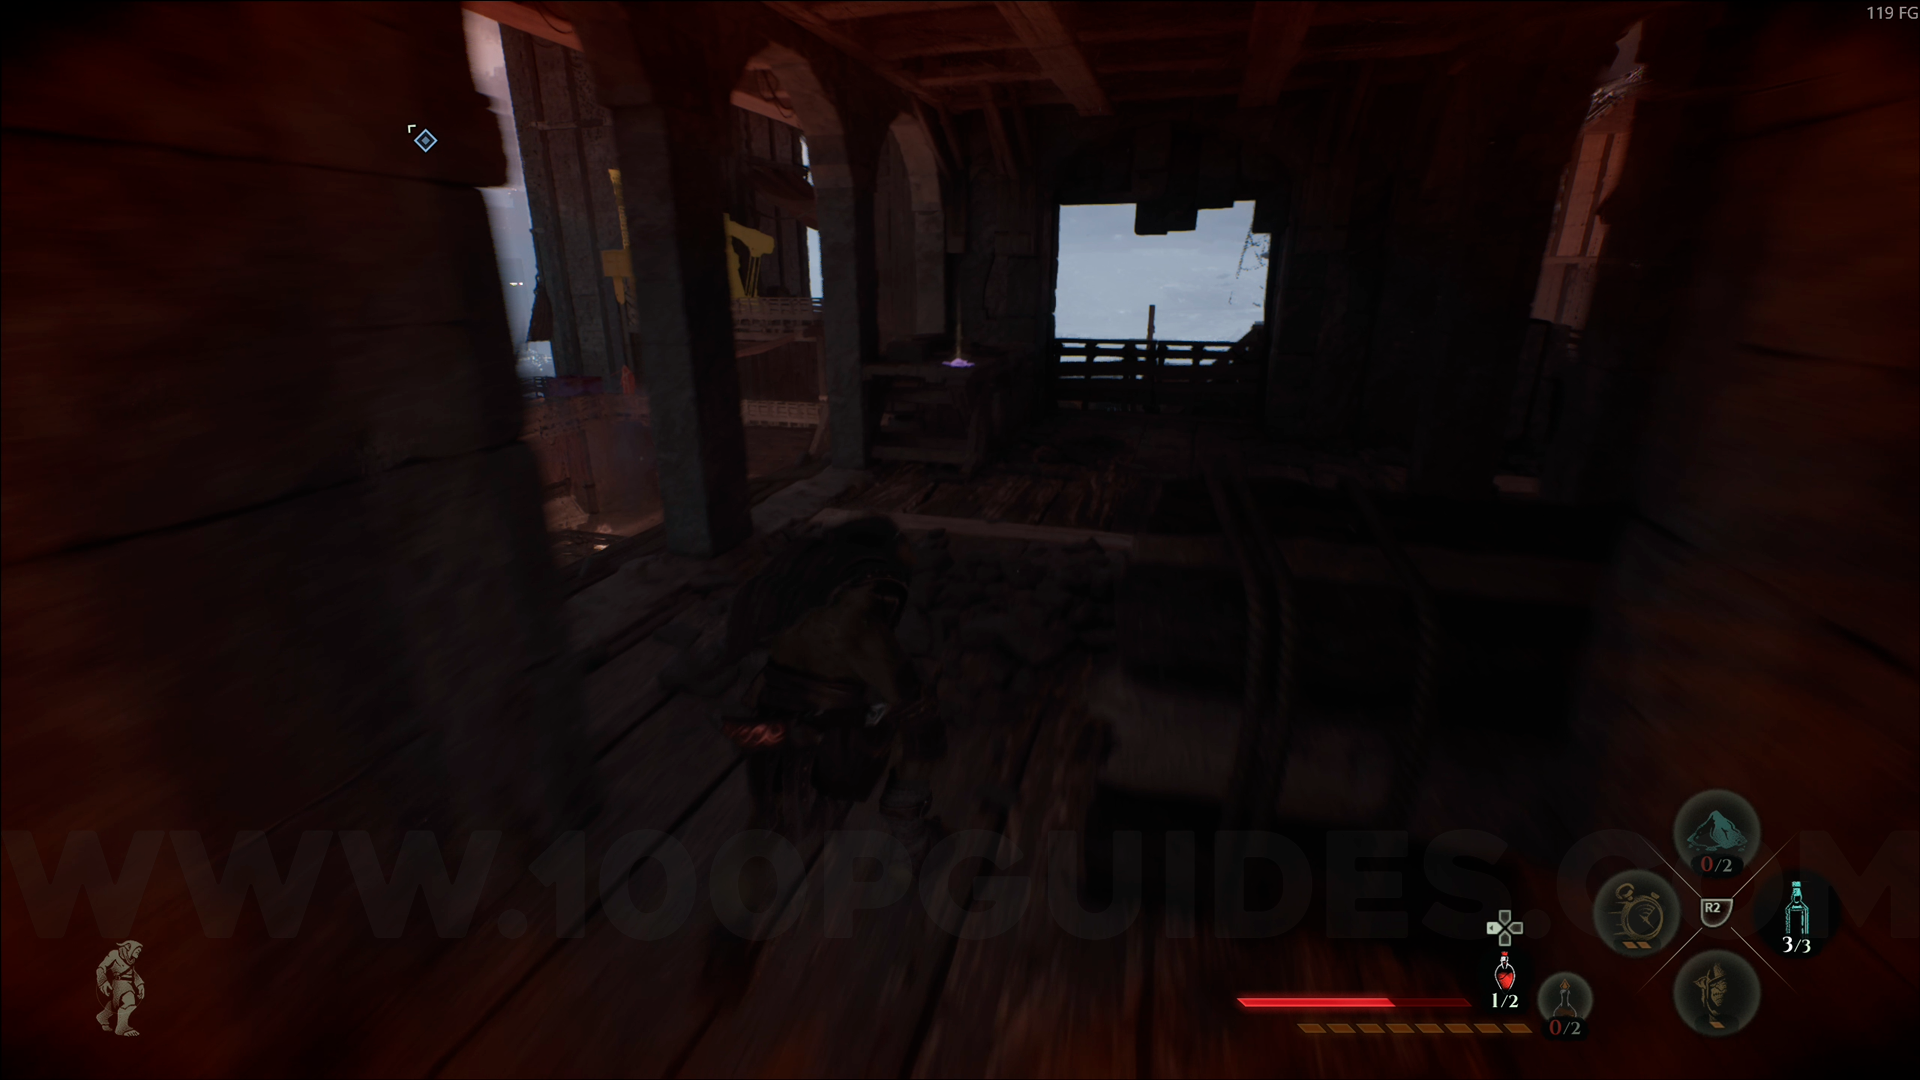
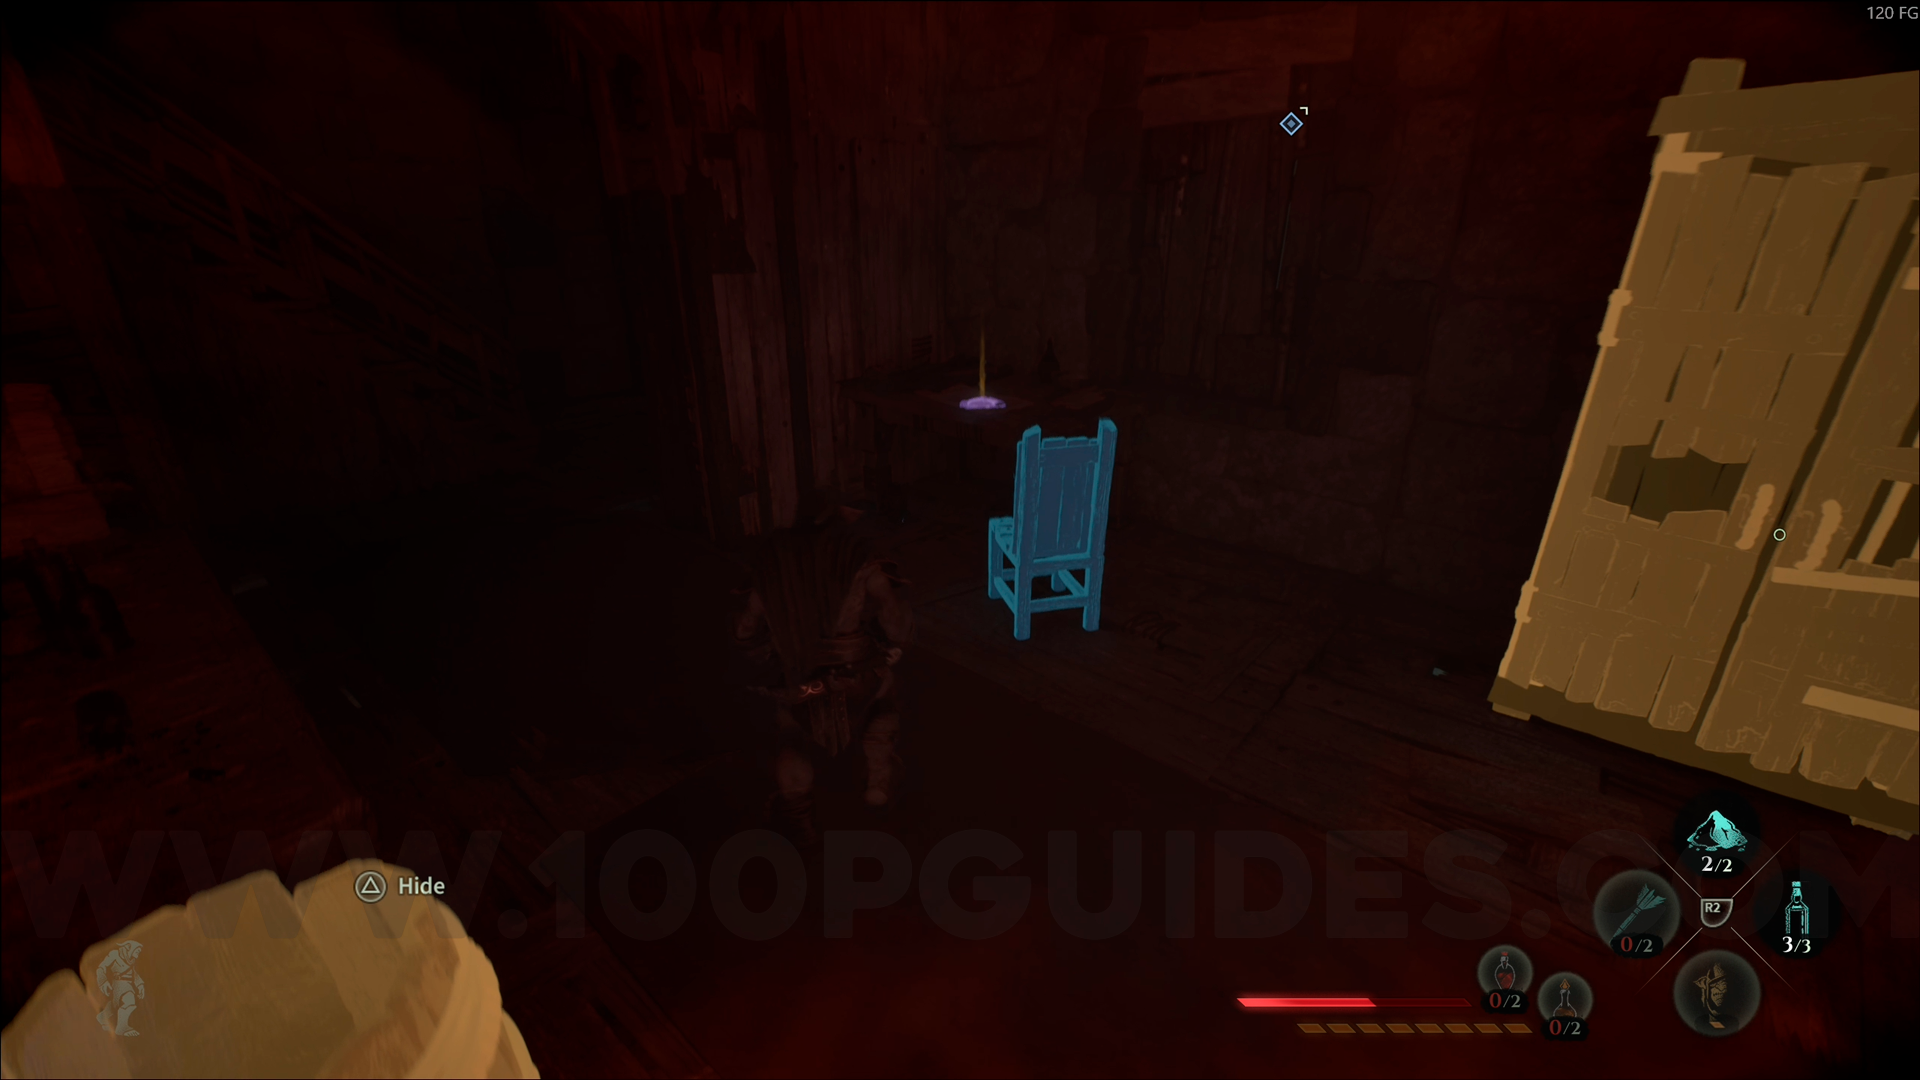
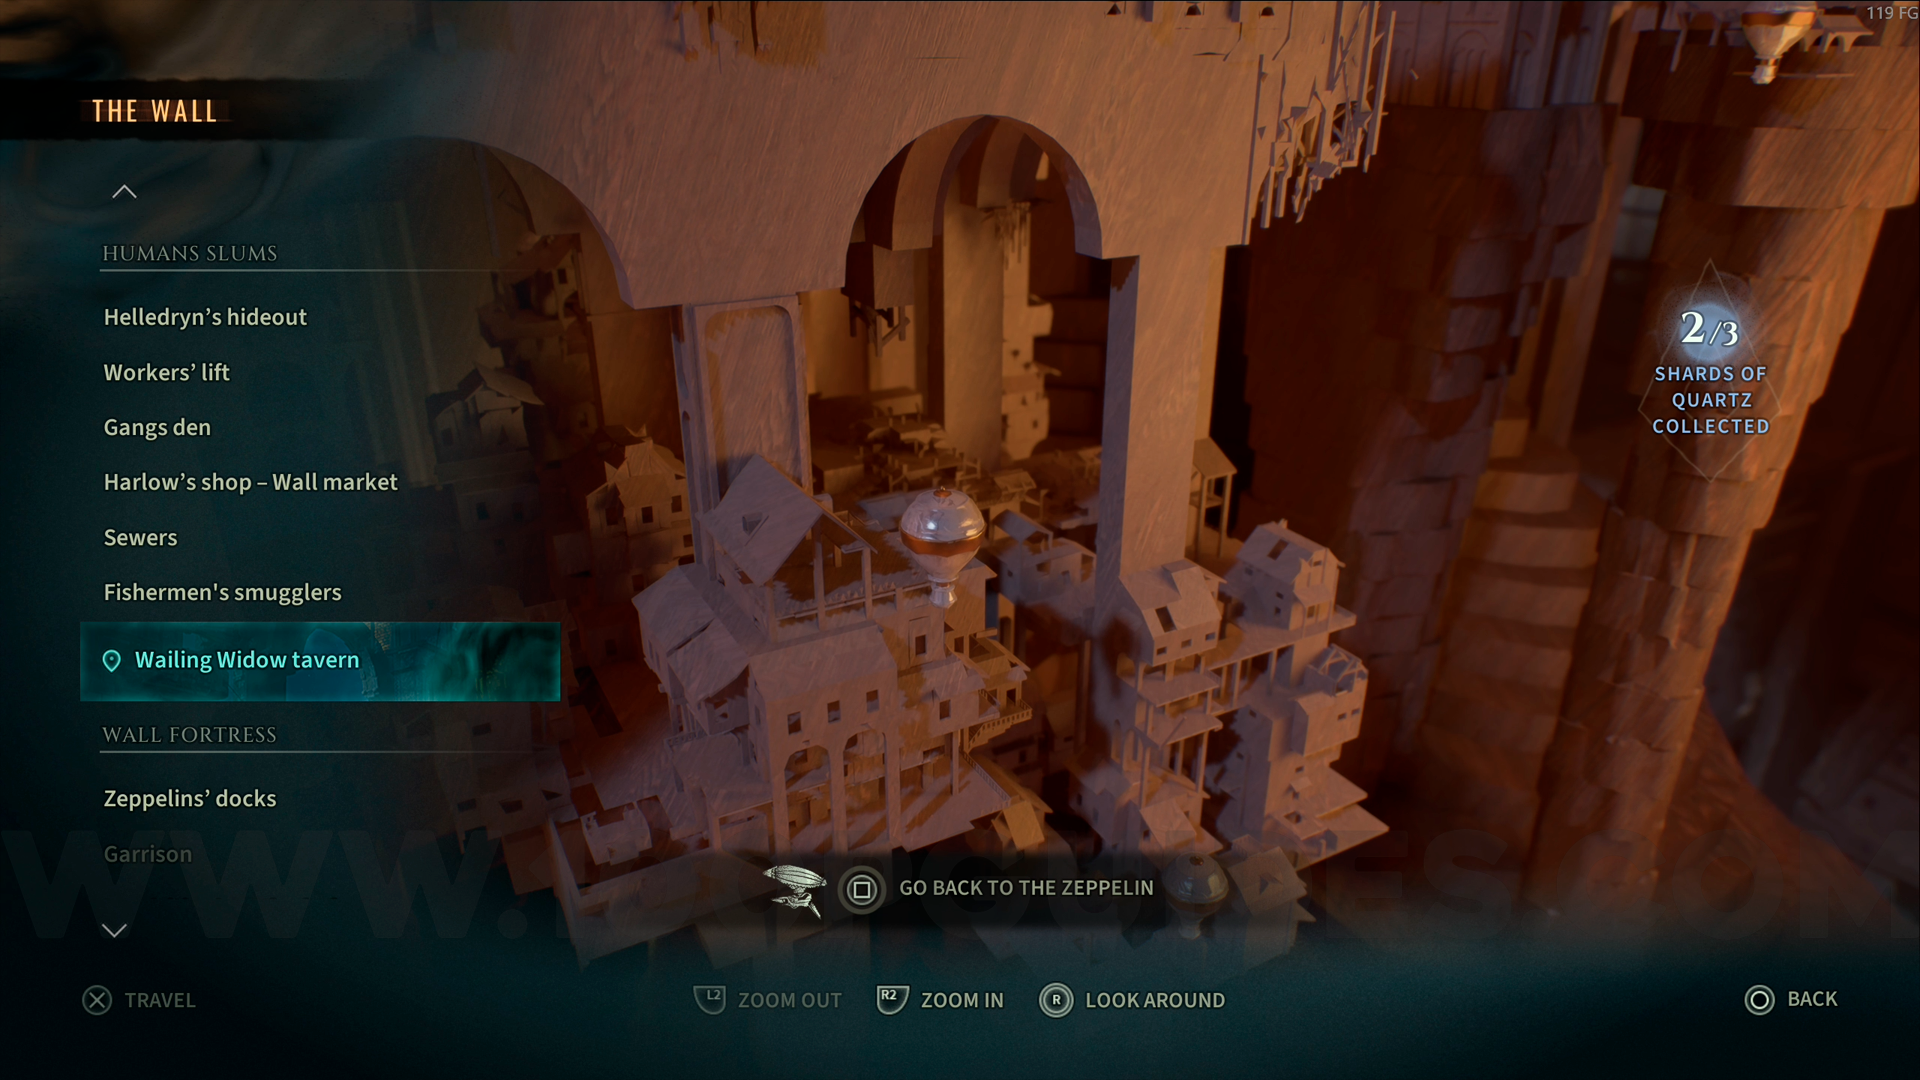
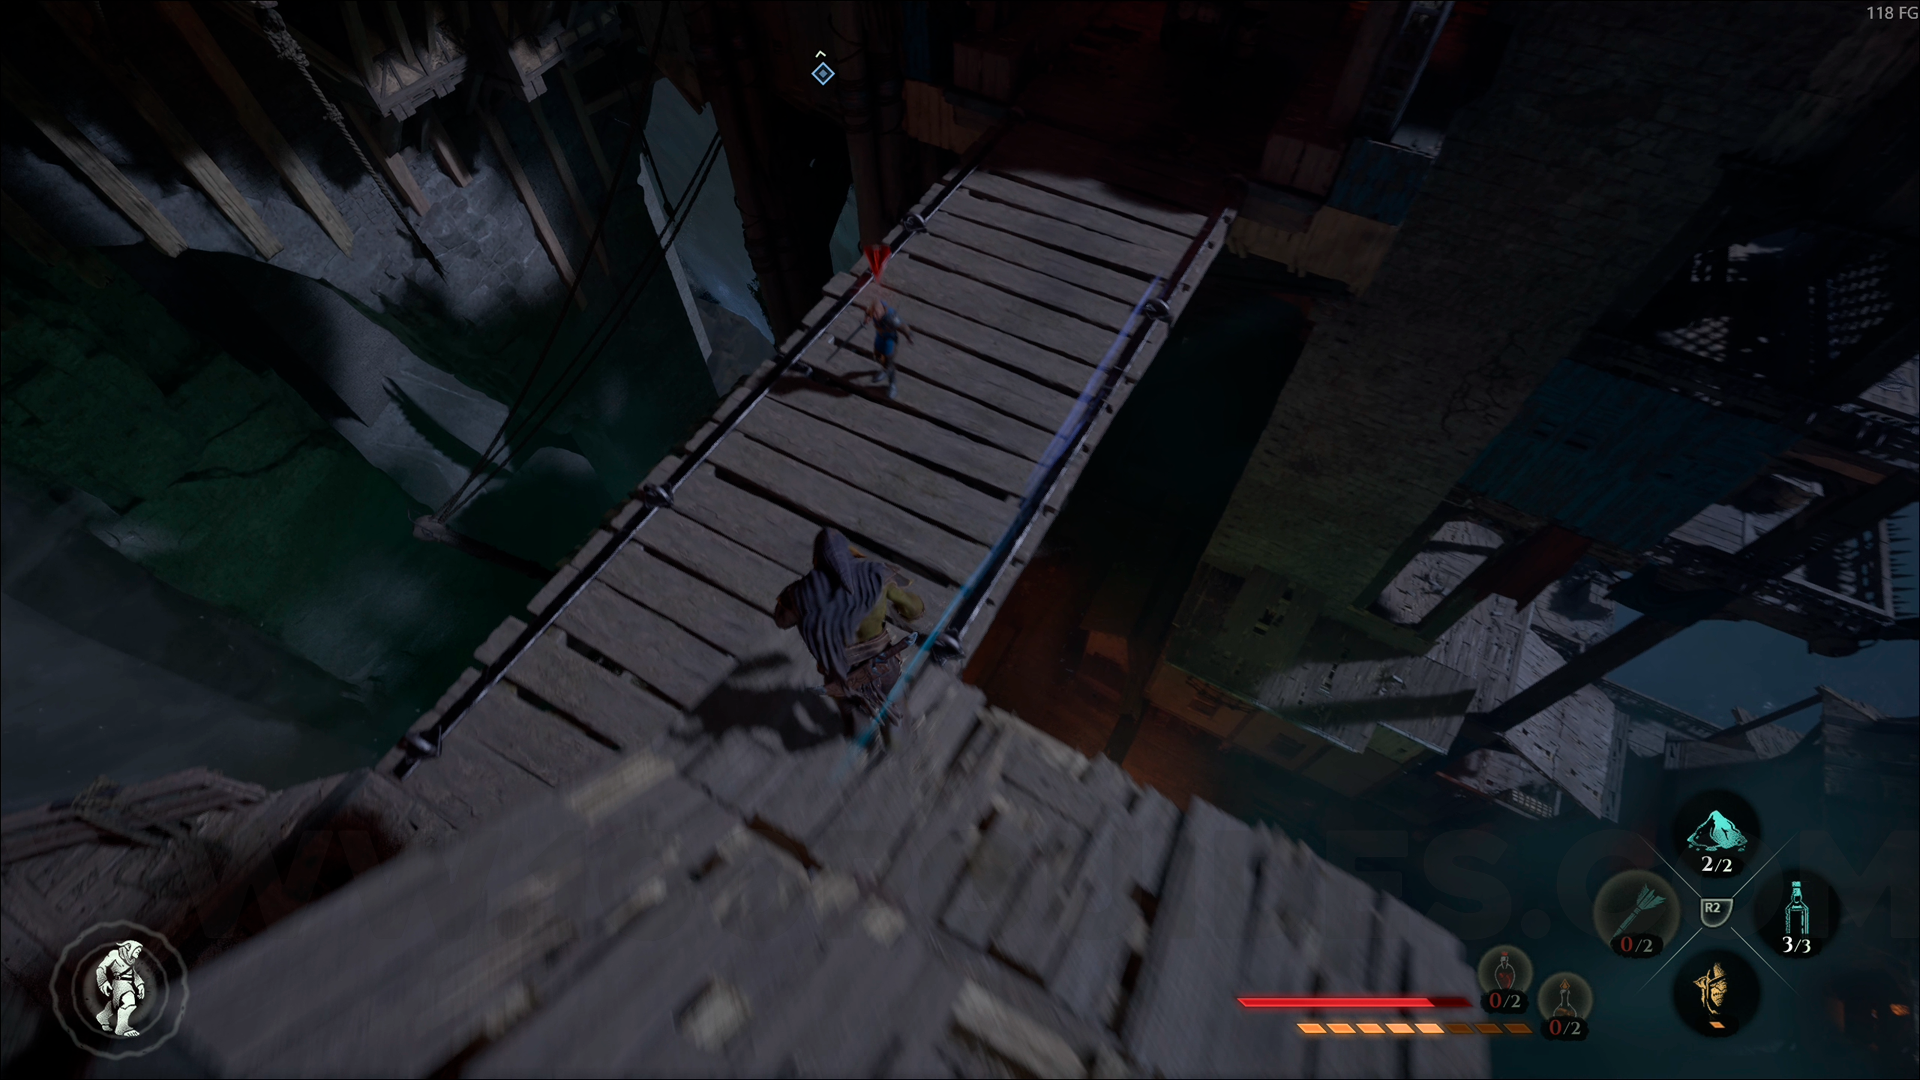
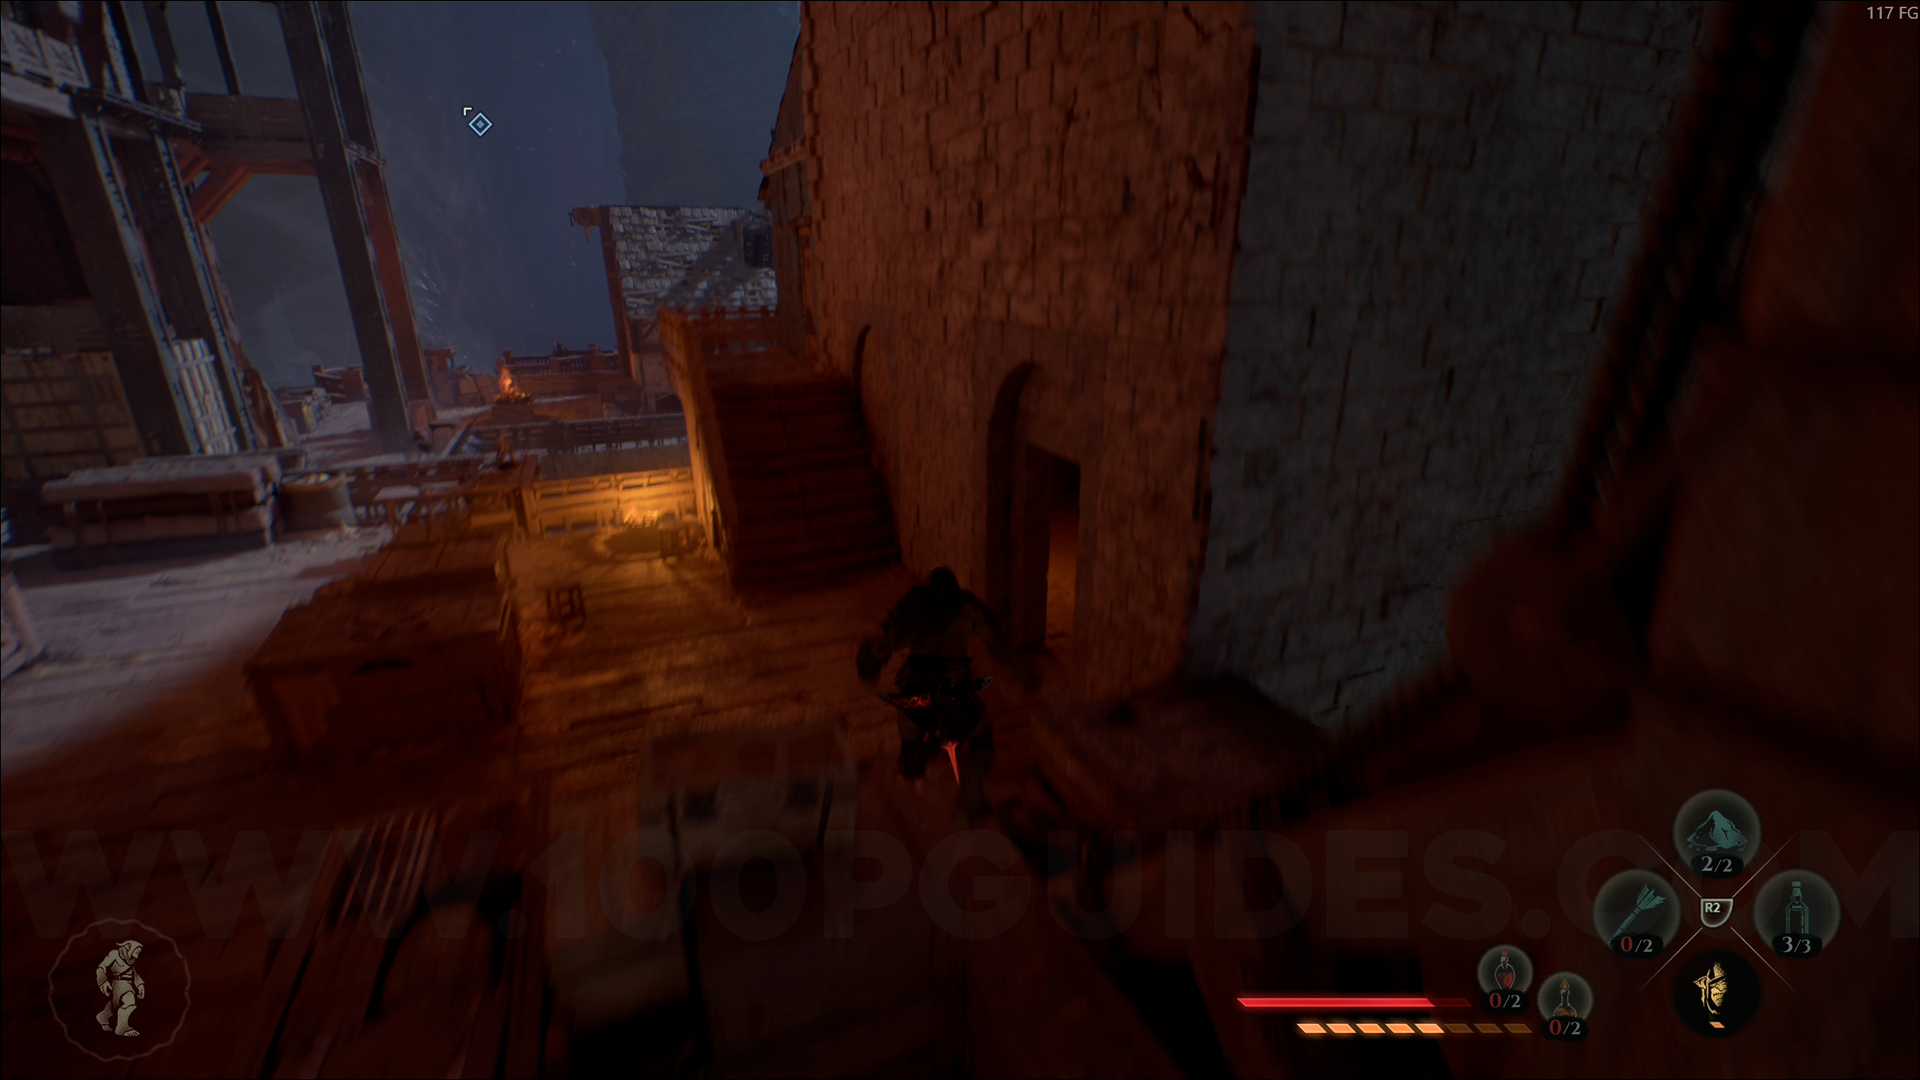
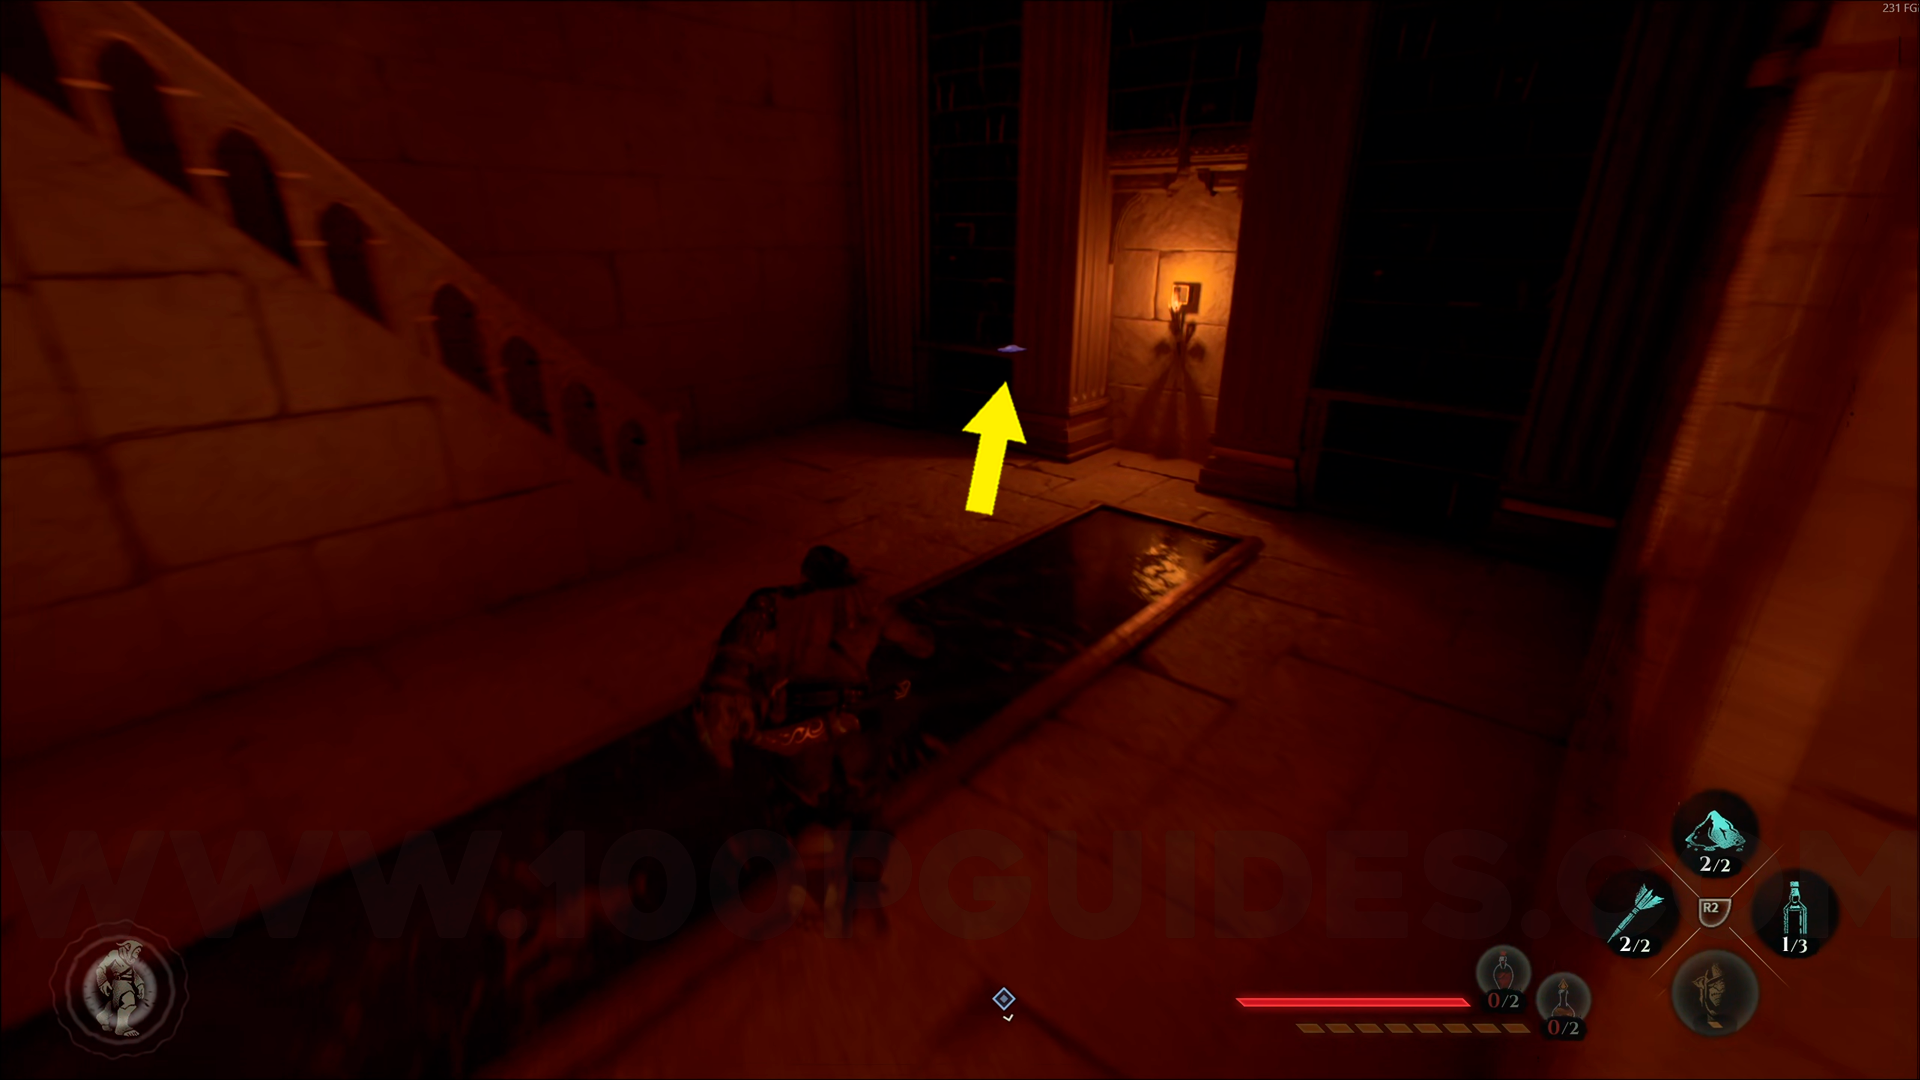
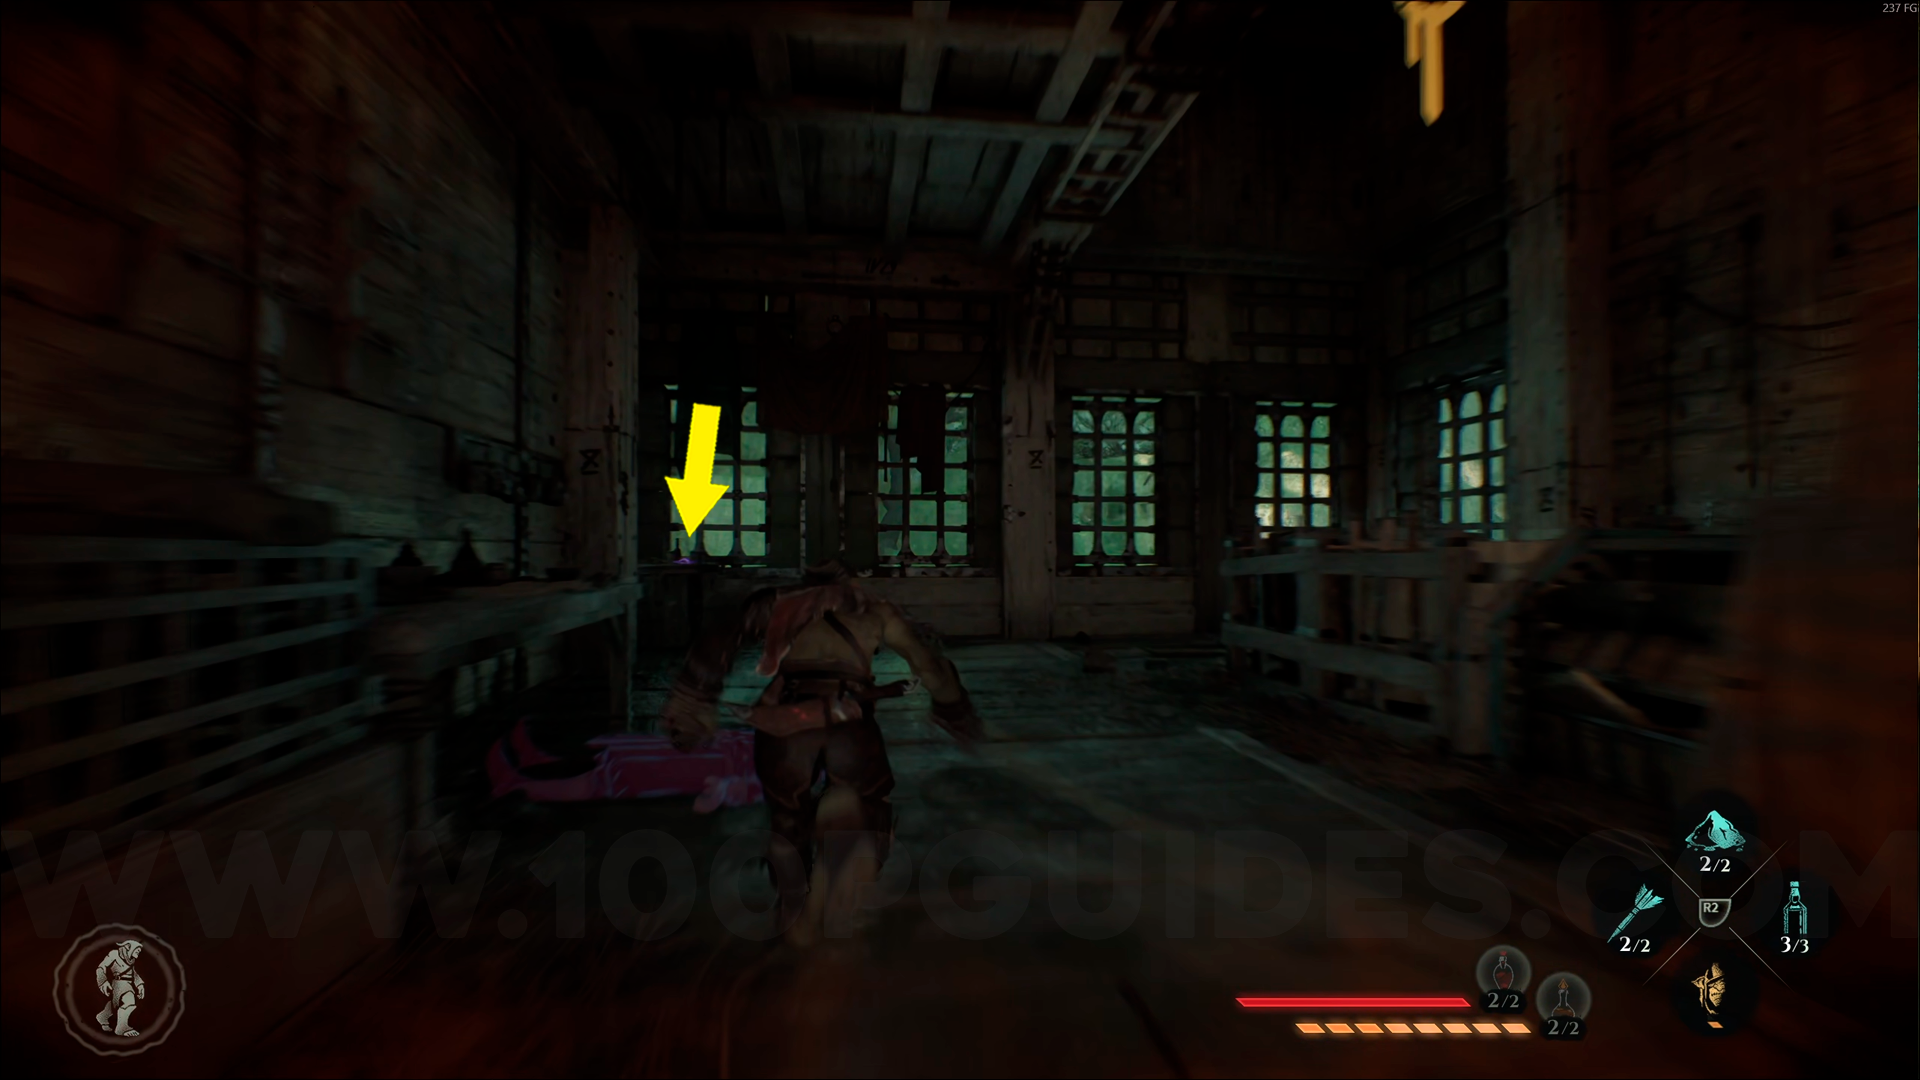
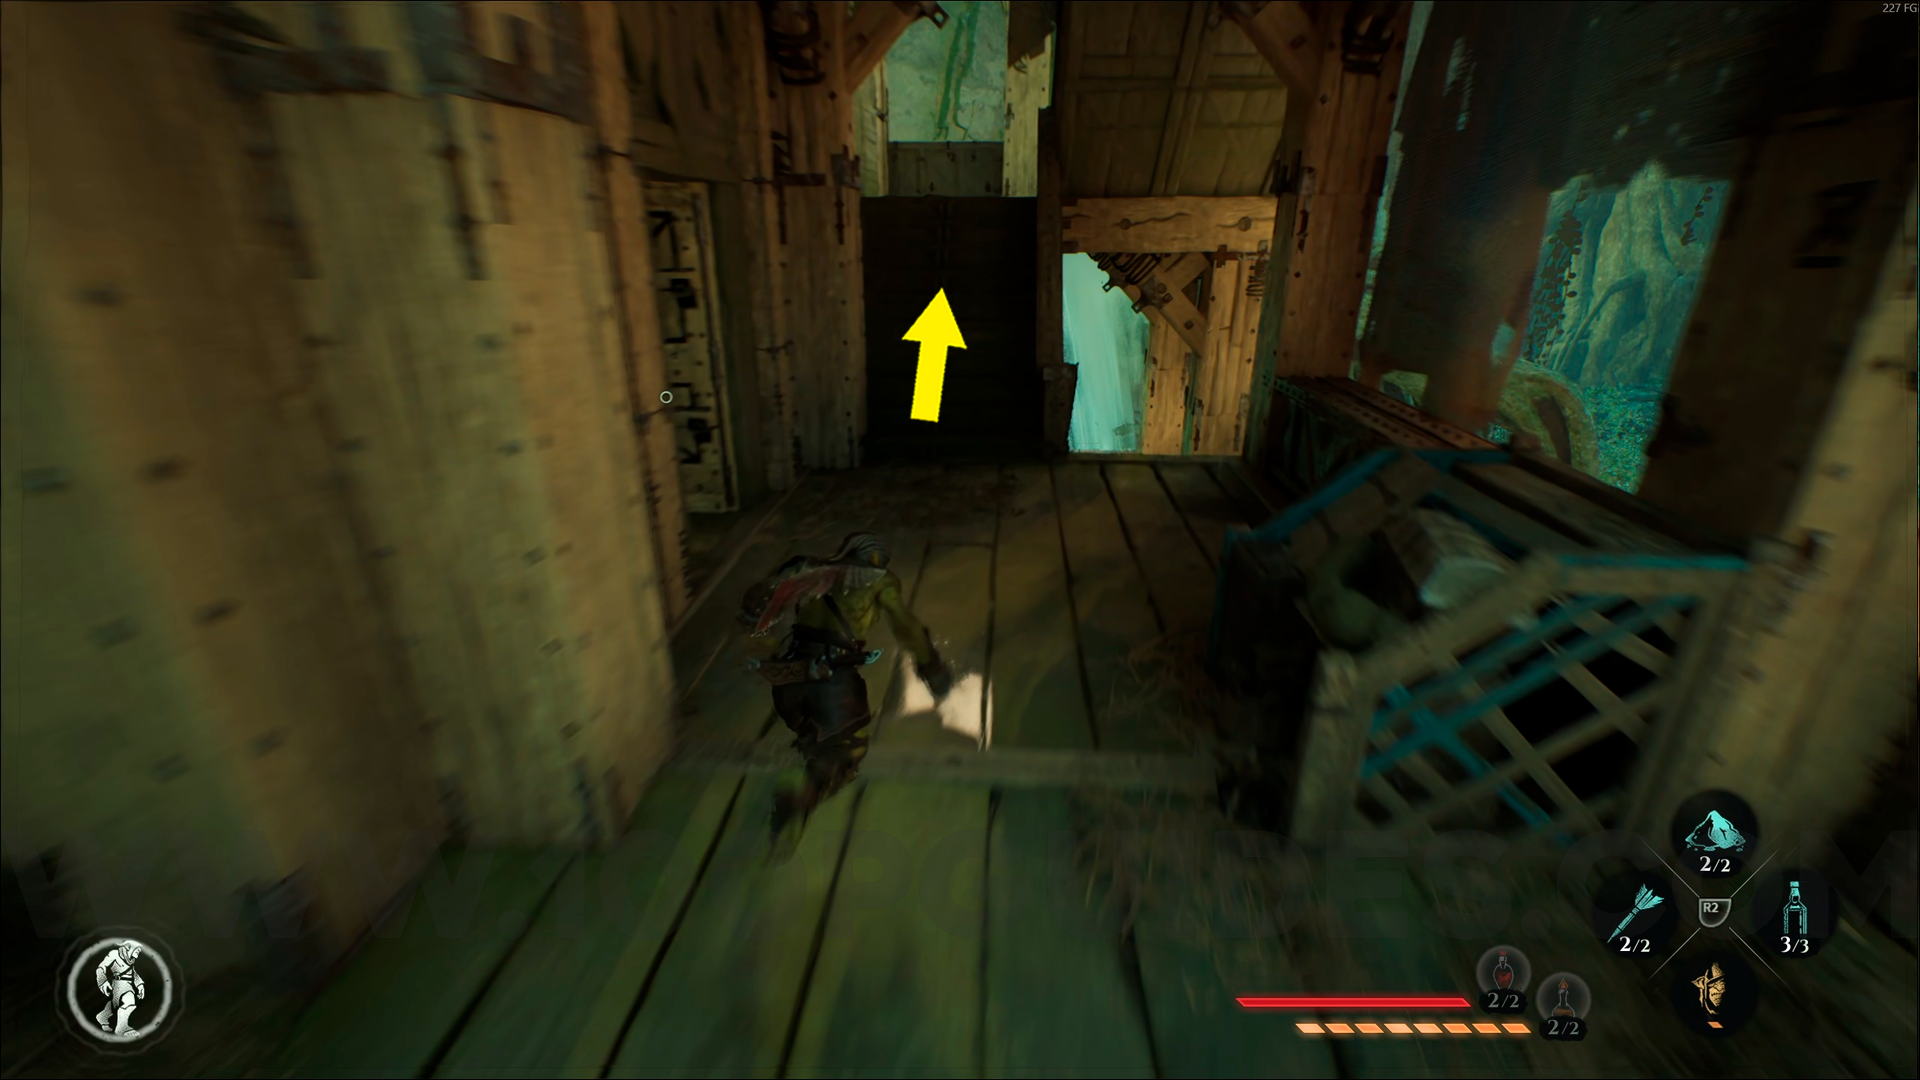
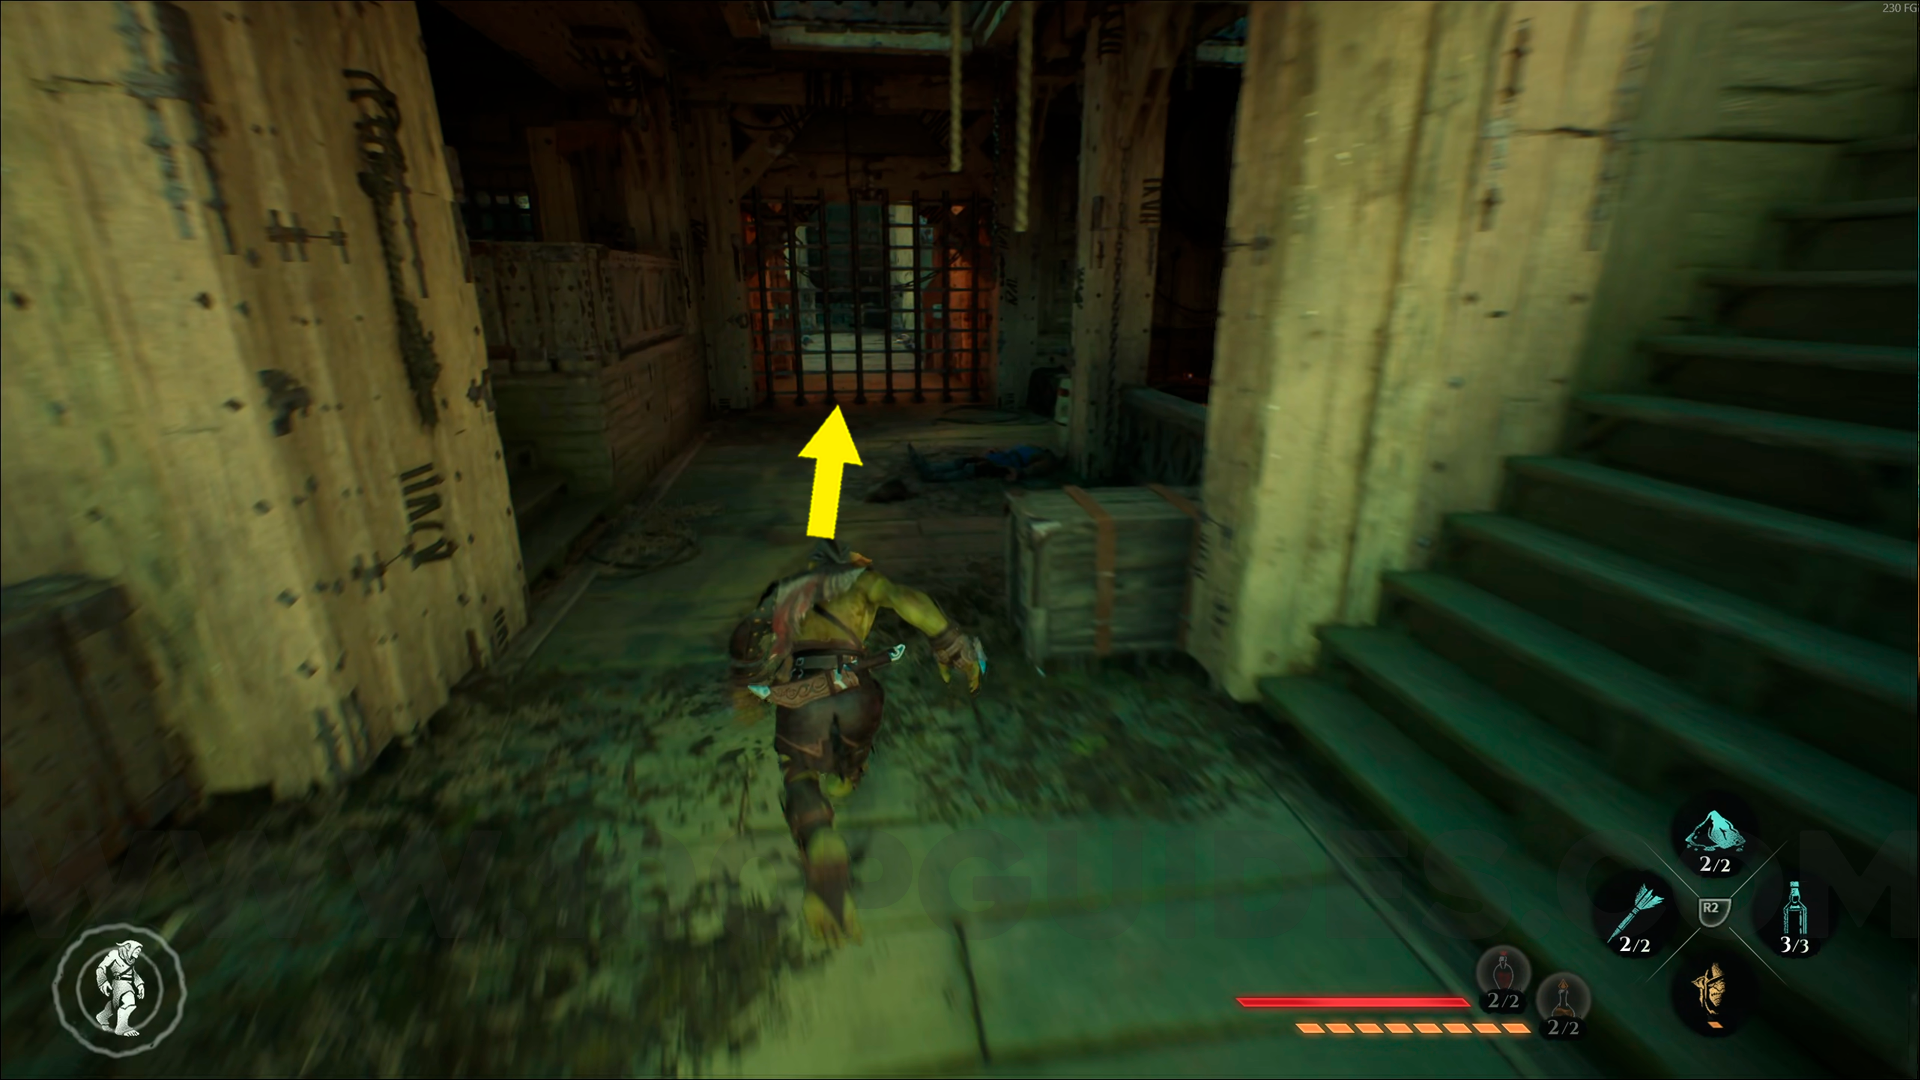
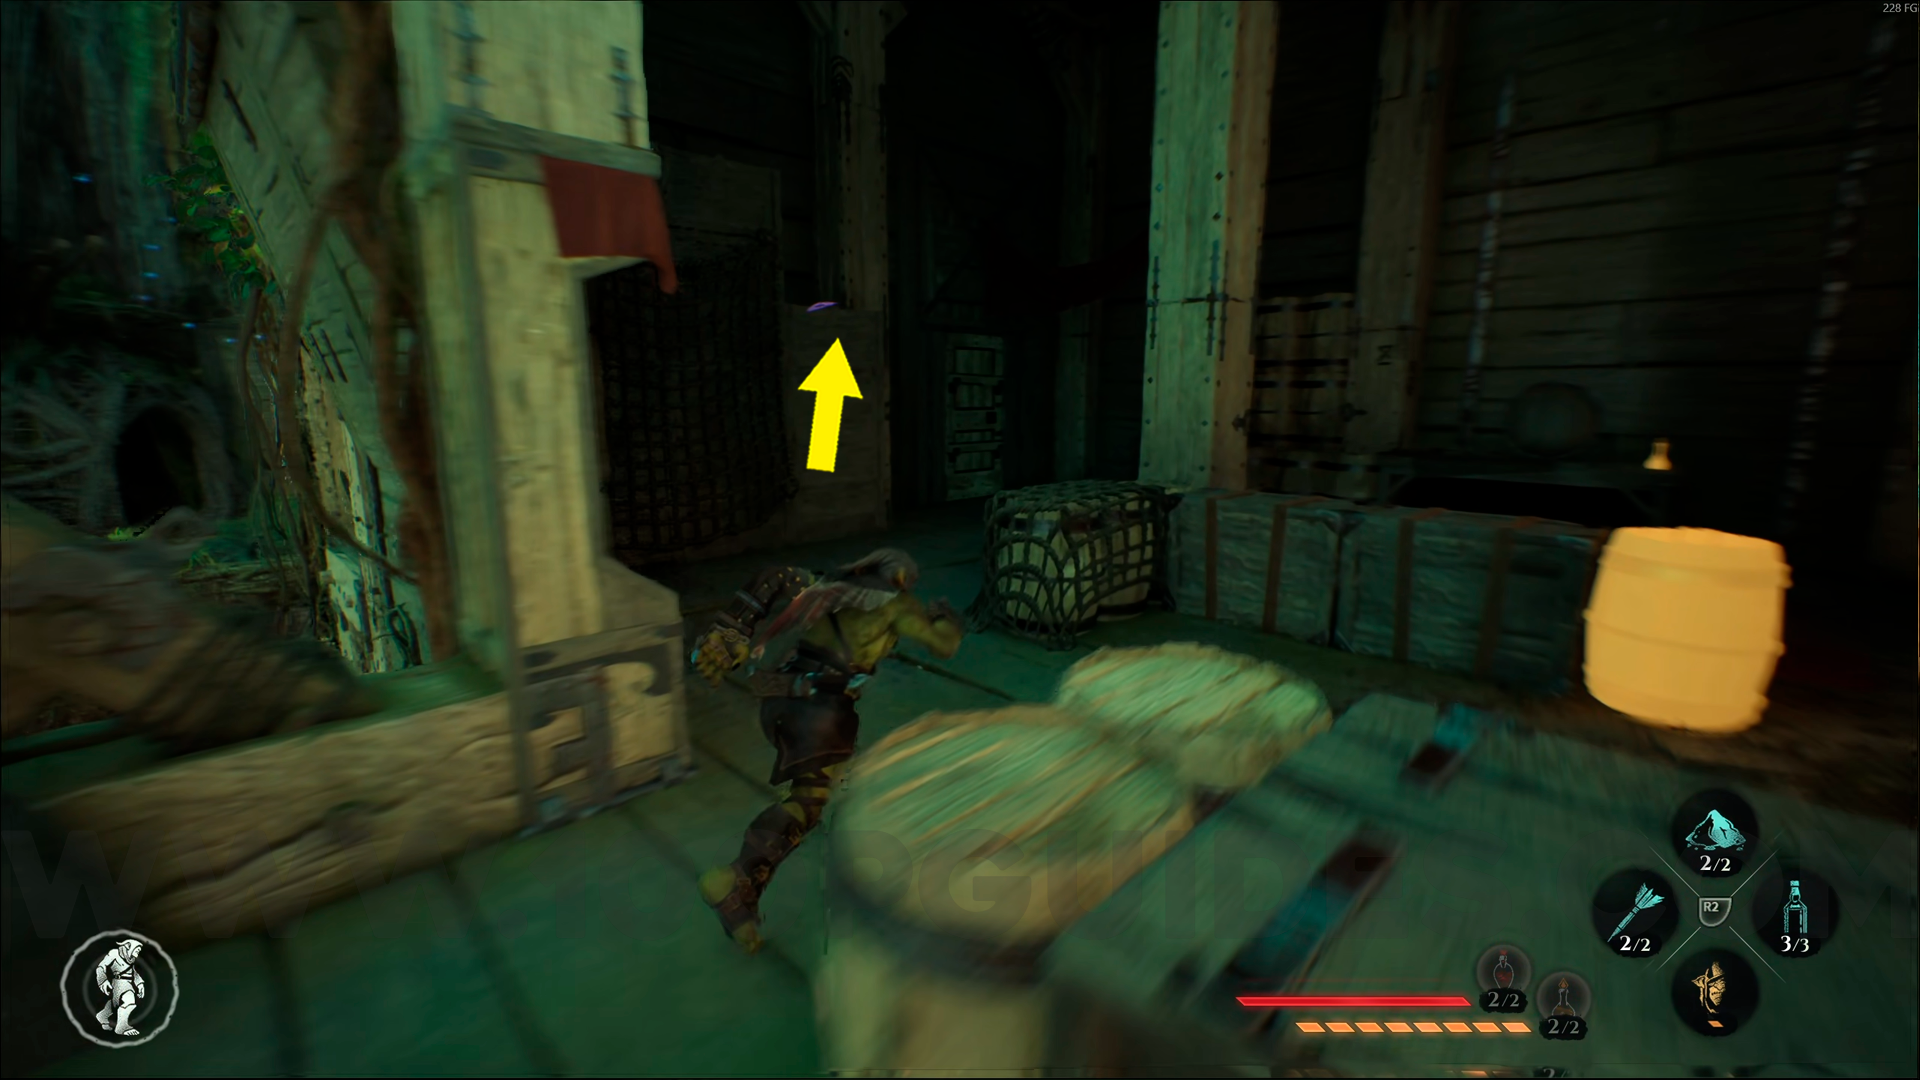
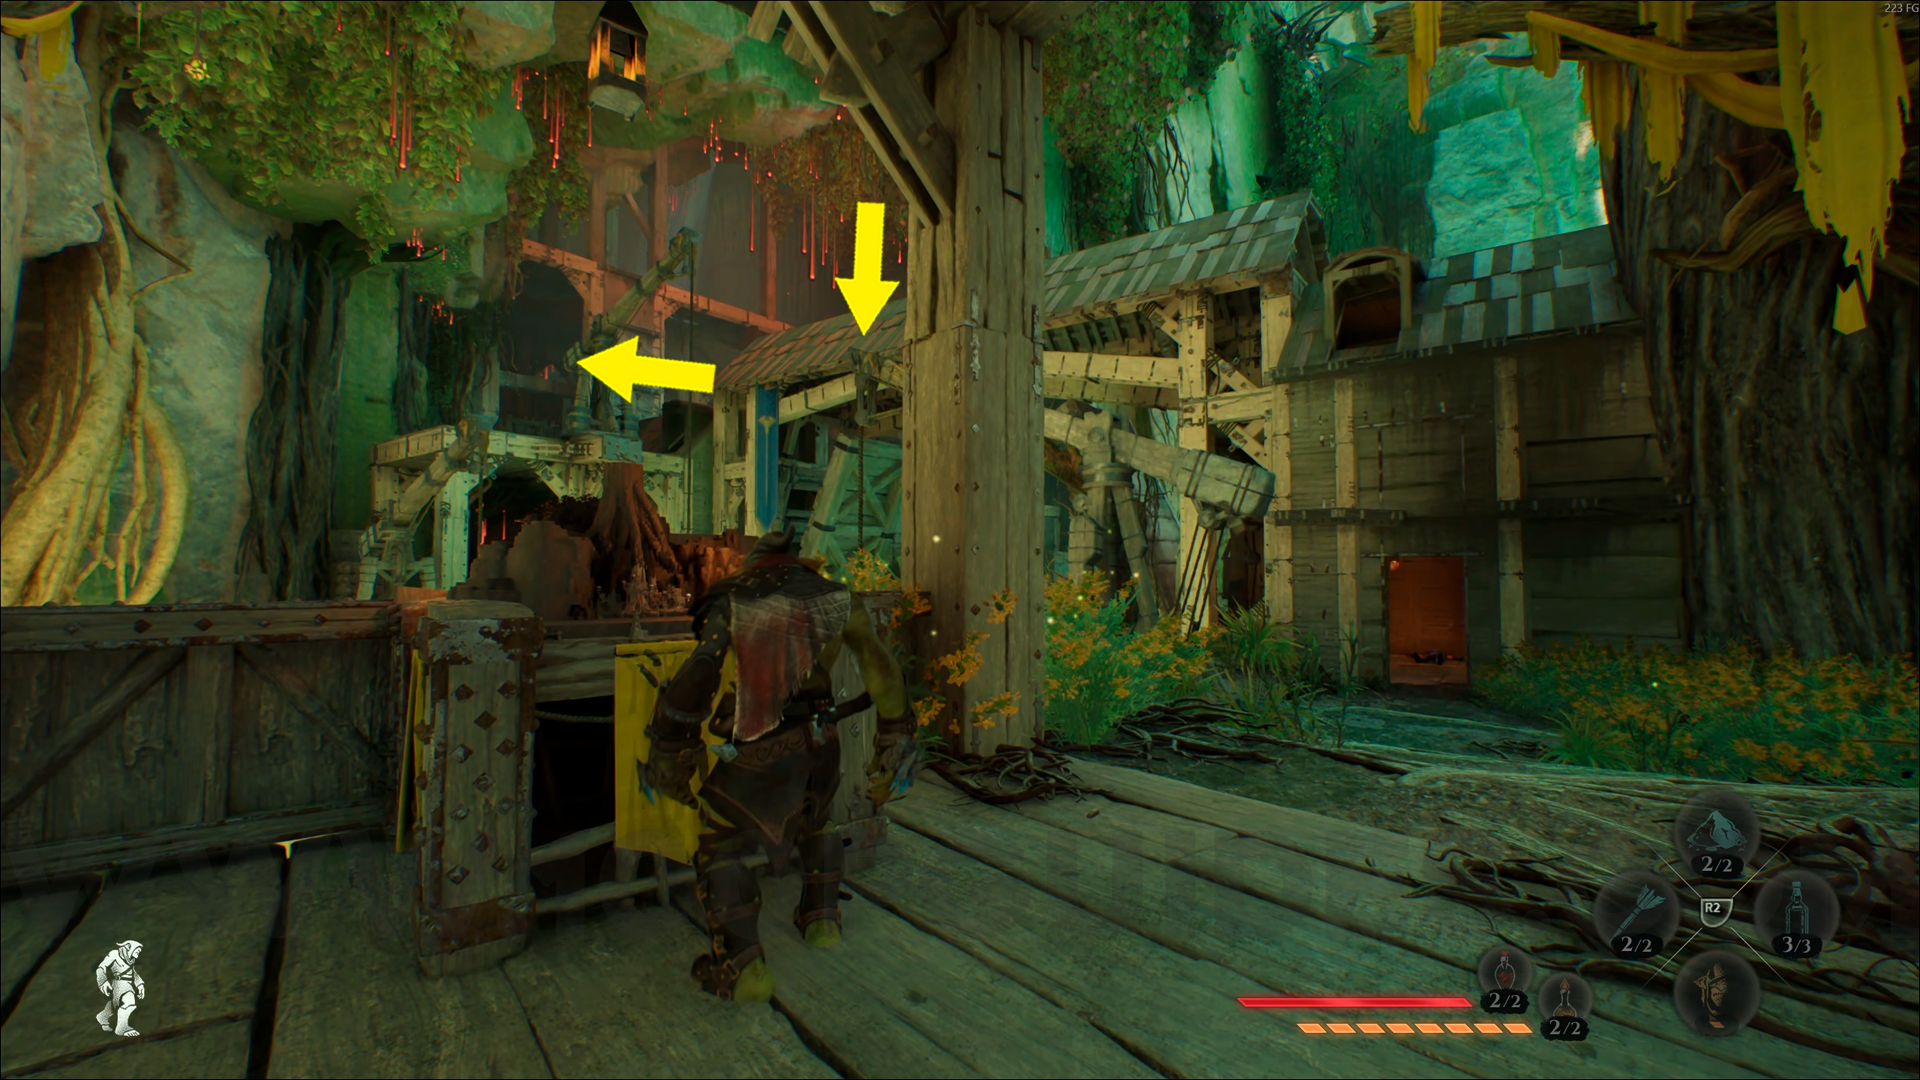
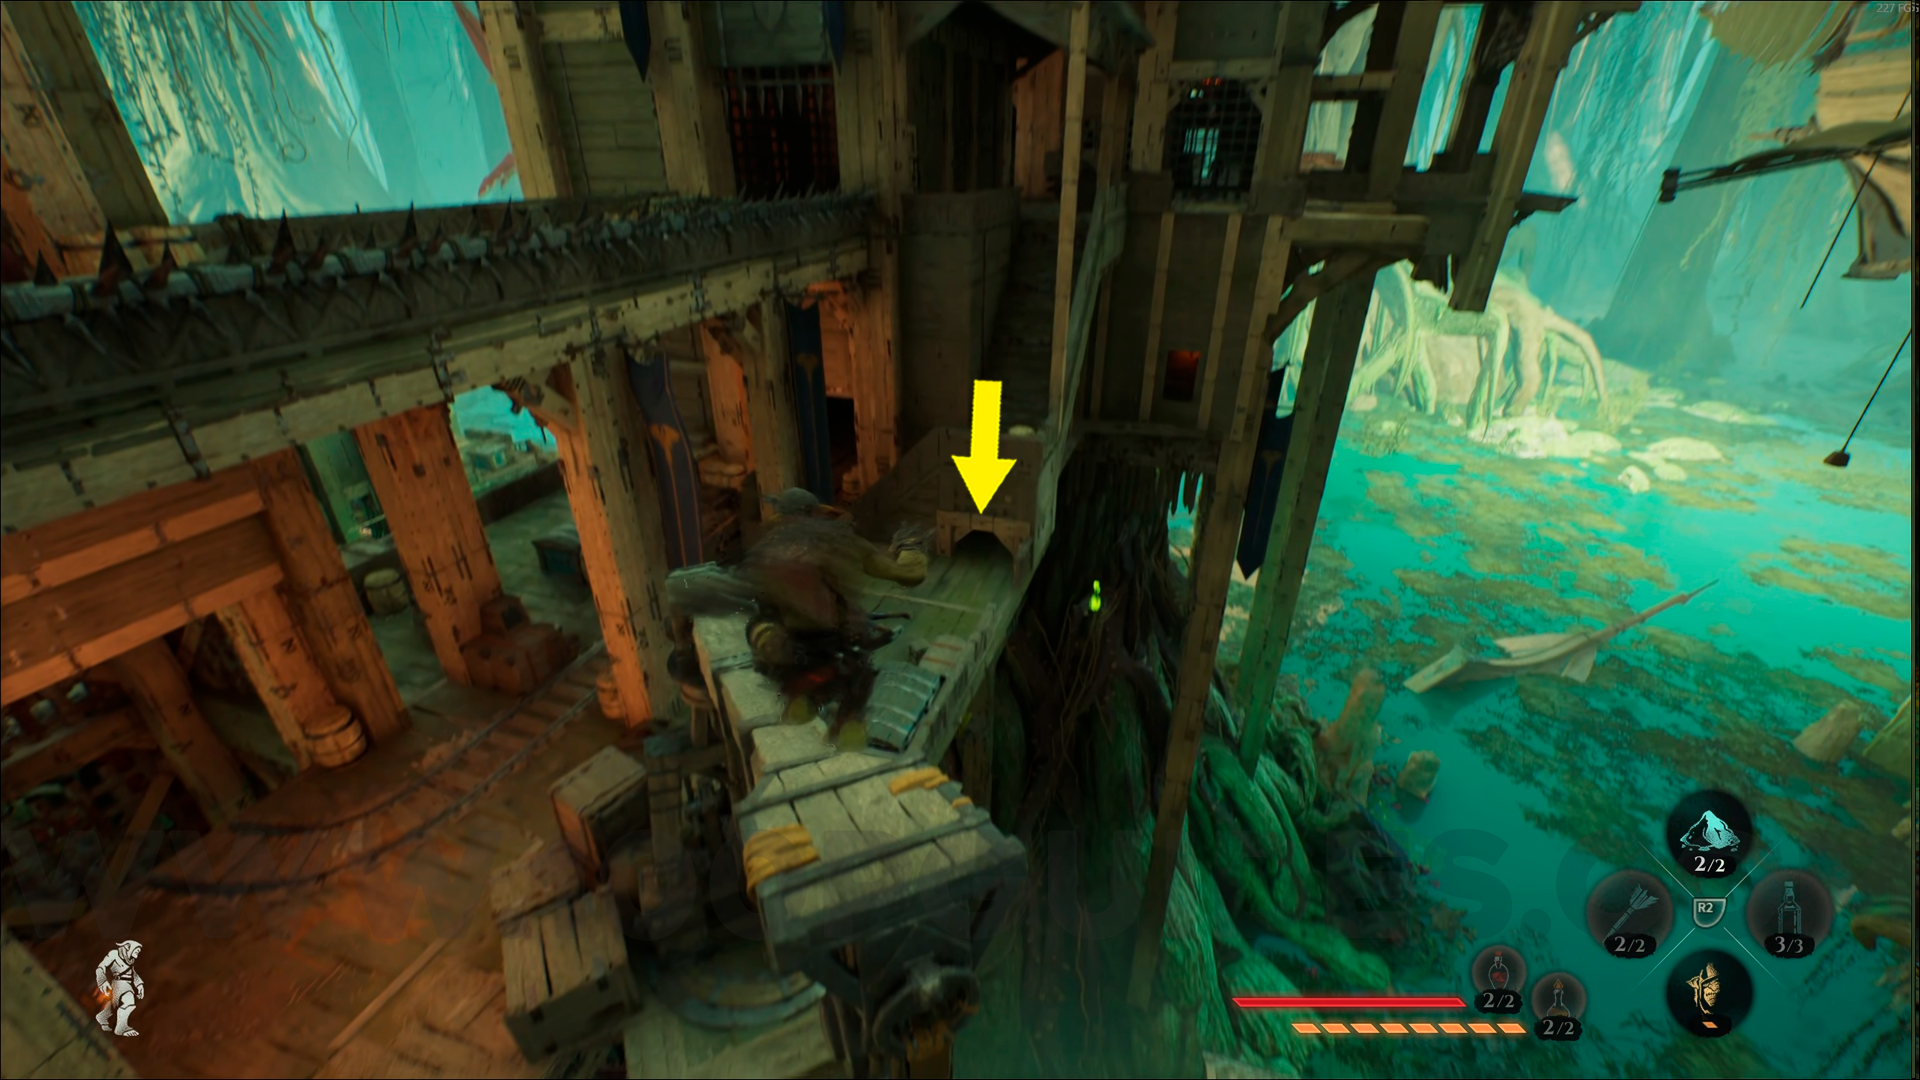
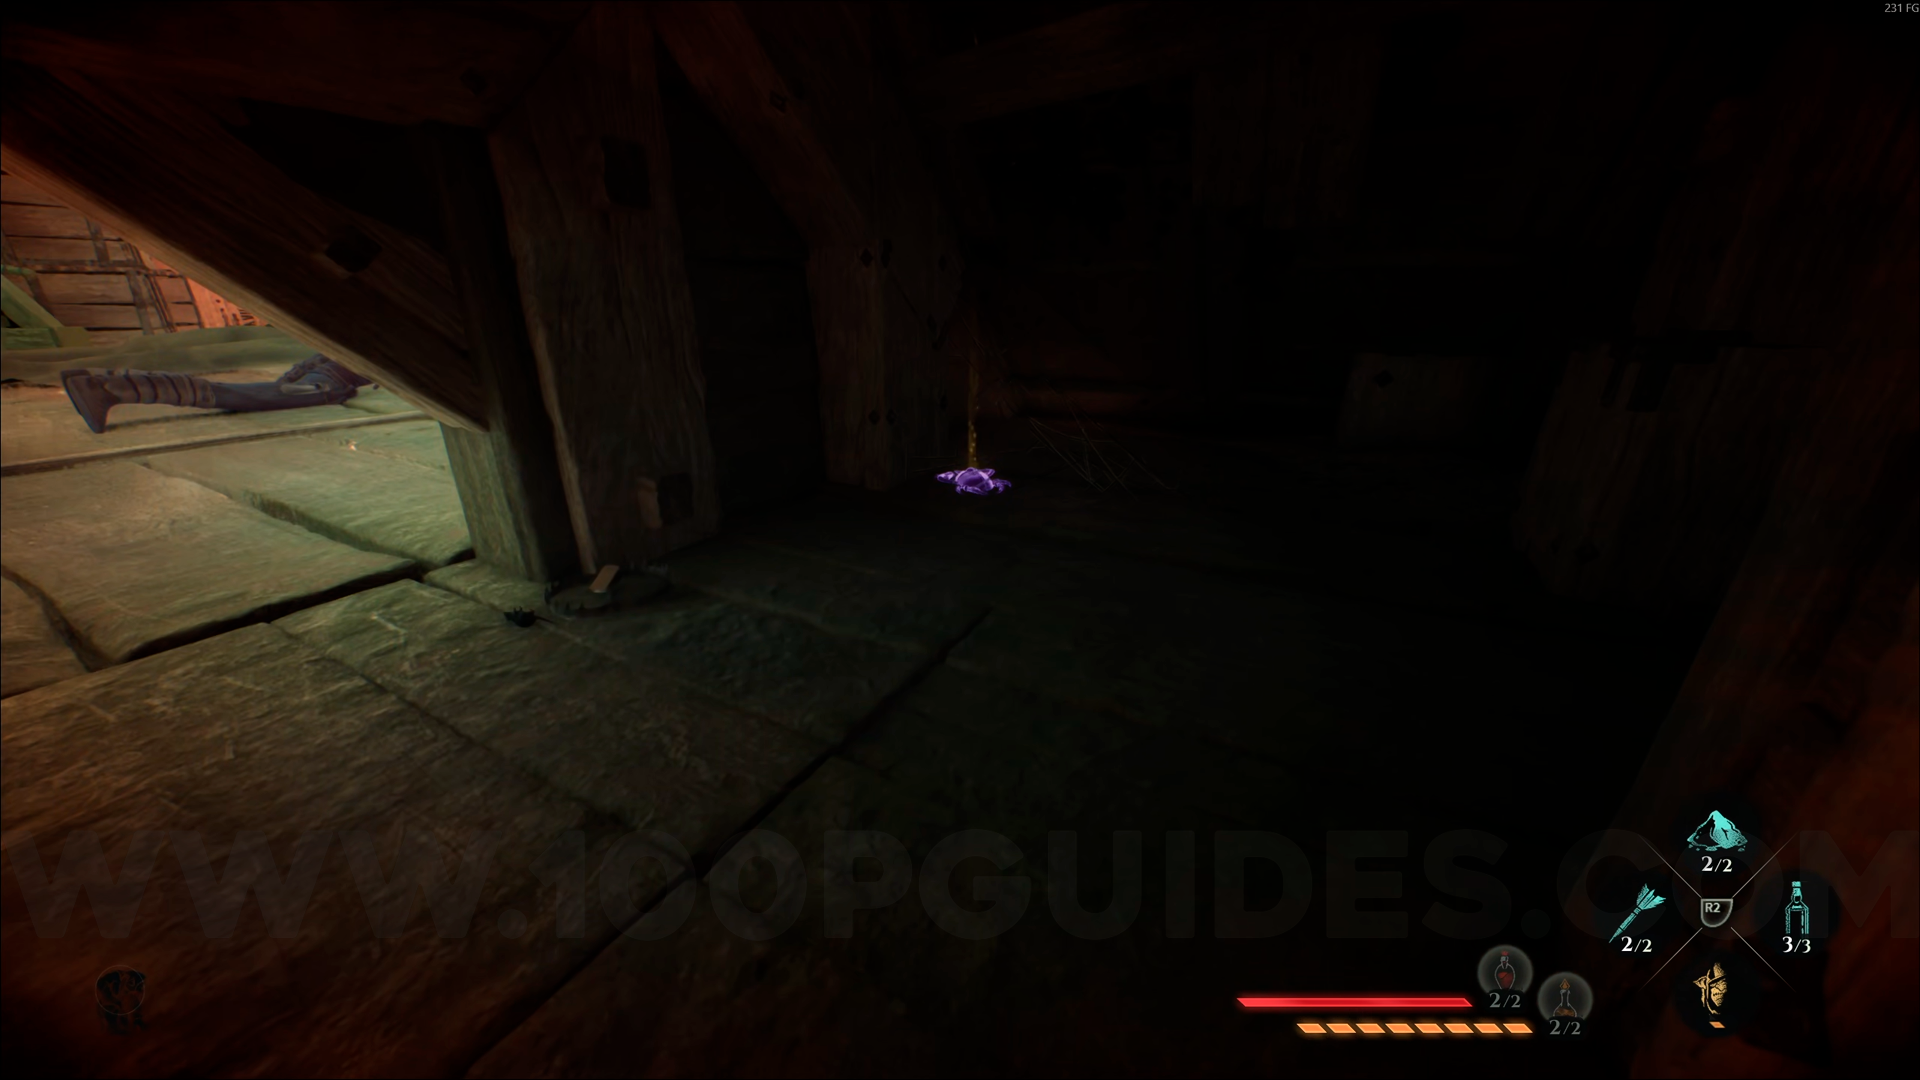
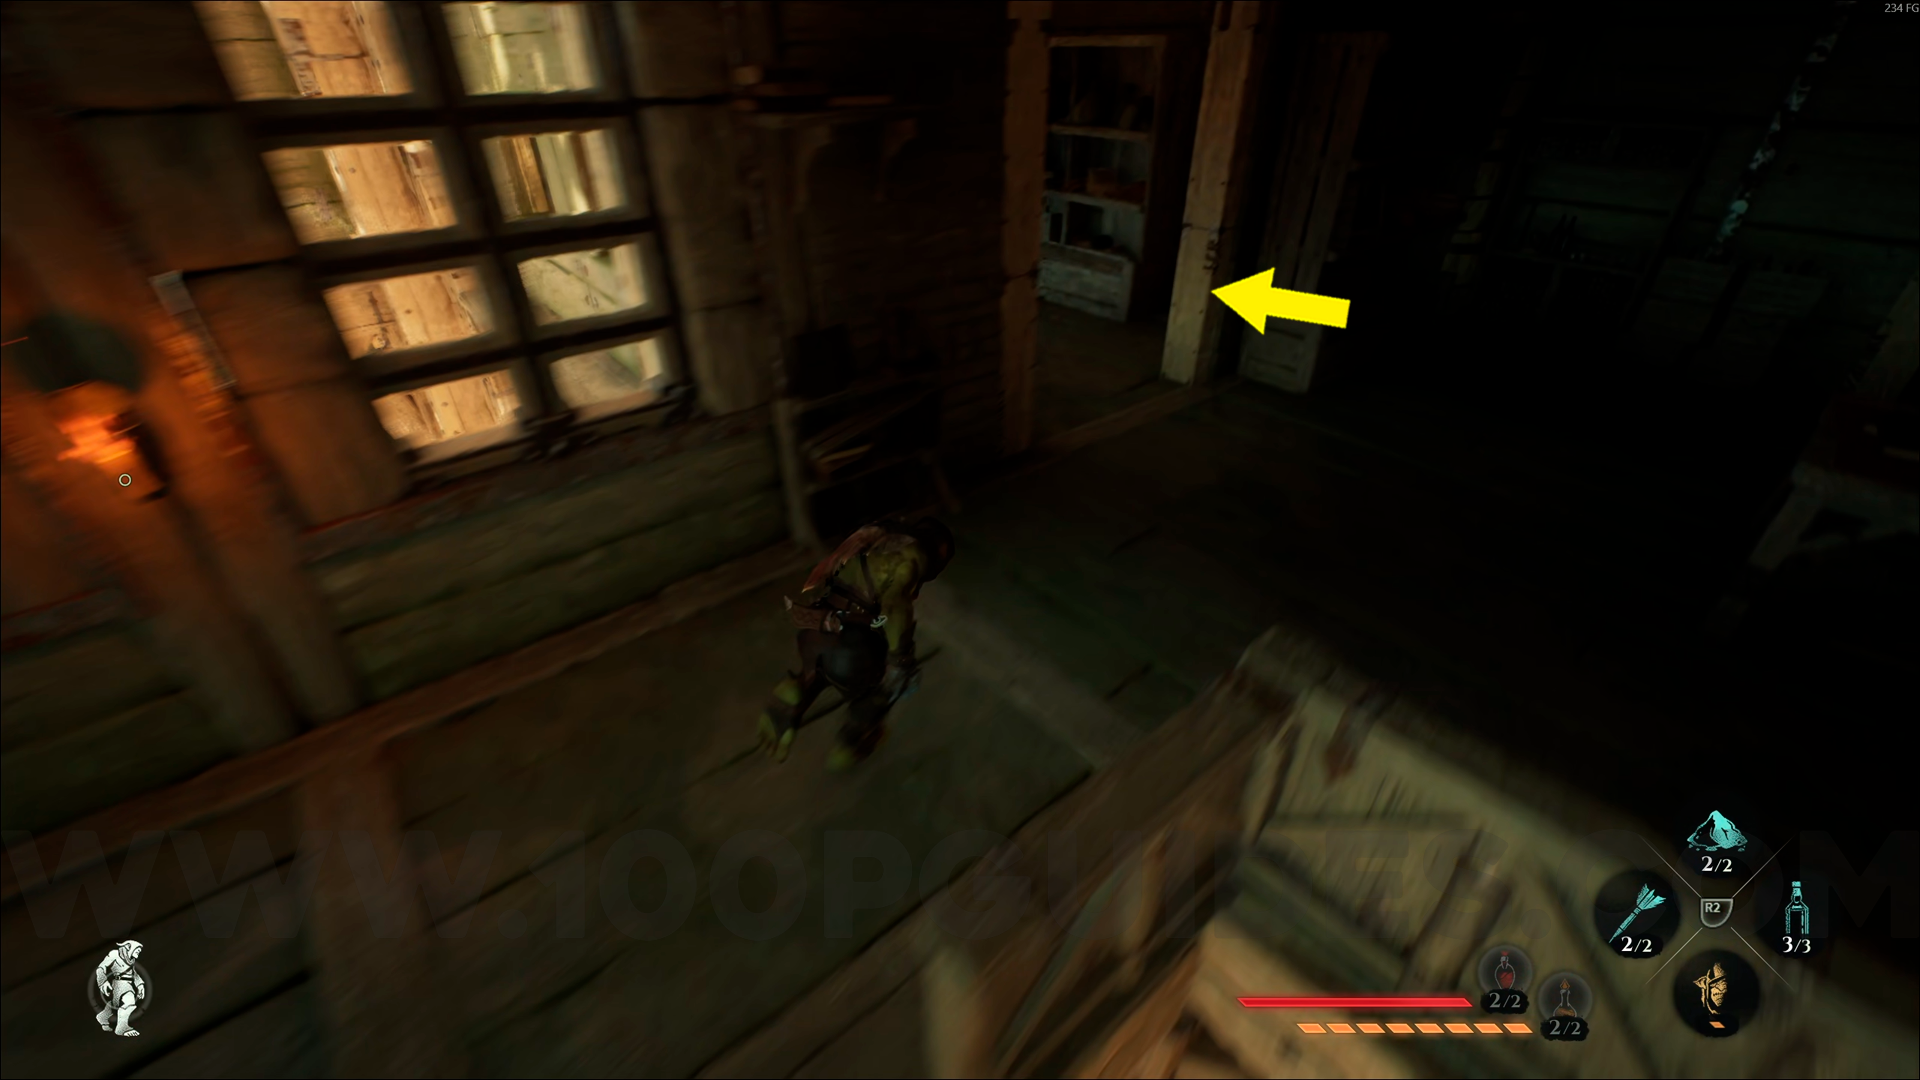
Wood Emblem #6. From the Wailing Widow Tavern checkpoint, head down the right side toward the bridge. Then go up the stairs on the left and pass through the door. Once inside, go up two flights of stairs, go through the hole in the wall, and continue forward to the door on the other side of the area. After going through that door, head down the stairs to the lower area. This emblem will be under a table. Use Amber Vision to help you spot it.
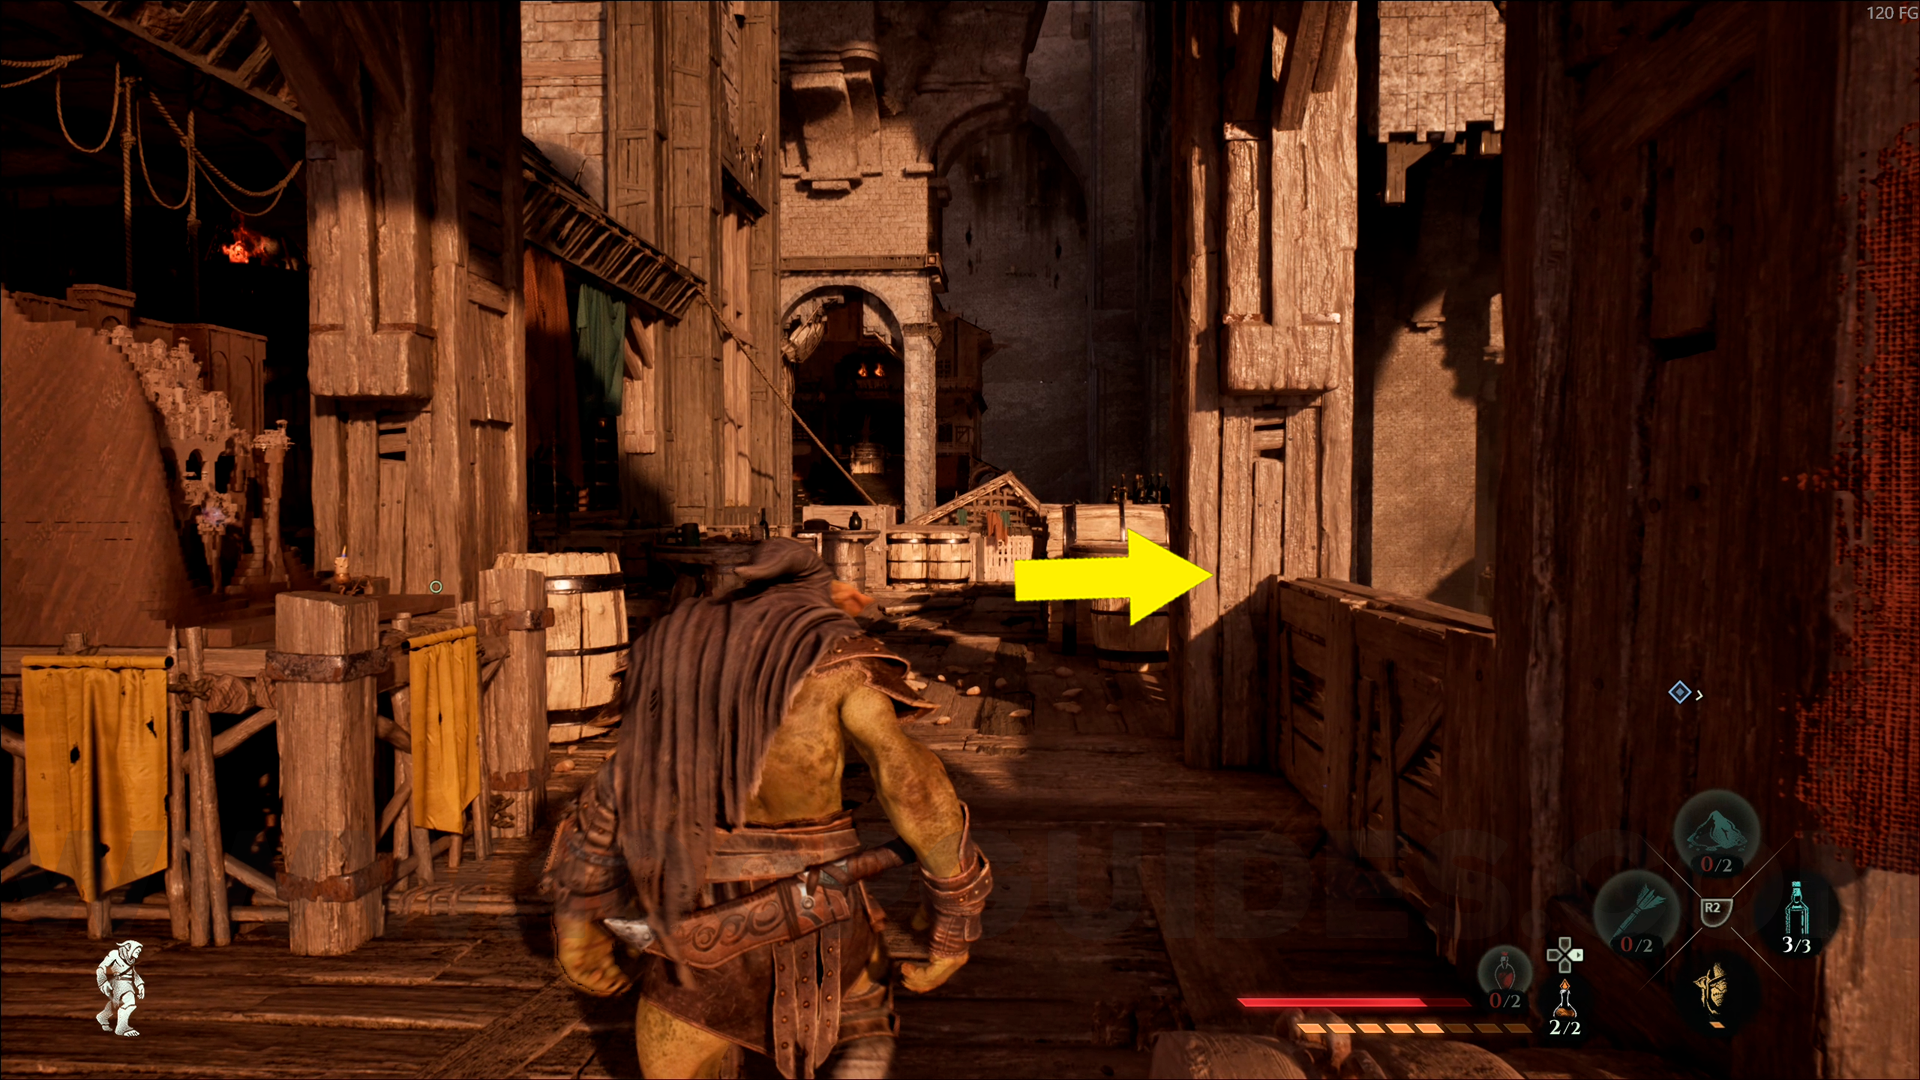
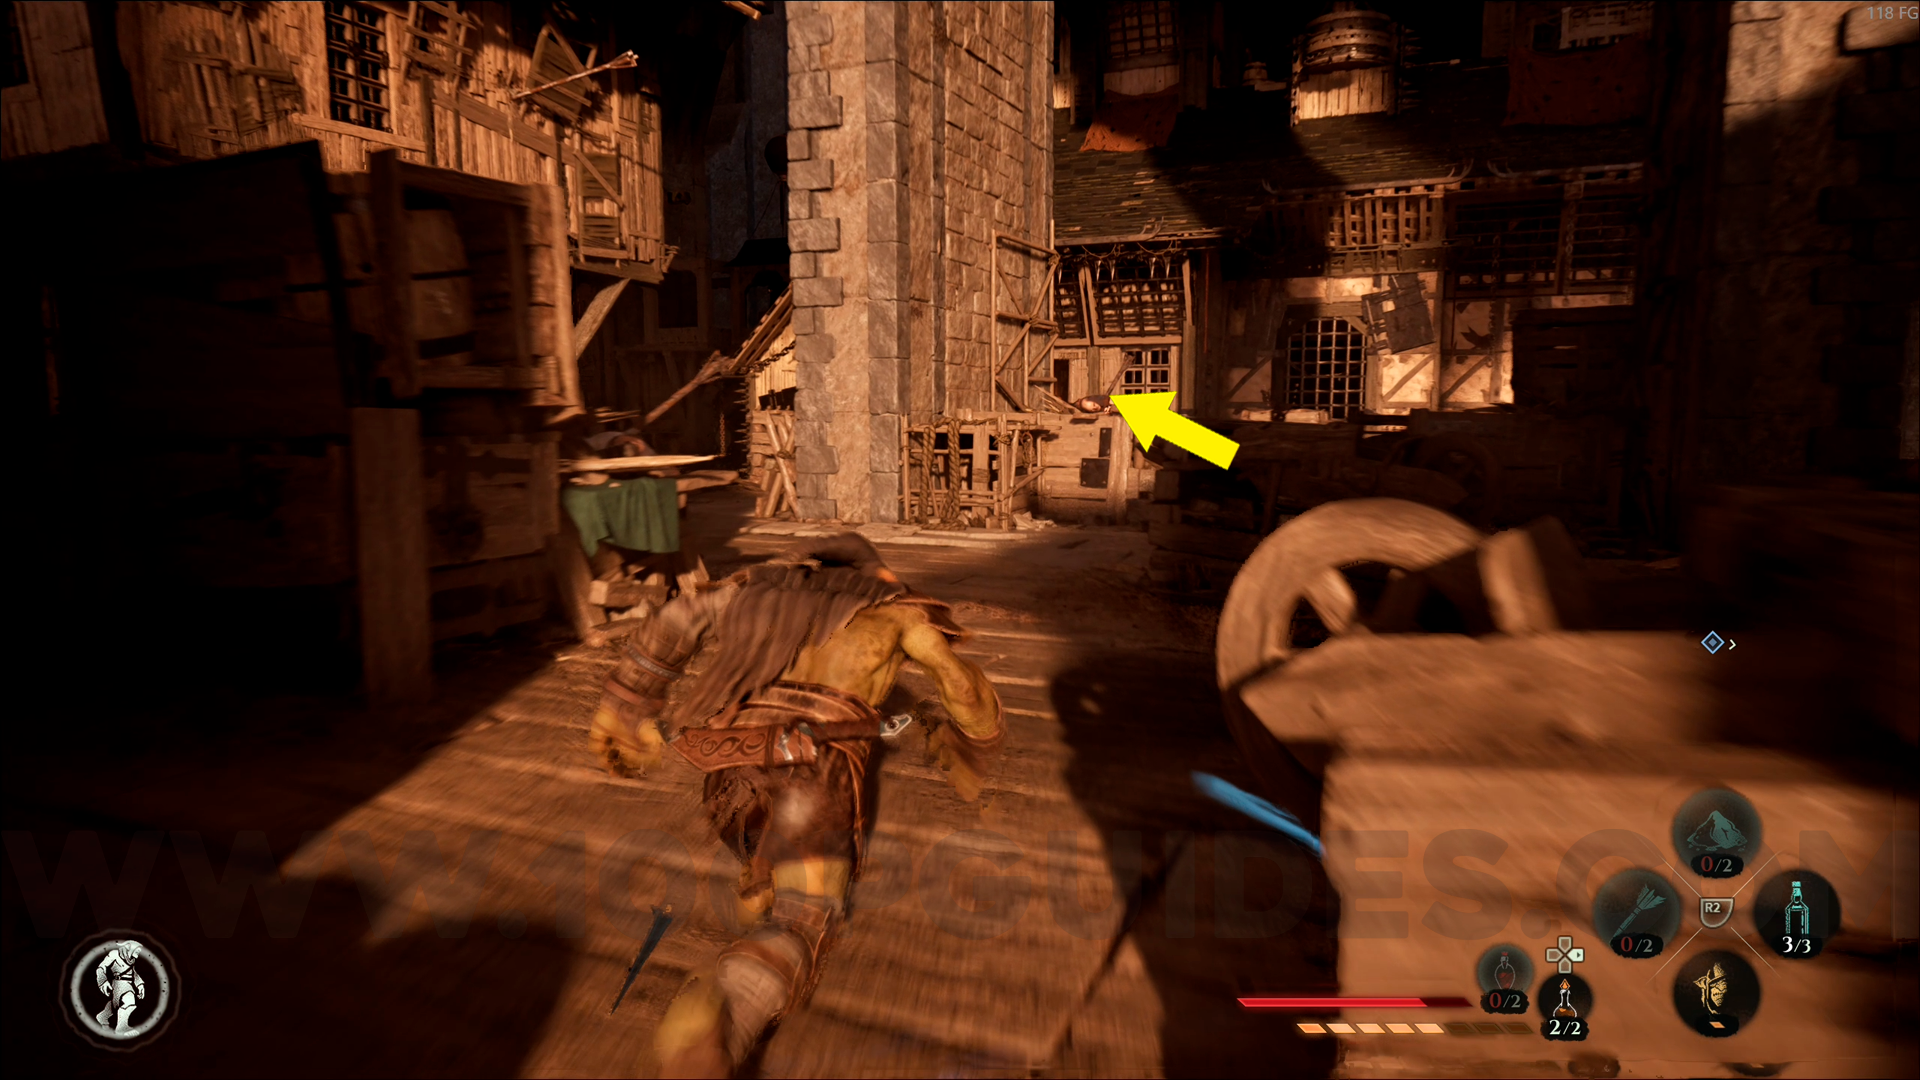
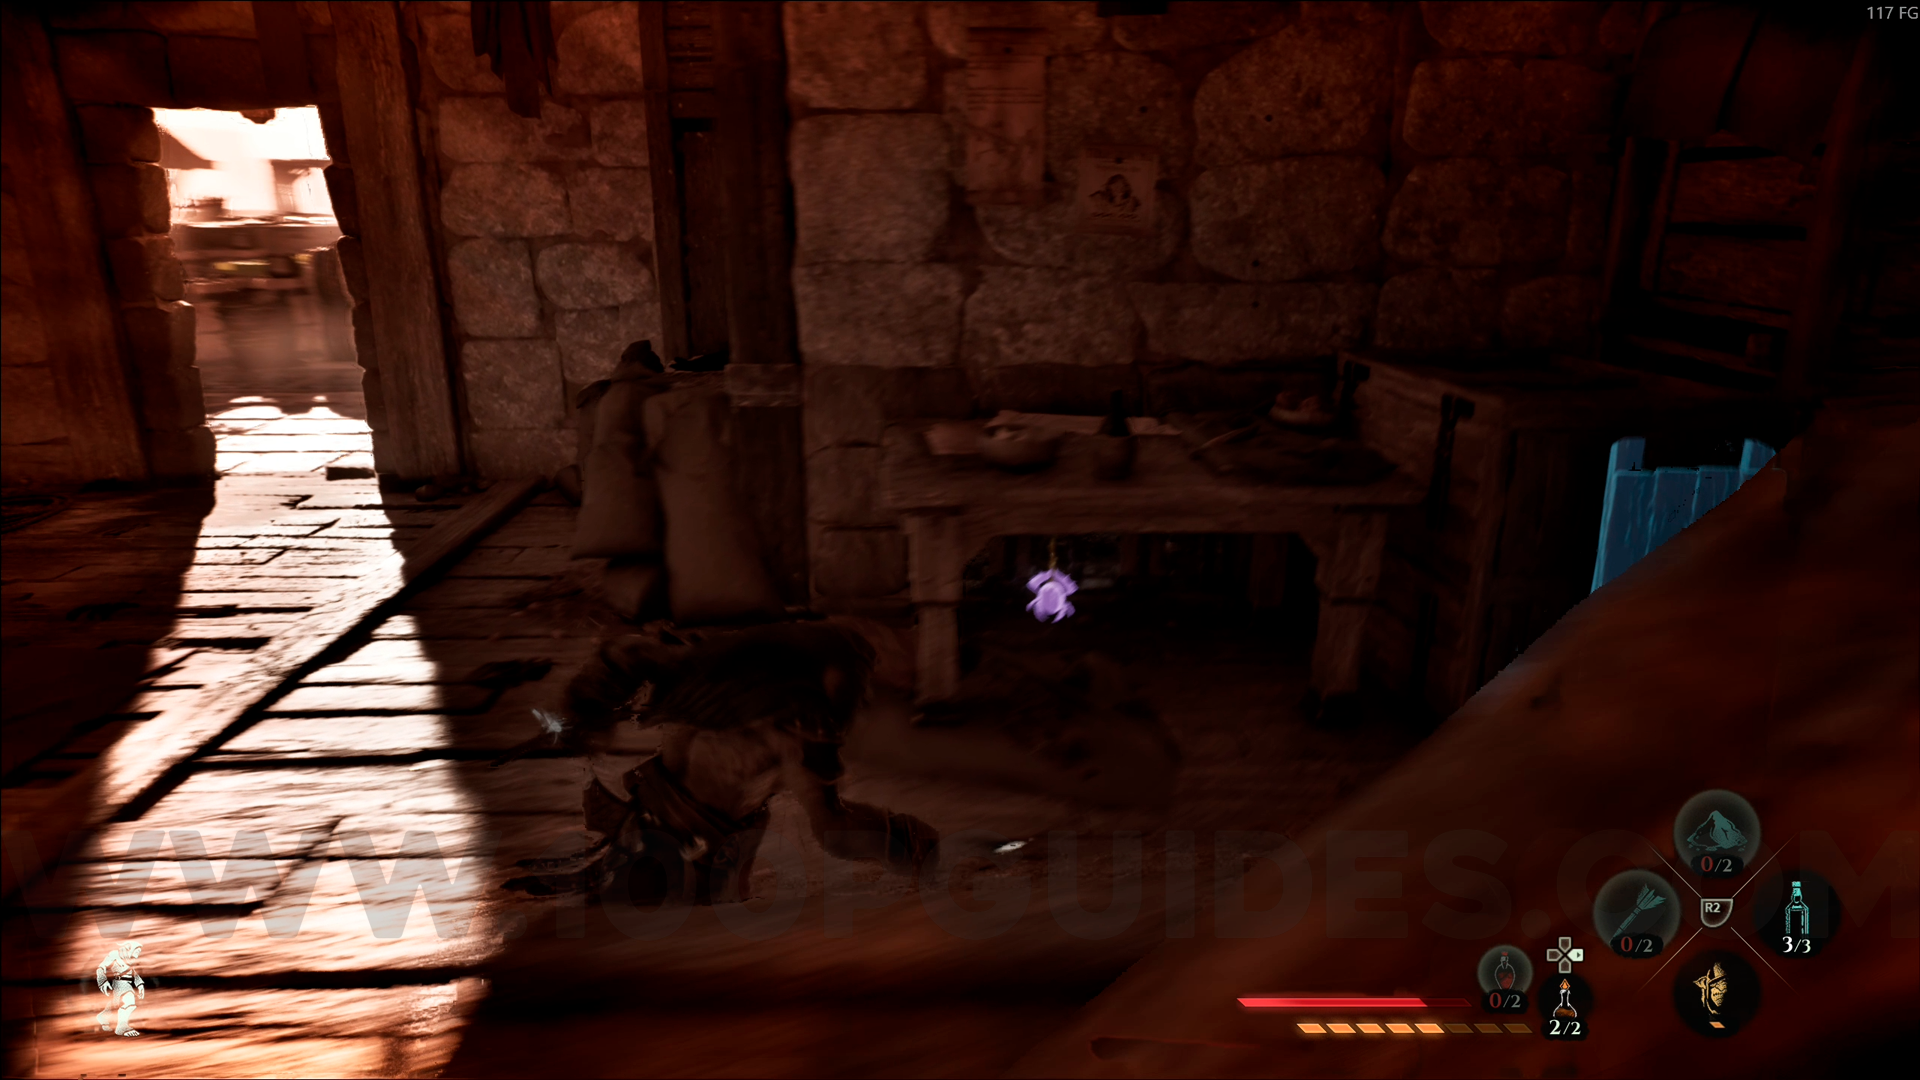
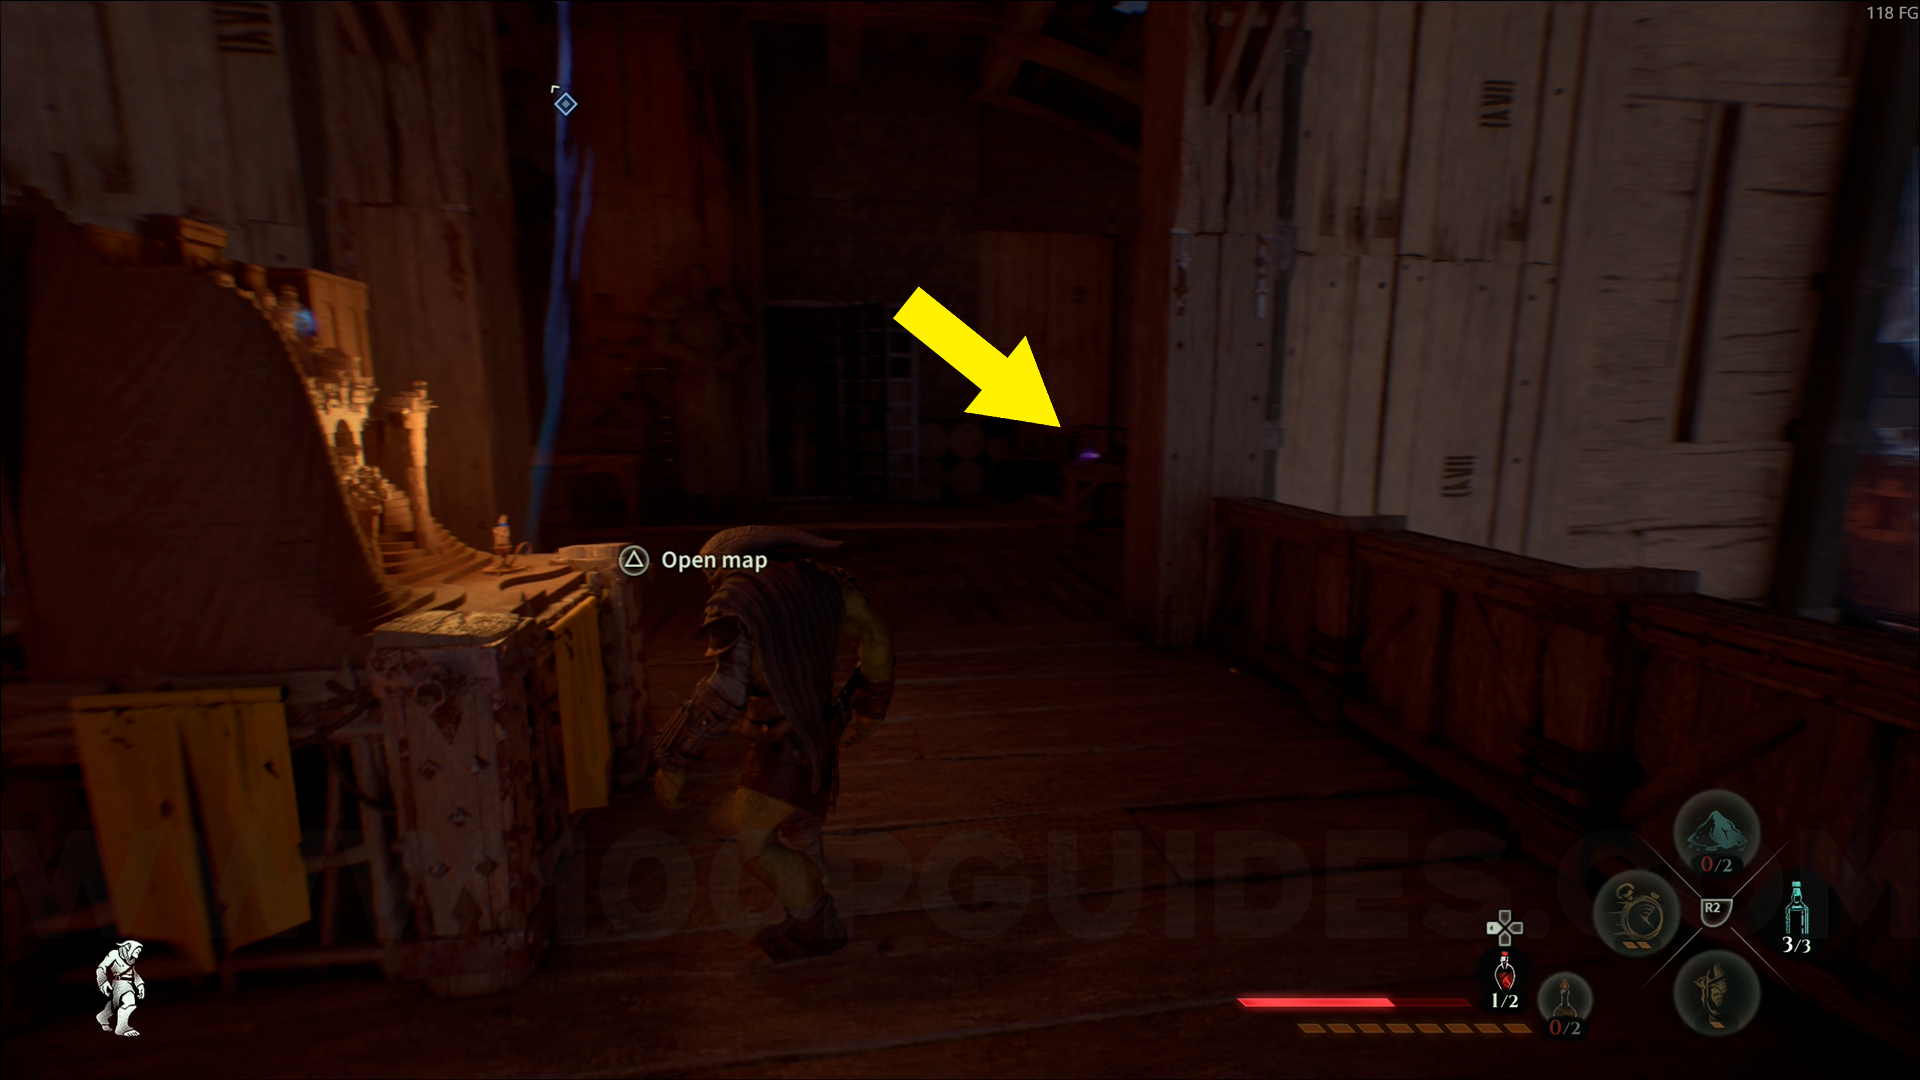
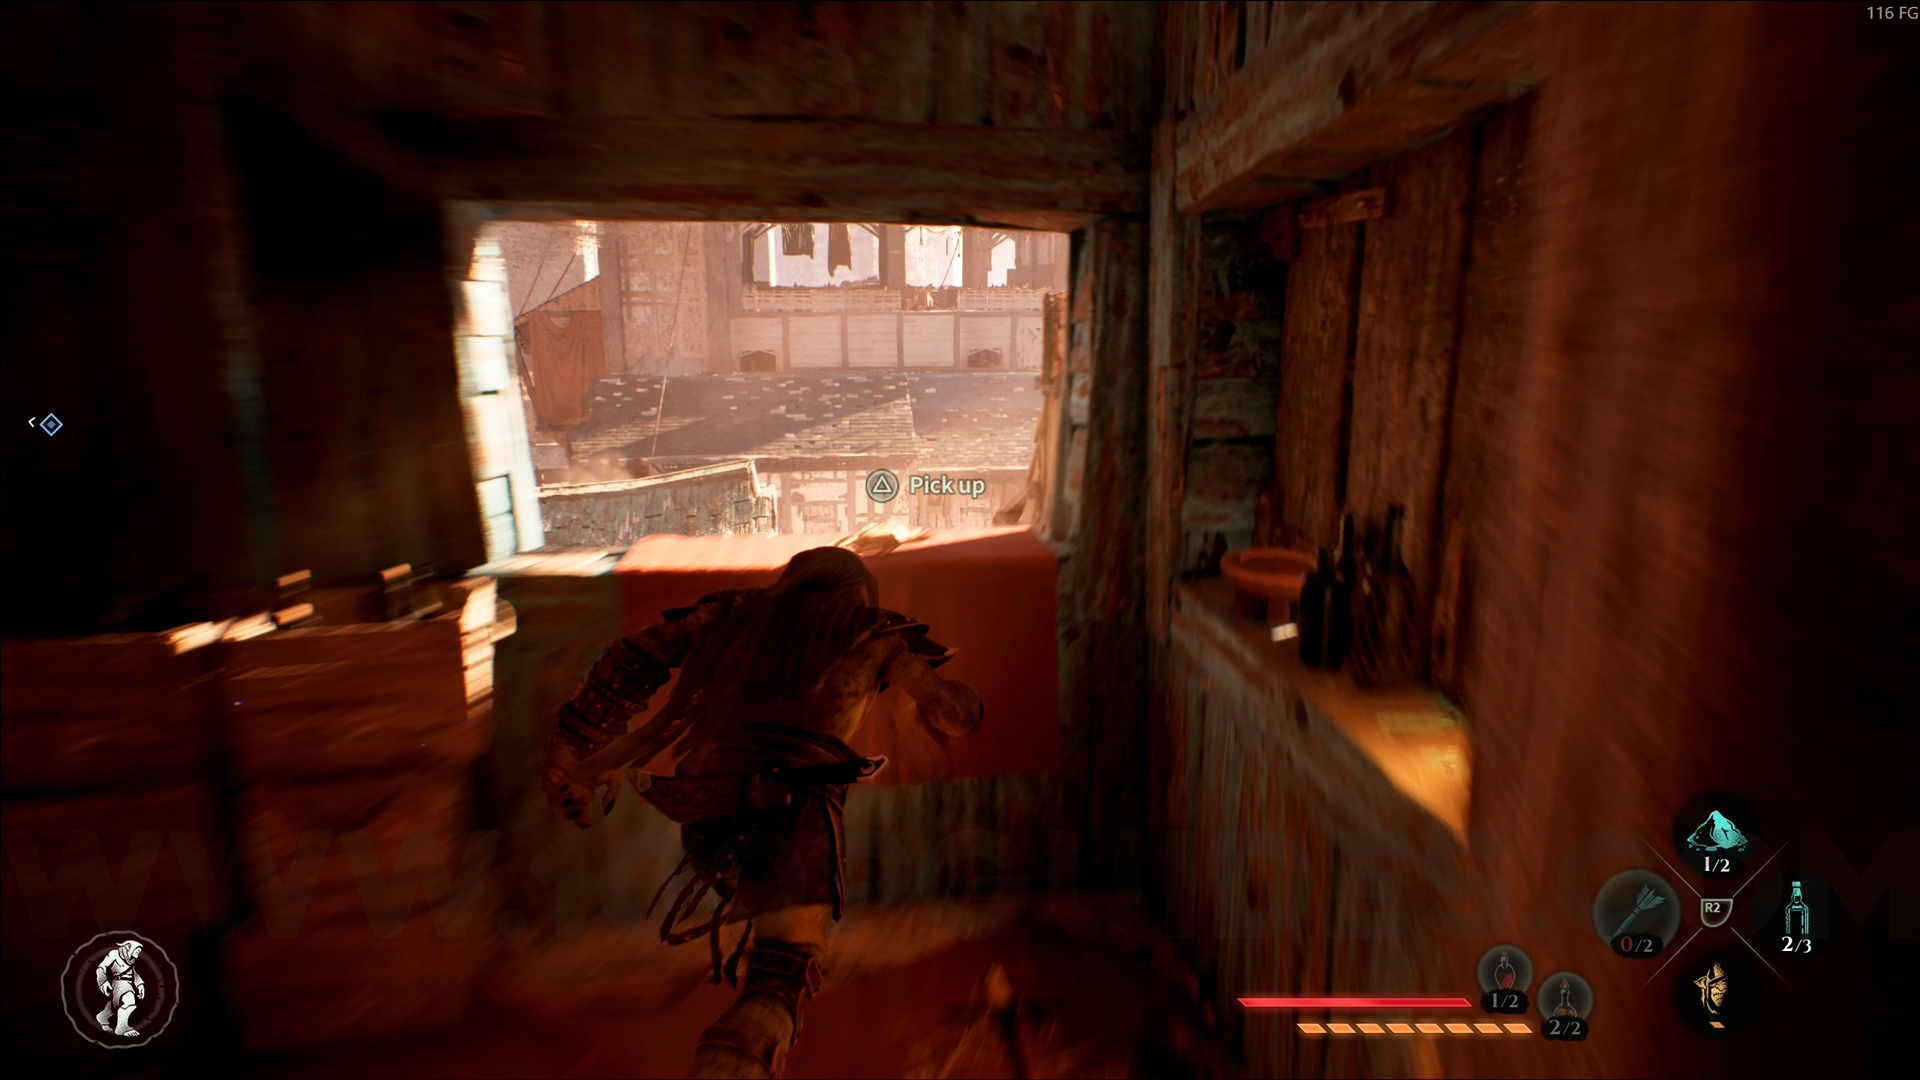
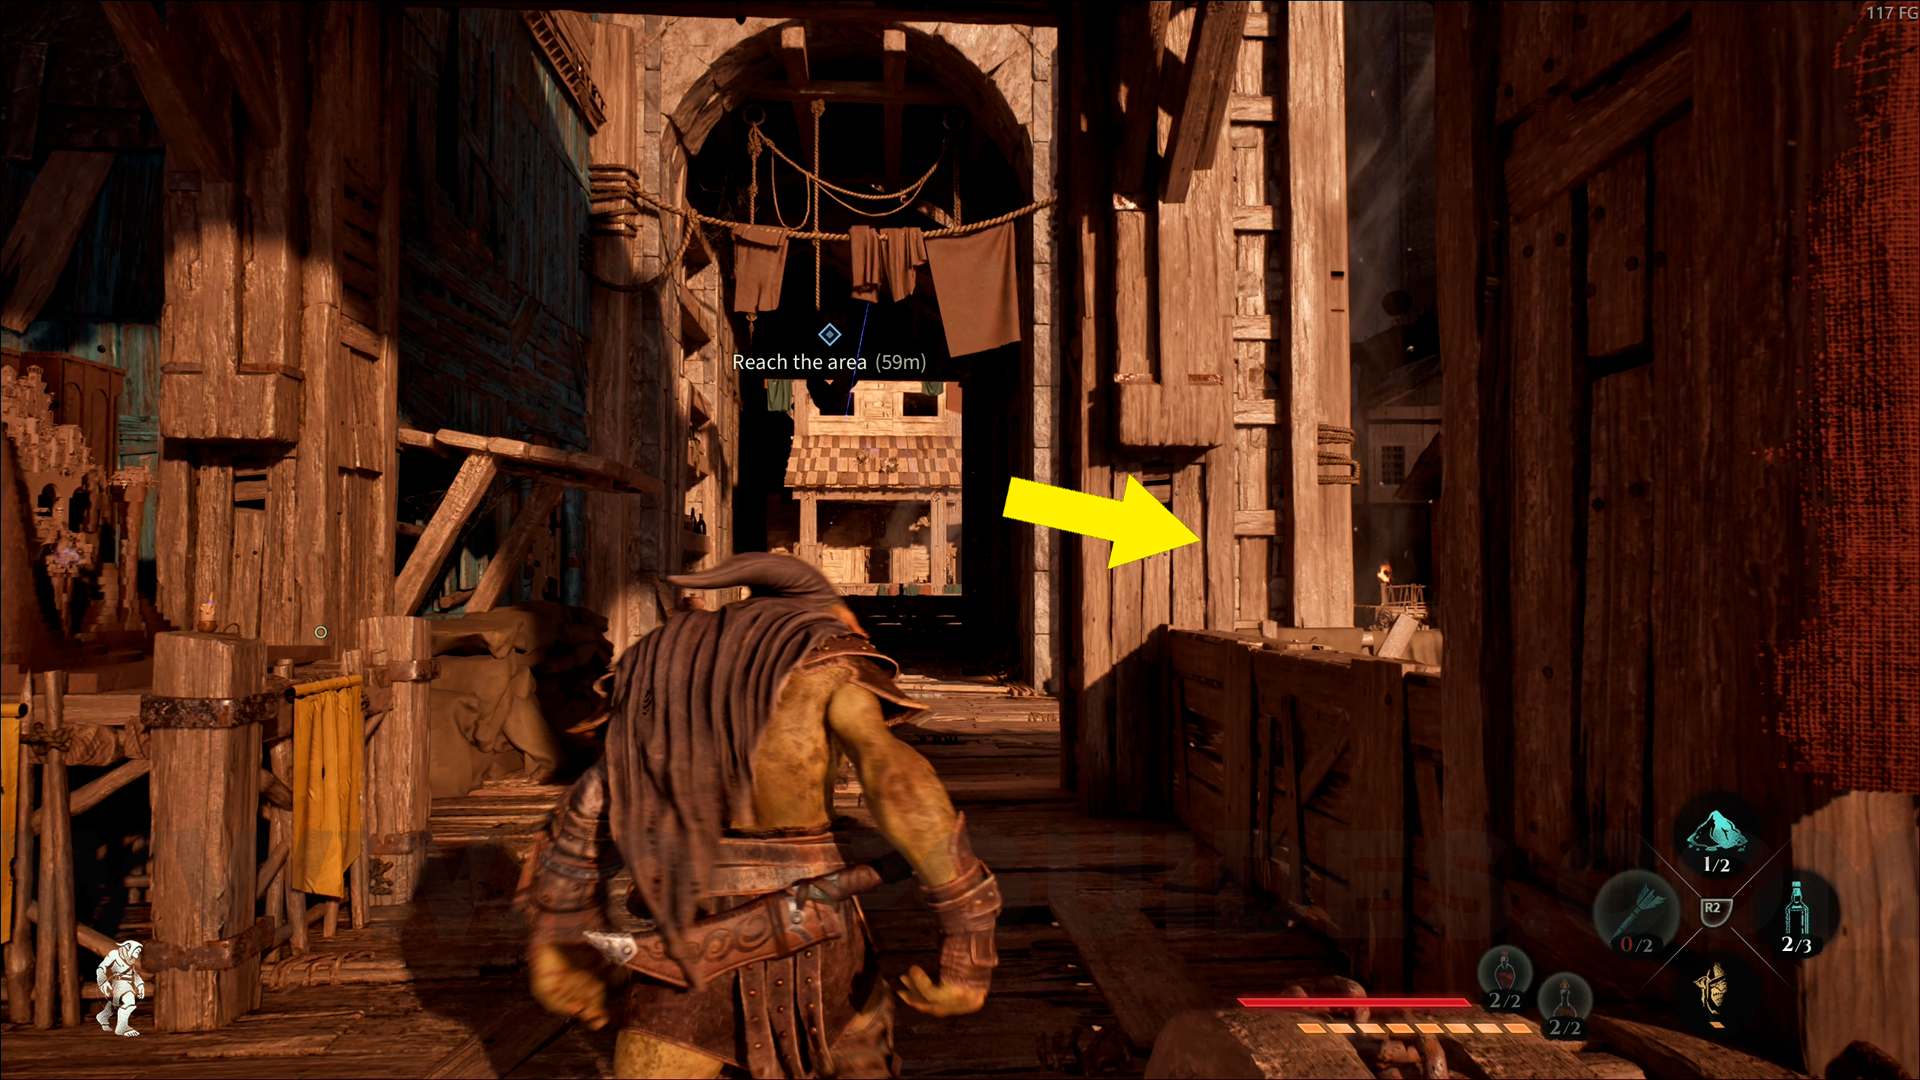
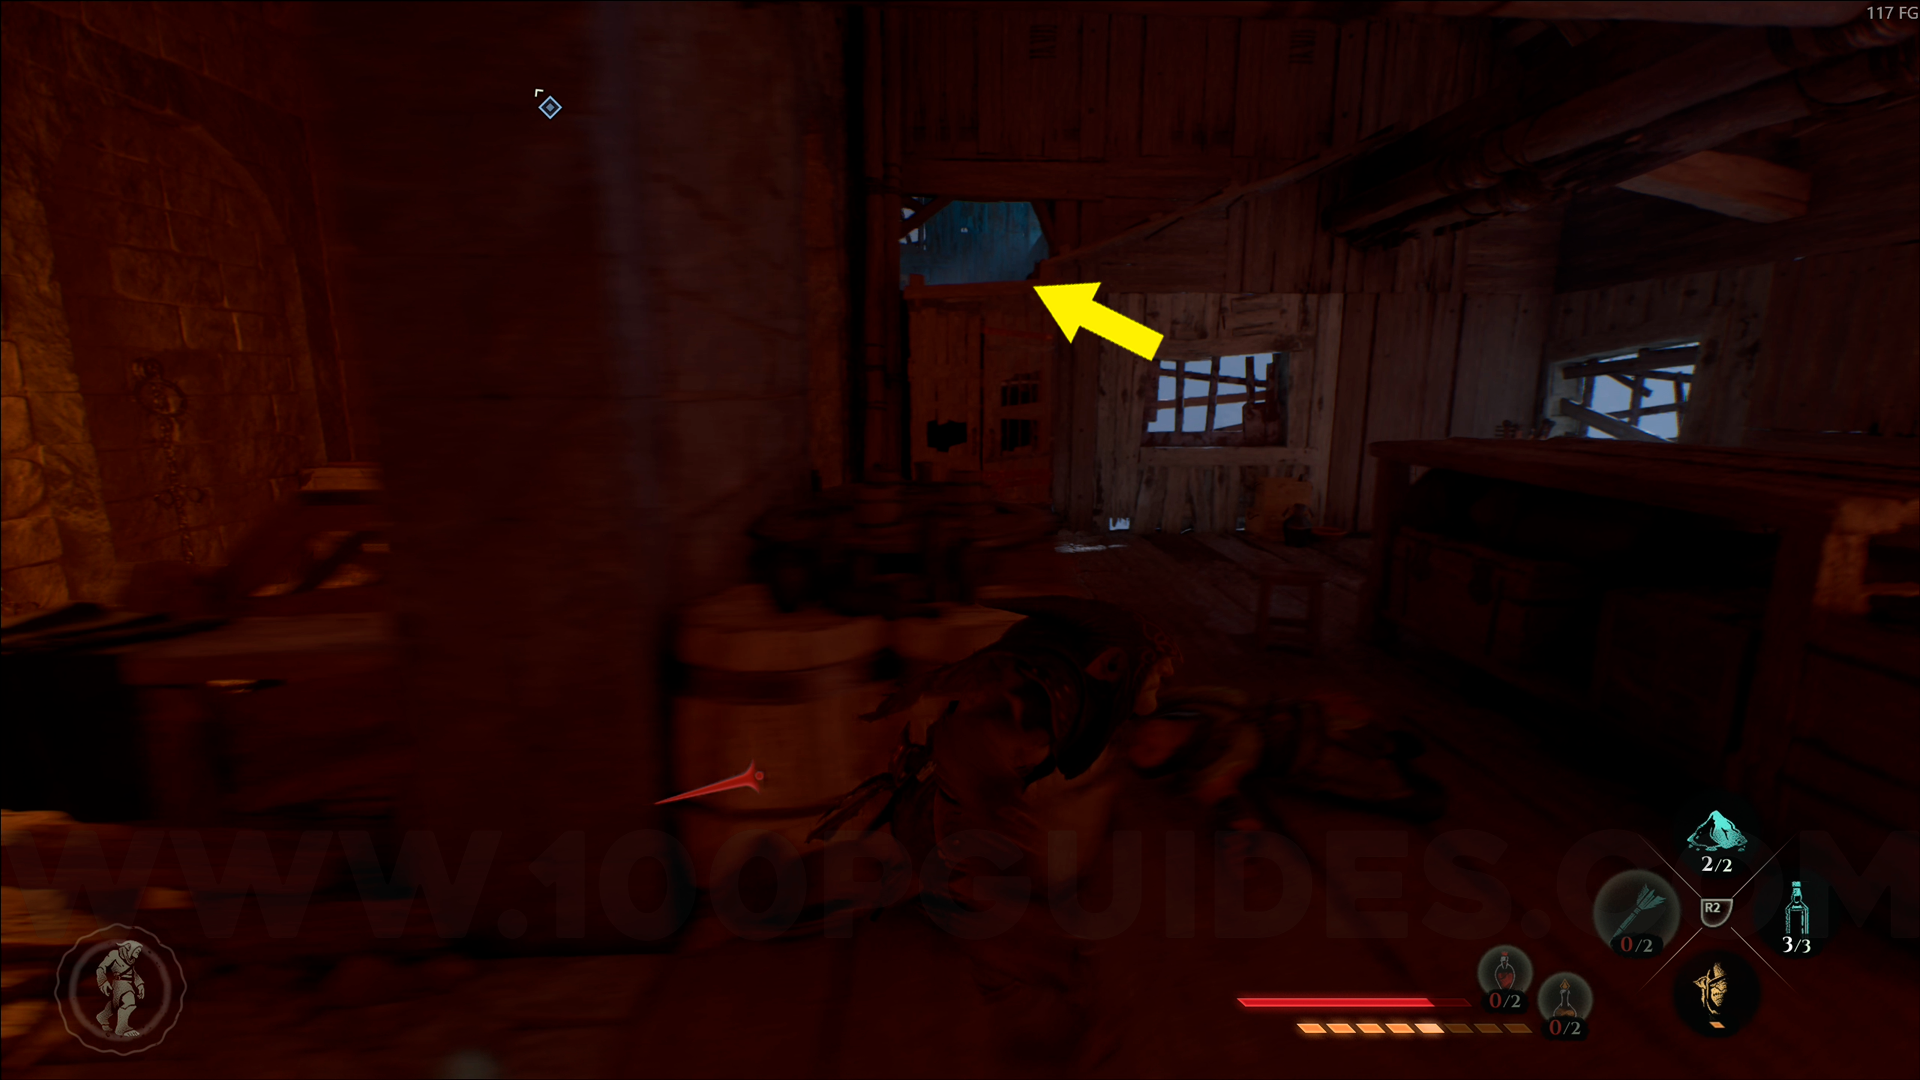
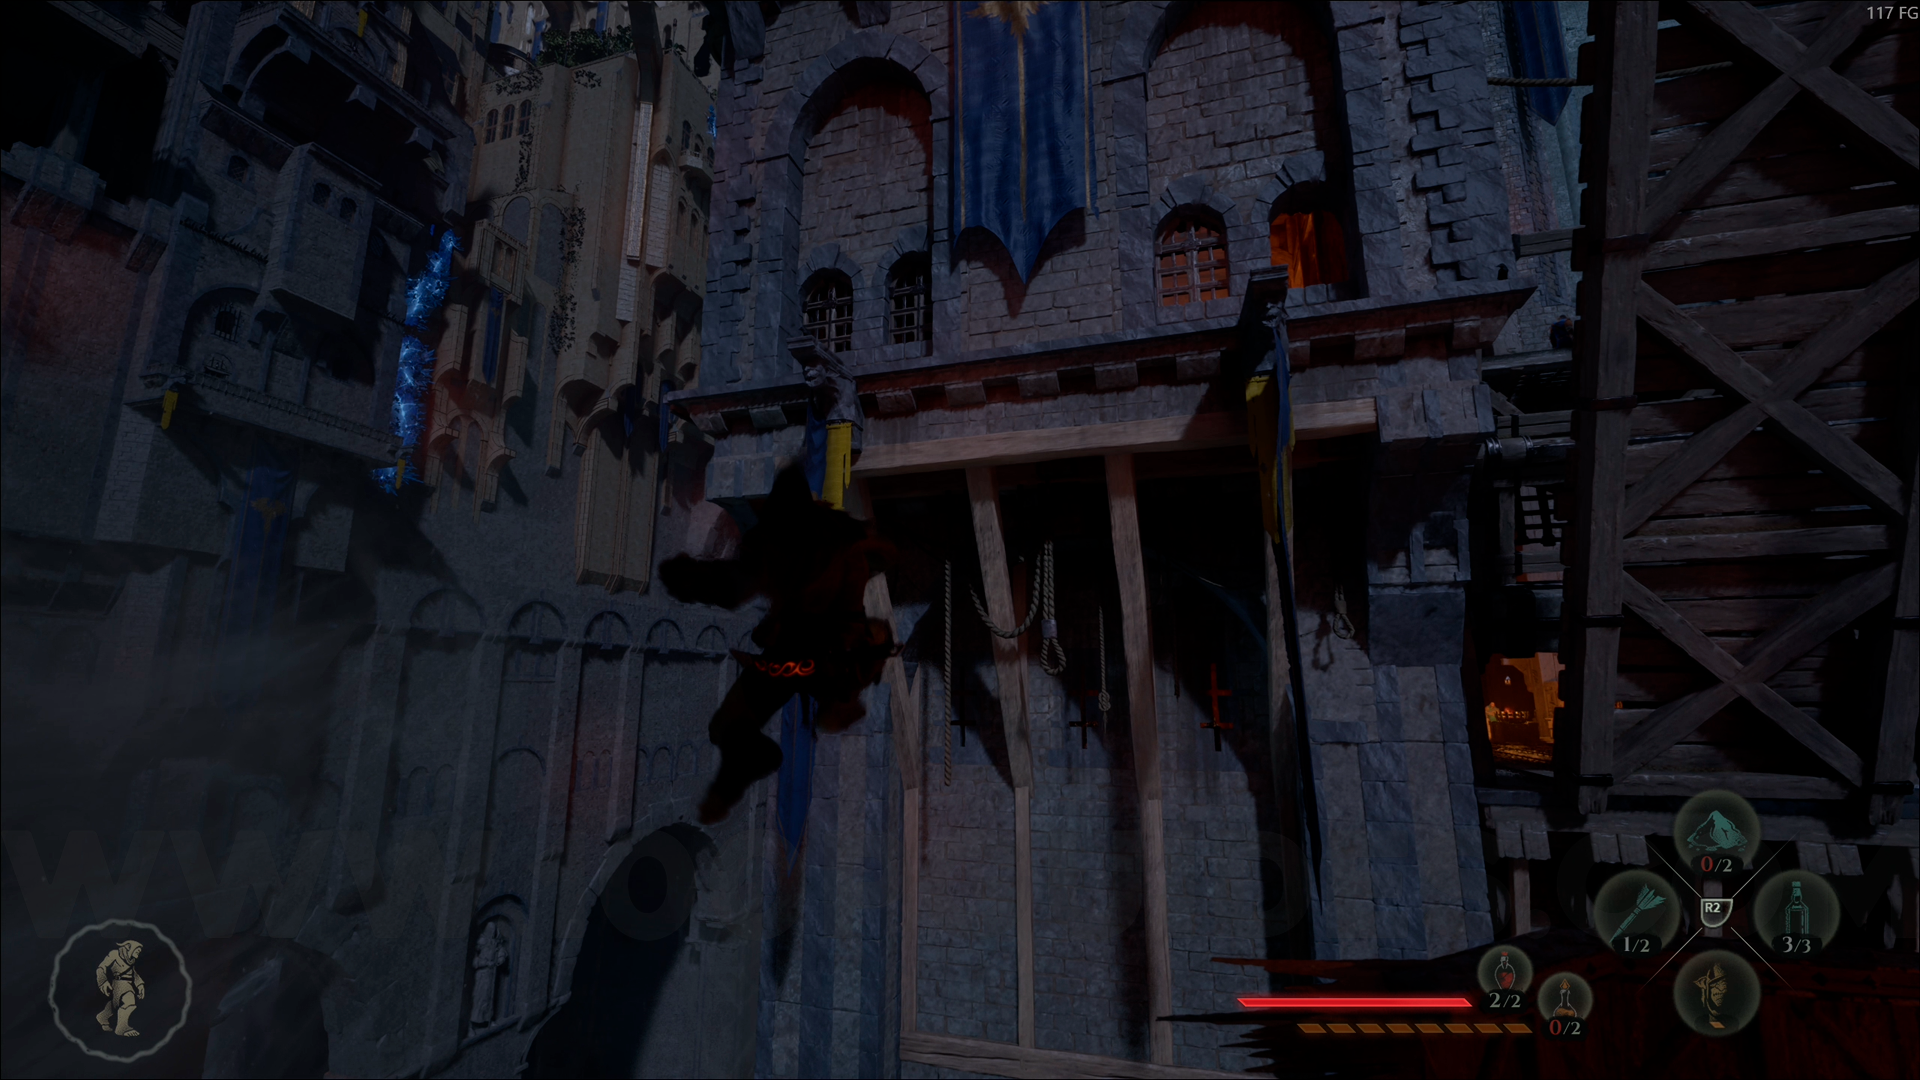
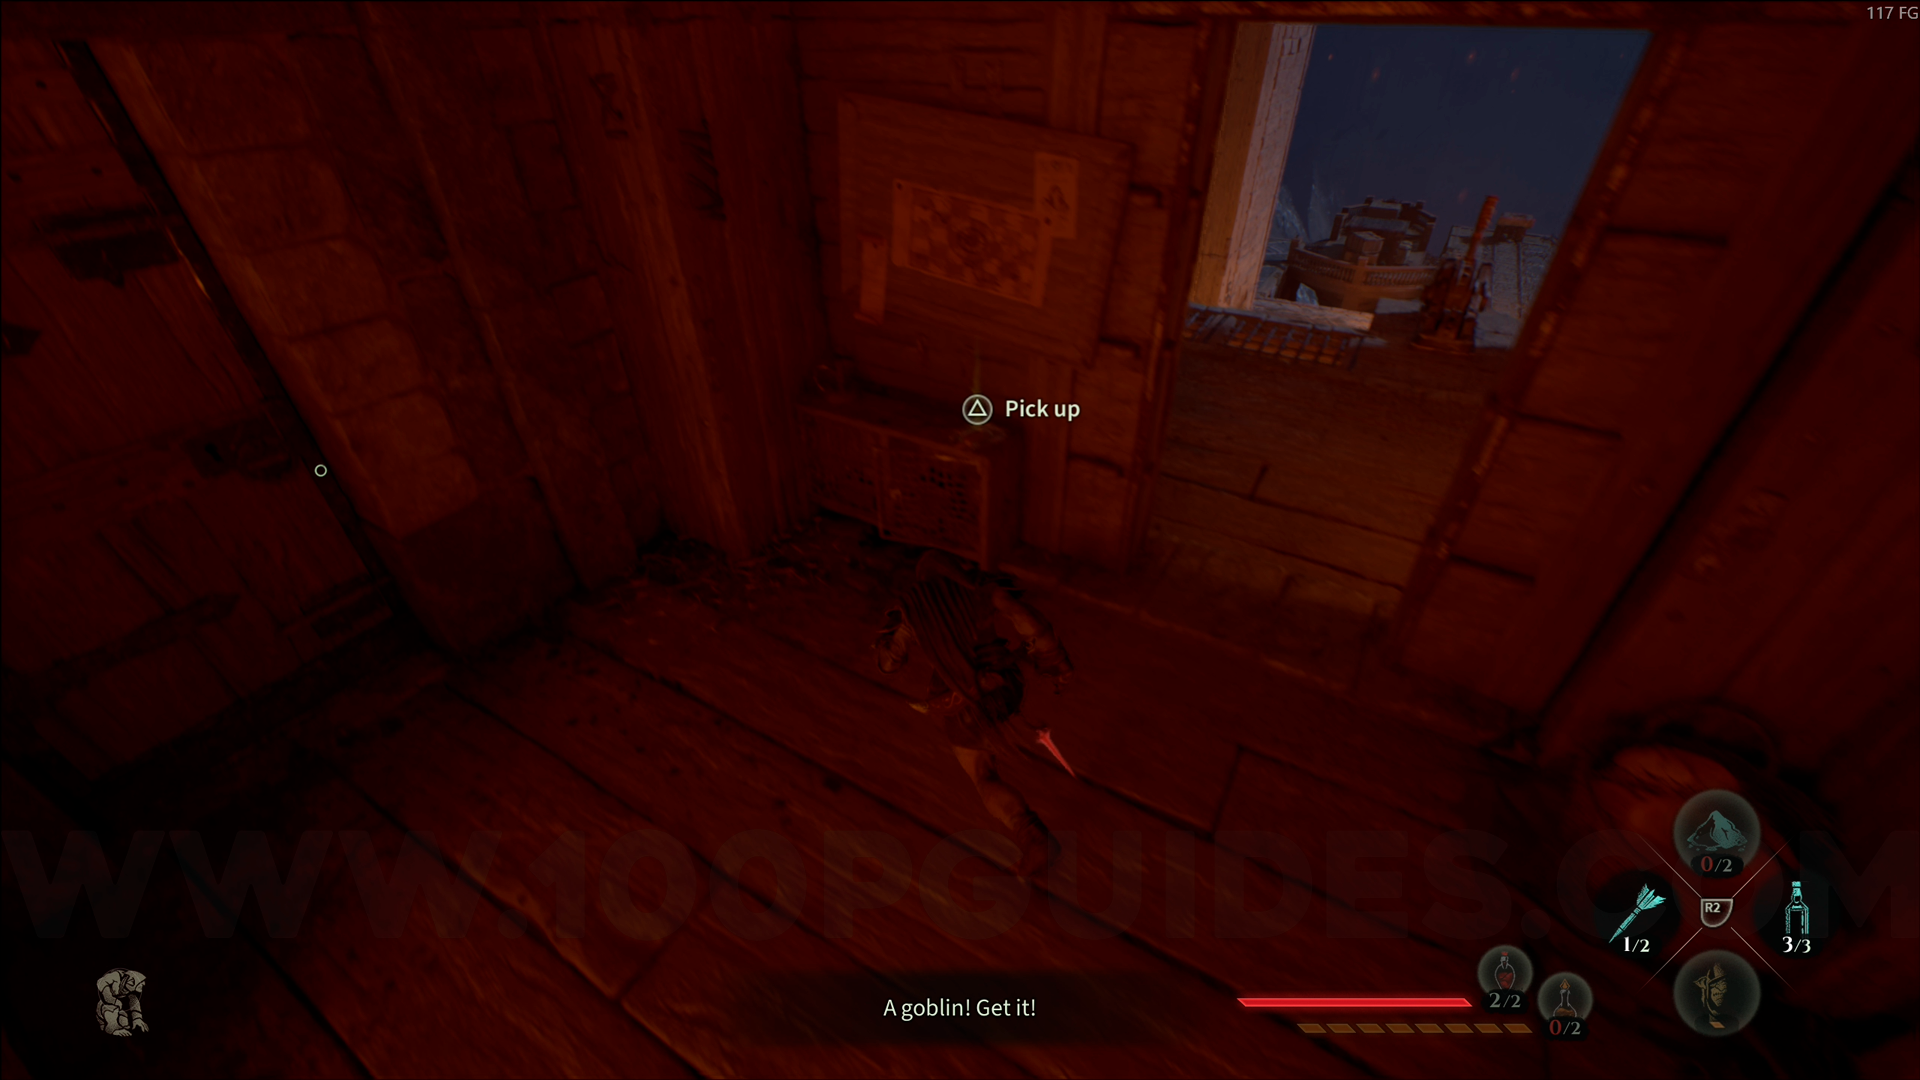
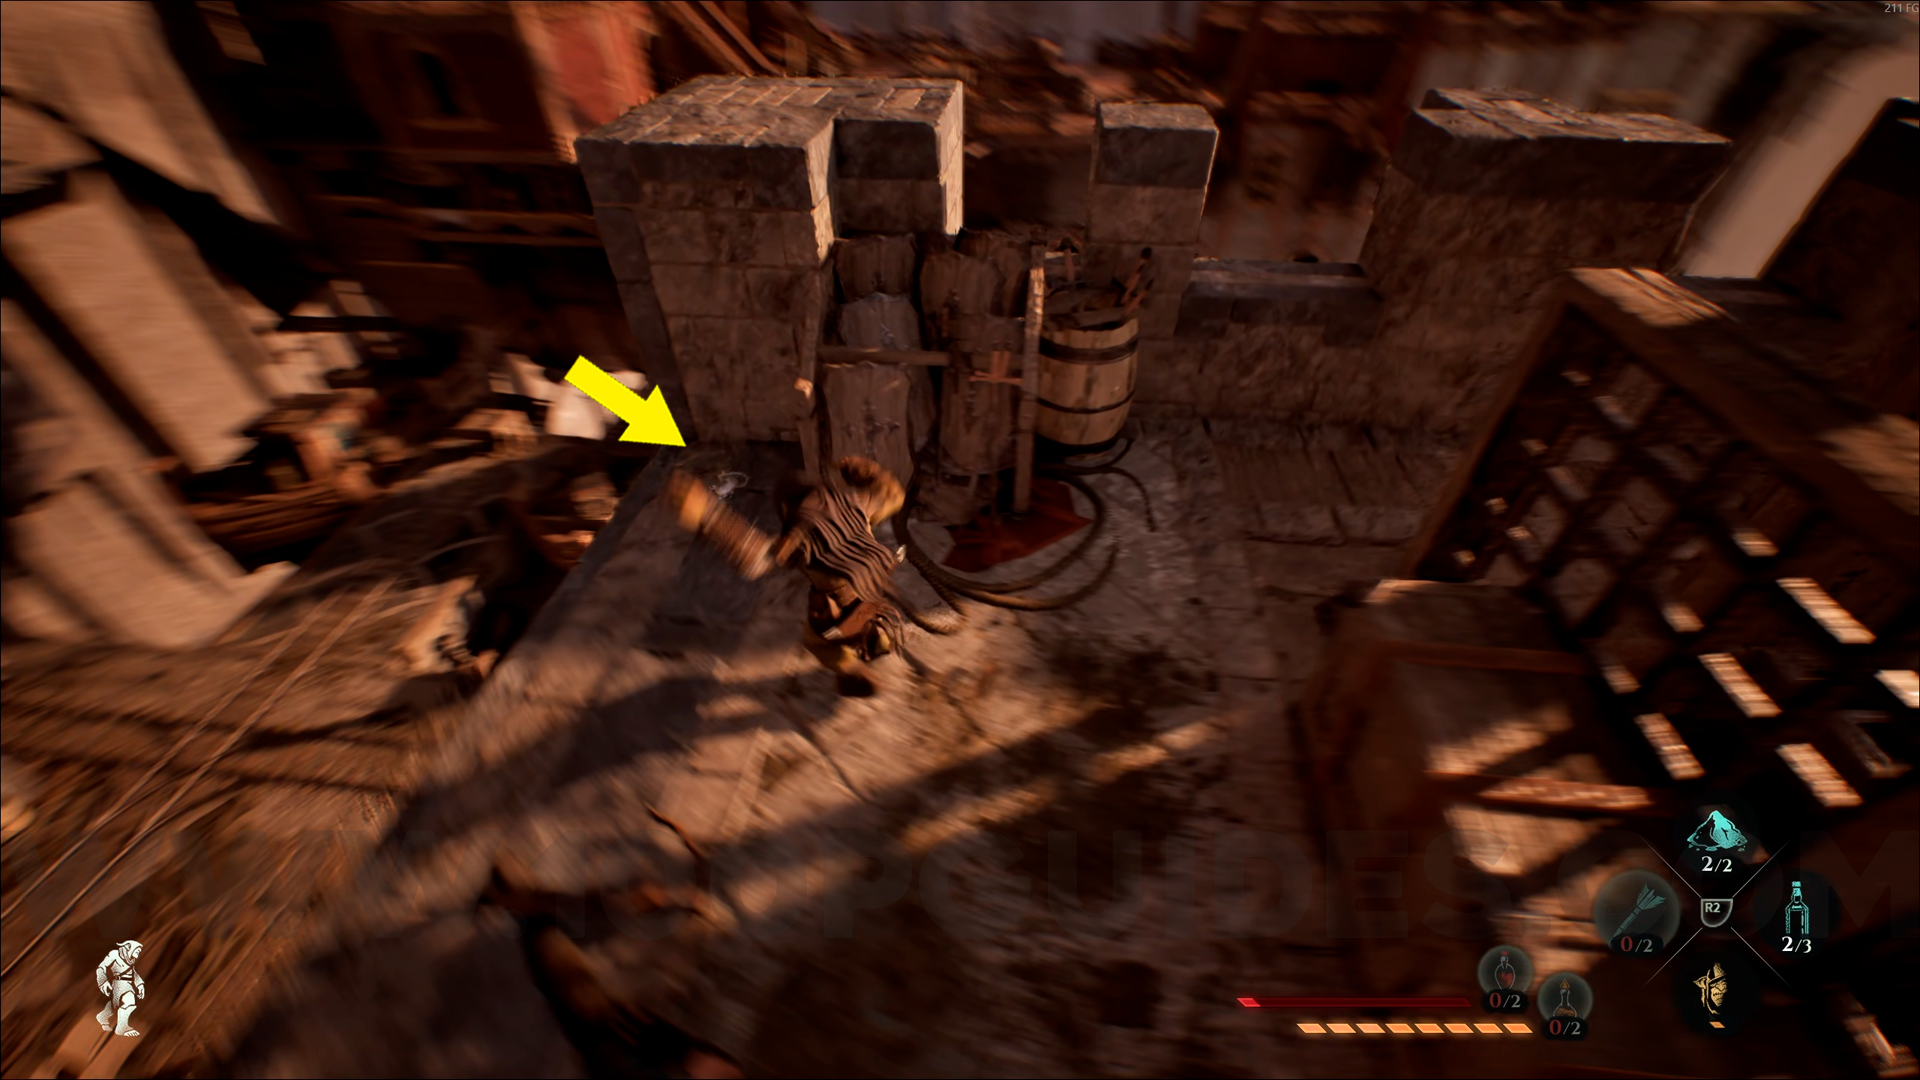
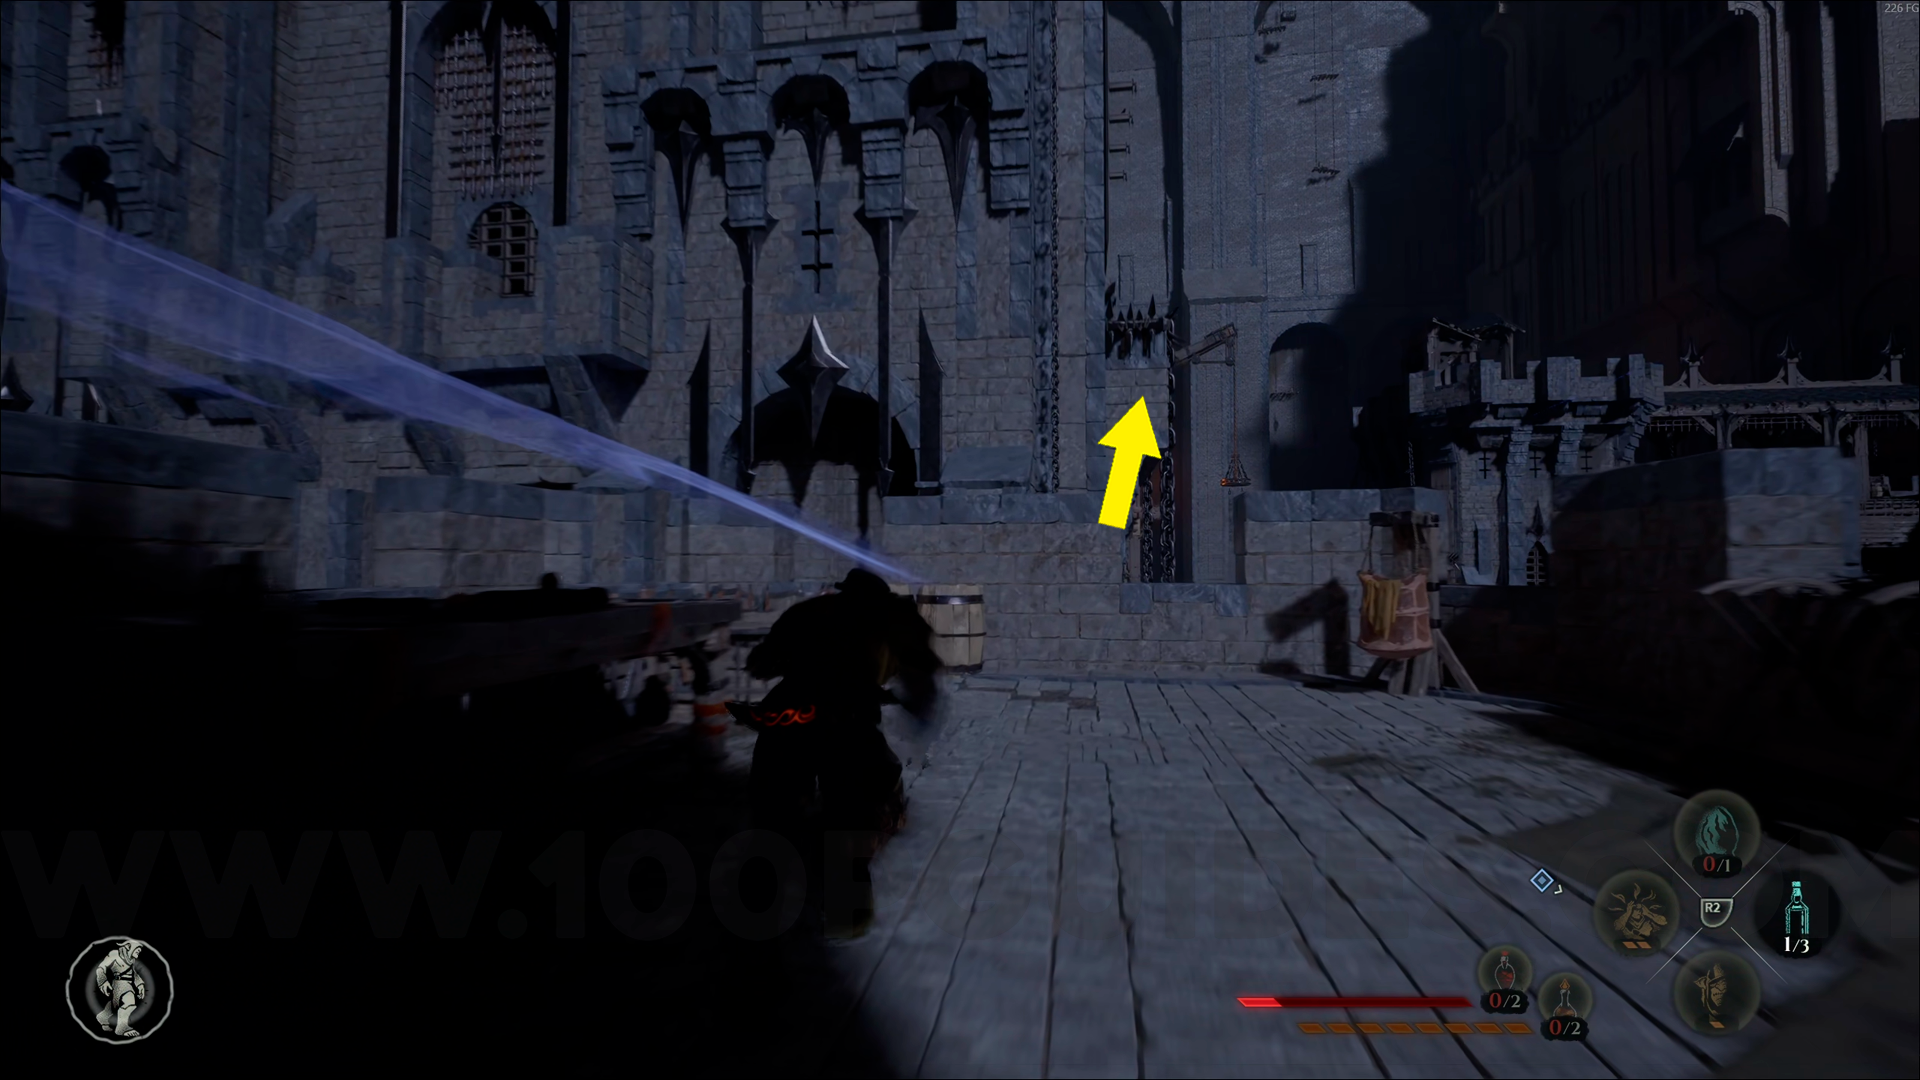
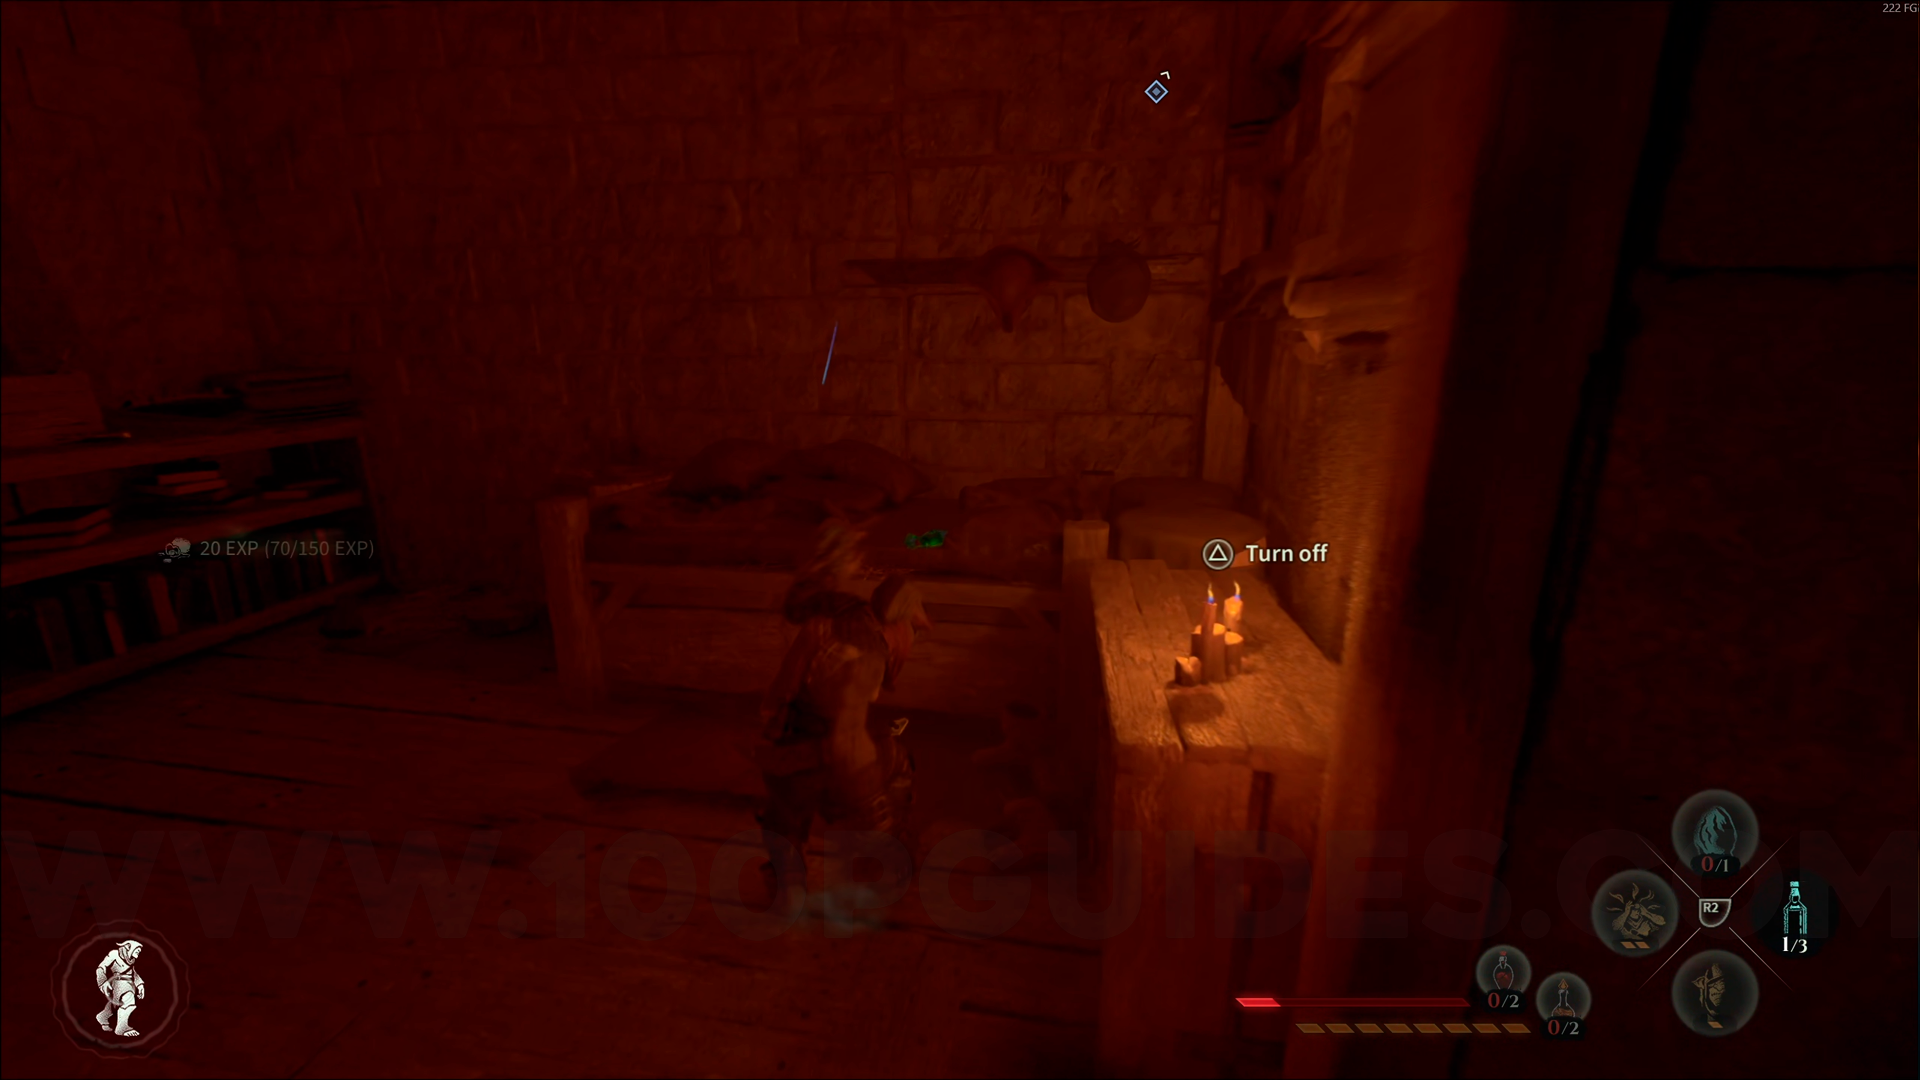
Wood Emblem #7. From the Harlow's Shop checkpoint in Wall Market, head toward the building in front of you. This emblem will be right ahead. Use Amber Vision to help you spot it.
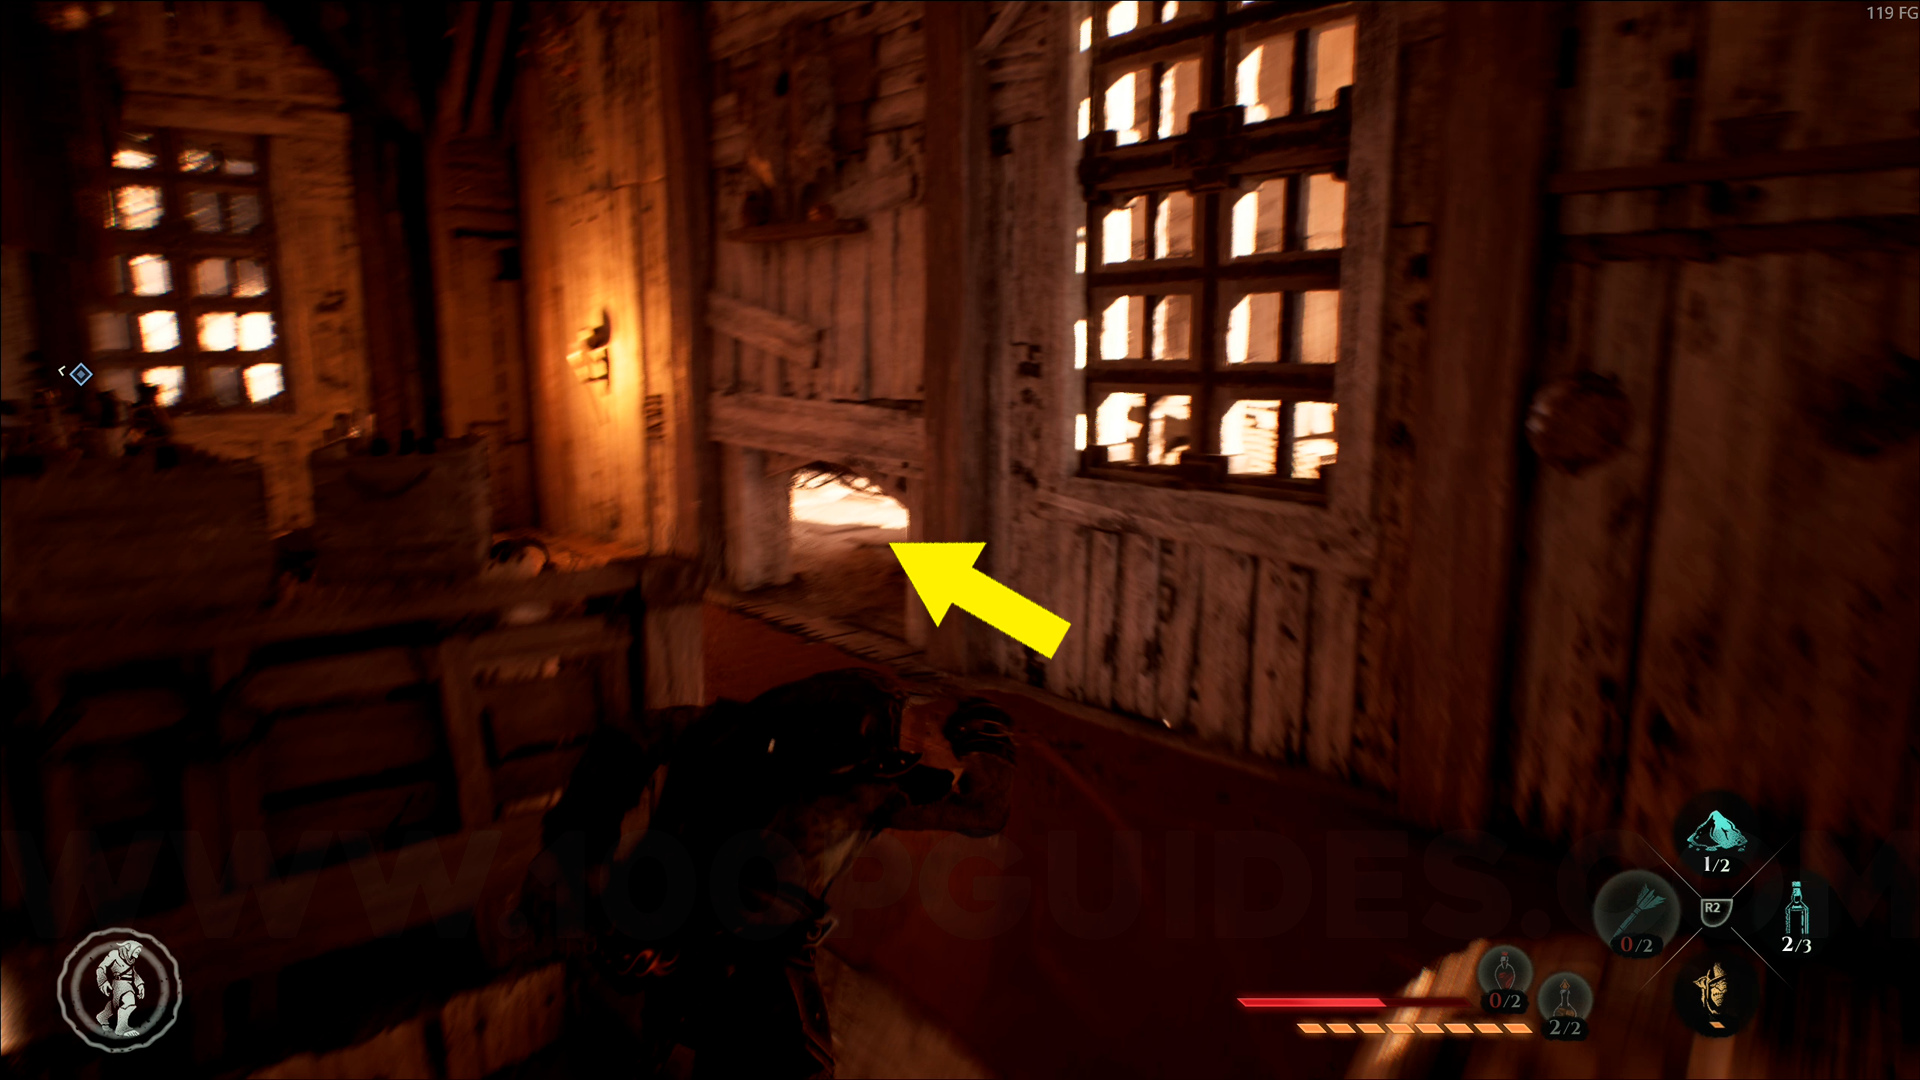
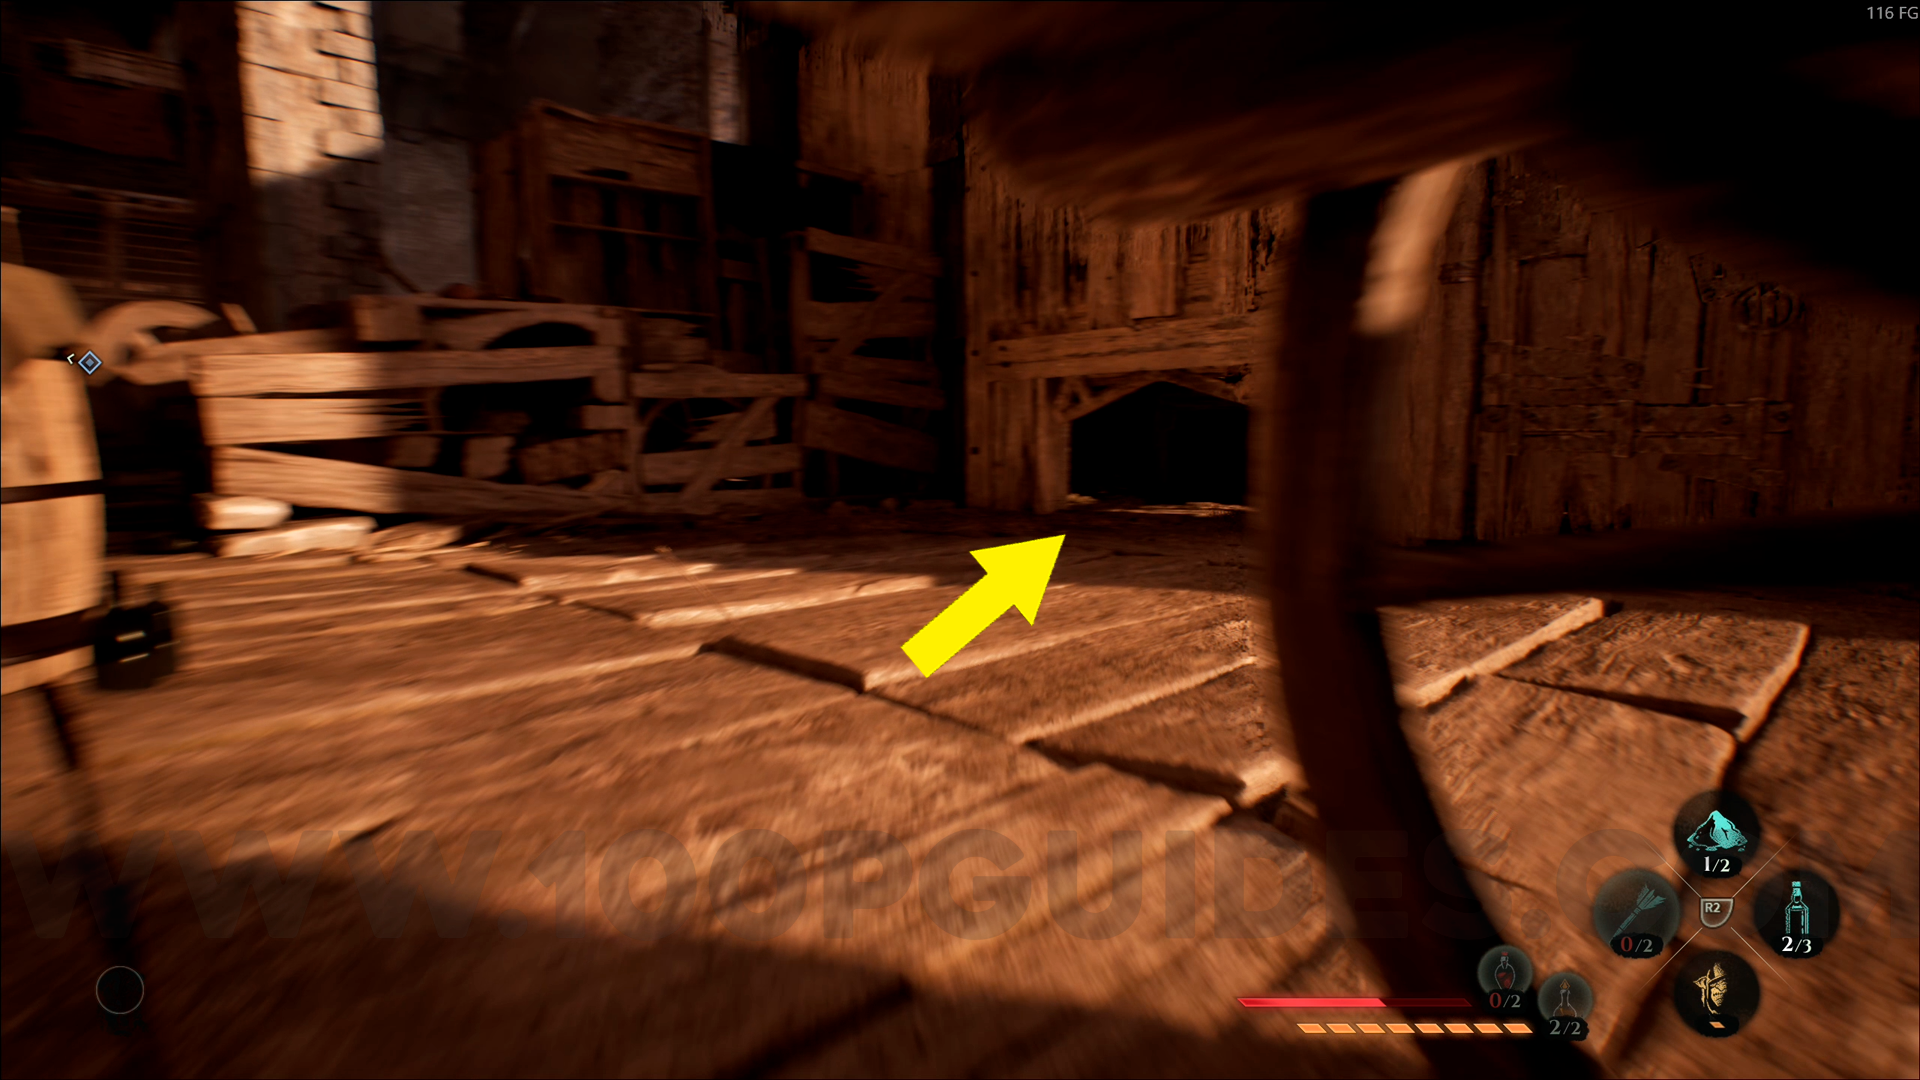
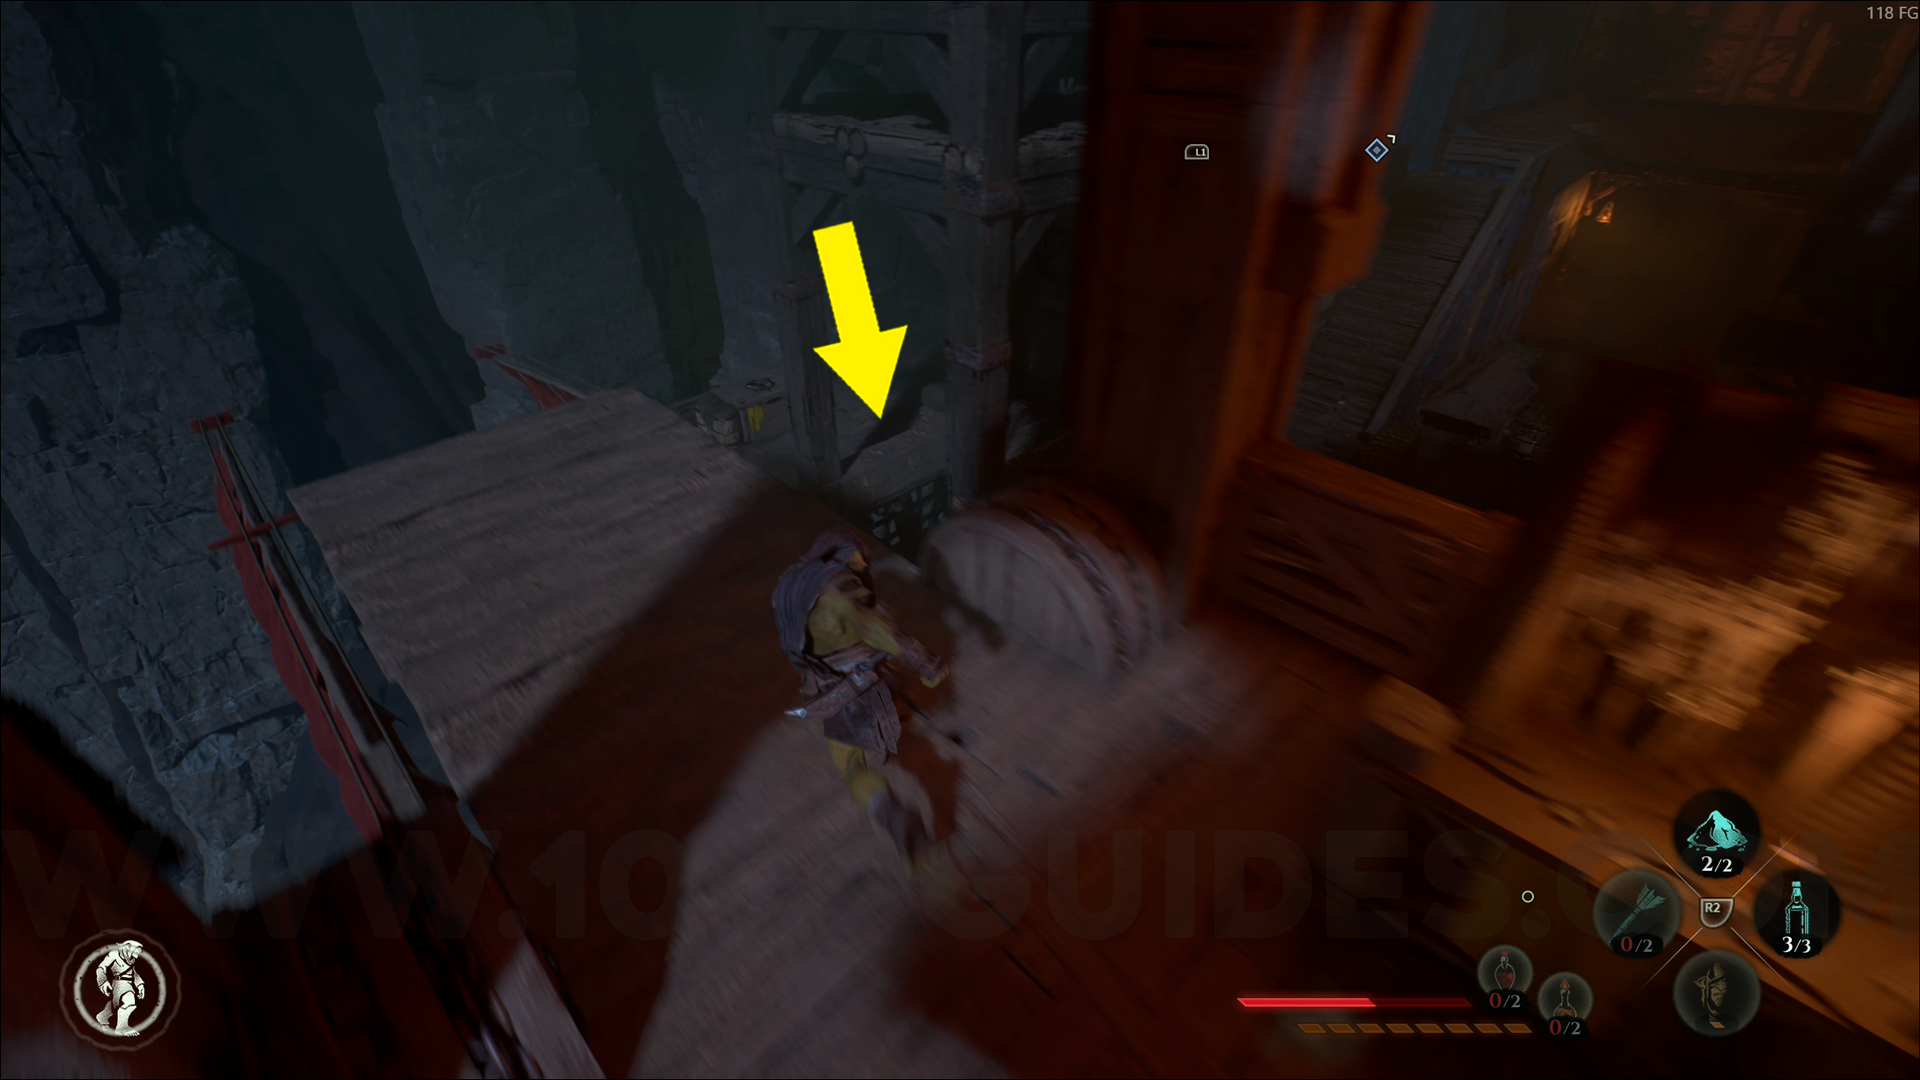
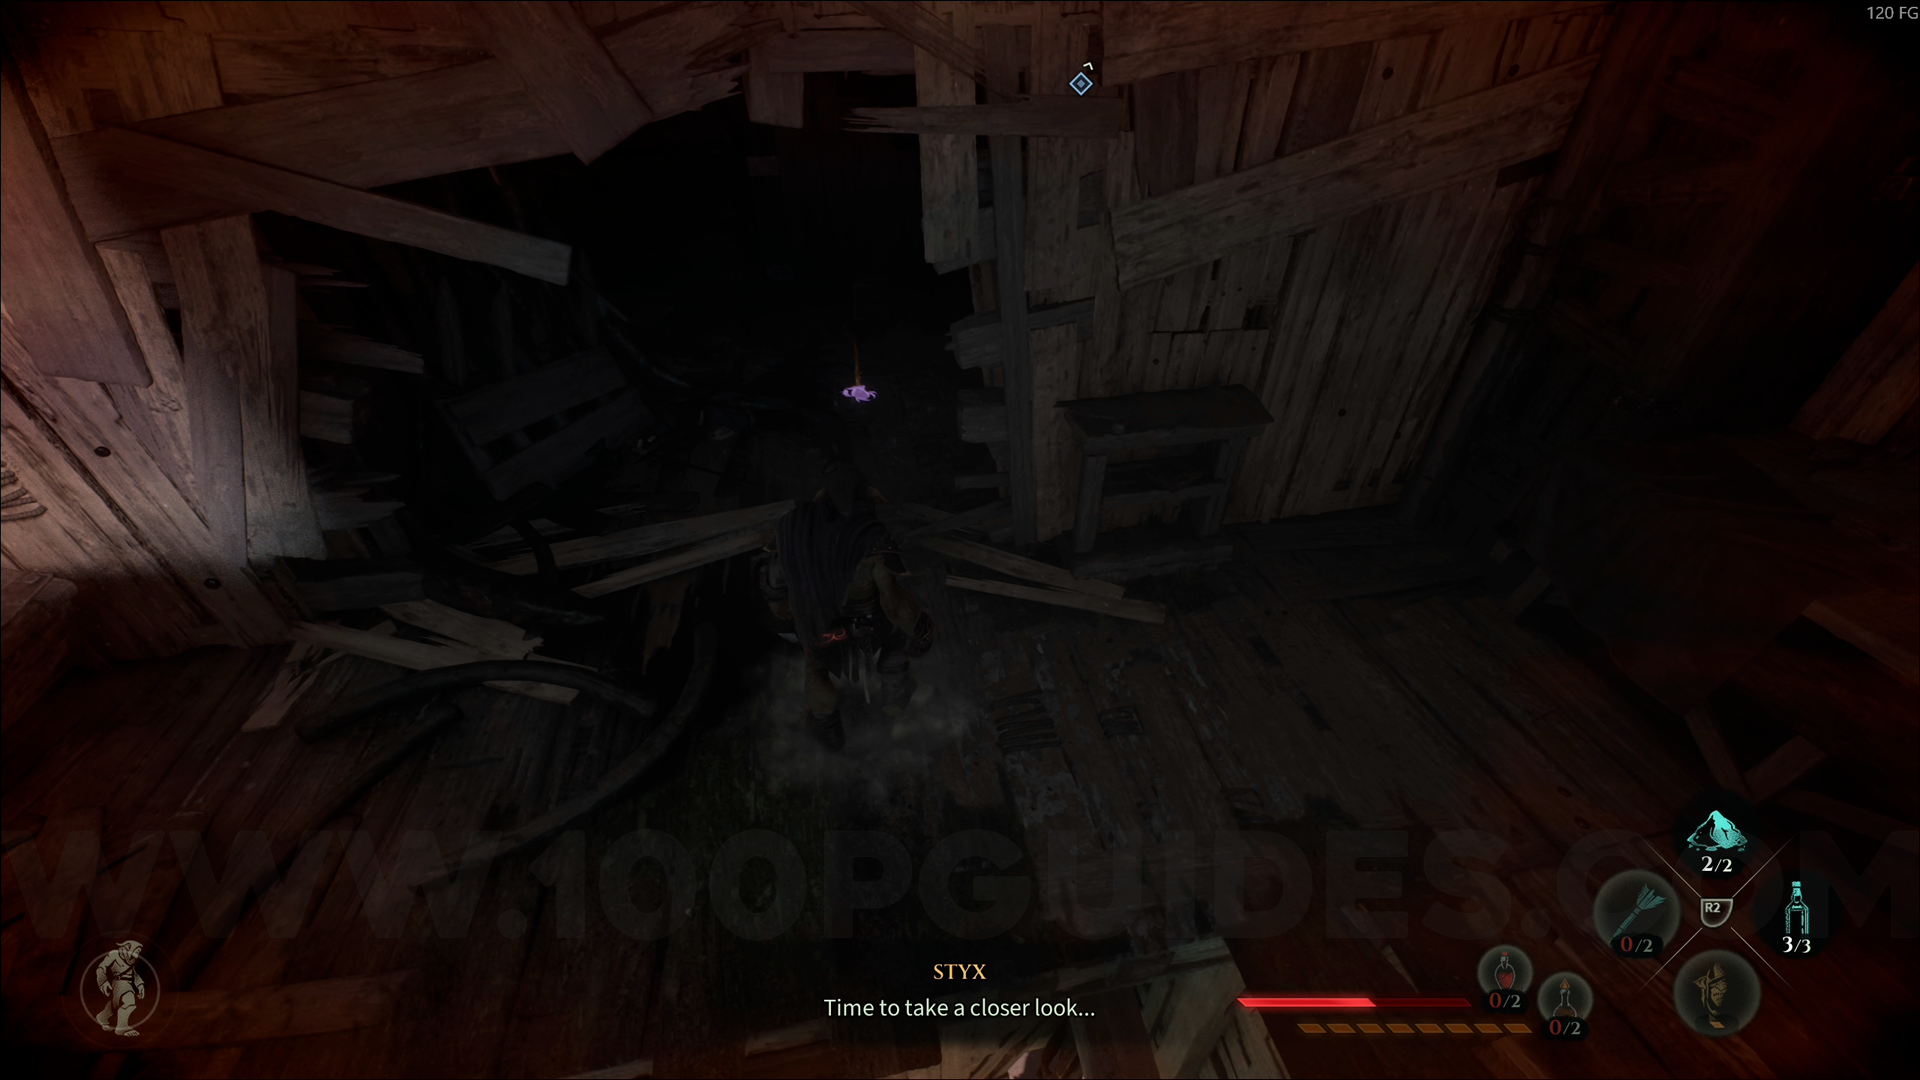
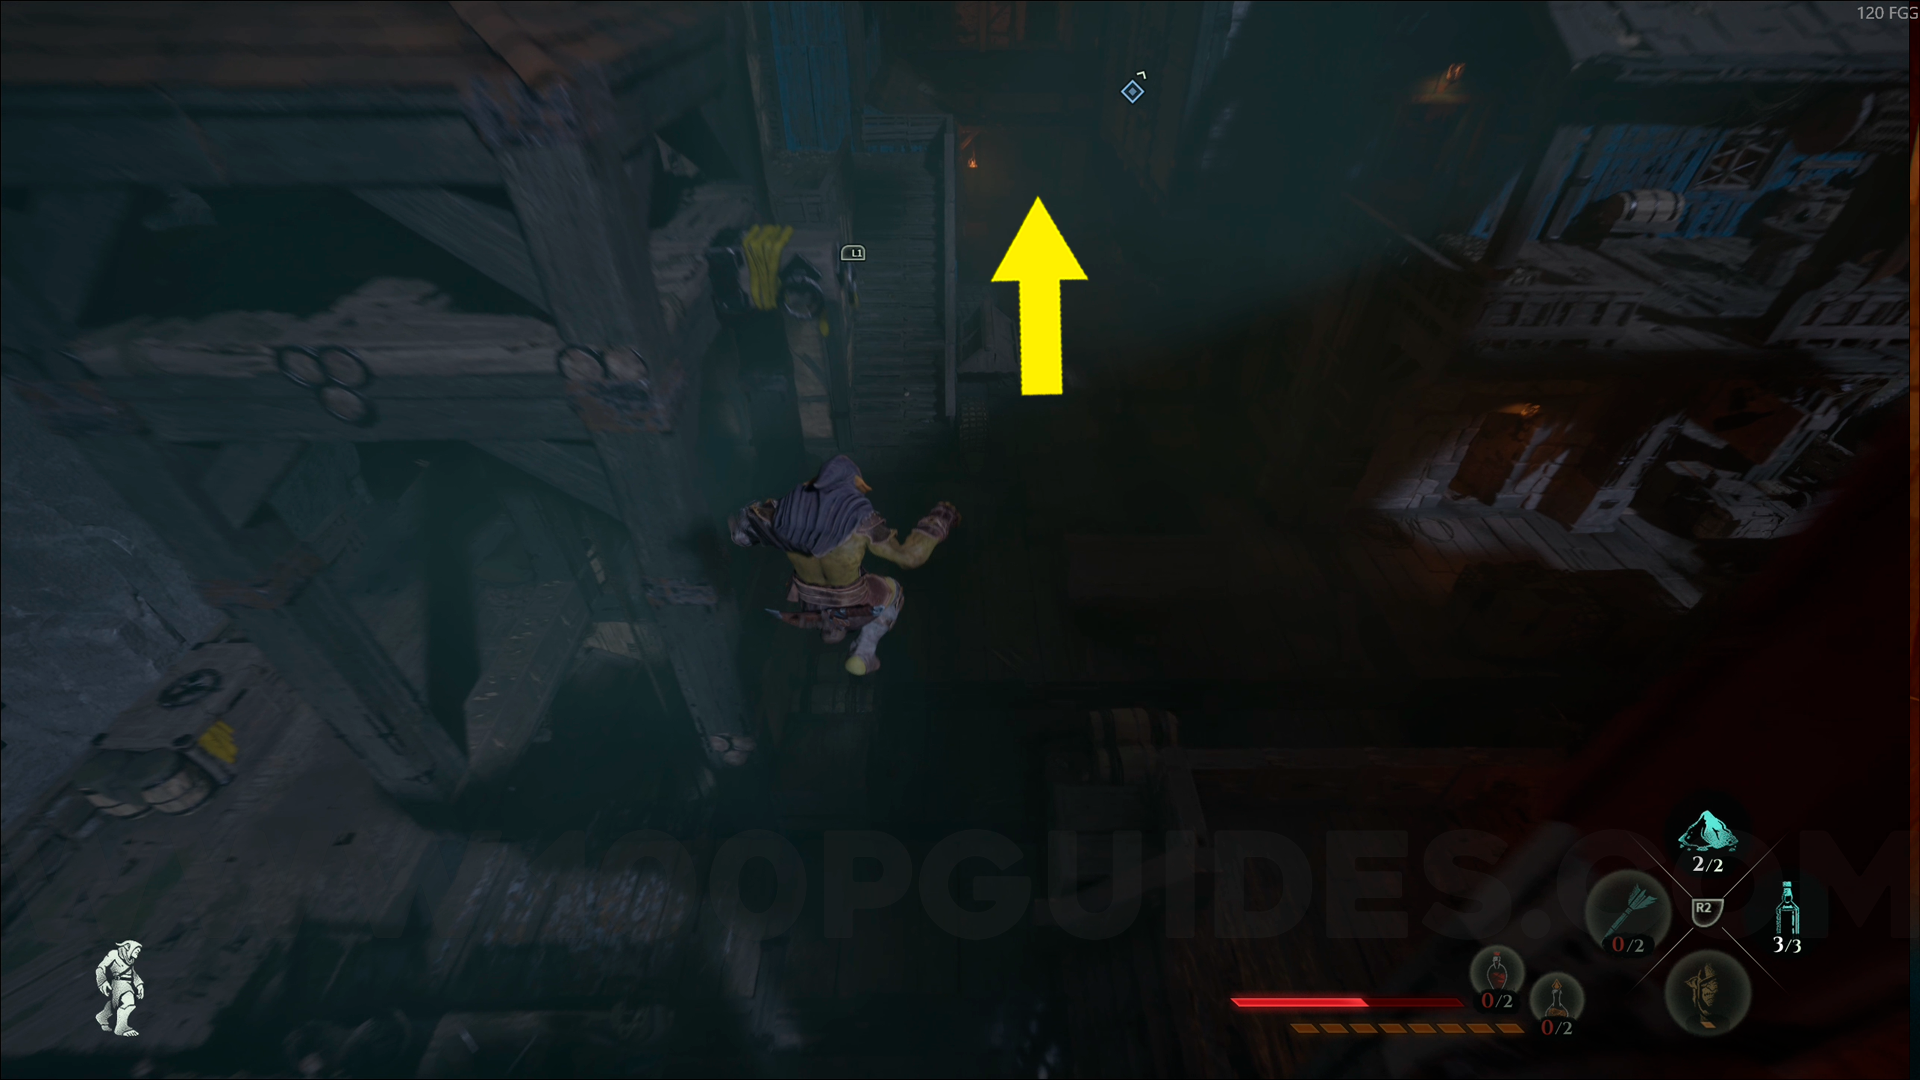
Wood Emblem #8. From the Fishermen's Smugglers checkpoint, go down through the hole on your left. This emblem will be right in front of you.

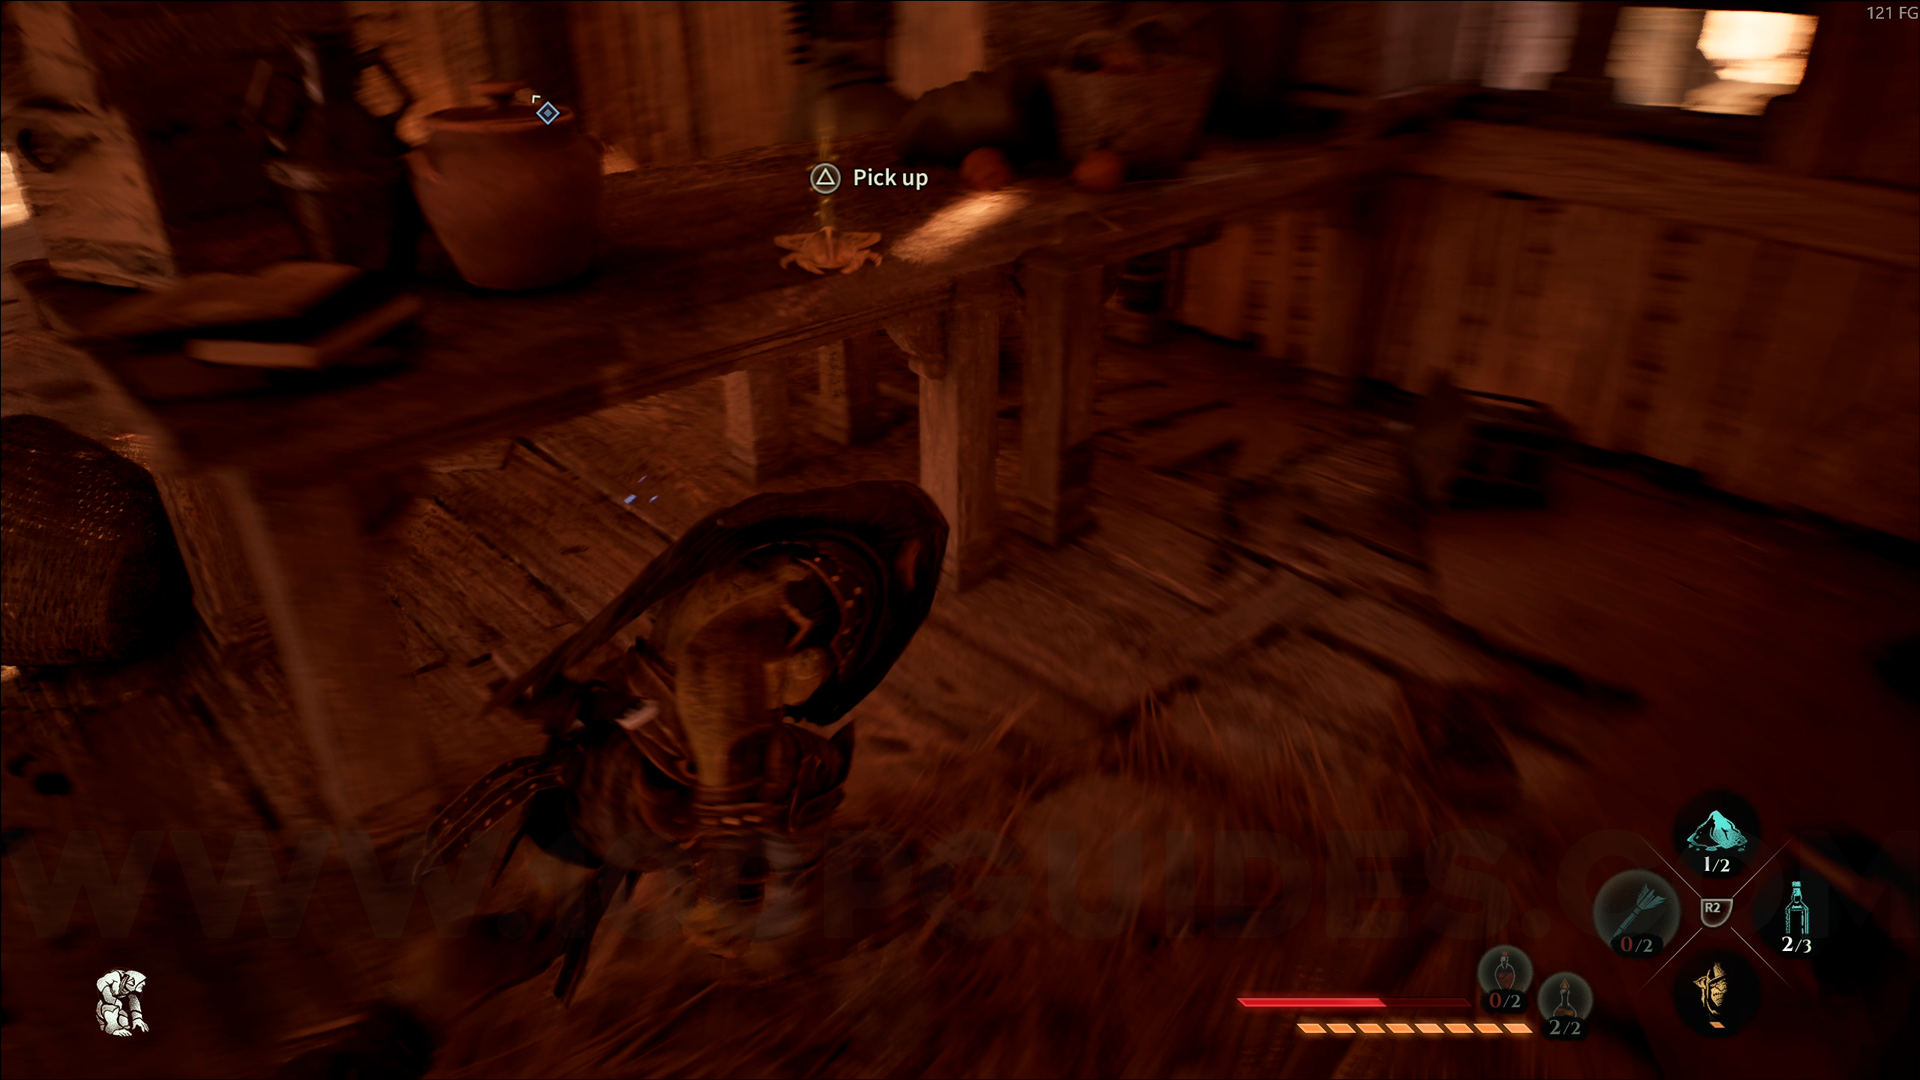
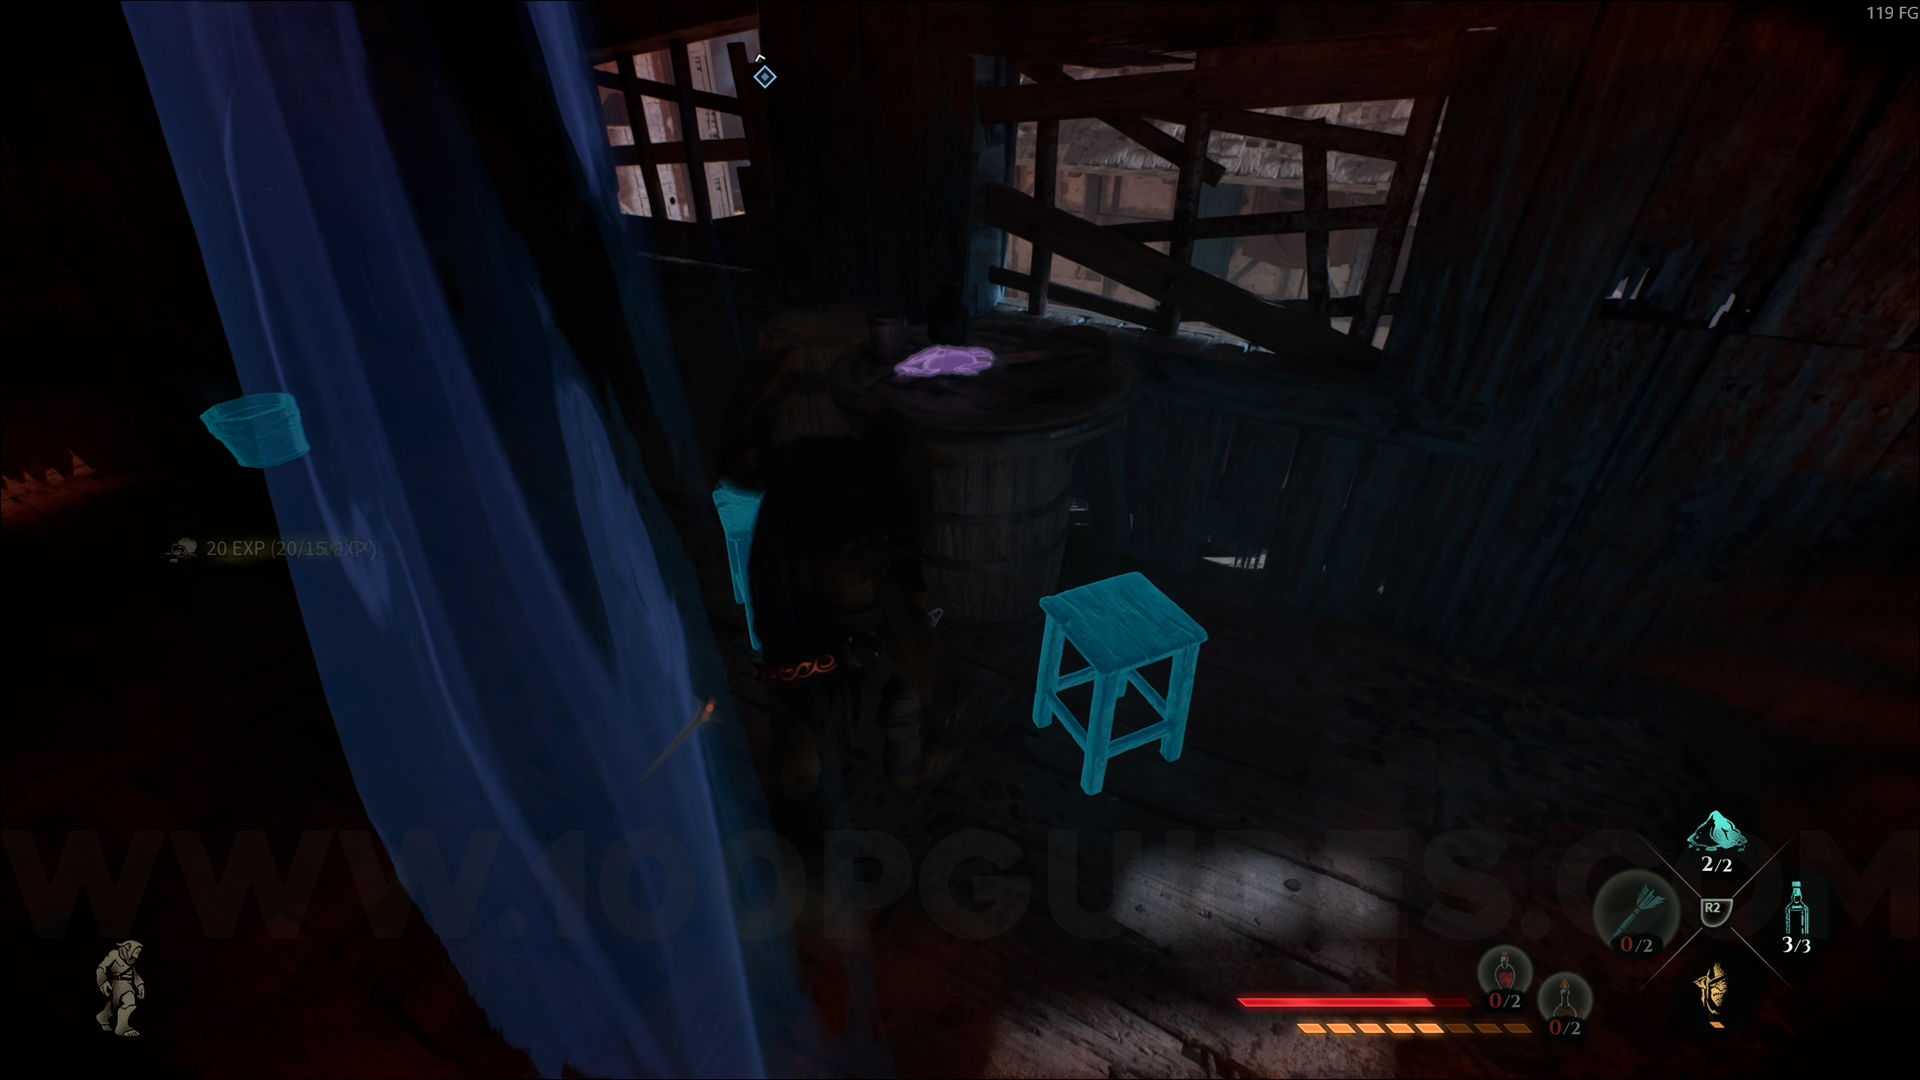
Wood Emblem #9. From the Fishermen's Smugglers checkpoint, enter the house in front of the checkpoint. This emblem will be on top of the table. Use Amber Vision to help you spot it.

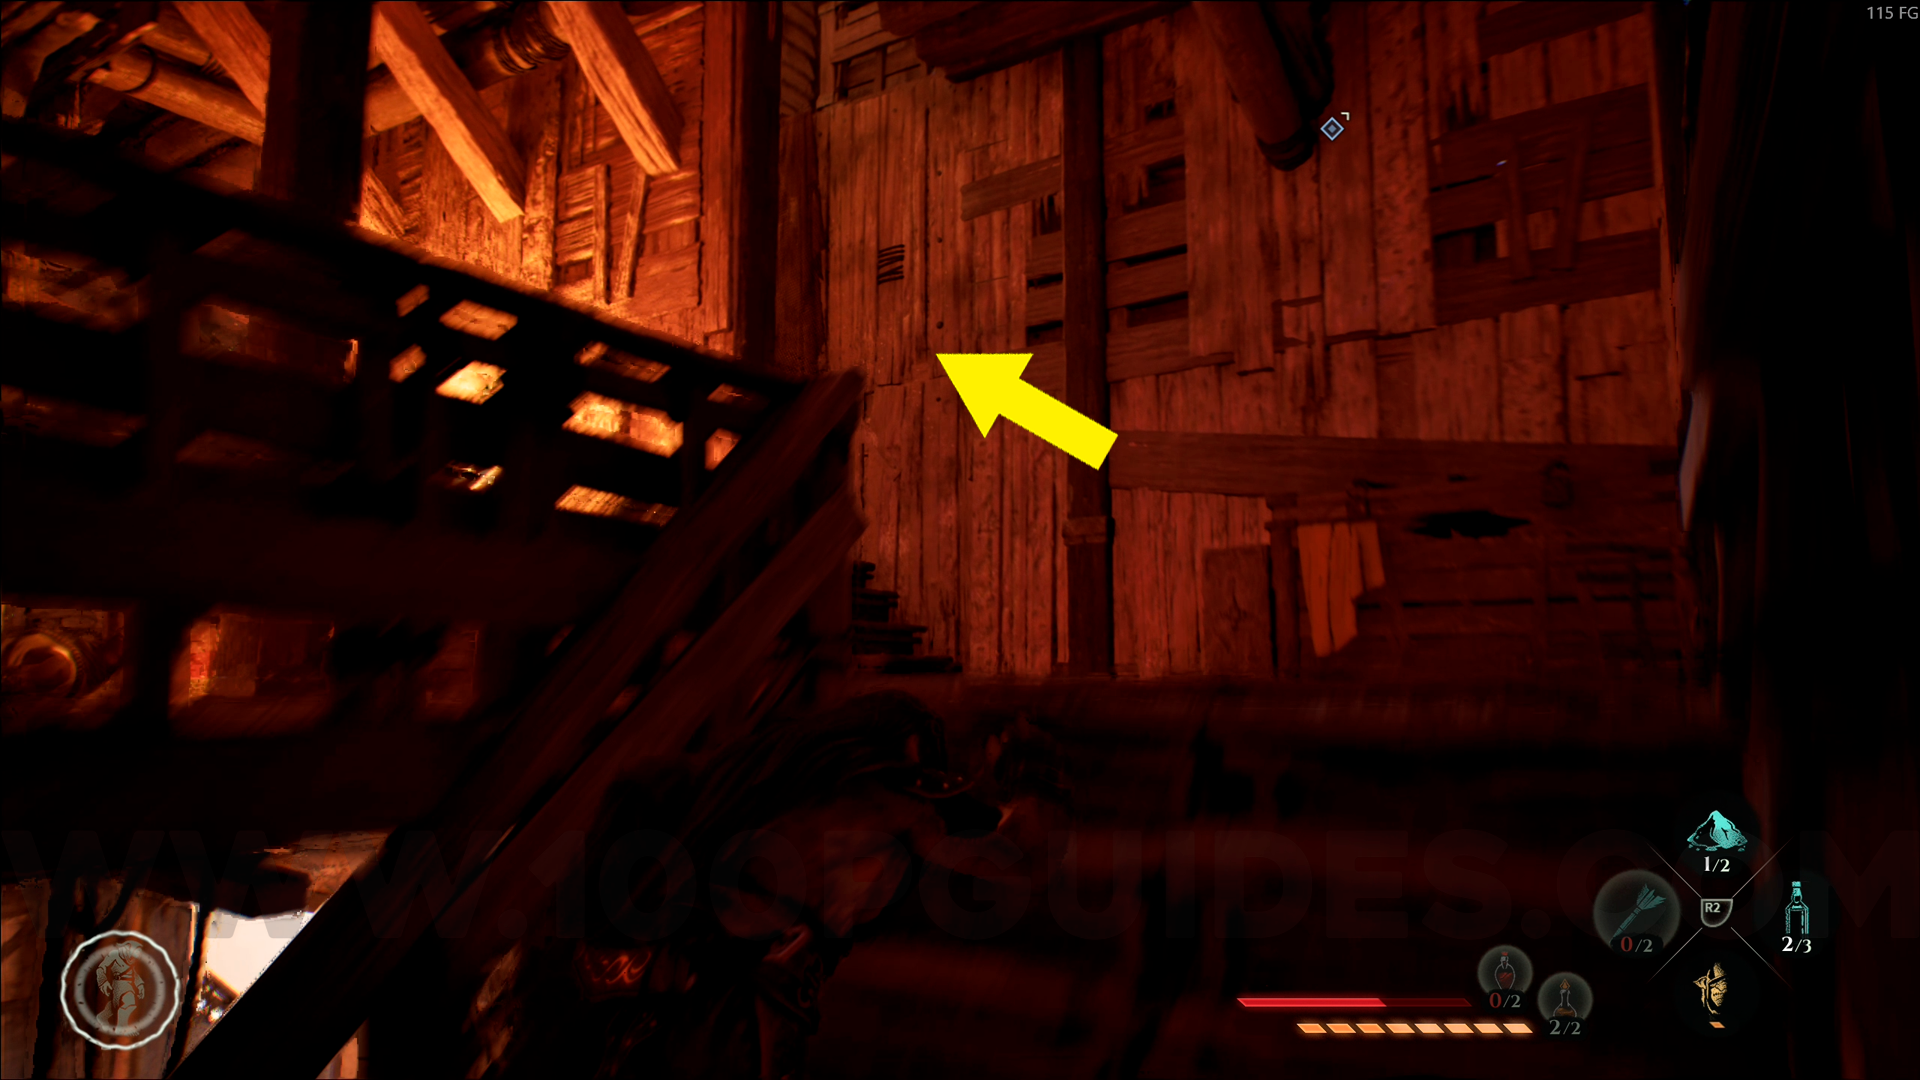
Wood Emblem #10. From the Wailing Widow Tavern checkpoint, head down to the right until you reach the bridge. Then enter the building on your right and go through the hole in the wall. This emblem will be directly in front of you. Use Amber Vision to help you spot it.
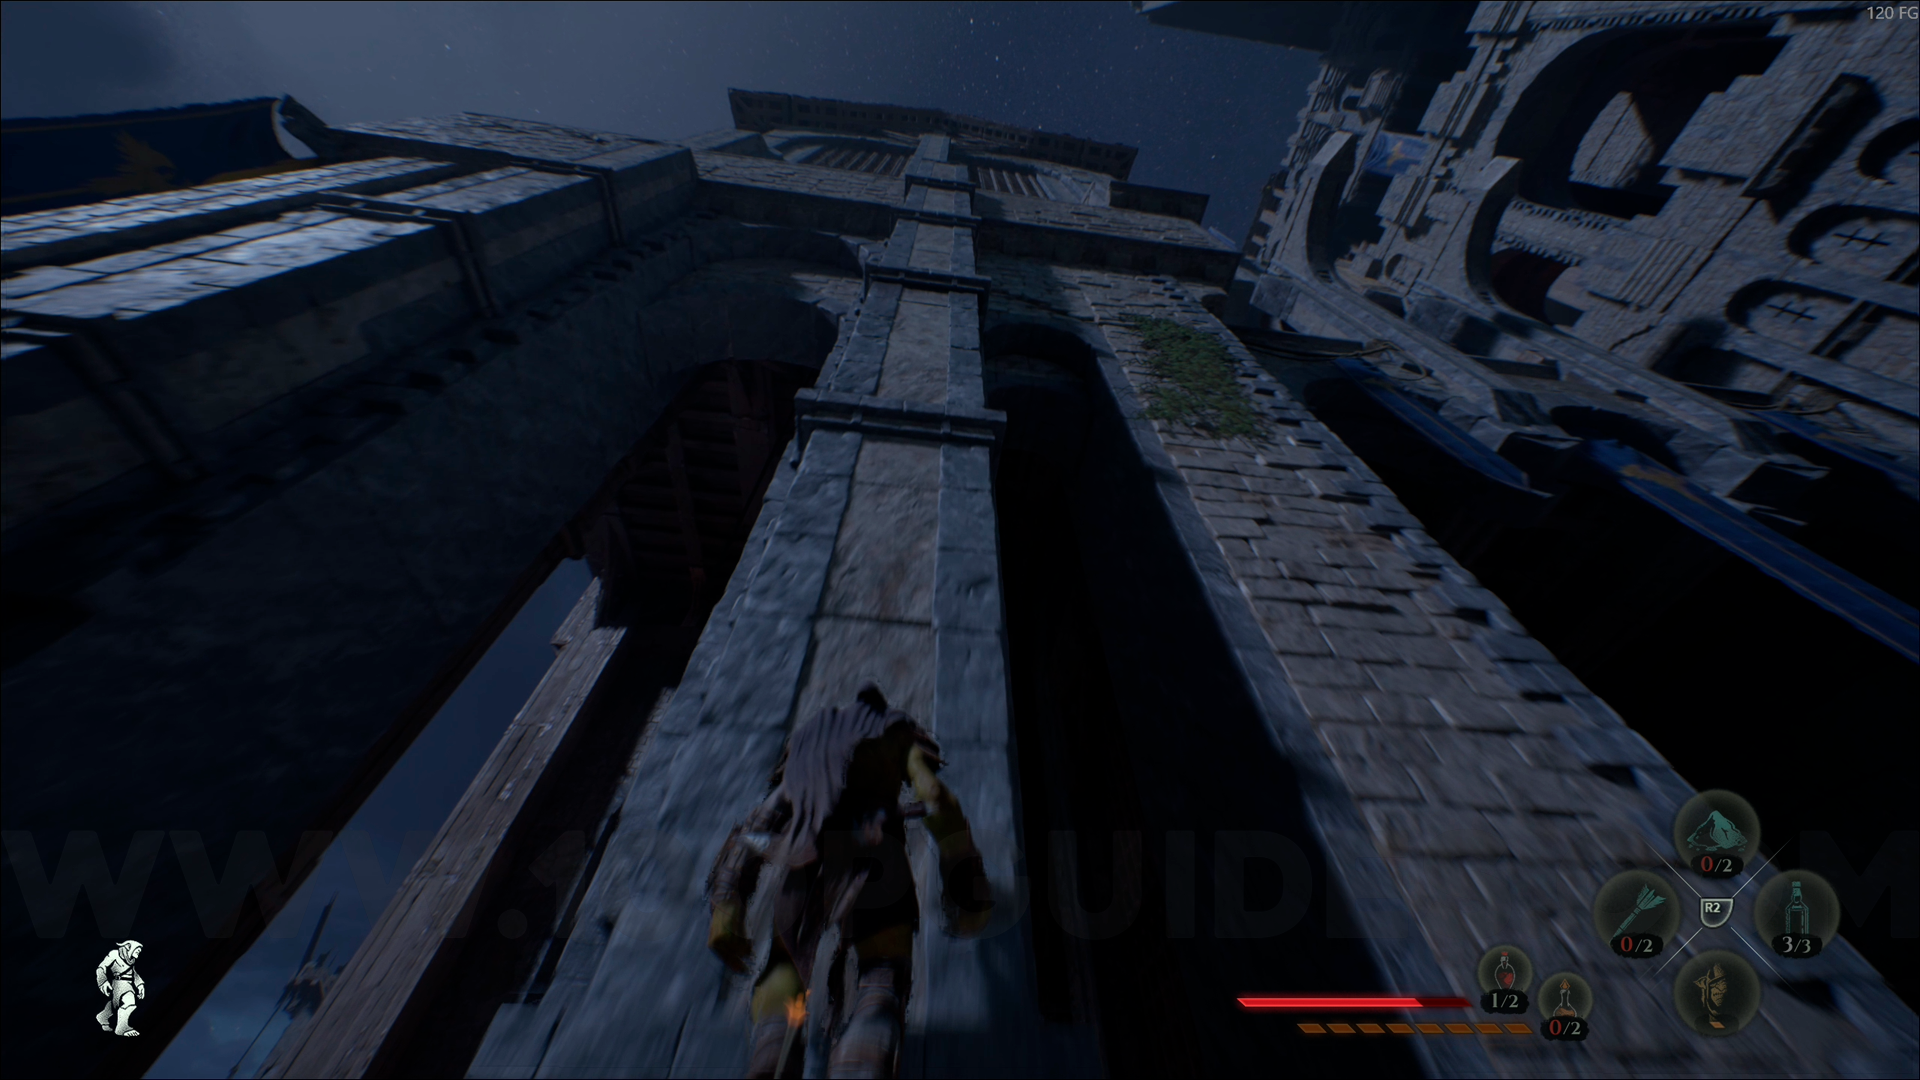
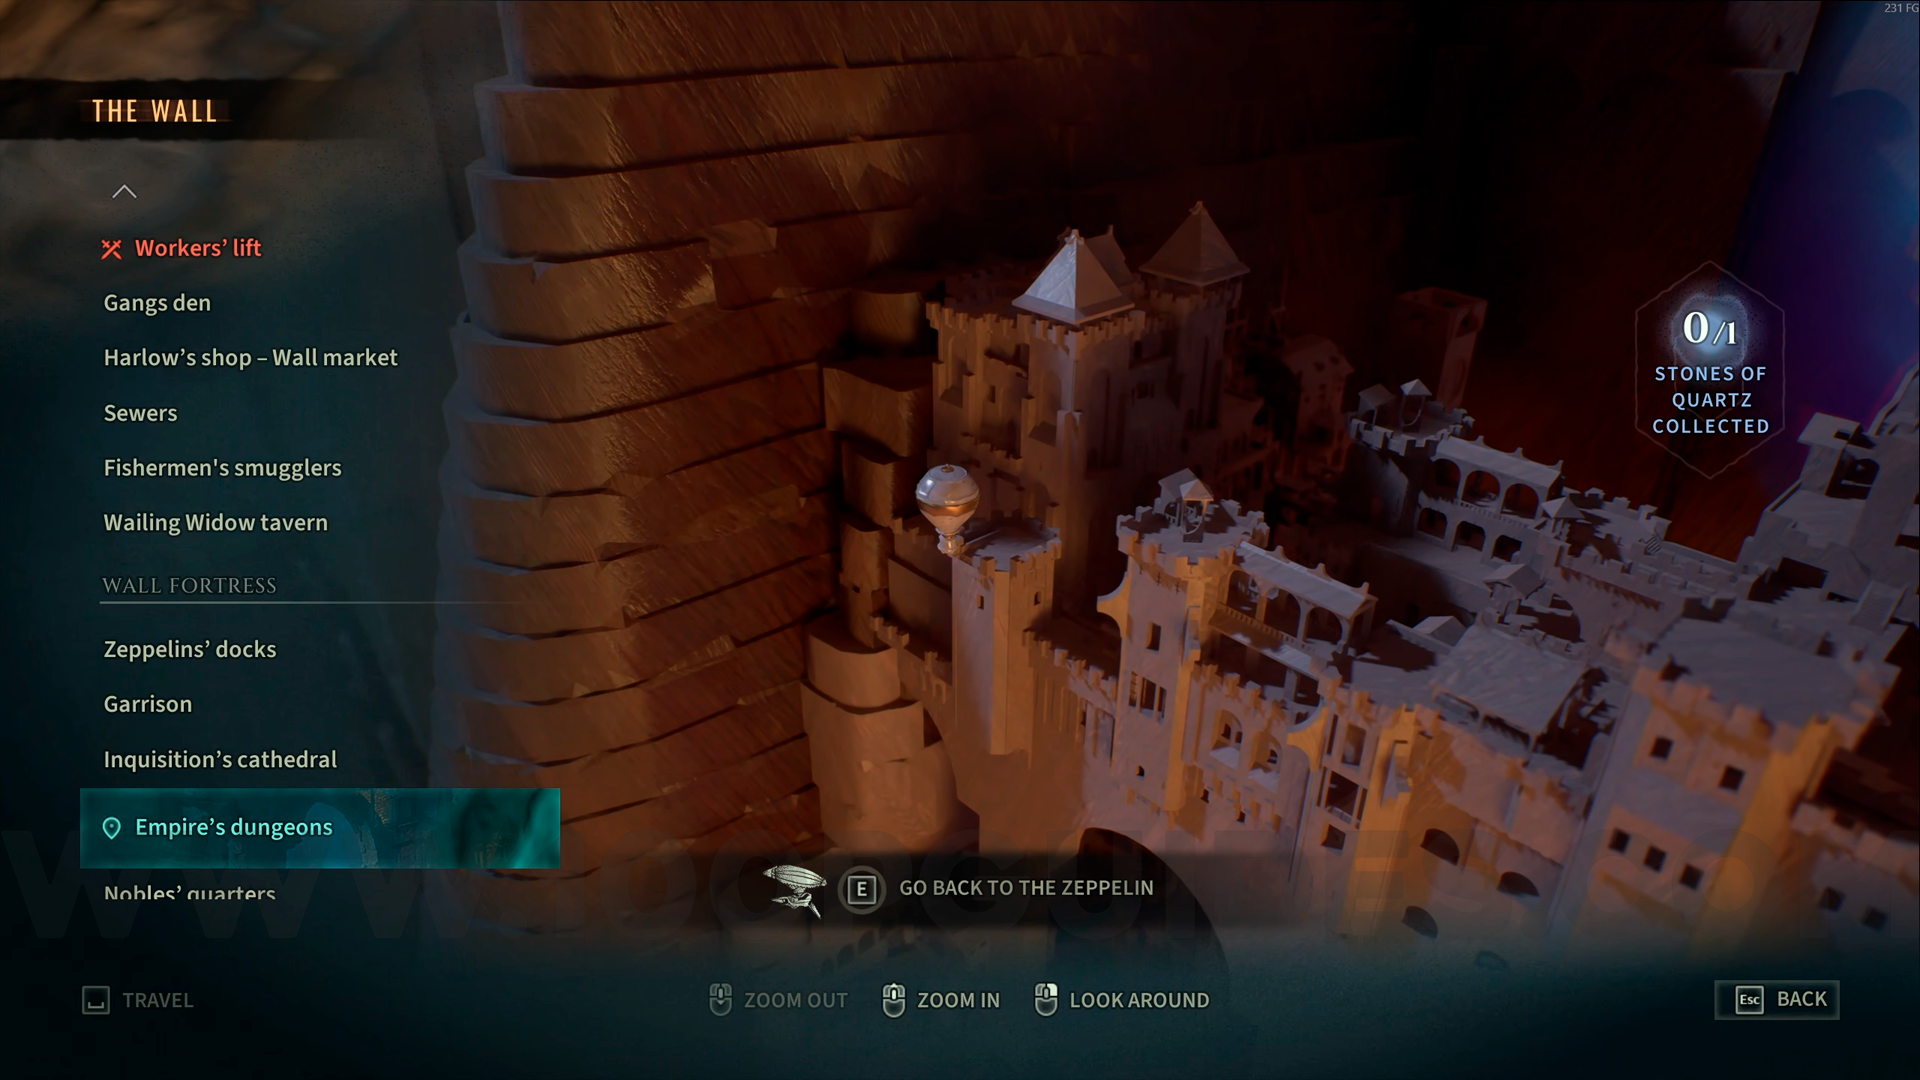
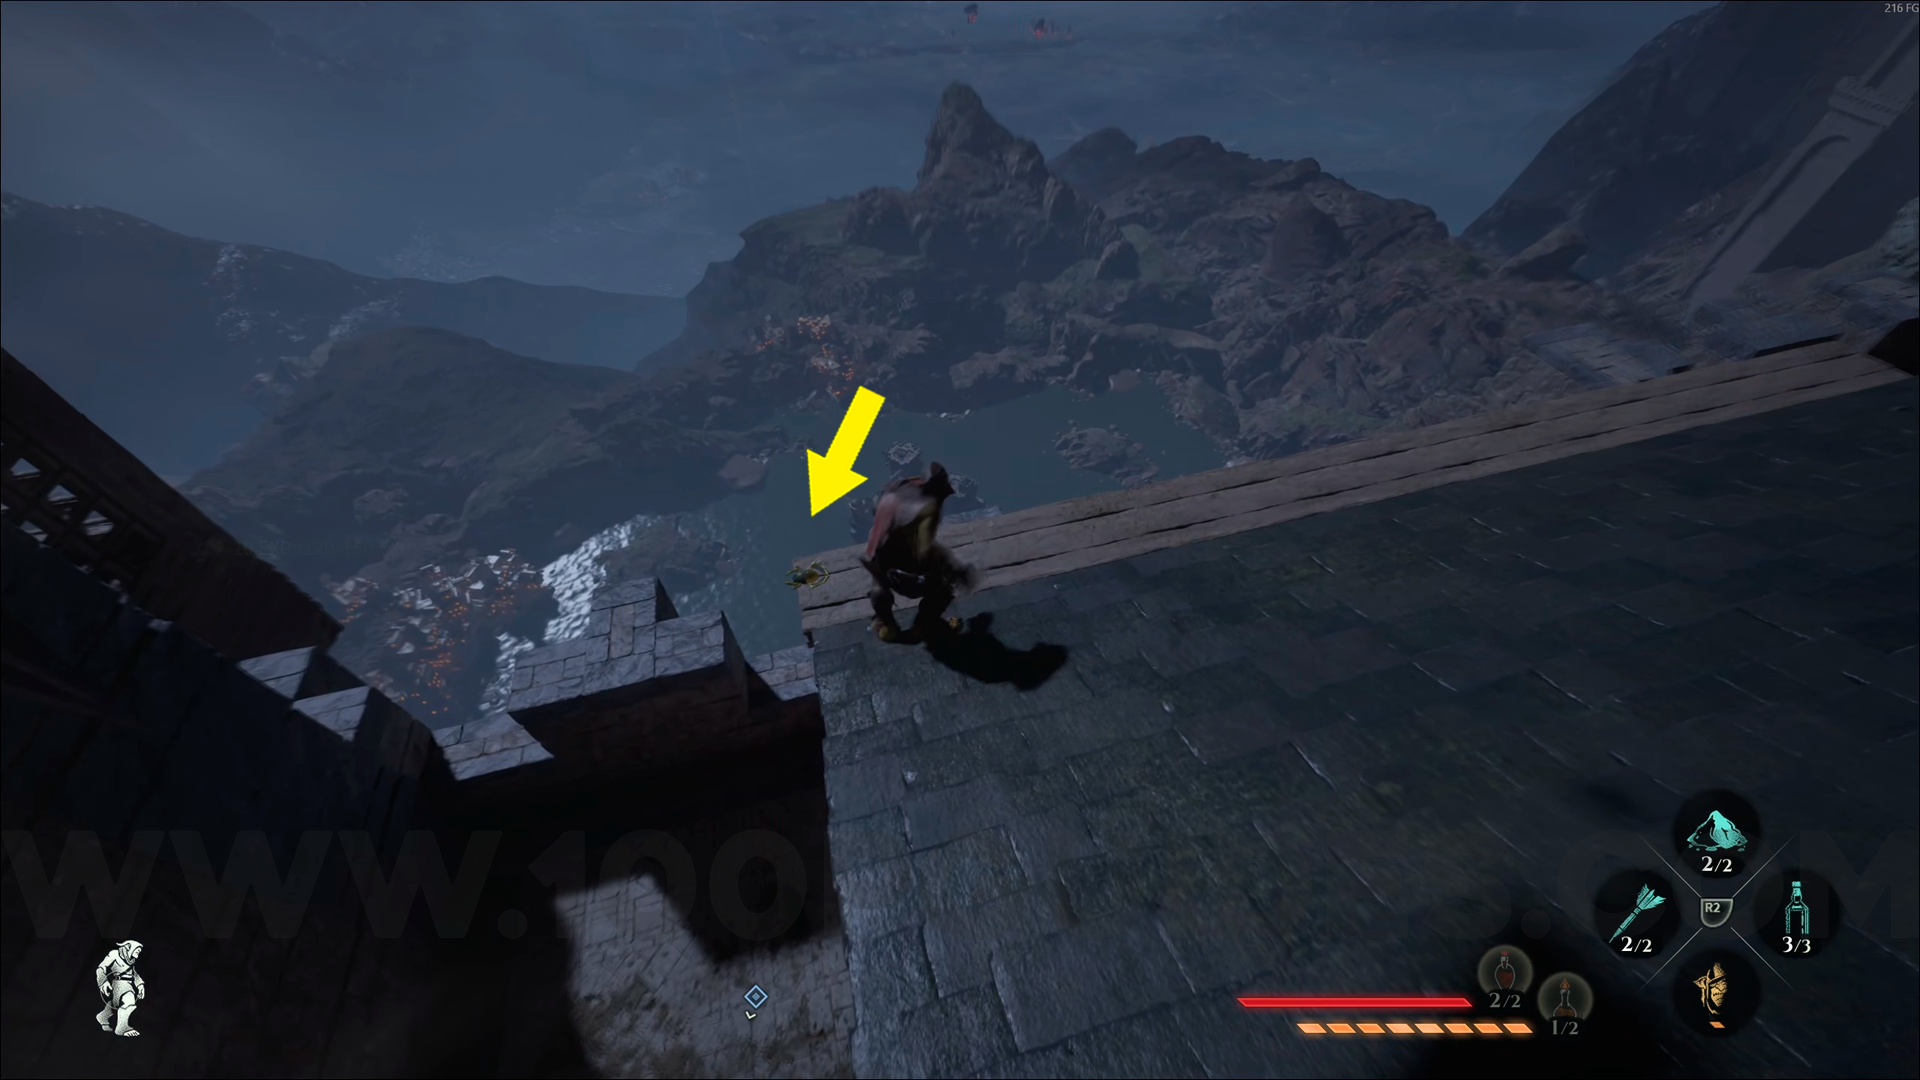
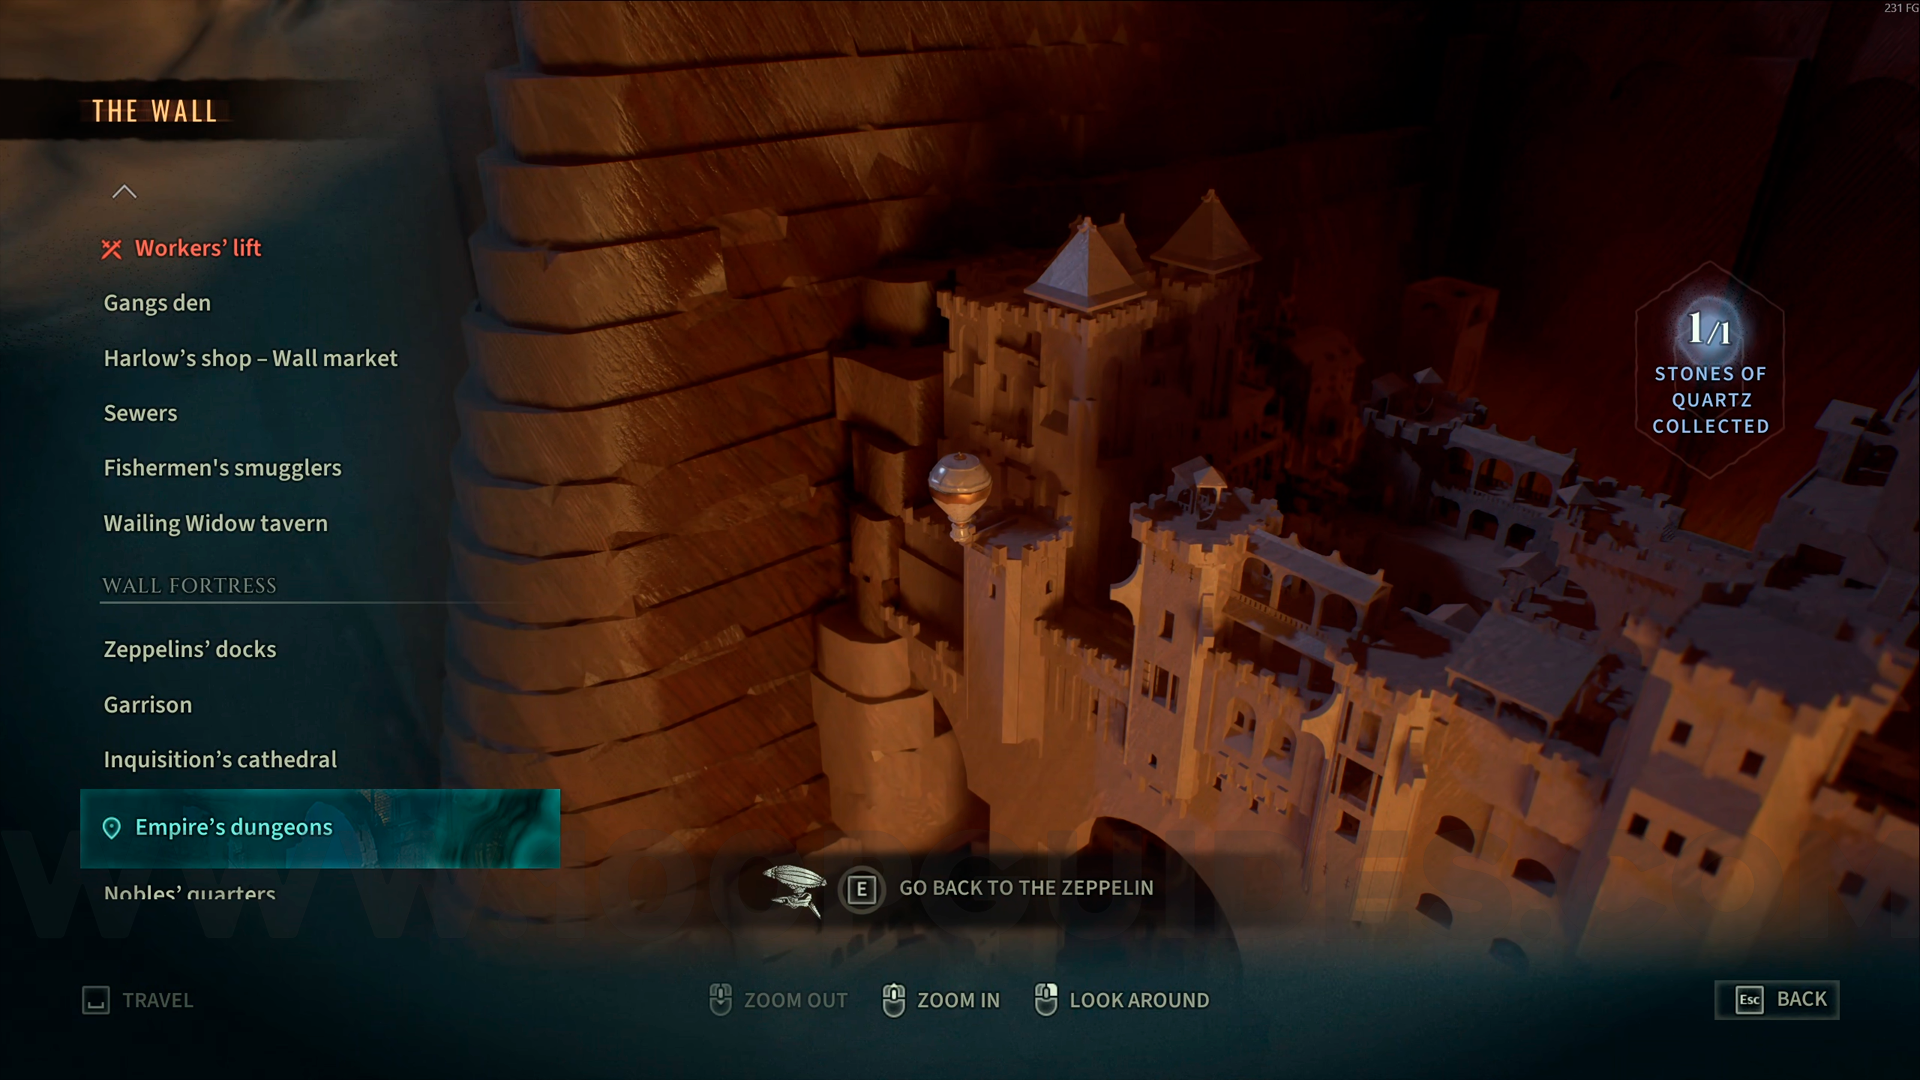
Bronze Emblem #1. From the Empire's Dungeons checkpoint, climb the wall on the left side to find this emblem. Use Amber Vision to help you spot it.

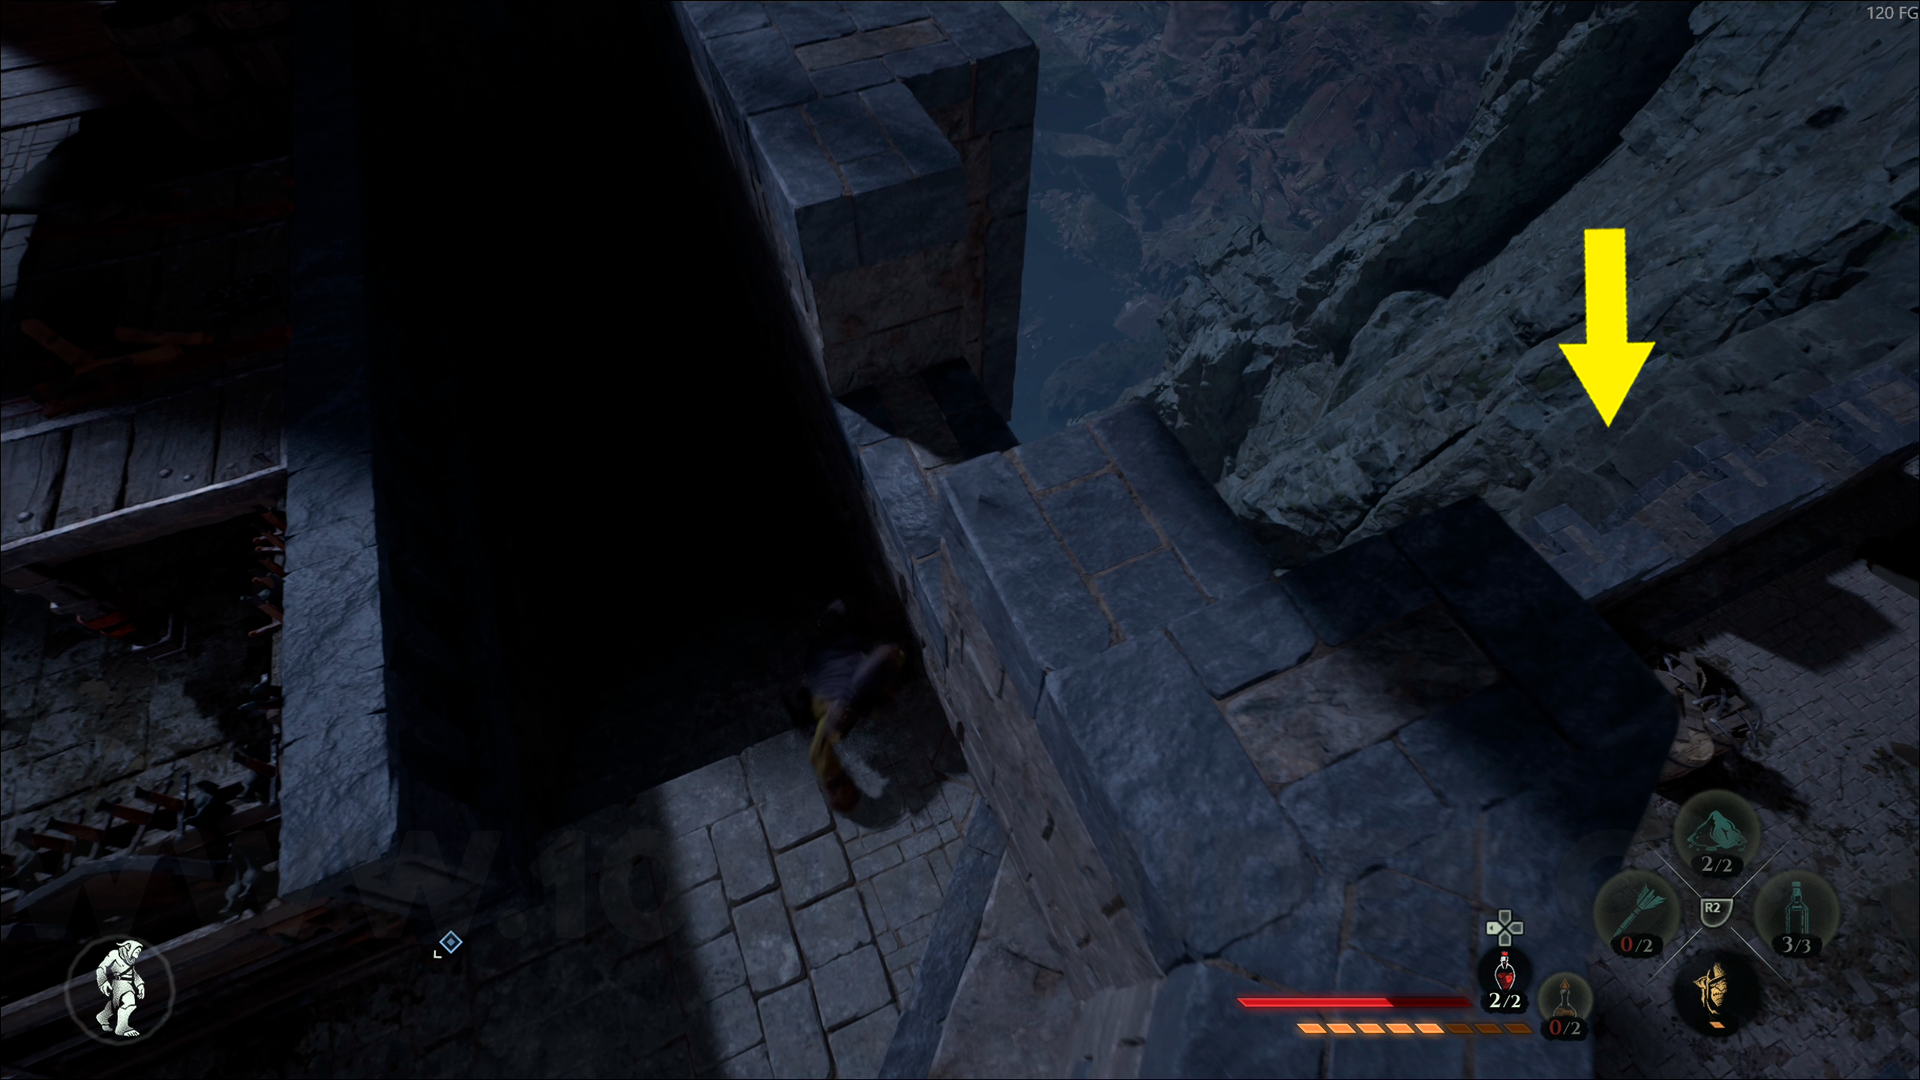

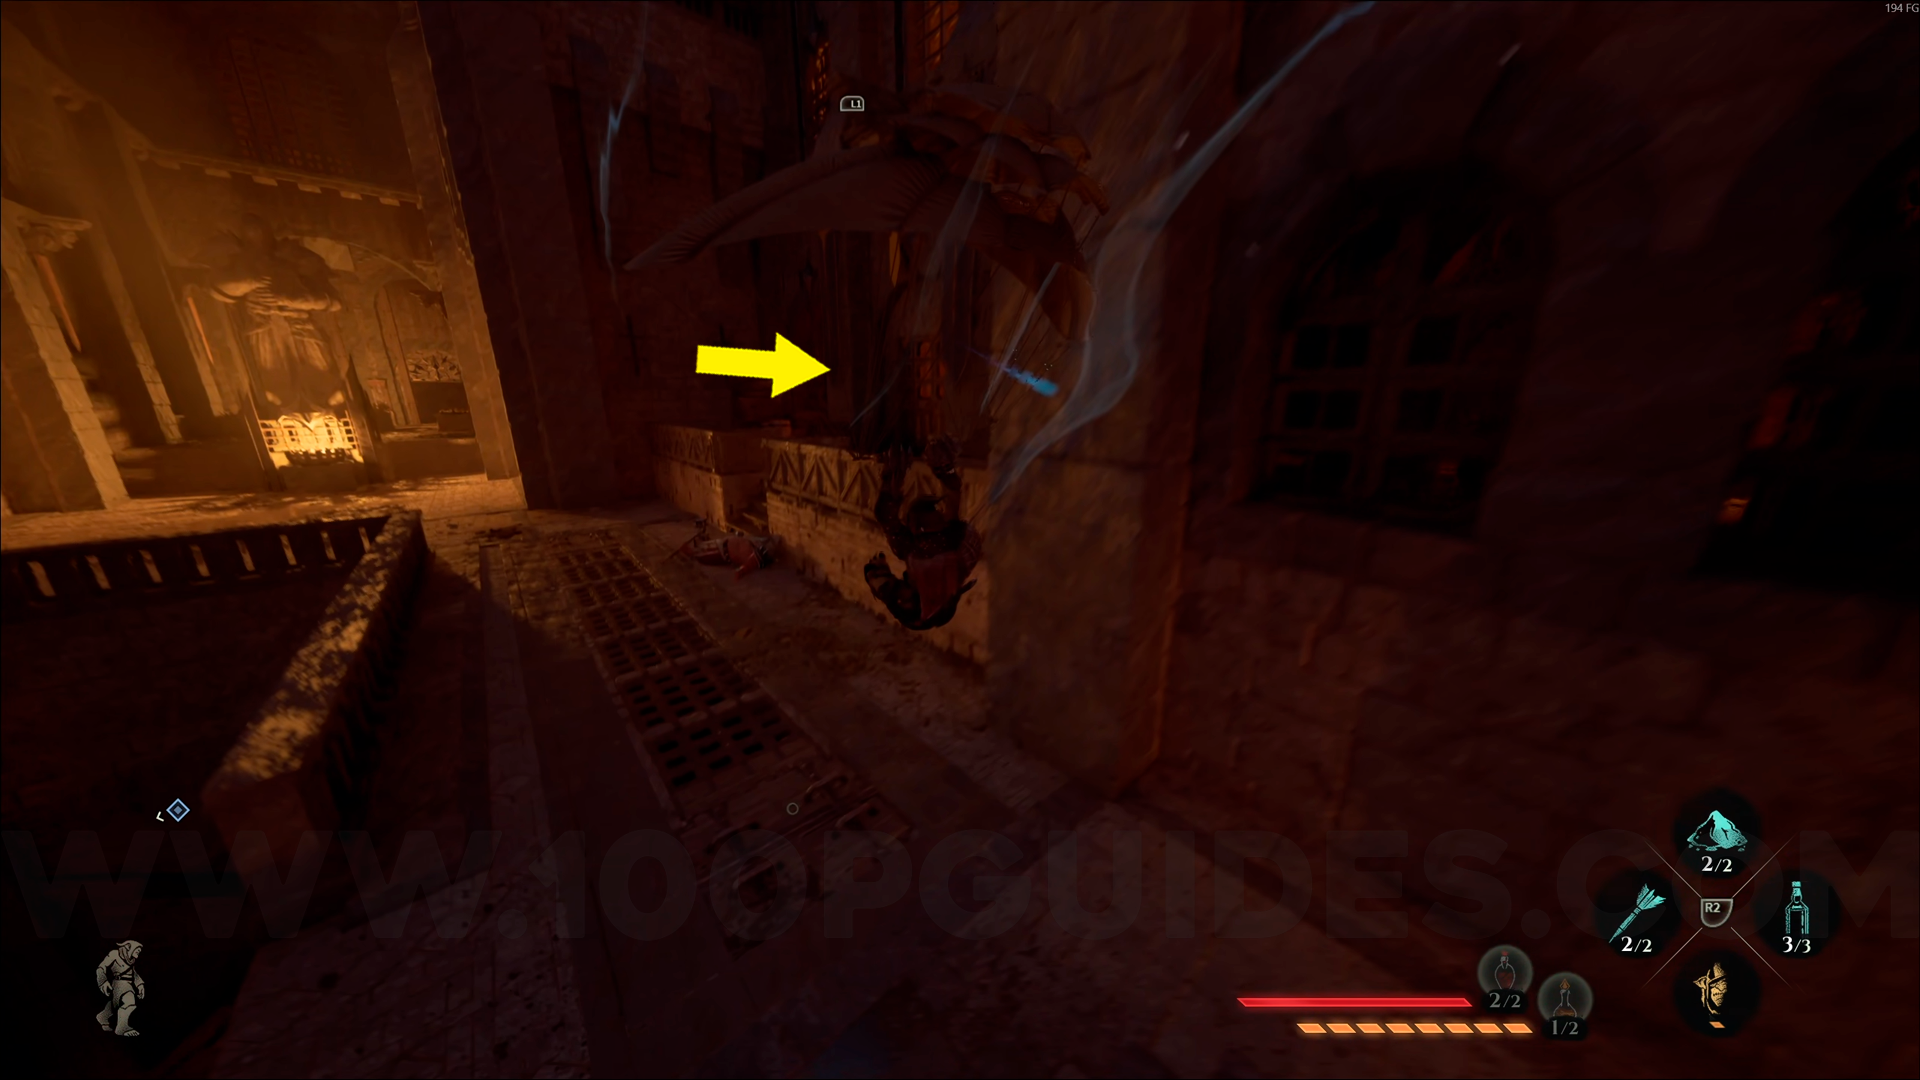
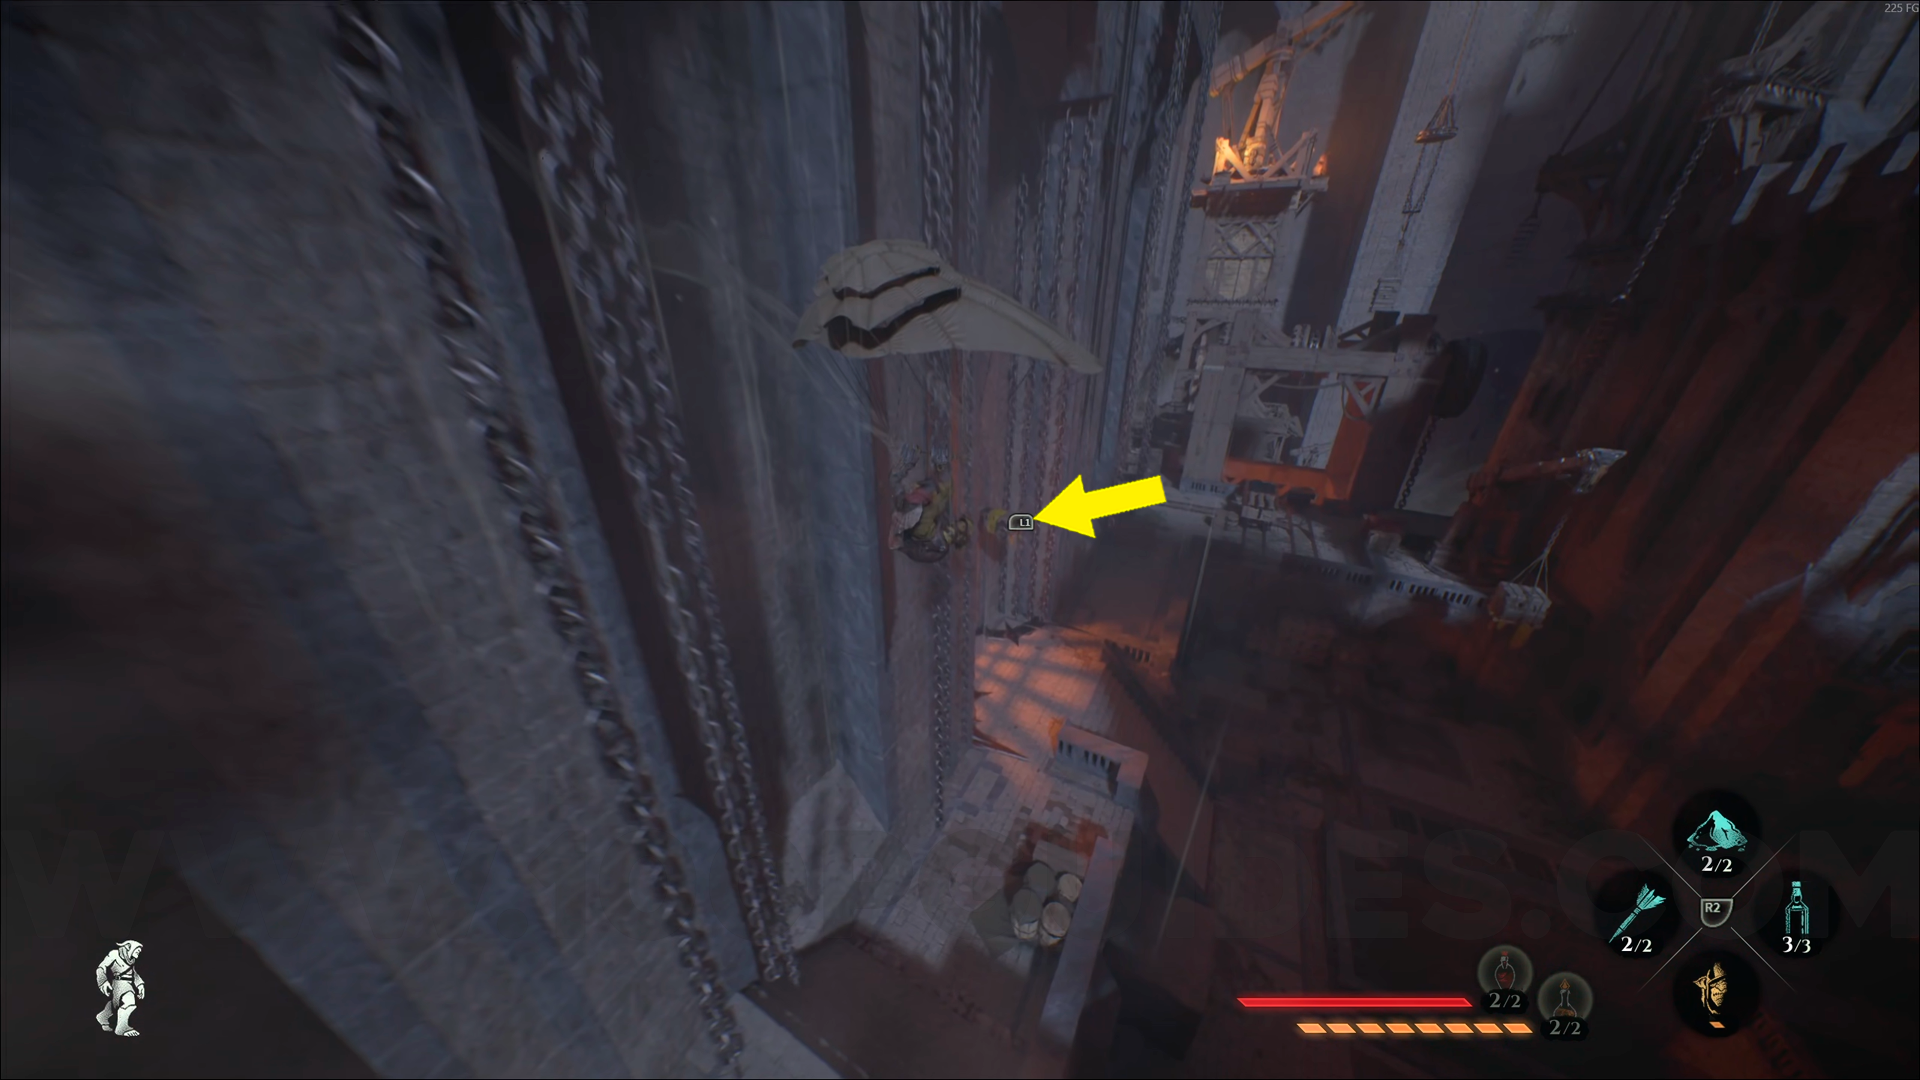
Bronze Emblem #2. From the Empire's Dungeons checkpoint, go down to the right and head to the end of the area. Then turn left, climb up the rope, and go through the window in front of you. Look down and you'll see the emblem. Use Amber Vision to help you spot it.

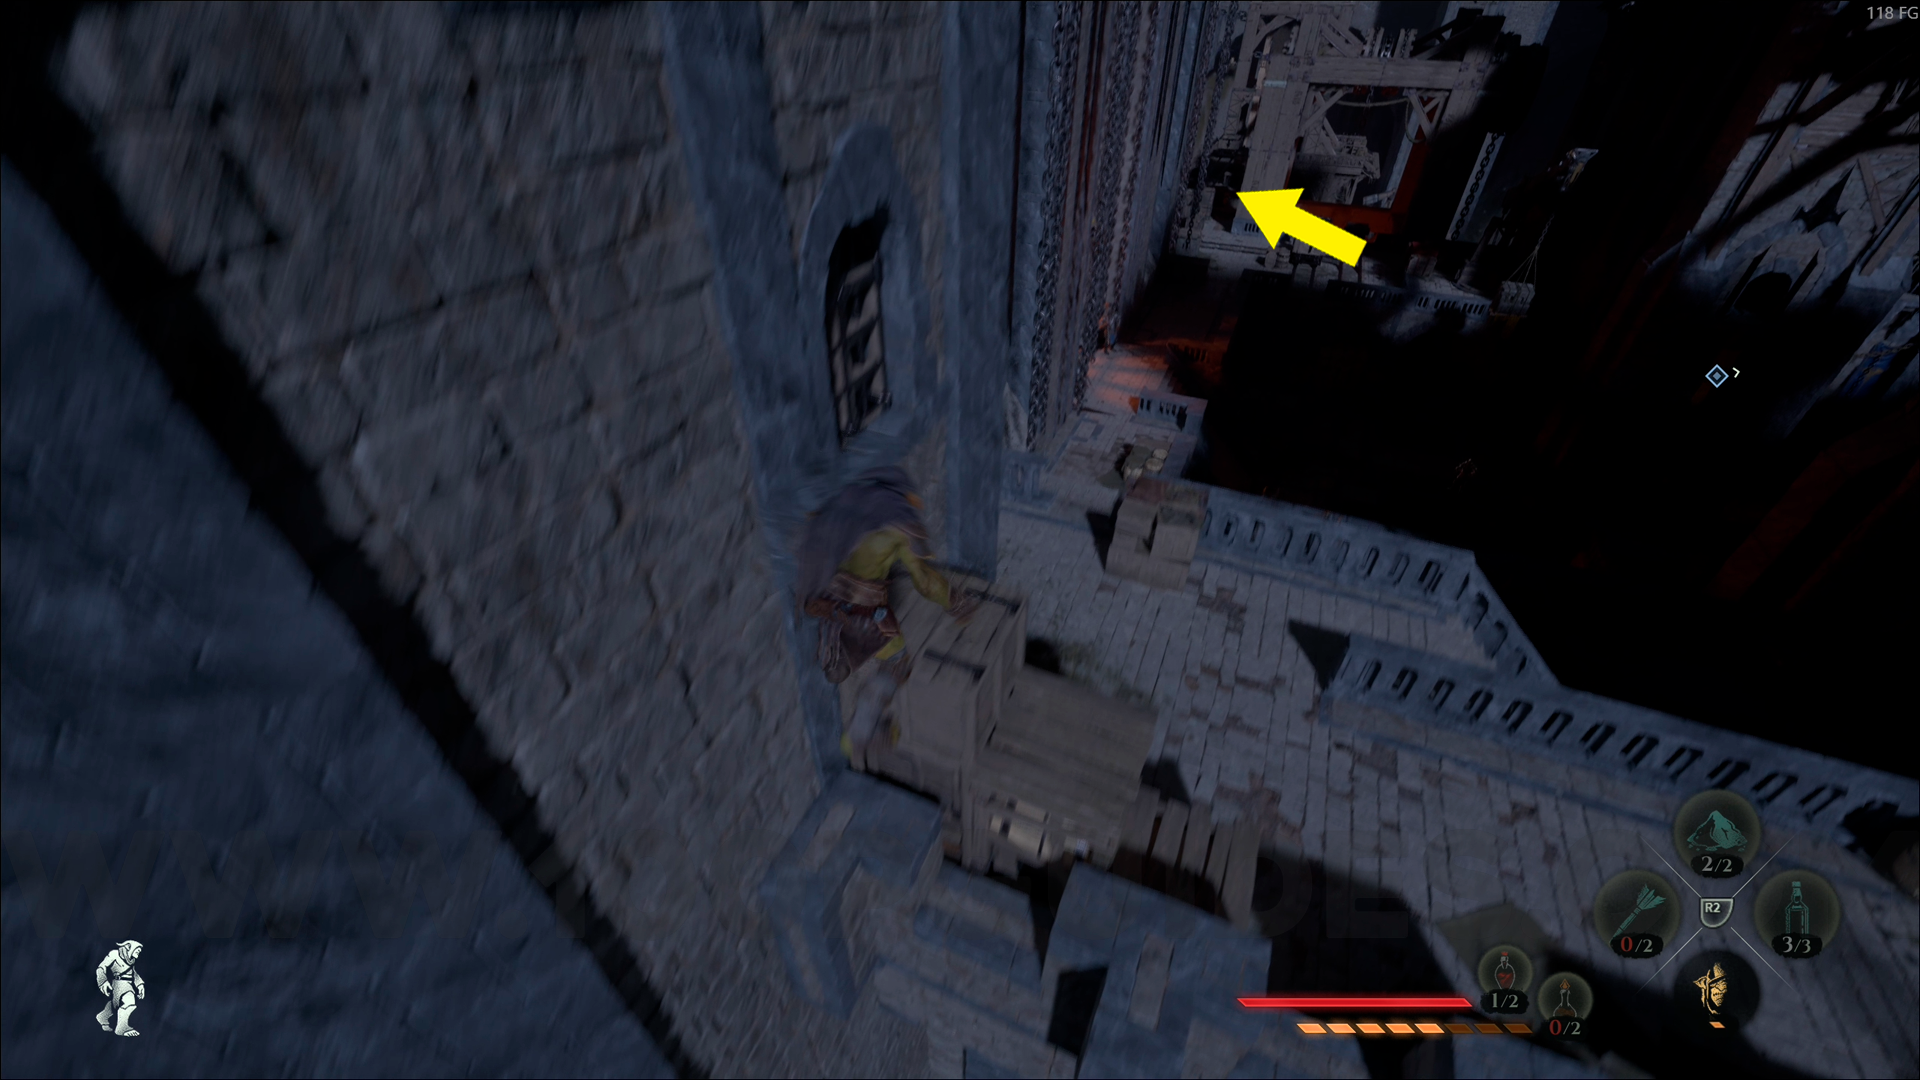

Bronze Emblem #3. From the previous collectible, move to the building in front of you, then go through the hole in the wall at the bottom. Once inside, go up the stairs and then climb the pillar to find this emblem. Use Amber Vision to help you spot it.
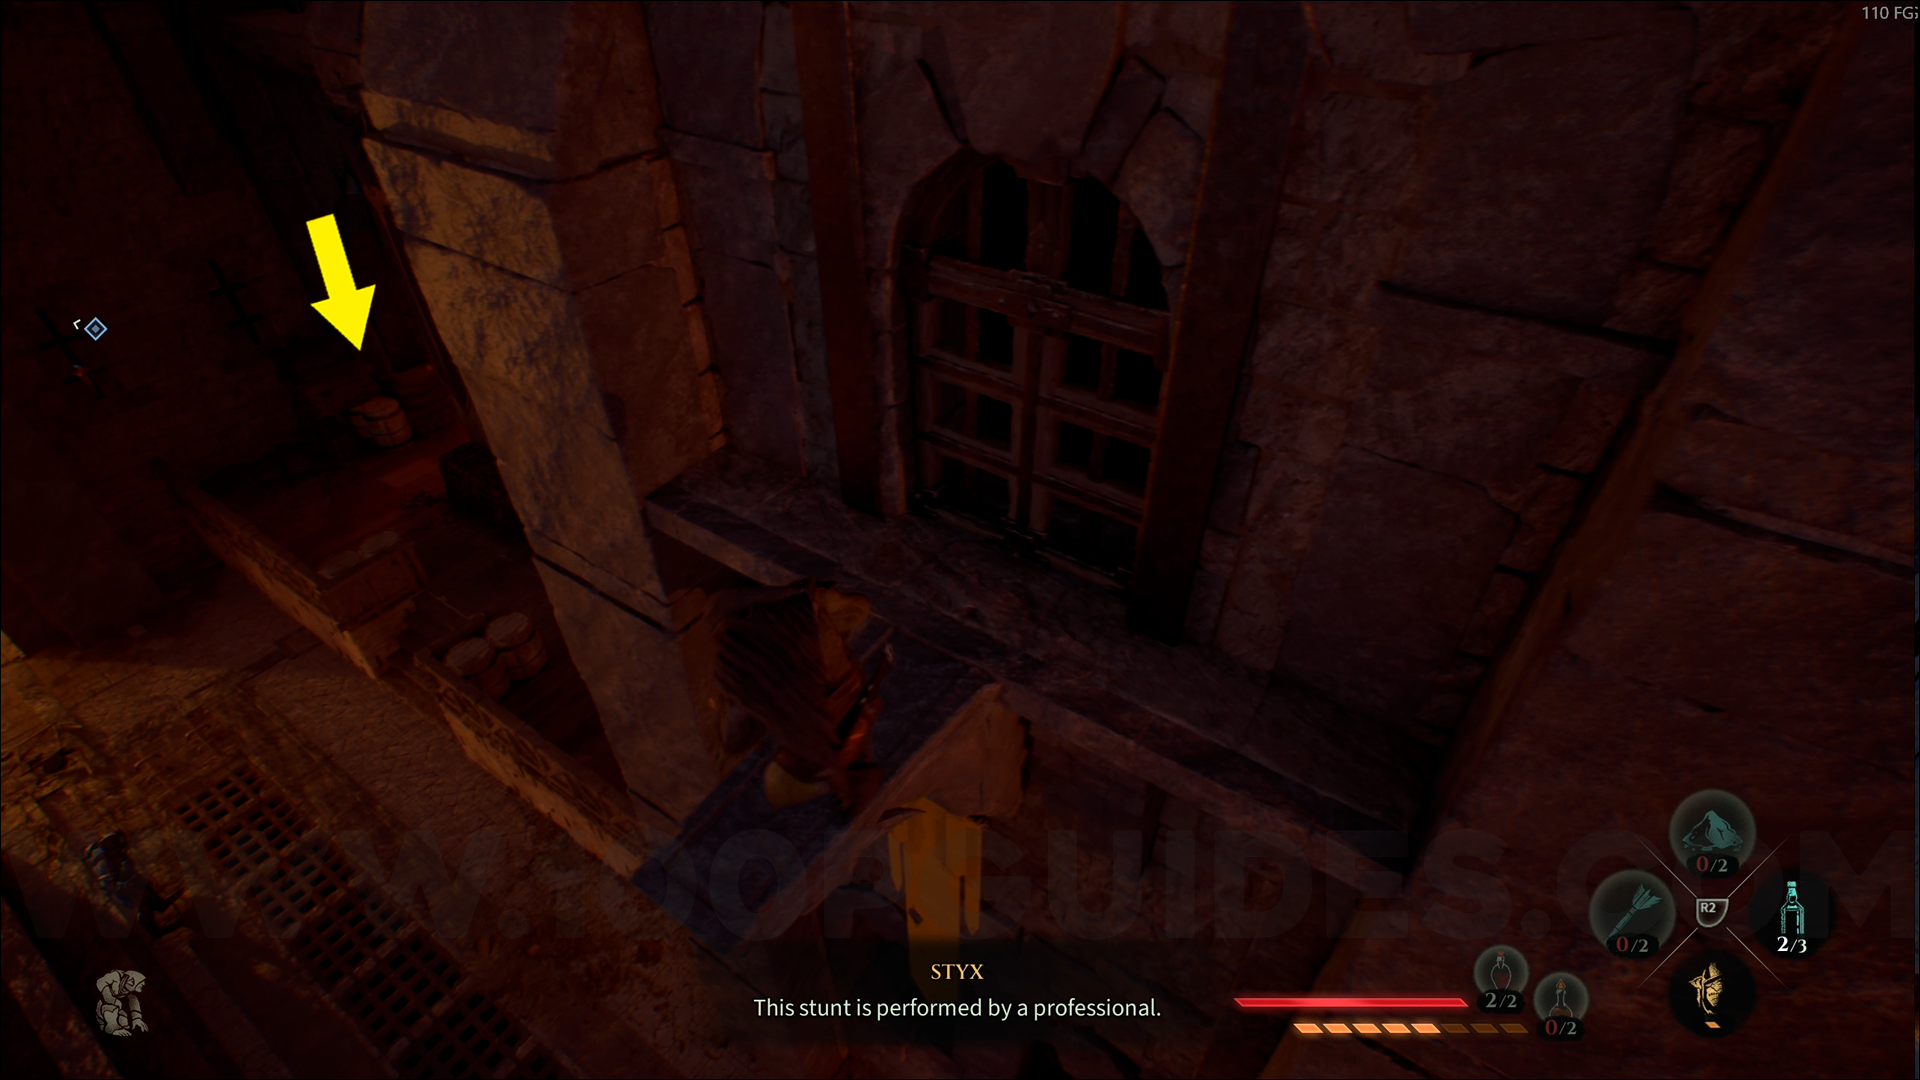
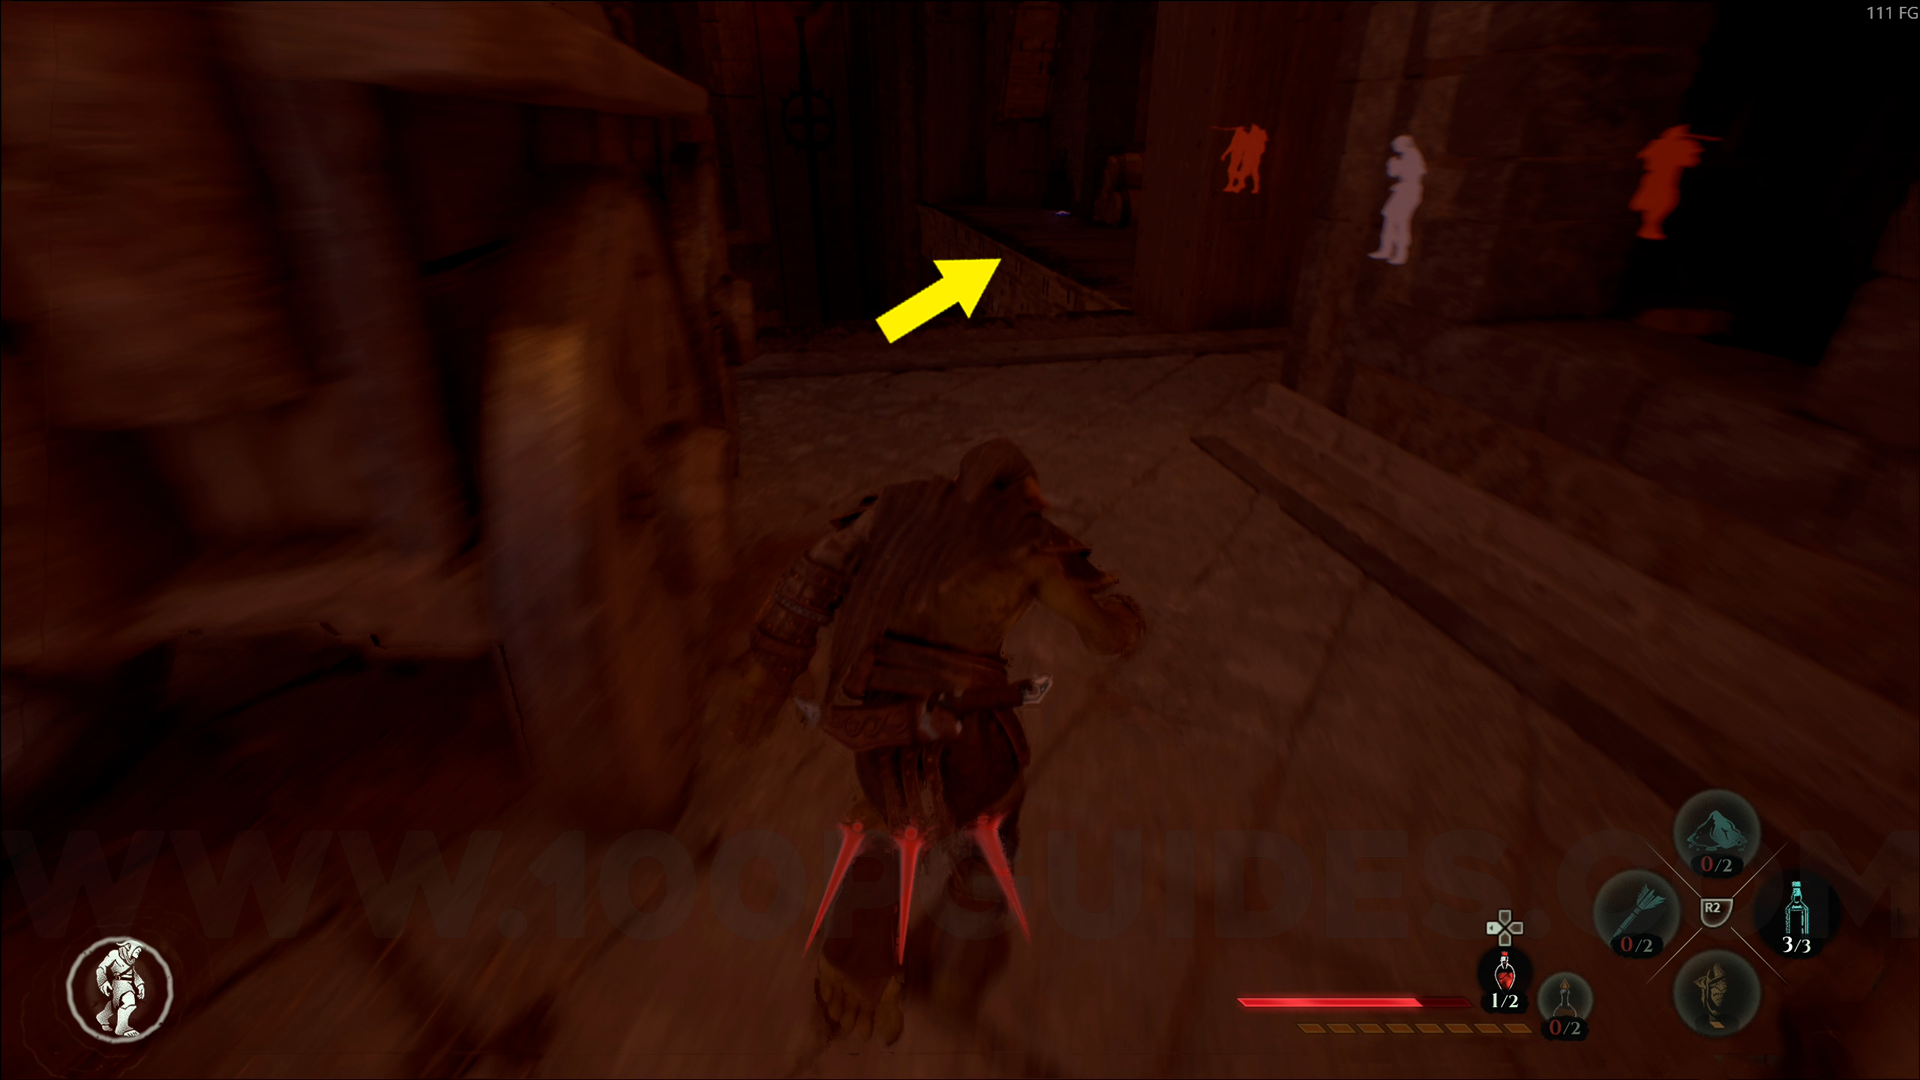
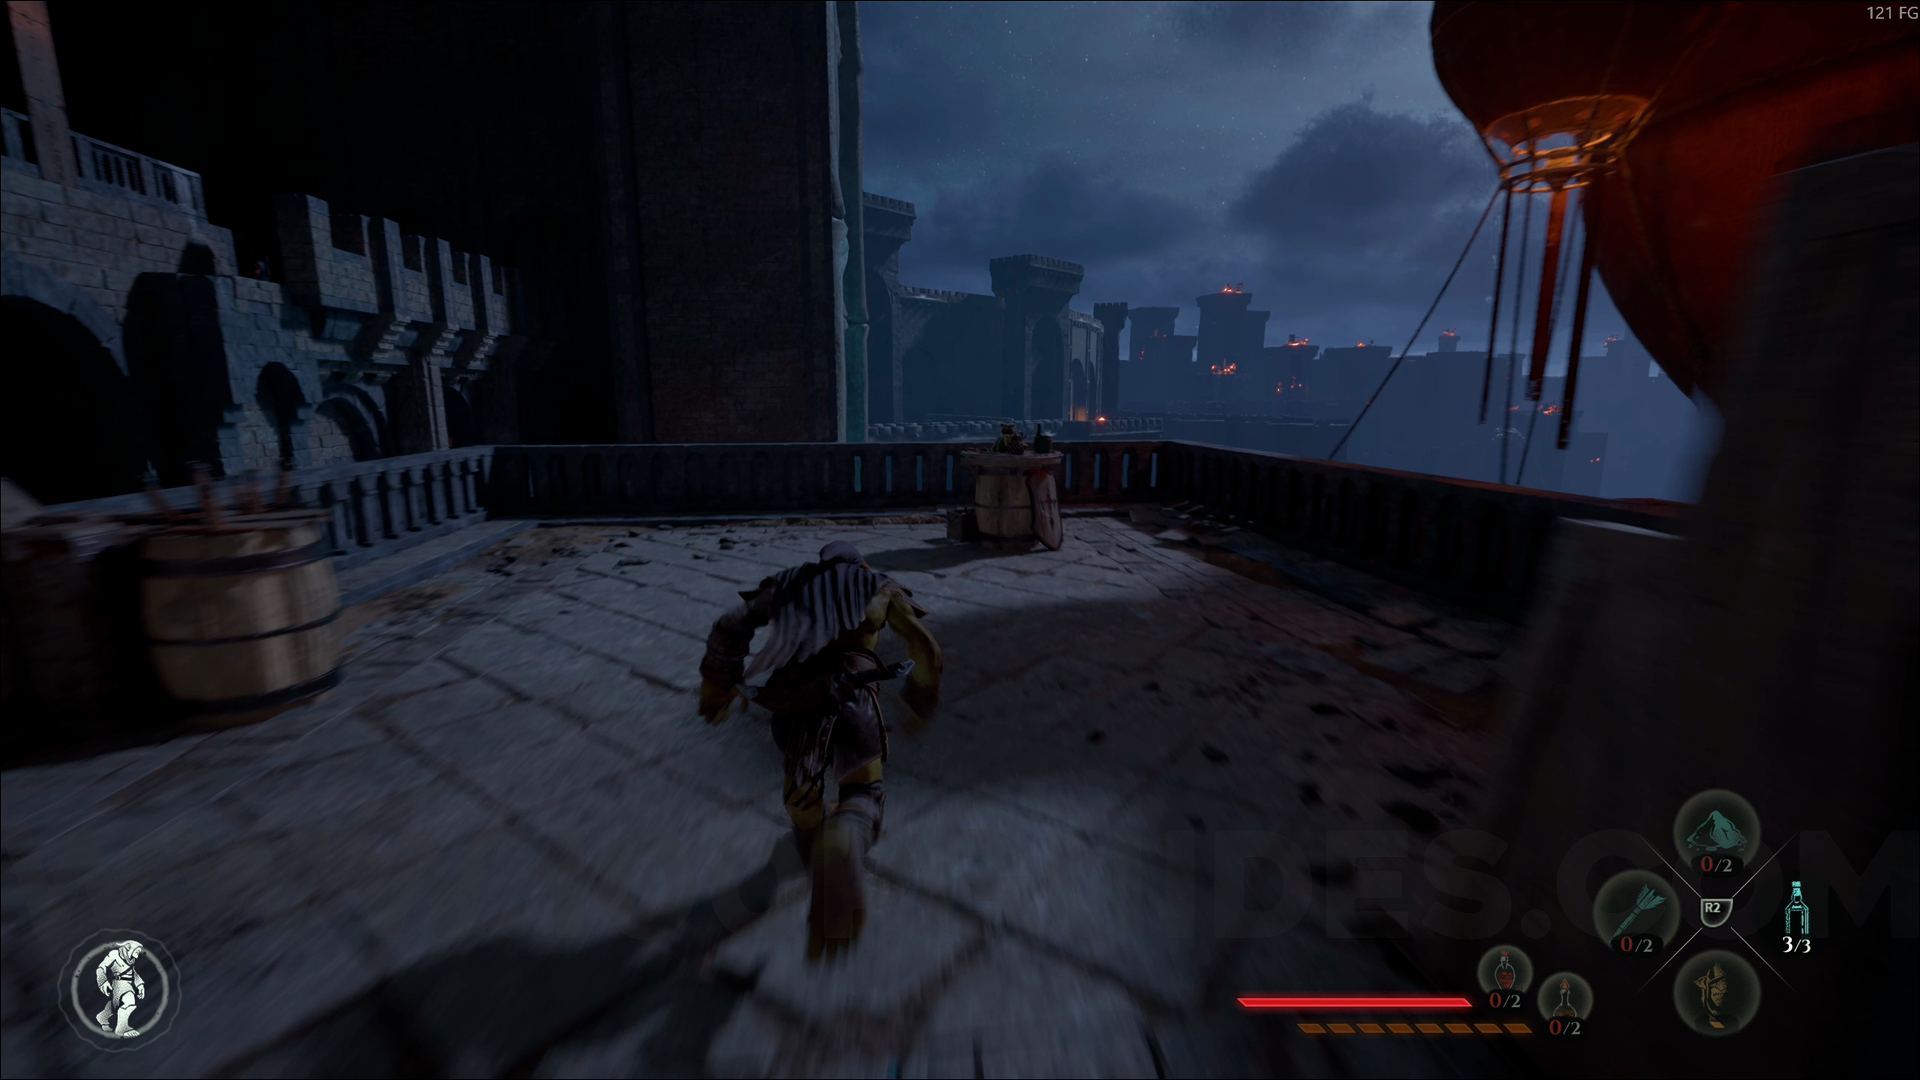
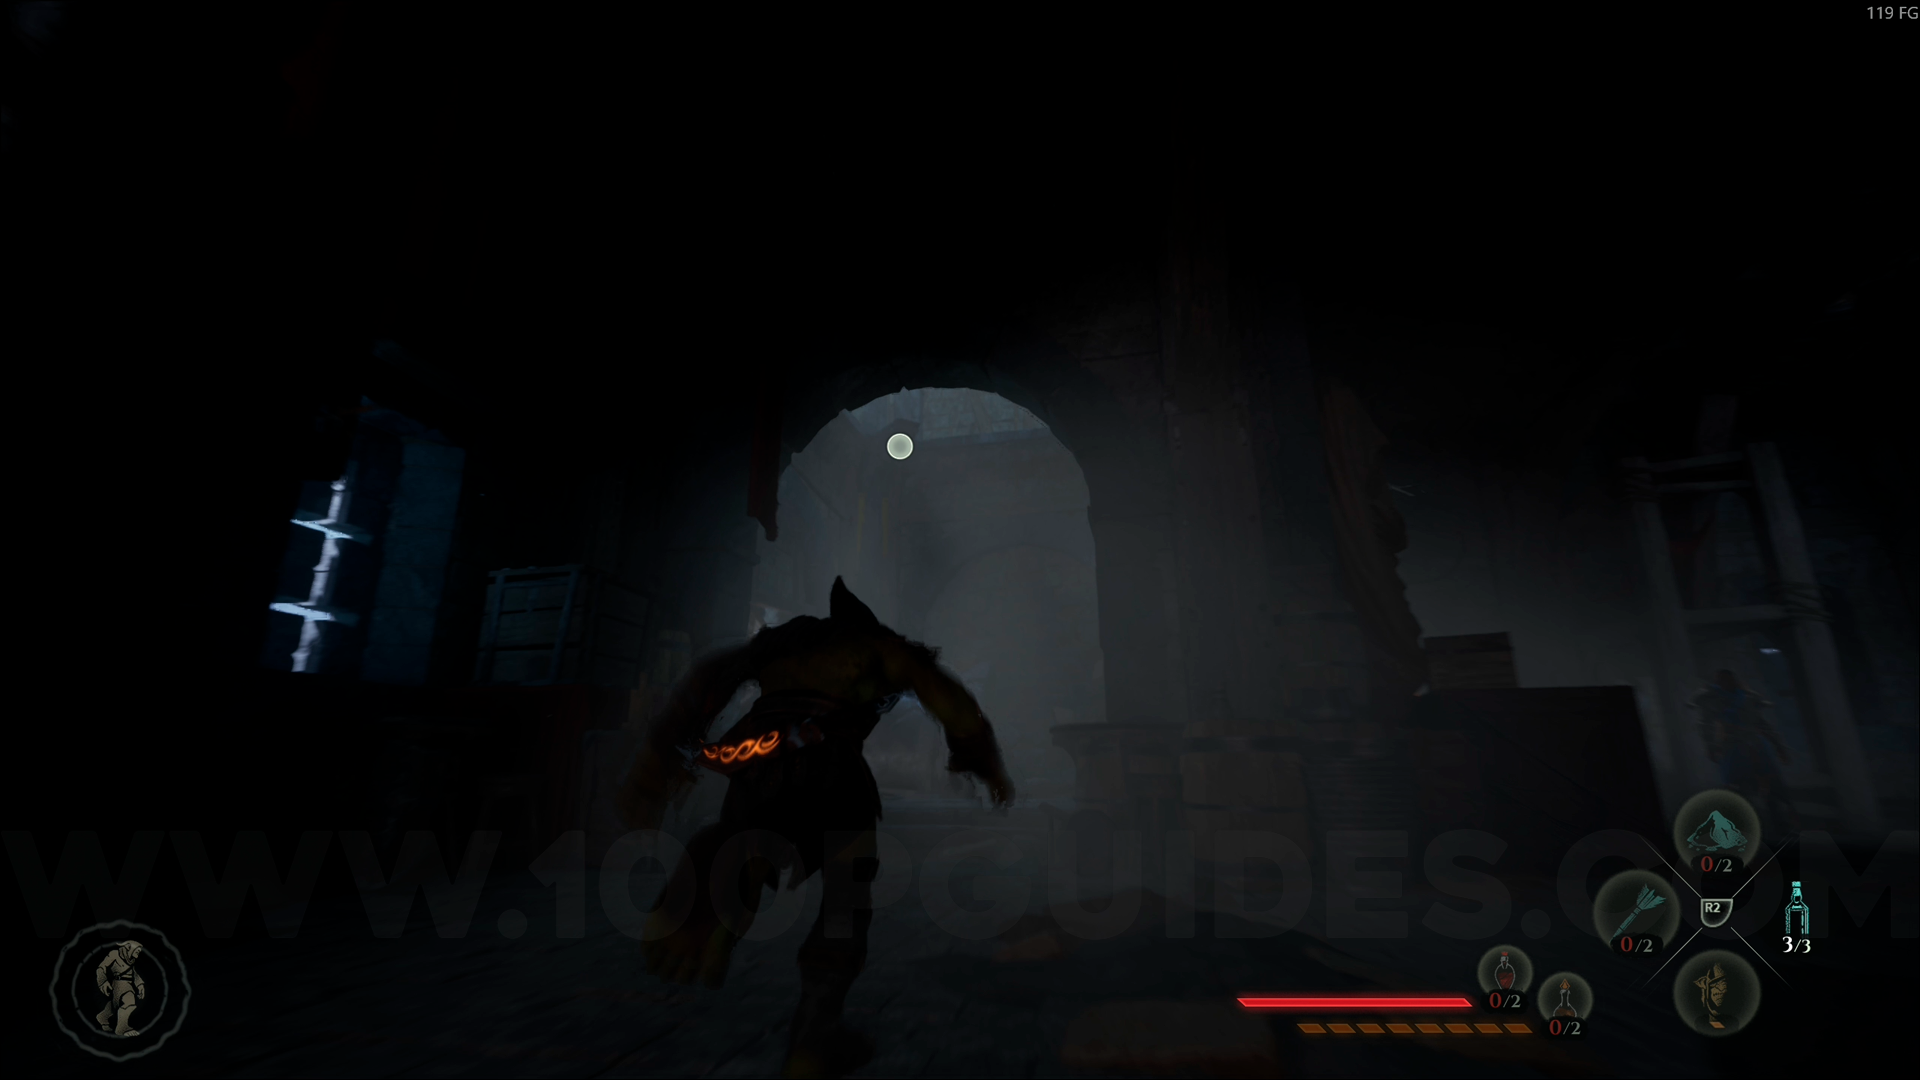
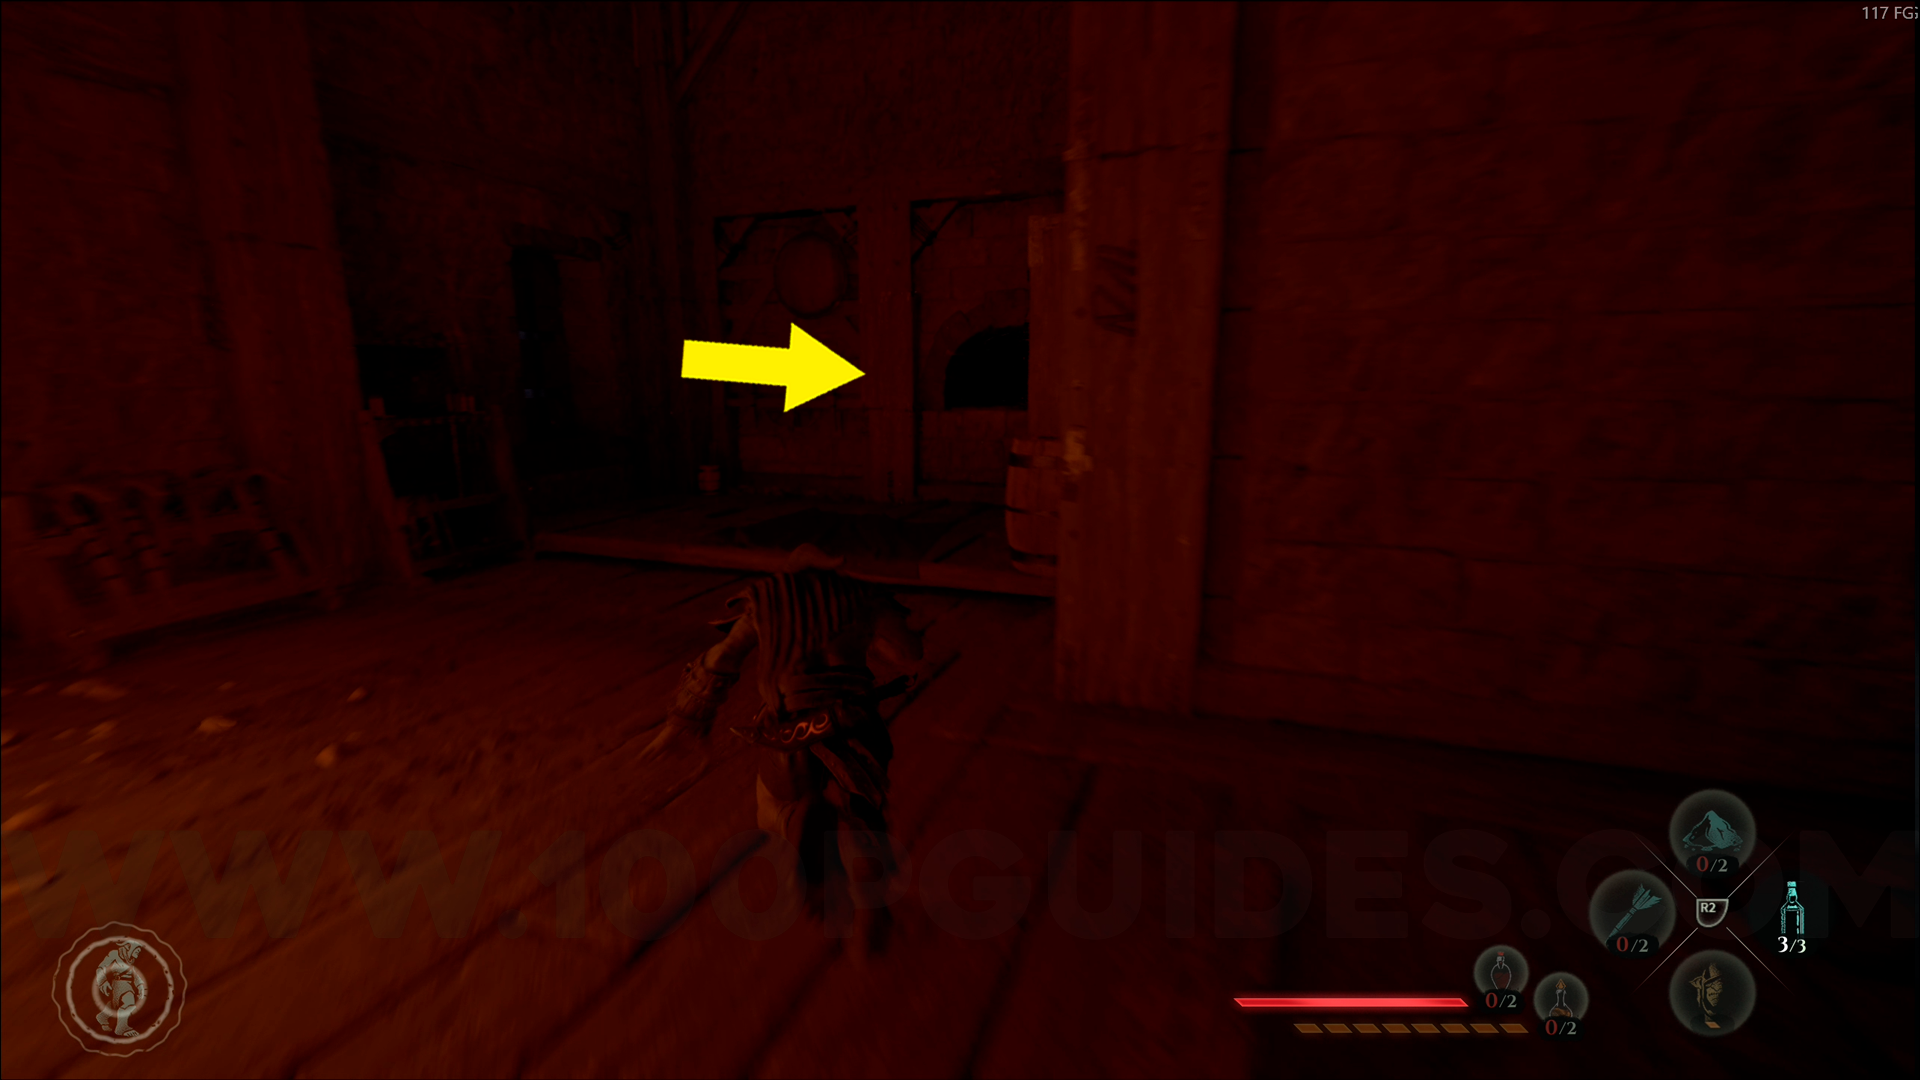
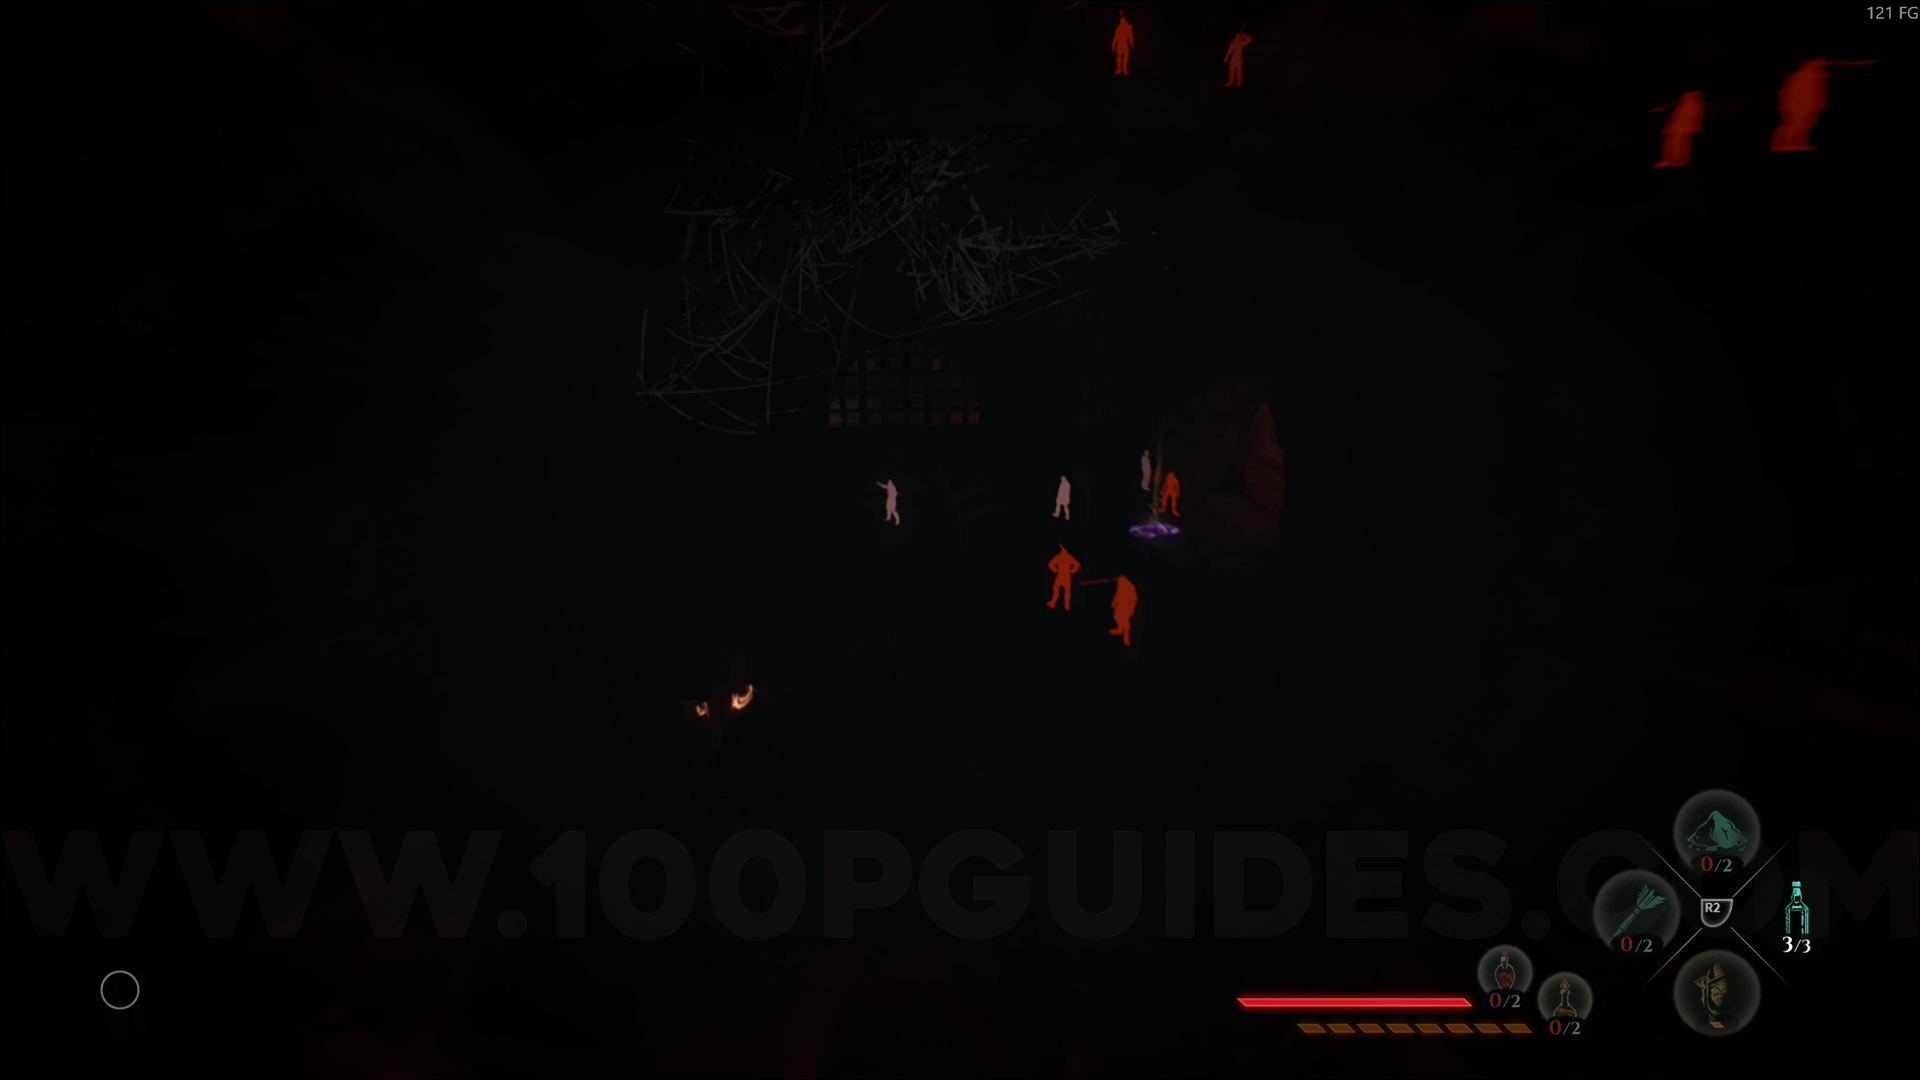
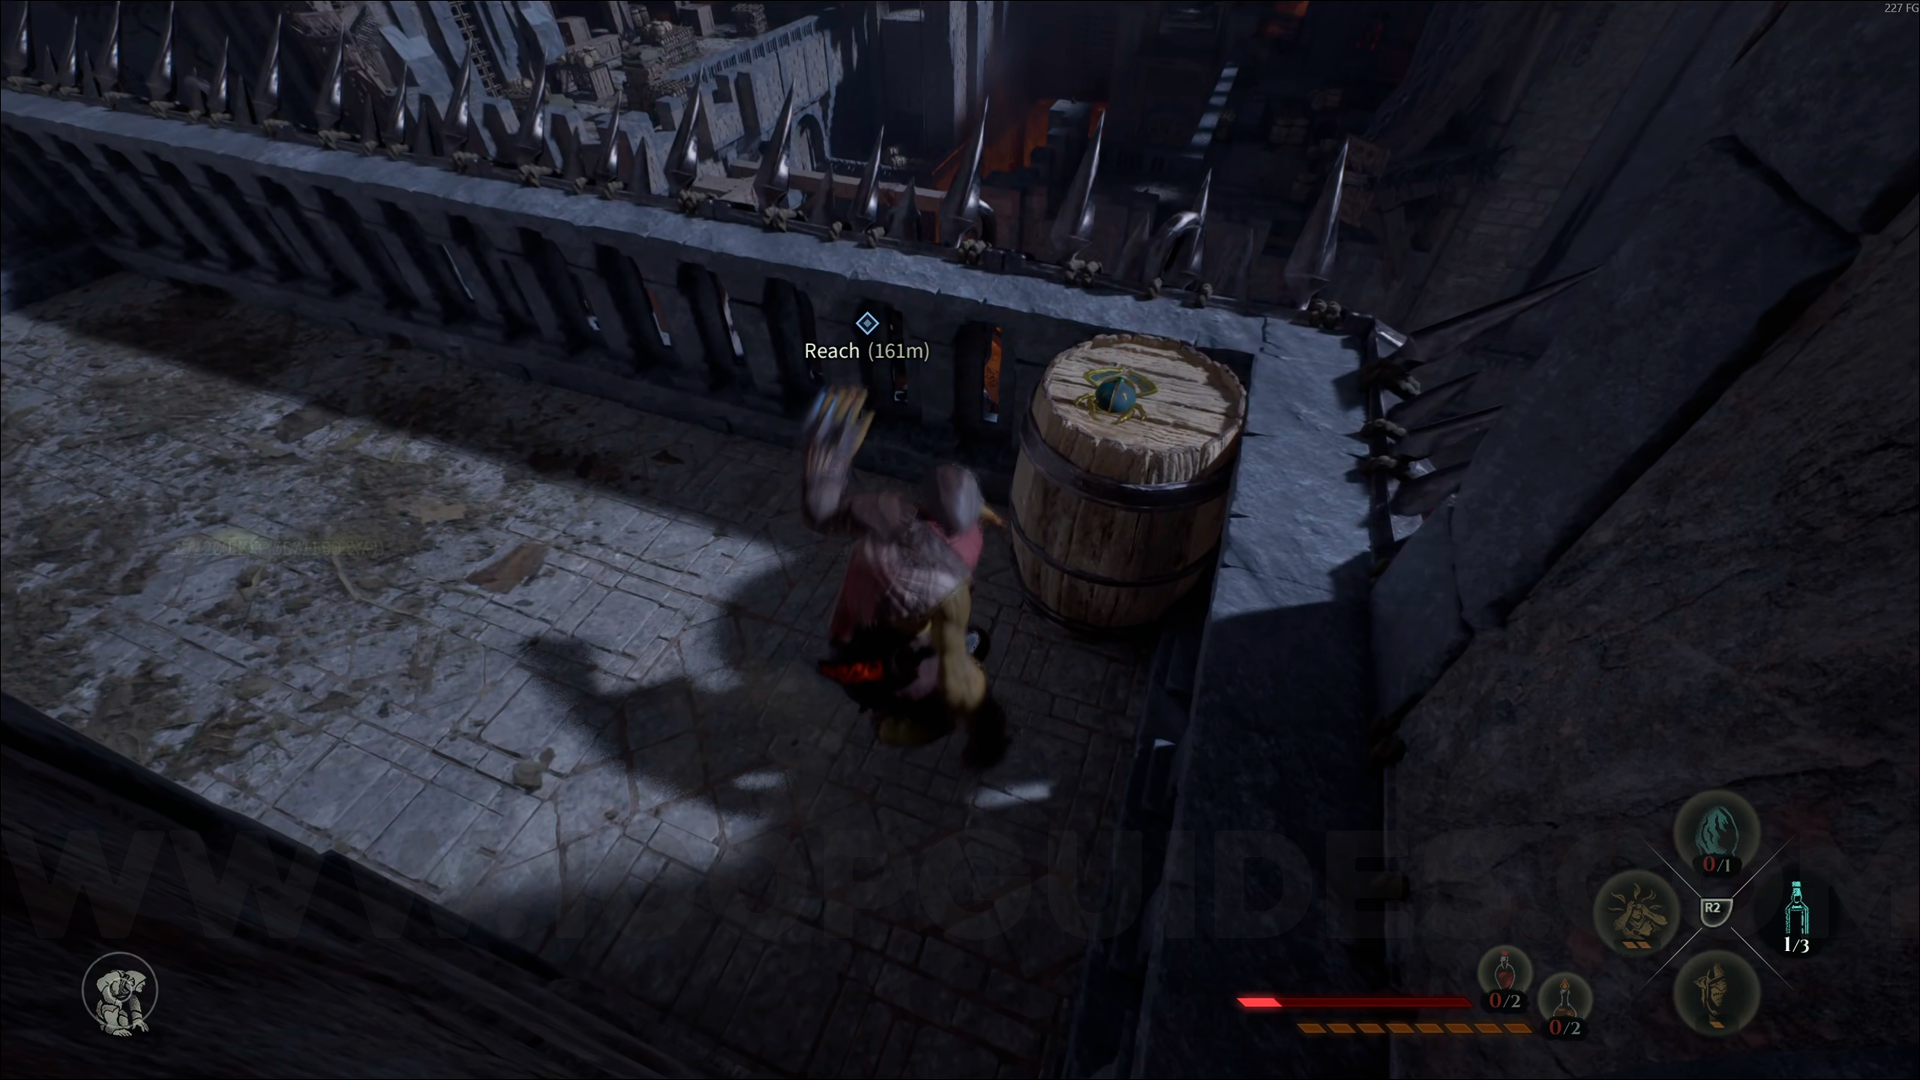
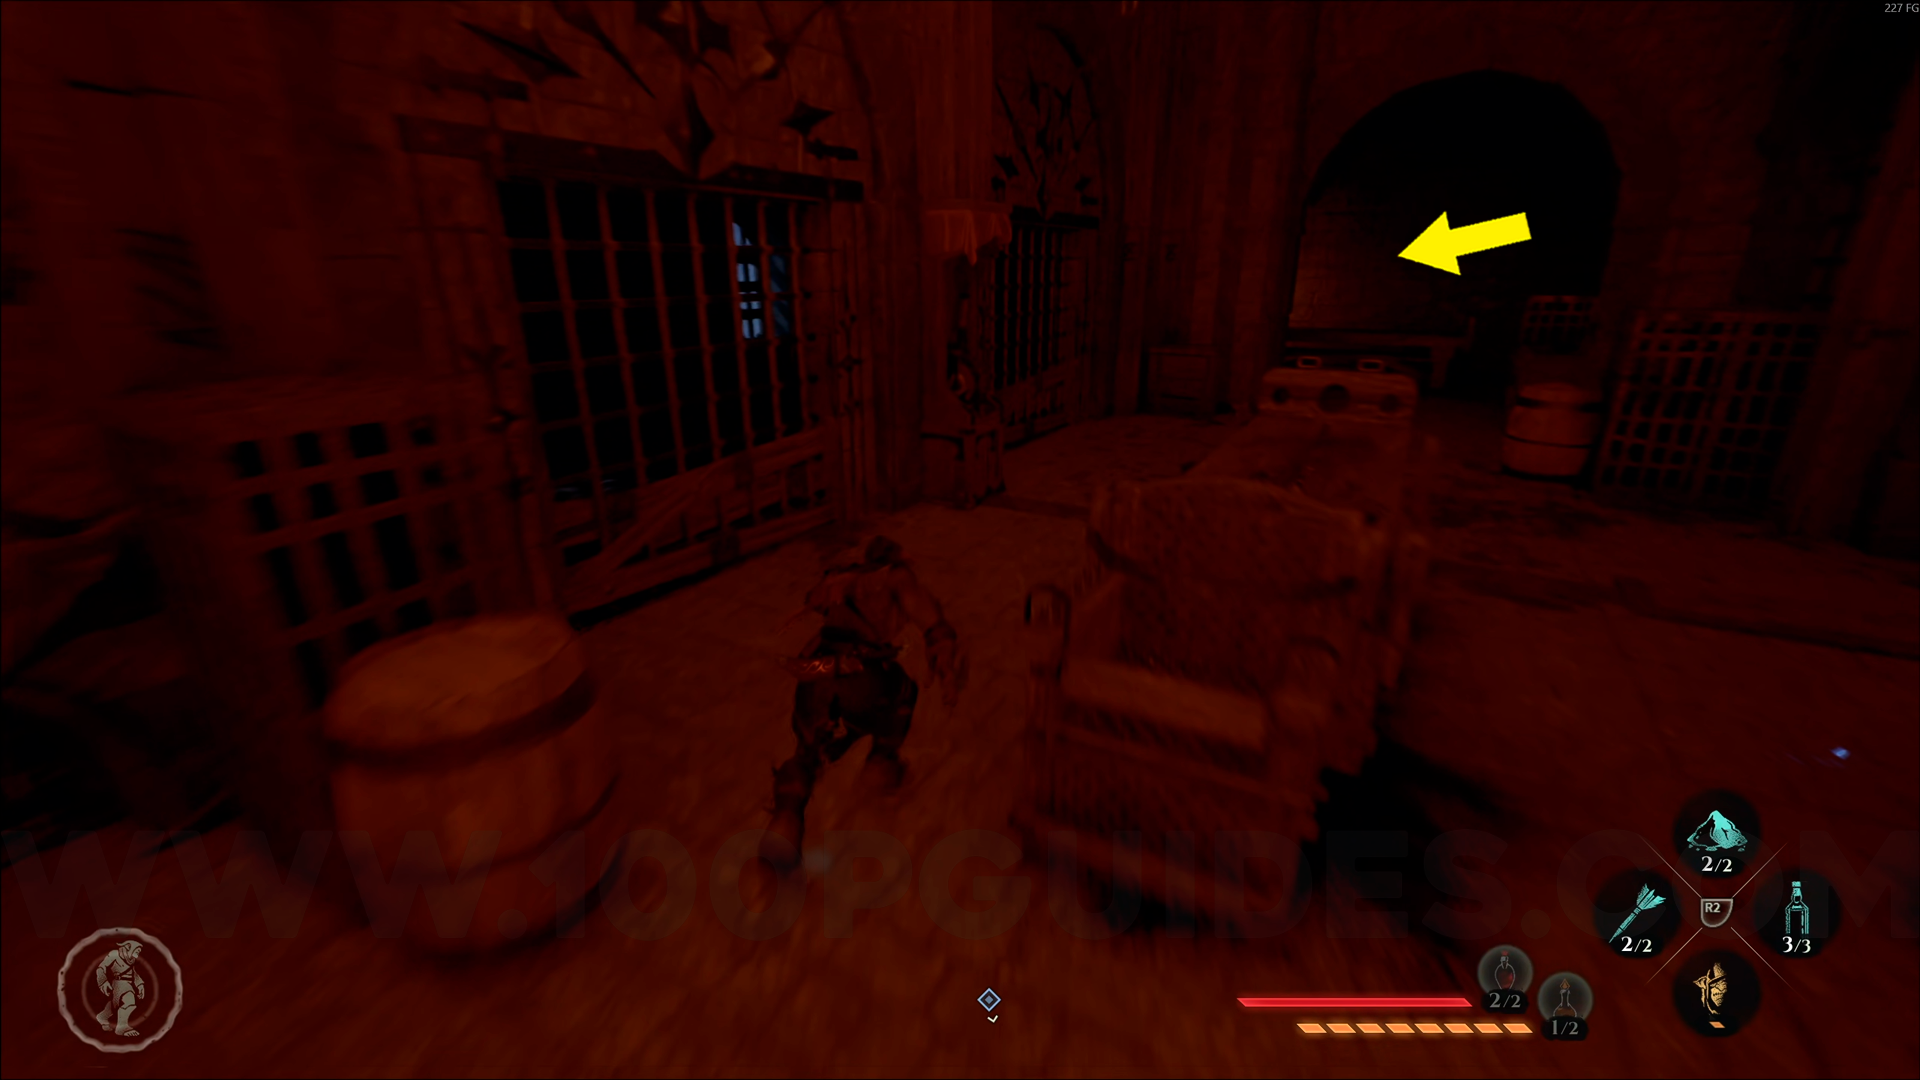
Bronze Emblem #4. From the Empire's Dungeons checkpoint, go down the right side of the checkpoint and continue forward. Take the first right where there are a few enemies. Use Amber Vision, and you’ll see this emblem on the right side of the area, on top of a barrel.


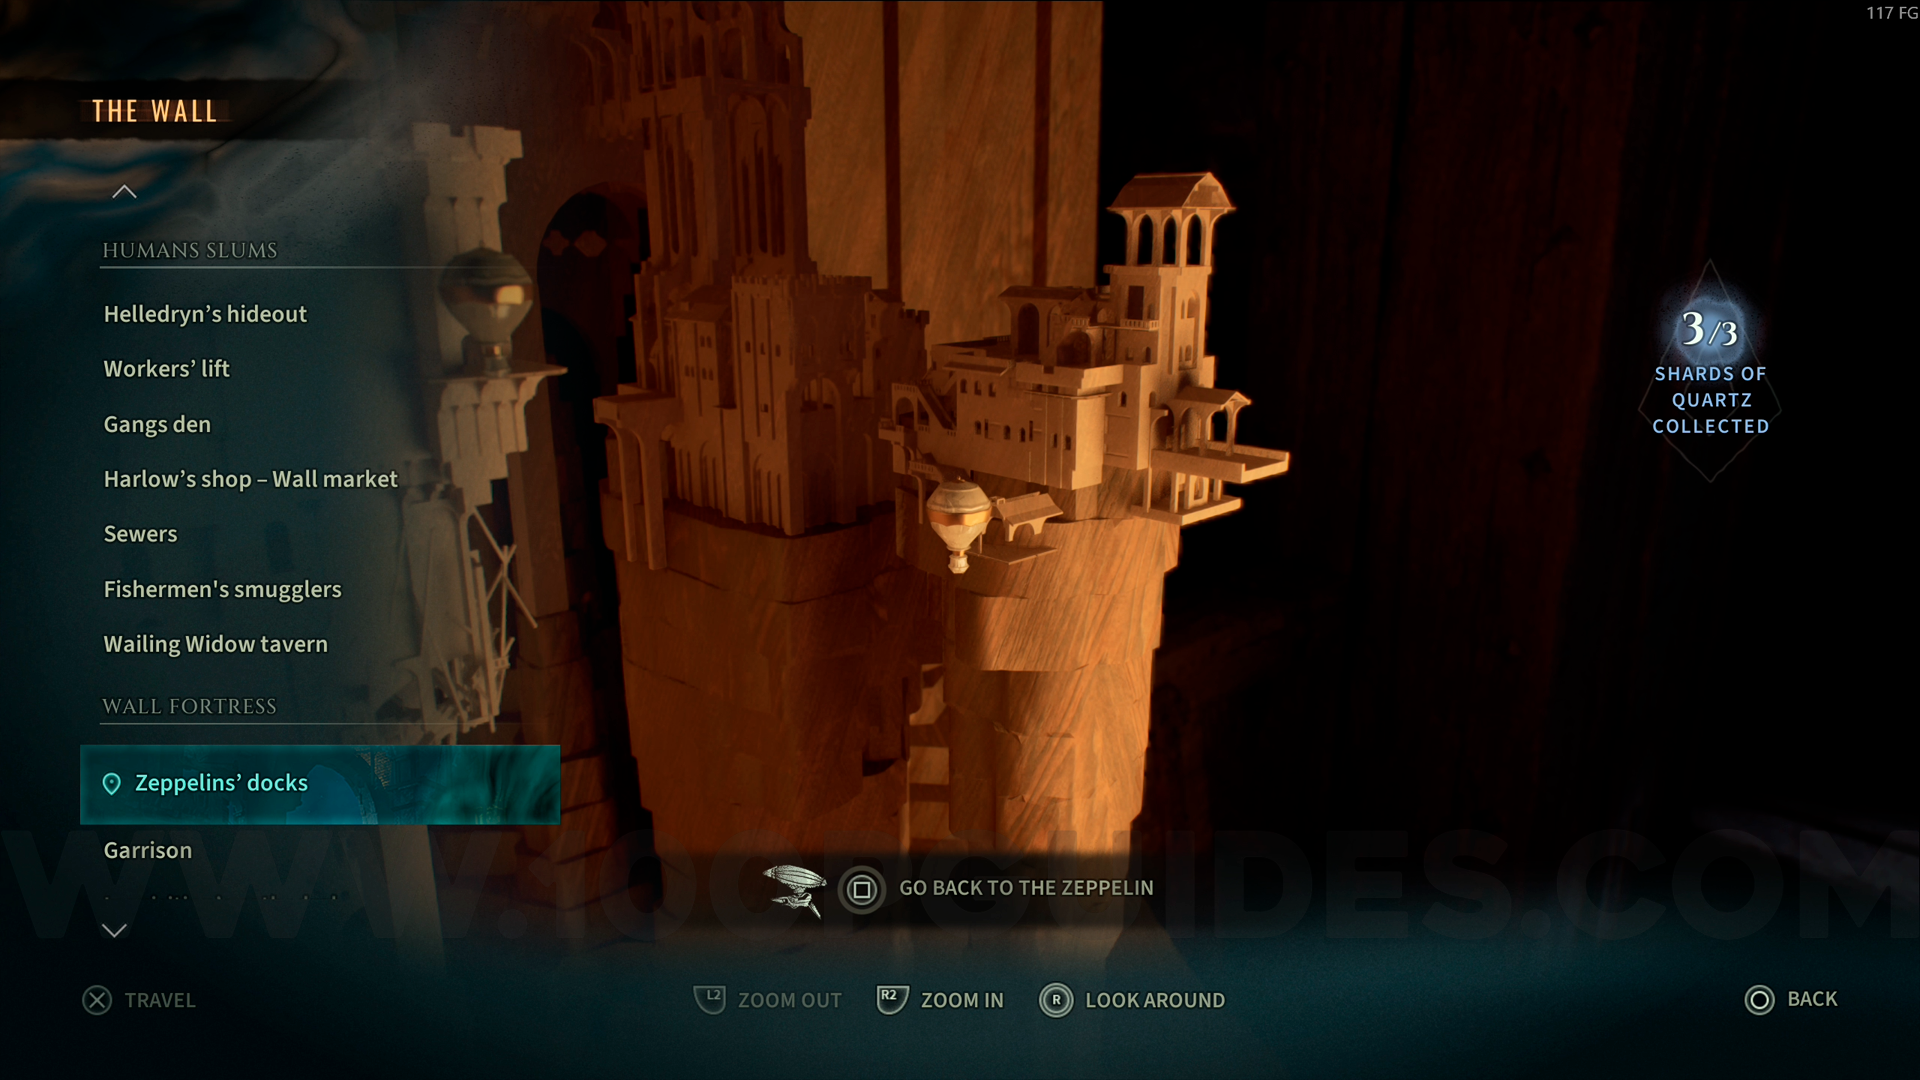
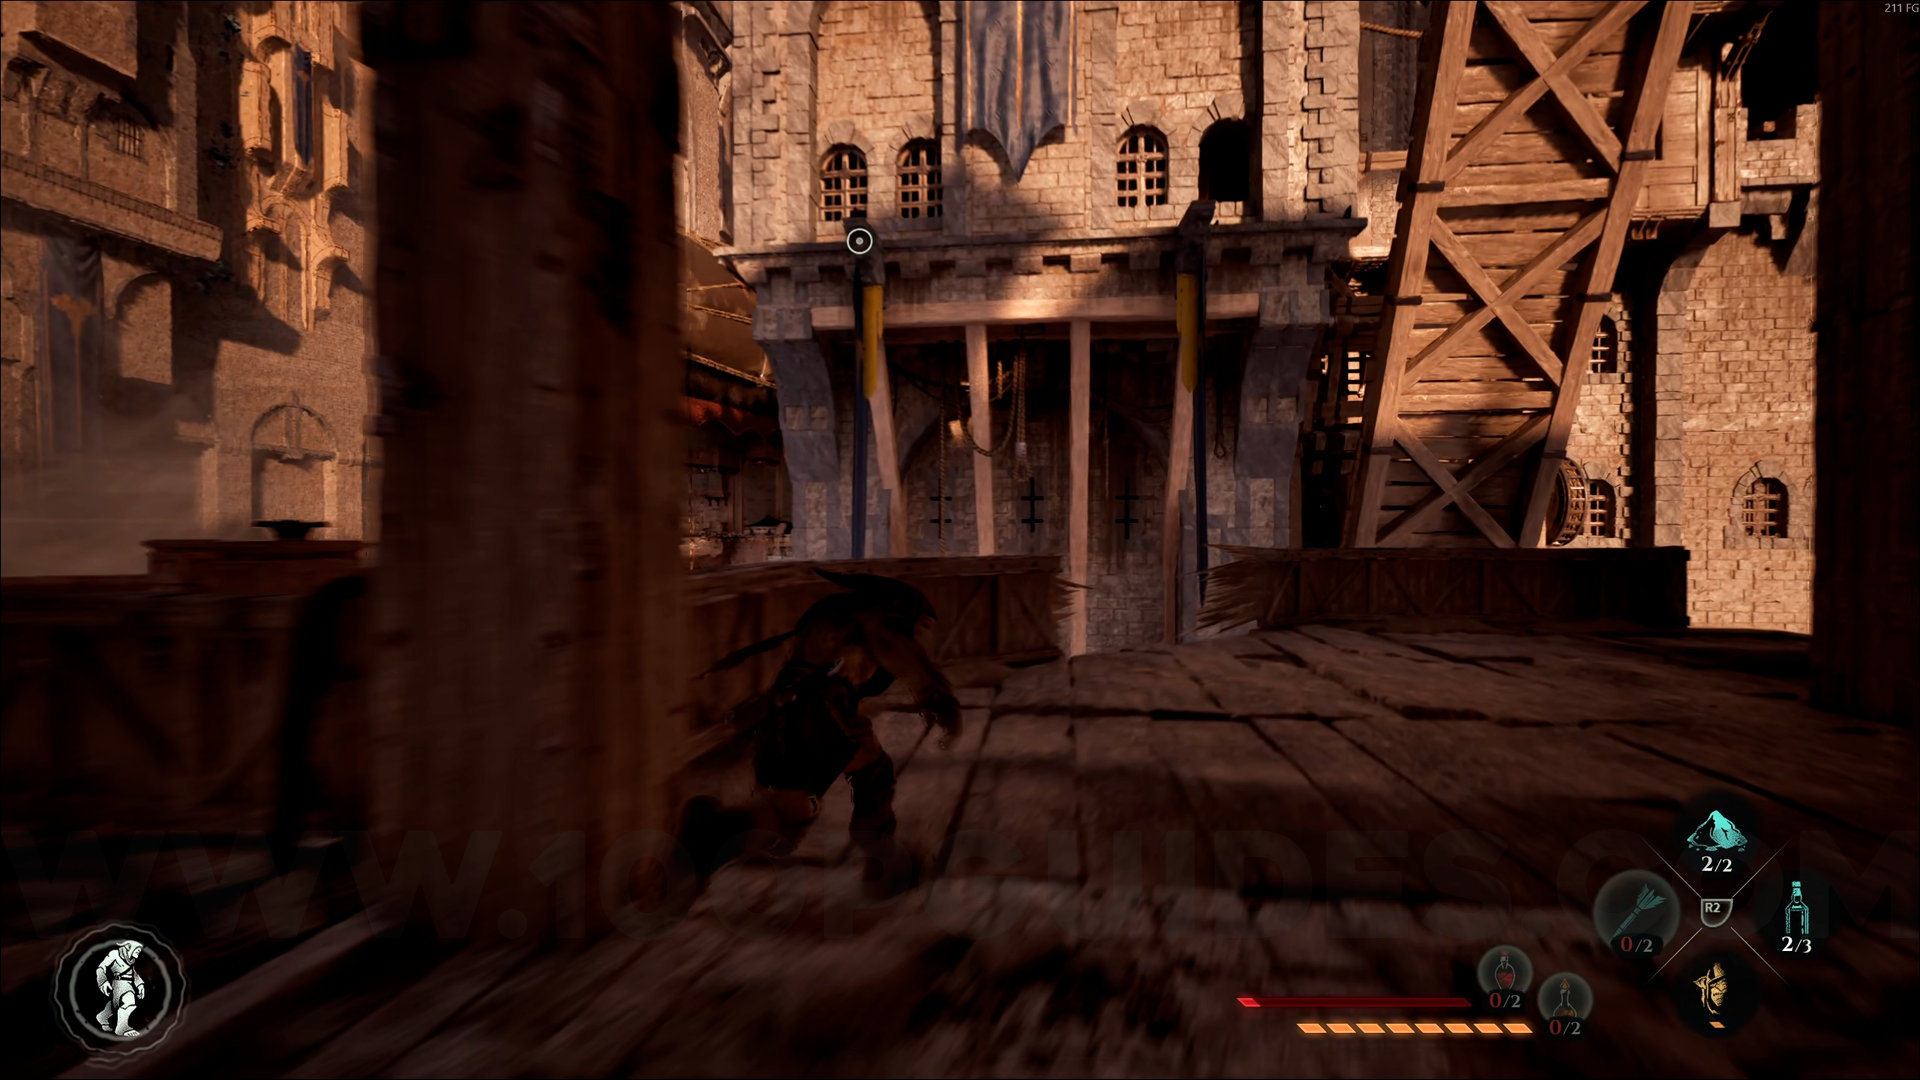
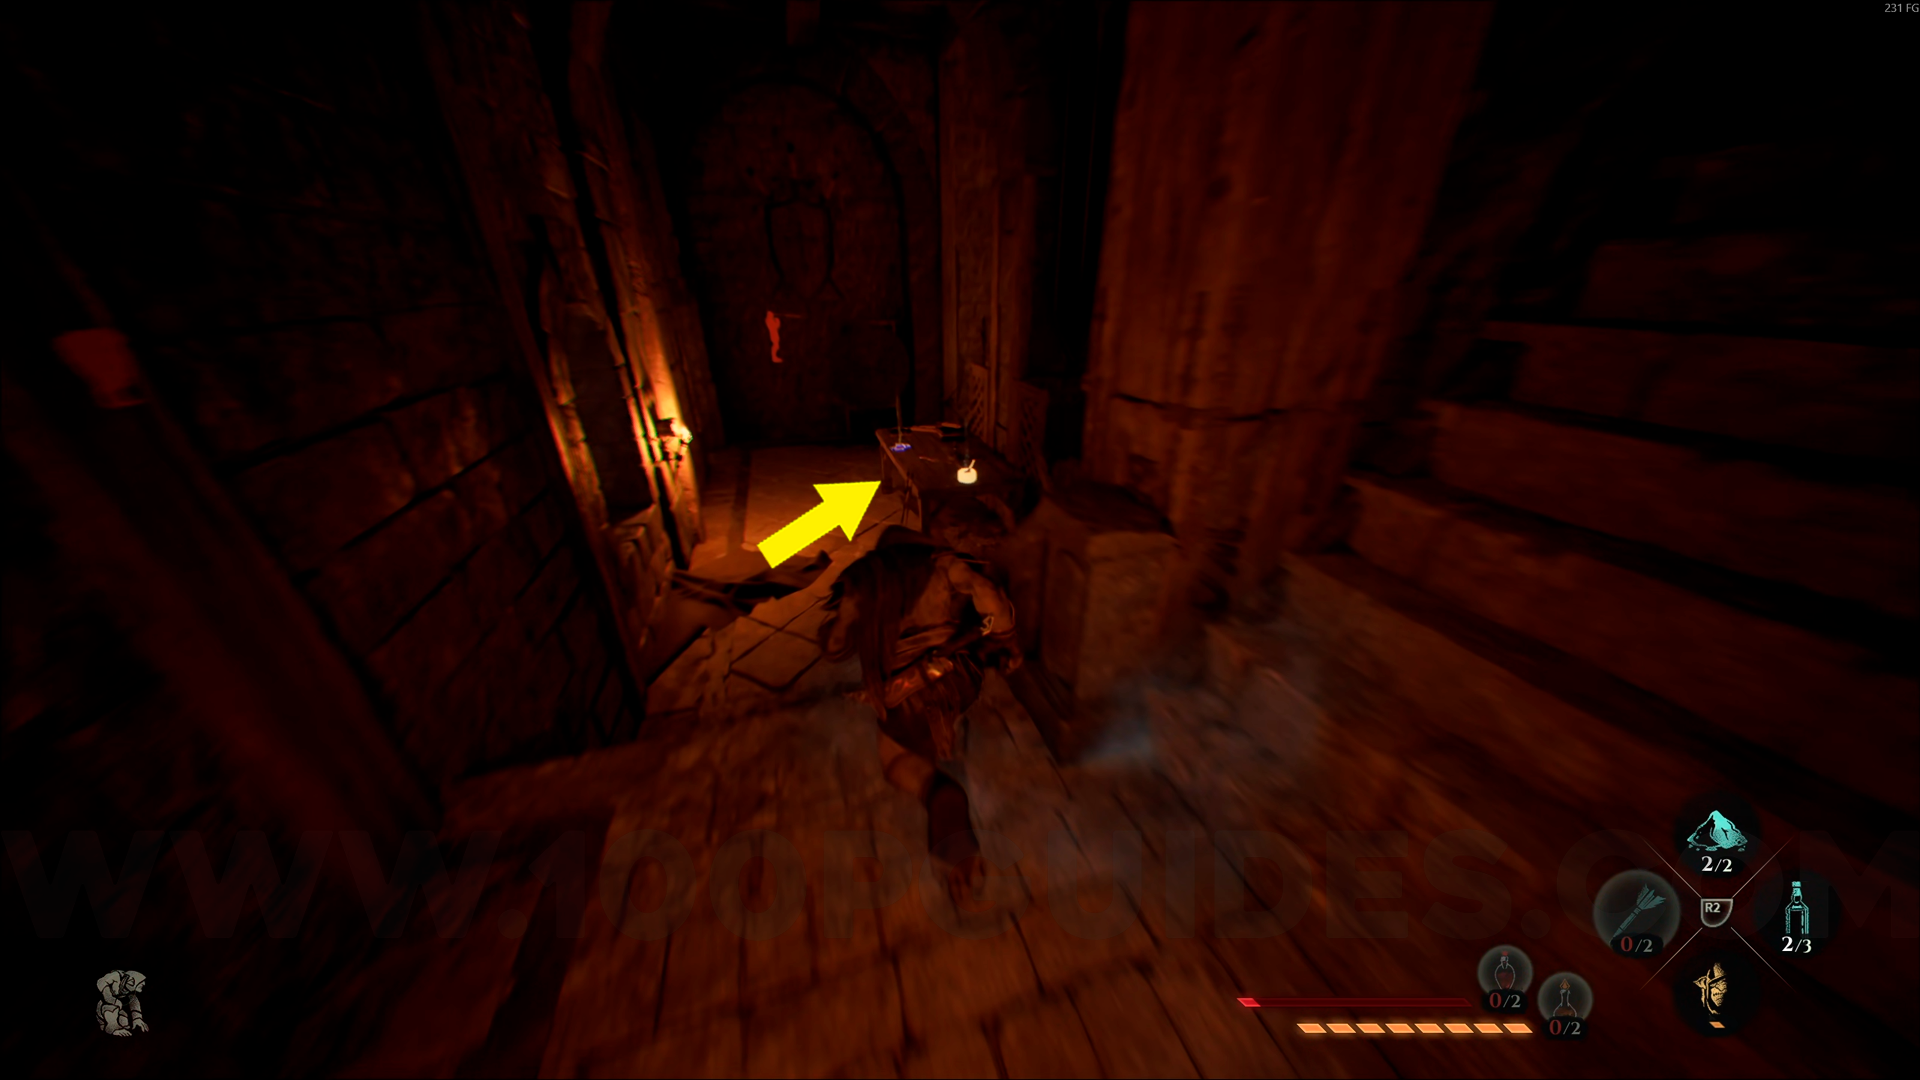
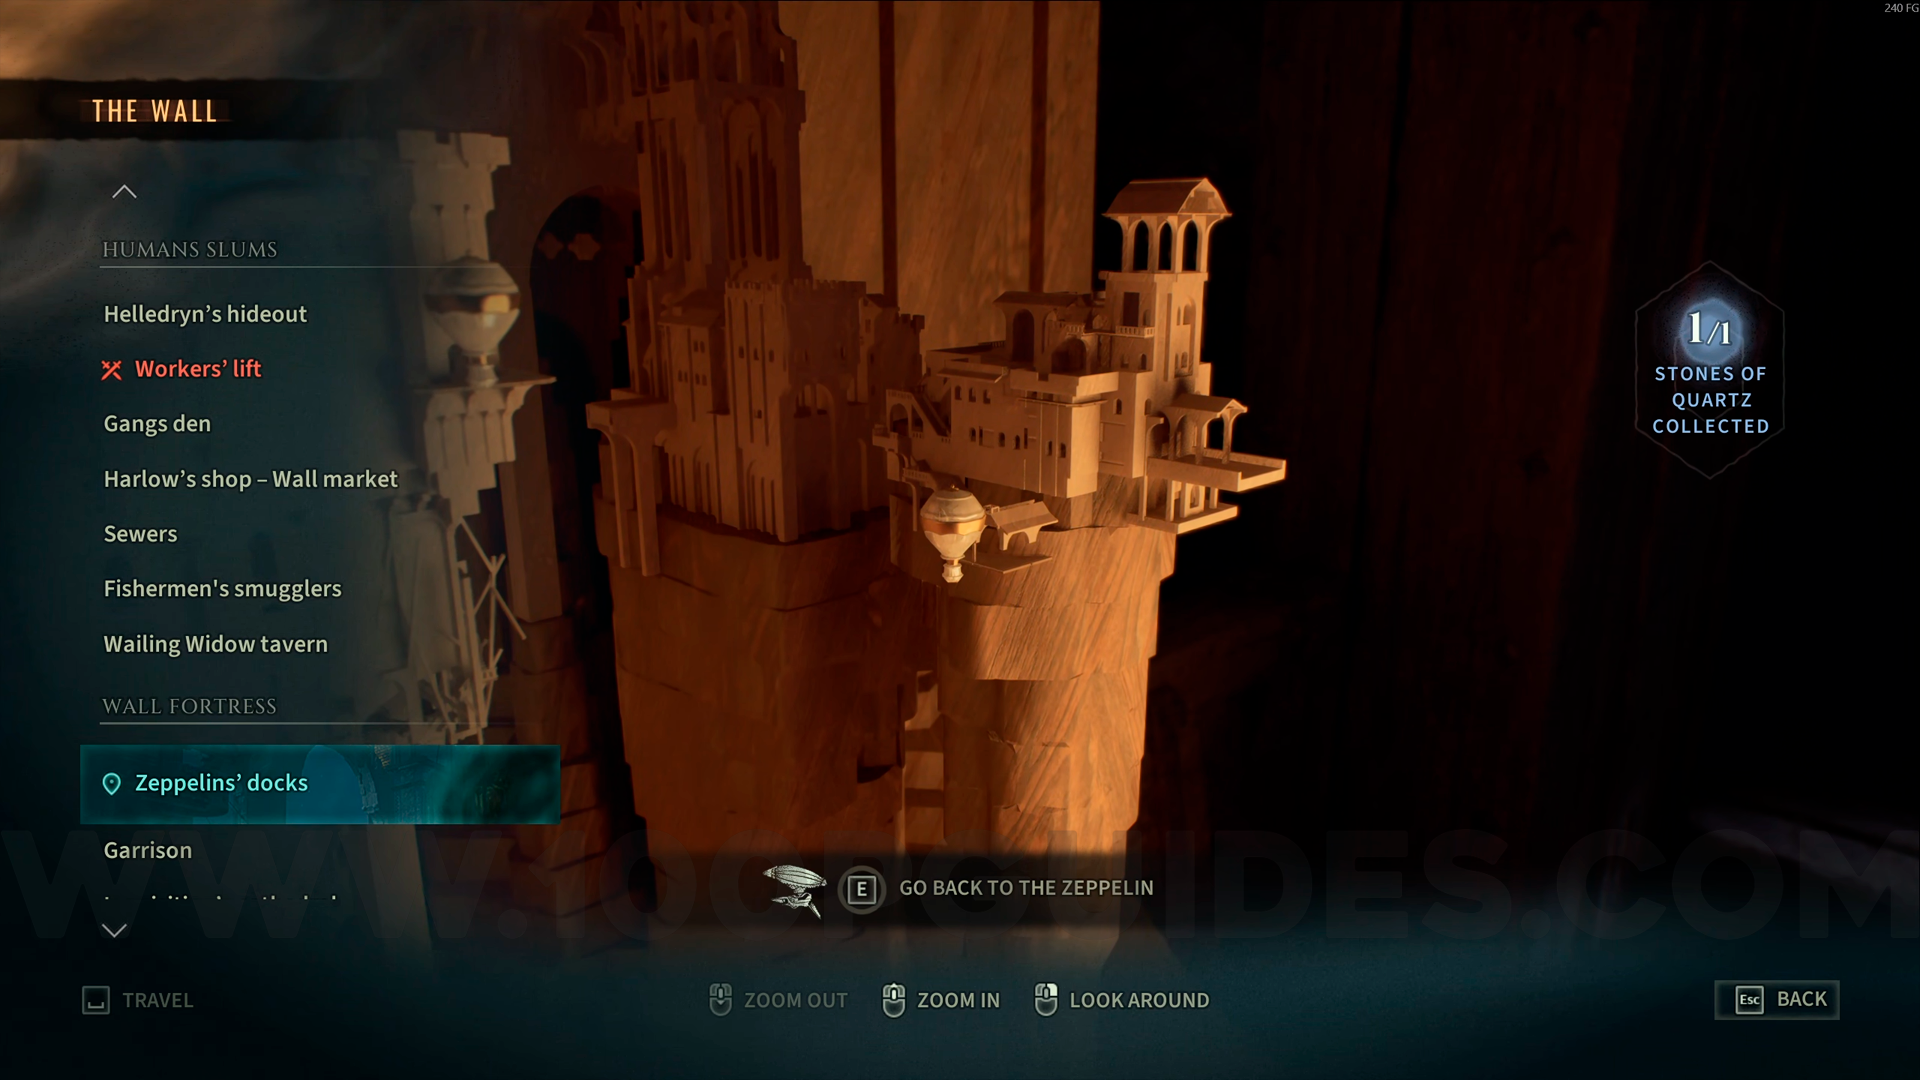
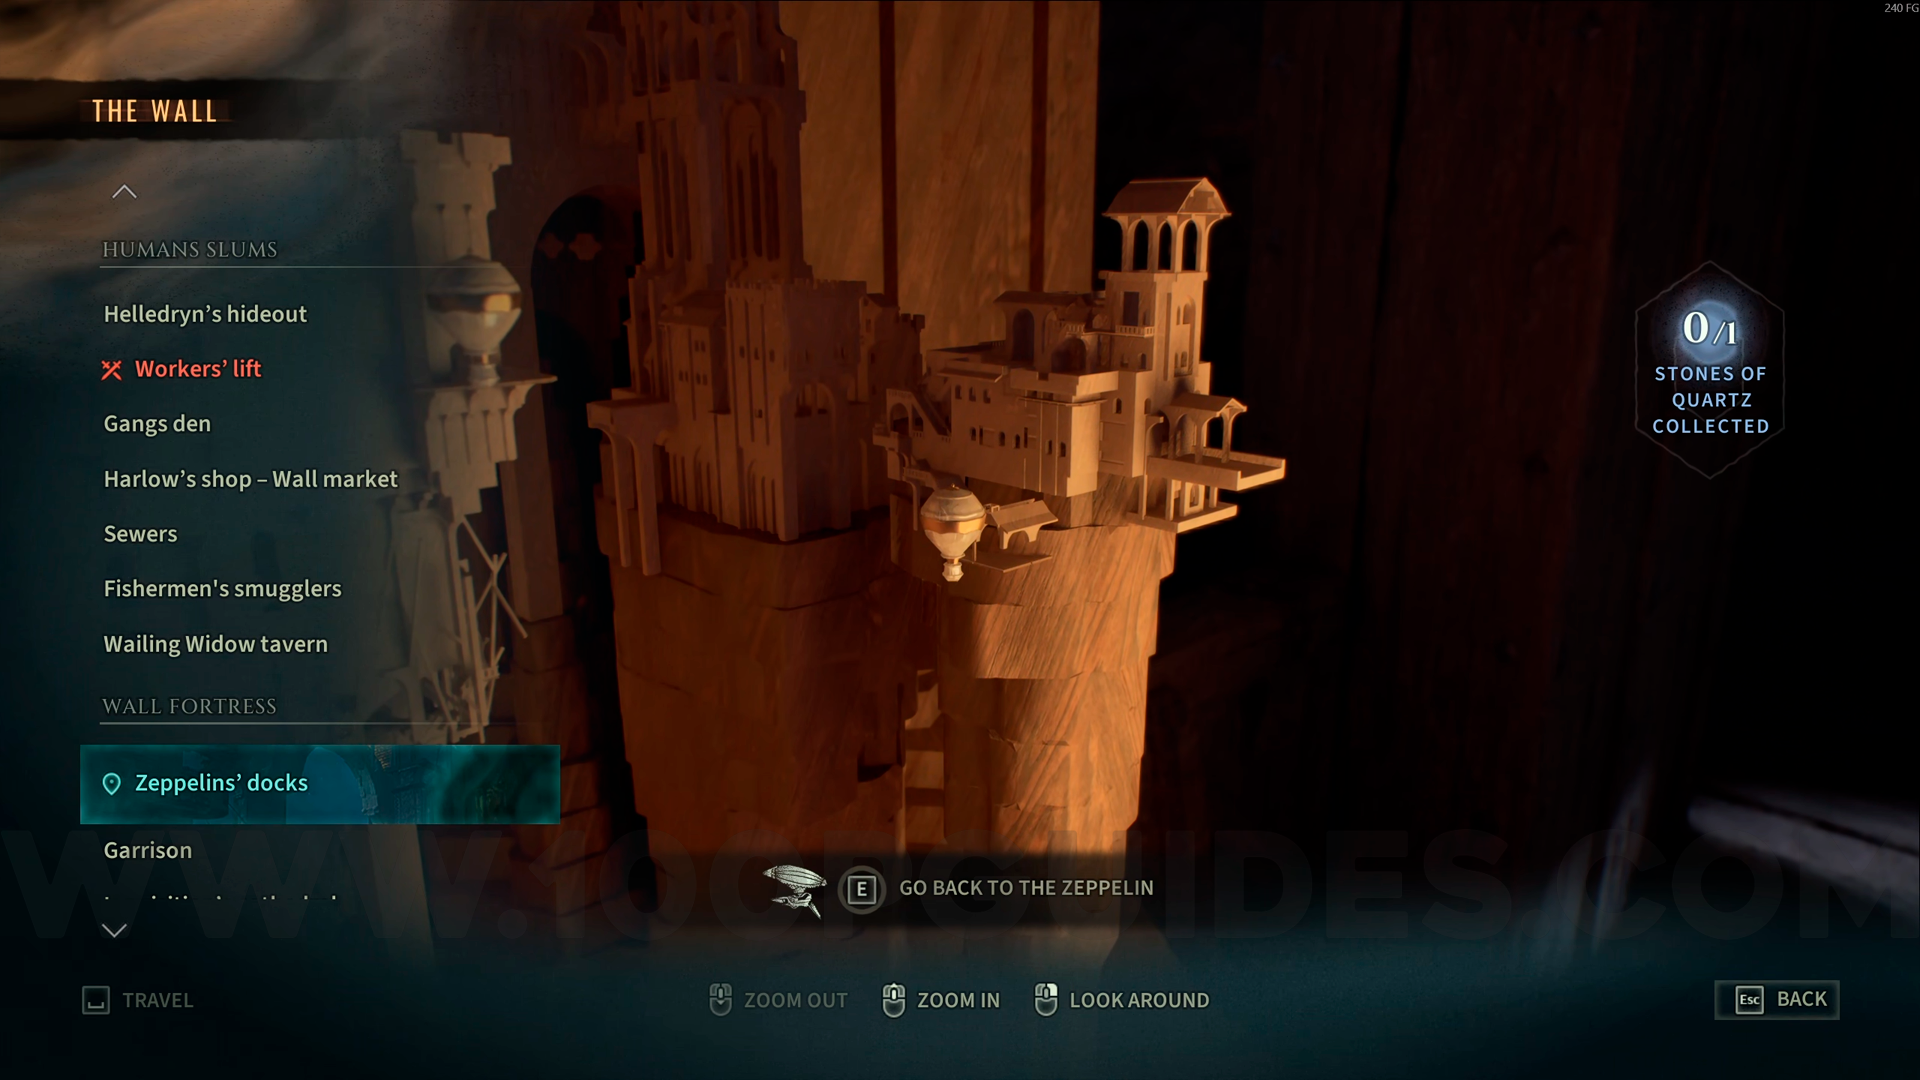
Bronze Emblem #5. From the Zeppelins' Docks checkpoint, head toward the large building in front of you and continue forward through the doors. This emblem will be directly ahead. It's right next to the two levers you'll need to pull later in the story. Use Amber Vision to help you spot it.
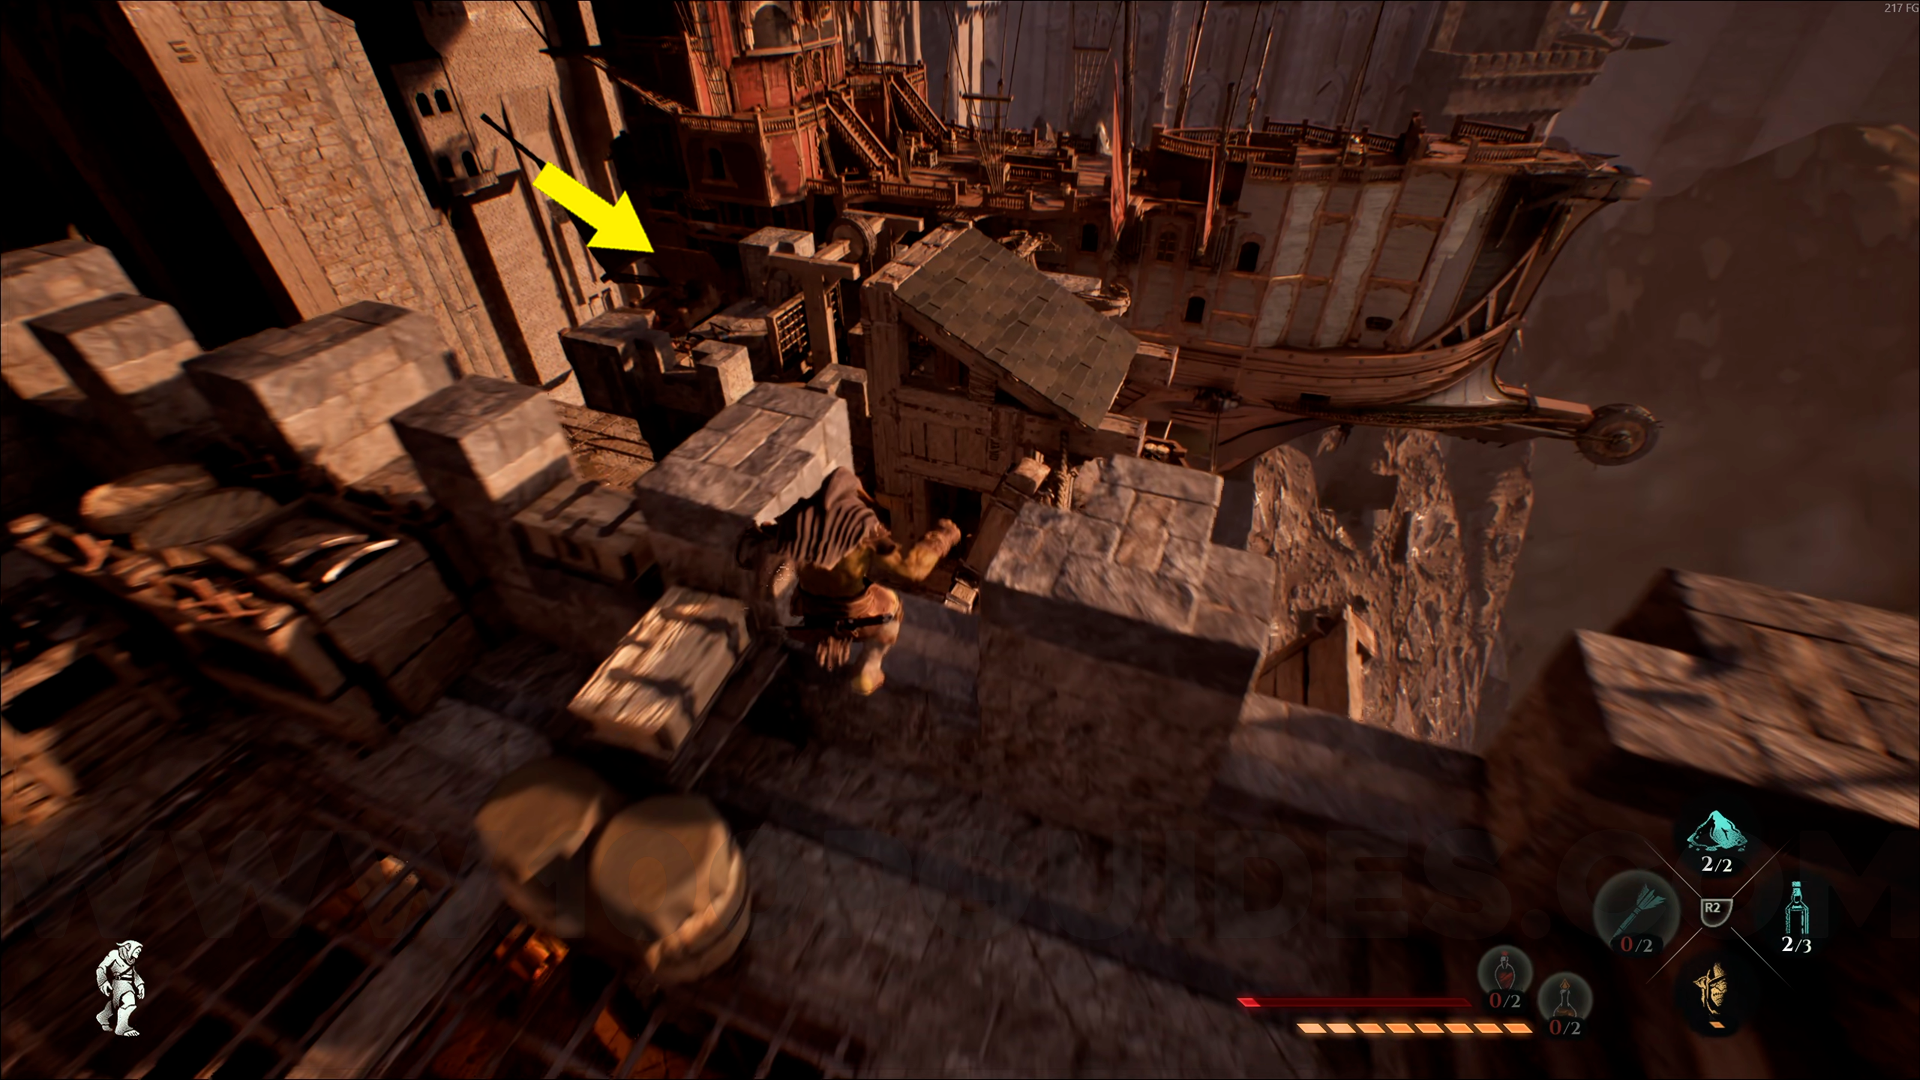
Bronze Emblem #6. From the previous collectible, head to the upper part of the area and continue forward along the only path. This emblem will be on the ground next to a hole in the wall. Use Amber Vision to help you spot it.

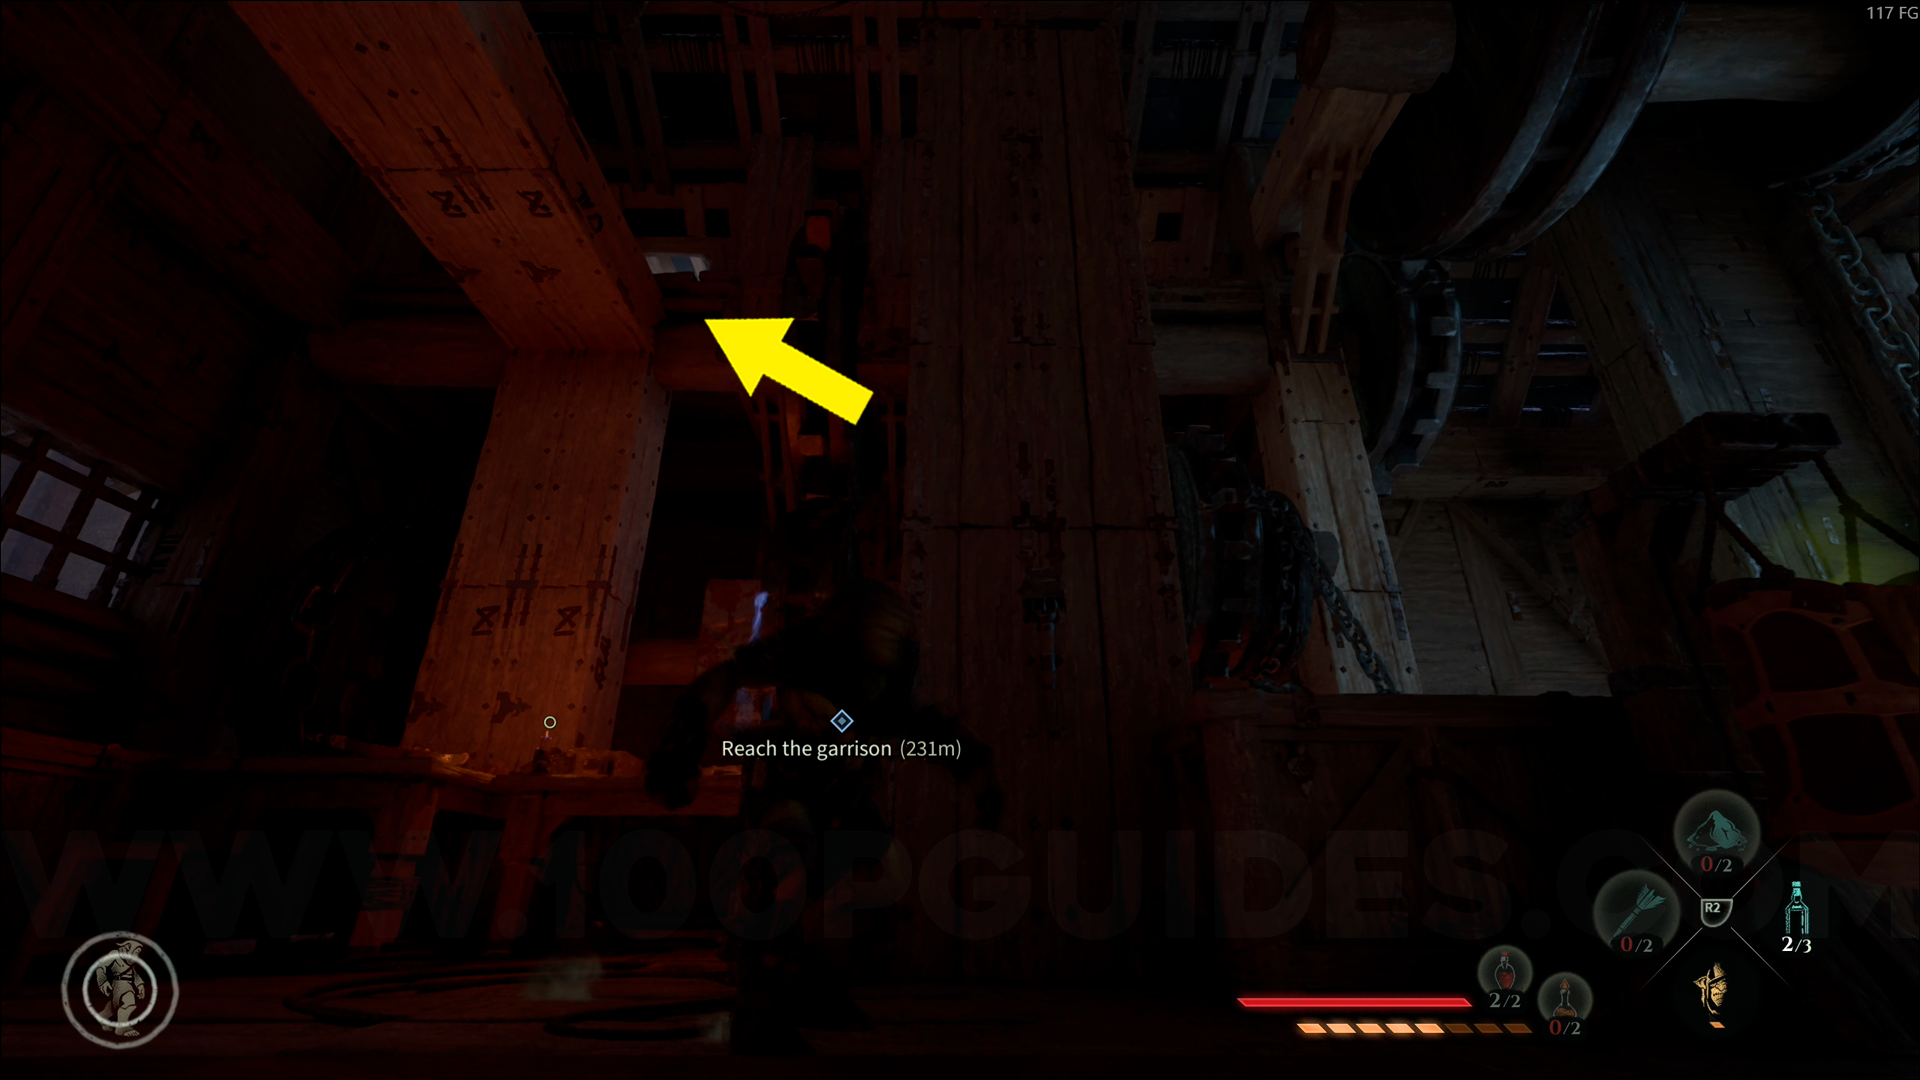
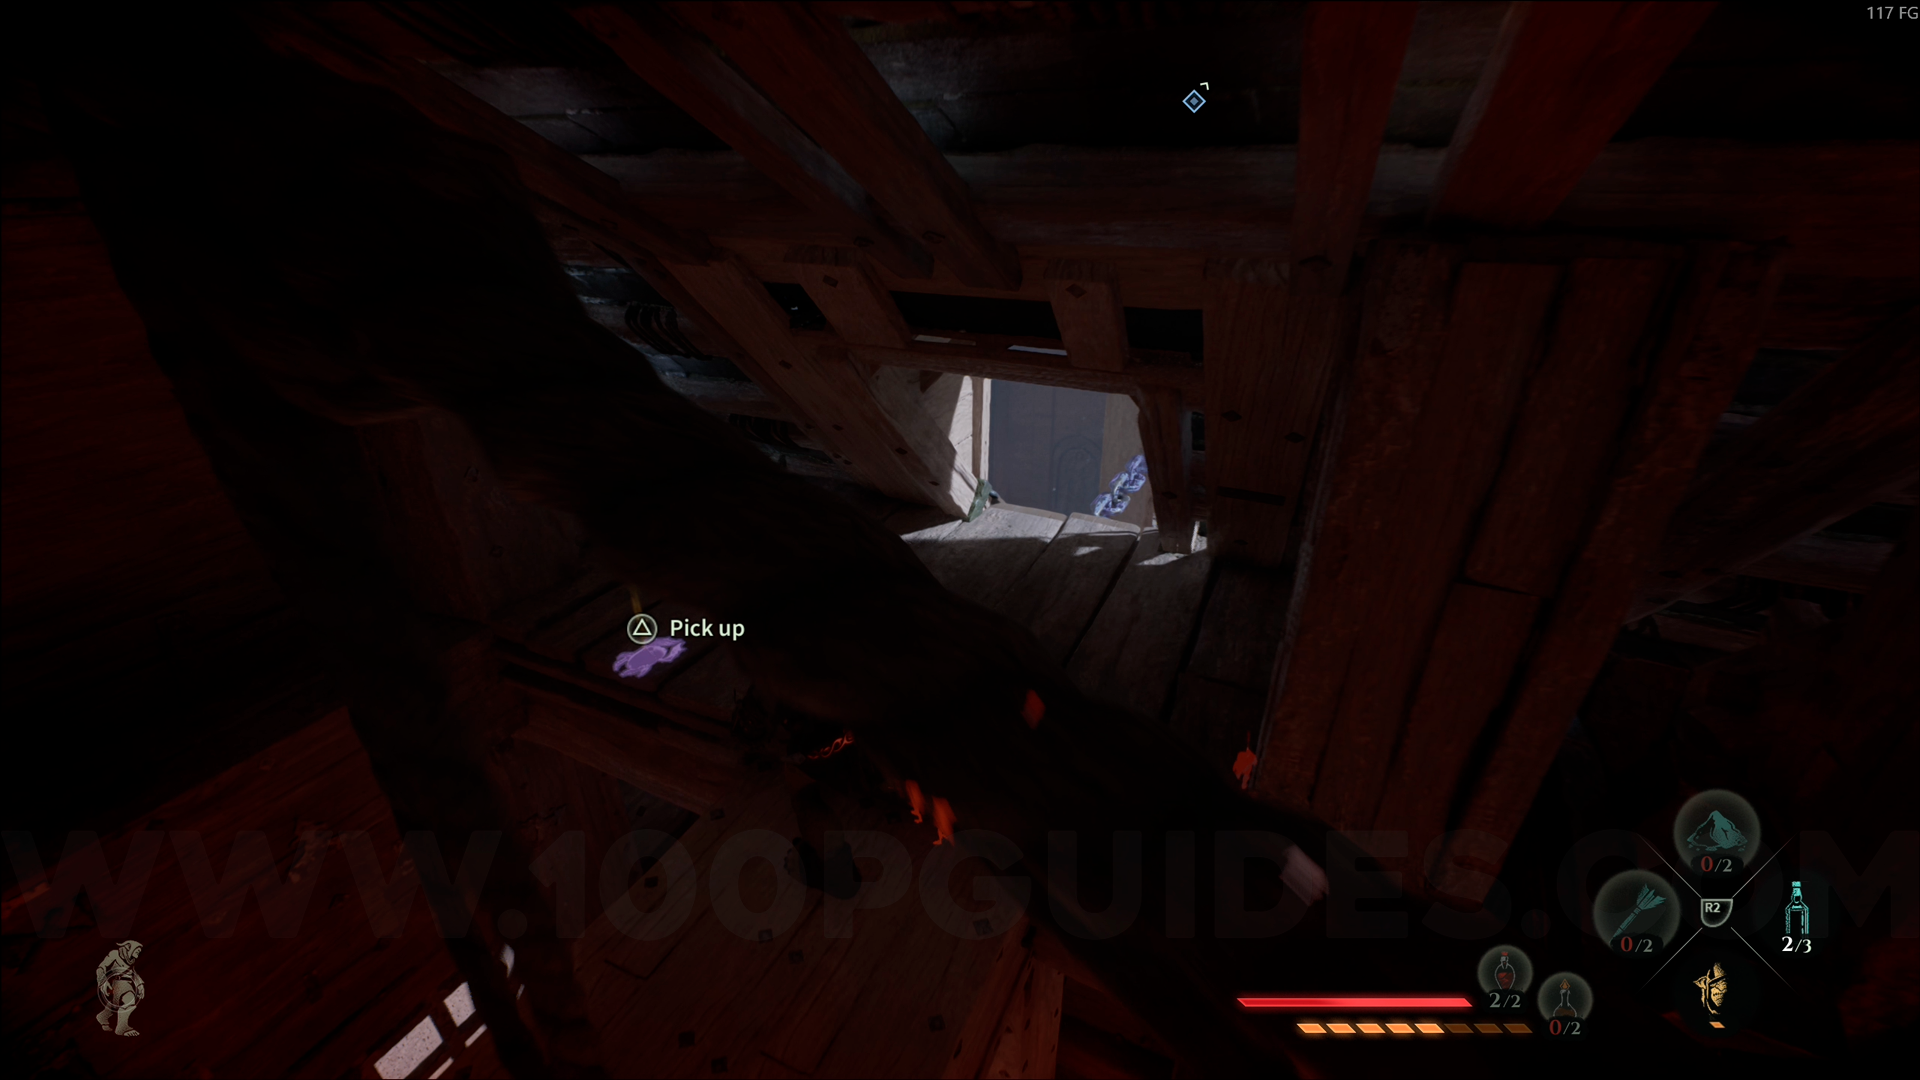
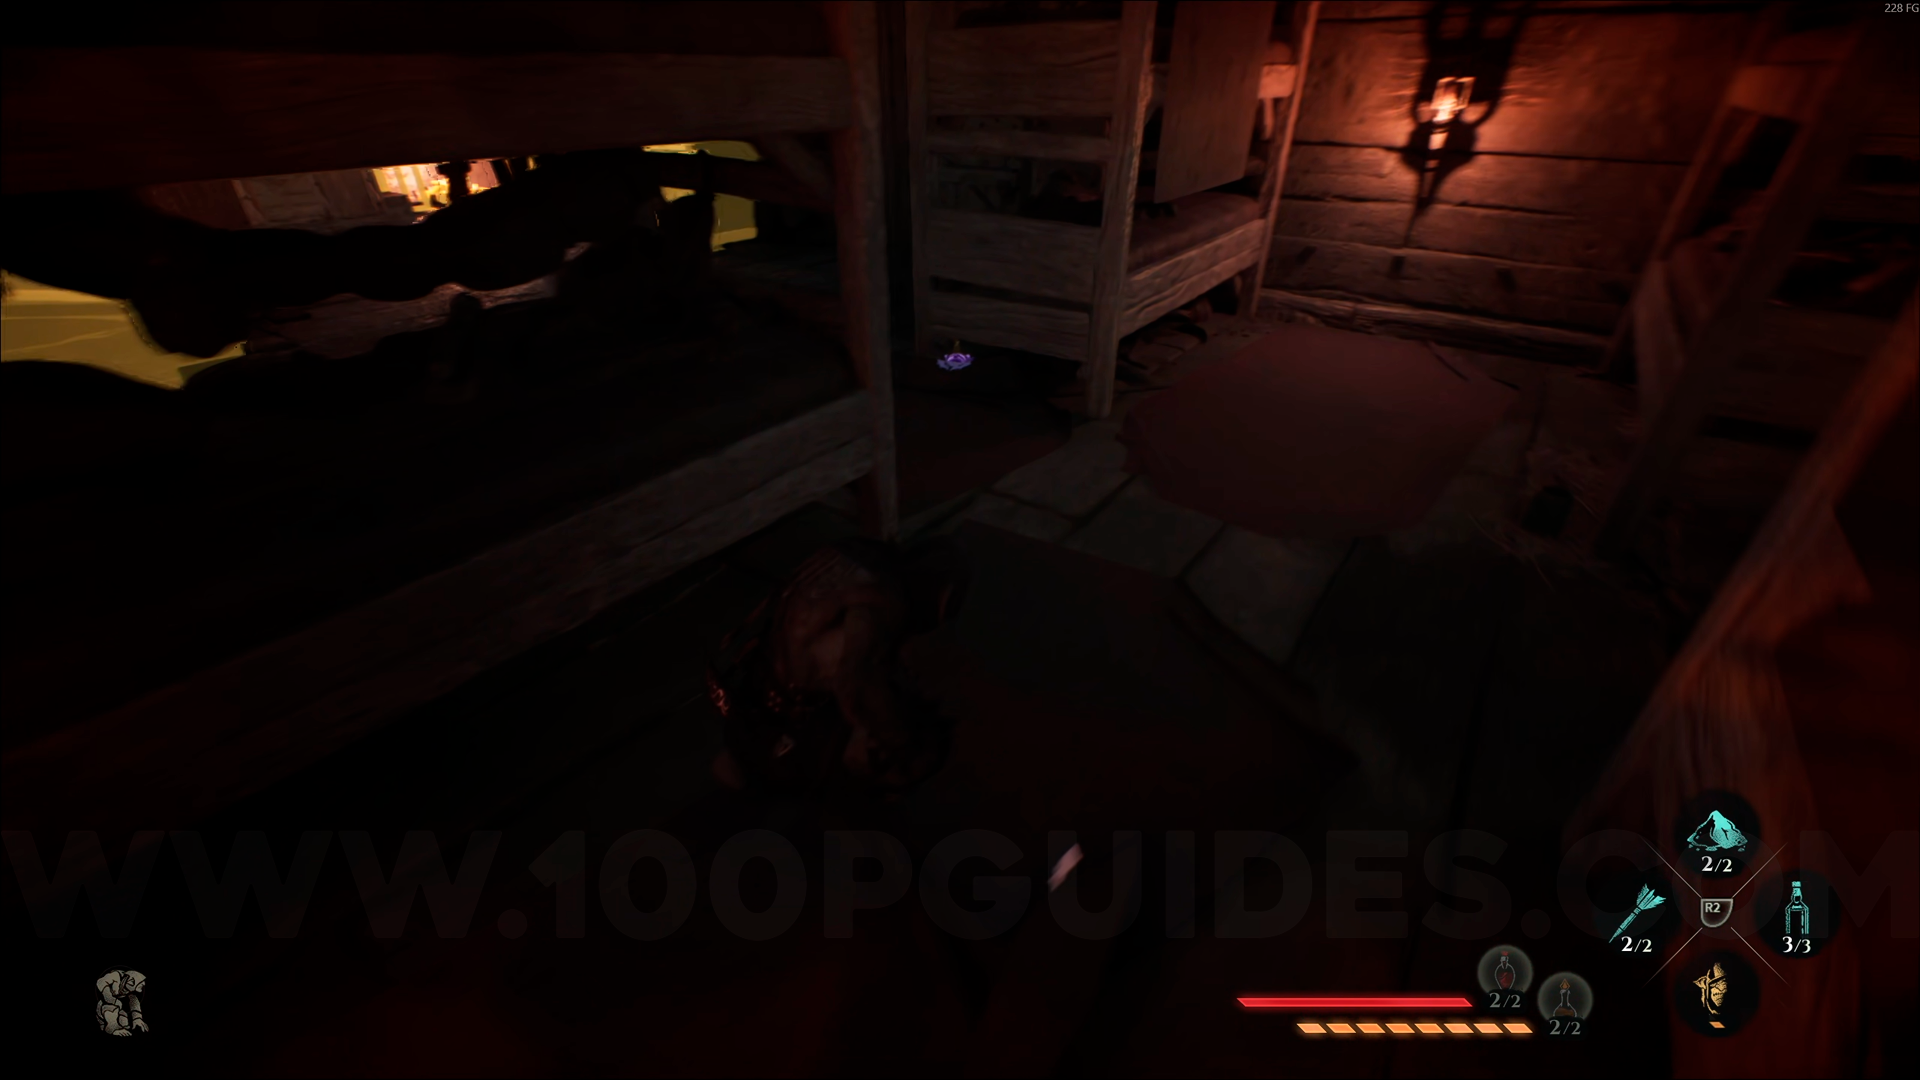
Bronze Emblem #7. From the previous collectible, go through the hole in the wall and then through the window in front of you. Turn through the door on your left and go up the stairs. Go through the next door, then through the hole on your left to avoid enemies.
Continue up the stairs, then turn around to spot another hole in the wall. Go through it, and you'll see a new room ahead. This emblem is on top of the bunk beds. Use Amber Vision to help you spot it here.
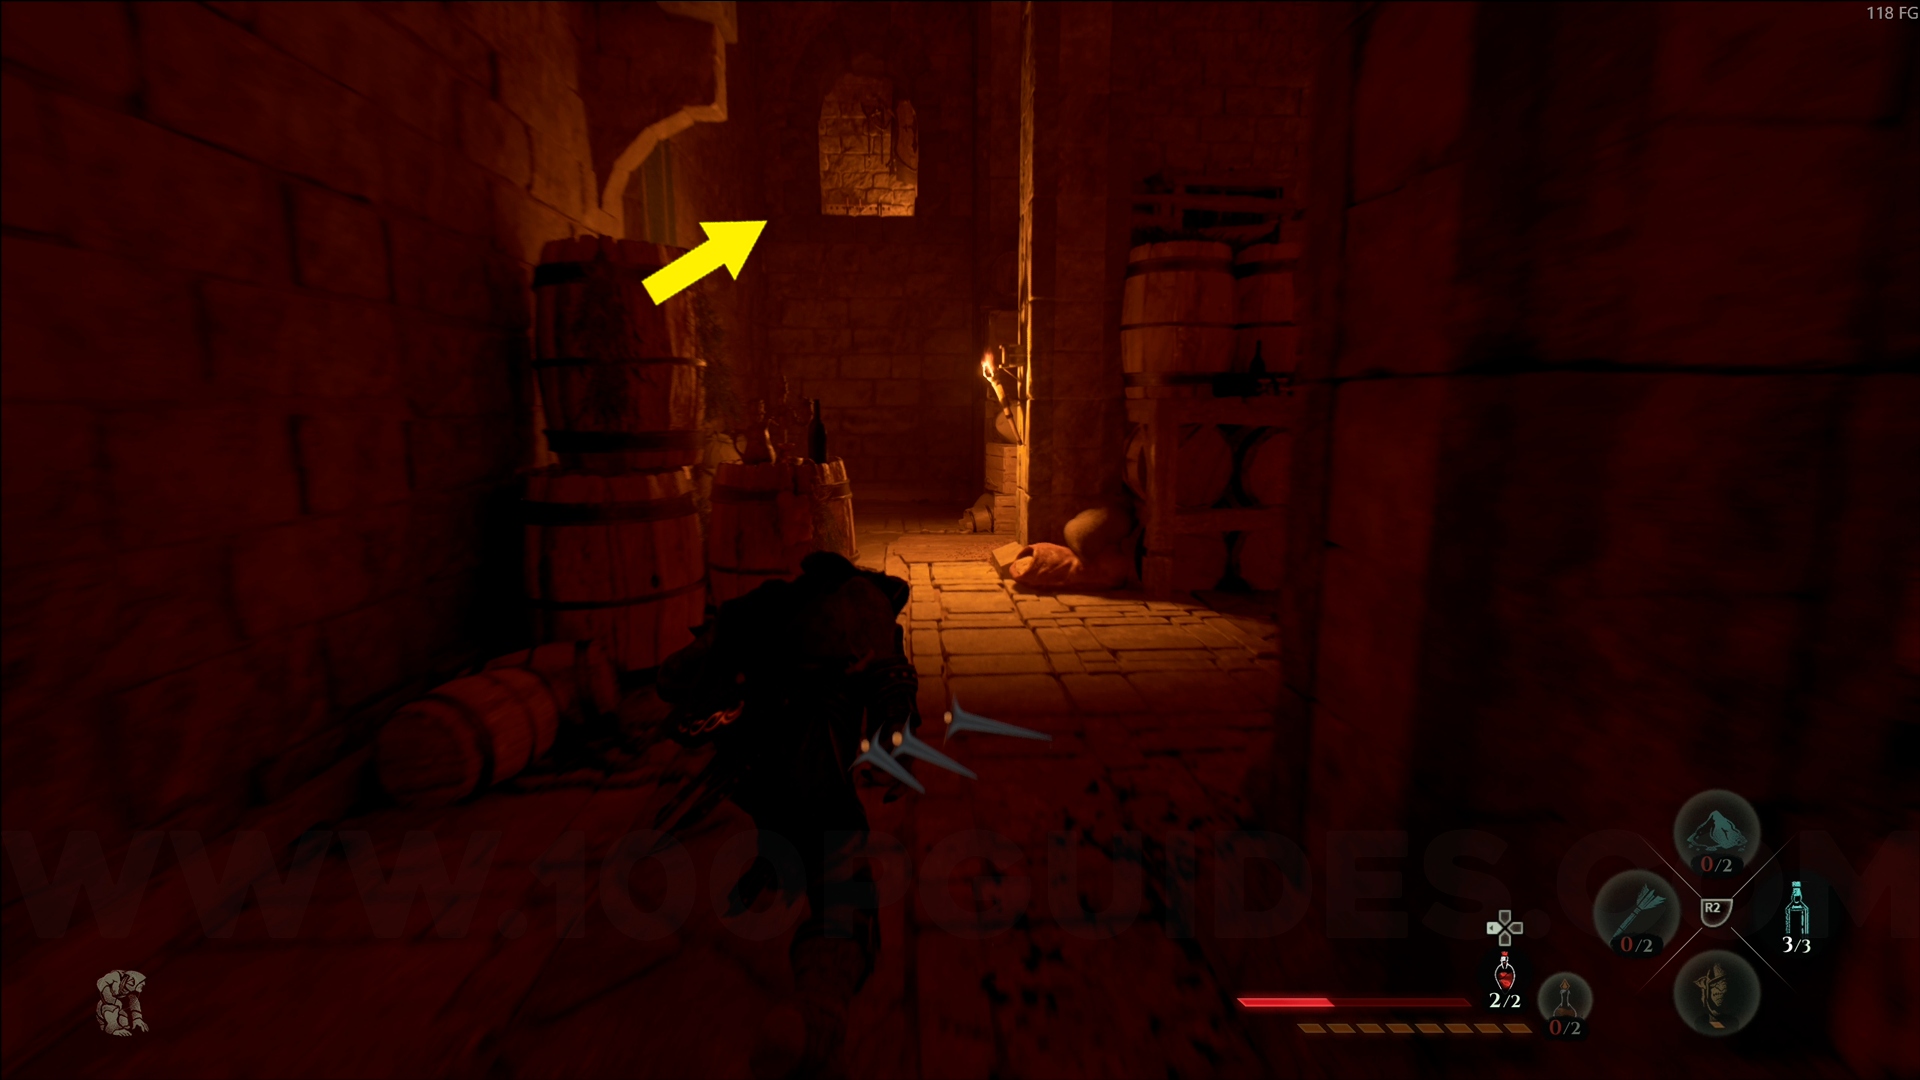

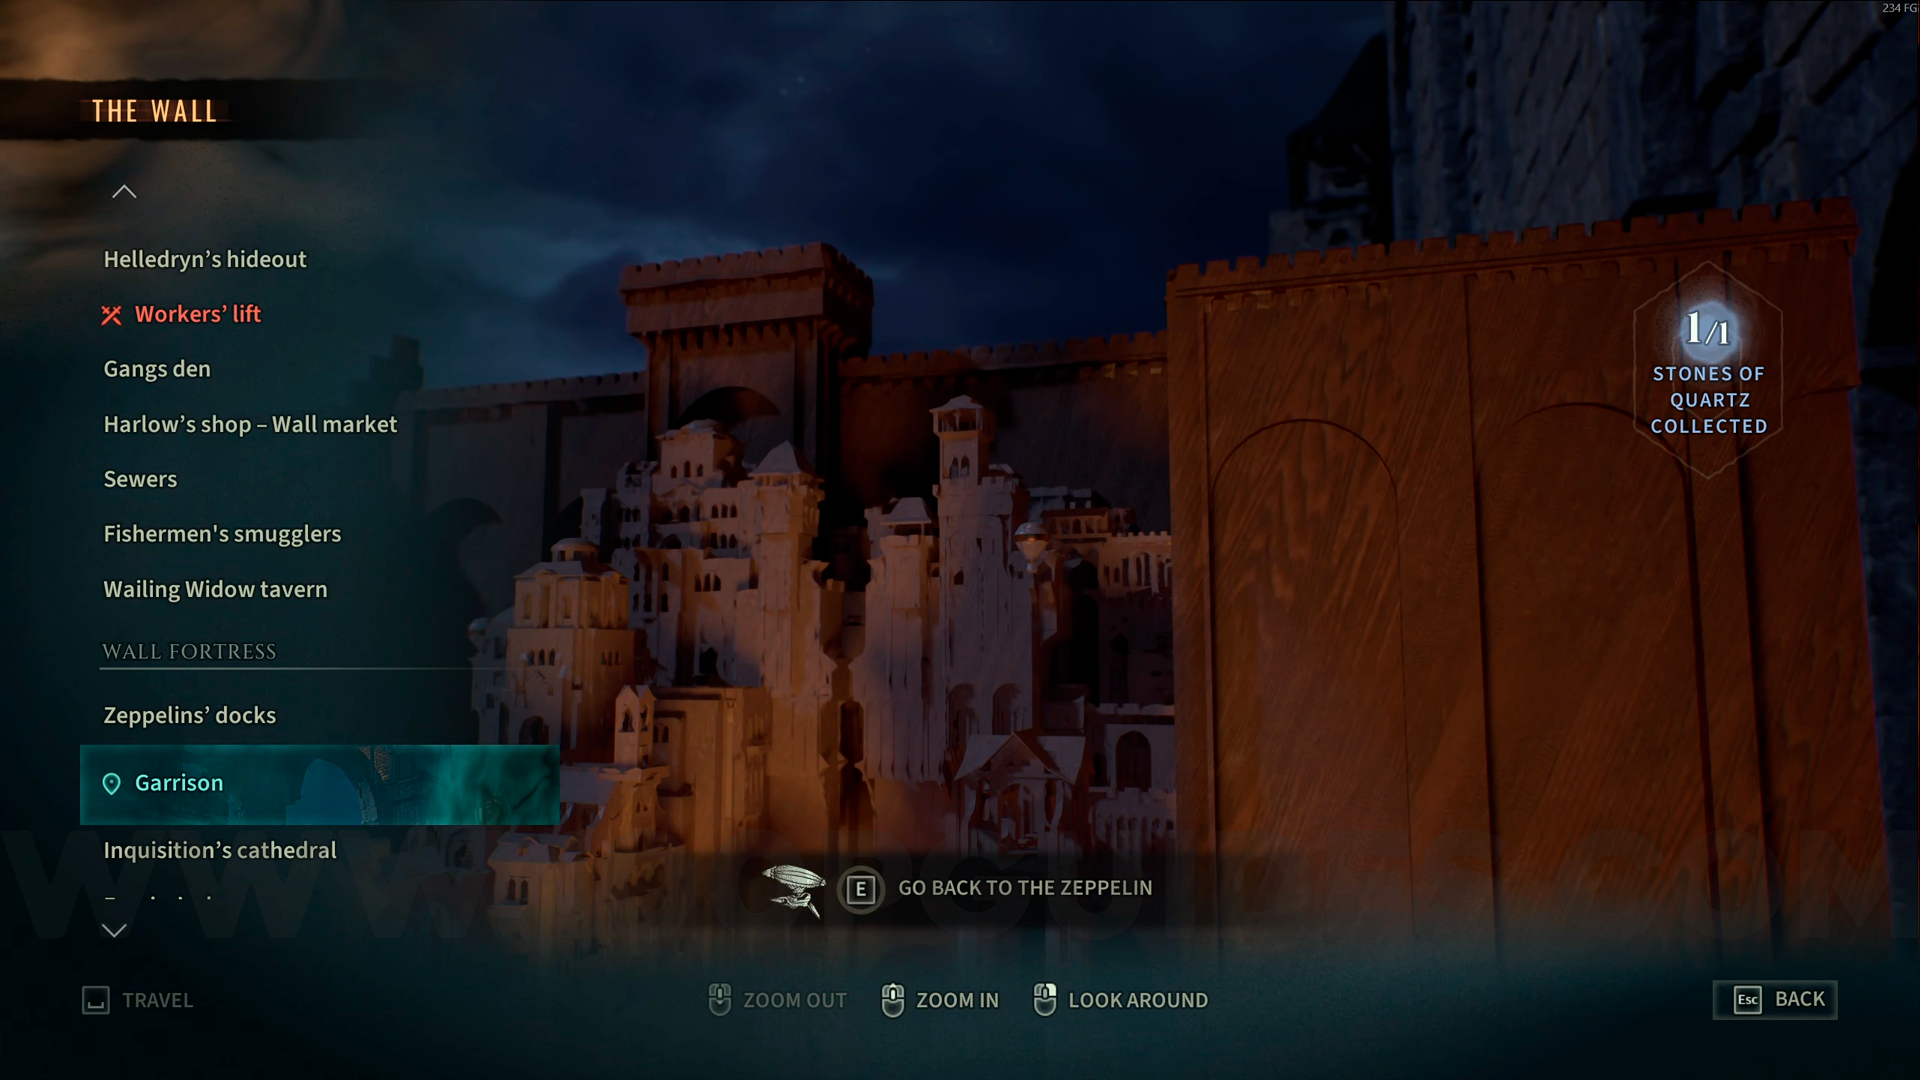
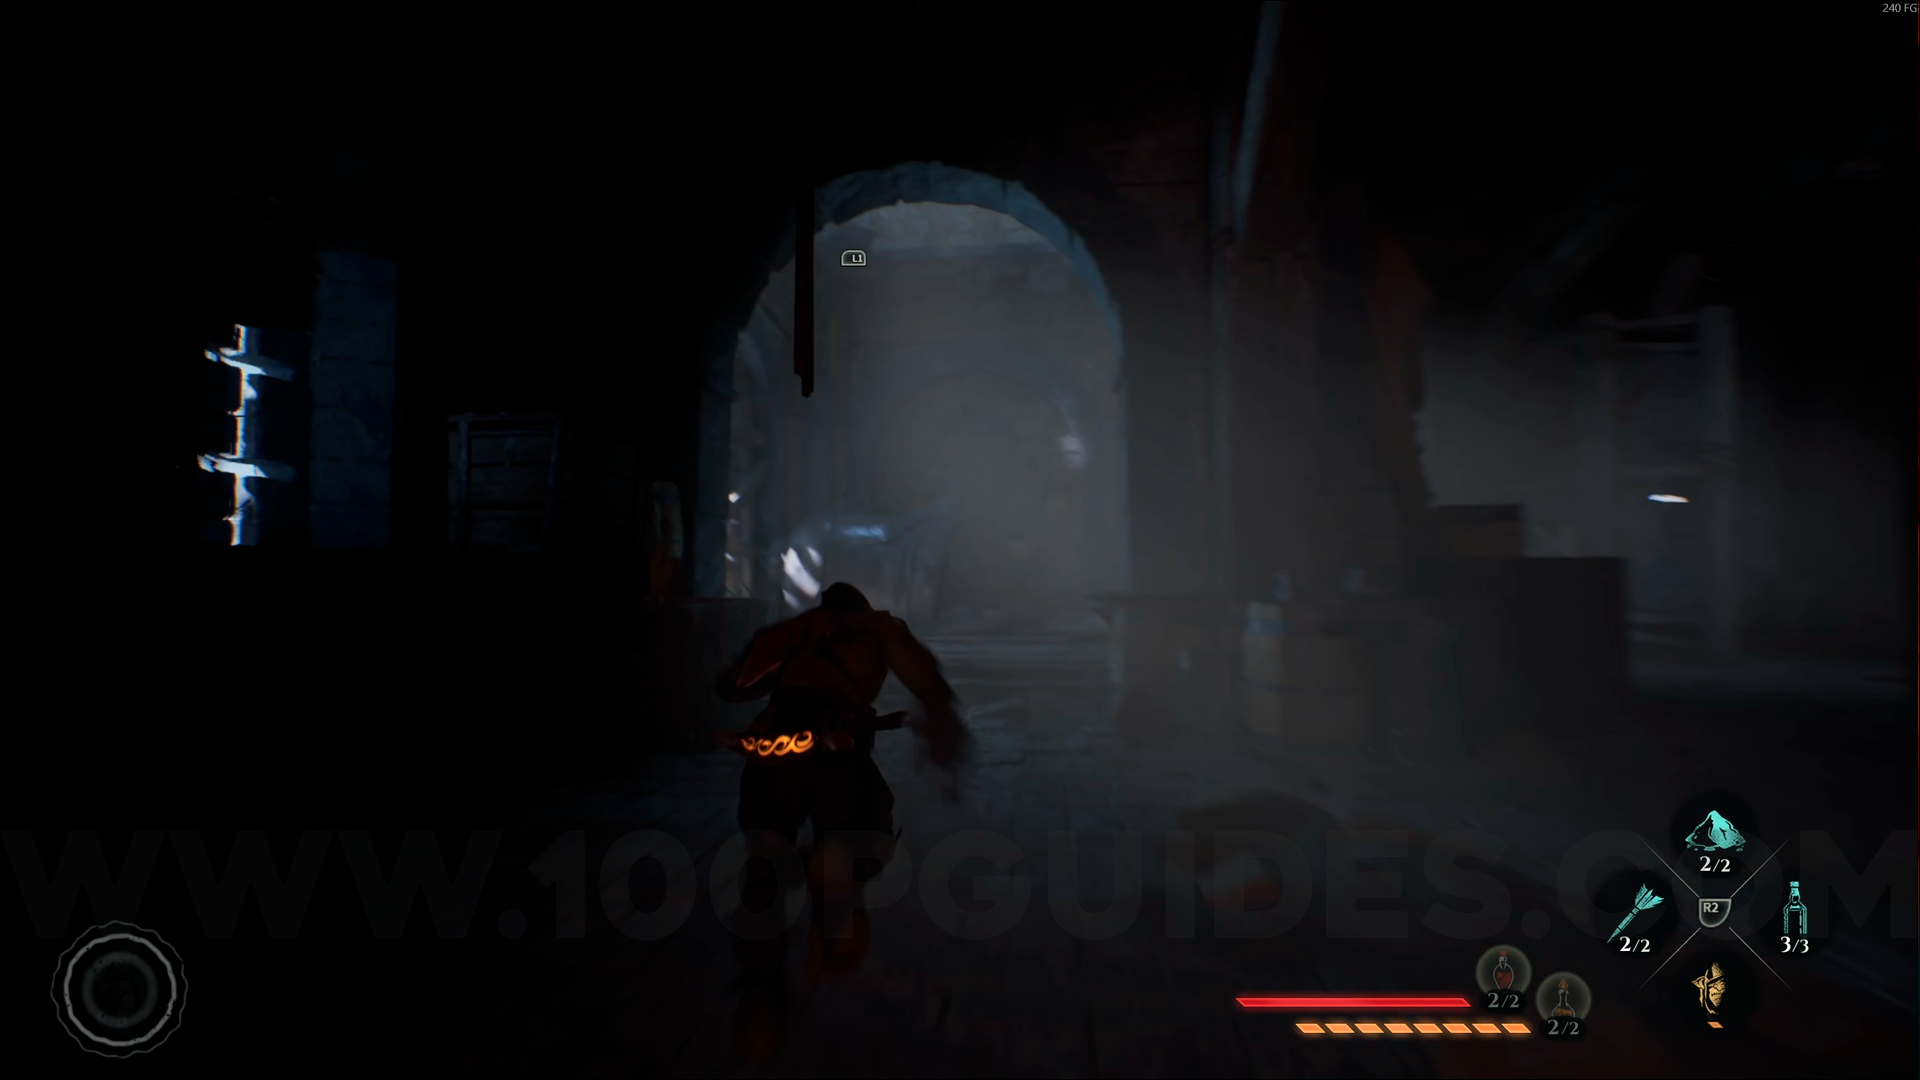
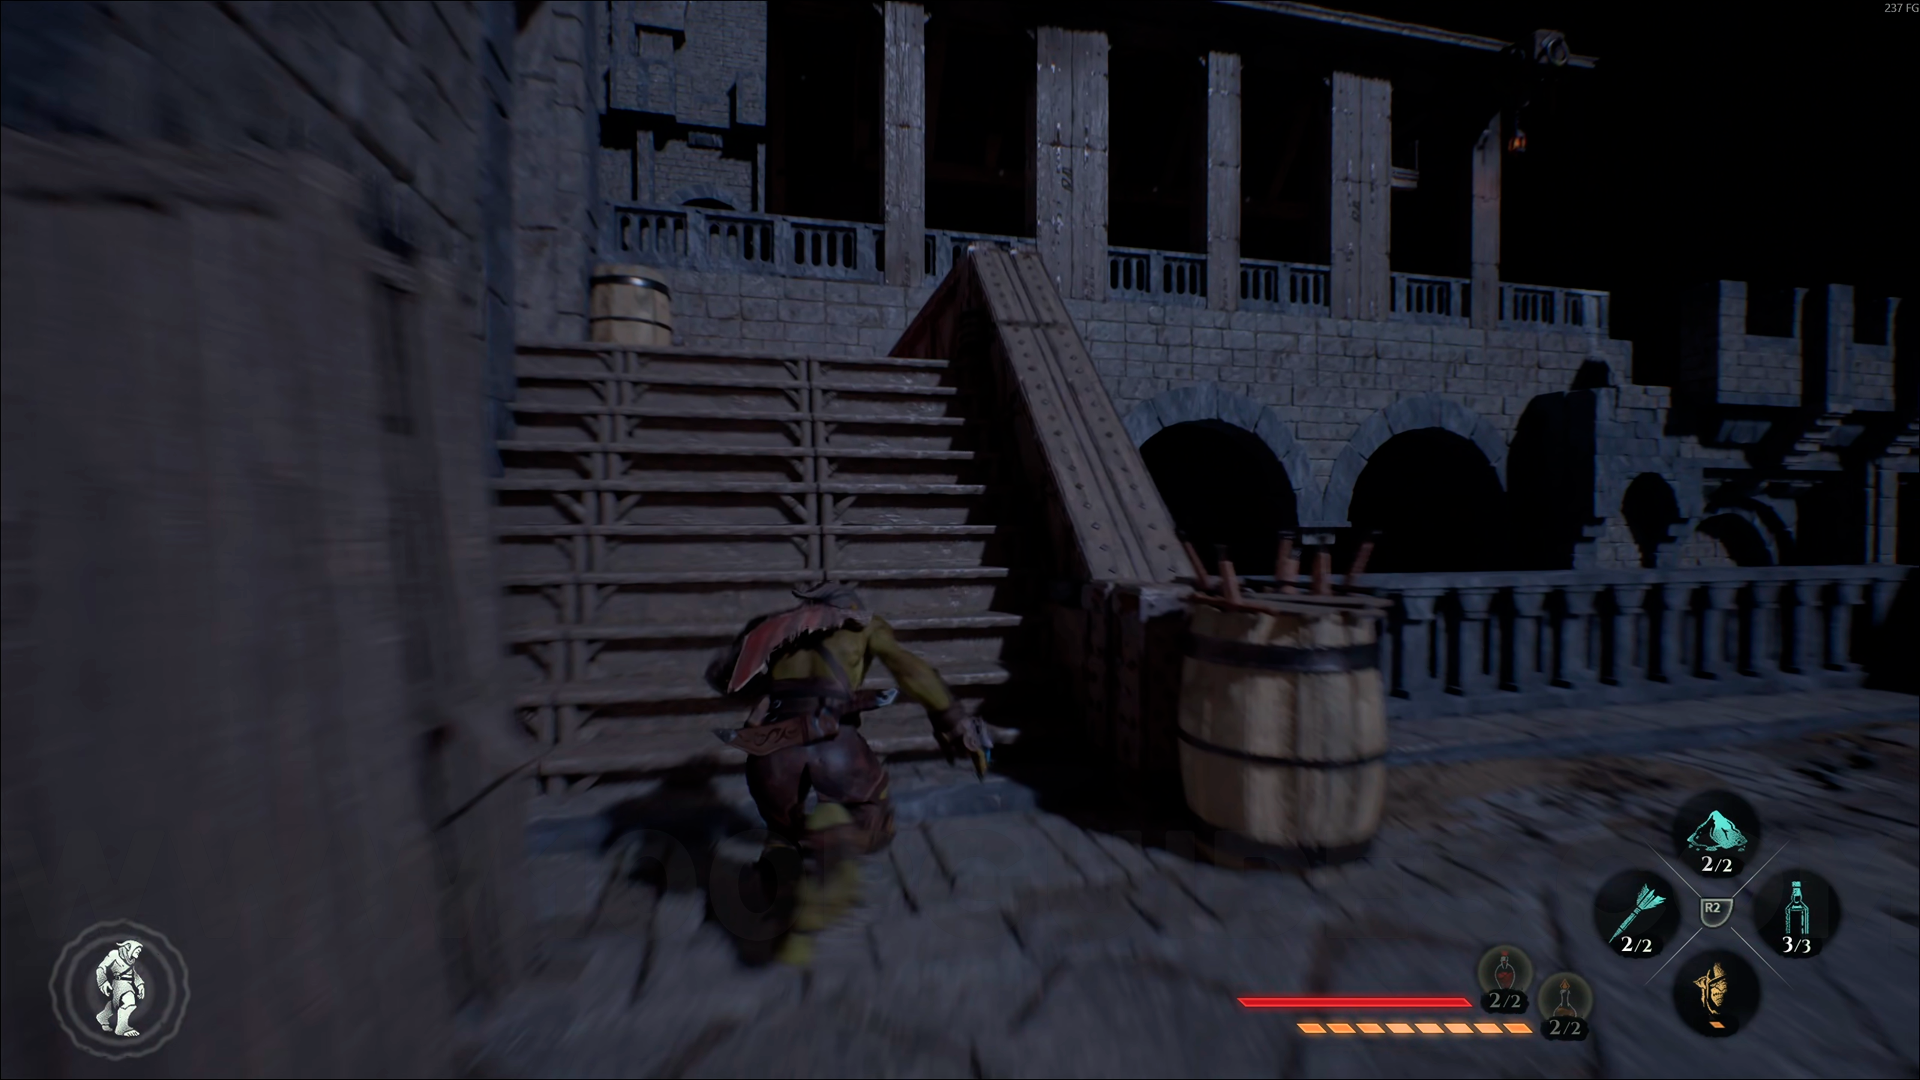
Bronze Emblem #8. From the Garrison checkpoint, head to the upper area, then go through the hole in the wall and continue forward through the door. This emblem will be directly in front of you. Use Amber Vision to help you spot it.
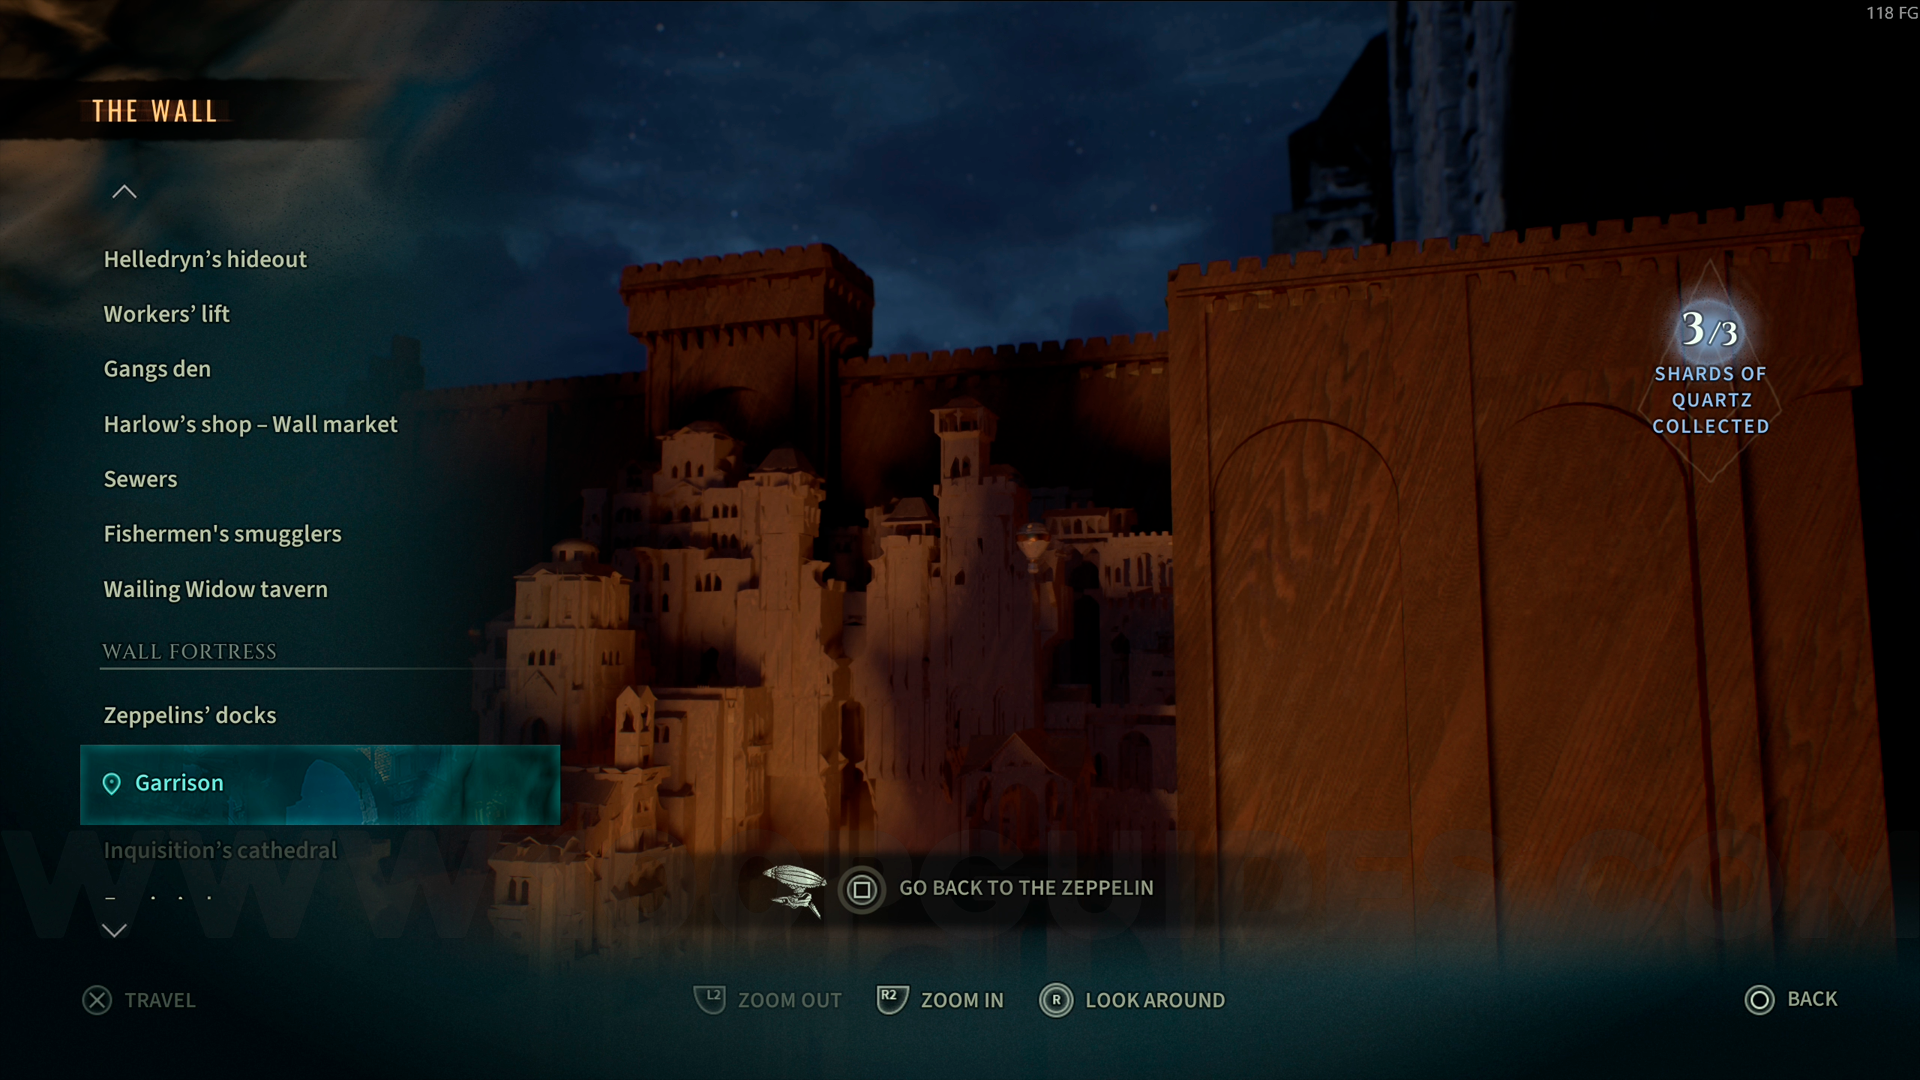

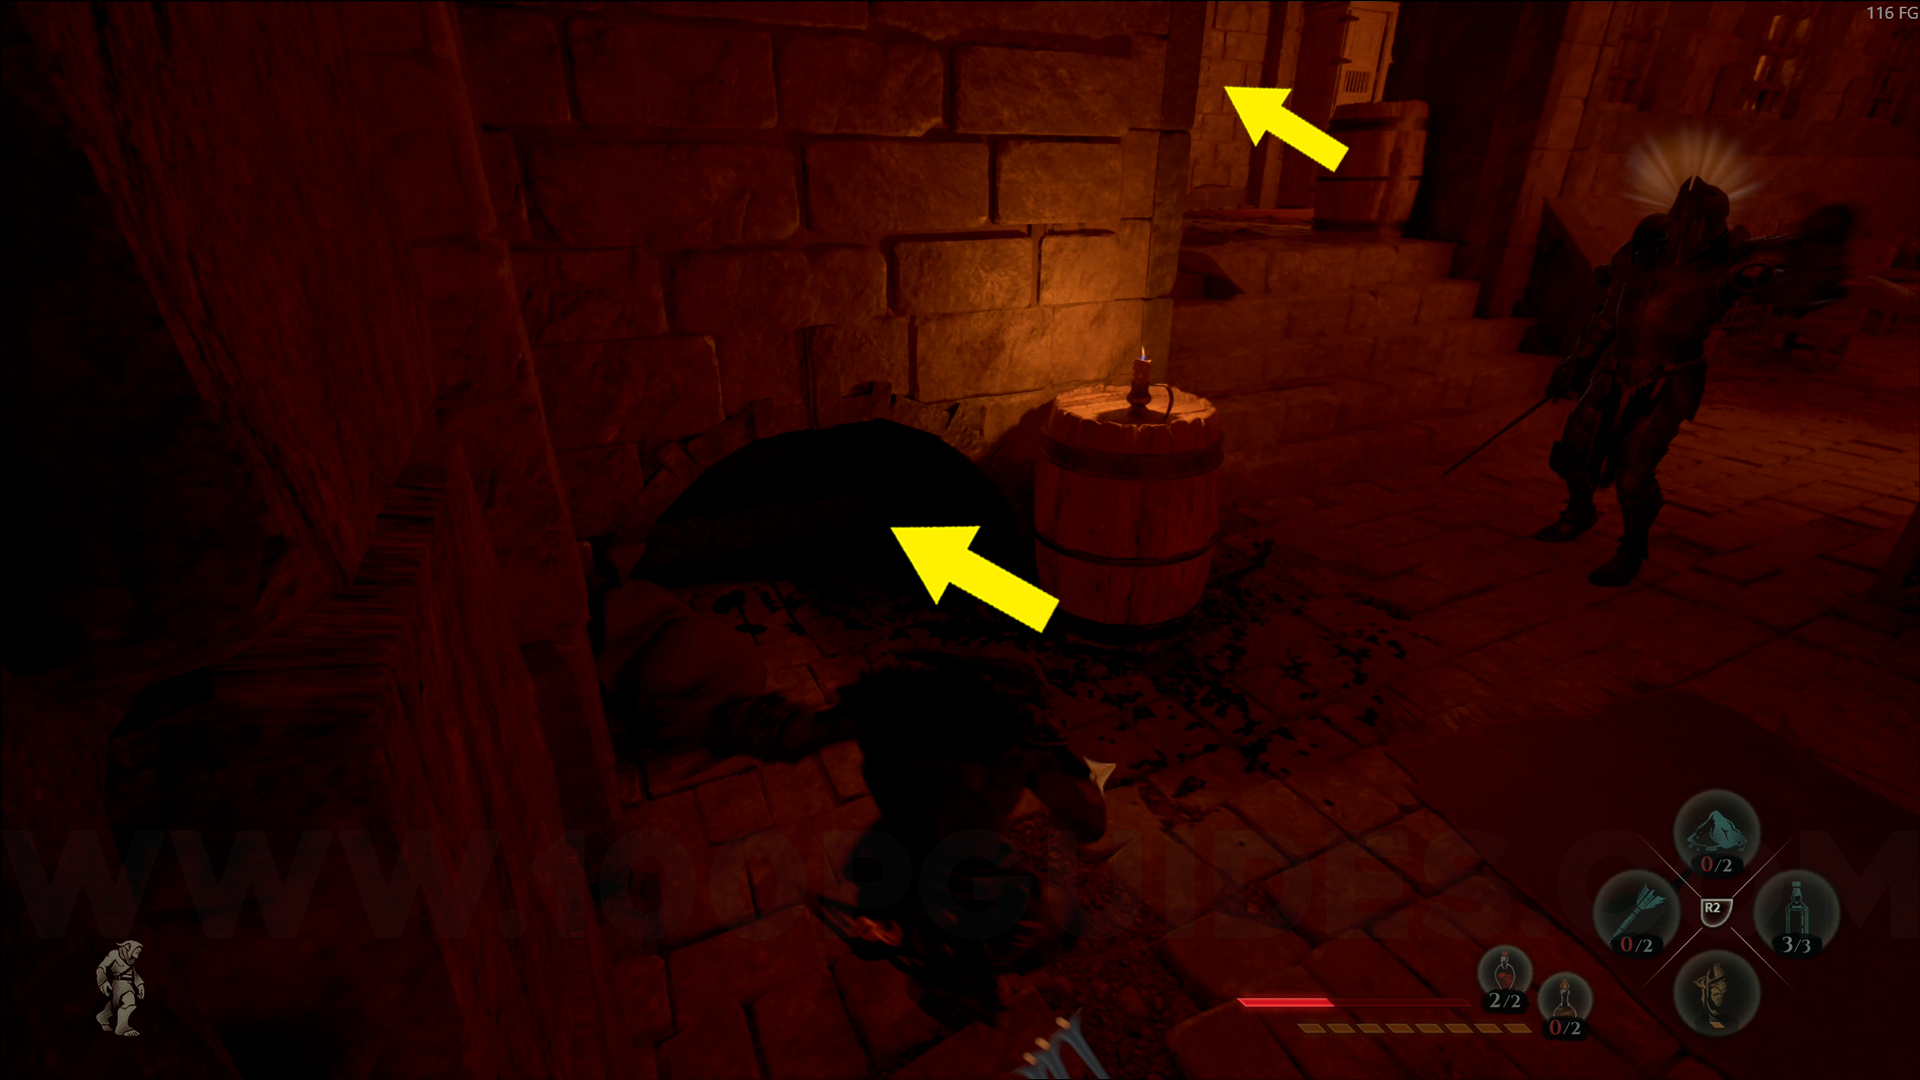
Bronze Emblem #9. From the Garrison checkpoint, head up to the upper area and go through the hole in the wall. Instead of going through the door in front of you like in the previous collectible, now turn left. Go through the hole in the wall, and you'll find the emblem inside.

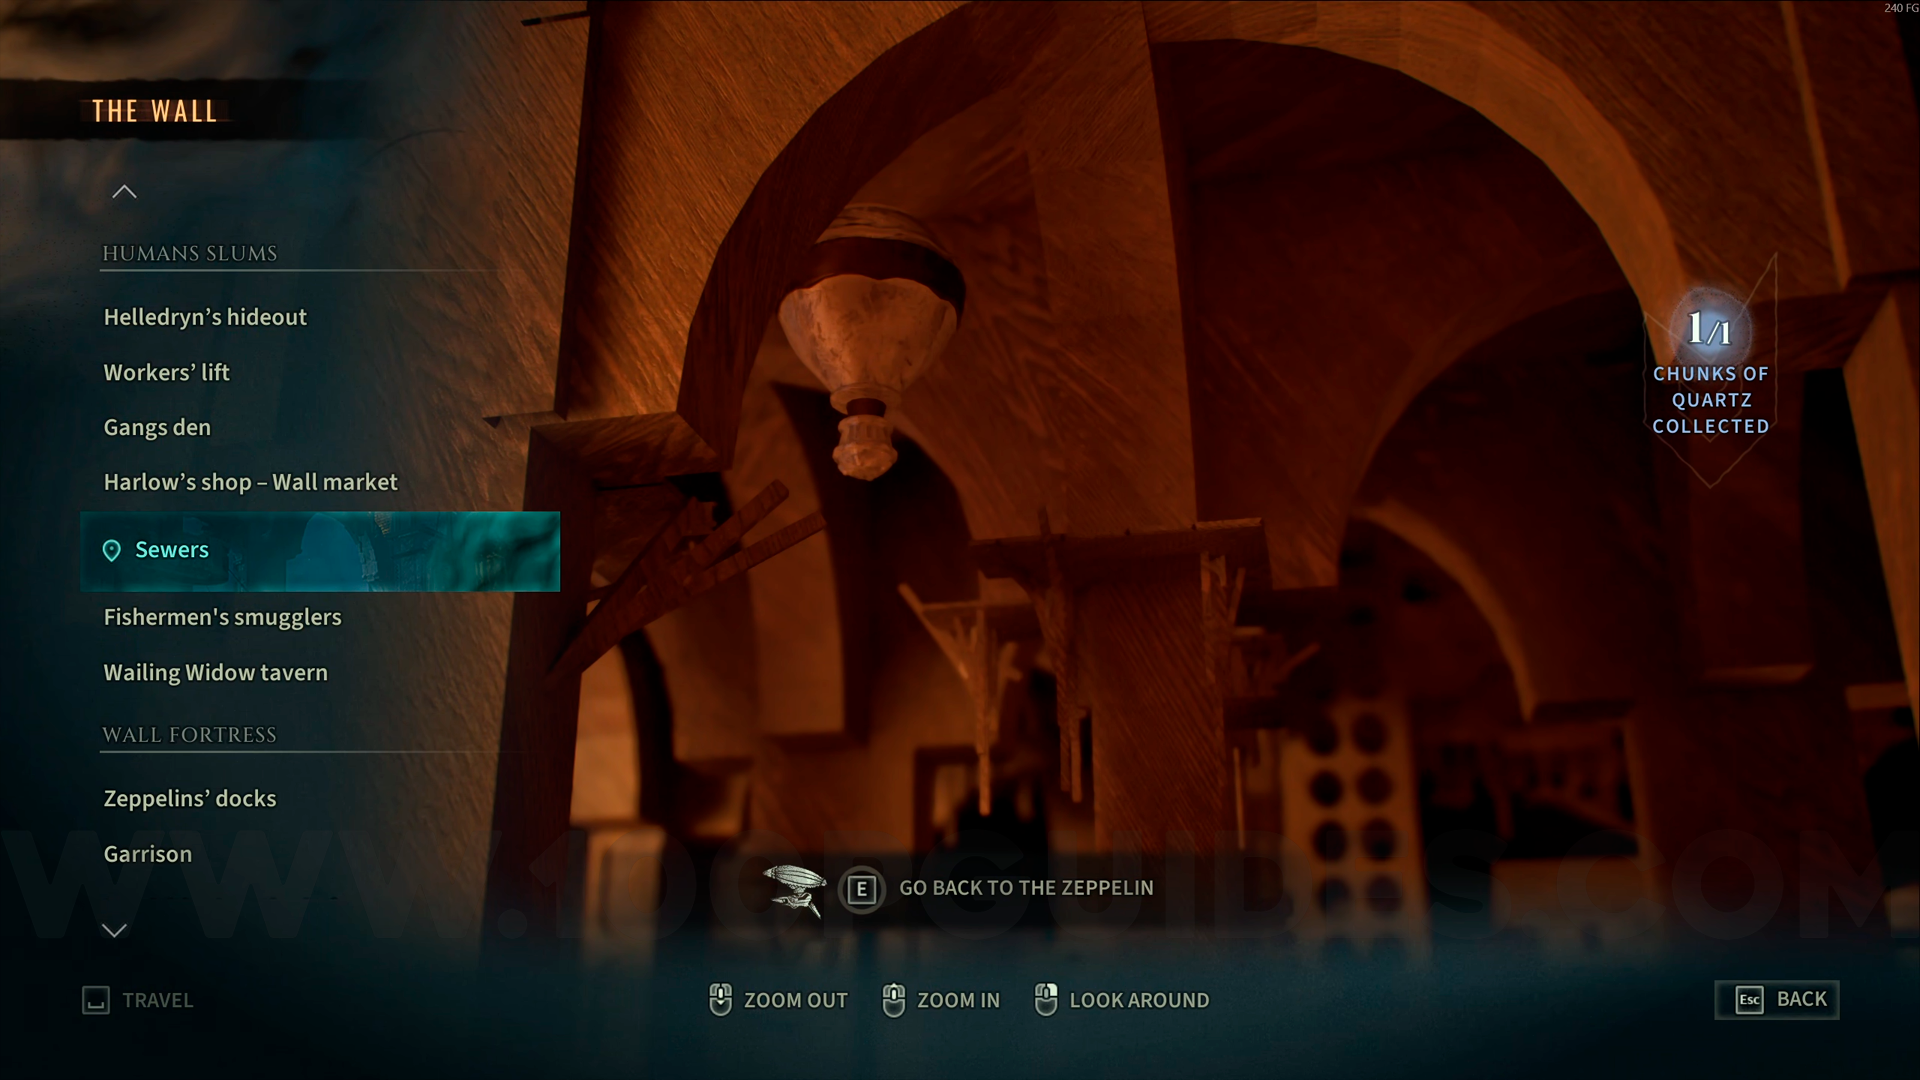
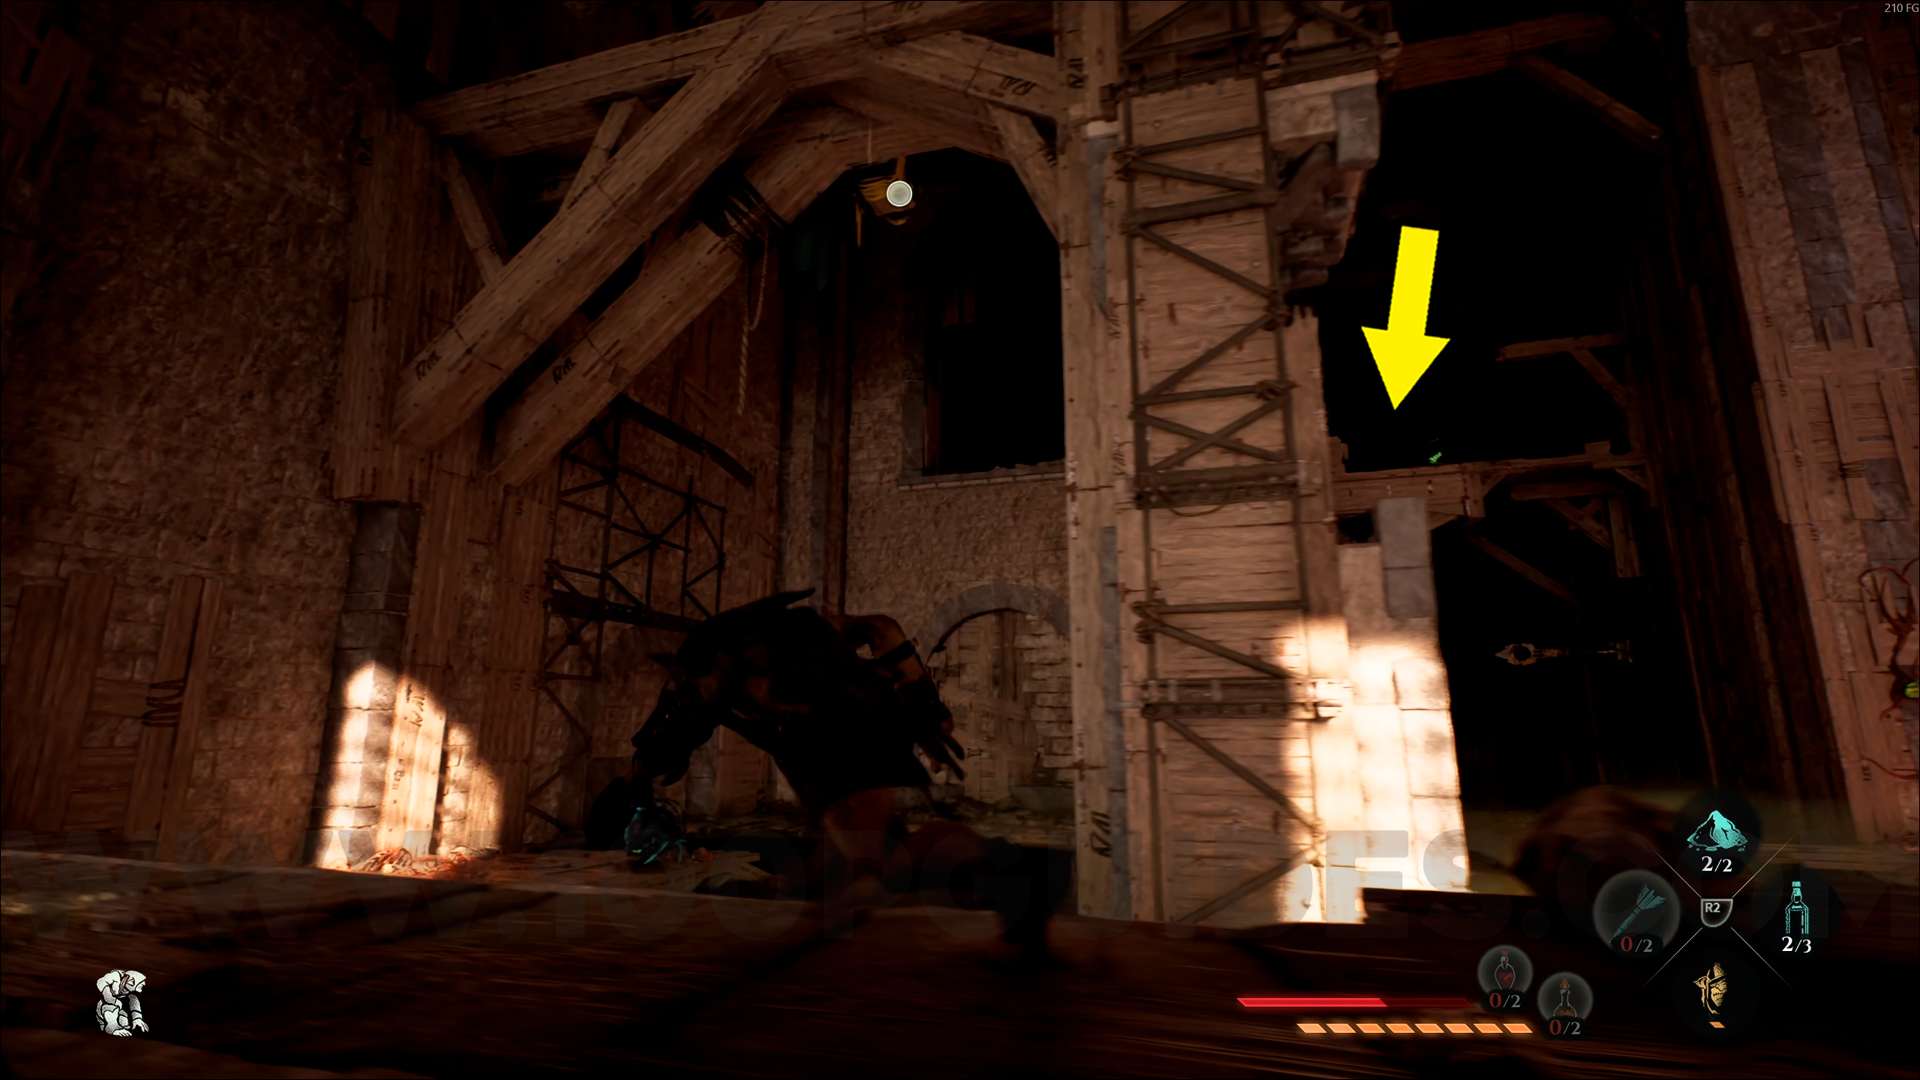
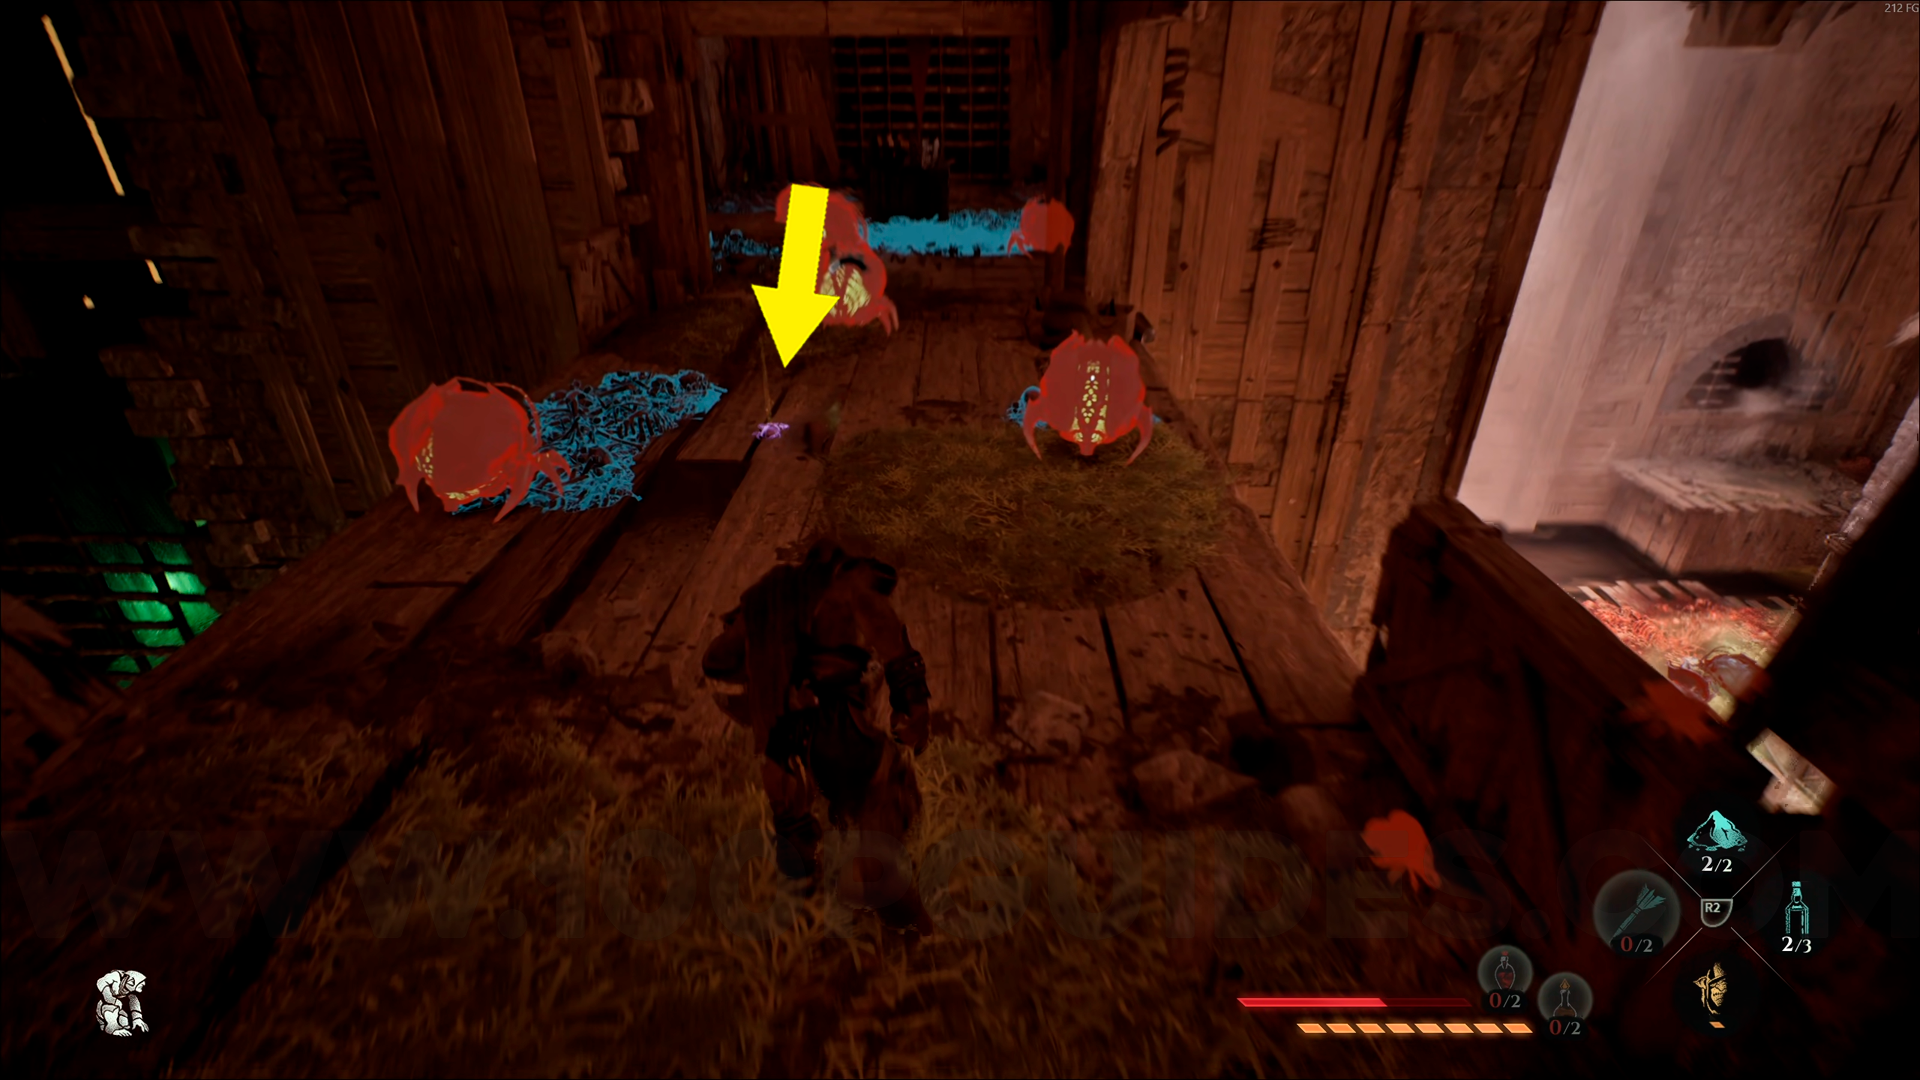
Bronze Emblem #10. From the Sewers checkpoint, head up to the upper area and you'll find this emblem.
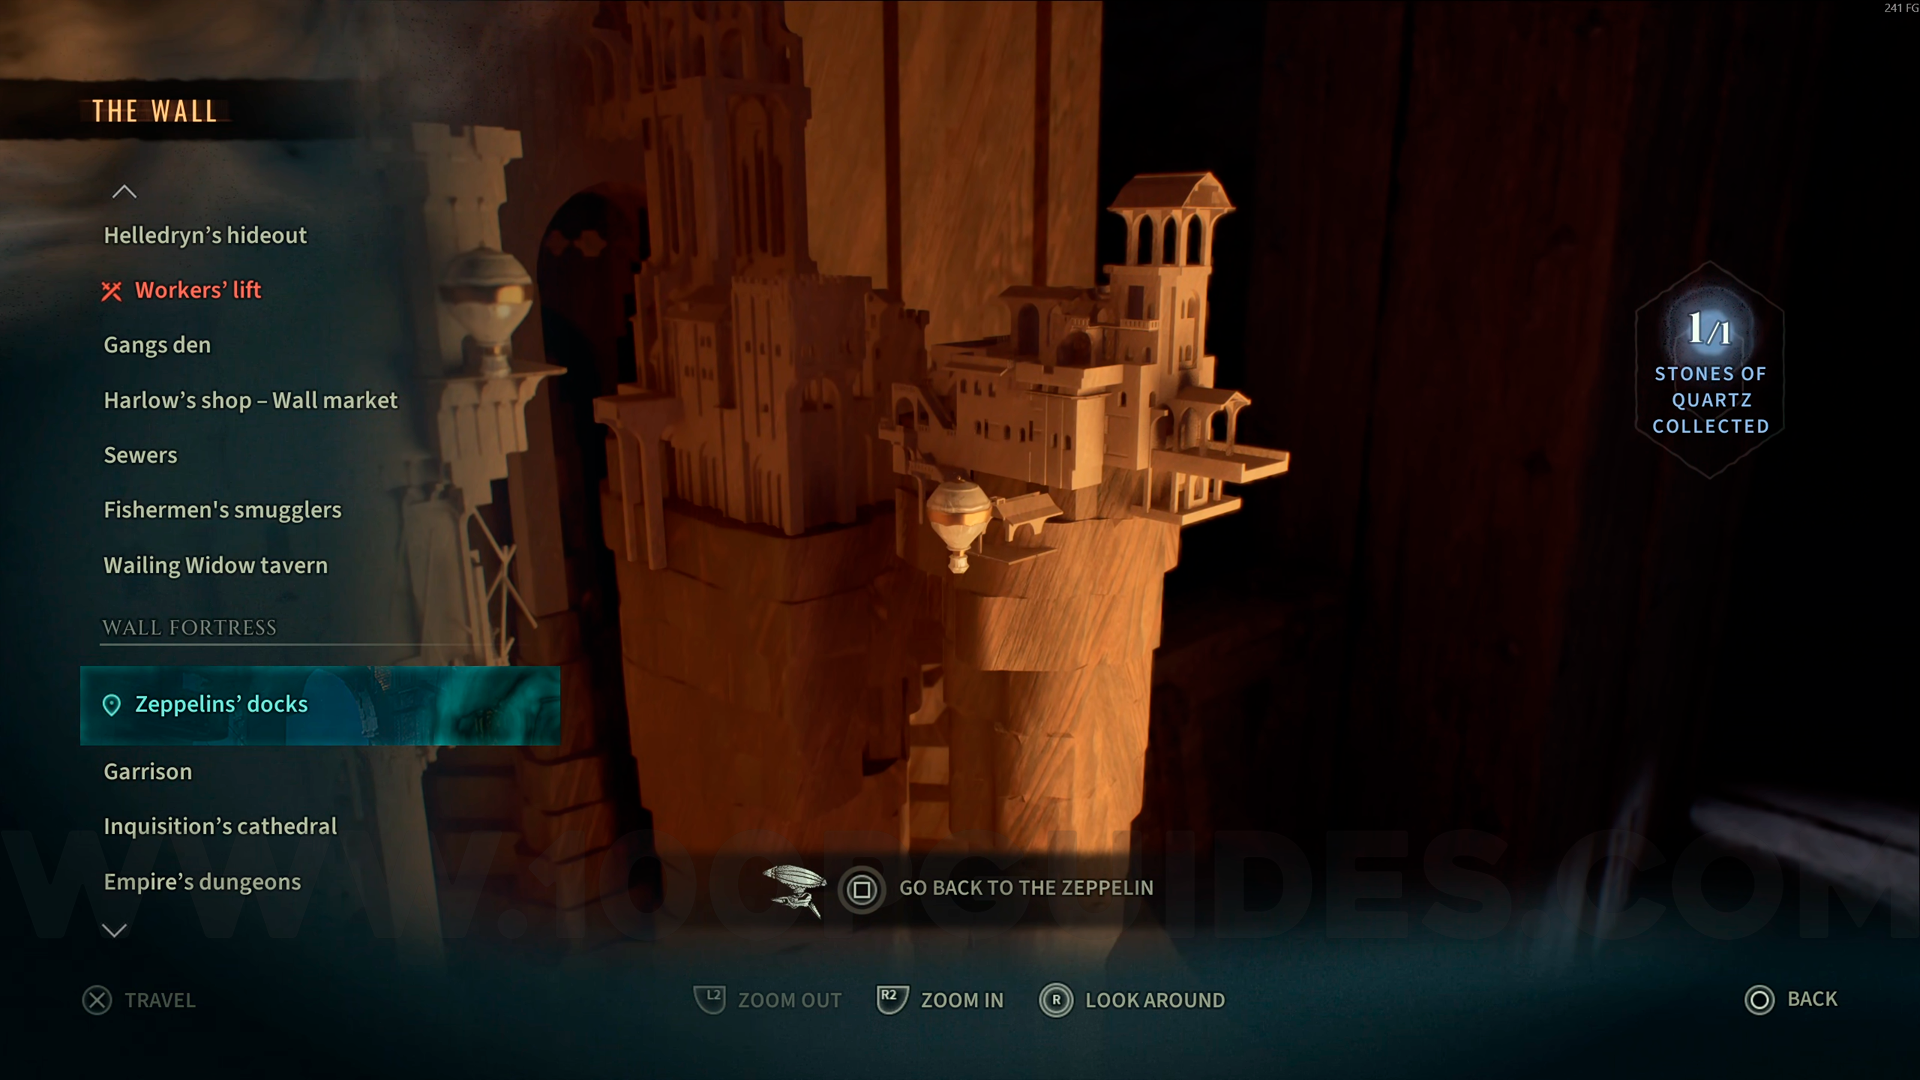
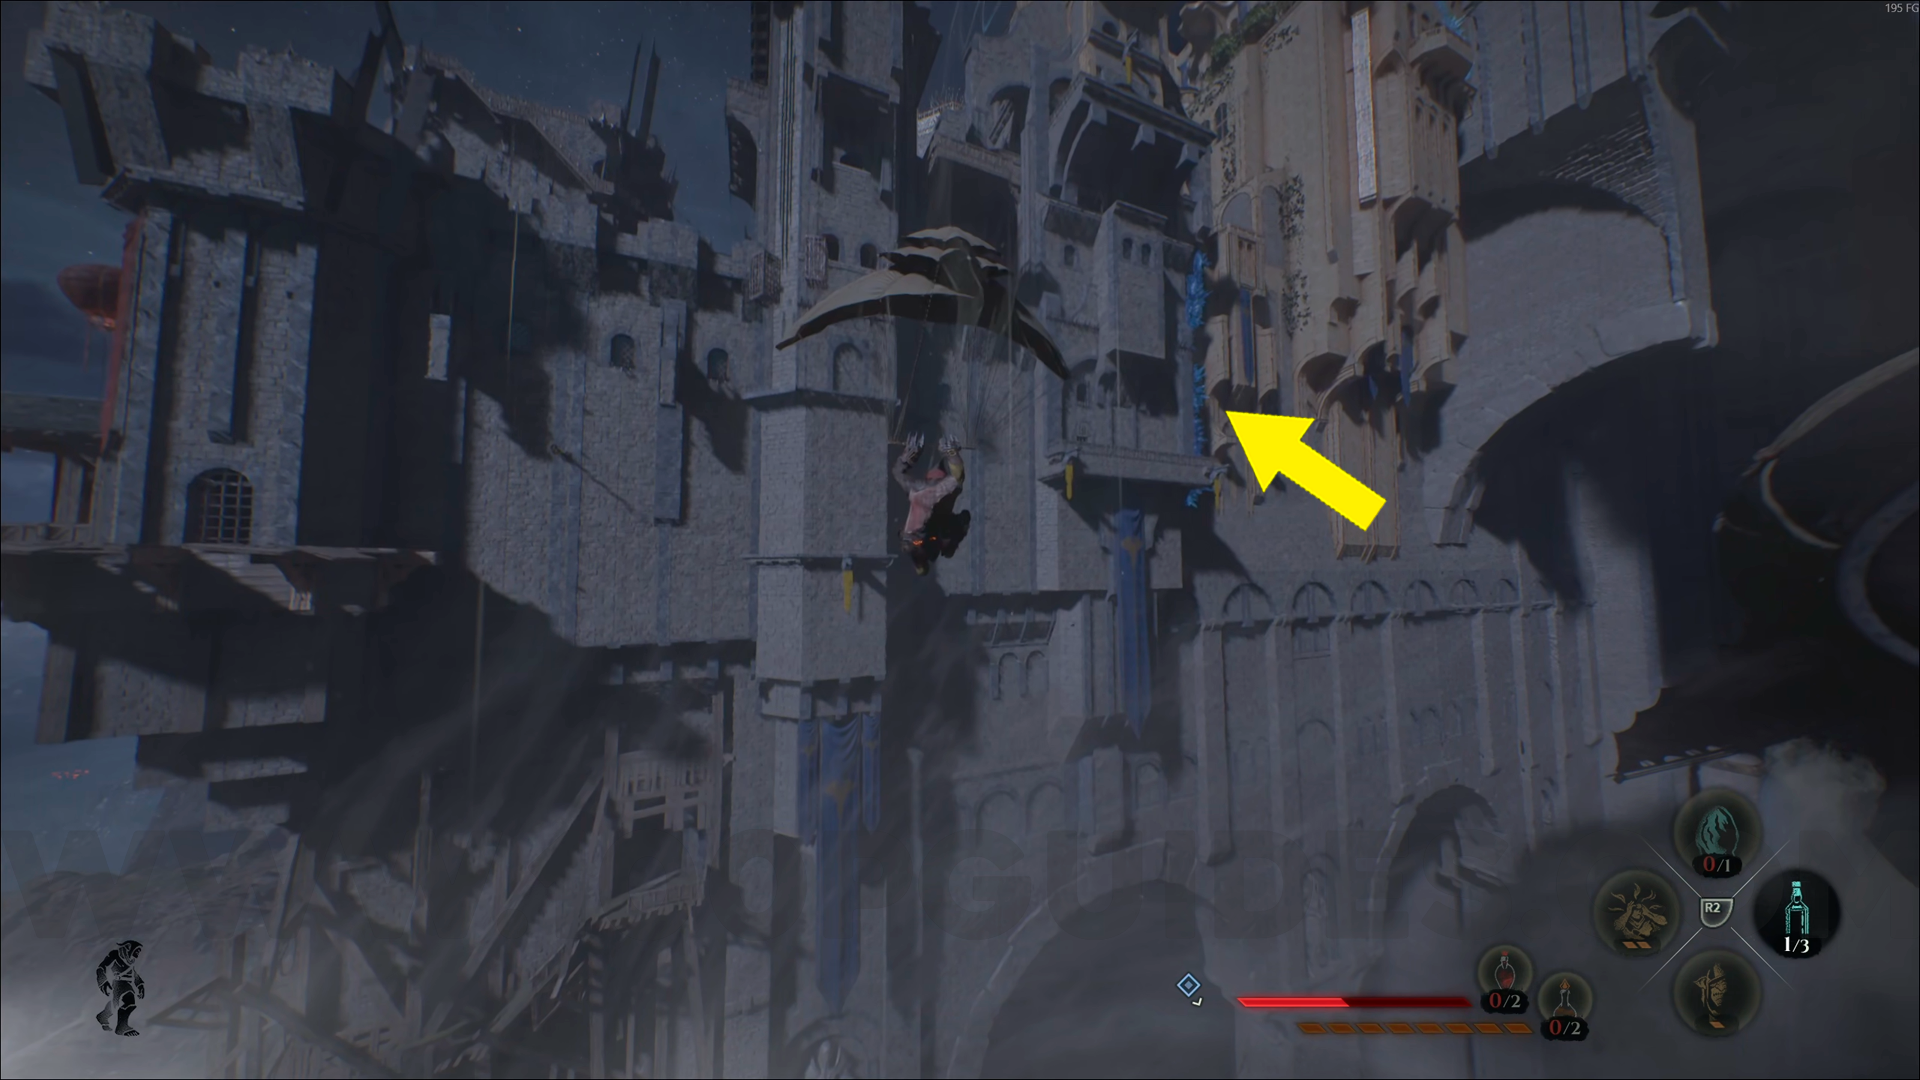
Silver Emblem #1. From the Zeppelins' Docks checkpoint, float through the wind current on your left side. Use Amber Vision to spot this emblem on the wall.

Silver Emblem #2. From the Zeppelins' Docks checkpoint, climb the wall beside you and head to the end of the area. Enter through the large door, and this emblem will be on the first pillar on the right side. Use Amber Vision to help you spot it.

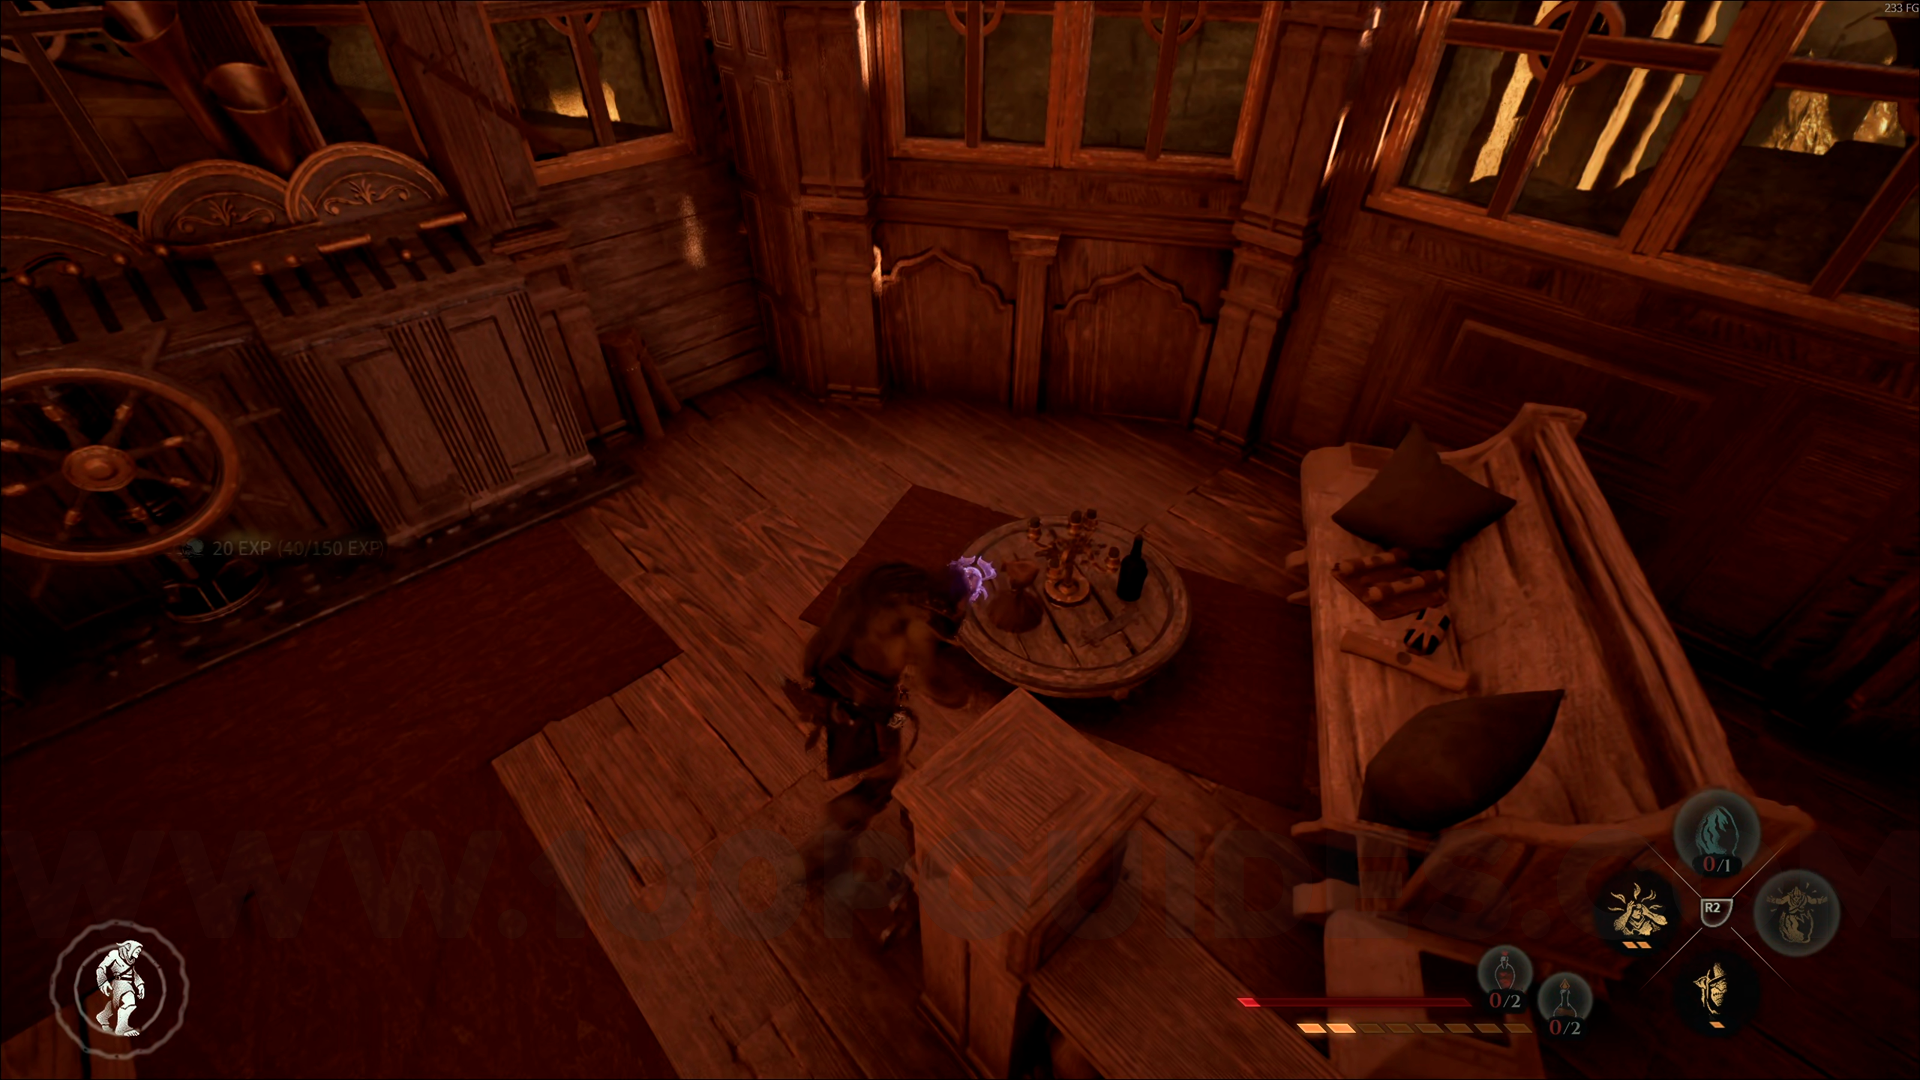
Silver Emblem #3. From the Zeppelins' Docks checkpoint, climb onto the building right in front of you and enter the window on the right. Go down the stairs, and this emblem will be in front of you on top of the table. Use Amber Vision to help you spot it.
Silver Emblem #4. Right after the previous collectible, climb to the top of the building you're in and jump to the building in front of you (the one next to the bridge). This emblem will be in the corner. Use Amber Vision to help you spot it.
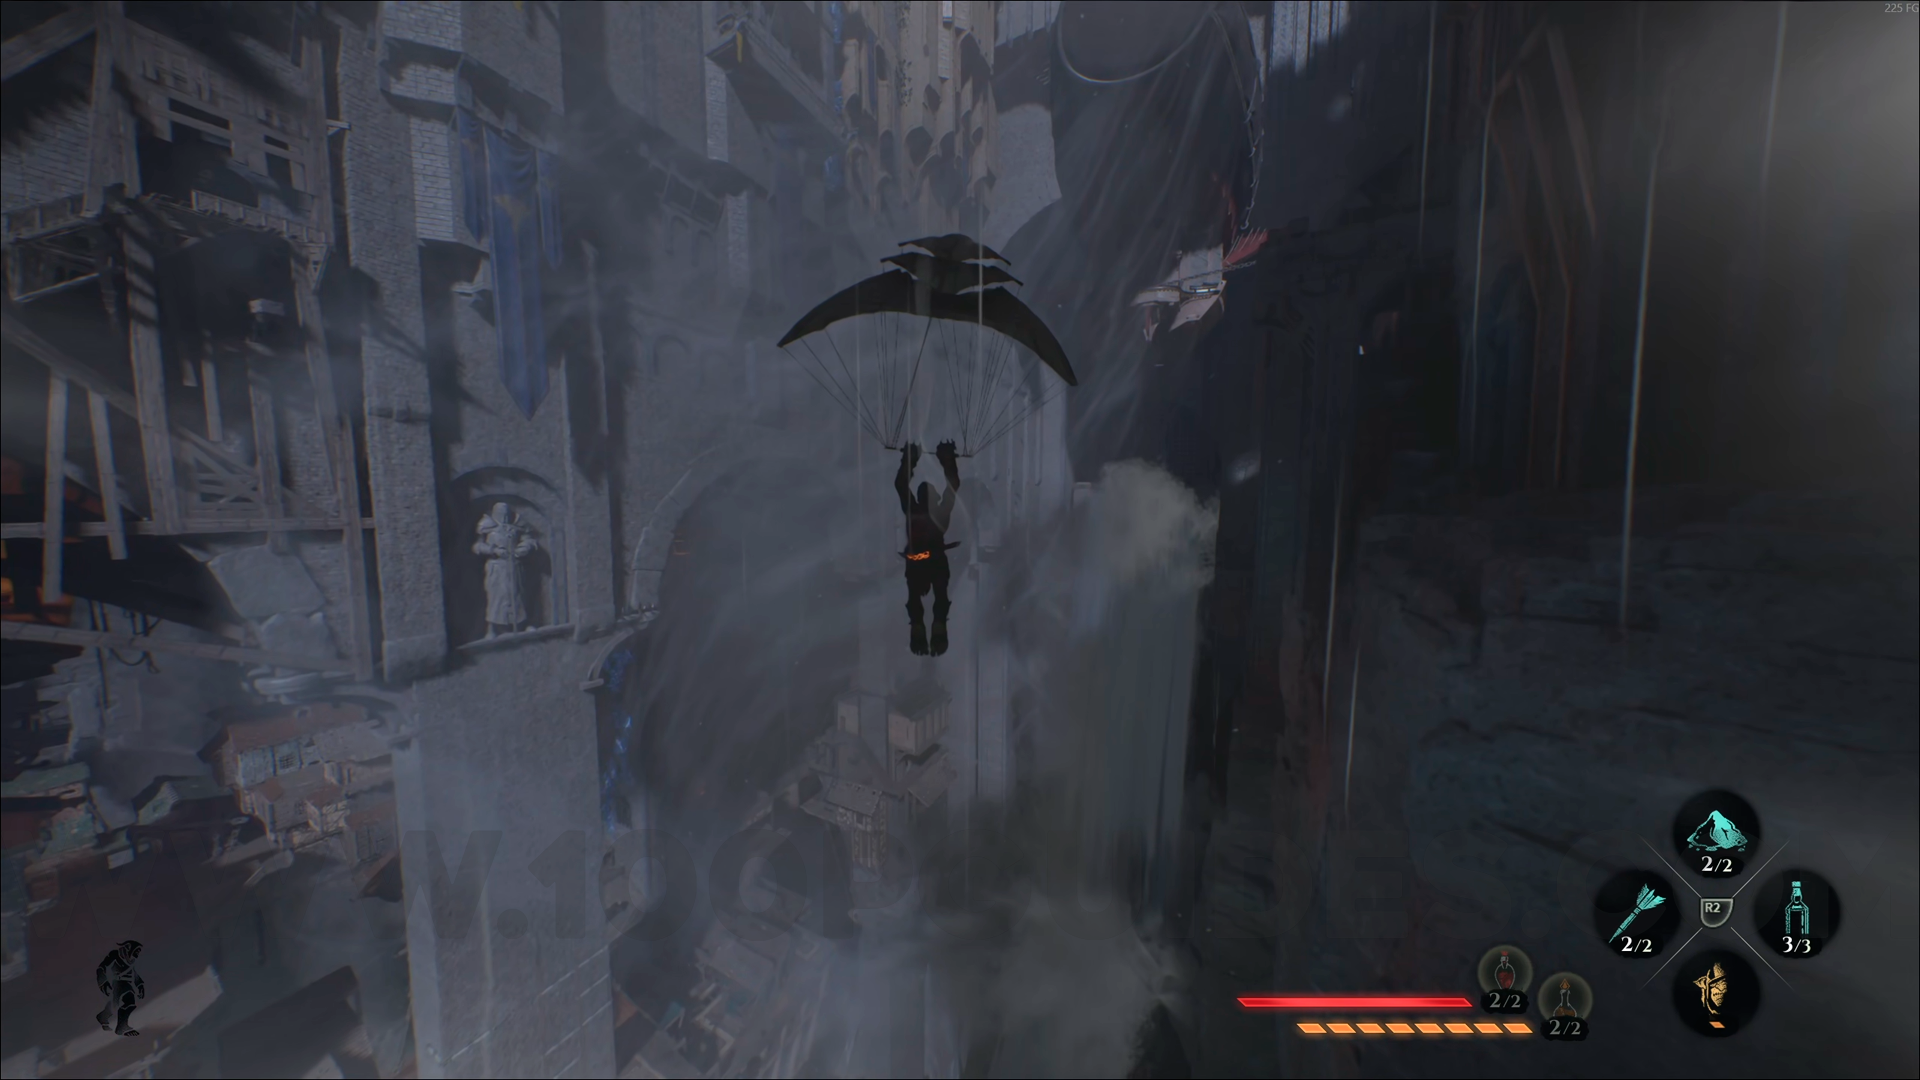
Silver Emblem #5. From the previous collectible, go under the bridge using the glider and circle around the area. Climb back up to the upper wall, and this emblem will be right next to you.

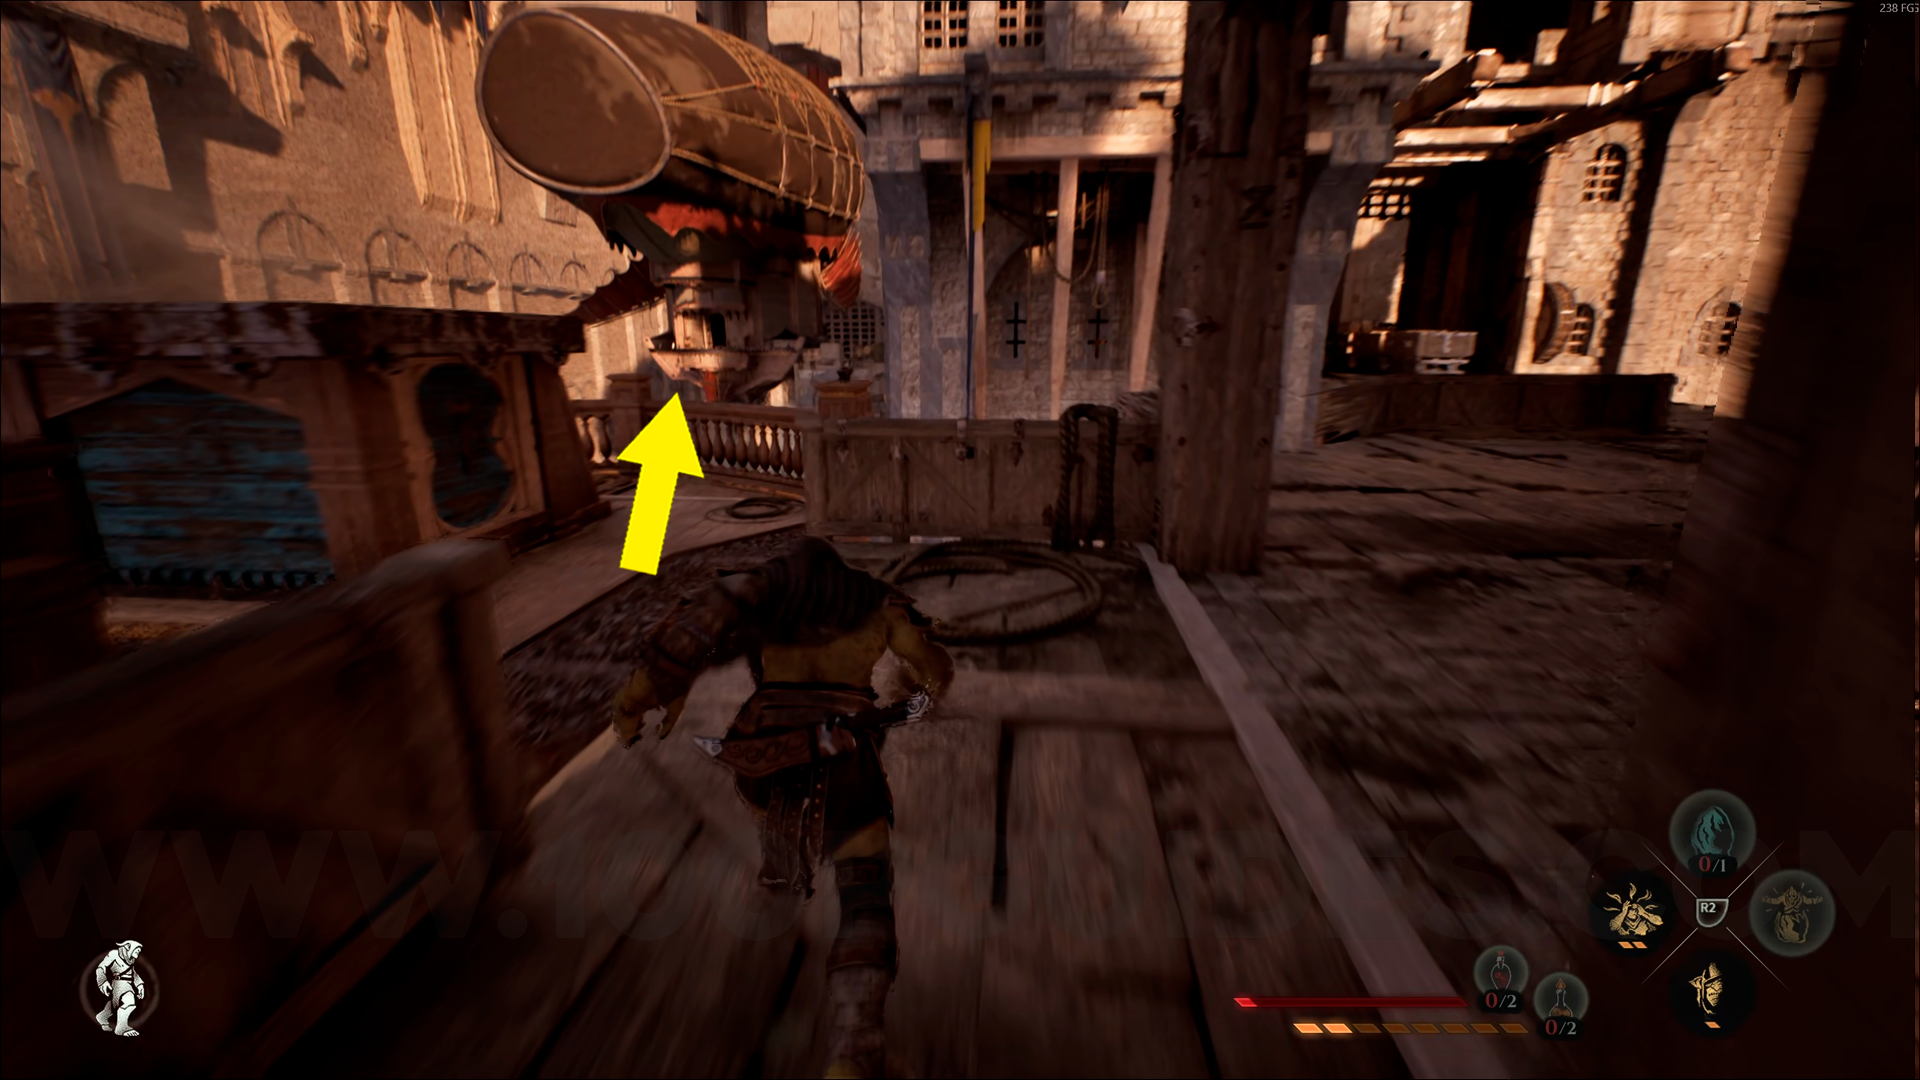
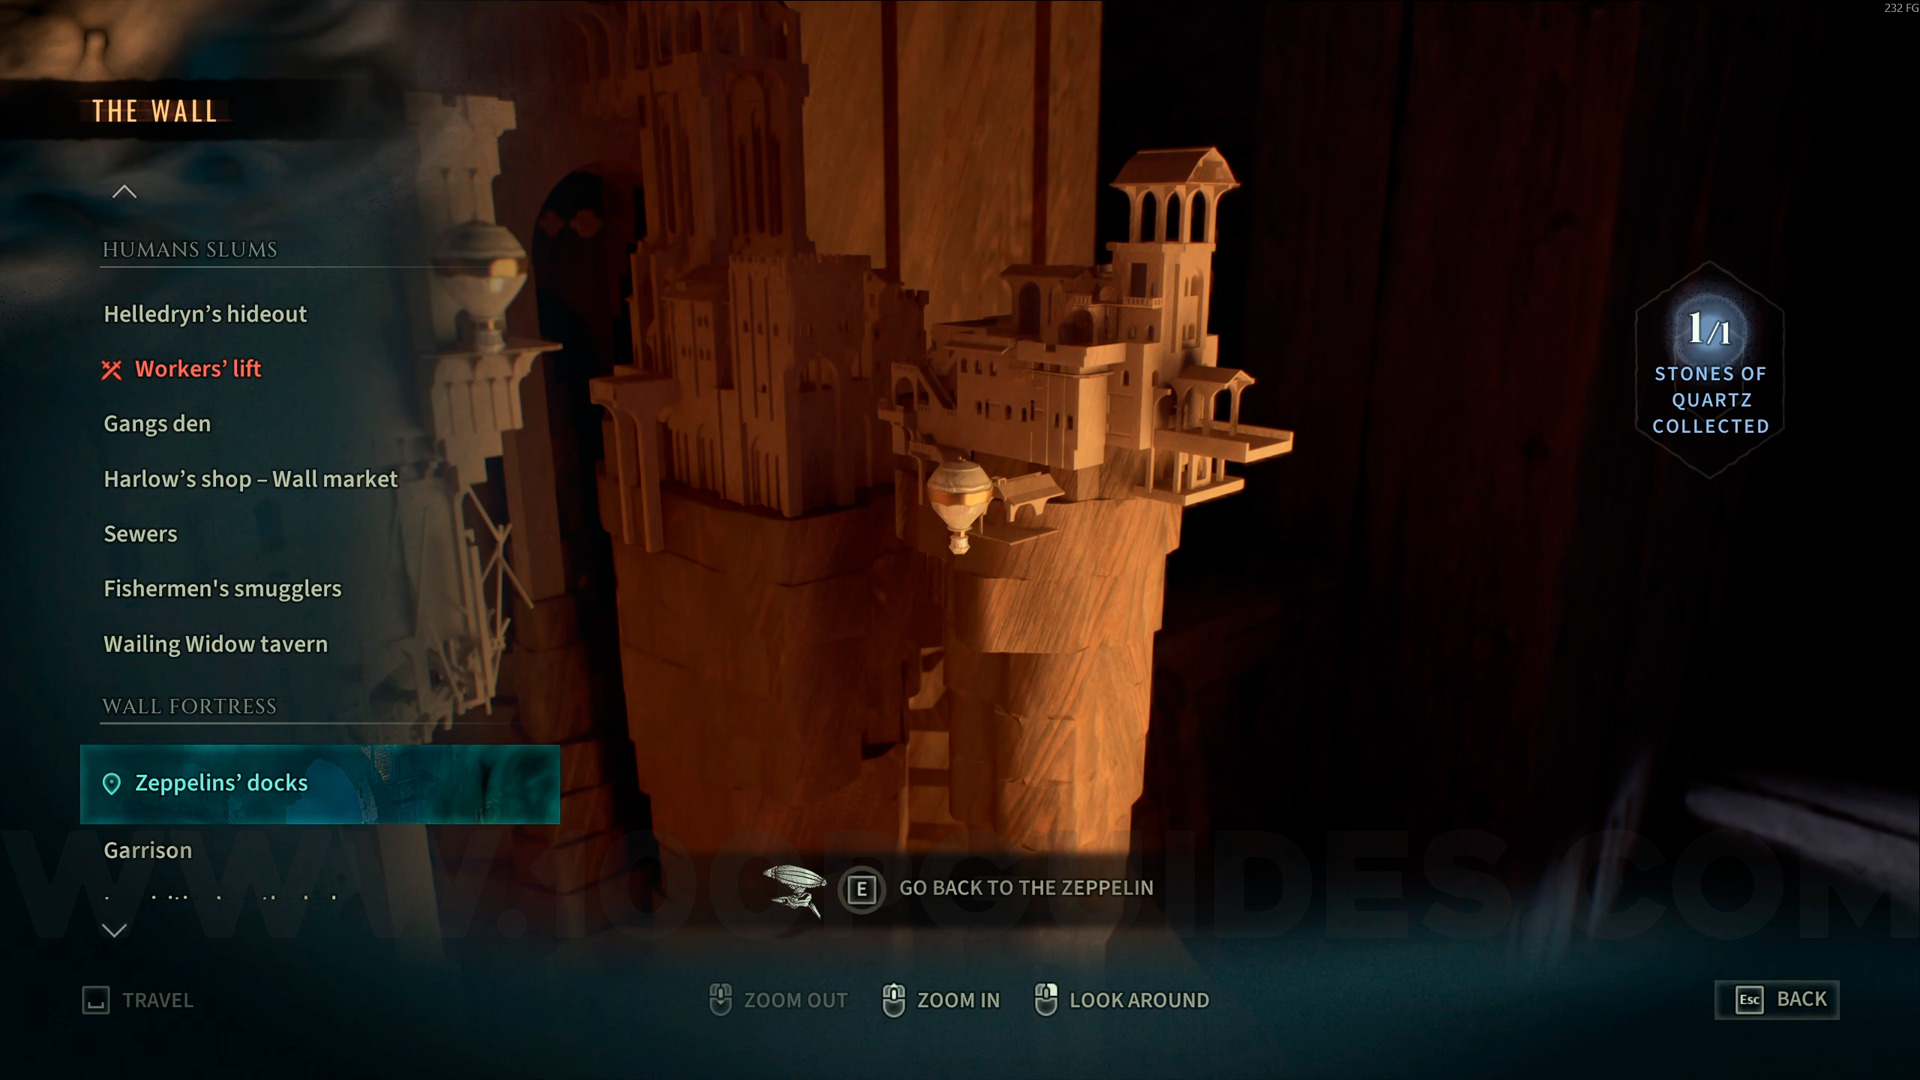
Silver Emblem #6. From Zeppelins' Docks, go to the zeppelin on the left side of the area and go inside to find this emblem.
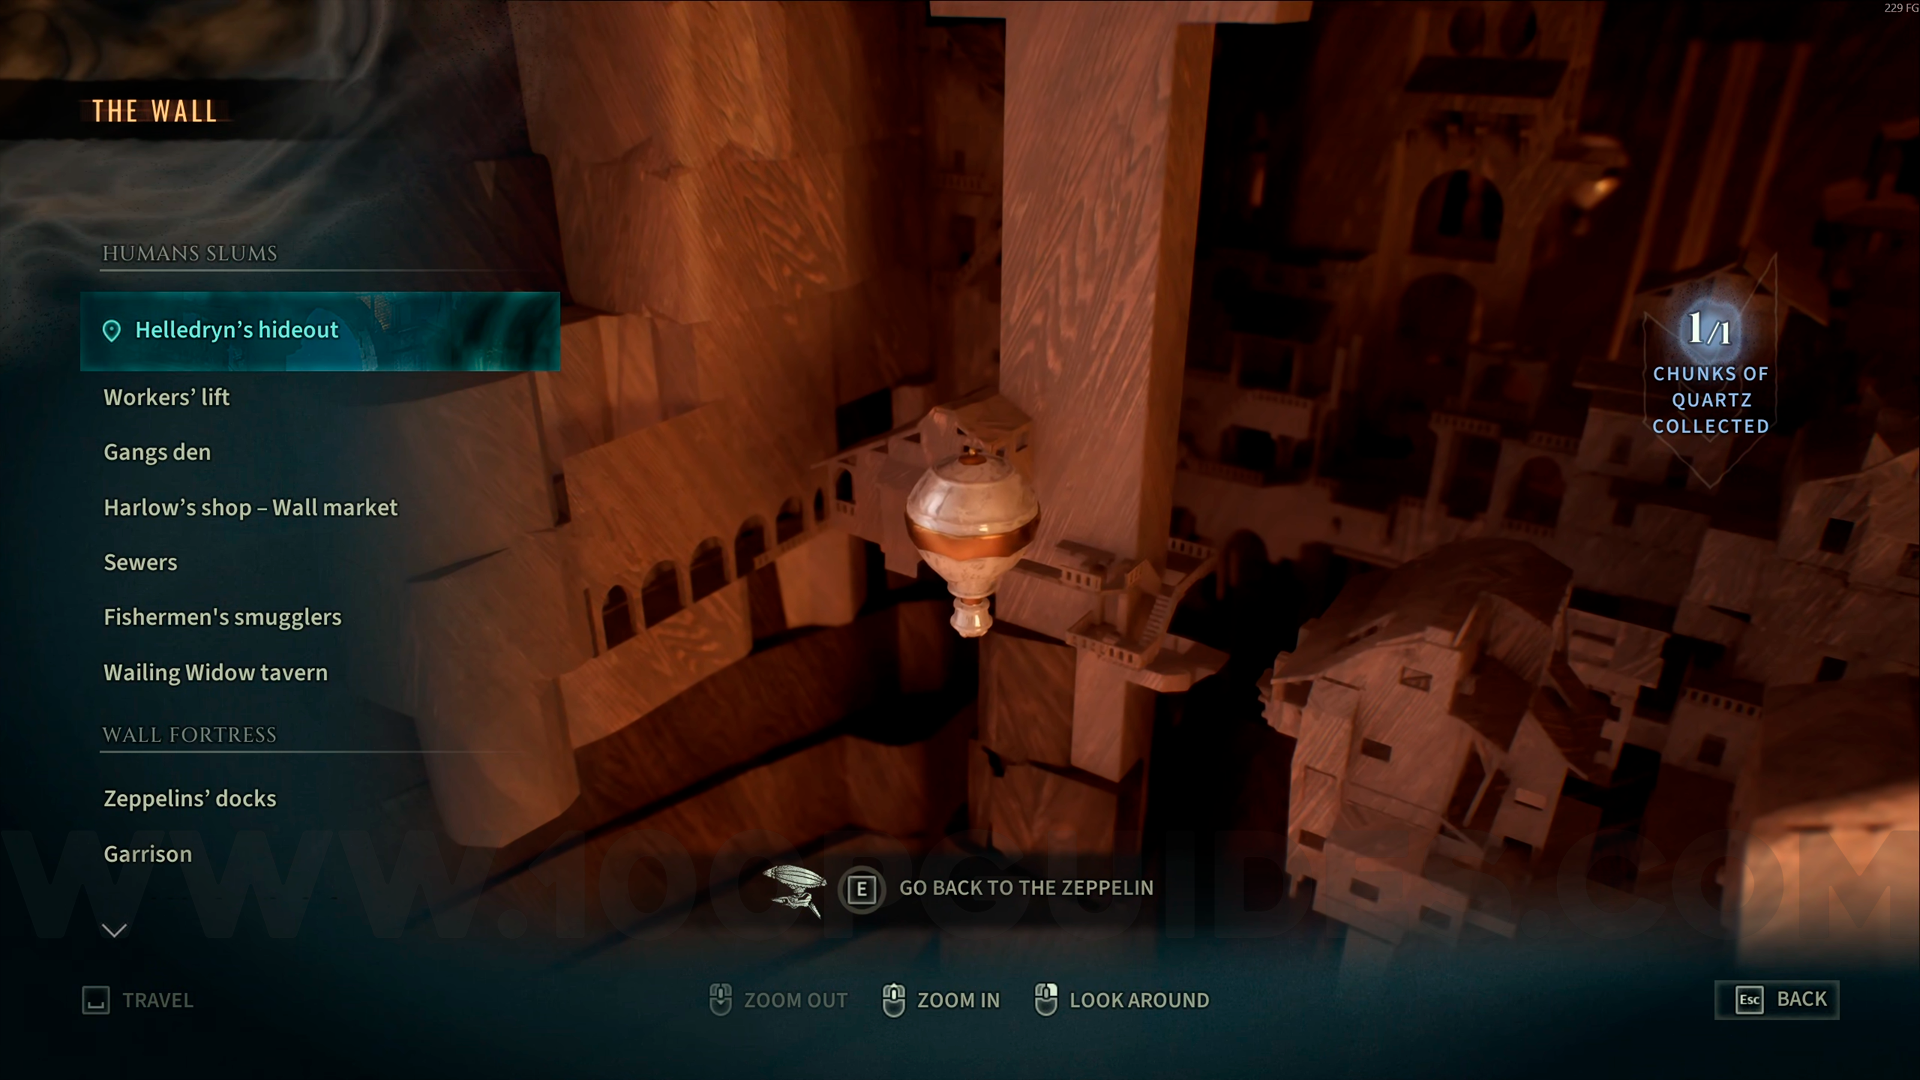
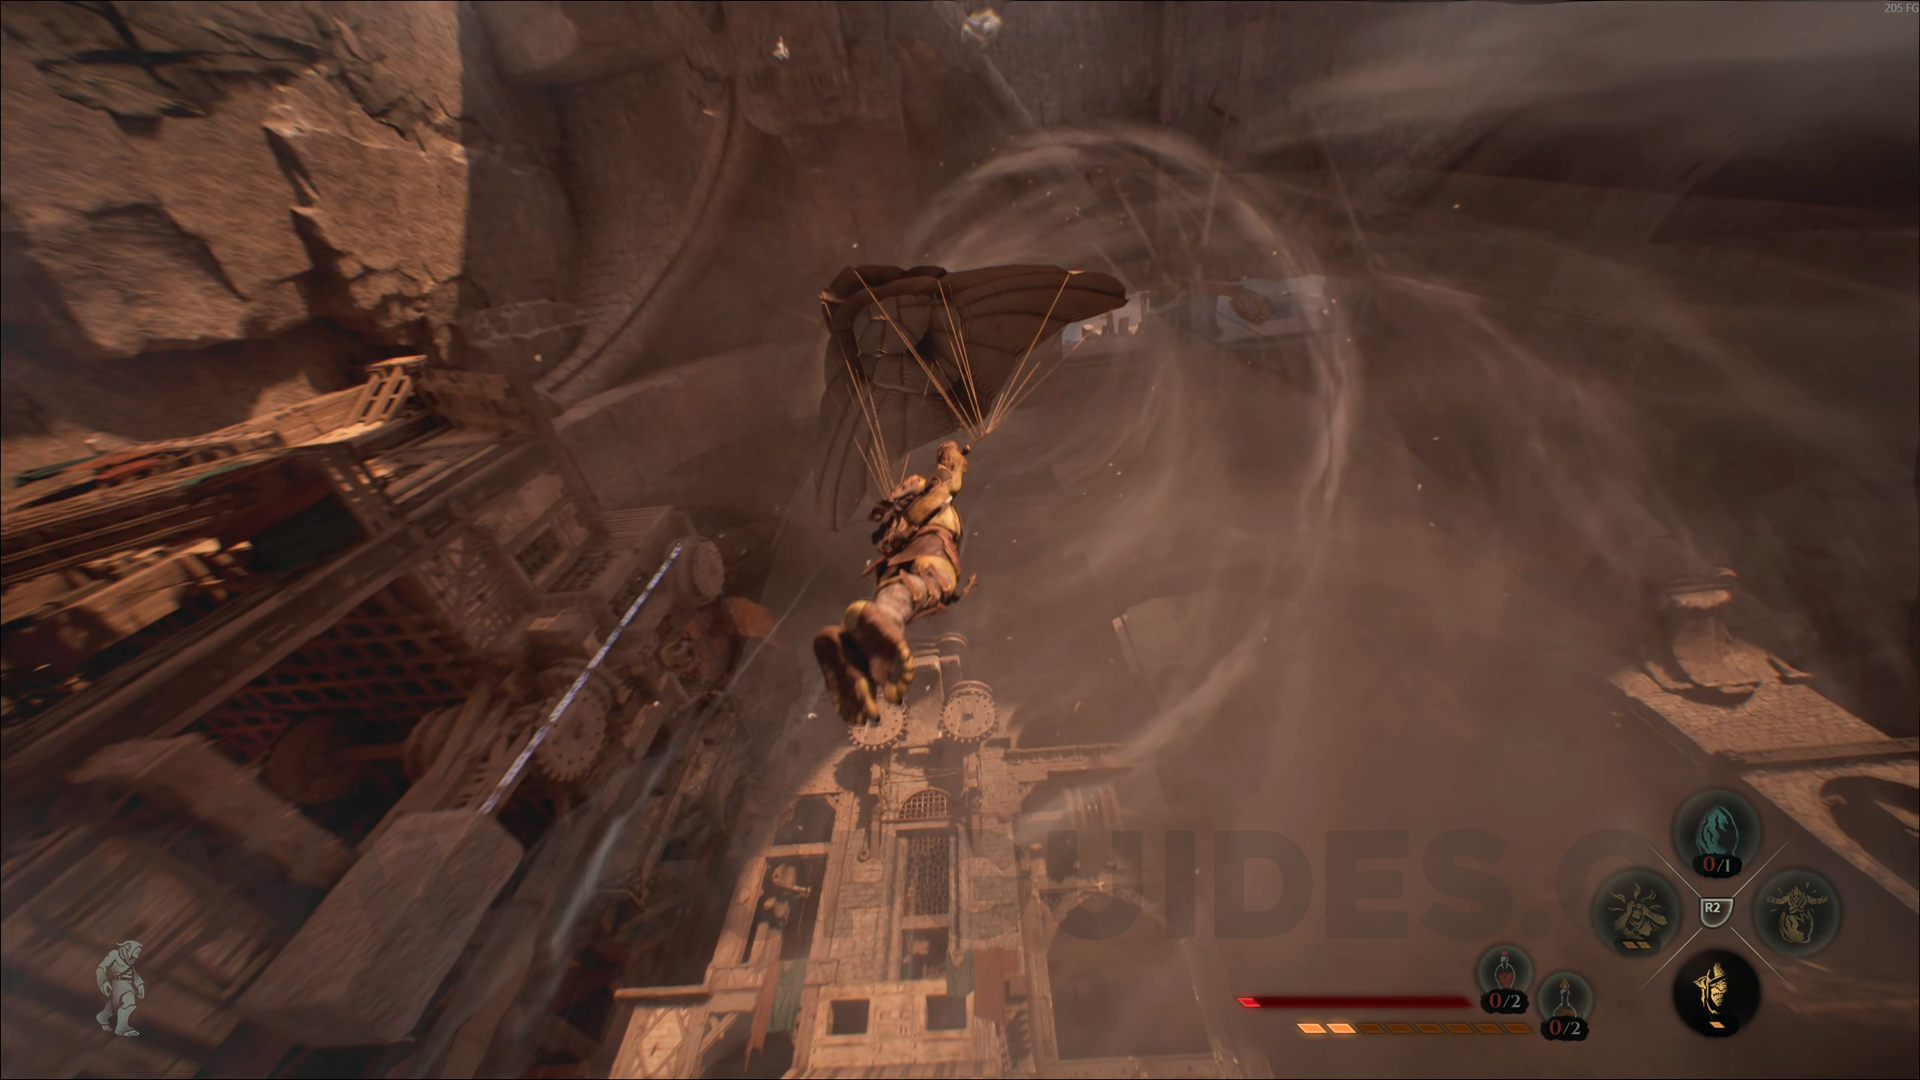
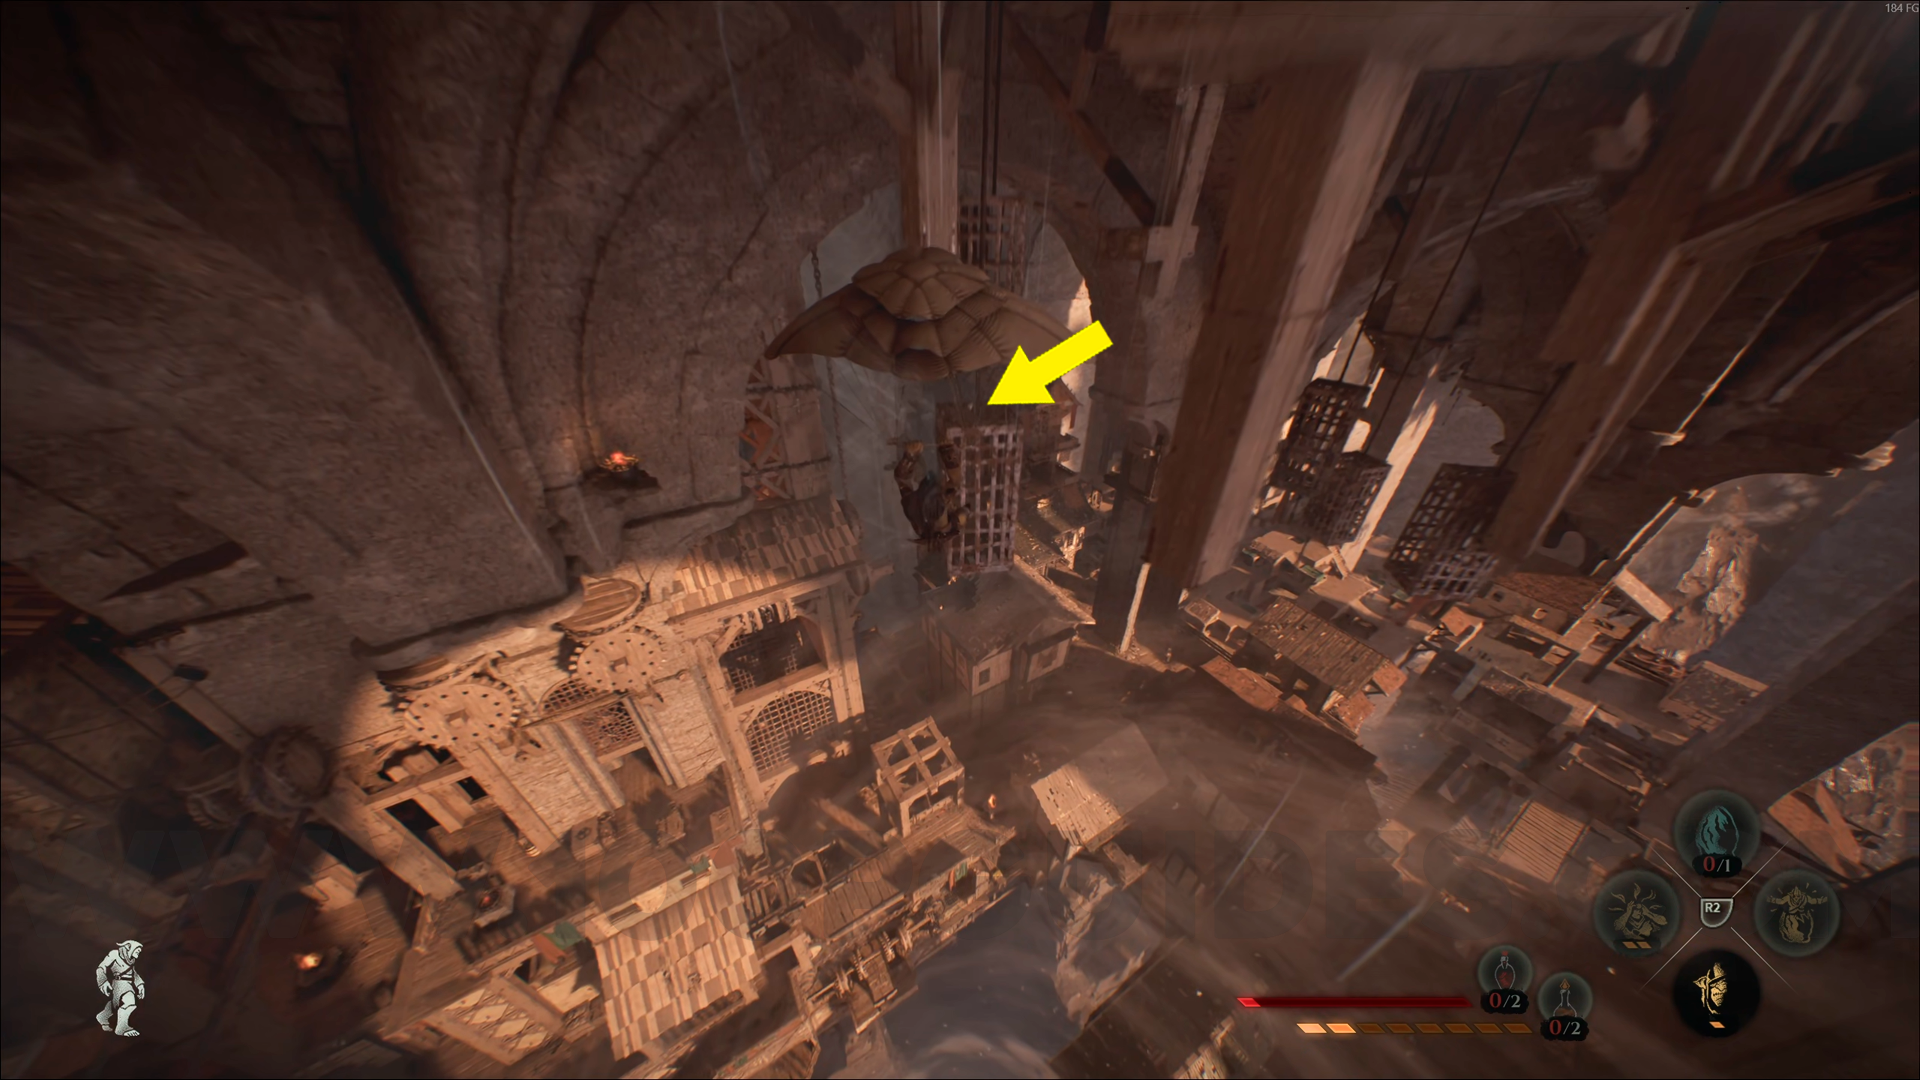
Silver Emblem #7. From Helledryn's Hideout checkpoint, ride the air current up to the top to find this emblem.
Silver Emblem #8. From Zeppelins' Docks, use the air current to reach the large wall. The emblem is next to the statue.

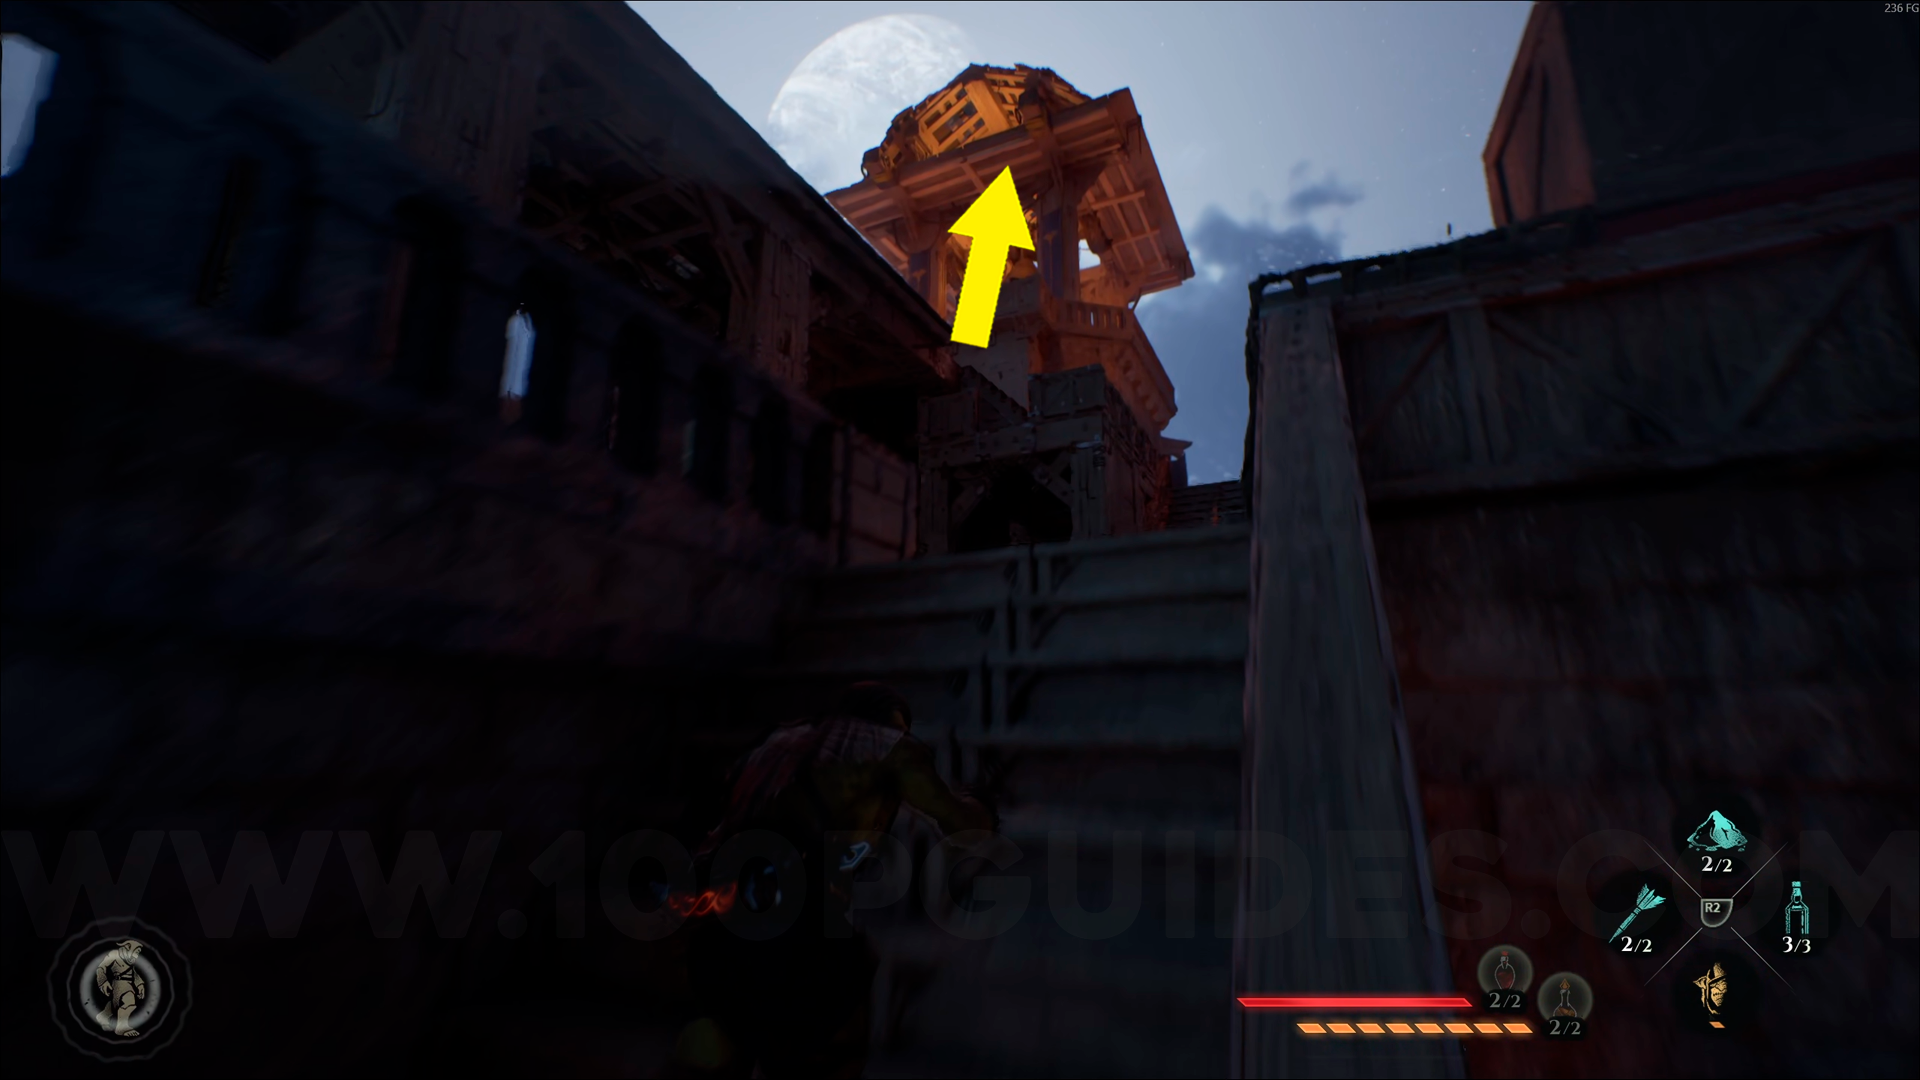
Silver Emblem #9. From Zeppelins' Docks, this emblem is in the same area as the checkpoint. Climb the large structure next to you, and climb to the top to find the emblem.

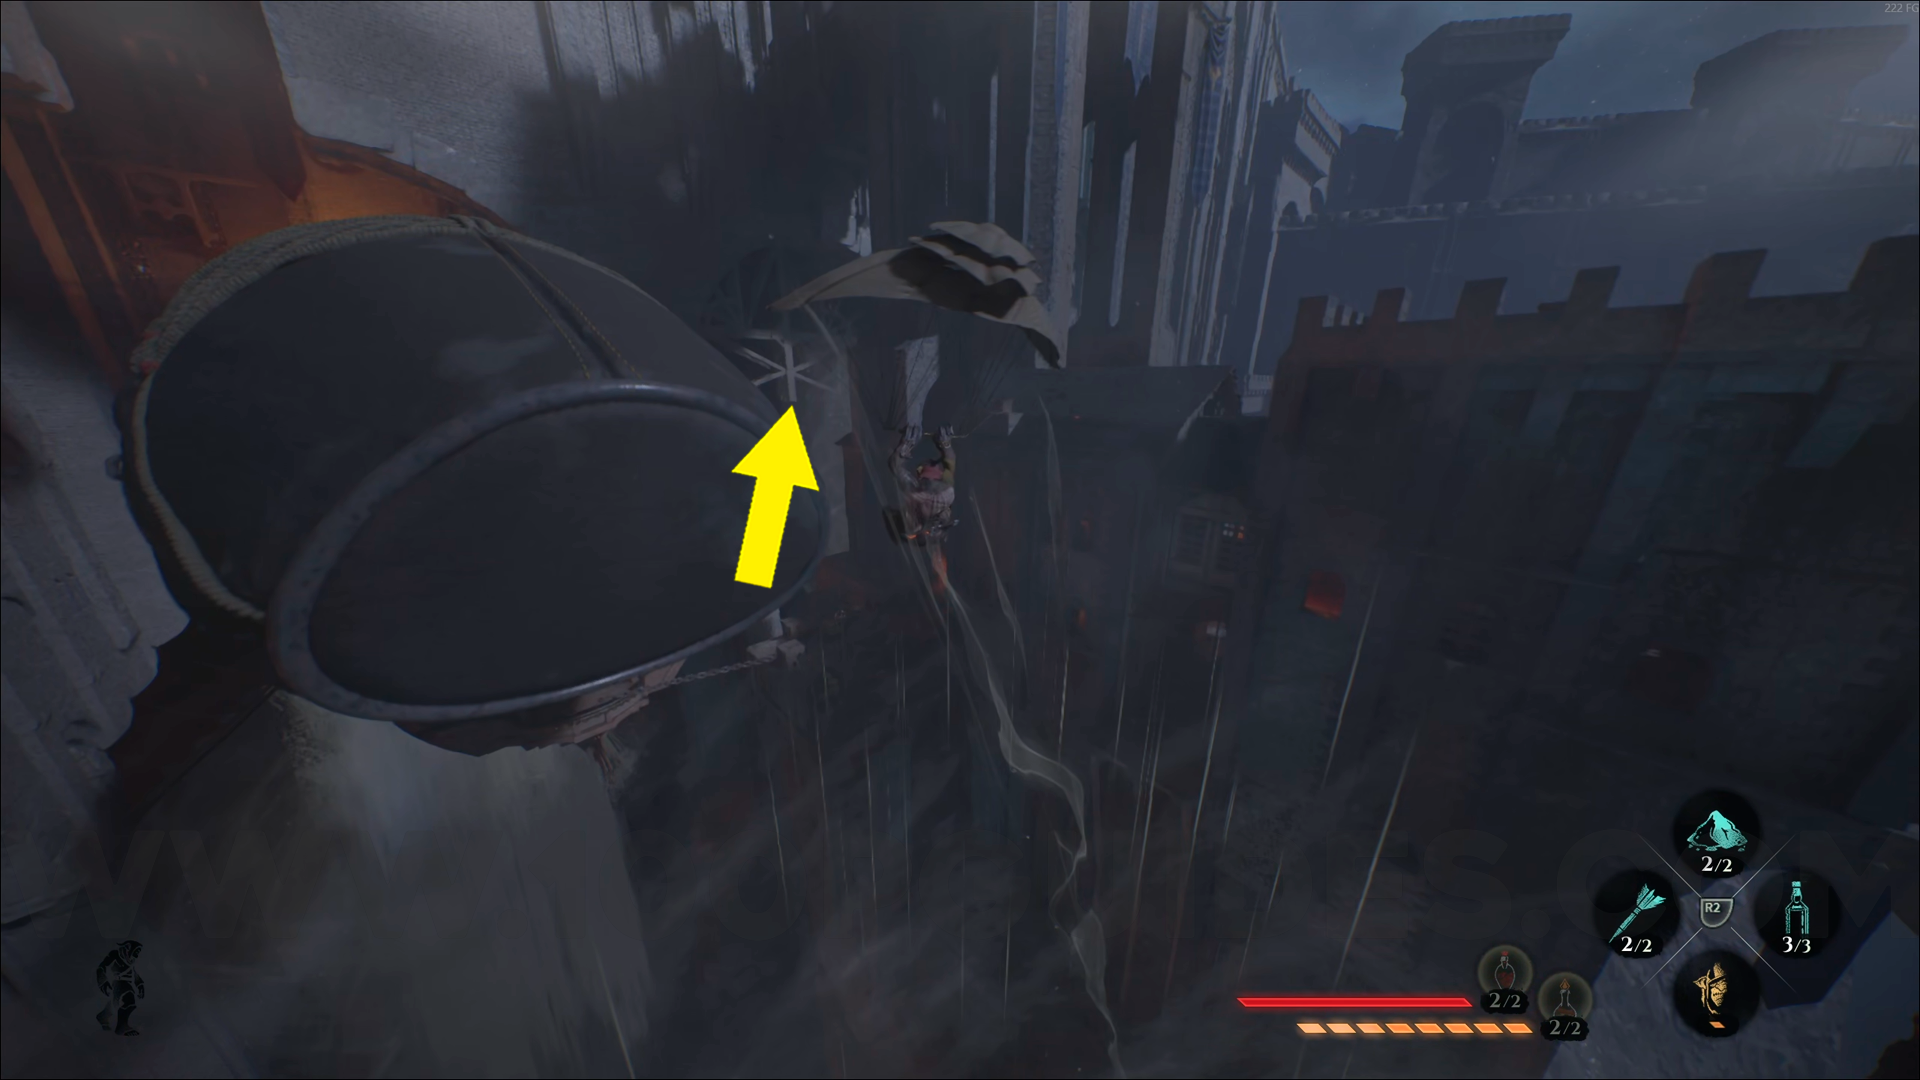
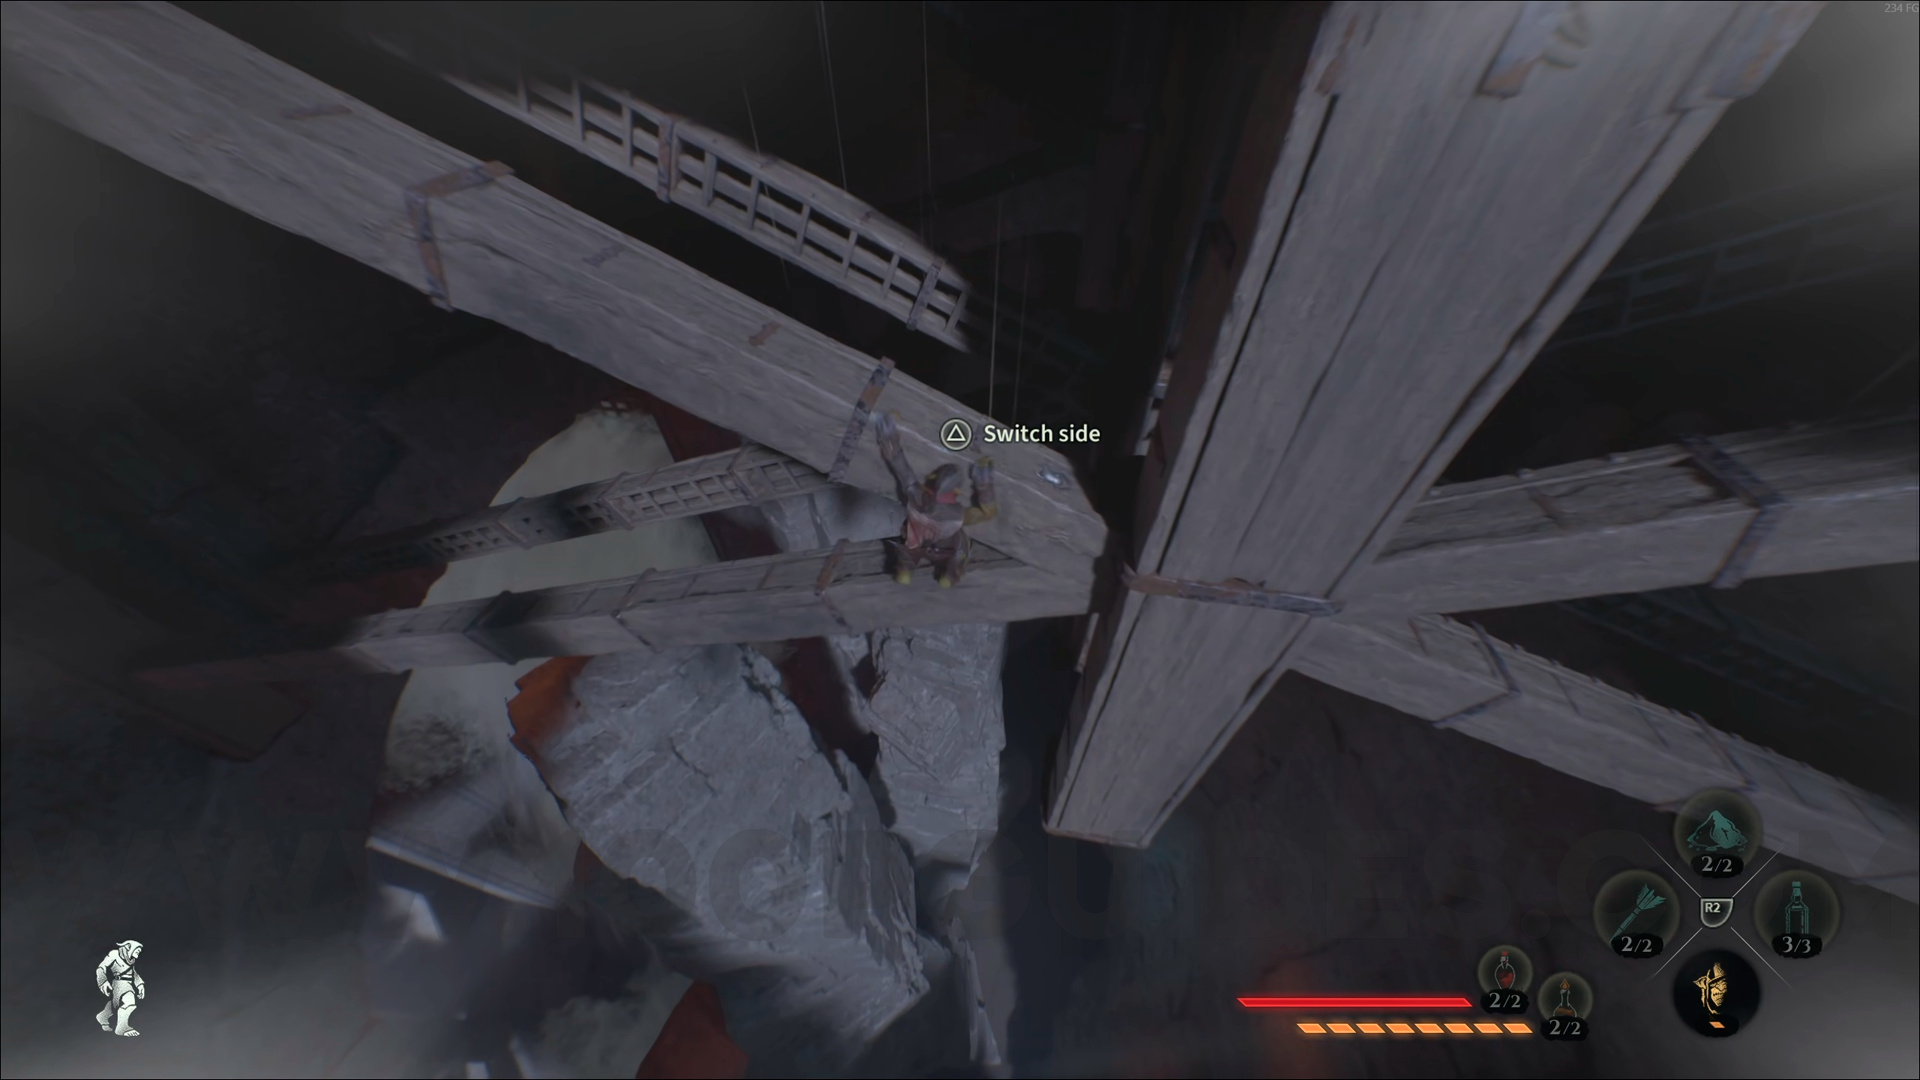
Silver Emblem #10. From Zeppelins' Docks, go to the end of the area using the air current, and this emblem will be on top of some wooden planks.
Gold Emblem #1. From Zeppelins' Docks, head left and climb up the wall. Once you're up there, turn left, then enter the door on the right. You'll find this emblem inside. Use Amber Vision to help you spot it.

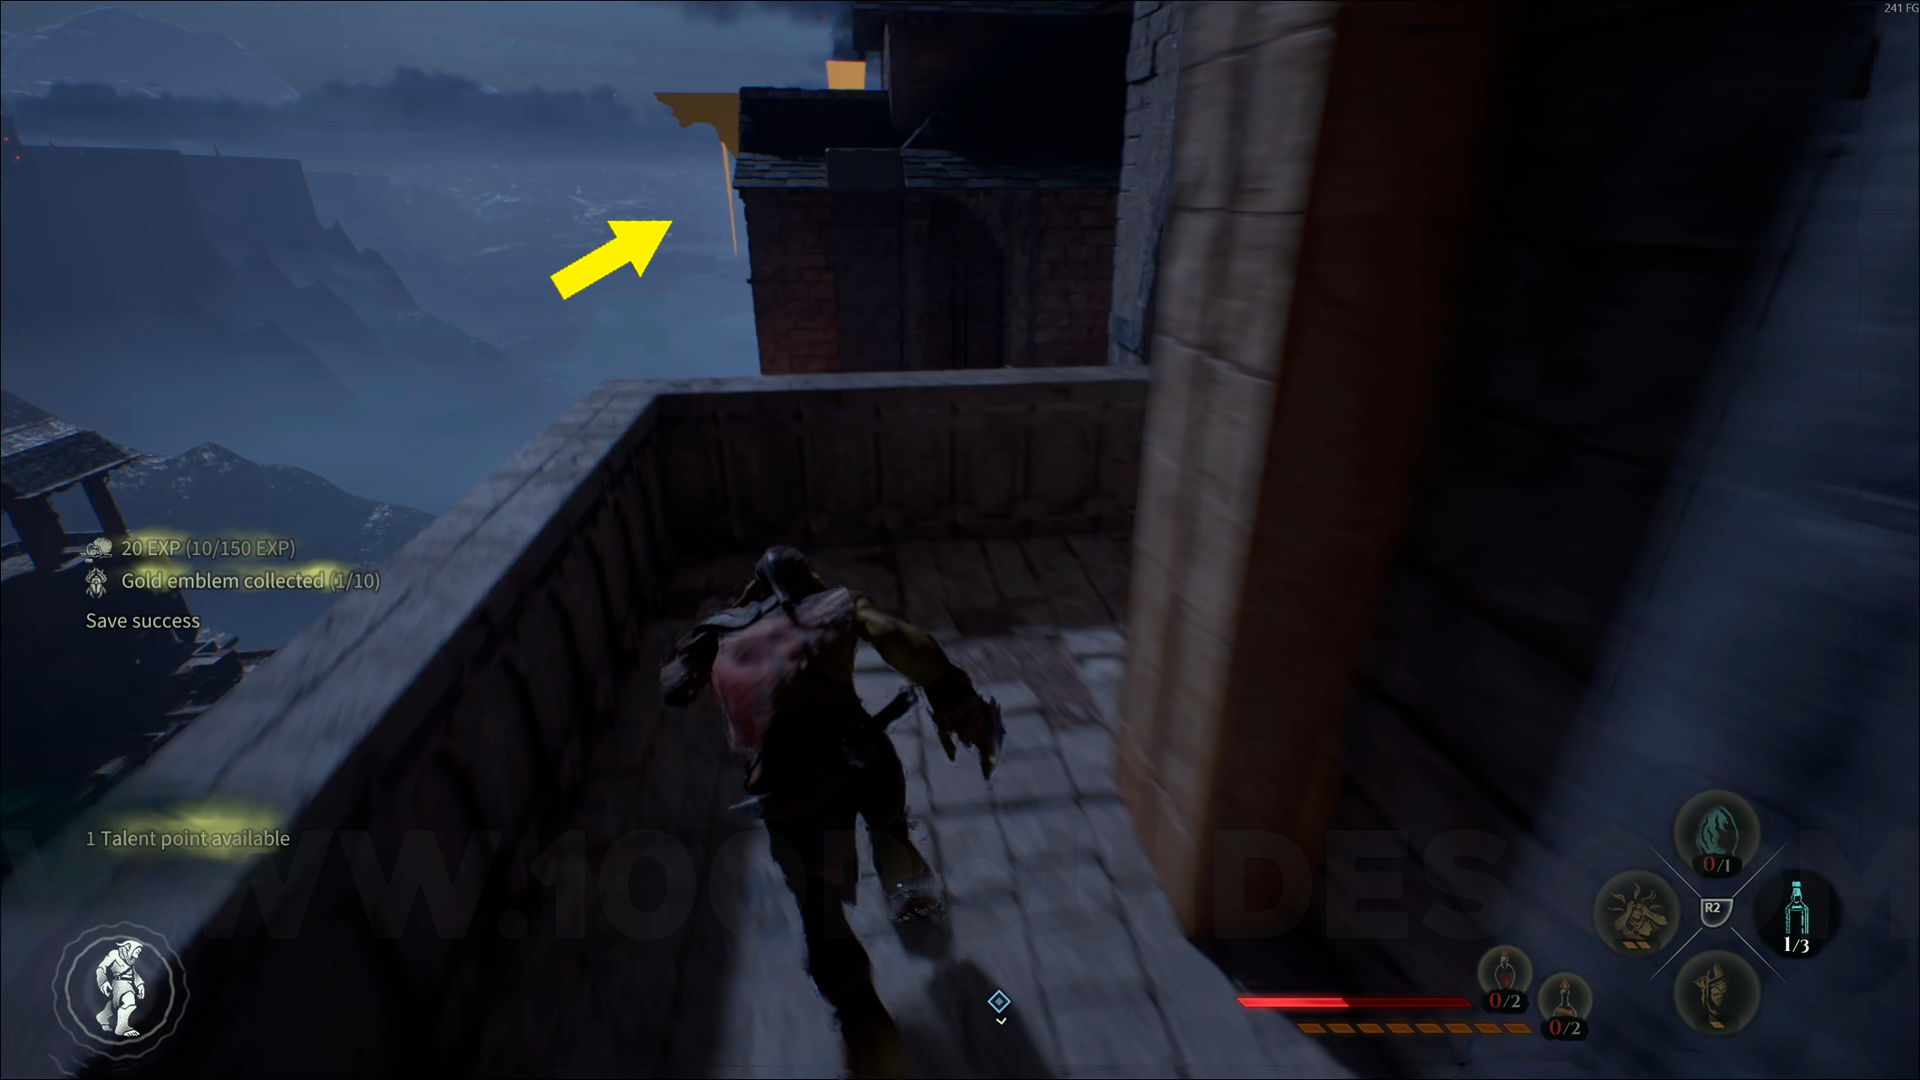
Gold Emblem #2. Right after the previous collectible, go back out through the door you entered and head to the building on your right. This emblem will be on the balcony of that building. Use Amber Vision to help you spot it.
Gold Emblem #3. From Empire's Dungeons, this emblem will be directly in front of you. Climb onto the building and go to the balcony to find it. Use Amber Vision to help you spot it.
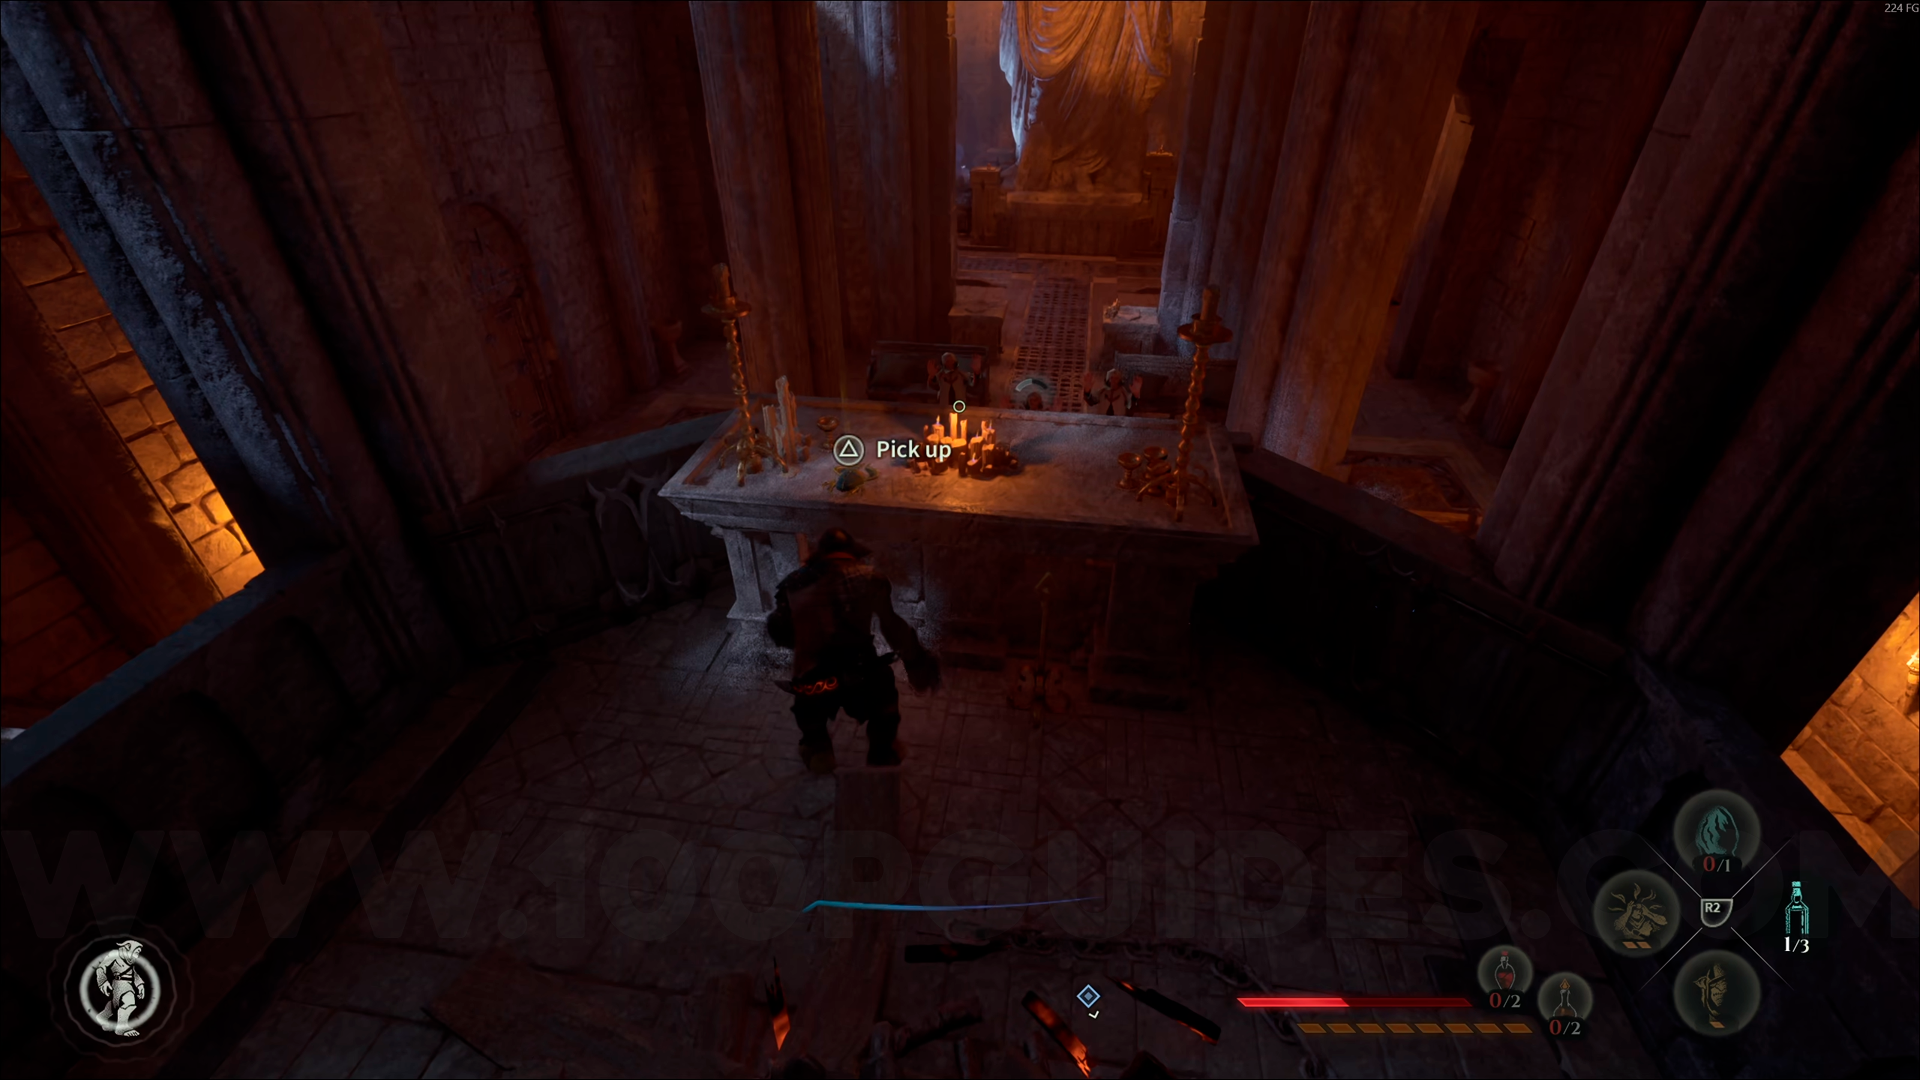
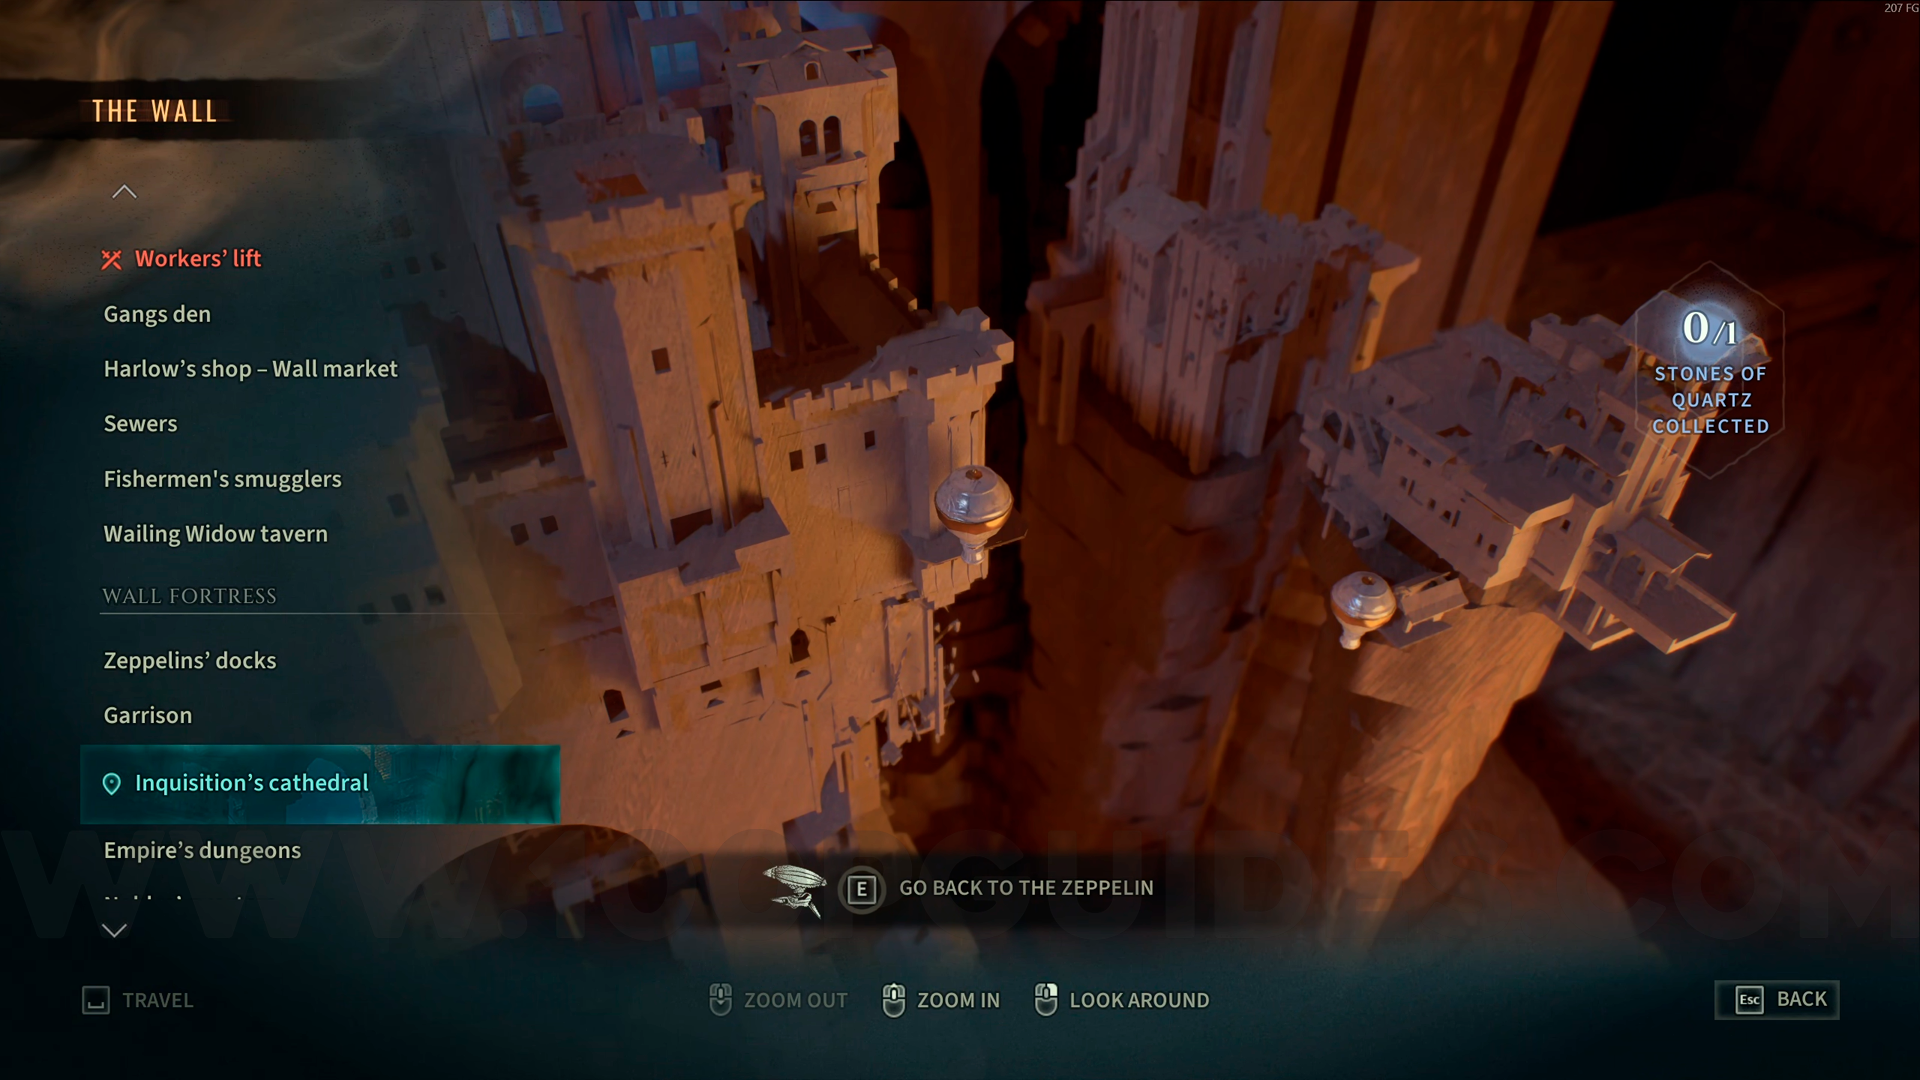
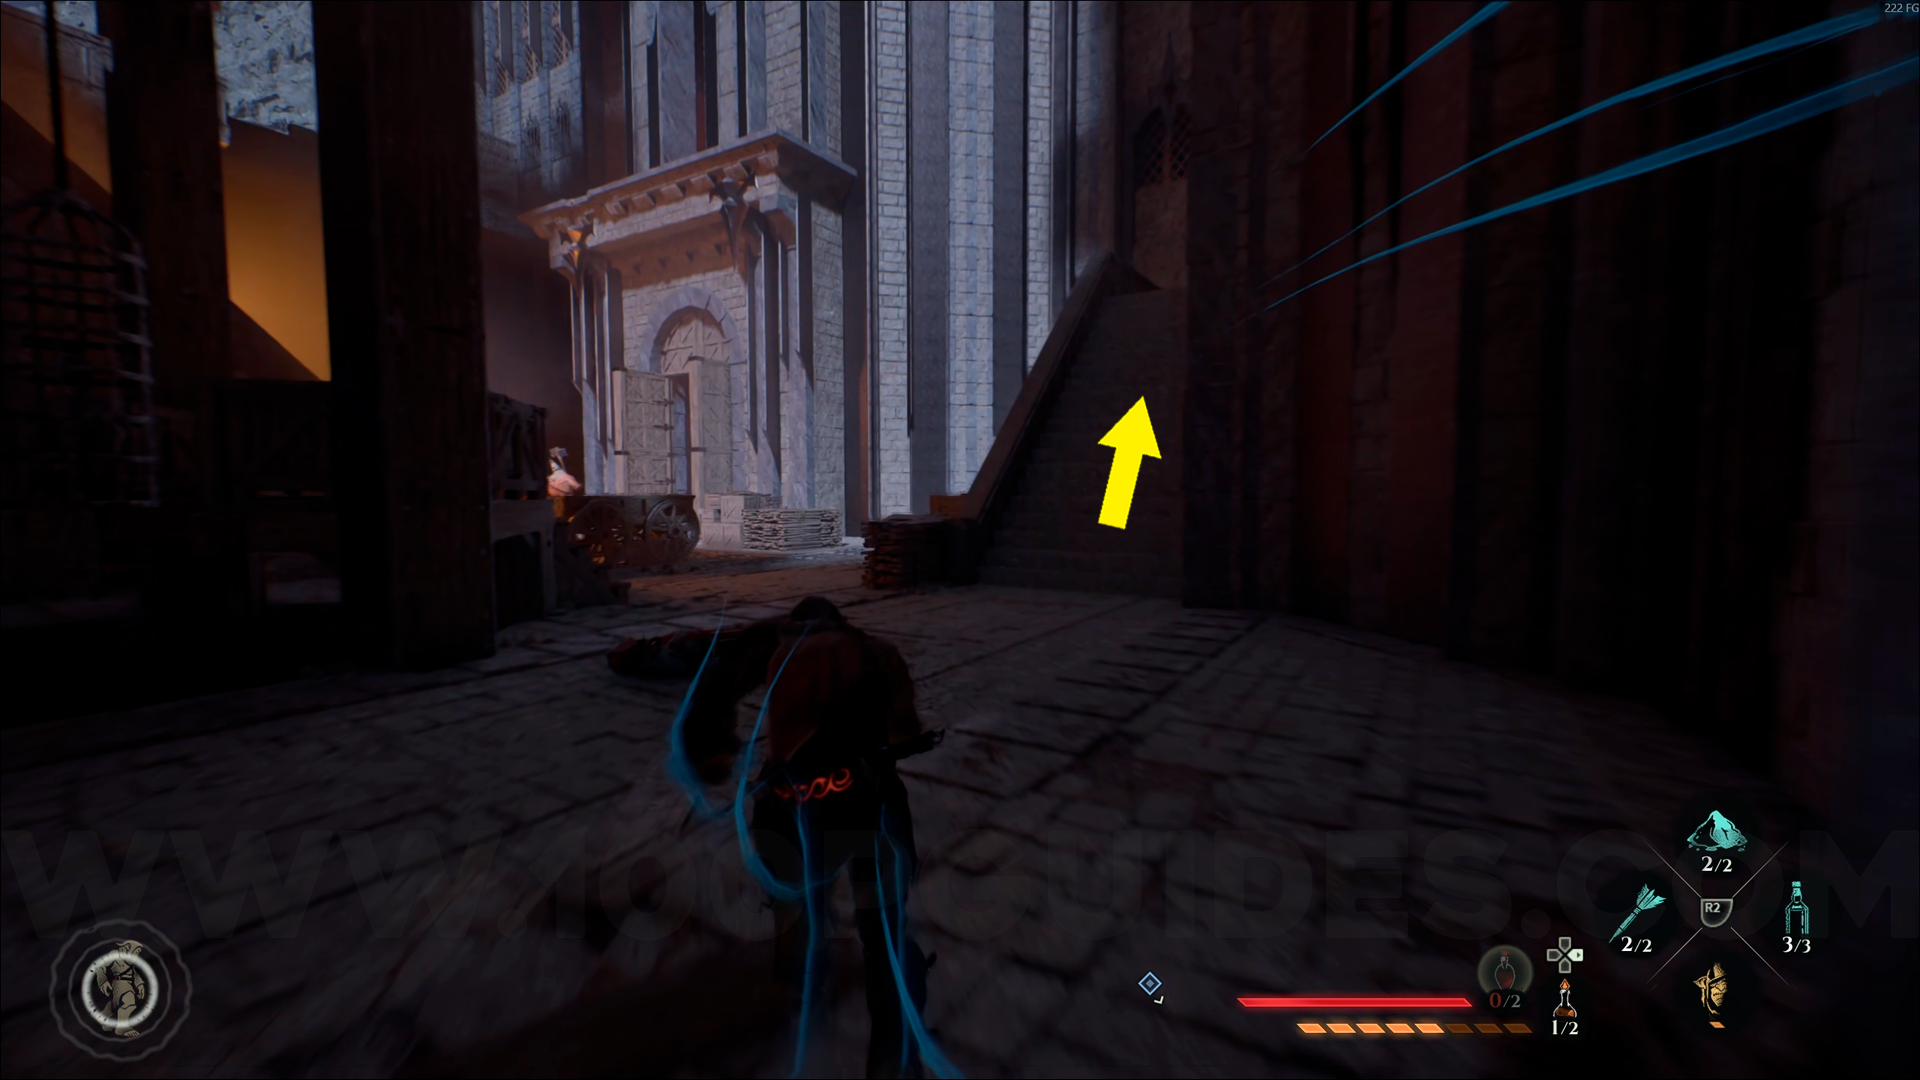
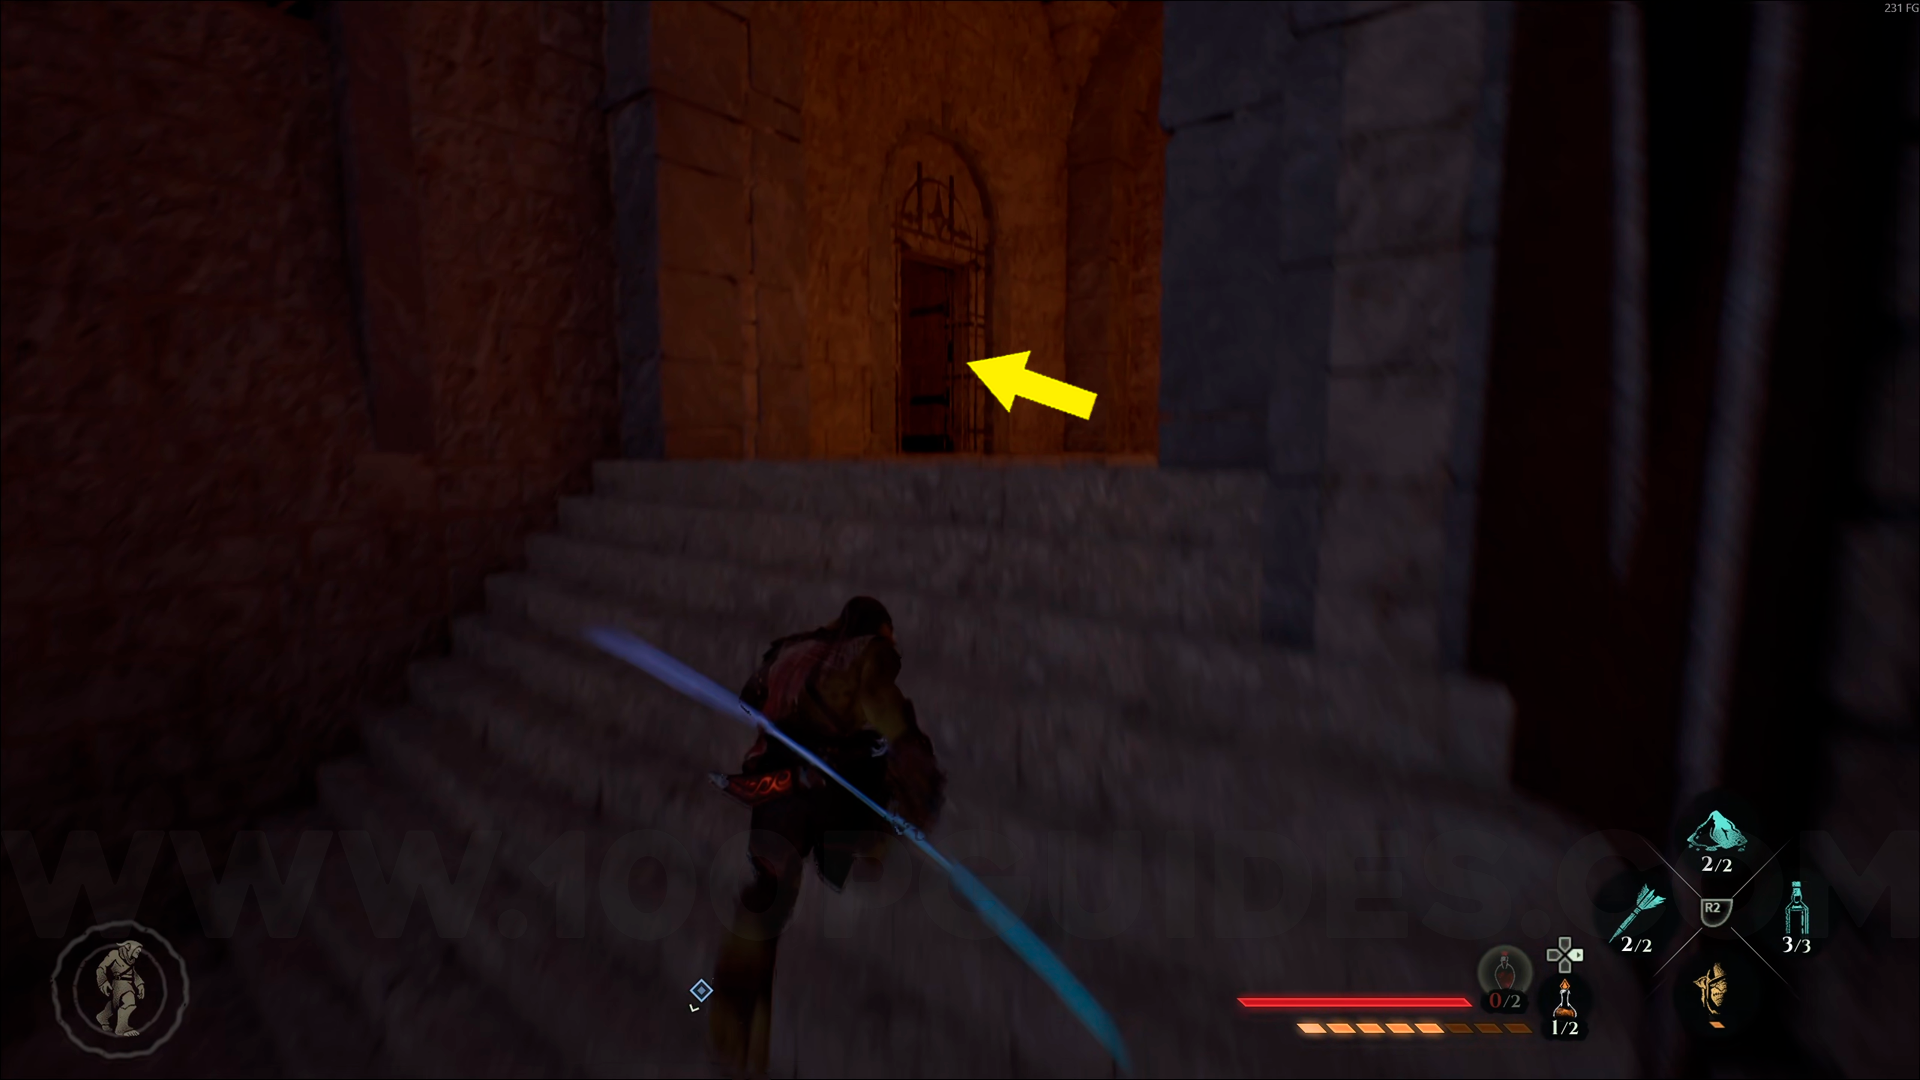
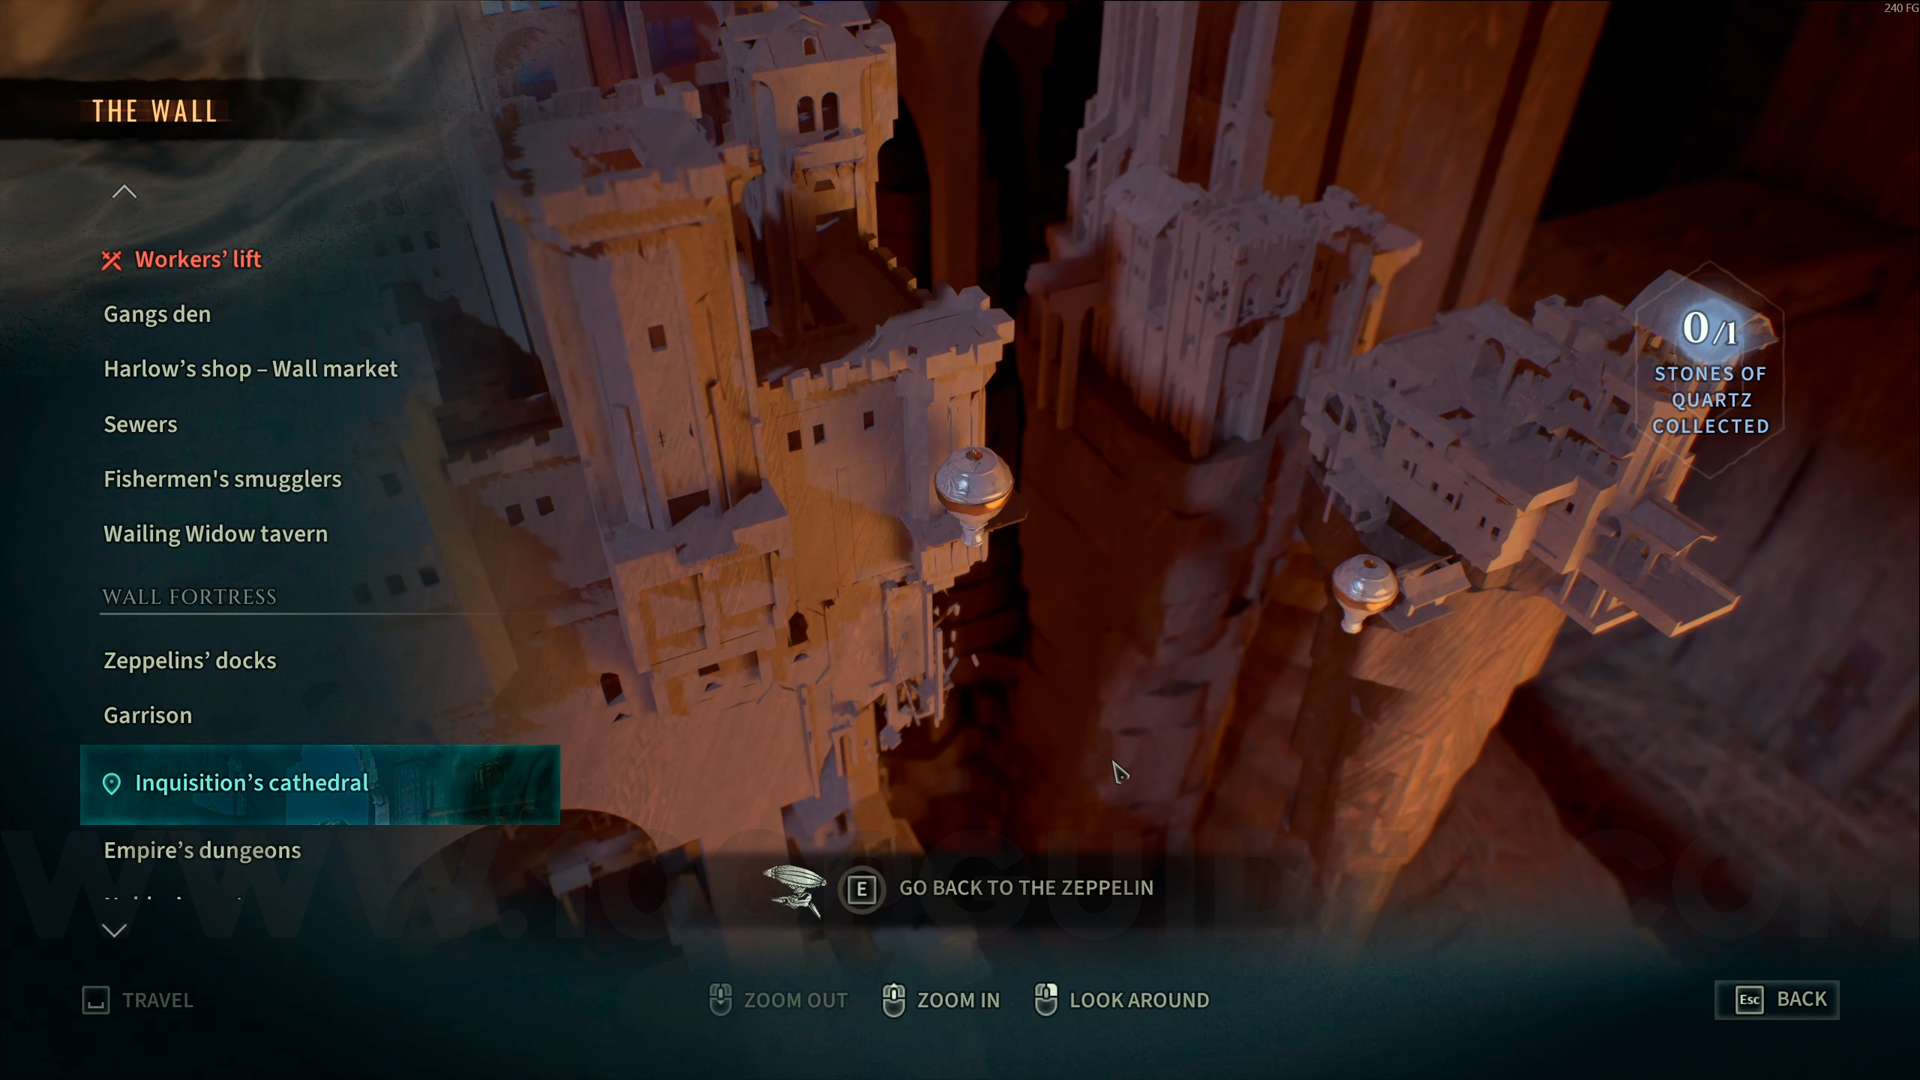
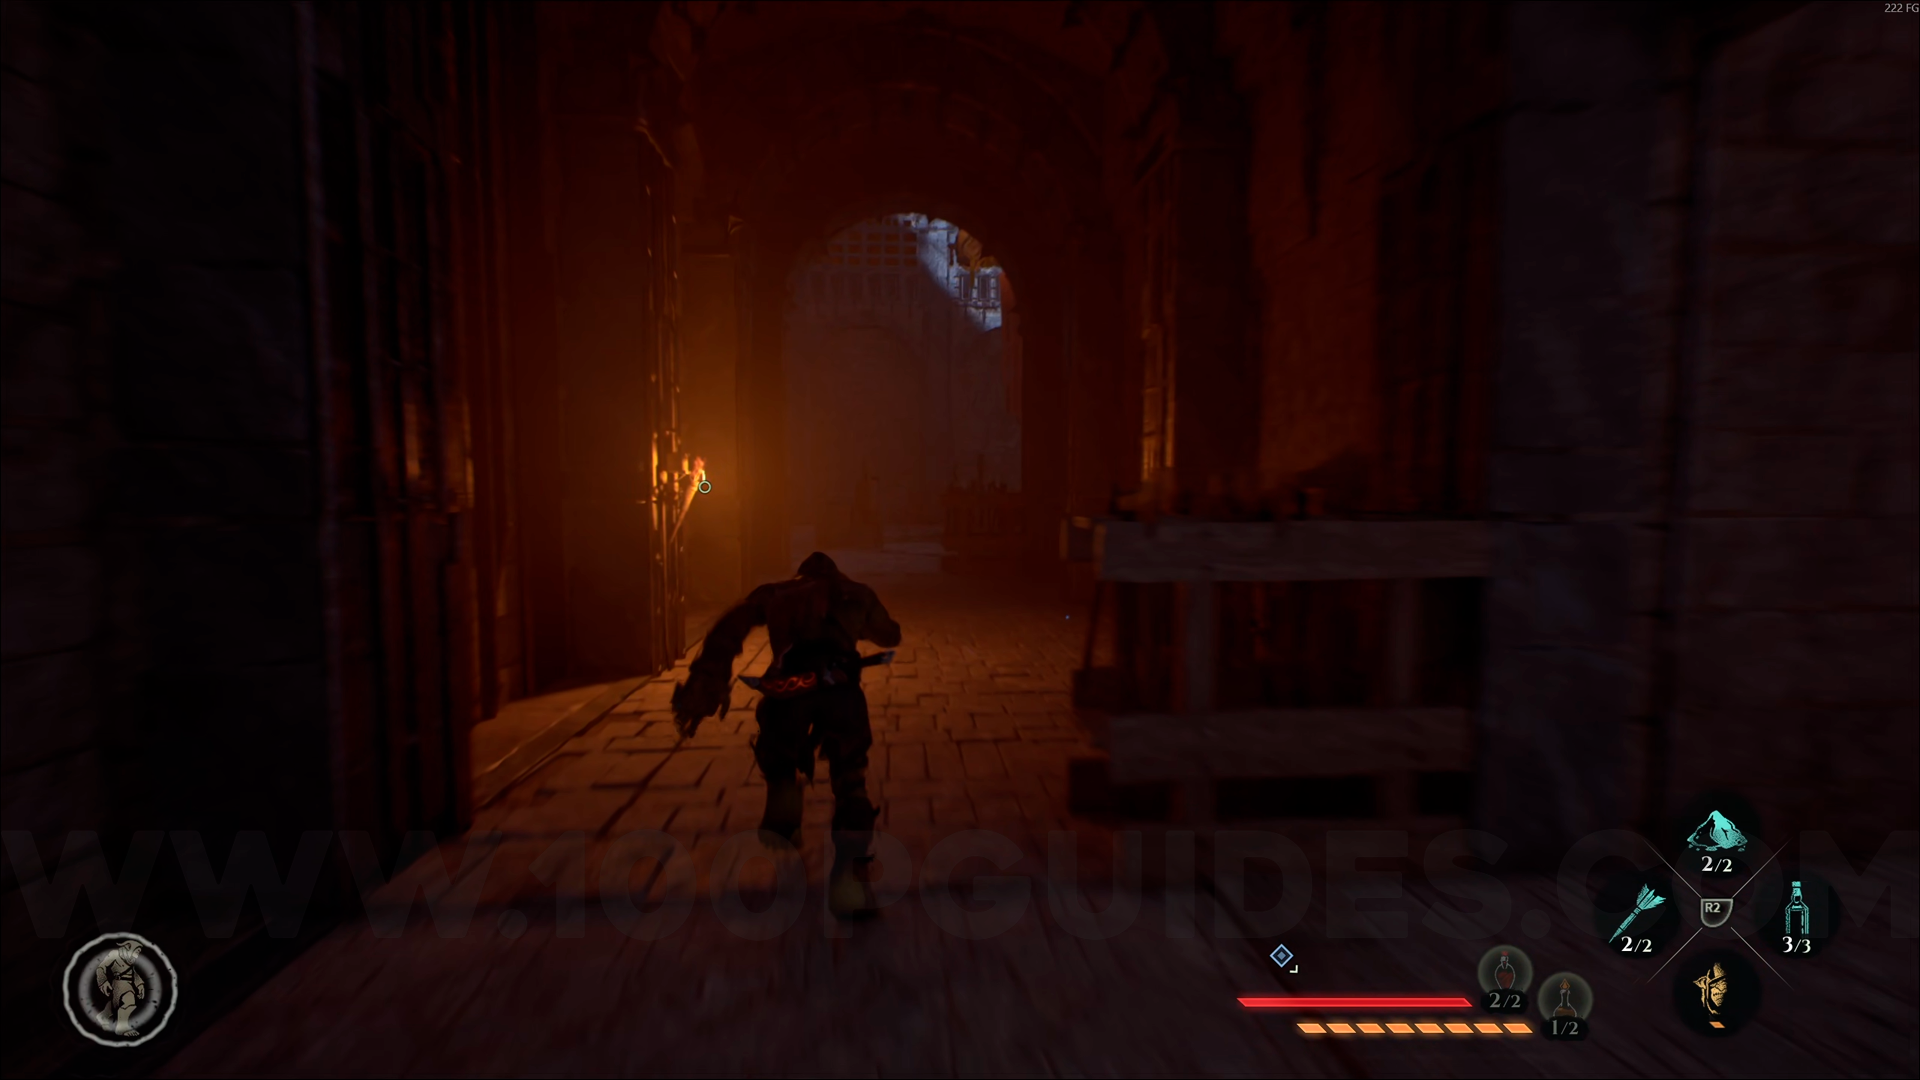
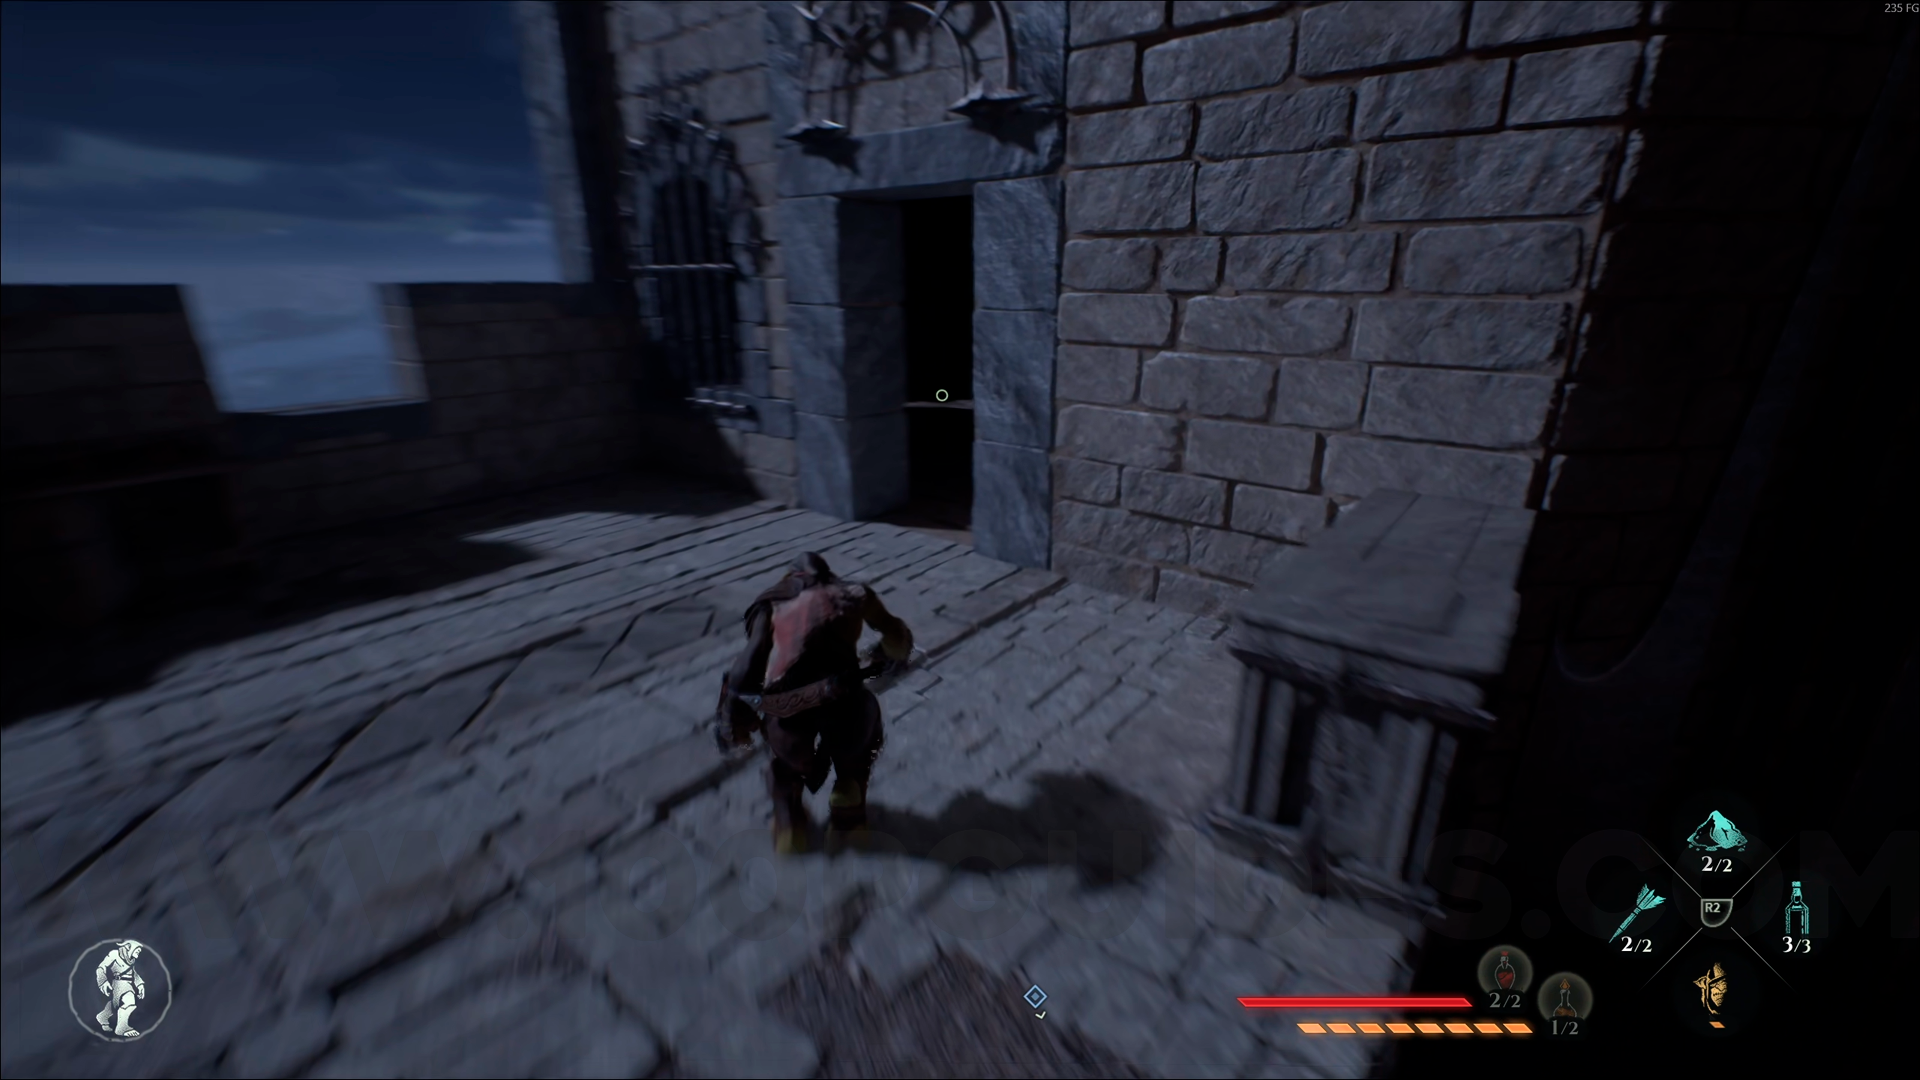
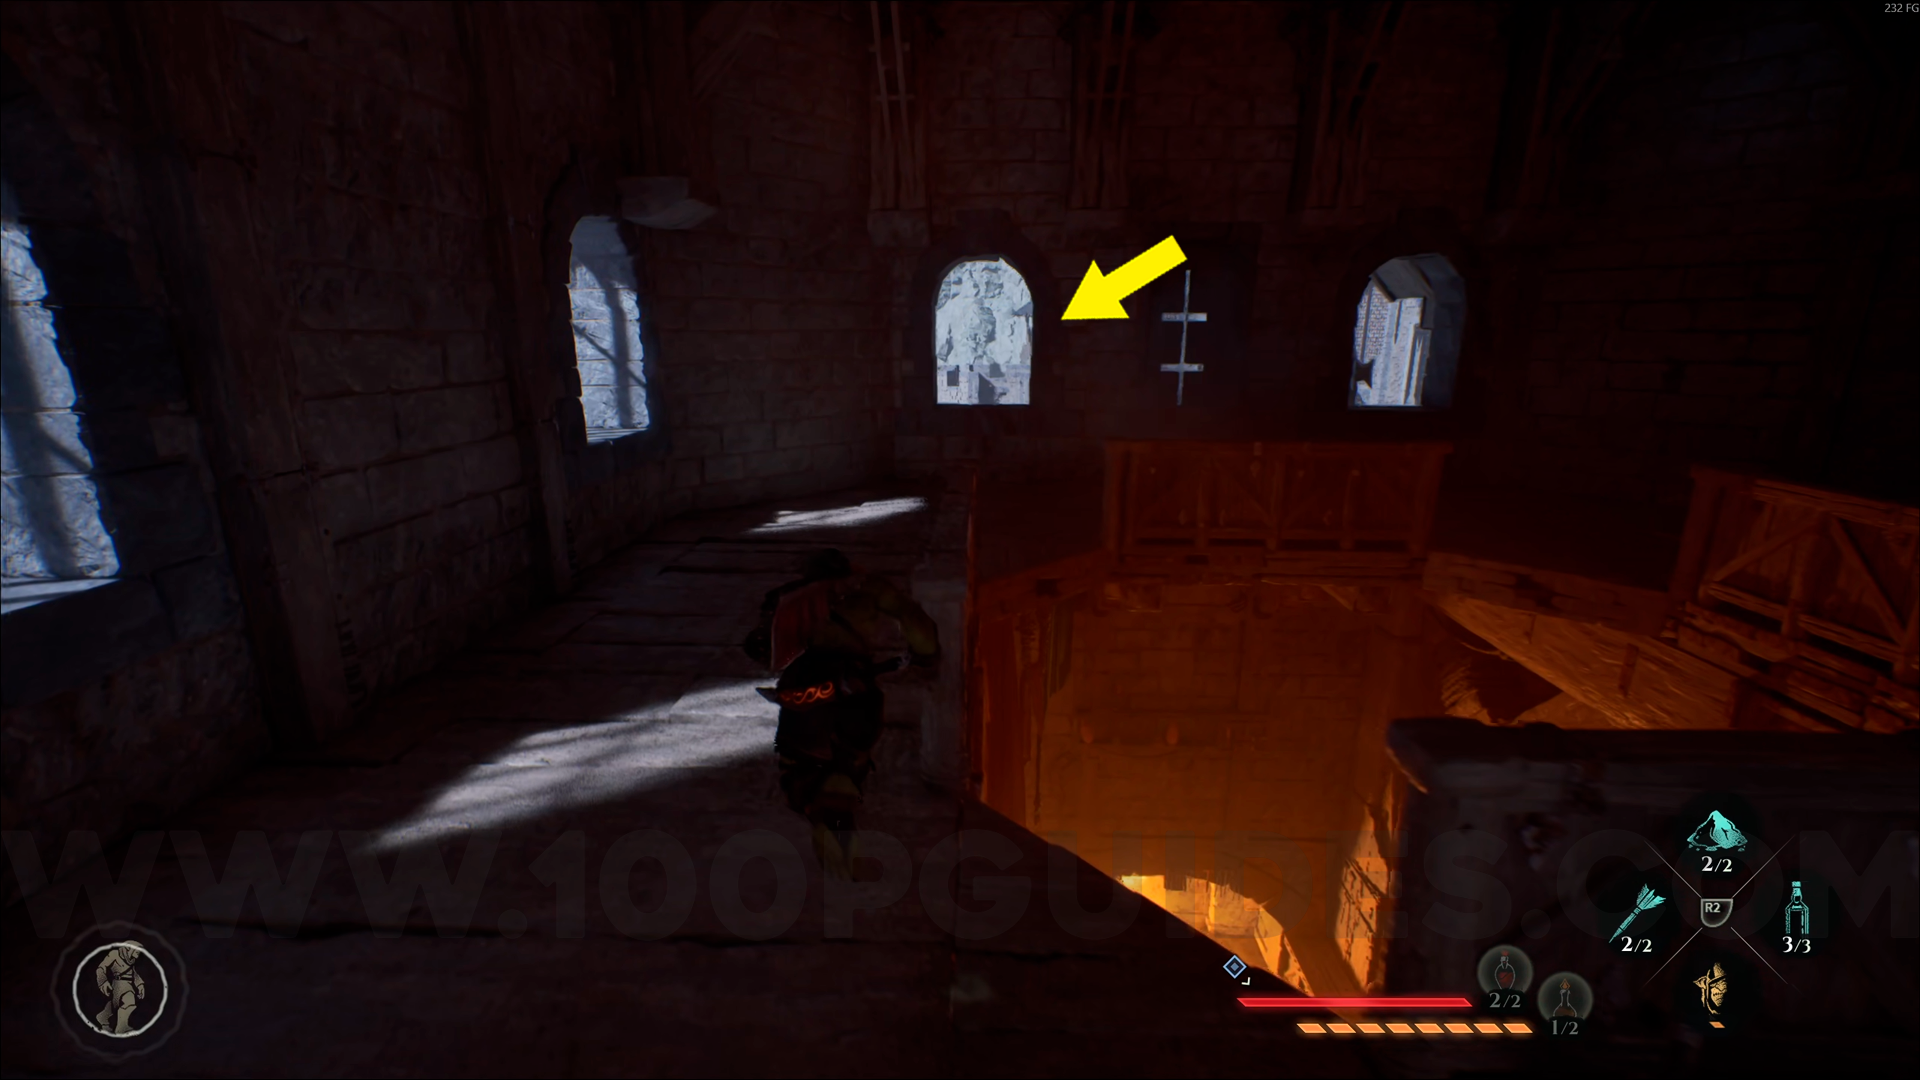
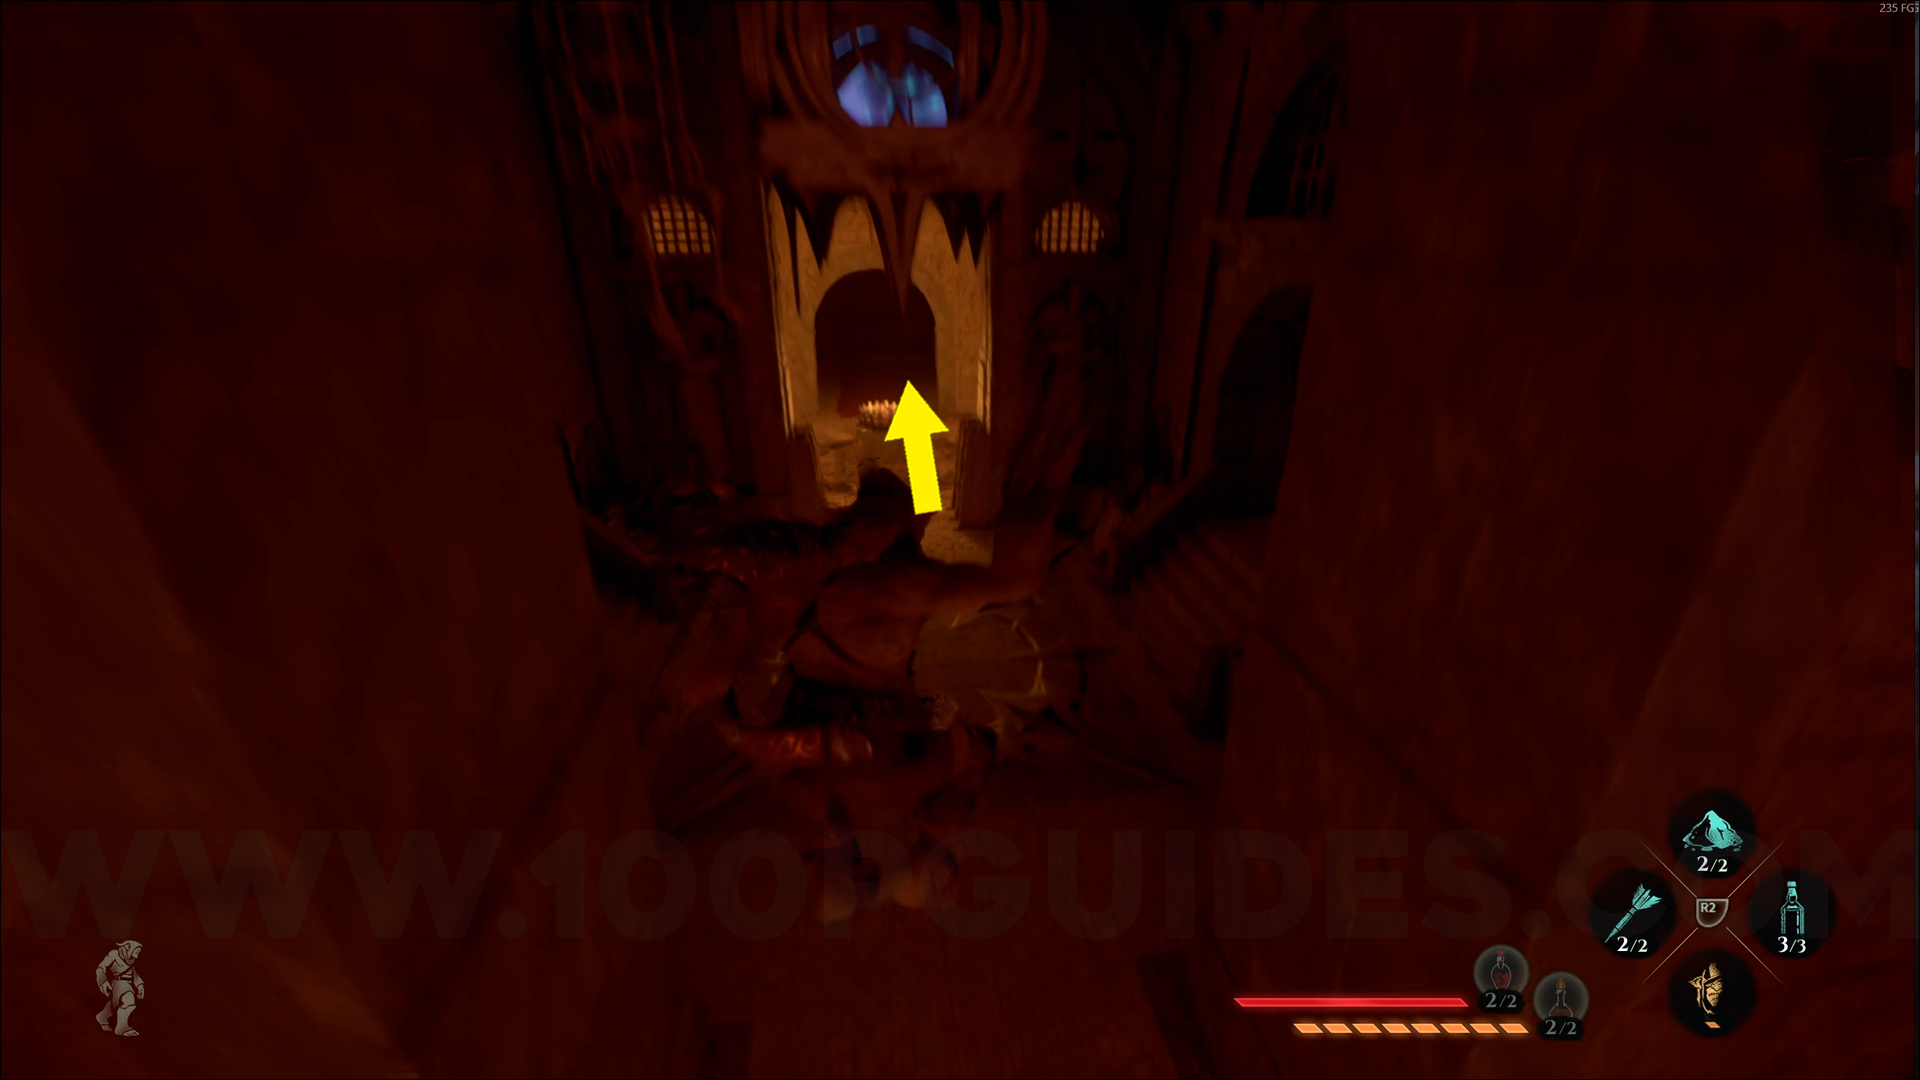
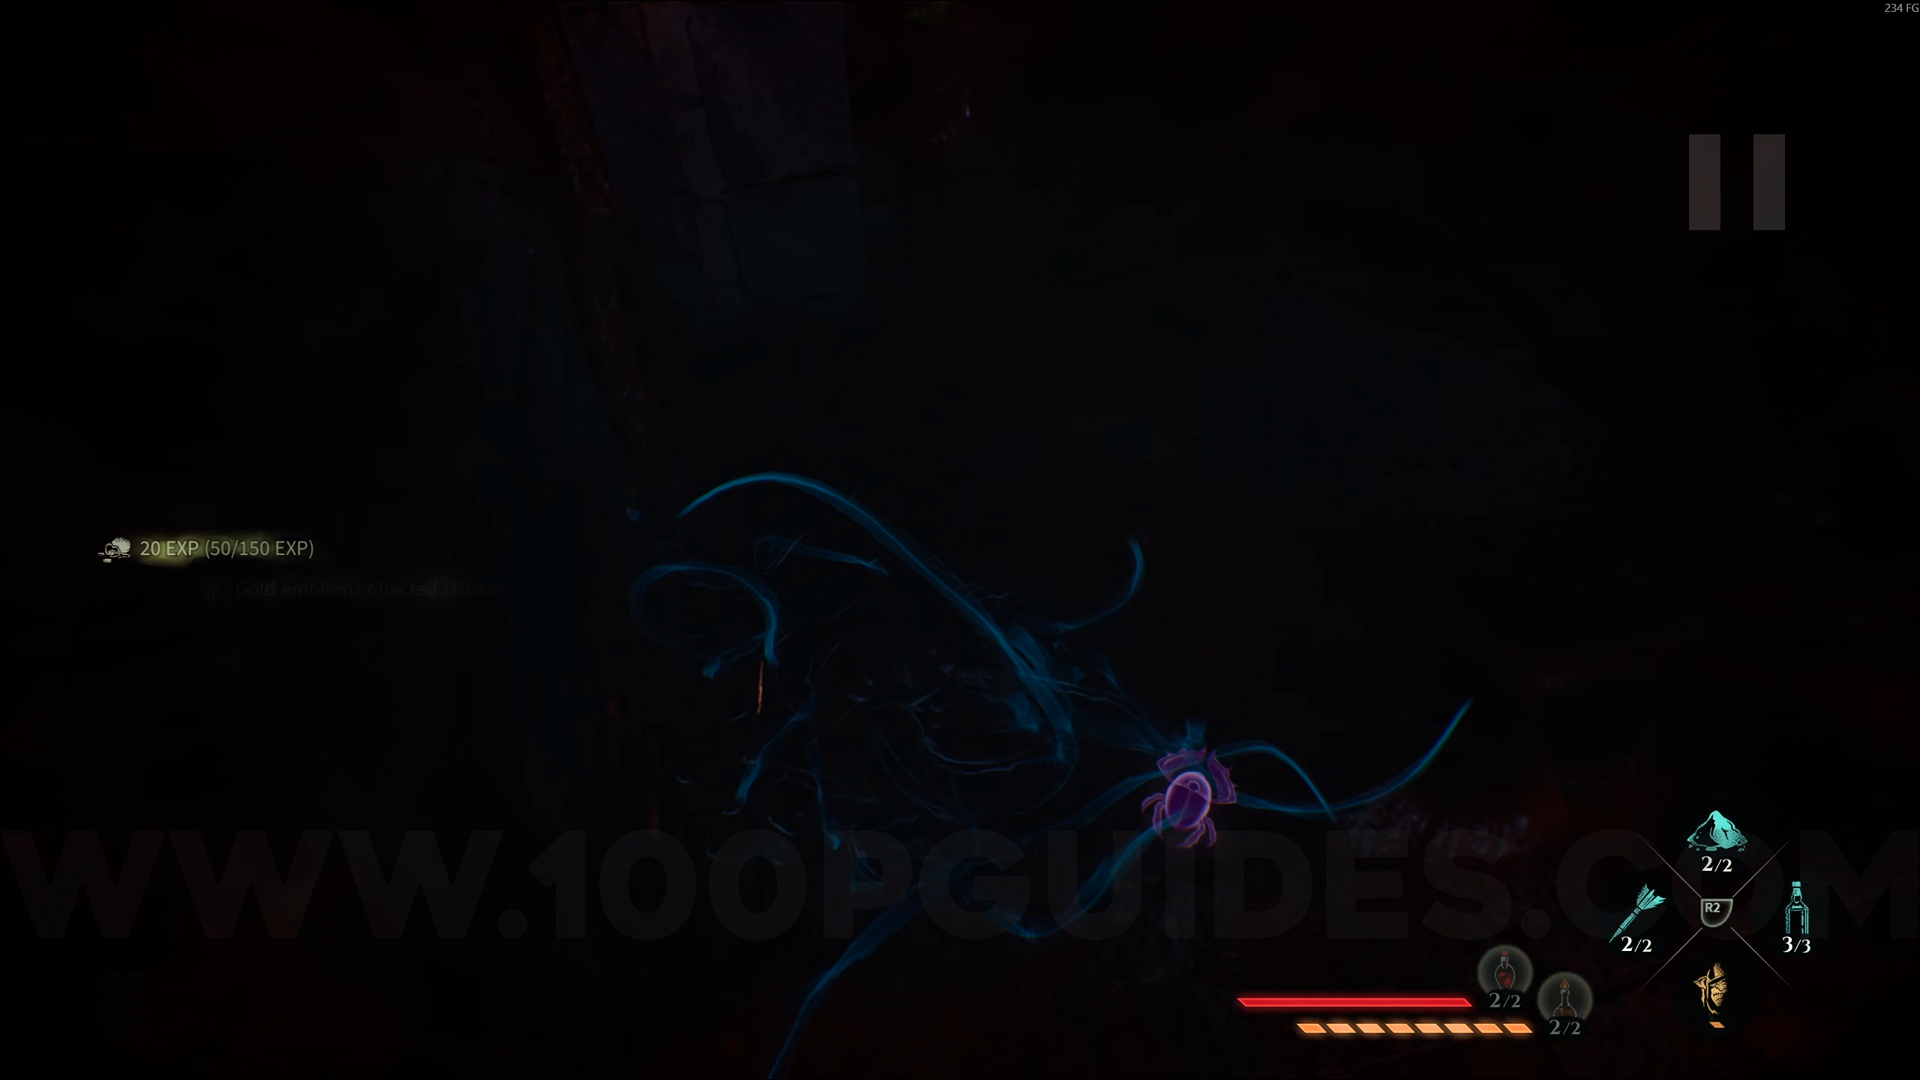
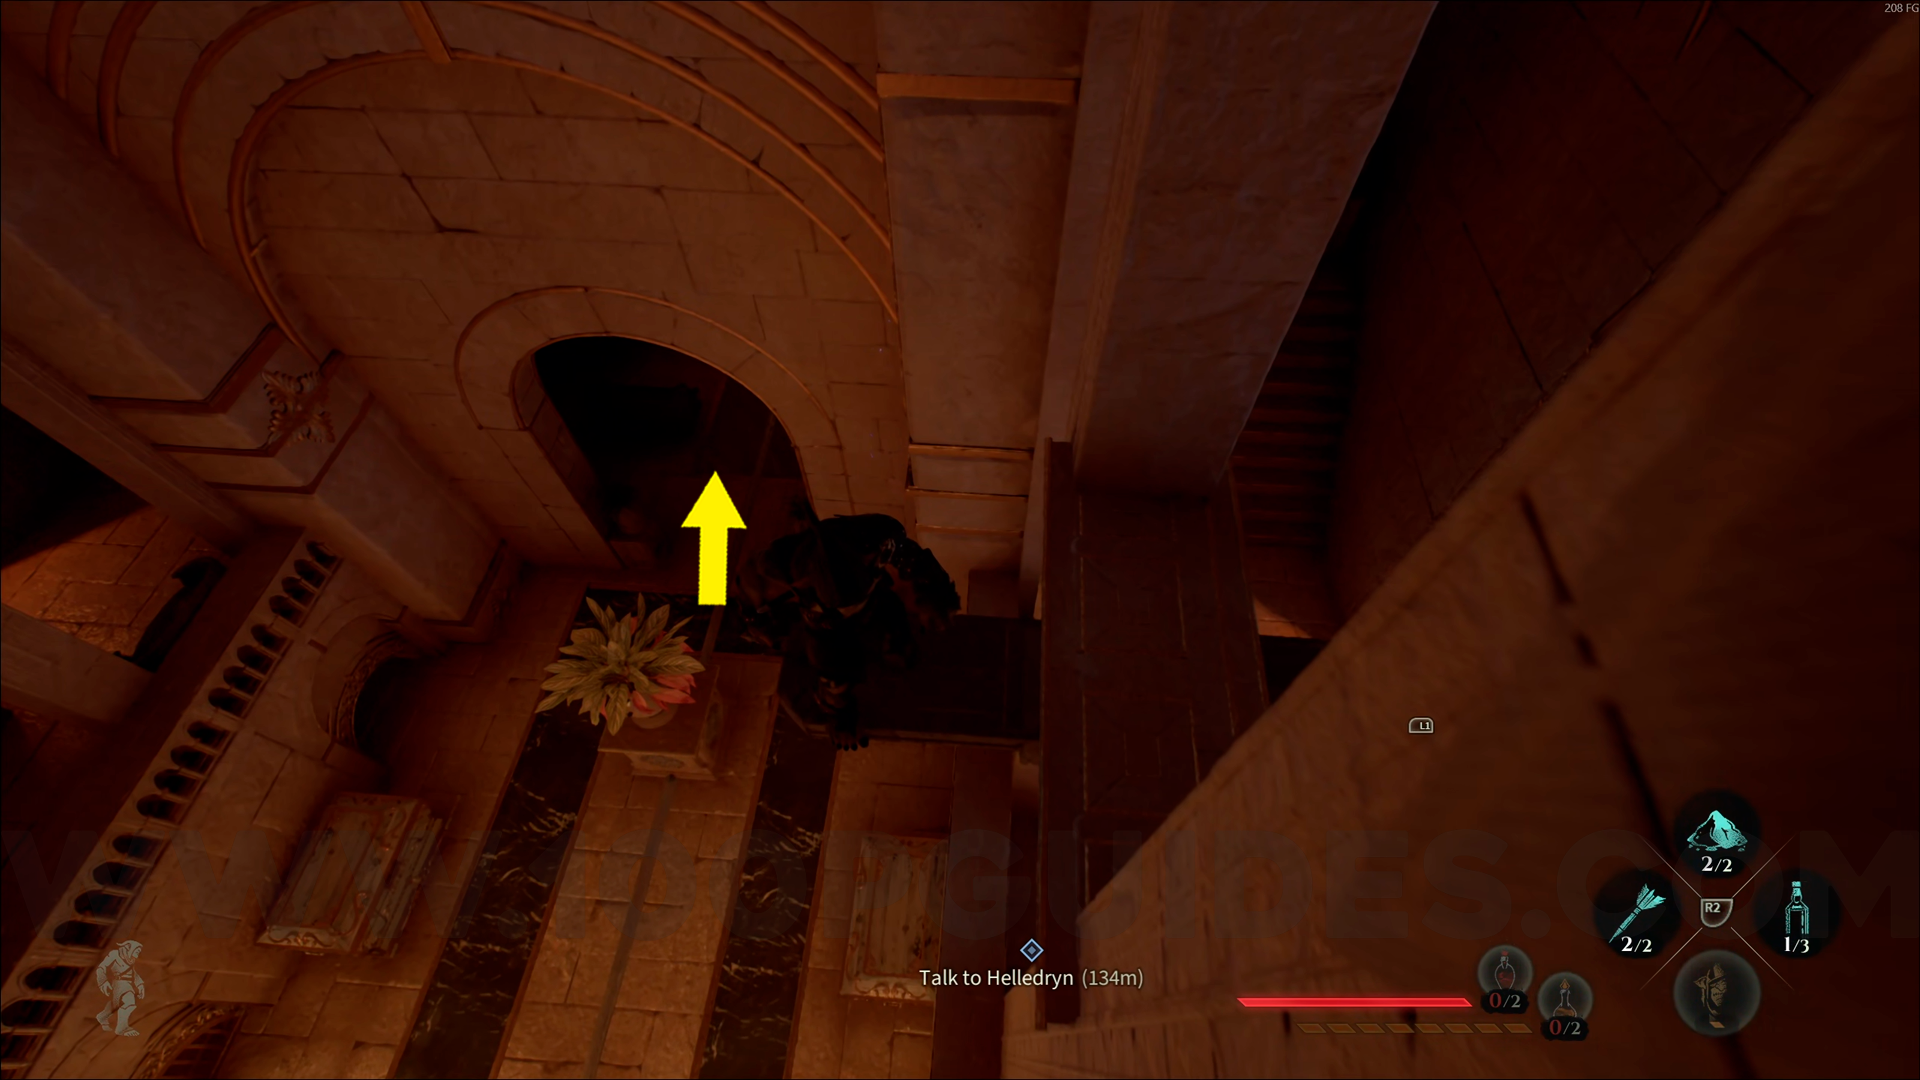
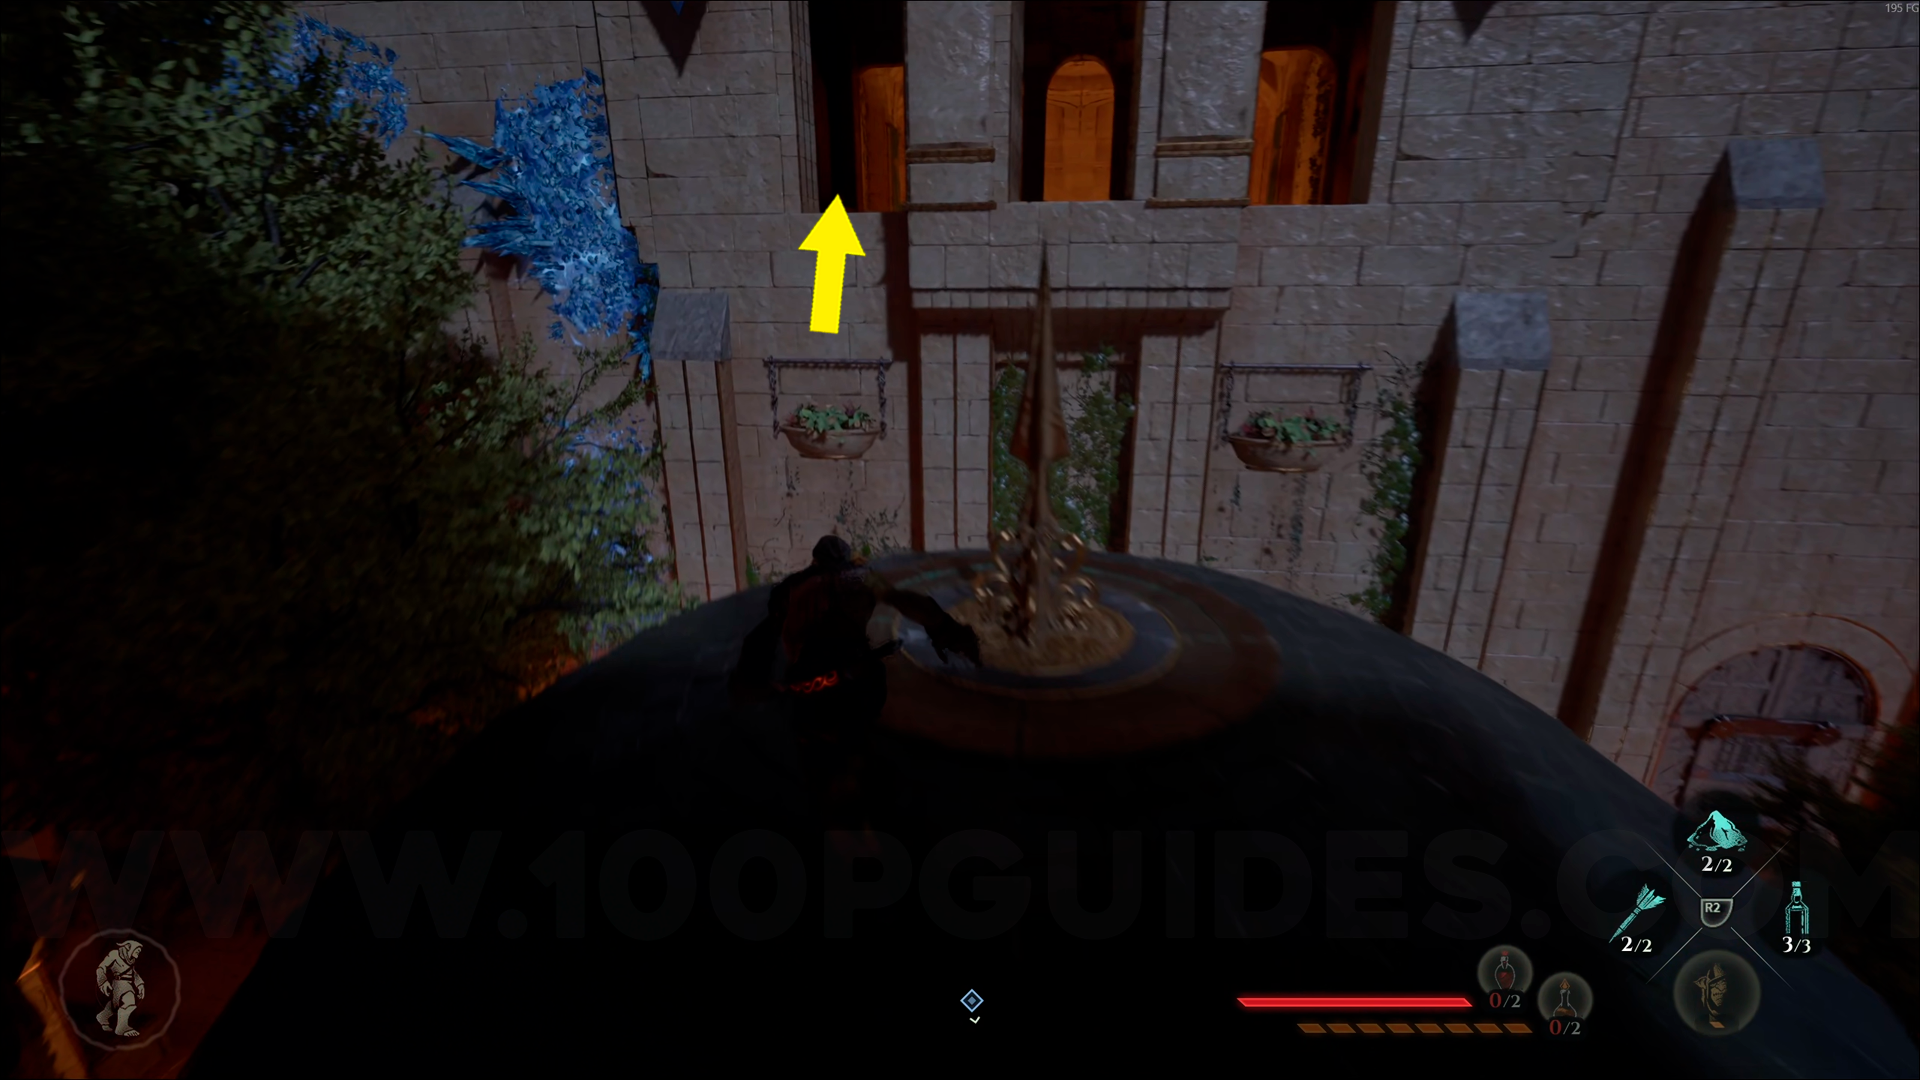
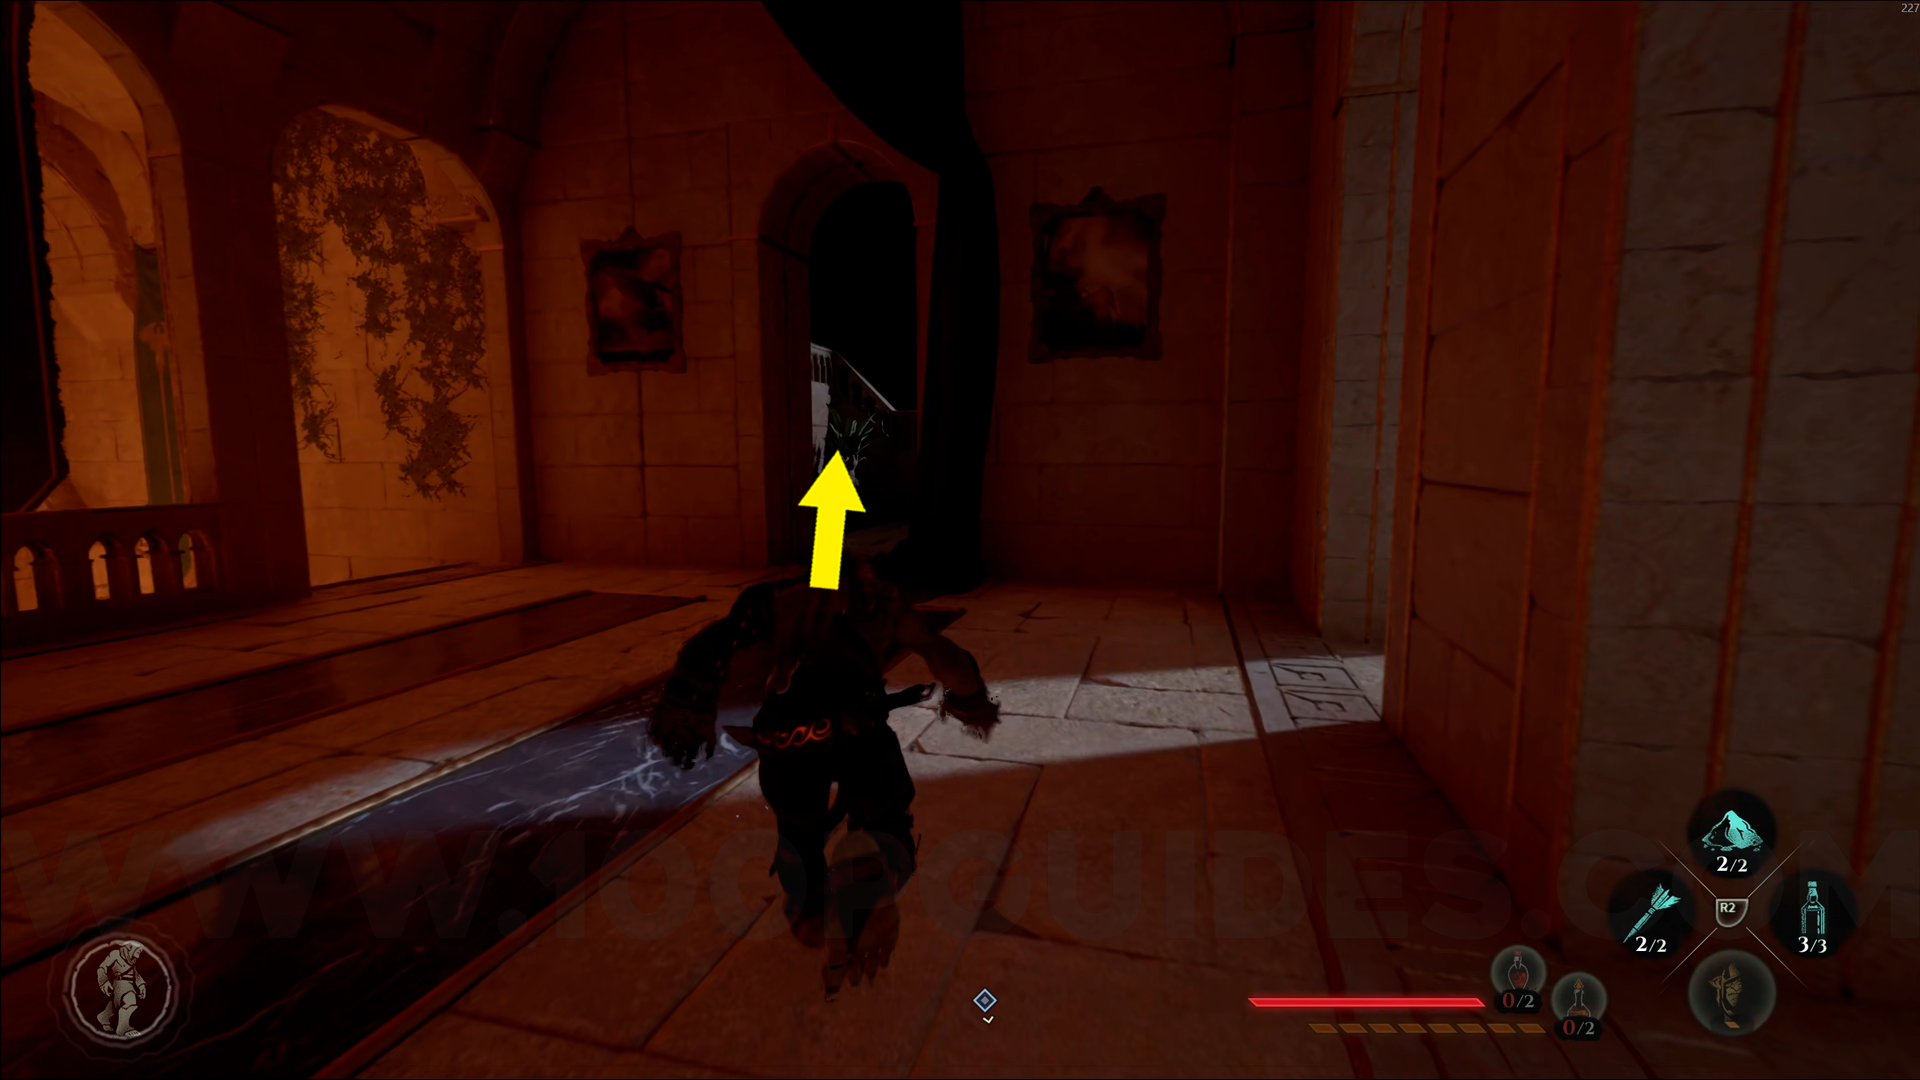
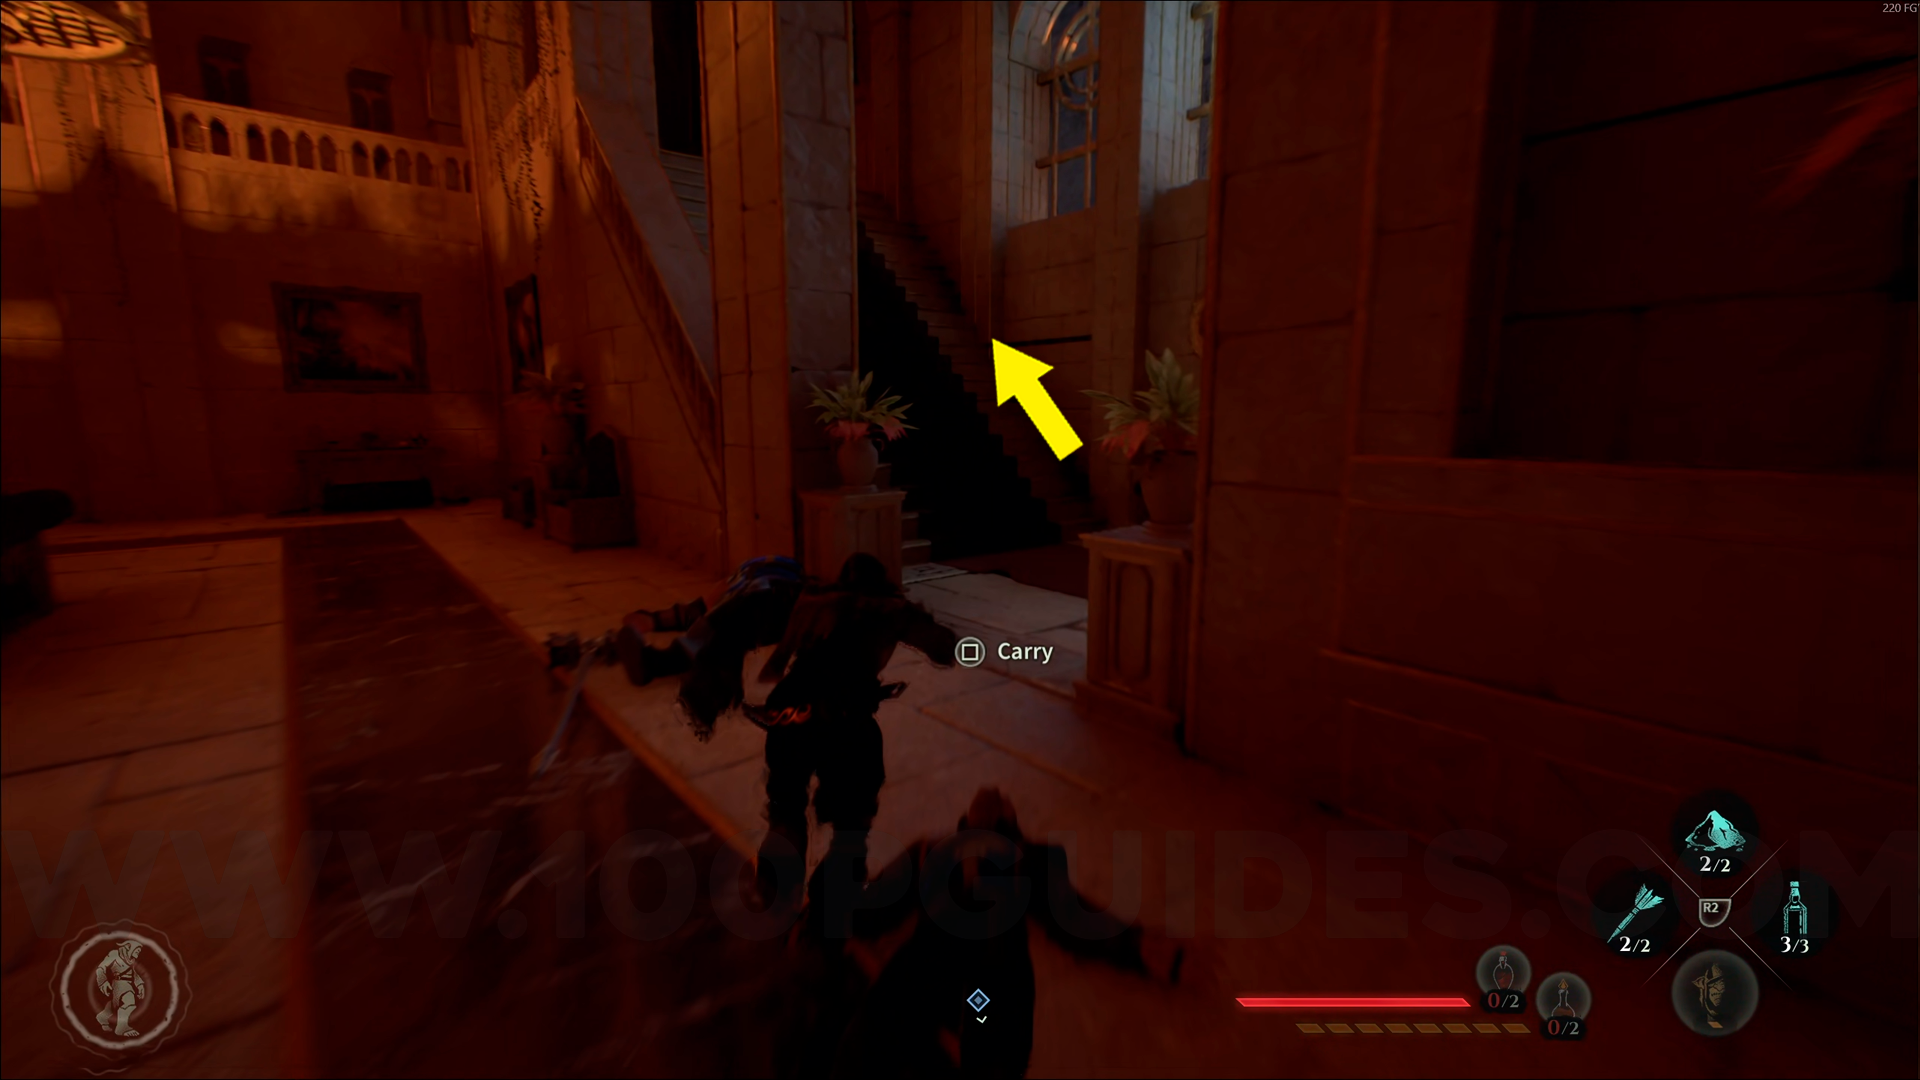
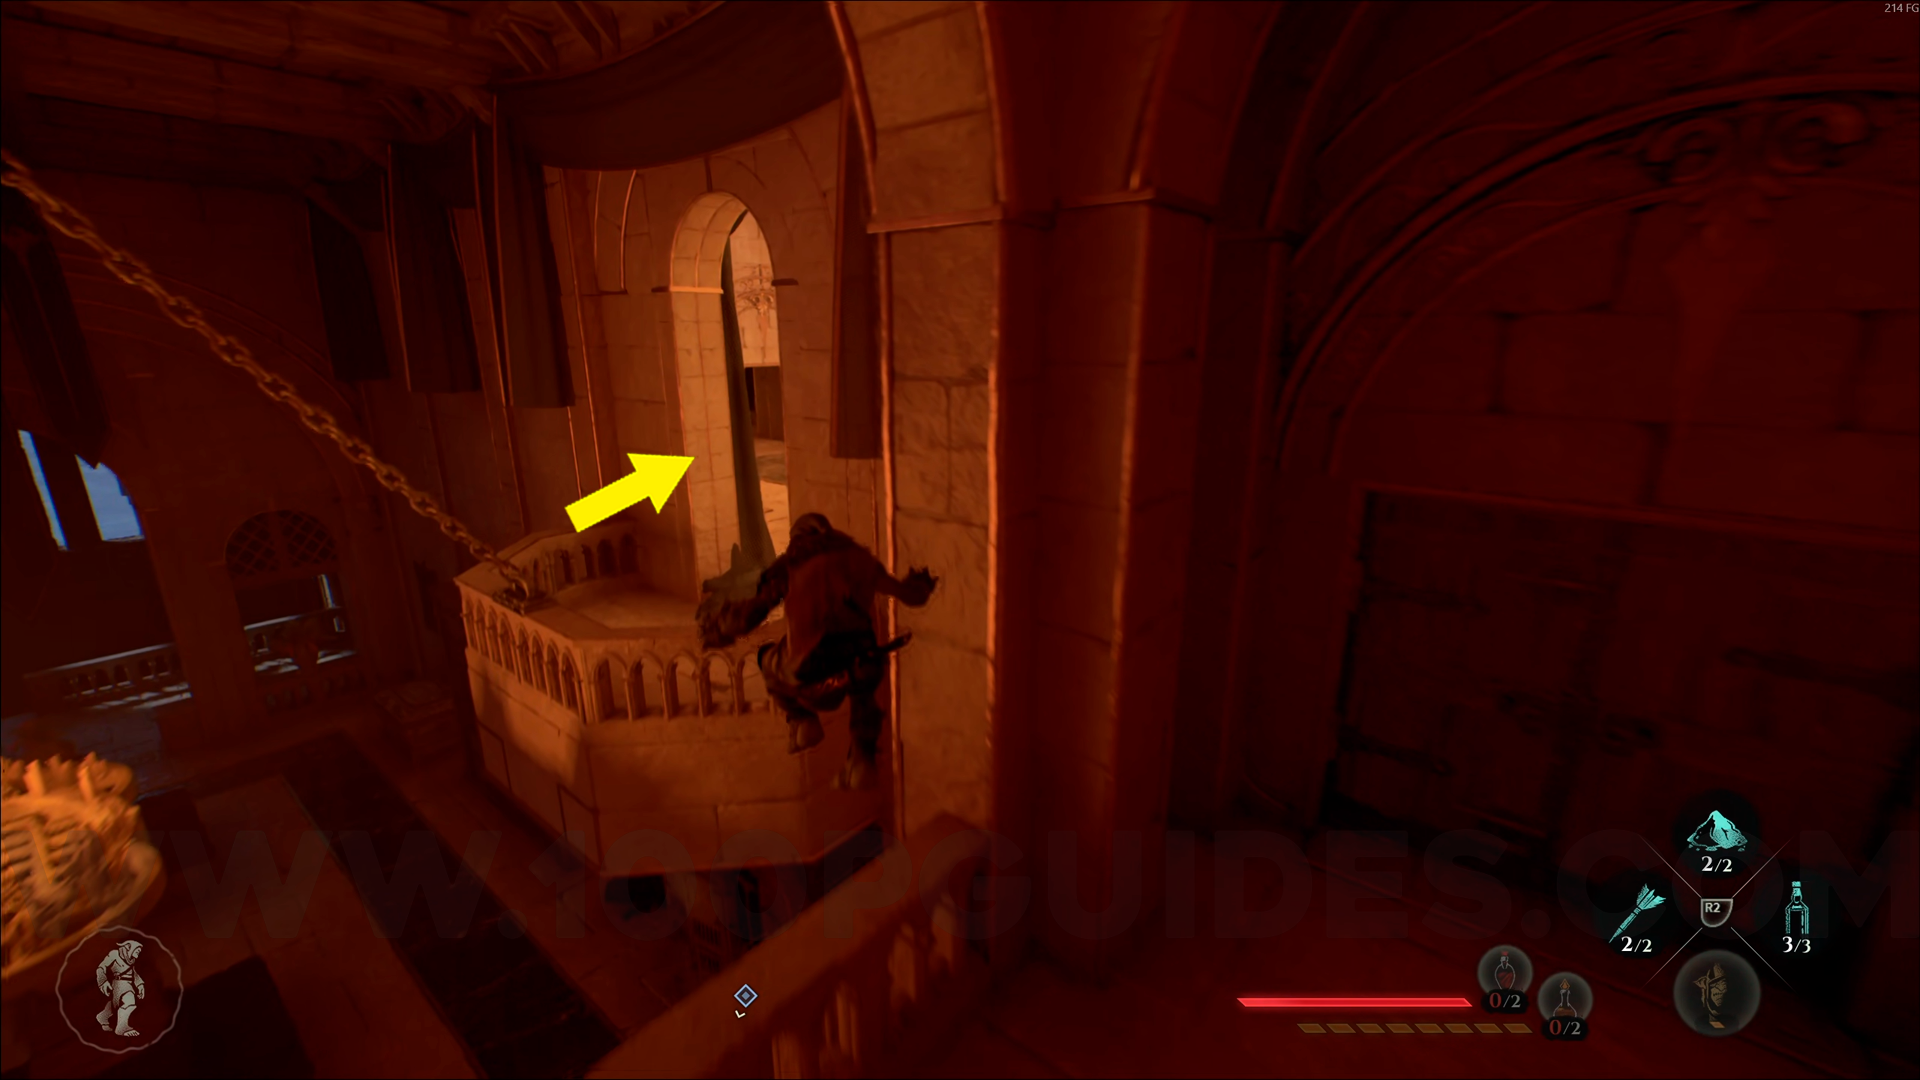
Gold Emblem #4. From Inquisition's Cathedral, go through the gate in front of you using your ability and head into the open area. Go up the stairs and enter the first door on your left. Climb all the way to the top using the stairs inside. Once you're at the top, you'll find this emblem. Use Amber Vision to help you spot it when you enter the room.
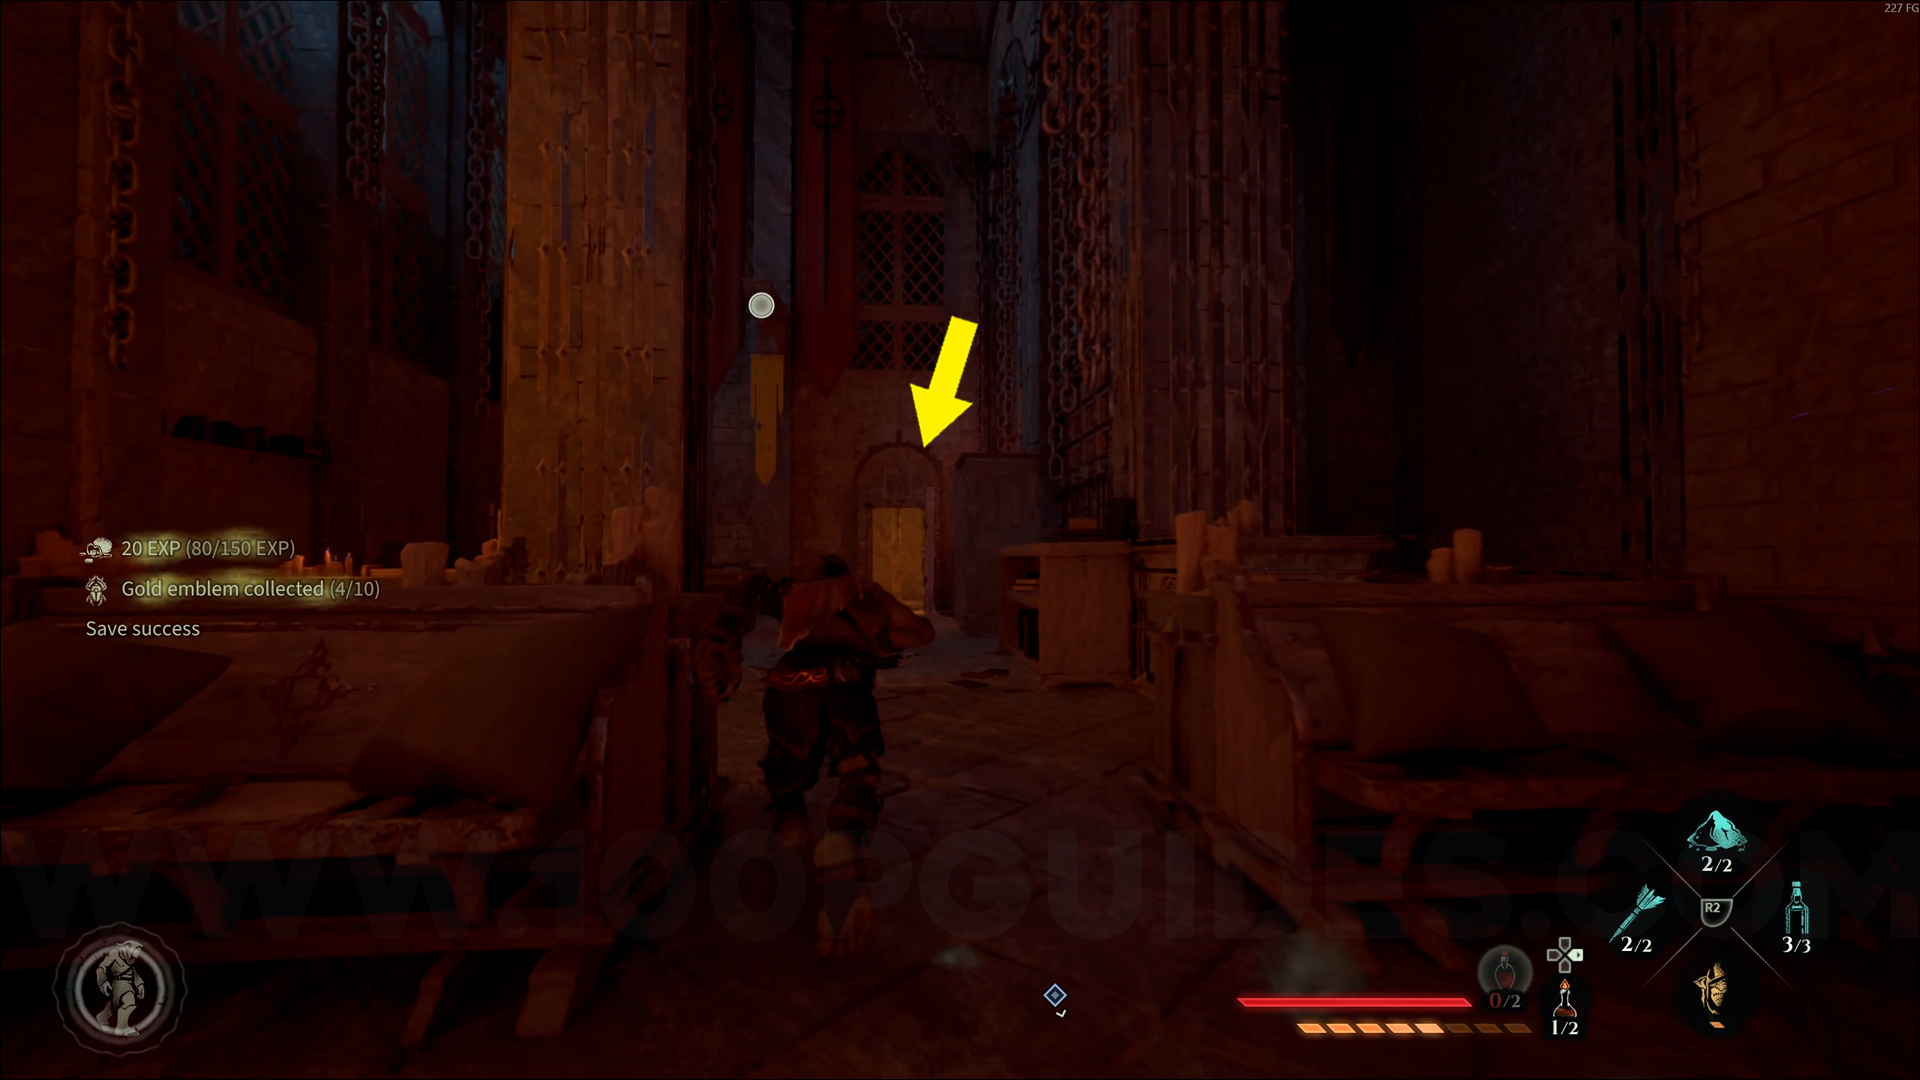
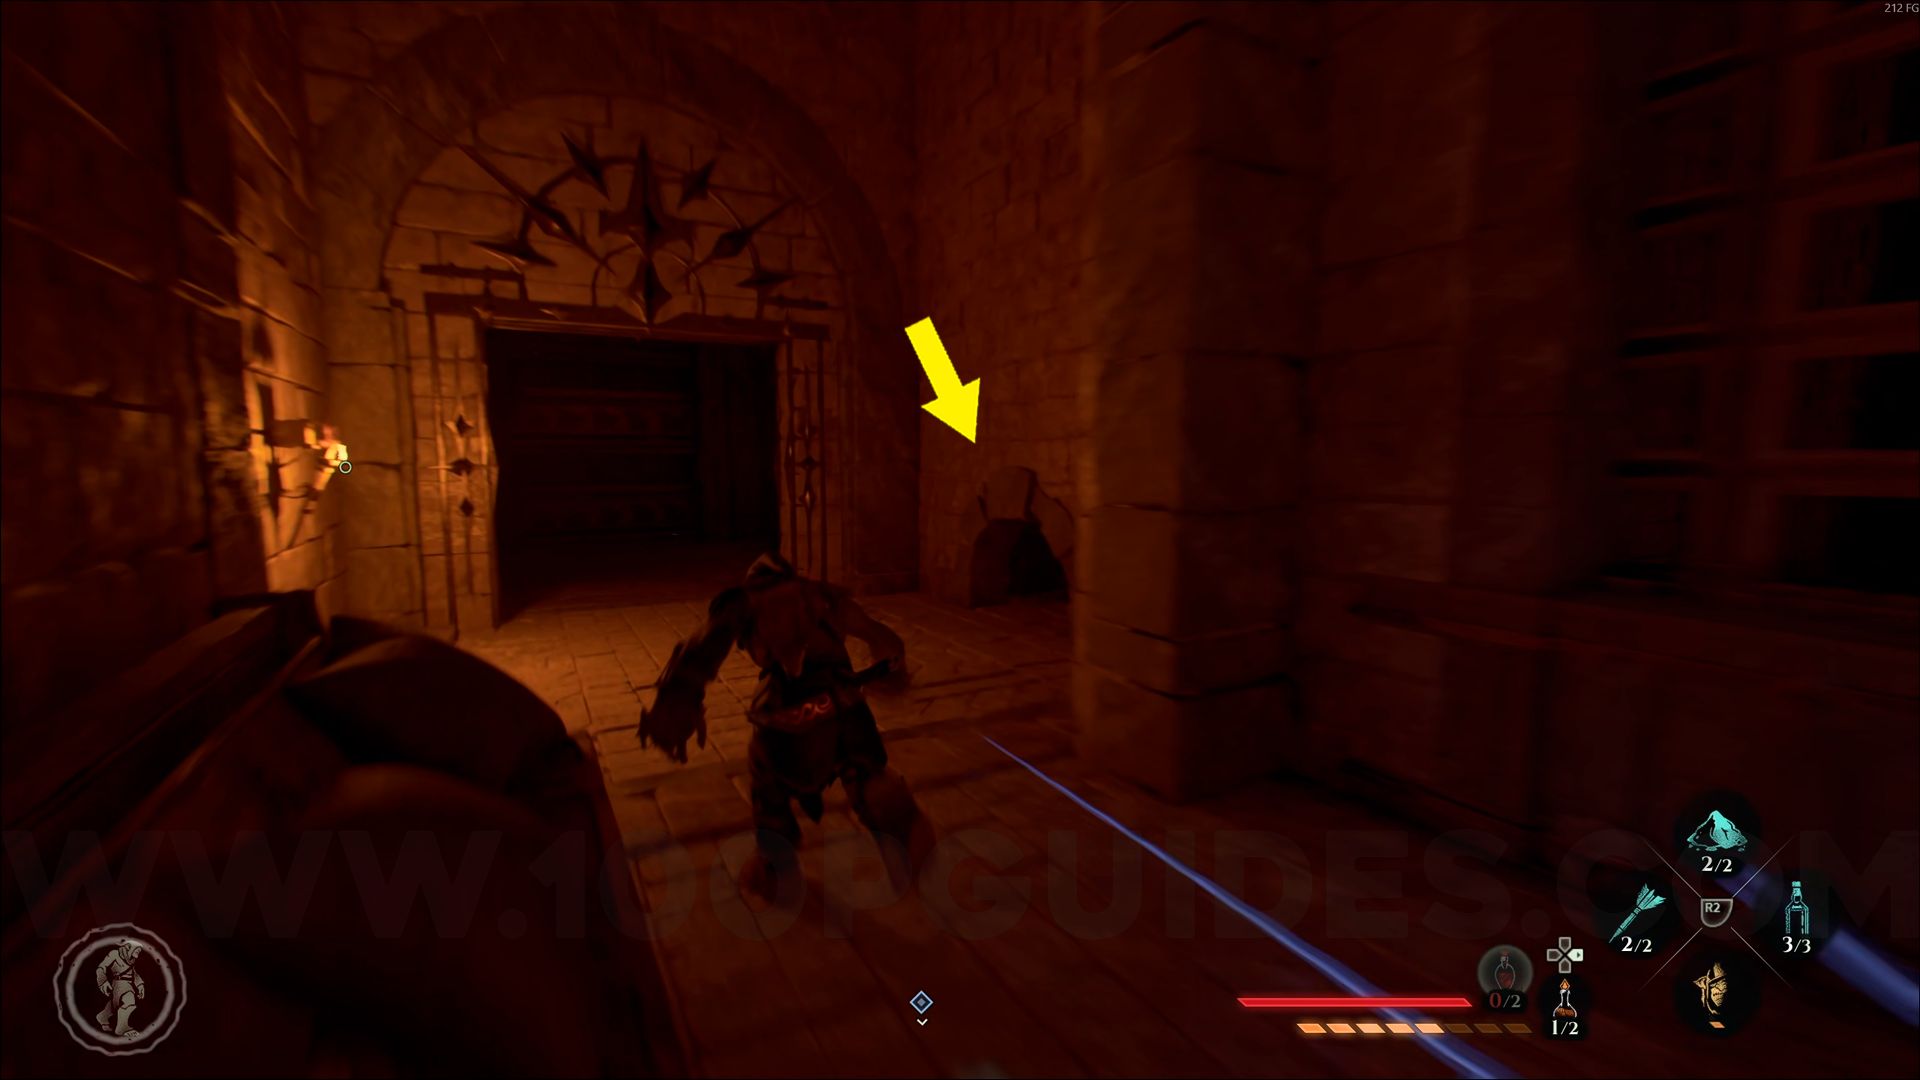
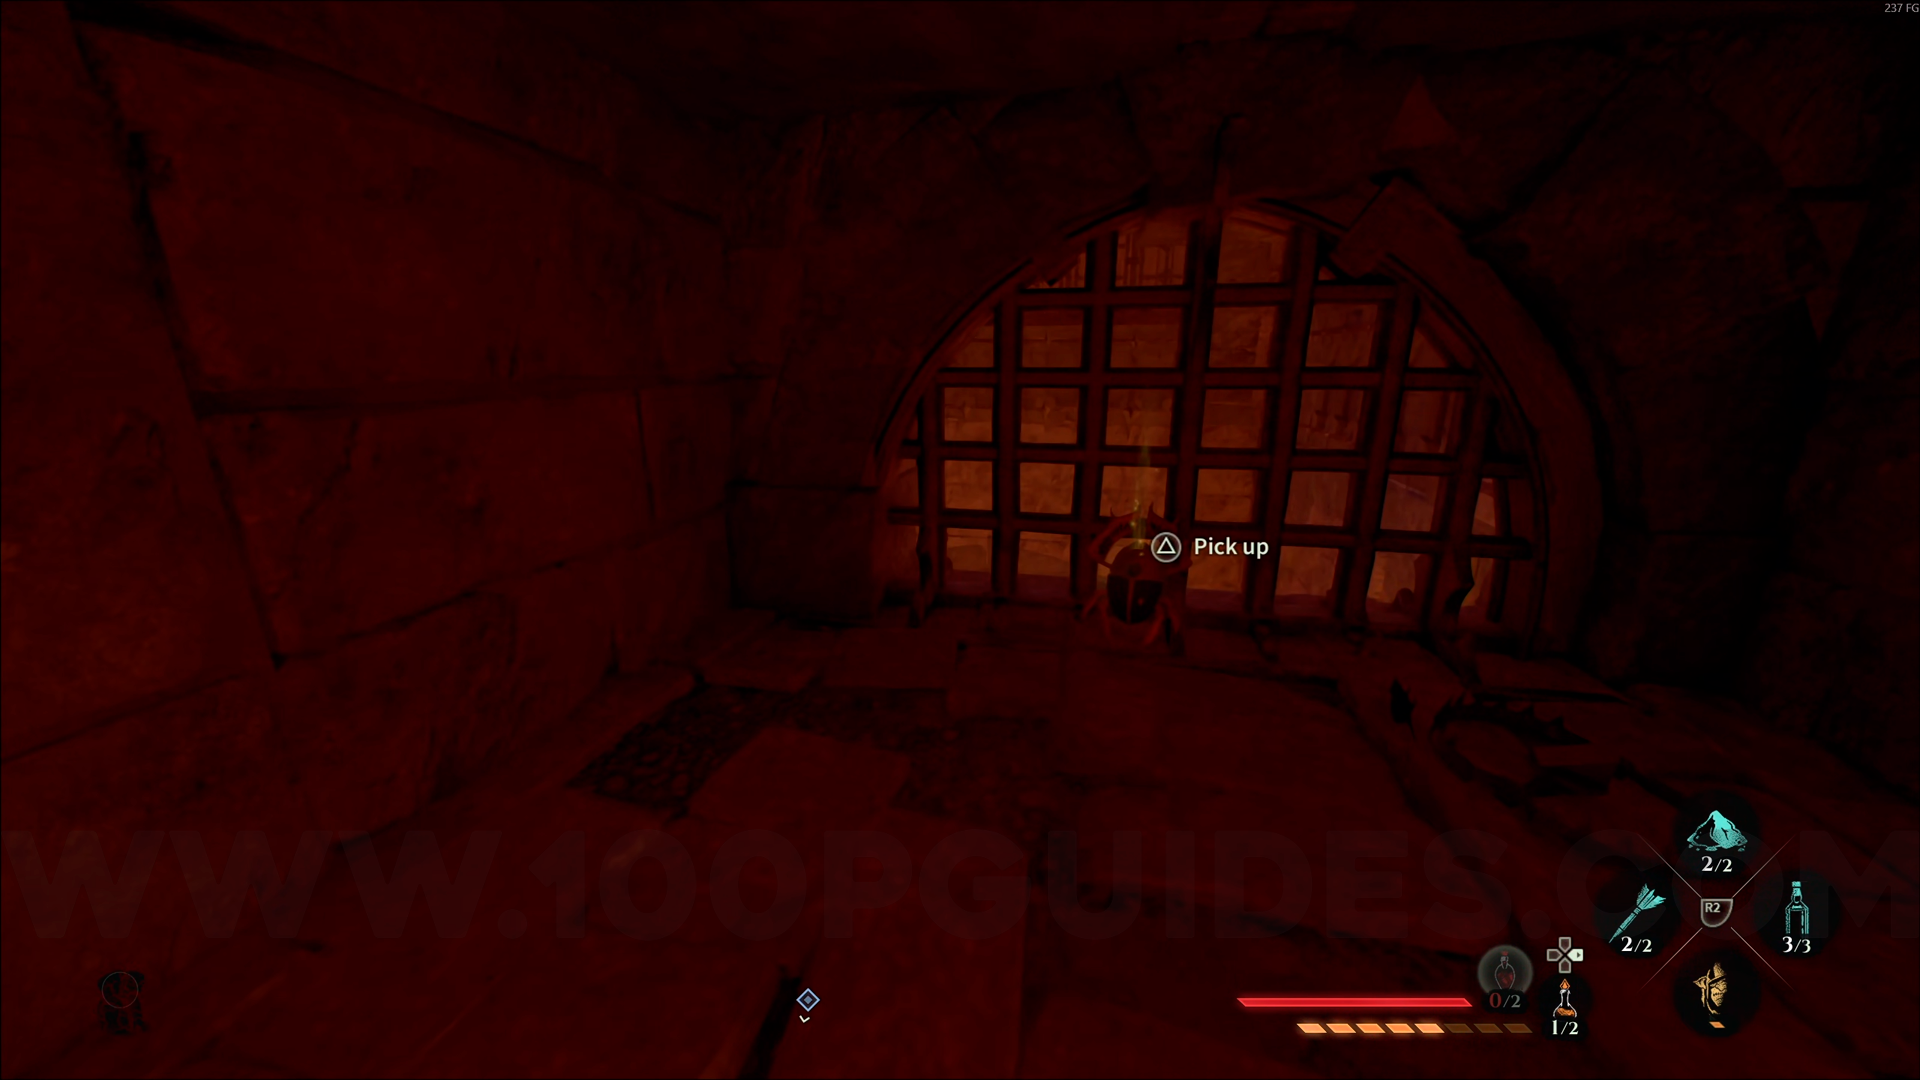
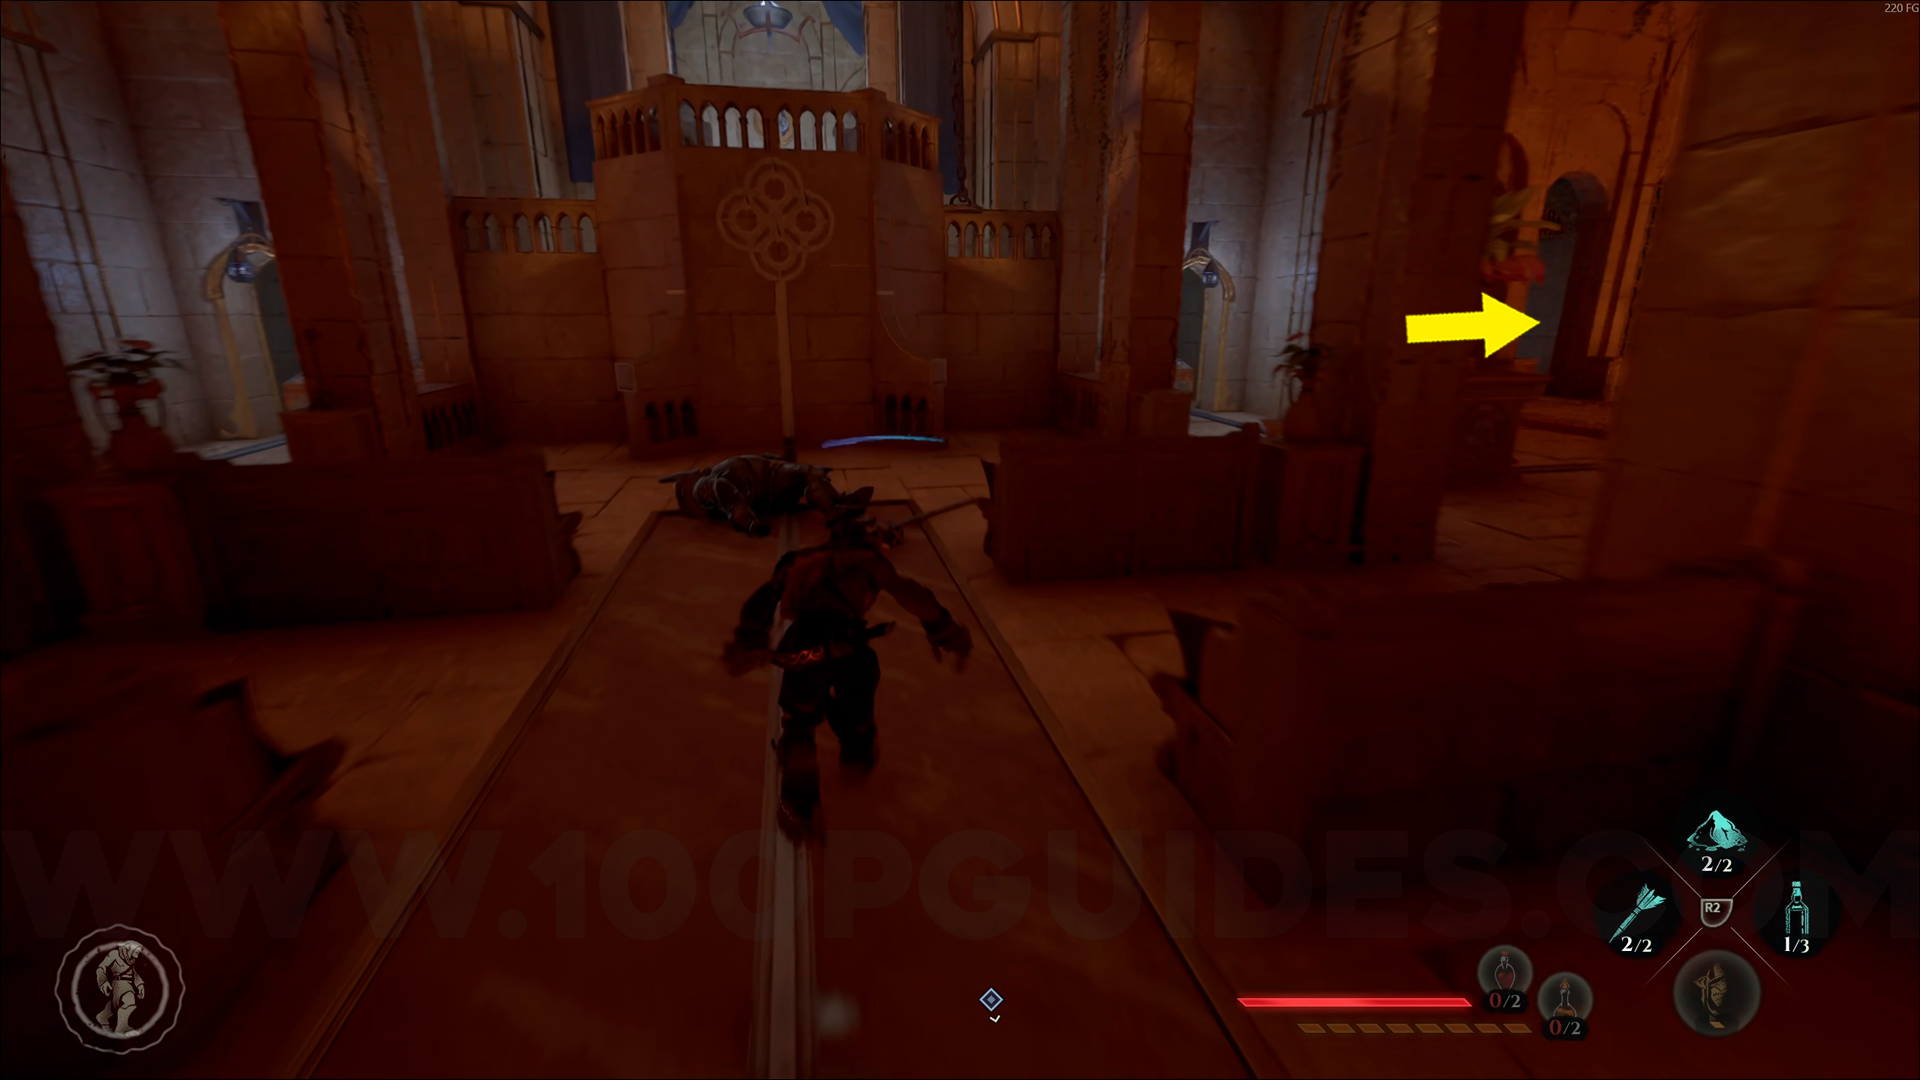
Gold Emblem #5. Right after the previous collectible, turn around and go through the back door. Turn right and enter through the hole in the wall. Inside, you'll find this emblem.
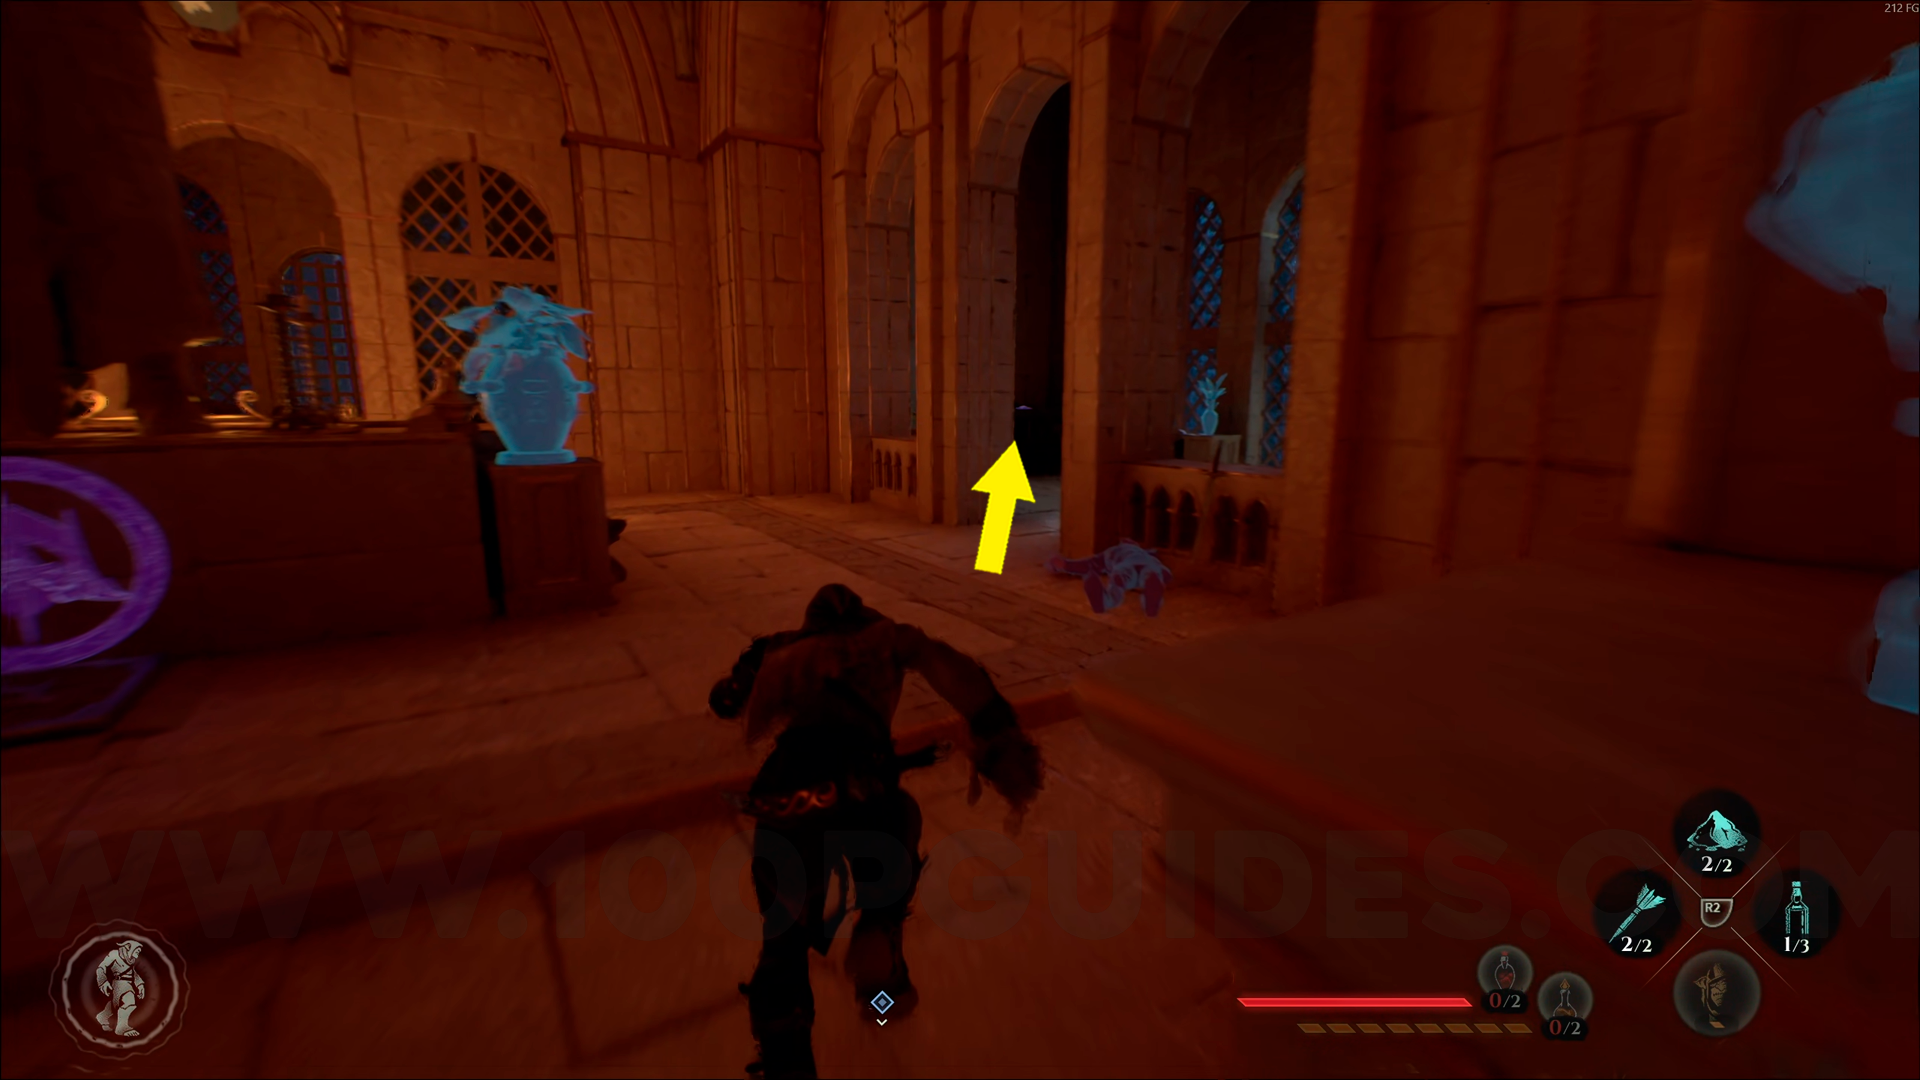
Gold Emblem #6. Inquisition’s Cathedral, go through the gate in front of you using your ability to reach an open area. Head to the far end and climb the rope on the left. At the top, enter the door on your right, go through the window, and continue onto the rooftop to find the emblem. Use Amber Vision to help spot it.

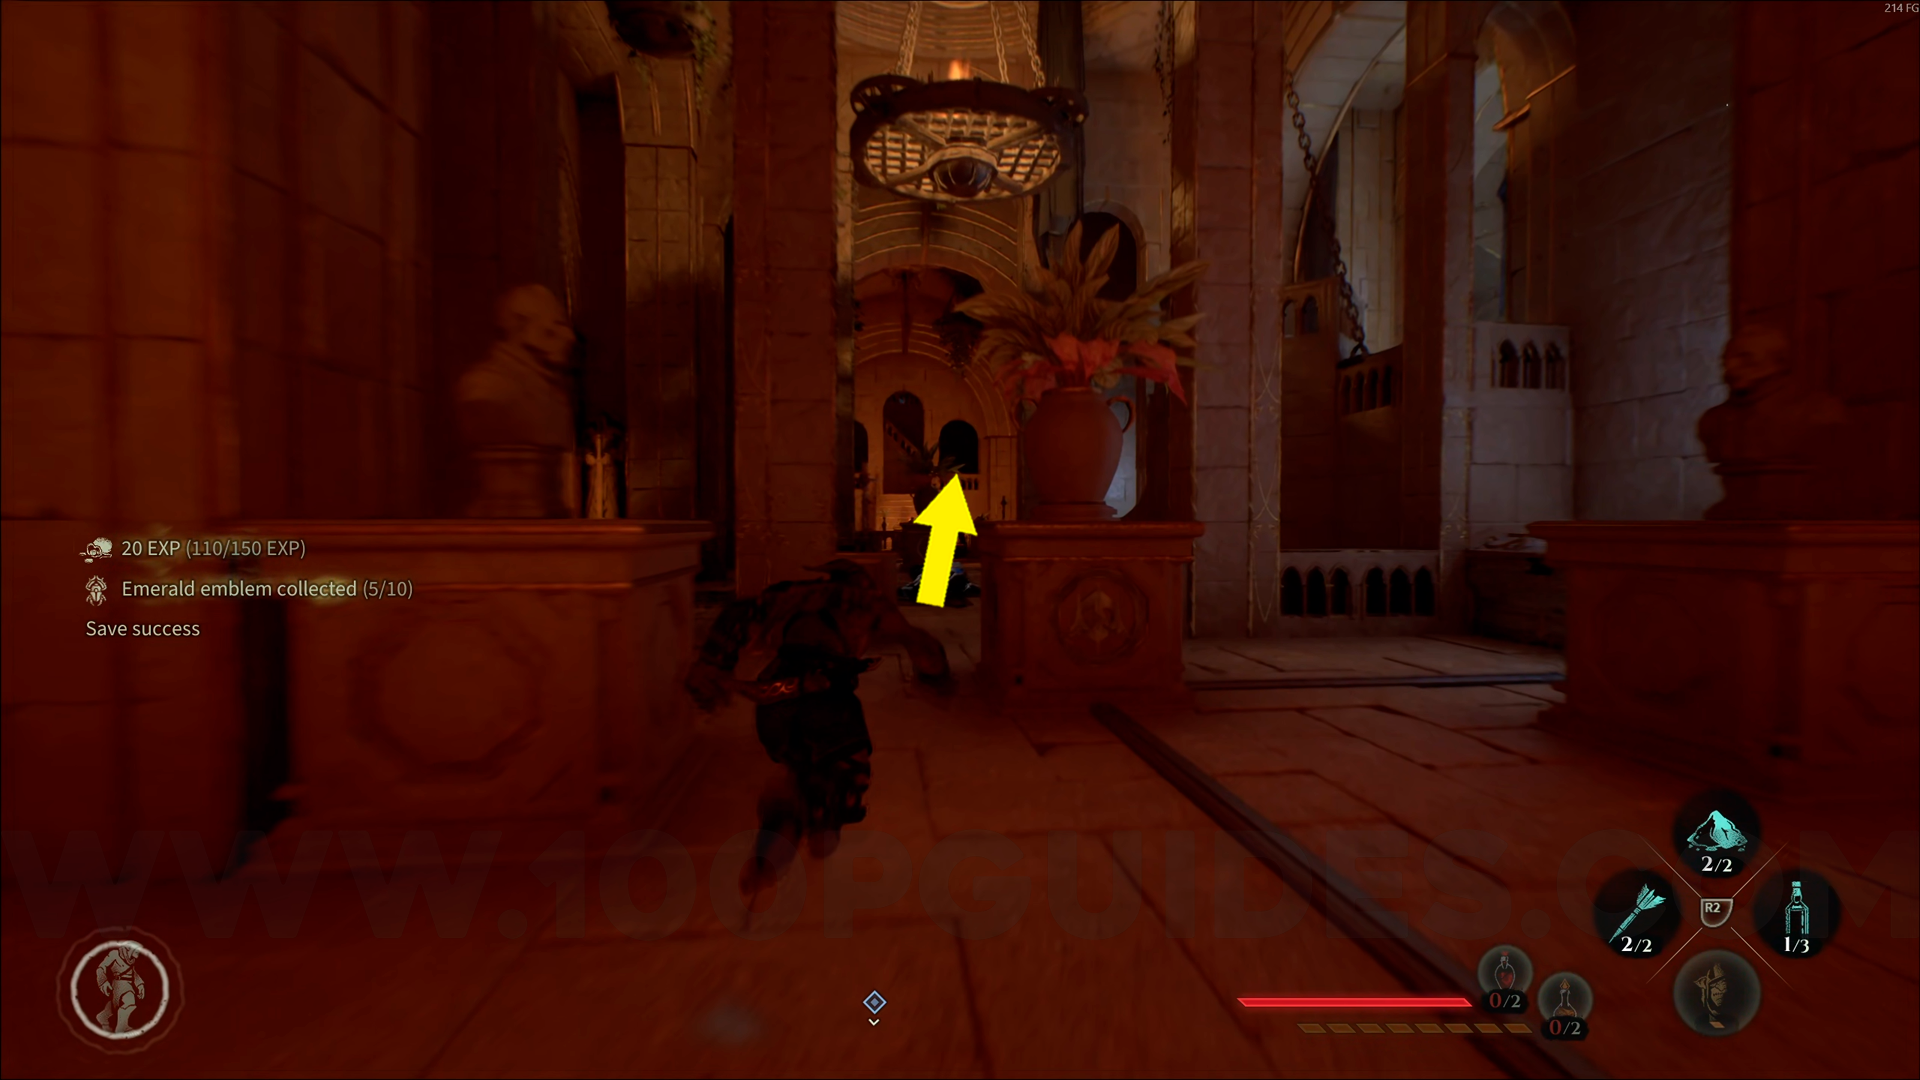
Gold Emblem #7. From Empire's Dungeons, go to the right and use your ability to pass through the gate. Once inside, make your way around the room and use your ability again to go through another gate to get this emblem. Use Amber Vision to help you spot it.
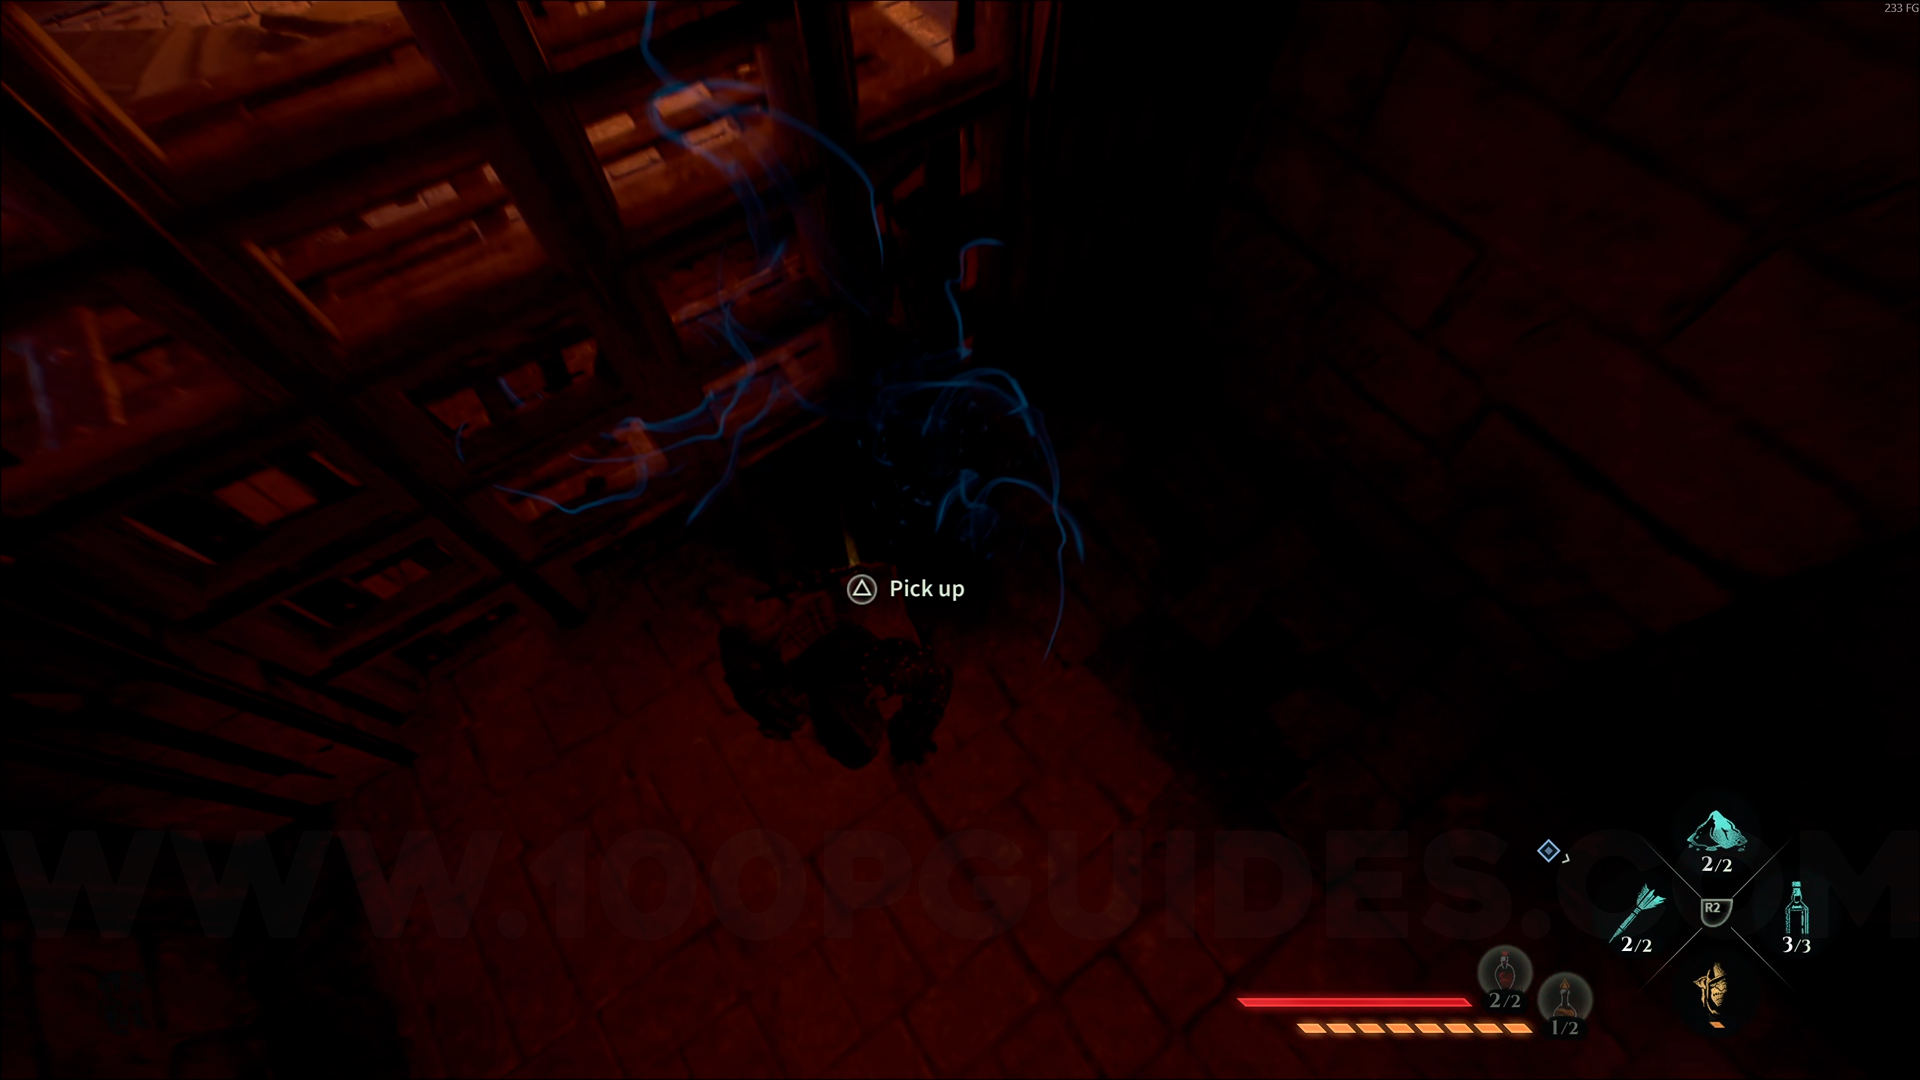
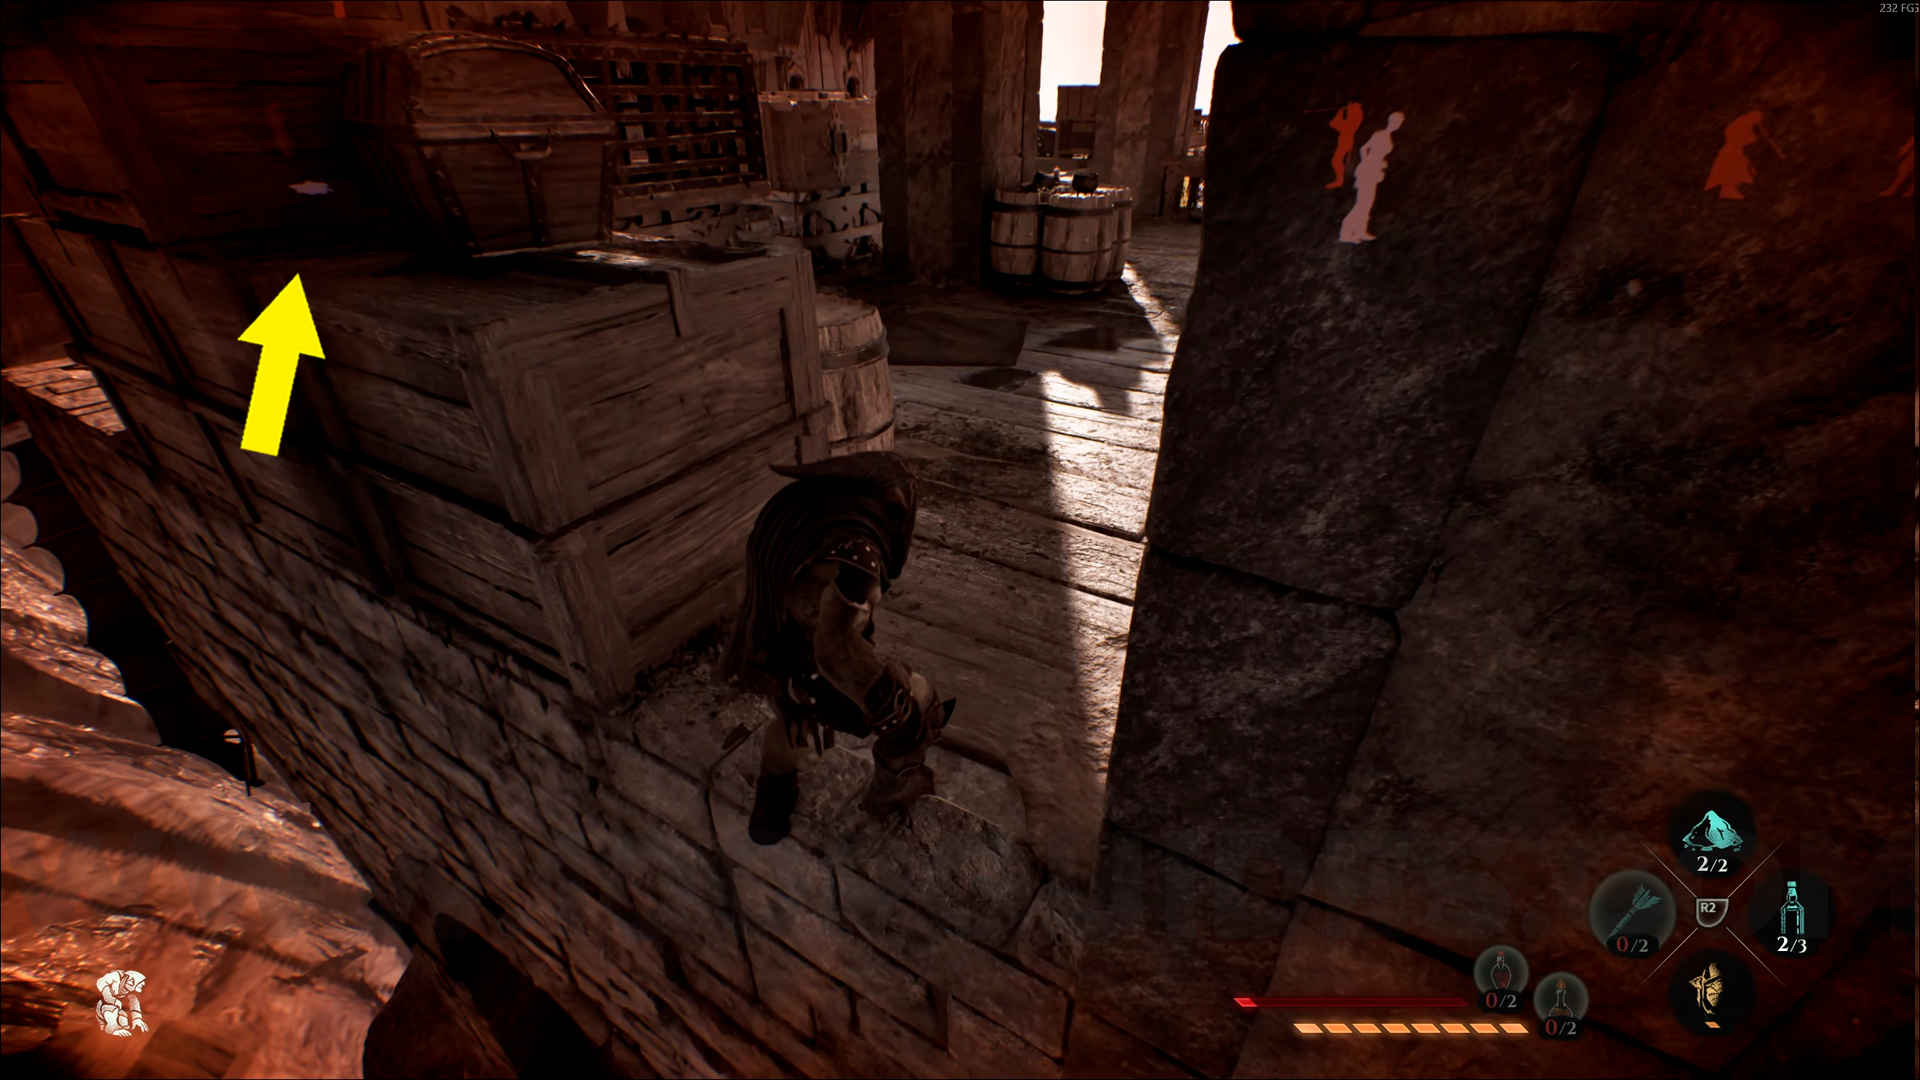
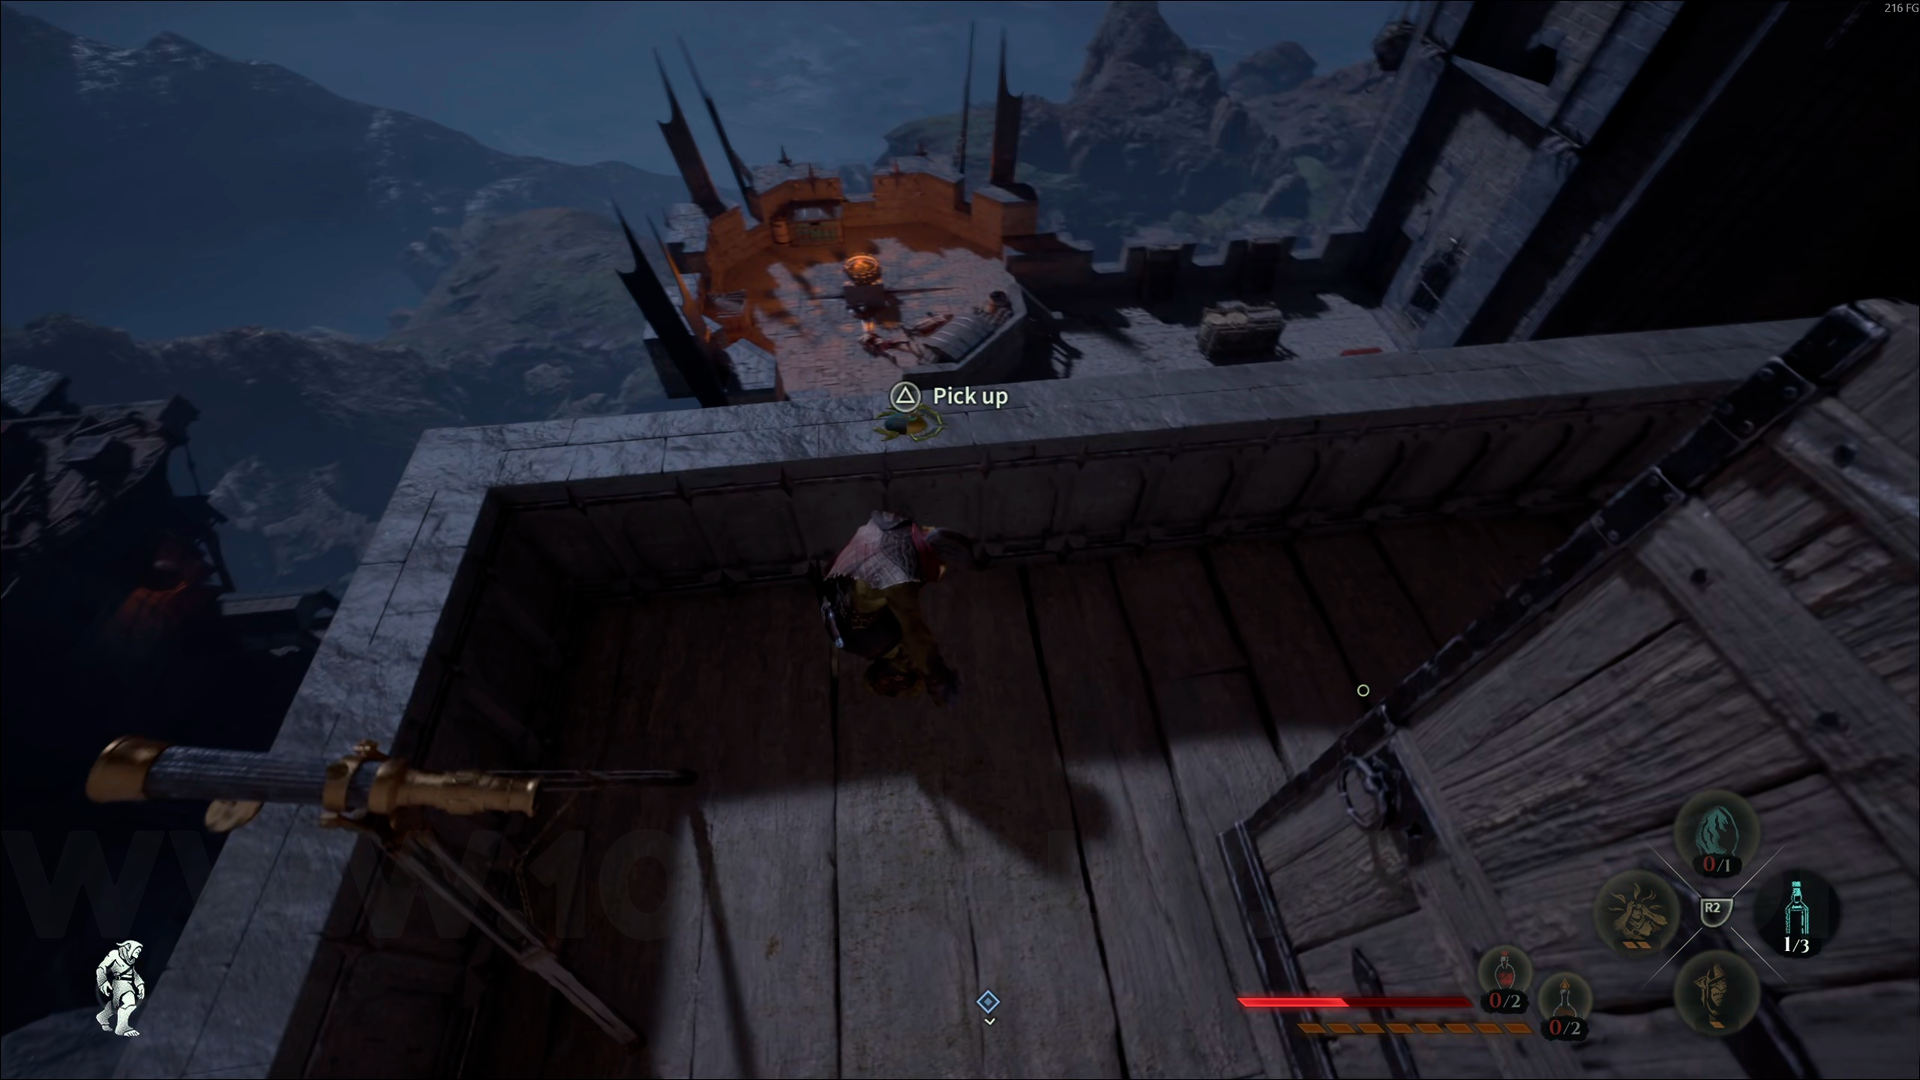
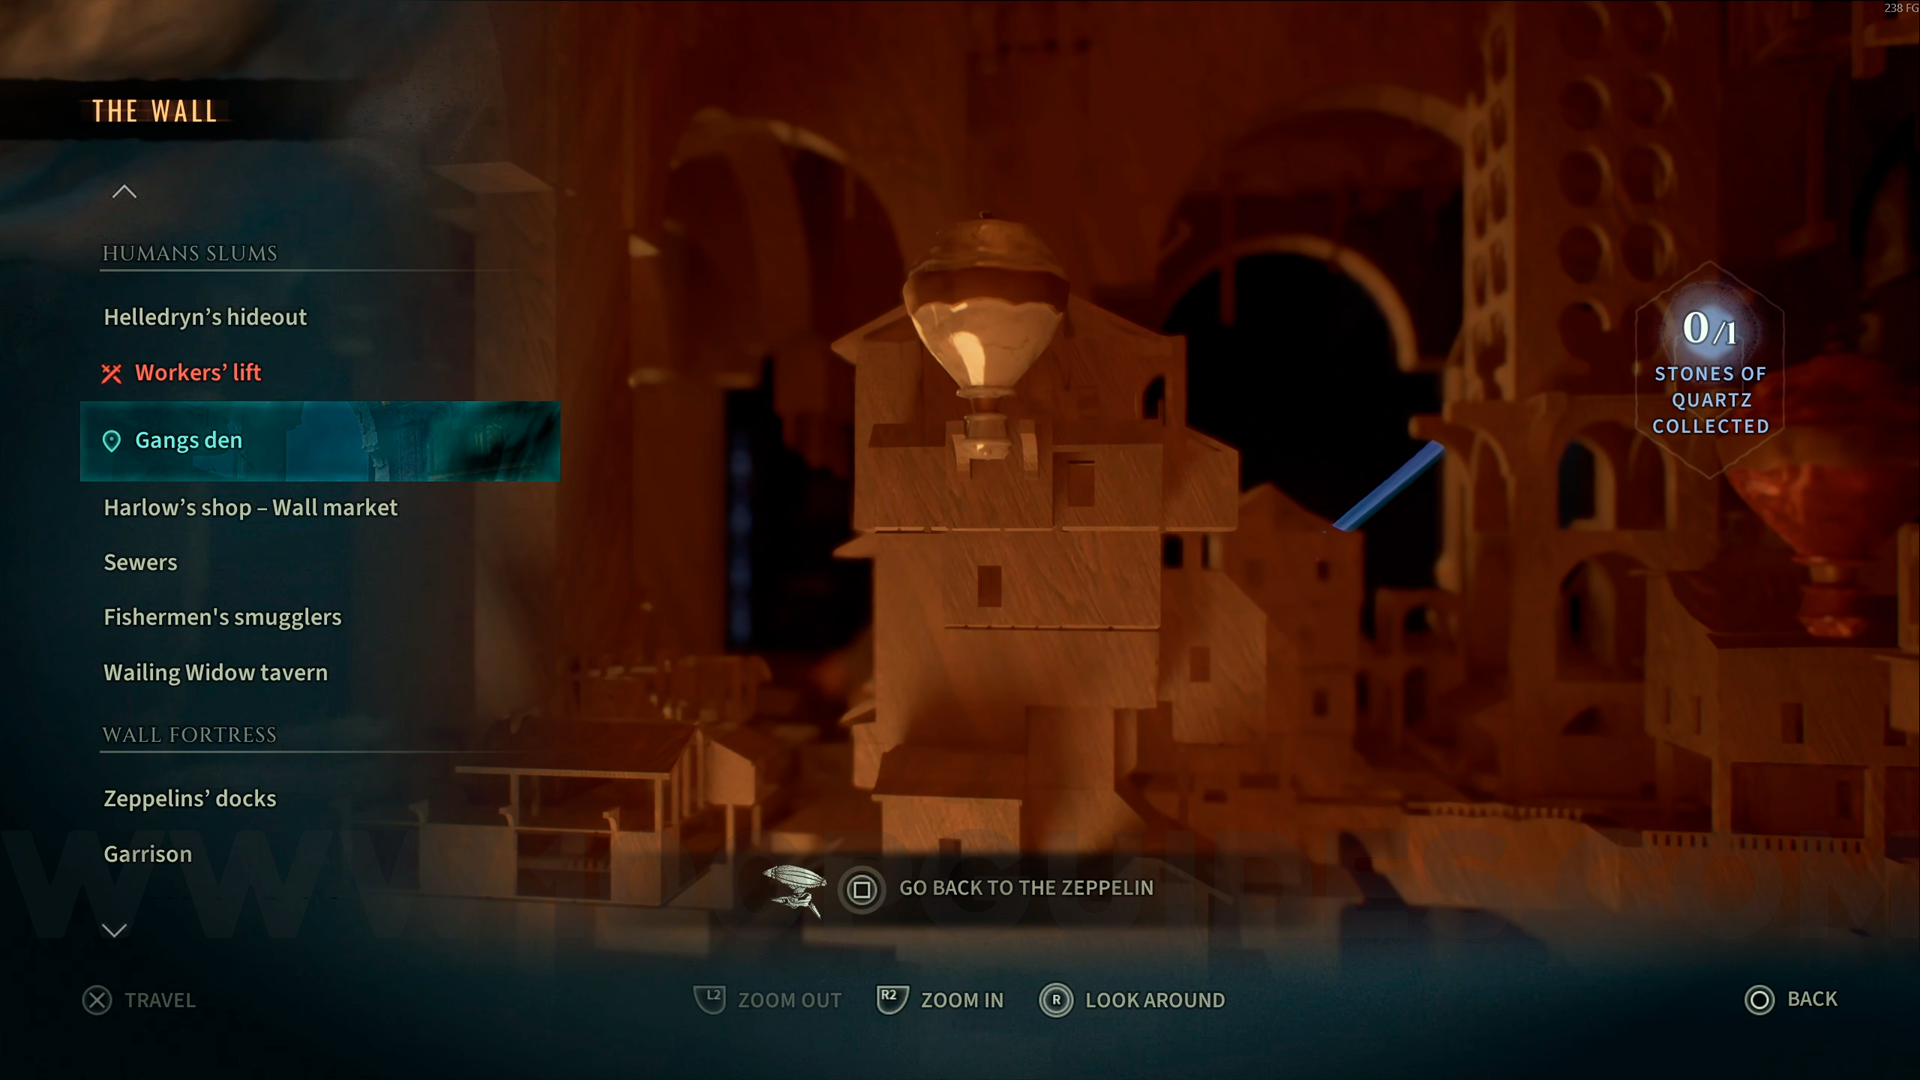
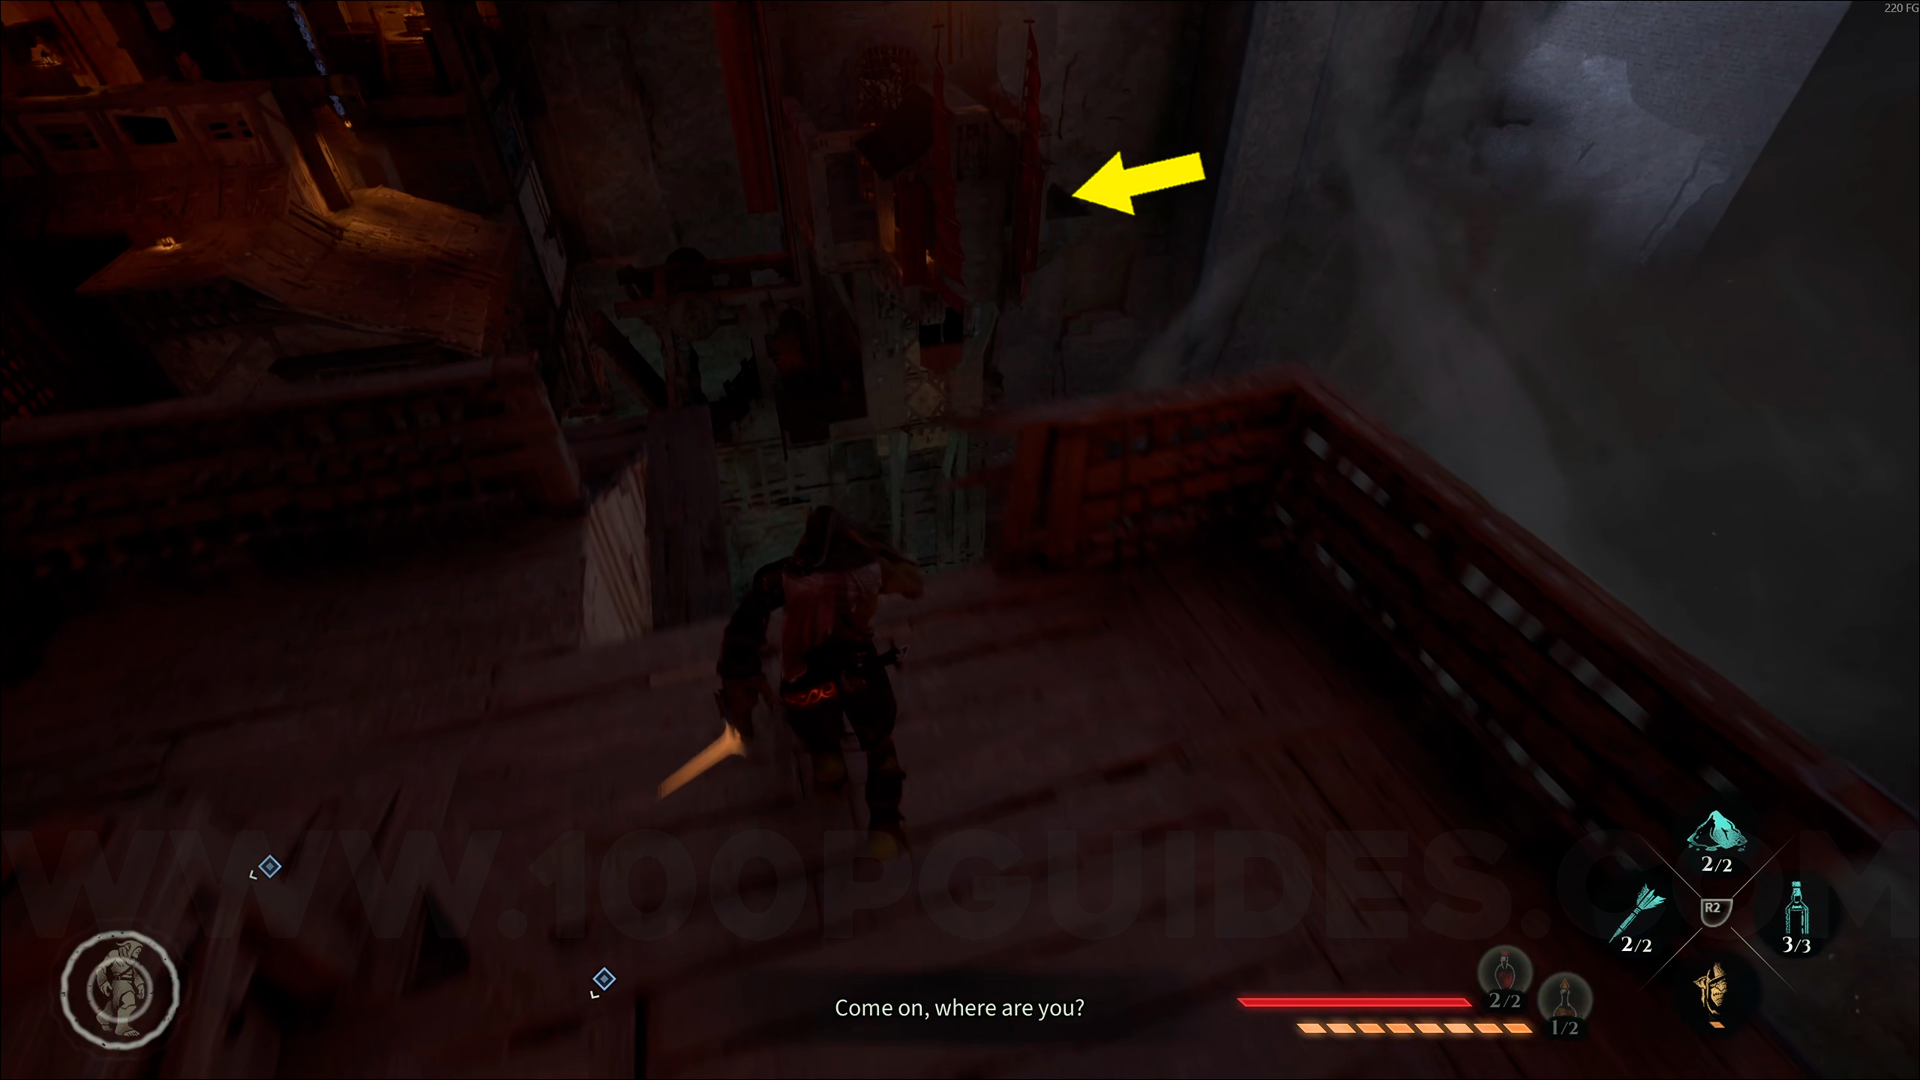
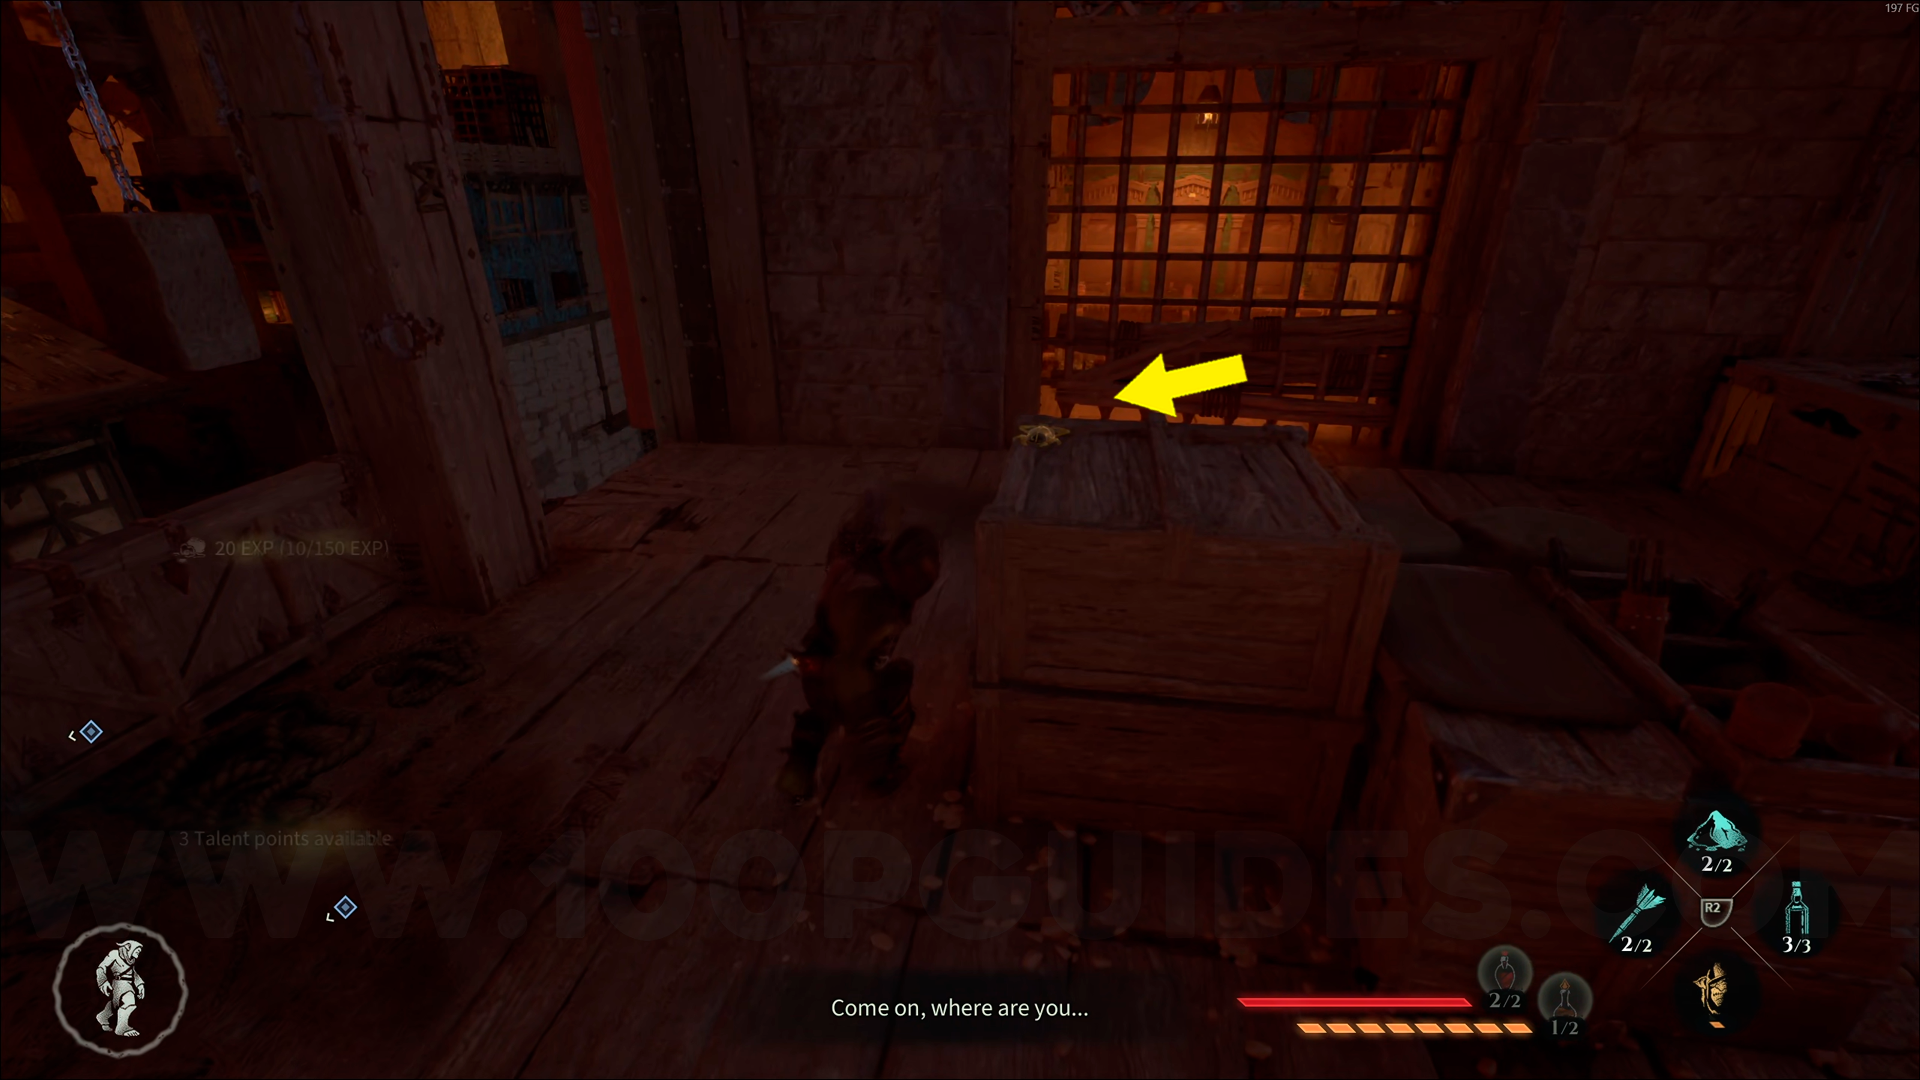
Gold Emblem #8. From the Gangs Den checkpoint, jump over to the other checkpoint nearby, and you'll find this emblem on top of a box.
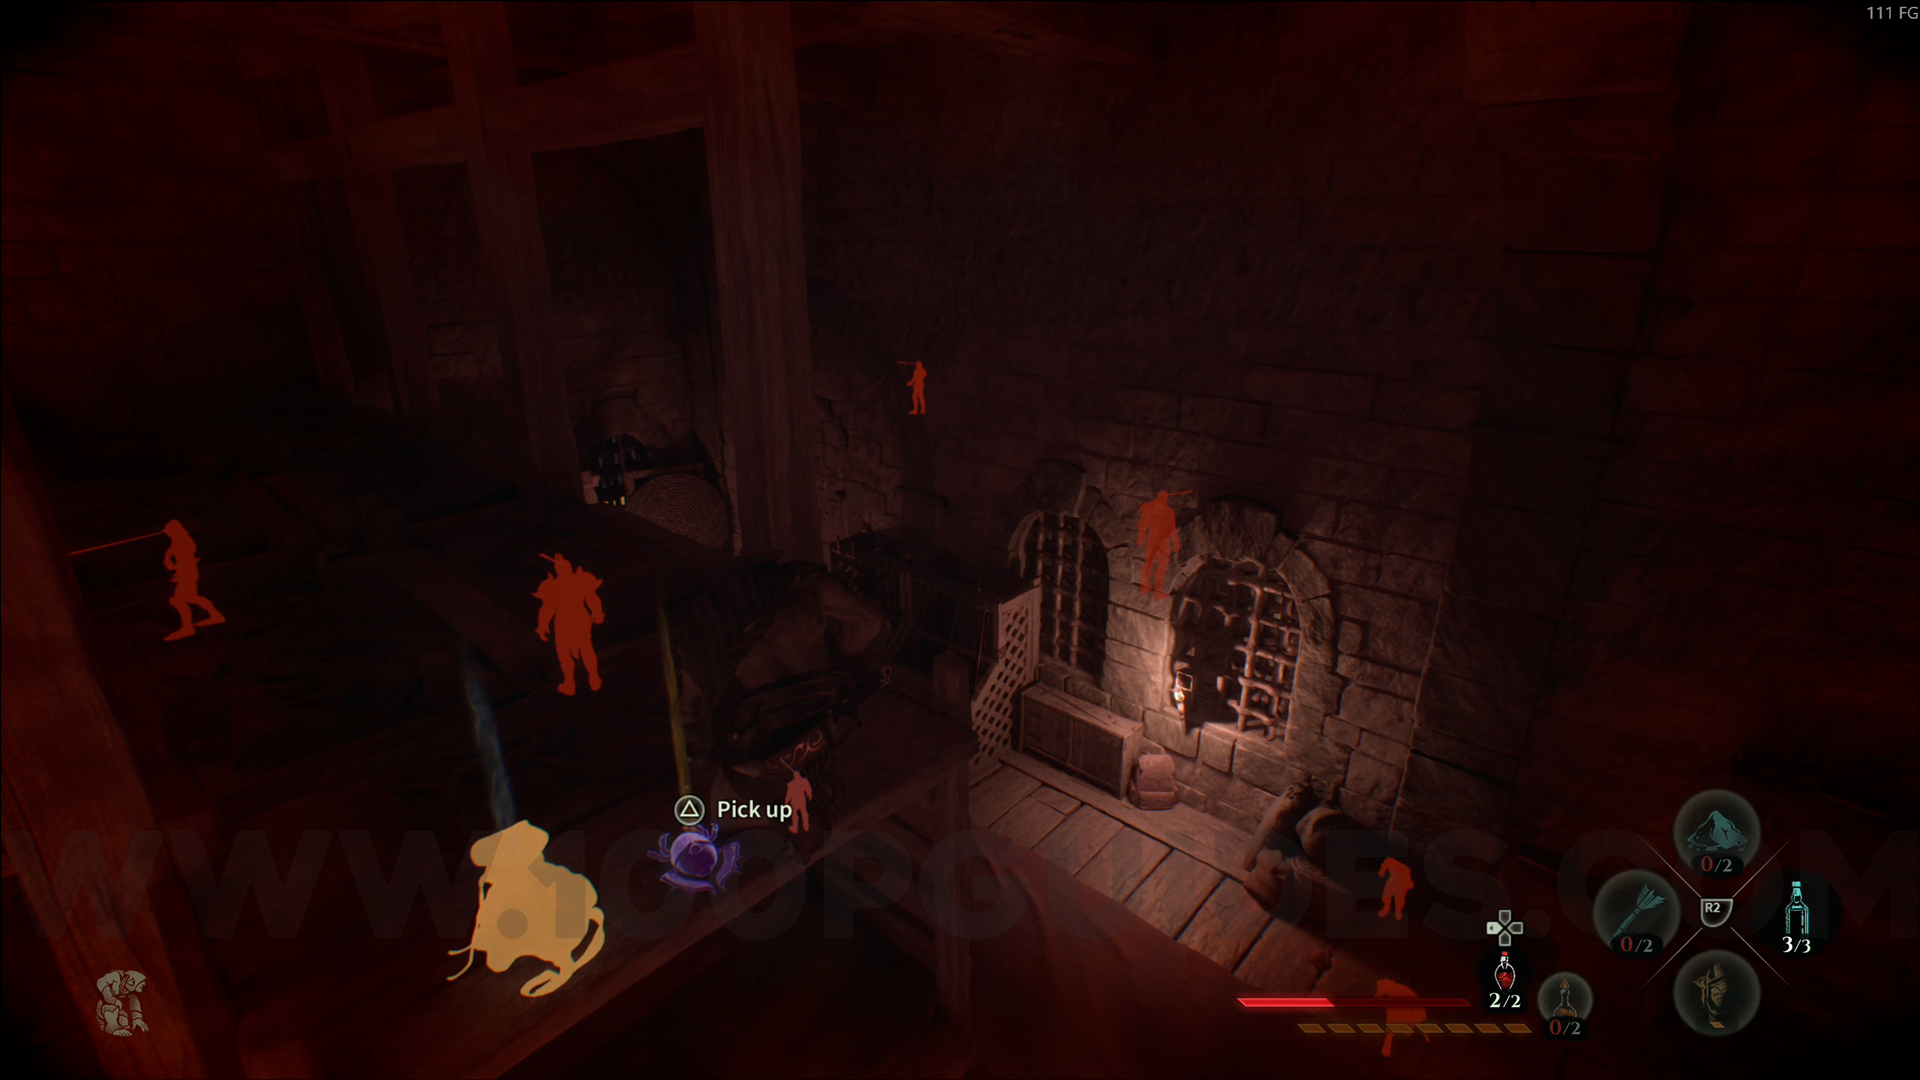
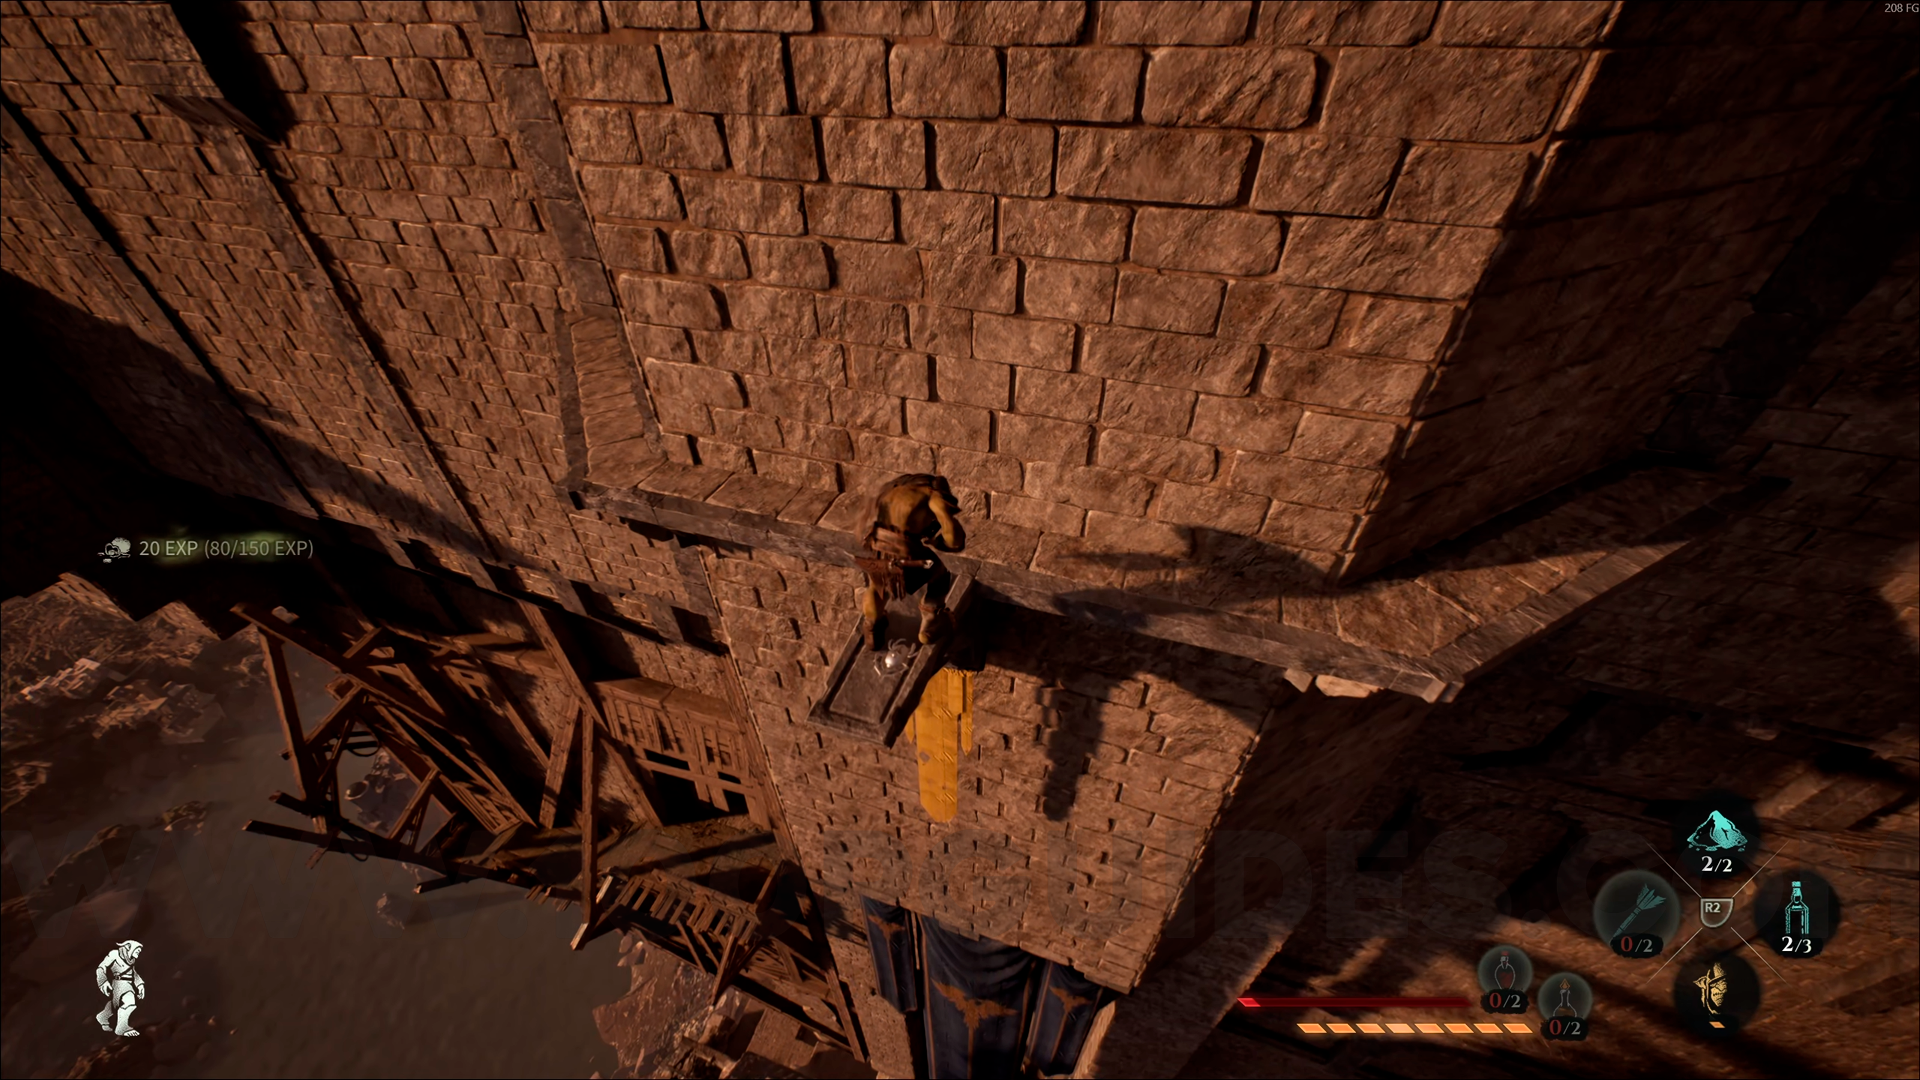
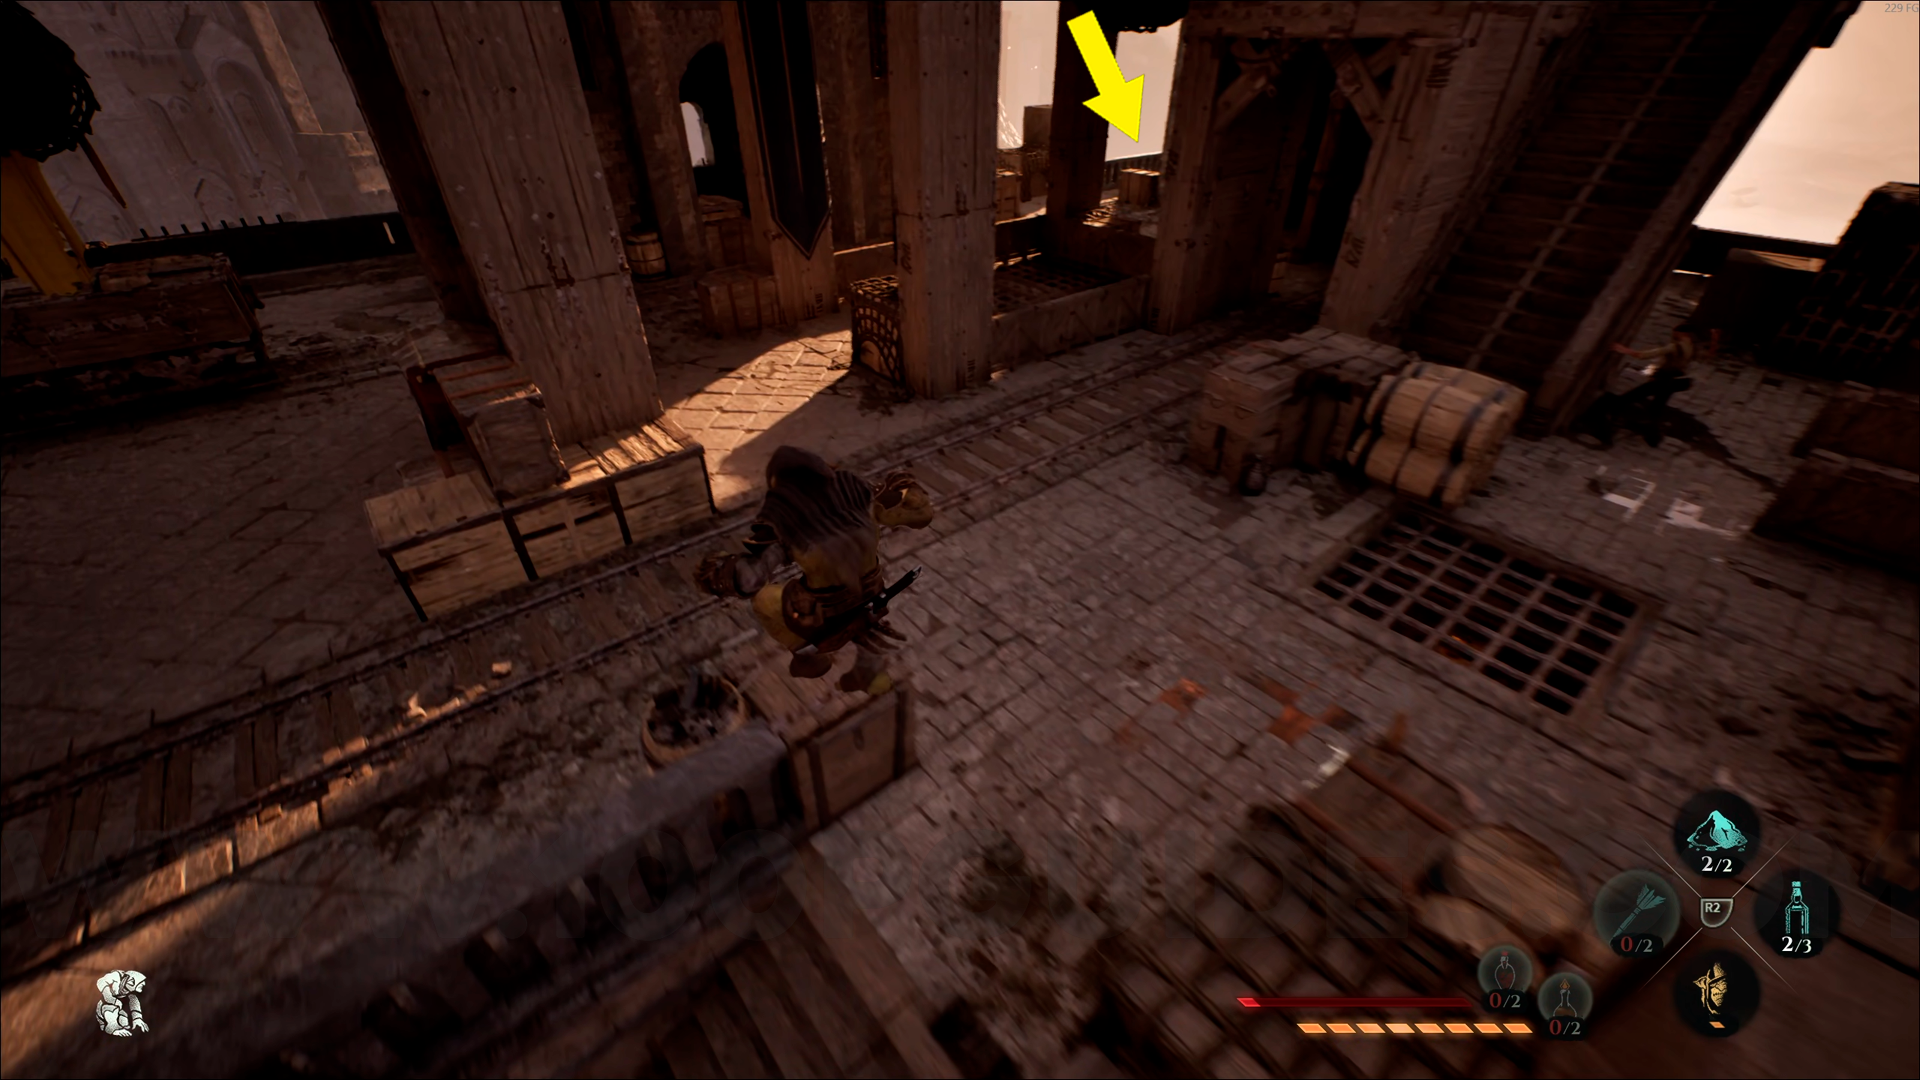
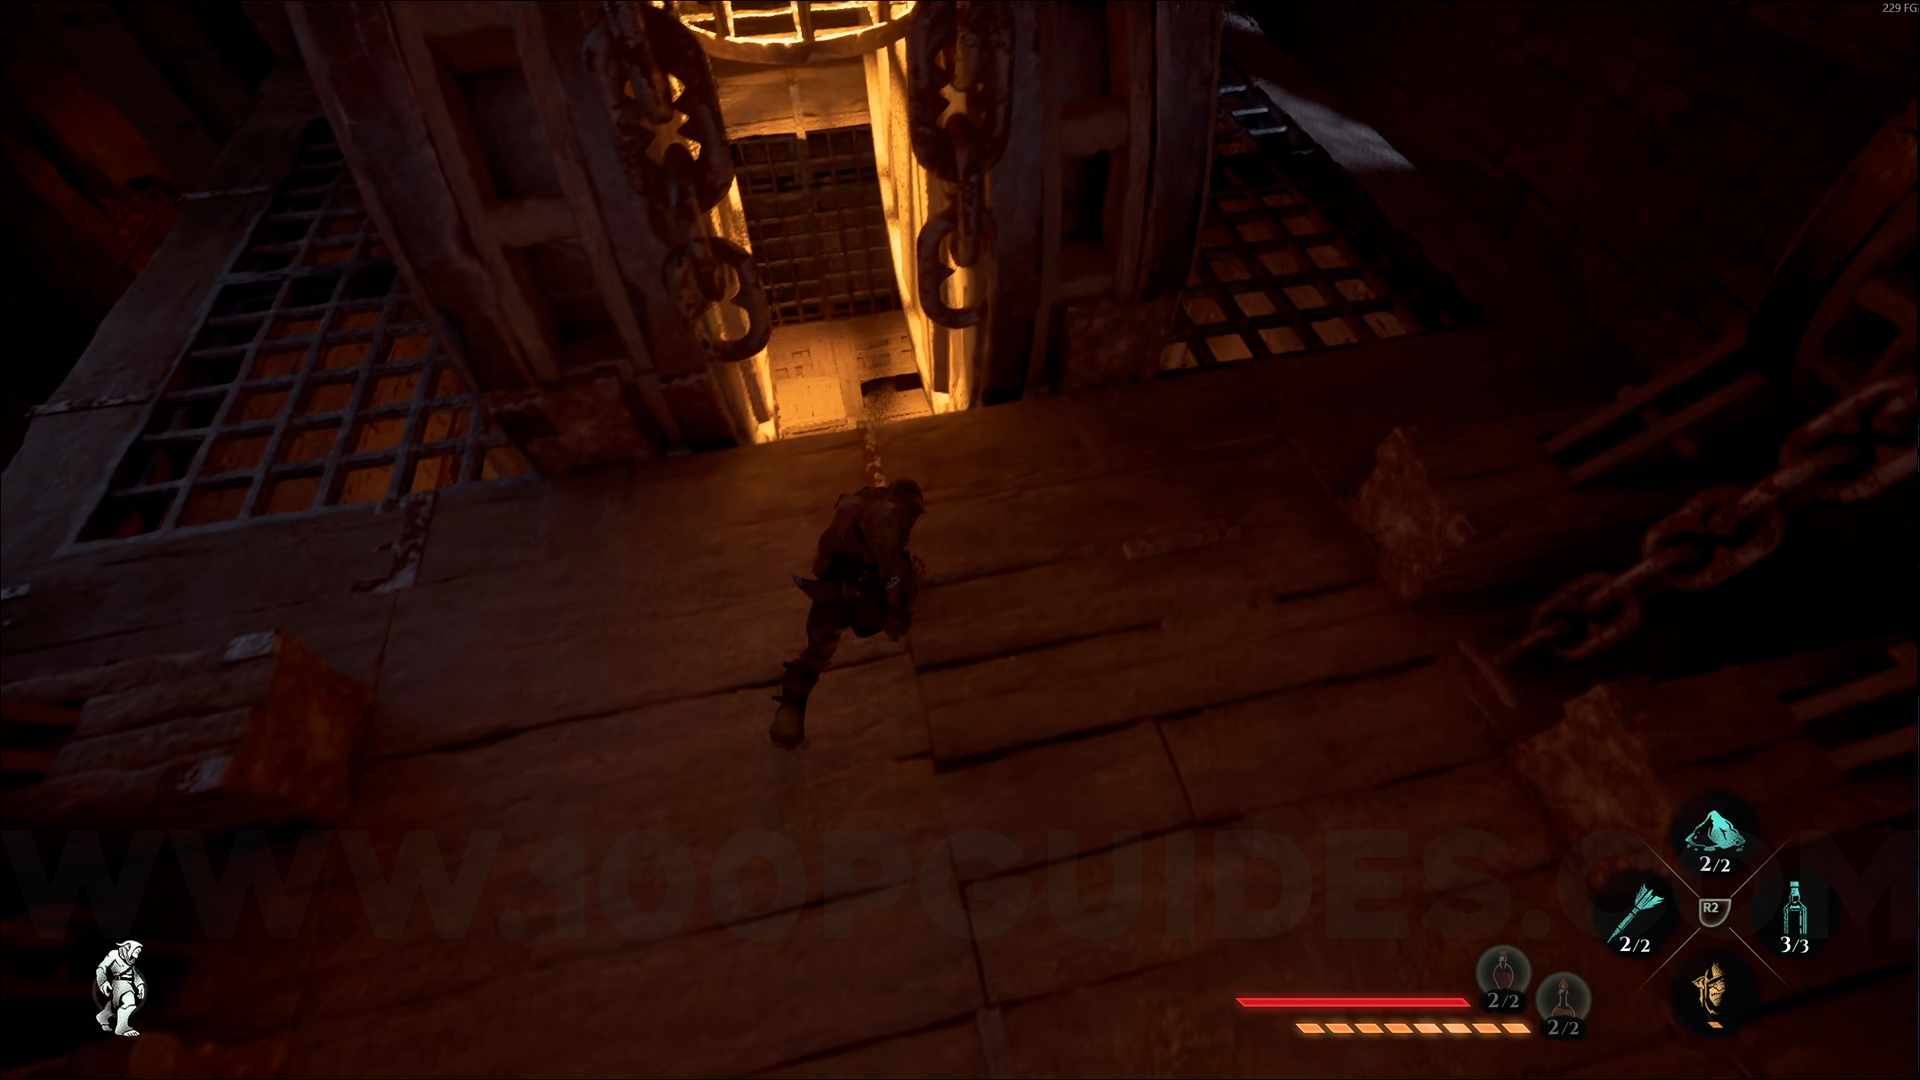
Gold Emblem #9. From the Garrison Checkpoint, go up to the upper area and through the hole in the wall. Go straight, passing through the door, then turn left and go up the stairs. Jump on top of the elevator, ride it down, and go through the hole in front of you.
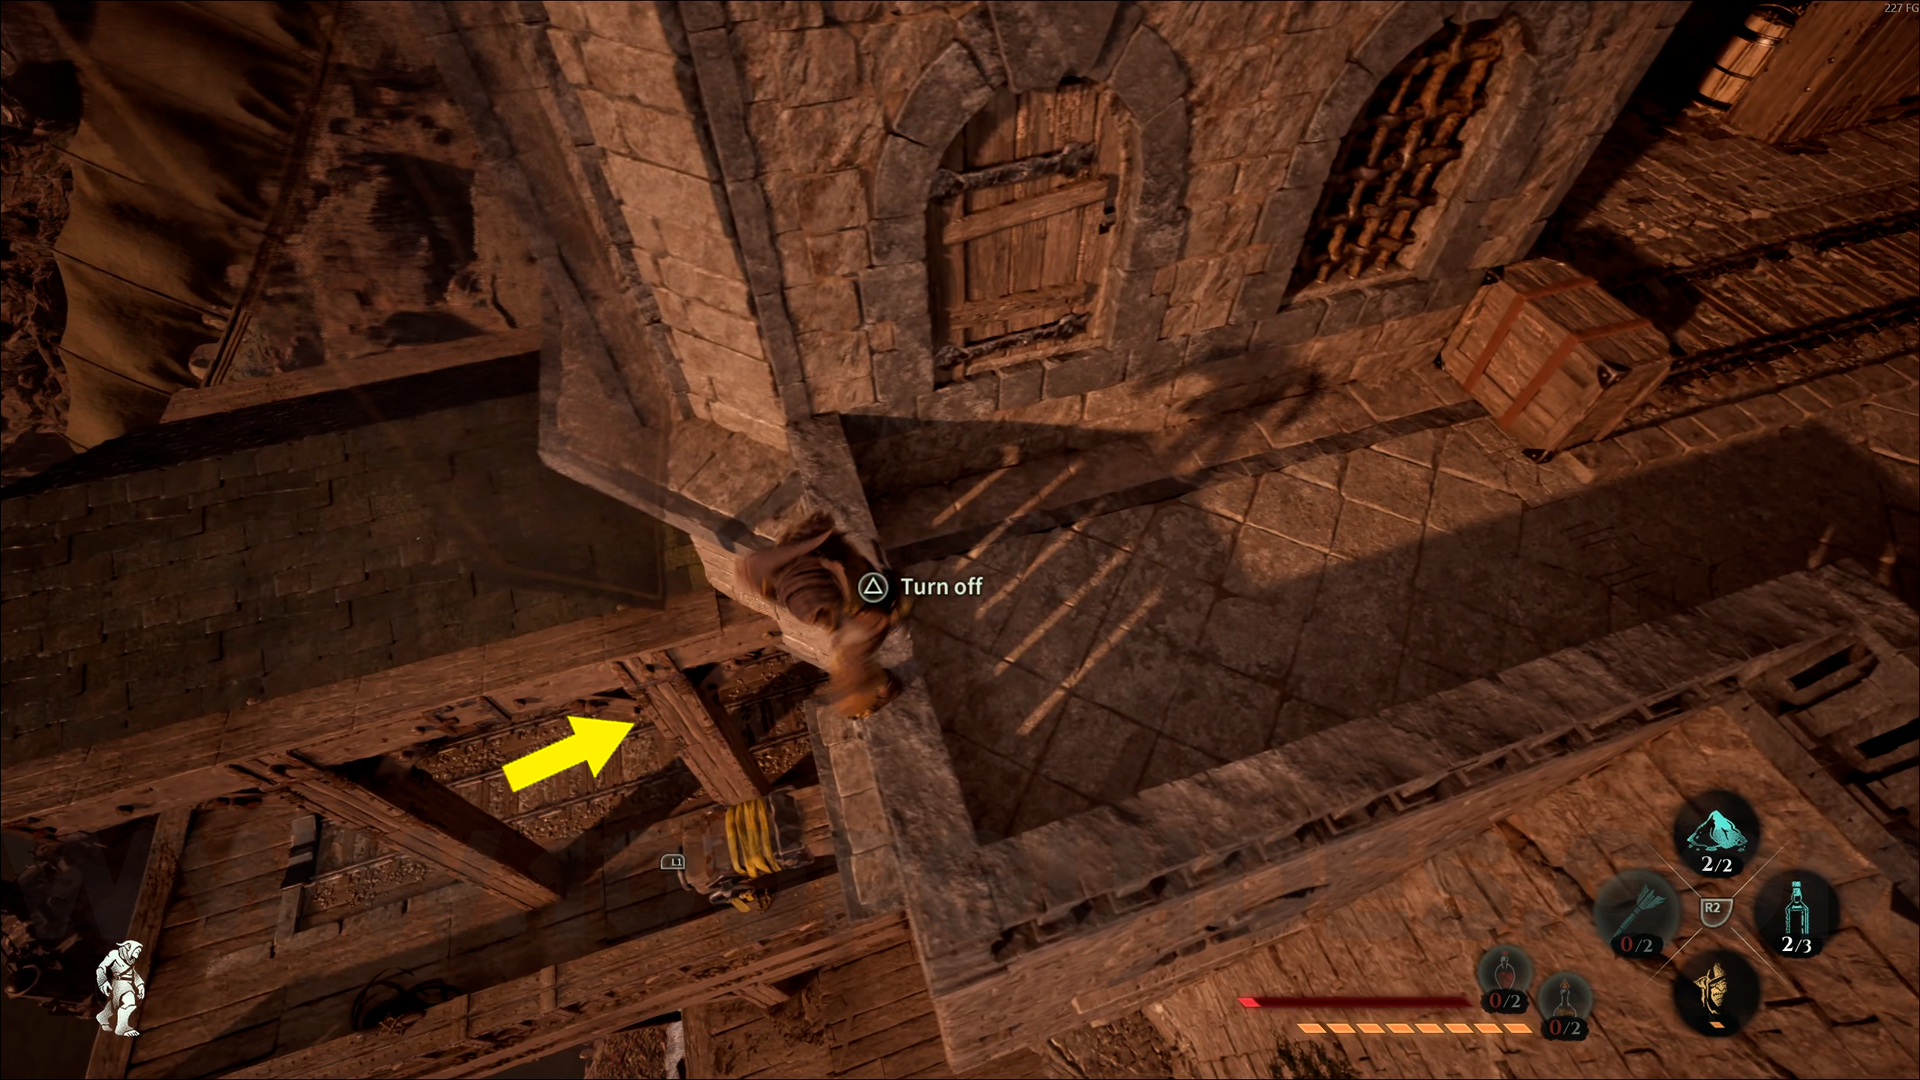
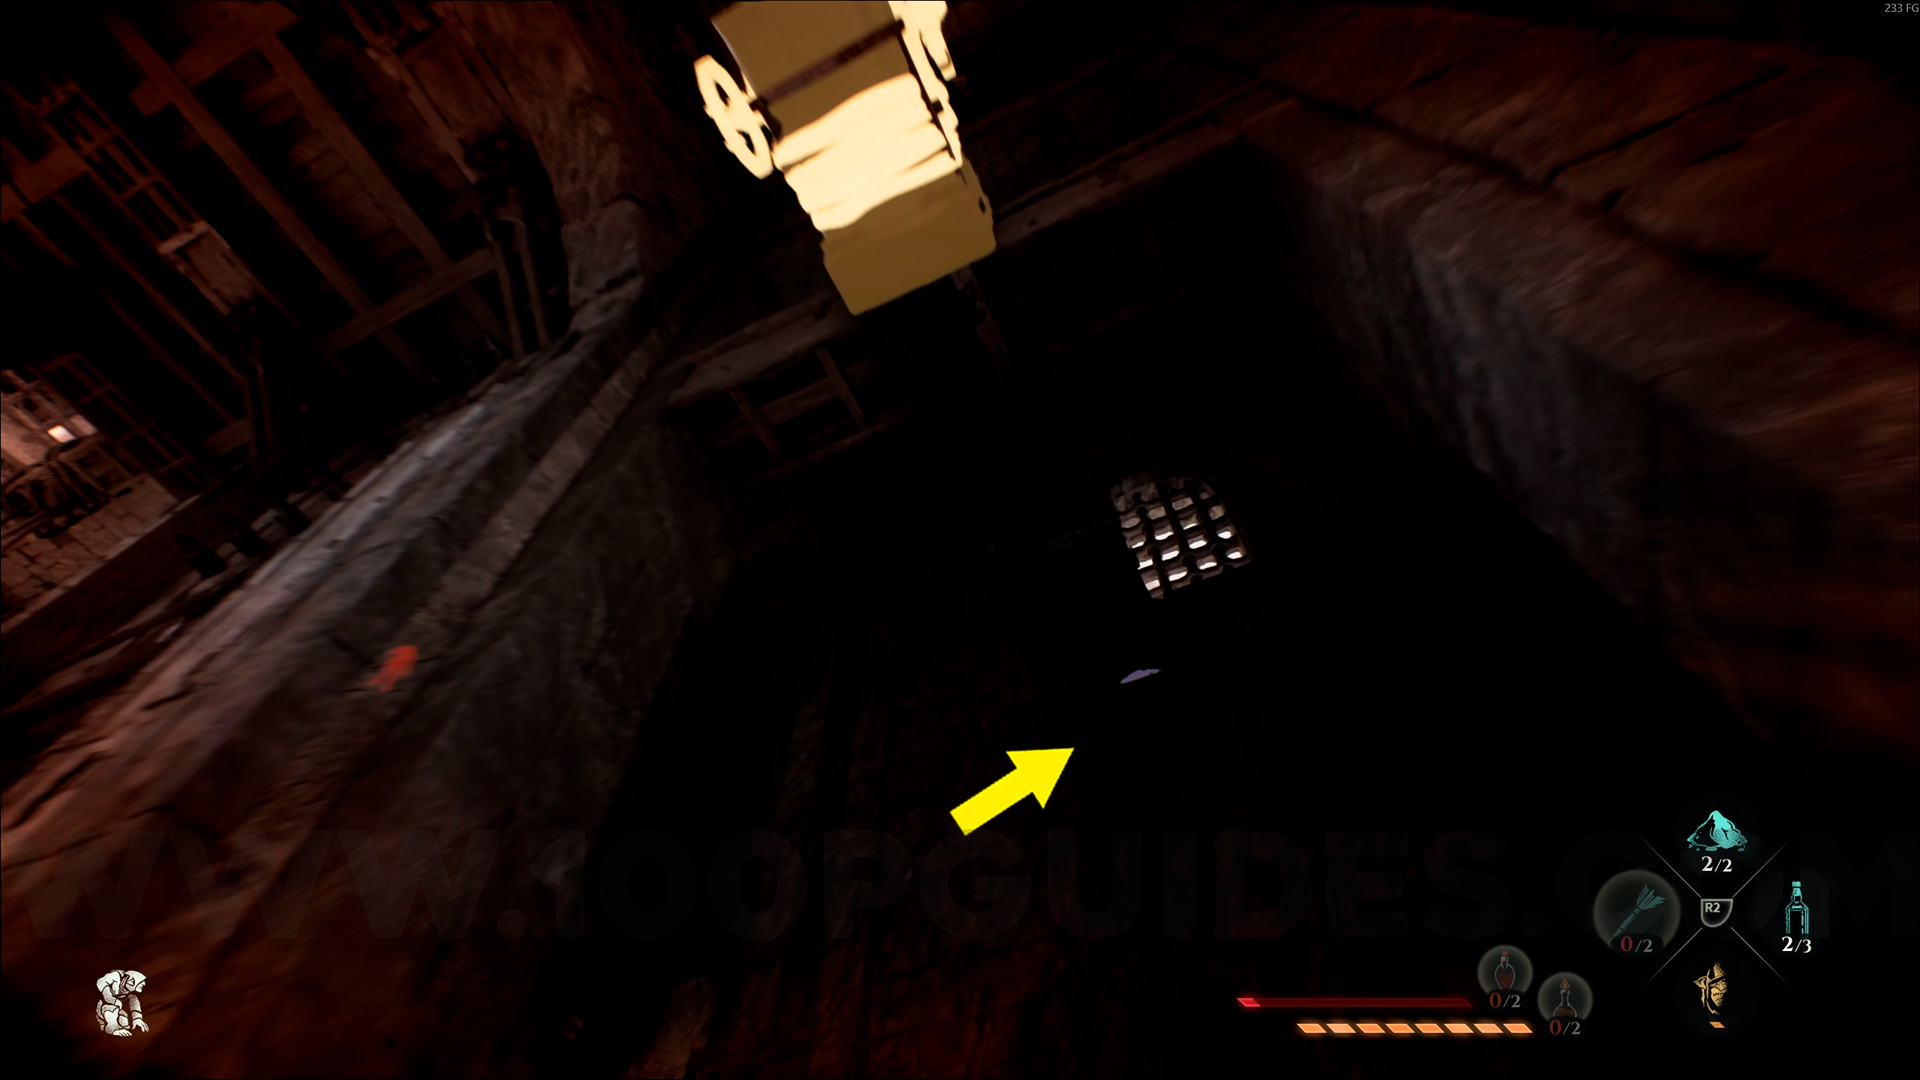
Look to the right, and you'll see a window. Go through it, then enter the first room on the right to find this emblem on top of the table. You can also use Amber Vision to spot the emblem through walls and help guide you.
Gold Emblem #10. From the Empire's Dungeons checkpoint, go forward and enter the large structure on your left. Once inside, head to the end of the hallway and go through the hole on your right to find this emblem. You can use your Amber Vision to help spot it through the wall.
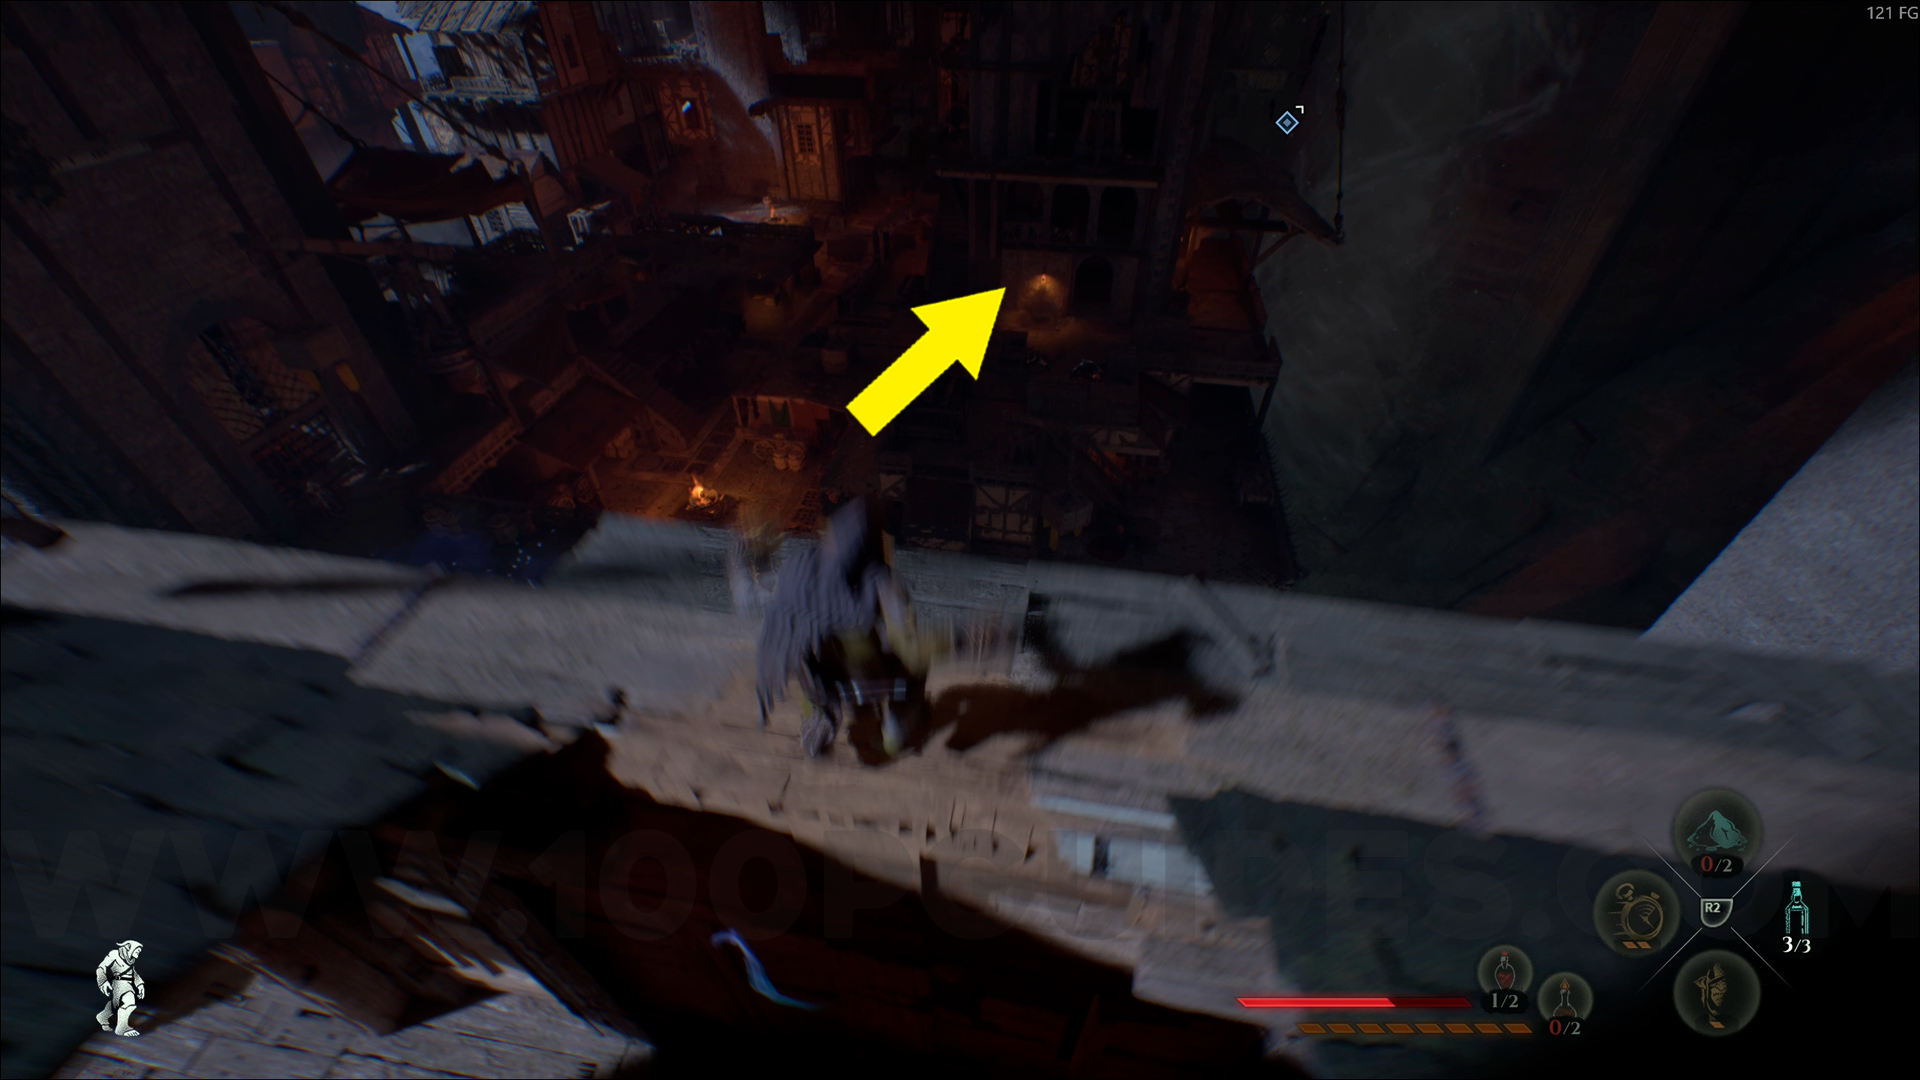
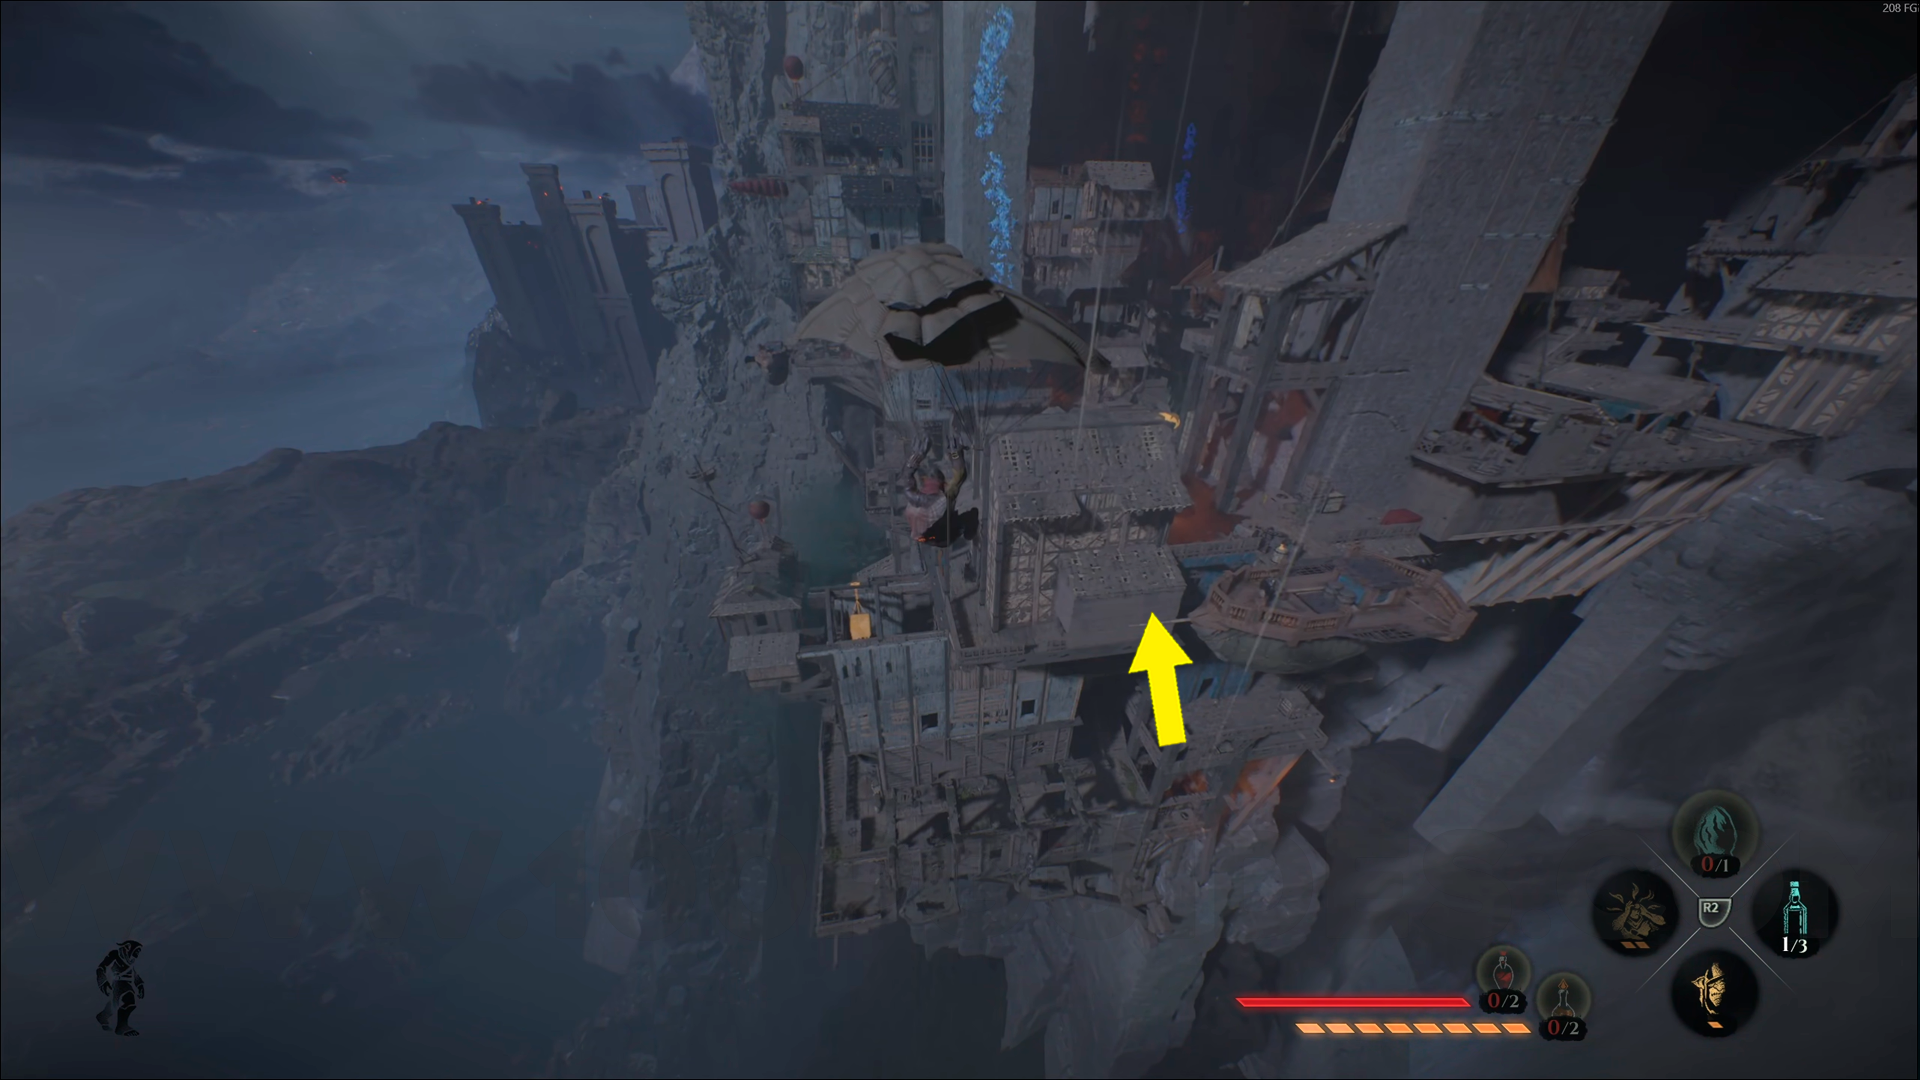
Emerald Emblem #1. From Zeppelins' Docks, glide down to the house in front of you, then go down the stairs to find this emblem. Use Amber Vision to help you spot it.
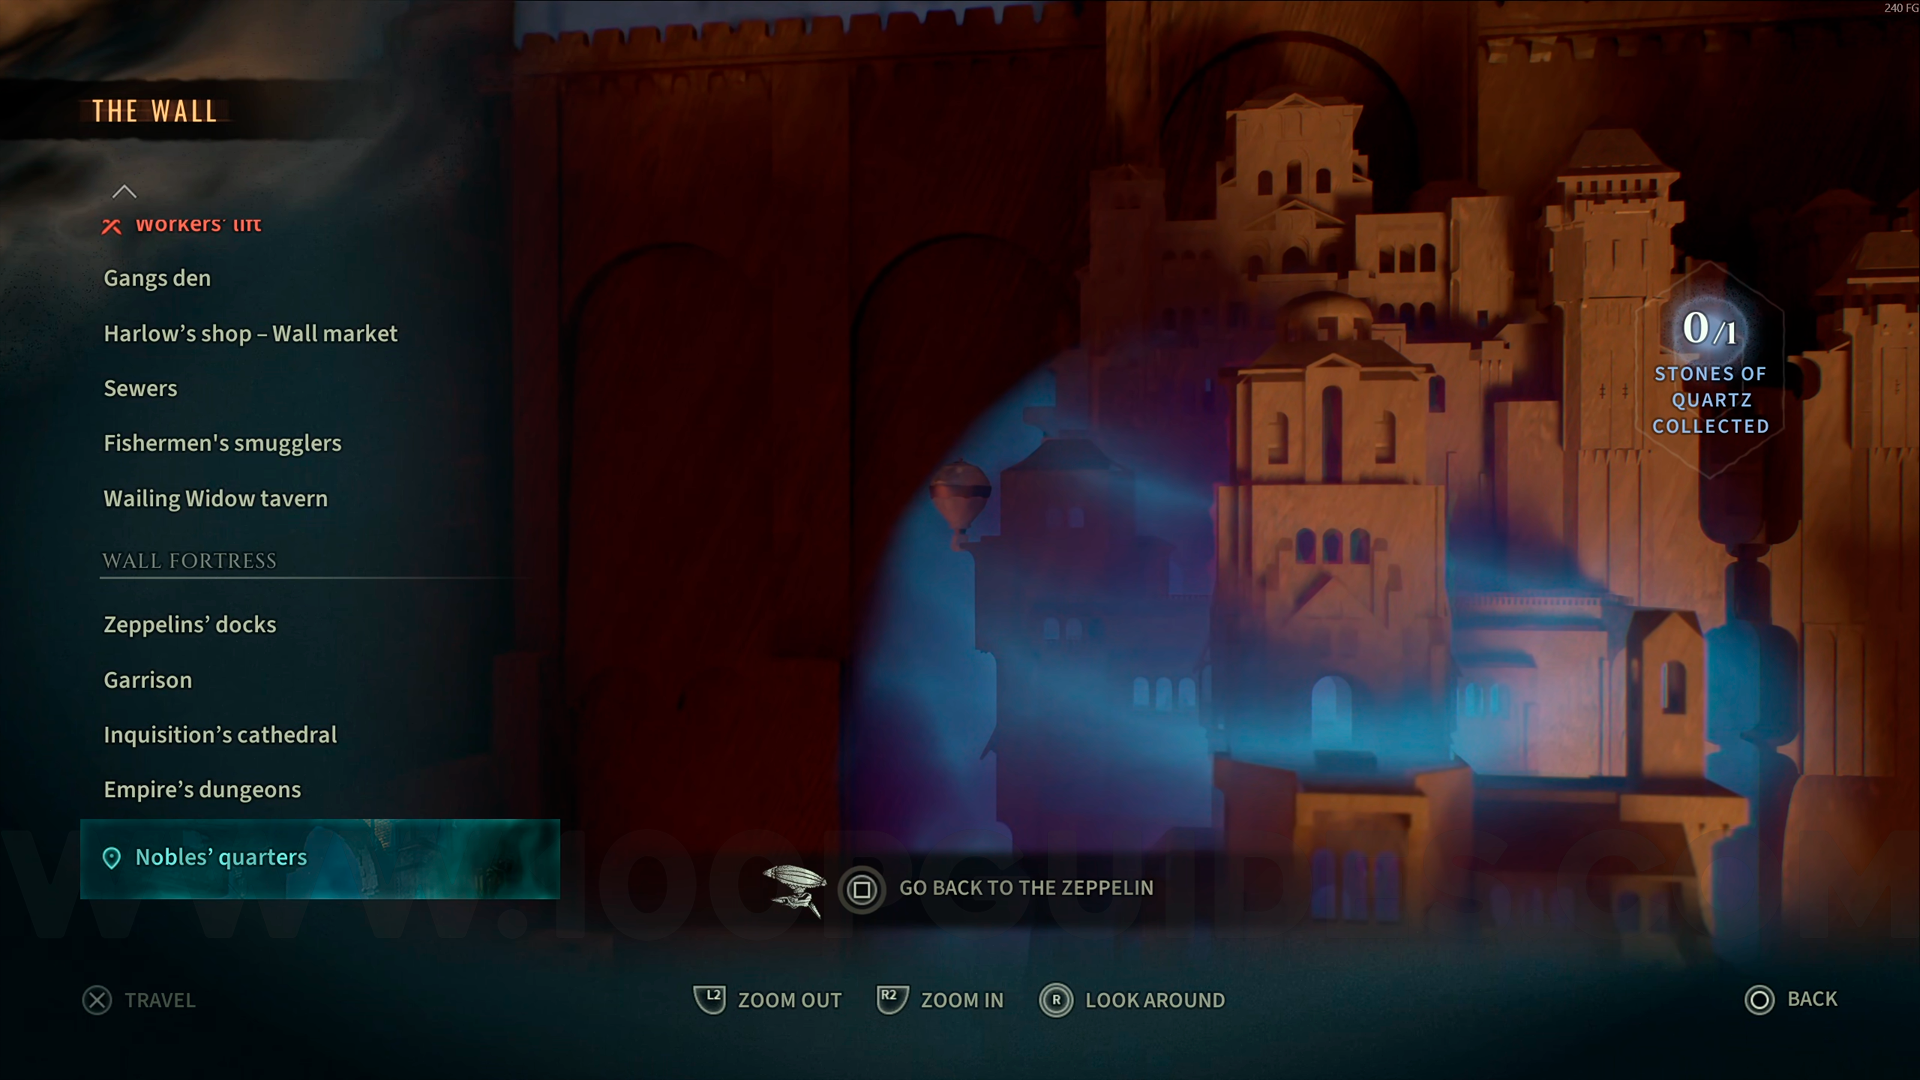
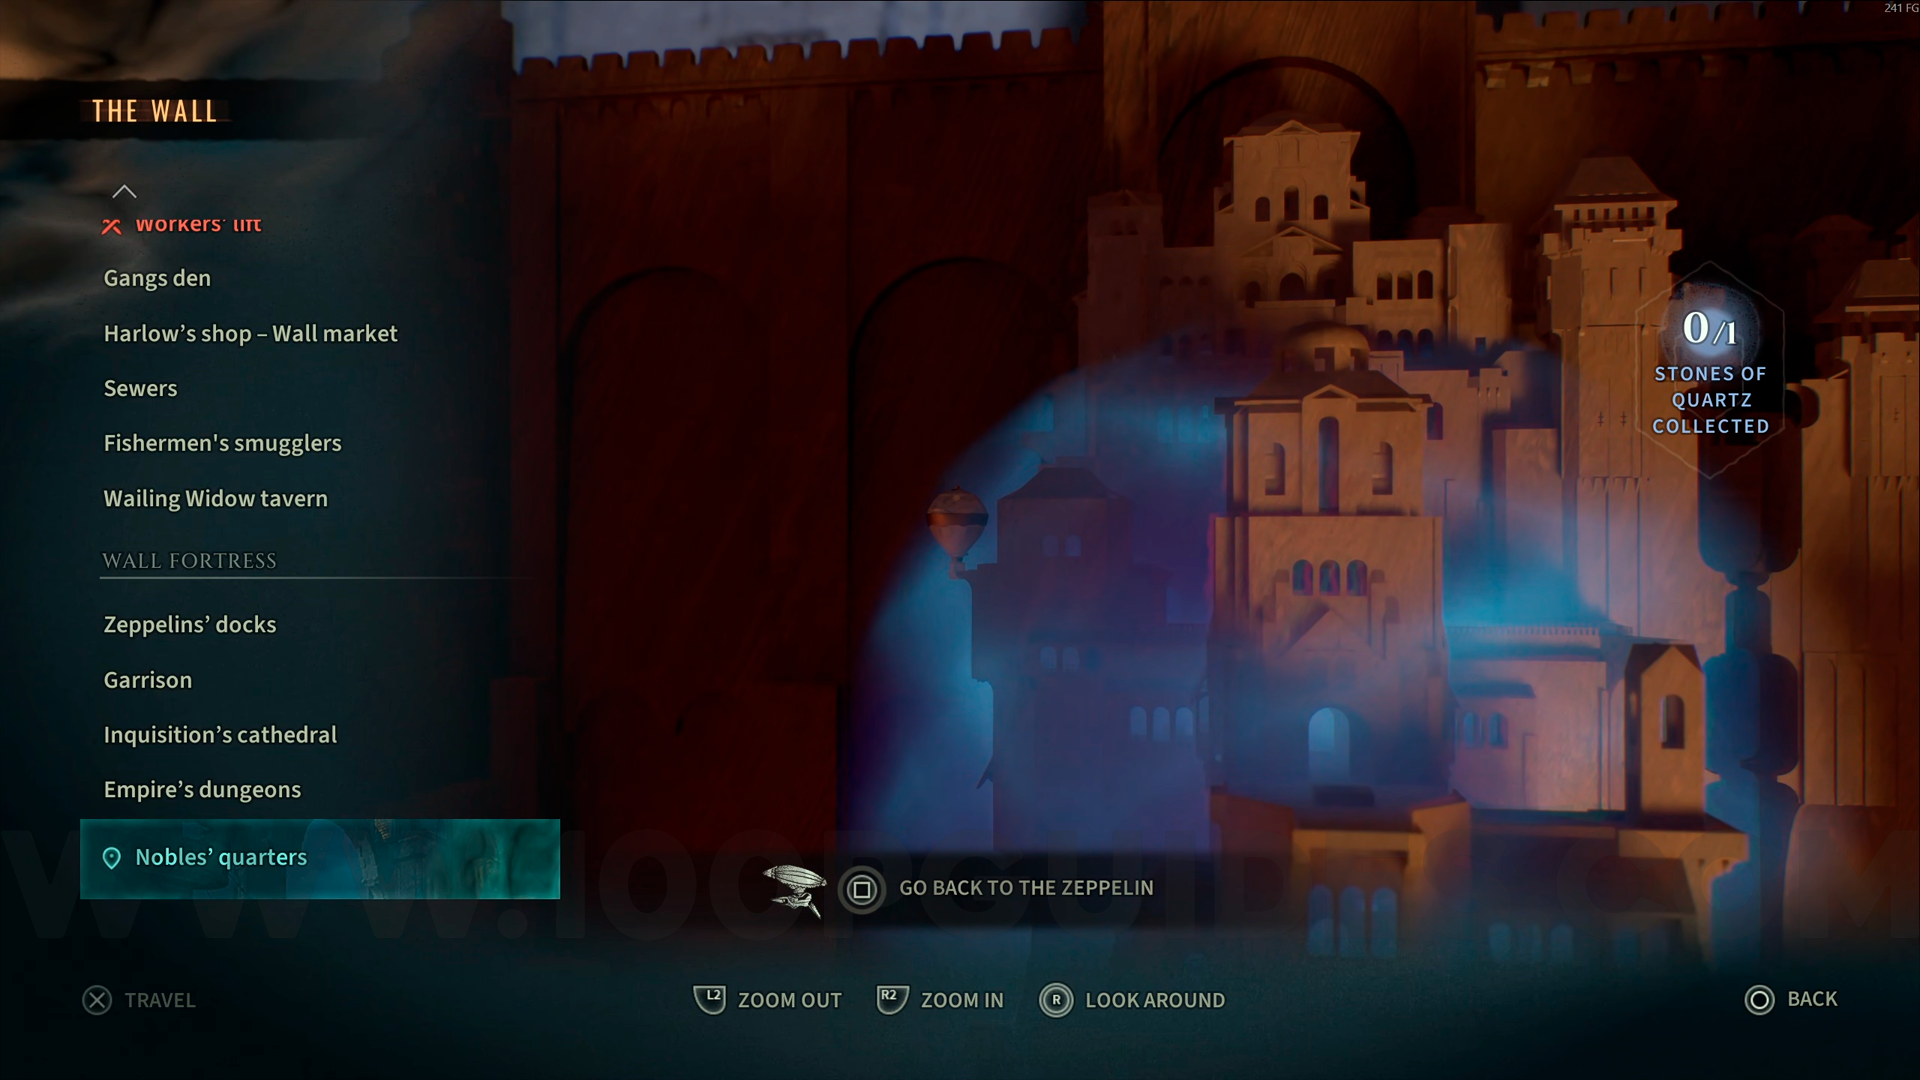
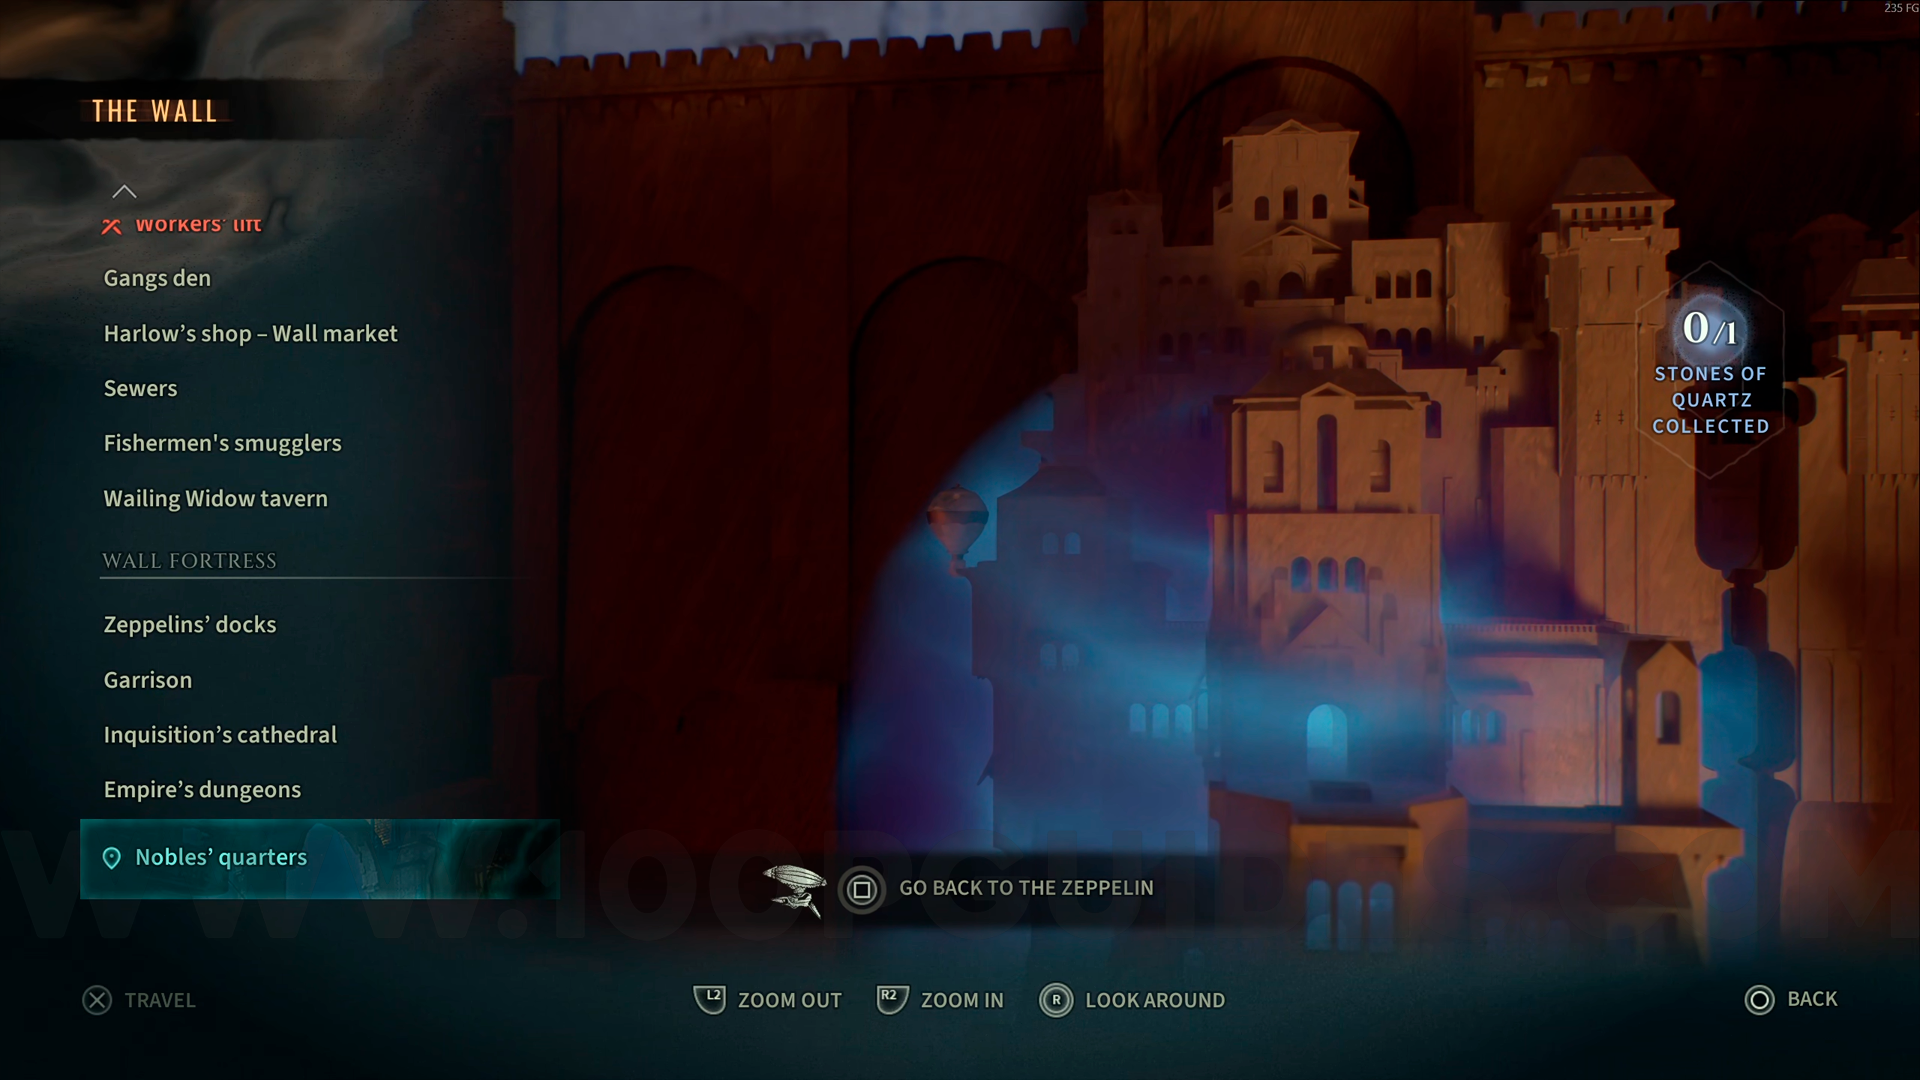
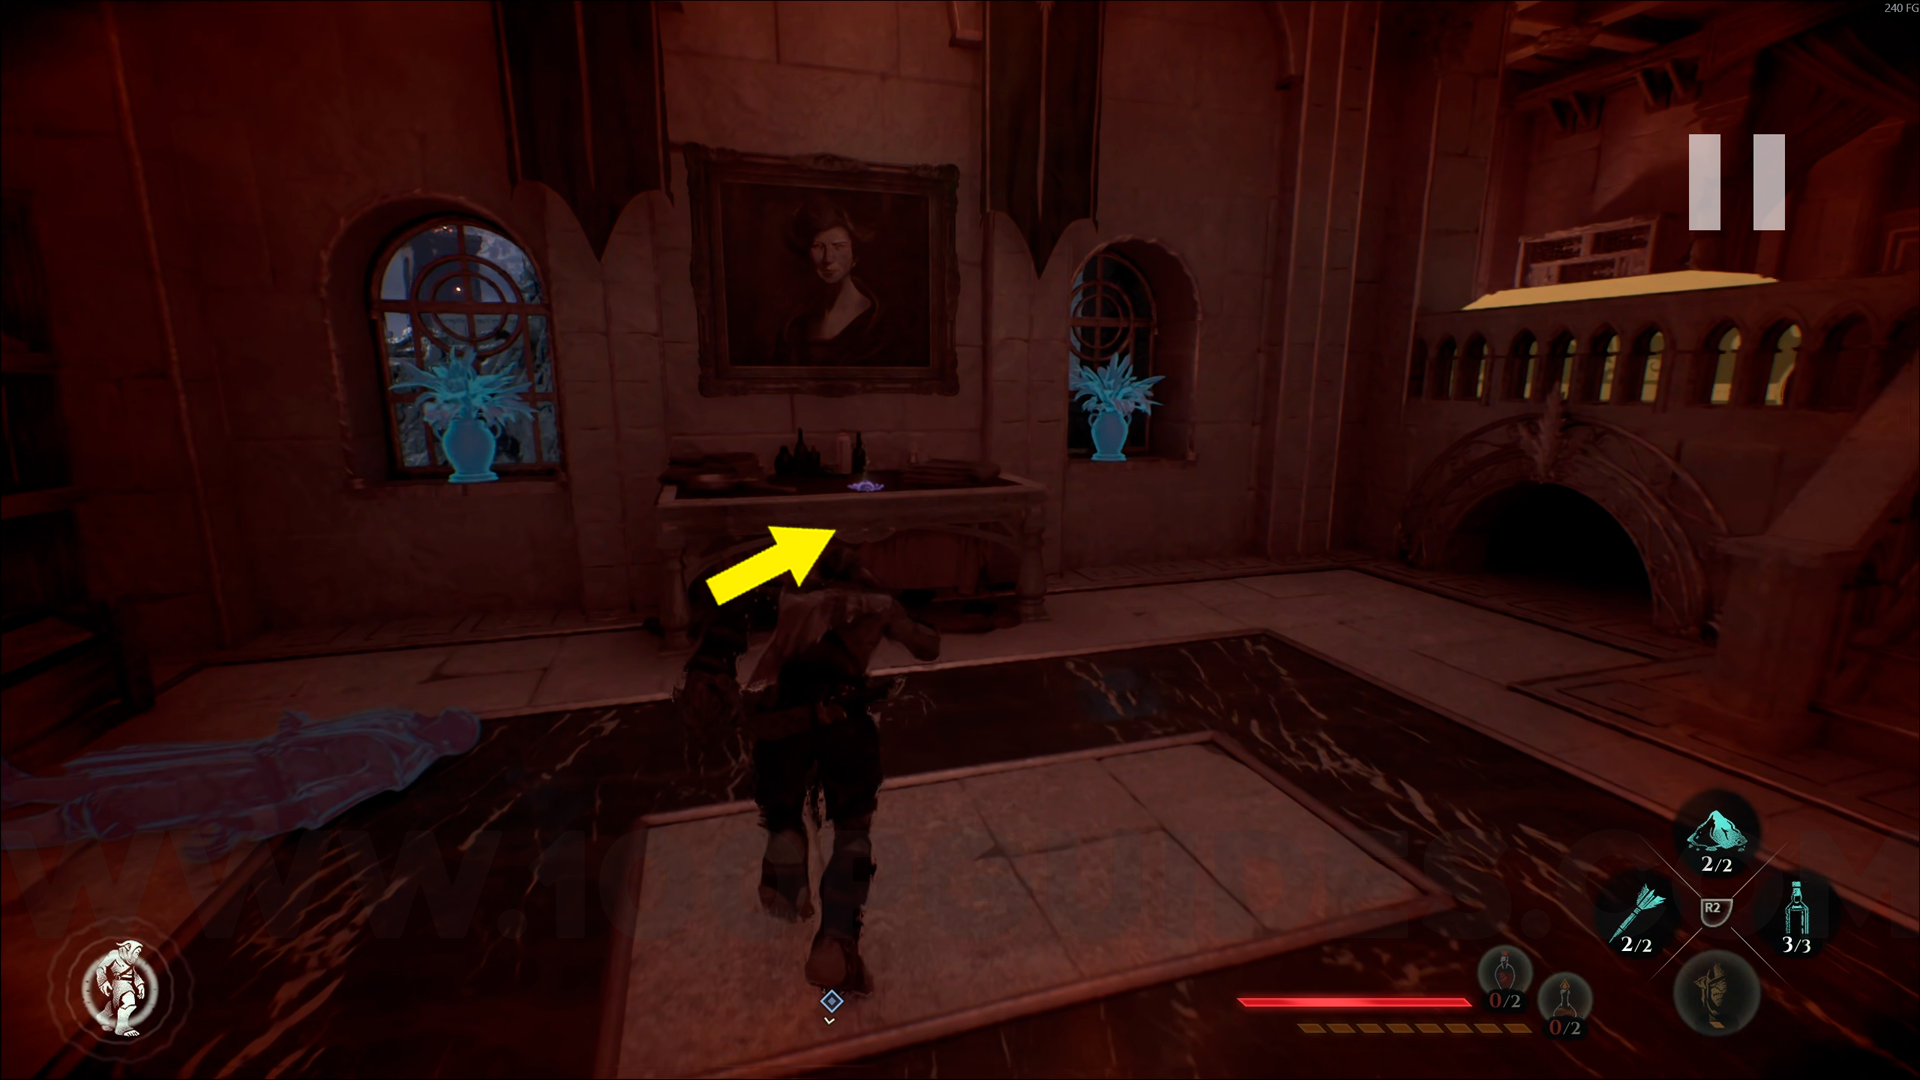
Emerald Emblem #2. From Nobles' Quarters, go down and enter the first door on your right. You'll see this emblem directly in front of you.
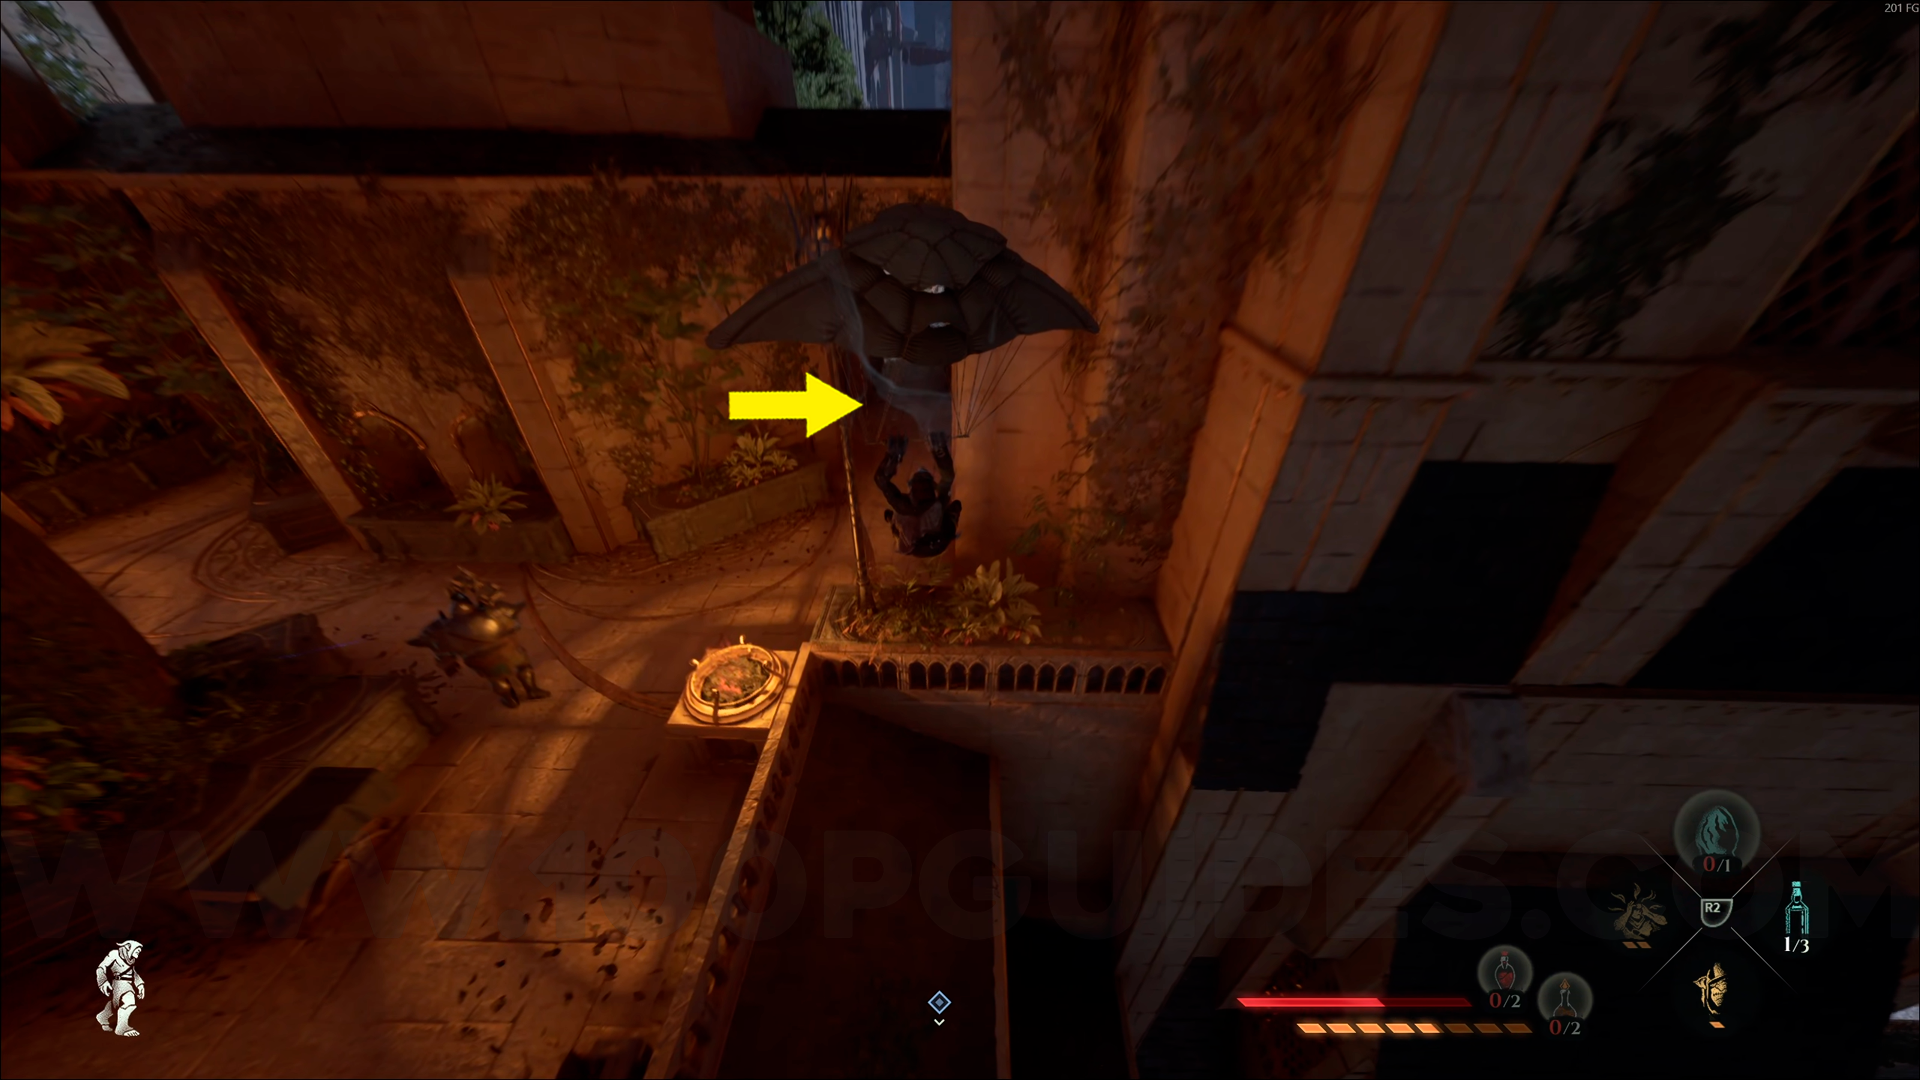
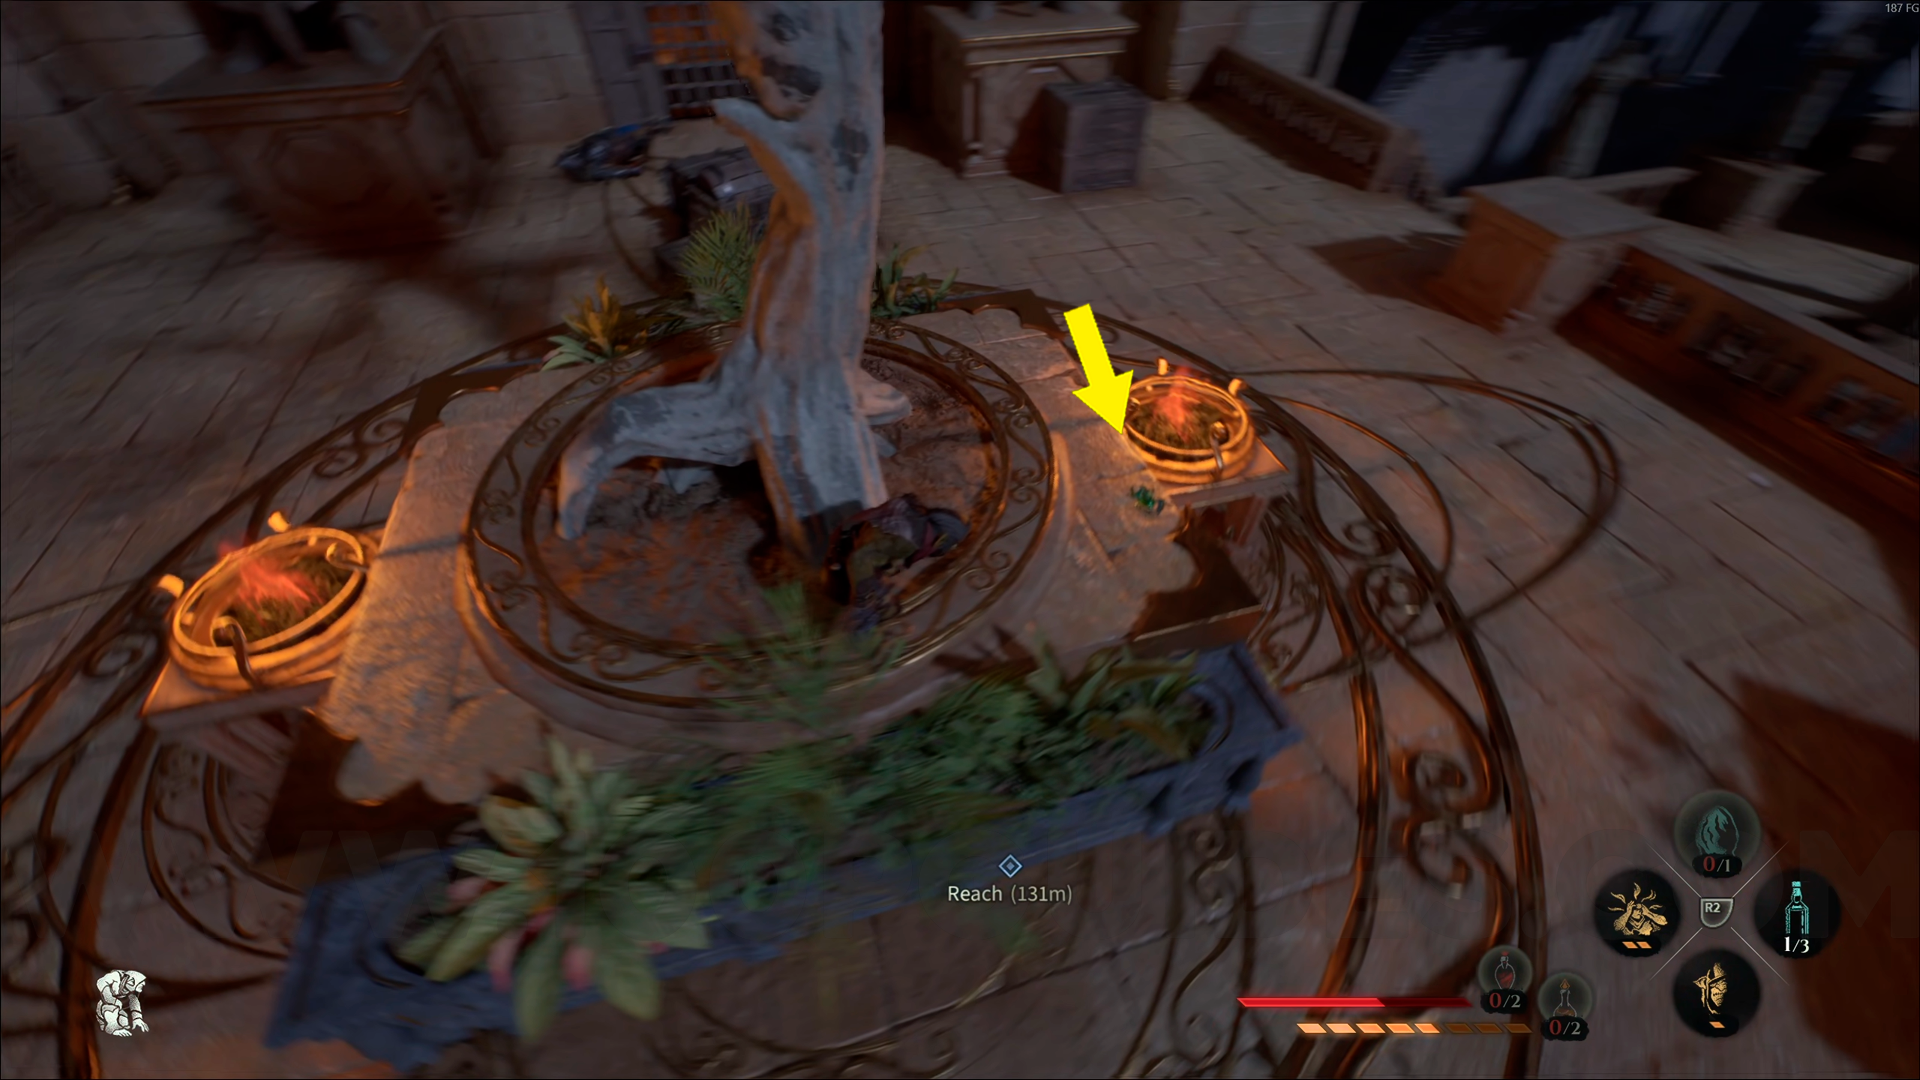
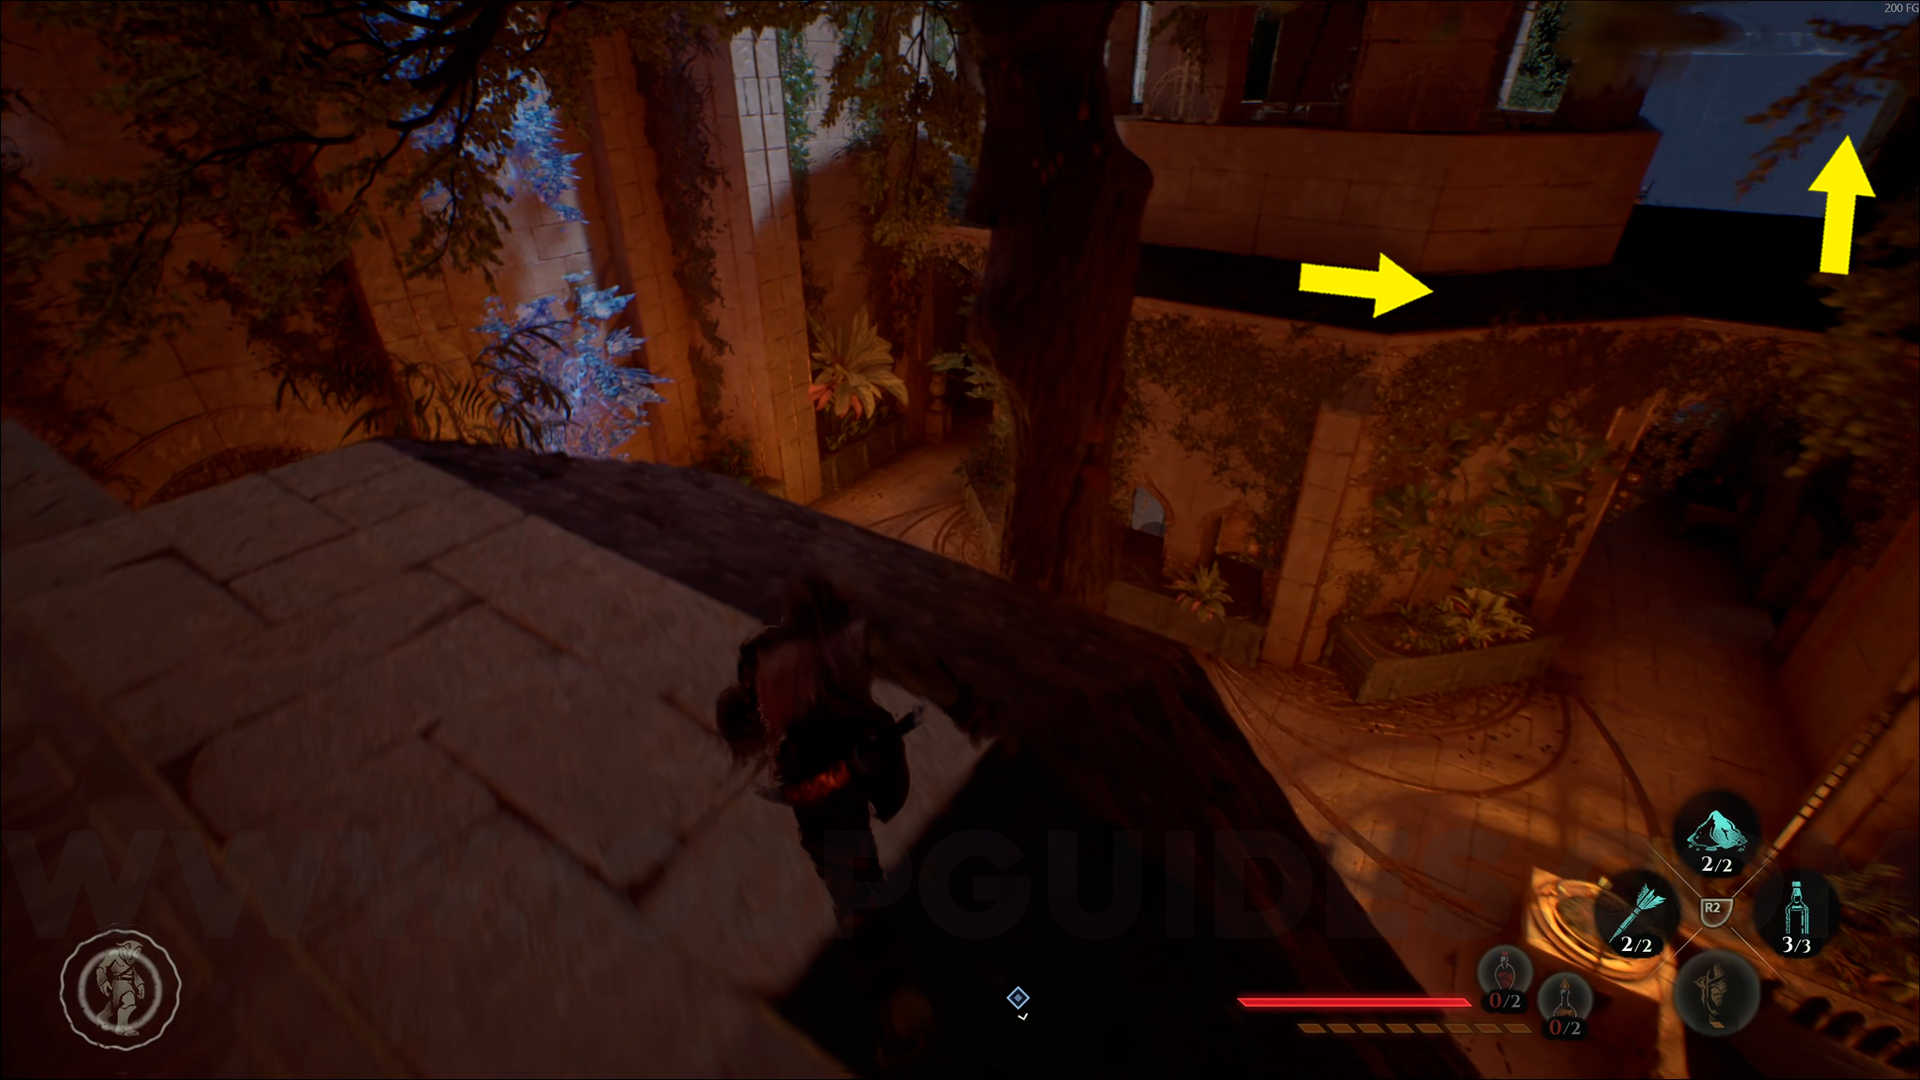
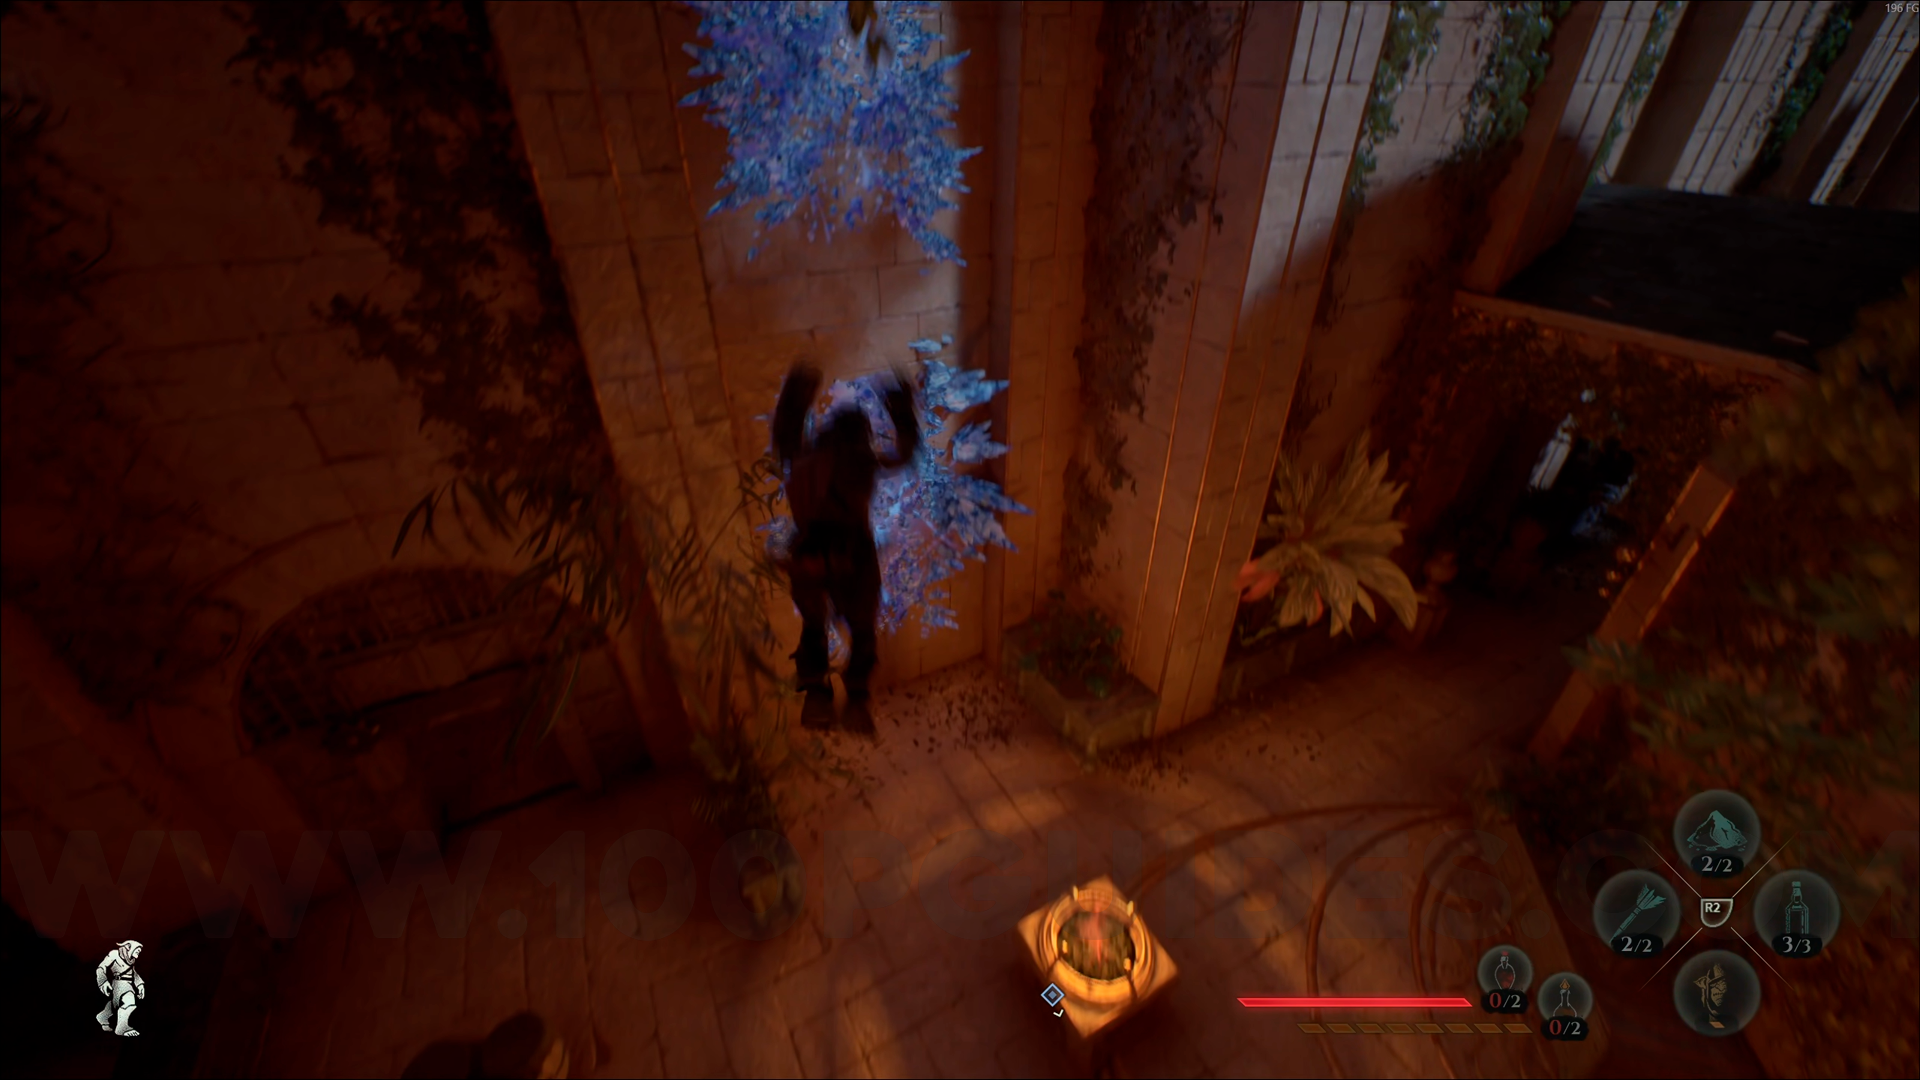
Emerald Emblem #3. From the previous collectible, go through the window and glide down to the ground. The emblem will be next to the tree.
Emerald Emblem #4. In the same building as Harlow's Shop in Wall Market, go down the stairs and you'll find this emblem.
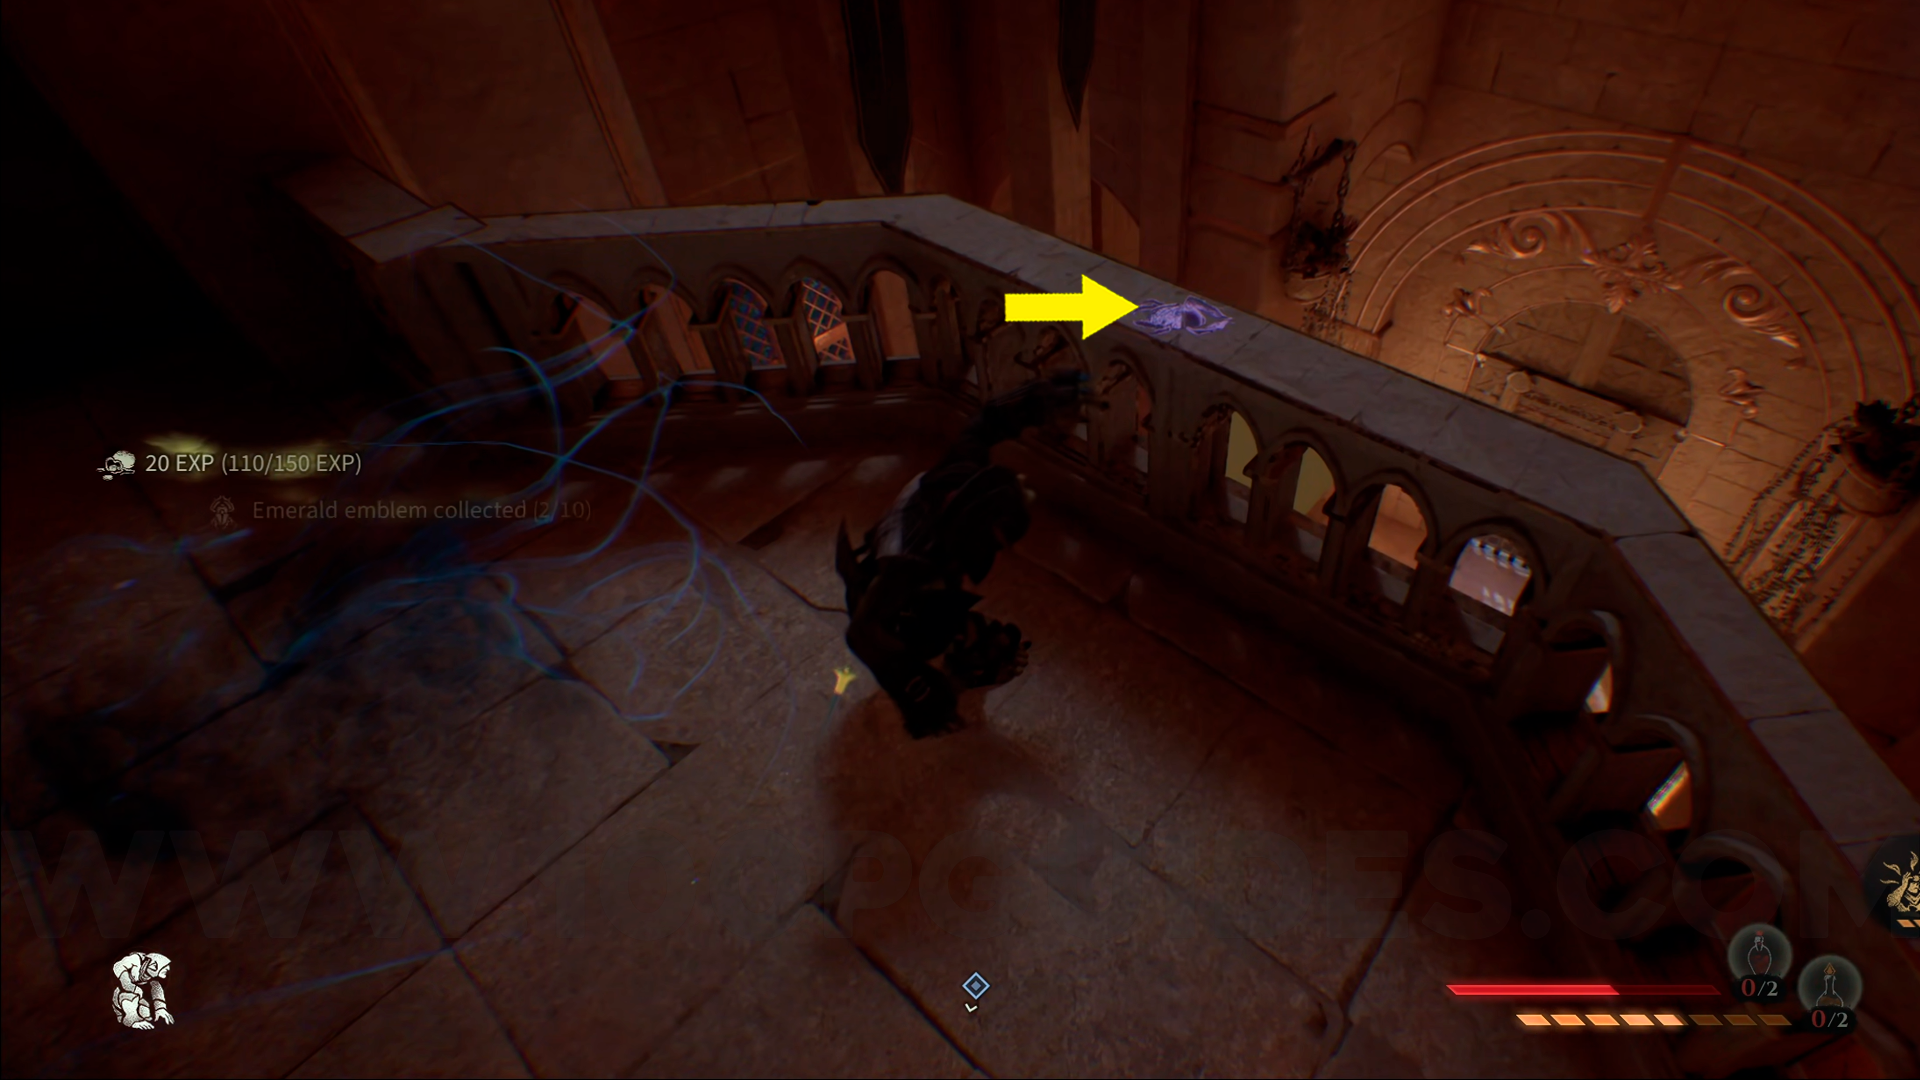
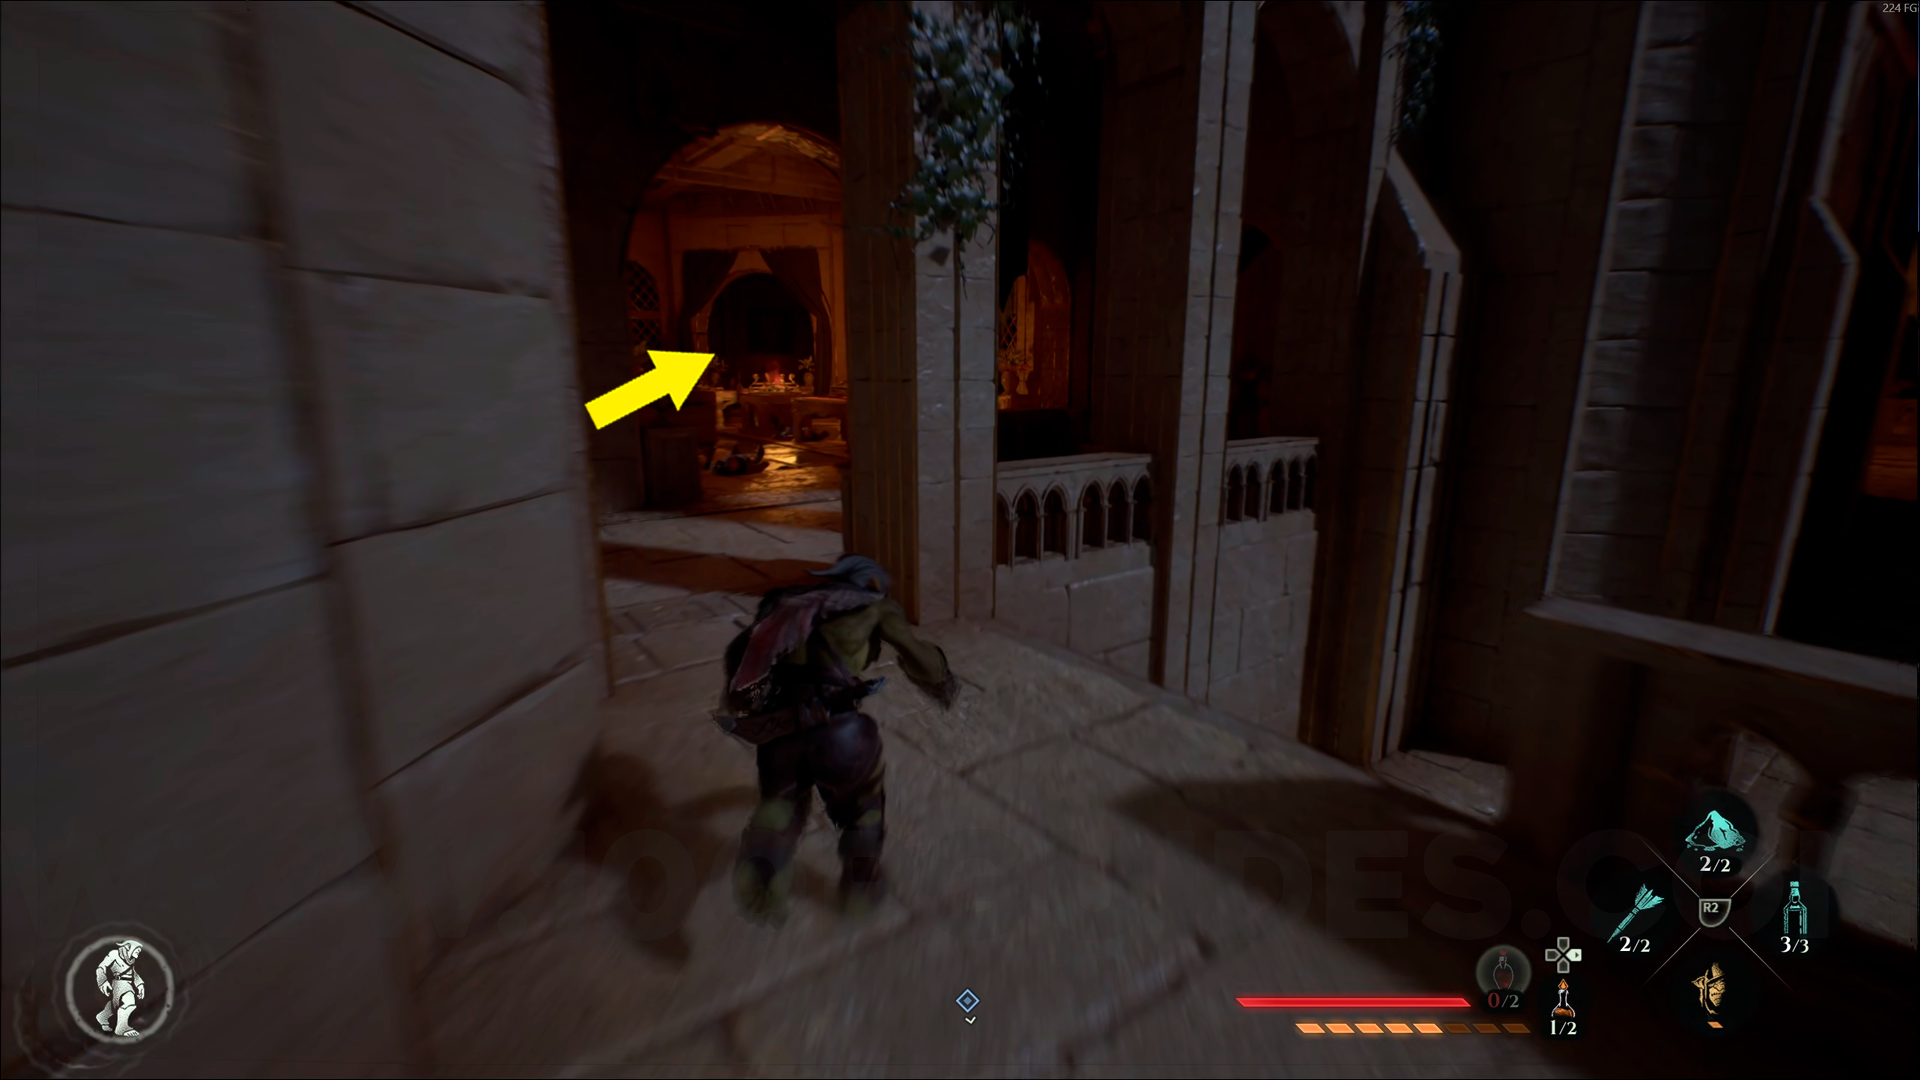
Emerald Emblem #5. From Nobles' Quarters, go down and go through the first door on the right. Then look down and go through the door, turn right, and at the end, you'll be able to spot this emblem. Use your Amber Vision to help you.


Emerald Emblem #6. From the previous collectible, turn around and go to the end of the hallway. You'll see this emblem.
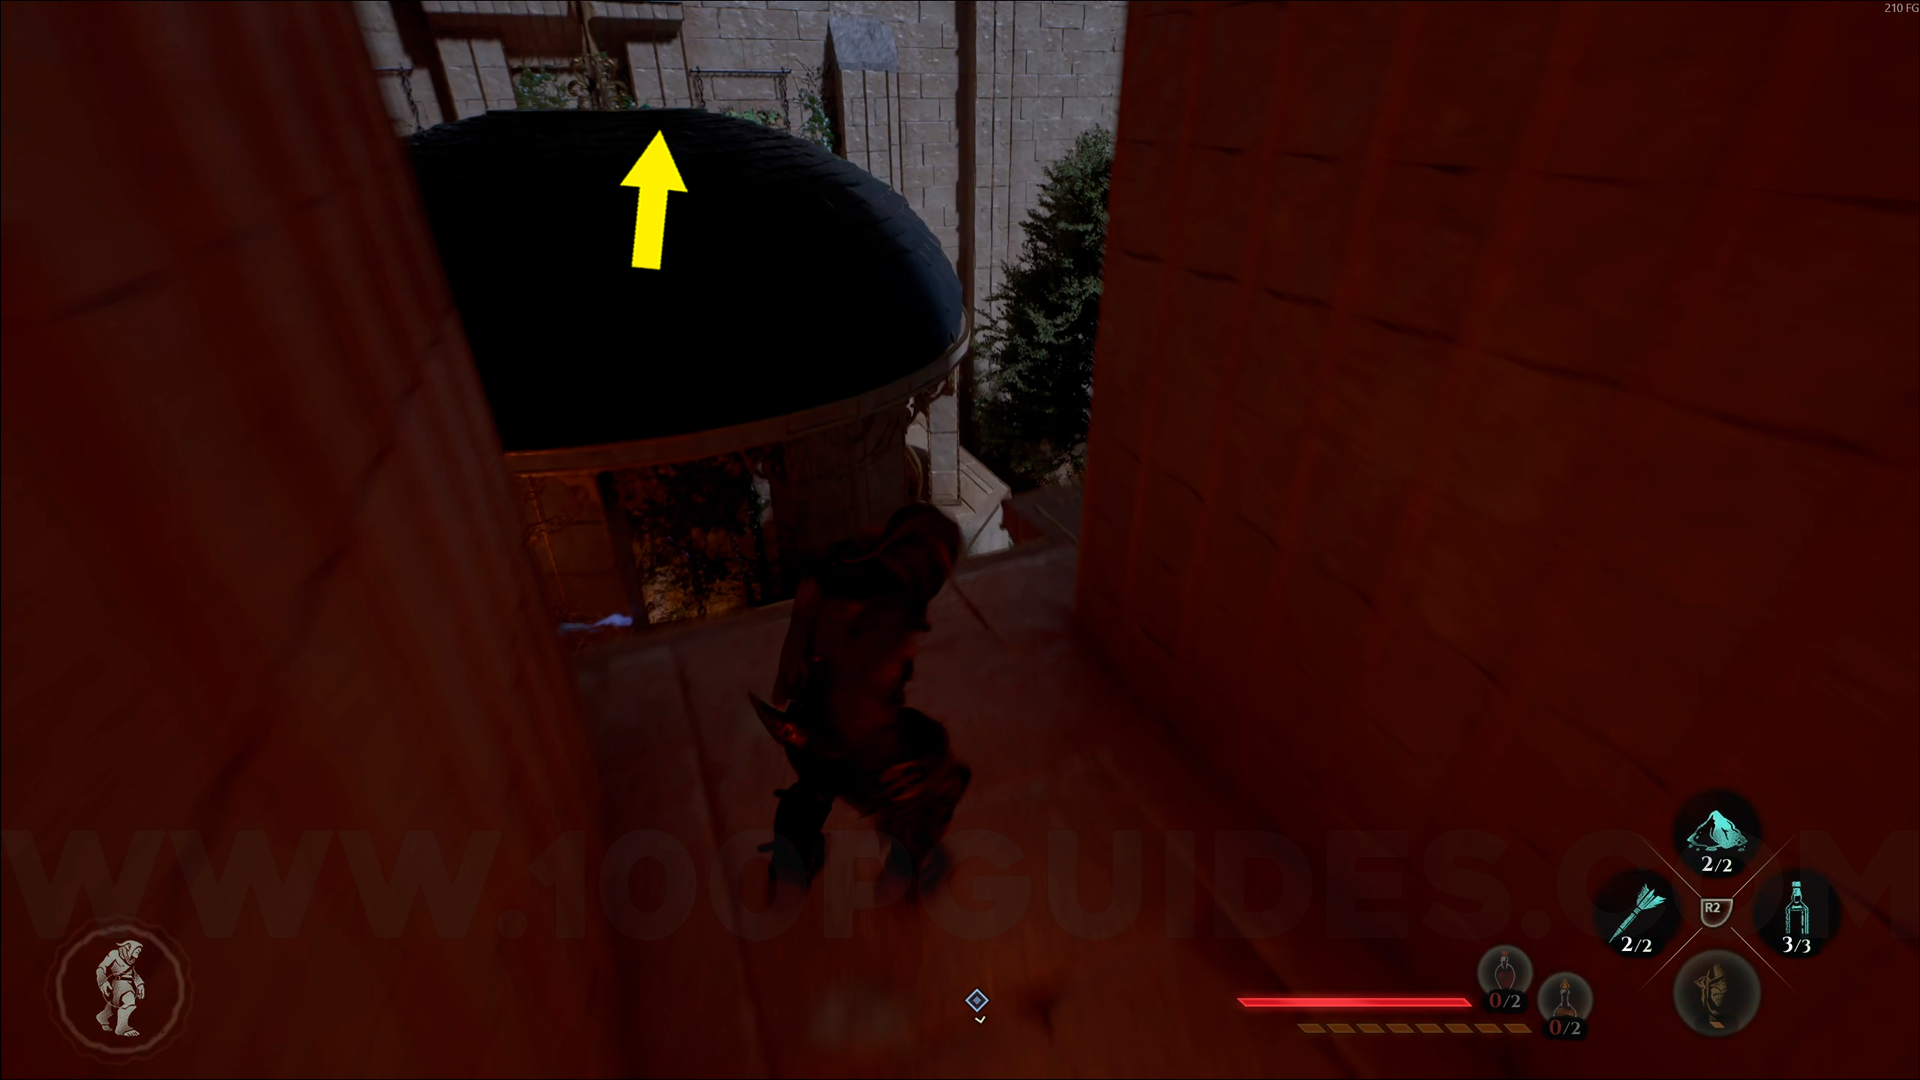
Emerald Emblem #7. From Nobles' Quarters, this emblem will be on top of the structure next to the checkpoint. Climb up and grab it.
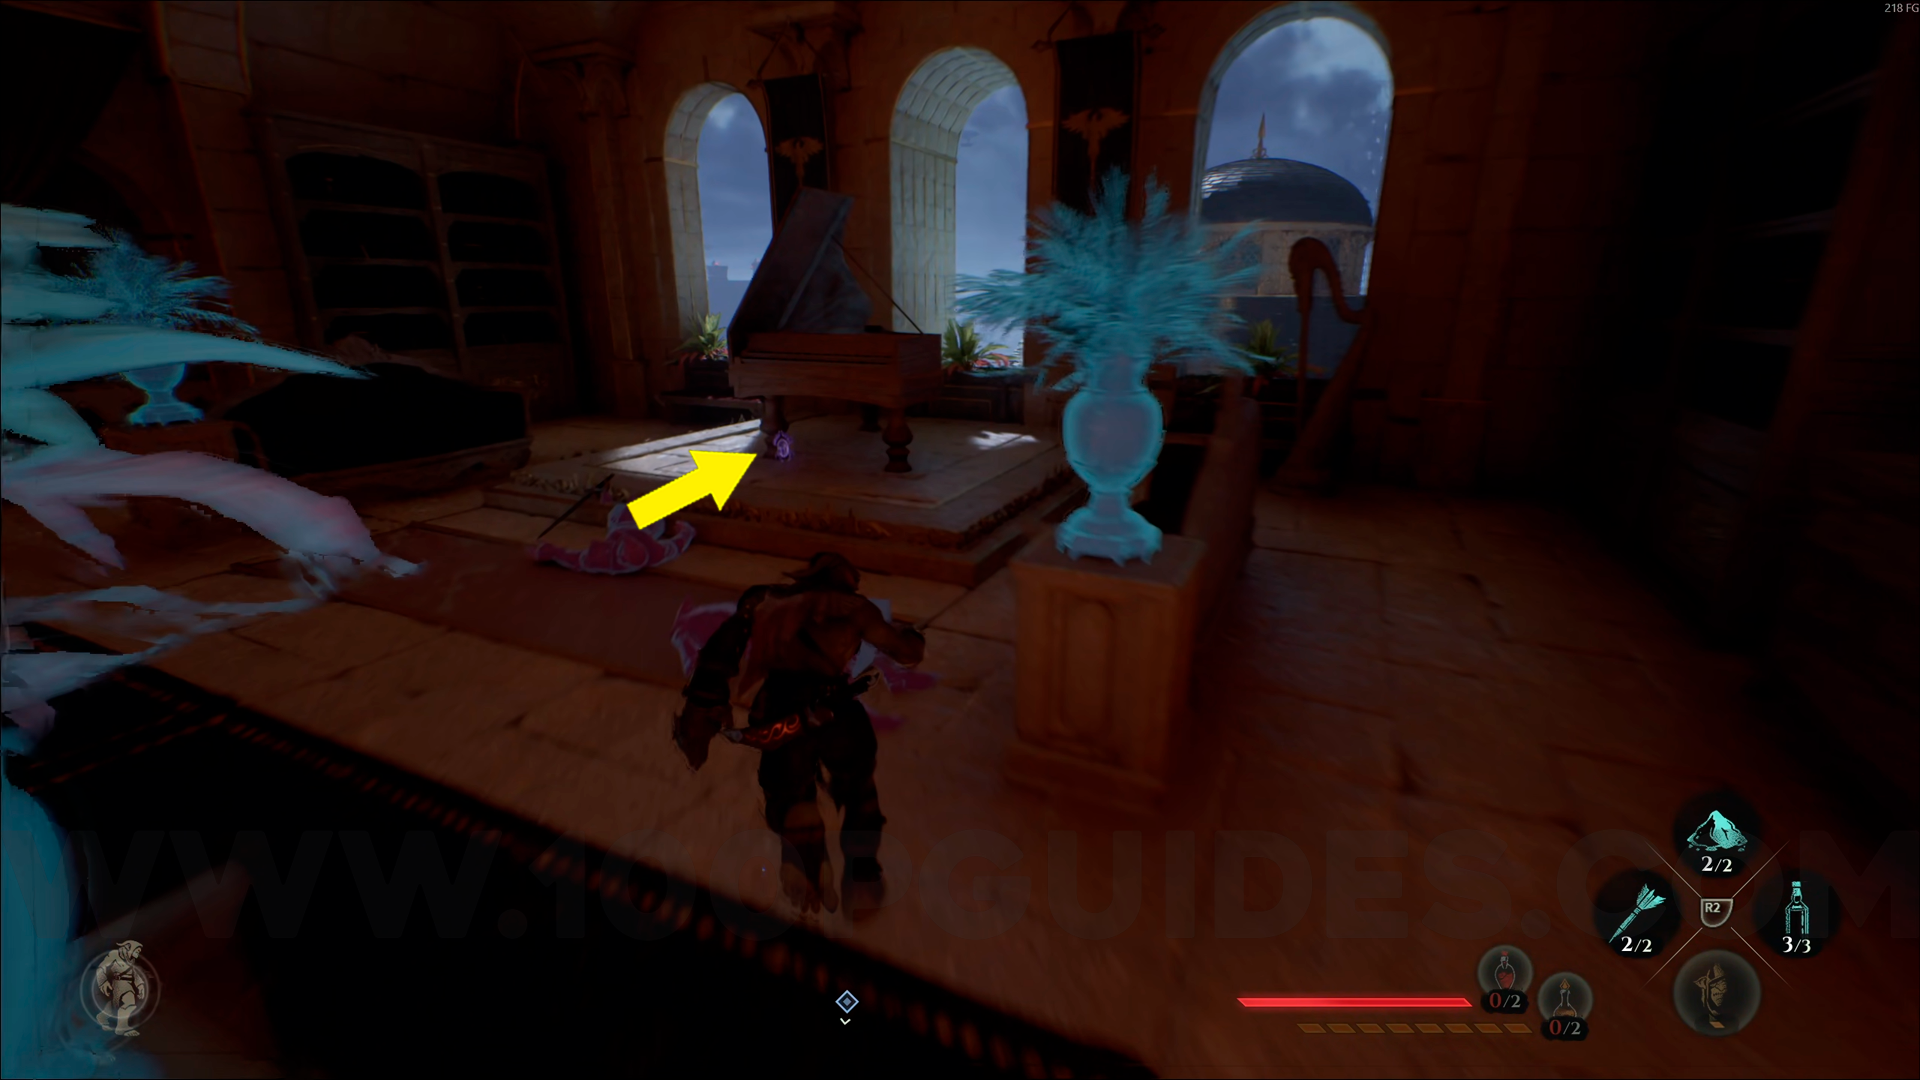
Emerald Emblem #8. Right after the previous collectible, go through the window, climb up both sets of stairs, and then jump to the other side of the area. Go through the door to find the emblem next to a piano. Use Amber Vision to help you spot it.
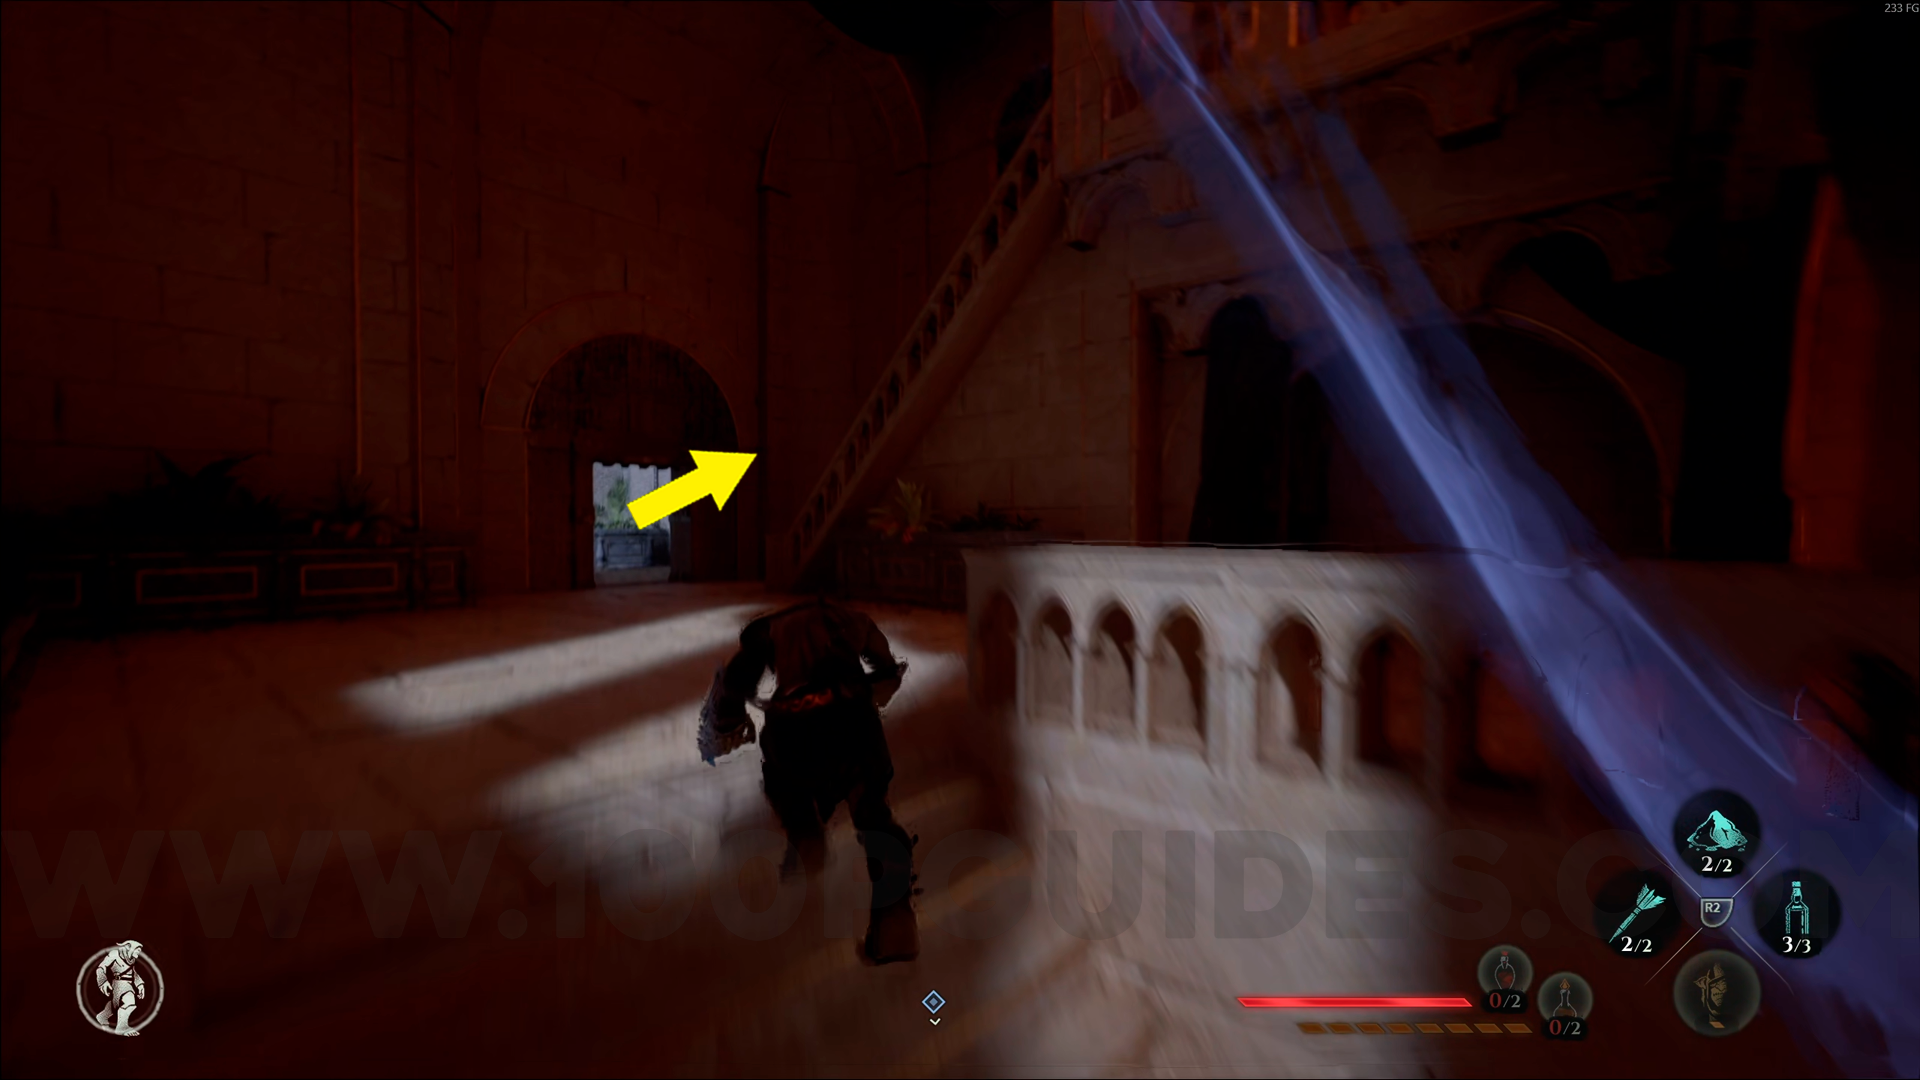
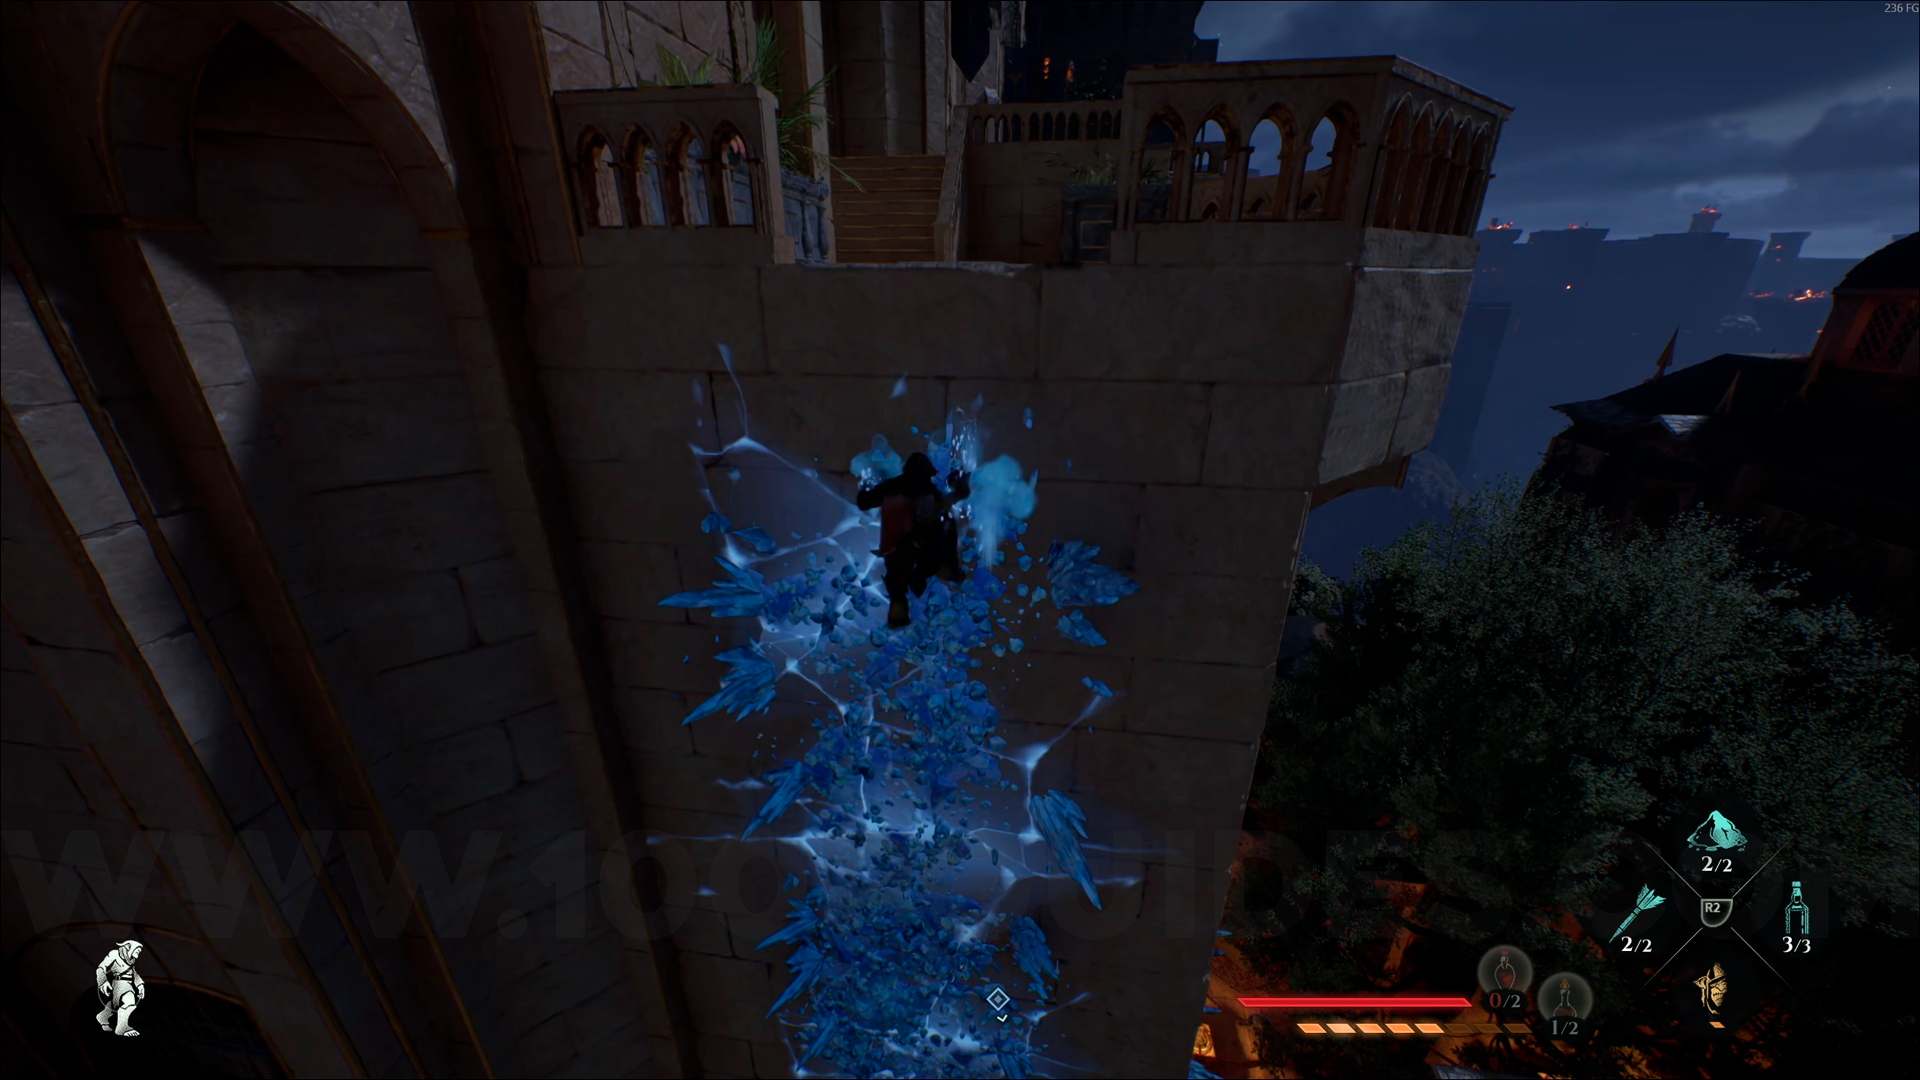
Emerald Emblem #9. From Nobles' Quarters, climb up the crystals on the wall and go through the first window. Then go up the stairs and enter the first door on the left. Climb up the chimney, then go through the window next to you. Go through the first door on the left, then enter the room on your left to find this emblem inside.

Emerald Emblem #10. From Nobles' Quarters, use the crystals on the wall to climb all the way to the top of the area. Once you're up there, go to the end and enter the room on the left at the back of the room to find the emblem.


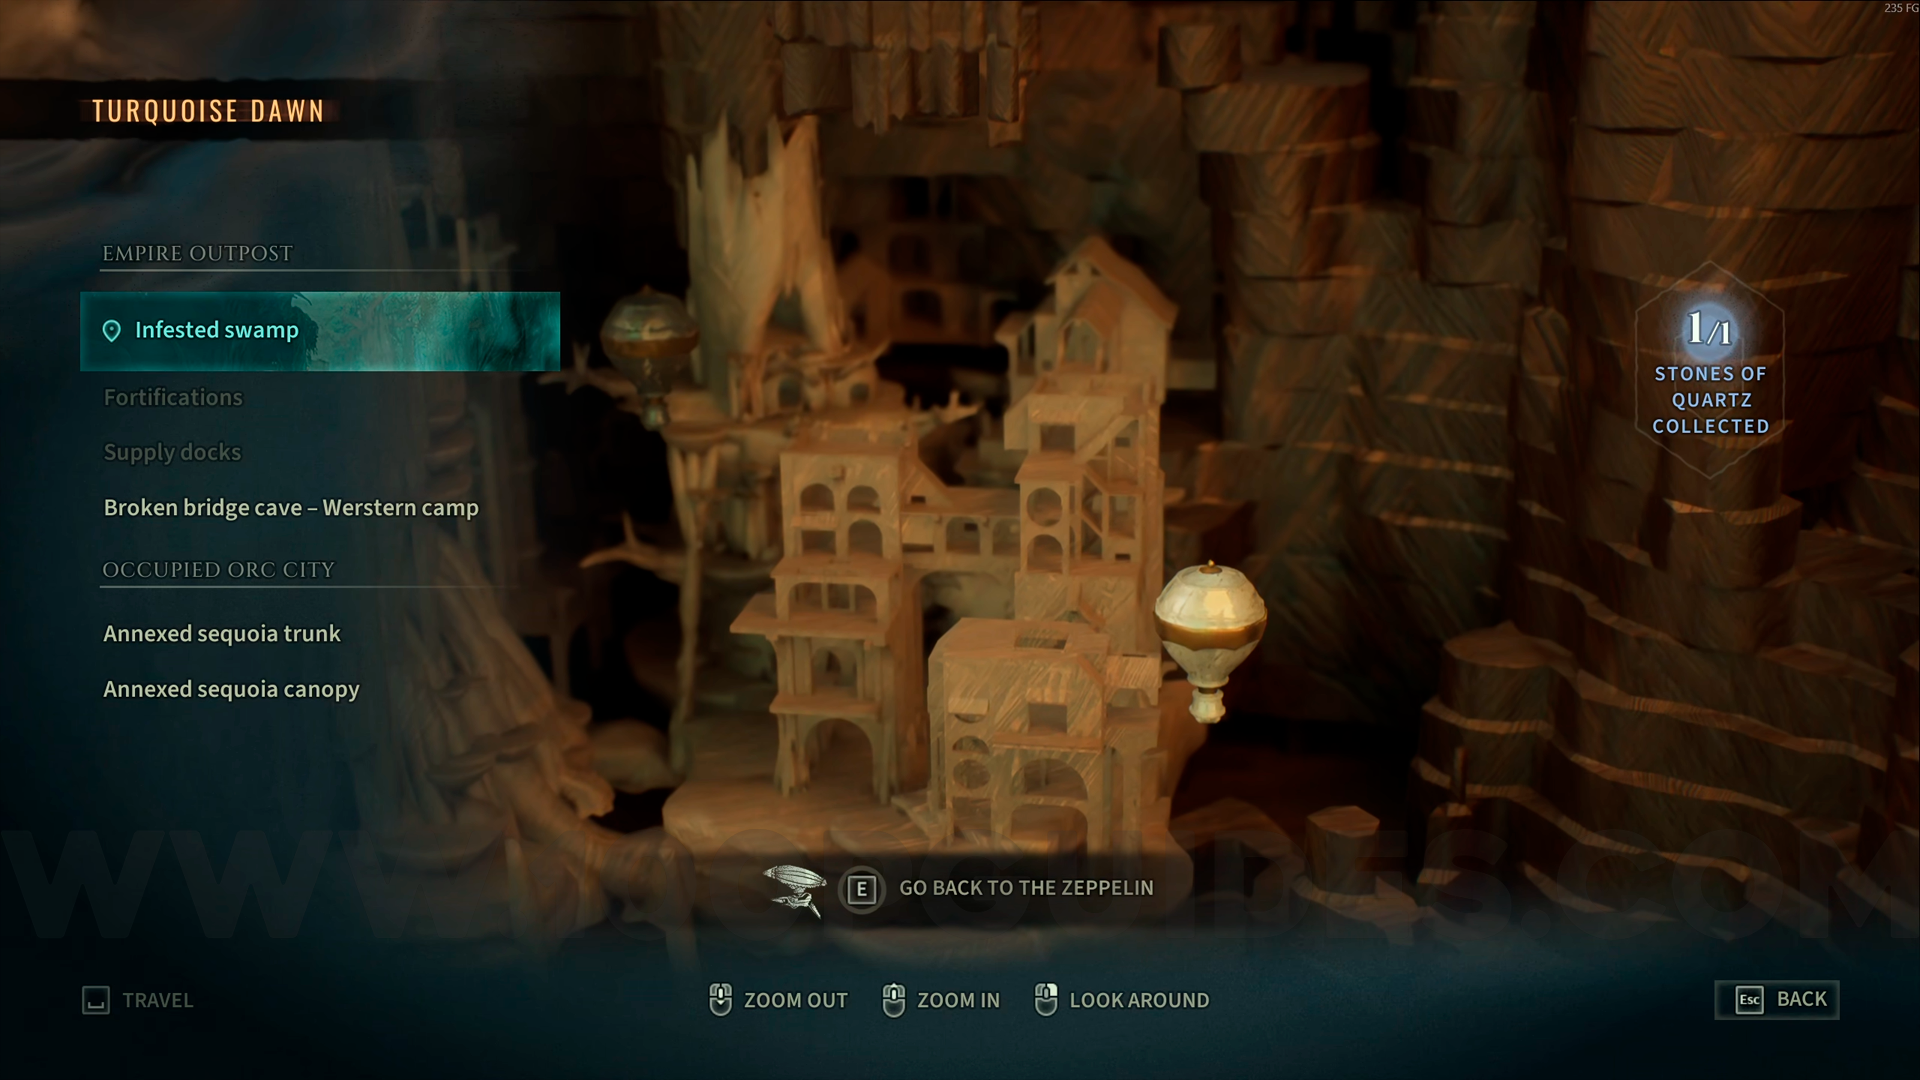
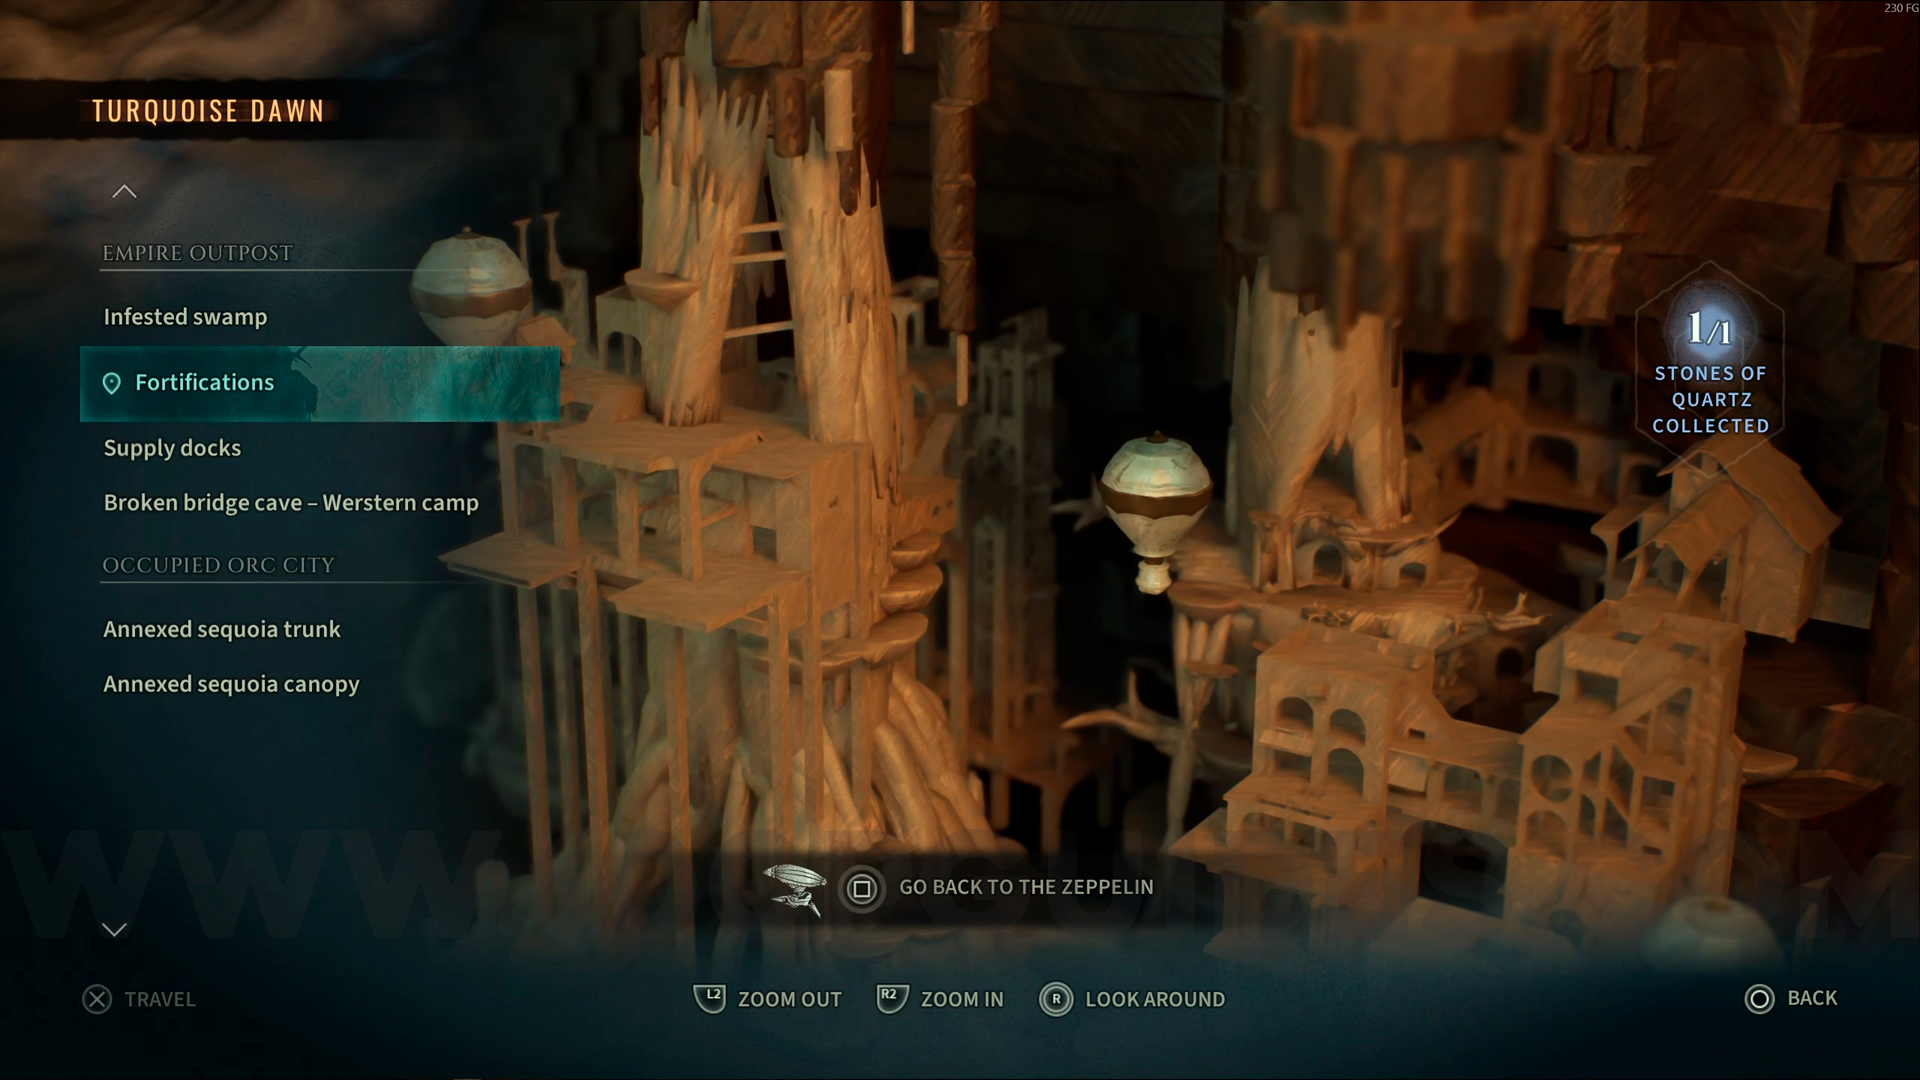
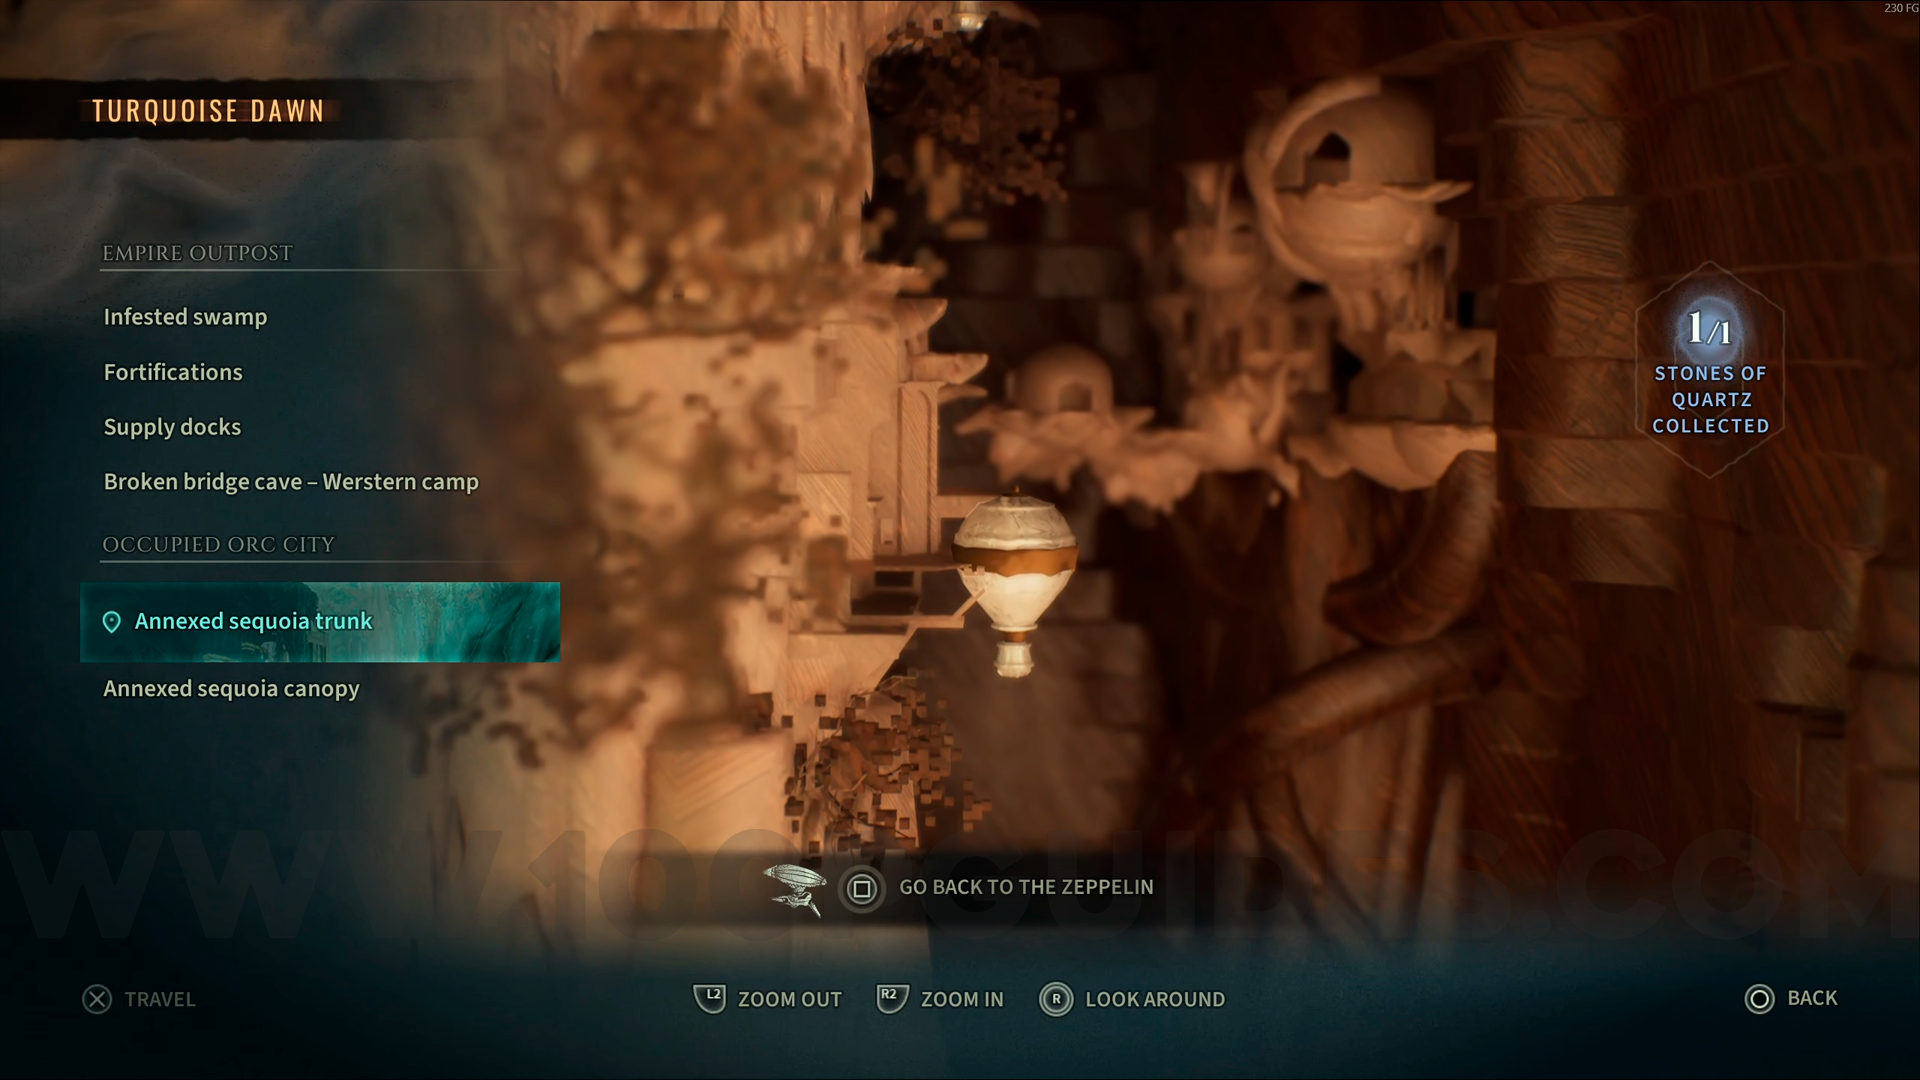
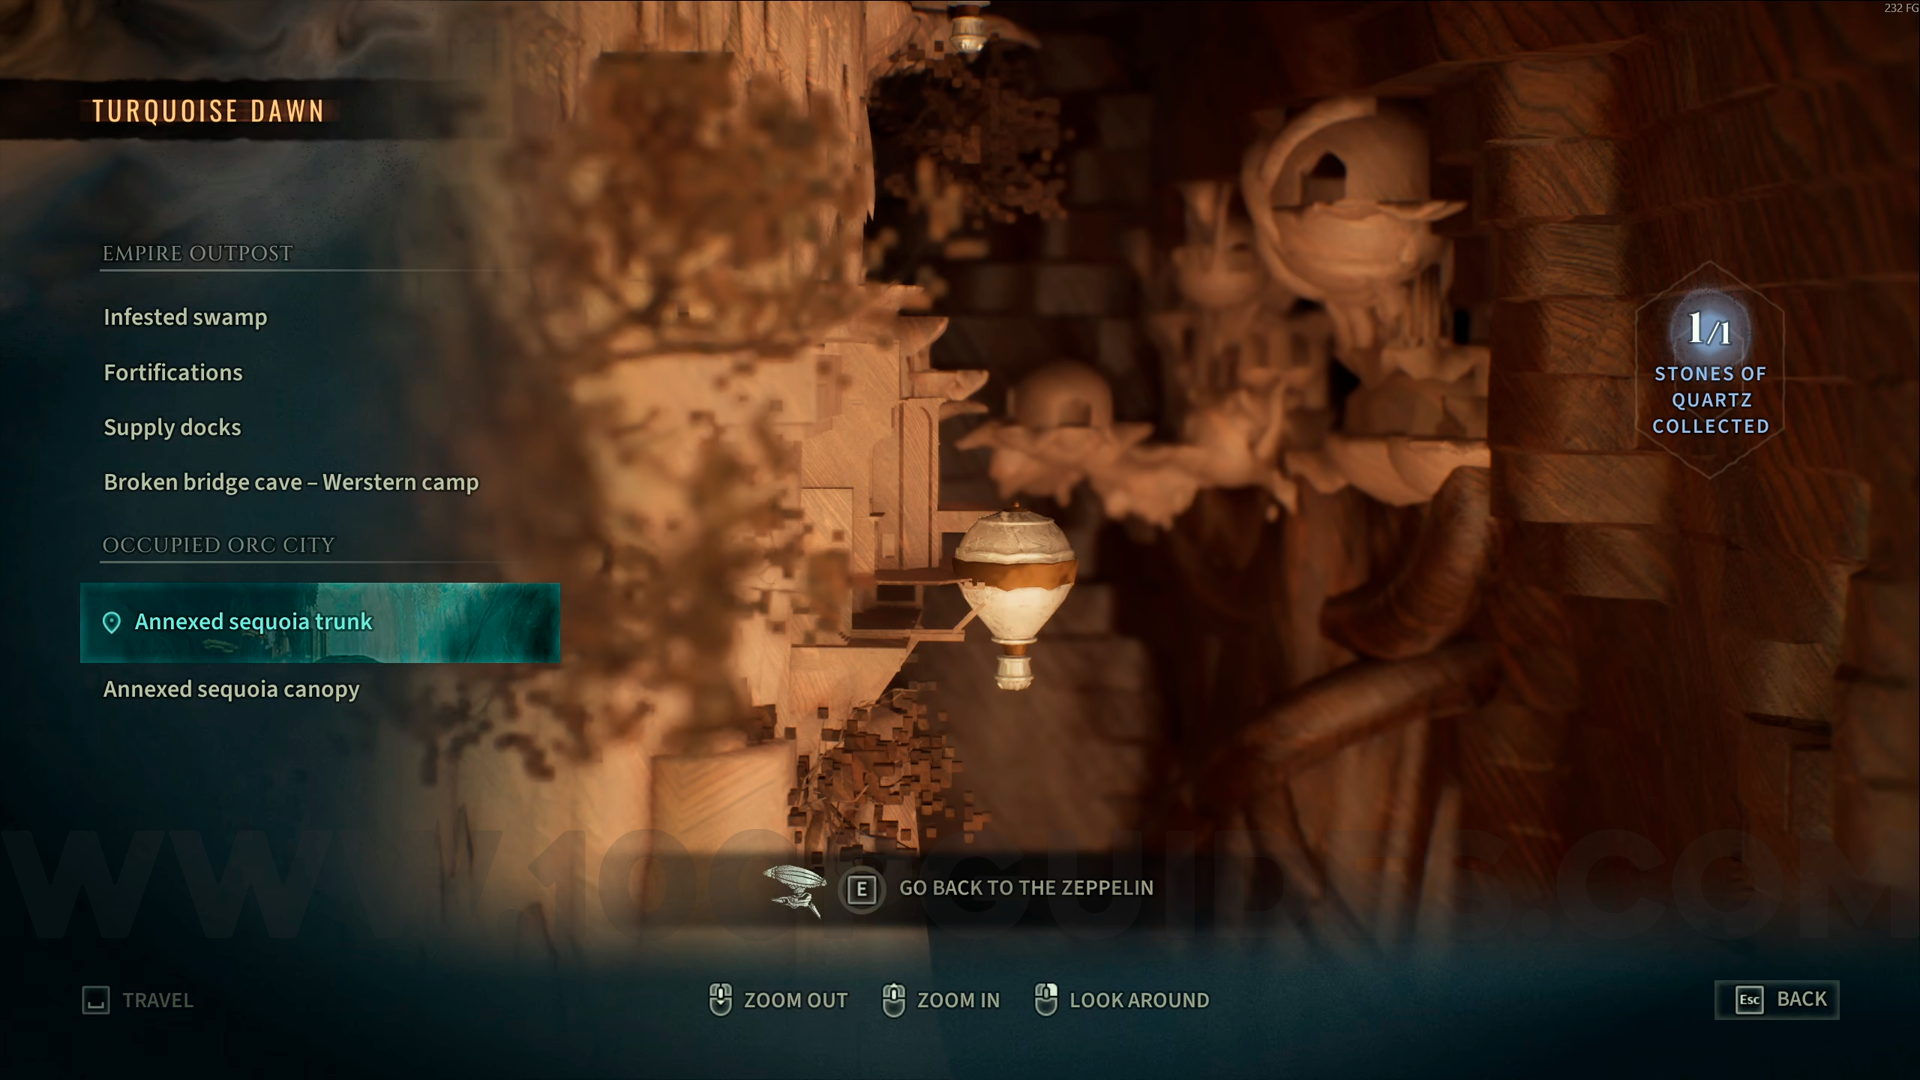
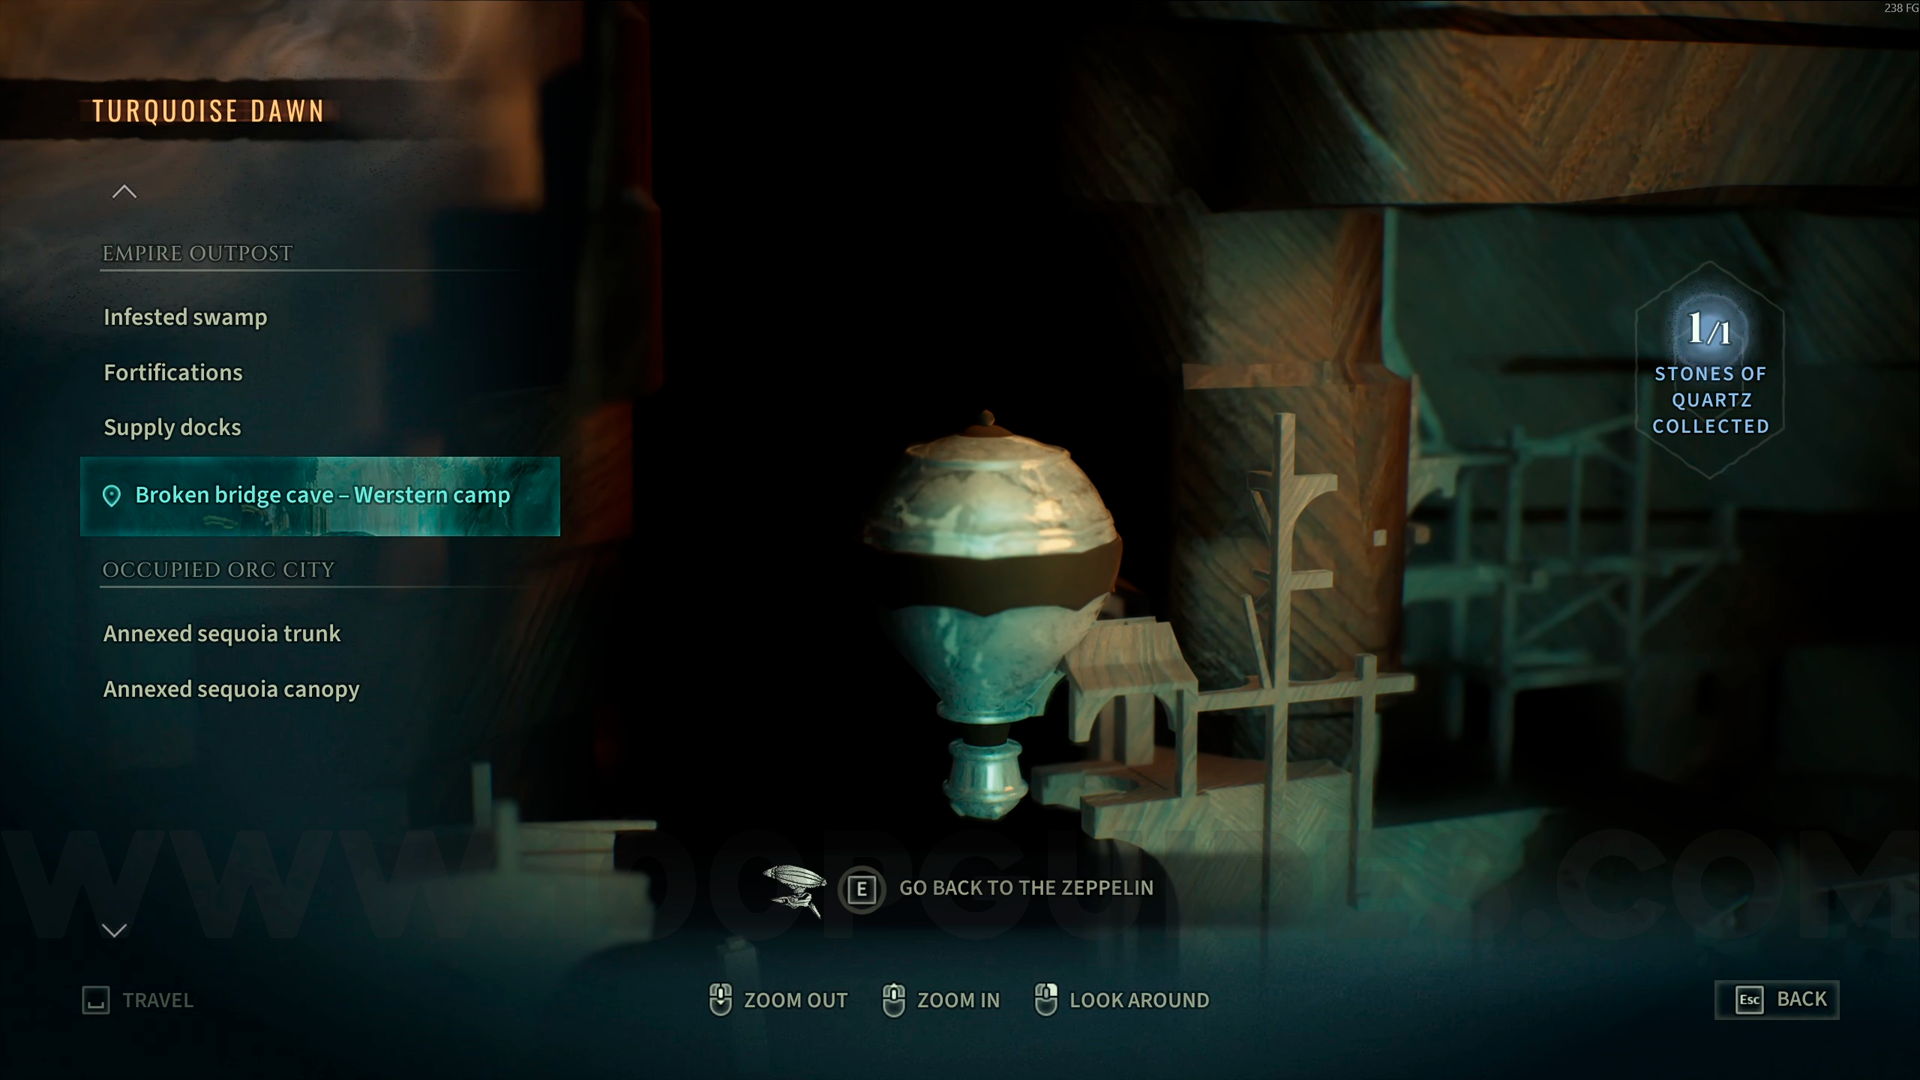
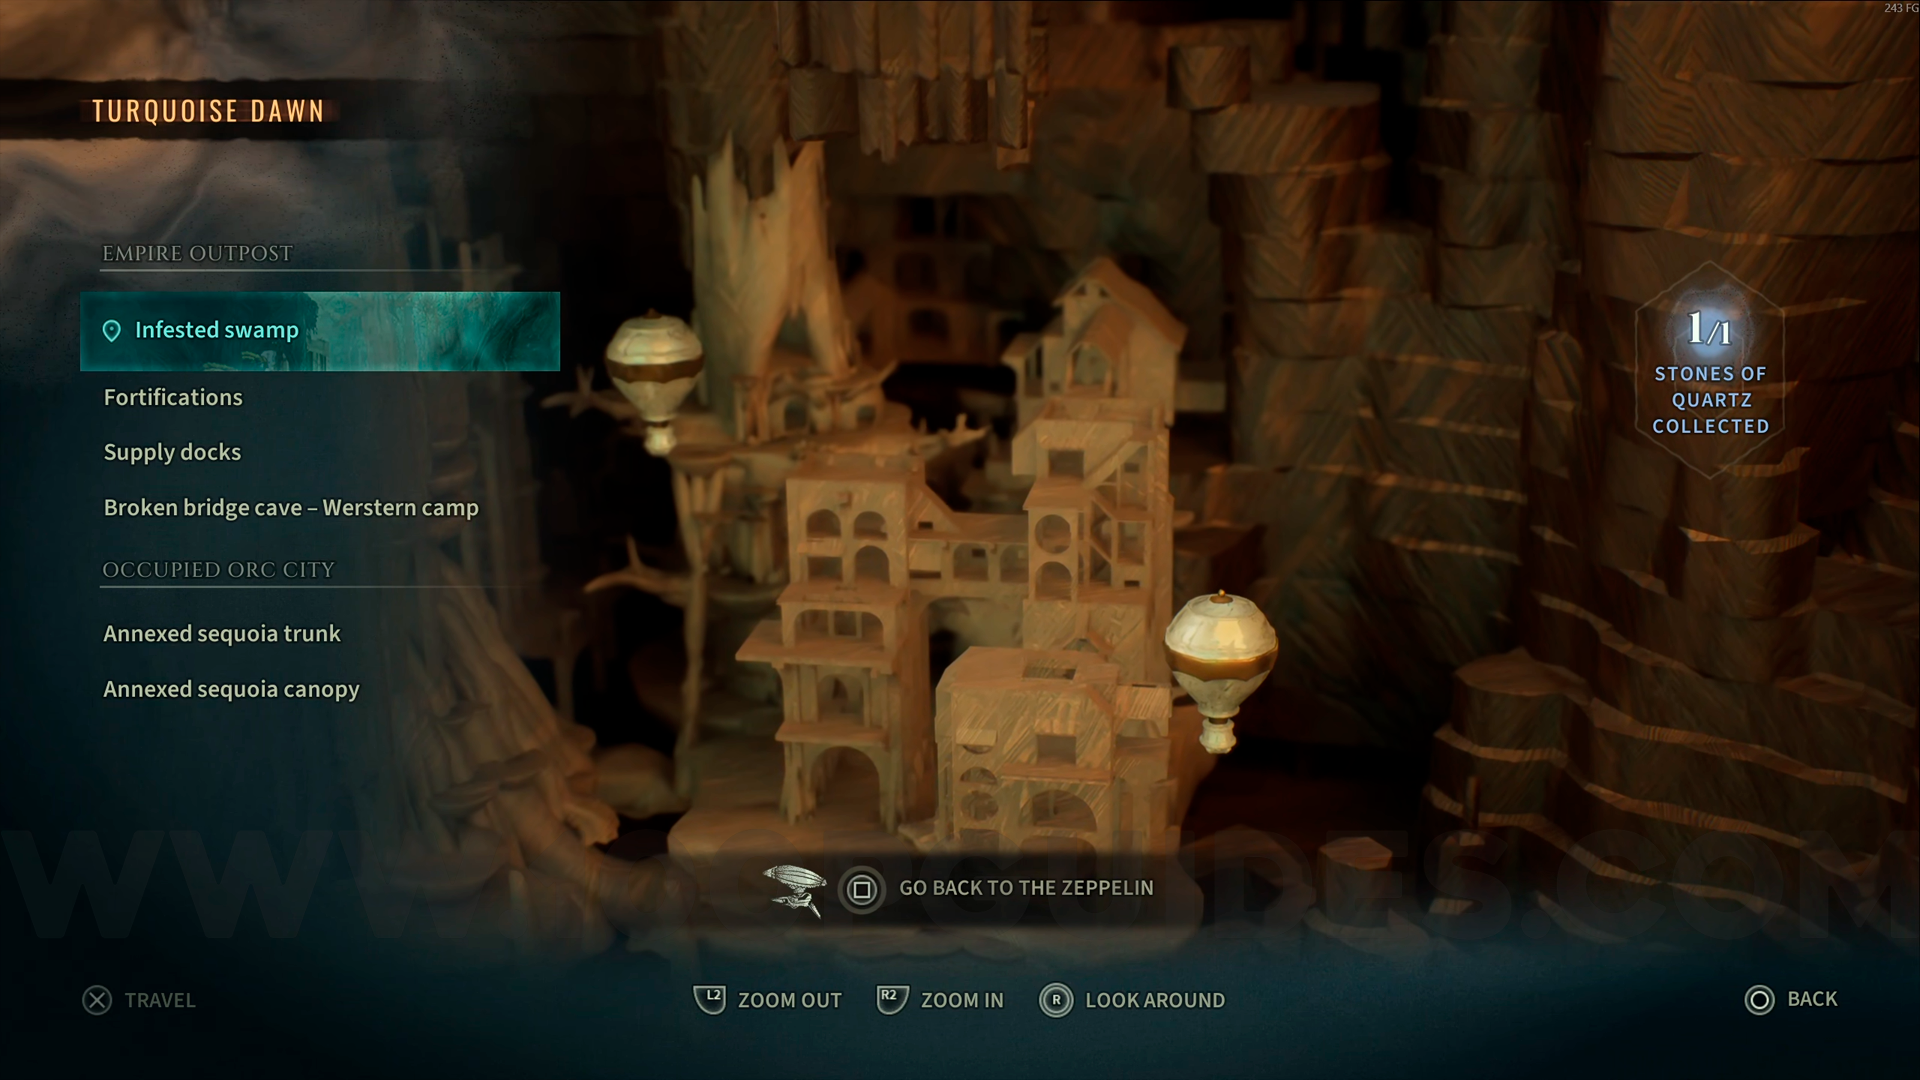
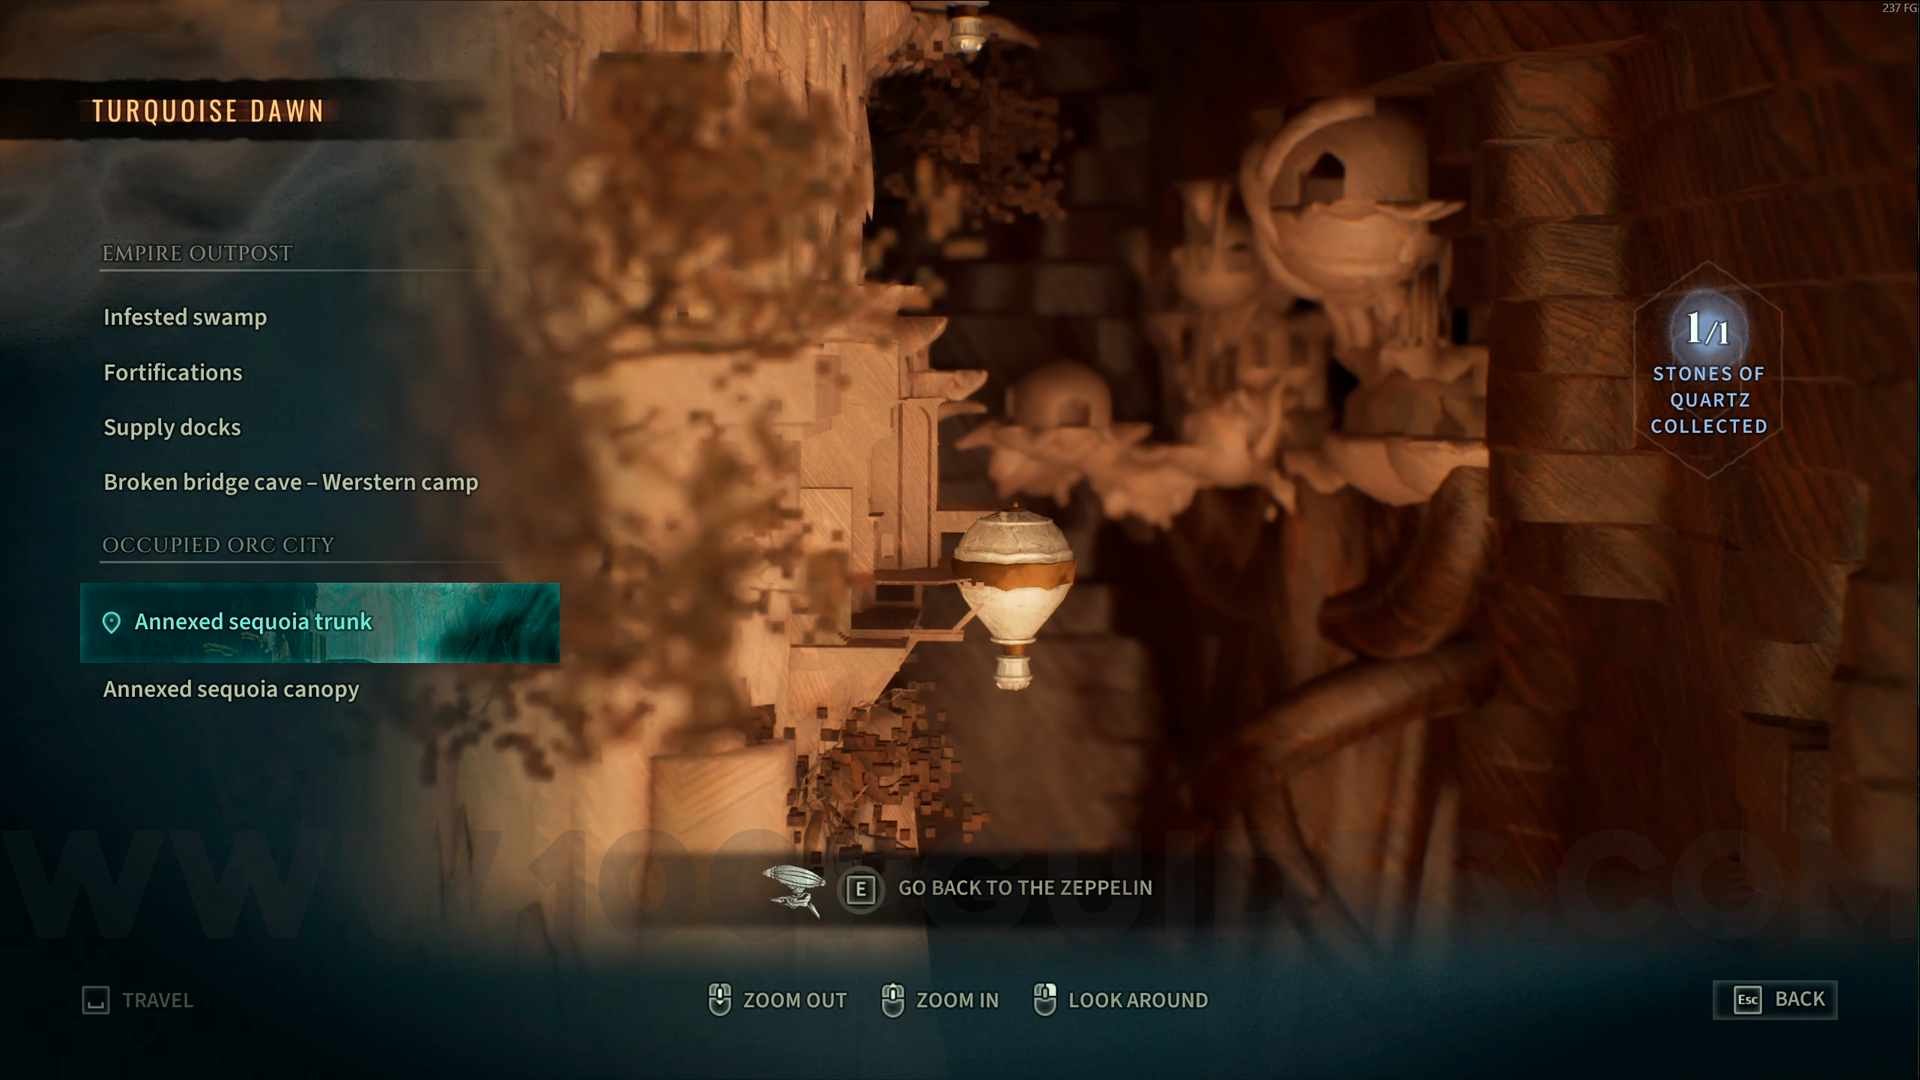
Turquoise Dawn
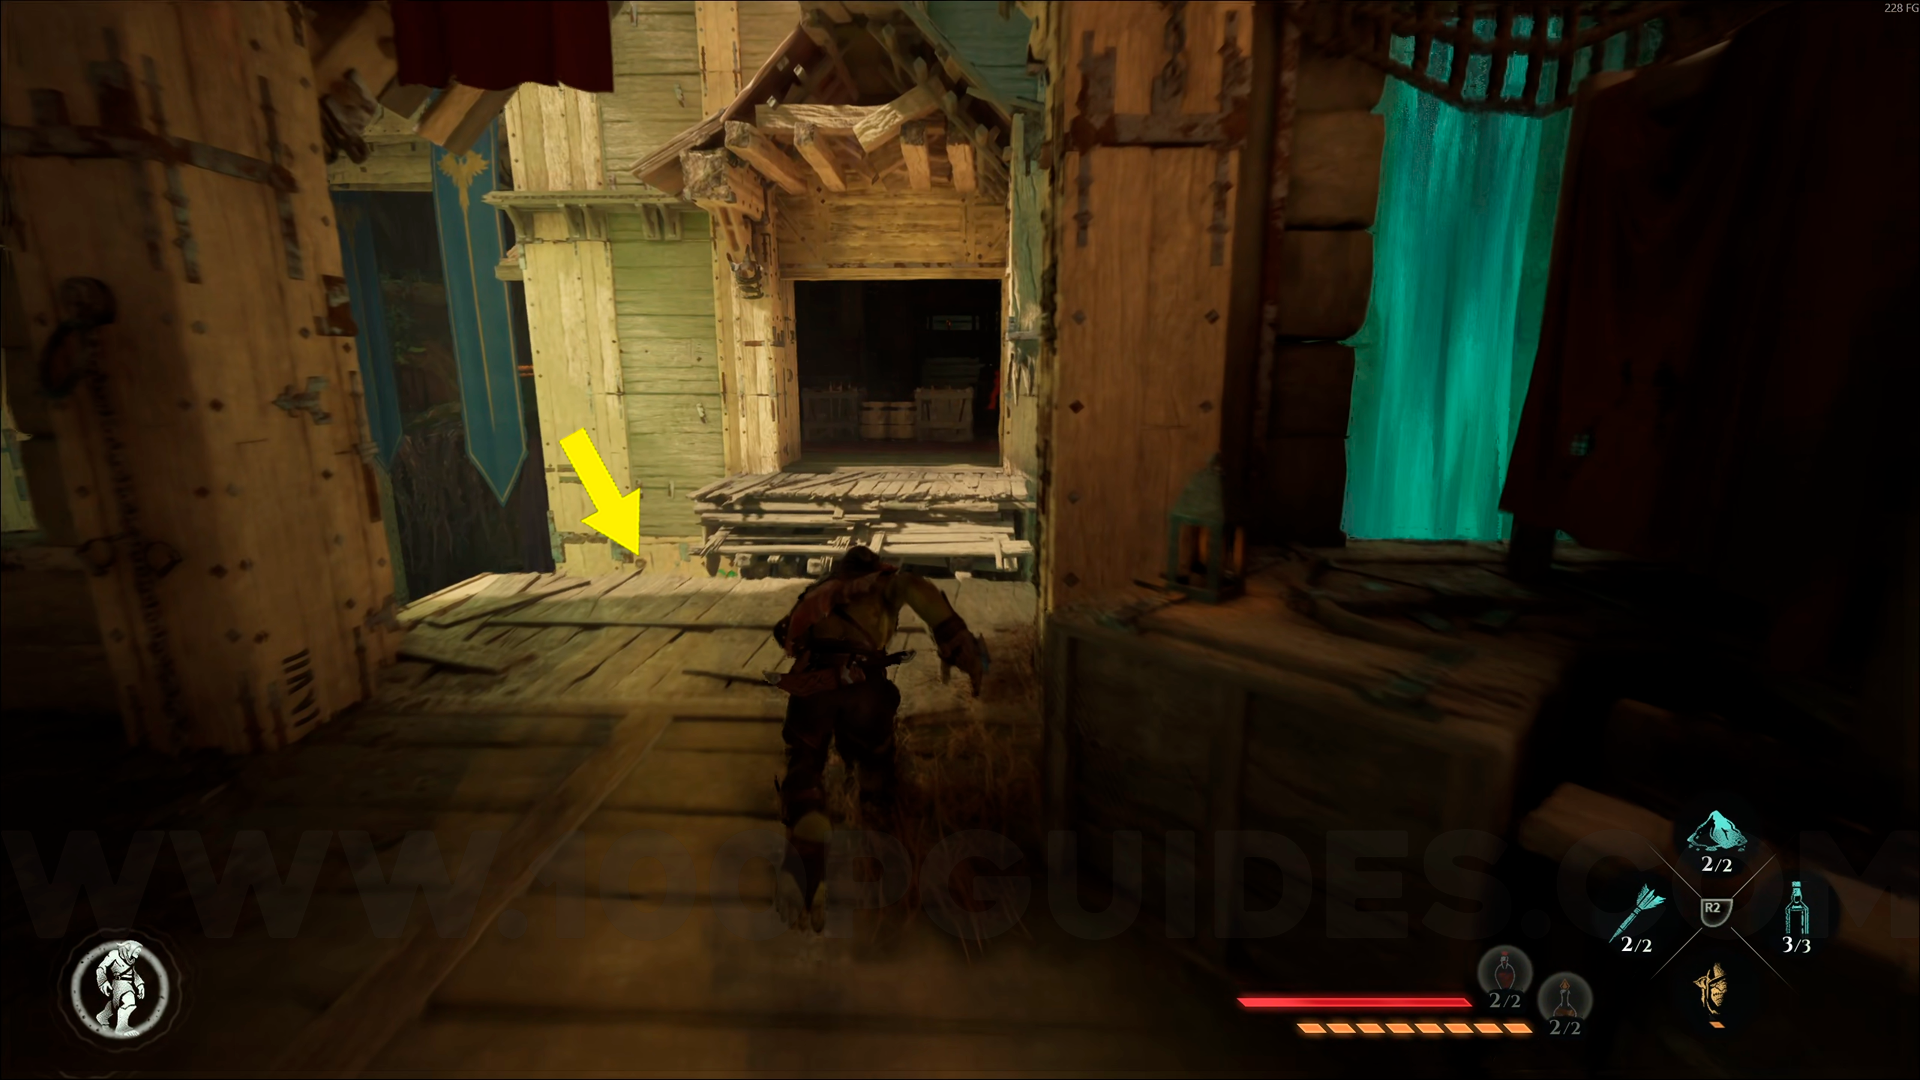
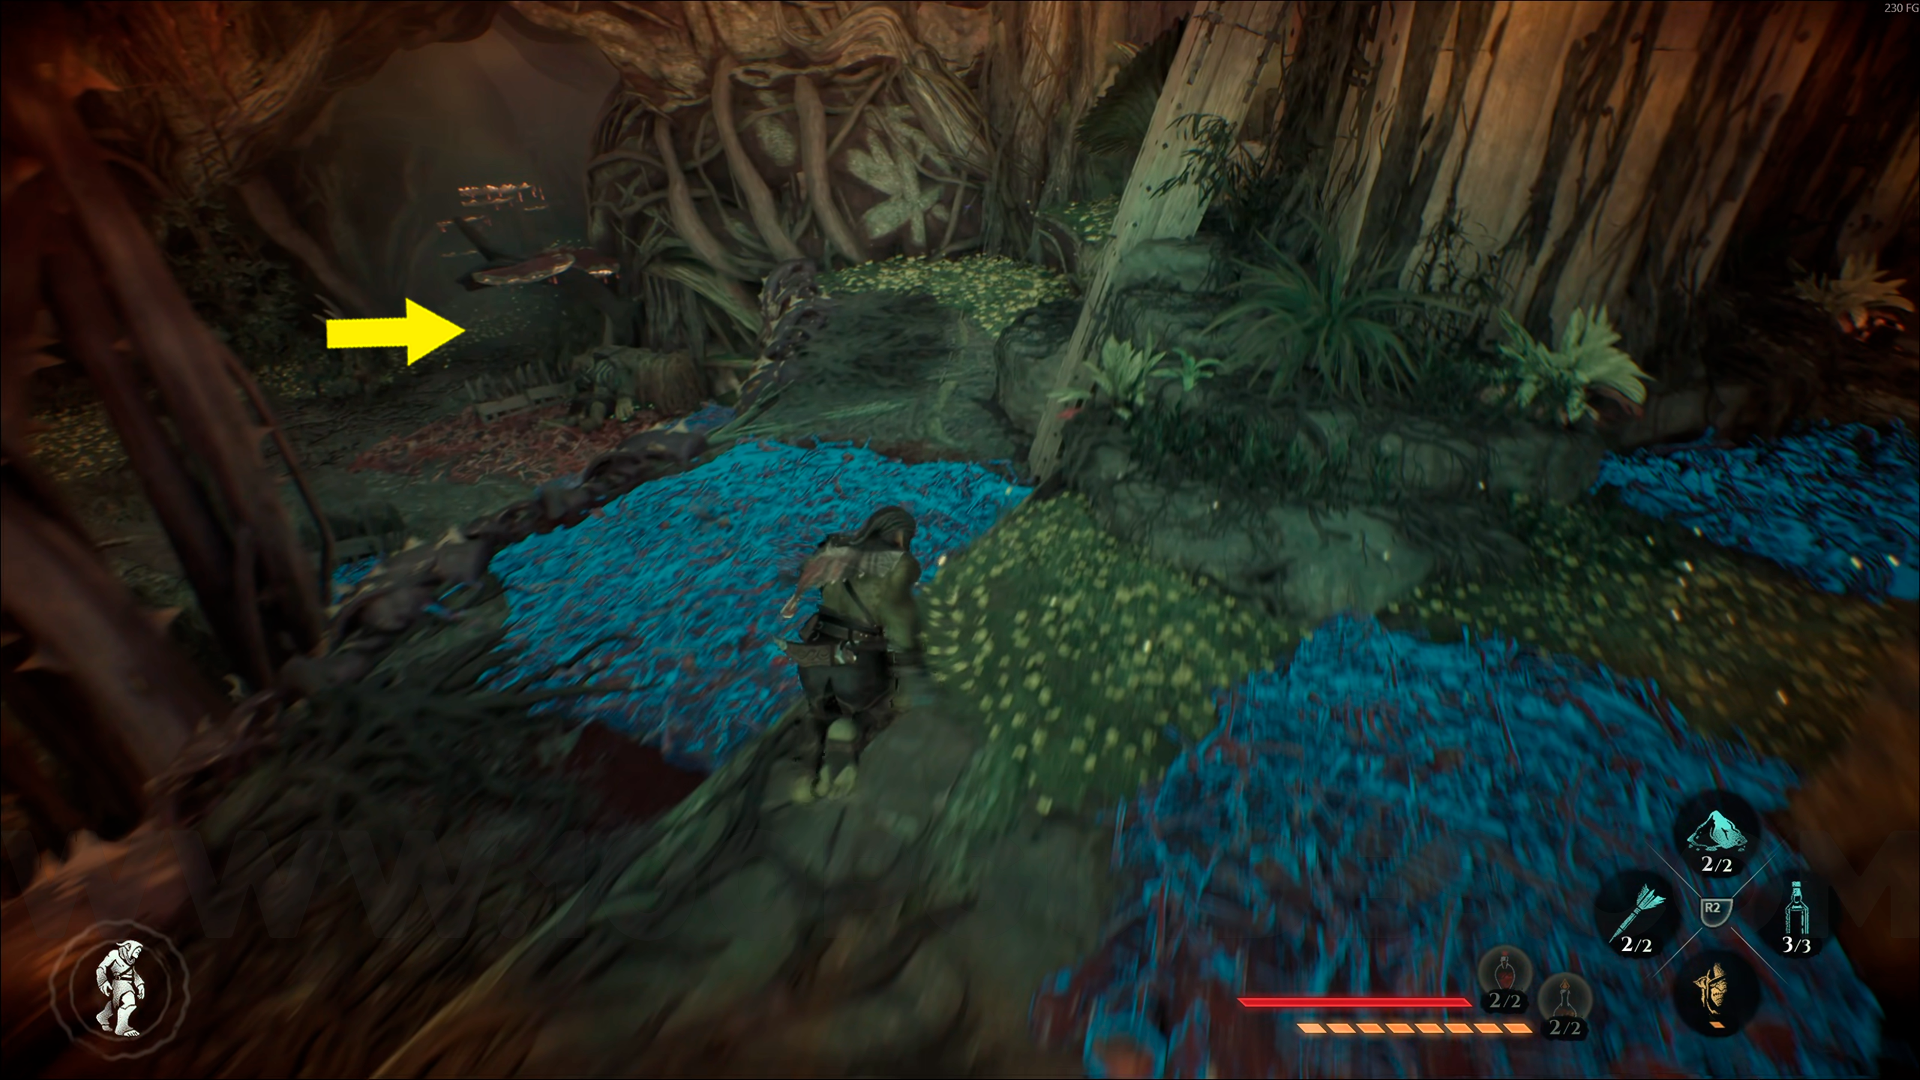
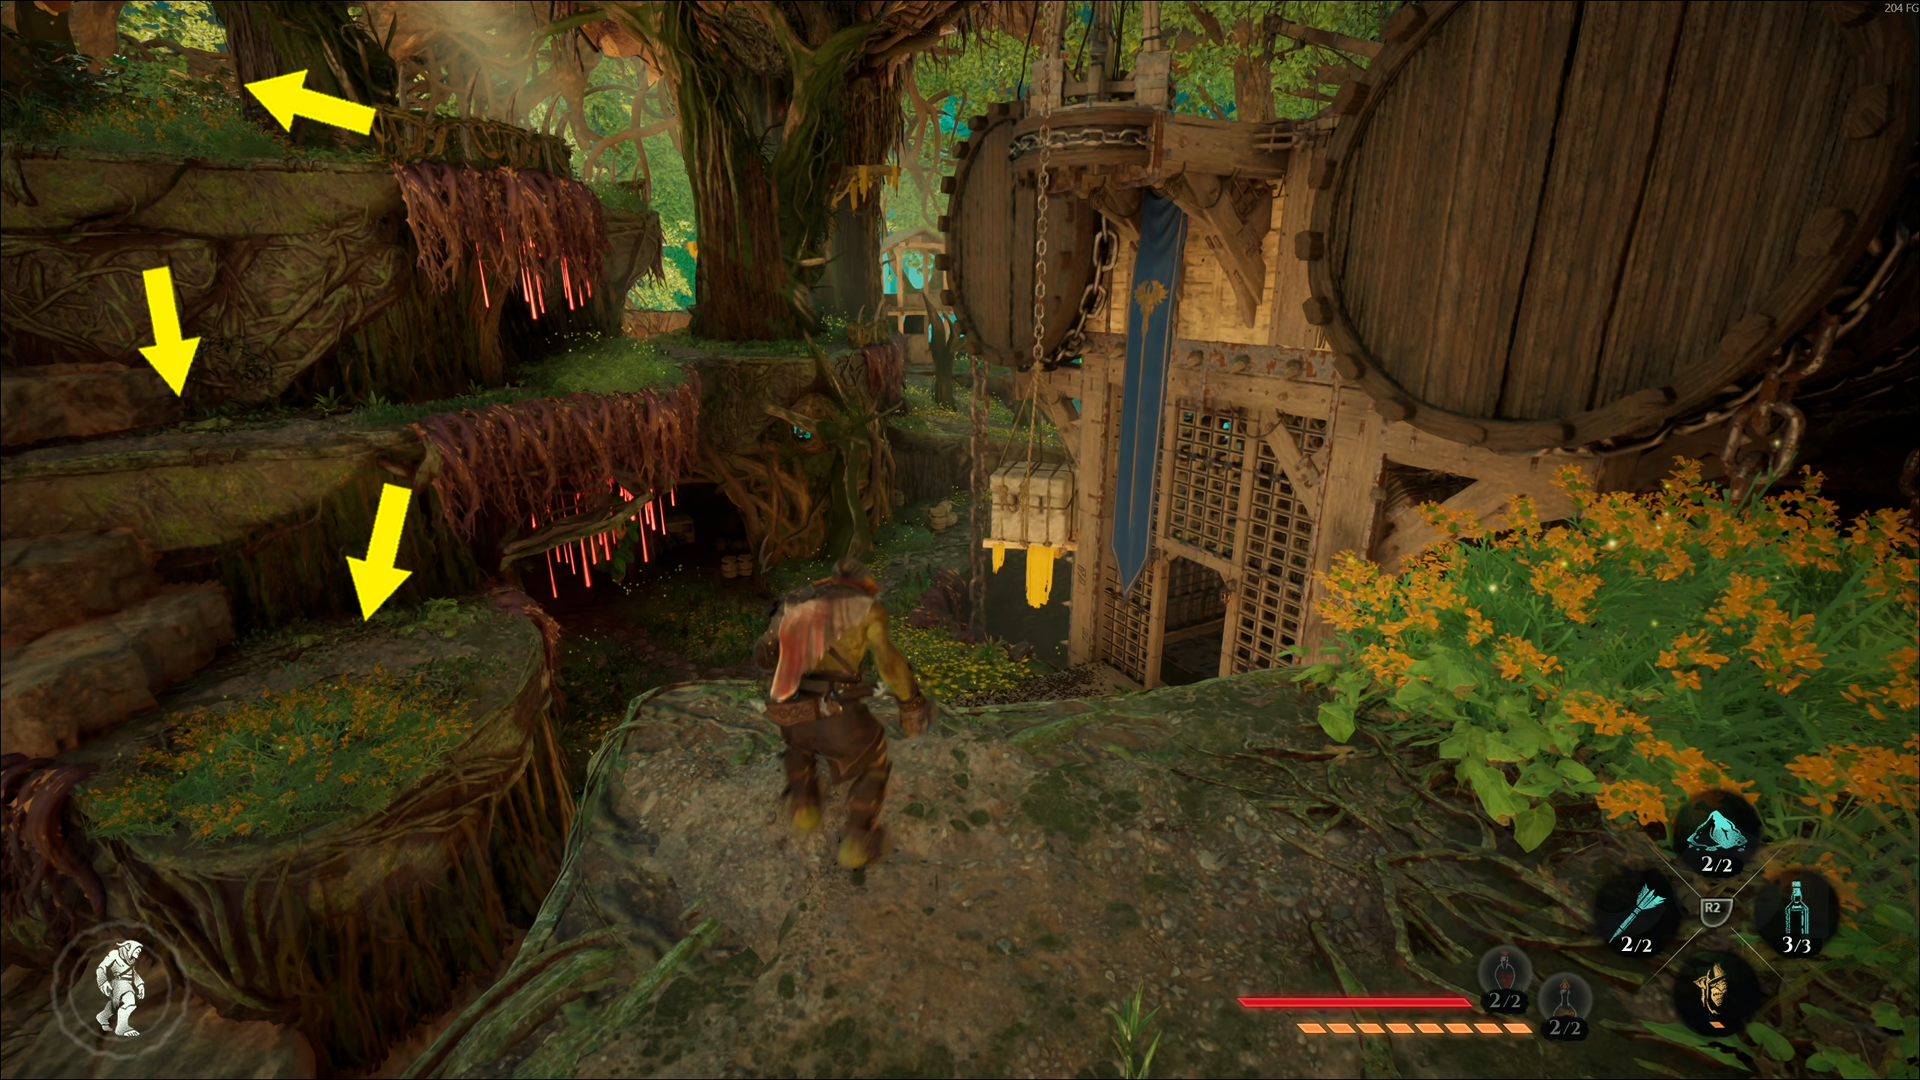
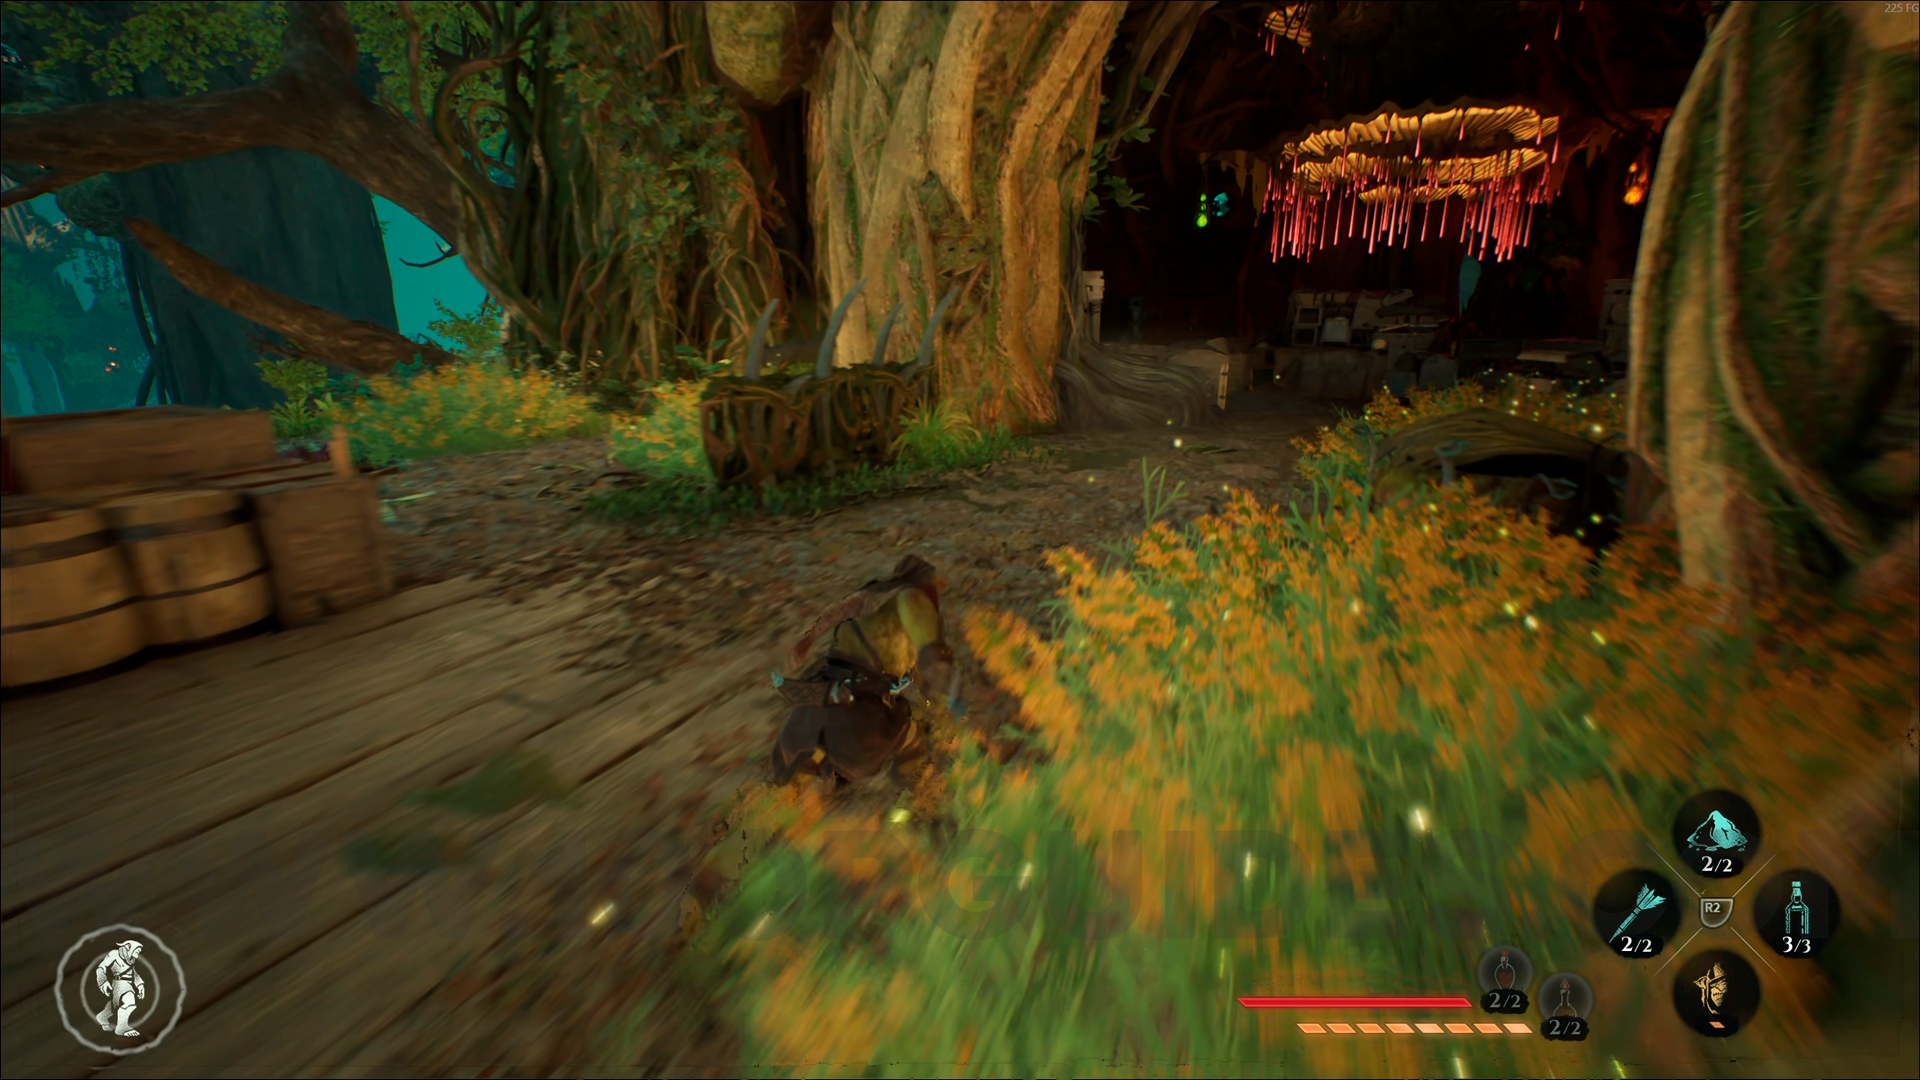
Wood Emblem #1. From the Infested Swamp checkpoint, turn right and head down to find this emblem.

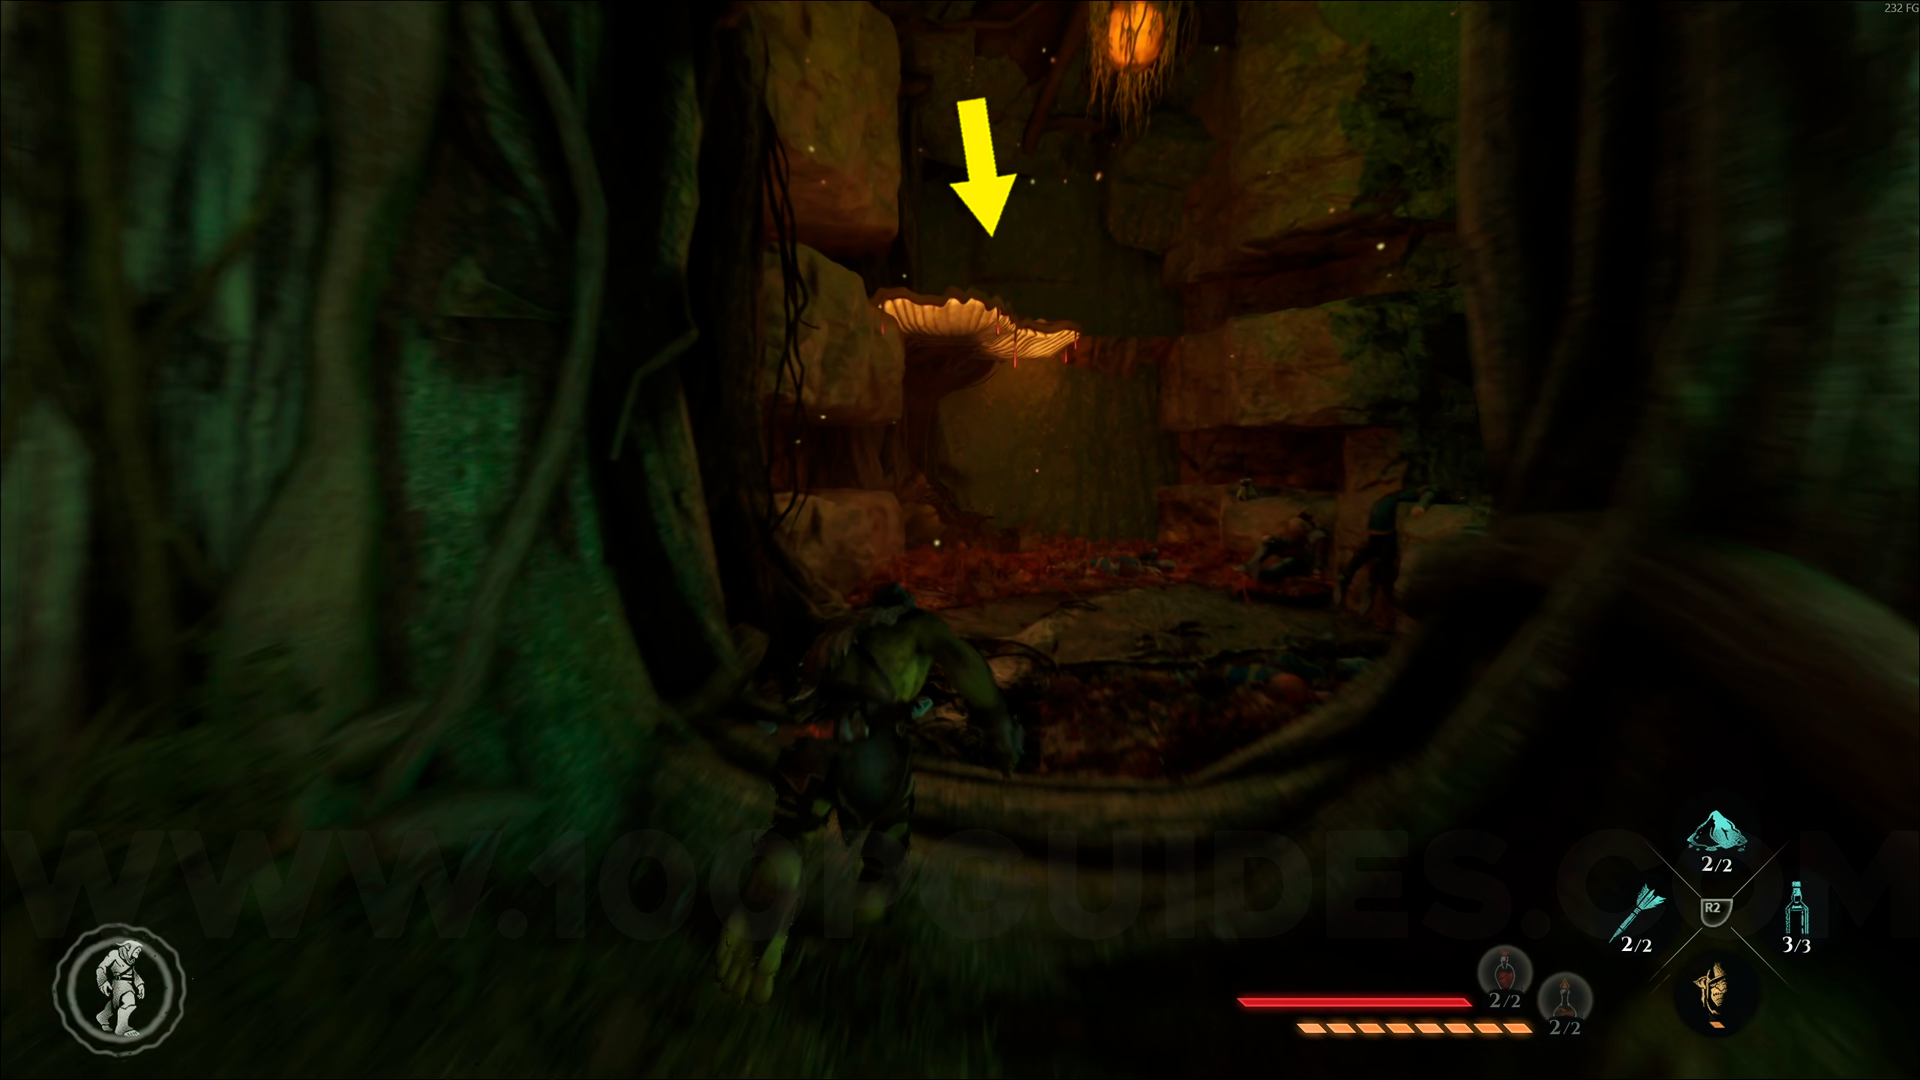
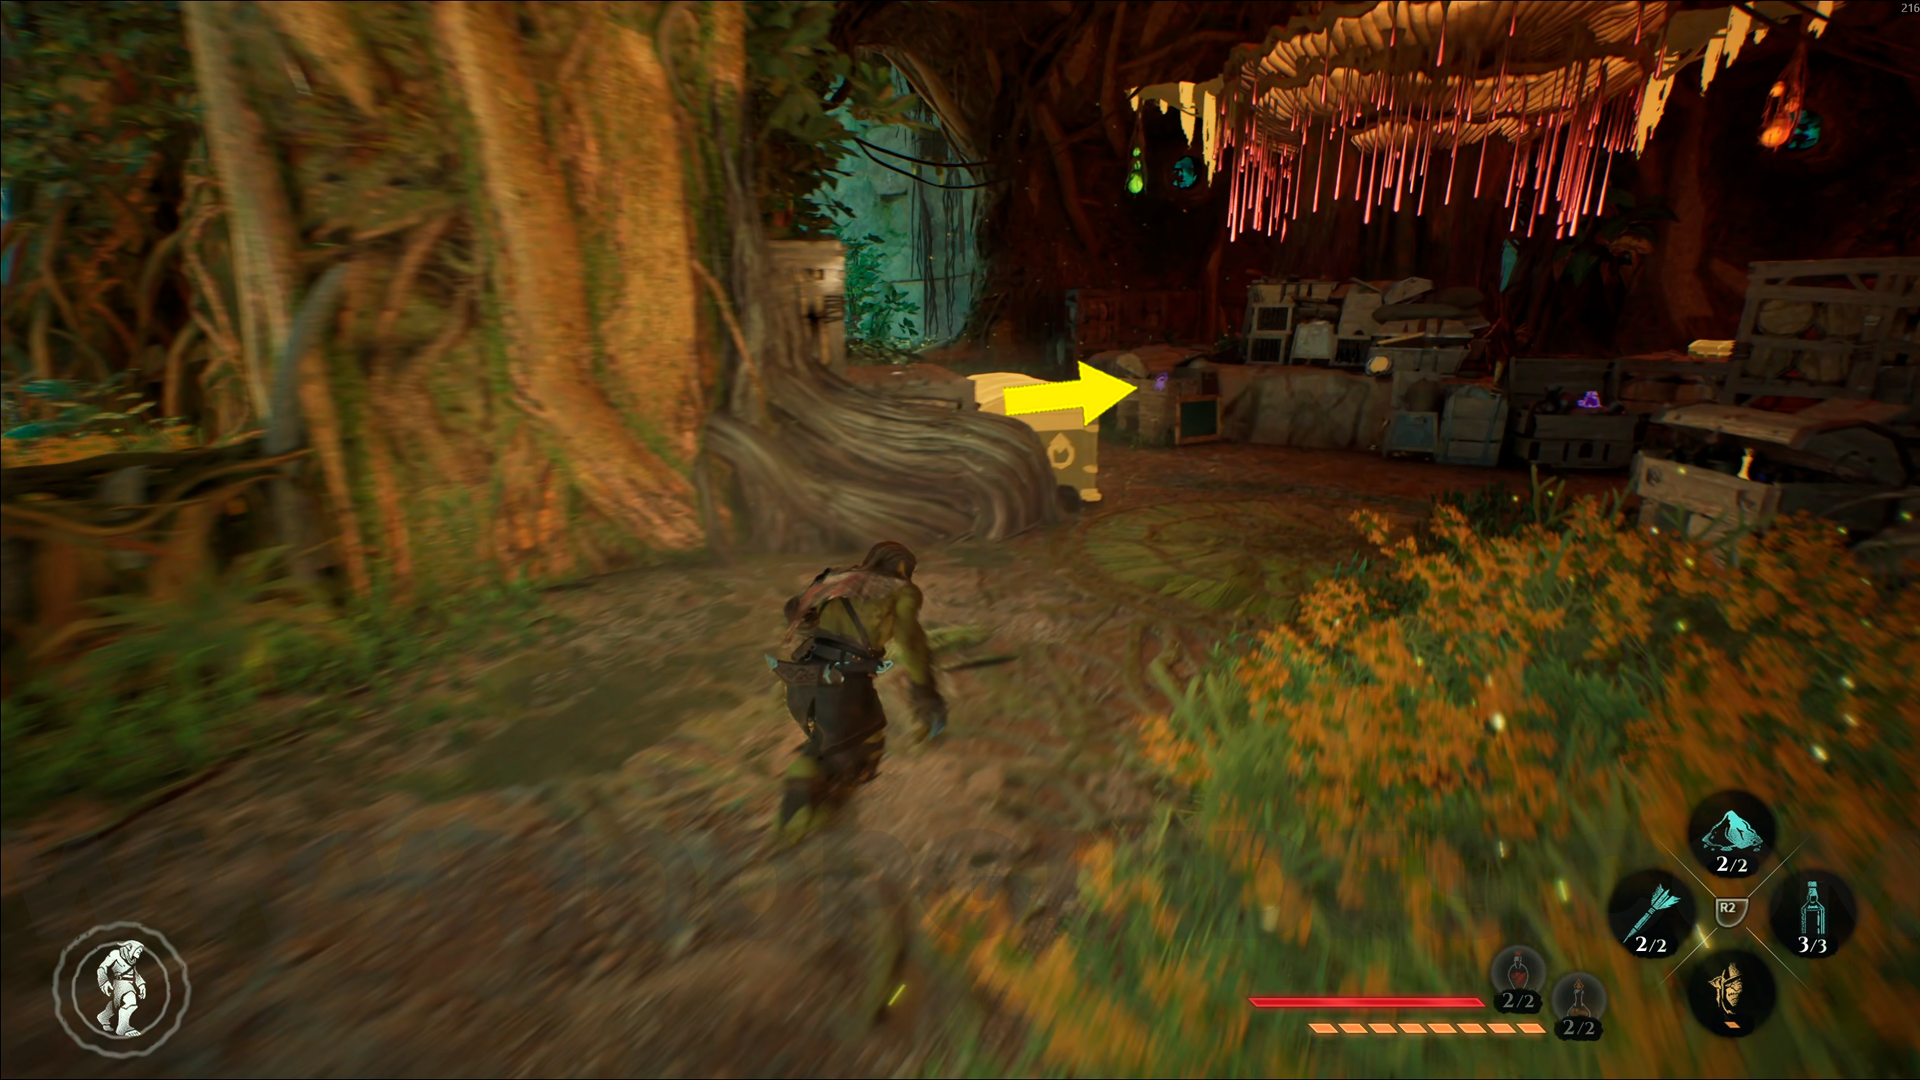
Wood Emblem #2. From the Infested Swamp checkpoint, turn right and go down. Continue forward, go down another ledge, then turn right to find this emblem. Use Amber Vision to spot it through the wall.
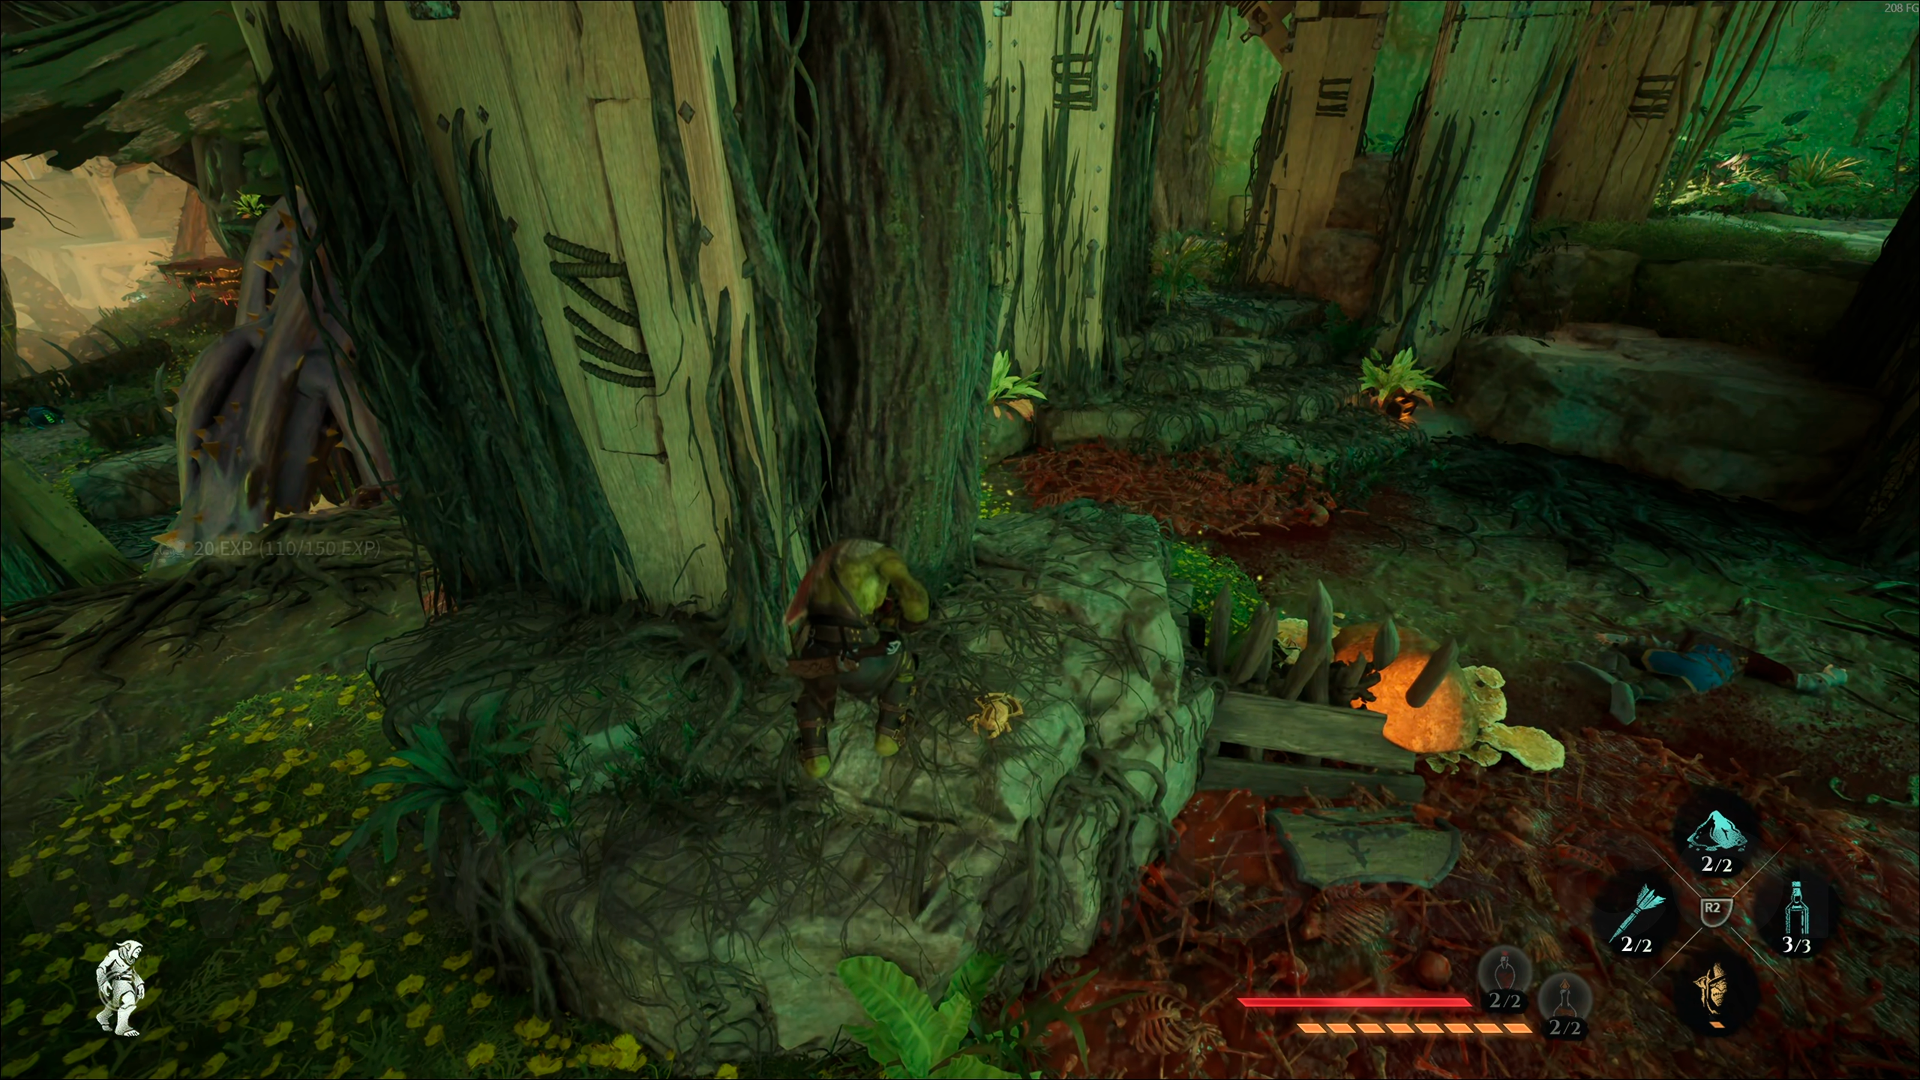
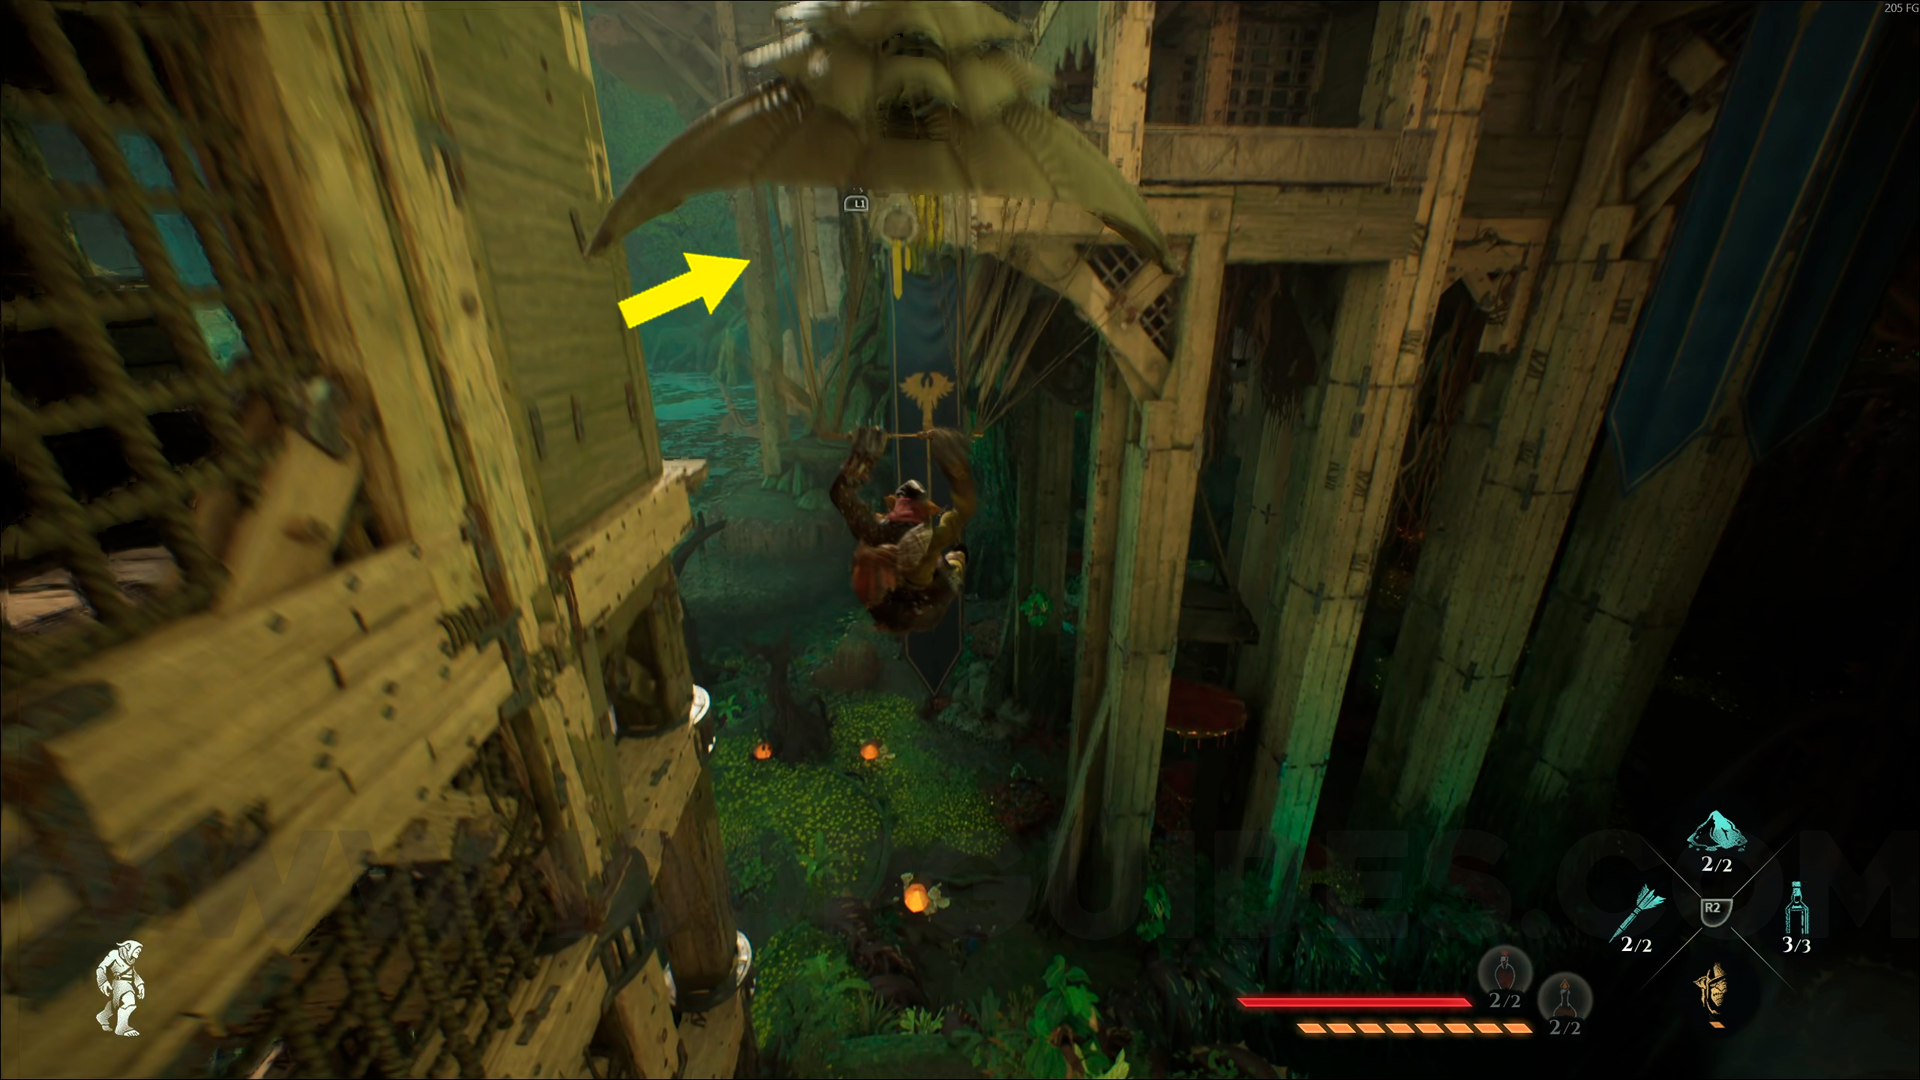
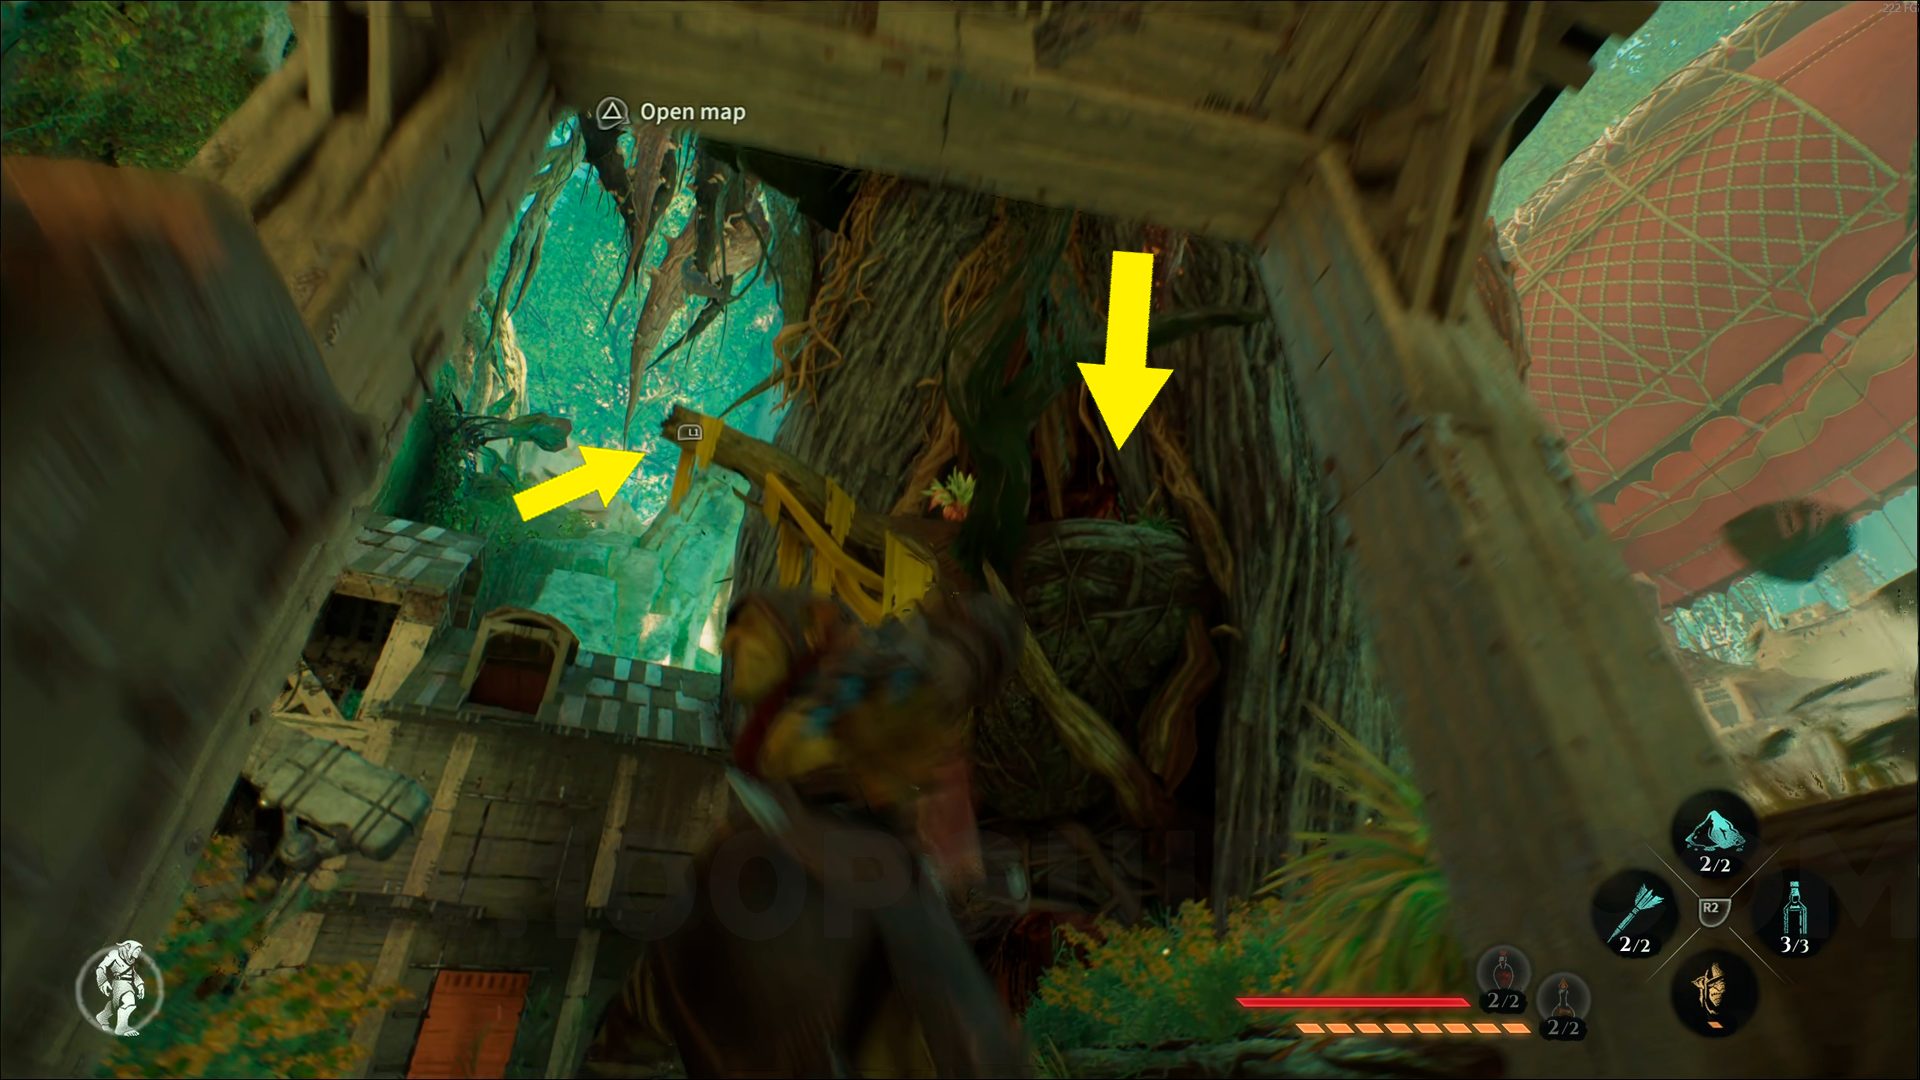
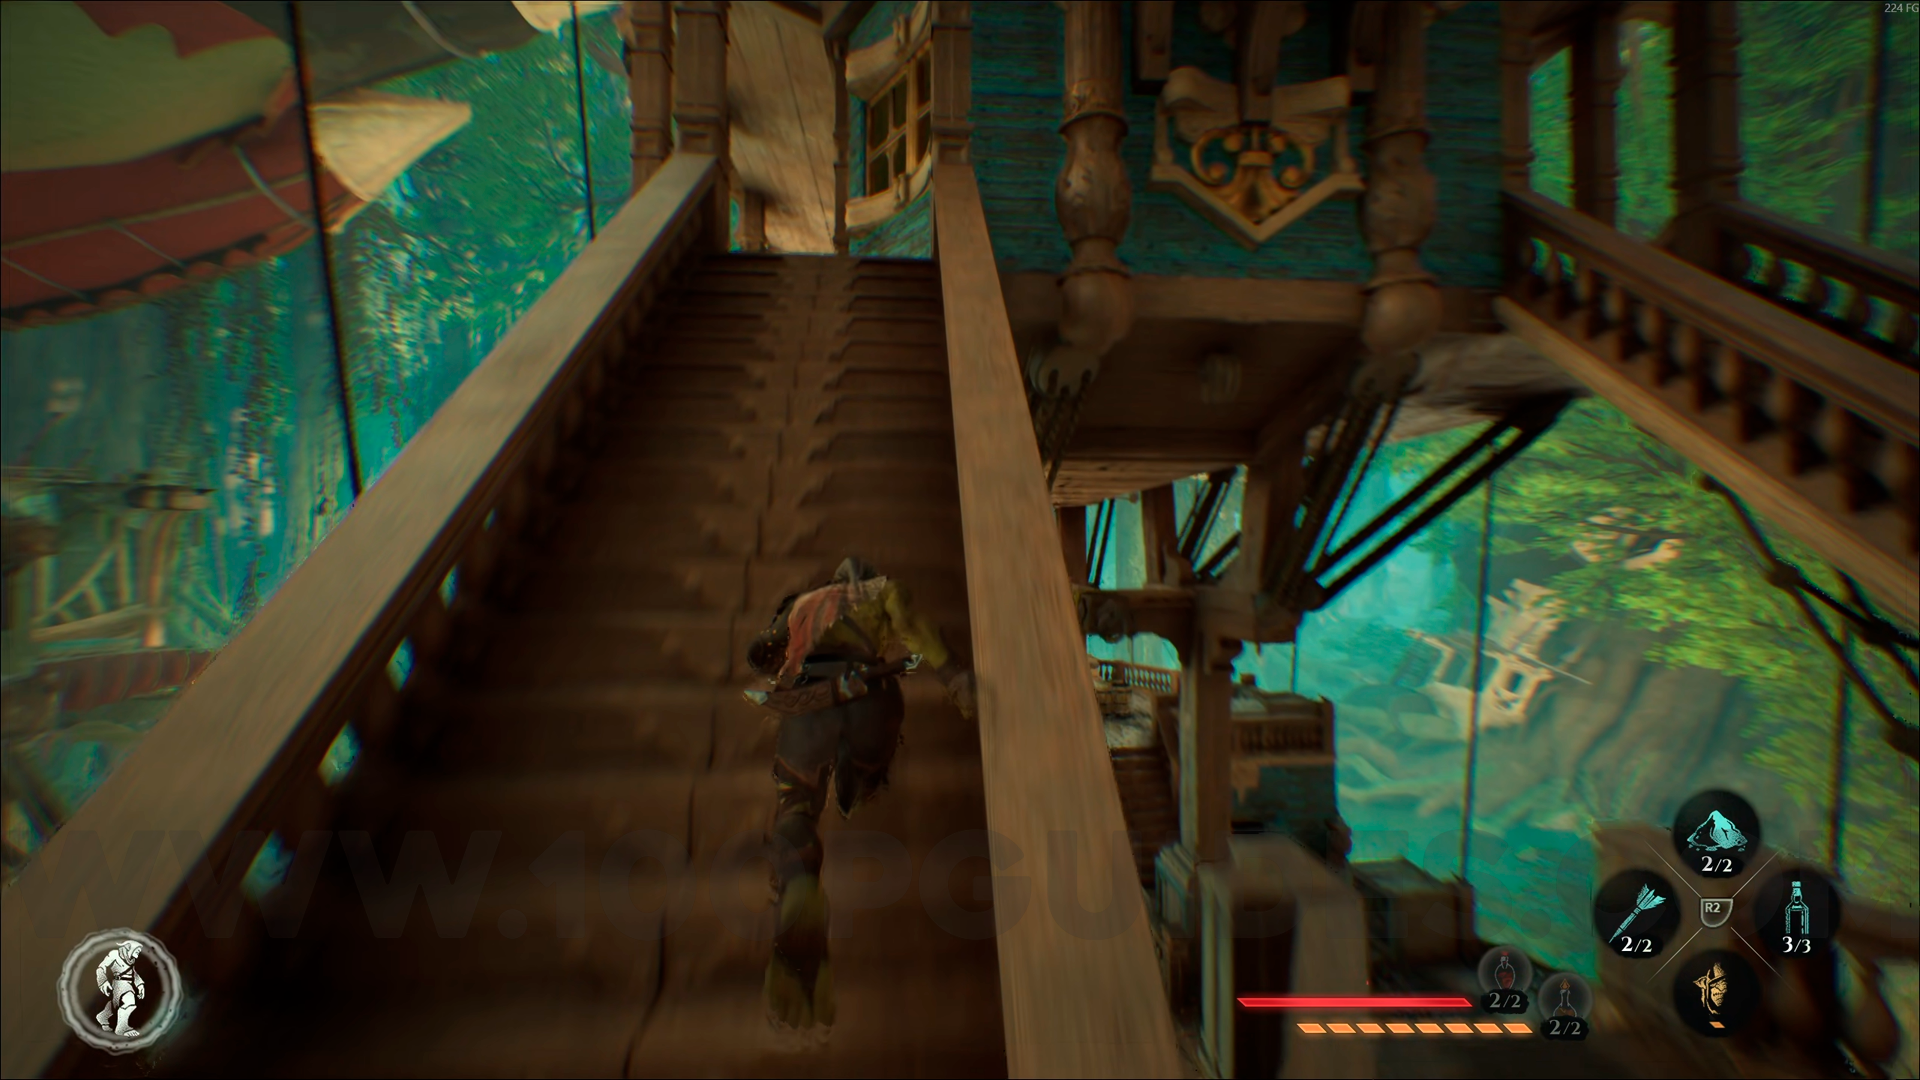
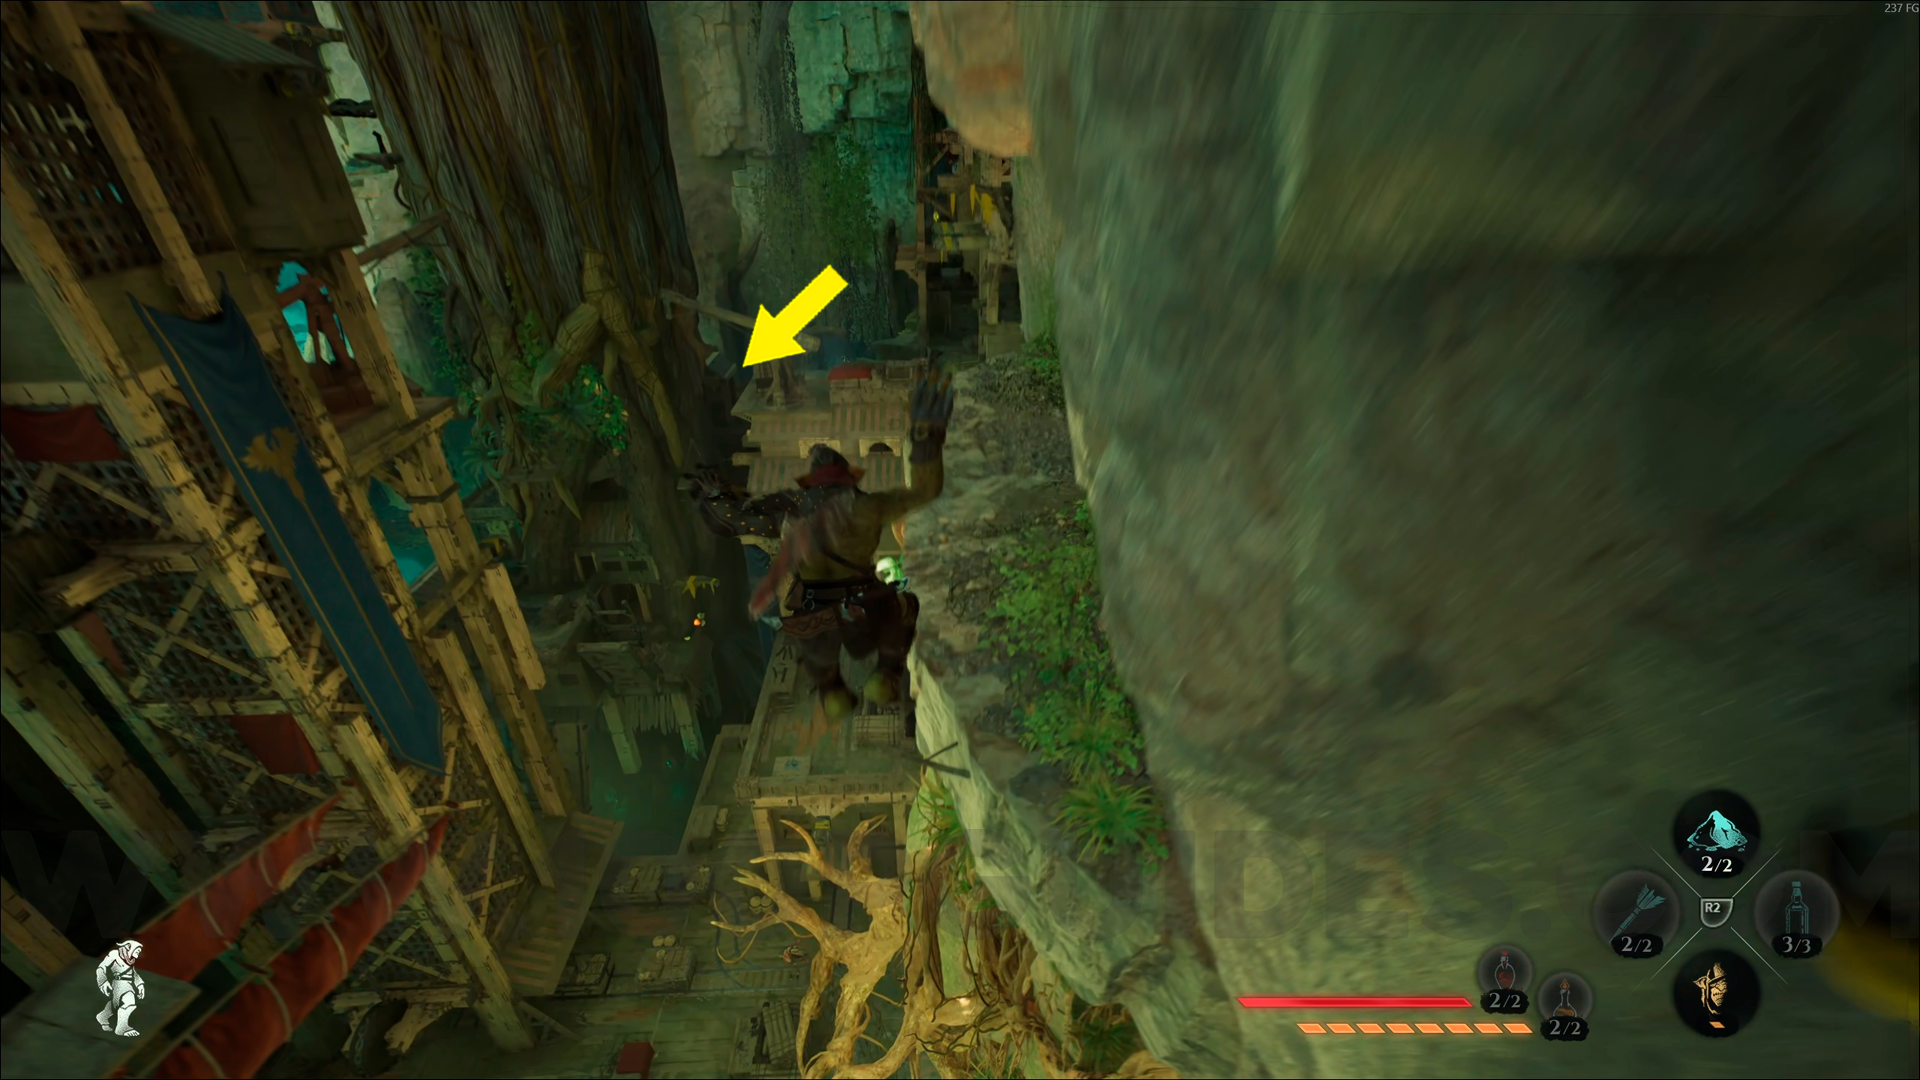
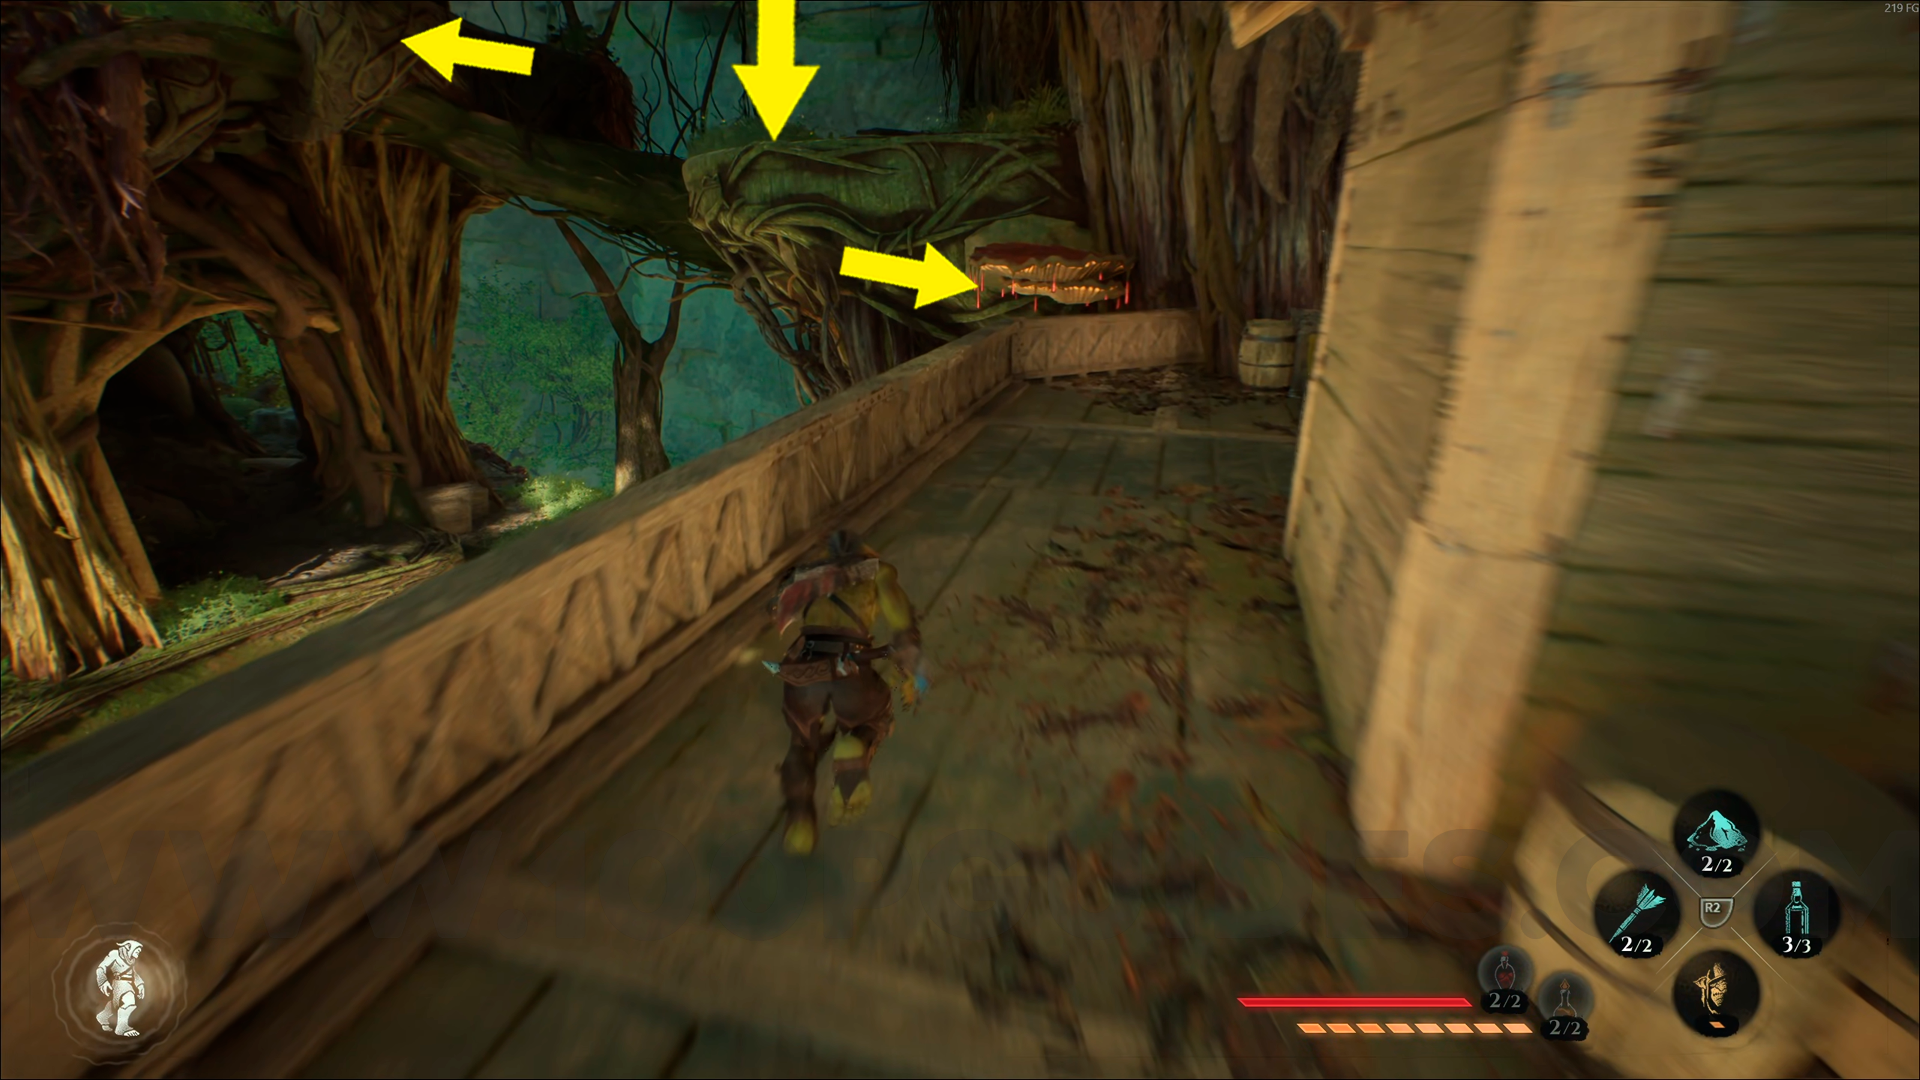
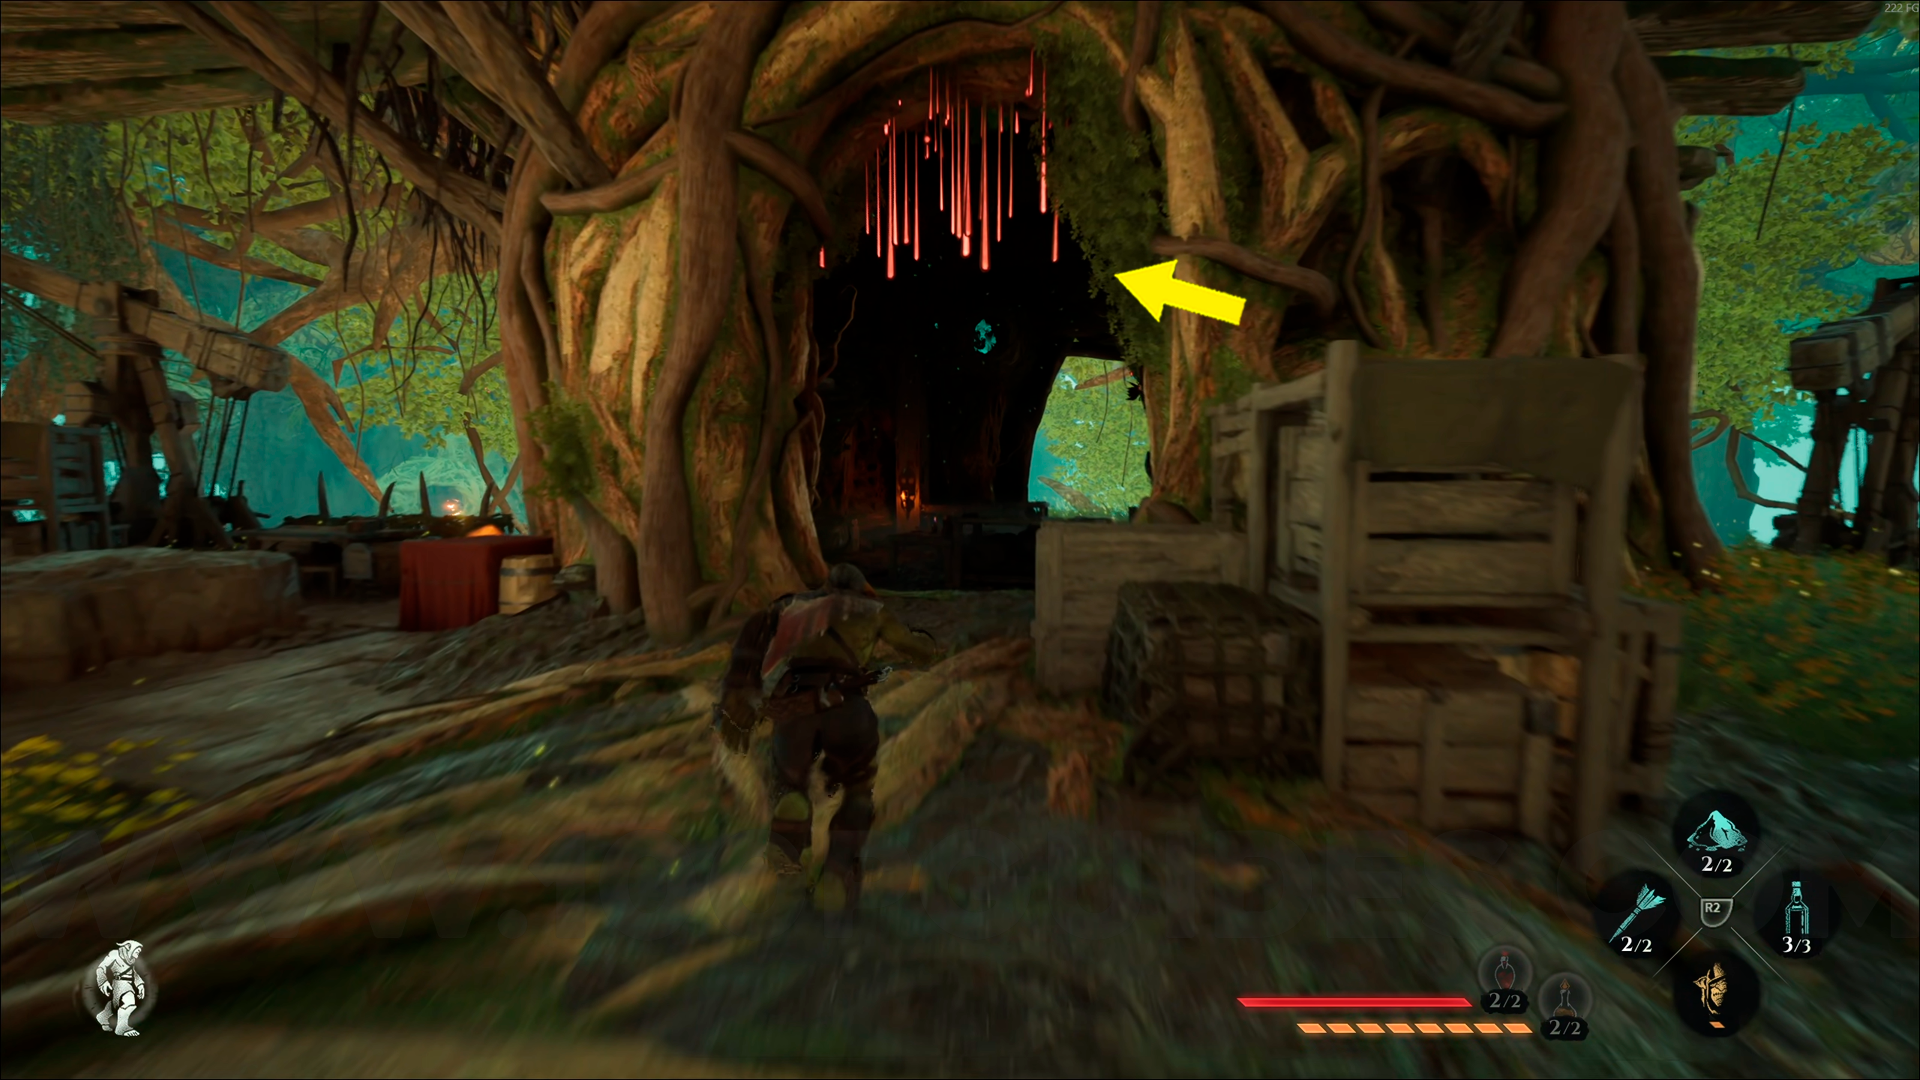
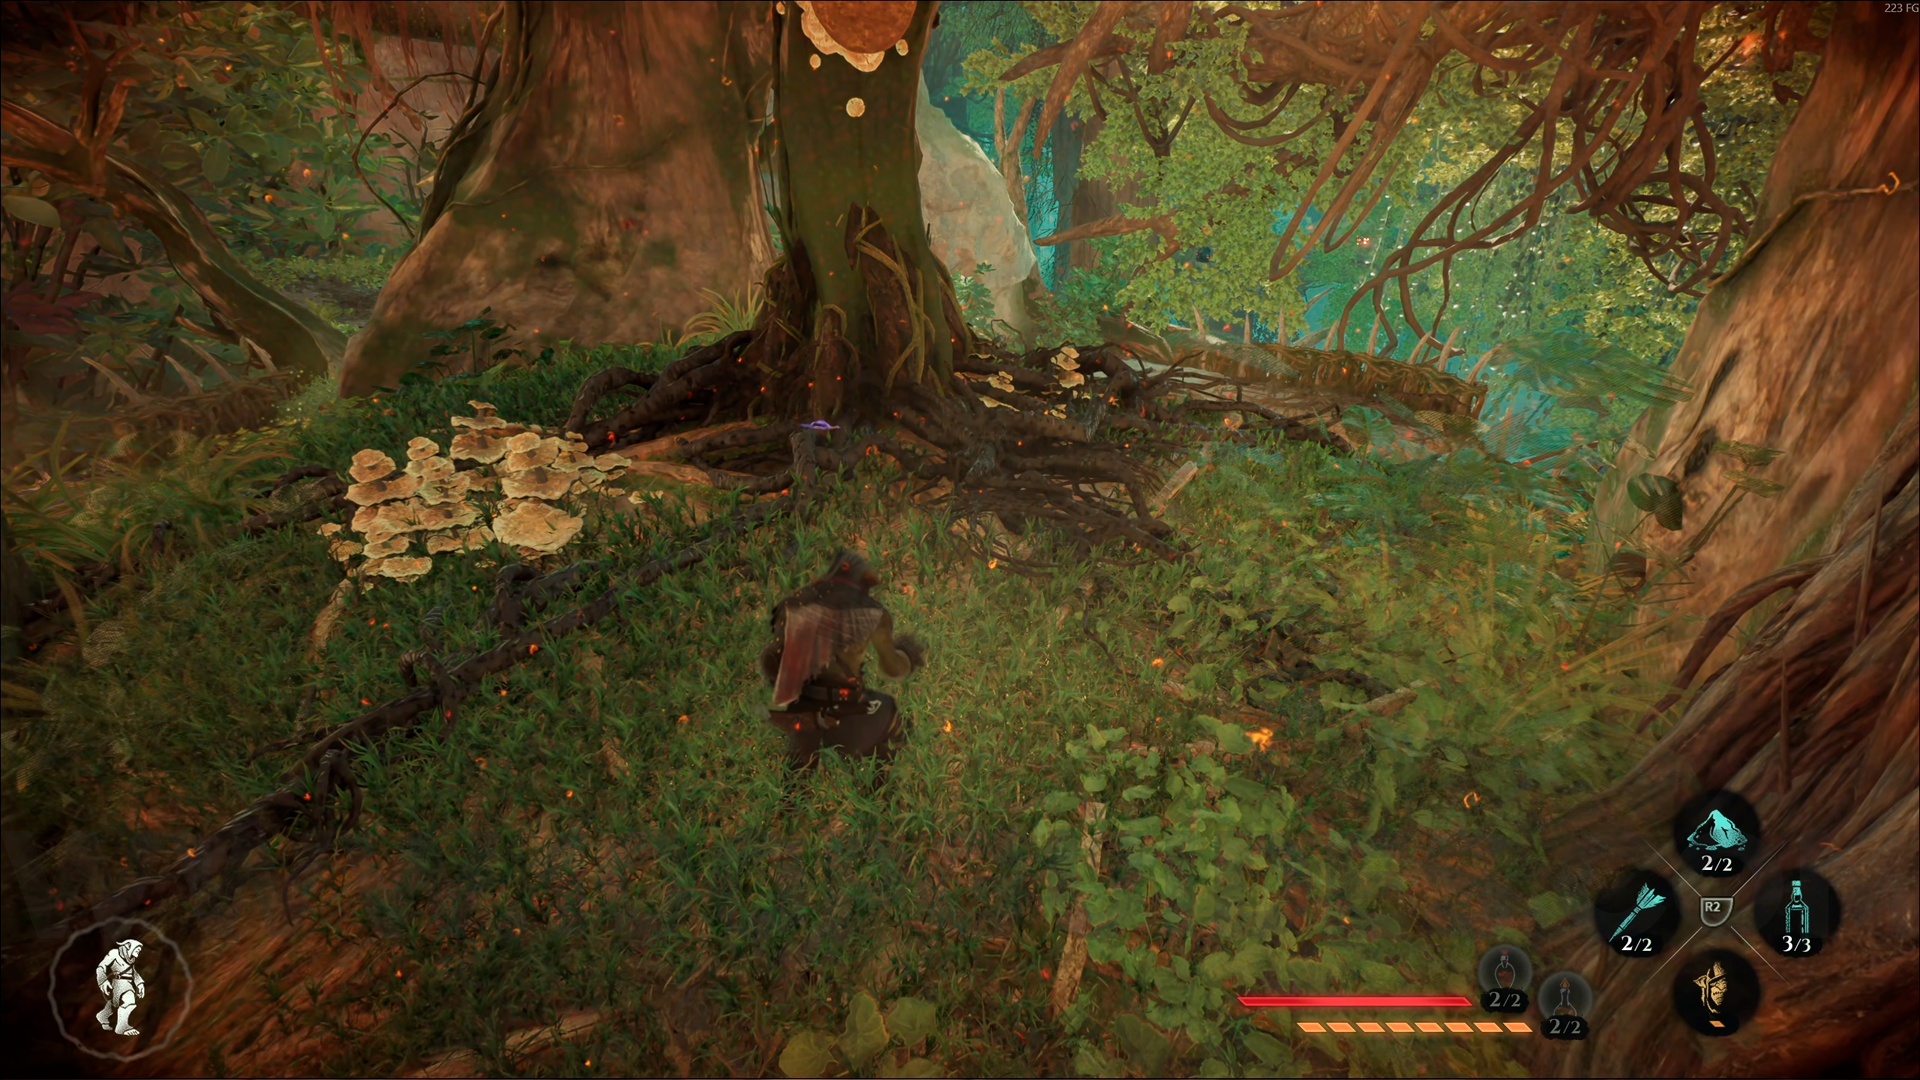
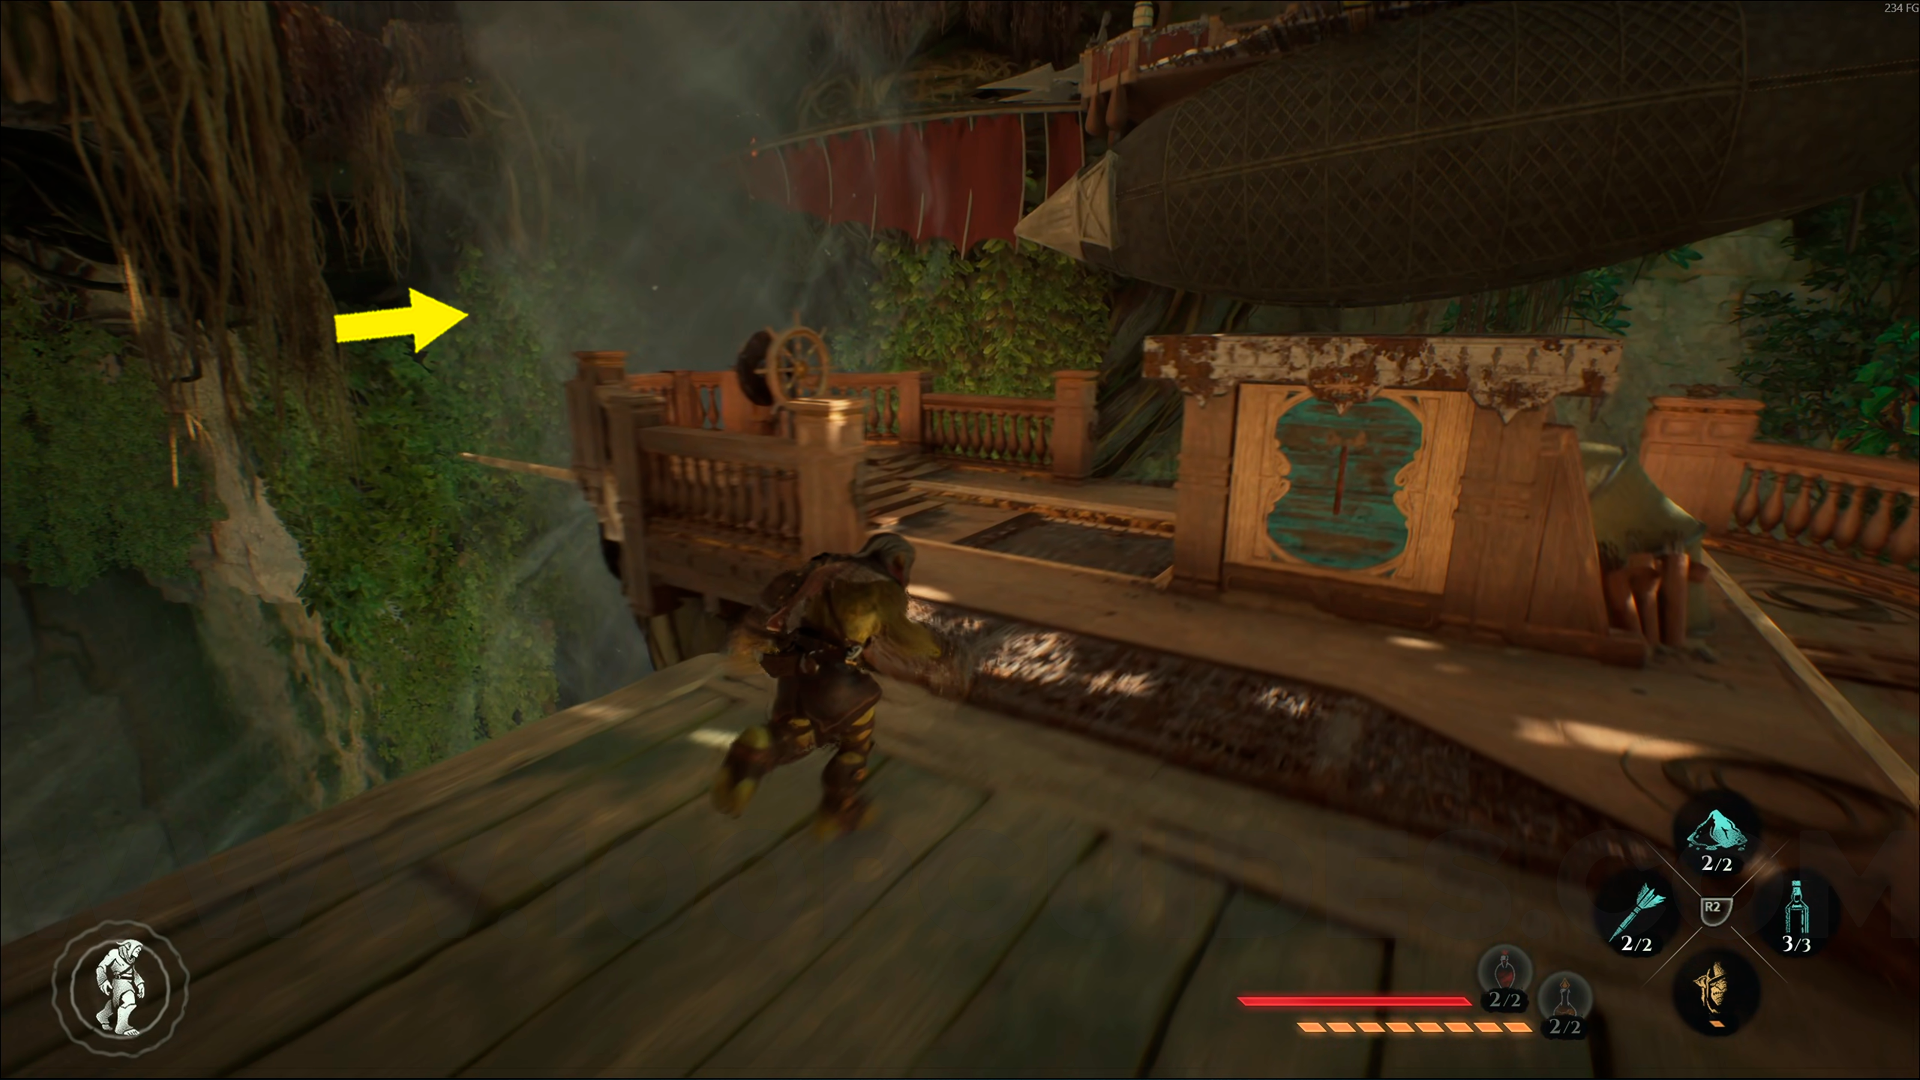
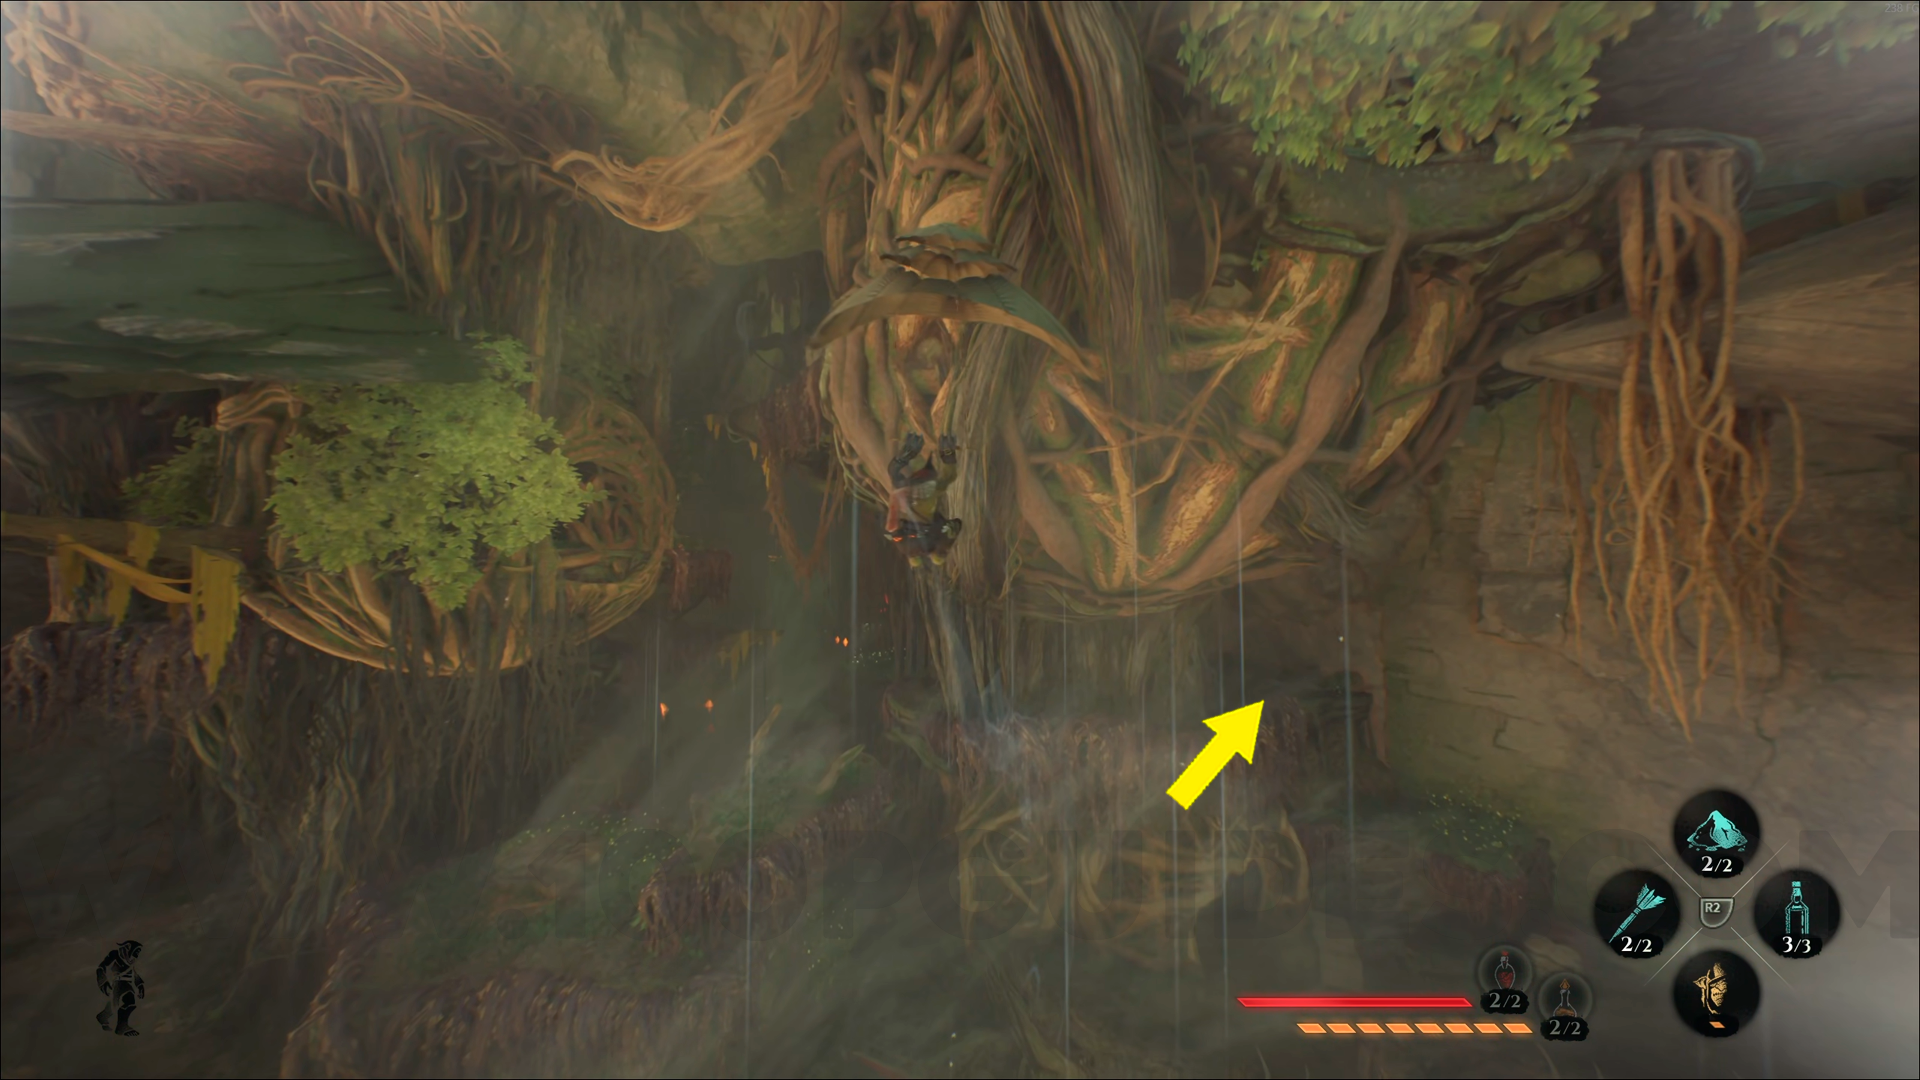
Wood Emblem #3. From the Infested Swamp checkpoint, turn right and jump onto the pillars ahead. Then go past the boat and climb down. Continue forward, jumping across the mushrooms, and climb onto the wooden platform to find this emblem.

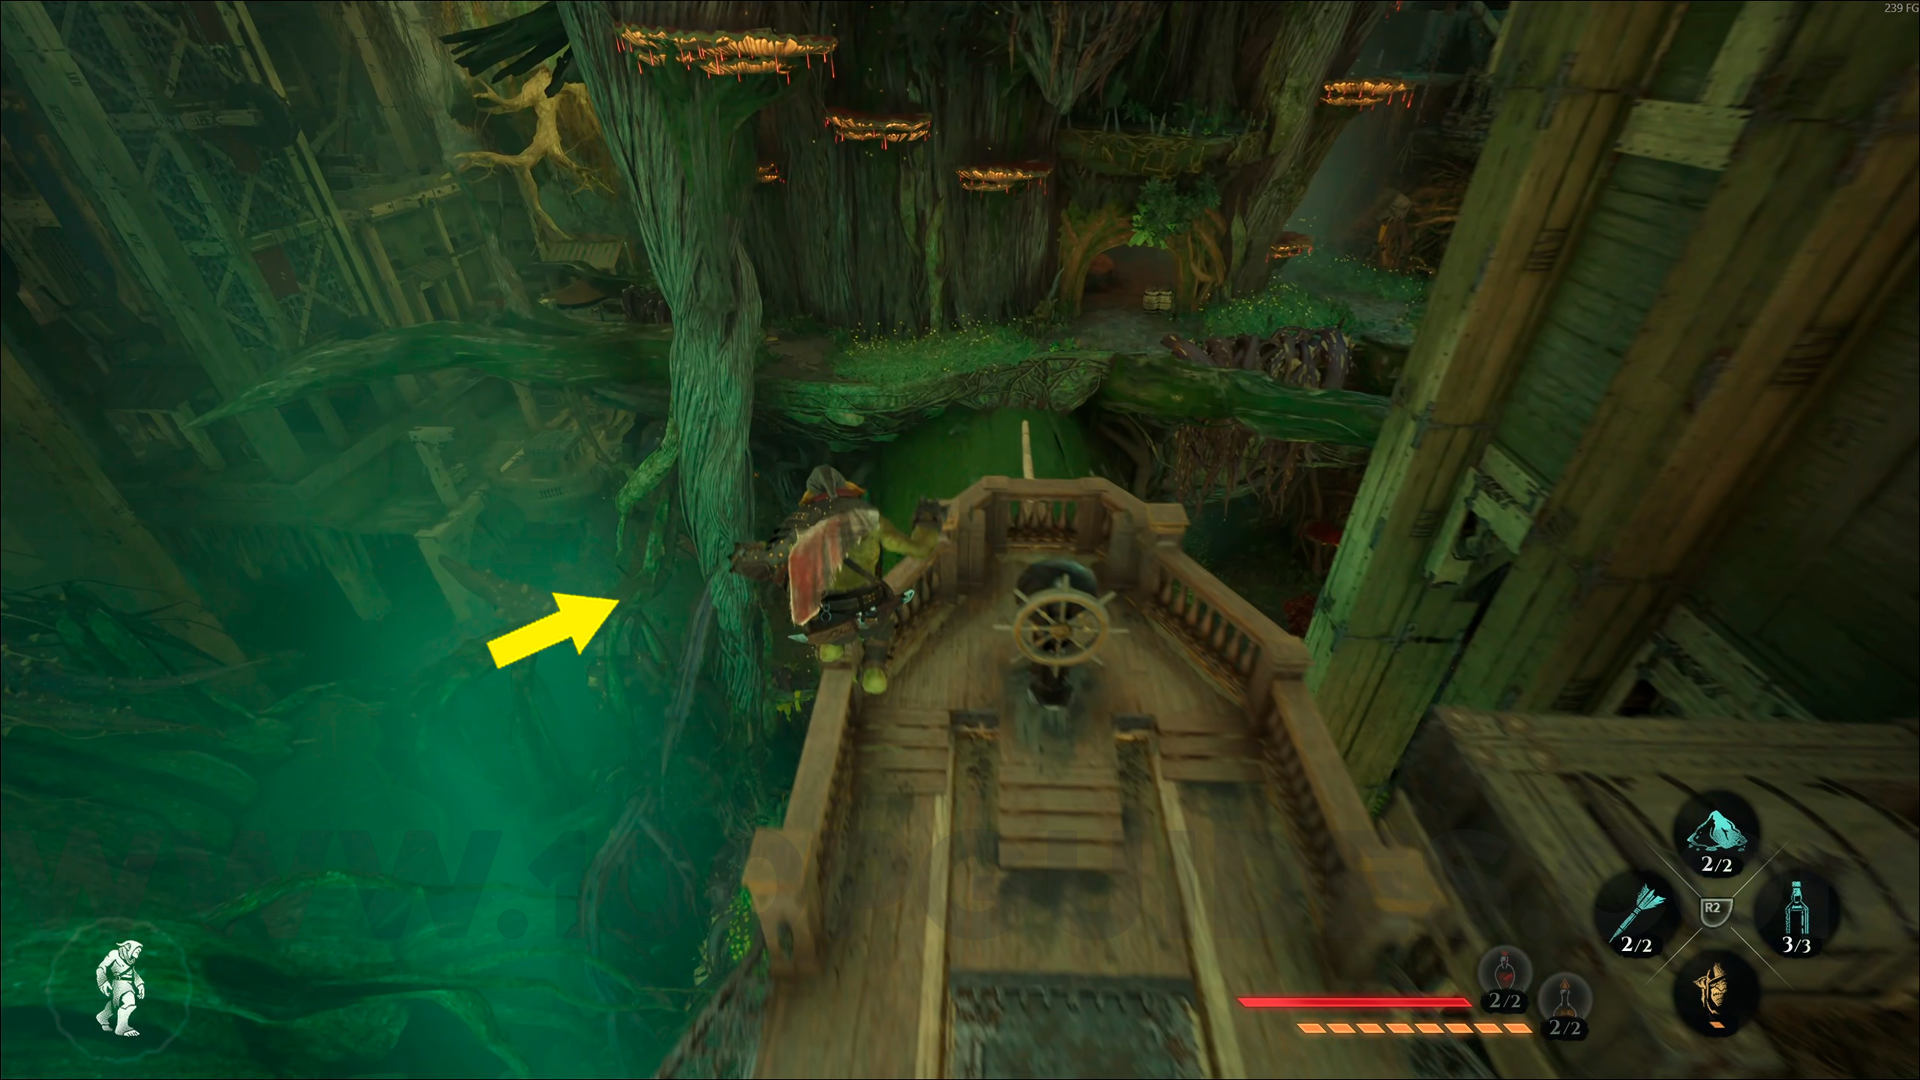
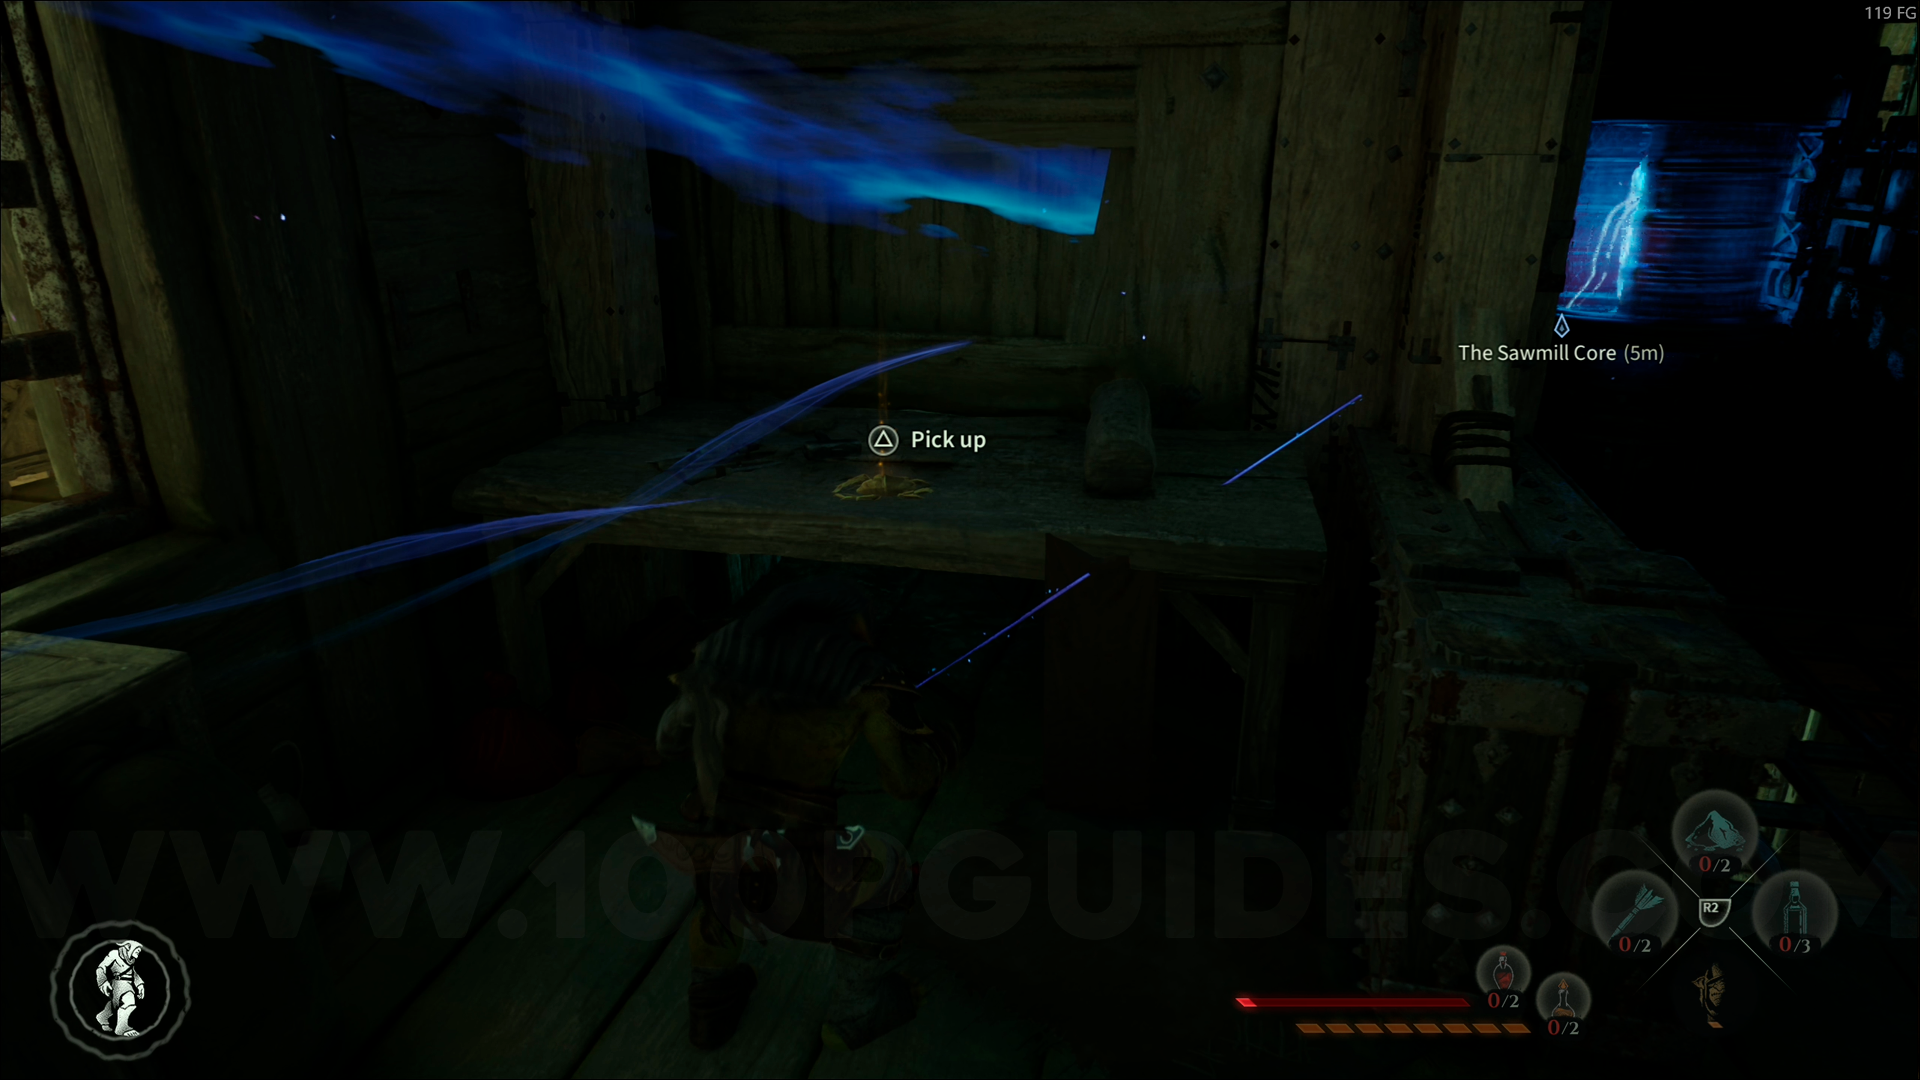
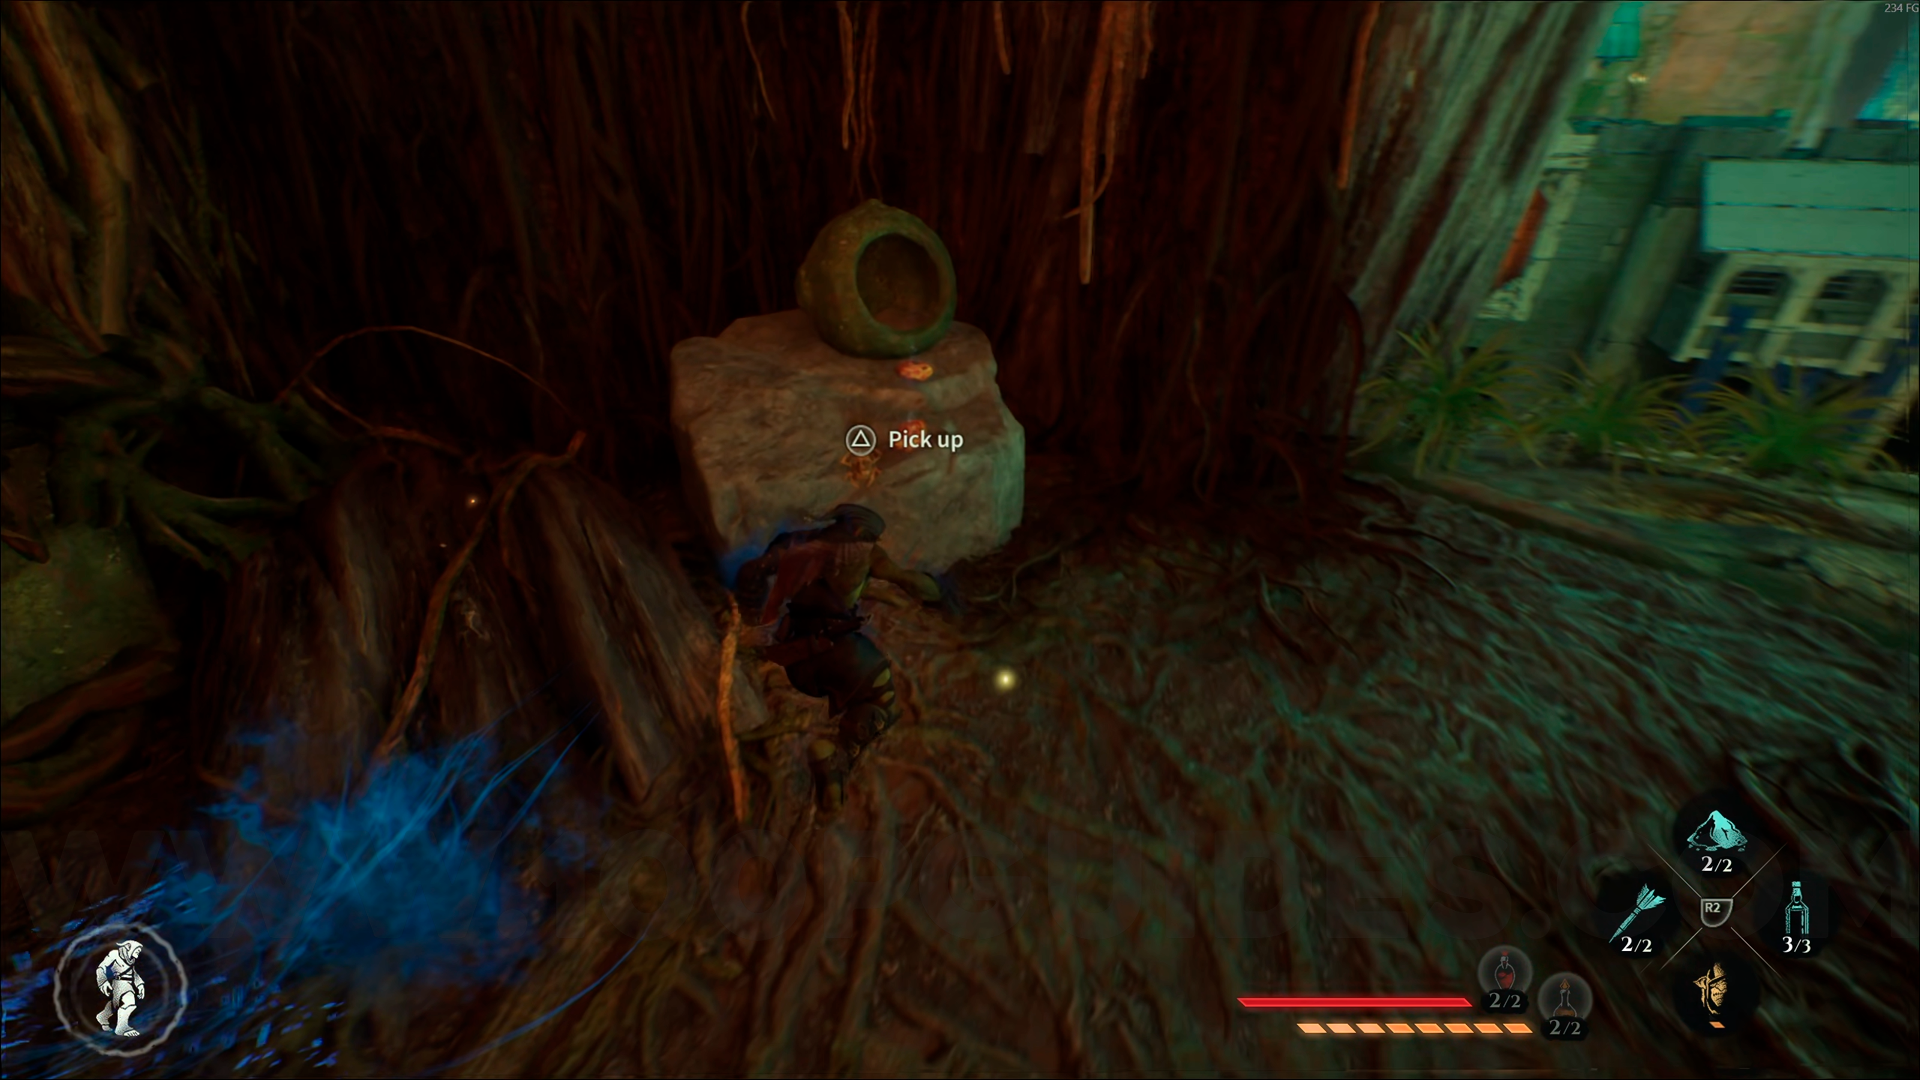
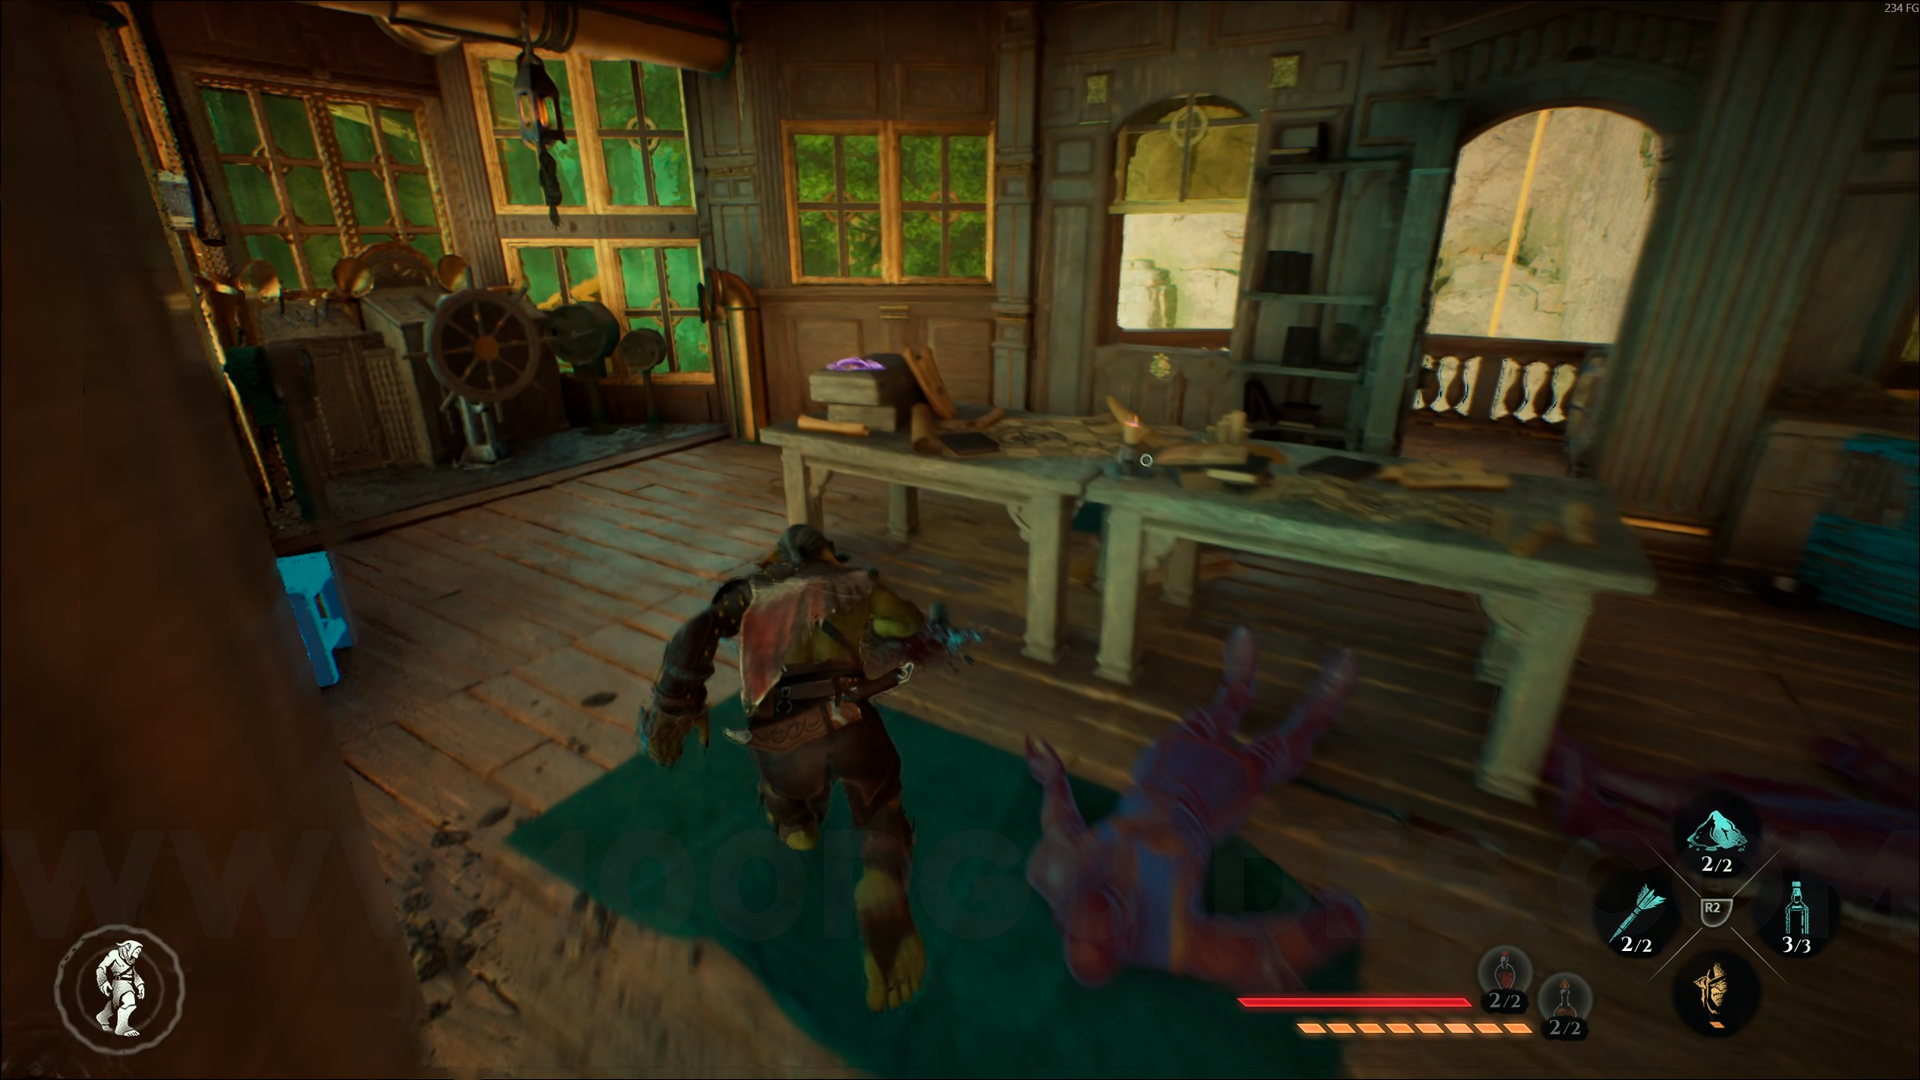
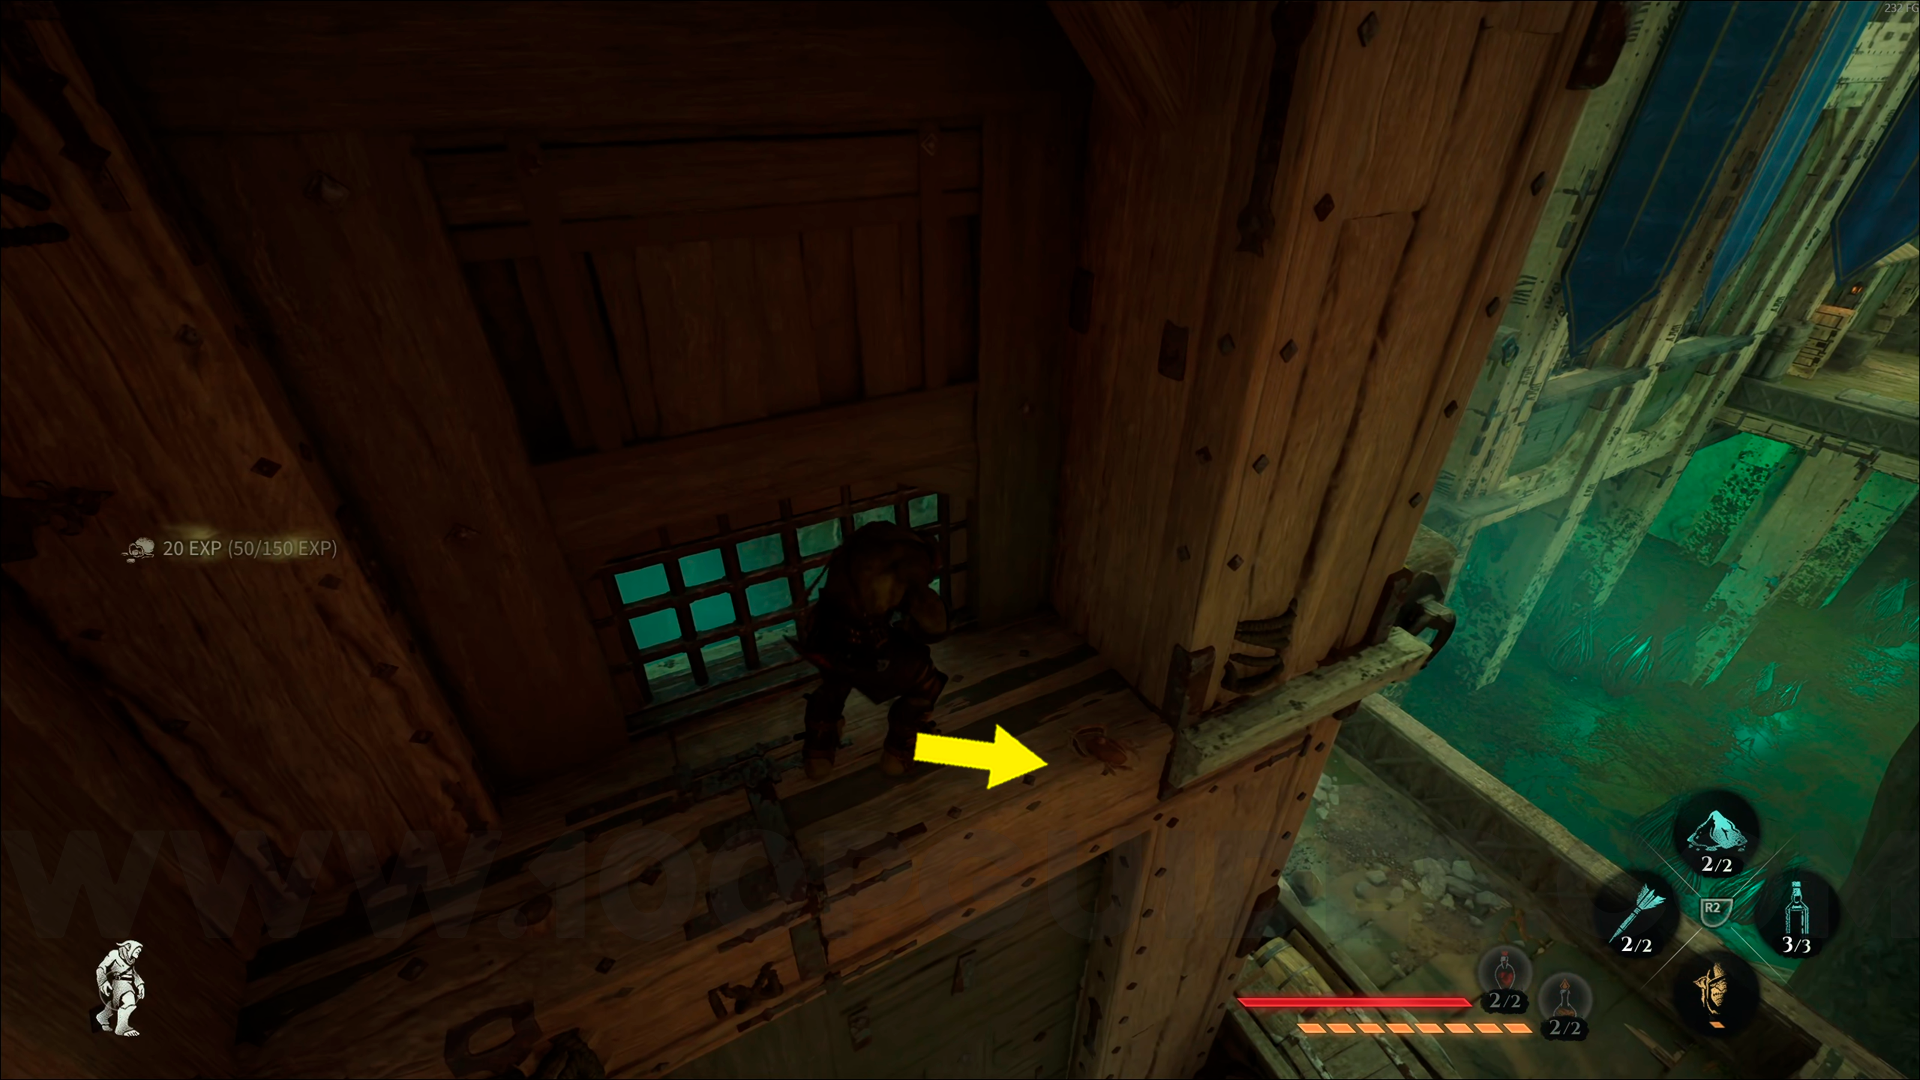
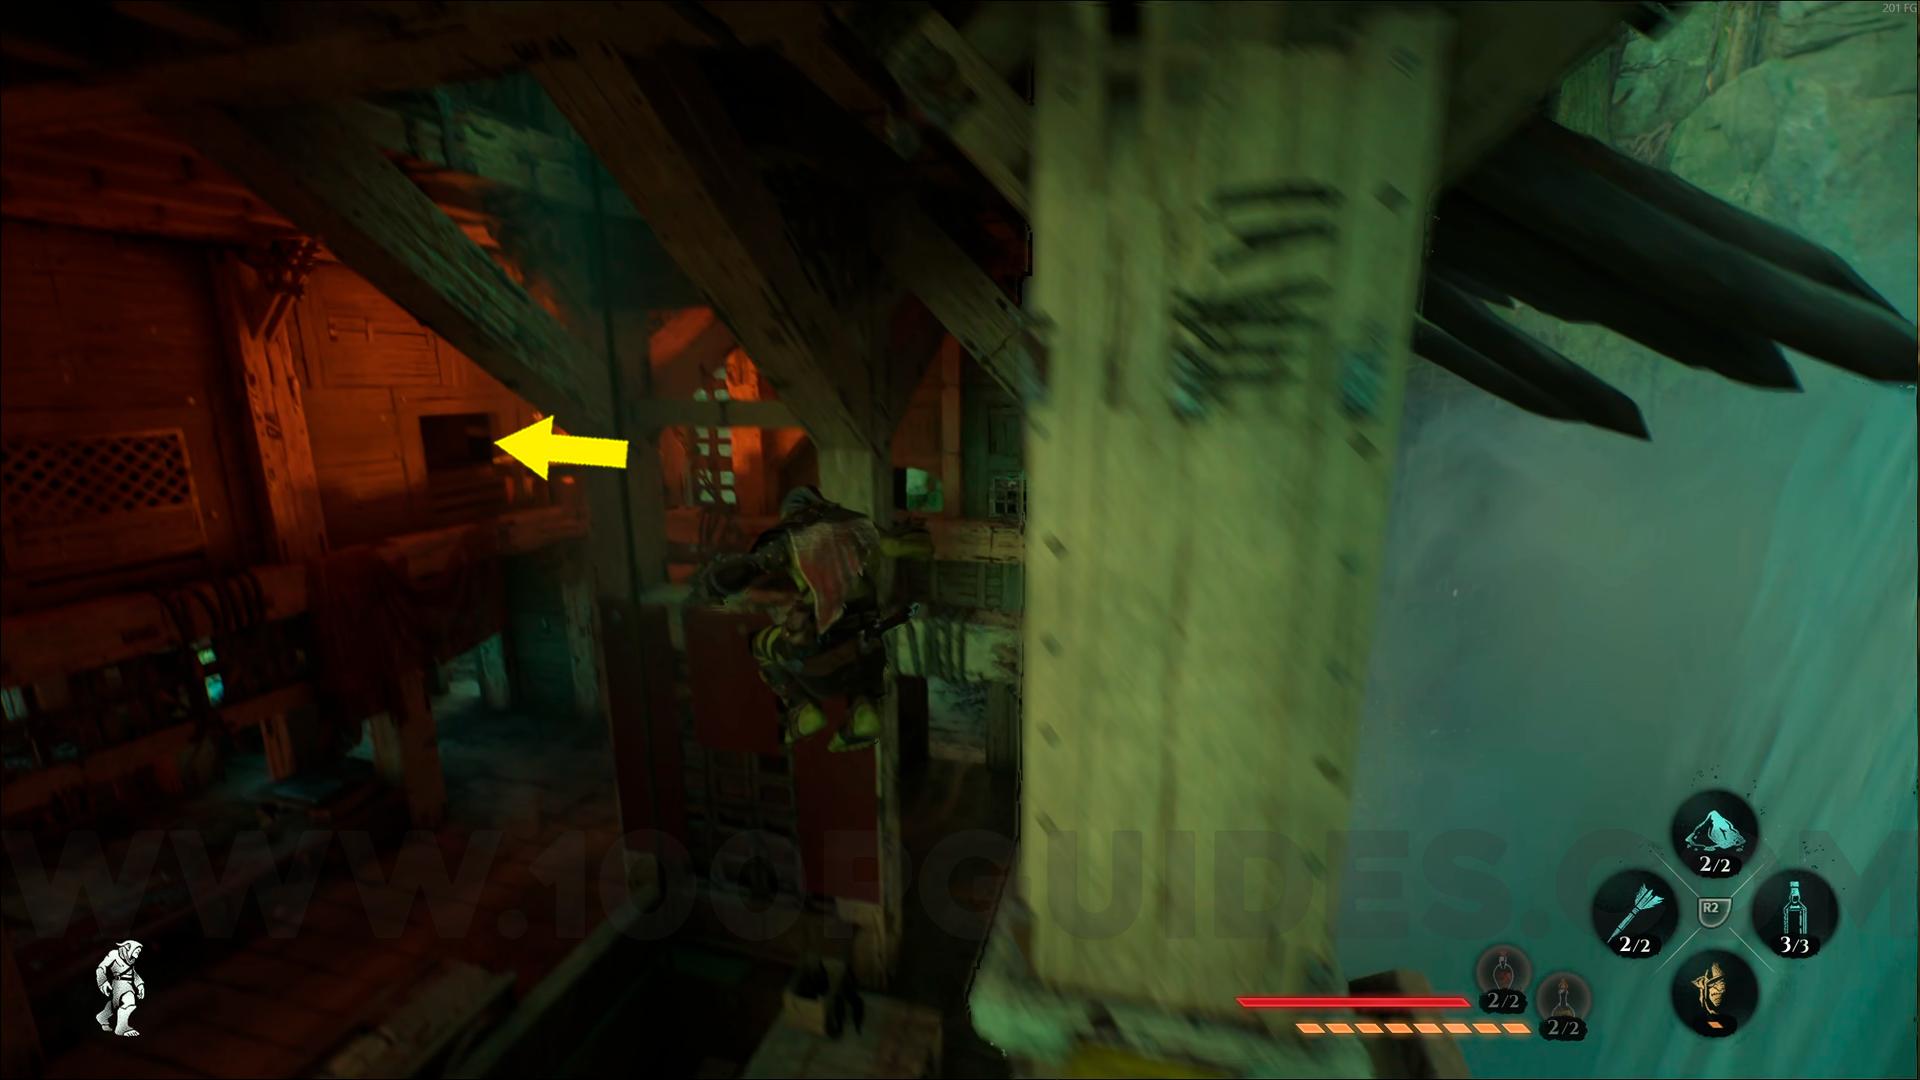
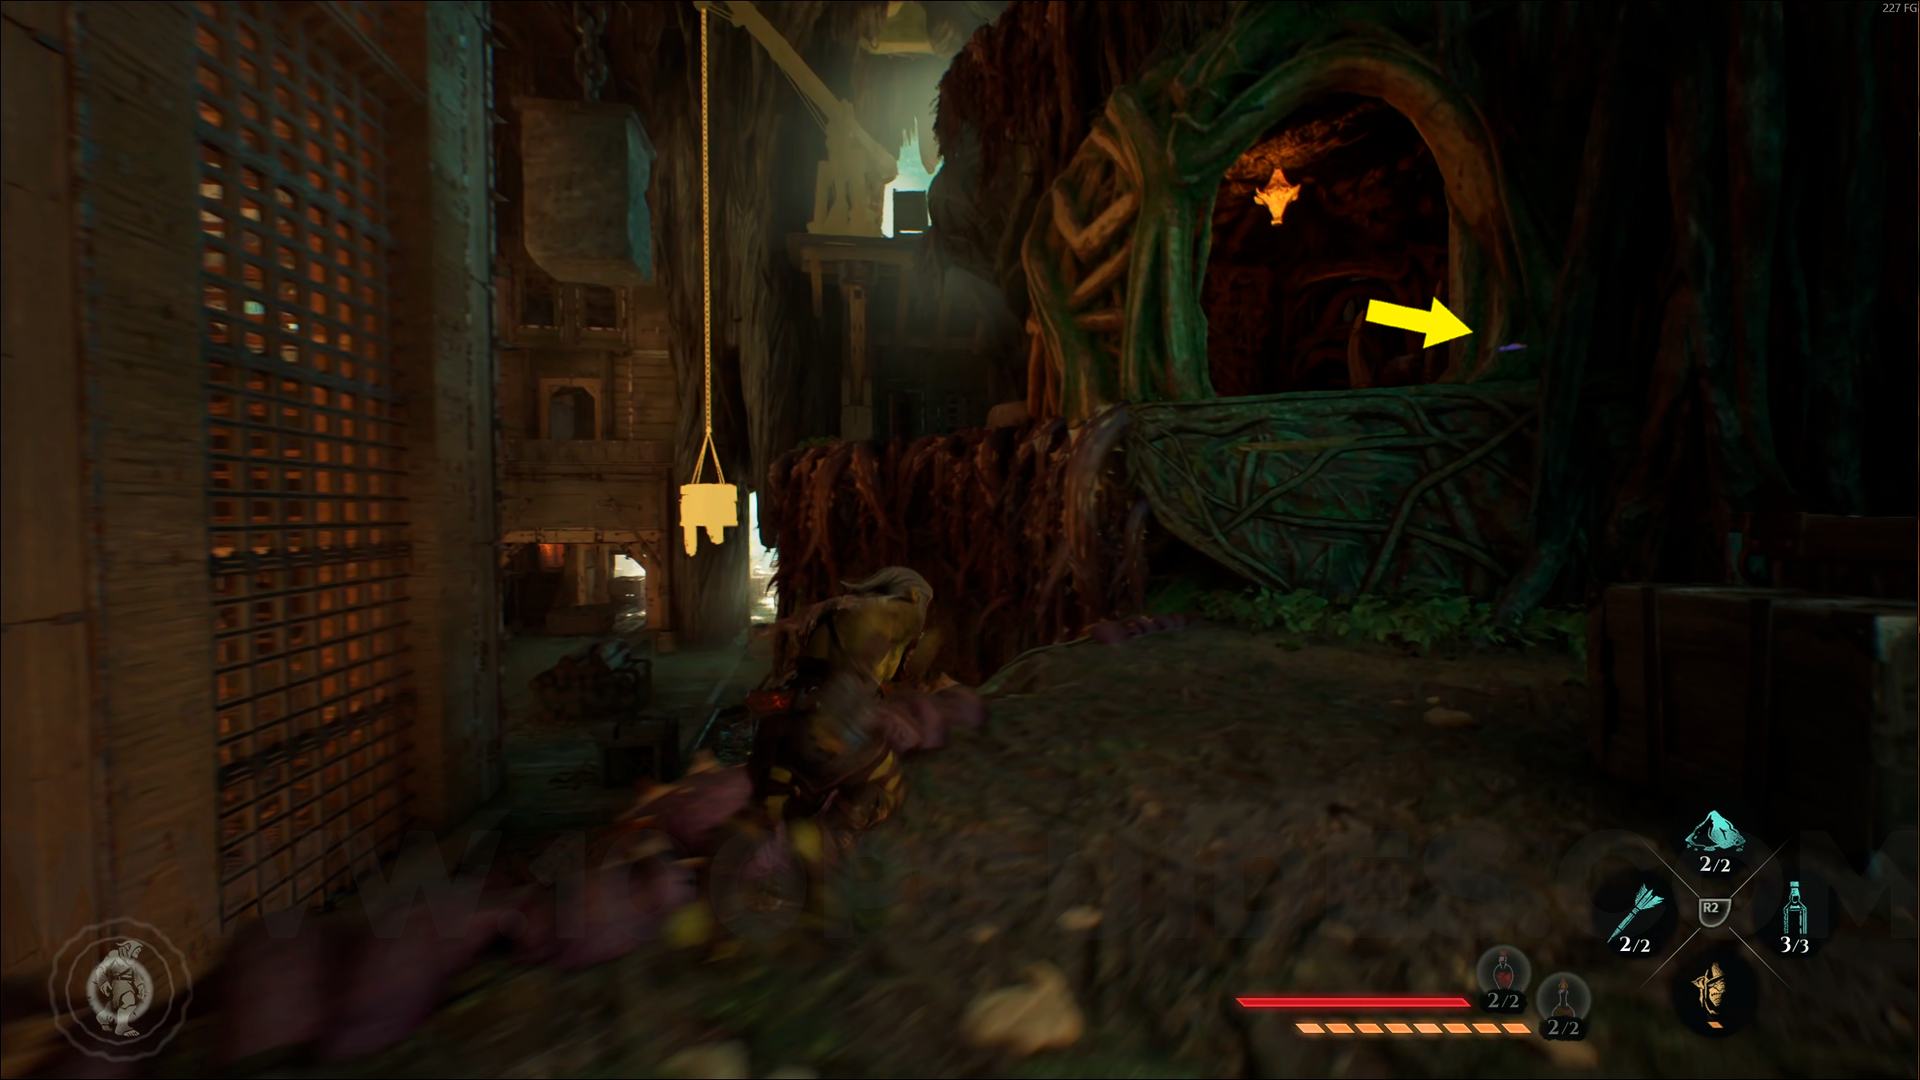
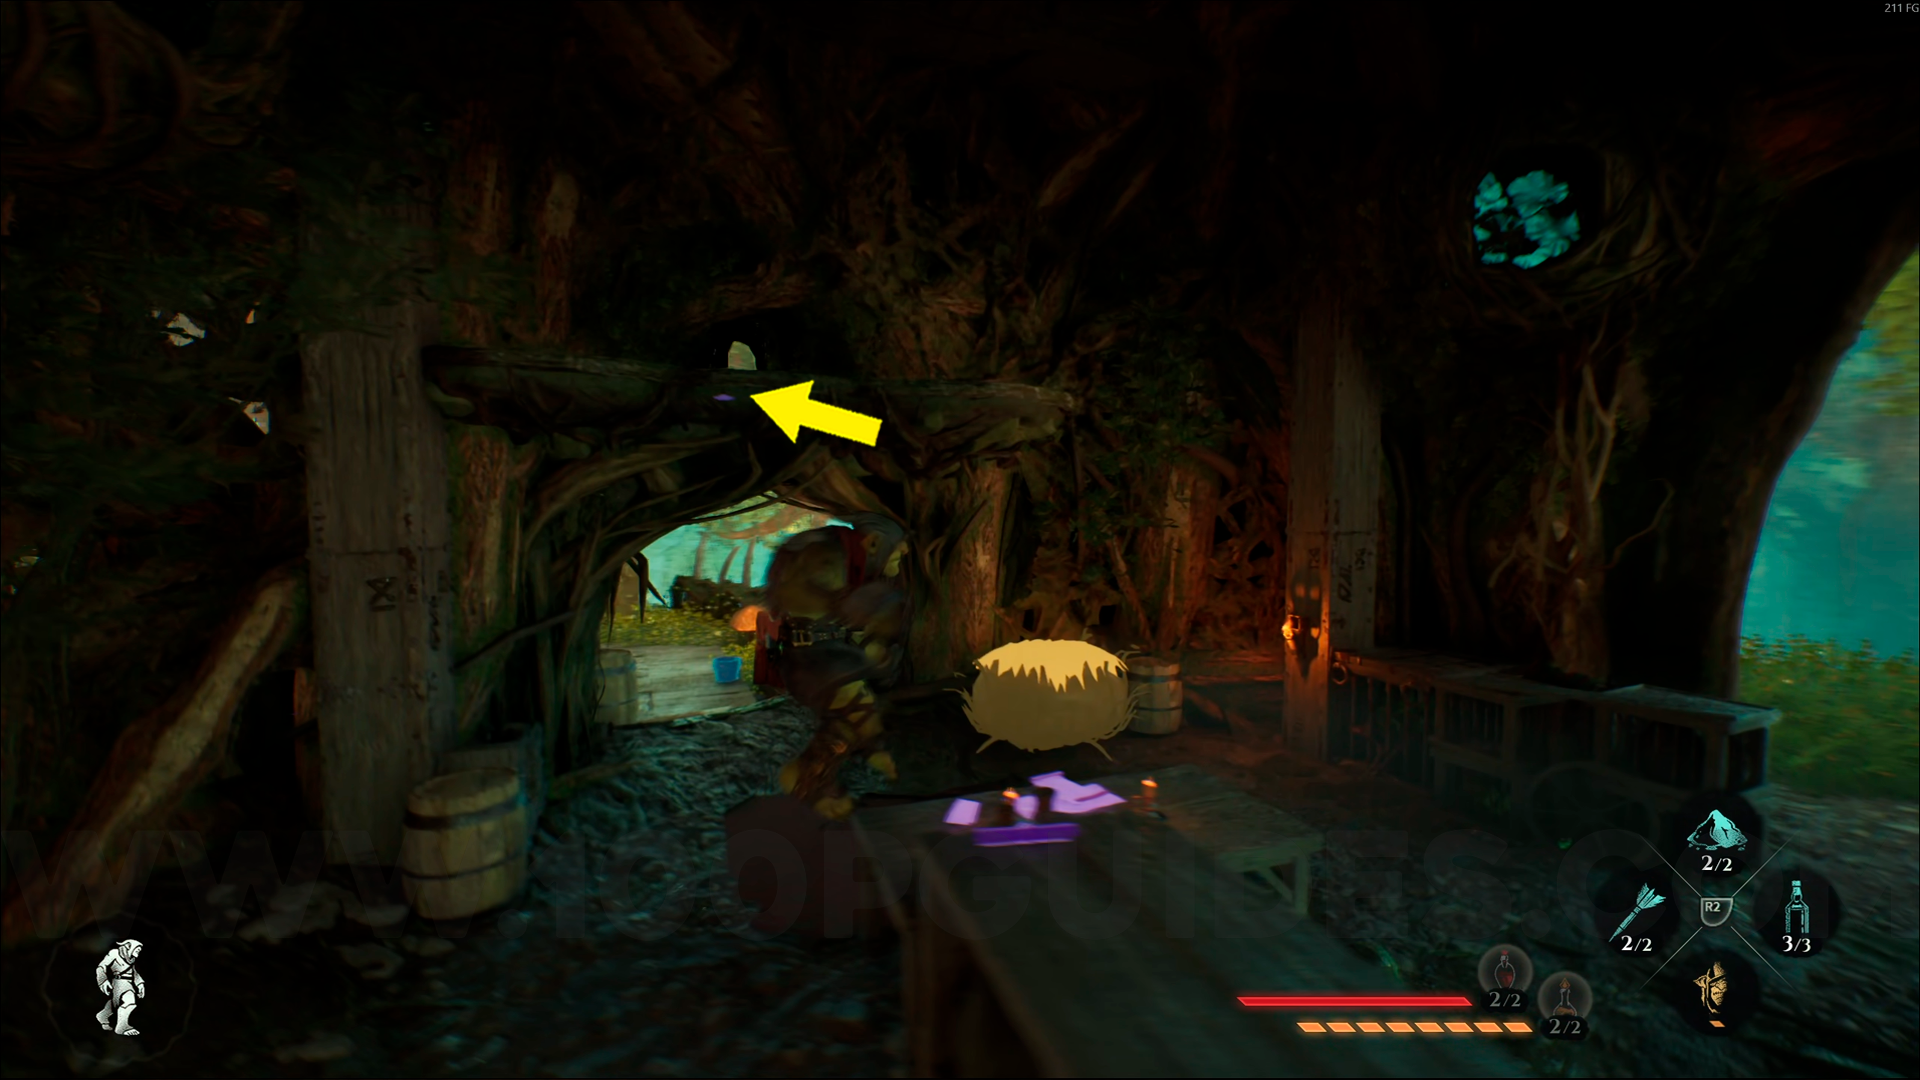
Wood Emblem #4. Right after the previous collectible, head to the structure at the back of the area and go through the hole in the wall. Then climb up the pillar, go through the door, and the emblem will be on the table in front of you.
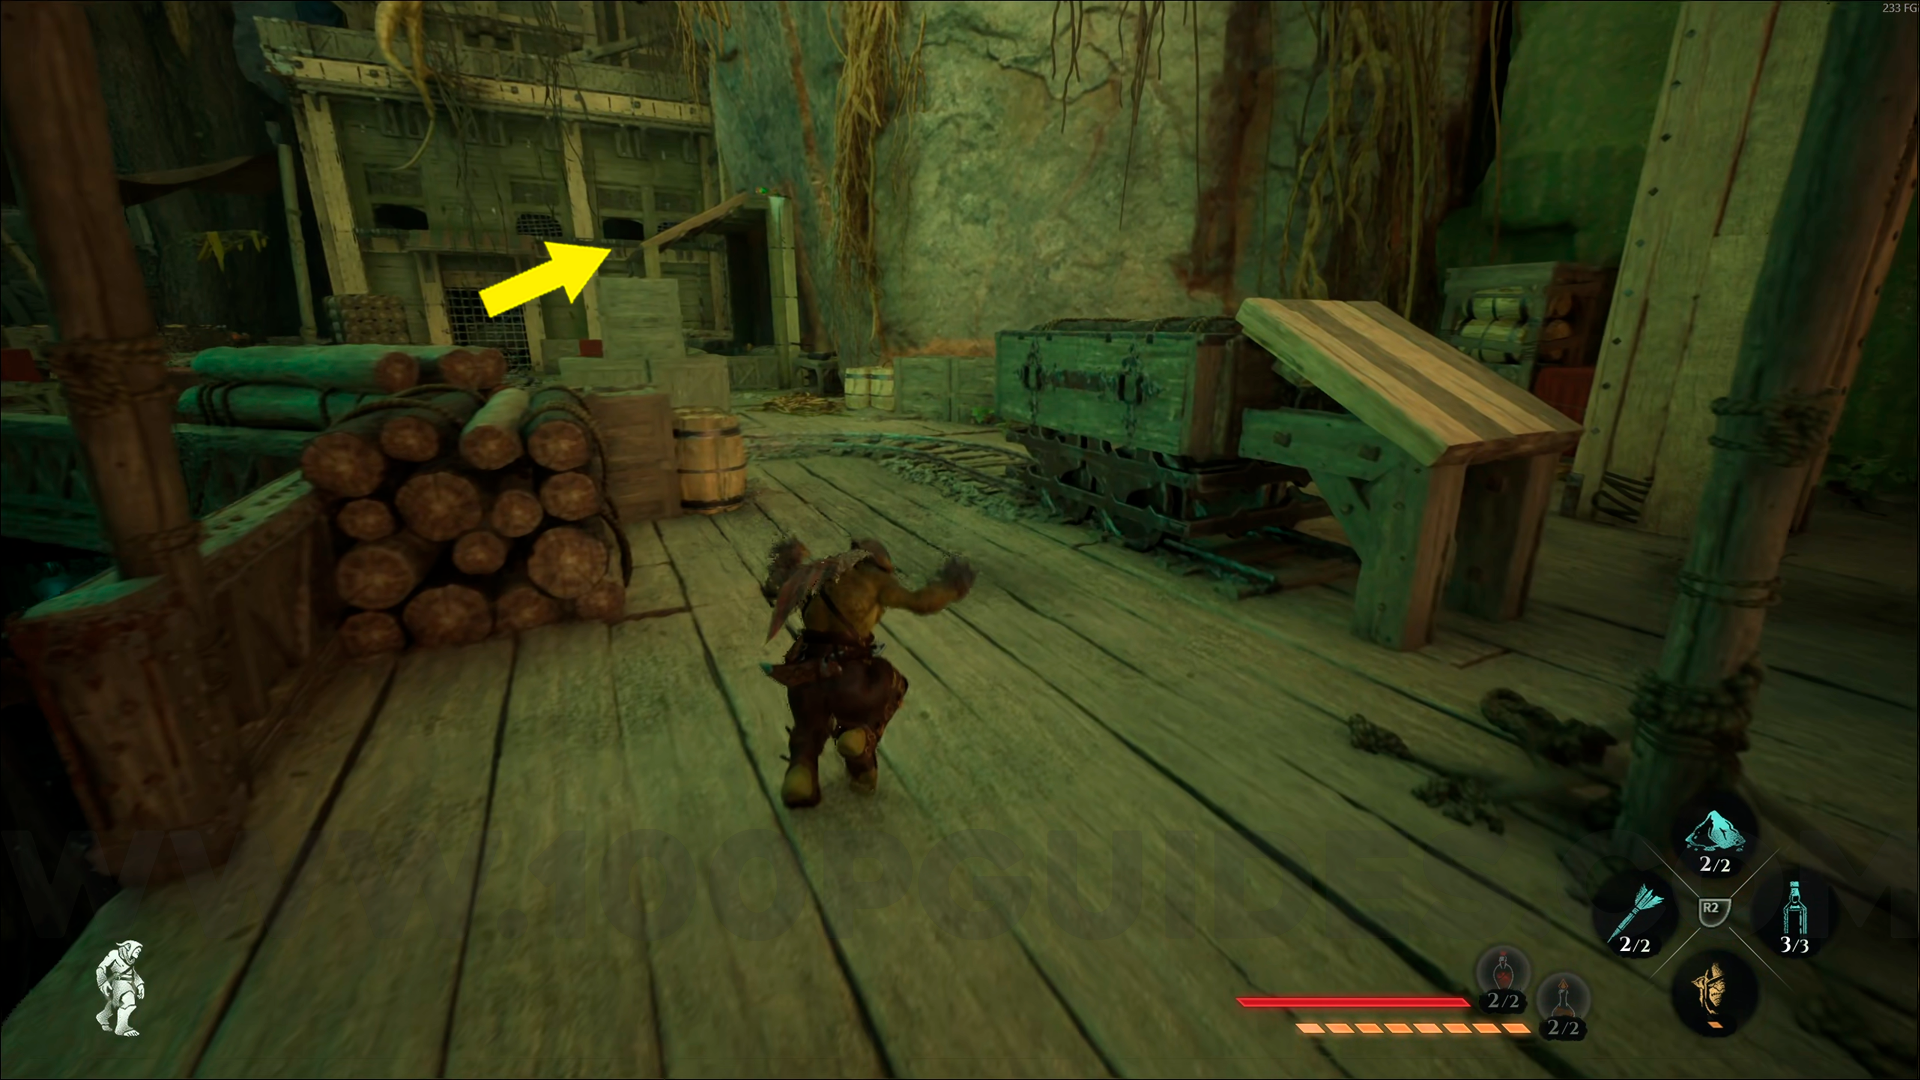
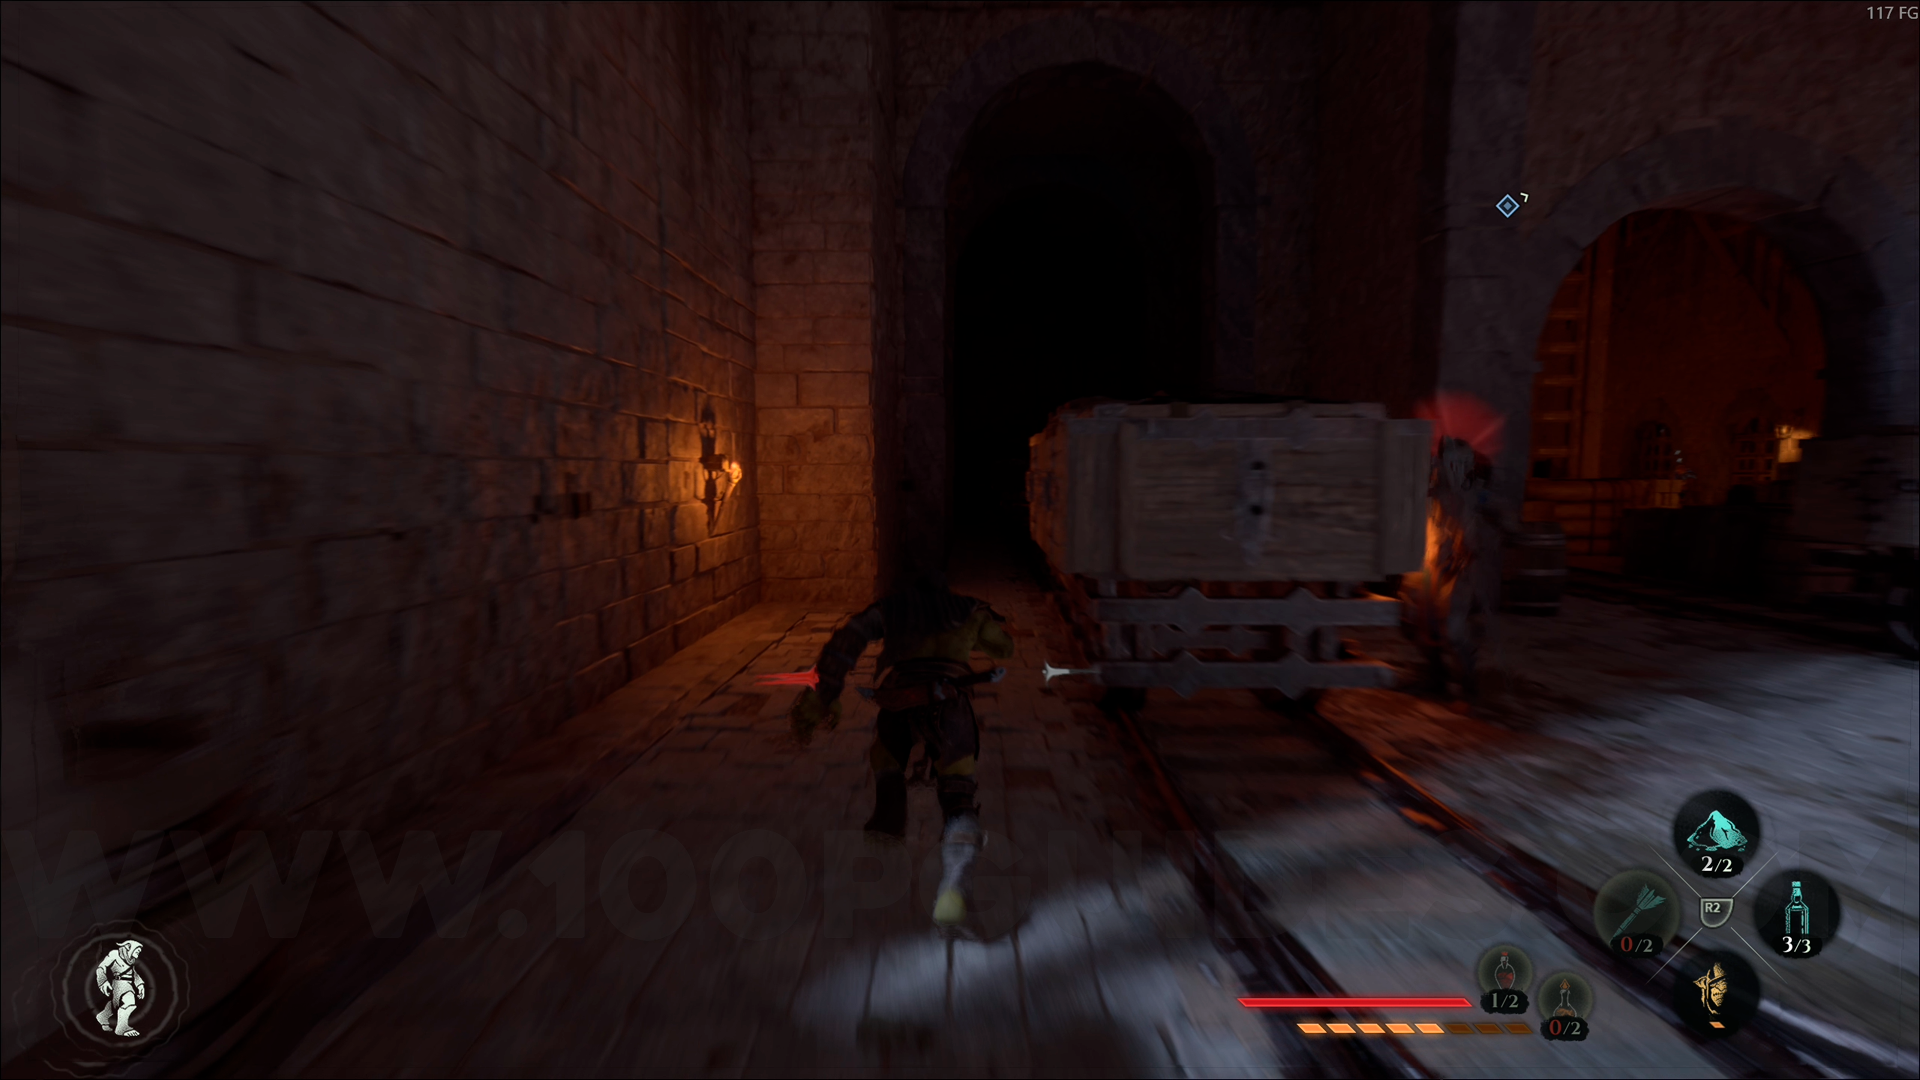
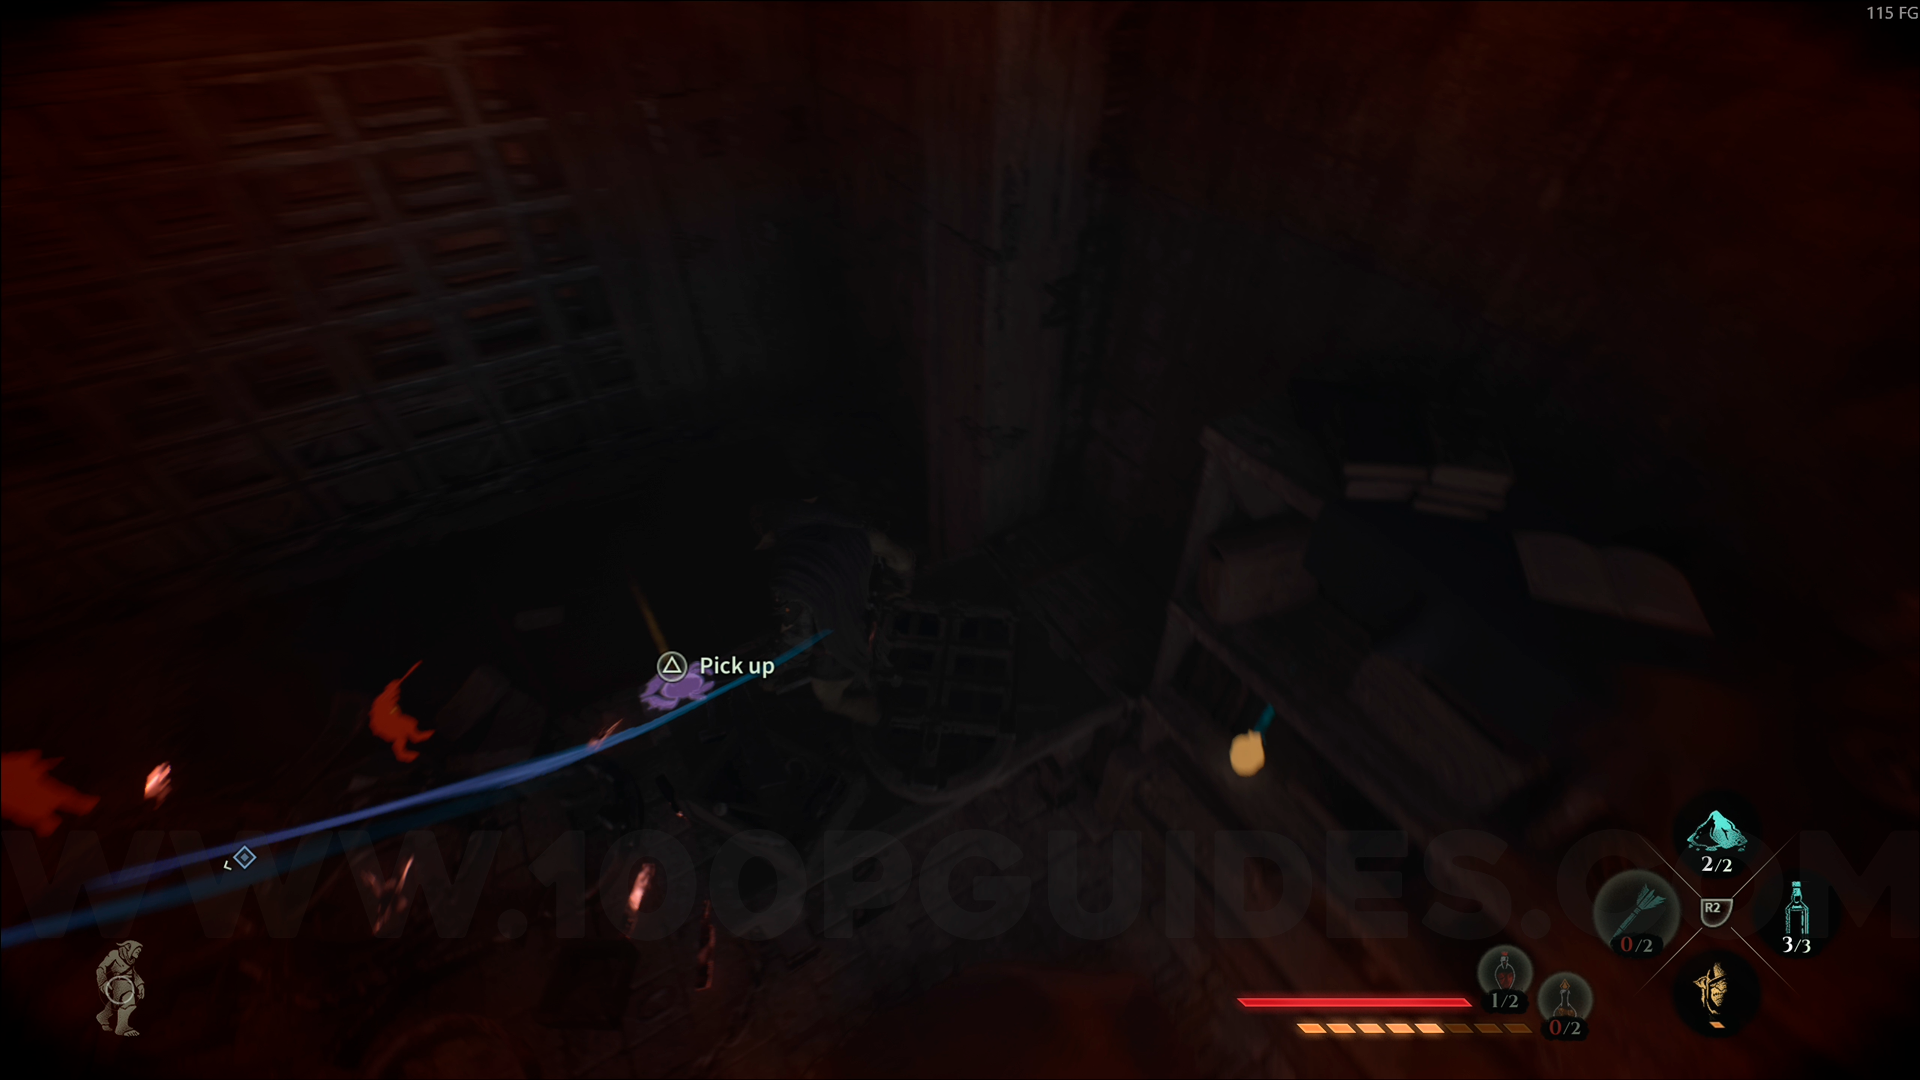
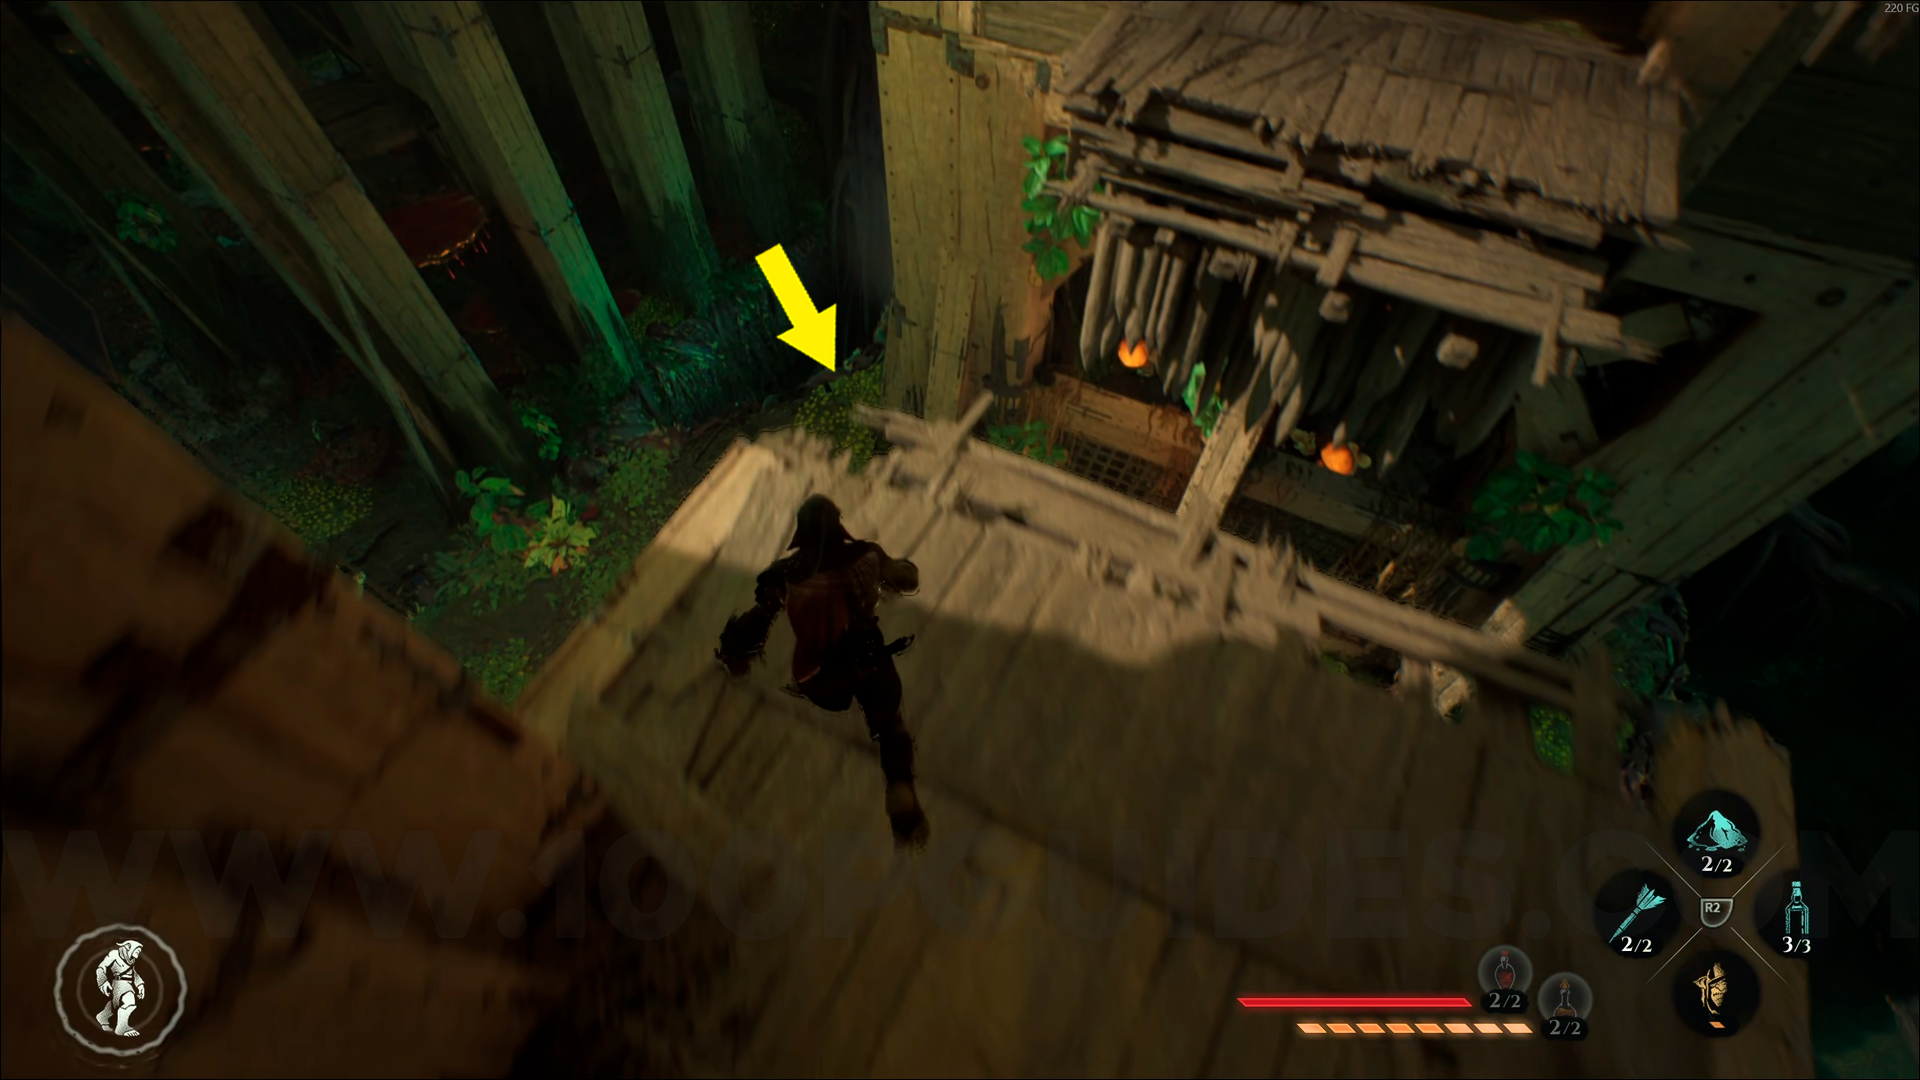
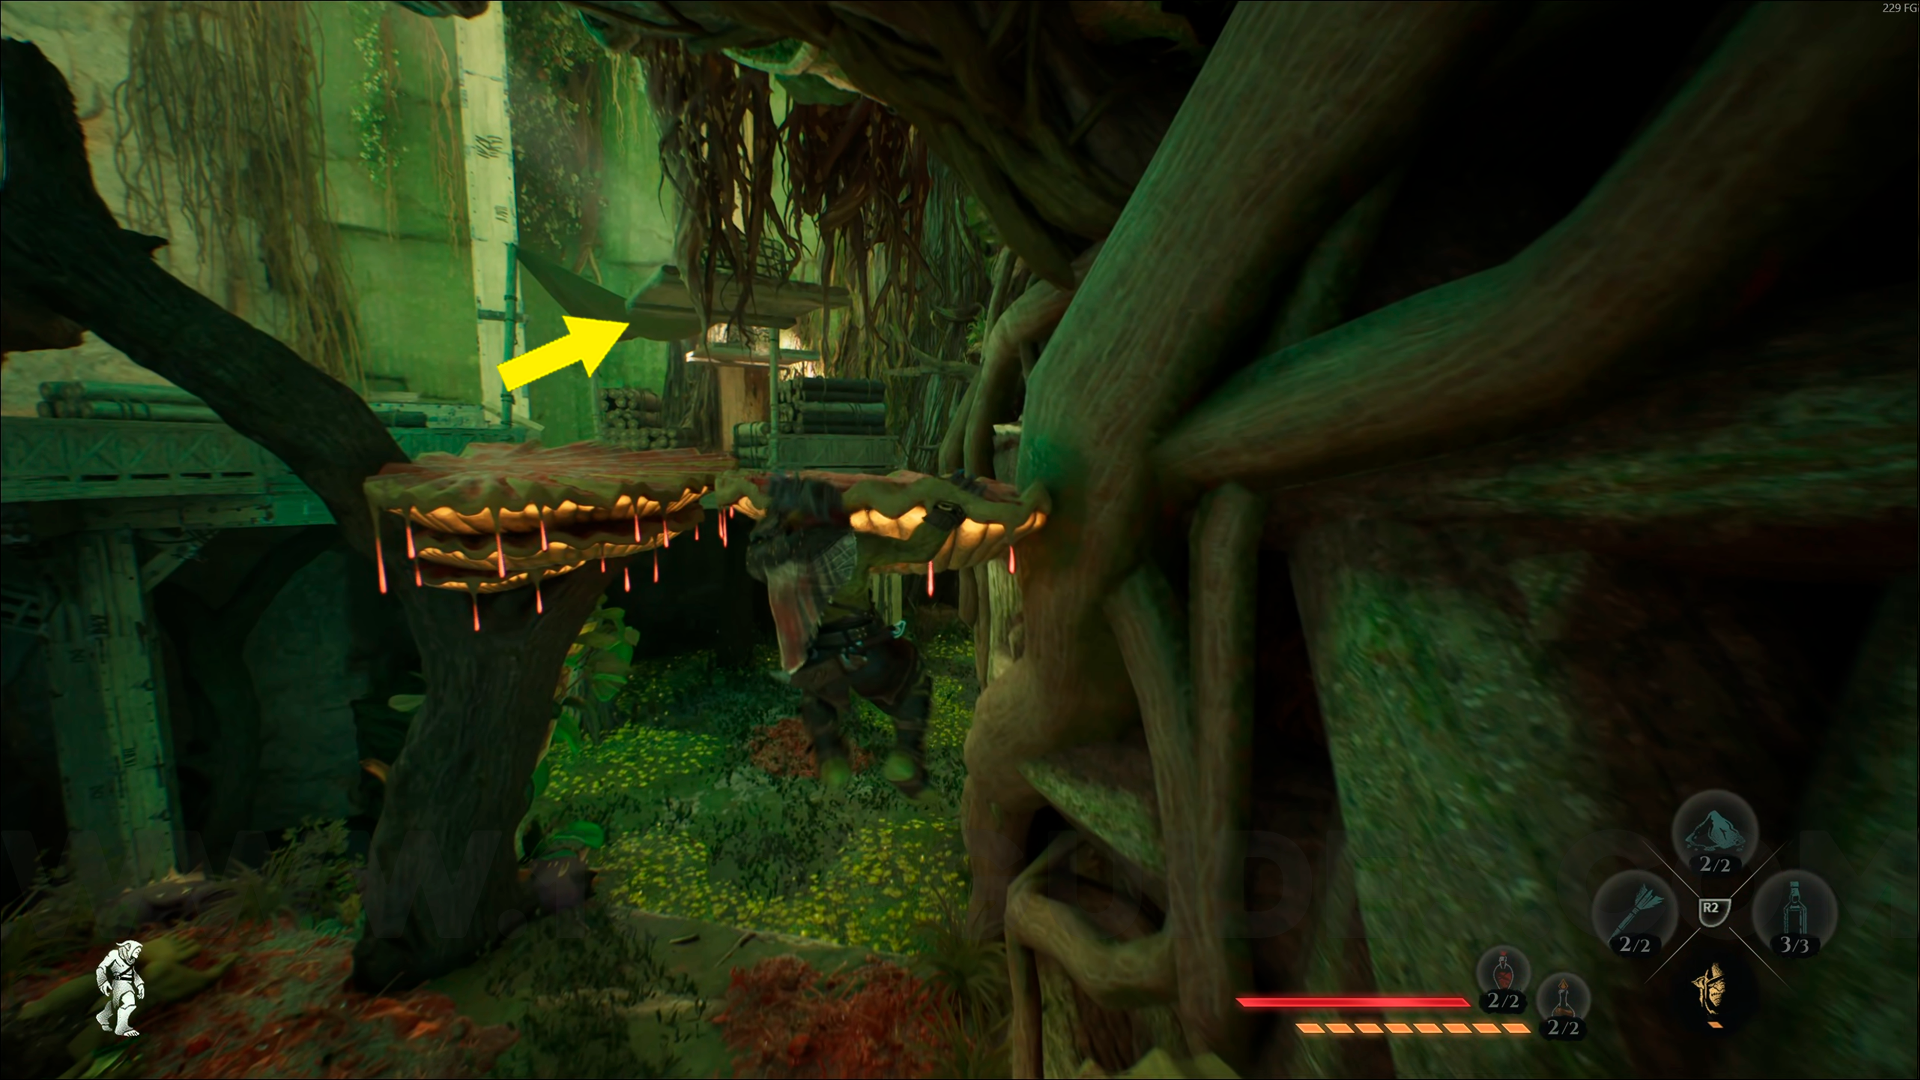
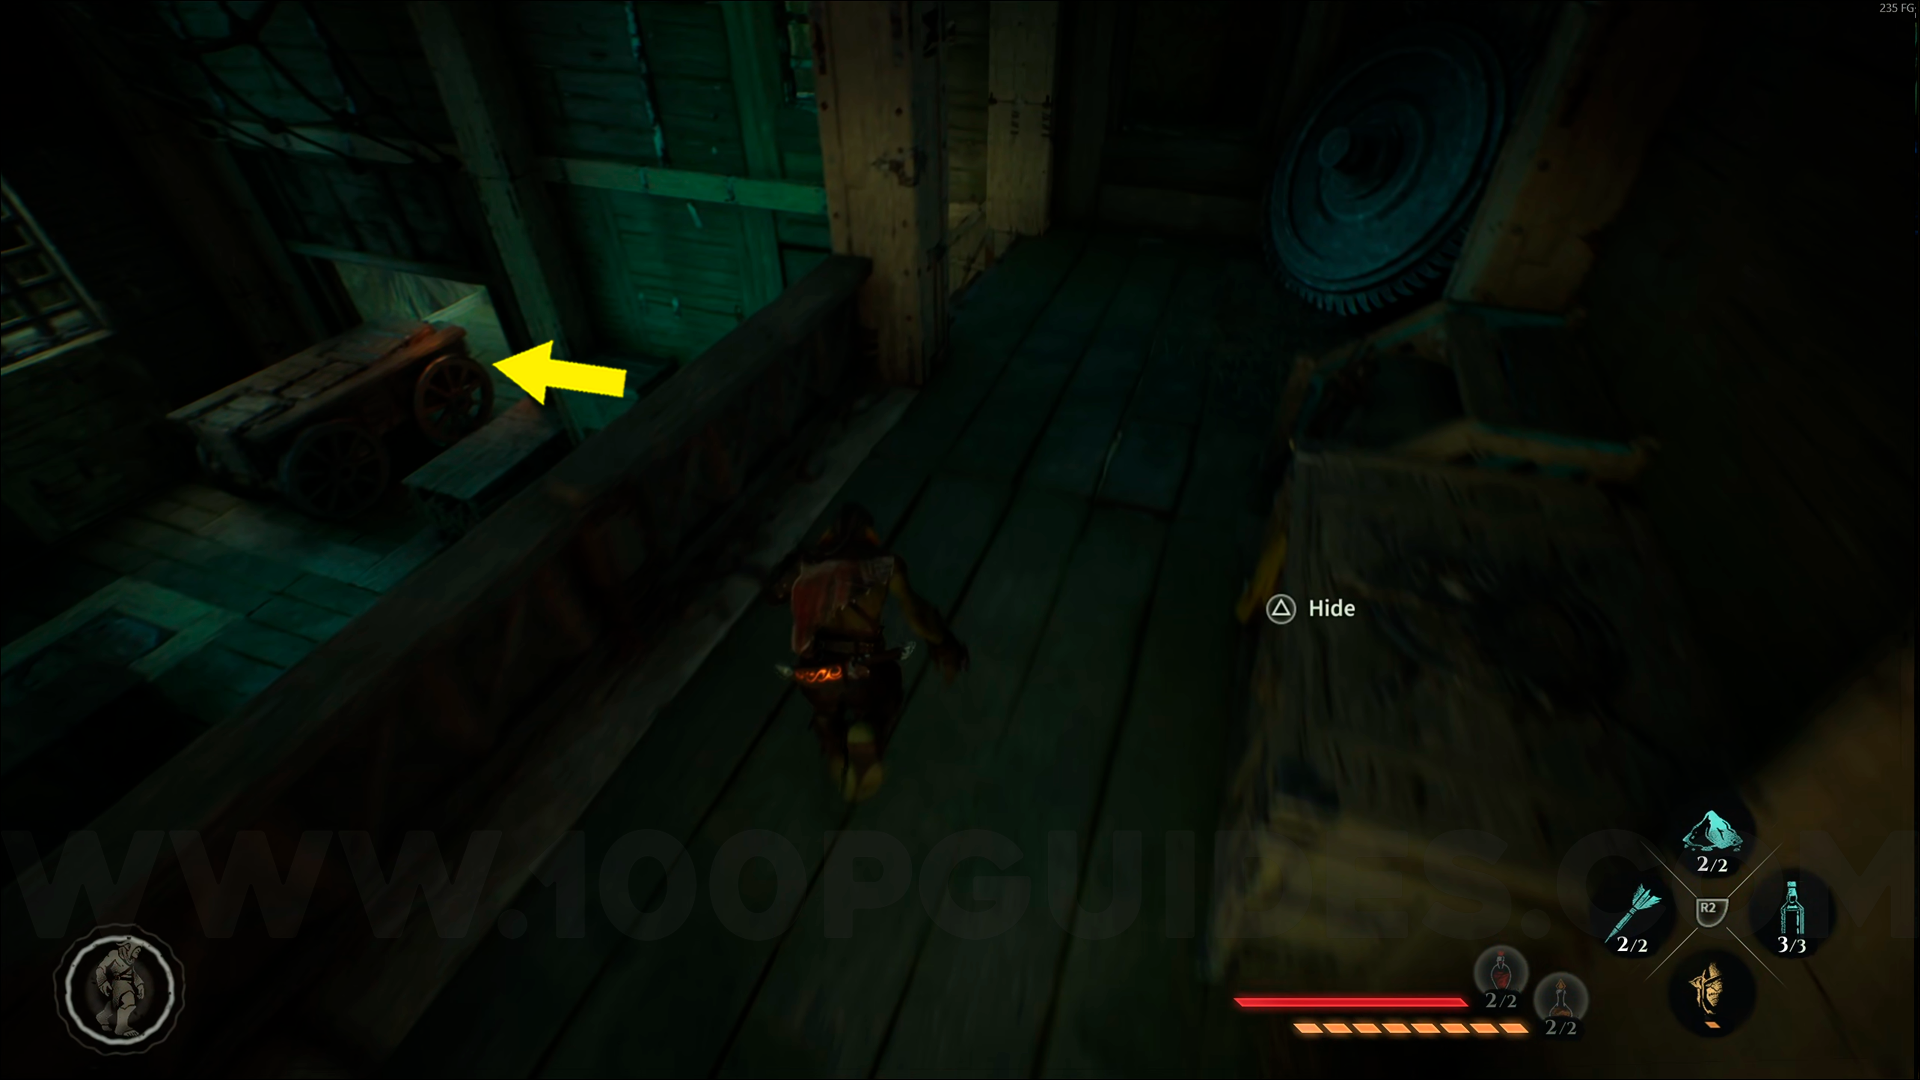
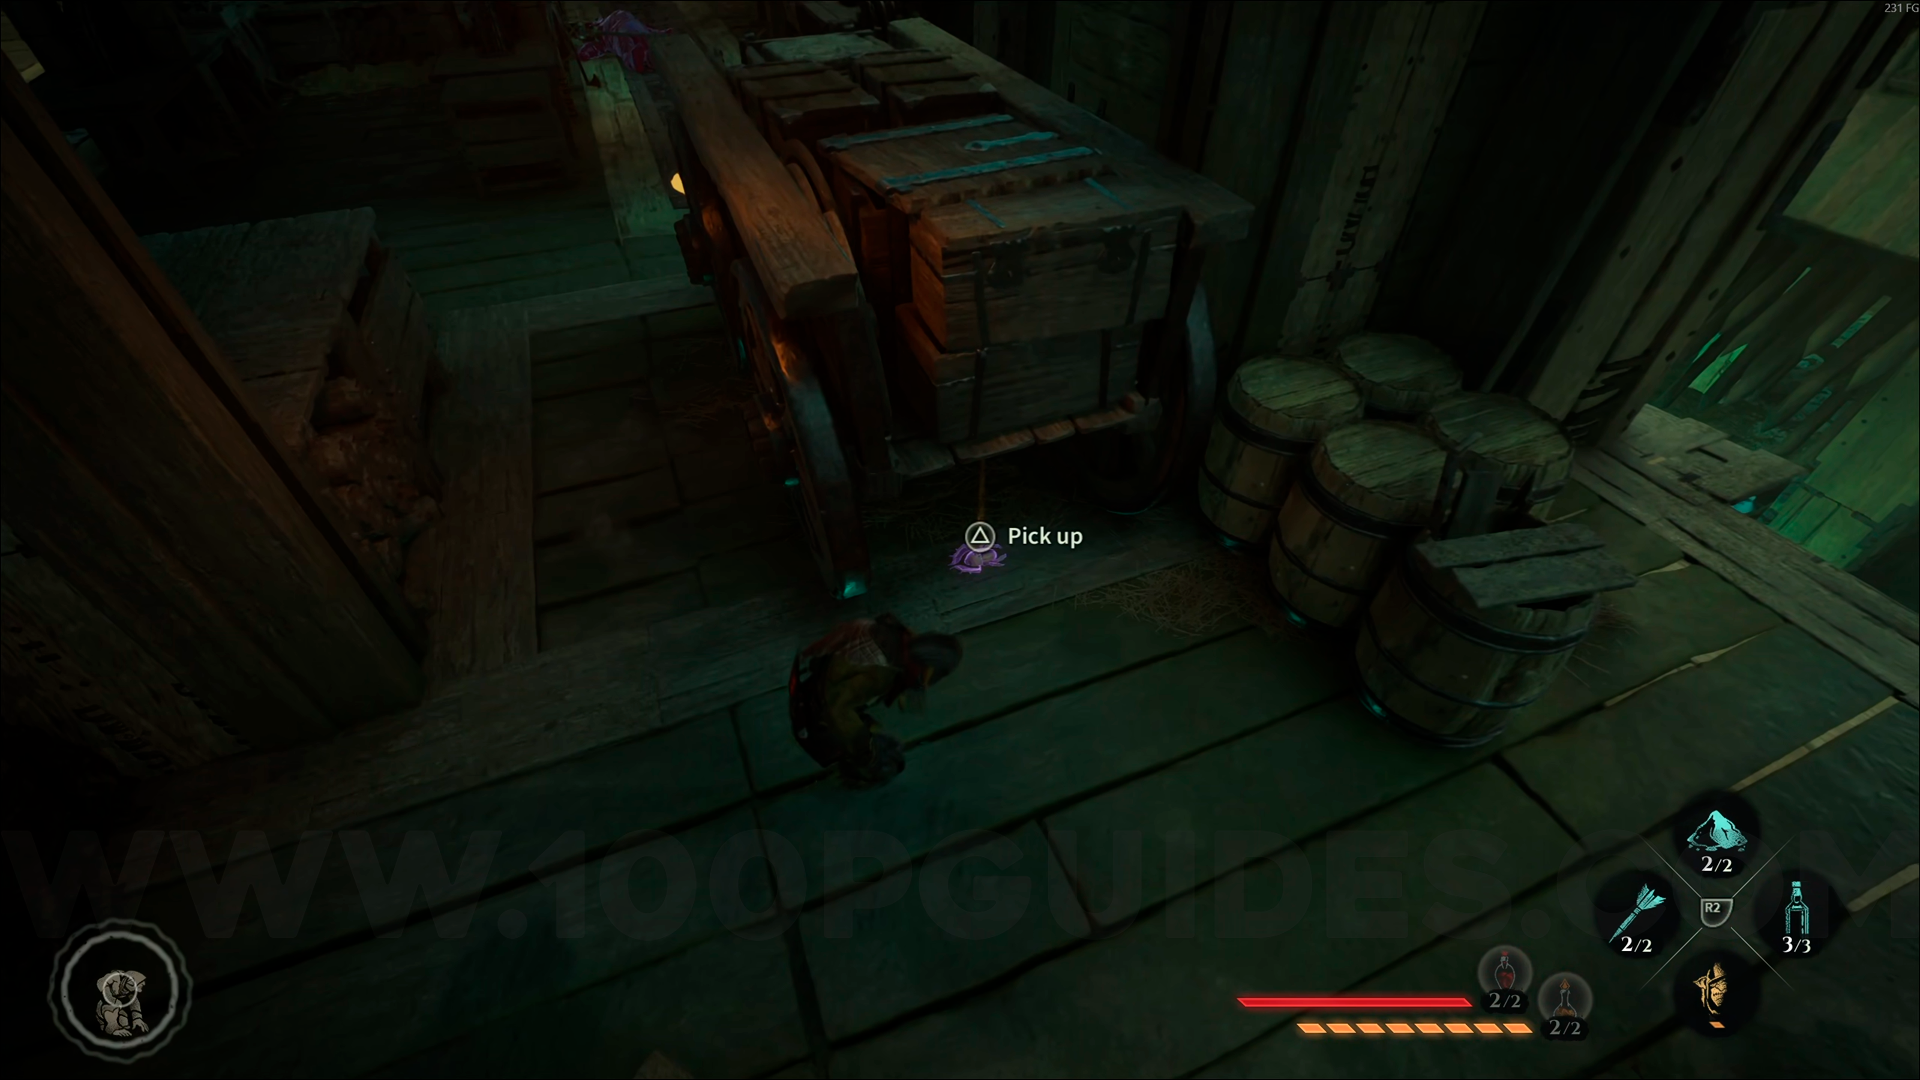
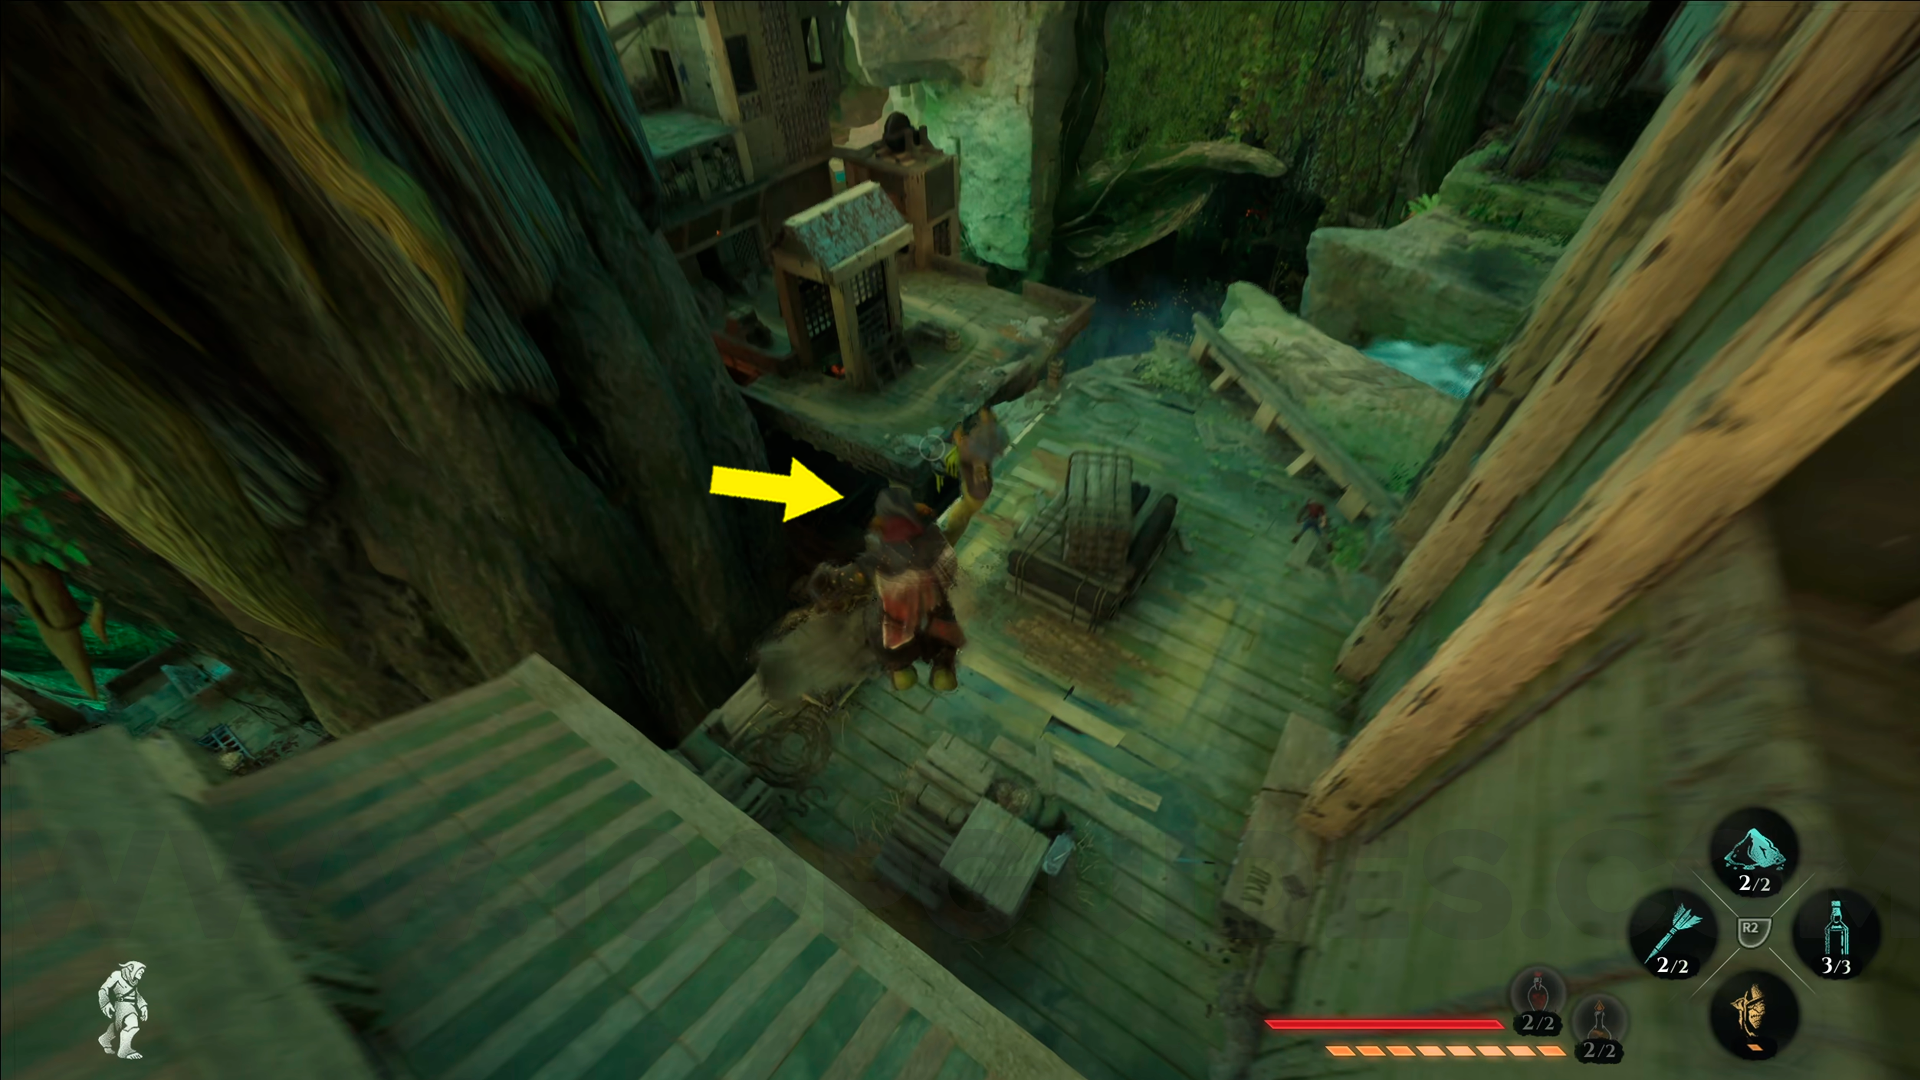
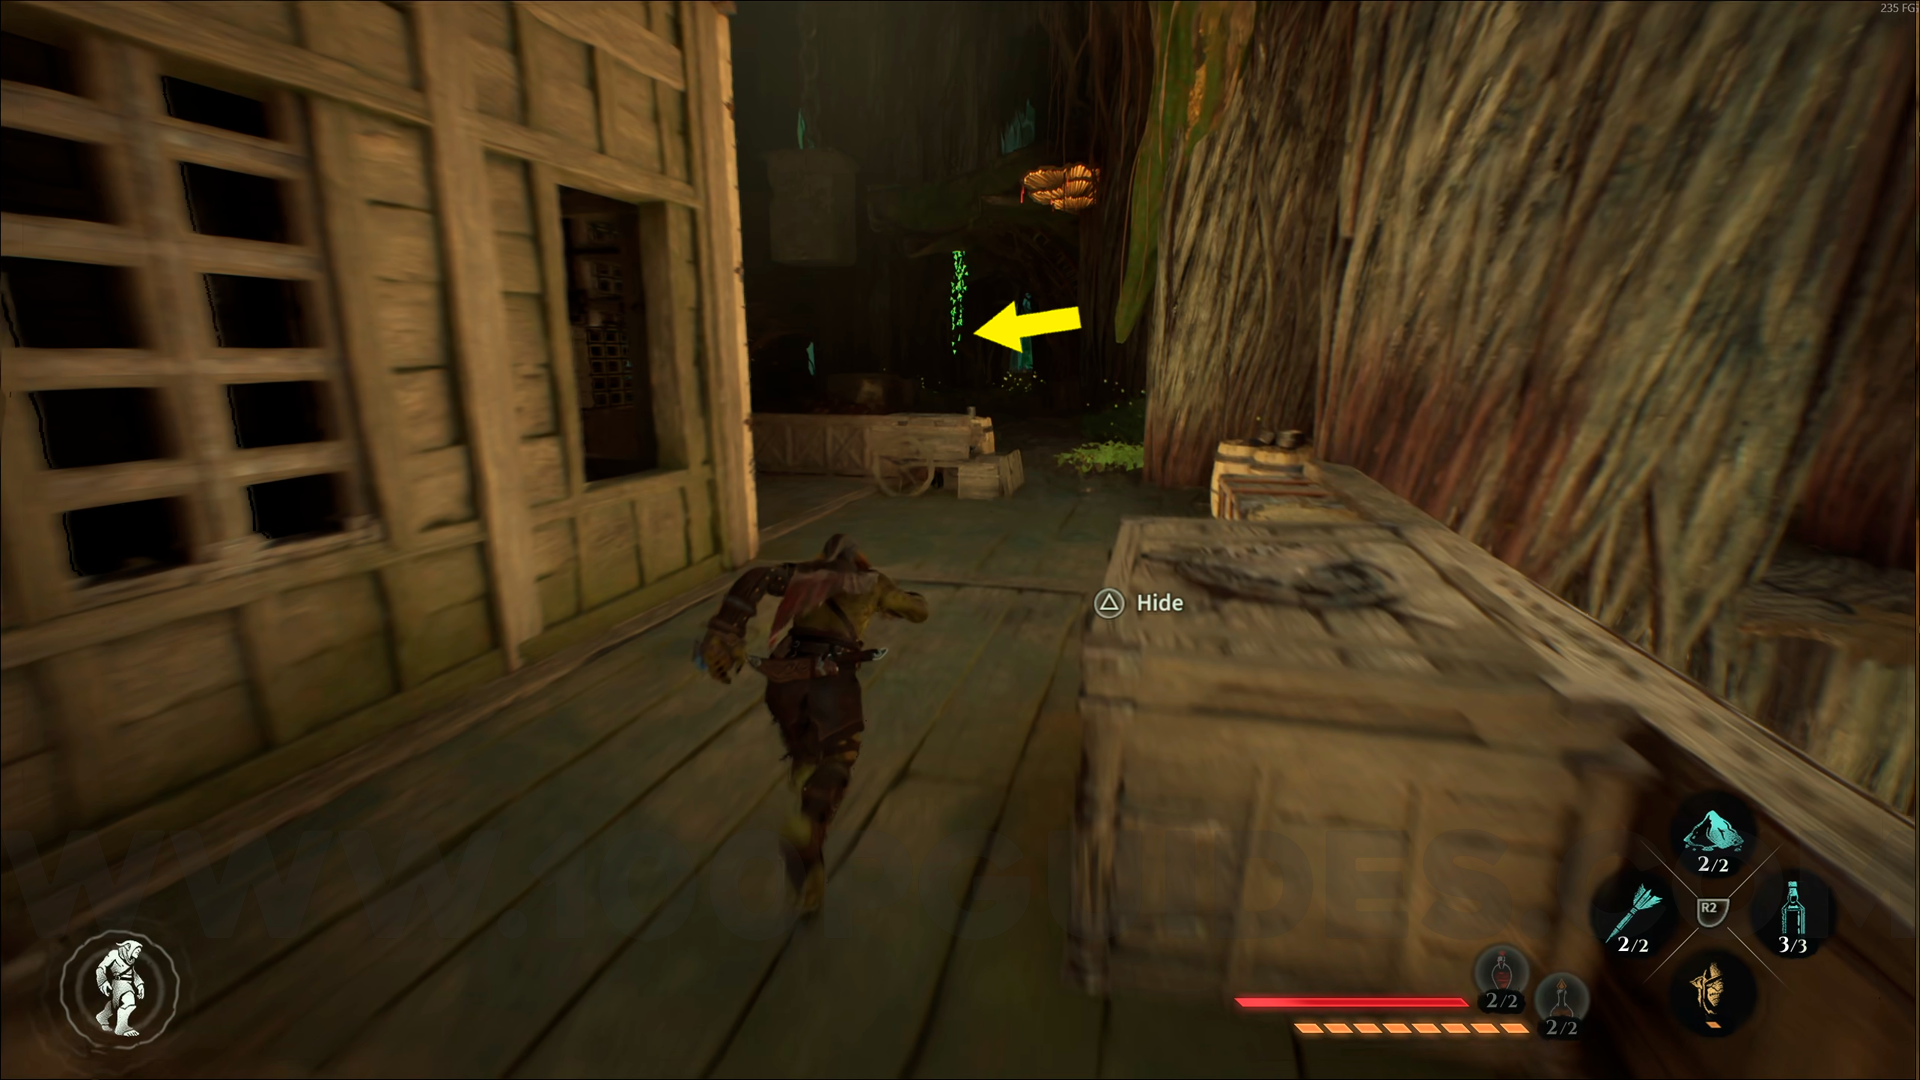
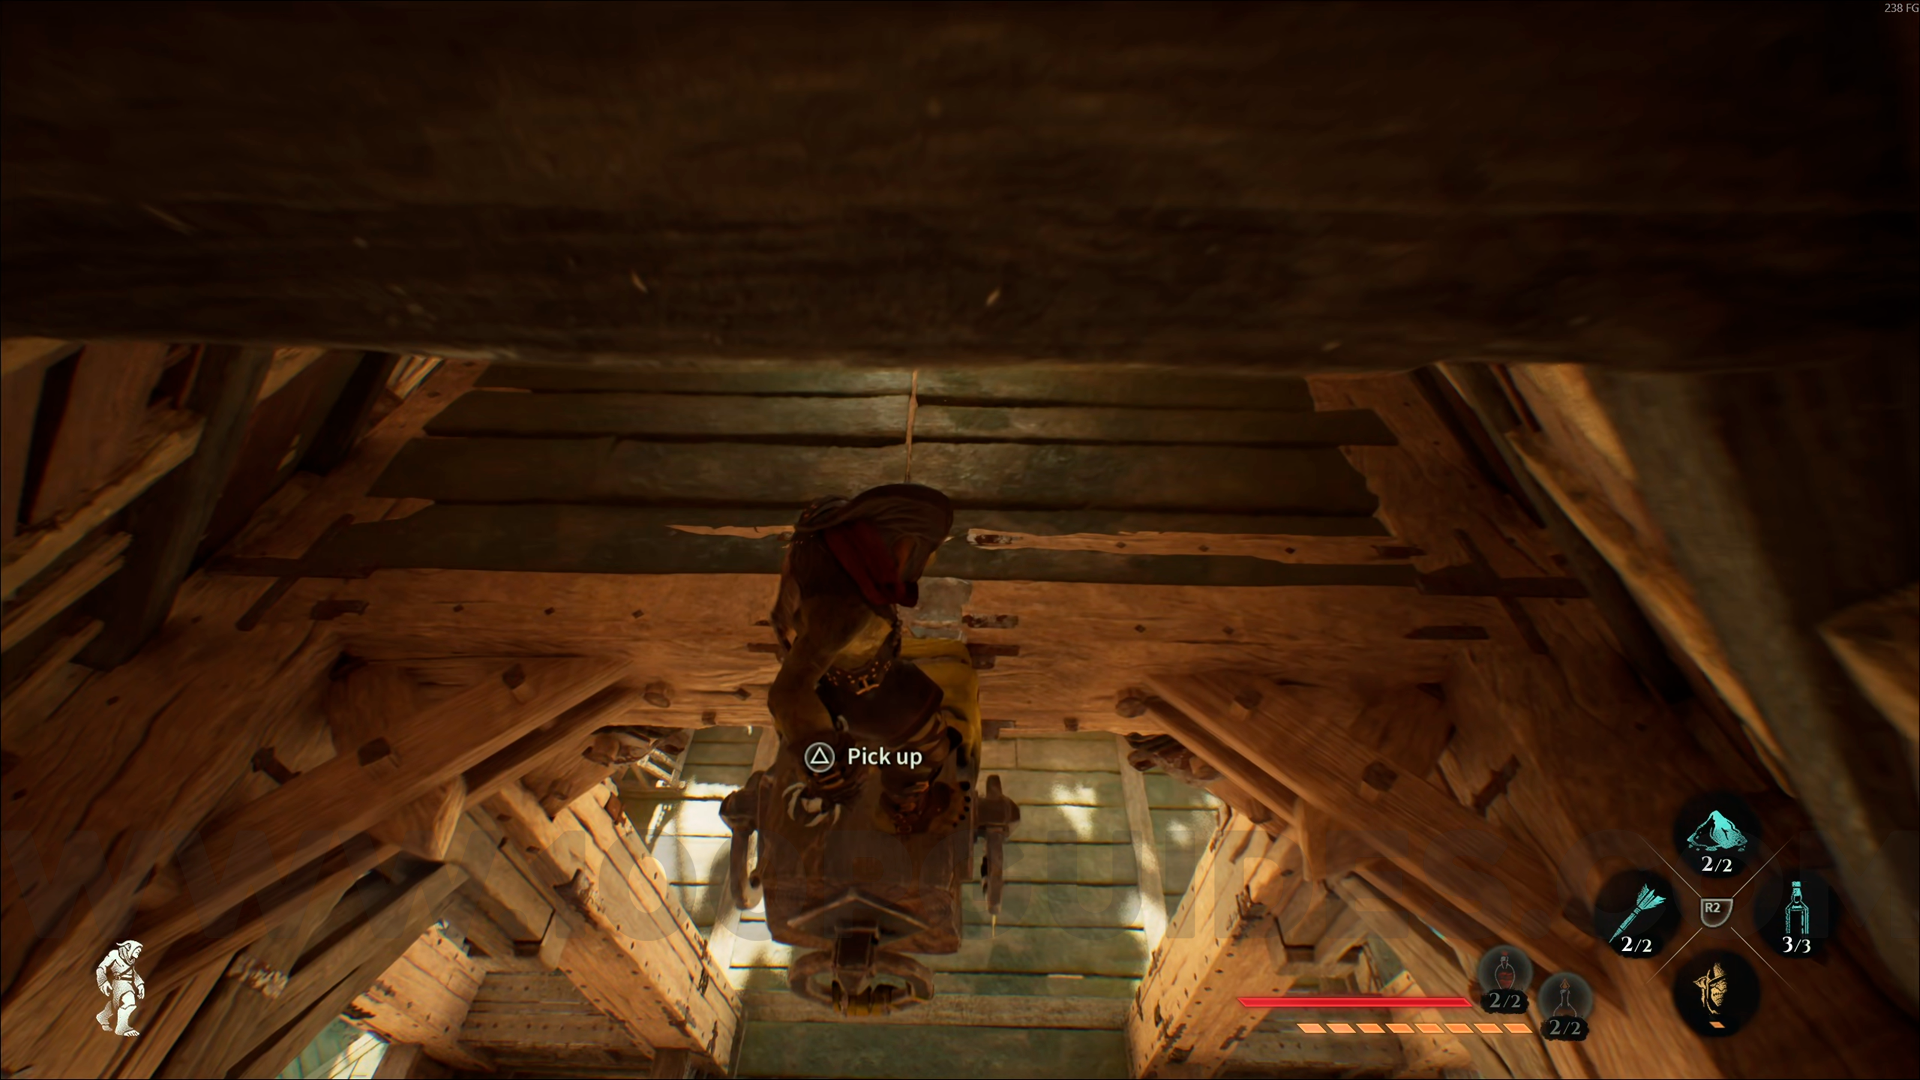
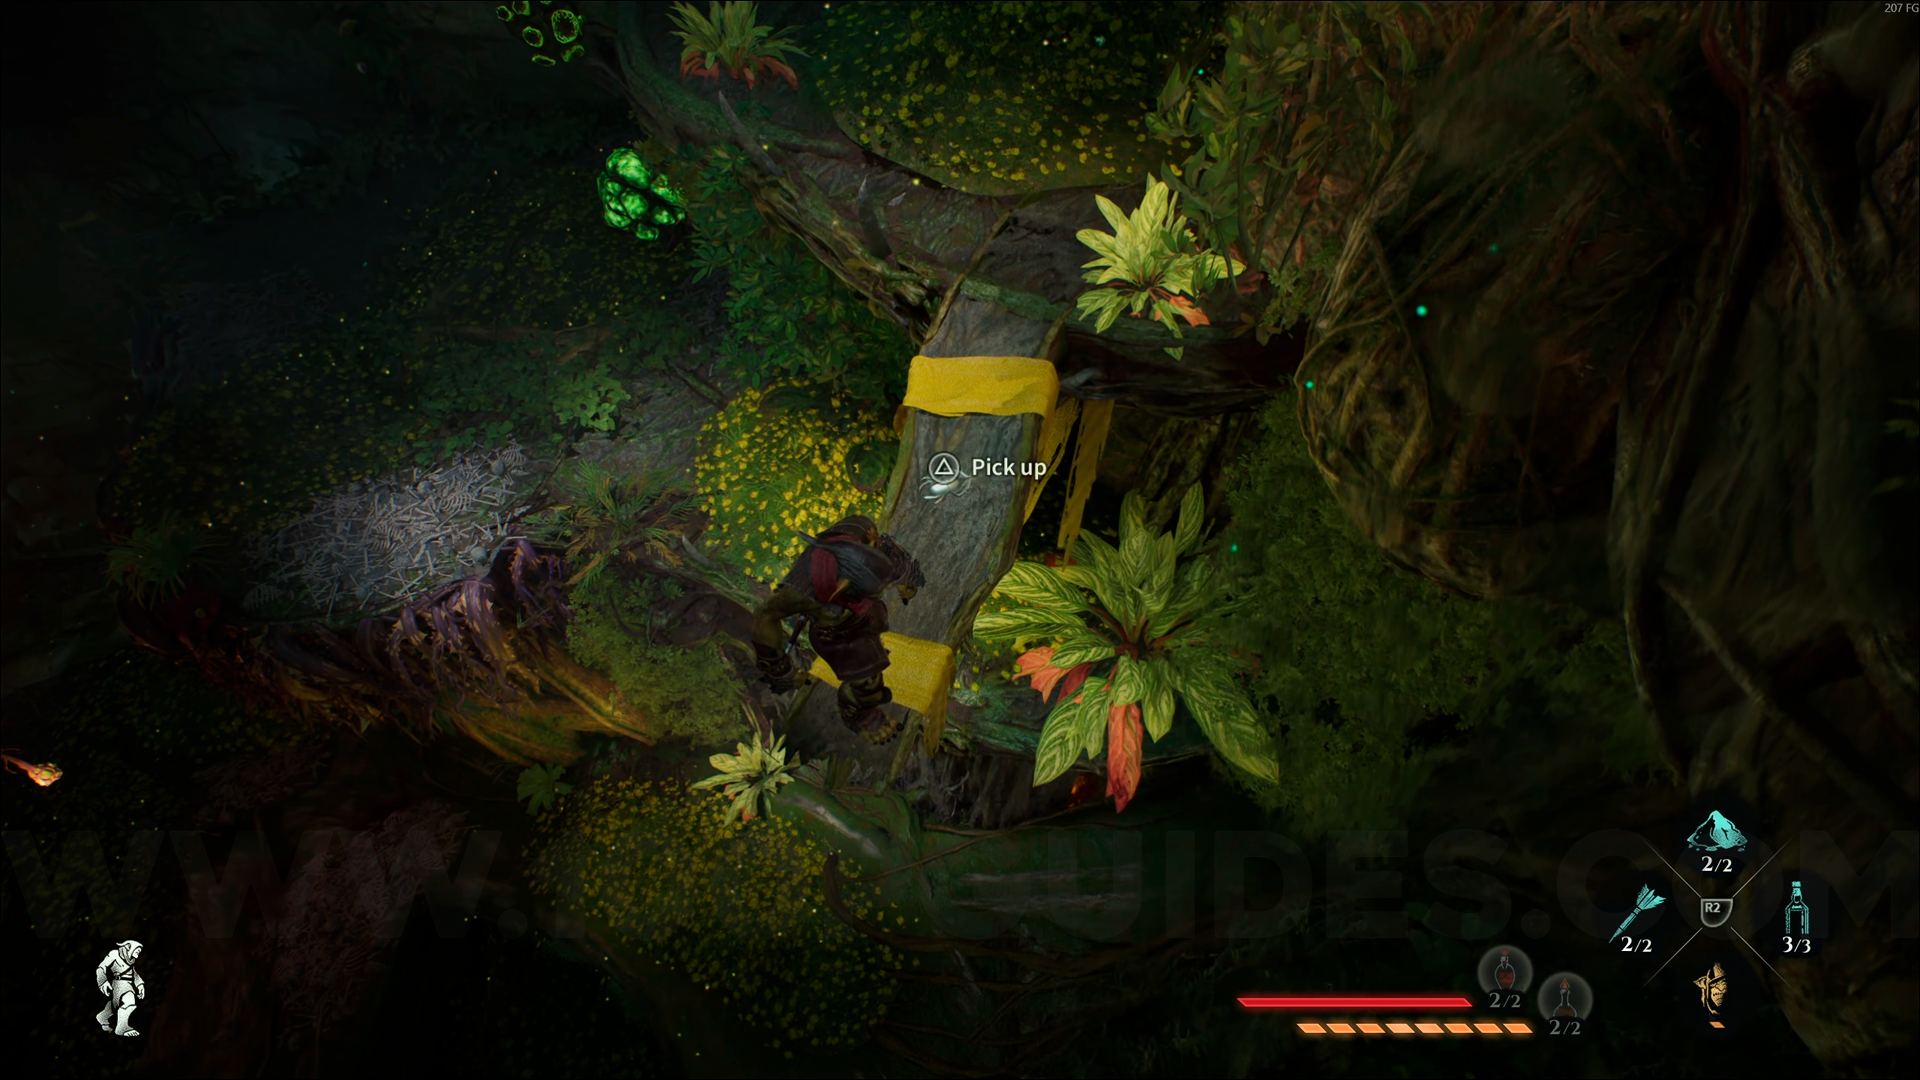
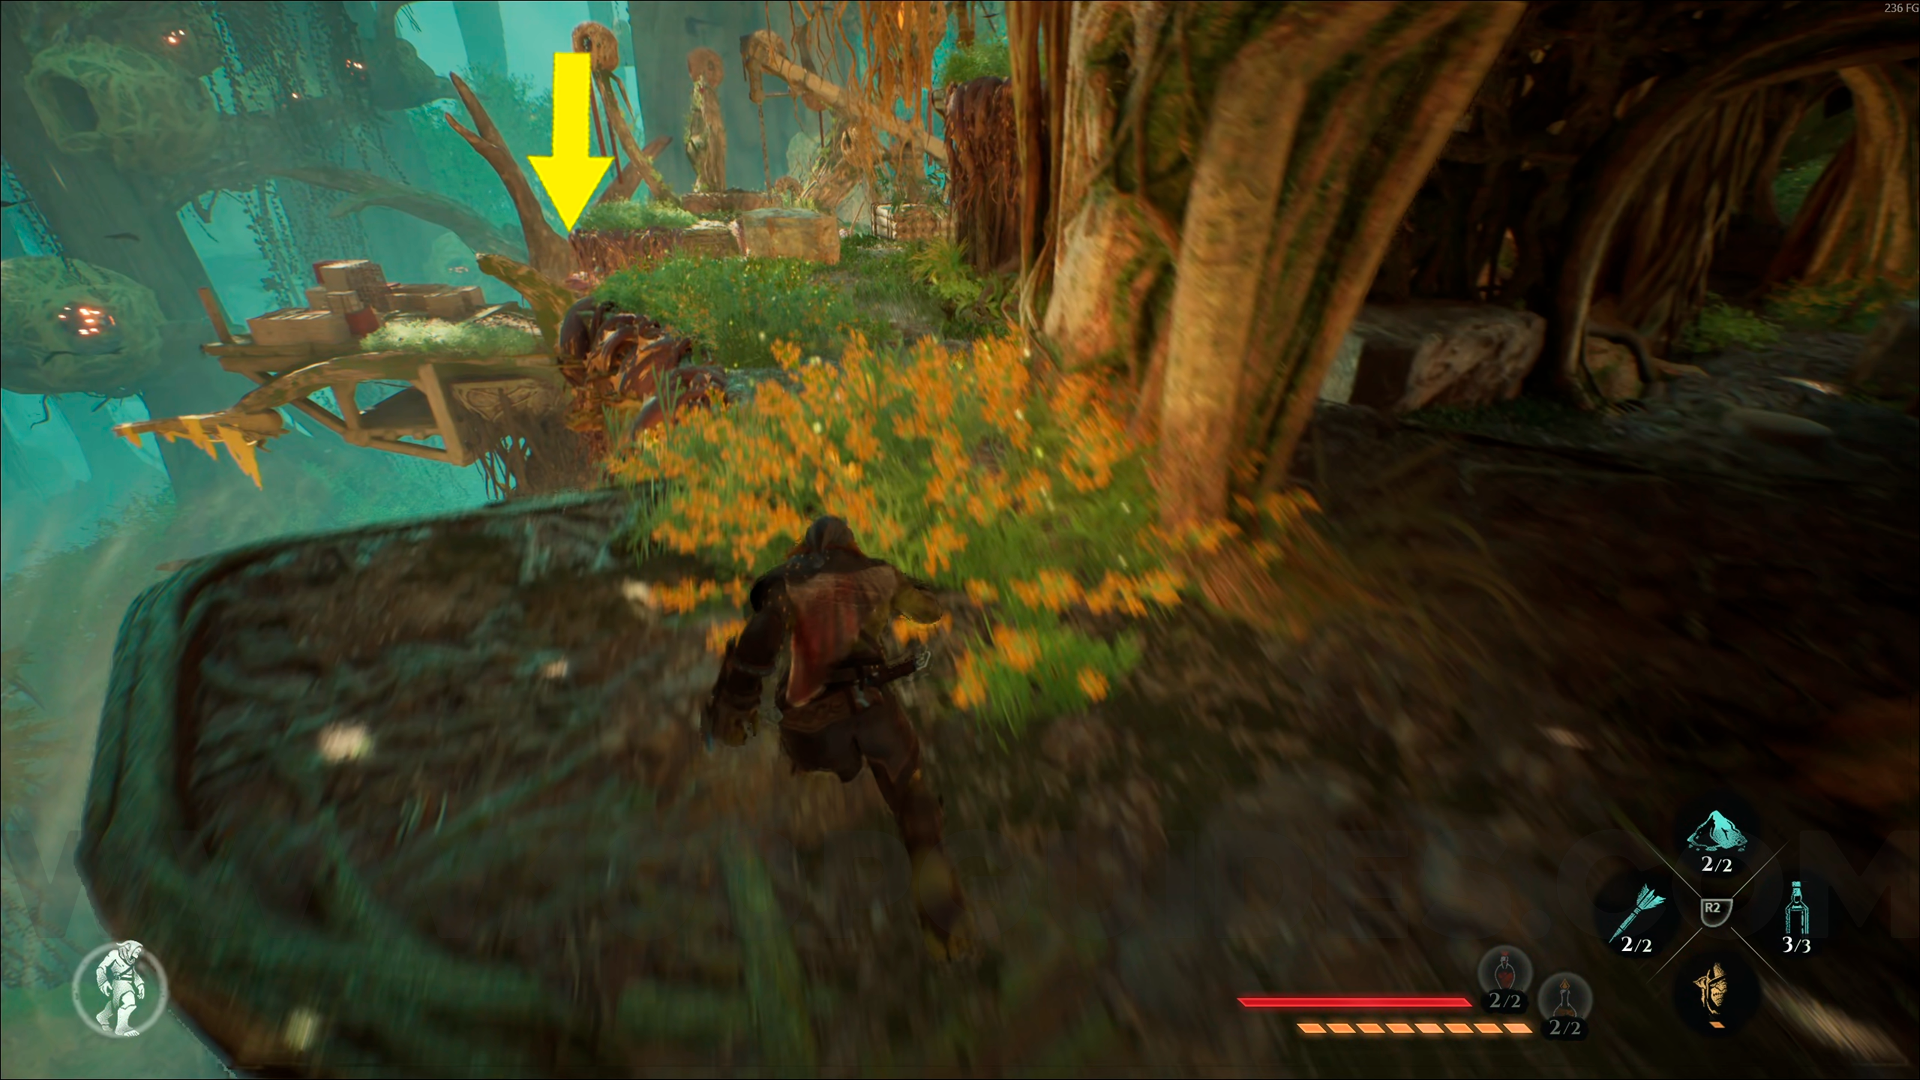
Wood Emblem #5. Right after the previous collectible, go down the stairs and look over the balcony you'll see a cart below. This emblem is underneath it.
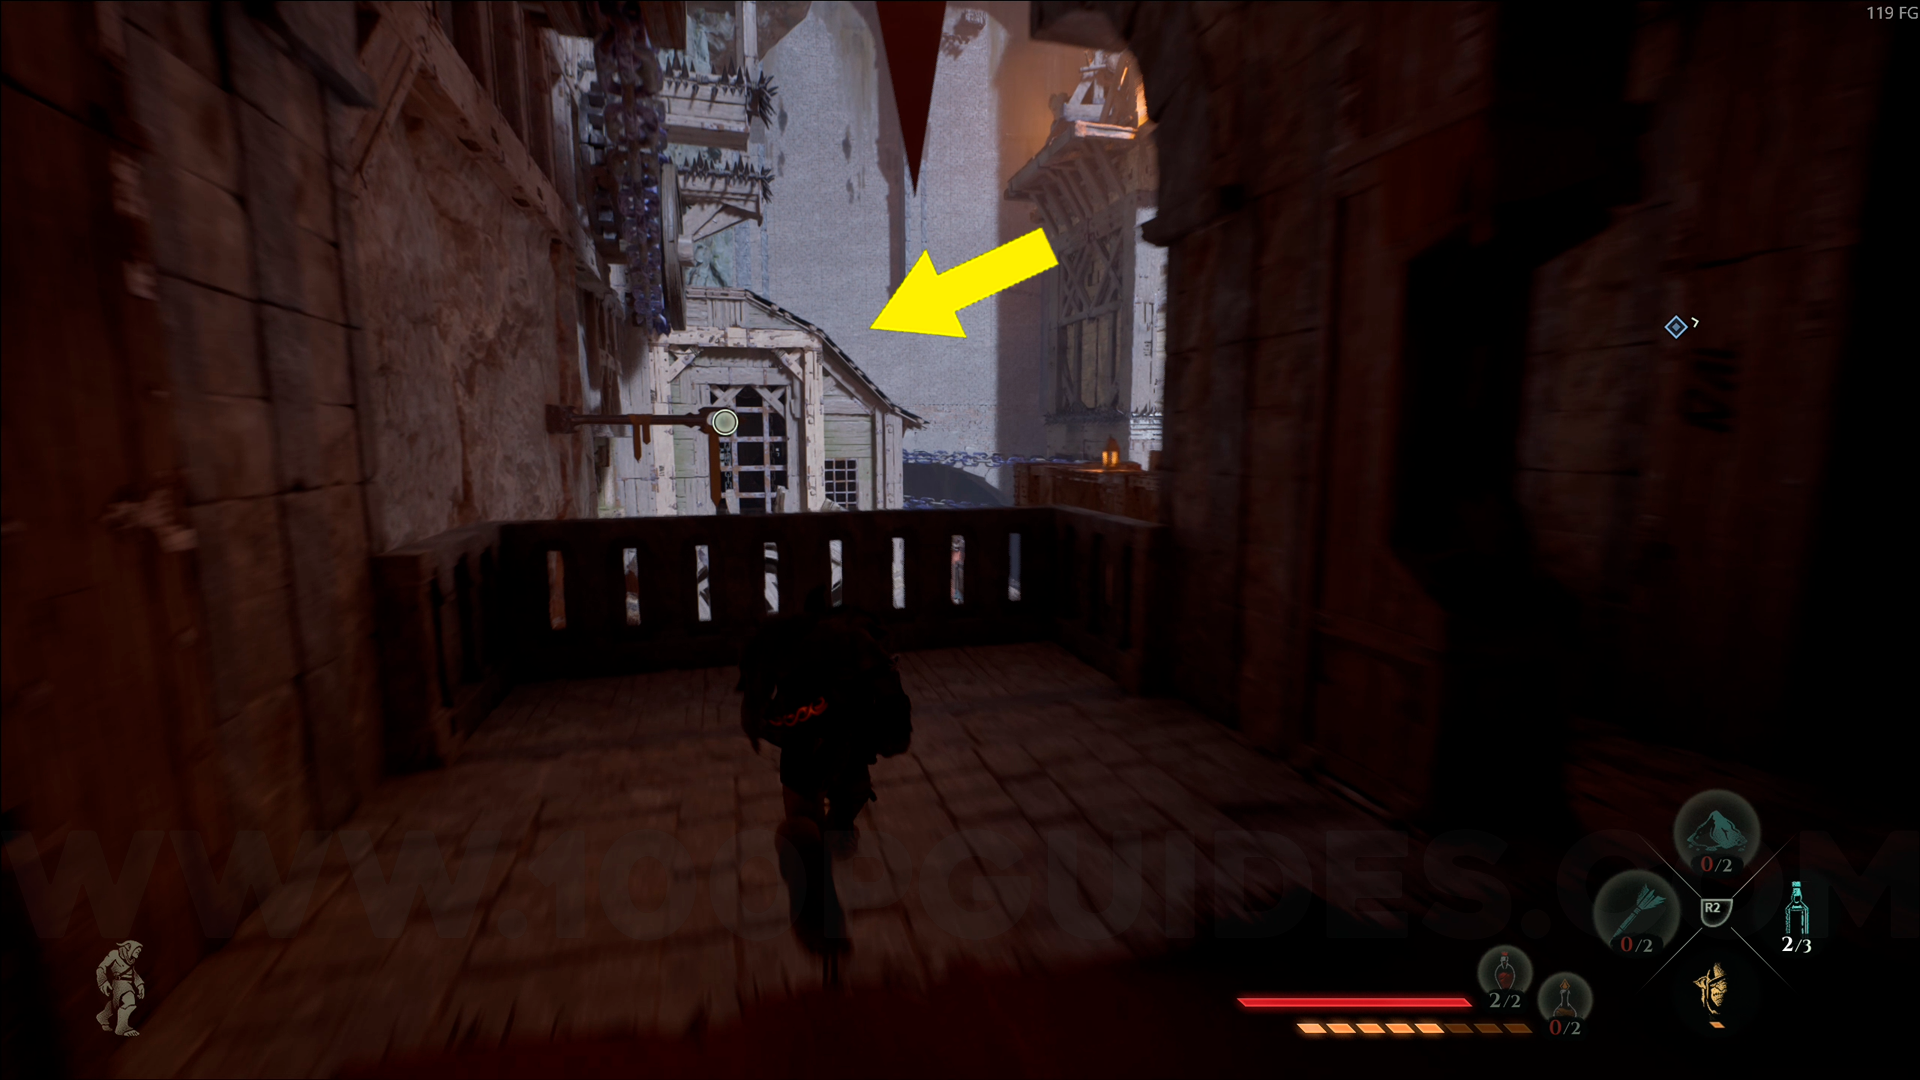
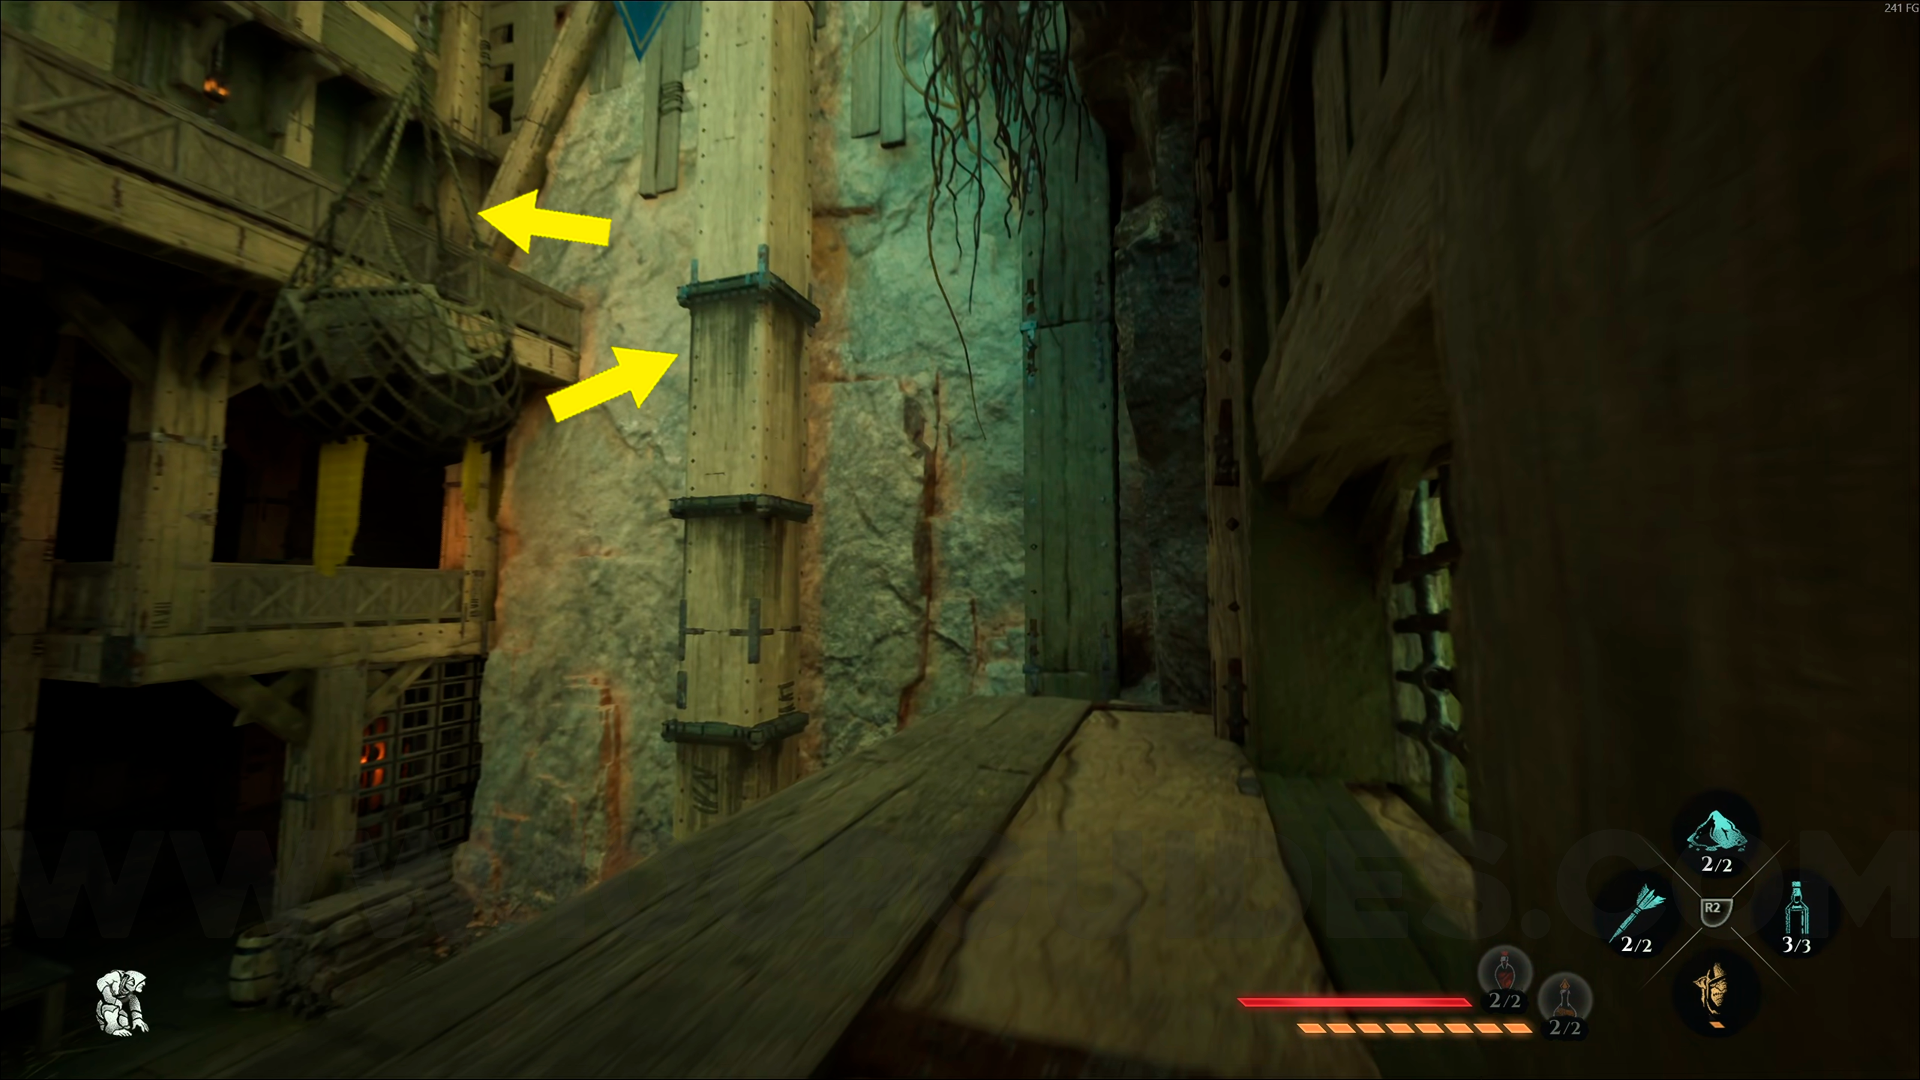
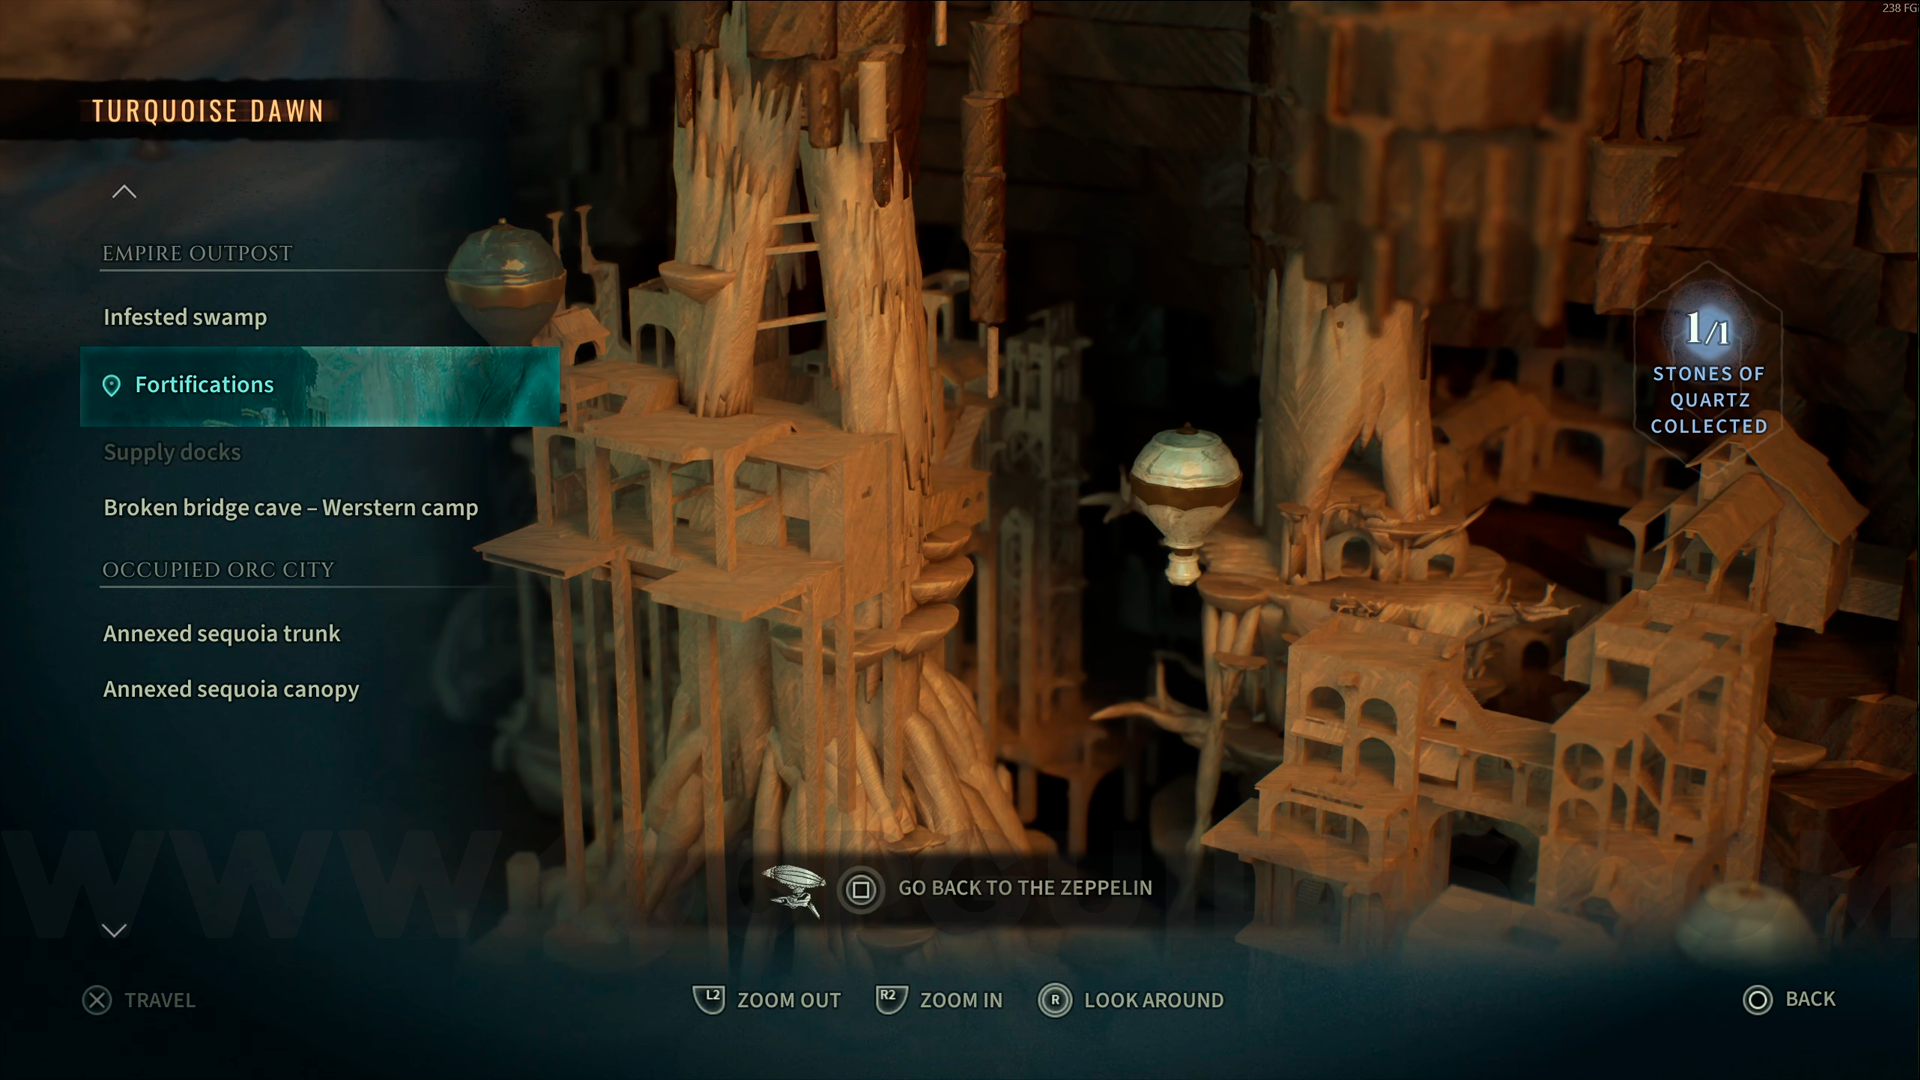
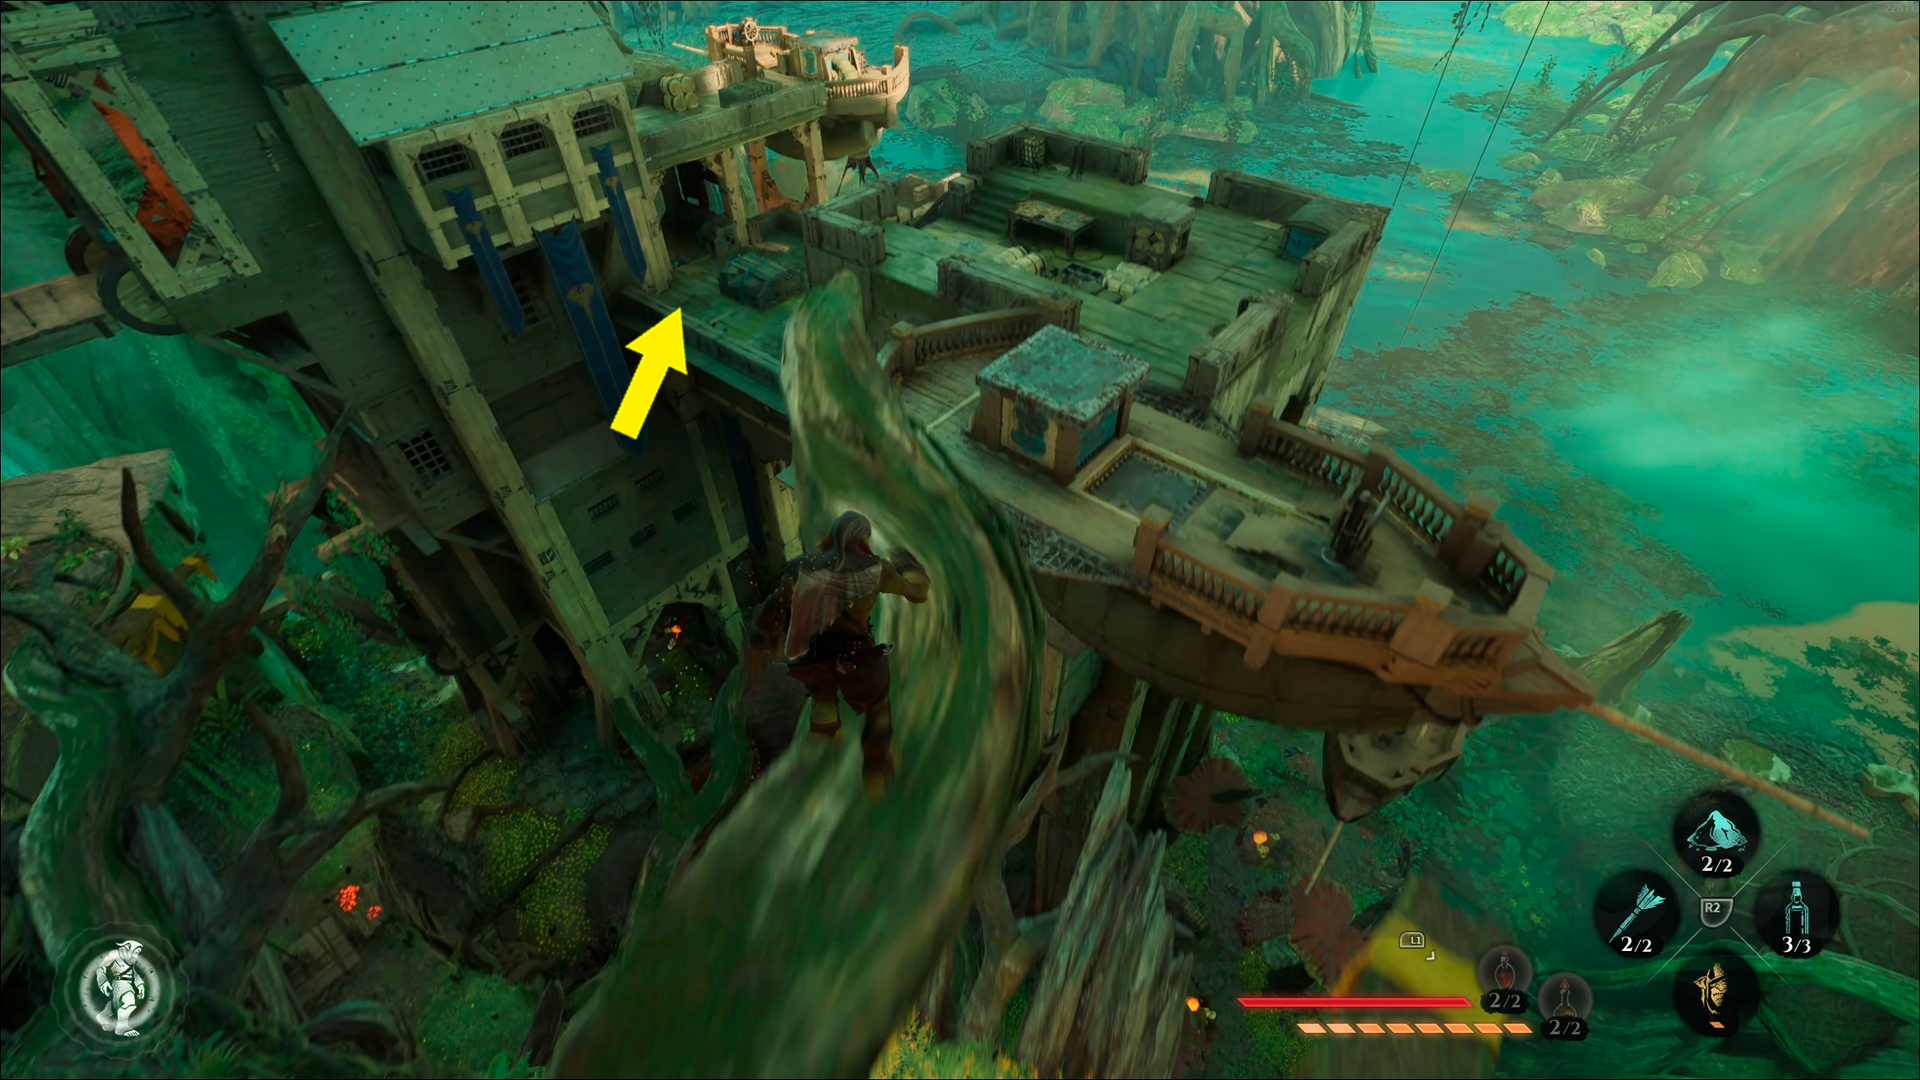
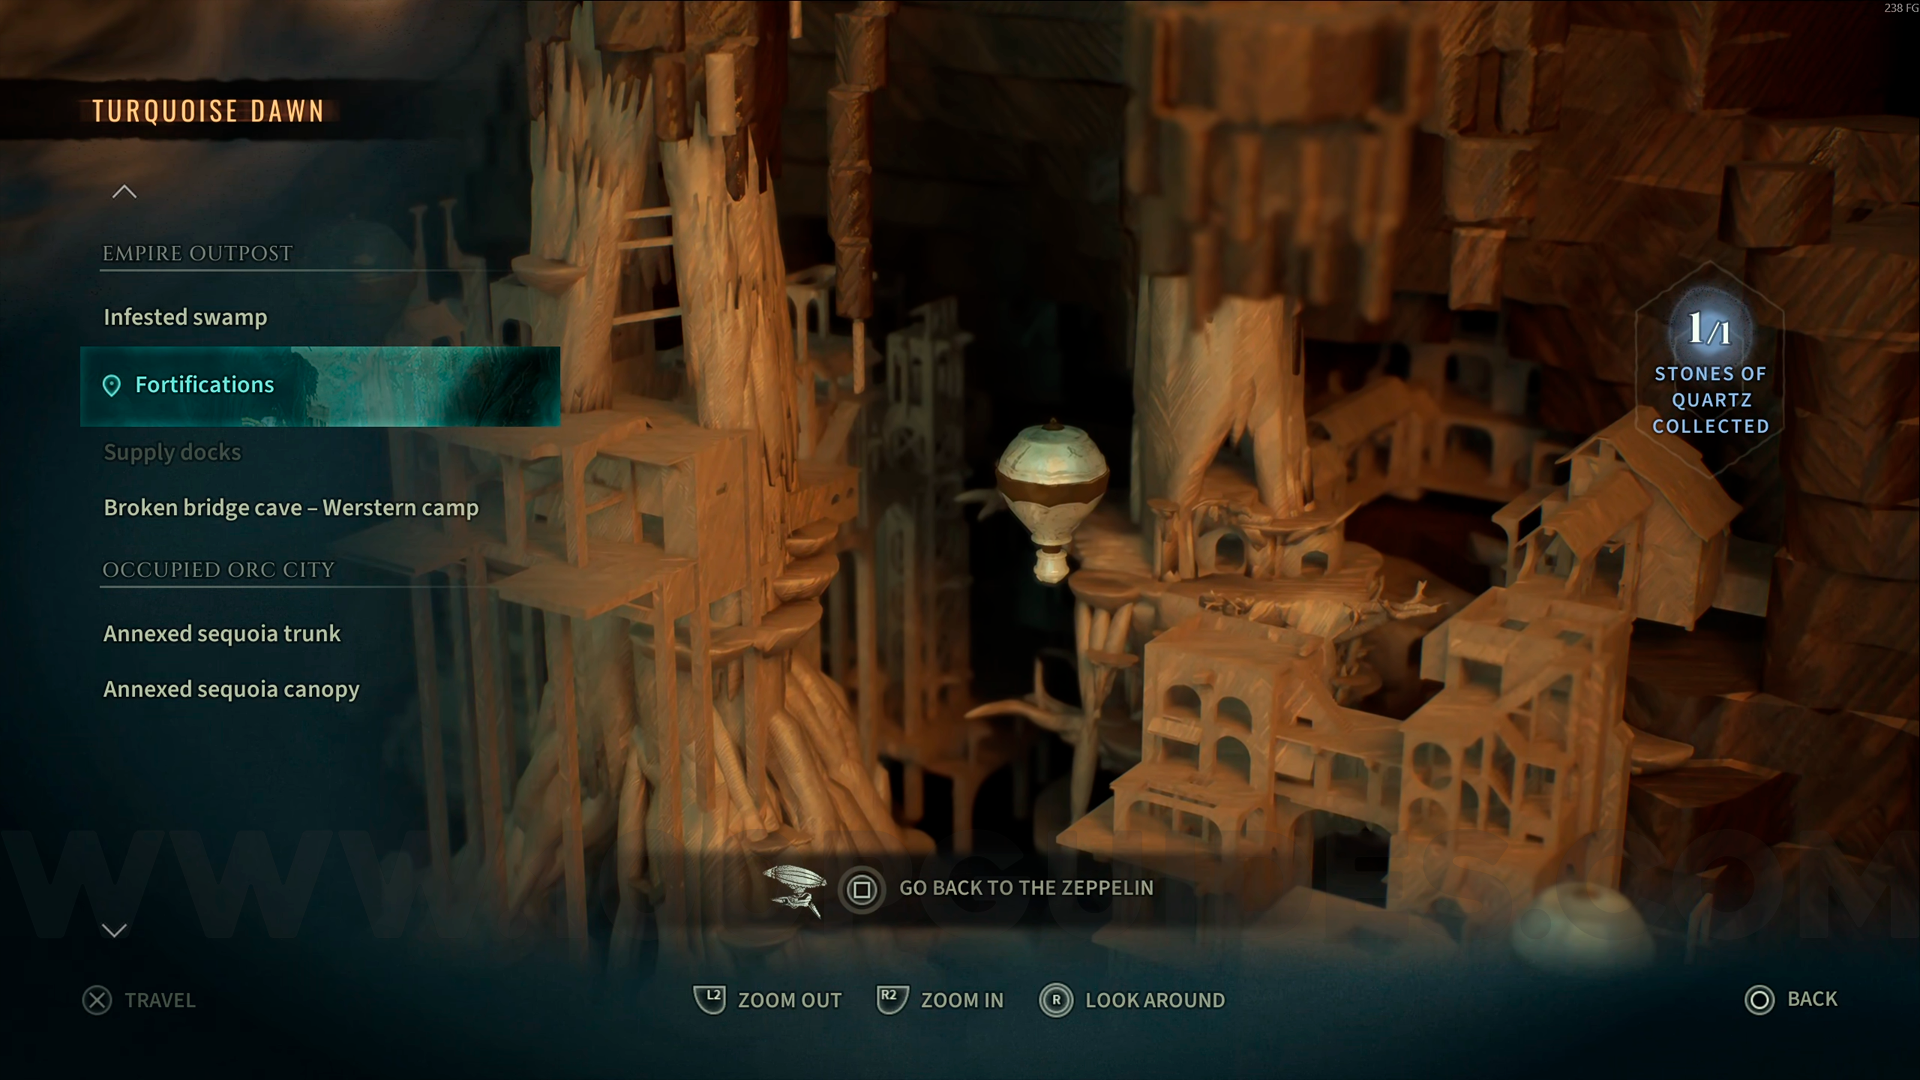
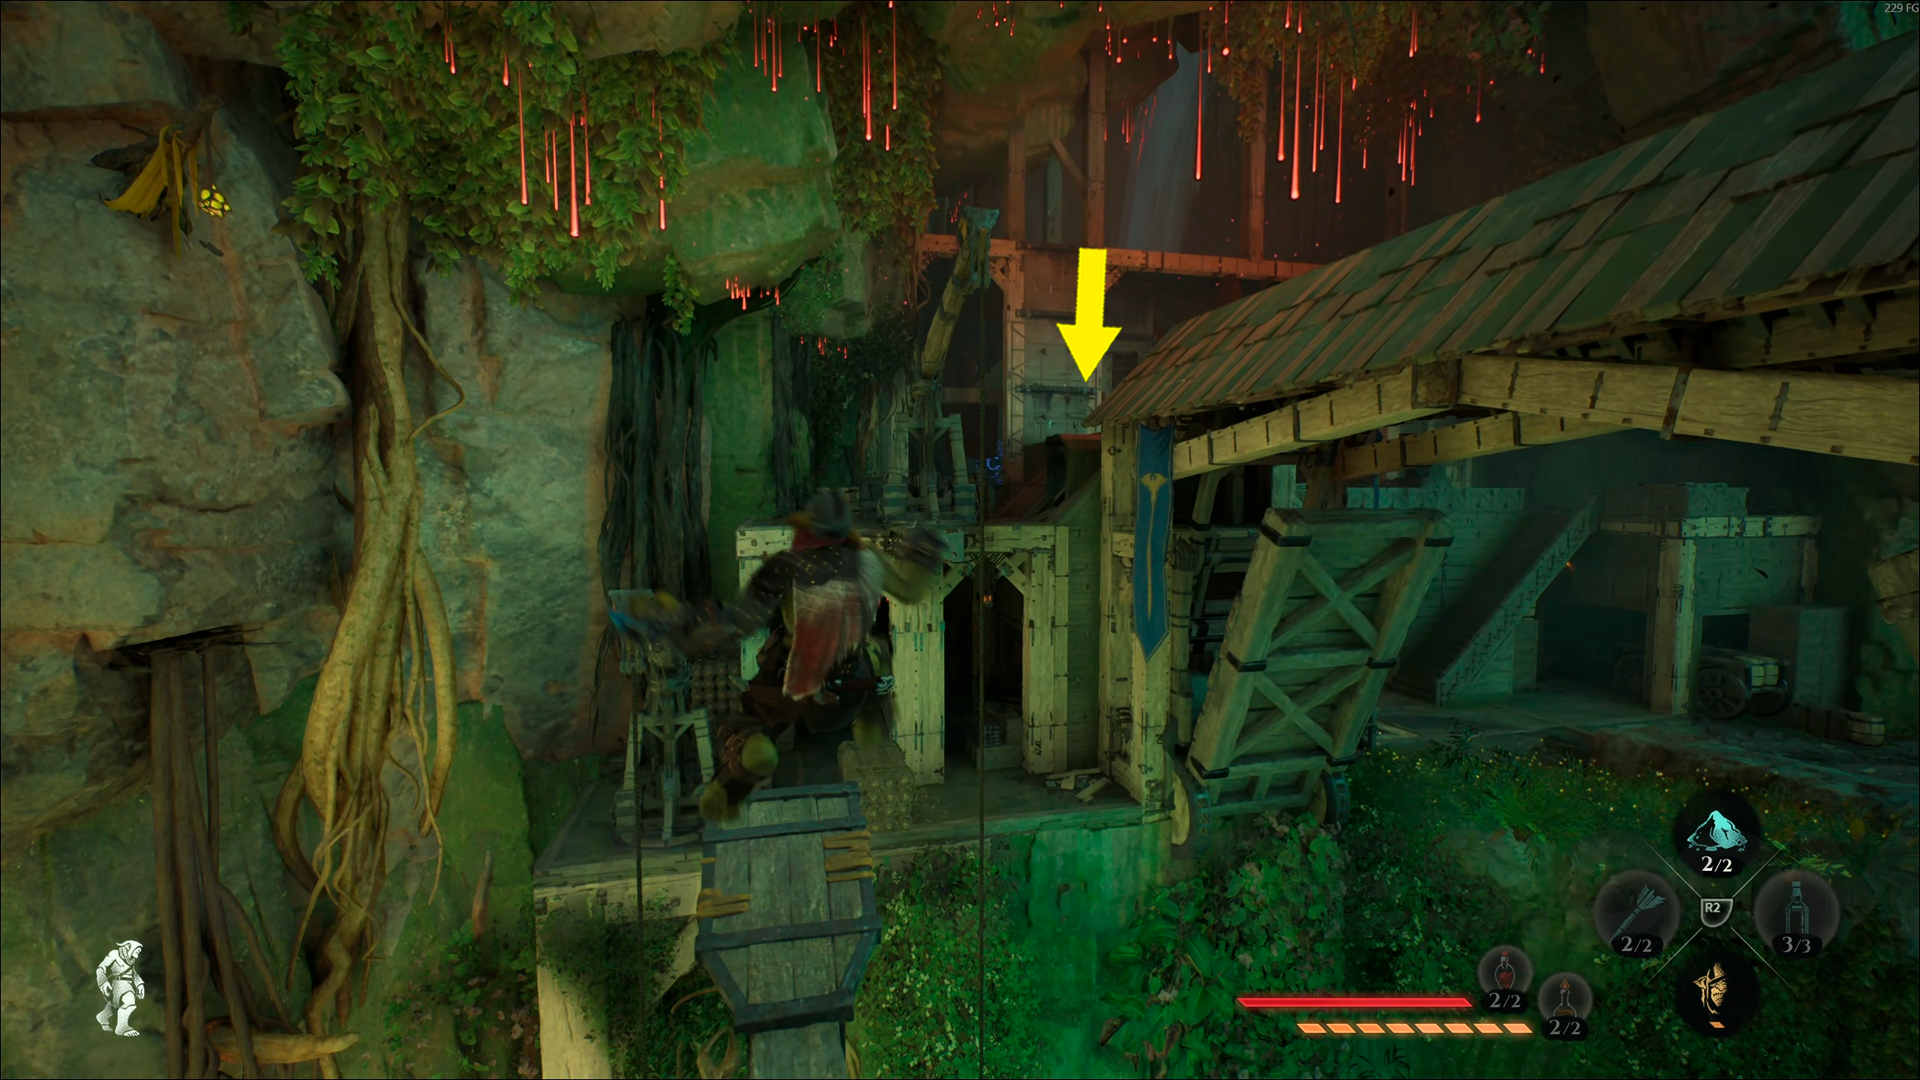
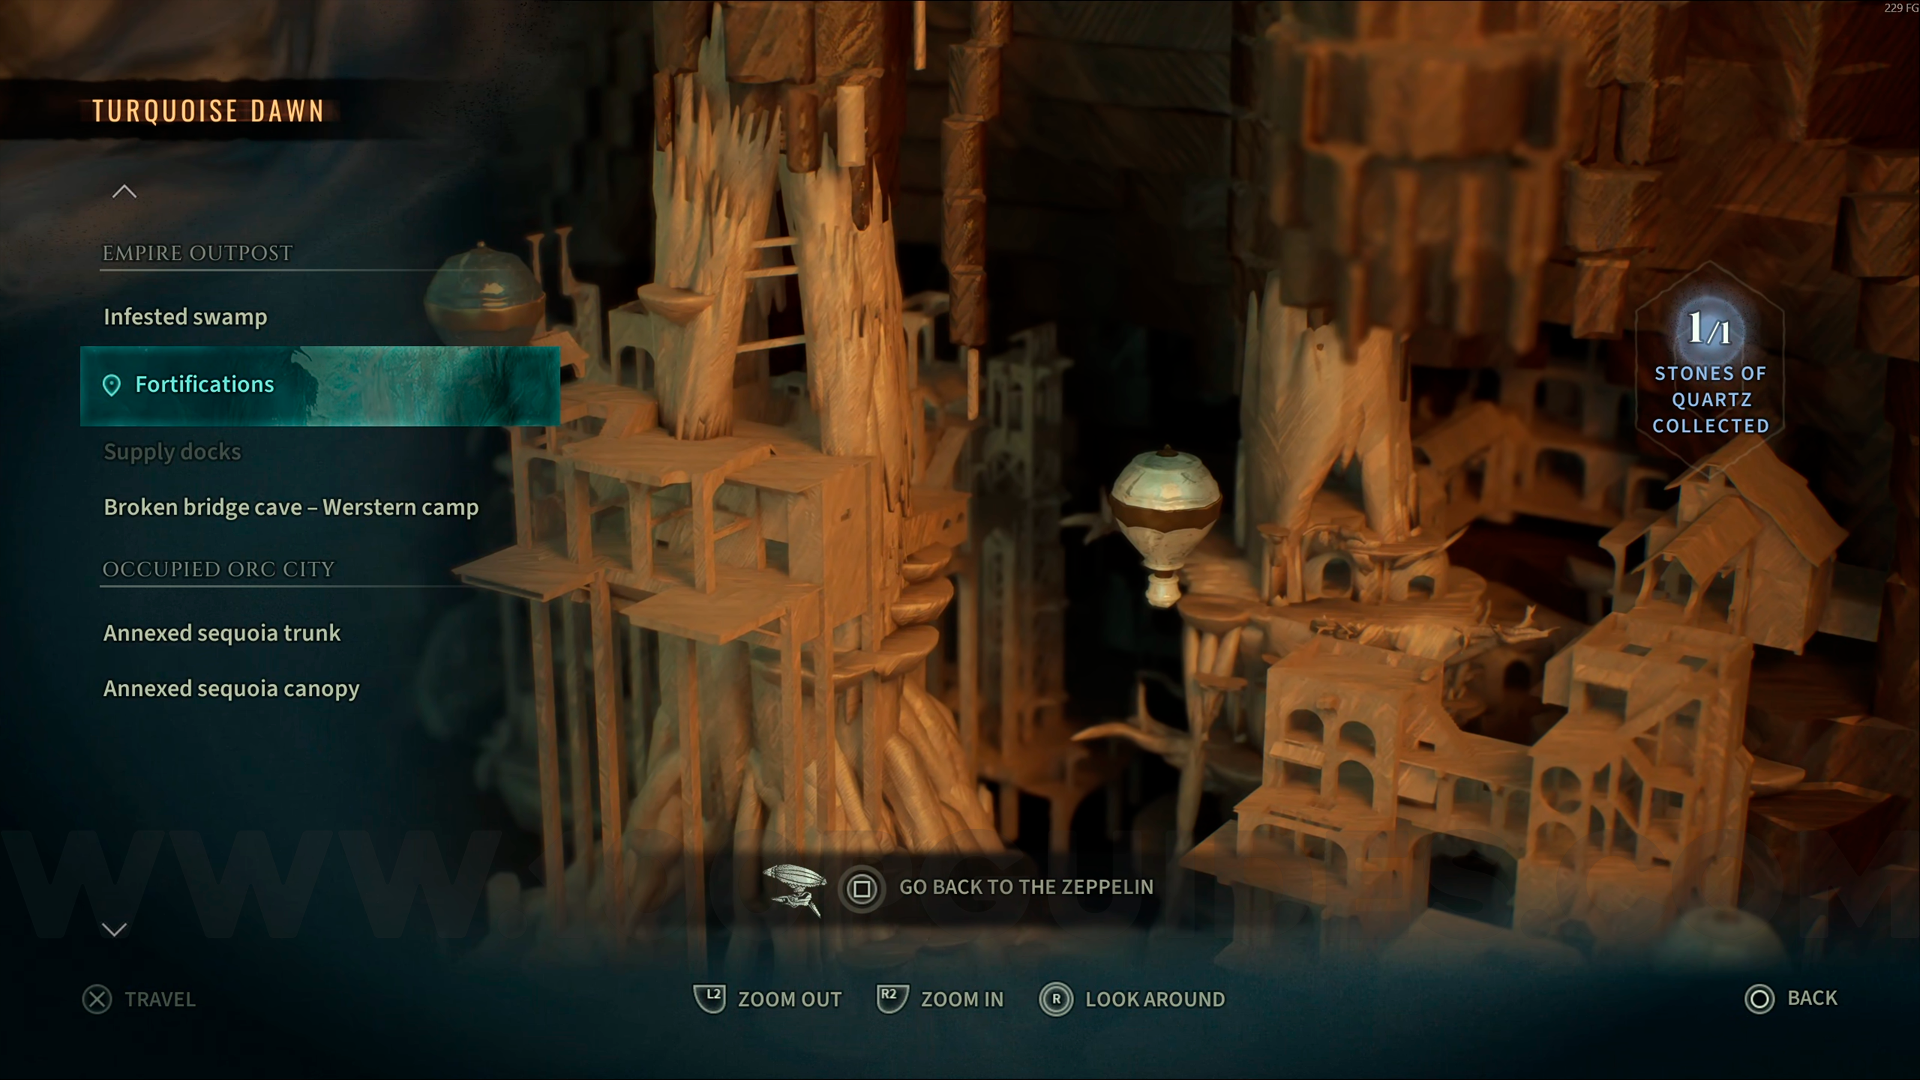
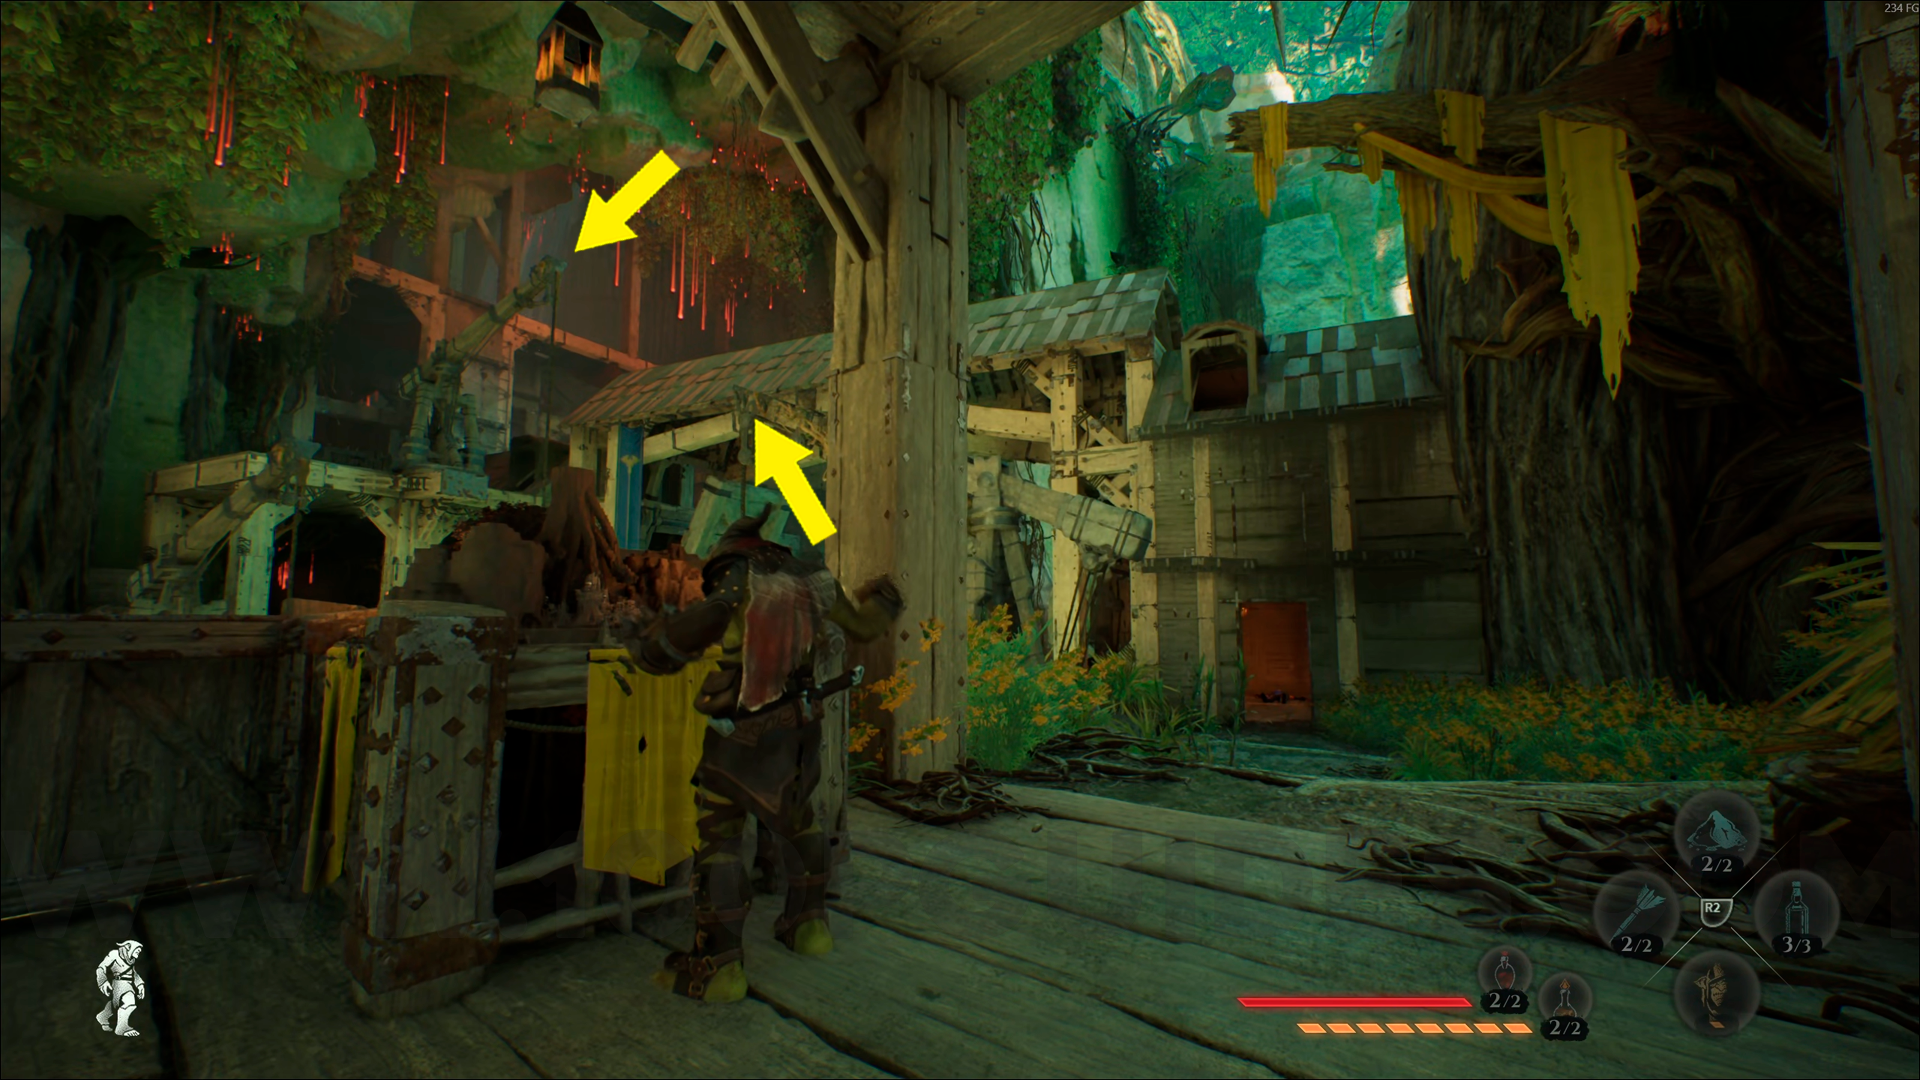
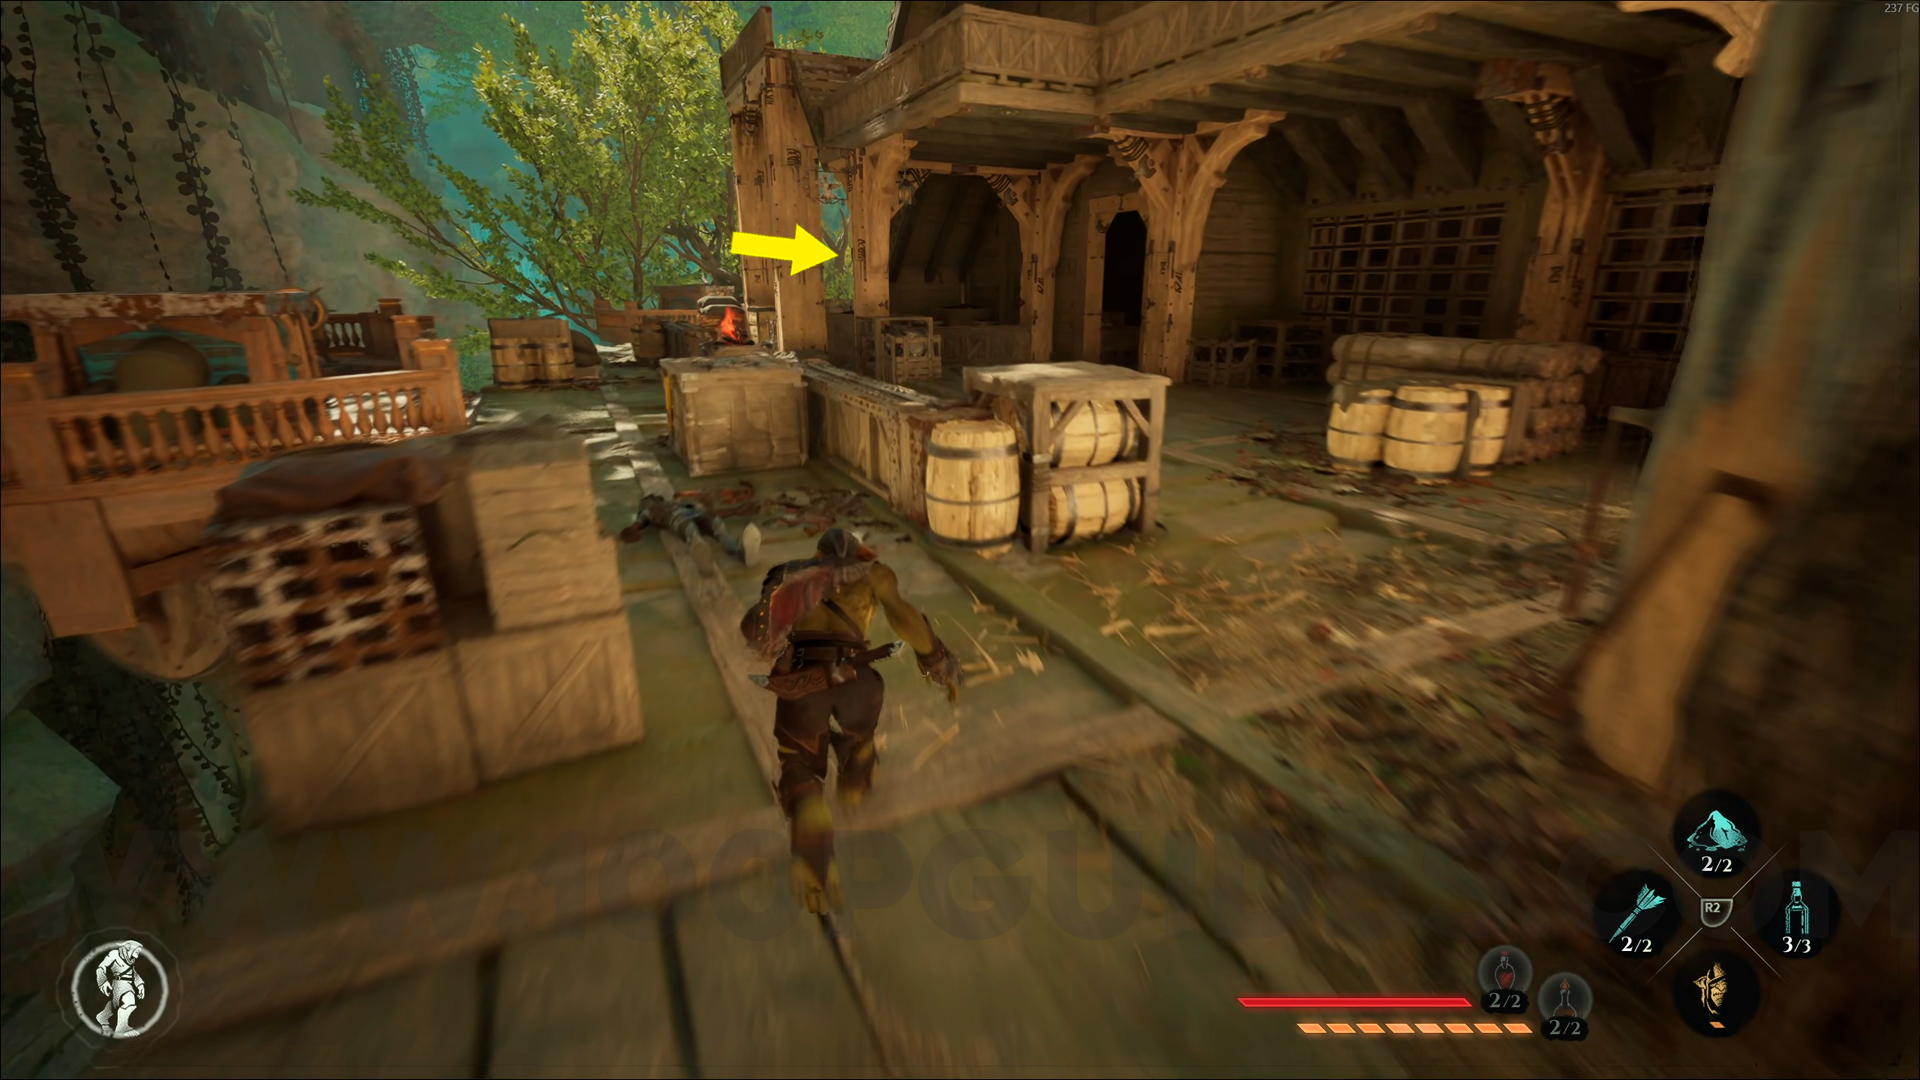
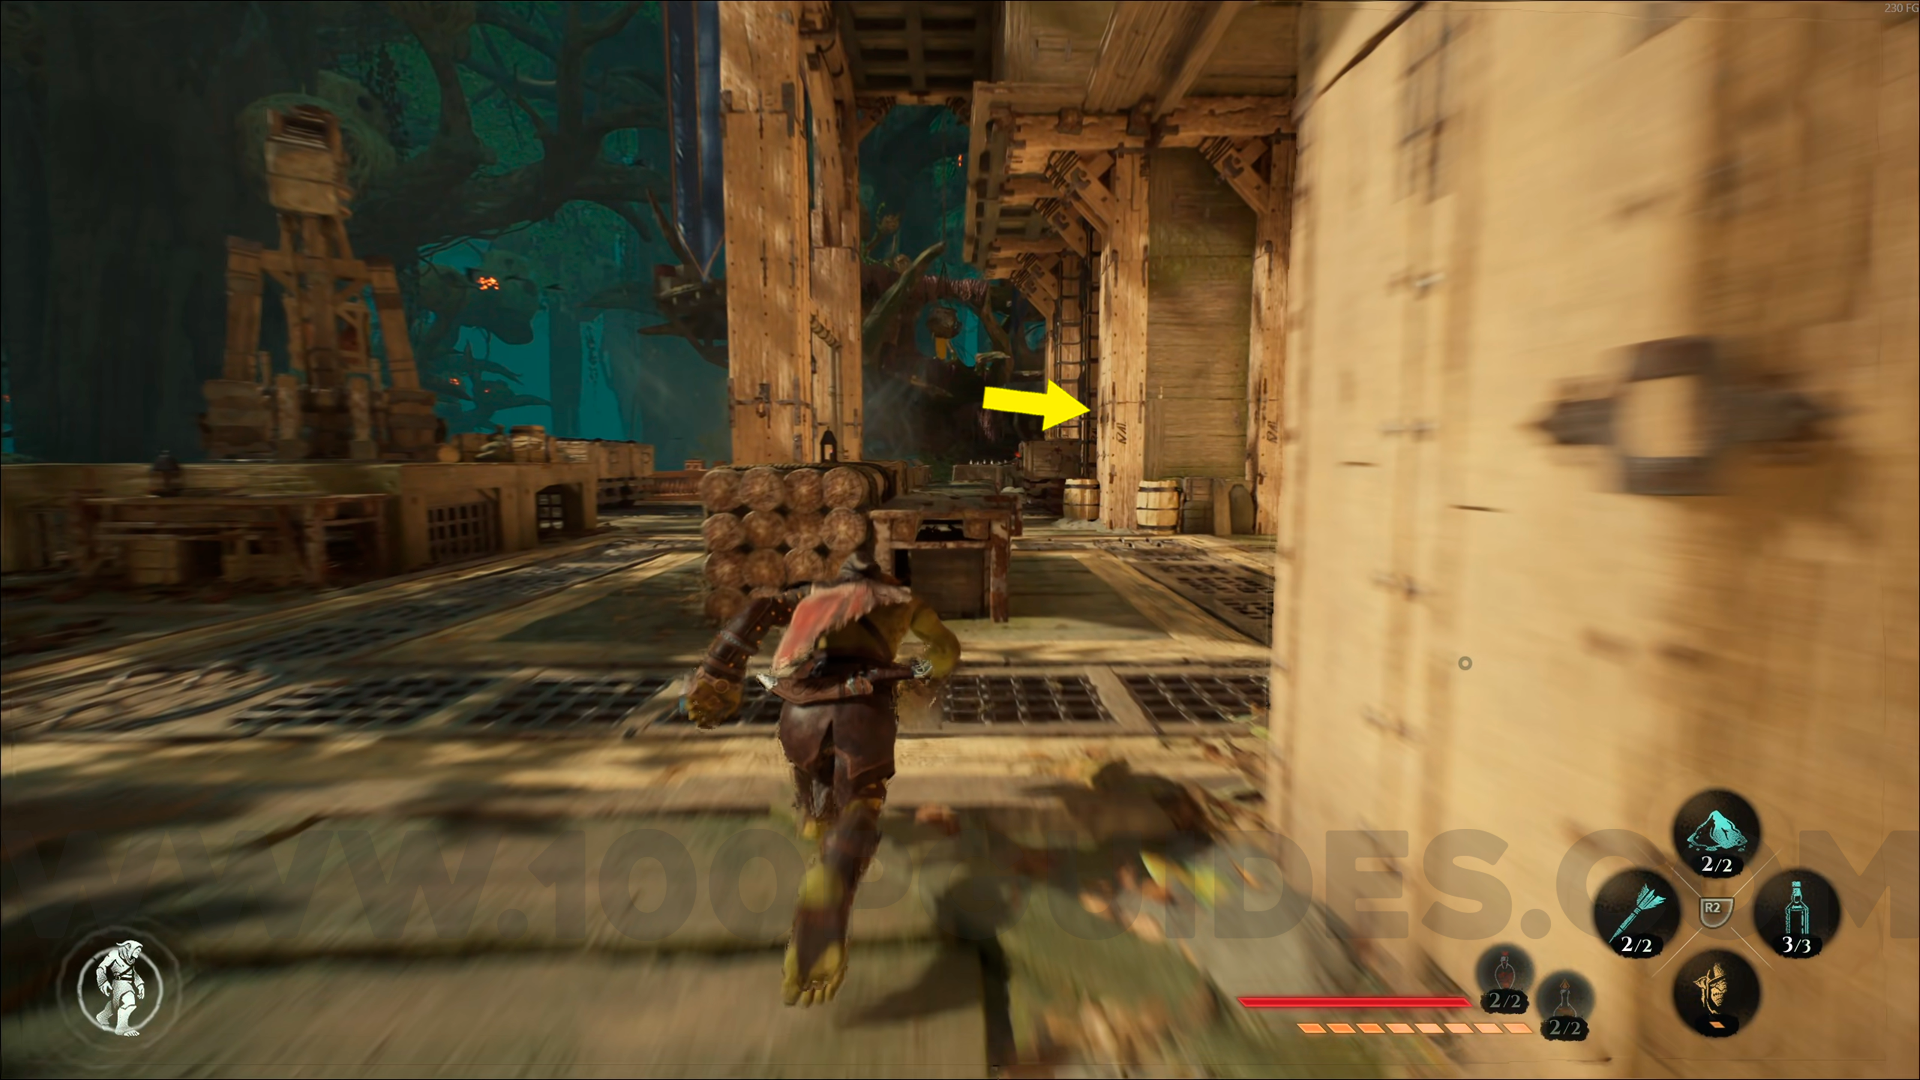
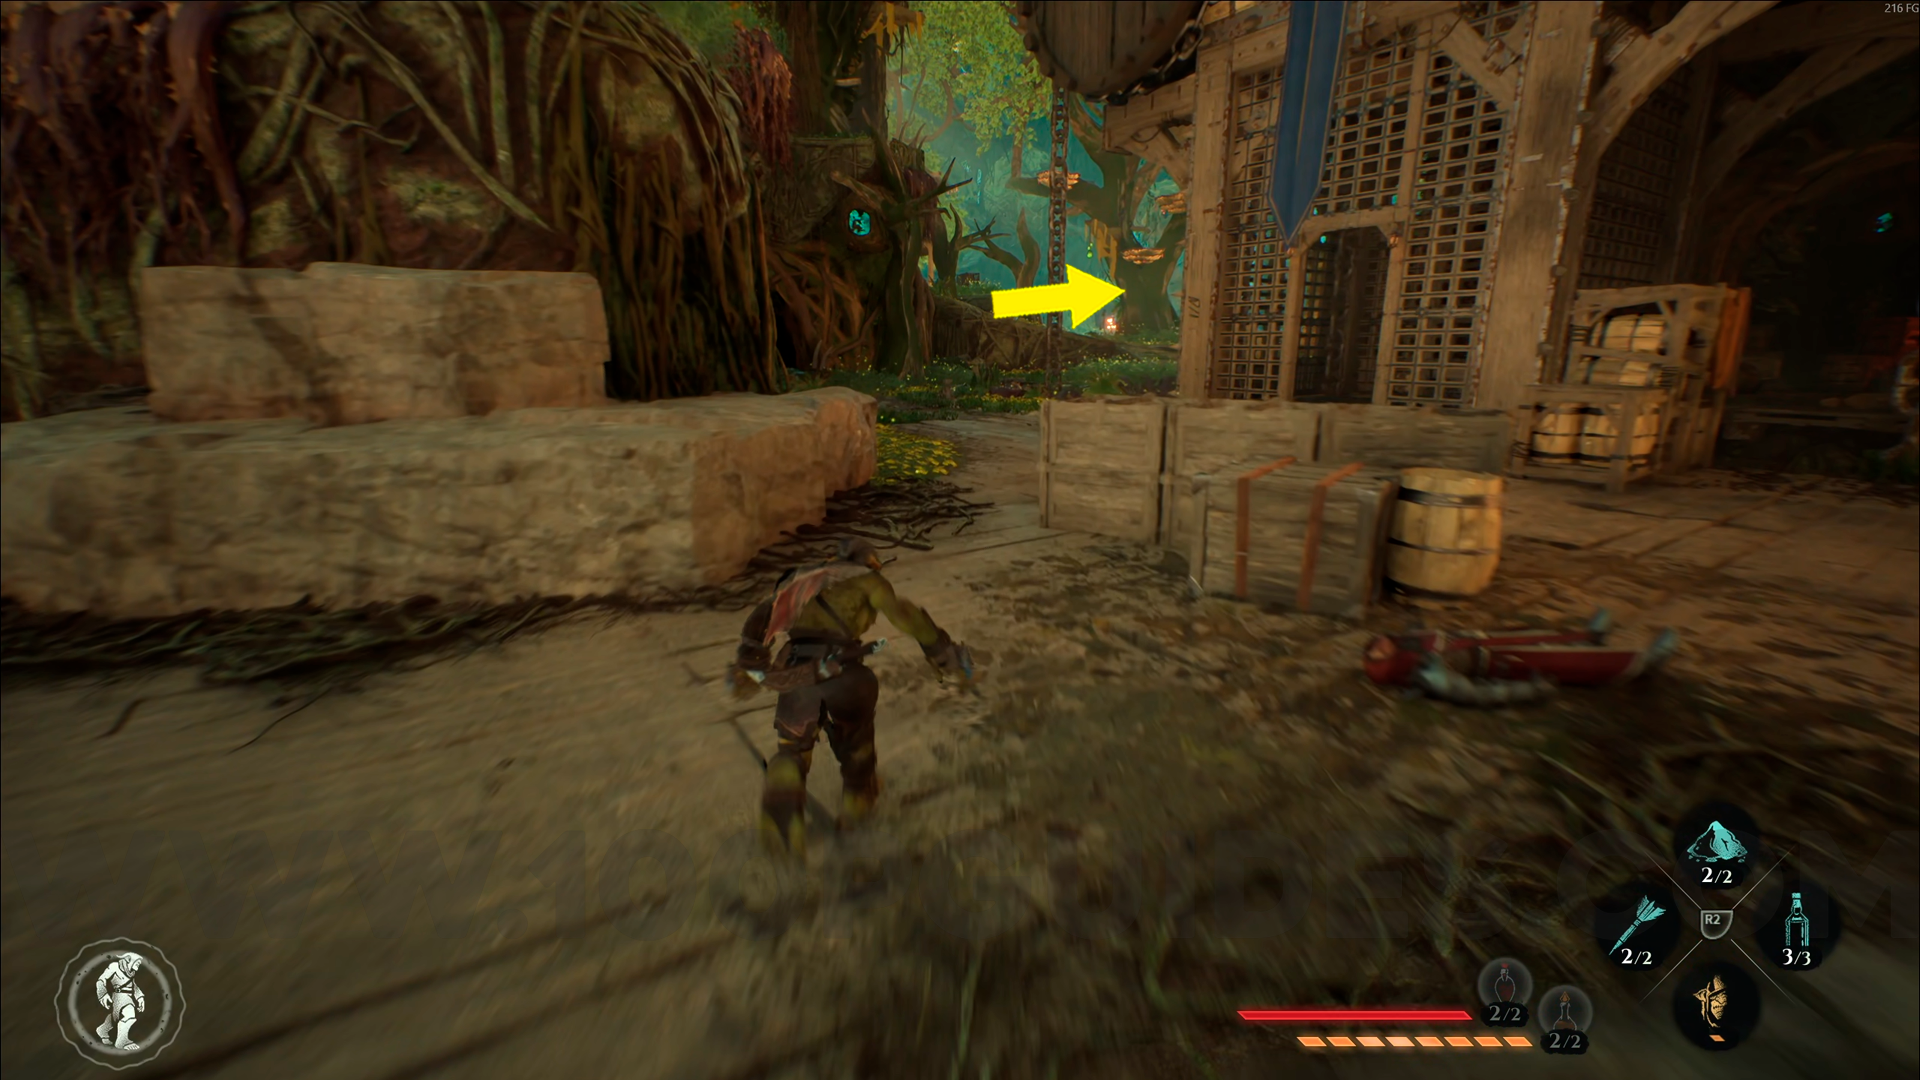
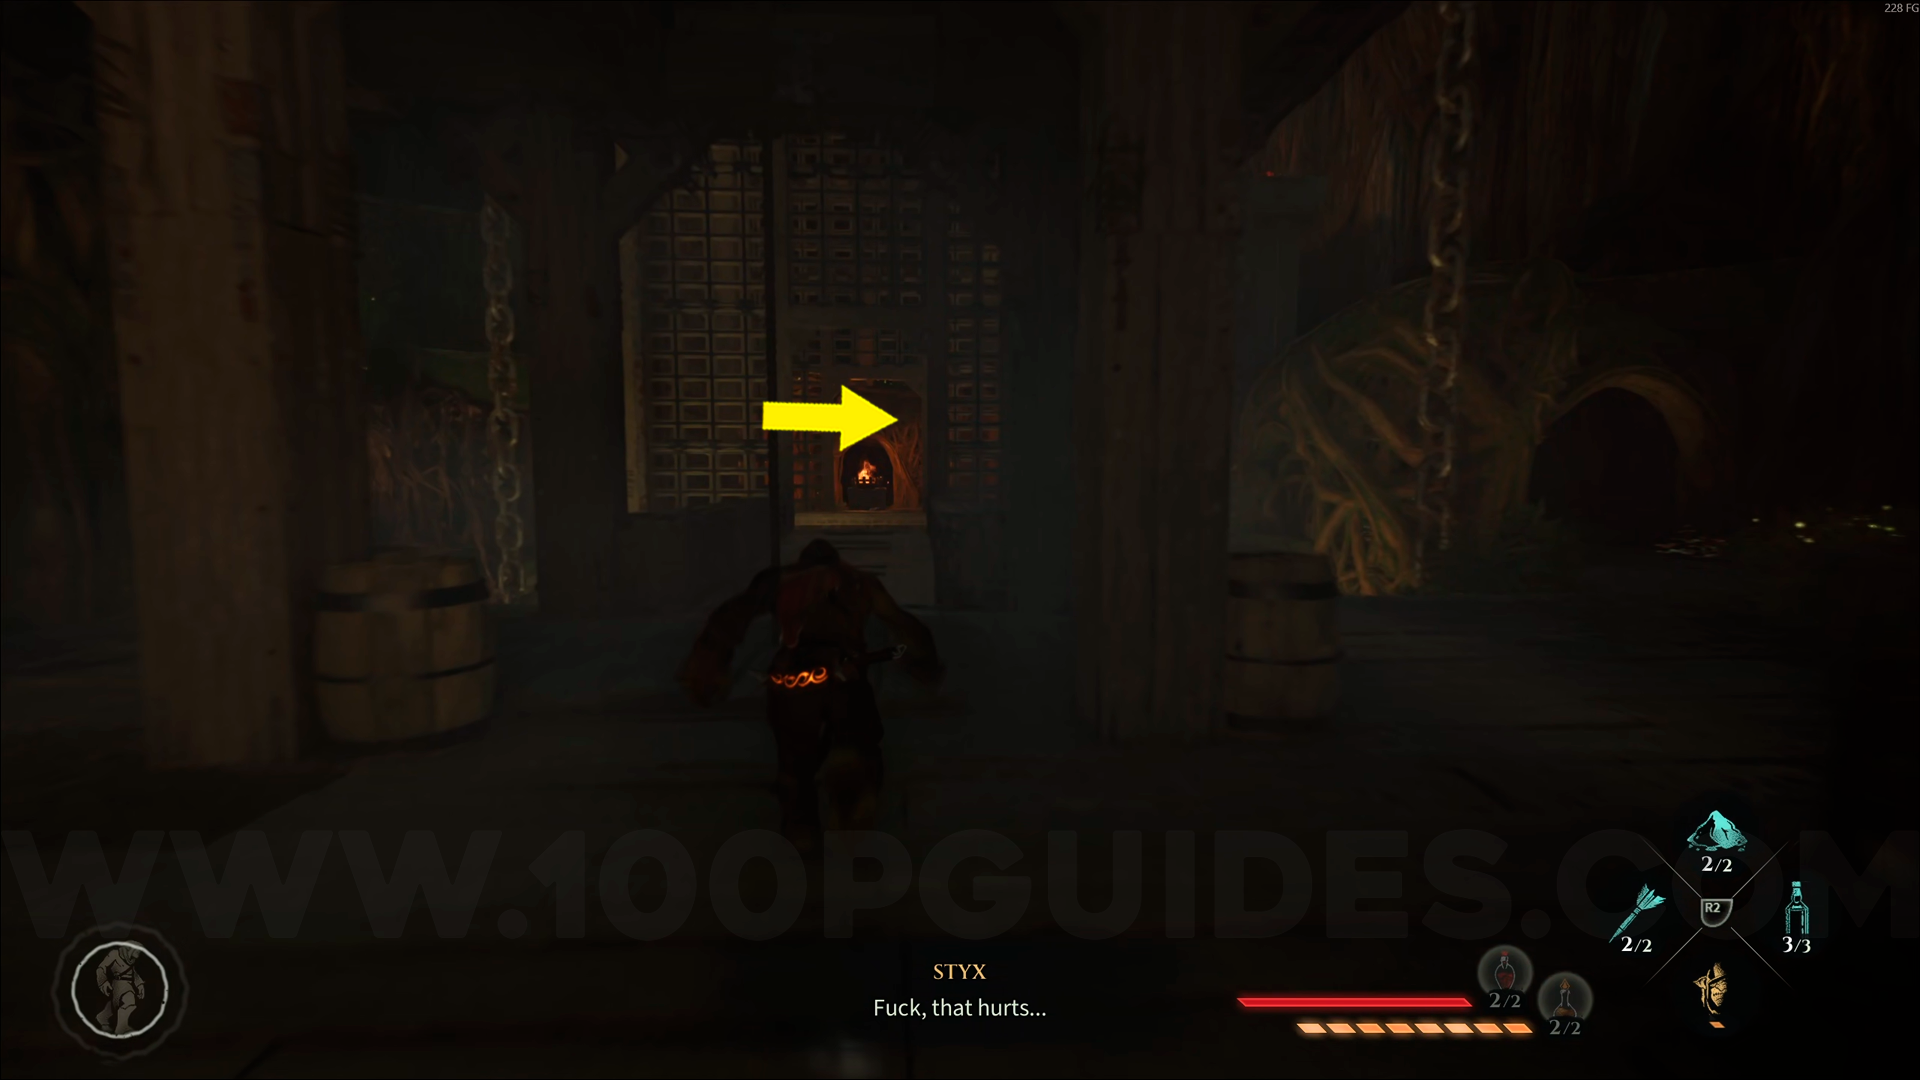
Wood Emblem #6. From the Fortifications checkpoint, go up to the upper area. The emblem will be right in front of you.
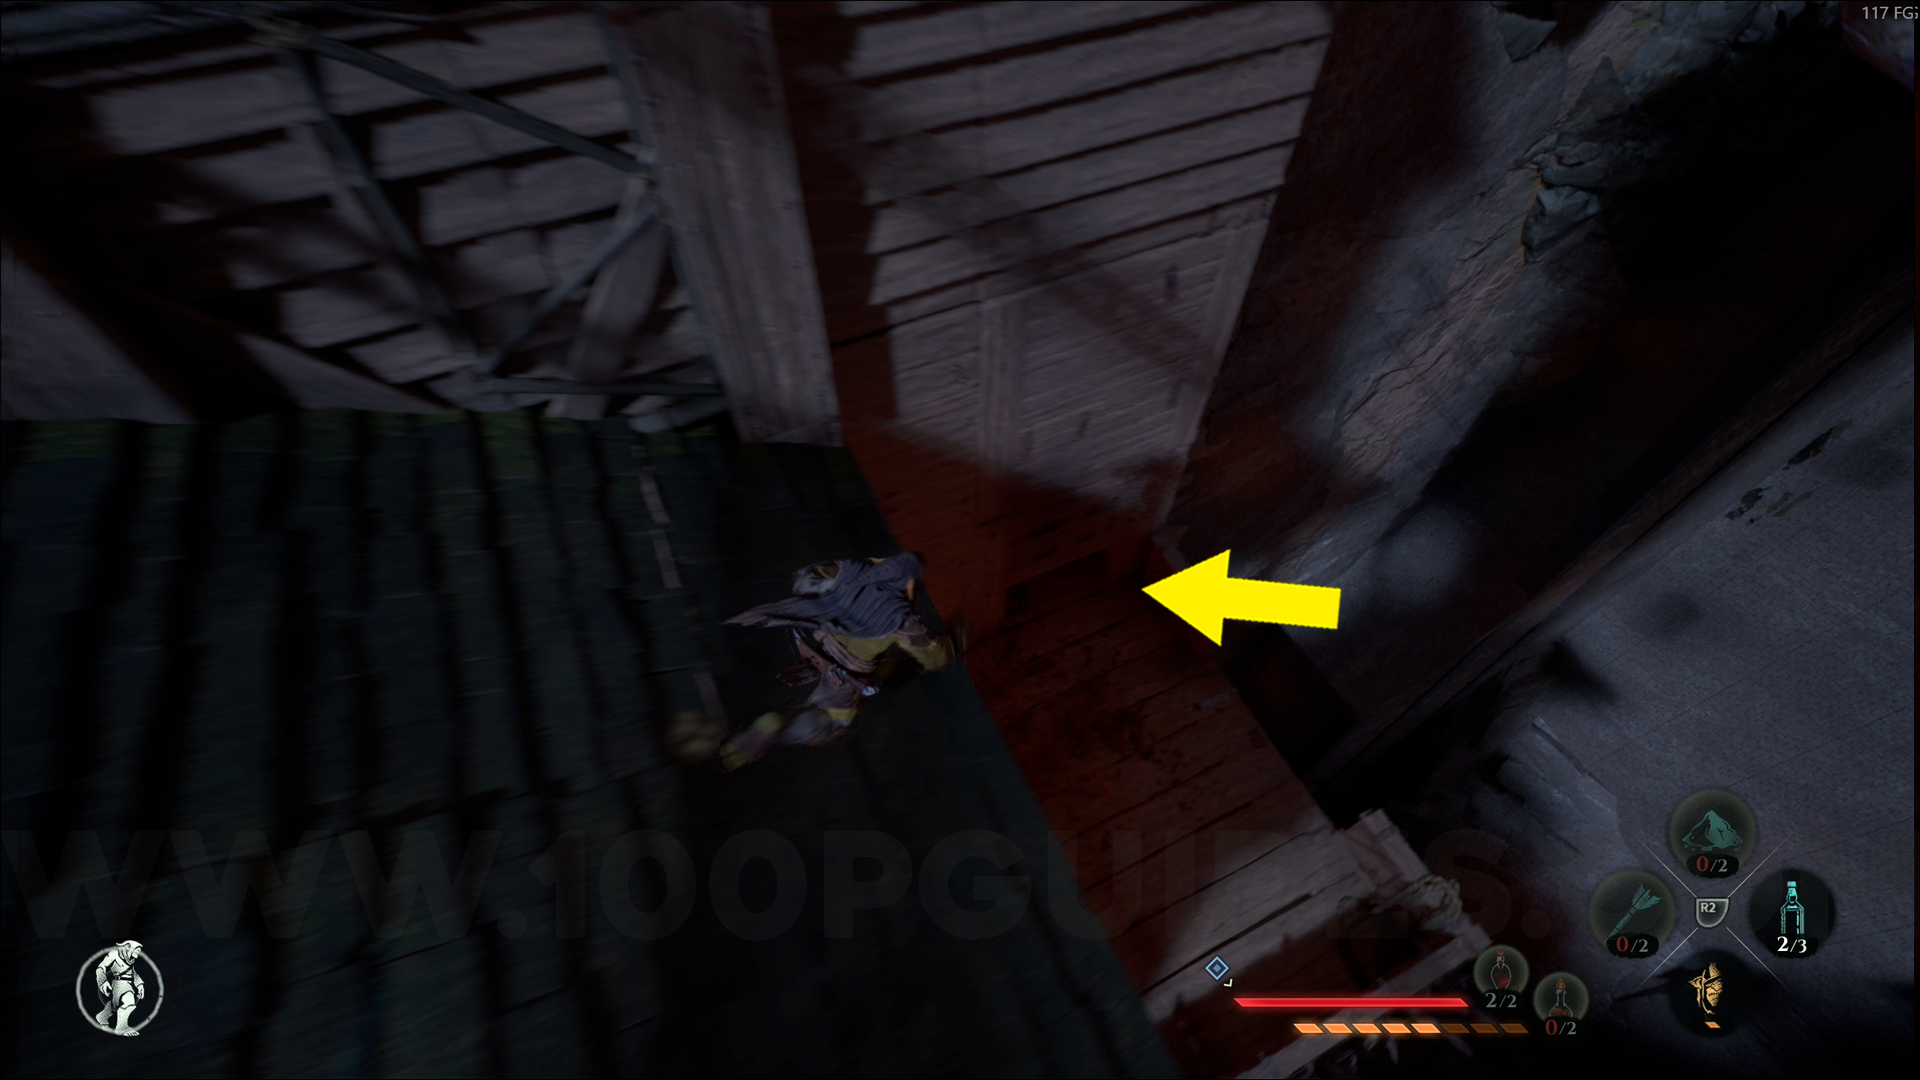
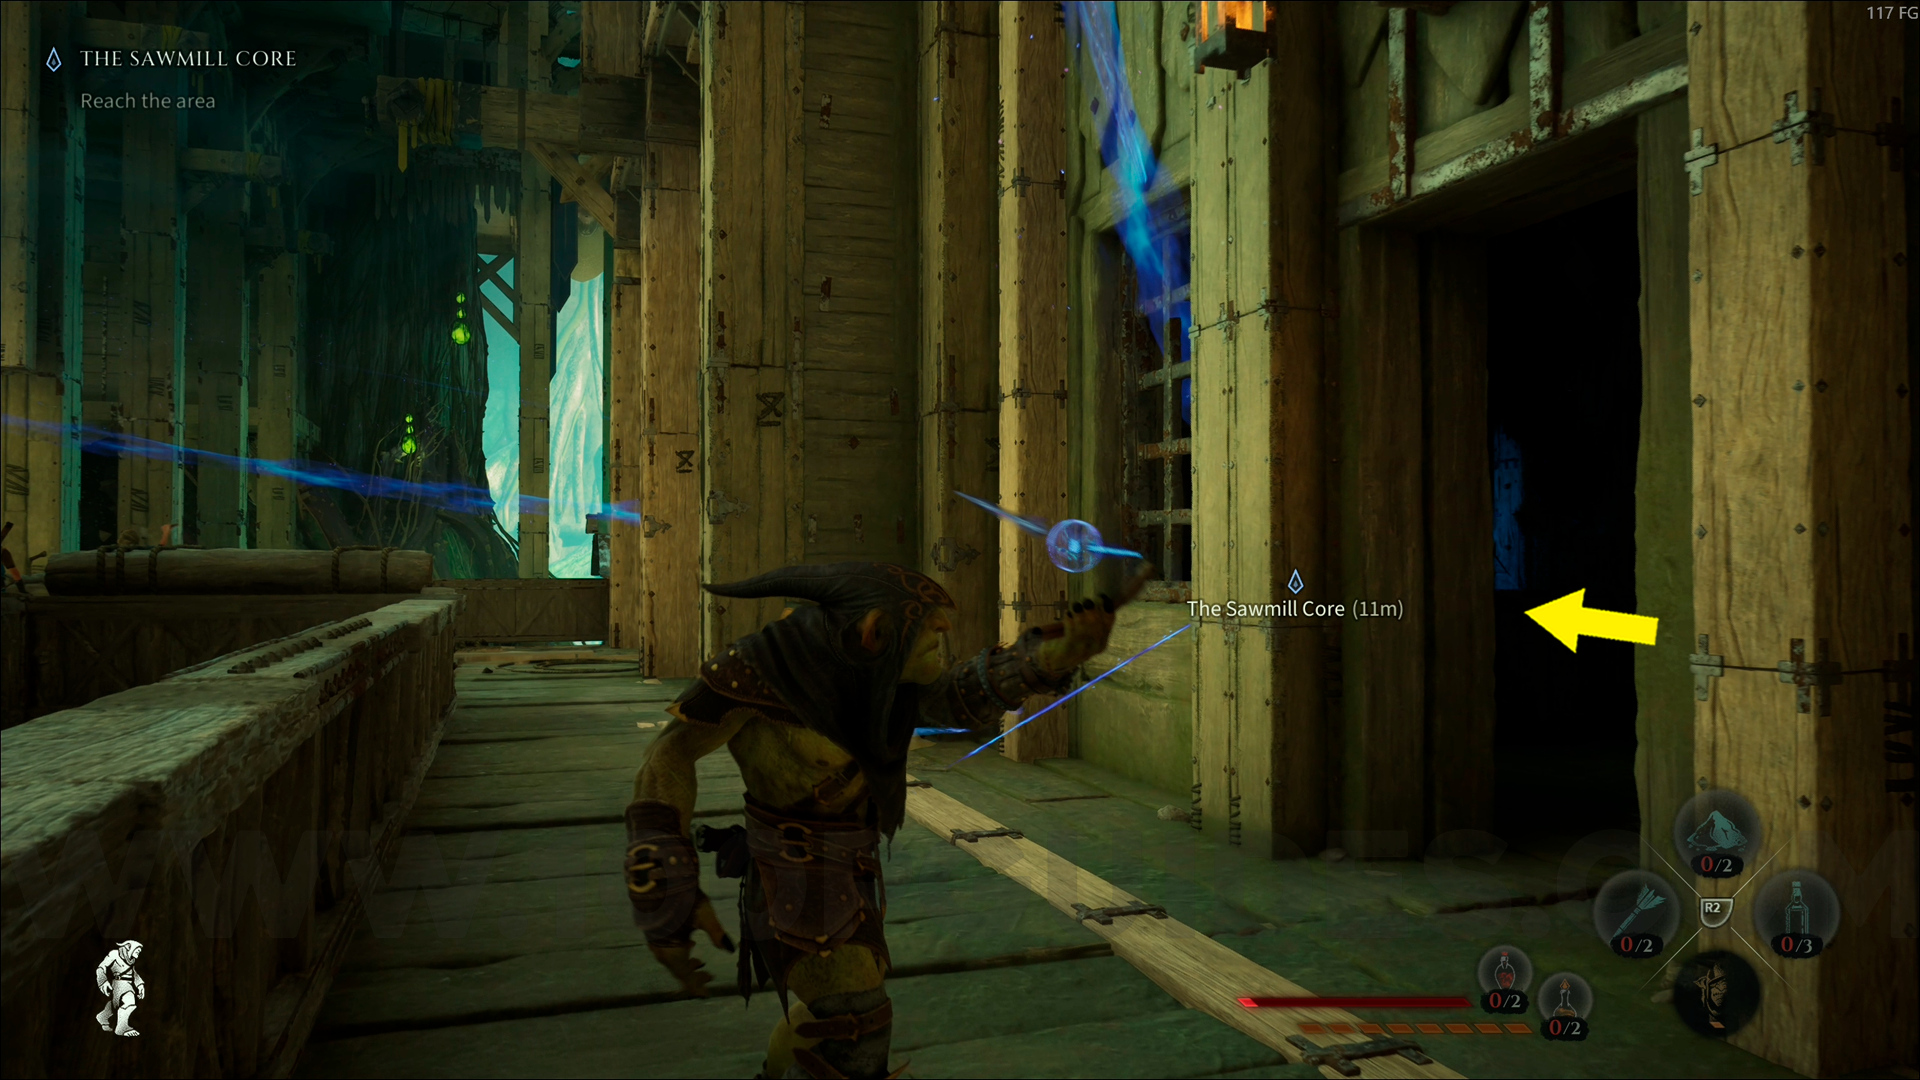
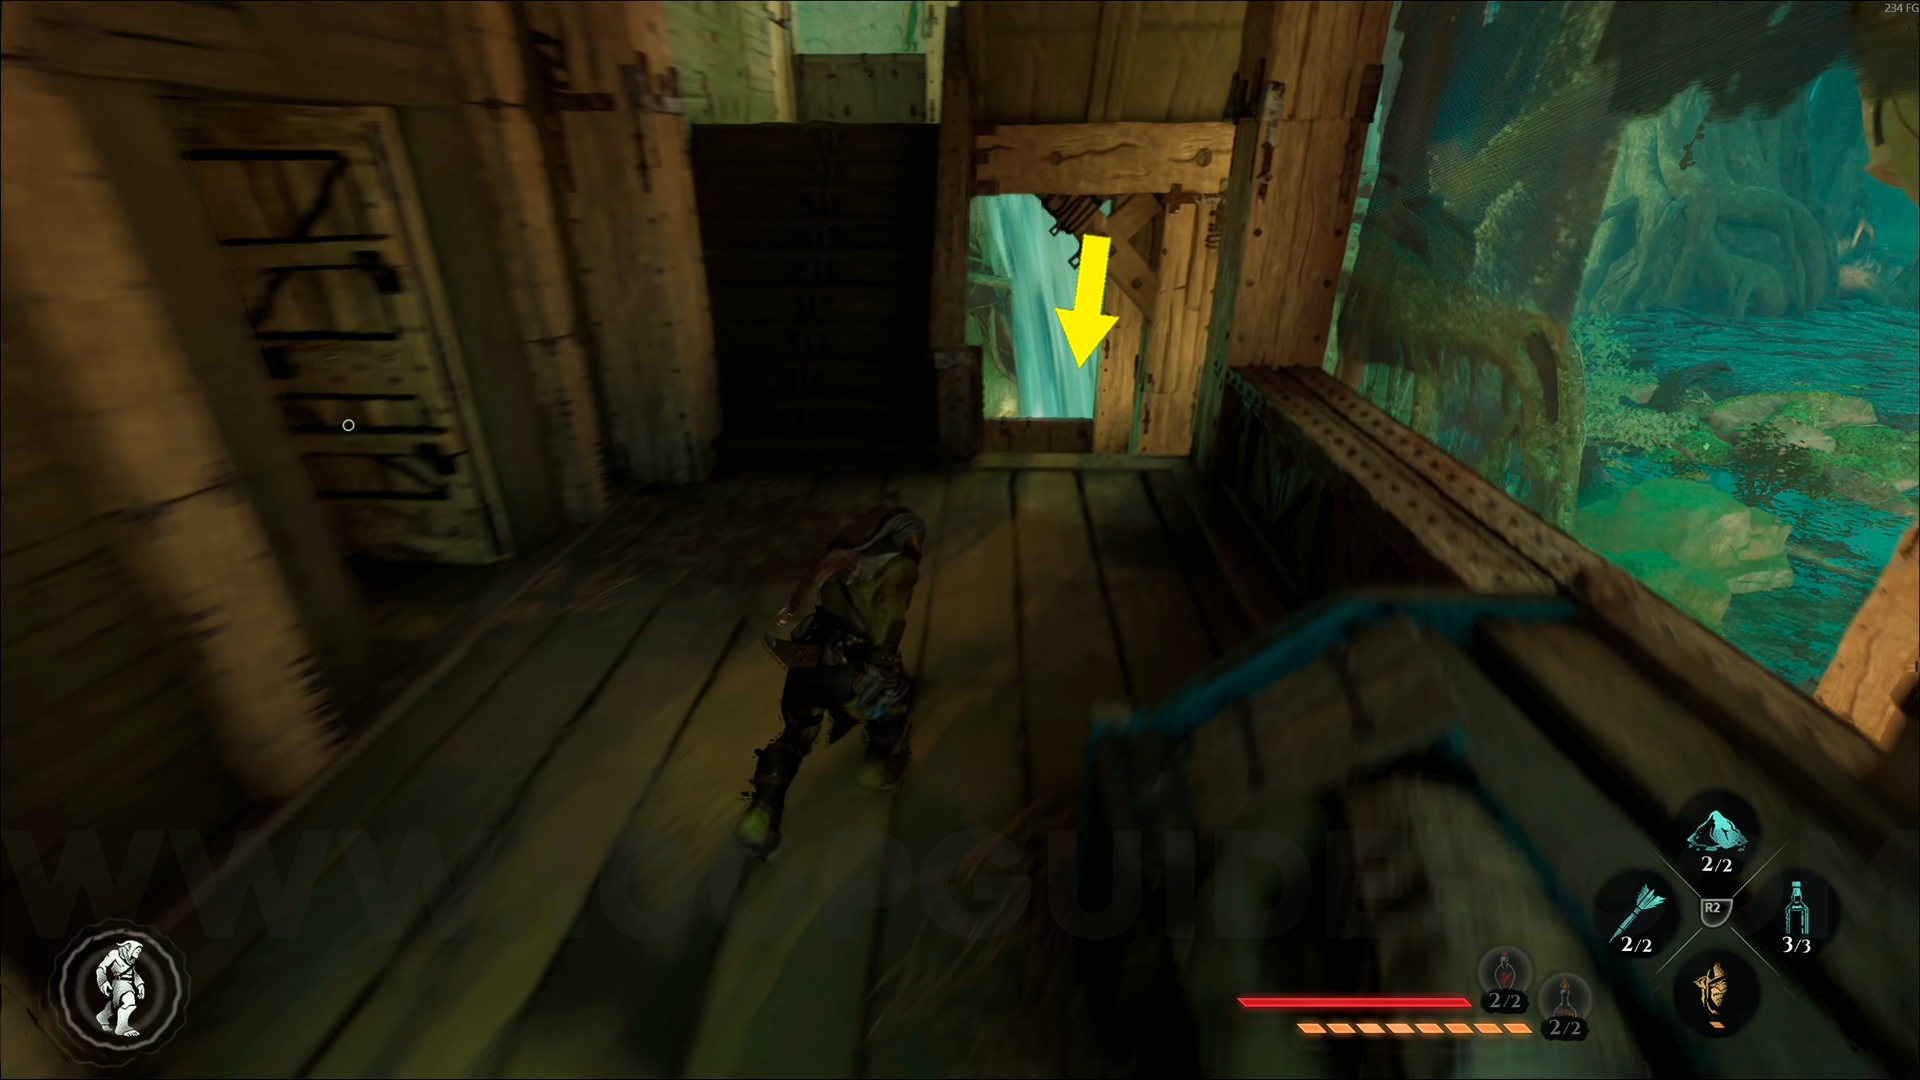
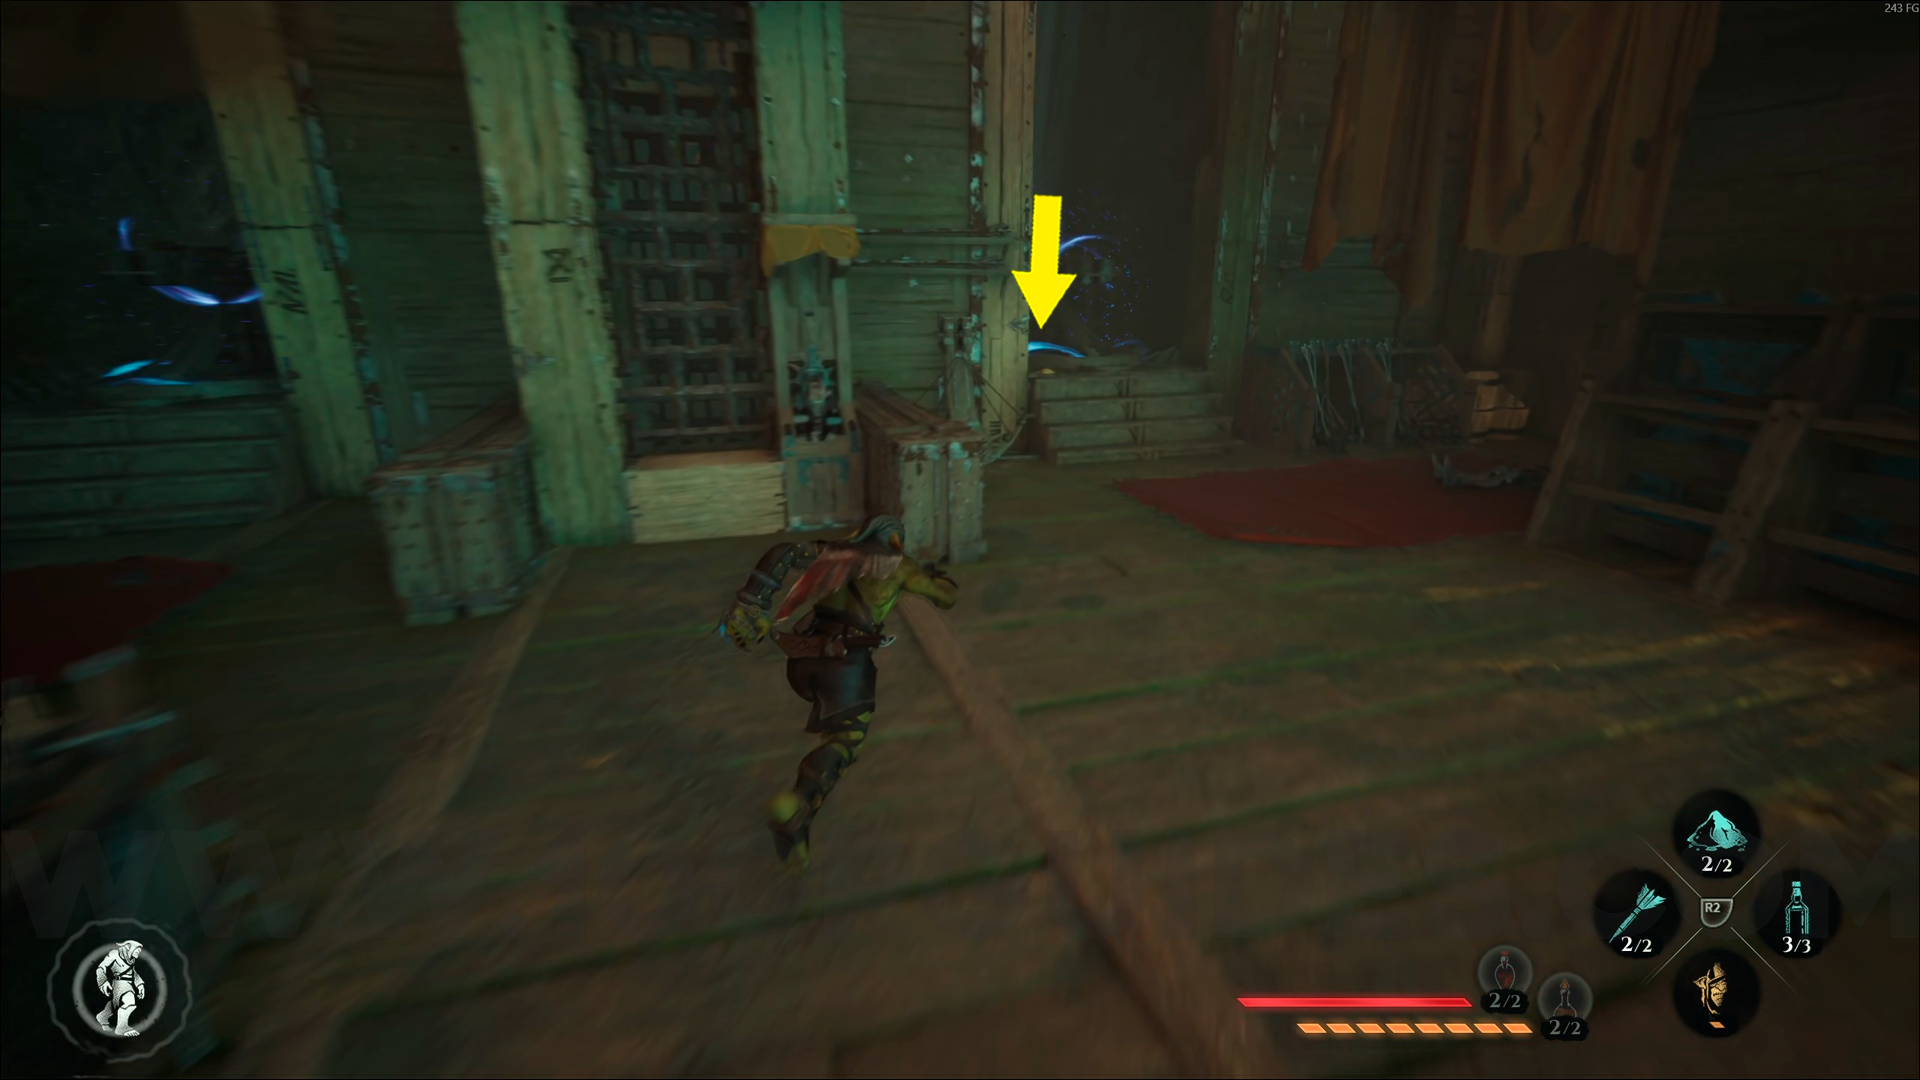
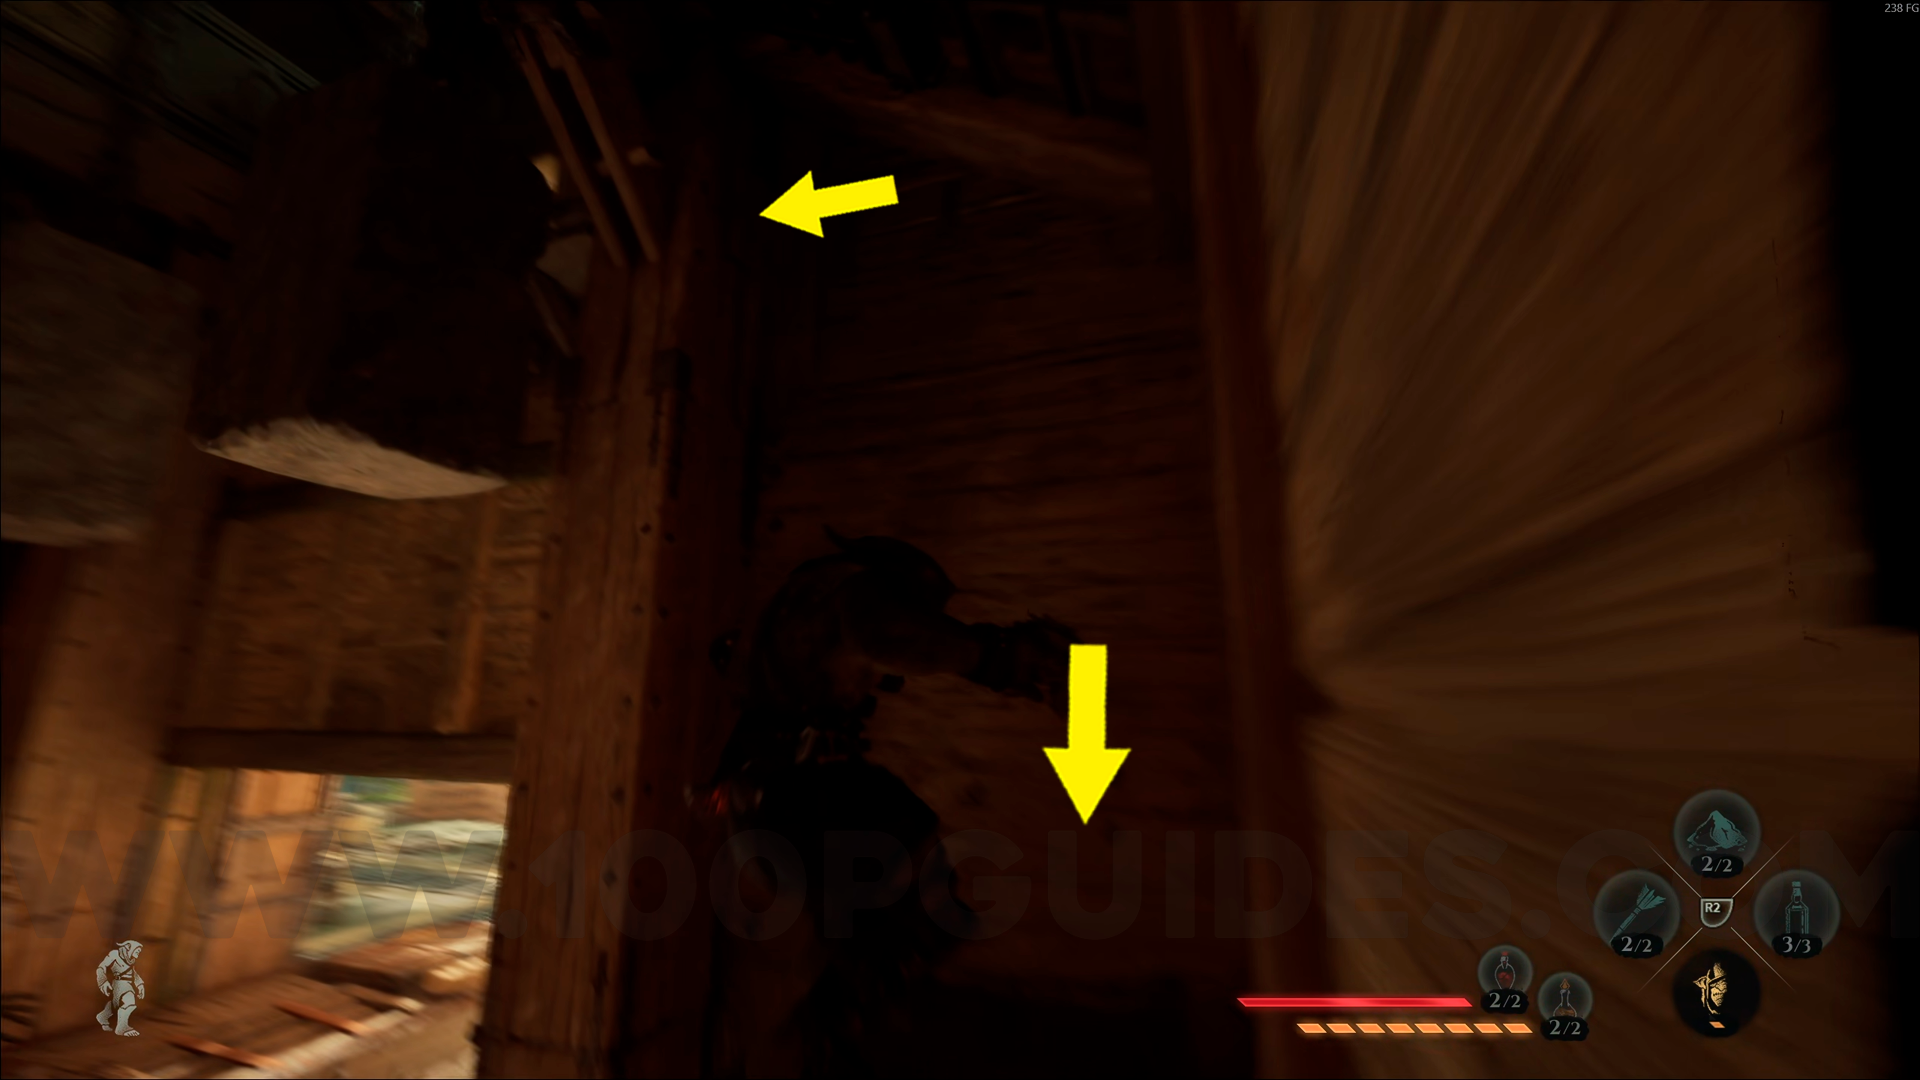
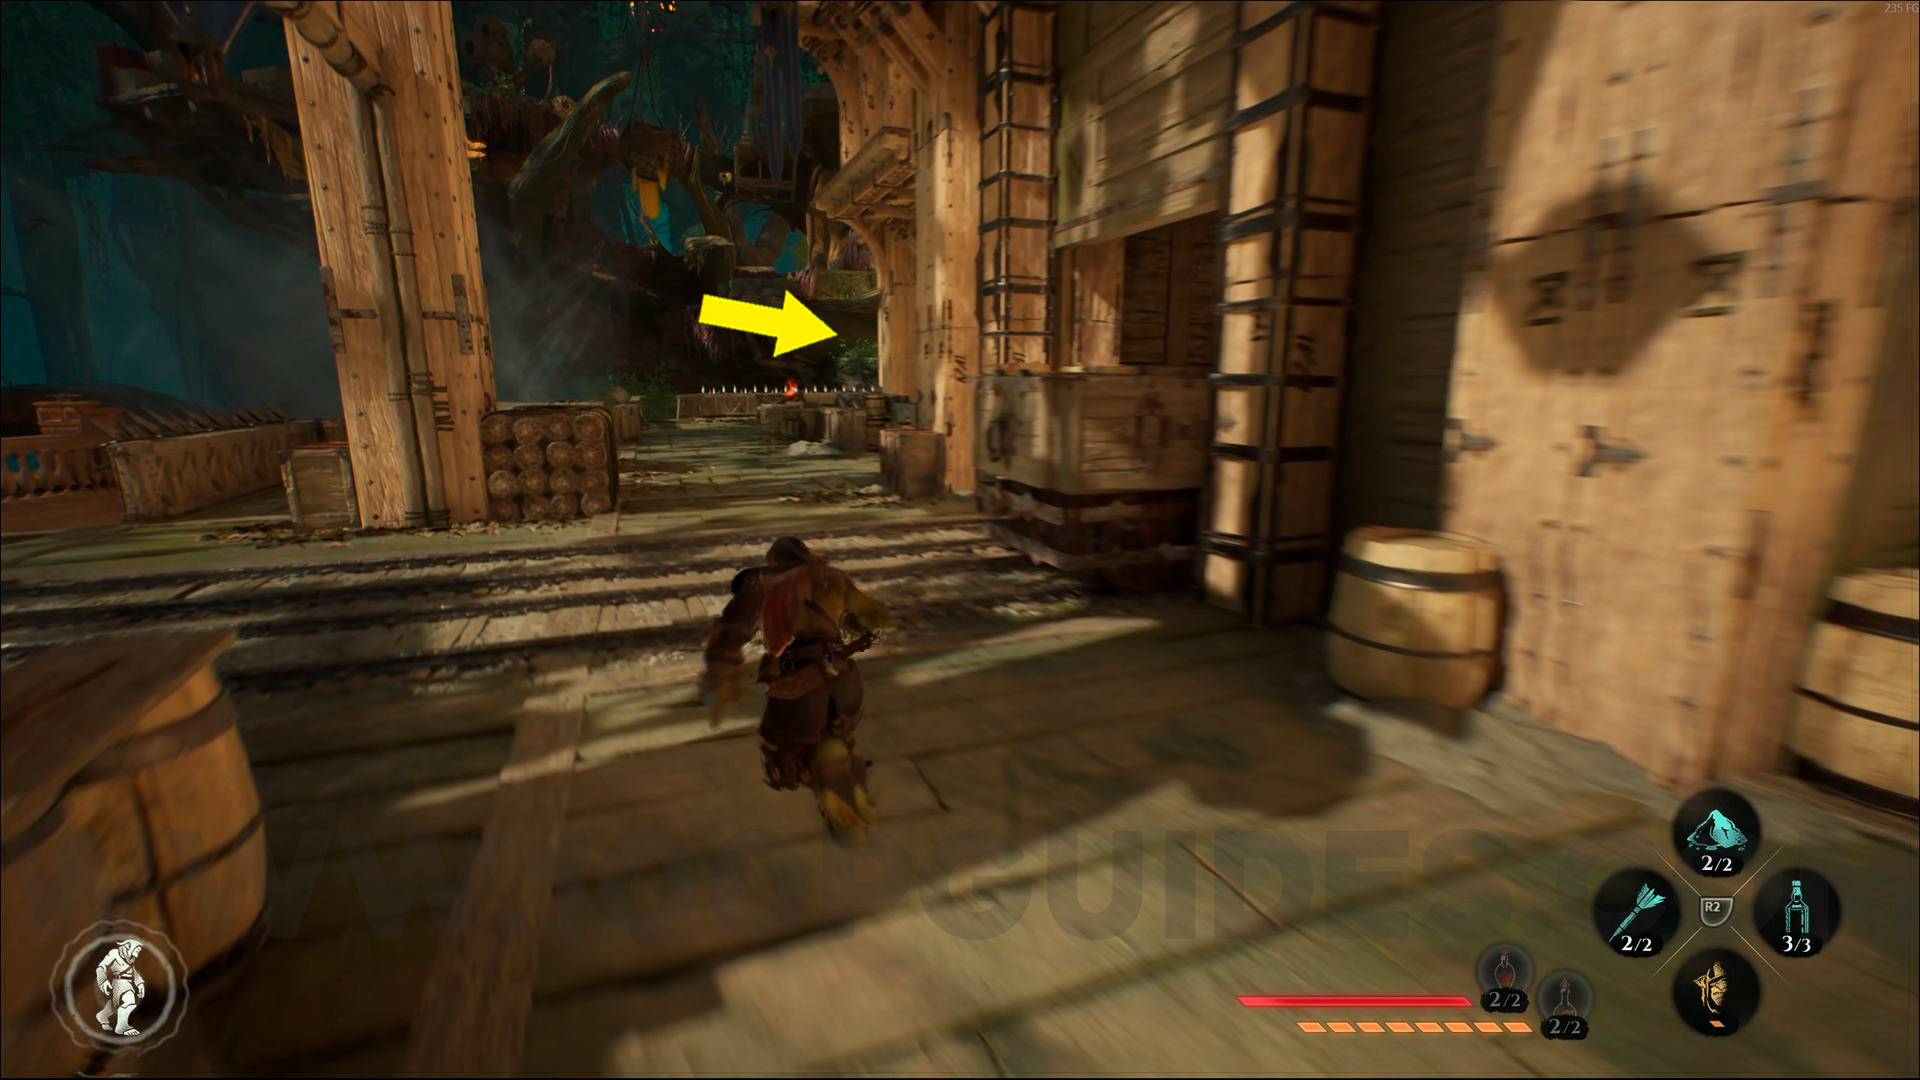
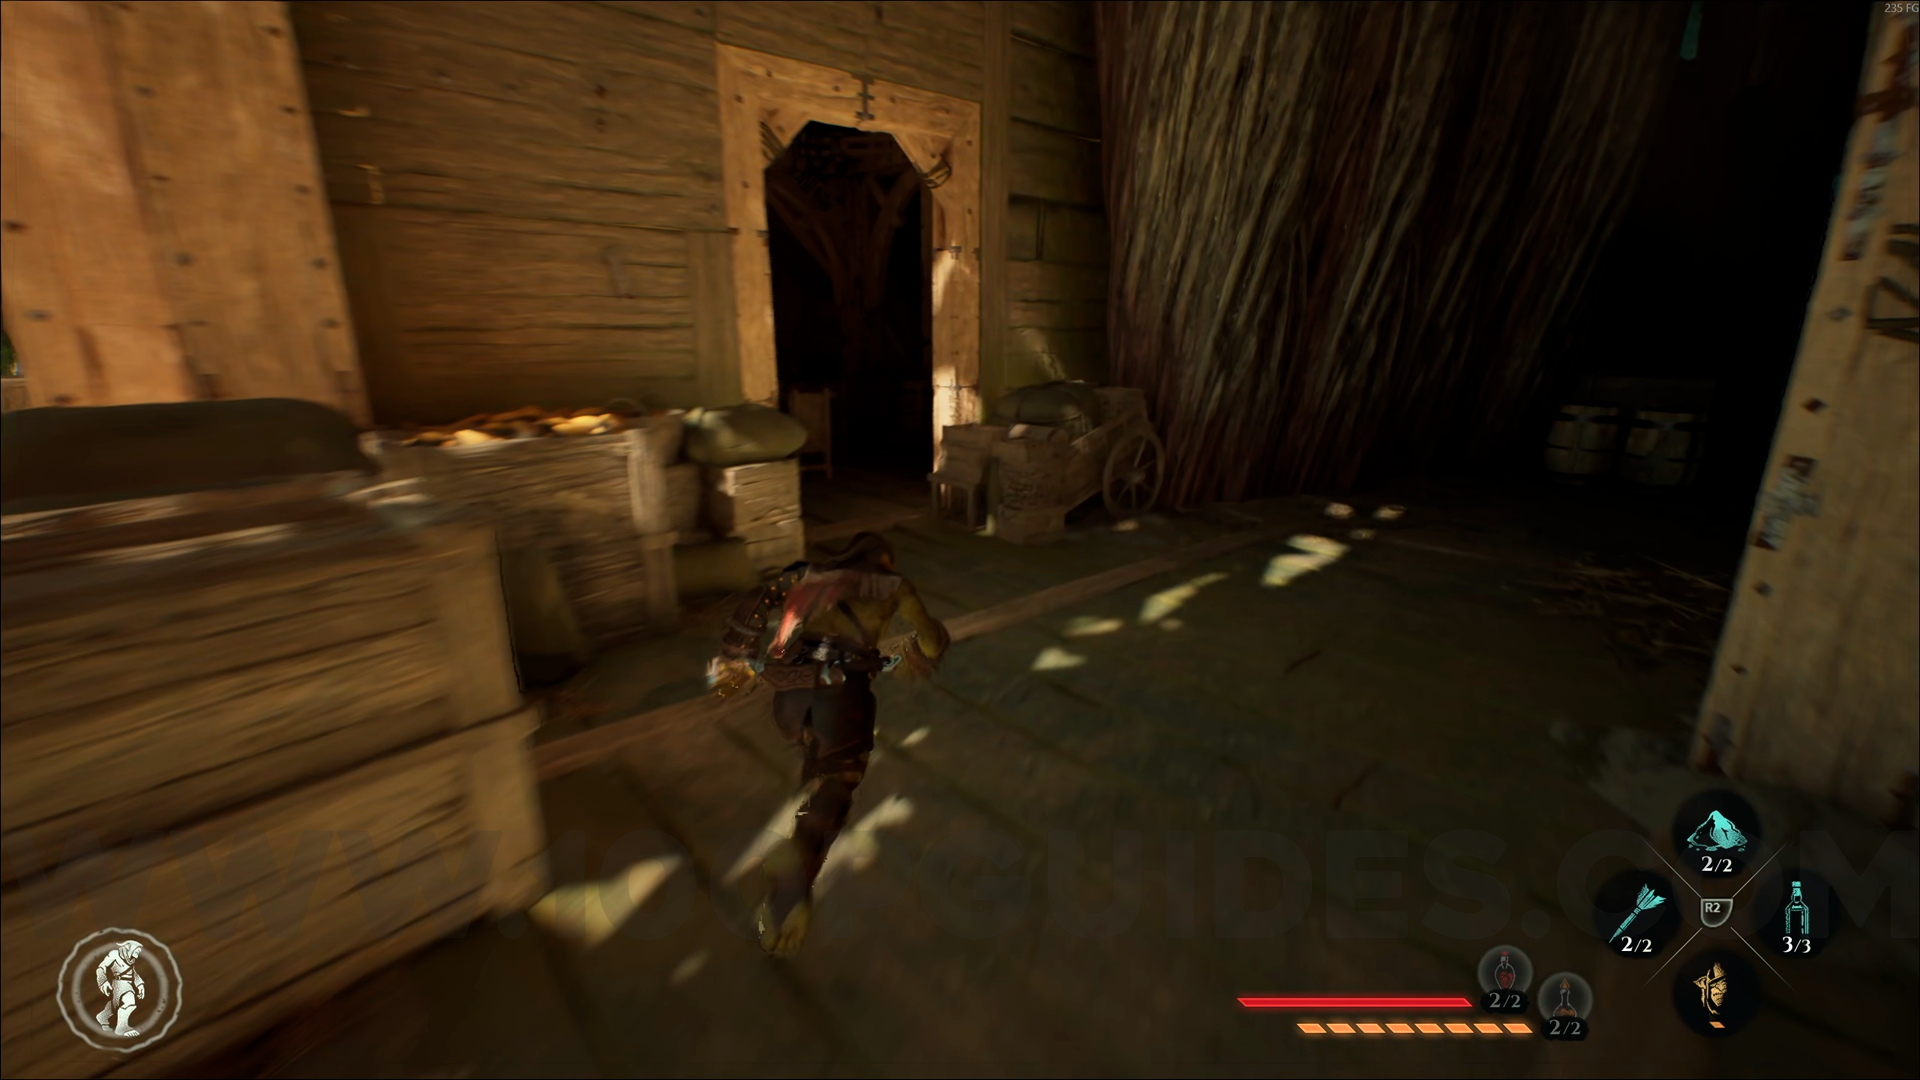
Wood Emblem #7. From the previous collectible, go down and turn through the first door on the left. The emblem will be in front of you, next to the bunk beds.

Wood Emblem #8. From the previous collectible, exit through the door you came in and go down the stairs. Then turn through the first door on your right. You'll find the emblem at the back, on the left side.
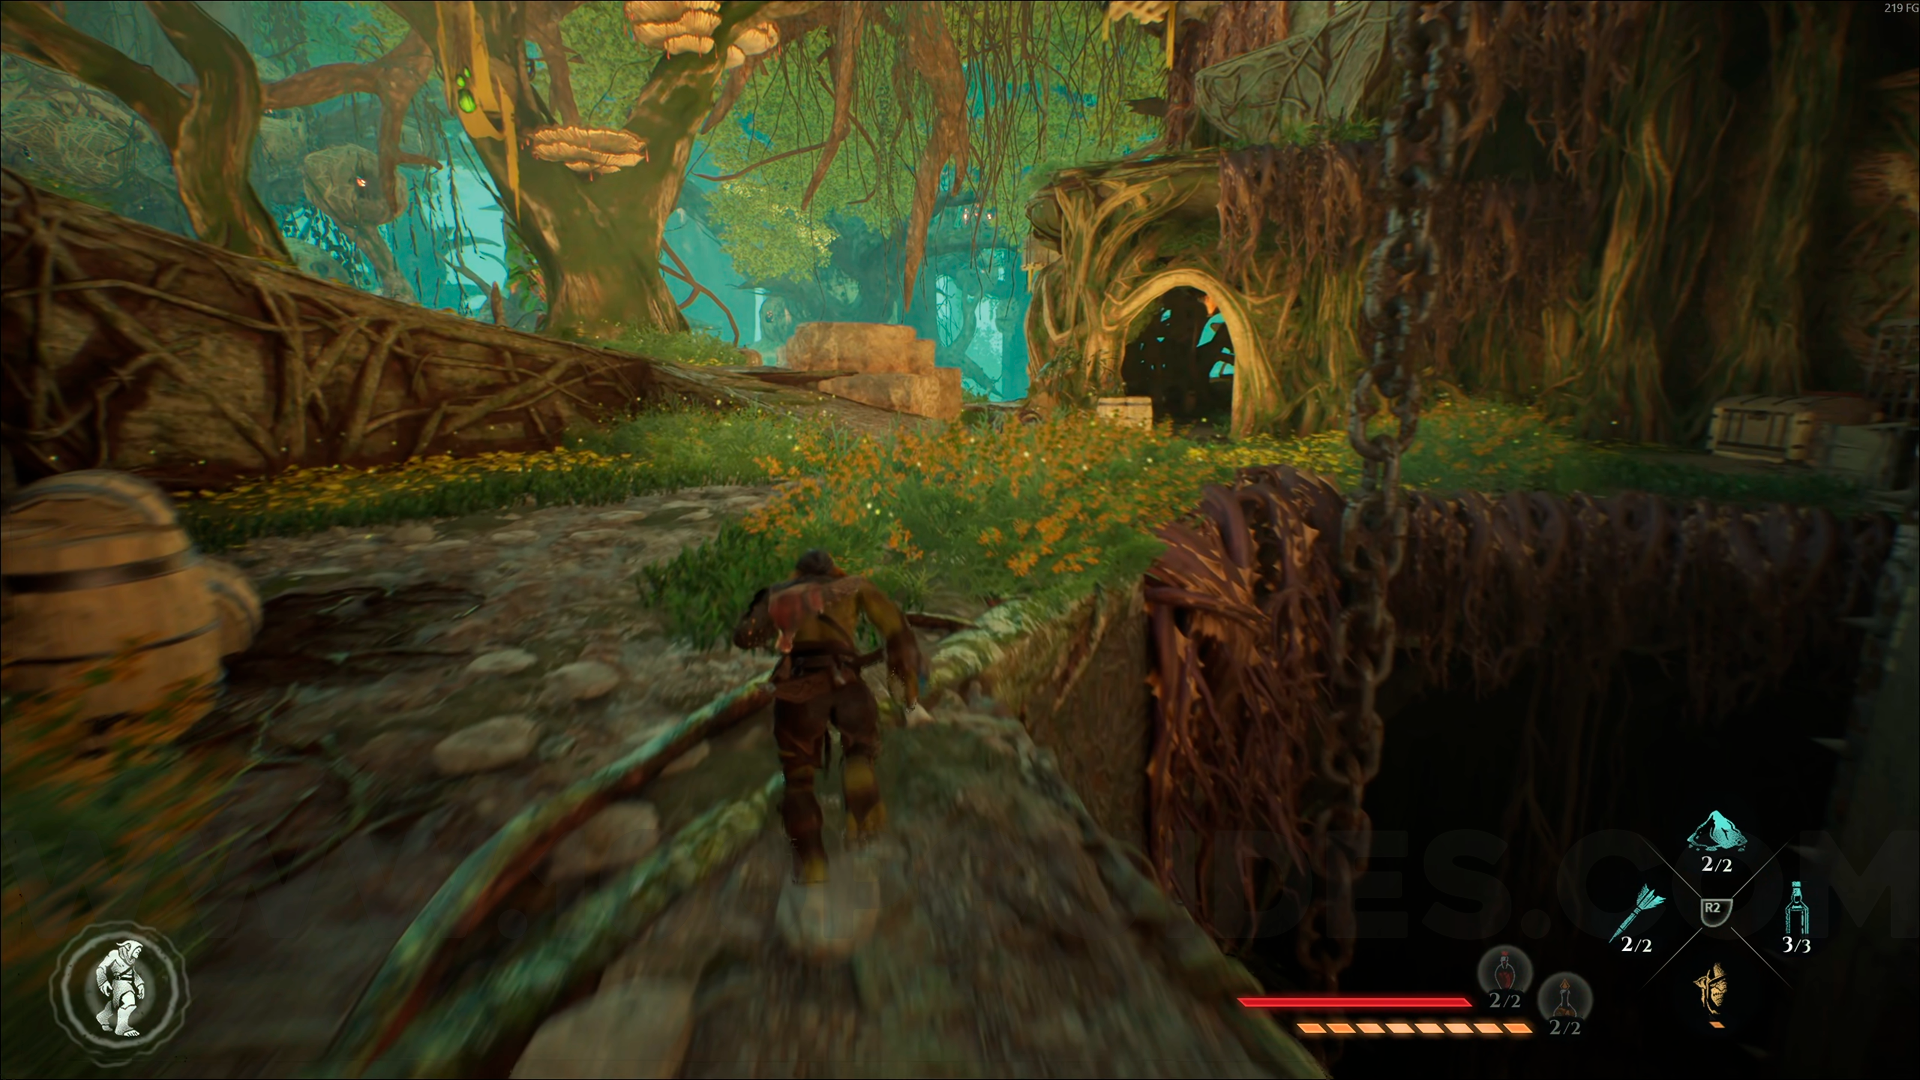
Wood Emblem #9. From the previous collectible, go up the stairs again, turn right, and pass through the gate using your ability. Continue to the end, crossing the bridge, to find this emblem.
Wood Emblem #10. From the Fortifications checkpoint, jump across the pillars and make your way to the end. The emblem will be next to the ballista on the right side.
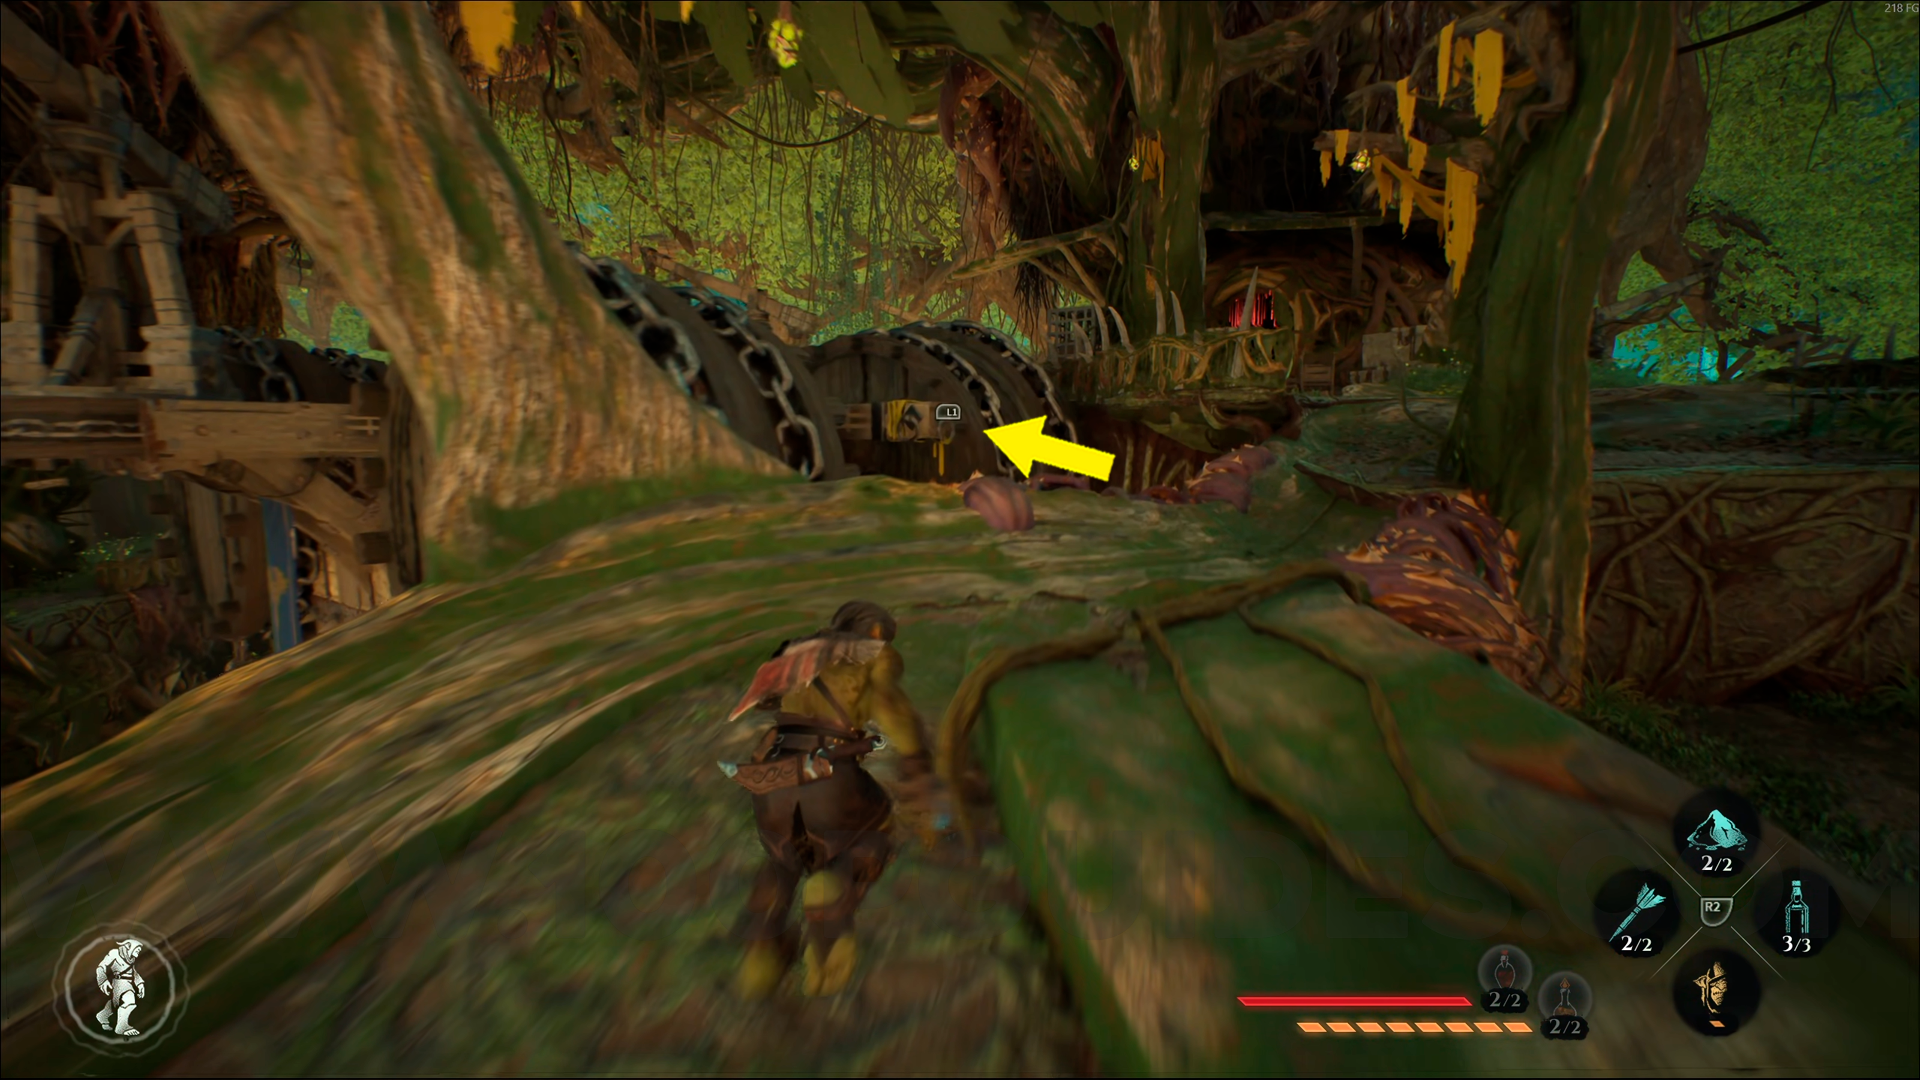
Bronze Emblem #1. From the Fortifications checkpoint, use the grappling hook to go around the area, then enter the hole. You'll see this emblem directly in front of you.

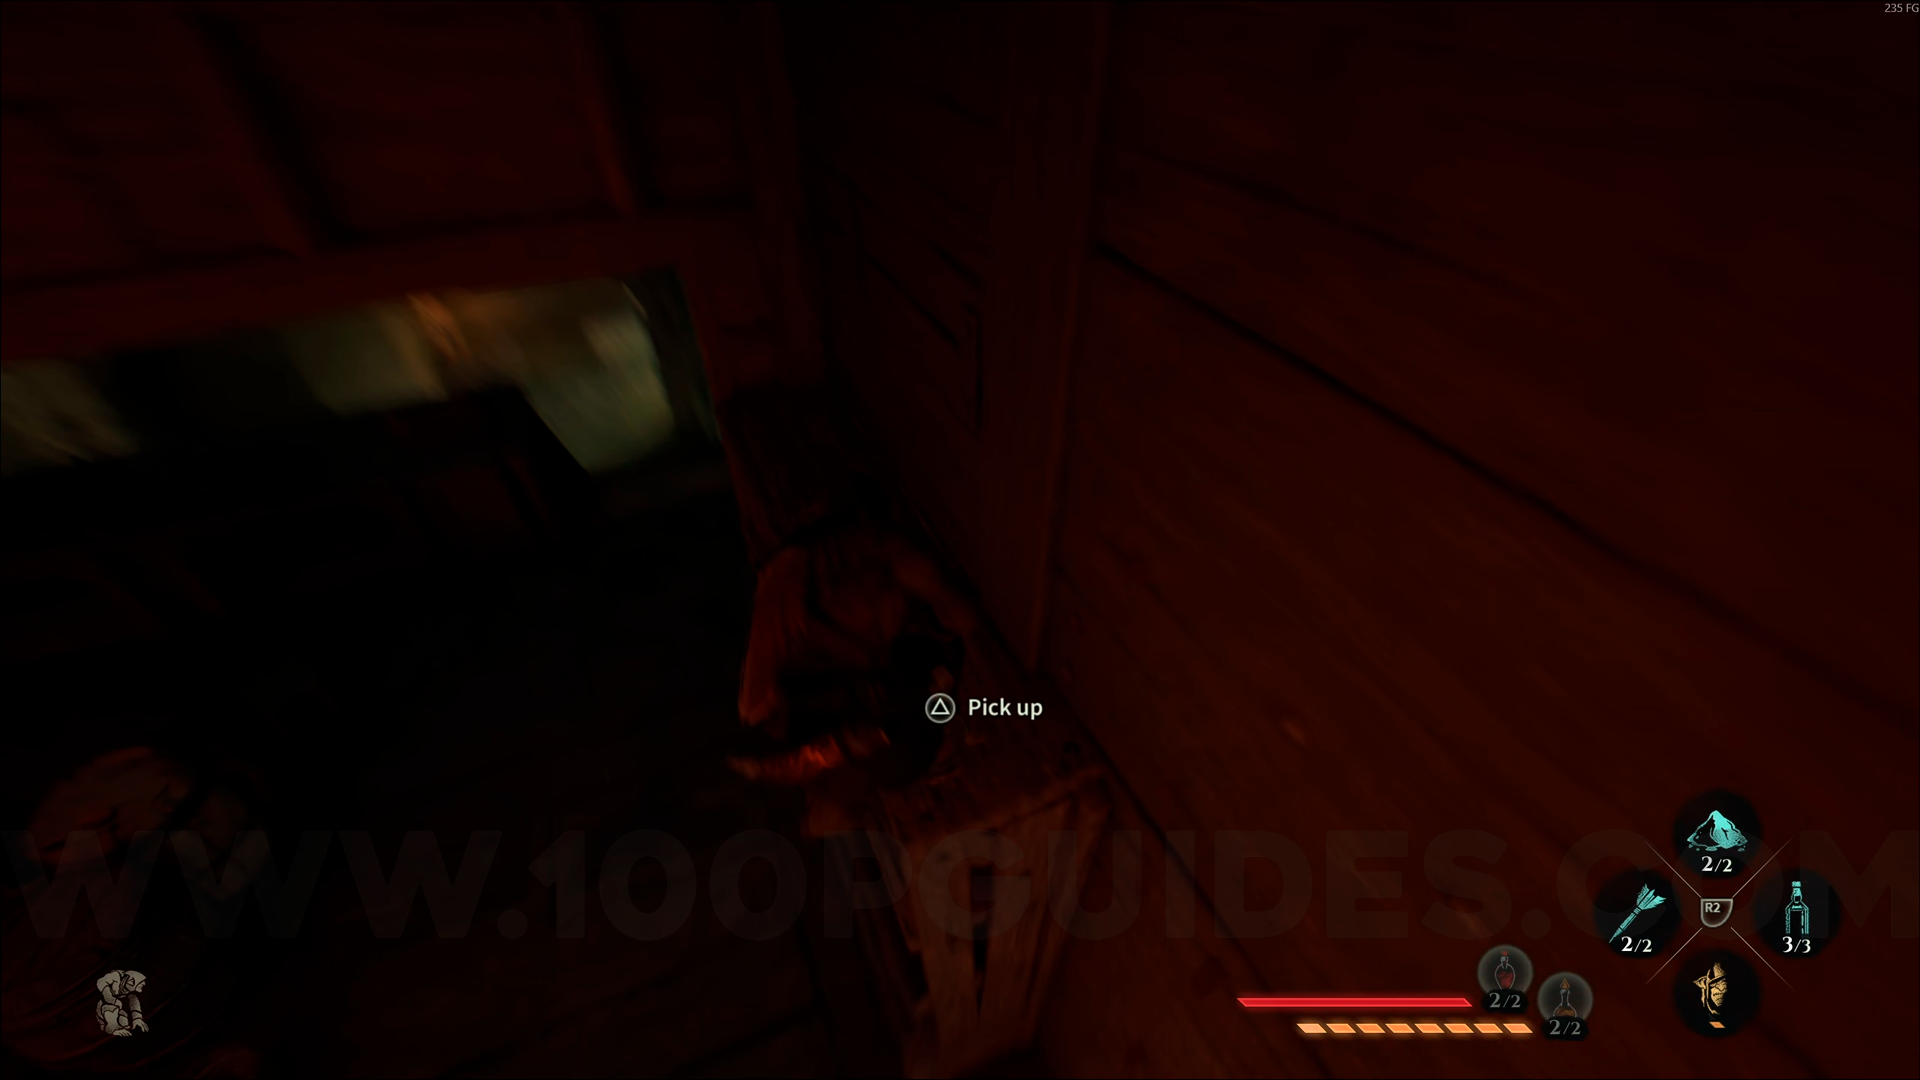
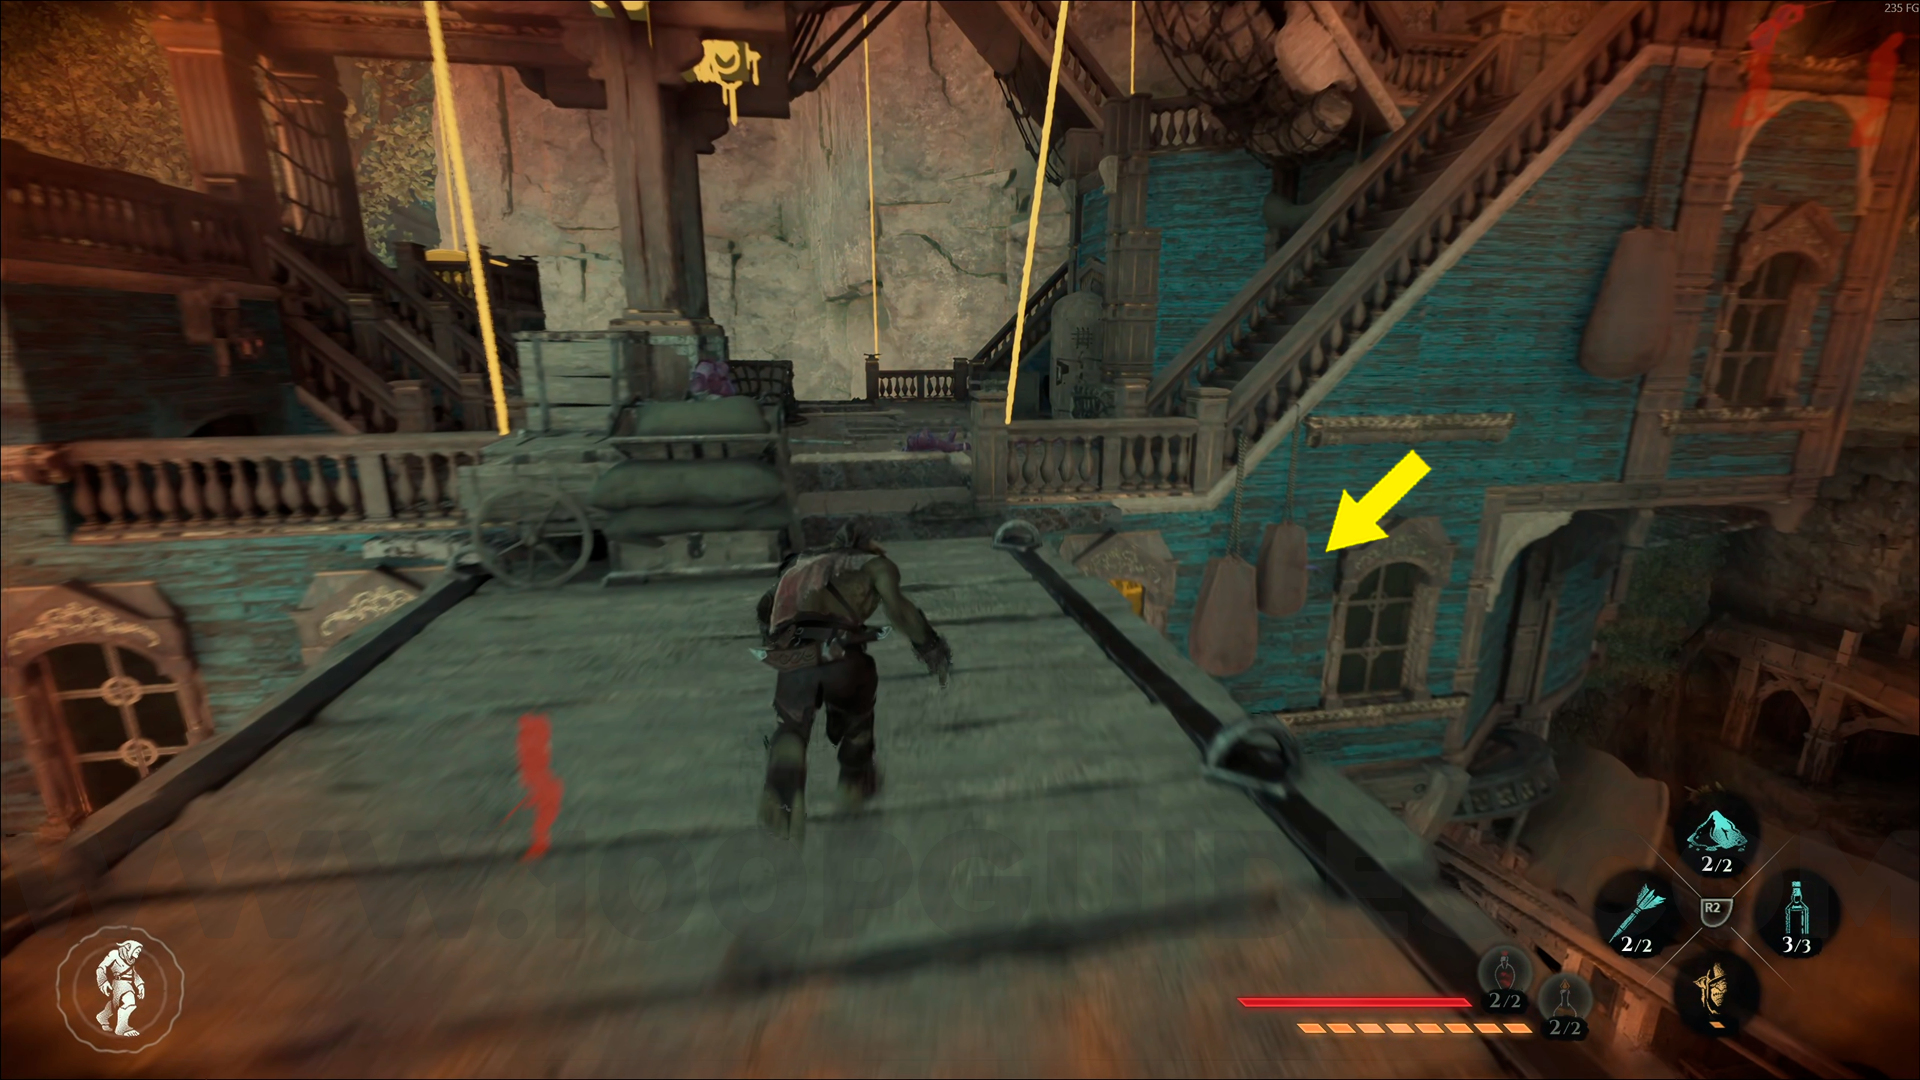
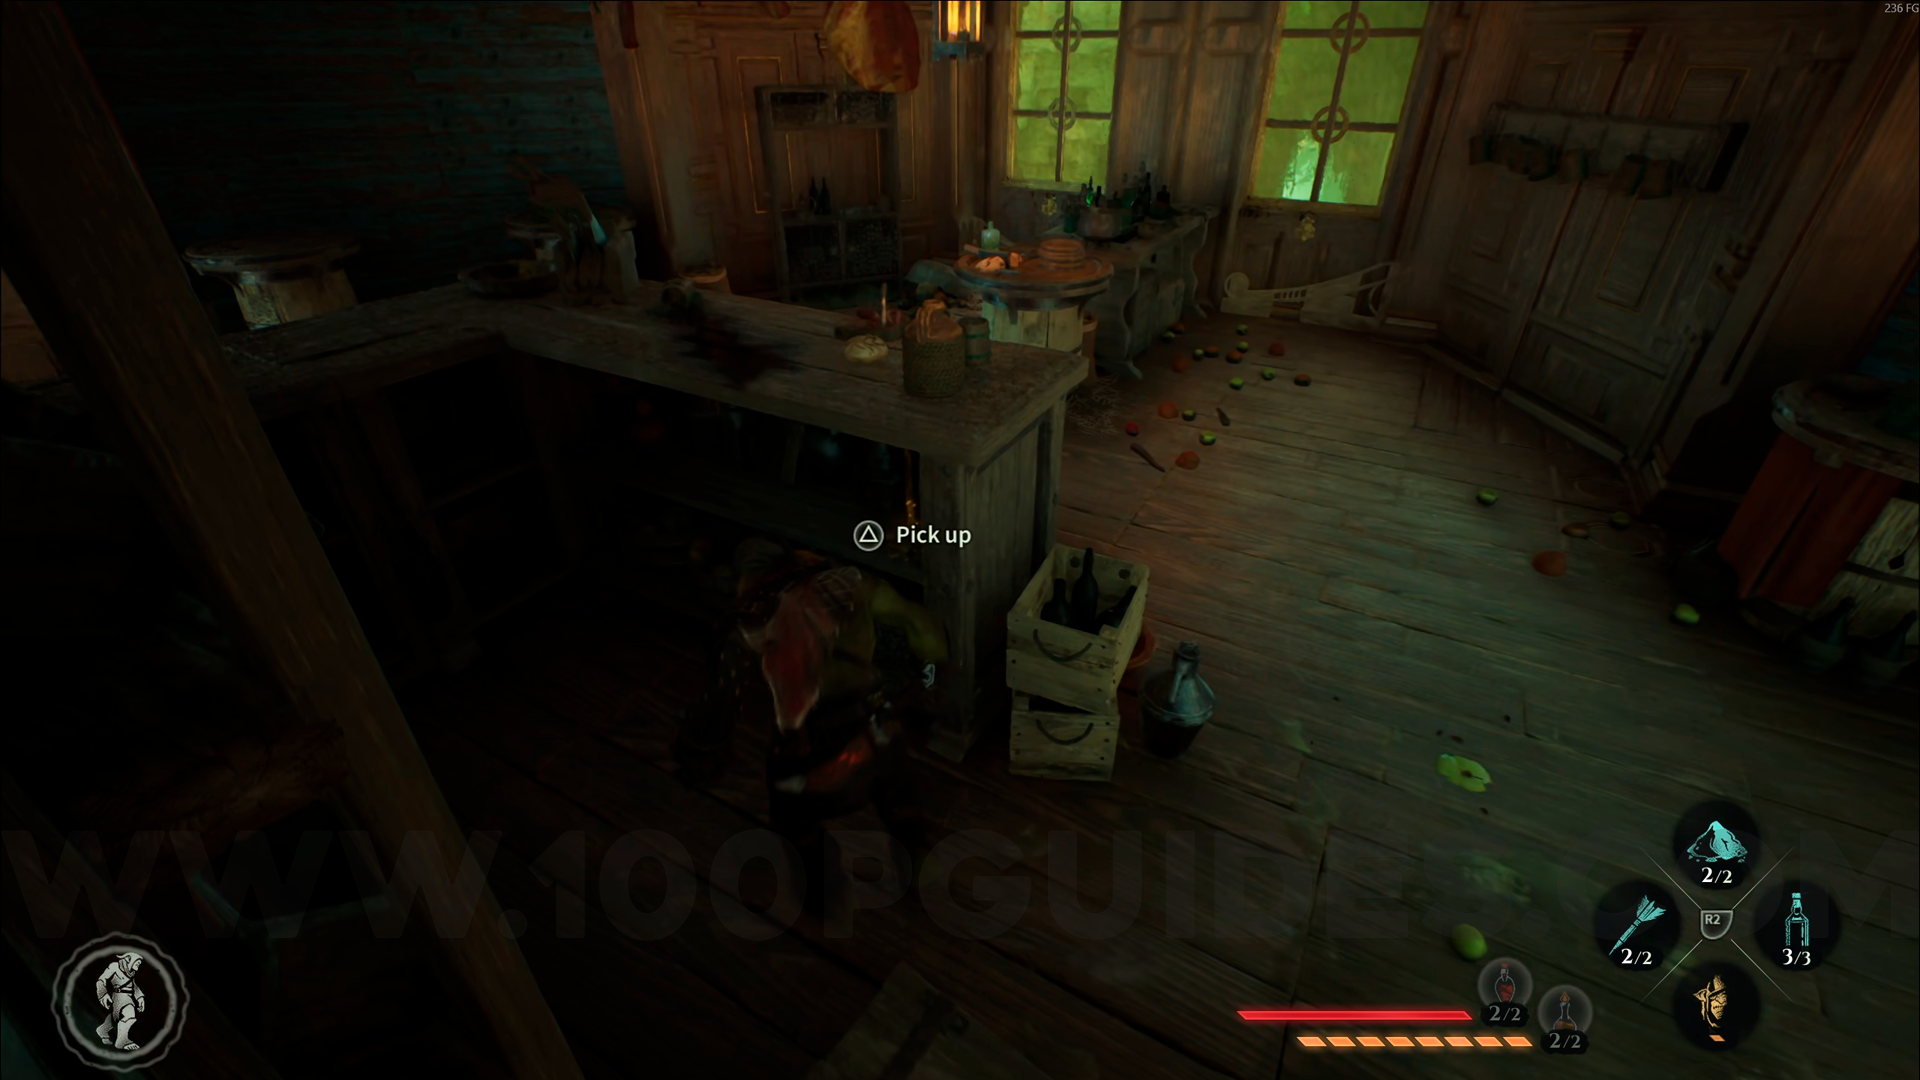
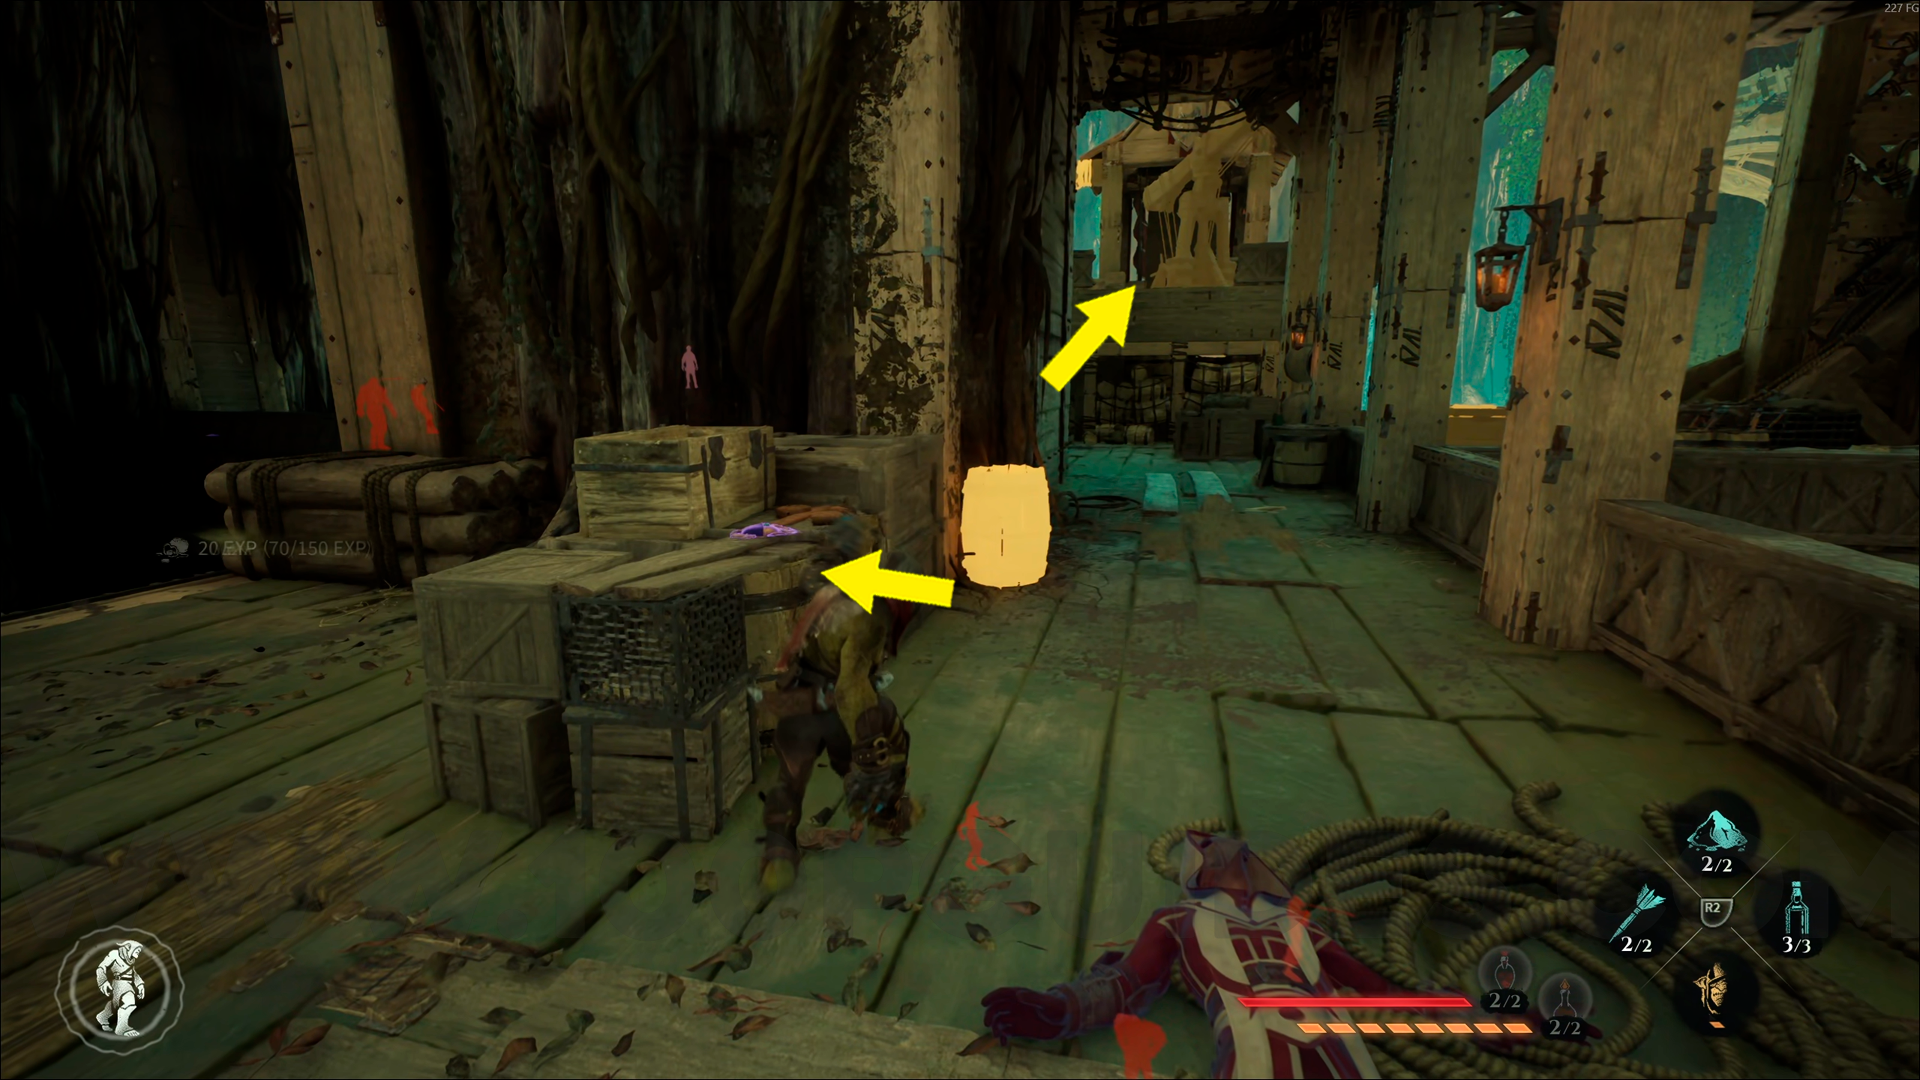
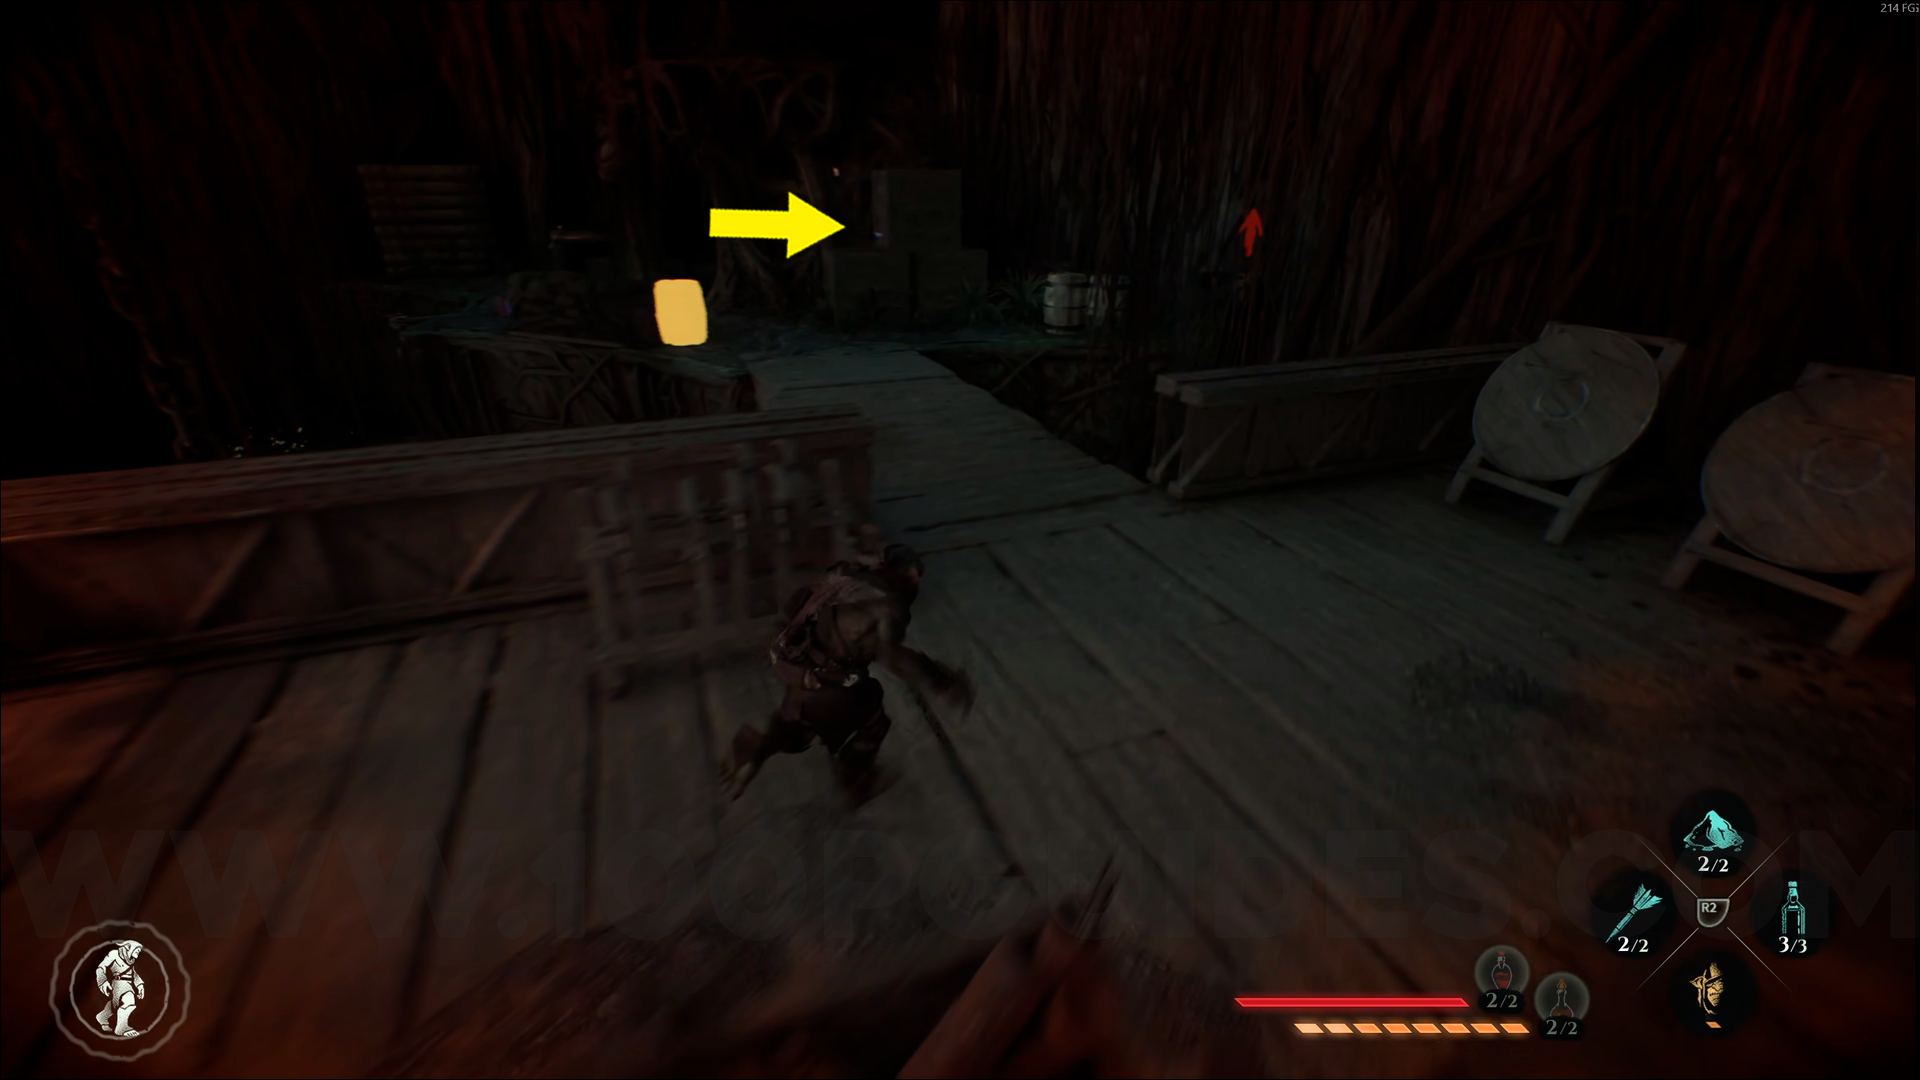
Bronze Emblem #2. This emblem is located just below the Supply Docks checkpoint. Go down to the lower area, pass through the hole, and it will be on top of the cabinet to your right as soon as you enter.

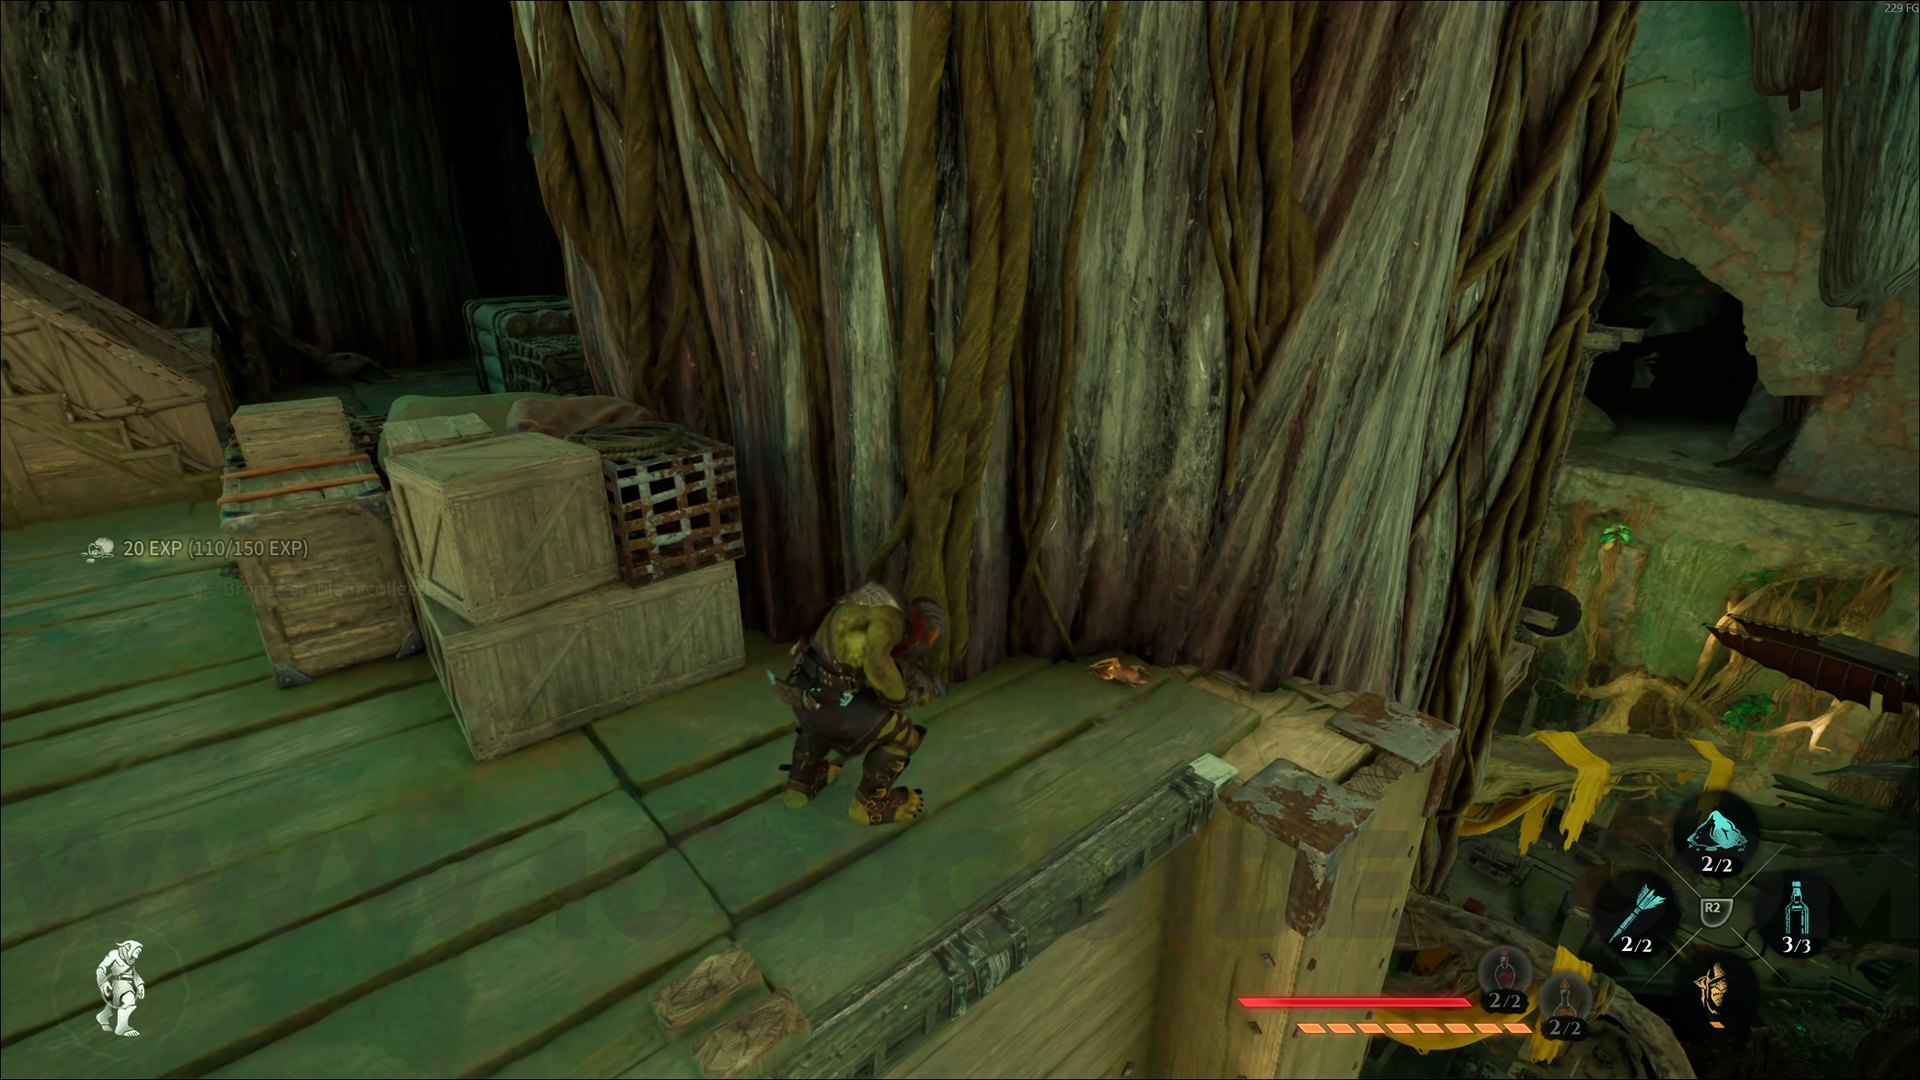
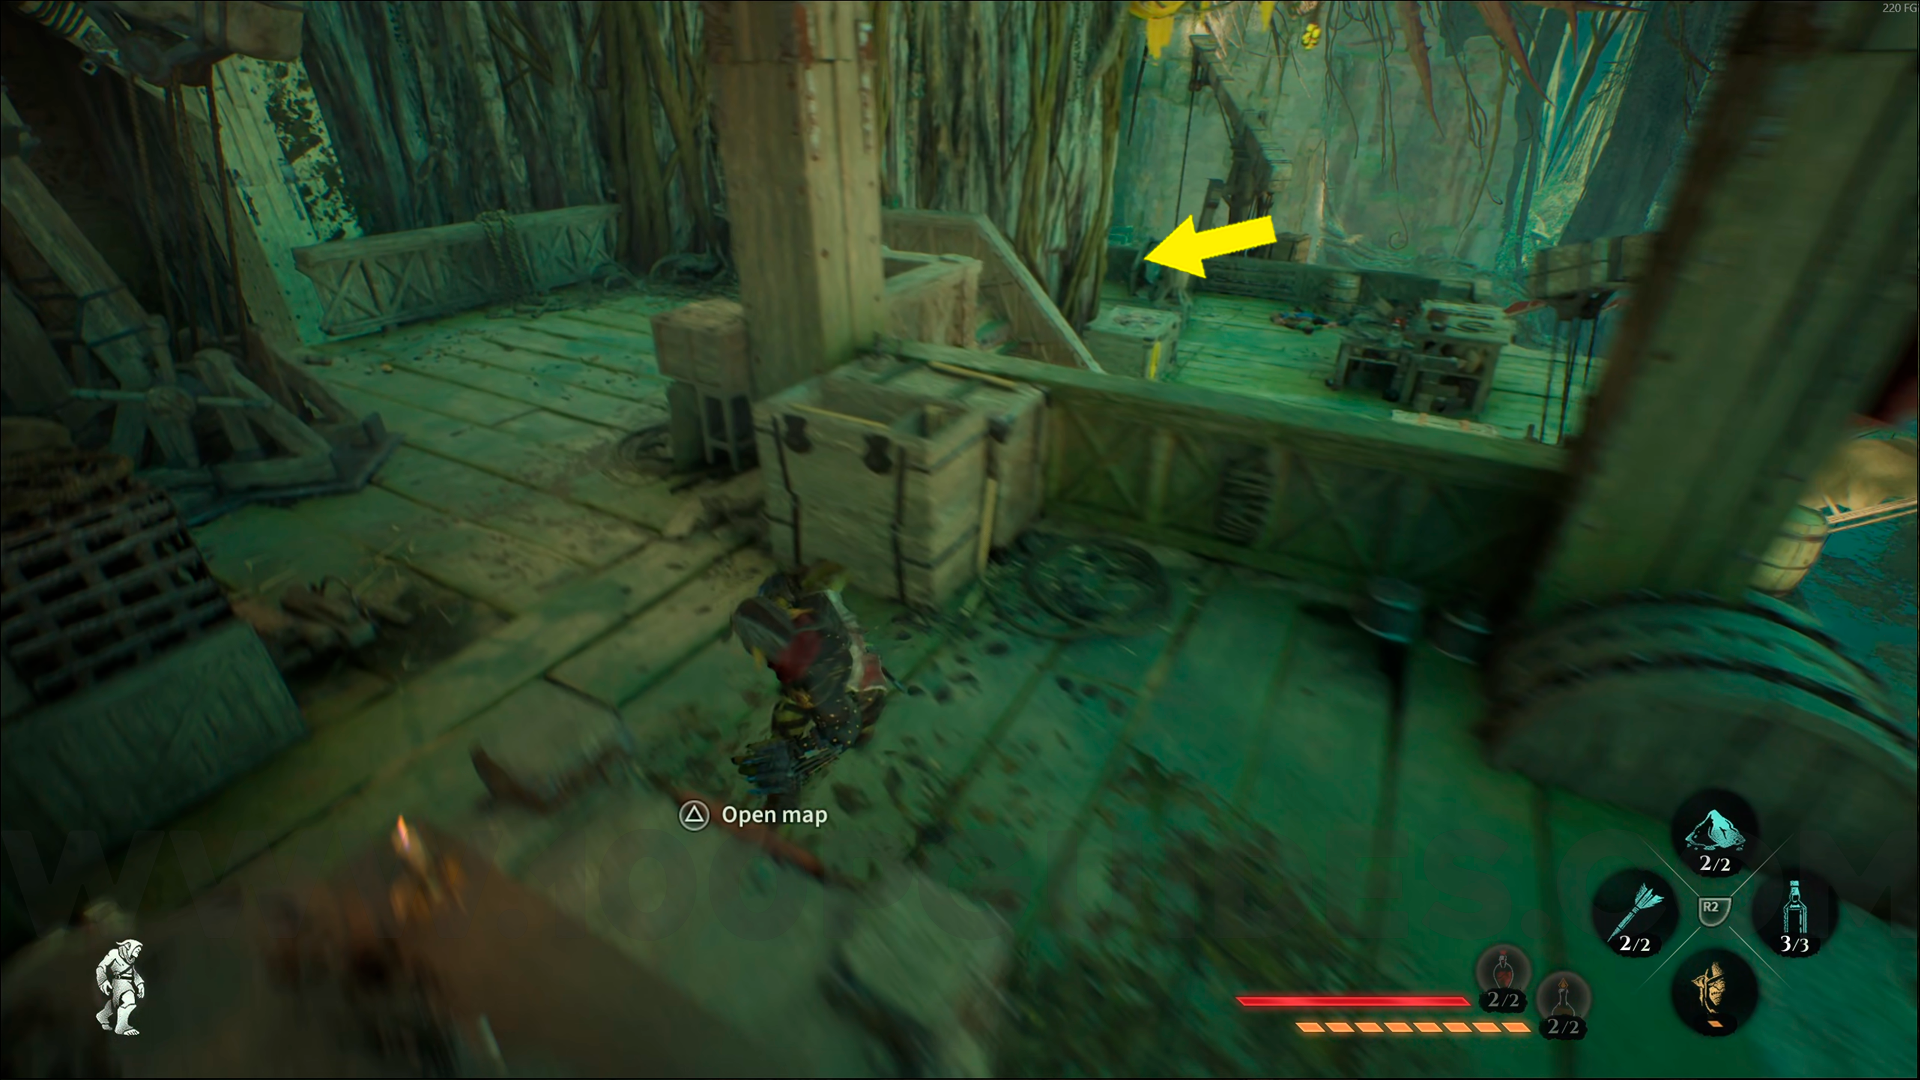
Bronze Emblem #3. From the Supply Docks checkpoint, go to the end of the area, then turn left. It will be directly in front of you.
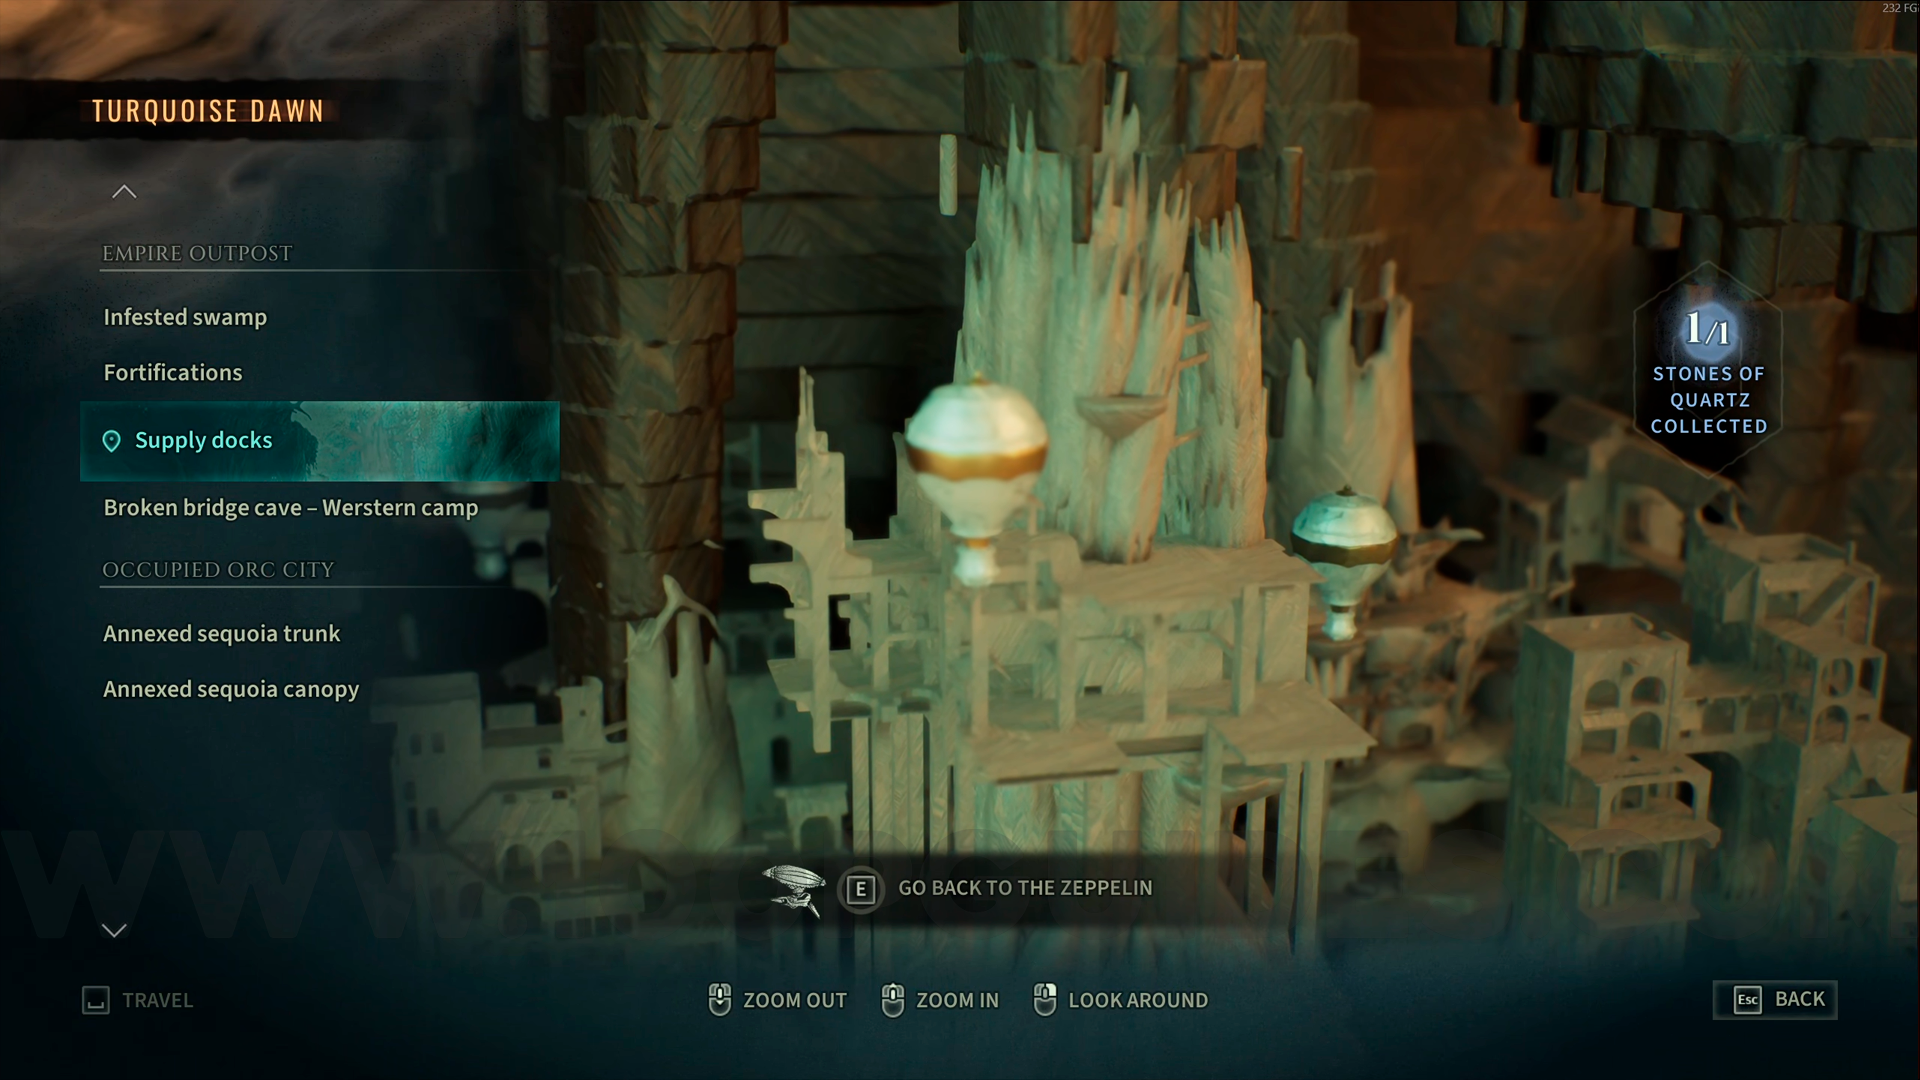
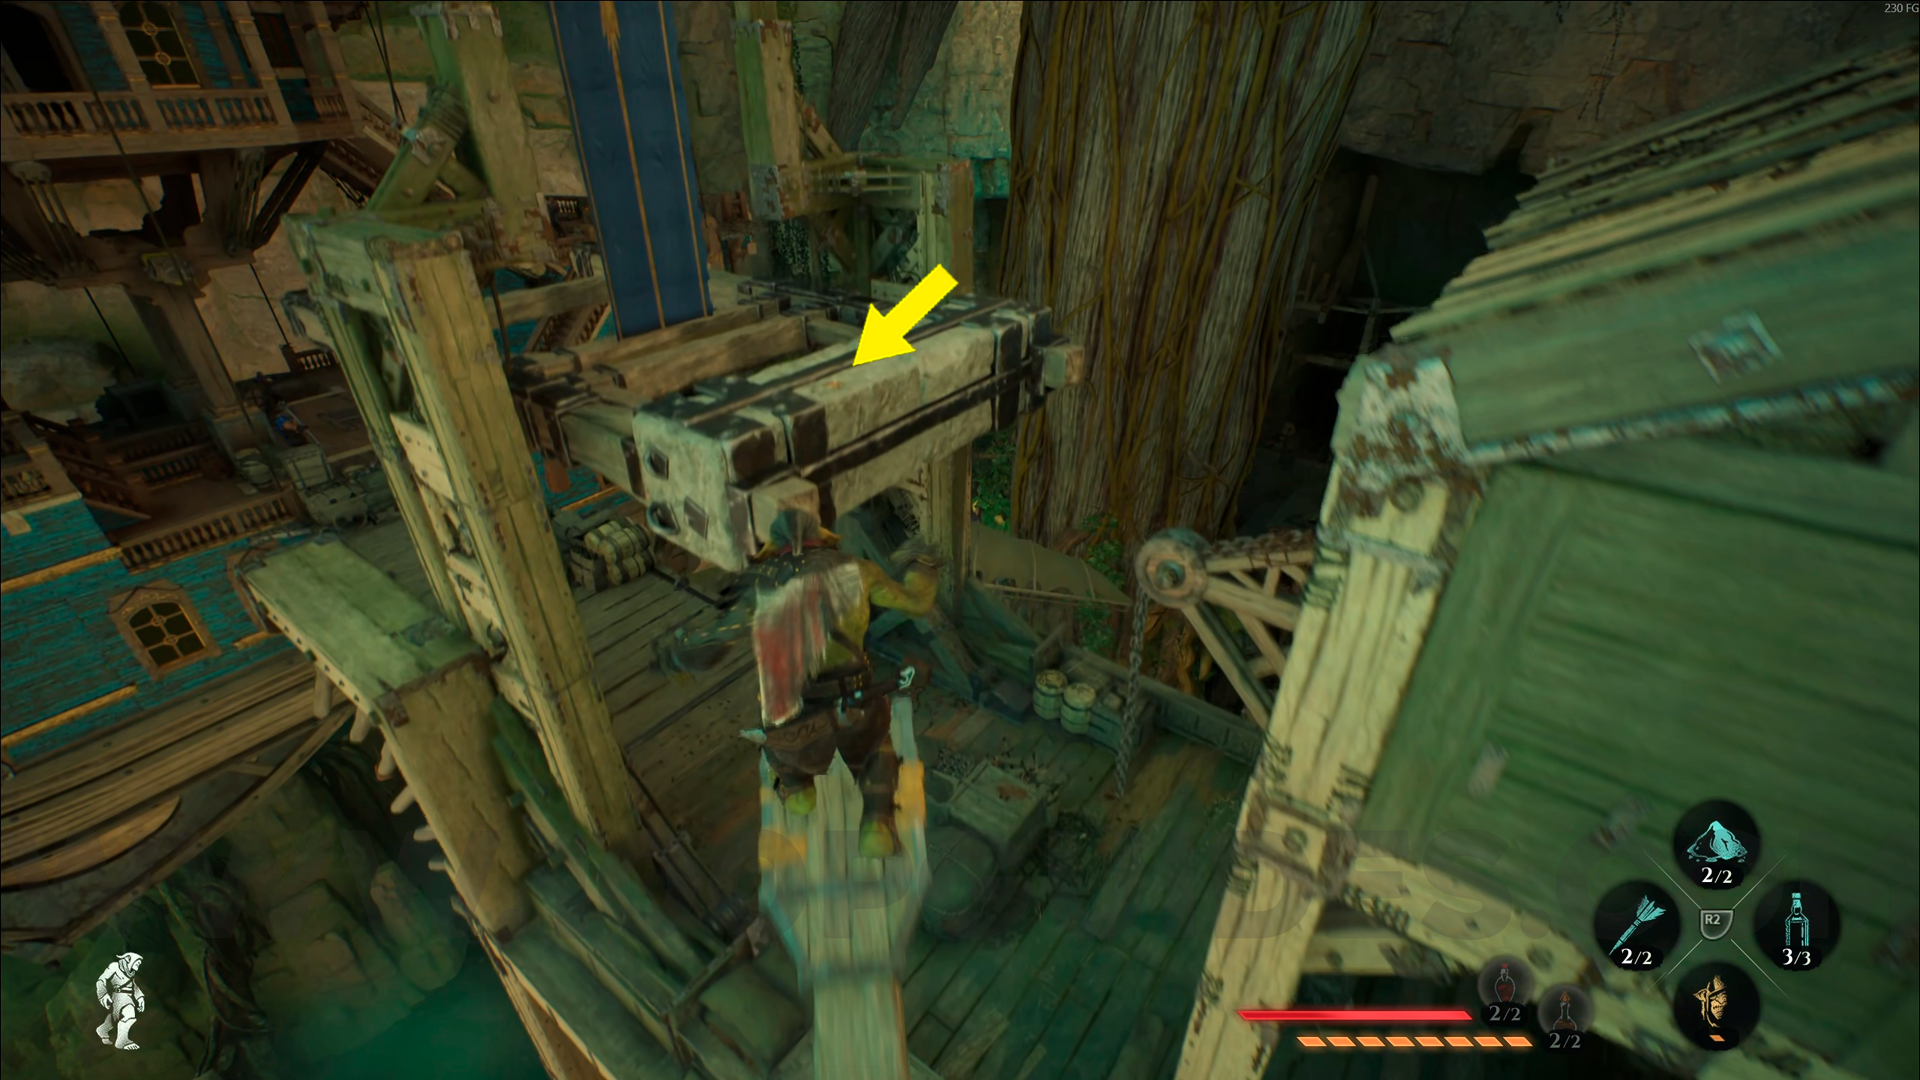
Bronze Emblem #4. From the Supply Docks checkpoint, climb up to the crane using the Grapple Hook. You'll see this emblem directly in front of you.

Bronze Emblem #5. From the Supply Docks checkpoint, enter the blue zeppelin next to the checkpoint and grab this emblem.

Bronze Emblem #6. From the previous collectible, now climb to the top of the zeppelin to find this emblem.
Bronze Emblem #7. From the Fortifications checkpoint, use the Grapple Hook to head left and go all the way to the end of the area before the waterfall. Climb down, and you'll find this emblem.
Bronze Emblem #8. From the previous collectible, go through the hole in the wall and you'll see this emblem directly in front of you.
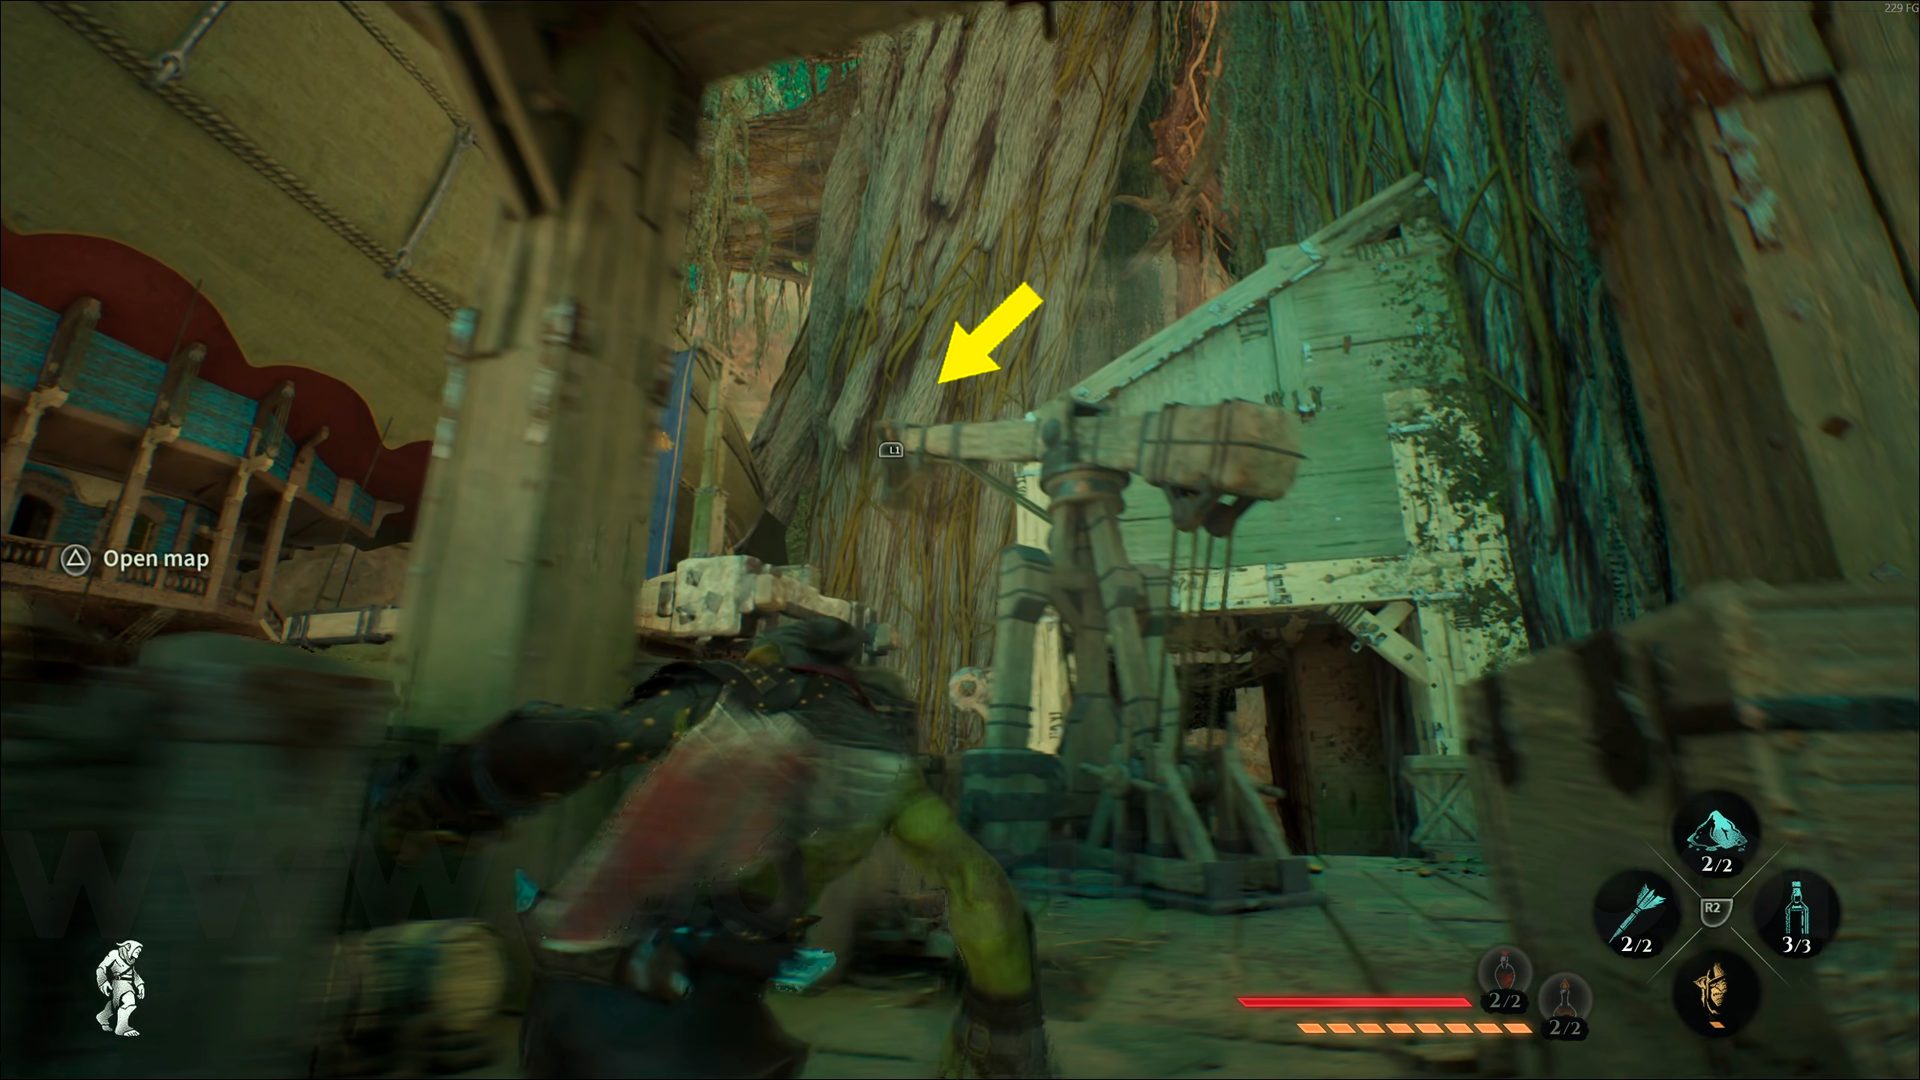
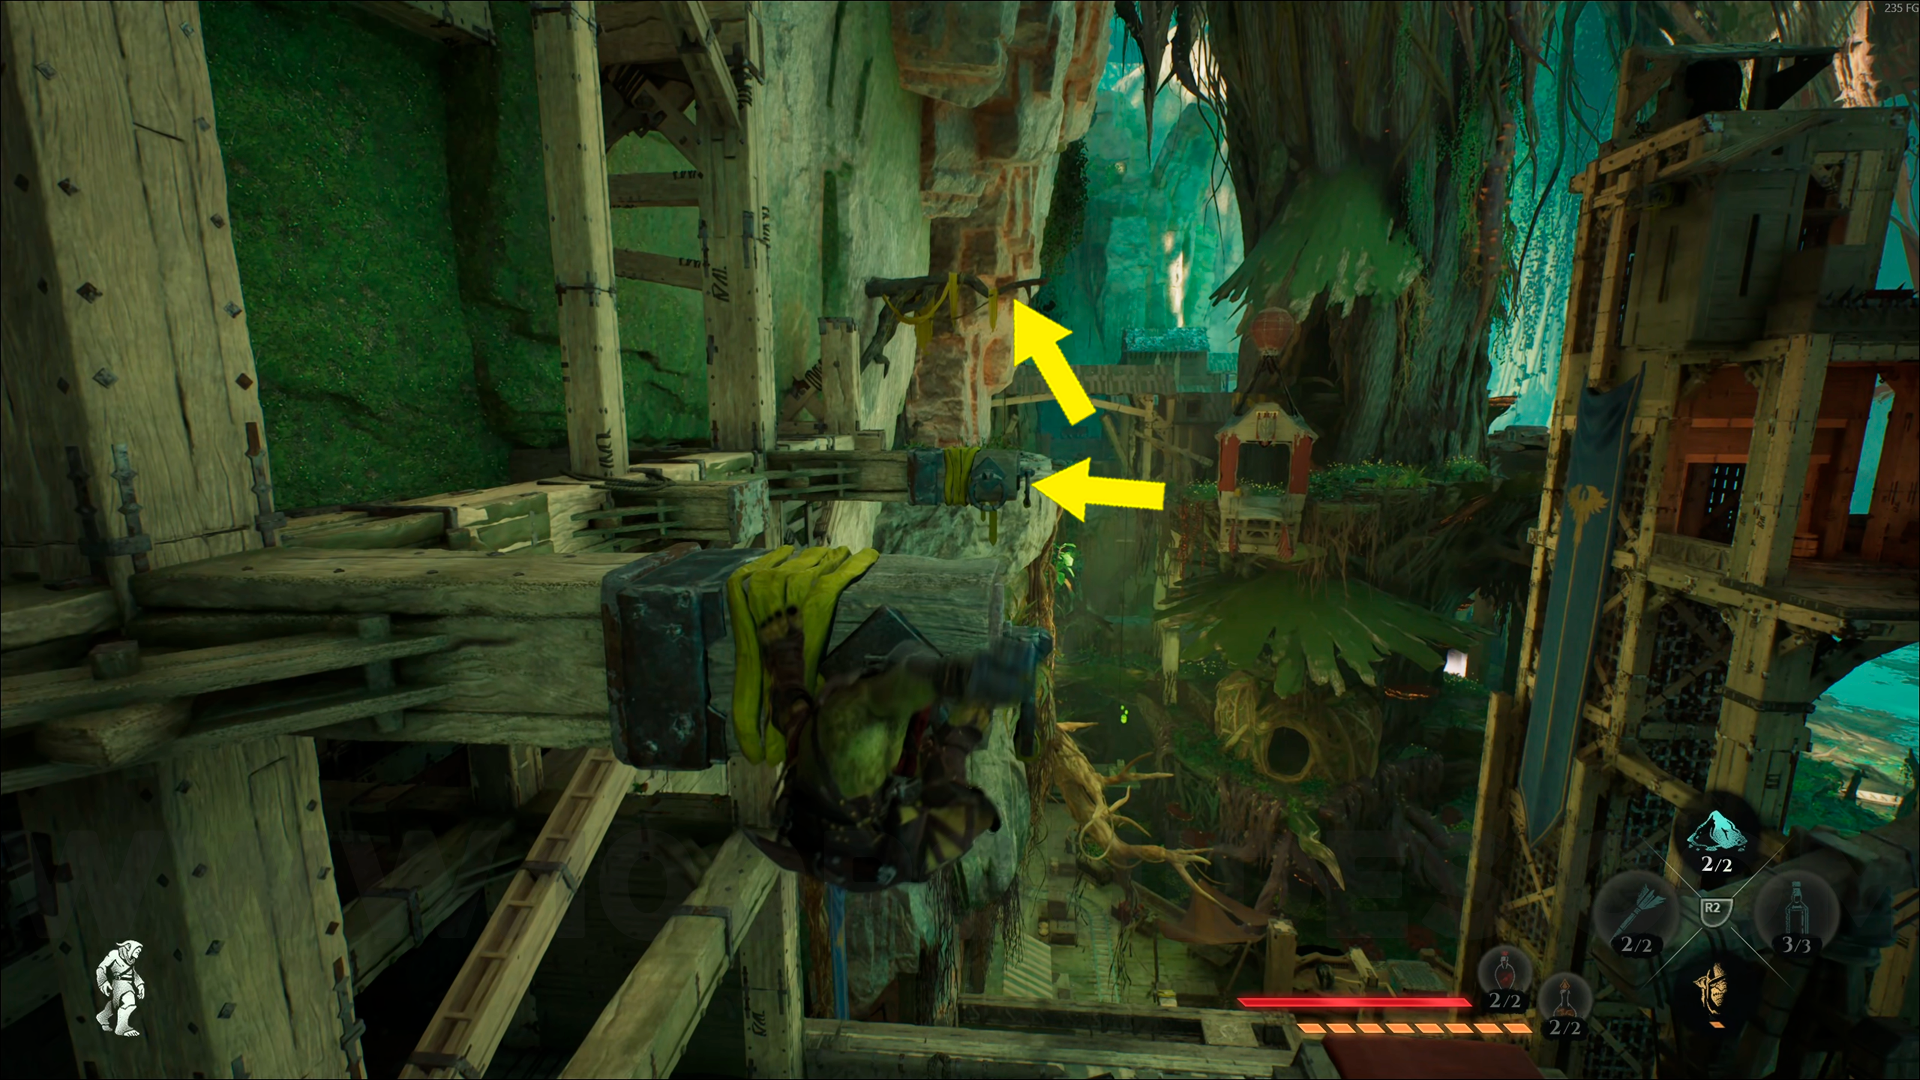
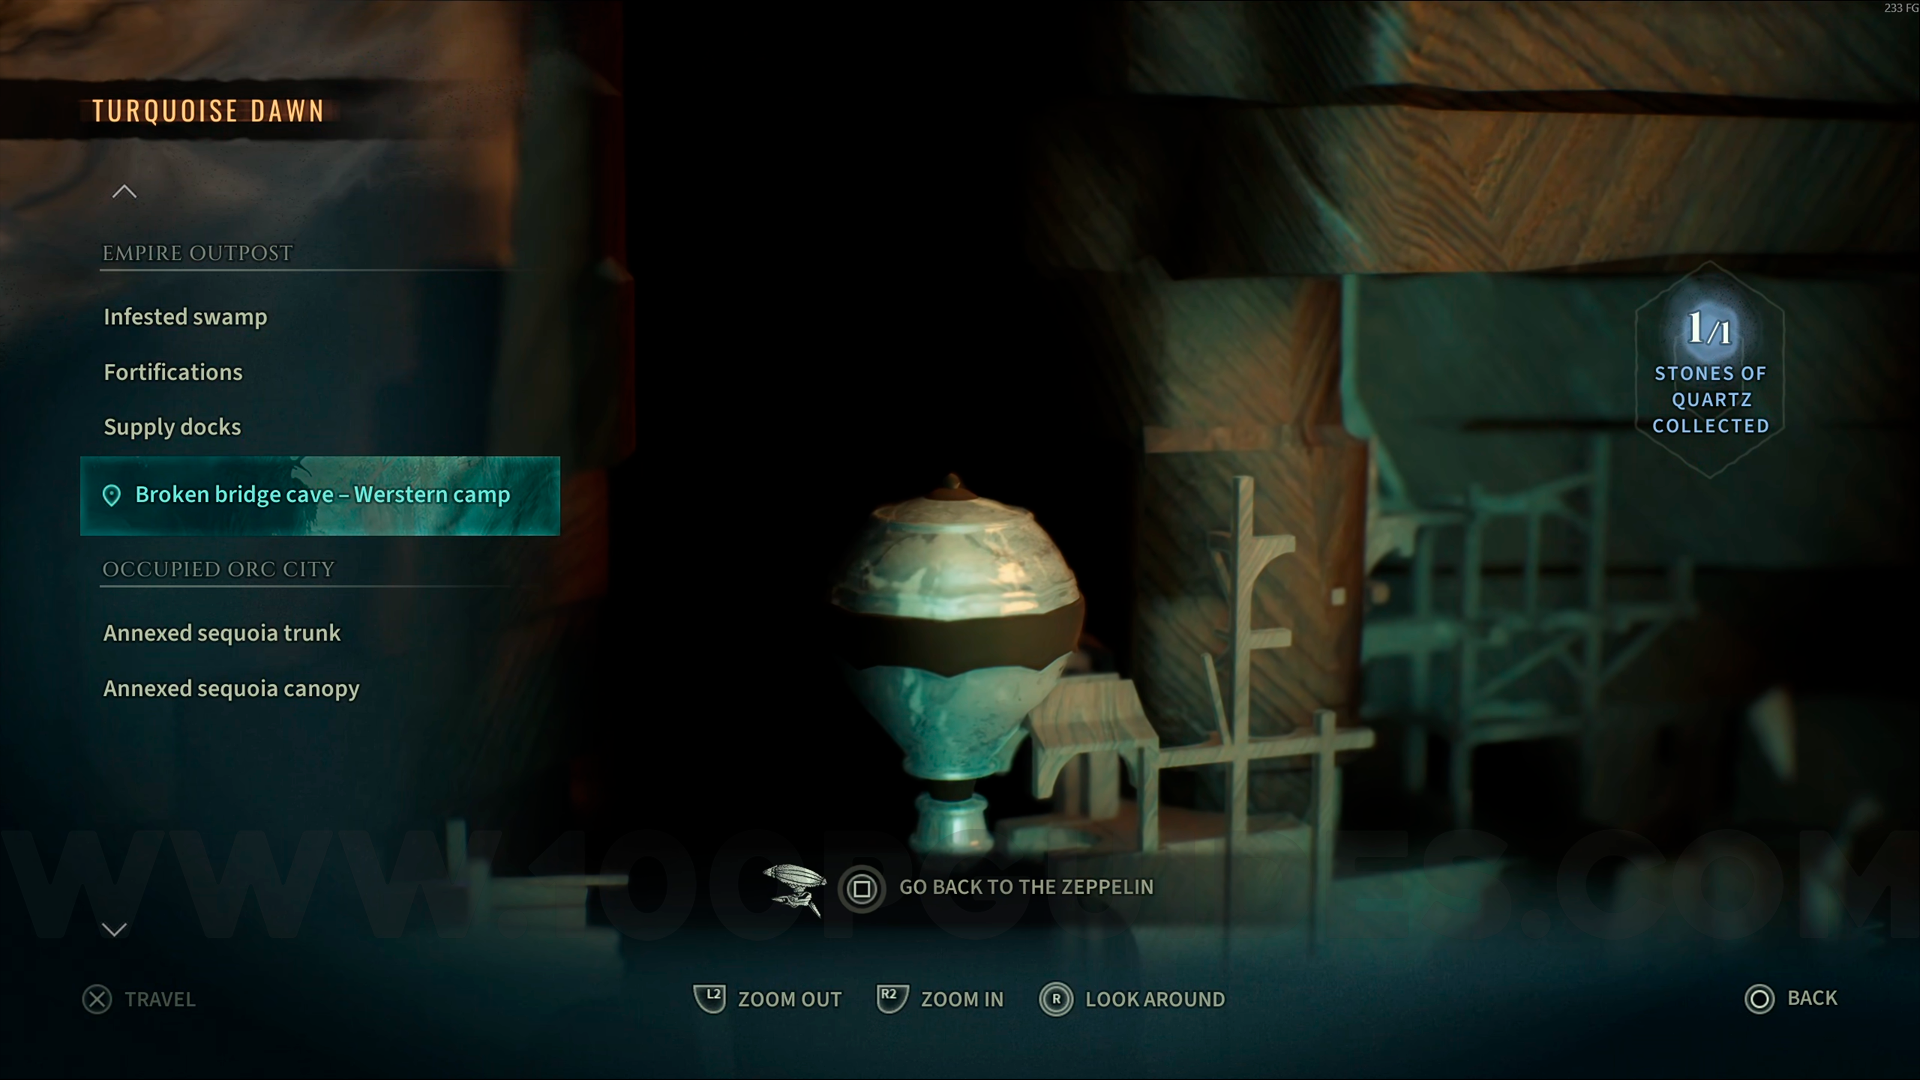
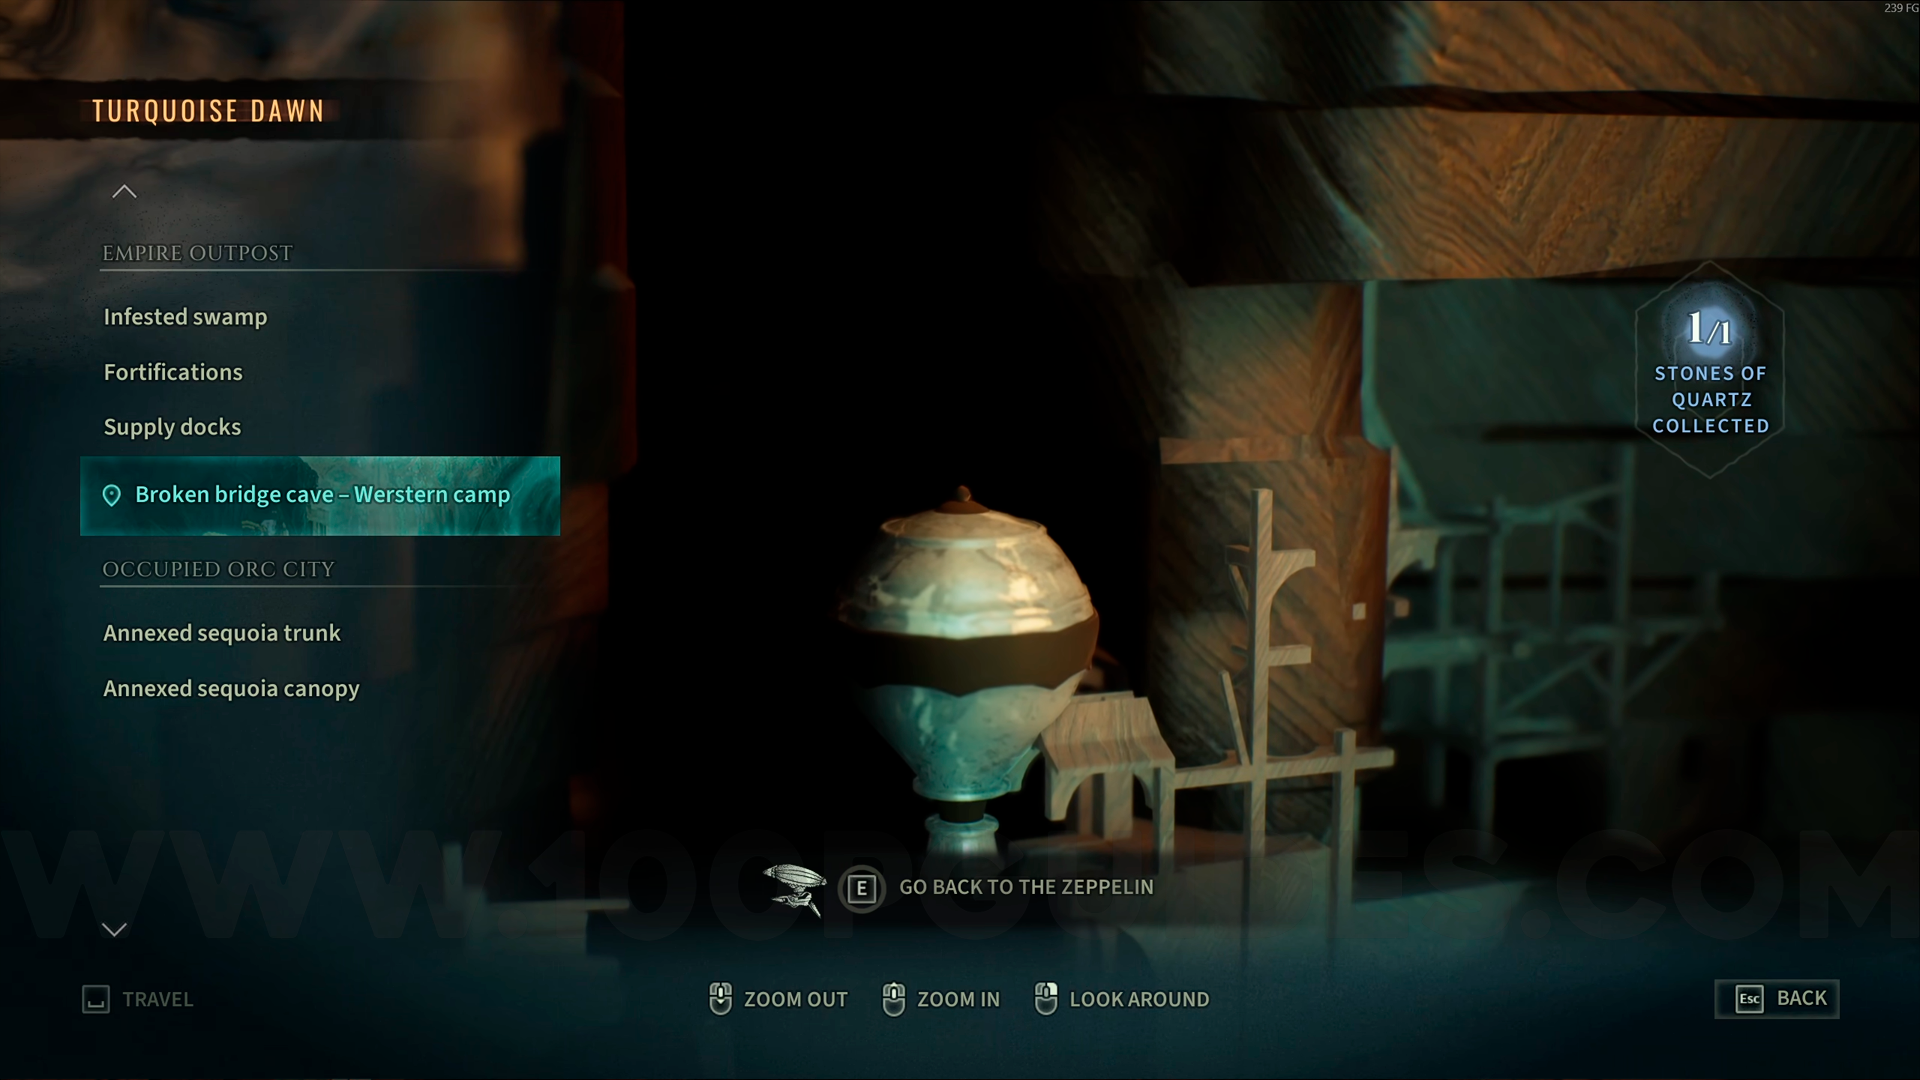
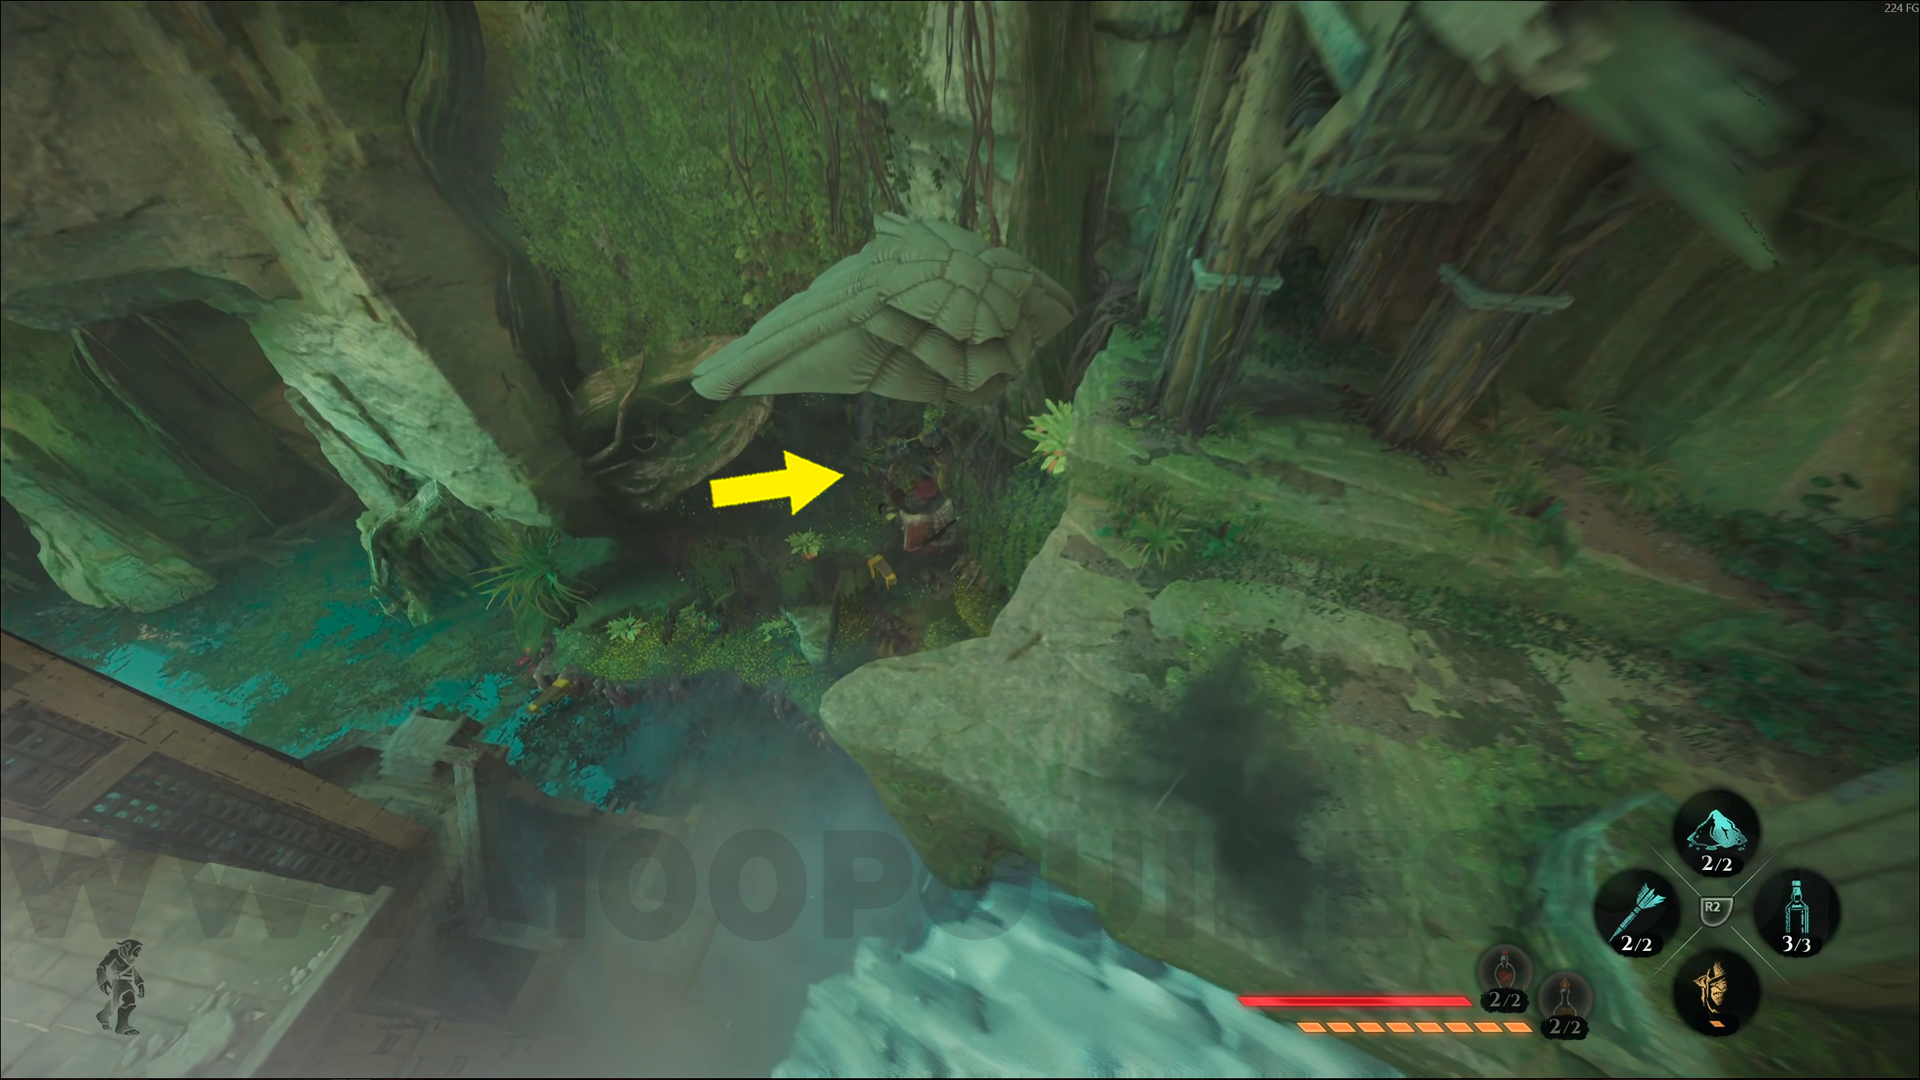
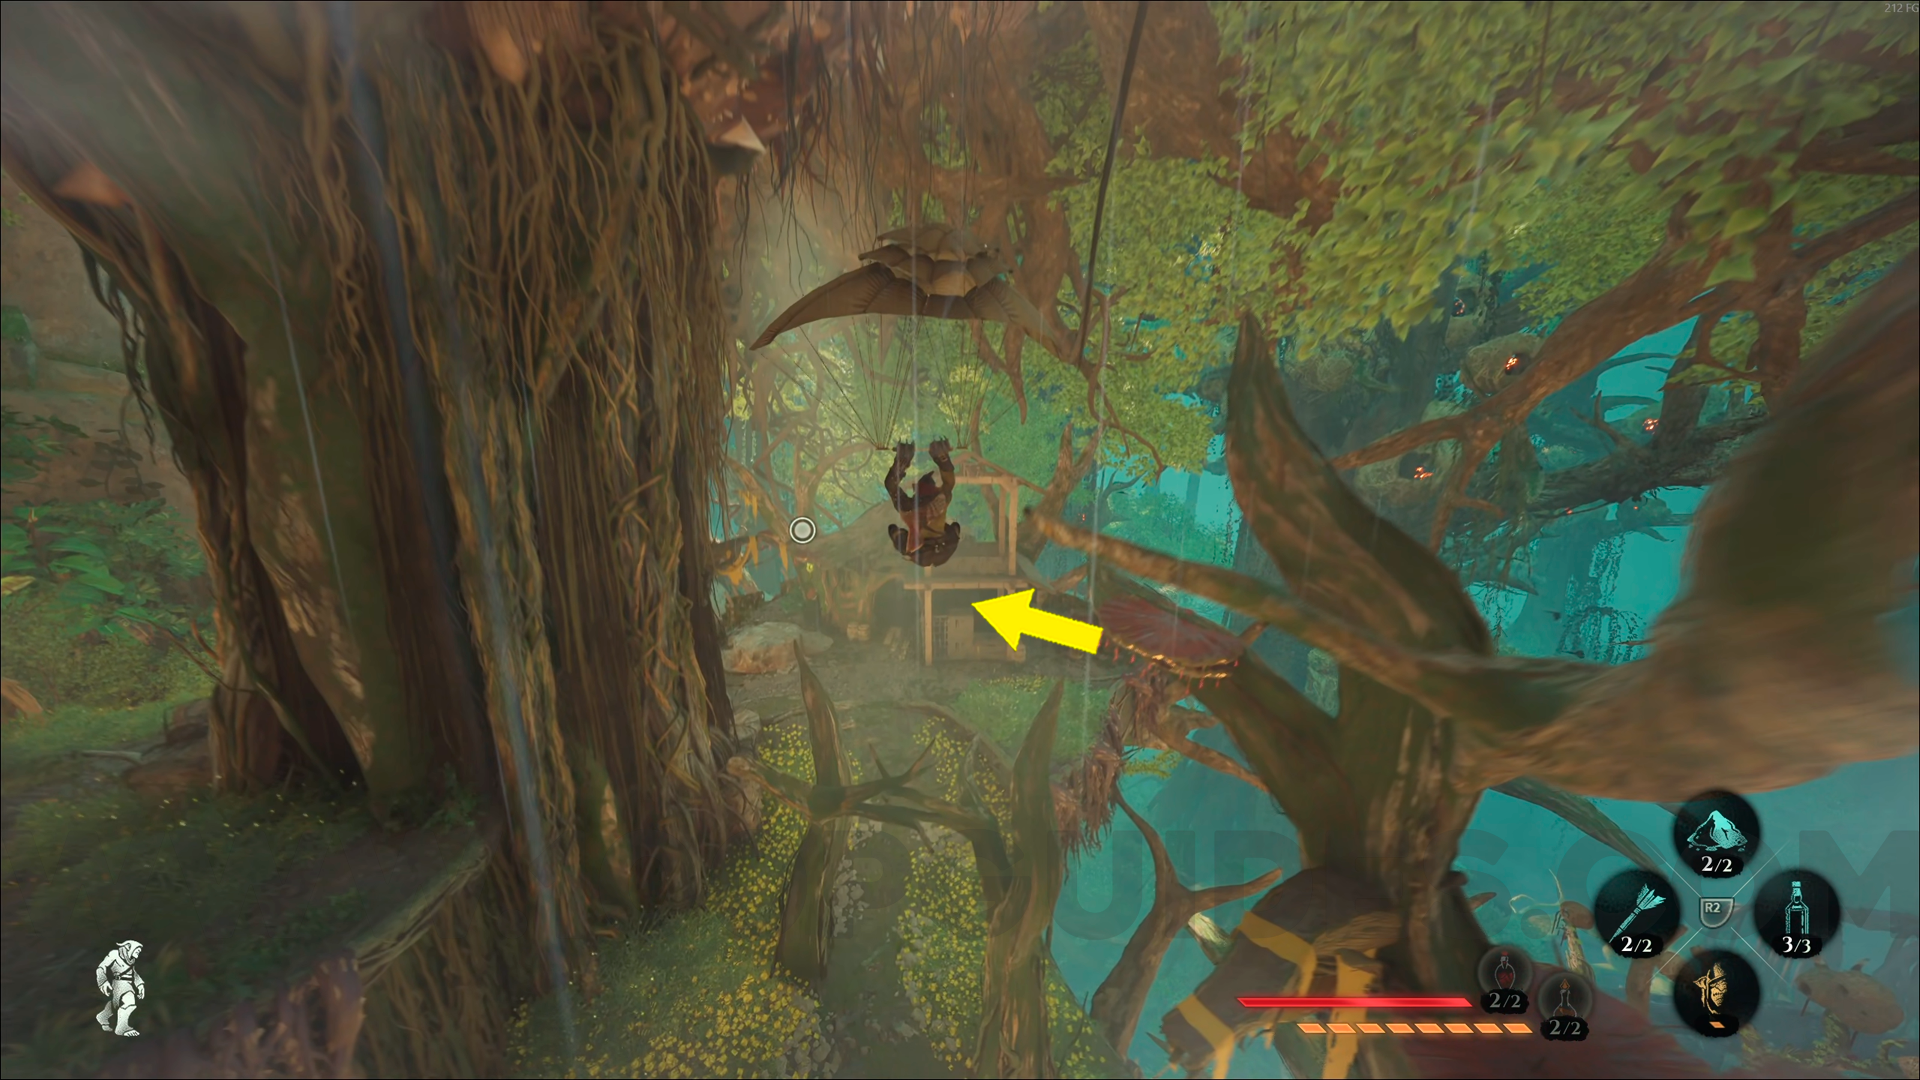
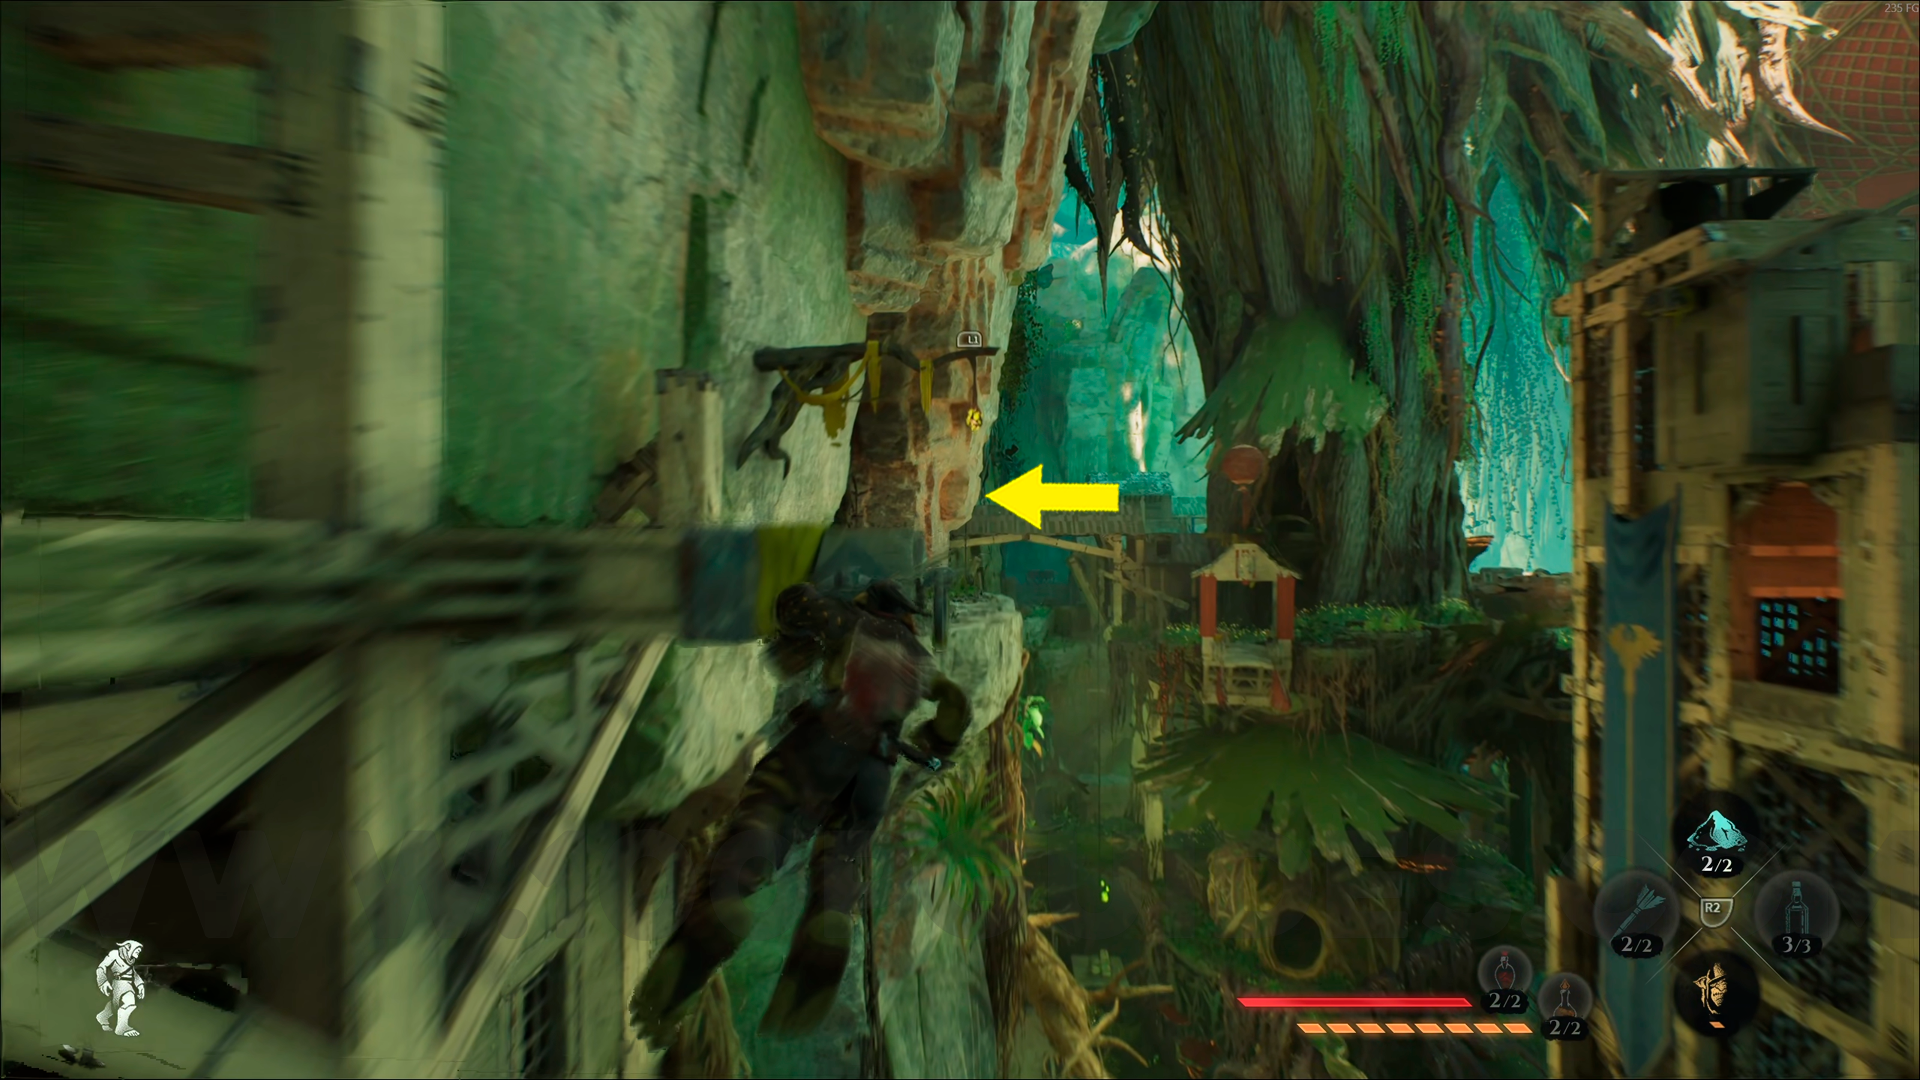
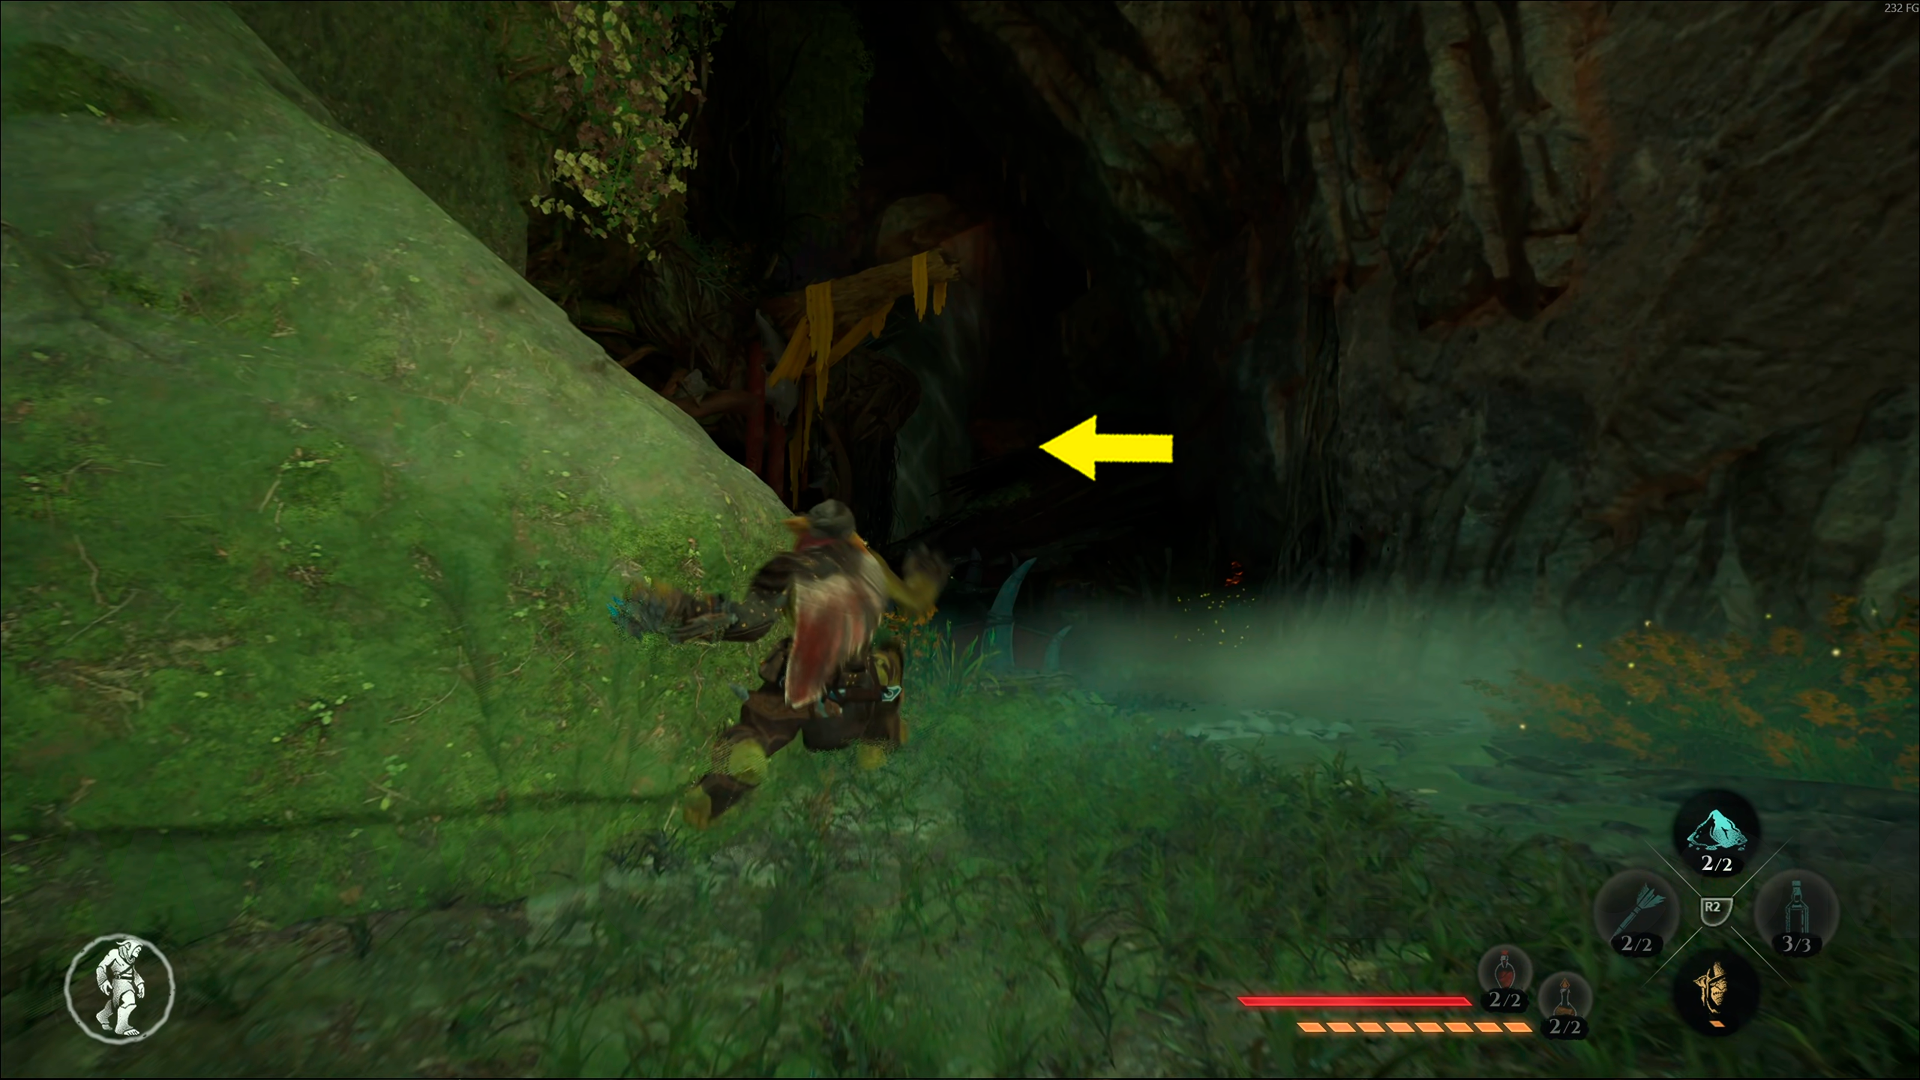
Bronze Emblem #9. From the Broken Bridge Cave – Western Camp, use the grappling hook to climb up to the upper area, then enter the cave on the left. Use the grappling hook again to climb up, and this emblem will be on the roof of a cabin.

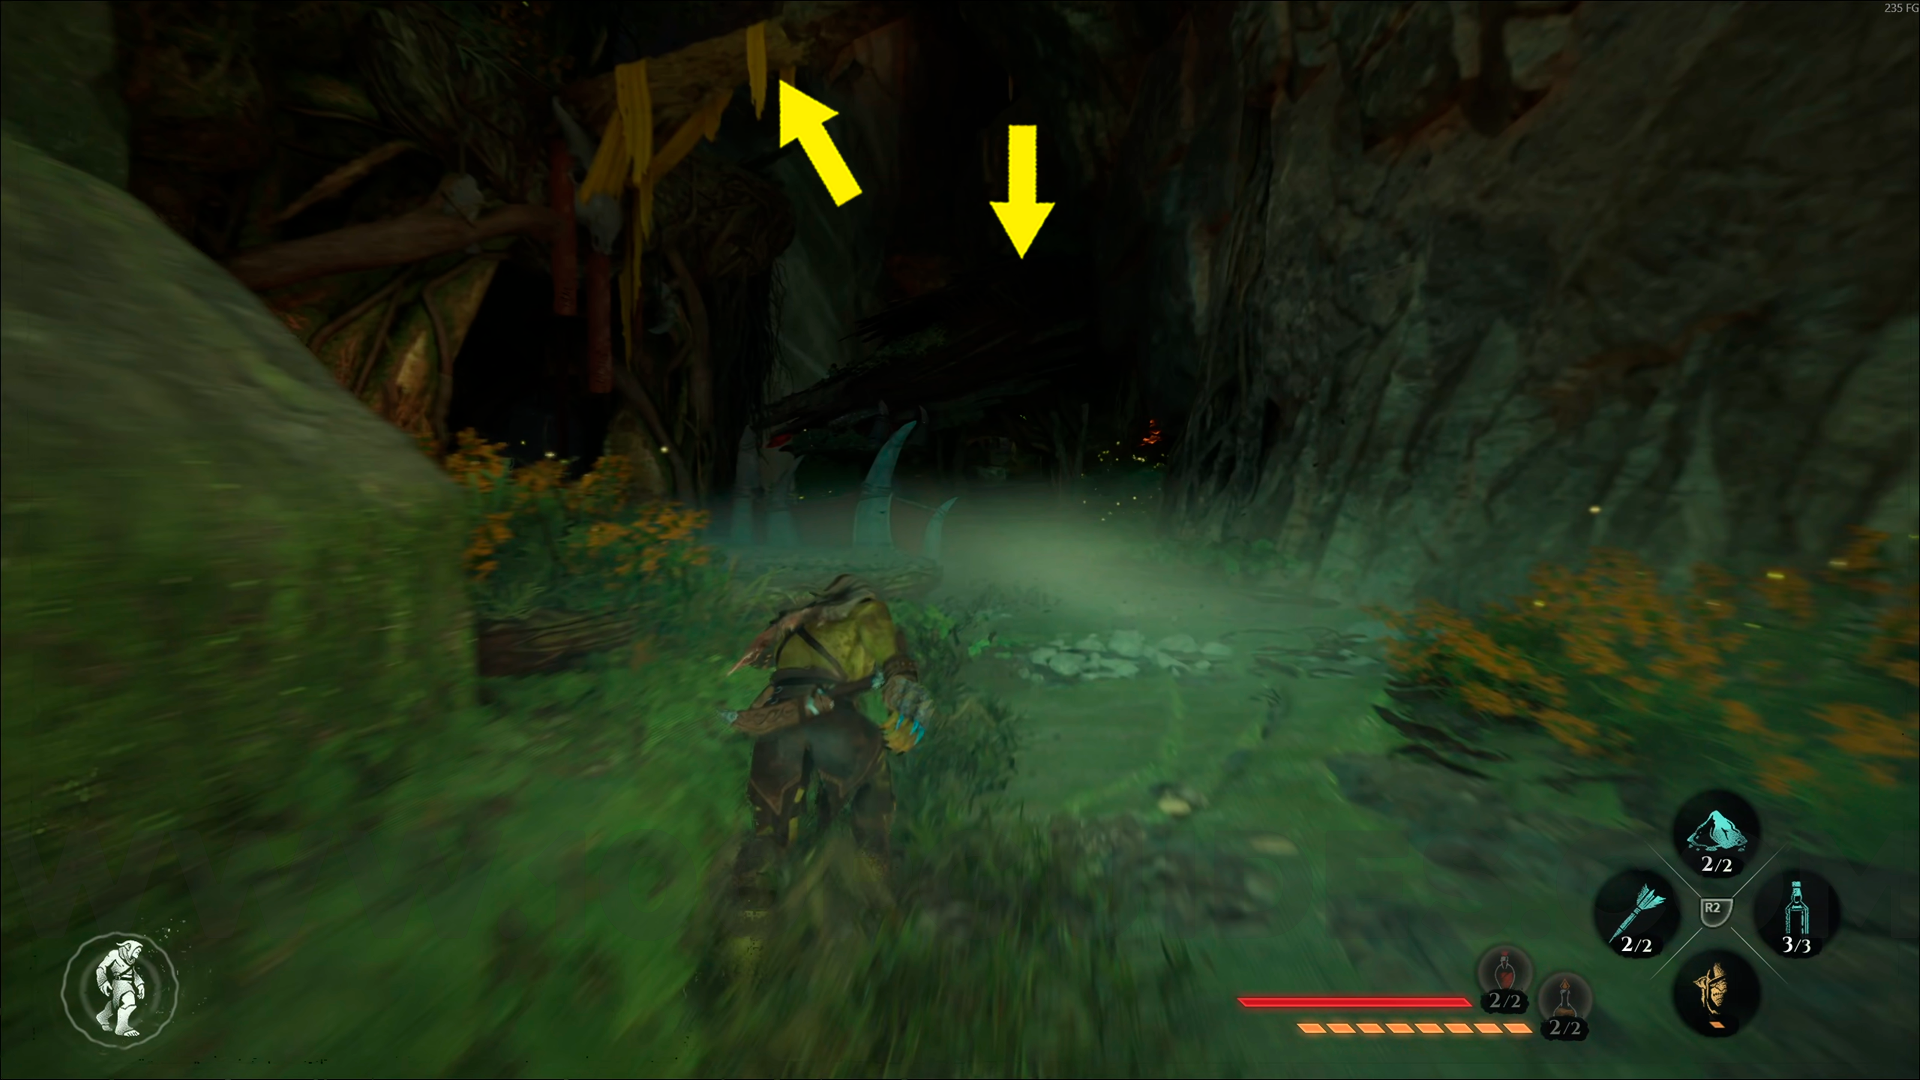

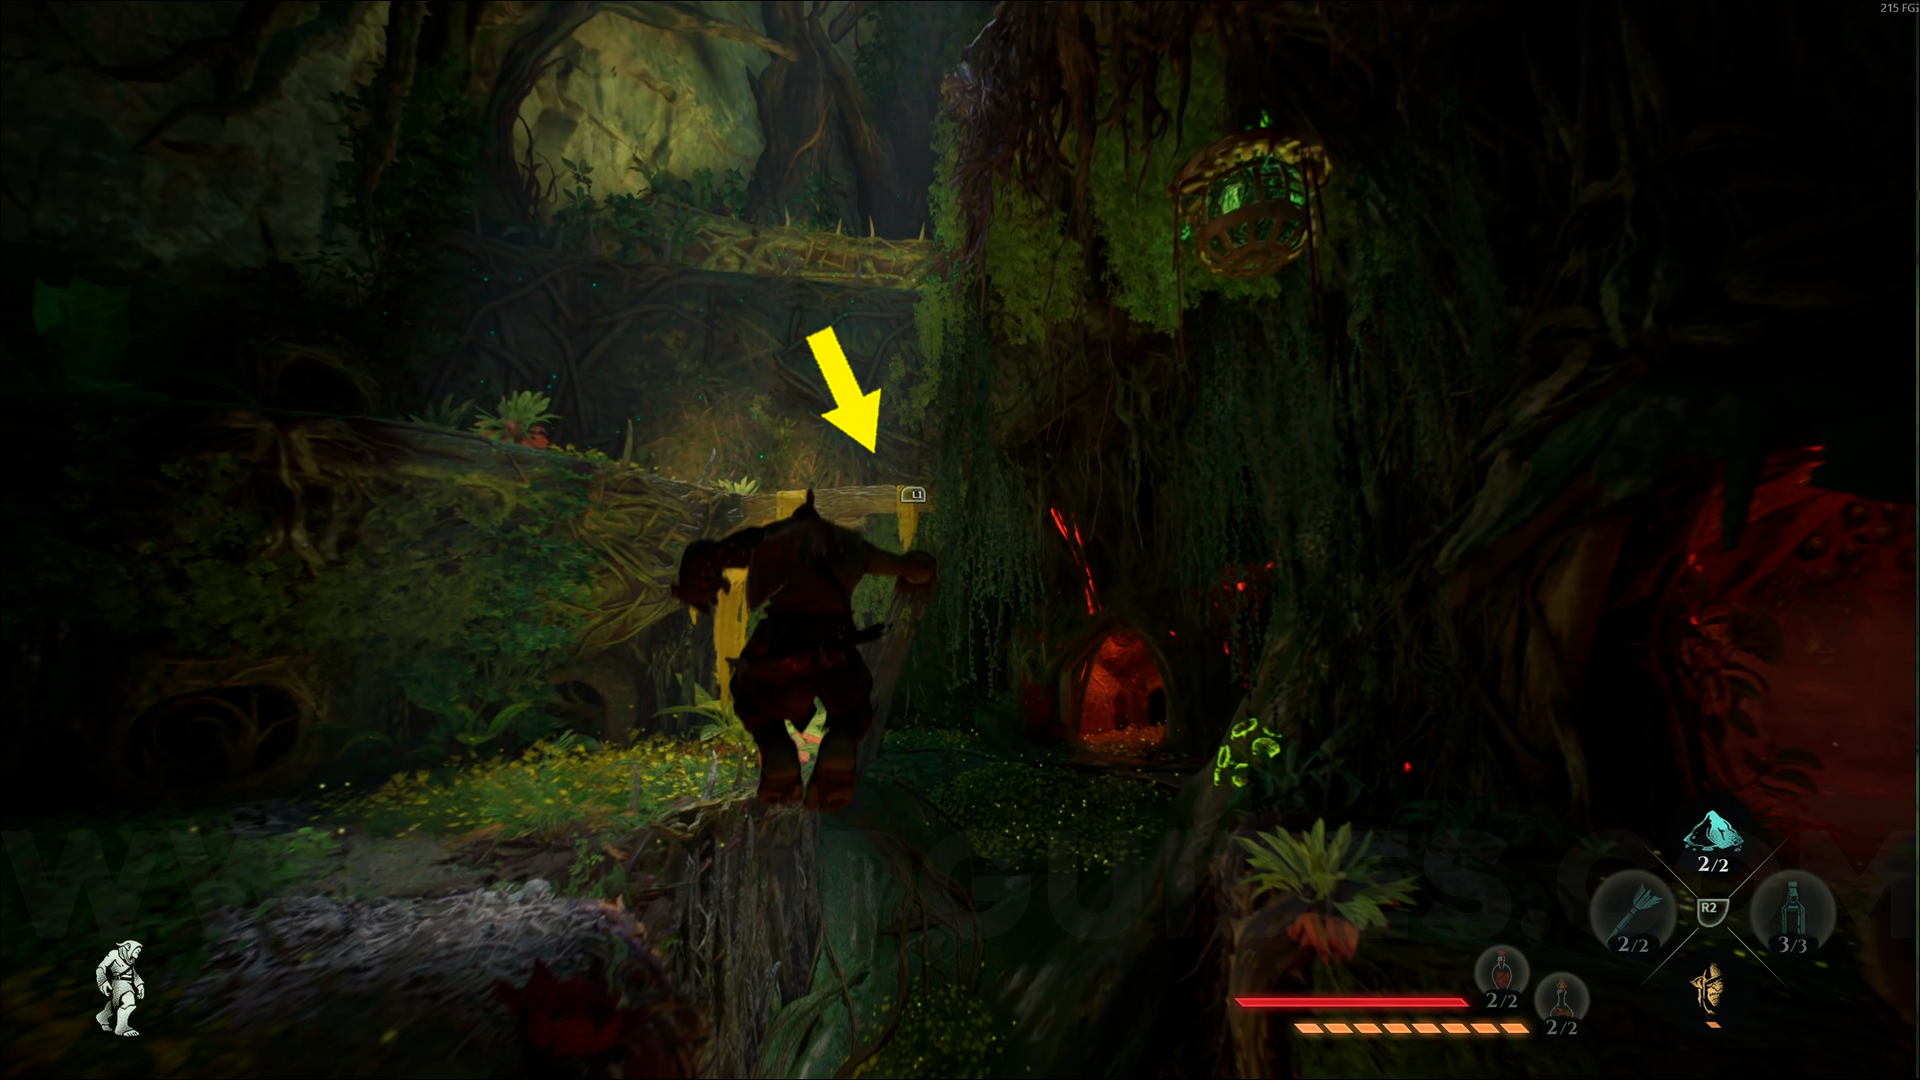
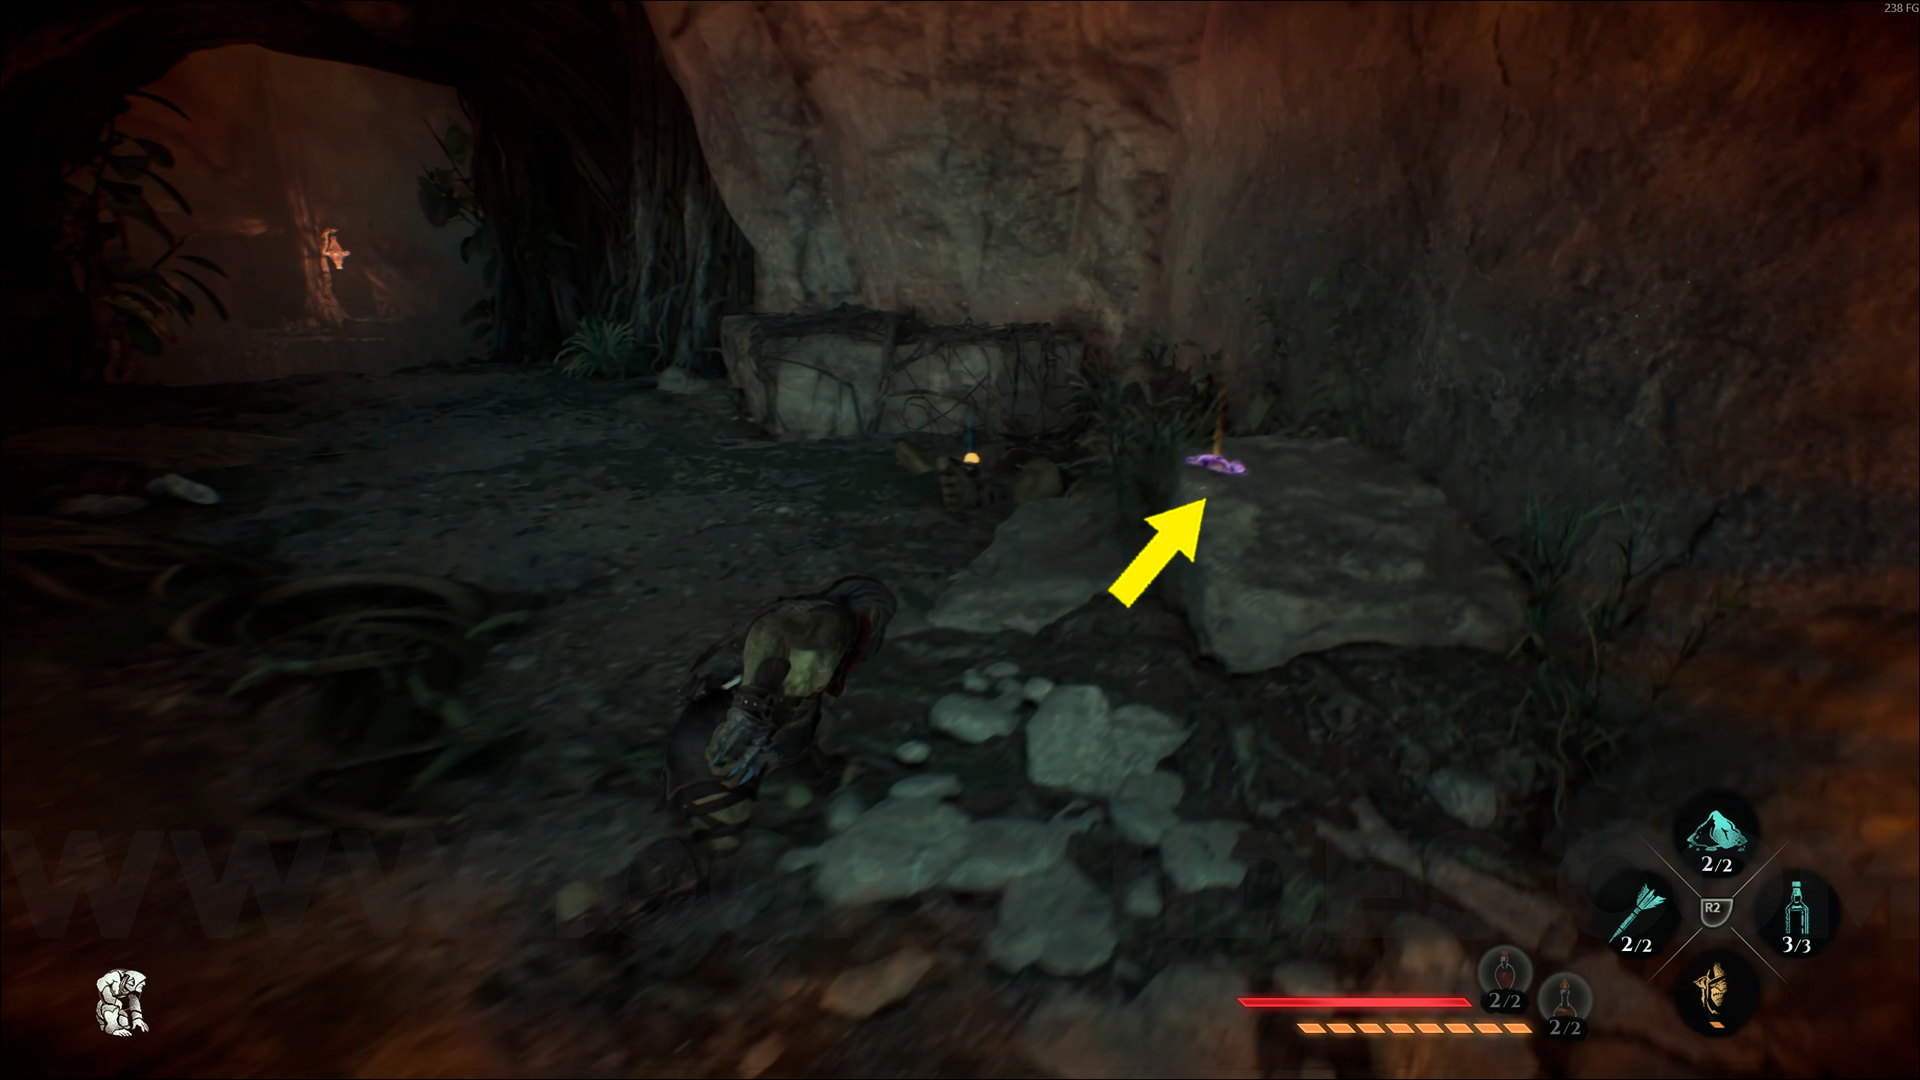
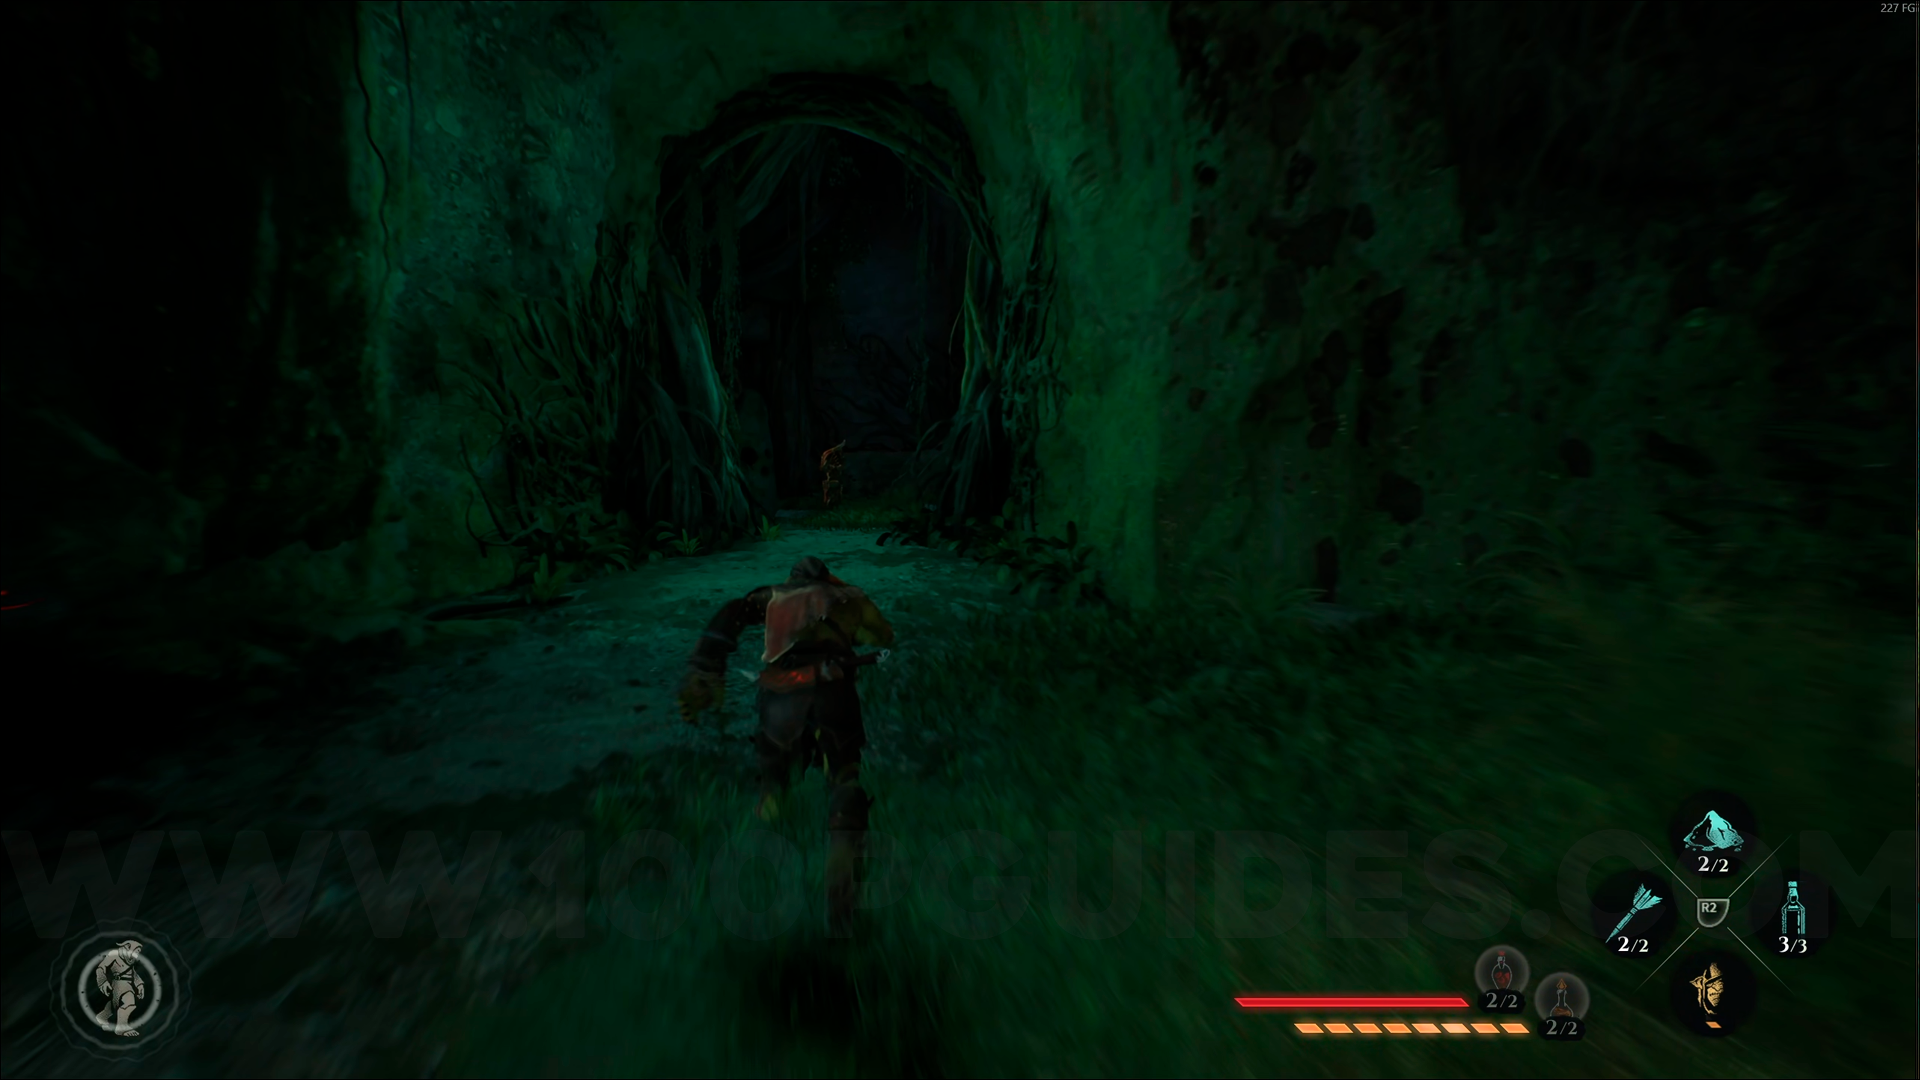
Bronze Emblem #10. From the Broken Bridge Cave – Western Camp, go through the tunnel just ahead of the checkpoint and take the first left. Continue to the end to find this emblem.
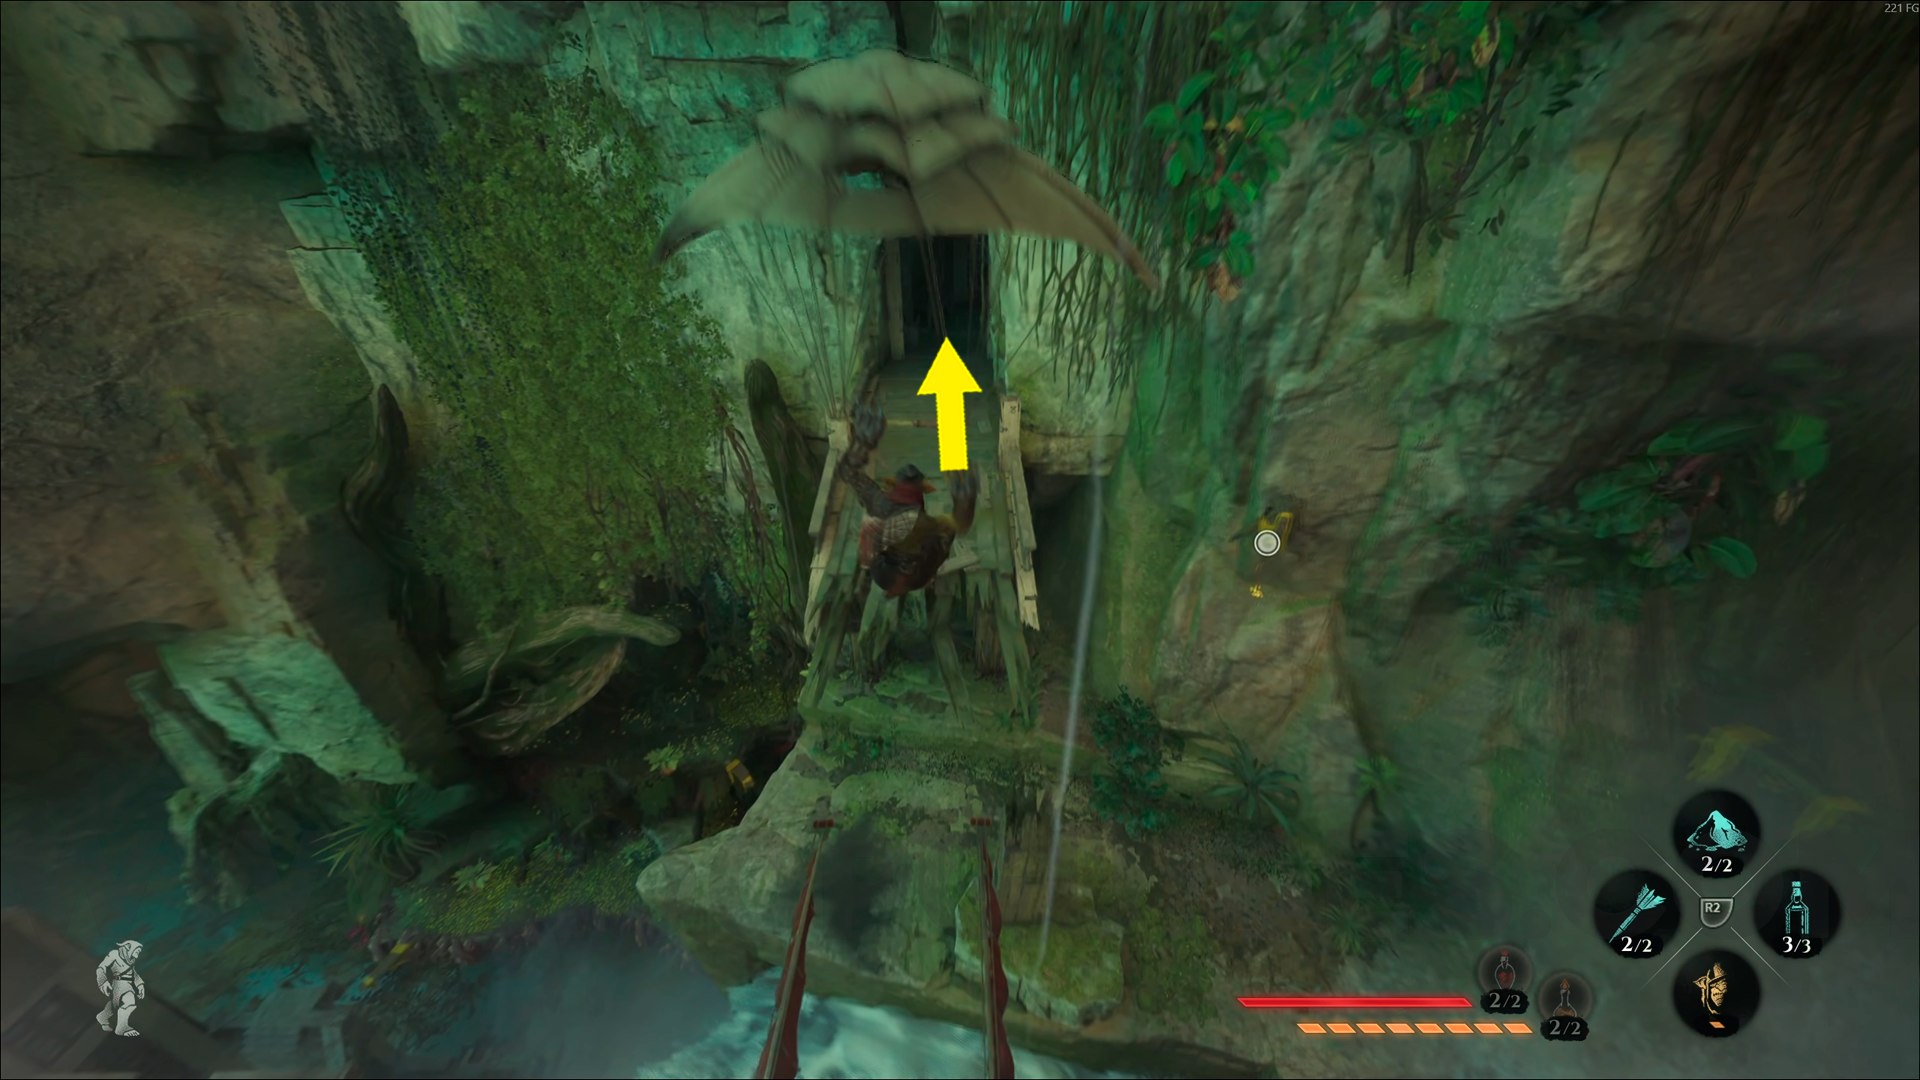
Silver Emblem #1. From the Broken Bridge Cave – Western Camp, use the grappling hook to reach the cave. Once you're inside, ride the wind current upward. The emblem will be right in front of you.

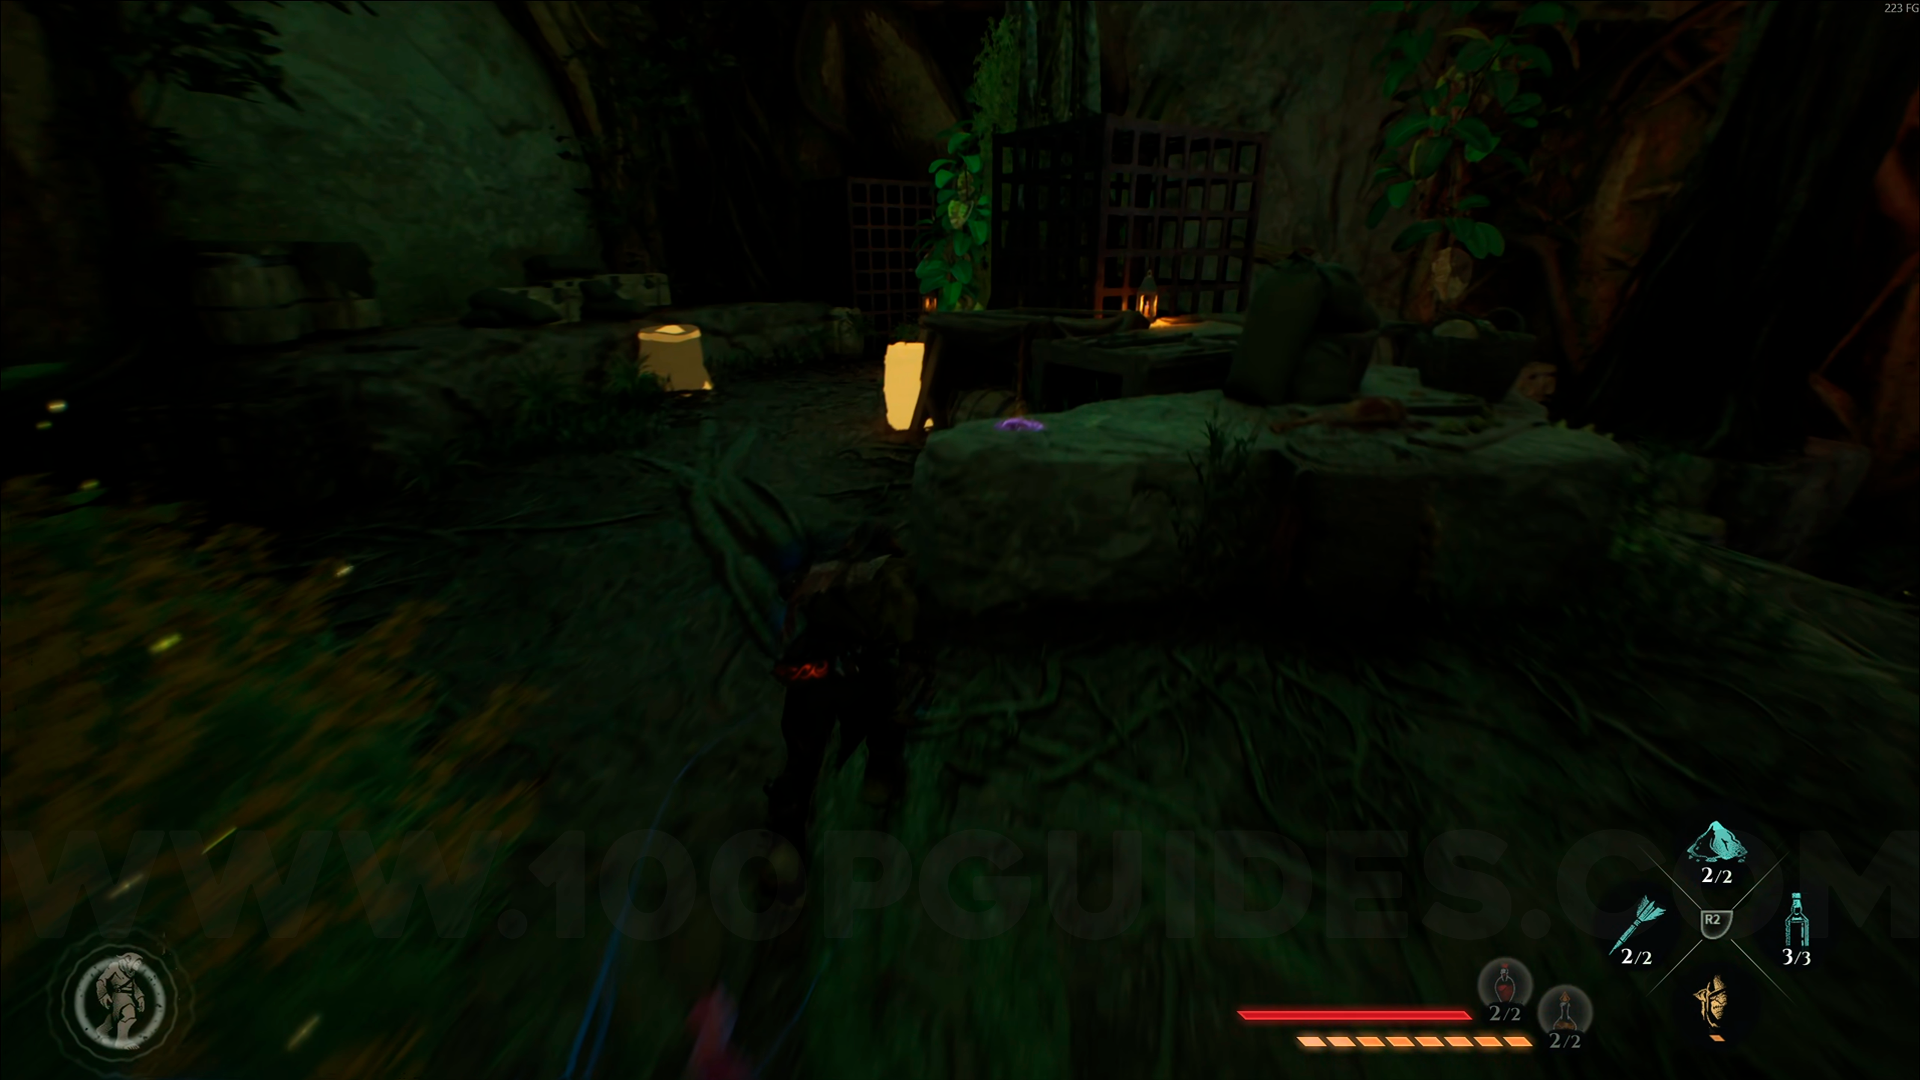
Silver Emblem #2. Right after the previous collectible, continue forward and turn left. Use your Amber Vision. You'll see this emblem inside a cabin.
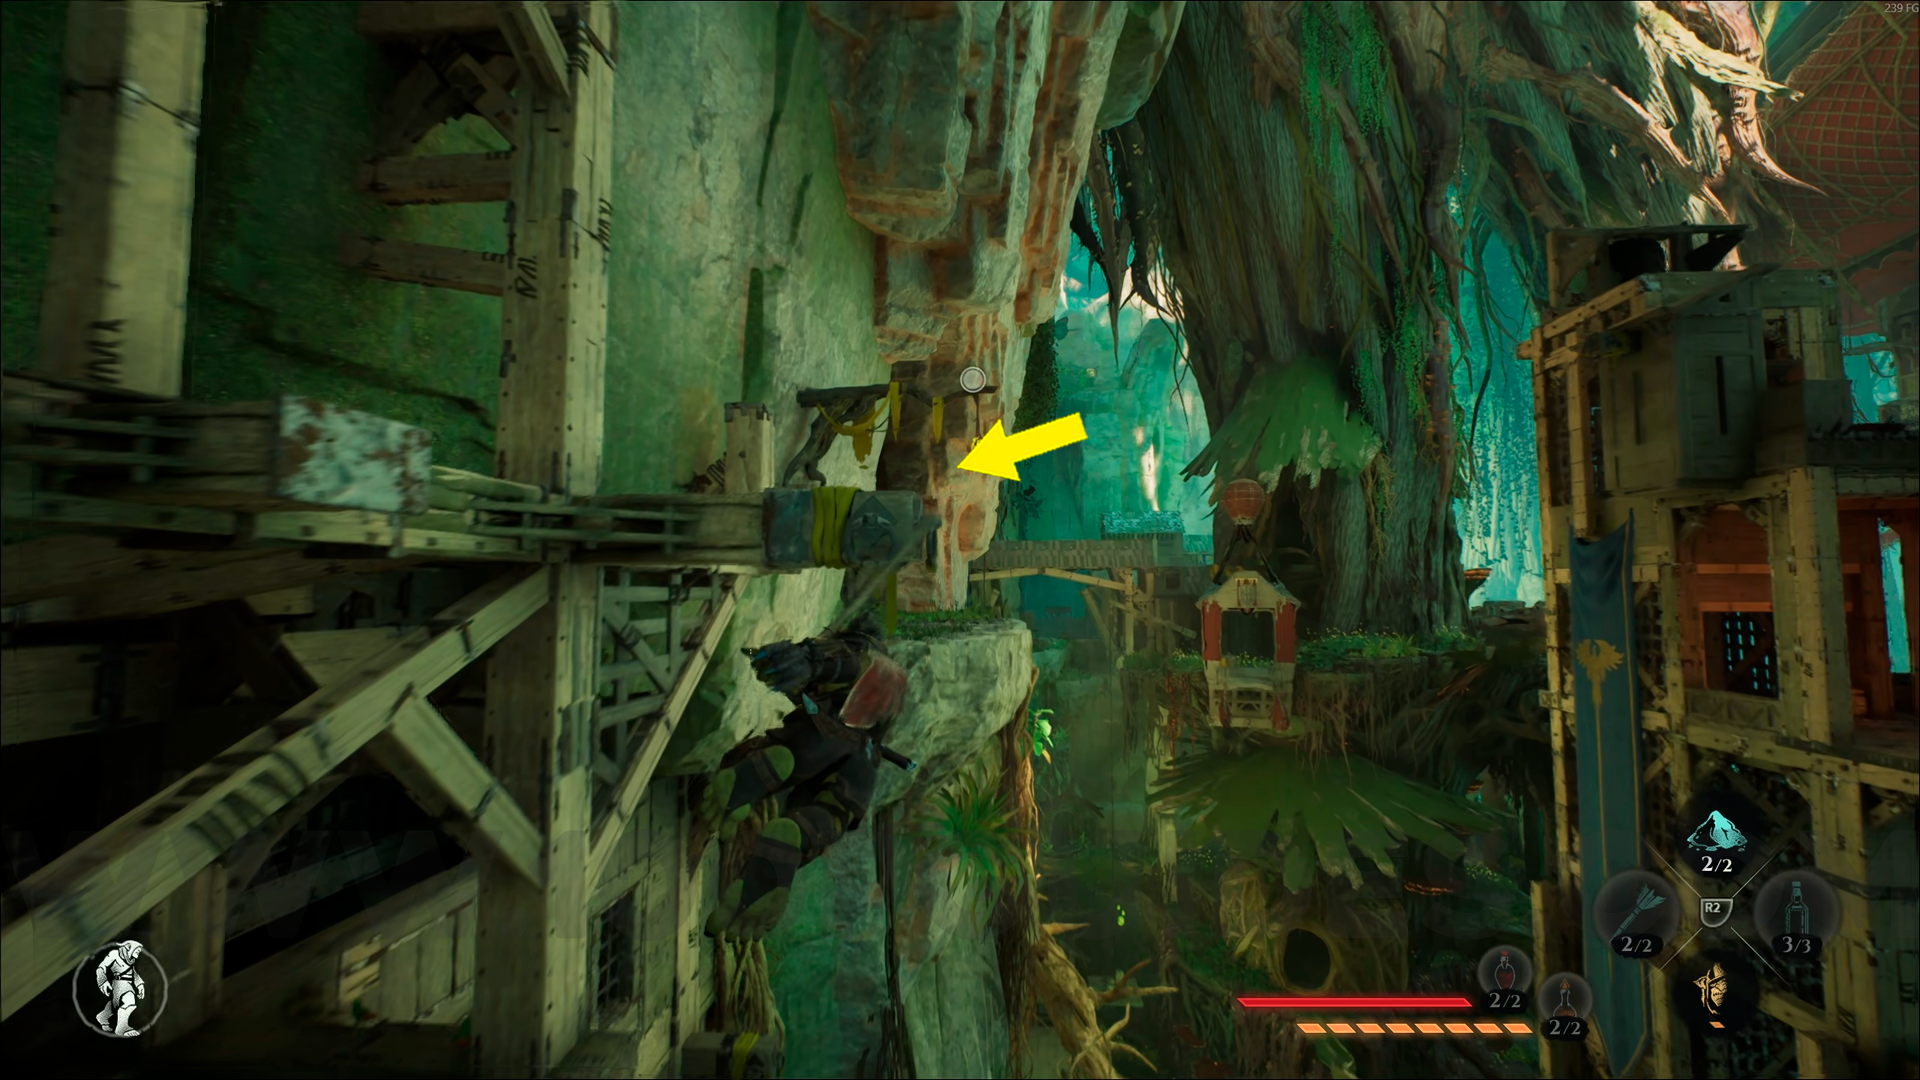
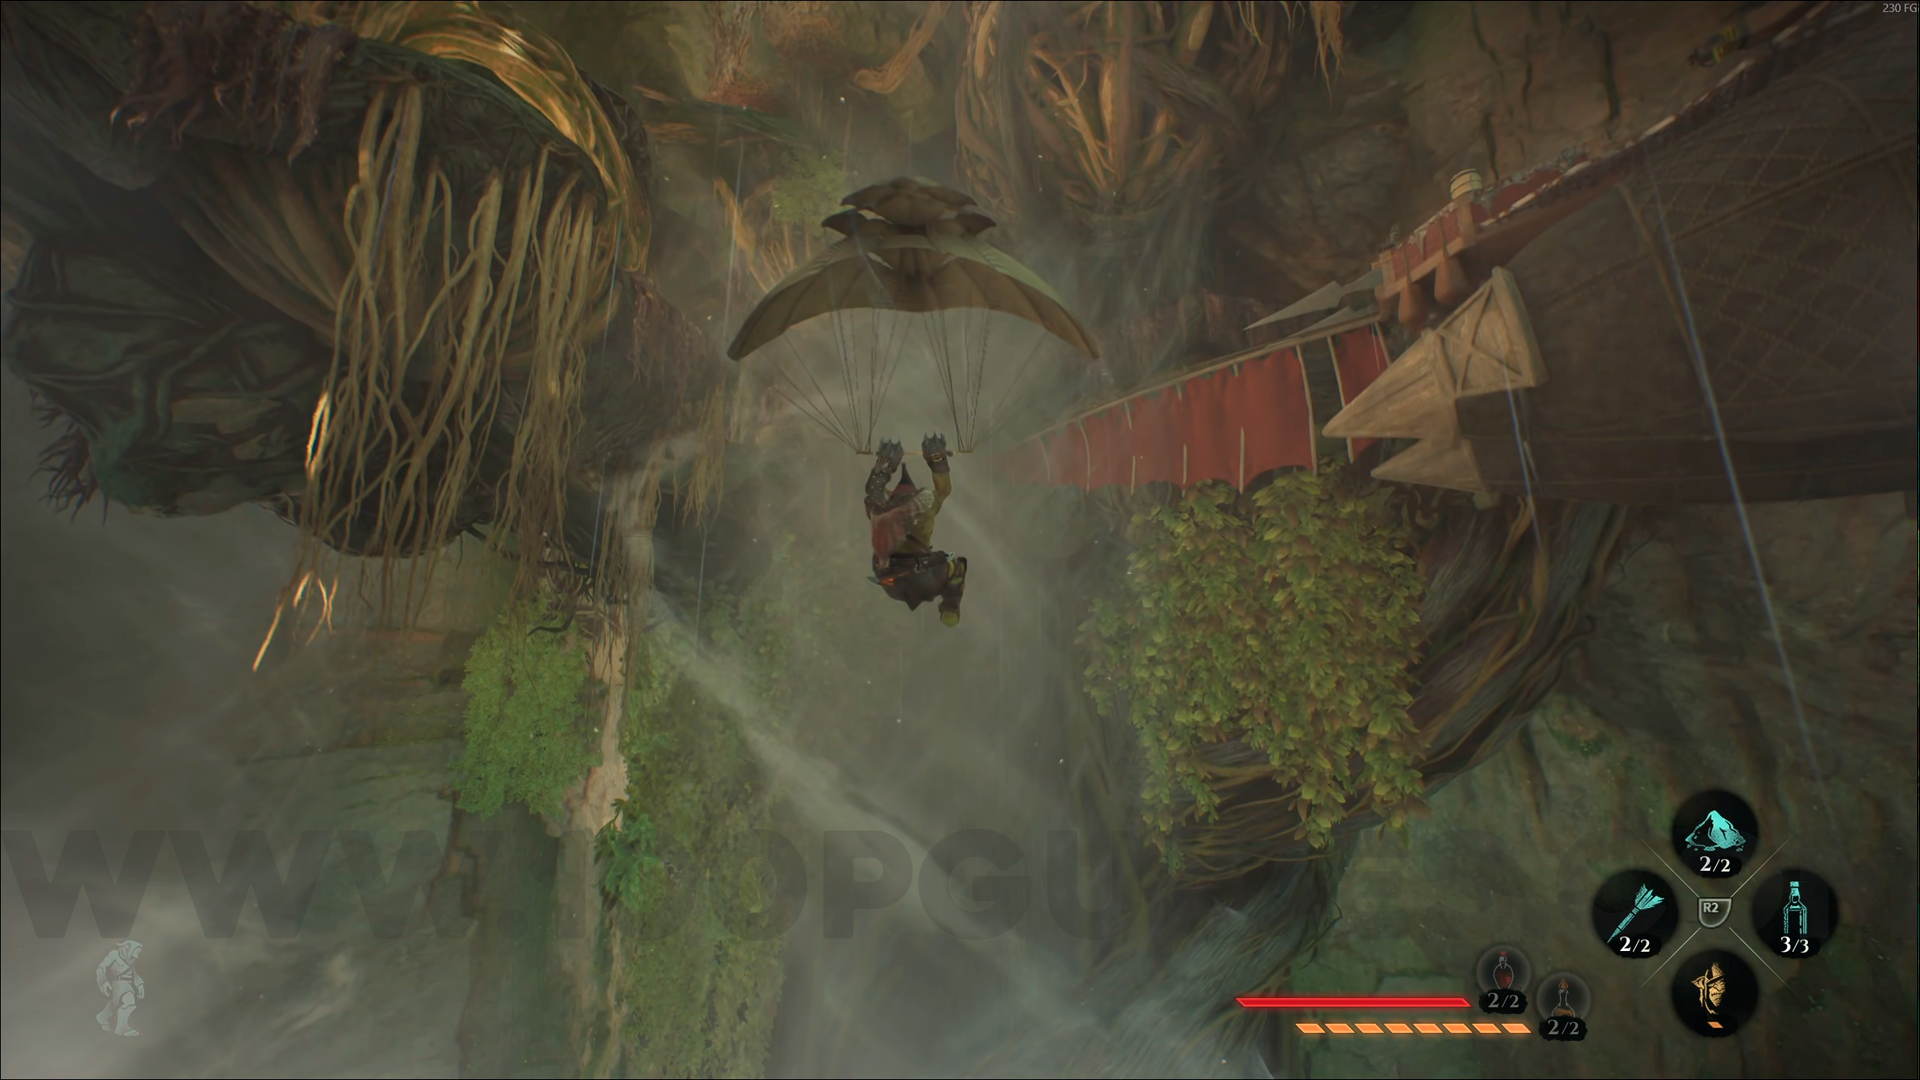
Silver Emblem #3. Go back to the cave entrance and take the left path instead of the right. When you reach the waterfall, use Amber Vision and look down to spot the emblem below. Use your glider to reach it.

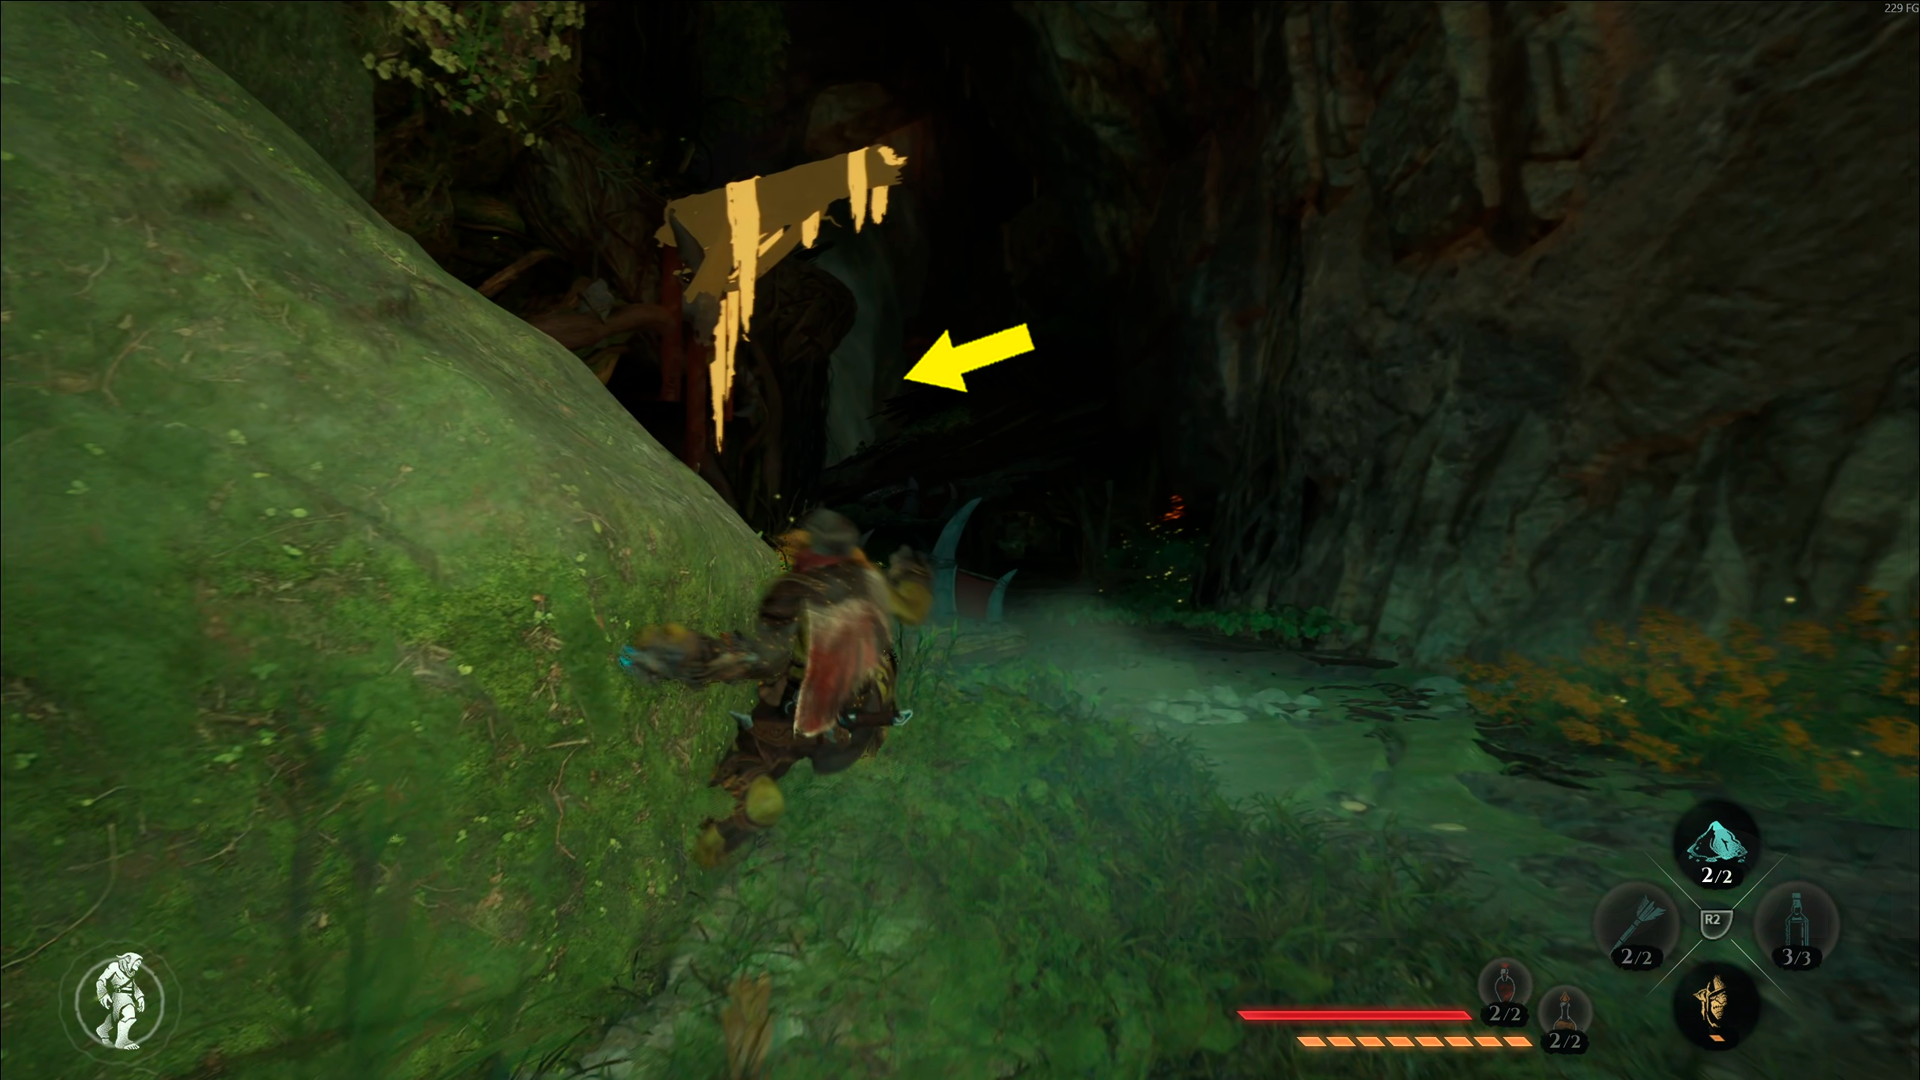
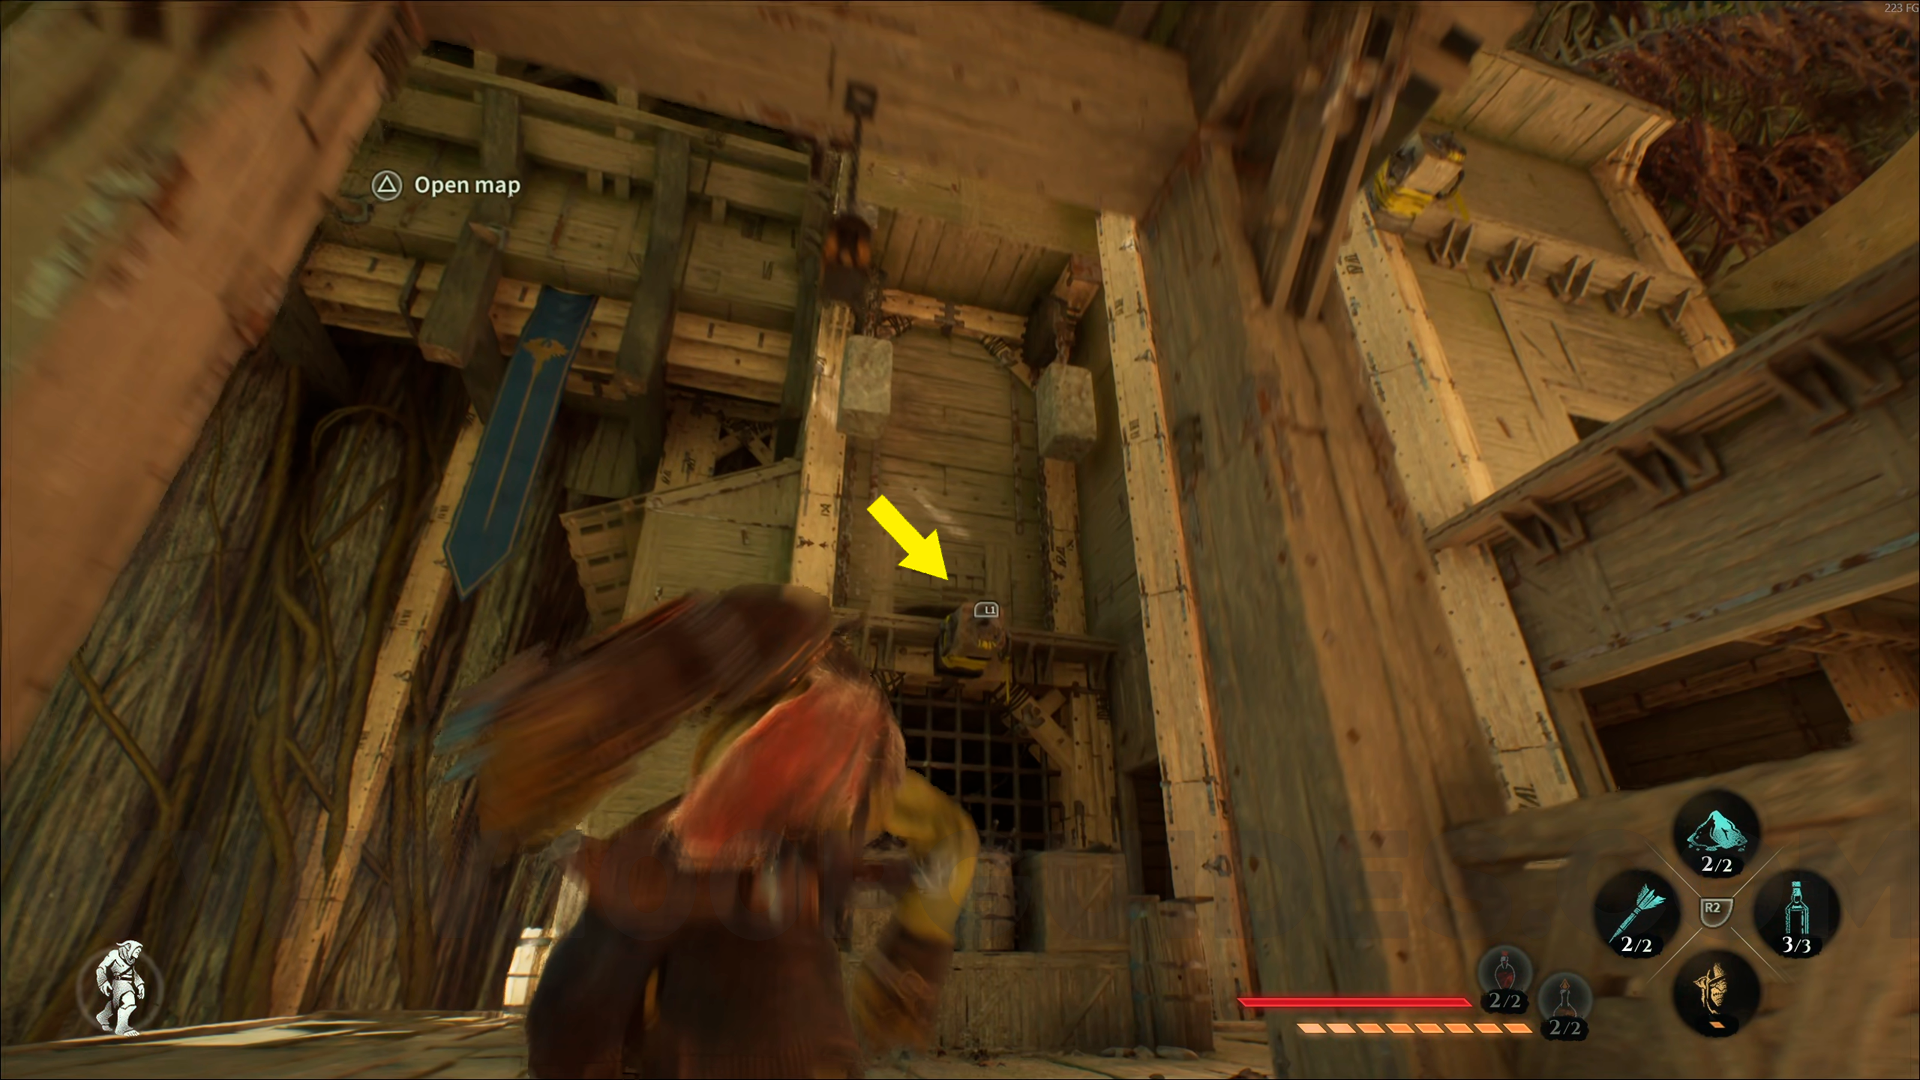
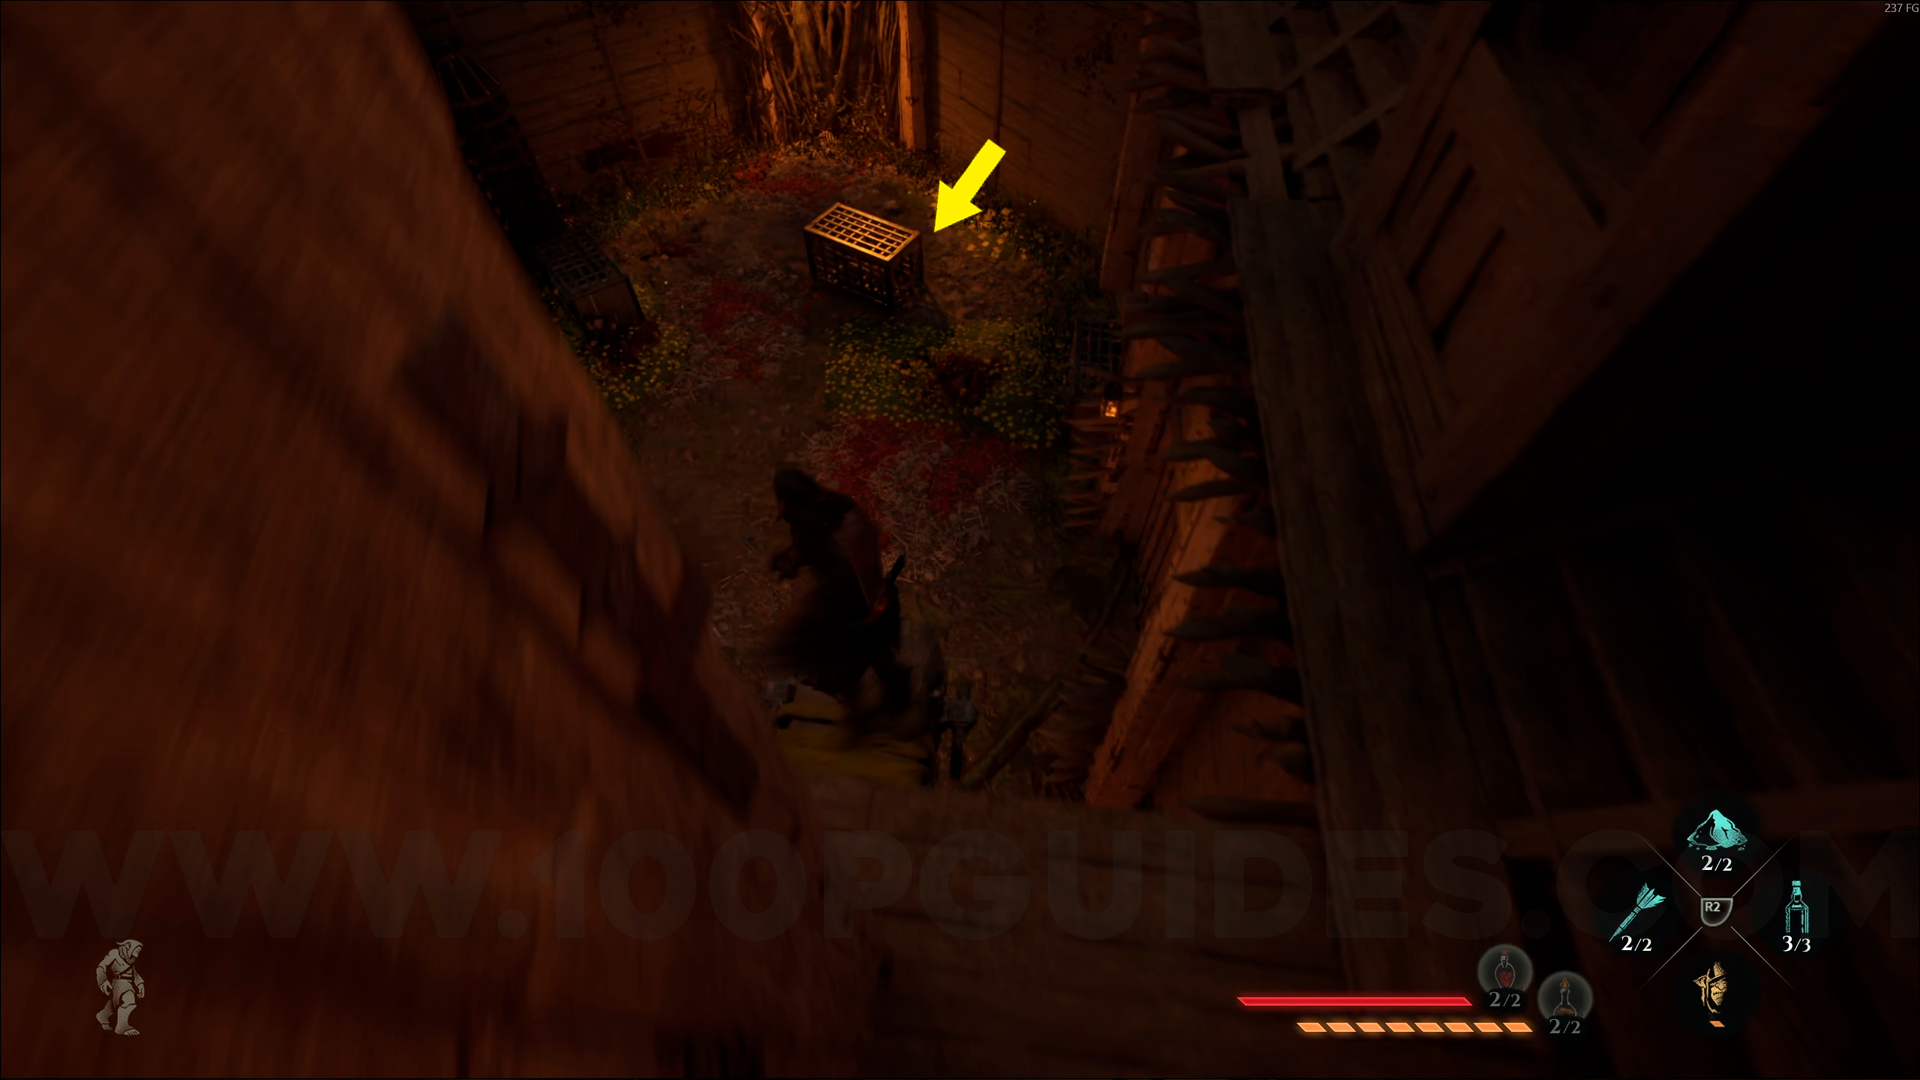
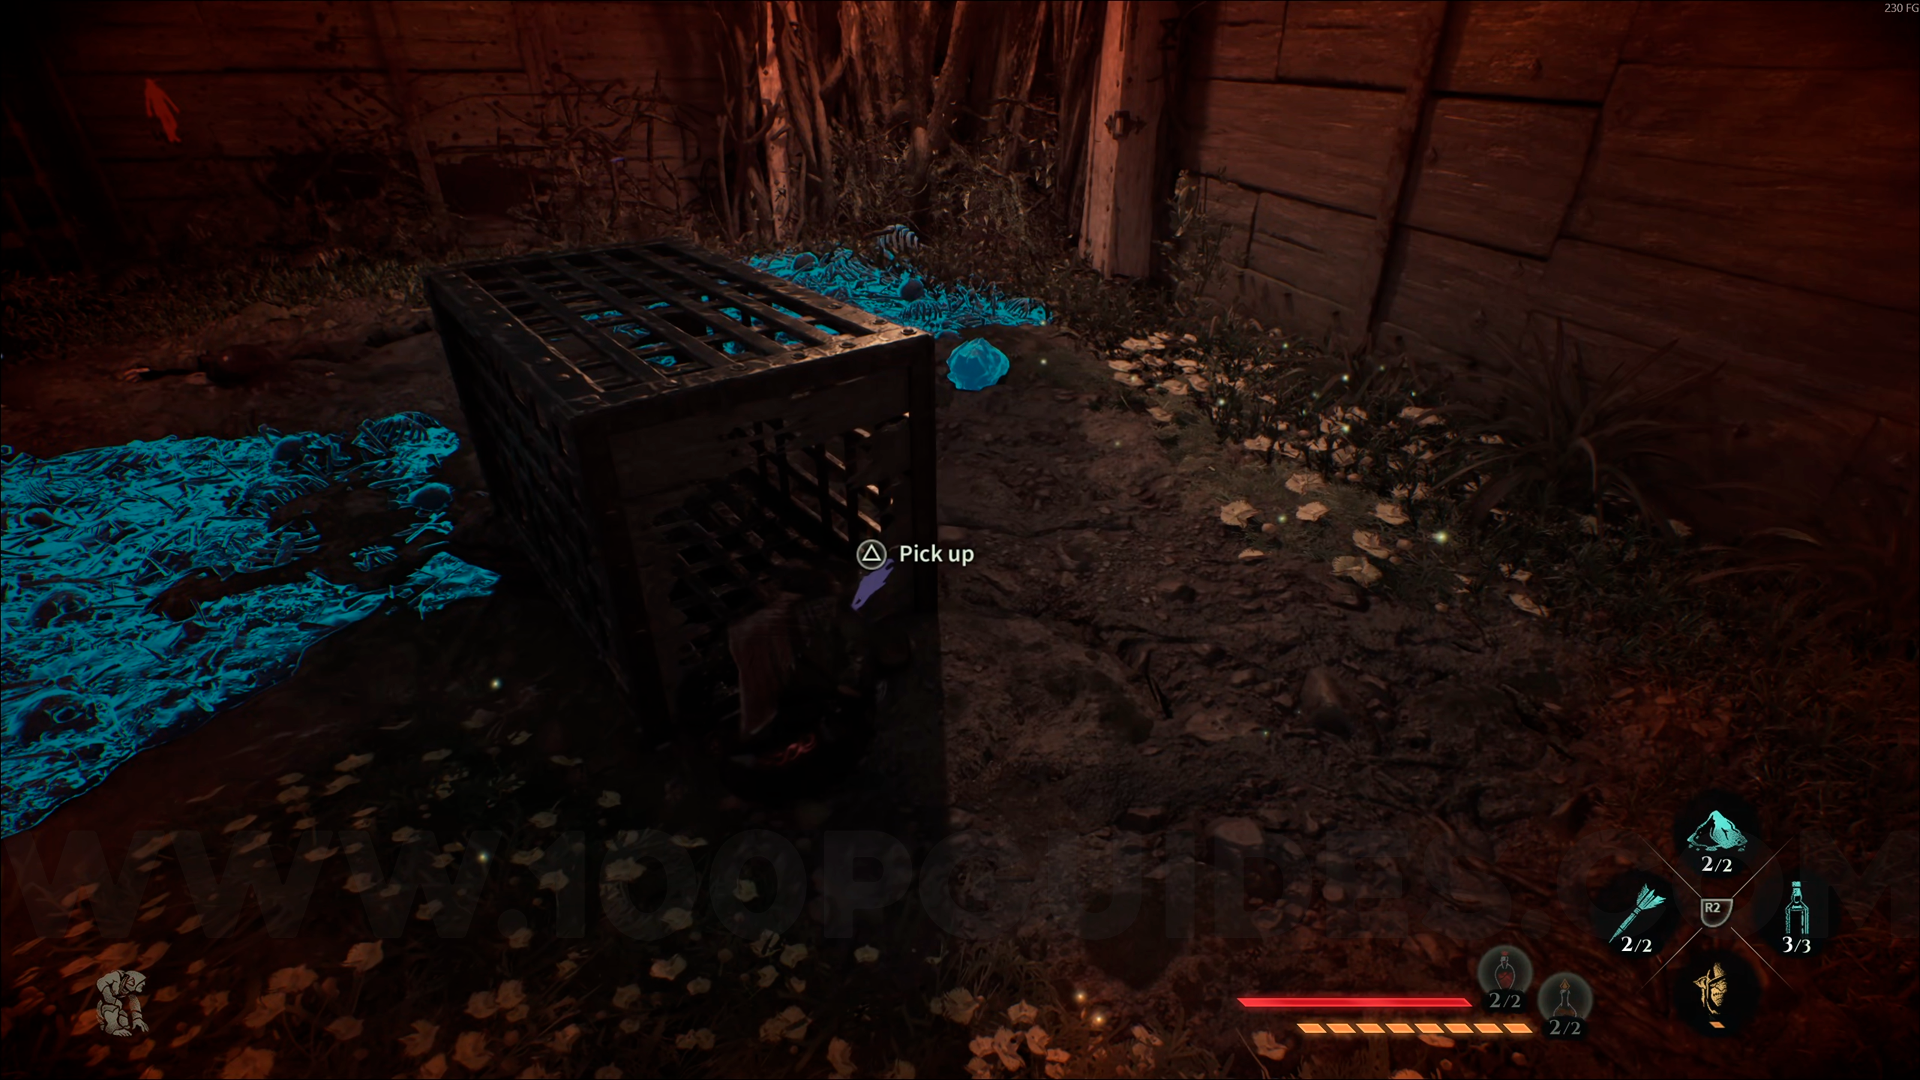
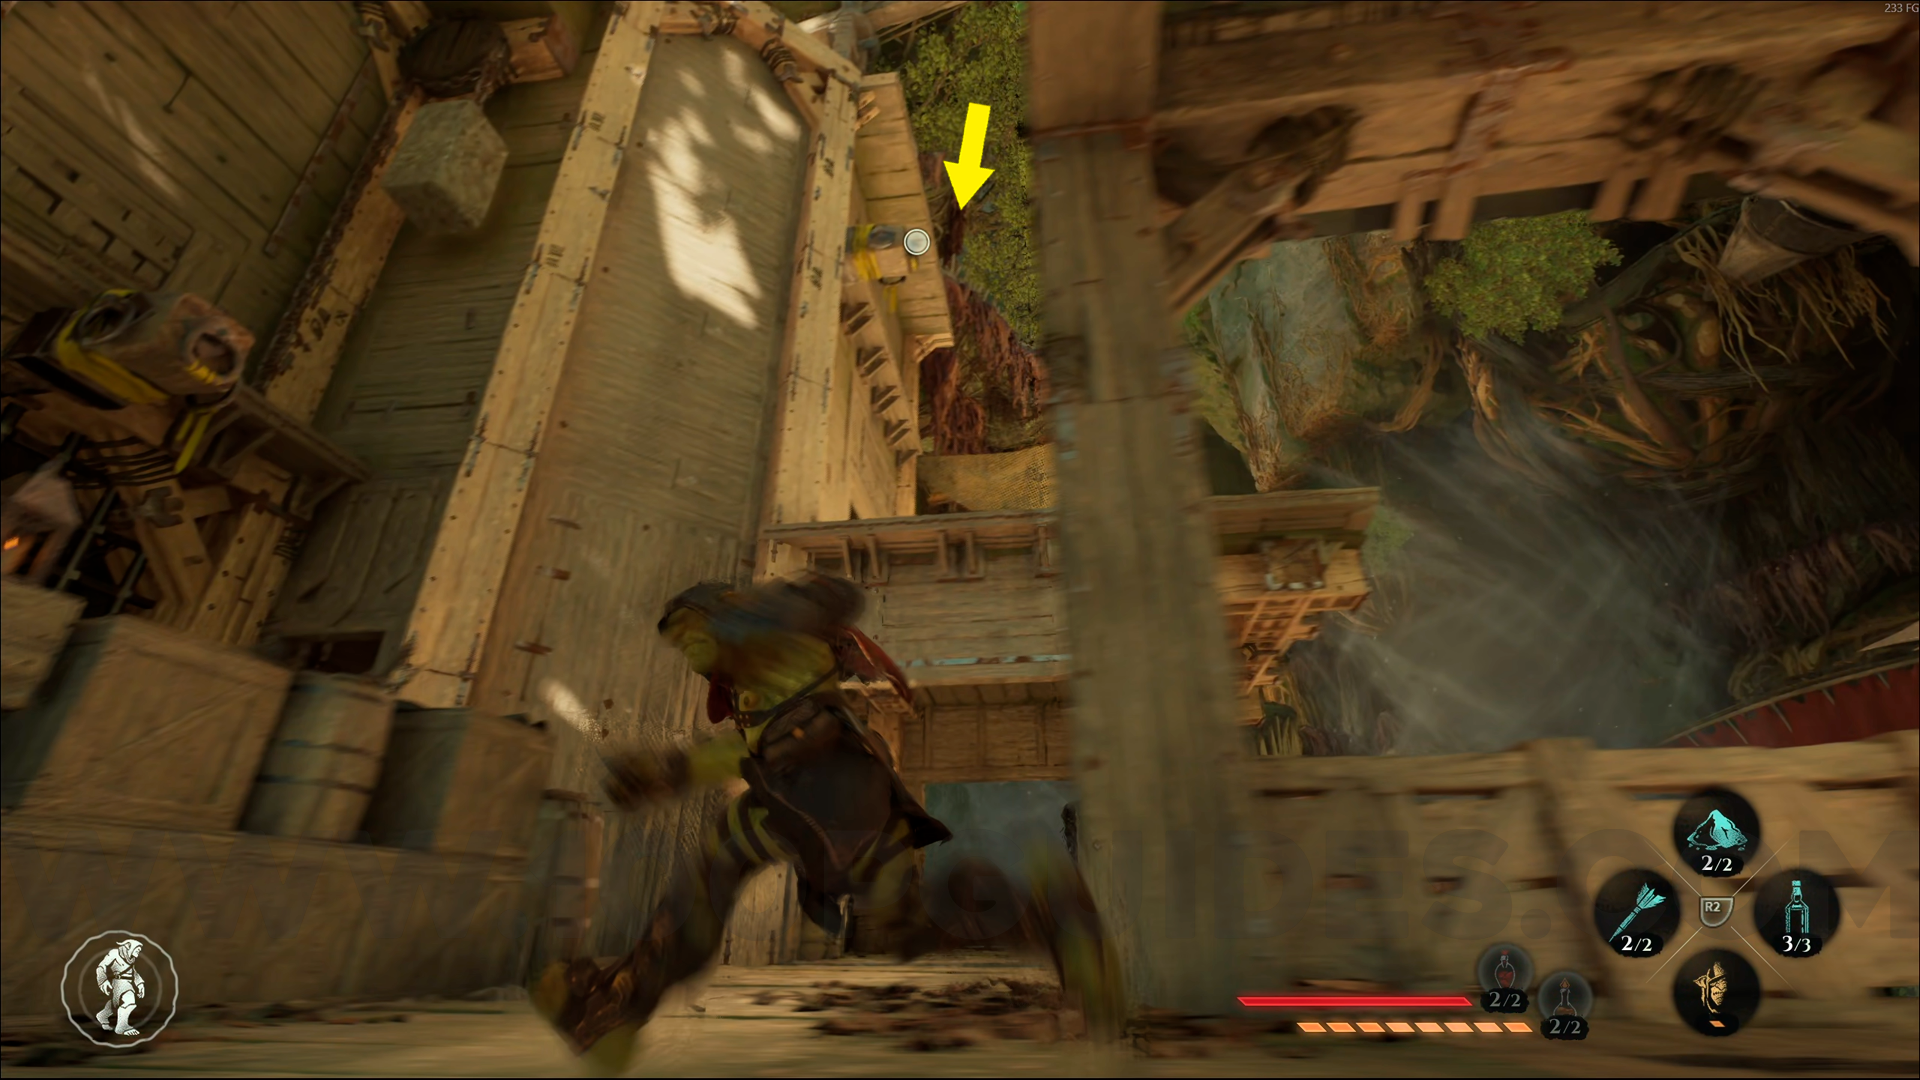
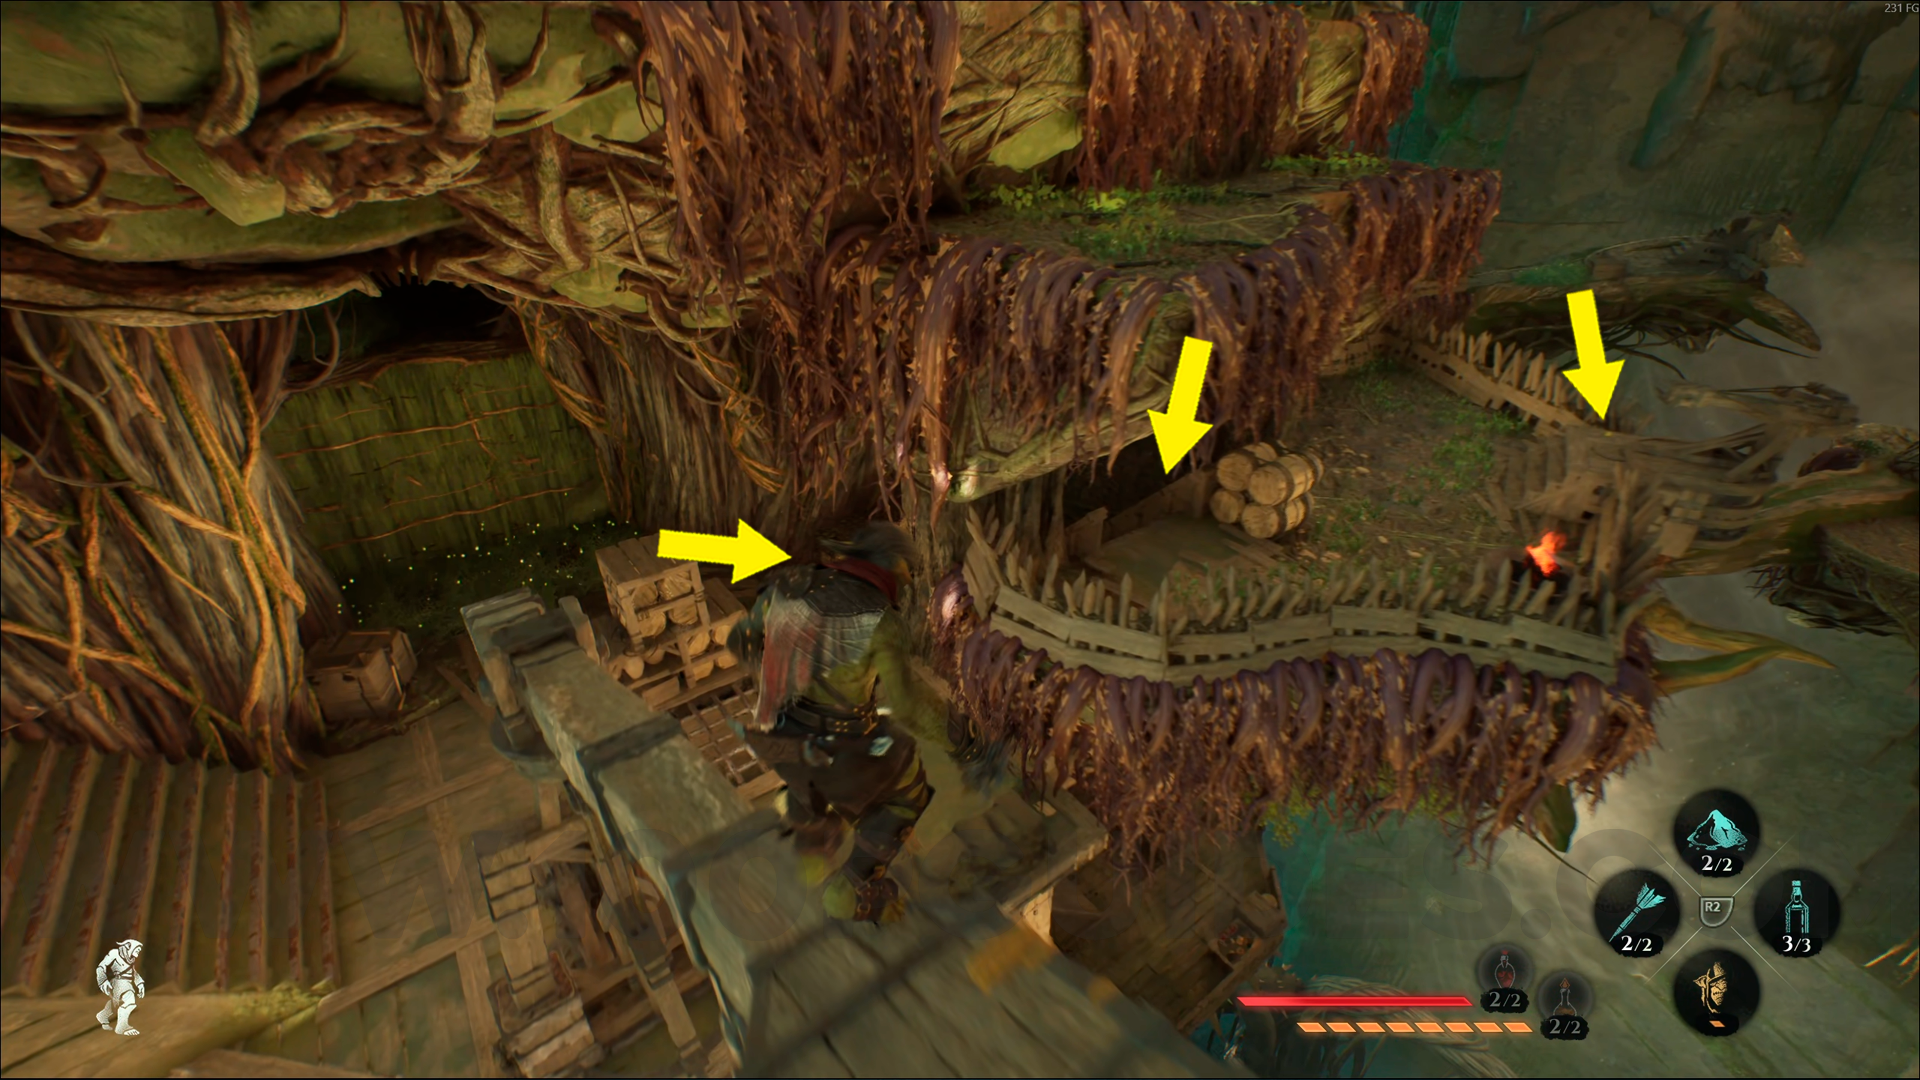
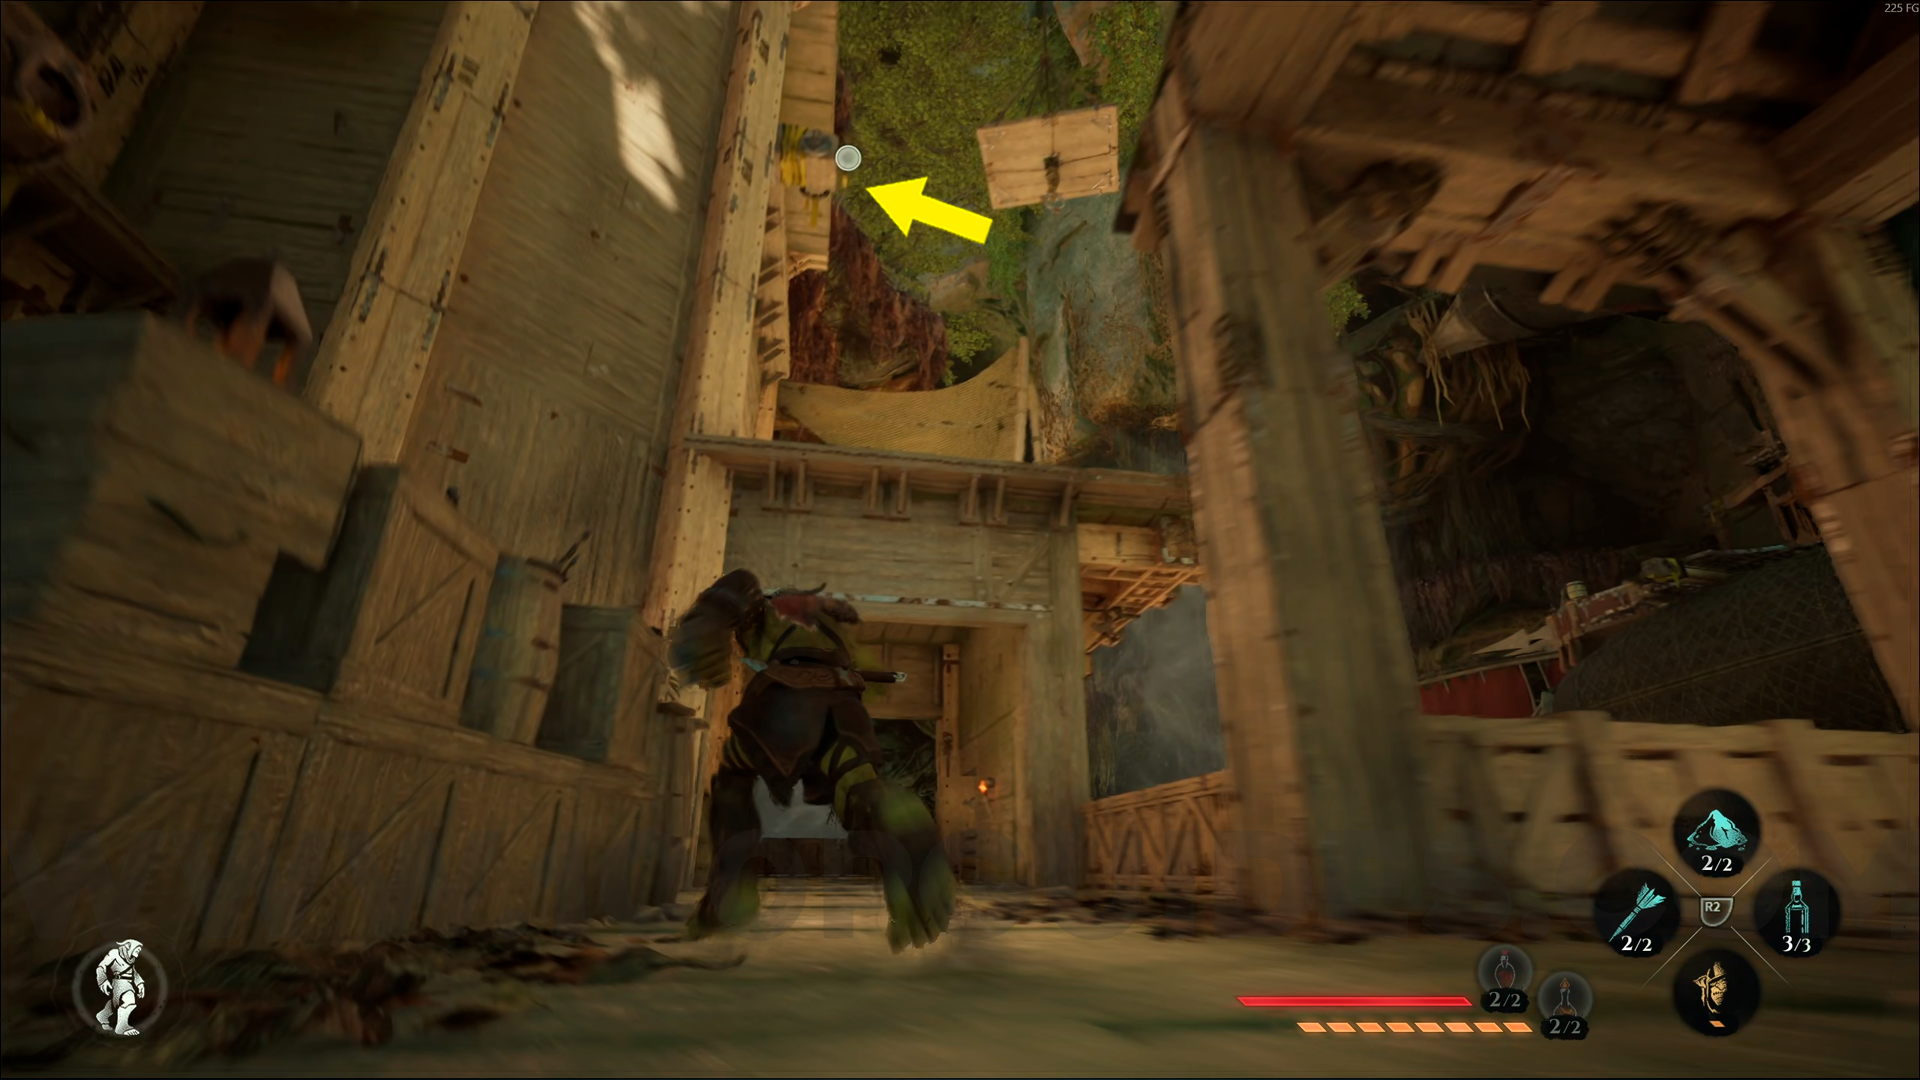
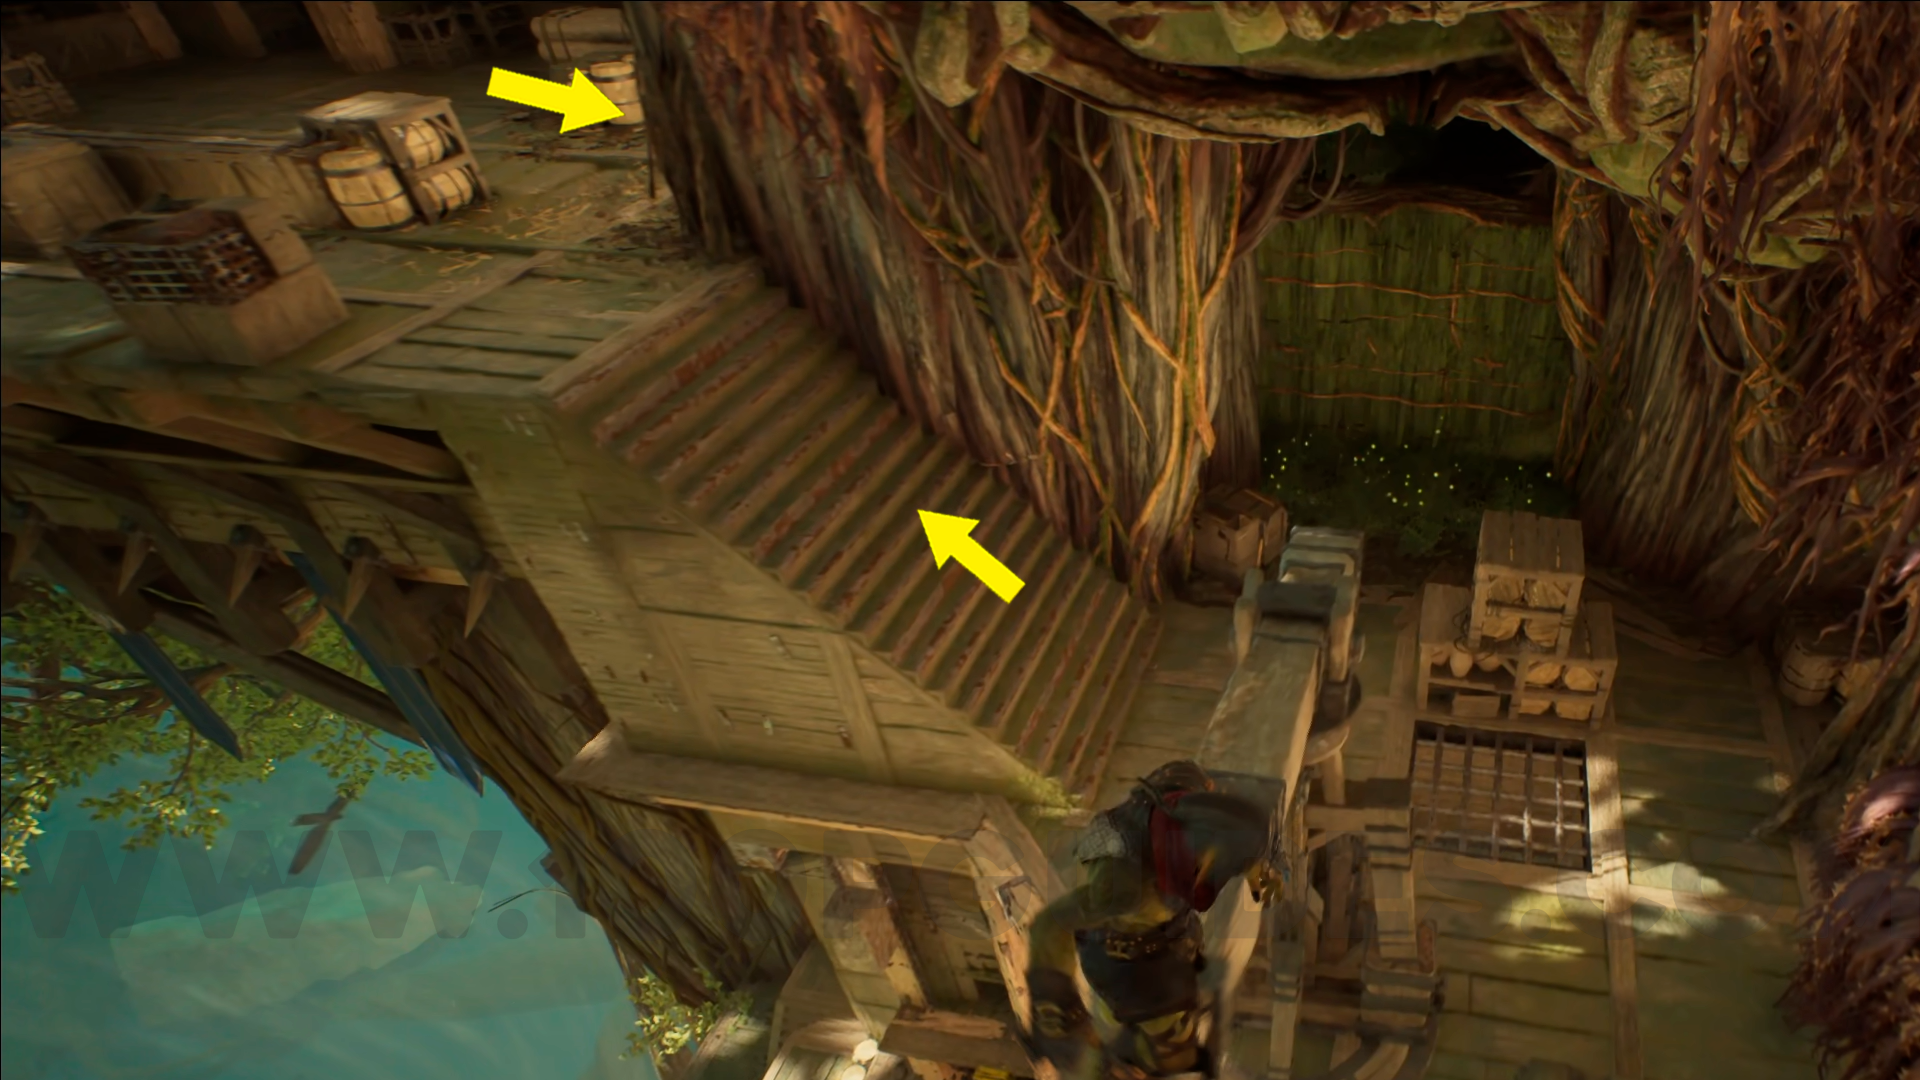
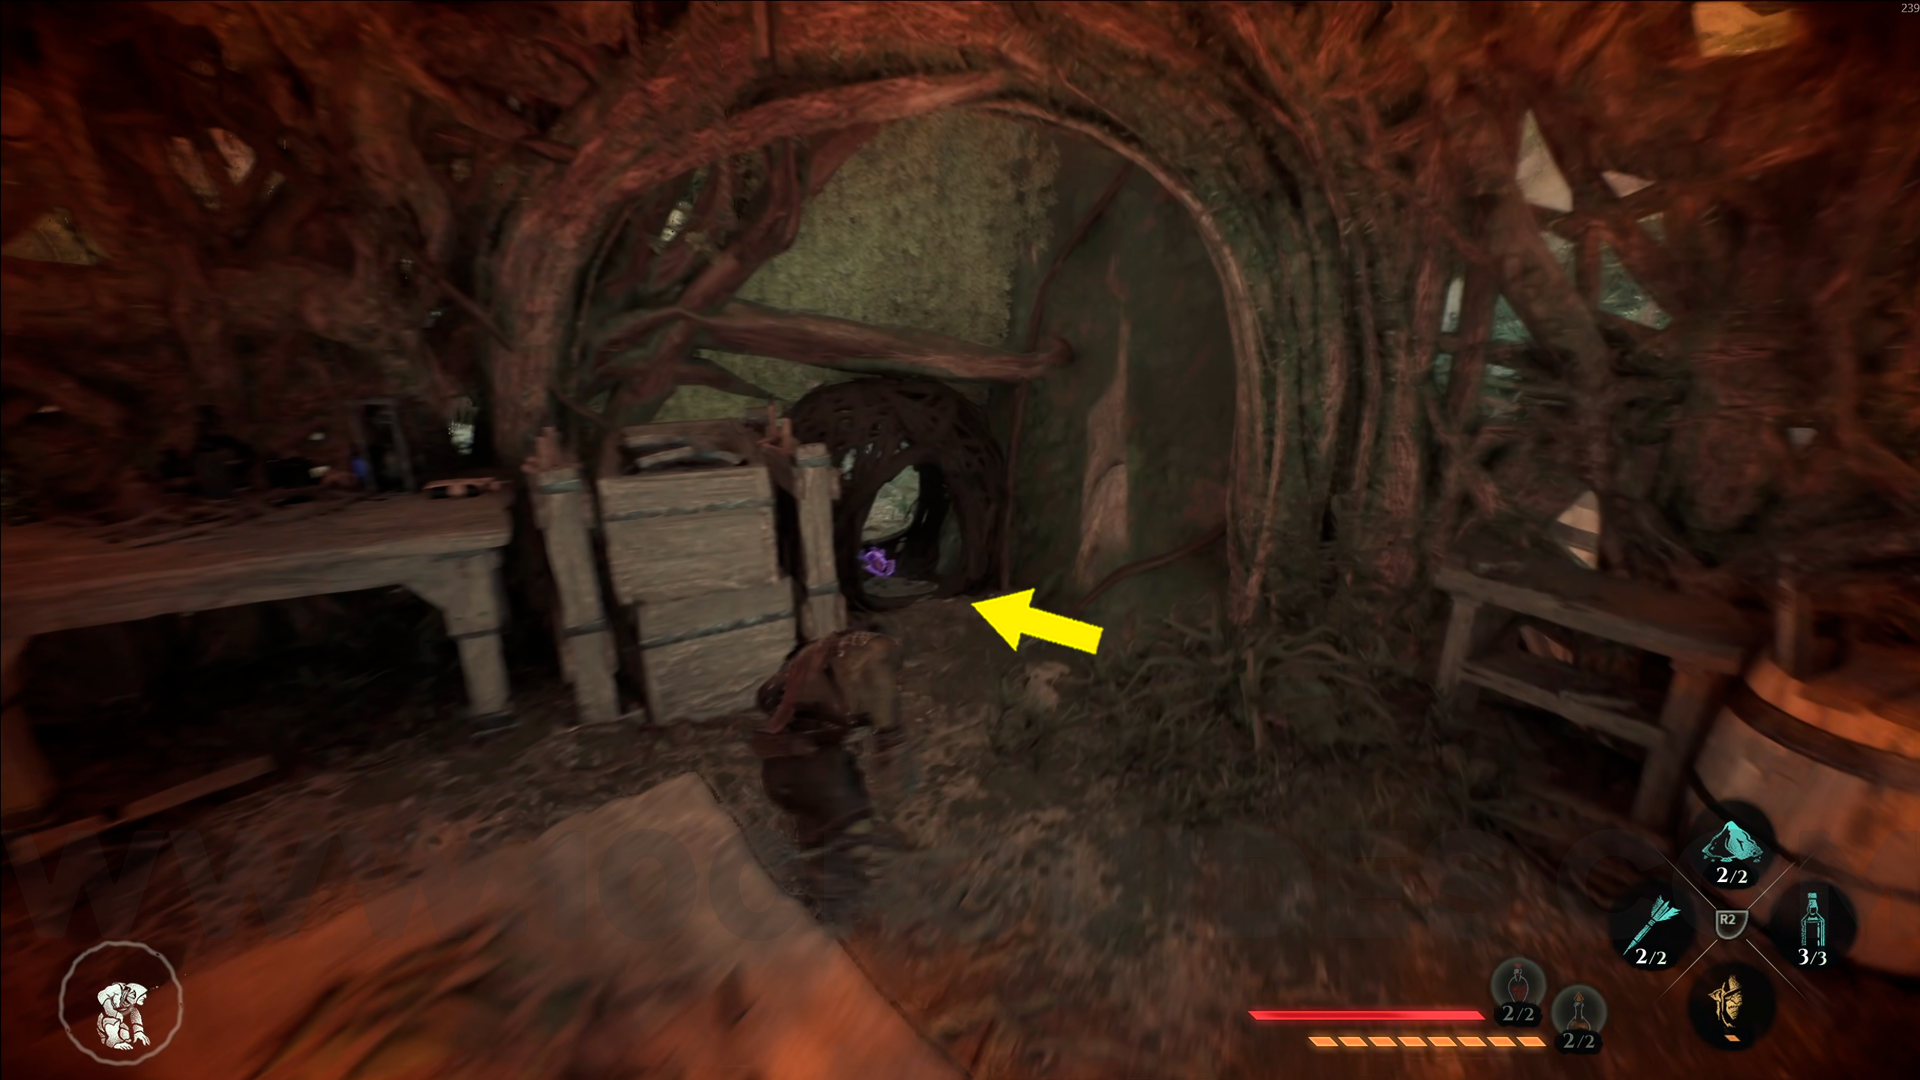
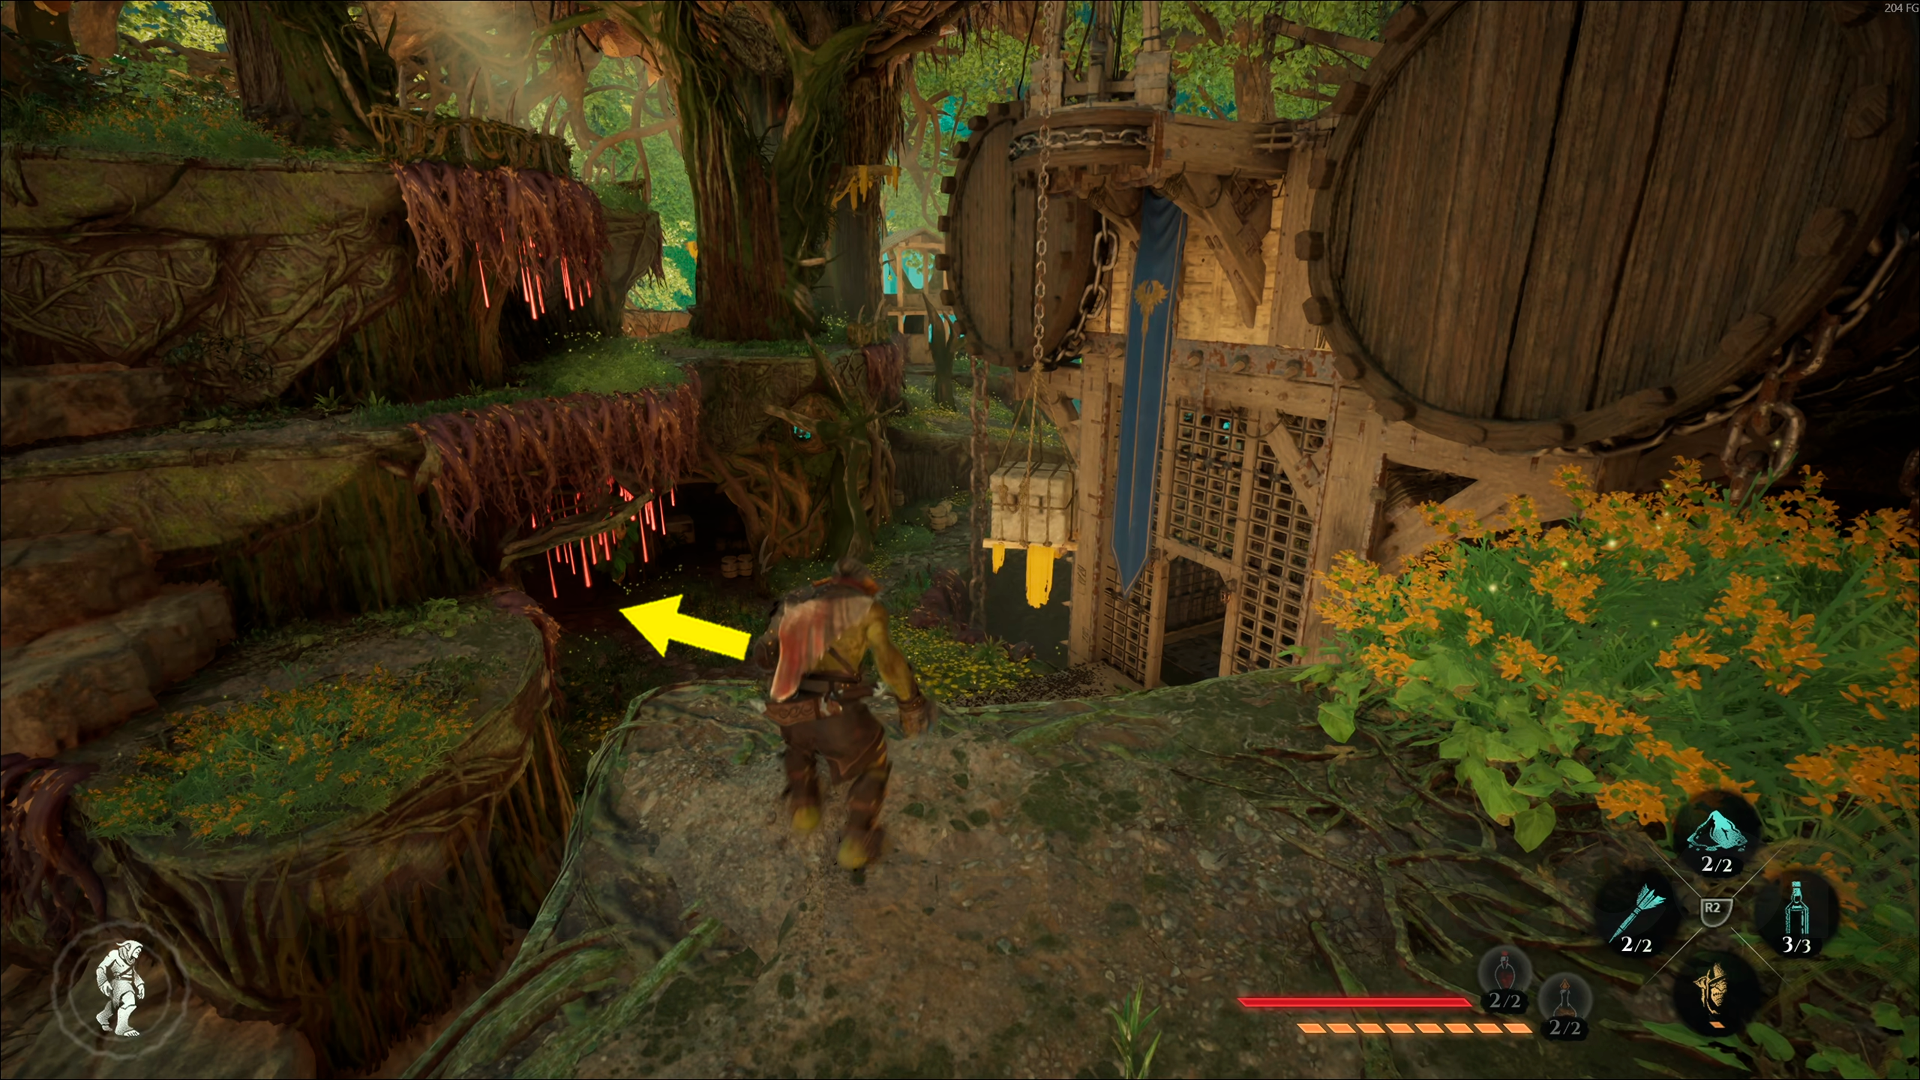
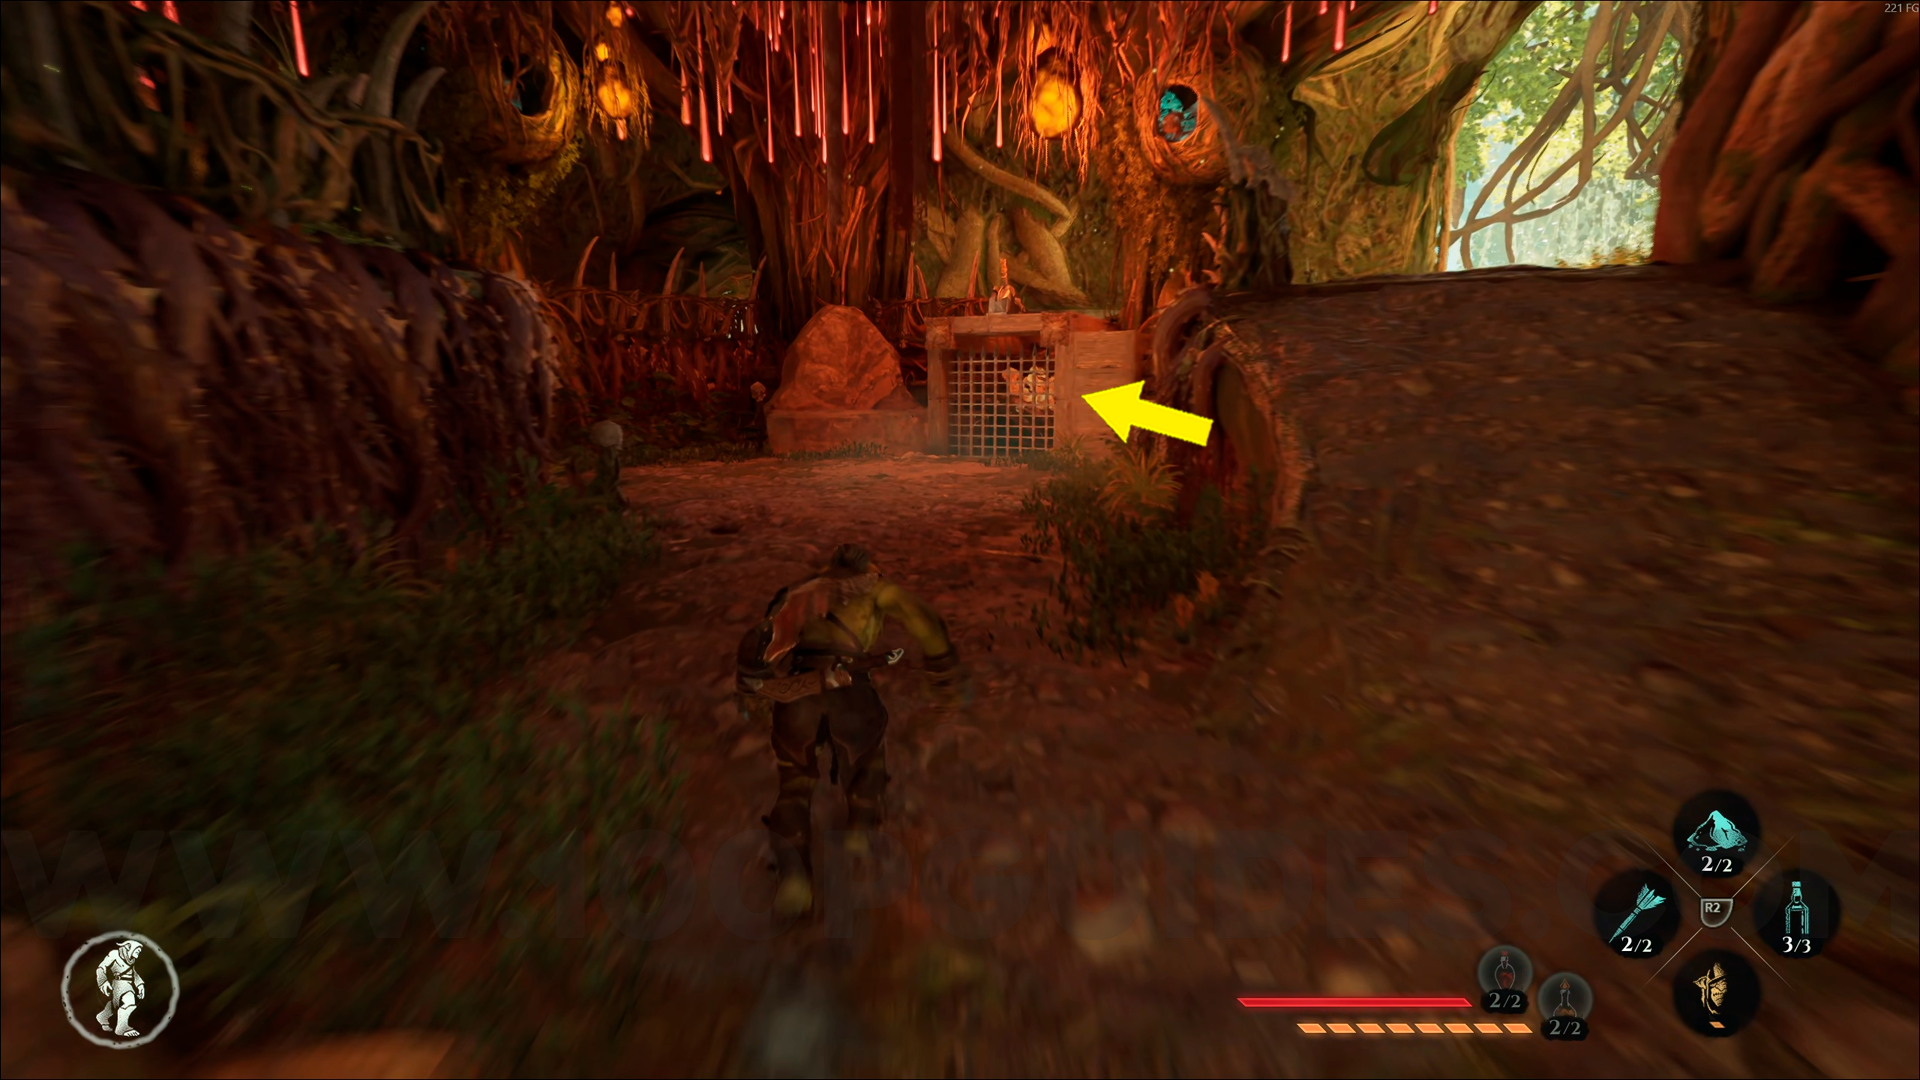
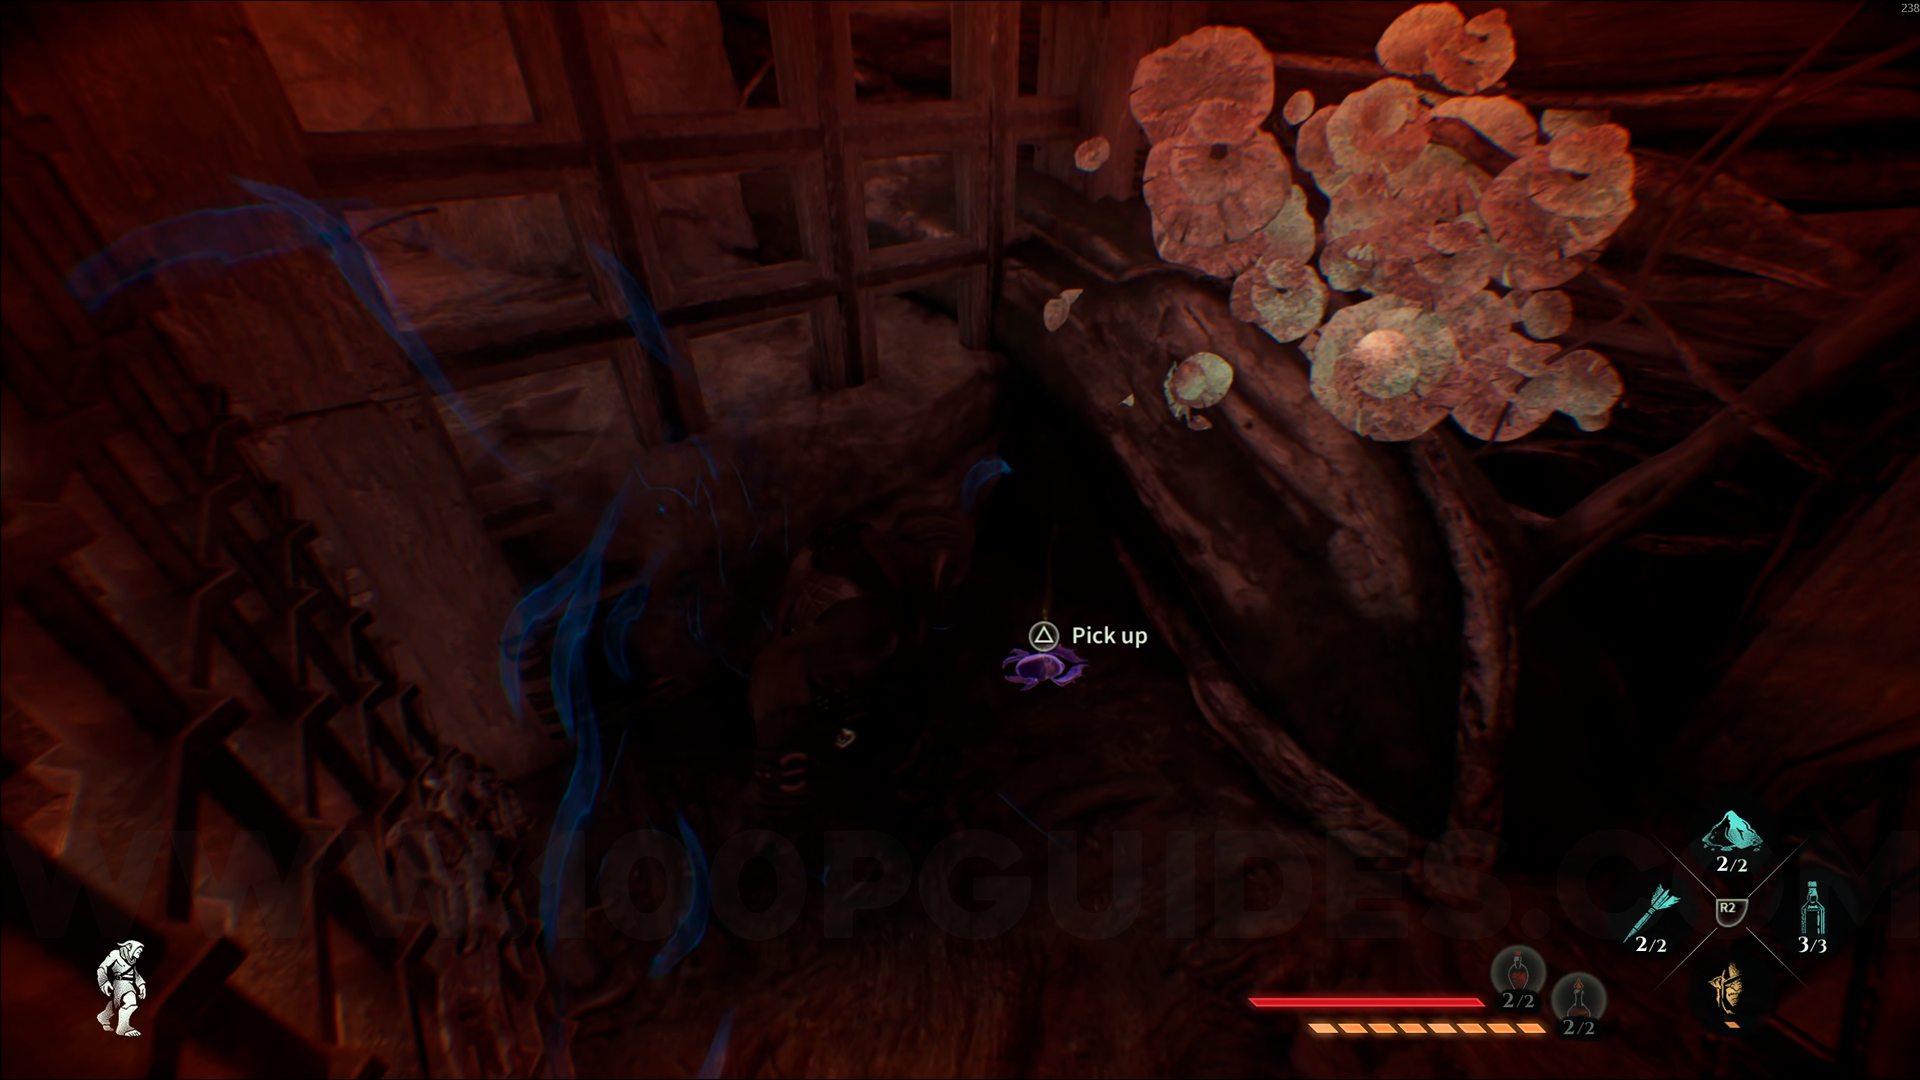
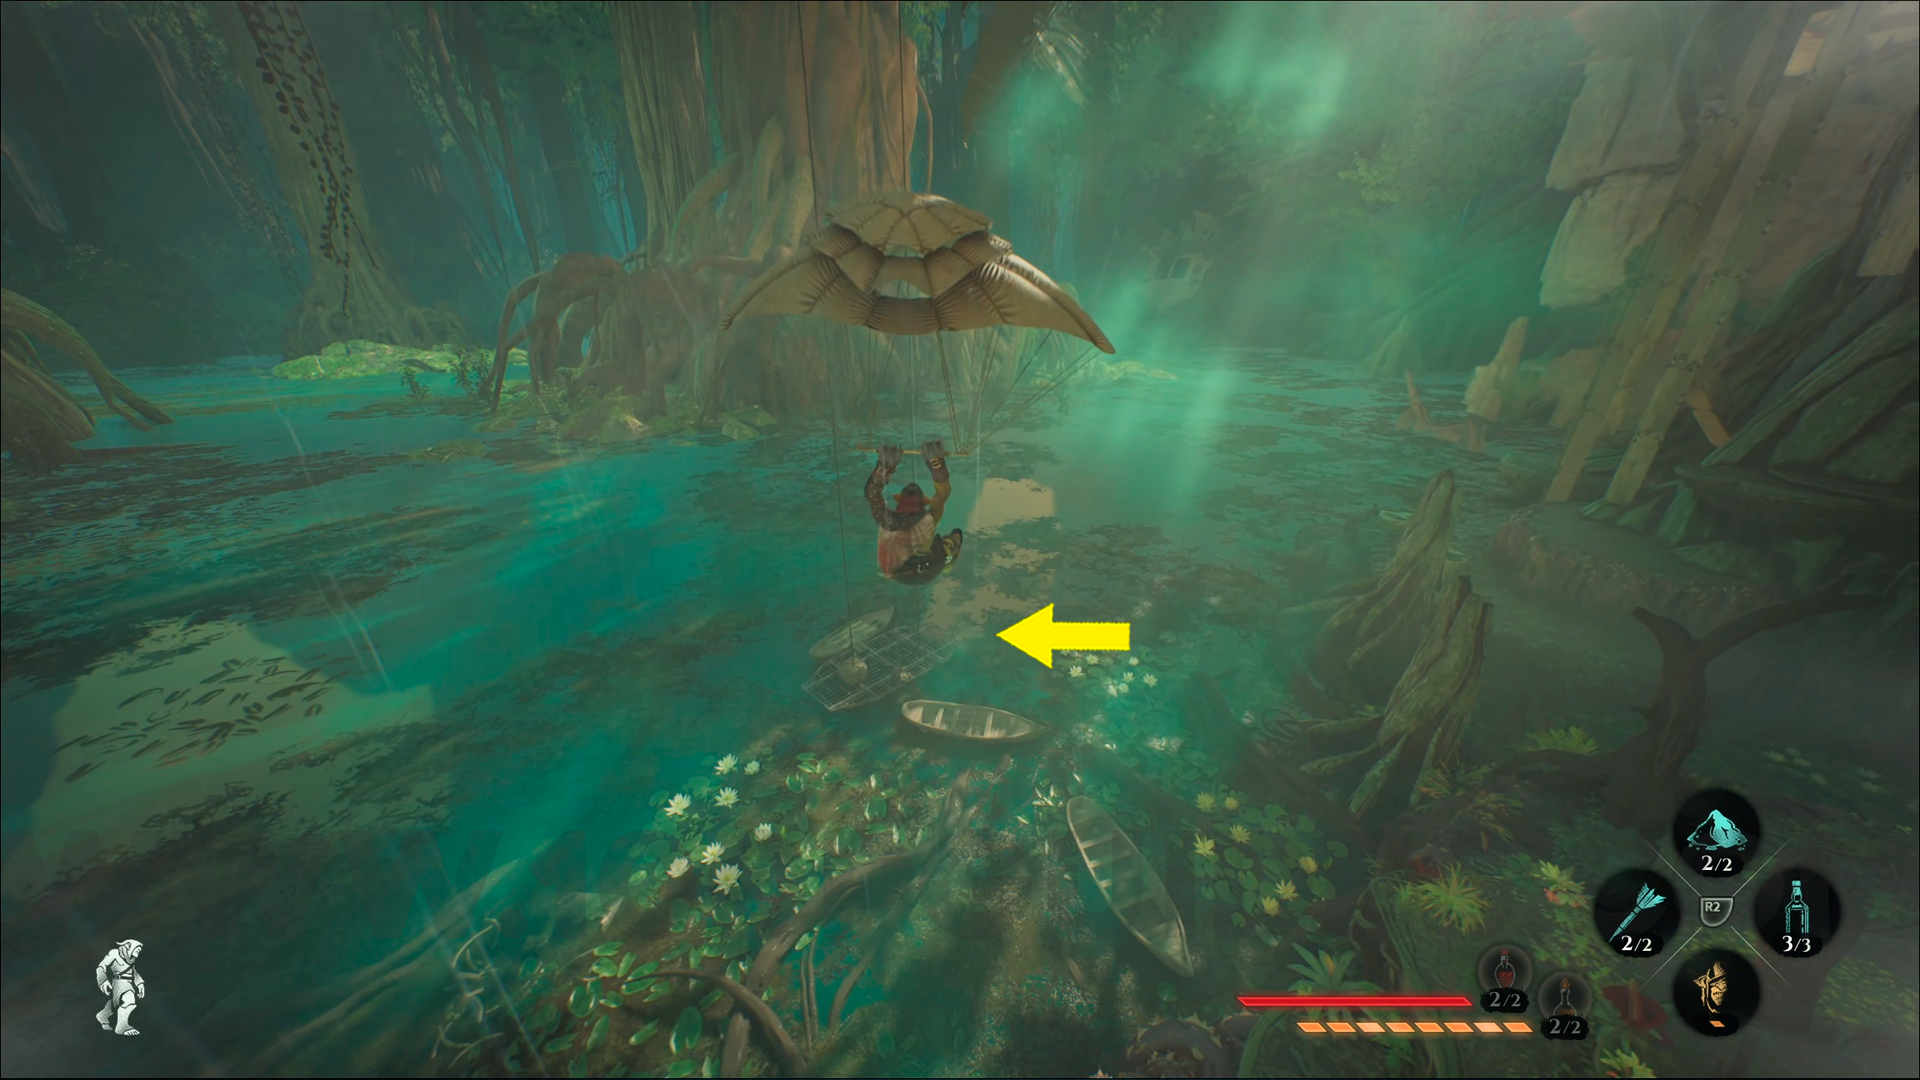
Silver Emblem #4. From the Annexed Sequoia Trunk, go through the hole in the wall. Walk a bit further and look down, you'll see a cage with the emblem inside.

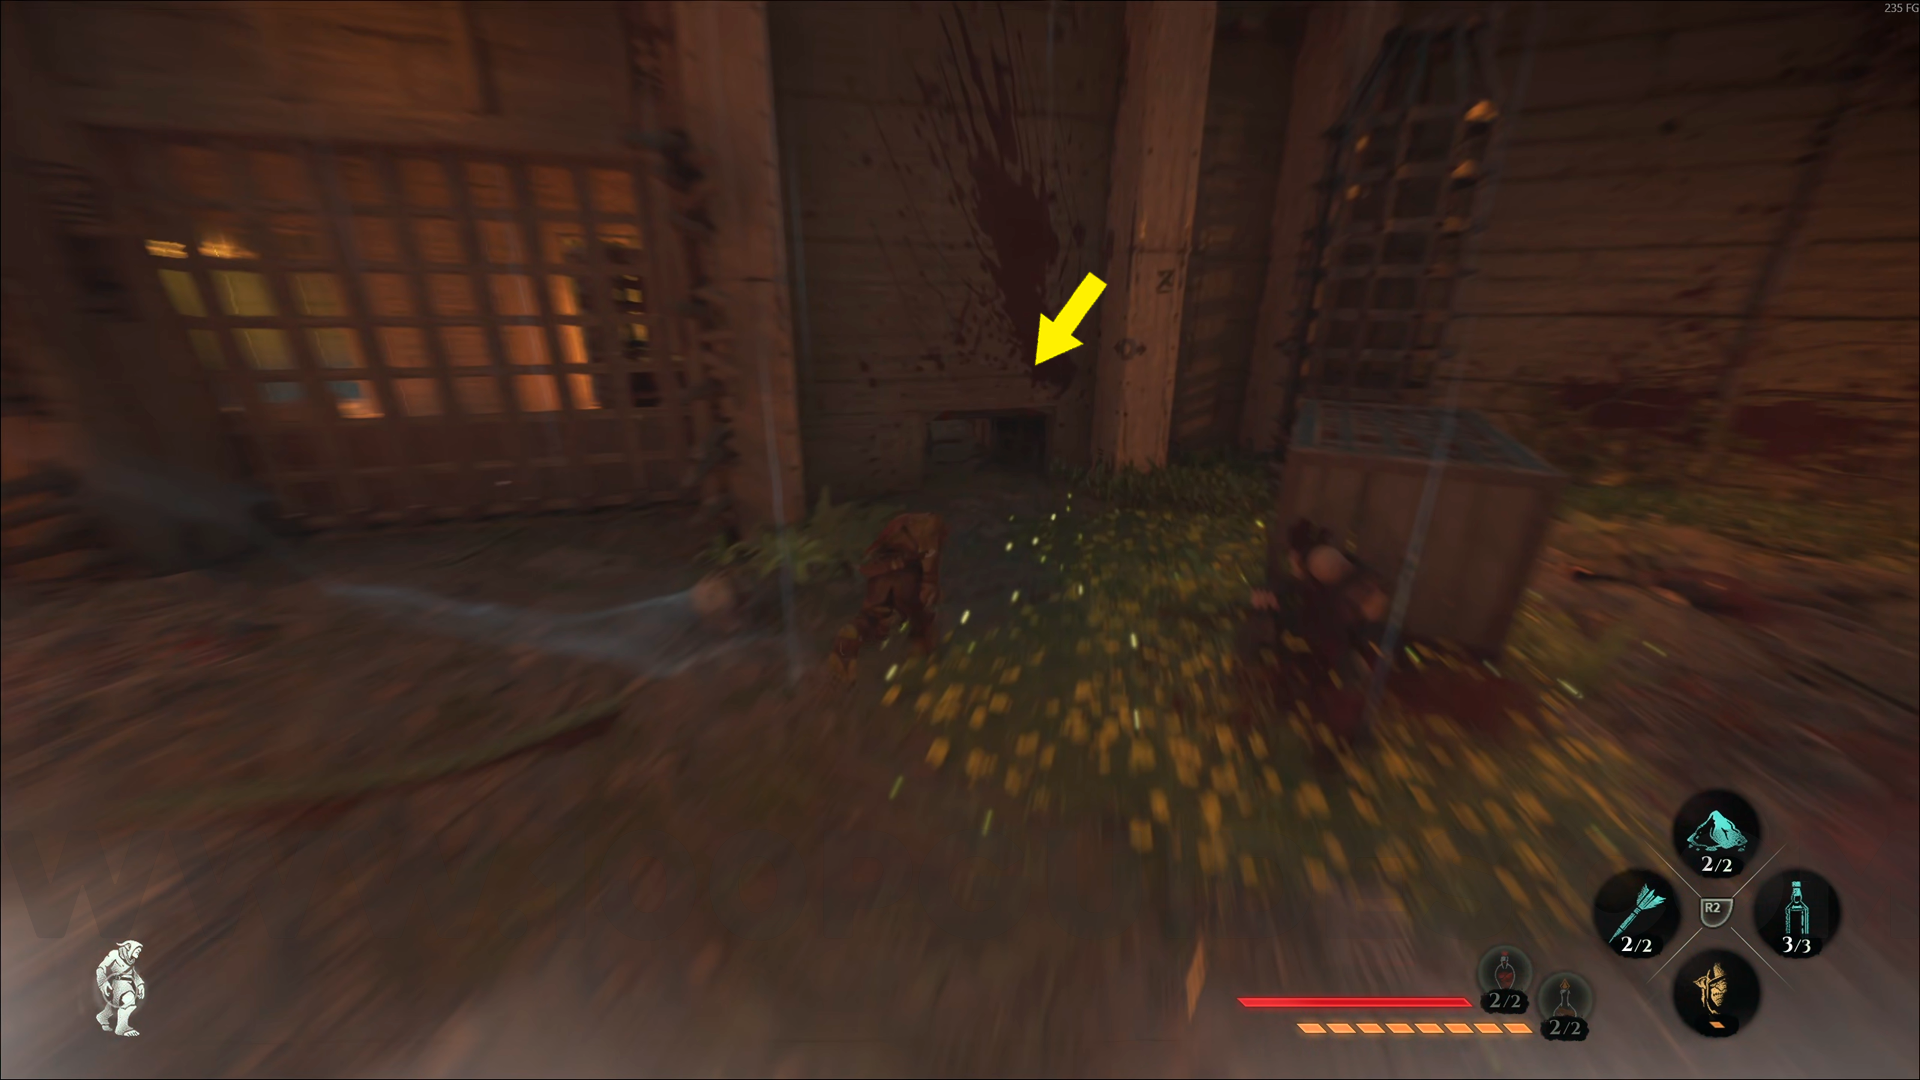
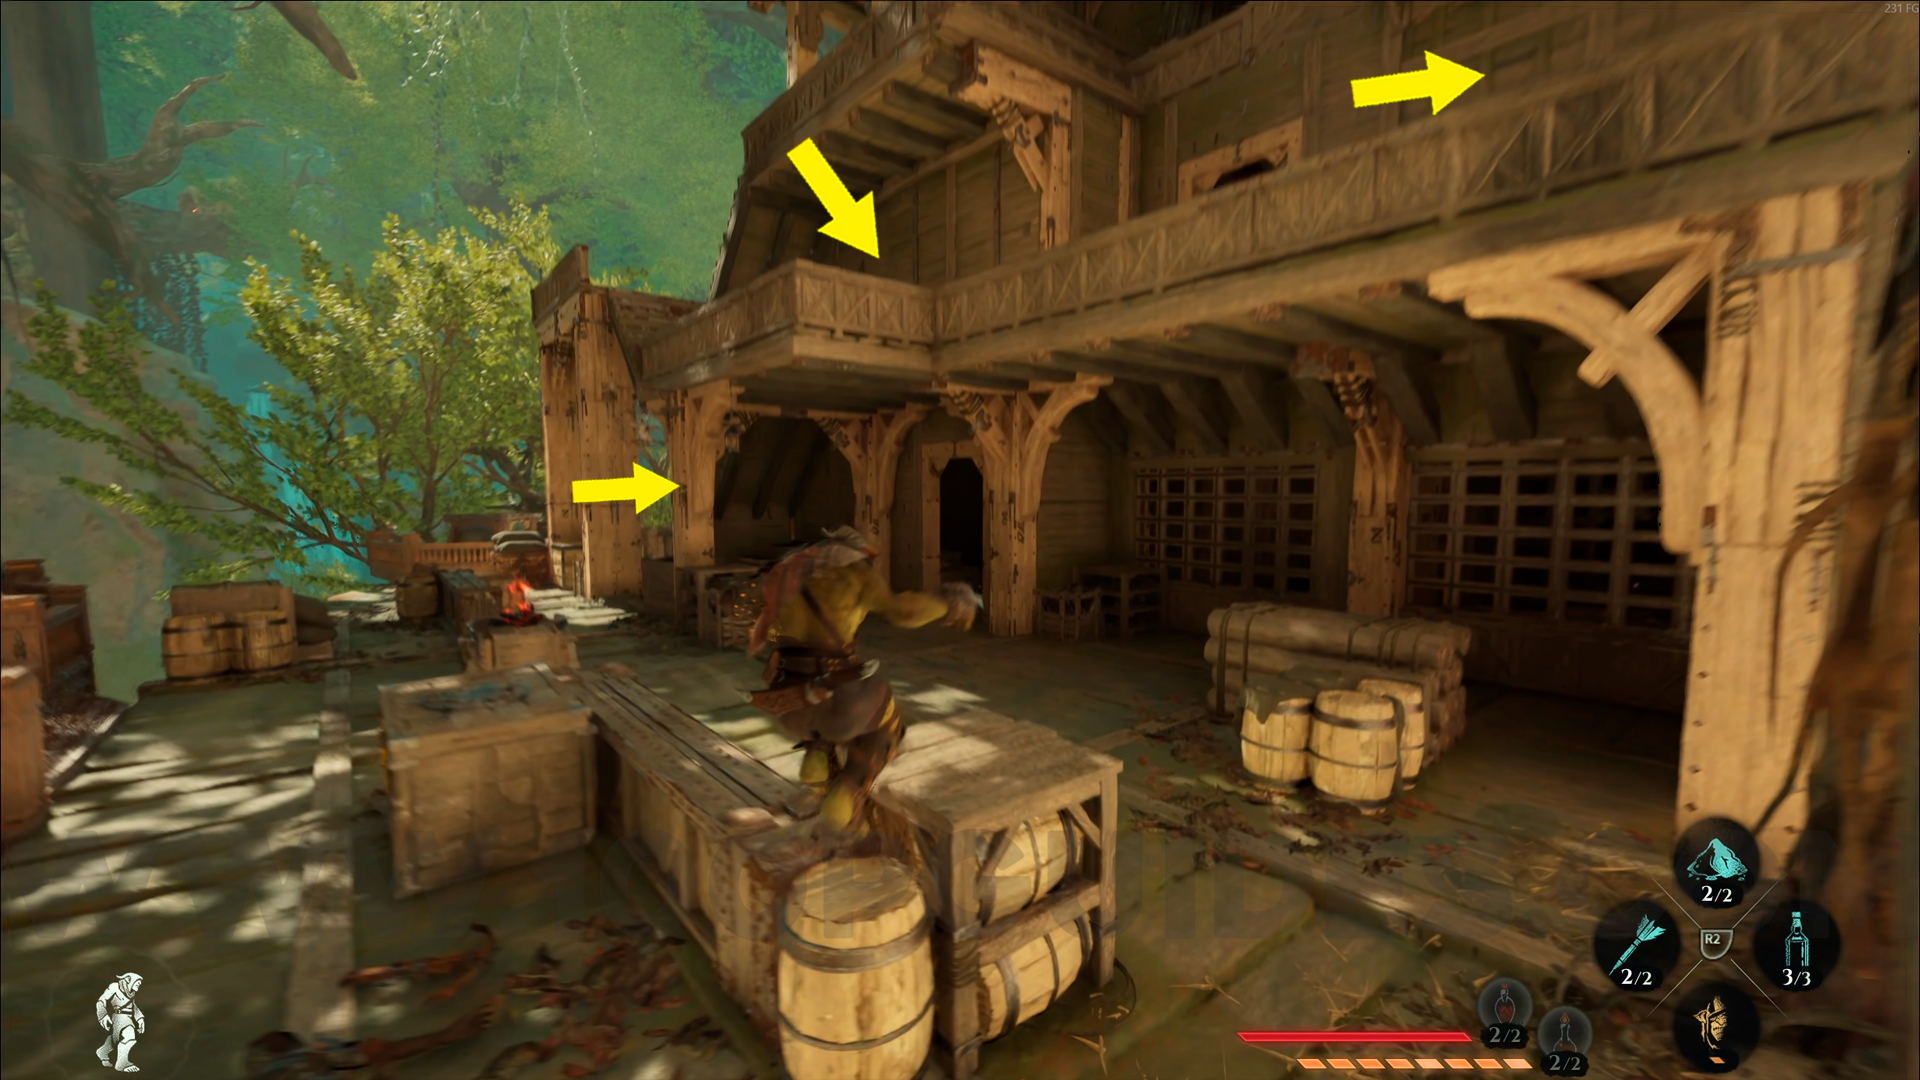
Silver Emblem #5. From the previous collectible, go through the hole in the wall, then turn right and enter another hole in the wall. Inside, you'll find this emblem.

Silver Emblem #6. From the Annexed Sequoia Trunk, use the grappling hook to climb up, then go up the stairs at the back of the area. Continue straight, circling around the area to the left. You'll see this emblem inside a cabin. Use Amber Vision to help you spot it.
Silver Emblem #7. From the previous collectible, go back to the stairs you climbed. This time, head right, then turn right again and use the rocks to climb up to the second floor. Once you're up there, go through the door and continue to the end, this emblem will be on top of the cabinet.

Silver Emblem #8. From the Annexed Sequoia Trunk, climb all the way to the top of the area and use the grappling hook to reach this emblem.

Silver Emblem #9. From the Broken Bridge Cave – Western Camp, go down to the lower area and enter the cave. Continue forward inside the cave. This emblem will be on top of a Grapple Hook point.
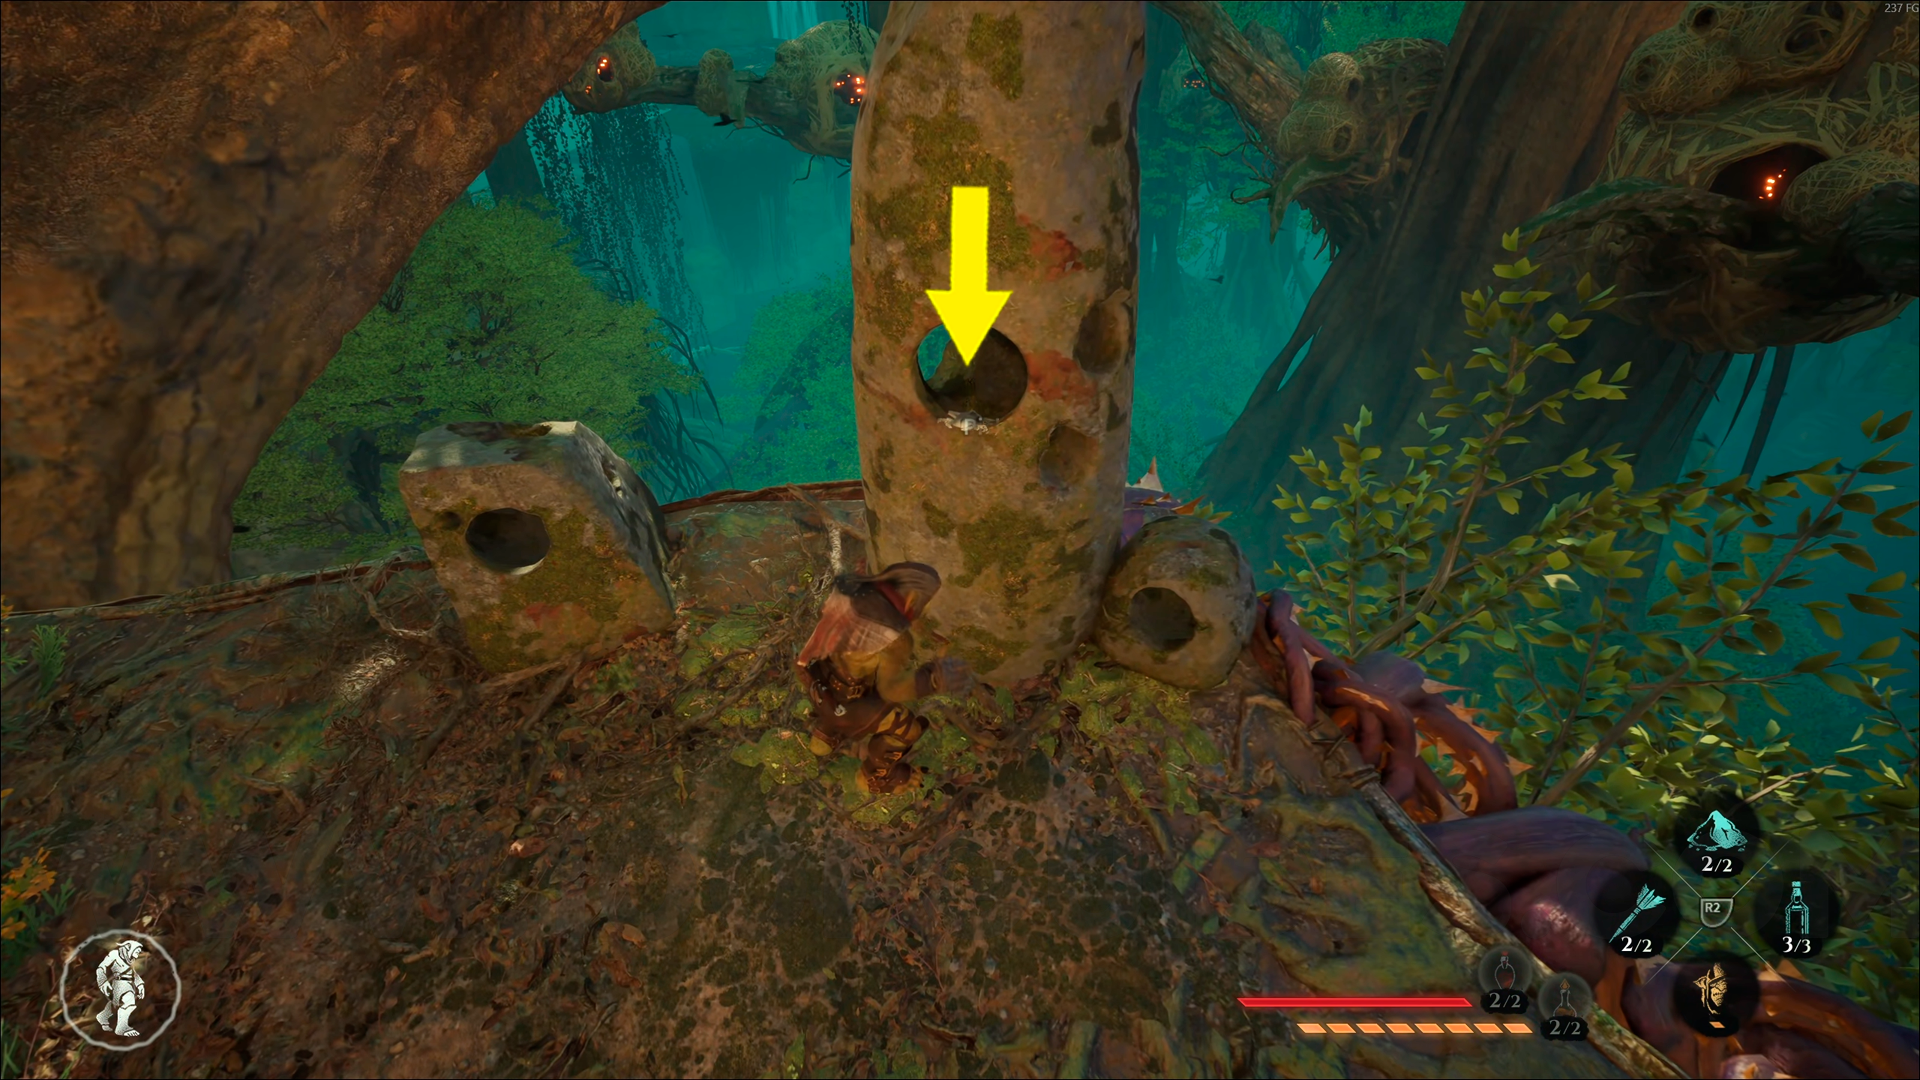
Silver Emblem #10. From the Annexed Sequoia Trunk, climb up and turn right at the end. Walk all the way to the end and go through the door. Once inside, go up the stairs, then turn right and climb the mushroom. Keep turning left as you go, all the way to the end of the area, you'll find this emblem inside a rock. Use Amber Vision to help you spot it.

Gold Emblem #1. Near the Supply Docks checkpoint.
Gold Emblem #2. From the Annexed Sequoia Trunk, use the Grapple Hook above, you'll see the emblem next to the ballista.
Gold Emblem #3. From the Annexed Sequoia Trunk, climb up using the grappling hook, then go up the stairs, turn right, and continue to the end to find this emblem.

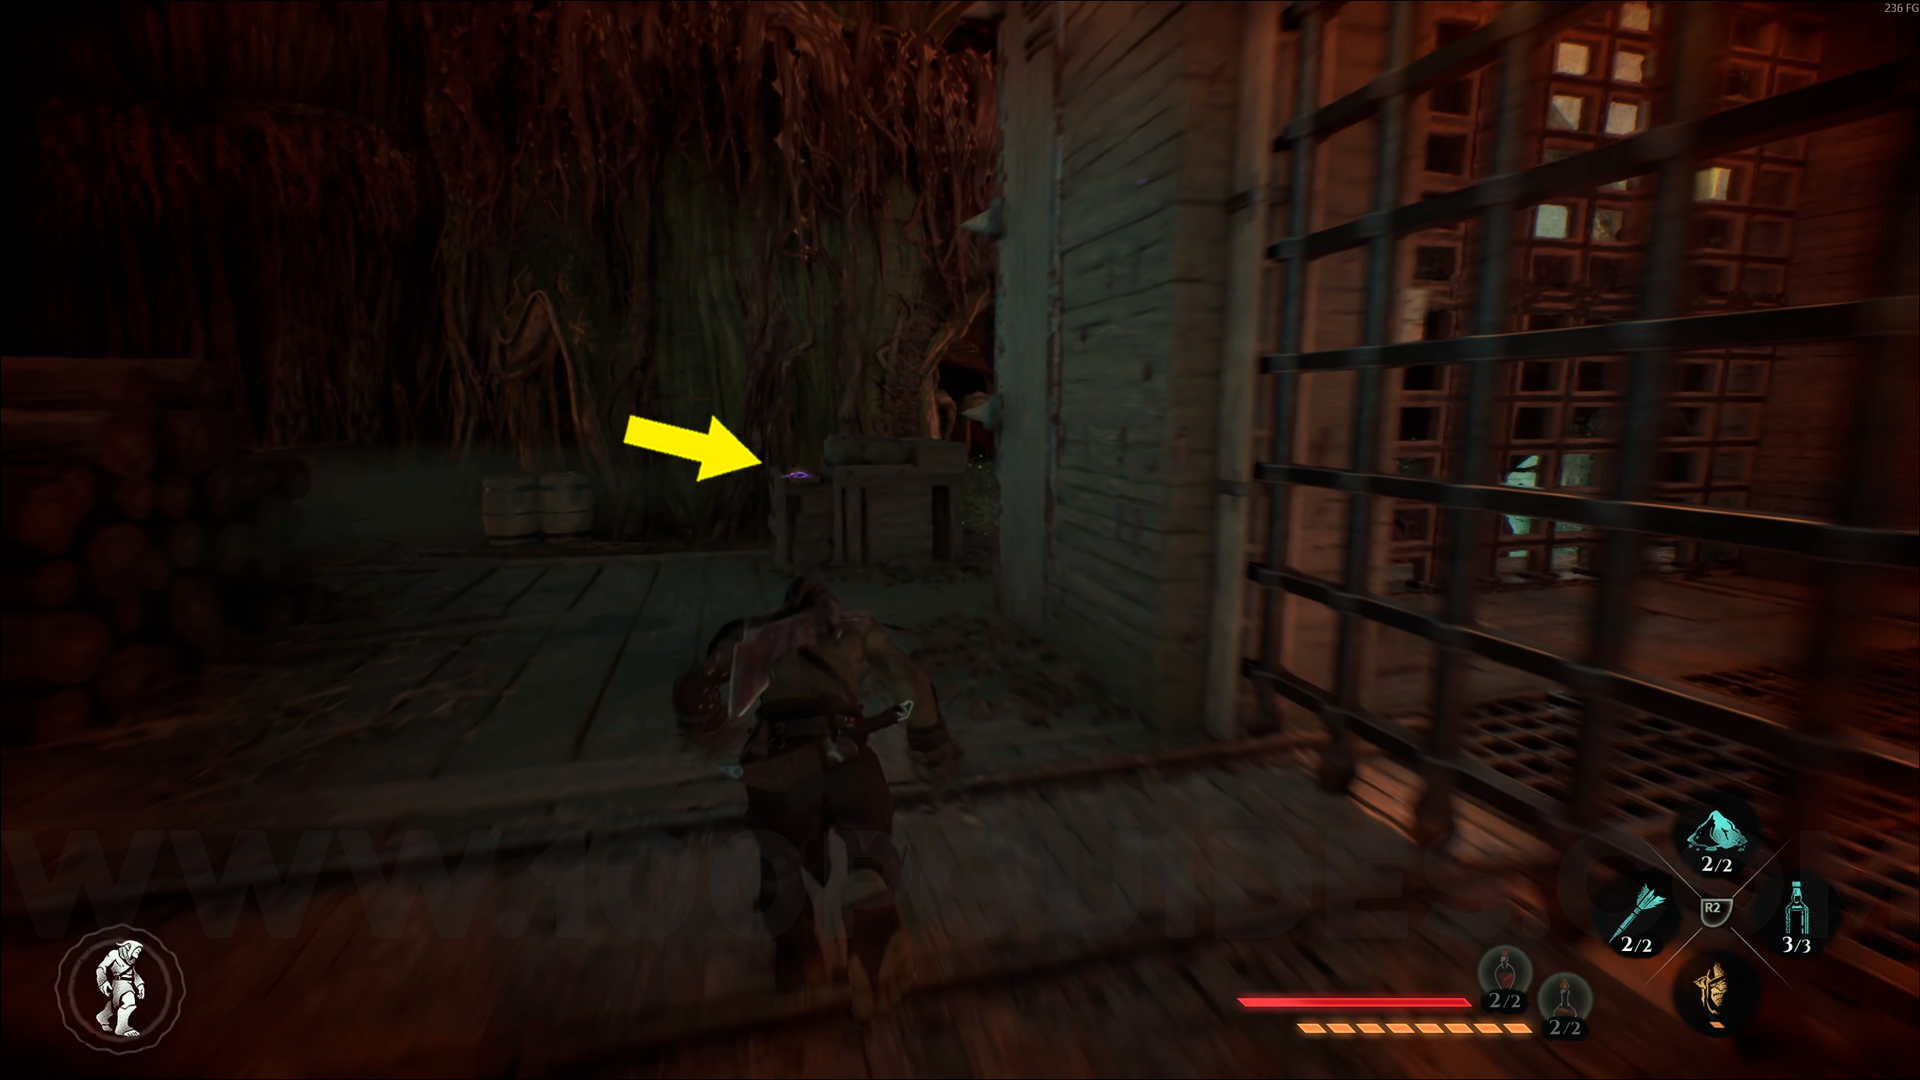
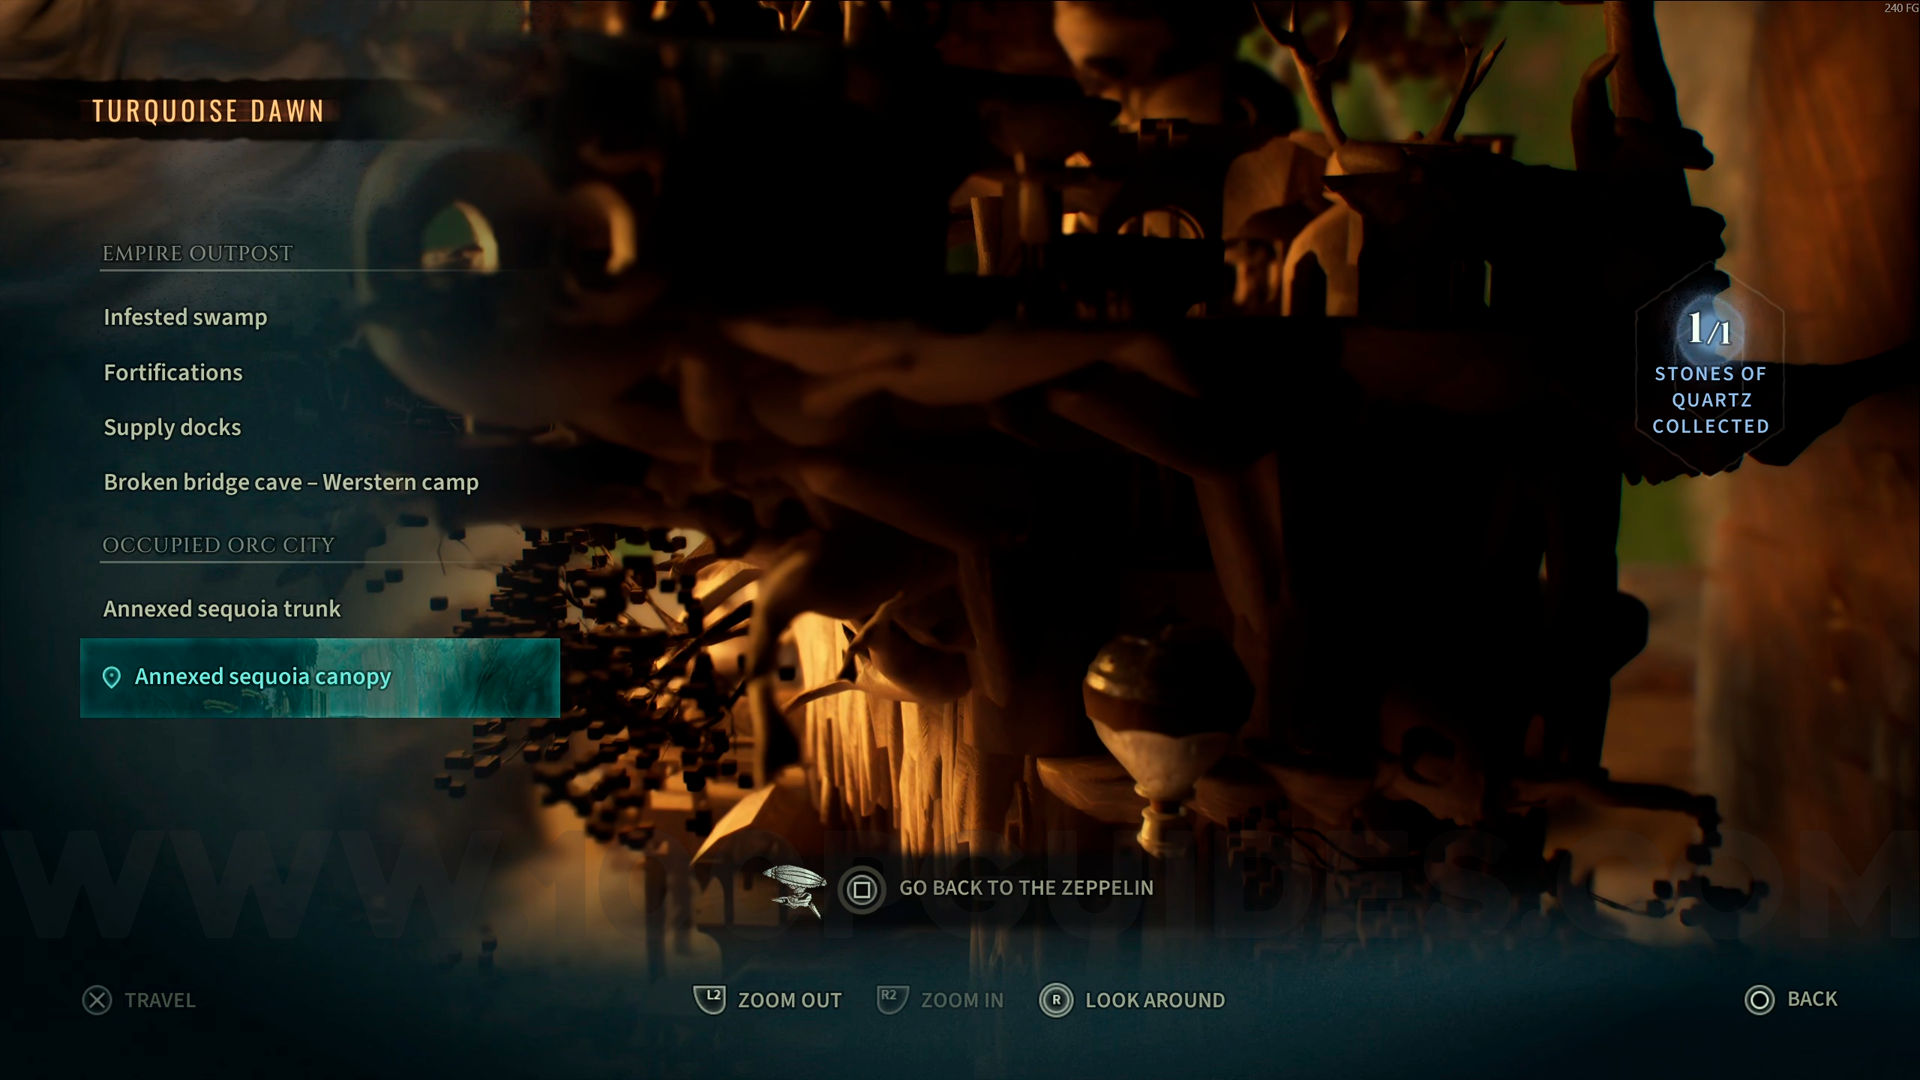
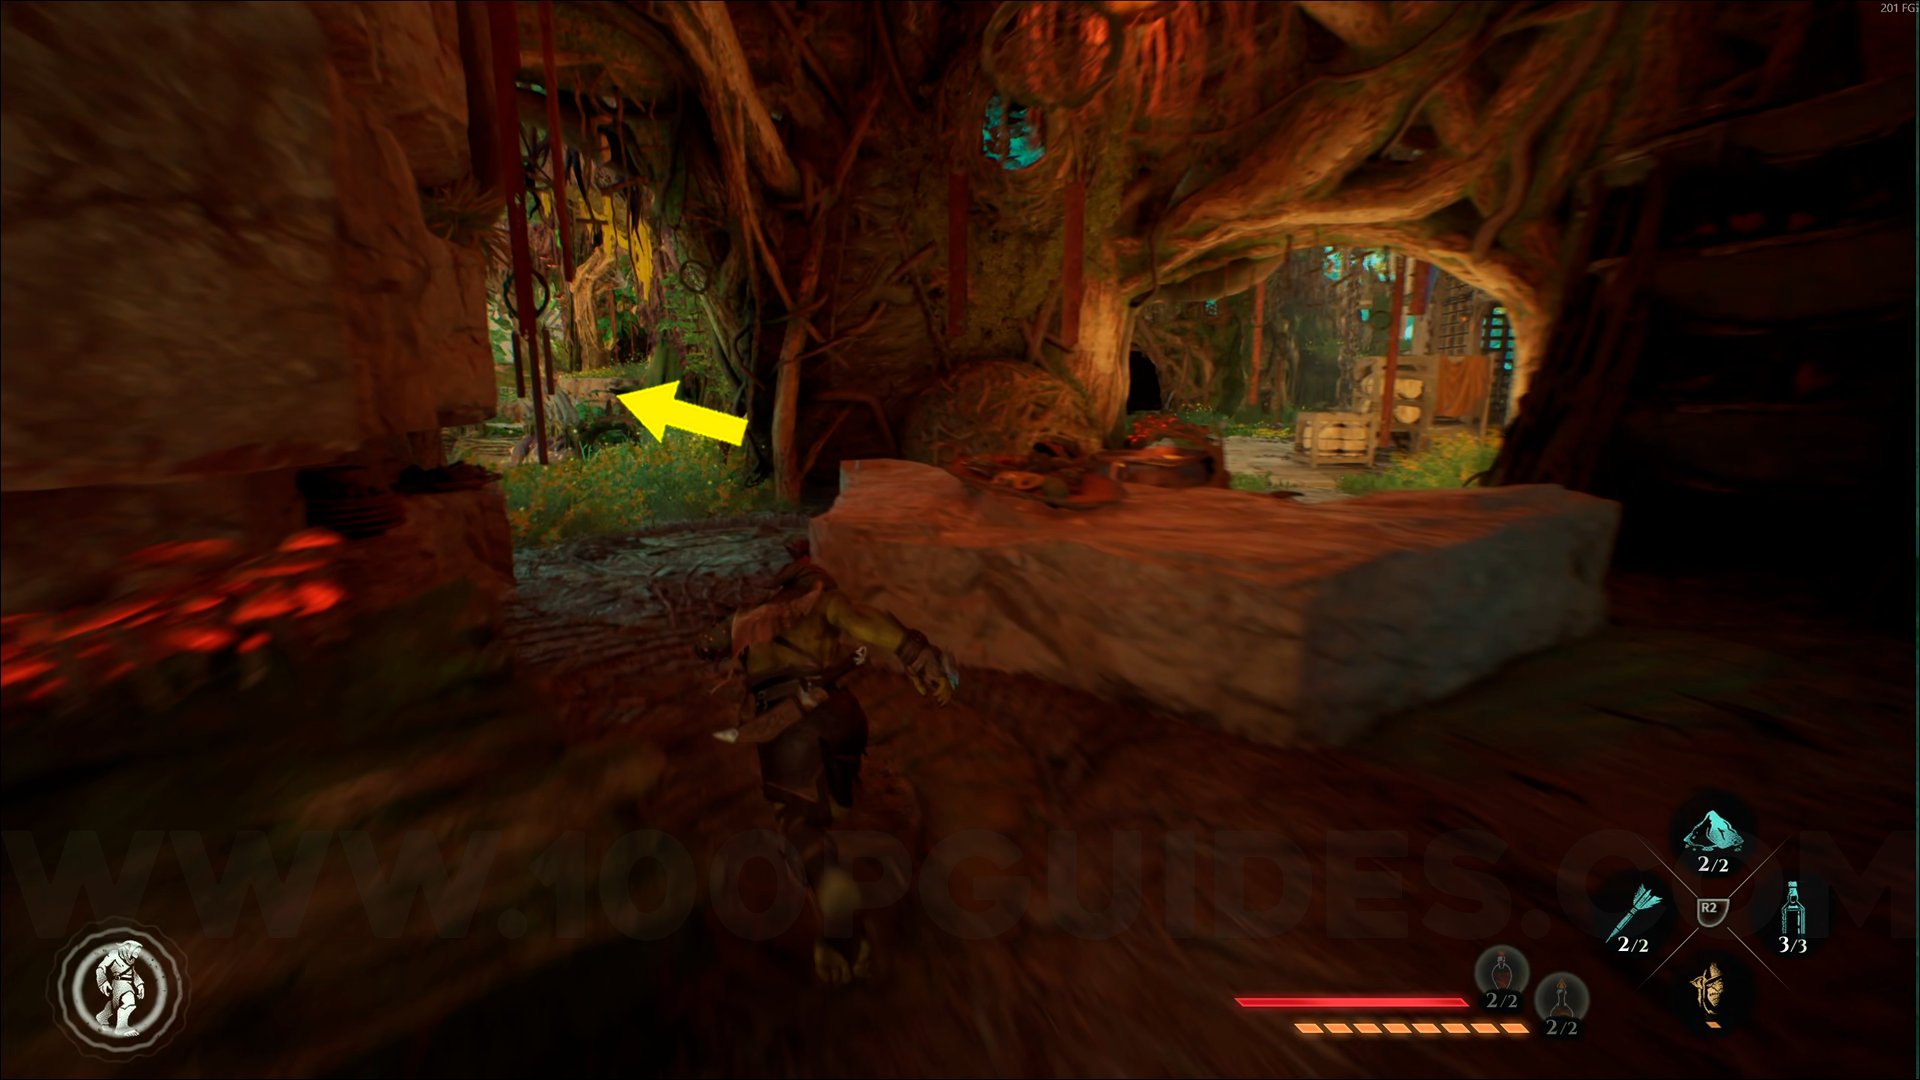
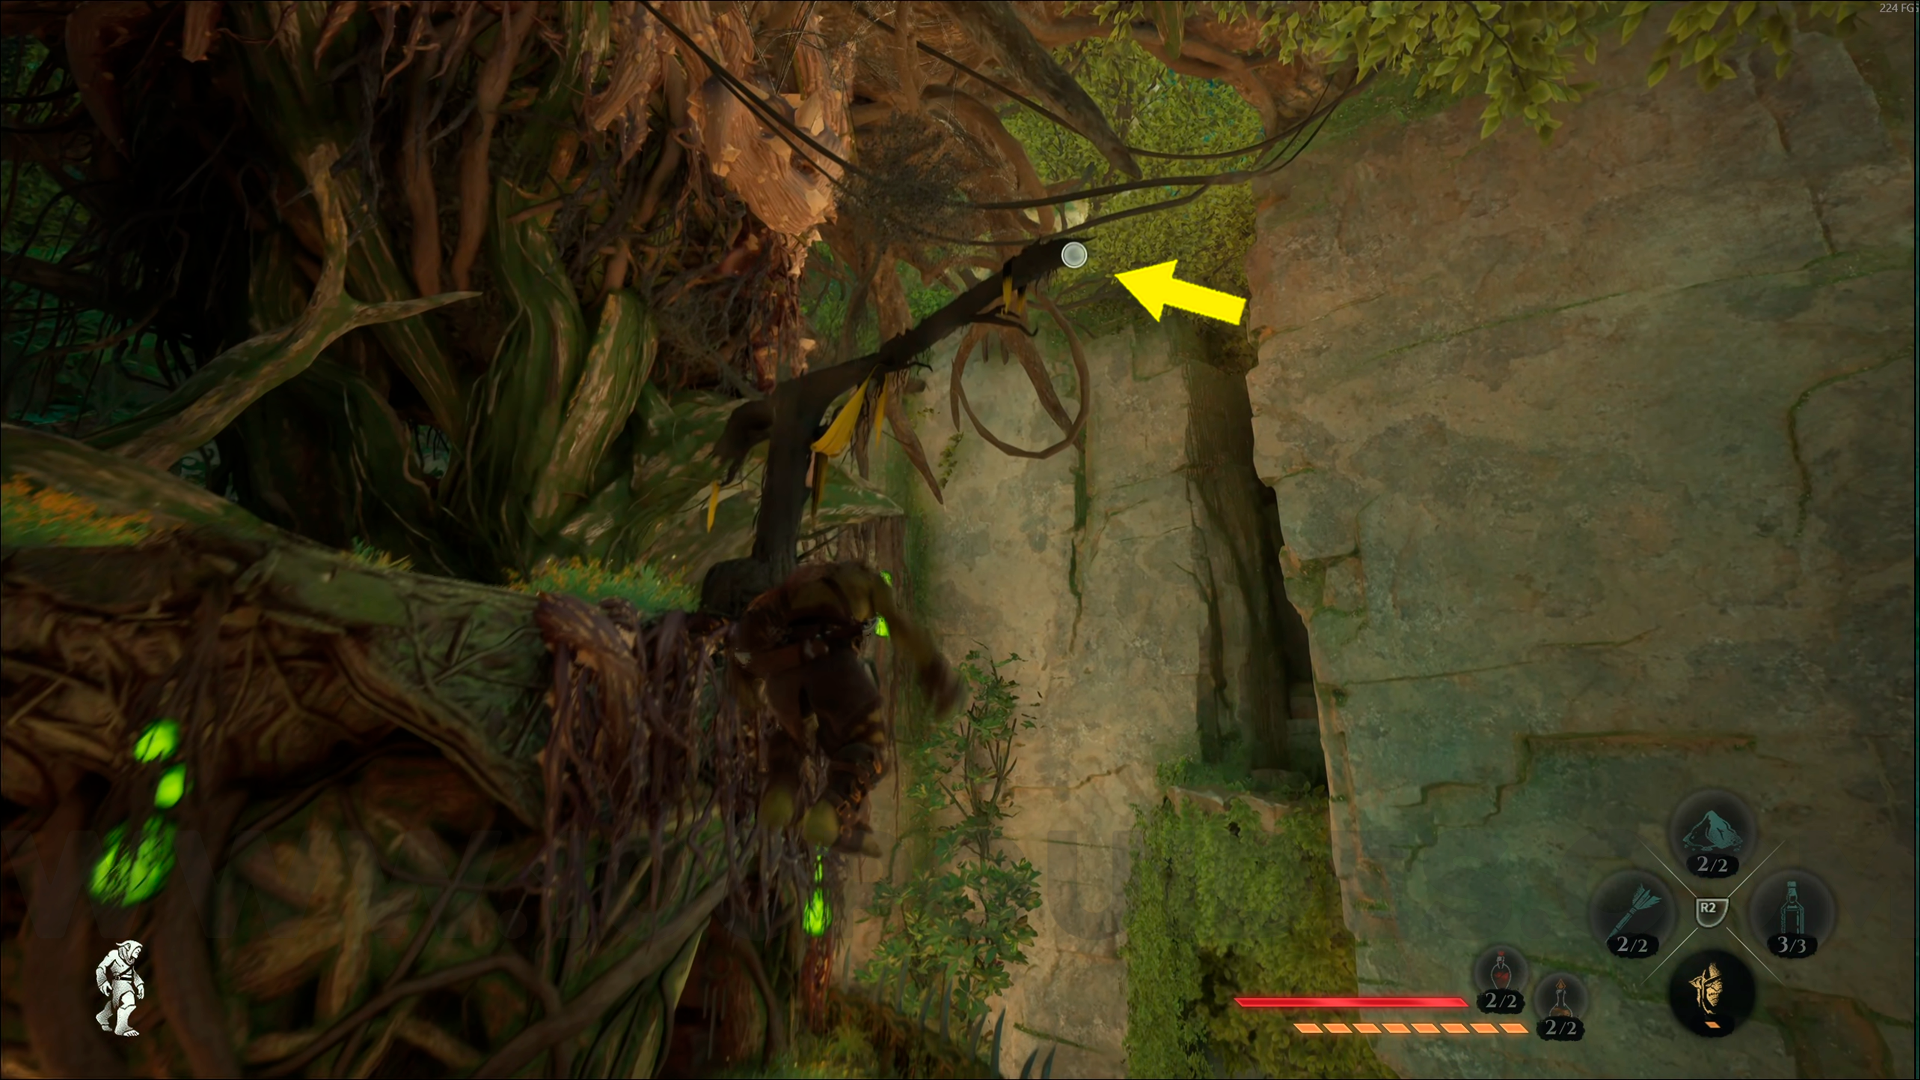
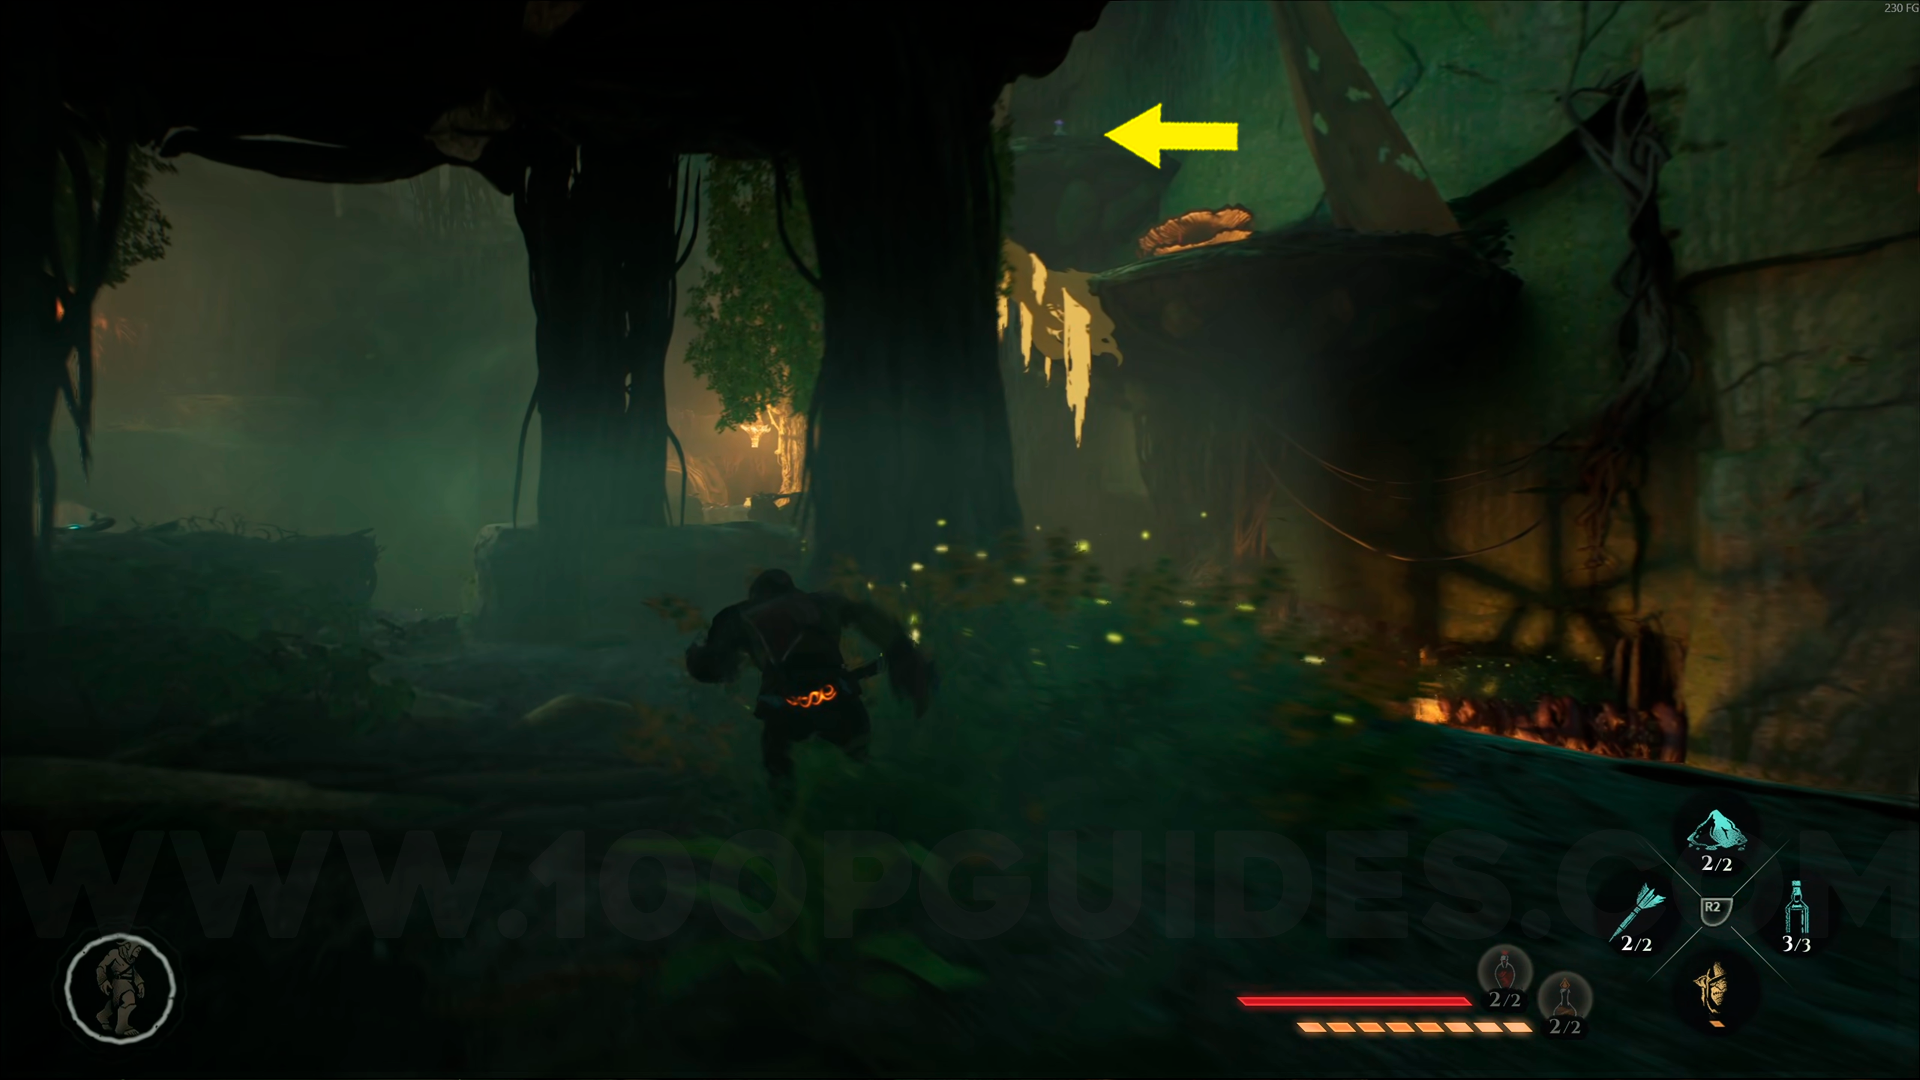
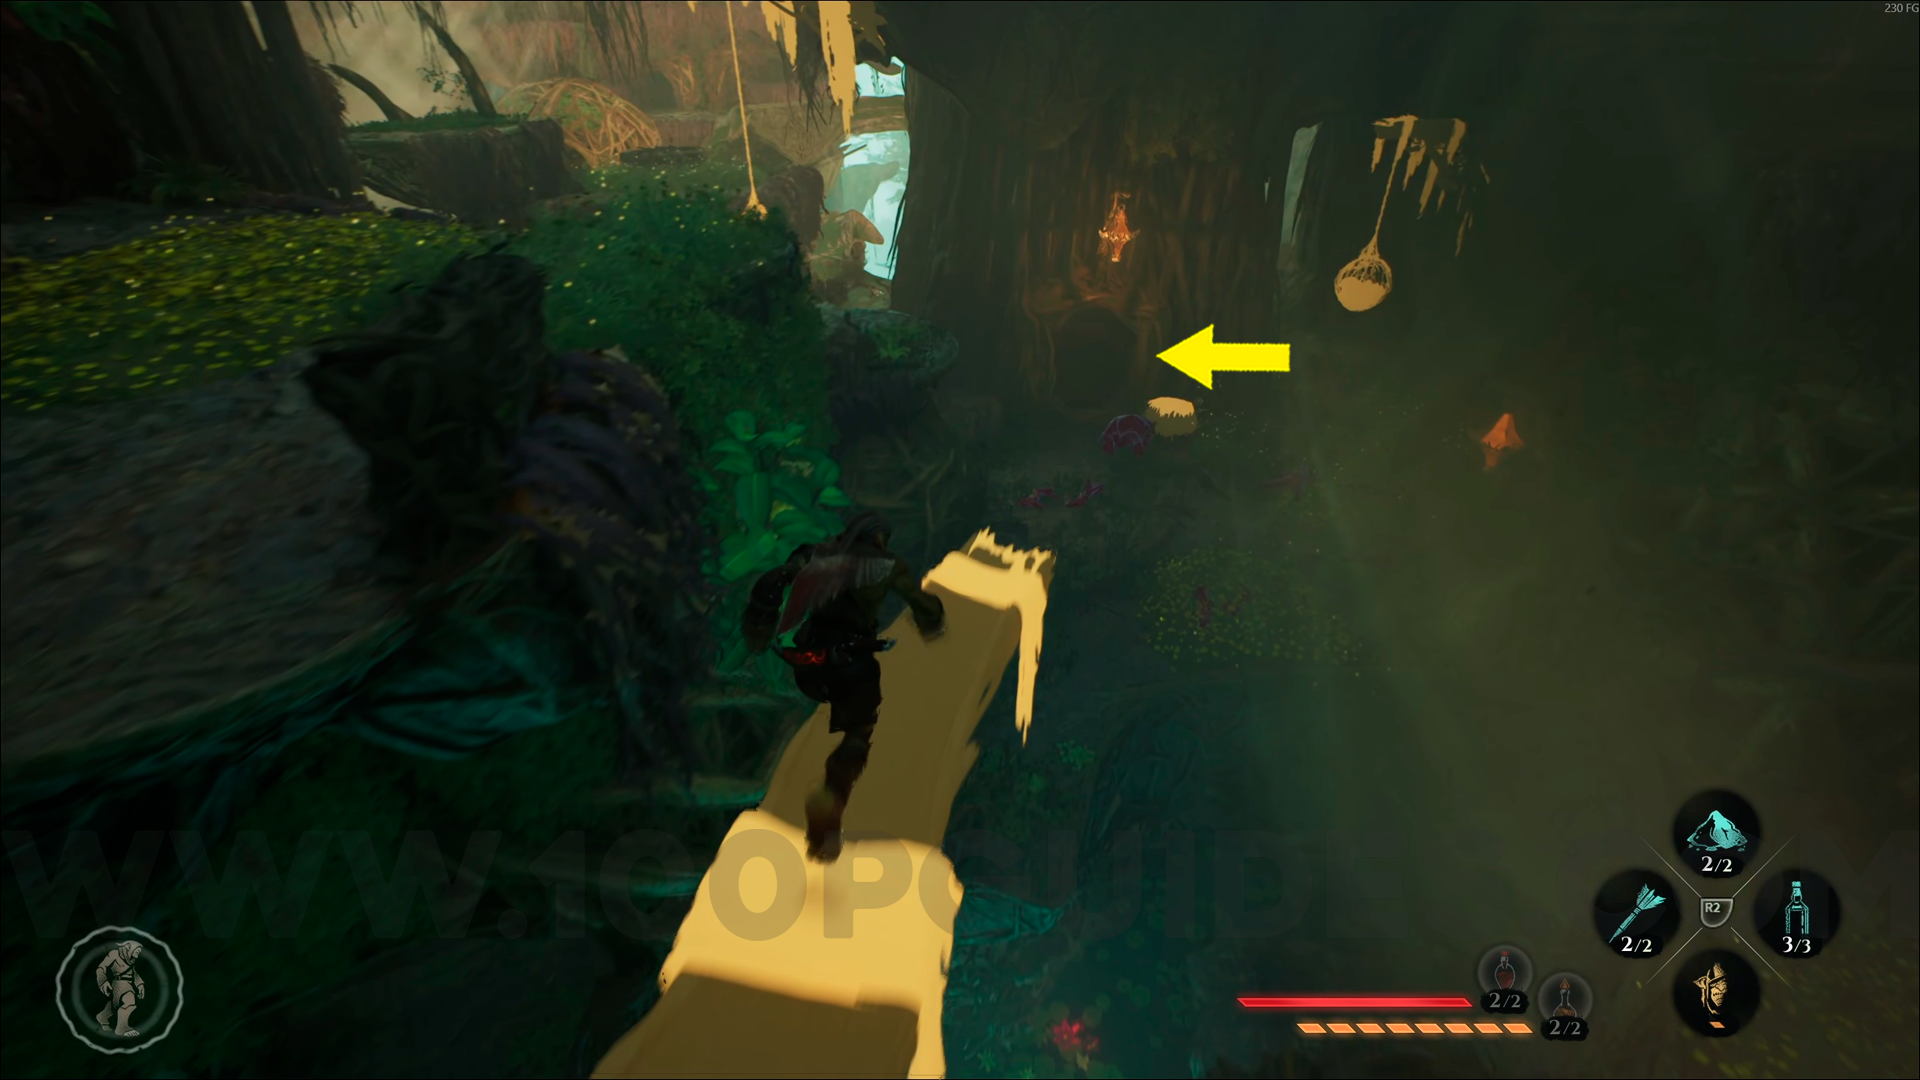
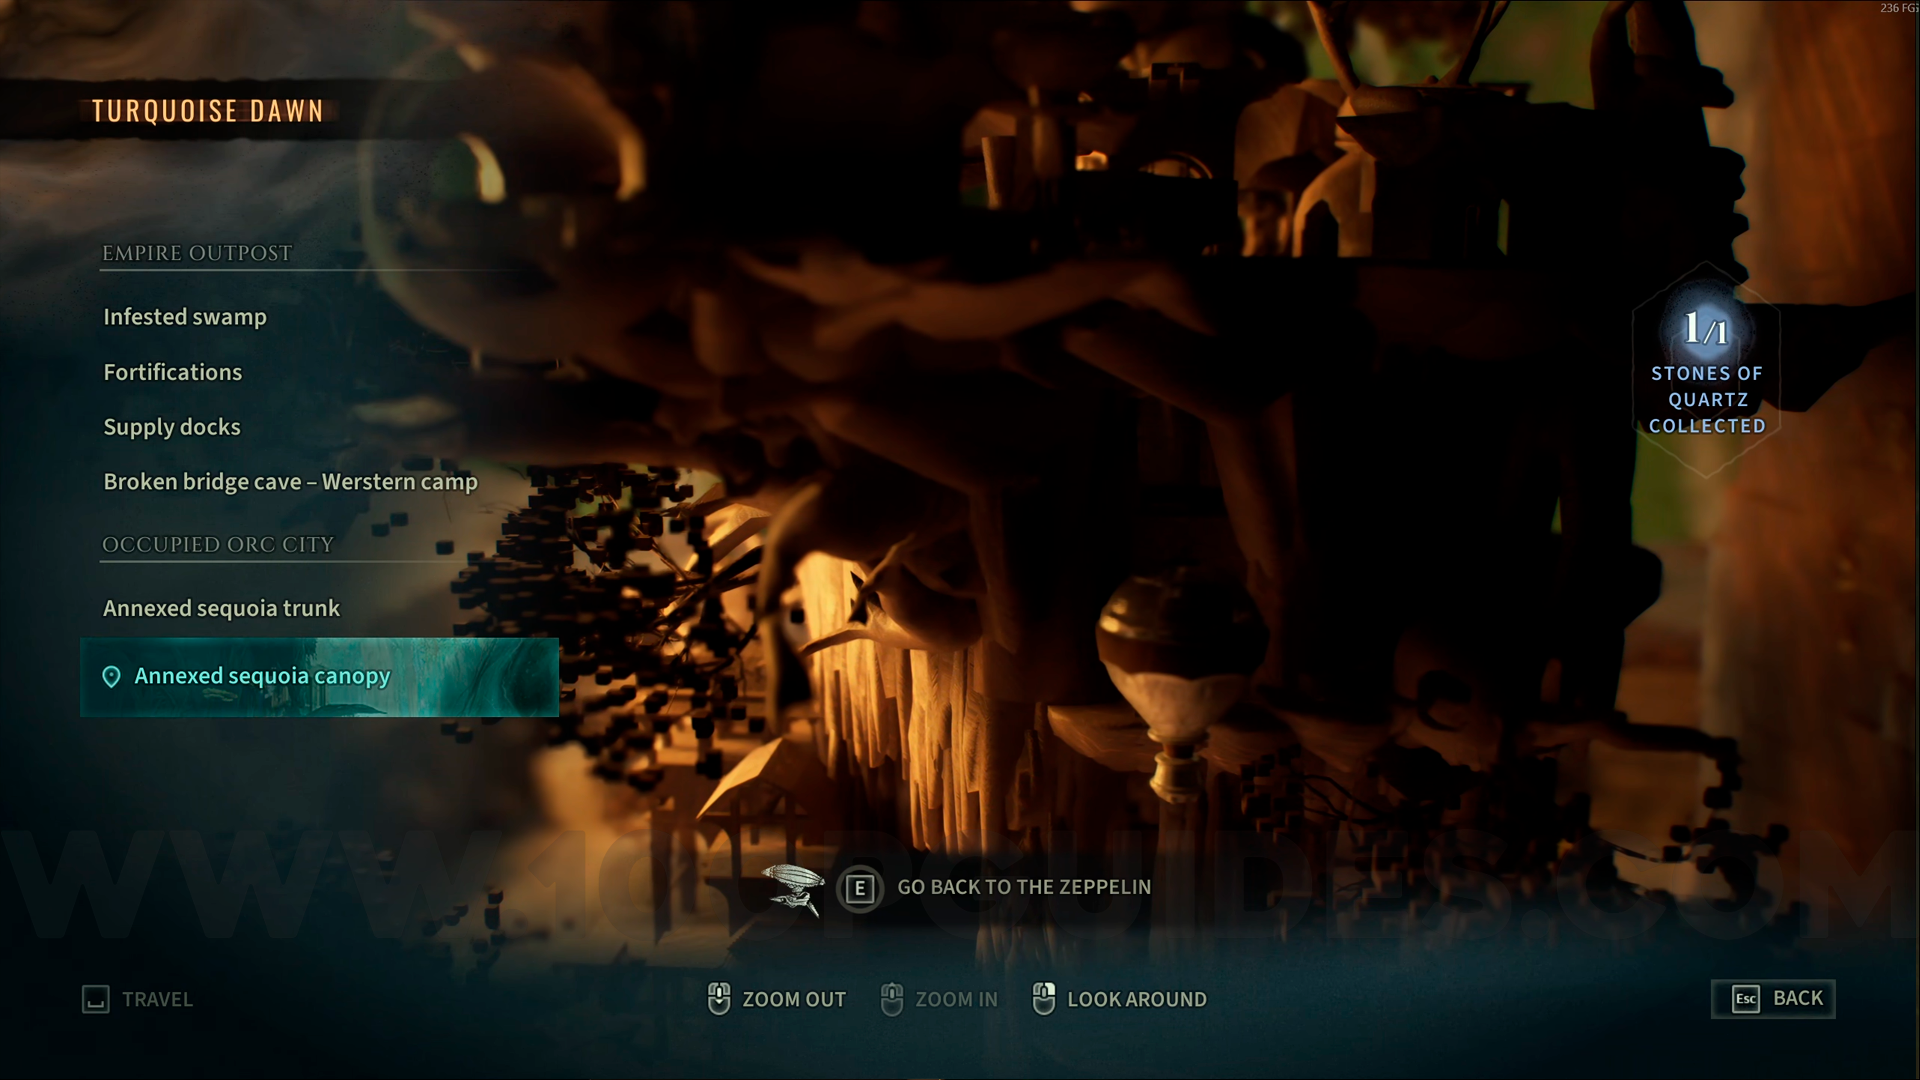
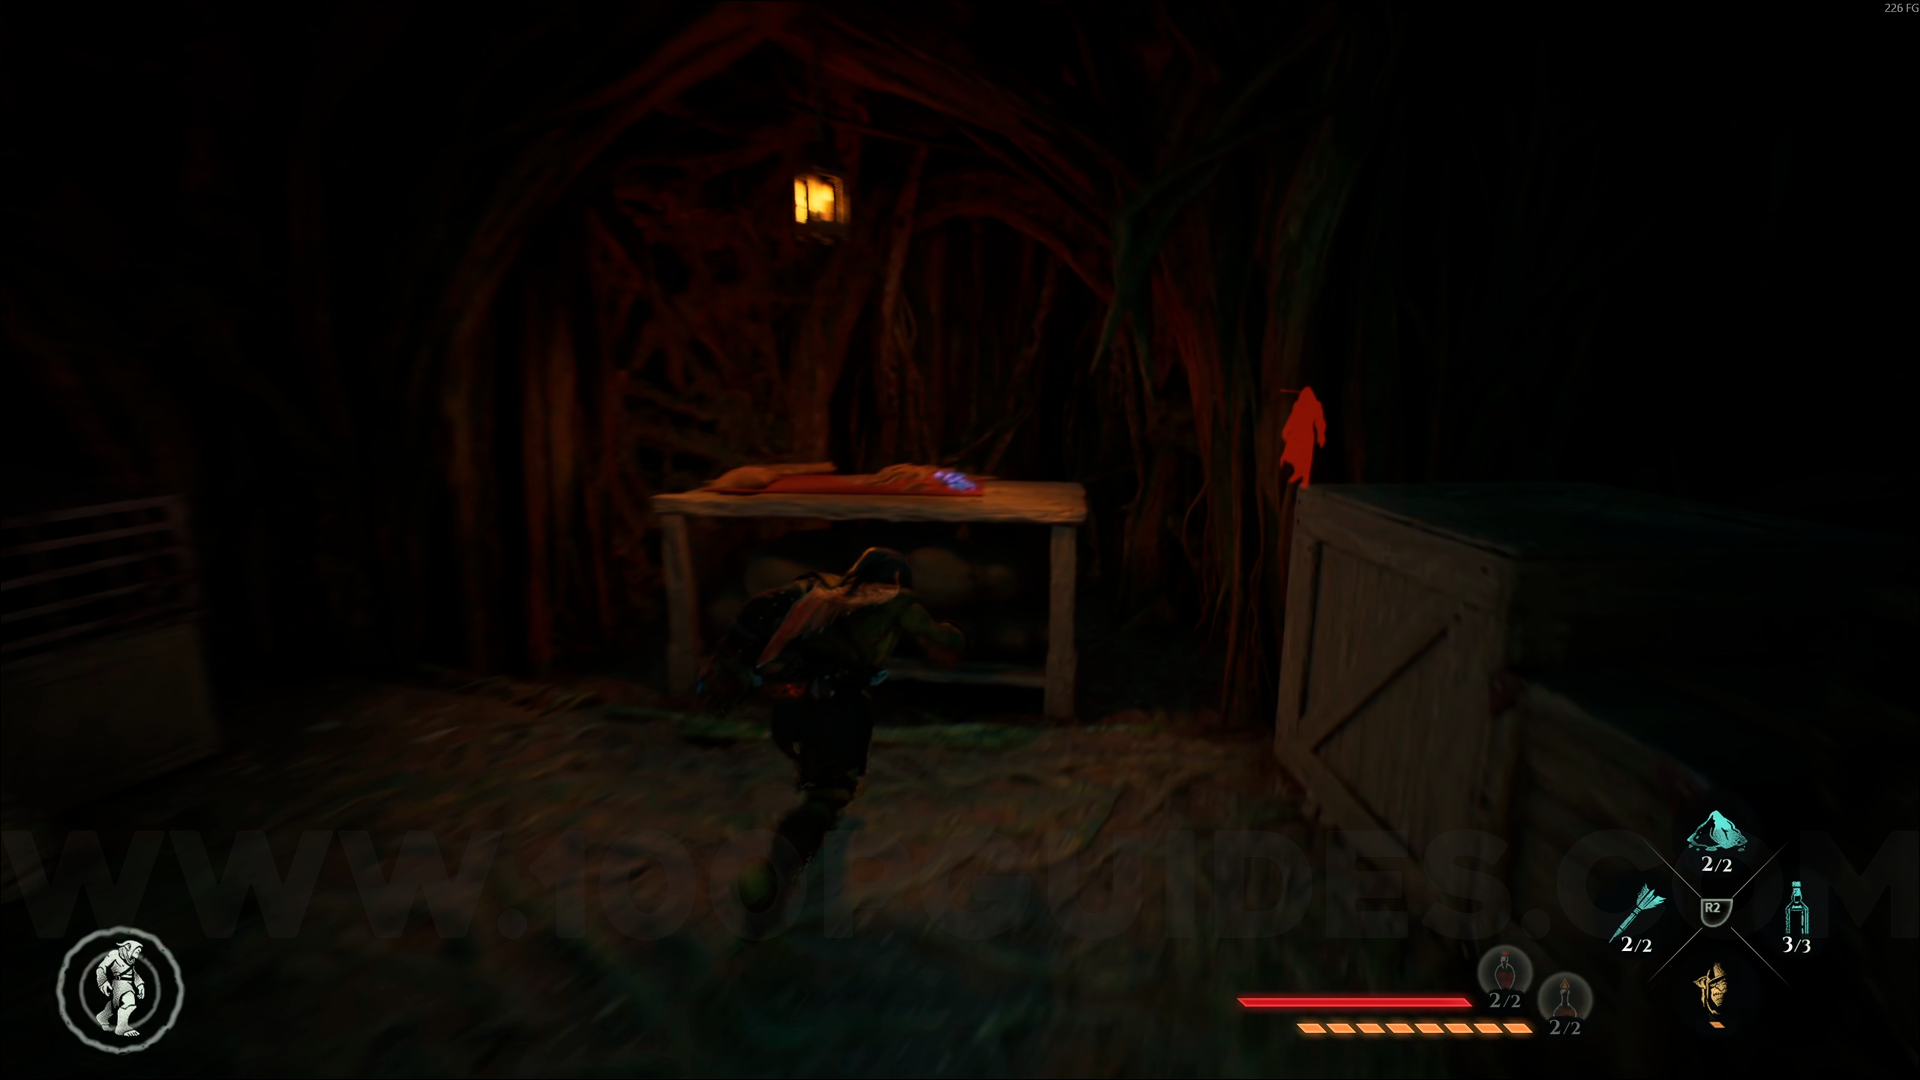
Gold Emblem #4. From the Annexed Sequoia Canopy, climb all the way to the top using the grappling hook. Once you're up there, you'll pass by the first cabin. After passing it, turn around and look up, you'll see a Grapple Hook point. Use it and continue along the path to the next cabin, which has some red vines. Inside that cabin, you'll find this emblem.

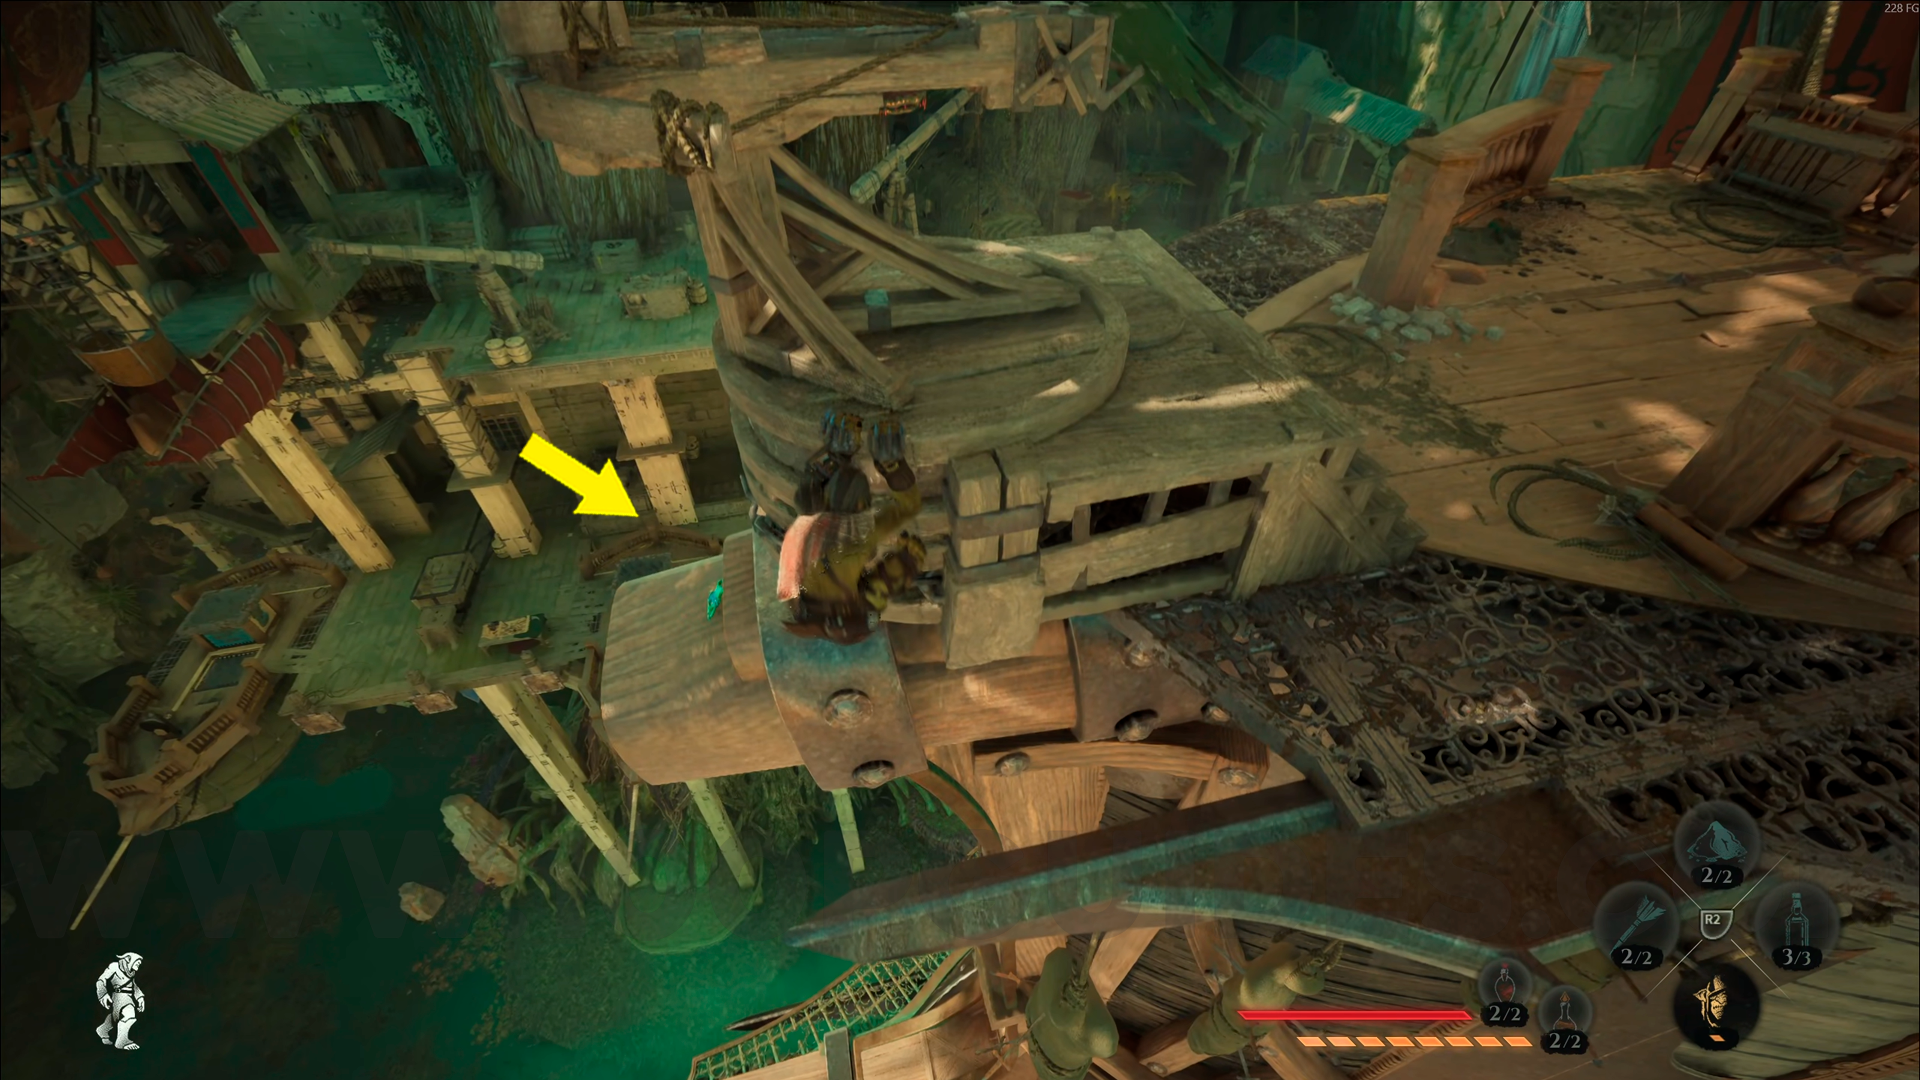
Gold Emblem #5. Right after the previous collectible, go back and use the grappling hook on the large wooden structure in the center. Then use the grappling hook on the scaffolding to the right and look down, you'll see a bird's nest with the emblem inside.

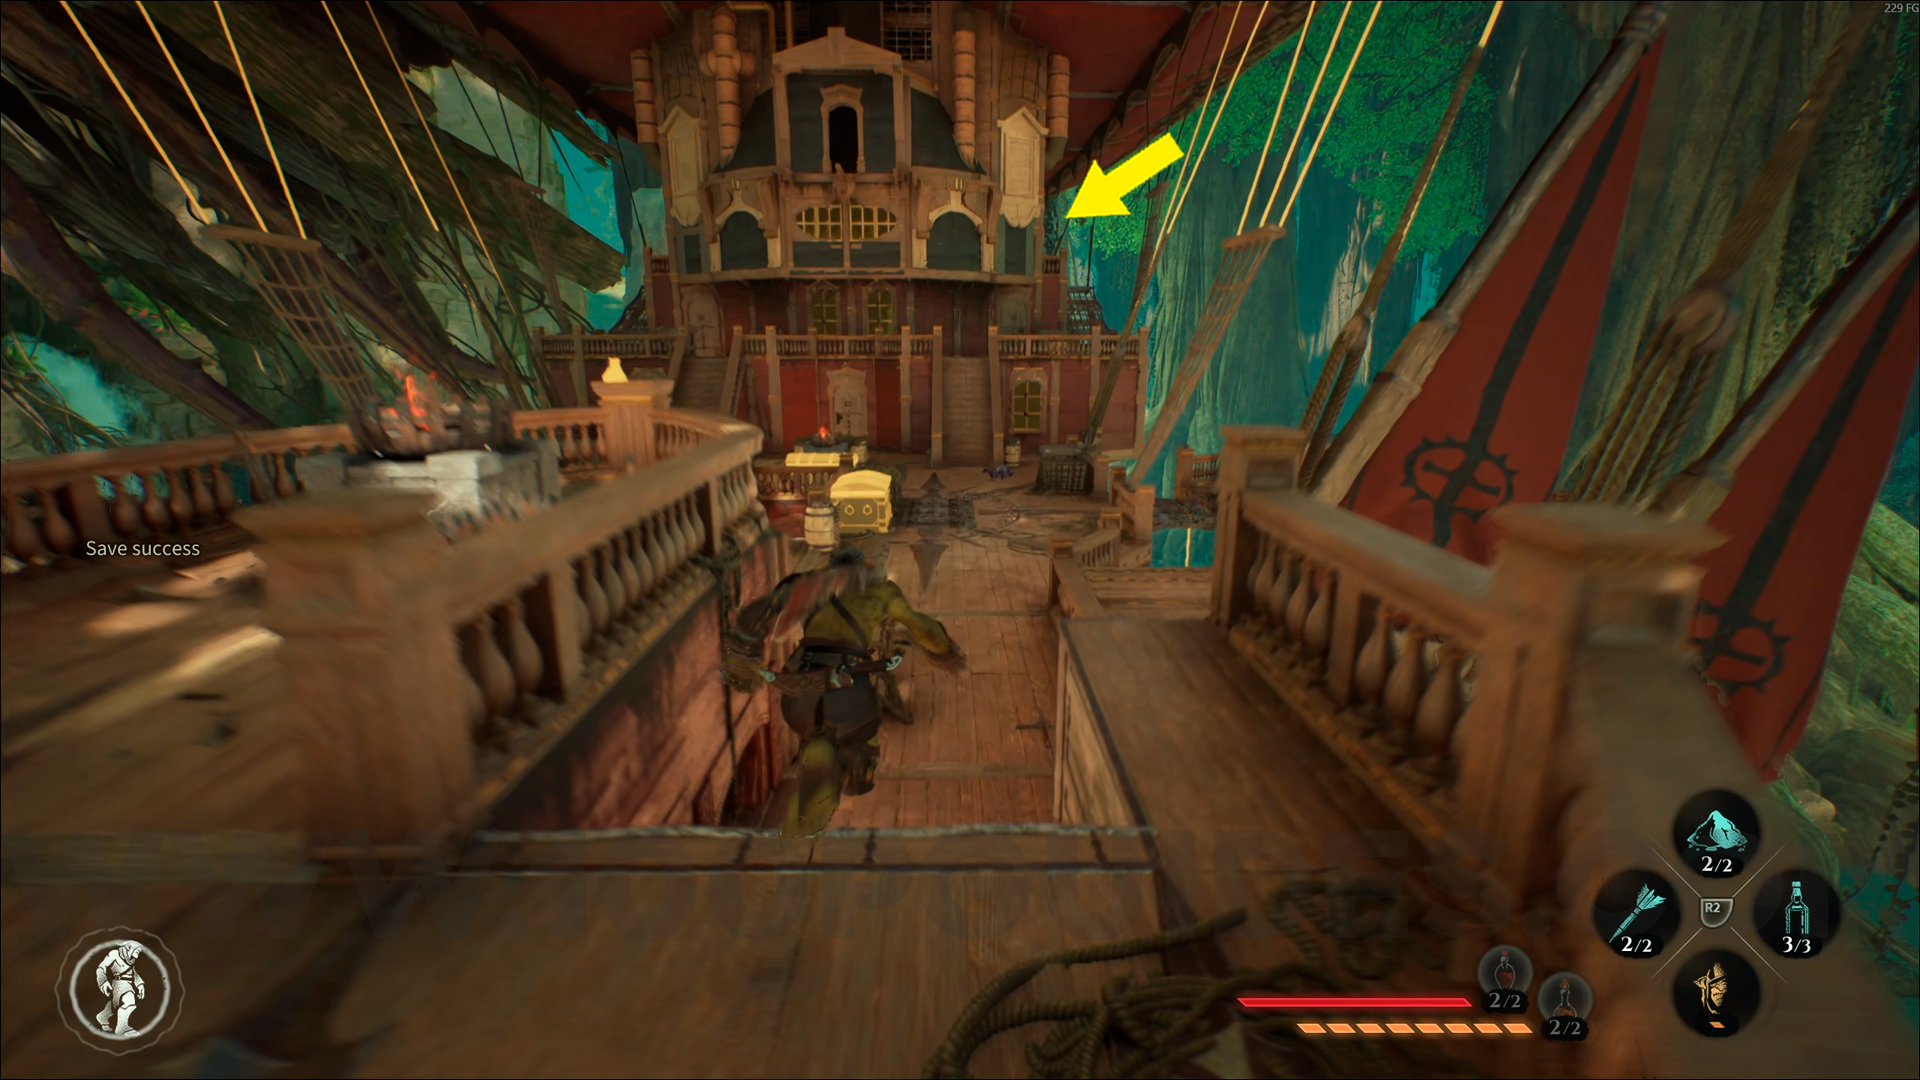
Gold Emblem #6. Right after the previous collectible, you'll notice a house at the end of this area, head over to it, and there will be another emblem inside.
Gold Emblem #7. From the previous collectible, return to the central area with the large wooden structure, you'll see a cave on the left. Enter it, and you'll find a cage with this emblem inside.
Gold Emblem #8. From the previous collectible, leave the cave and now climb up to the left. Go all the way to the end, passing between some trees, to find this emblem.
Gold Emblem #9. From the previous collectible, climb back down the way you came up and go around the large wooden structure with the blue flag. You'll reach another cave with red vines on the ceiling, inside, you'll find another emblem.
Gold Emblem #10. From the Annexed Sequoia Trunk, use the glider to ride the wind current up and head to the right side of the area to find this emblem.

Emerald Emblem #1. From the Broken Bridge Cave – Western Camp, use the grappling hook to reach the upper area and enter the cave on the left. Ride the wind current at the back of the cave to reach the platform above. Cross to the other side of the cave and use Amber Vision, you'll see the emblem at the top of the area. Use the grappling hook to reach it.
Emerald Emblem #2. From the previous collectible, go down and enter the cabin inside the tree. You'll find this emblem there.
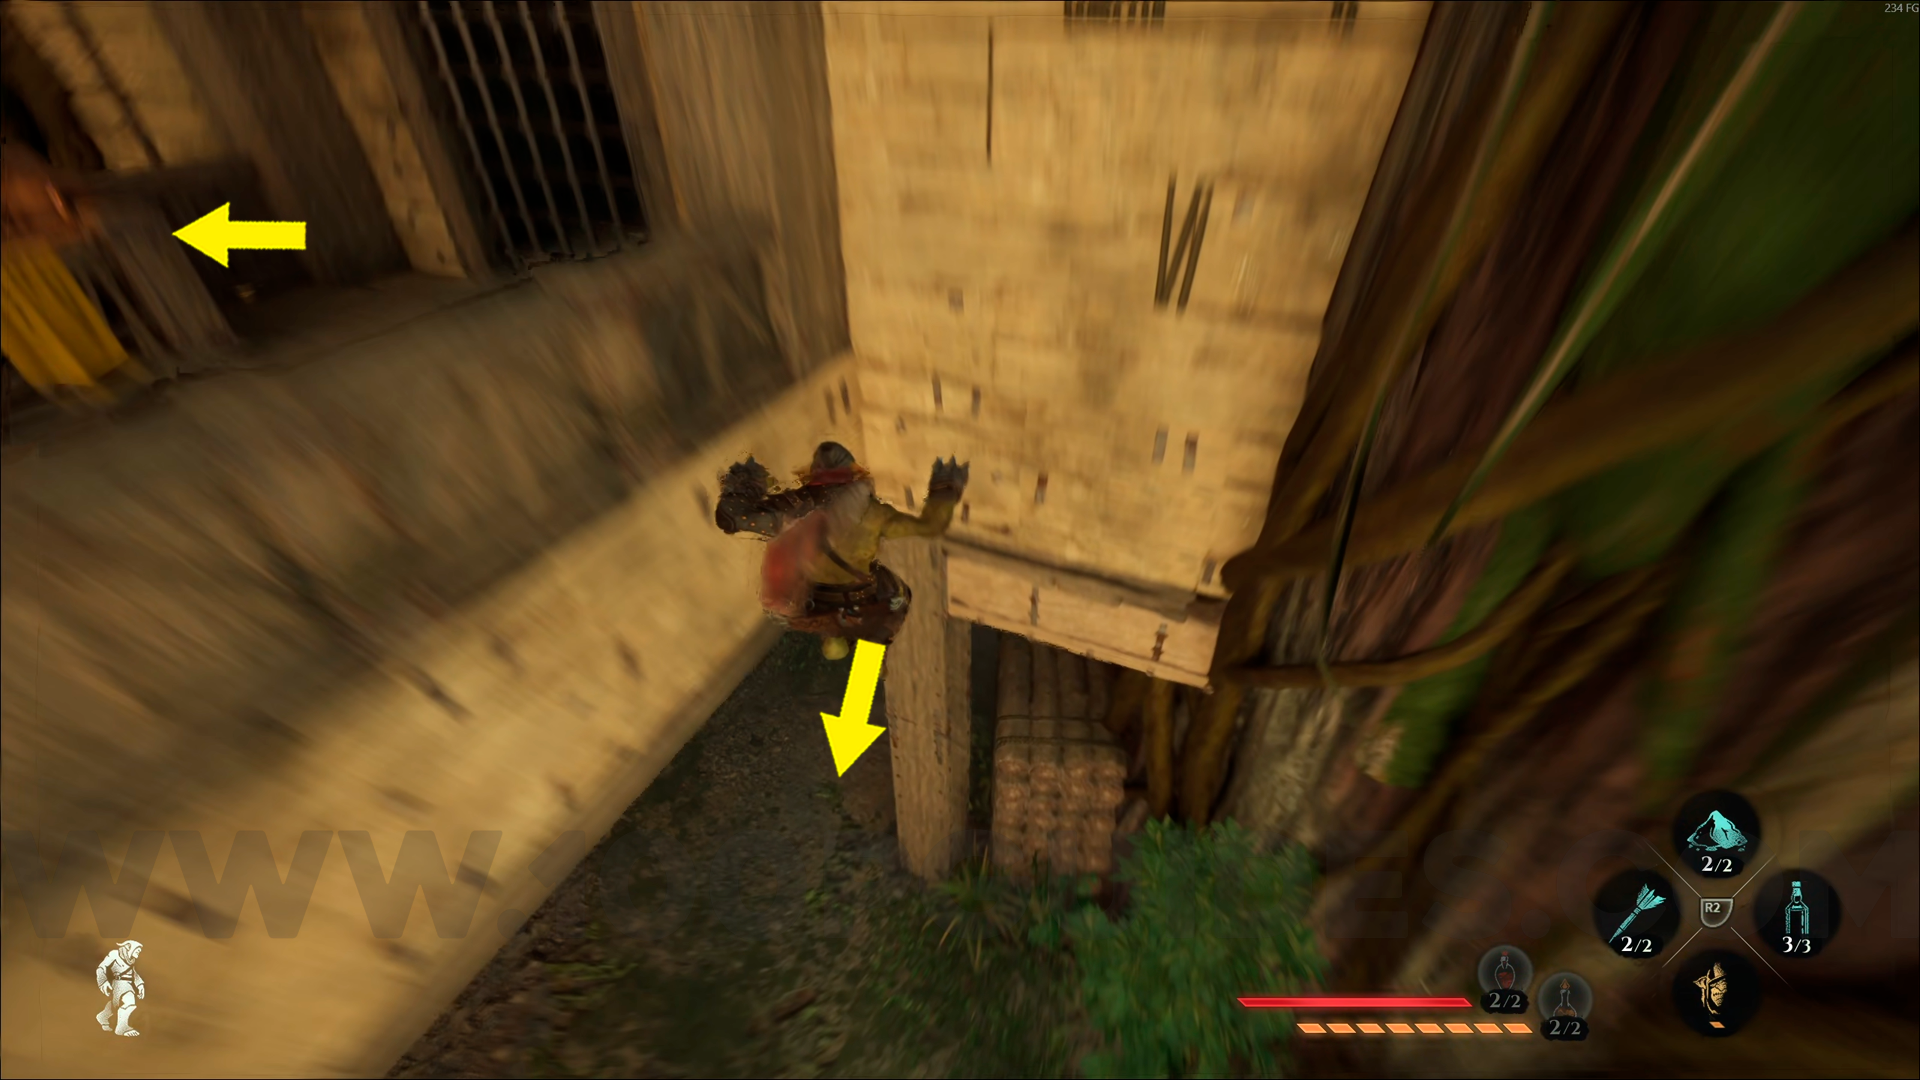
Emerald Emblem #3. From the Annexed Sequoia Canopy, go down to the lower part of the checkpoint and head to the end of the area, then turn right. Enter the room and climb the next two flights of stairs. Once you're up top, make your way around the area and use Amber Vision to spot this emblem inside a hut.
Emerald Emblem #4. From the Infested Swamp, climb the rope to reach the zeppelin, once inside, you'll find this emblem right next to you.
Emerald Emblem #5. From the previous collectible, climb to the top of the zeppelin, you'll find another emblem on the bow, next to a ballista.
Emerald Emblem #6. From the previous collectible, go to the end of the boat and you'll find this emblem.
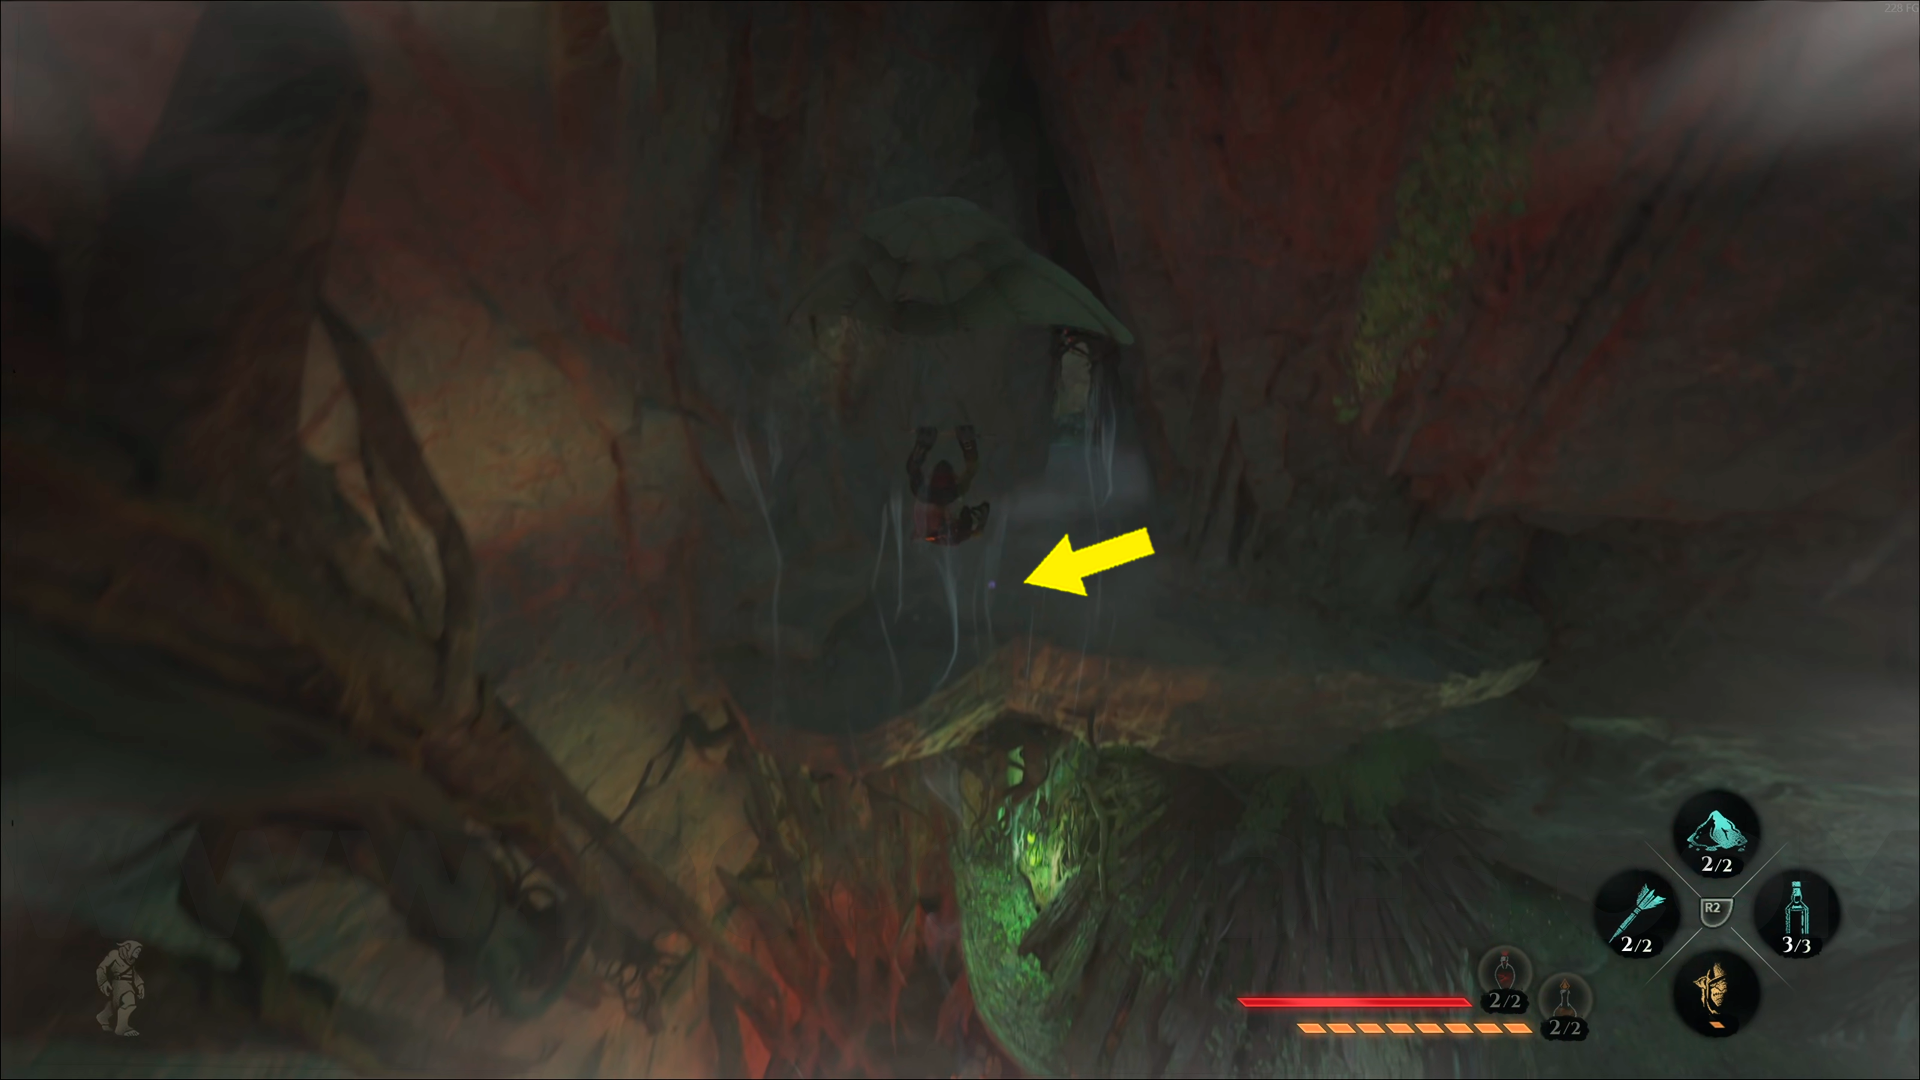
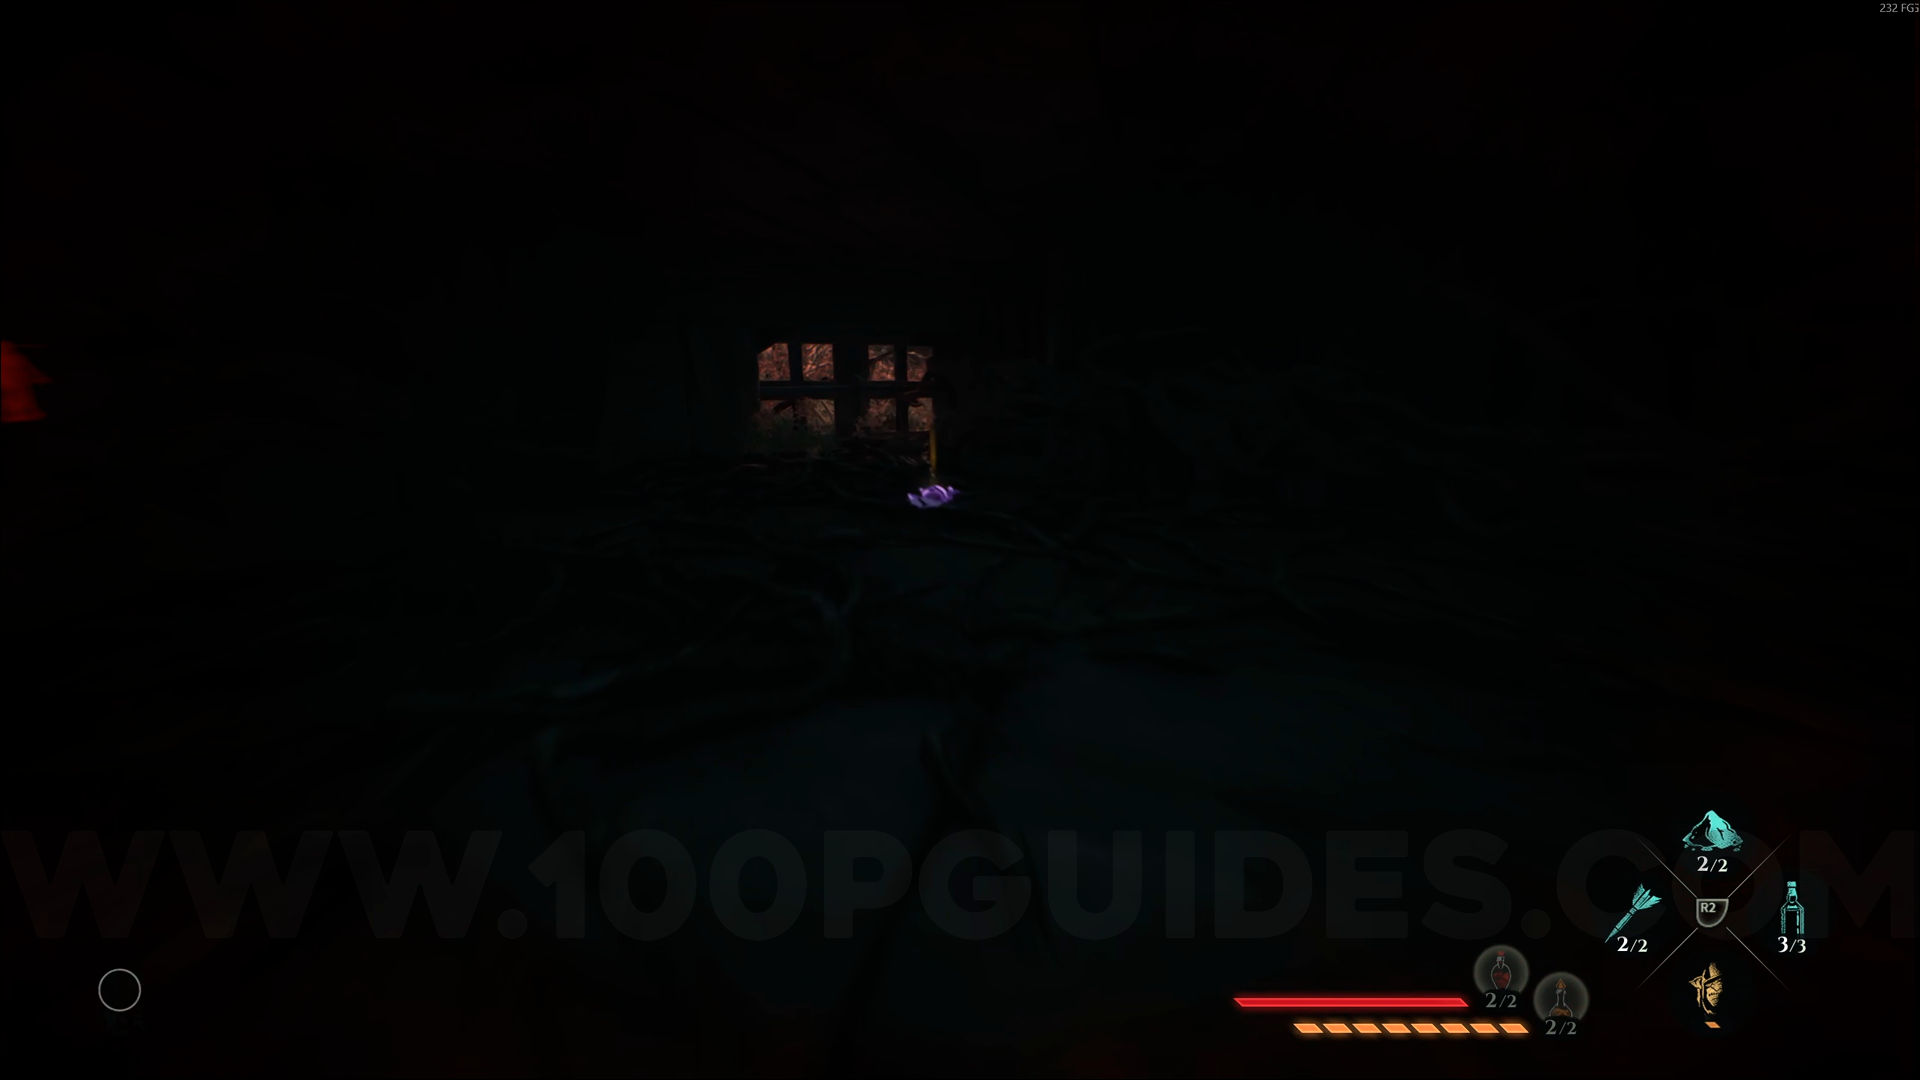
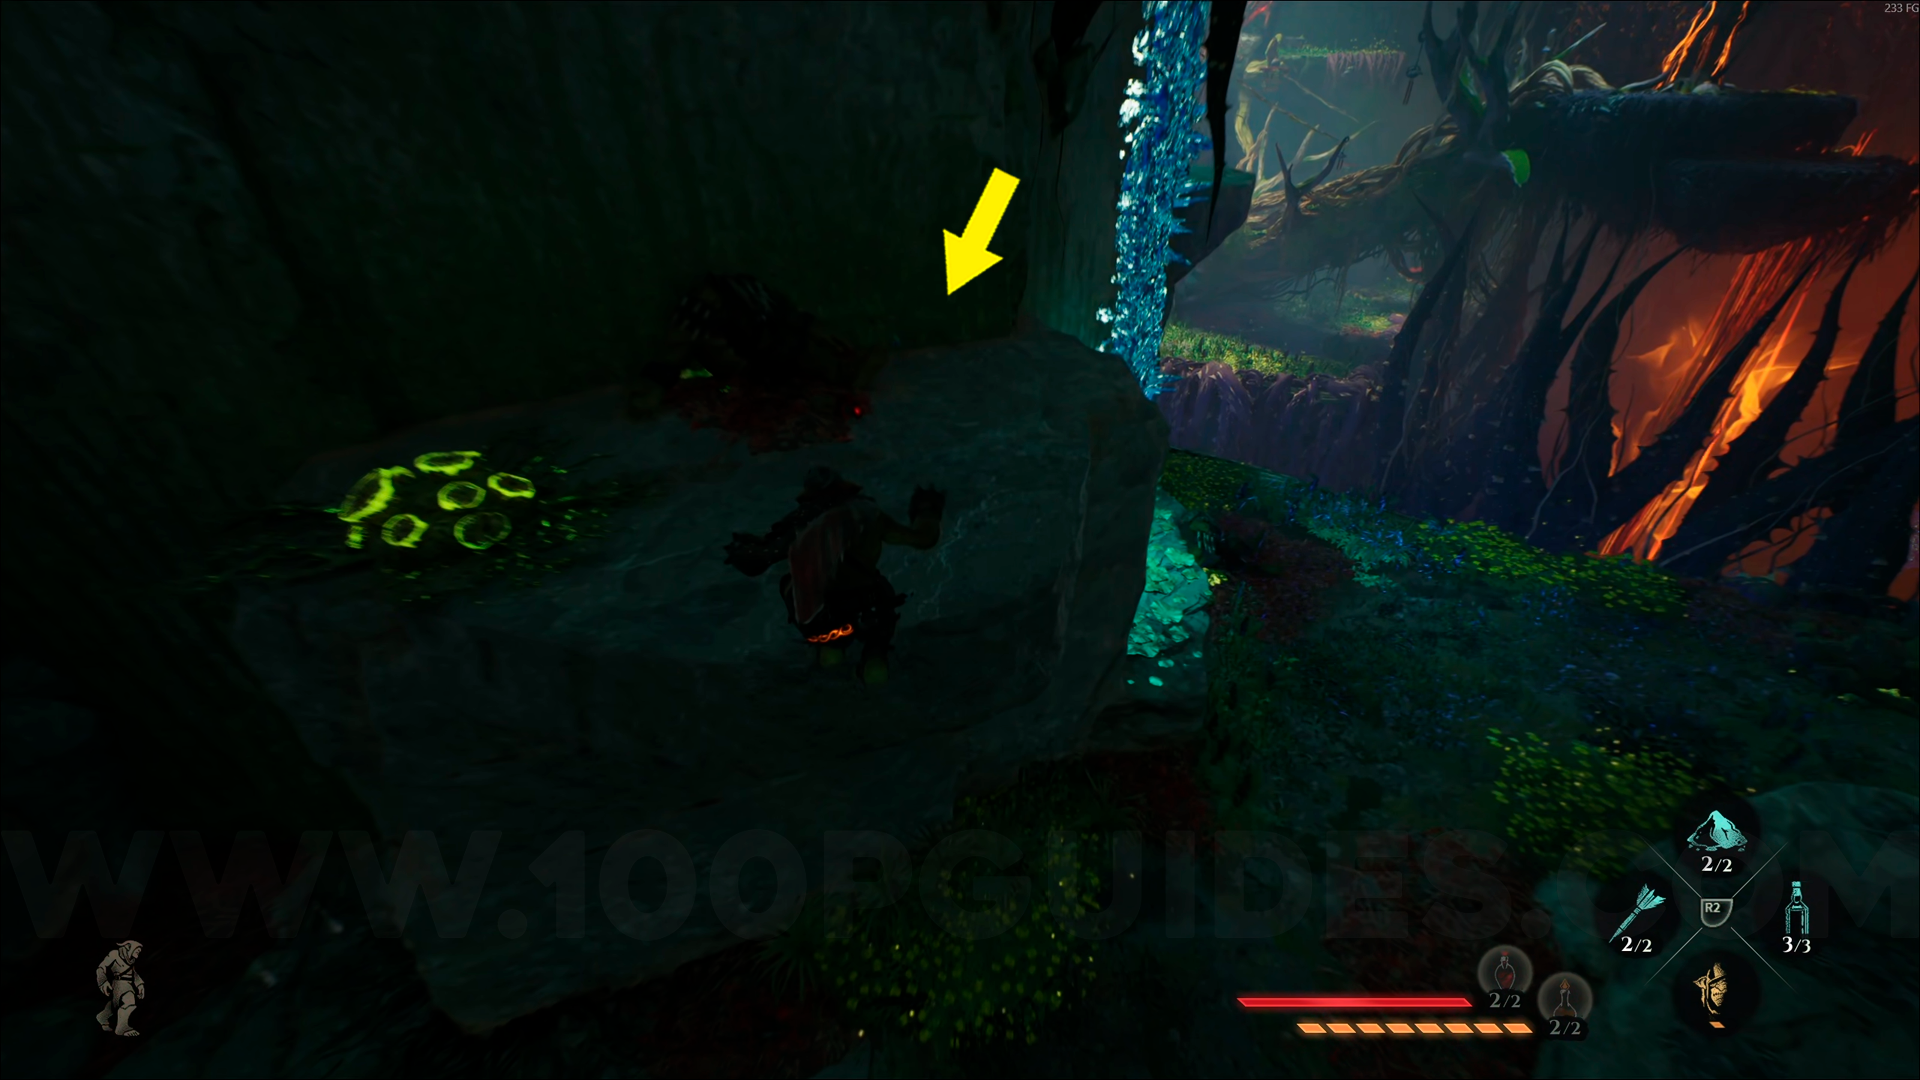
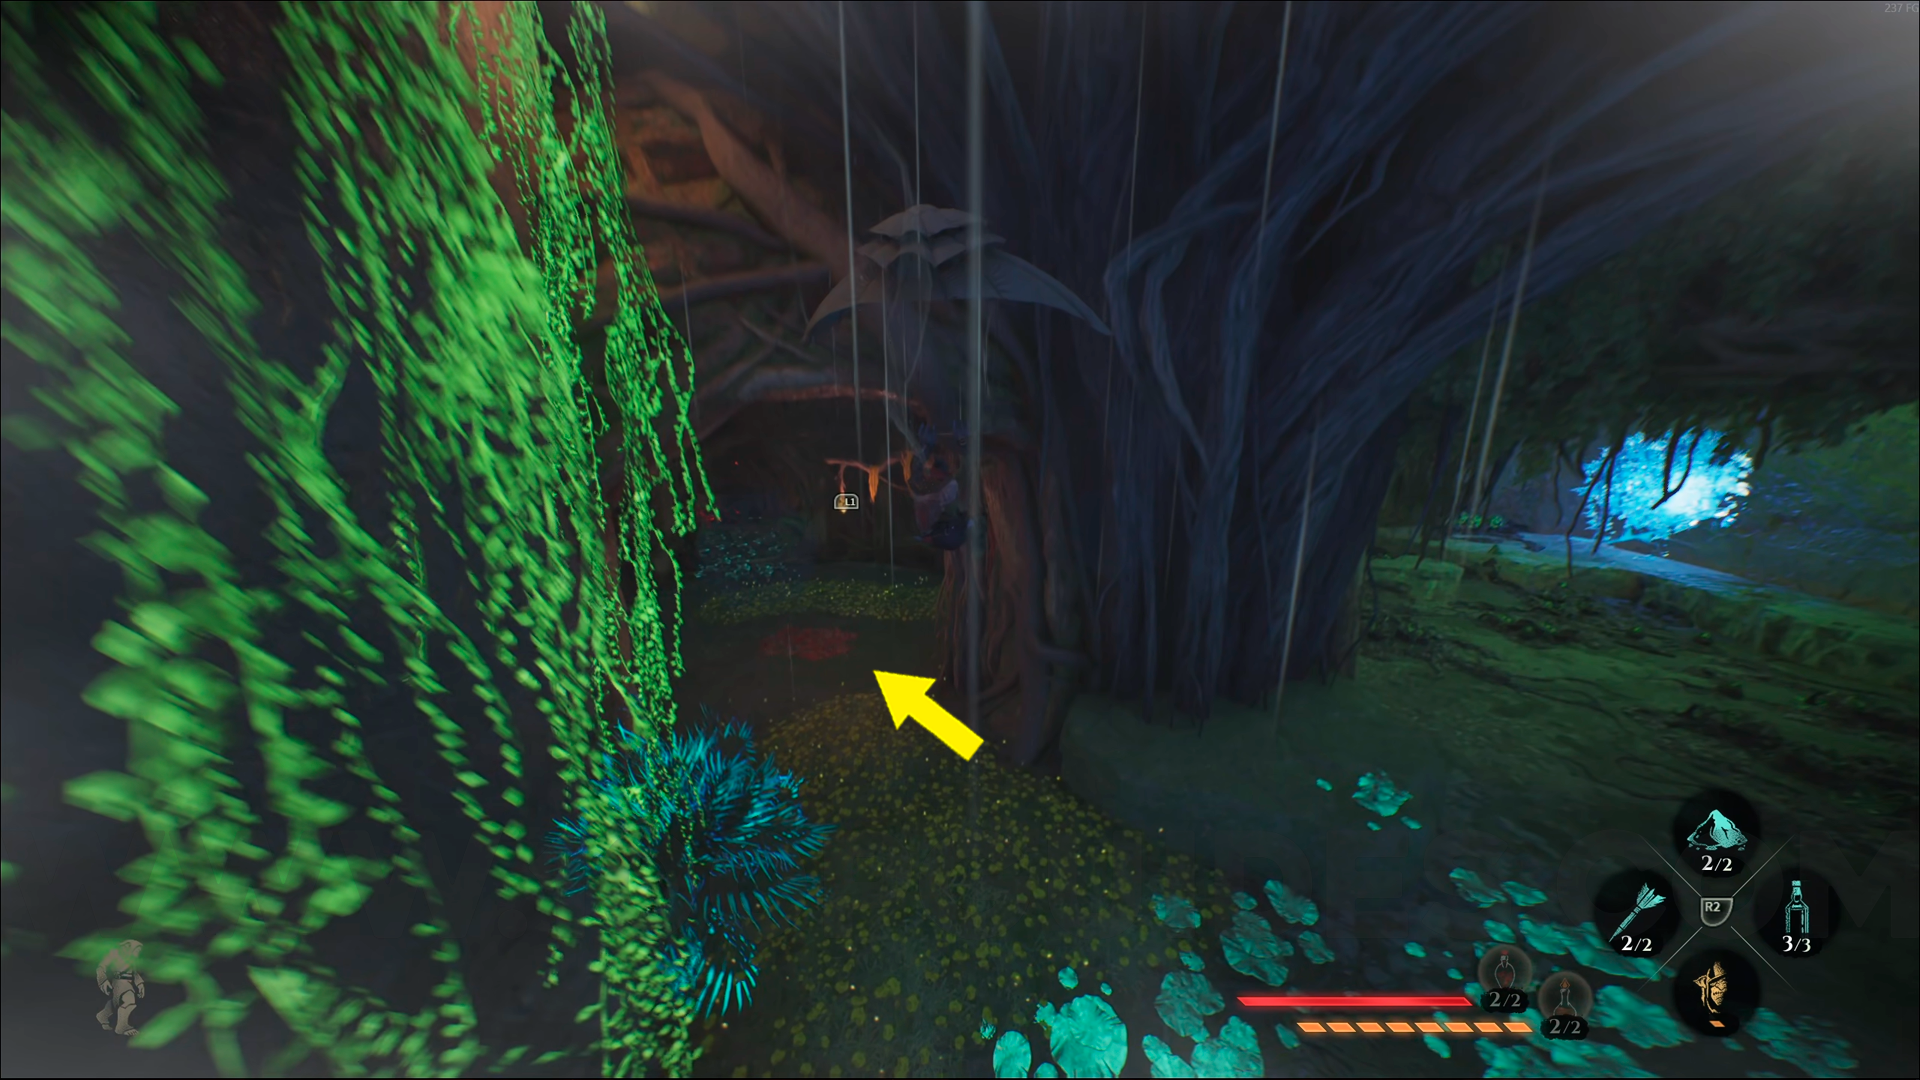
Emerald Emblem #7. From the Annexed Sequoia Trunk, use the wind current and head forward into the cave. Once inside, keep to the left, then turn right. You'll reach a cave with some crystals, climb up them, and you'll find this emblem directly in front of you, next to some green mushrooms. (This is the same area you'll need to pass through at the end of the story)
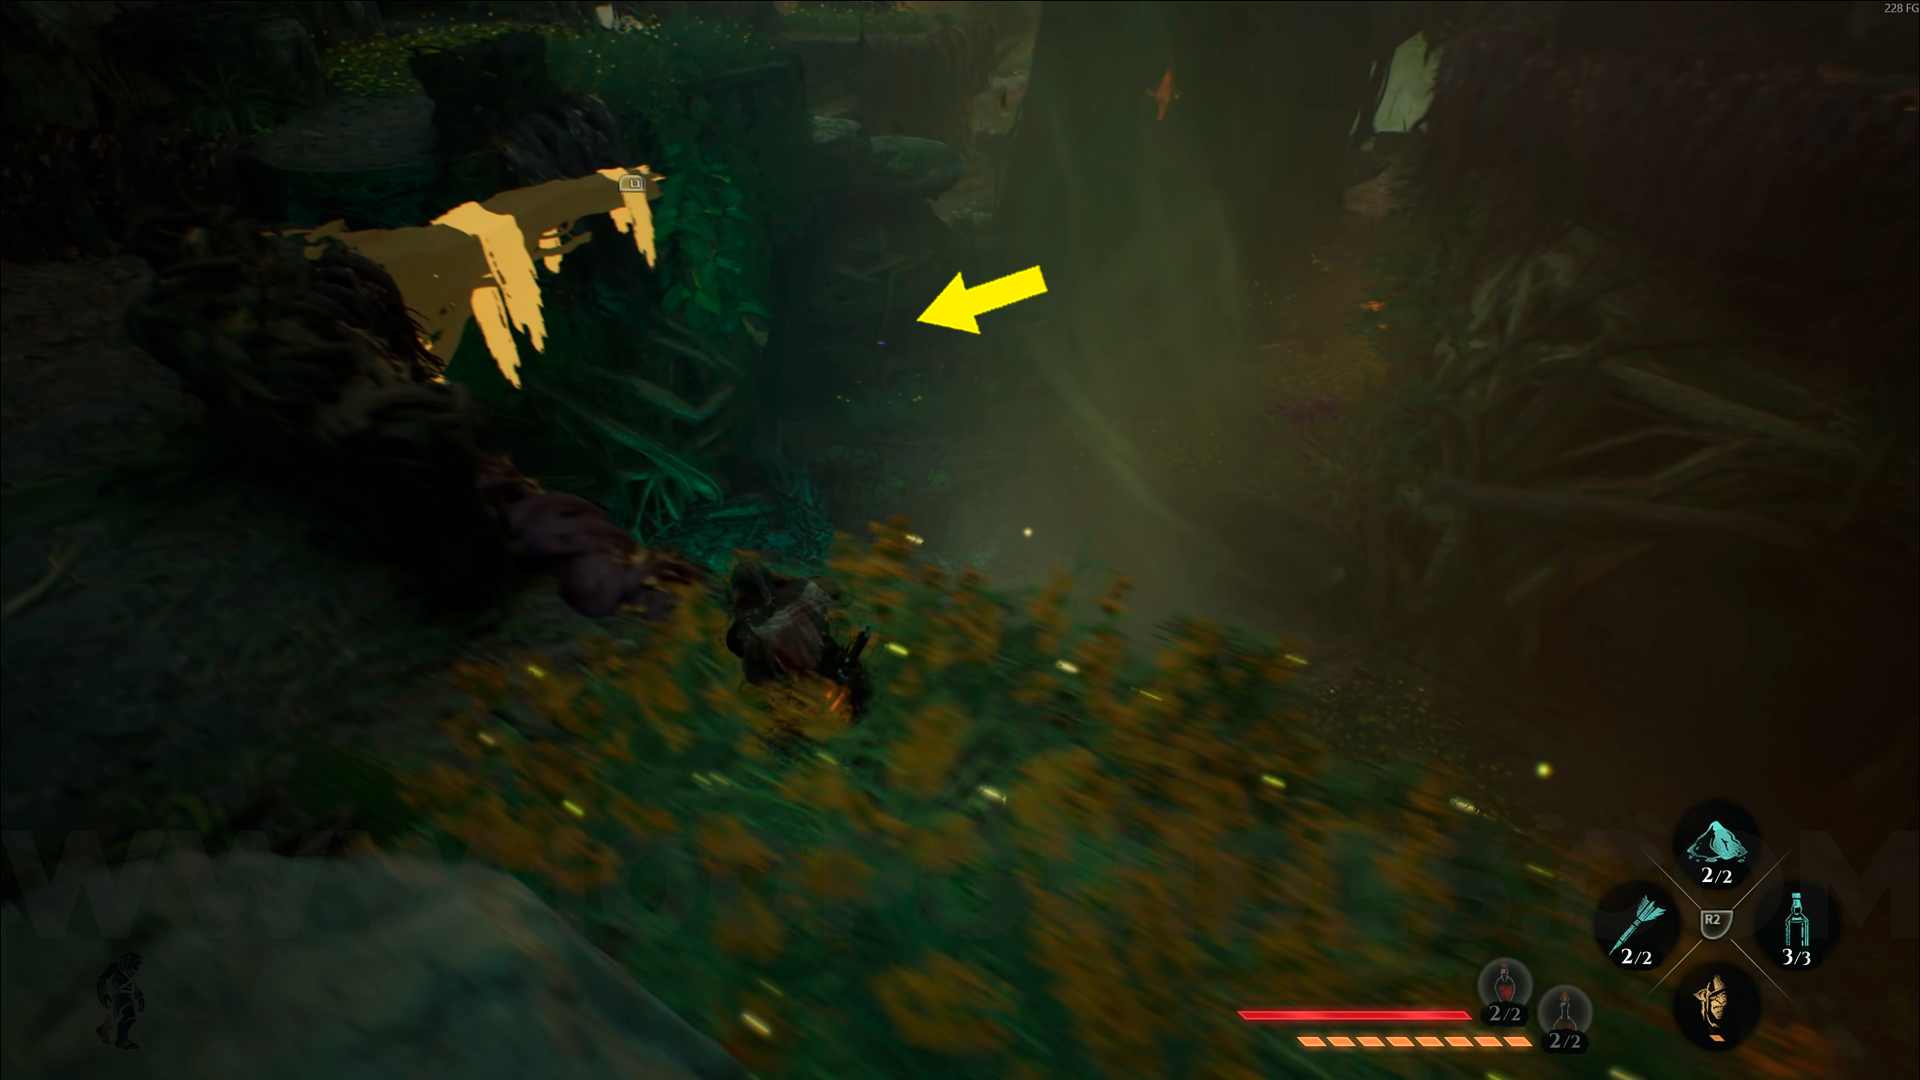
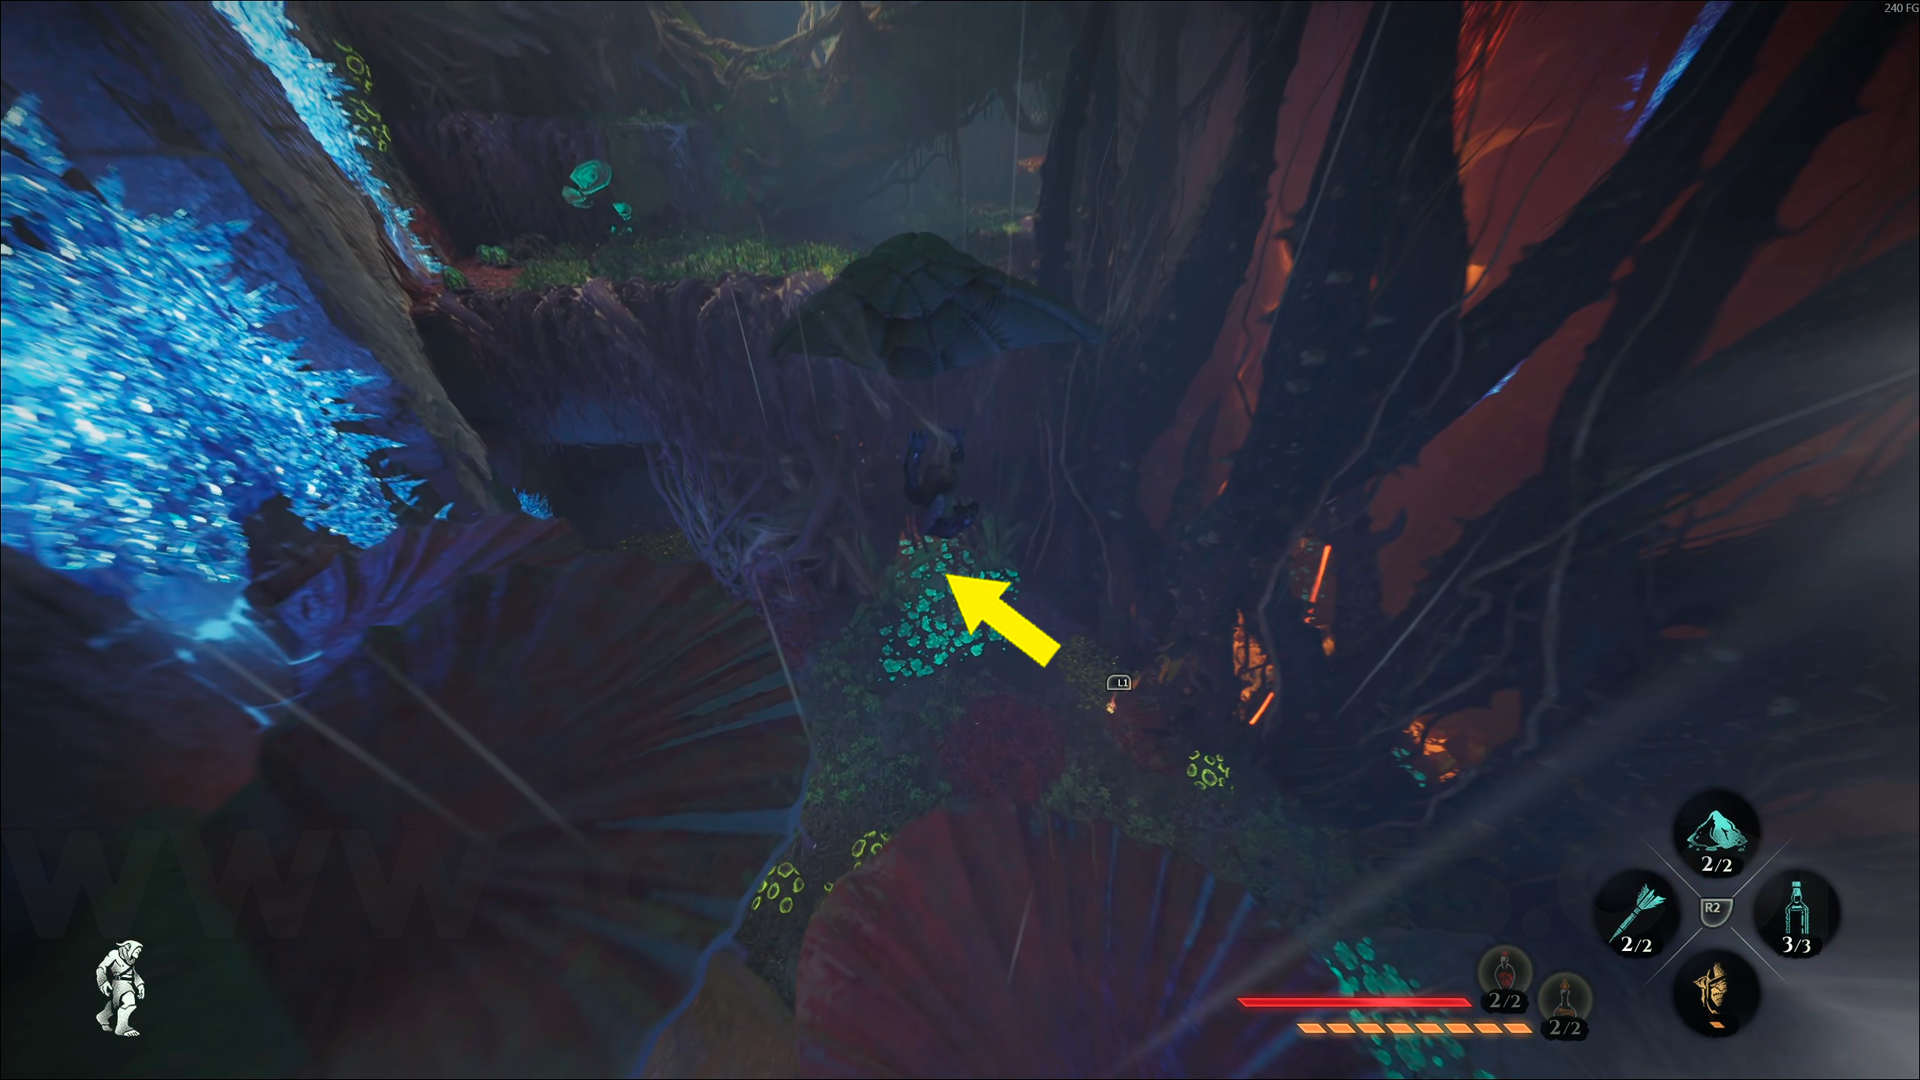
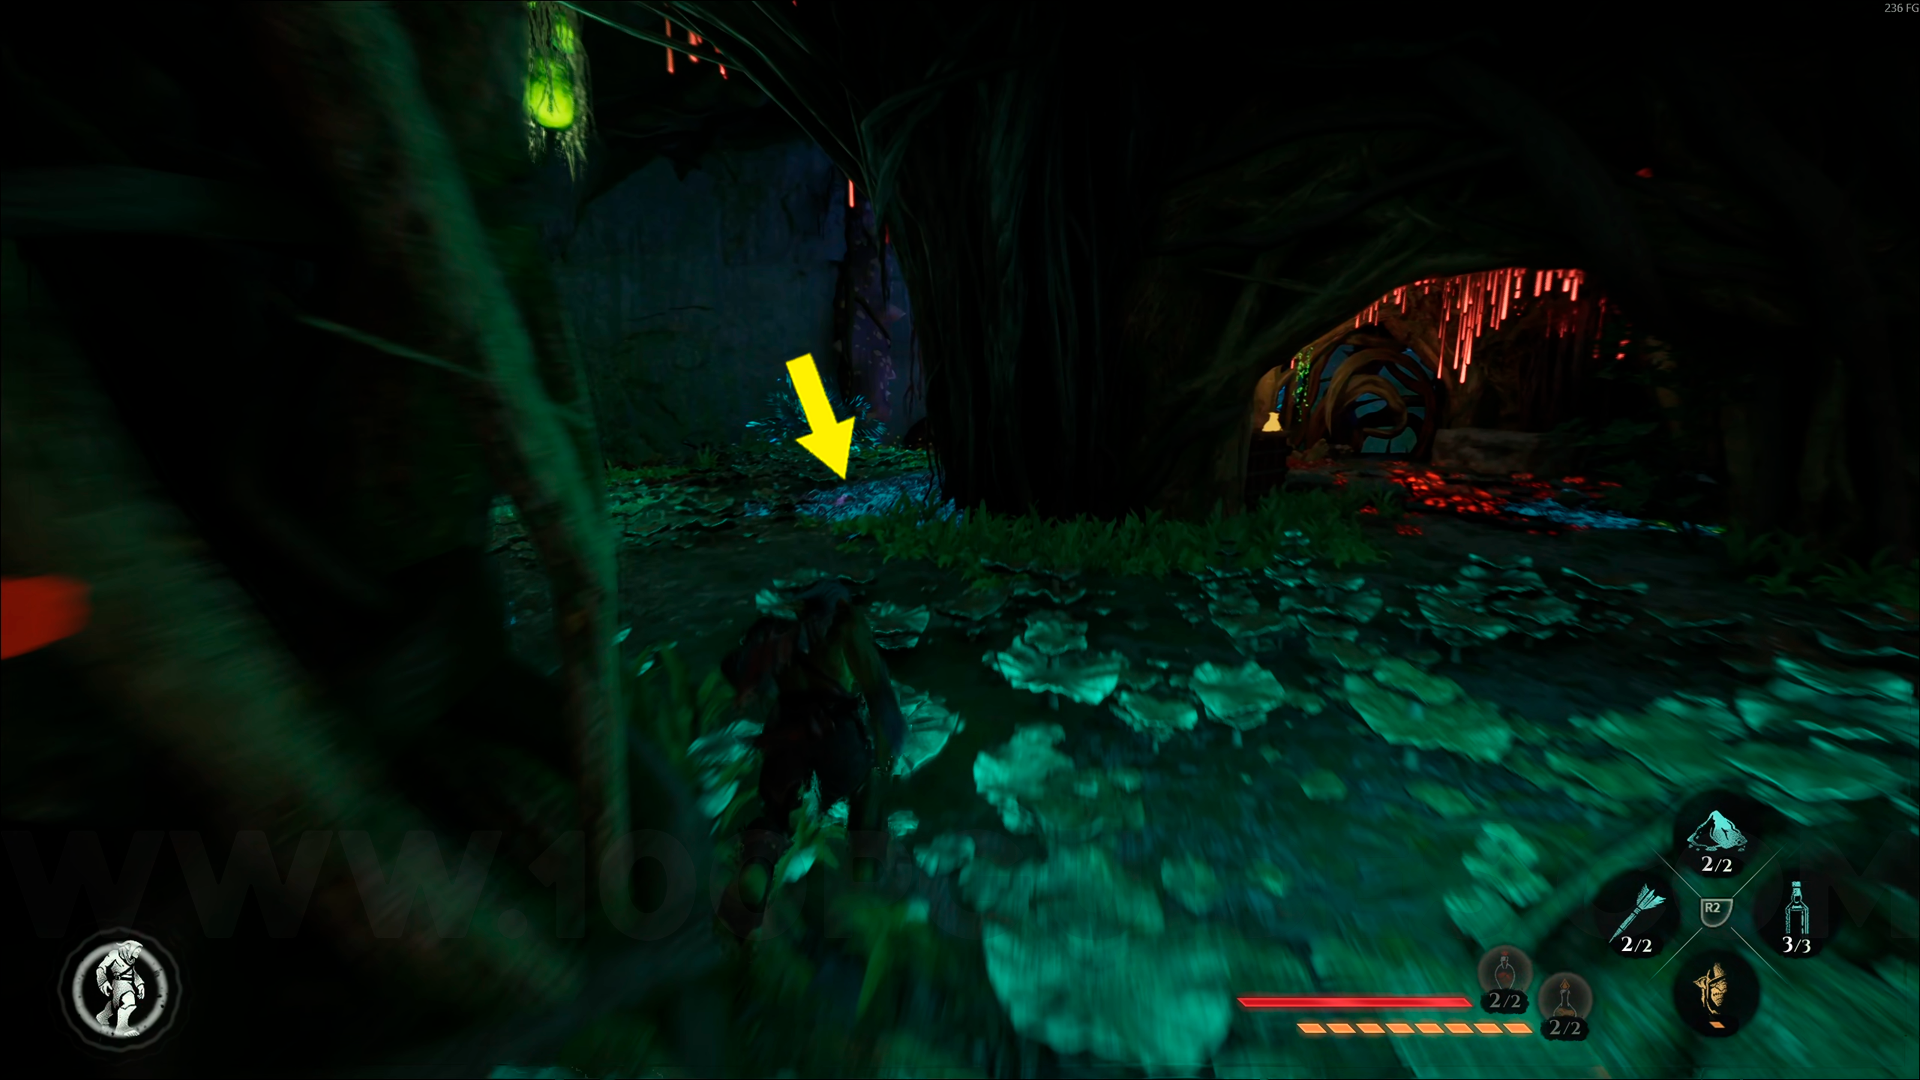
Emerald Emblem #8. From the previous collectible, use the glider to descend to the area below, this emblem will be directly in front of you.
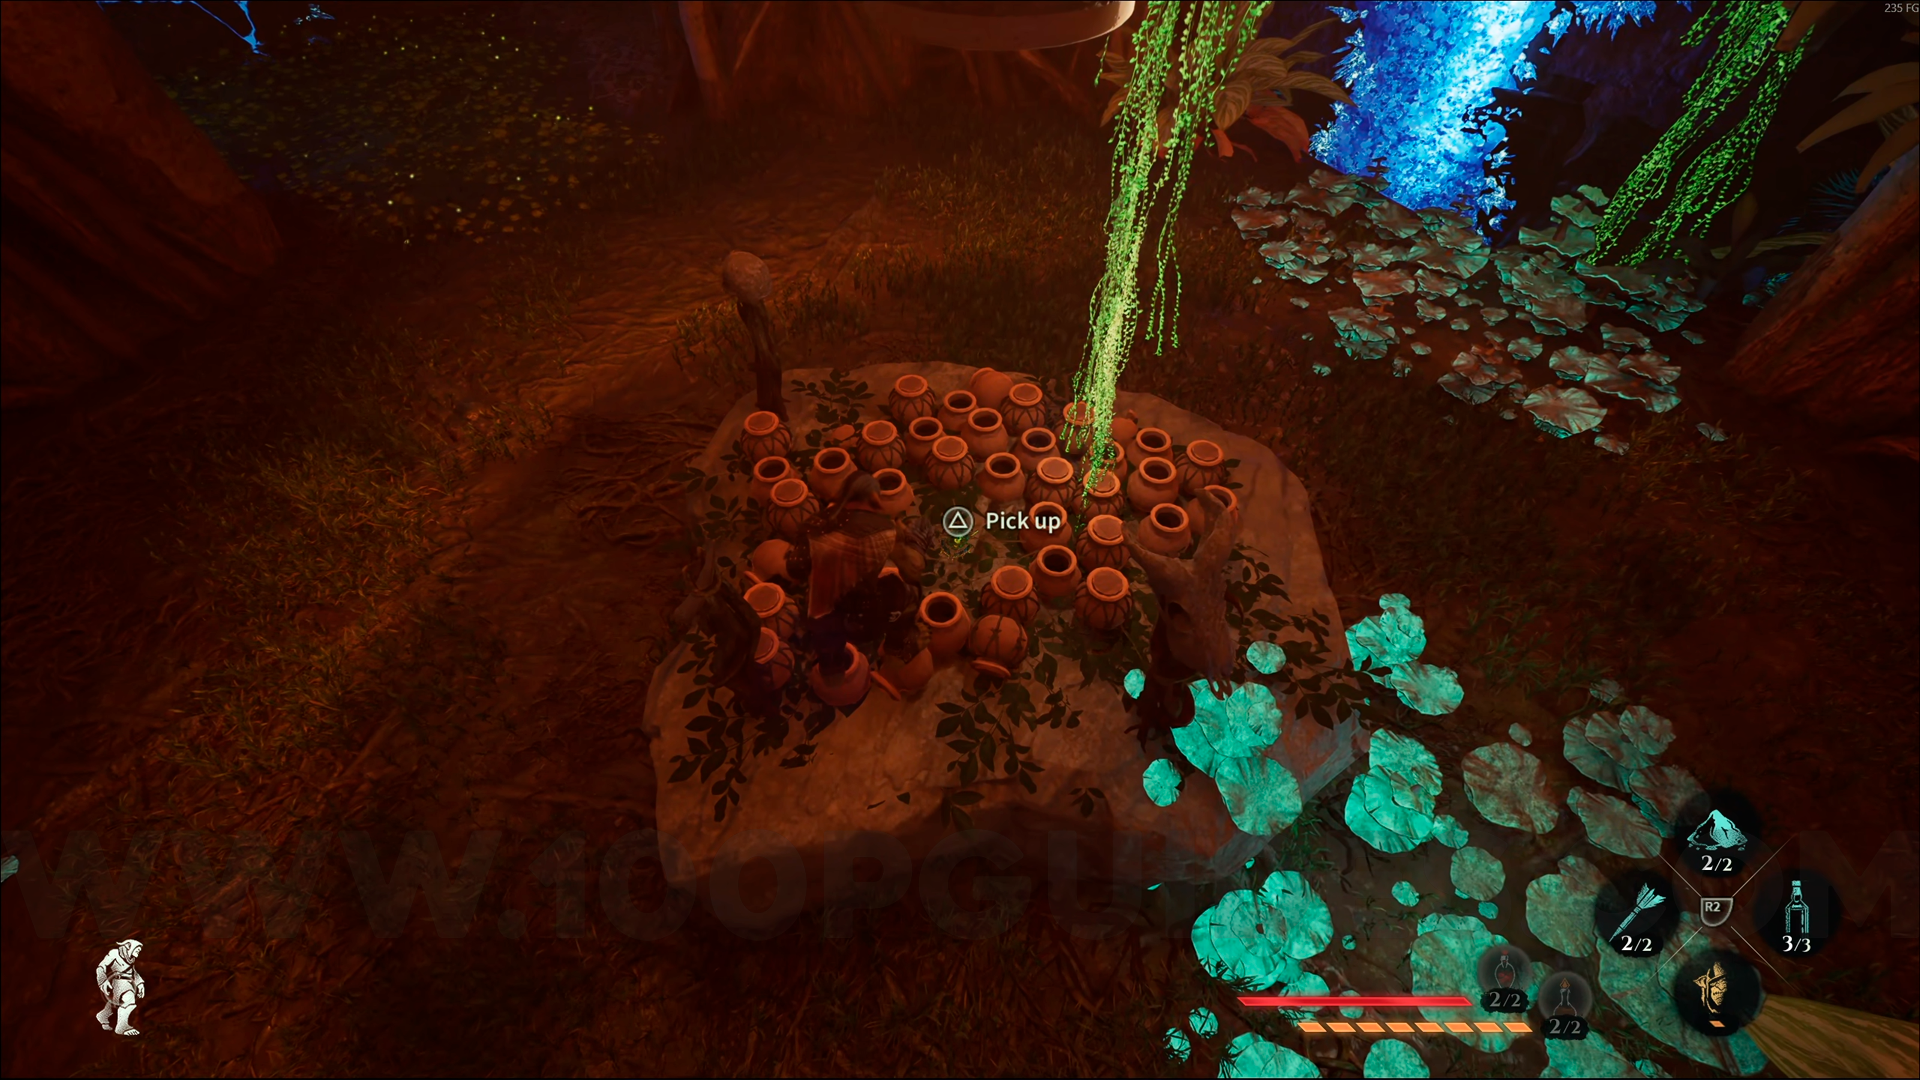
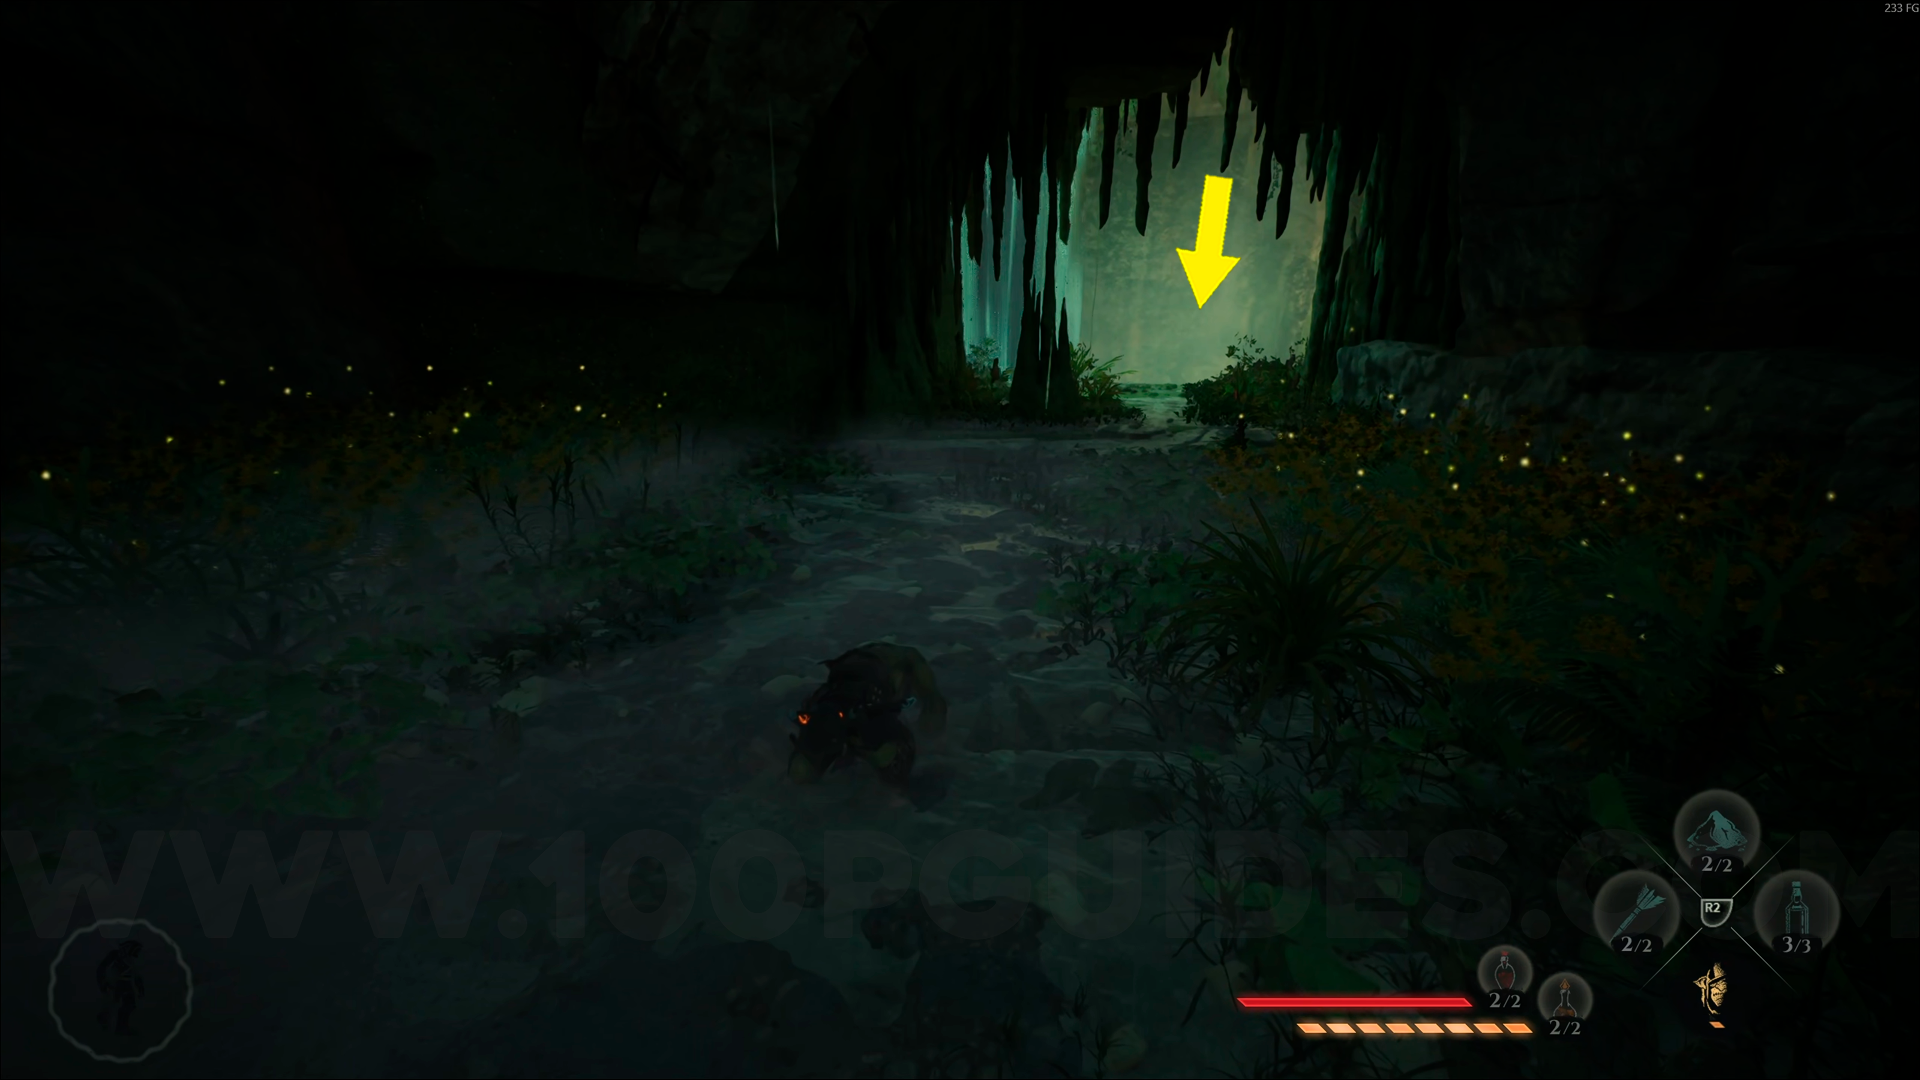
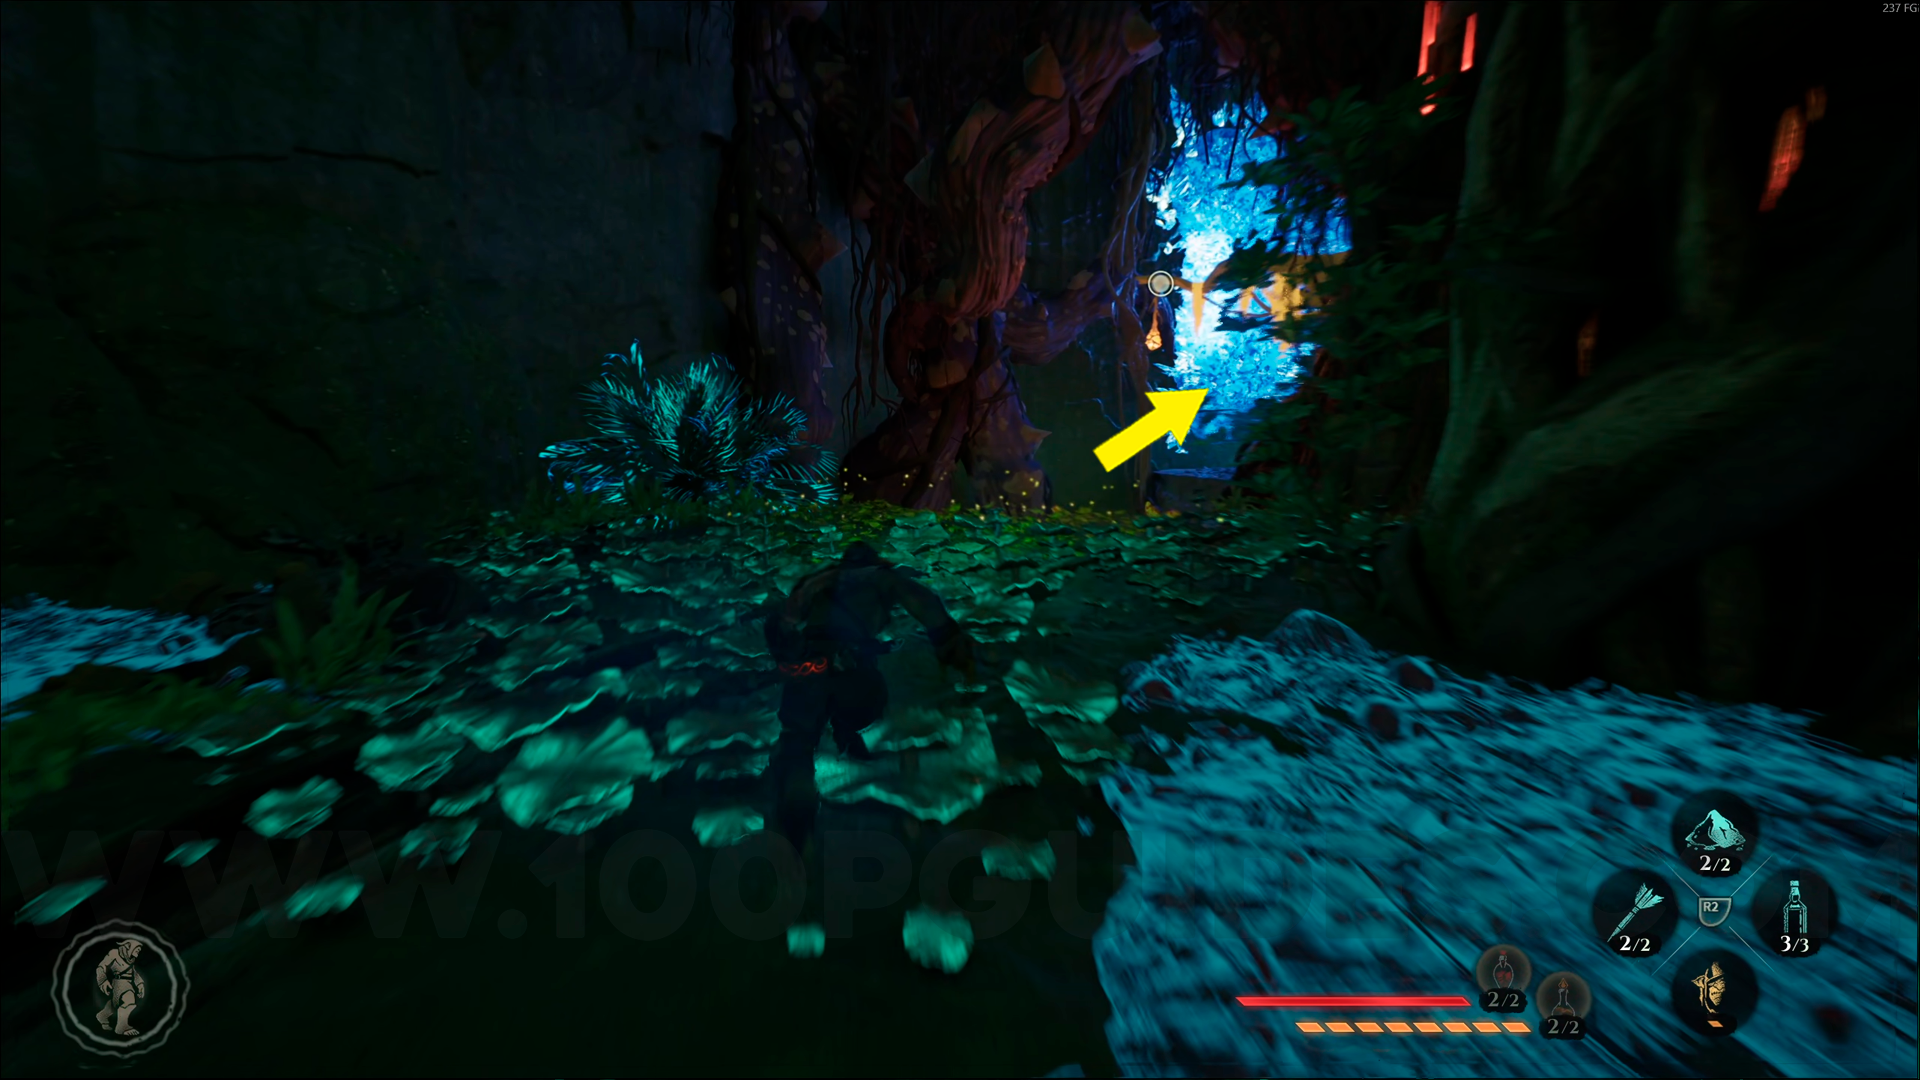
Emerald Emblem #9. From the previous collectible, use the glider again to reach the lower part, then head left. Turn left once more, and this emblem will be directly in front of you.
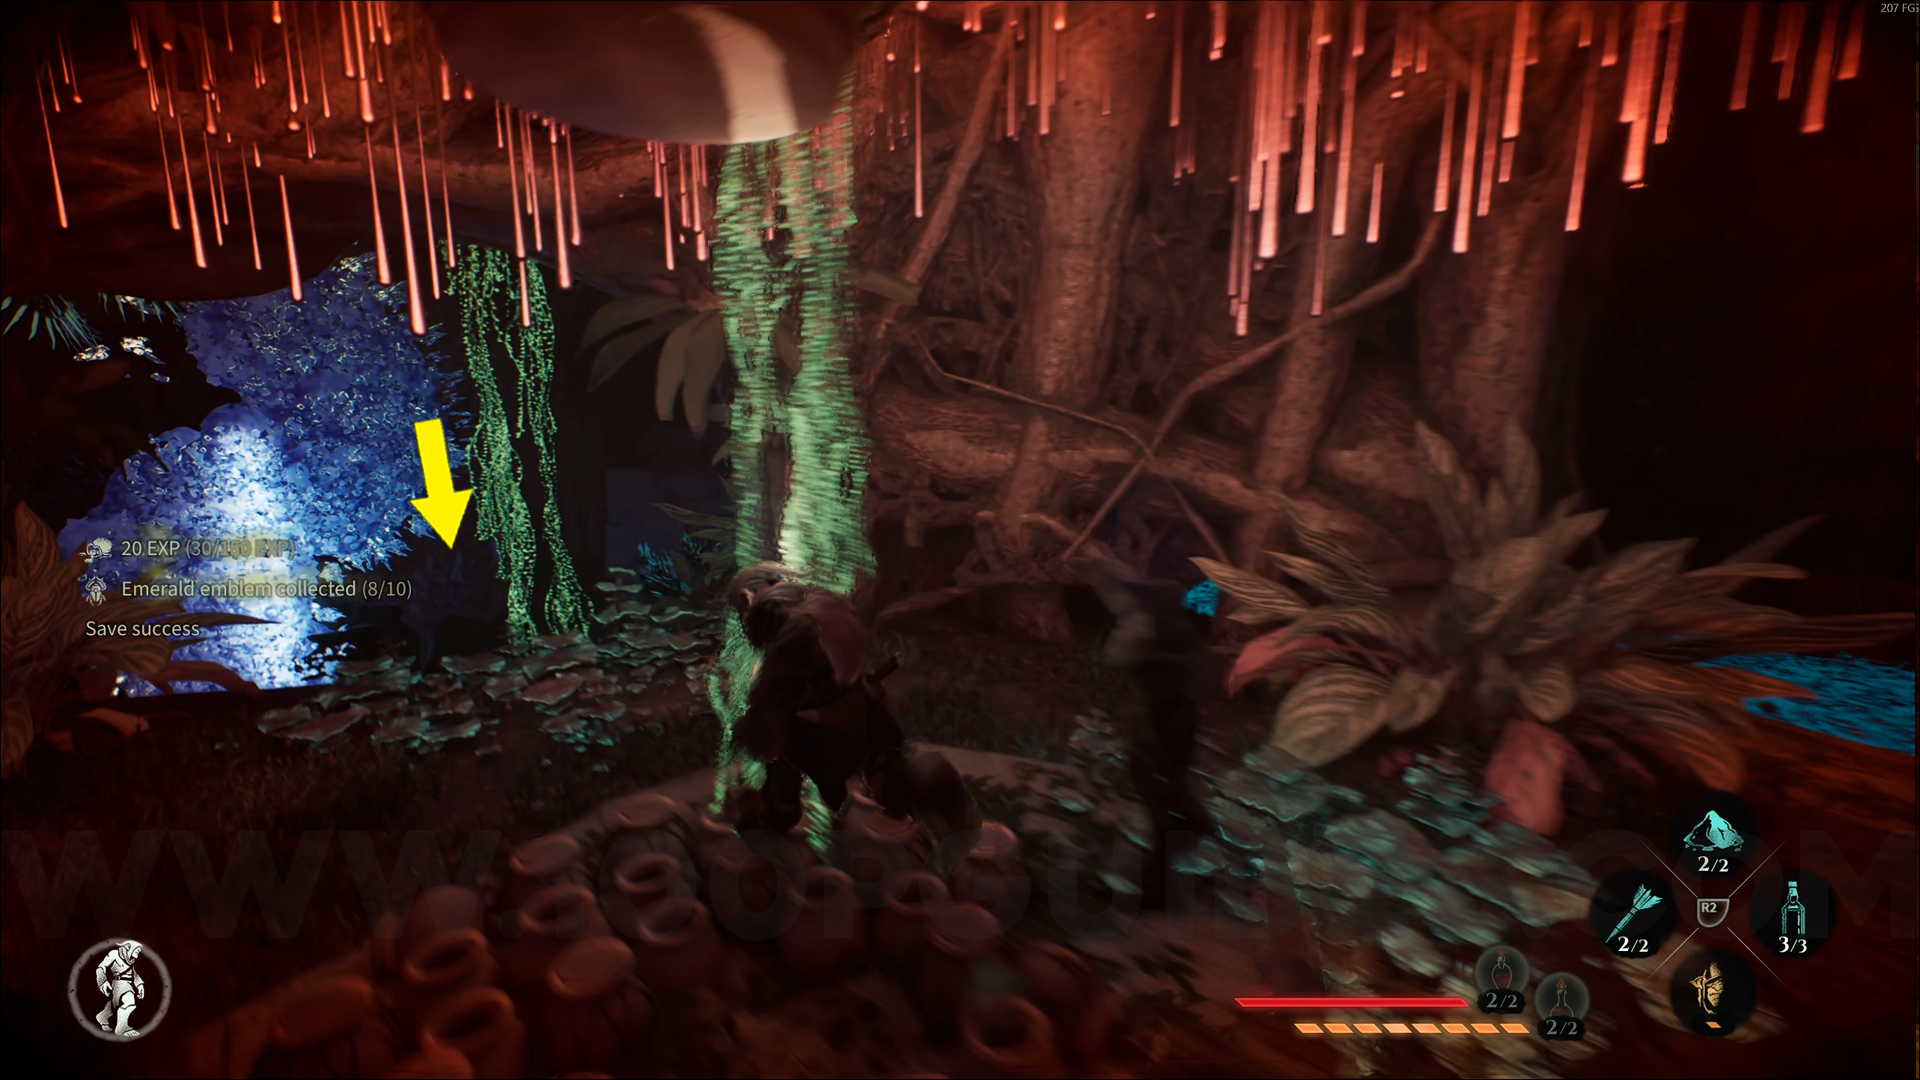
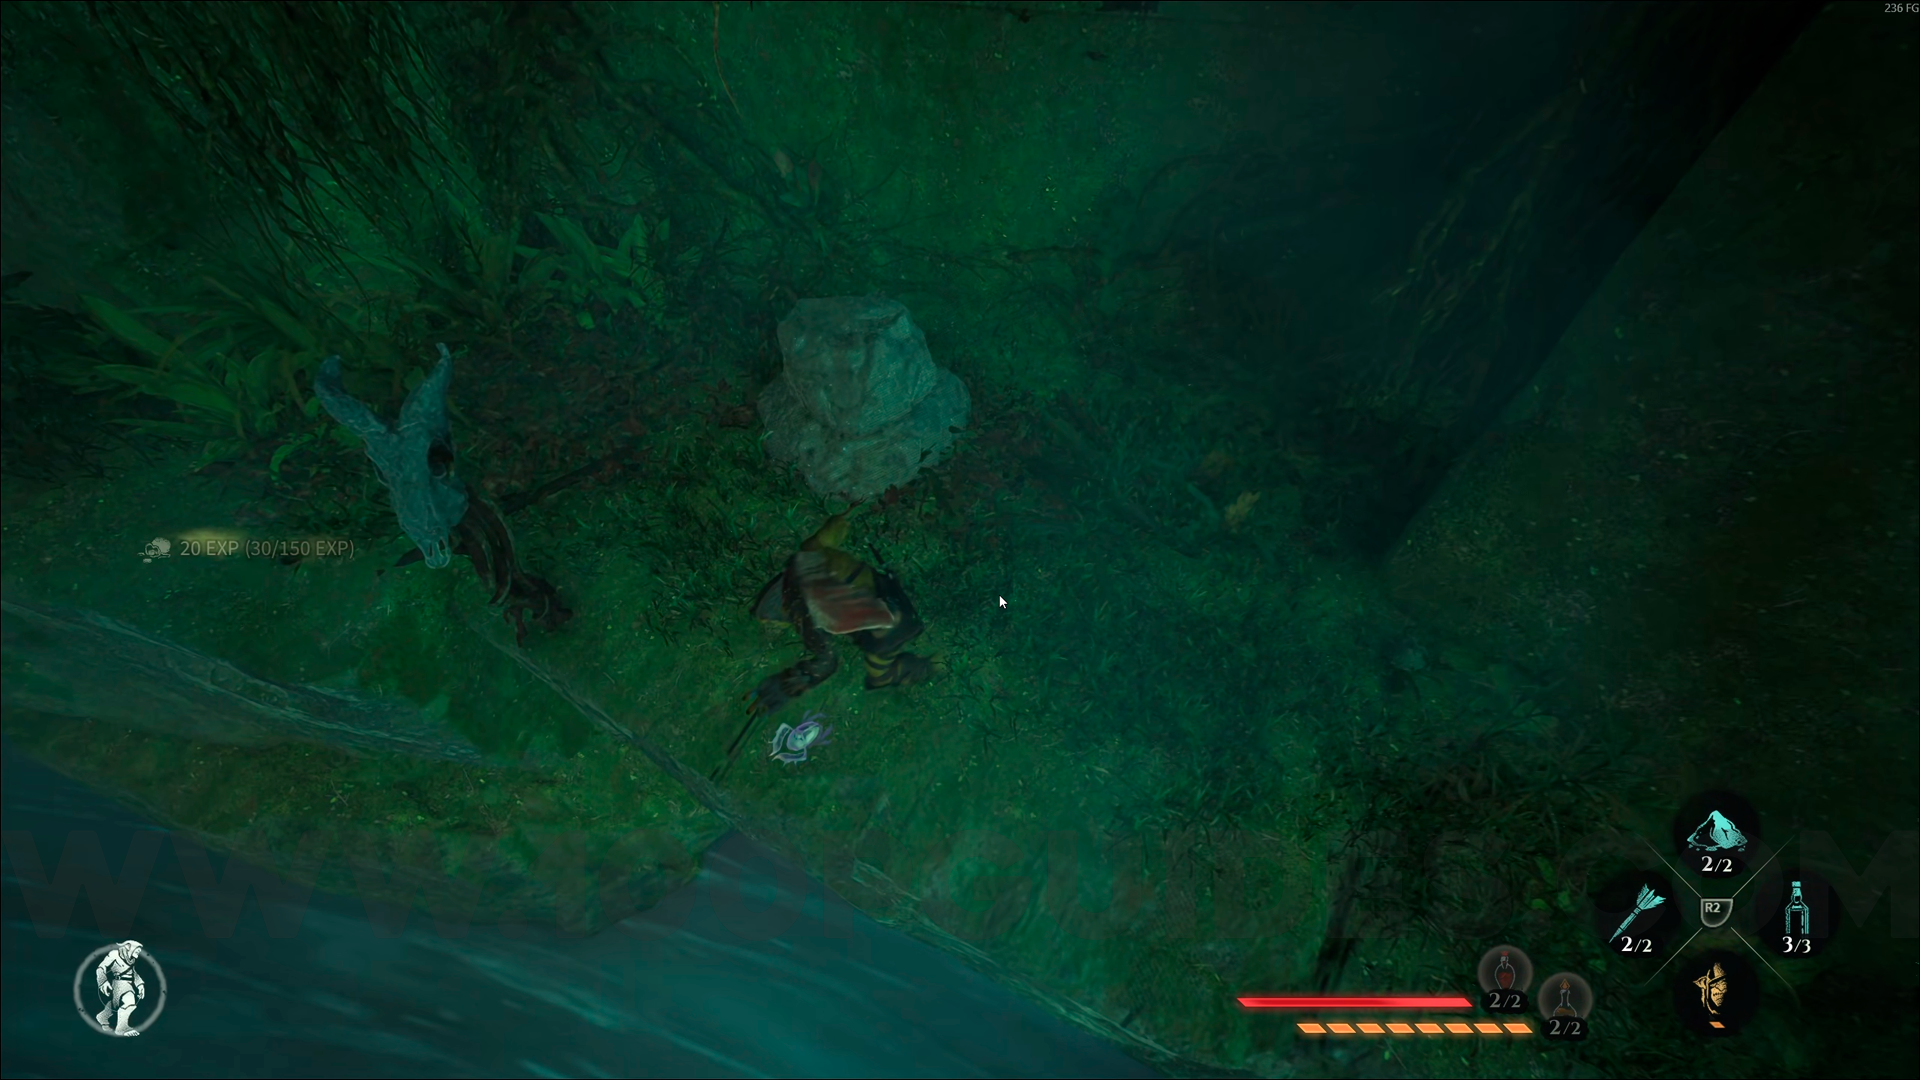
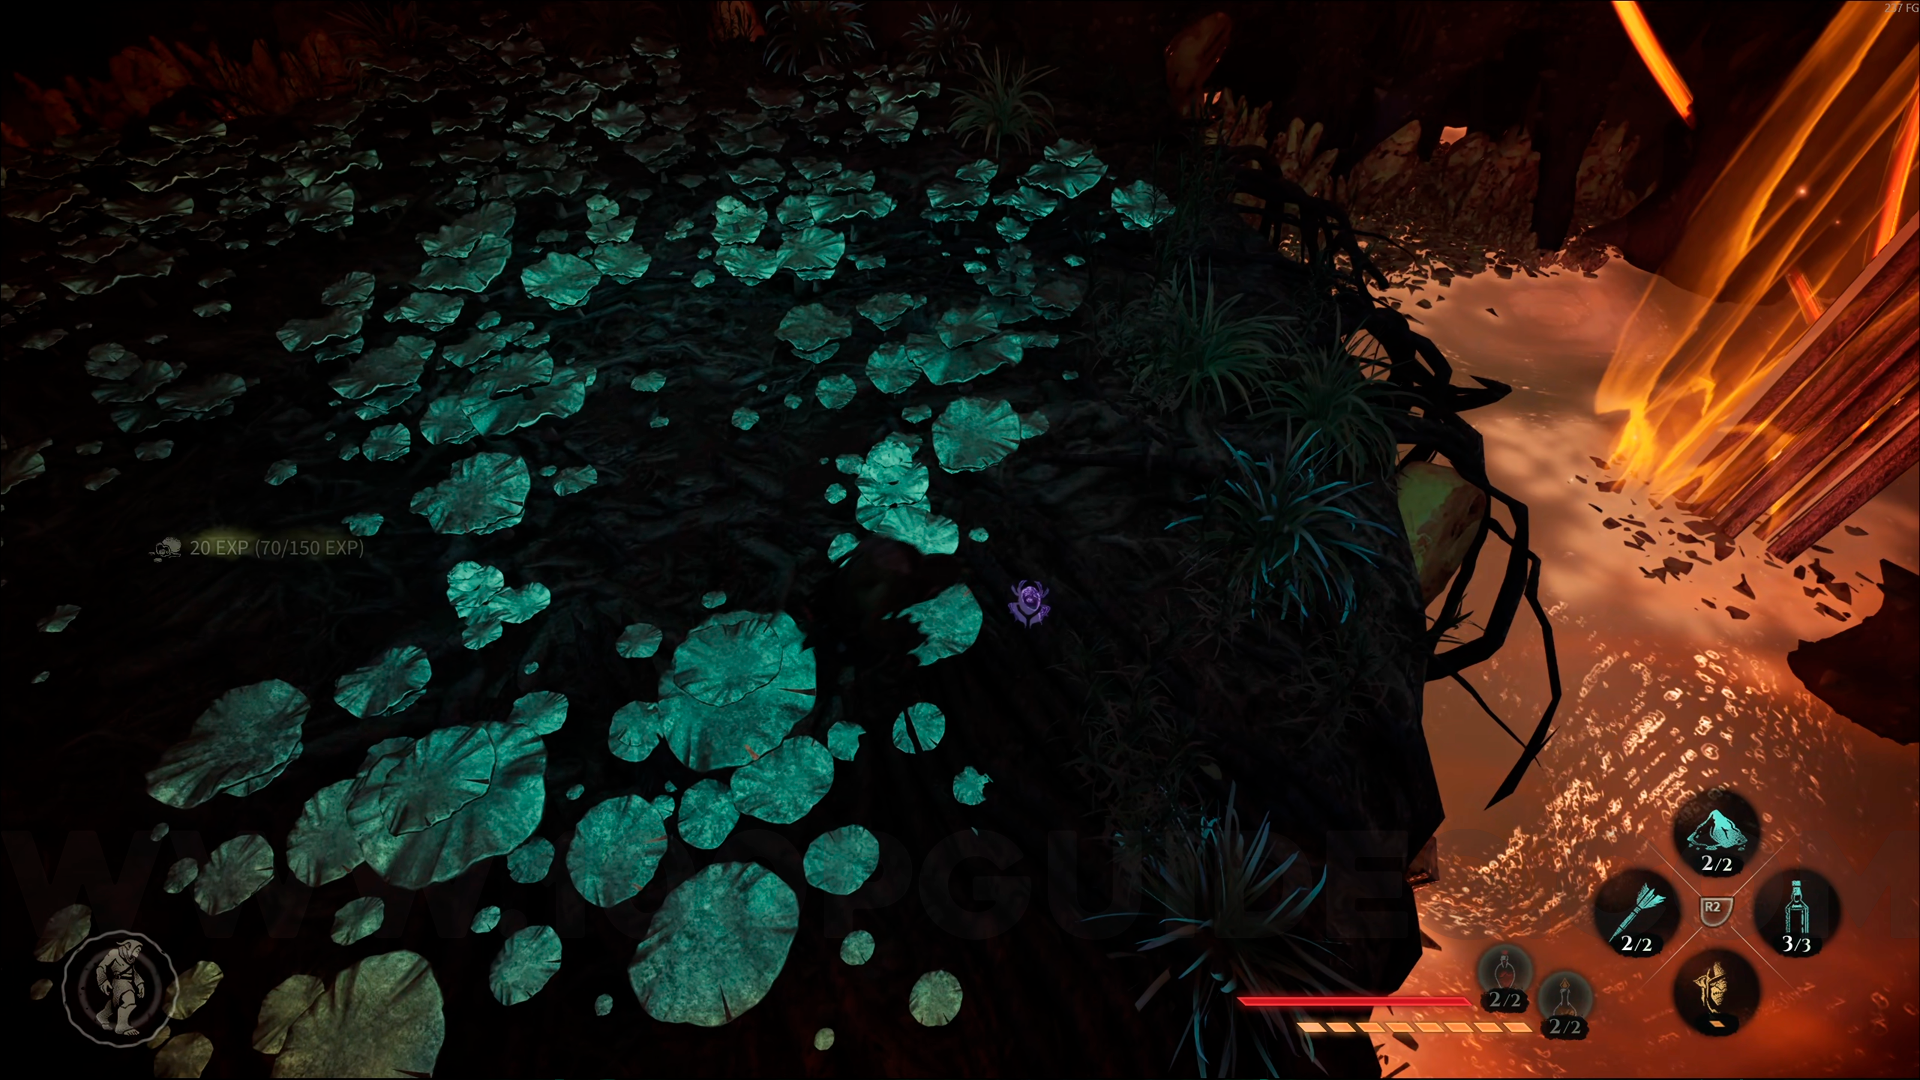
Emerald Emblem #10. From the previous collectible, go through the crystals on the wall, then head to the island in the middle of the next area, you'll find this emblem there.
Video Guide