Call of the Elder Gods Trophy Guide

Welcome to our Call of the Elder Gods Trophy Guide, where you can find everything you need to 100% the game.
Author: 100% Guides
Summary
- Estimated Time to Platinum: 6 Hours.
- Difficulty: 2/10
- Missable Trophies: 0 (You can use chapter select to get anything you missed).
- Playthroughs Needed: 1
Intro
Call of the Elder Gods is a Lovecraftian investigation puzzle game where you explore a series of small “escape room” style areas, collecting clues and solving puzzles as you progress through the story. The platinum trophy is fairly straightforward and mainly consists of finding all clues, completing the game with both endings (which only depends on a single decision at the end), locating a few hidden items, and performing certain actions in specific chapters to unlock chapter-related trophies. Nothing is missable, as you can replay any chapter at any time through Chapter Select to clean up any remaining trophies or collectibles.
Step 1. Finish the game + Clues + Secret Items + Chapter Specific Trophies.
Play through the game while collecting All Clues, All Secret Items and Rooms, and all chapter-specific trophies (see the checklist below). Alternatively, you can simply enjoy the game on your first playthrough and collect whatever you find naturally, then use Chapter Select after finishing the story to clean up any remaining trophies or collectibles. You can turn Hard Mode OFF since it's not necessary for any trophies. If you get stuck on any story-related puzzles, you can request hints from the main menu, which basically will tell you how to solve it.
These are the Chapter Specific Trophies:
- Prologue: You Looked That Up in a Guide... Again!
- Chapter 1: Bouquet.
- Chapter 2: Best Served Cold.
- Chapter 3: You Damn Brat! & Meta-Reference.
- Chapter 4: This City Is Afraid of Me & I Can Hold My Breath for Ten Minutes.
- Chapter 5: Leave Him the F*ck Alone!
- Chapter 6: Wrong Game... or Maybe Not.
Step 2. Getting the other Ending
Once you finish the game, select "Continue" on the main menu to spawn just before the final decision (If you have already used chapter select to return to another chapter since you finished the game, use chapter select to replay Chapter 6) and progress to the ending once again. During the final scene, choose the option you did not select during your first playthrough to unlock the other ending trophy. For example, if you originally chose “Stop Evangeline and take her place.”, choose “Let Evangeline sacrifice herself.” this time instead.
Guides
Trophy Guide

You have unlocked all trophies.
Unlock all other trophies.
Complete the Prologue.
Story related and unmissable. Obtained after finishing the Prologue.
Complete Chapter 1.
Story related and unmissable. Obtained after finishing Chapter 1.
Complete Chapter 2.
Story related and unmissable. Obtained after finishing Chapter 2.
Complete Chapter 3.
Story related and unmissable. Obtained after finishing Chapter 3.

Completed Chapter 4.
Story related and unmissable. Obtained after finishing Chapter 4.
Complete Chapter 5
Story related and unmissable. Obtained after finishing Chapter 5.
Finish the game.
Story related and unmissable. Obtained after finishing the game.
Endure a very strange hypnosis session.
Story related and unmissable. Obtained during Chapter 3.
Learn how to use a decryption device.
Story related and unmissable. Obtained during Chapter 4.
Remember some coordinates.
Story related and unmissable. Obtained during Chapter 5.
Be yourself again.
Story related and unmissable. Obtained during Chapter 5.
Open the great door.
Story related and unmissable. Obtained during Chapter 6.
Fill 50% of Norah's journal.
Every time you find a clue, it will be added to your journal. These clues are important files, notes, and objects found throughout the game that help you solve the main puzzles. Use the All Clue Locations guide.
Fill 100% of Norah's journal.
Every time you find a clue, it will be added to your journal. These clues are important files, notes, and objects found throughout the game that help you solve the main puzzles. Use the All Clue Locations guide.
Find the secret objects in Chapter 1.
There are 3 Secret Objects in Chapter 1.
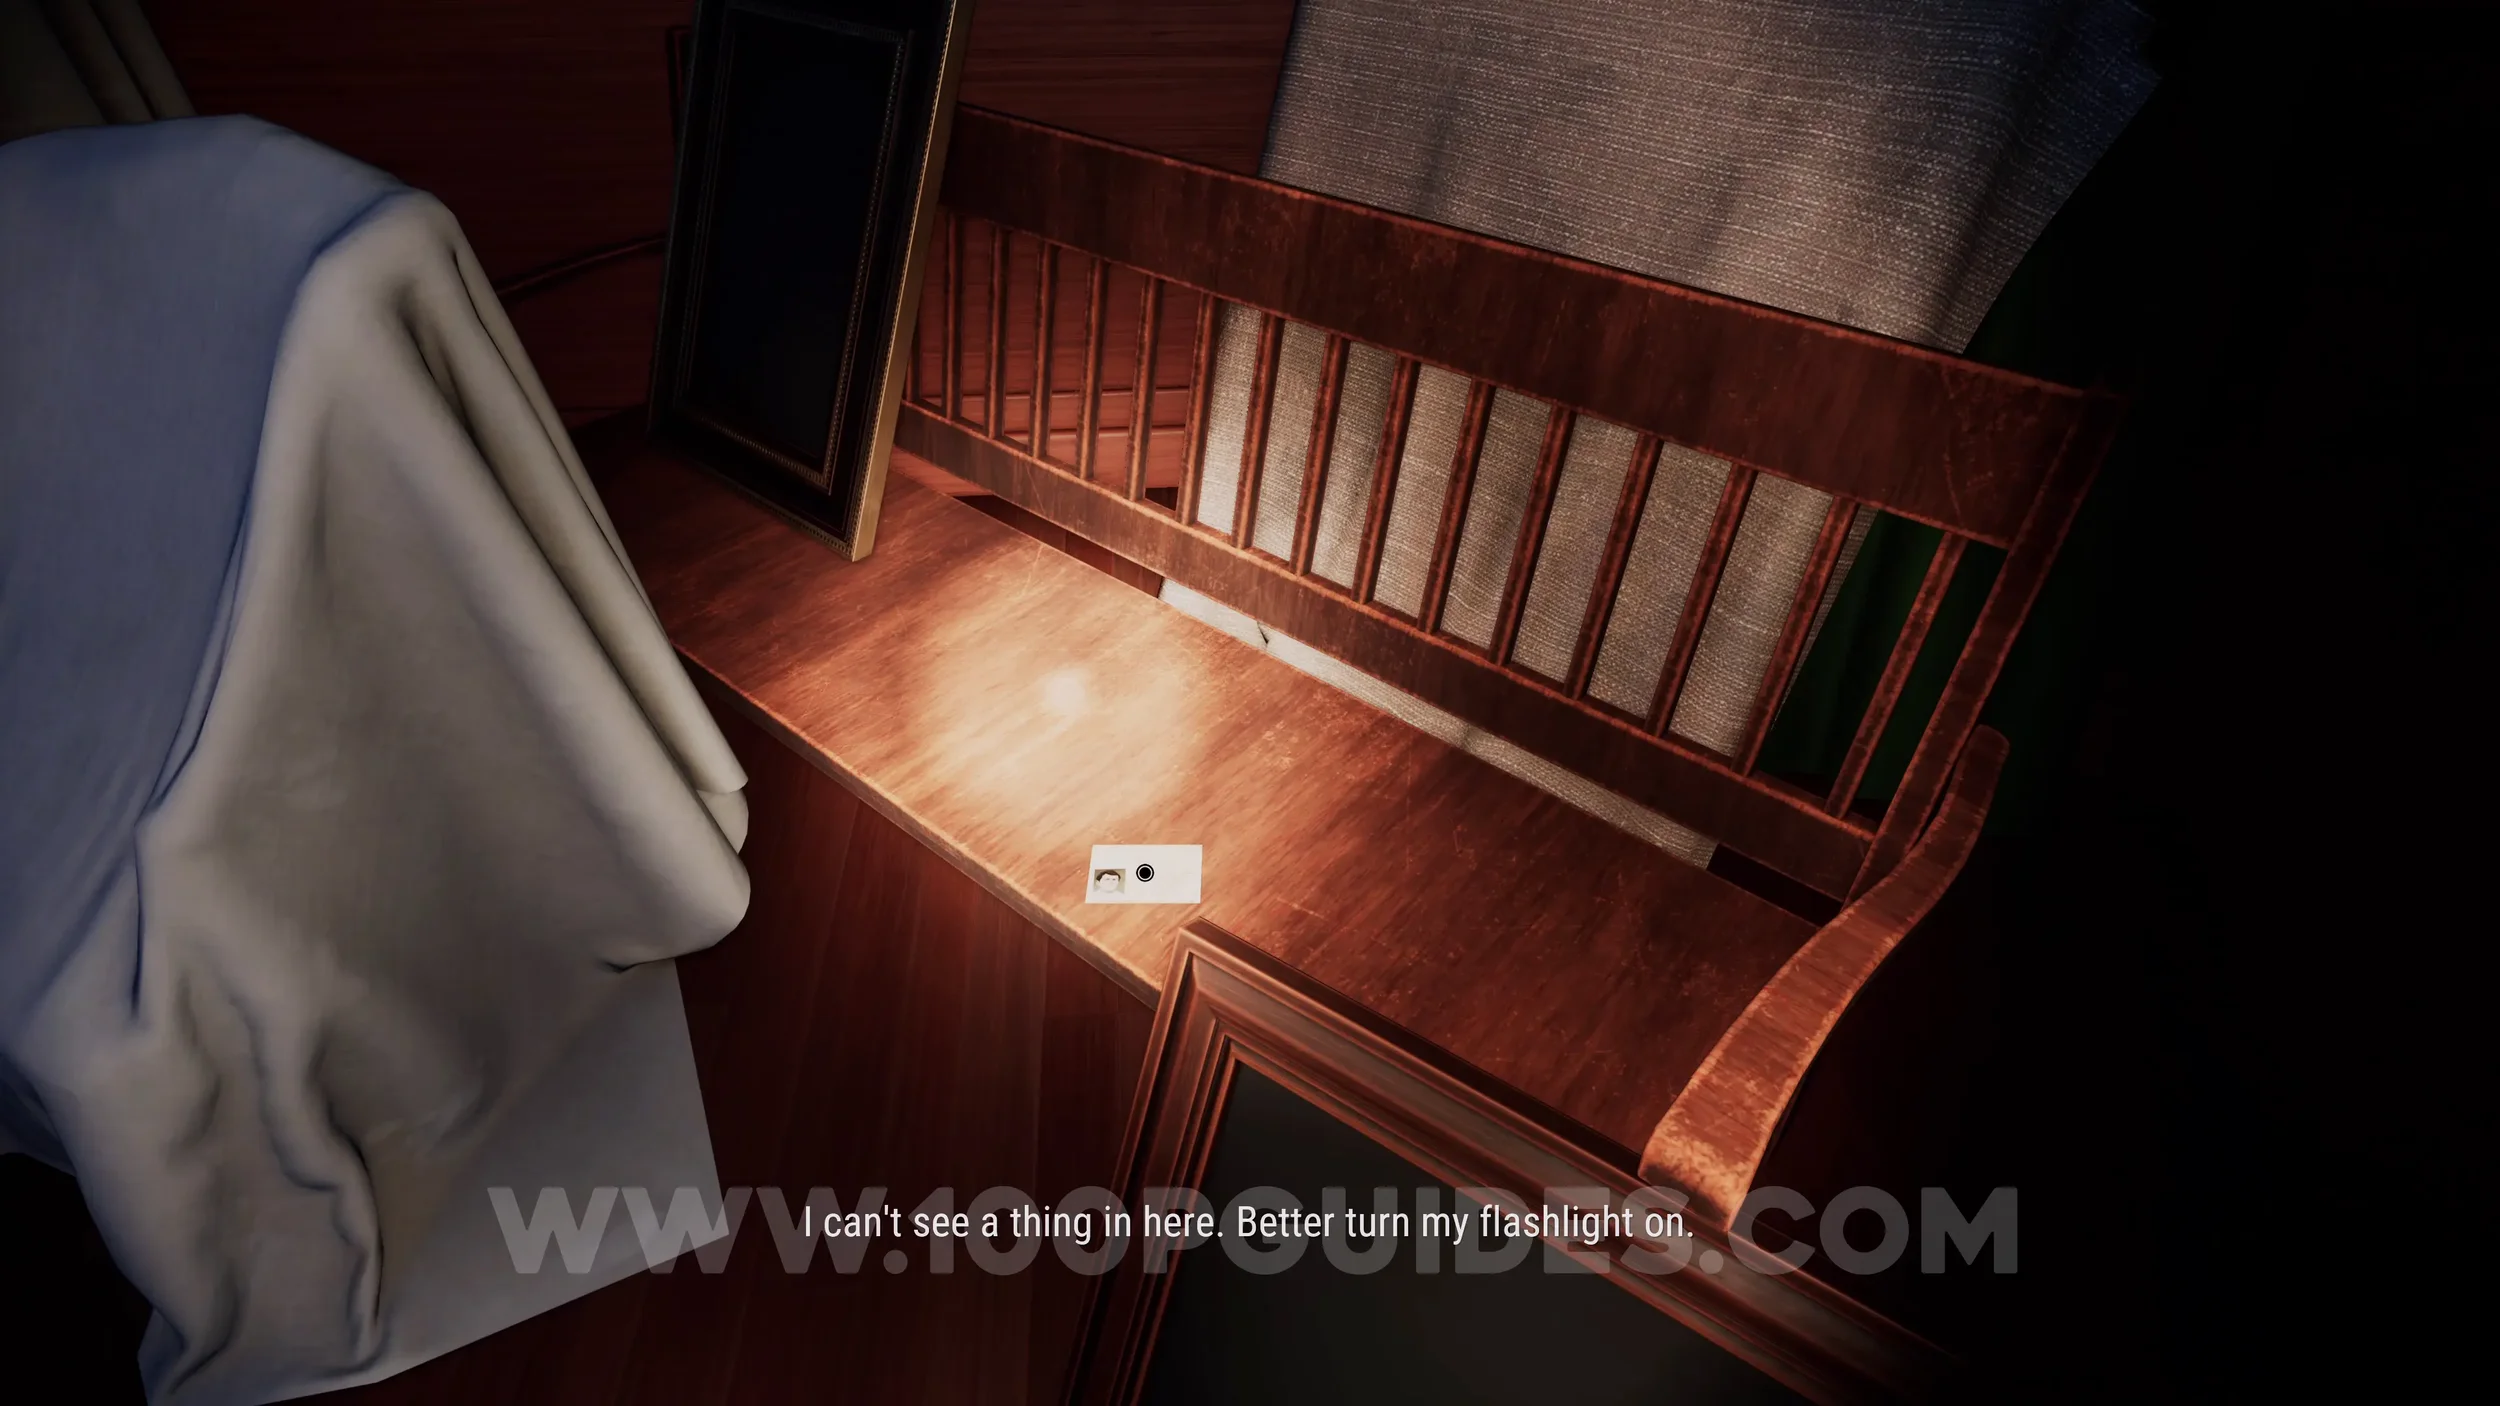
Object 1. Found on the bench in the dark room upstairs.
Object 2. Go upstairs and onto the balcony to your left. Head left and continue to the end to find the object hidden behind the chair.
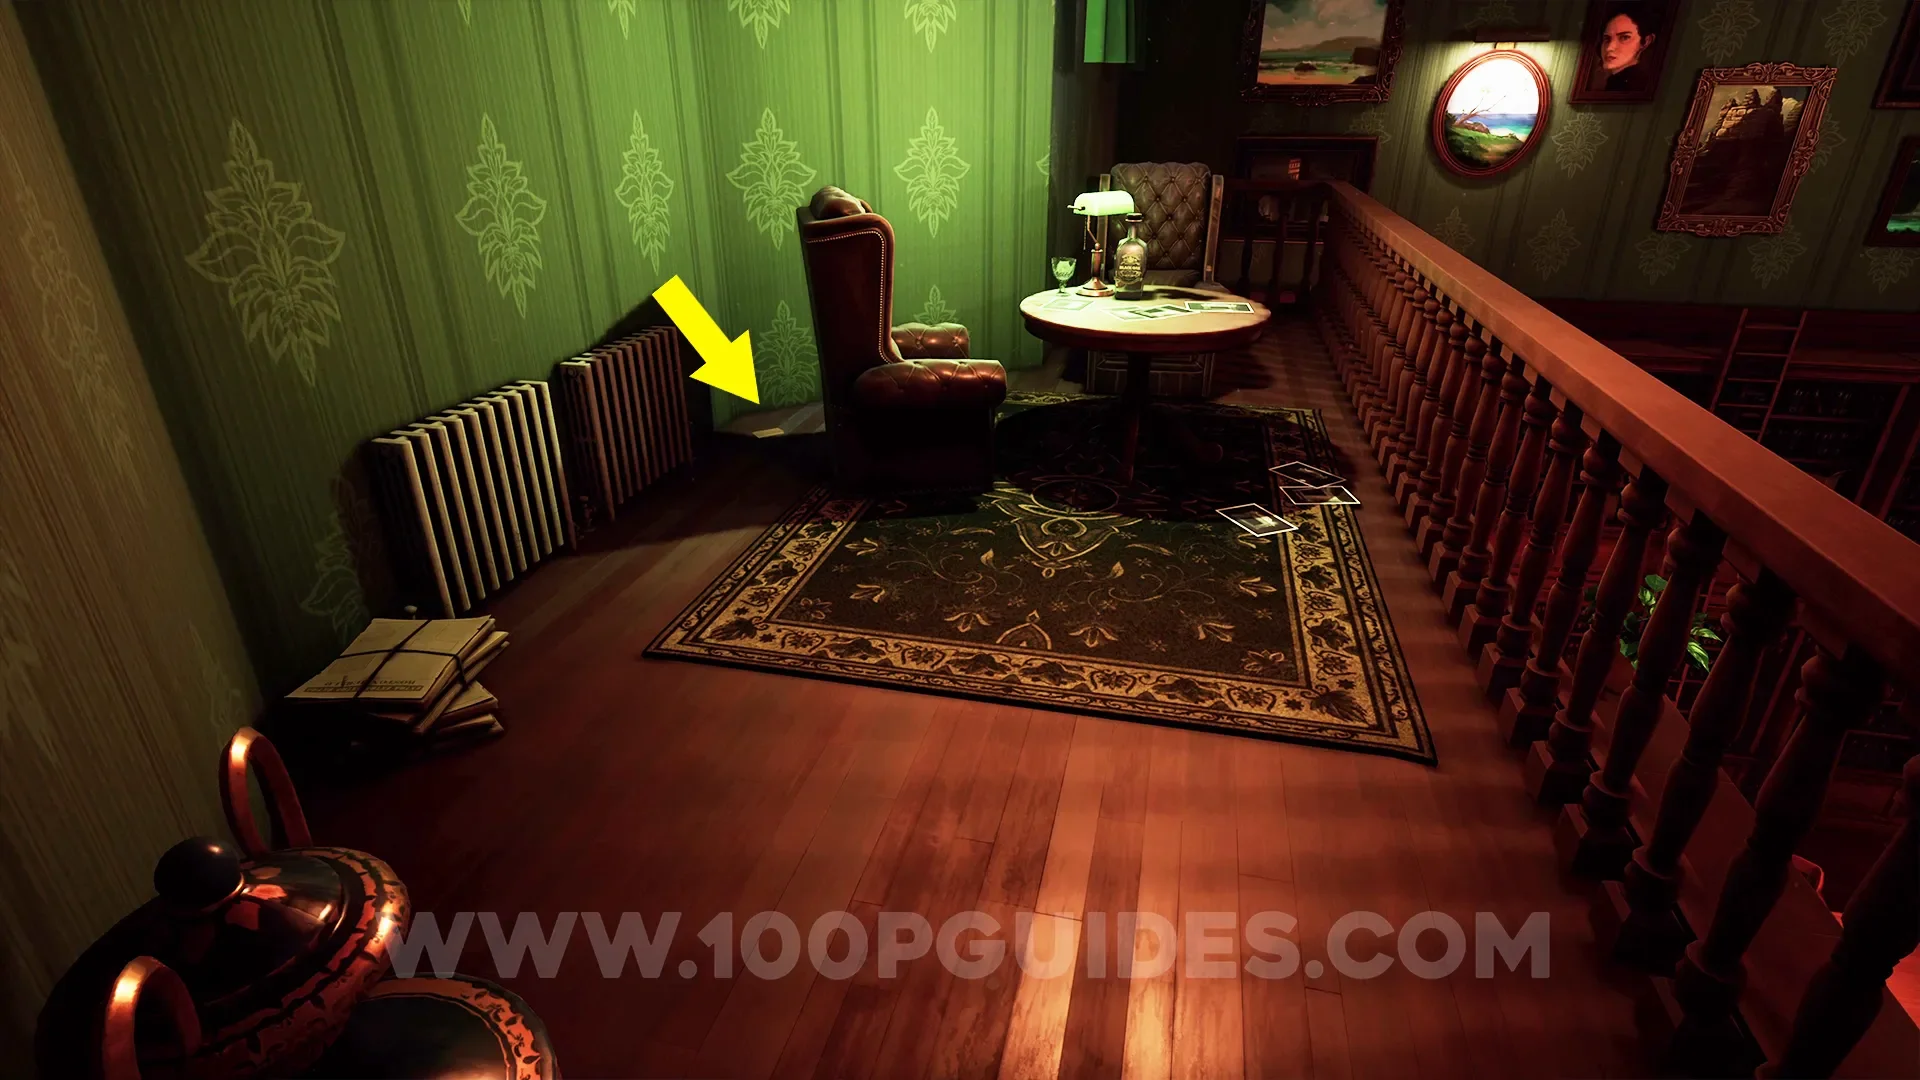
Object 3. As soon as you exit the house to the garden, look right to find it on some sacks.

Find the secret object in Chapter 2.
The secret object in Chapter 2 can be found by following the wall on the left side of the main area until you reach the water. From here, head left and follow the narrow strip of land to the end to find the object hidden in the darkness.
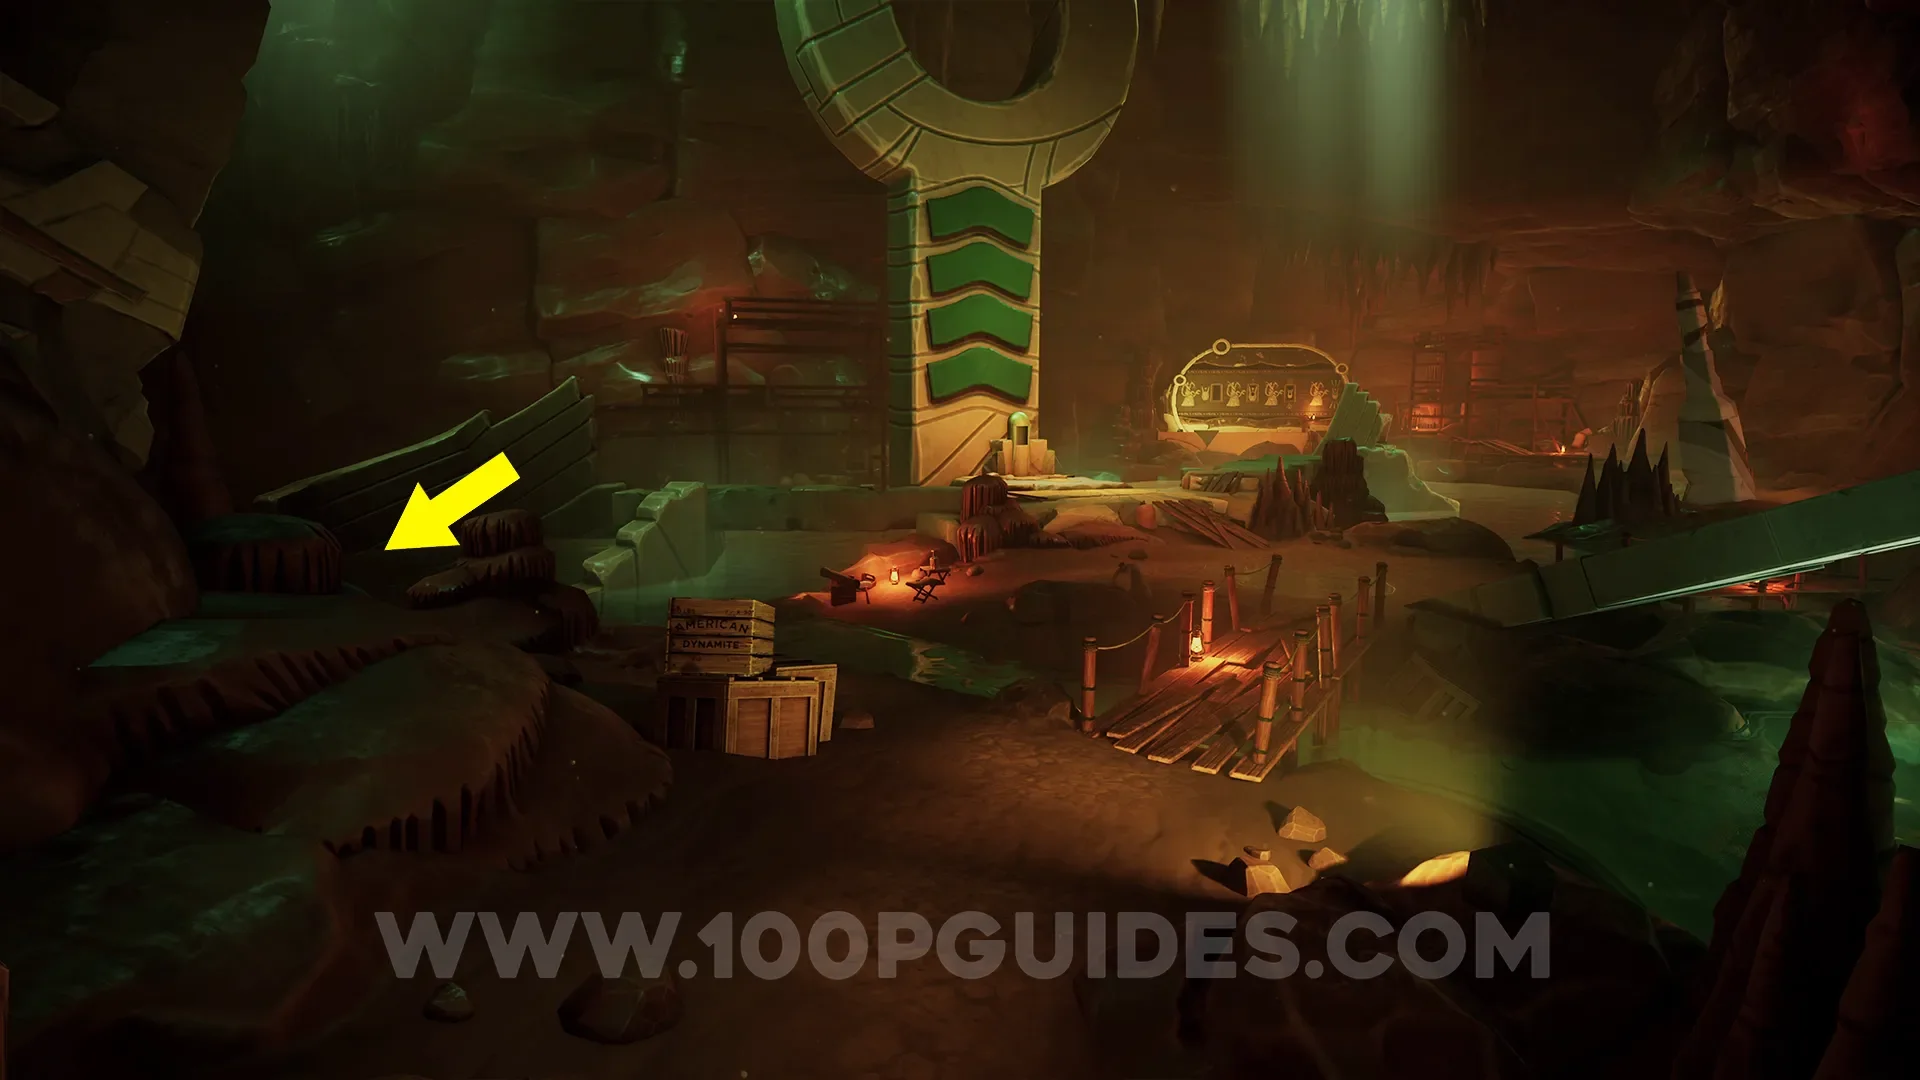

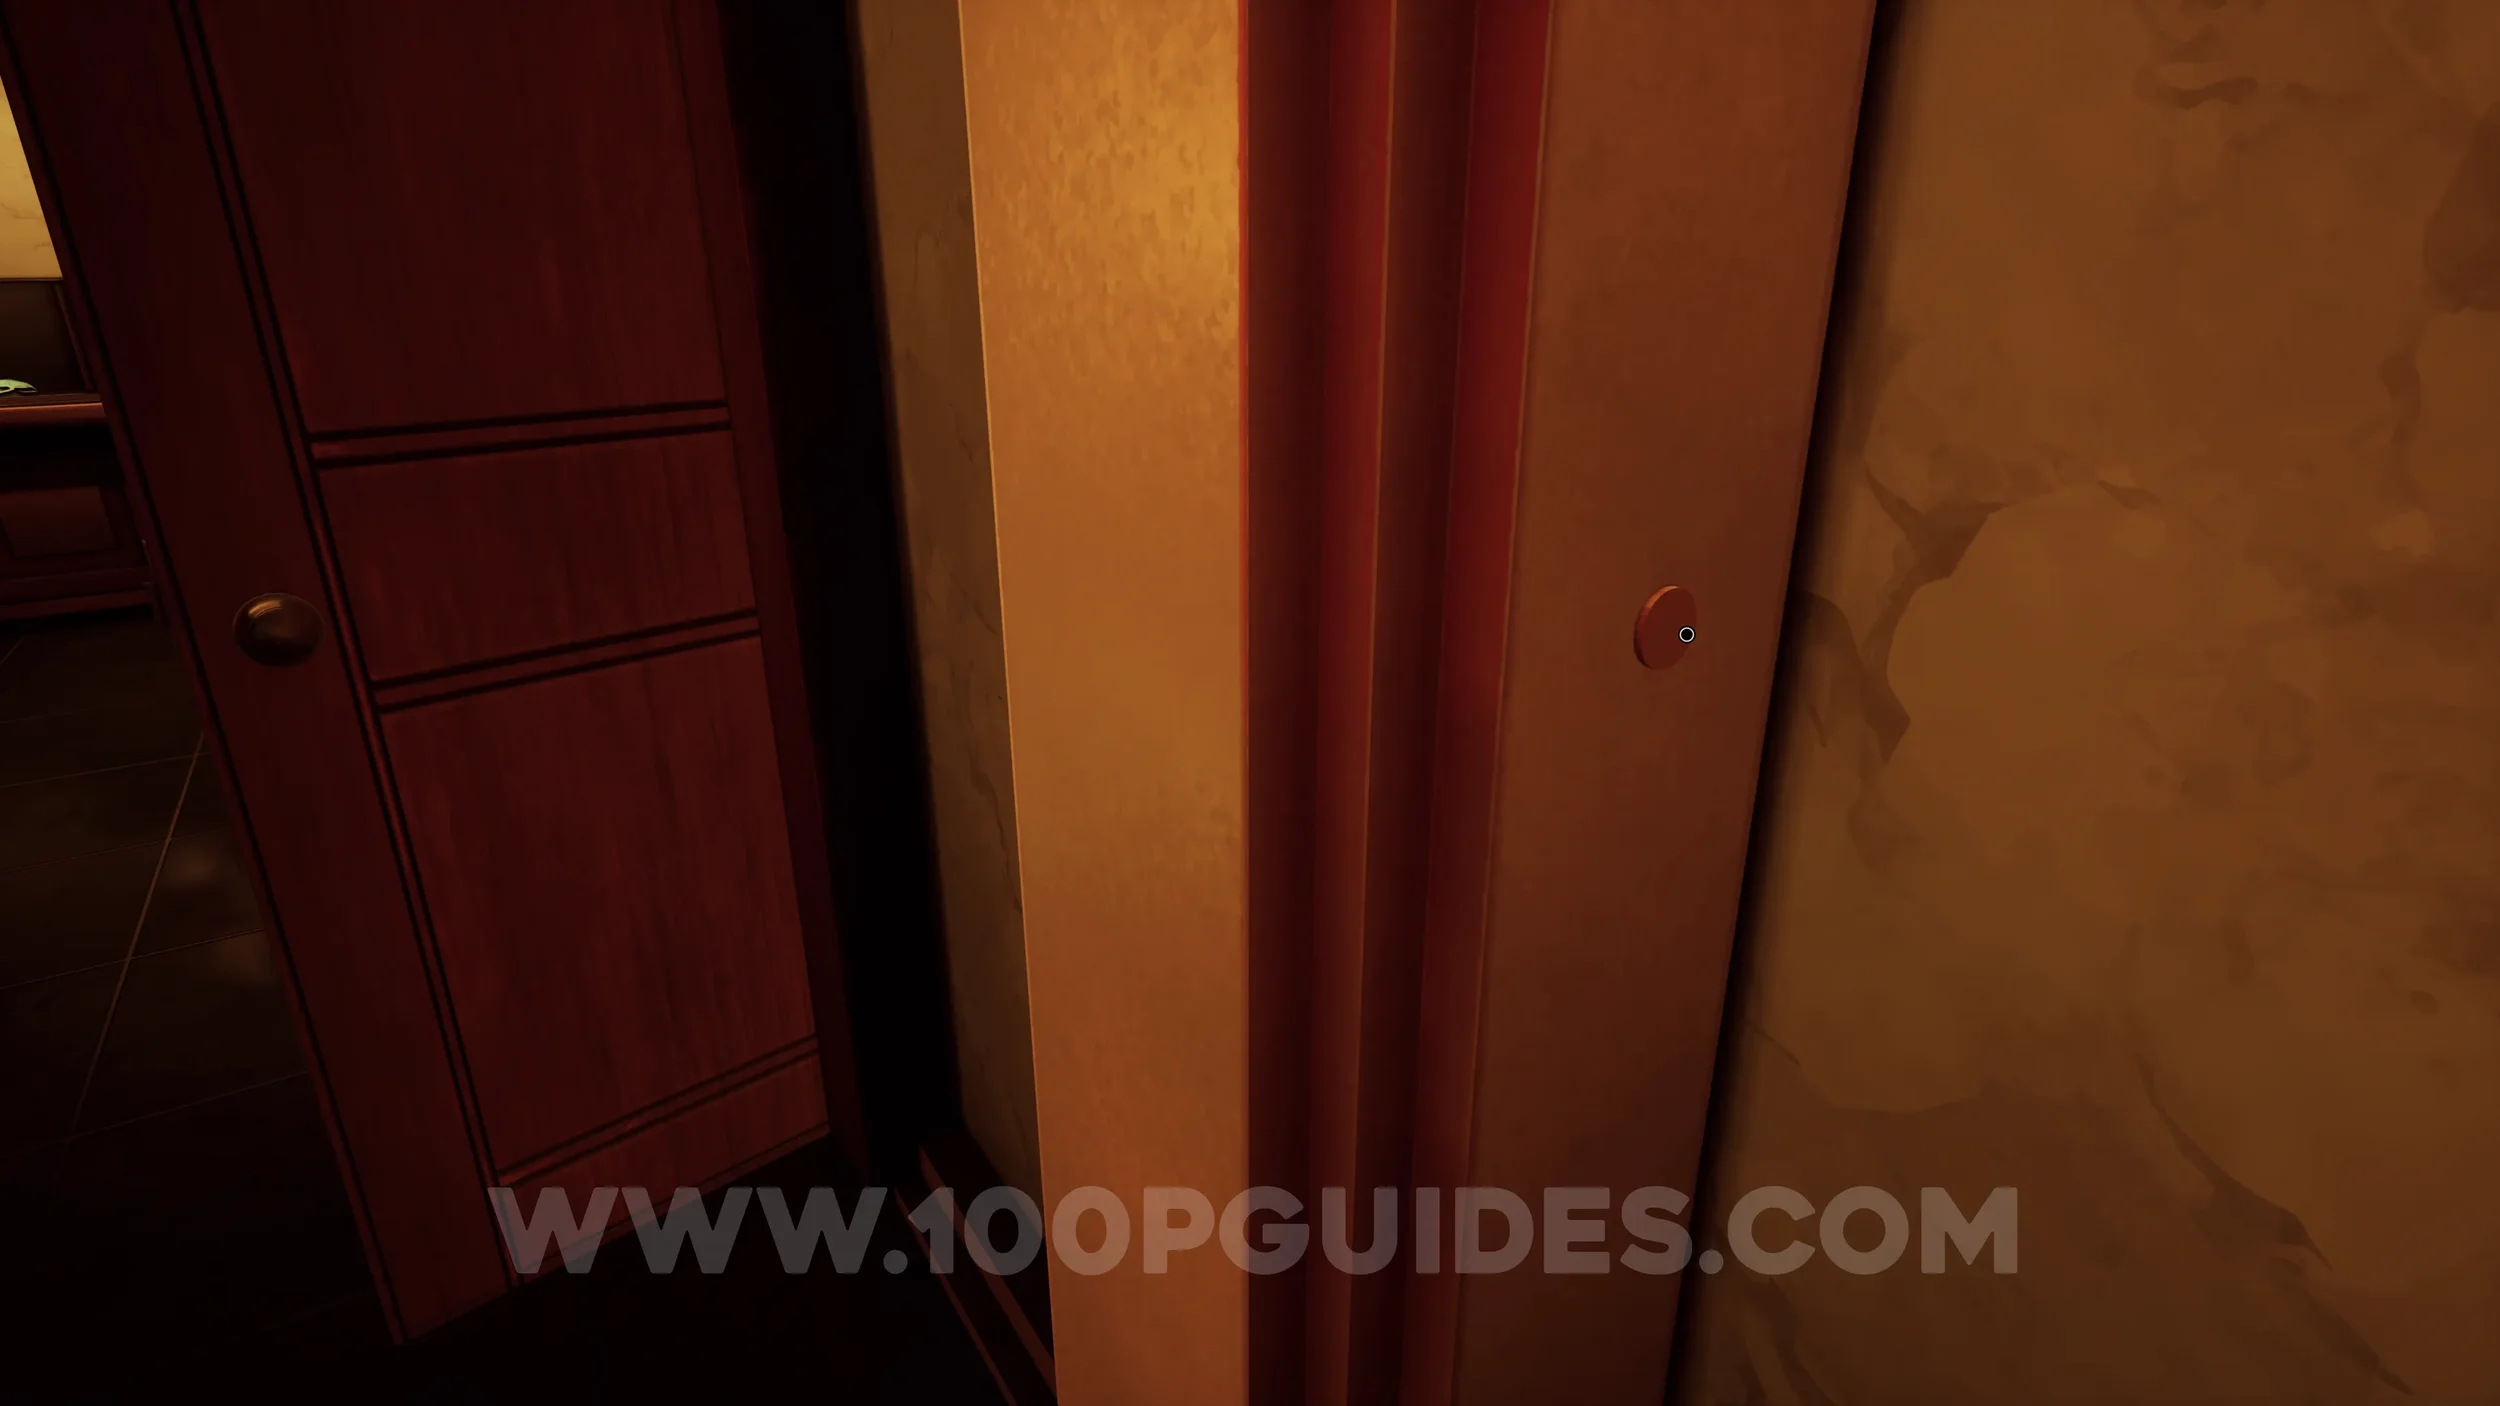
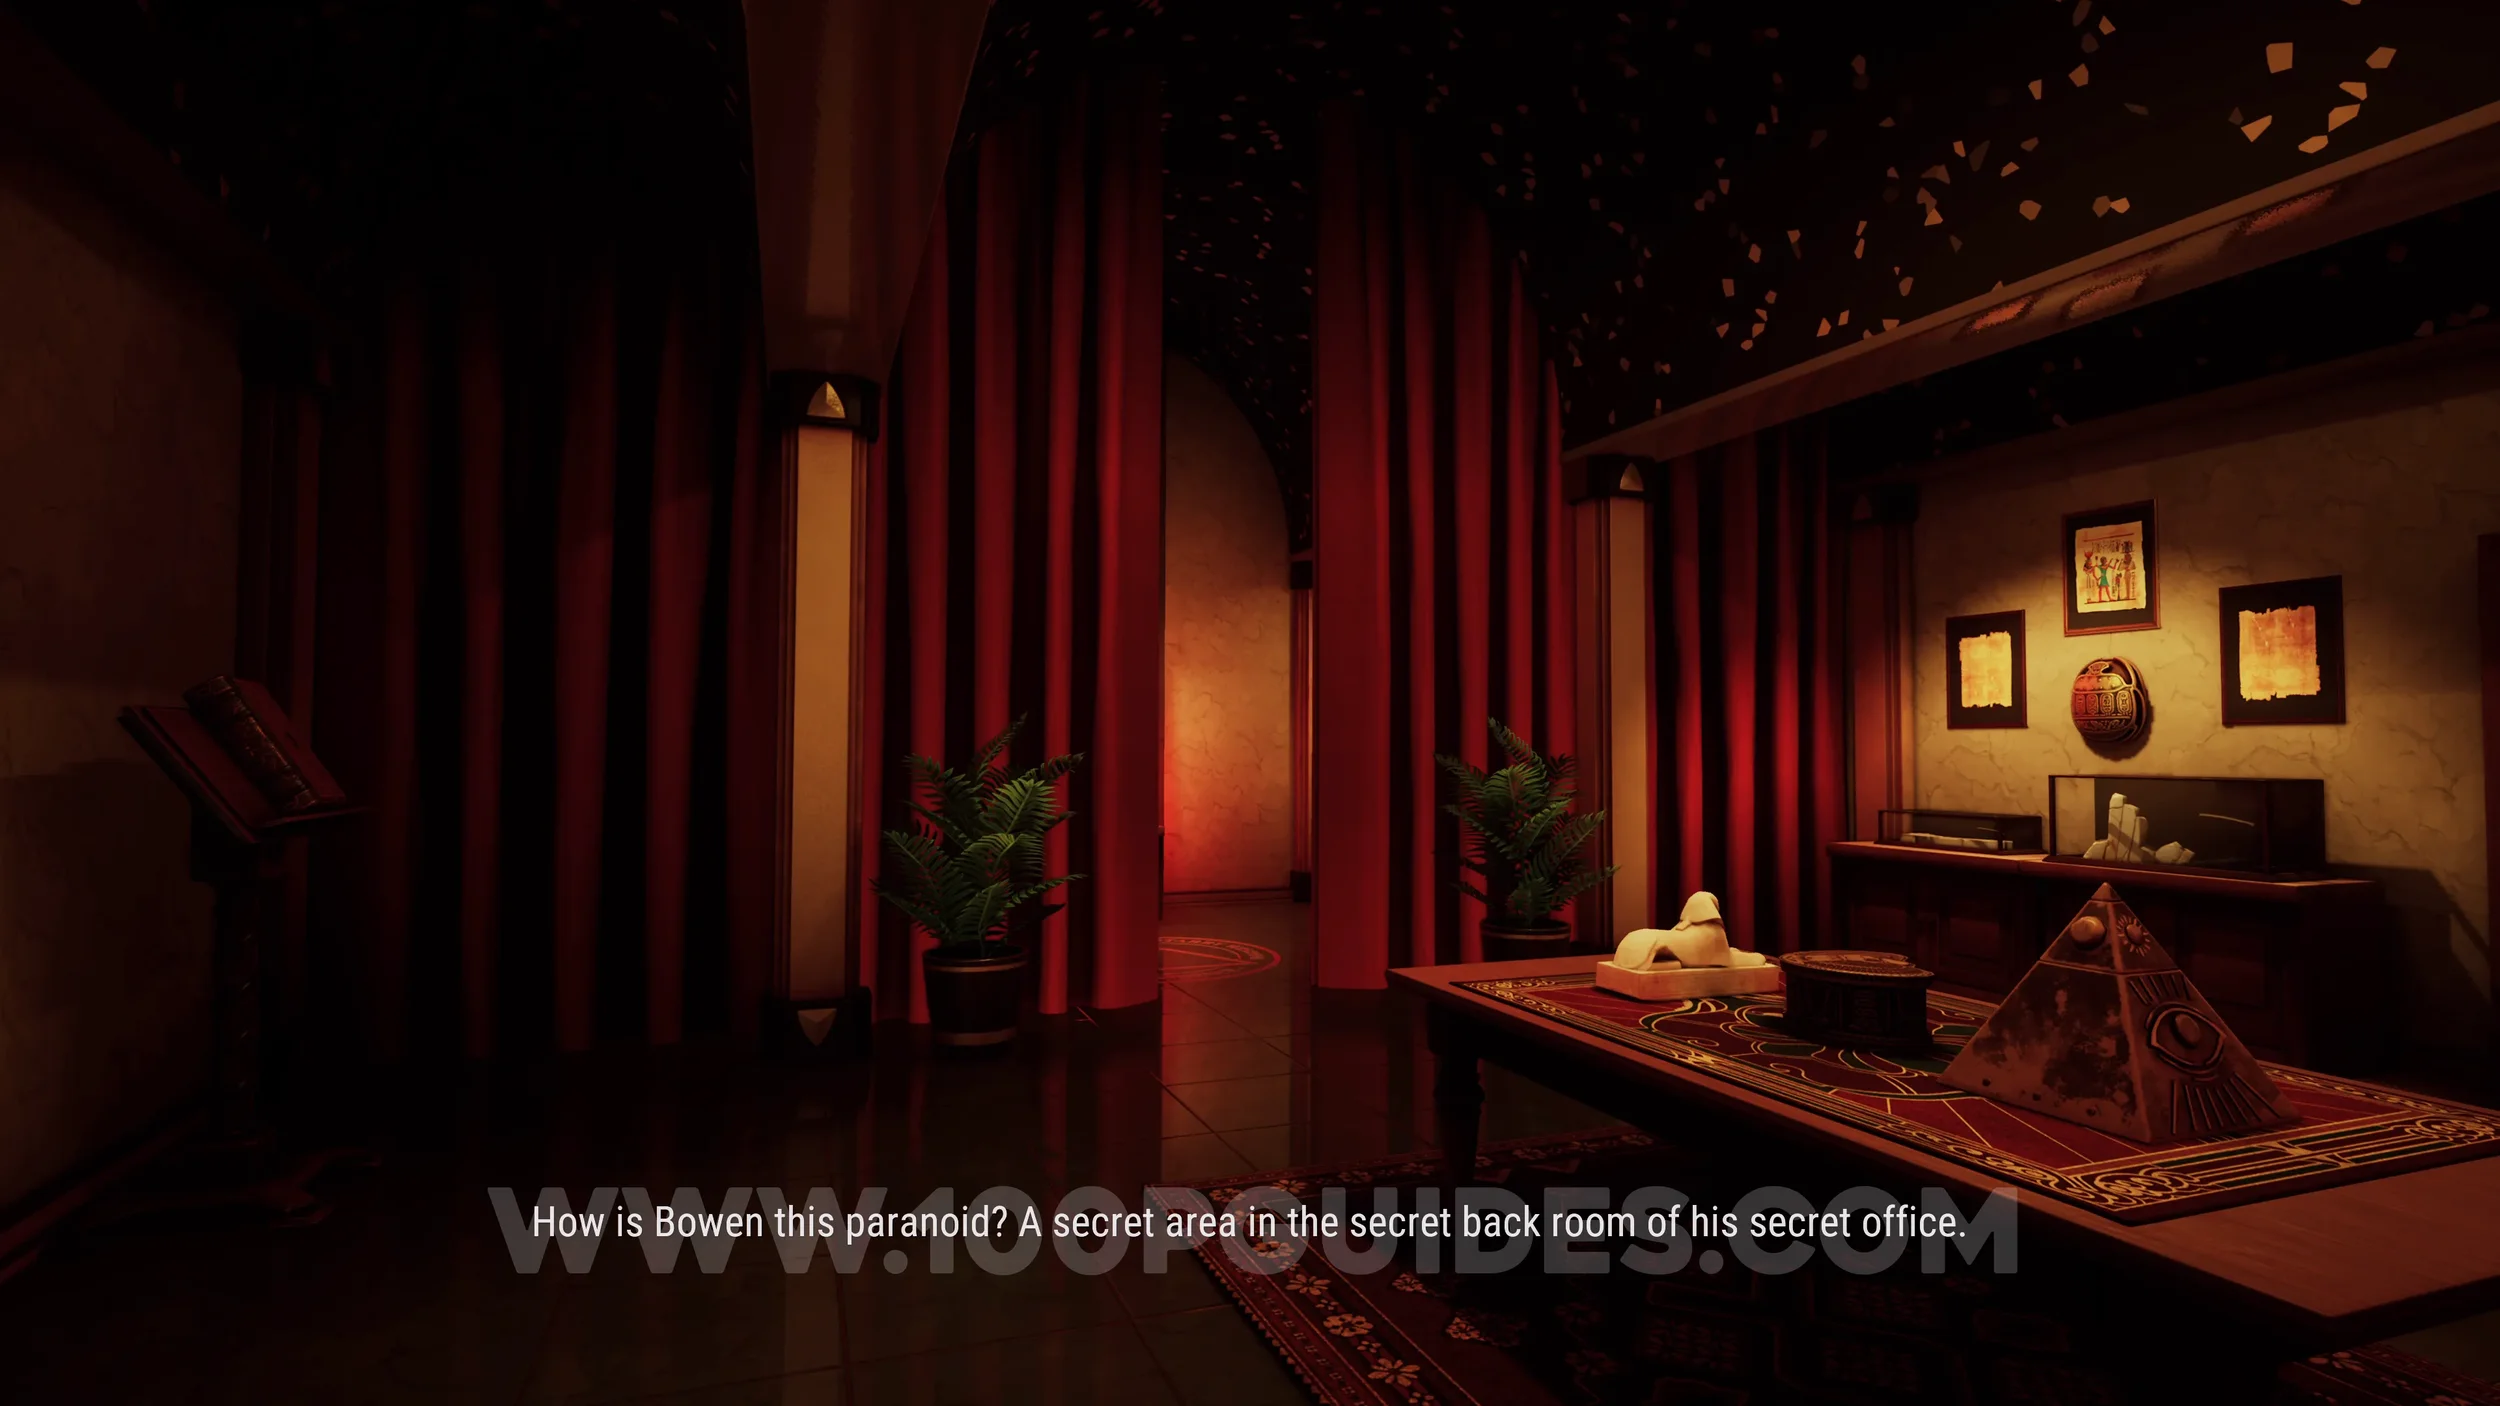
Find the secret room in Chapter 3.
You can find the secret room in Chapter 3 by pressing the two hidden buttons located on the sides of the columns beside the door leading to the final room after taking the lift up to the office.

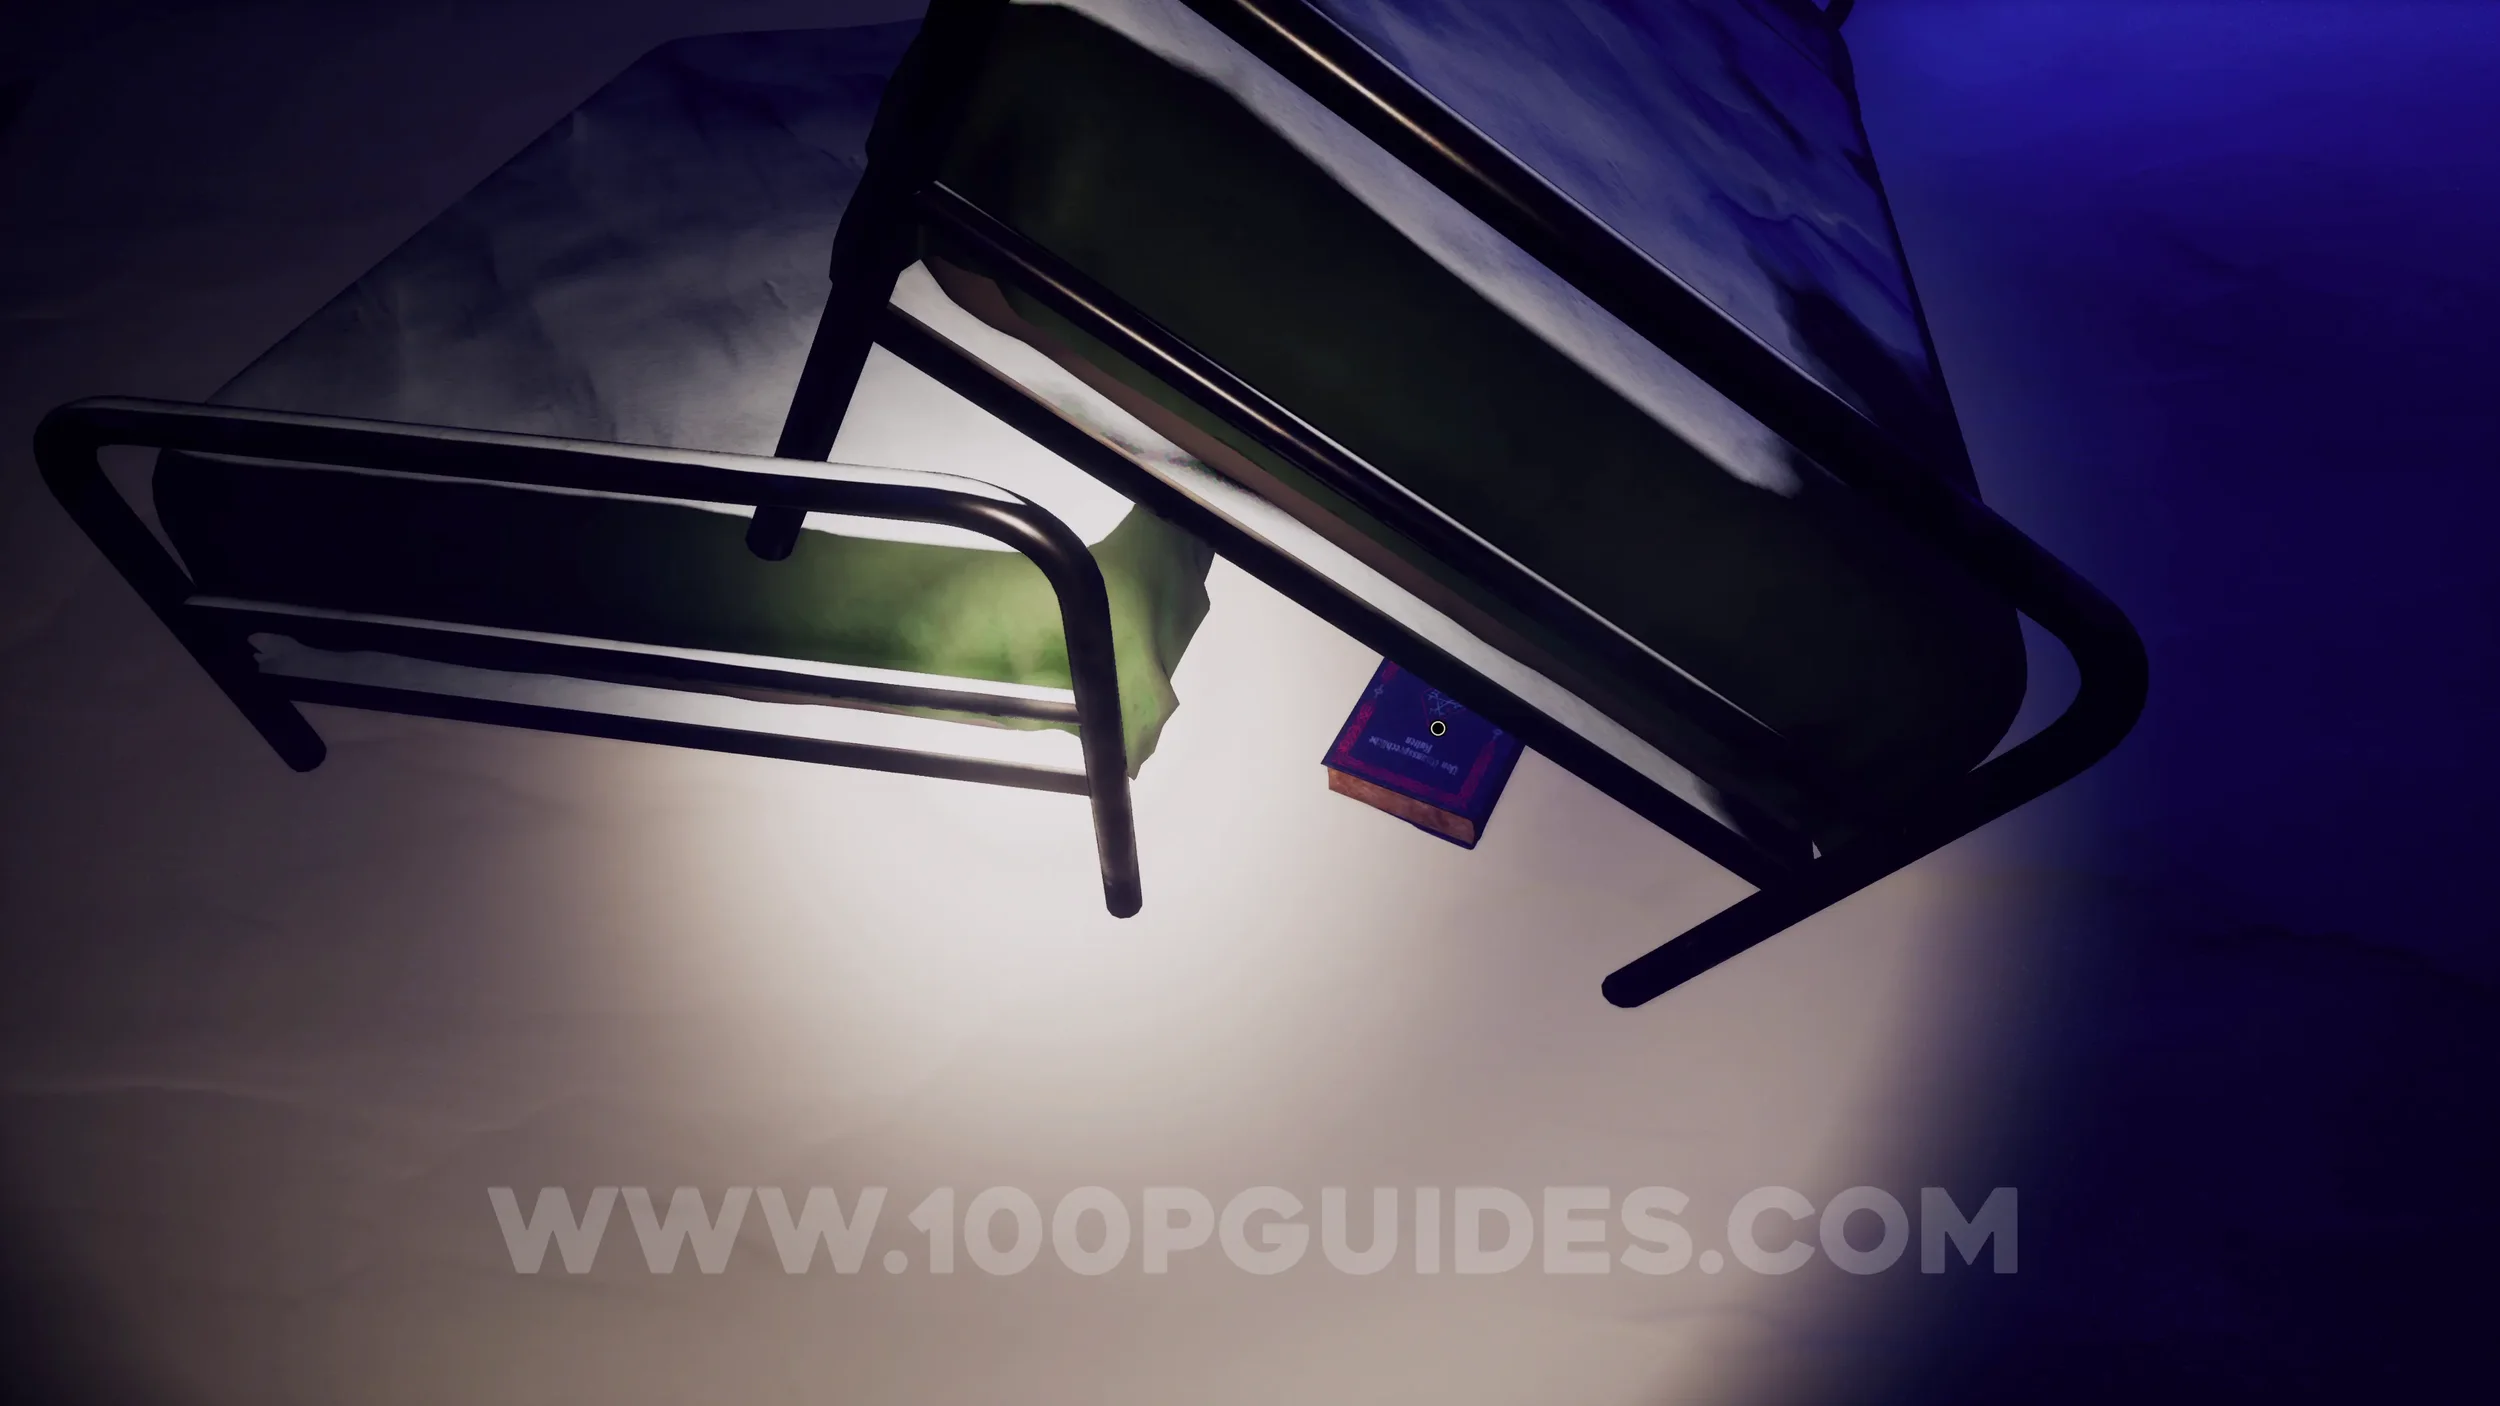
Find the secret object in Chapter 4.
In Chapter 4, after passing through the first building (the tower), look to your left to spot another building with a destroyed corner. Head inside and check underneath the first bed on your right to find the secret object.


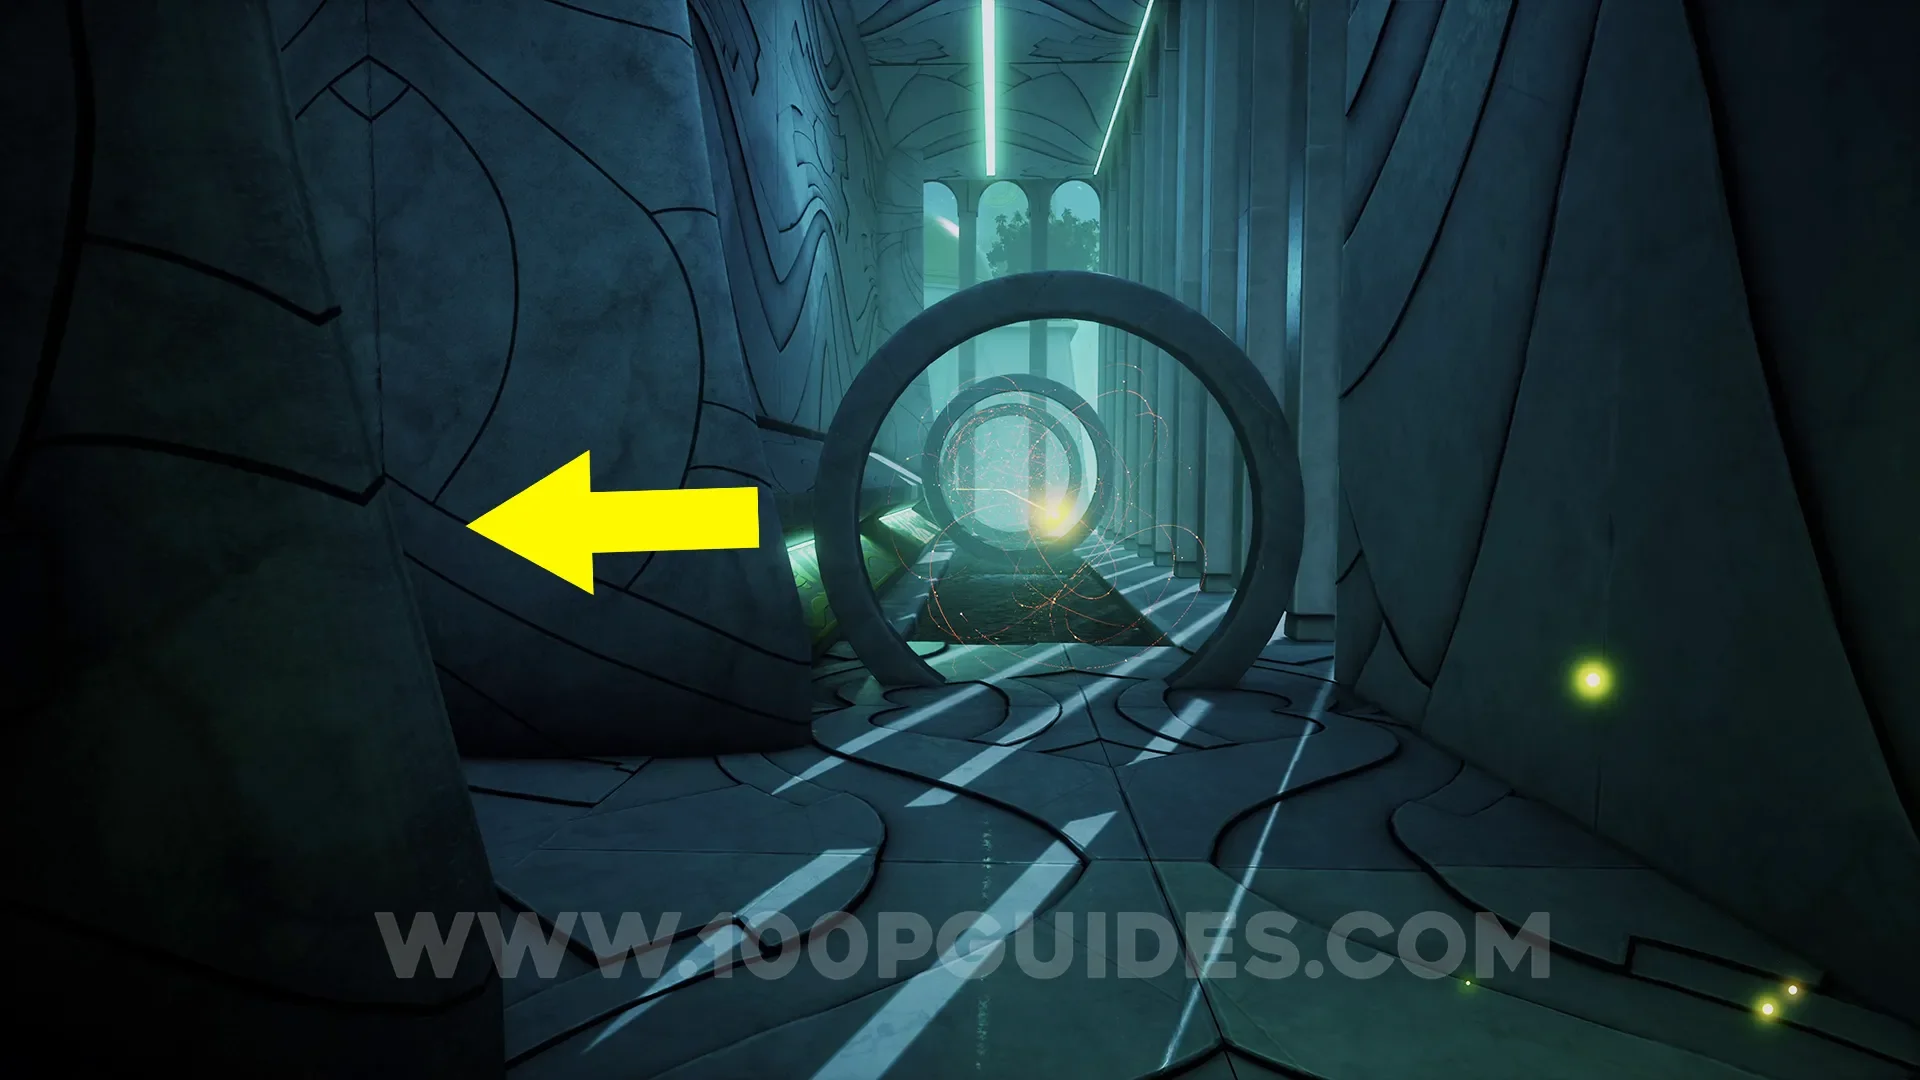
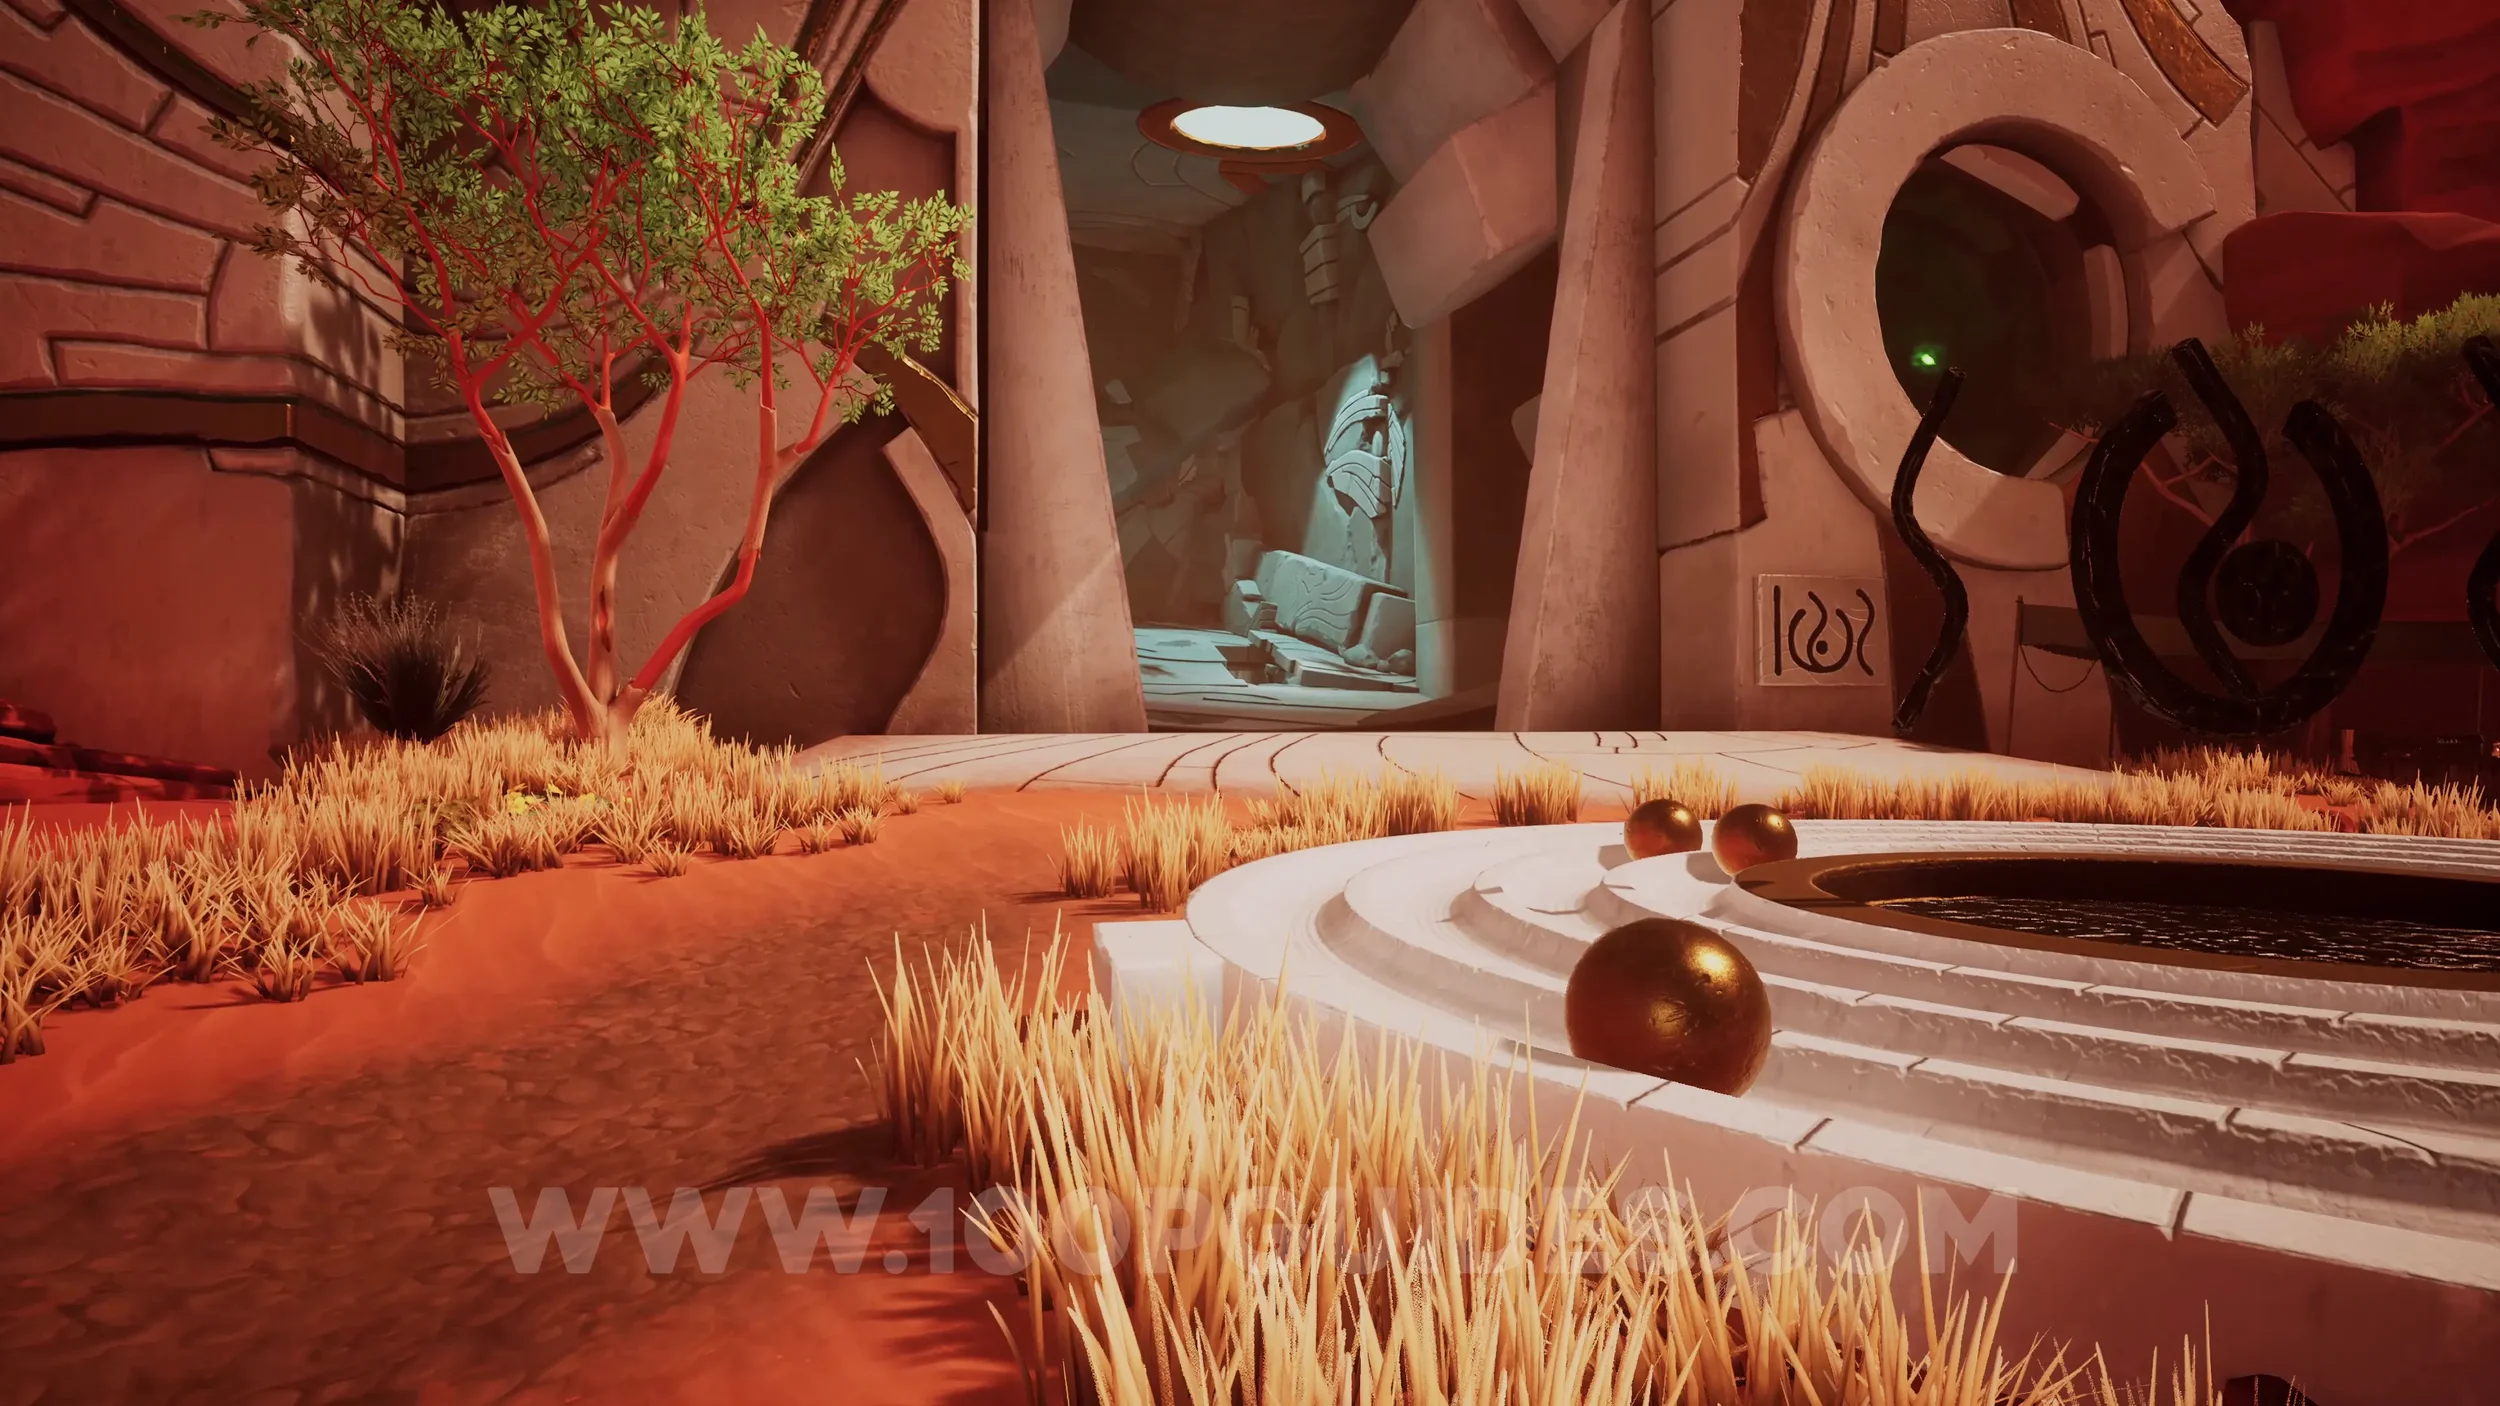
Find the secret object in Chapter 5.
During Chapter 5, you will enter a dream sequence where you pass through a garden before entering a large building with tall hallways. Inside this building, just before reaching the yellow beam that carries you around the corner, enter the room on your left. From there, head to the far-right corner of the room and use the small ramp to reach the hidden object lying on the floor.


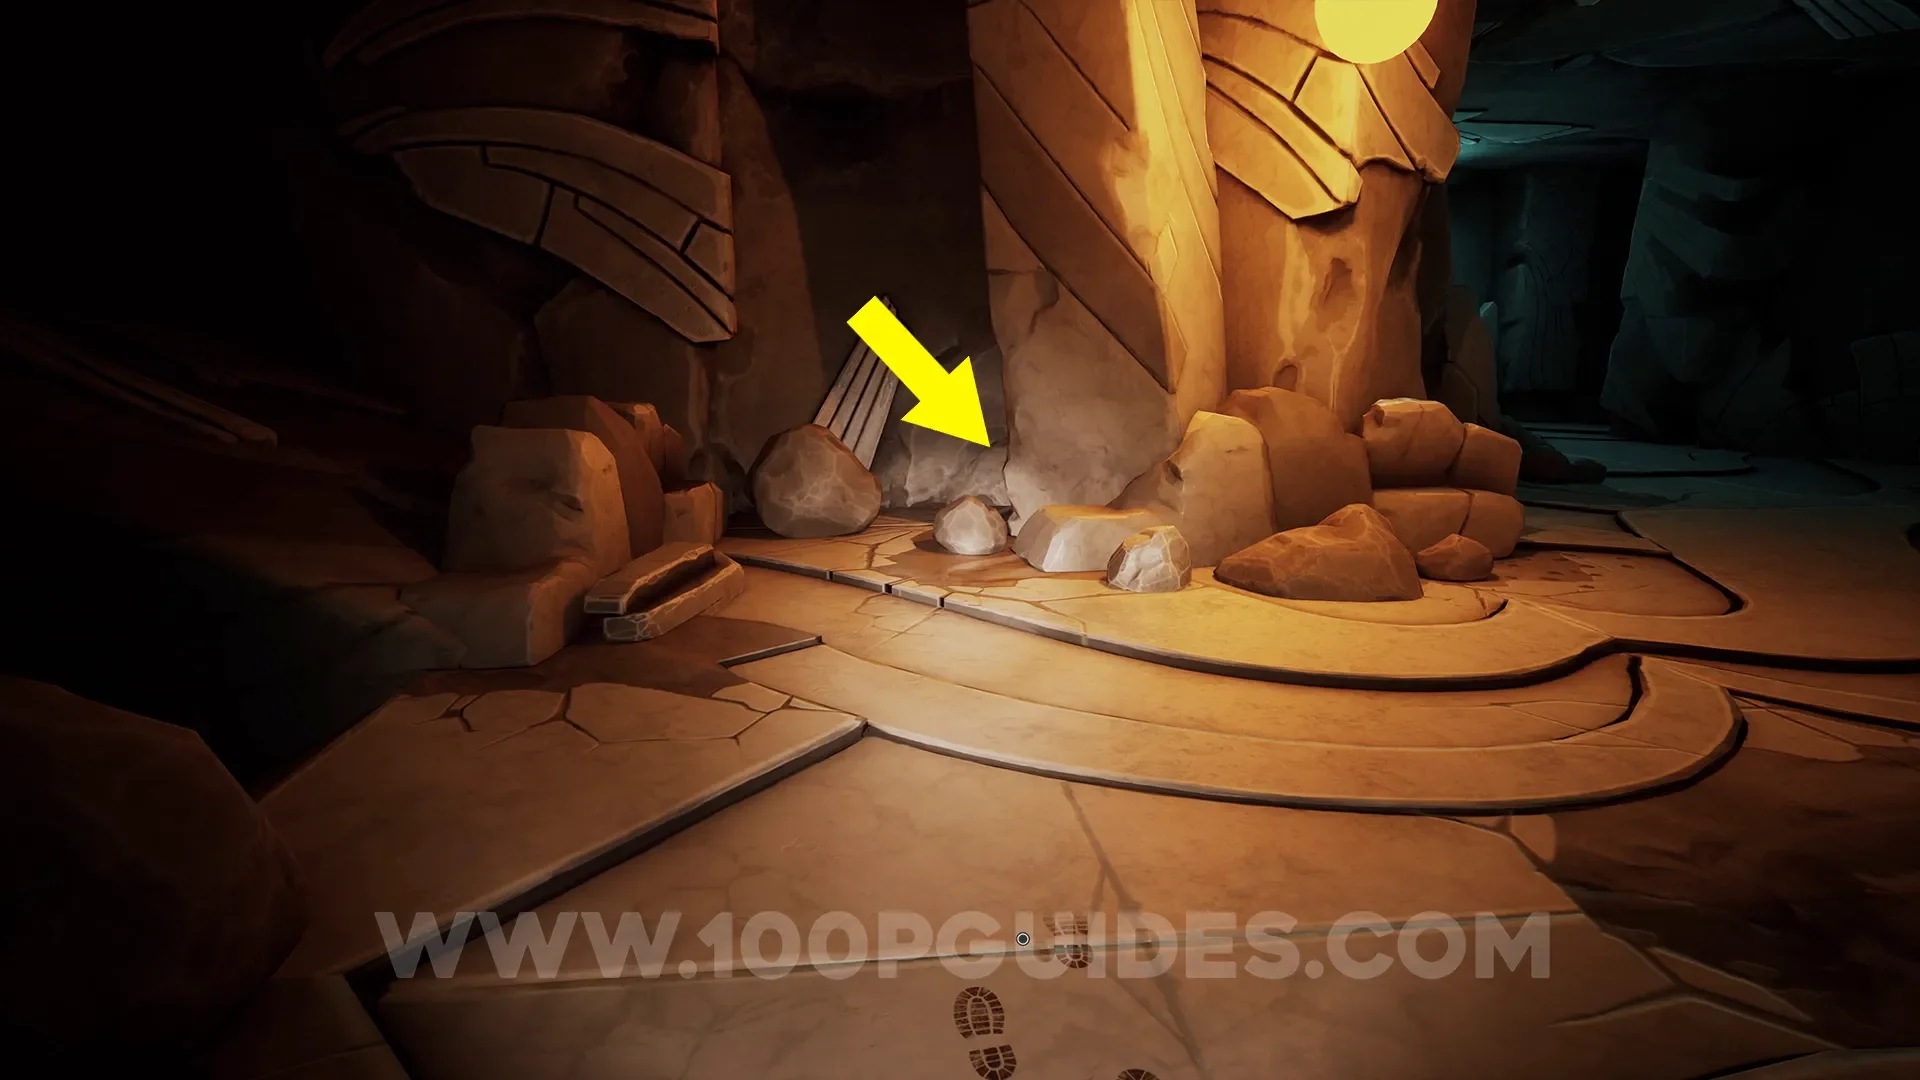
Find the secret object in Chapter 6.
You can find the secret object in Chapter 6 shortly after solving the main puzzle and passing through the massive door. Head down the ramp and continue around the first corner on the left. You will notice a set of footprints on the floor. The collectible is a book hidden behind the pillar directly in front of the footprints.


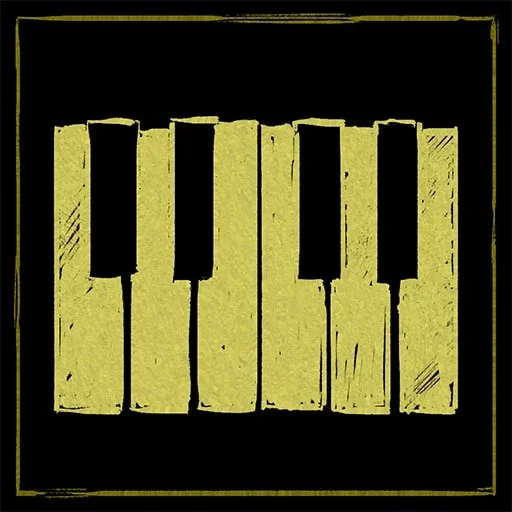
Play a well-known tune.
During the prologue, play the piano keys in the following order to perform a secret tune: 6-1-9-11-8.

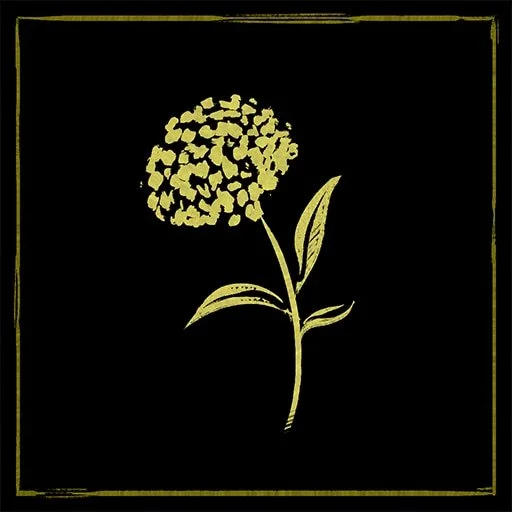
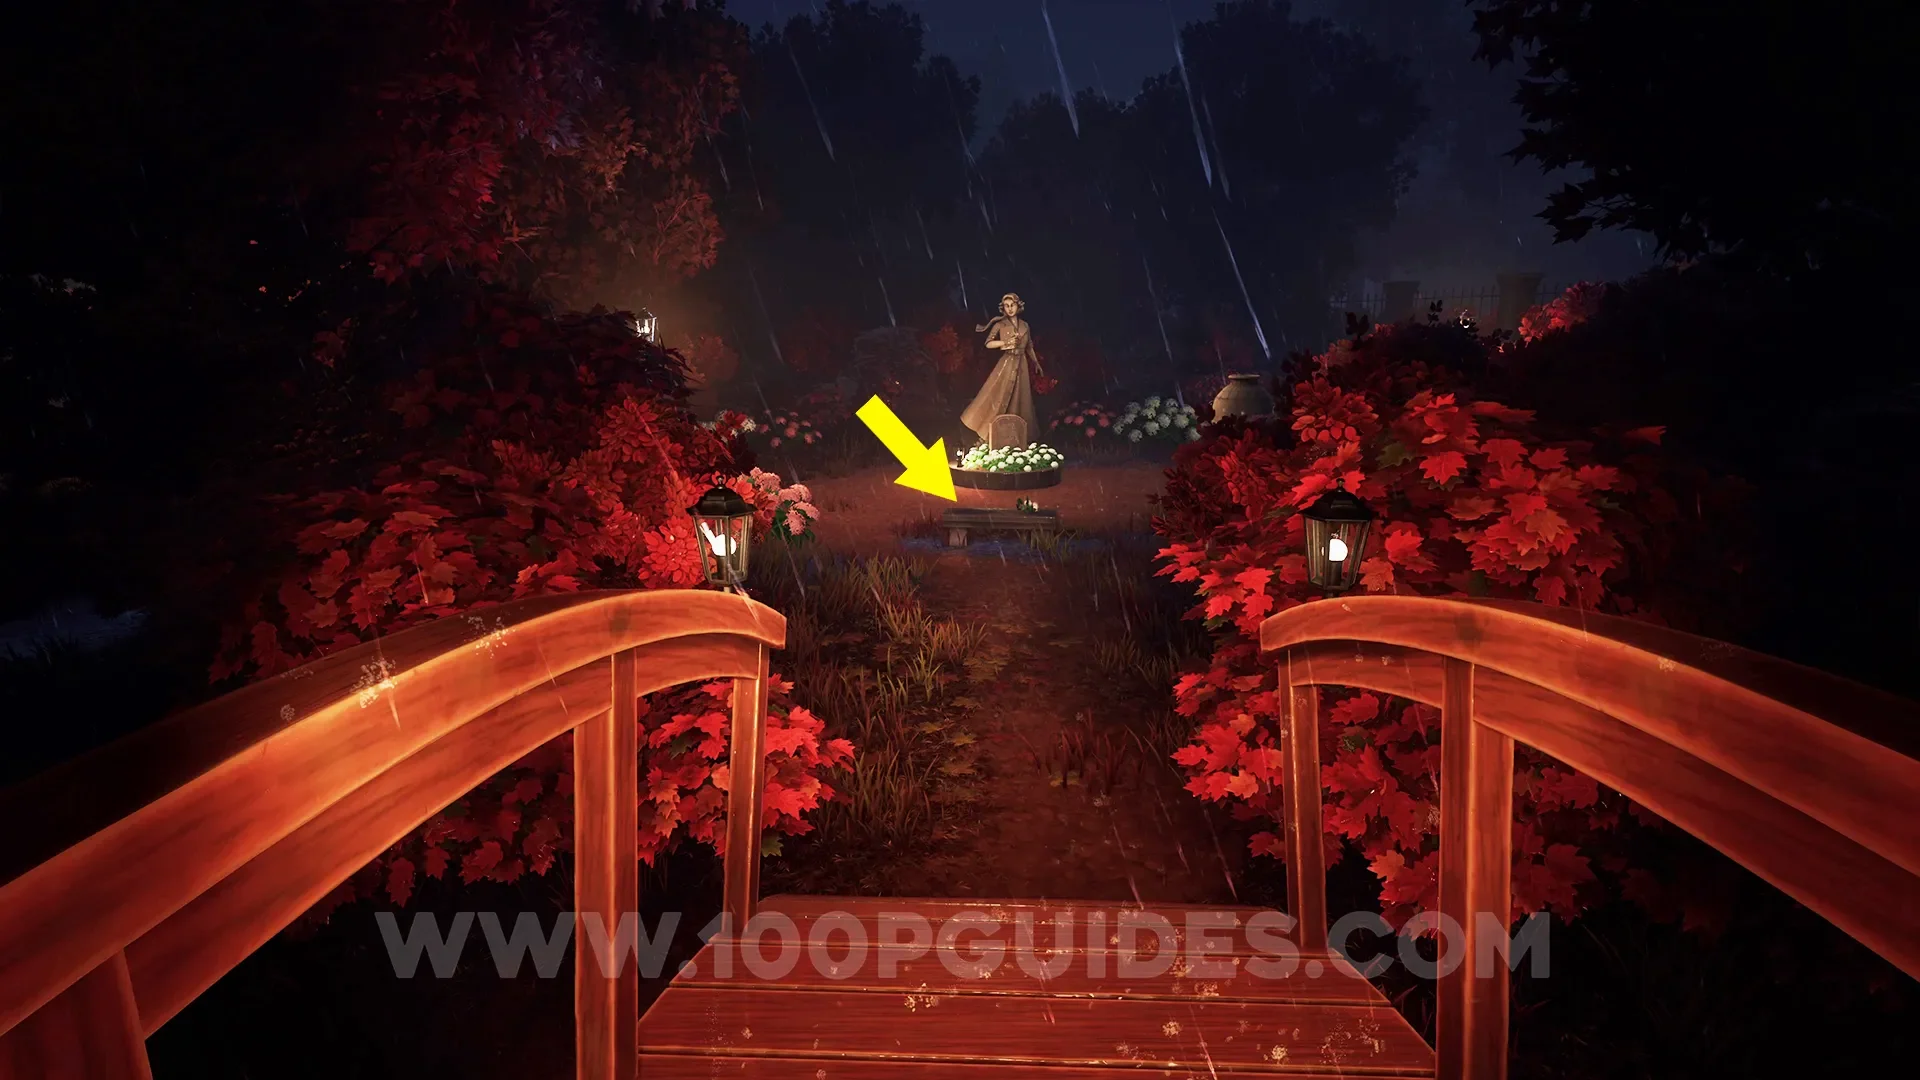
Bring someone flowers.
During Chapter 1, you will eventually reach a greenhouse where you need to retrieve the missing book. Inside the greenhouse, look for a set of white flowers on one of the lower shelves on the right side. Take them to the statue of the lady in the garden where you previously spun one of the vases. Place the flowers on the bench beside the statue to unlock the trophy.

Execute a sequence backwards.
Play through Chapter 2 until you reach the point where you place the statuette into the slot in the tower on the right side that you raised using the “piano.” After placing the statuette, you would normally cover it in oil and burn it. Instead, play the “piano” in the following order to freeze the statue: 3-5-2-4. Once you pick up the frozen statue, the trophy will unlock.


Don't stop being sarcastic.
At the start of Chapter 3, you will be interrogated. During this scene, always choose the “Sarcastic” dialogue option whenever it appears. Also make sure to select “Yes, he might help you with your medical condition,” even though it is not marked as a sarcastic response.


Go underwater and drown.
During Chapter 4, you will reach an underwater section. Progress through the area until your character mentions that he has 10 minutes of air remaining. After that, simply stay idle for a few minutes until the trophy unlocks.
Find a comic book.
During Chapter 4, after restoring the electricity, you will travel back in time to the past. In the first room of this section, you will see a desk on the left side. Look behind the desk to find a comic inside the bin. Pick it up to unlock the trophy.


Catch someone goofing off at work.
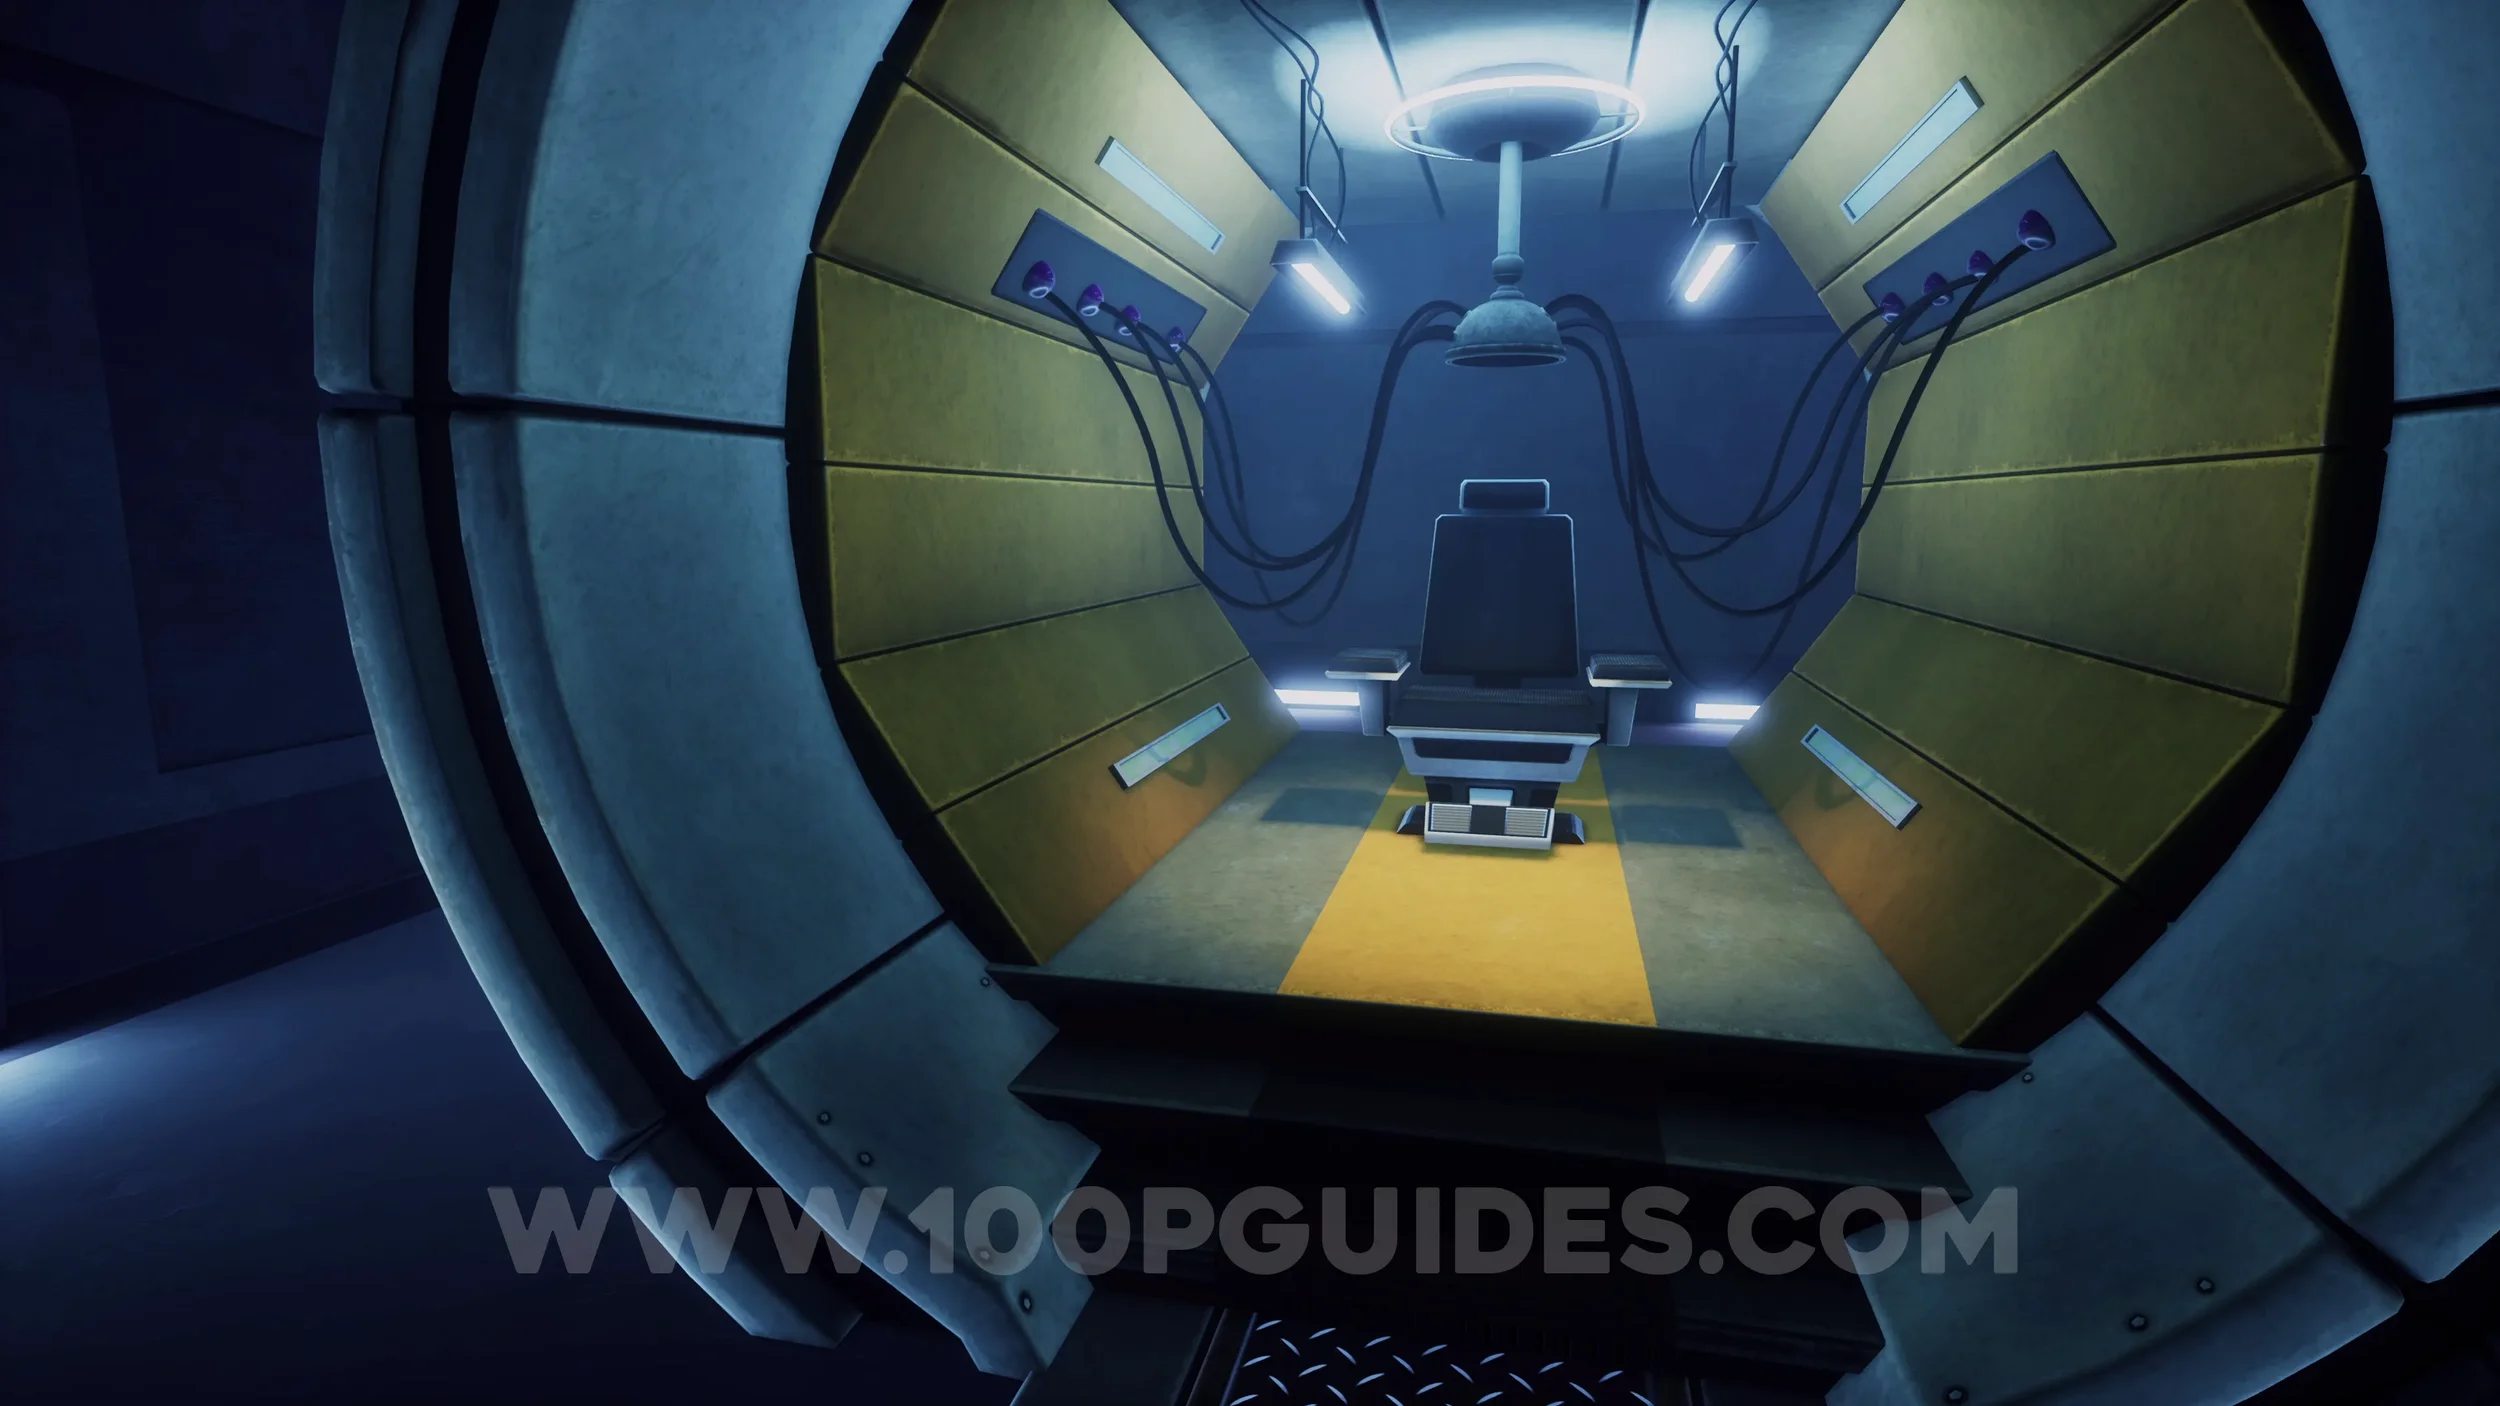
Near the end of Chapter 5, you will wake up in a lab beside a chair inside a tube. Leave the room through the door on the left side, then turn left and enter the office immediately on your right. Inside the office, head to the PC on the far right side of the room and turn on the monitor to unlock the trophy.


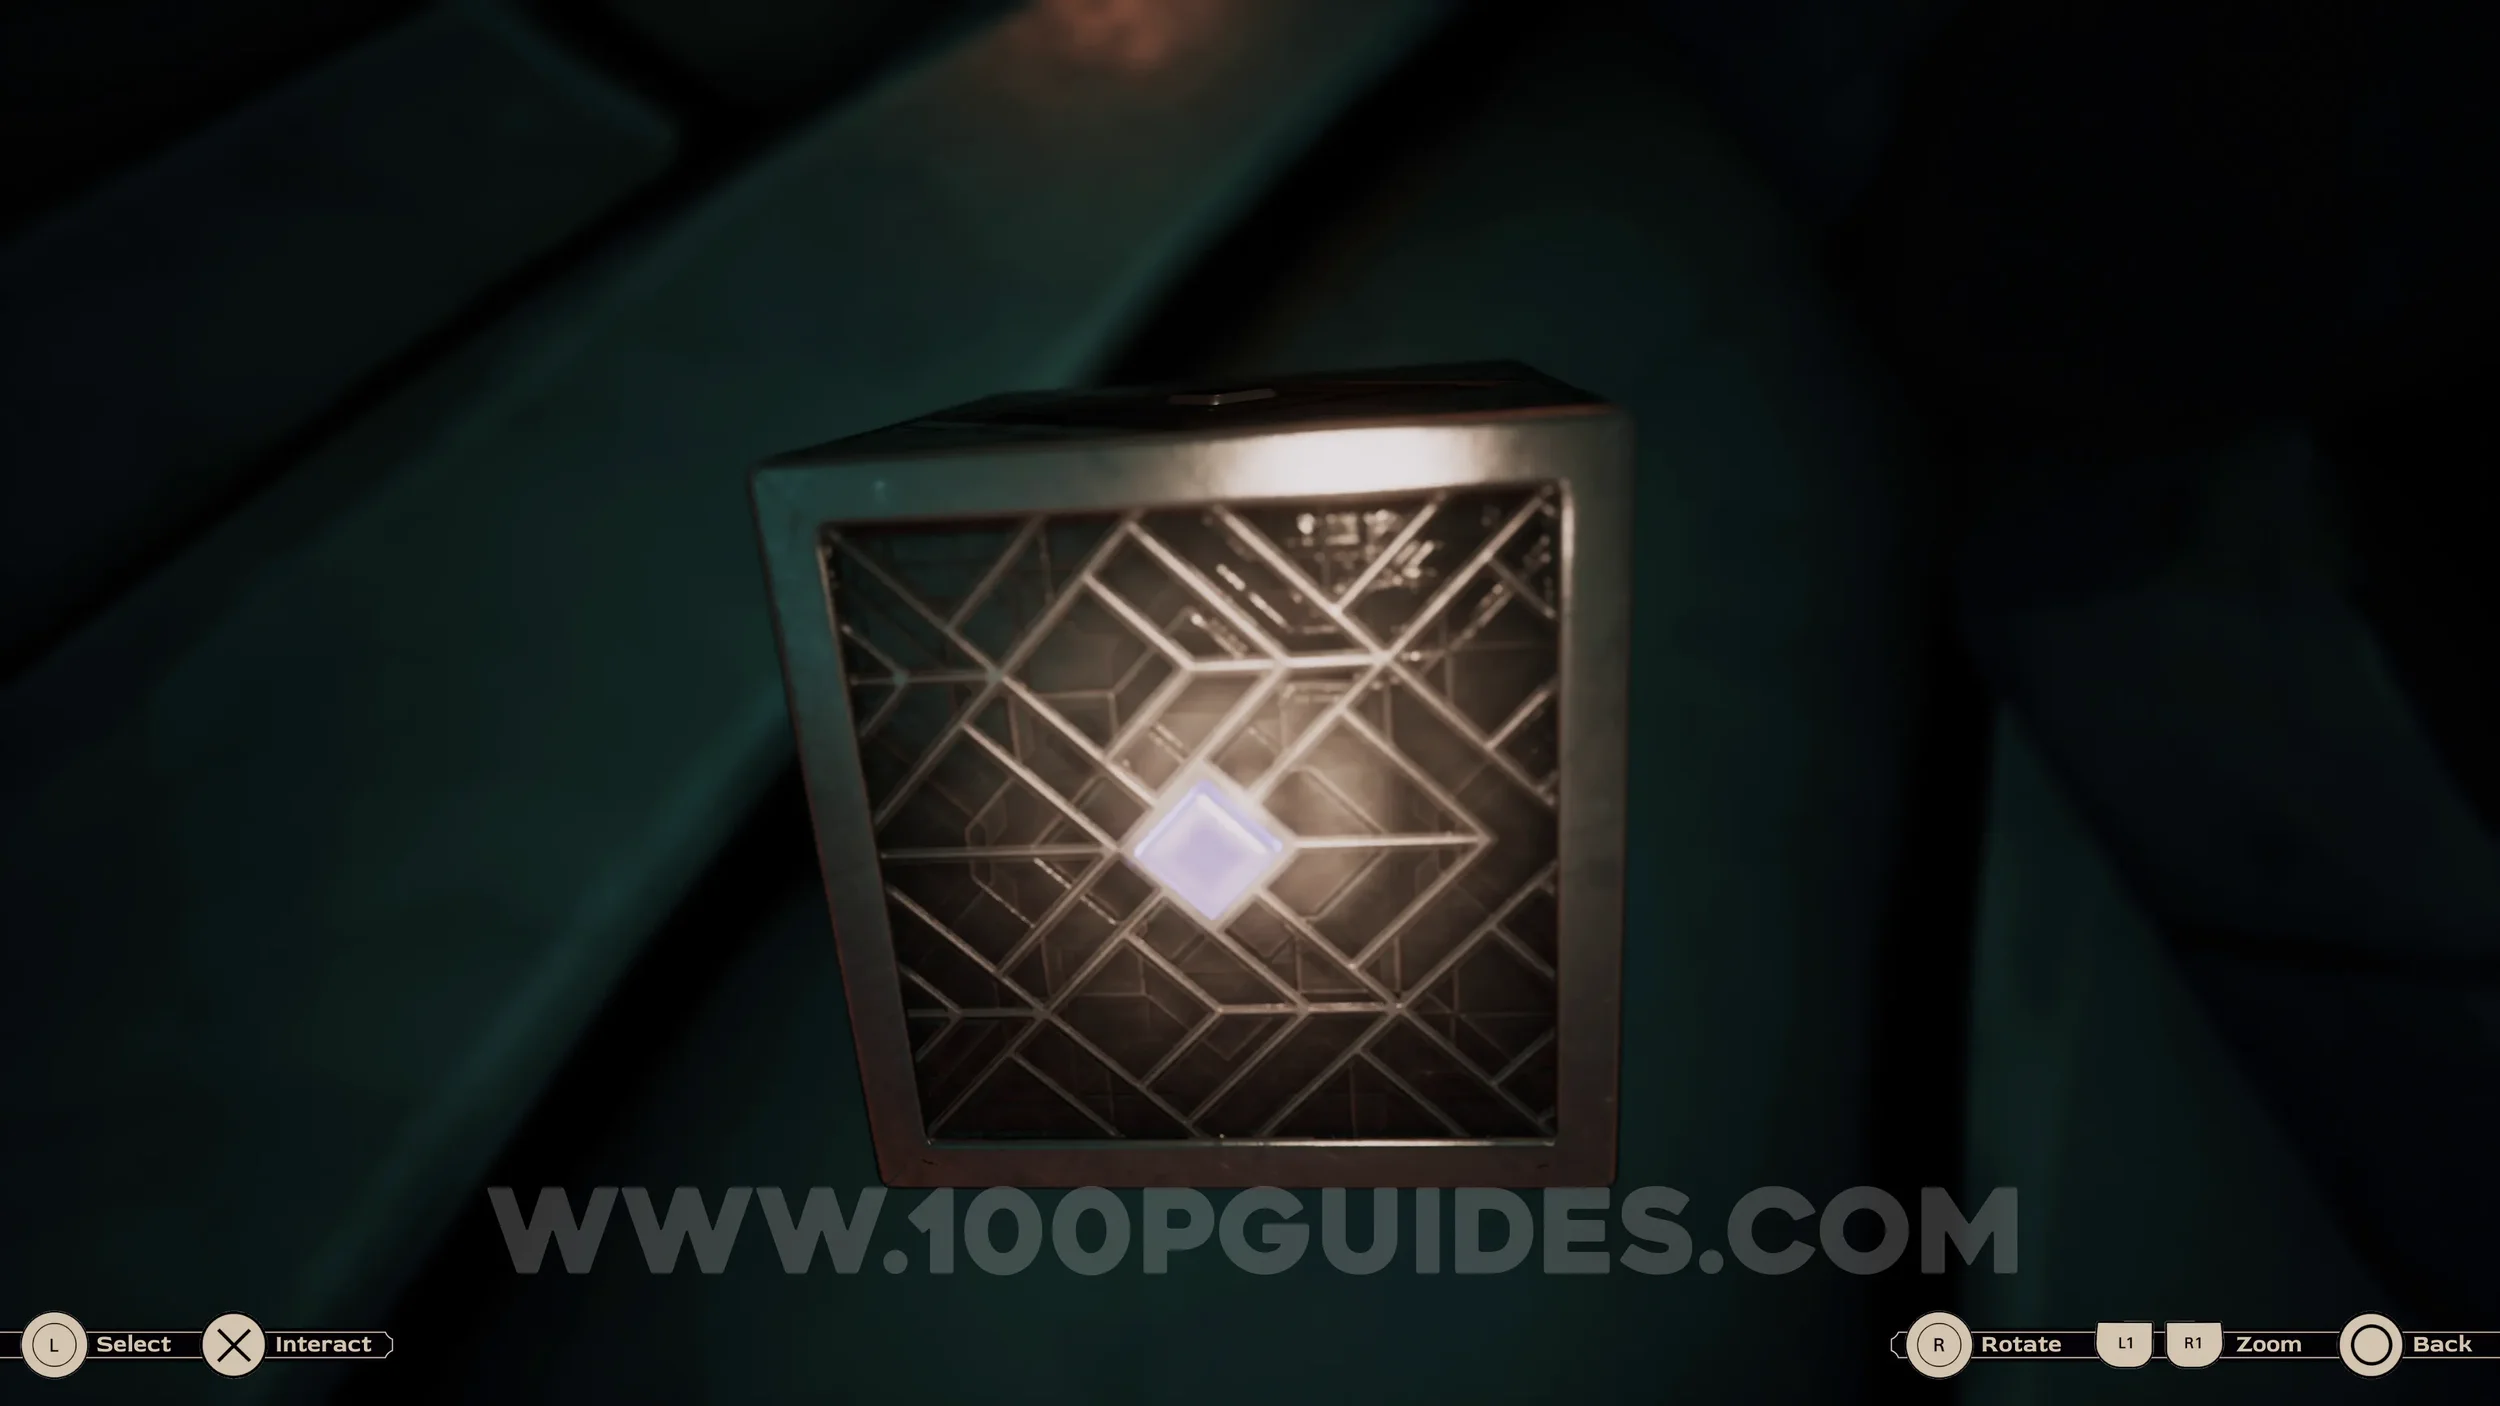
Does the word TIWOHAR mean anything to you?
During Chapter 6, after solving the main puzzle and passing through the large door, do not head down the slope. Instead, go to the back of the room and look for a small gap in the rocks on the left side that you can squeeze through. Inside this hidden area, you will find a cube. To open it, interact with the sides in the correct order. Start with the side that has no diamonds around it, then select the side with one diamond, then two diamonds, and continue in order until the cube opens and the trophy unlocks.

Refuse to follow Doctor West's orders.
At the end of the game, you will be given a choice. To unlock this trophy, select "Stop Evangeline and take her place".
Let Evangeline sacrifice herself.
At the end of the game, you will be given a choice. To unlock this trophy, select "Let Evangeline Sacrifice Herself".
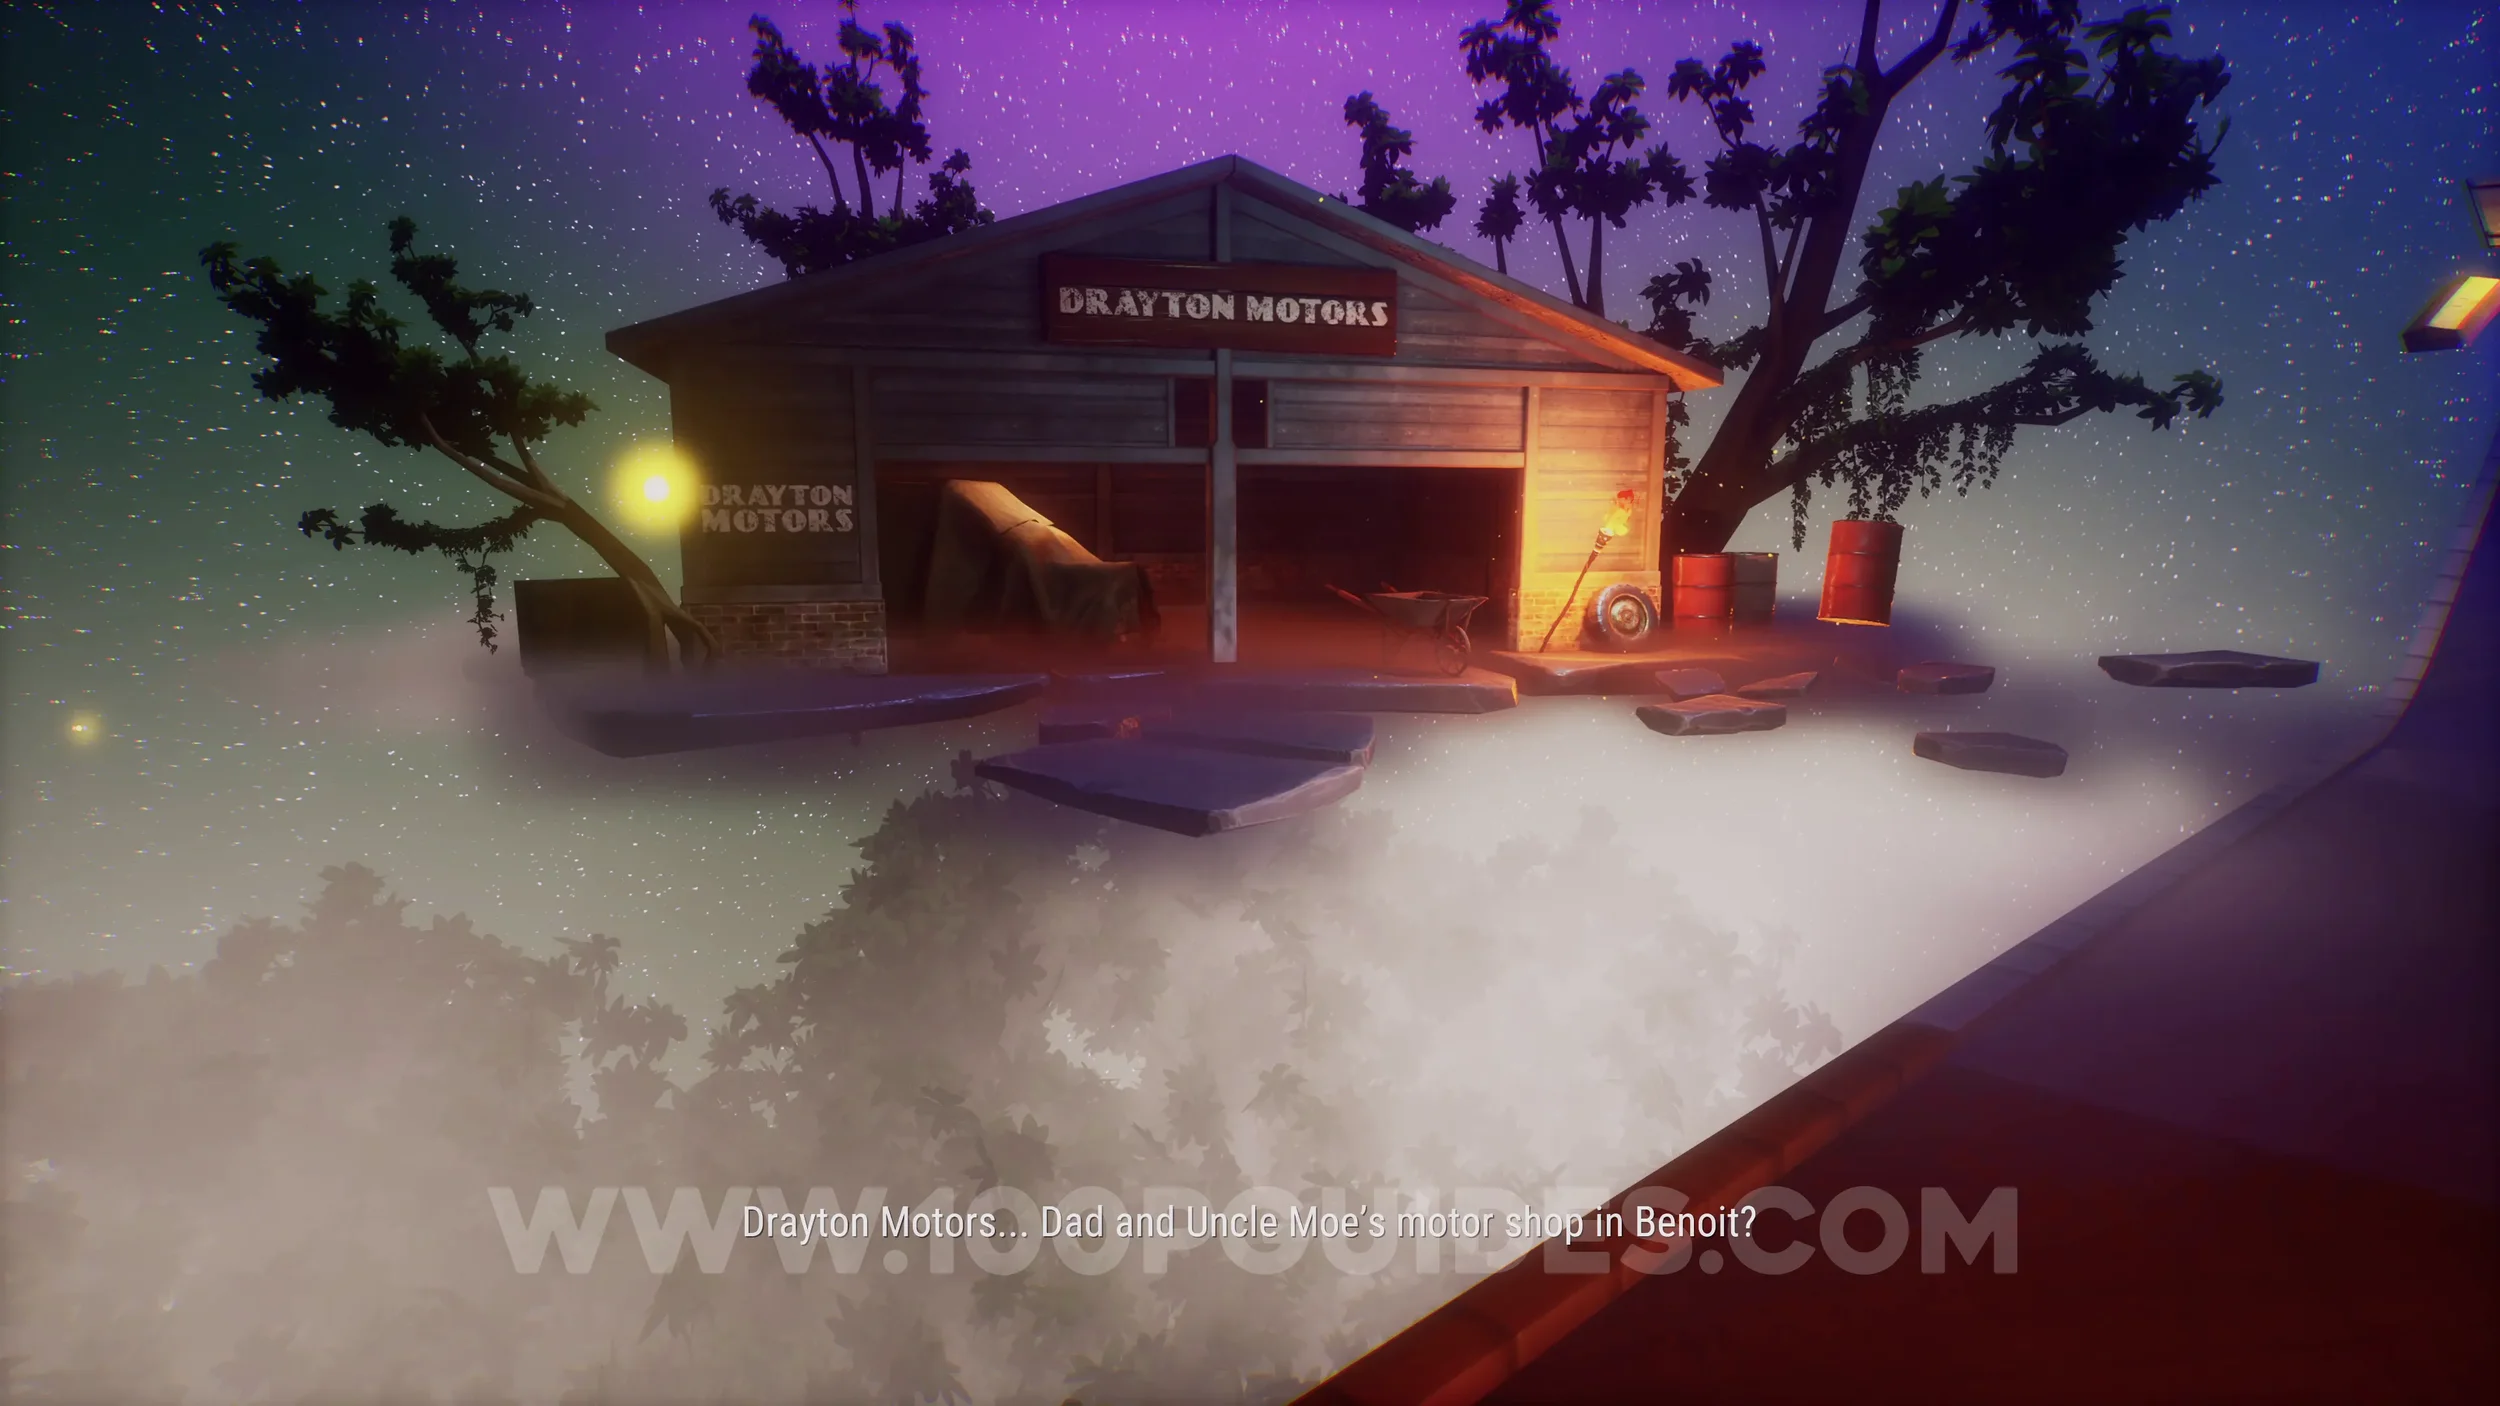
Find the Out of the Blue Key.
After the interrogation scene at the start of Chapter 3, you will enter a dreamlike area. Continue forward until you walk through a book and spot a garage on your left. At this point, turn around to find a floating blue key. Pick it up to unlock the trophy.