Resident Evil 9 Requiem All Collectible Locations
This guide will show you where to find every collectible in Resident Evil 9 Requiem. This includes all Files, Mr. Raccoons, Safes, Antique Coins, Weapons, Upgrades, Charms, etc... It also includes the more missble trophies in the game.
This guide will cover every collectible in Resident Evil 9 Requiem. The following are the only ones needed for trophies:
75 Files
25 Mr. Raccoons
3 BSAA Containers
5 Safes
This guide covers all collectibles in the game, including Mr. Raccoons, Files, Safes, BSAA Containers, and other optional items such as Antique Coins, Upgrades, Weapons, Charms, Crafting Recipes, Hip Pouches, and the more missable trophies.
I highly recommend creating a manual save at the start of each major section of the game. Collectibles count across all save files, so if you miss anything, you can quickly reload the closest save and pick it up without needing a full replay. These saves are also extremely helpful for cleaning up missable trophies.
Please note that this guide was created while playing on Casual/Standard difficulty. If you are playing on Insanity difficulty, certain safe codes and Antique Coin locations may differ.
Wrenwood
File #1 - Investigation Report. You start with this file in your inventory as soon as you start the game. Press the Touch Pad and go to files in the menu. Then turn the folder until you can press X and open it.
File #2 - Wrenwood City Guide. On the board to your right as you walk down the first street.

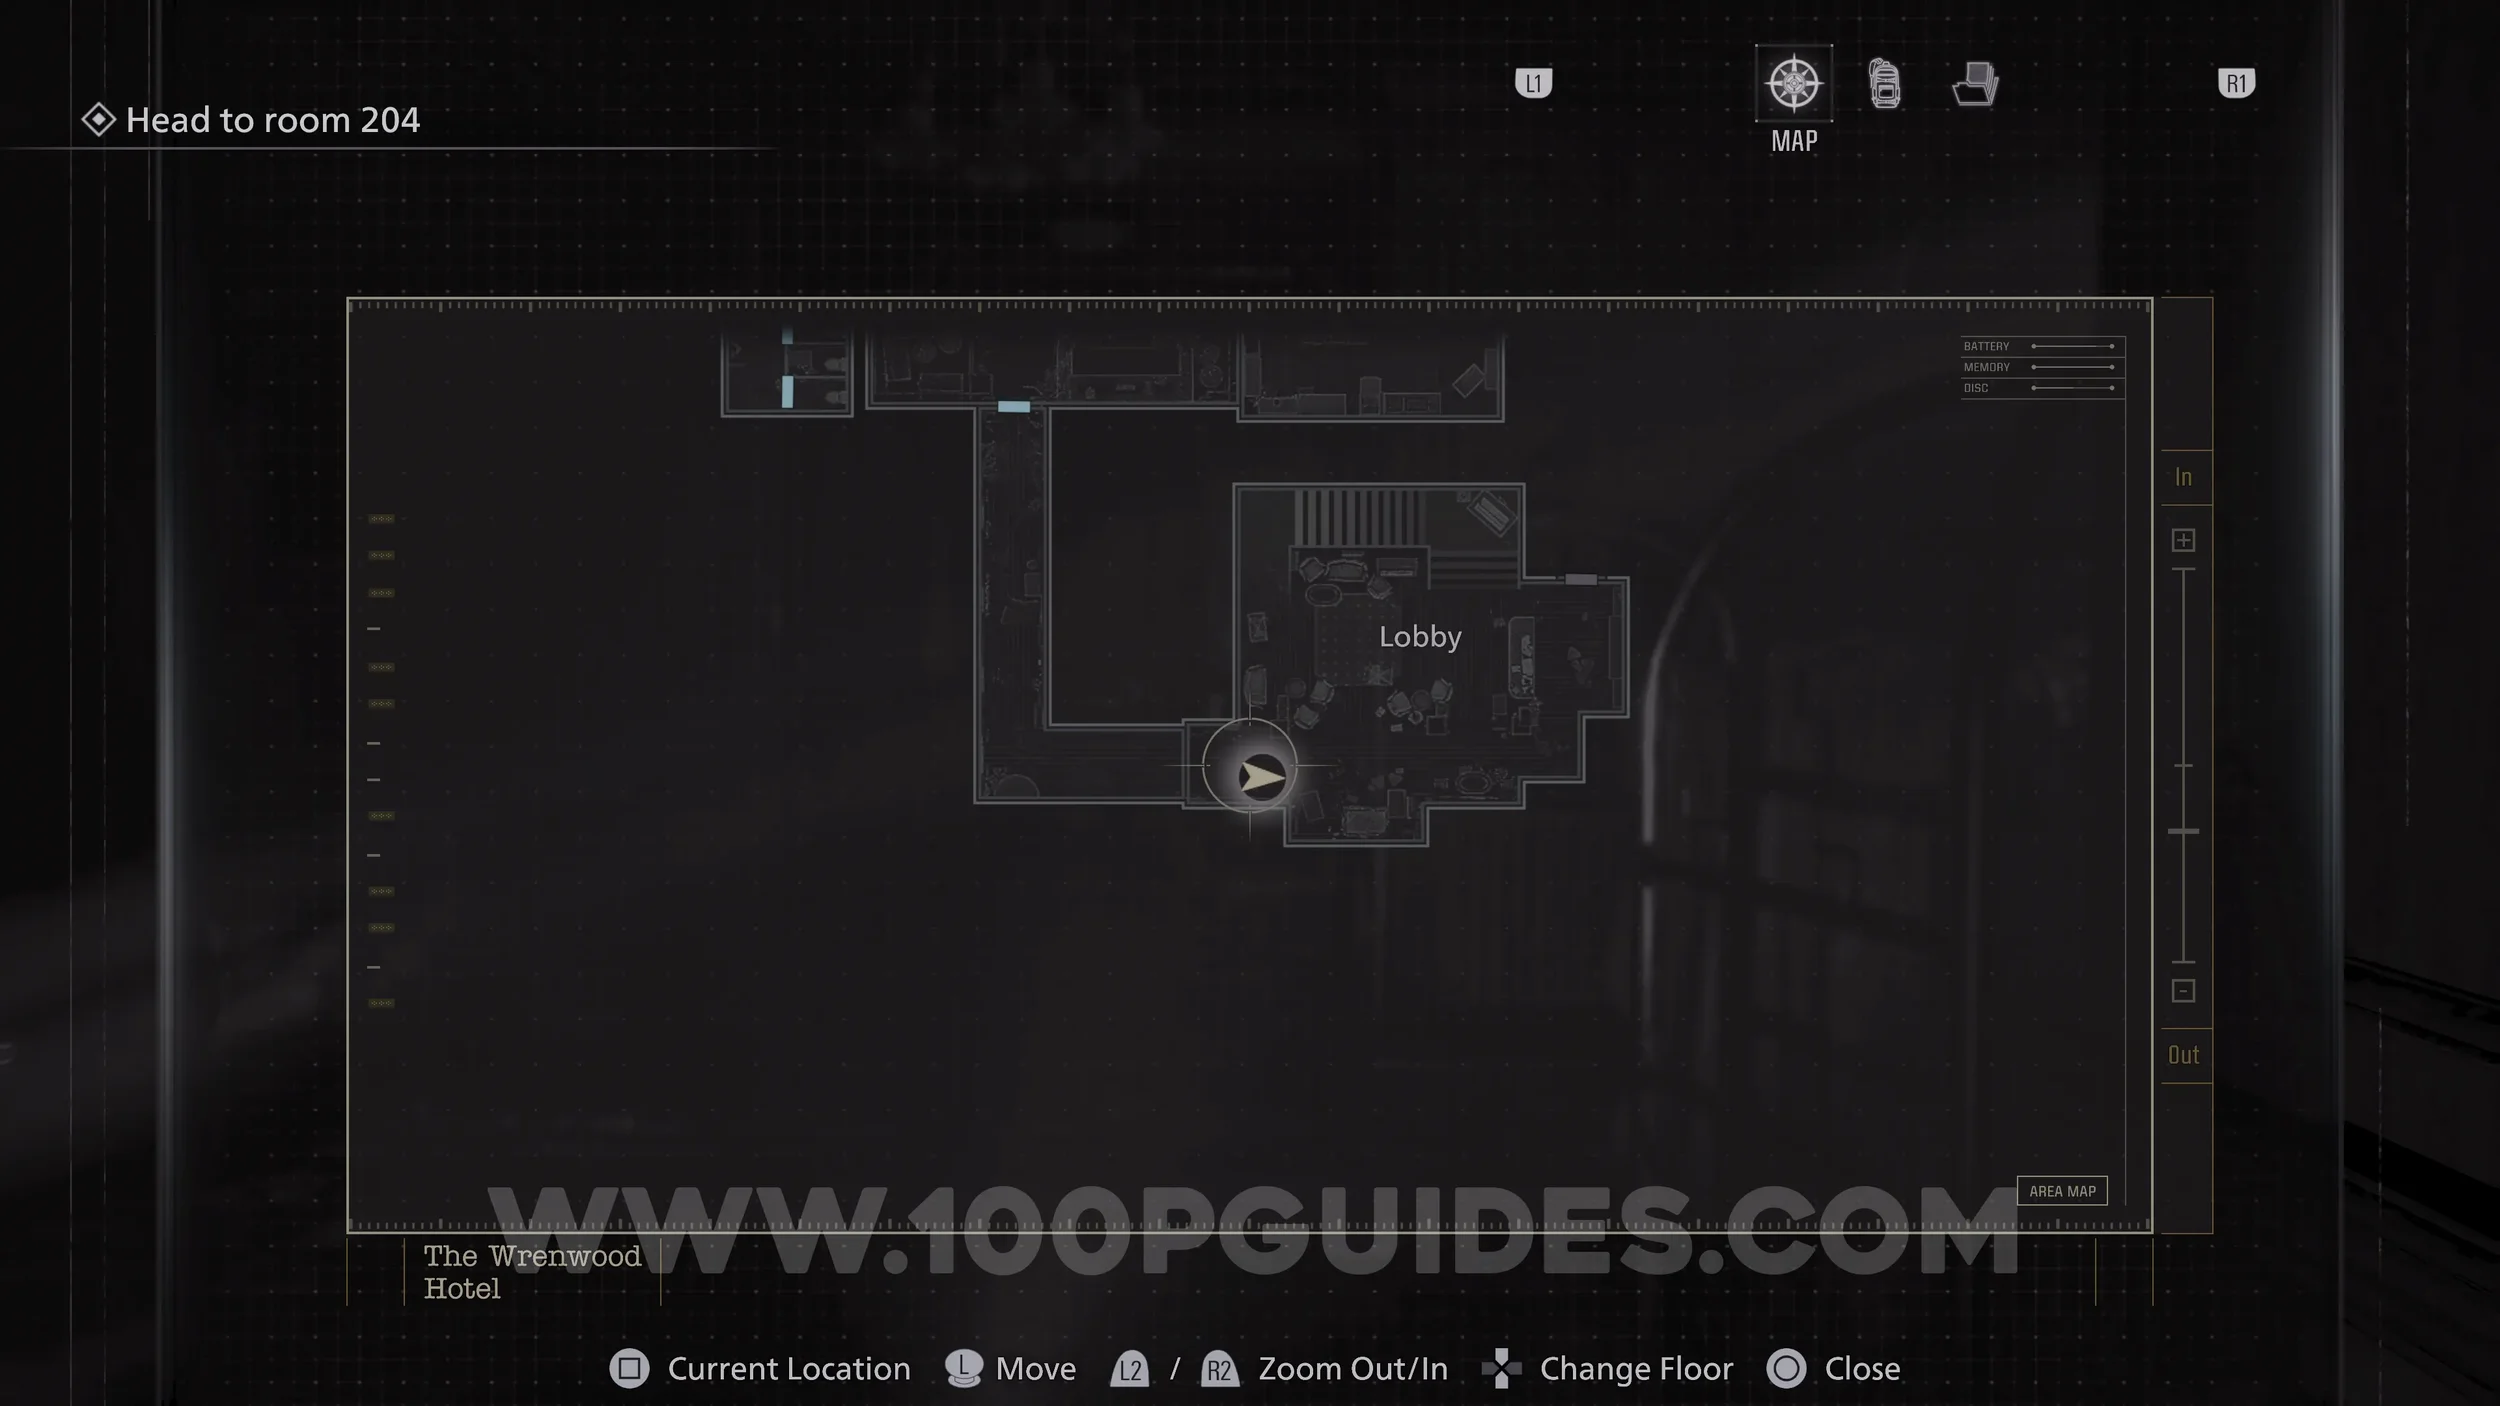
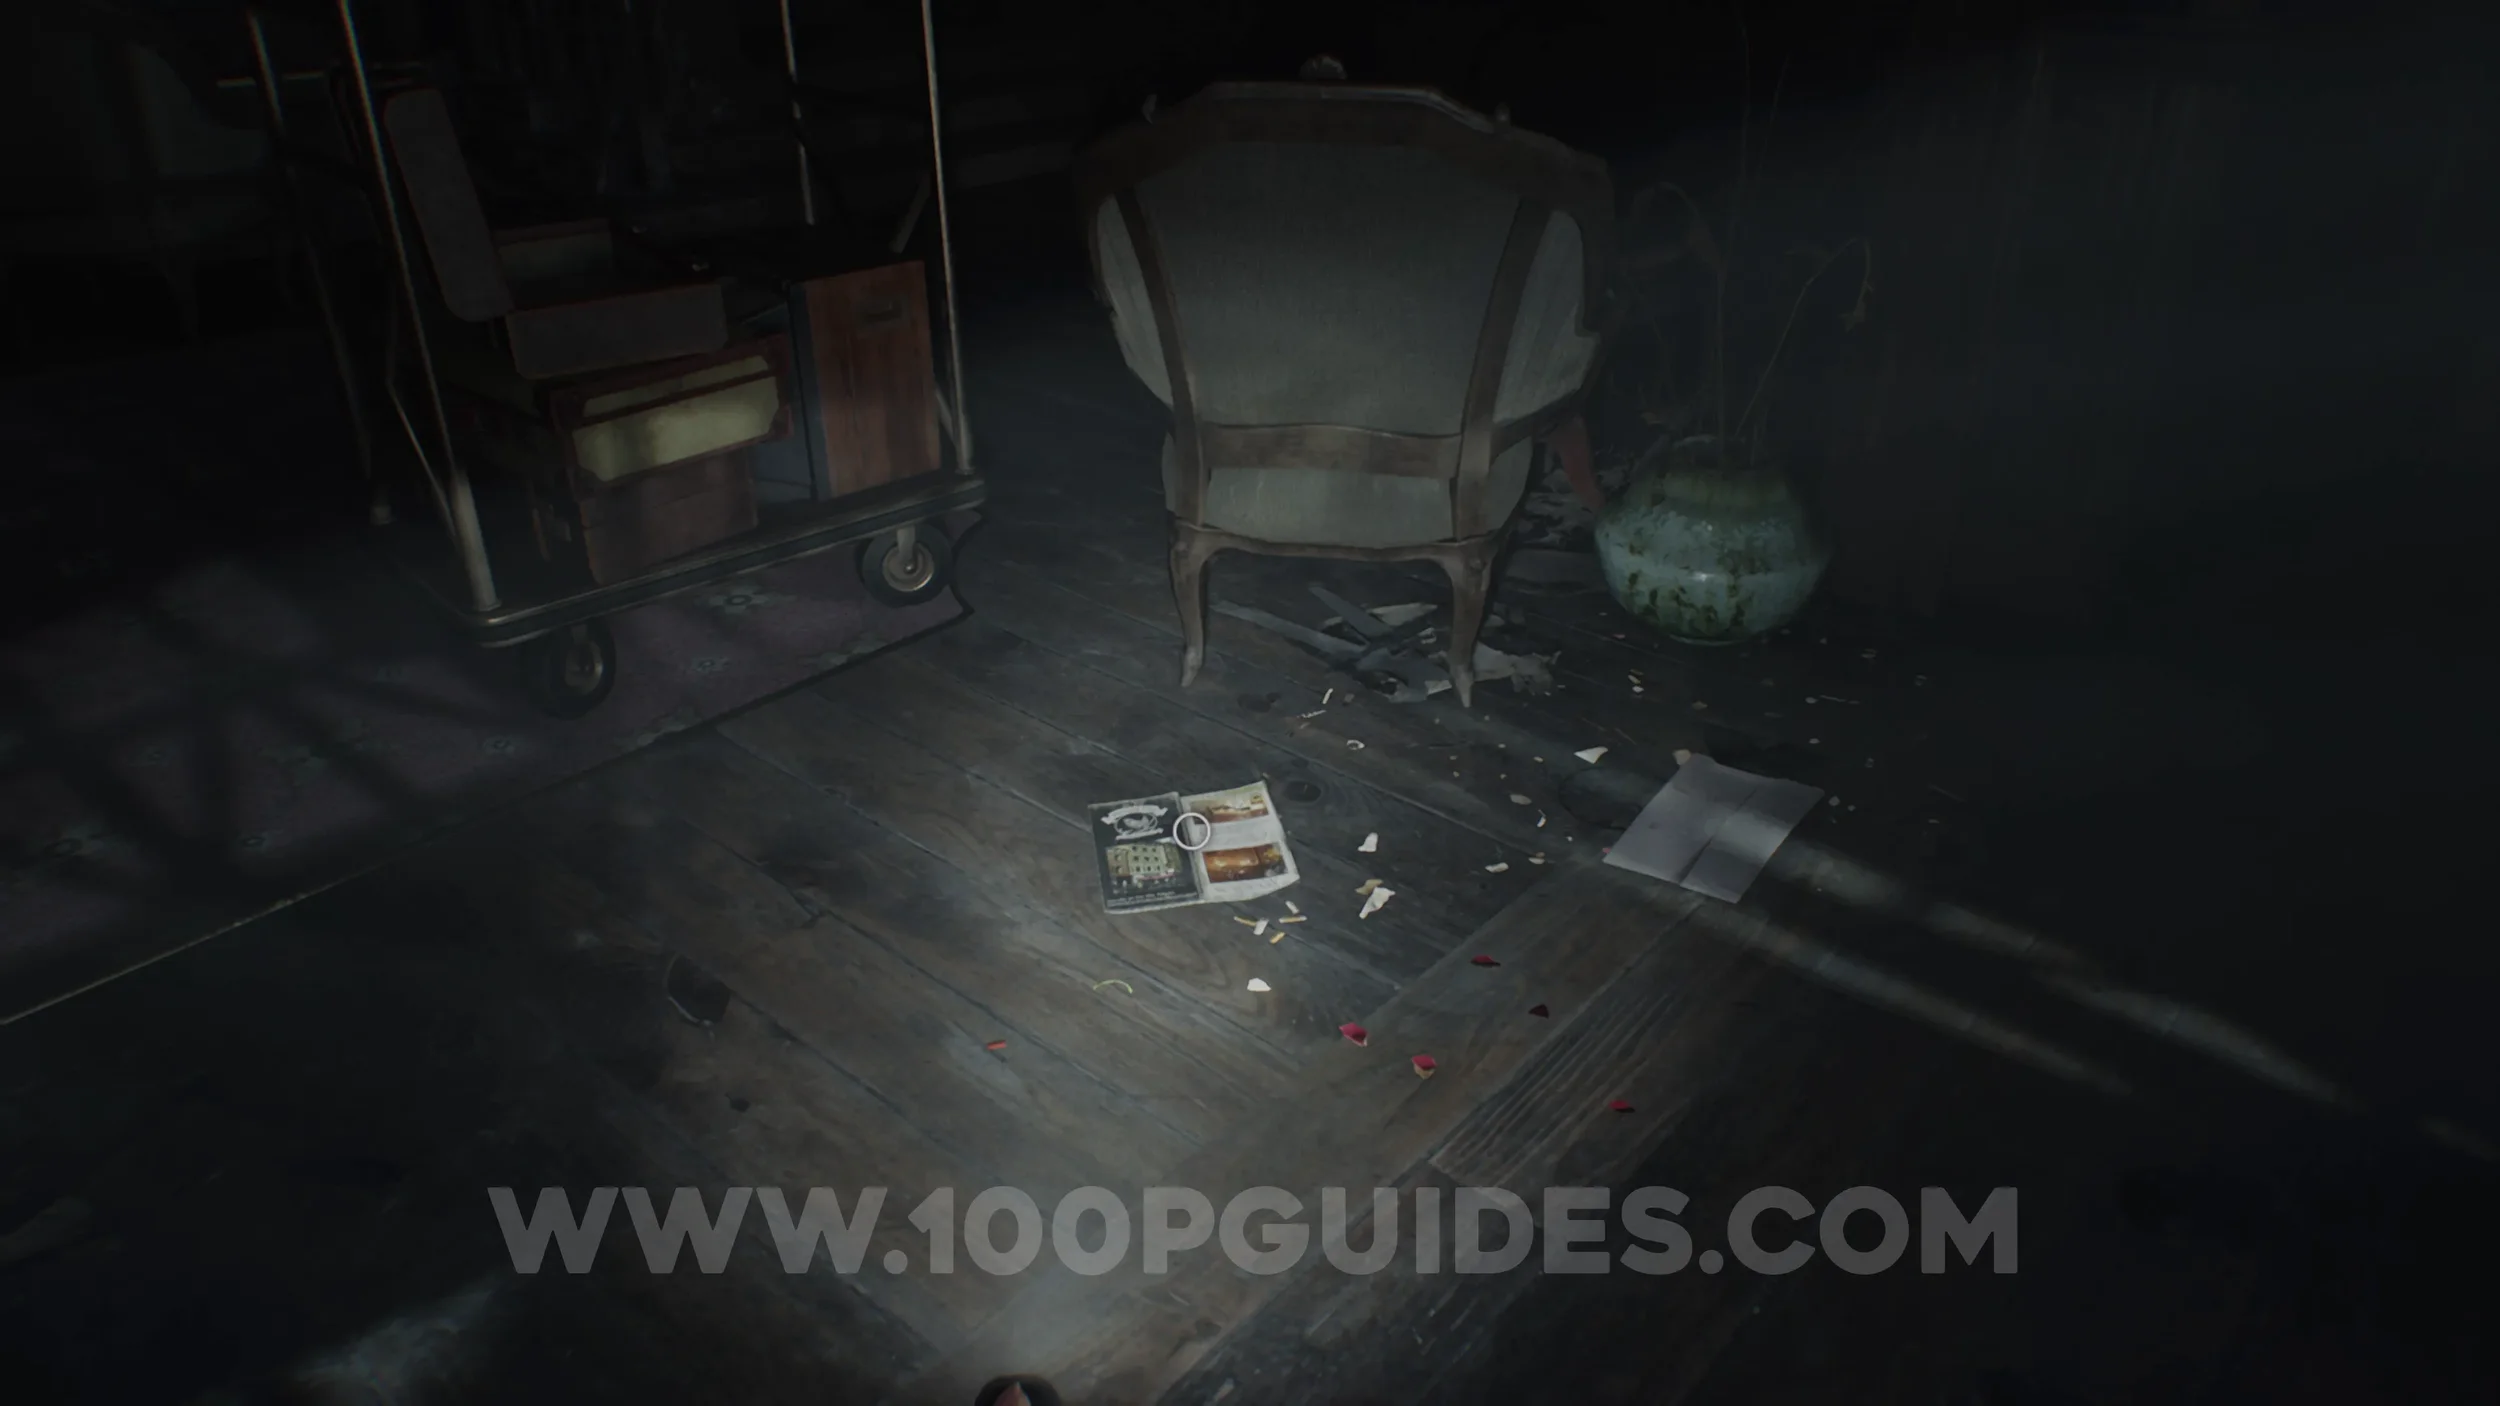
File #3 - Hotel Pamphlet. Found on the floor in the Lobby after using the old key to open a door.
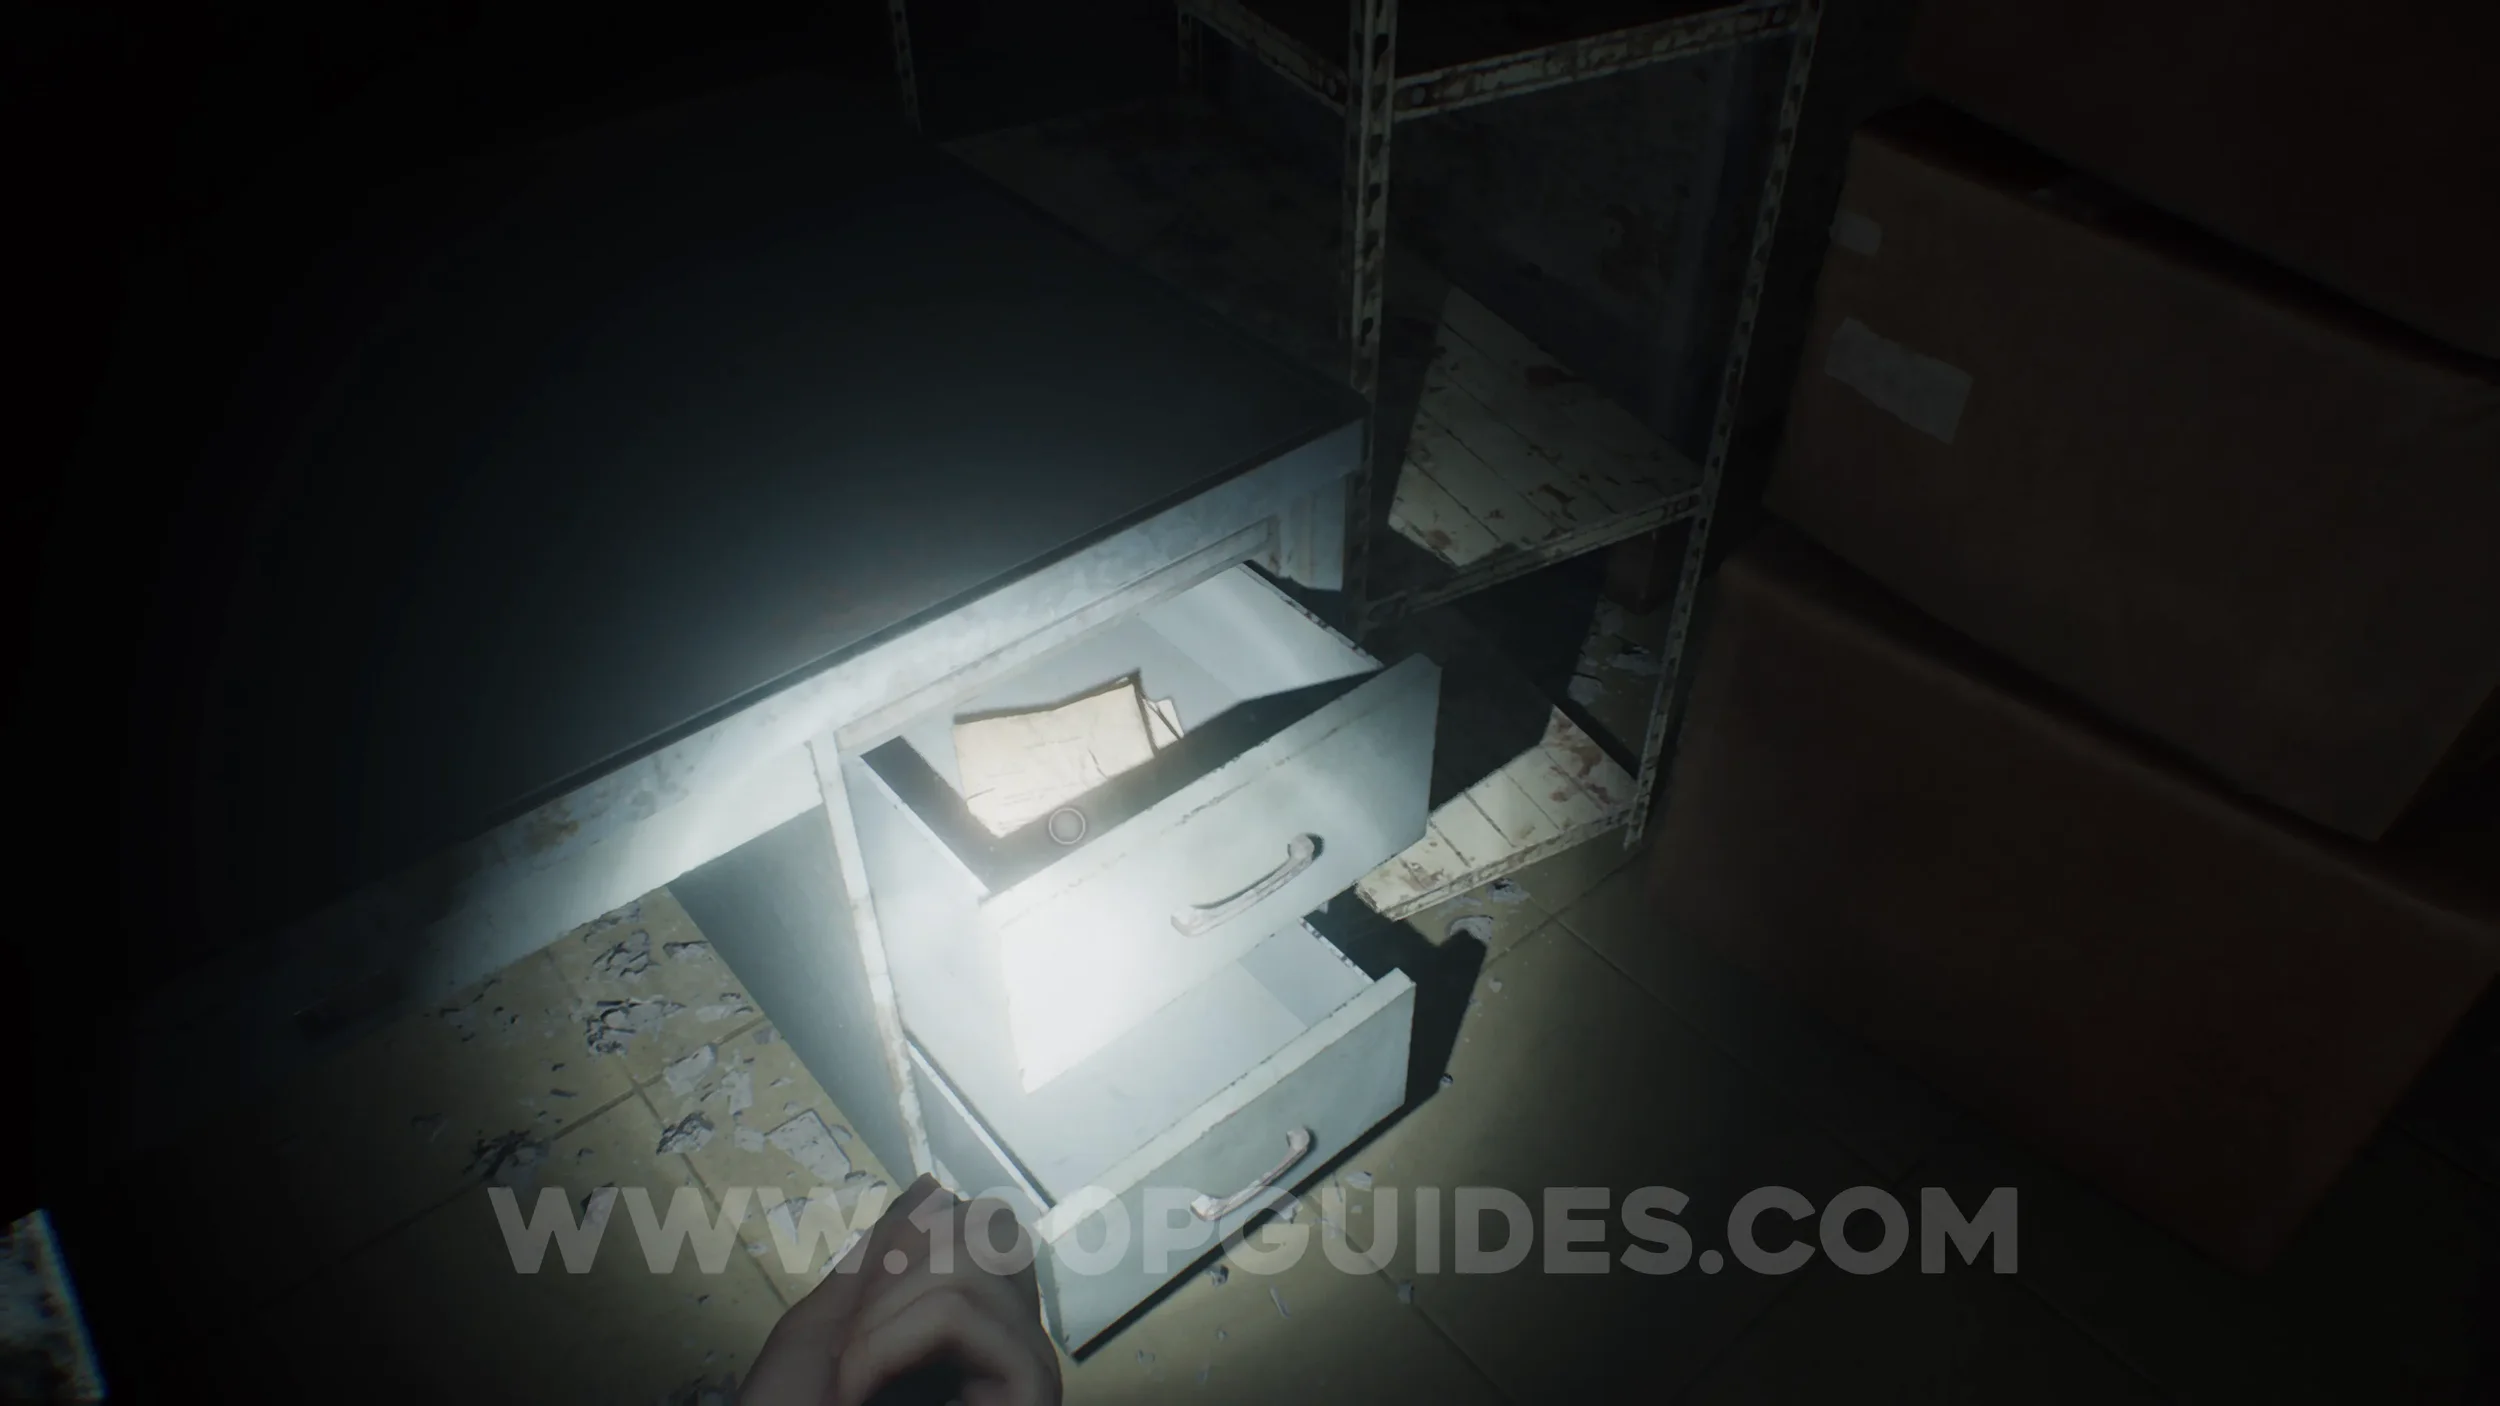
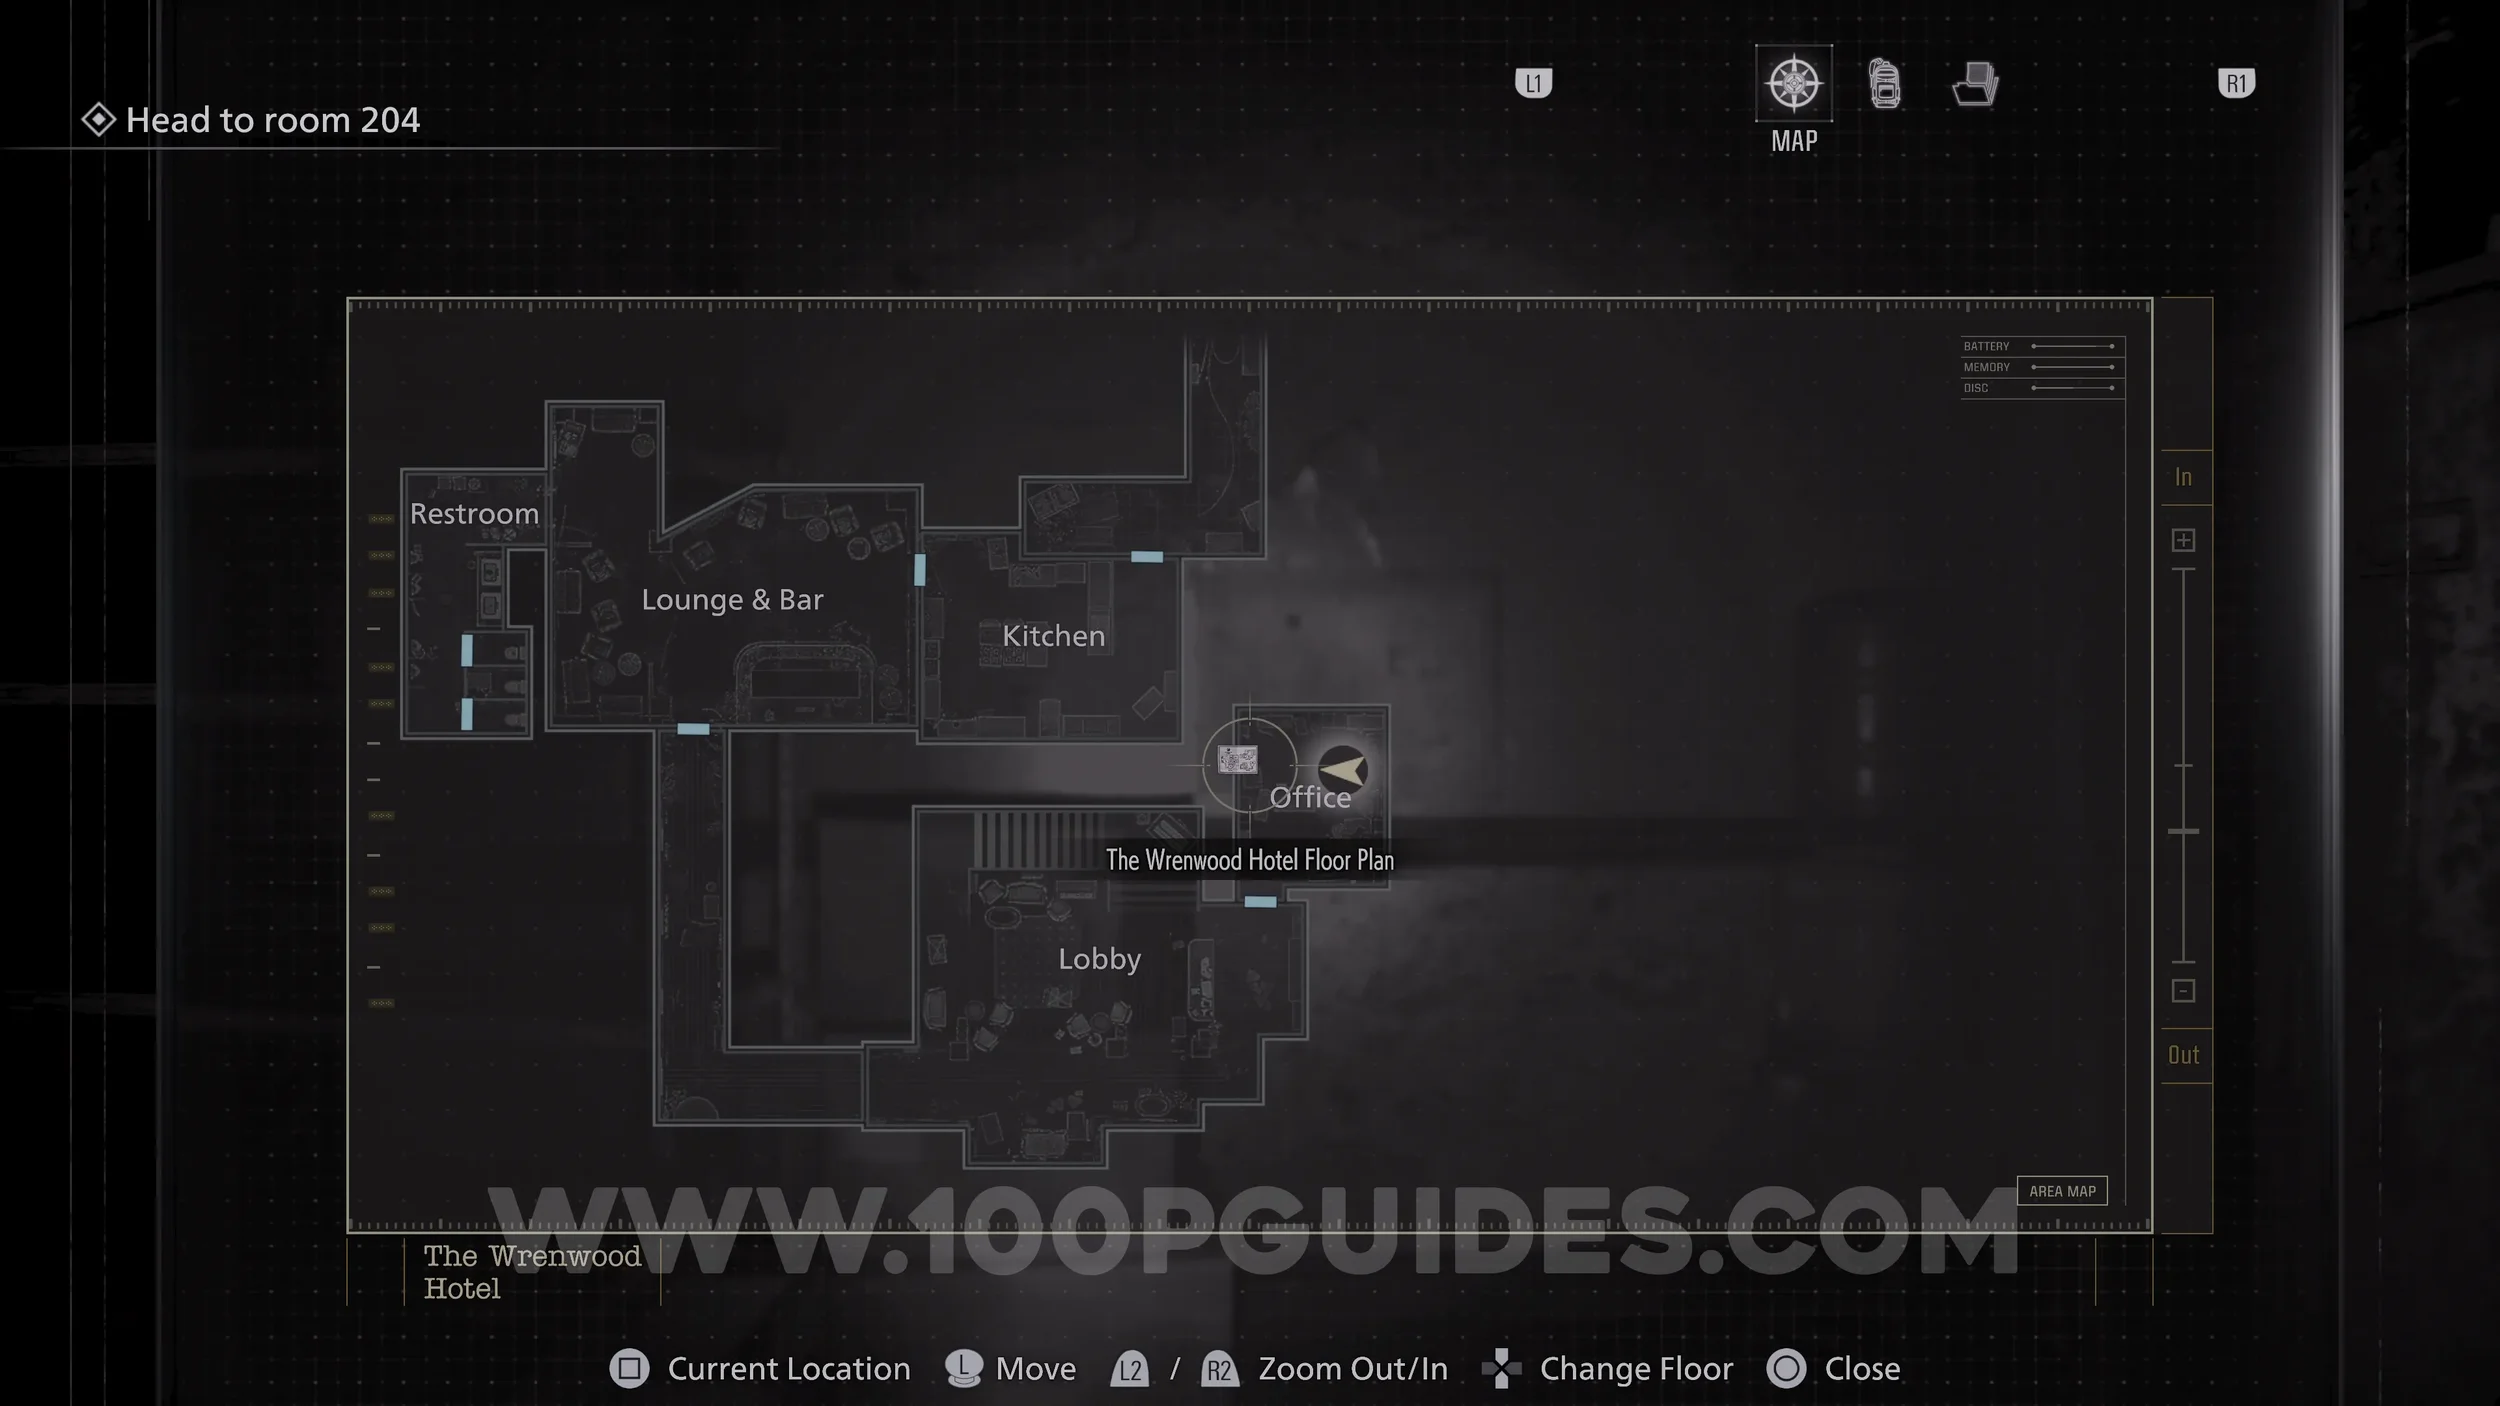
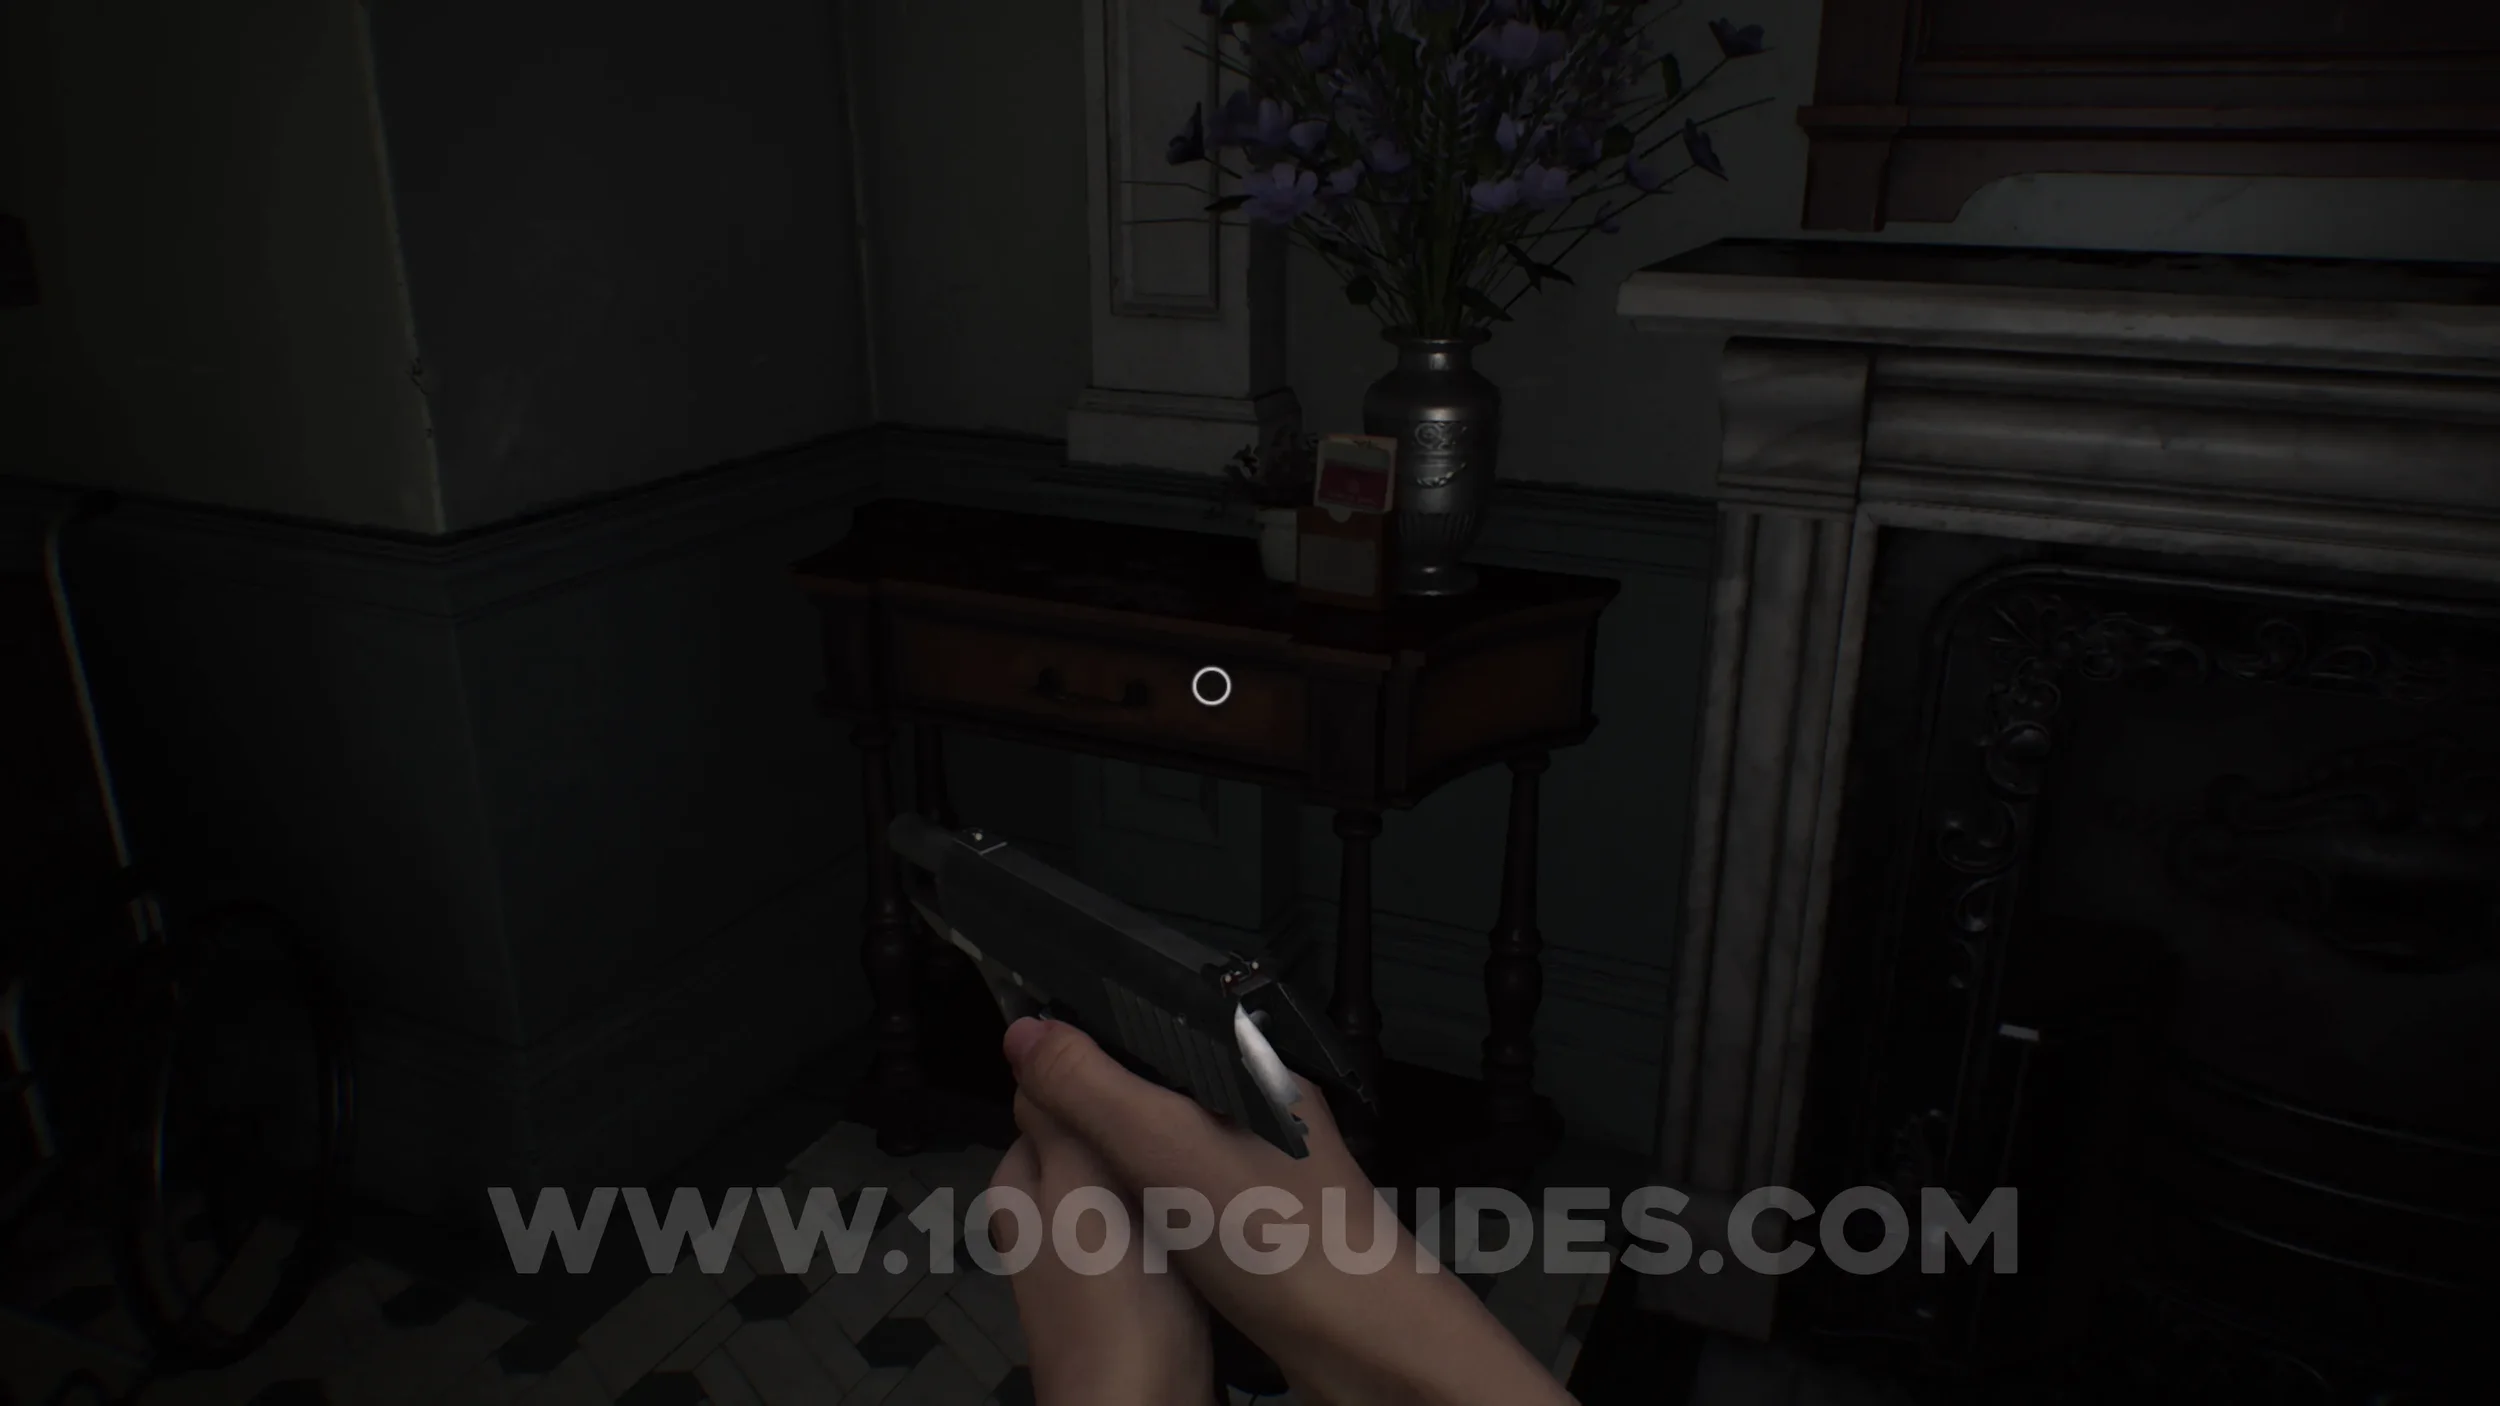
File #4 - Notice of Closure. In a drawer in the Office. This is the small room attached to the Lobby.
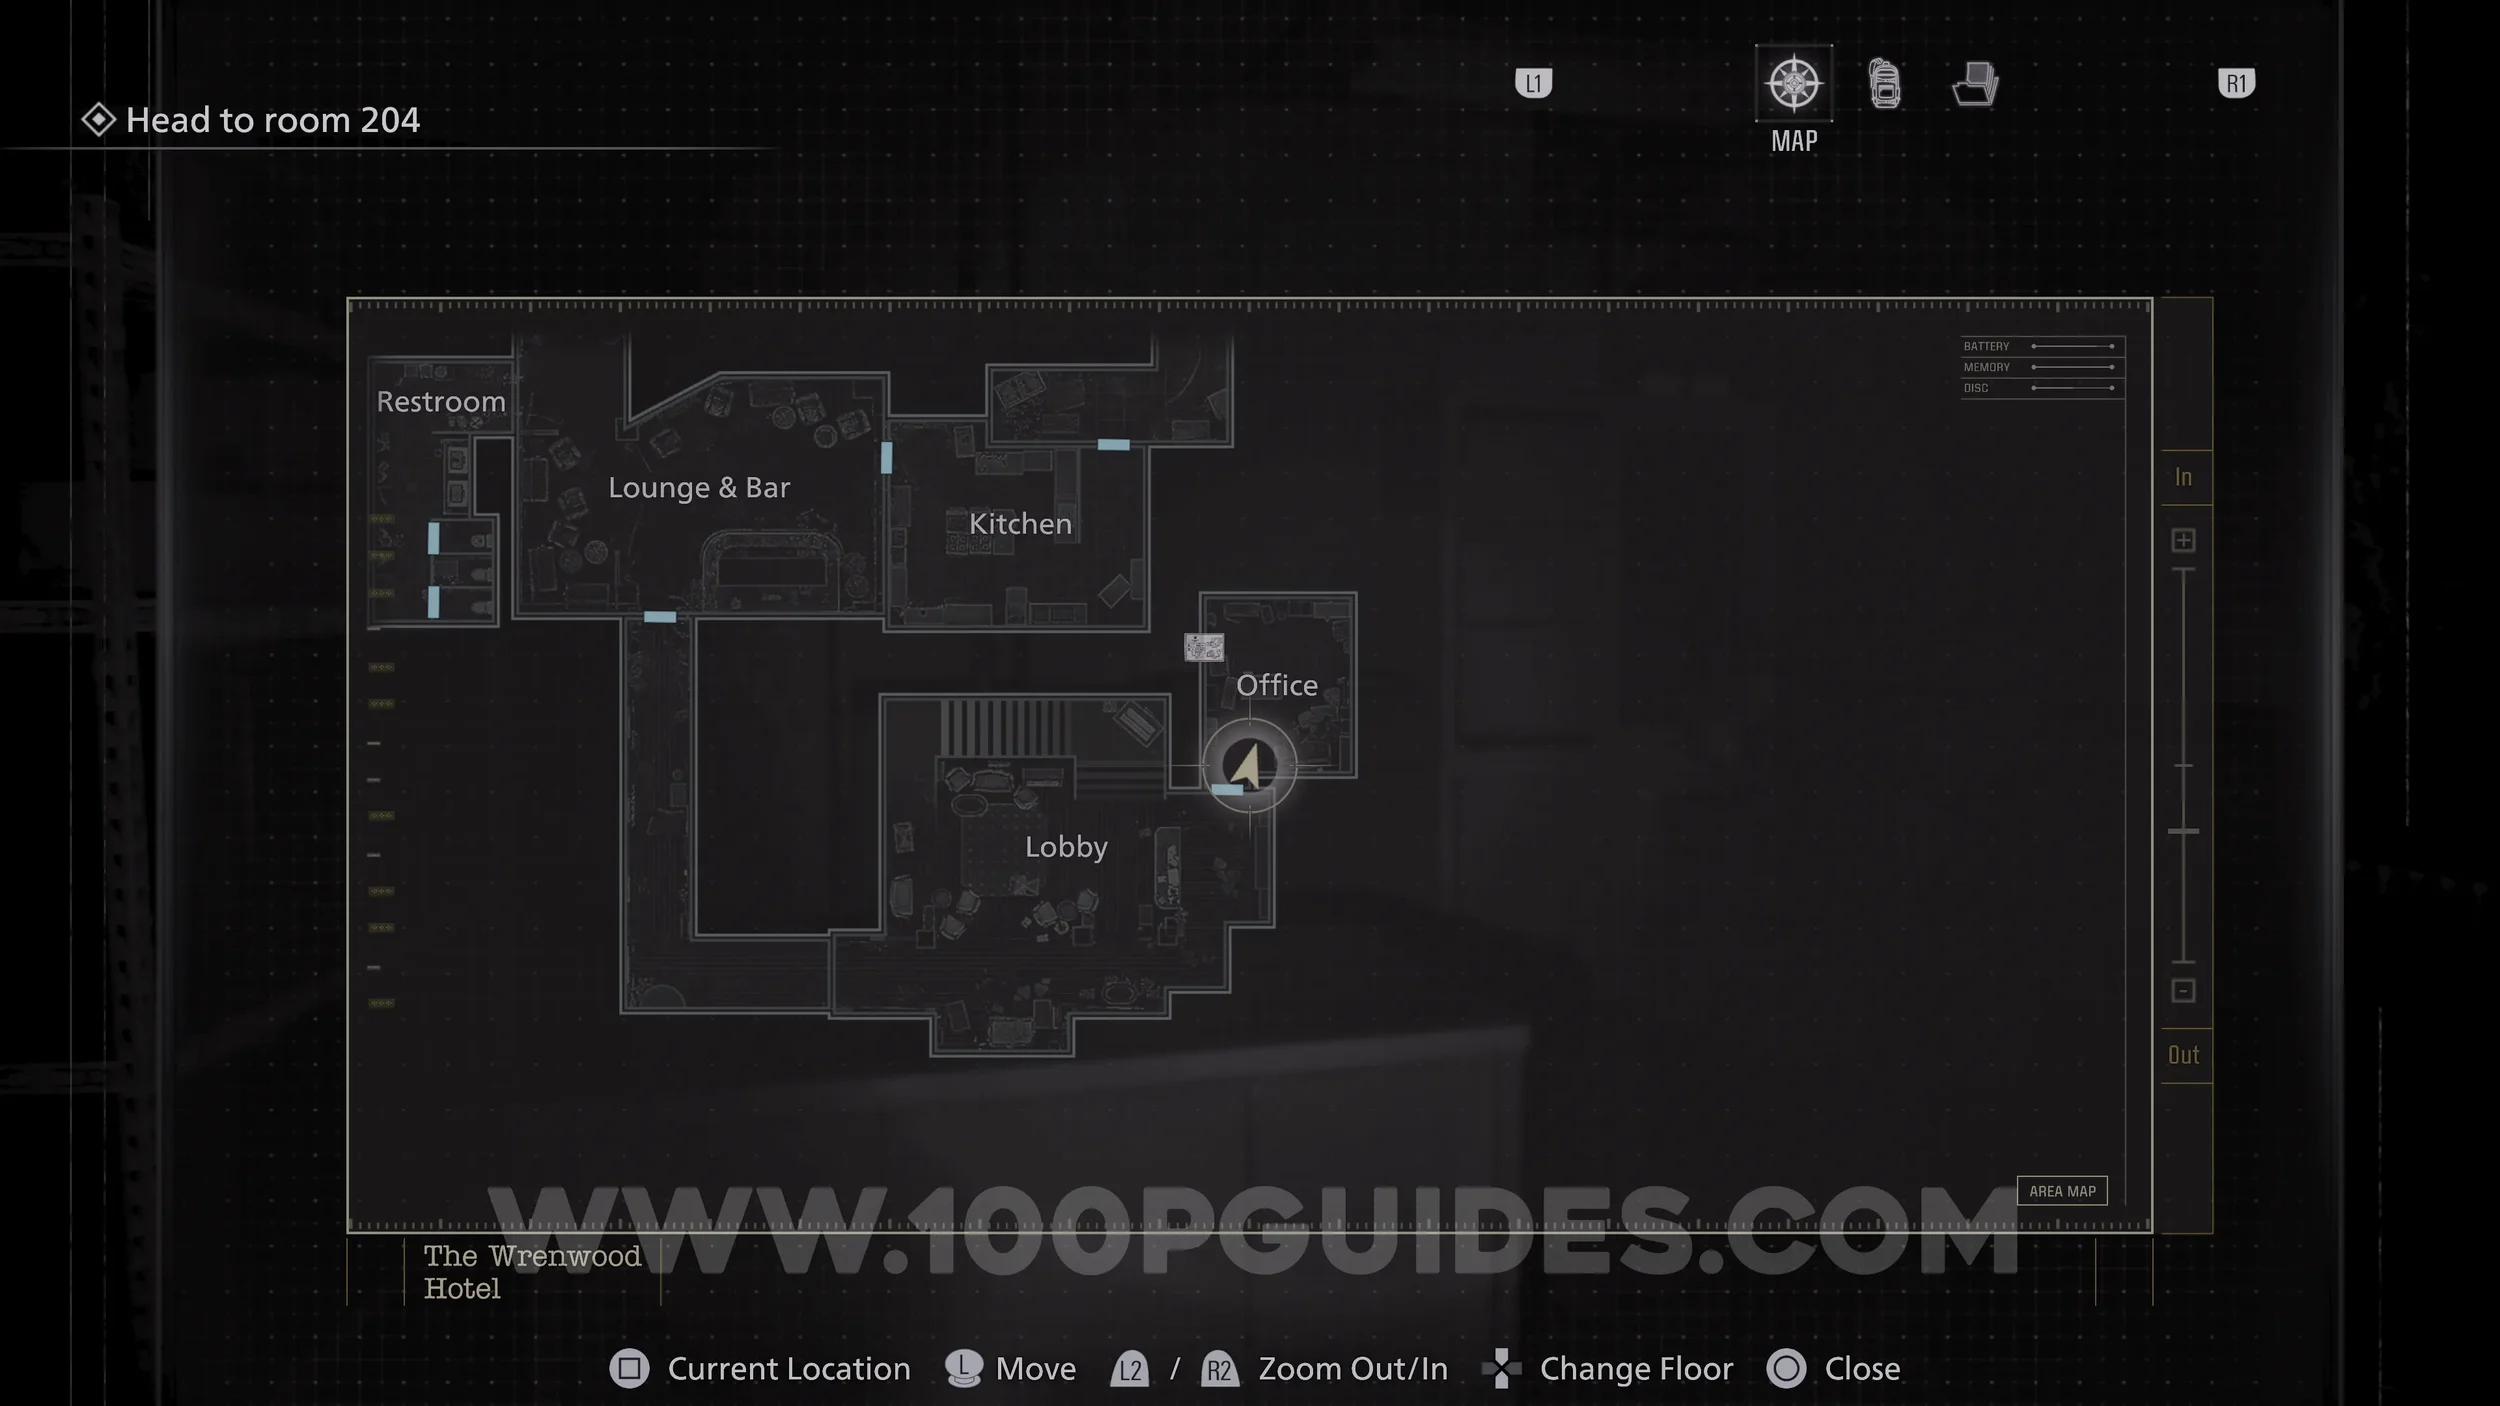
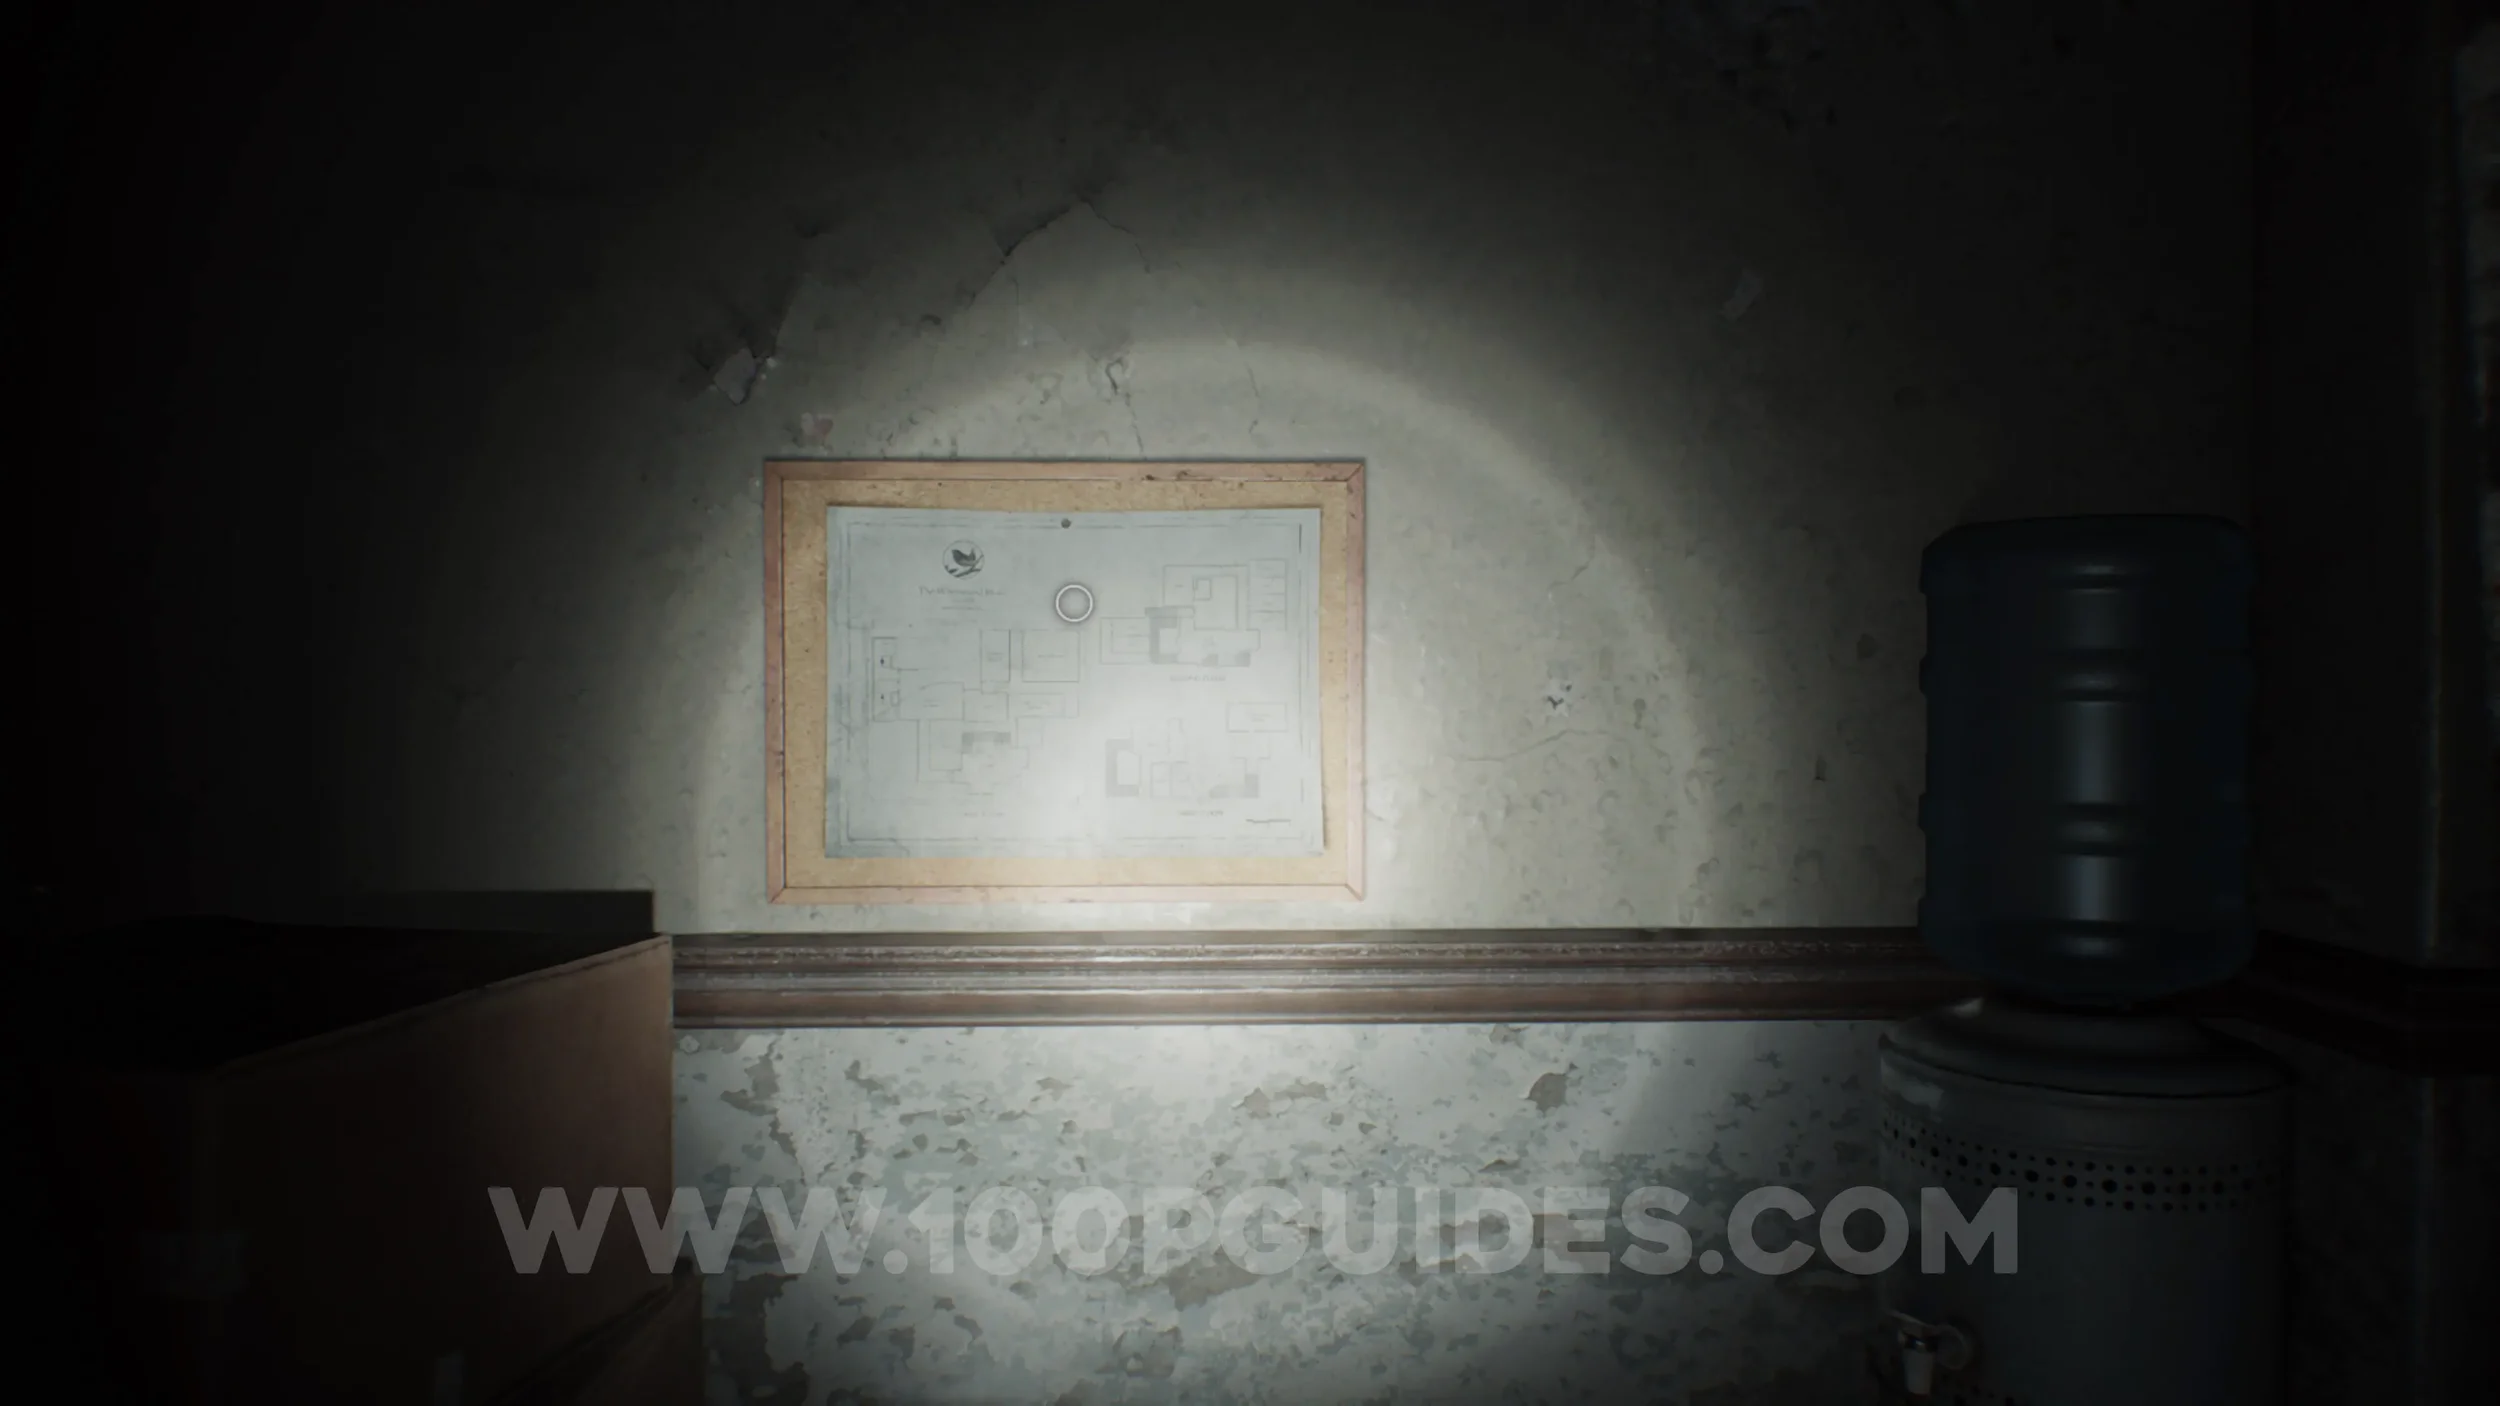
Wrenwood Hotel Map. On the Office Wall.
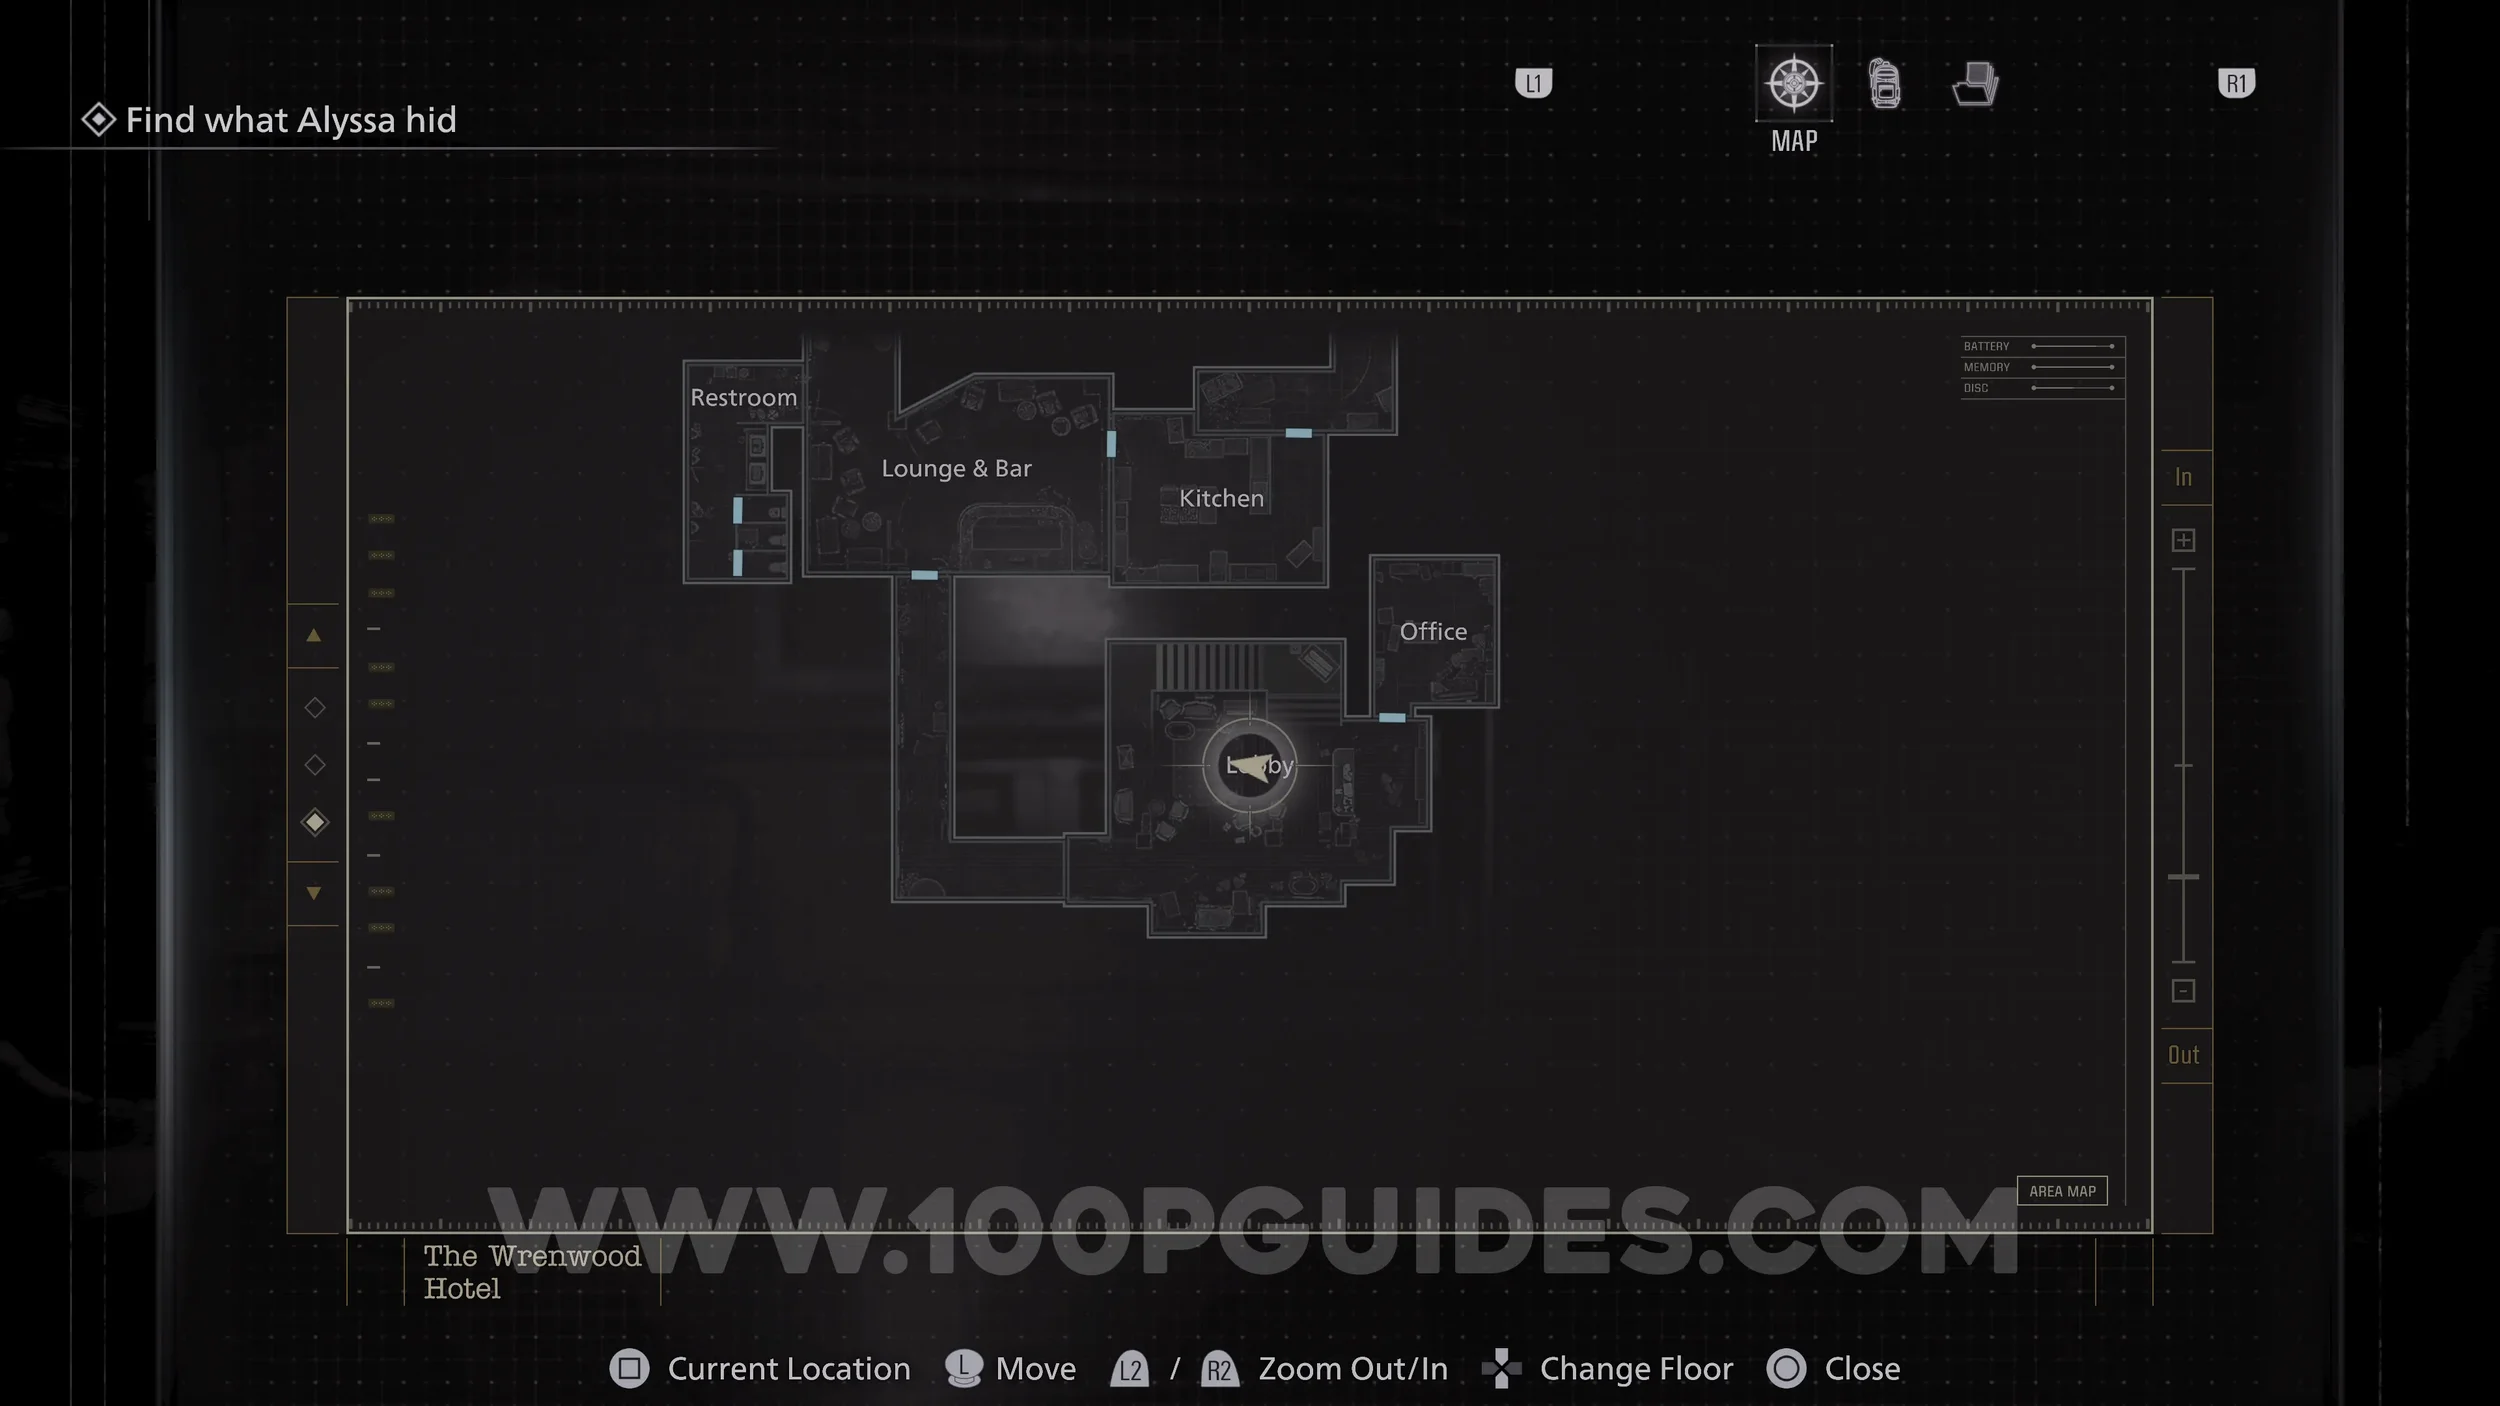
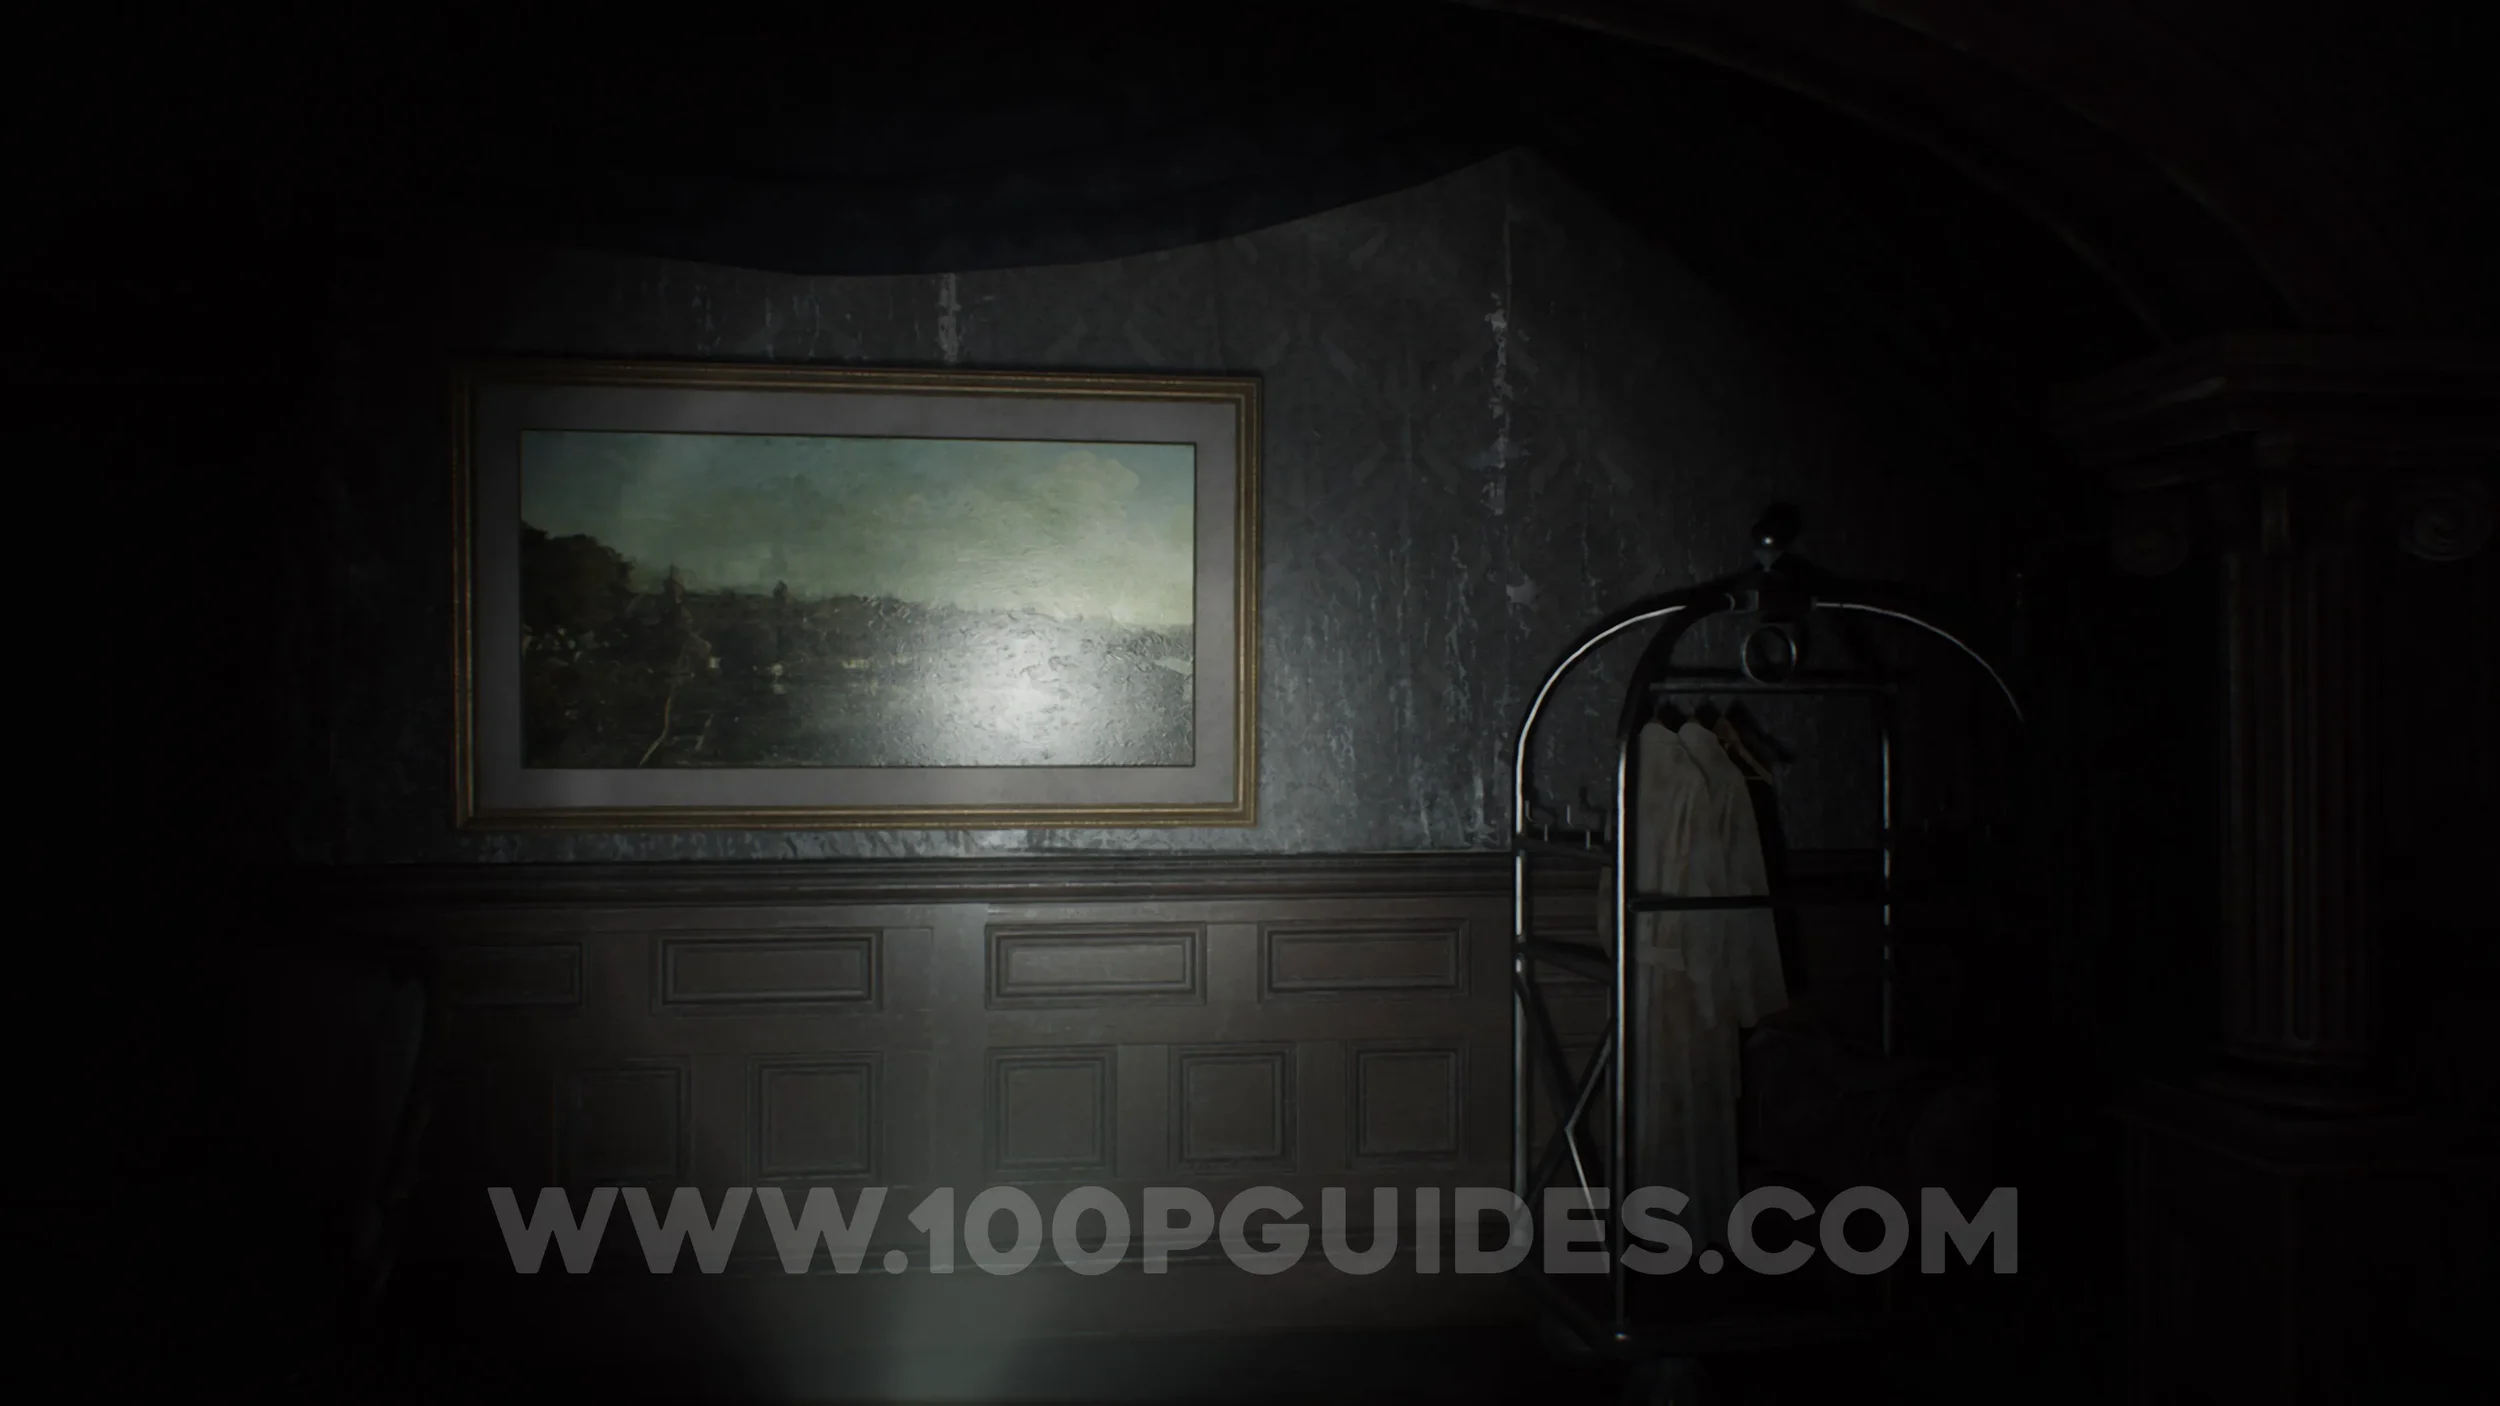
File #5 - Alyssa’s Journal. Obtained automatically after interacting with the painting.
File #6 - Report on Victor Gideon. You start with this in your inventory once you gain control of Leon.
Rhodes Hill (Care Center)
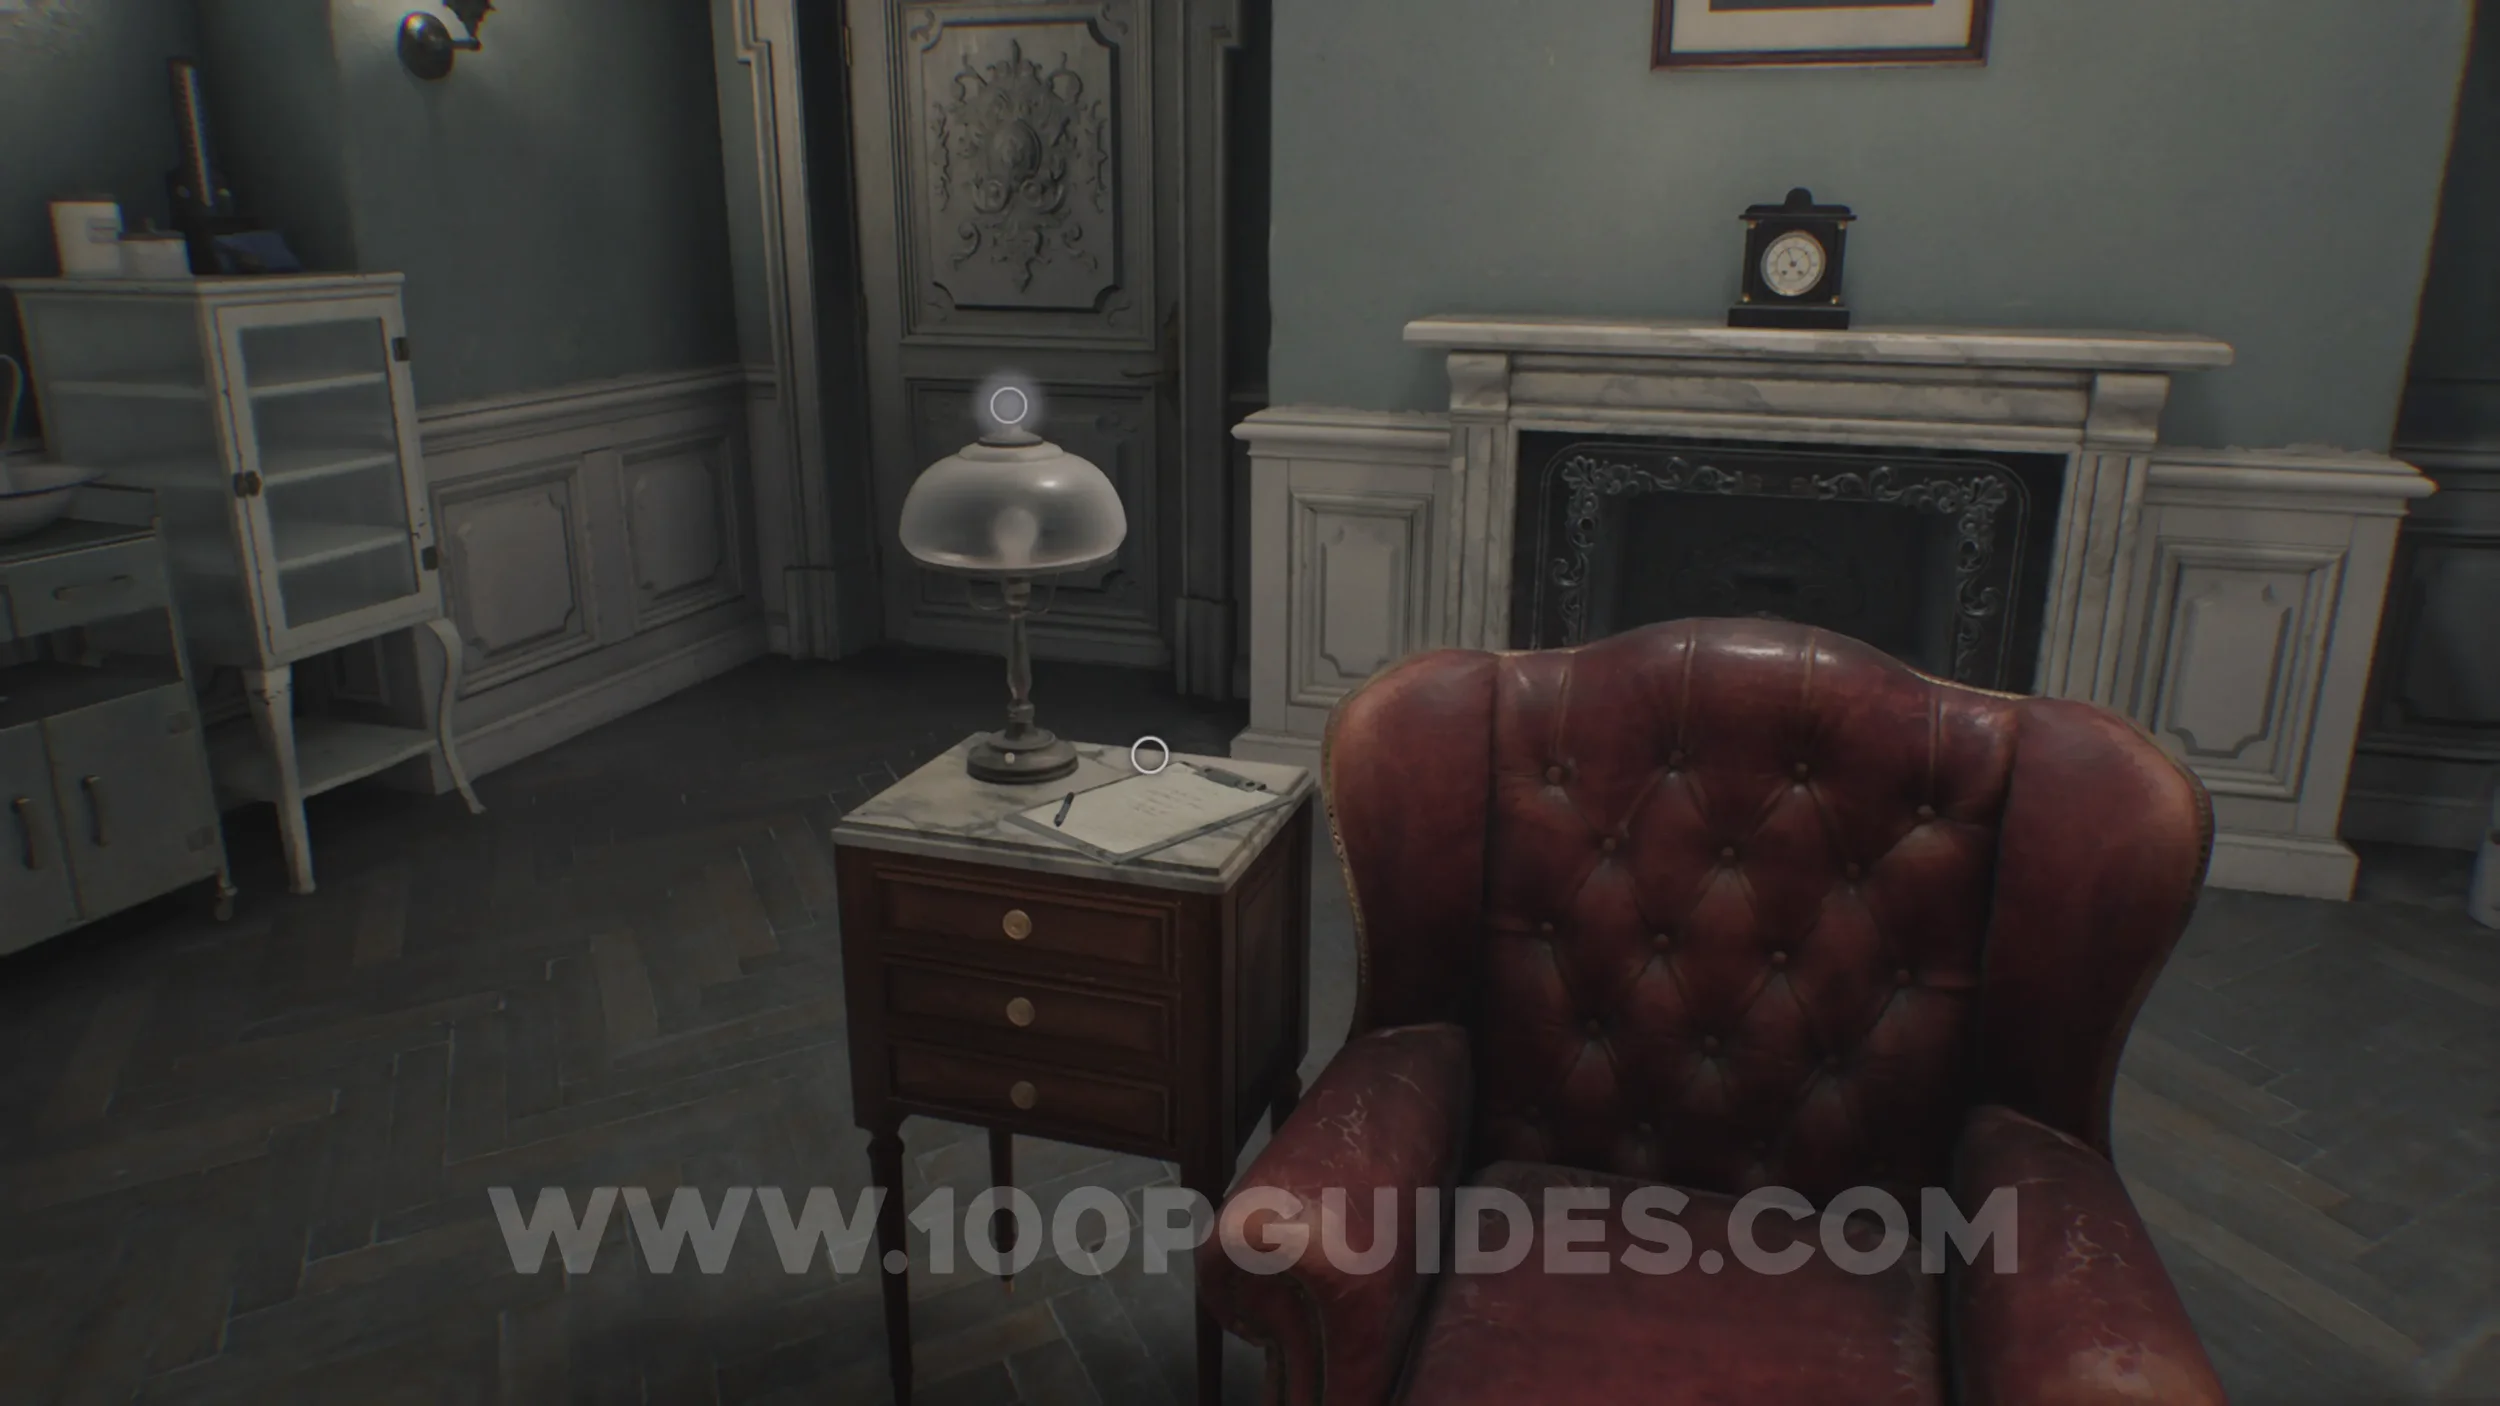
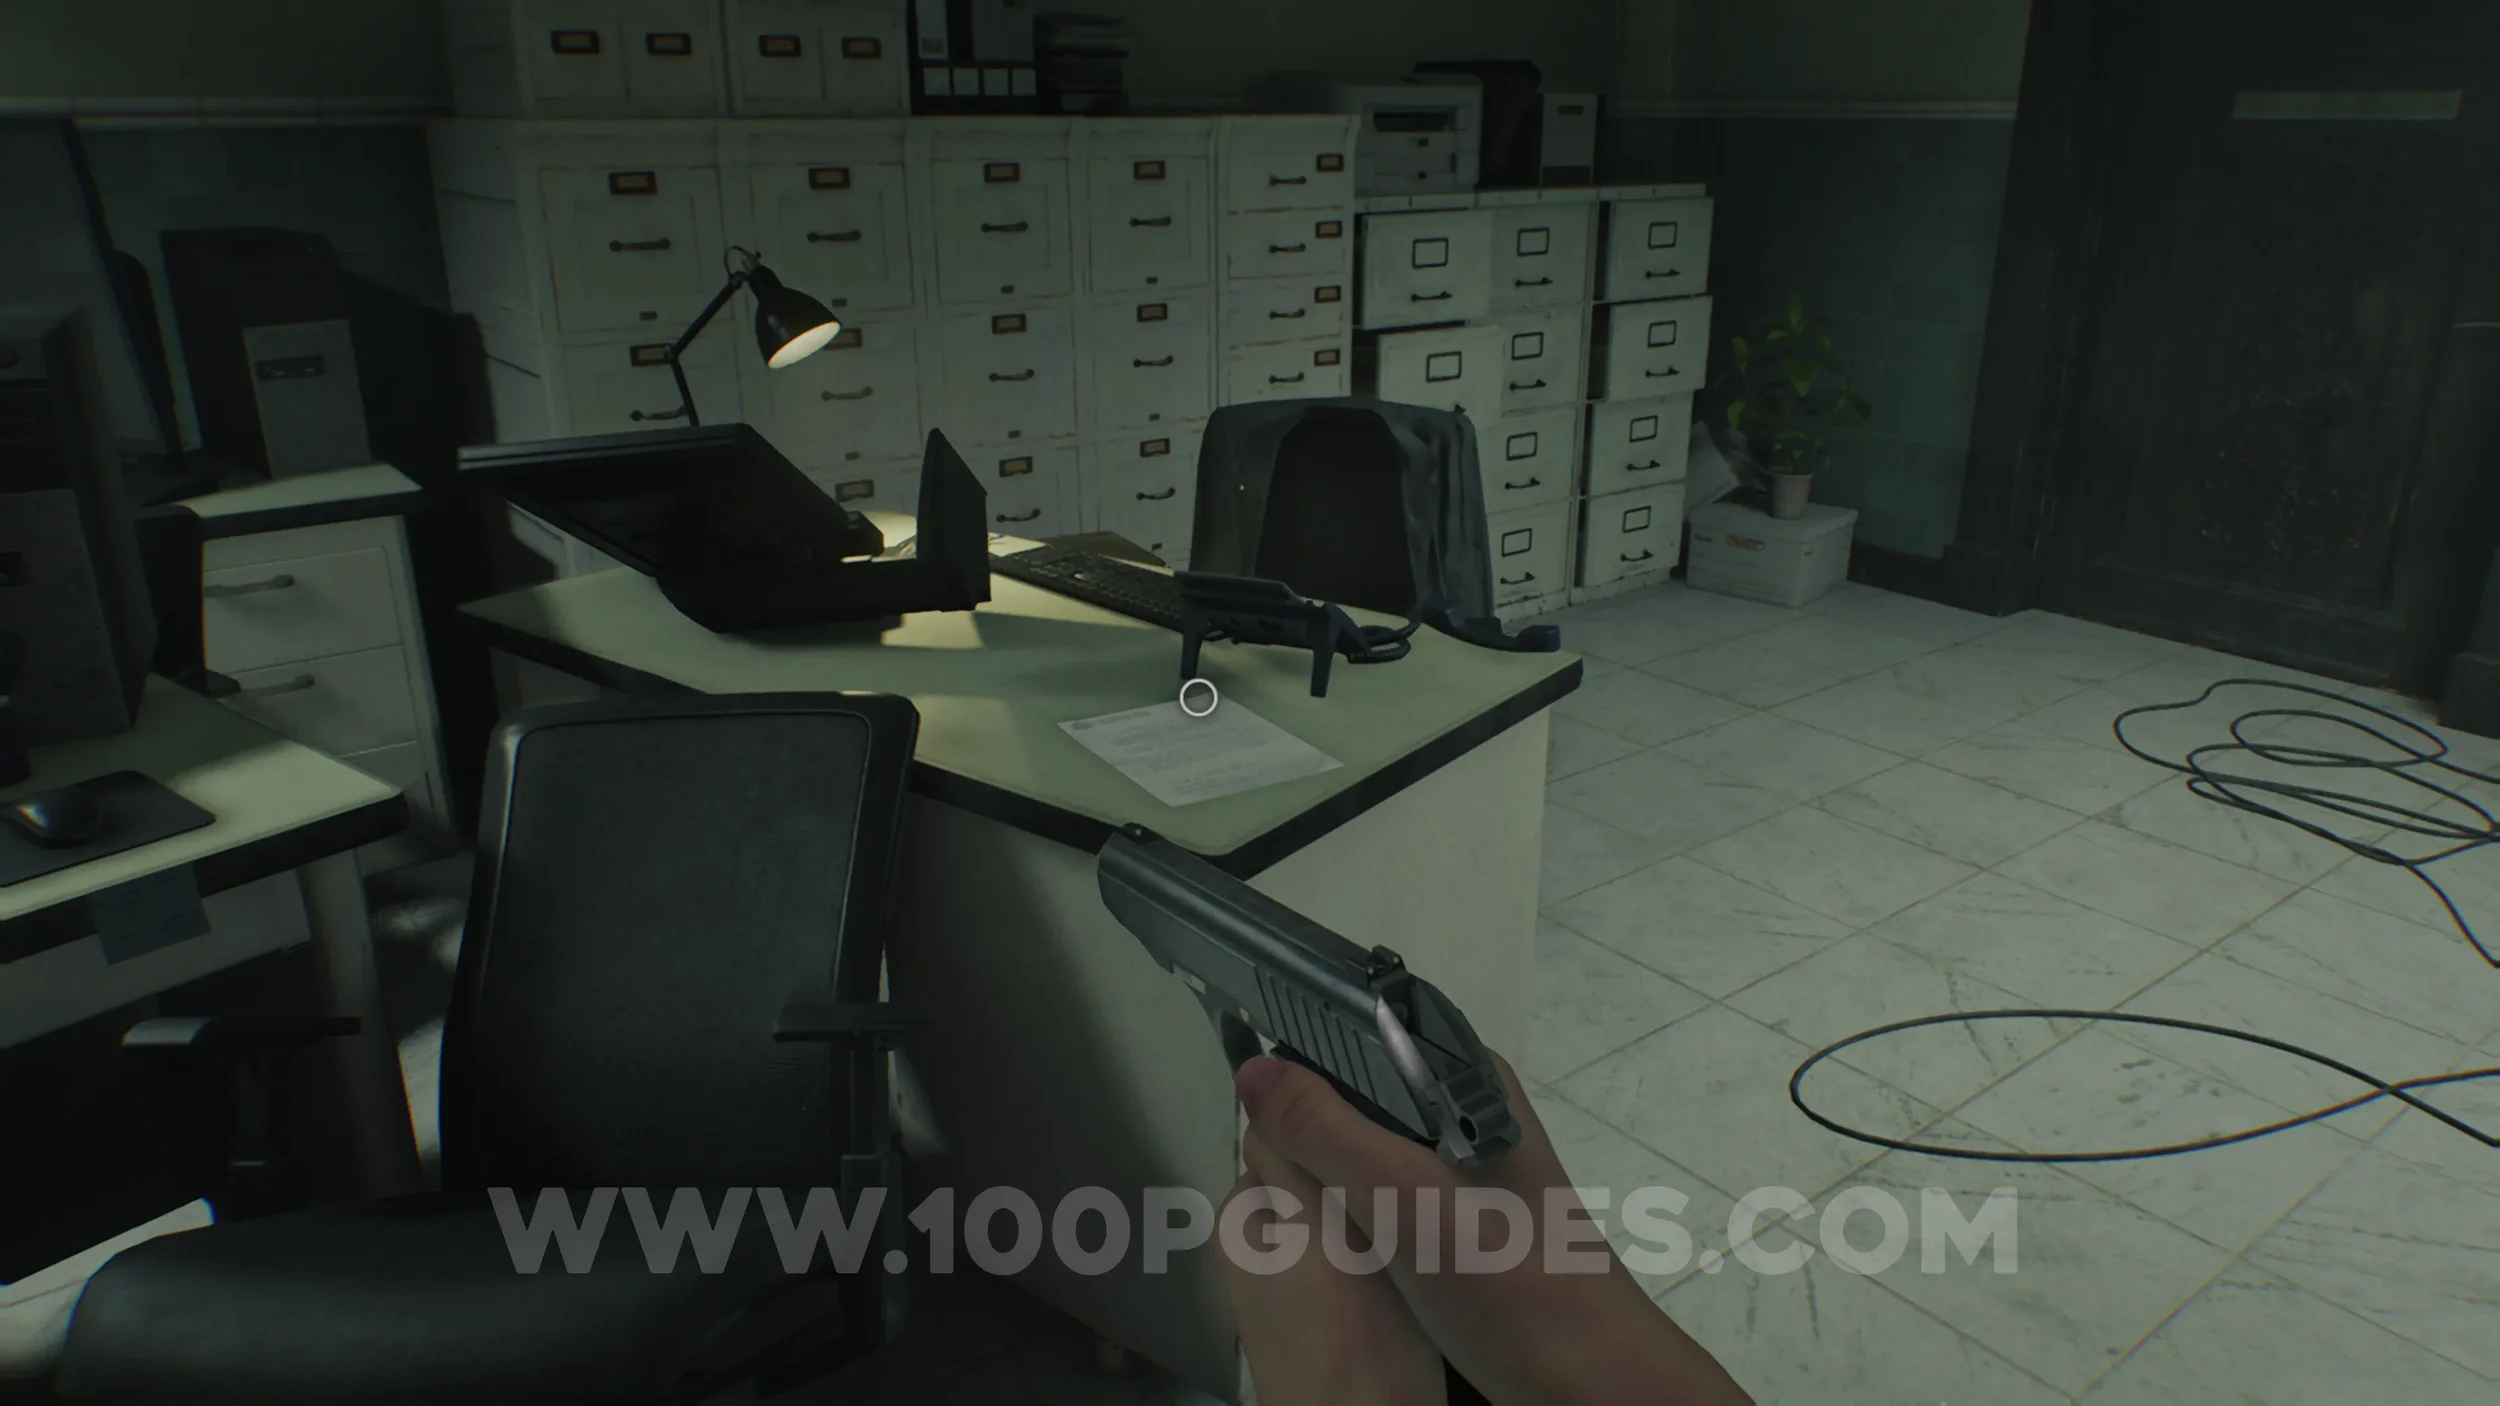
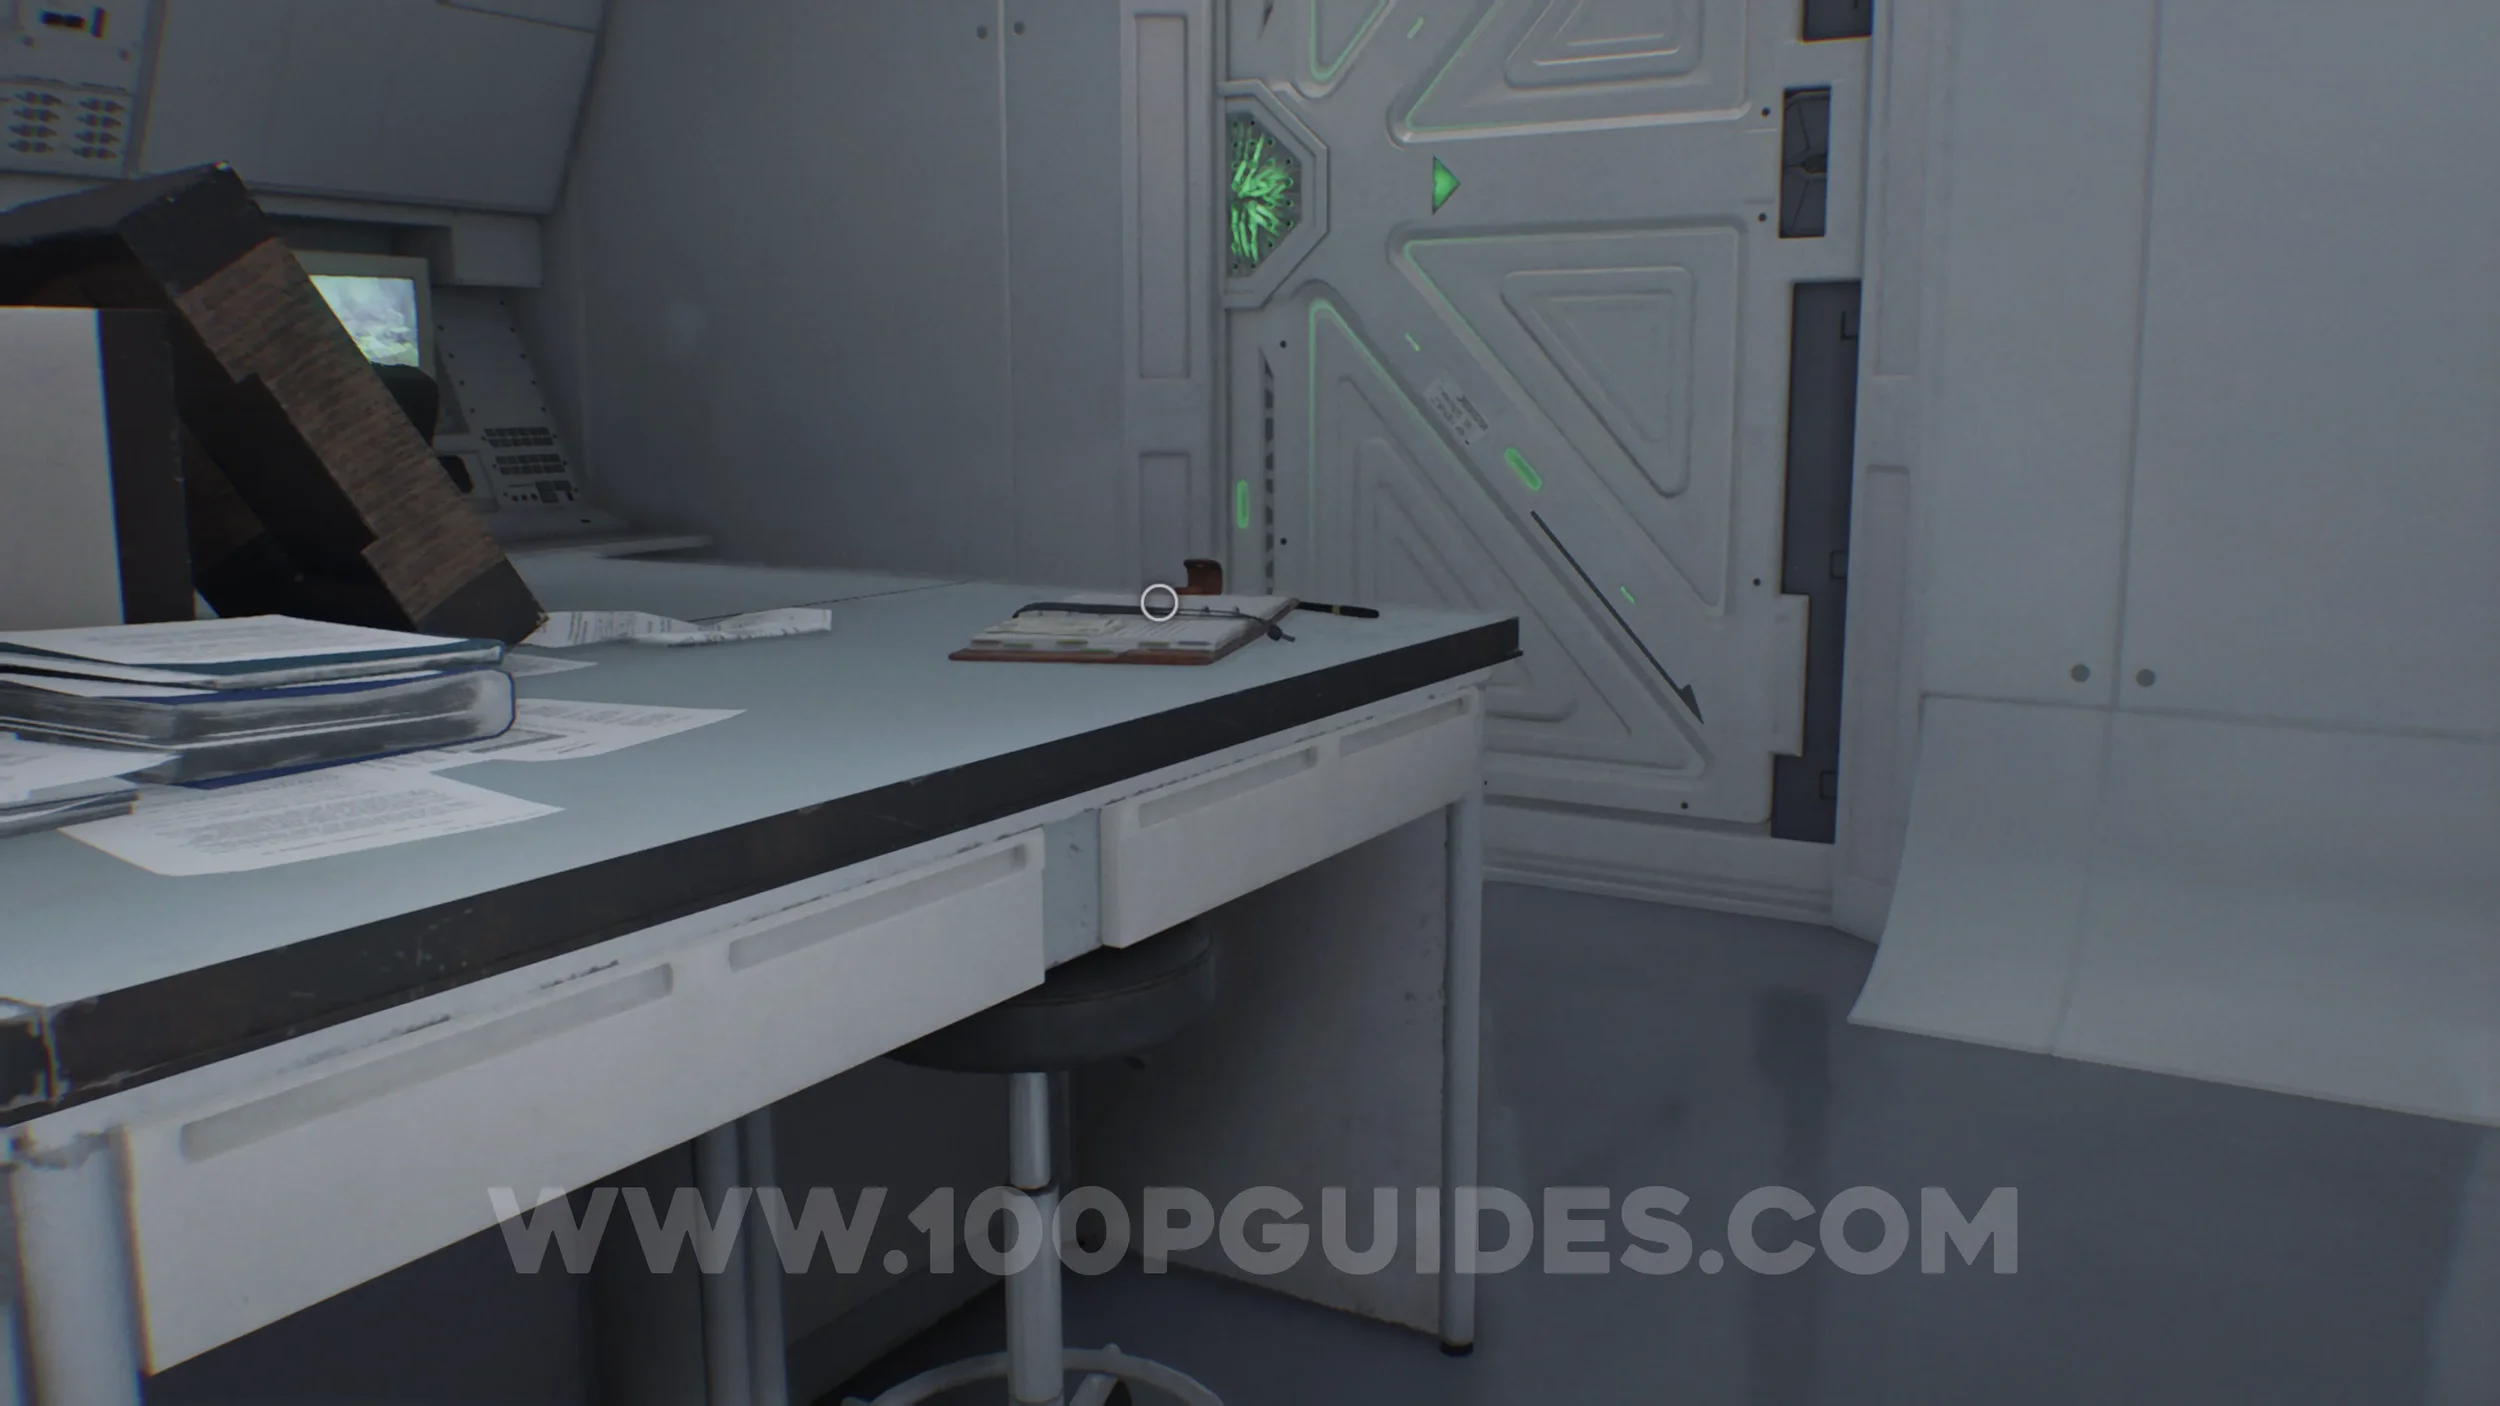
File #7 - Progress Notes. On the table in front of you, as soon as you take control of Grace.

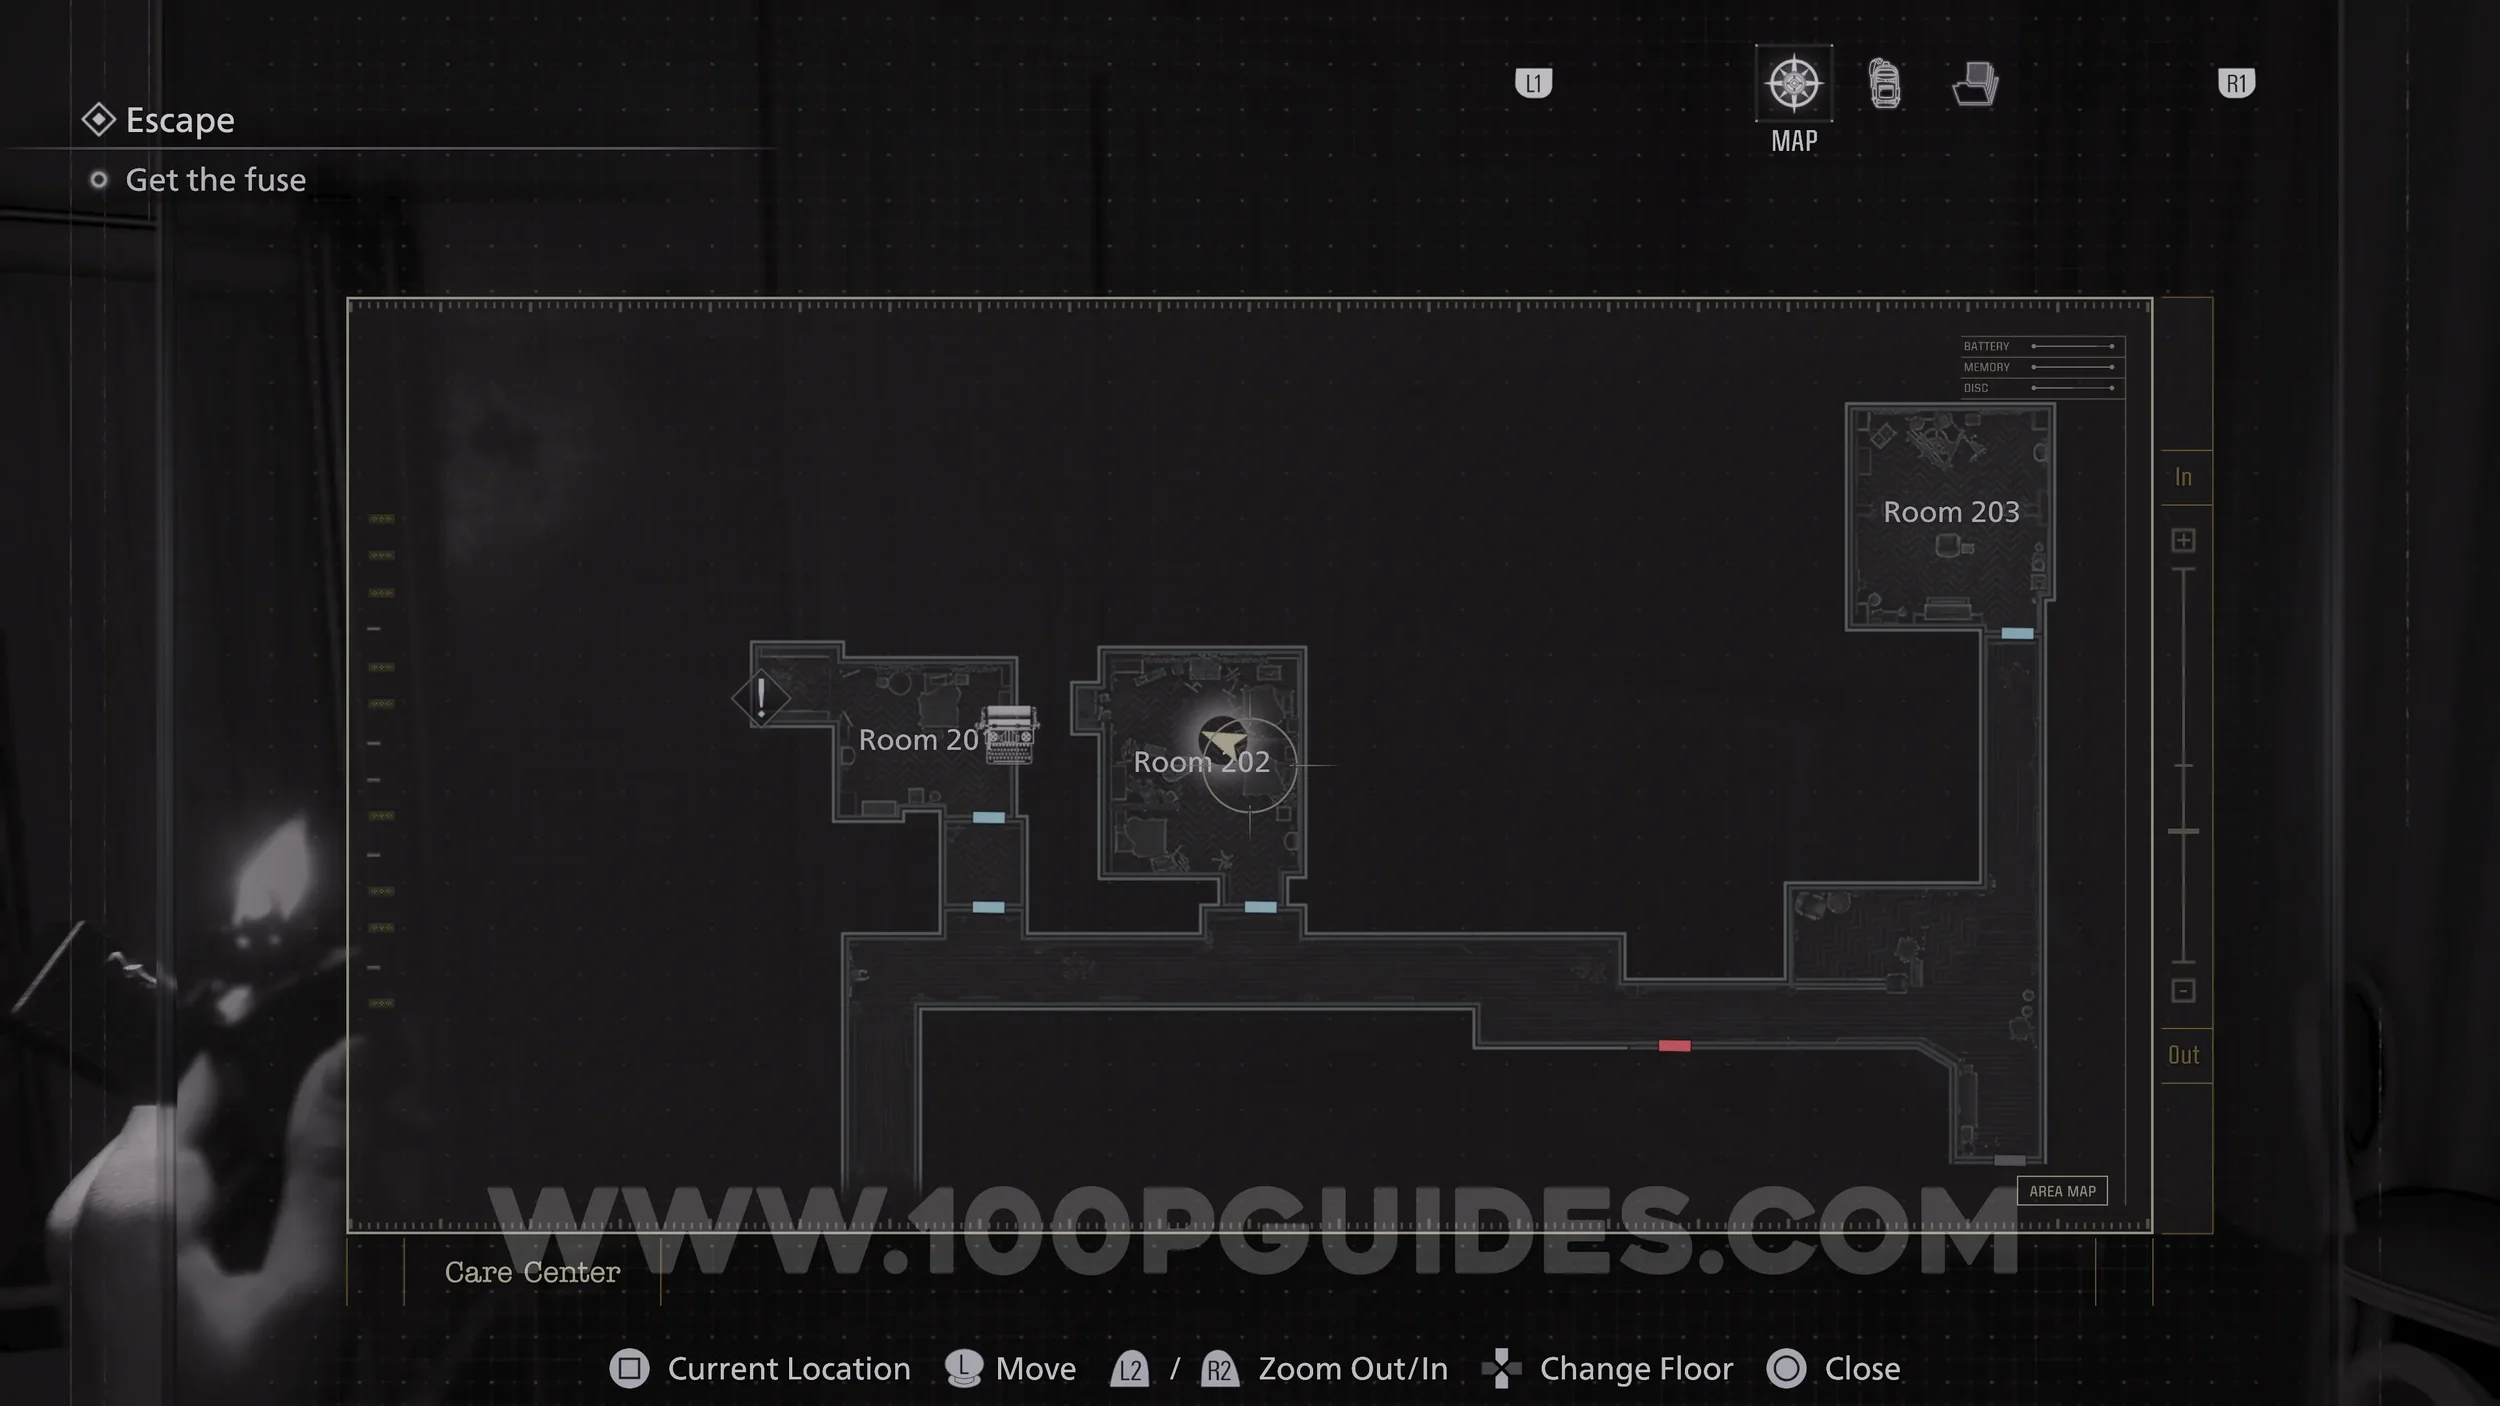
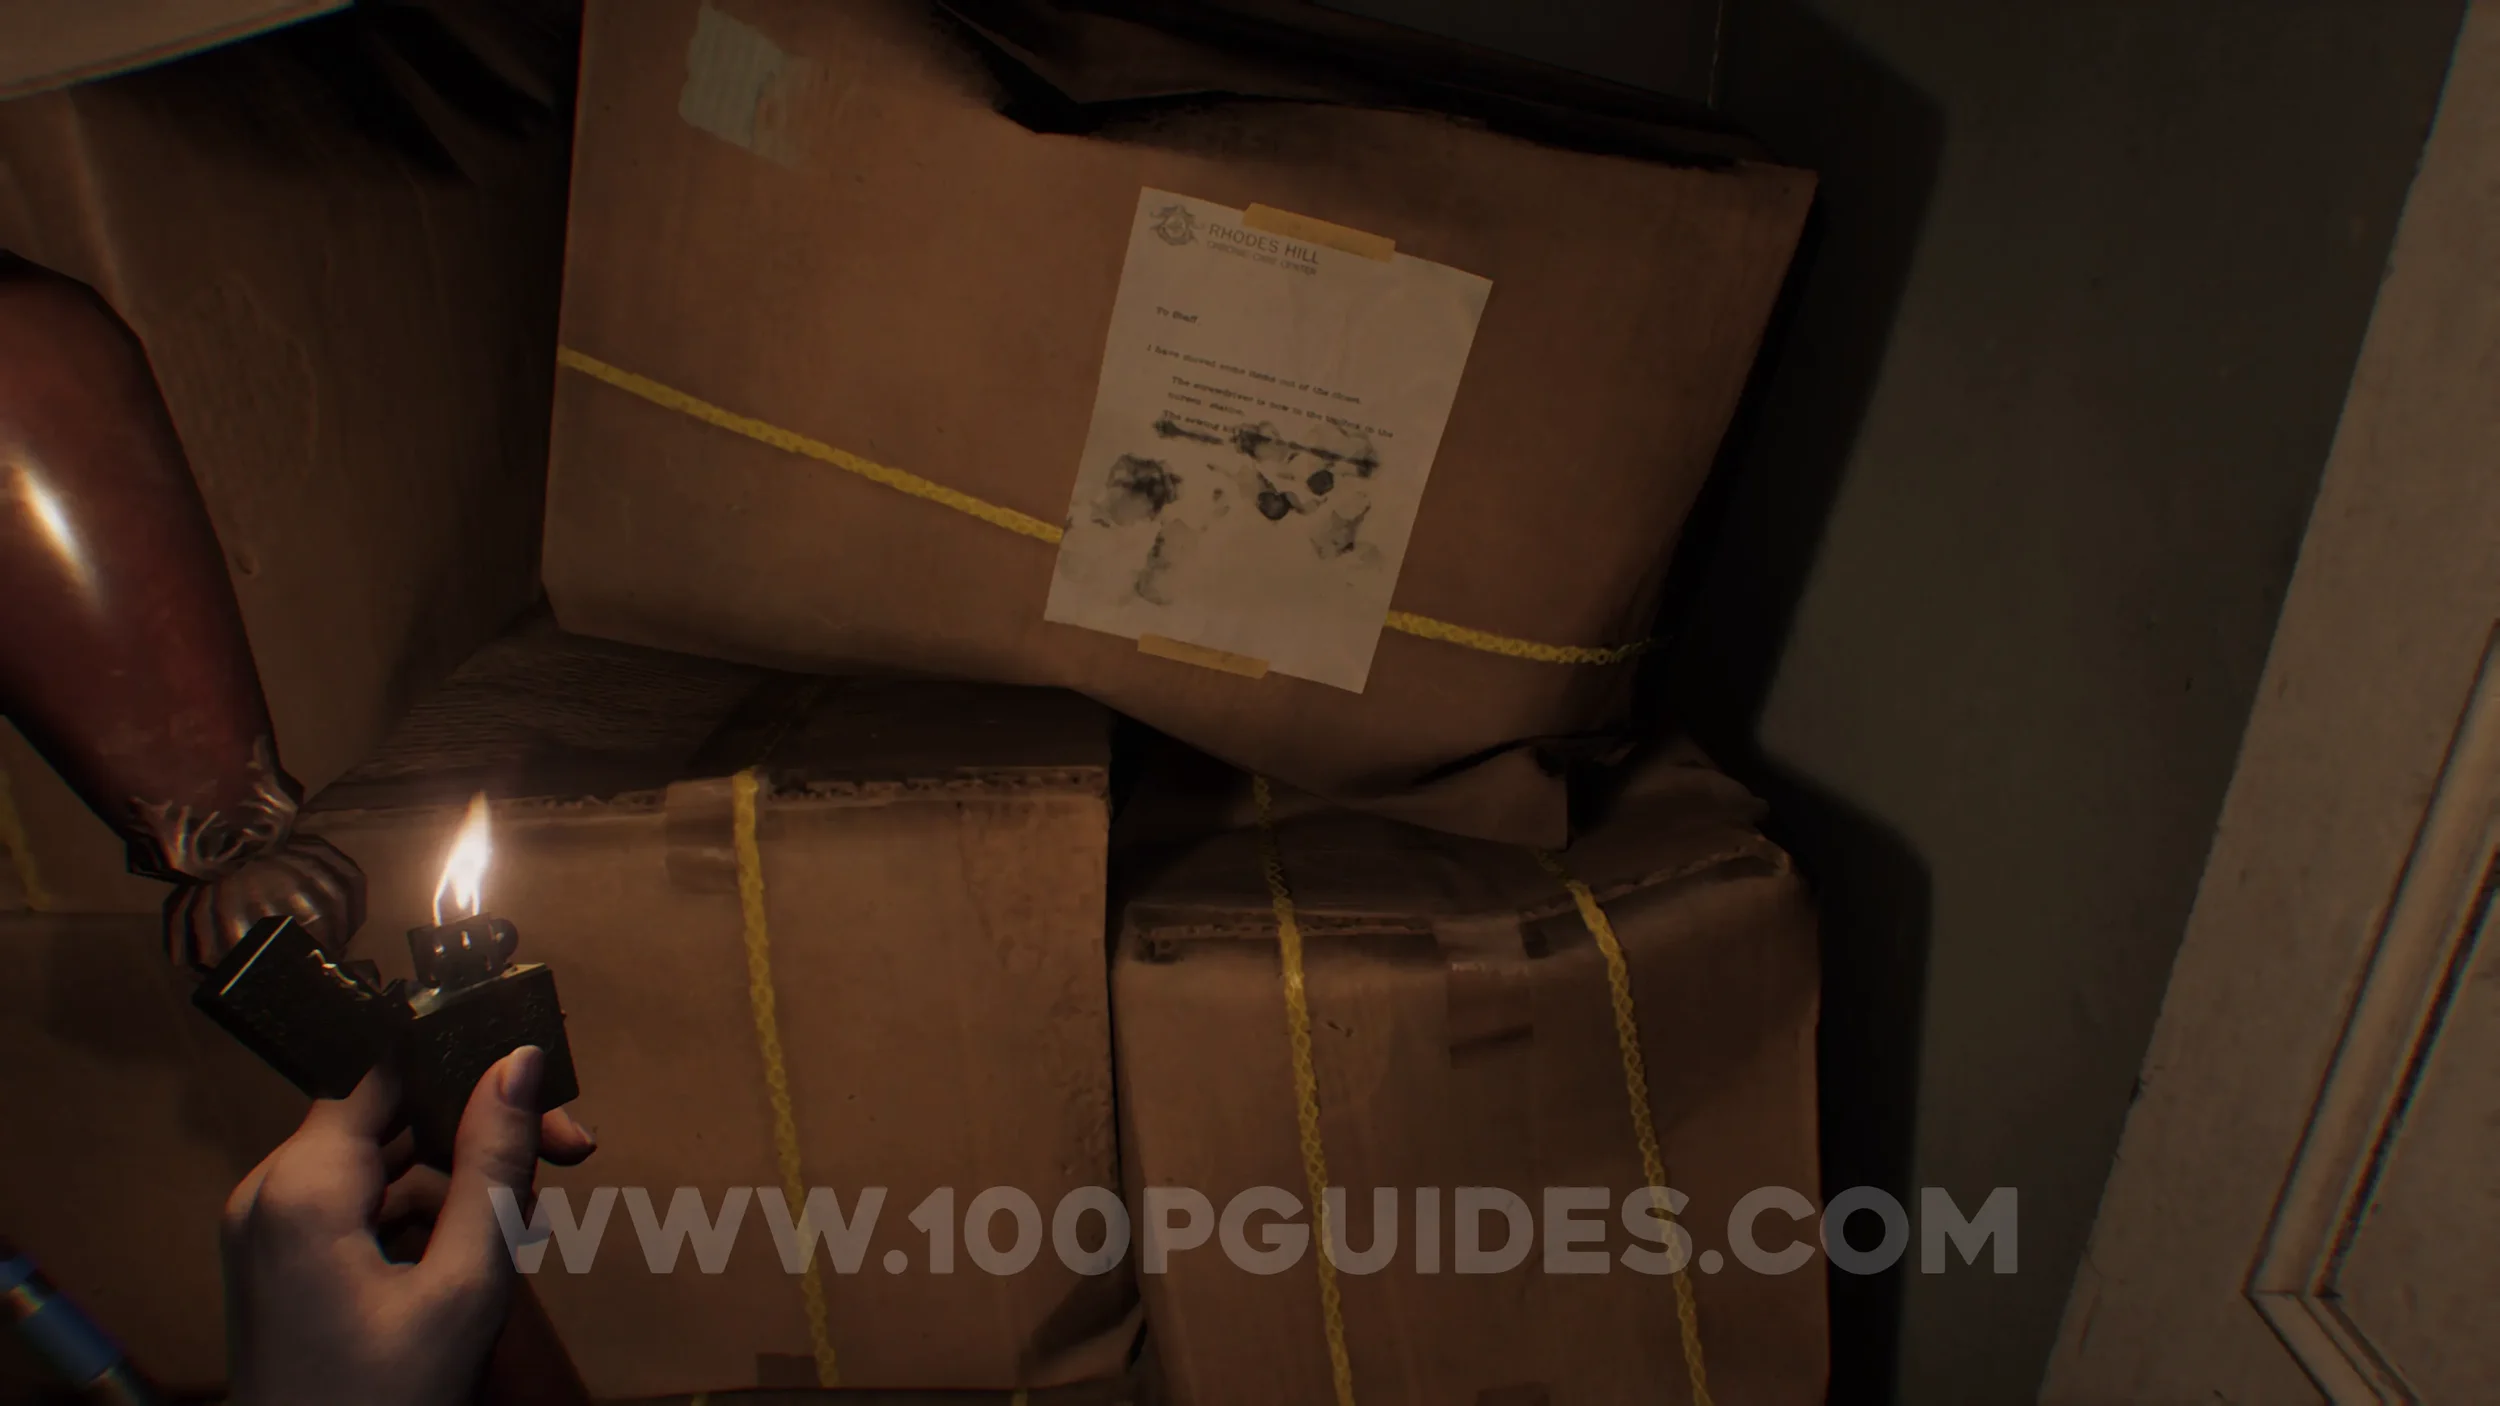
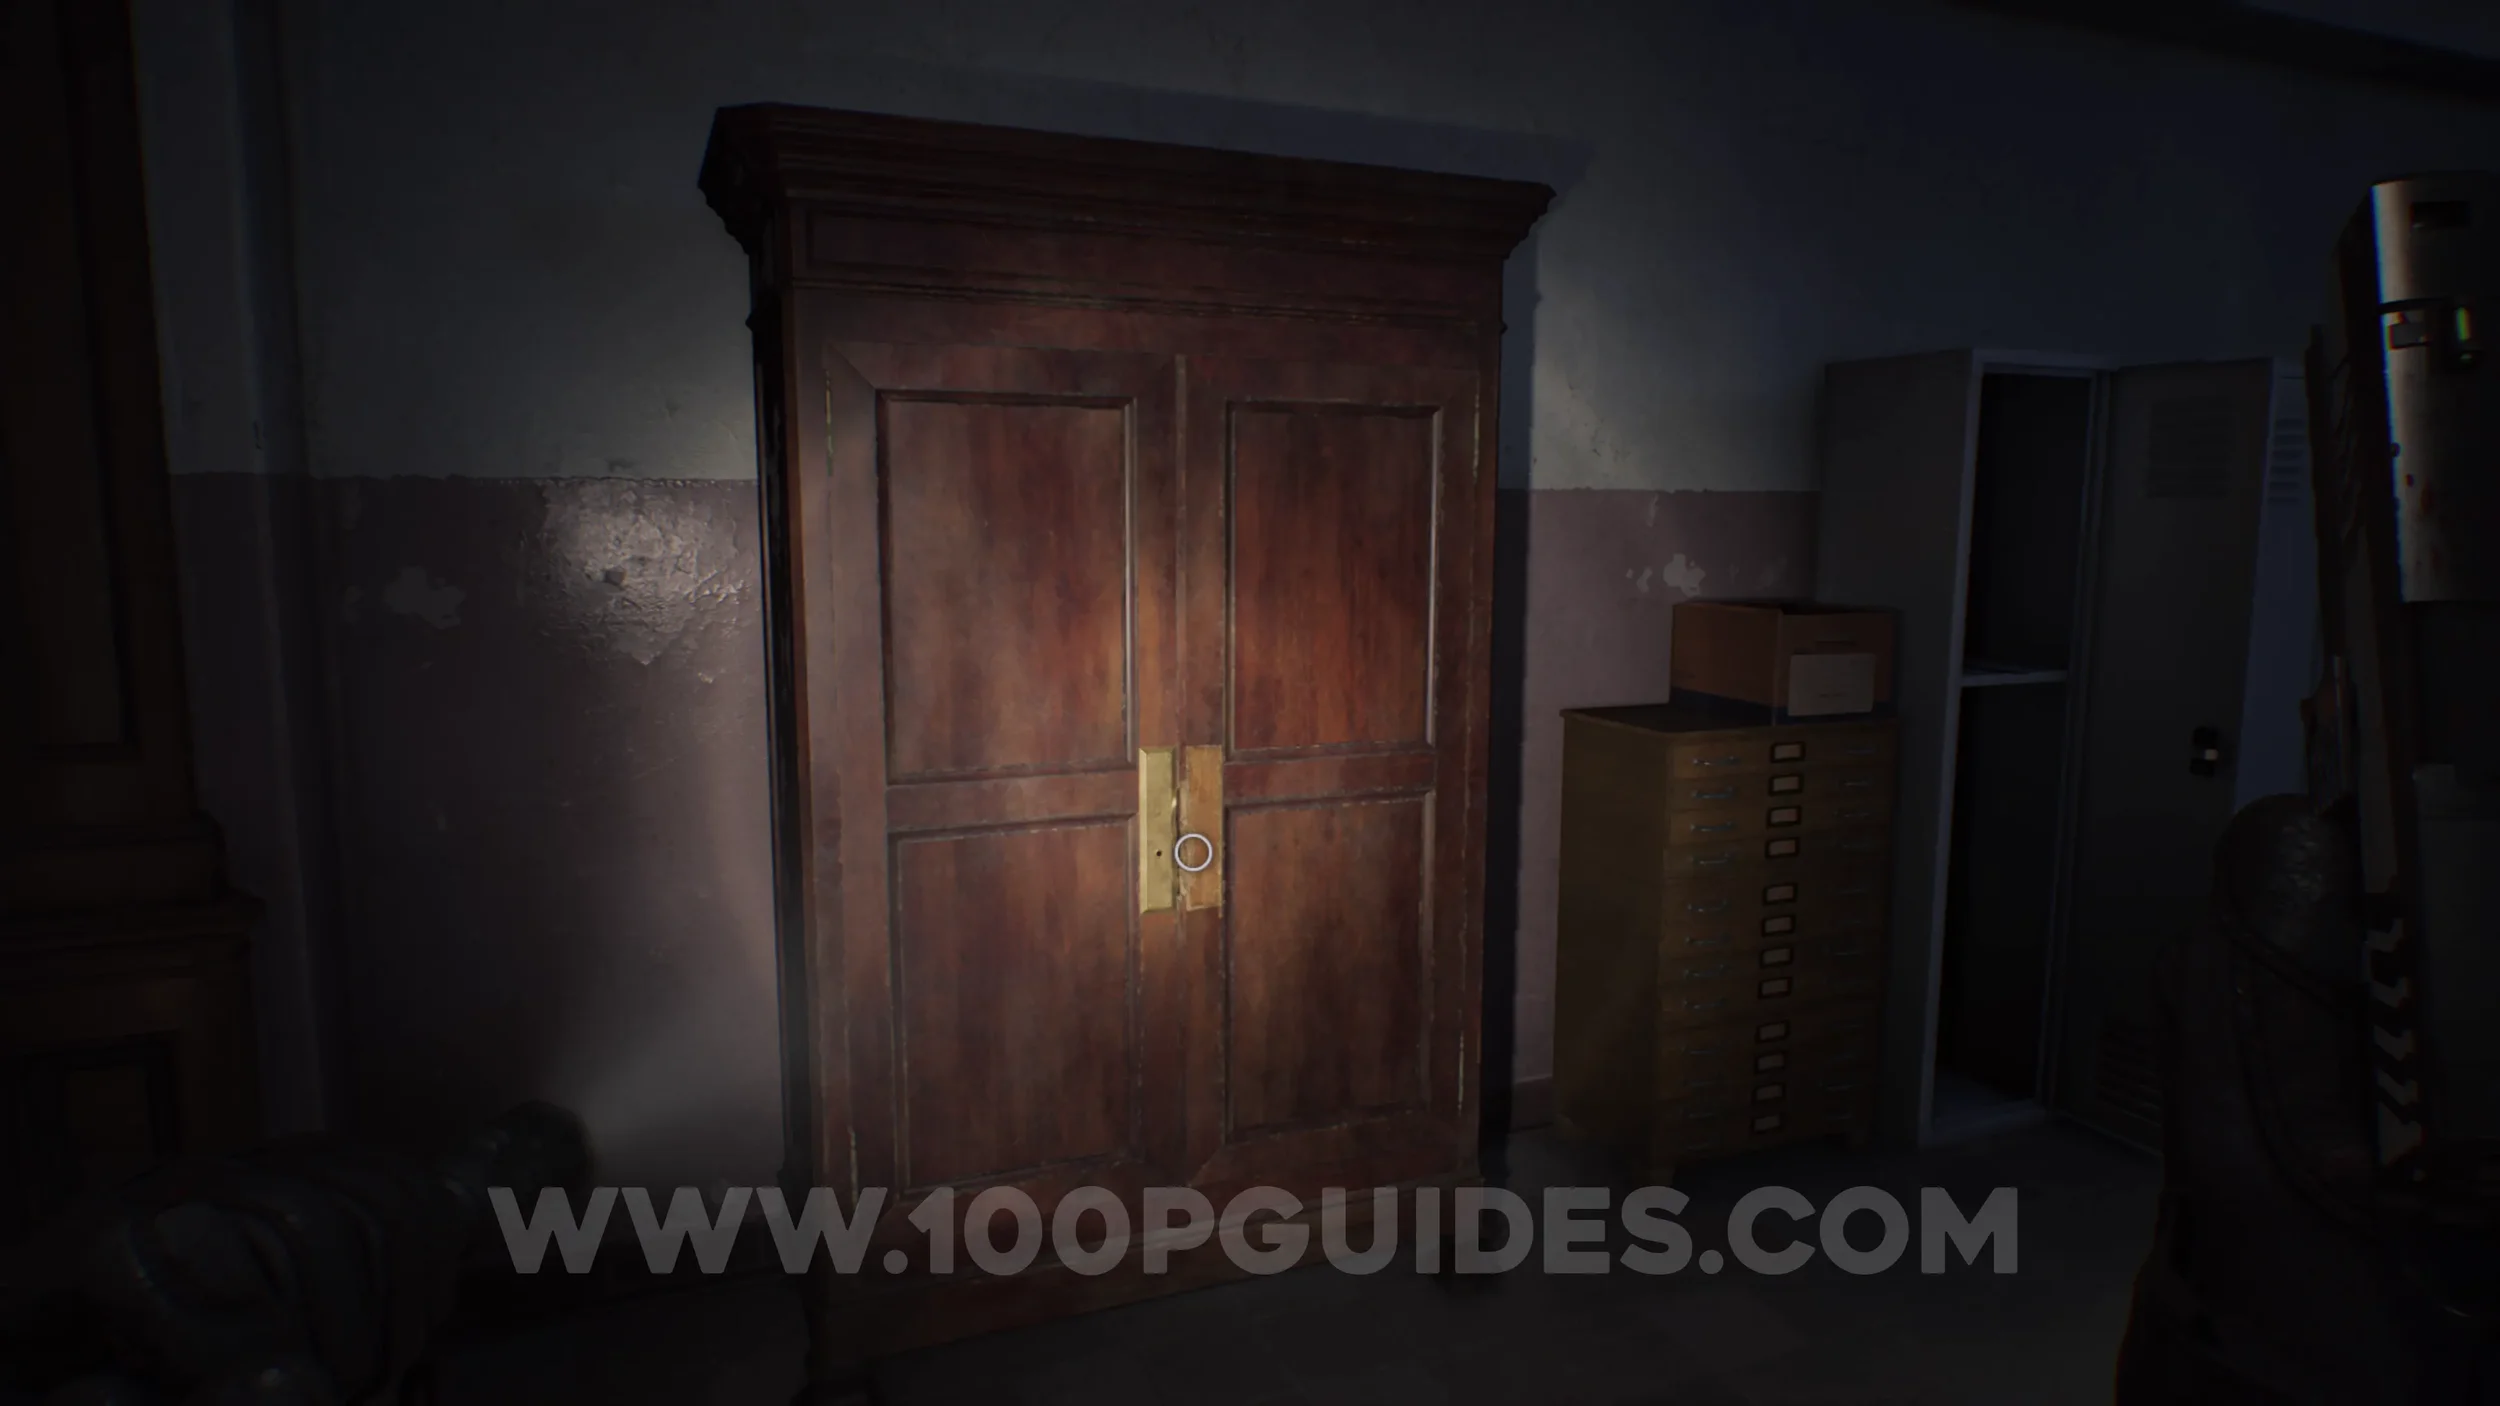
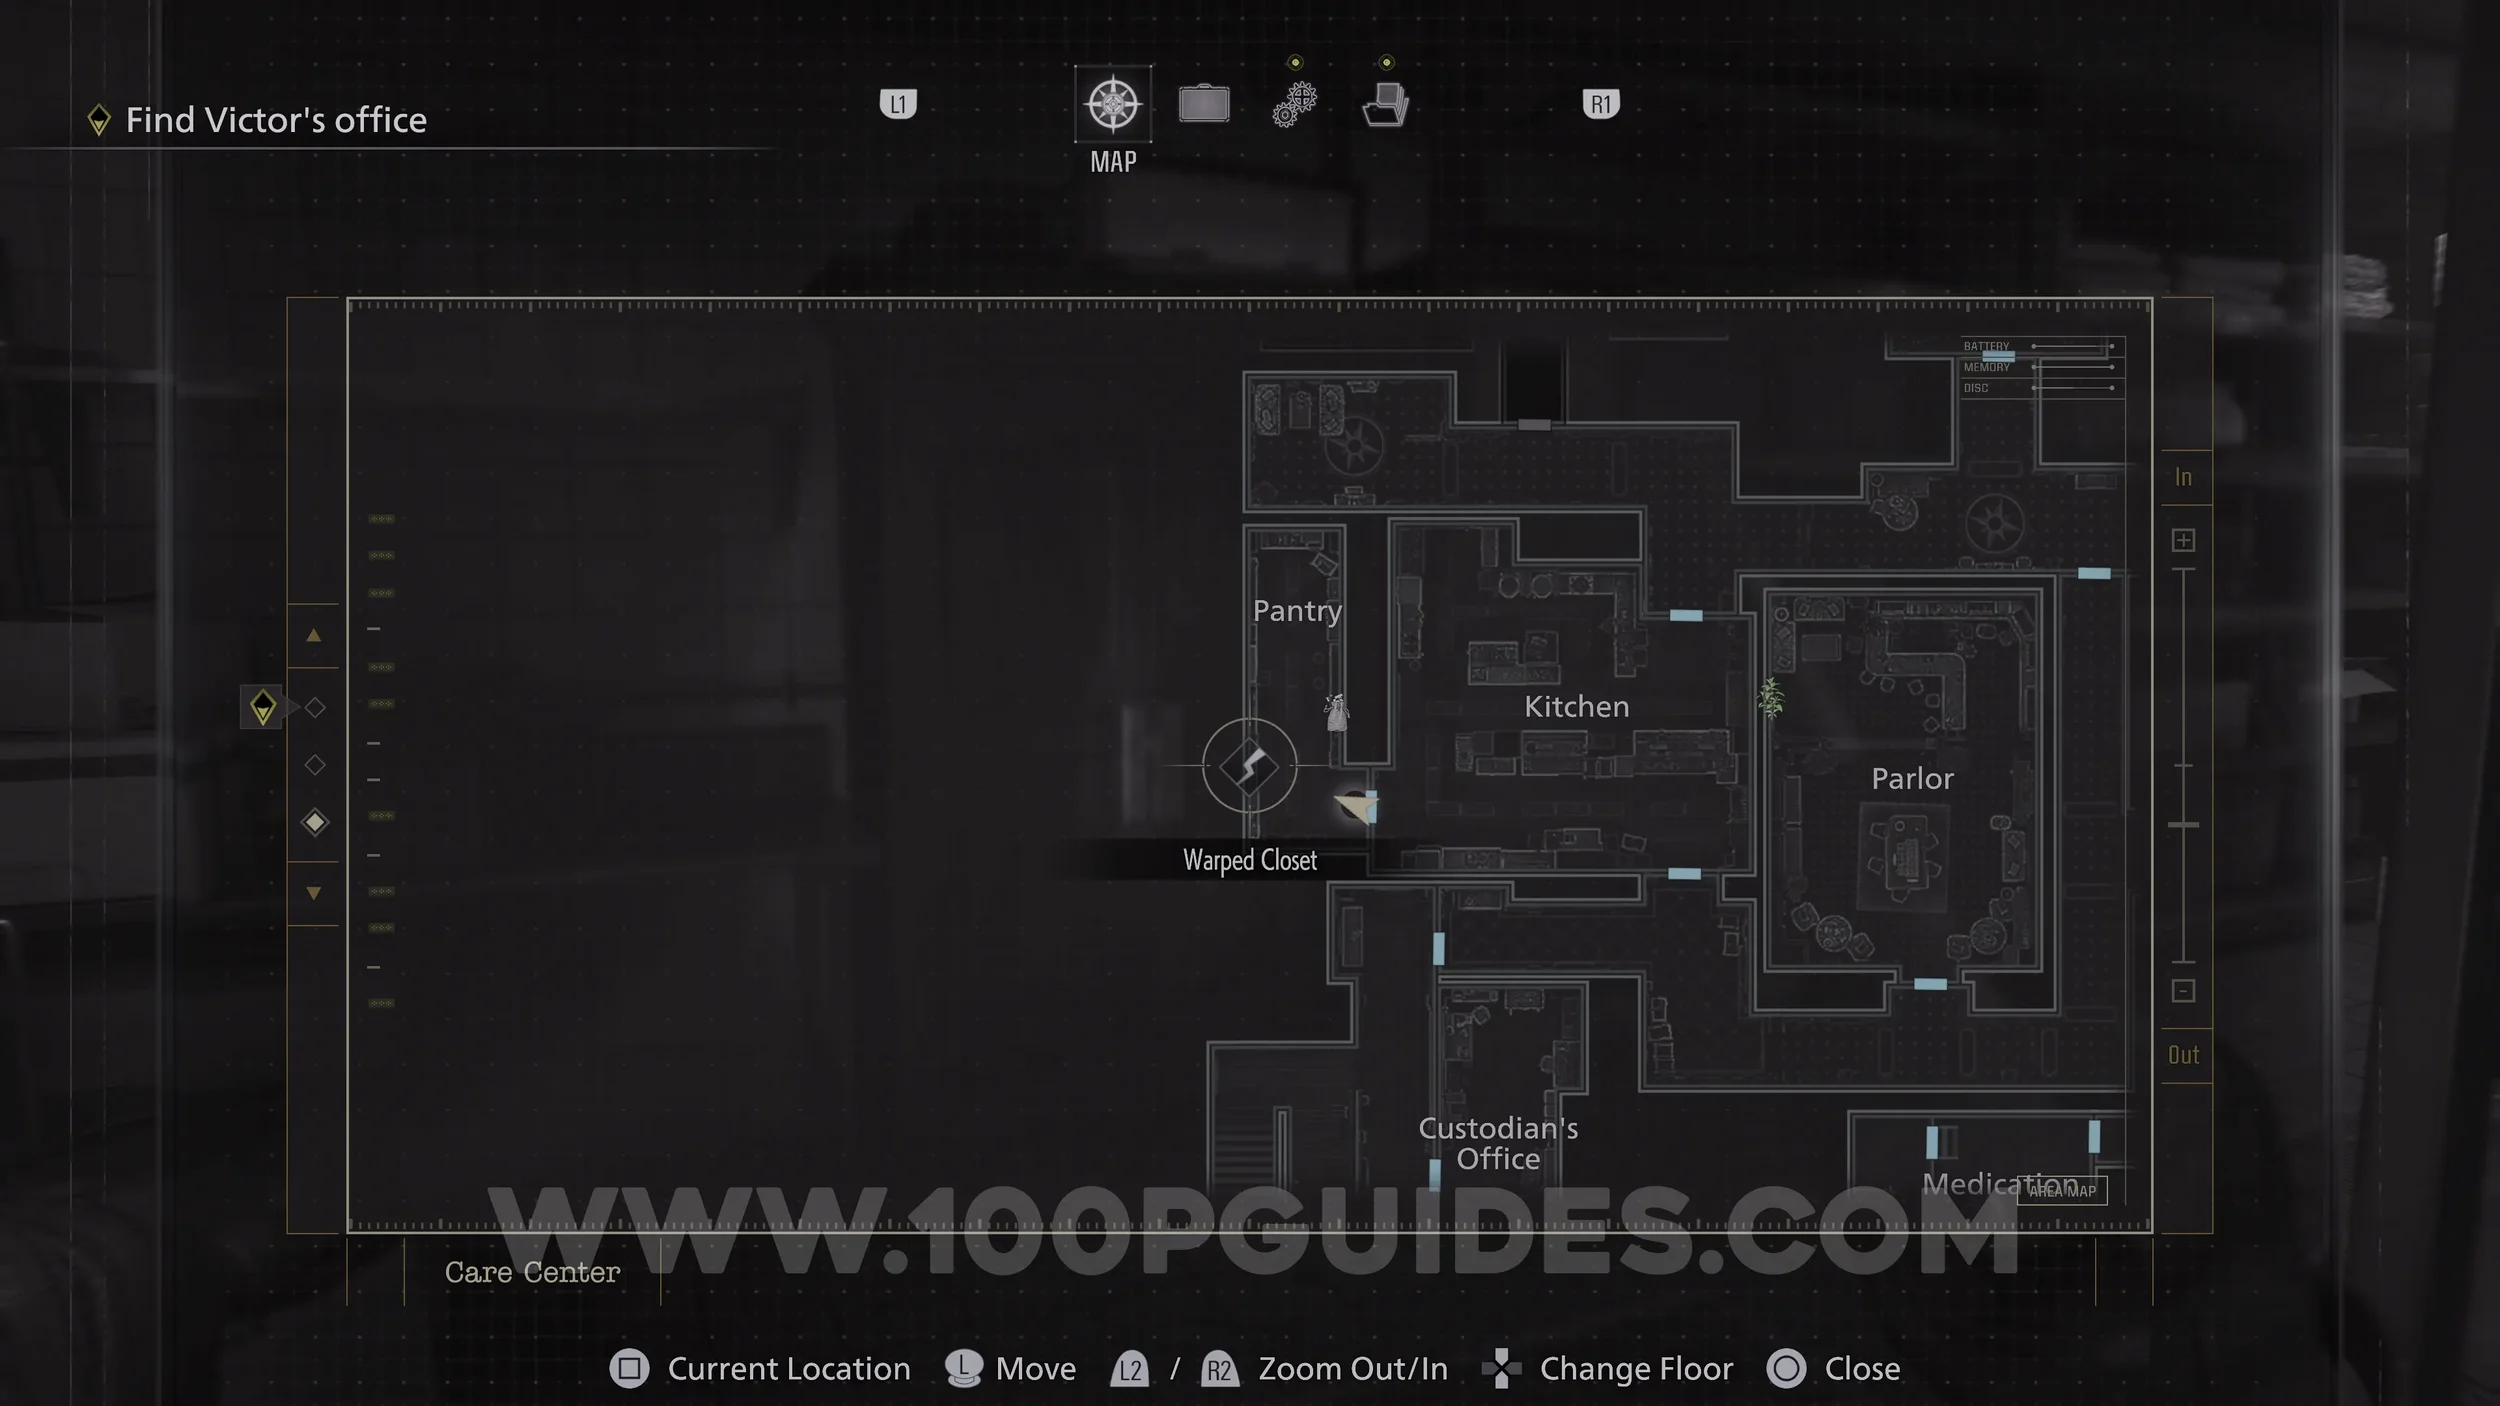
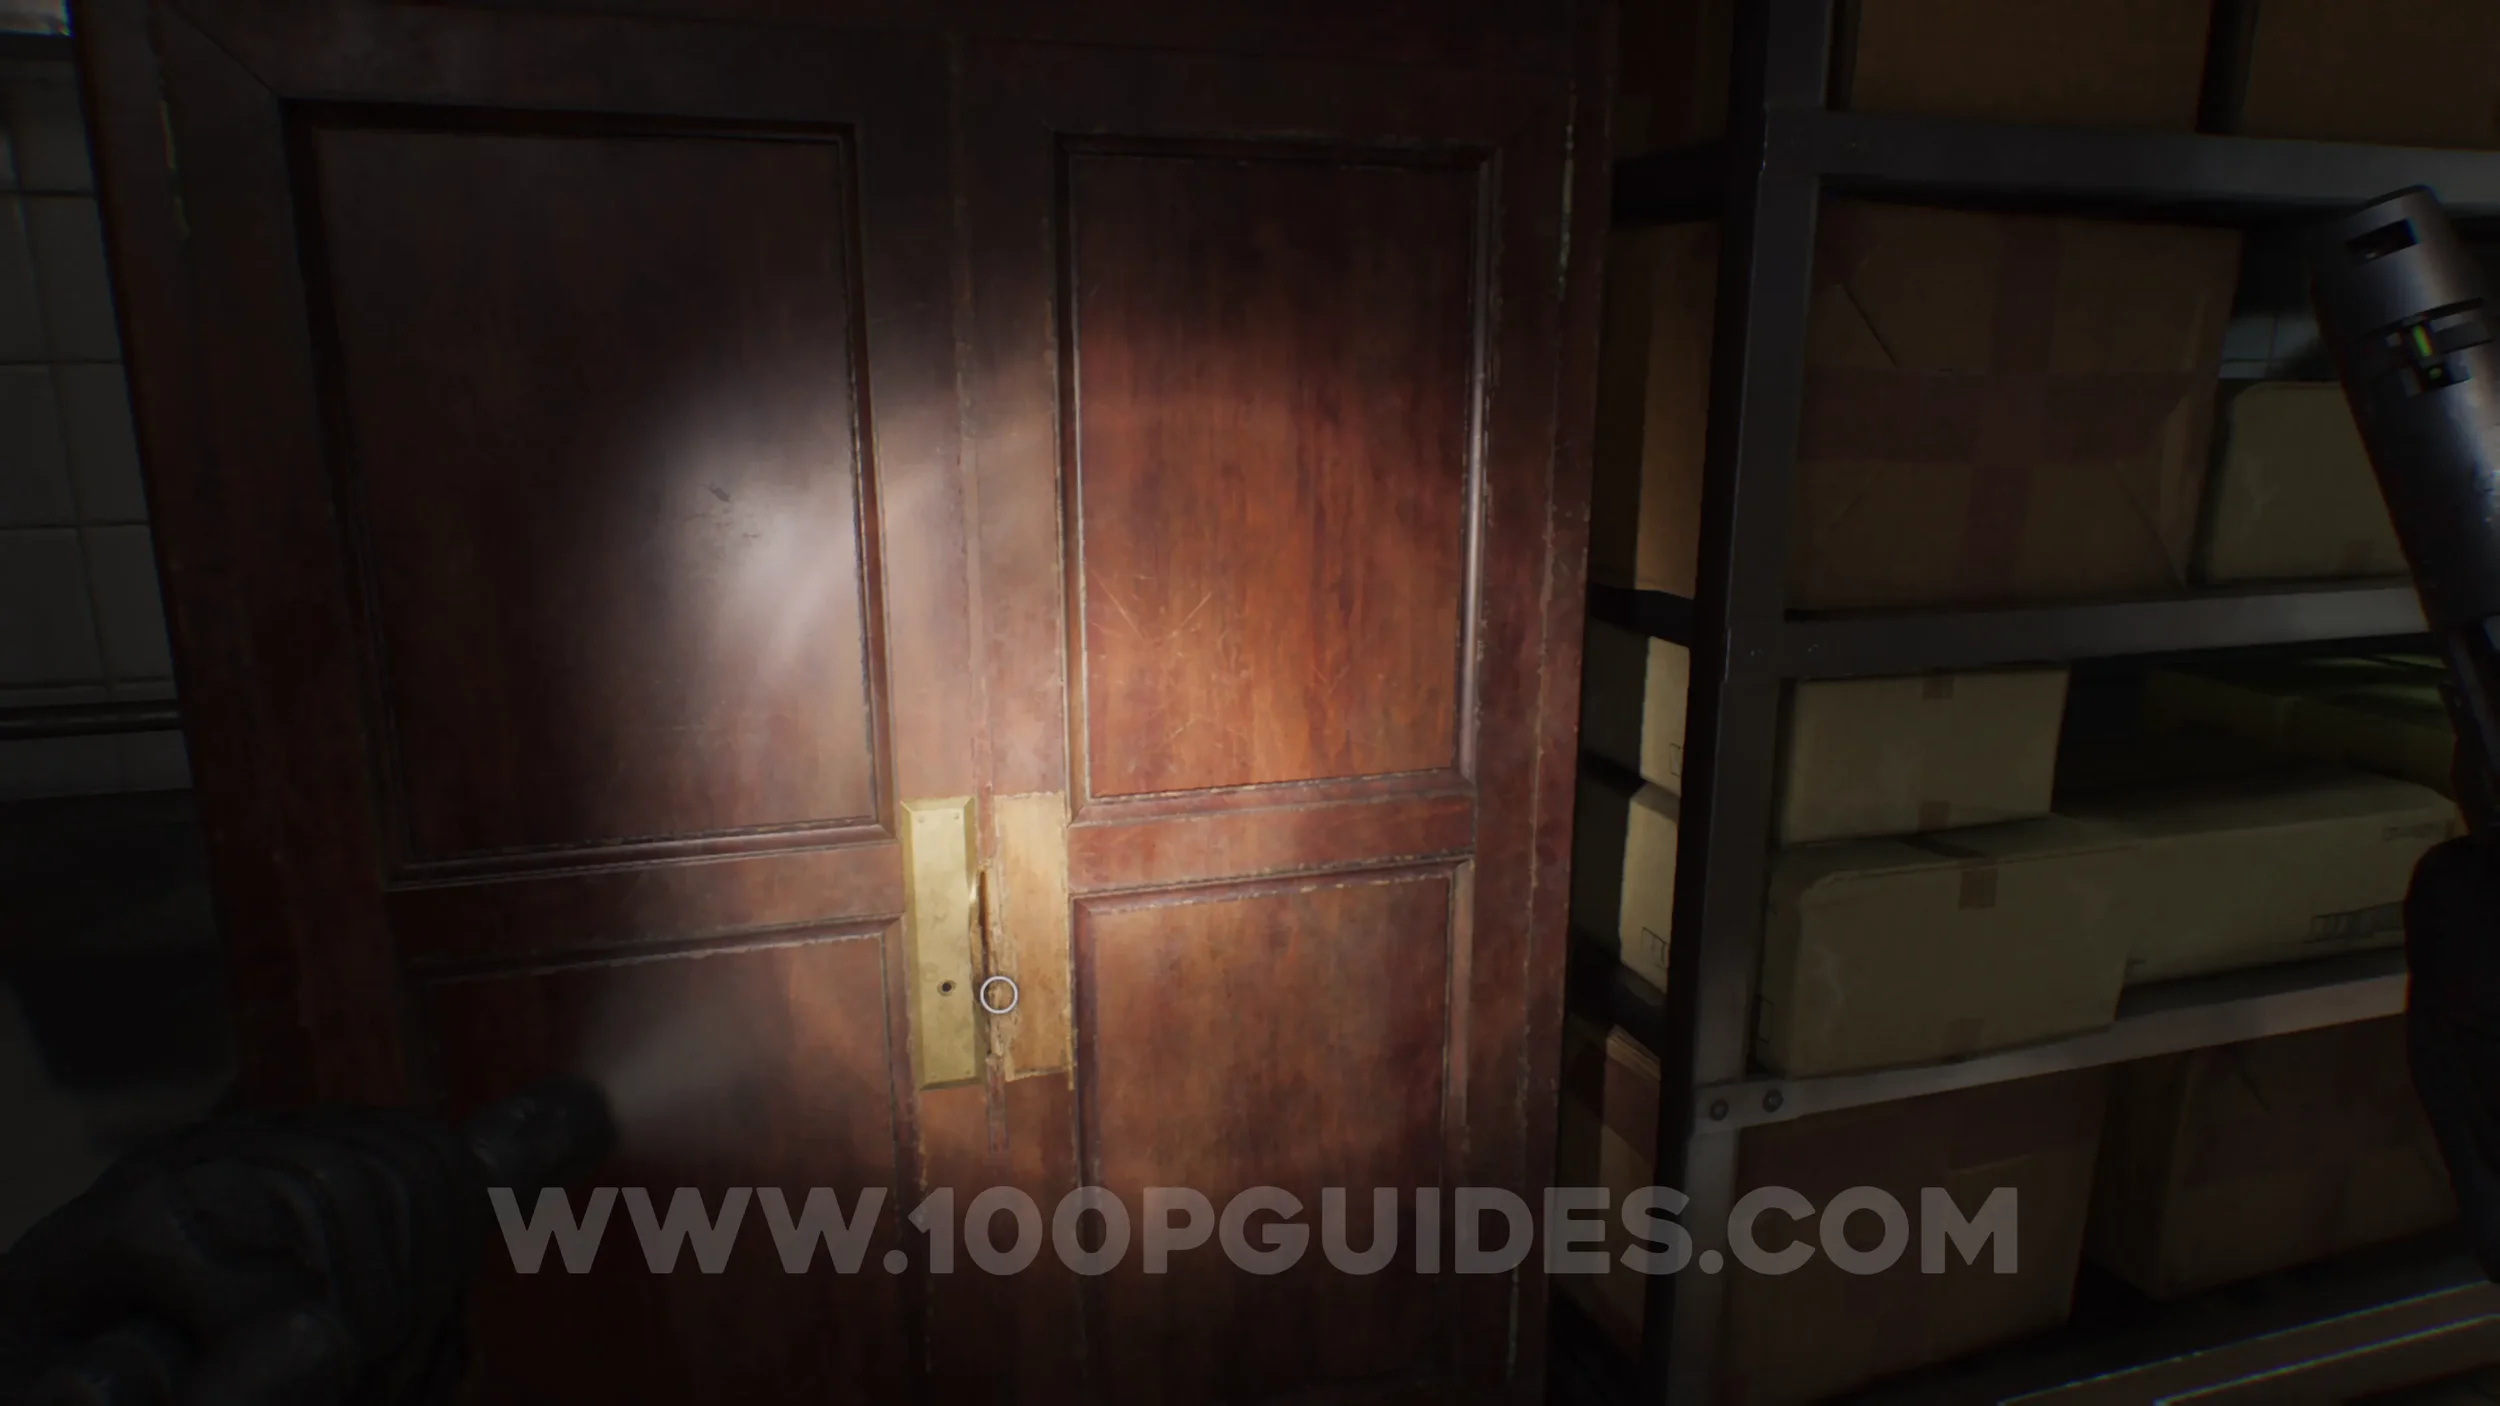
File #8 - Note on Cardboard Box. Inside the wardrobe in Room 202.
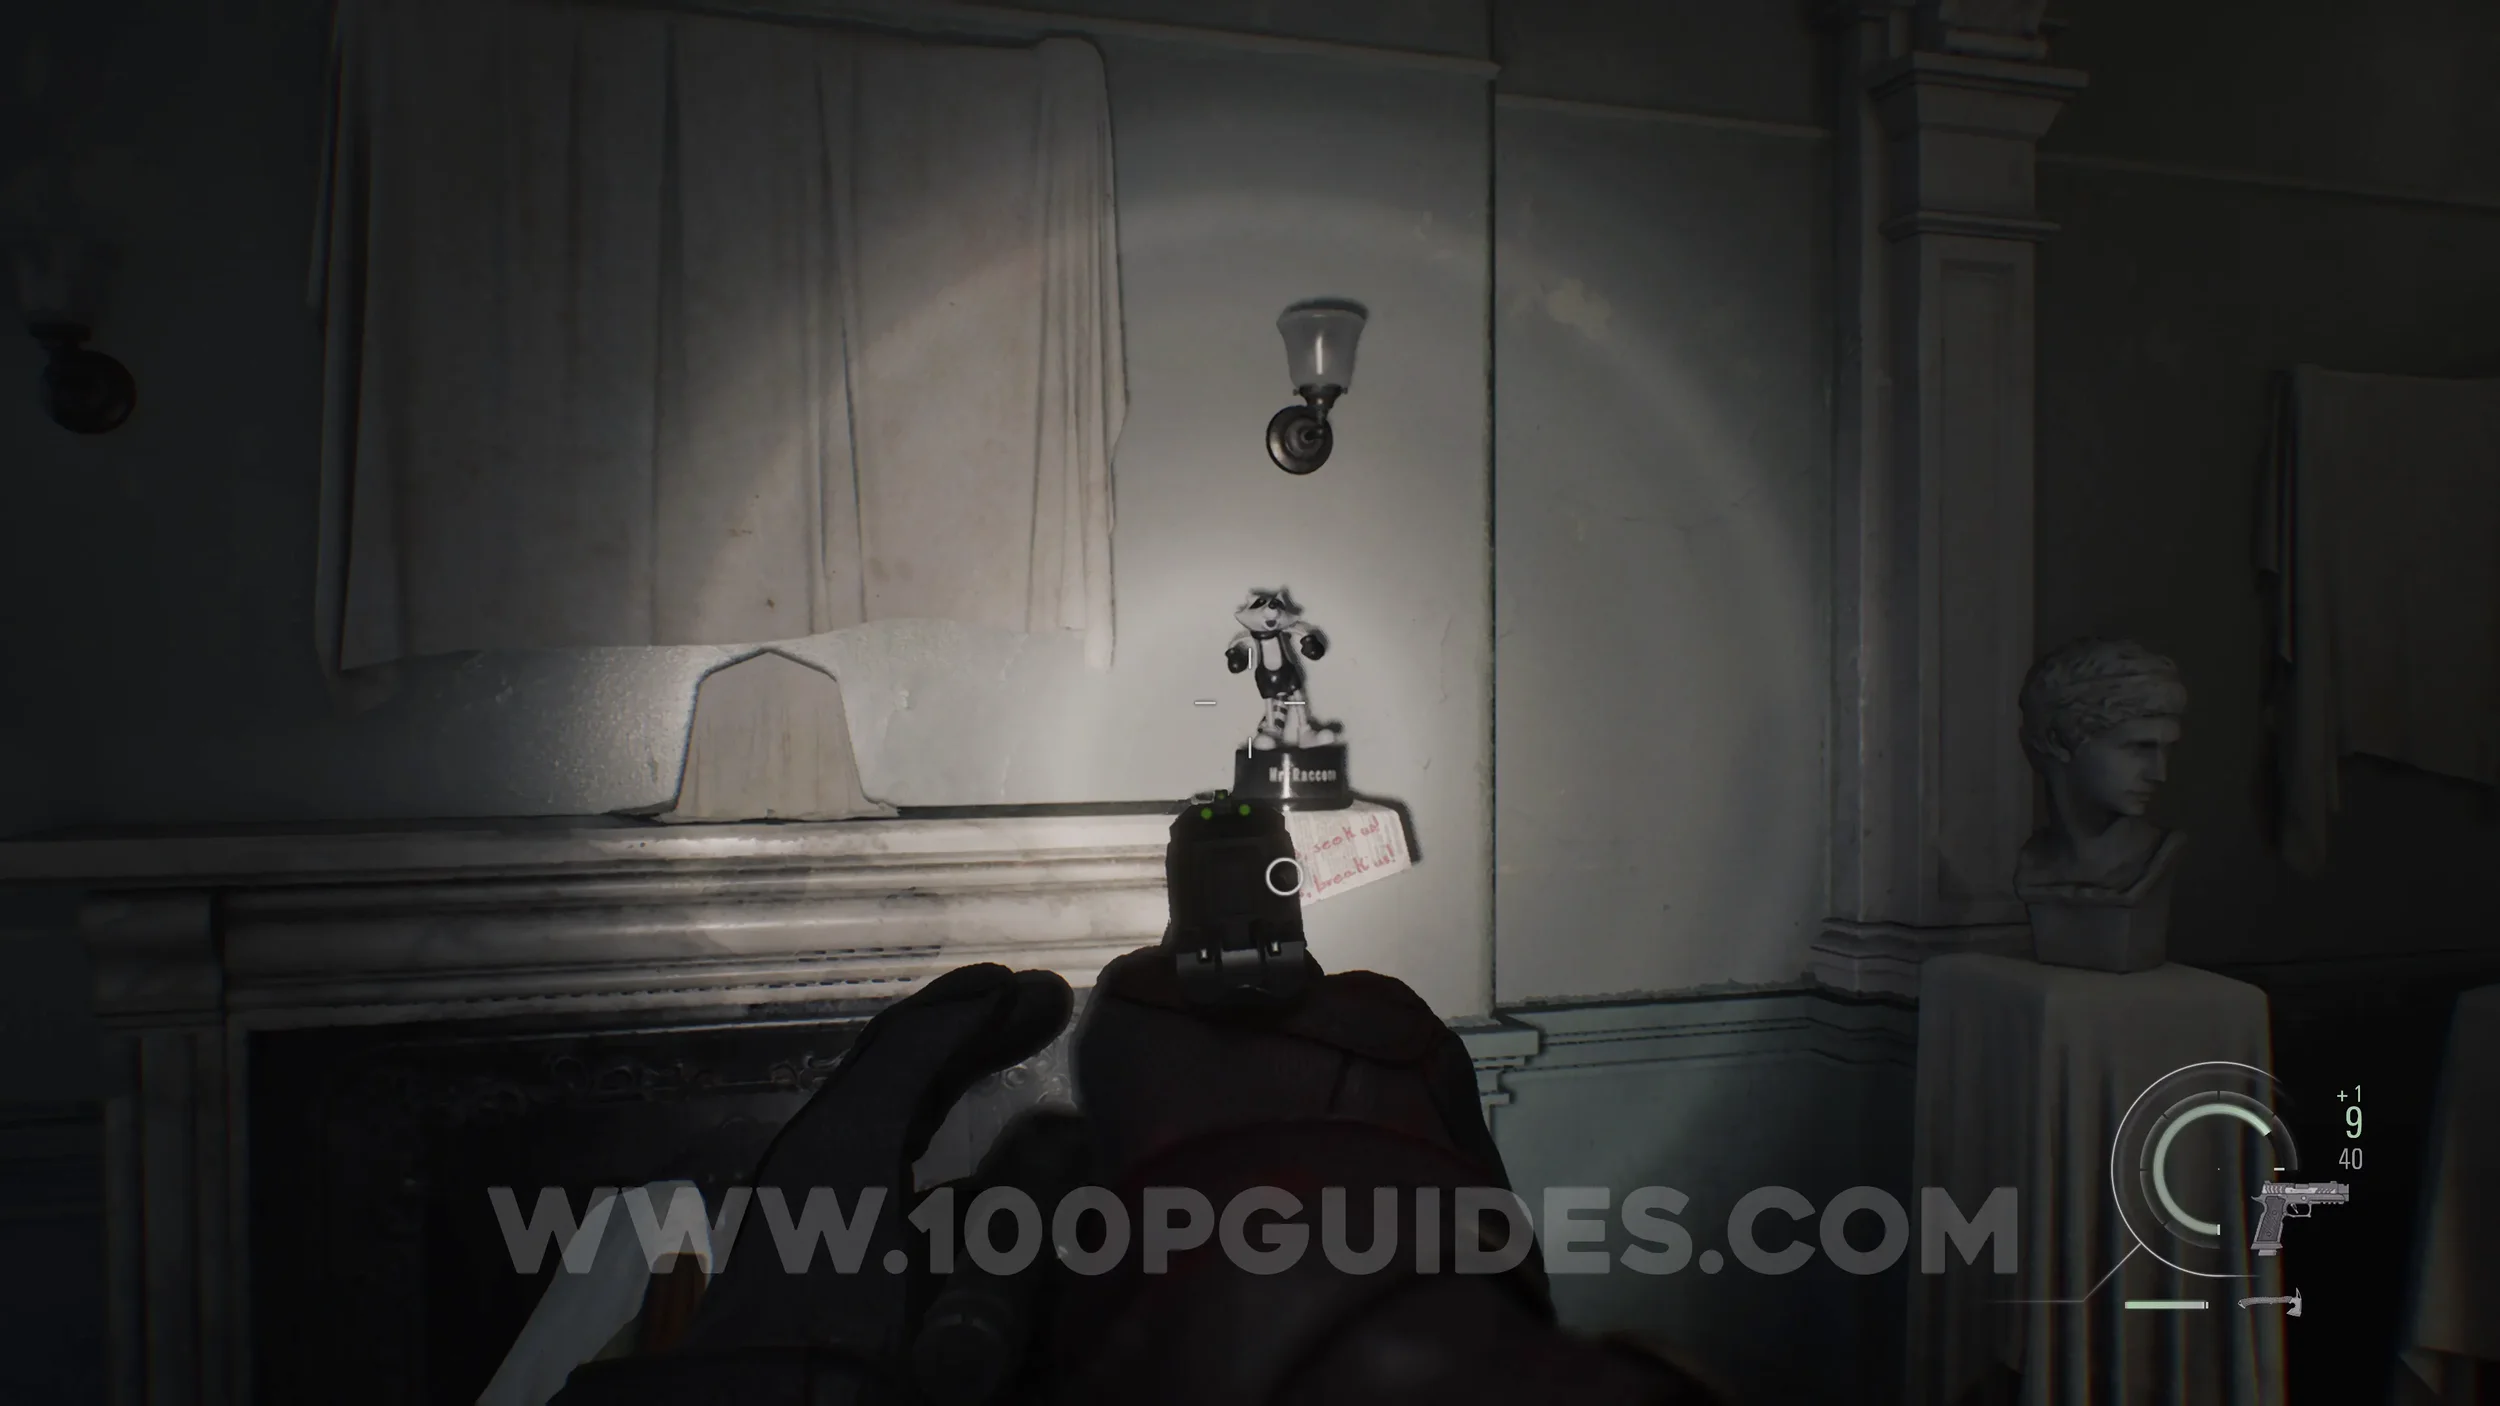
Mr. Raccoon #1. Once you gain control of Leon, continue until you break open a door with a chainsaw. Just after this you will find the first Mr. Raccoon on the fireplace.
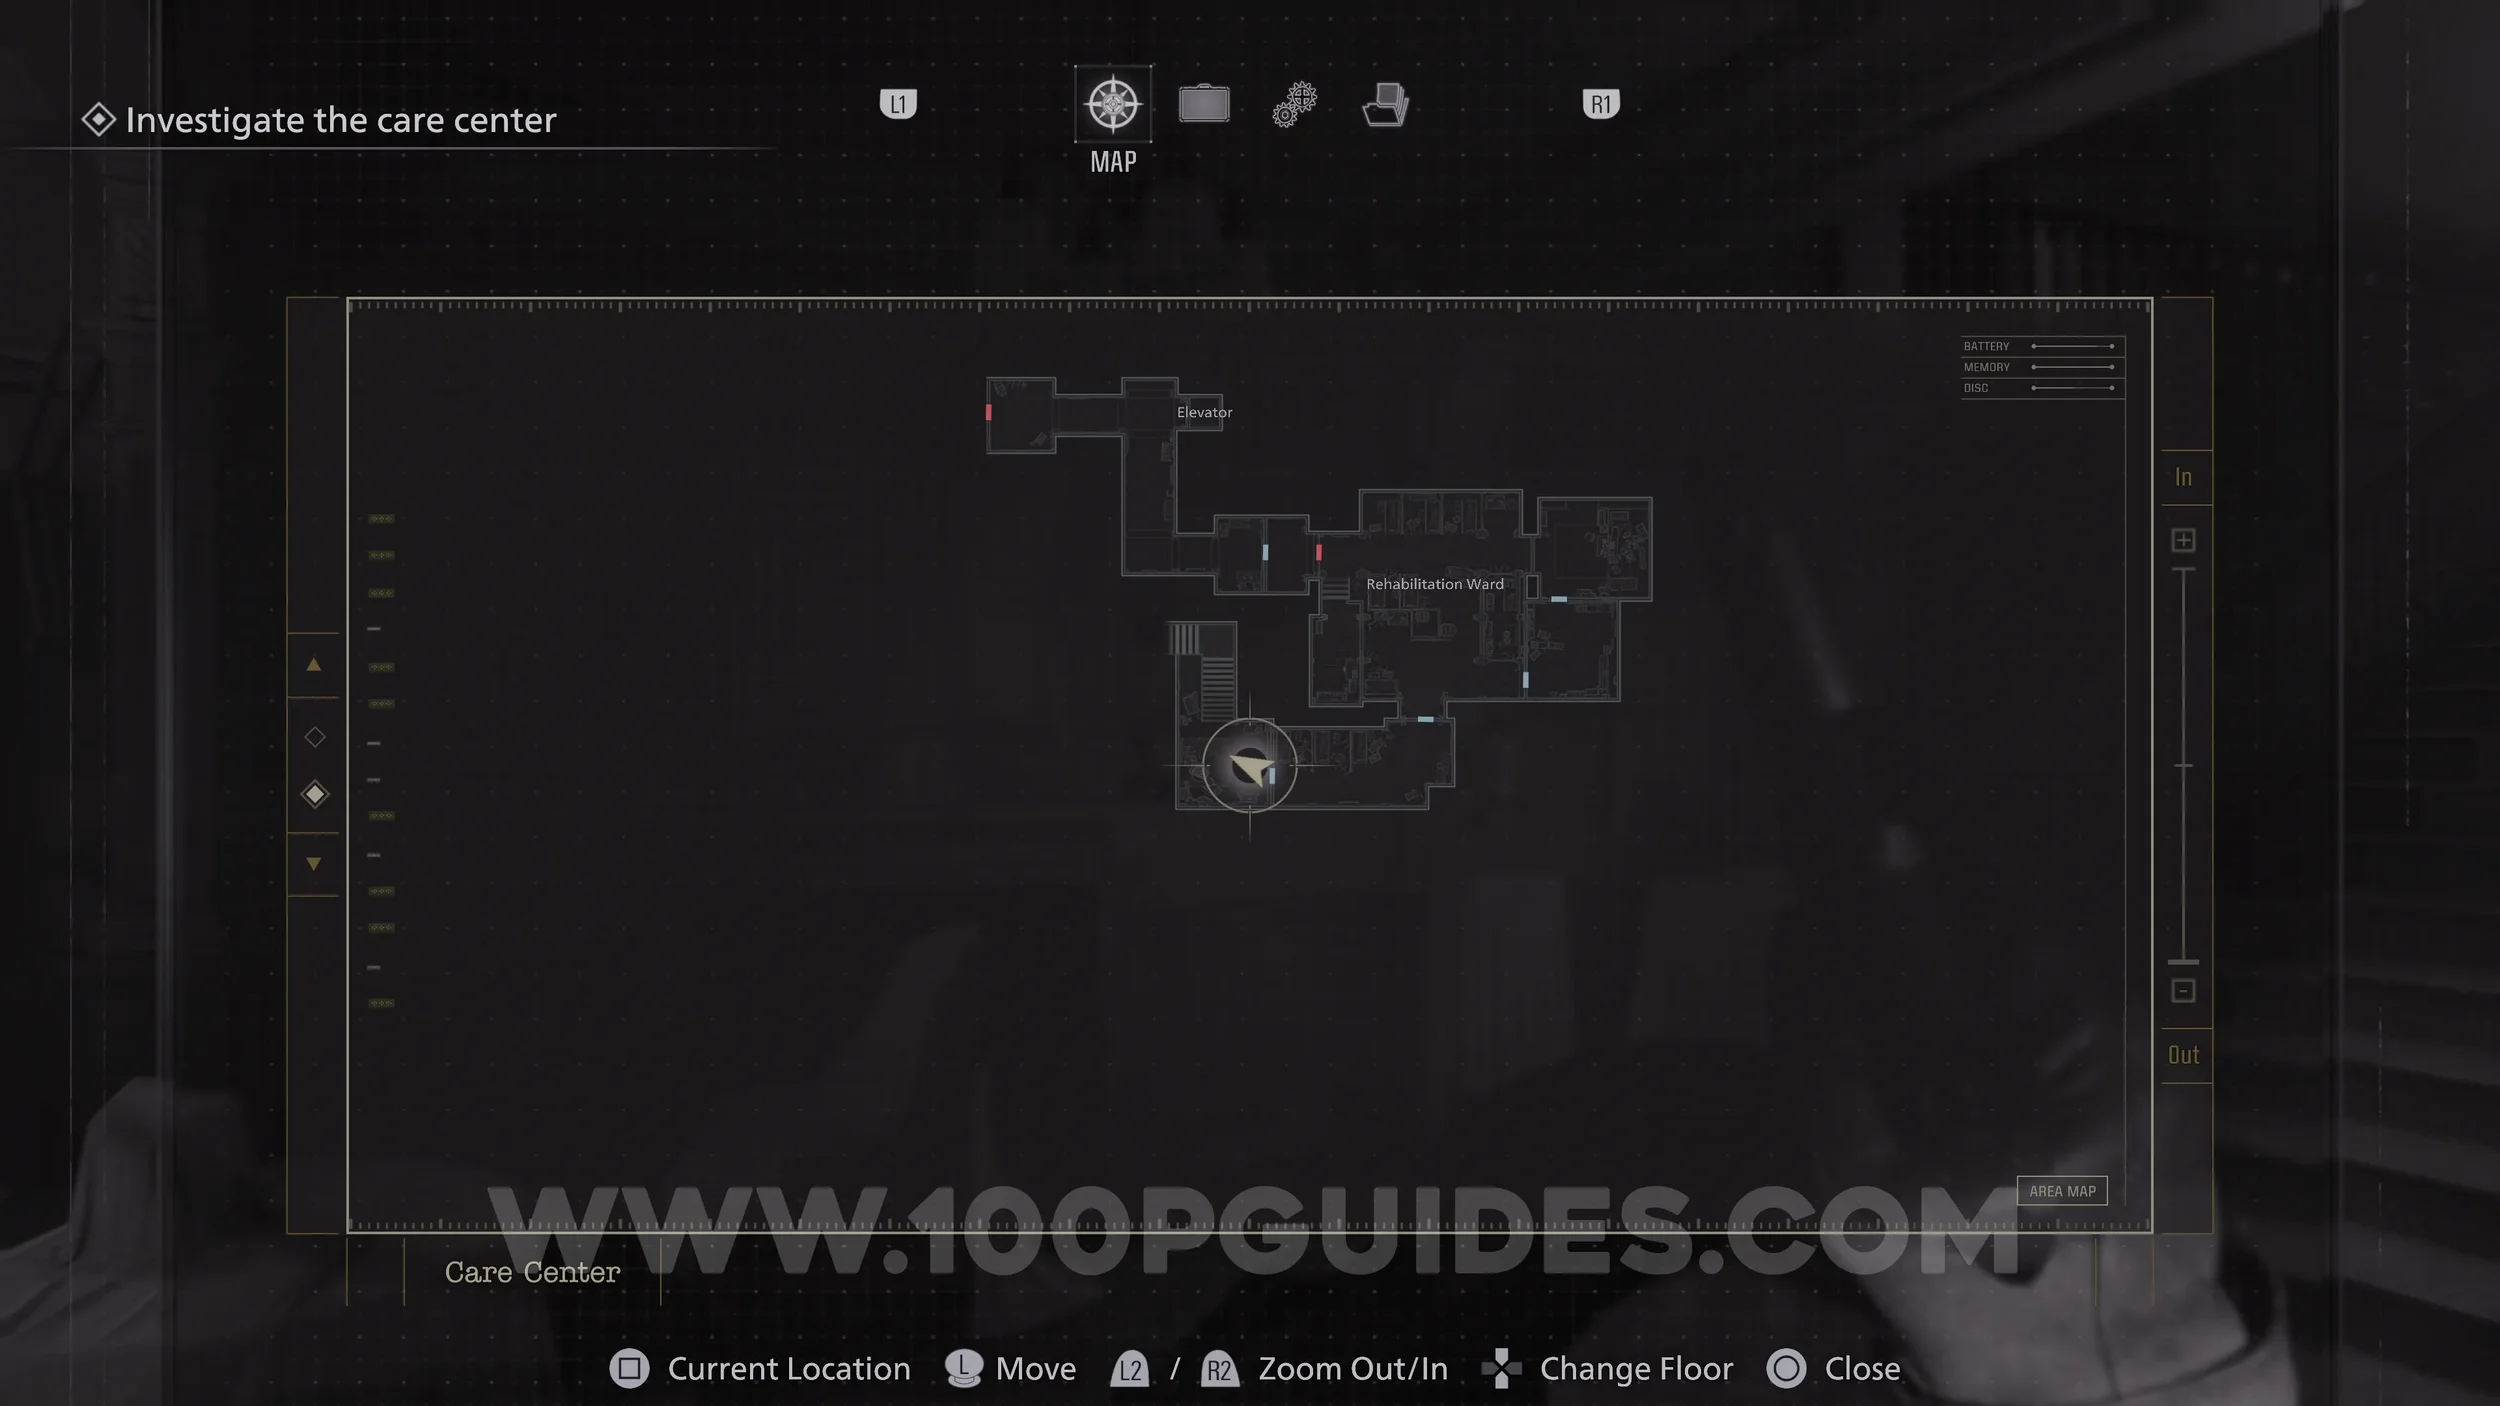
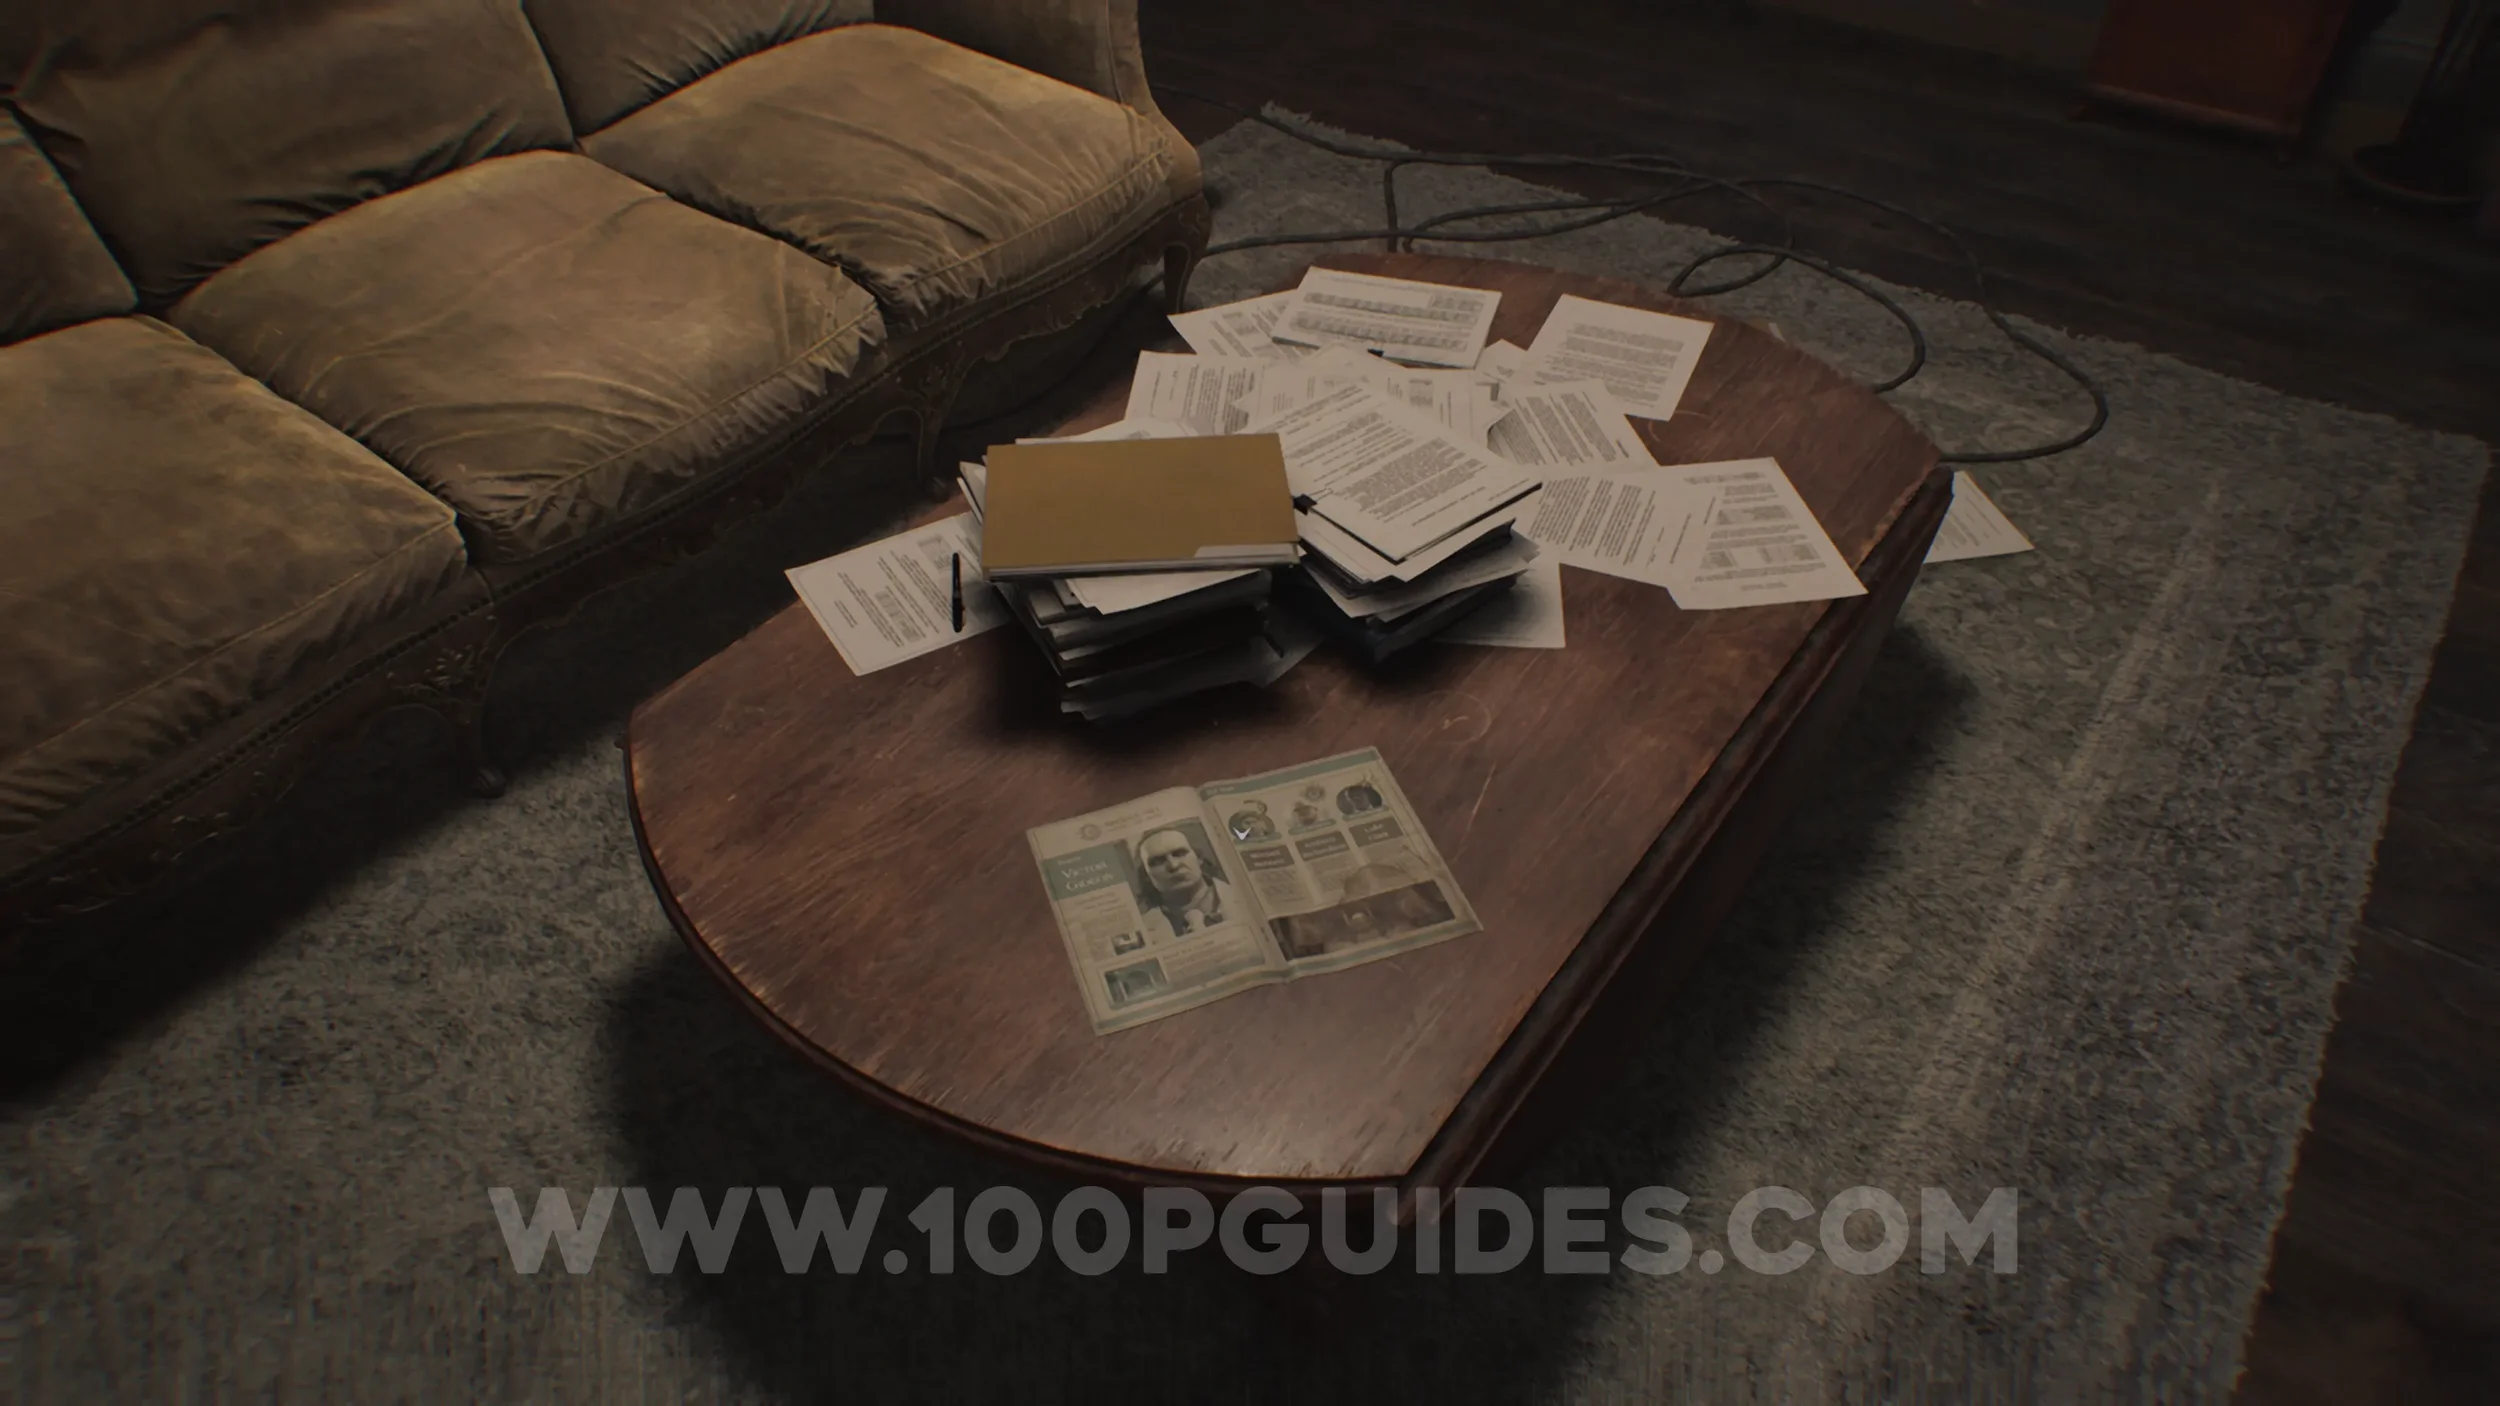
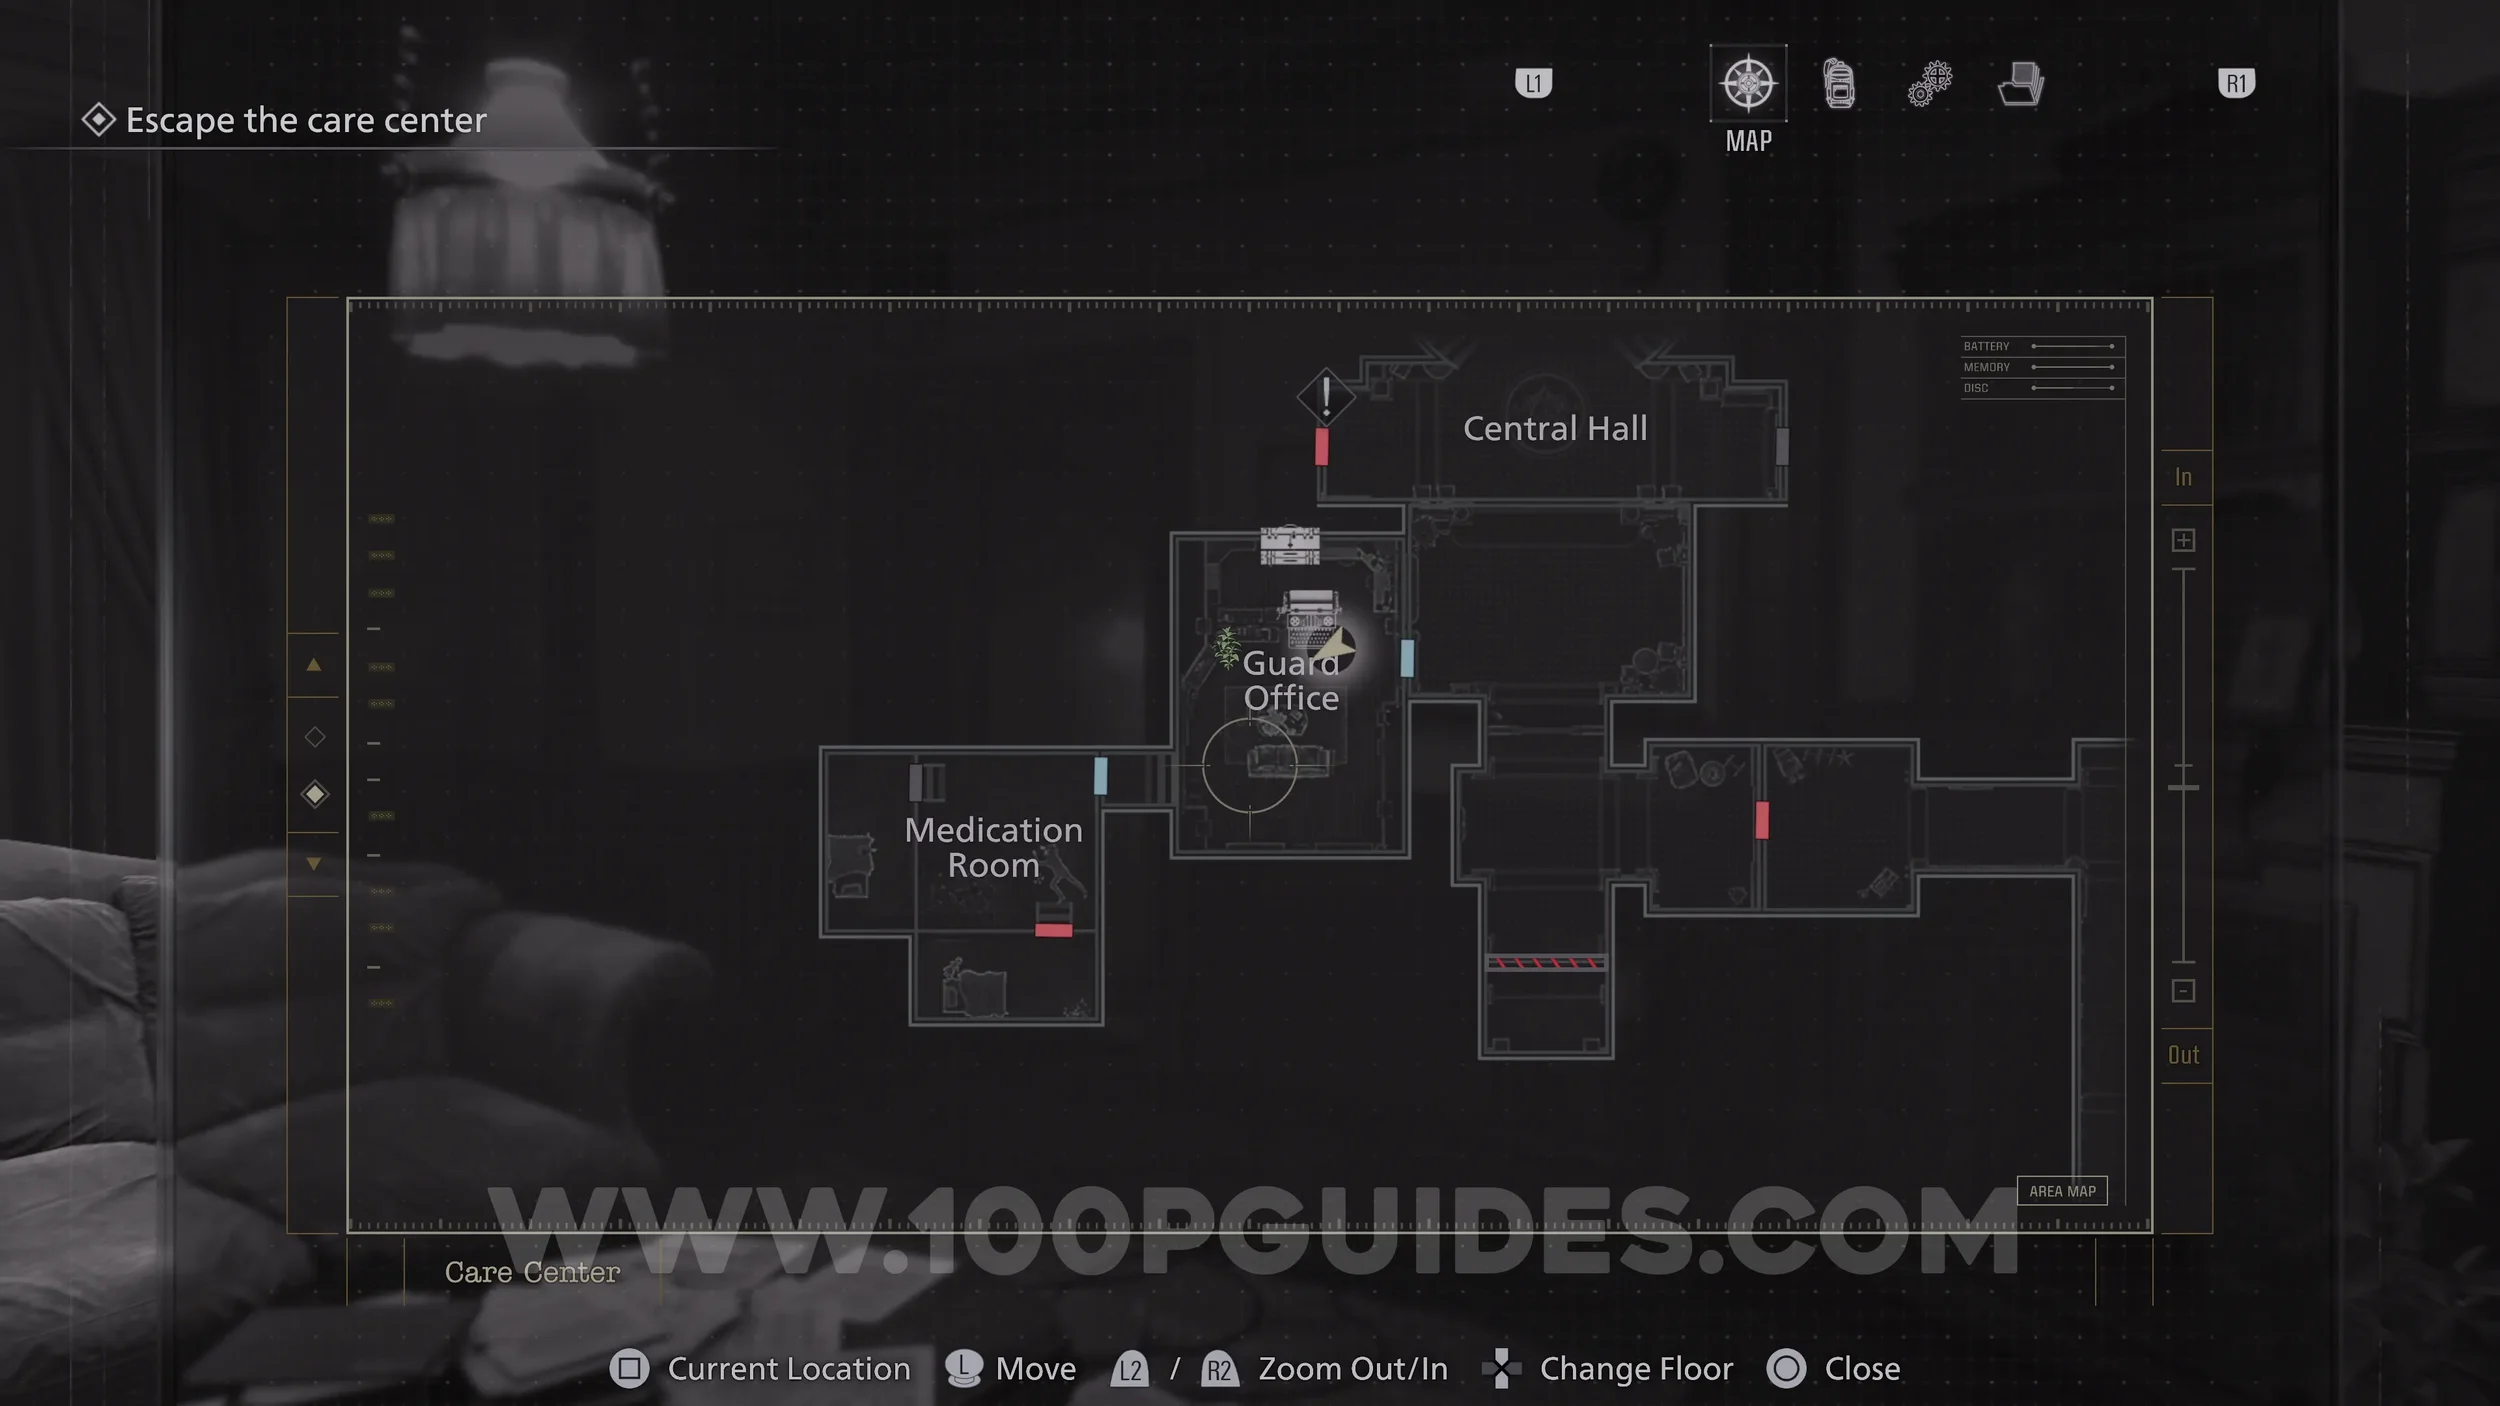
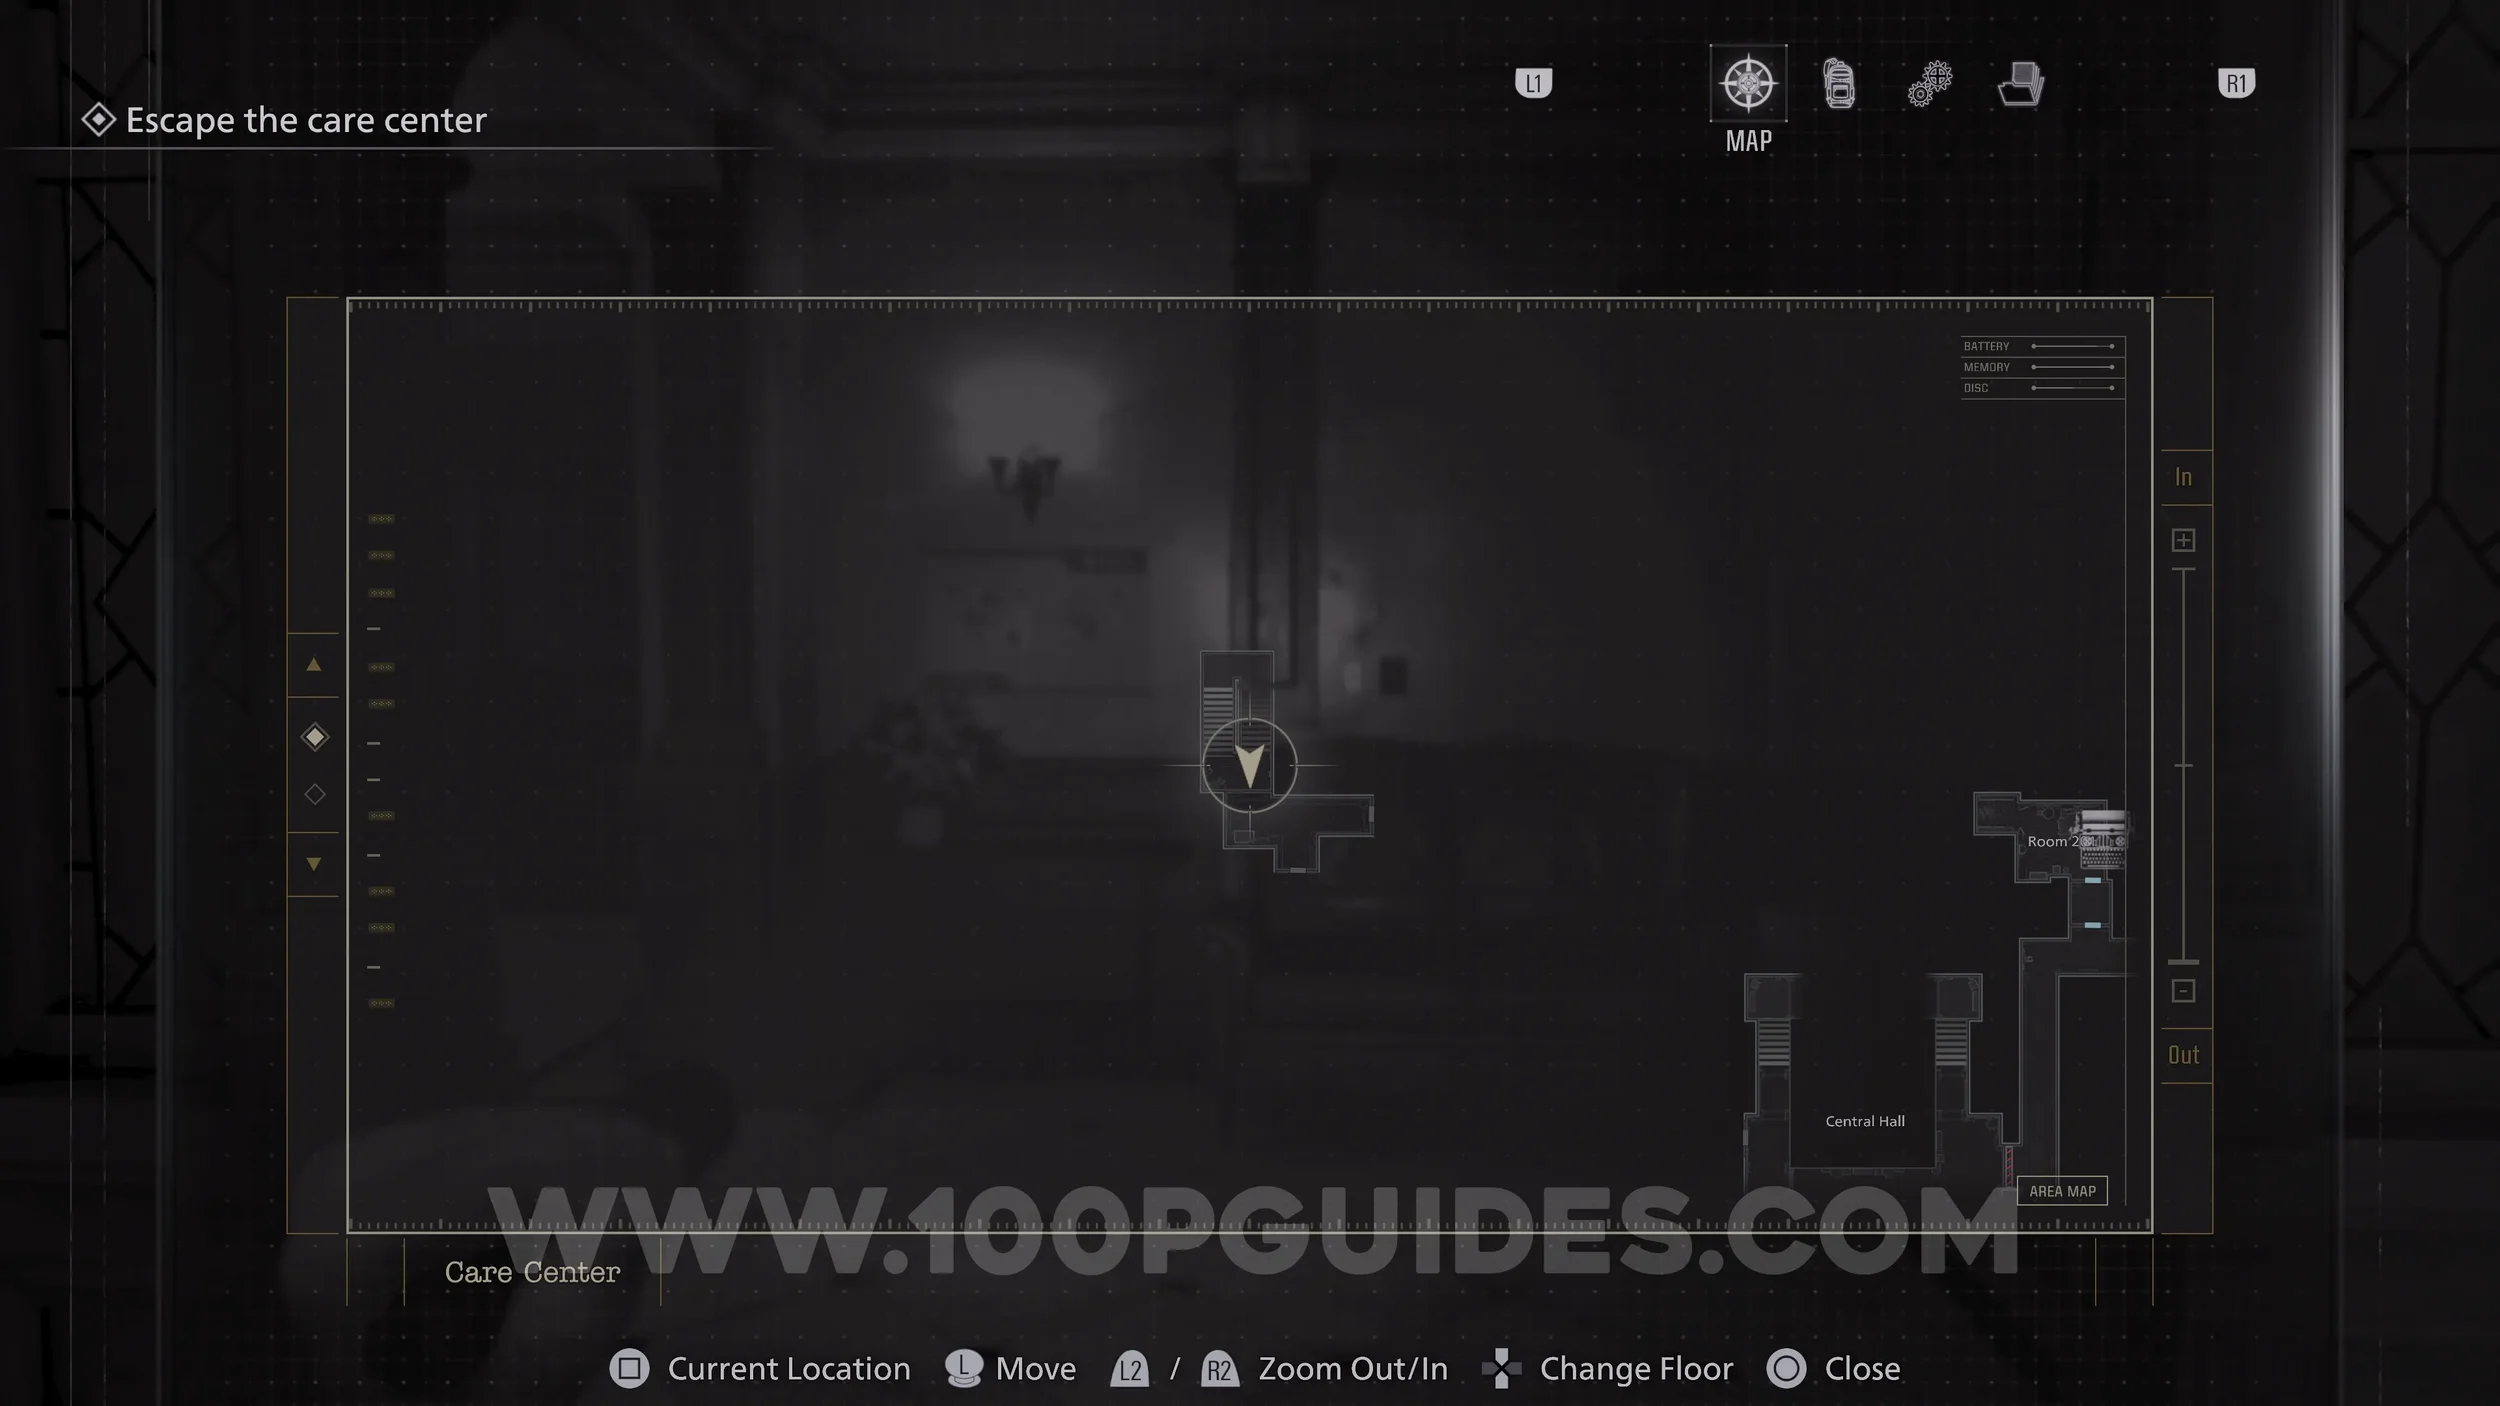
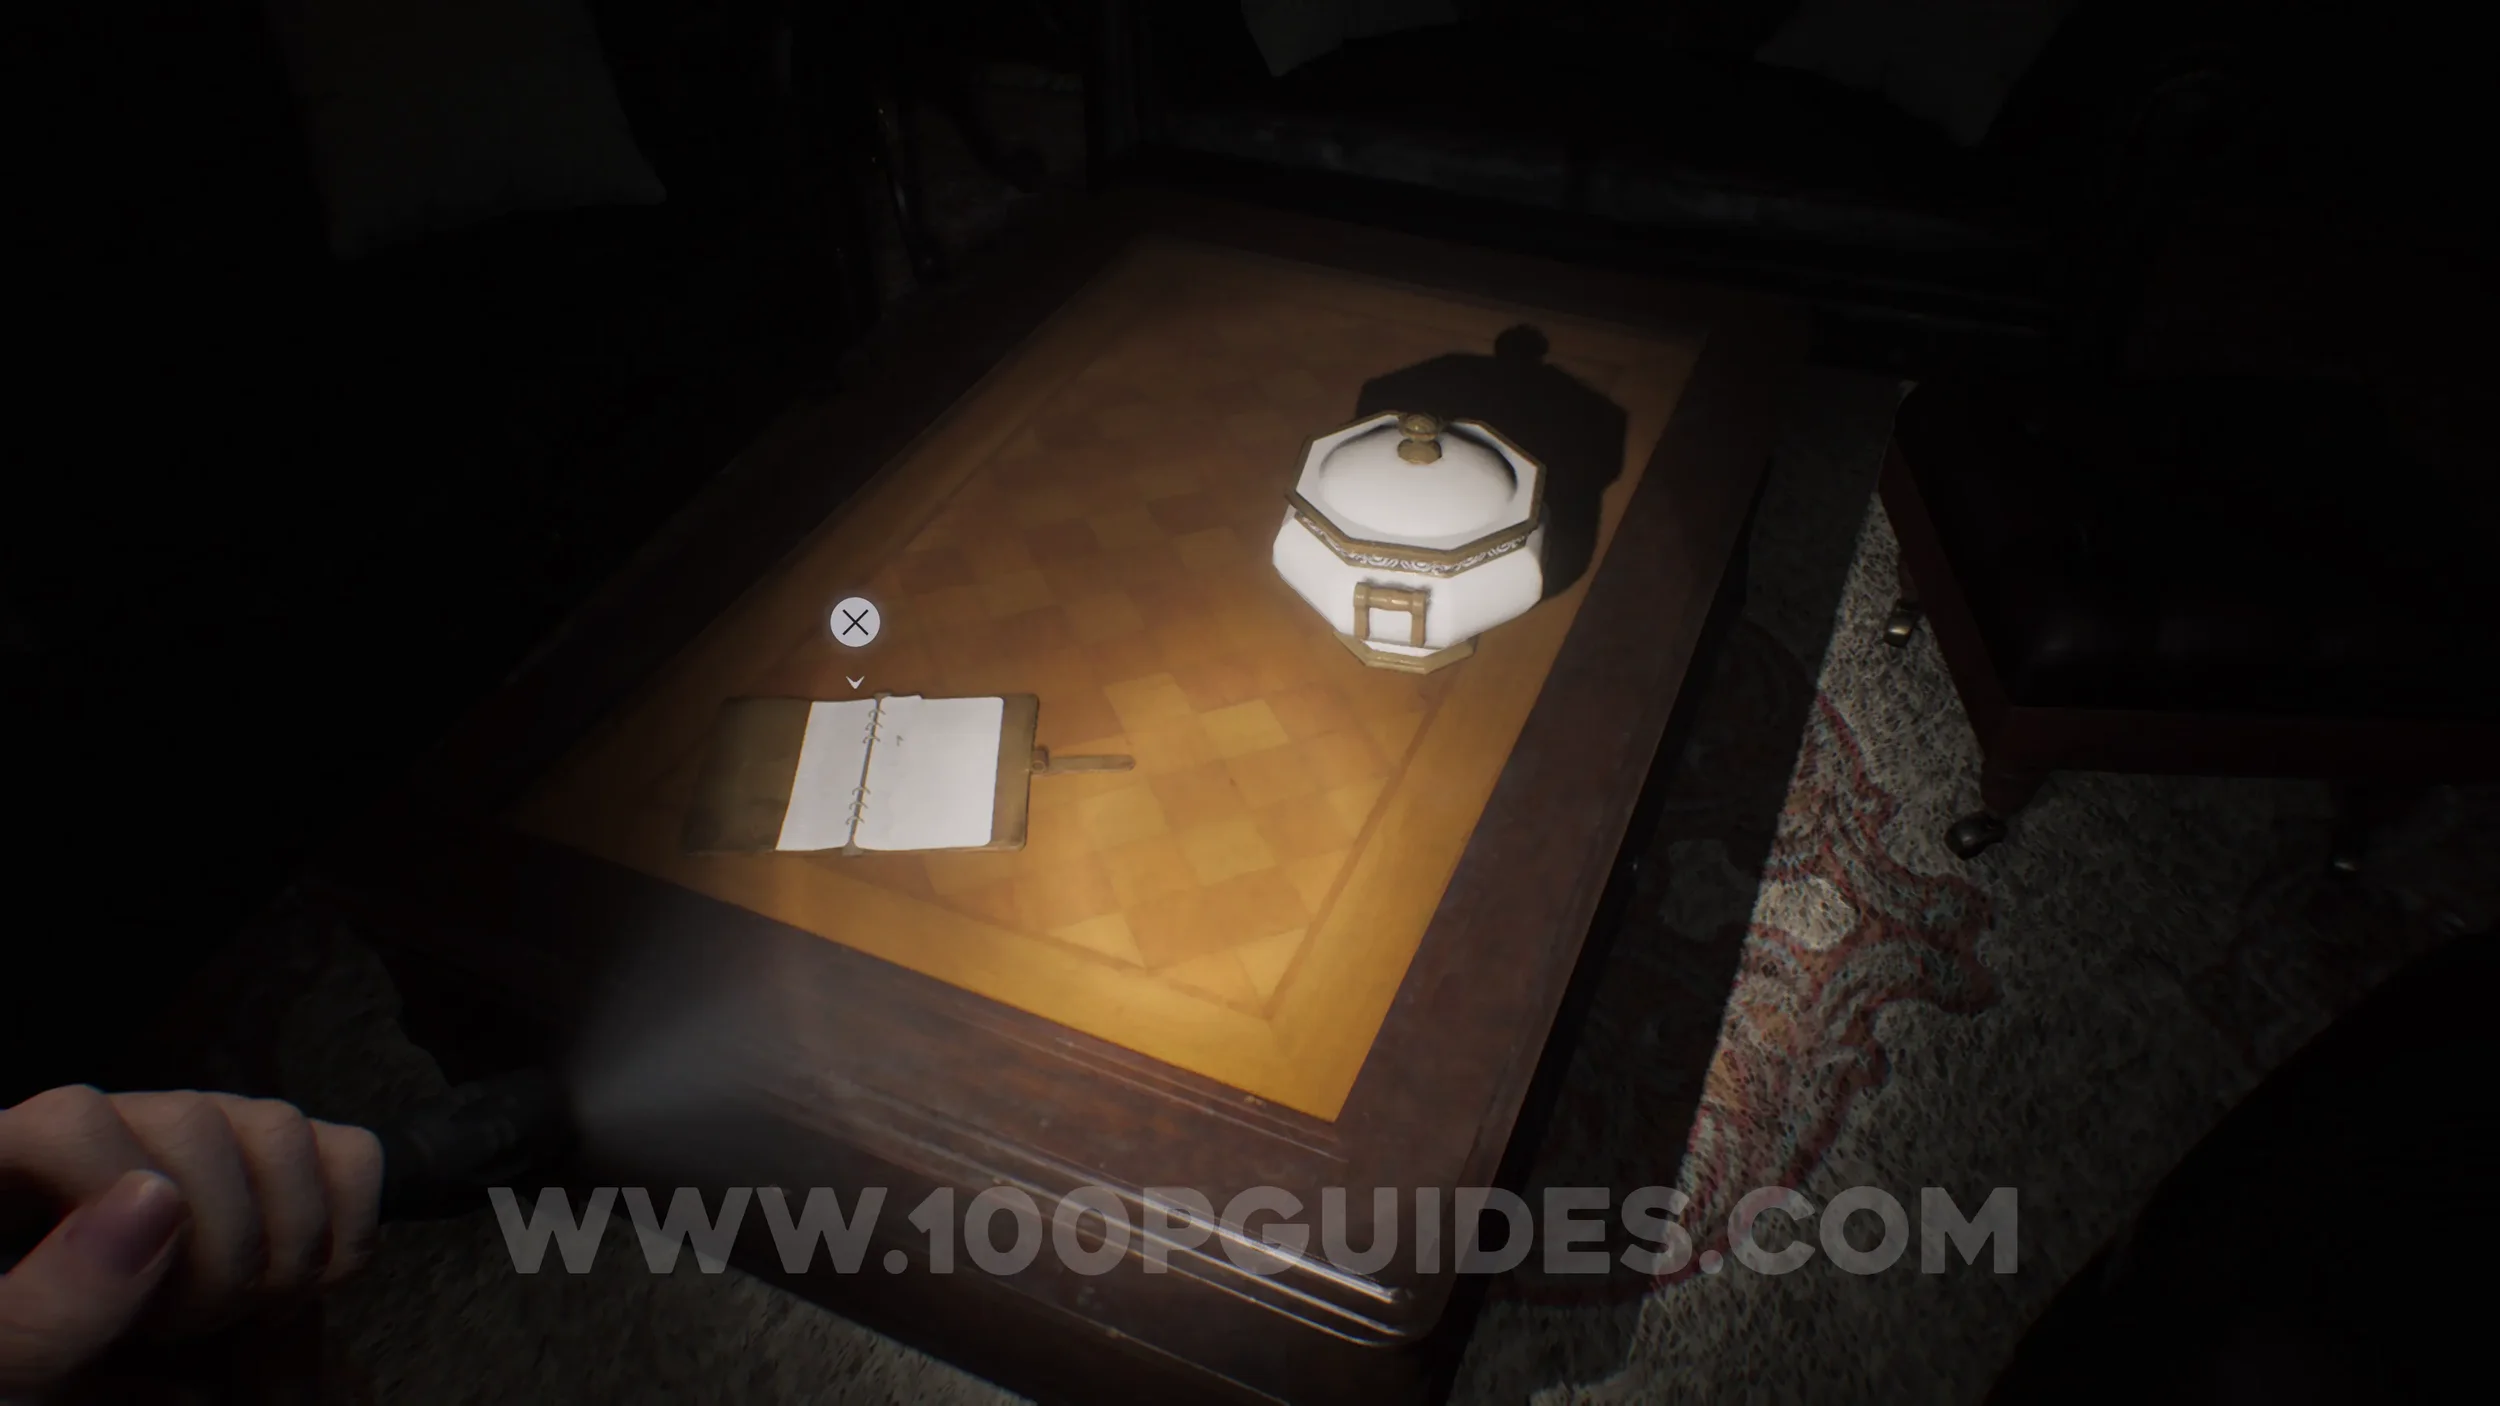
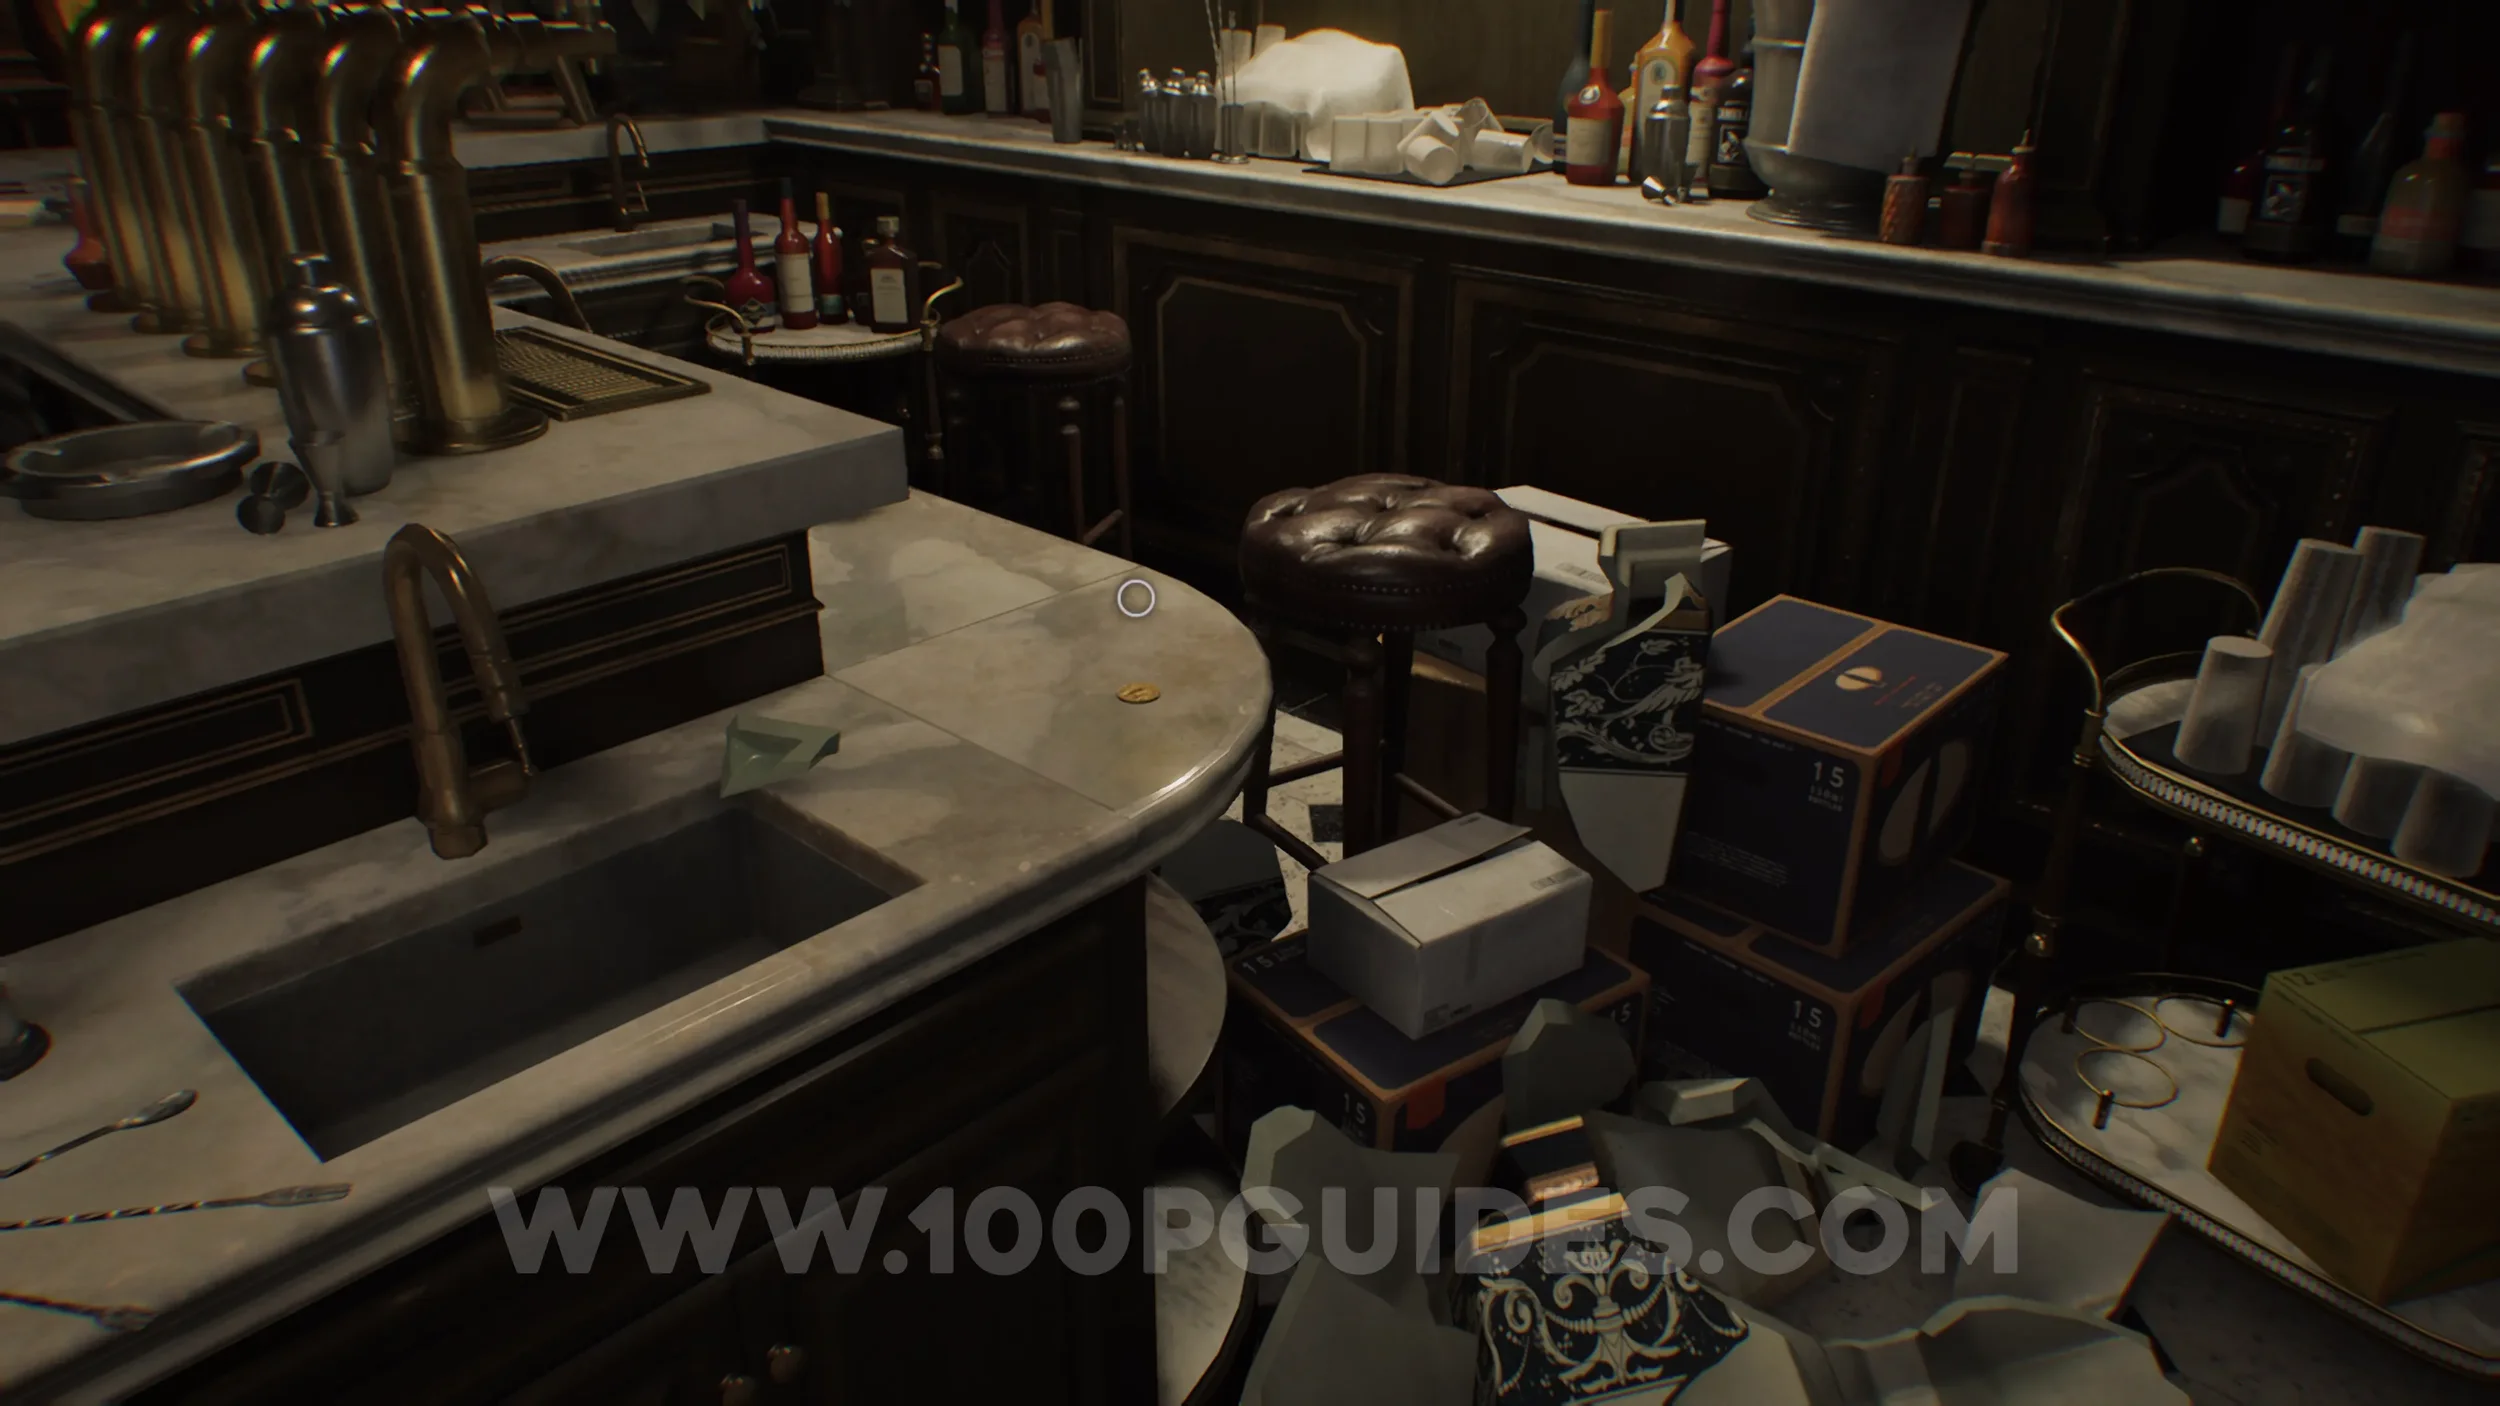
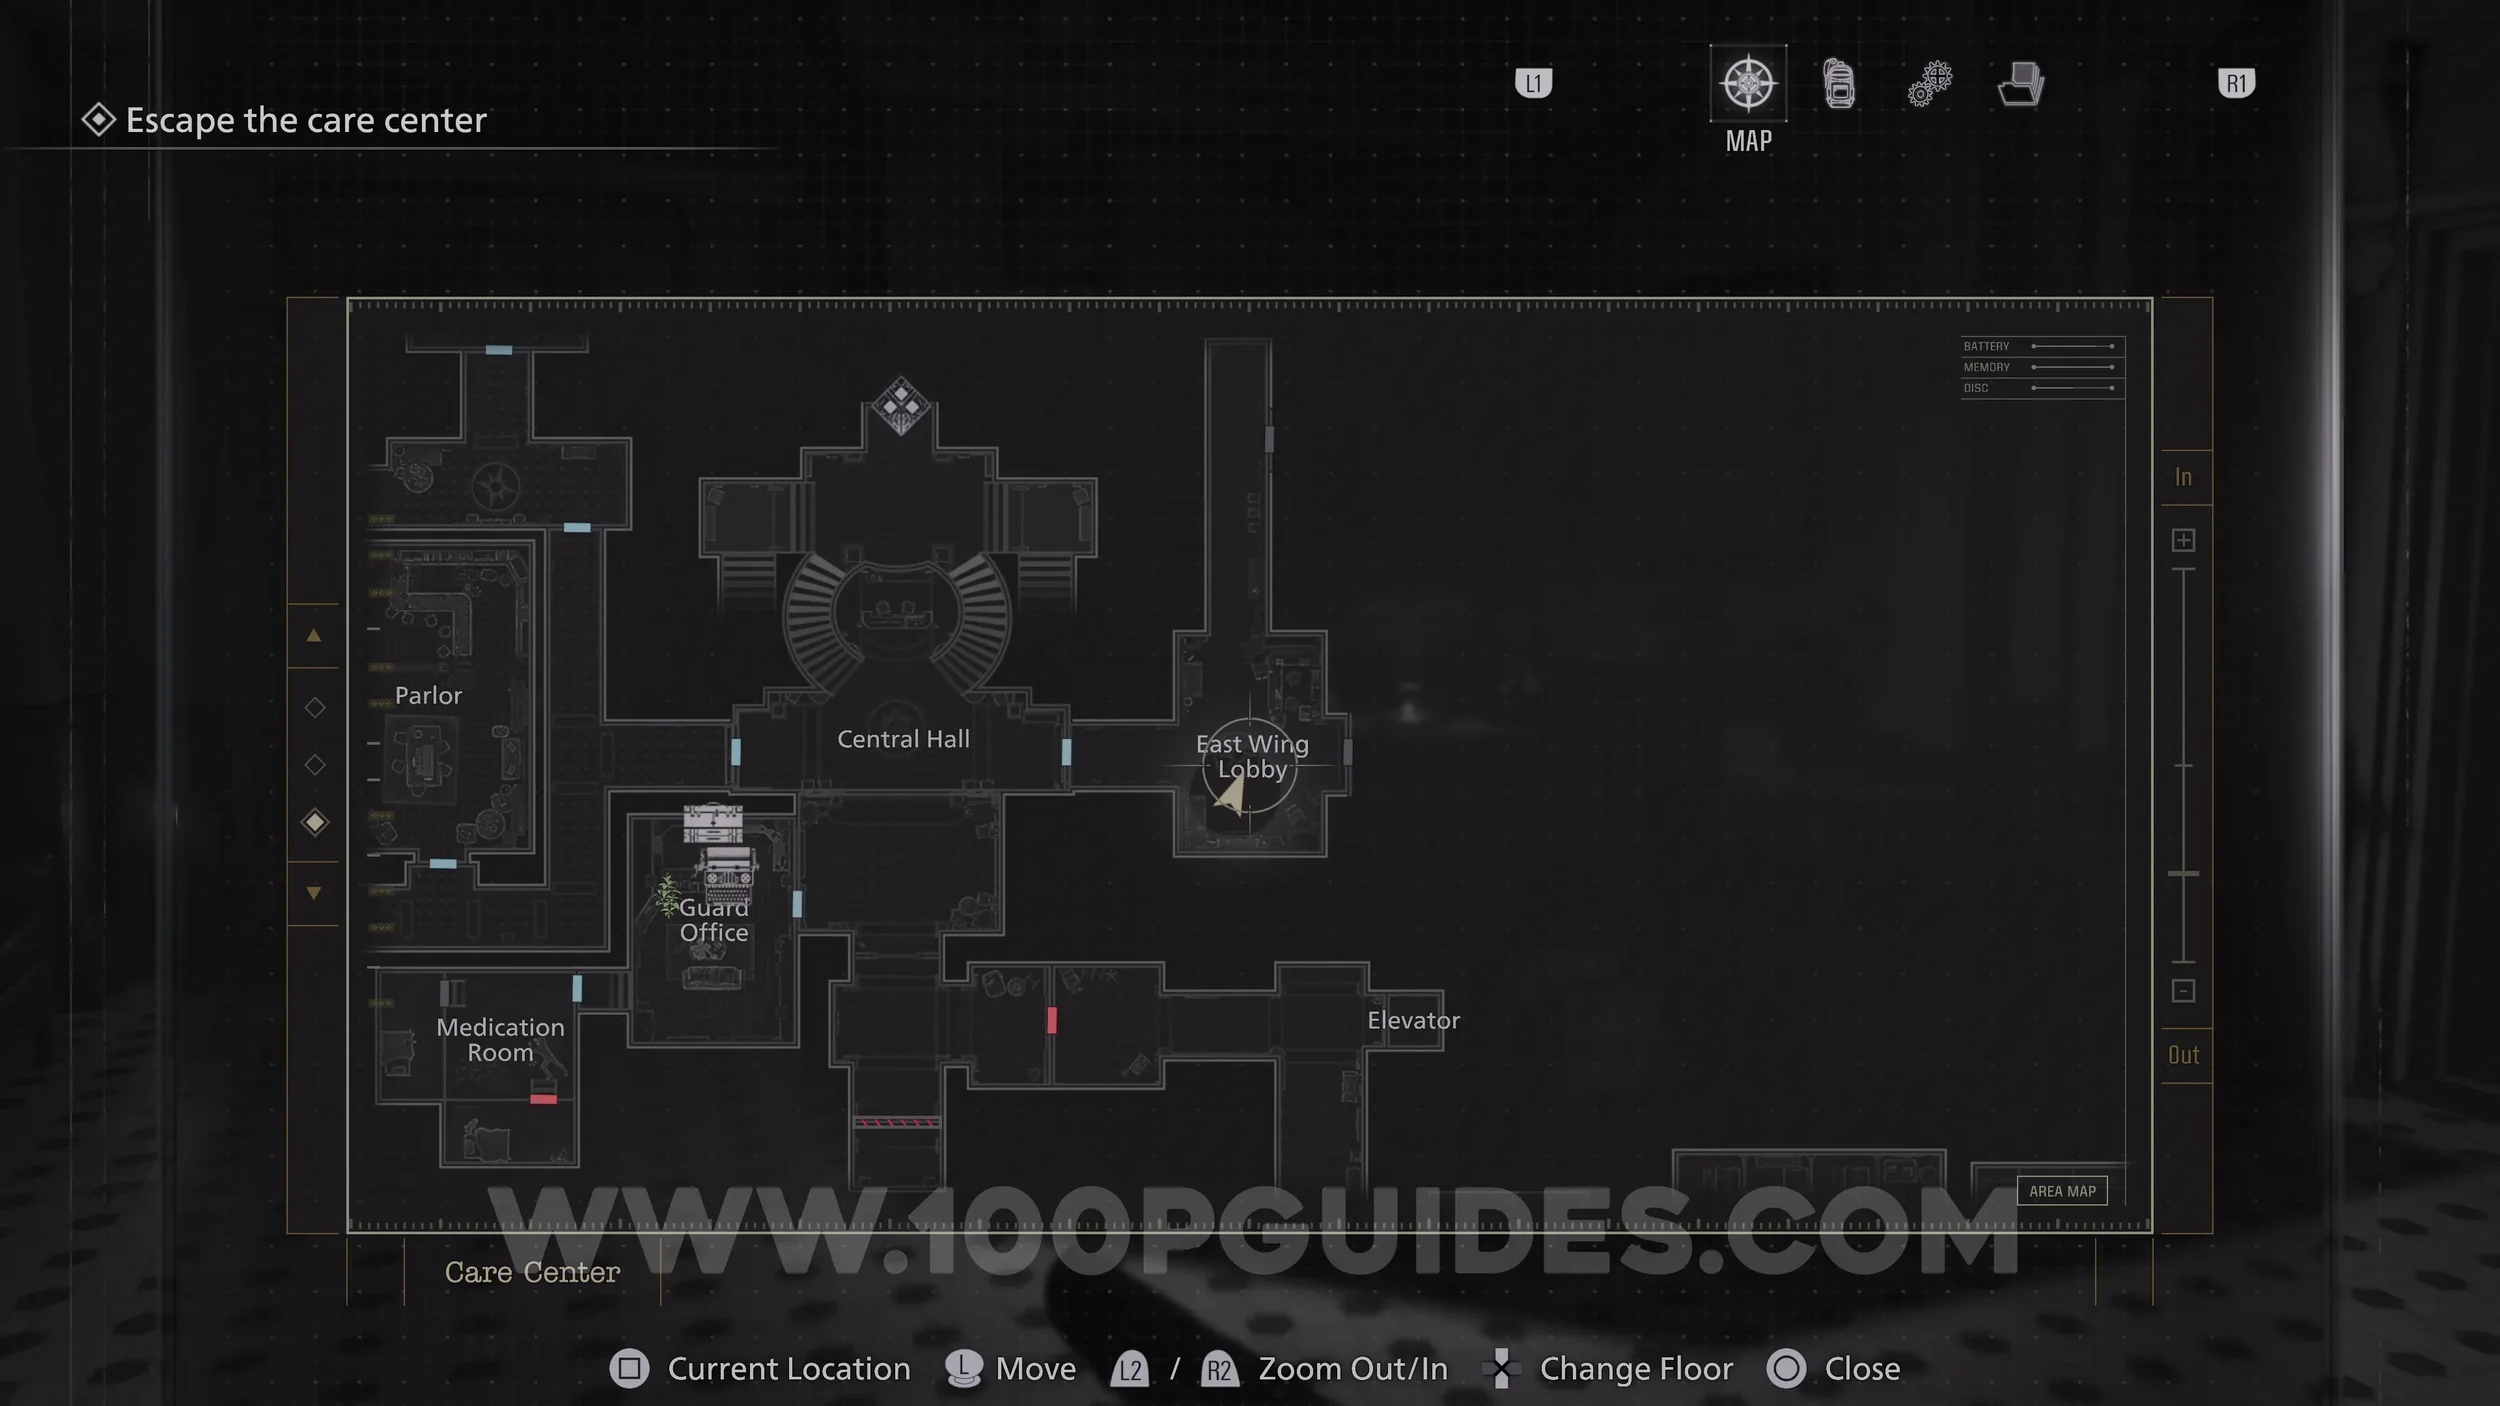
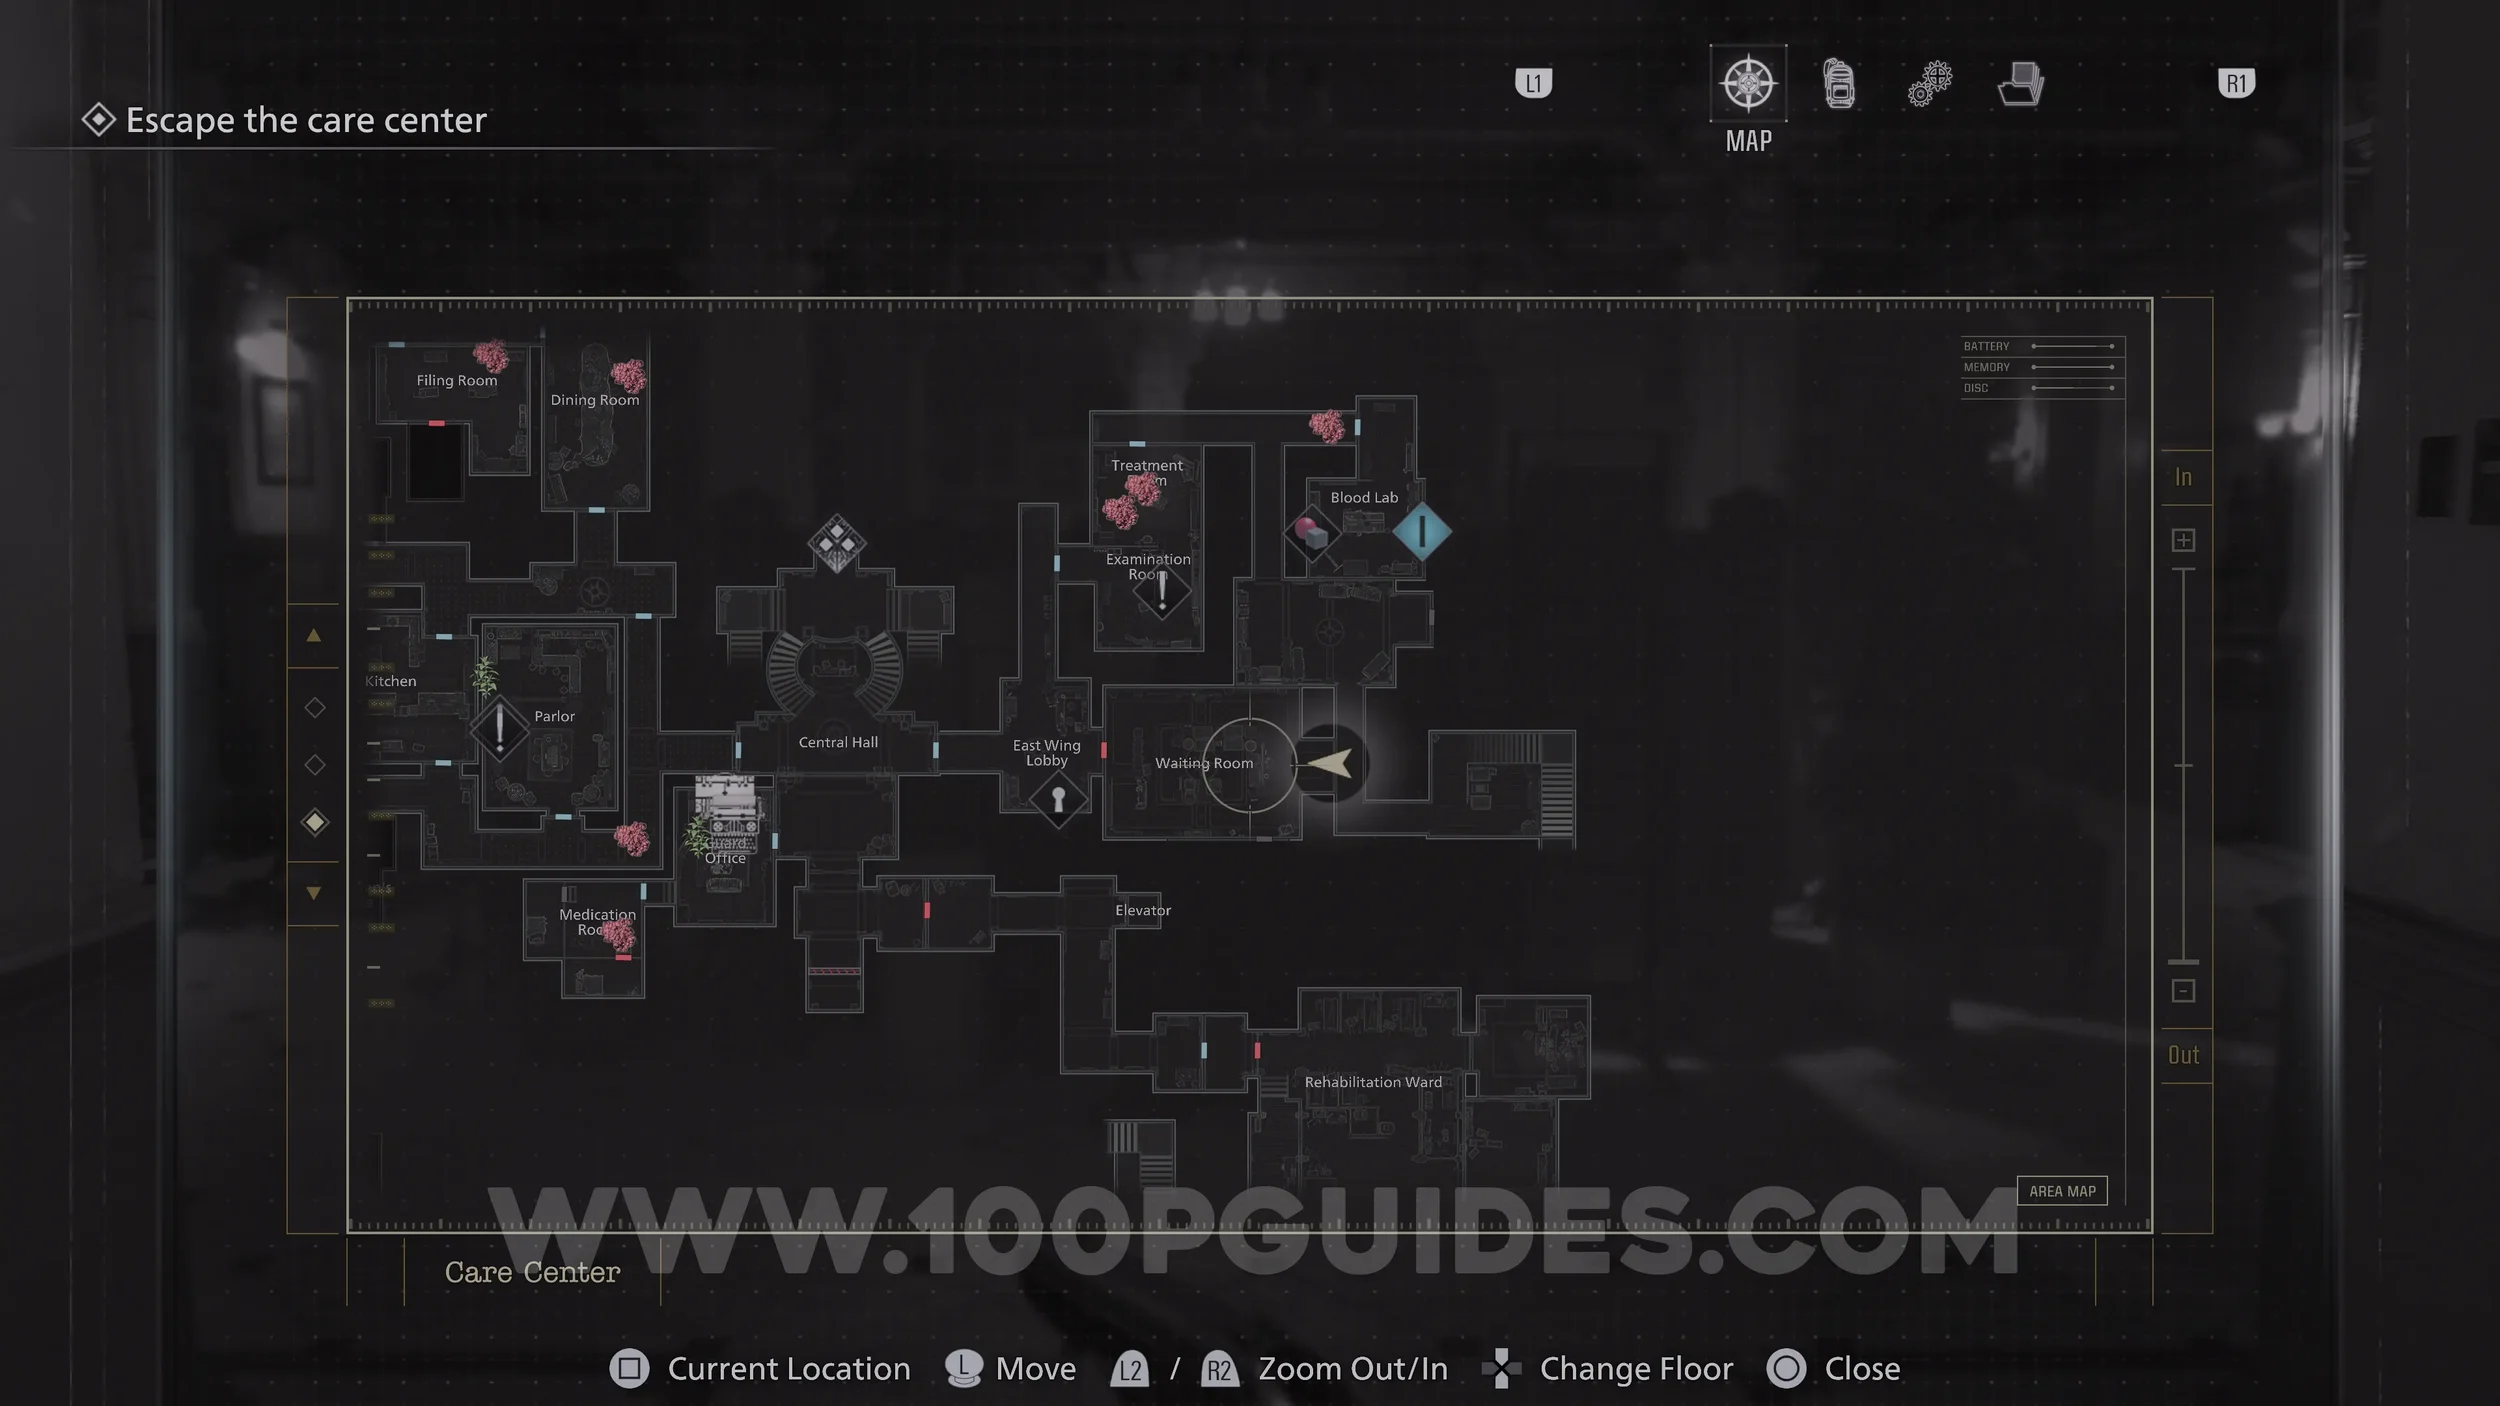
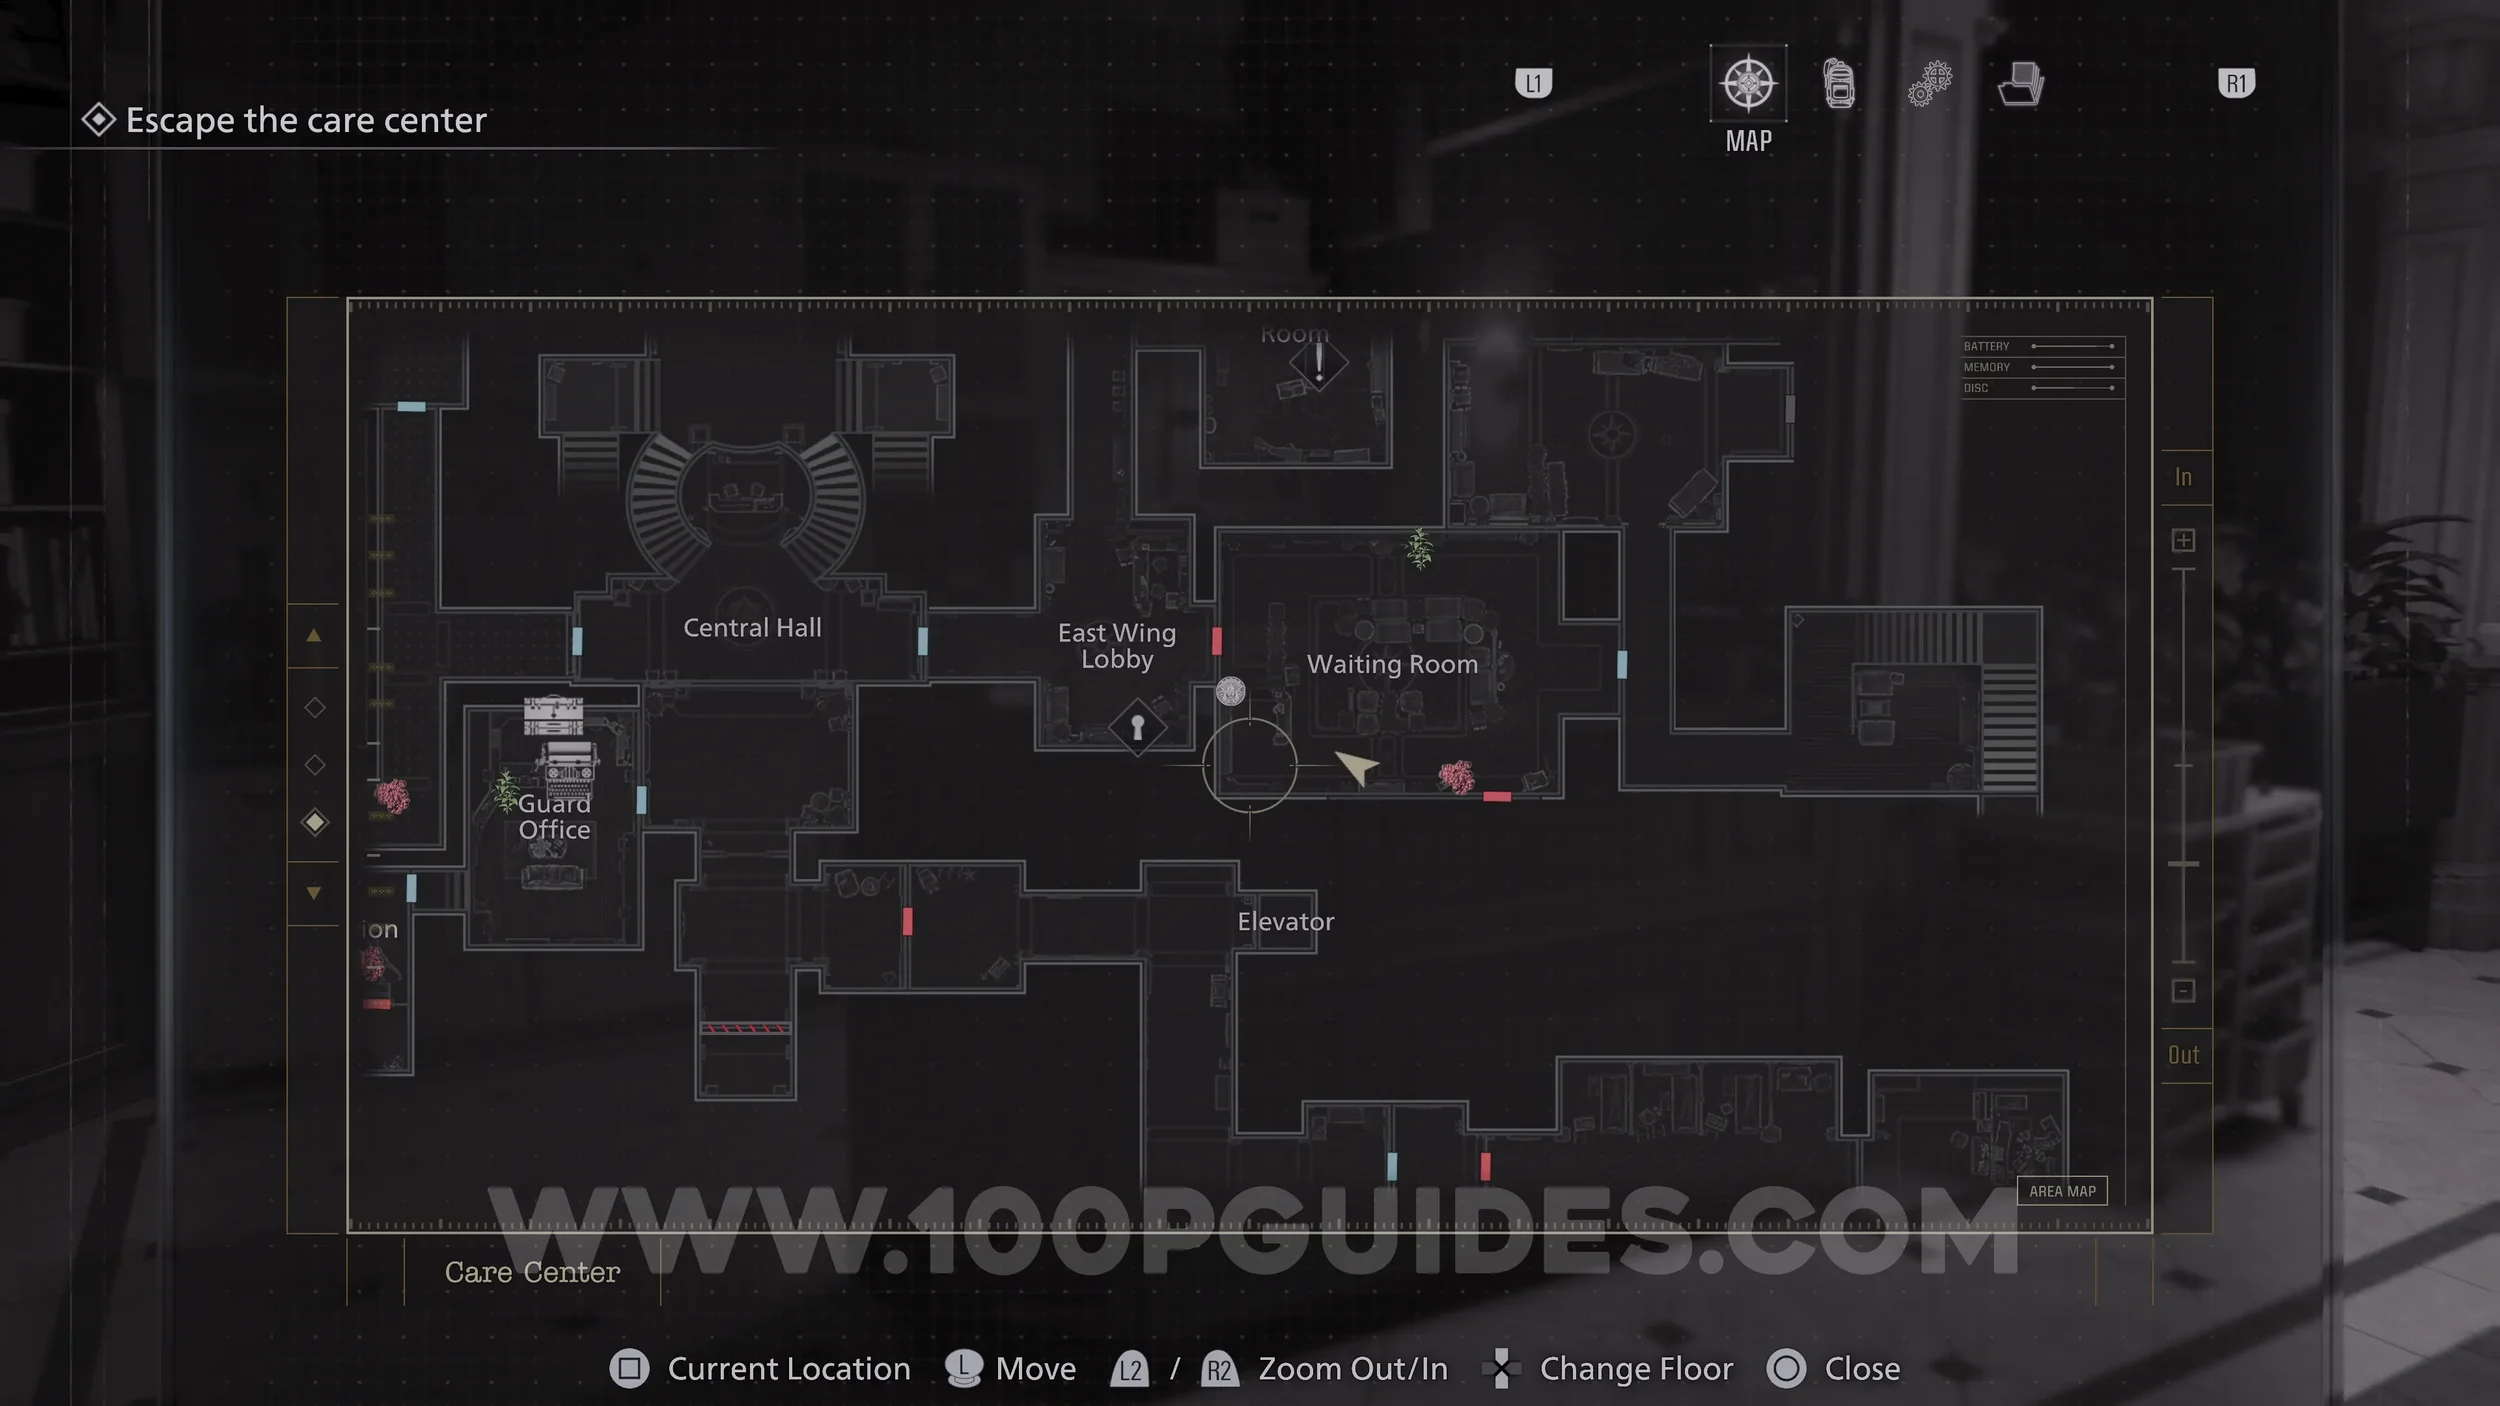
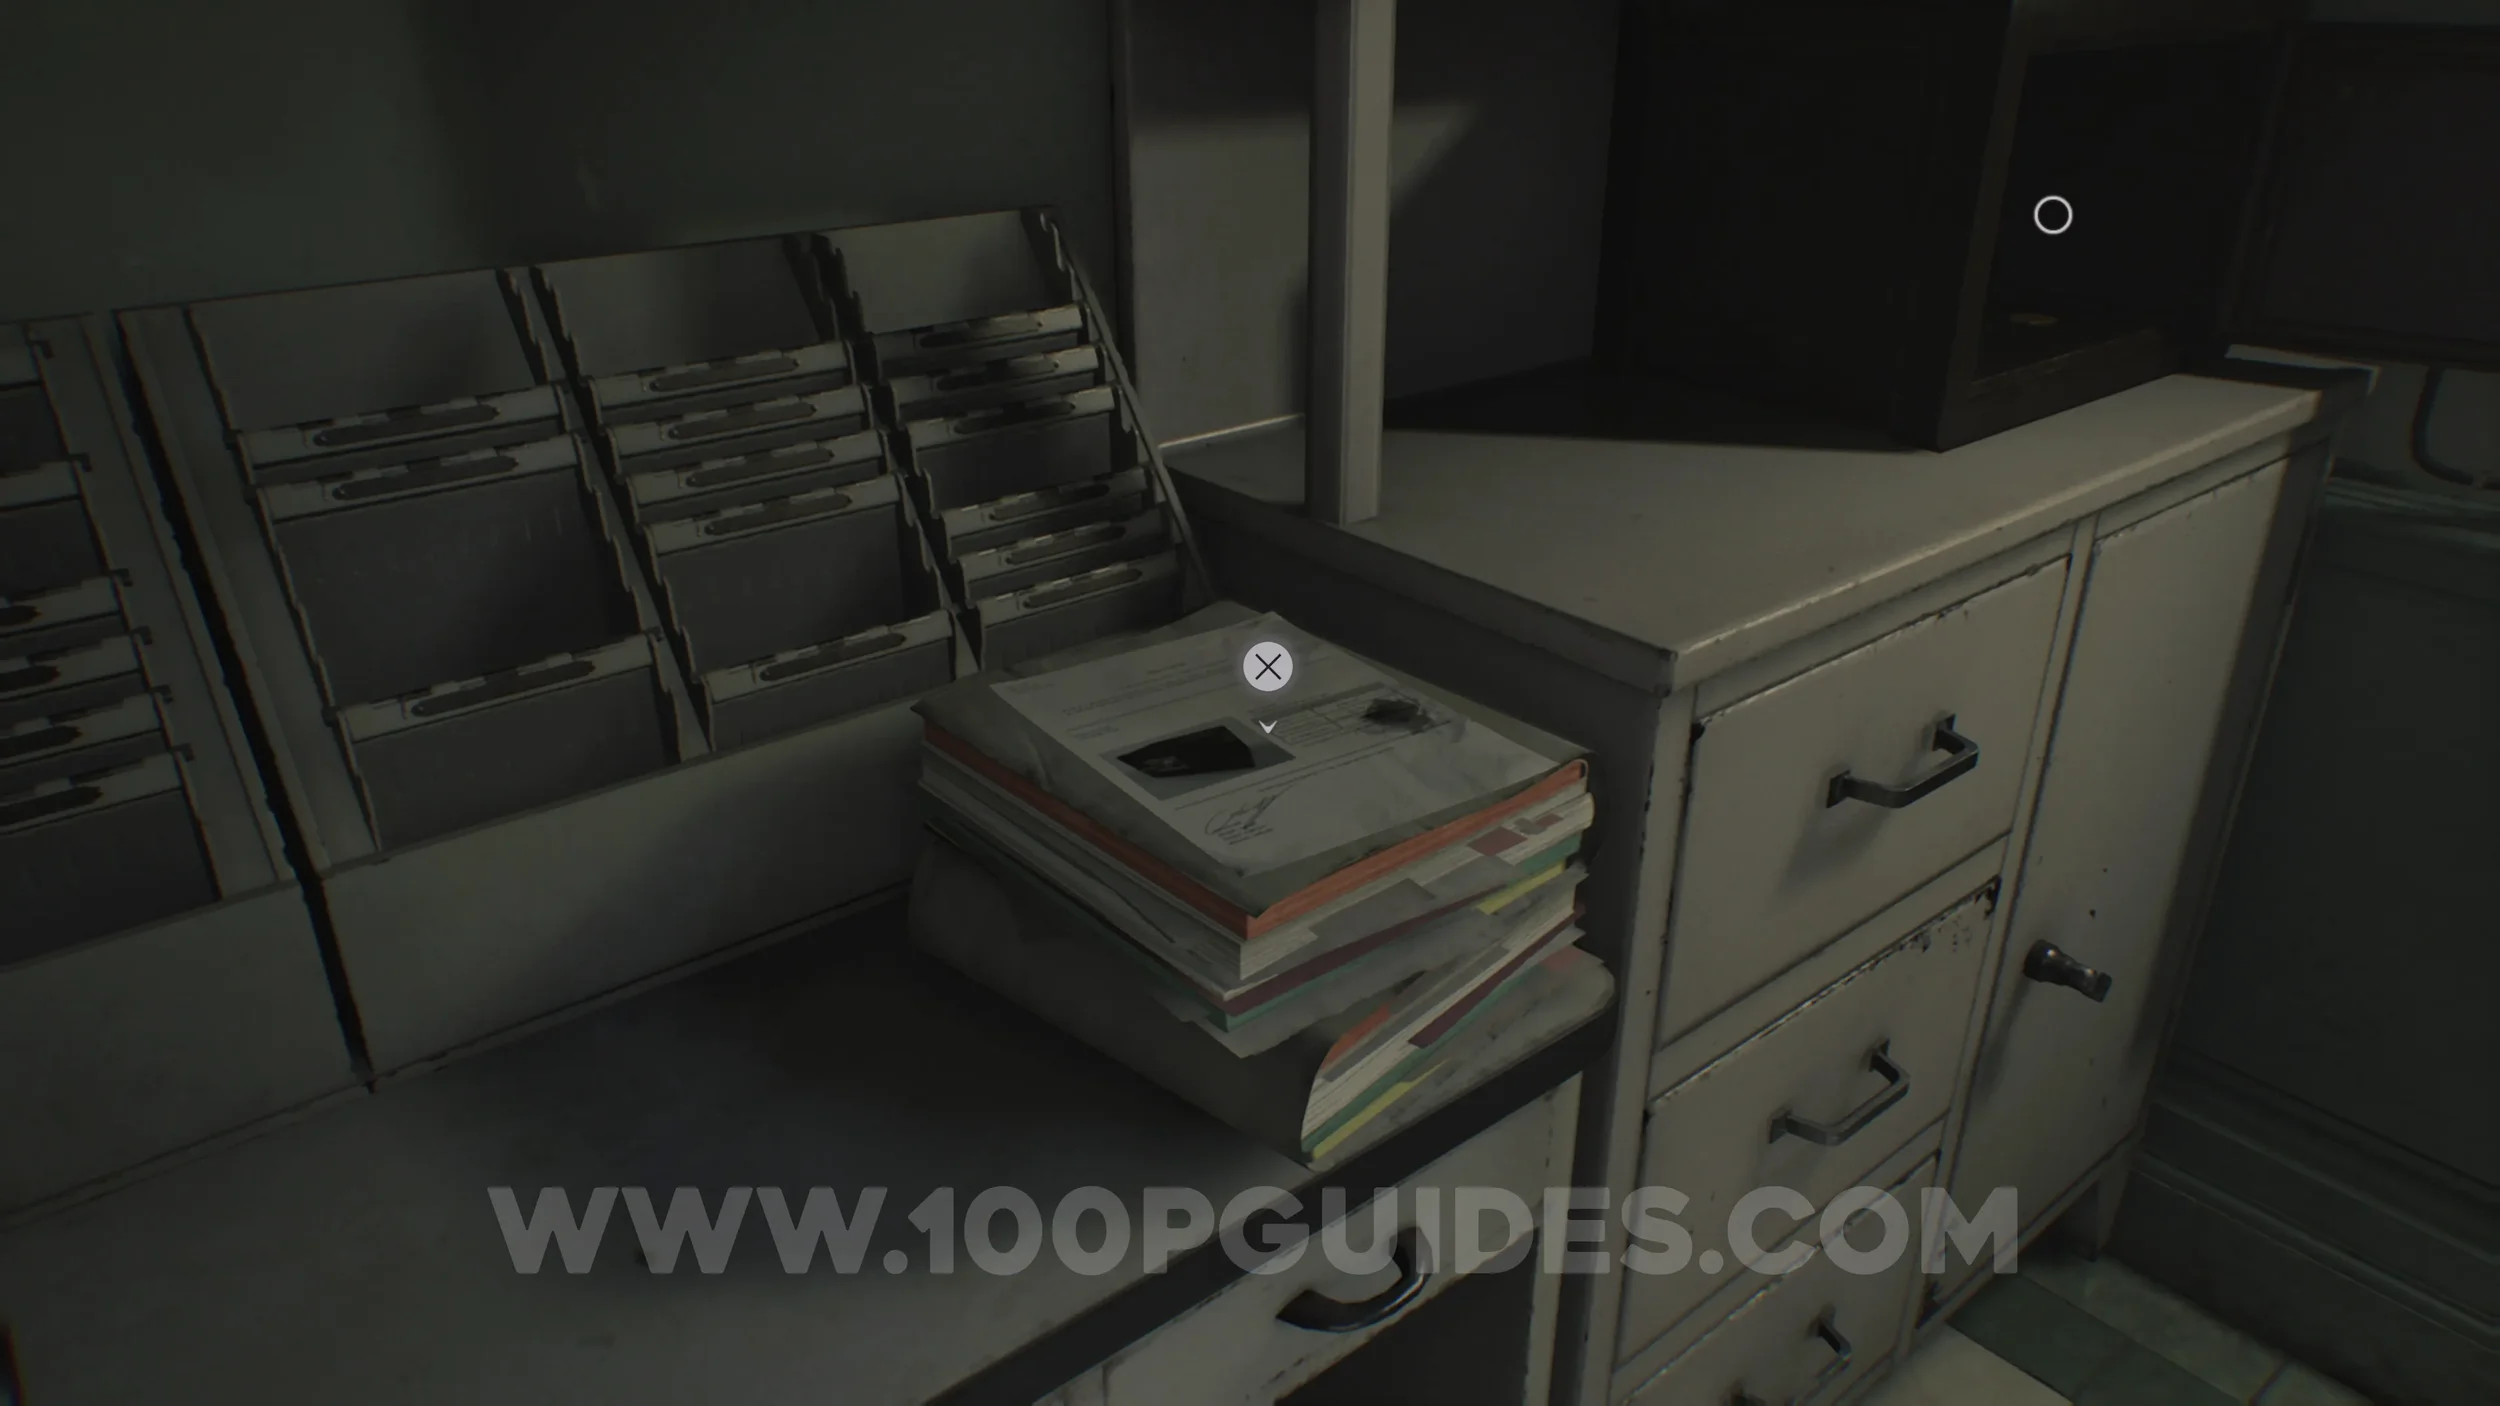
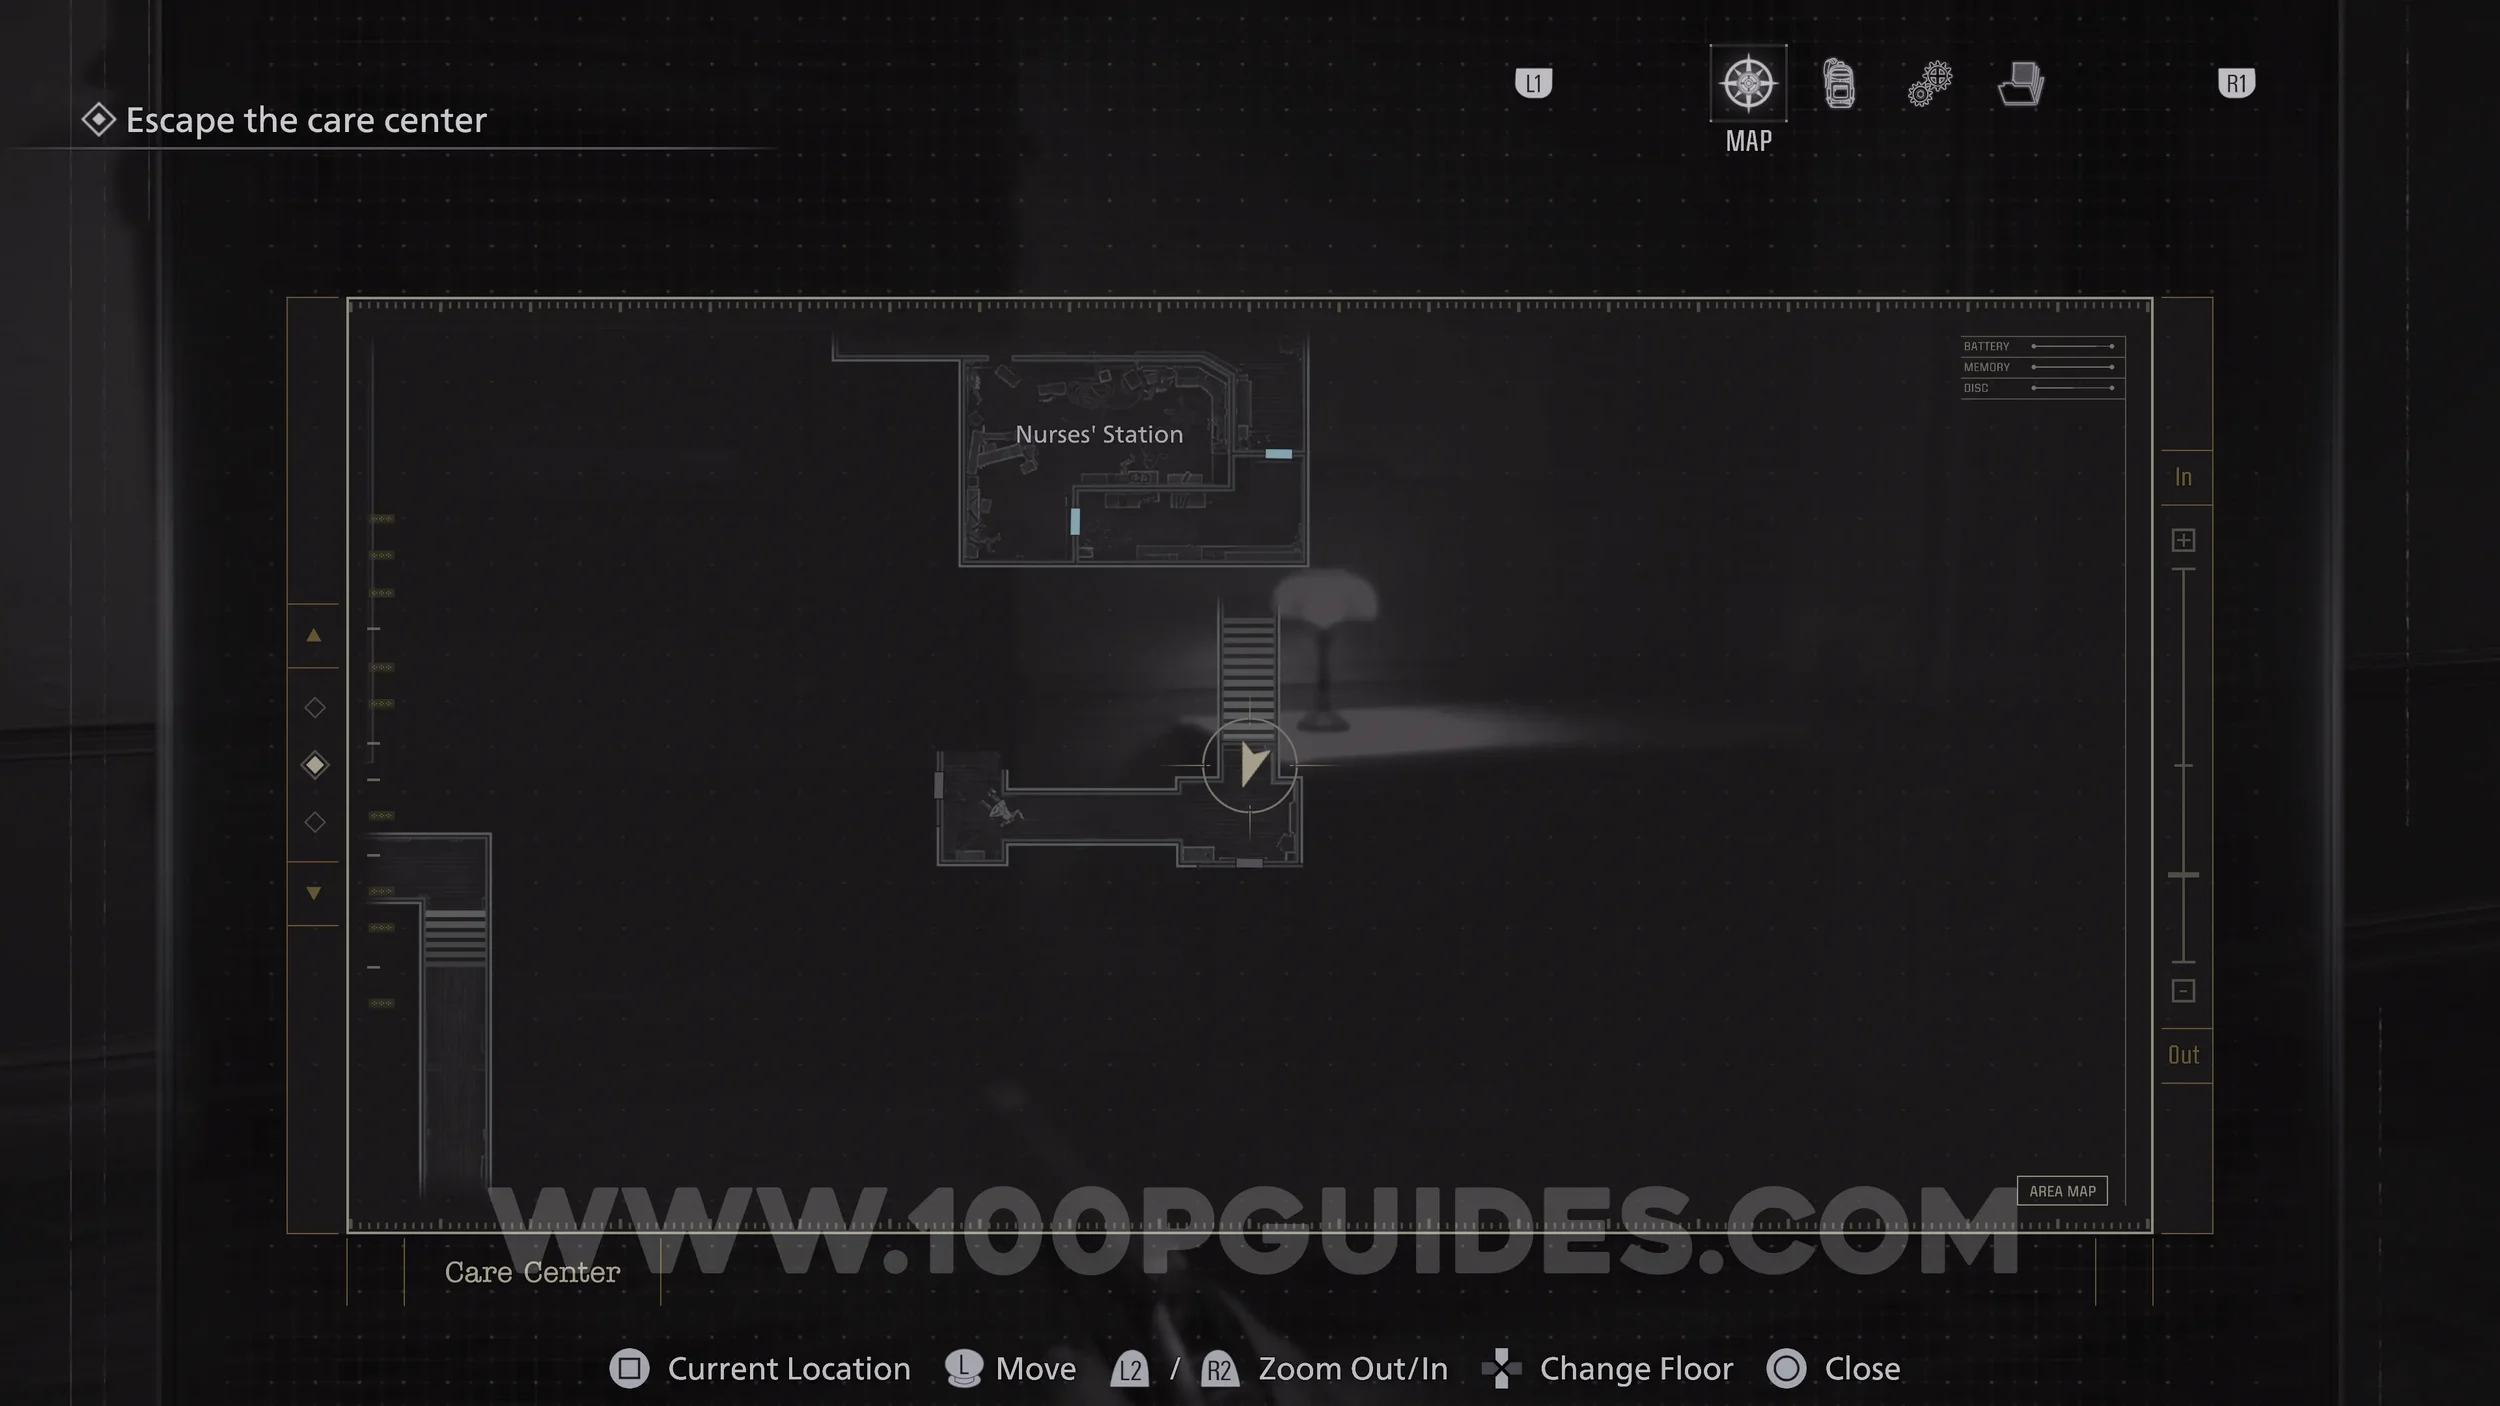
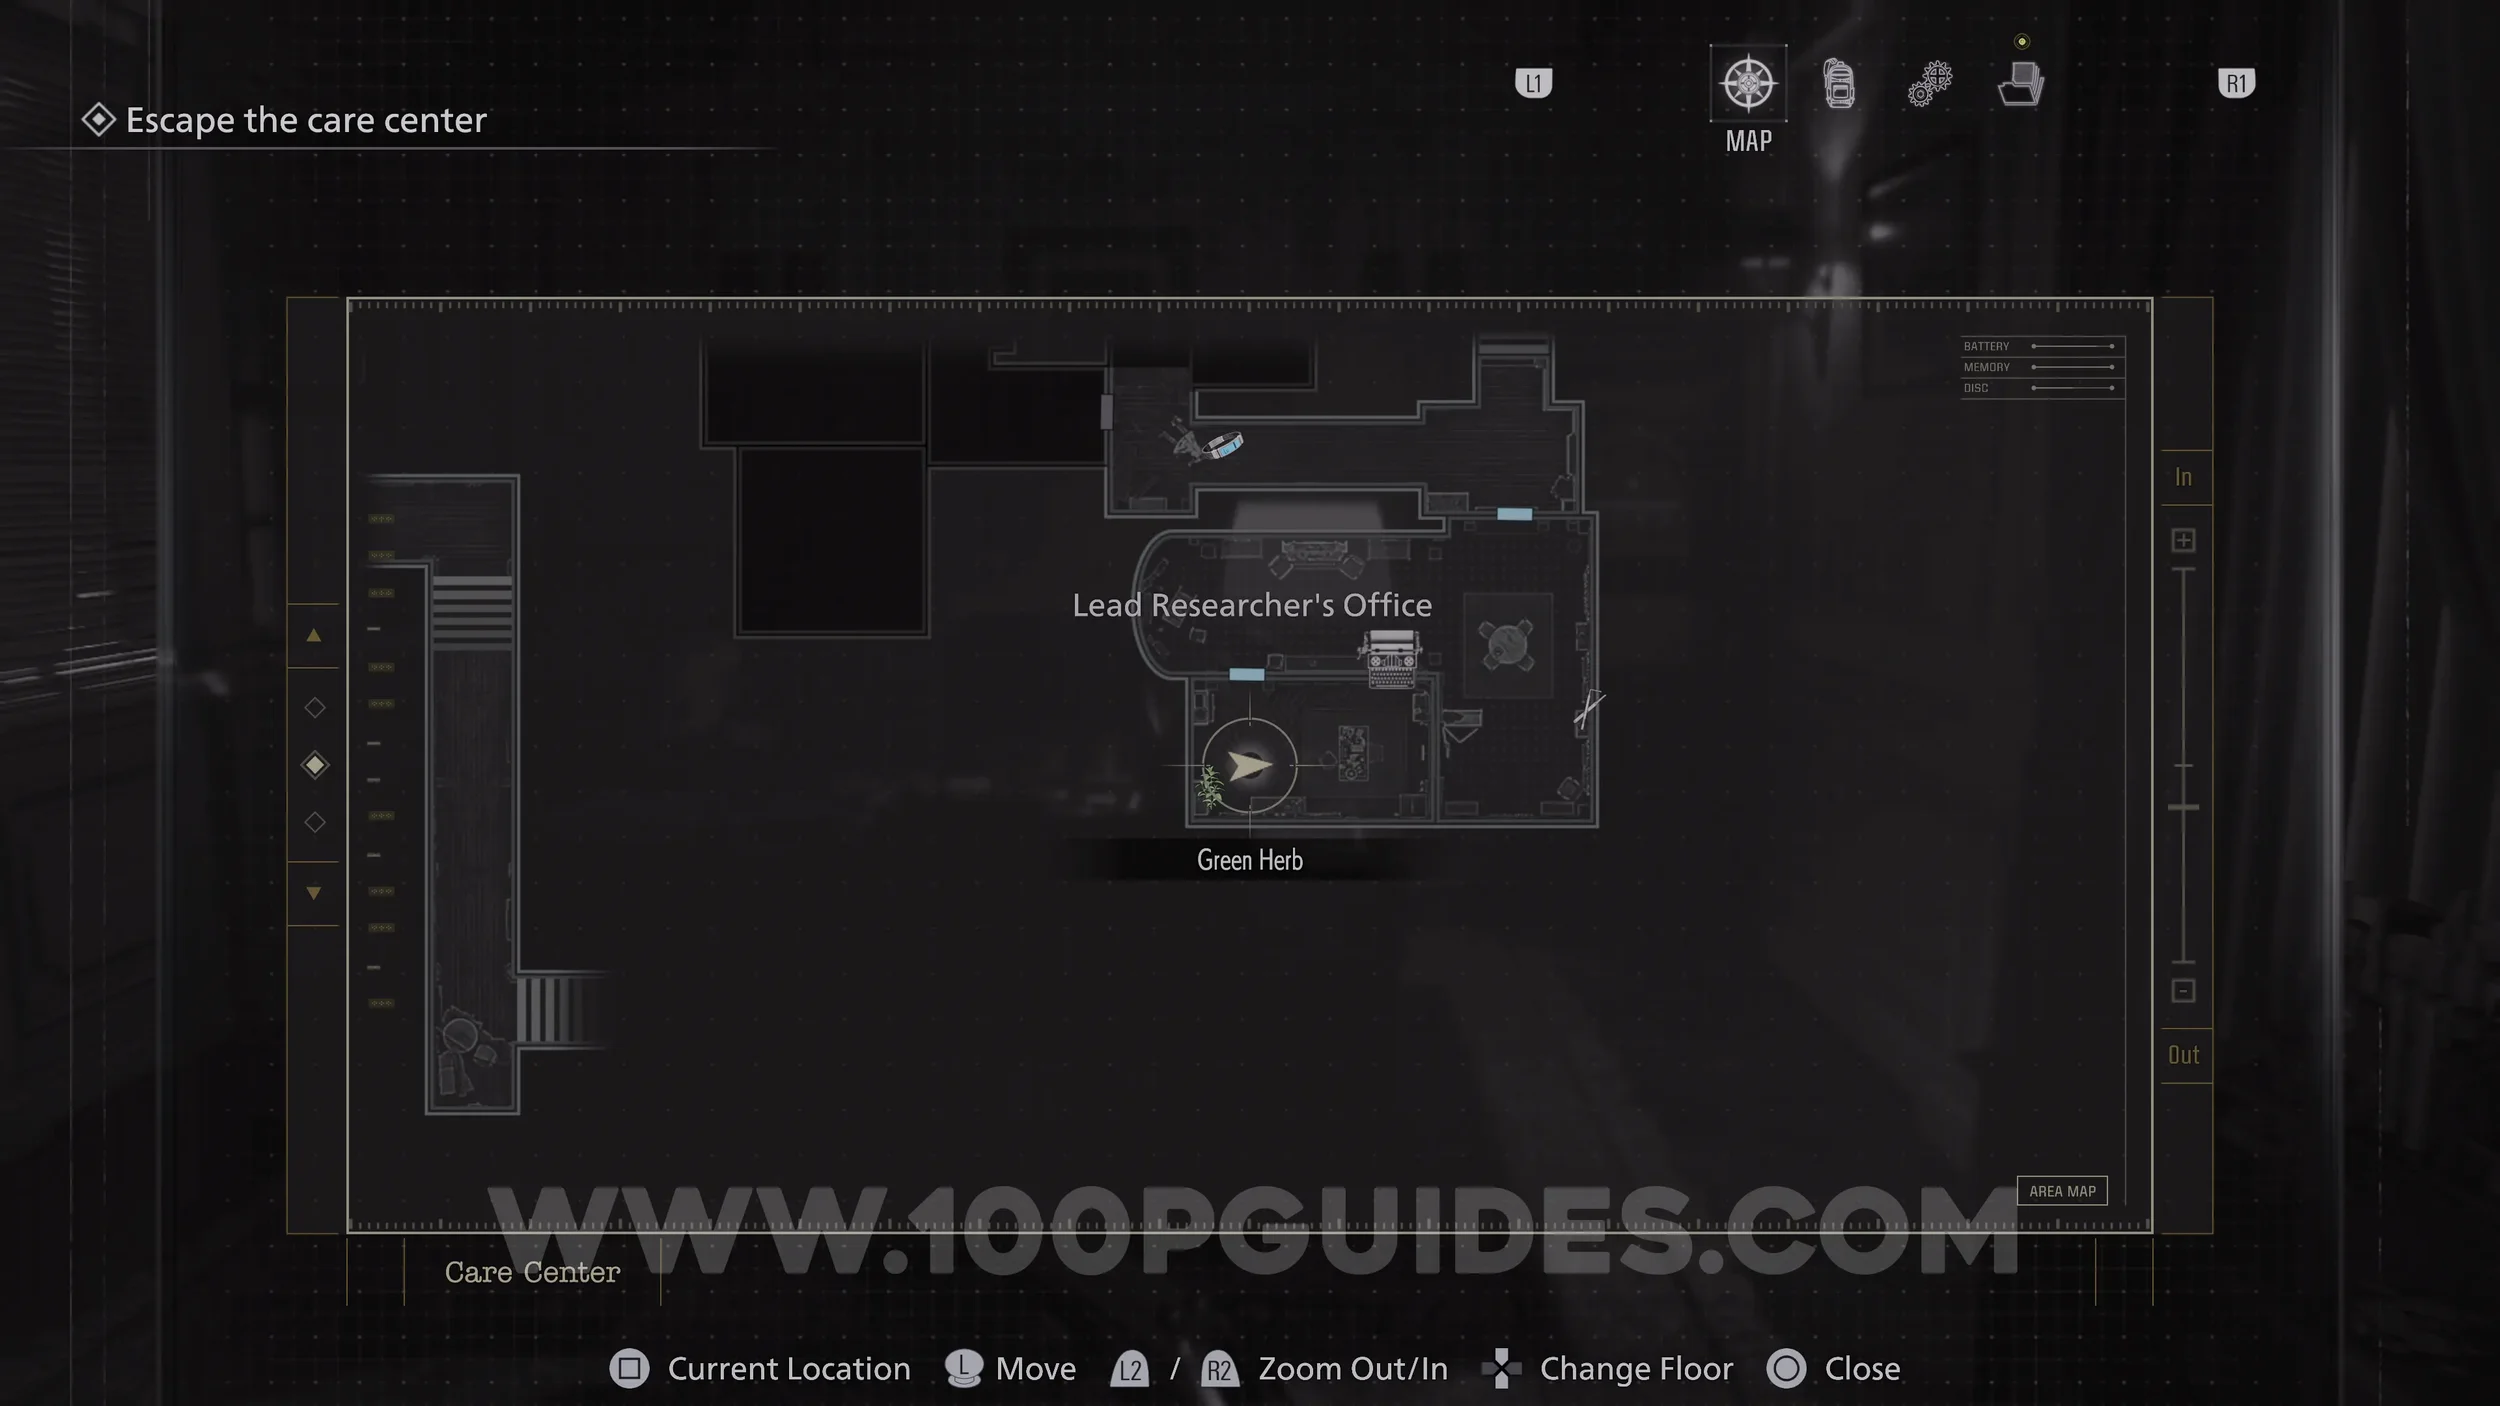
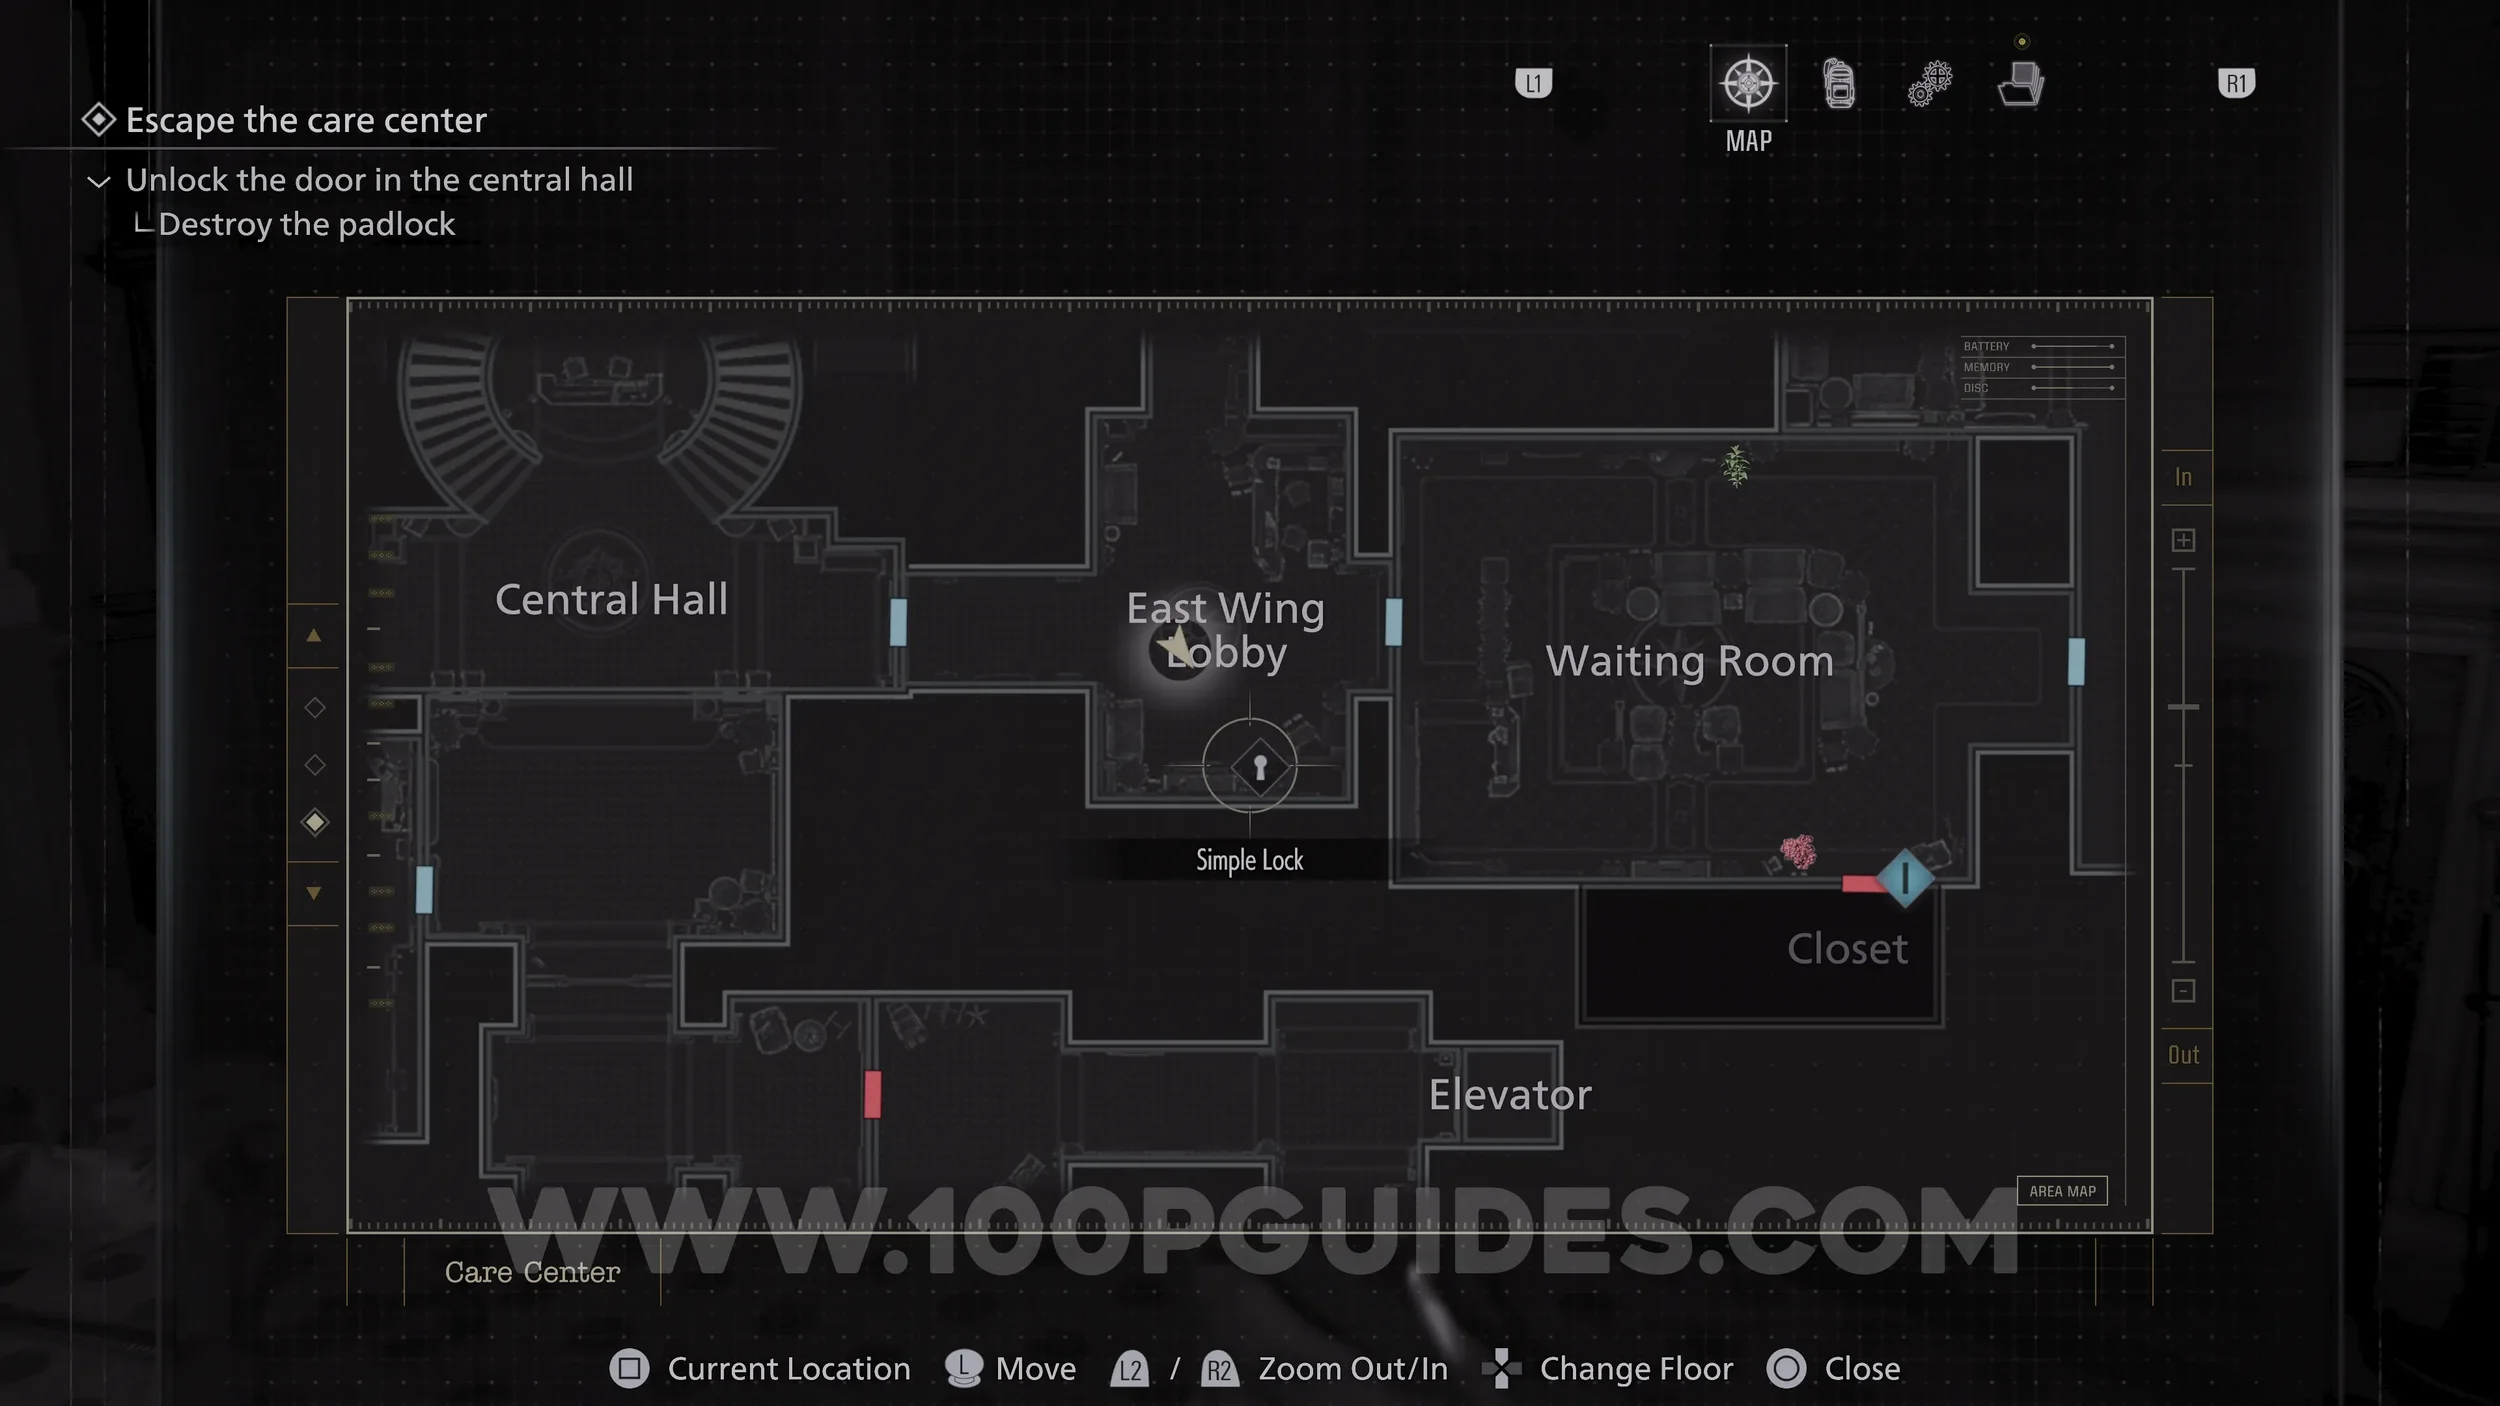
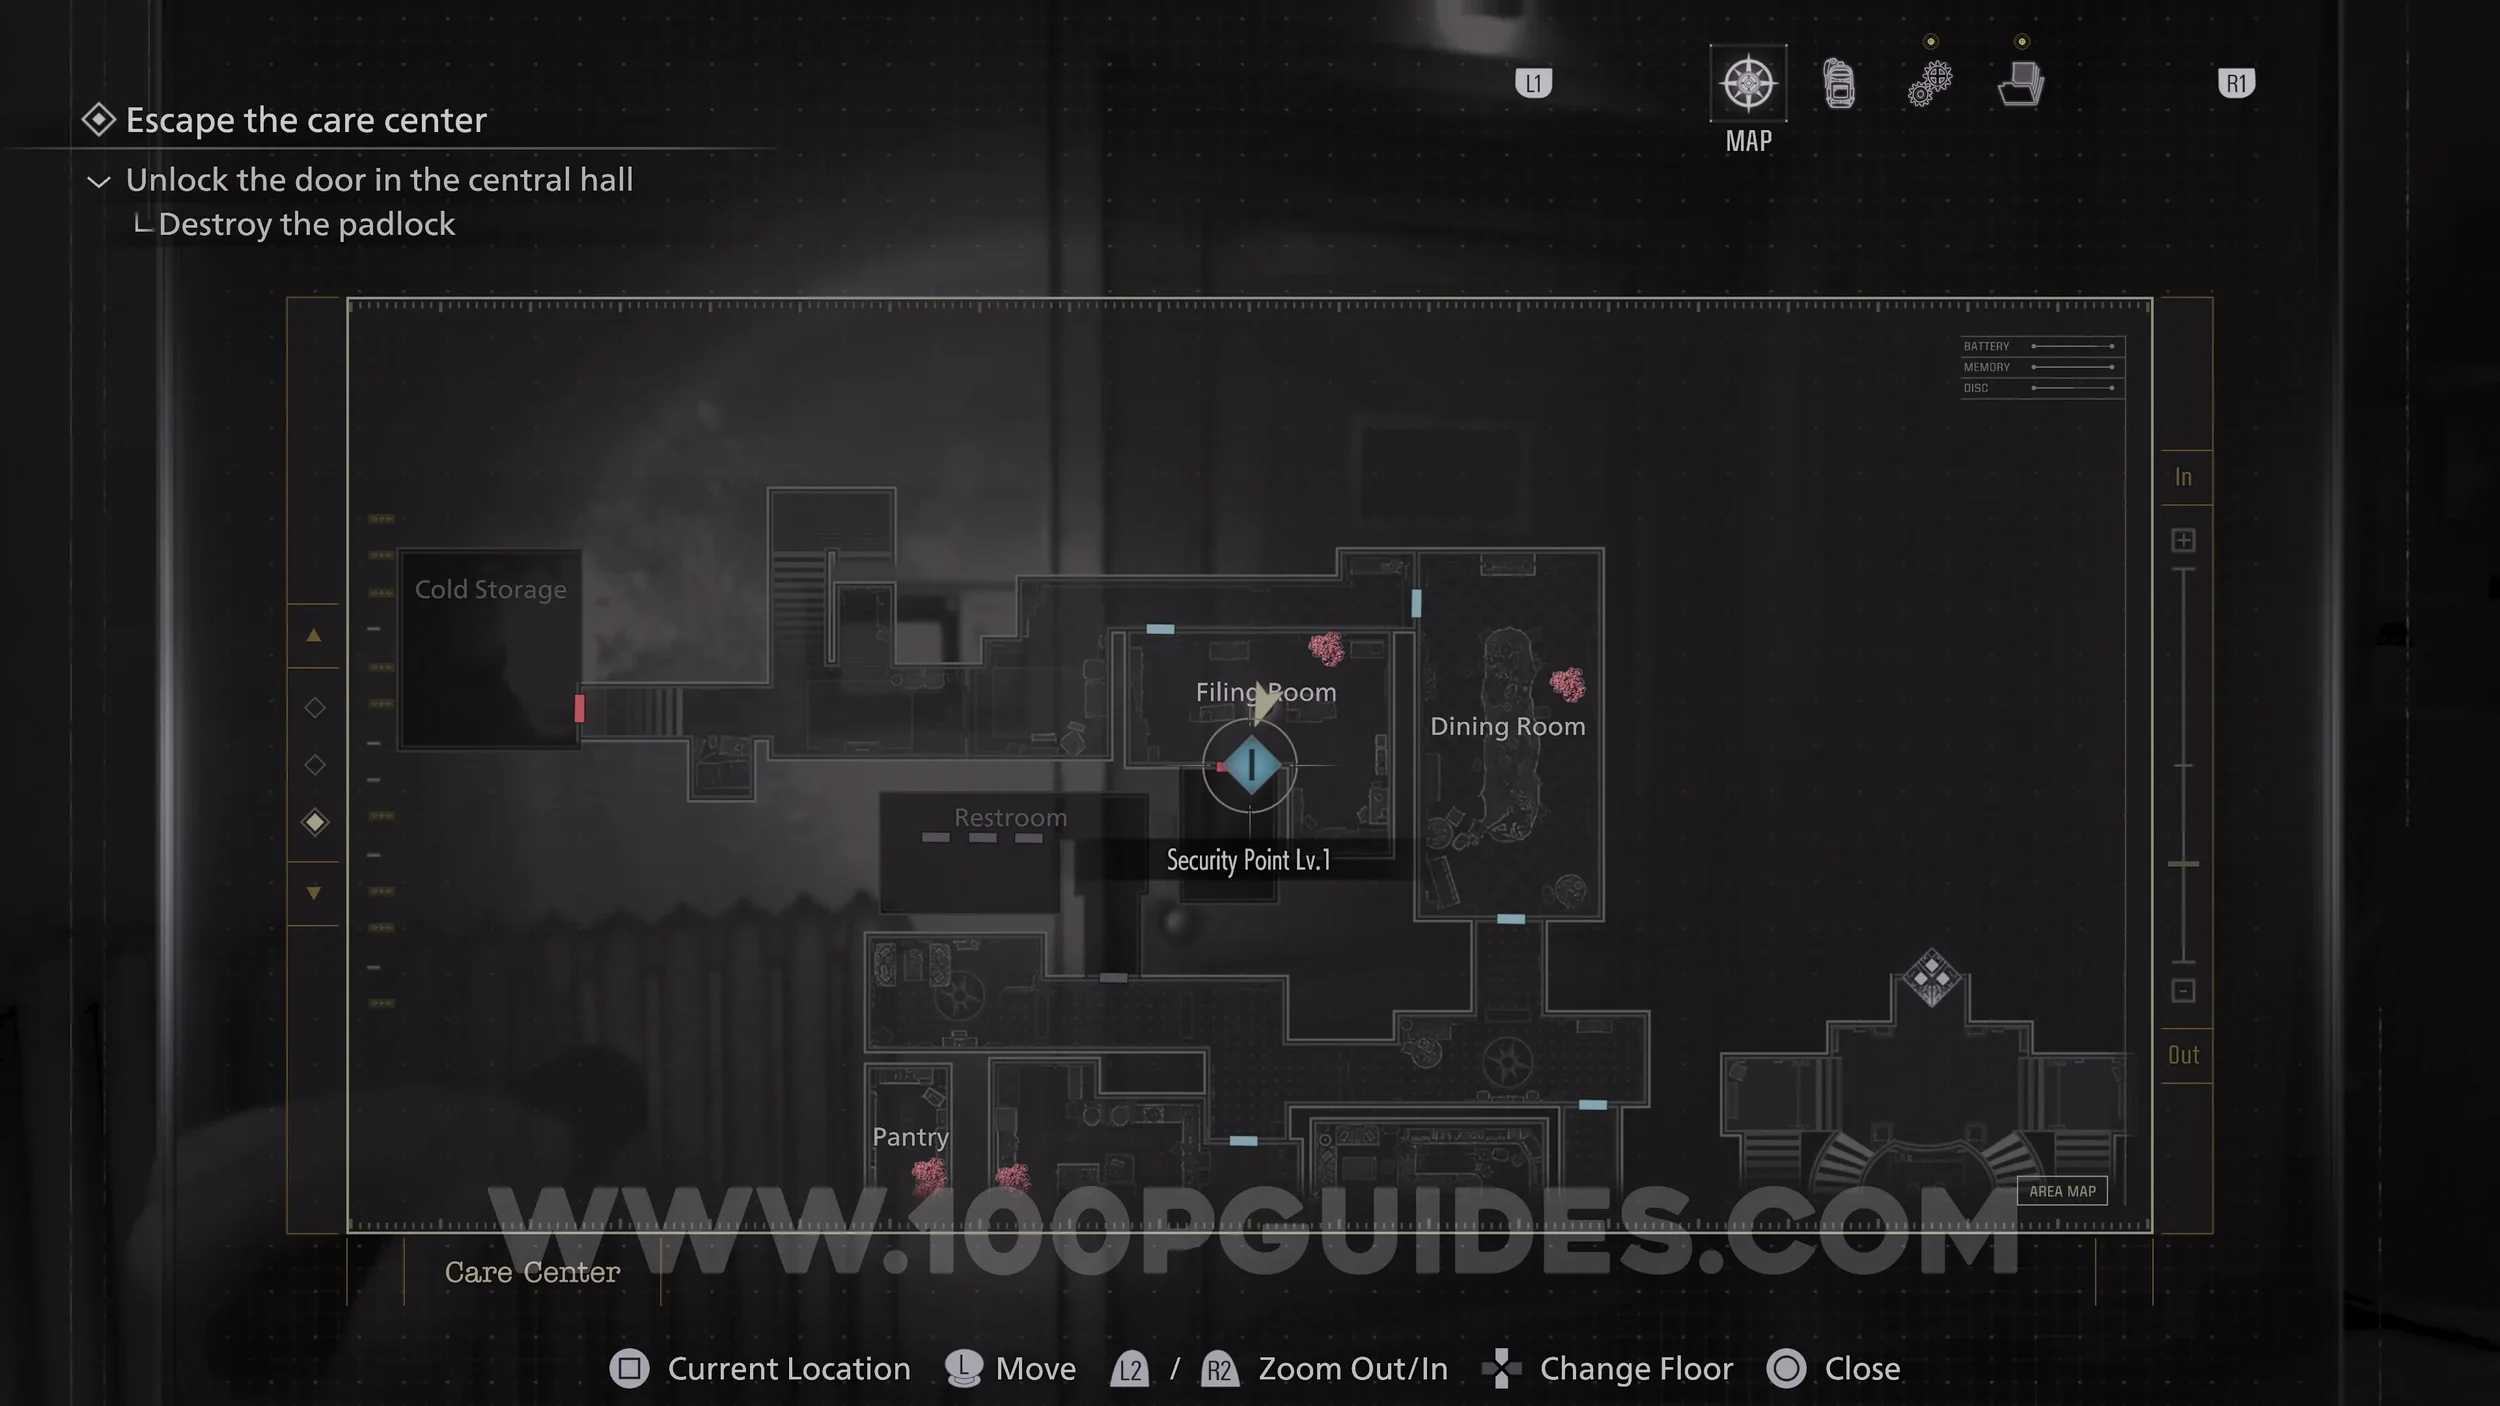
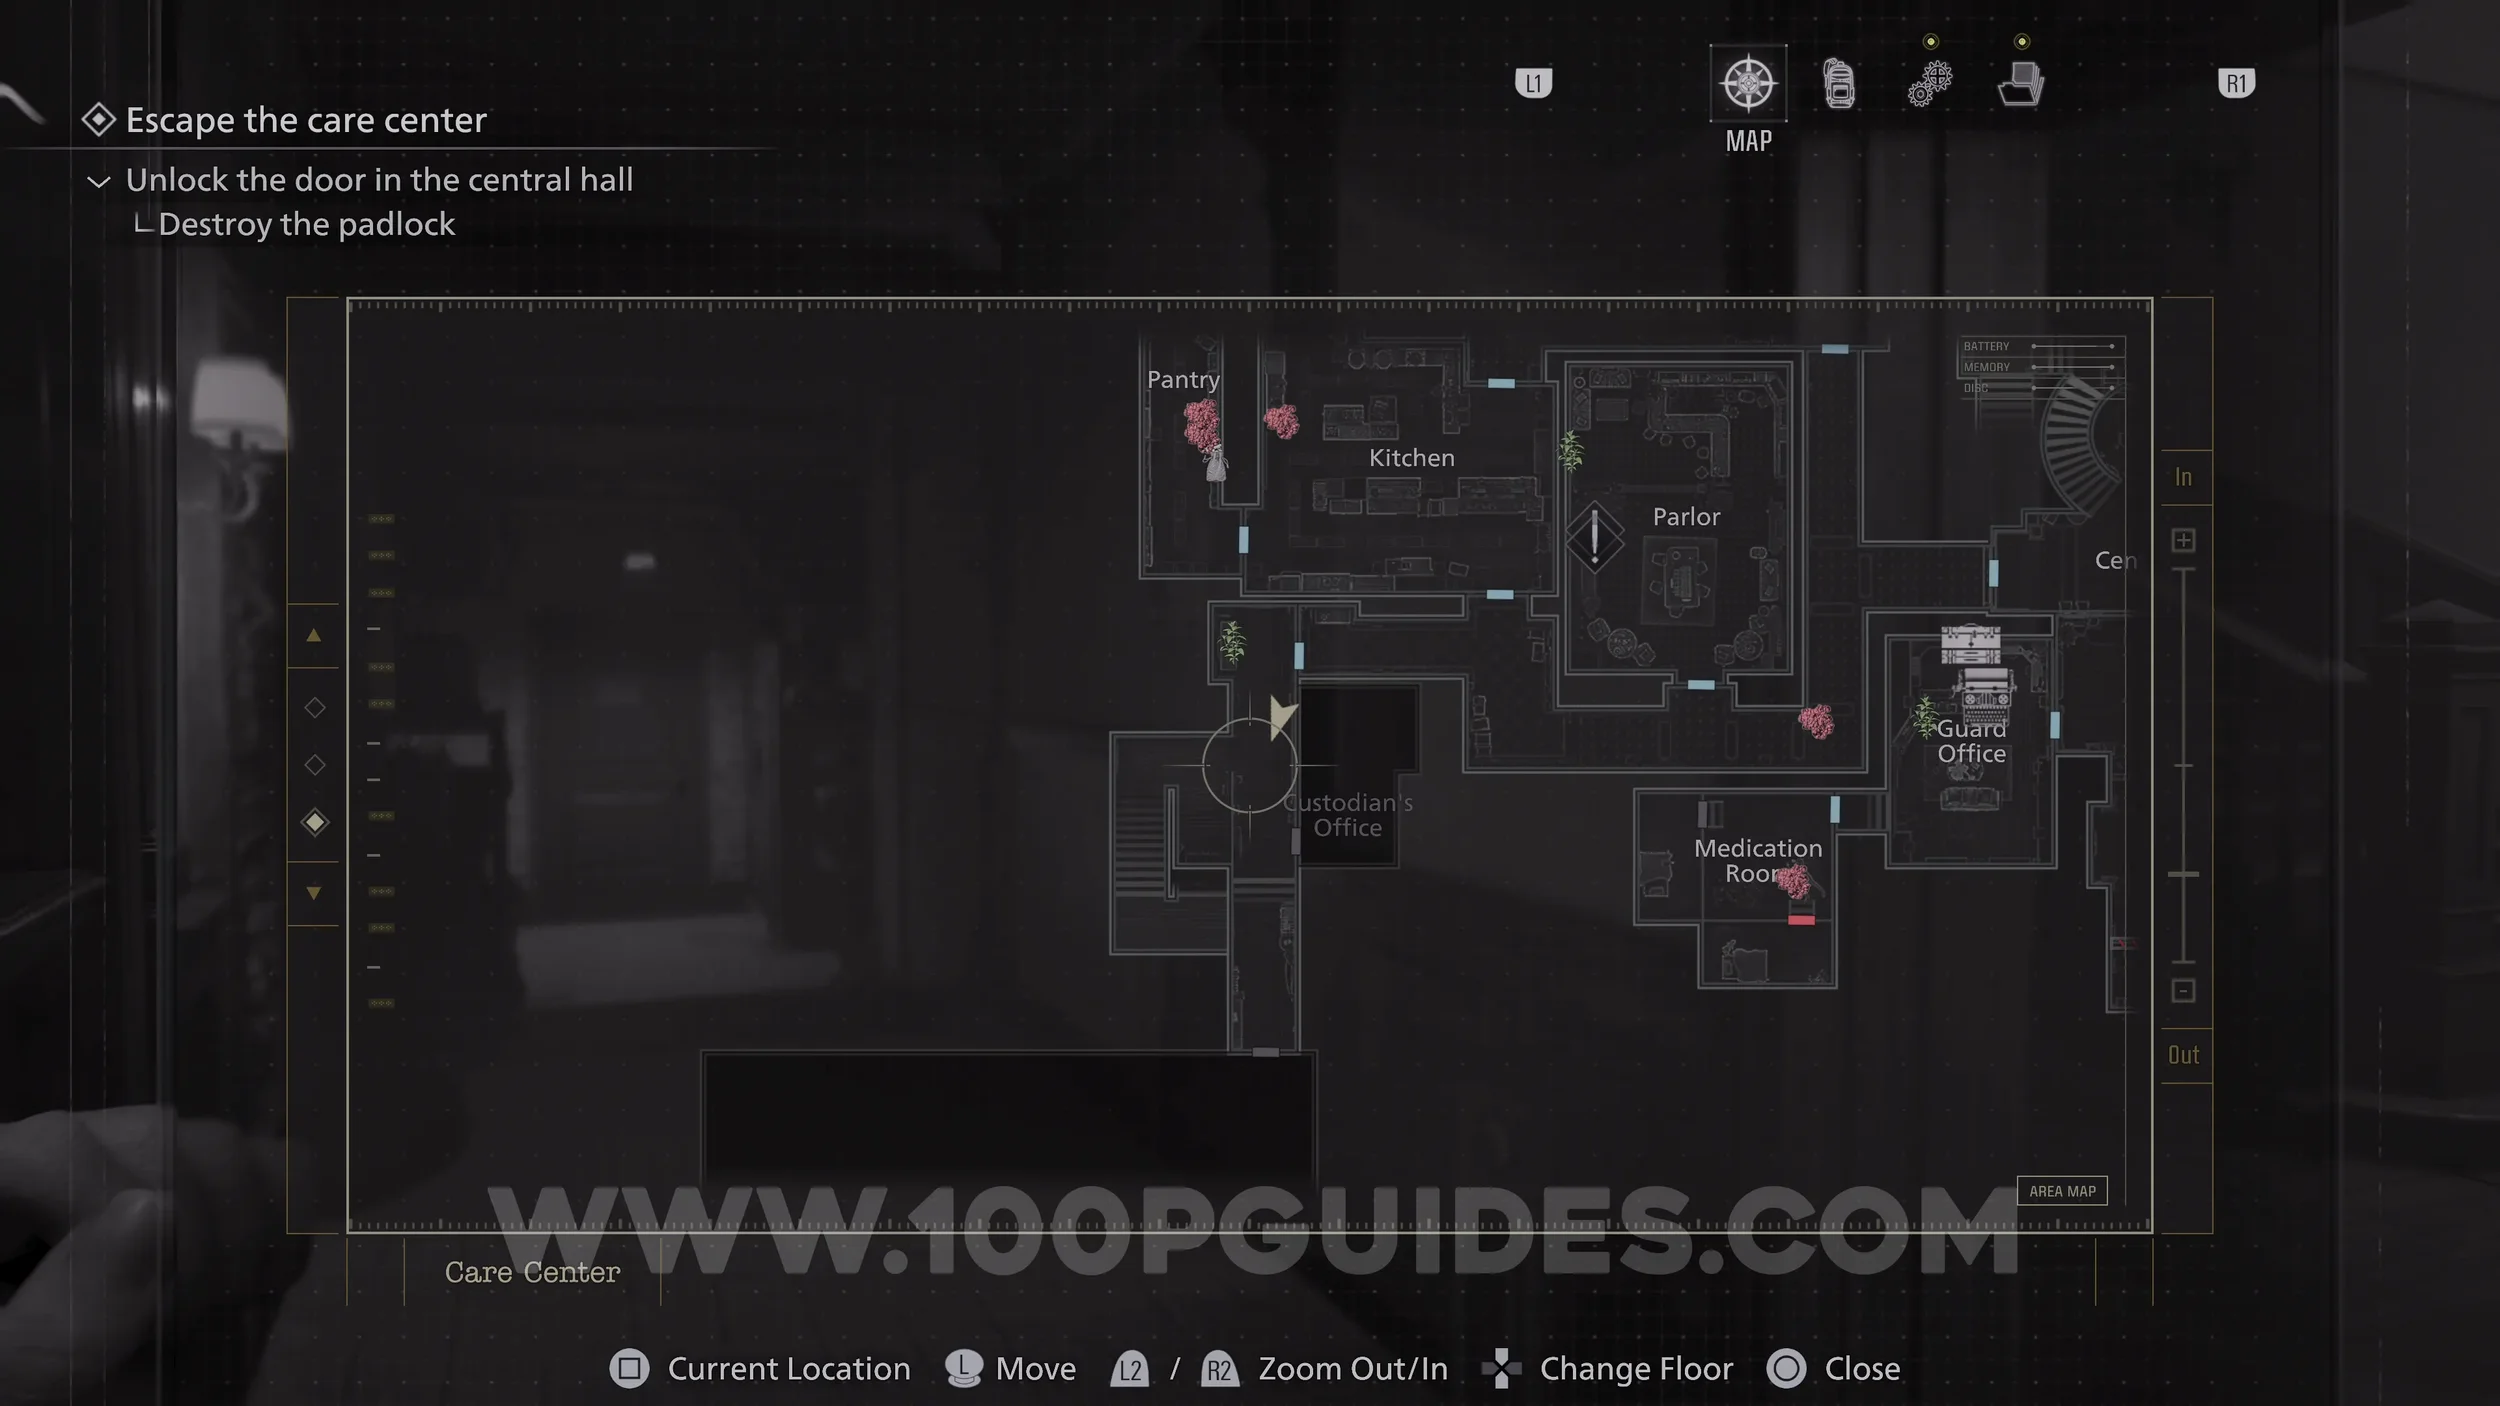
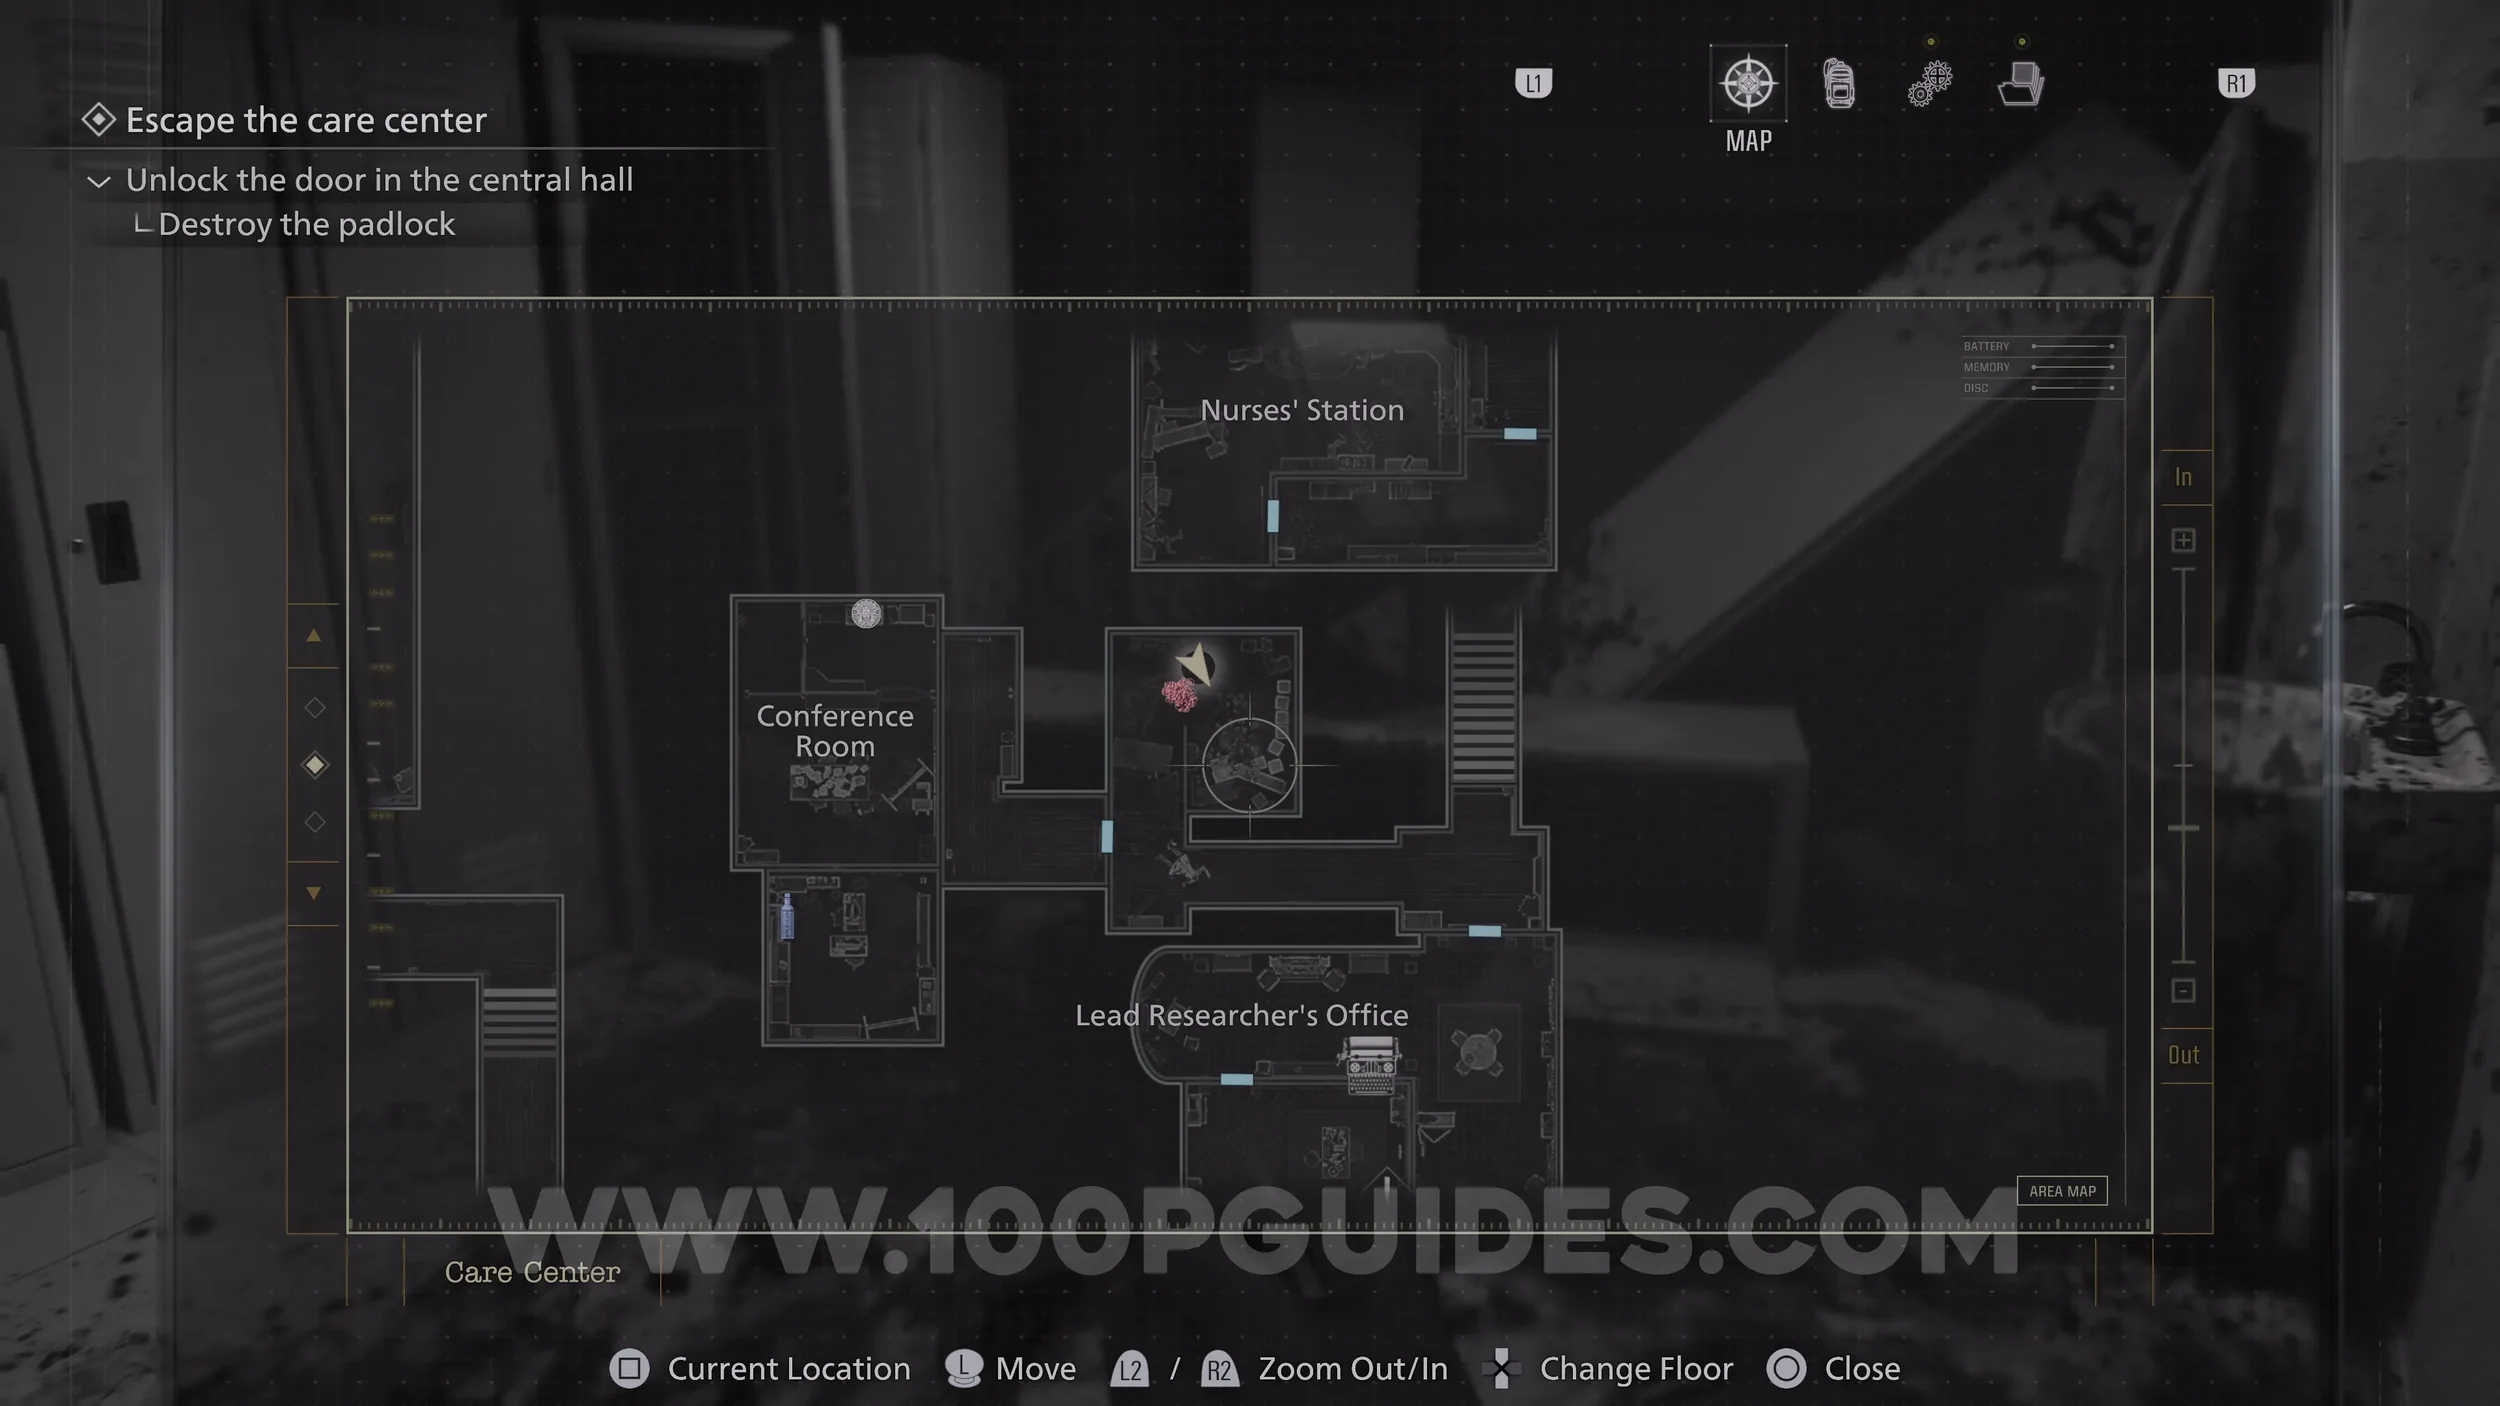
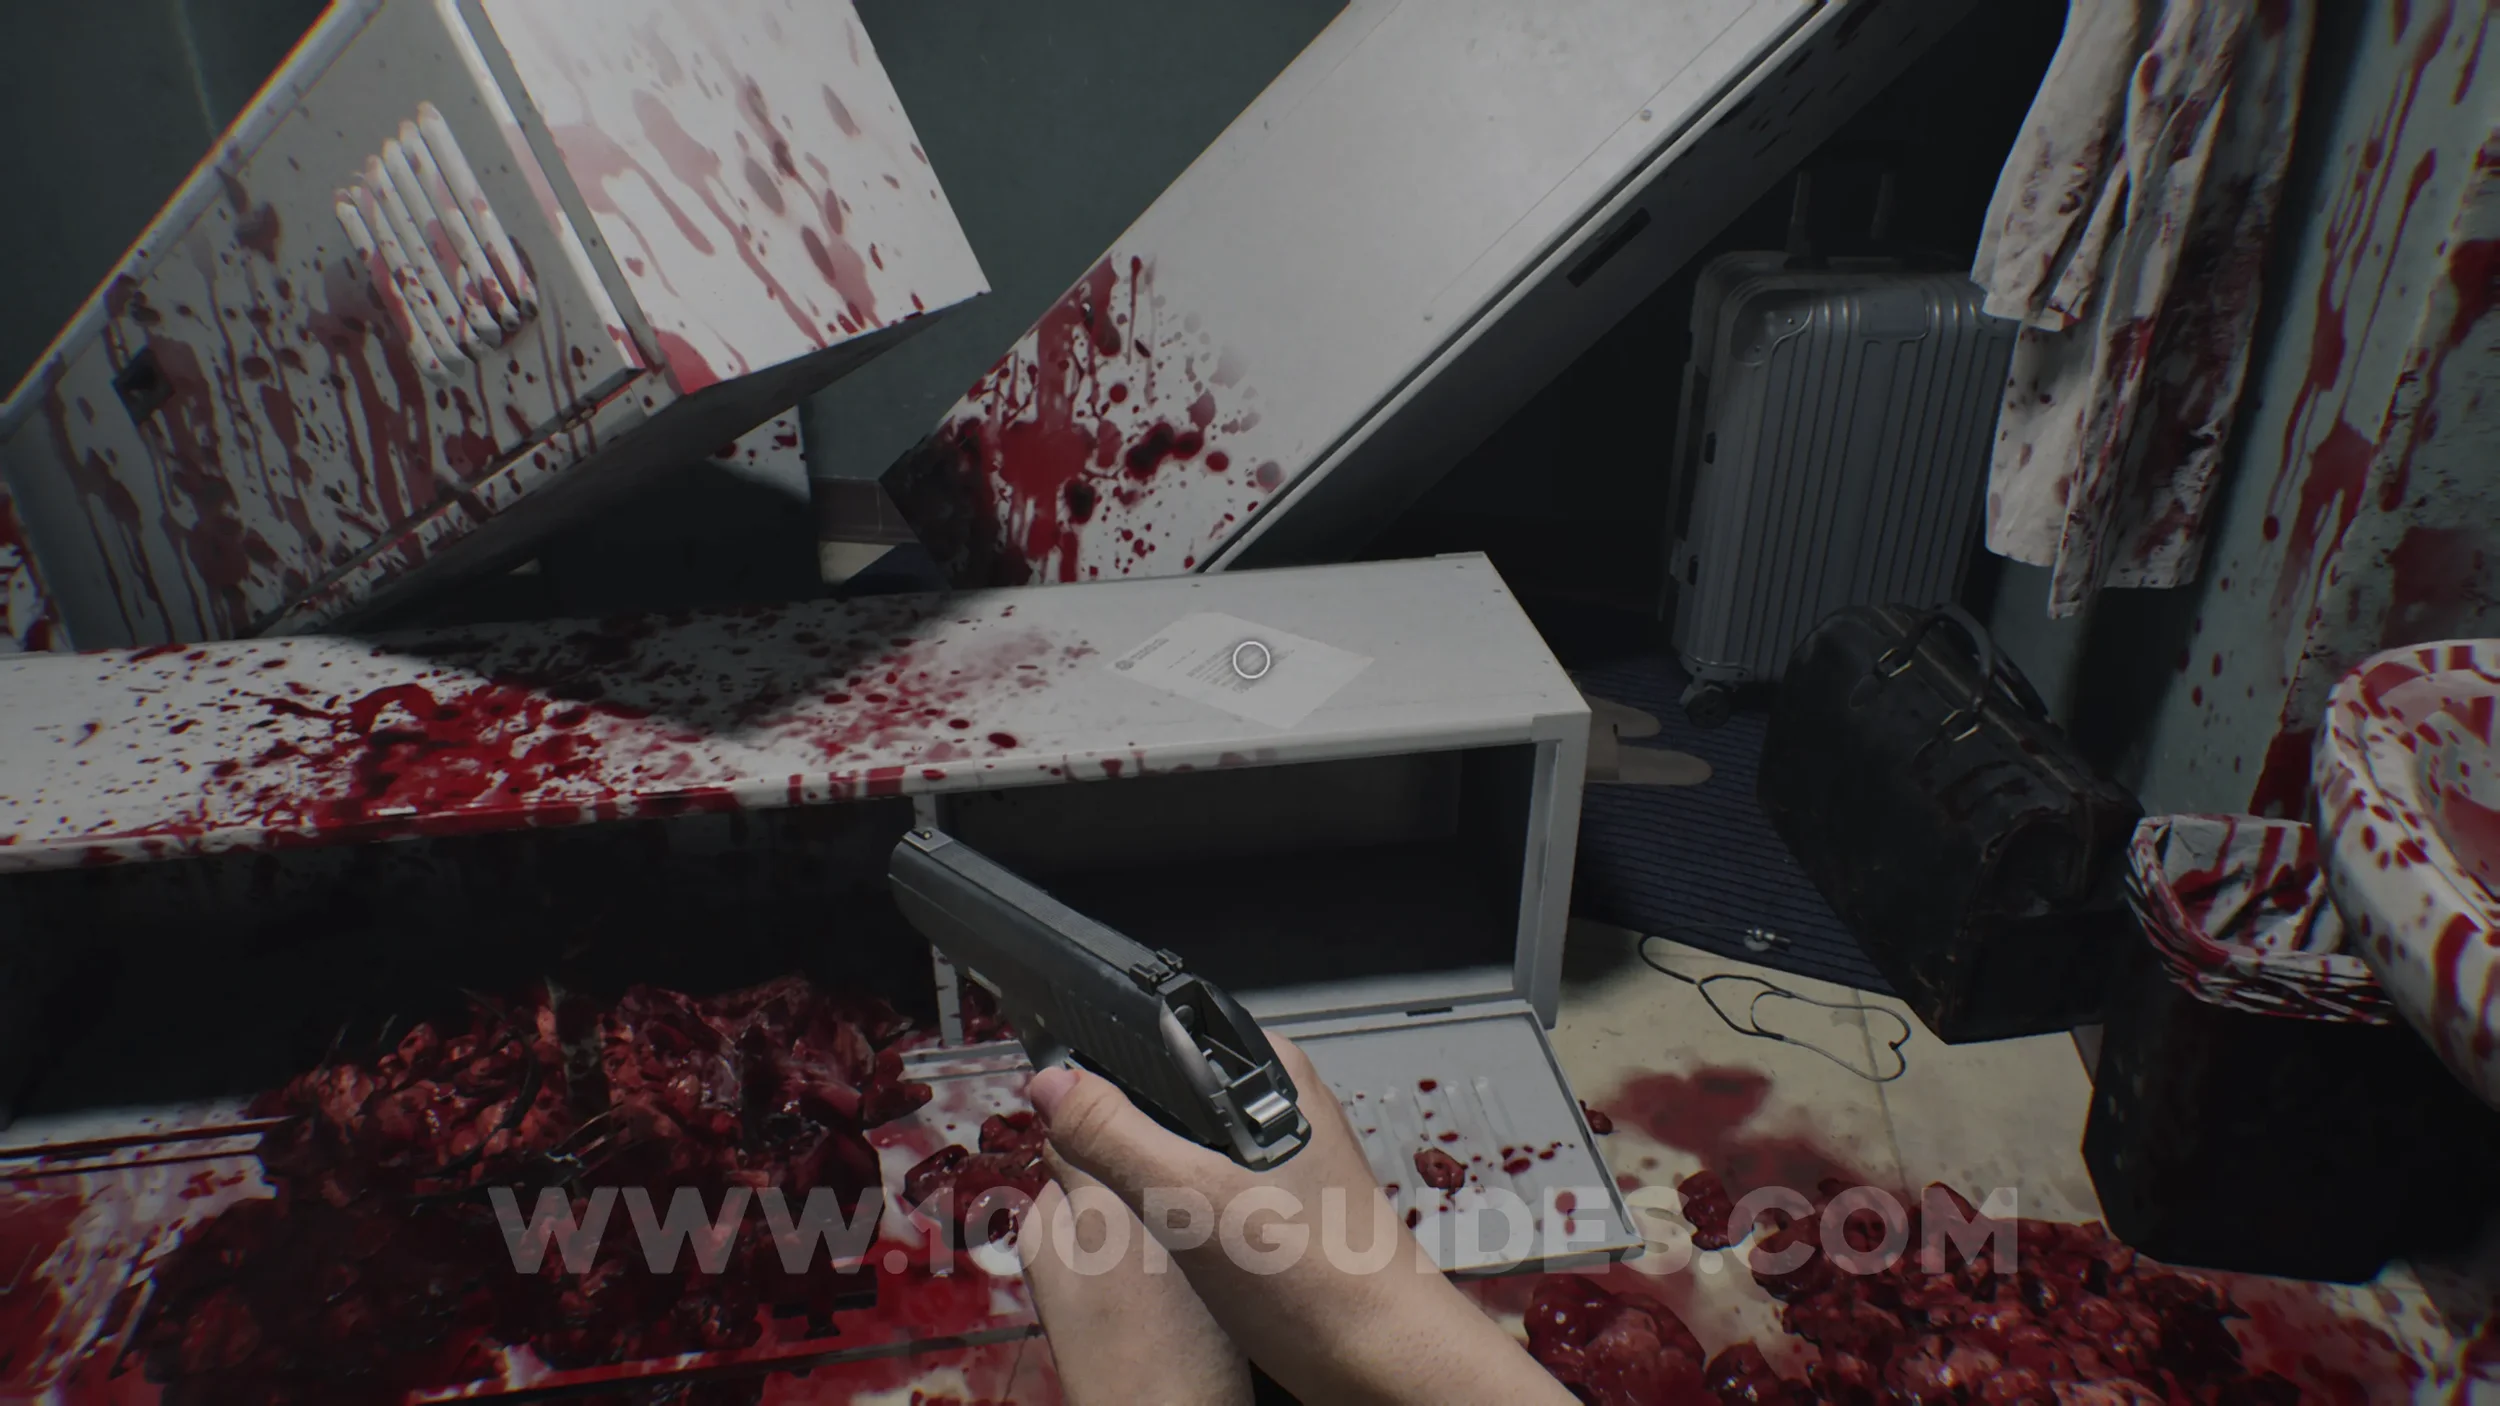
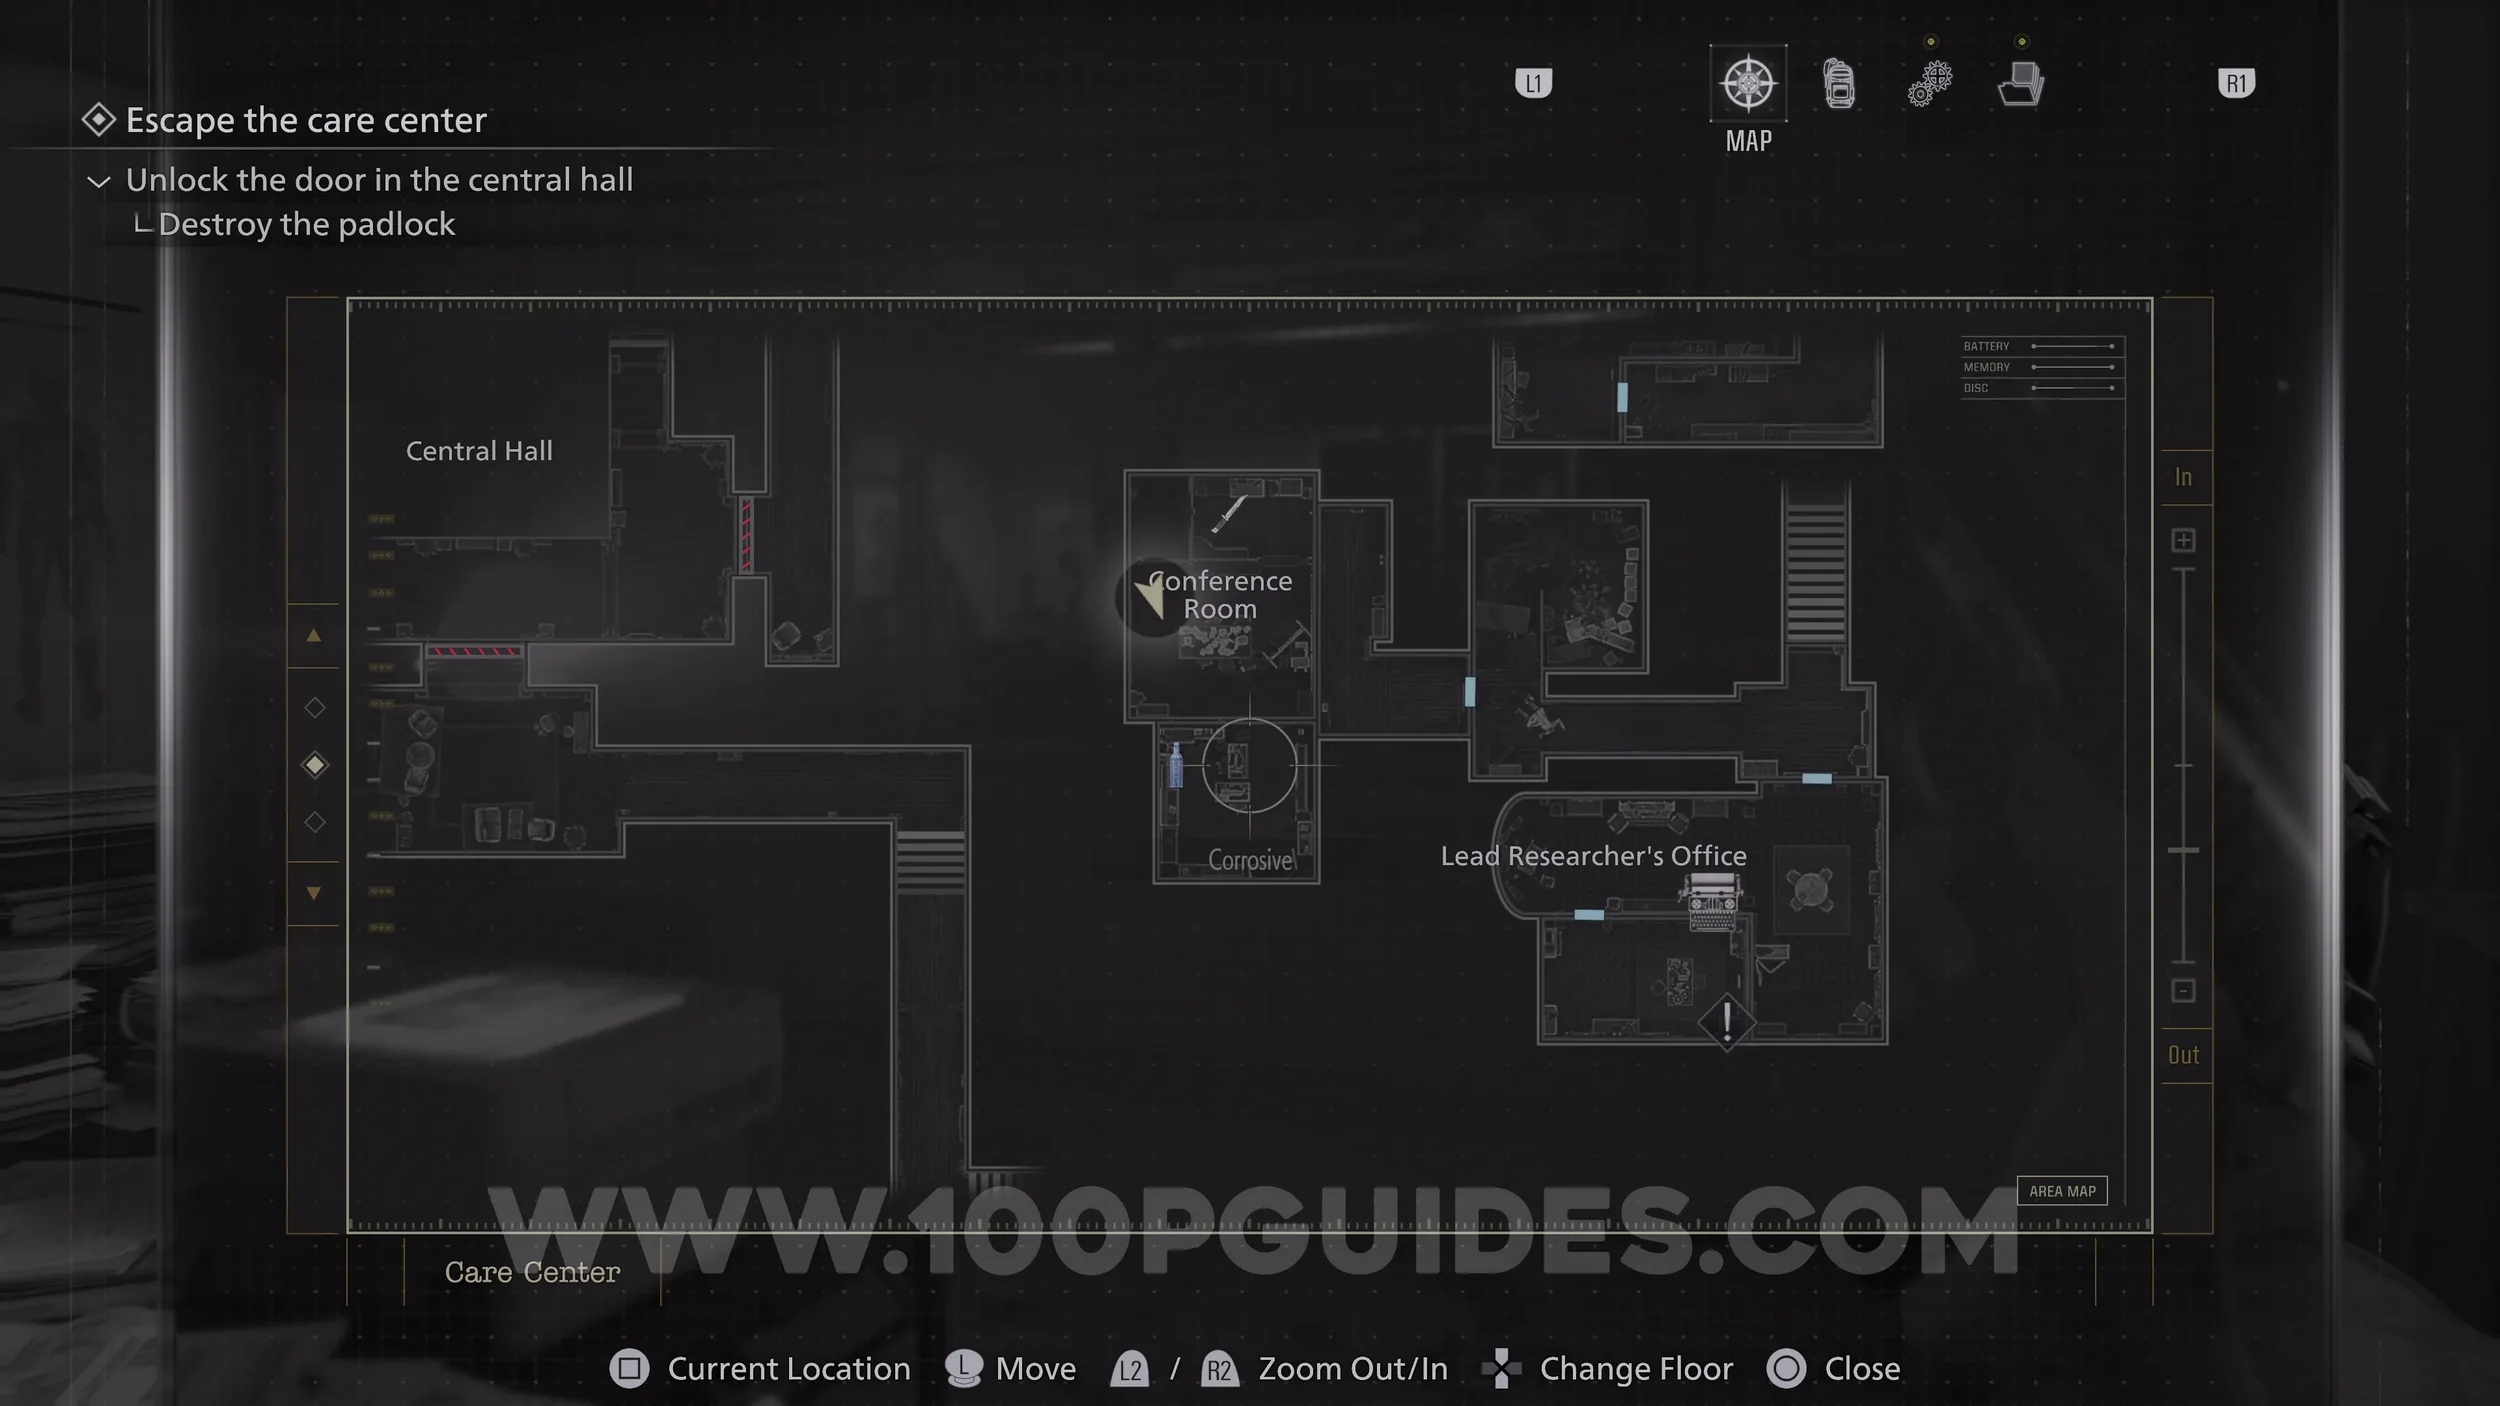
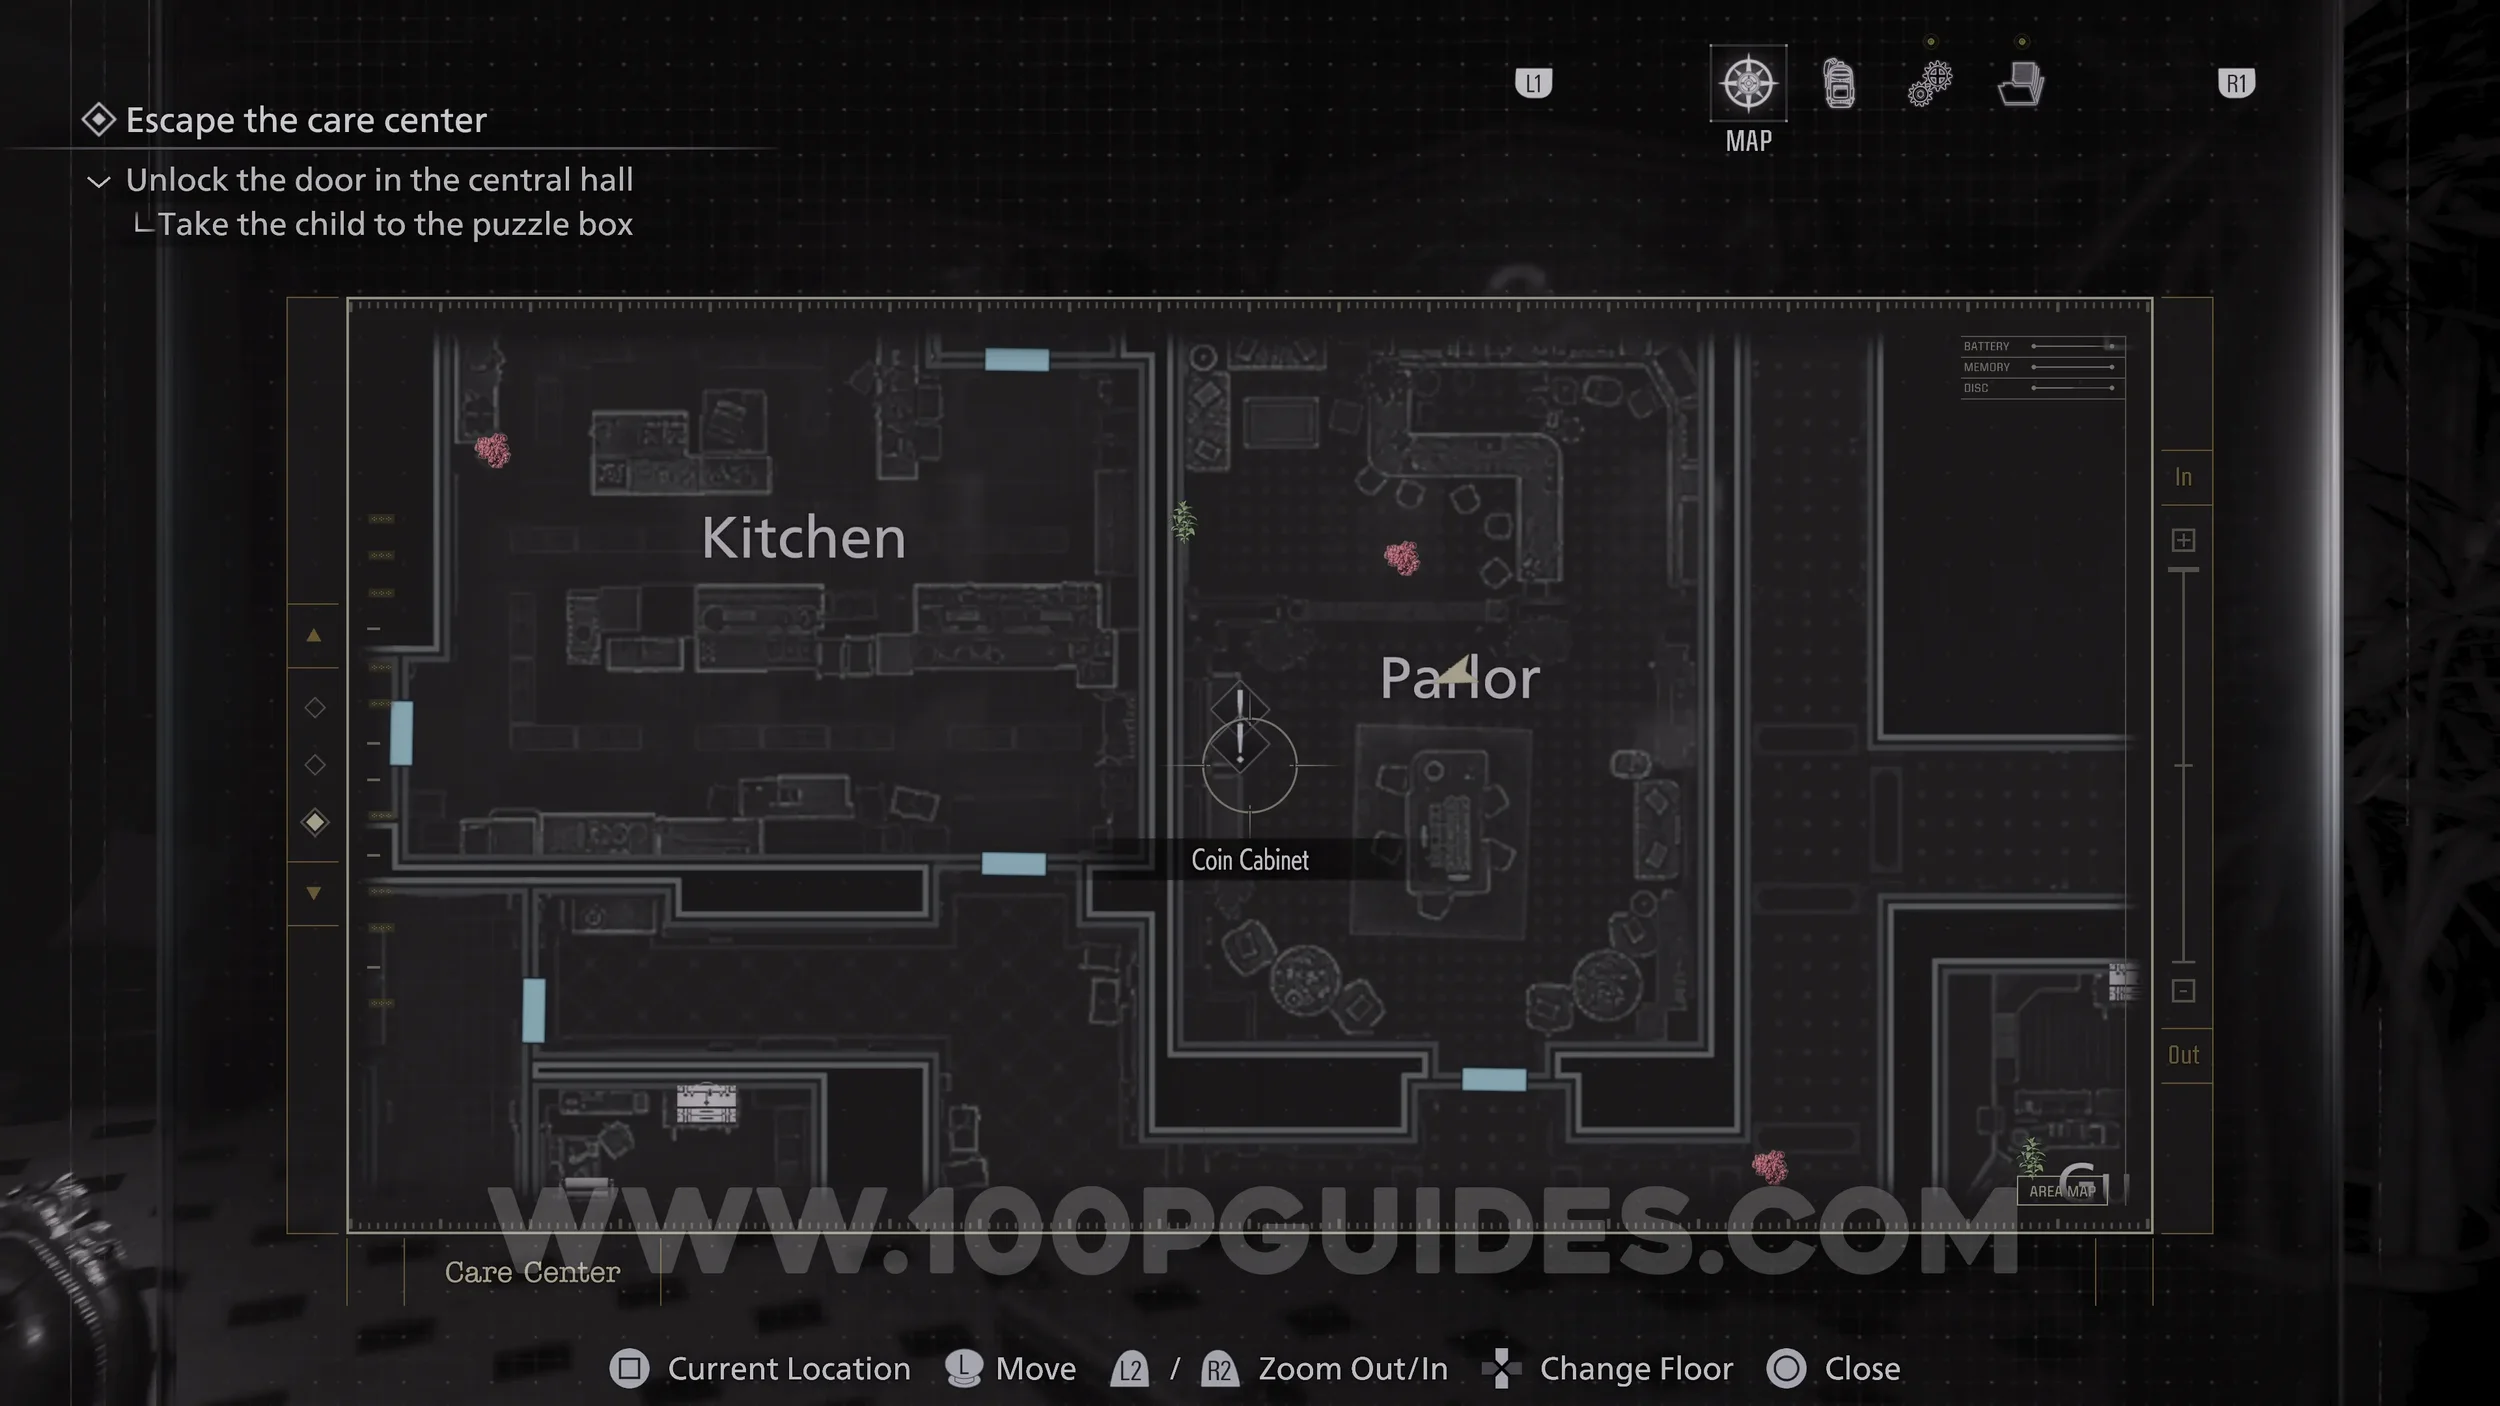
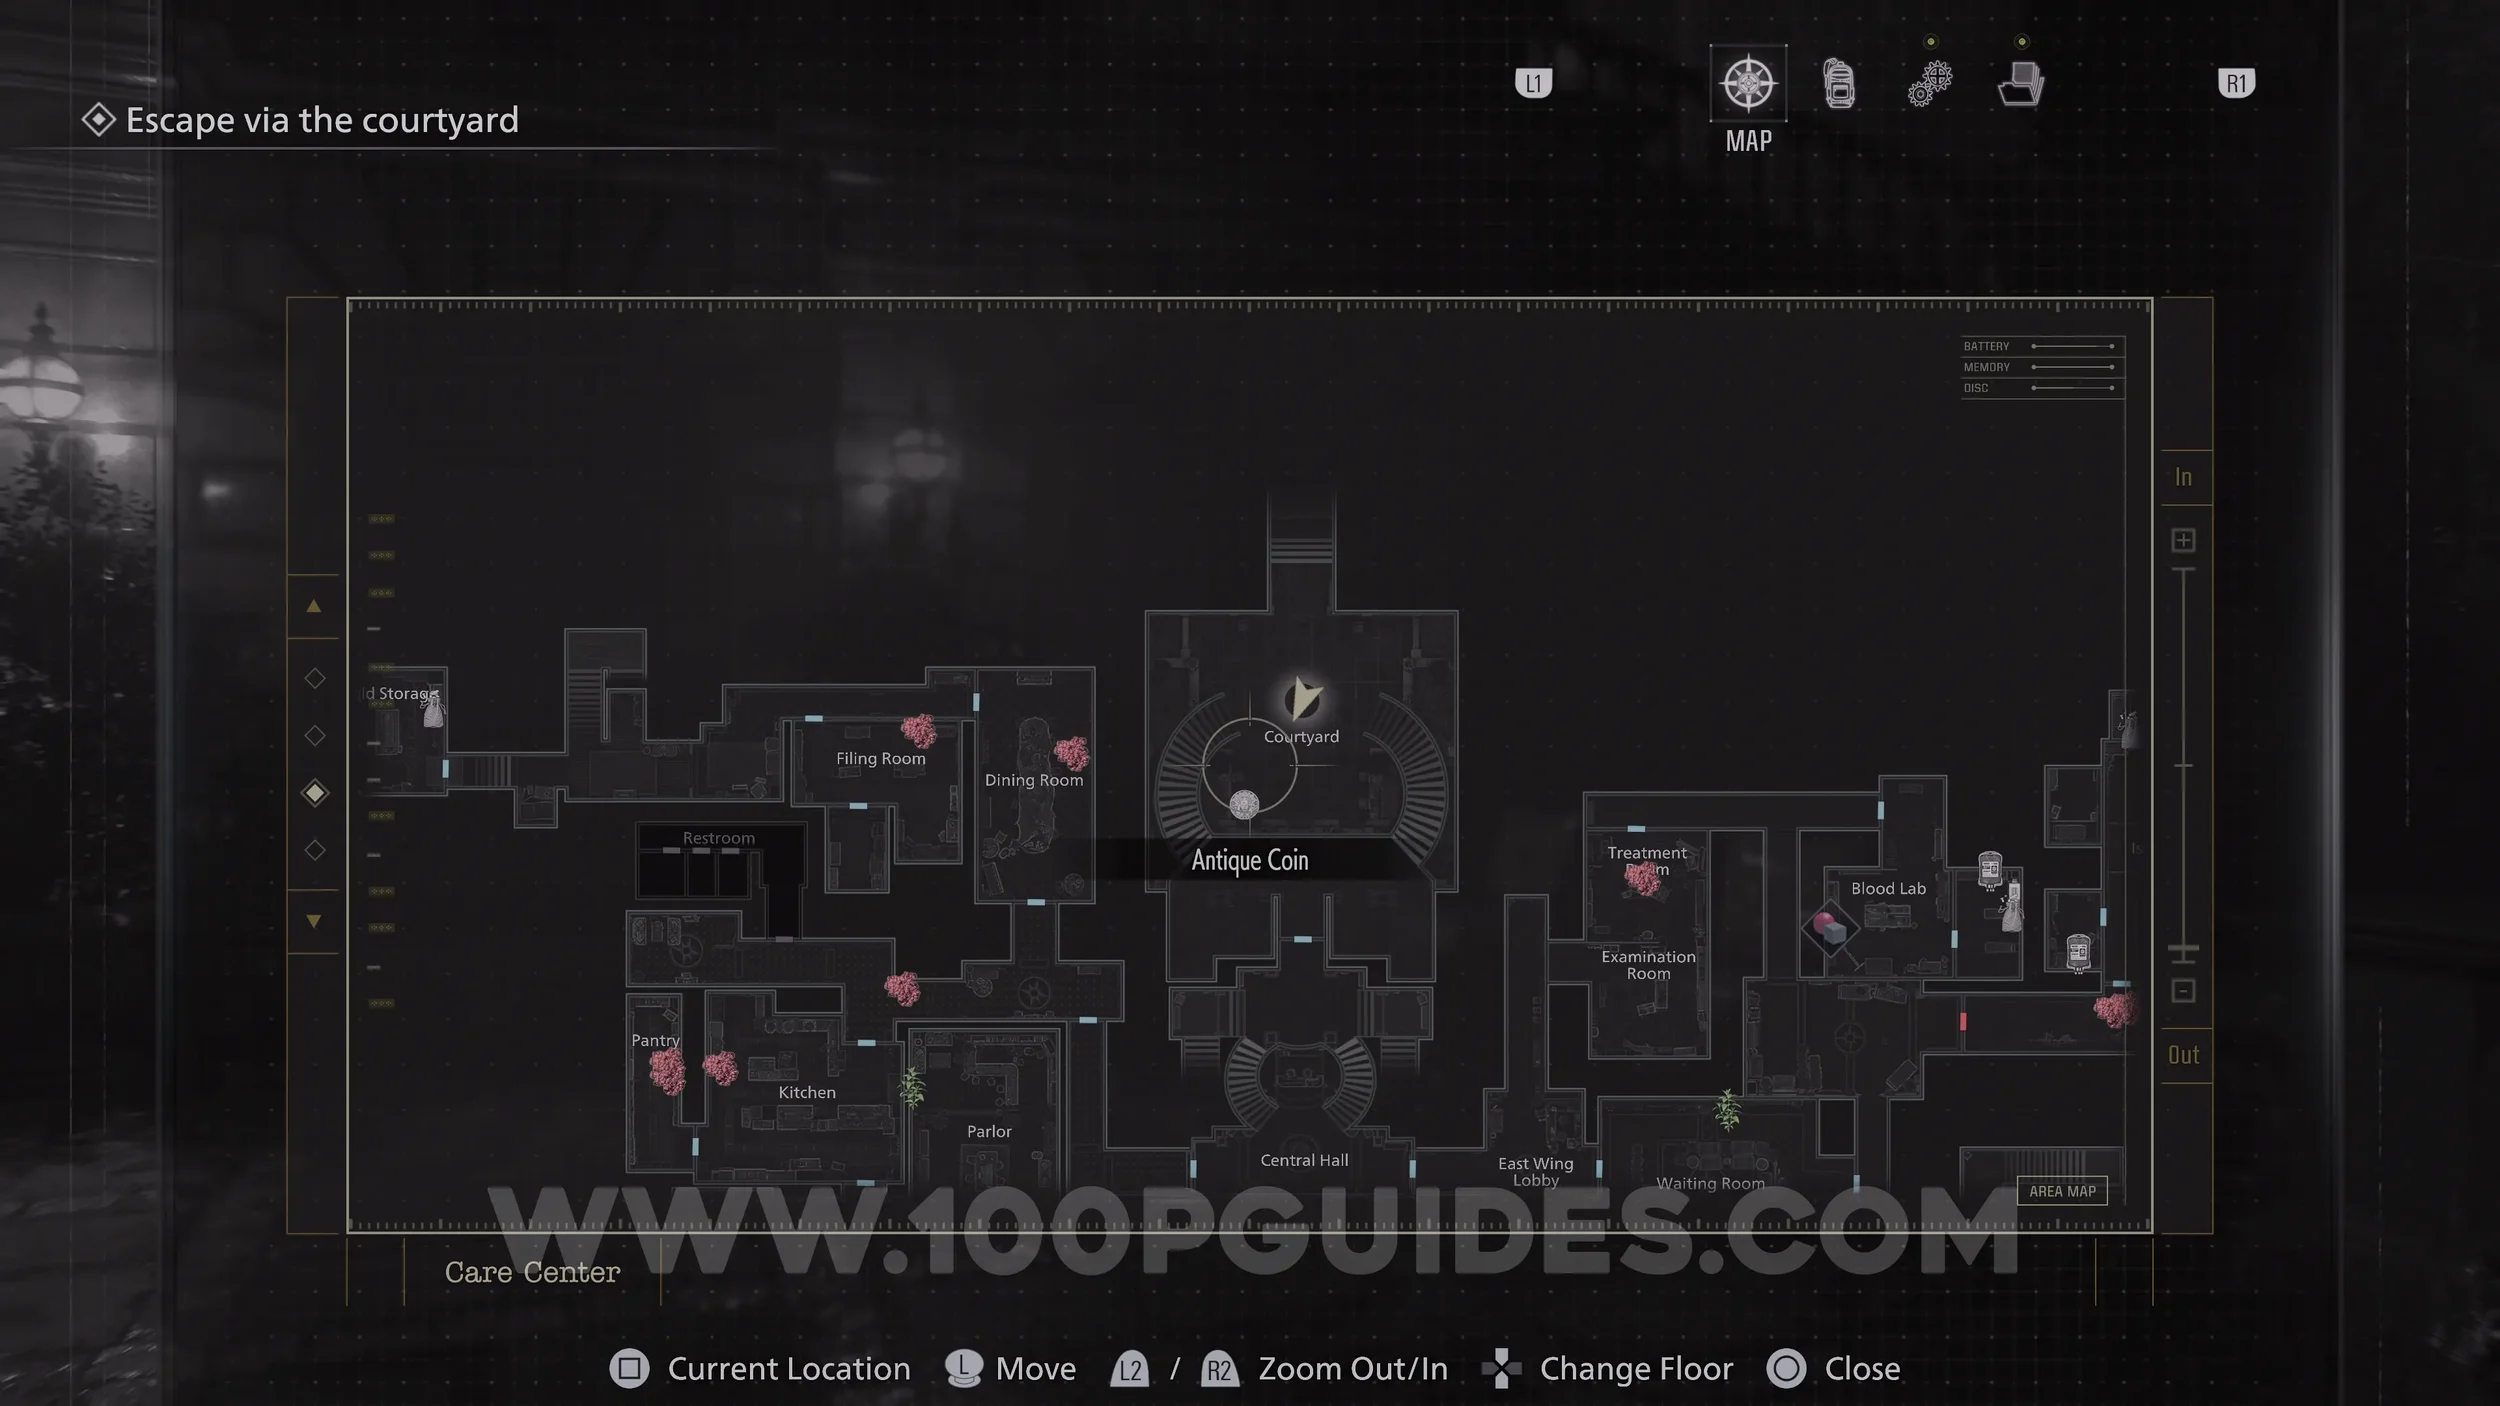
File #9 - Care Center Pamphlet. Once you regain control of Grace again, go to the safe room to the south-west of the Central Hall. The file can be found on the table.
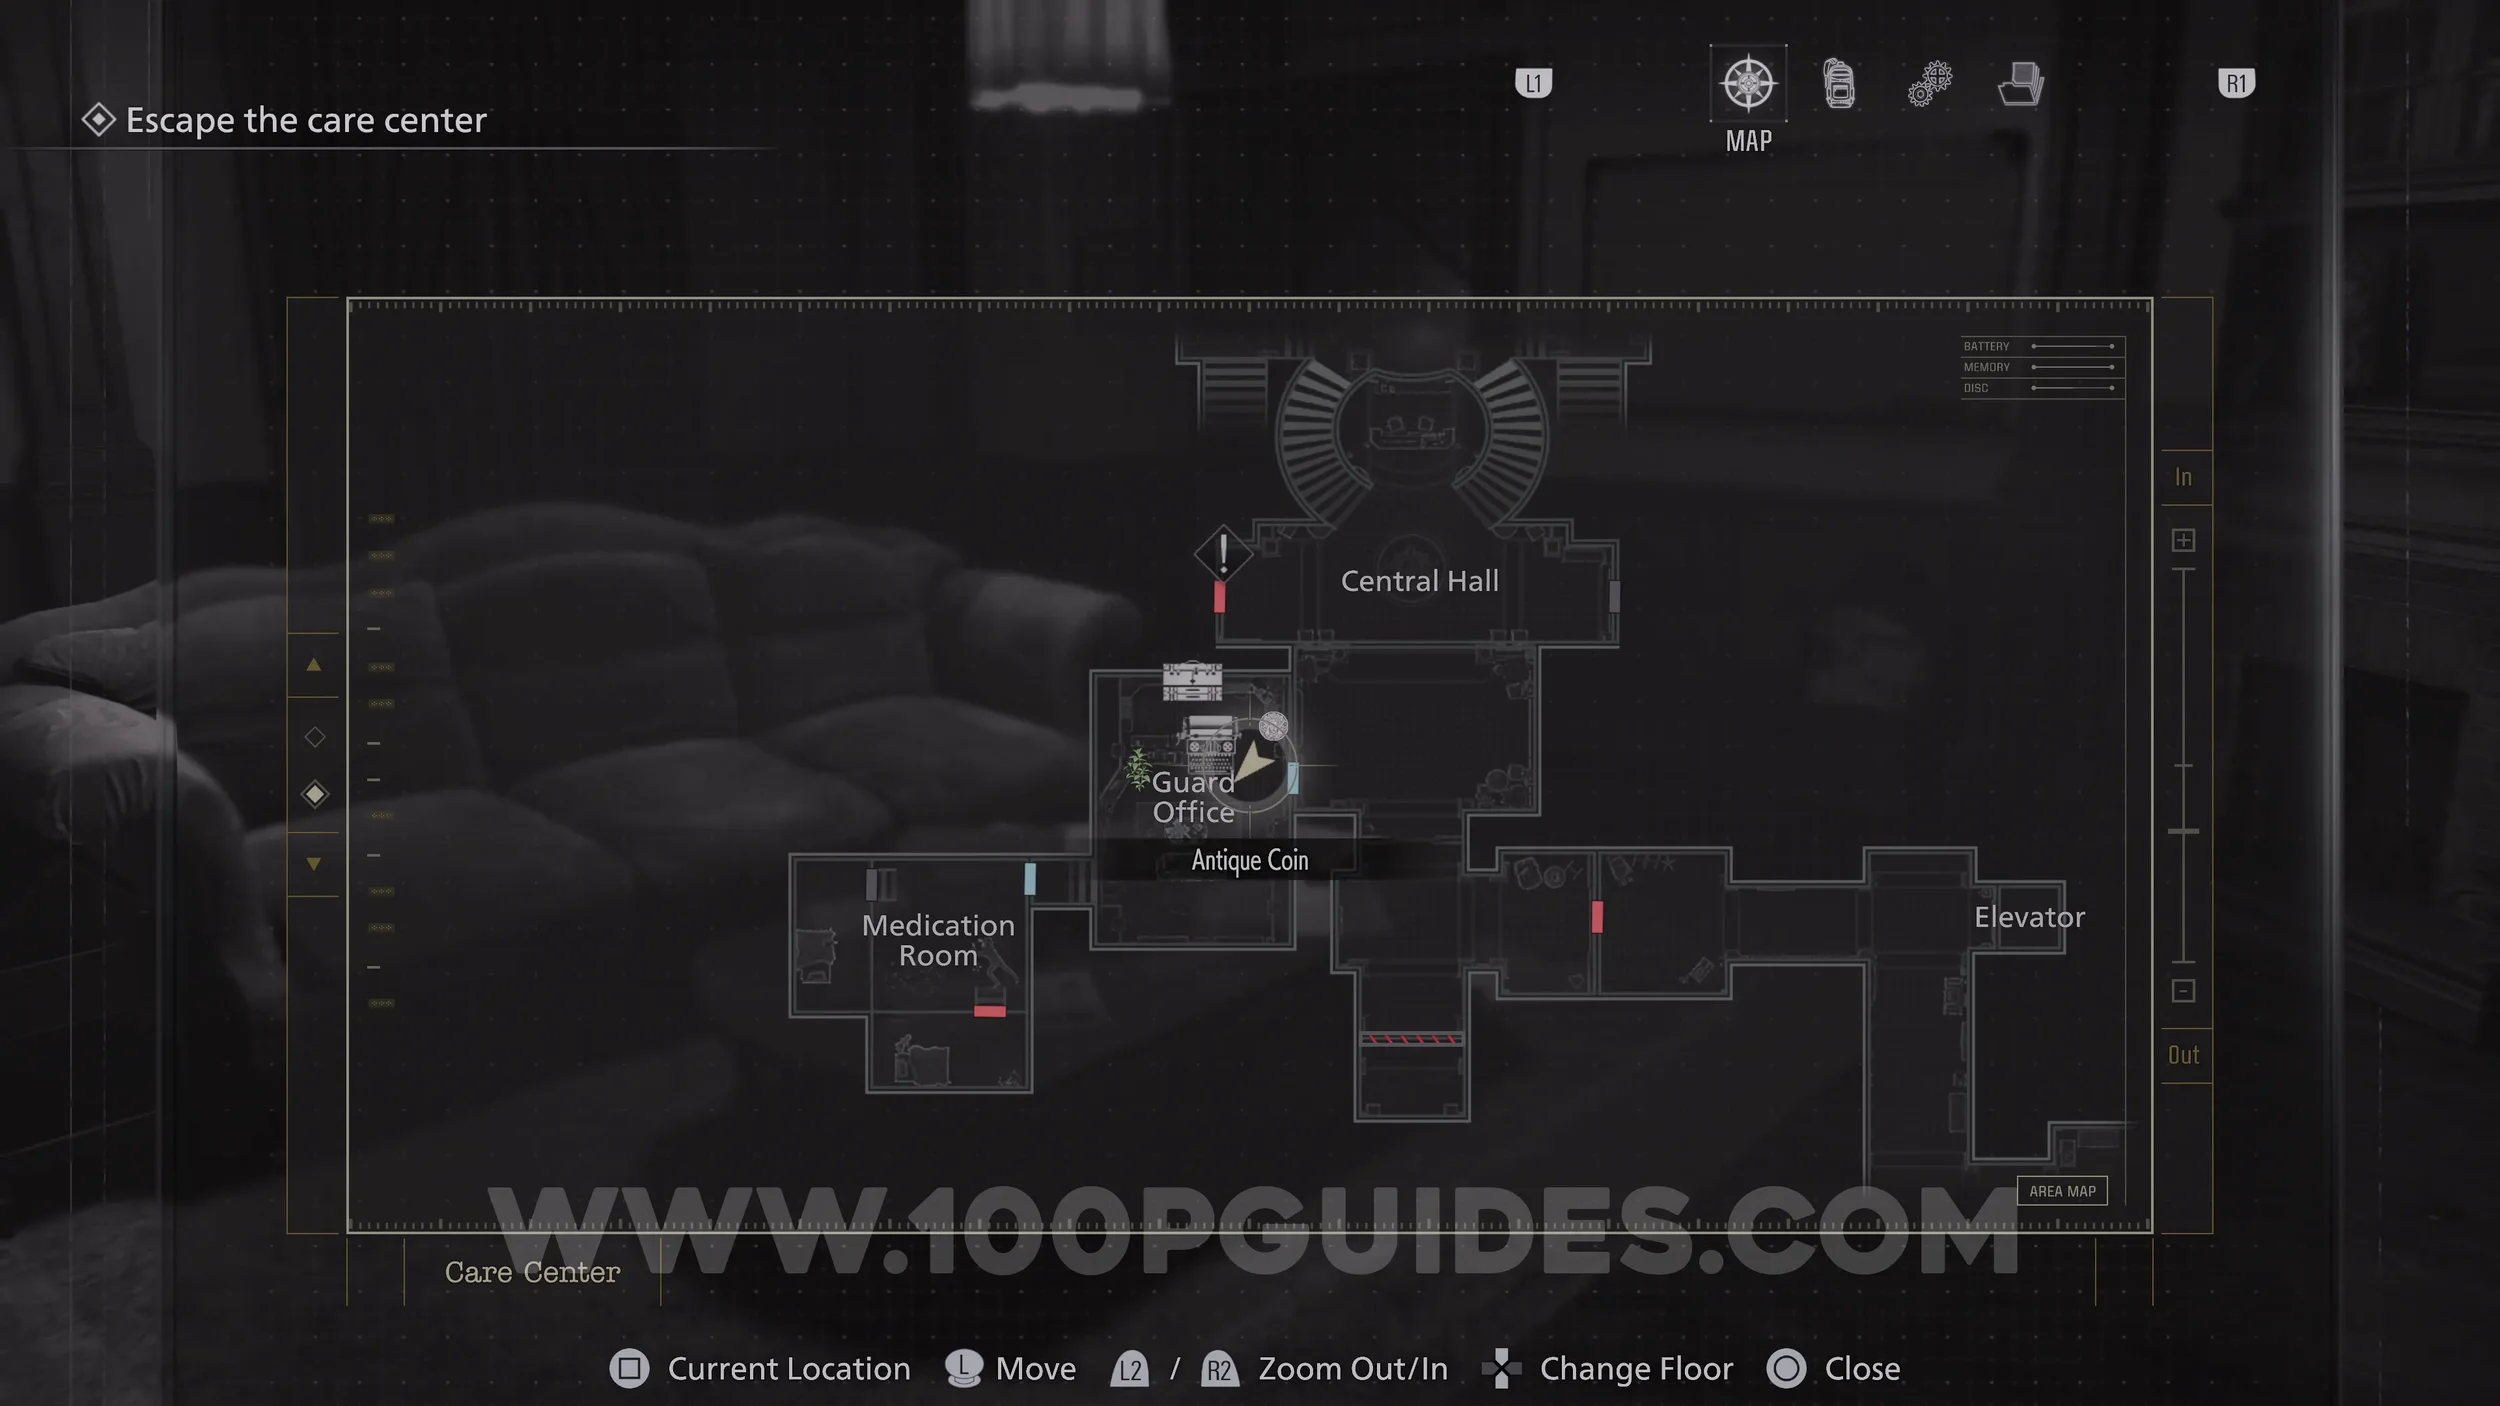
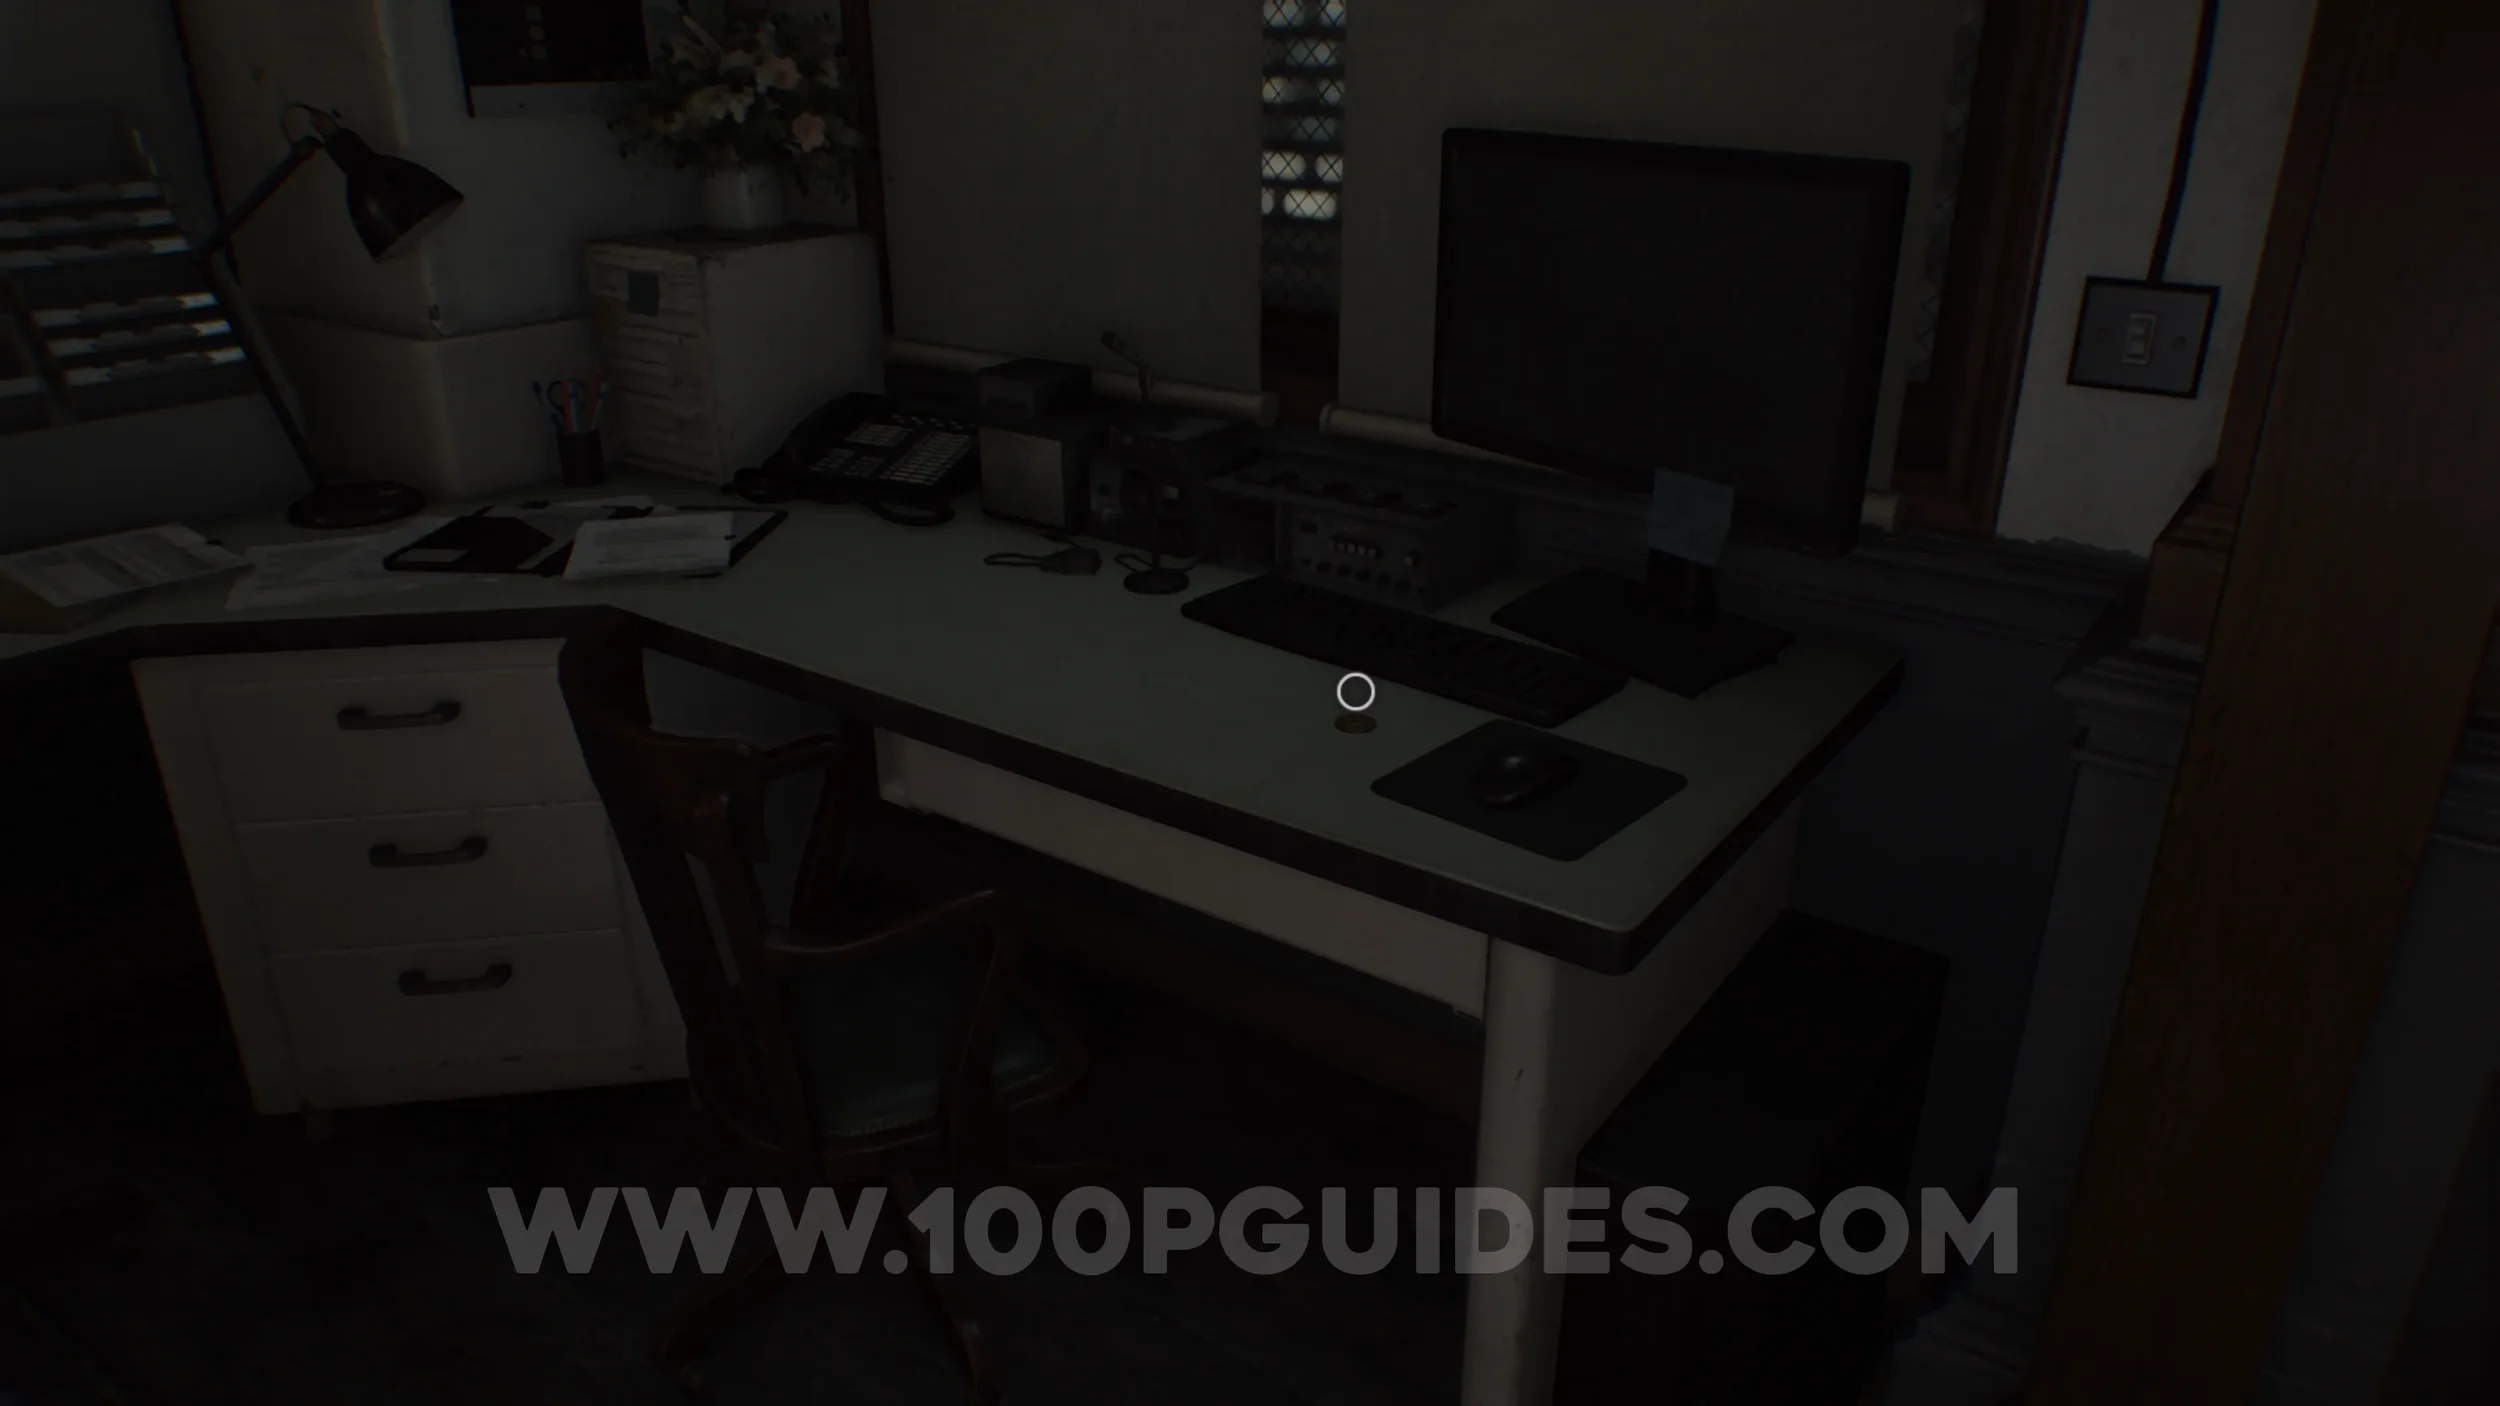
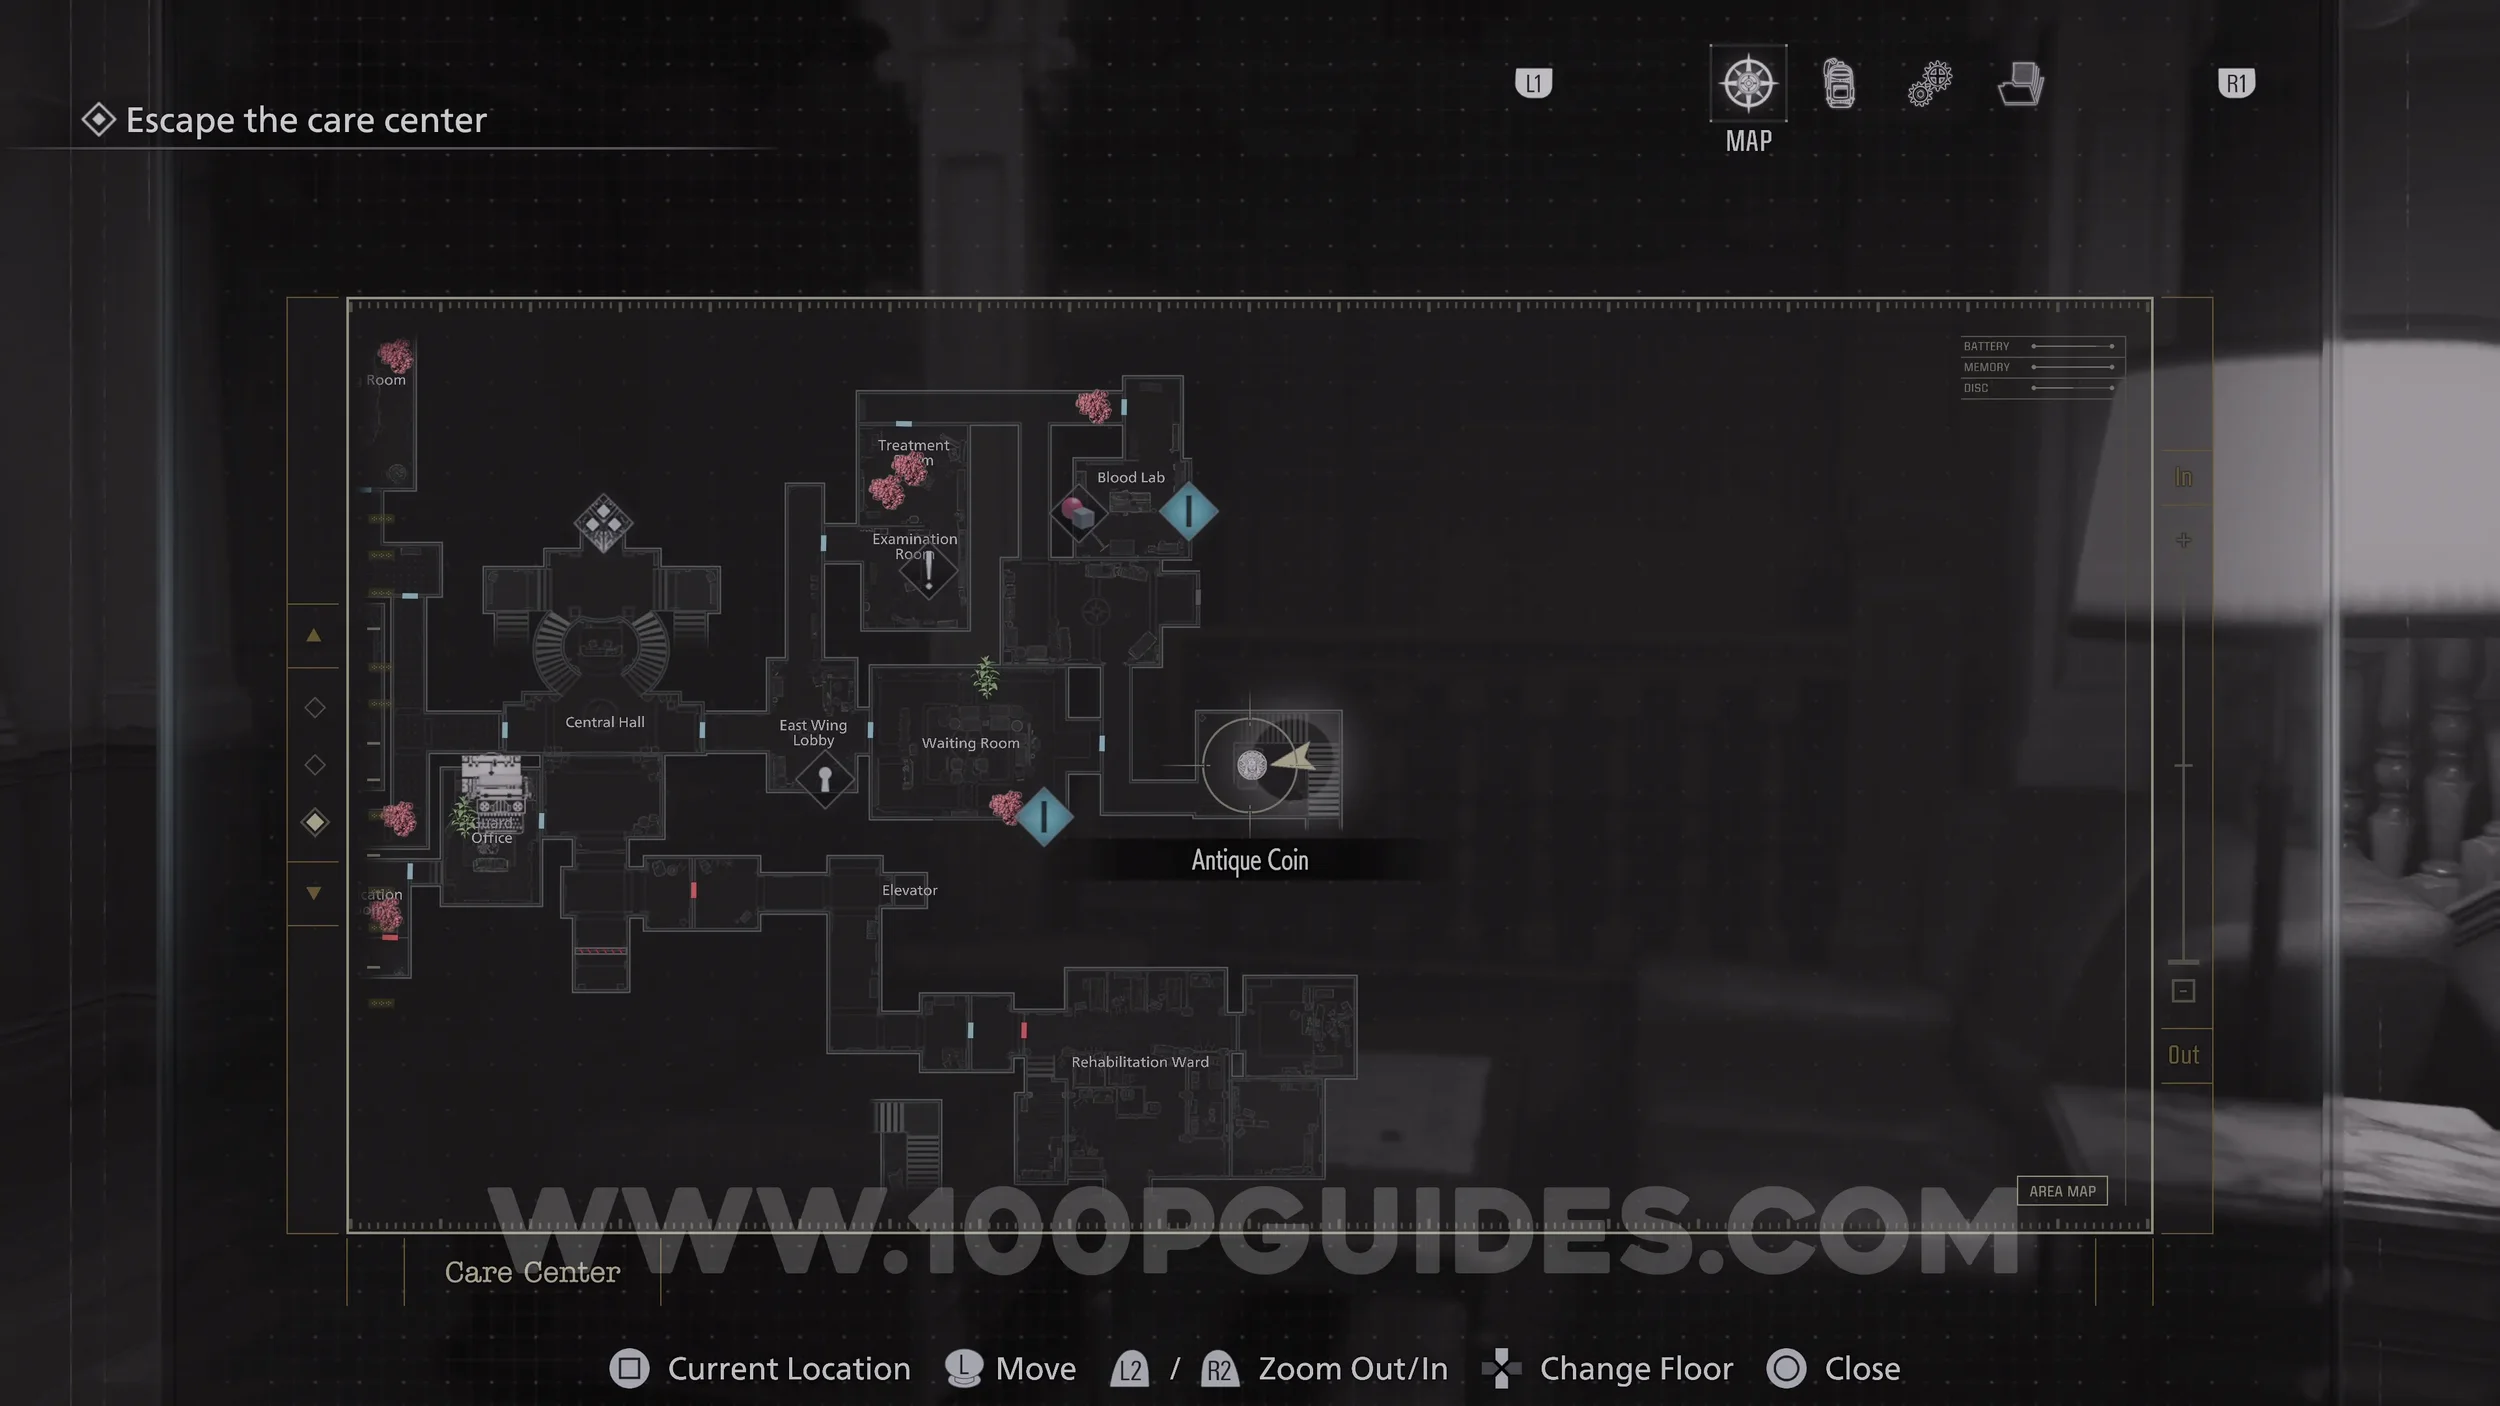
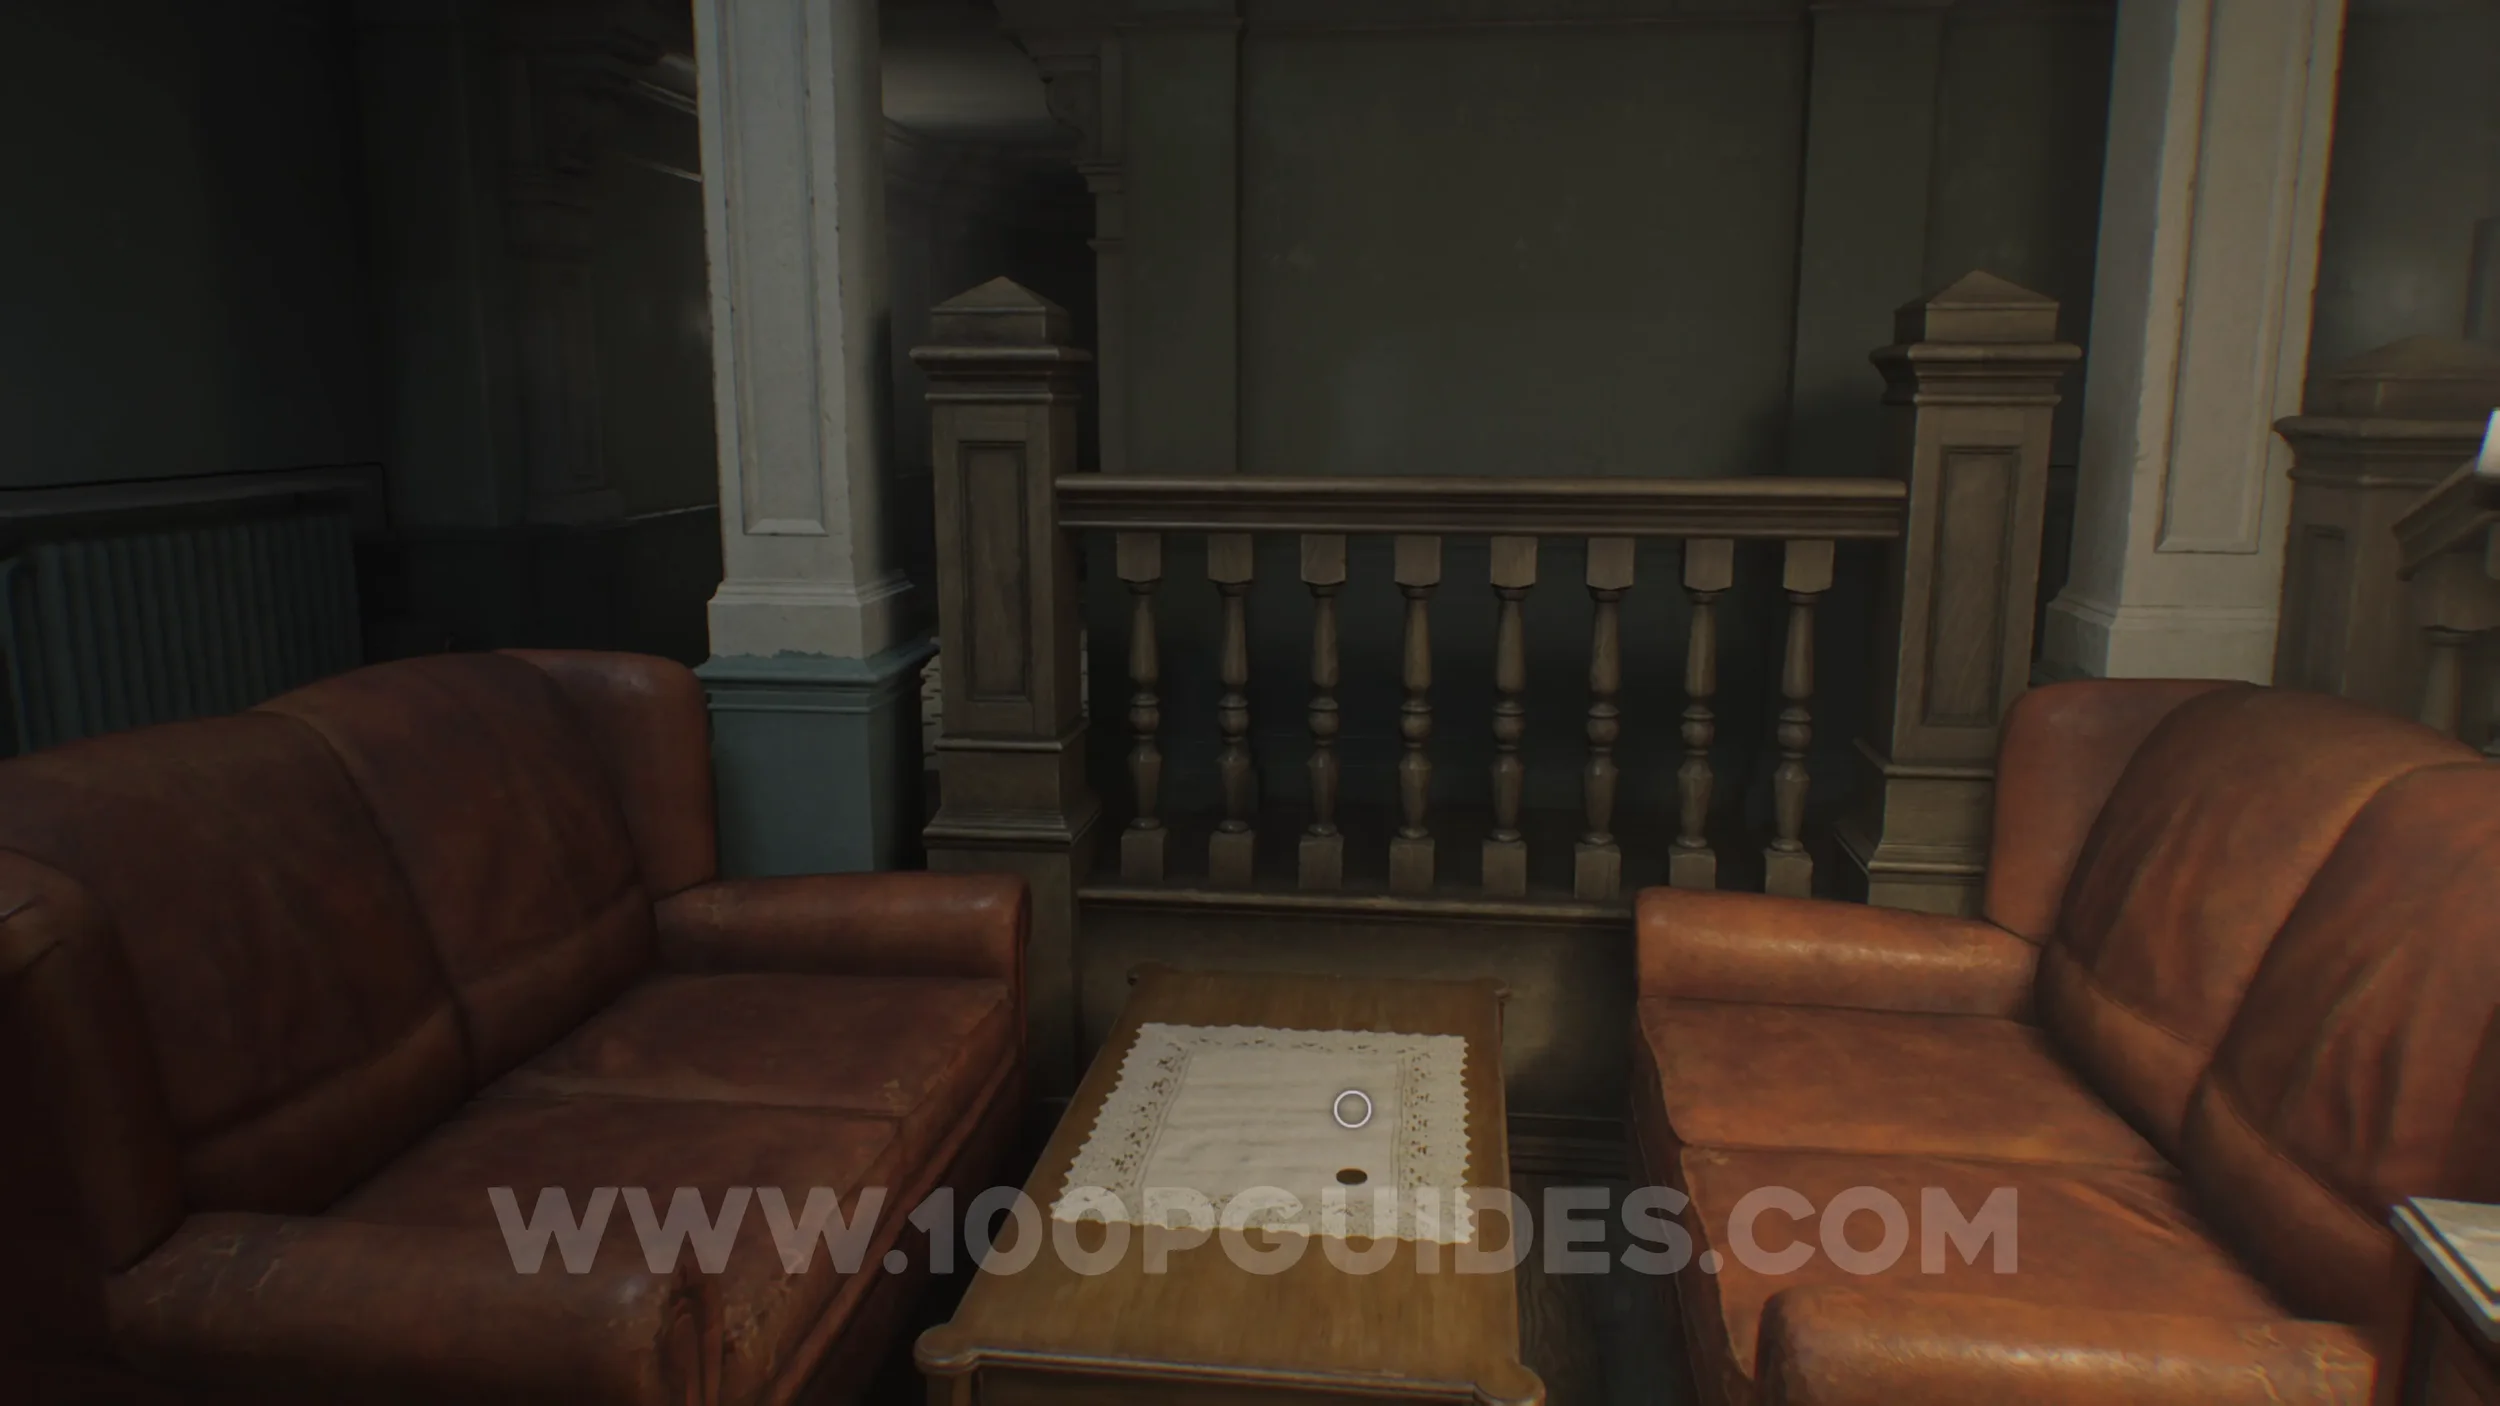
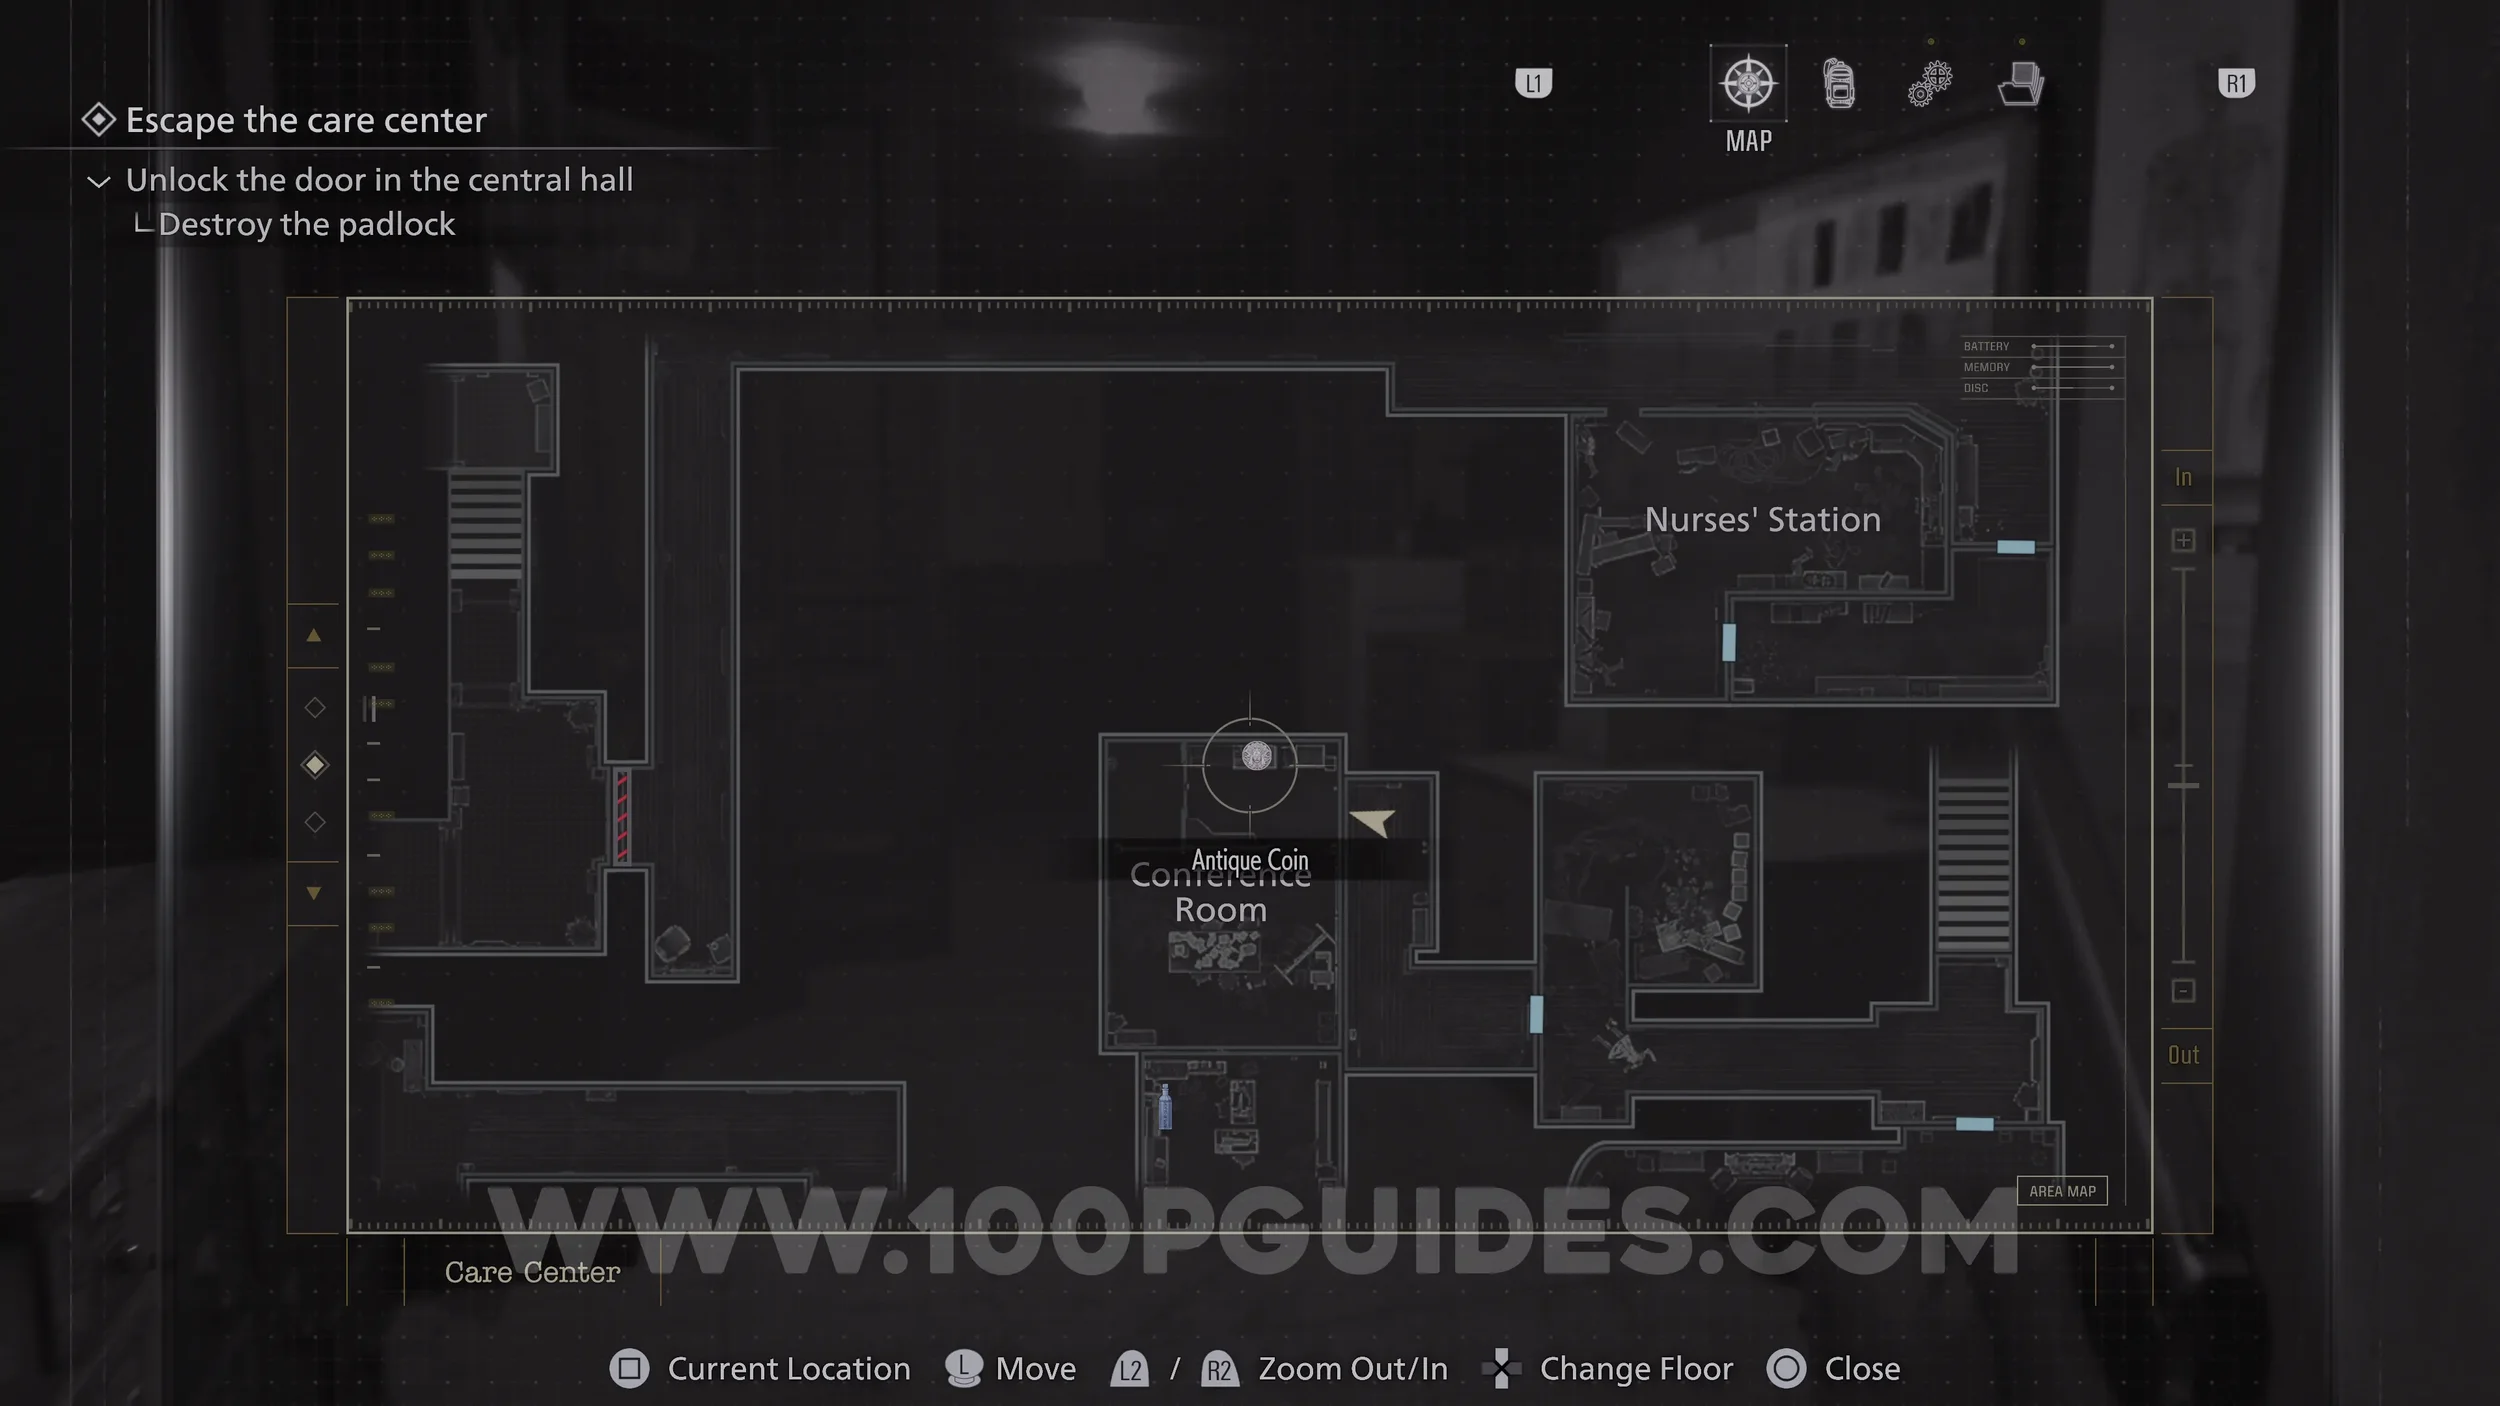
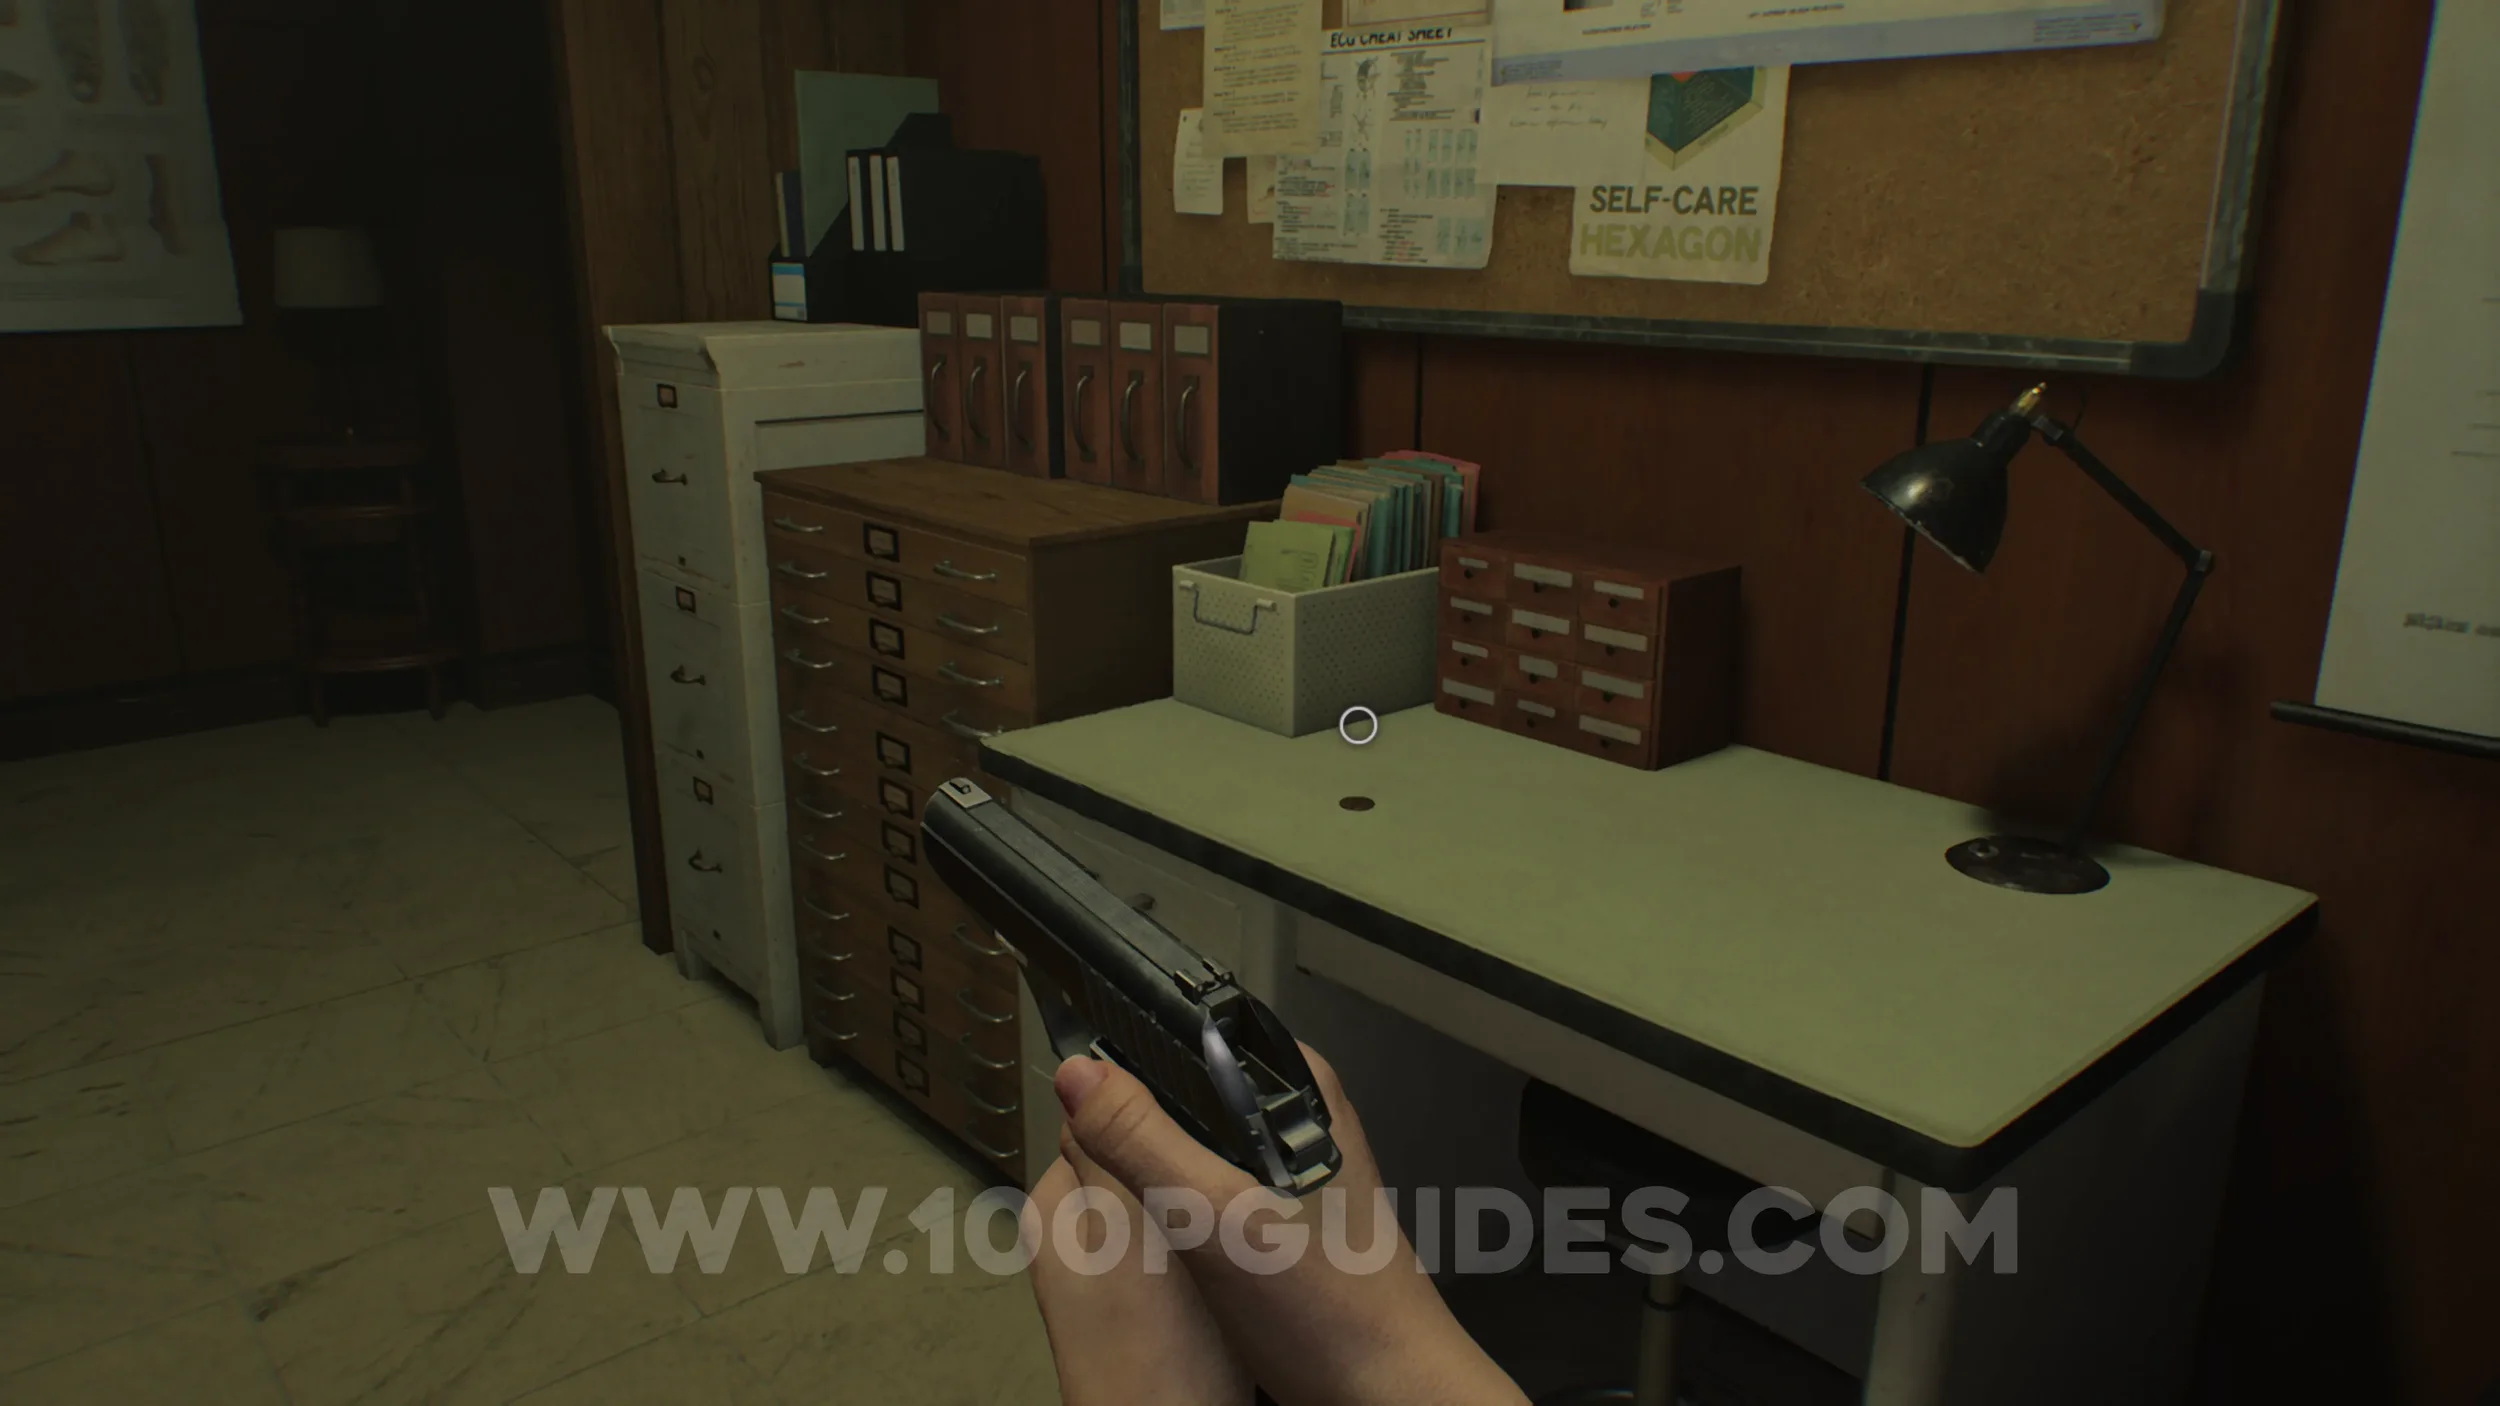
Antique Coin #1. On the desk in the same safe room.

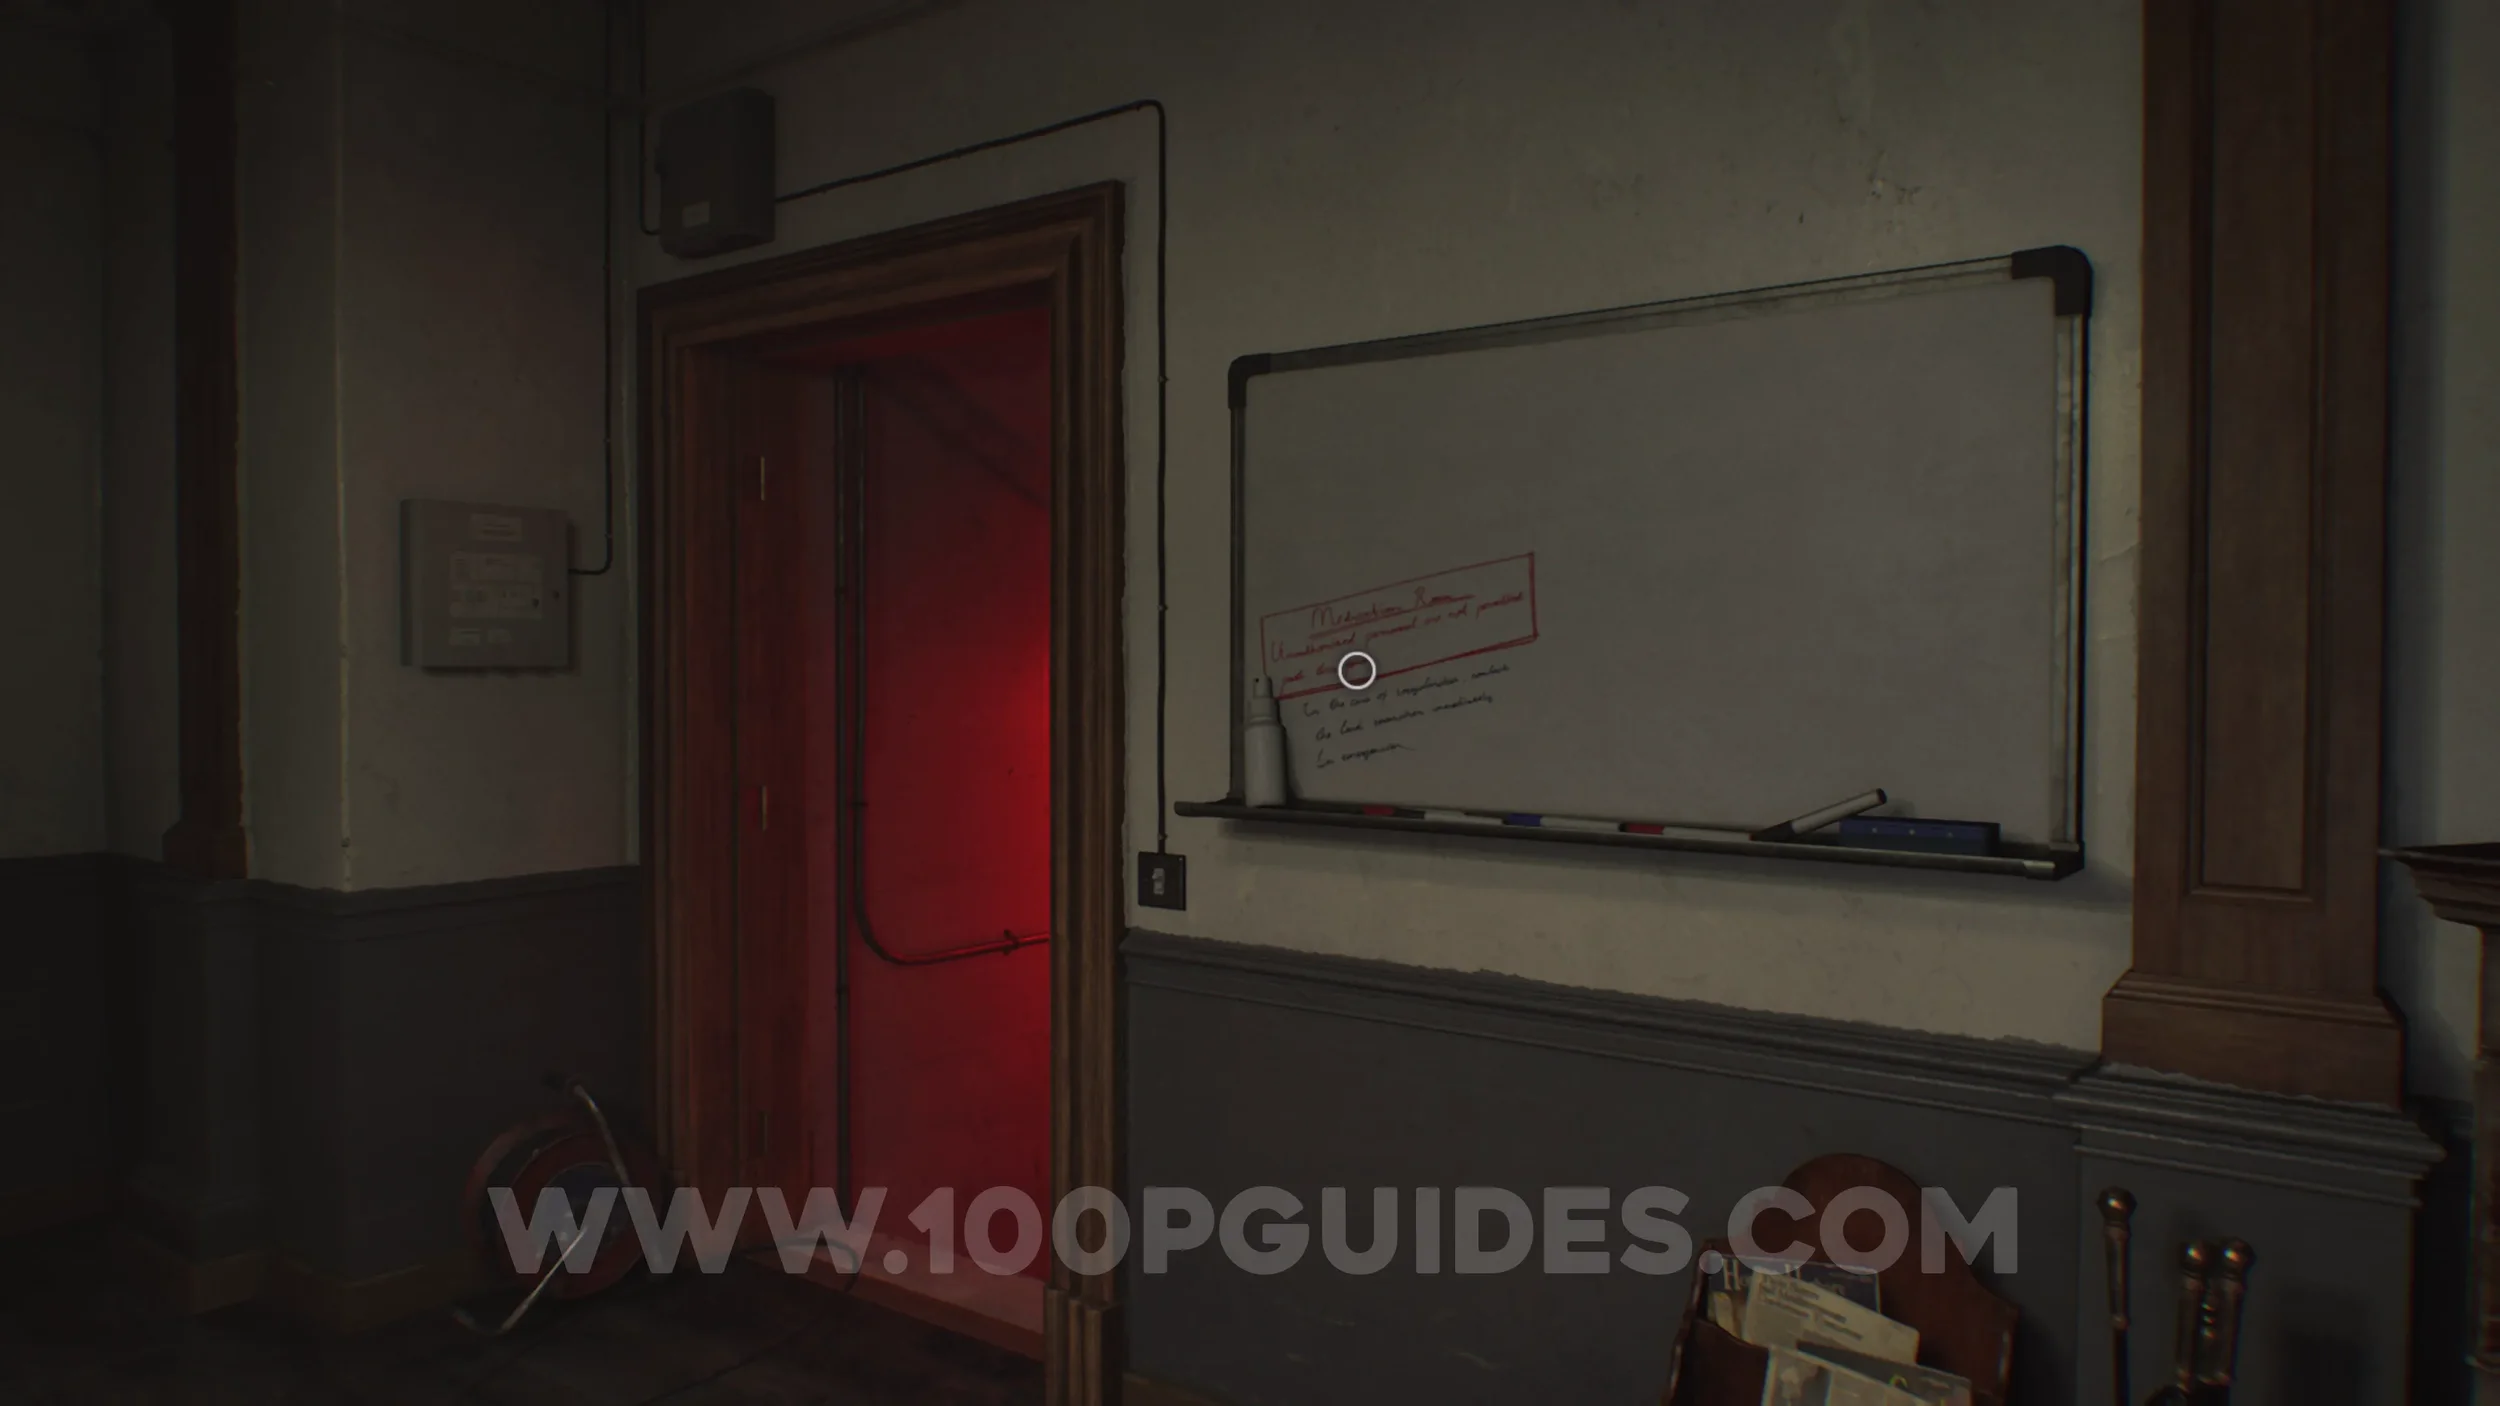
File #10 - Whiteboard Scrawl. On the whiteboard in the same safe room.
Trophy - Order Up! Once you reach the kitchen you will encounter The Chef. This large enemy will roam and follow you around the area. Defeat him to get the trophy. On the Casual difficulty, one bullet to the head from the Requiem should be enough.

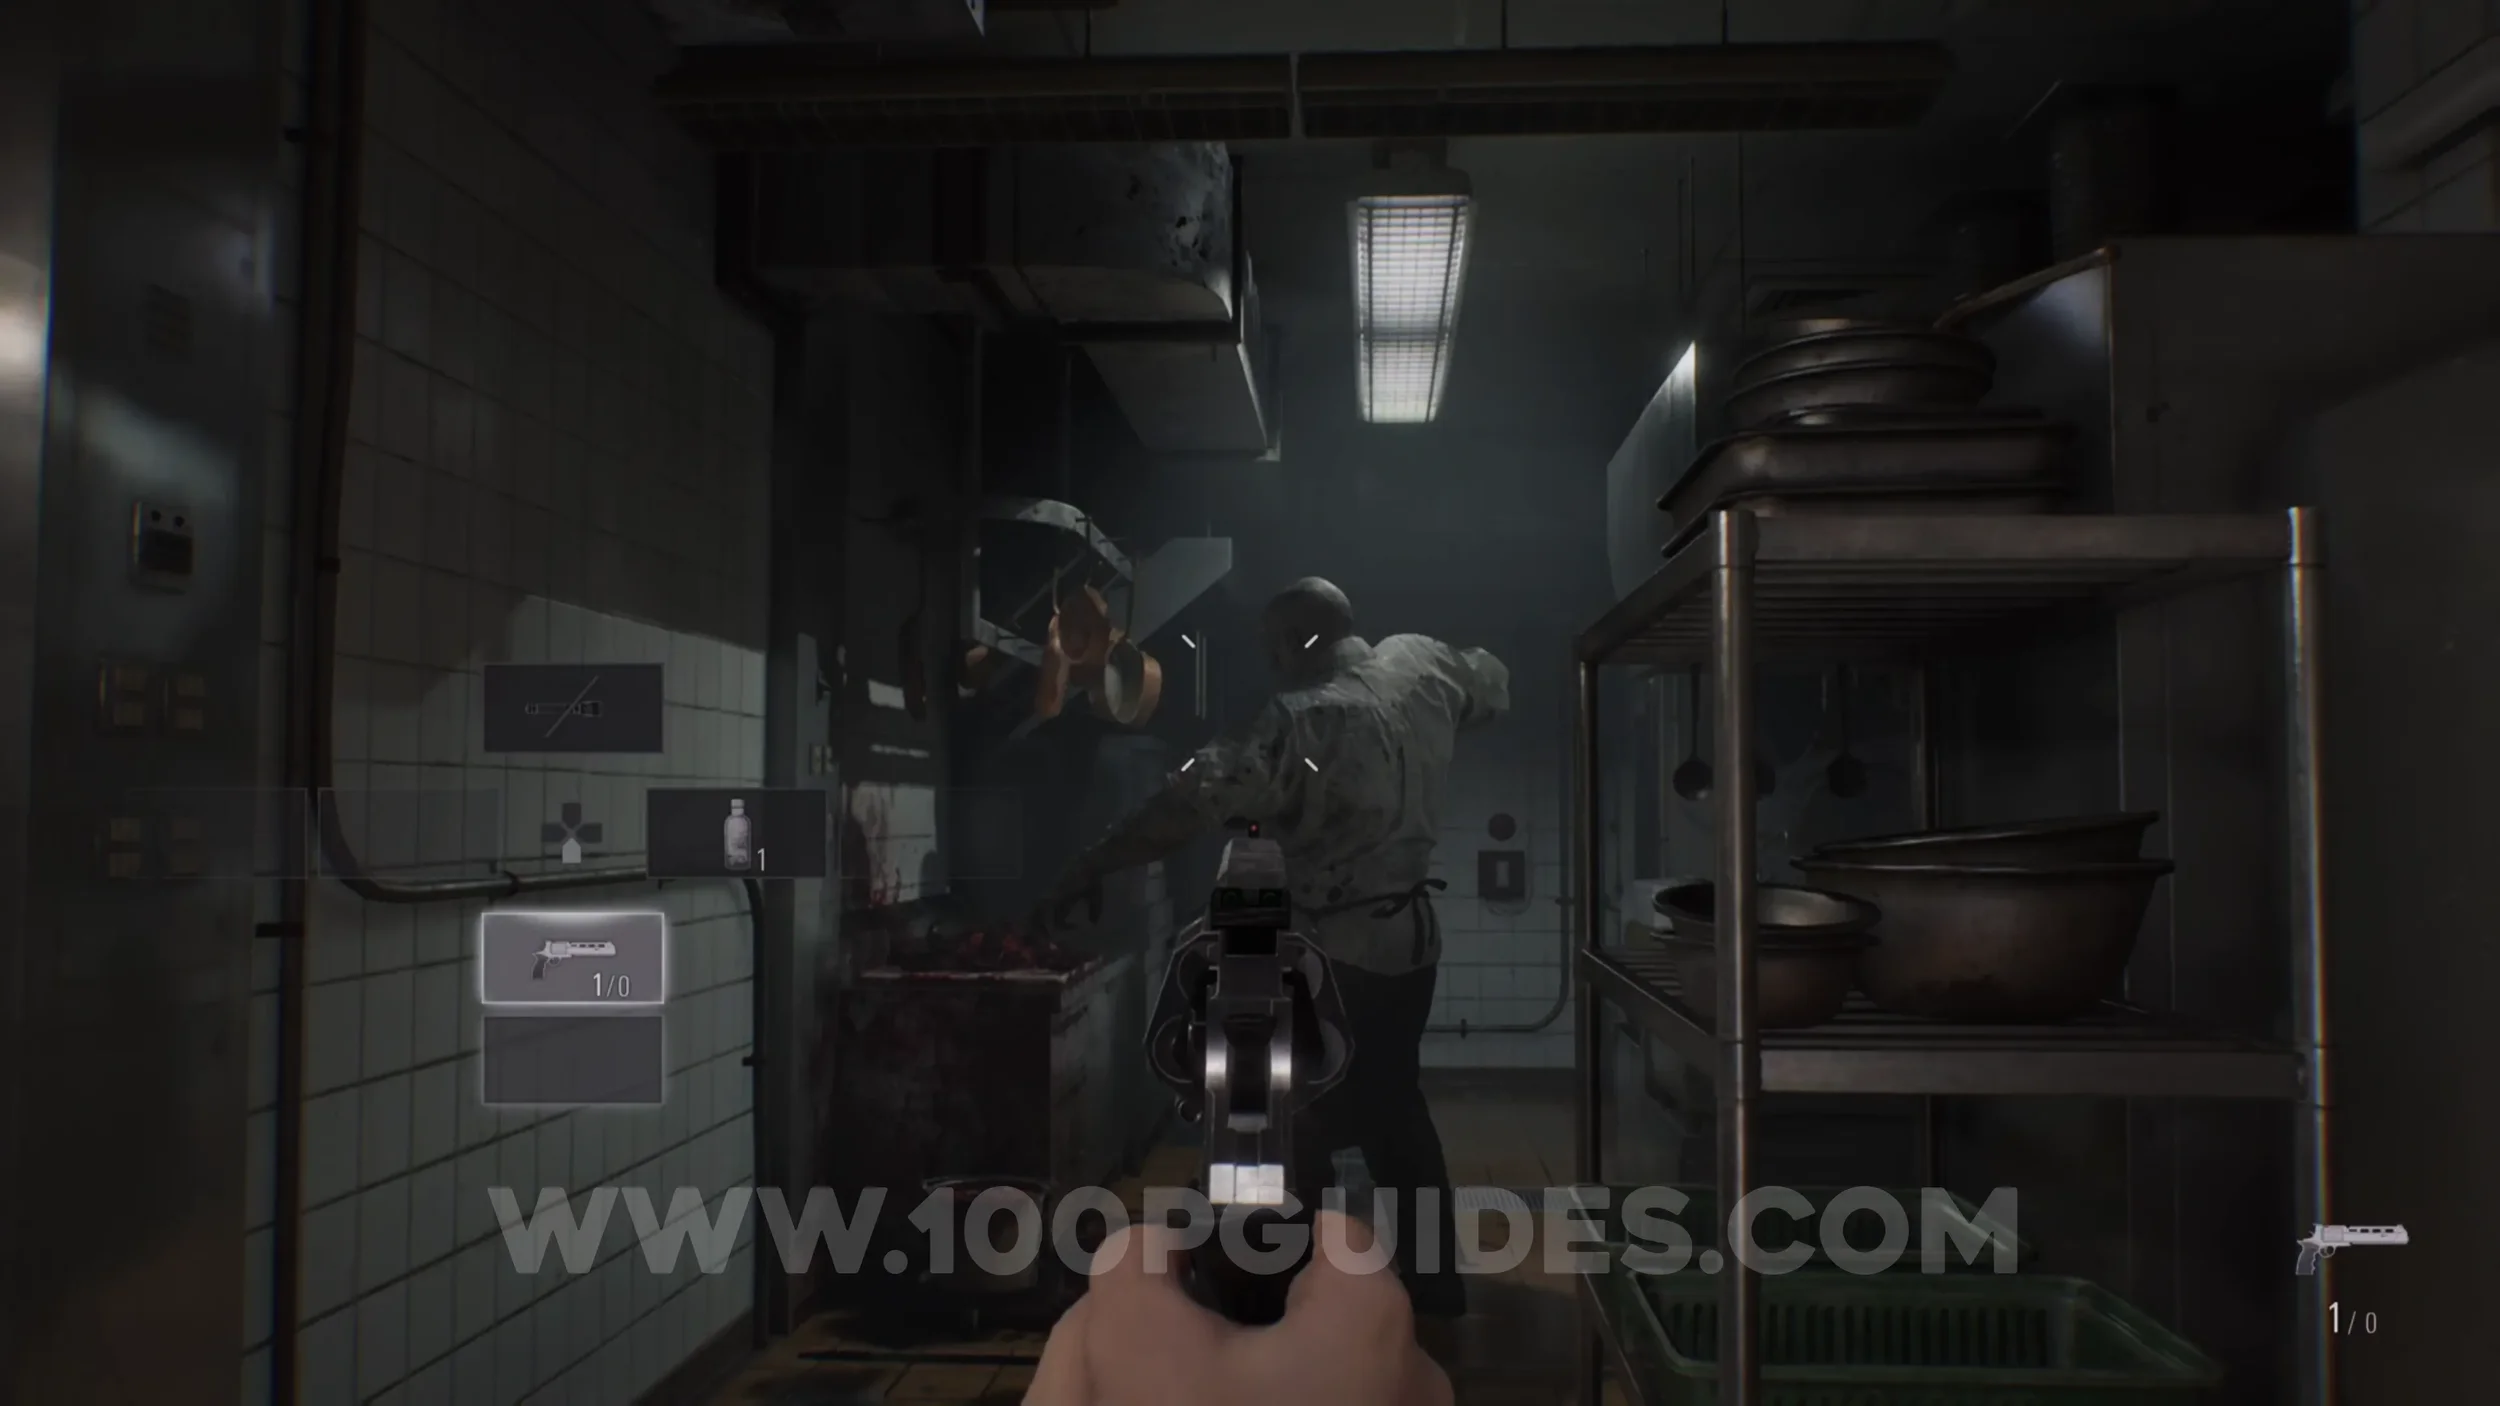
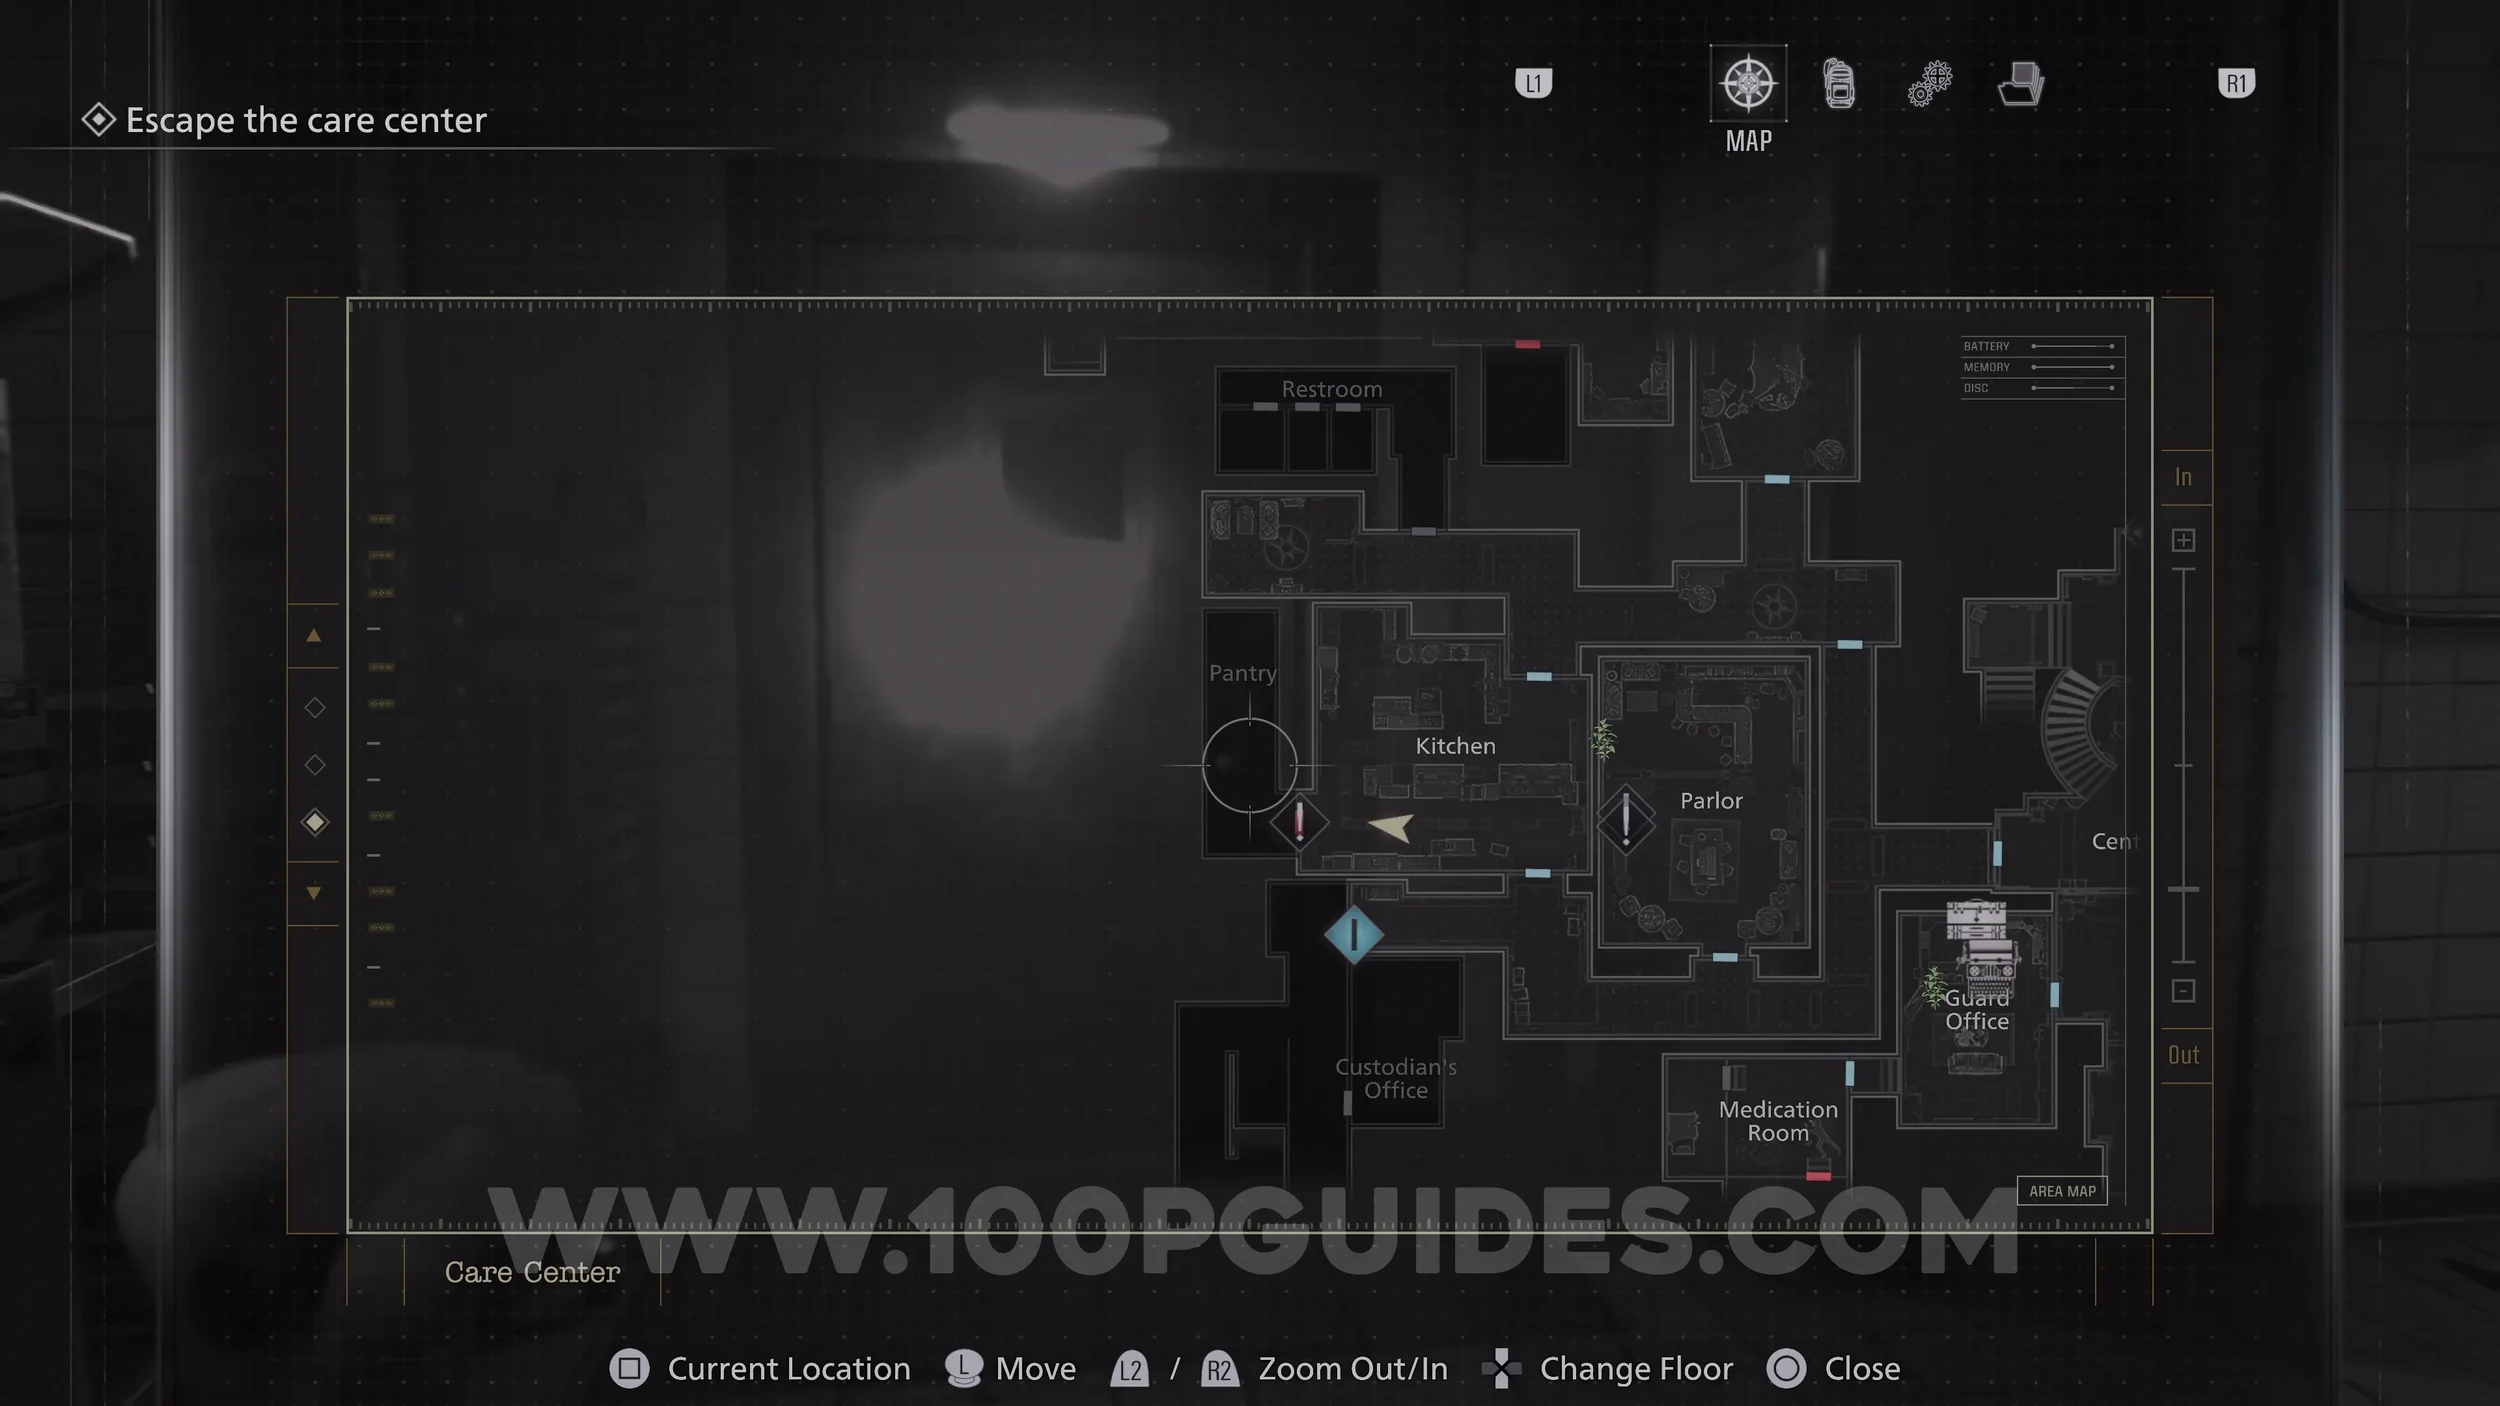
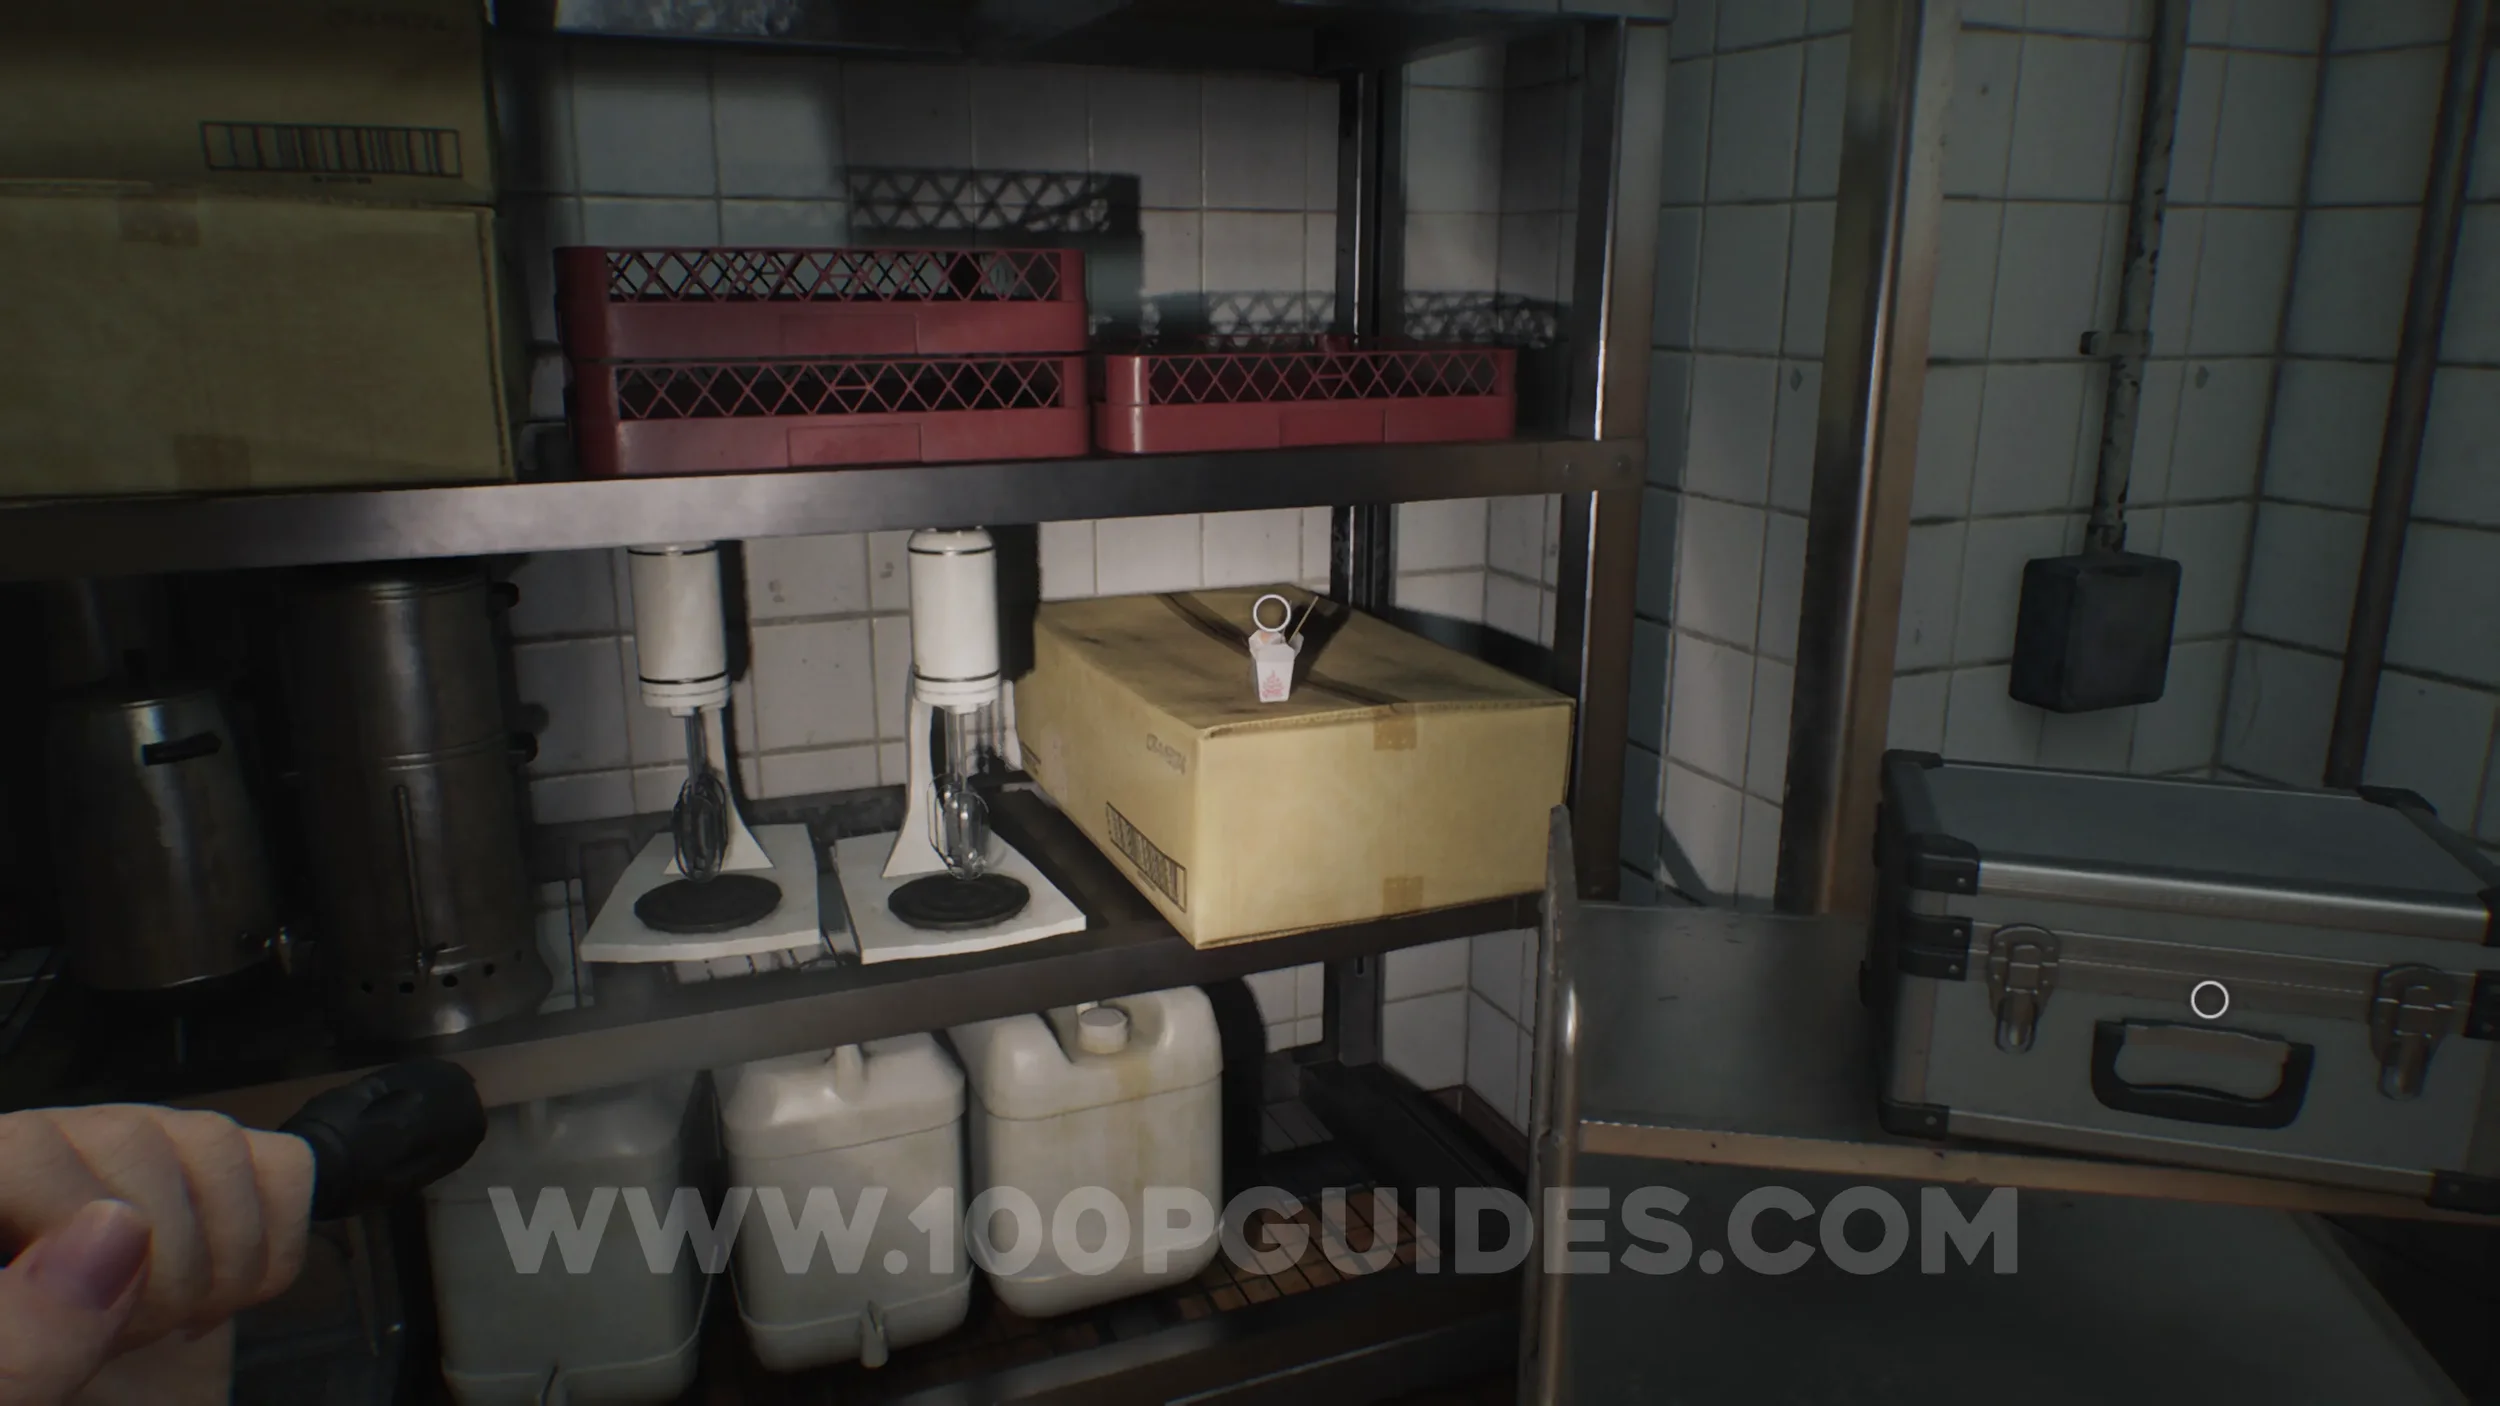
Charm #1 - Stakeout Takeout Charm. Once you defeat the Chef, he will drop the Pantry Key. Use it to open the Pantry room in the Kitchen to find the charm inside.
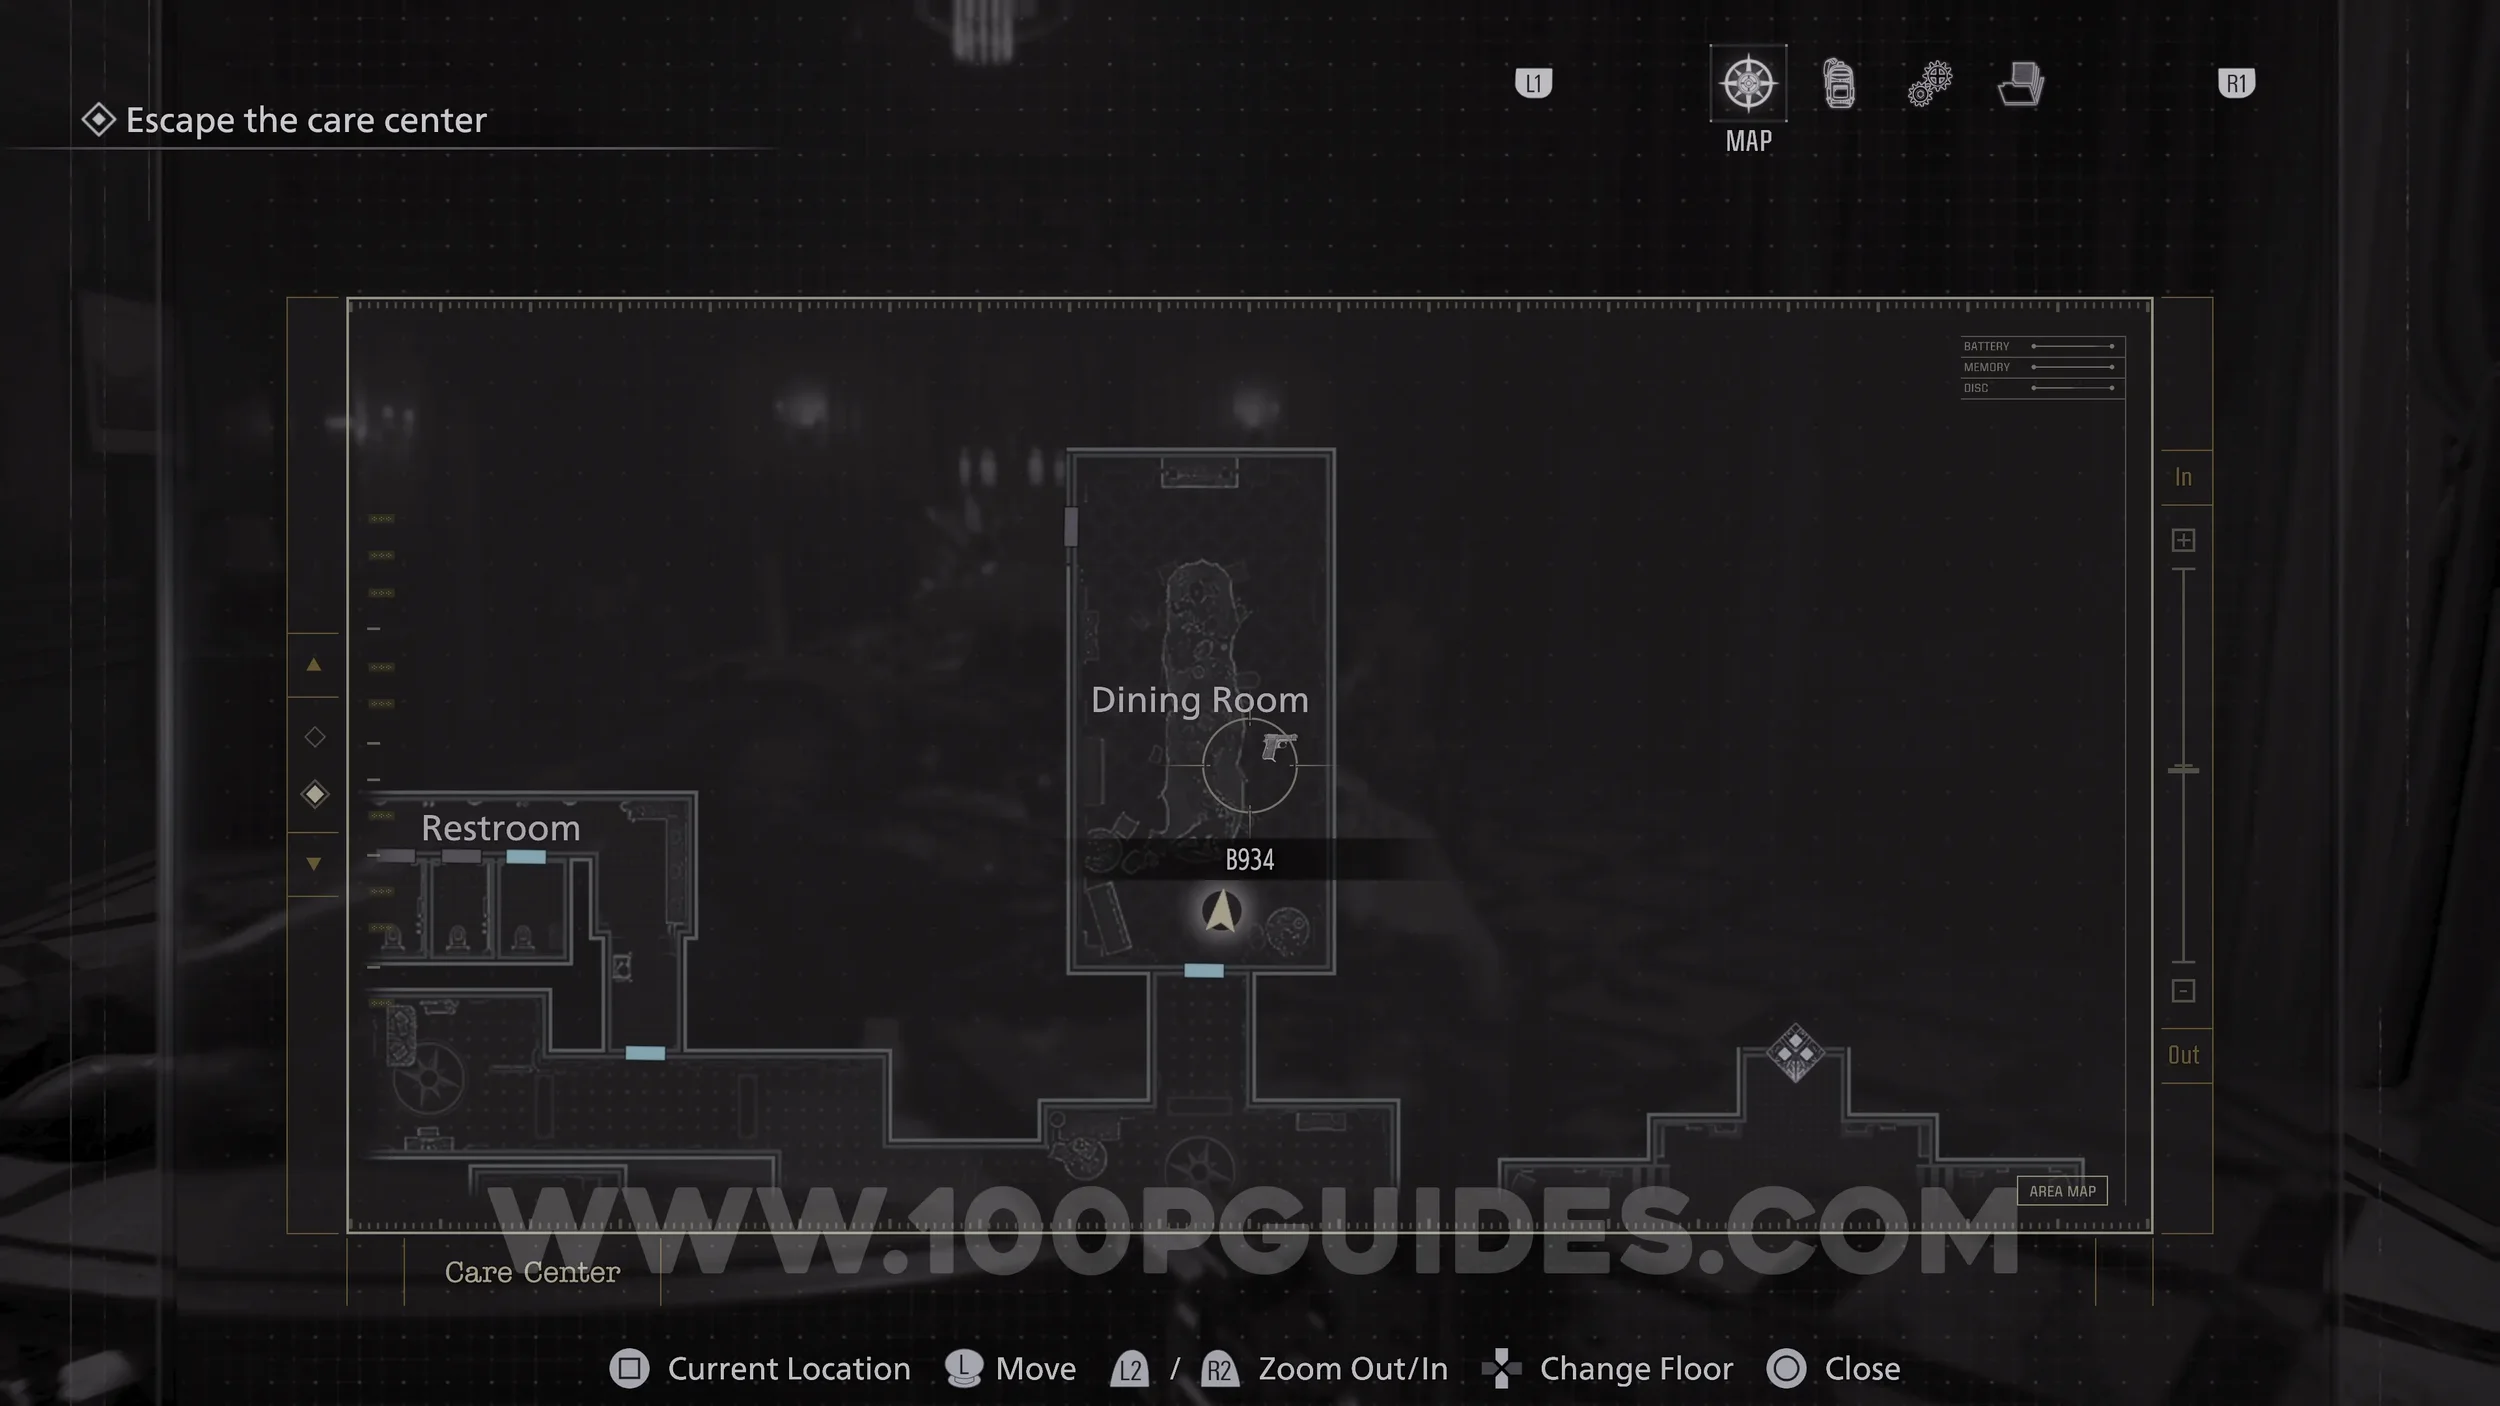
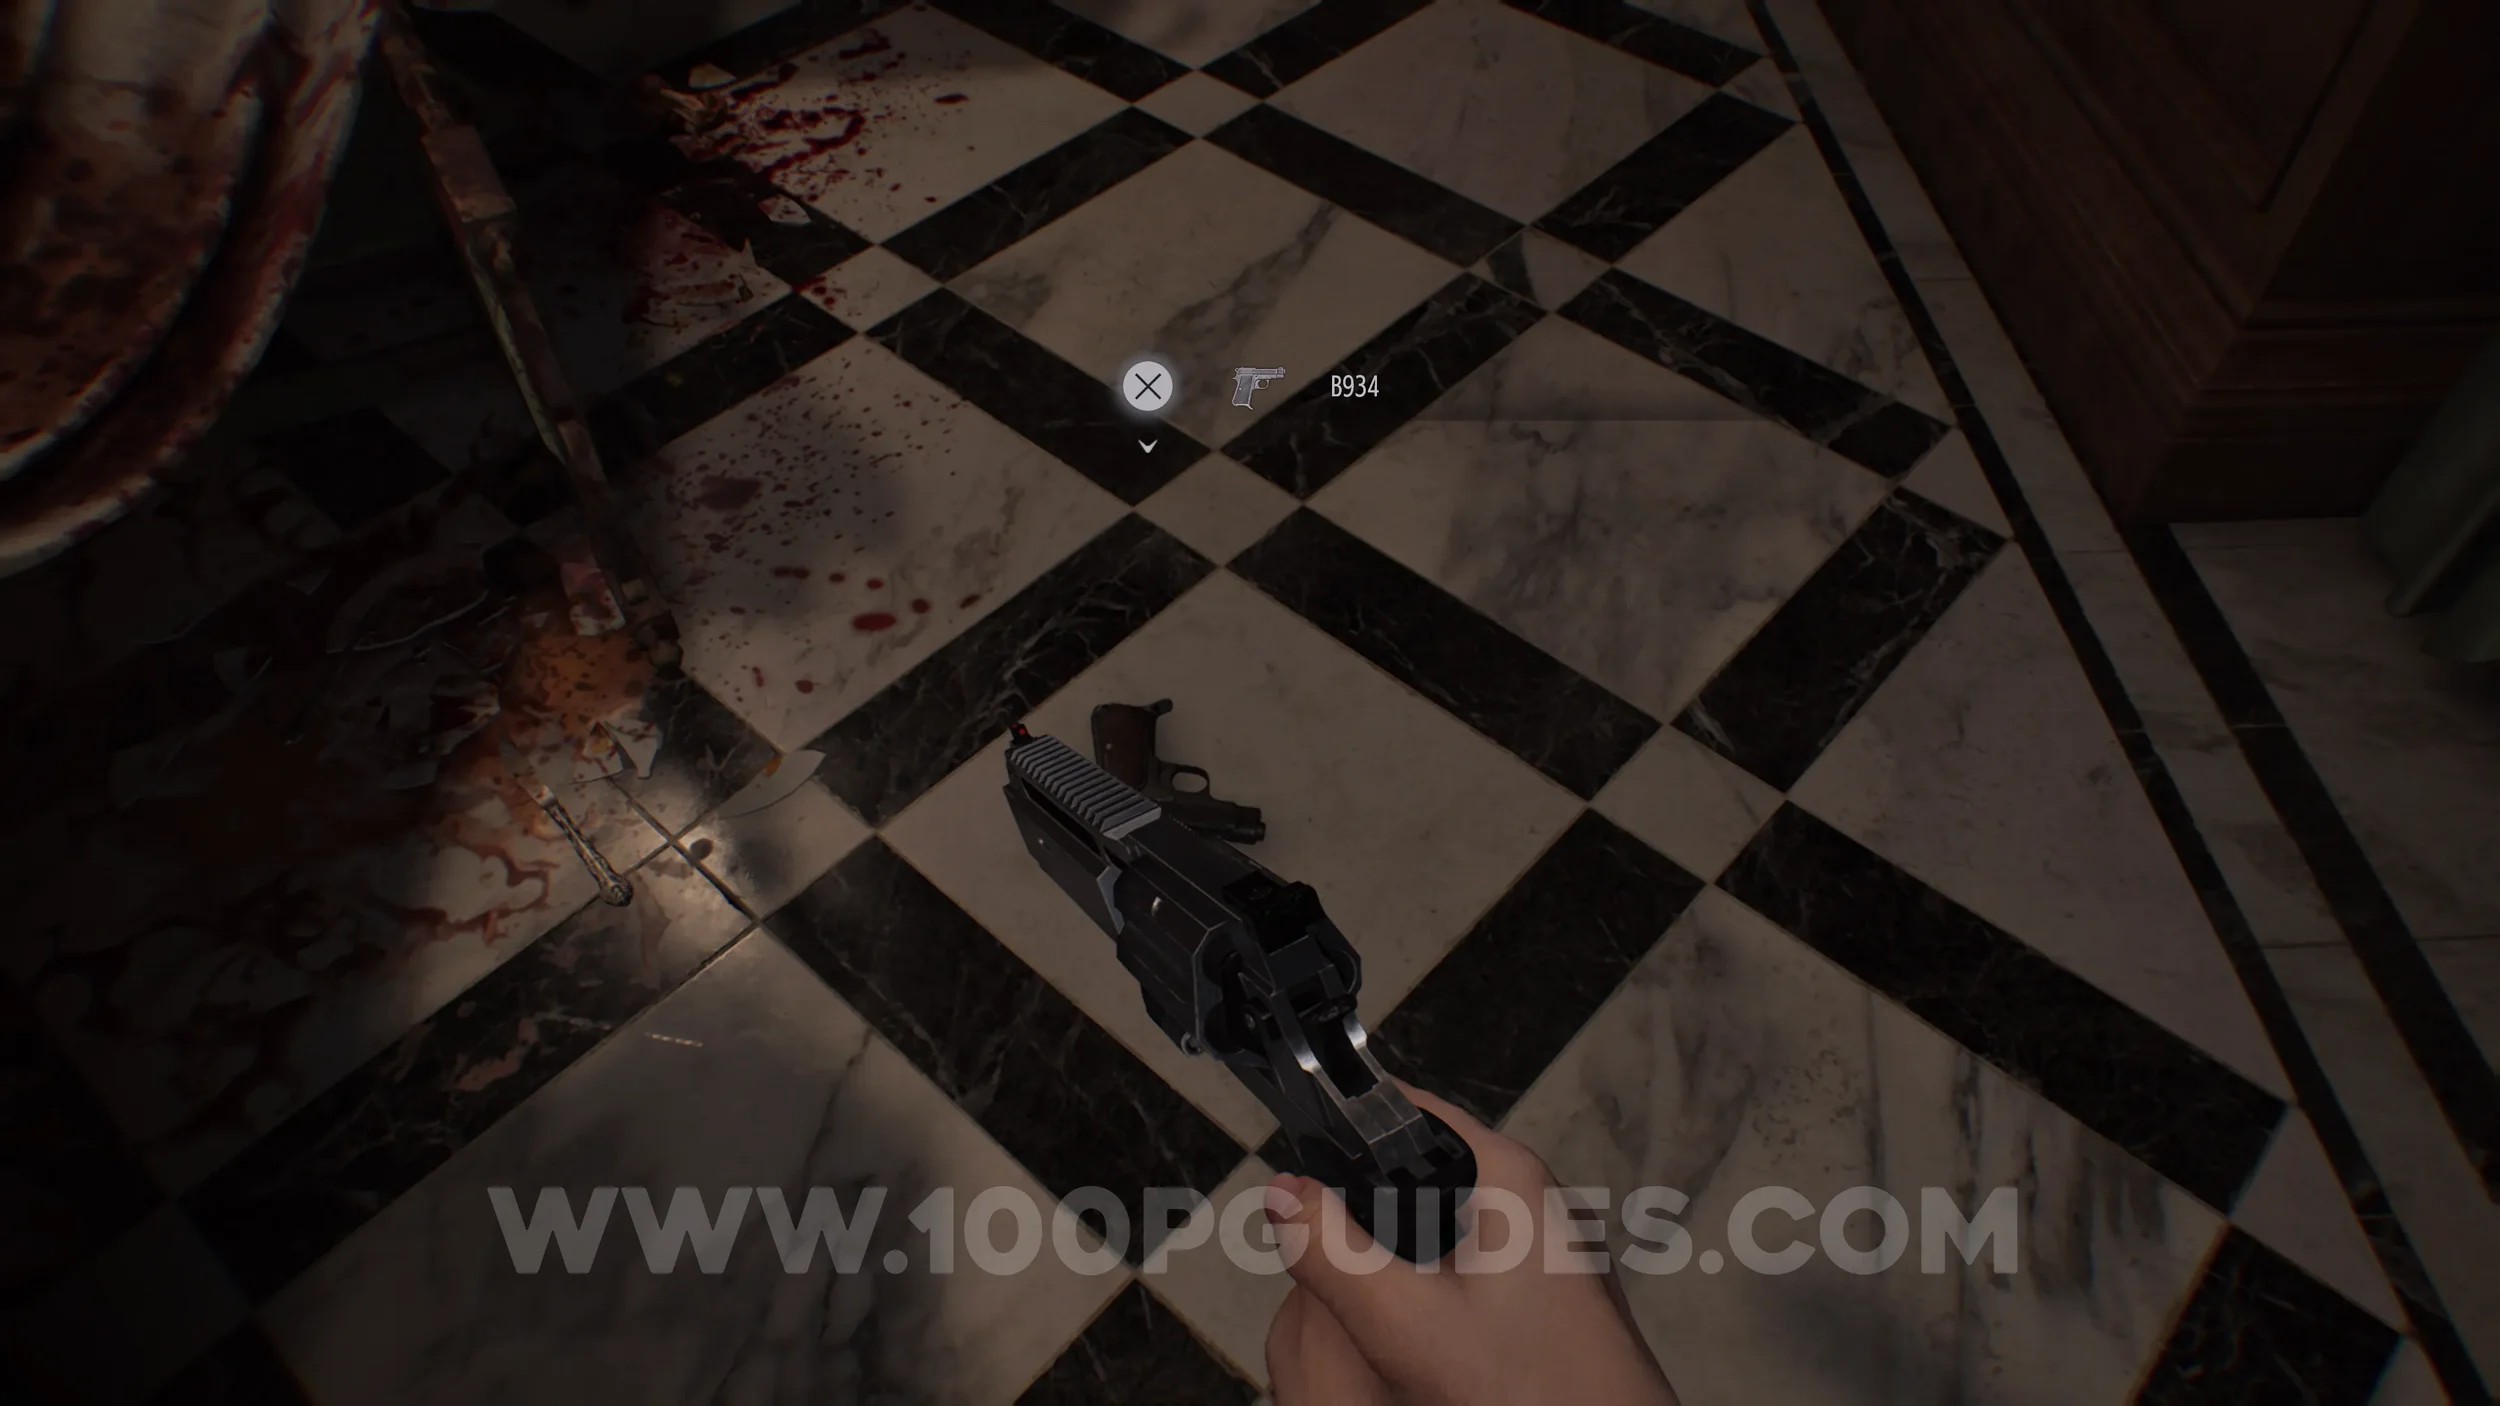
Weapon - B934. On the floor of the Dining Room.
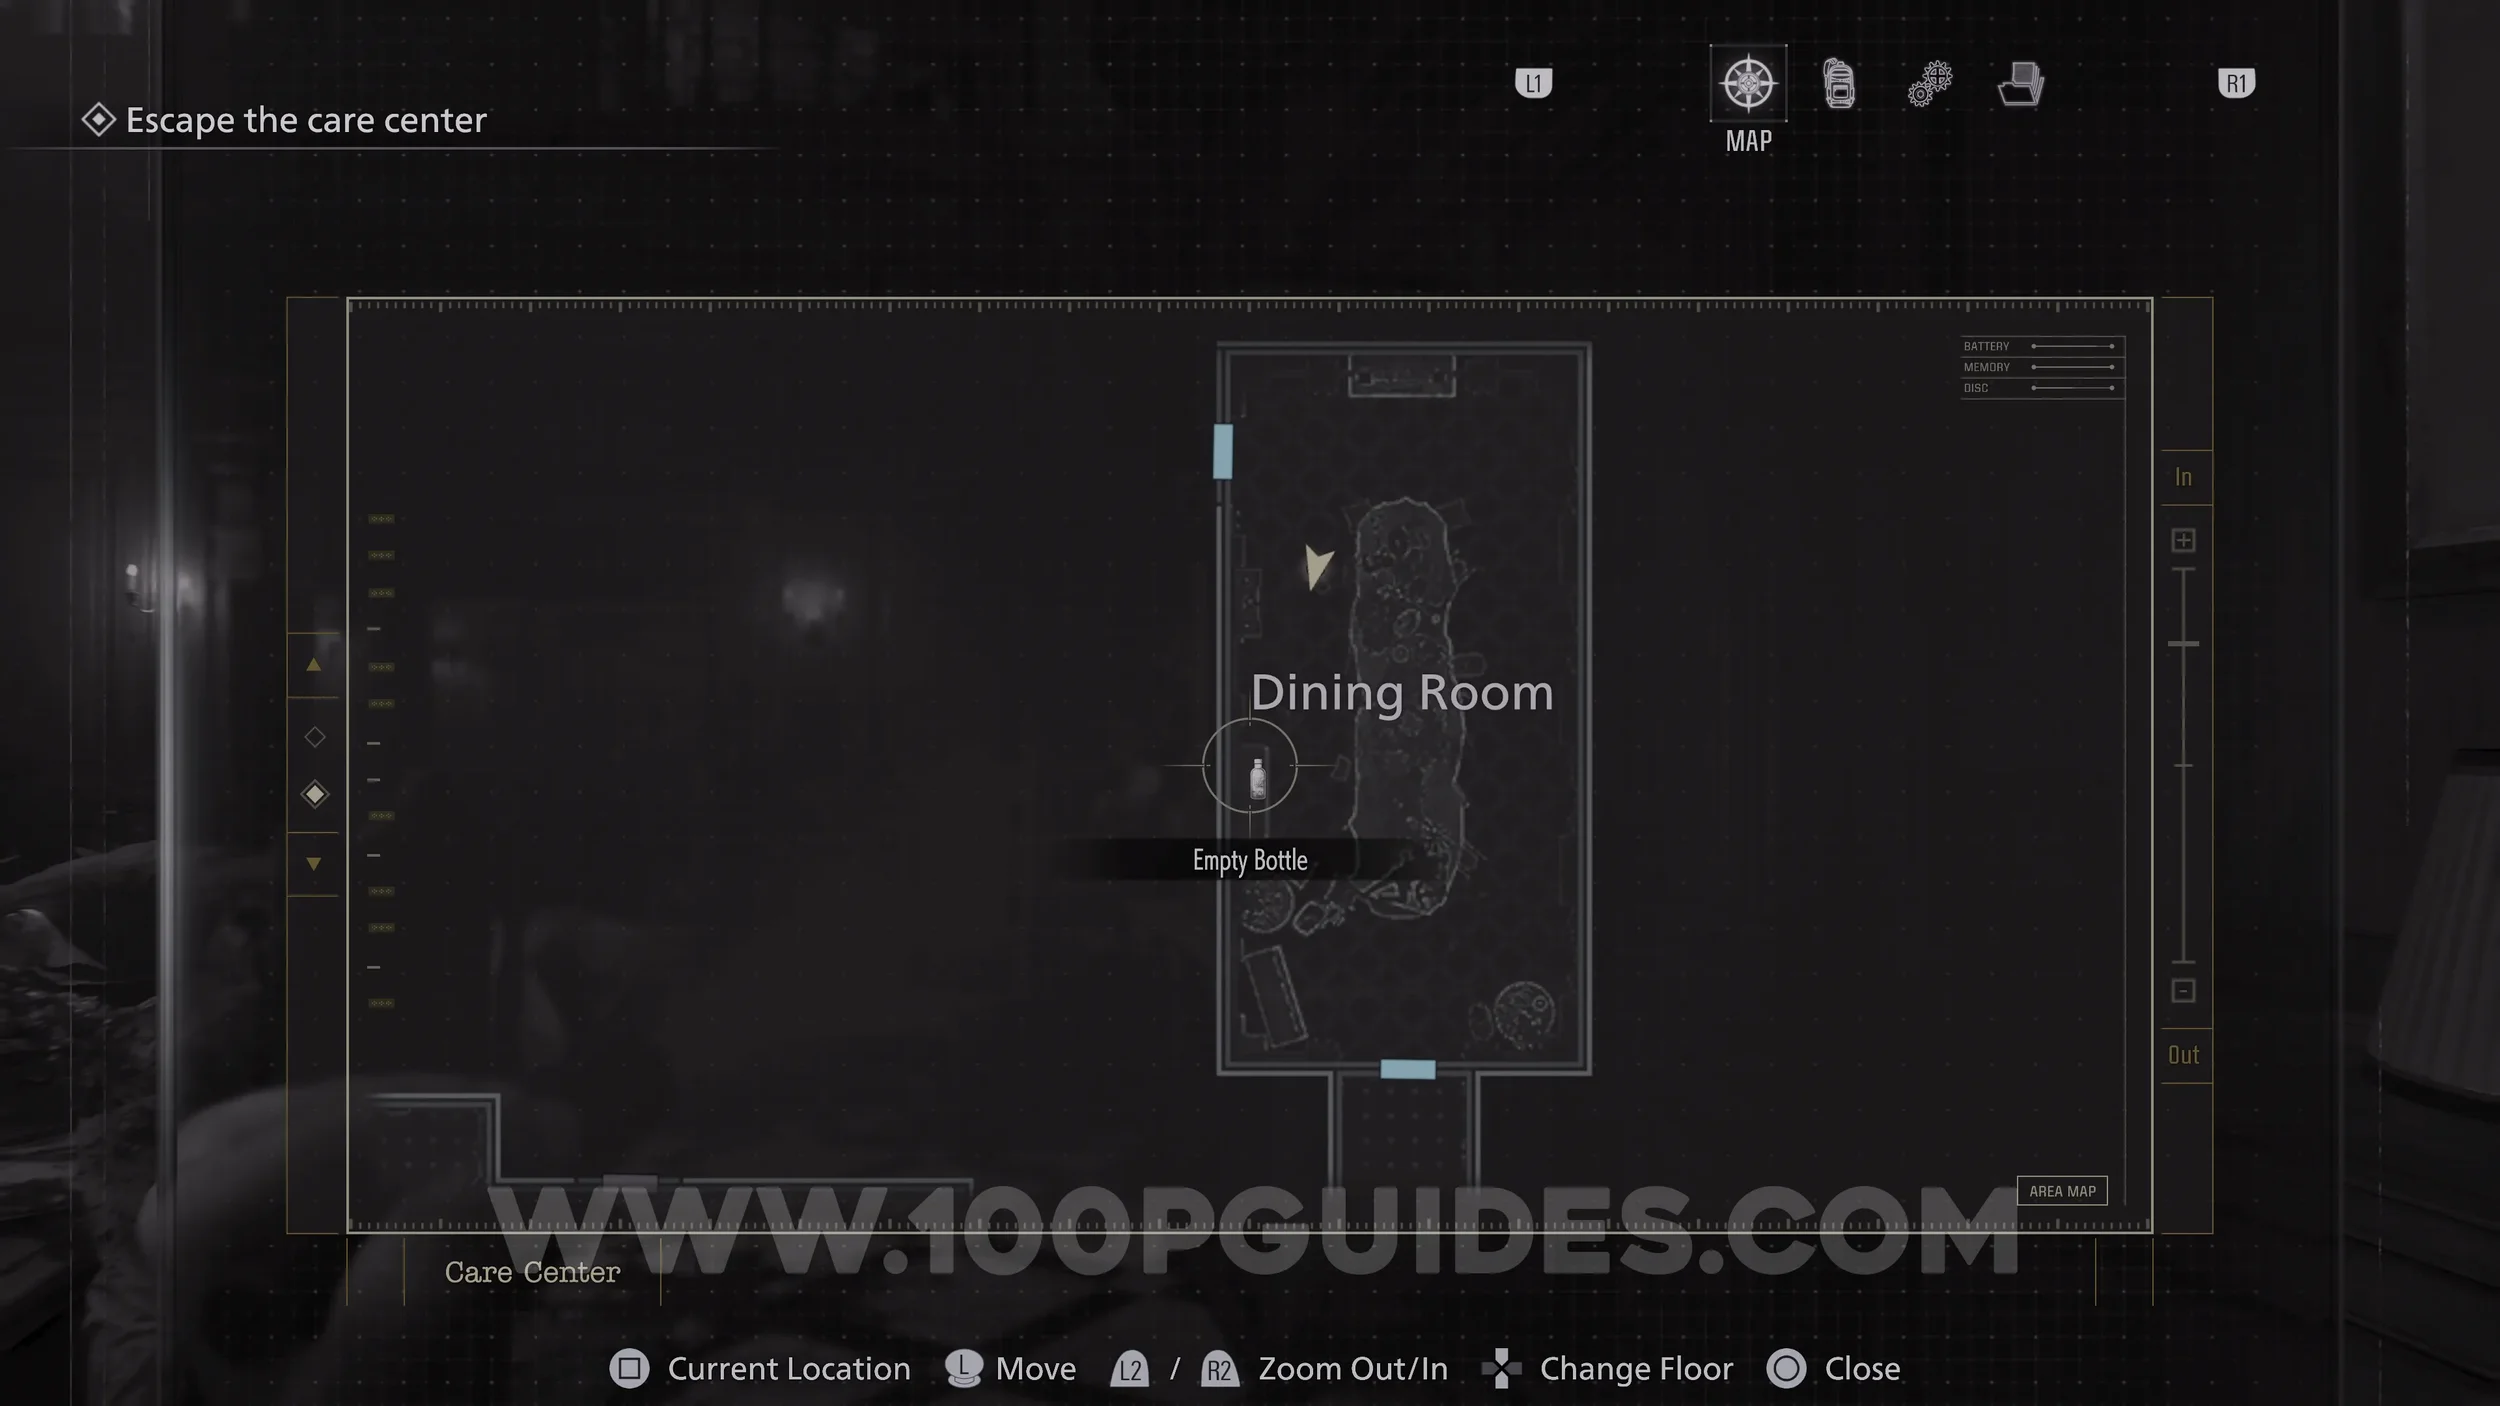
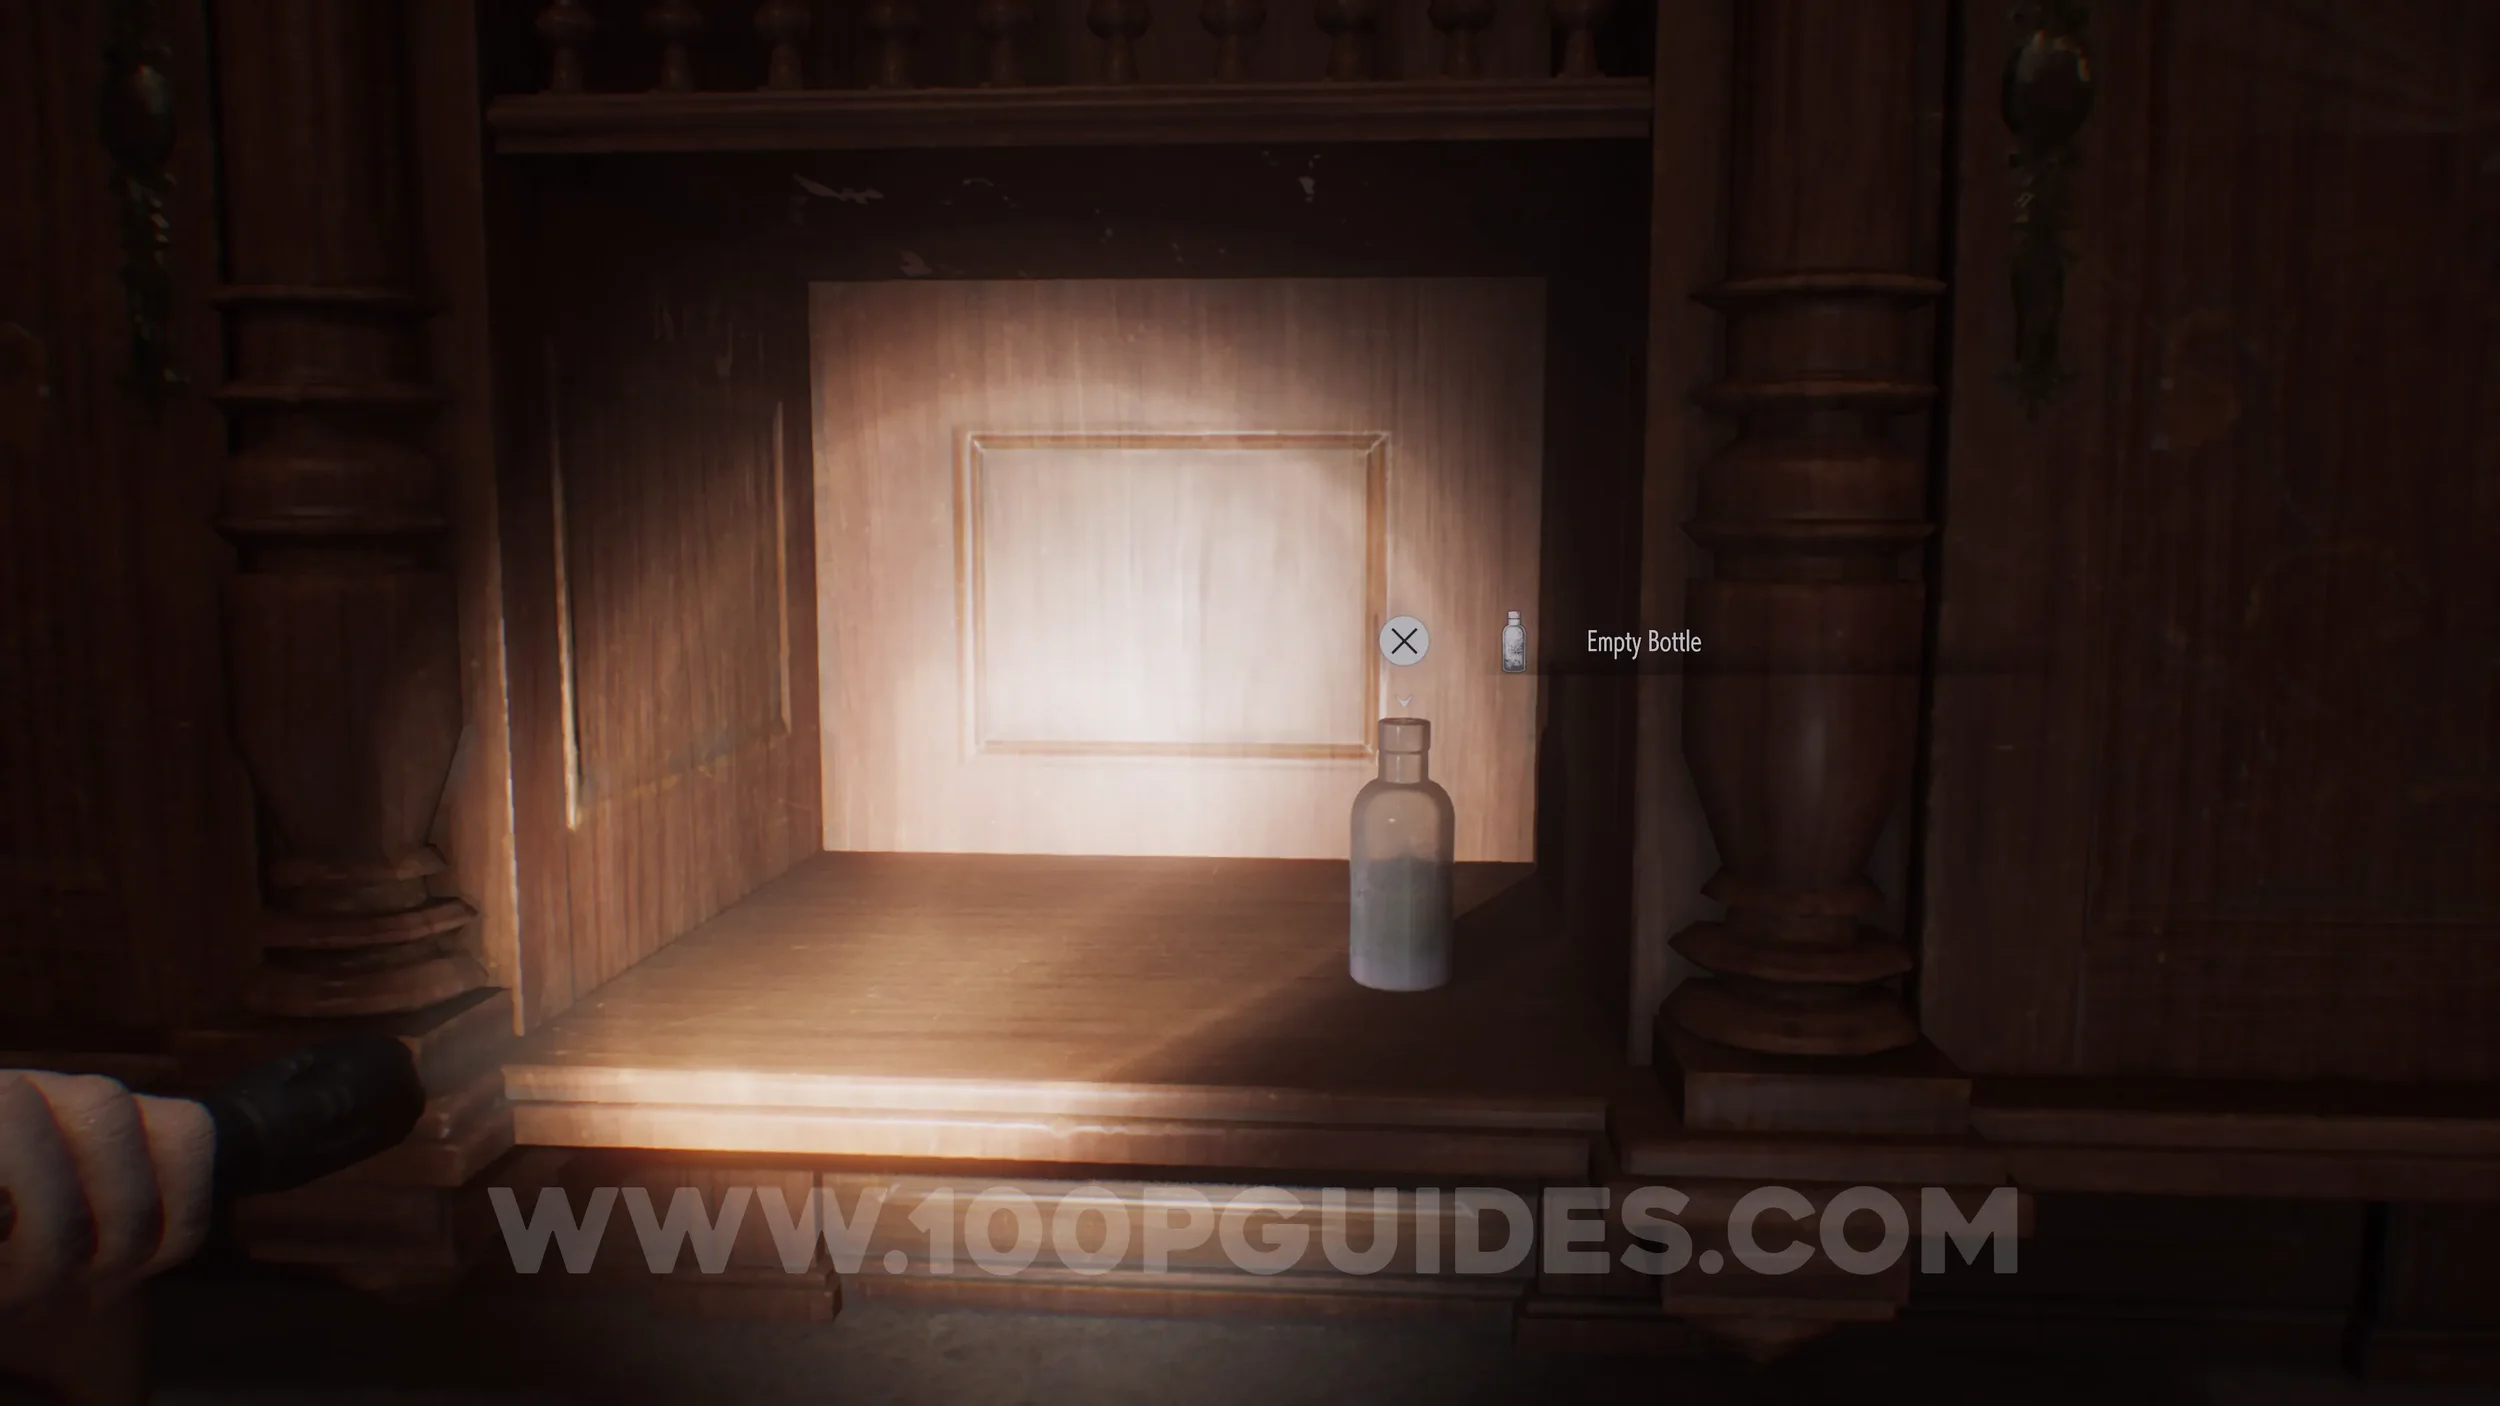
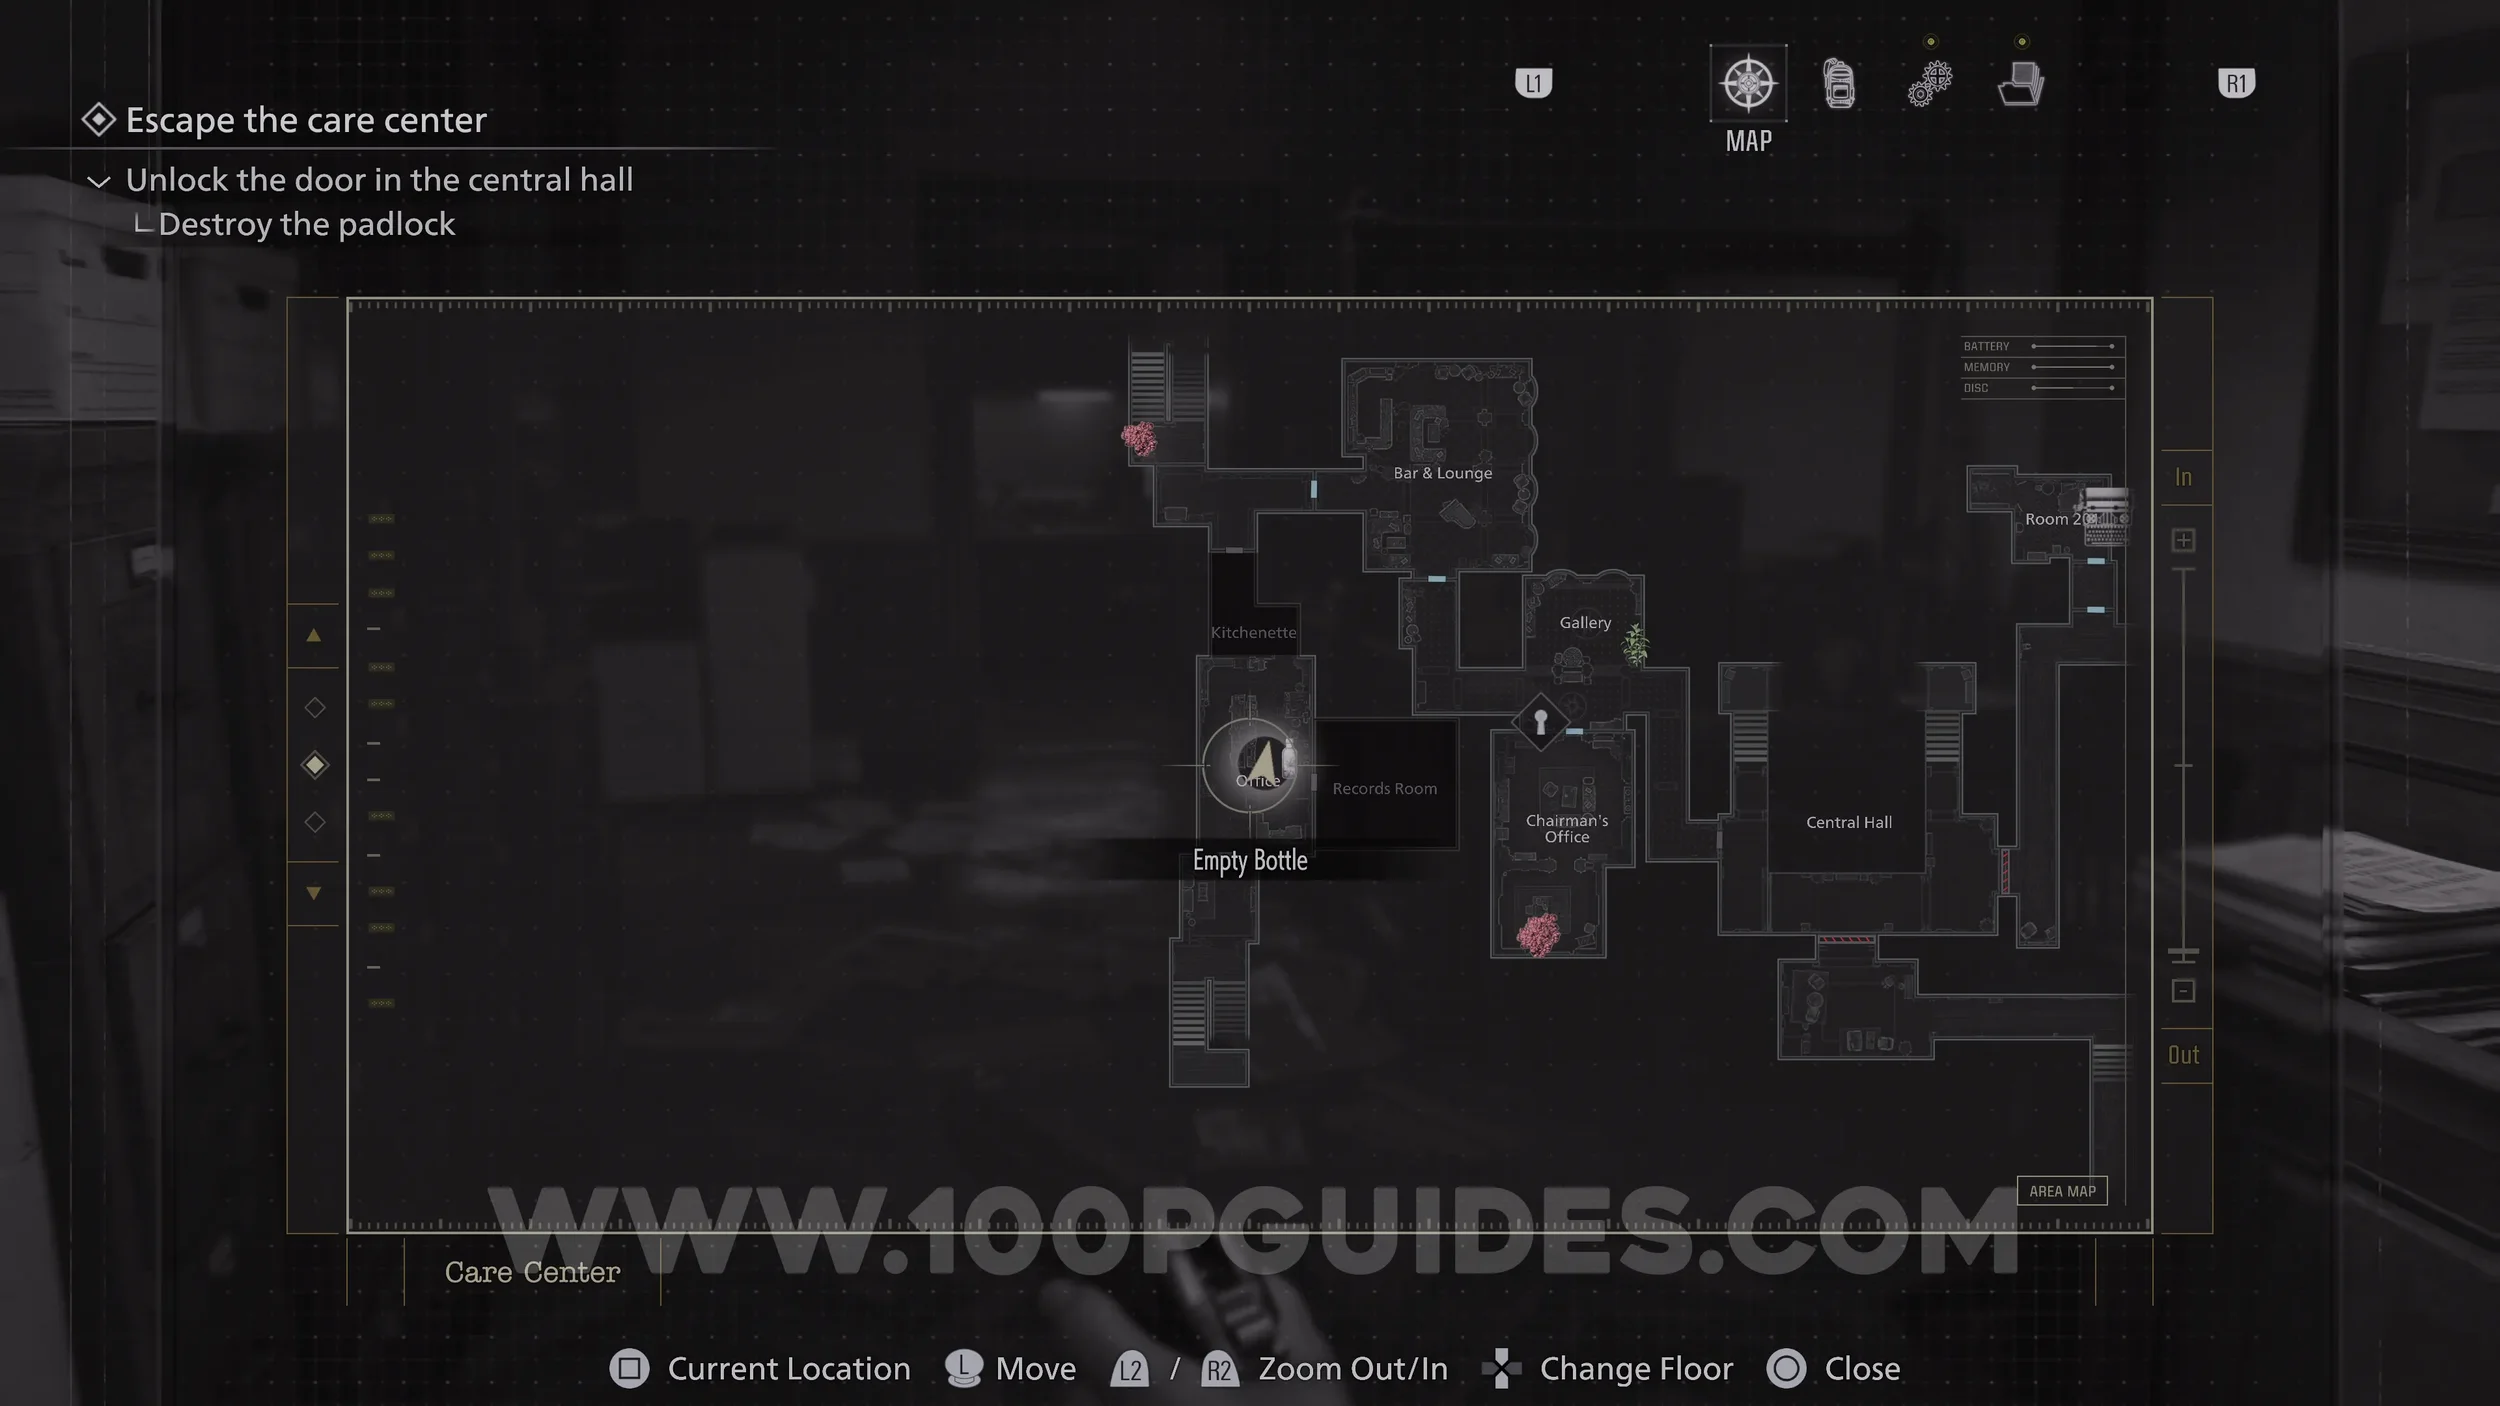
Trophy - Internal Dispute (Part 1). Pick up the Empty Bottle in the Dining Room and save it for later.
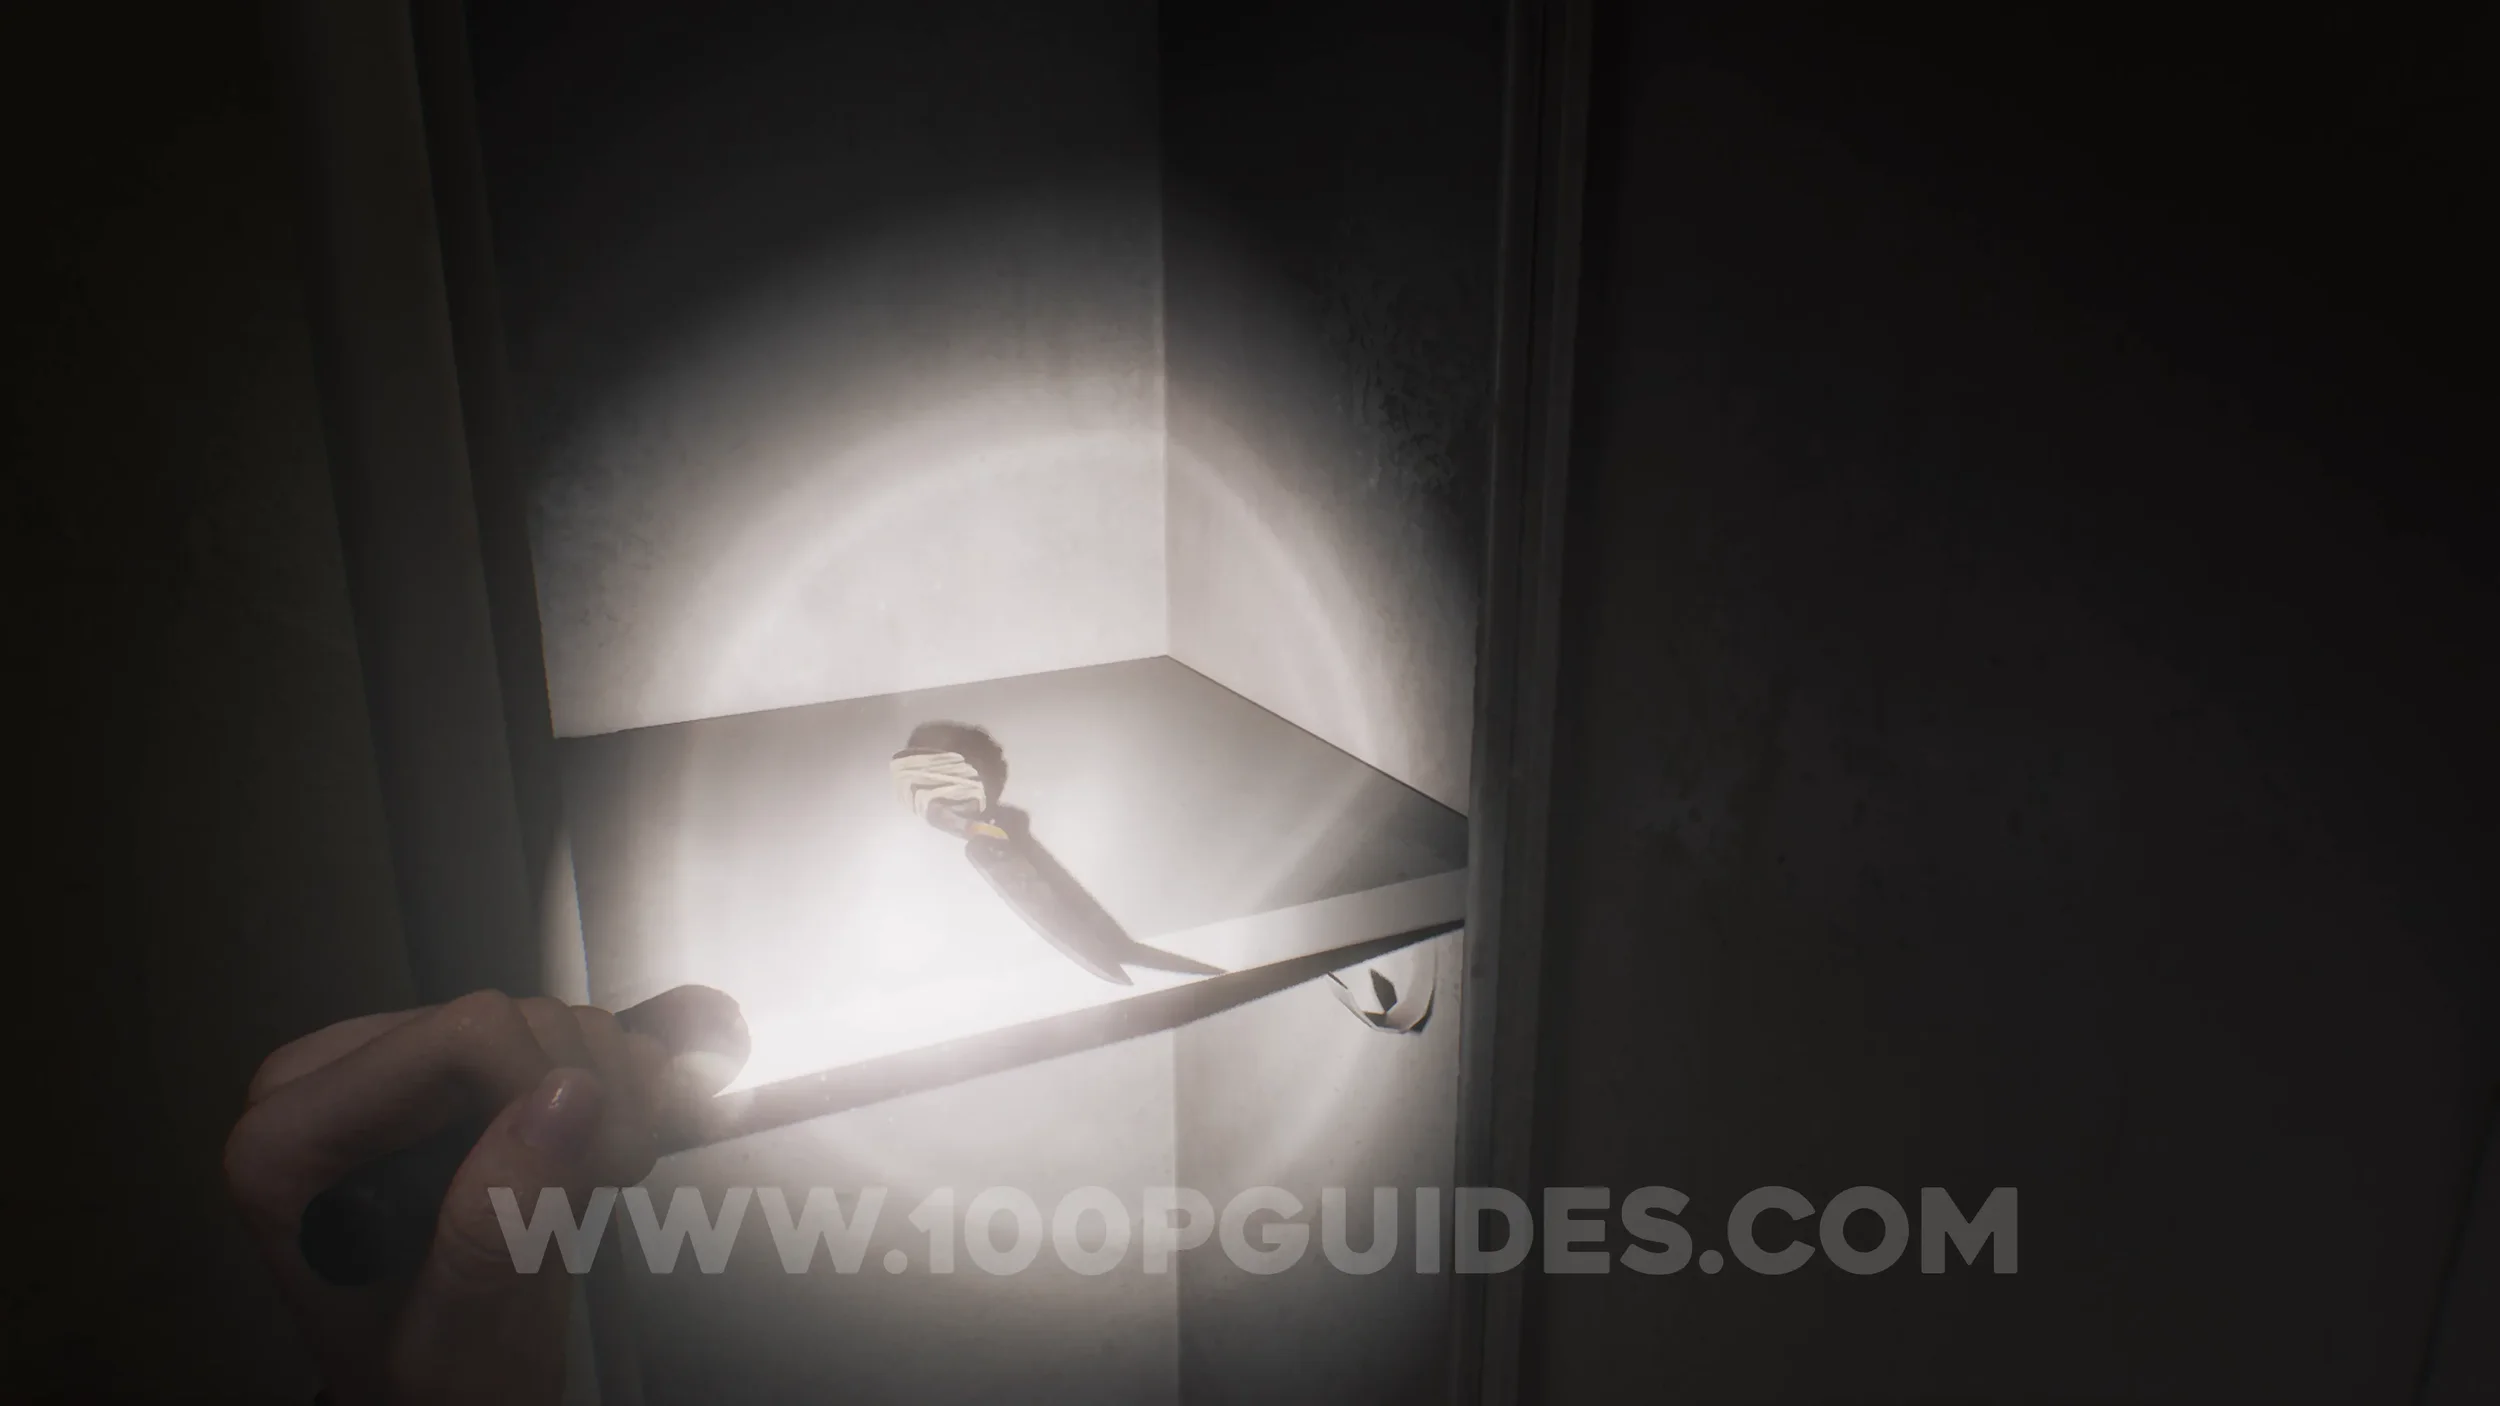
Weapon - Hunting Knife. Dropped by one of the zombies in the Dining Room.
Weapon - Makeshift Knife. Inside one of the lockers in the Filing room.

Antique Coin #2. In the corridor to the west of the Dining Room.

Map - West Wing Map. At the top of the stairs after the previous corridor.

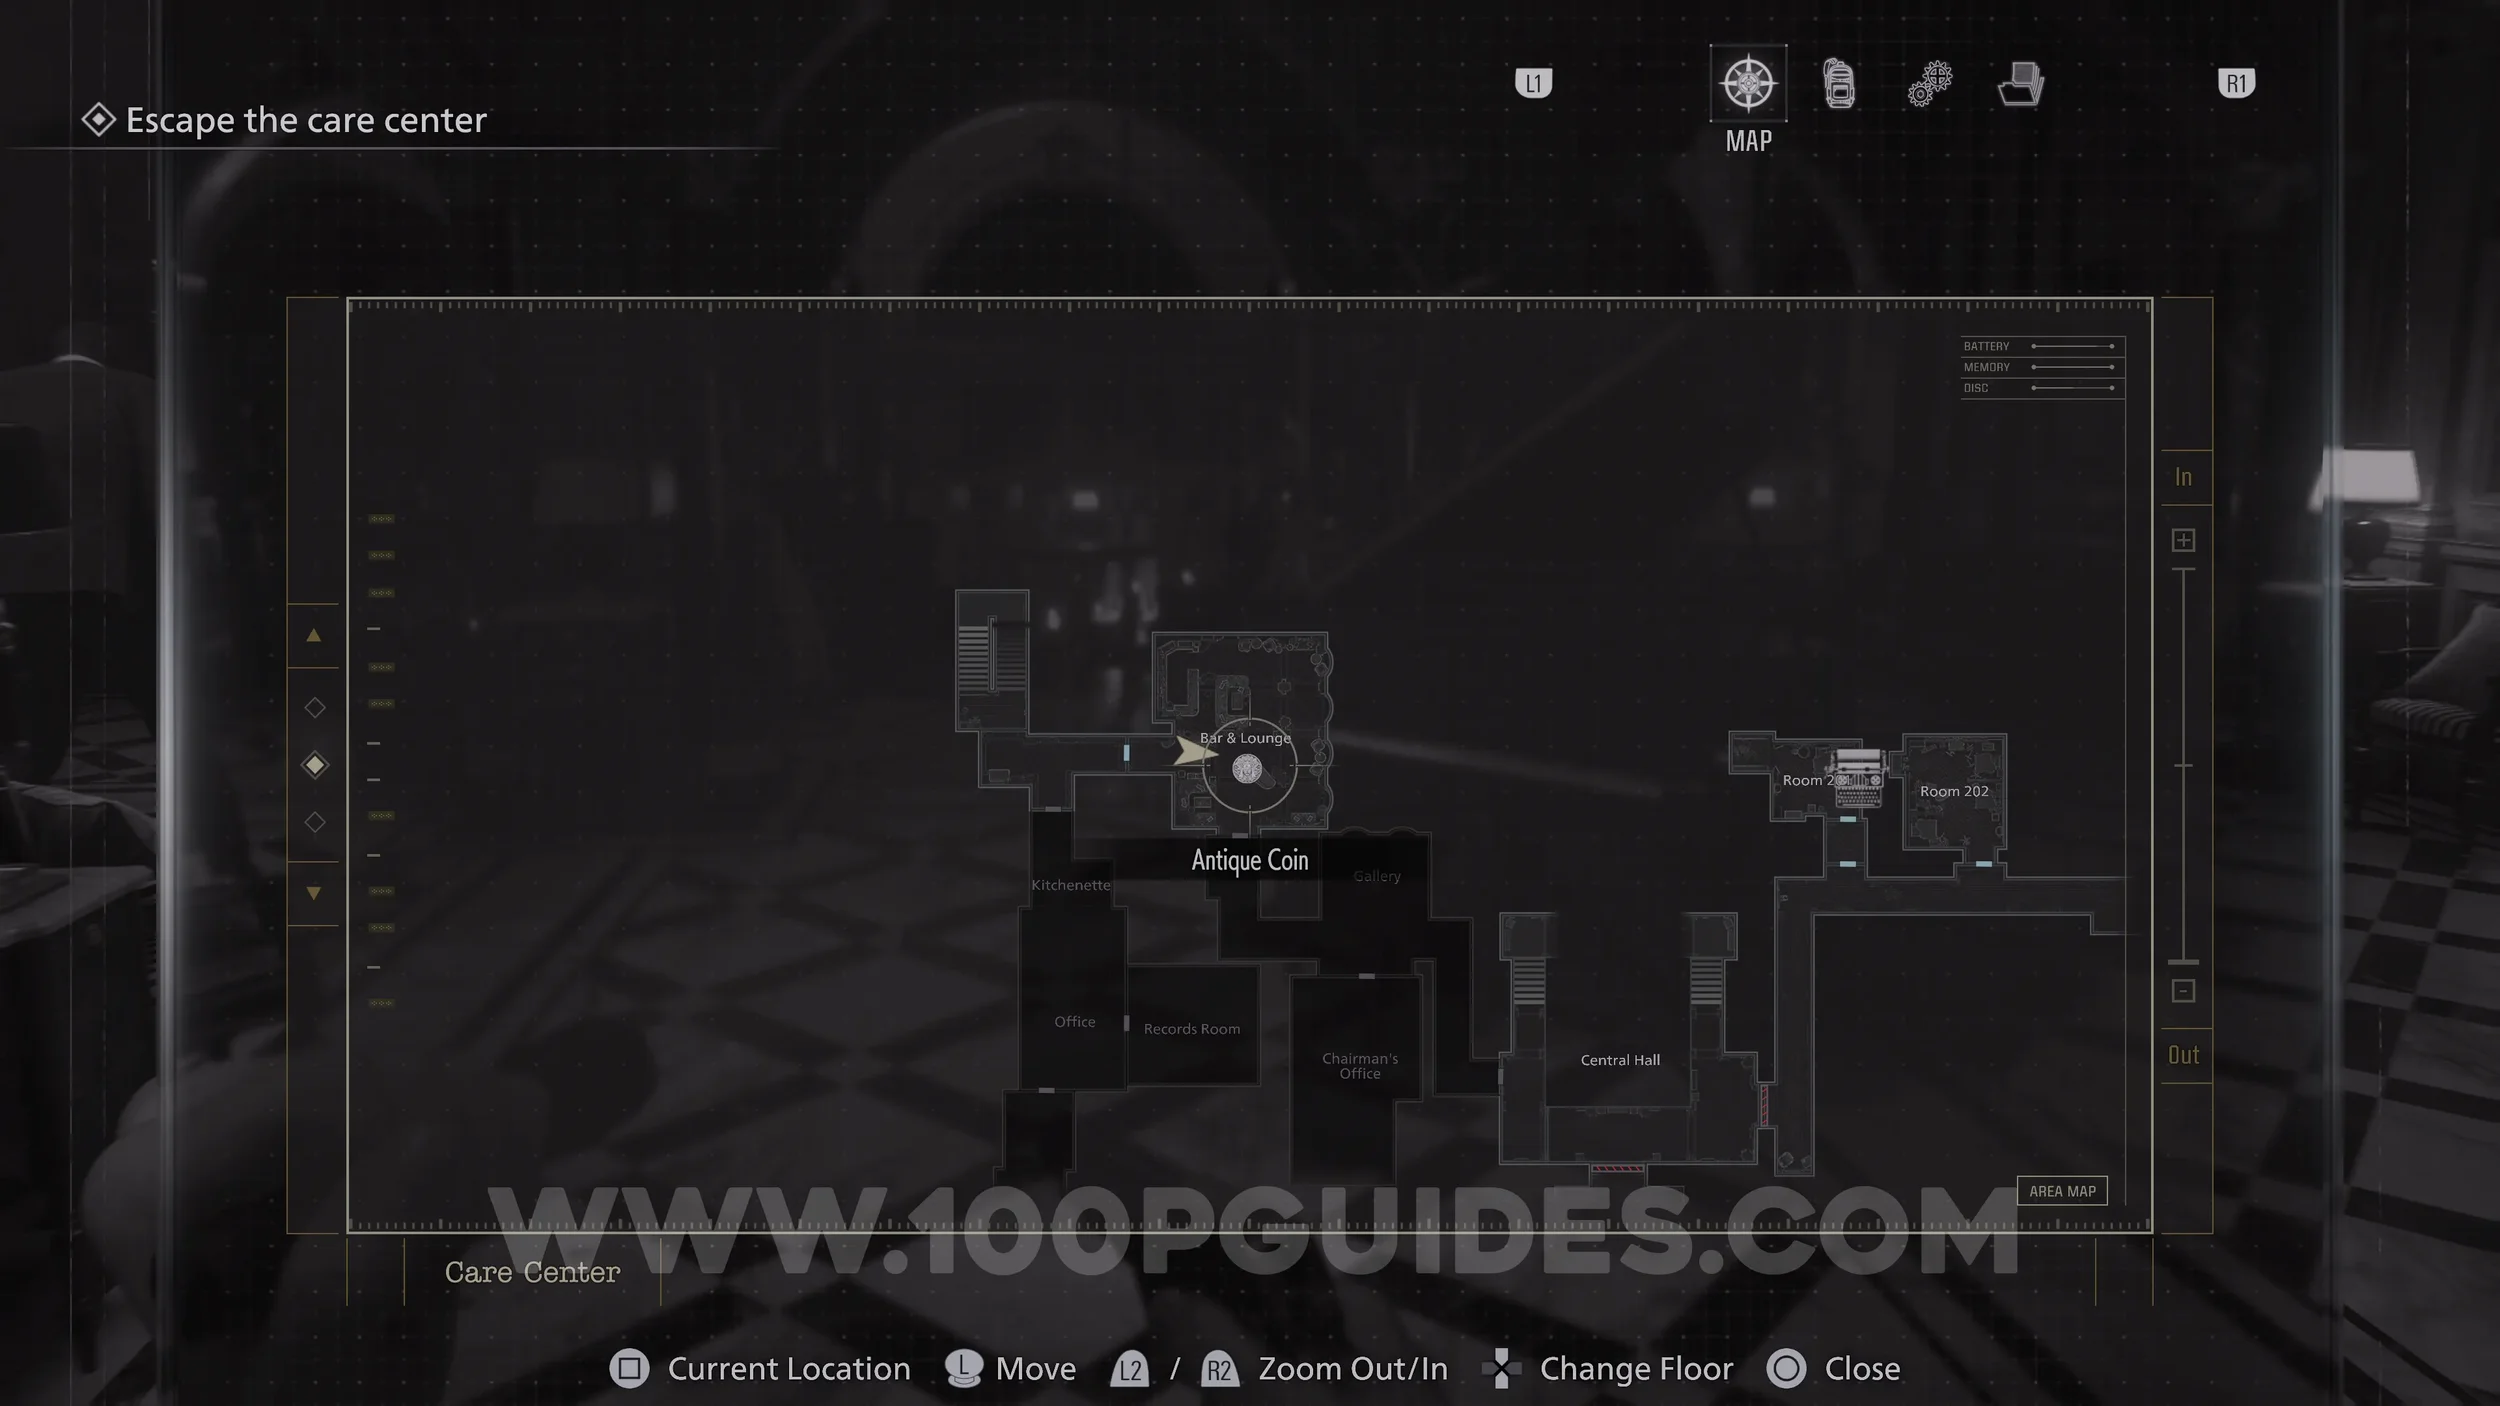
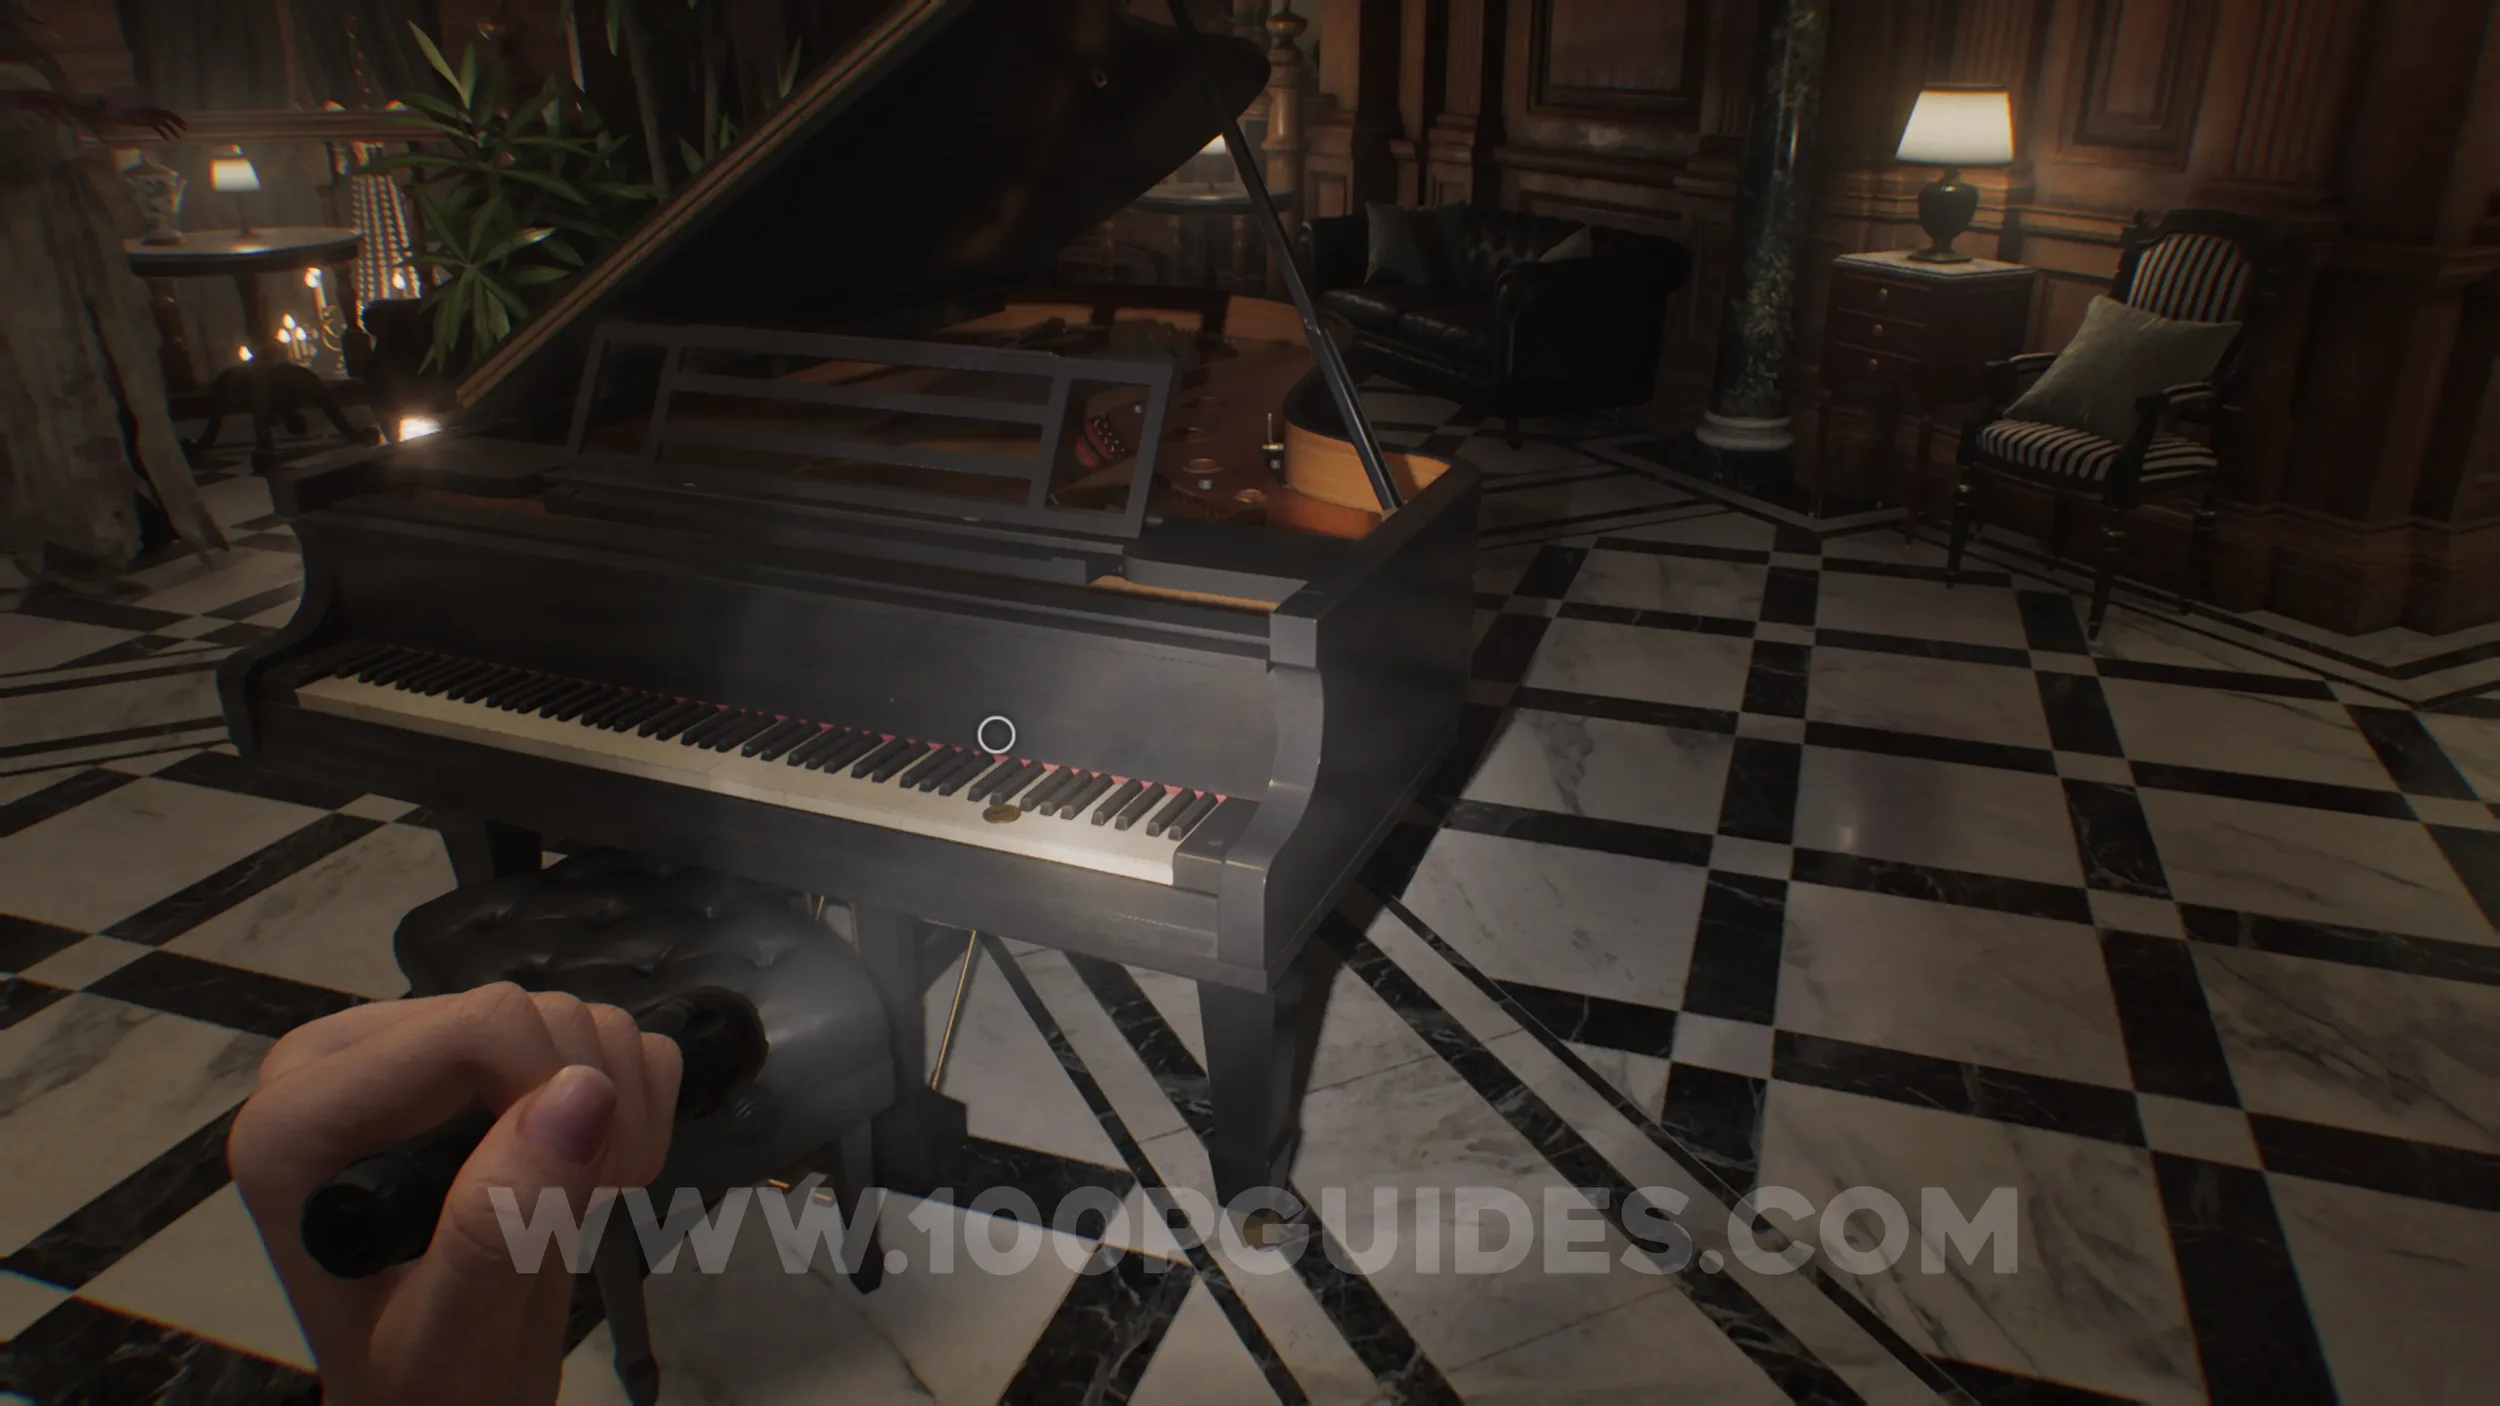
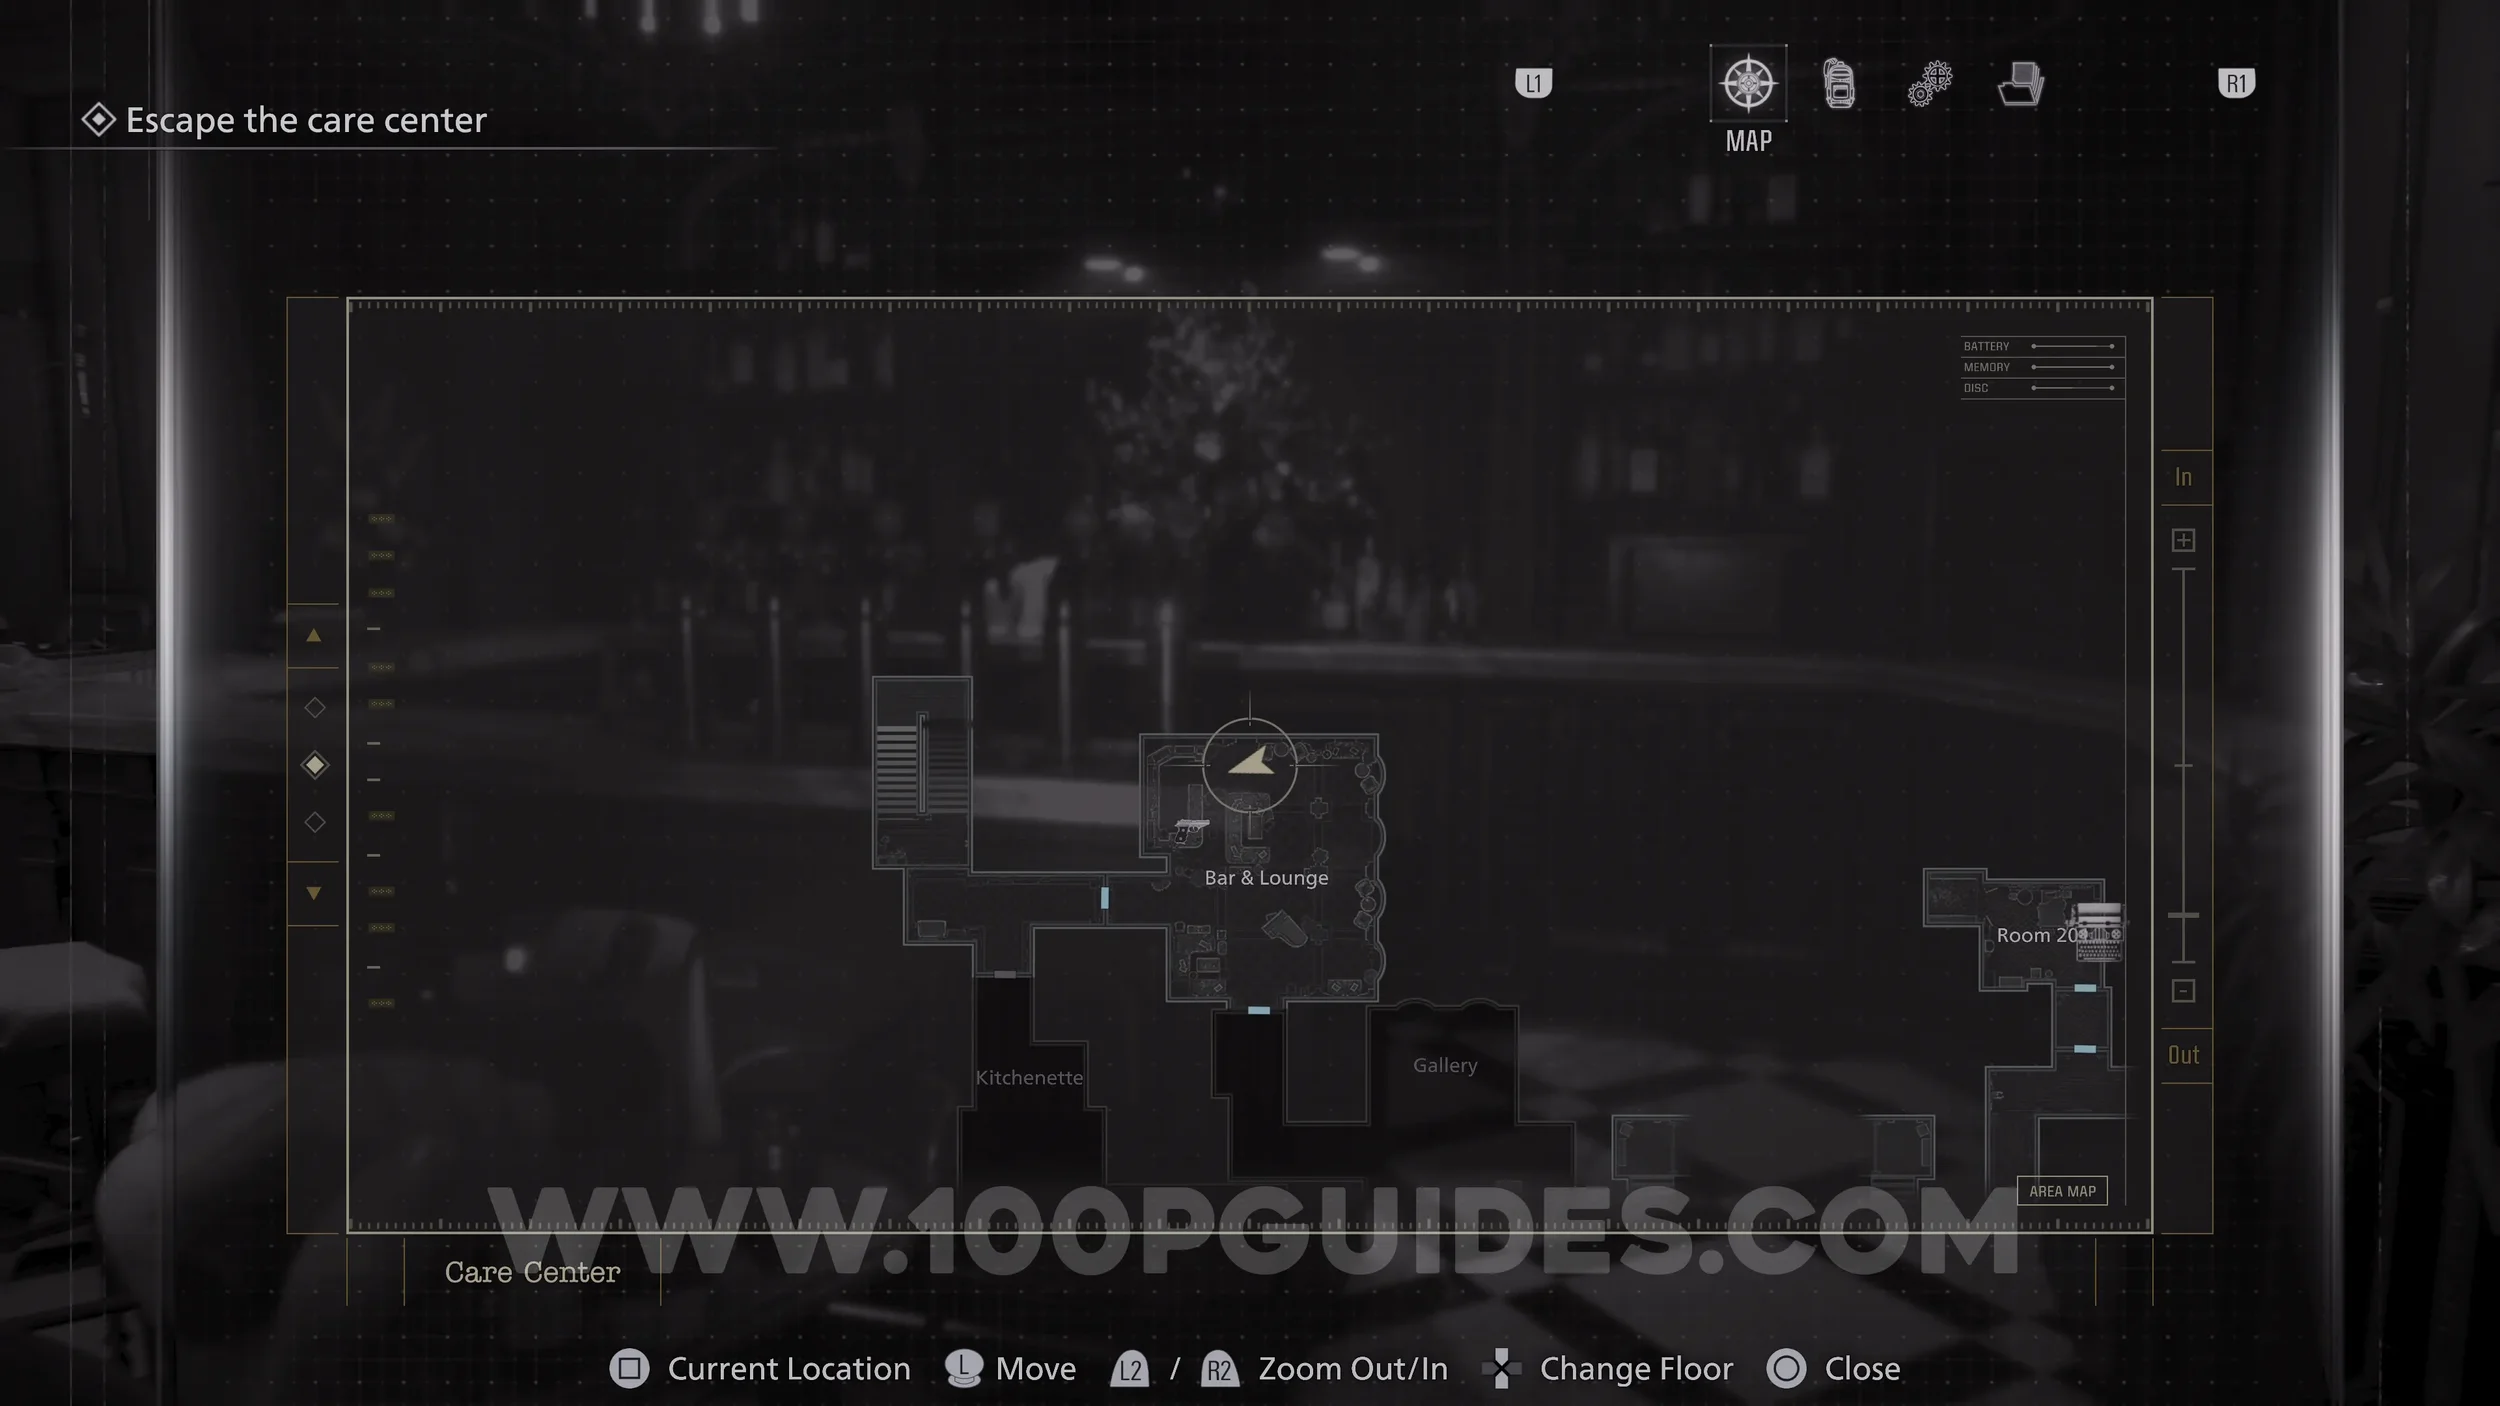
Antique Coin #3. On the piano in the Bar & Lounge.
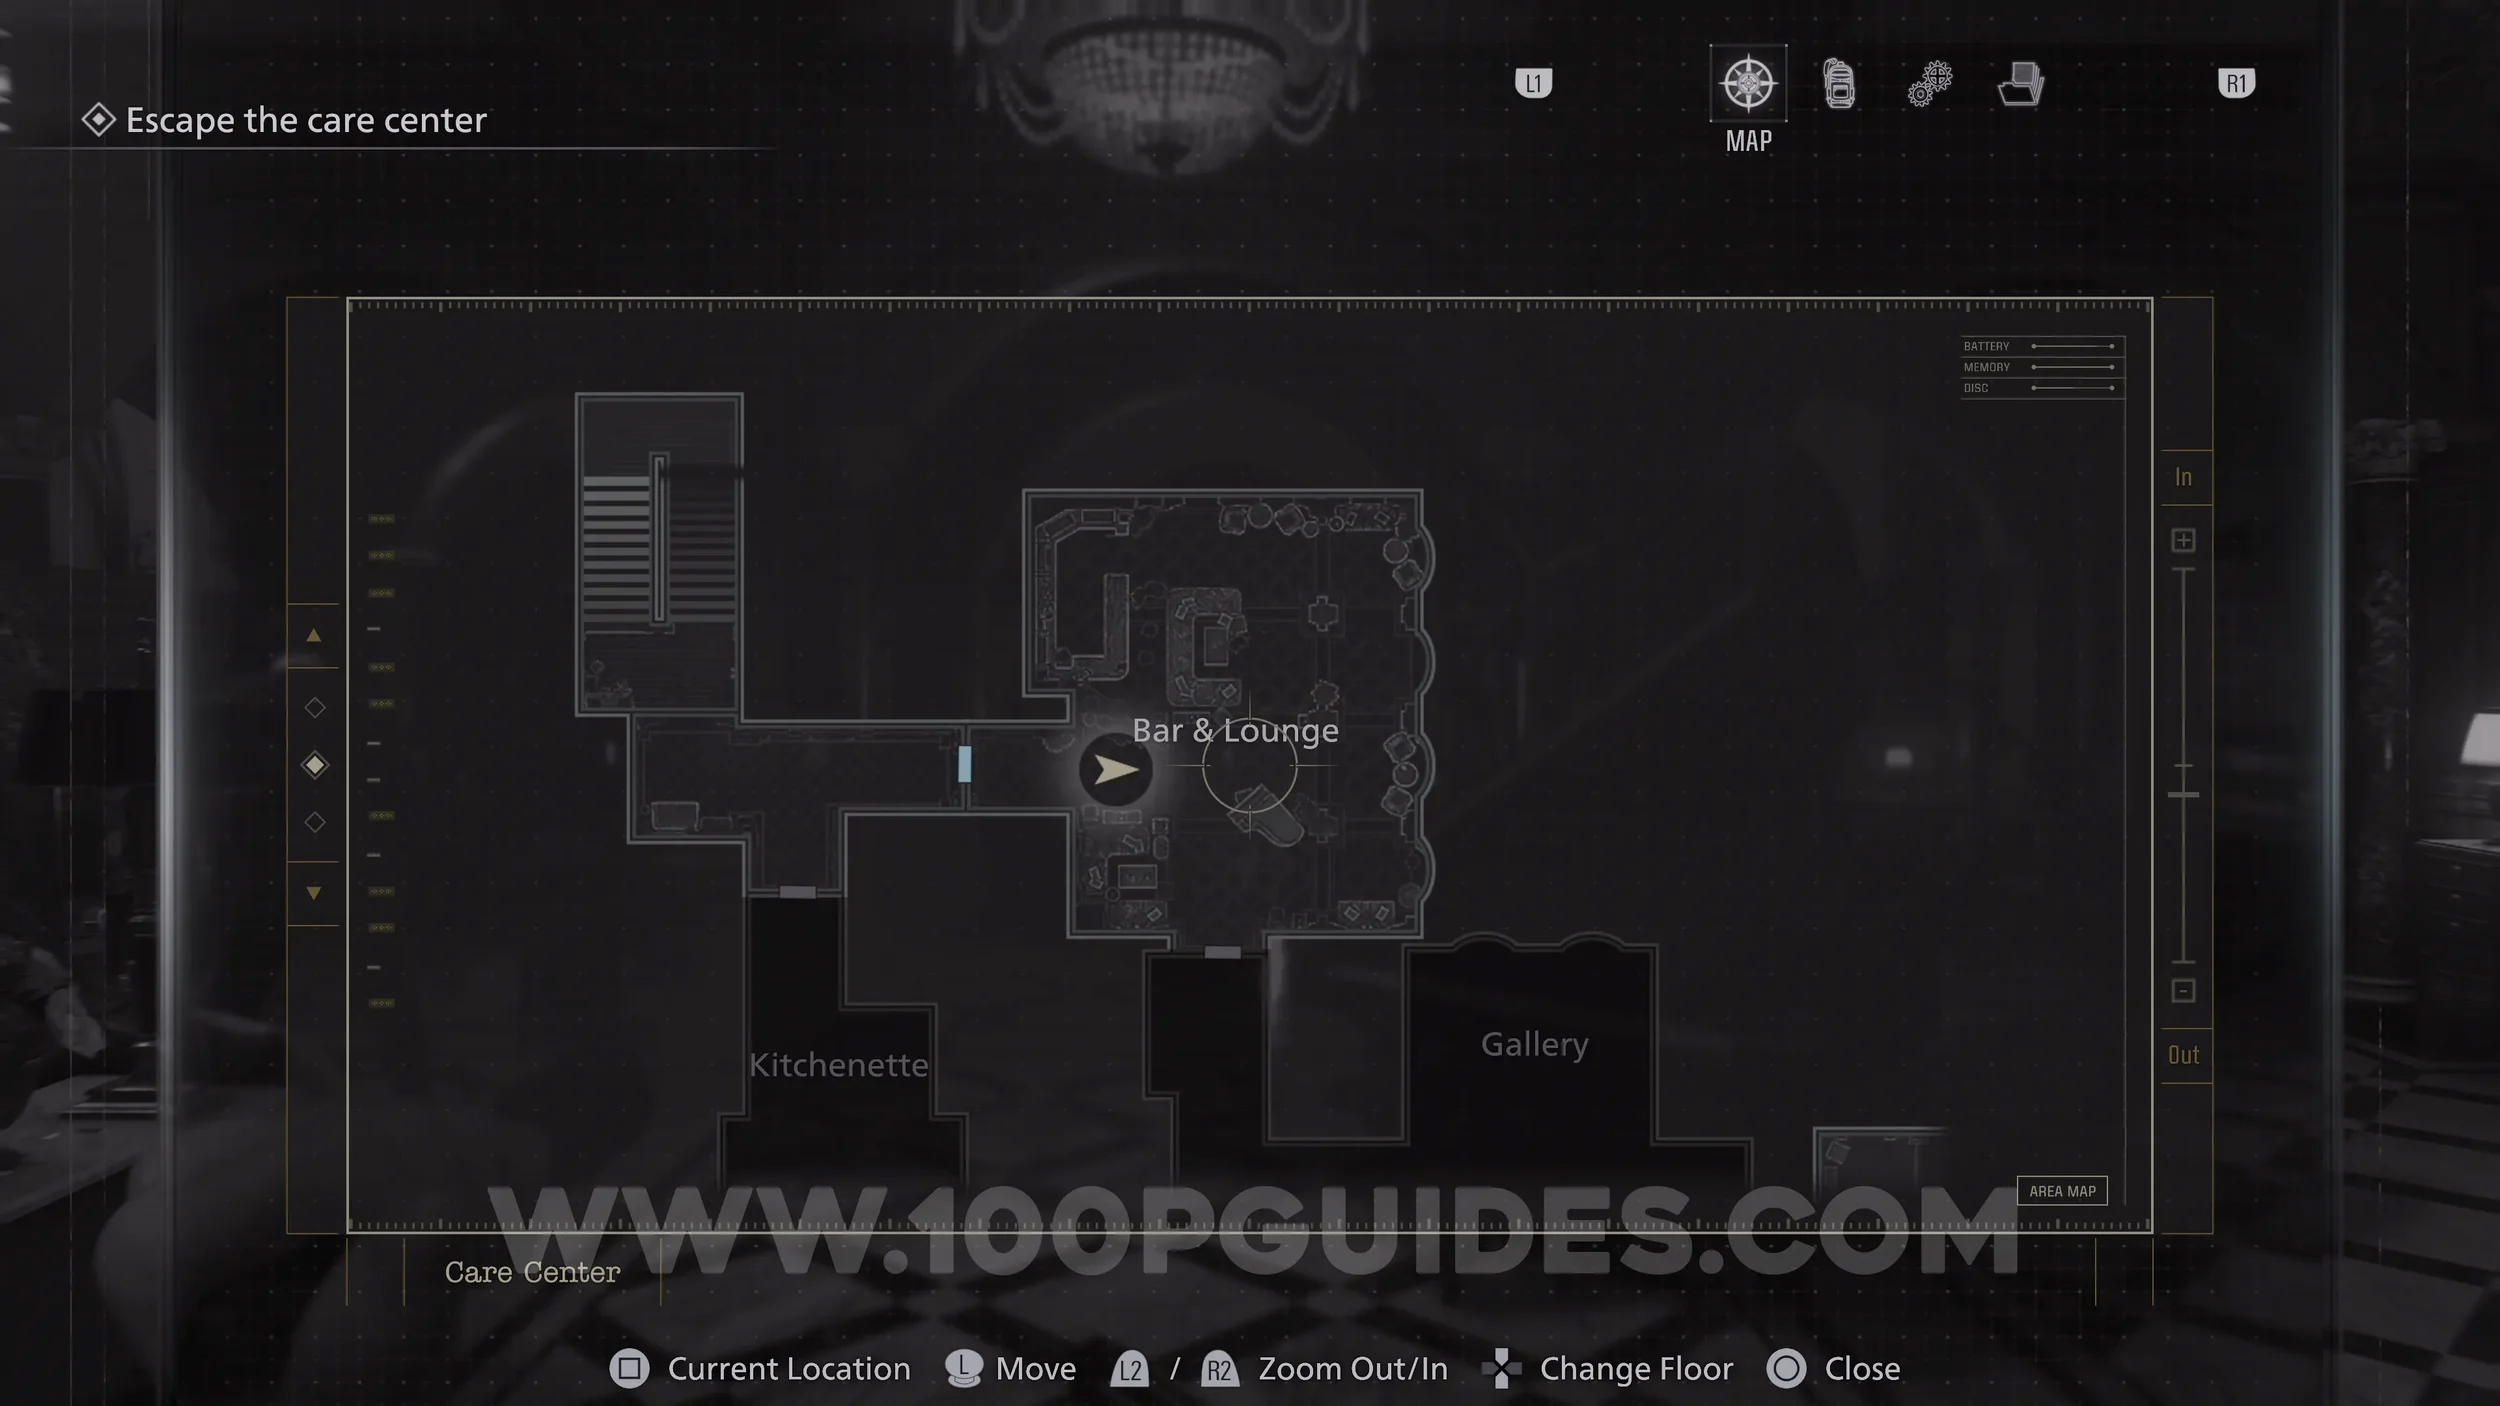
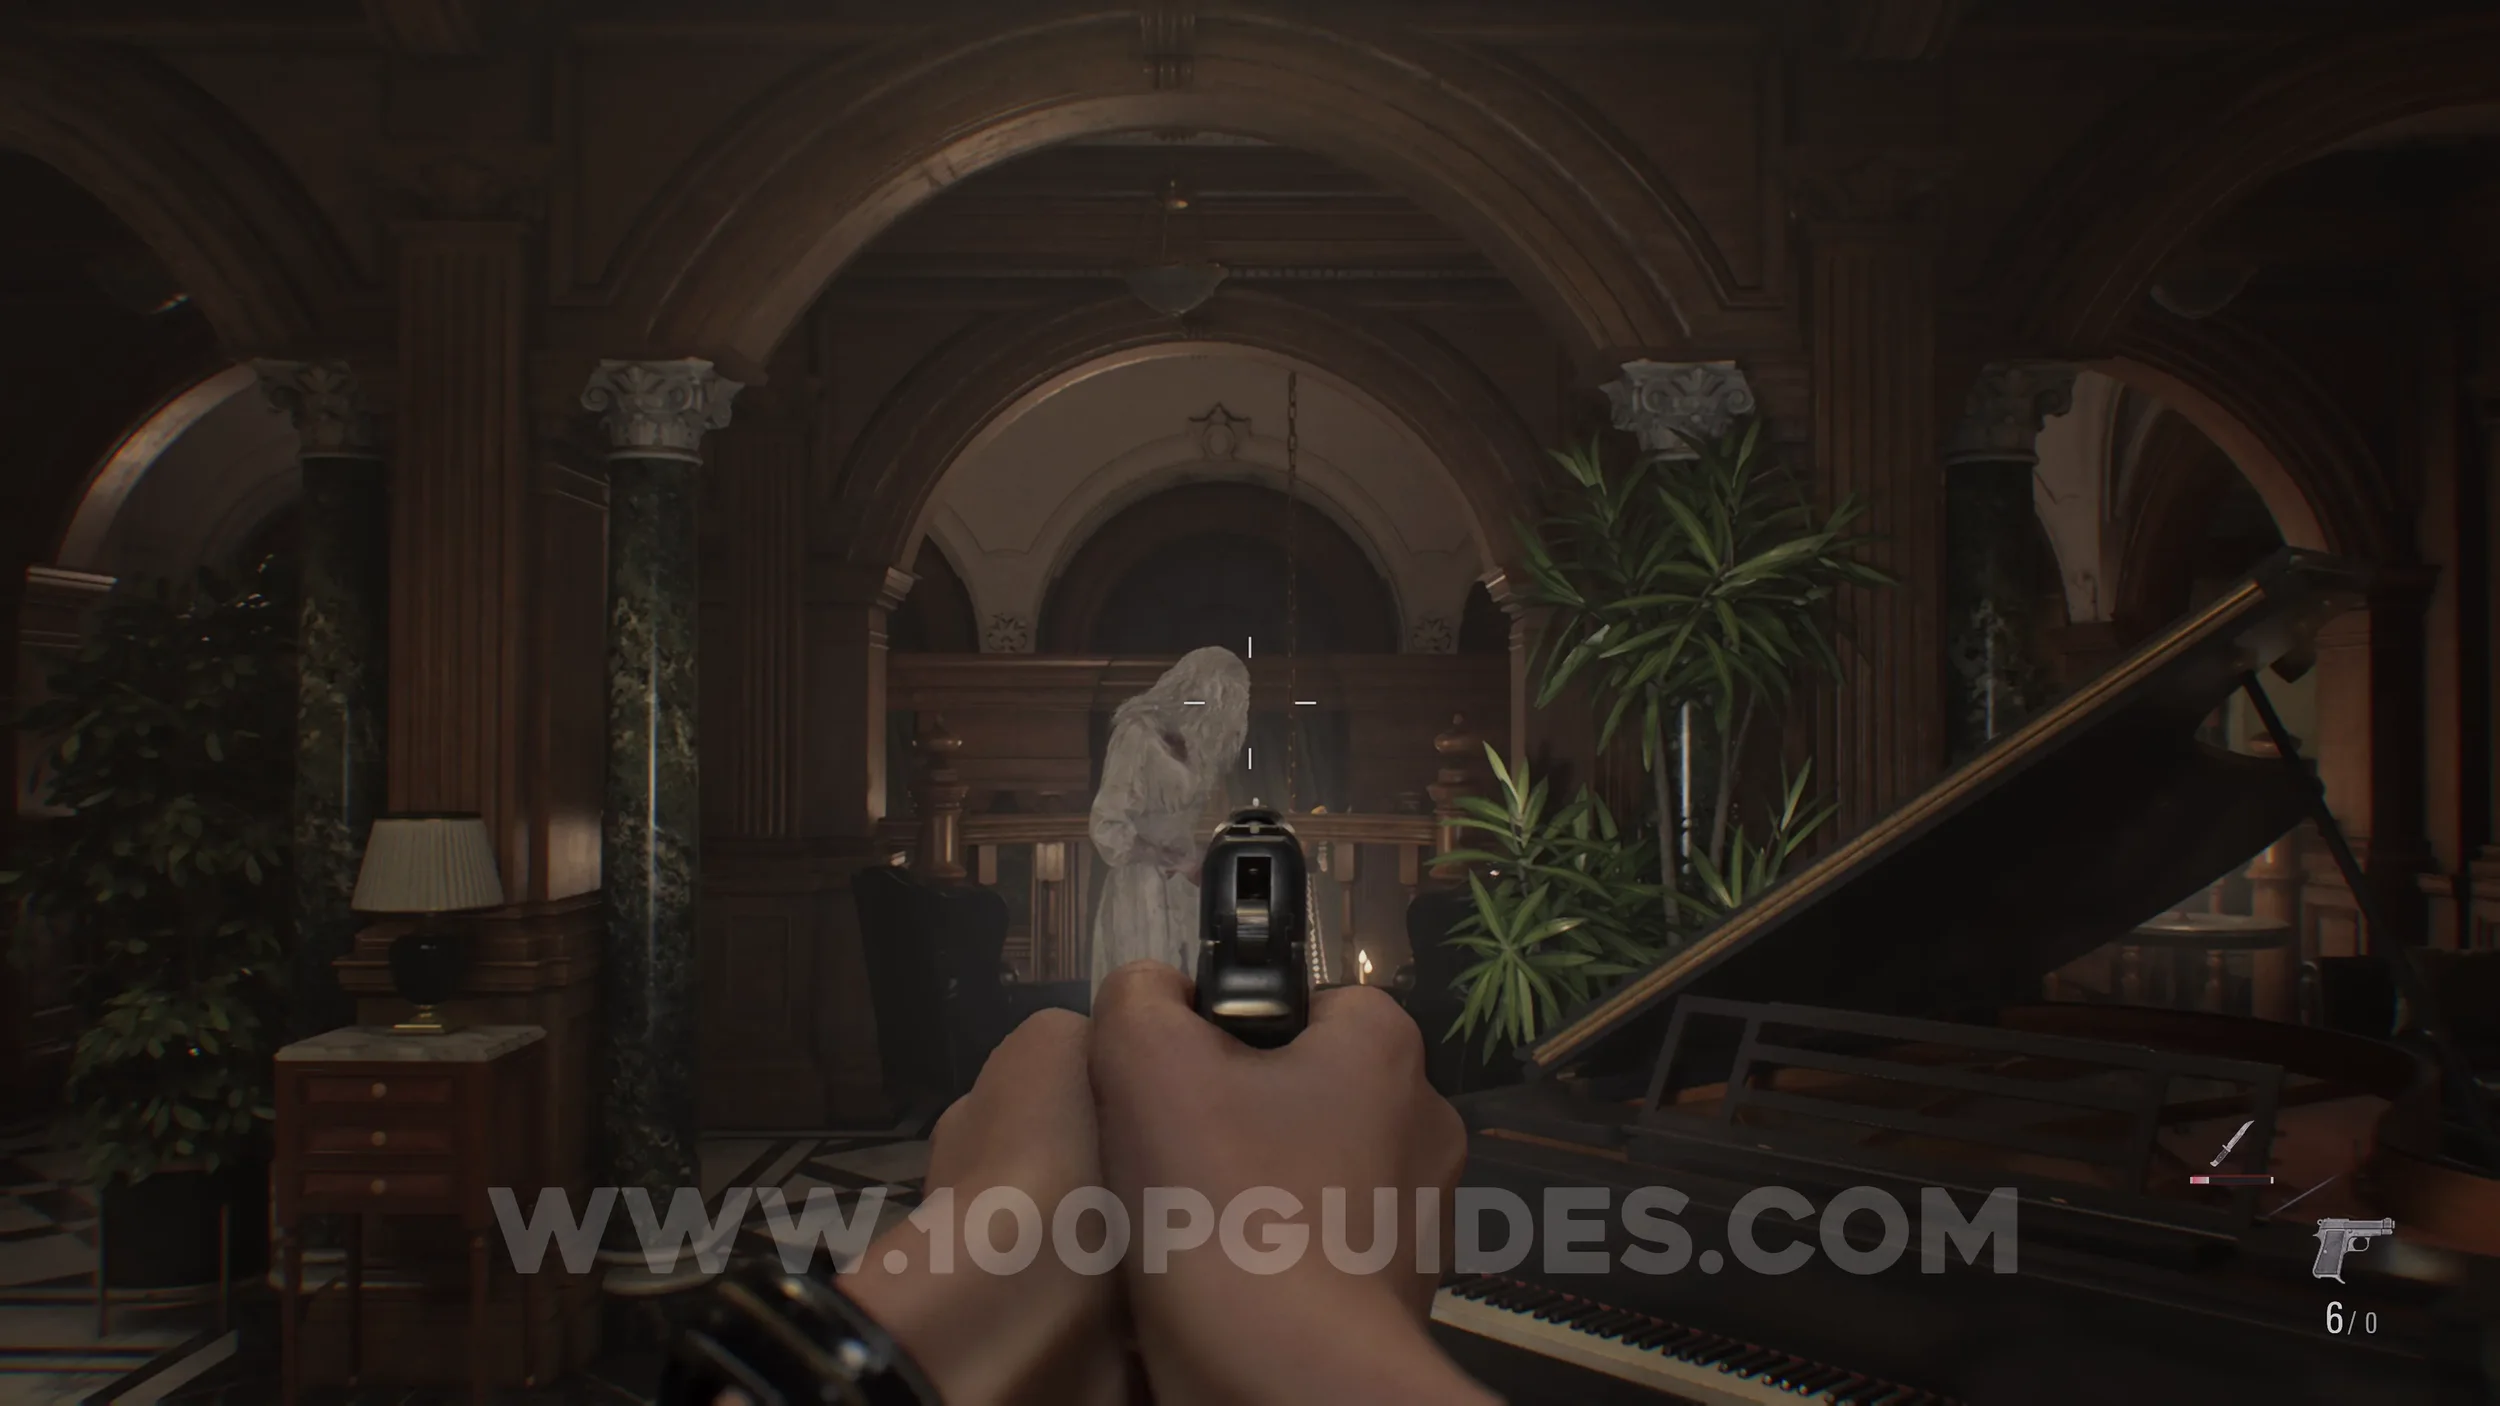
Antique Coin #4 & Trophy - Deadly Duet (Part 1). Defeat the zombie in white in the Bar & Lounge. She will drop the coin. This is also one of the two zombies needed for the “Deadly Duet” trophy.
Safe #1 & Antique Coin #5-7. Open the safe in the Bar & Lounge to find the 3 coins inside. Open it with the following code:
Casual/Standard difficulty:
10 Left, 80 Right, 30 Left.
Insanity Difficulty:
20 Right, 50 Left, 30 Right.
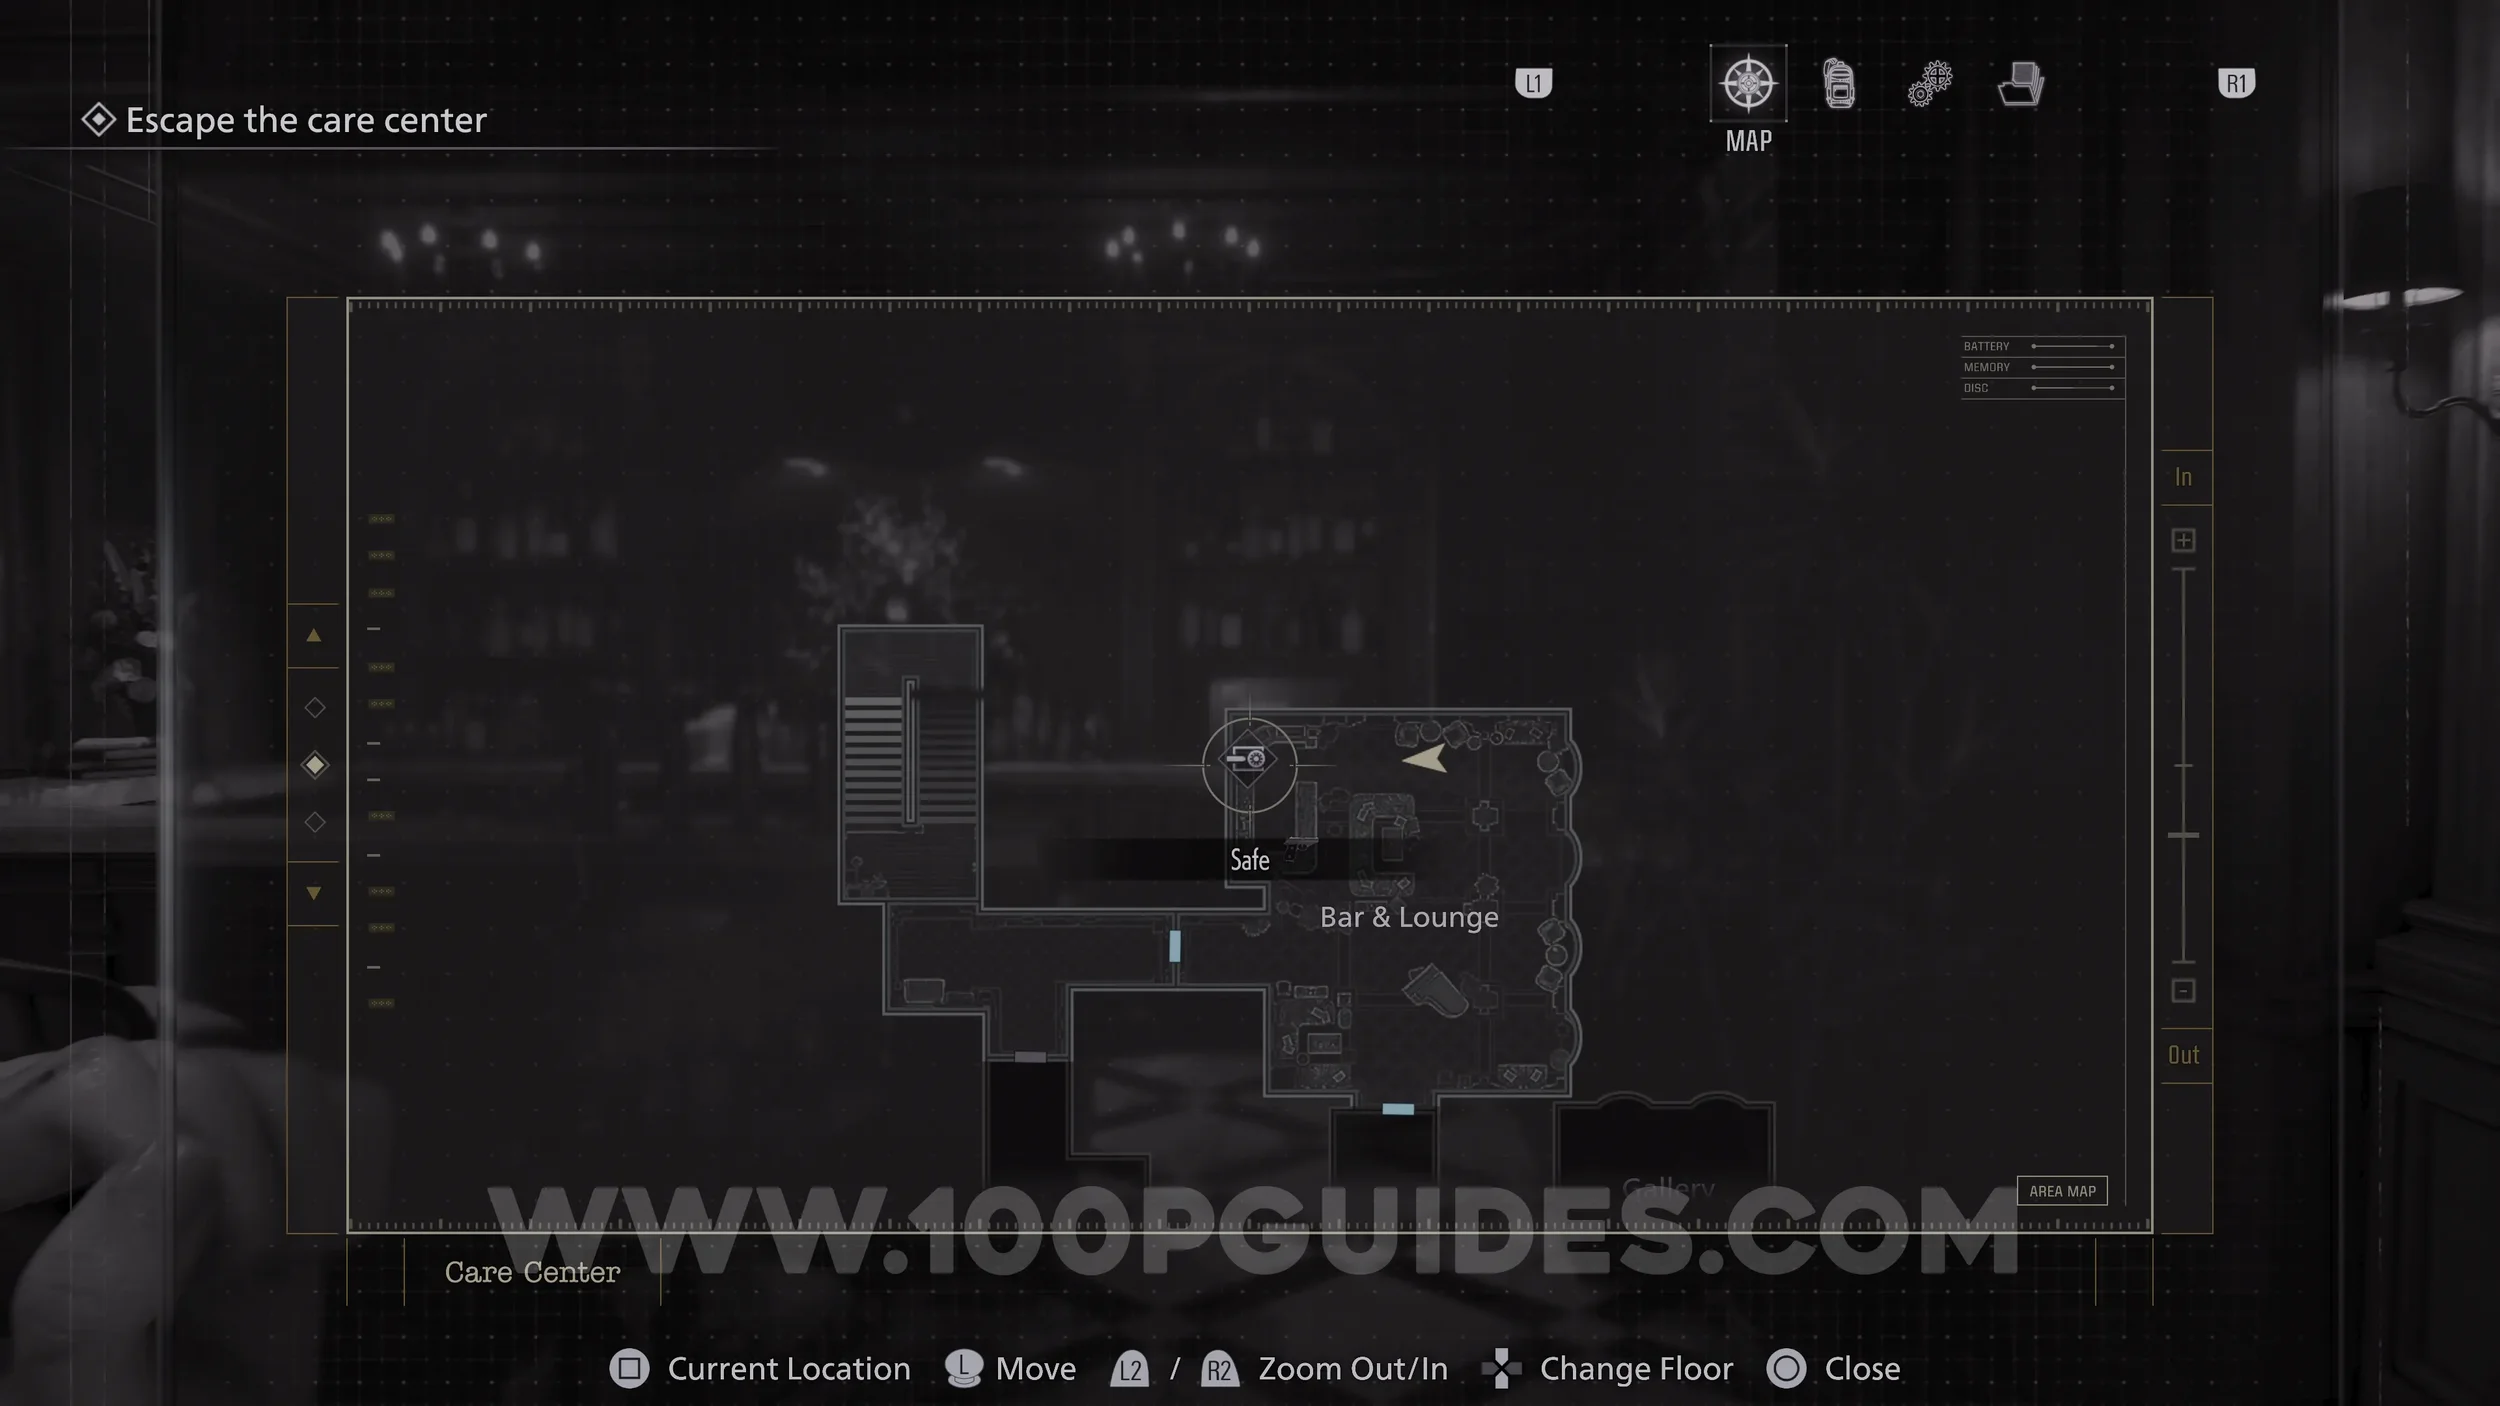
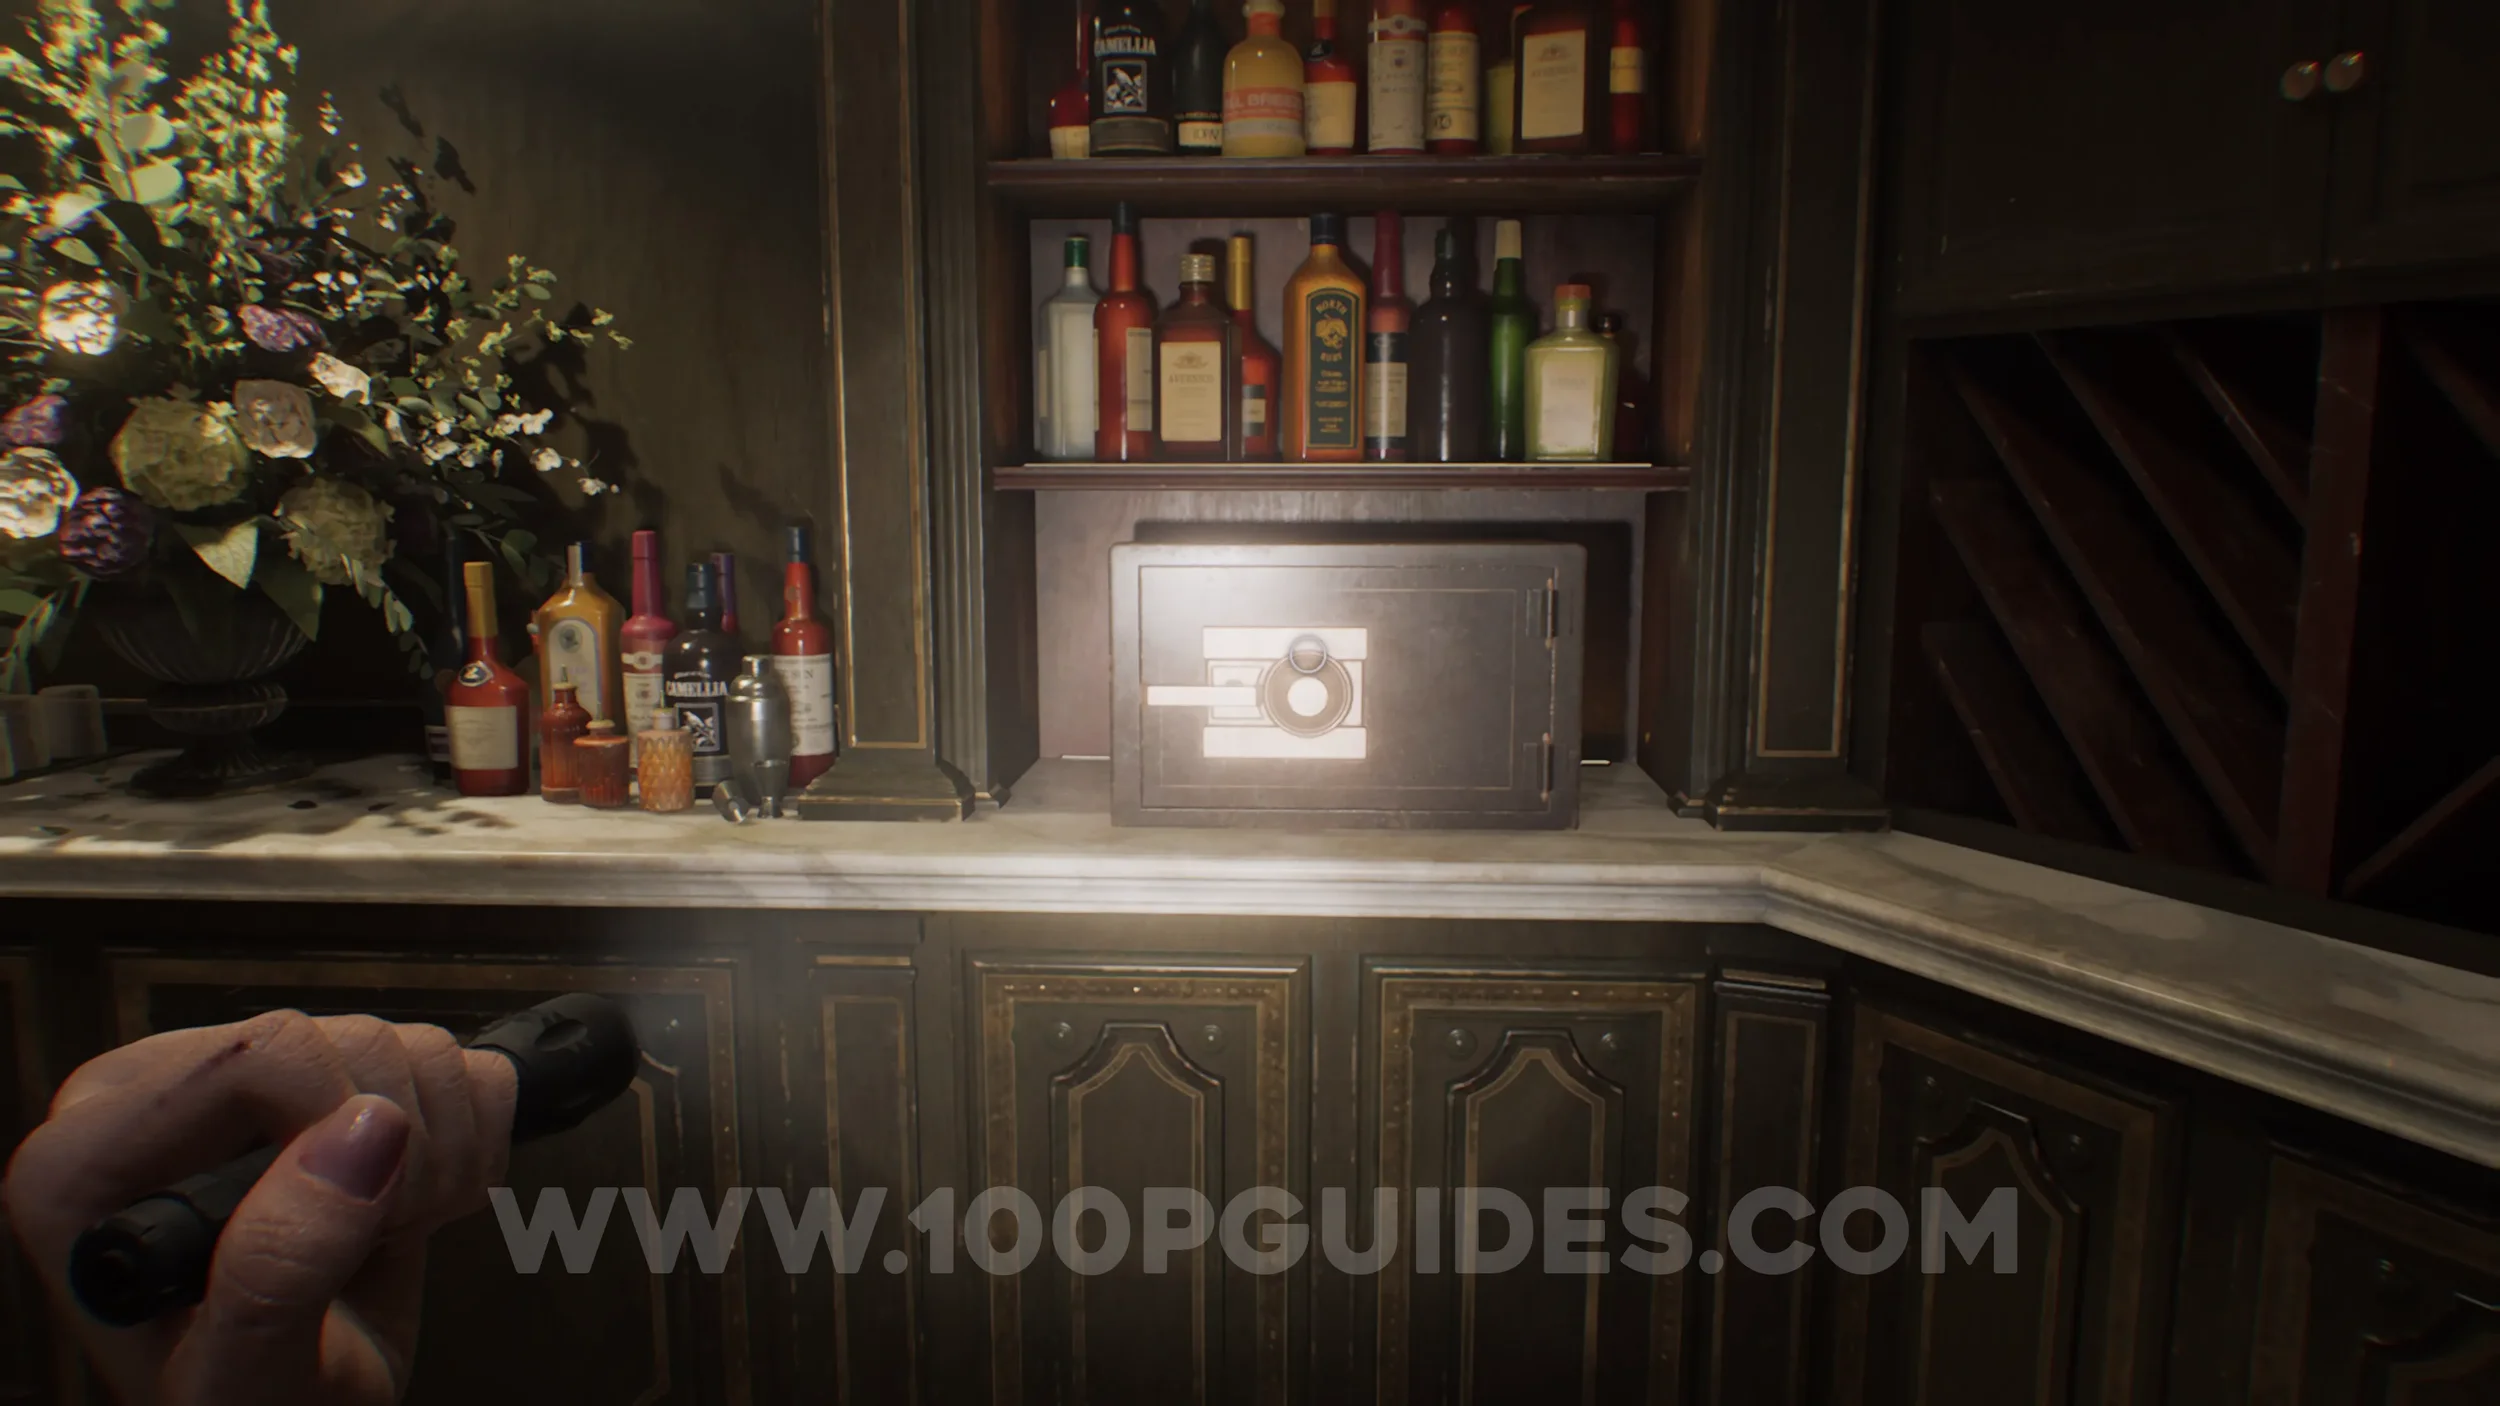
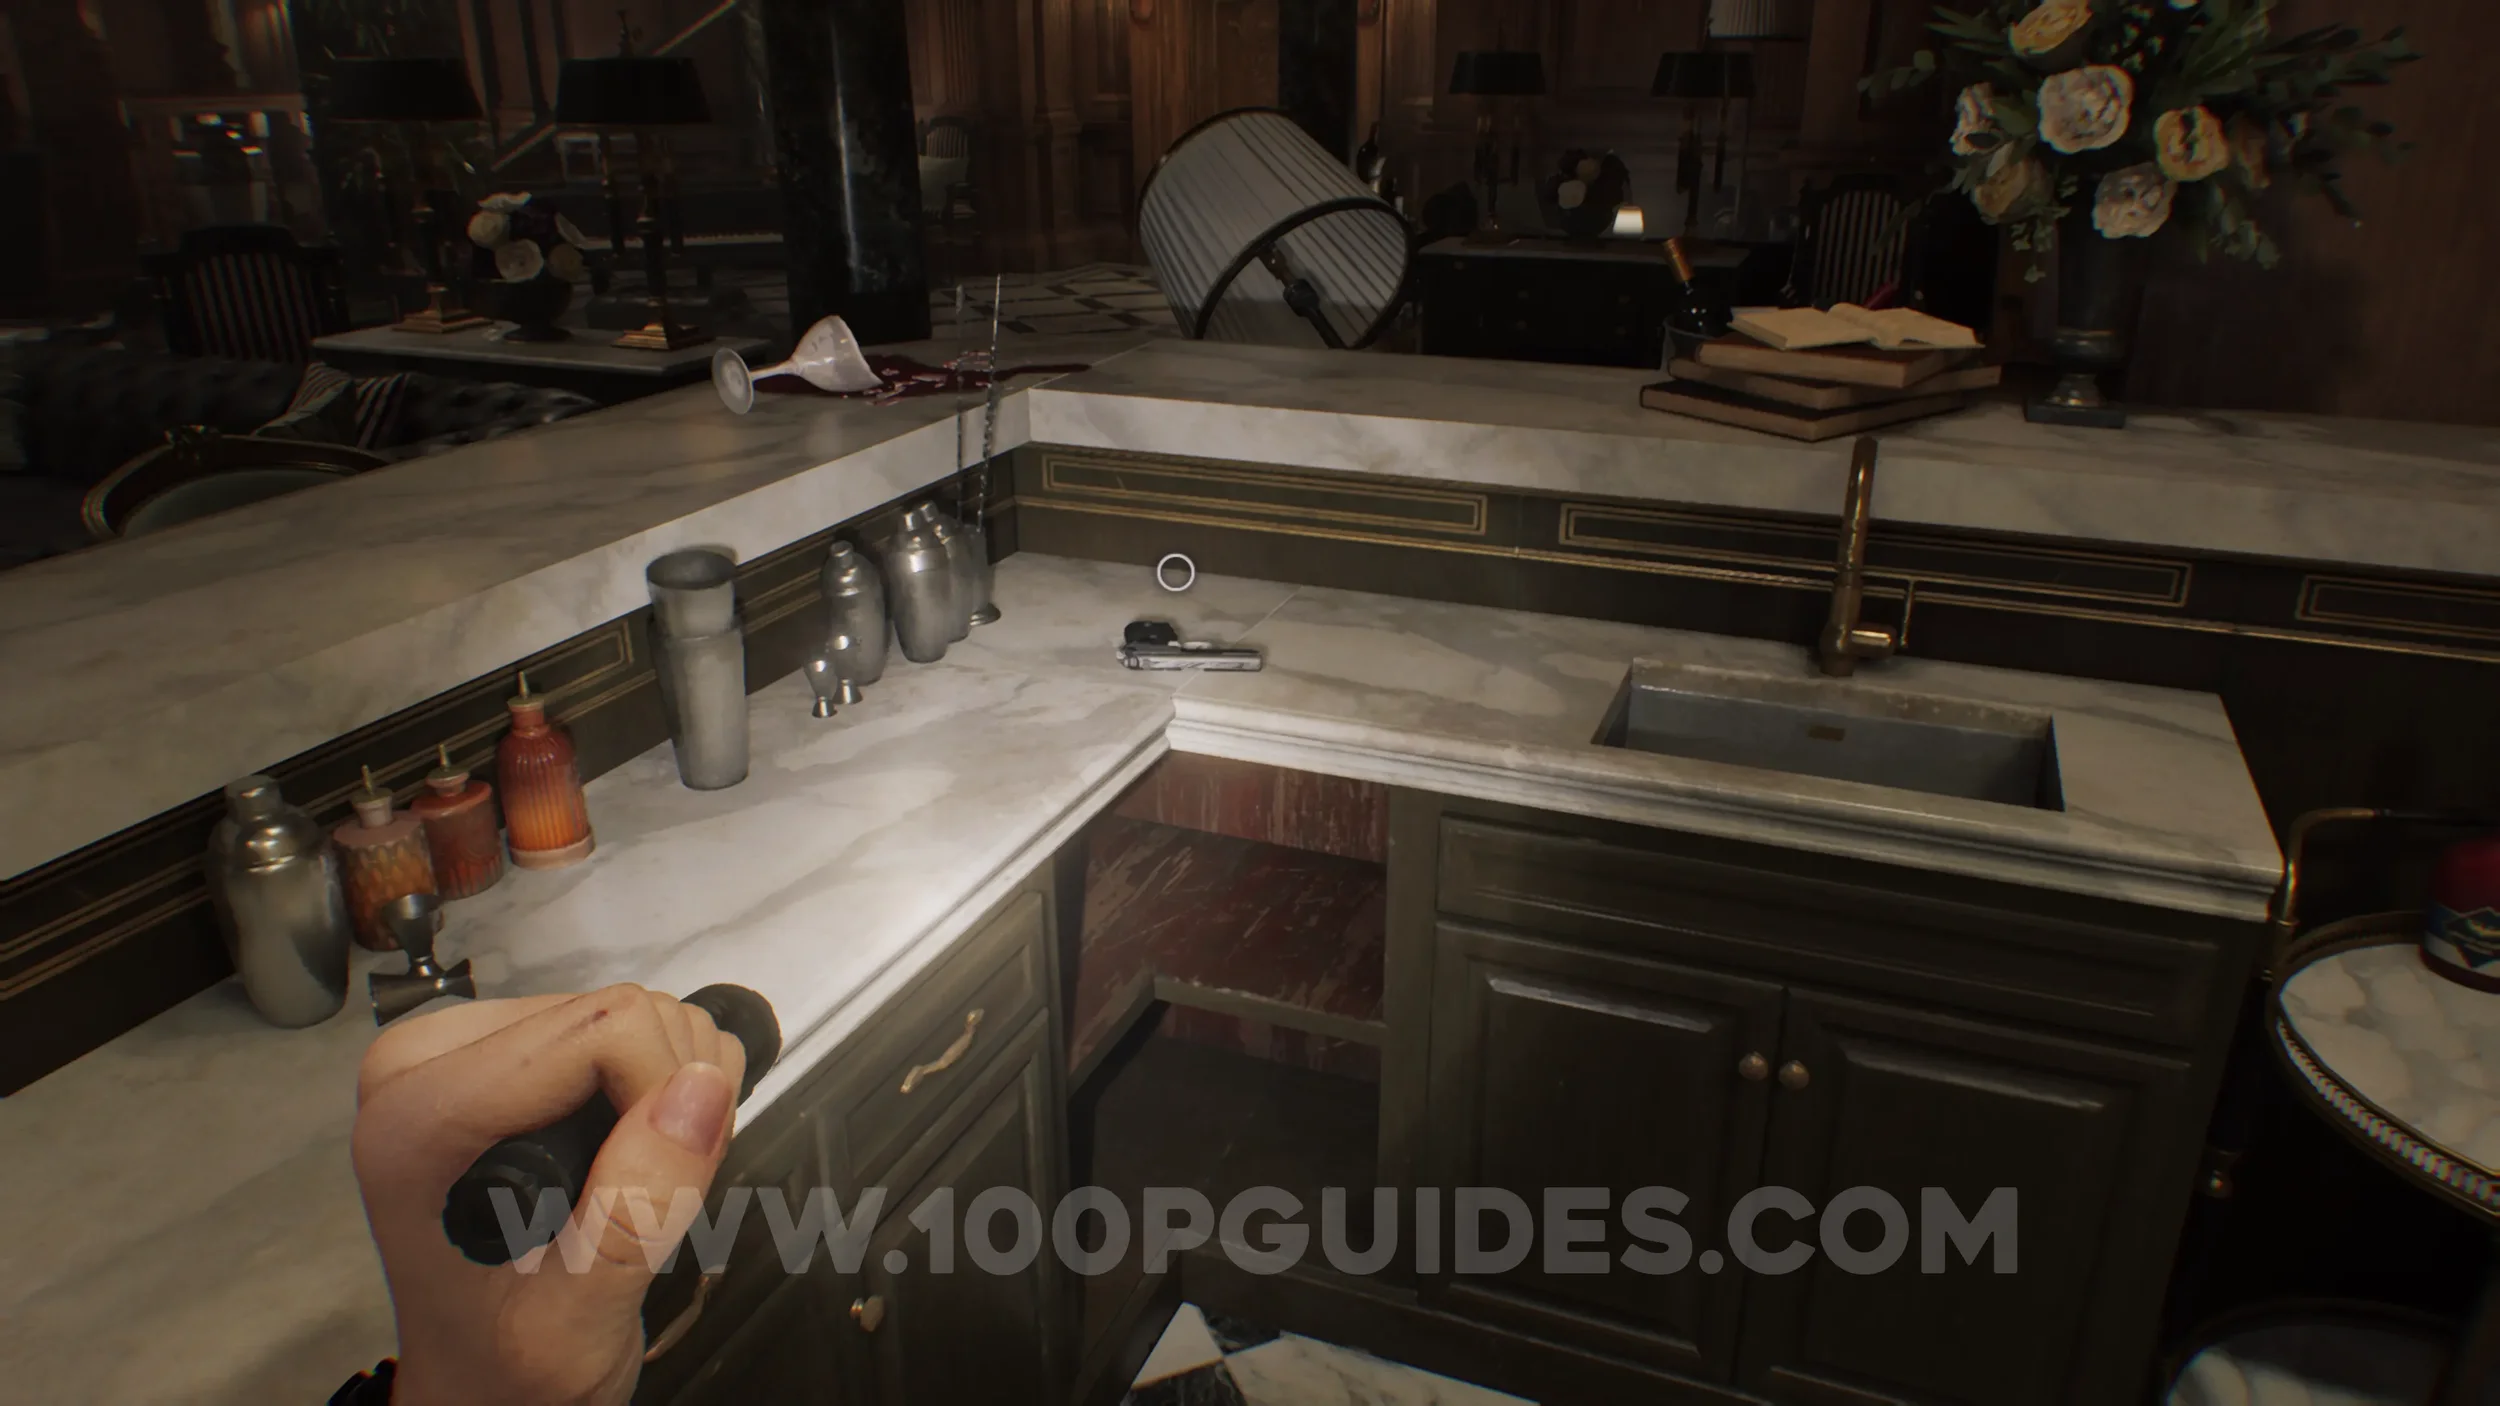
Weapon - S&S M232. On the bar to the left of the safe in Bar & Lounge.
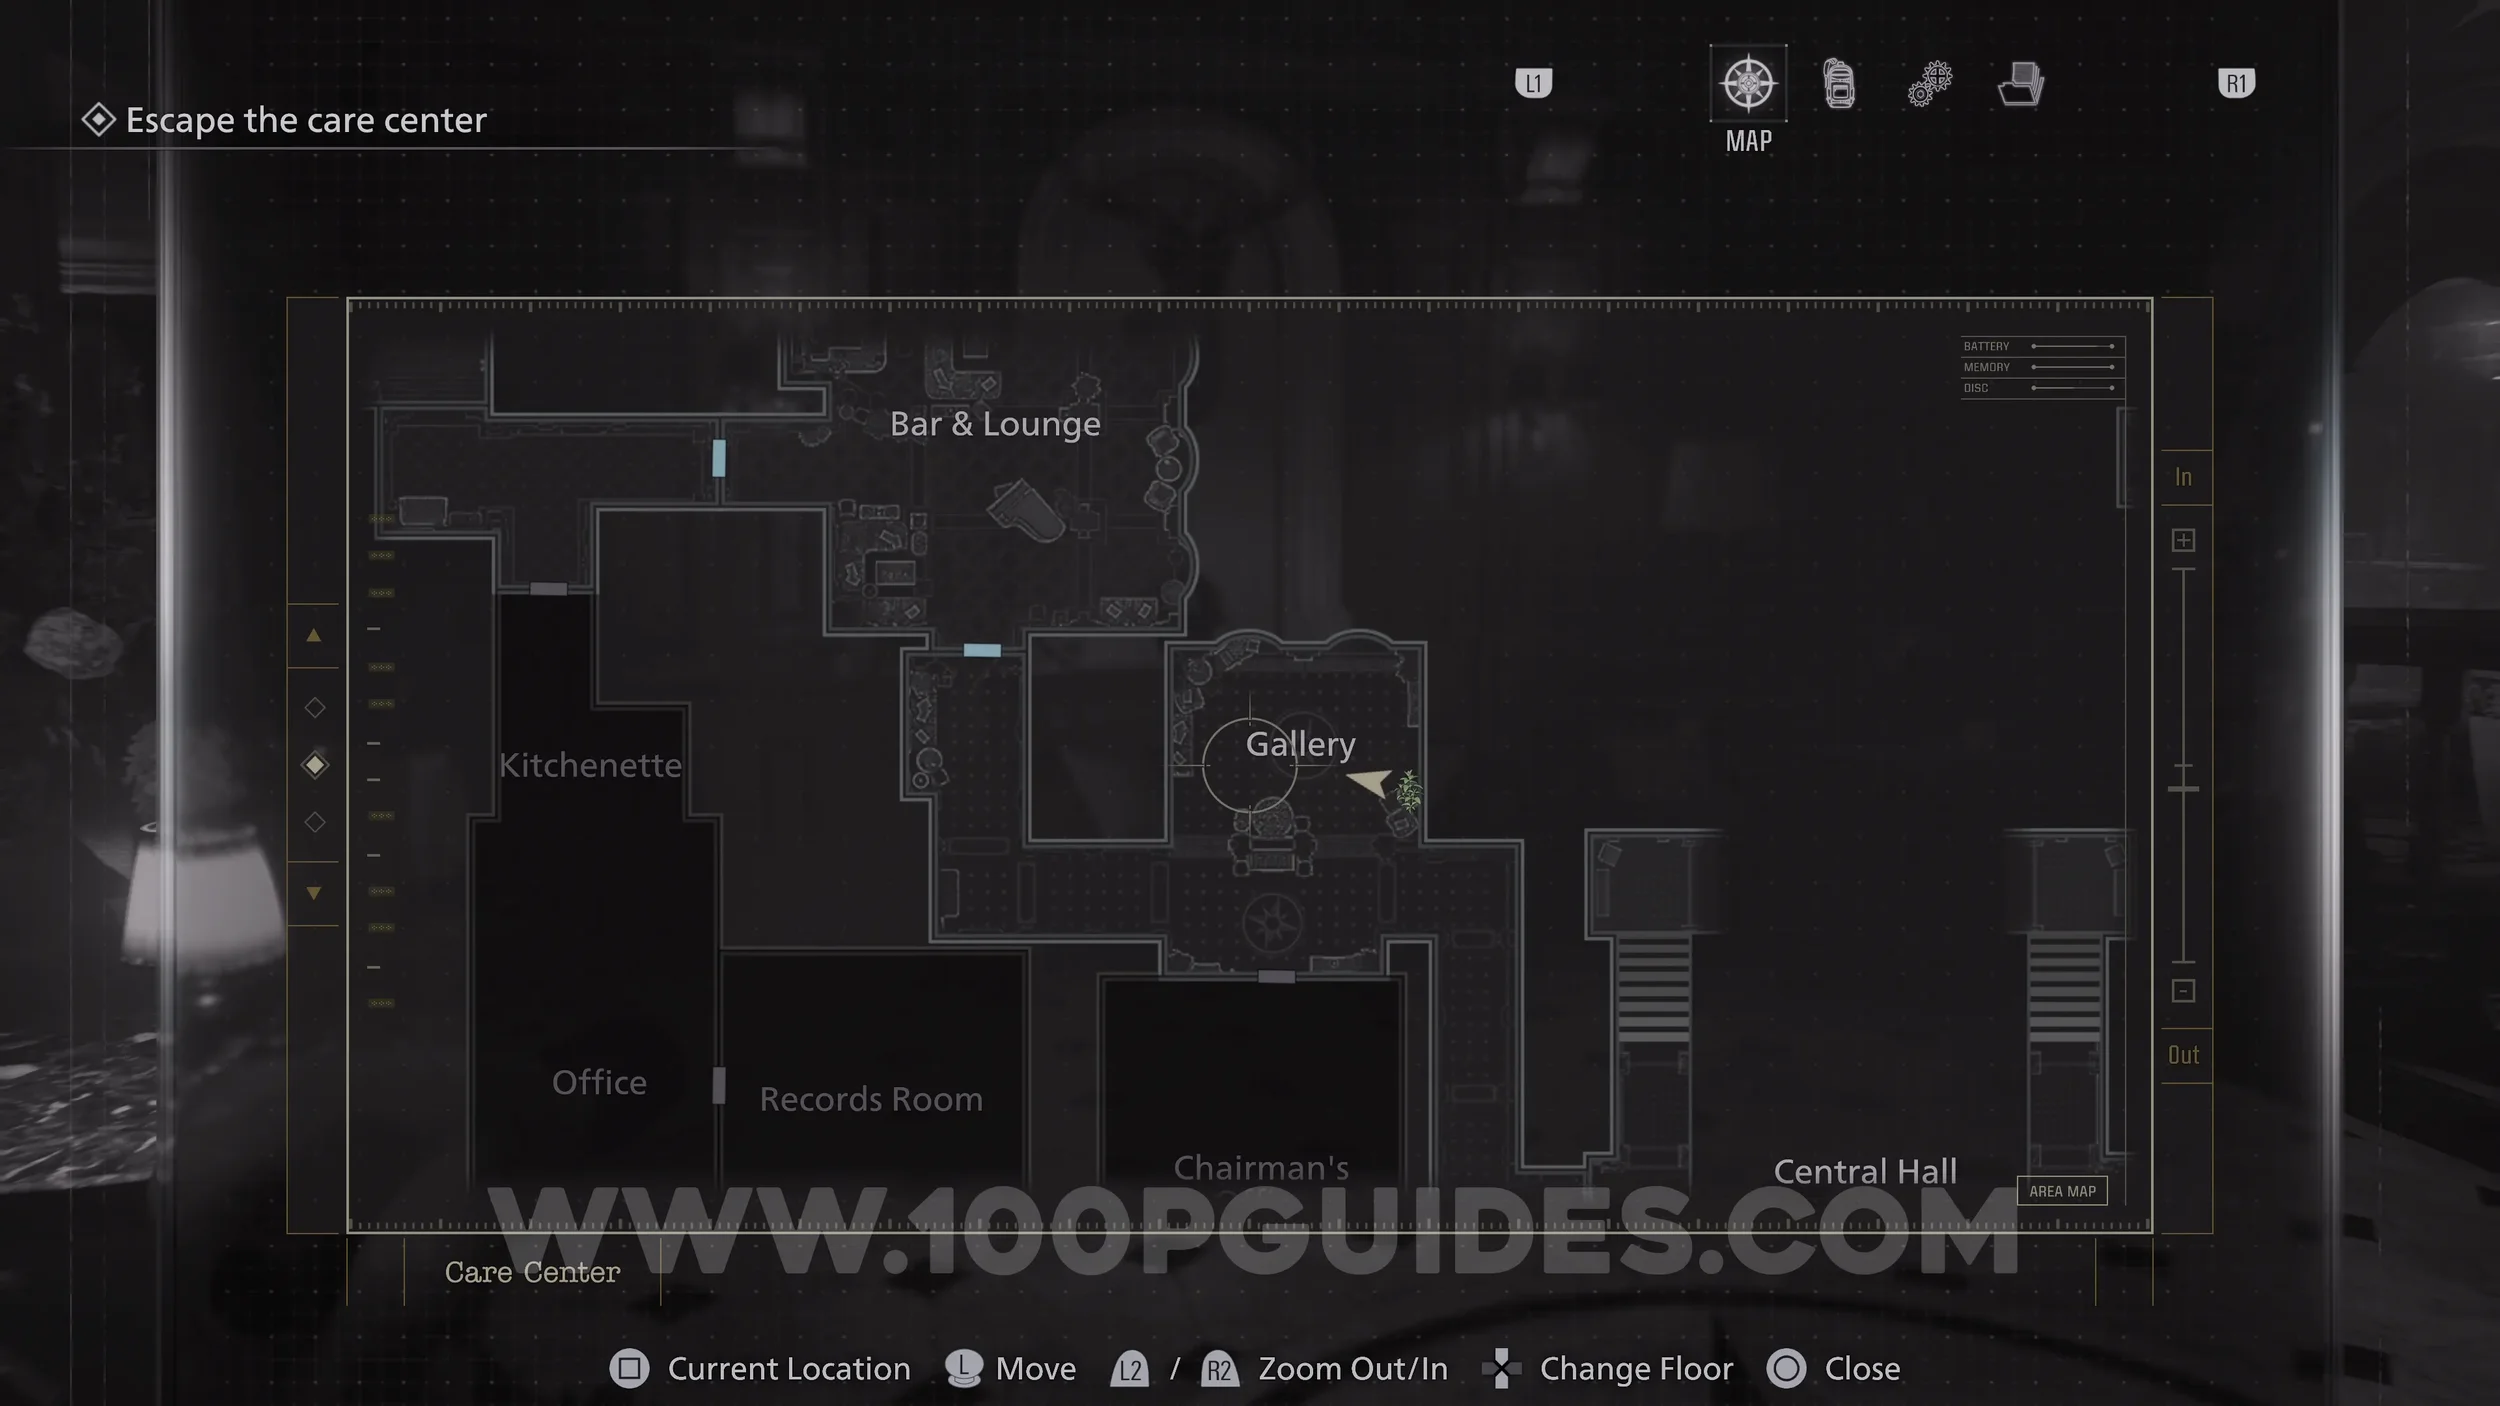
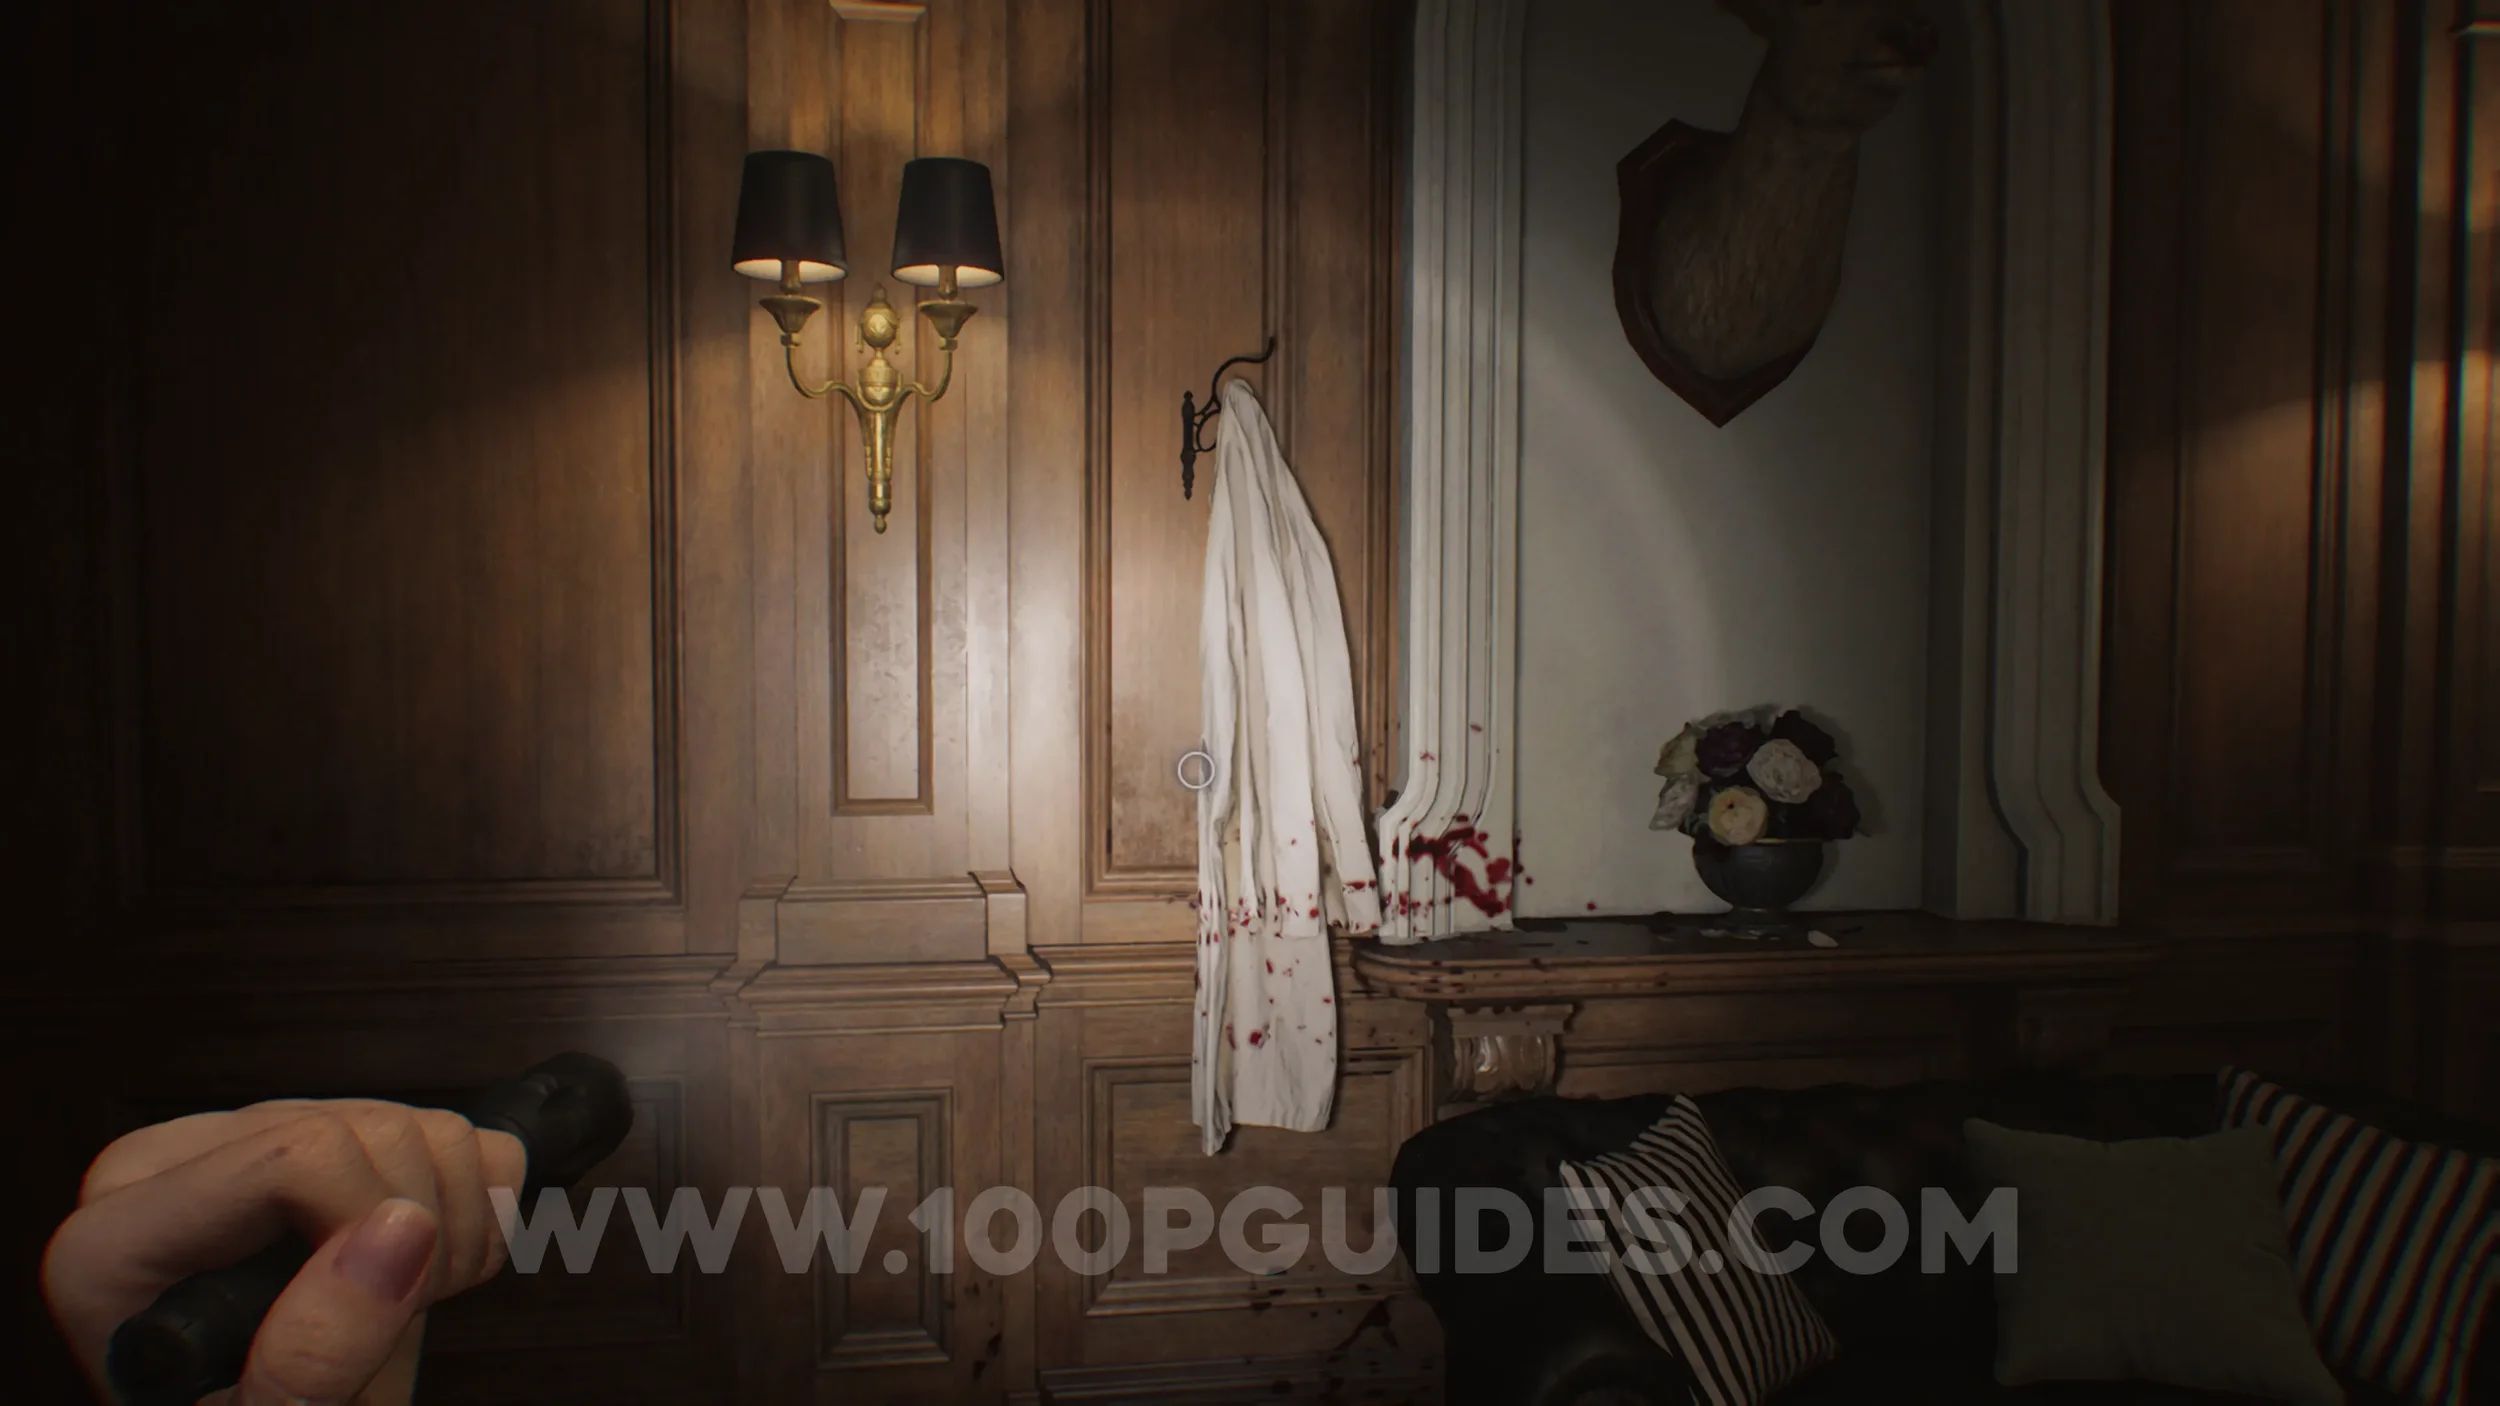
File #11 - Folded Note. In the white coat in the Gallery.
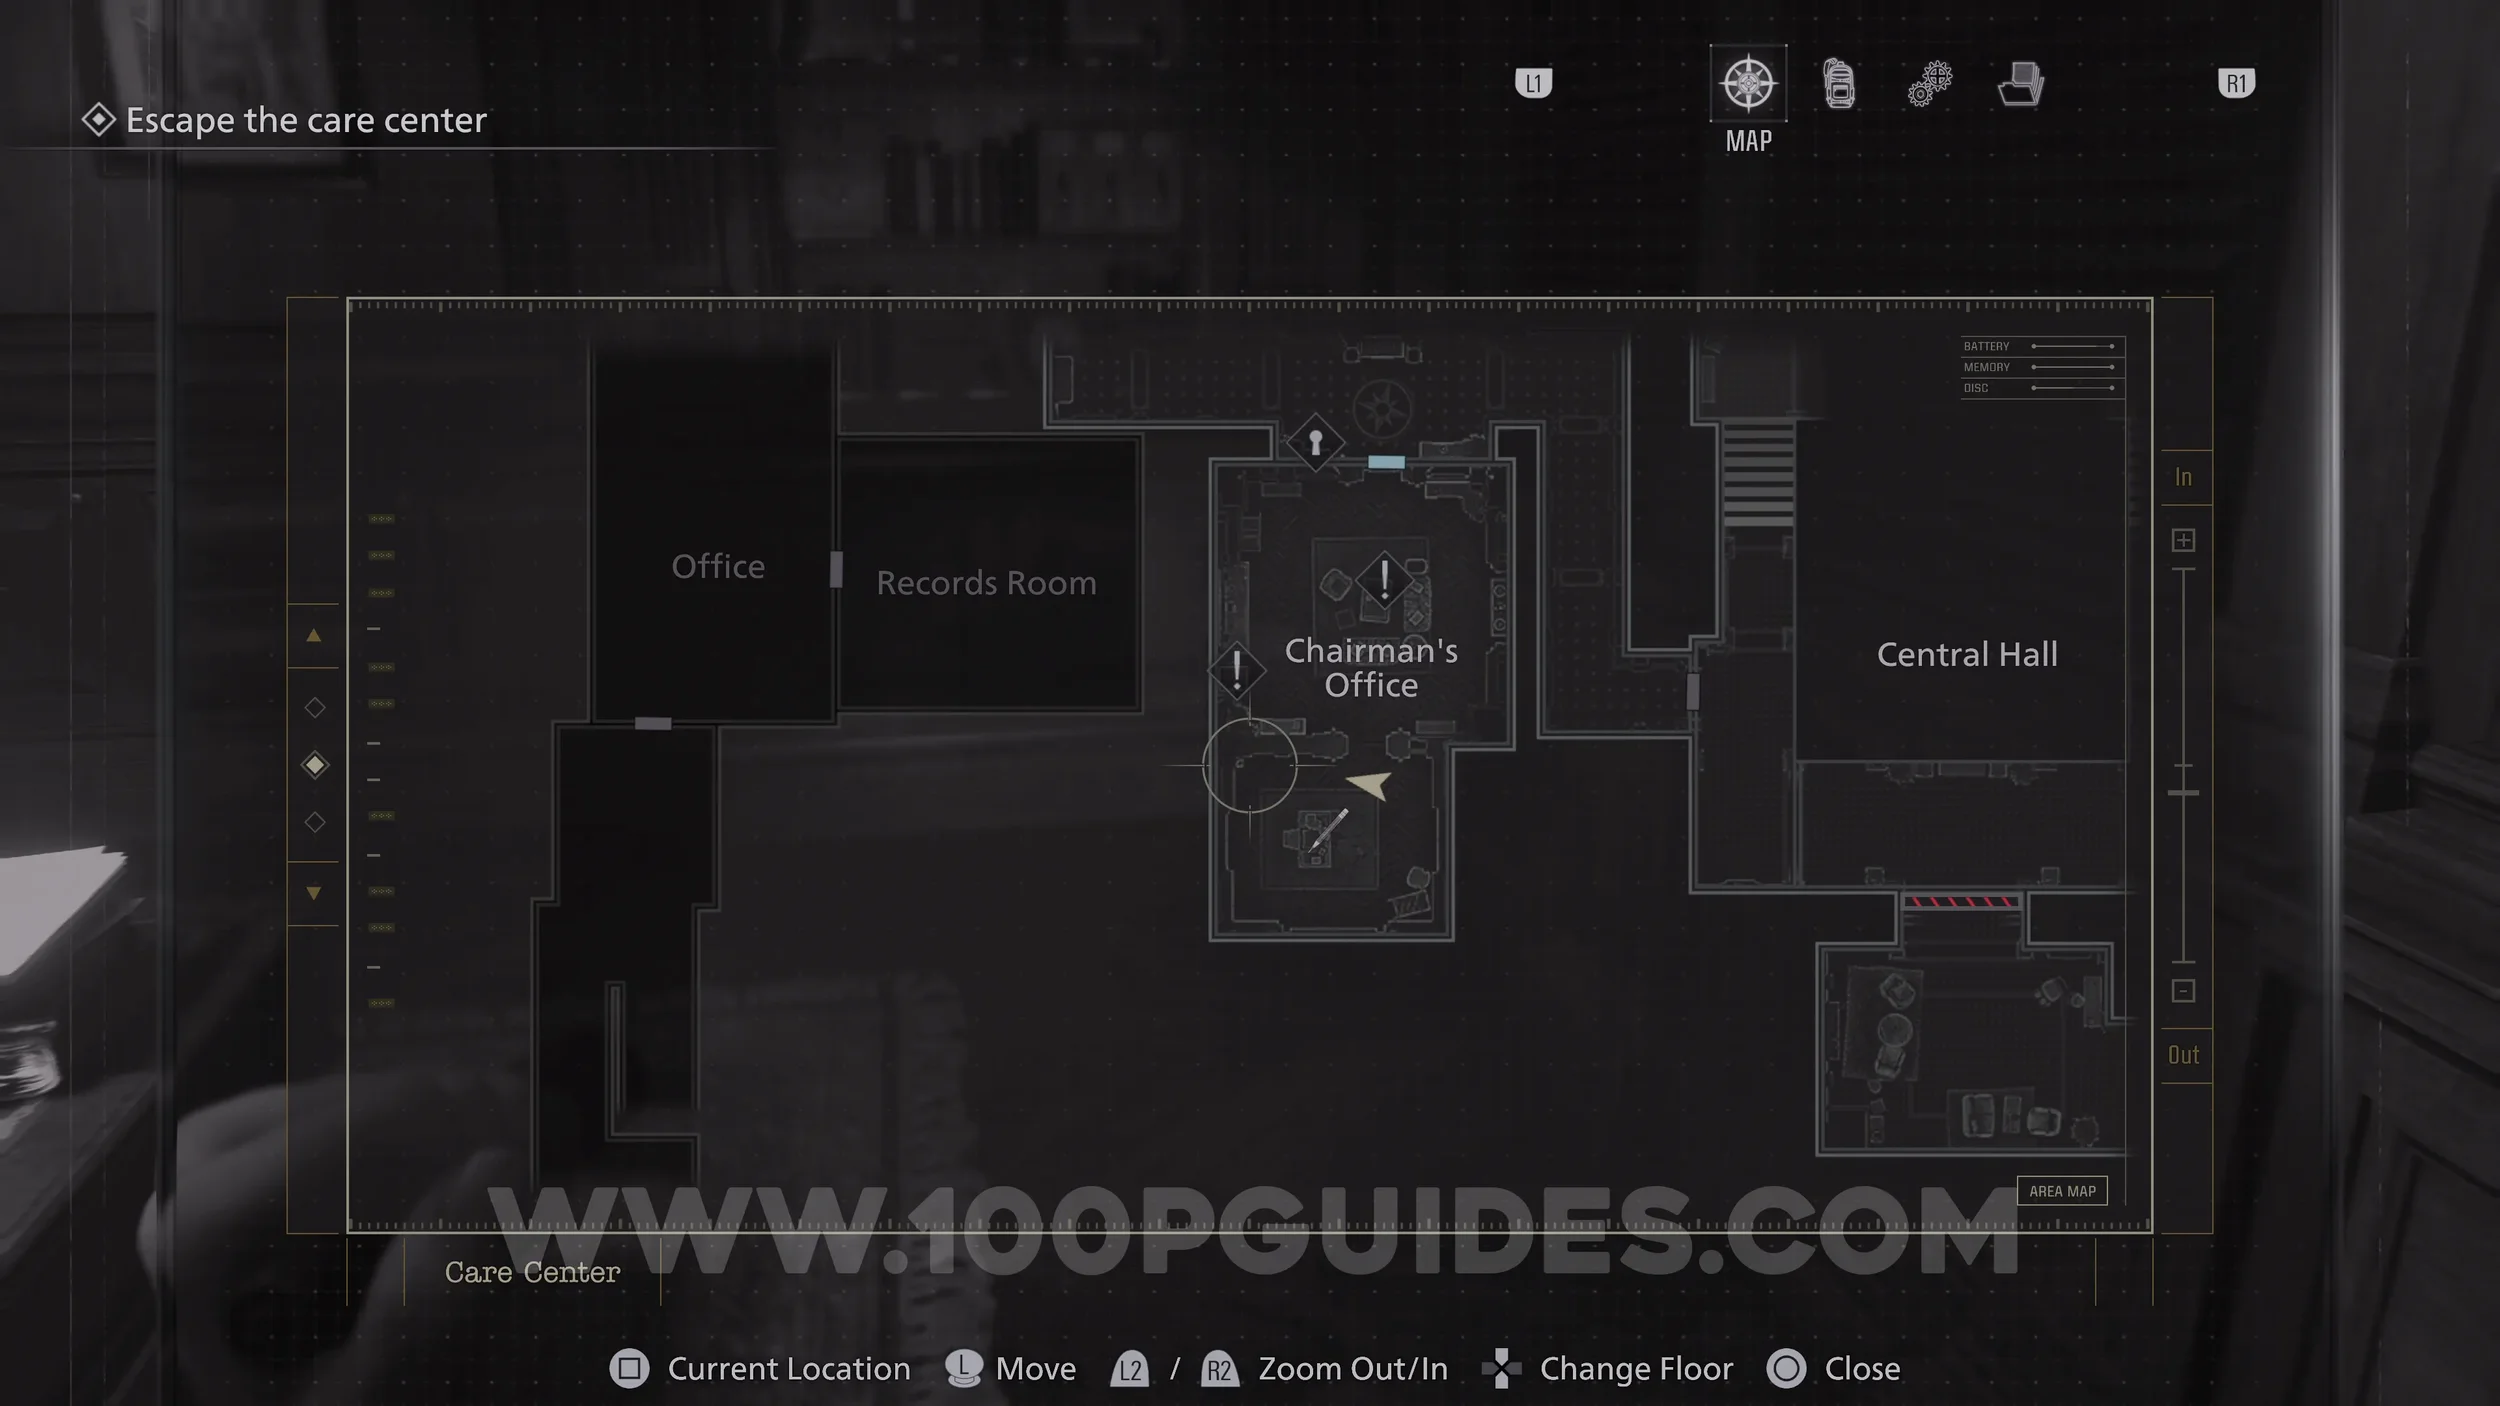
File #12 - Copy of An Email to a Manager. In the Chairman’s Office.
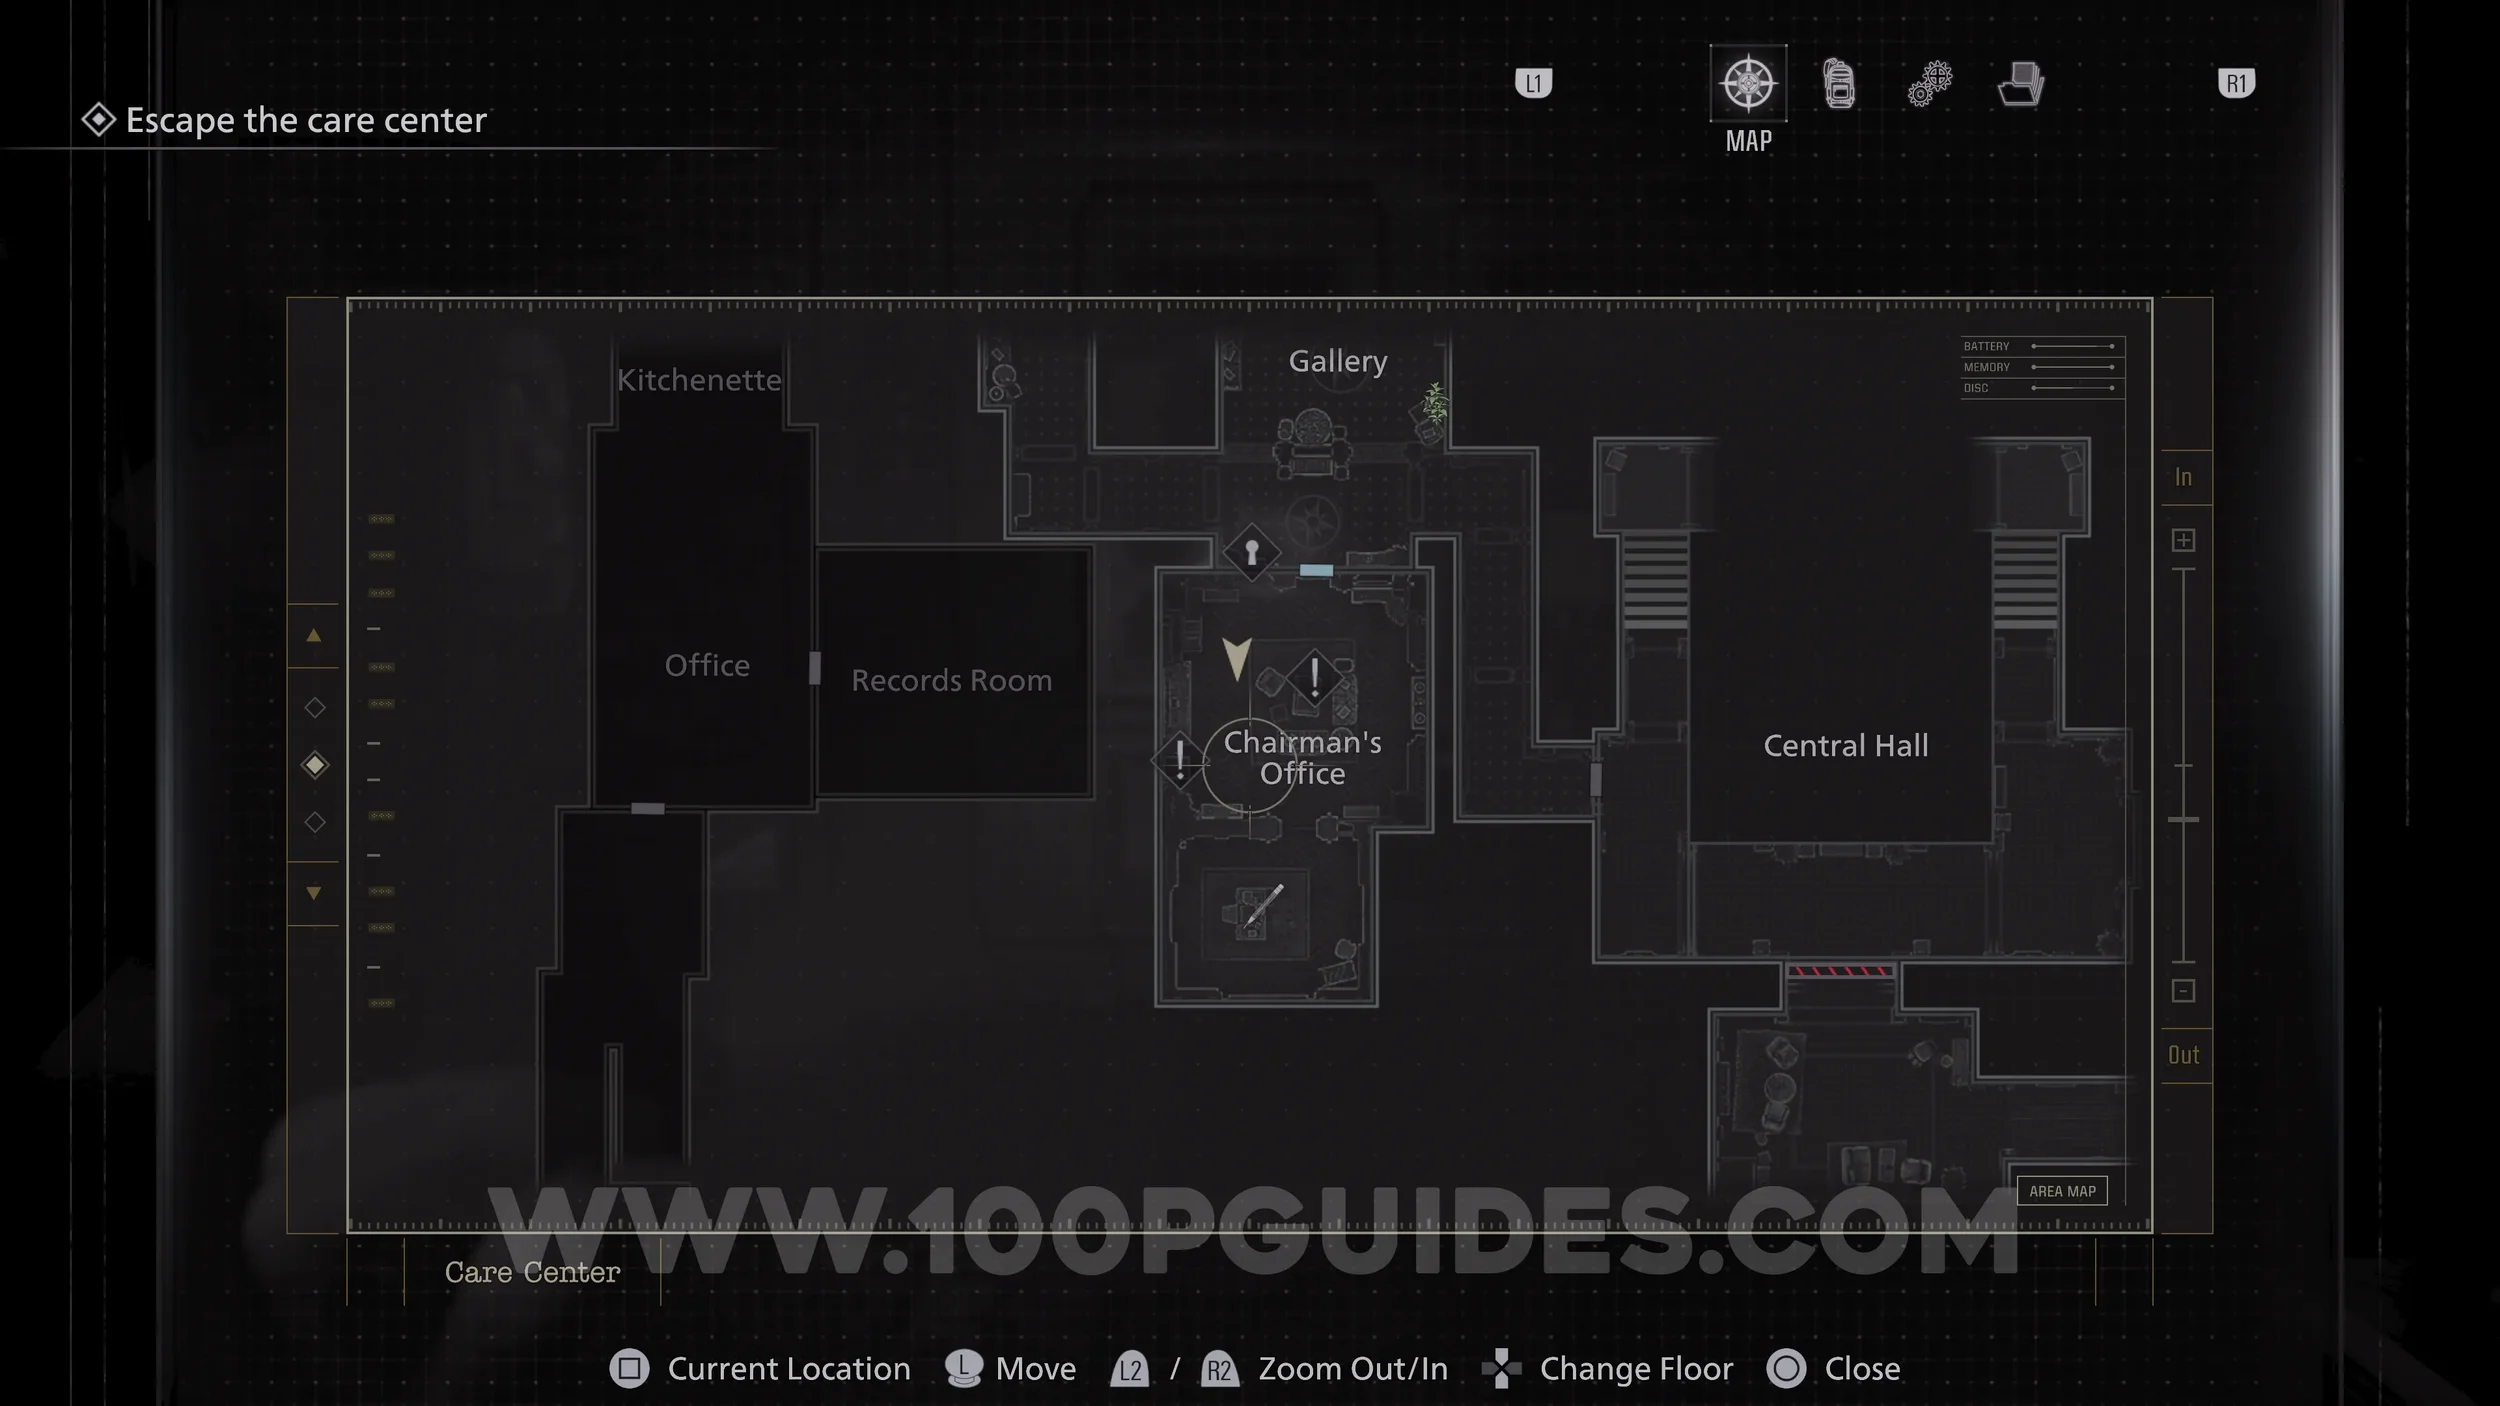
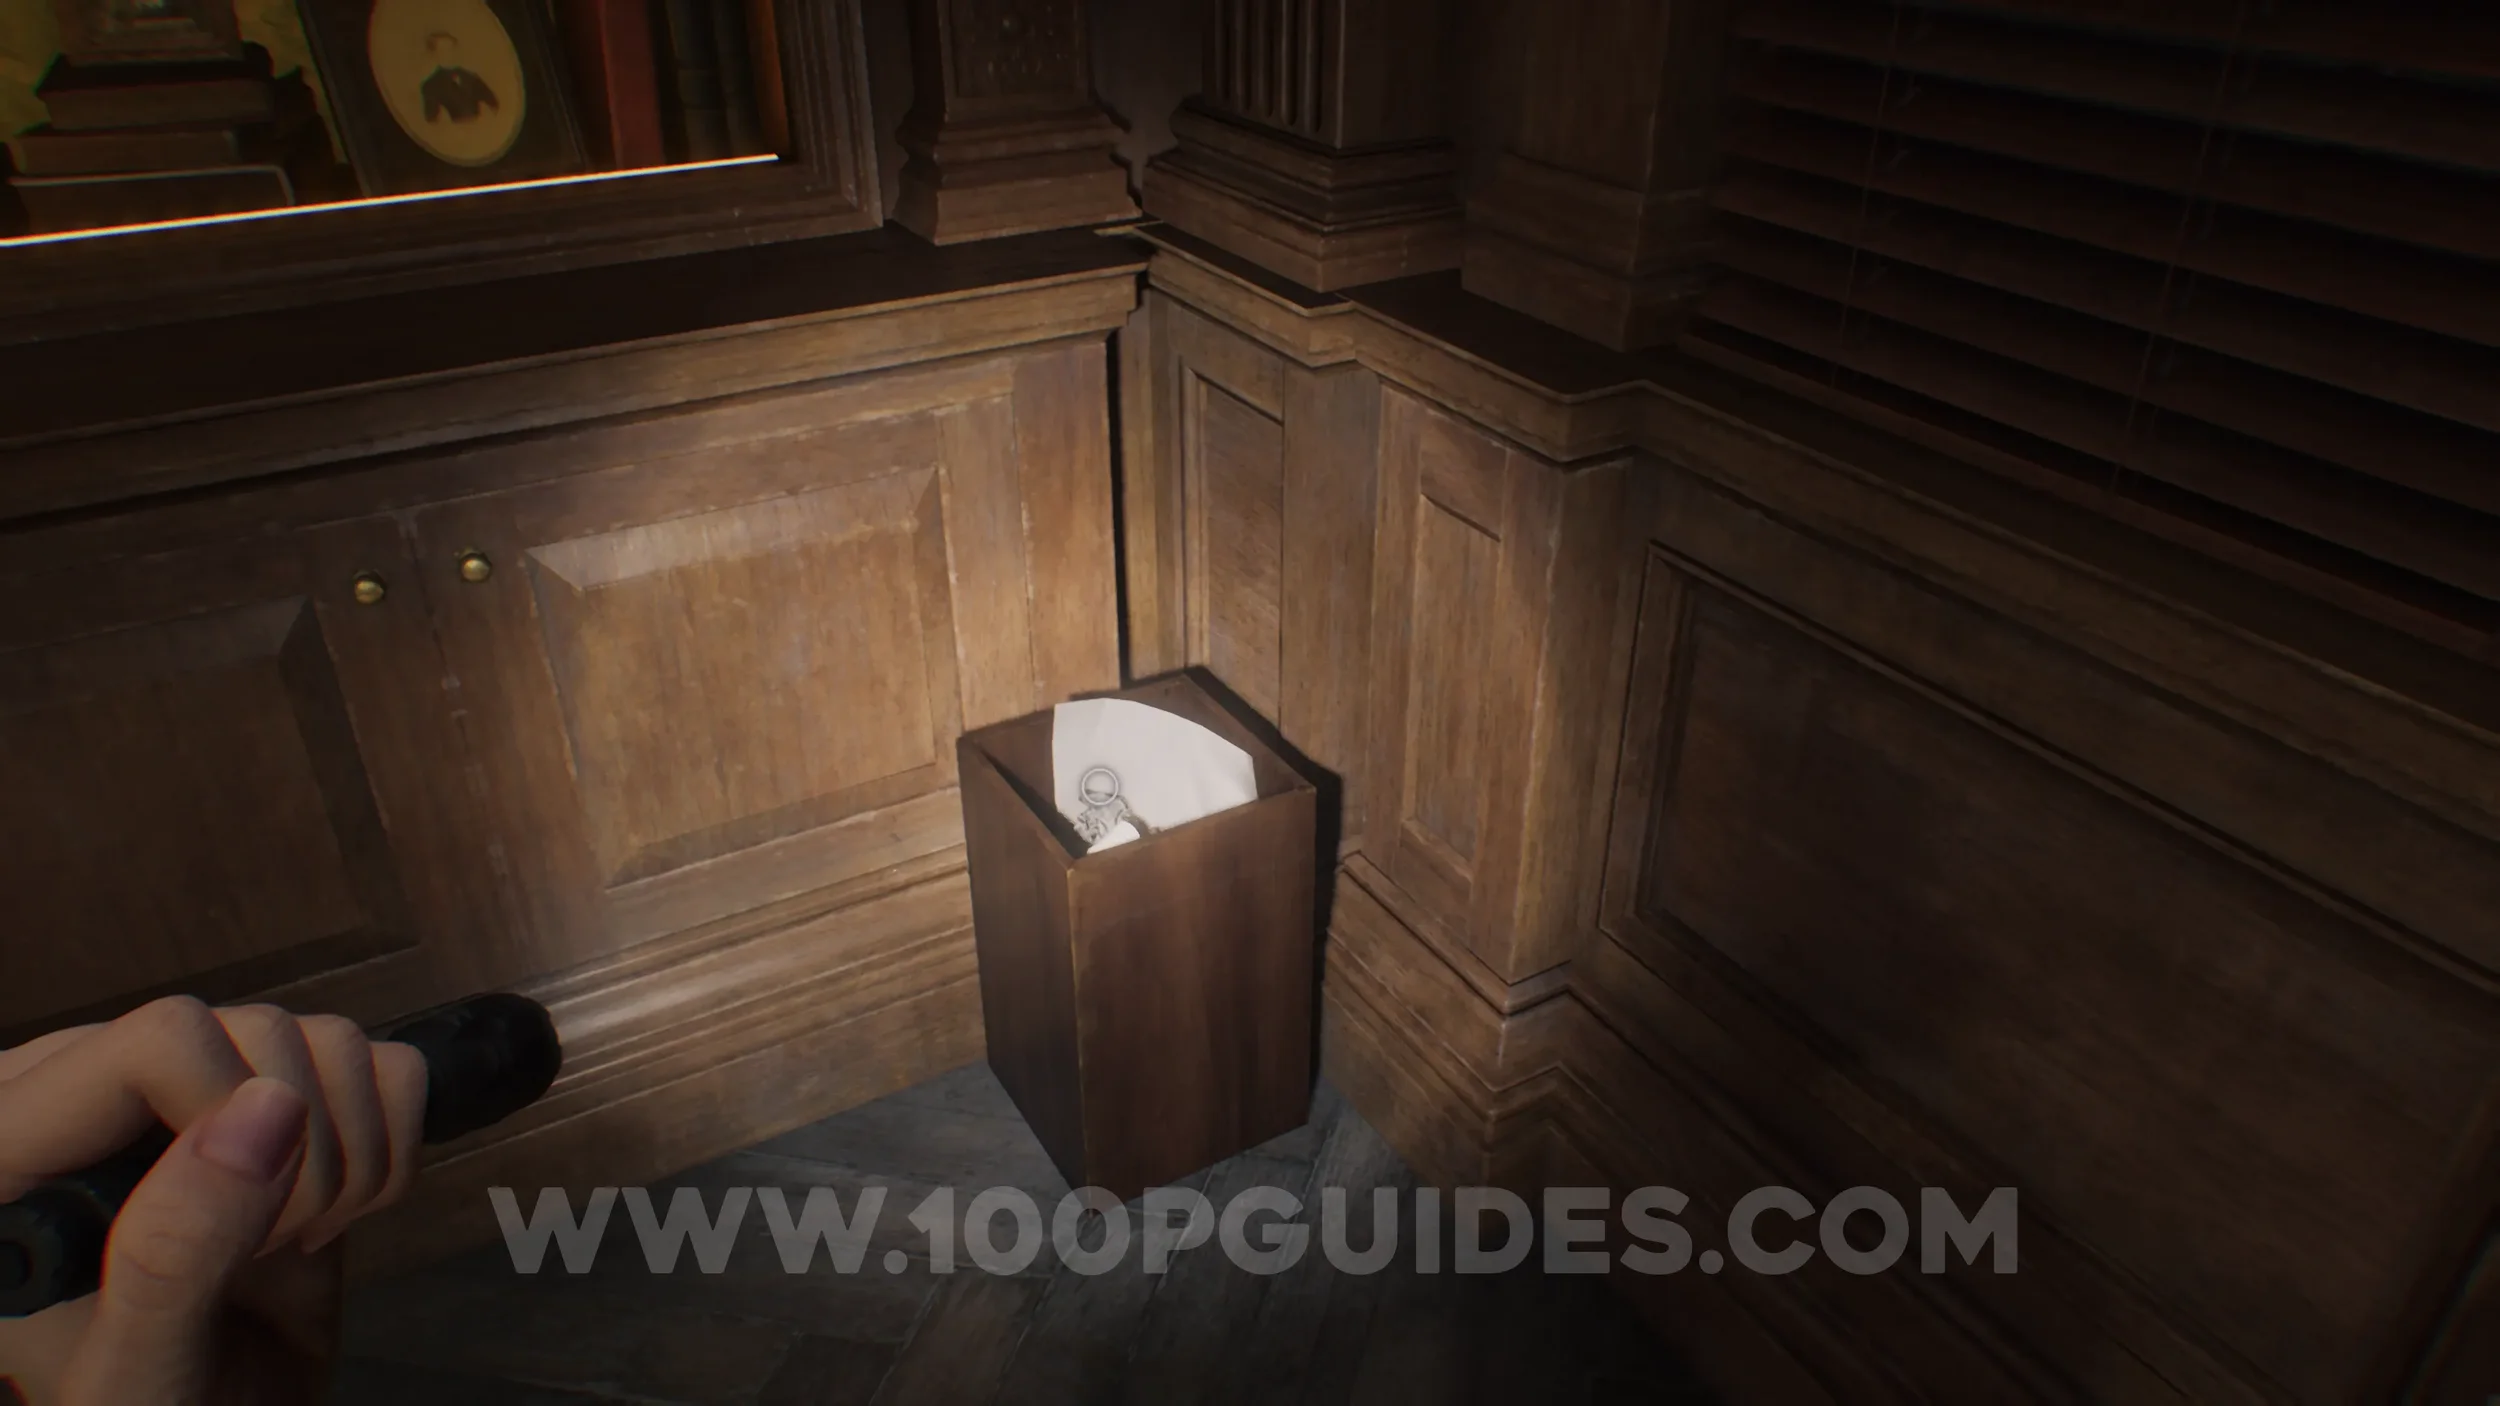
File #13 - Note to a Chairman. In the bin in the corner of the smaller room in the Chairman’s Office.
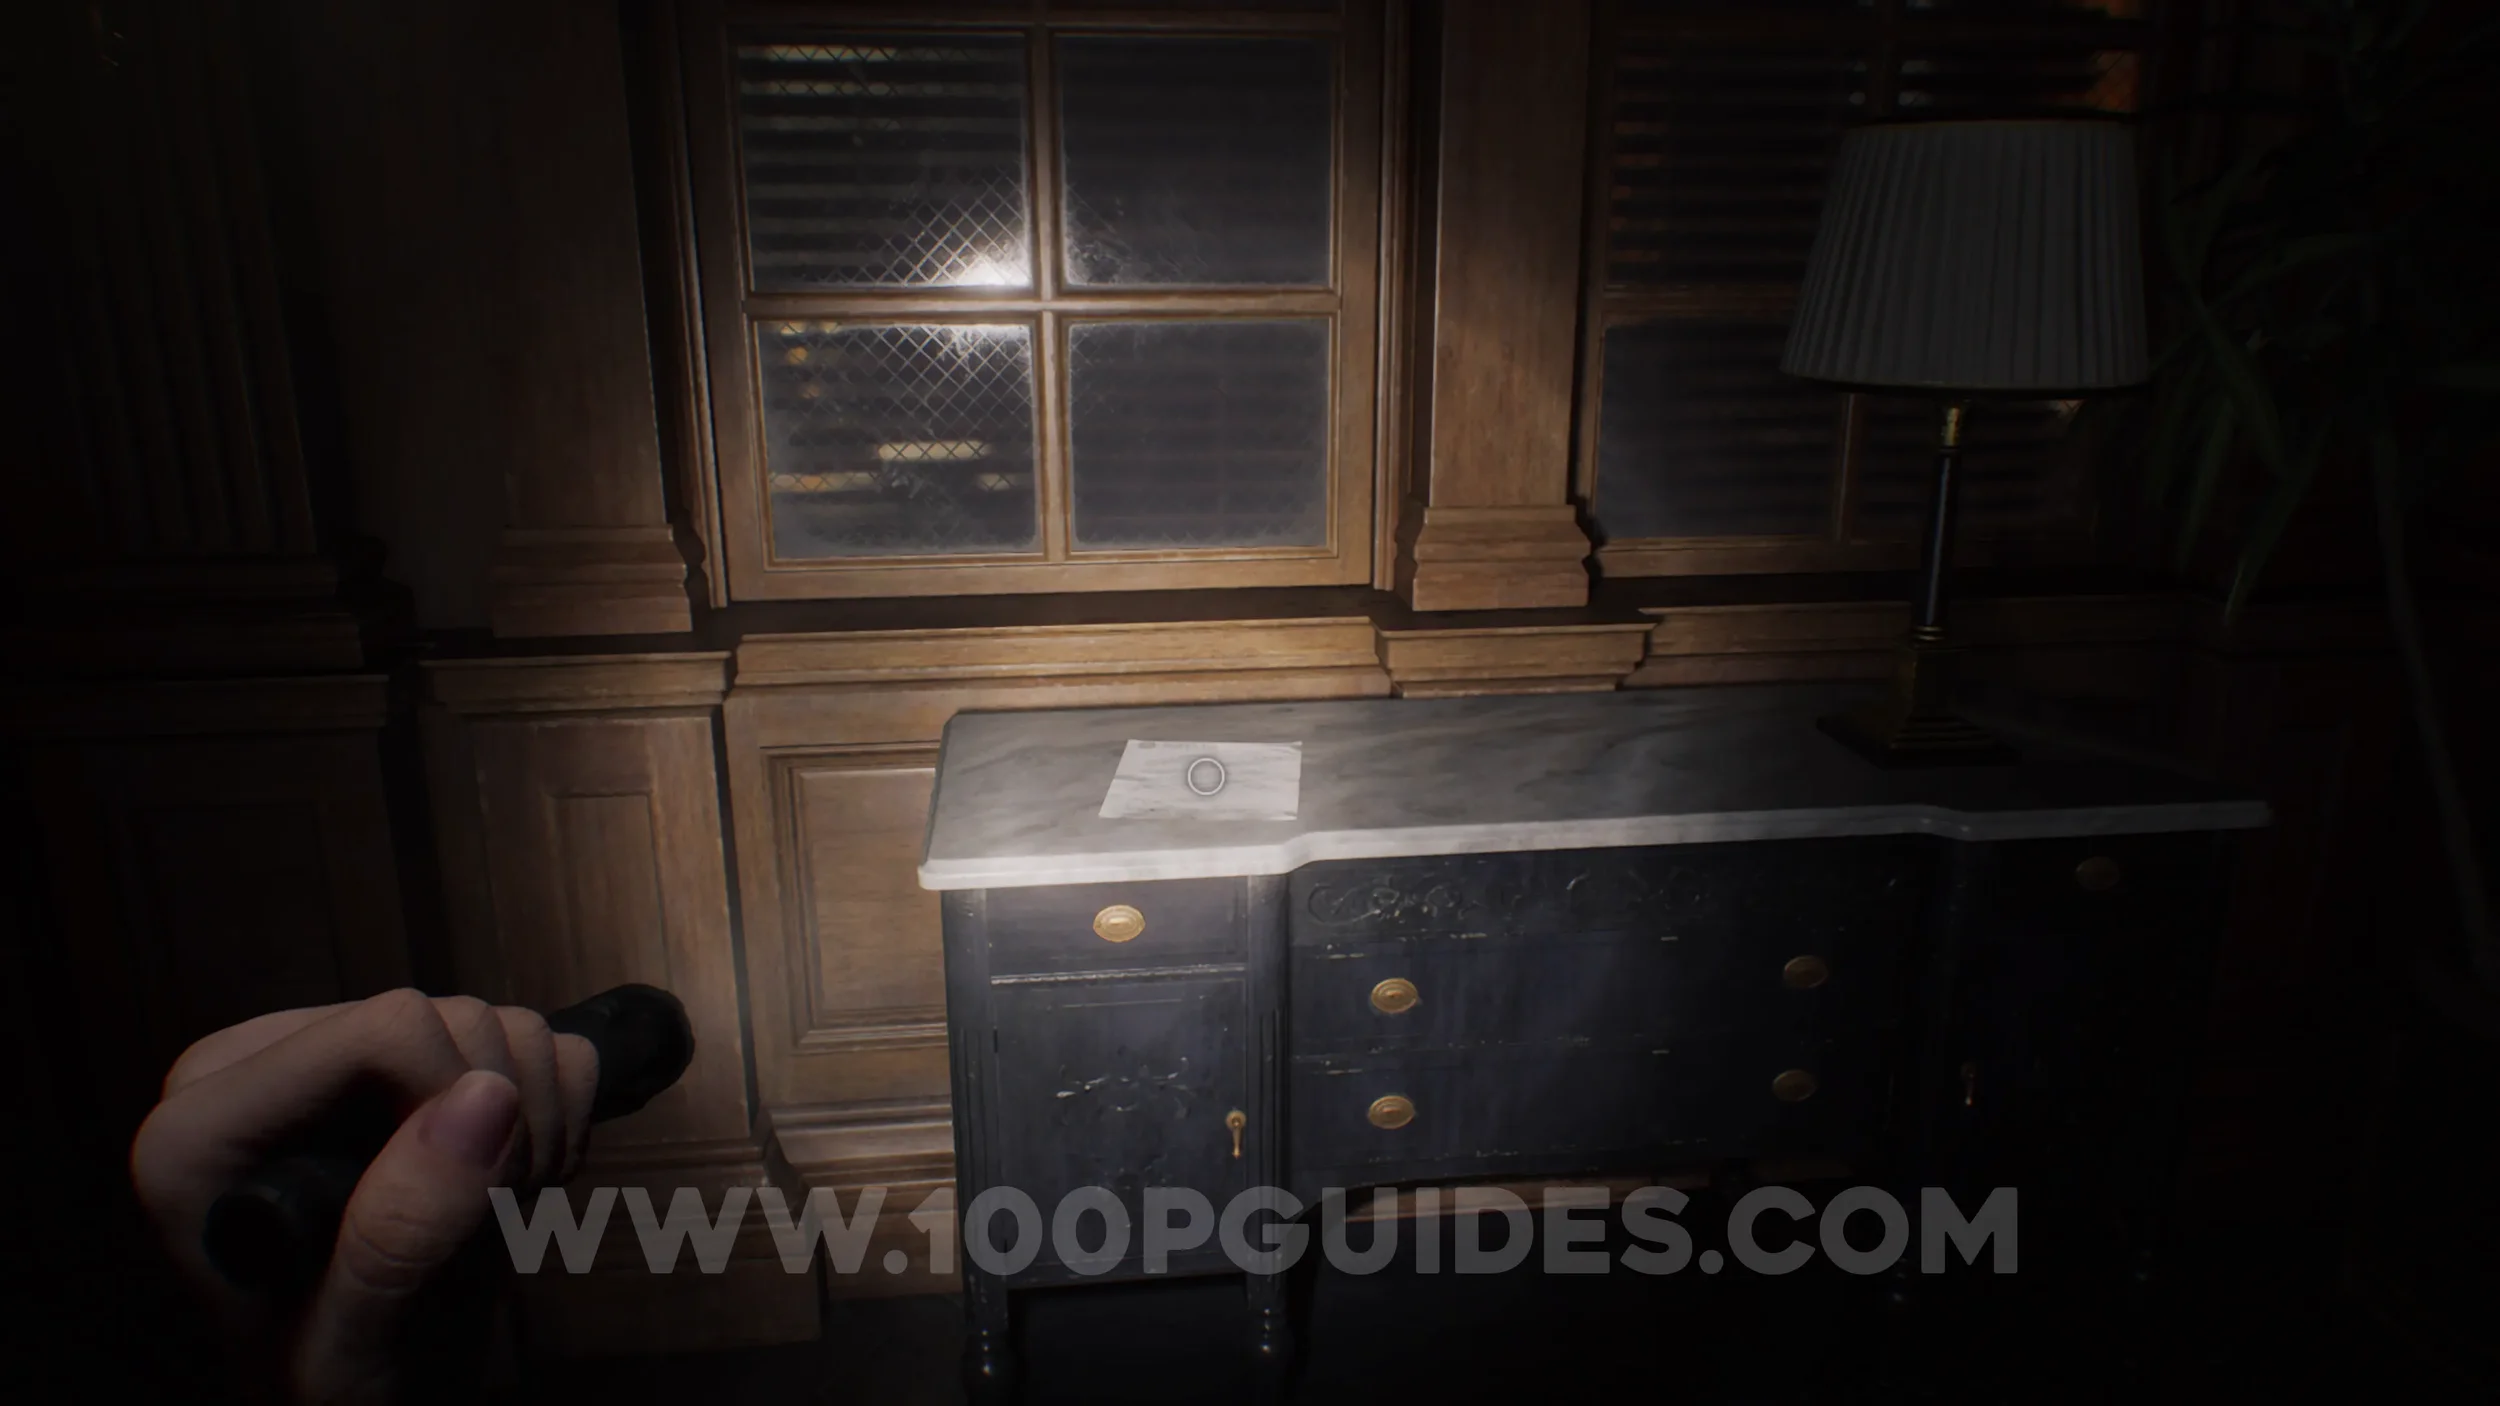
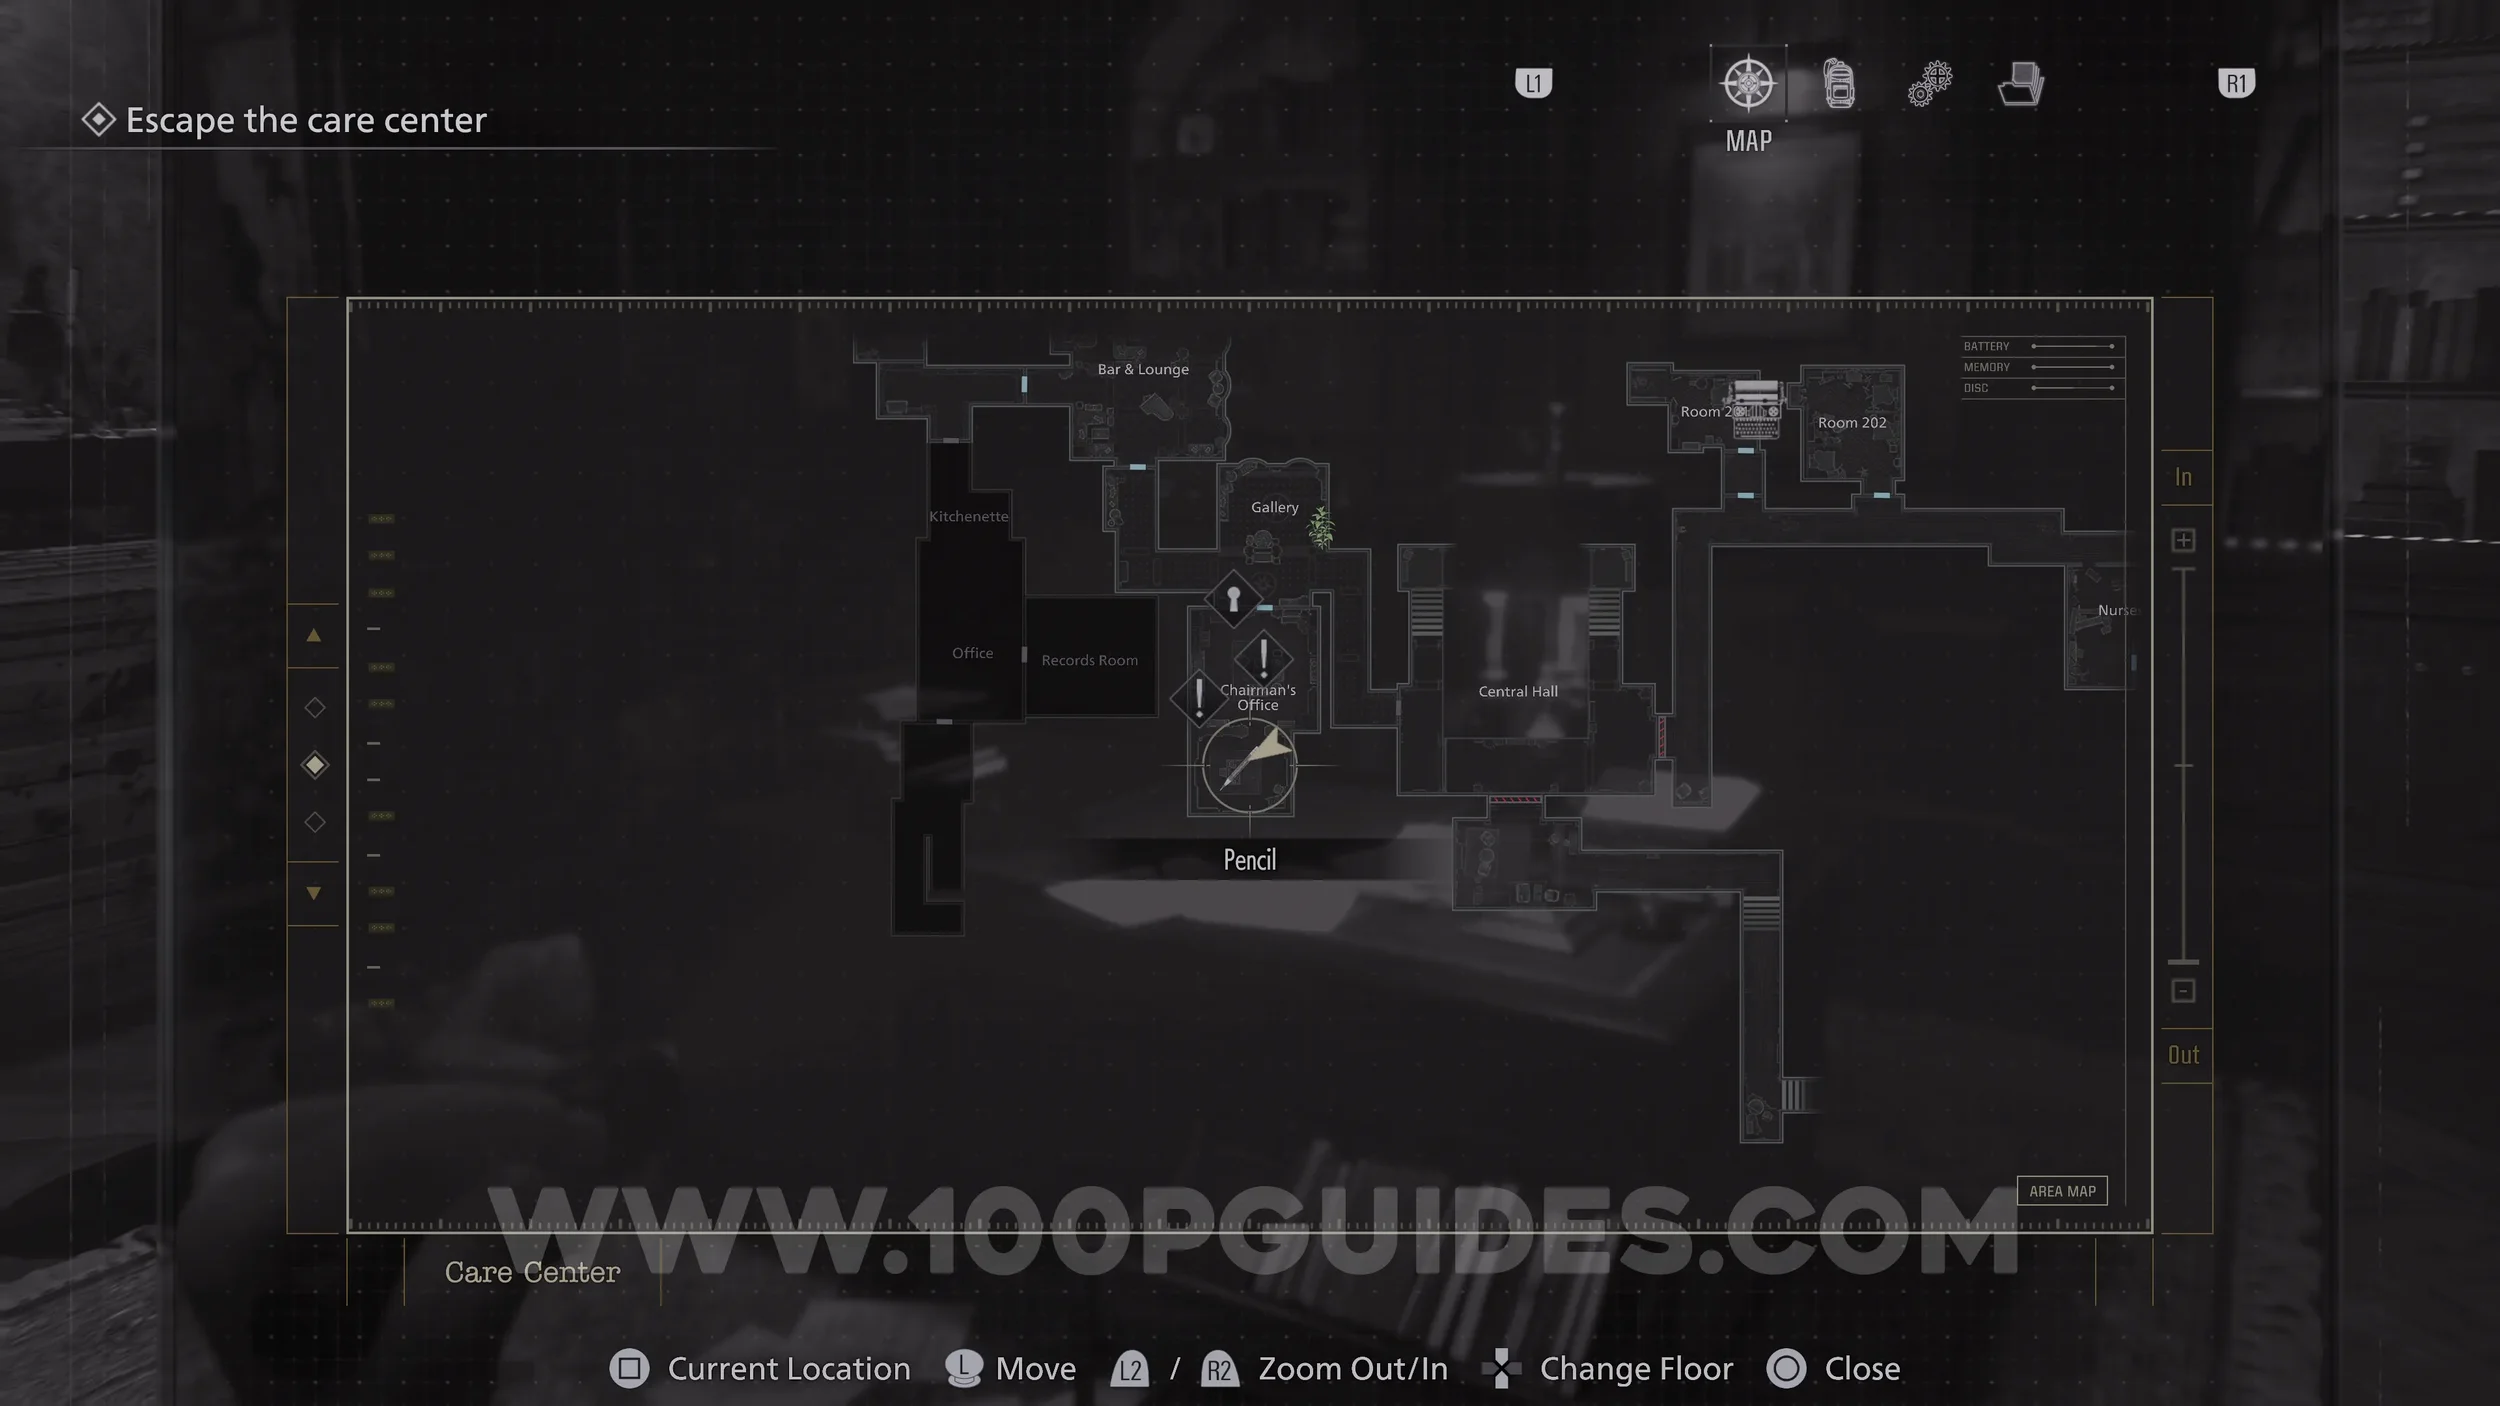
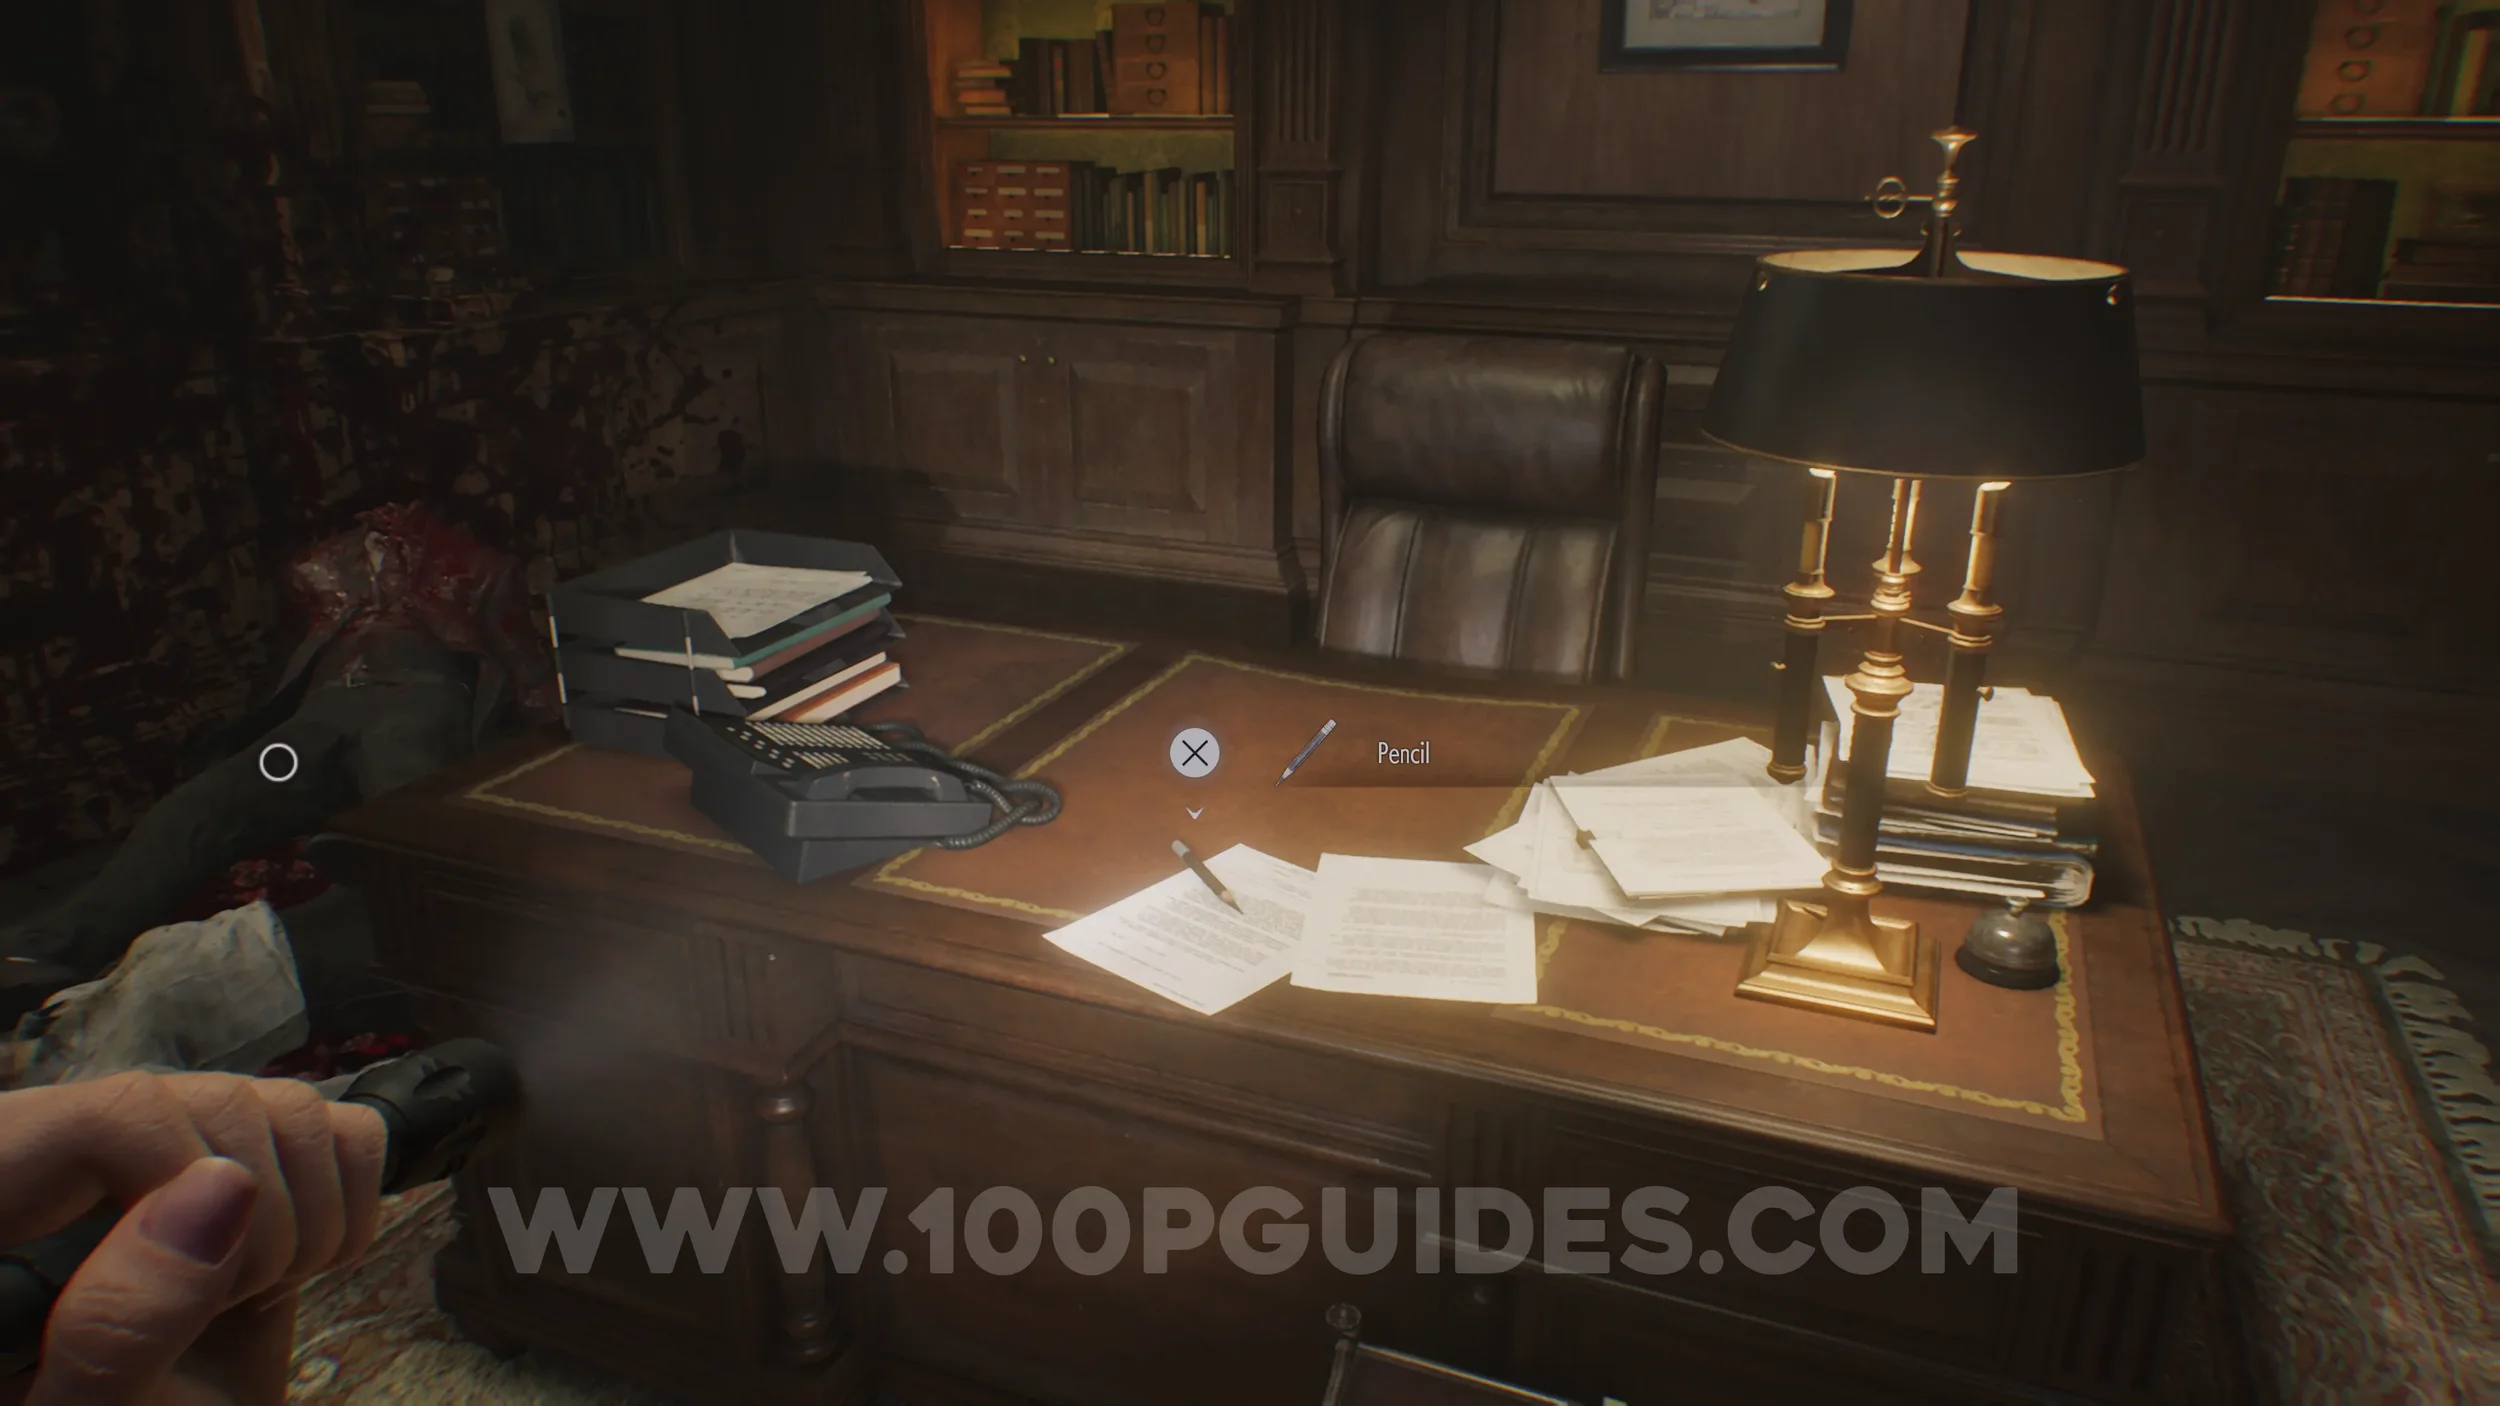
File #14 - Chairman’s Note. Pick up the pencil from the smaller room in the Chairman’s Office and then use it to reveal the text on the note on the table in the other room.
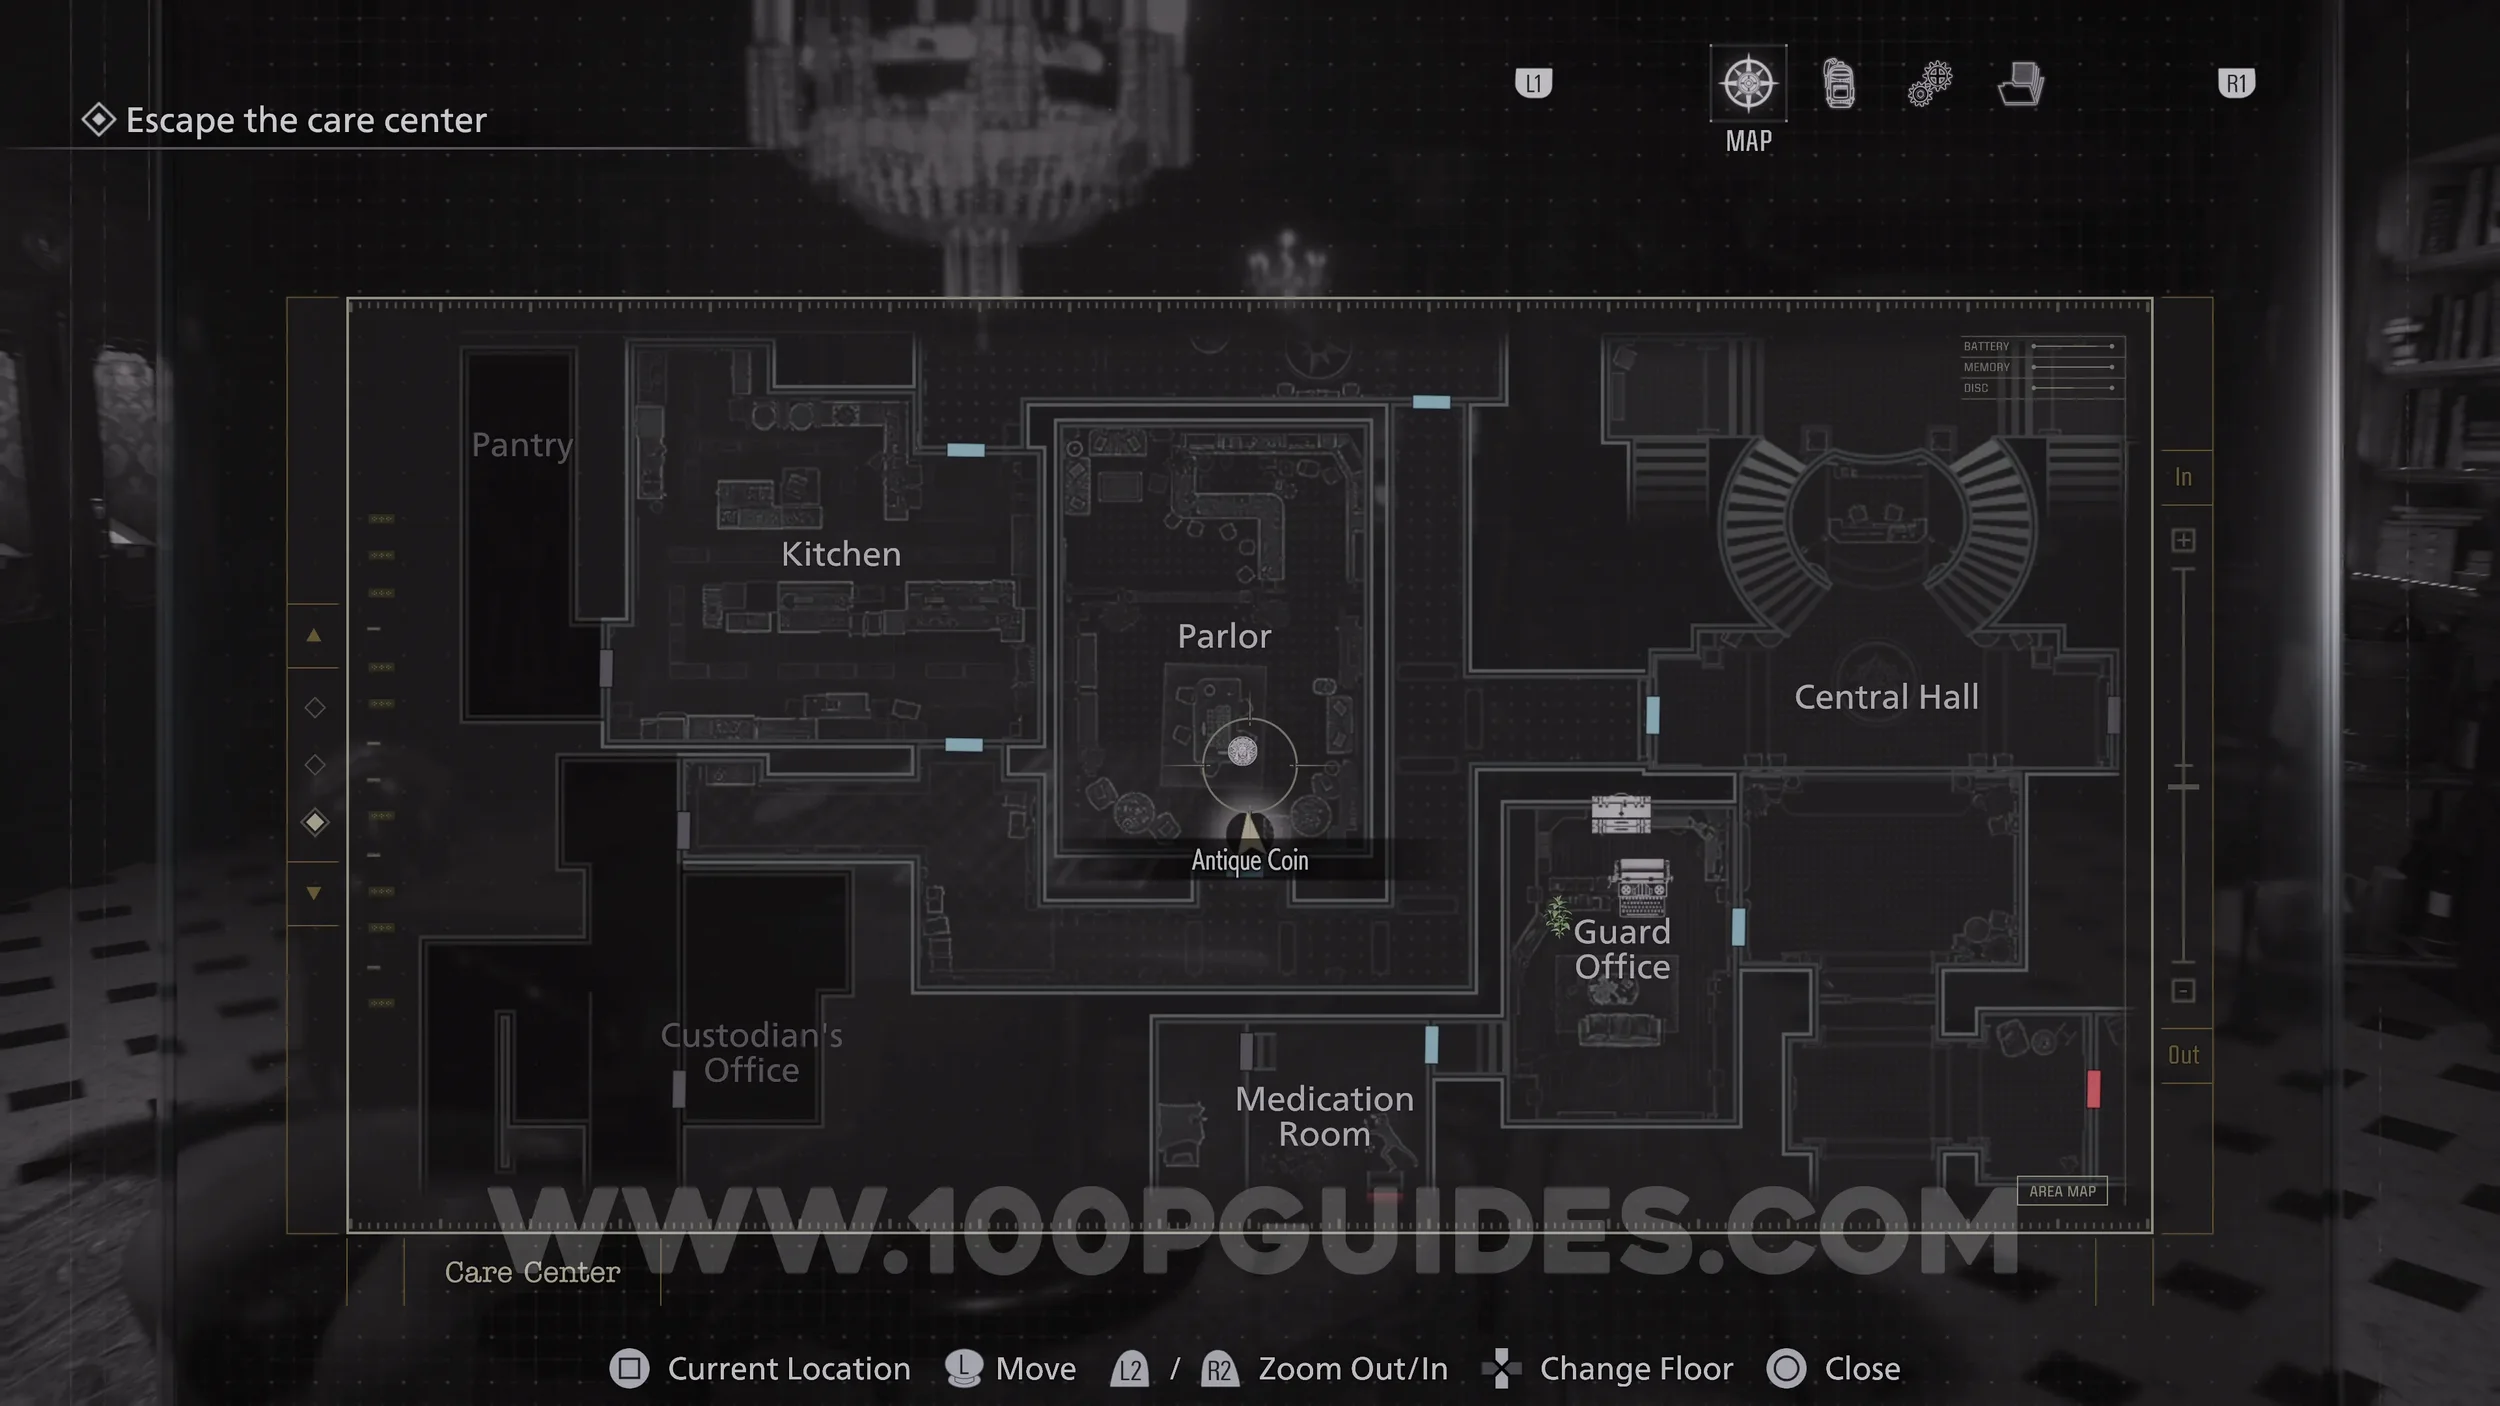
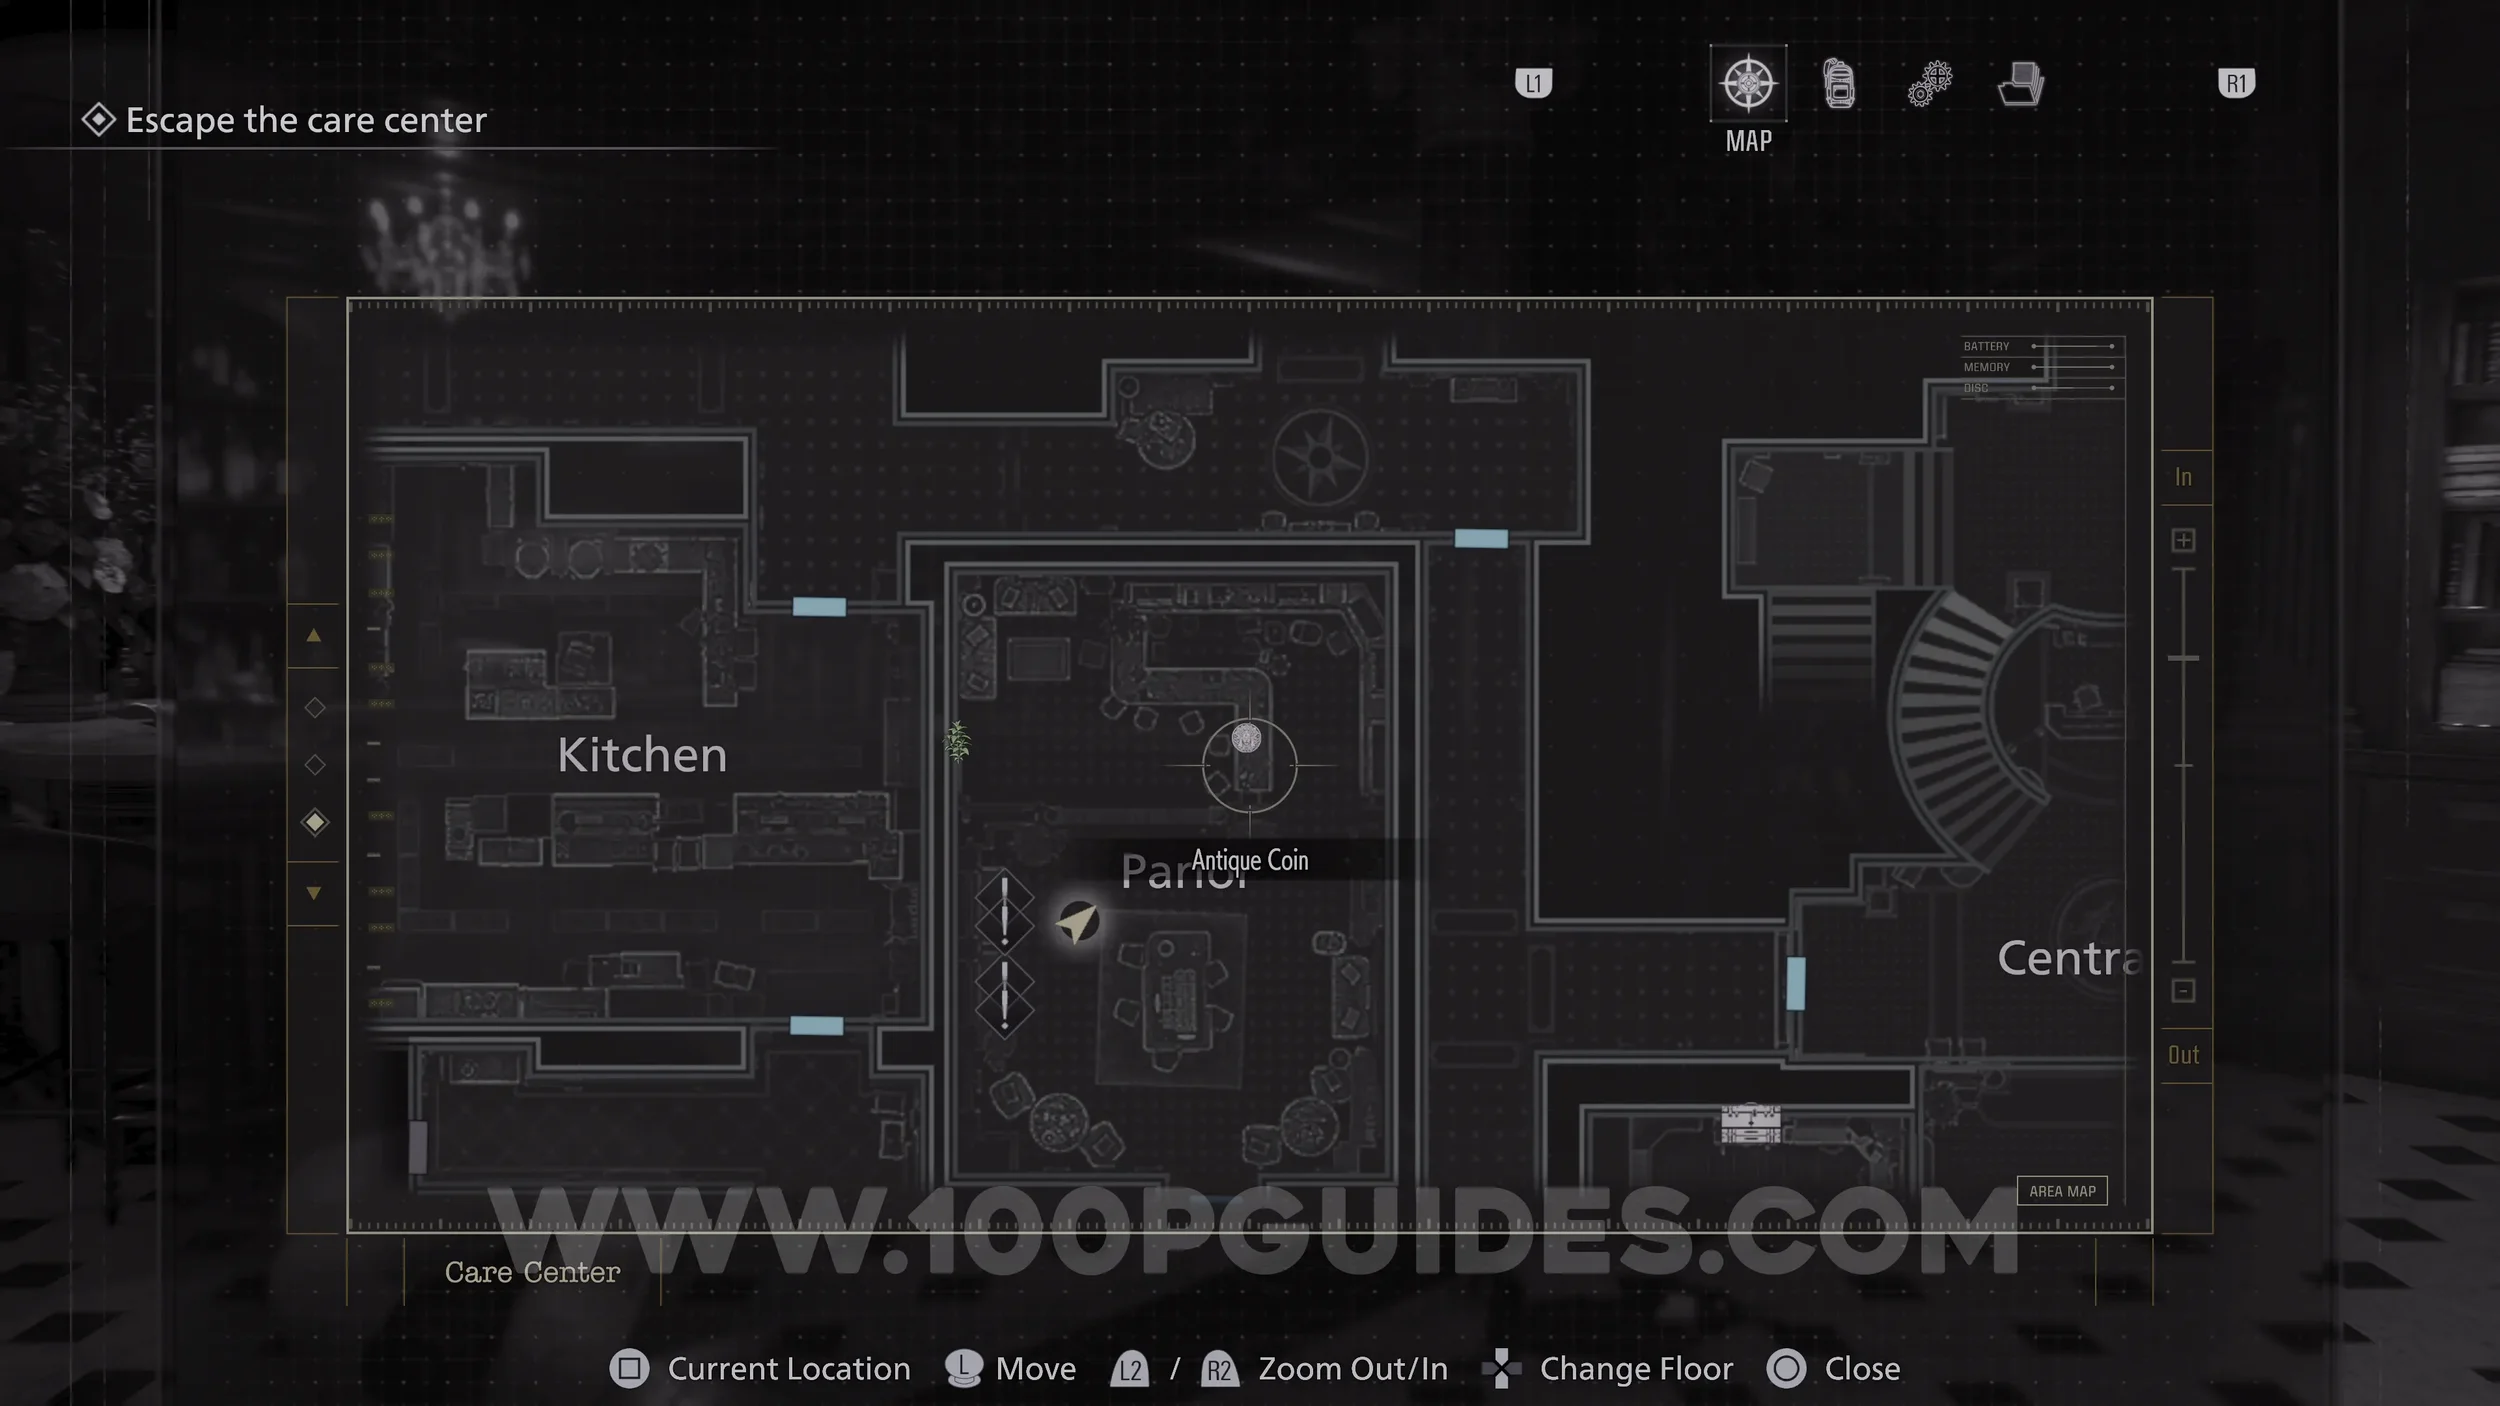
Antique Coin #8. On the roulette table in the Parlor.

Antique Coin #9. Shoot either the 7, 15, or 29 on the roulette table, then interact with the wheel to spin it. If the ball lands on the number you shot, you will receive the coin.
You can retry this as many times as needed until it lands on your chosen number.
Antique Coin #10. On the bar in the Parlor.
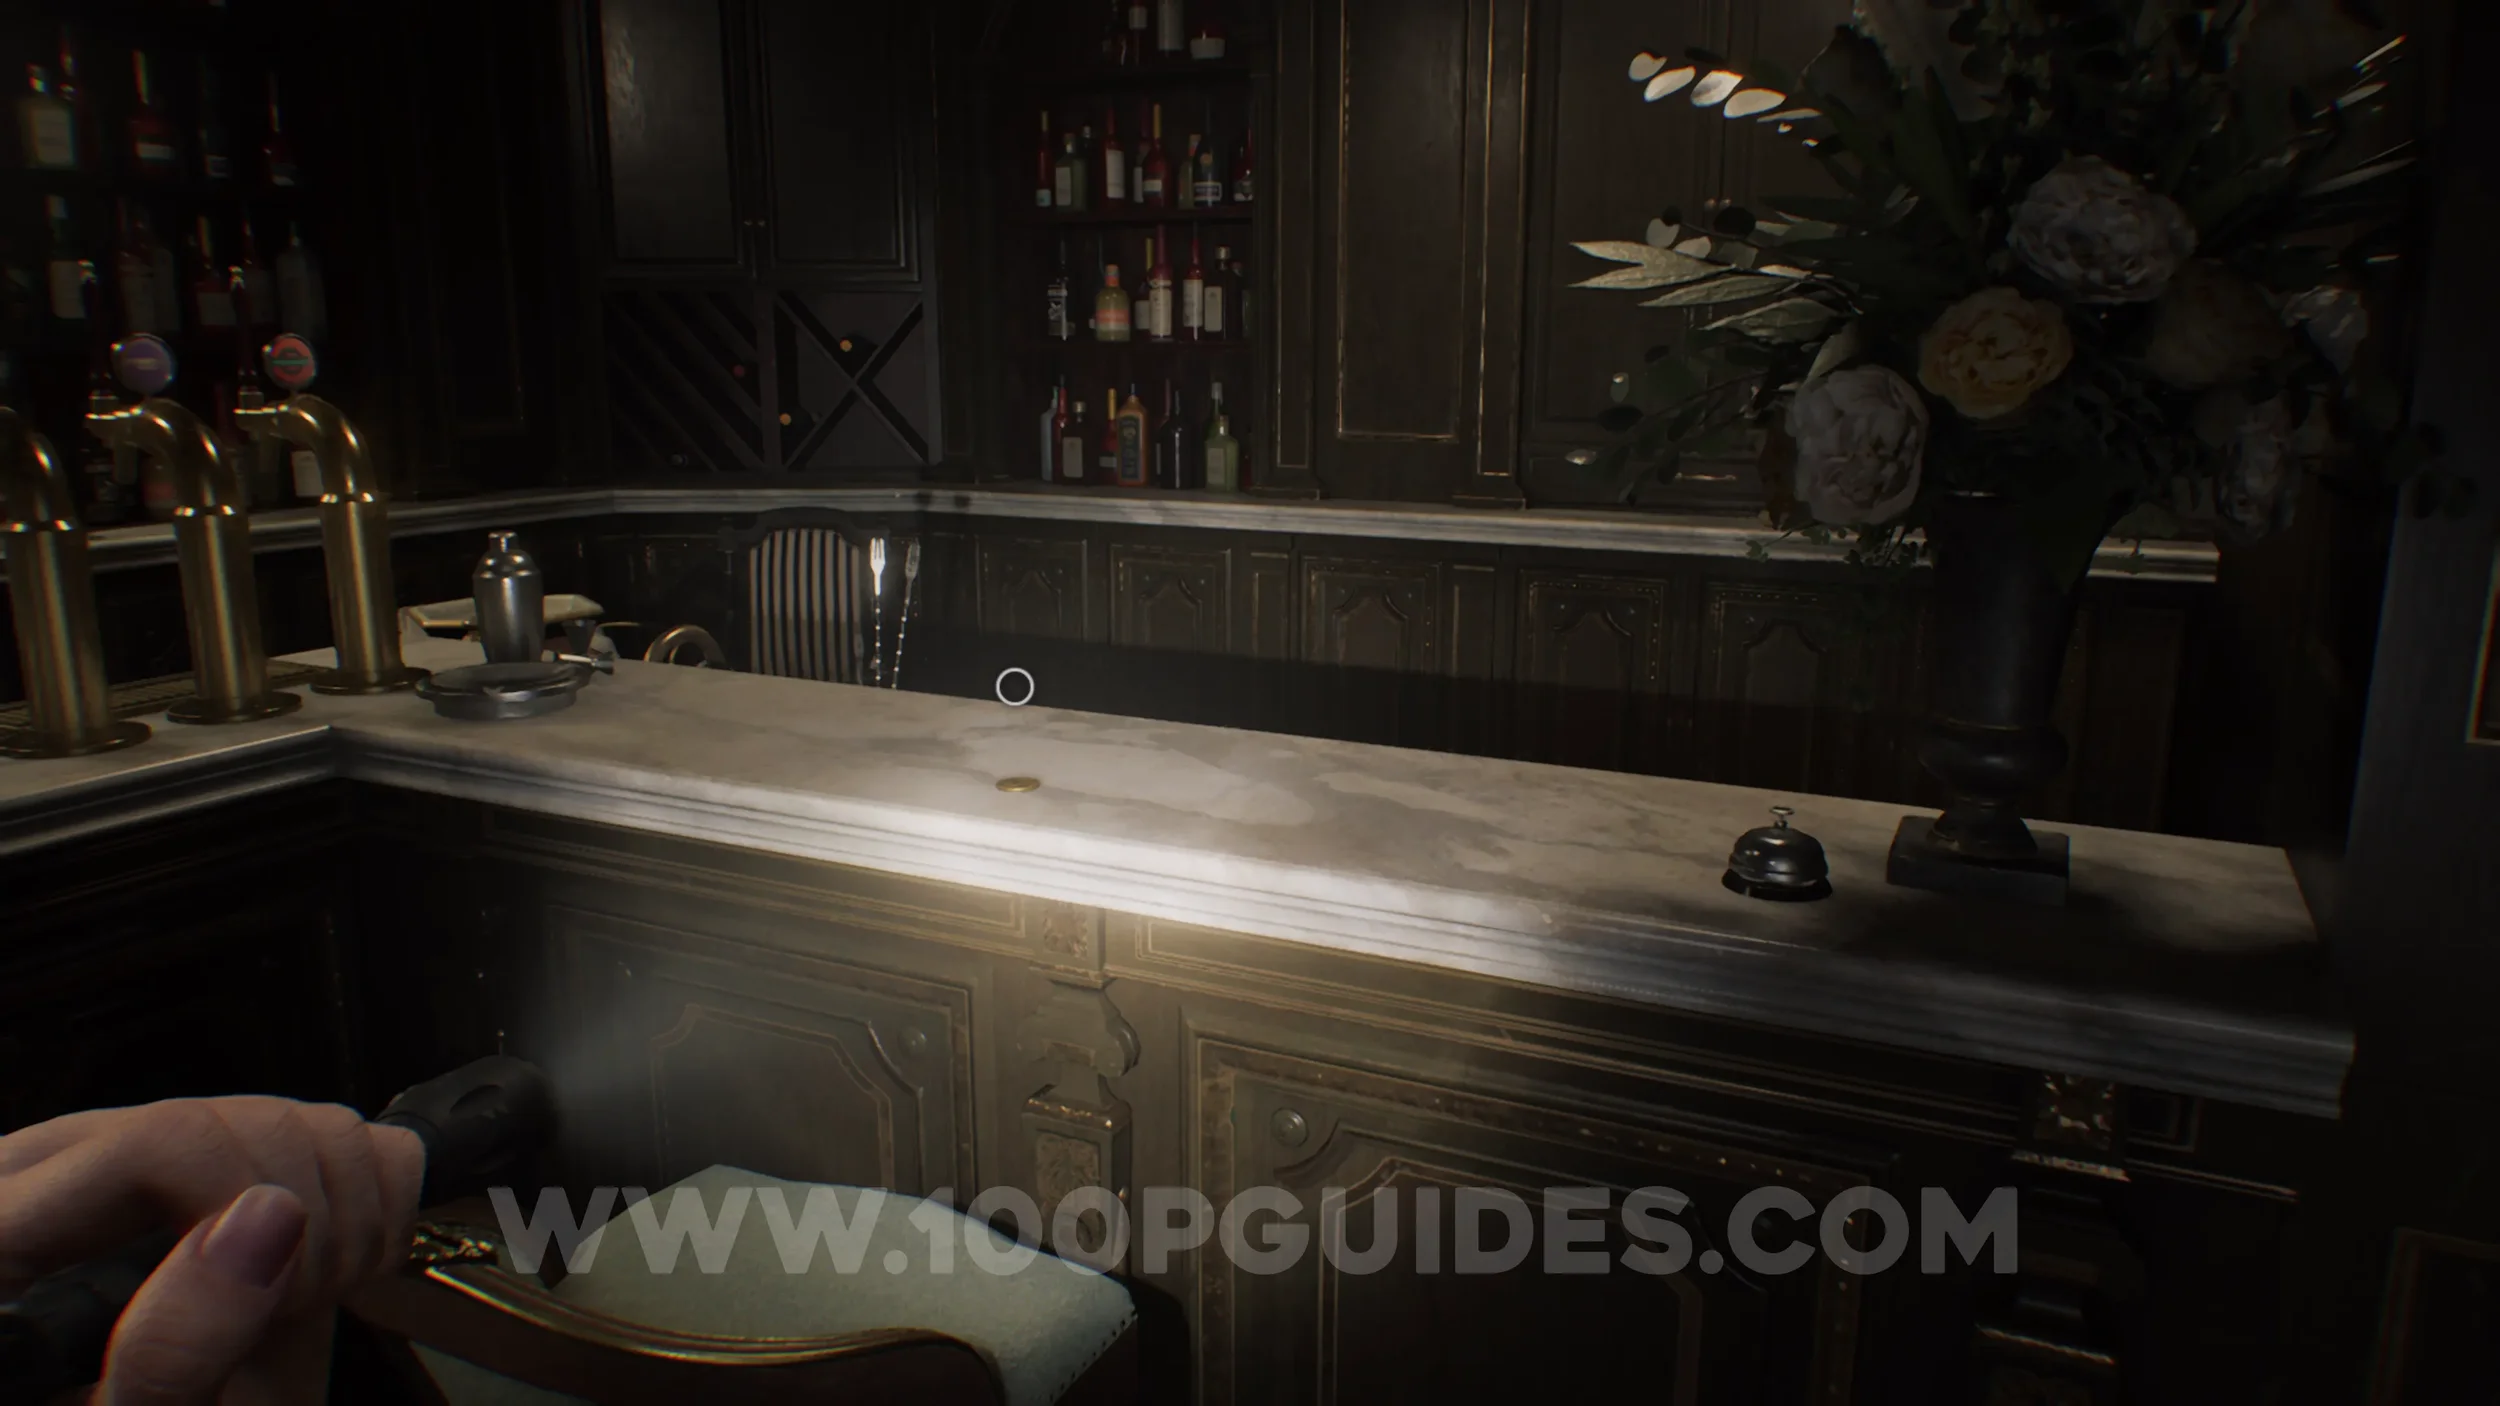
Antique Coin #11. Break the vase behind the bar in the Parlor to reveal the coin on the corner of the bar.

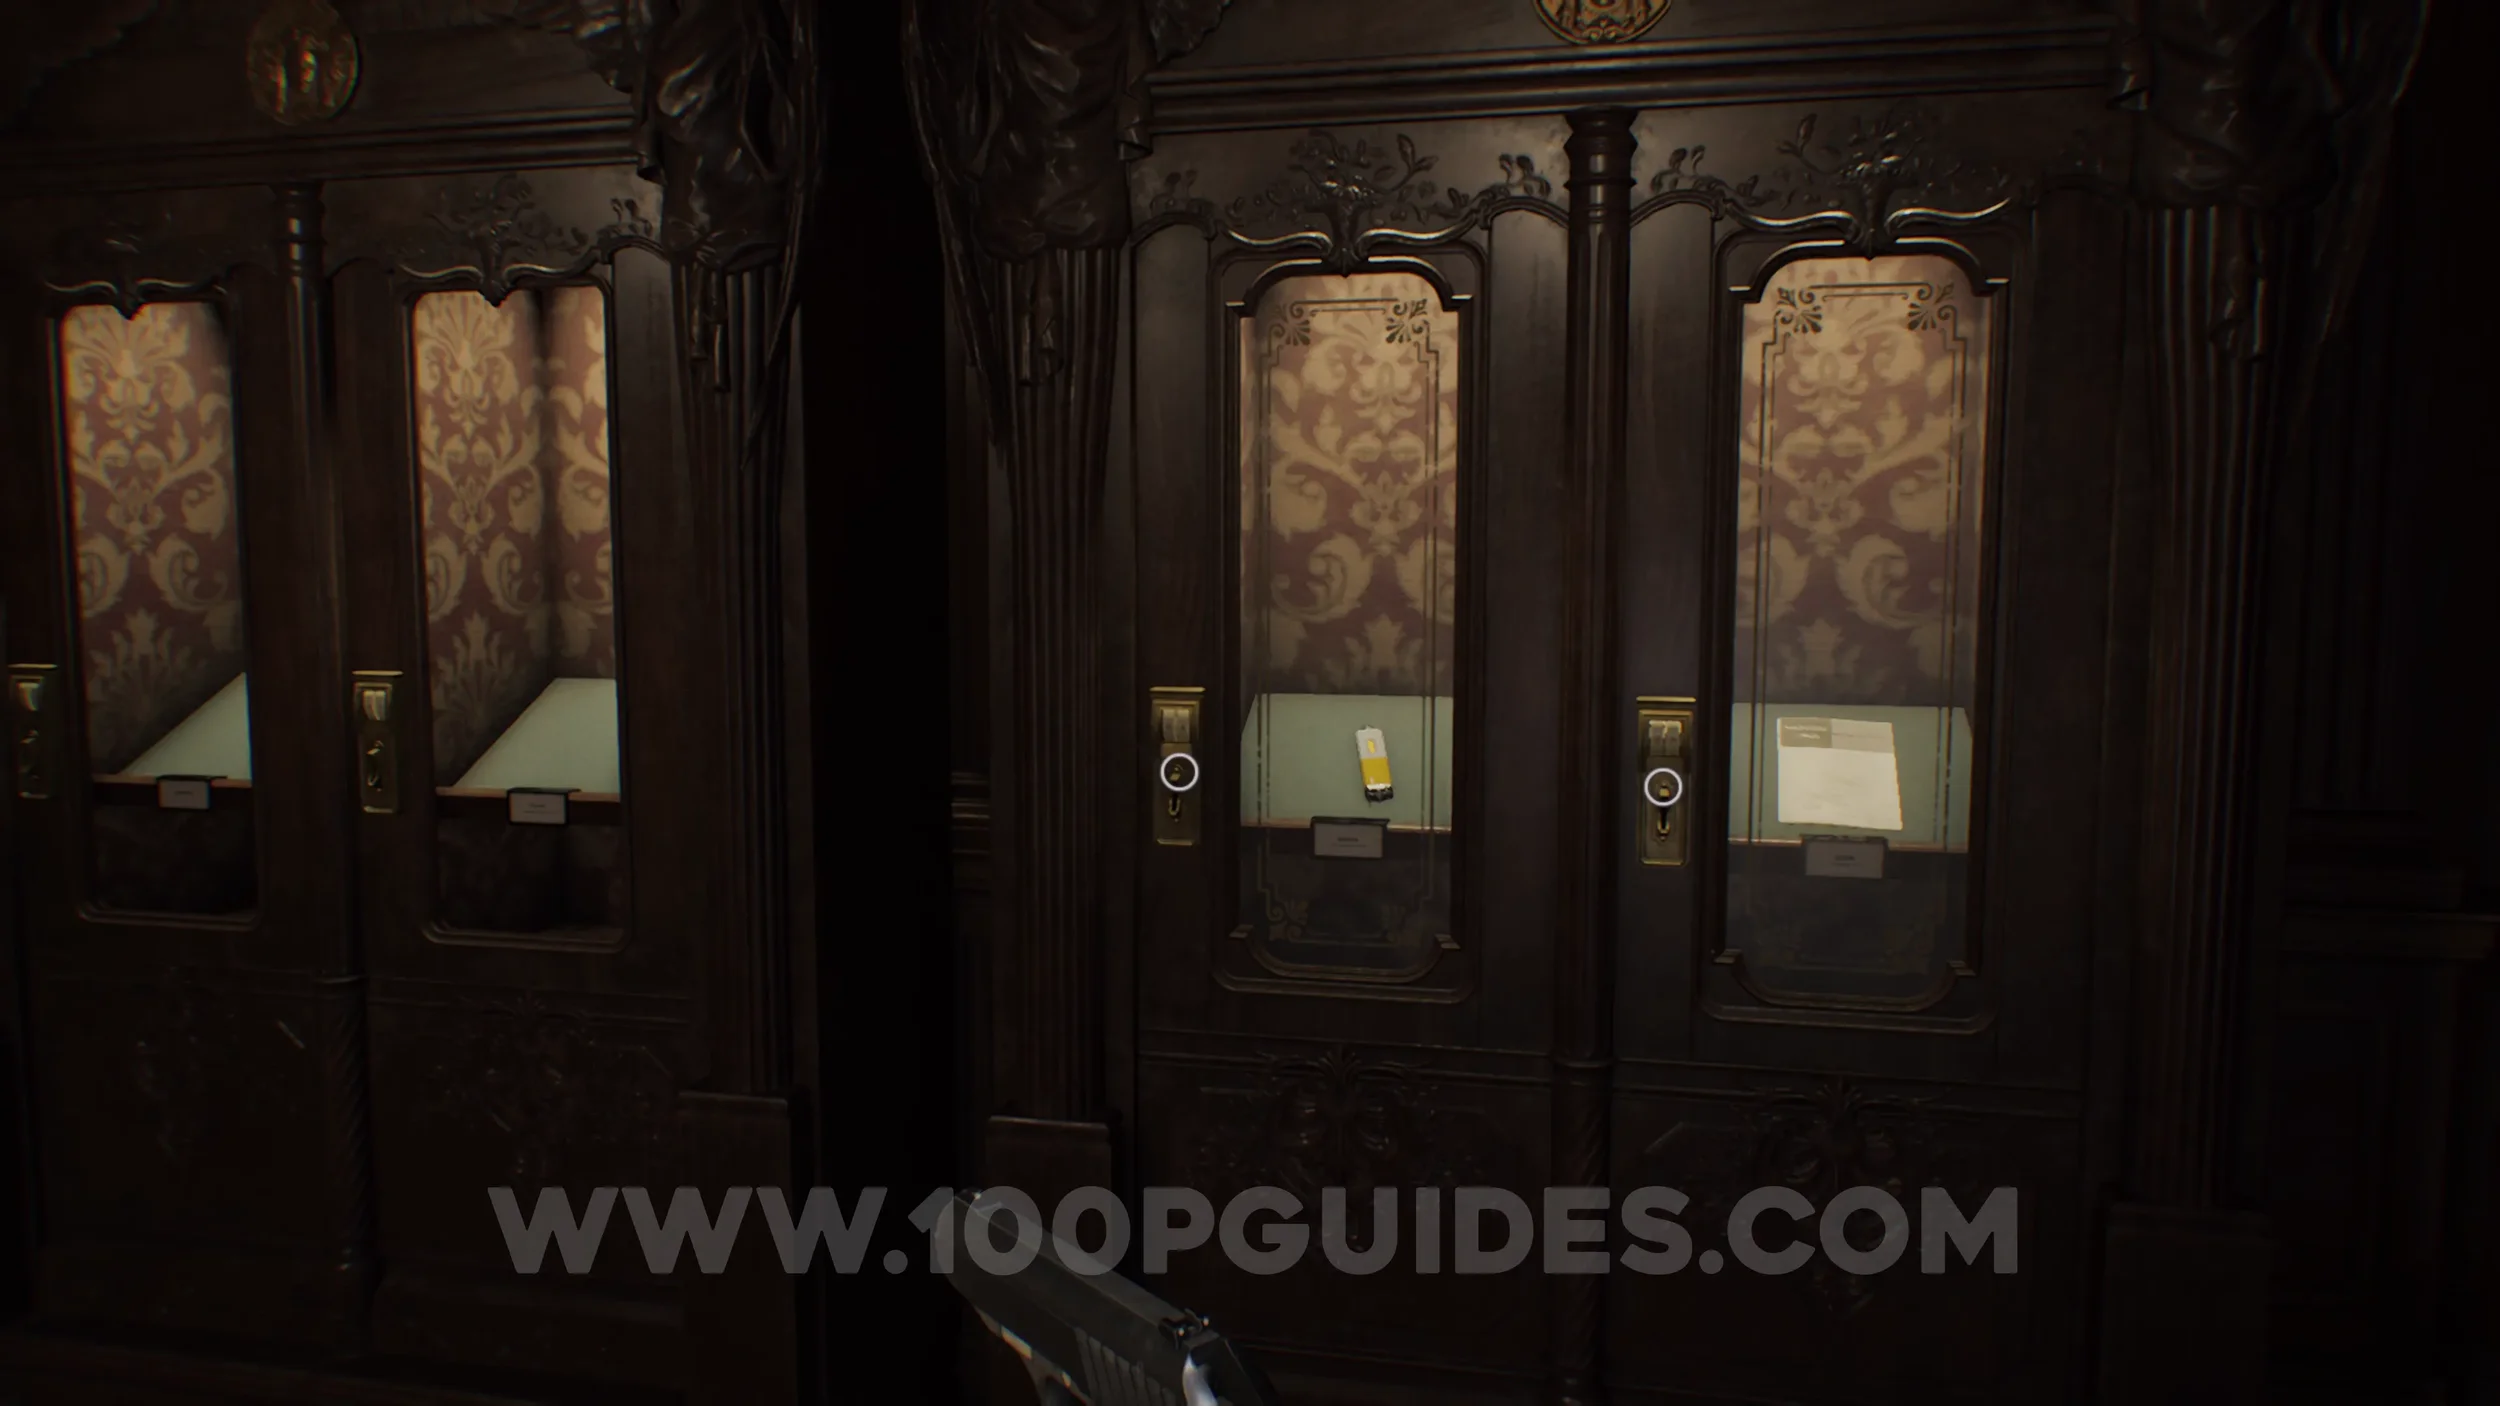
Hip Pouch #1 & Stabilizer. In the Parlor, there are four cabinets that require Antique Coins to open. You should currently have enough coins to unlock the two on the left.

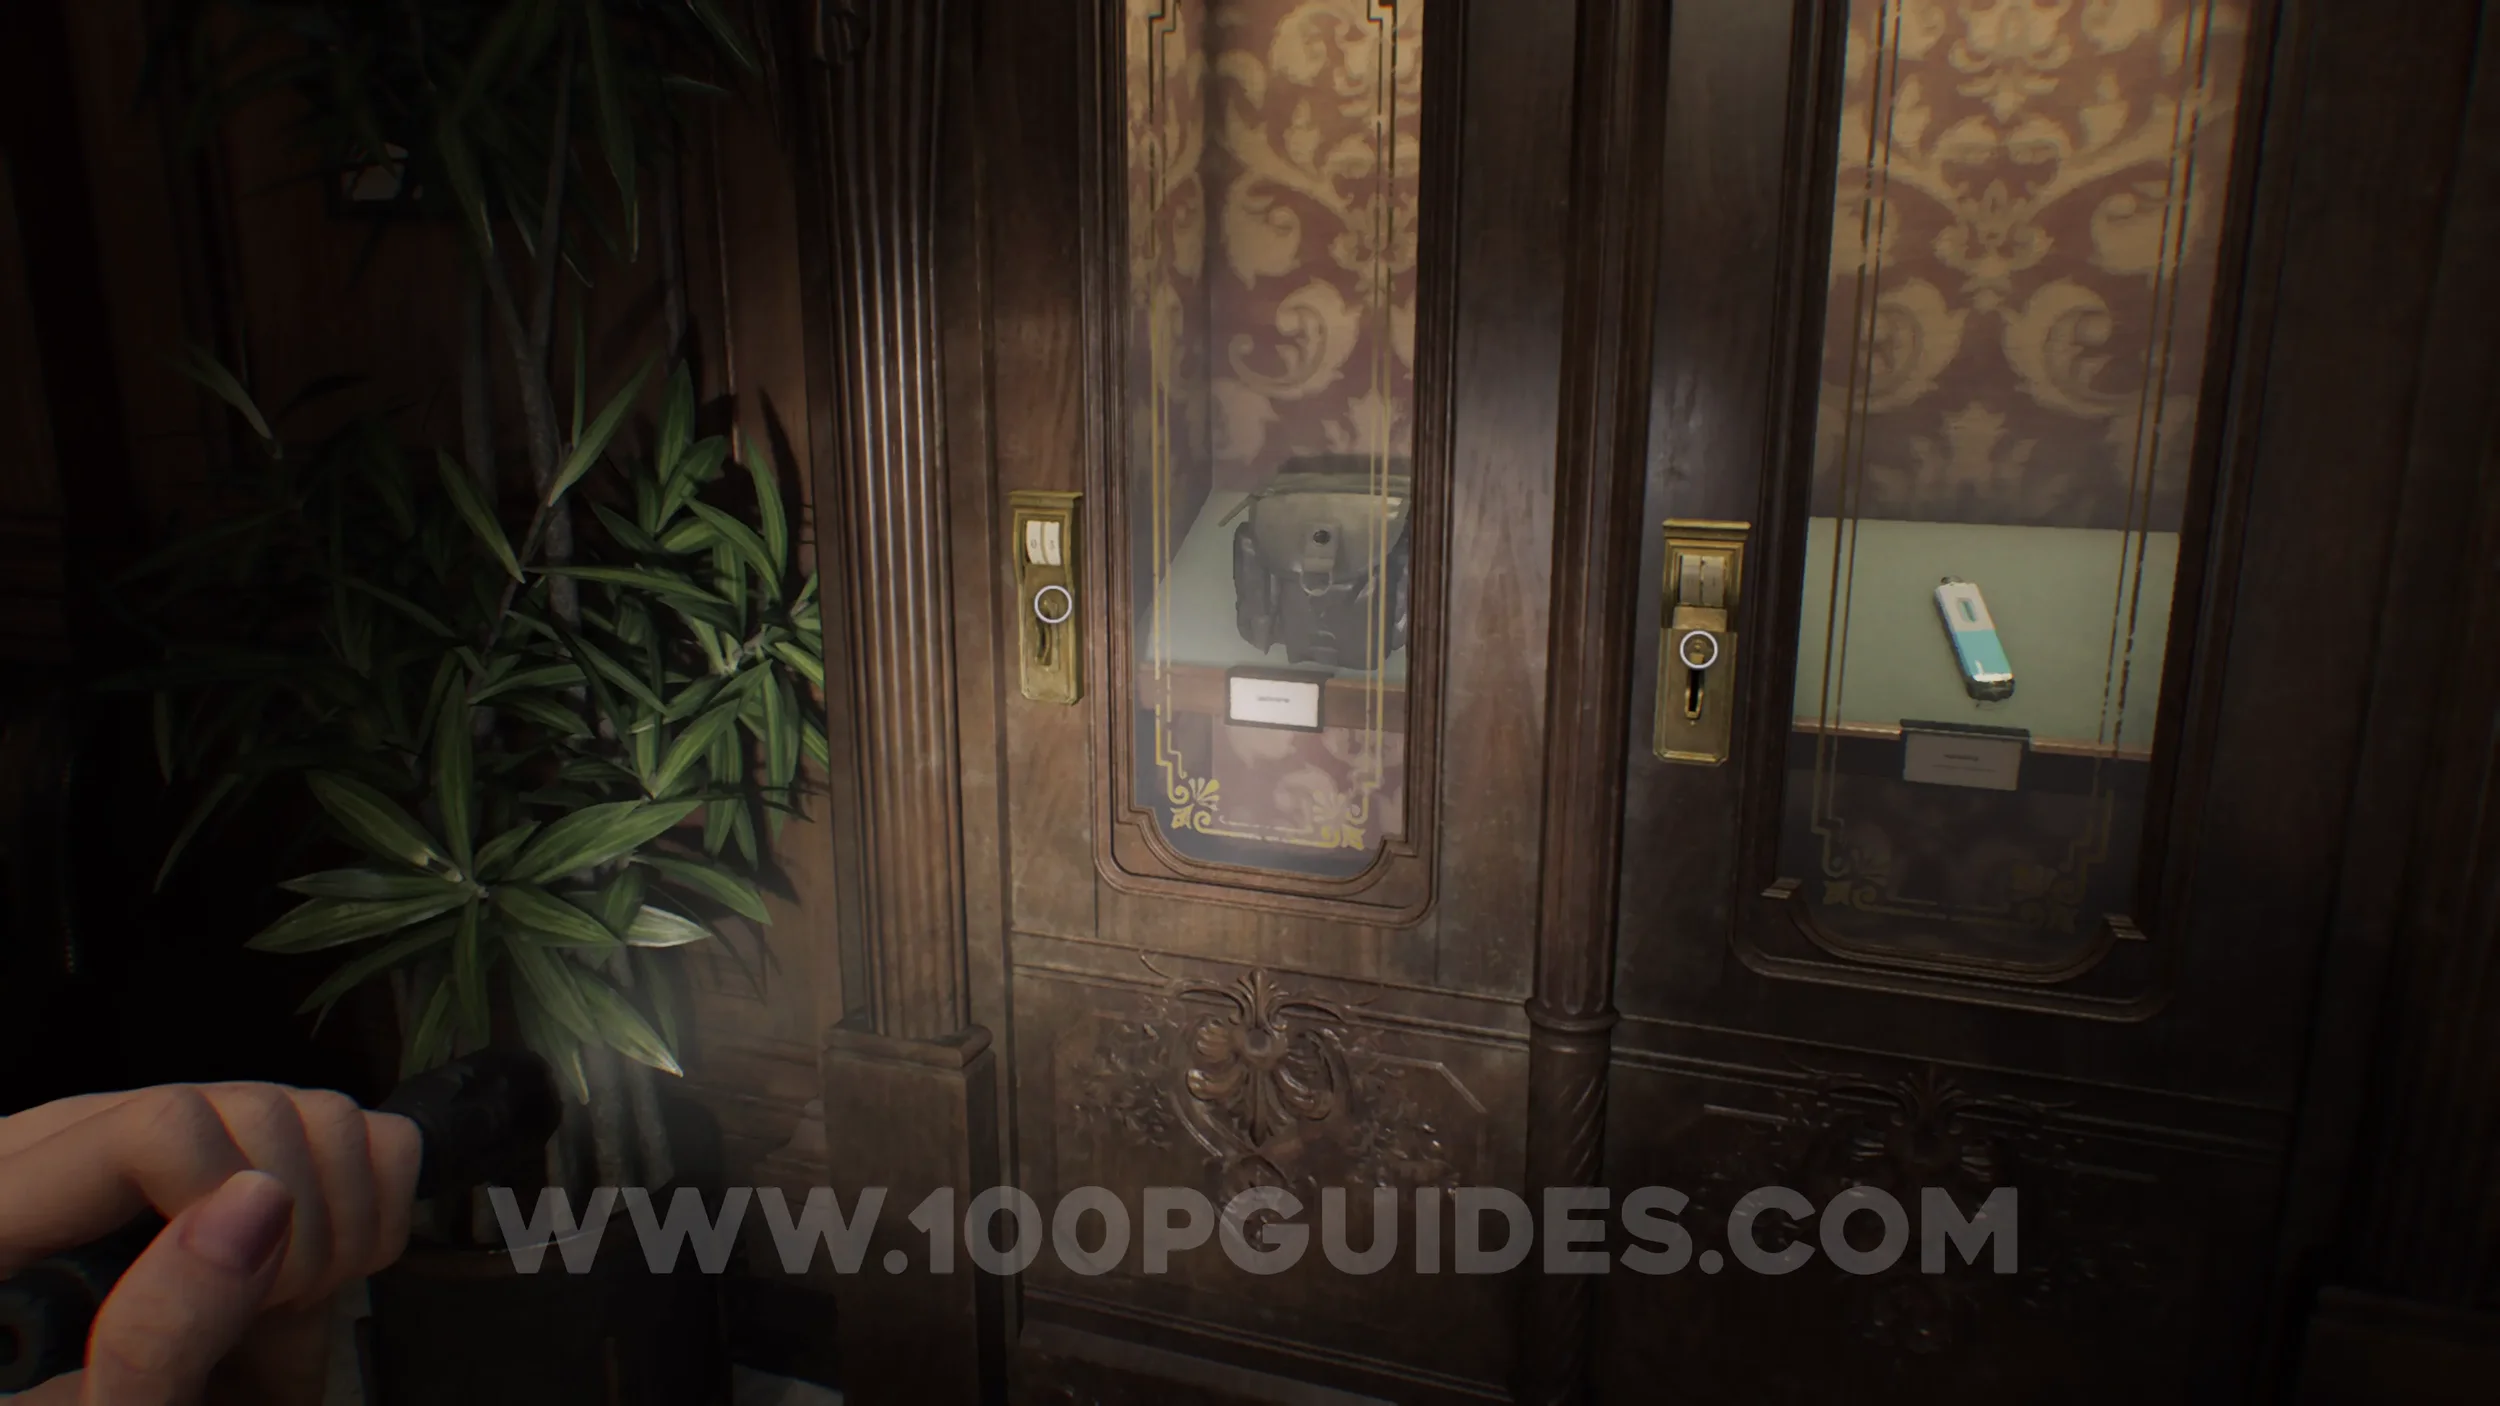
Mr. Raccoon #2. In the East Wing after using the Key Card.
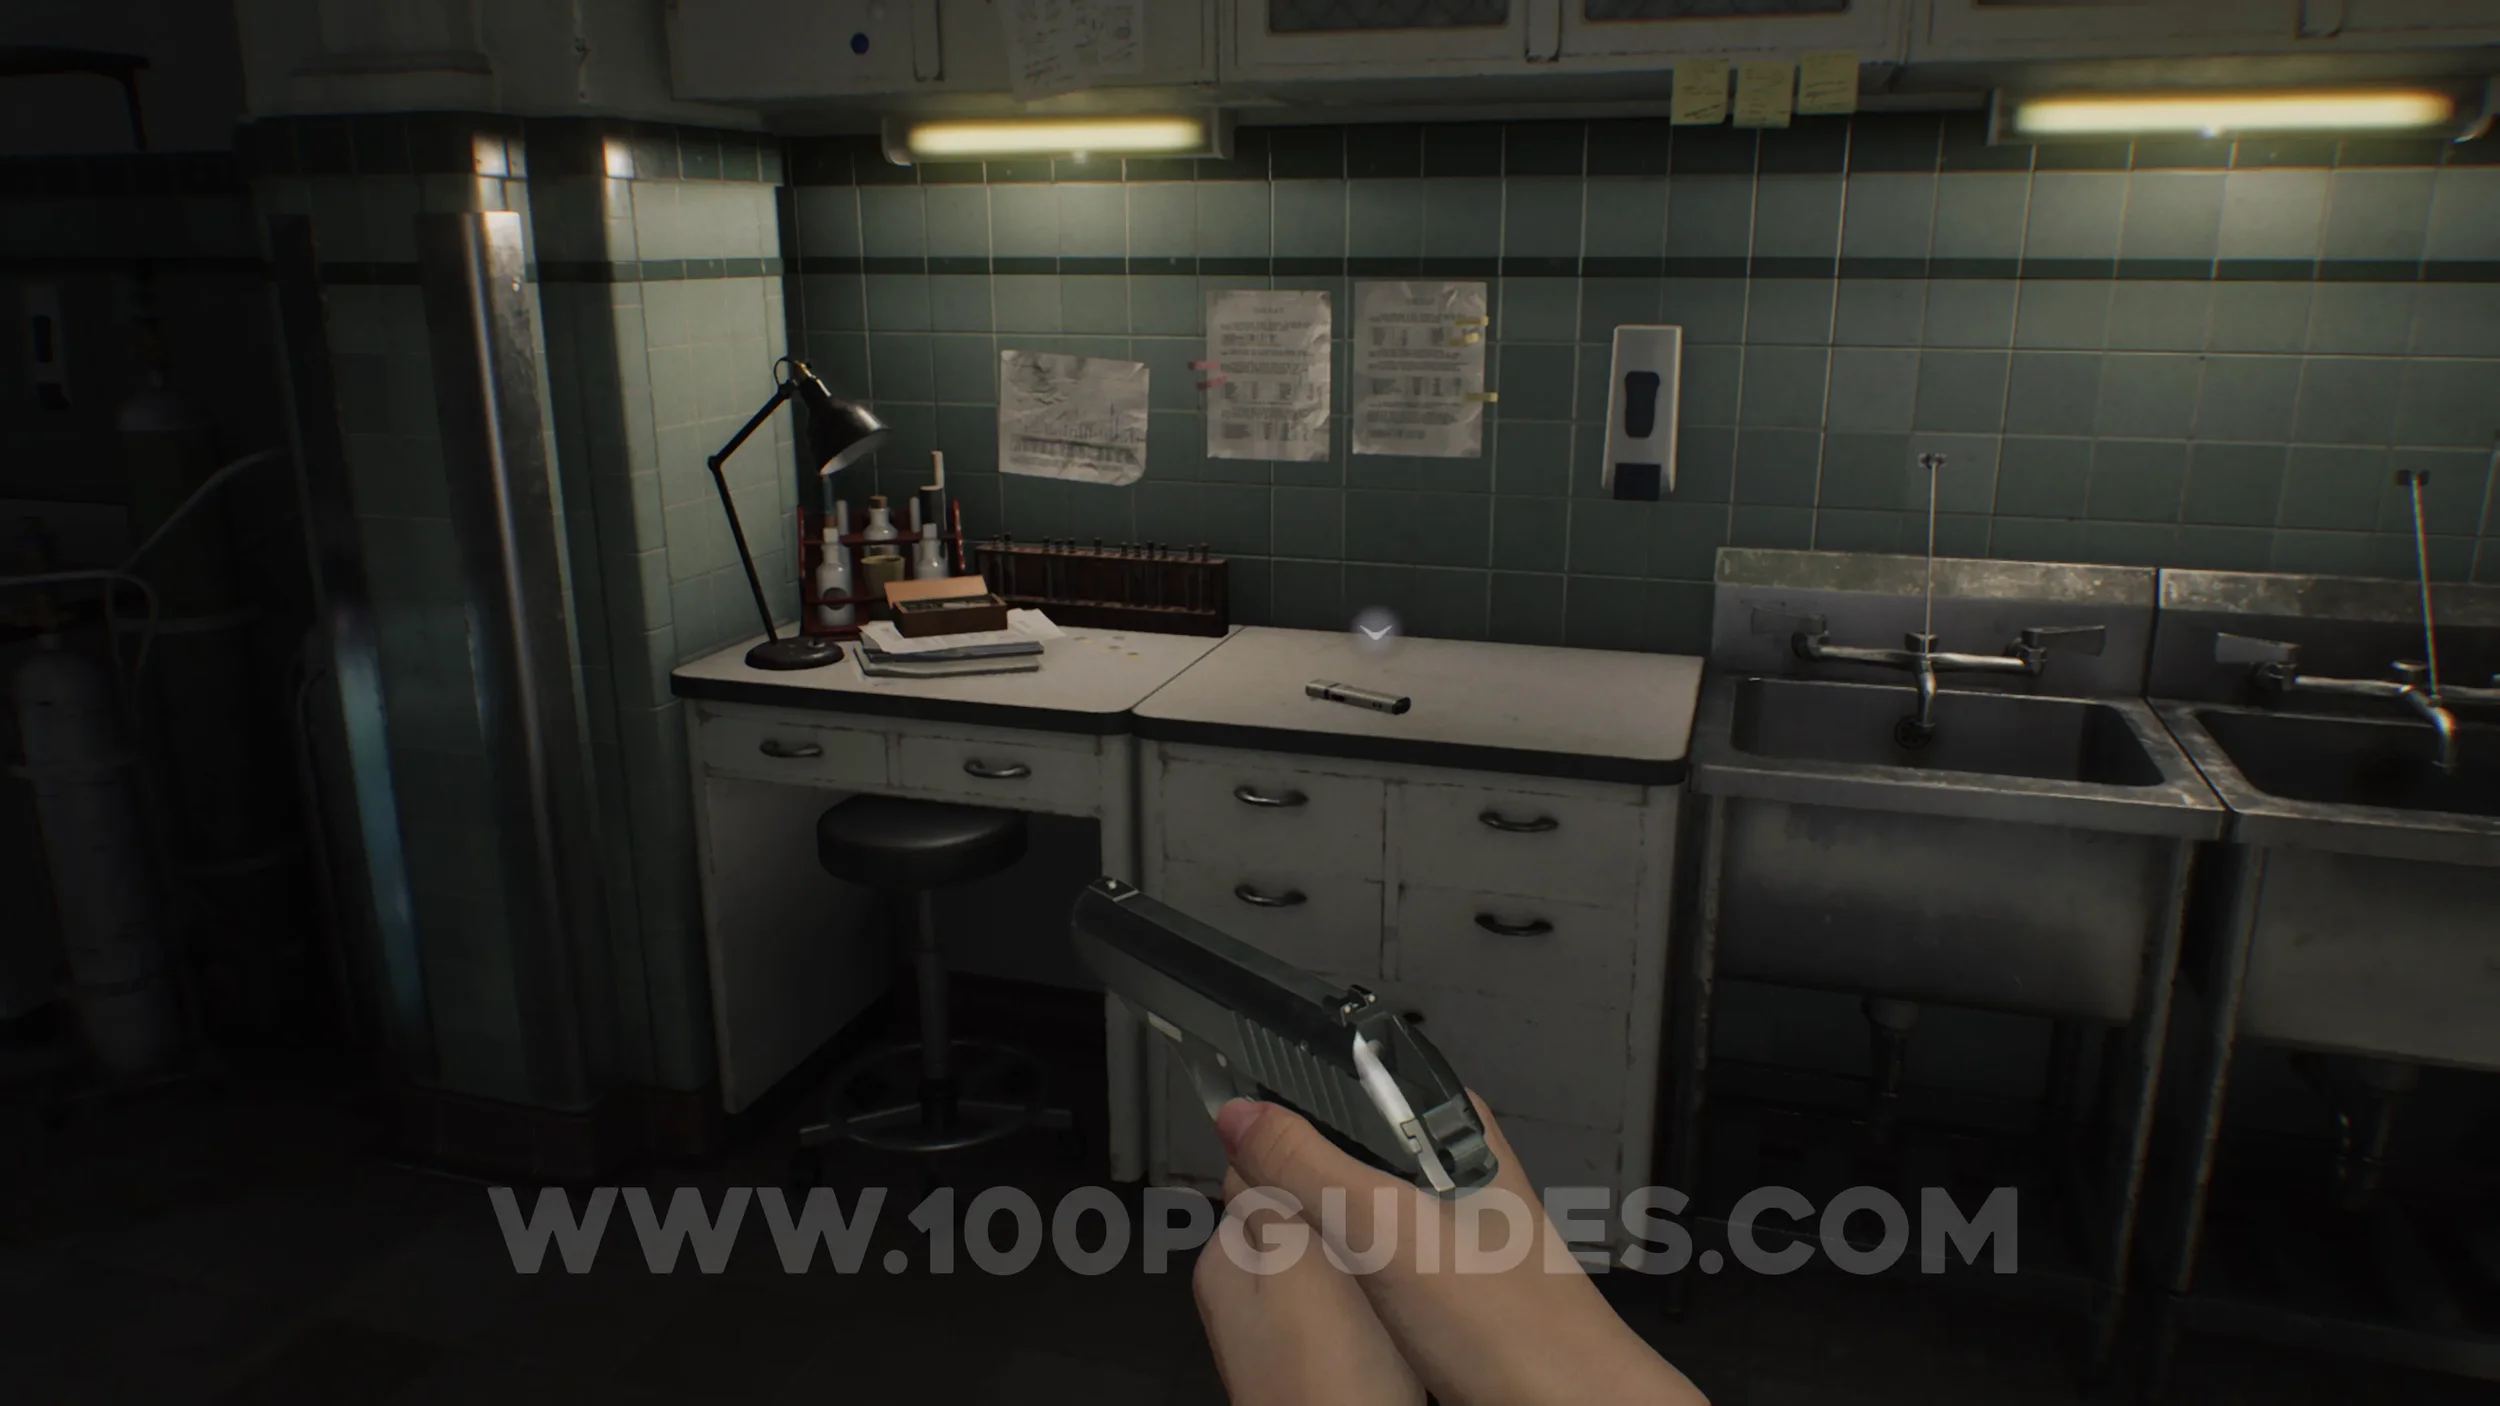
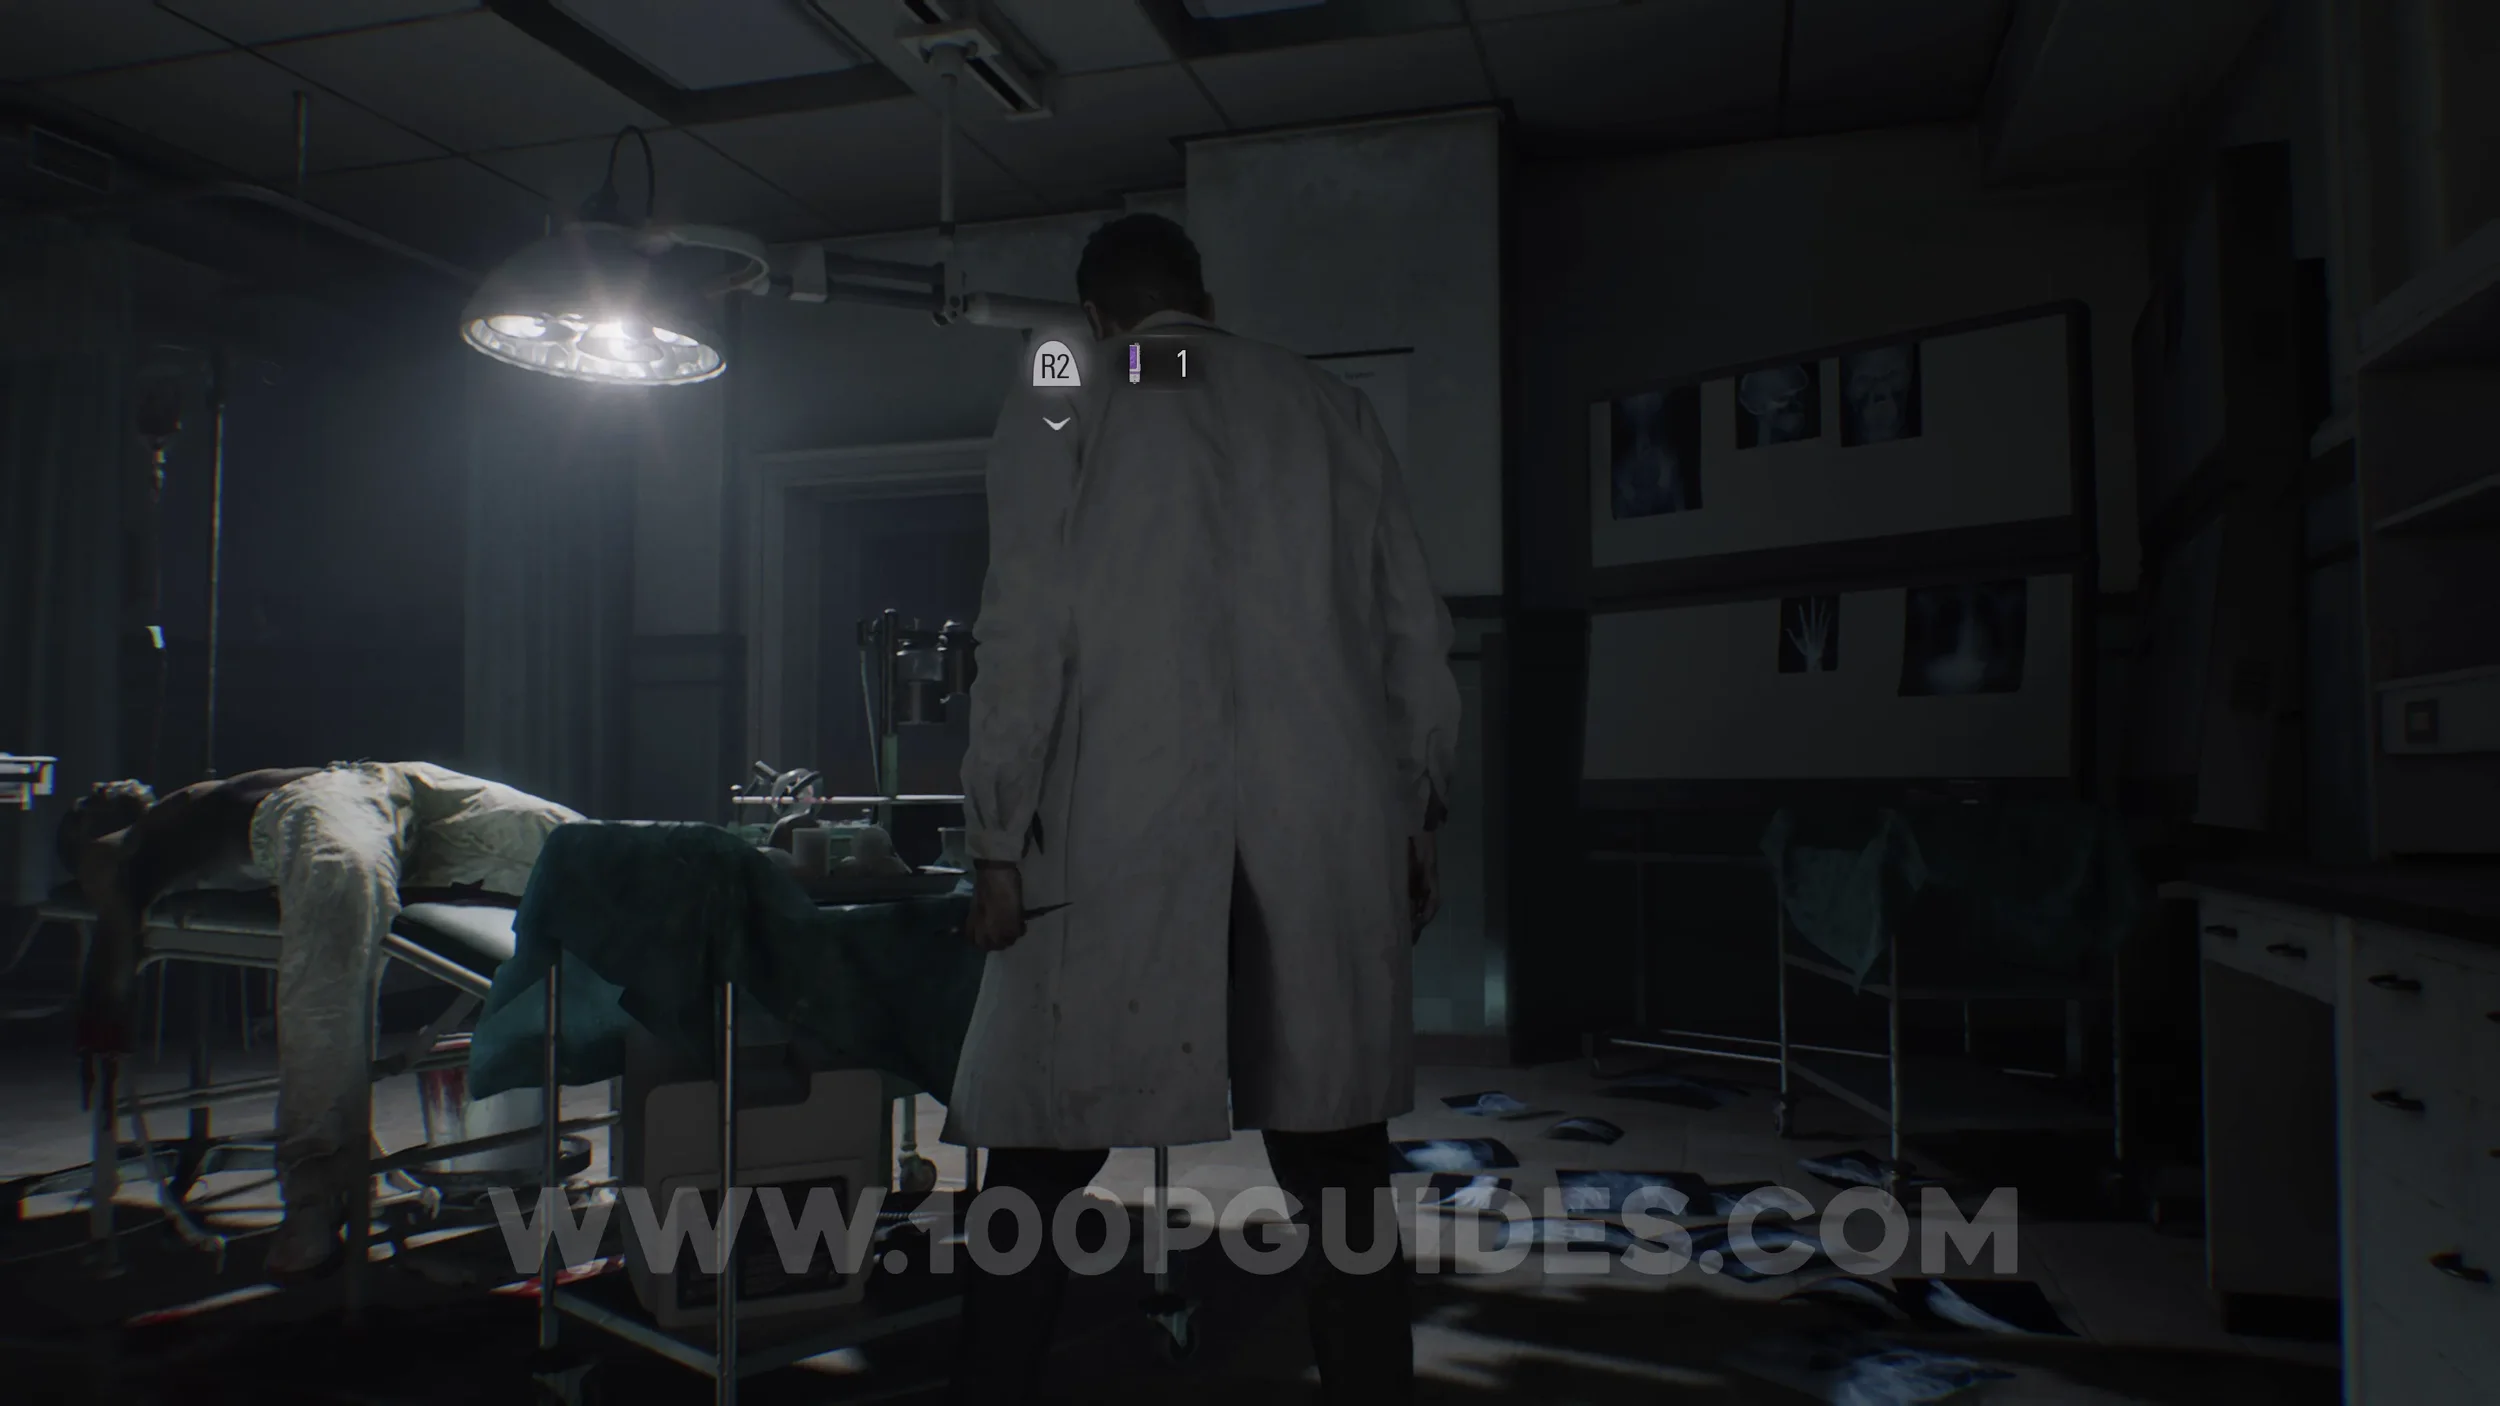
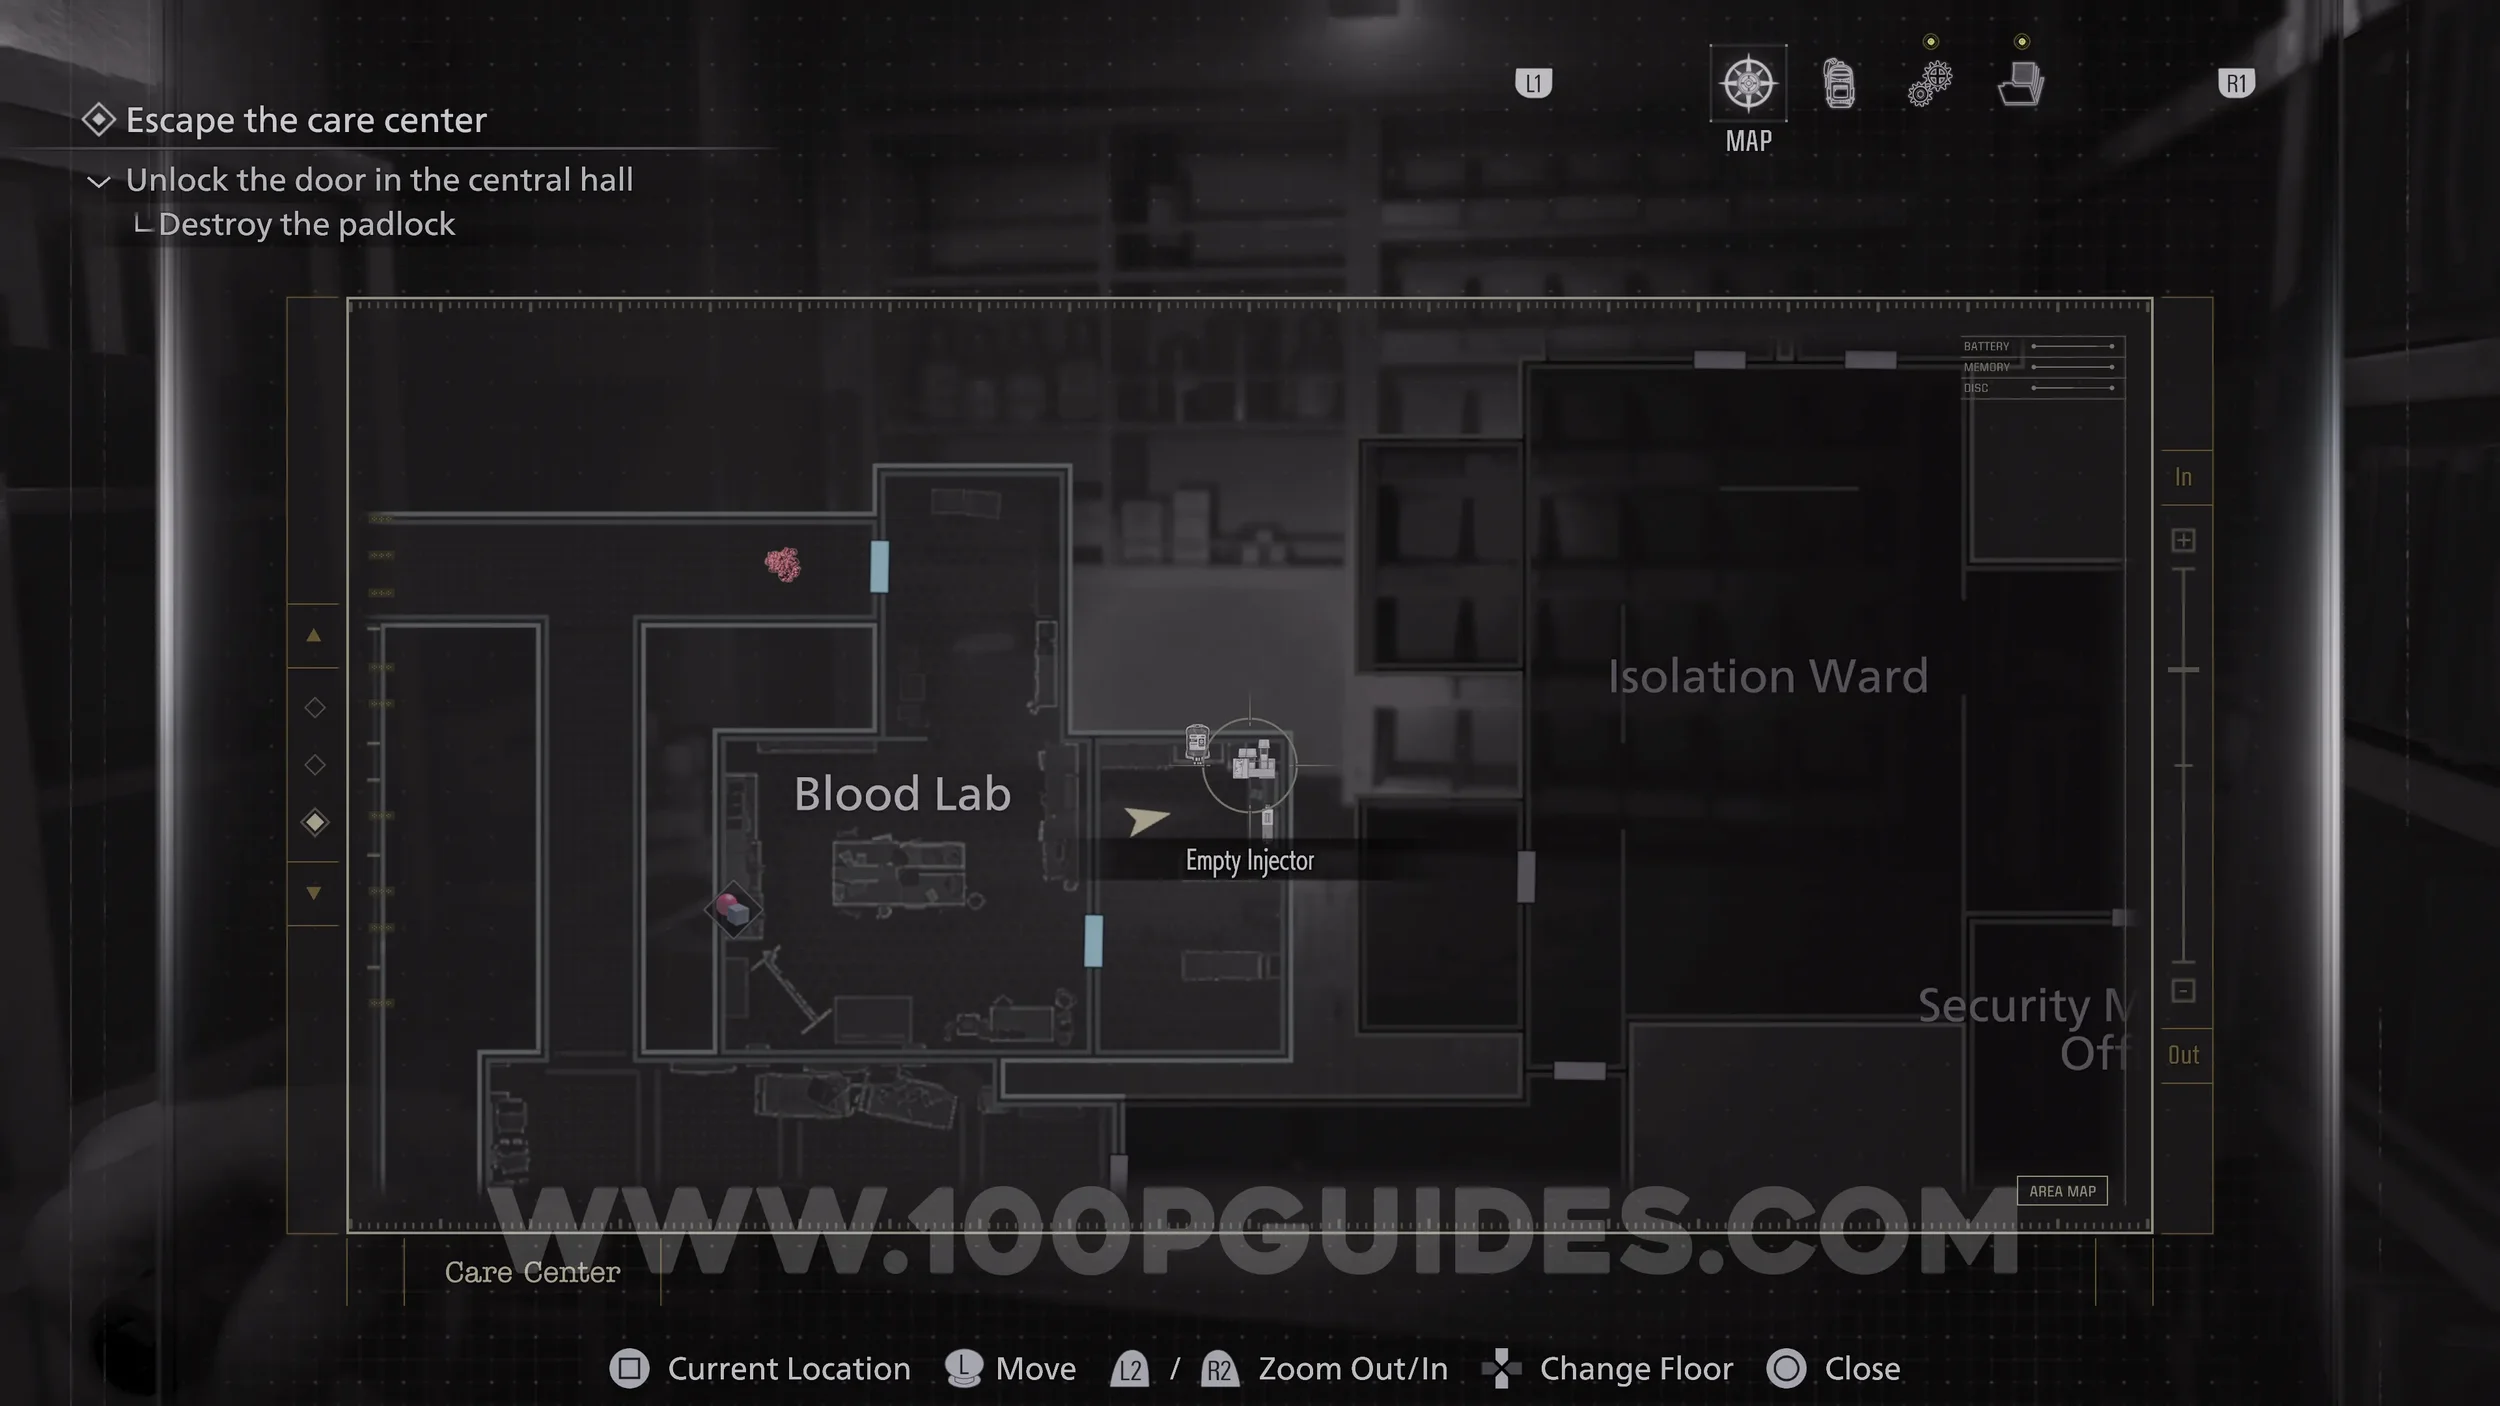
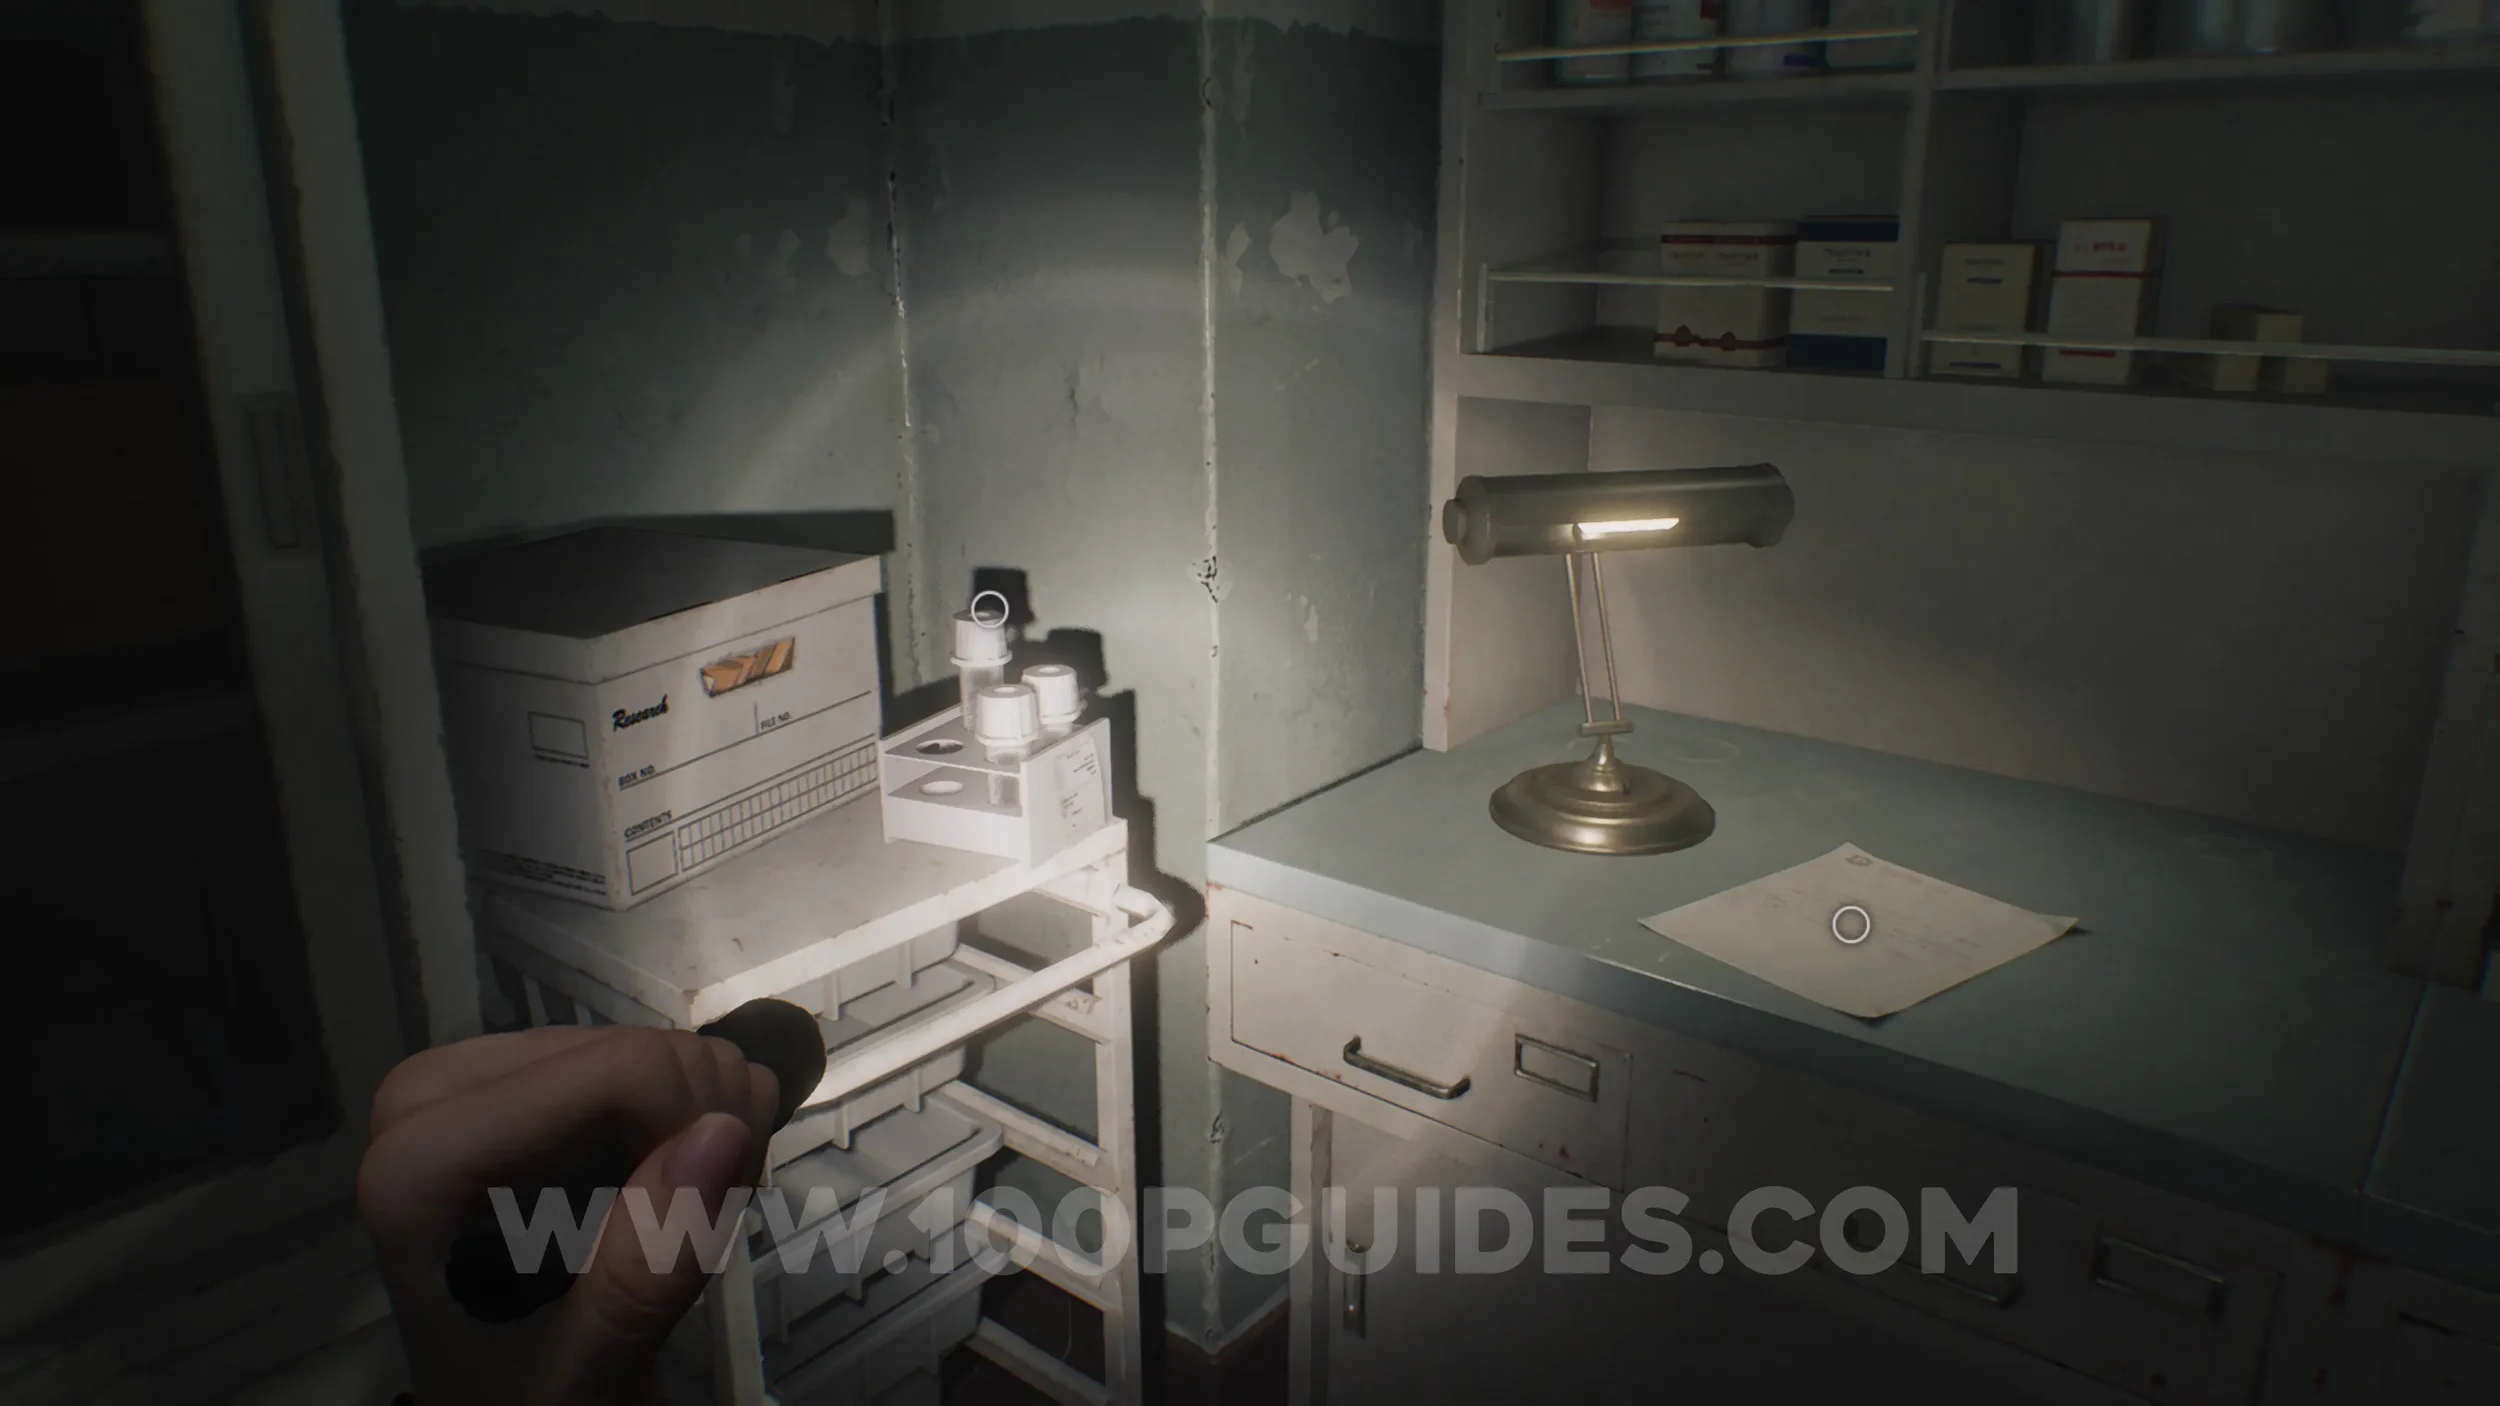
Trophy - Fatal Dose. In the Examination Room, pick up the Hemolytic Injector. This item allows you to instantly kill zombies by sneaking up behind them and pressing R2.
To unlock this trophy, use it on a zombie from behind. Conveniently, there is a zombie with its back turned in the room to the left, making this an easy opportunity.
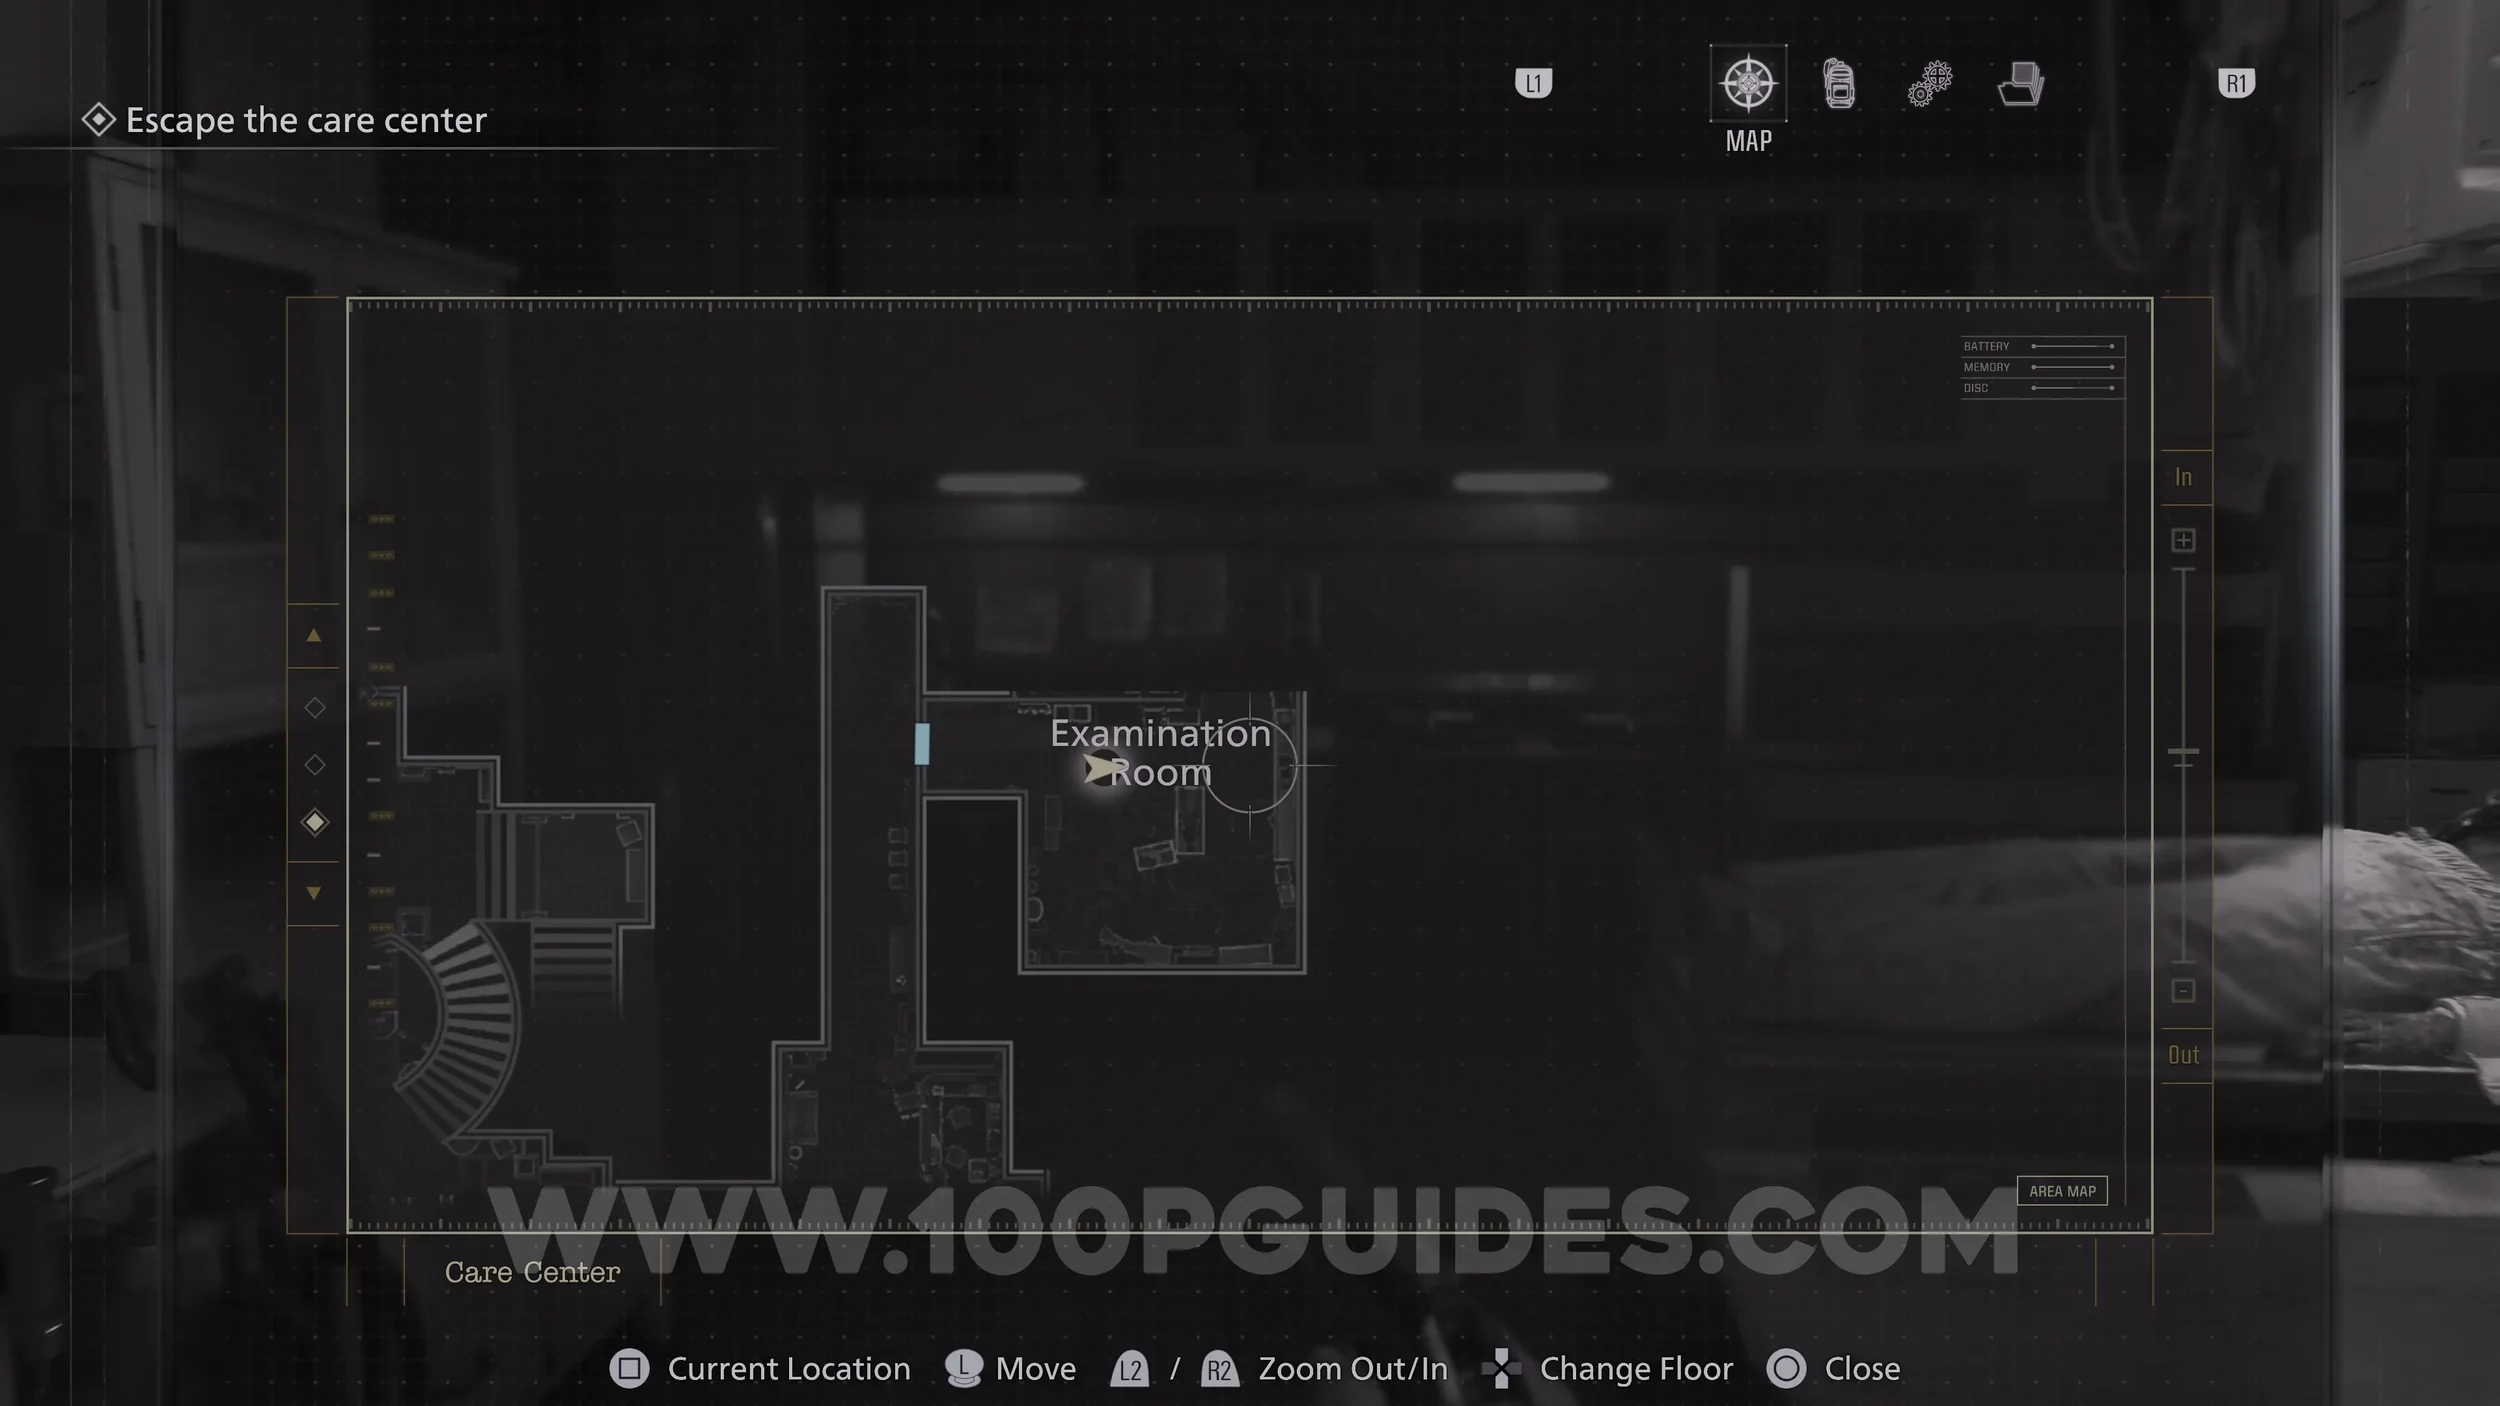
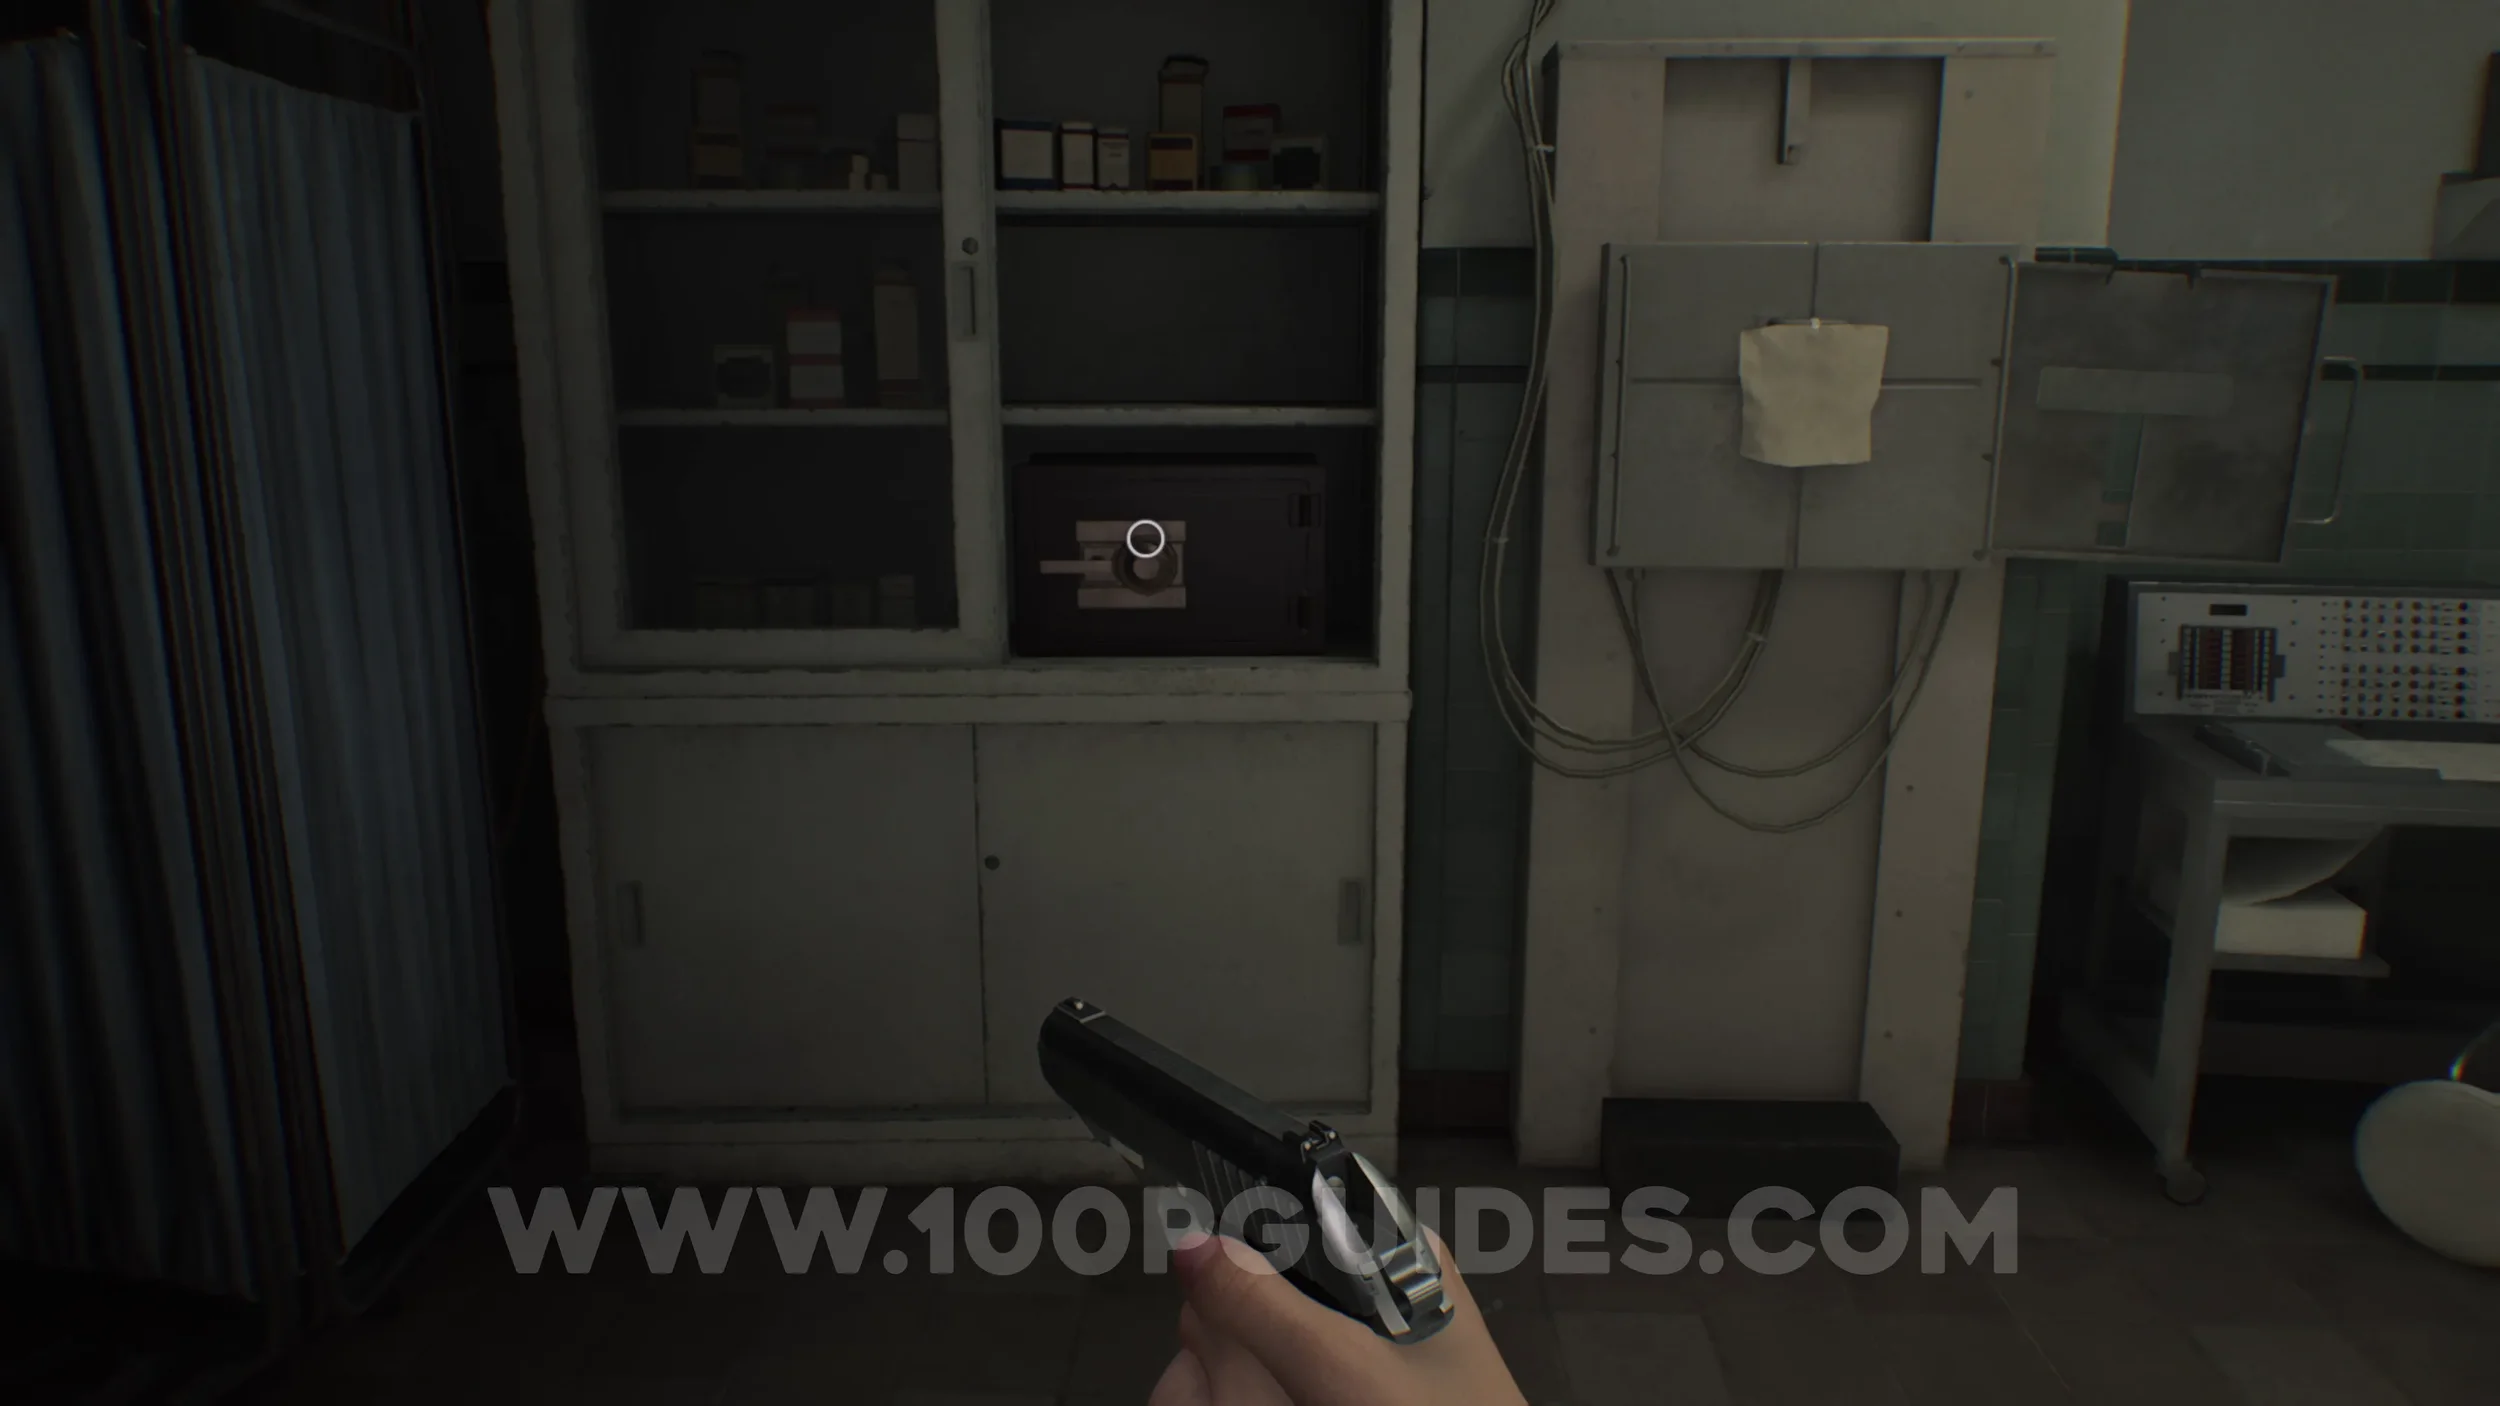
Safe #2 & Antique Coin #12-14. Found in the Examination Room. The coins are inside. You can open it with code:
Casual/Standard:
30 Right, 10 Left, 50 Right.
Insanity:
50 Left, 30 Right, 90 Left.

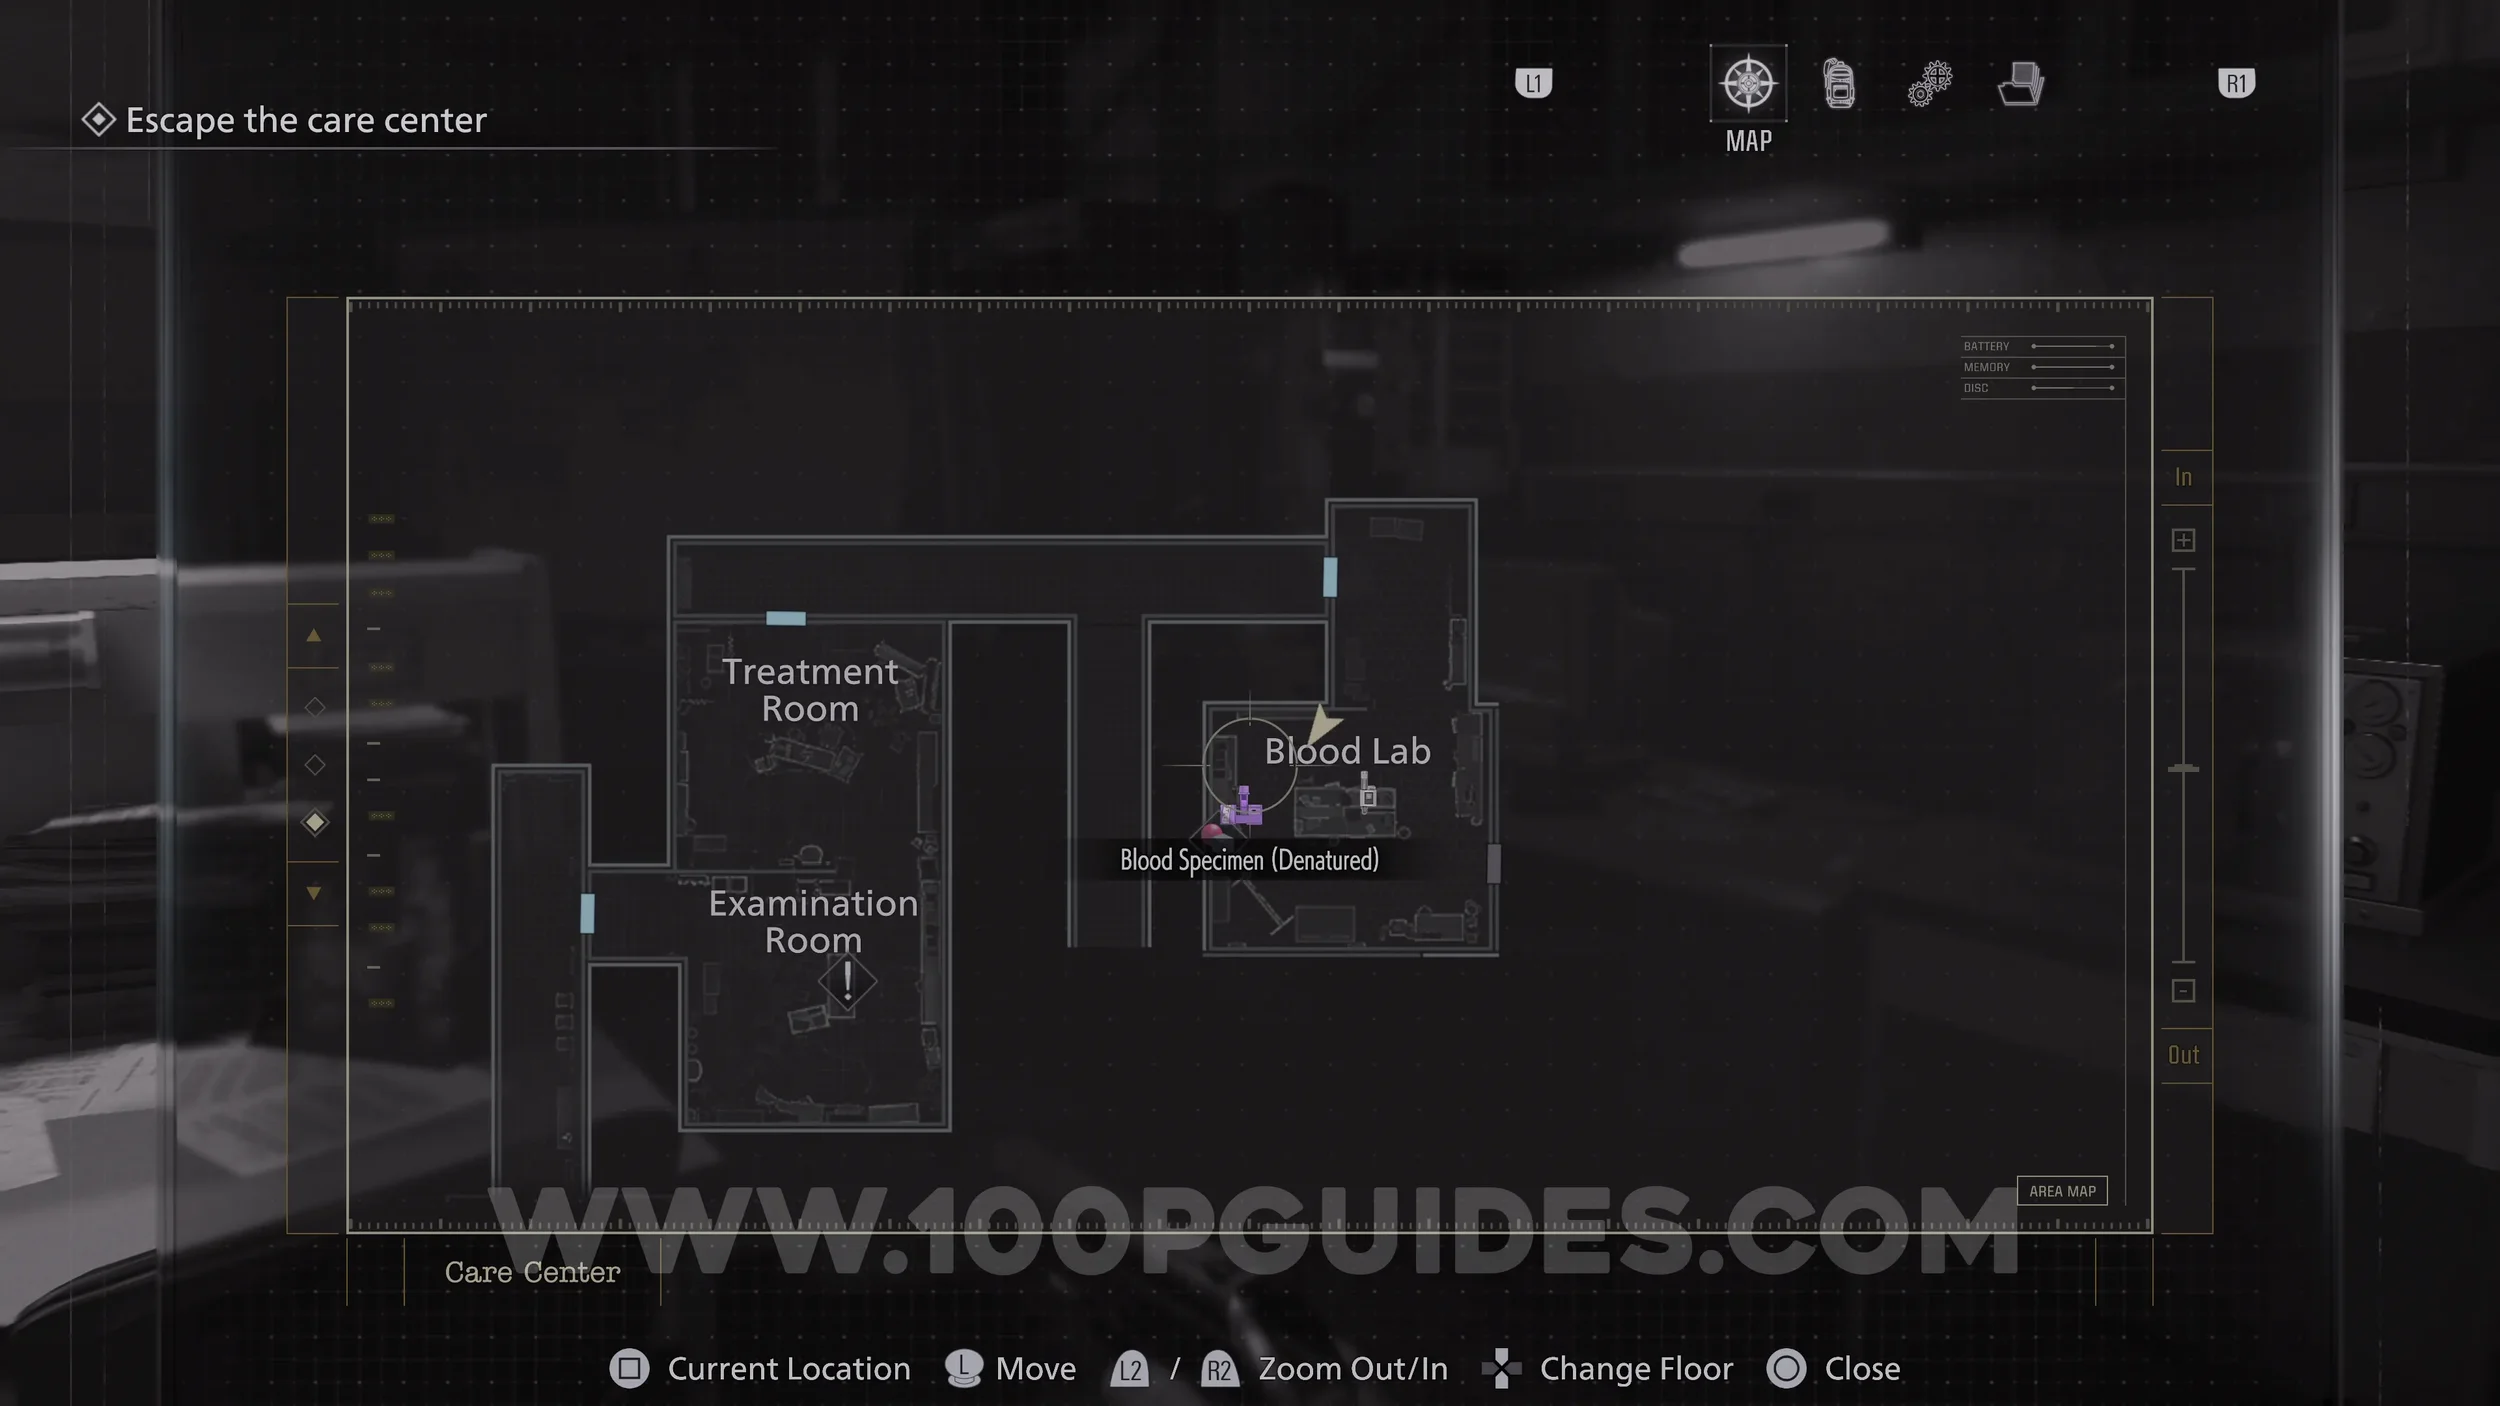
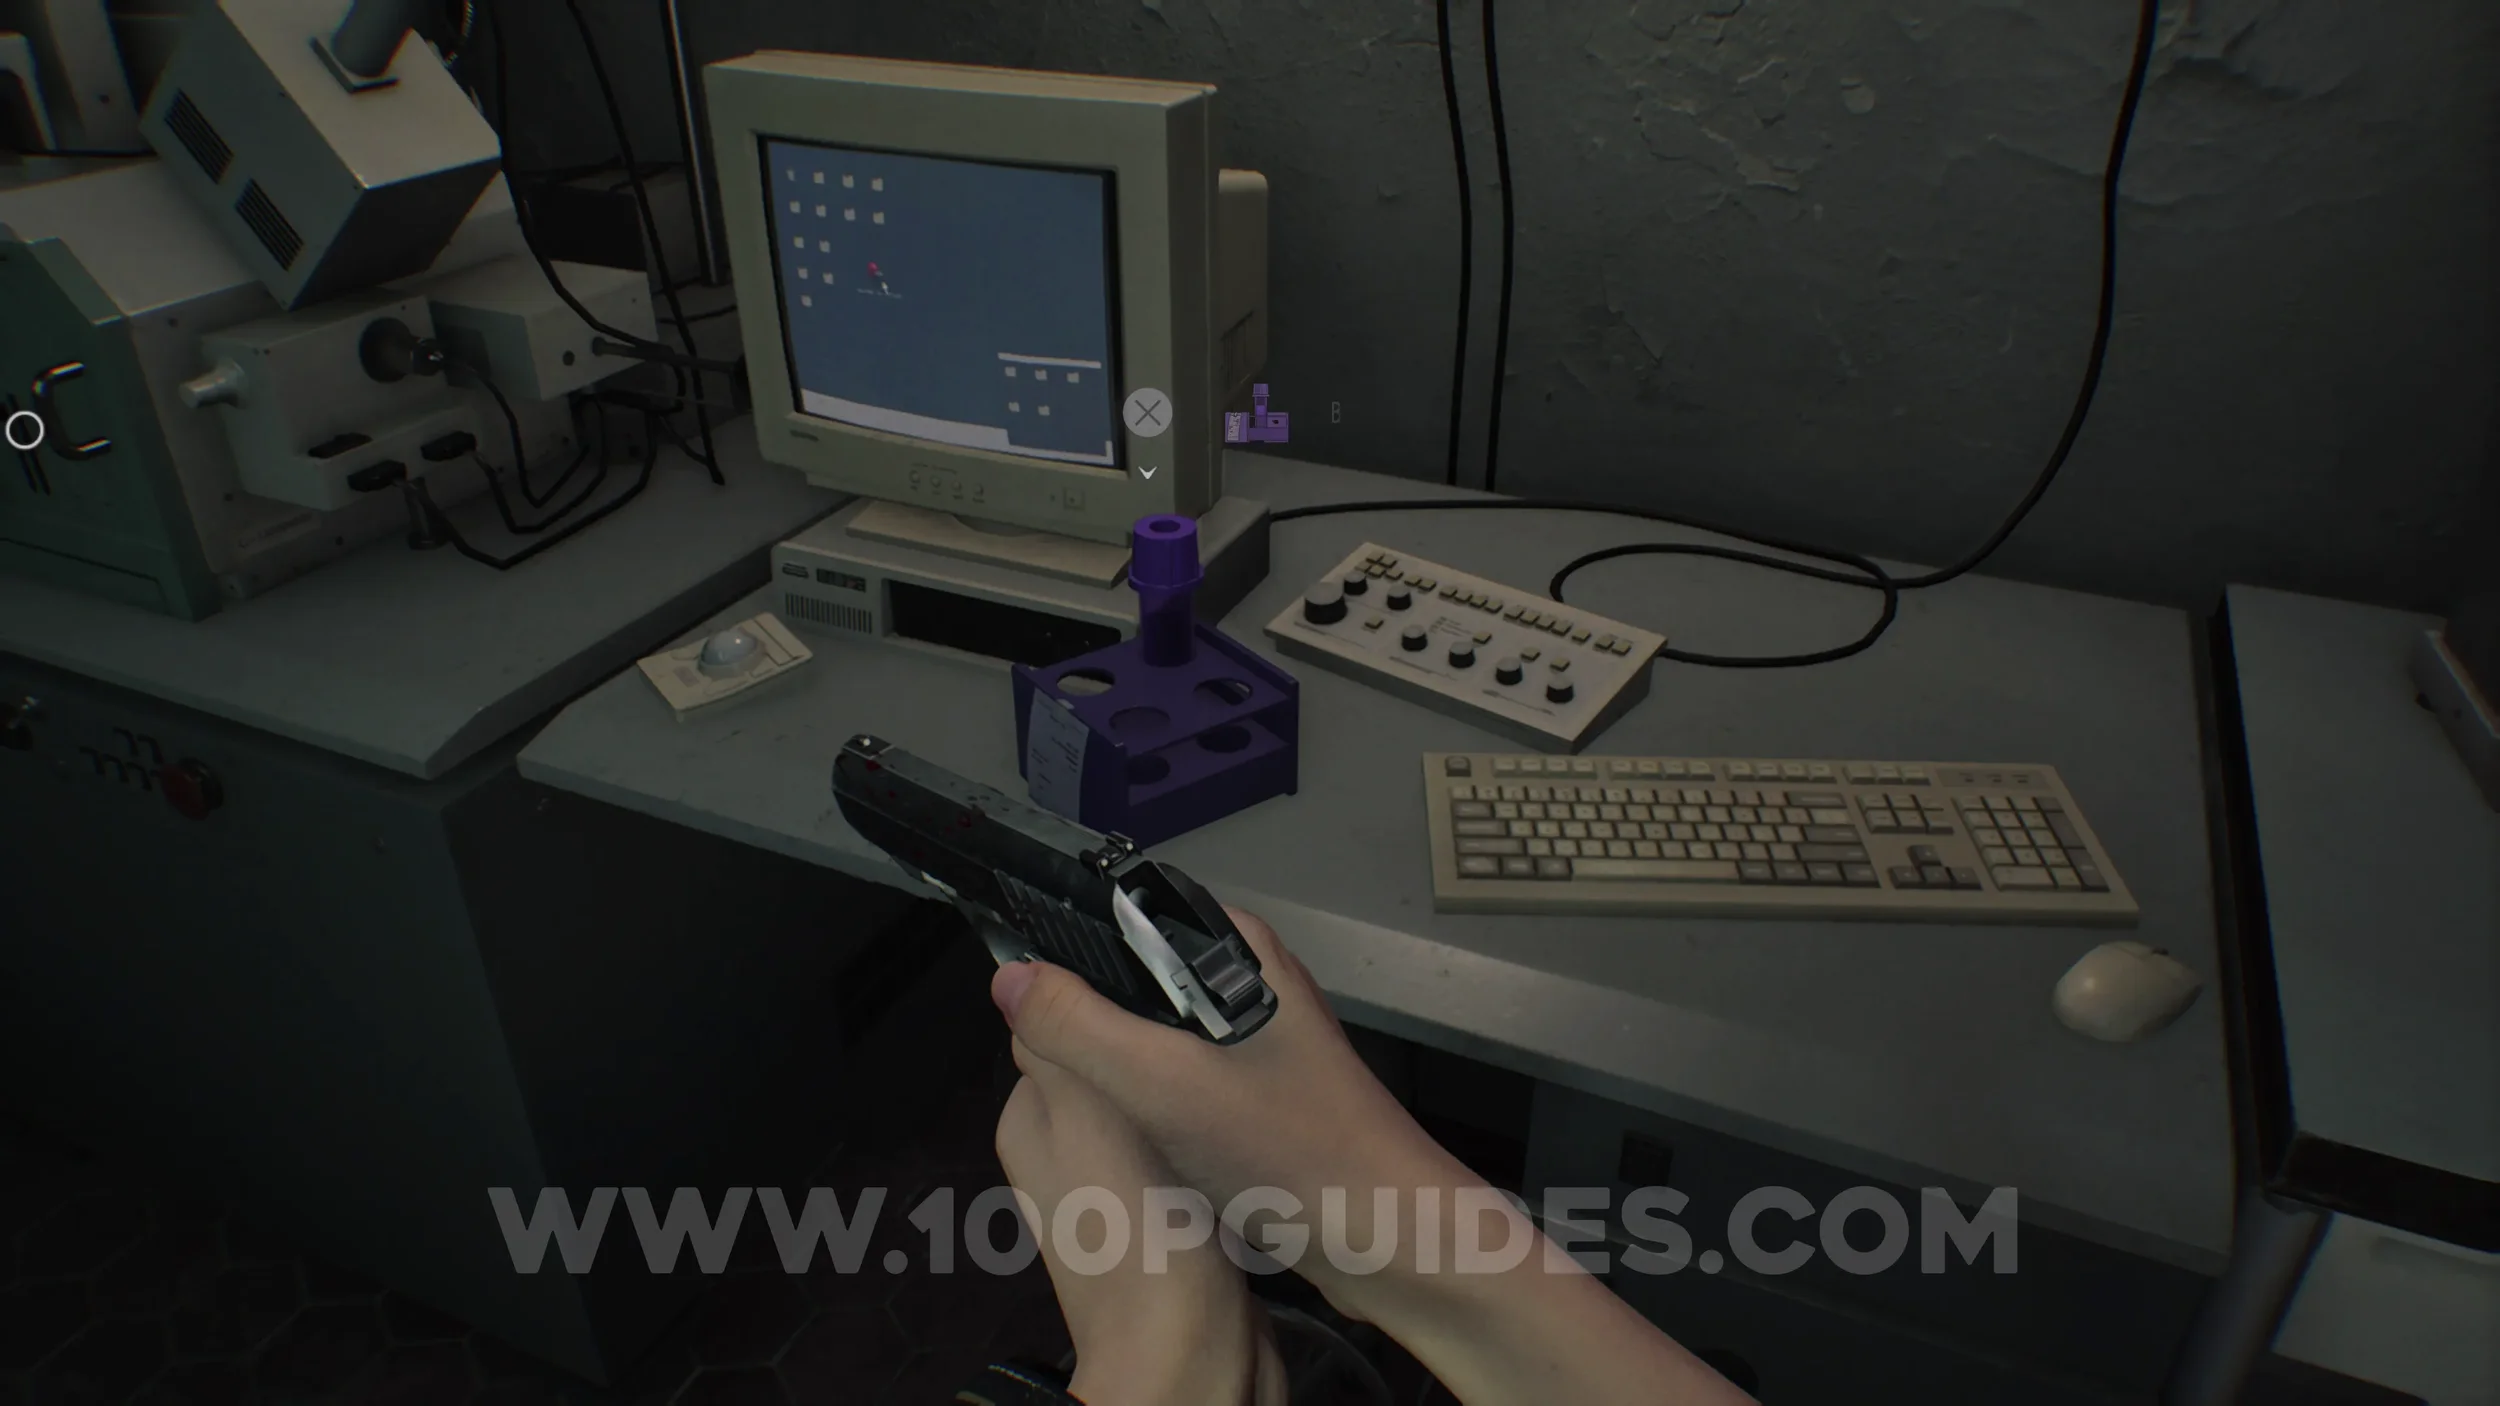
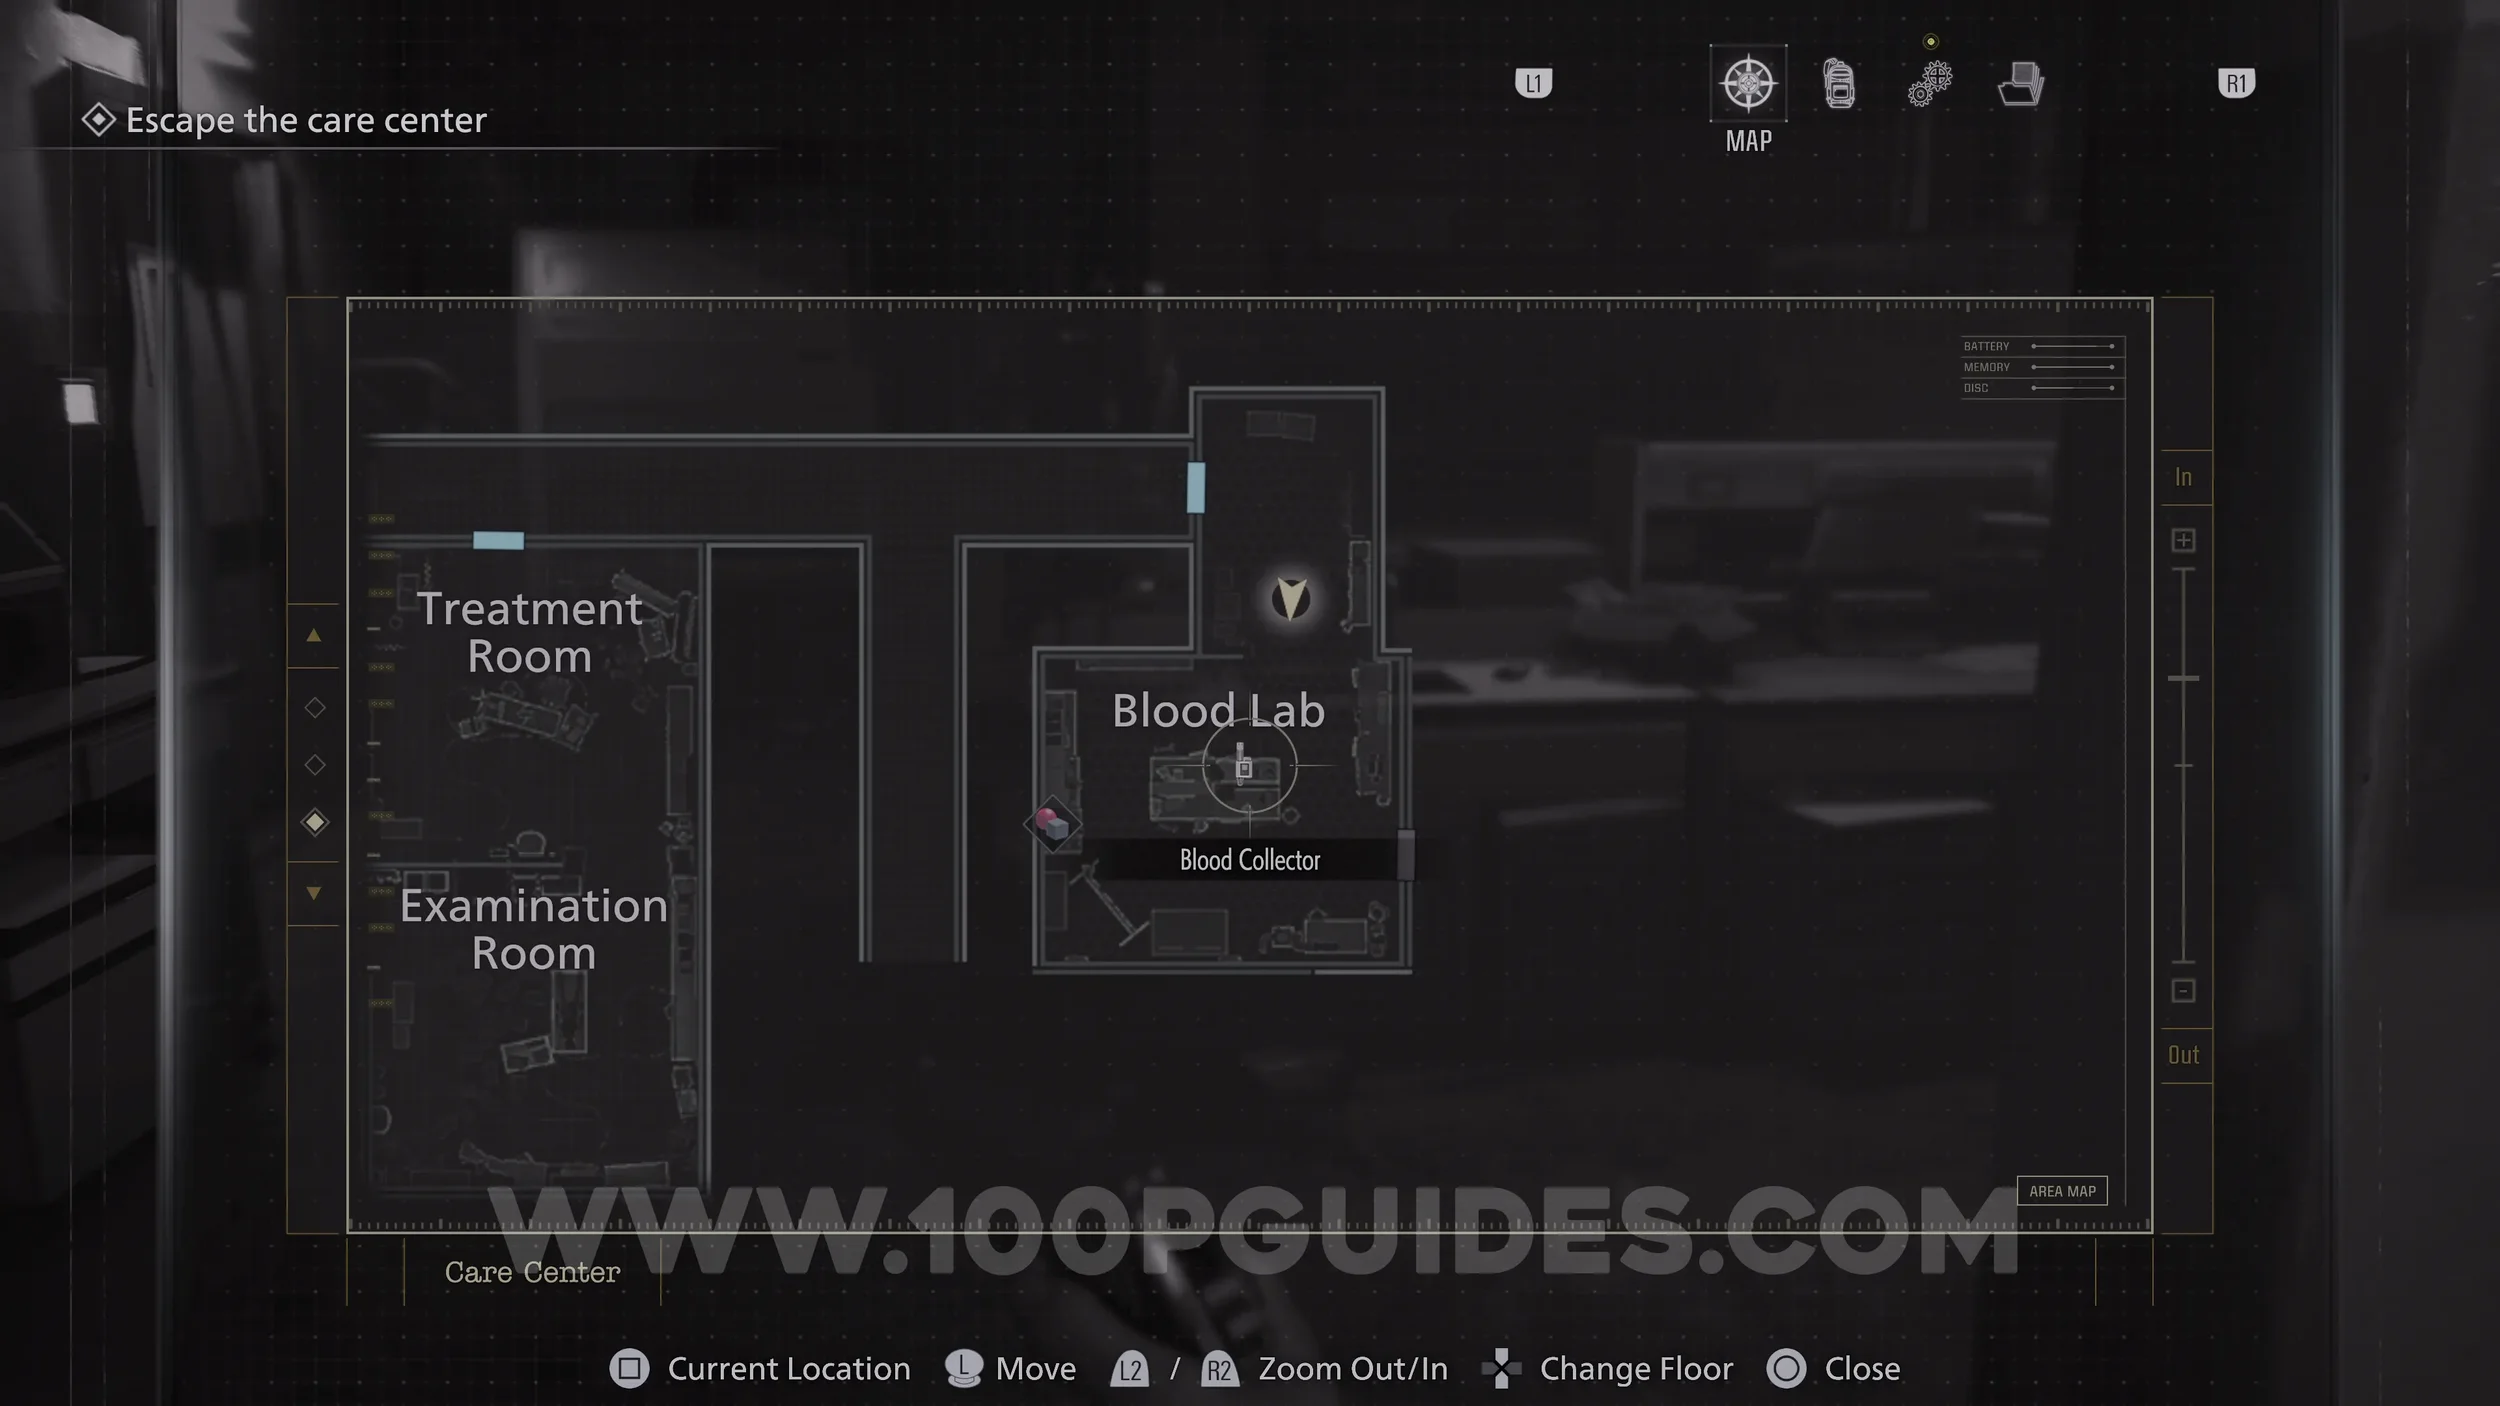
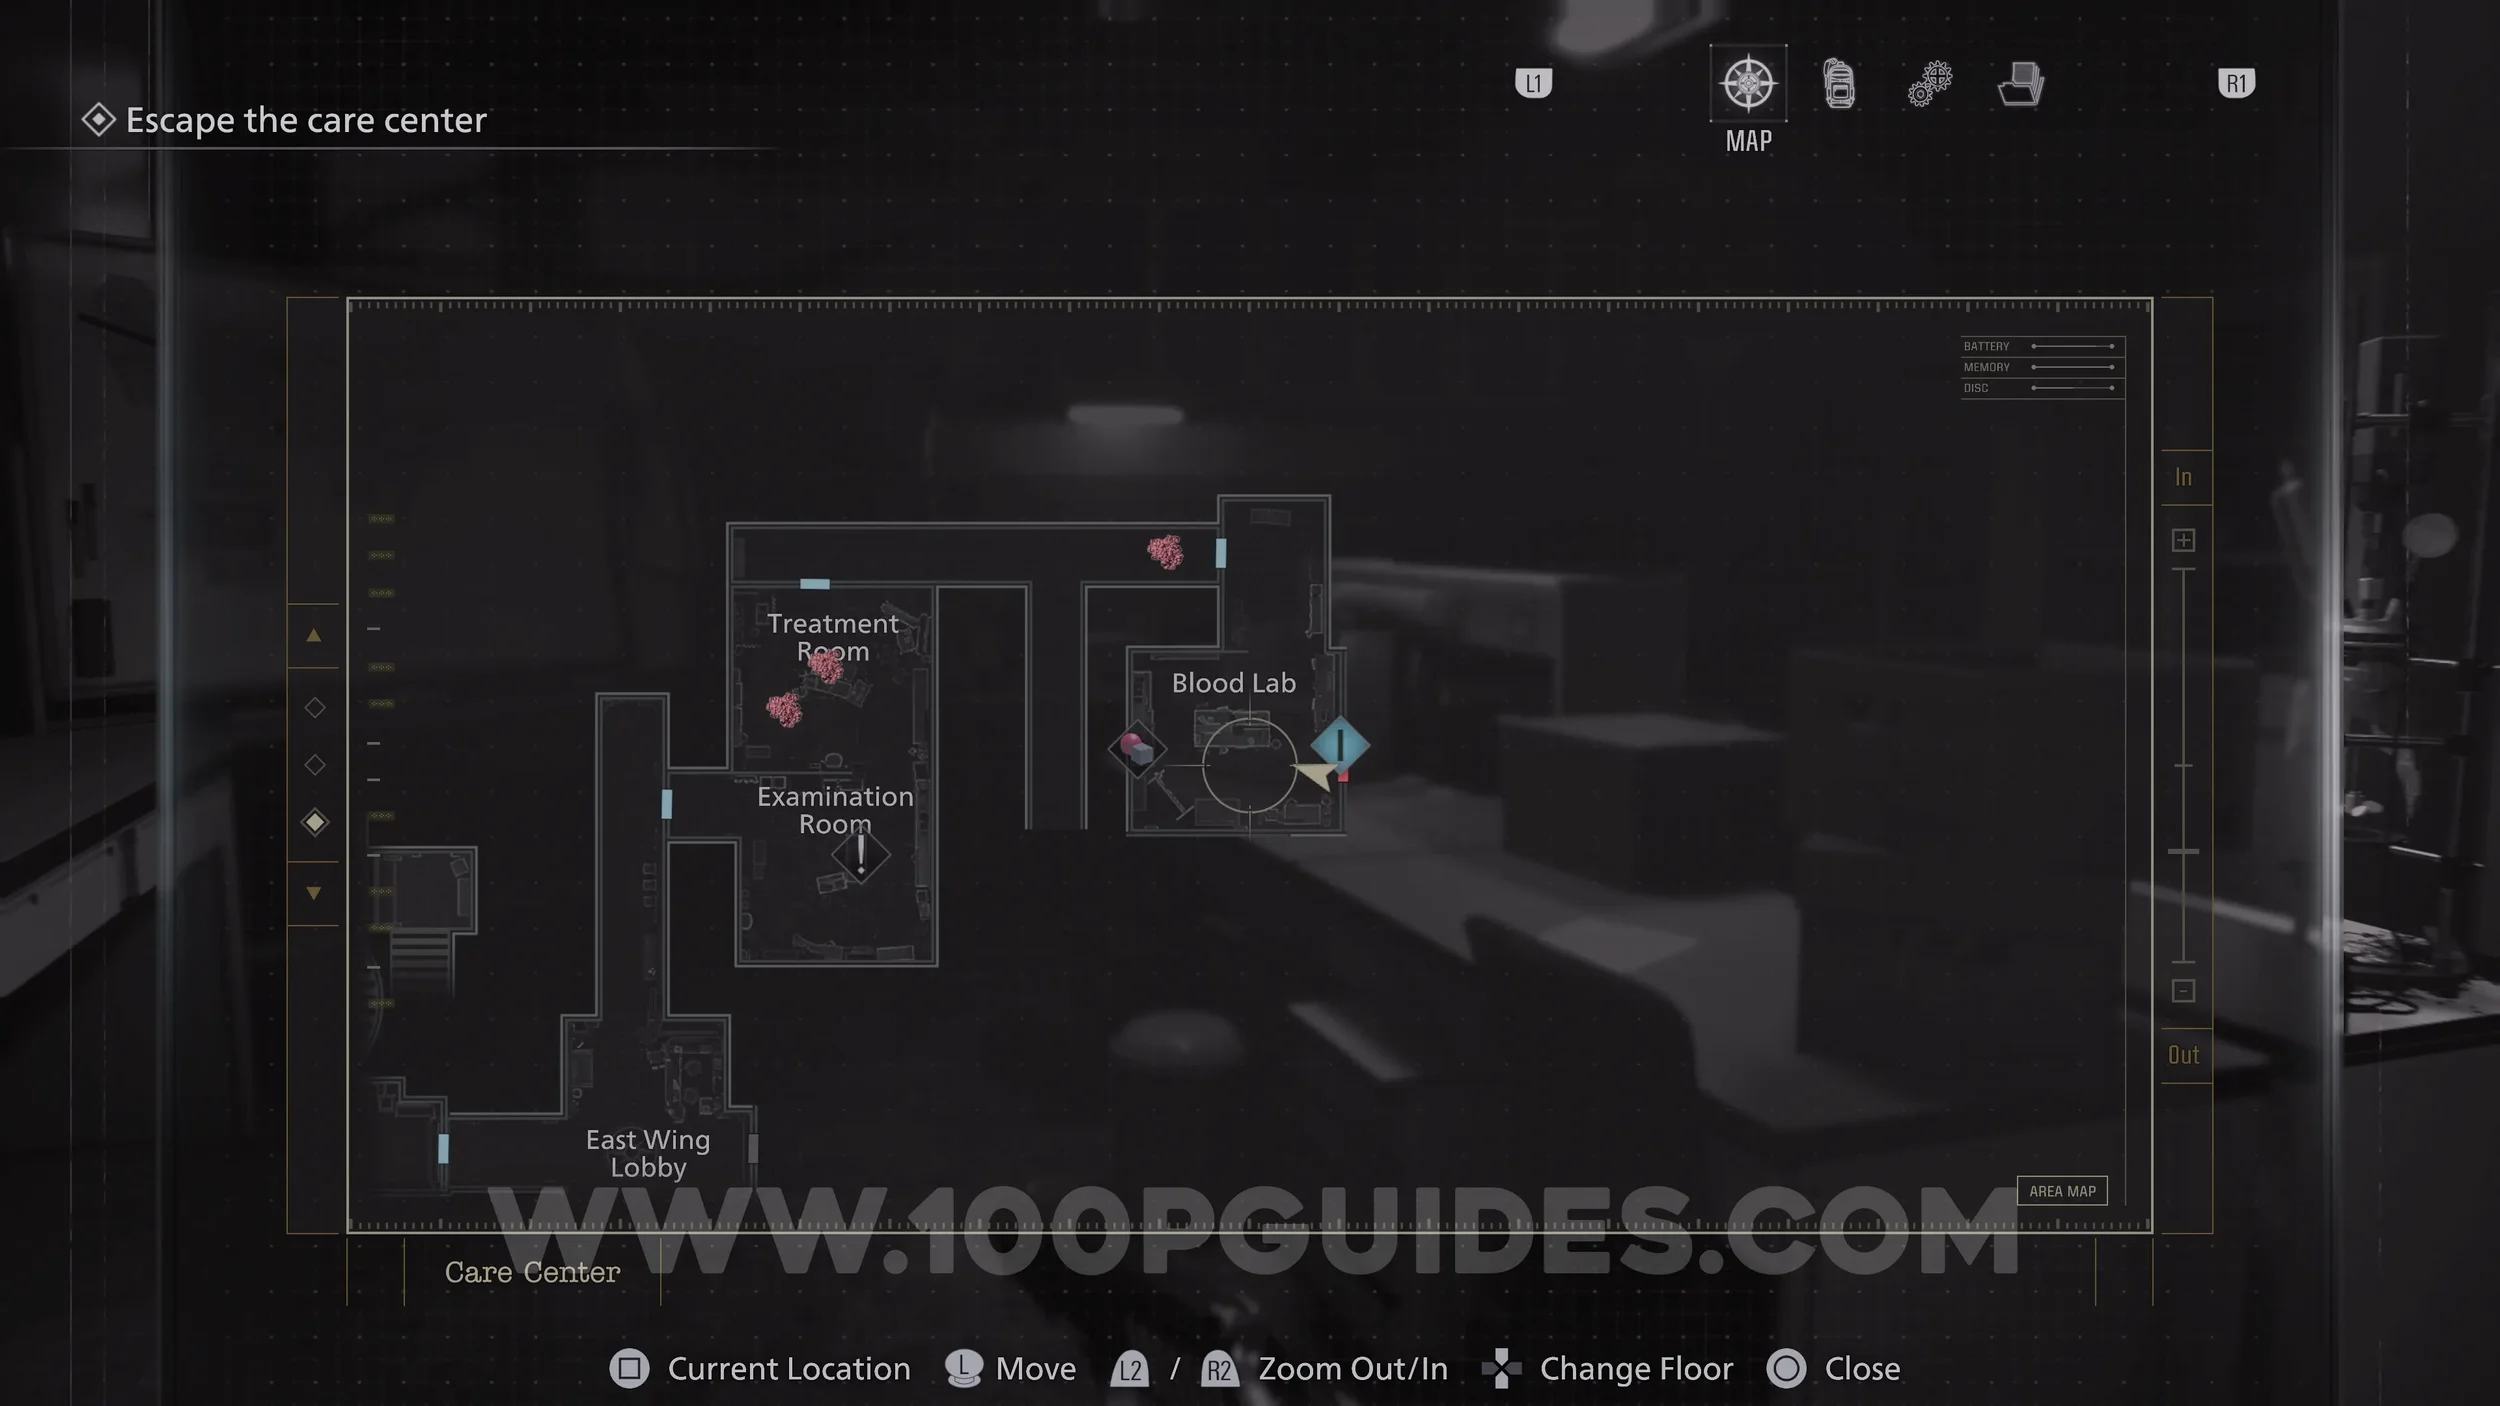
Blood Specimen (Denatured). Found on a desk in the Blood Lab. You can use these on the Analyzer in the same room to upload crafting recipes.
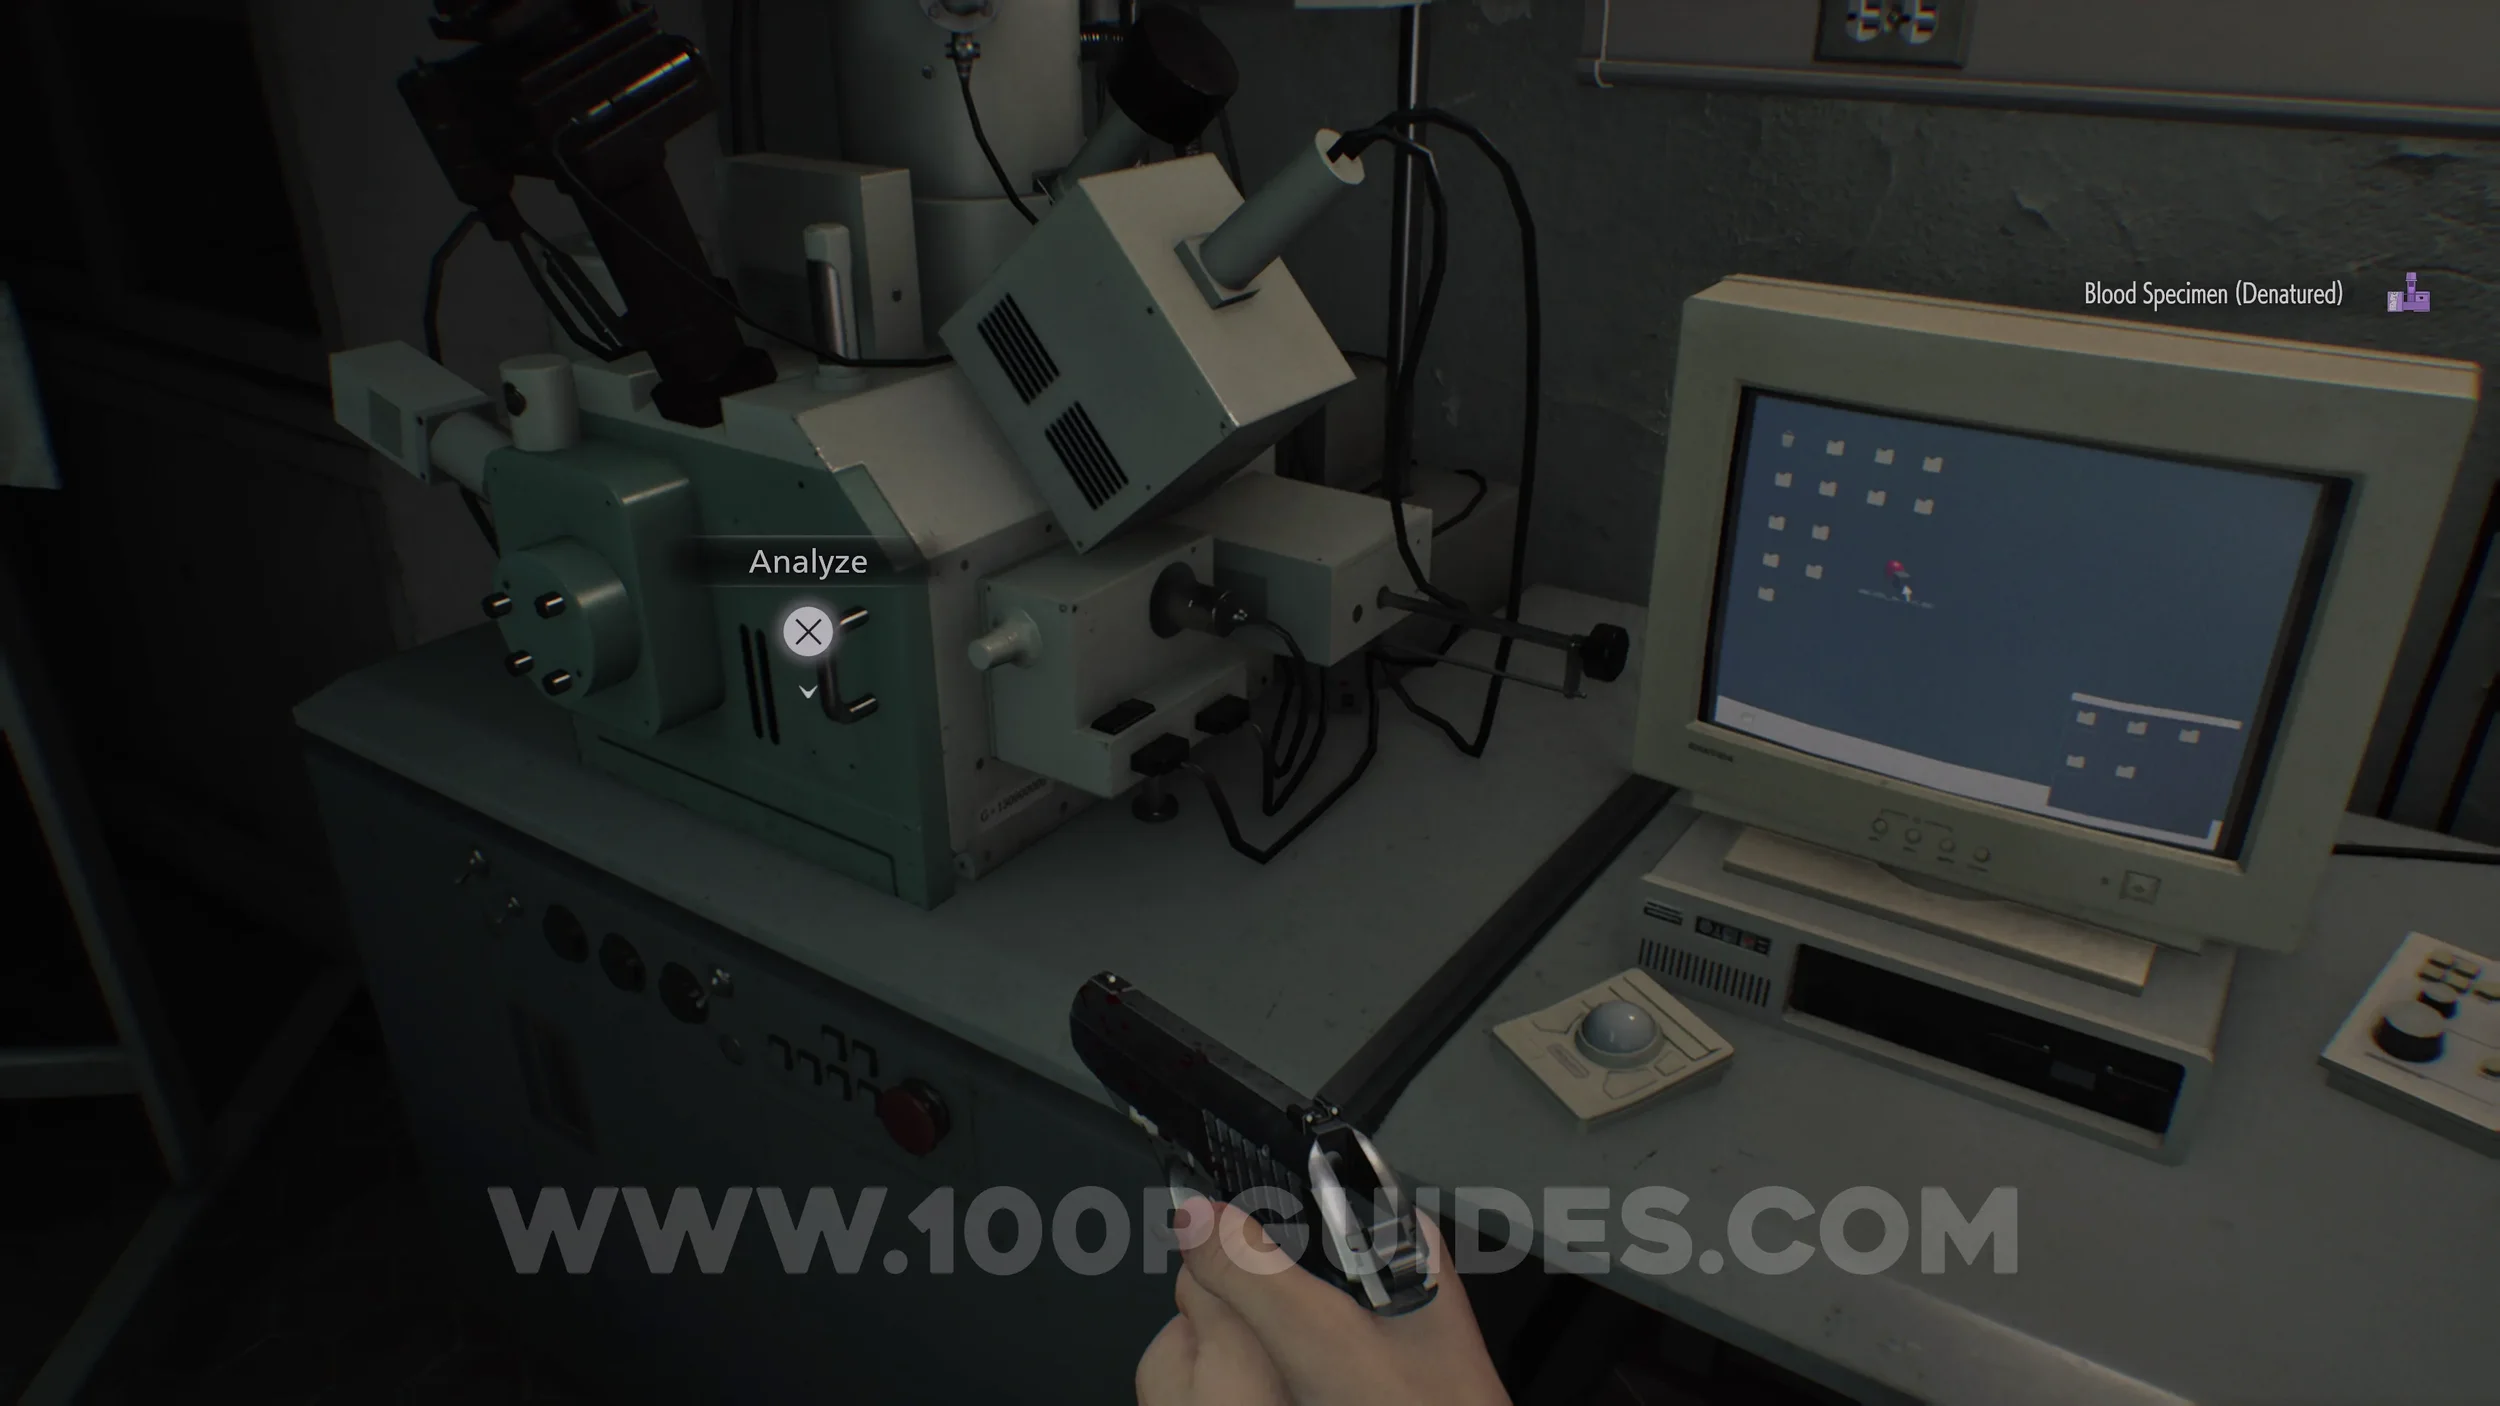
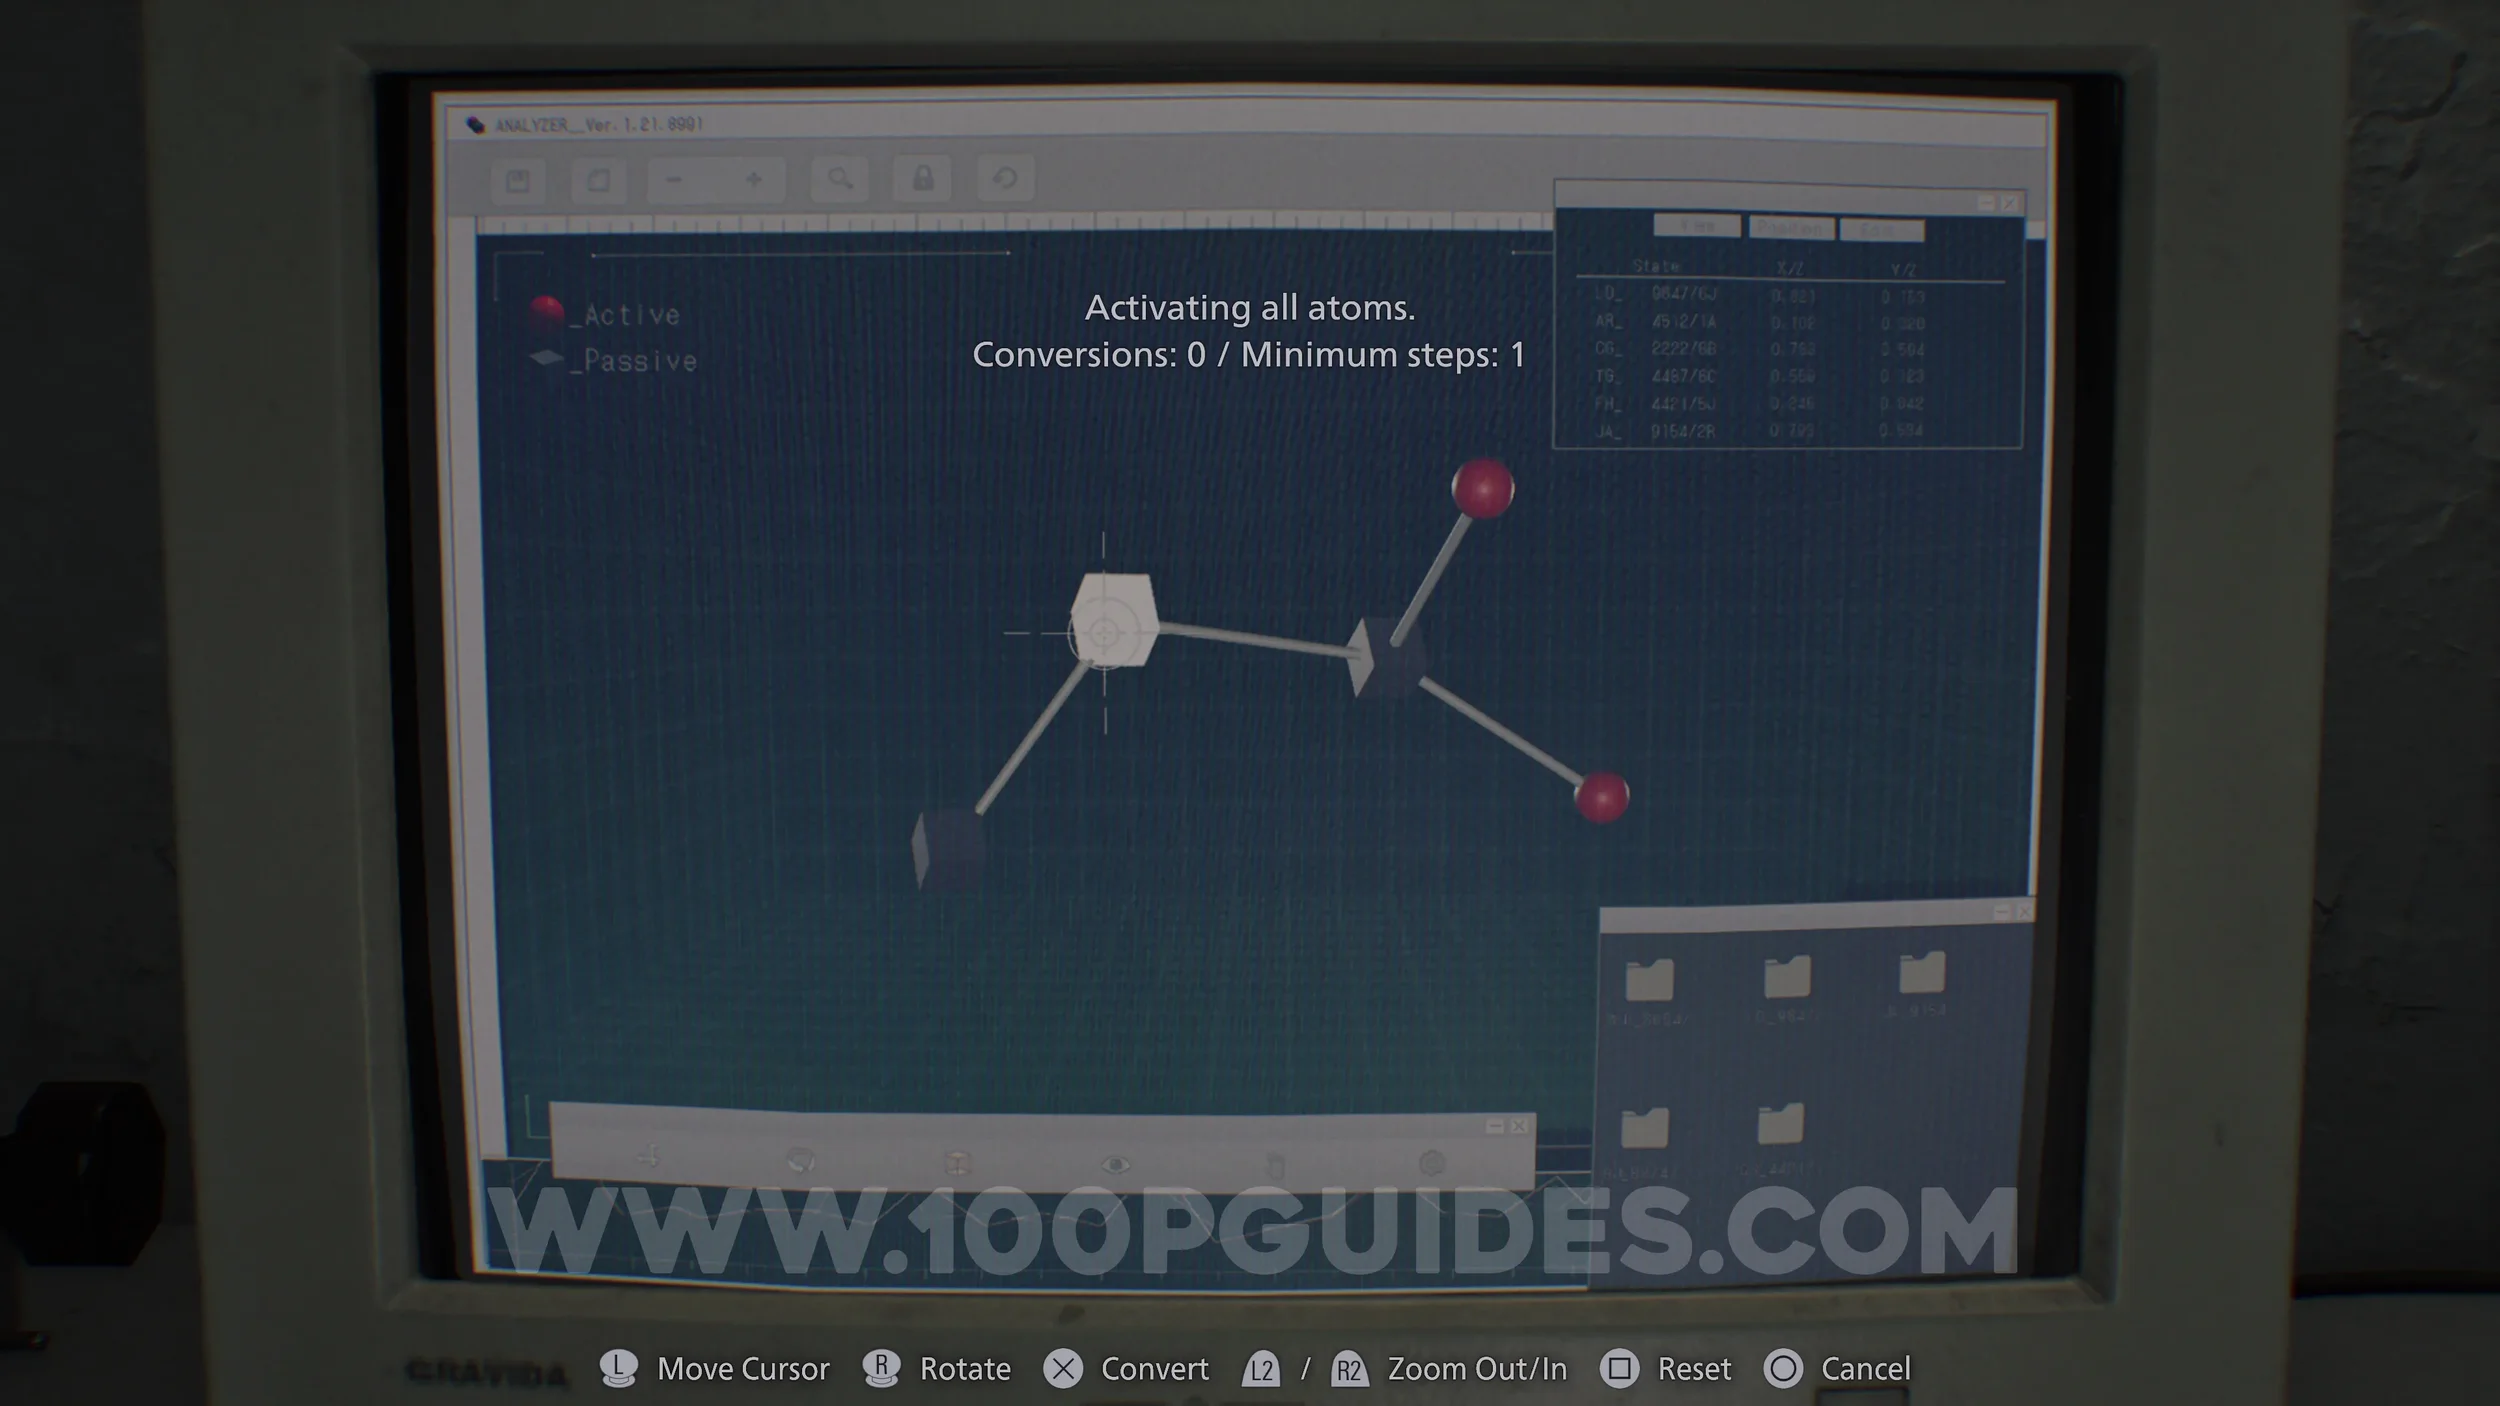
Trophy - Science! Use the Blood Specimen on the Analyzer in the Blood Lab. Then, solve the puzzle by turning all nodes red. For this puzzle, just press the second from the left.
Trophy - The Power of Blood. Pick up the Blood Collector from the Blood Lab. This item allows you to extract blood from defeated zombies and from blood-filled buckets.
In this same room, extract blood from the nearby bucket. Then open the Crafting Menu using the Touch Pad and craft any item that requires blood. If you have already analyzed the Blood Specimen, you should have two available crafting recipes.
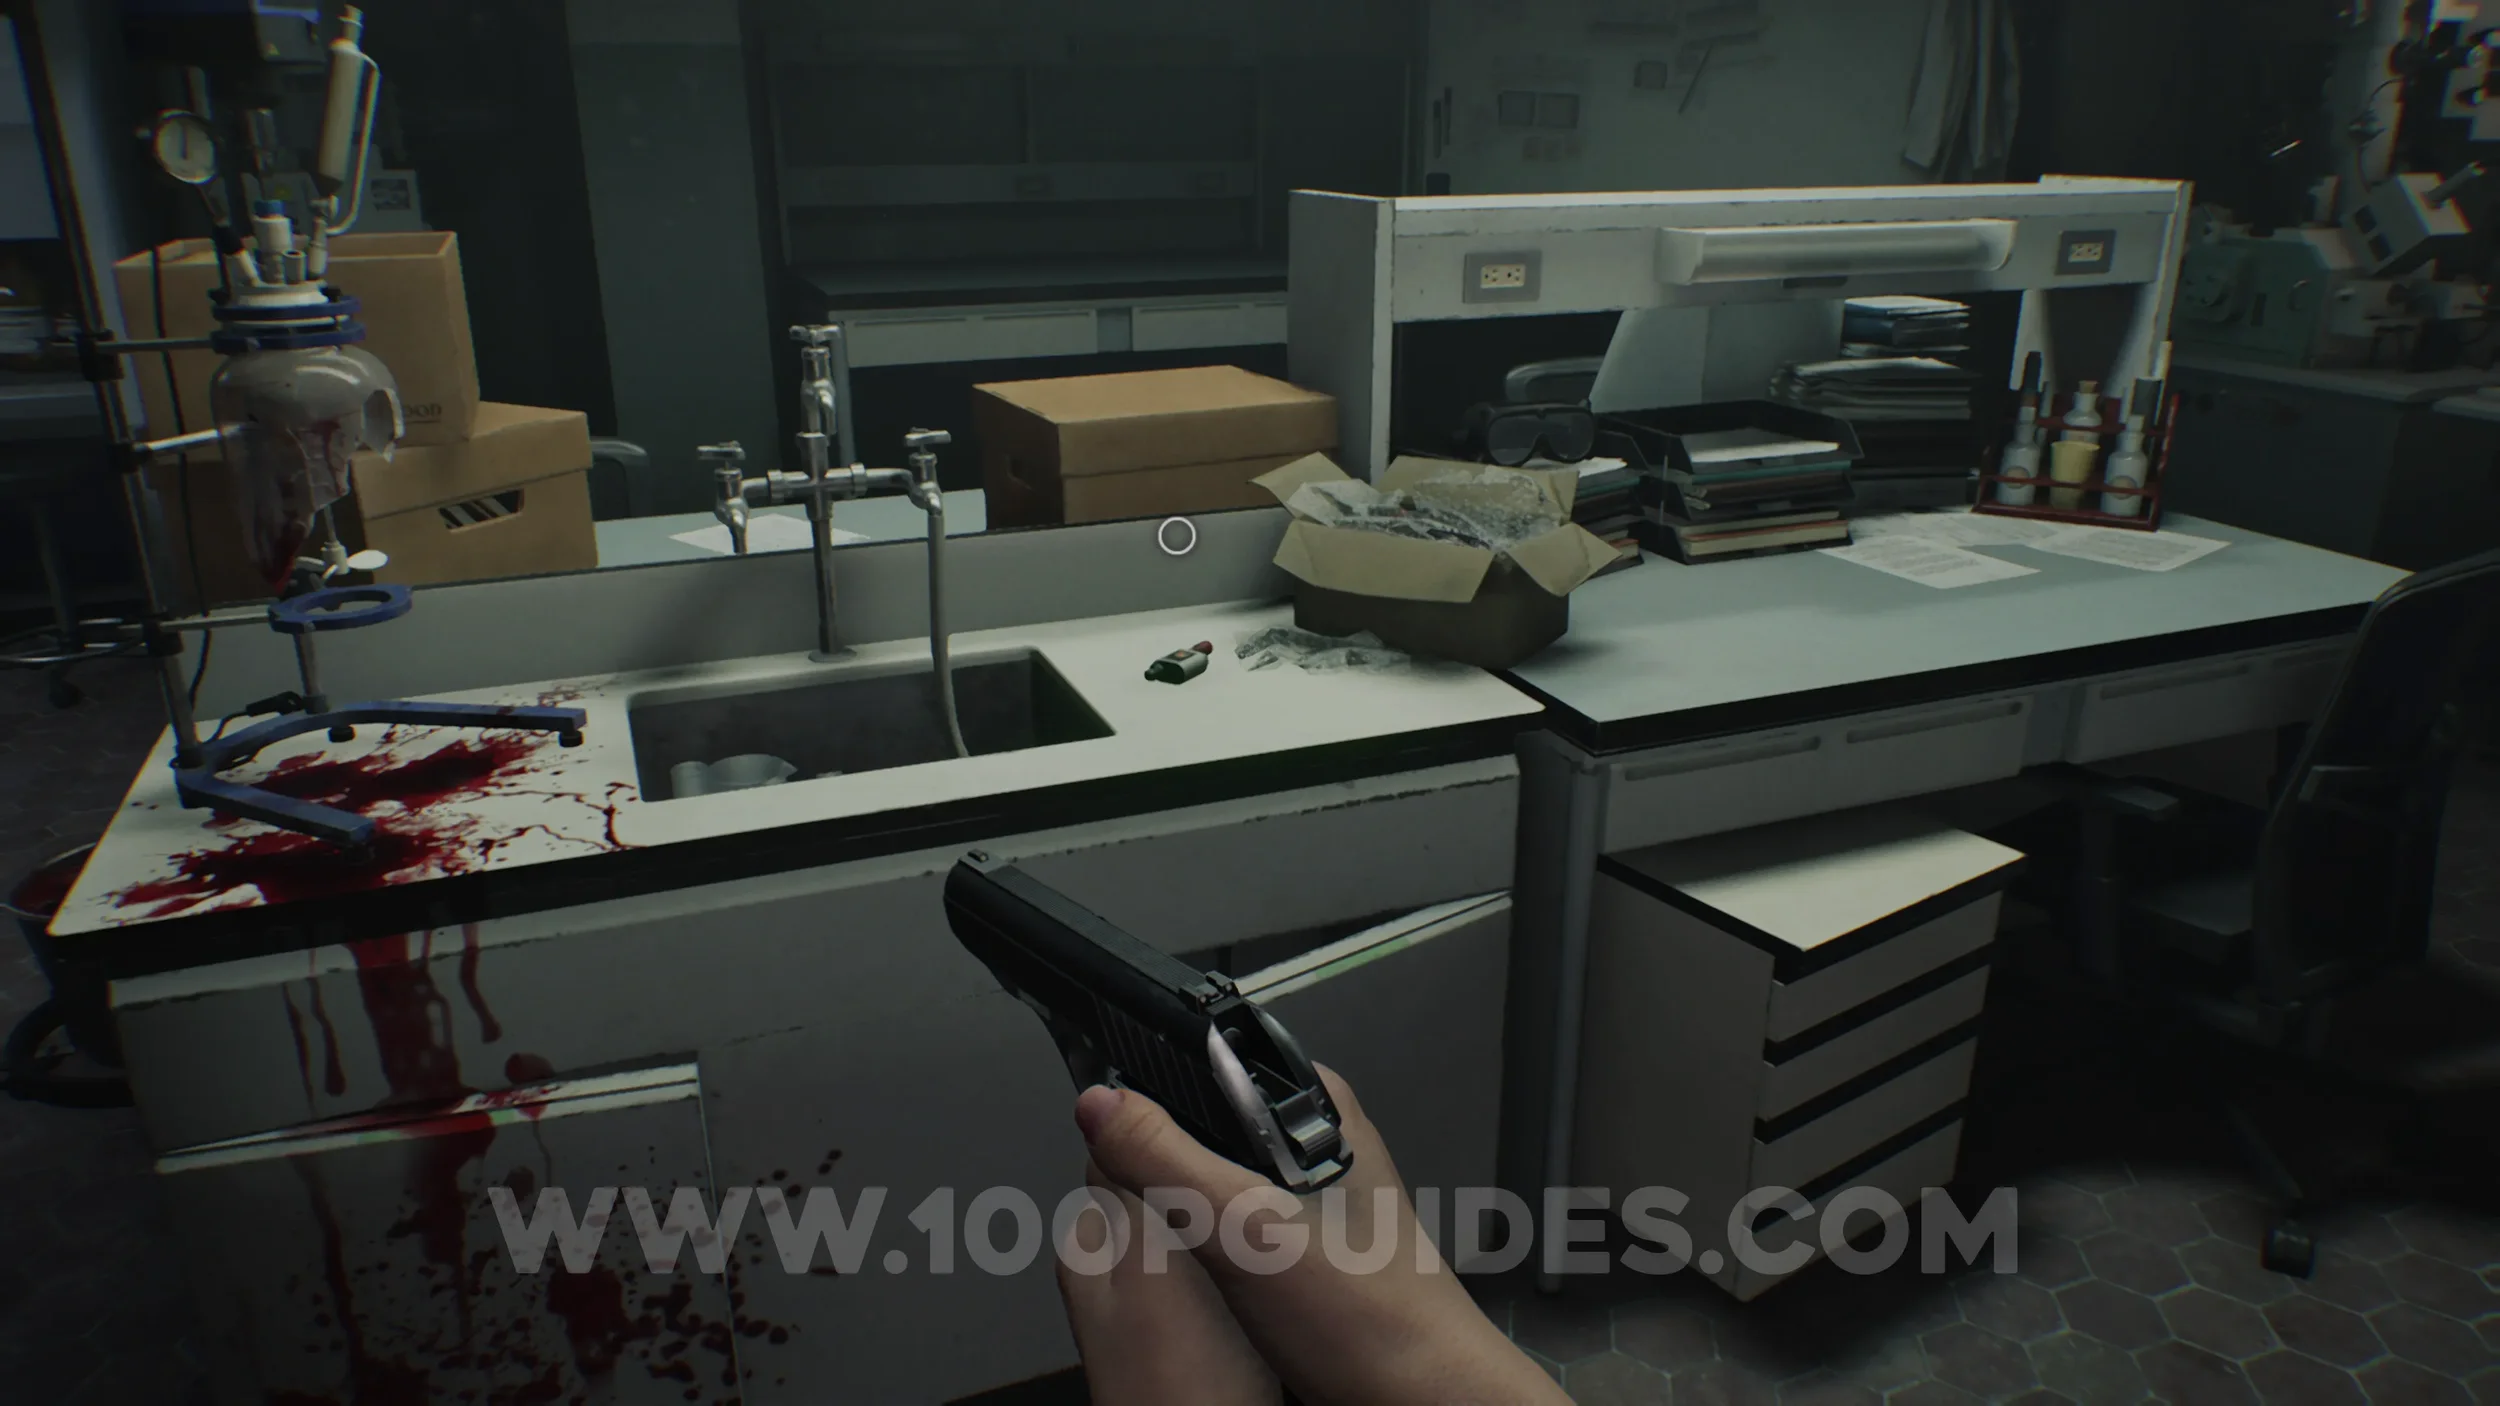
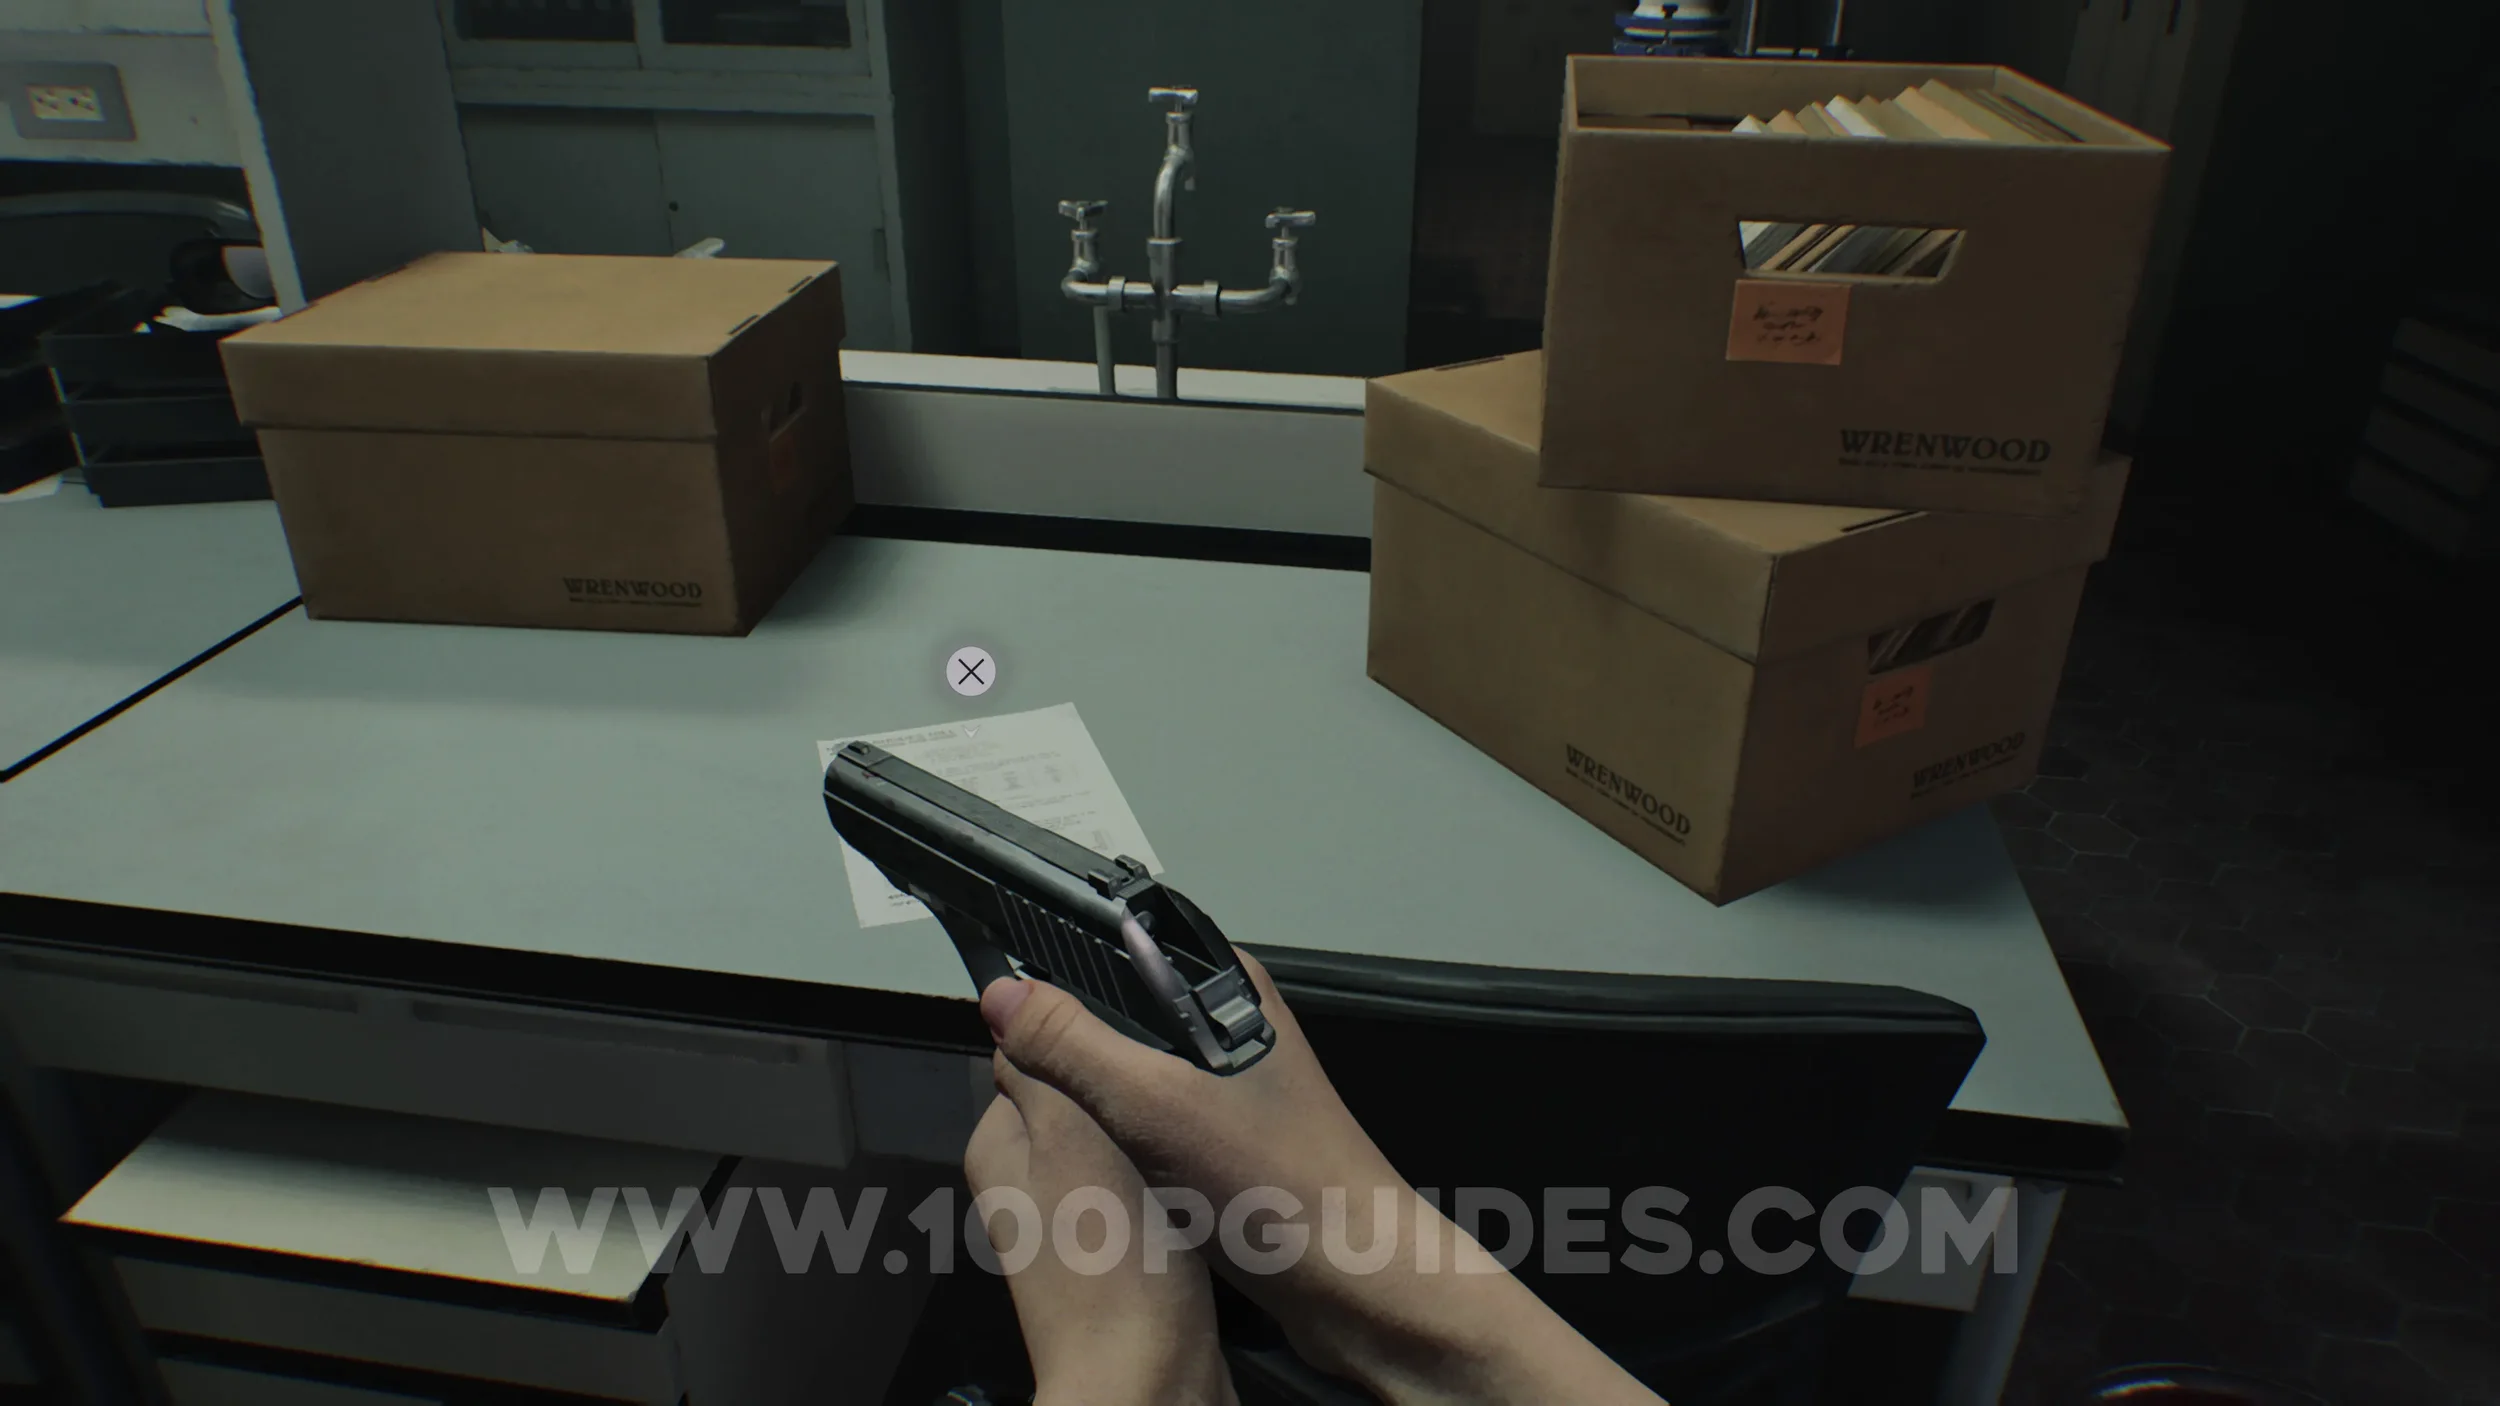
File #15 - Blood Compound Synthesis. Found on the Table in the Blood Lab.
Trophy - Internal Dispute (Part 2). Make sure you have the Empty Bottle you picked up in the Dining Room before attempting this trophy.
When you reach the Waiting Room, sneak to the right side and break the vase by pressing X. Then move into the nearby corner and wait until the blind zombie (dressed in white) and the maid zombie are standing together near the broken vase.
Throw the Empty Bottle at the maid zombie. This will cause the blind zombie to attack and kill her, unlocking the trophy.
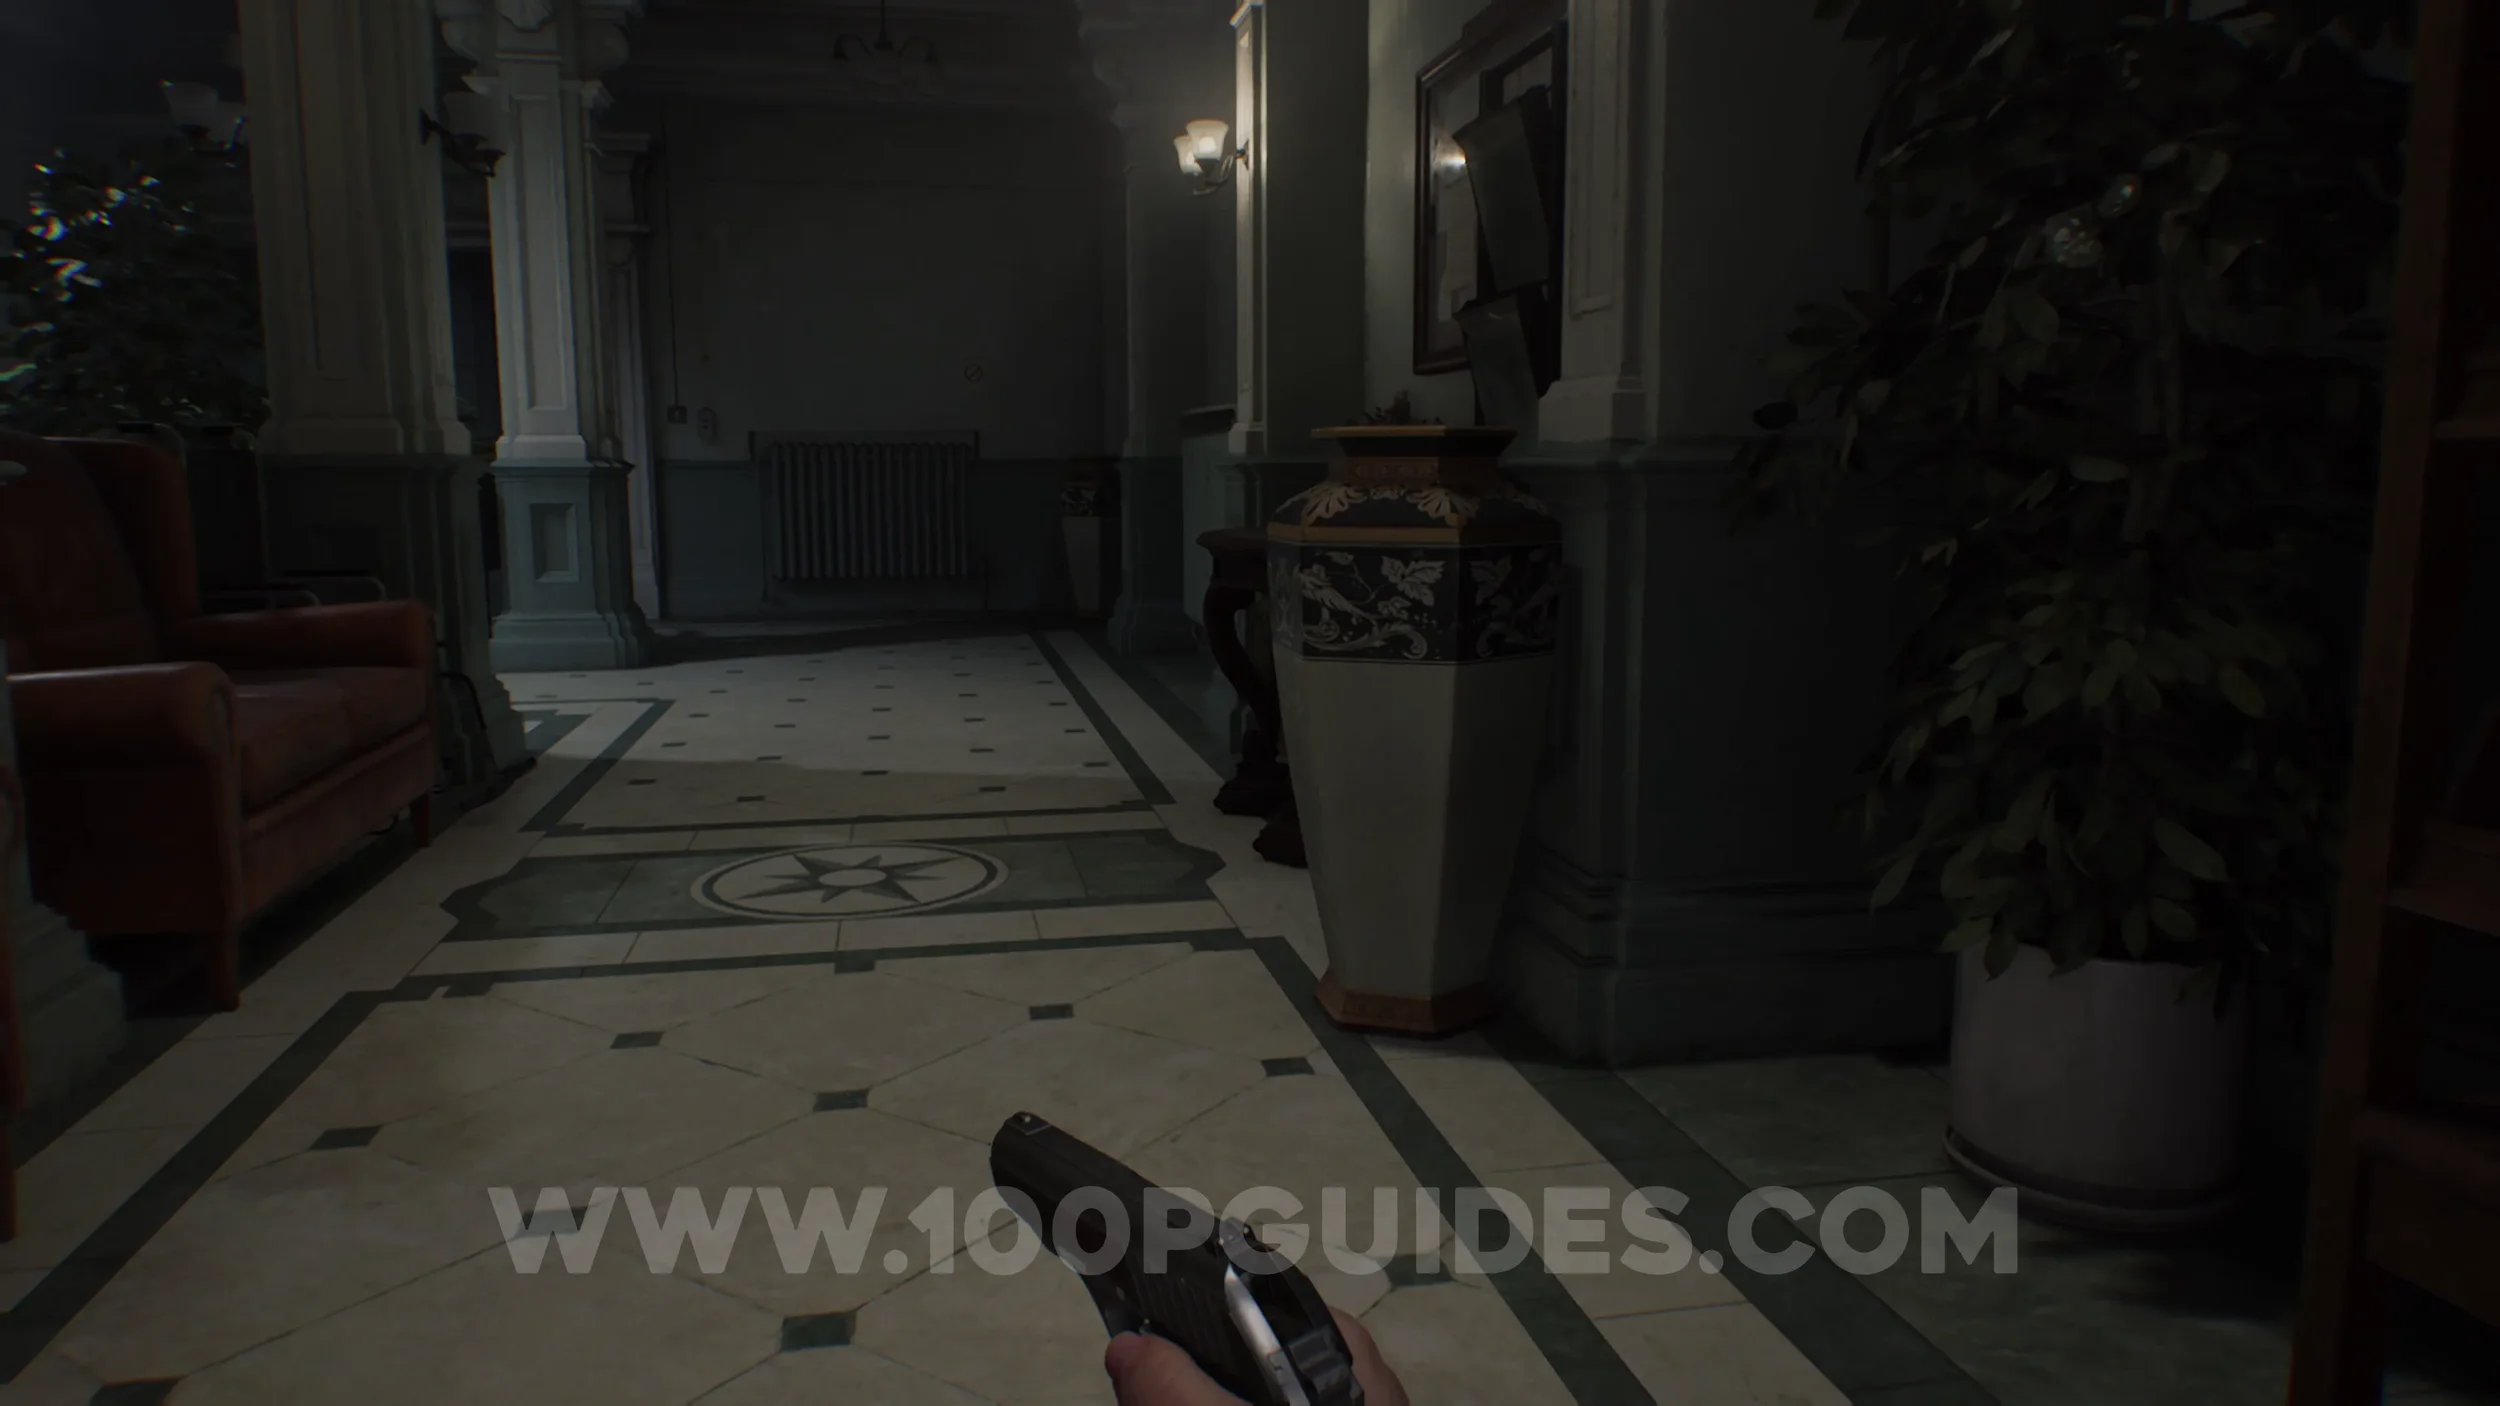

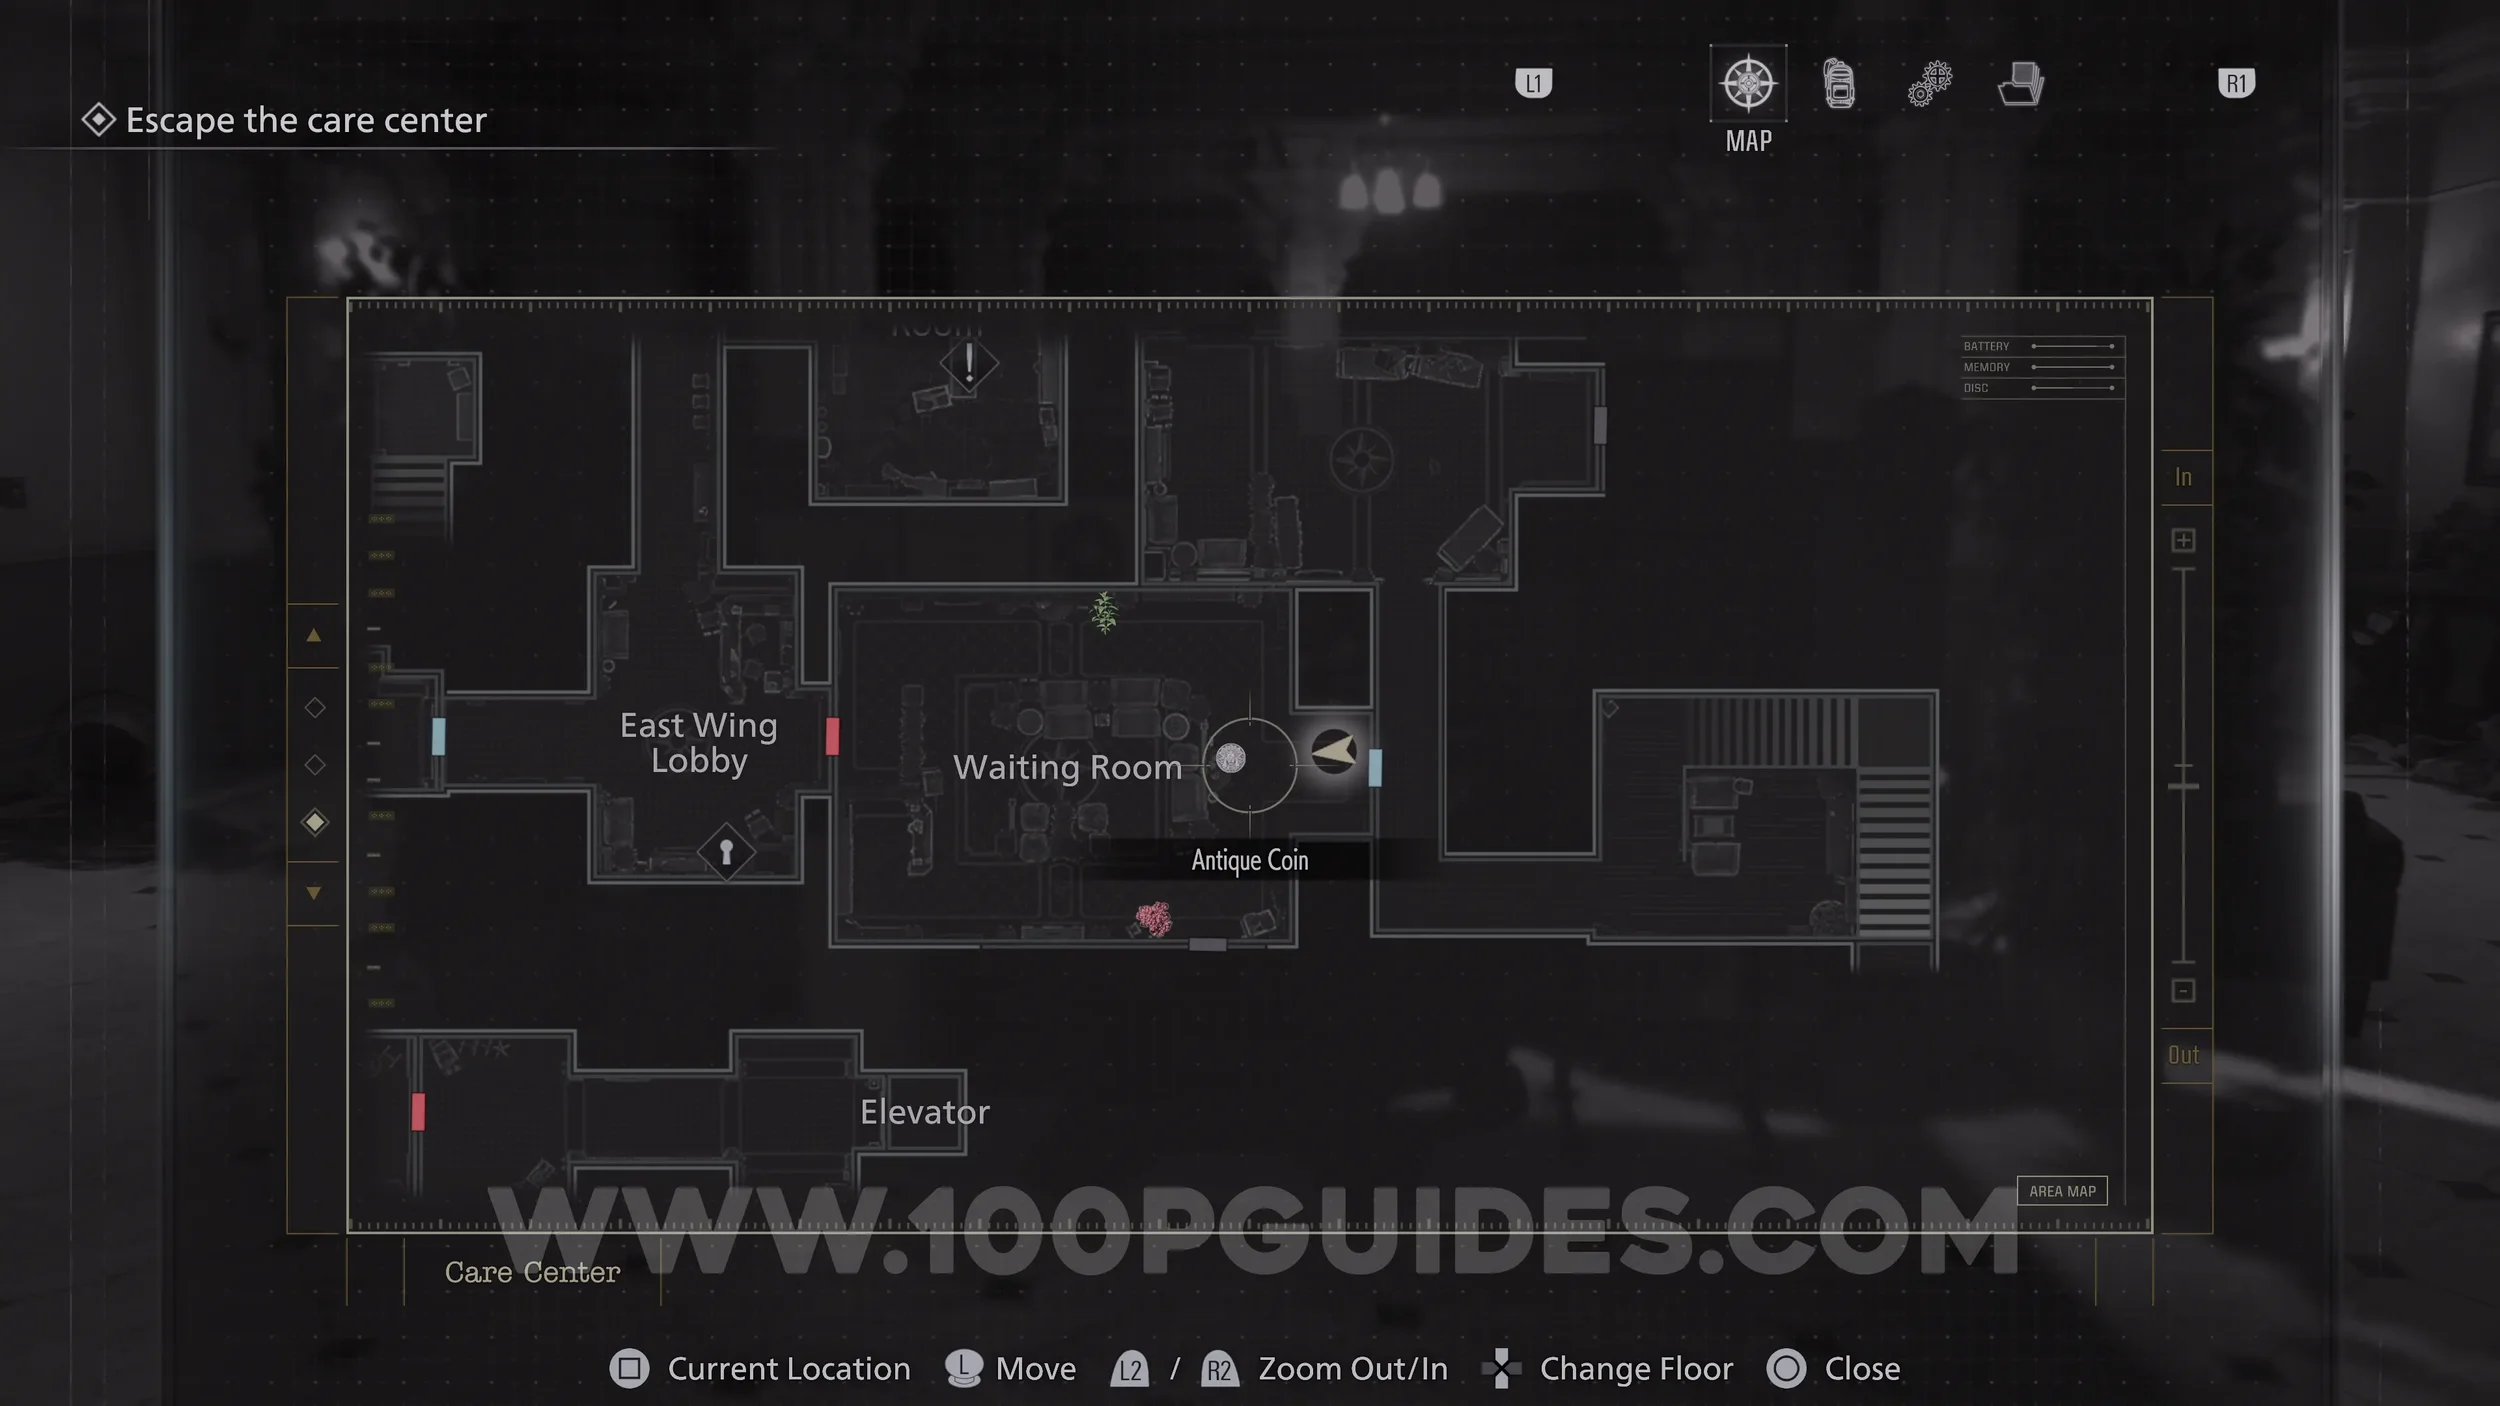
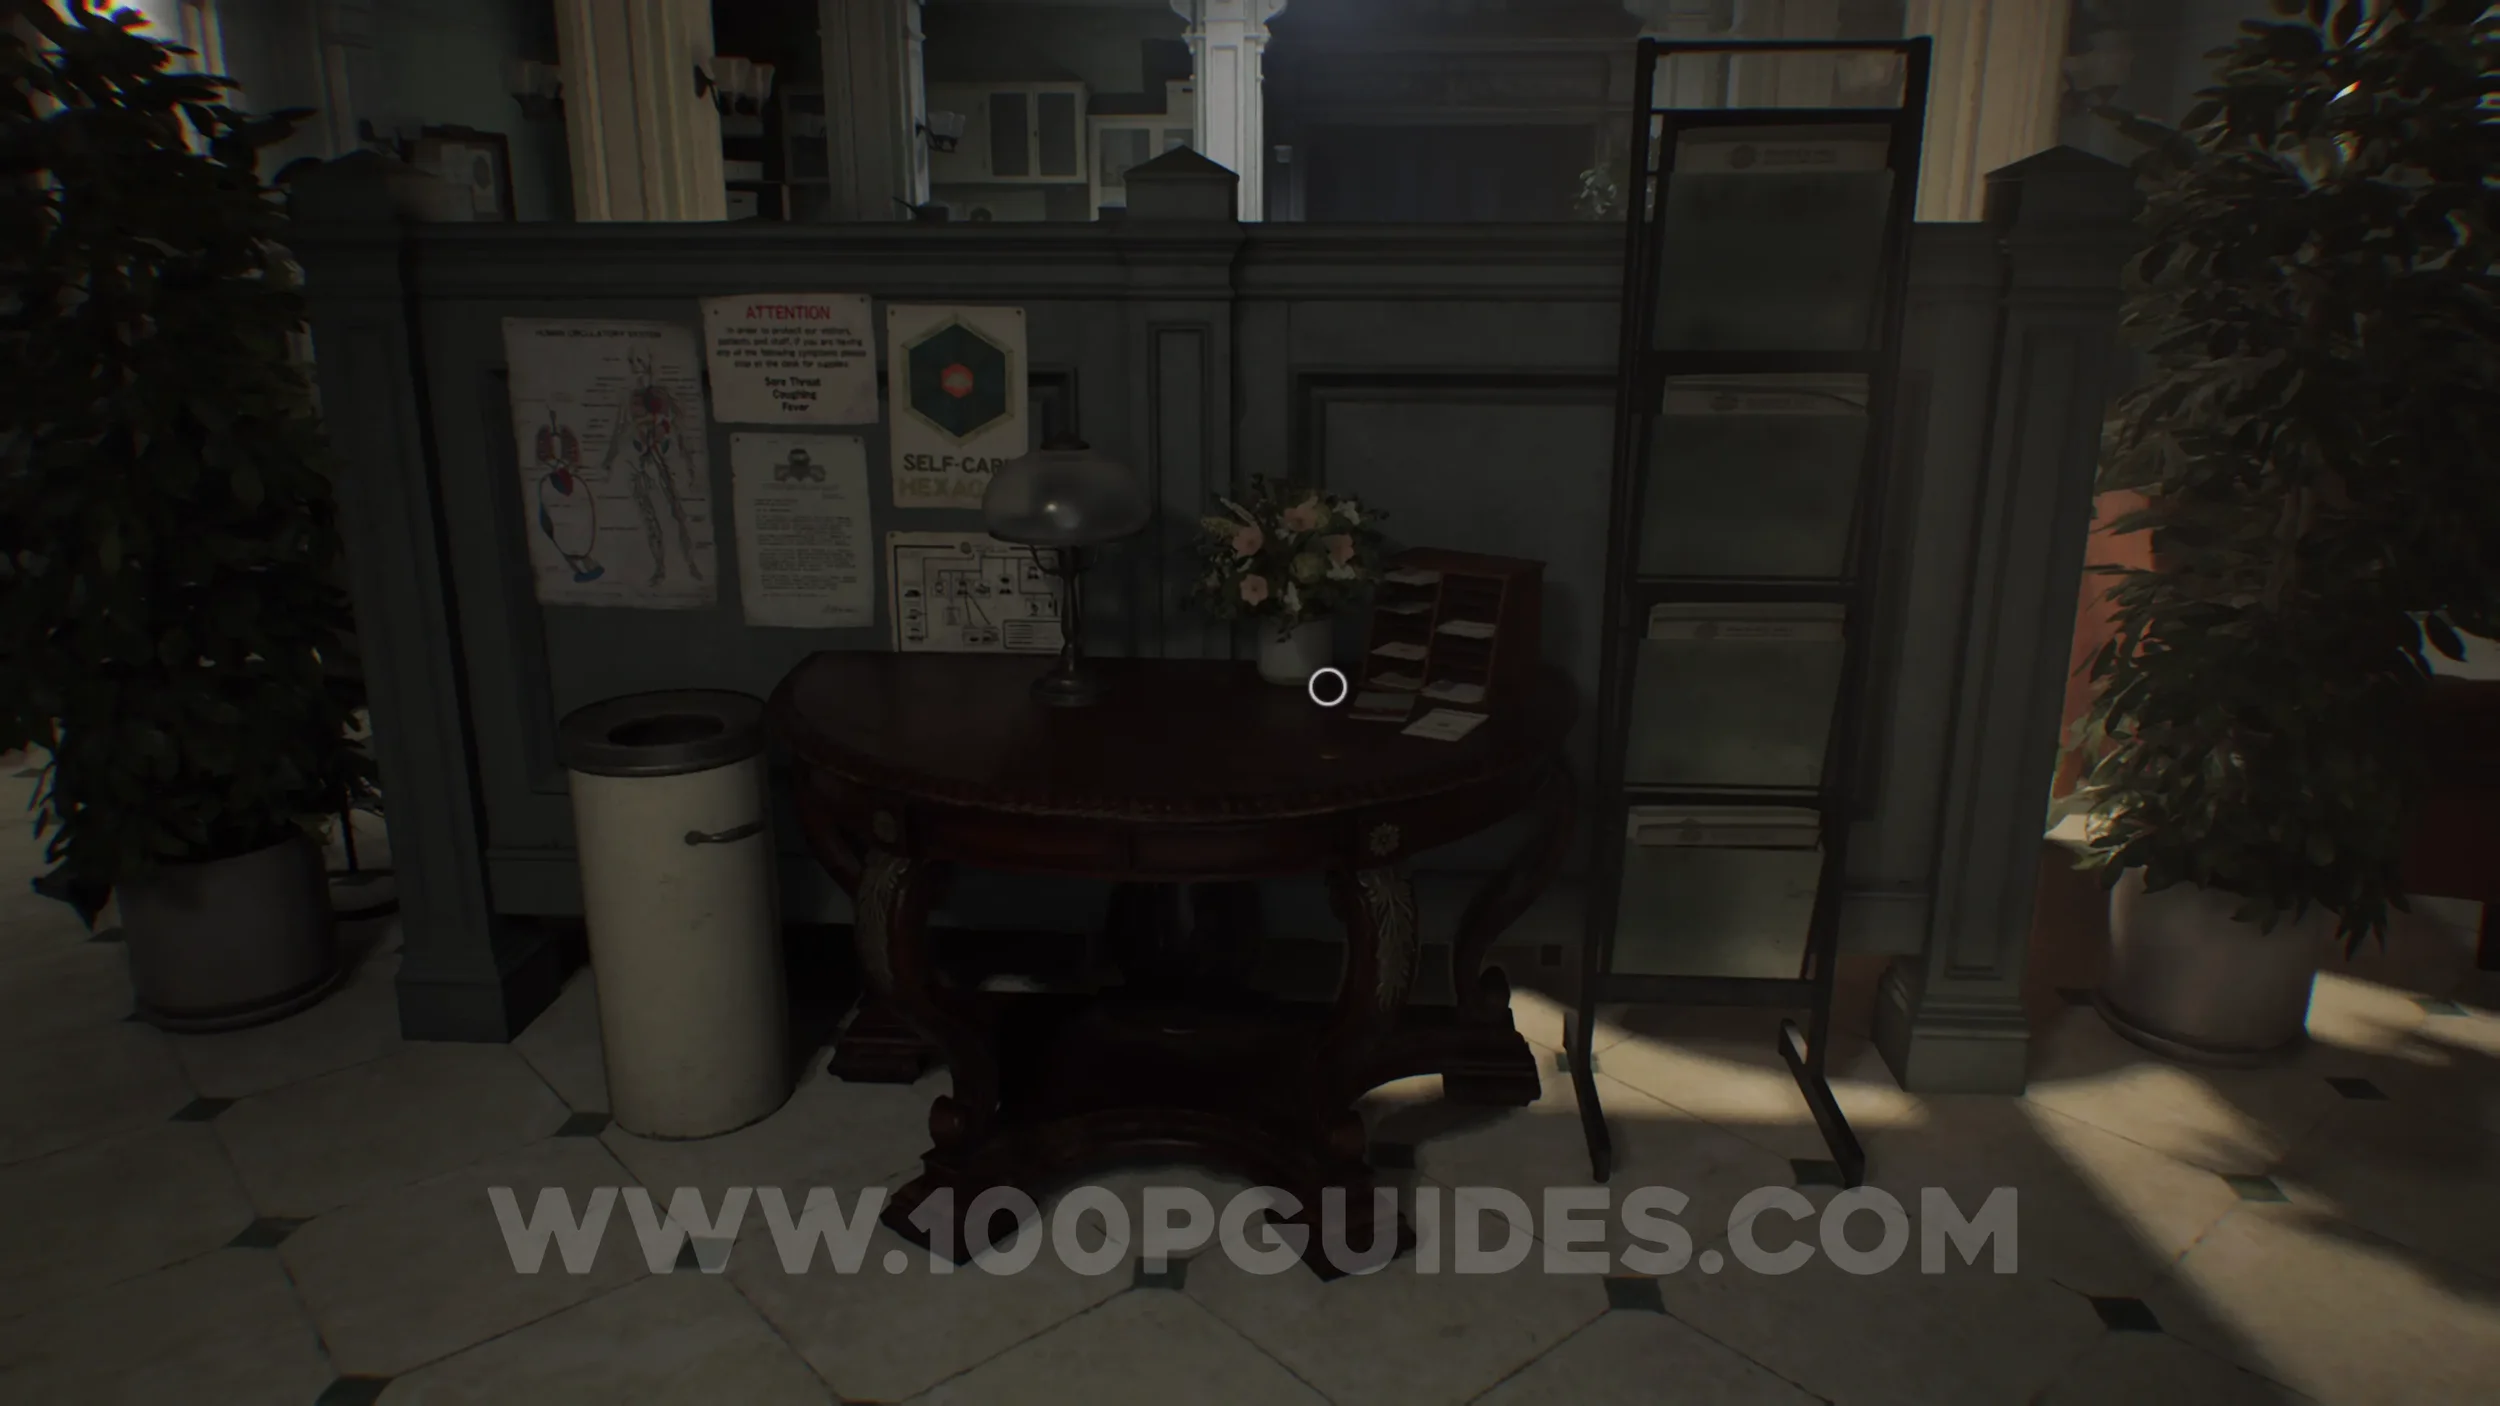
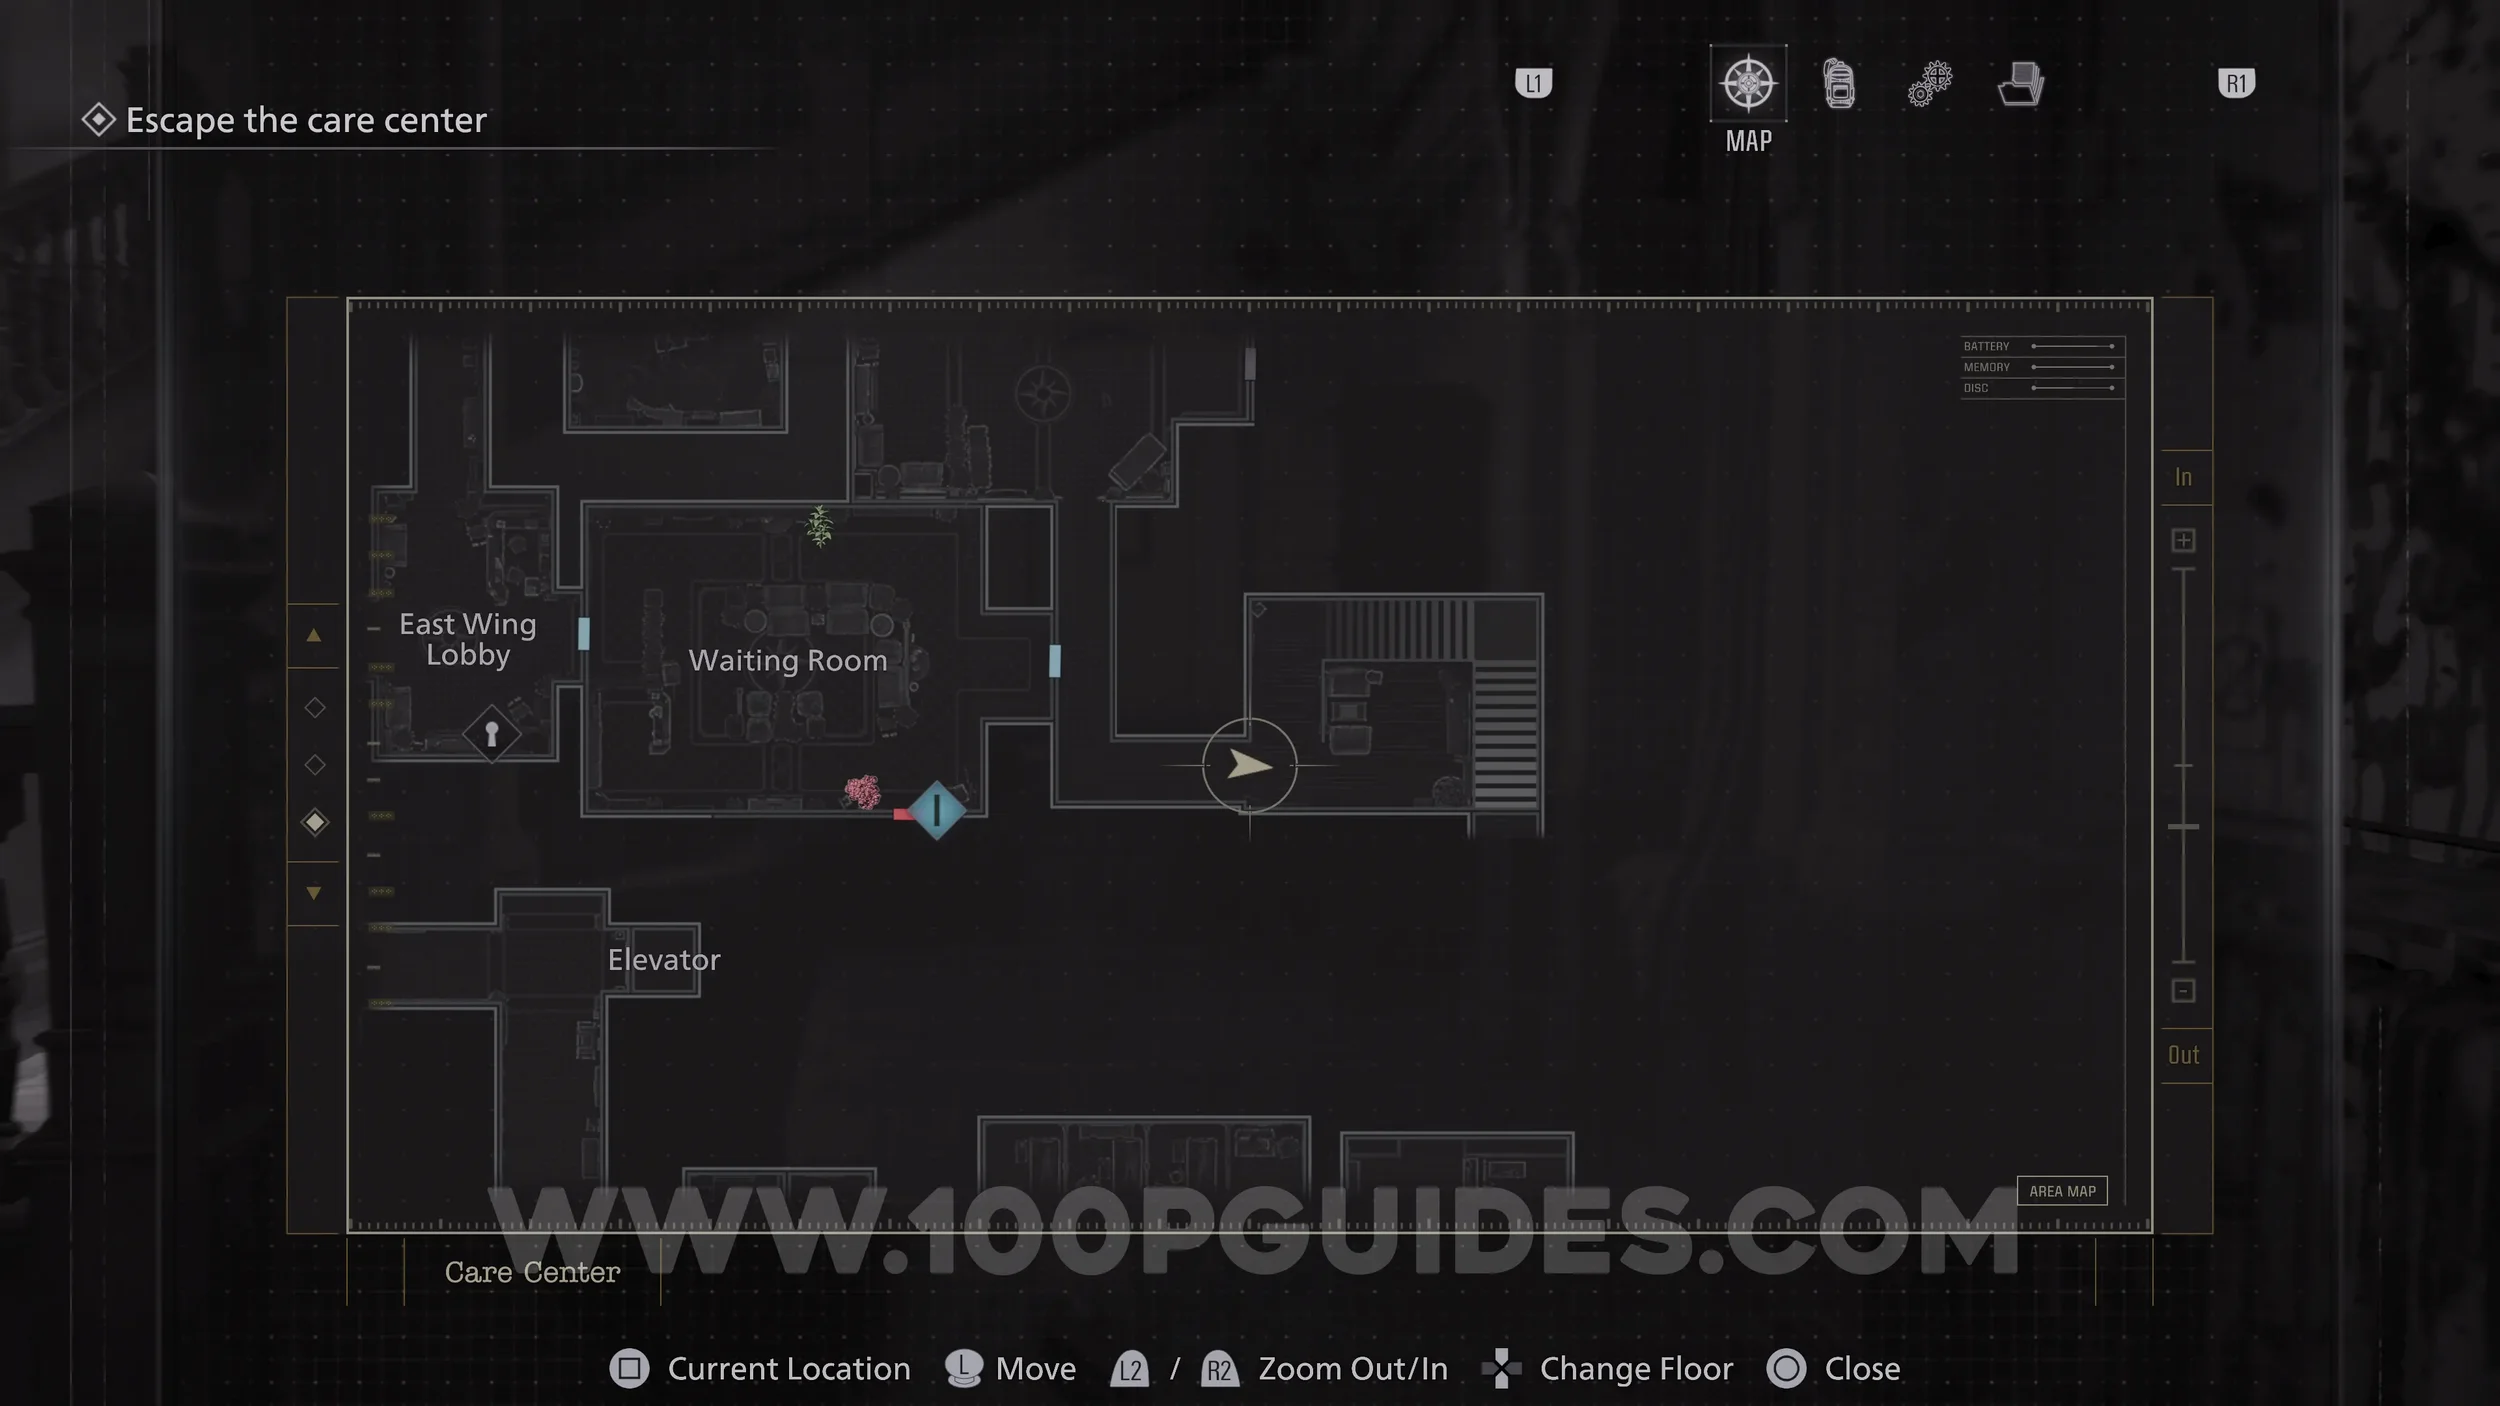
Antique Coin #15. On the table in the Waiting Room.
File #16 - Safe Replacements. Also in the Waiting Room in the south-west corner.
Antique Coin #16-17. In the open safe in the Waiting Room near the previous file.


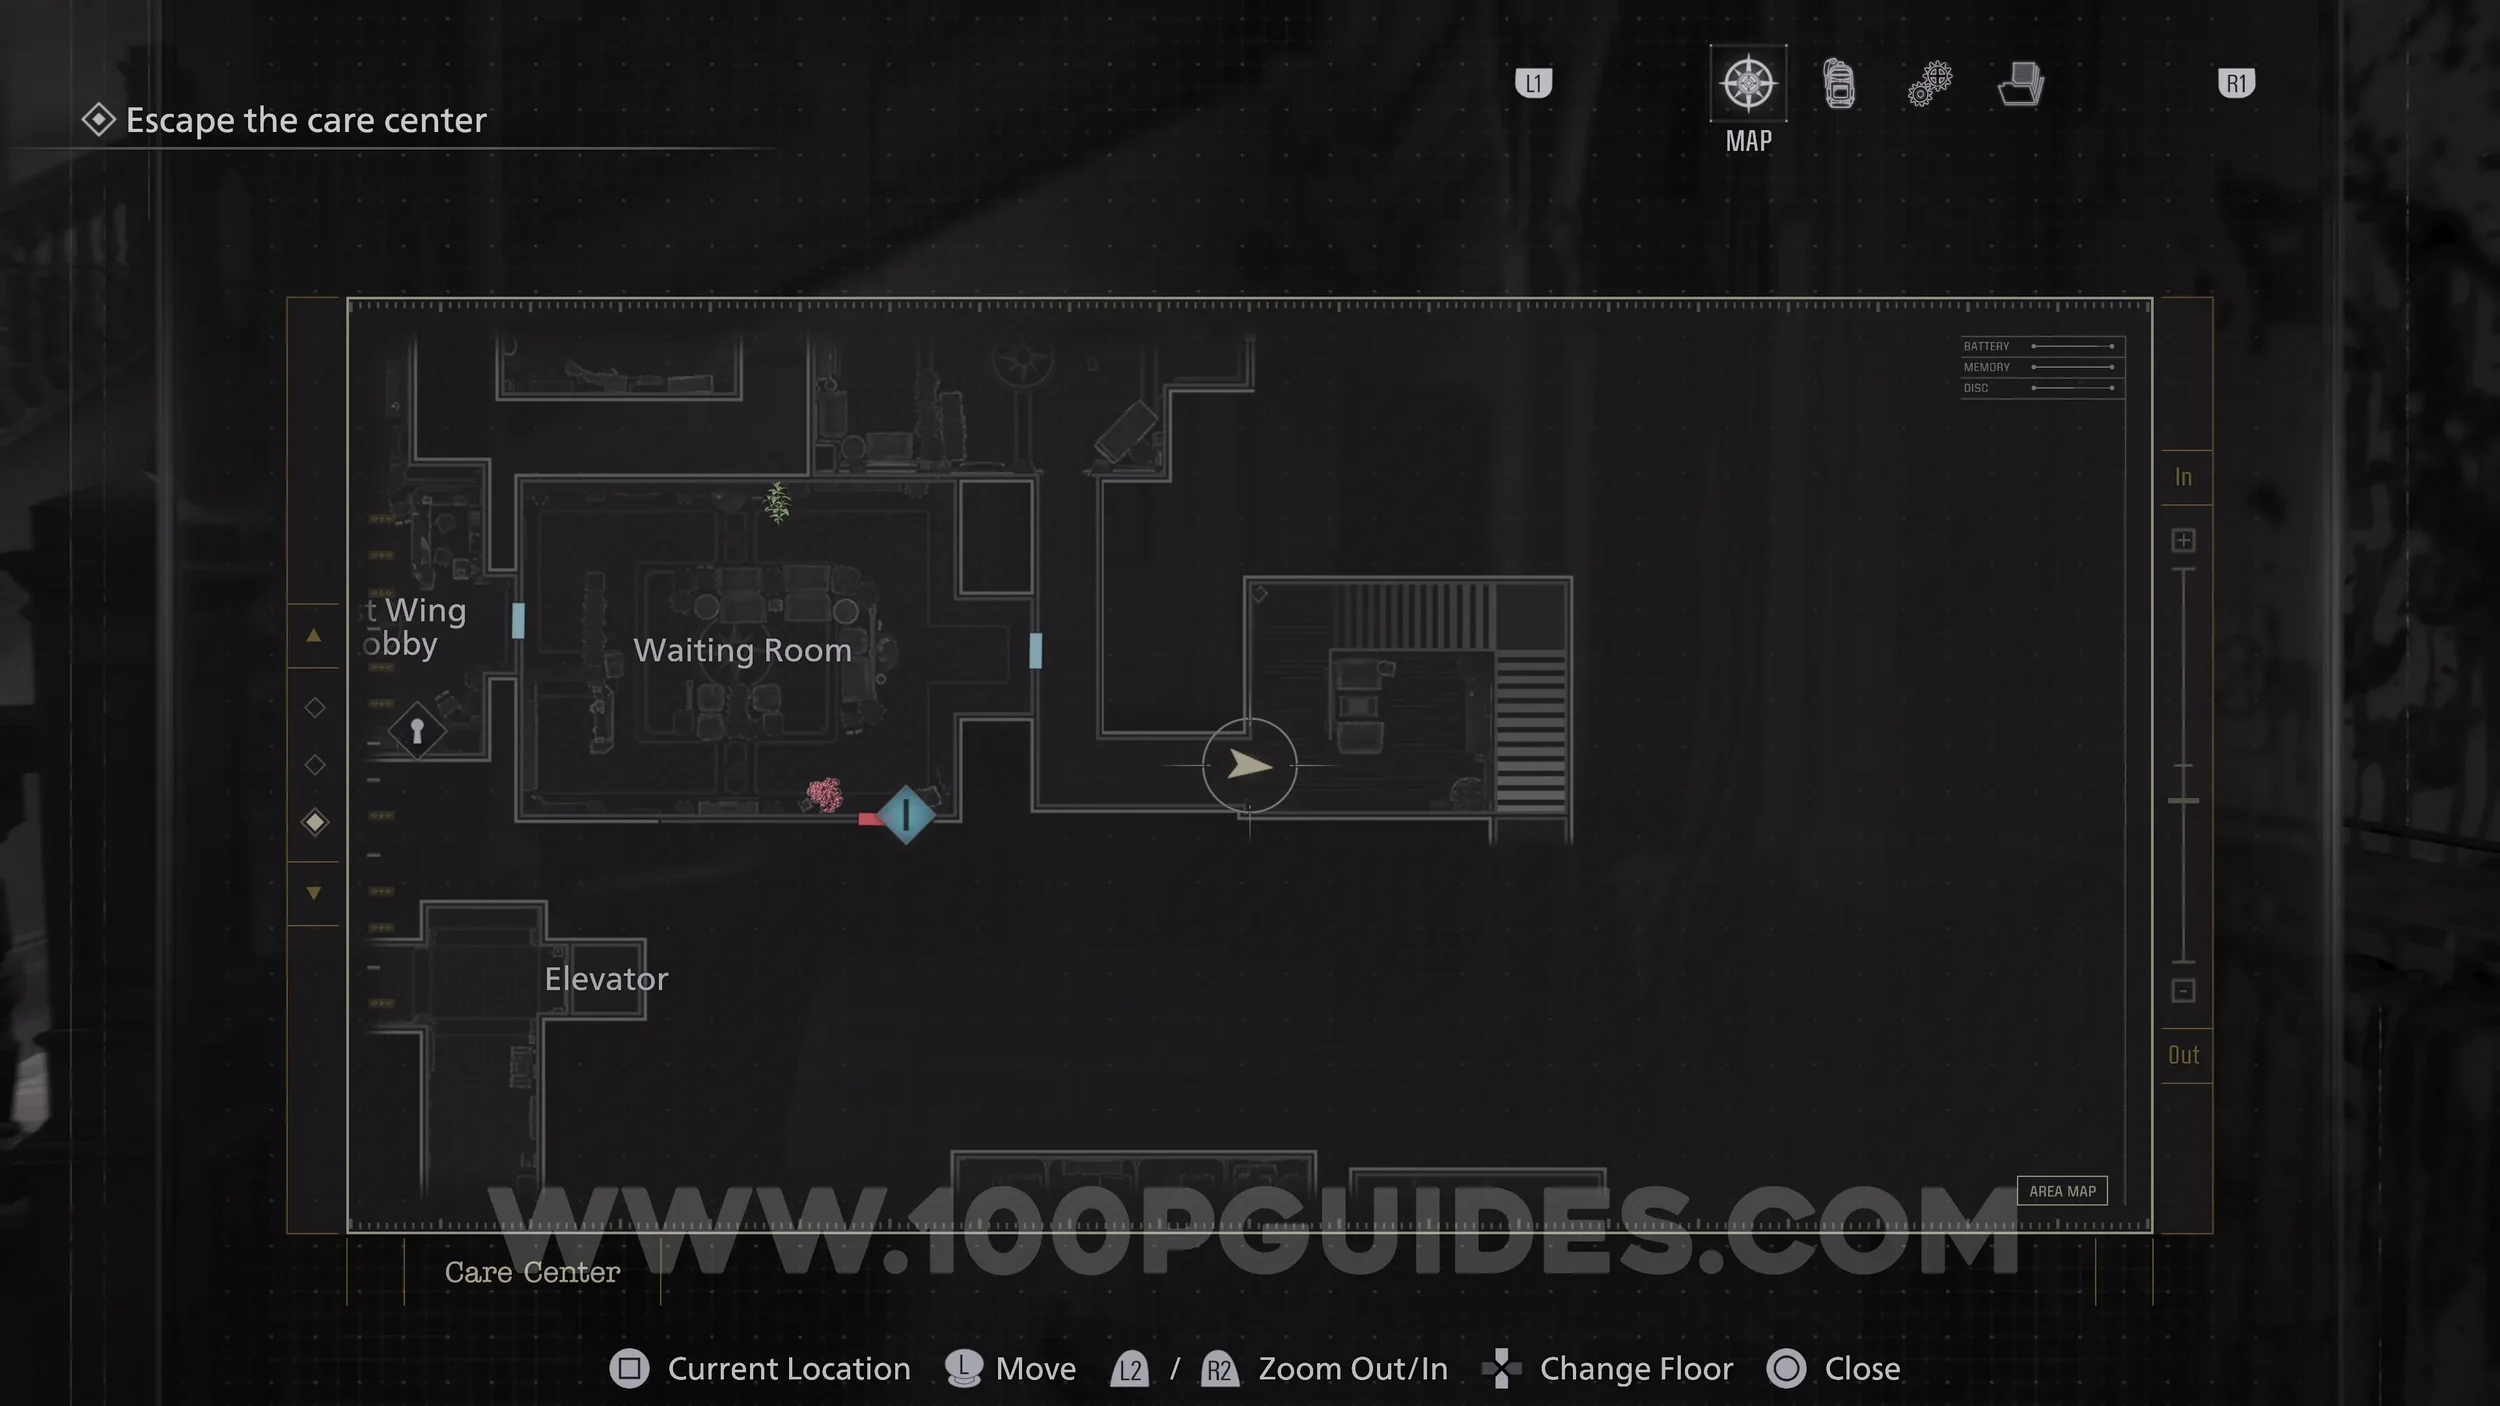
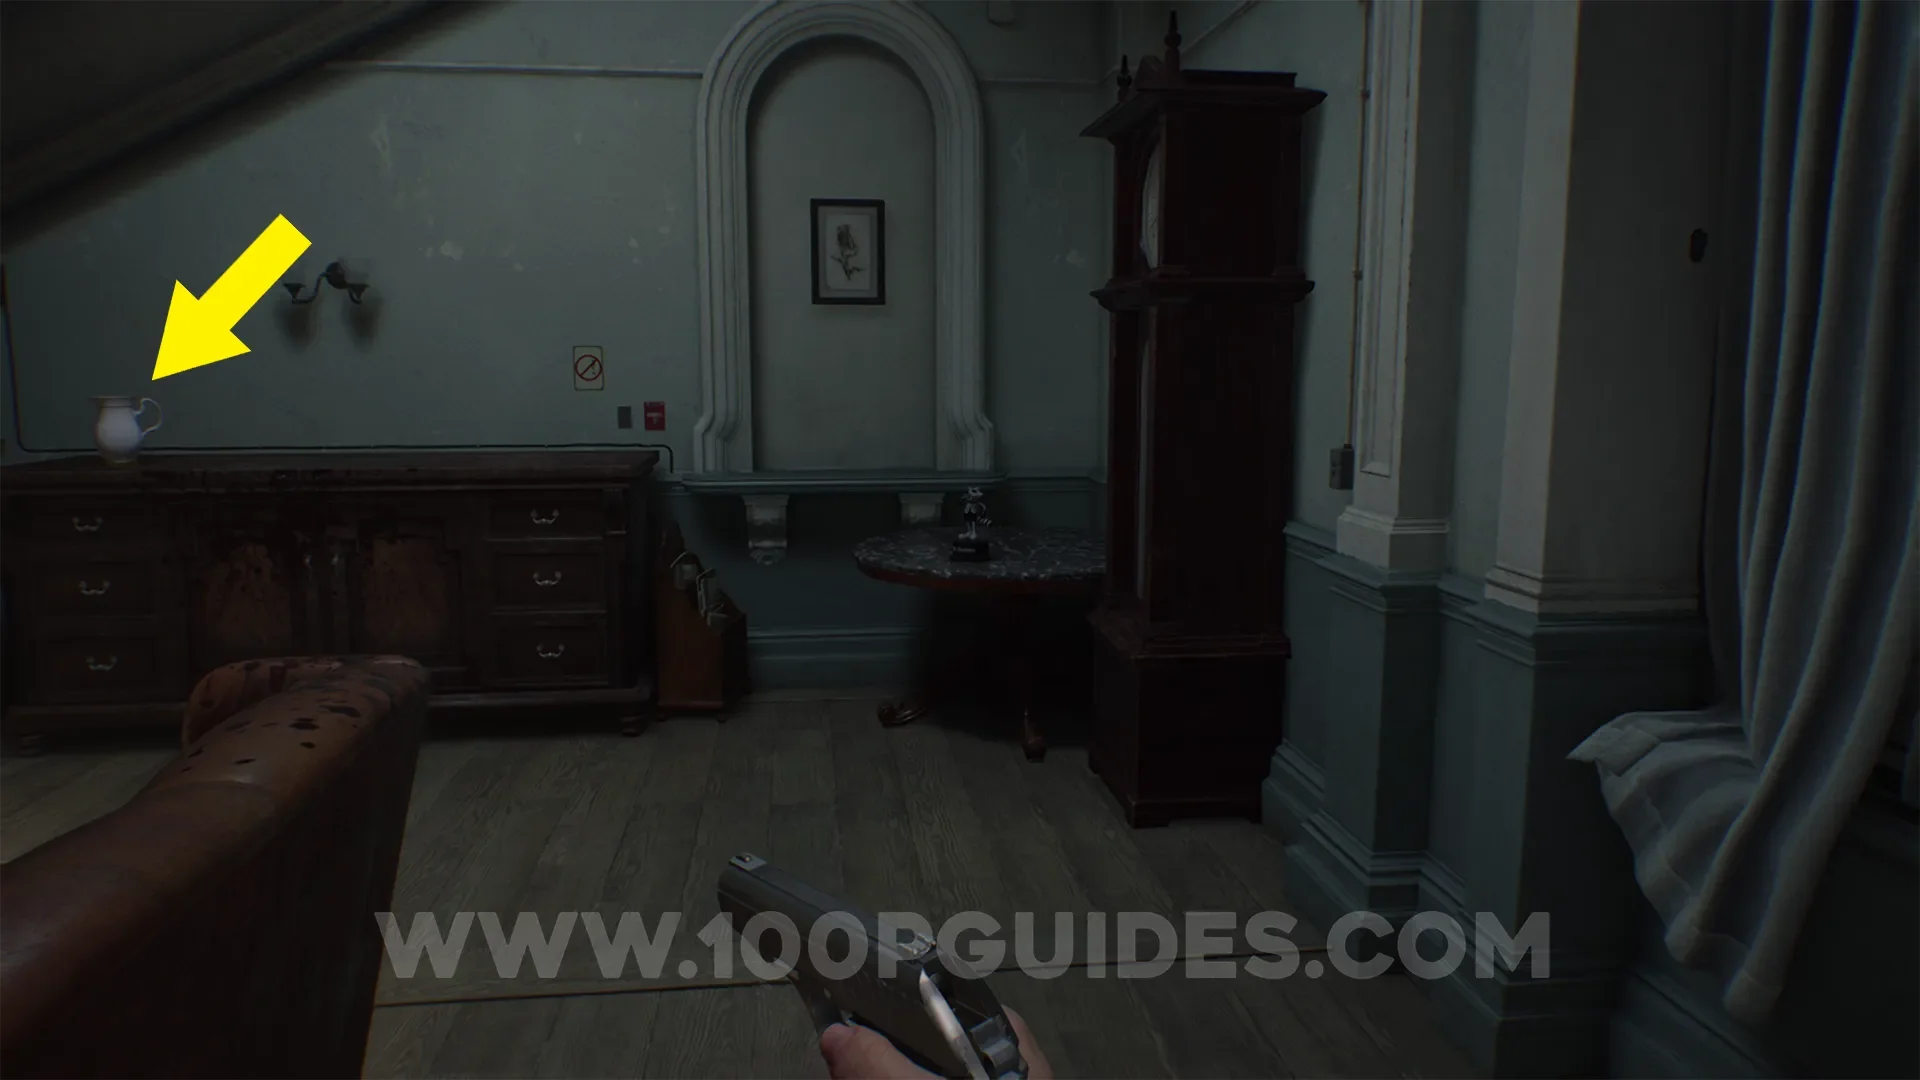
Antique Coin #18. On the table at the end of the corridor to the east of the Waiting Room.
Mr. Raccoon #3. In the same room.
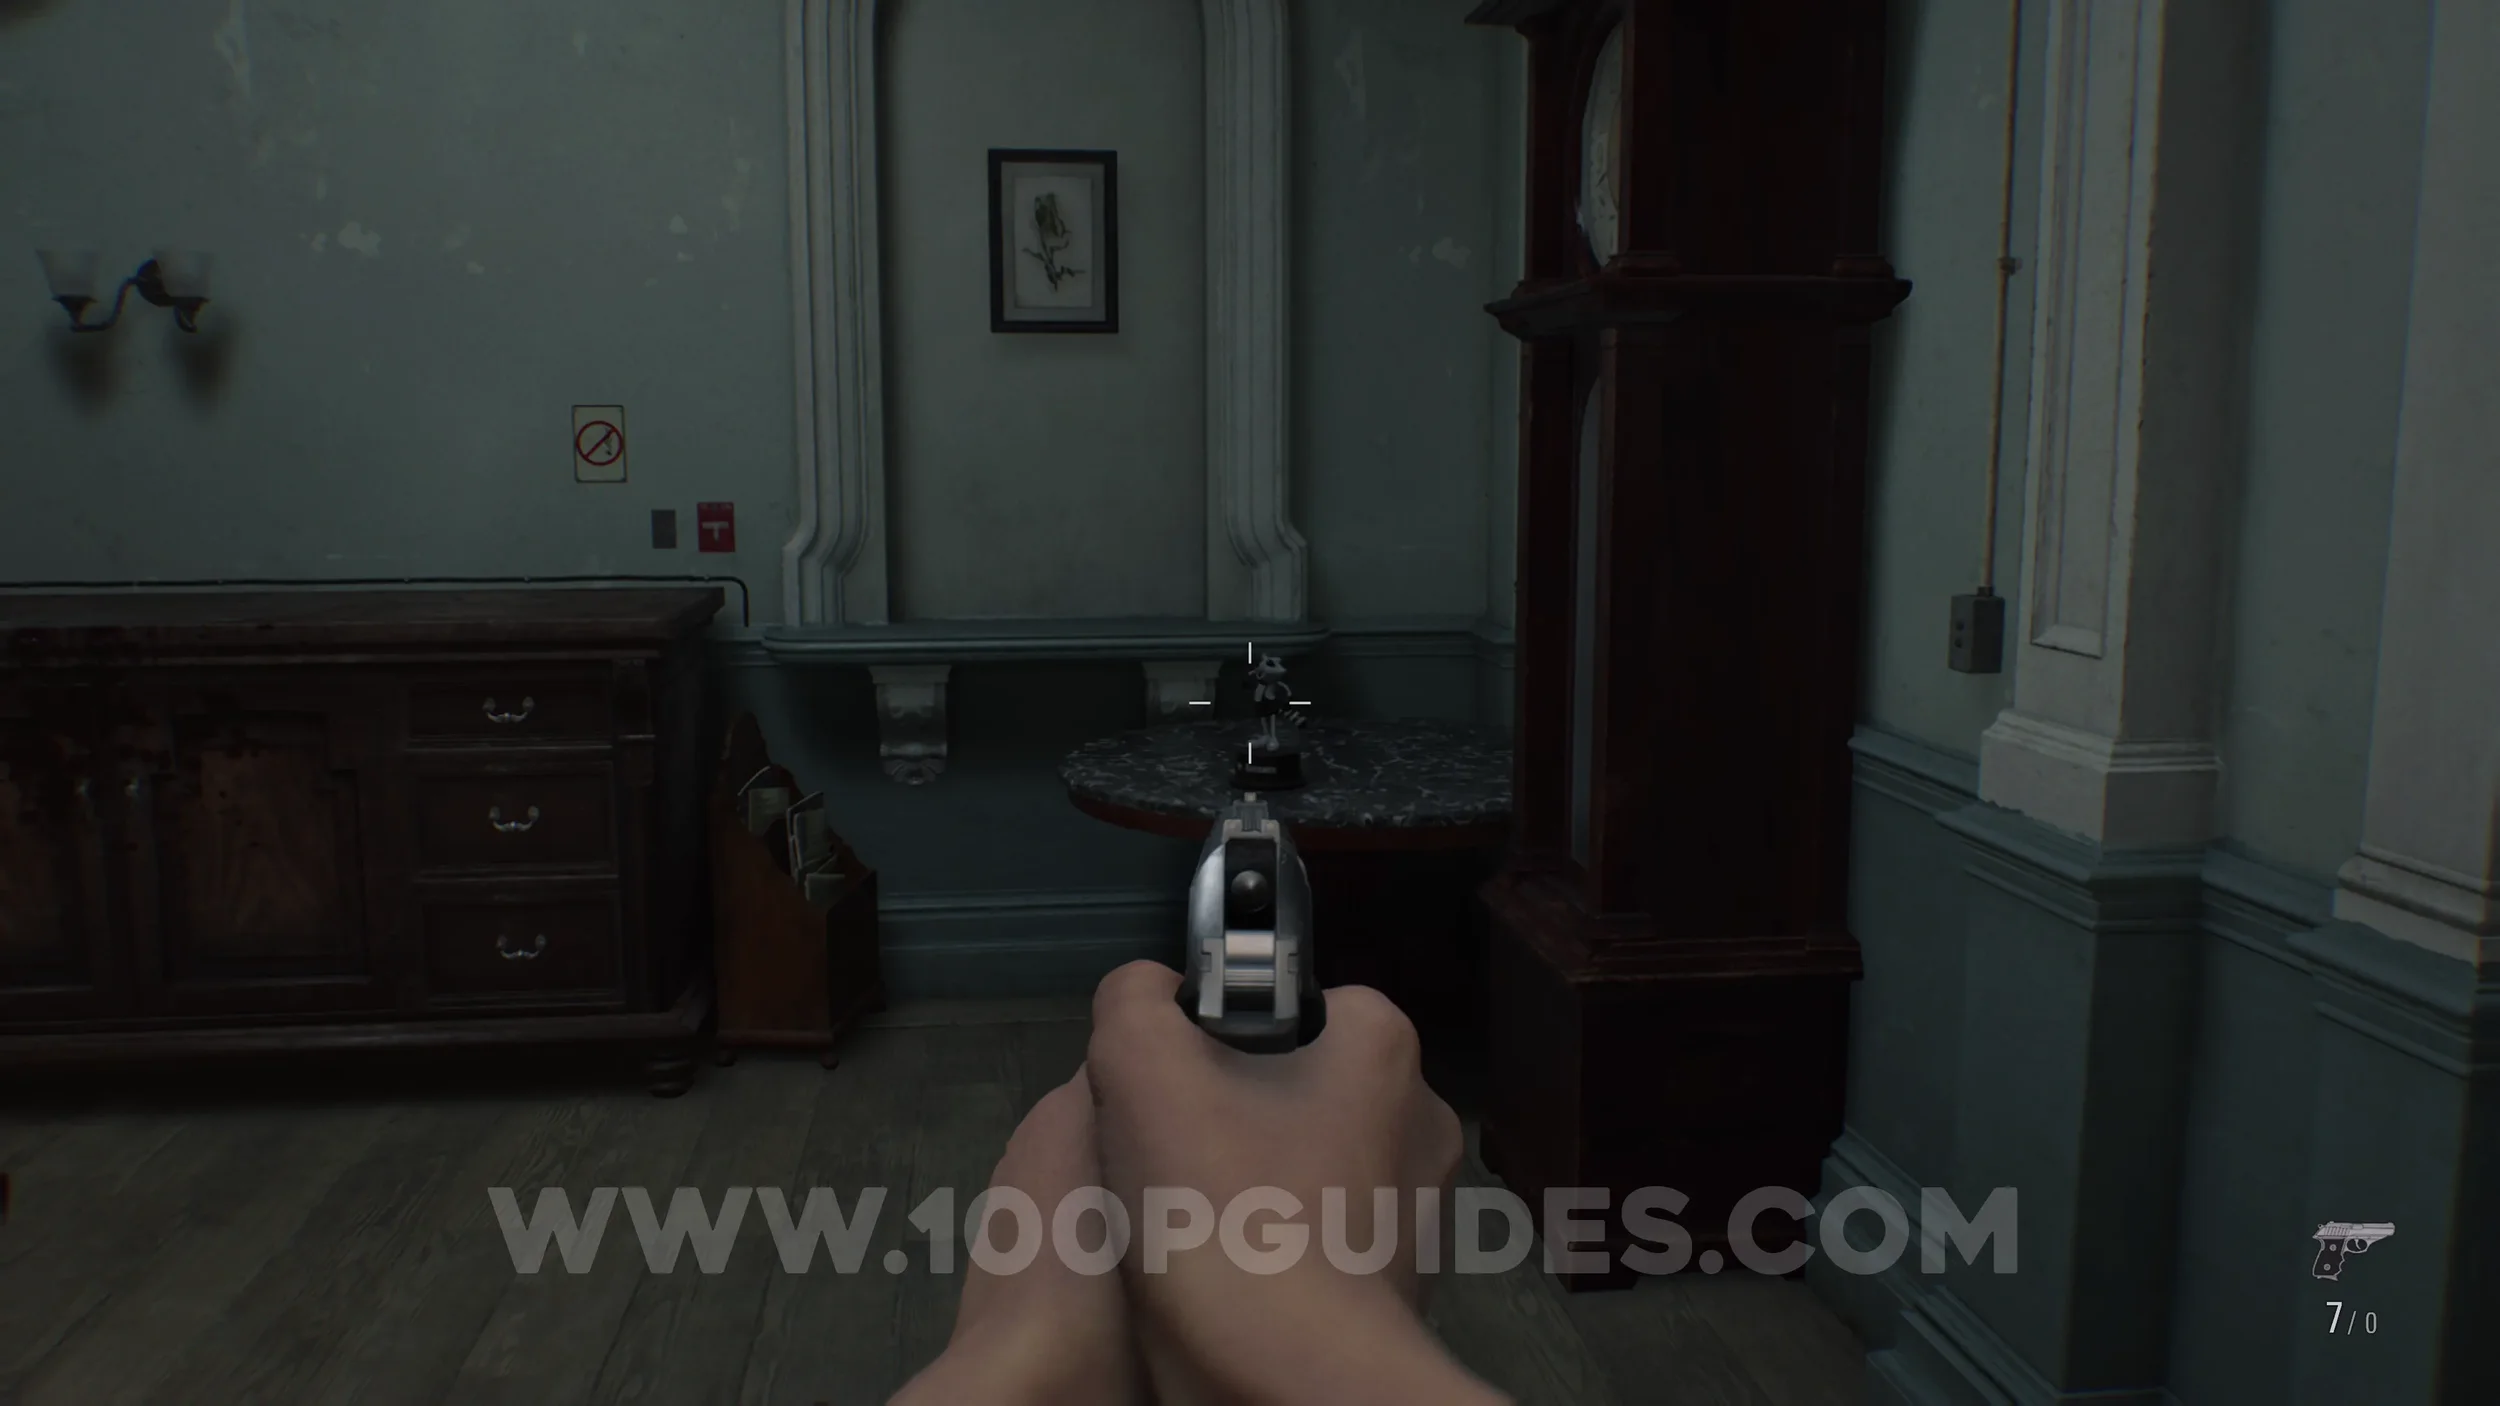
Antique Coin #19. Shoot the small jar to the left of the previous Mr. Raccoon.
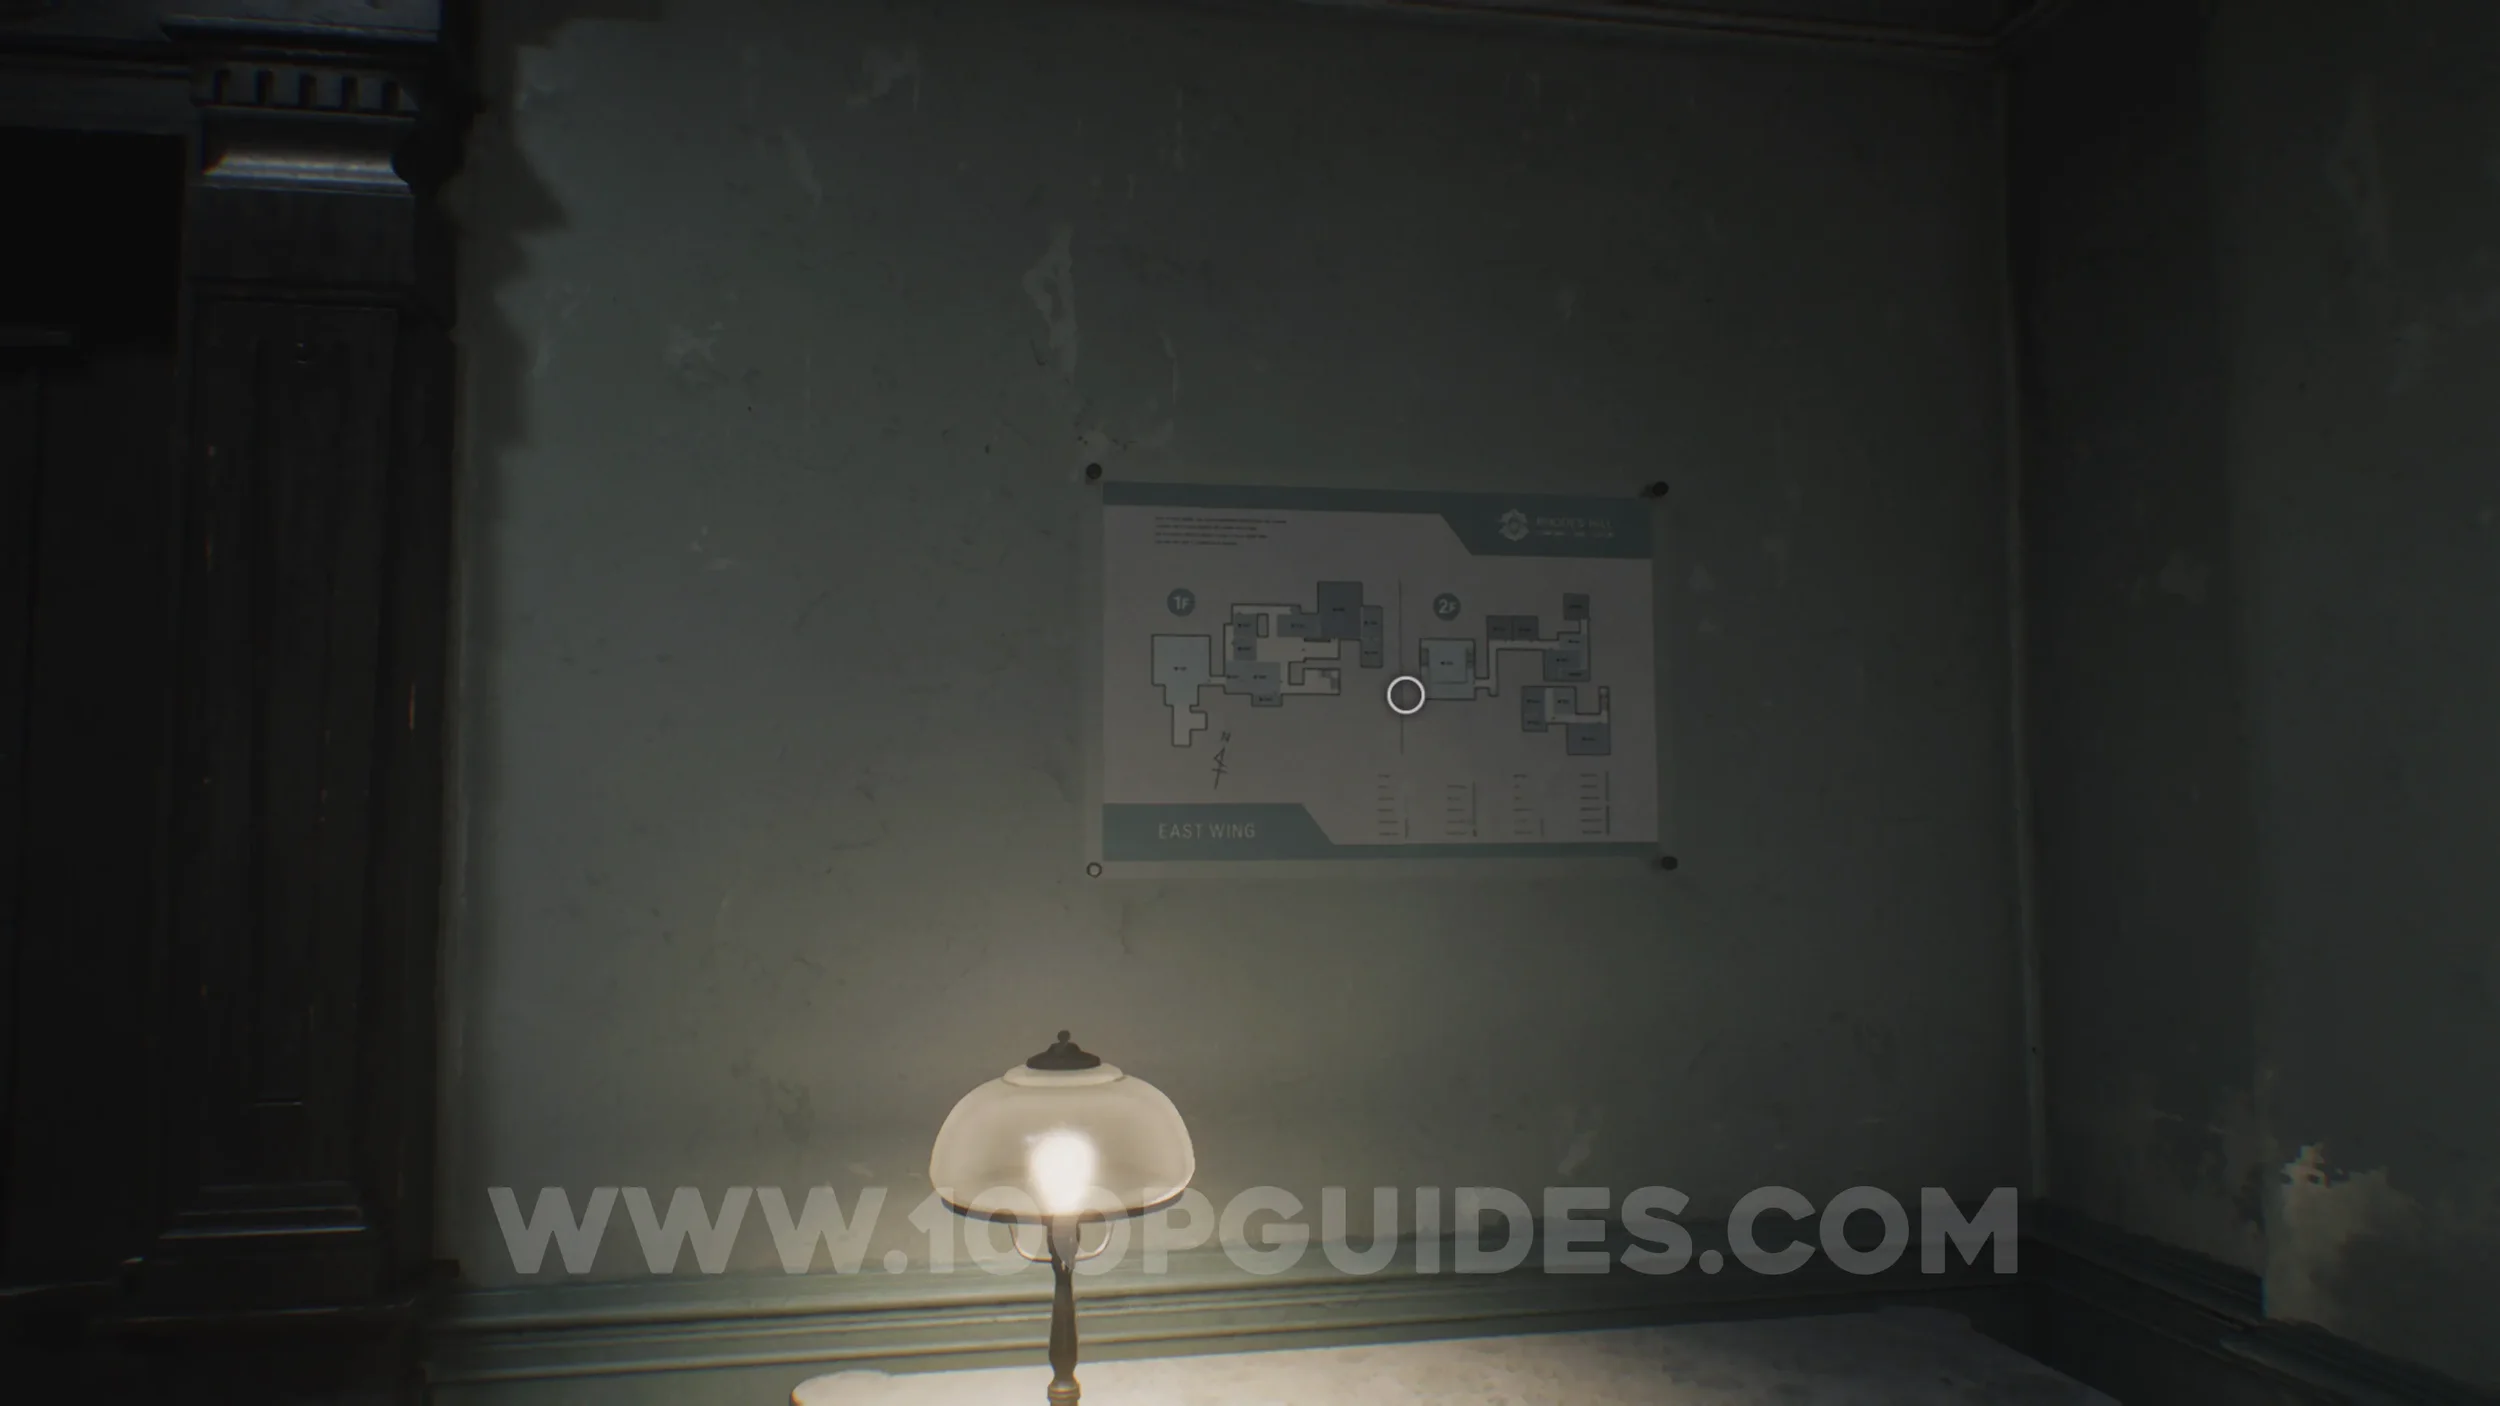
Map - East Wing Map. From the previous collectibles, go up the stairs to find the map on the wall.
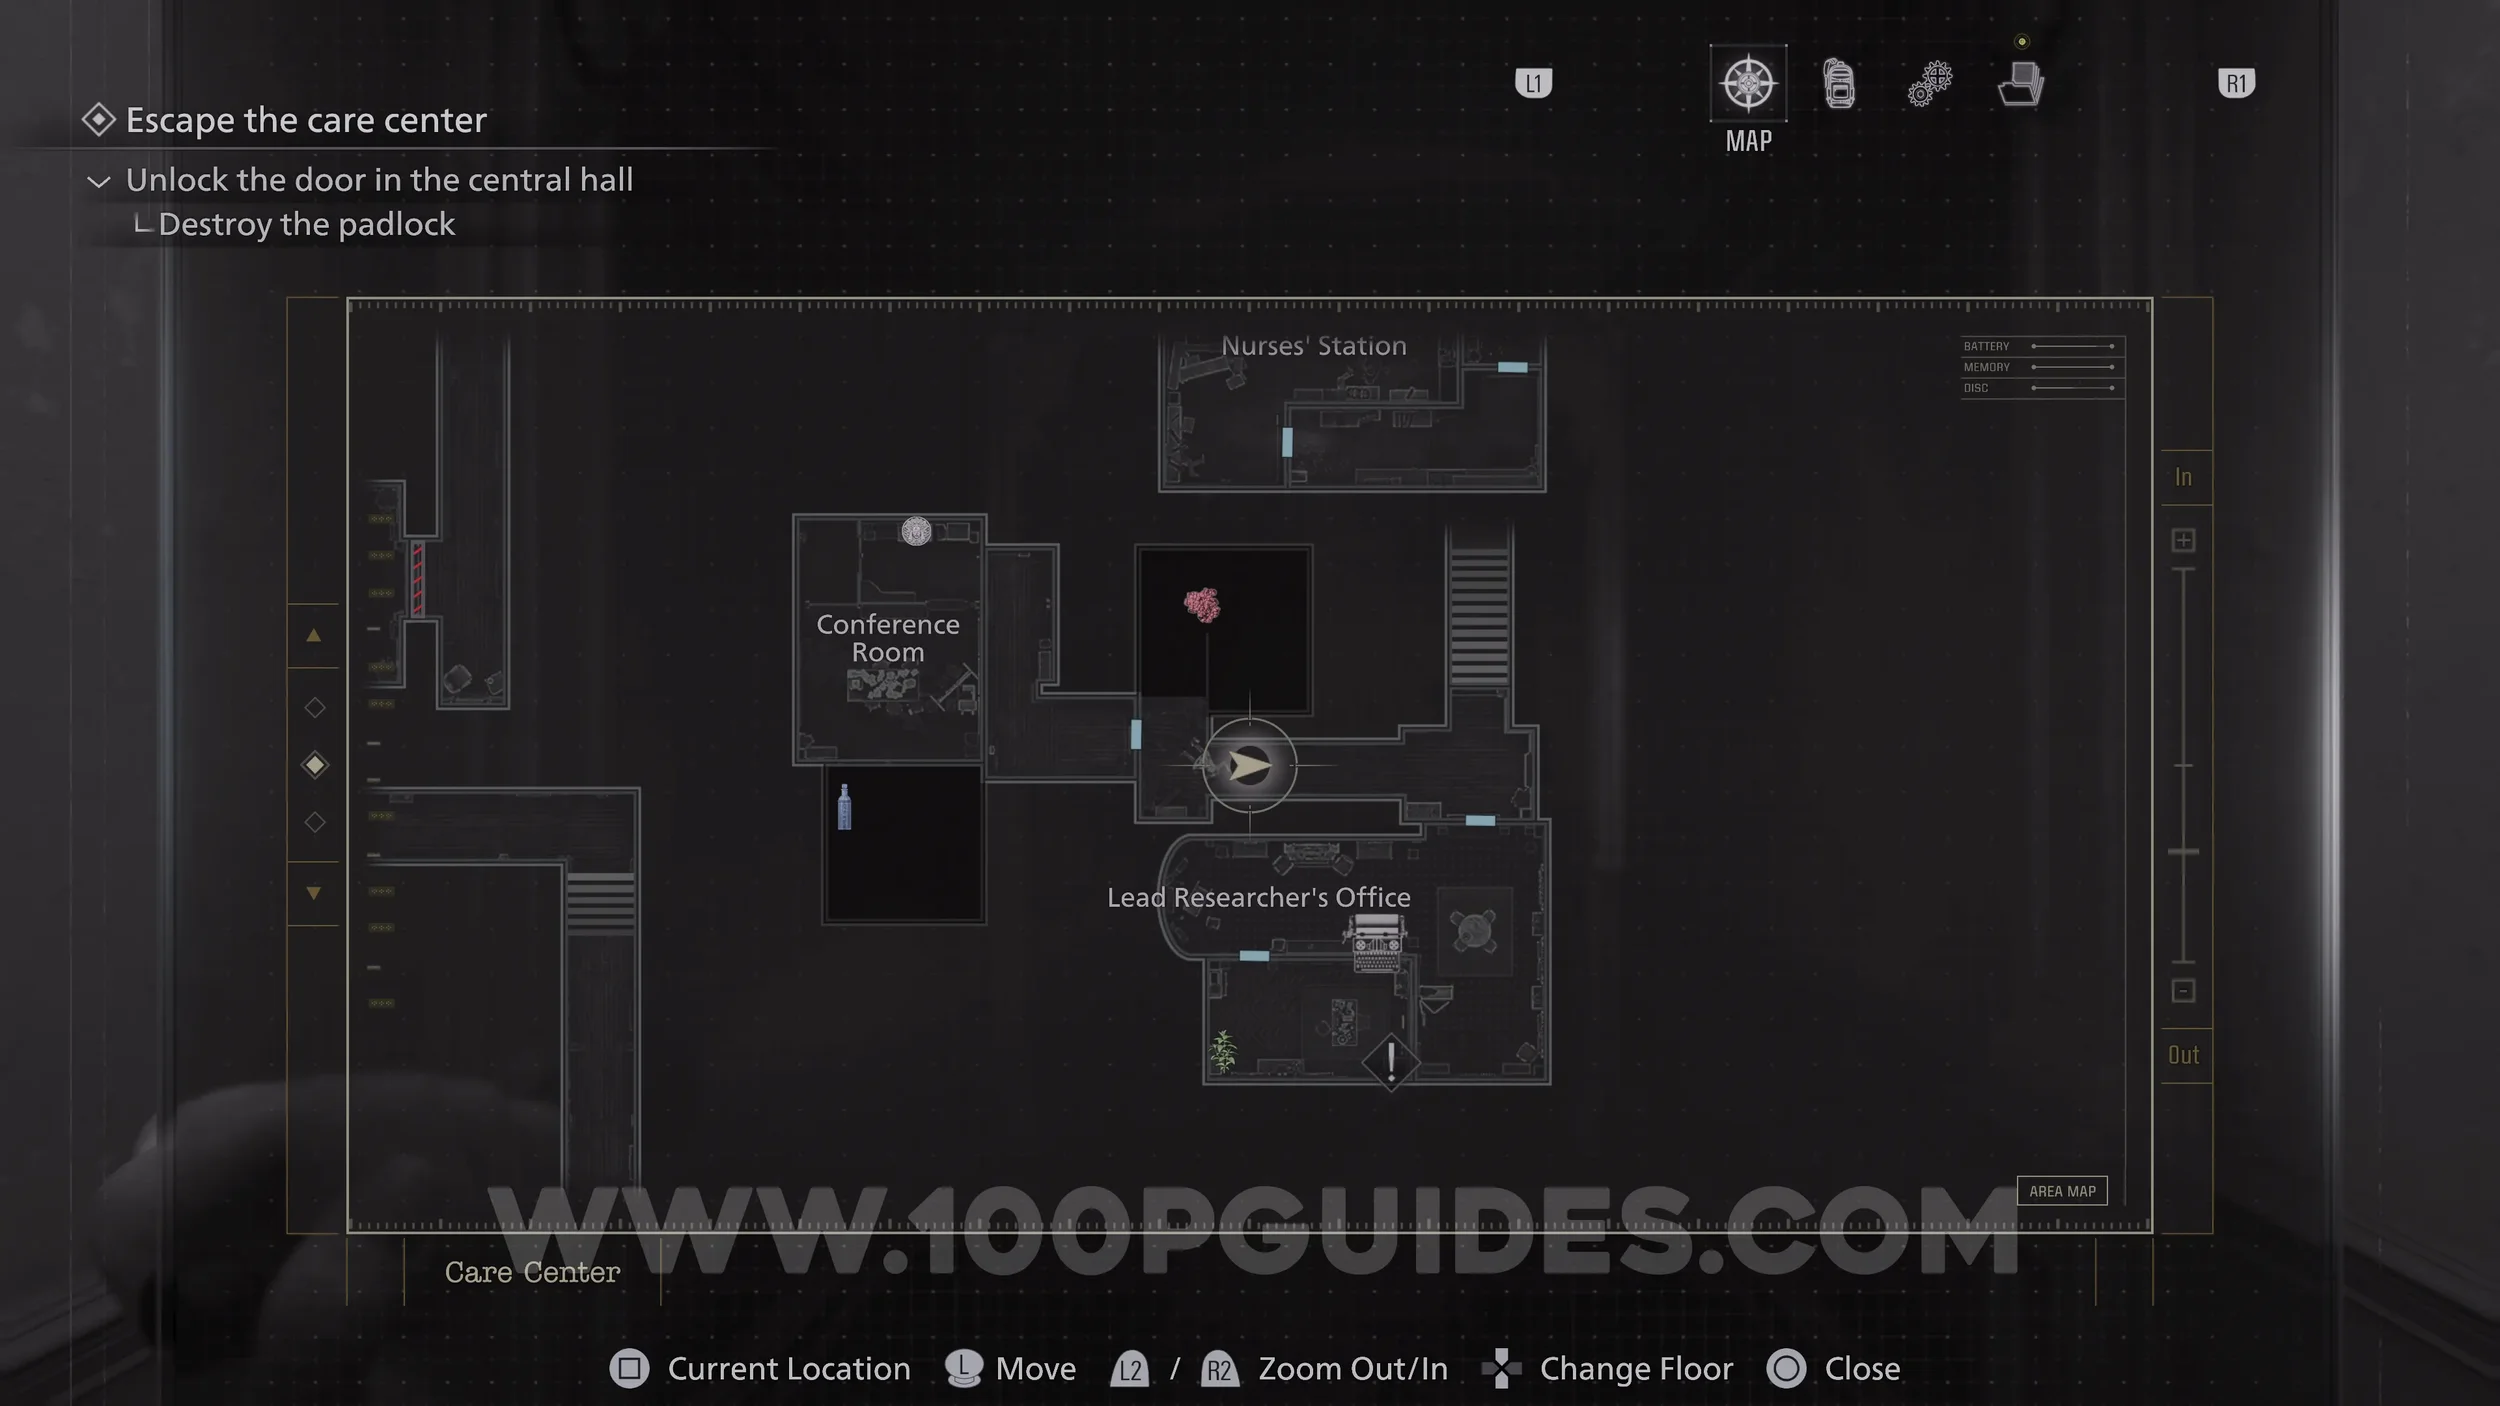
File #17 - Researcher’s Picture 2. On a cupboard in the small room behind the Researcher’s Office.
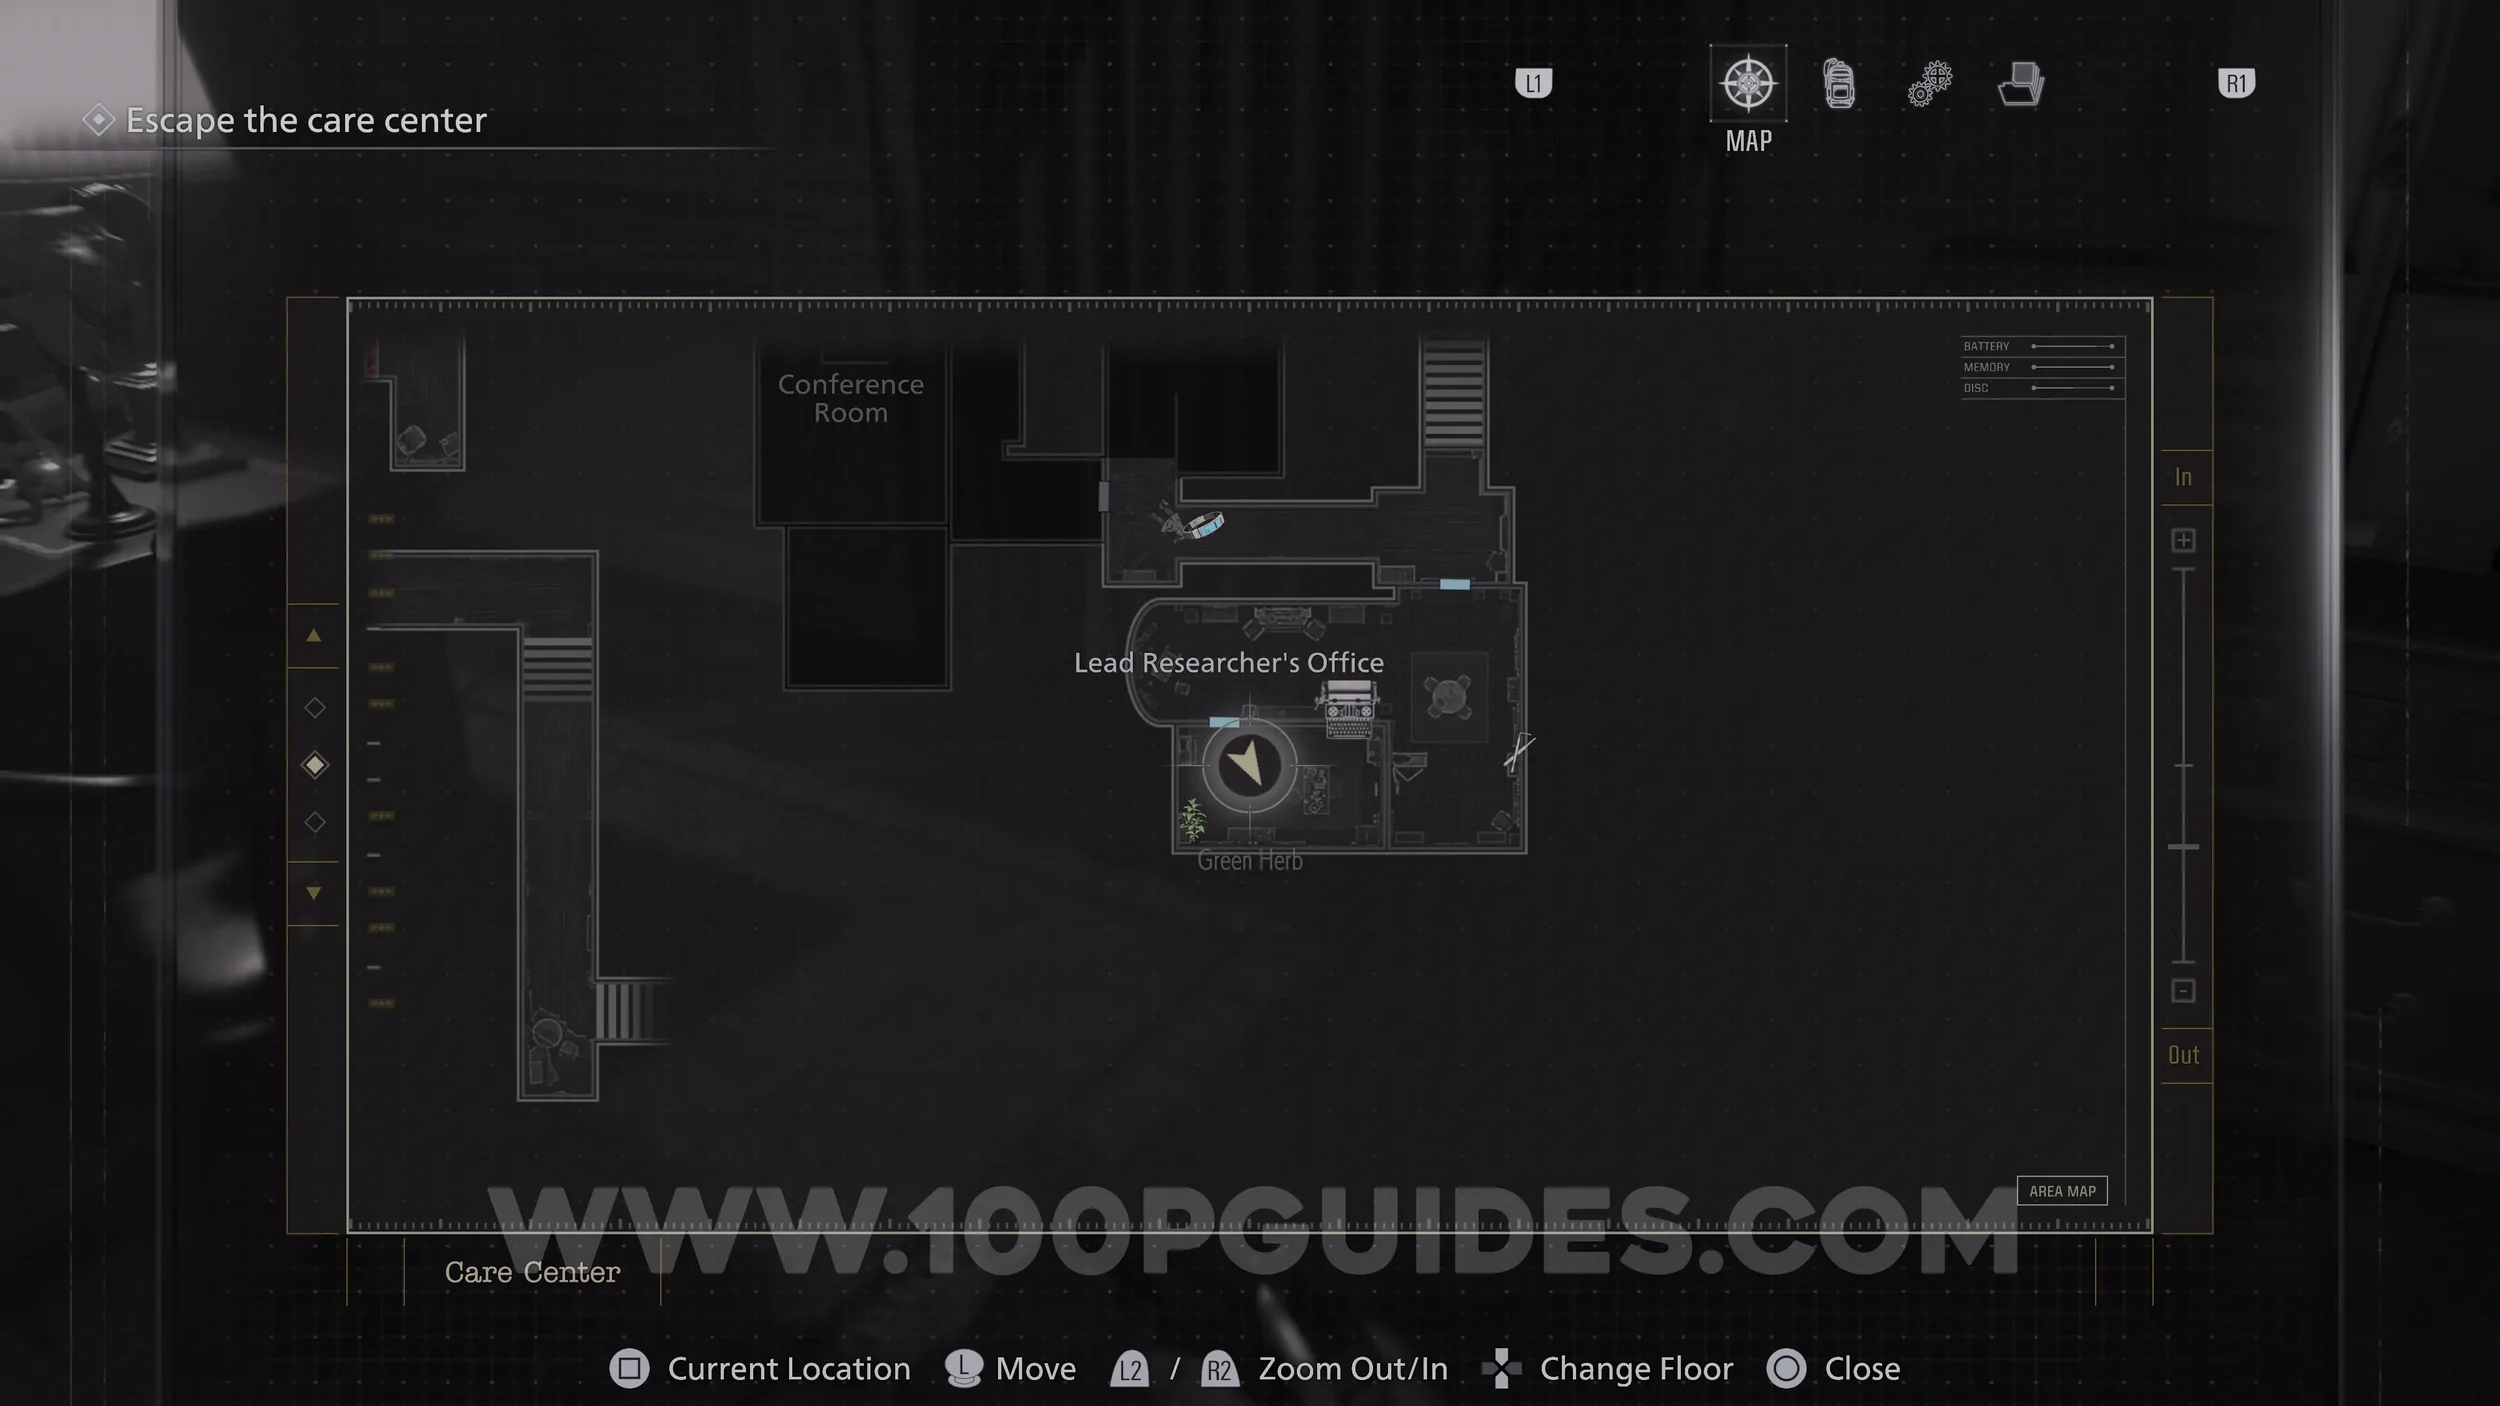
File #18 - Researcher’s Picture 1. On the desk in the small room behind the Researcher’s Office.
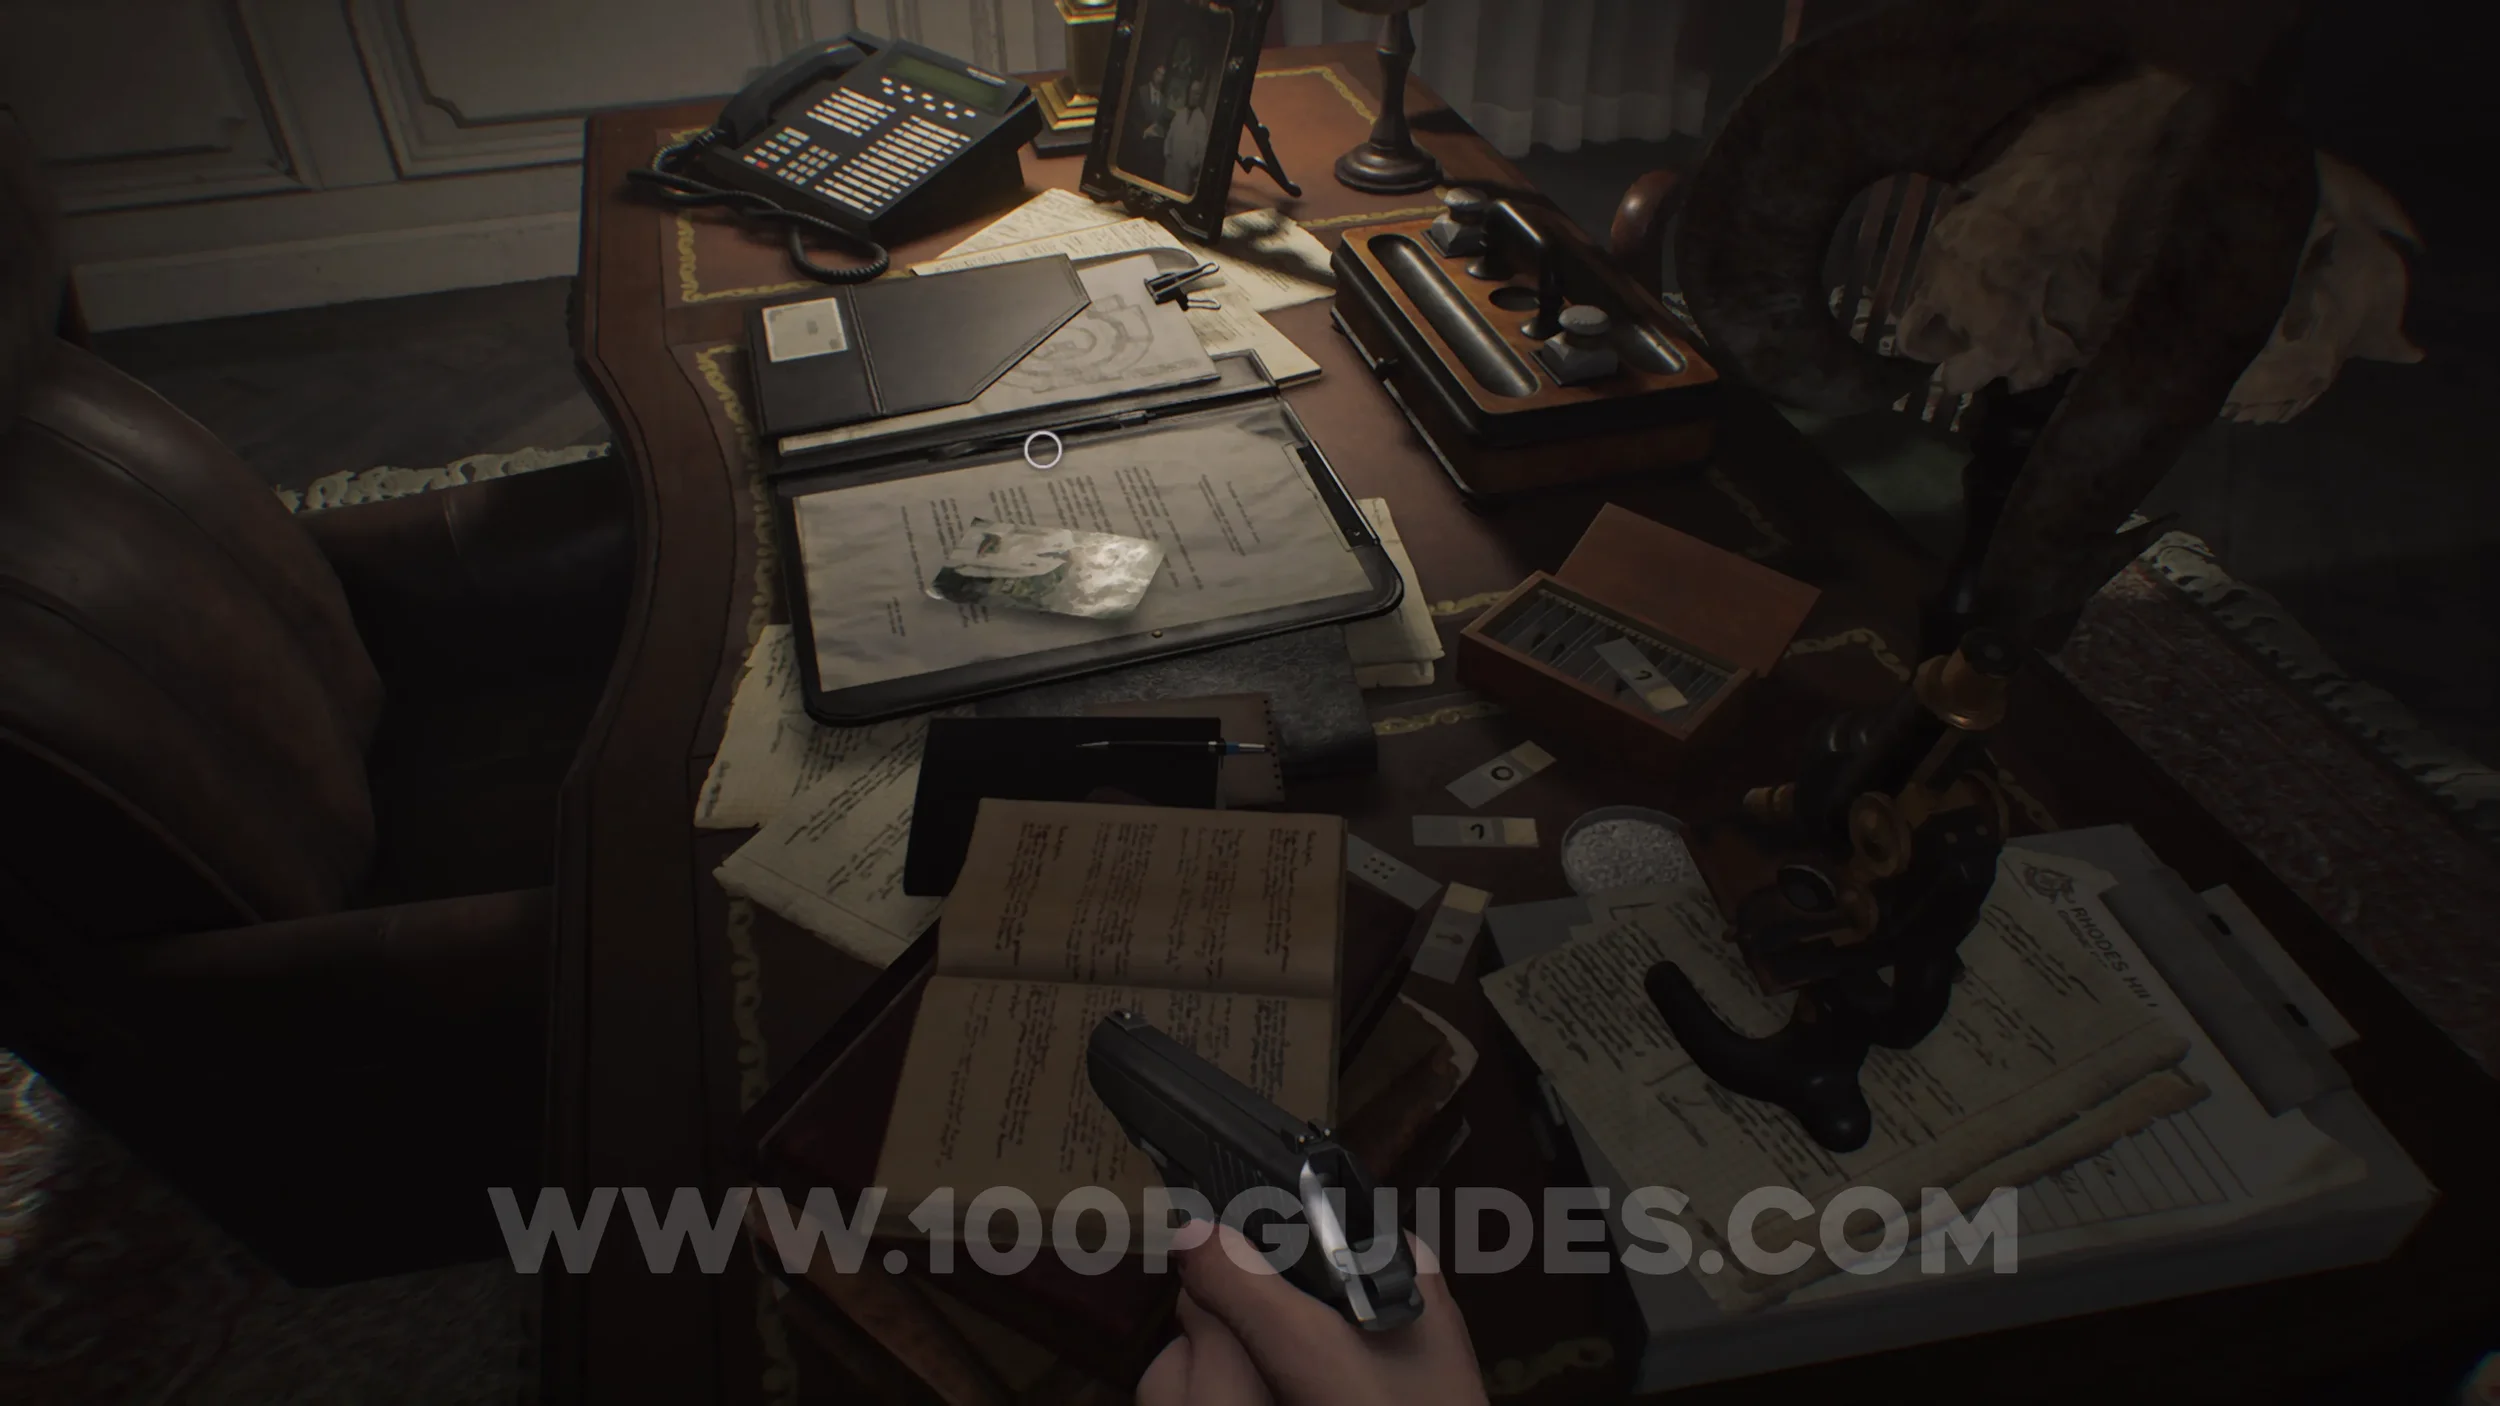
File #19 - Researcher’s Picture 3. On the desk in the small room behind the Researcher’s Office. Interact with the picture.
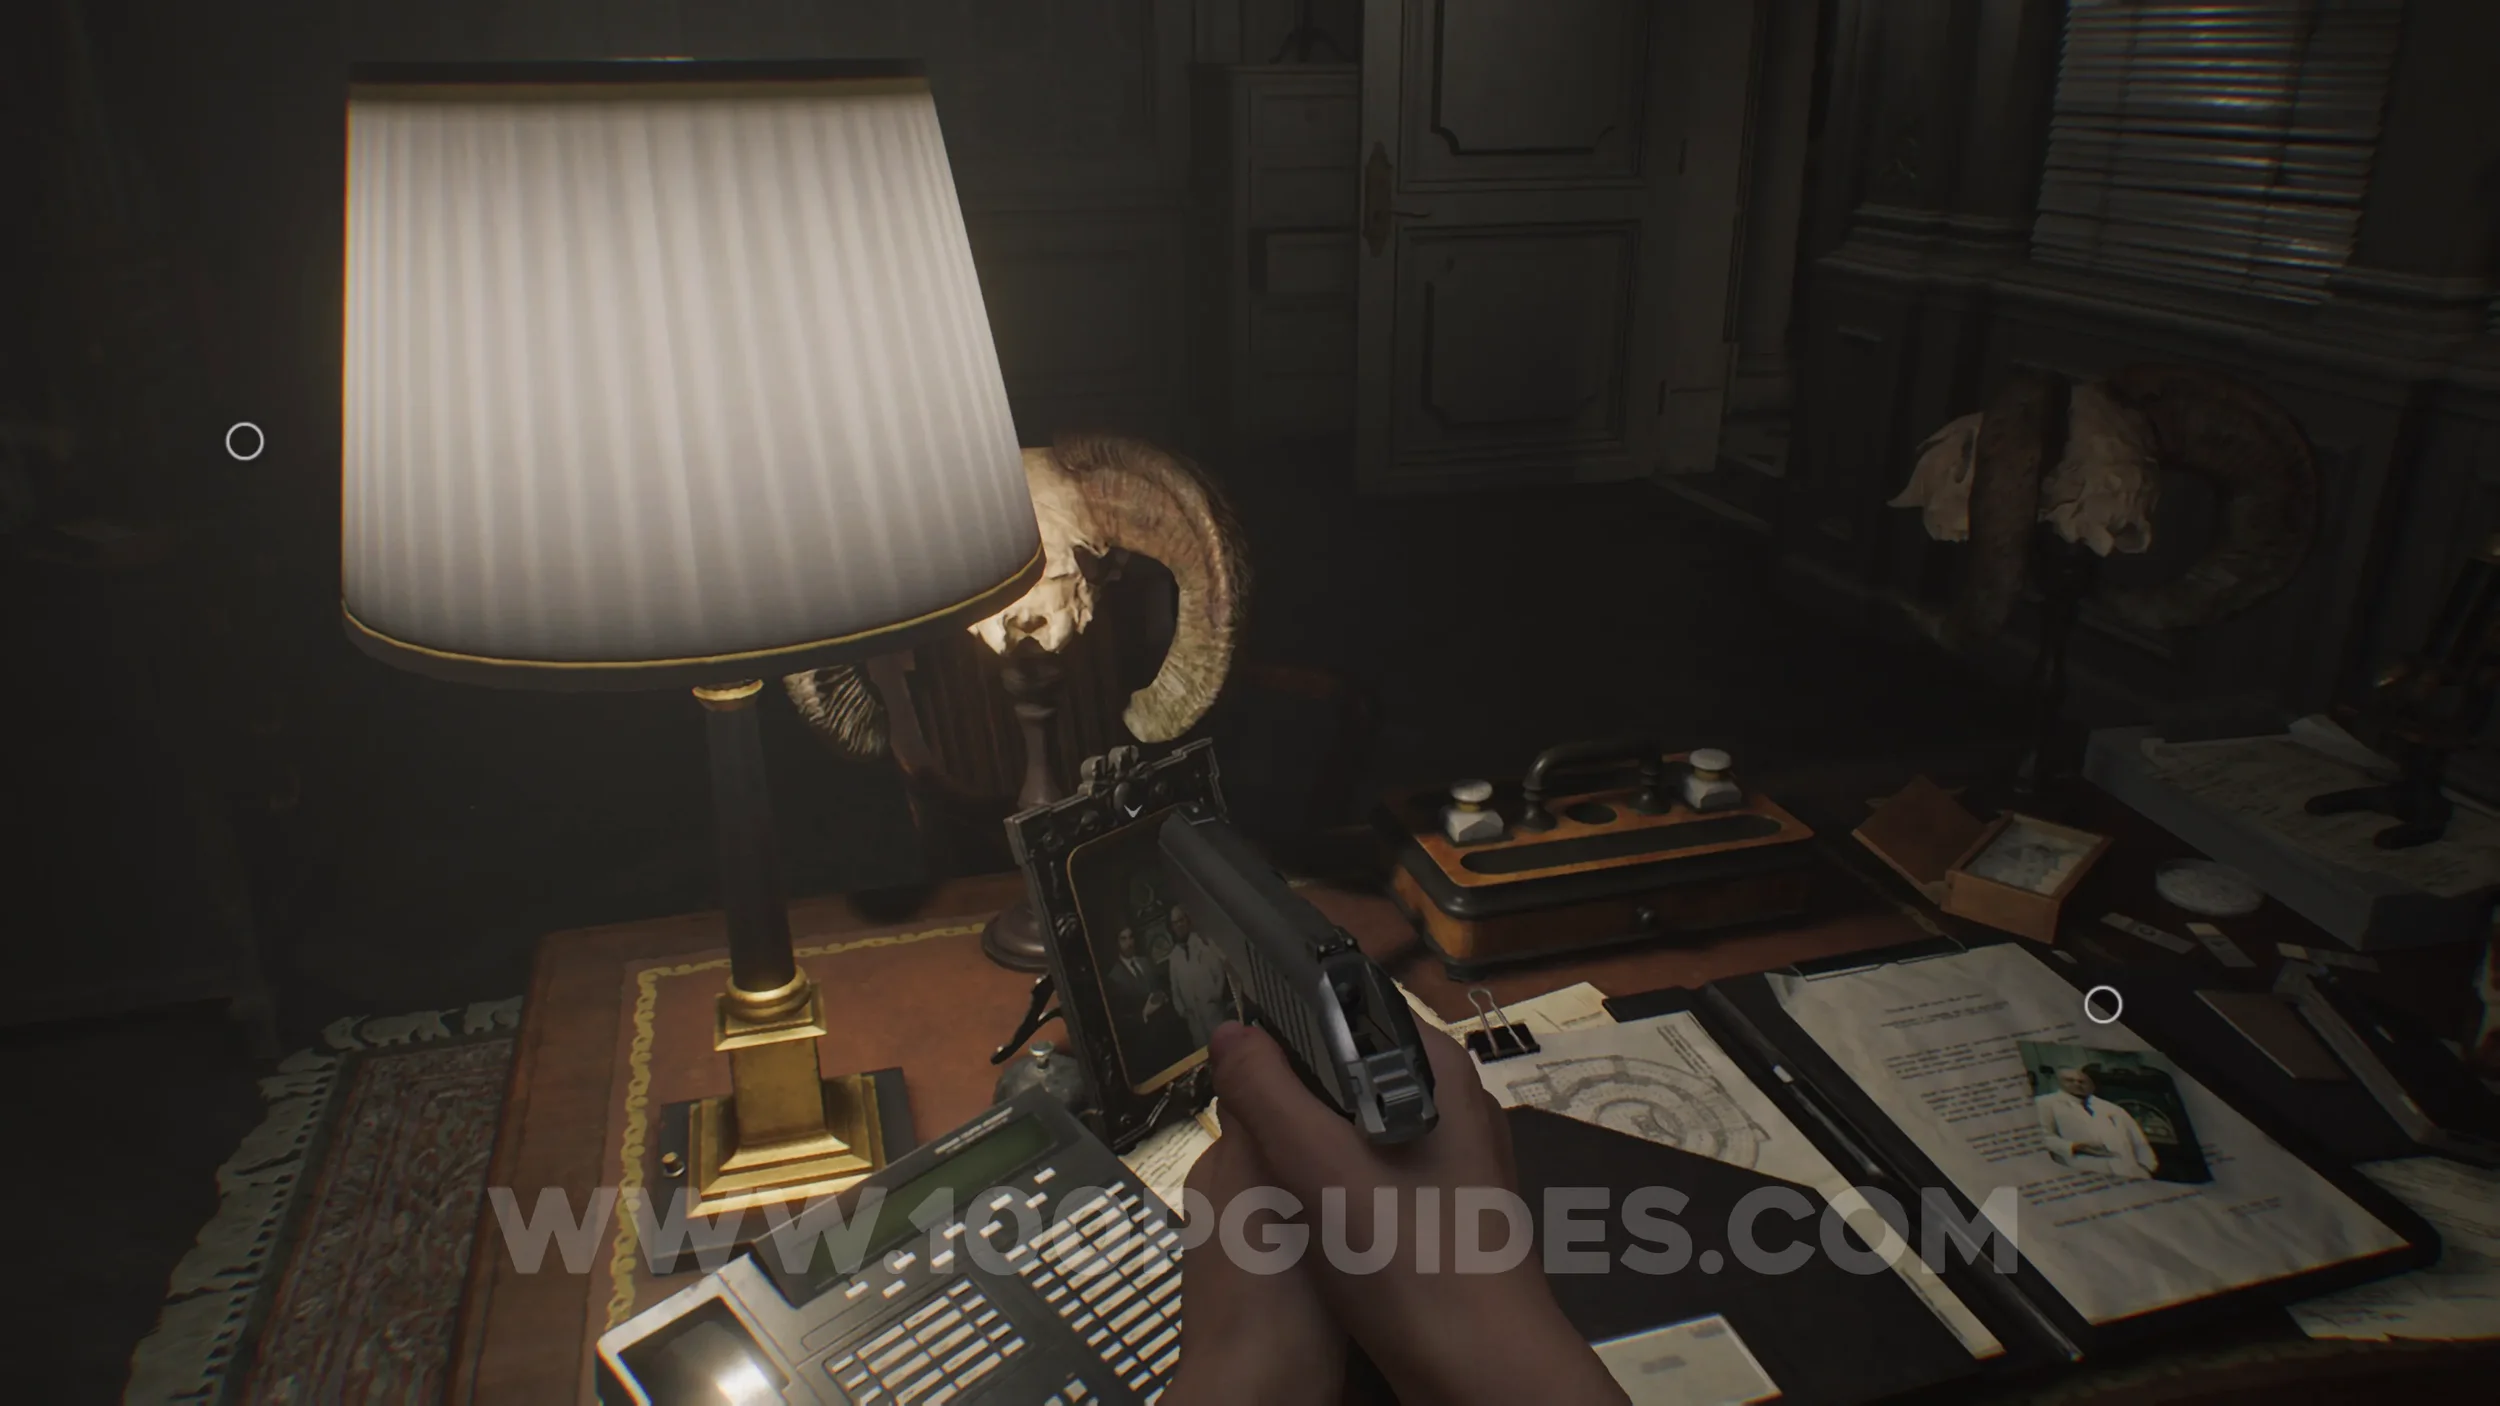
File #20 - Lead Researcher’s Message. On the cupboard in the same room.
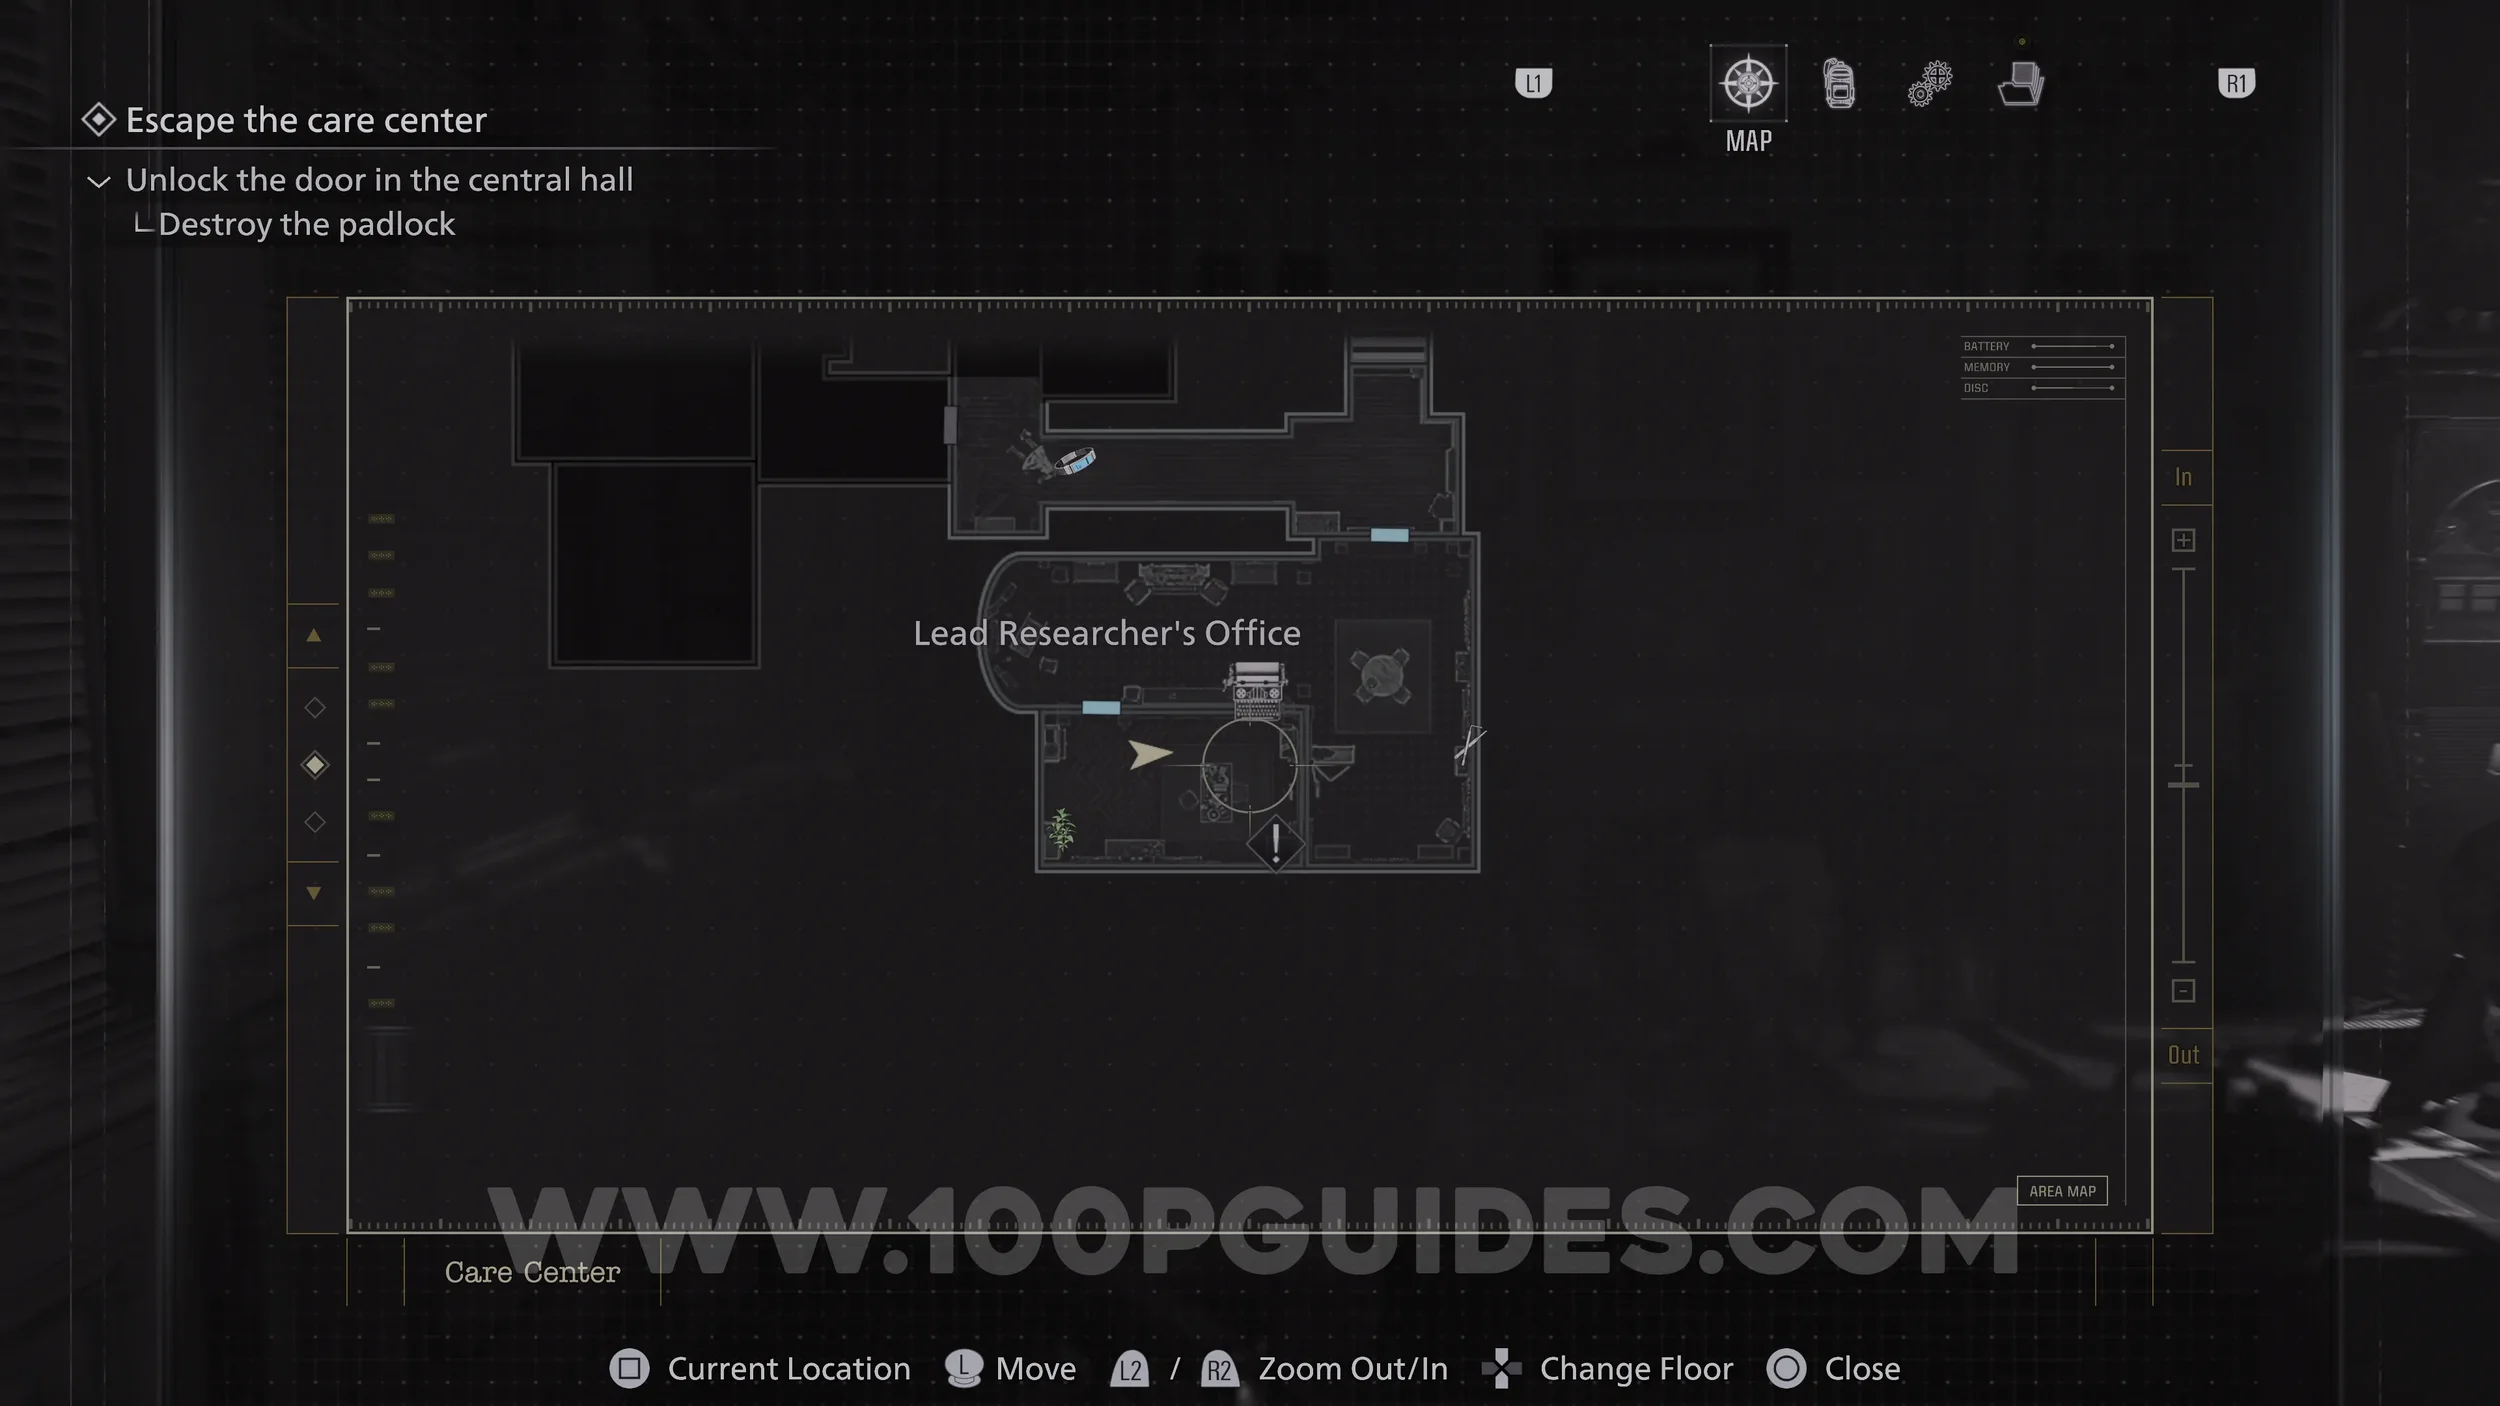
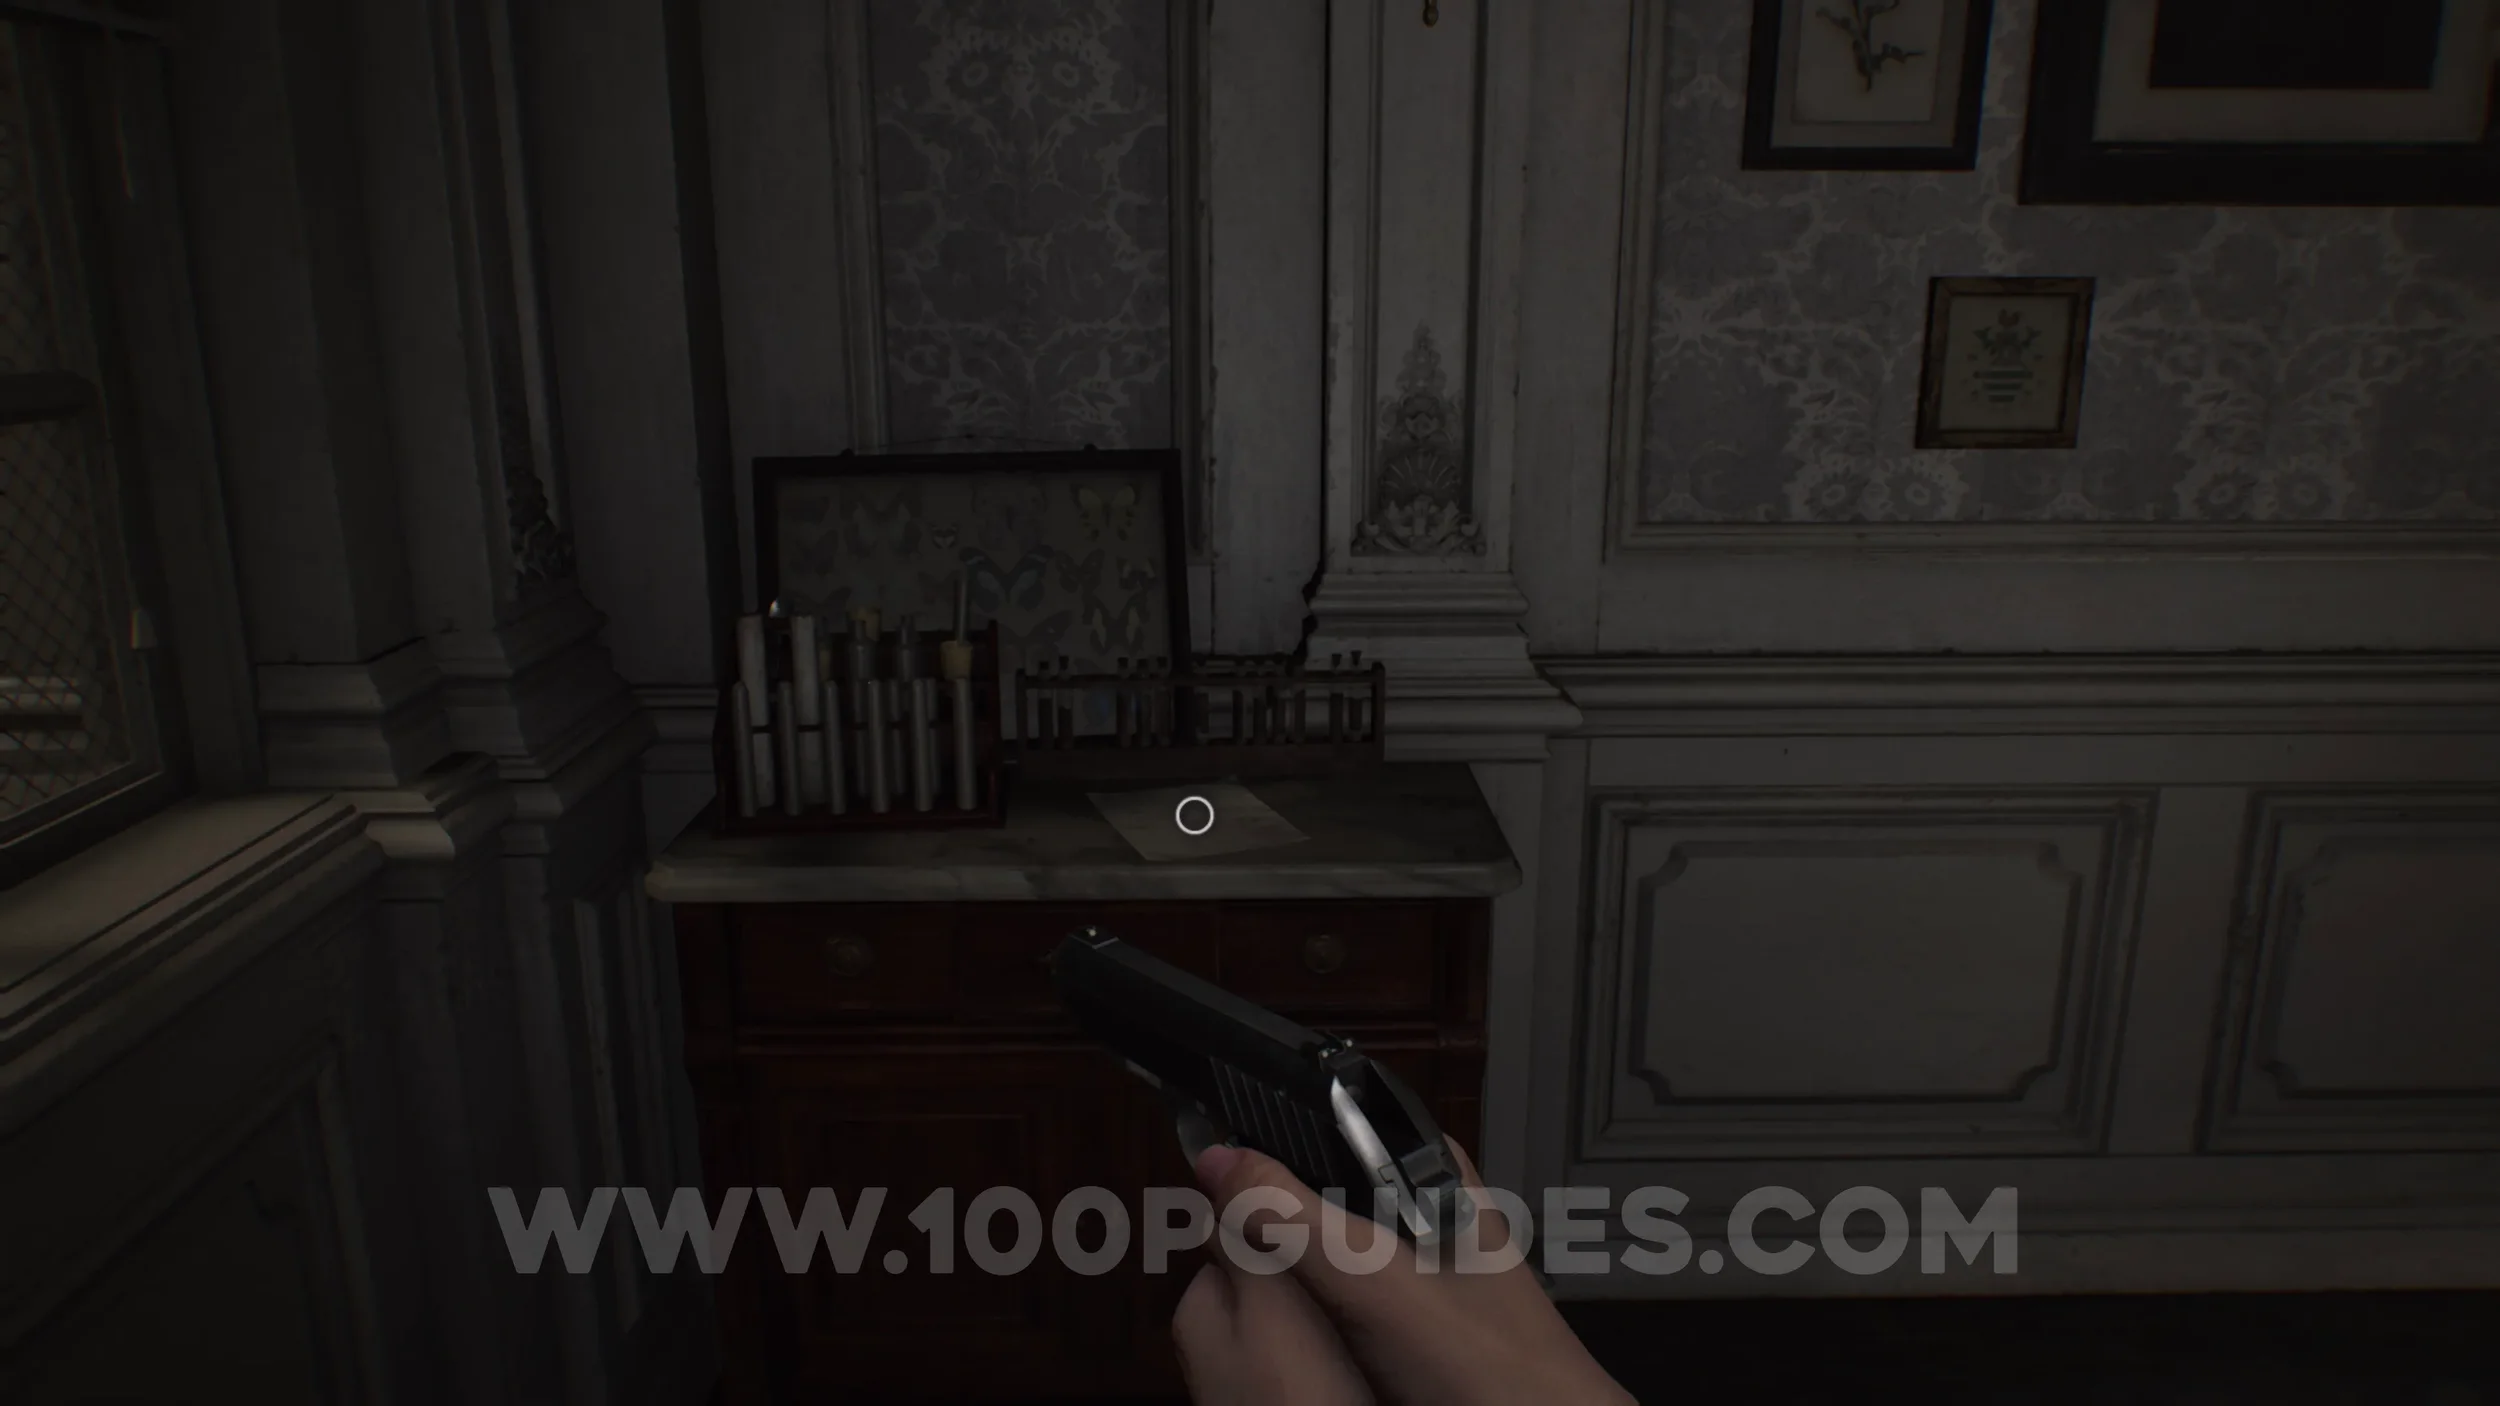
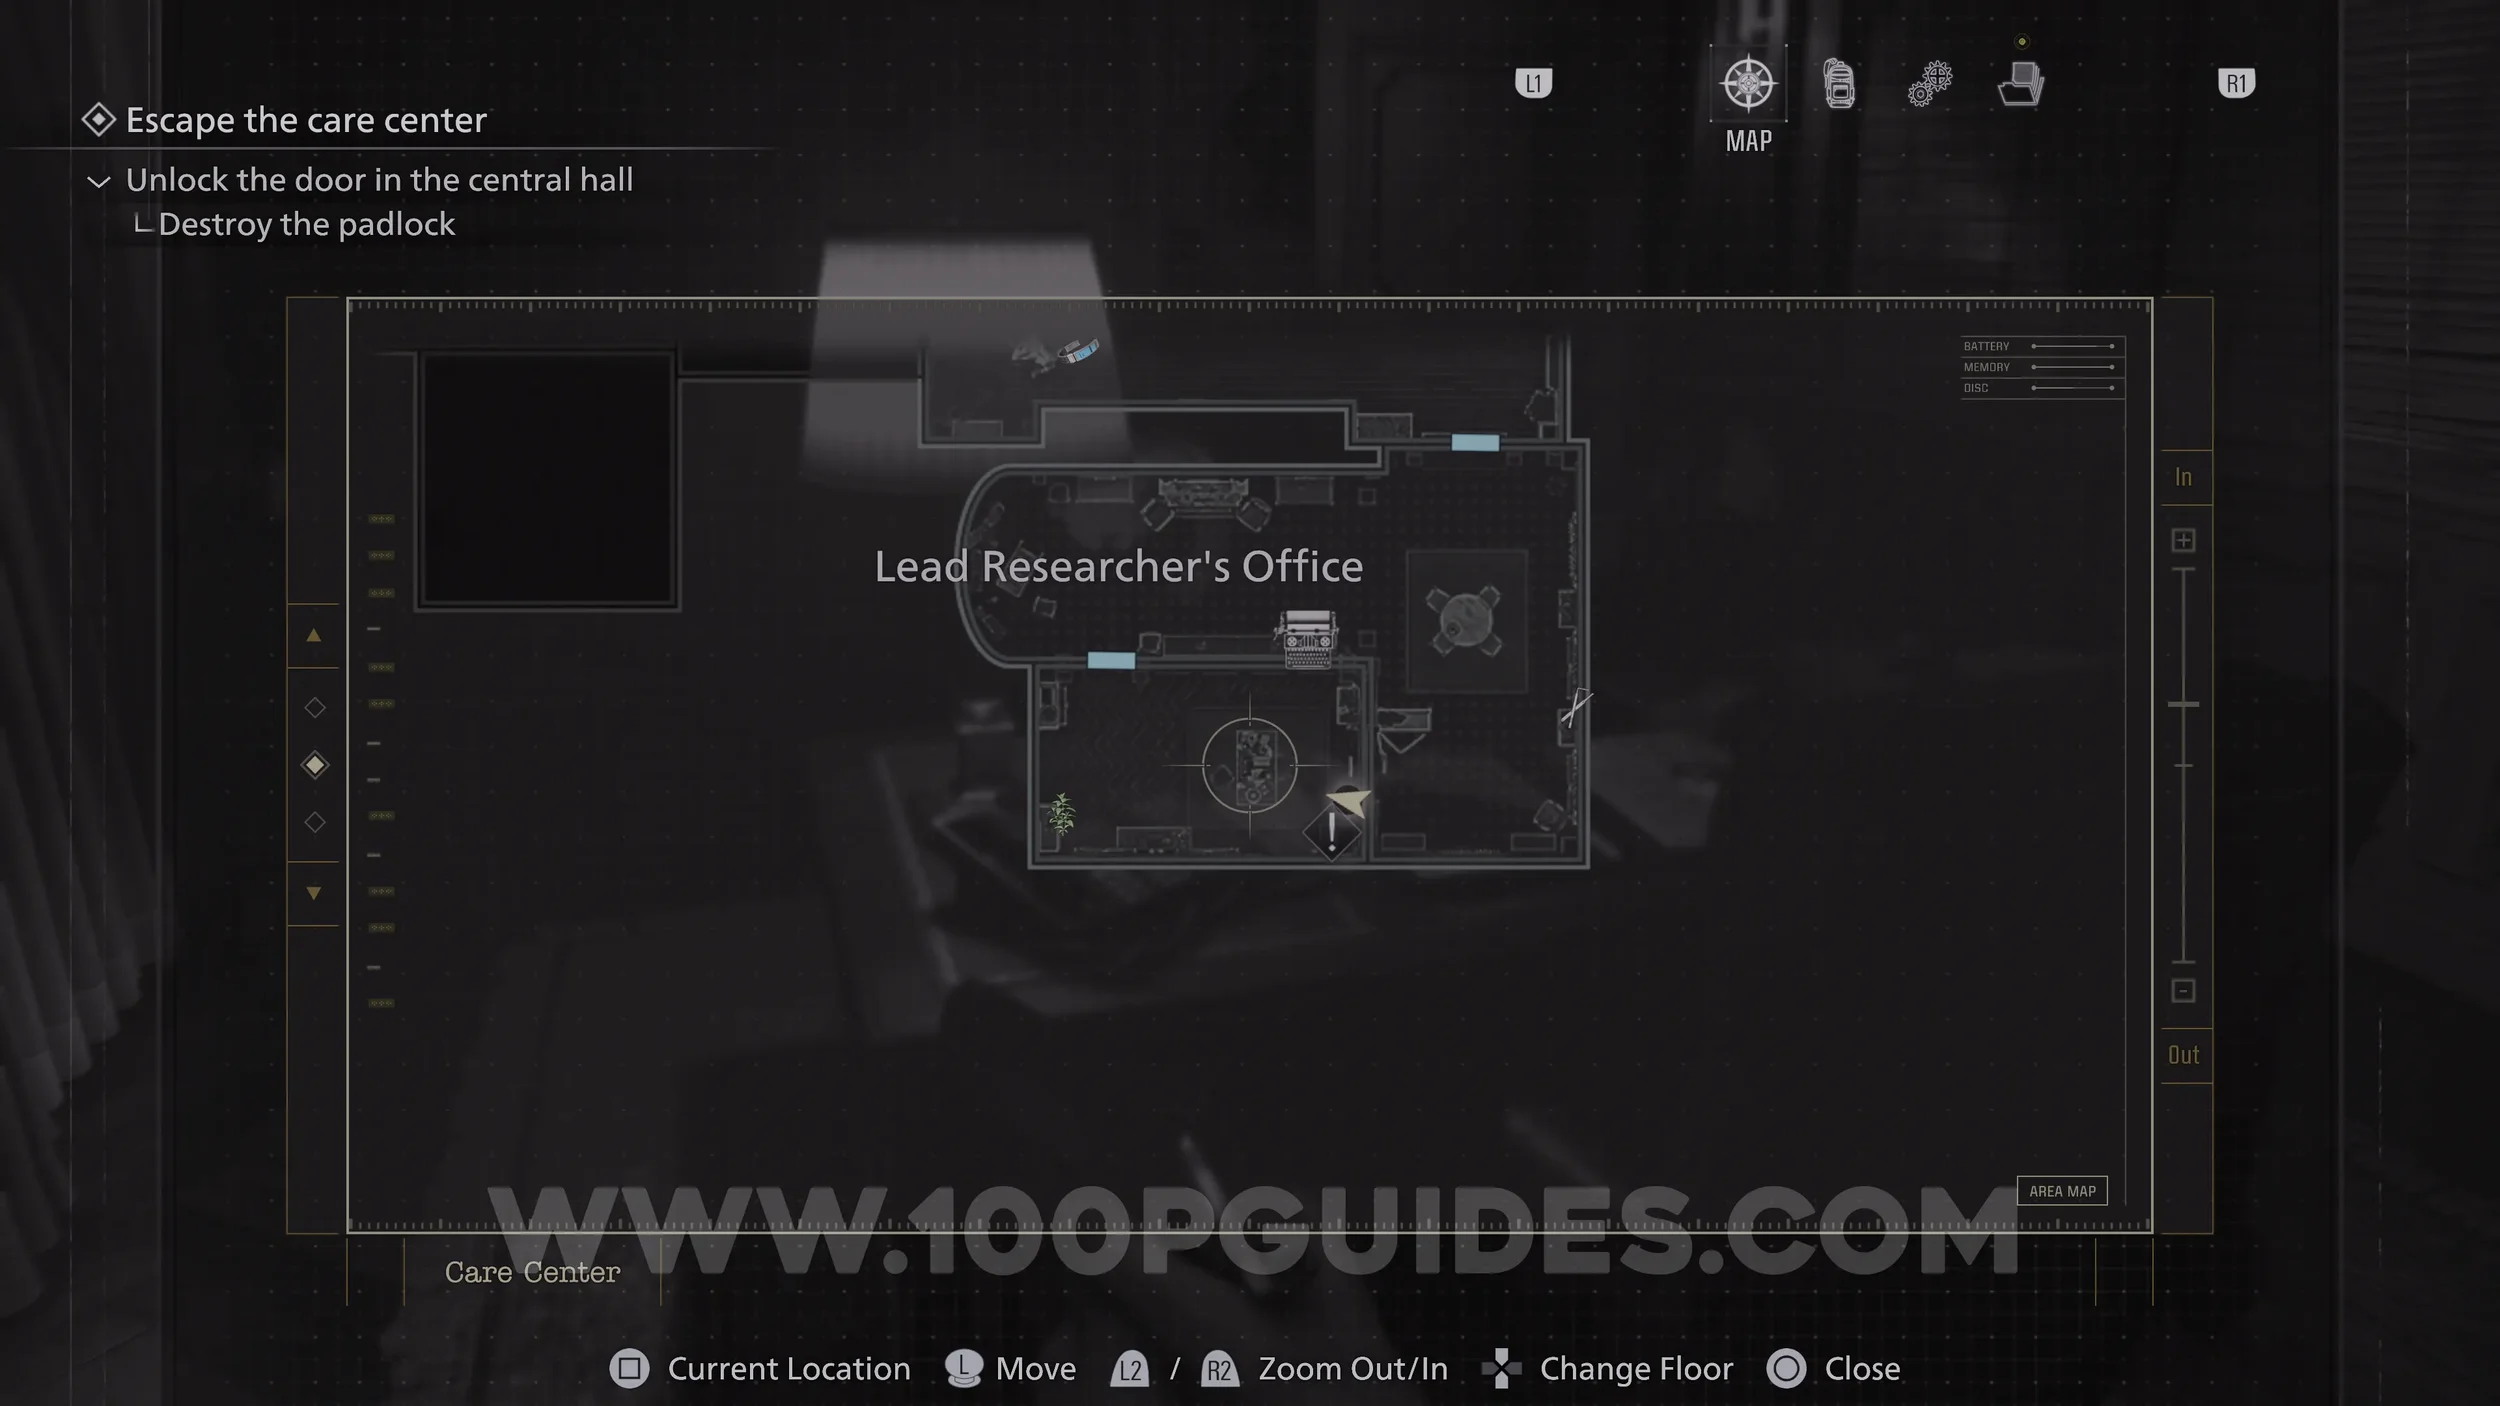
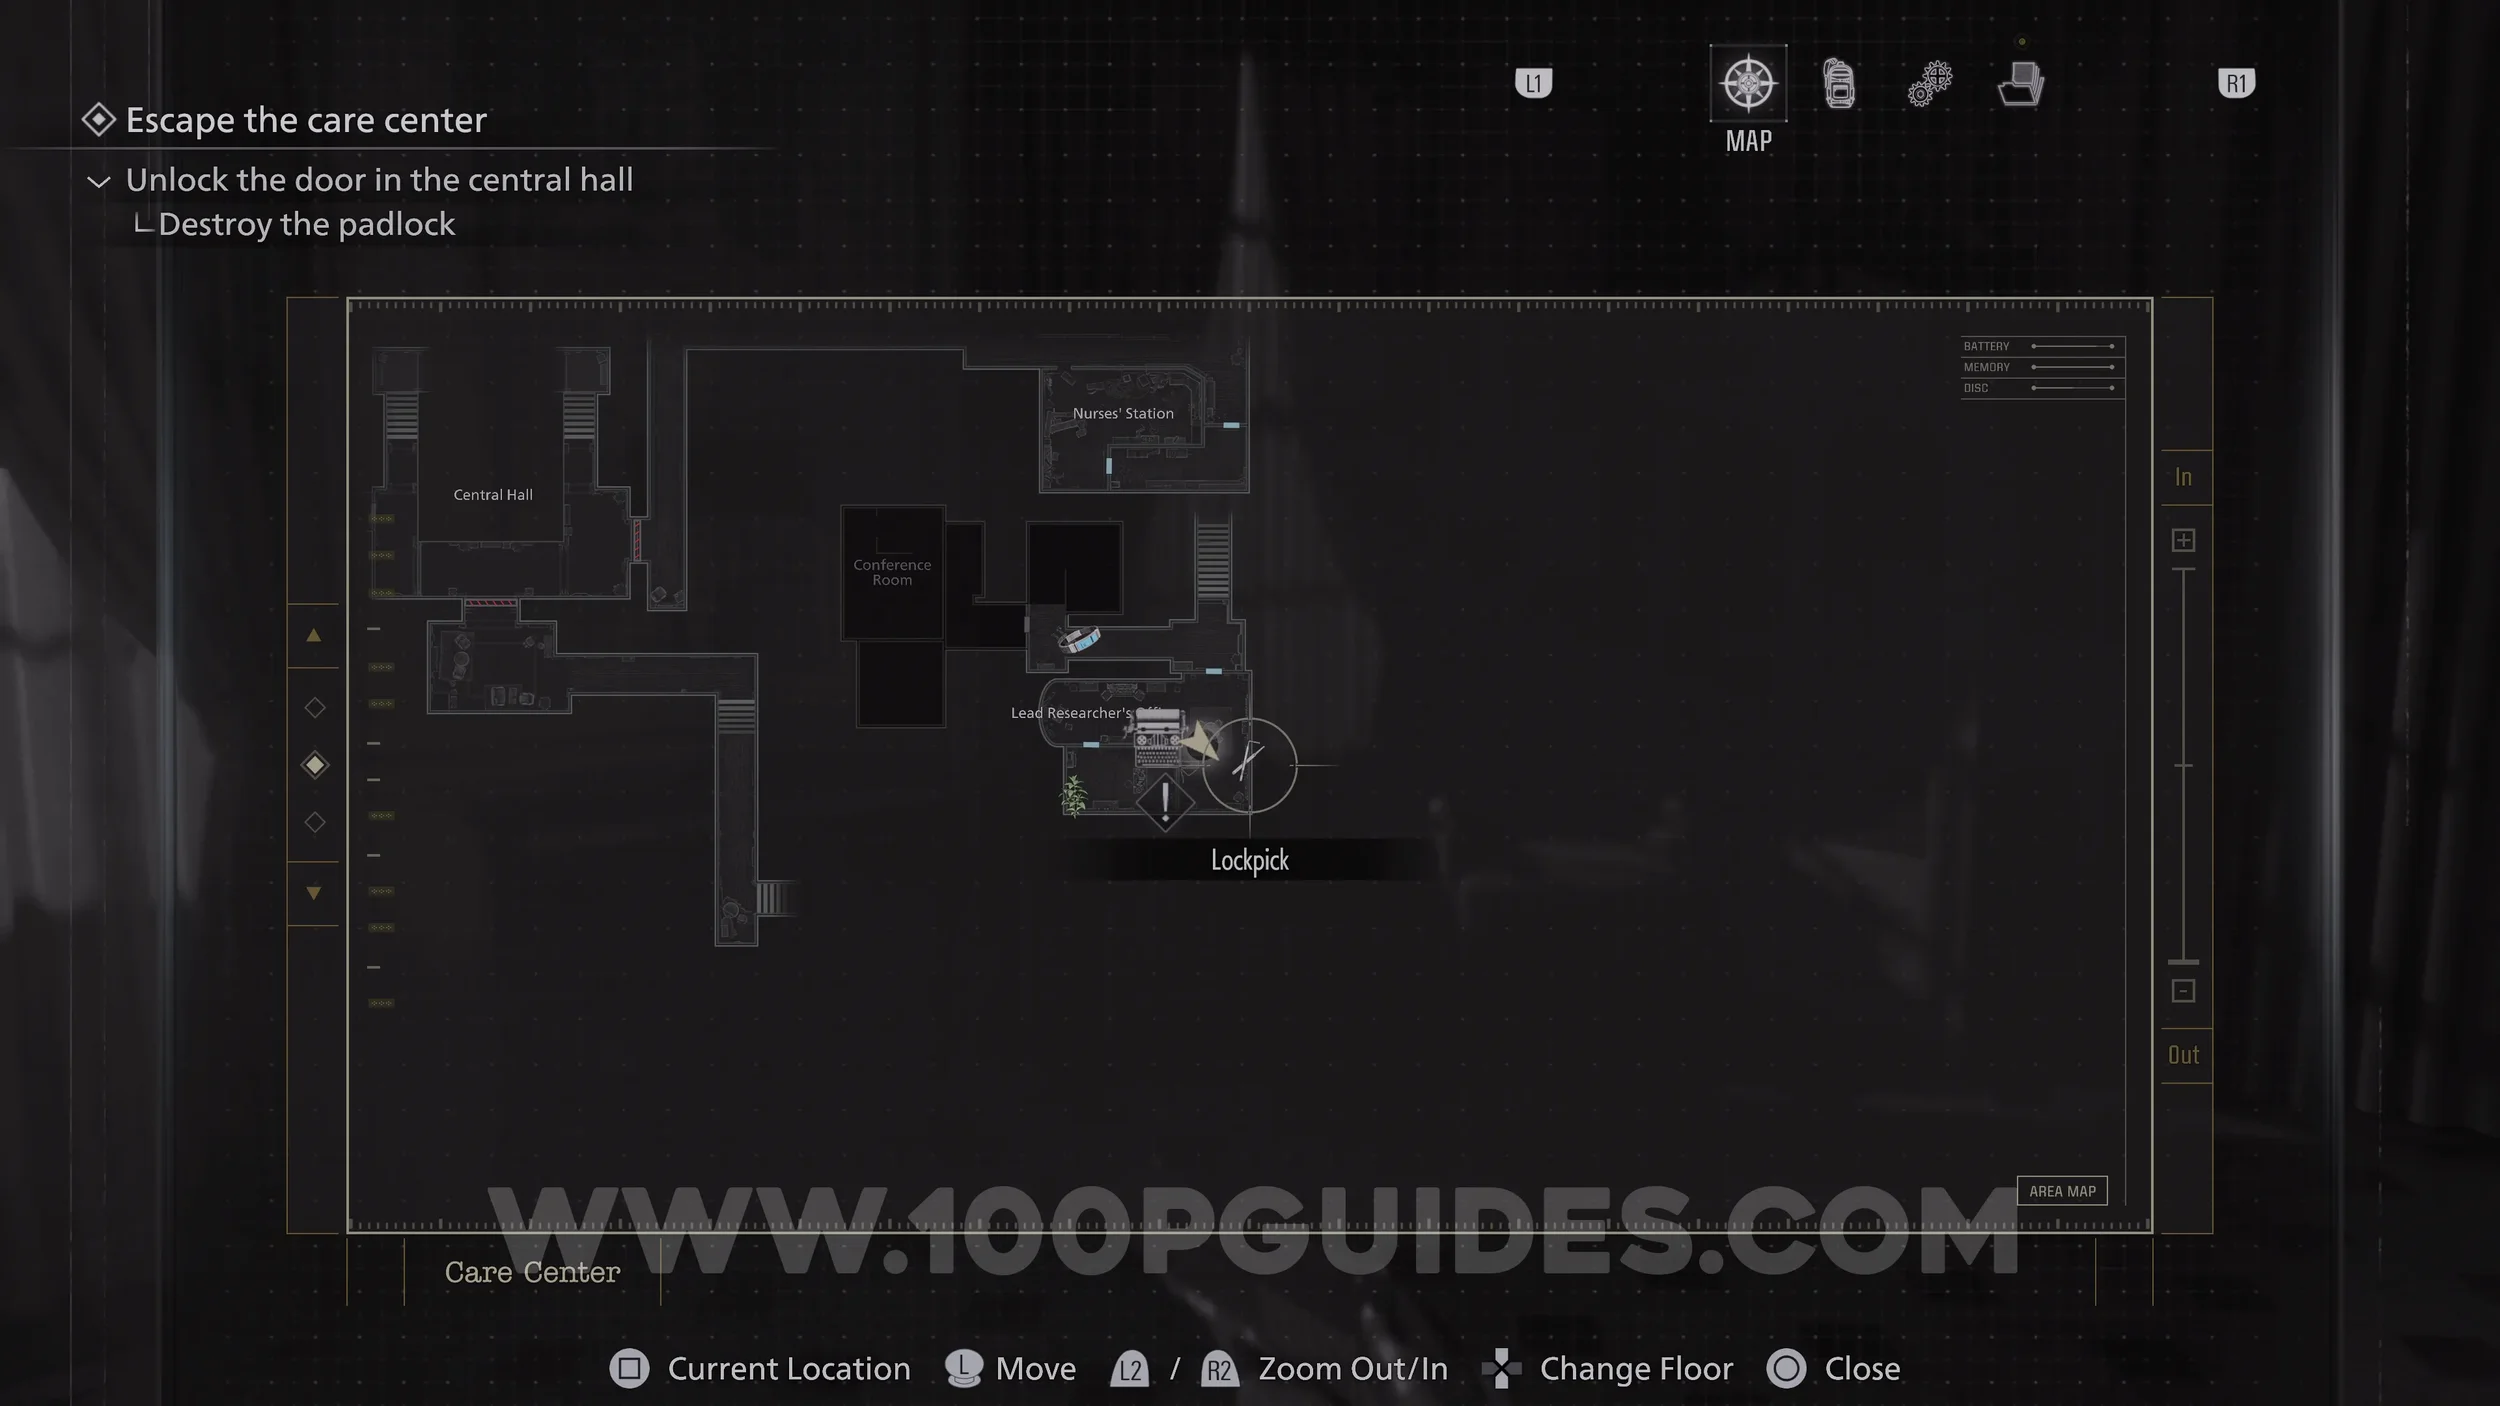
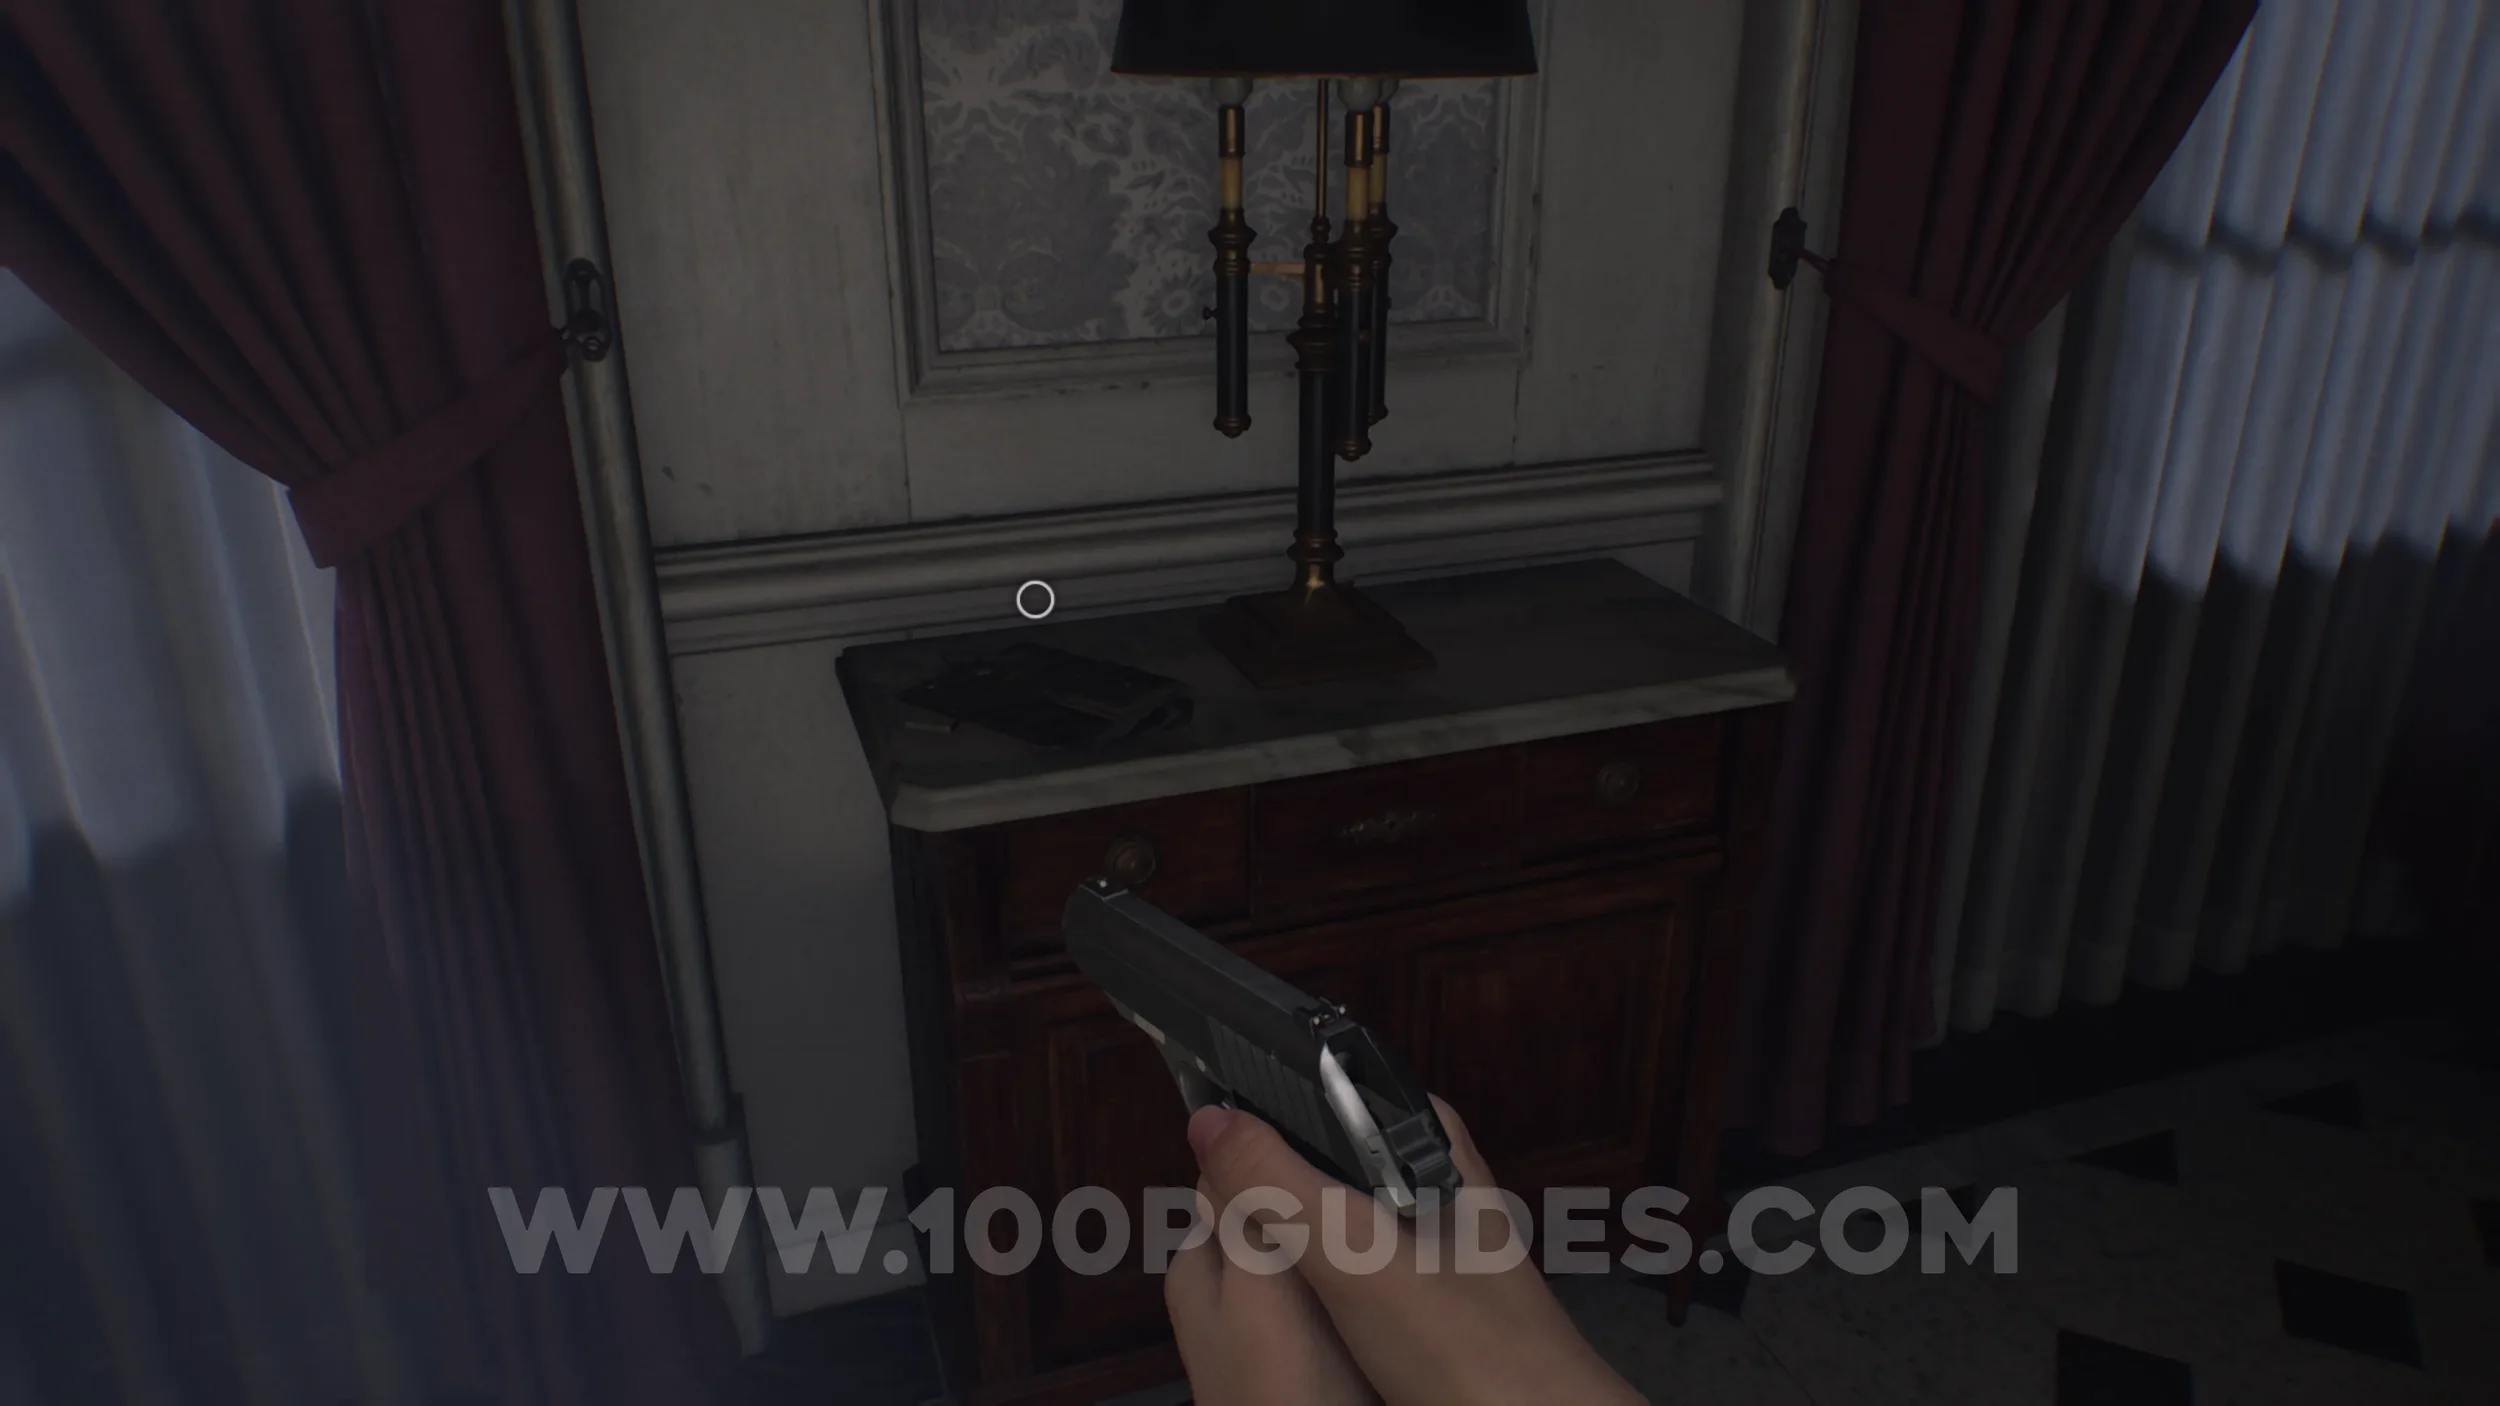
Trophy - Like Mother, Like Daughter. Pick up the Lockpick in the Lead Researcher’s Office. Then open any locked drawer. You can find one in the East Wing Lobby.
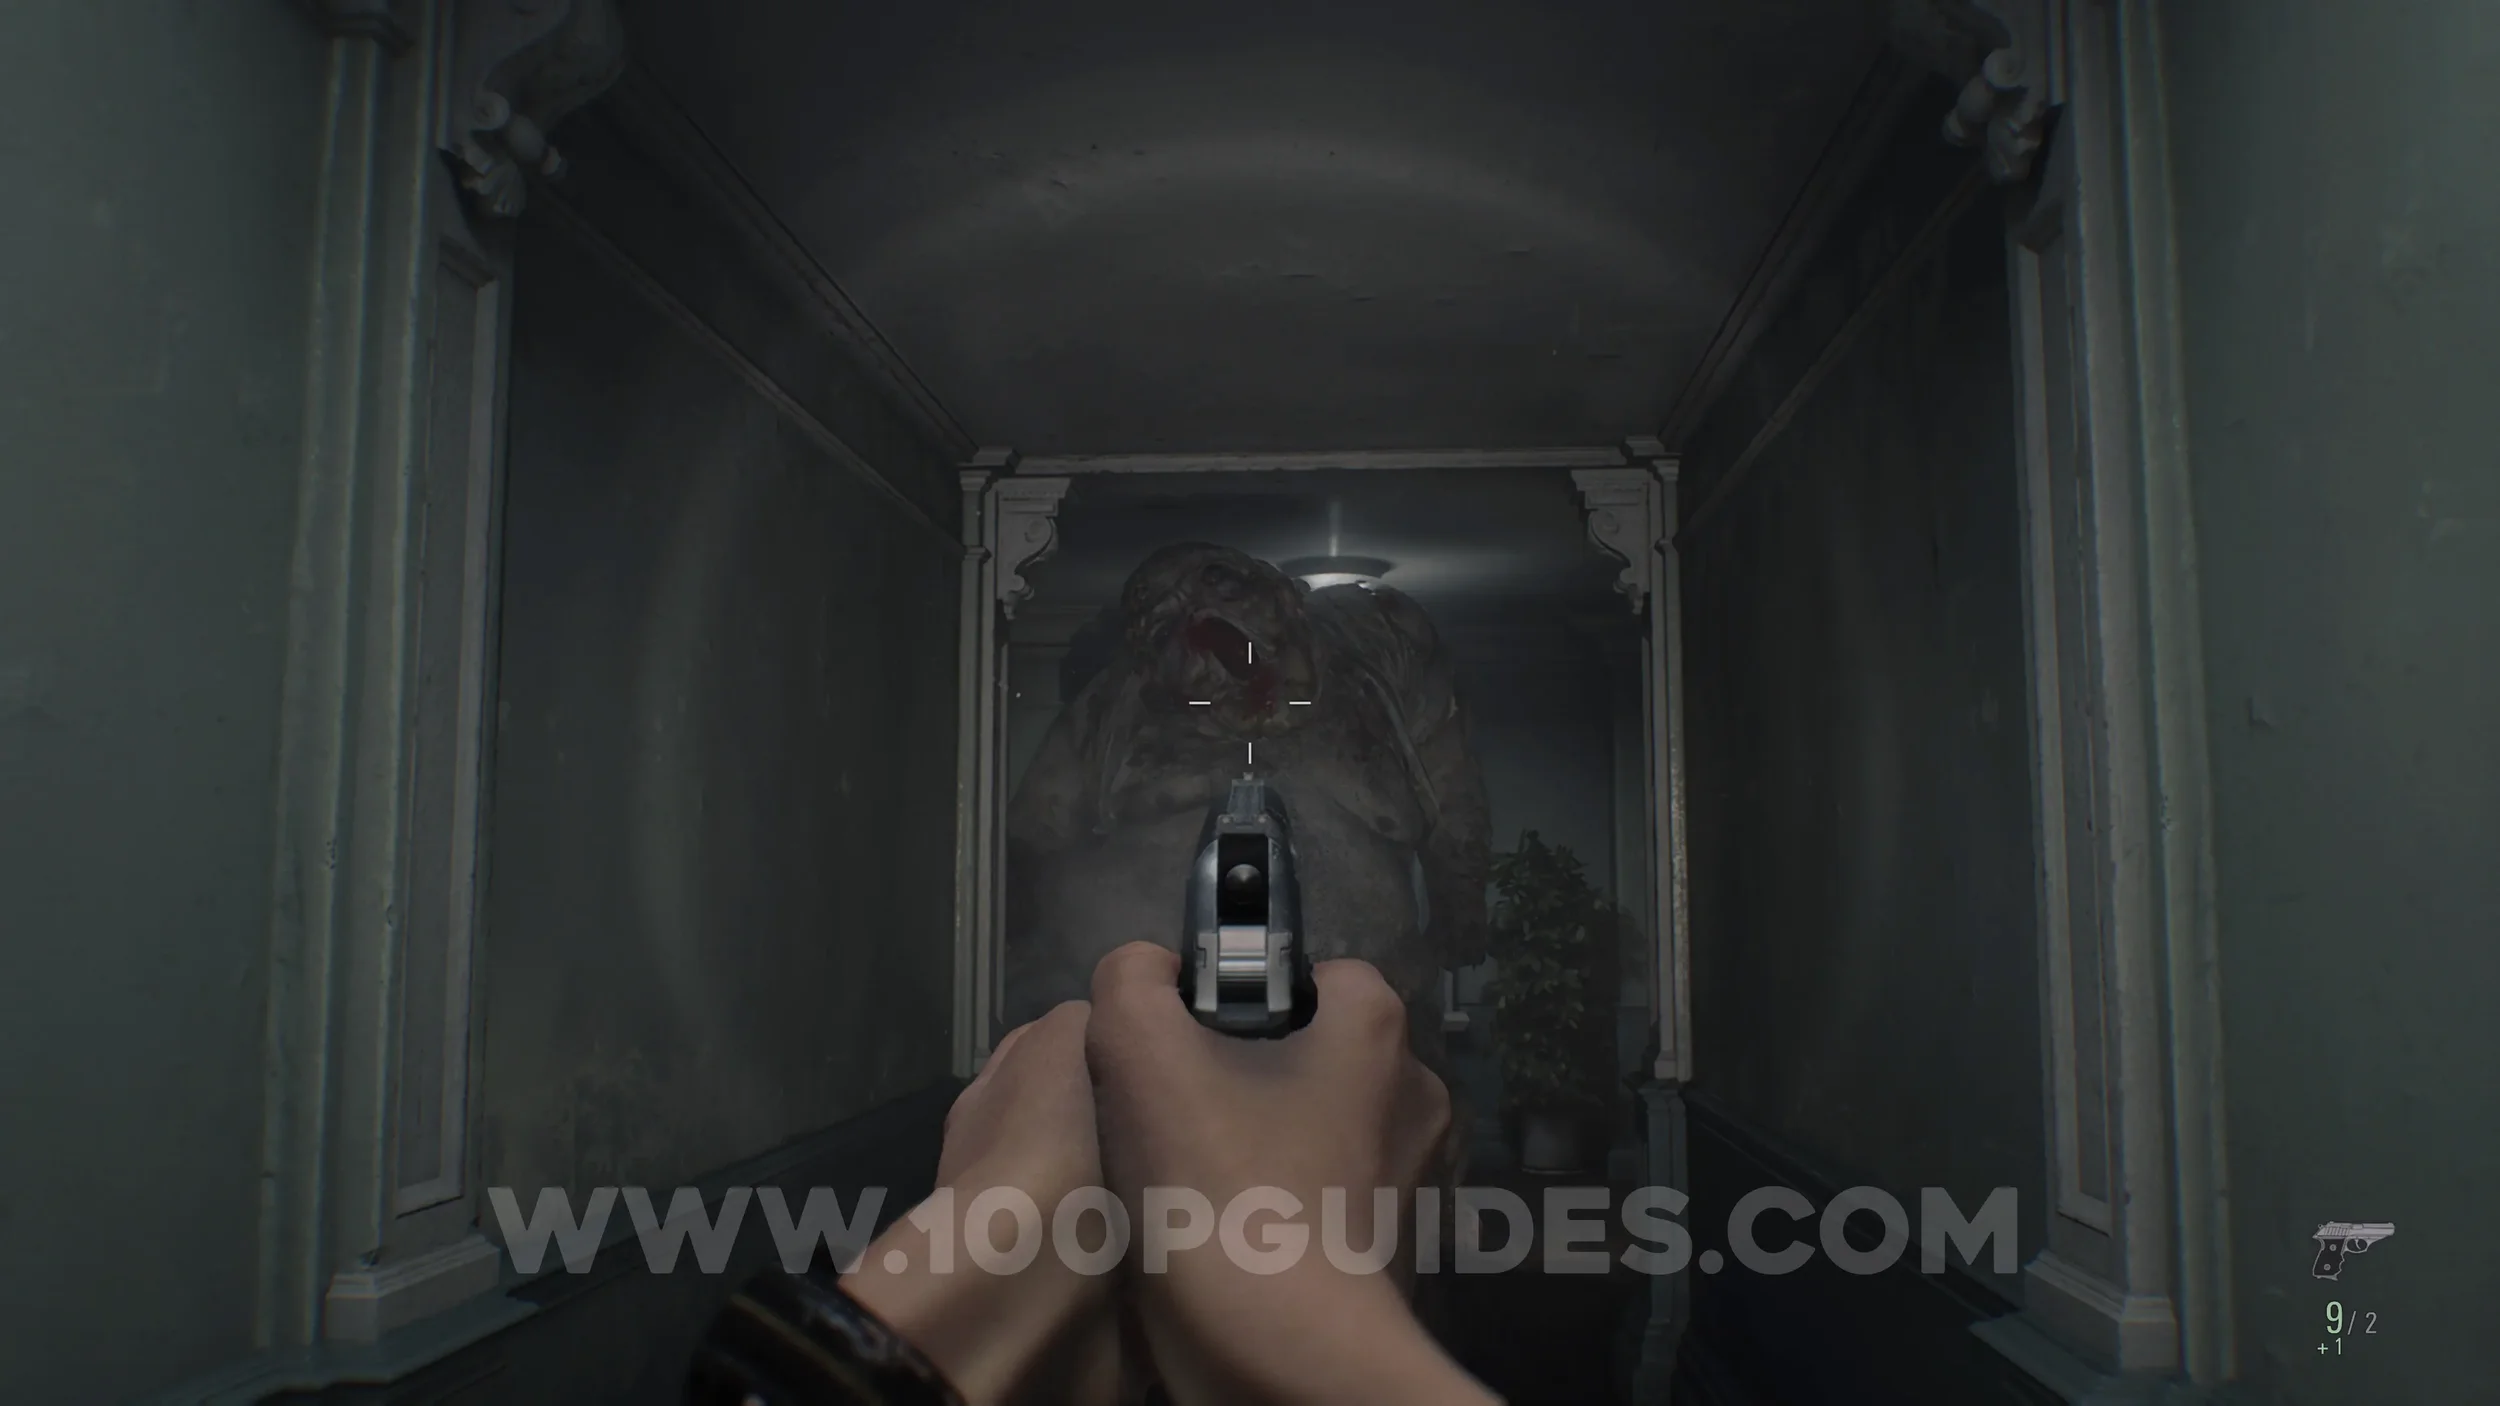
Trophy - Grace and Goliath & Charm #2 - Eye Spy Charm. As soon as you pick up the Level 1 ID Band from the corridor north of the Lead Researcher’s Office, you will be attacked by a large enemy known as the Chunk. After this encounter, it will begin roaming the area and actively hunting you.
To unlock the trophy, defeat it by dealing enough damage. It has a substantial amount of health even on Casual difficulty, so if you do not have enough ammo at this point, don’t worry. You can defeat it later.
Just make sure to take it down before leaving the Care Center and progressing to the Courtyard area, as you cannot return afterward.
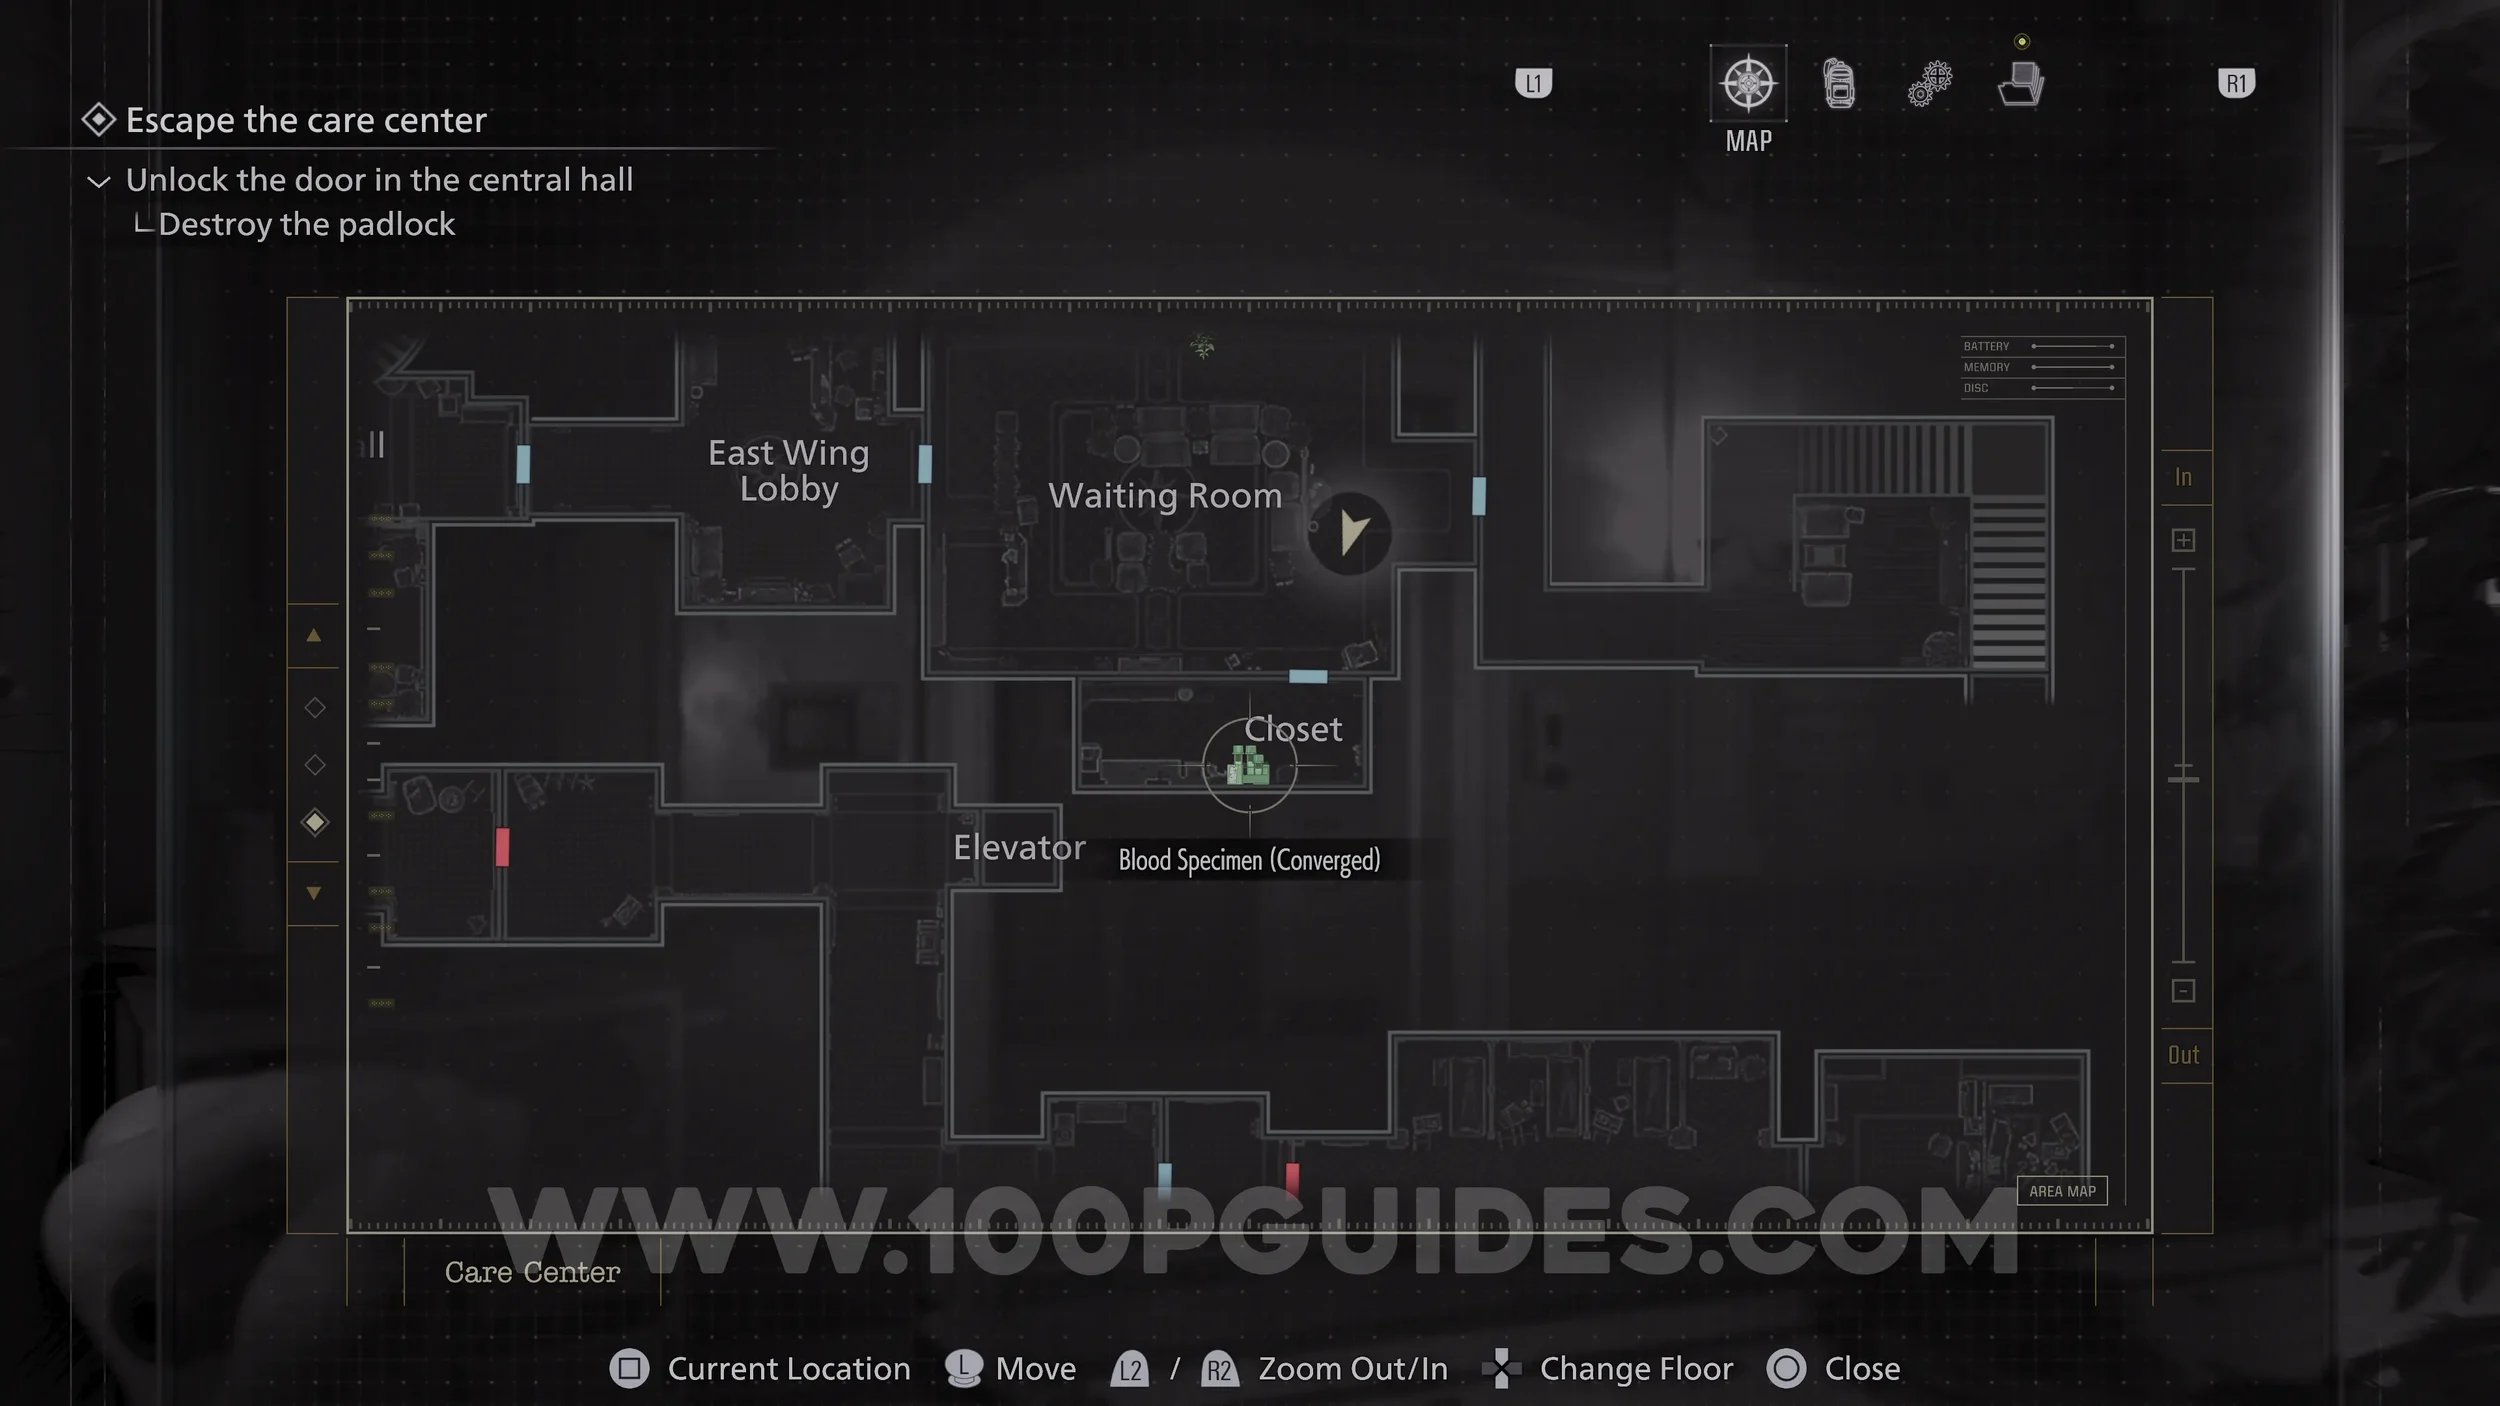
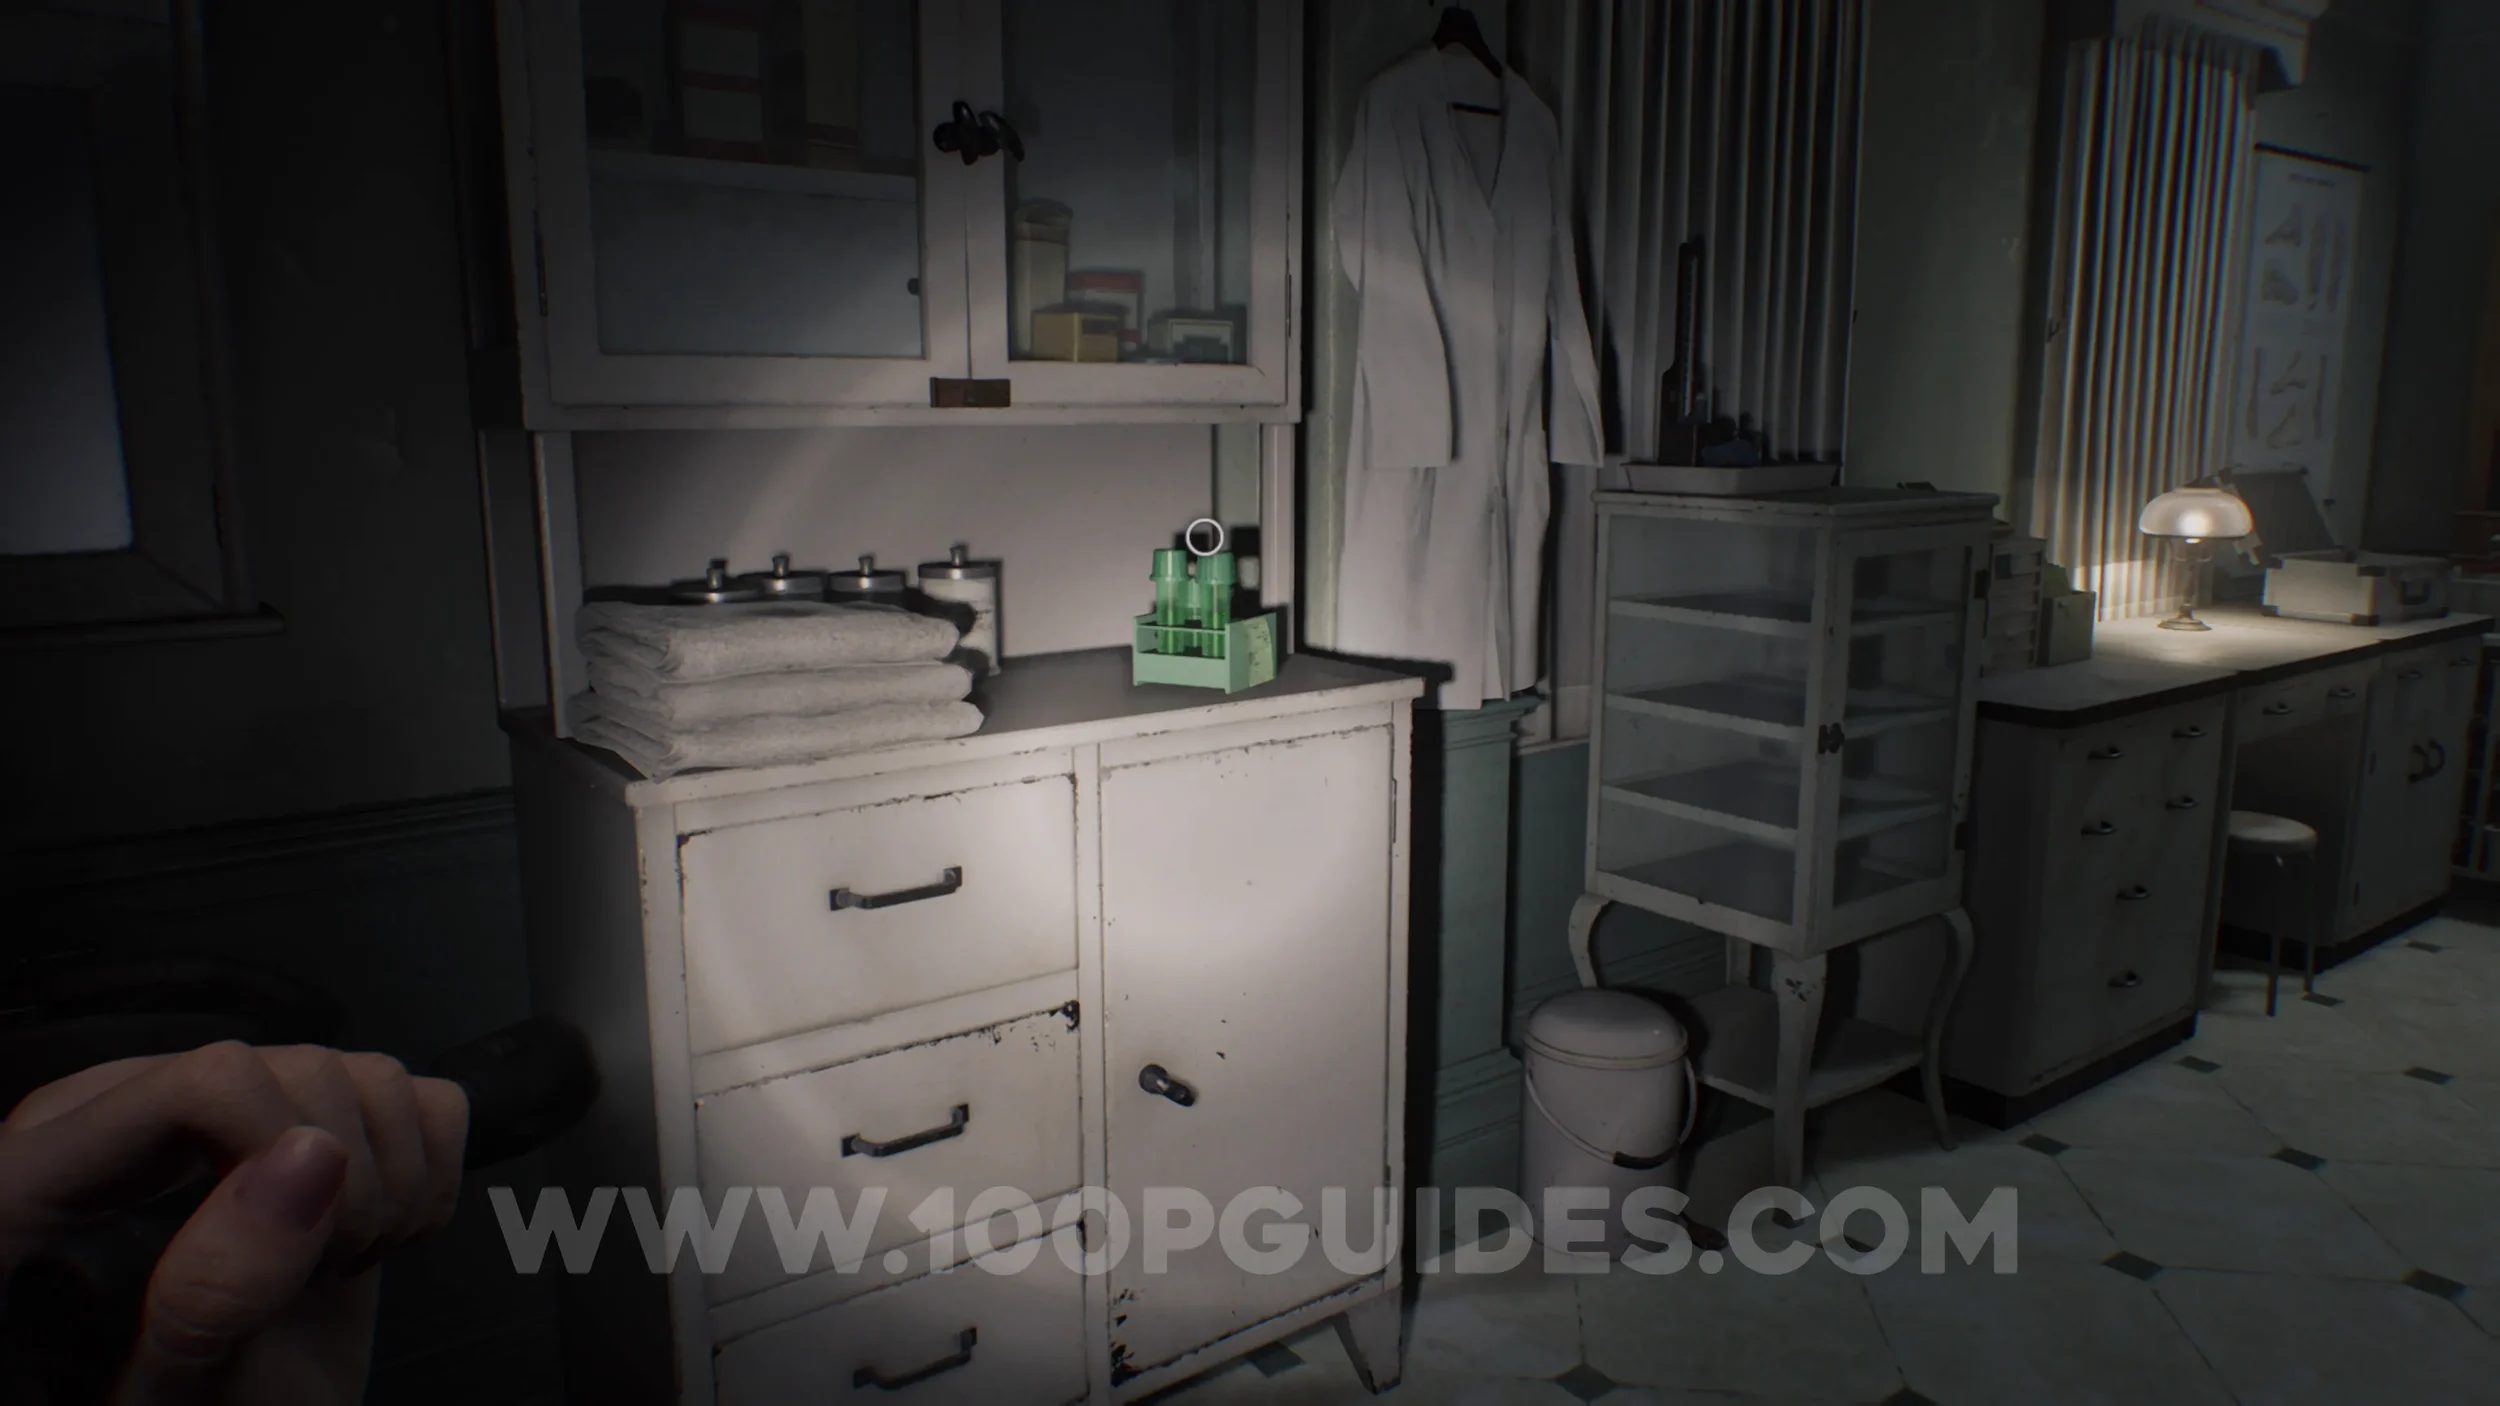
Blood Specimen (Converged). Use the Level 1 ID Band to open the Closet in the Waiting room. The Blood Specimen will be inside. Take it to the Analyzer to unlock new crafting recipes.
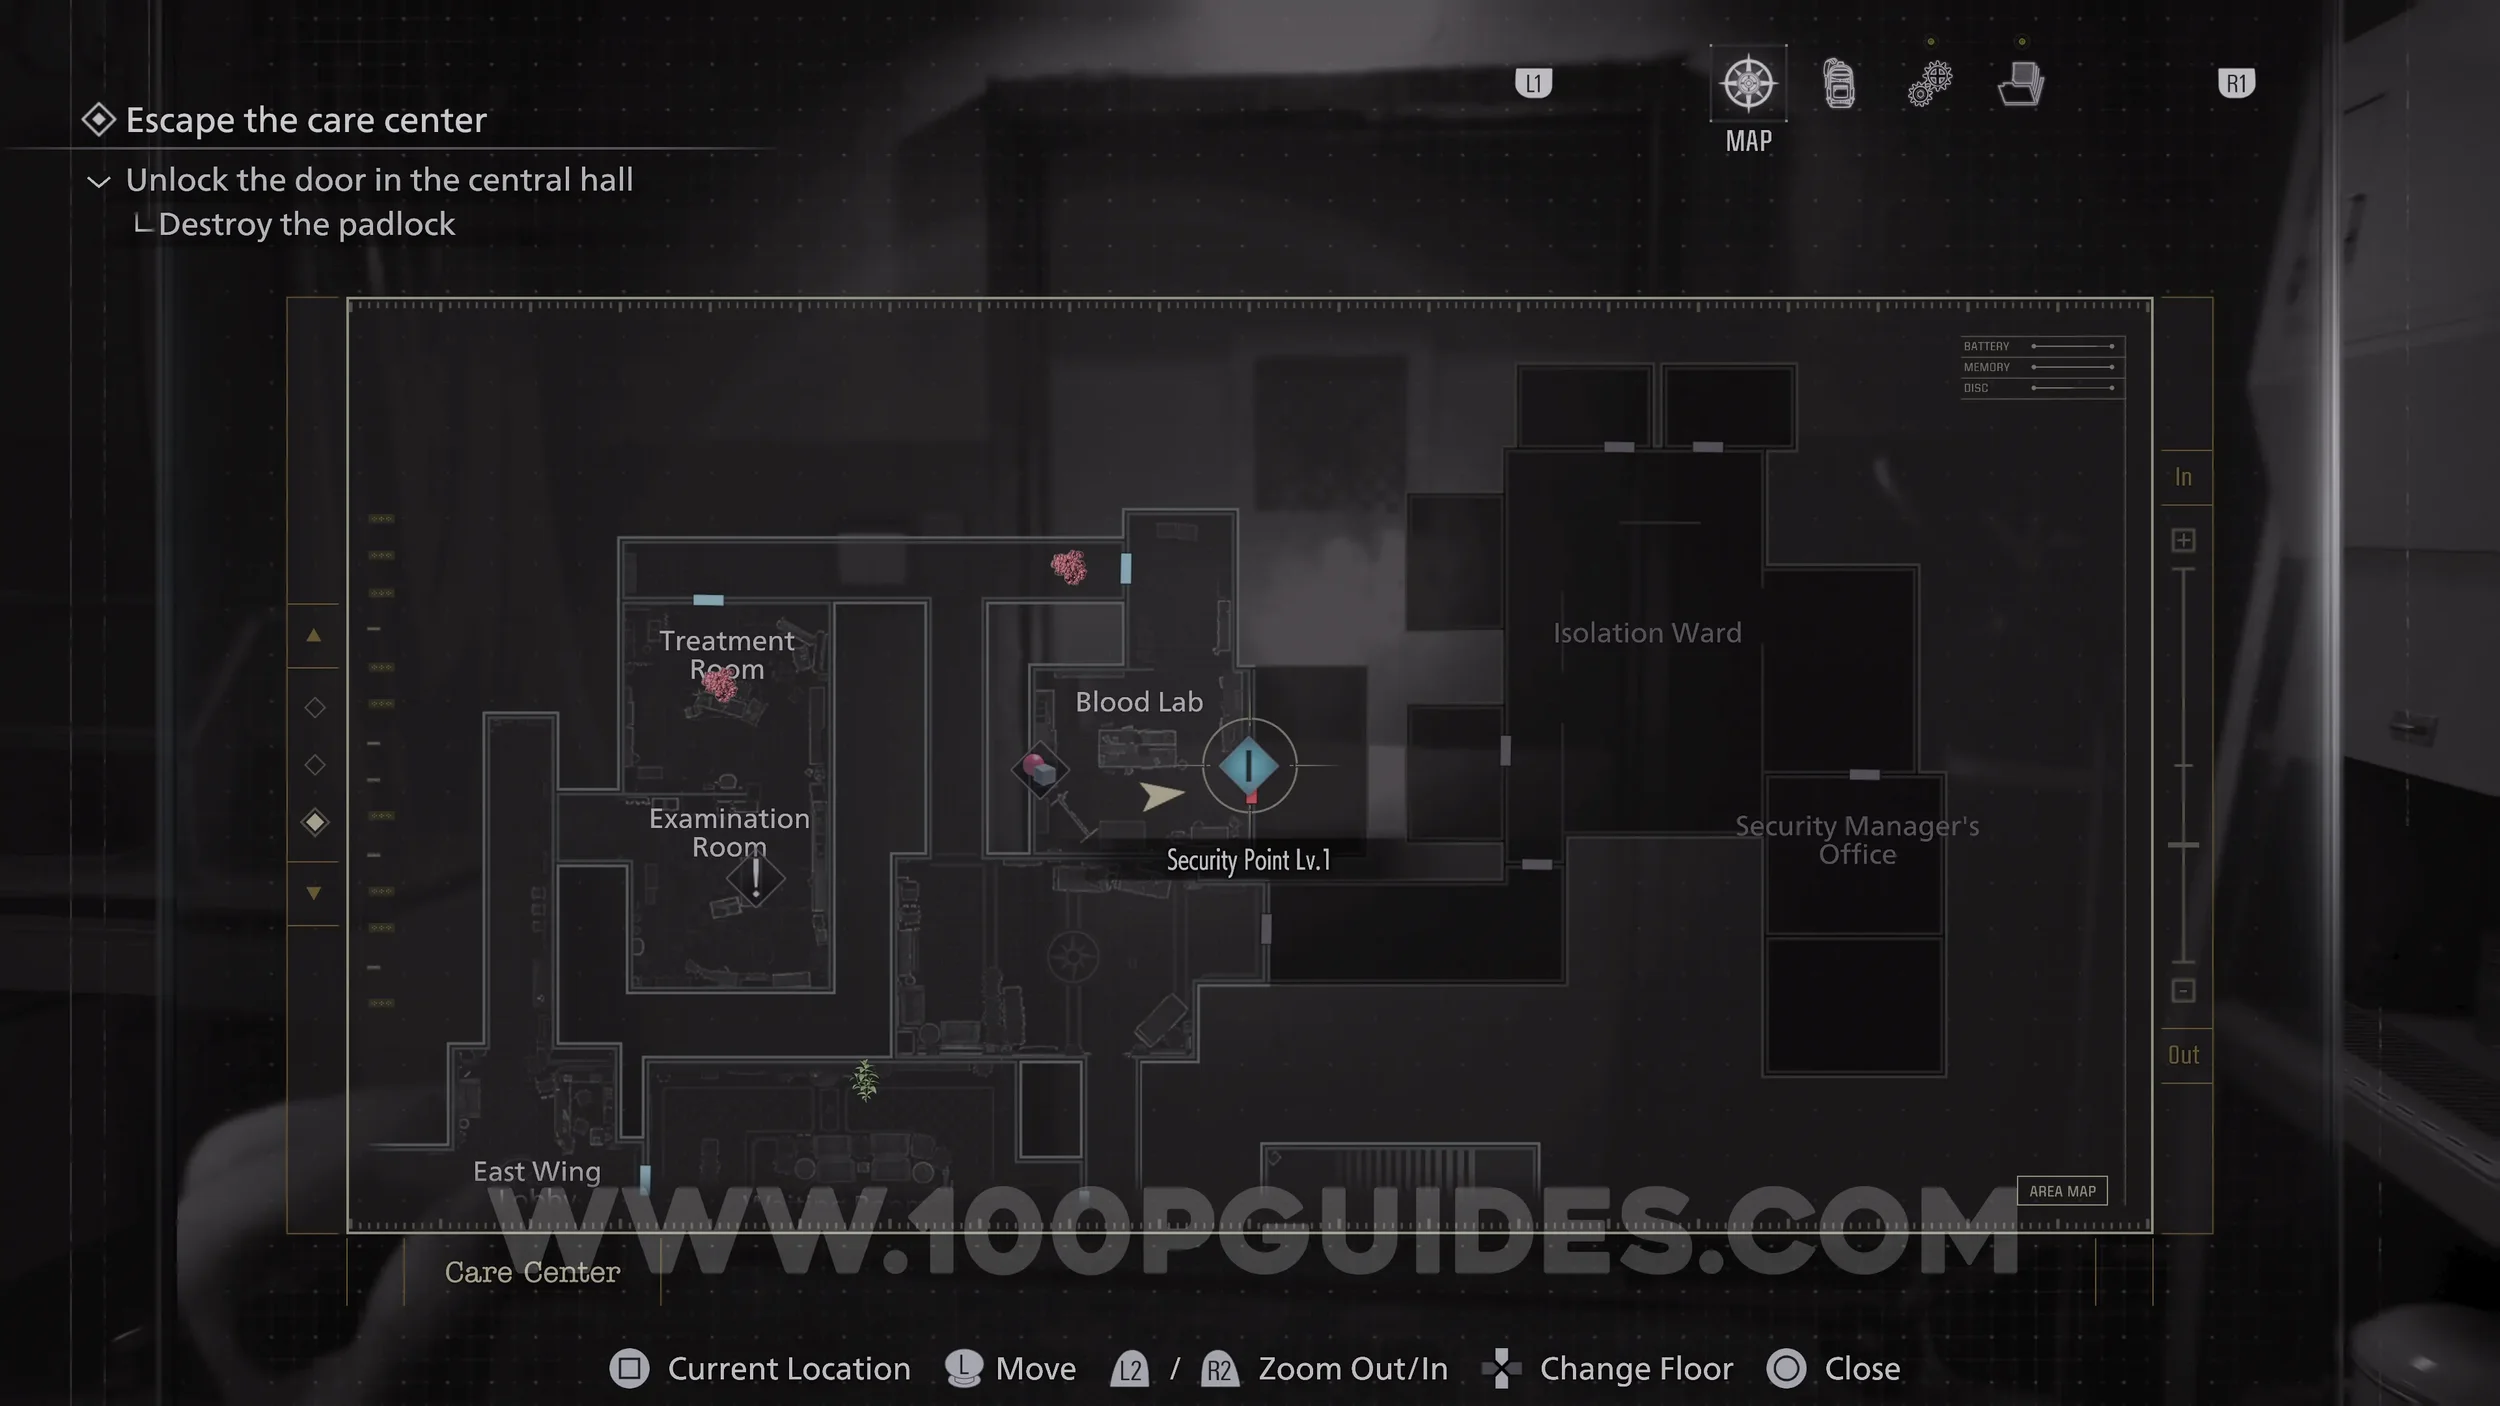
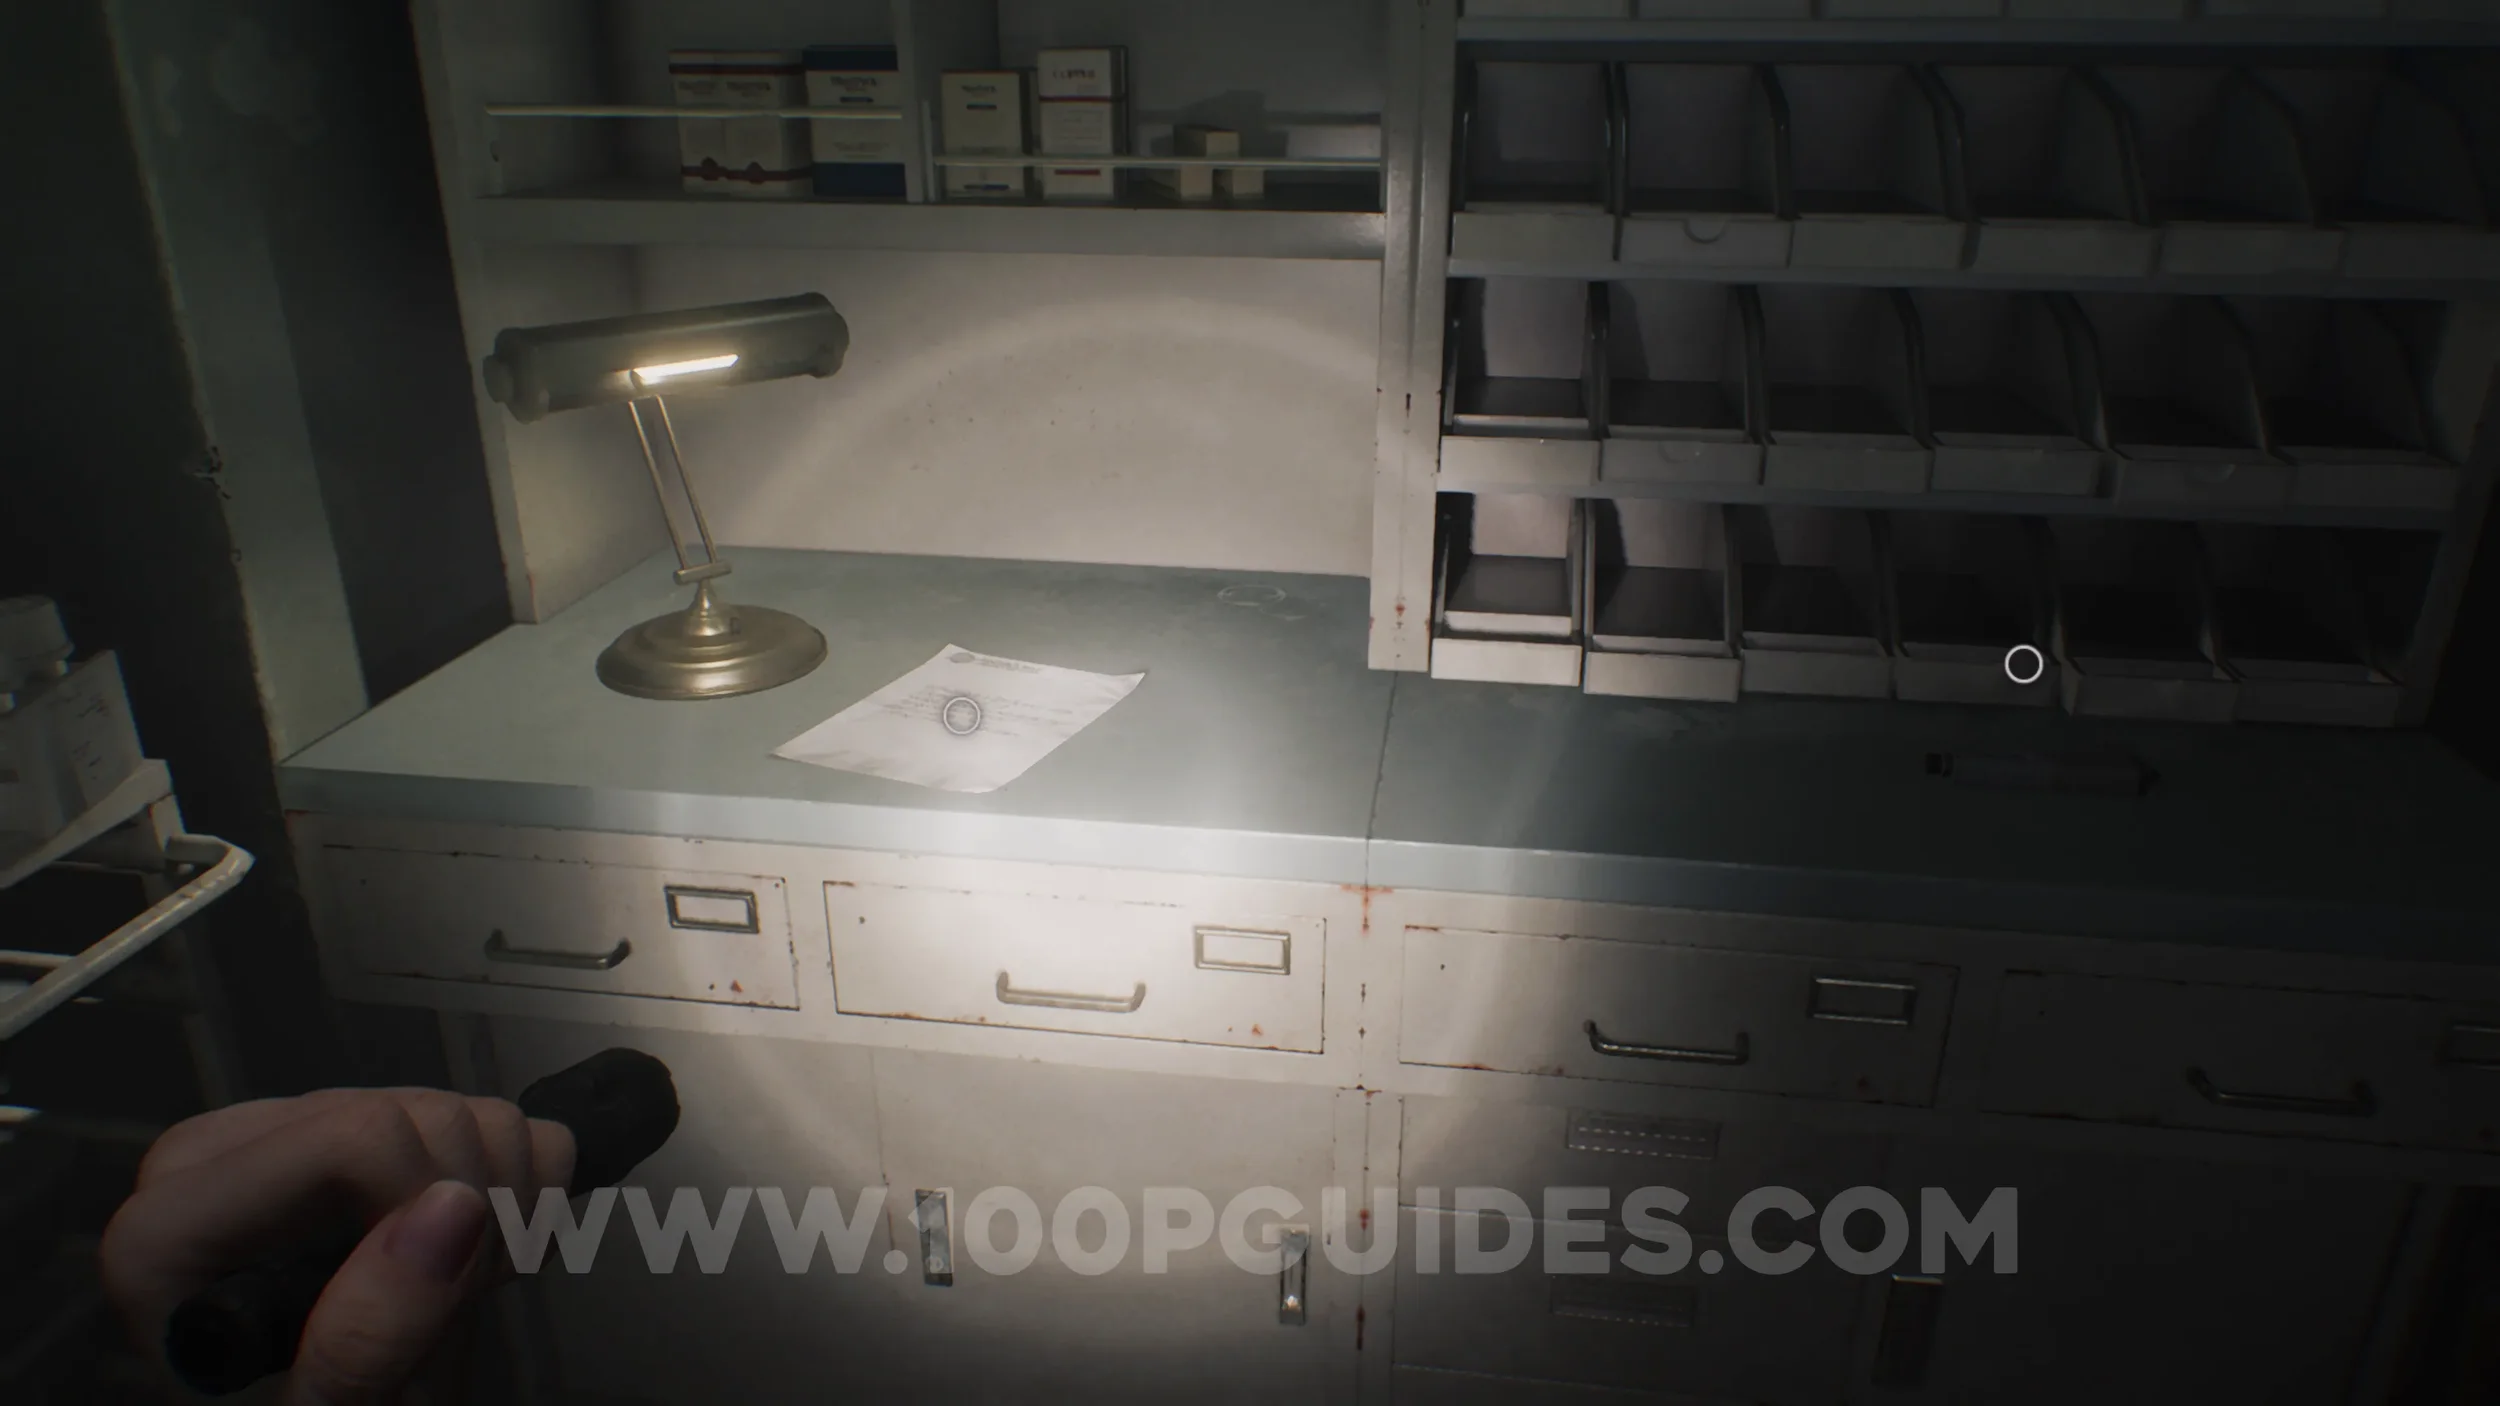
File #21 - Victor’s Journal Entry. Use the Level 1 ID Band to open the room to the right of the Blood Lab. The file can be found inside.
Blood Specimen (Reversible). In the same room. Take it back to the Analyzer to unlock new crafting recipes.
Hip Pouch #2. Behind the Level 1 ID Band door in the Filing Room.
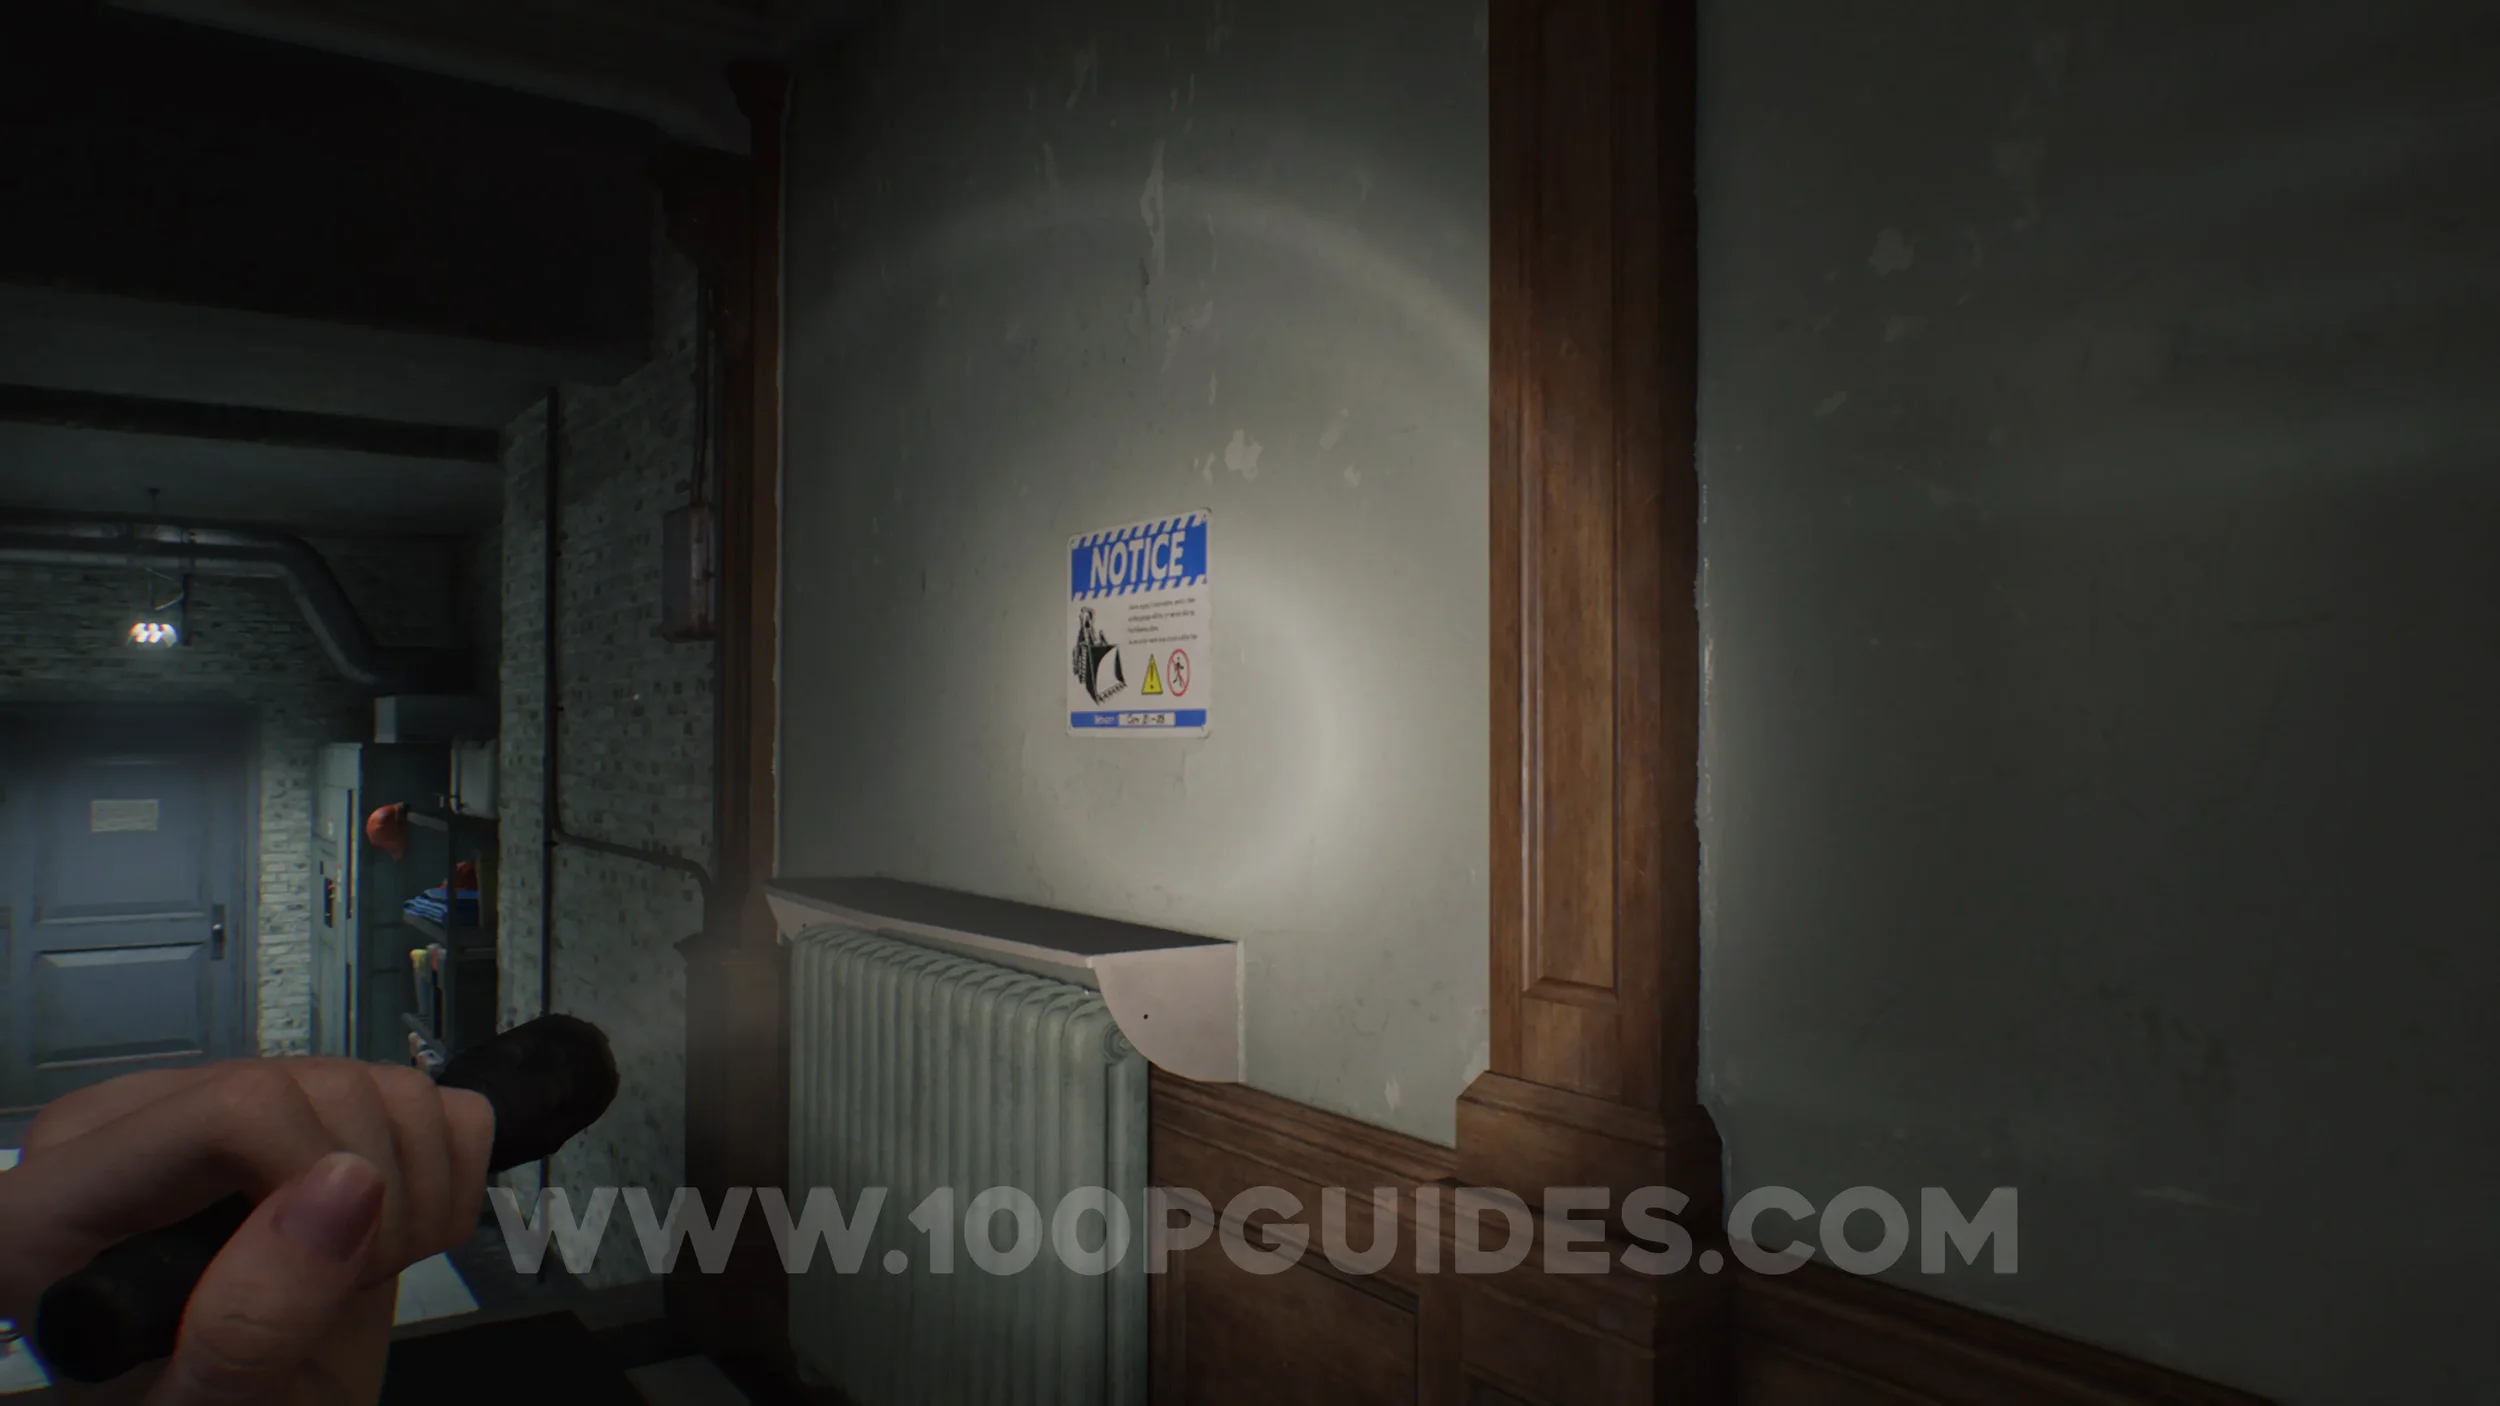
File #22 - Construction Notice. In the corridor to the south-west of the Kitchen. You will need the Level 1 ID Band.
File #23 - Bar & Lounge Safe Code. Go up the stairs from the previous collectible to find it in the office.
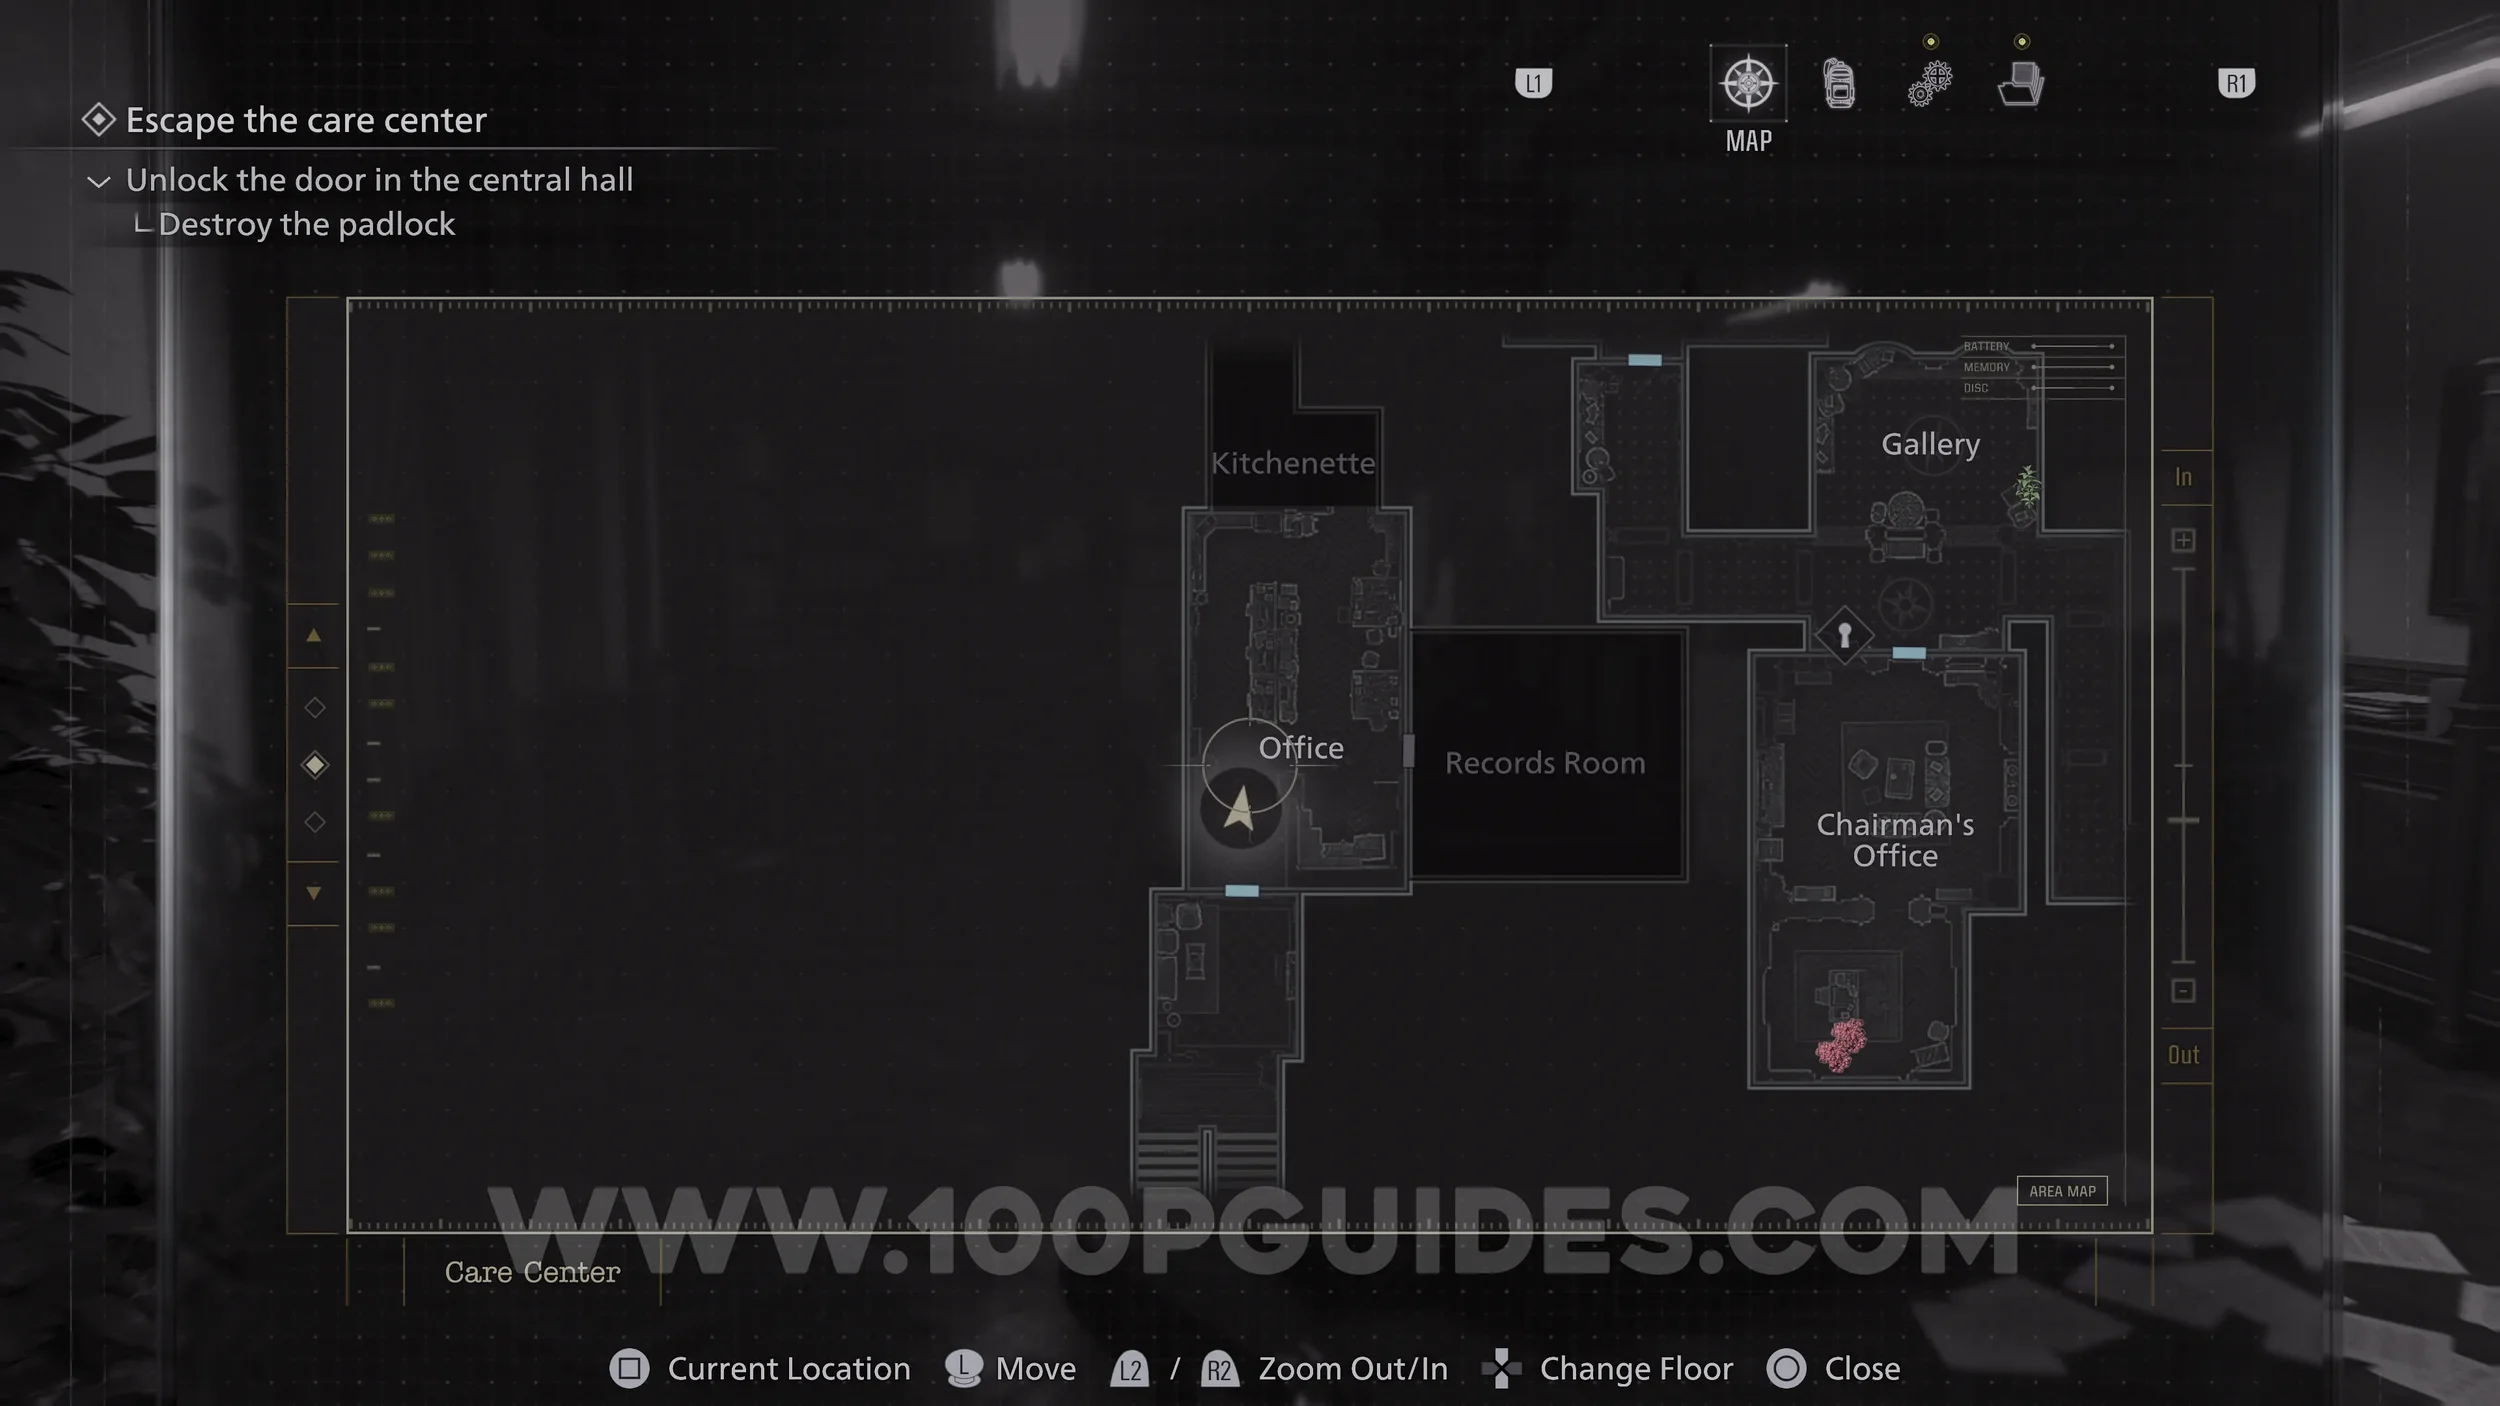

File #24. Also in the Office.

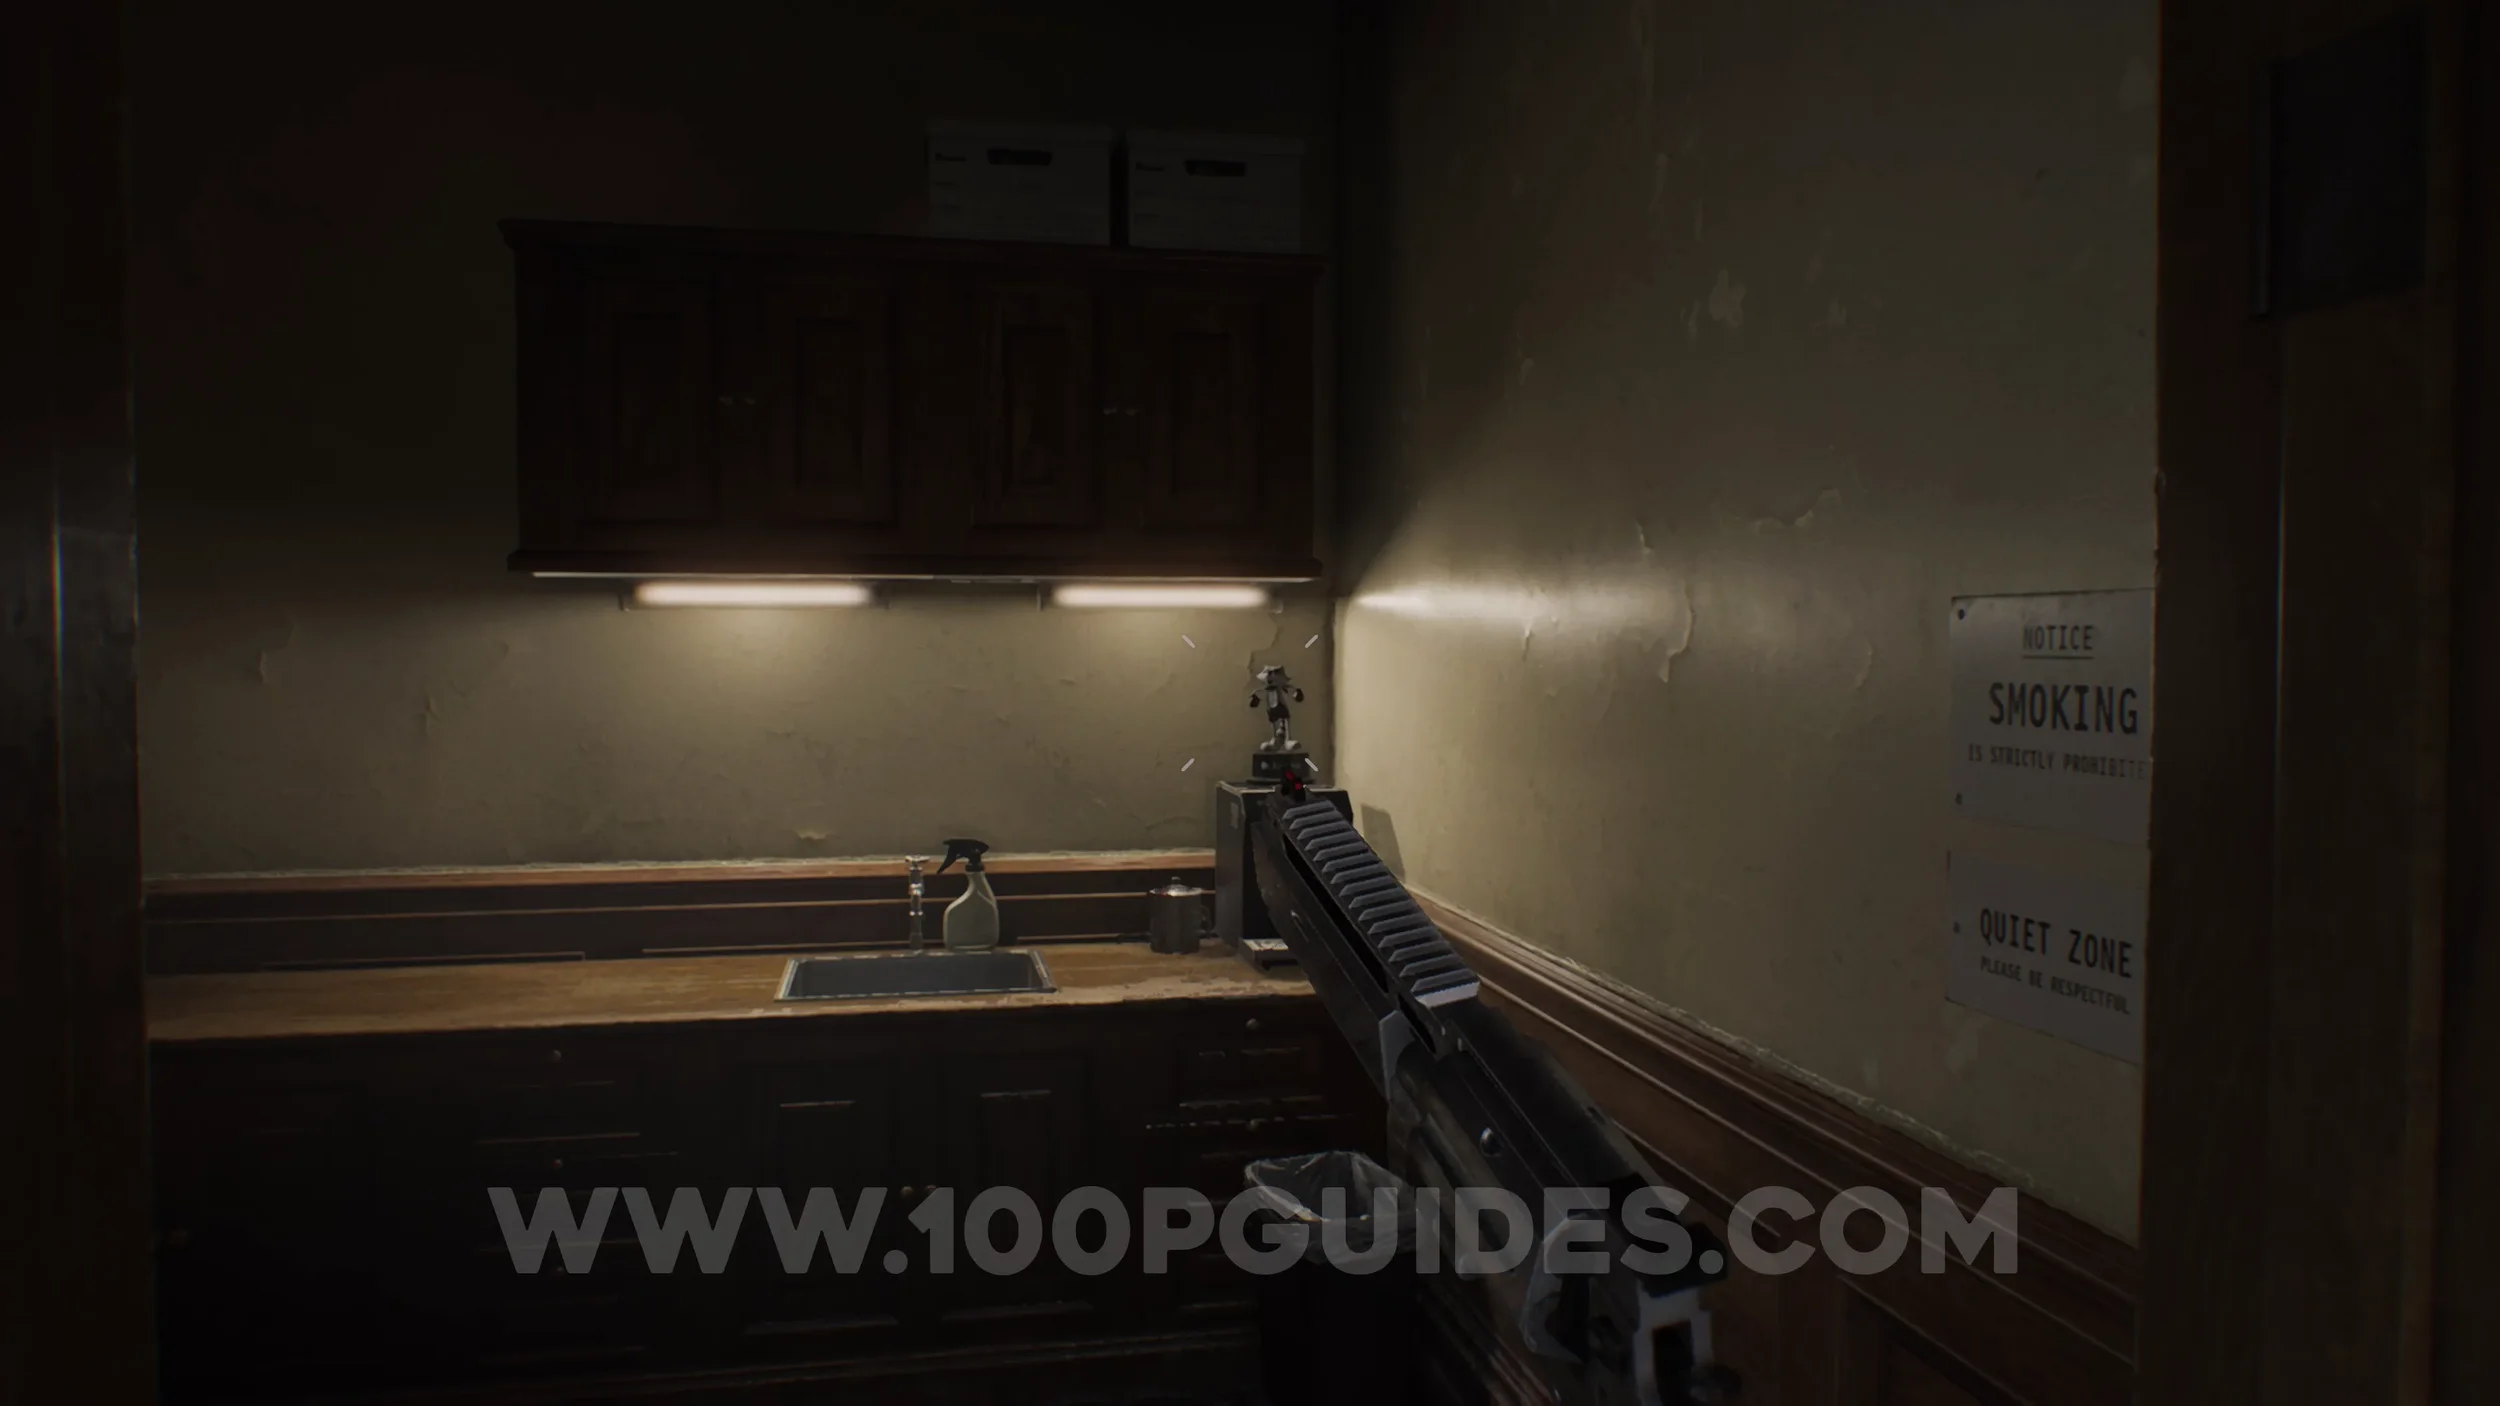
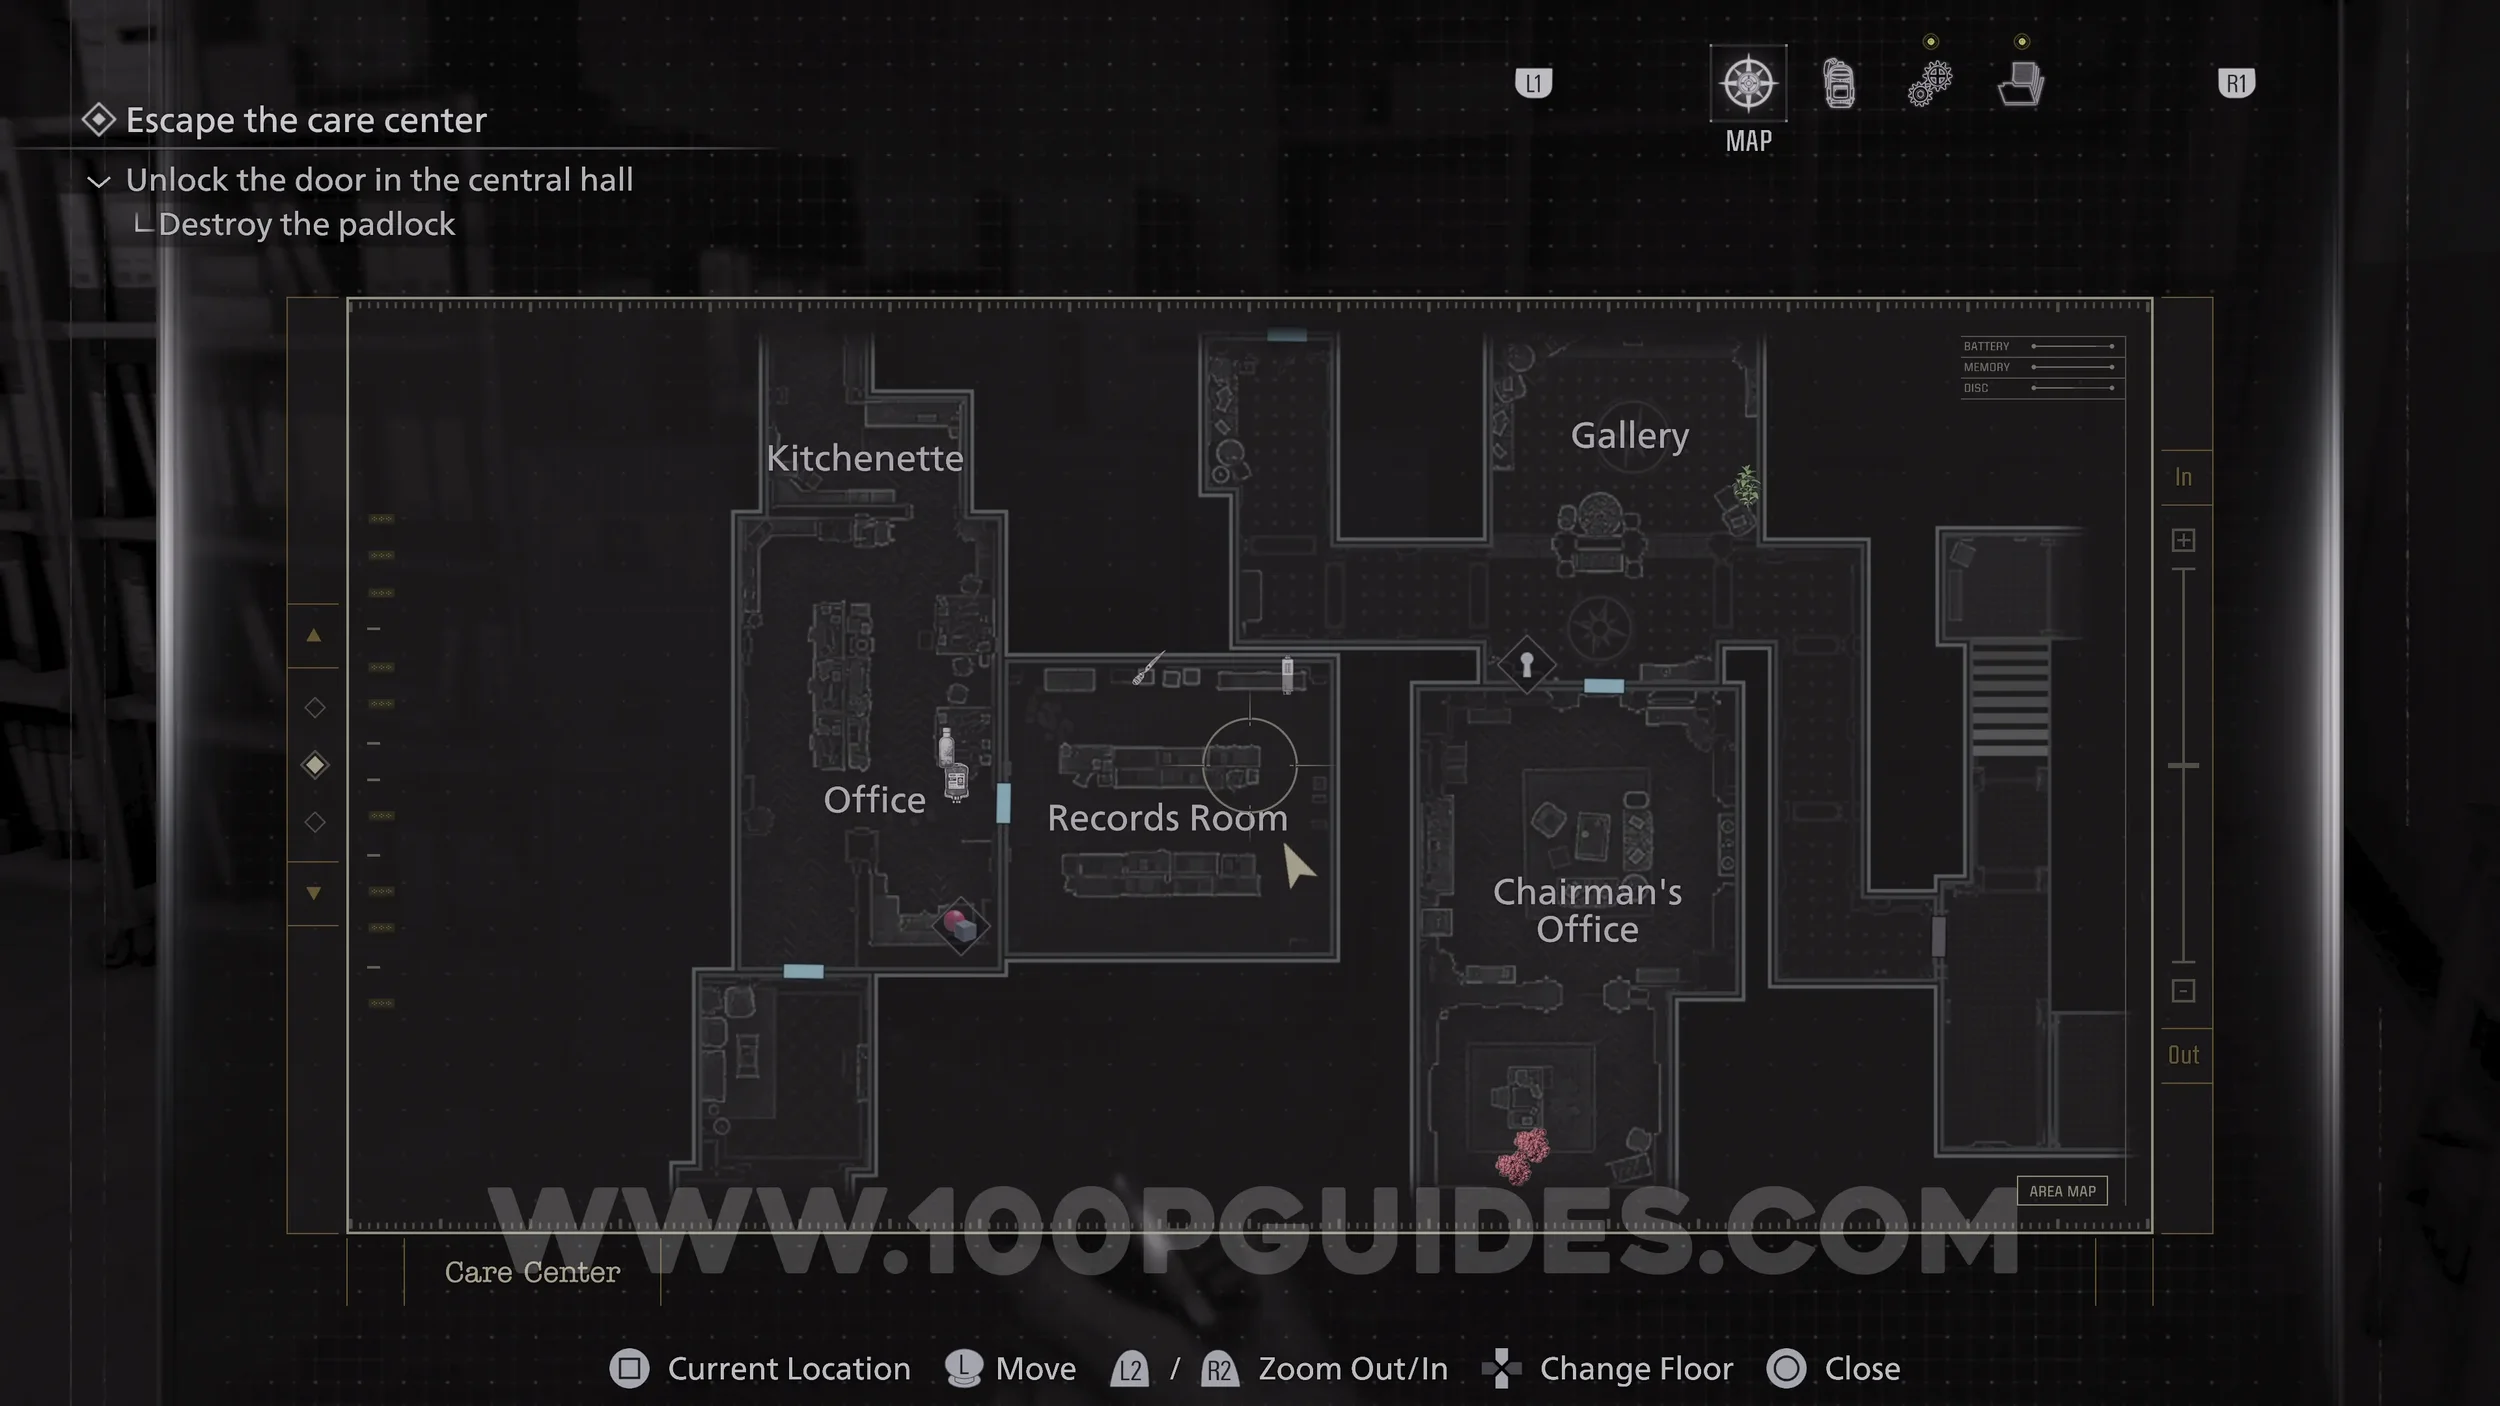
Mr. Raccoon #4. In the Kitchenette to the north of the Office.
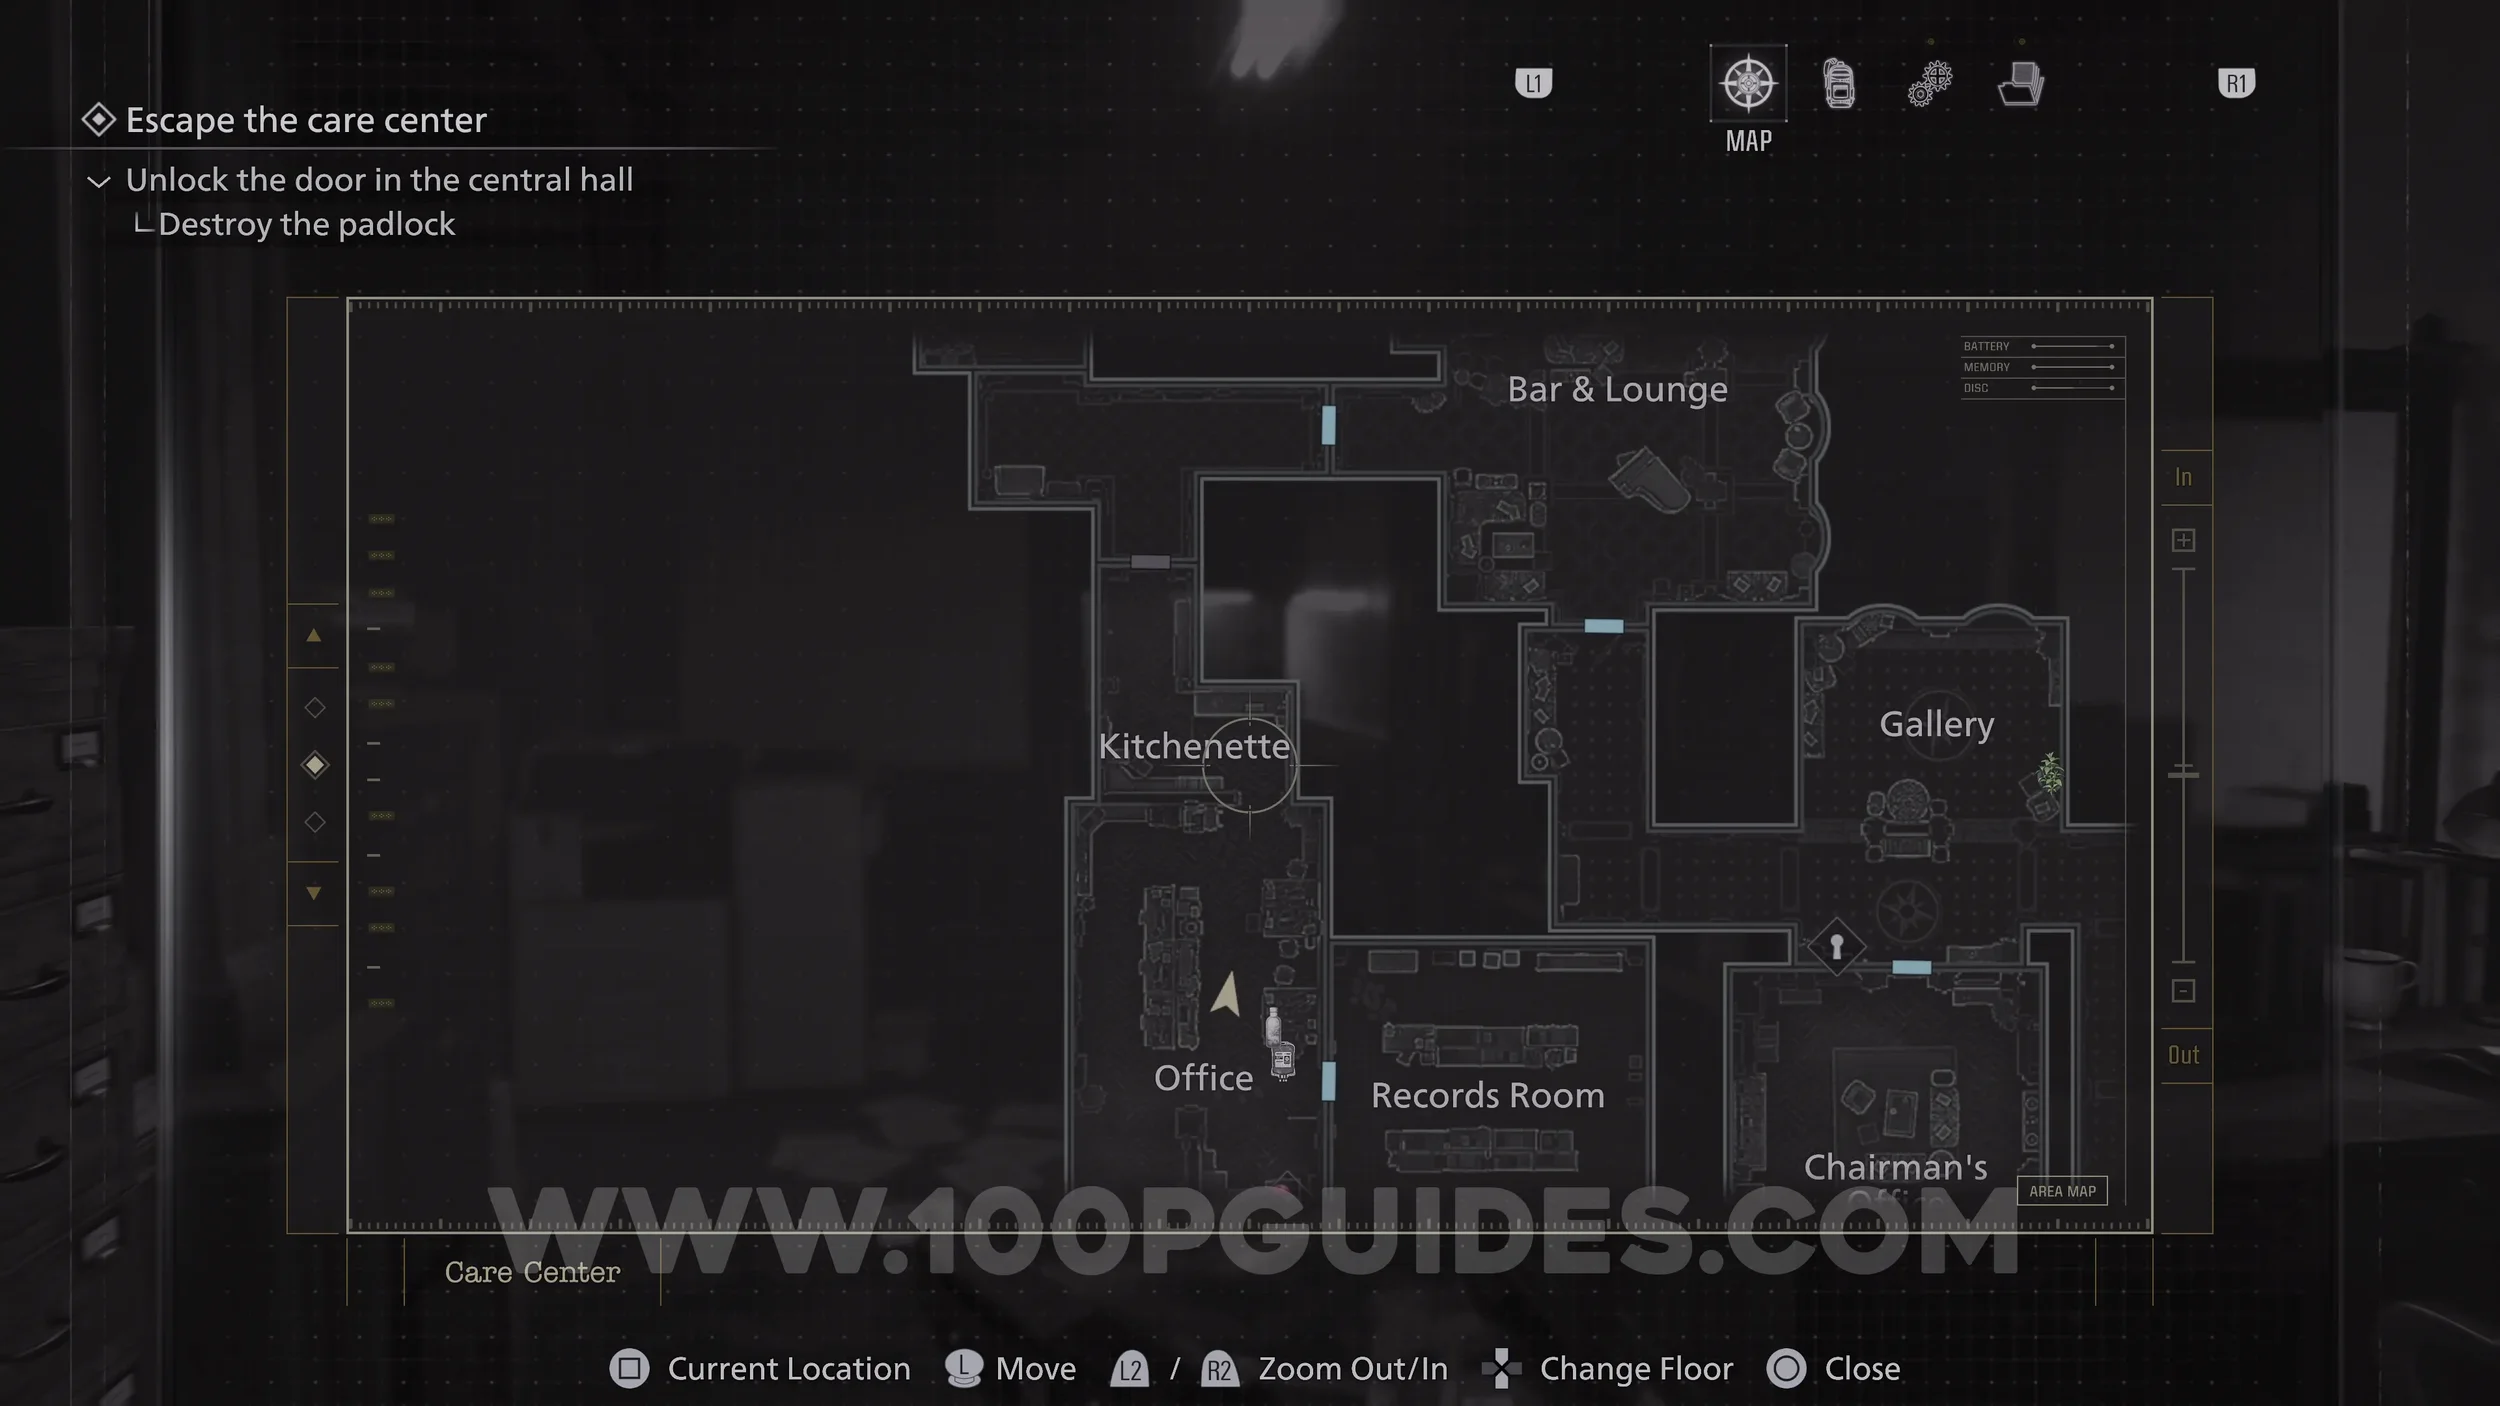
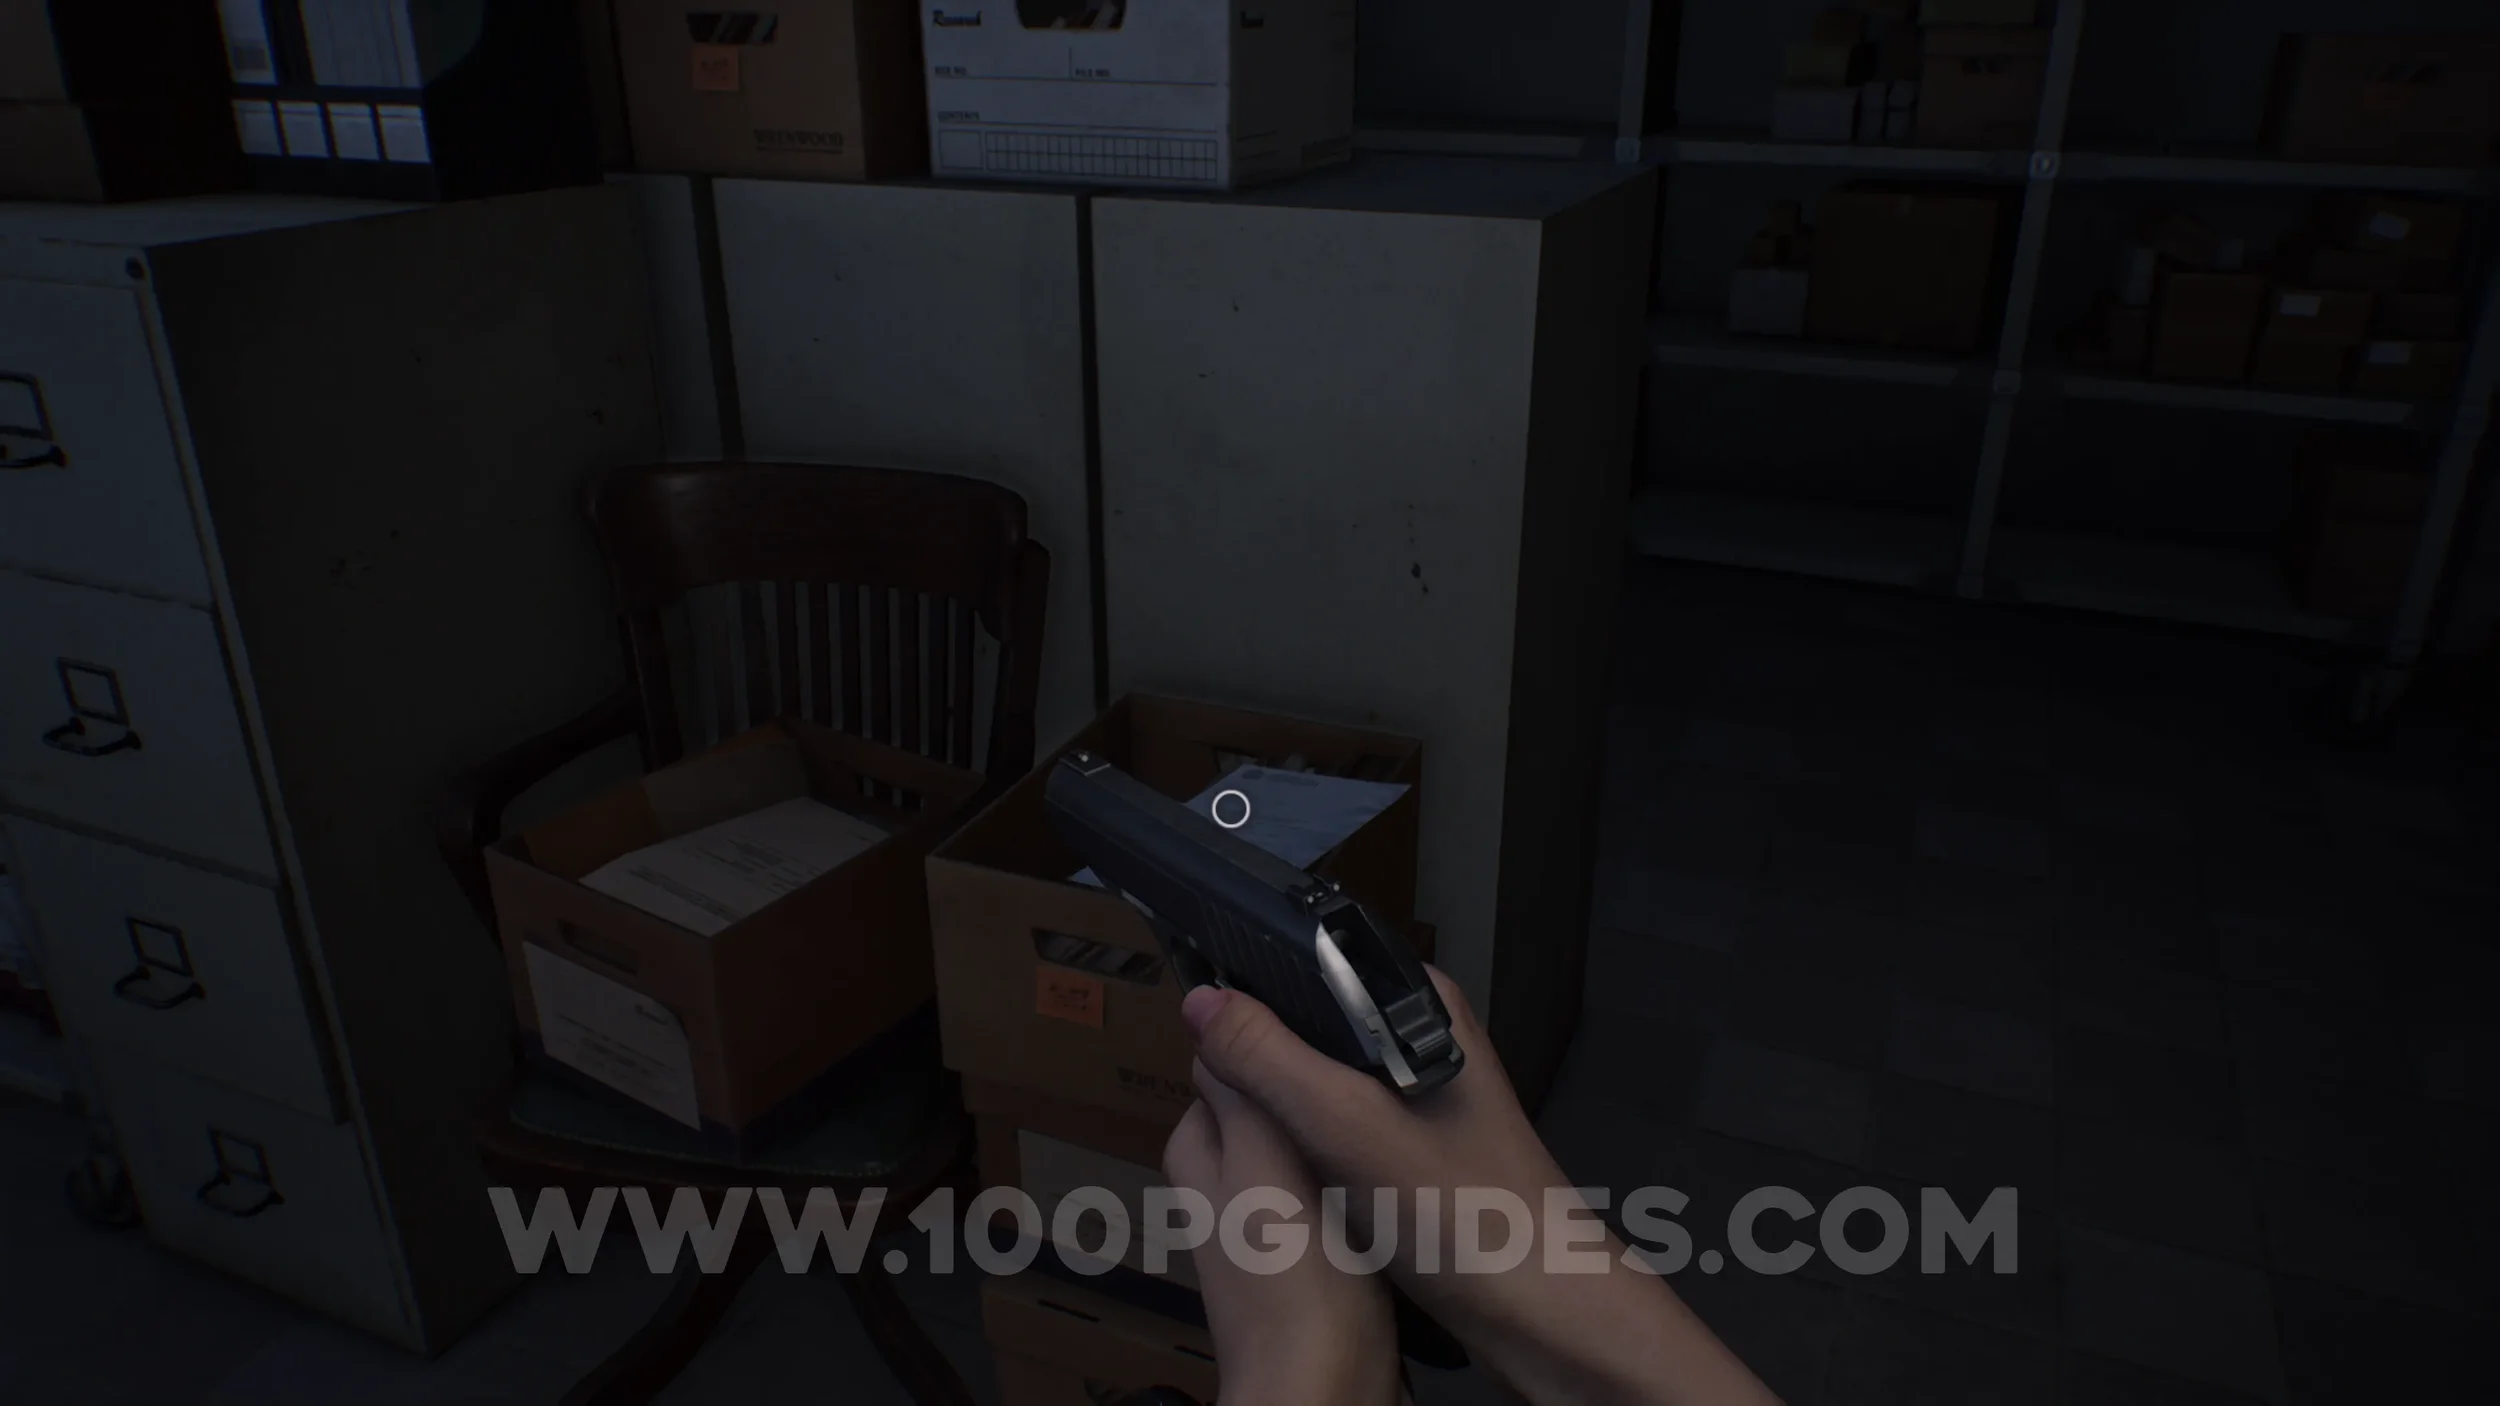
File #25. In the Records Room to the east of the Office.
File #26. In the room north of where you picked up the Level 1 ID Band.
Antique Coin #20. On the desk in the Conference Room.
Trophy - Deadly Duet (Part 2). The second of the two singer zombies that you need to defeat for the trophy can be found in the Conference Room.
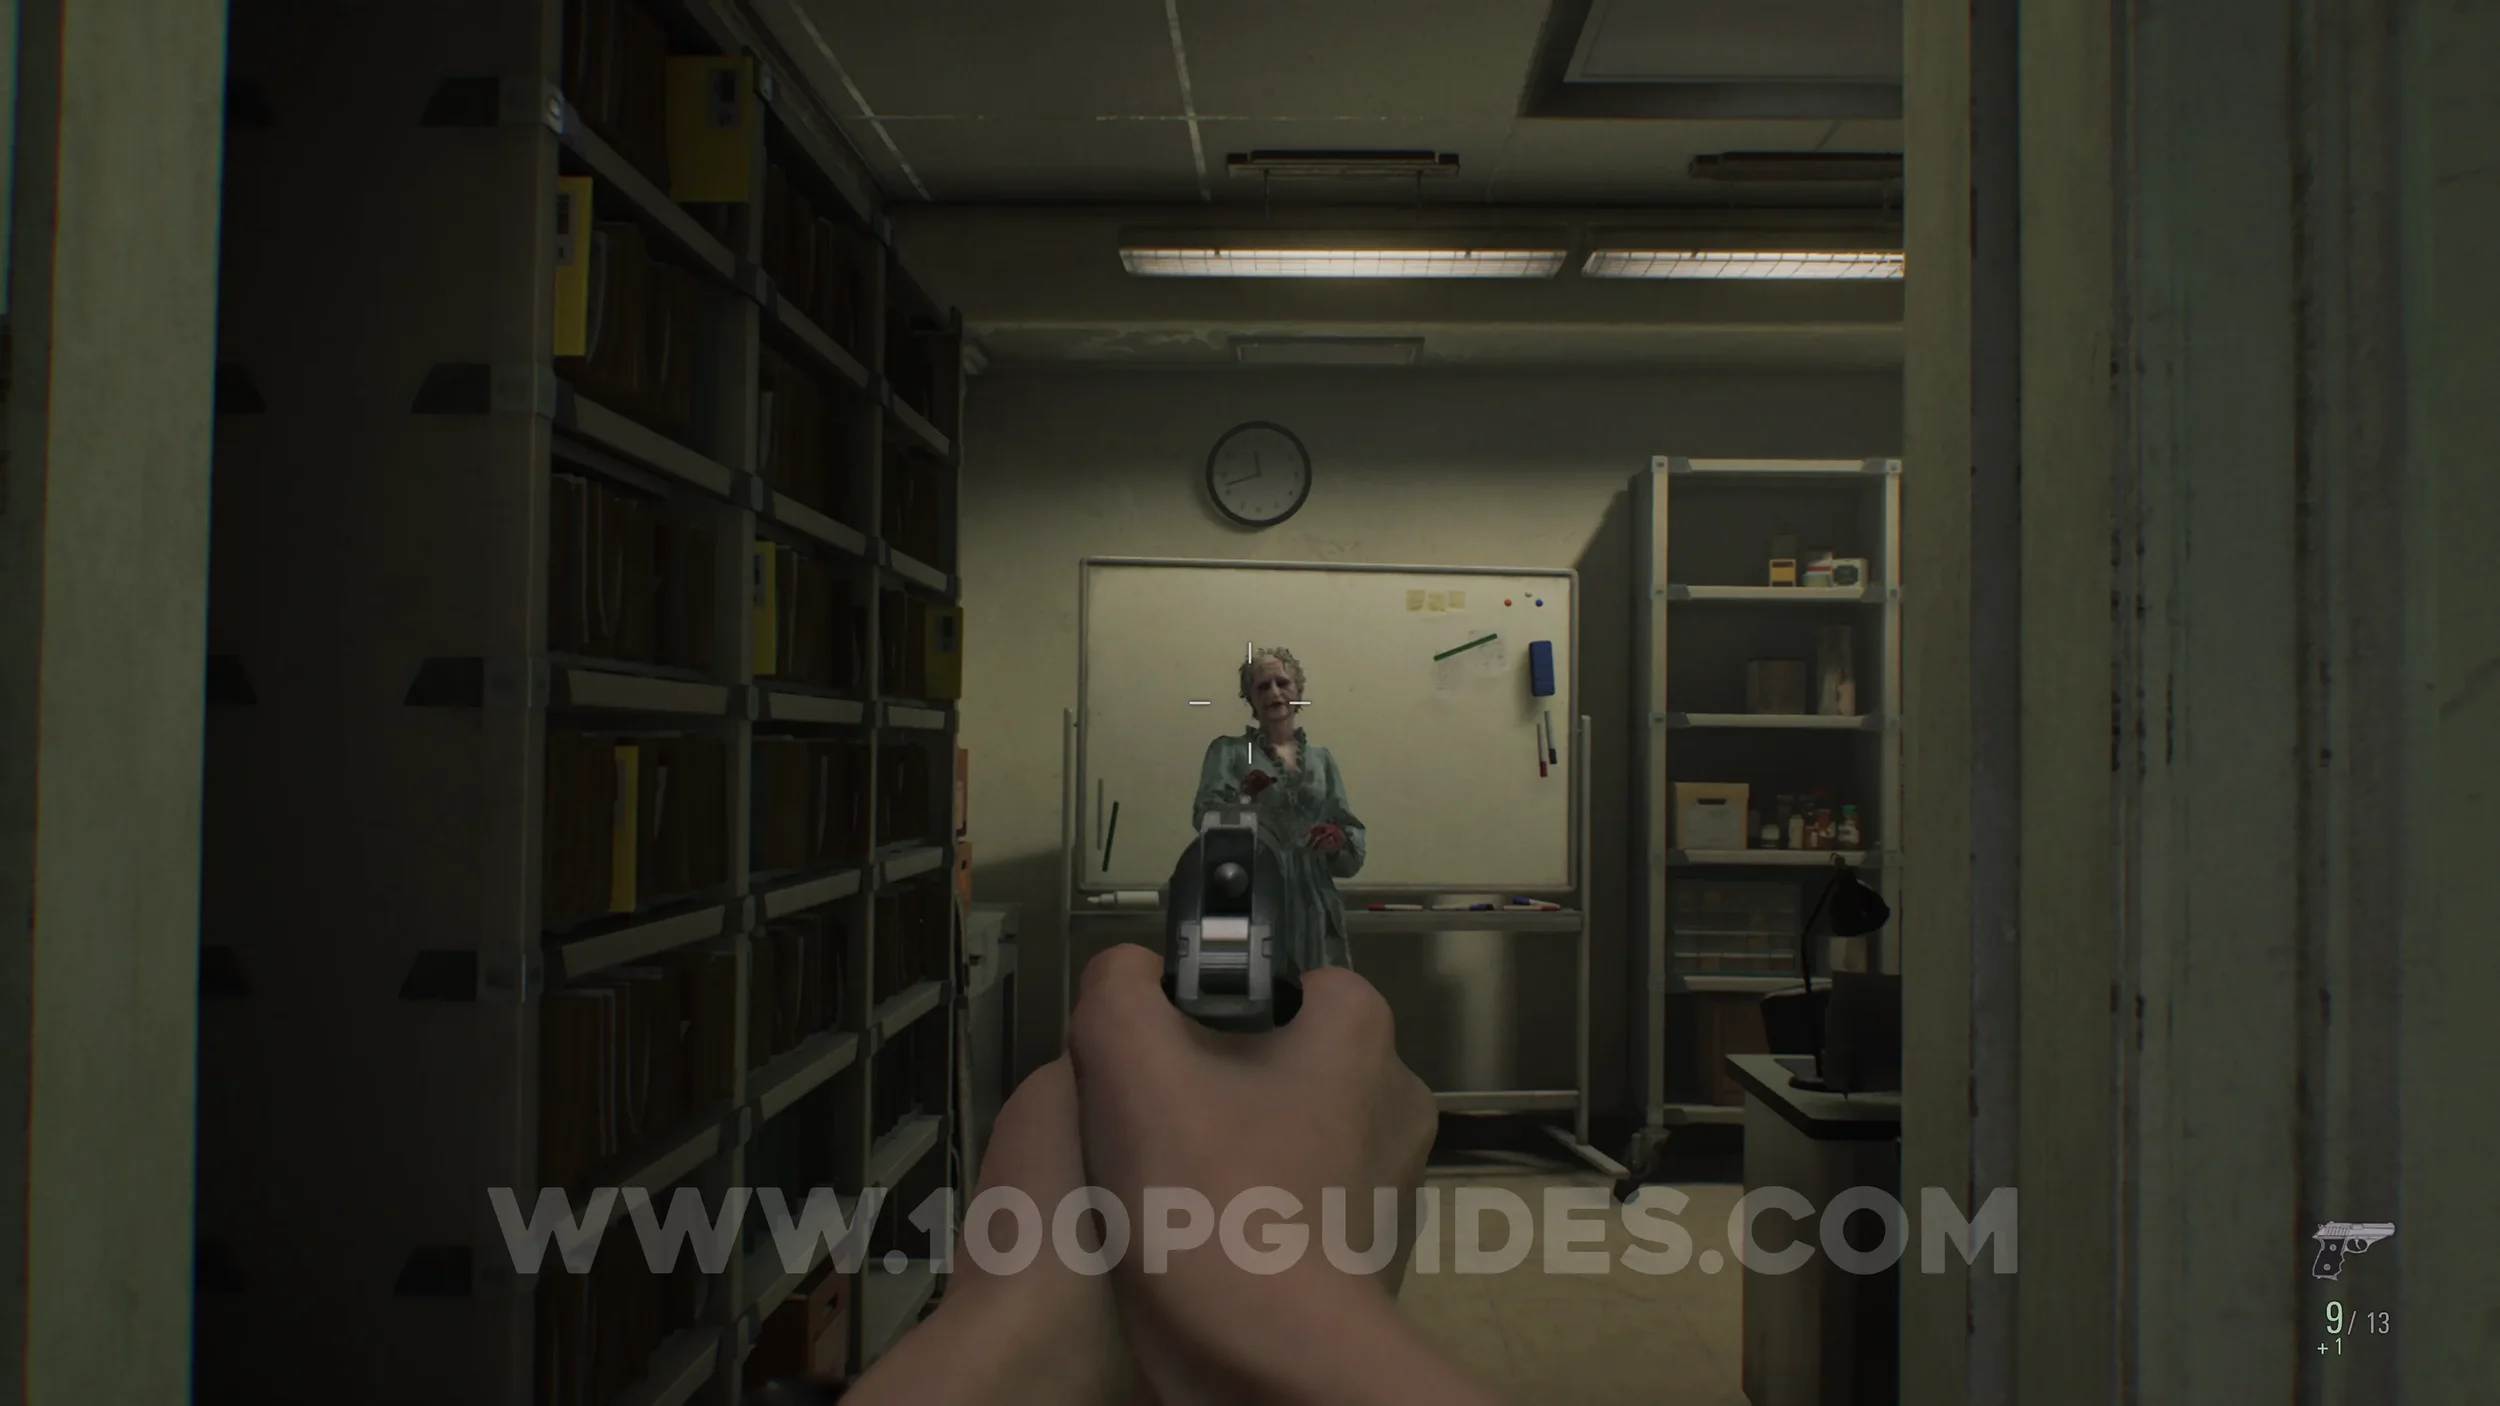
Antique Coin #21. Dropped by the singer zombie.
File #27 - Patient Medical Records. In the same room as the singer zombie.
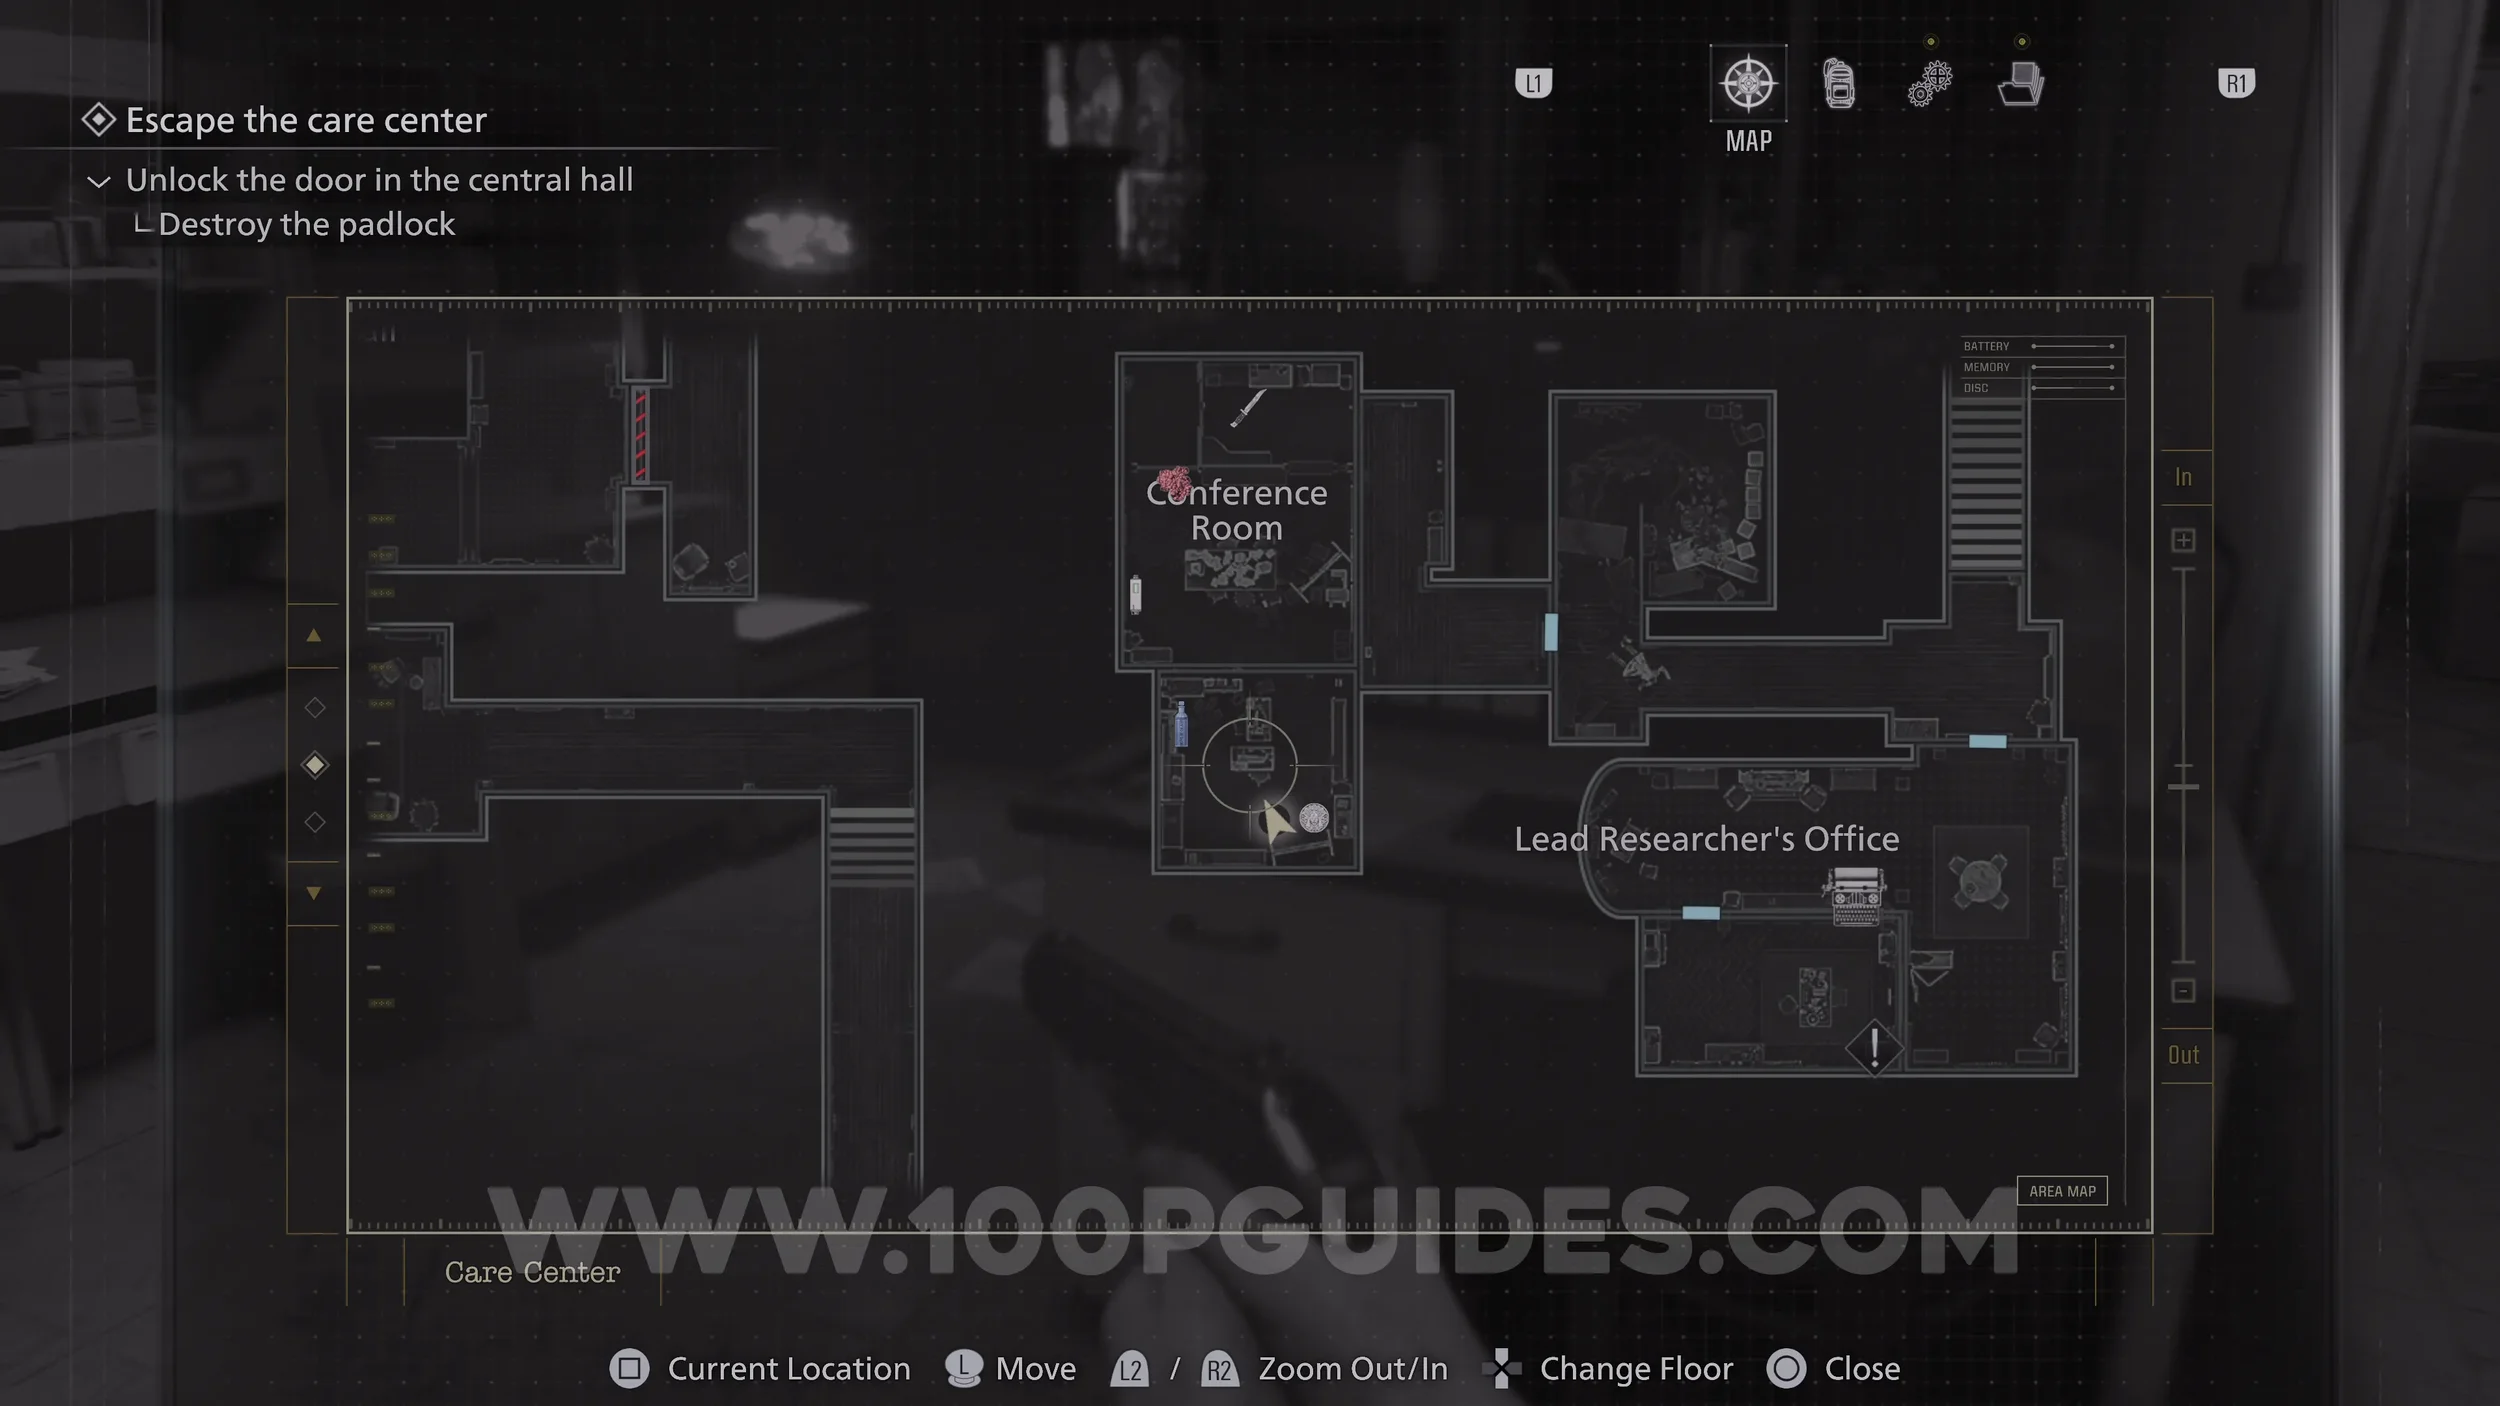
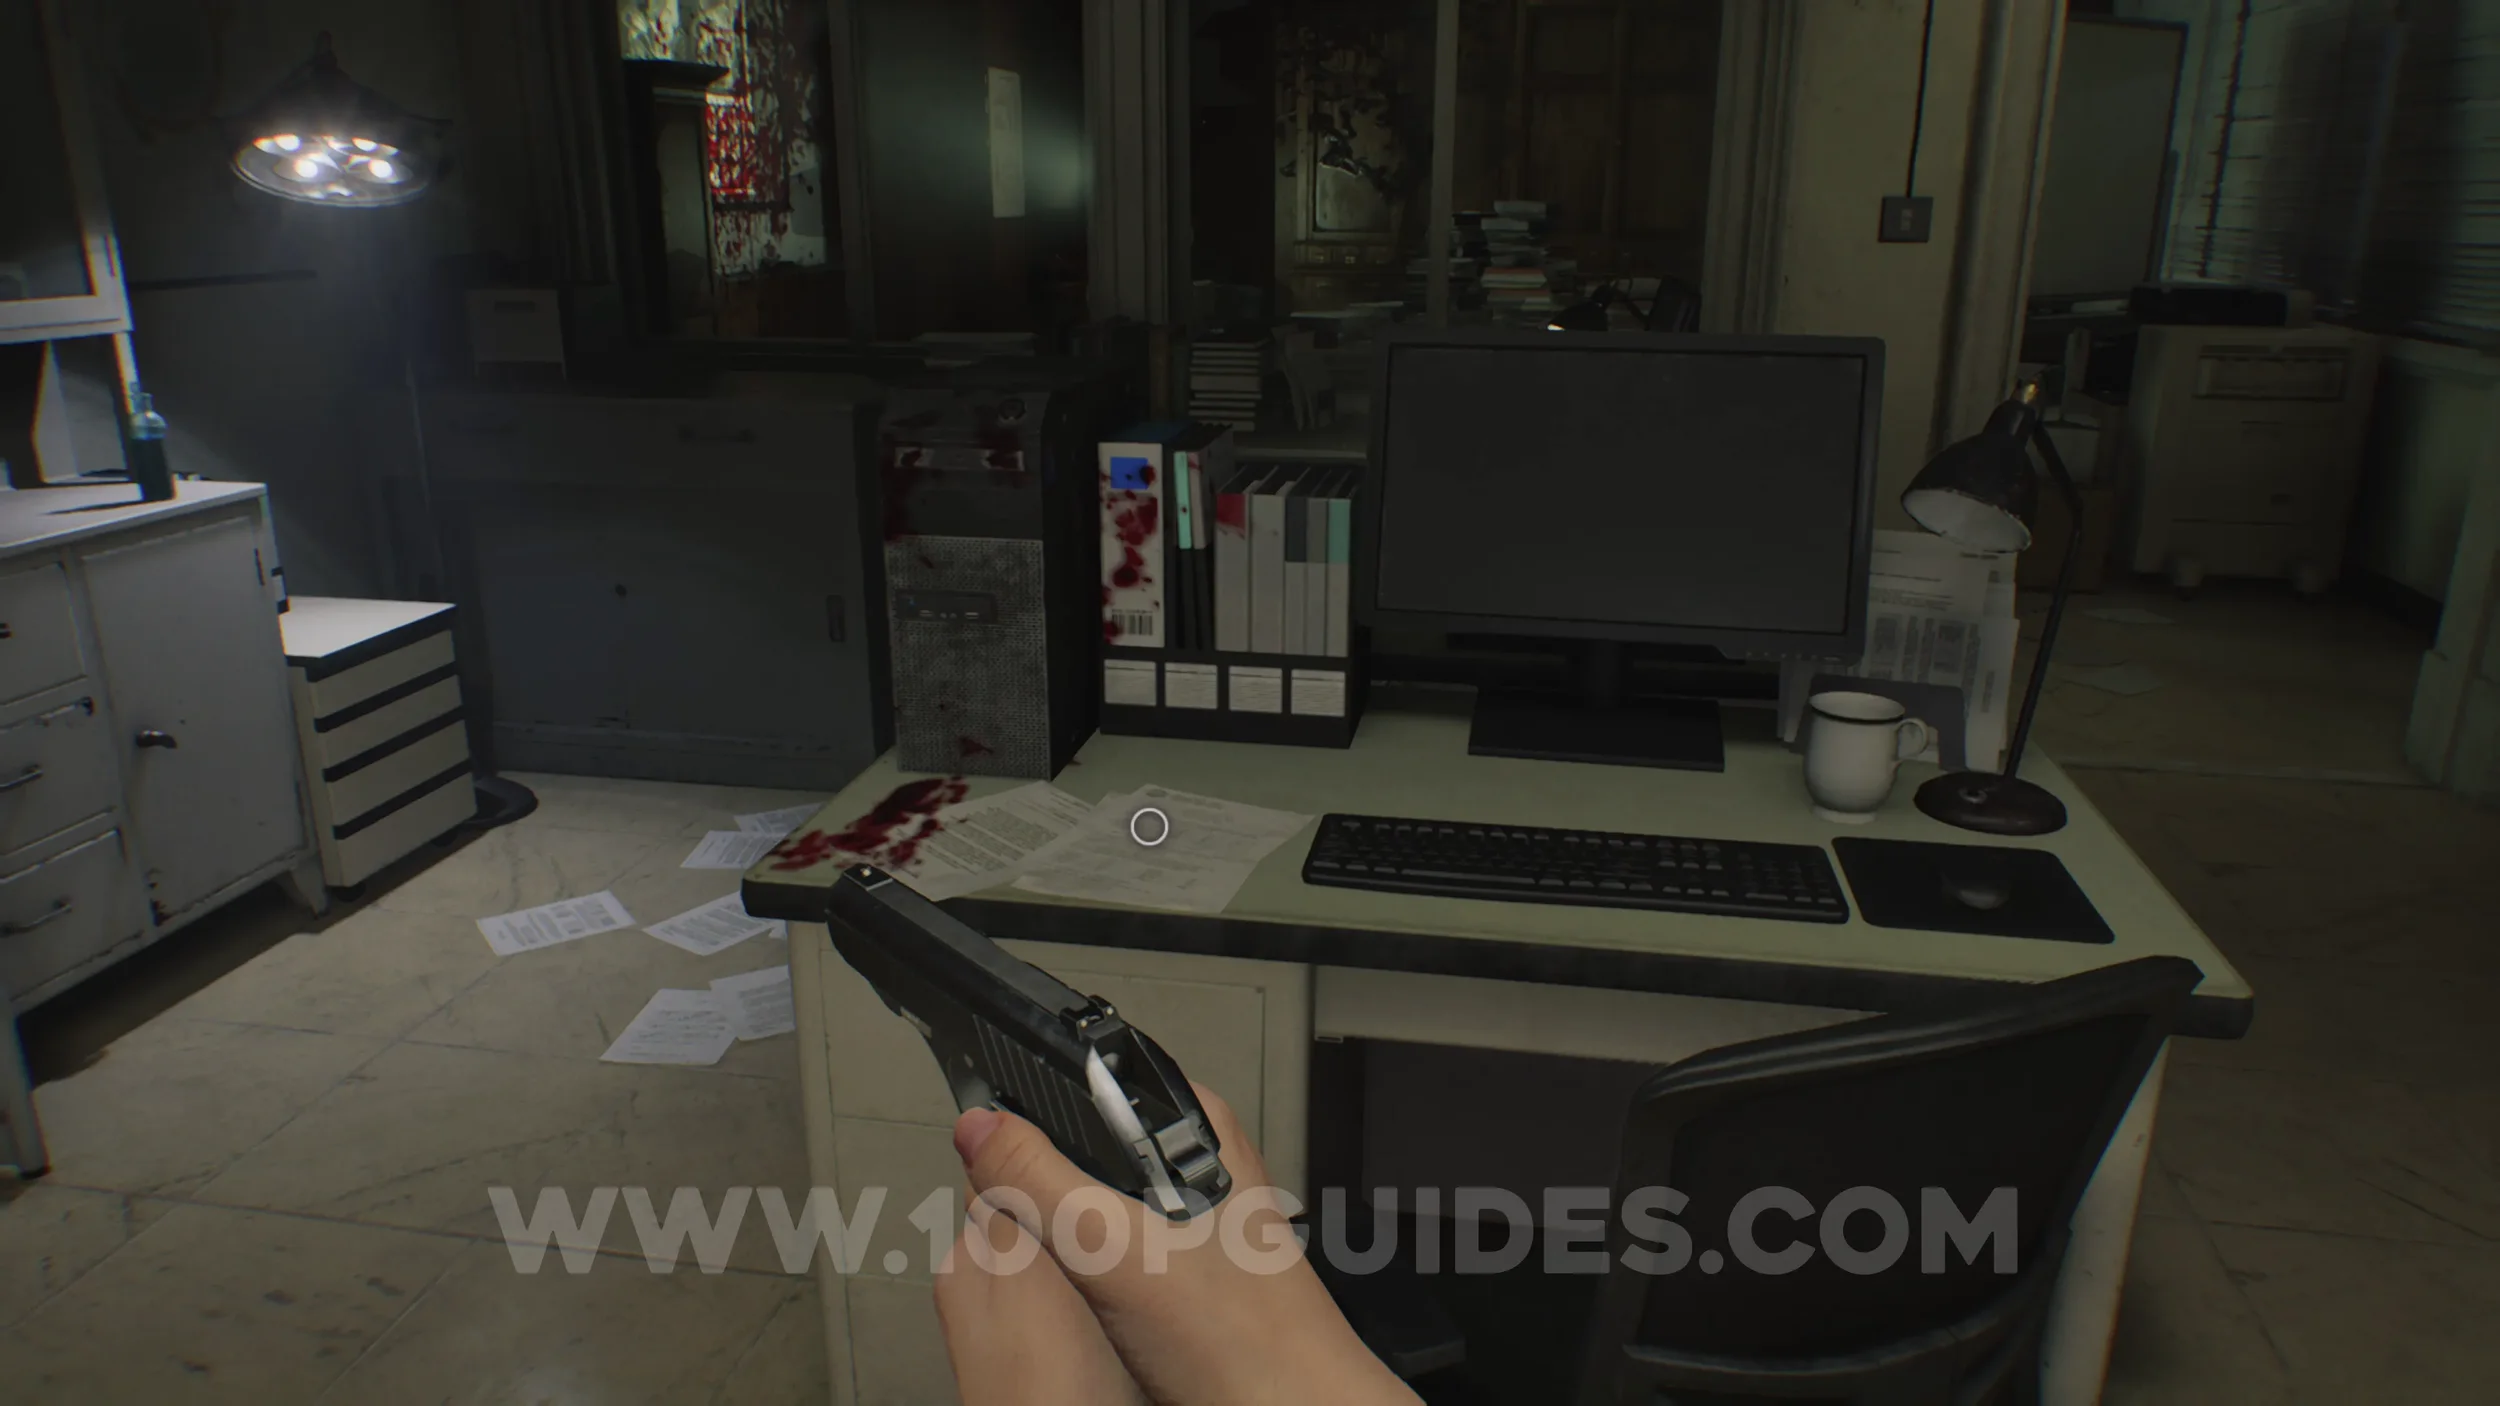
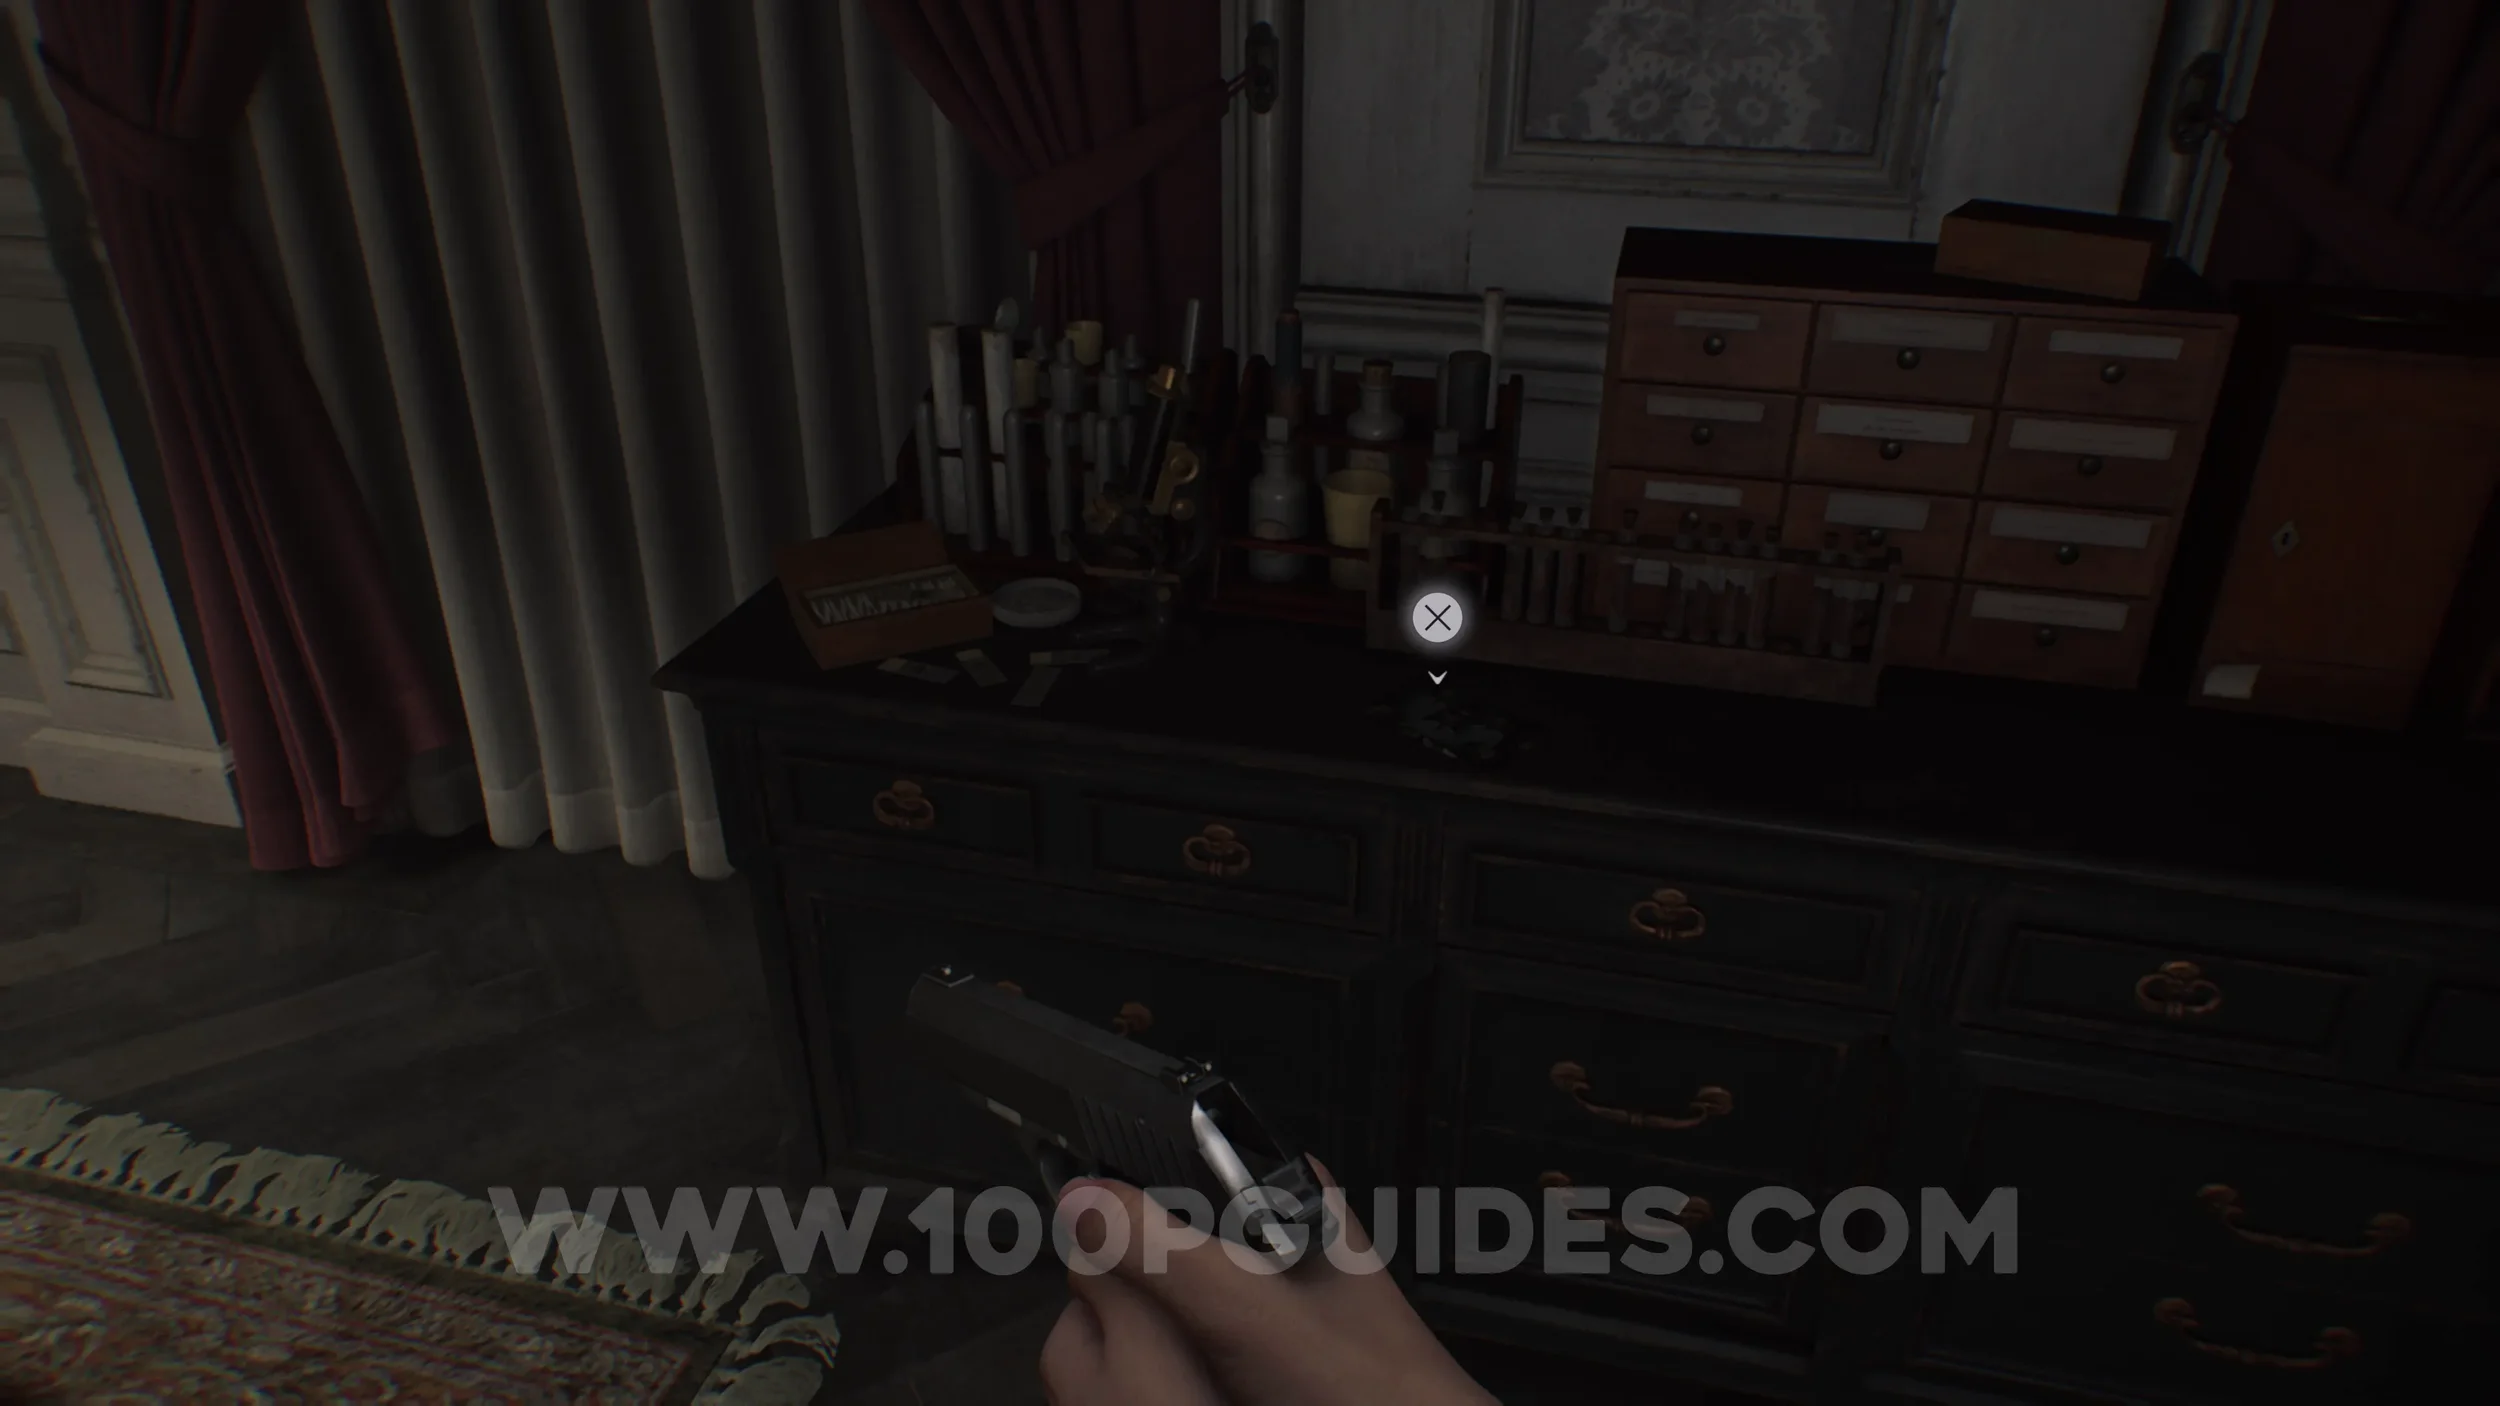
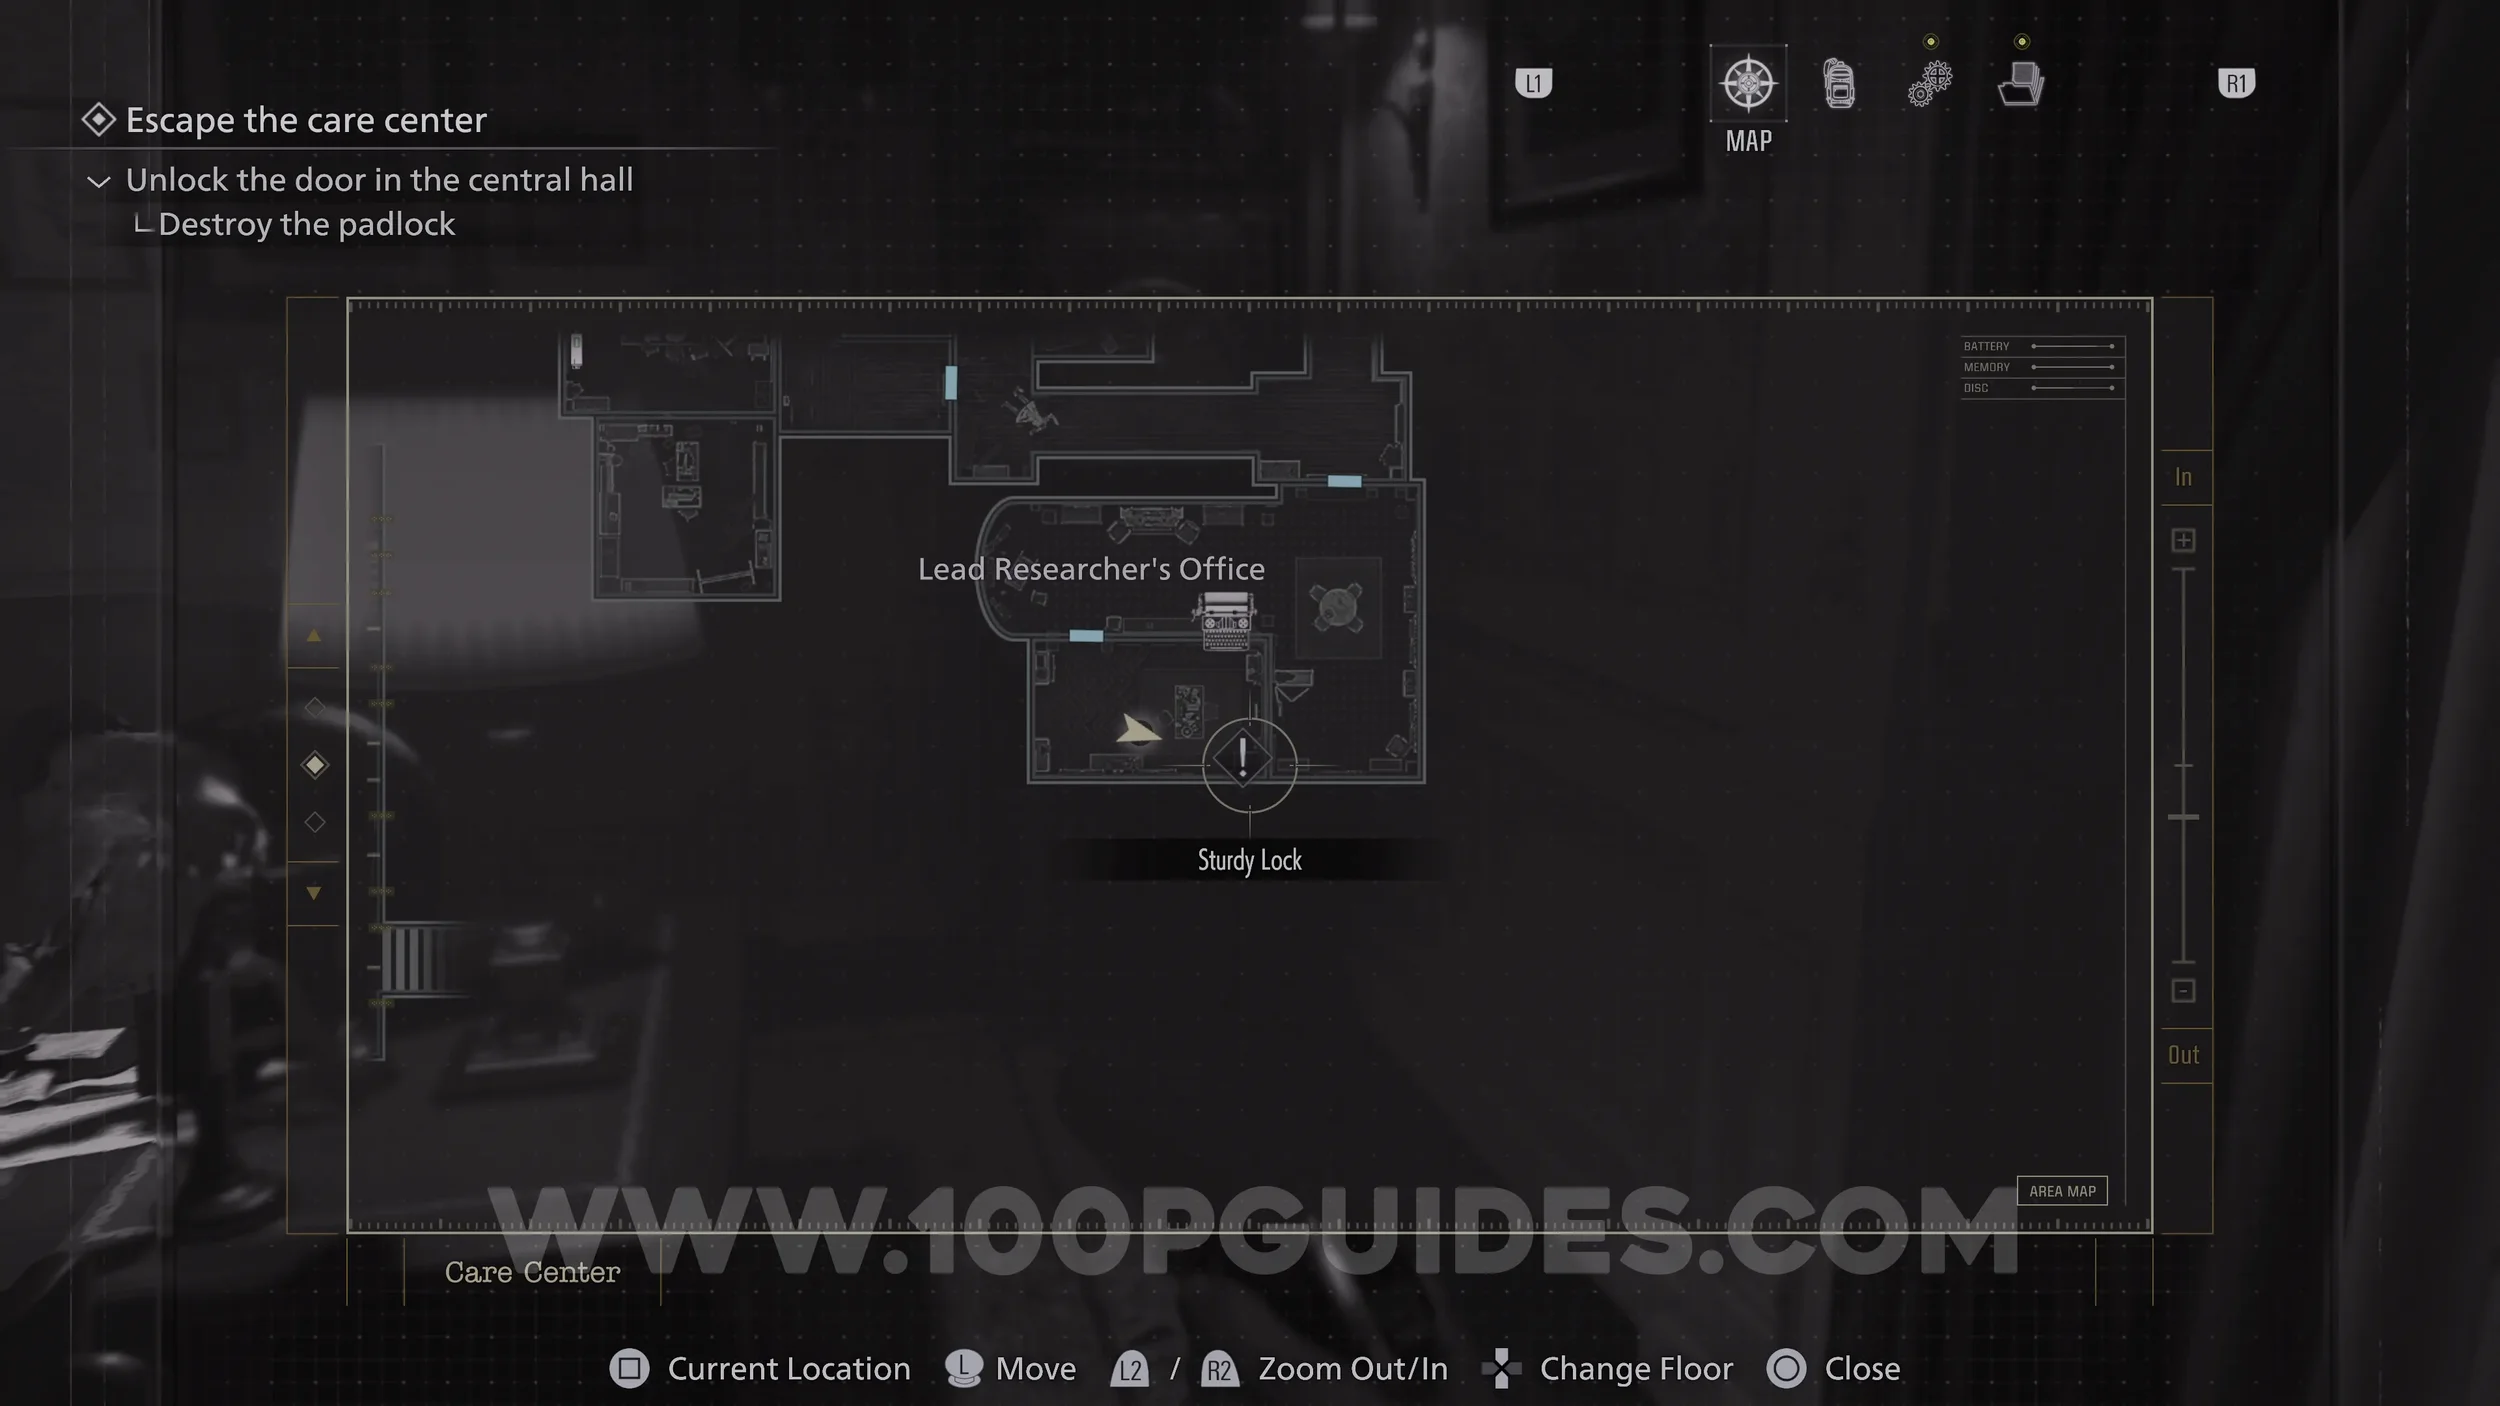
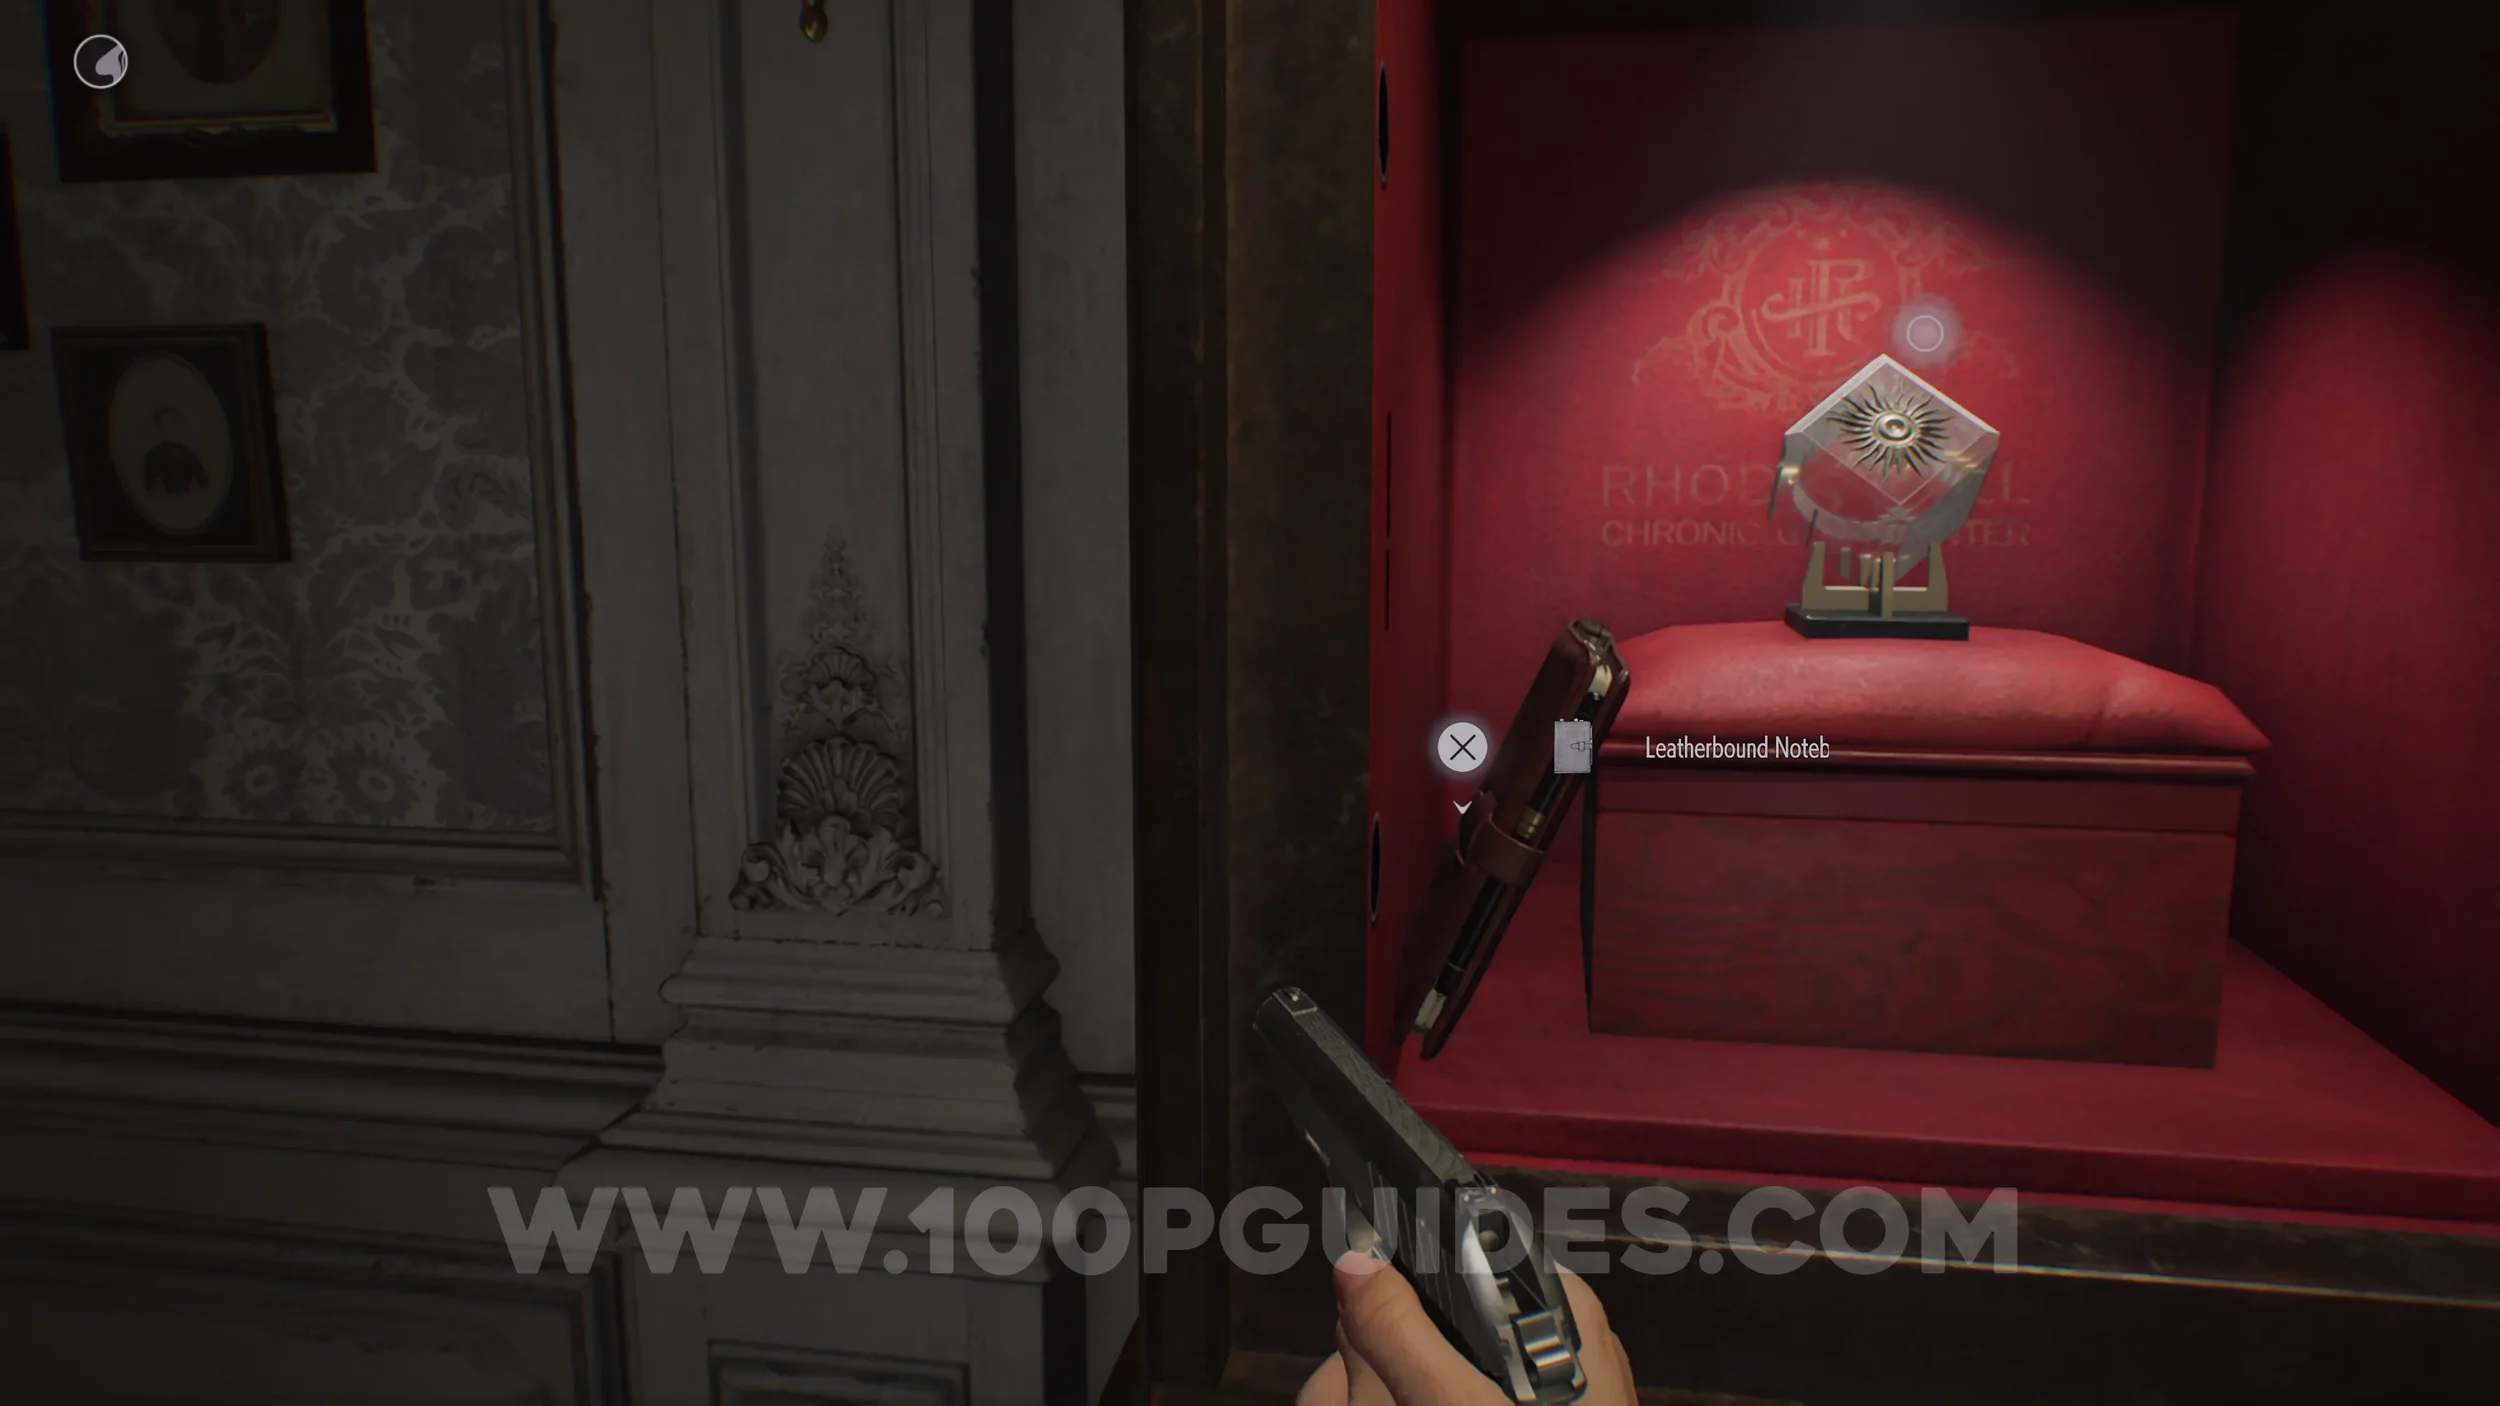
File #28 - Unlocking The Organ Transport Box & File #29 - Spencer’s Research I. After picking up the Corrosive from the Conference Room, return to the Lead Researcher’s Office and open the Puzzle Cabinet.
Enter the combination: Star > Sun > Moon > Sun.
Inside, pick up the journal and open it to collect the two files.
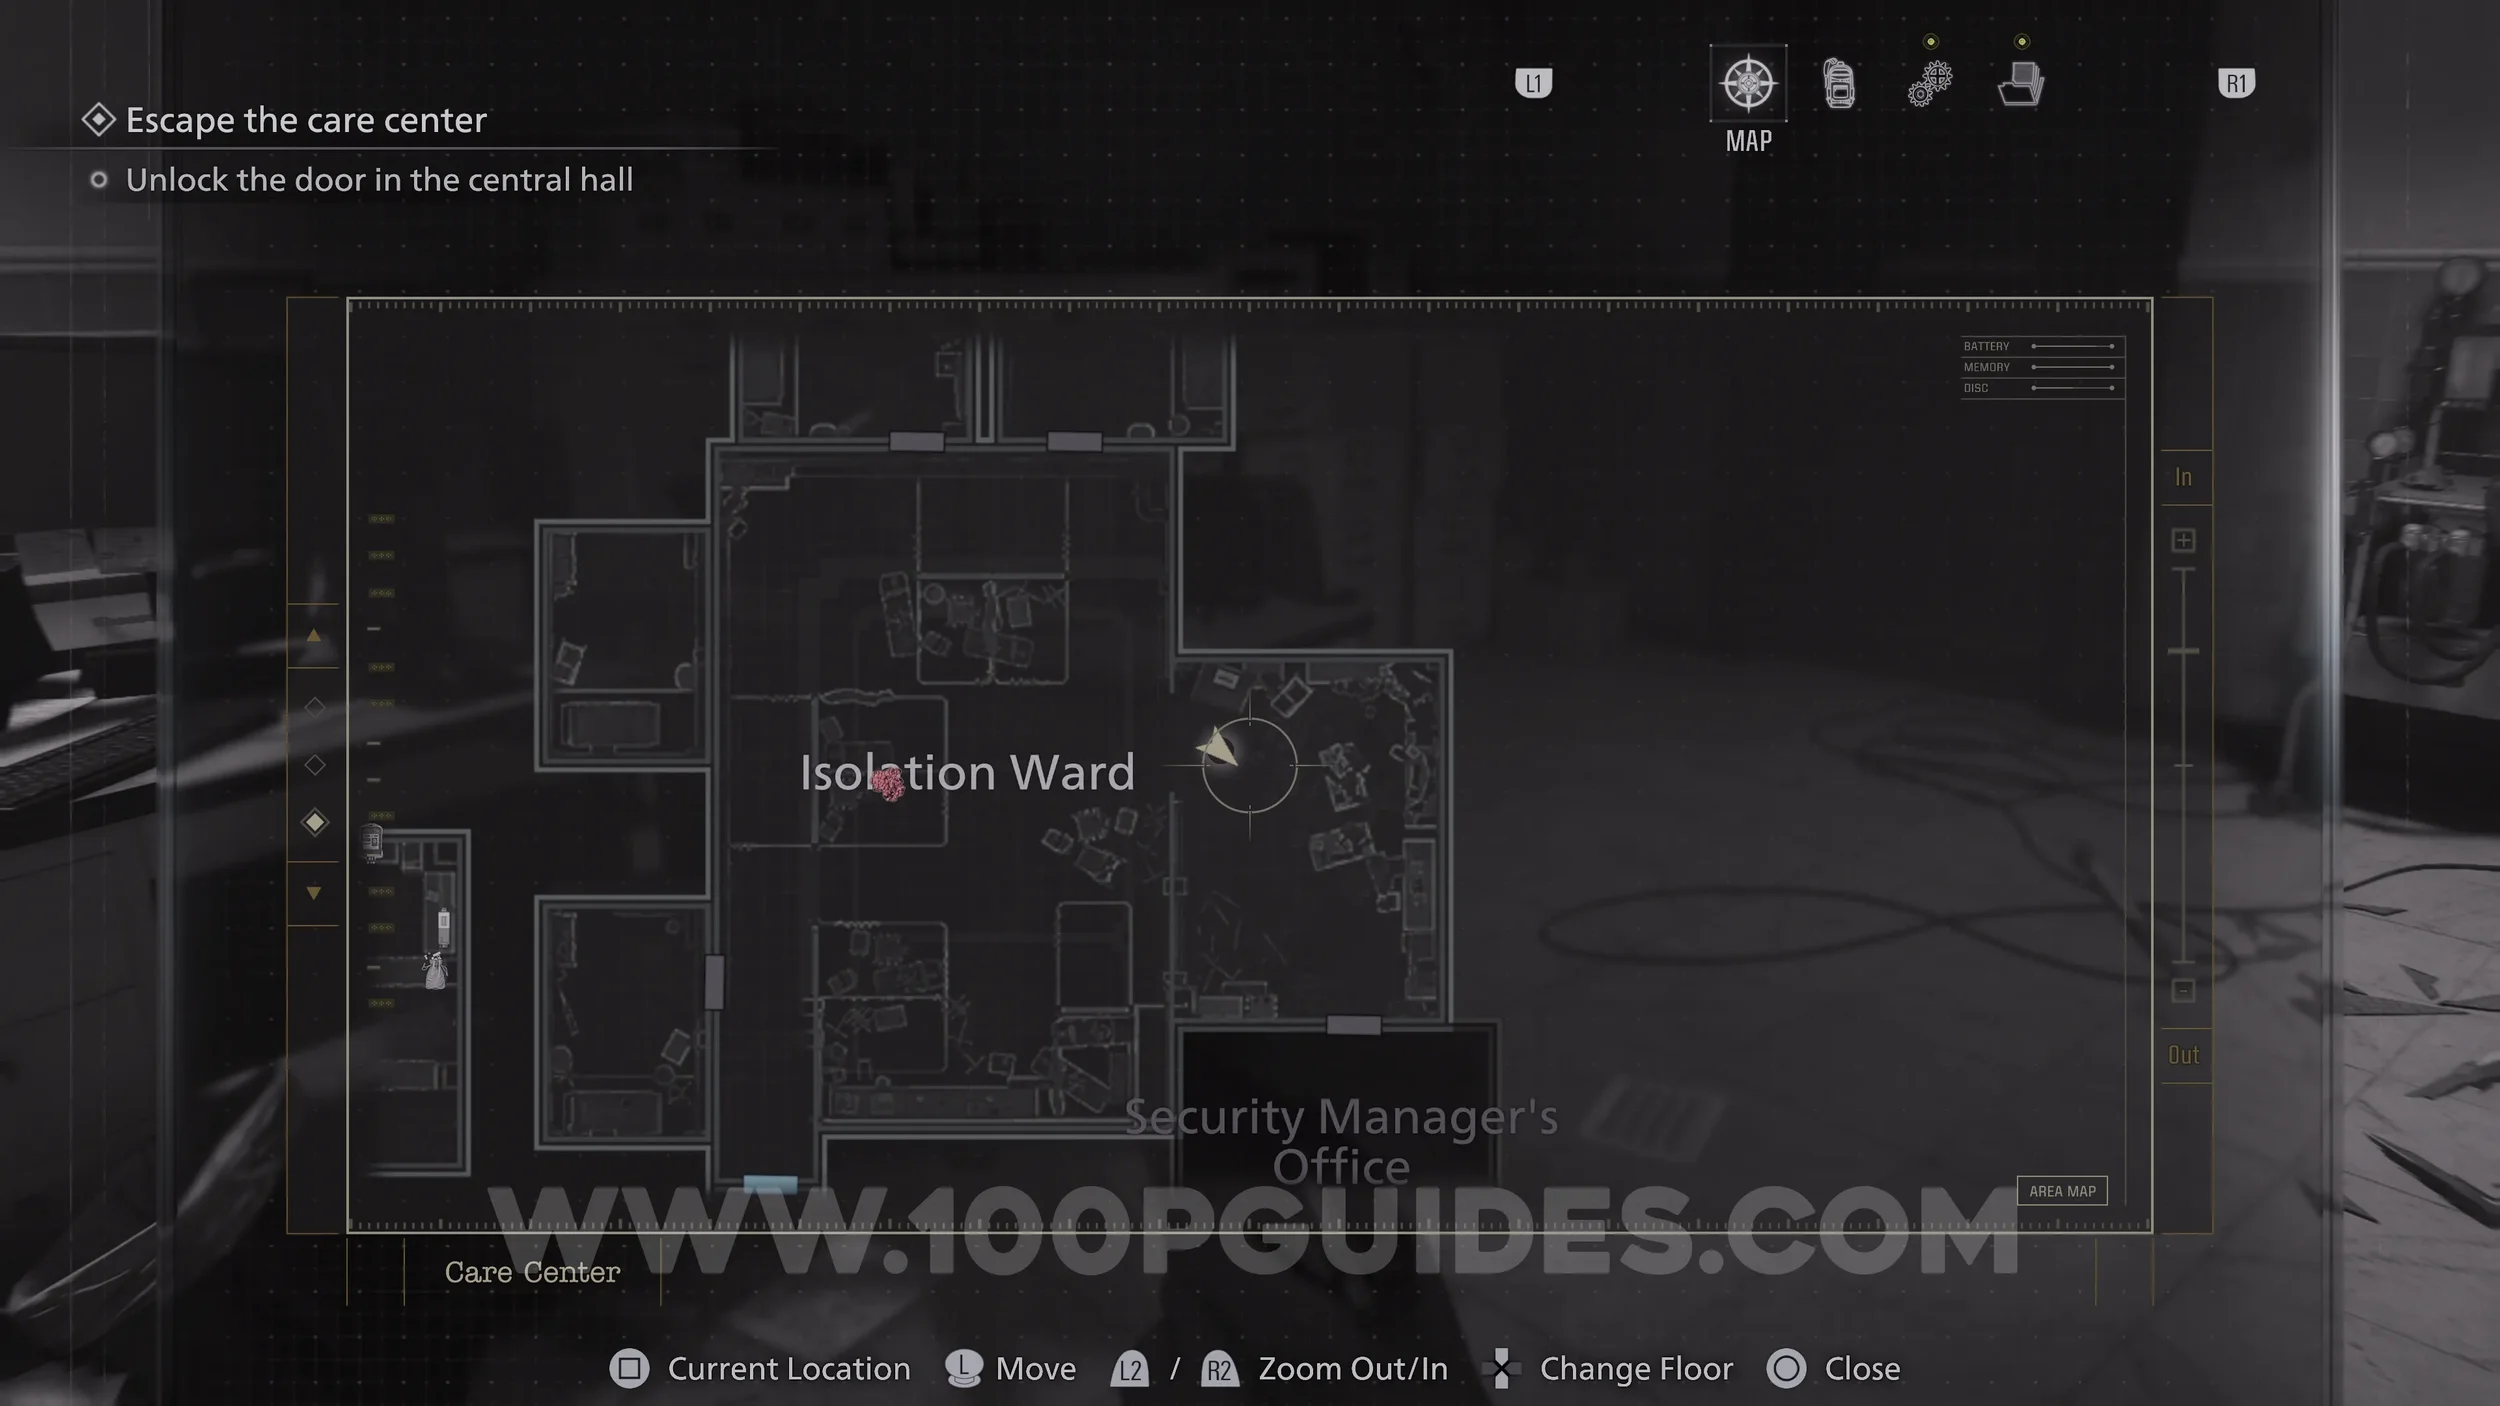
File #30 - Double Mutation. Found in the Isolation Ward. You will need to advance the story until you get the Level 2 ID Band first.
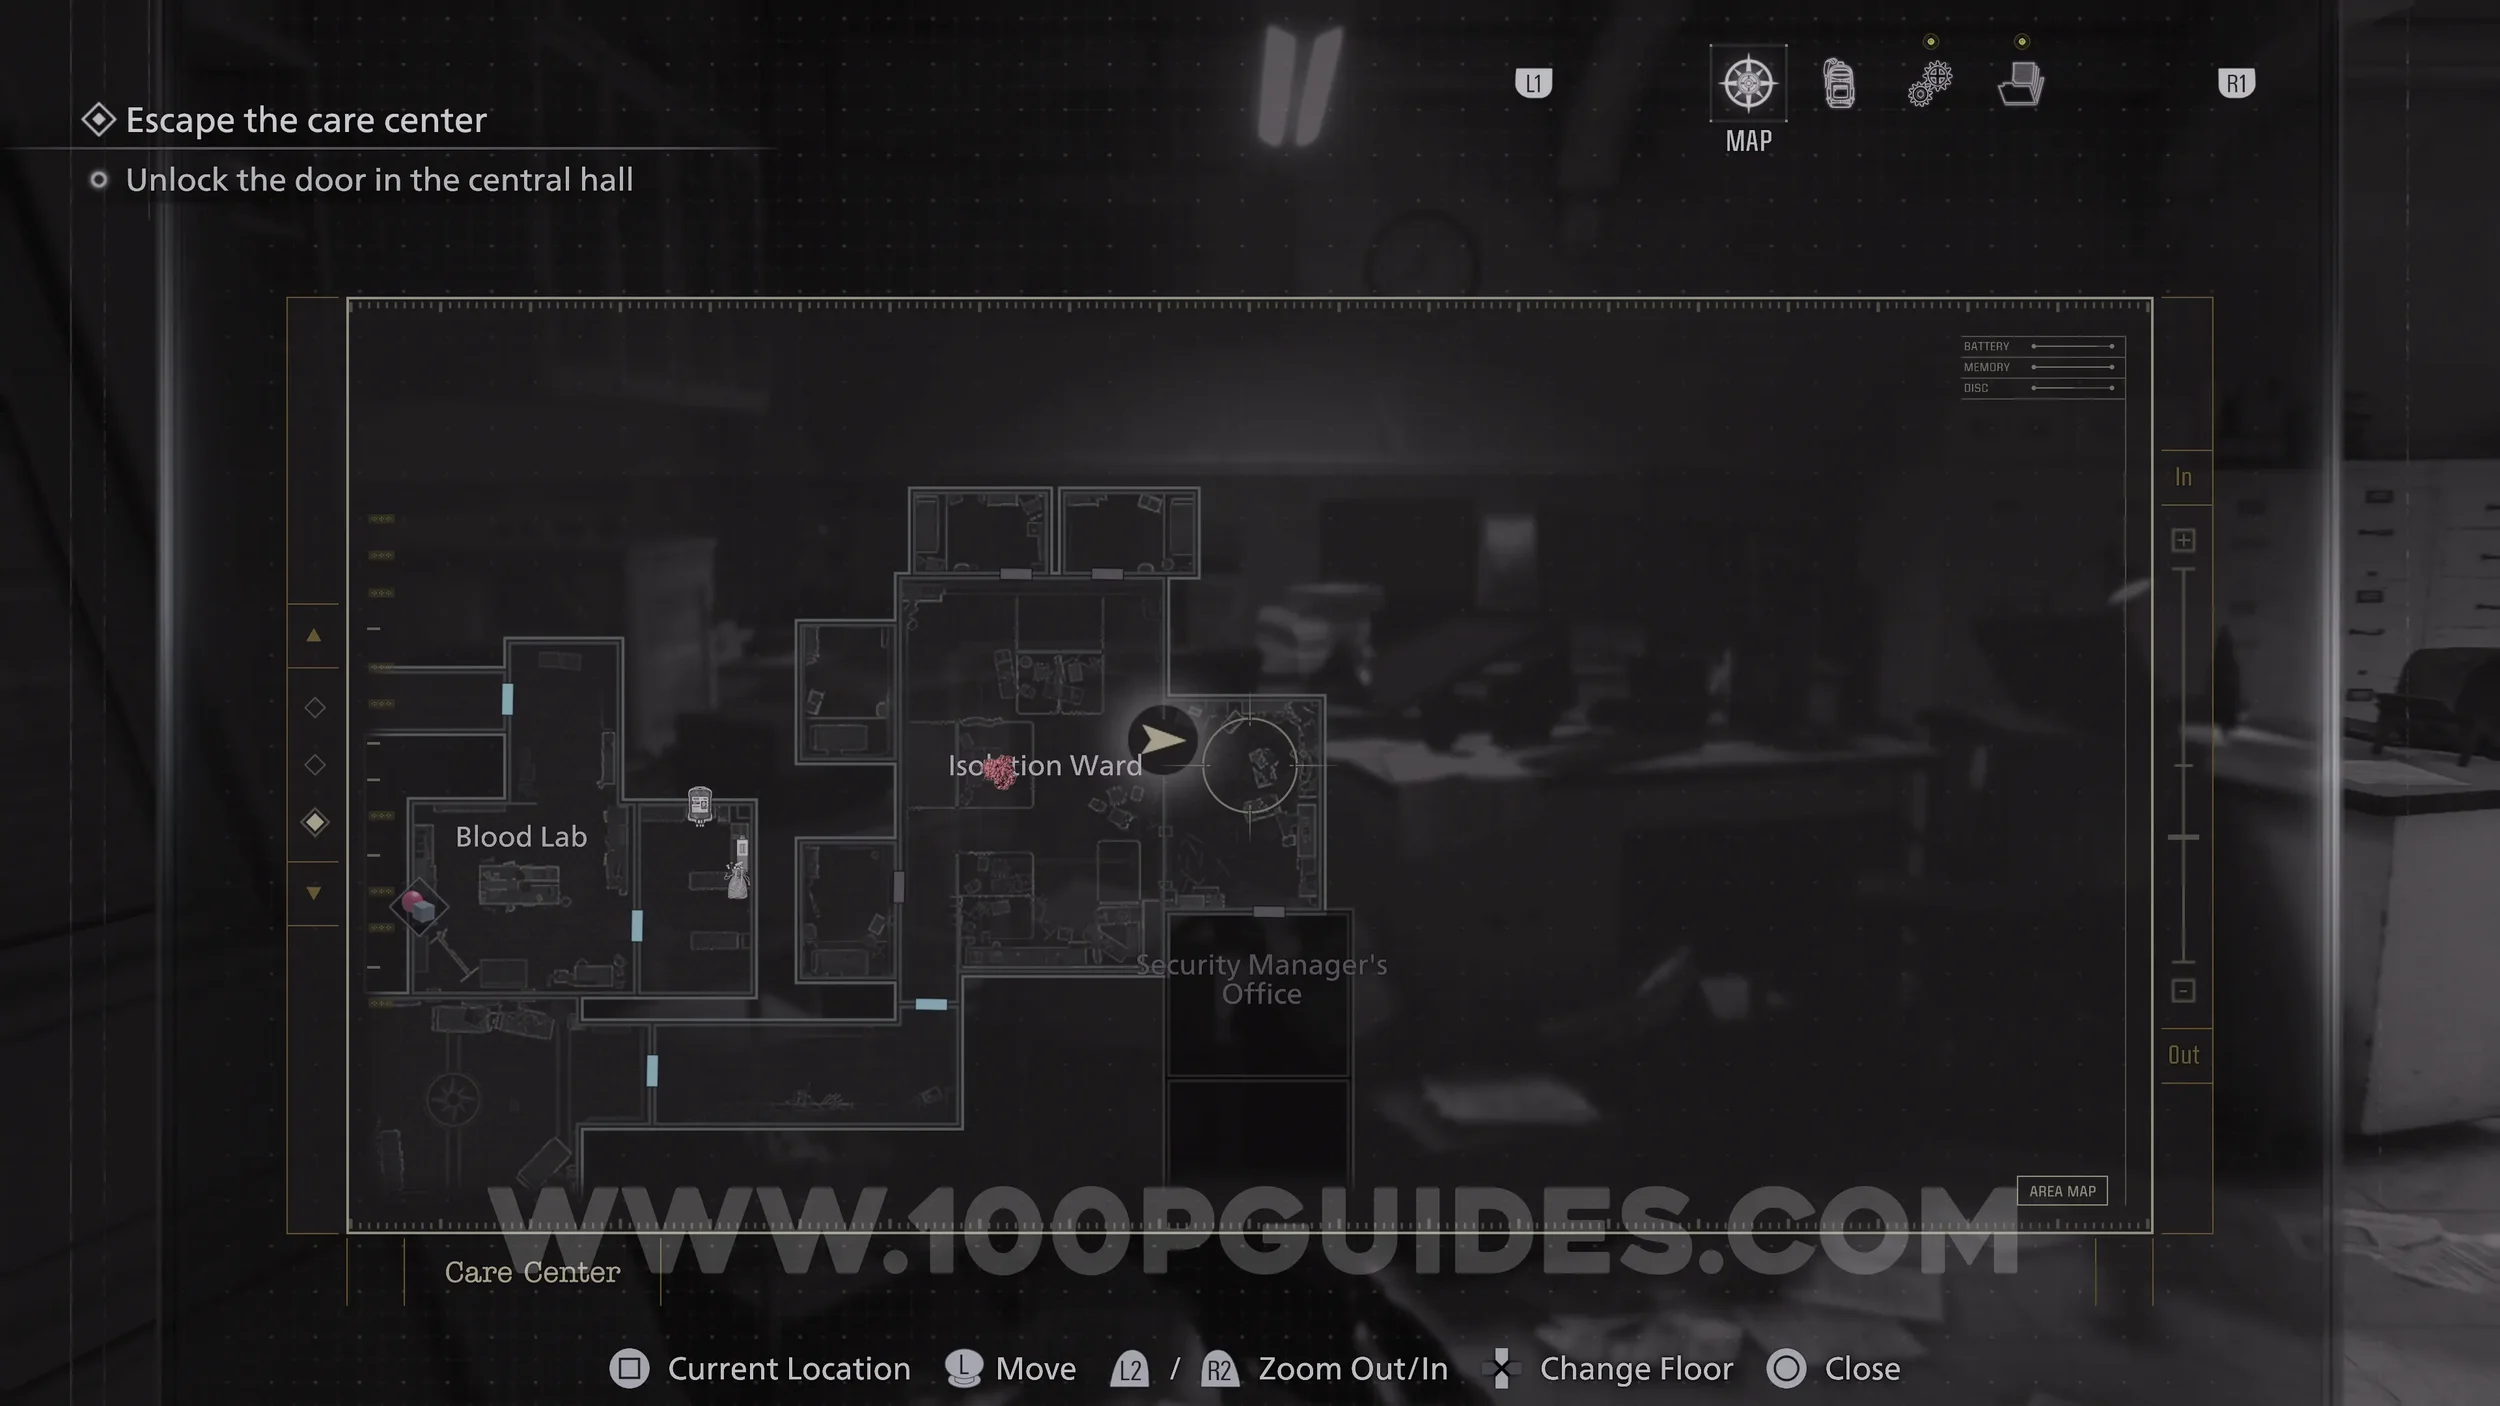

File #31 - Nurse’s Log. In the same room as the previous collectible.
Steroids & Override Manual. We are approaching the end of the Care Center and you should now have more than enough Antique Coins to open the two remaining cabinets in the Parlor.
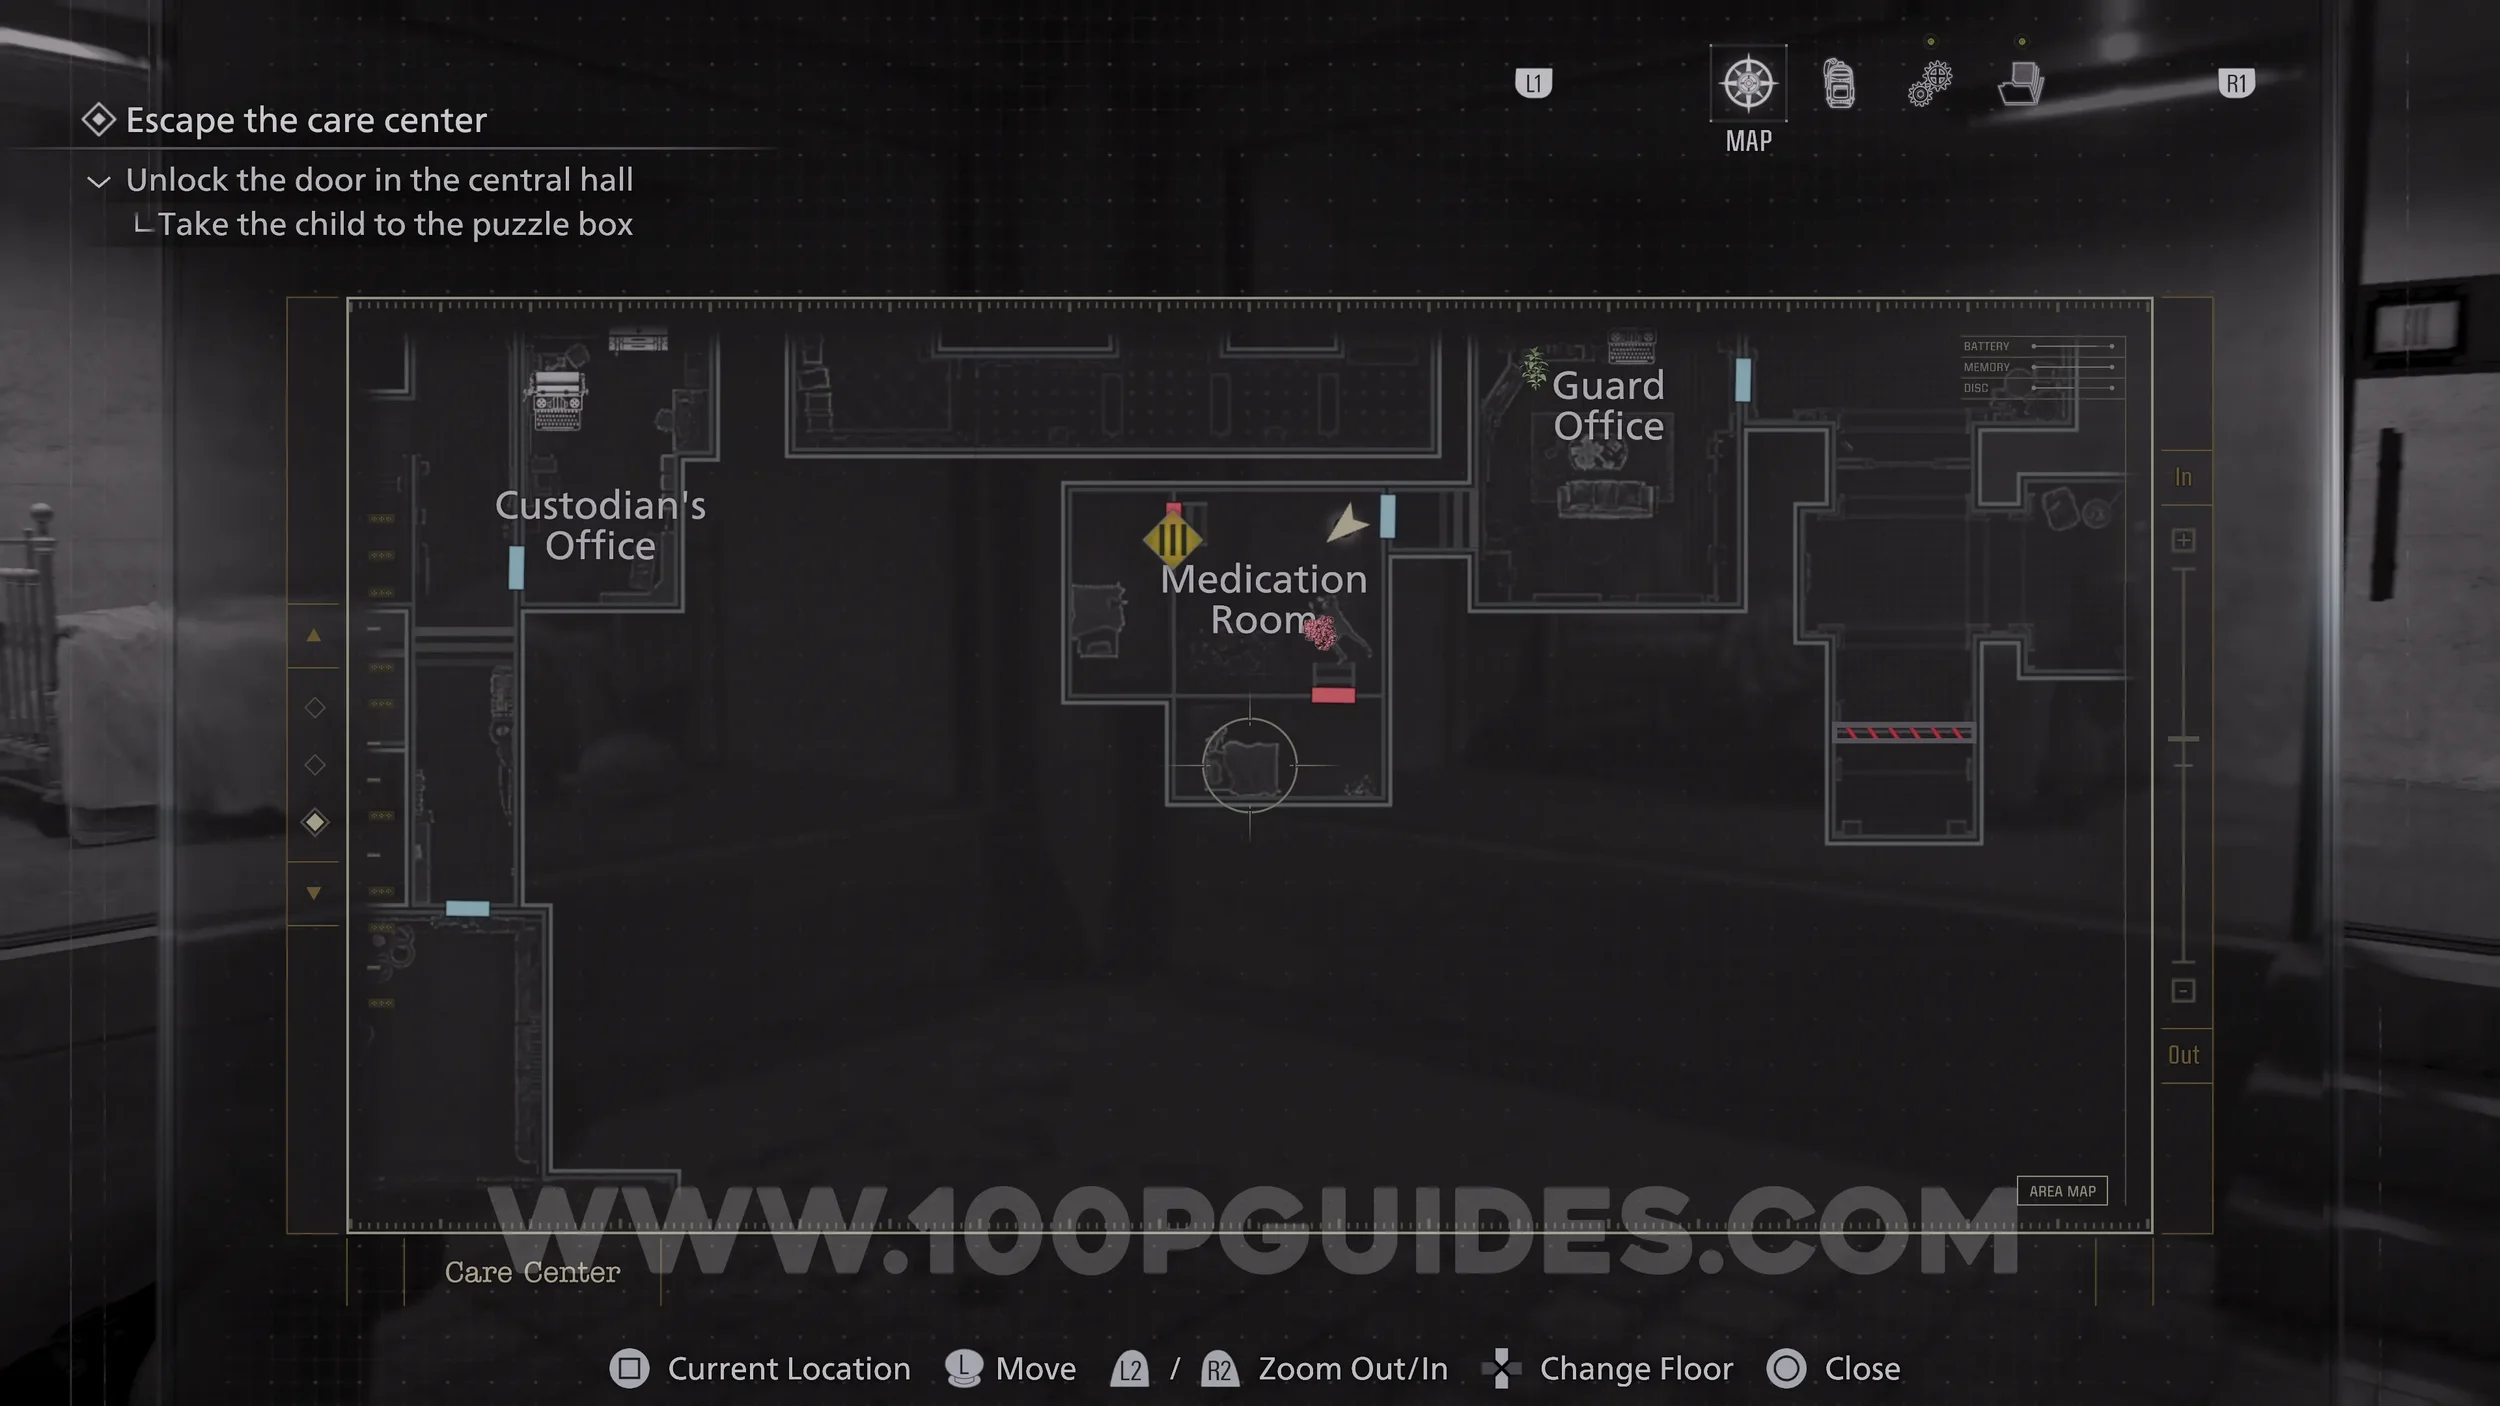
Mr. Raccoon #5. In the empty cell in the Medication Room where the little girl is. You will first need to advance the story until you get the Level 3 ID Band.
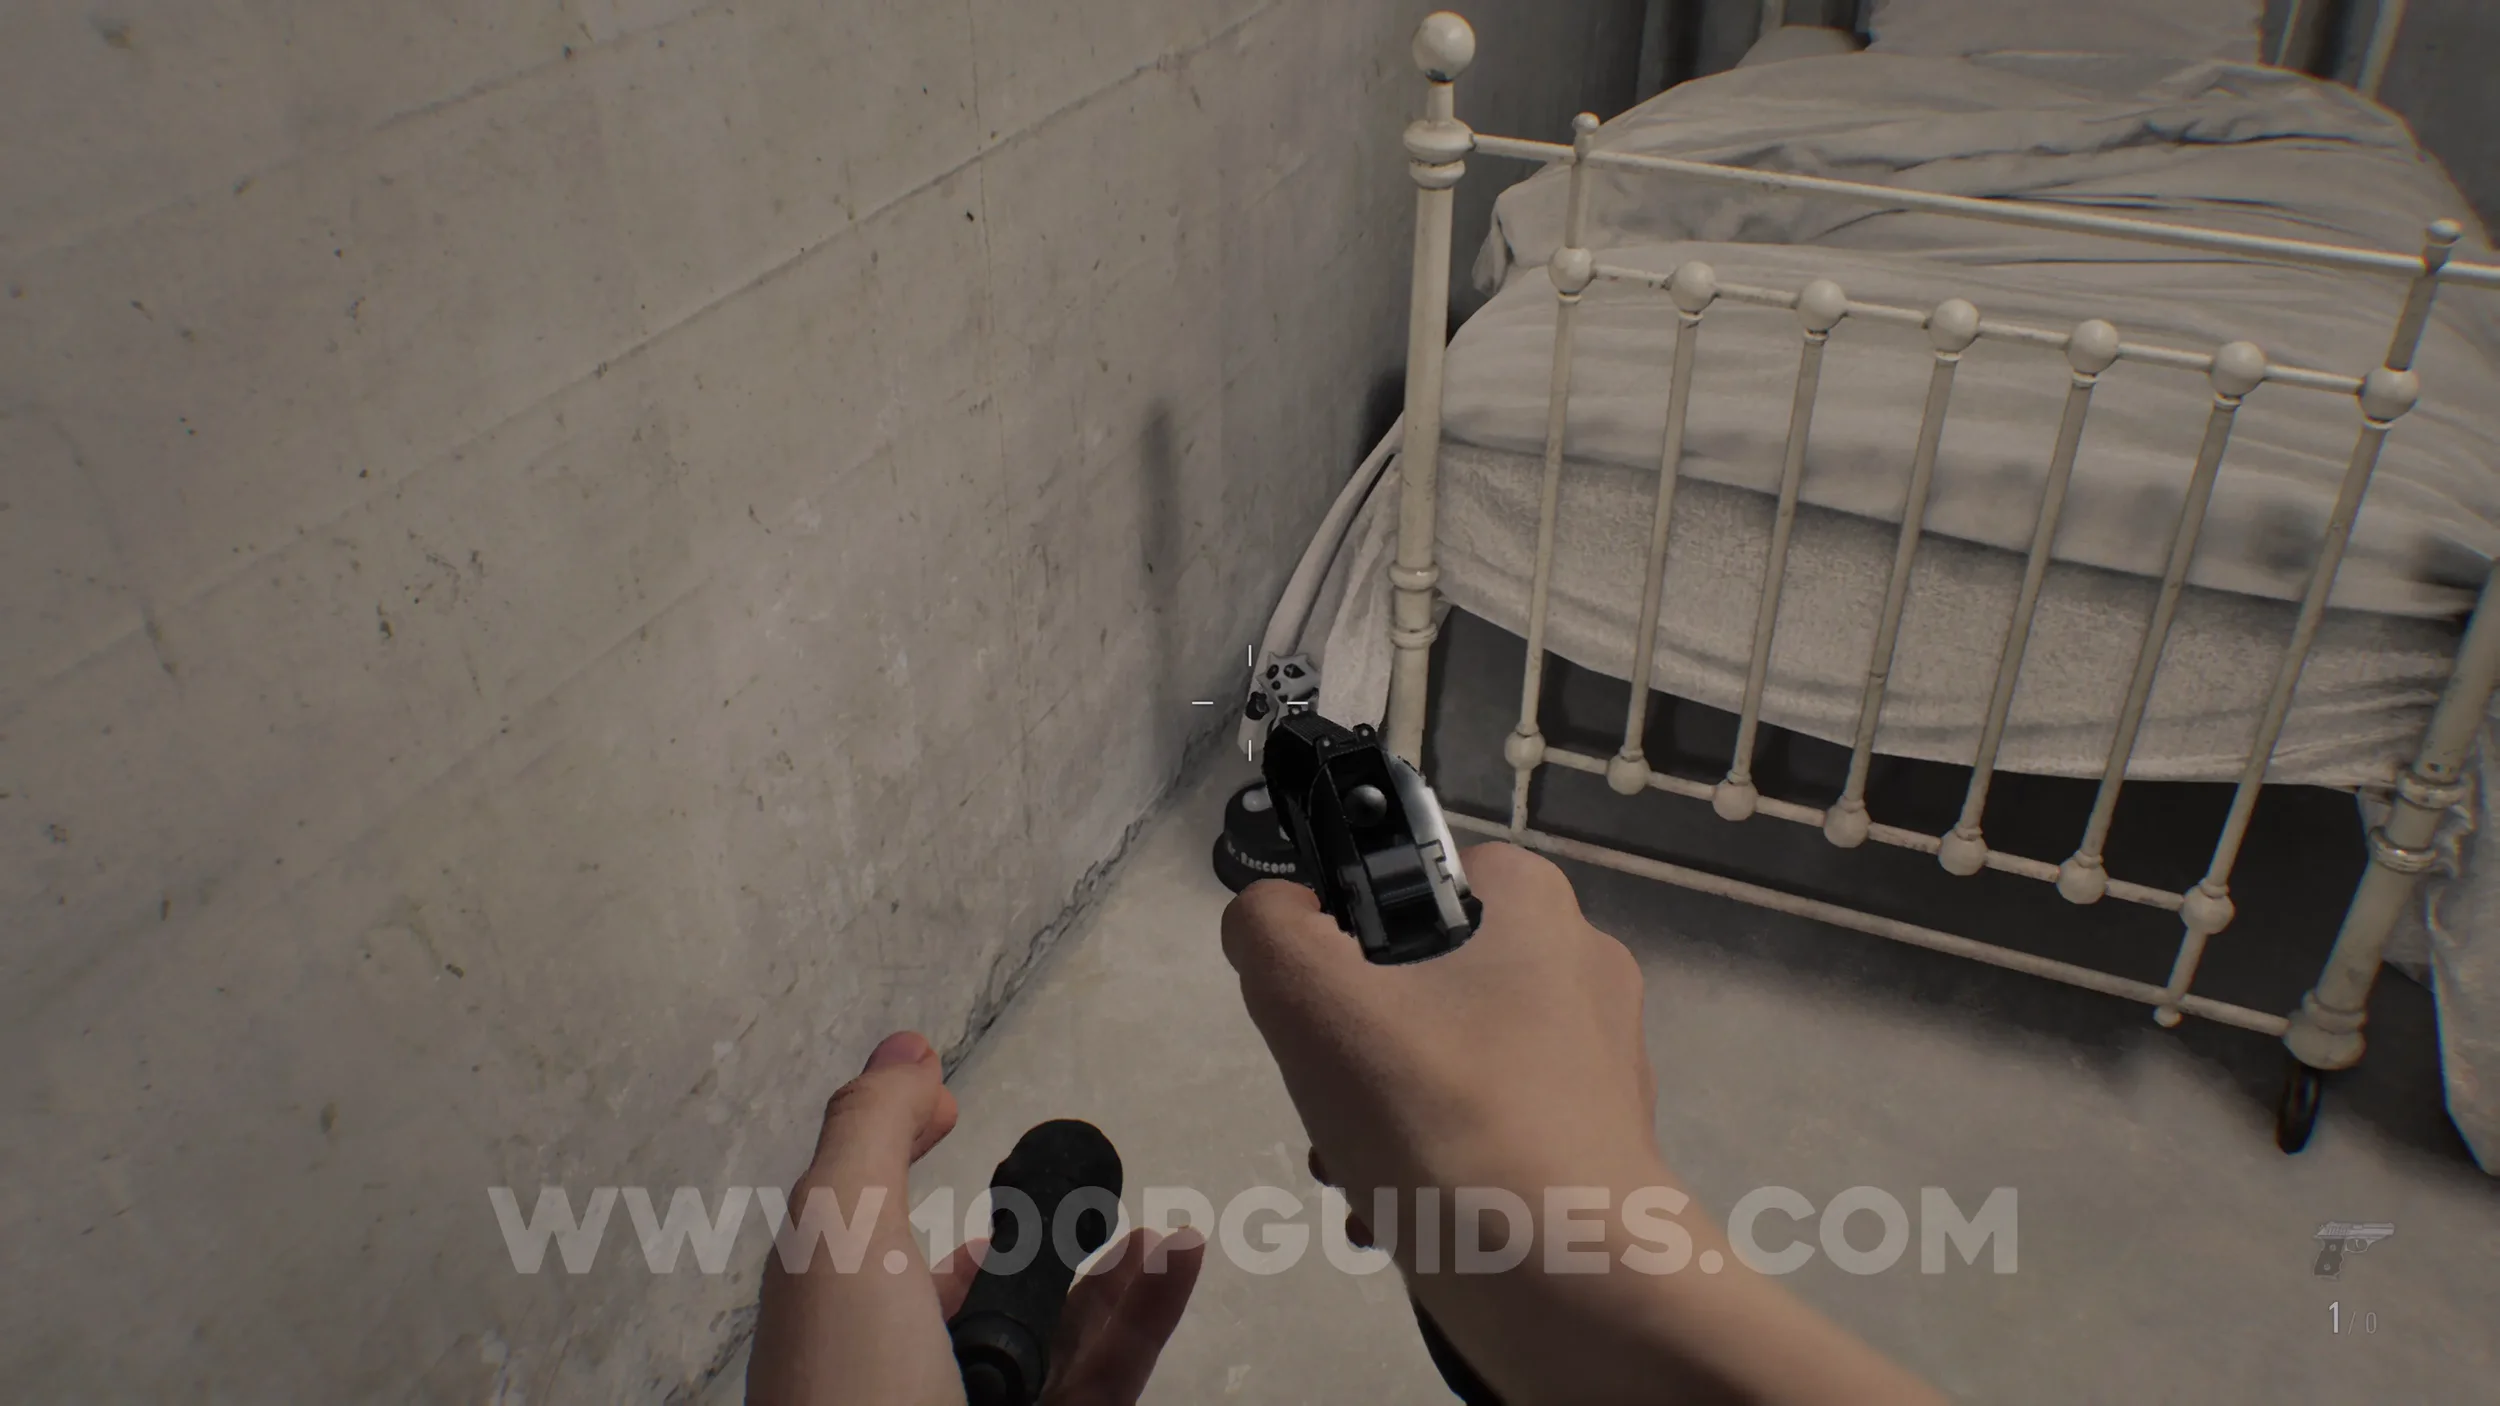
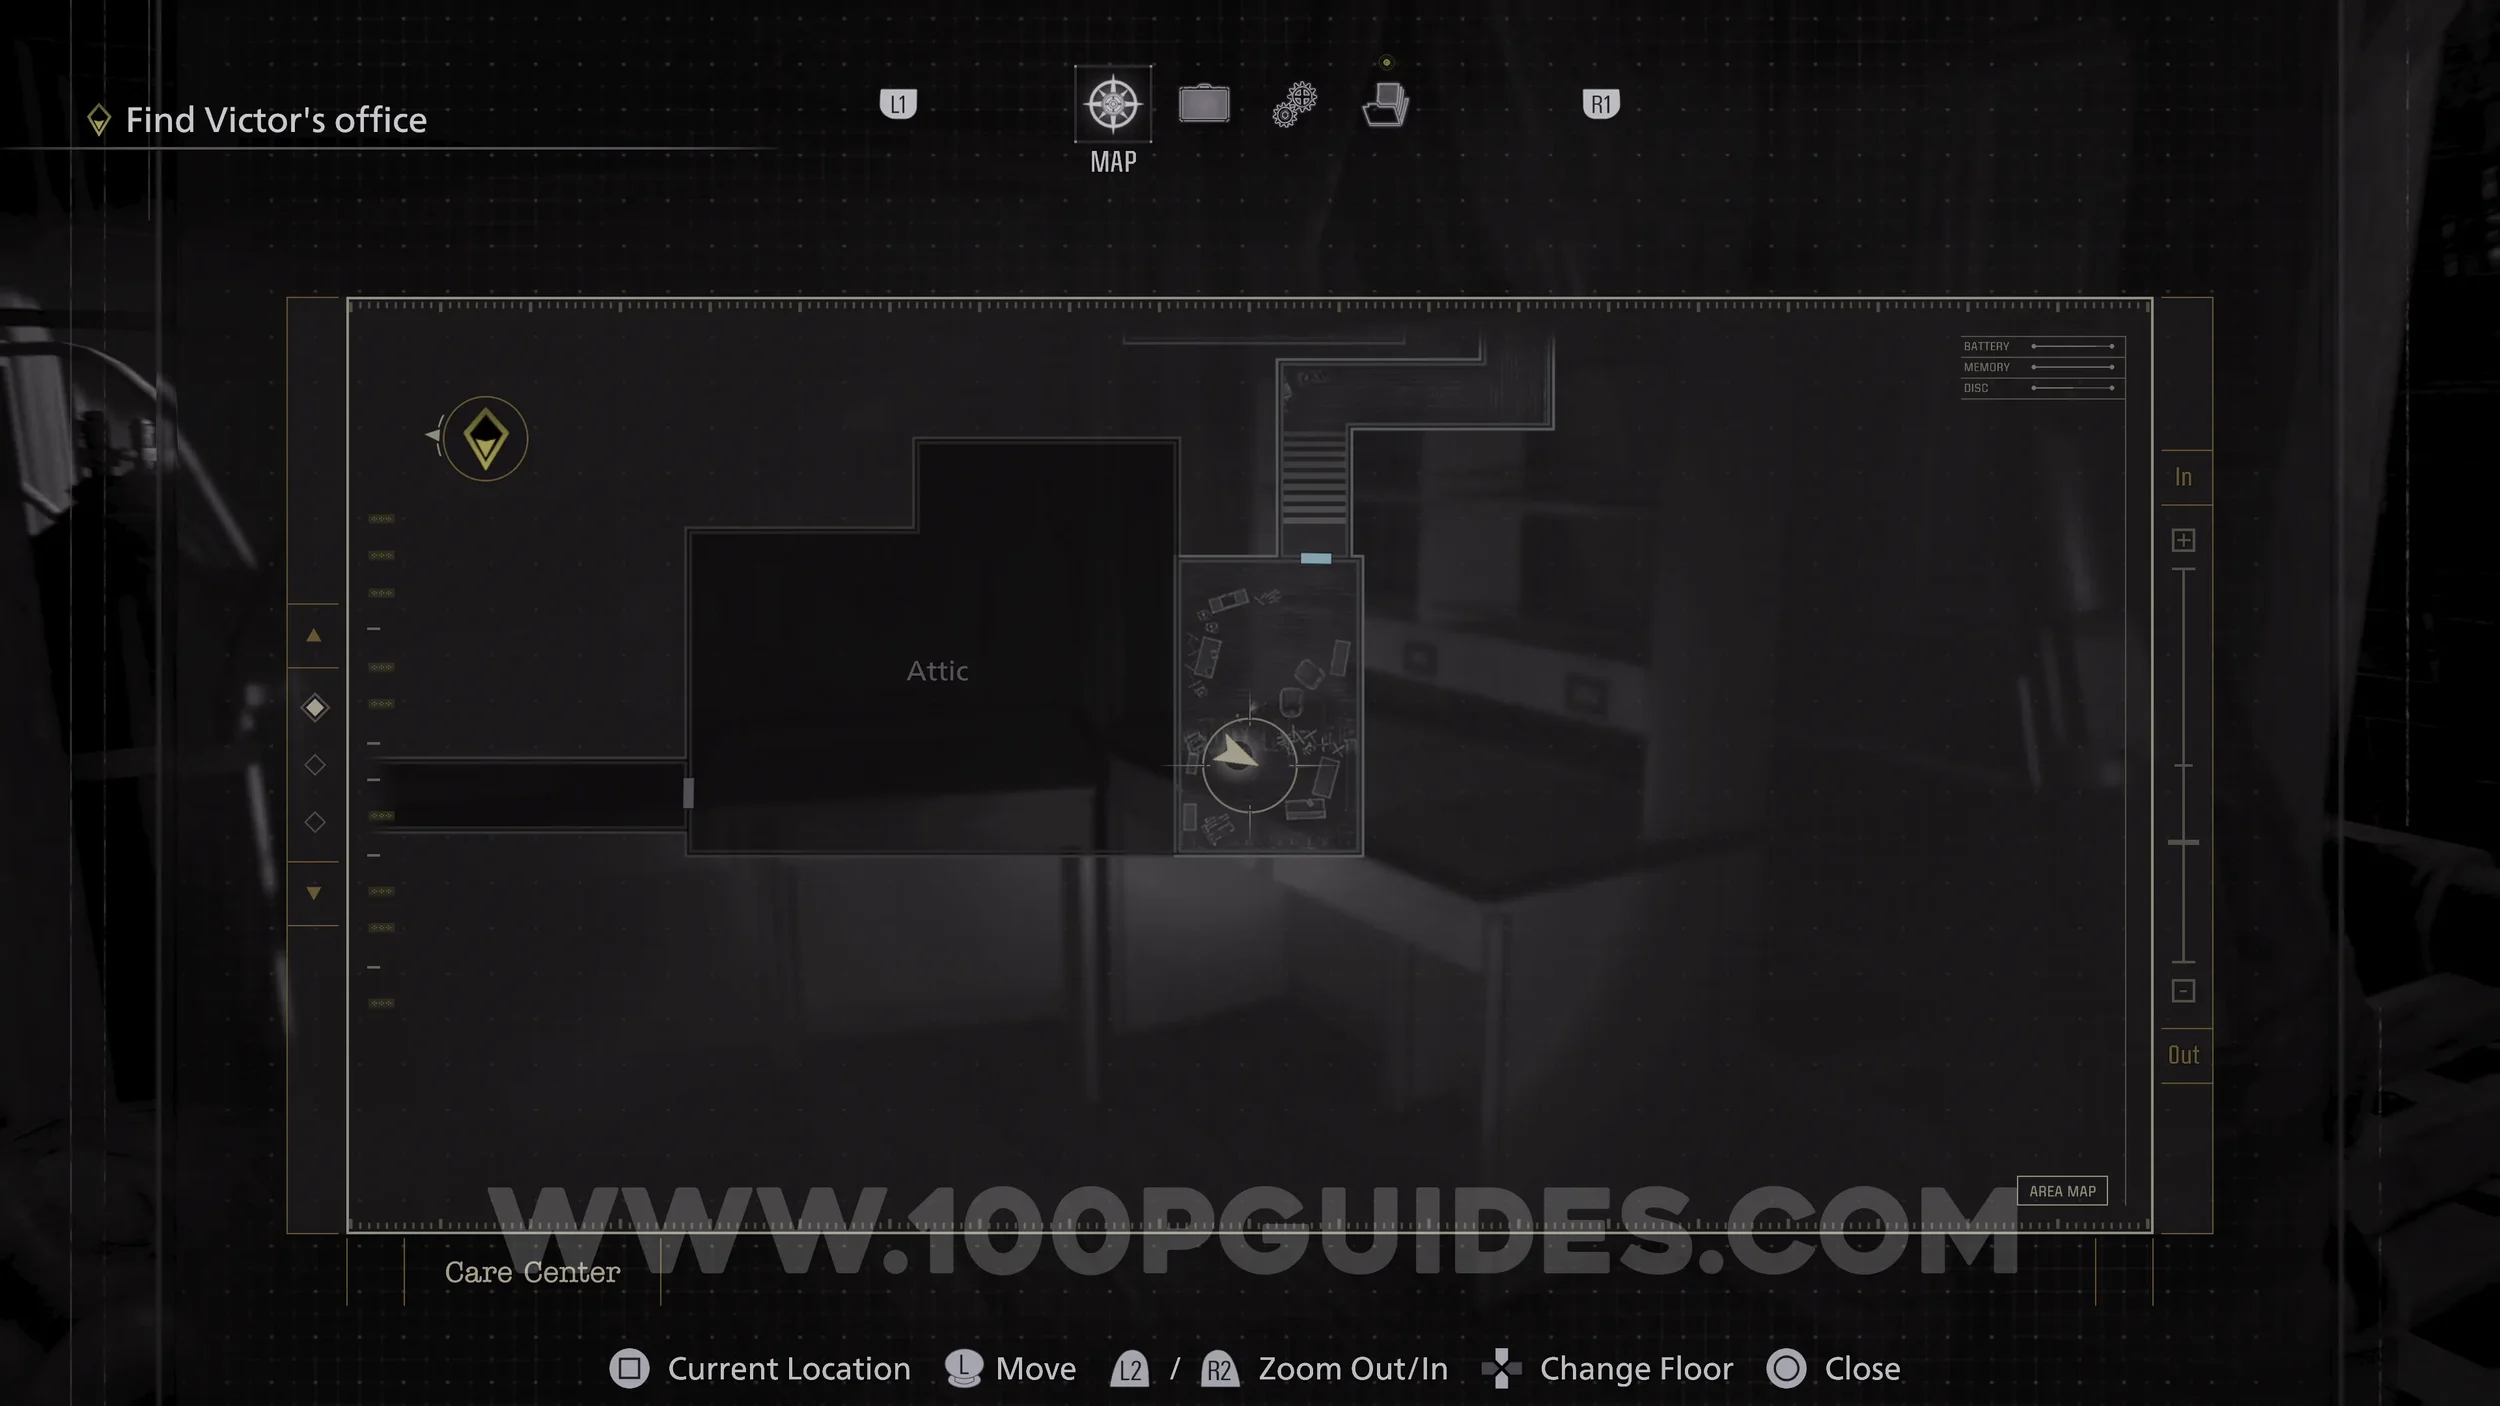
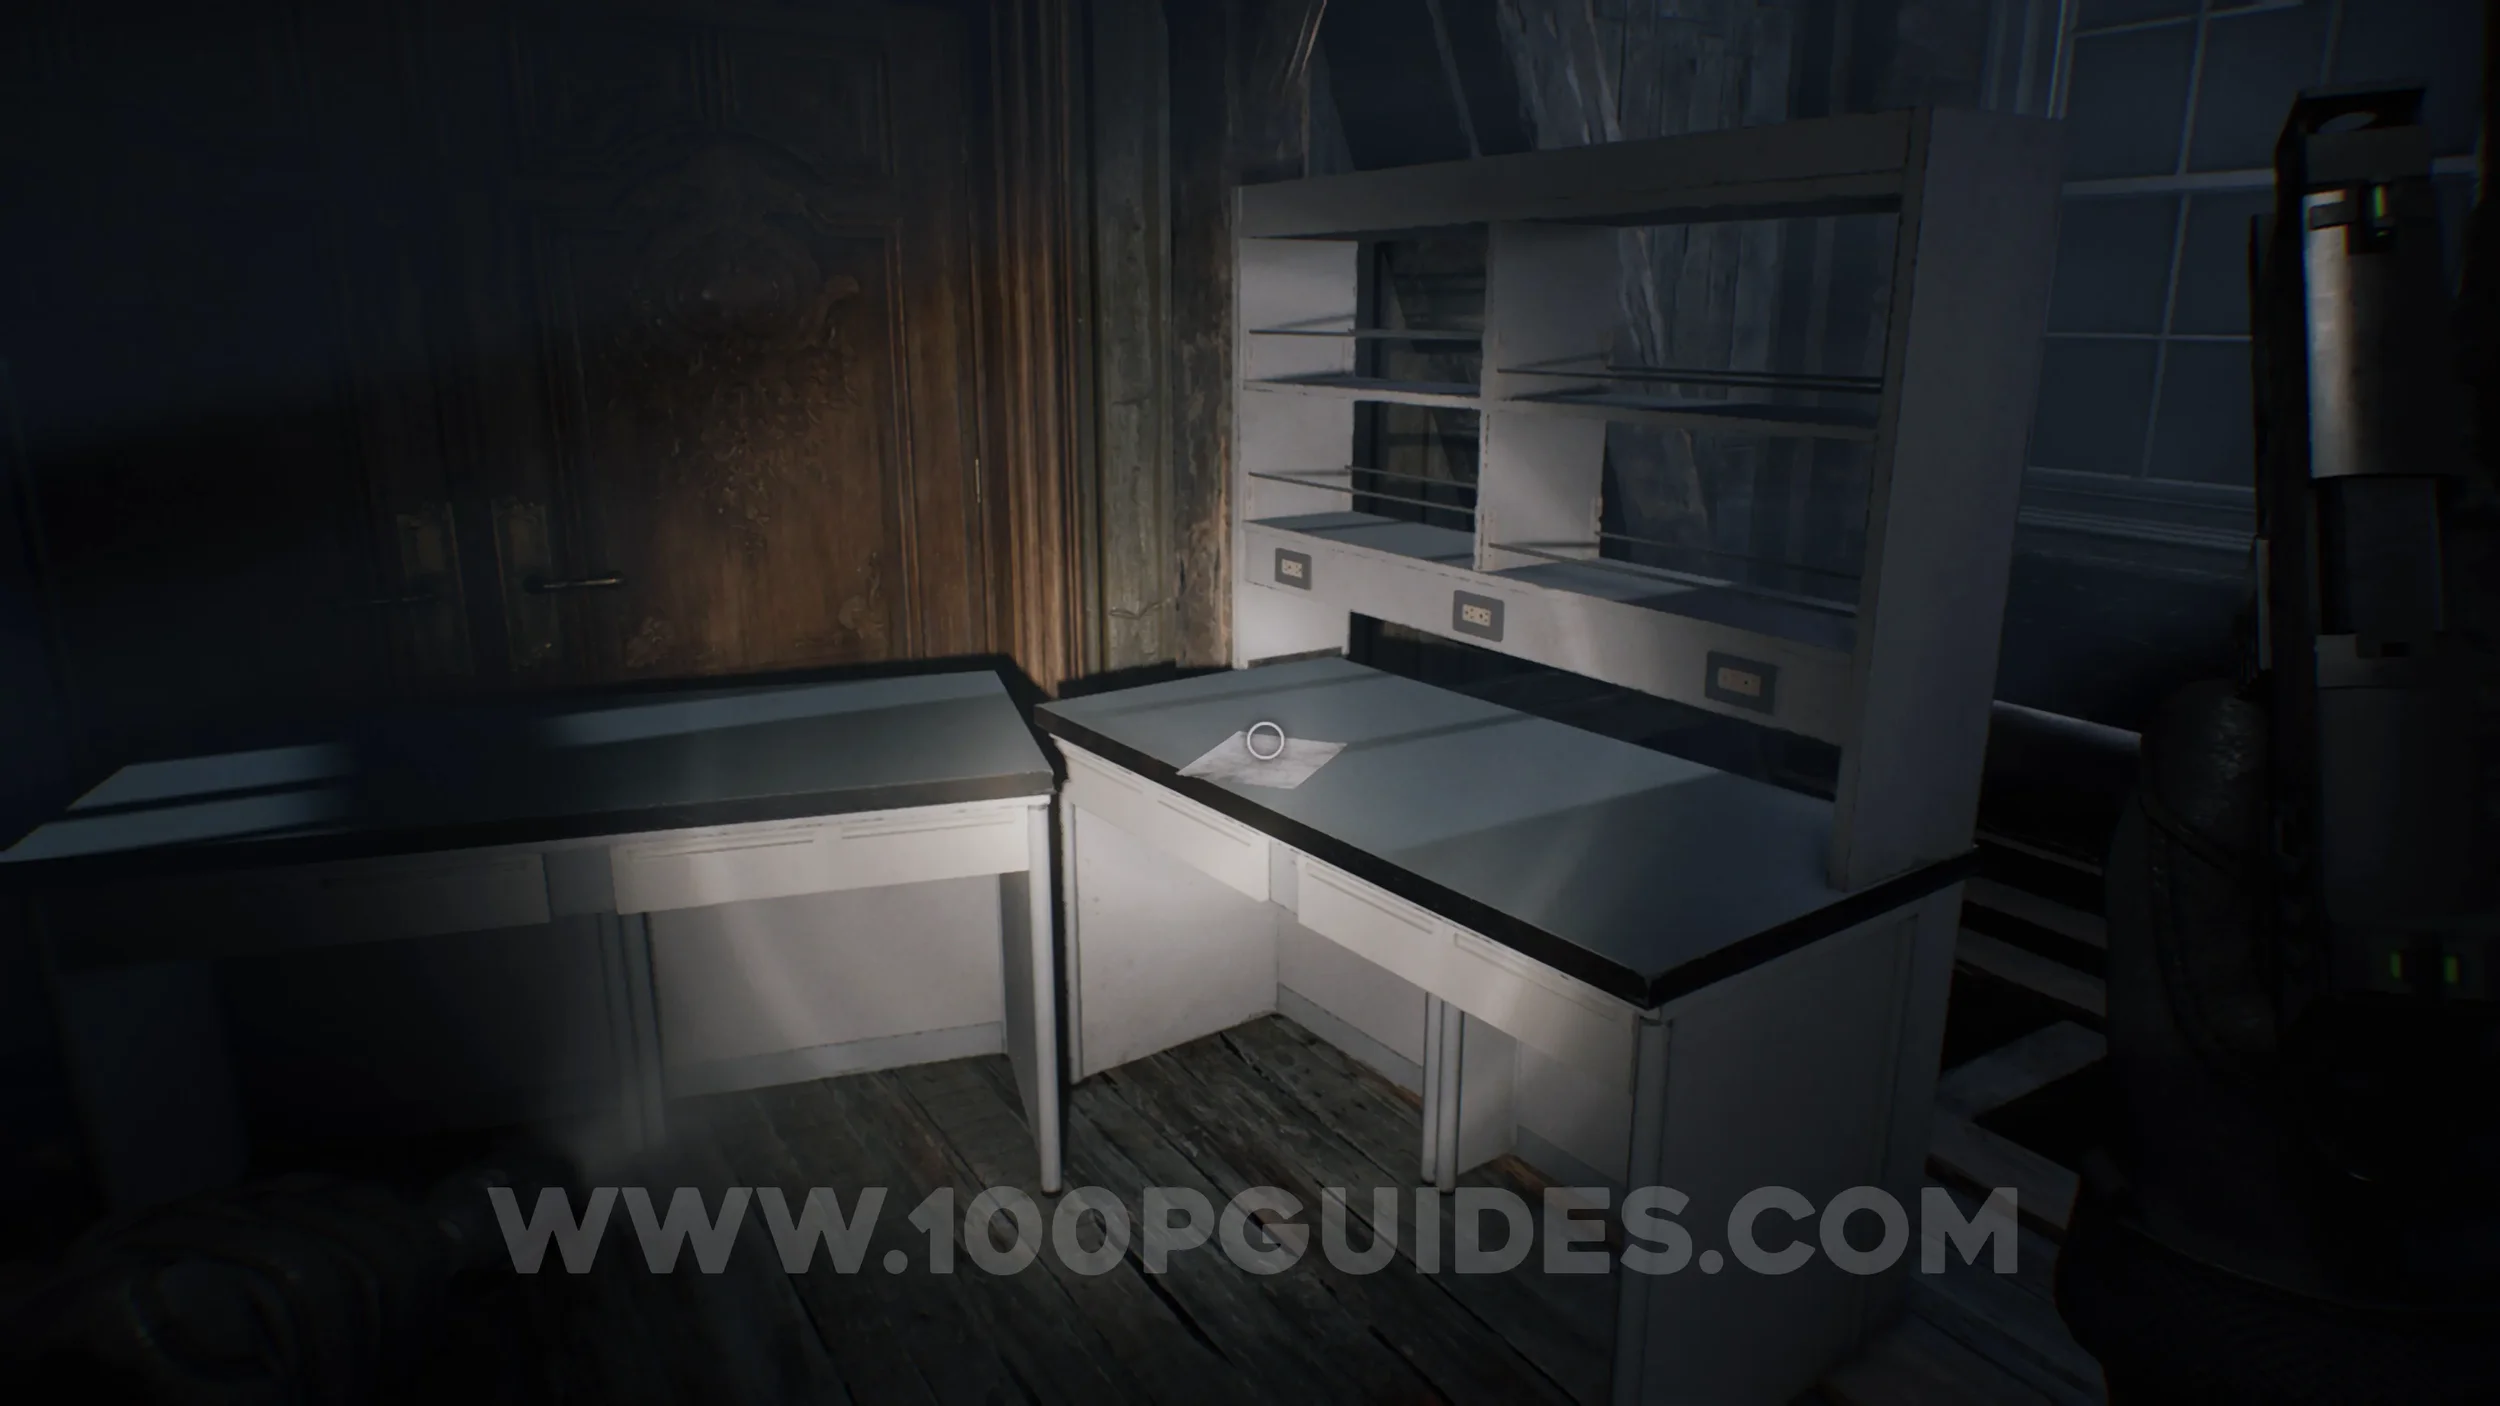
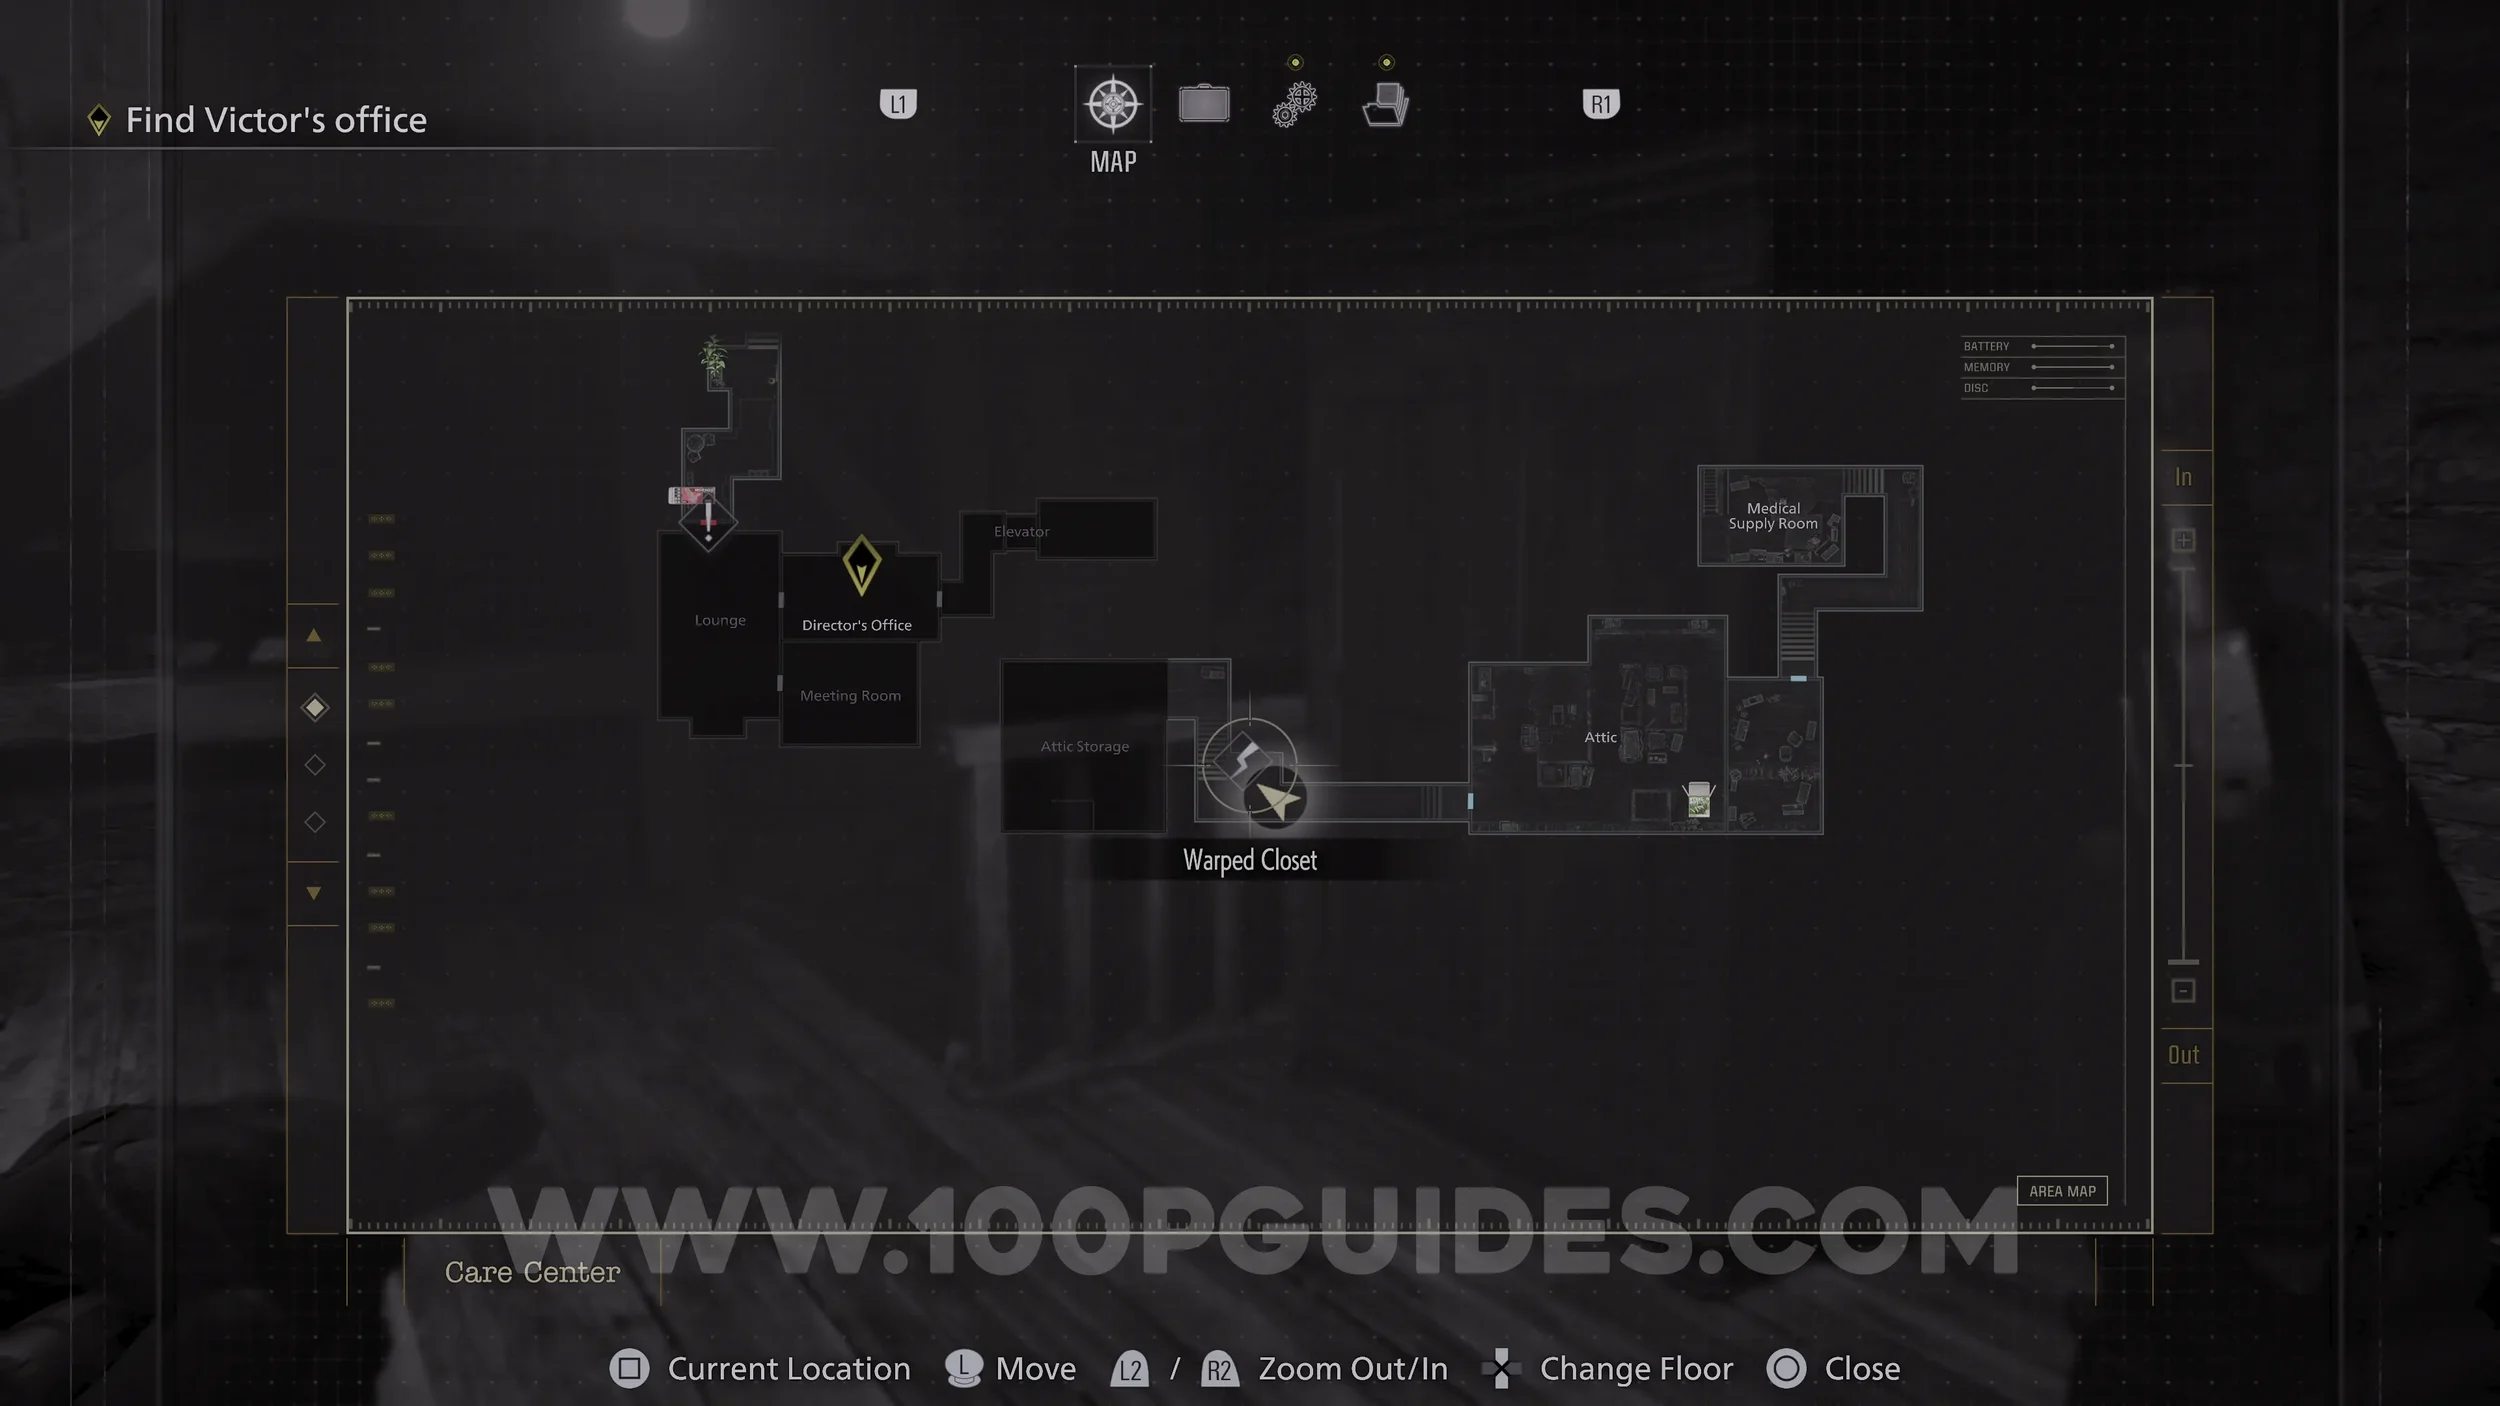
File #32 - Satiety Suppression Records. Once you regain control of Leon, go south to find the file on a desk just before the Attic.
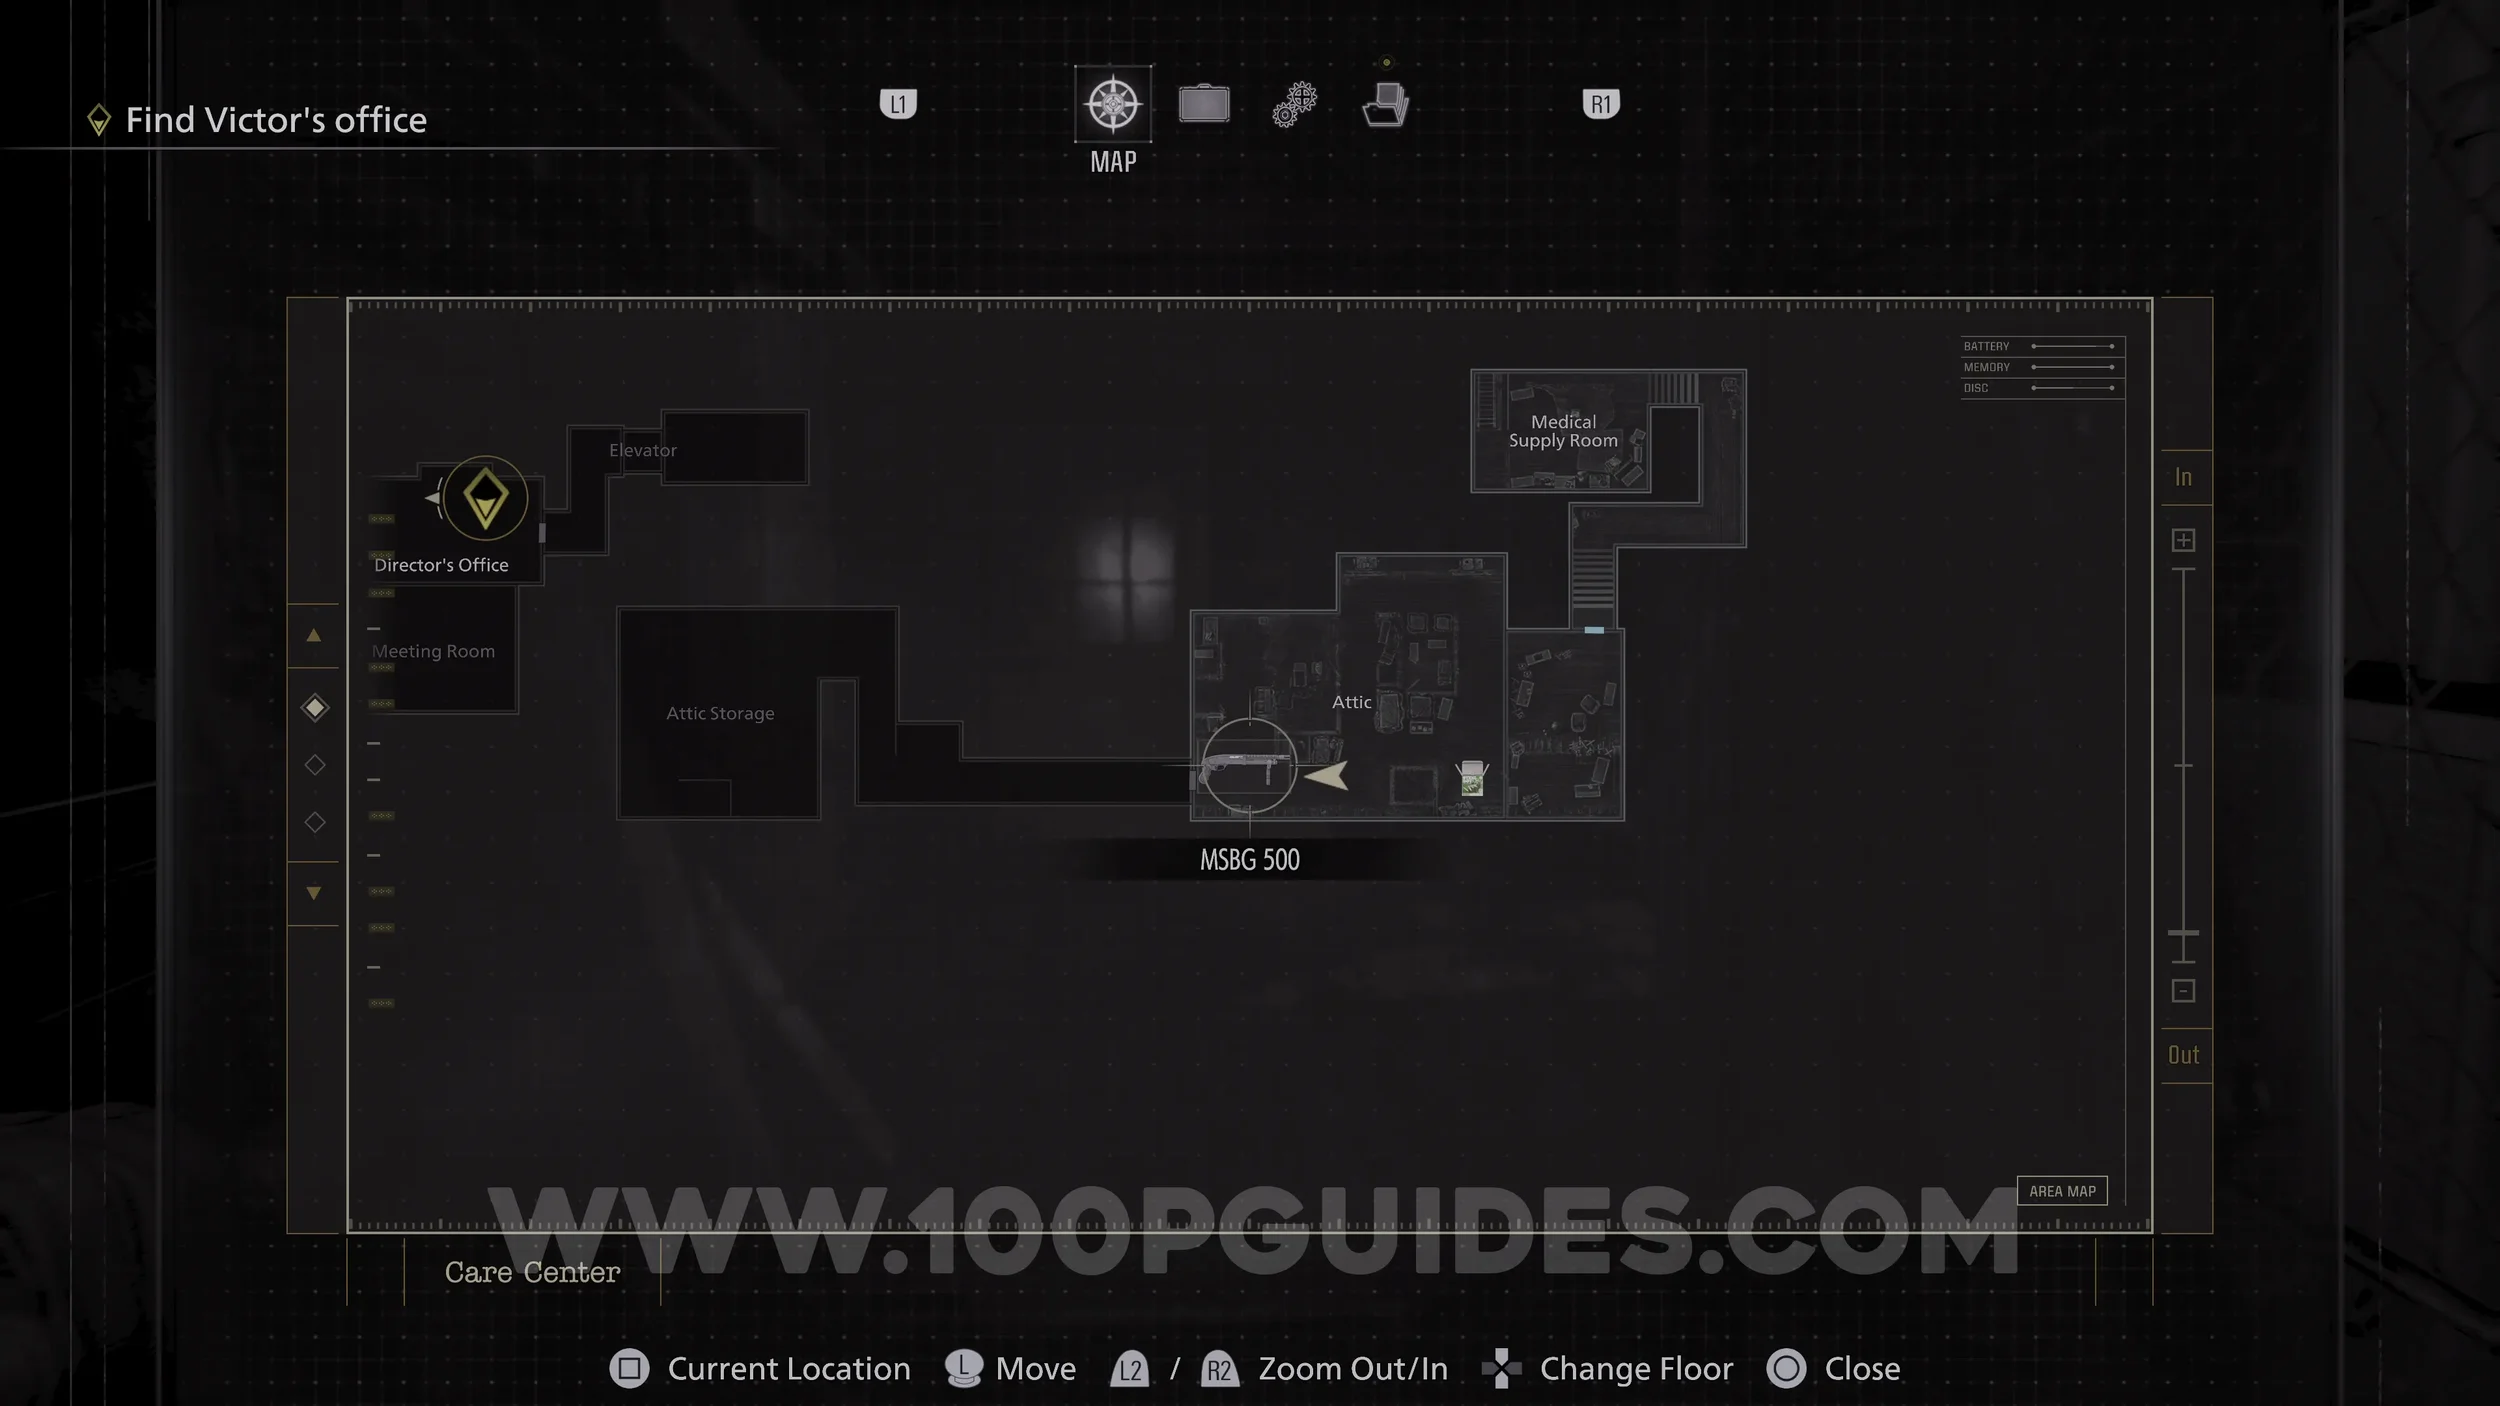
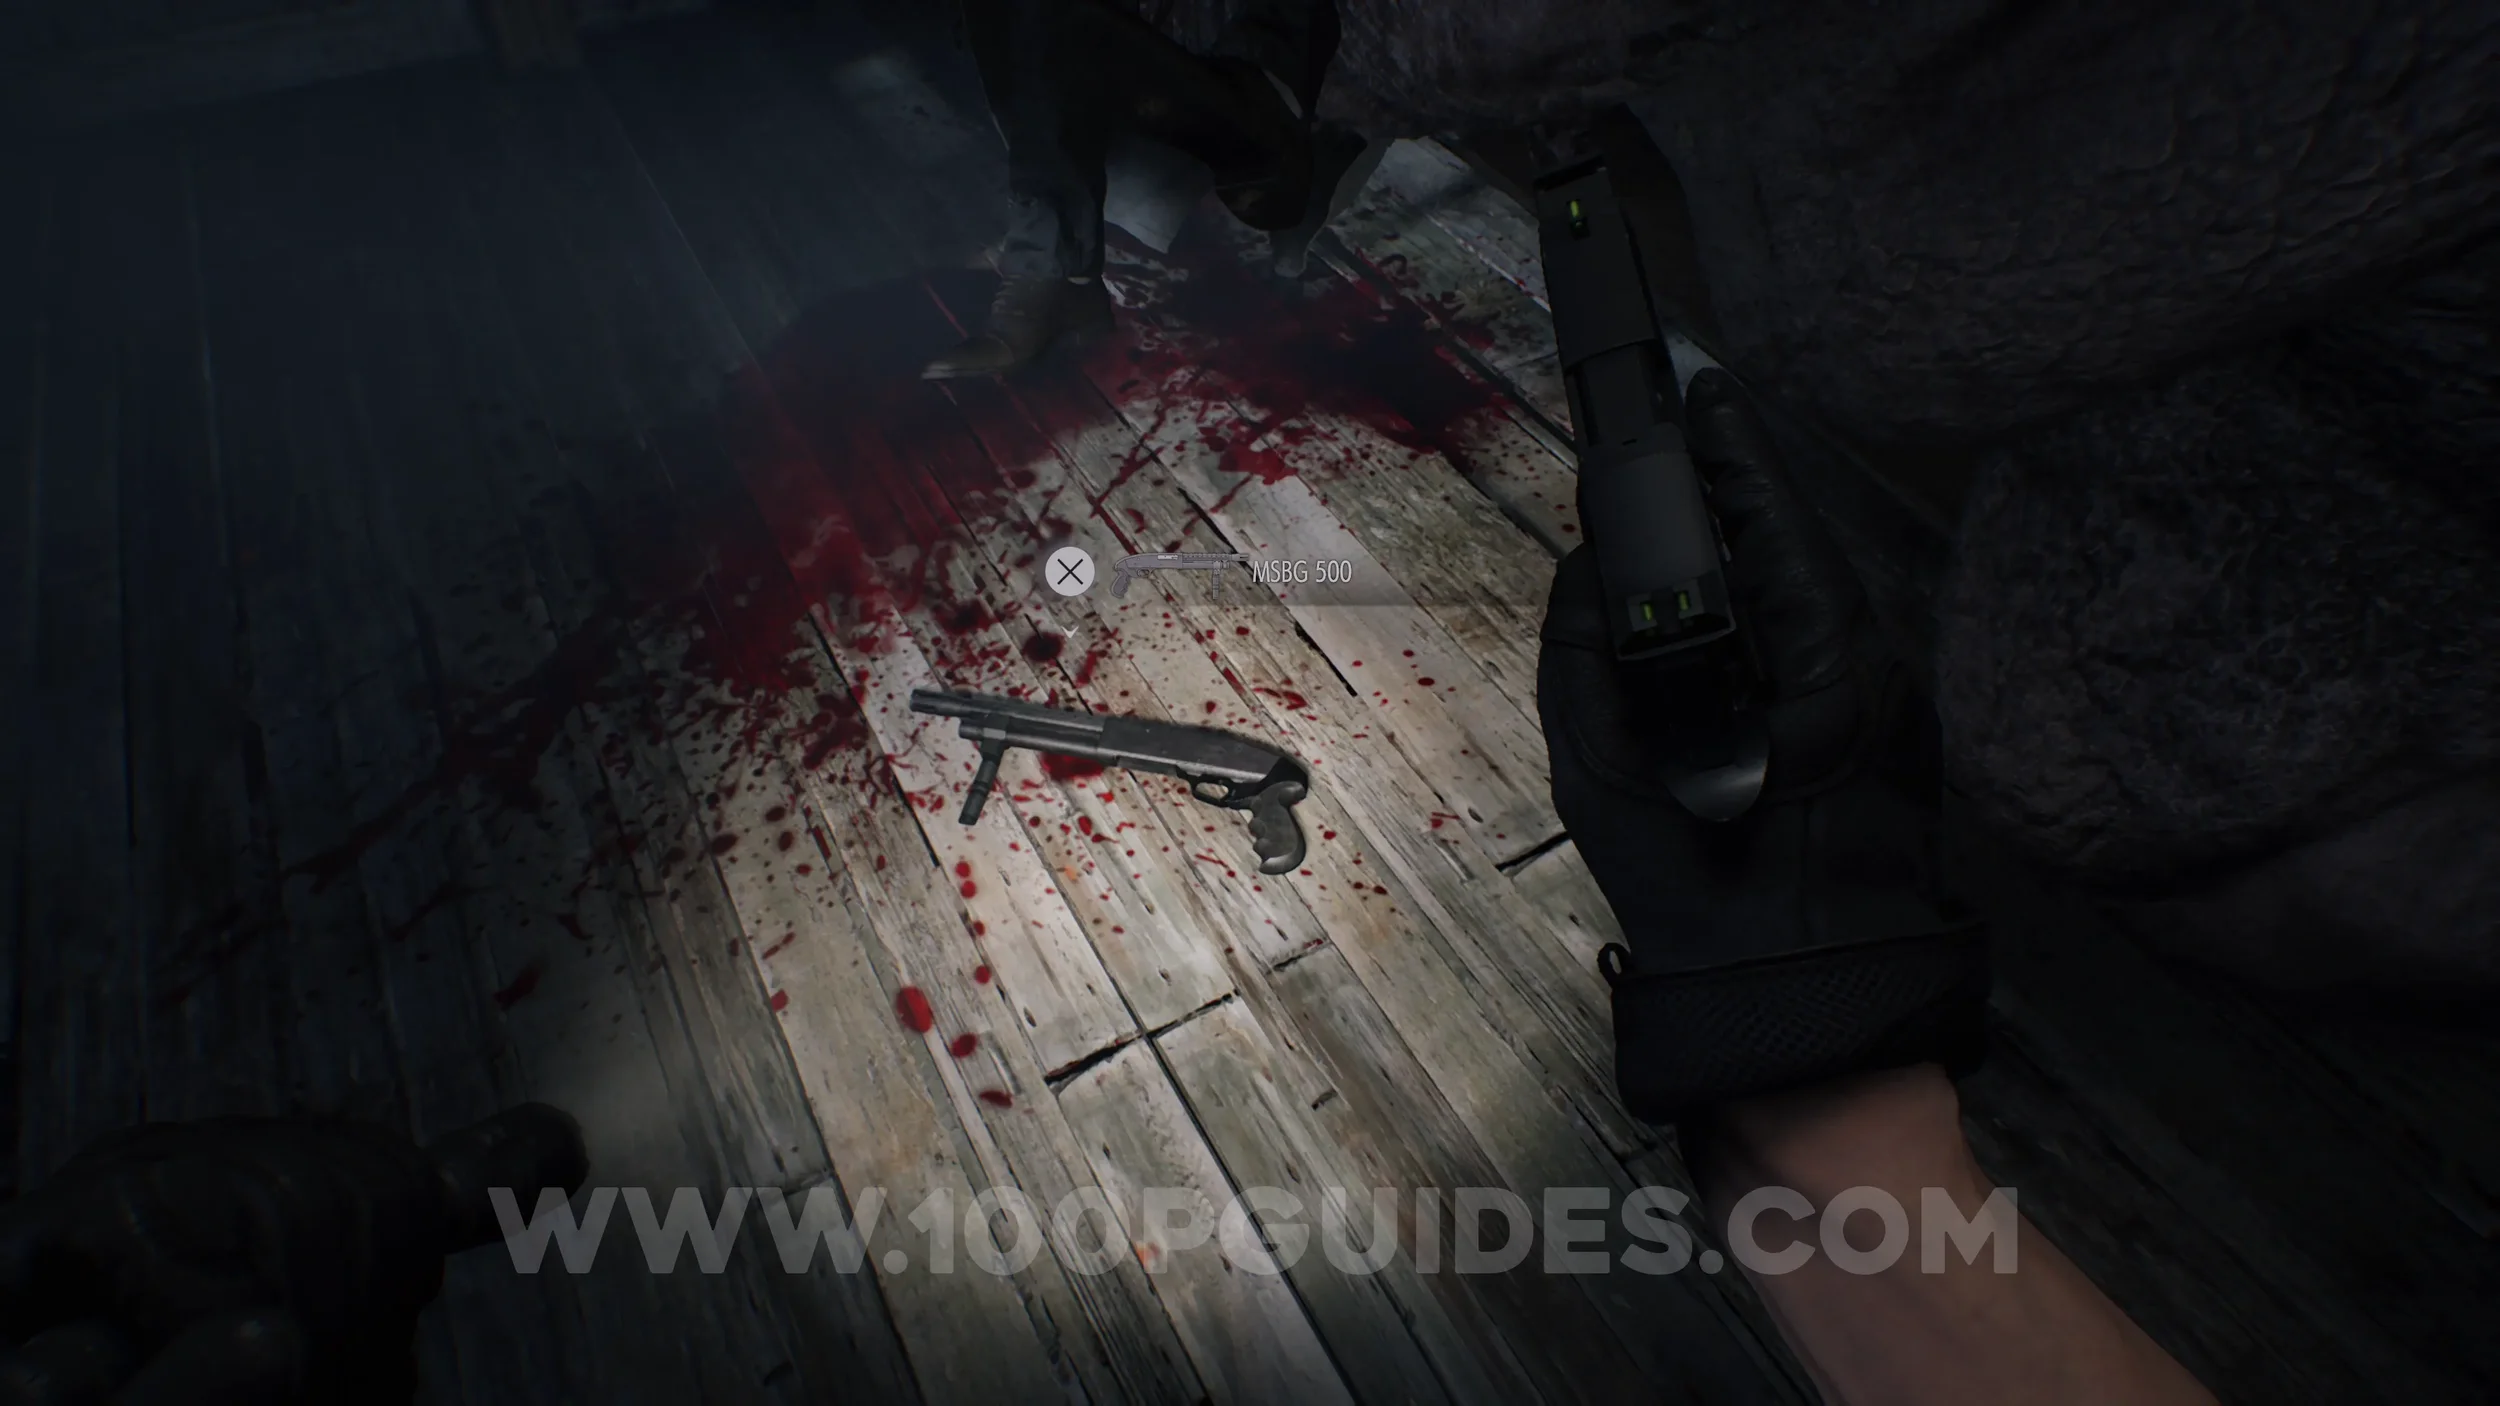
Weapon - MSBG 500. On the floor next to the Chunk in the Attic.
Weapon - Hand Grenade. Dropped by the Chunk.

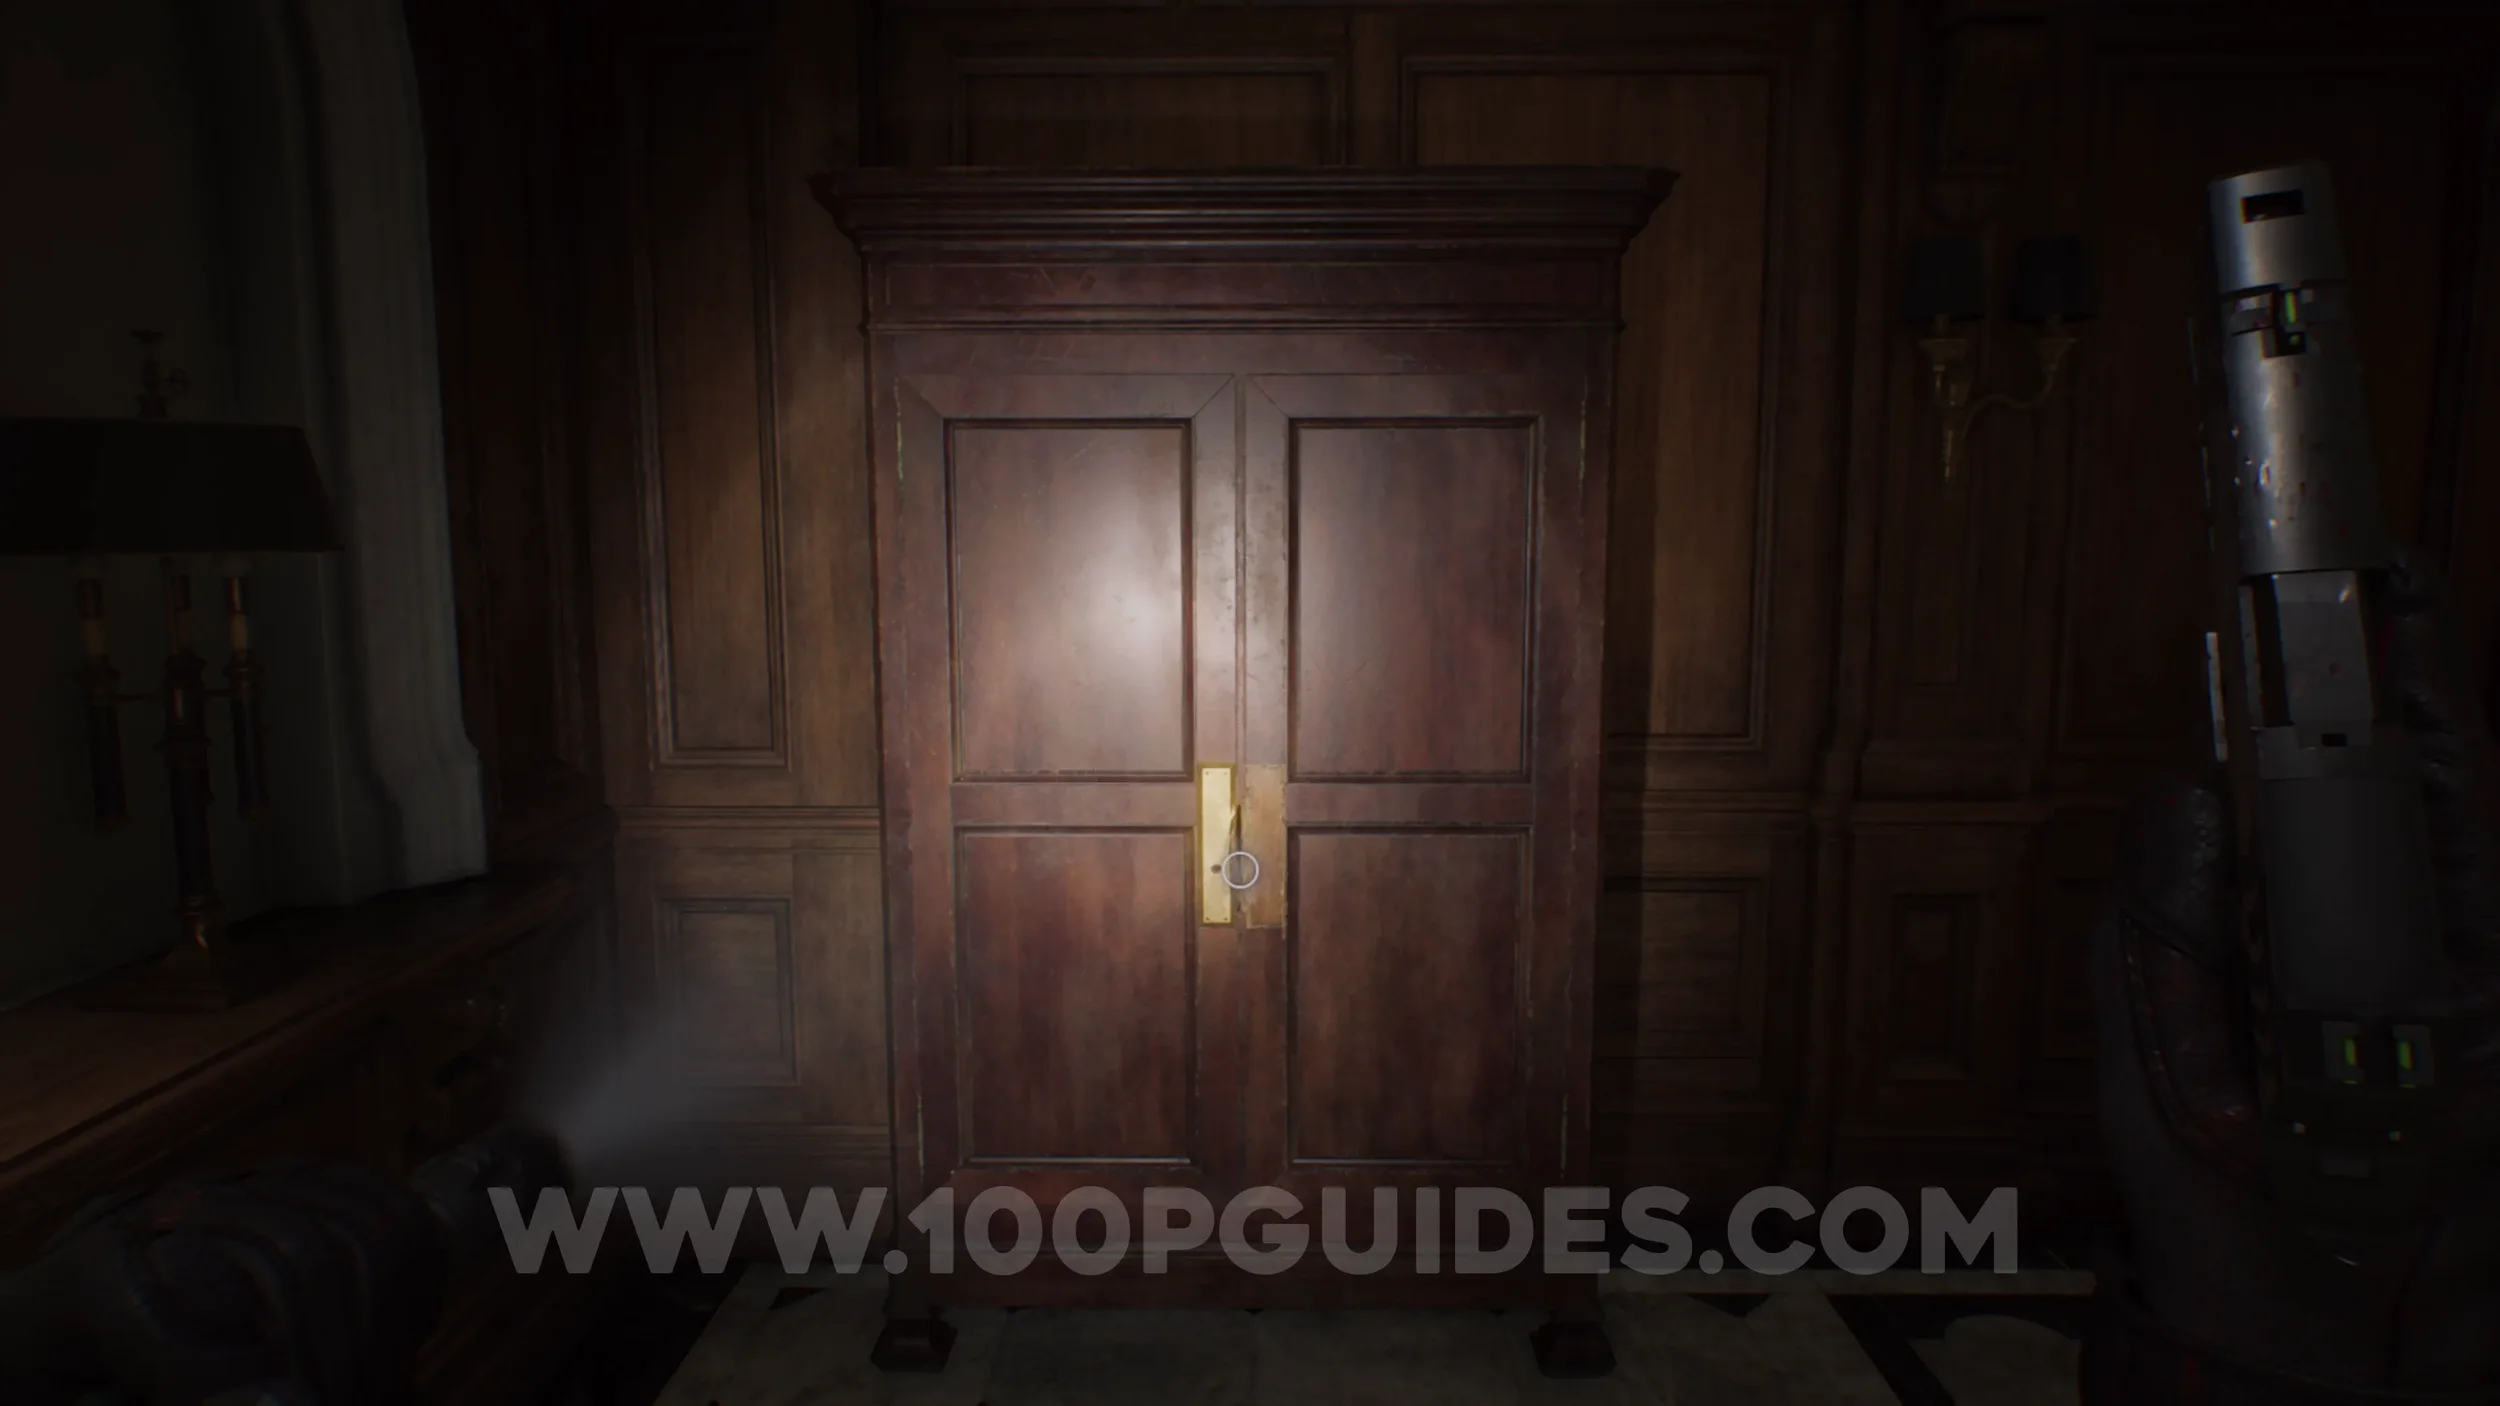
File #33 - Basement Safe Code & Weapon Accessory - Compensator. This can be found in the wardrobe just past the Attic. Note that these wardrobes can only be opened while playing as Leon.

Trophy - Tailor Made. Equip the accessory to the pistol.
File #34 - Dishwasher’s Note. In the wardrobe in the corridor to the west of the Gallery.
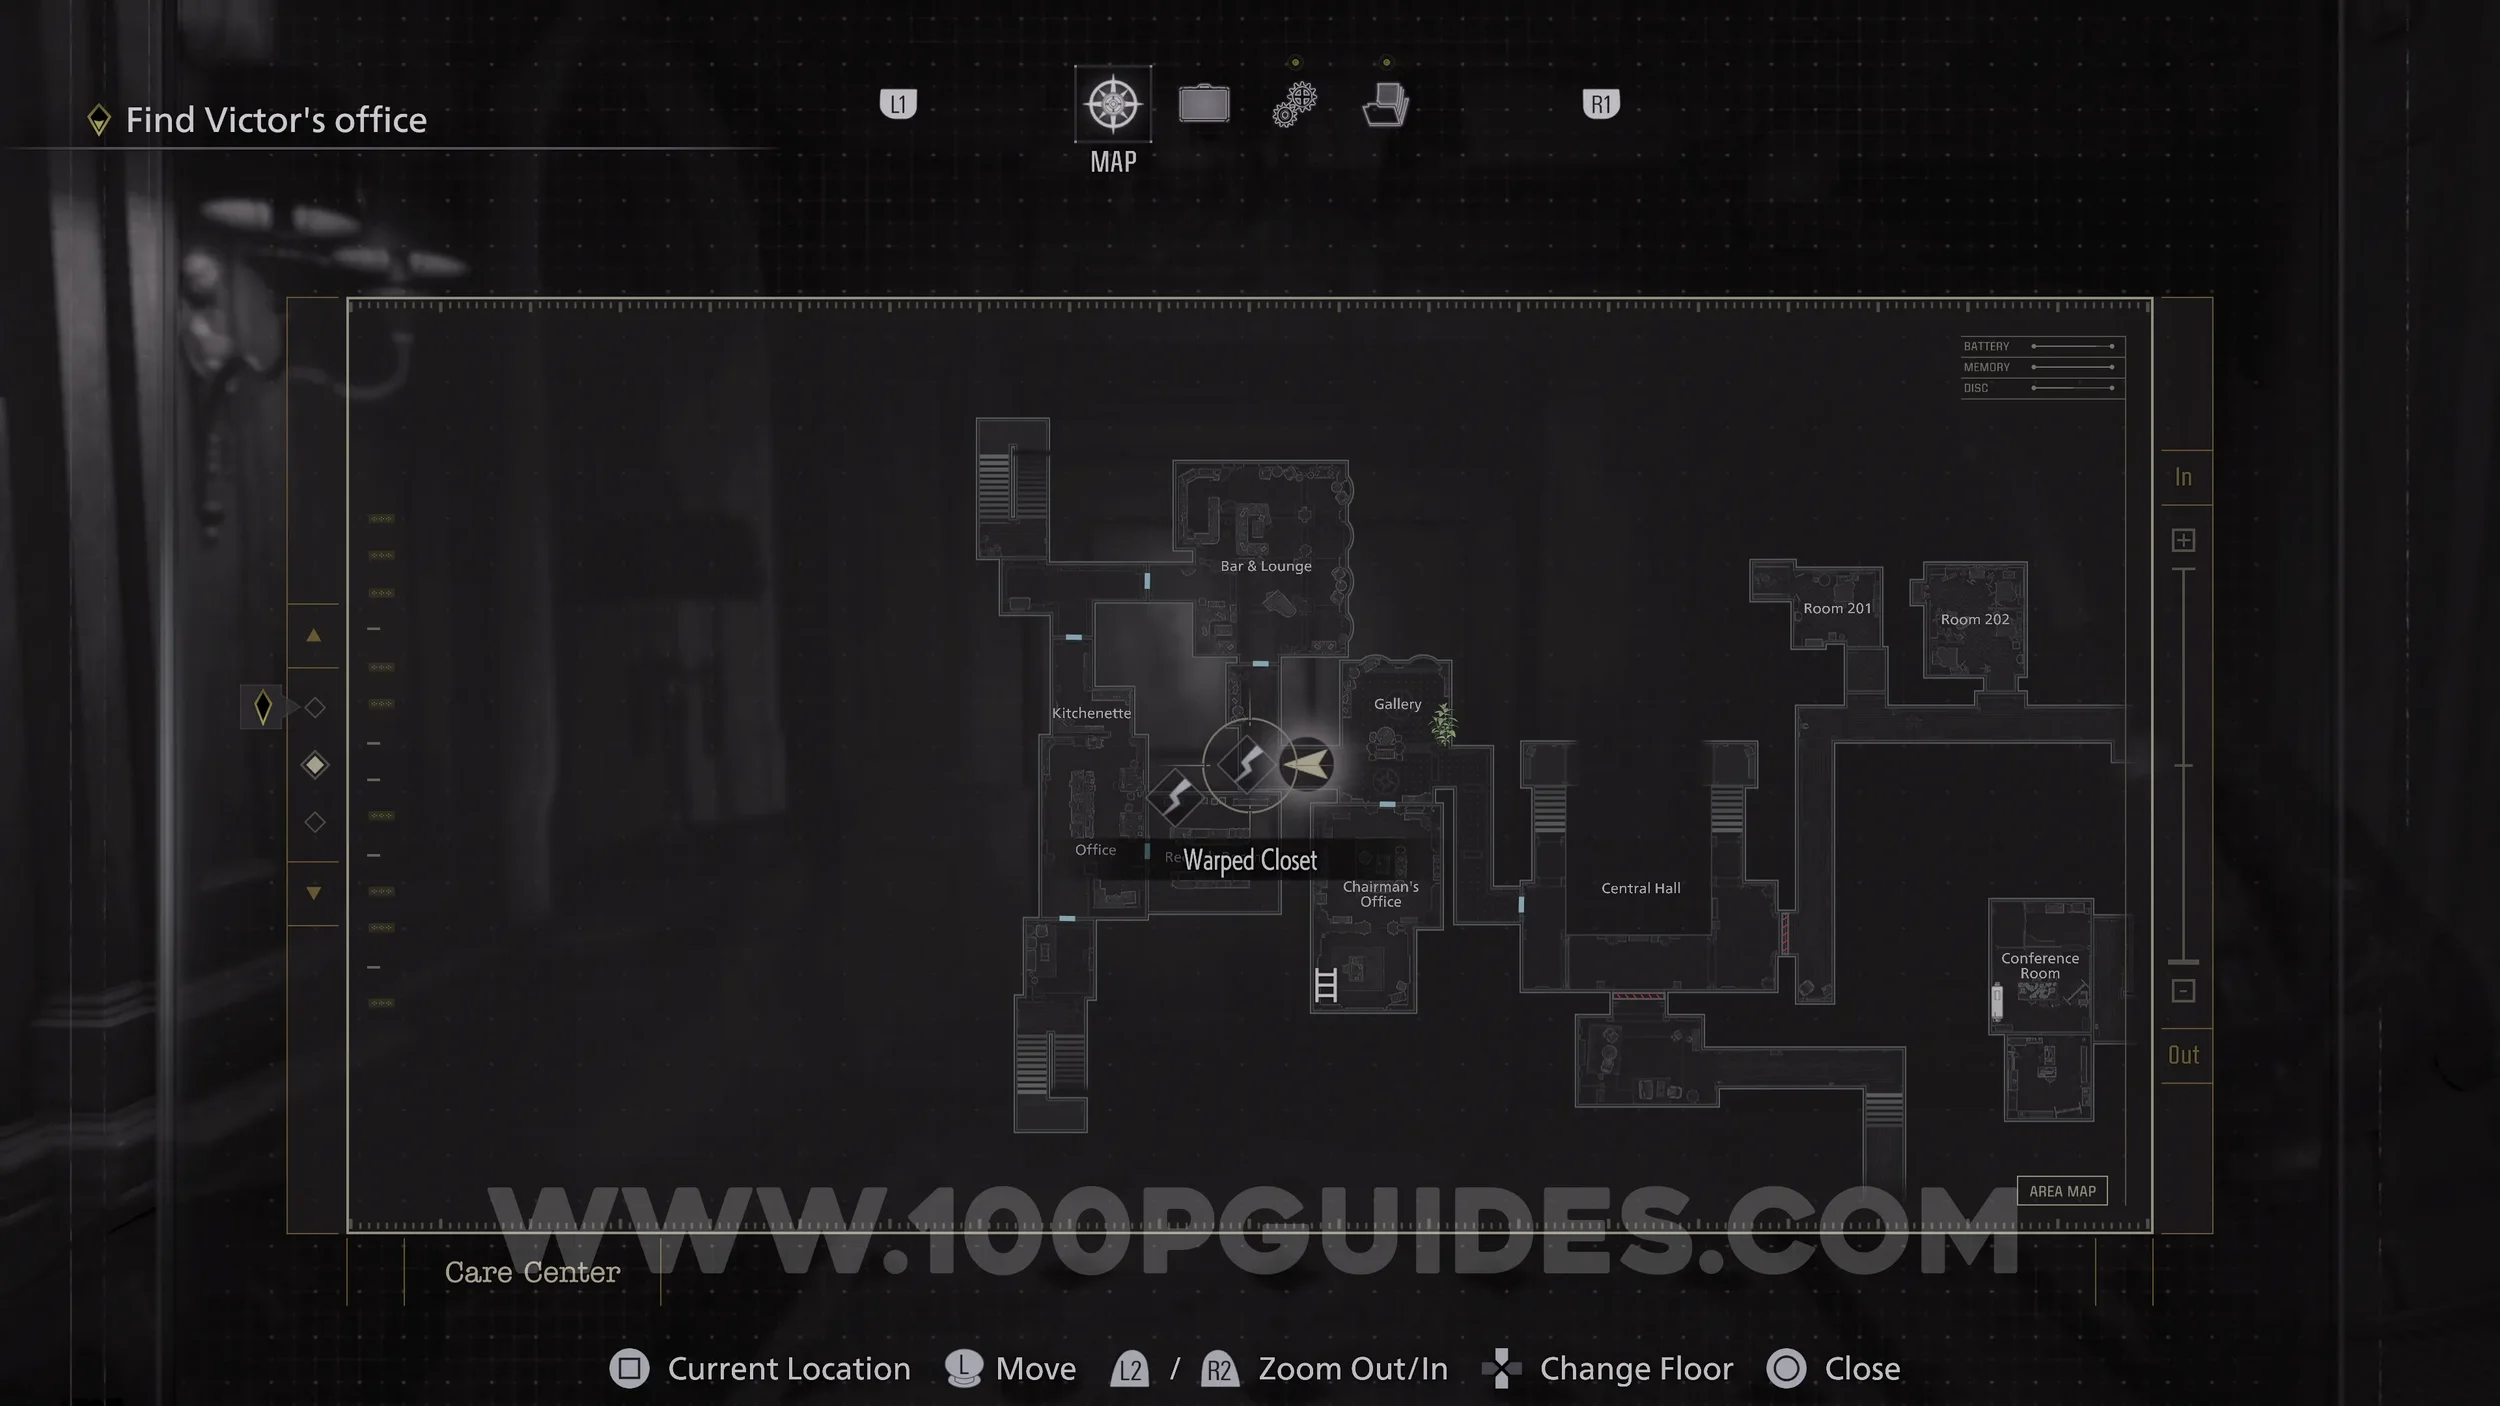
Mr. Raccoon #6. In the wardrobe in the Records Room.

Charm #3 - Connoisseur Charm. In the Wardrobe in the Pantry.
File #35 - Special Directive for Raccoon City & File #36 - Report on Raccoon City Syndrome. Automatically in your inventory once you regain control of Grace in the Basement area.
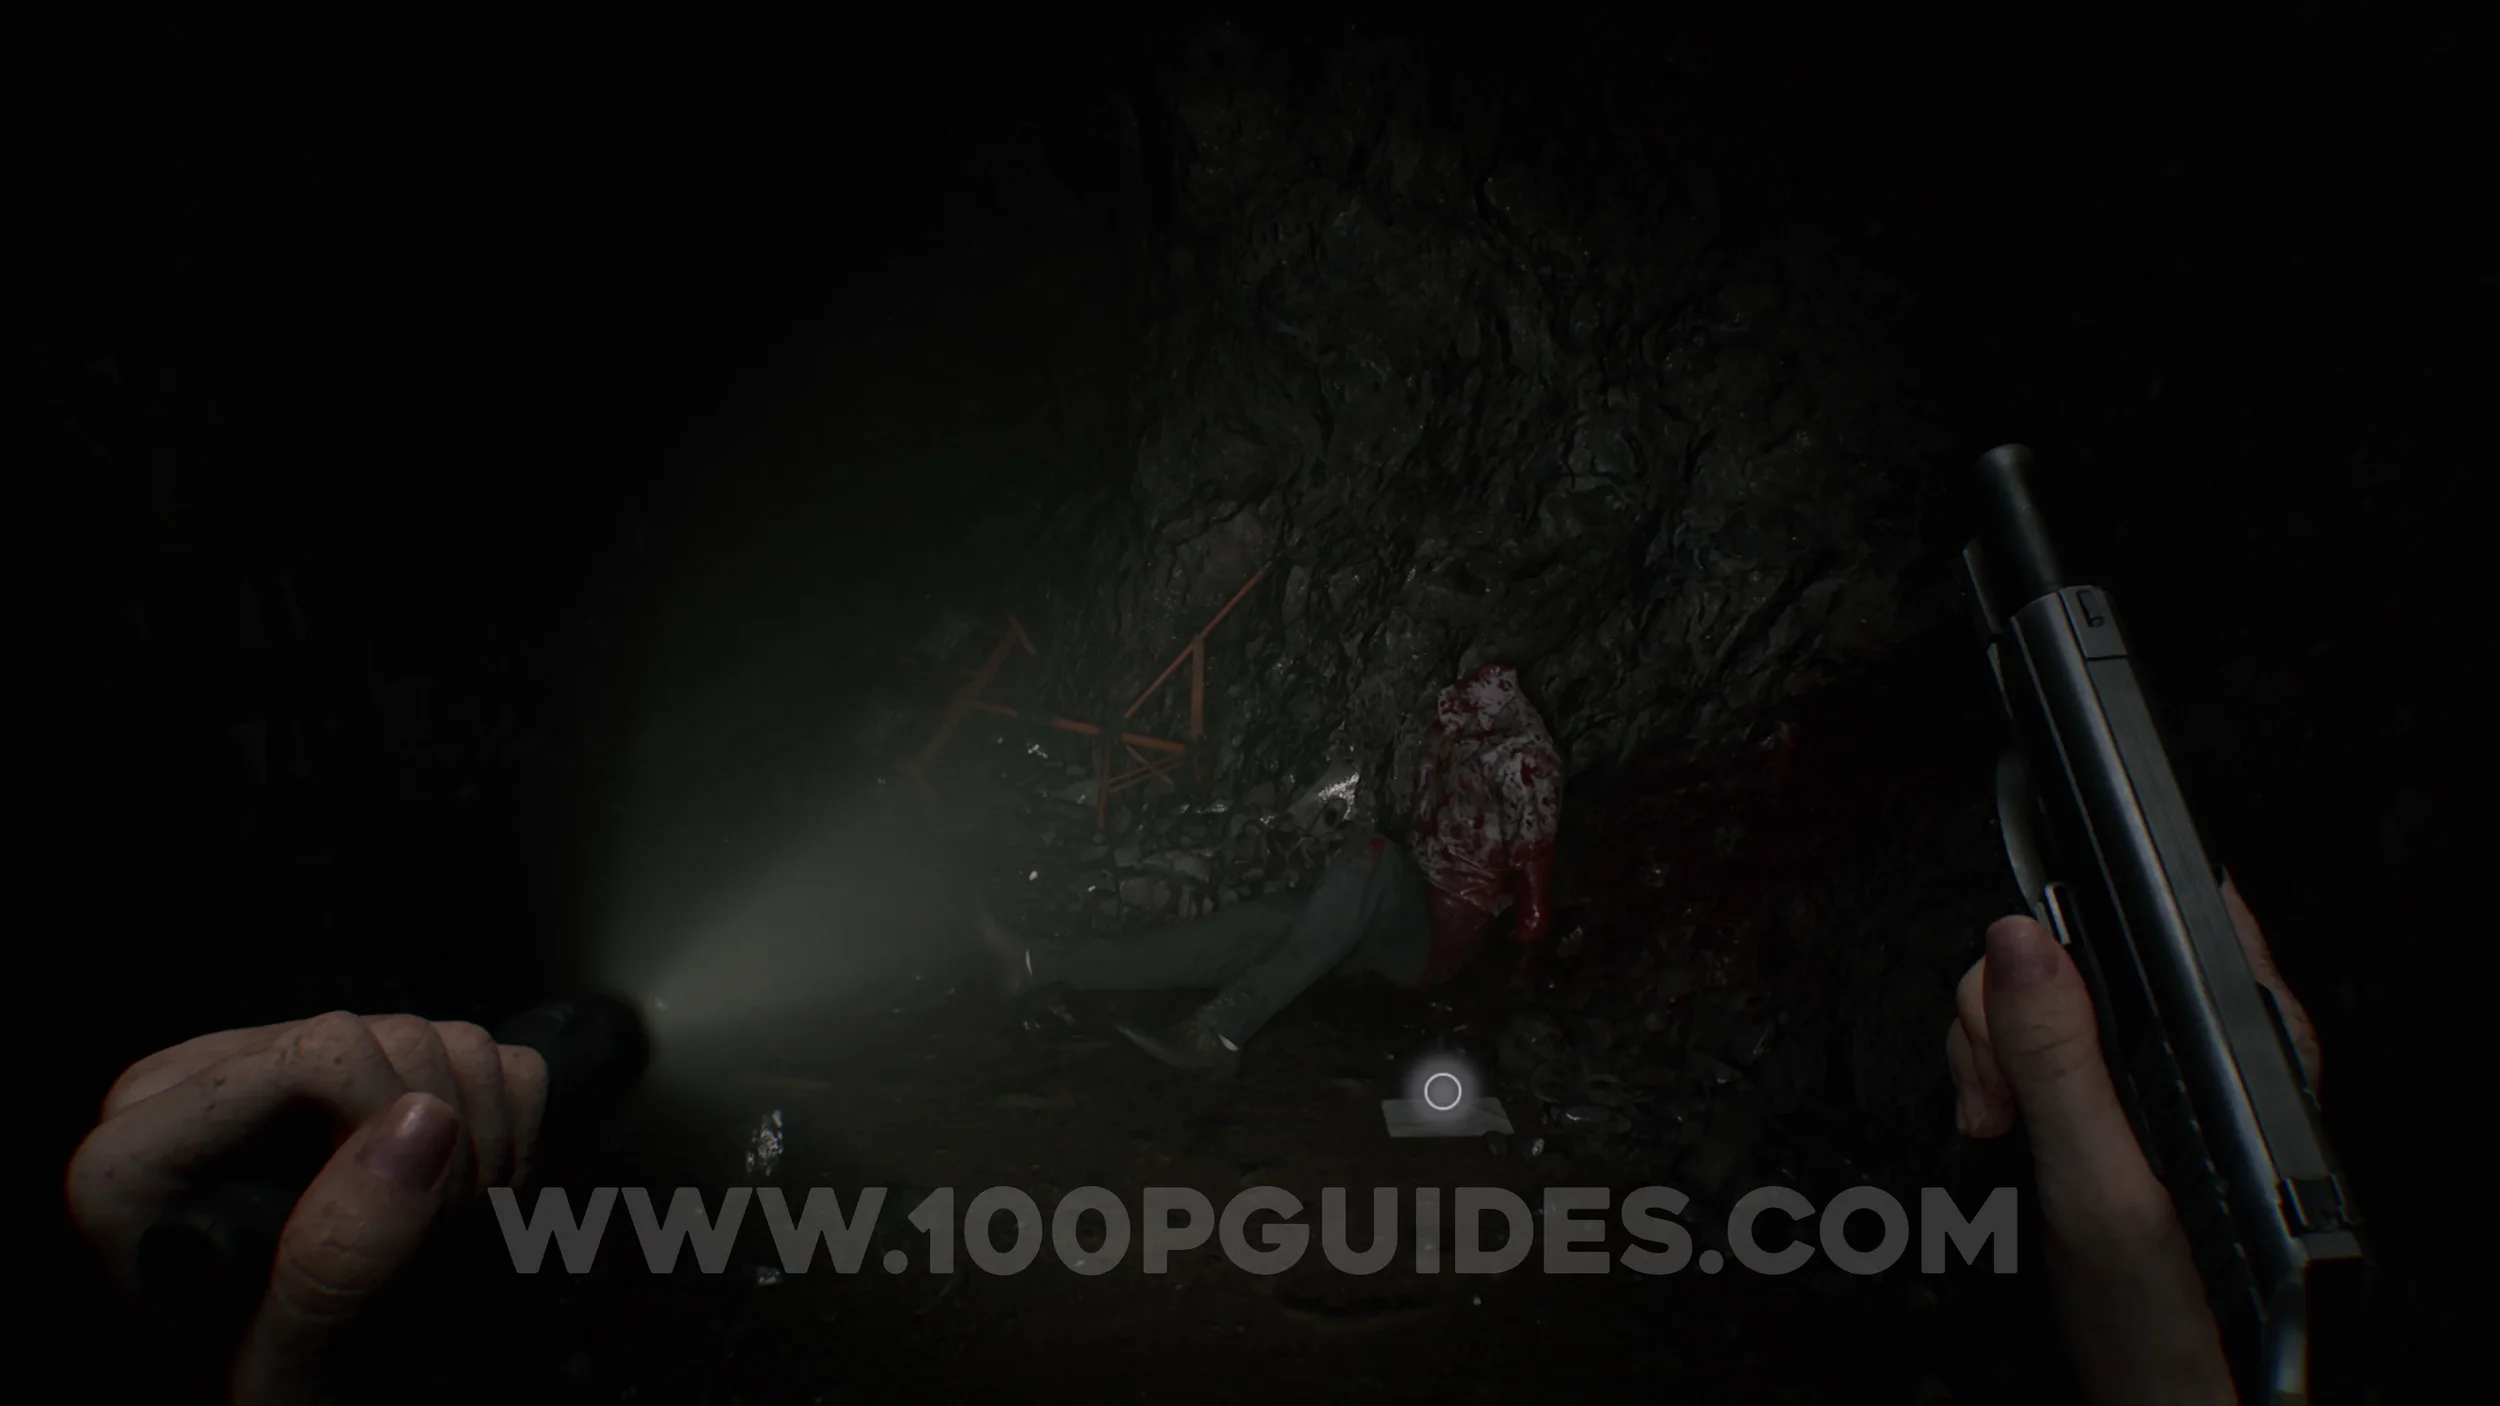
File #37 - Staff Member’s Last Words. Next to the corpse on the ground in front of you, as soon as you regain control of Grace.
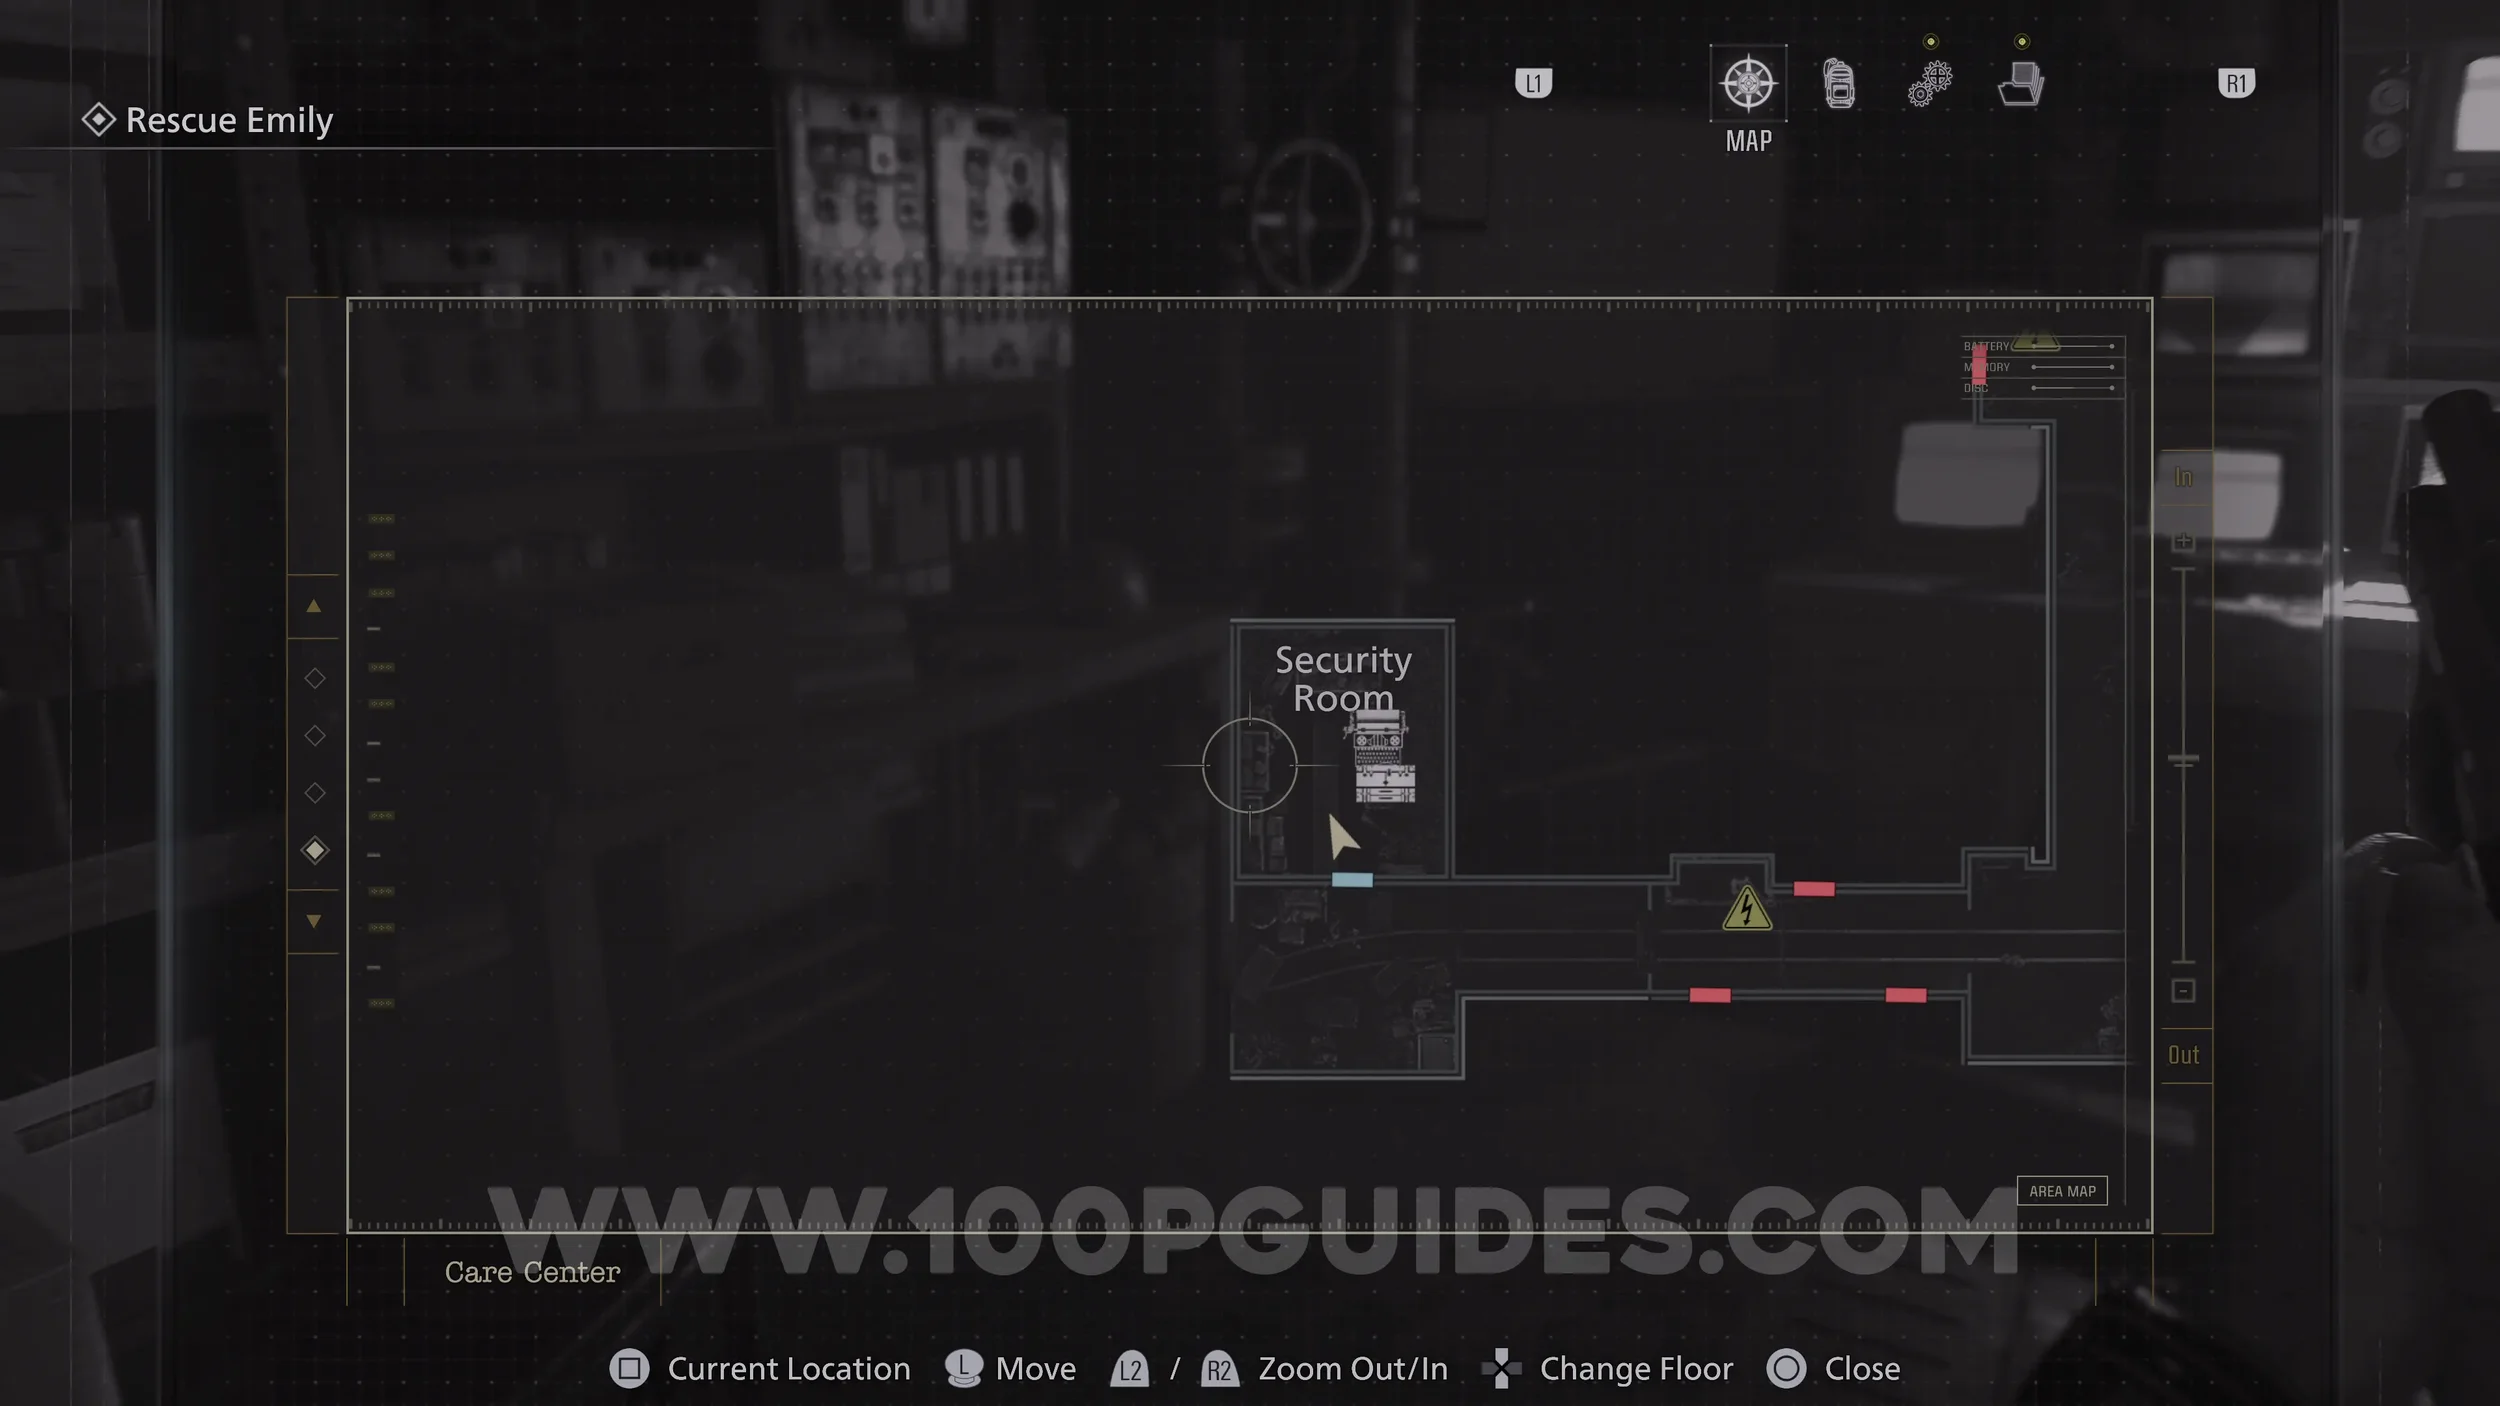
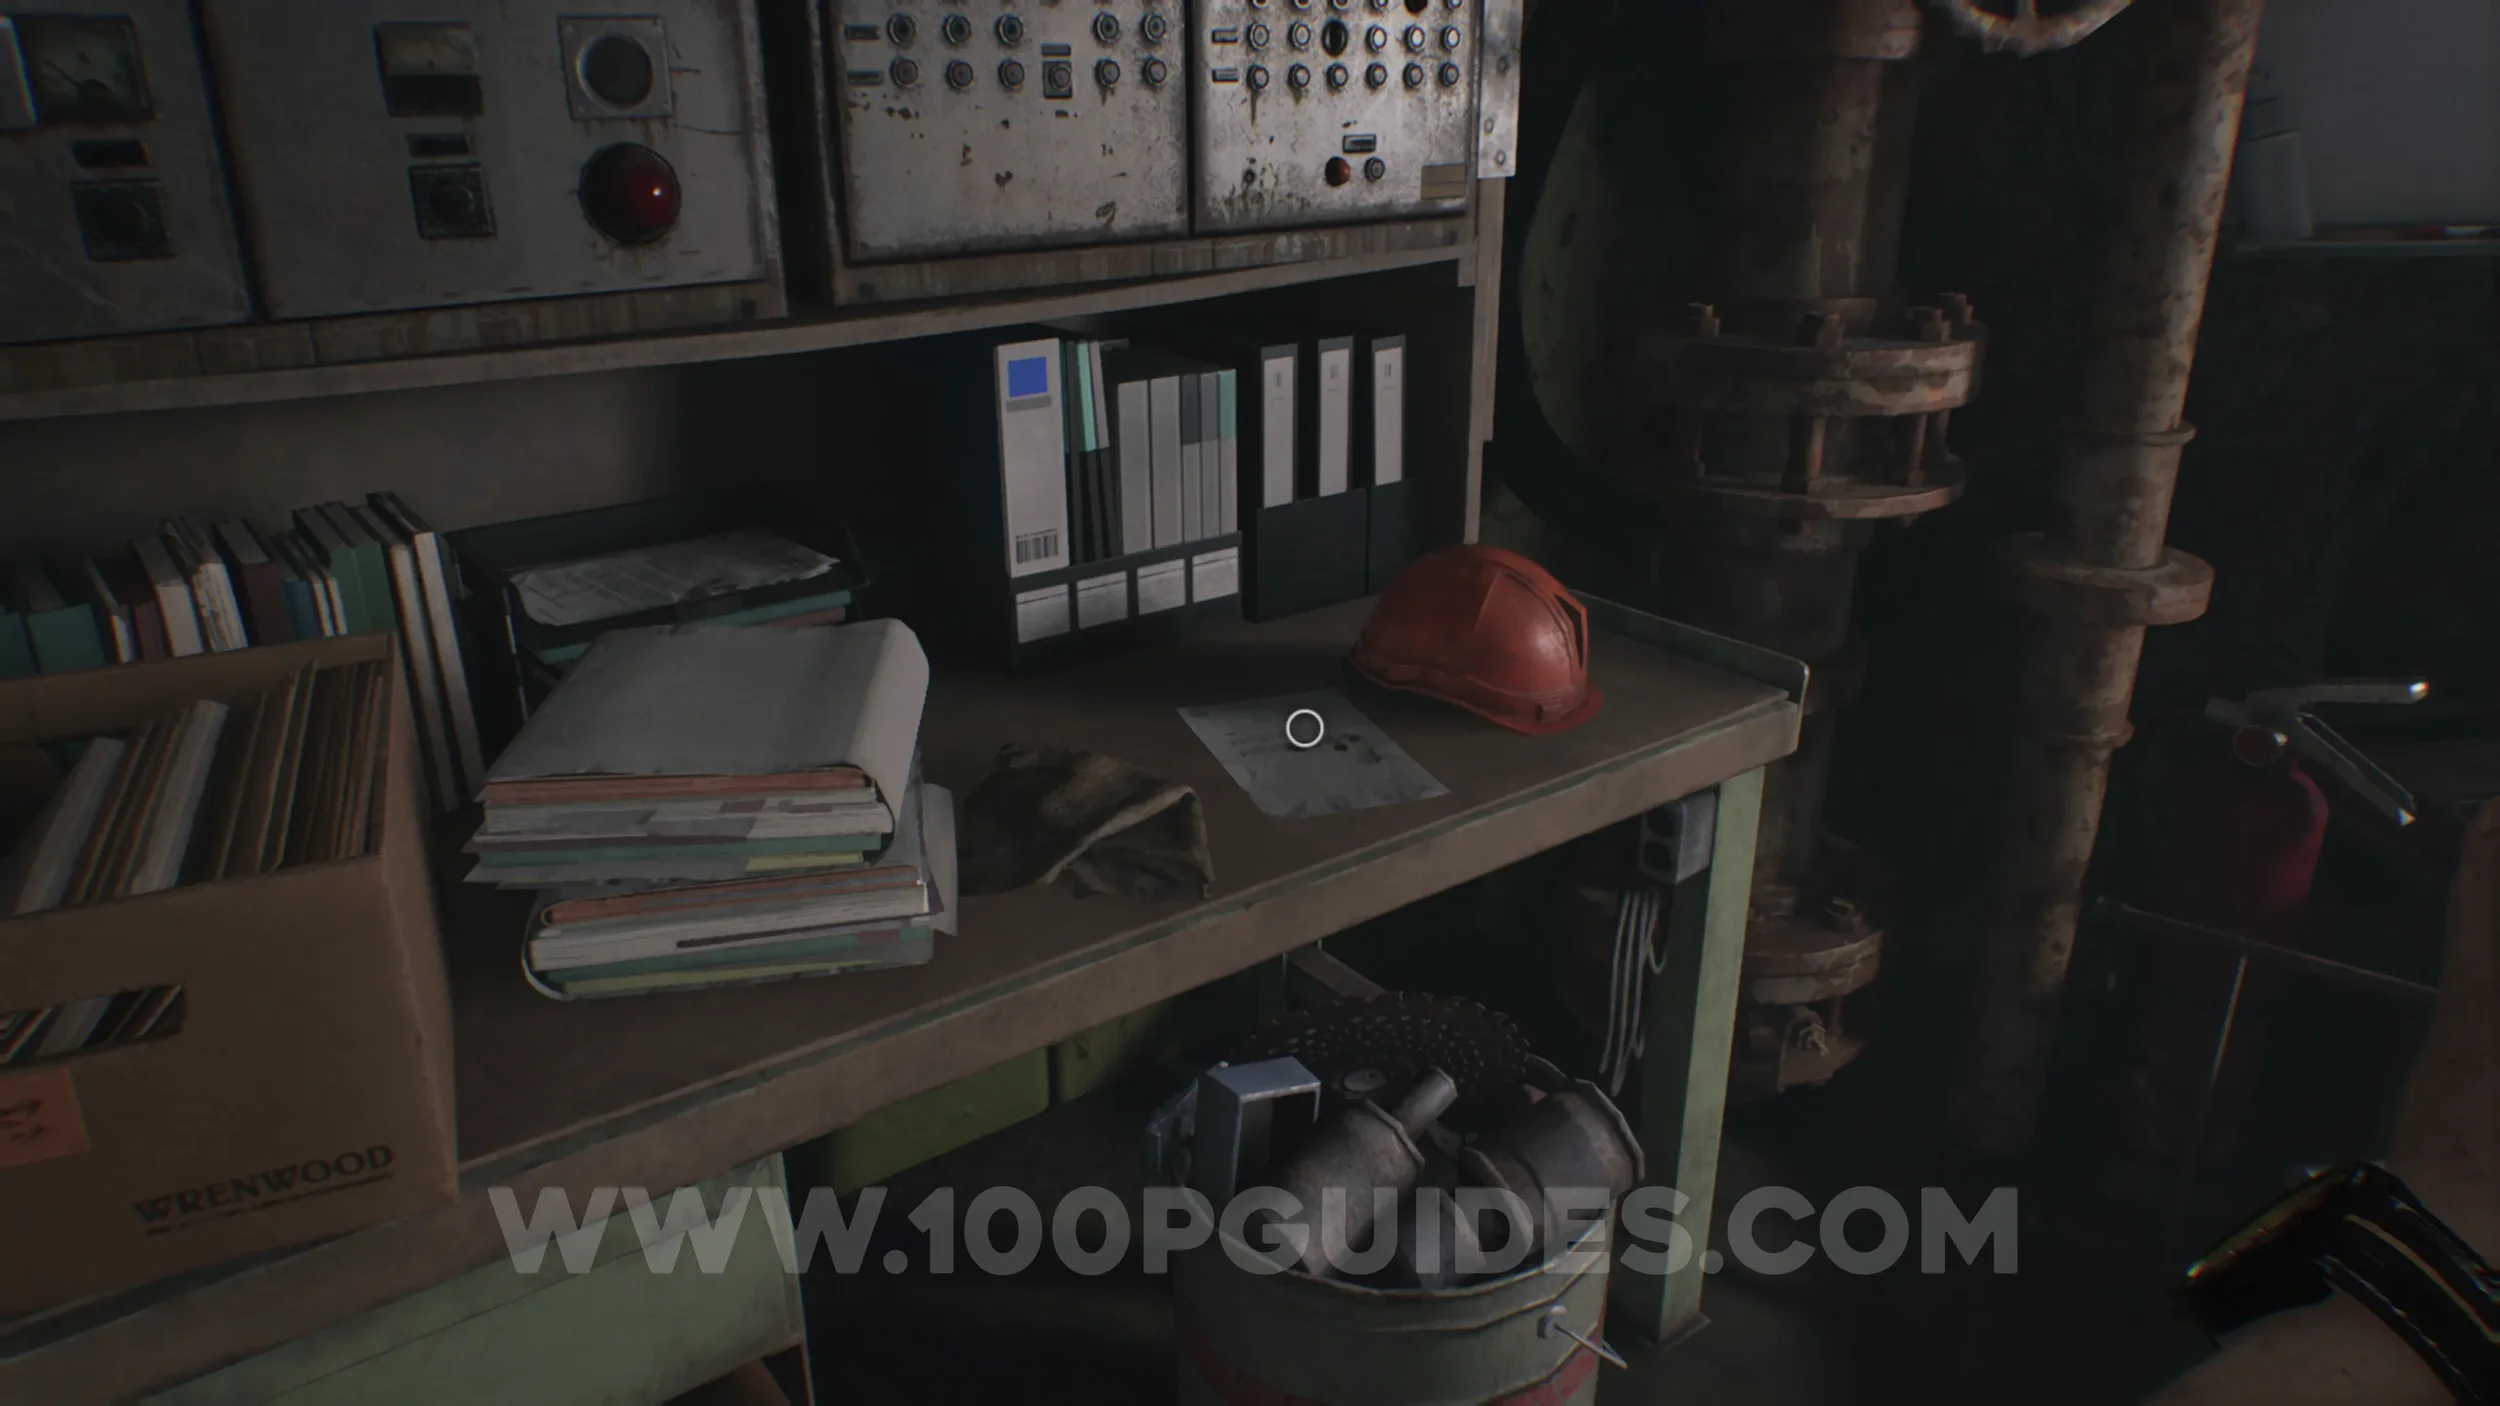
File #38 - Operation to Eliminate “The Girl”. Found in the basement Safe Room.
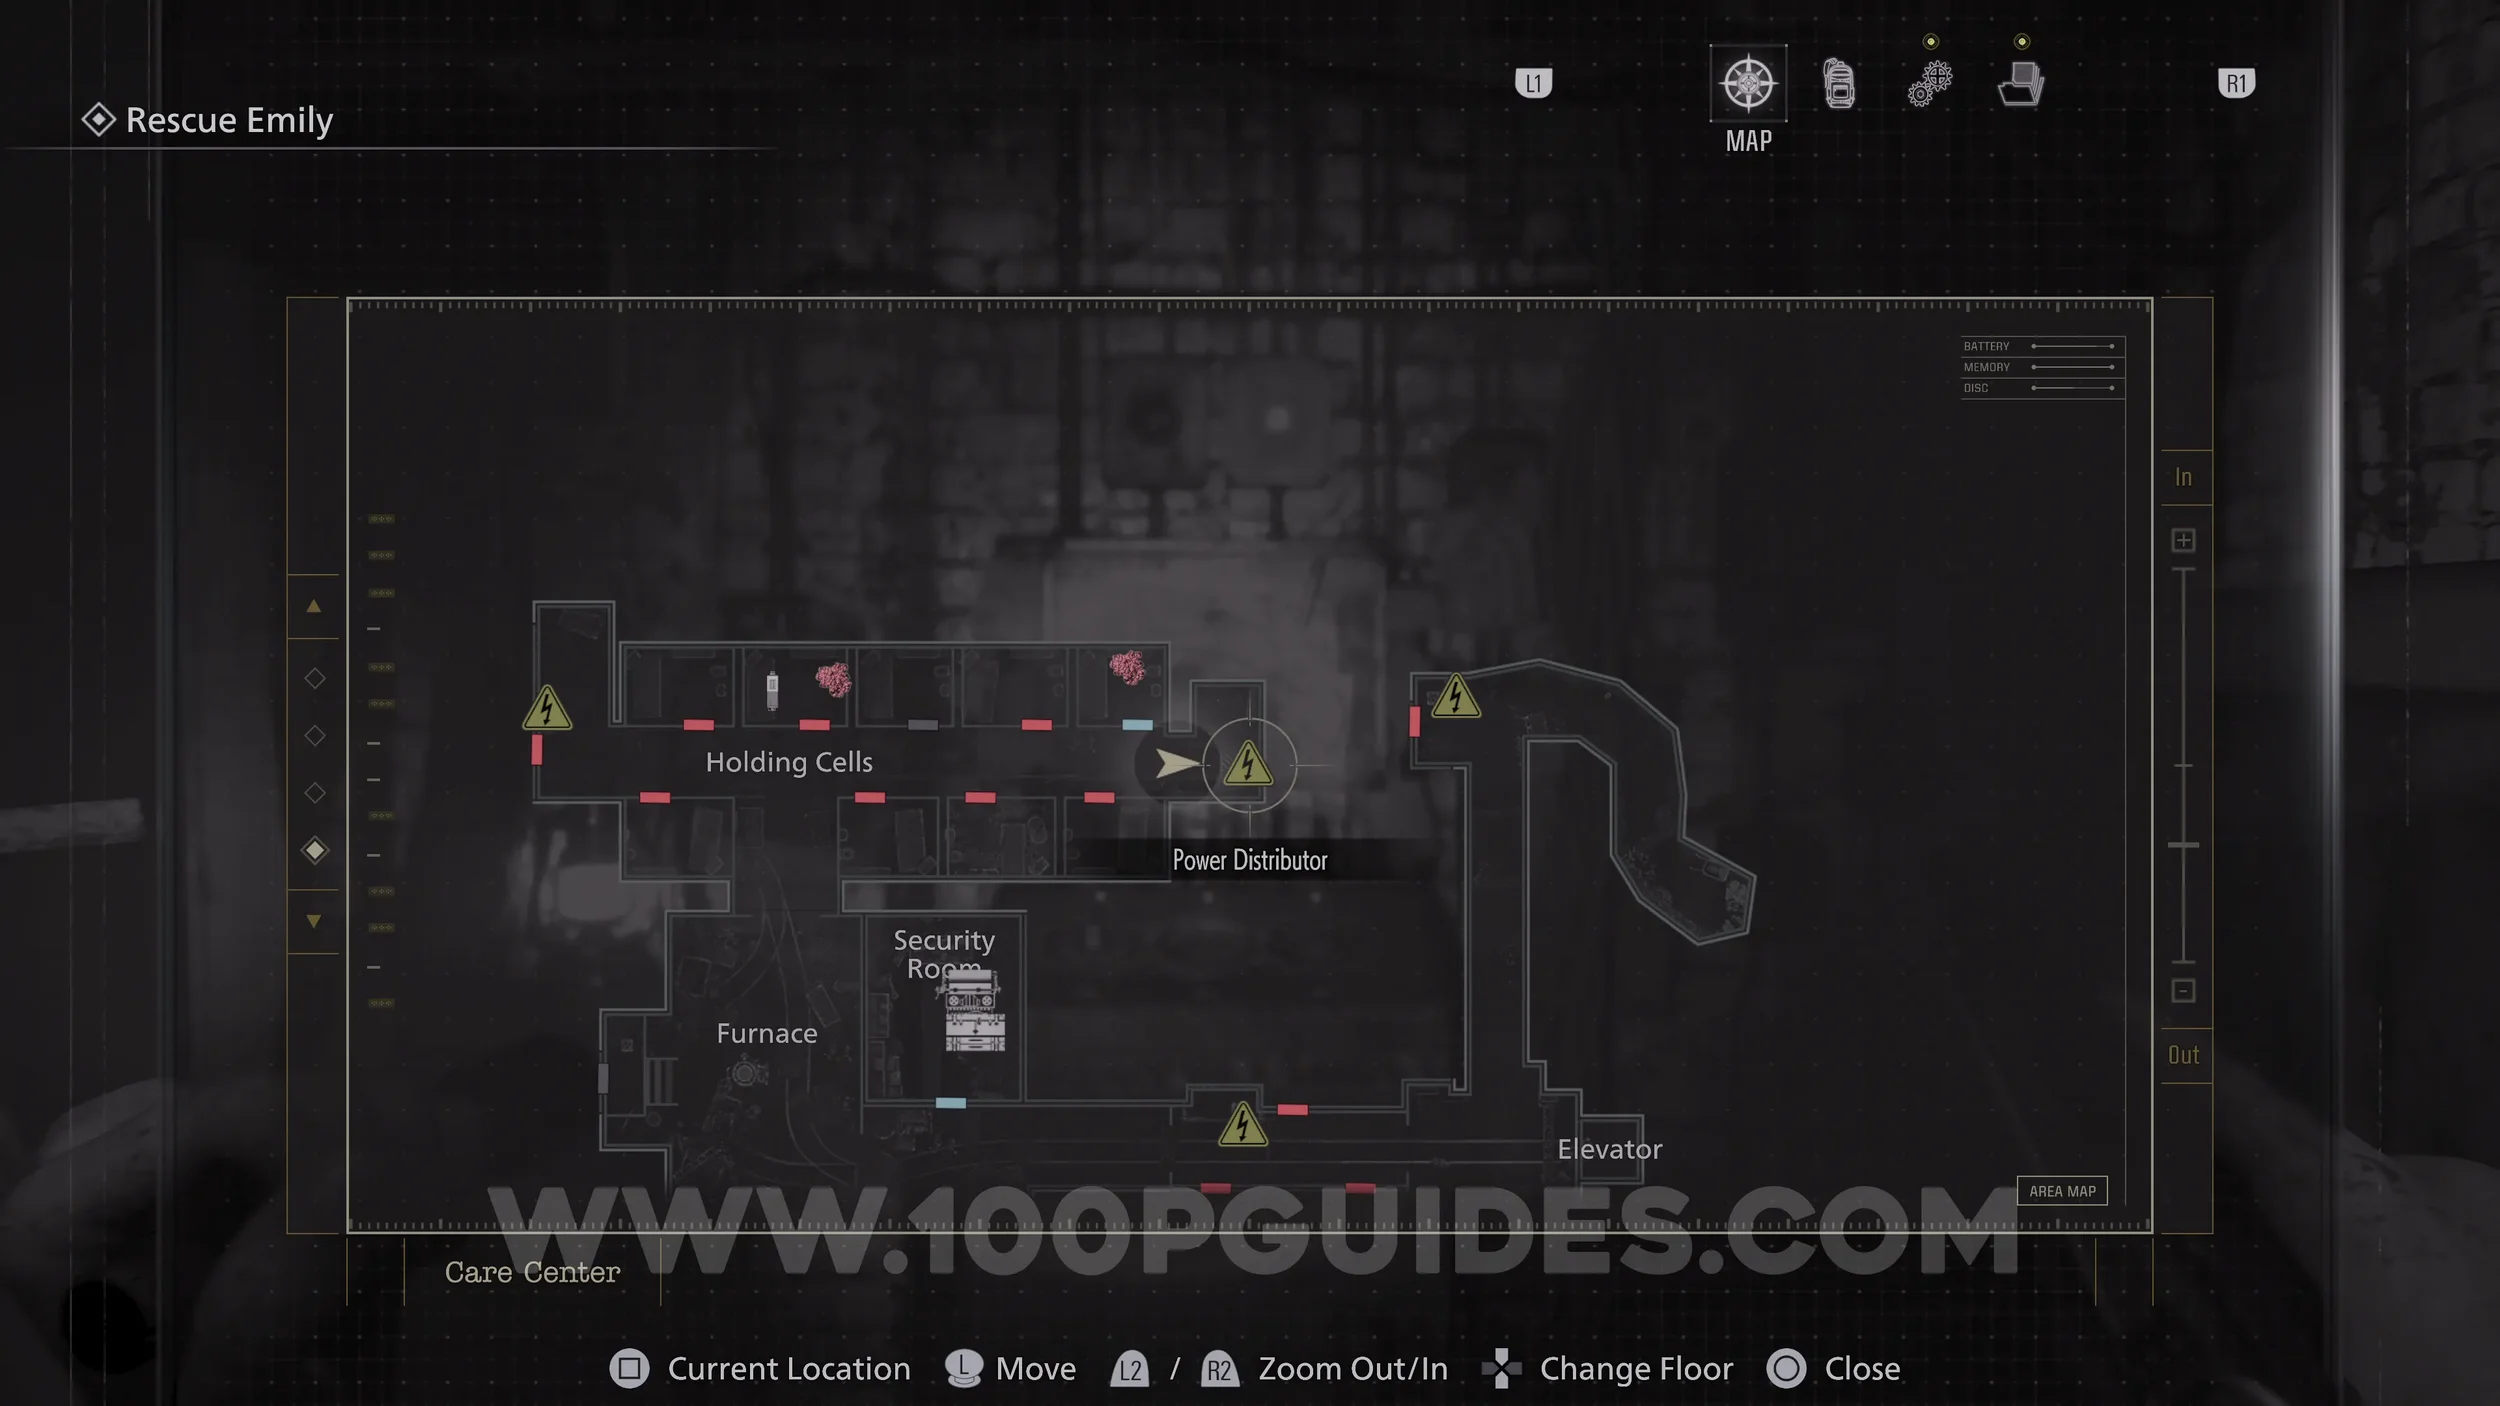
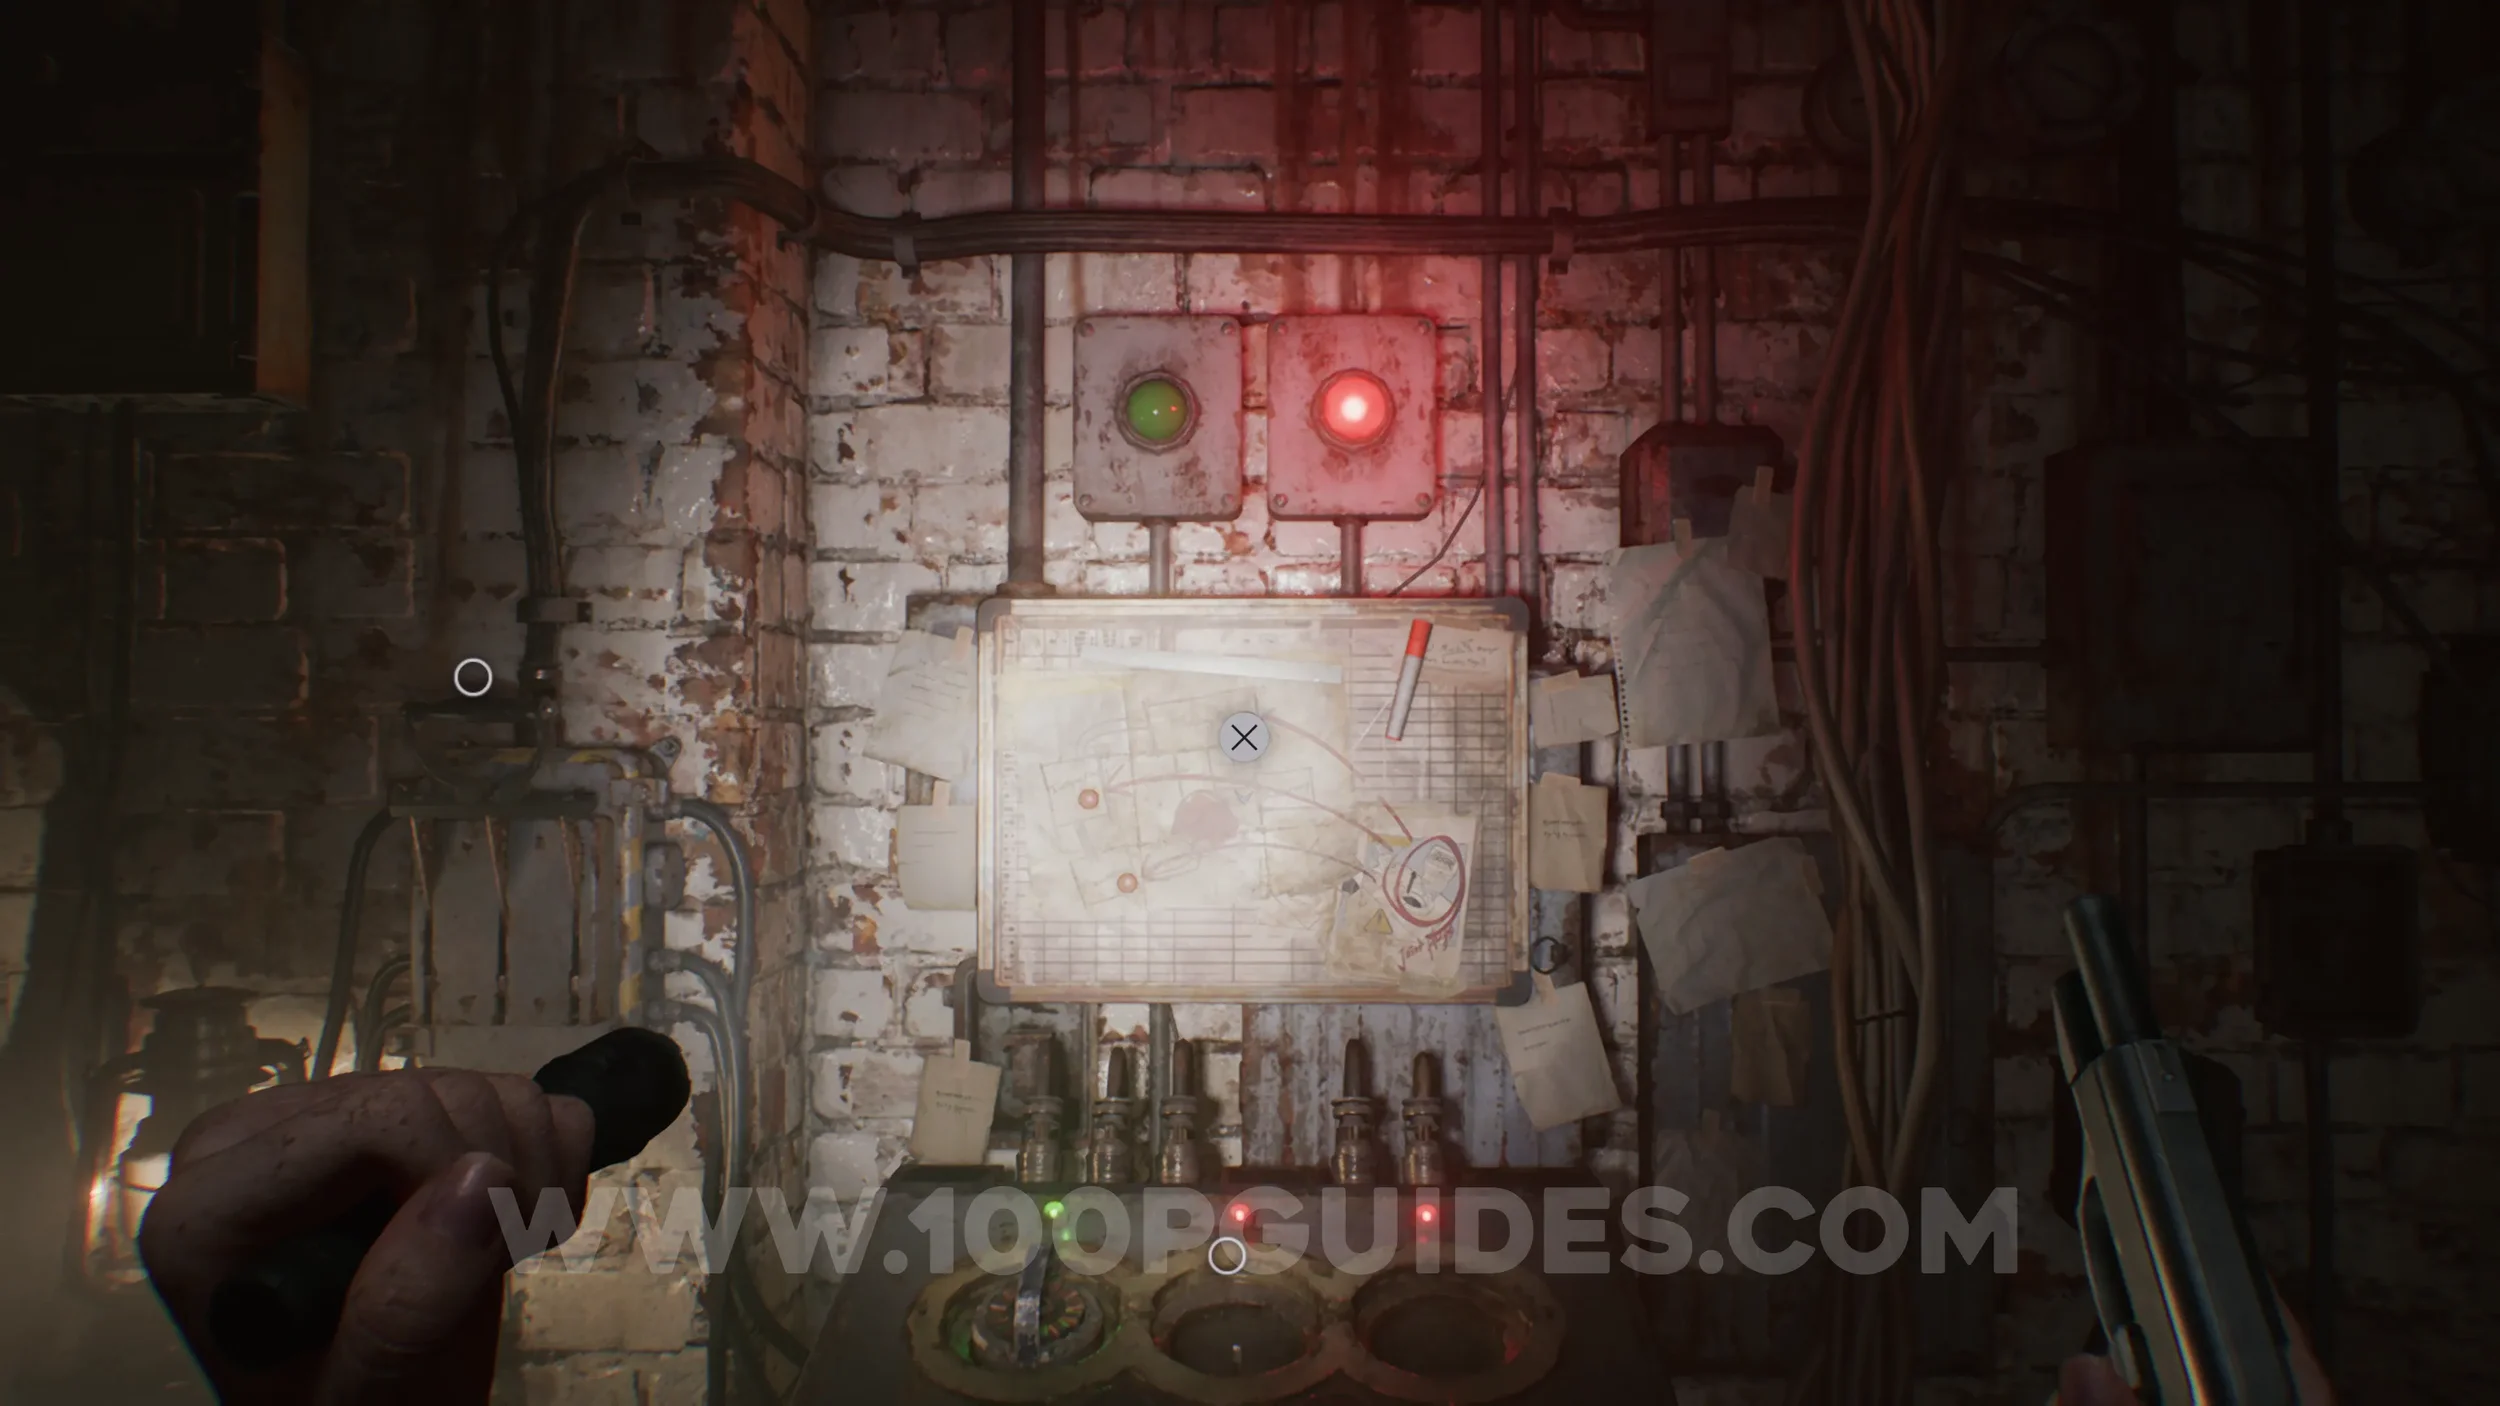
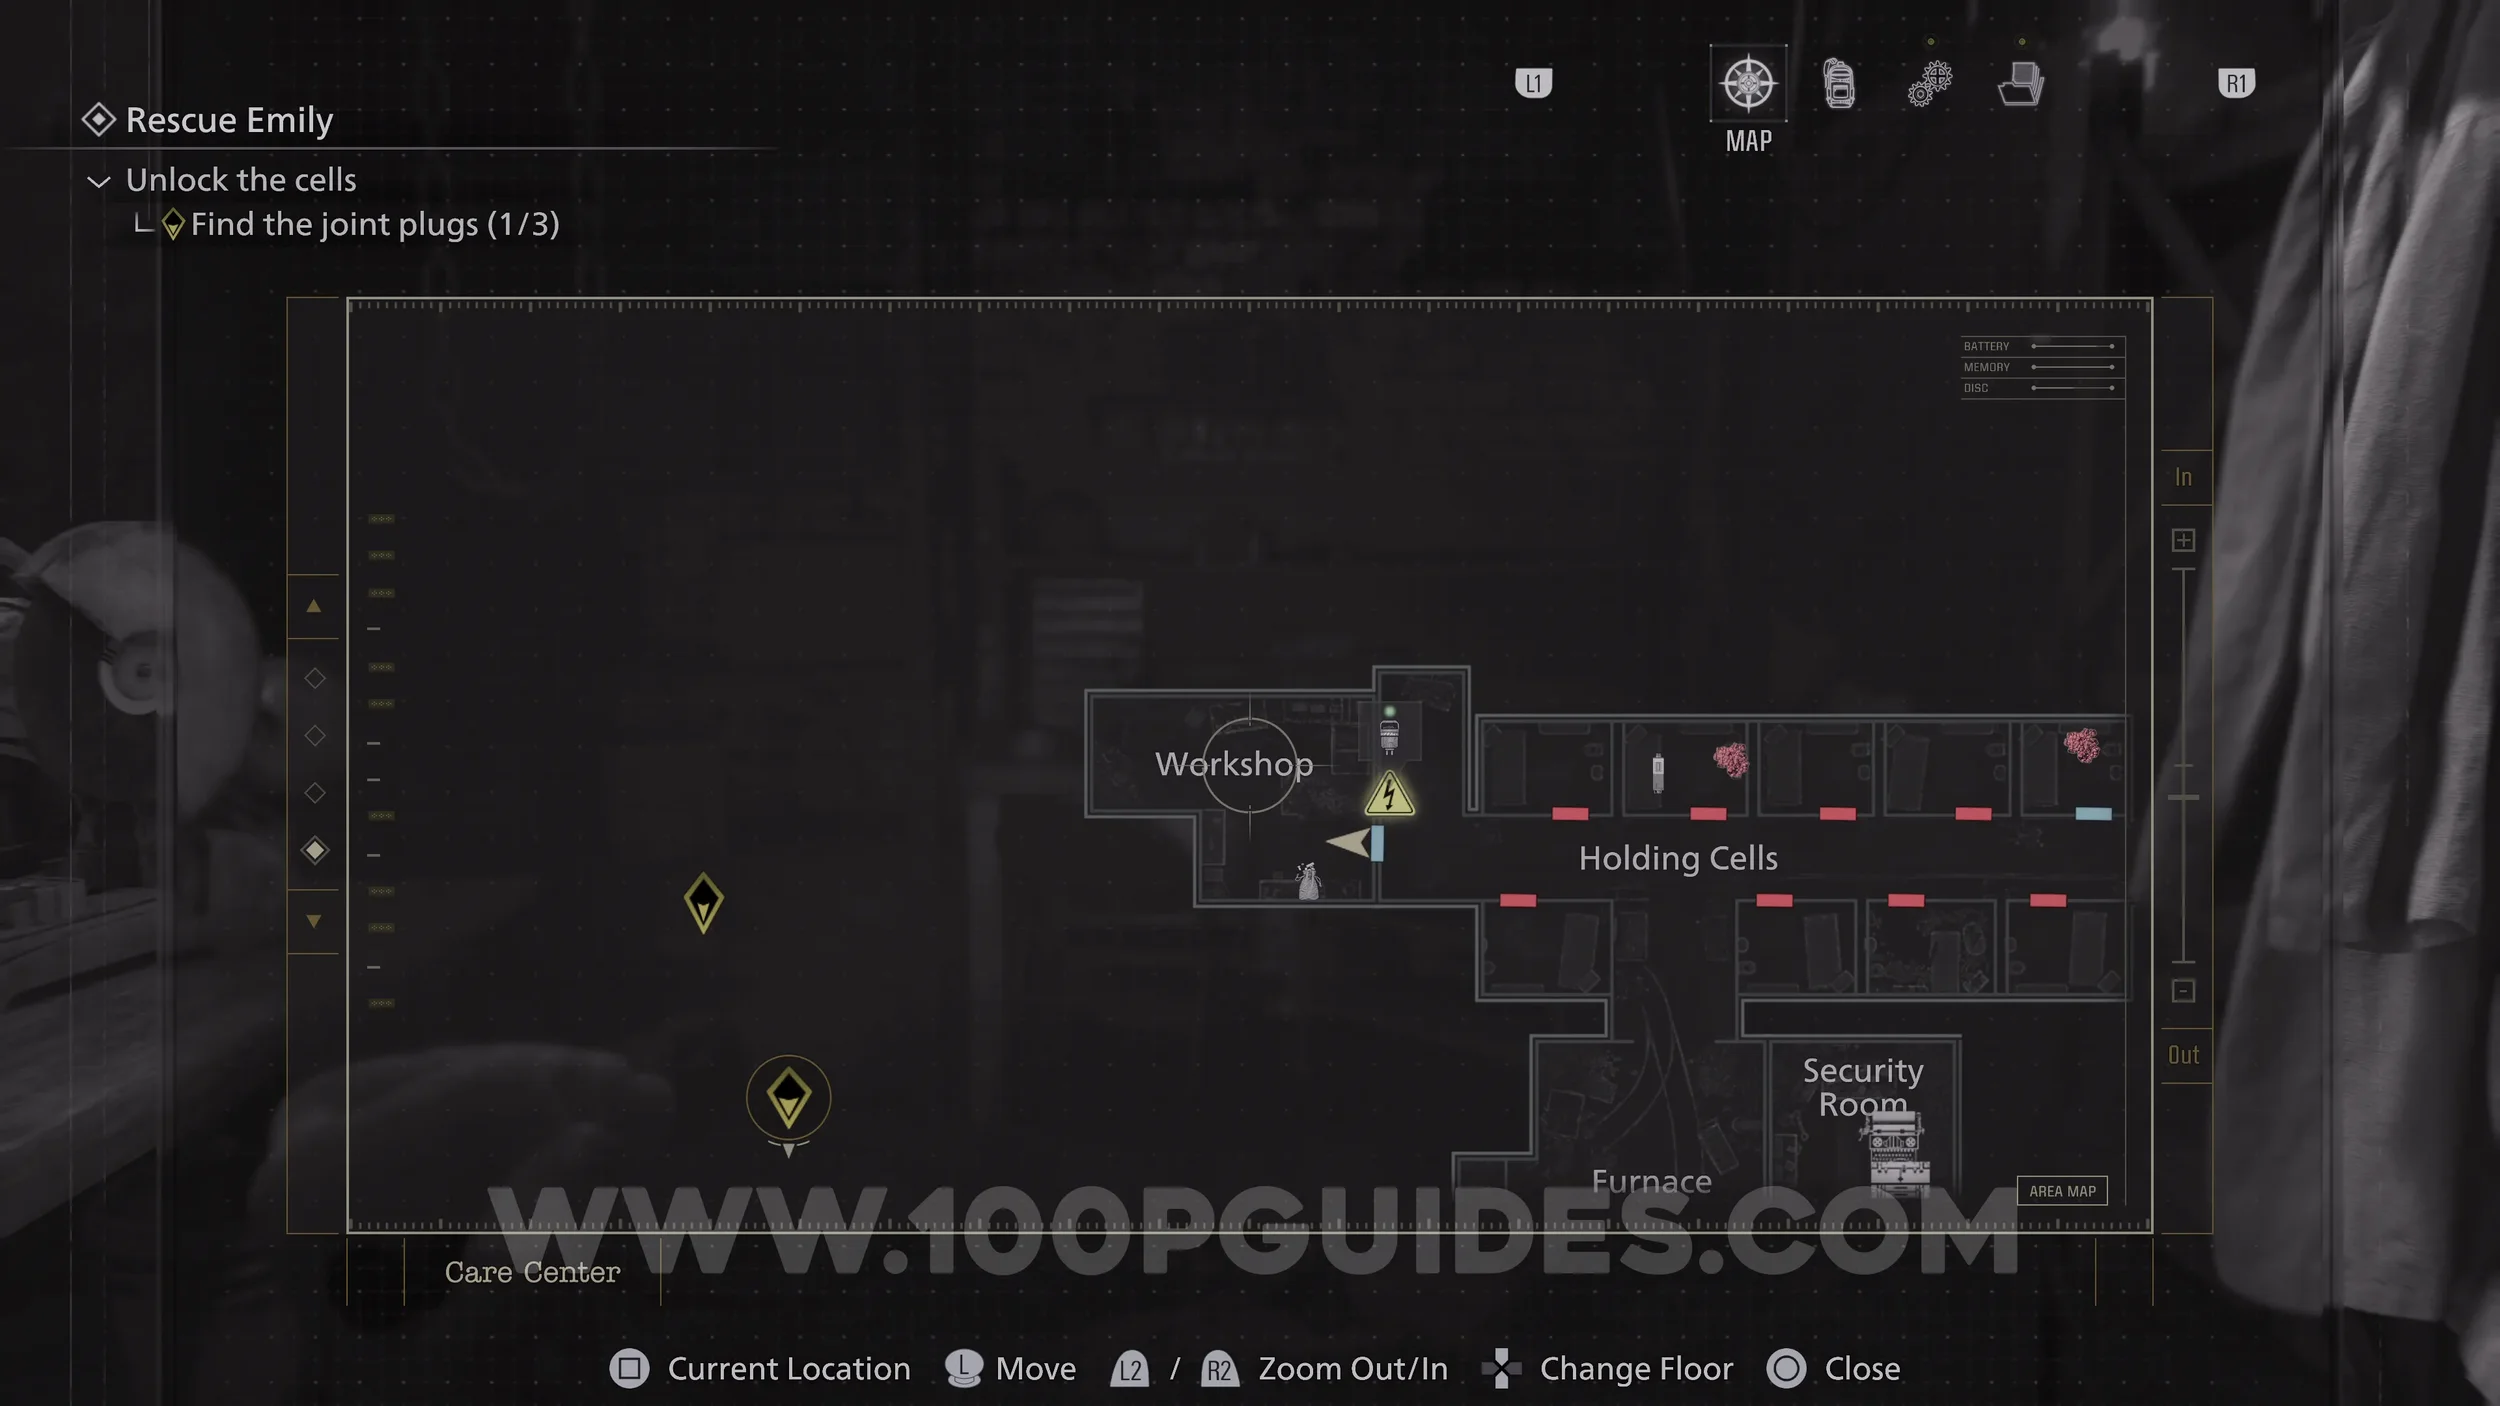
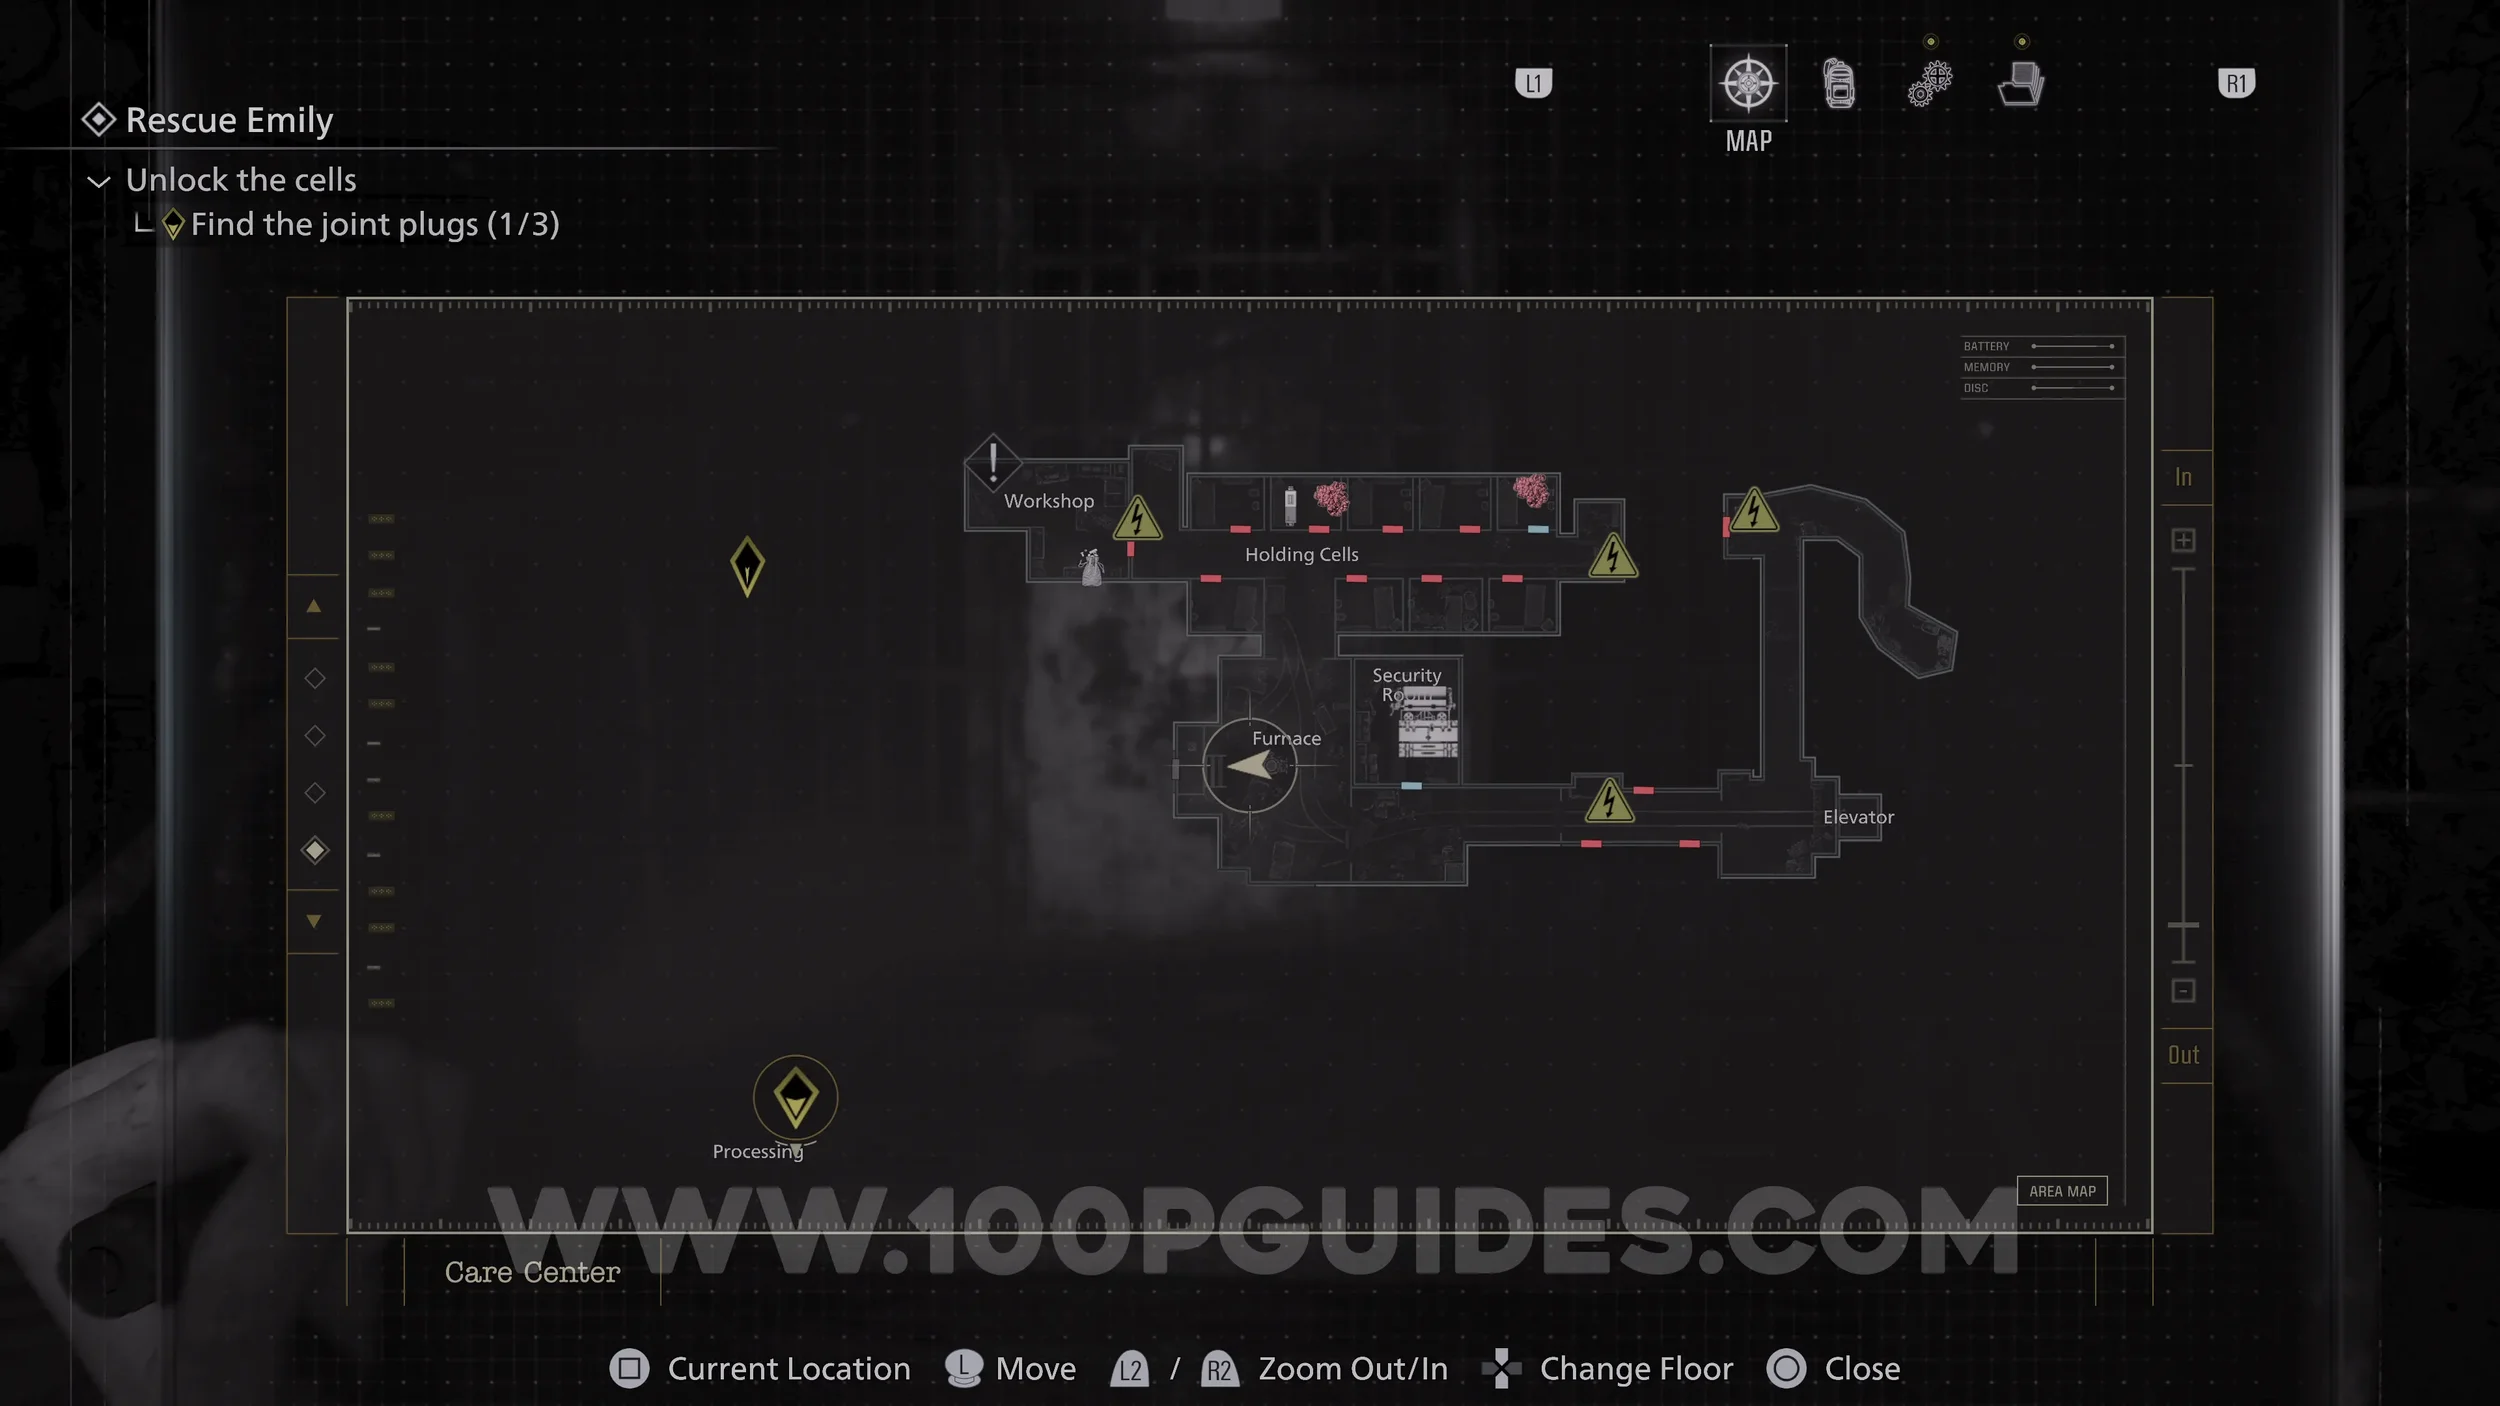
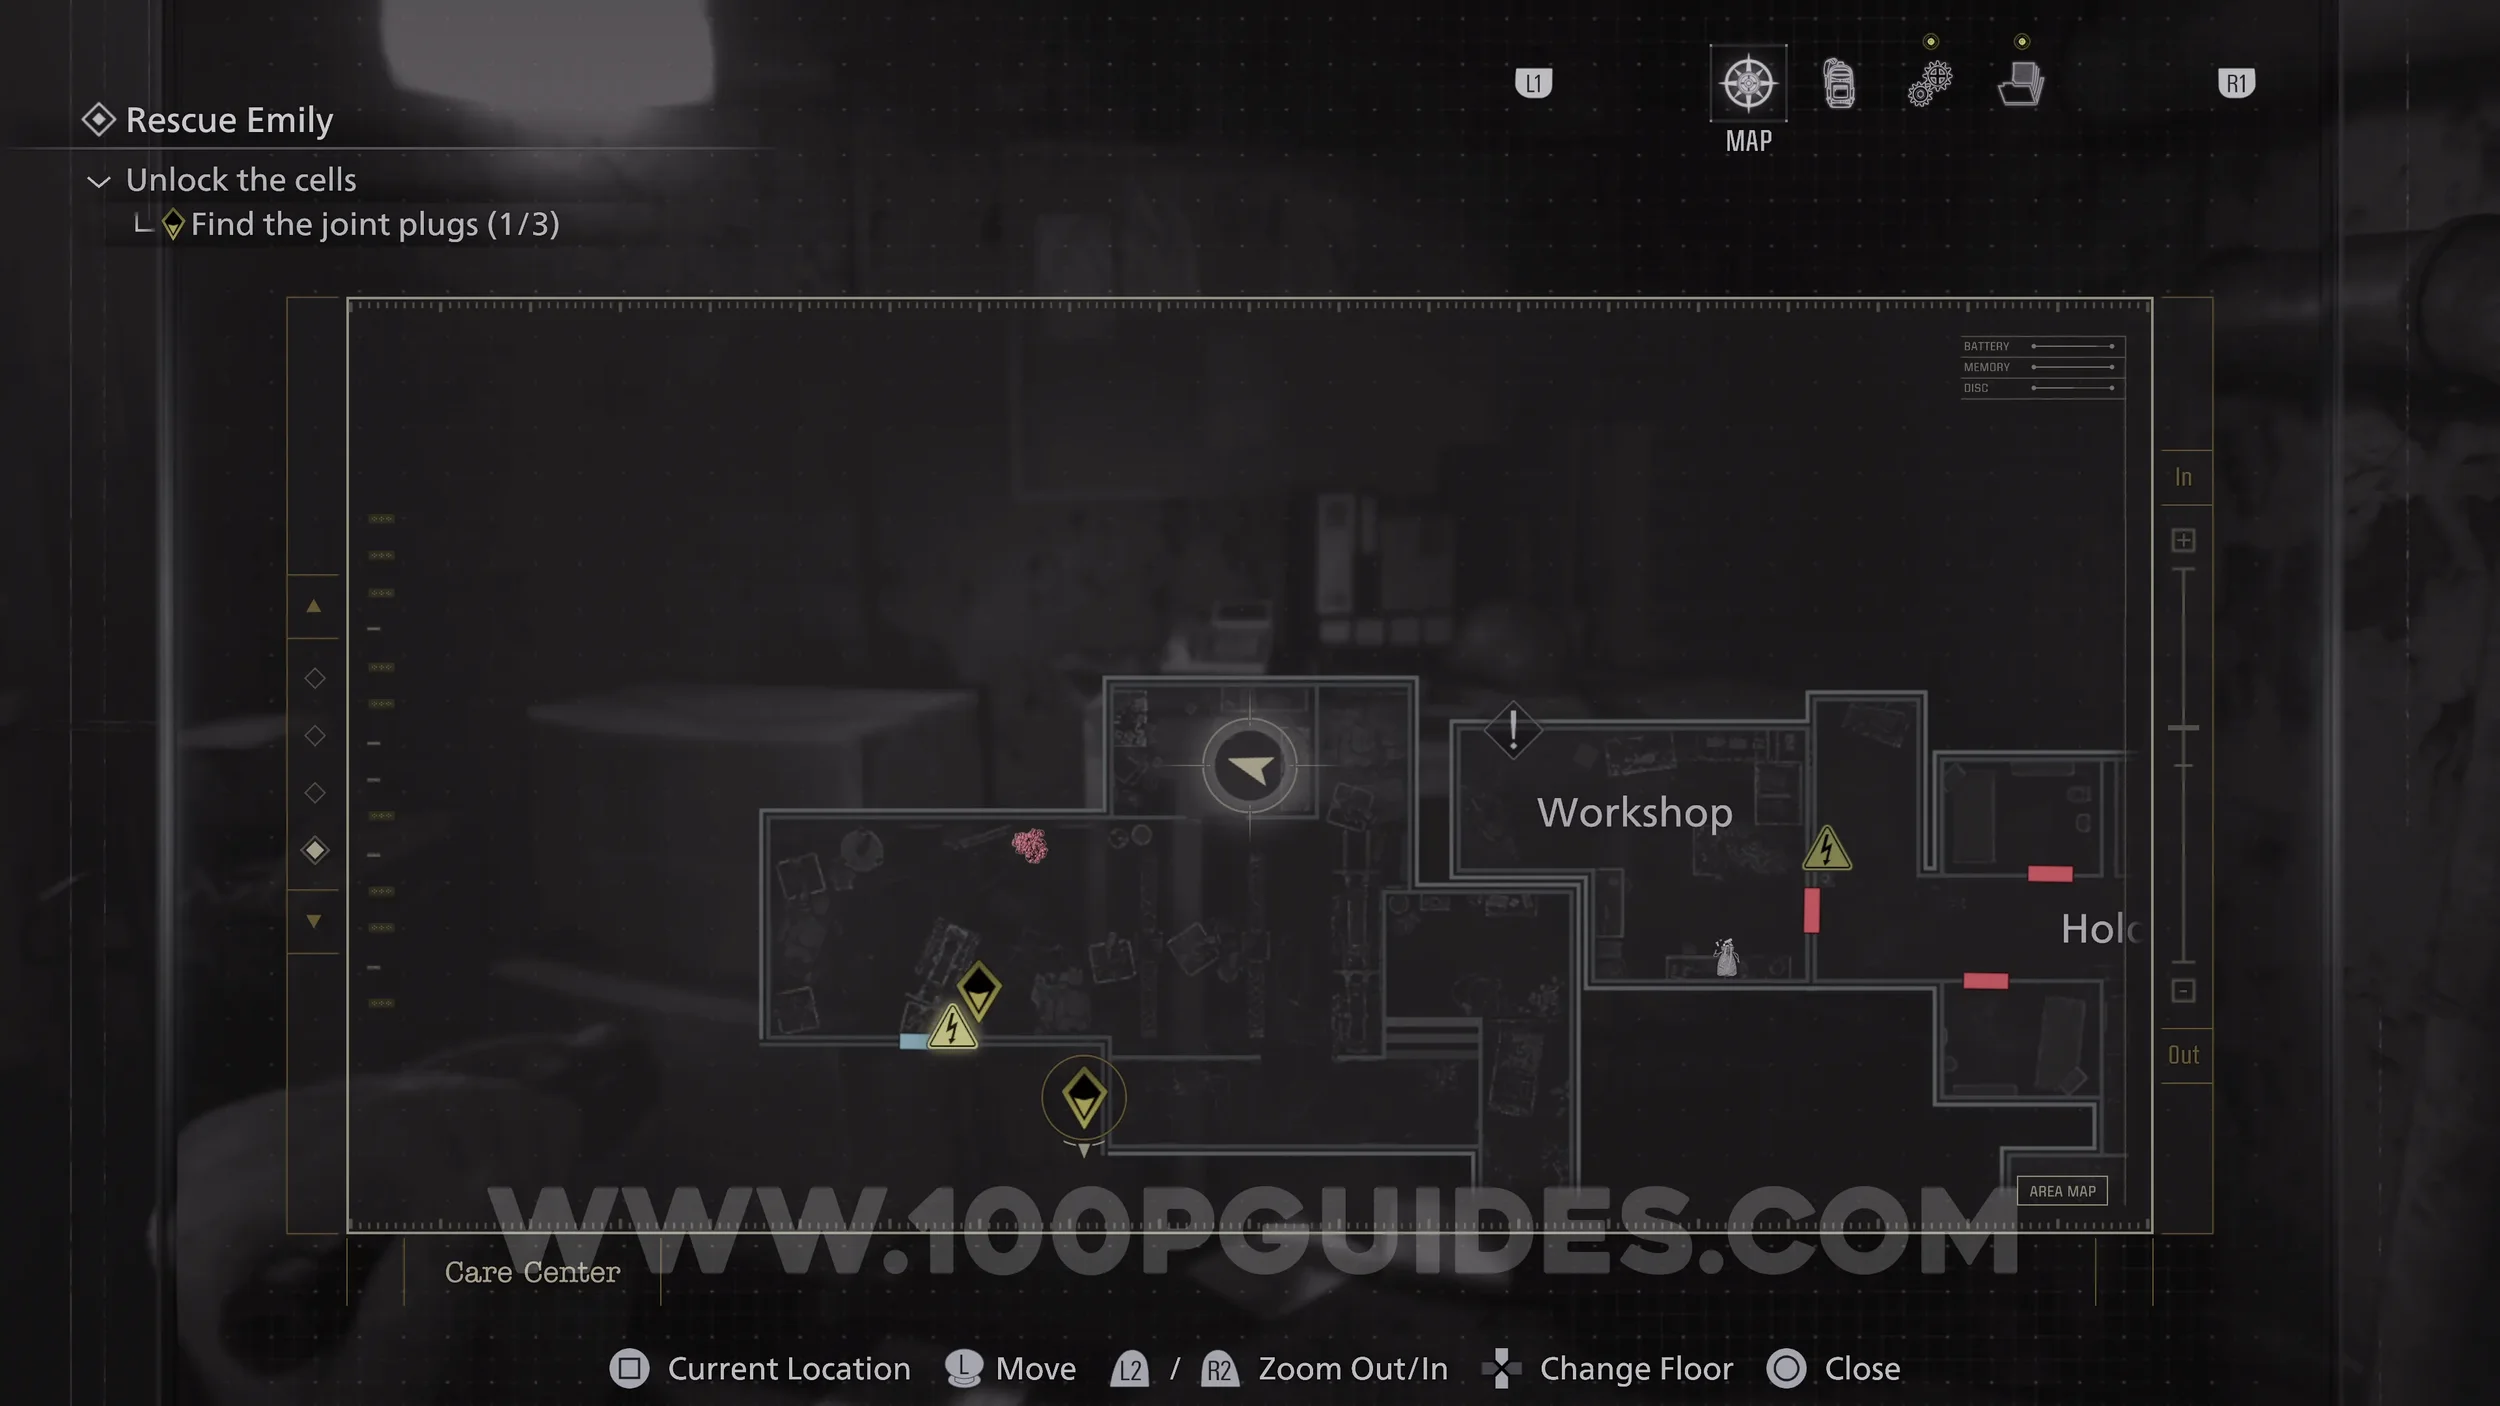
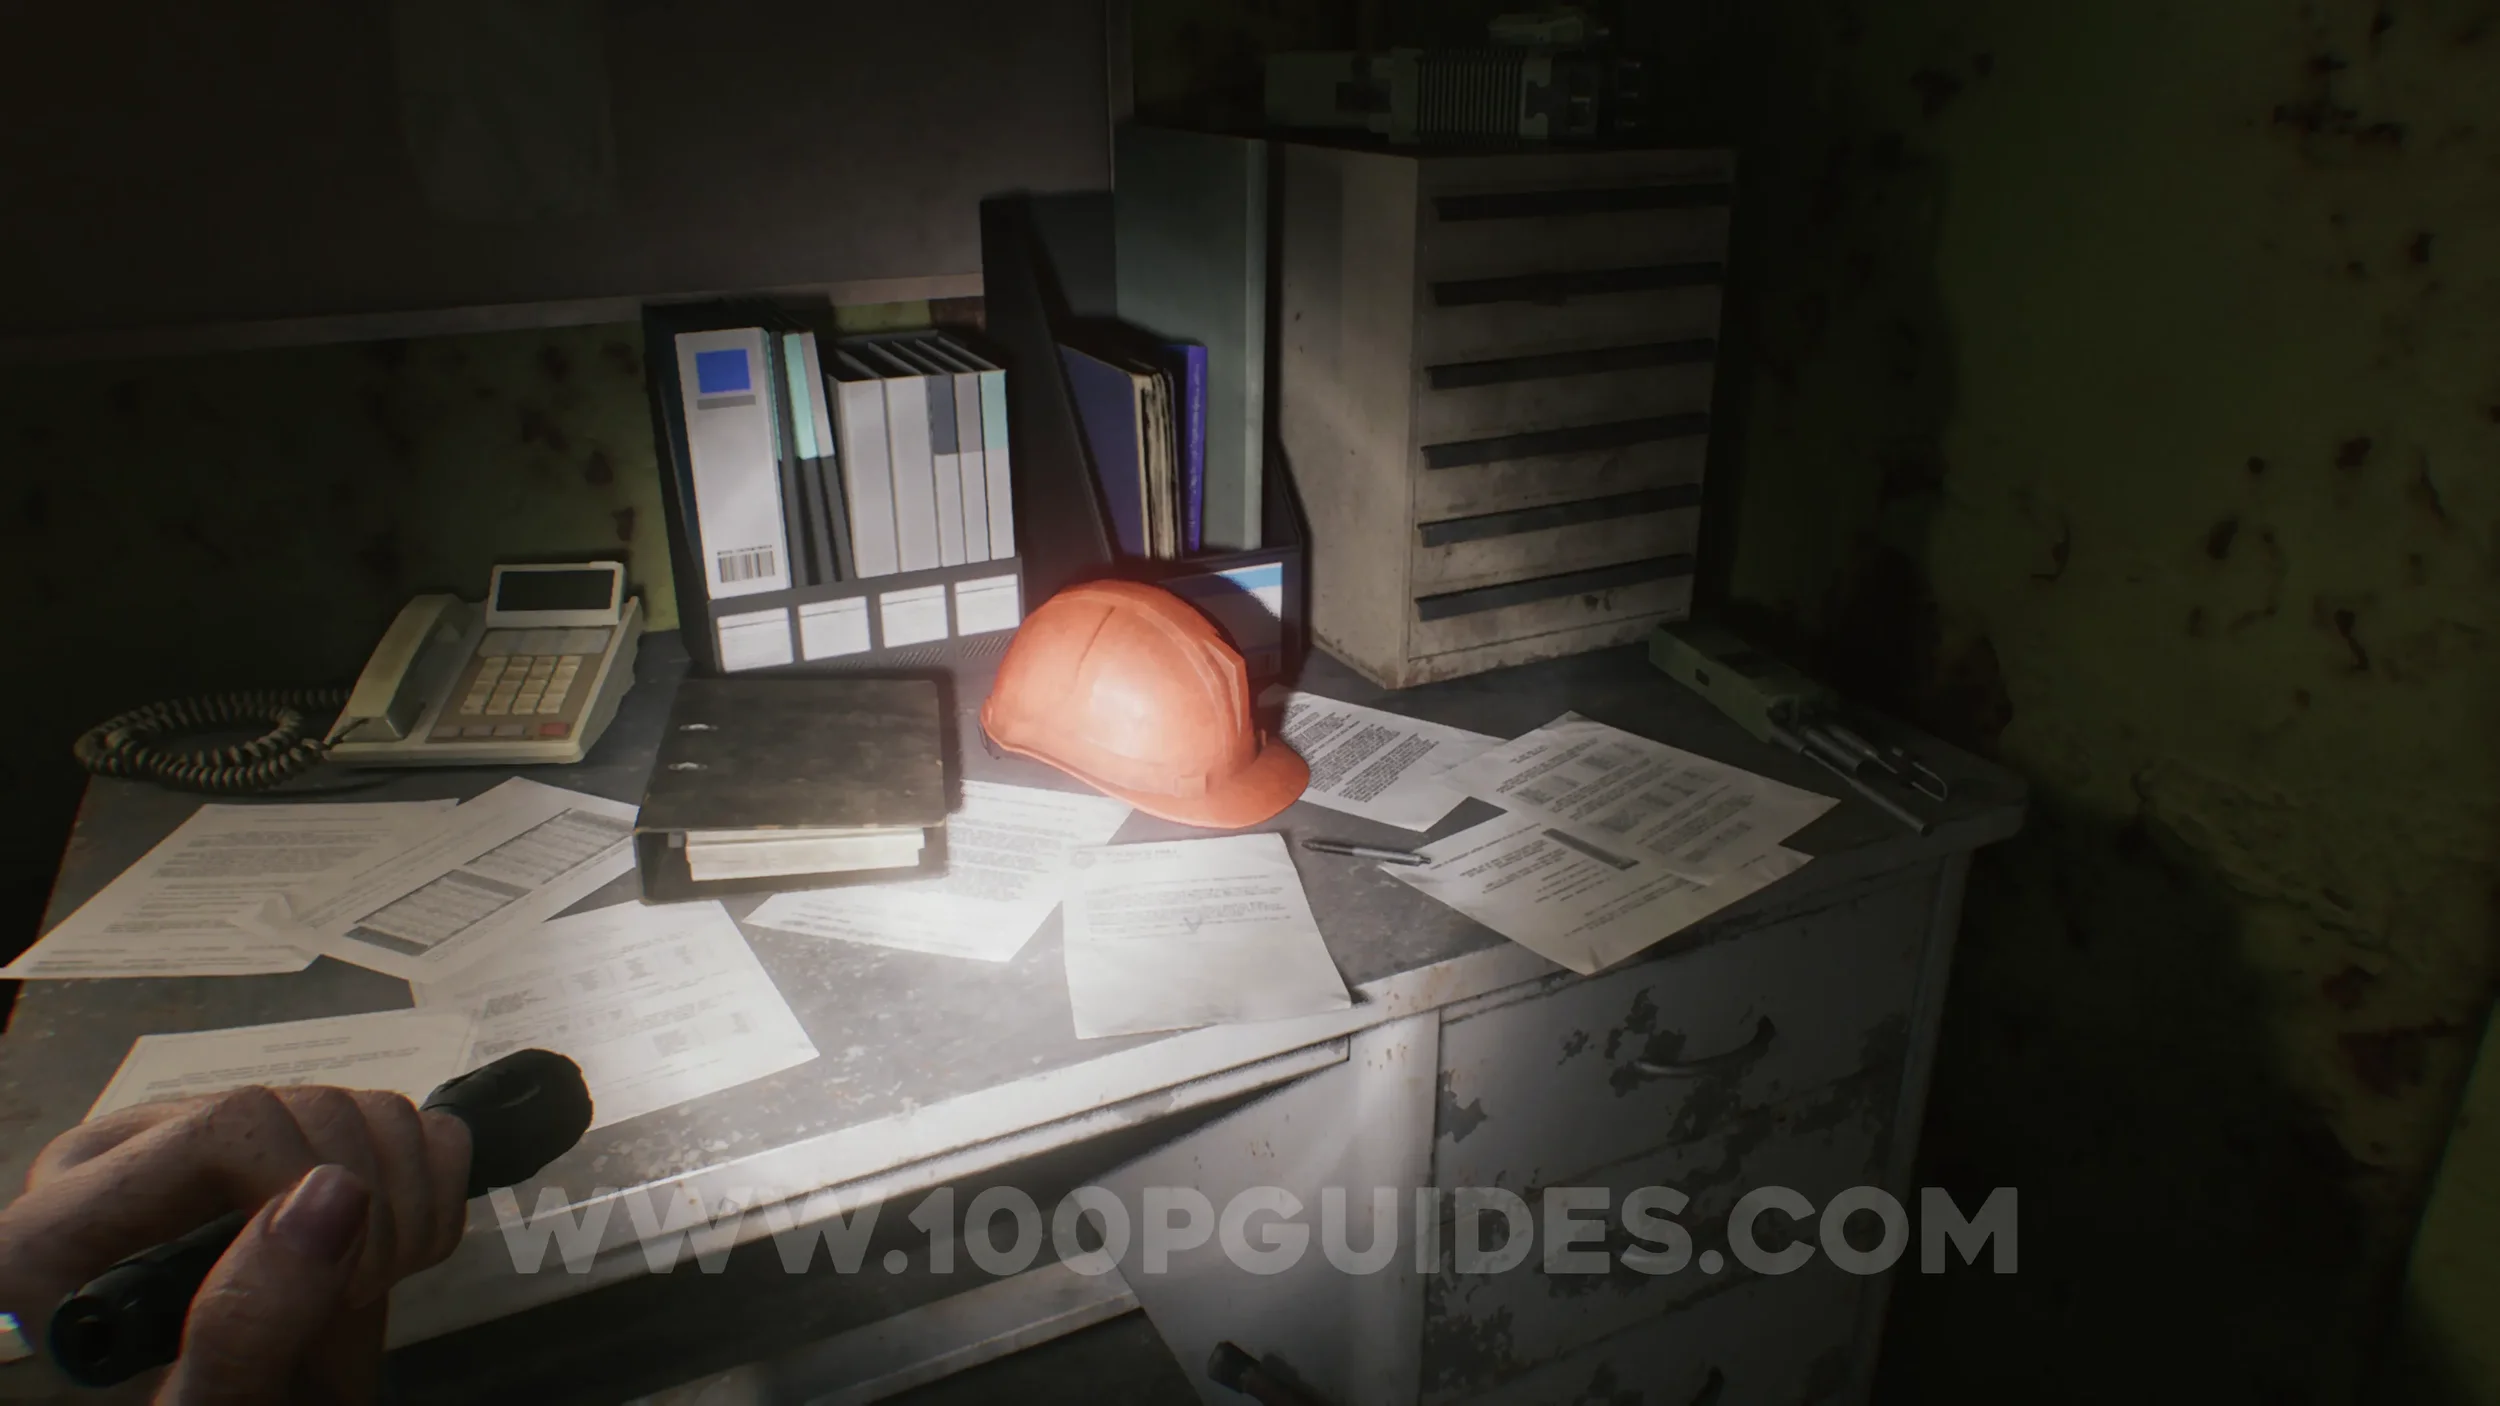
File #39 - Unlocking the Cells. Above the machine where you have to insert the joint plugs.
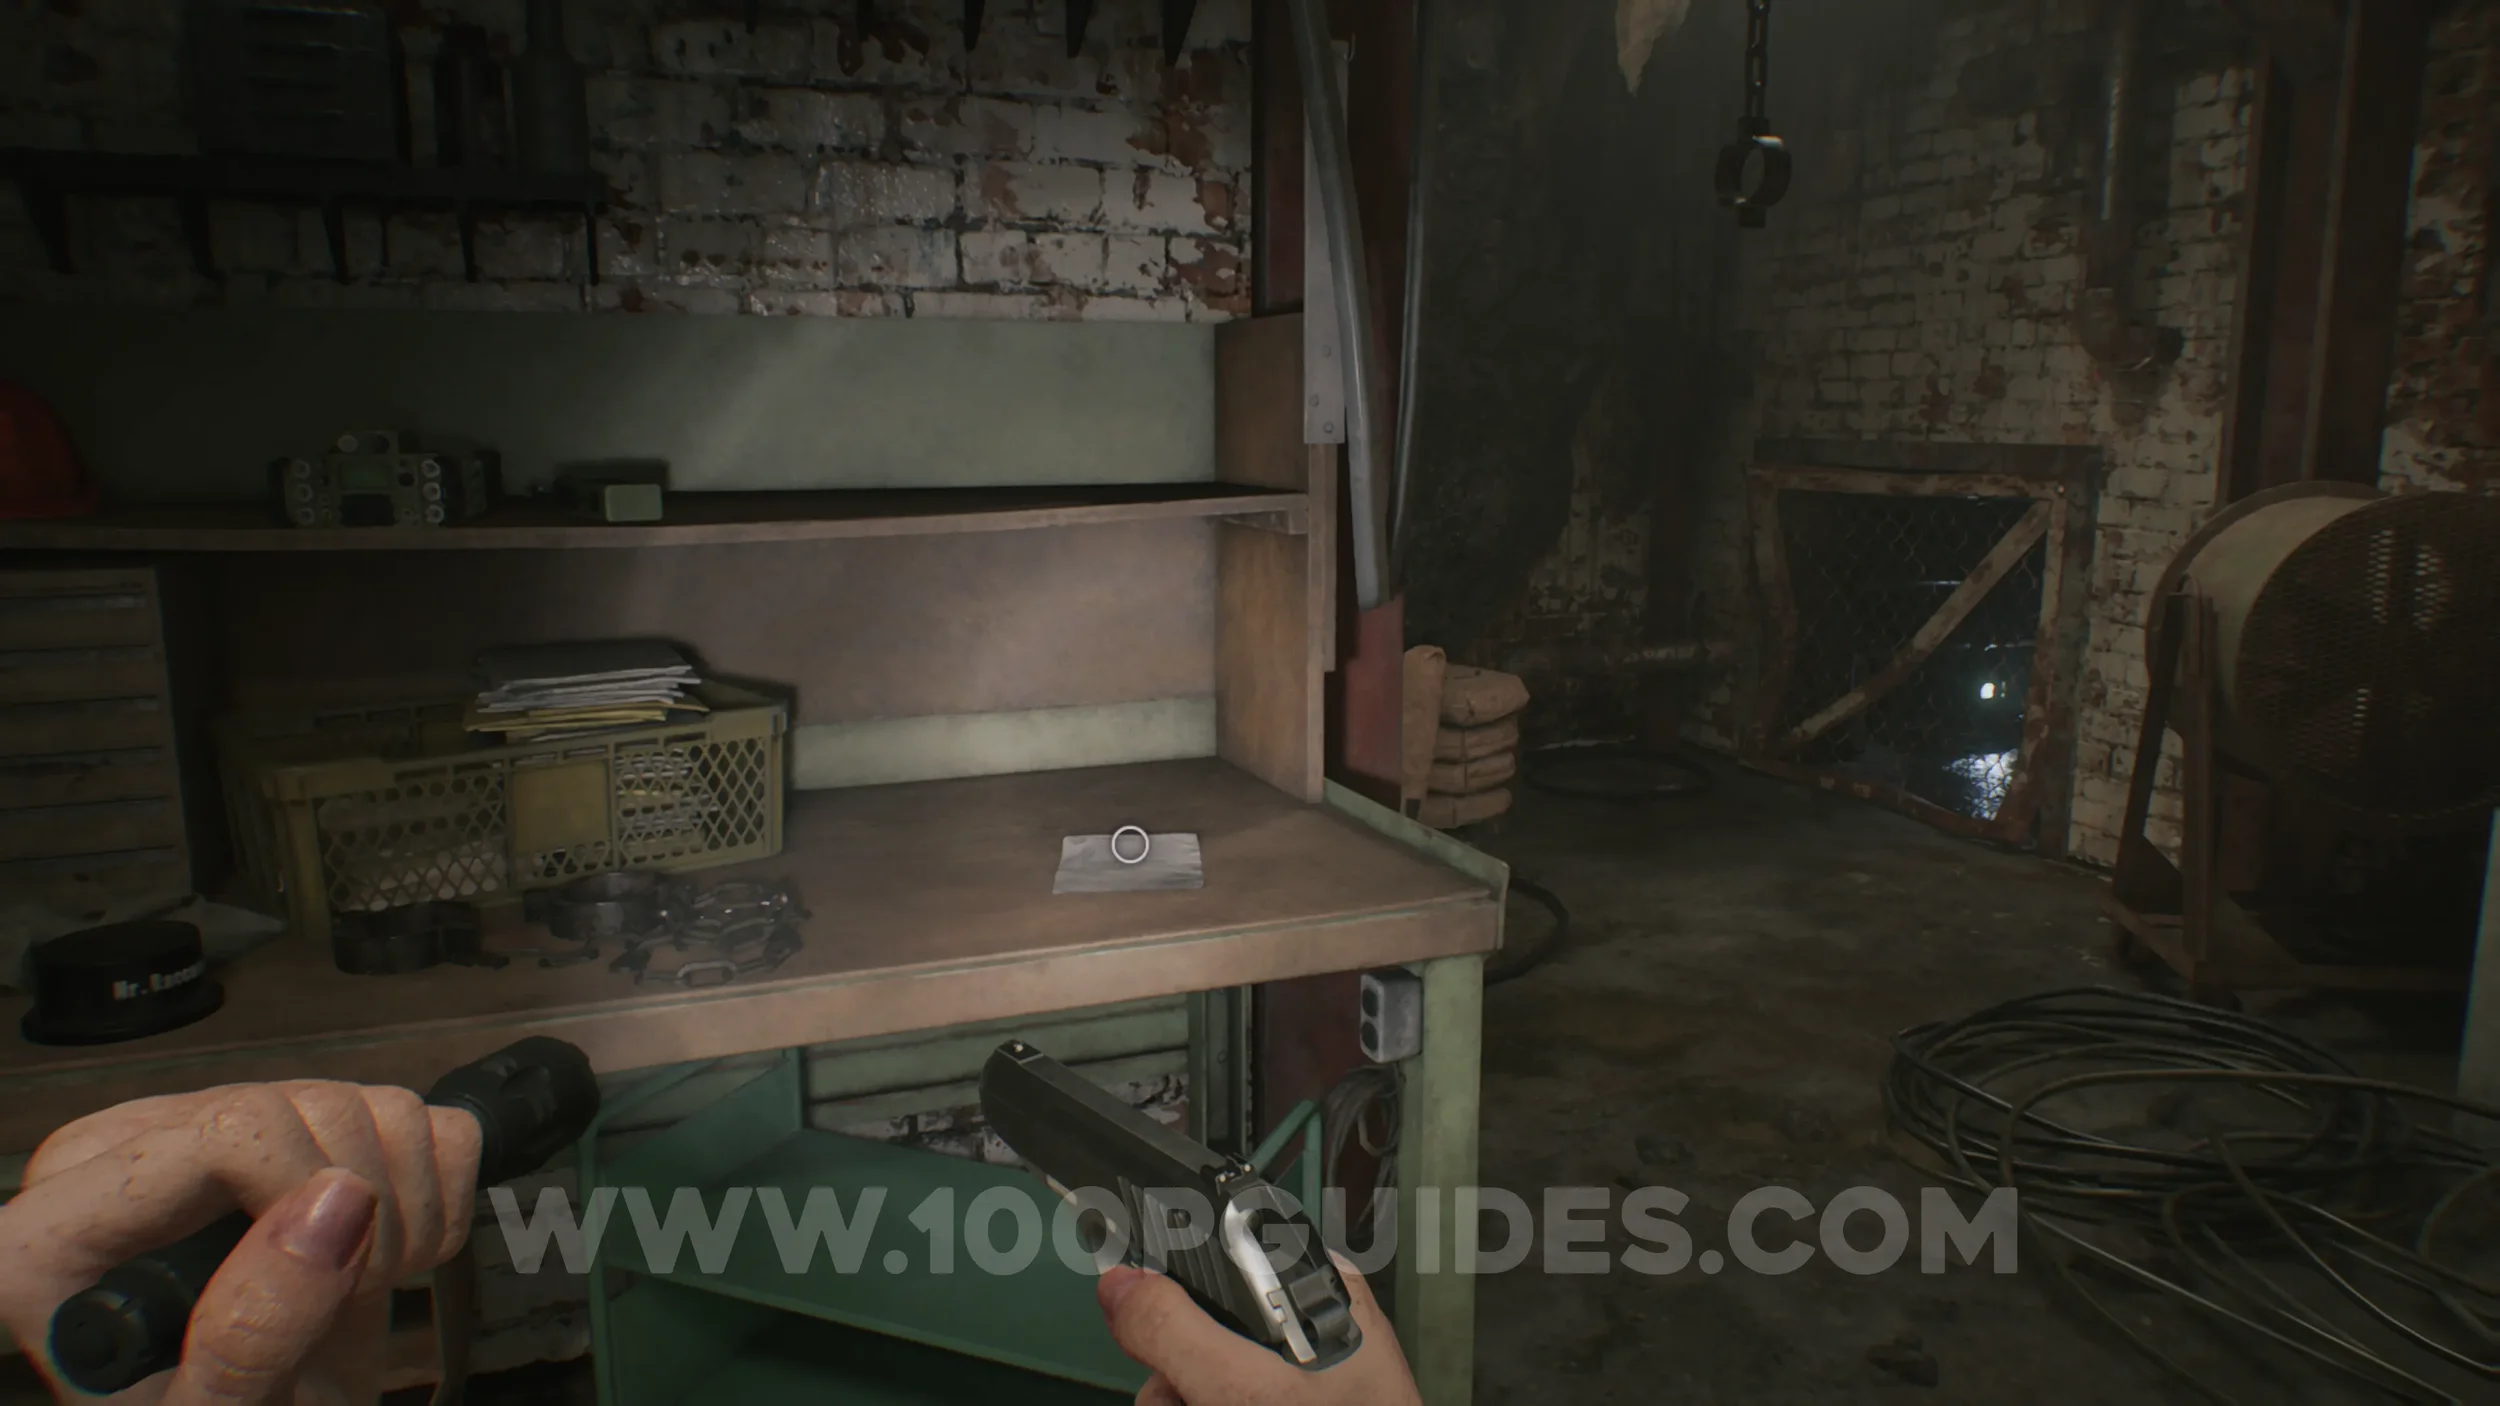
Mr. Raccoon #7. Use the joint plug to open the door on the opposite end of the corridor. The figurine will be on the table in front of you.
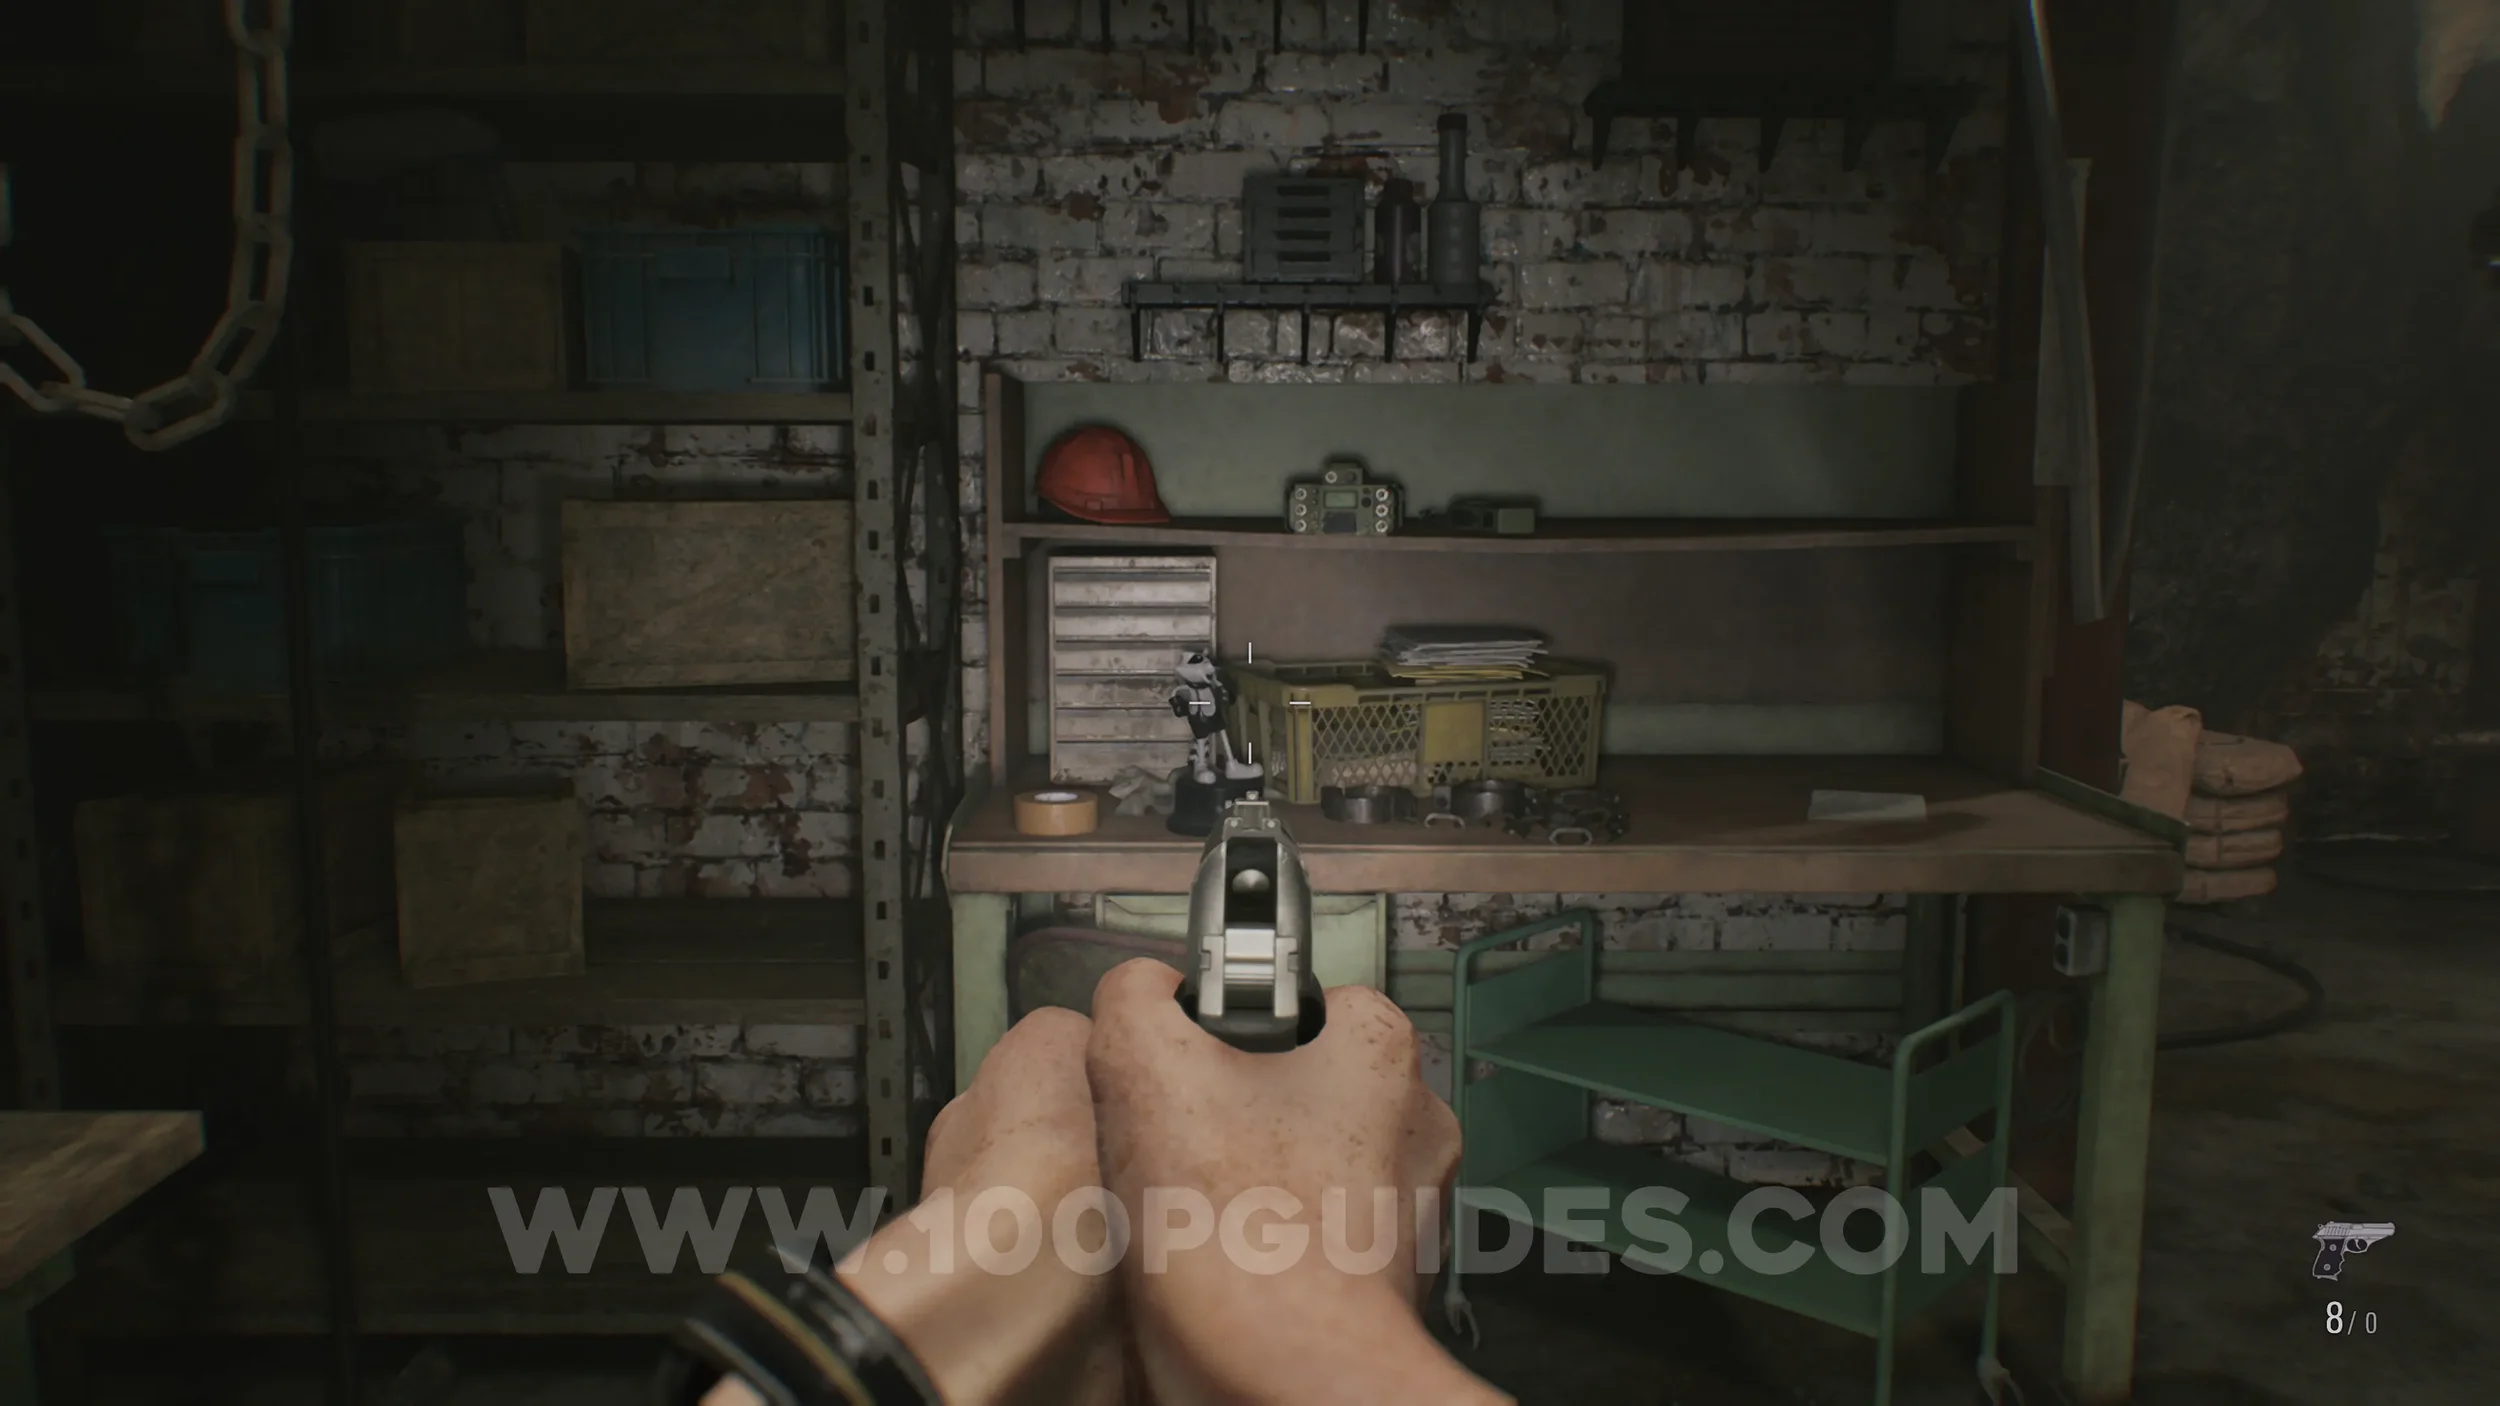
File #40. On the same table.

Safe #3 & Raccoon Roundup Map. Place the Joint Plug in the door to the west of the Safe Room. In the next area, enter the small room to the north and interact with the safe.
Use the following code:
Casual / Standard:
60 Right, 40 Left, 80 Right
Insanity:
70 Left, 50 Right, 20 Right
Inside the safe, you will find the Raccoon Roundup Map, which reveals the locations of all Mr. Raccoons in Rhodes Hill.

File #41 - Security Guard’s Report. In the same room.
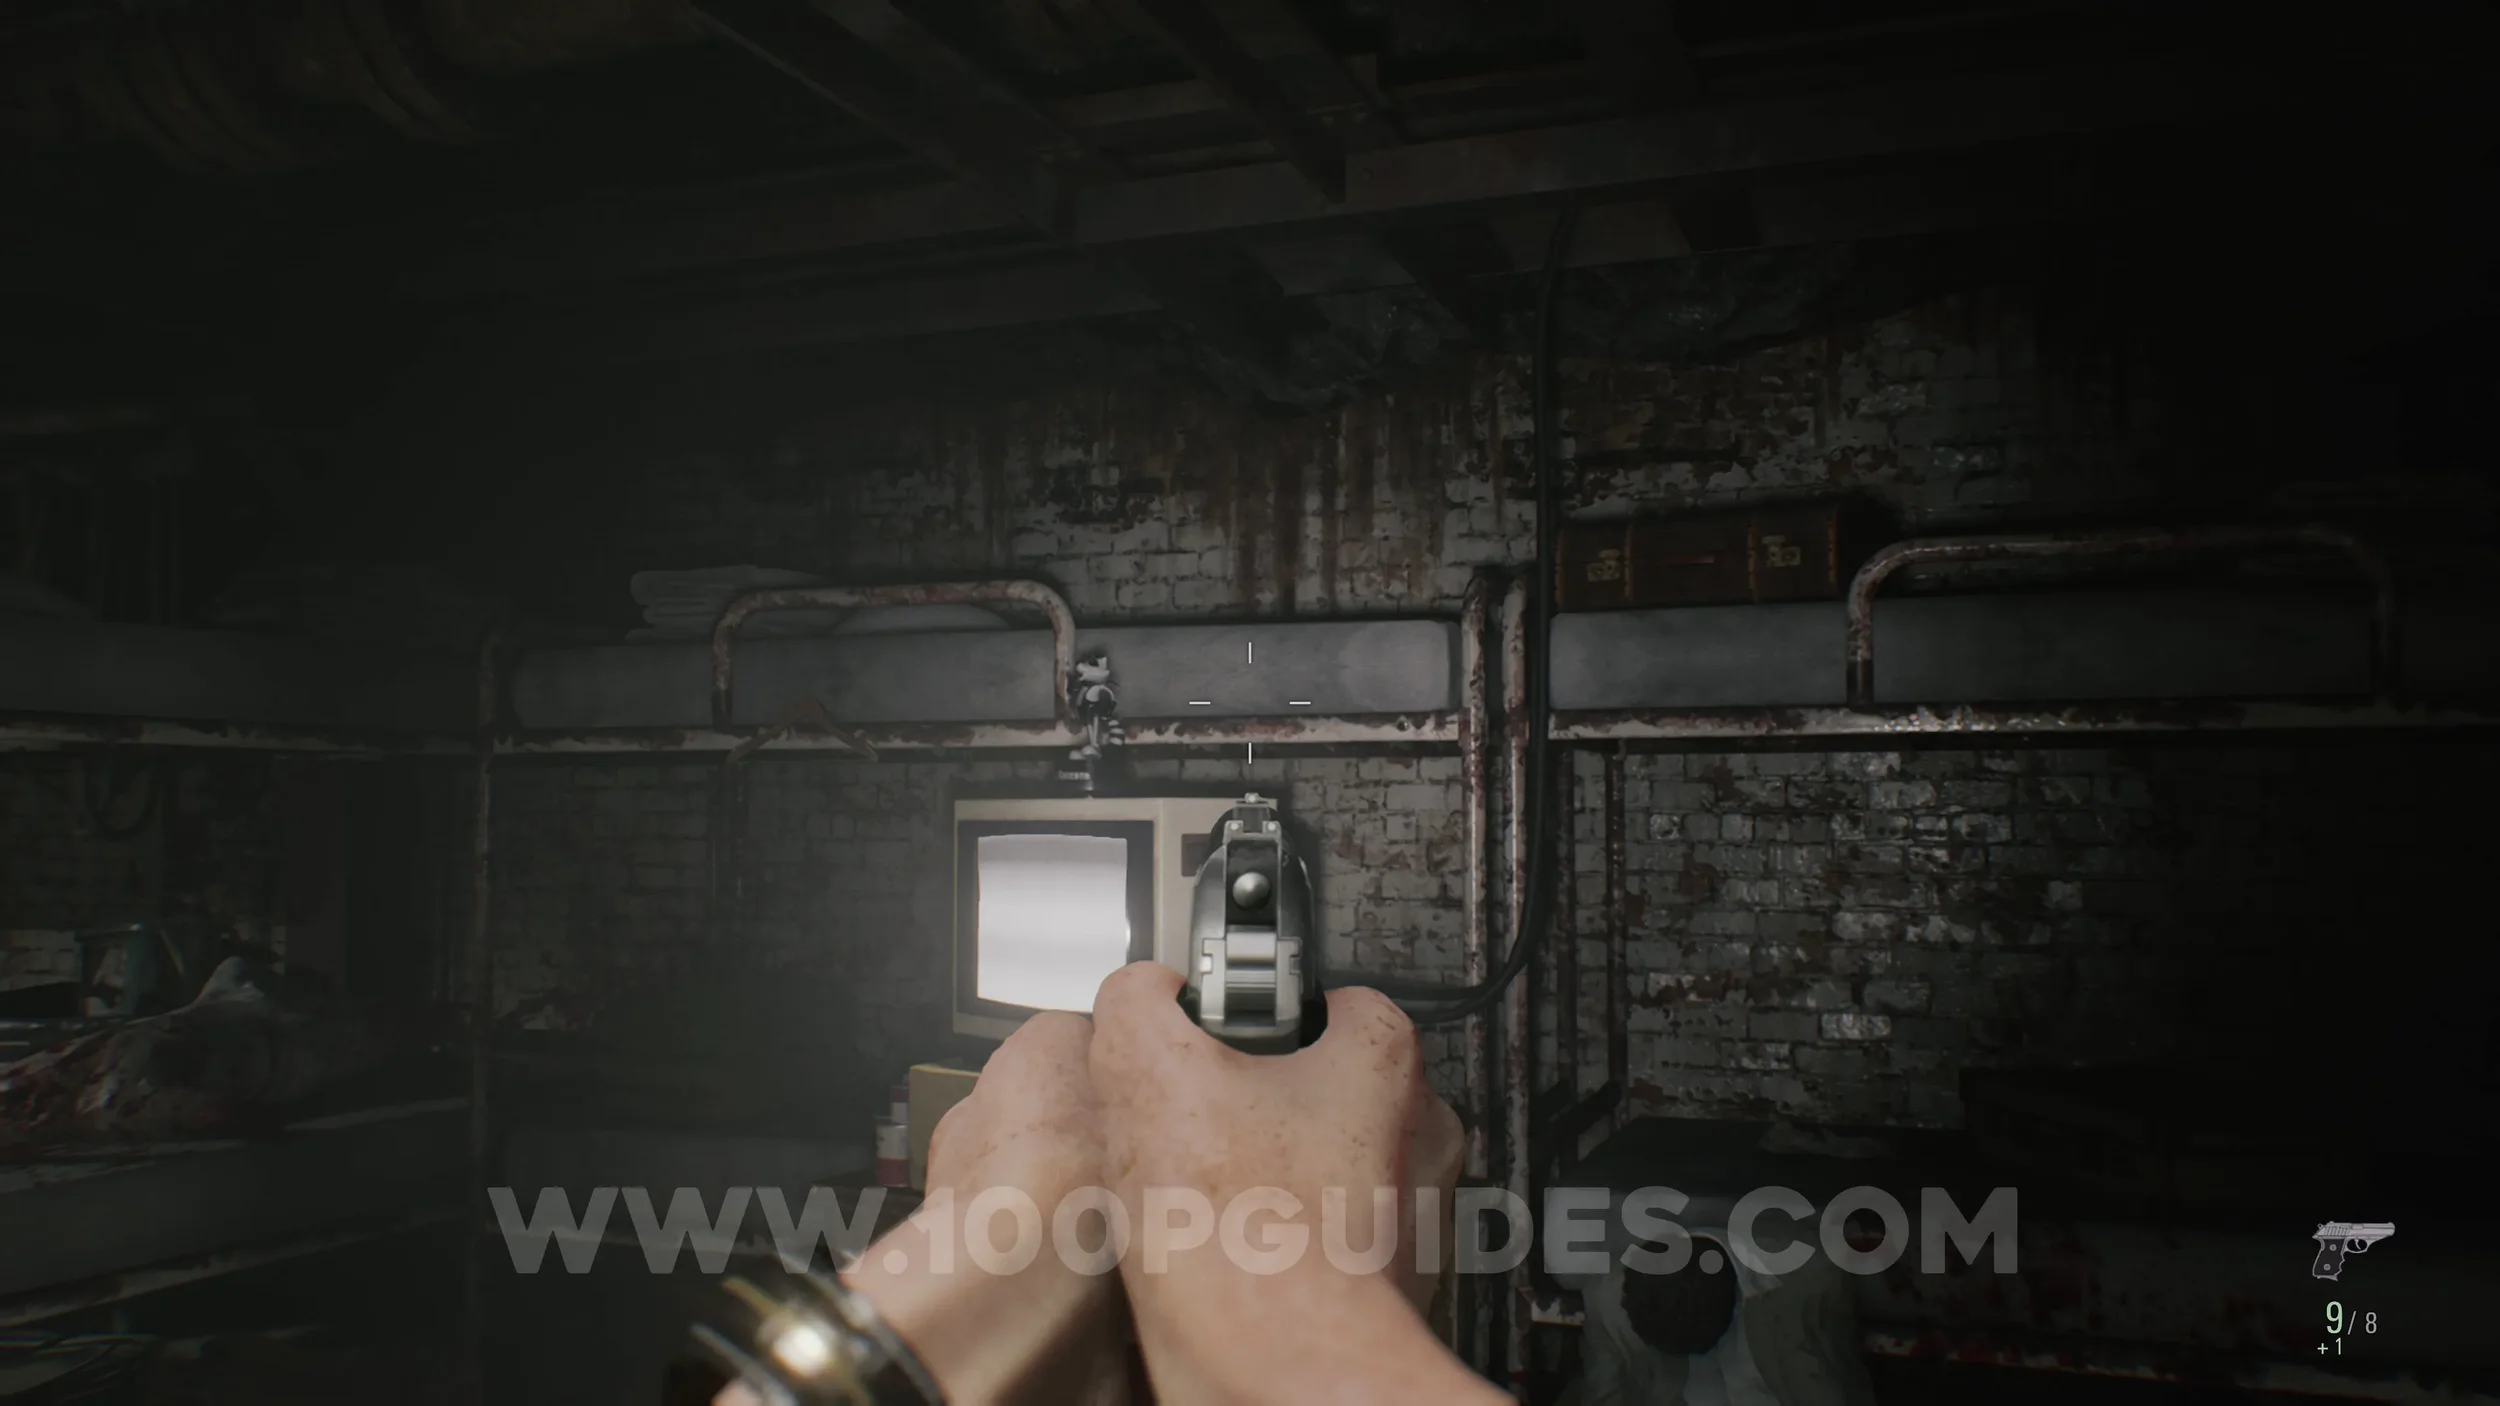
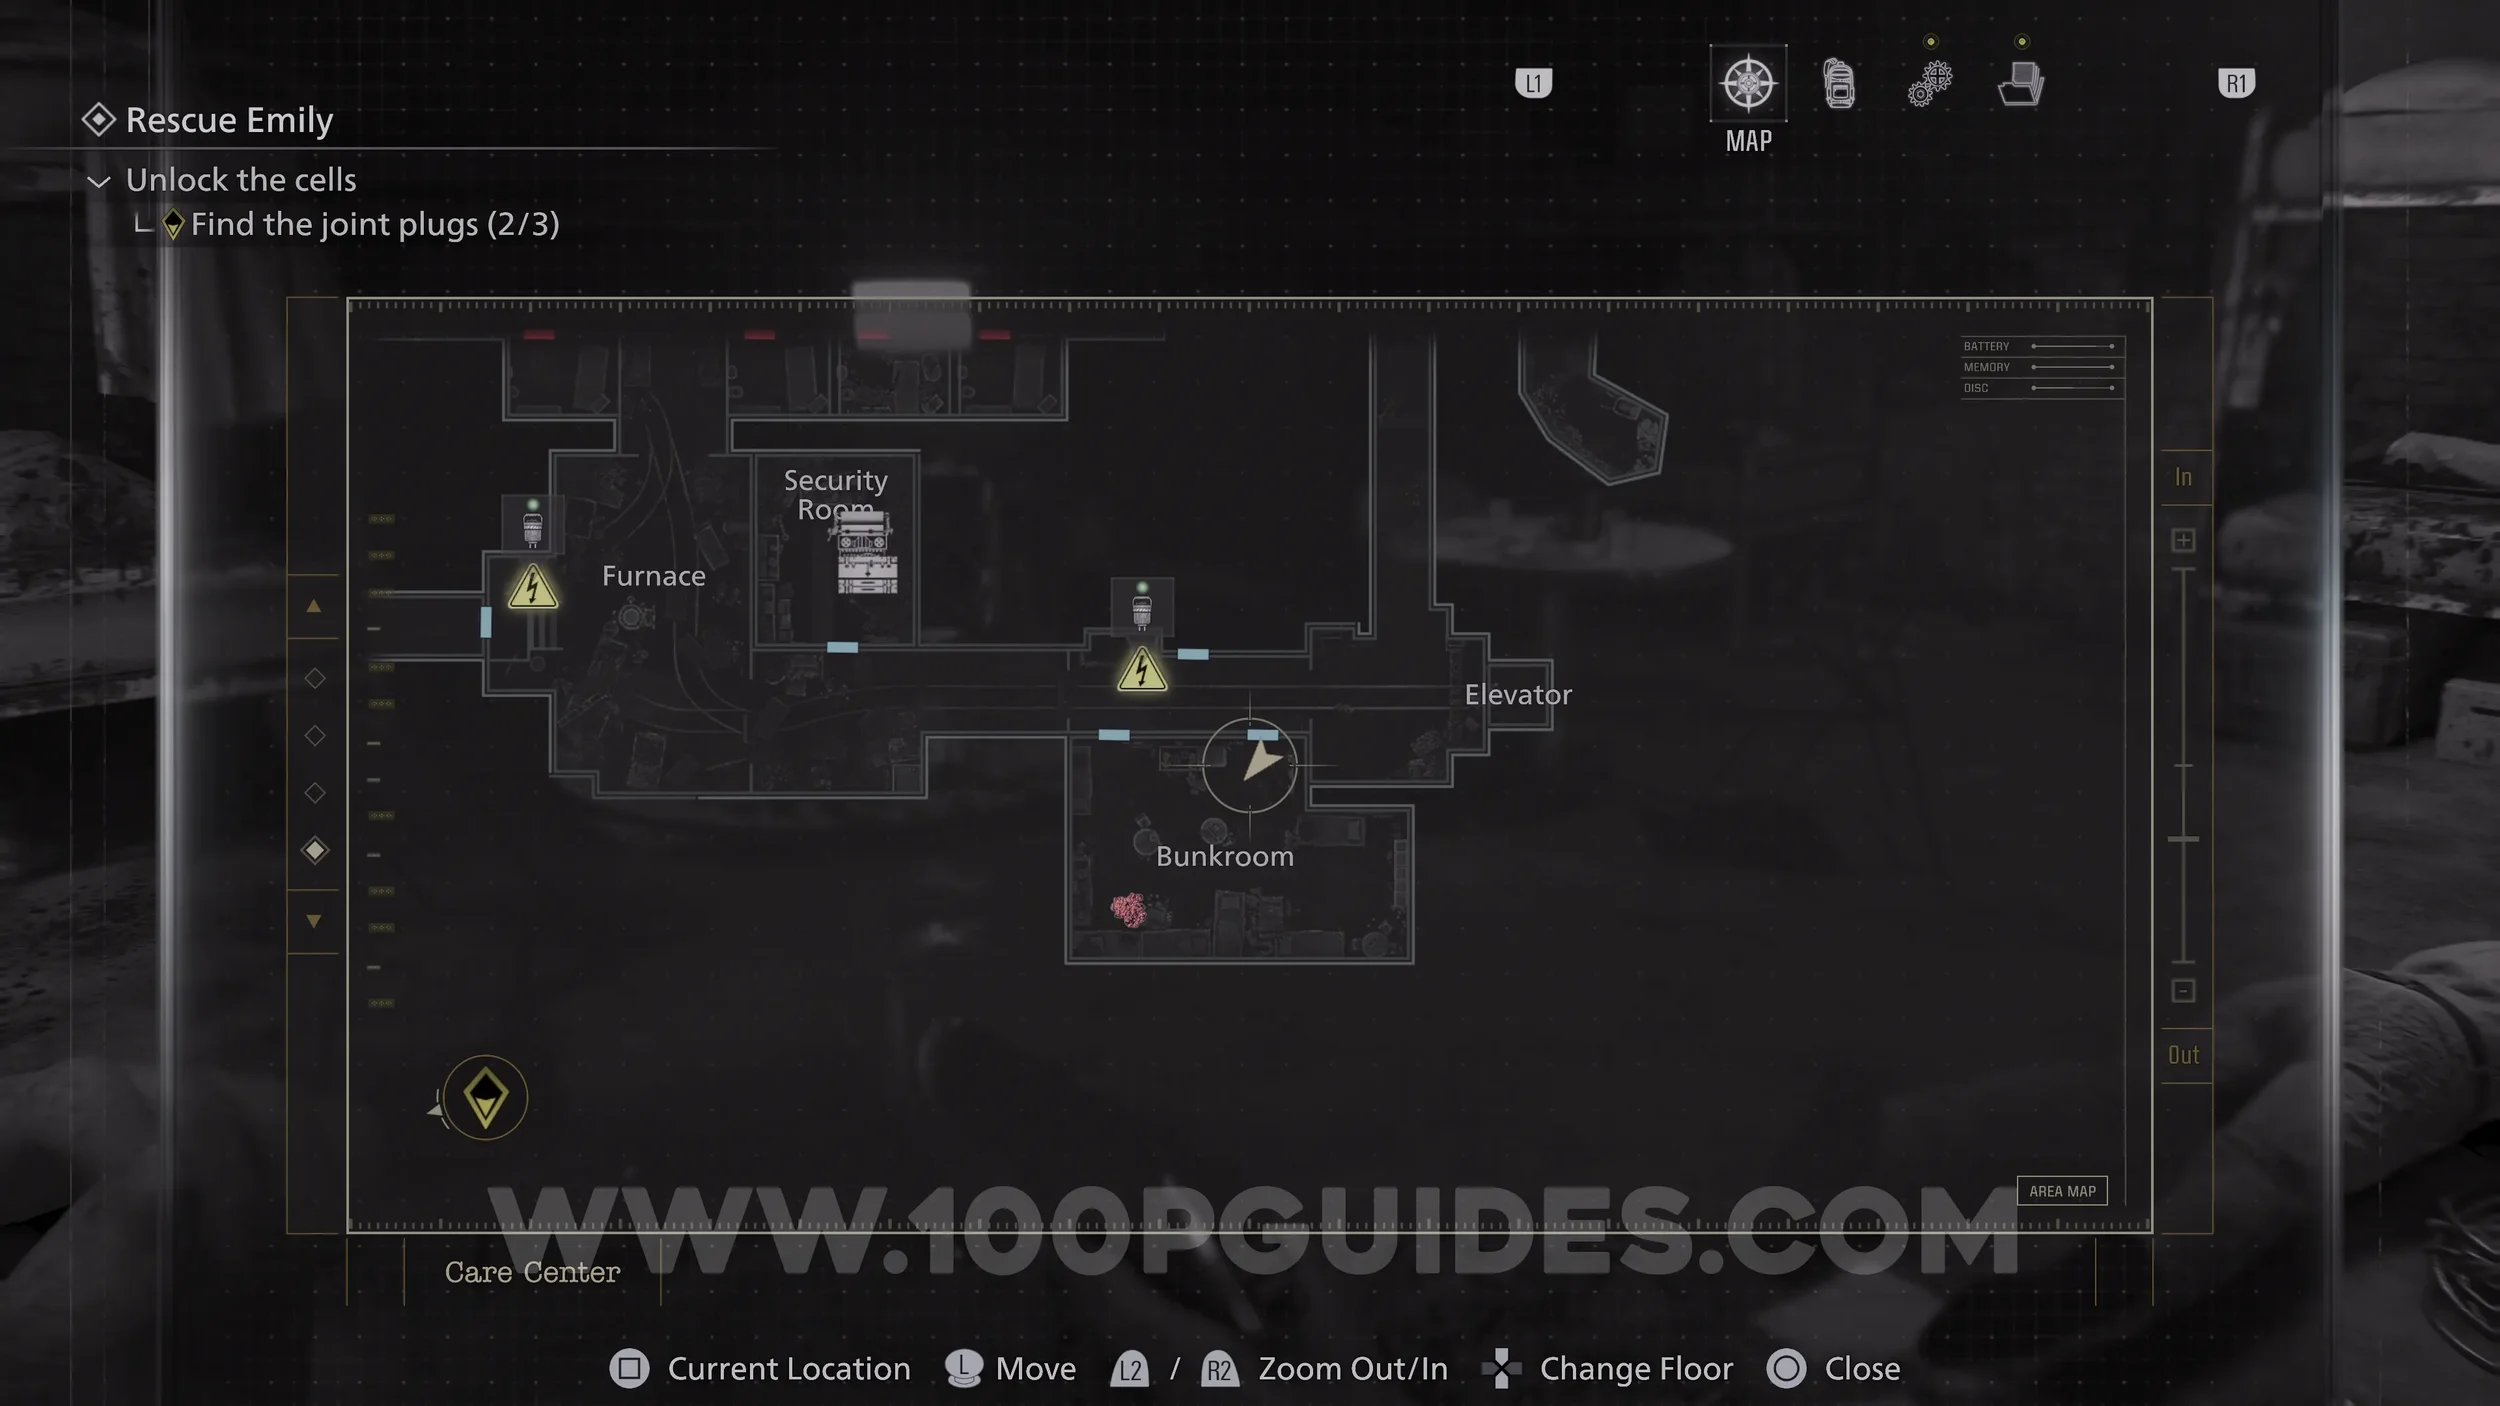
Mr. Raccoon #8. After obtaining the Joint Plug from the area west of the Furnace, return to the main Basement area and insert it into the machine in the corridor east of the Security Room. This will unlock the door to the Bunkroom. Go through the door on the opposite side of the corridor and find the Mr. Raccoon on top of the TV.
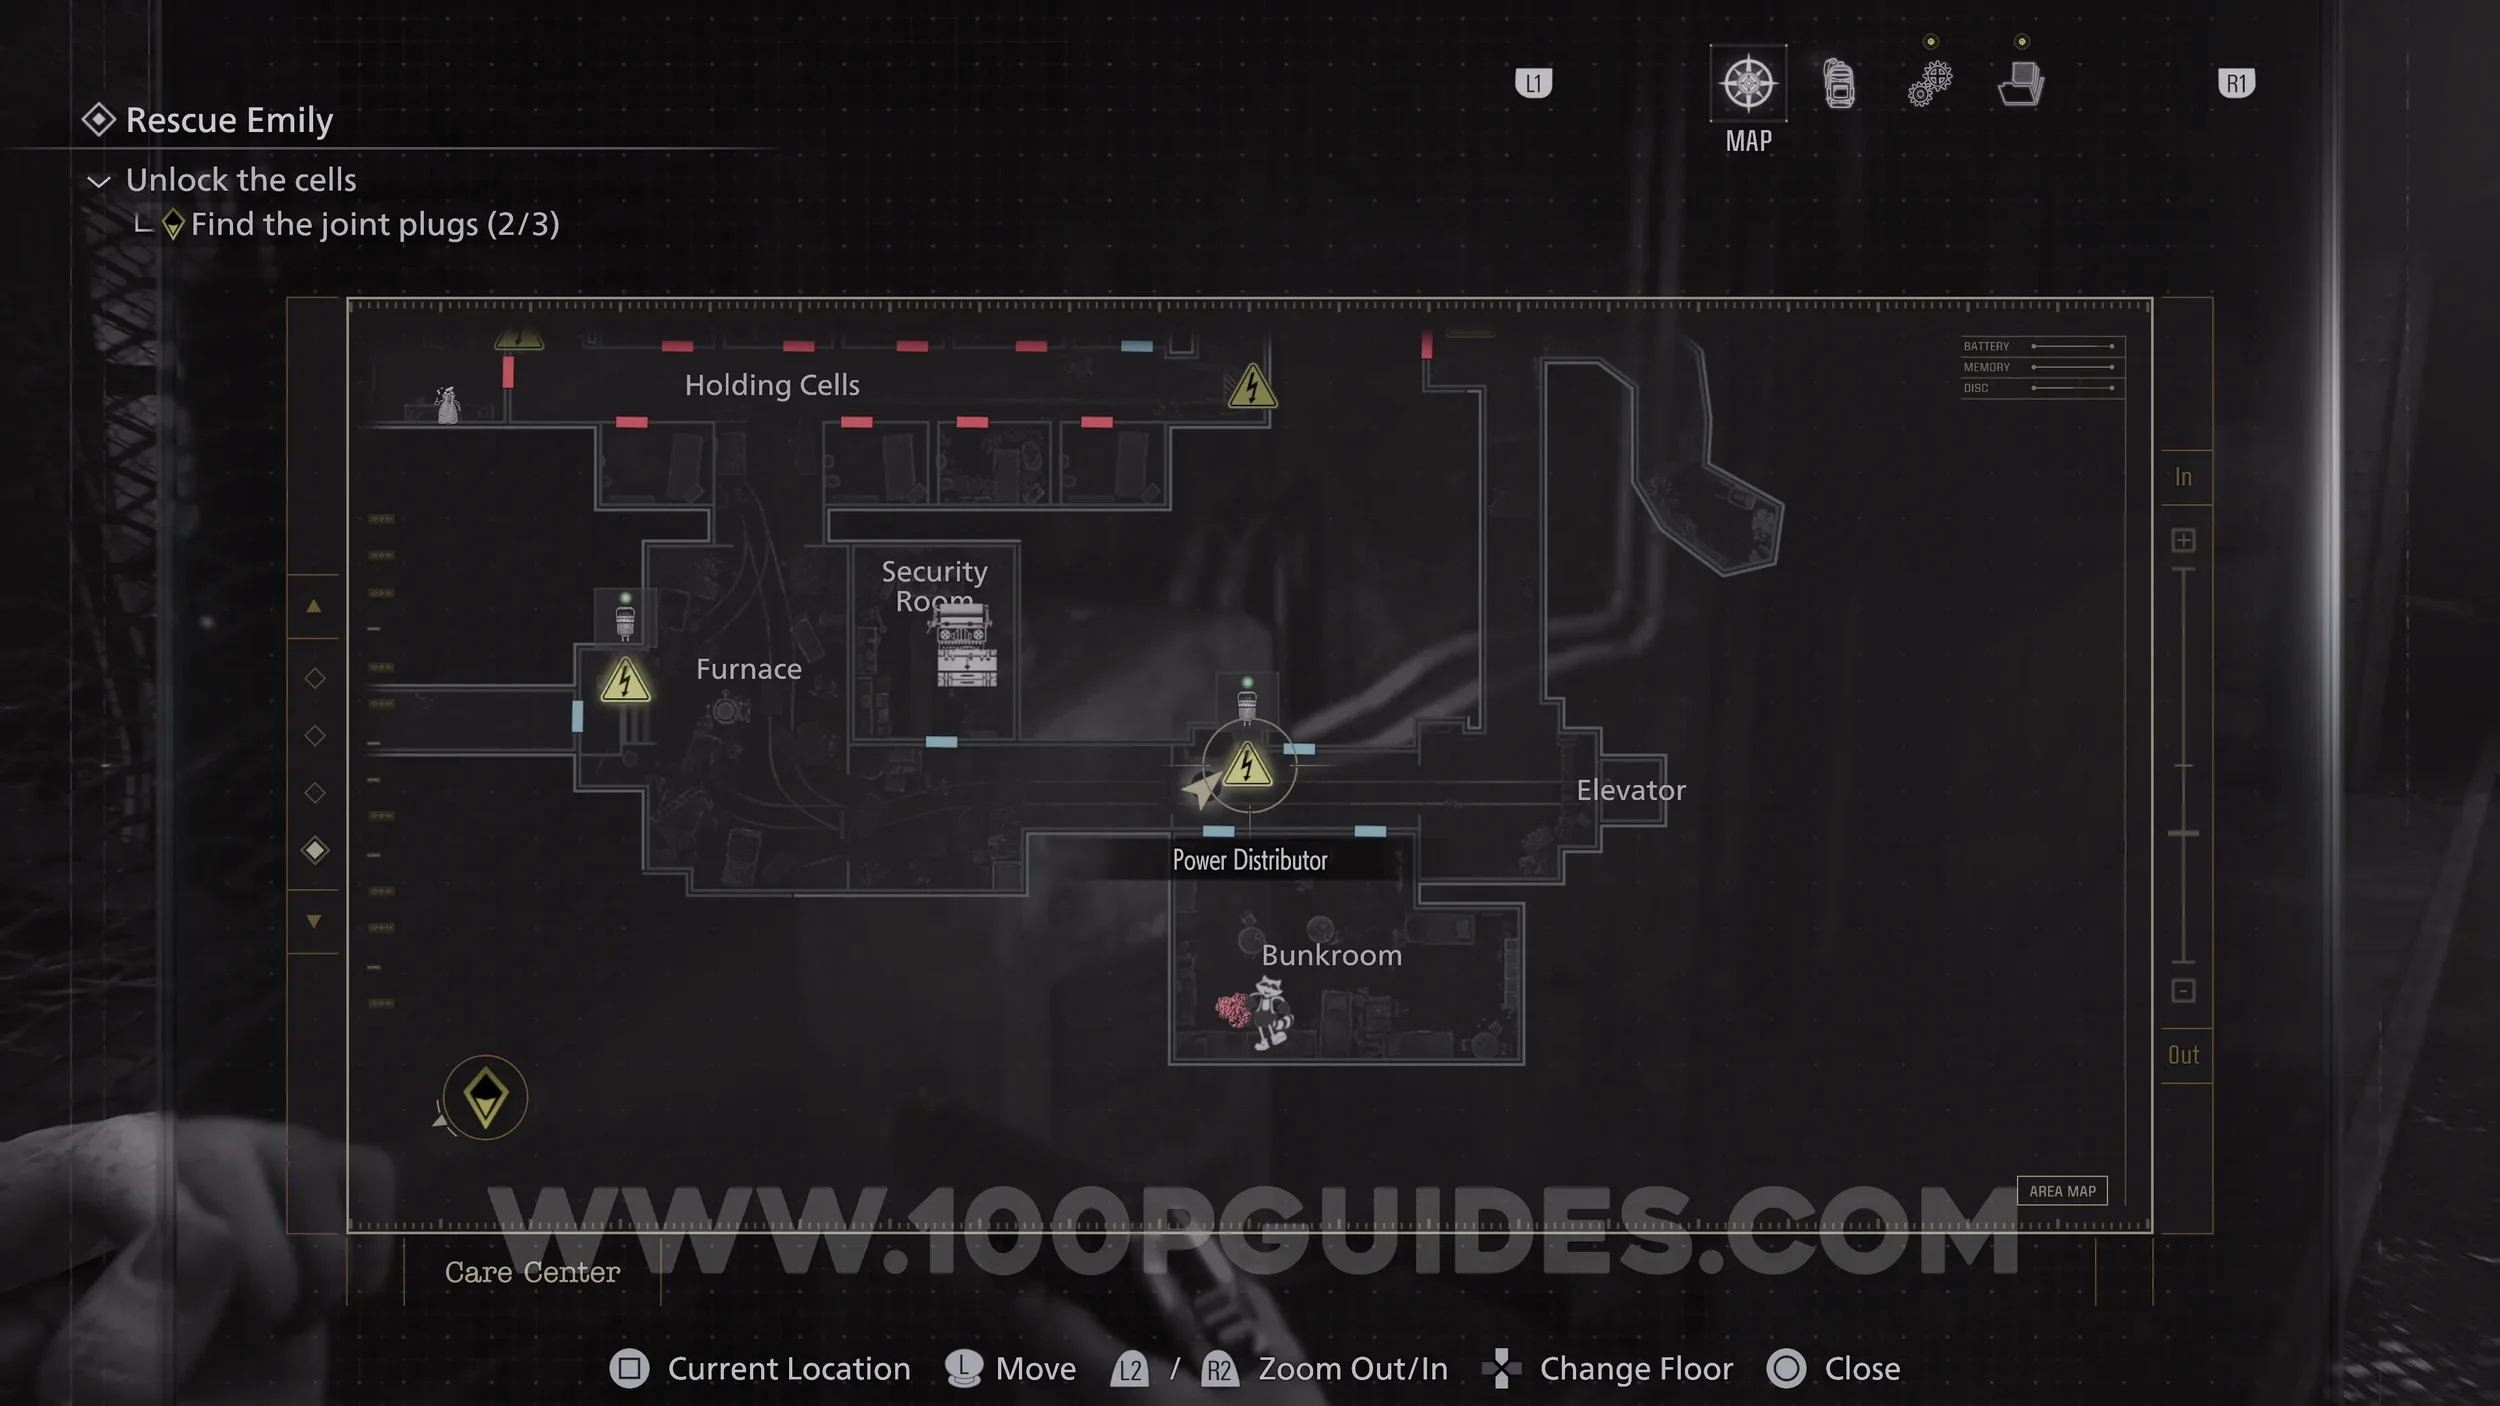
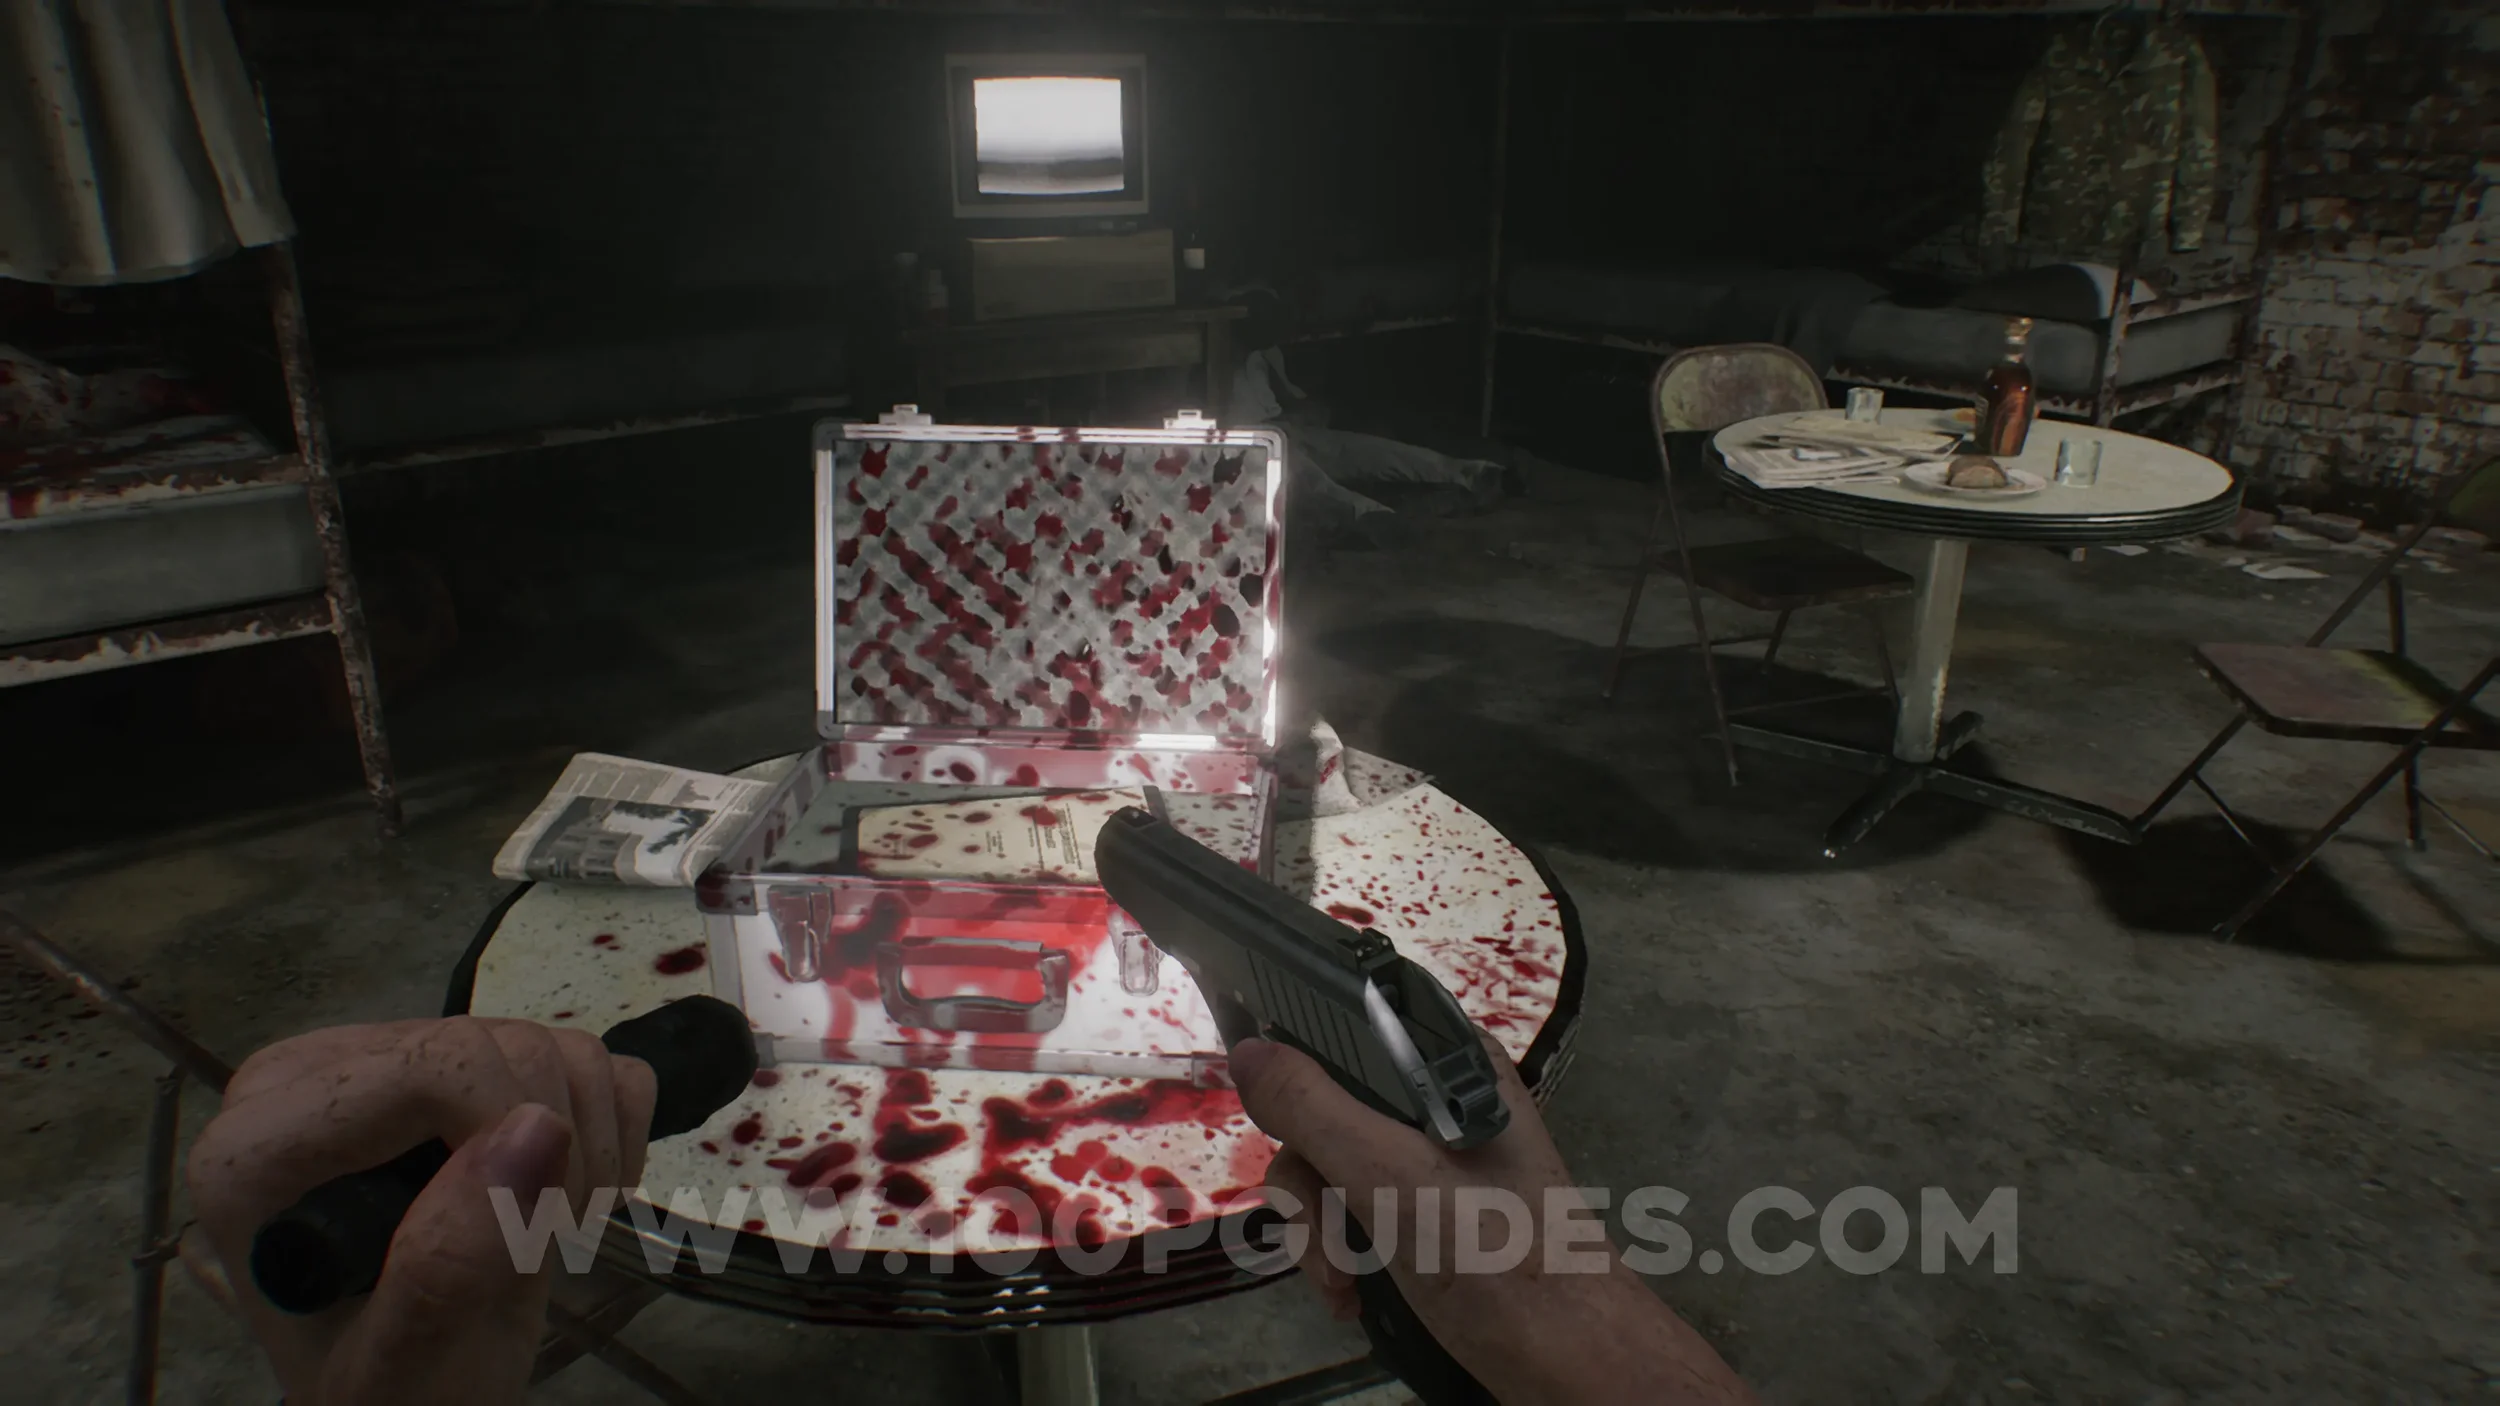
Crafting Recipe - Molotov Cocktail. Also found in the Bunkroom.
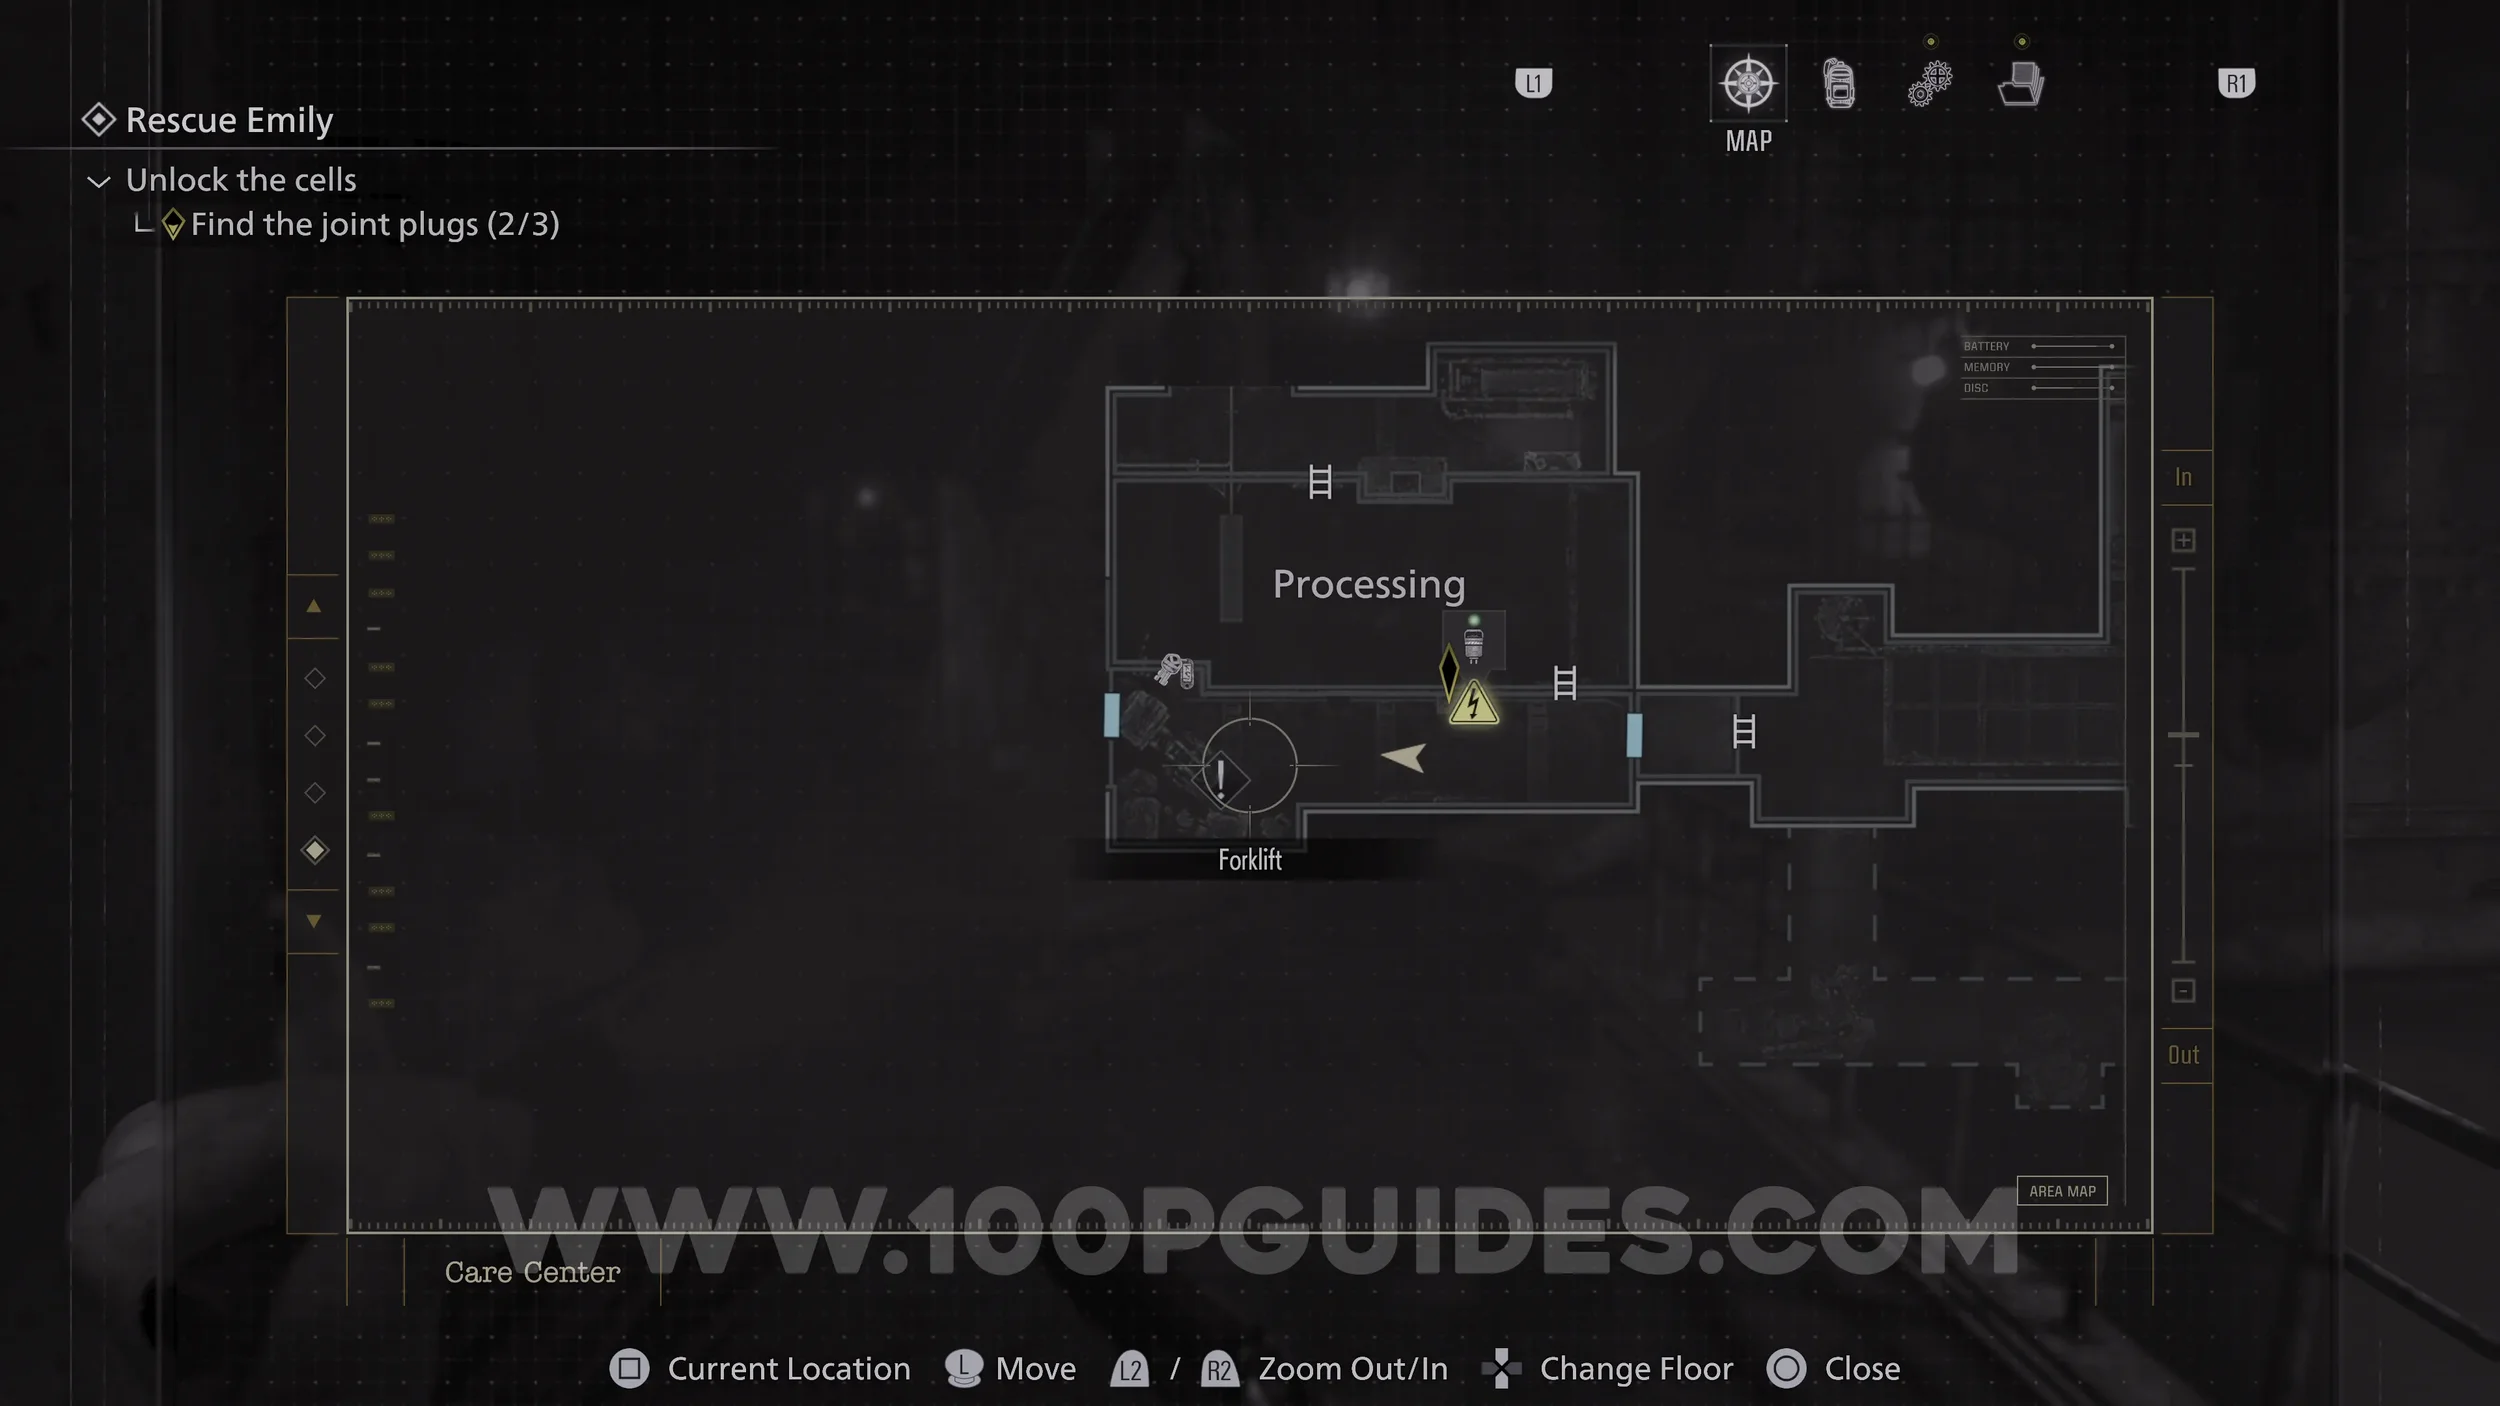
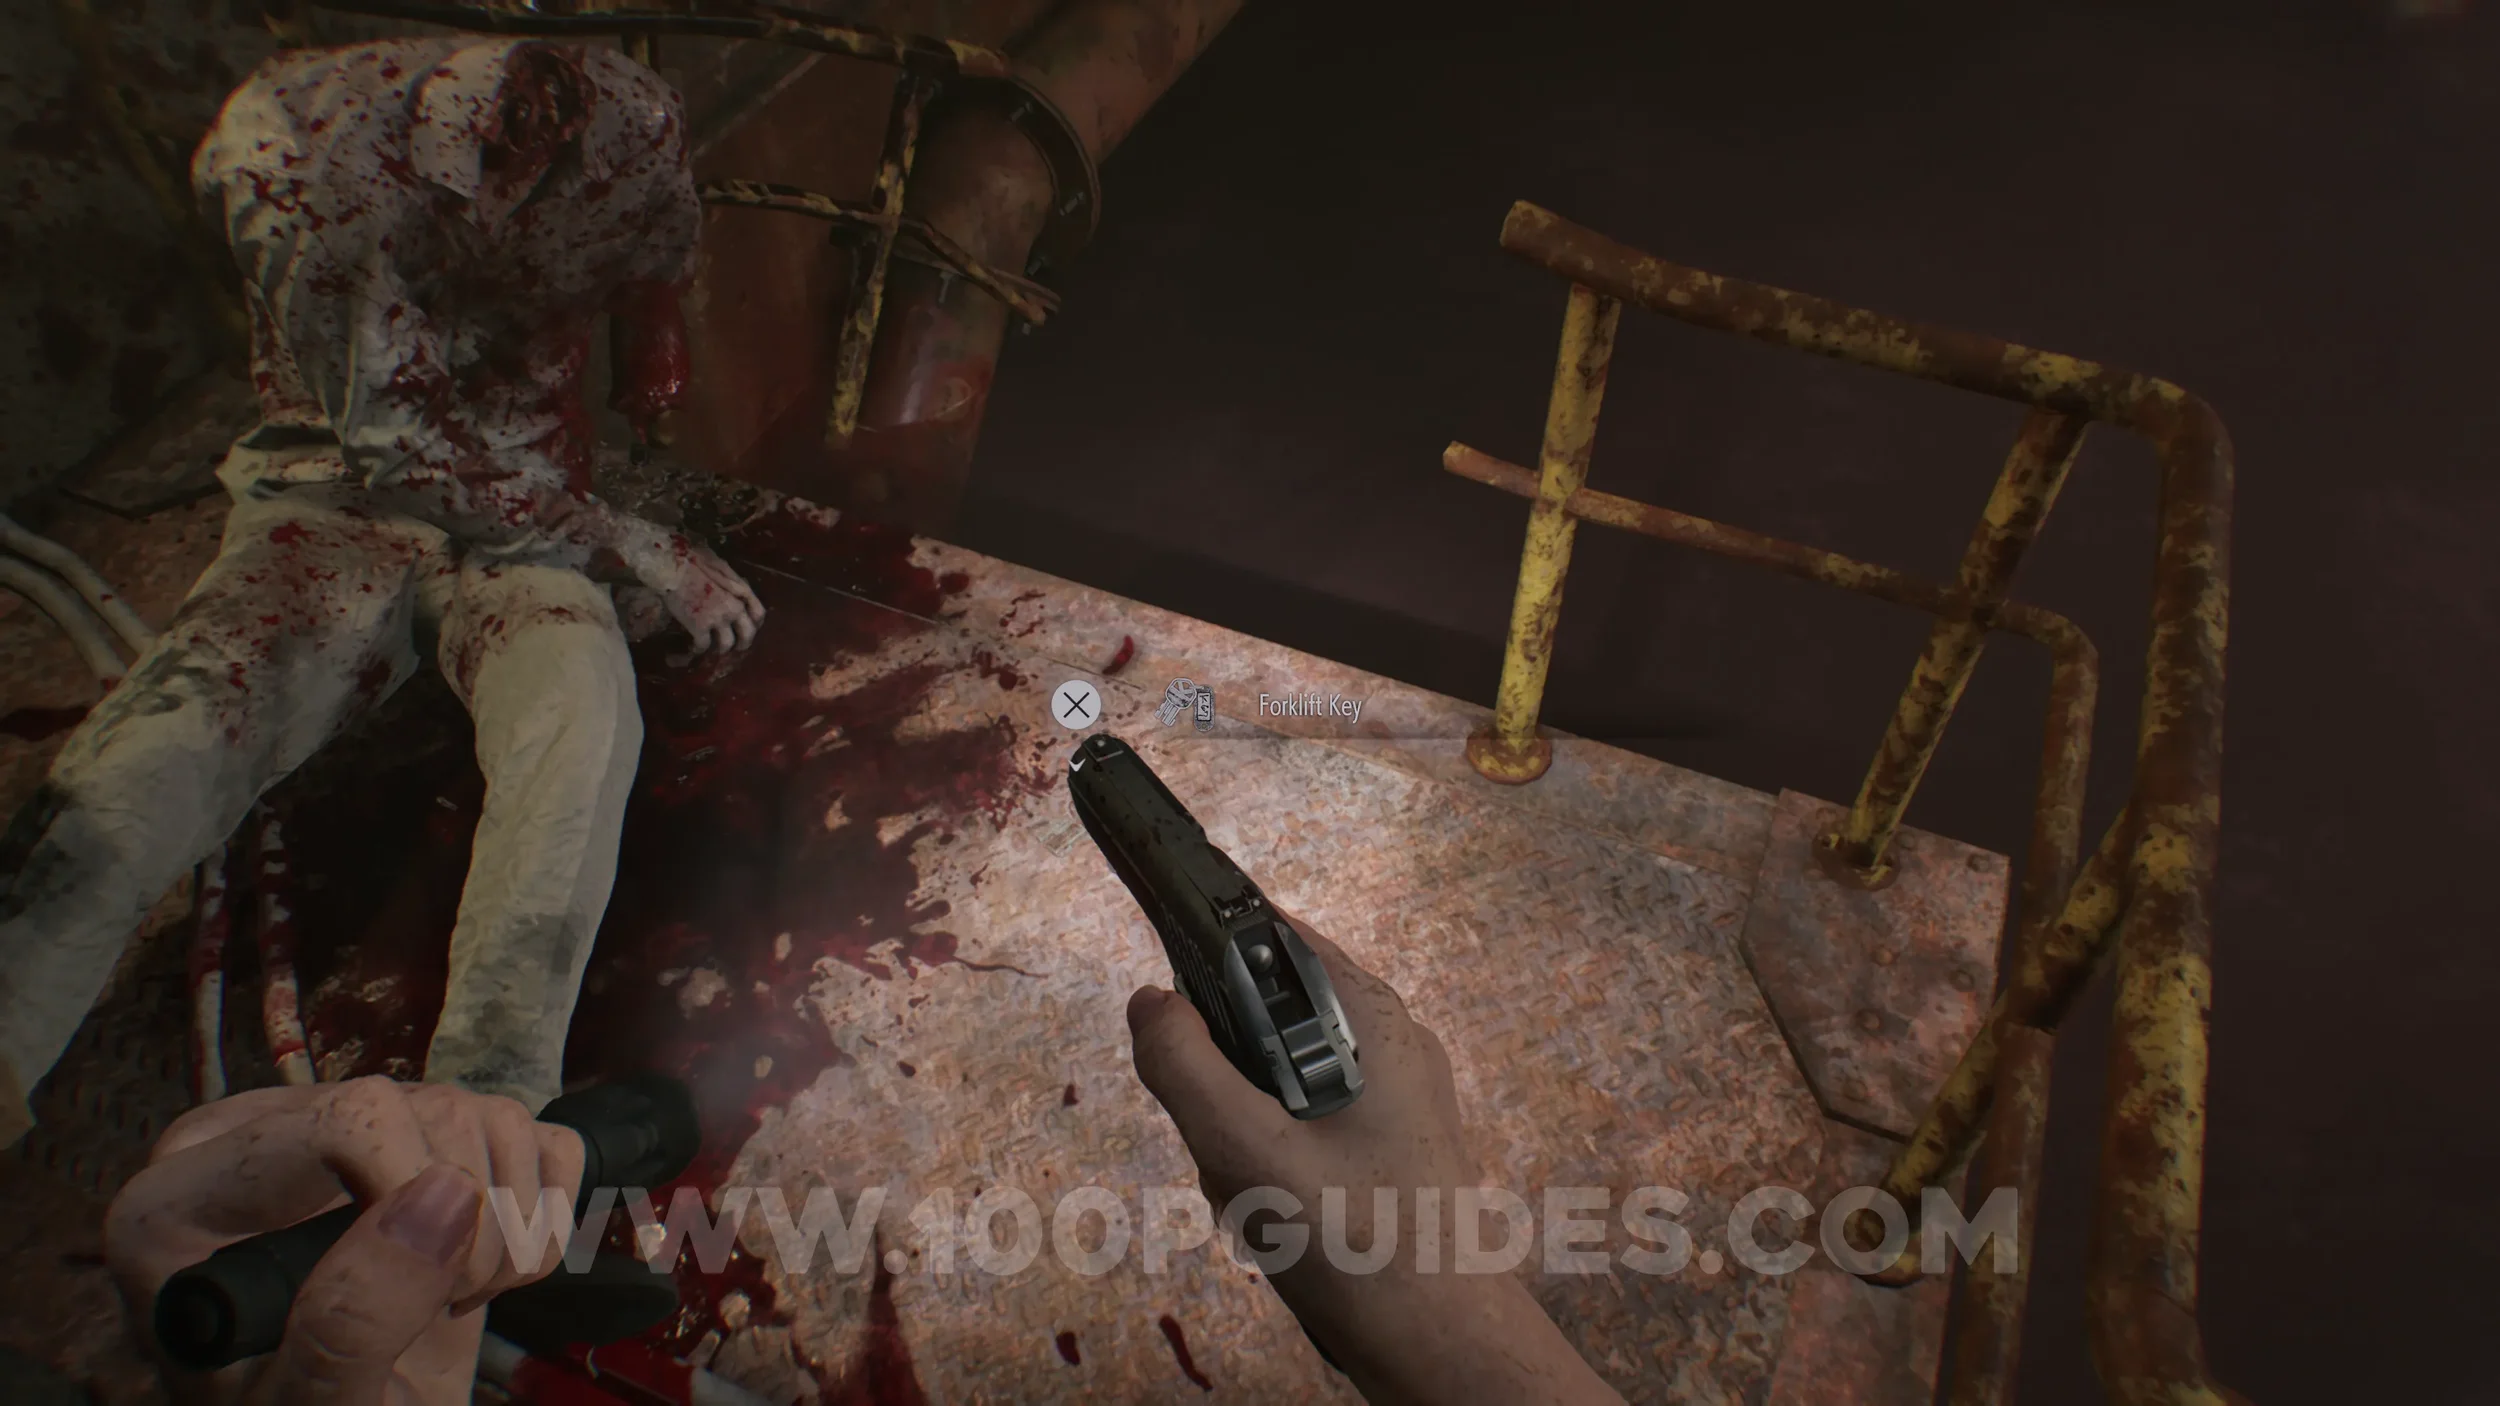
Hip Pouch #3 & Map - Care Center Basement Floor Plan. Once you have obtained both Joint Plugs and the Square Socket Key, head to the Processing Area. You can reach it by taking the south-west path from the main area.
Inside, pick up the Forklift Key from the corpse near the forklift. Use it to move the forklift away from the doorway, then proceed inside to collect the remaining items.
Rhodes Hill (Care Center Courtyard)
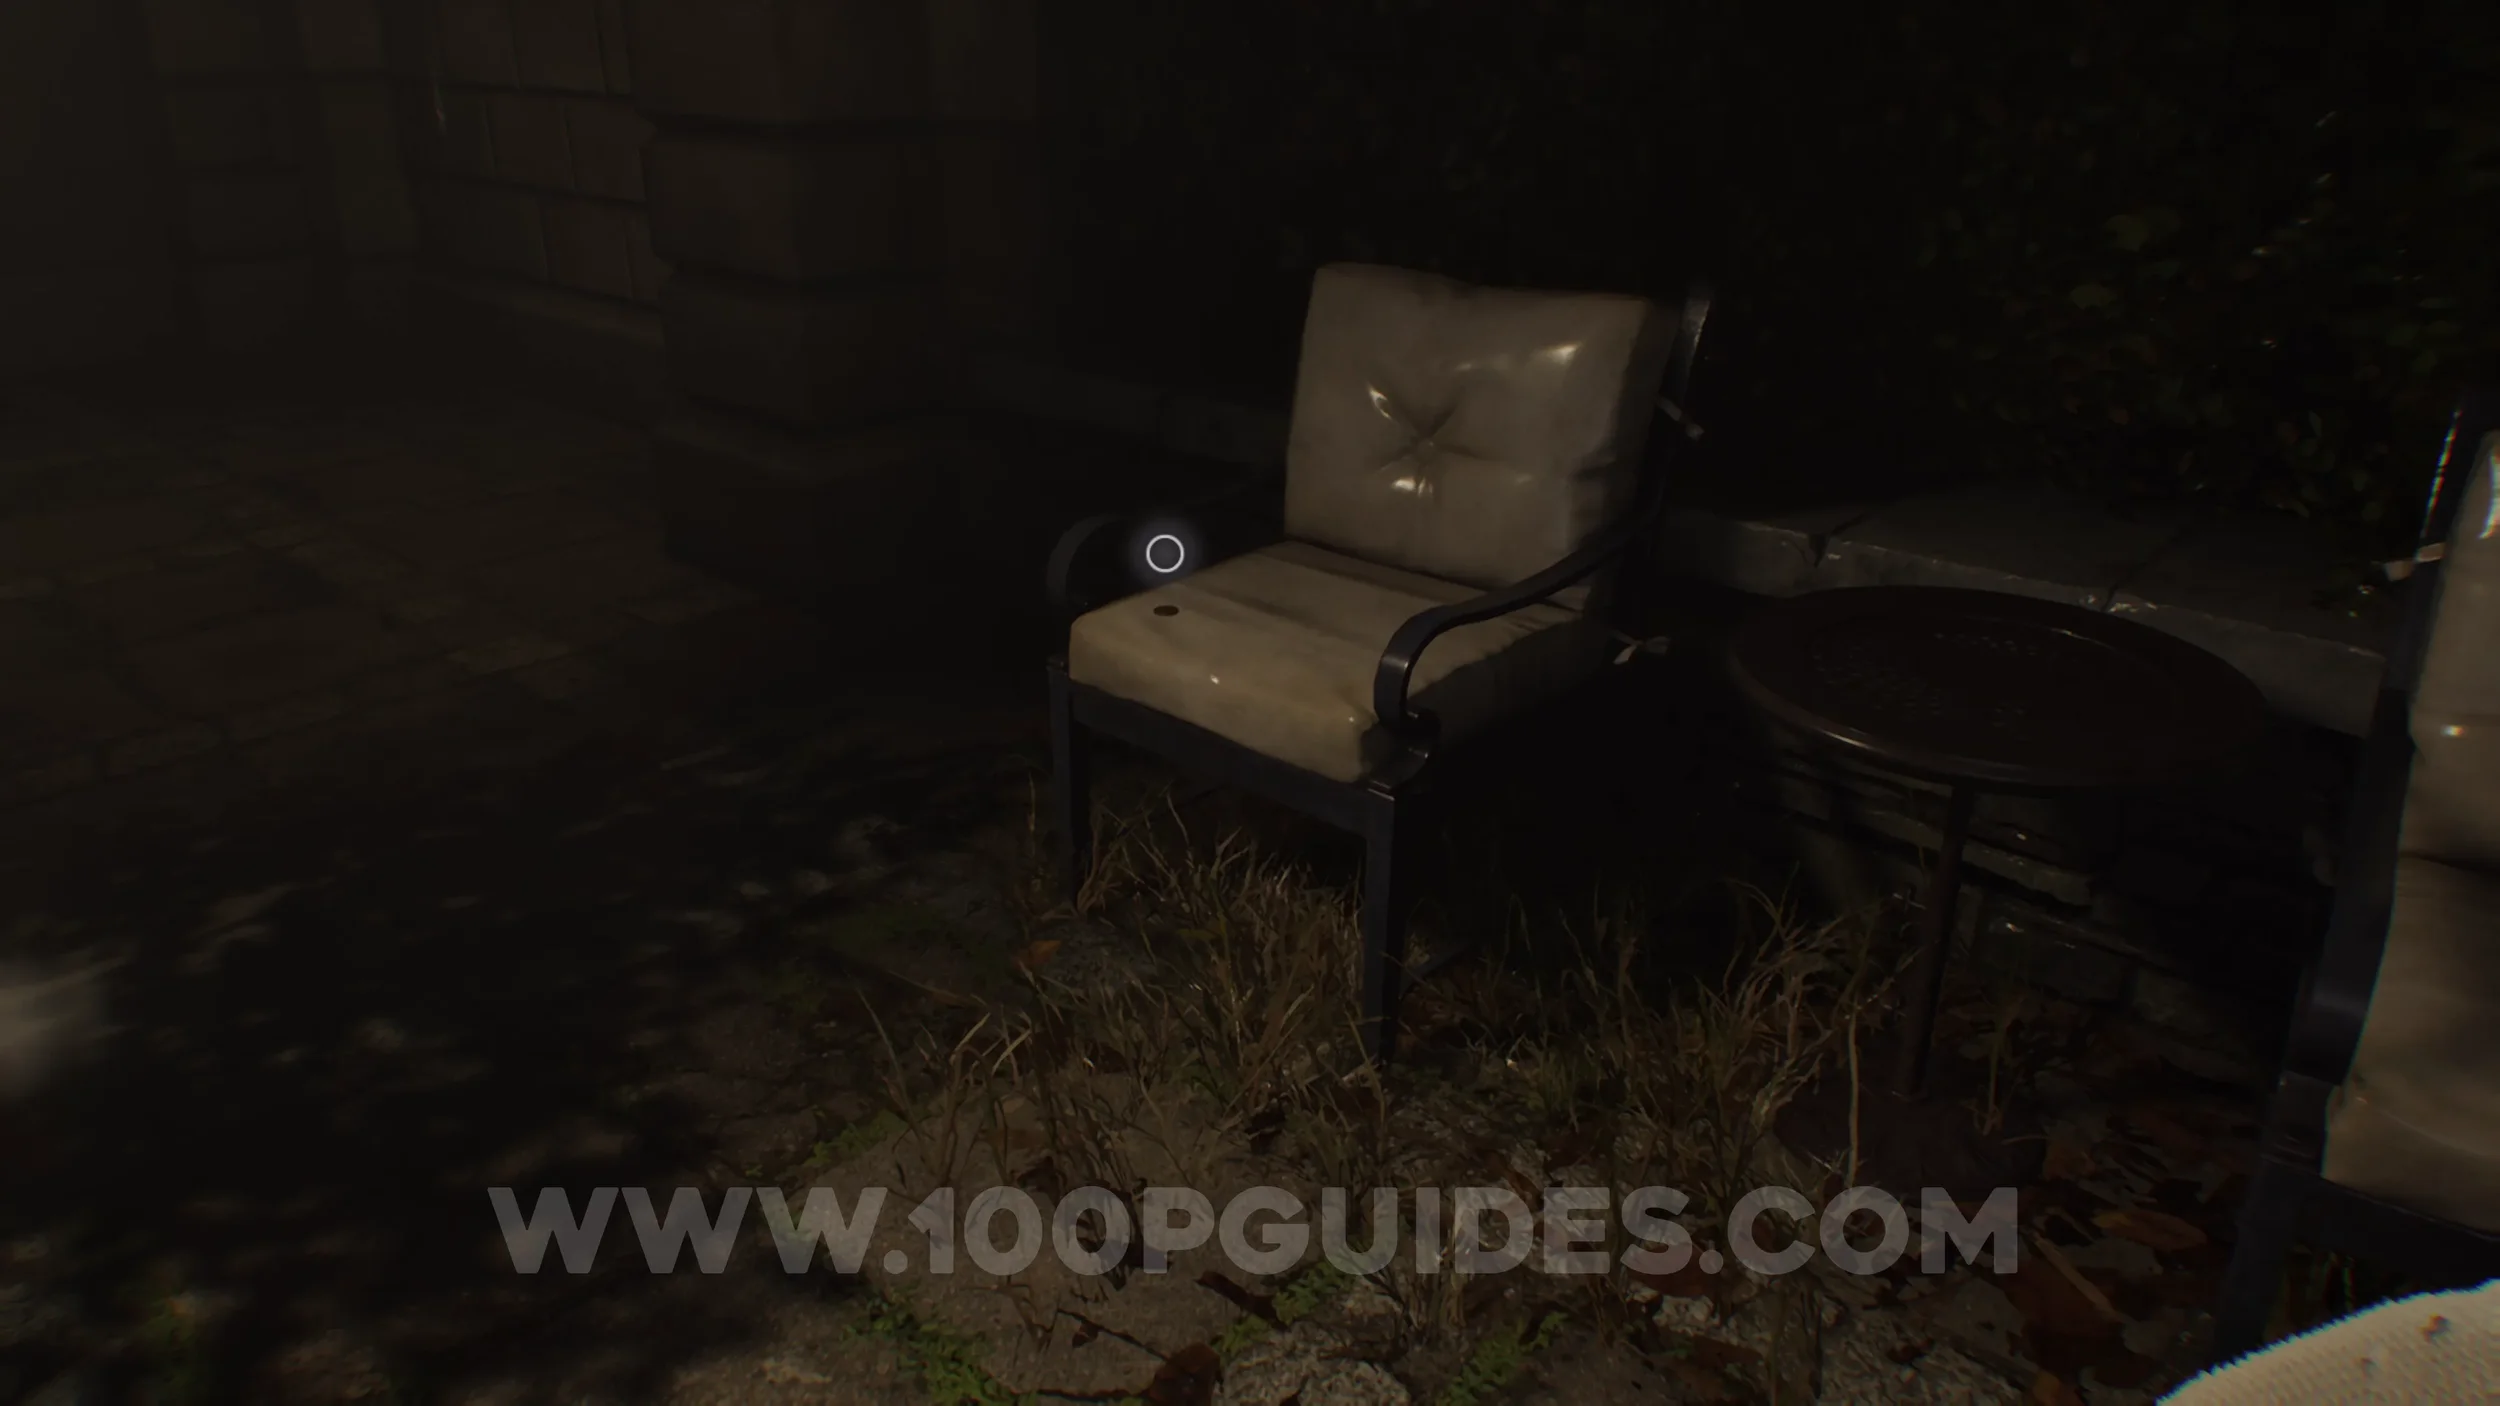
Antique Coin #22. On the chairs once you get outside.
File #42 - Visitor Record. In the house just after the helicopter cutscene.
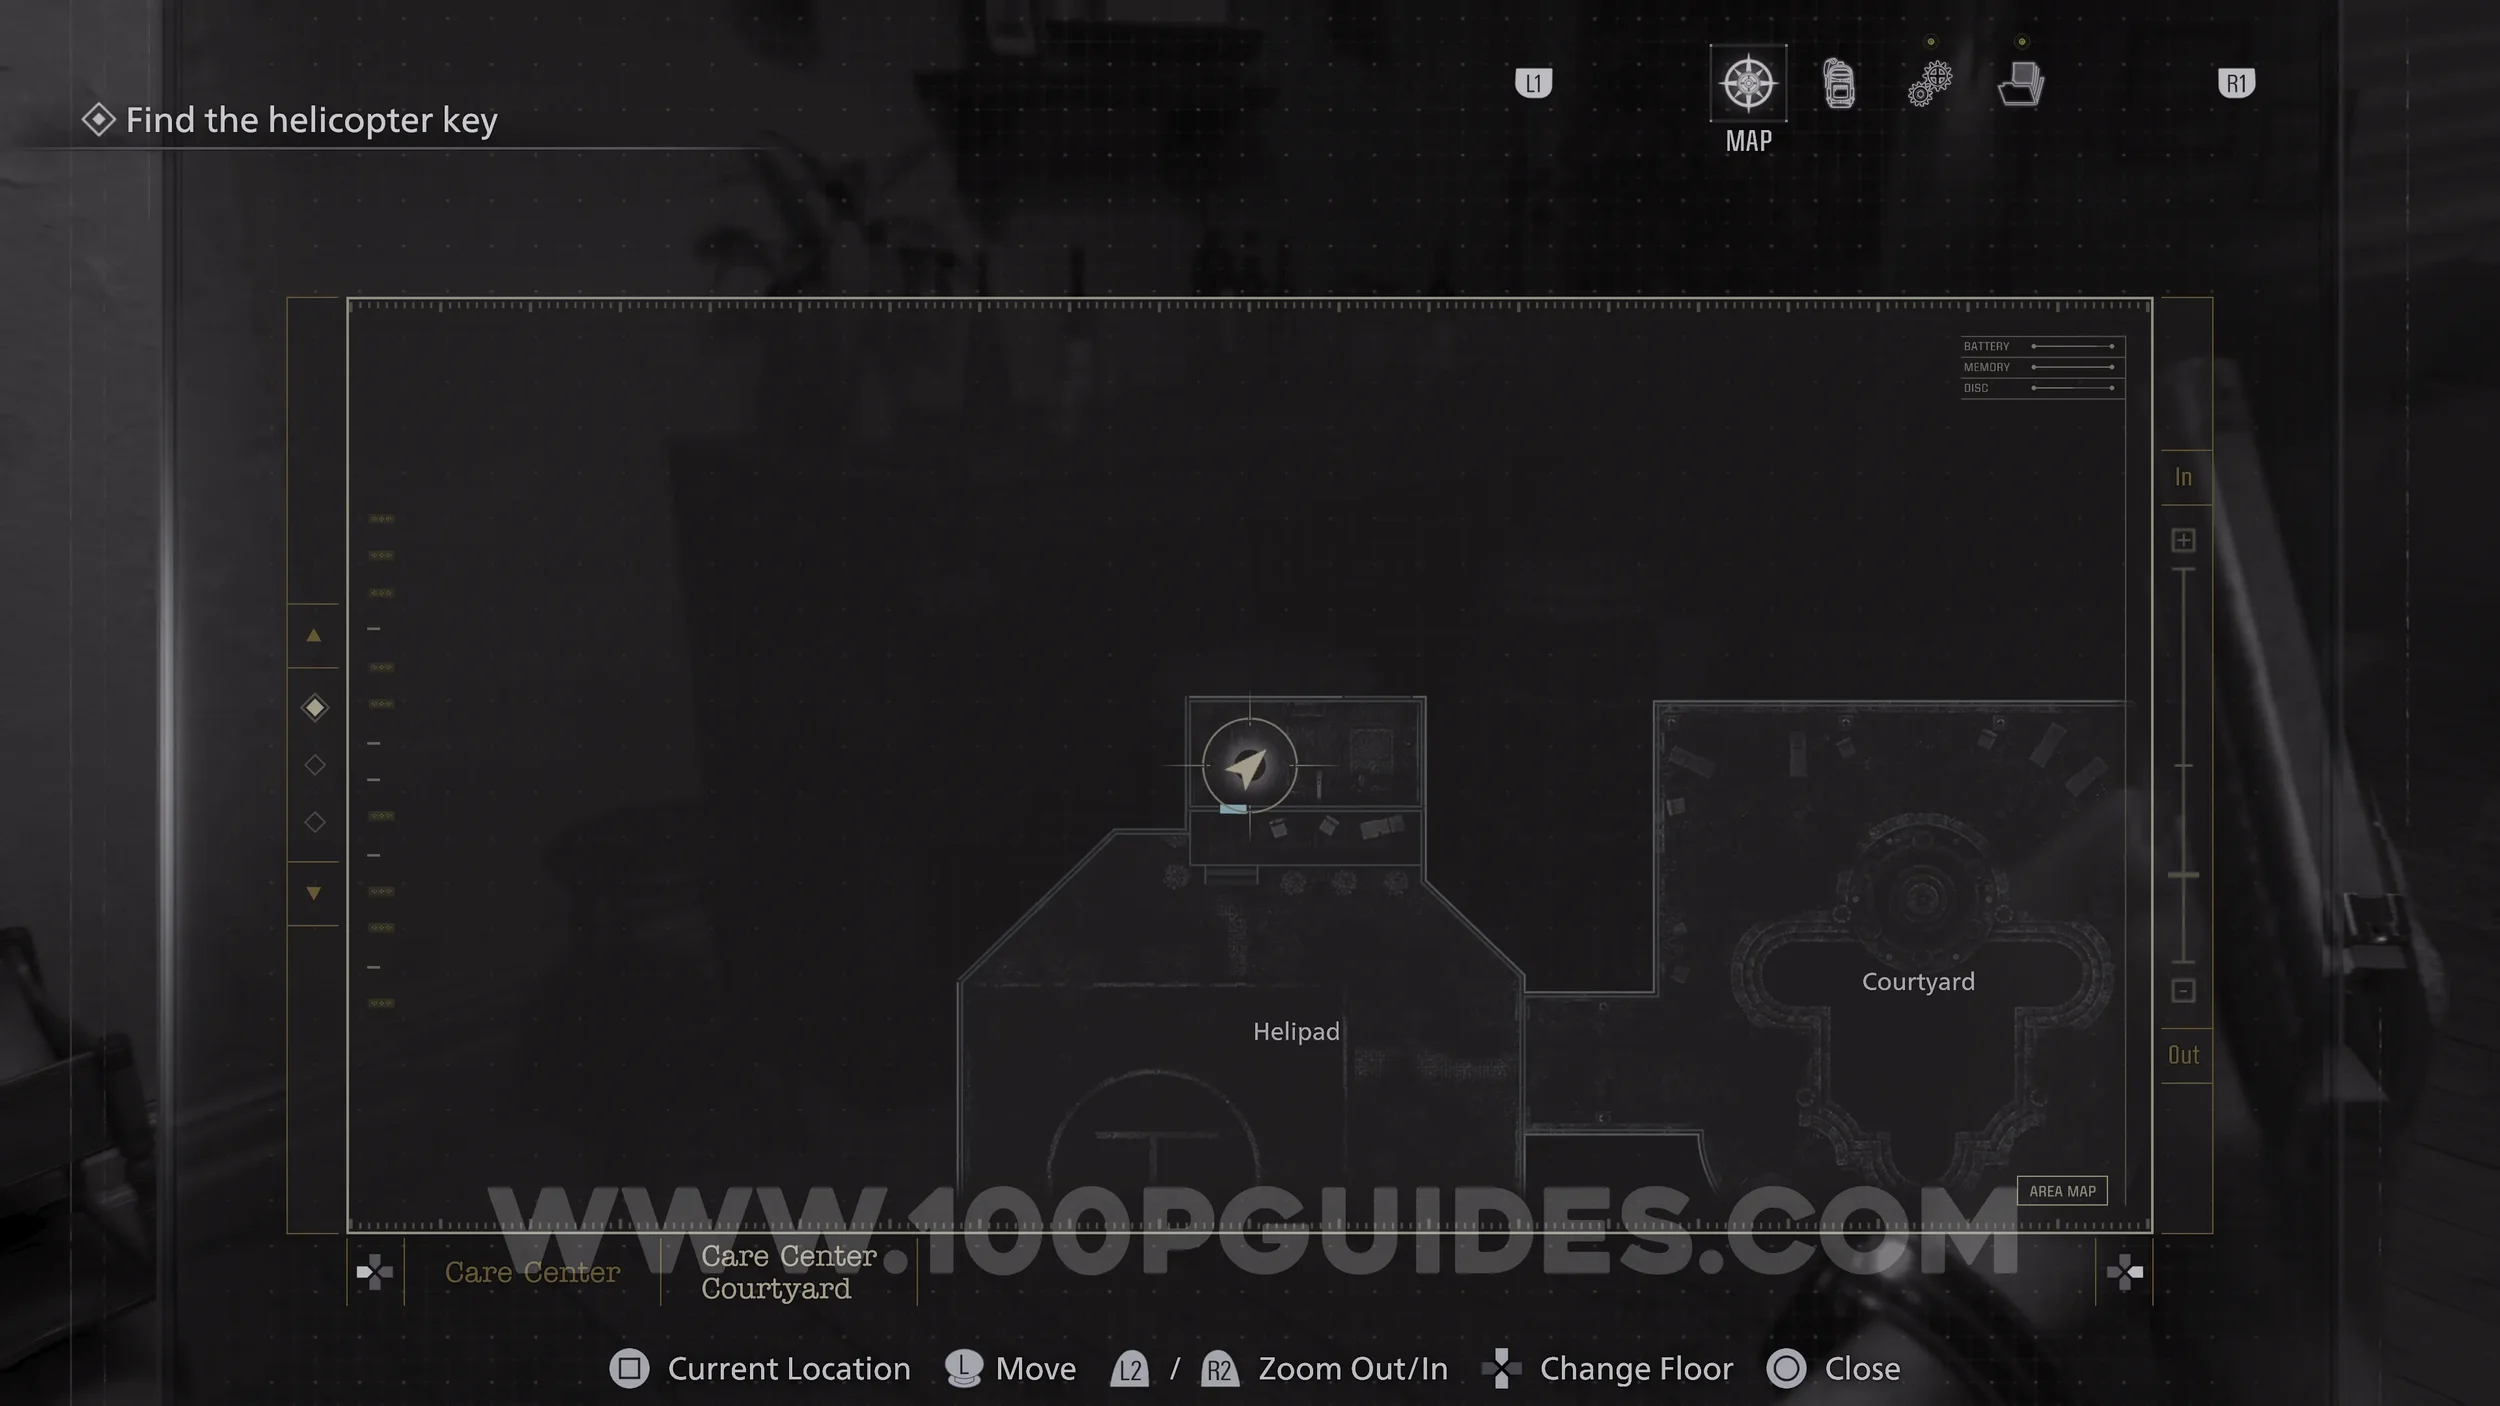

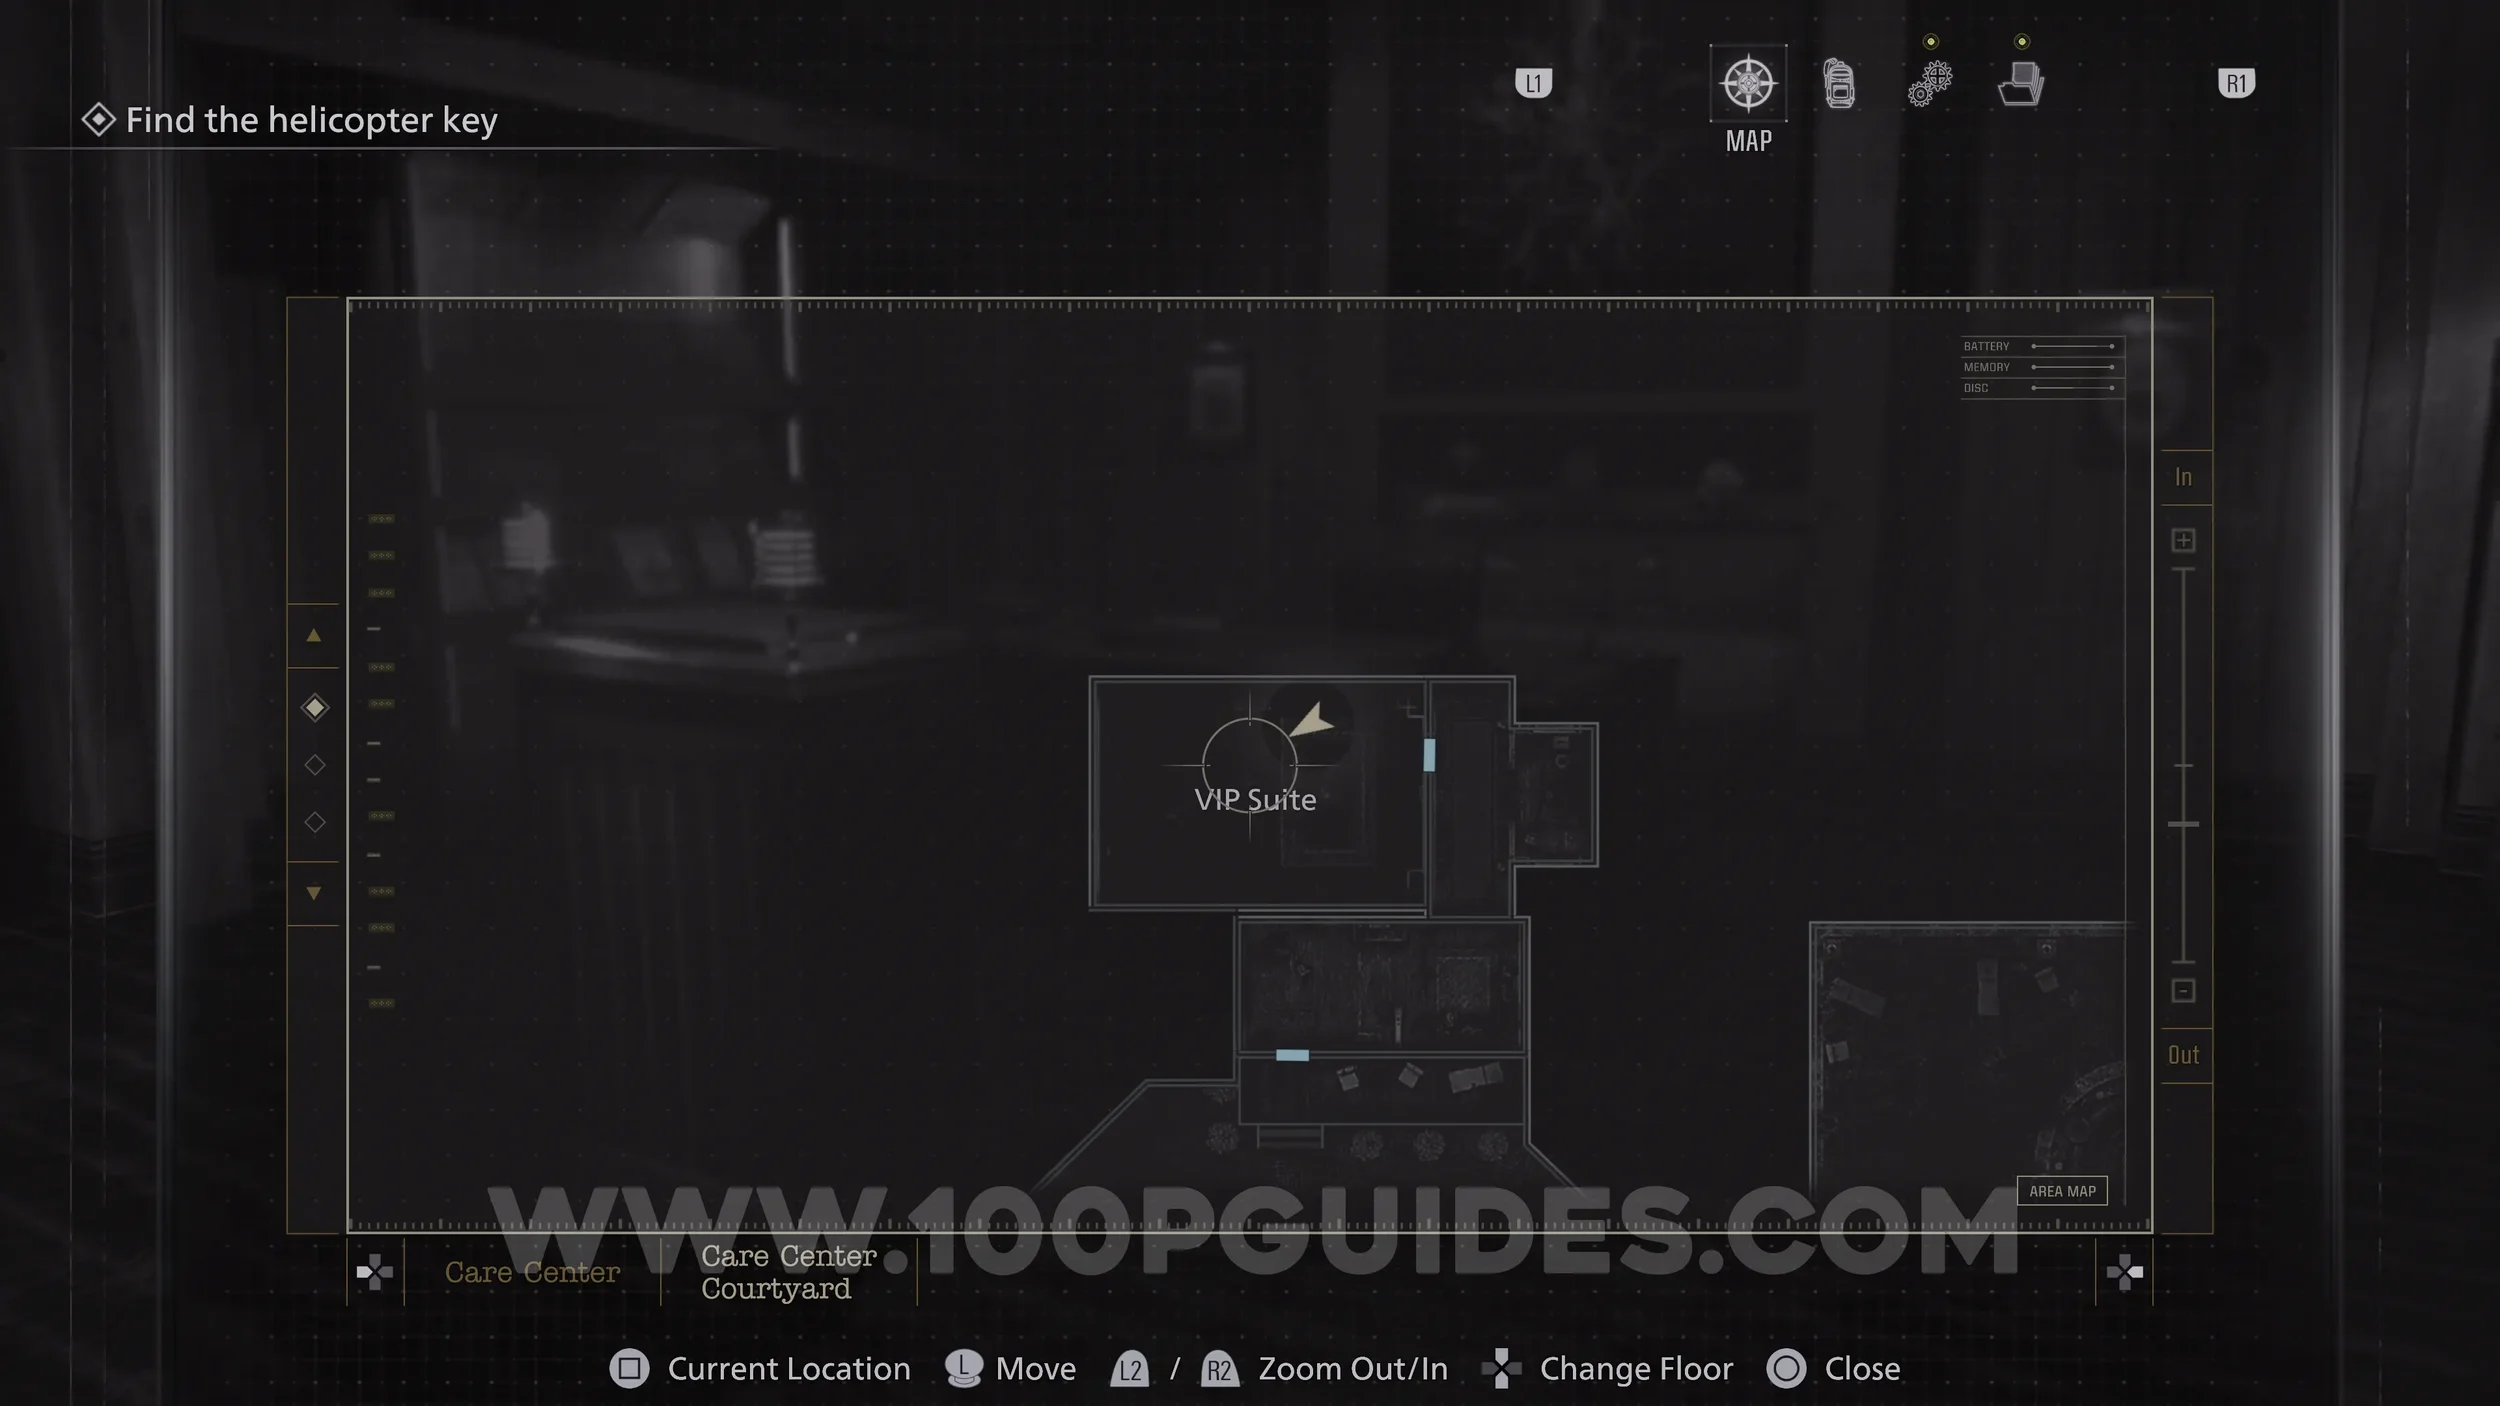
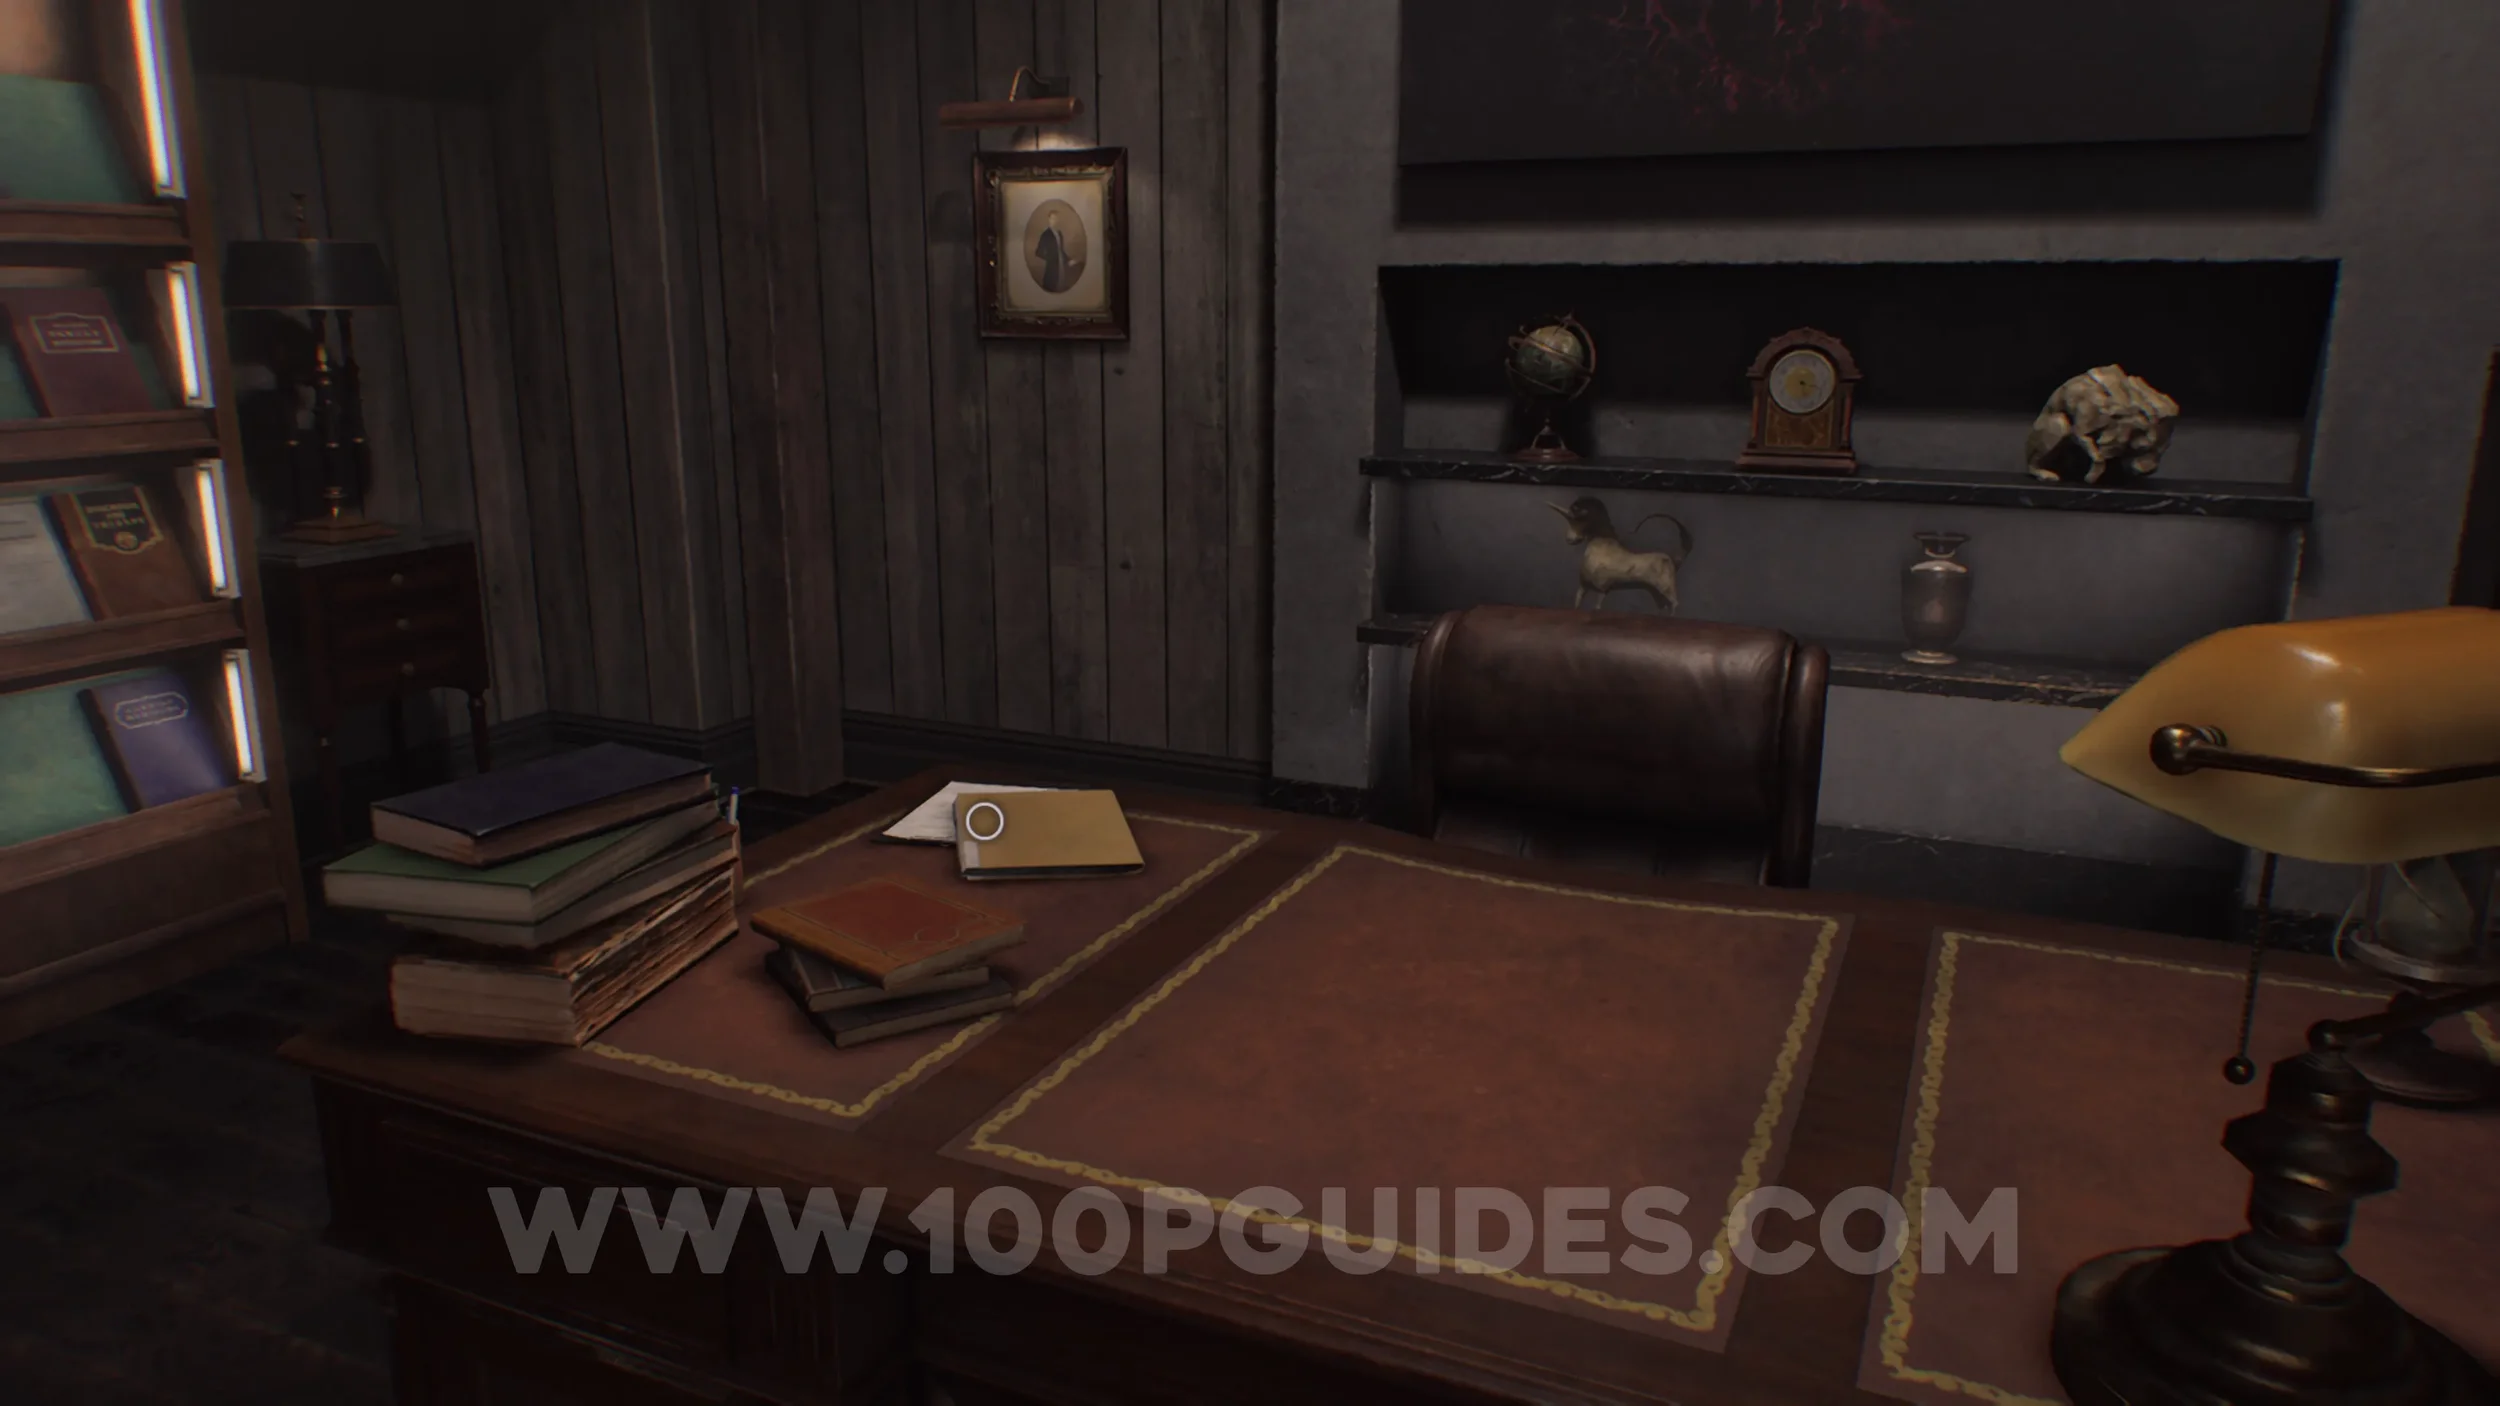
File #43 - Note Regarding Research Result. In the VIP Suite in the house after the helicopter cutscene.
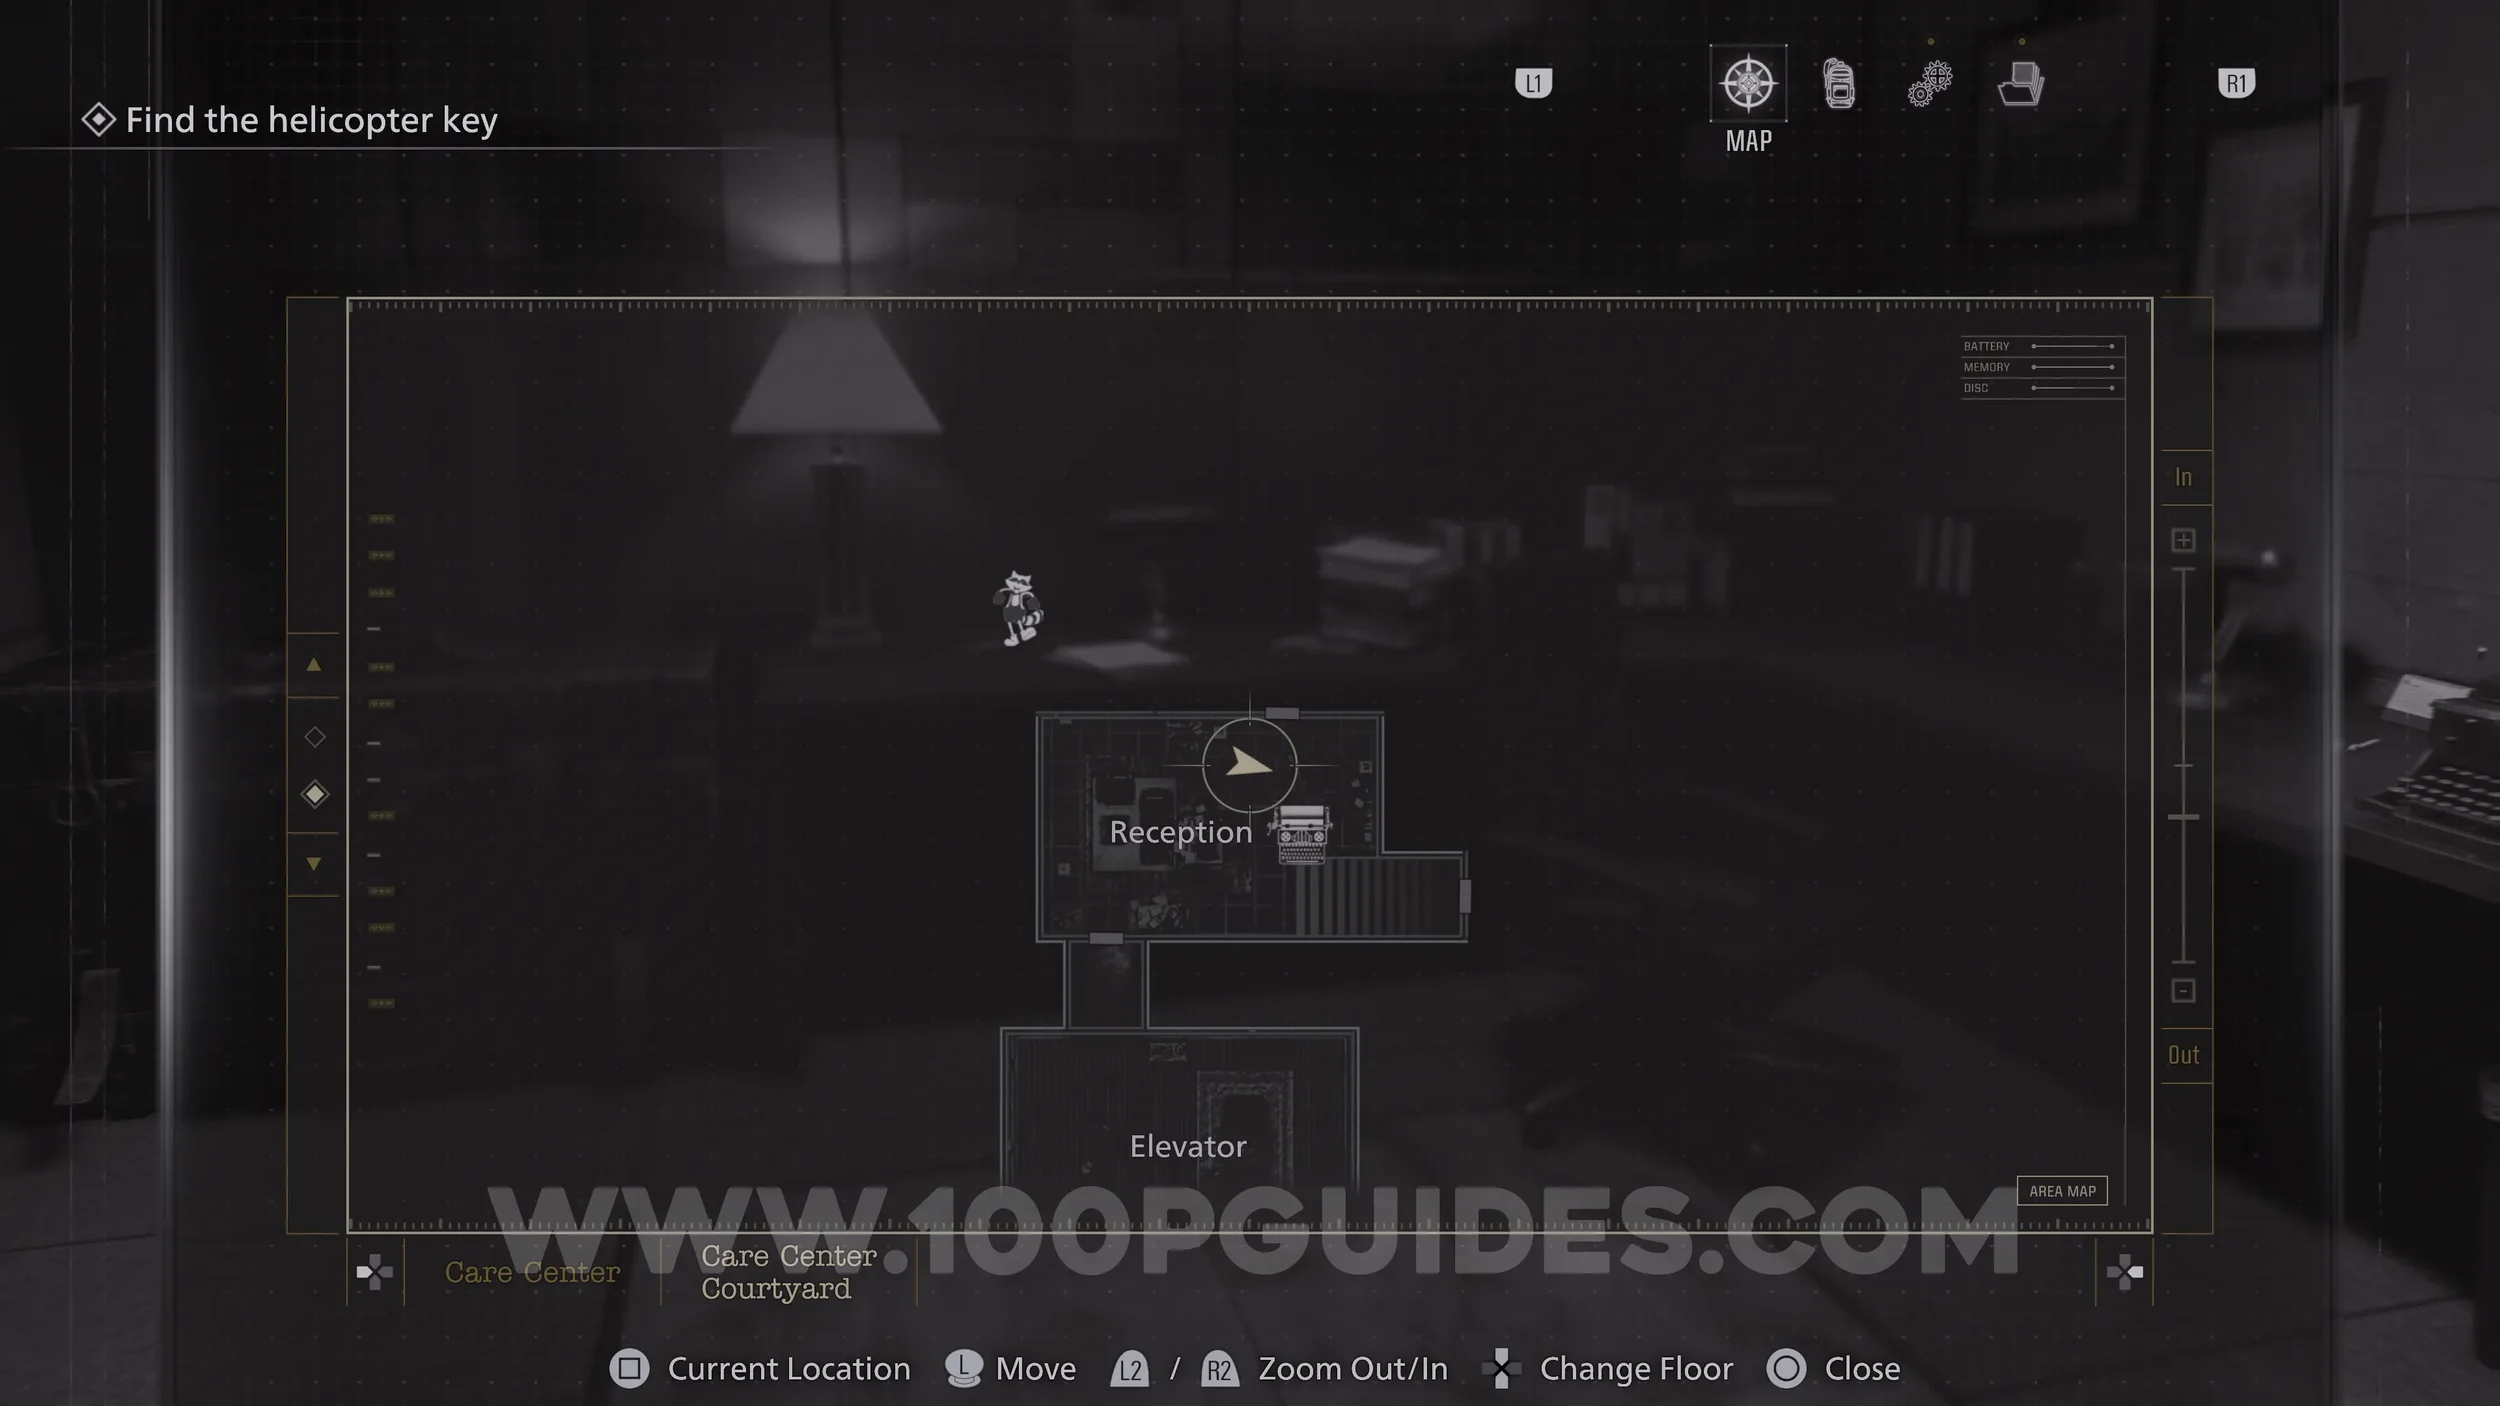
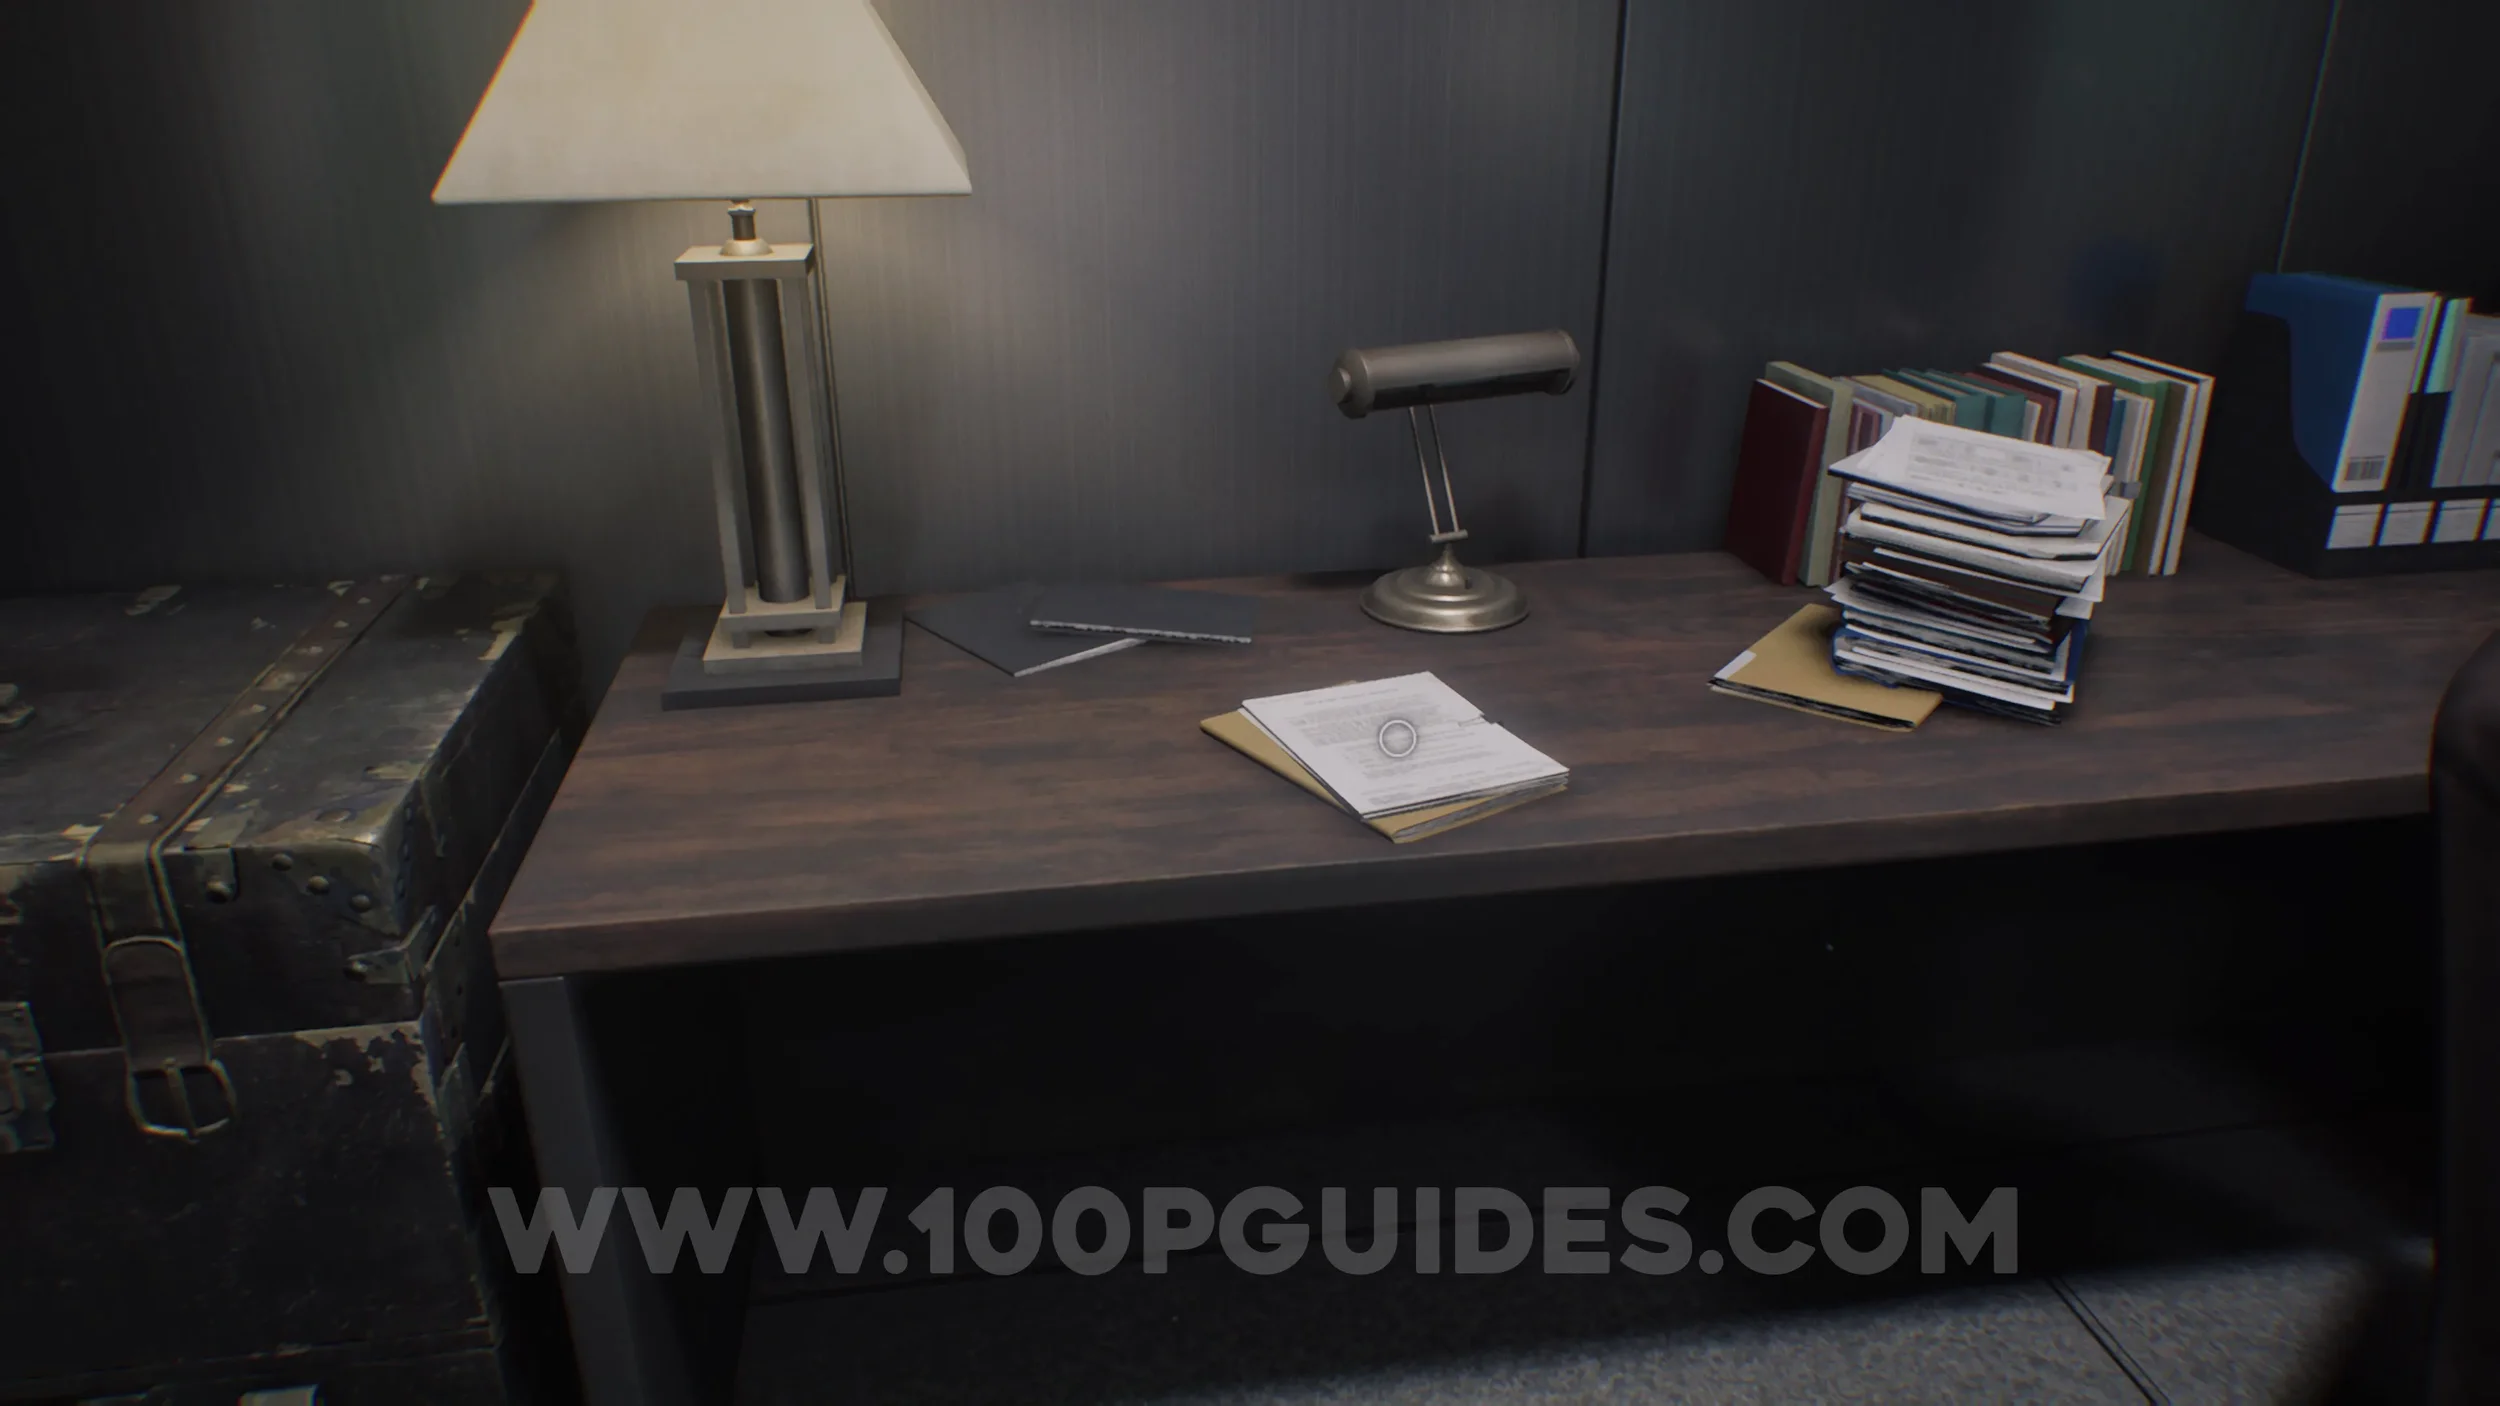
File #44 - Spencer’s Research II. After using the helix and descending the lift in the VIP room, you will soon get to the Reception. The file is on the desk.
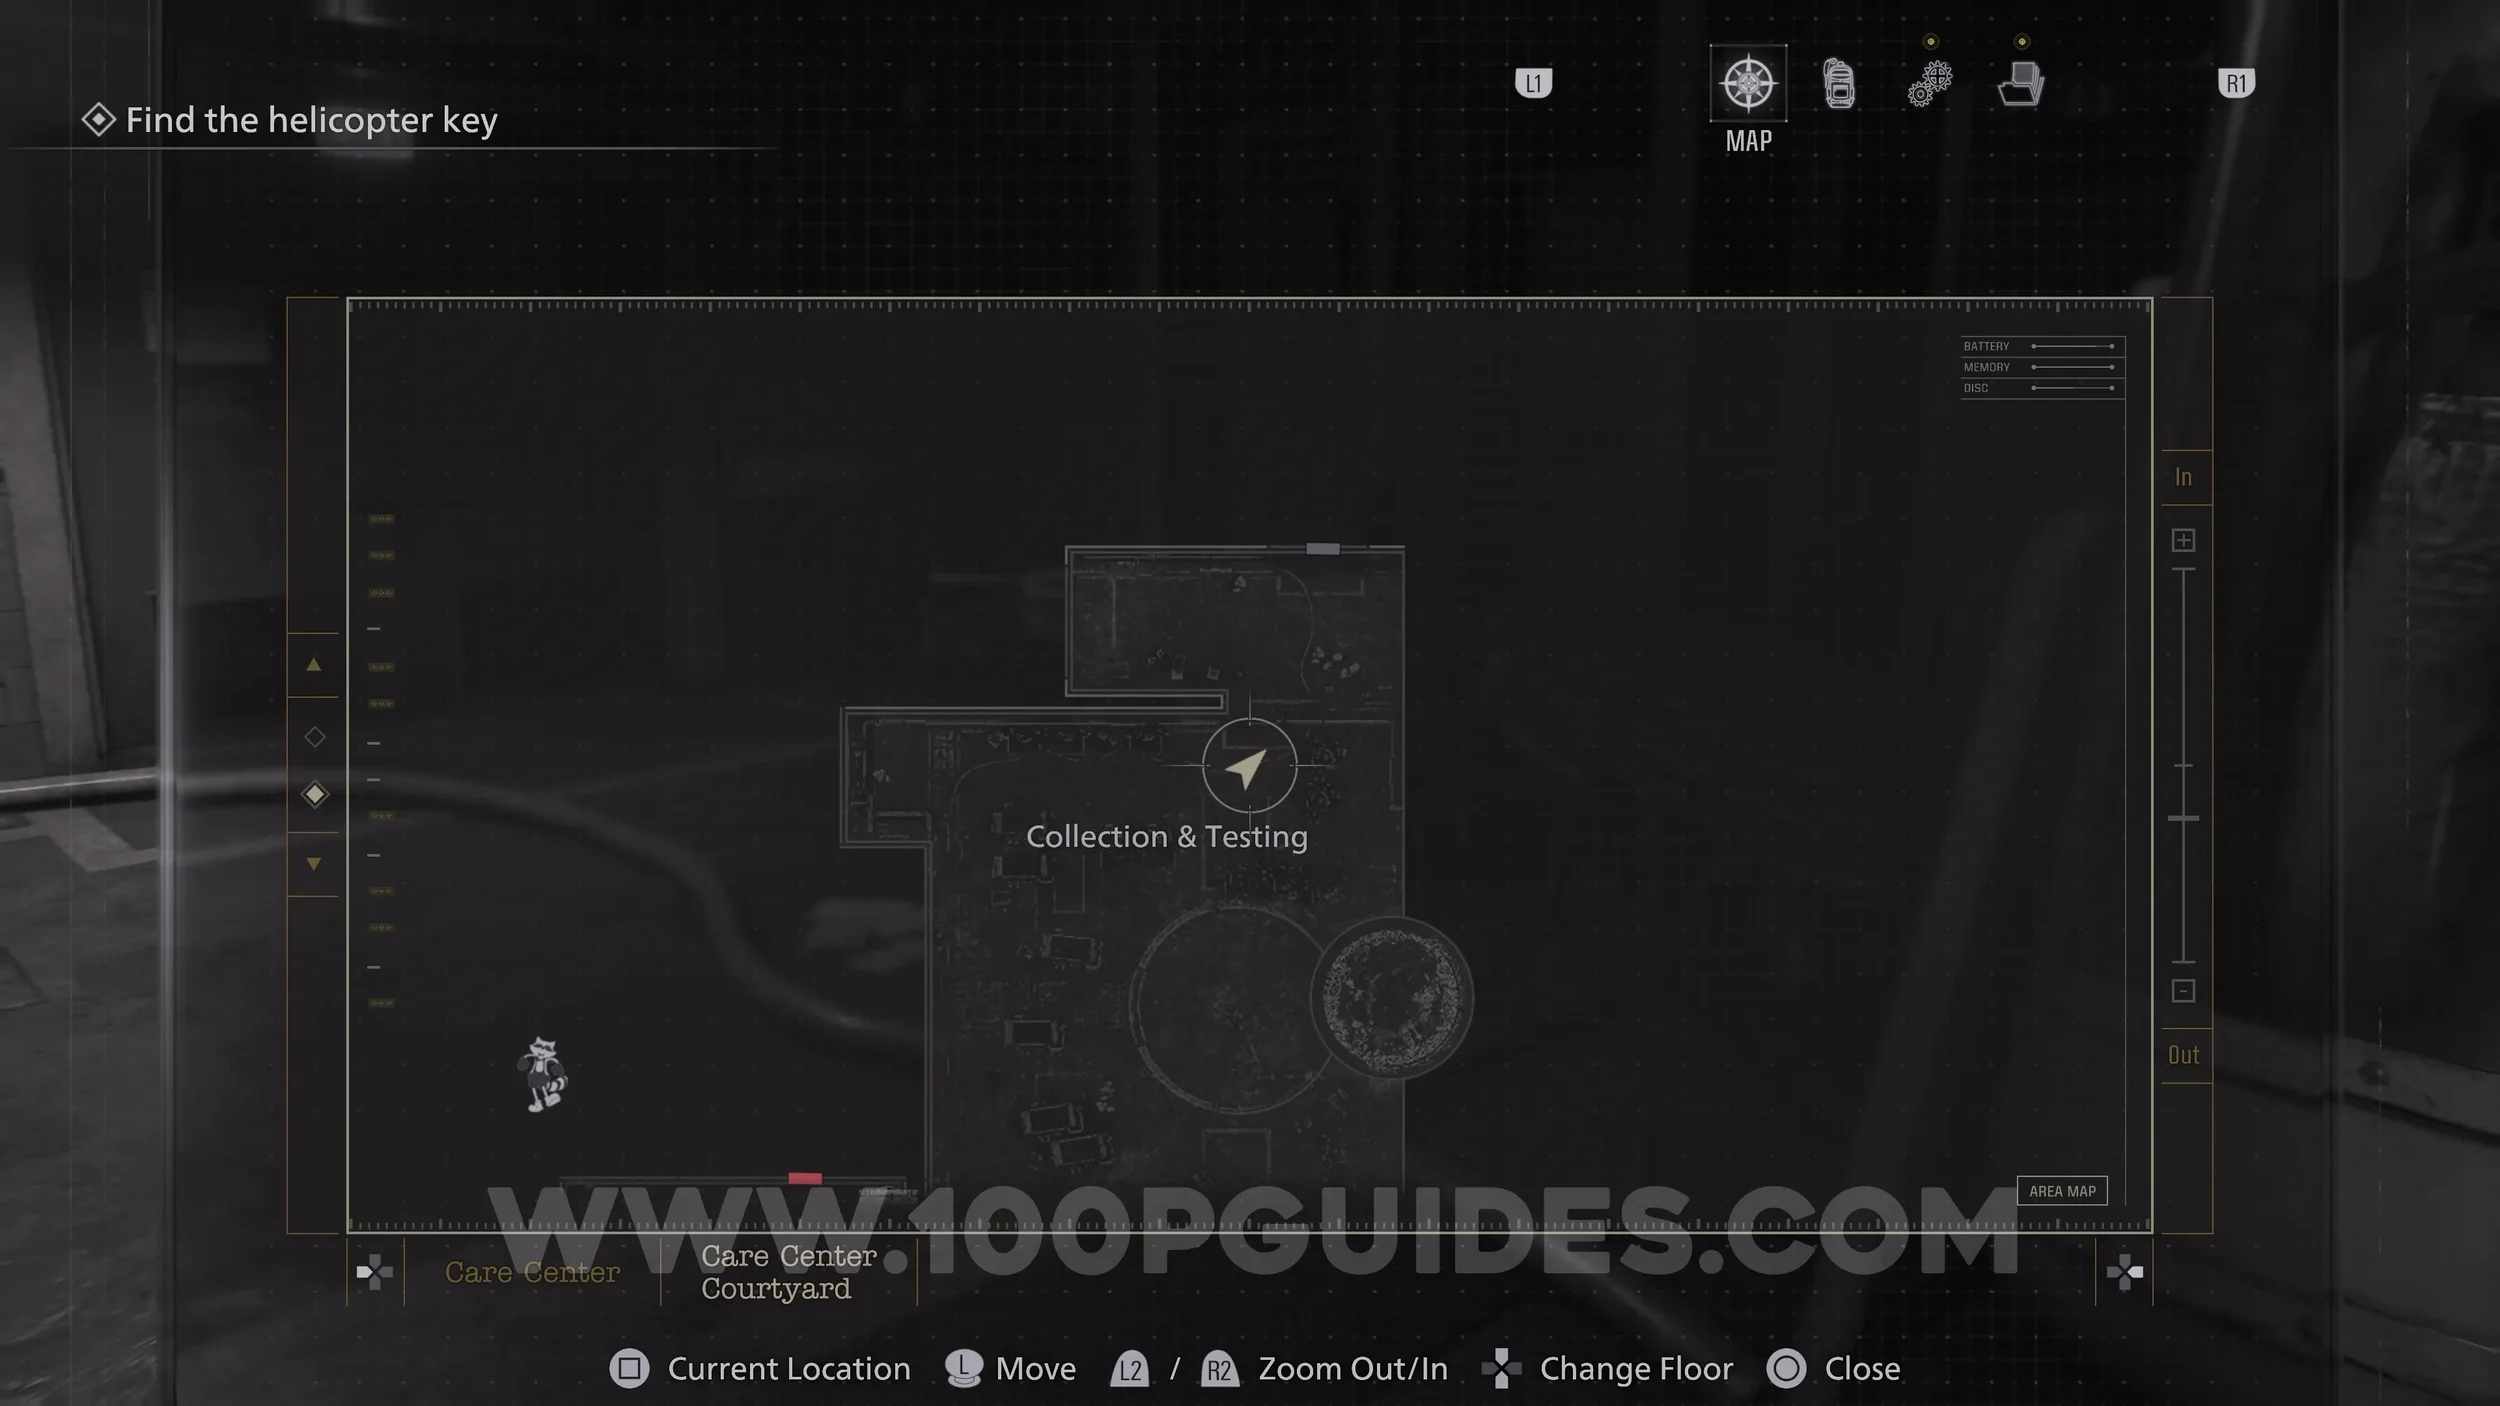
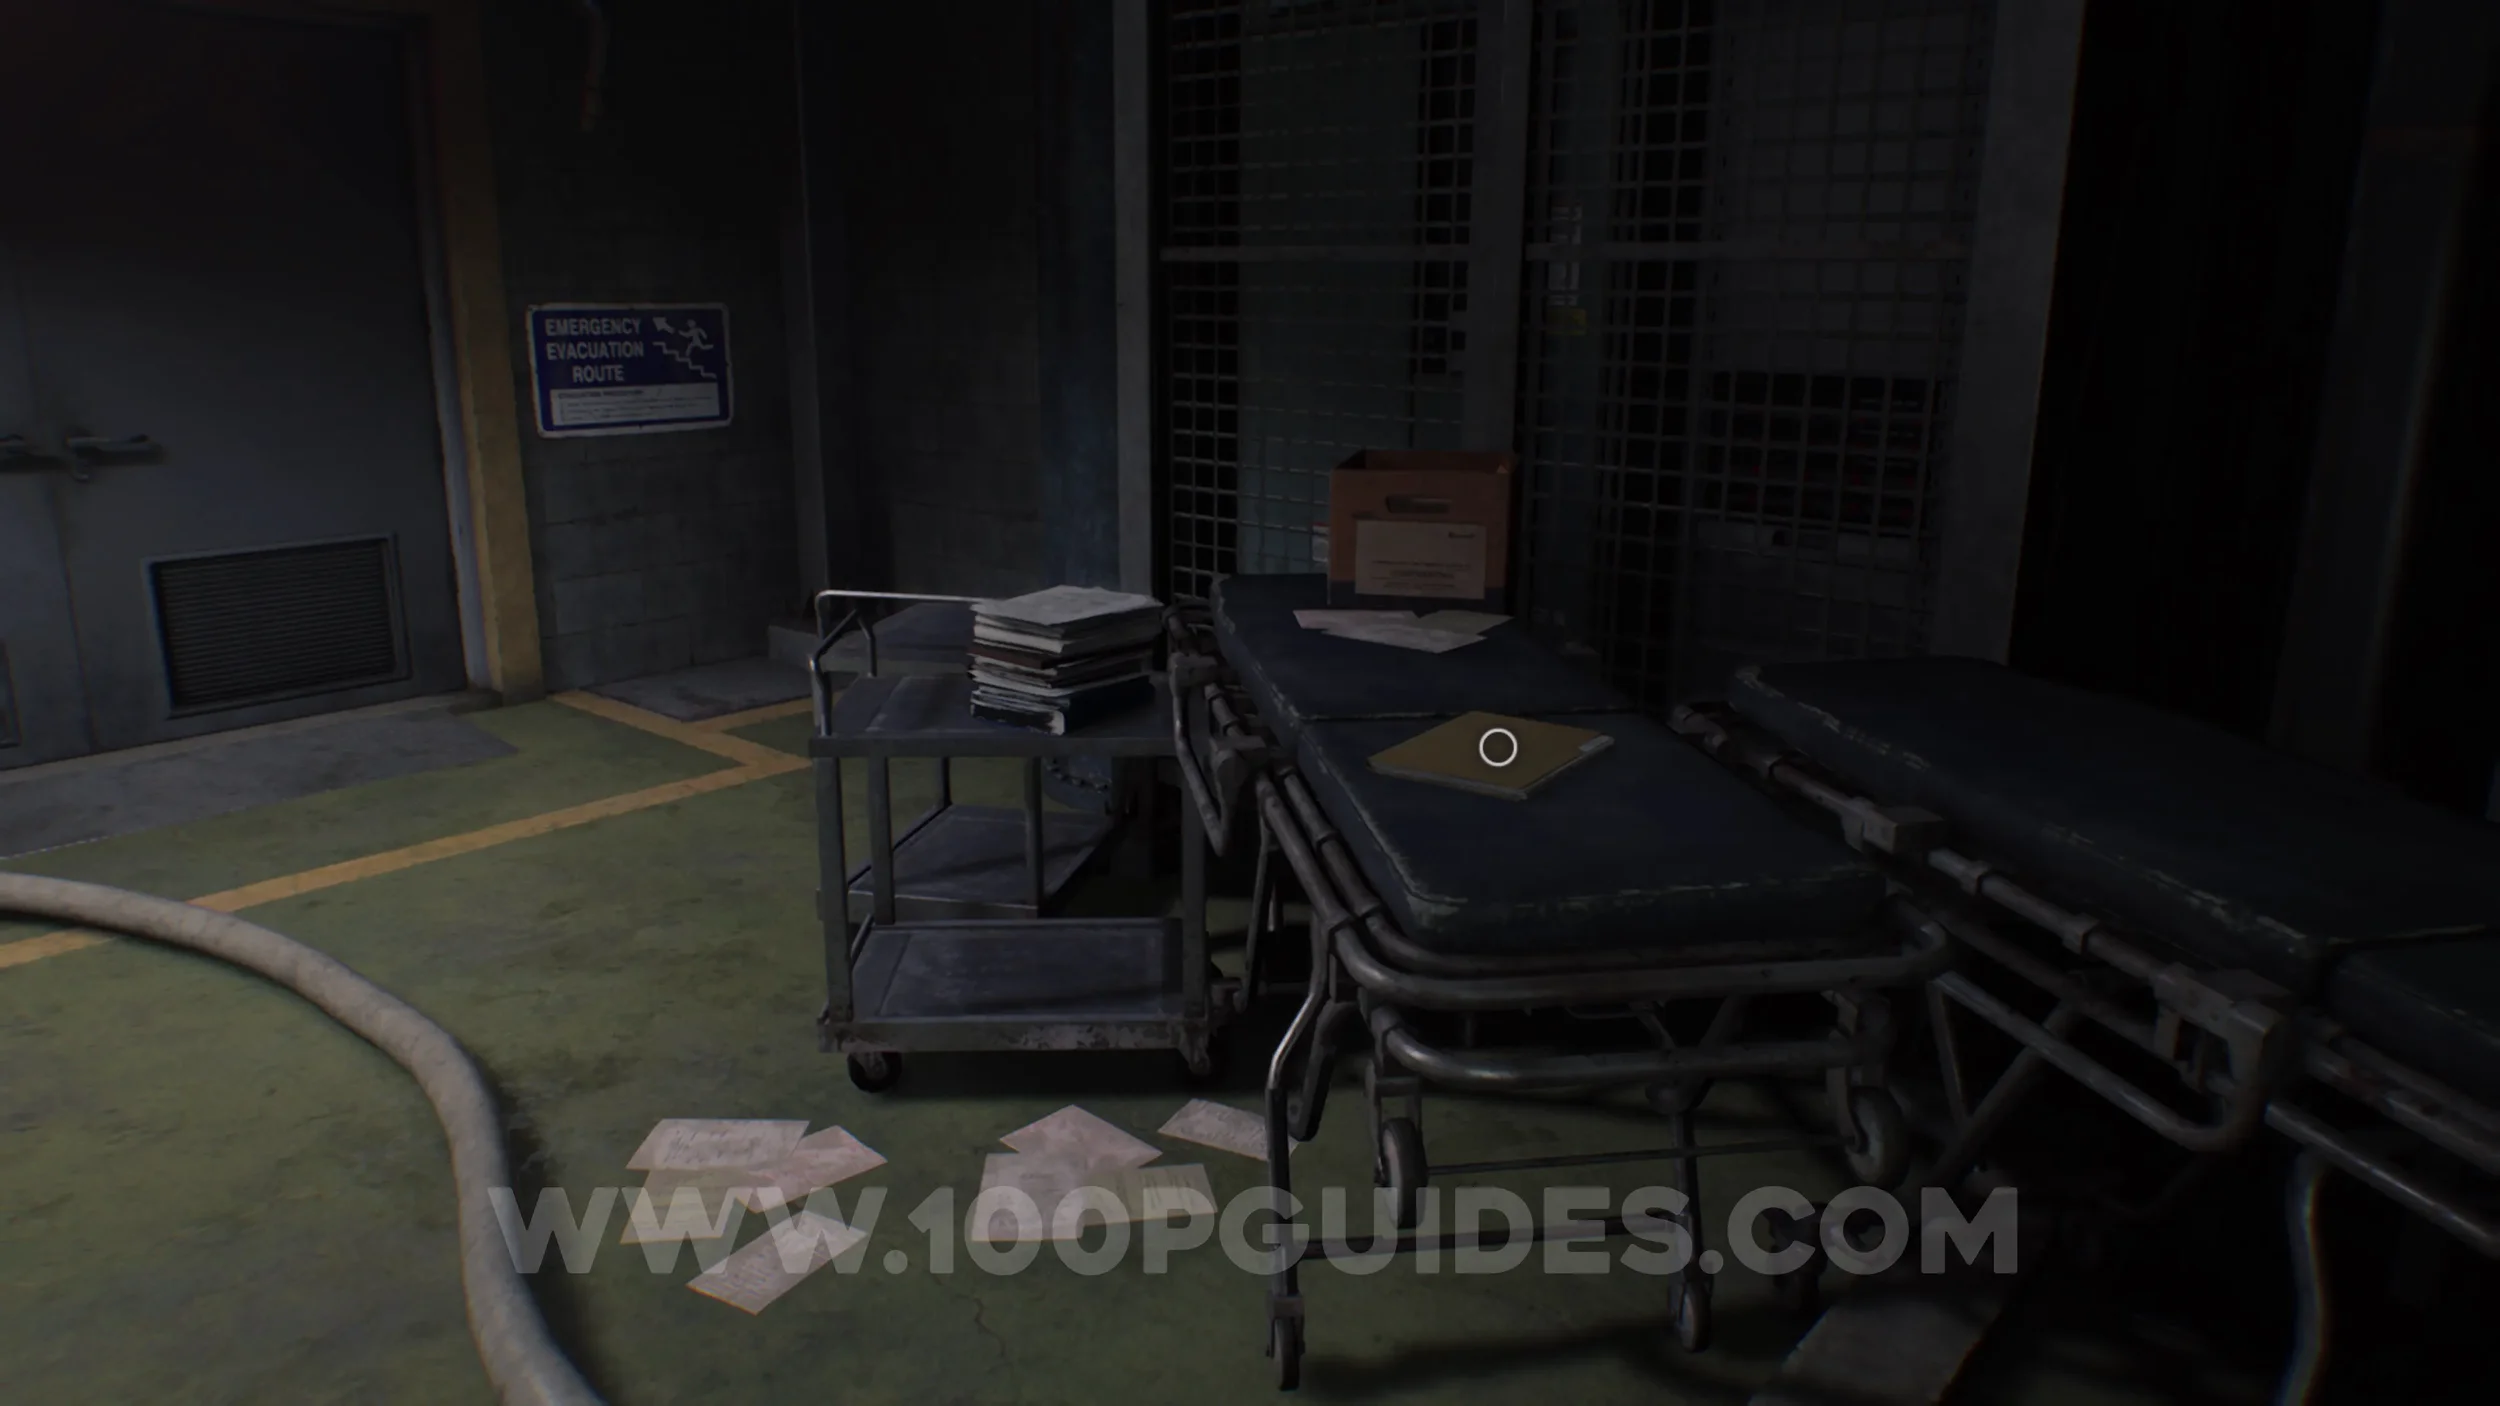
File #45 - Subject 170 Record. In the Collecting & Testing area.
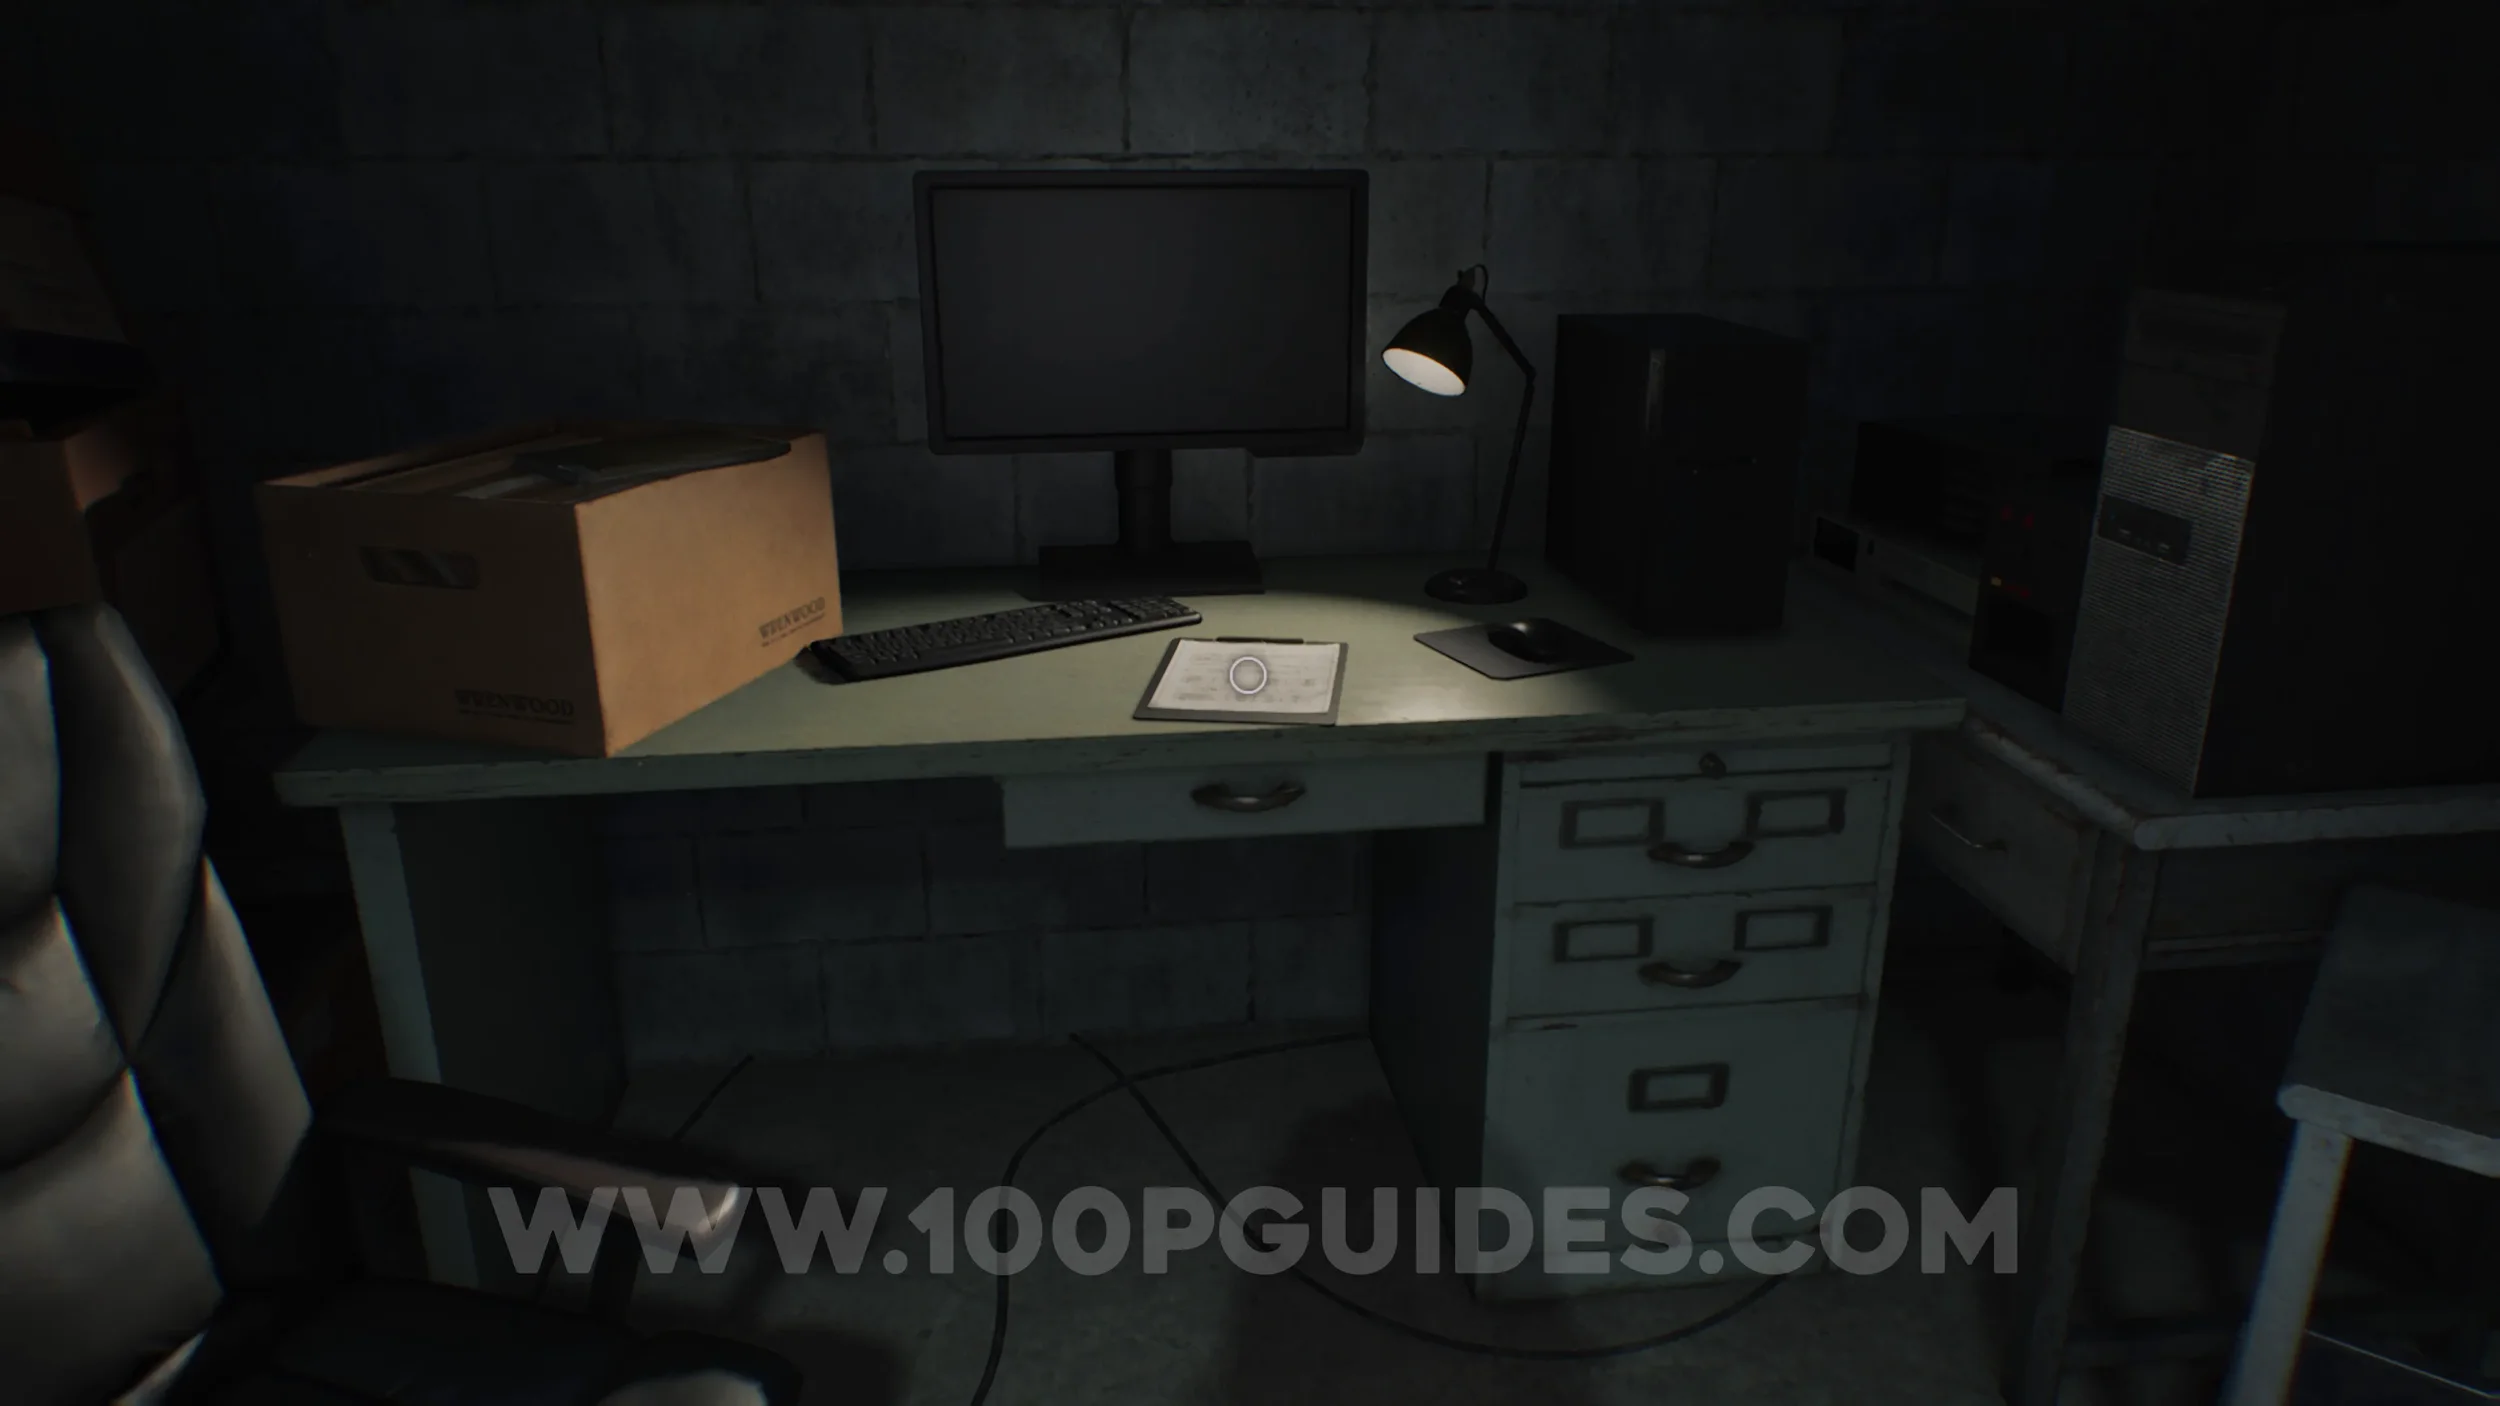
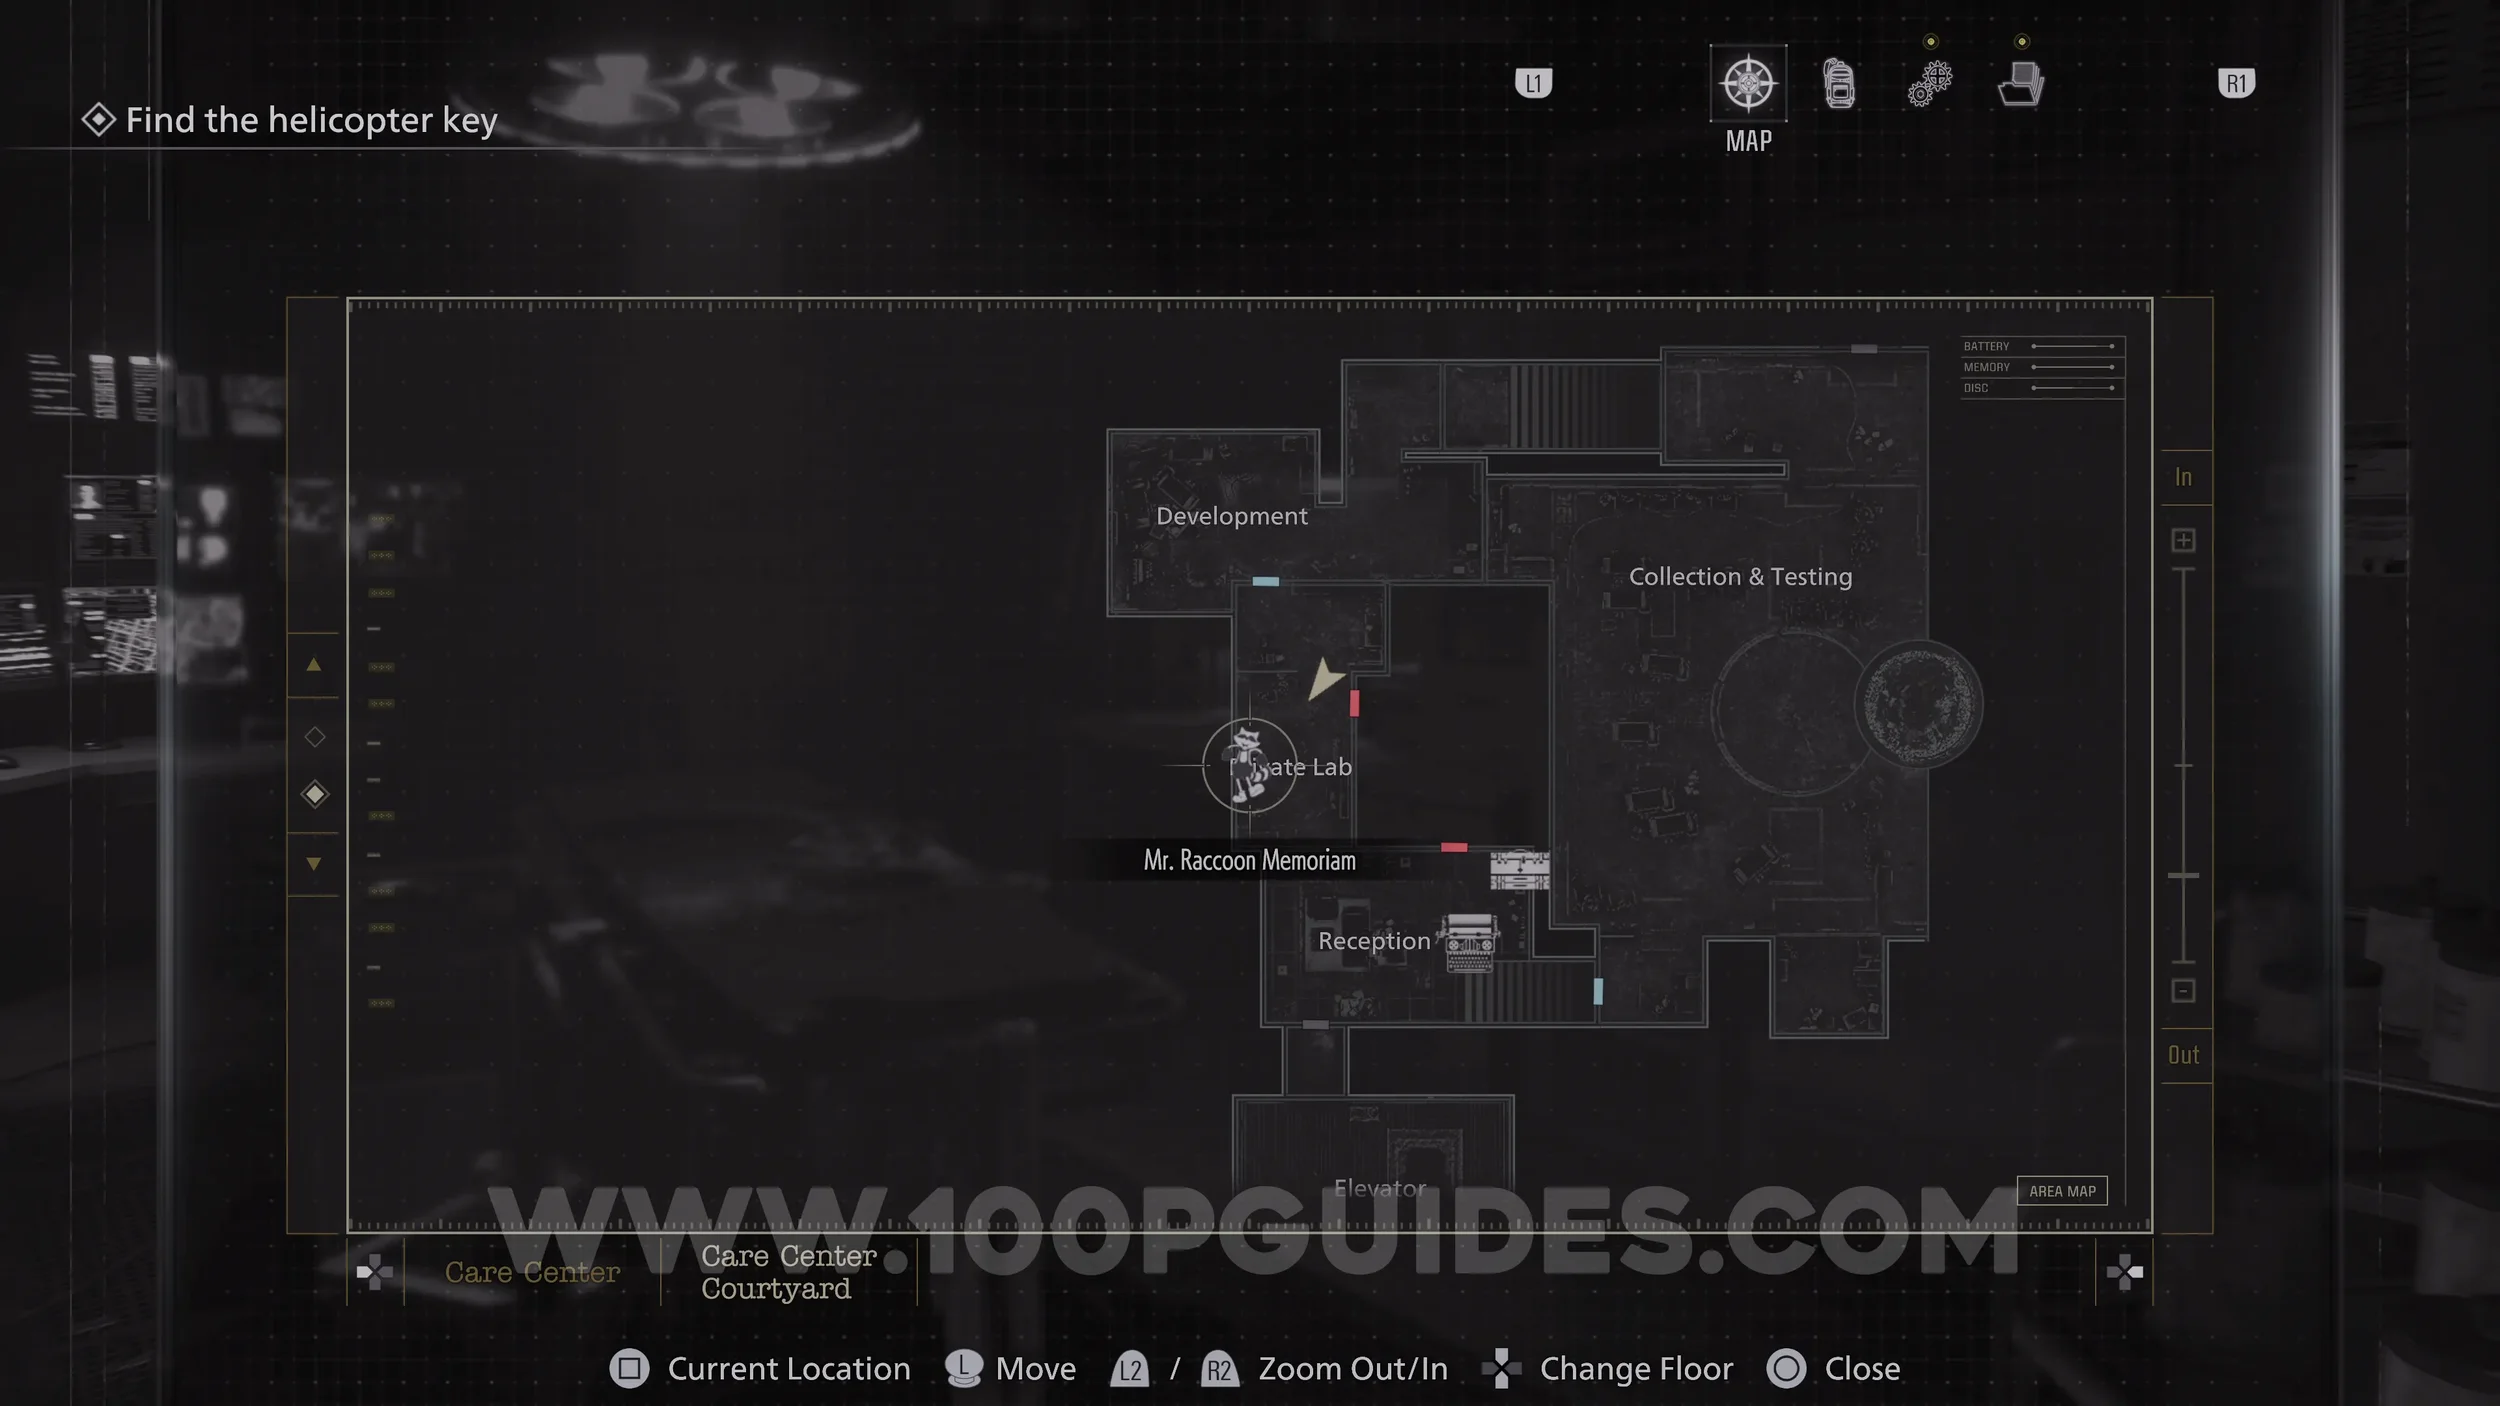
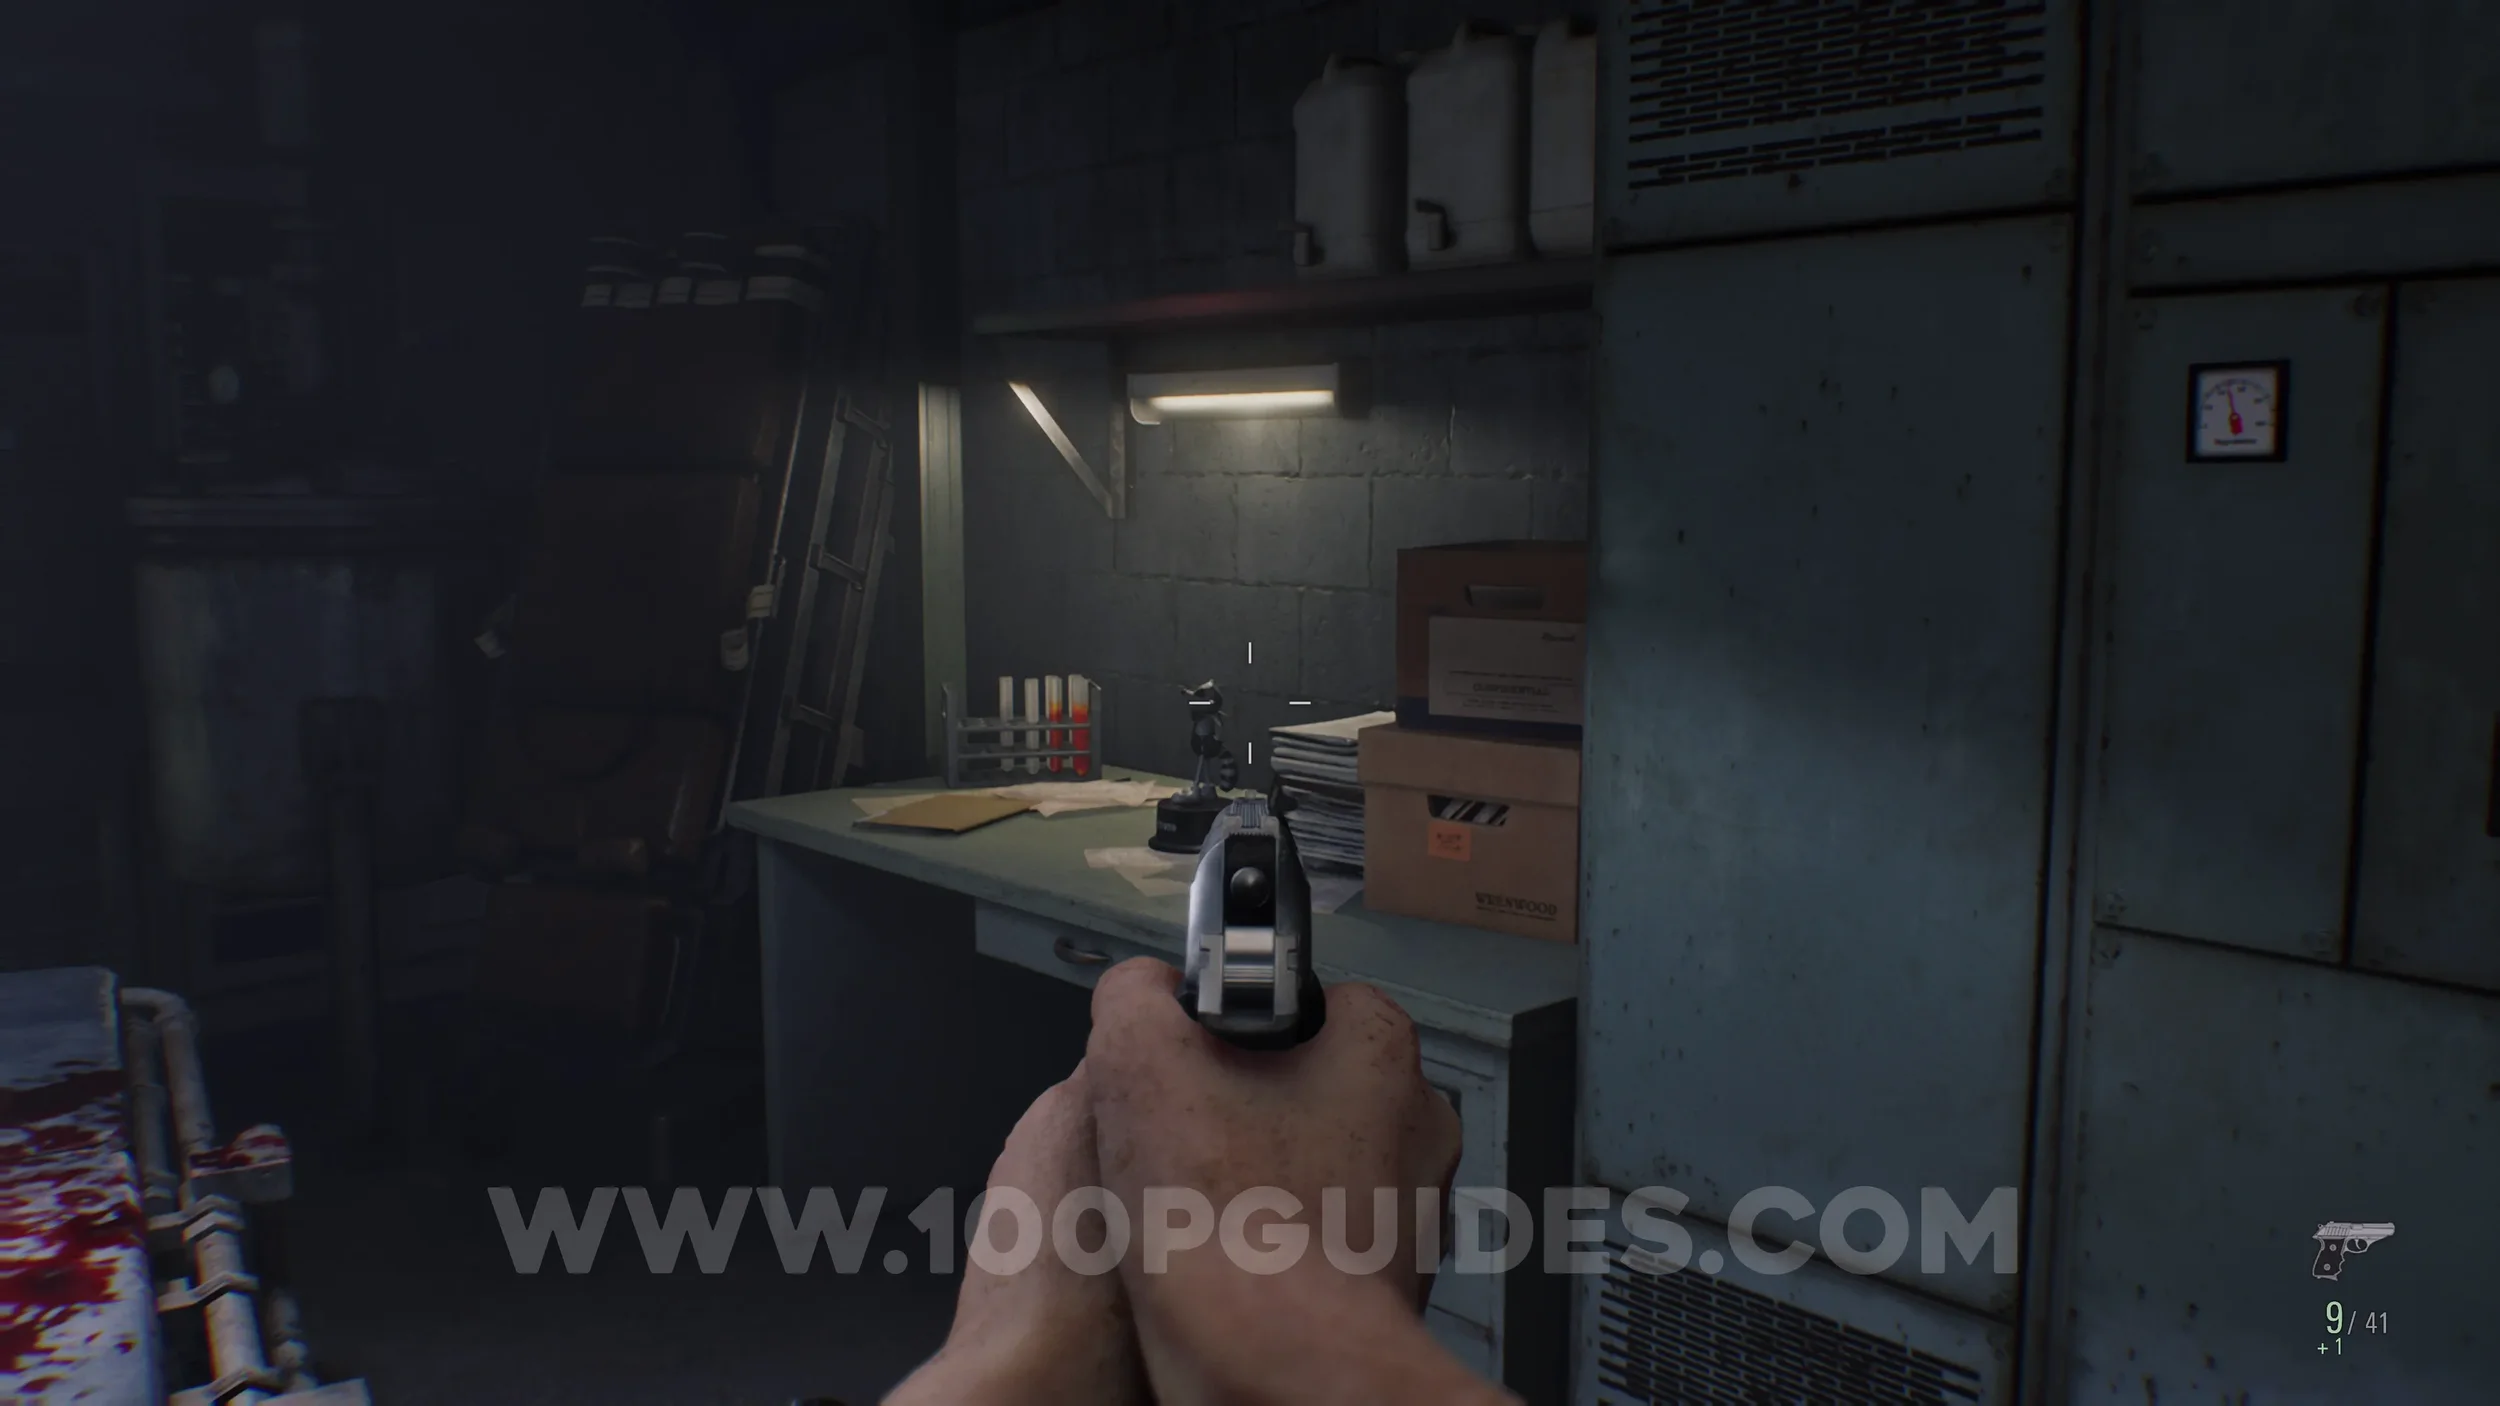
File #46 - Grace Ashcroft Blood Analysis Report. In the Private Lab.
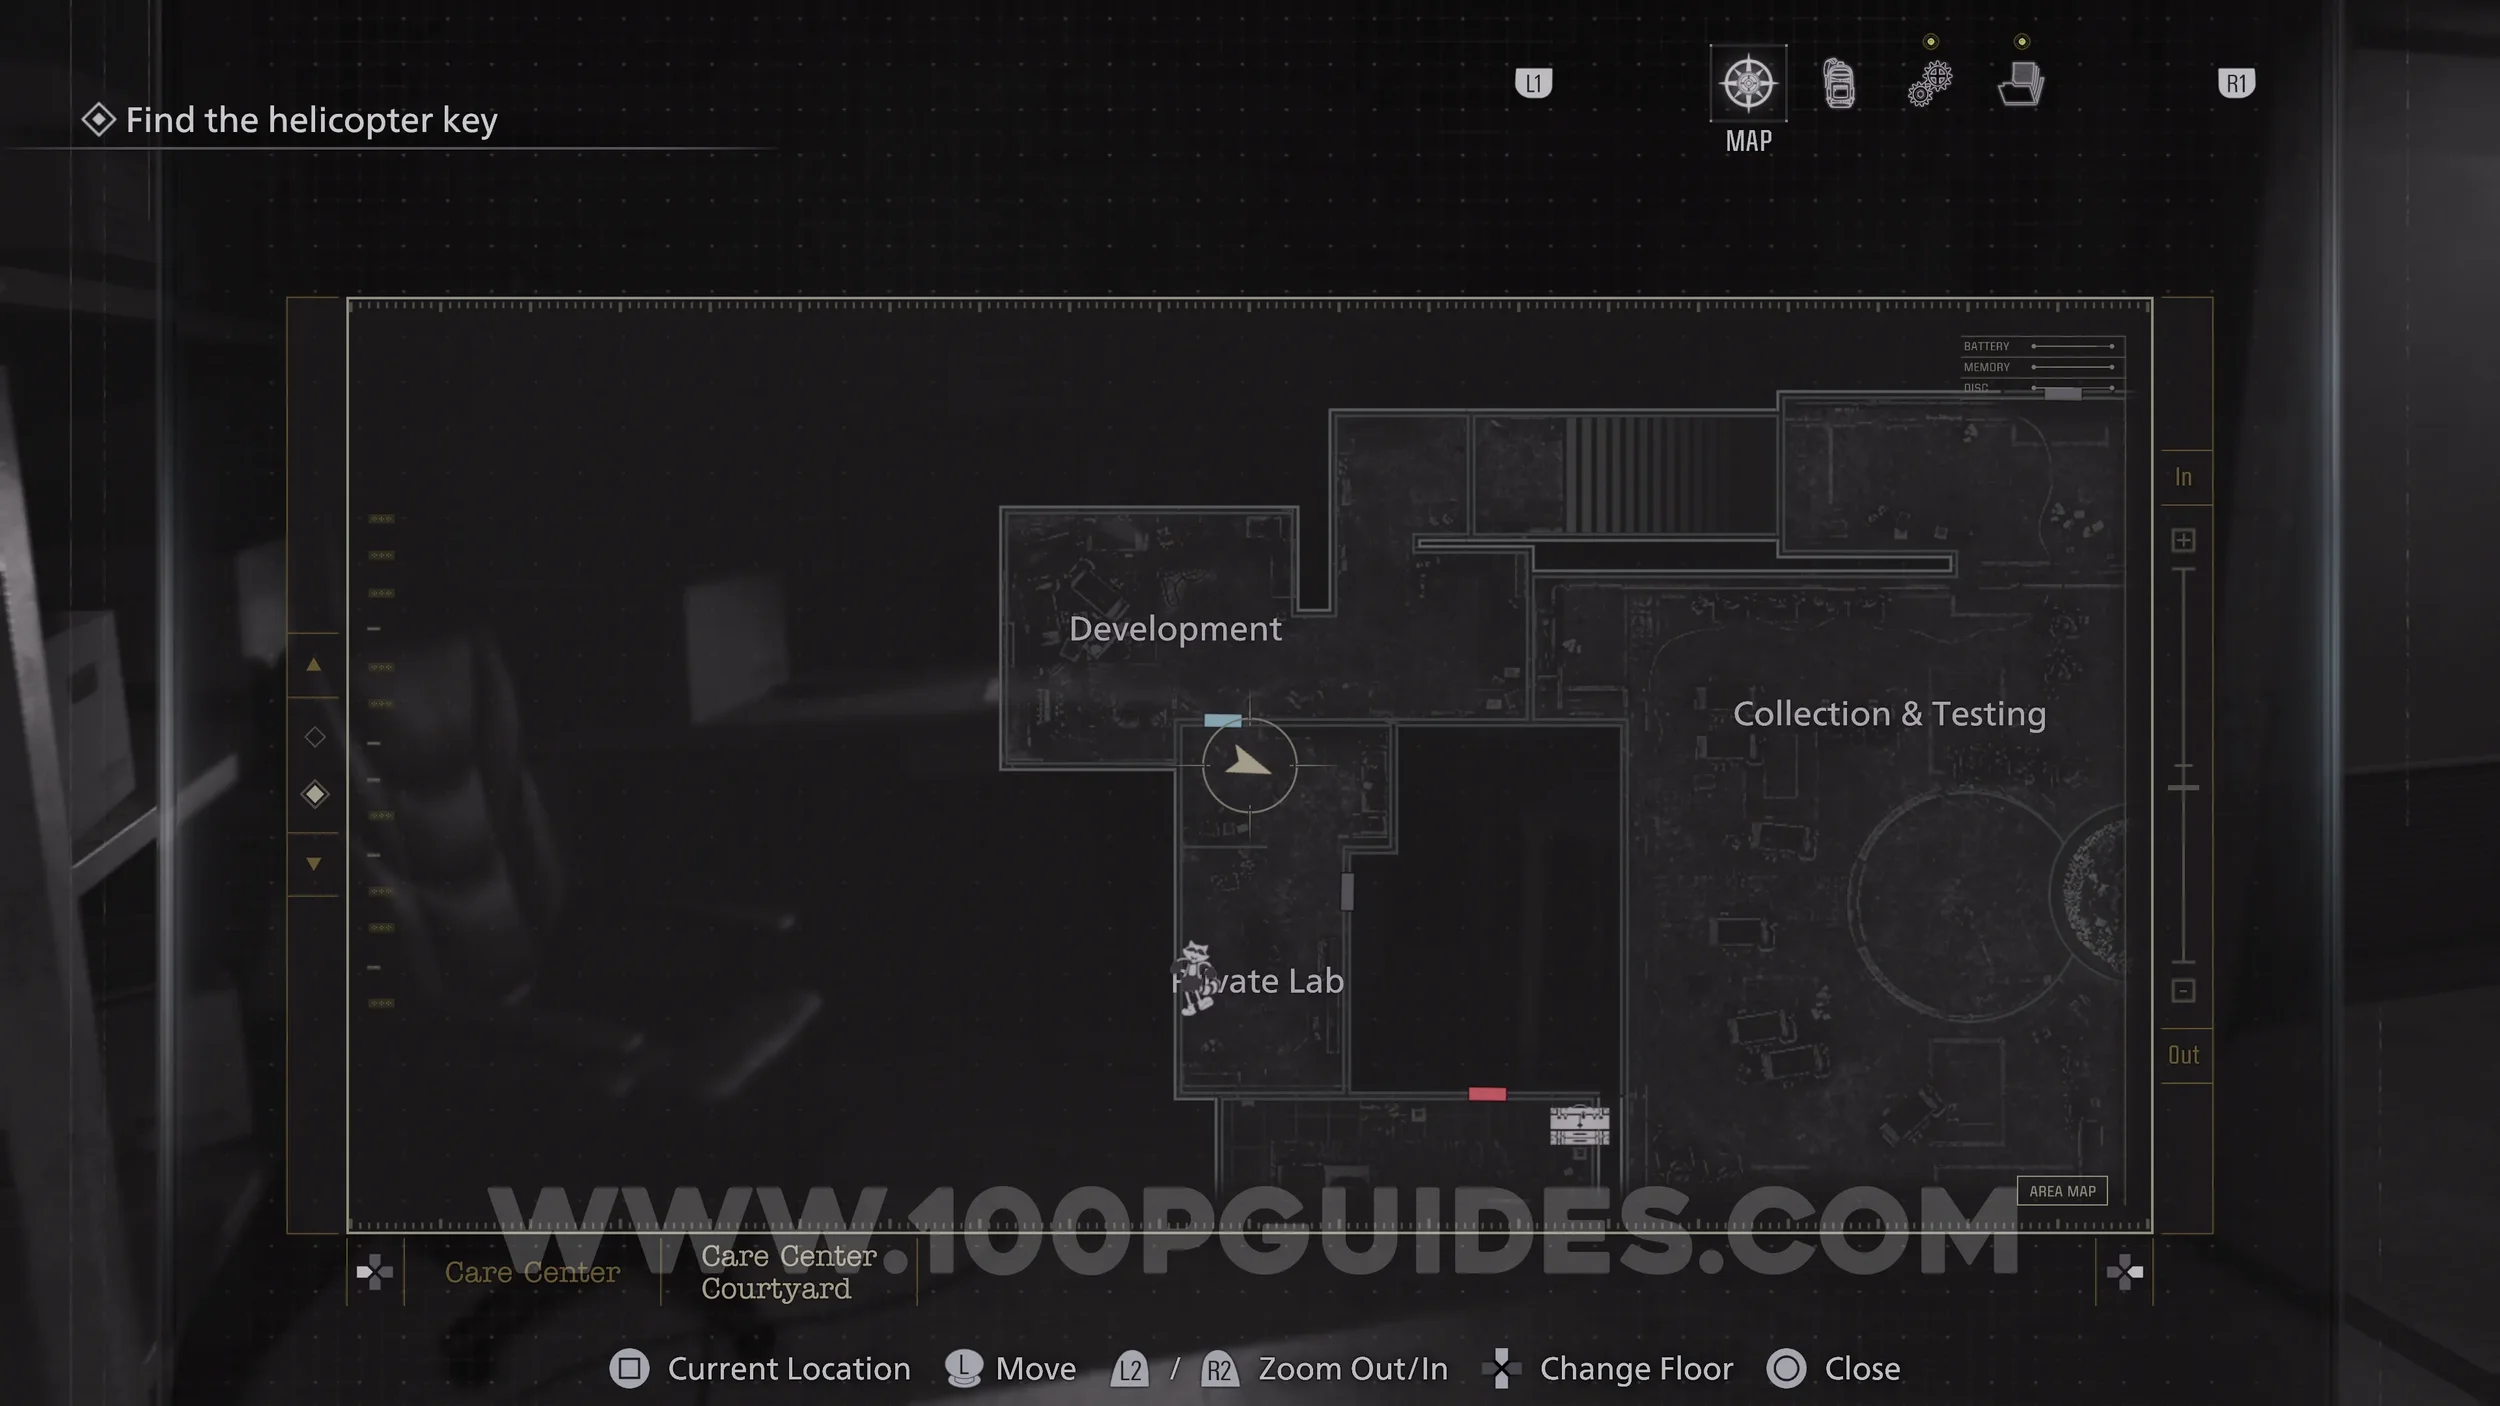
Mr. Raccoon #9. Also in the Private Lab.
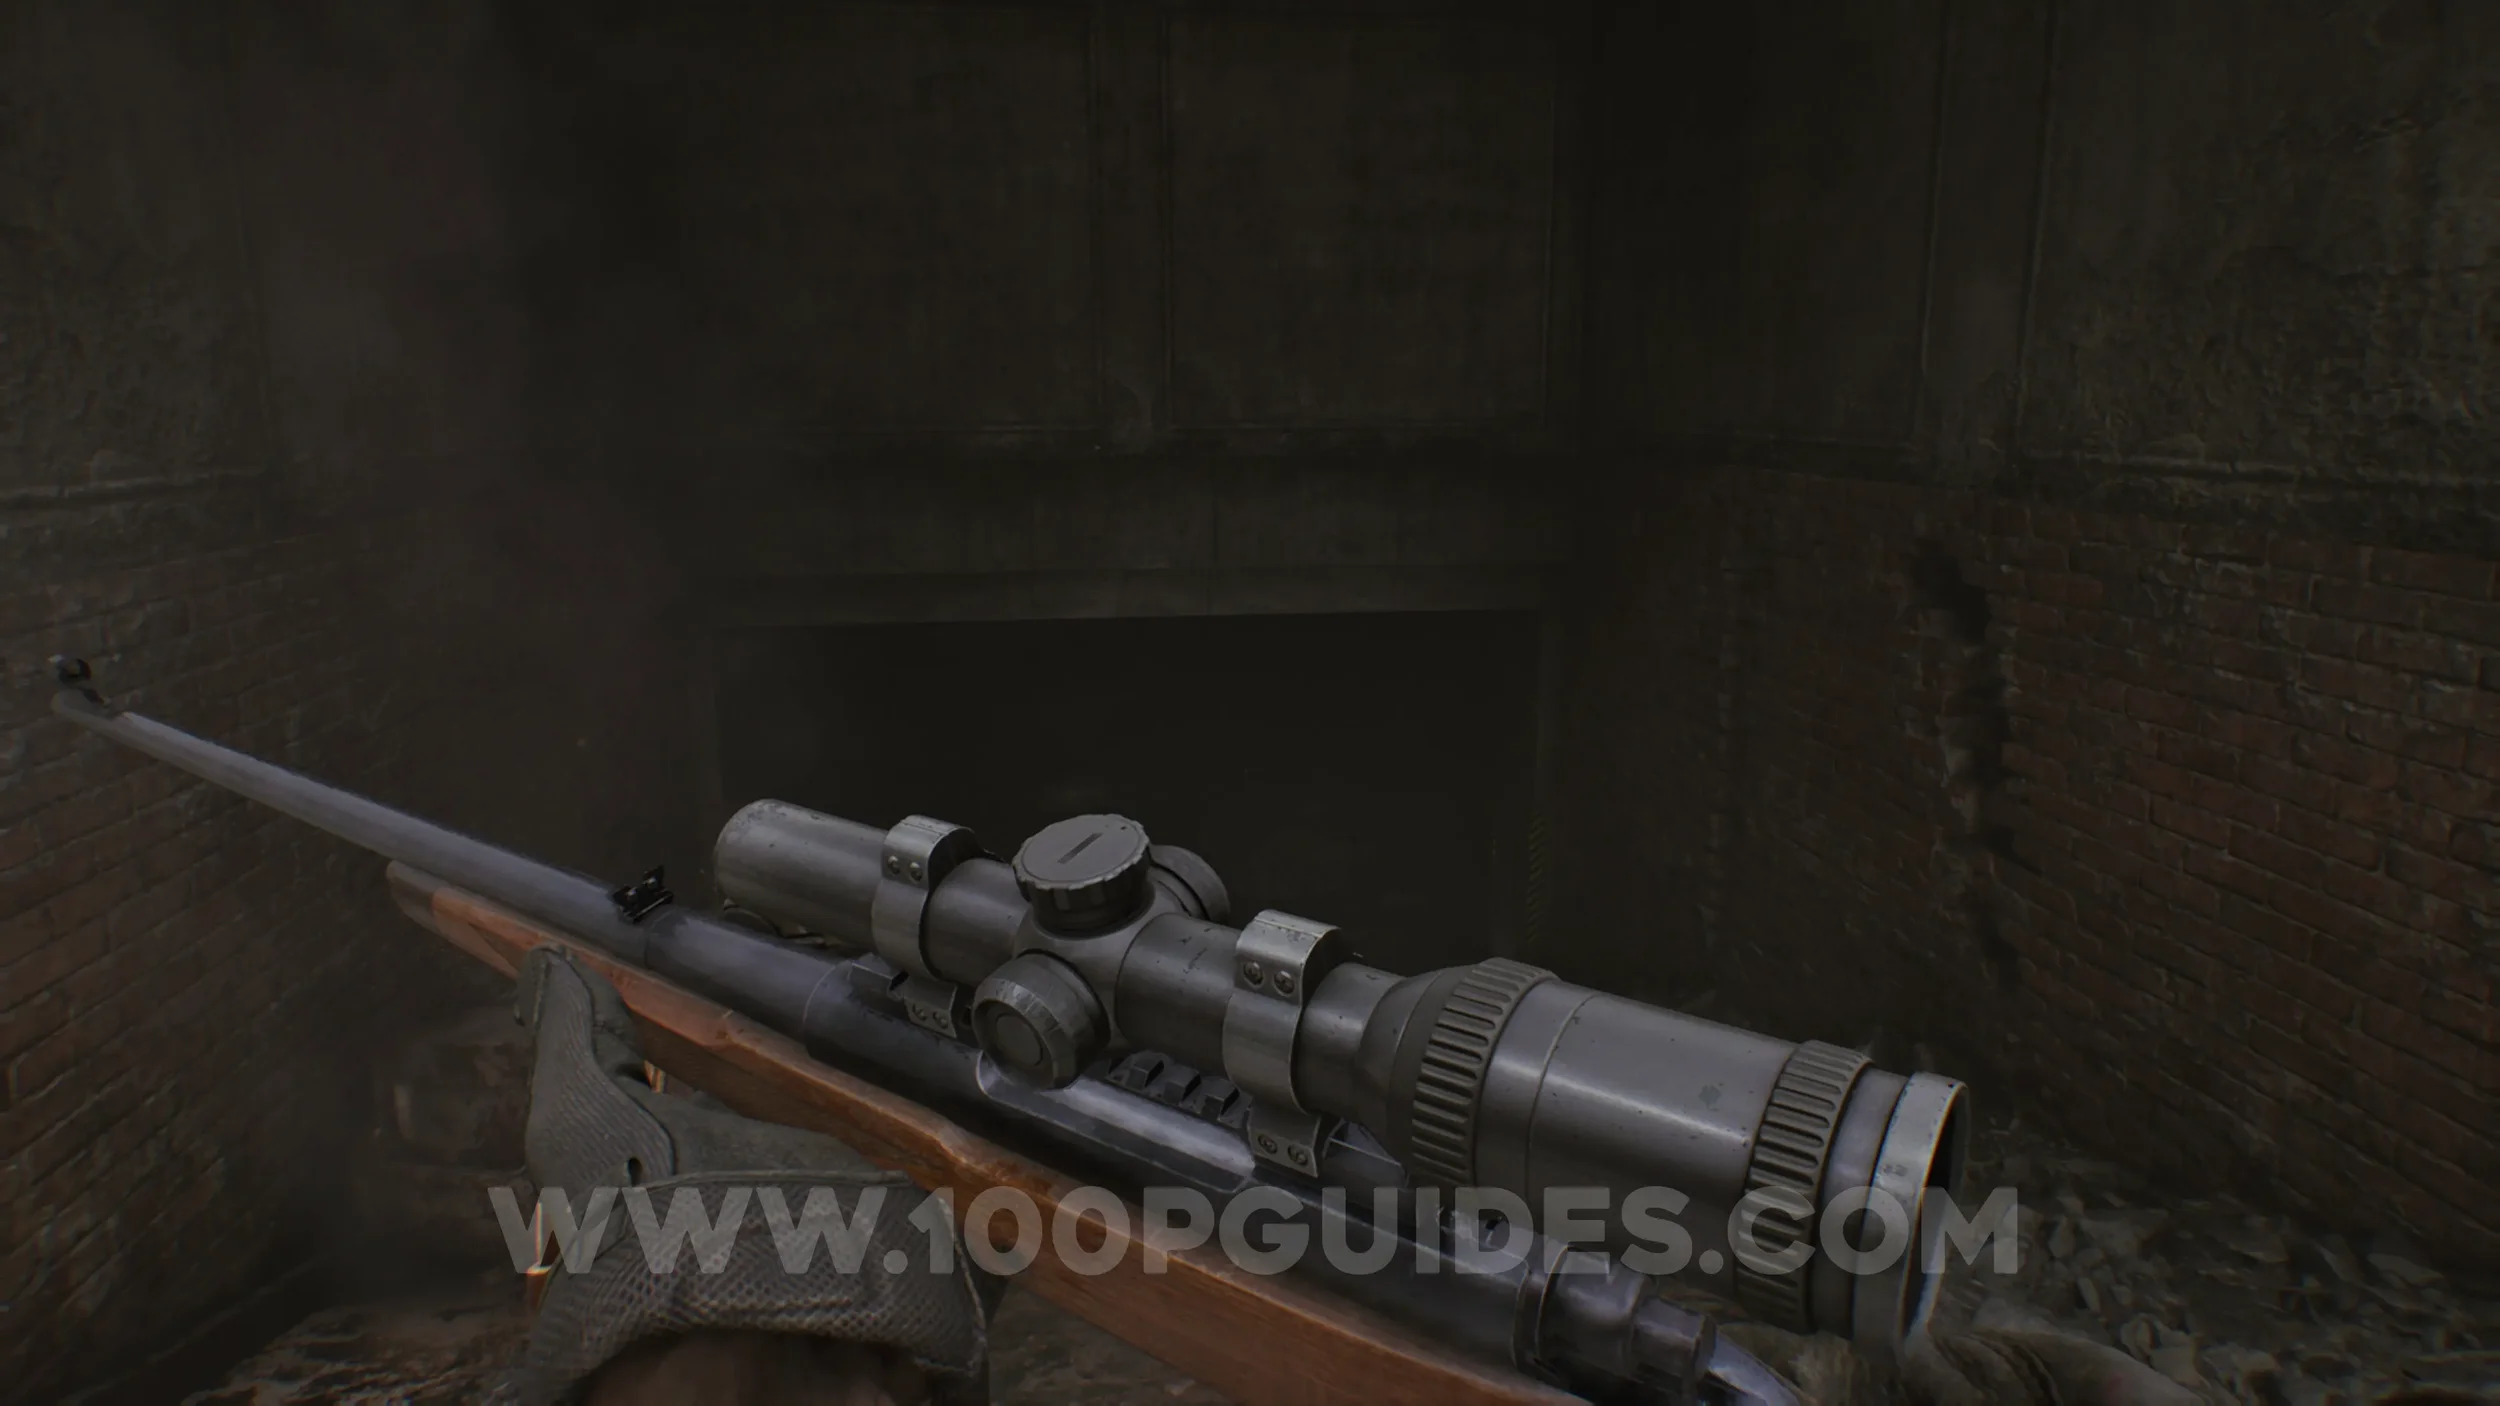
Weapon - Classic 70. You start with this once you regain control of Leon.
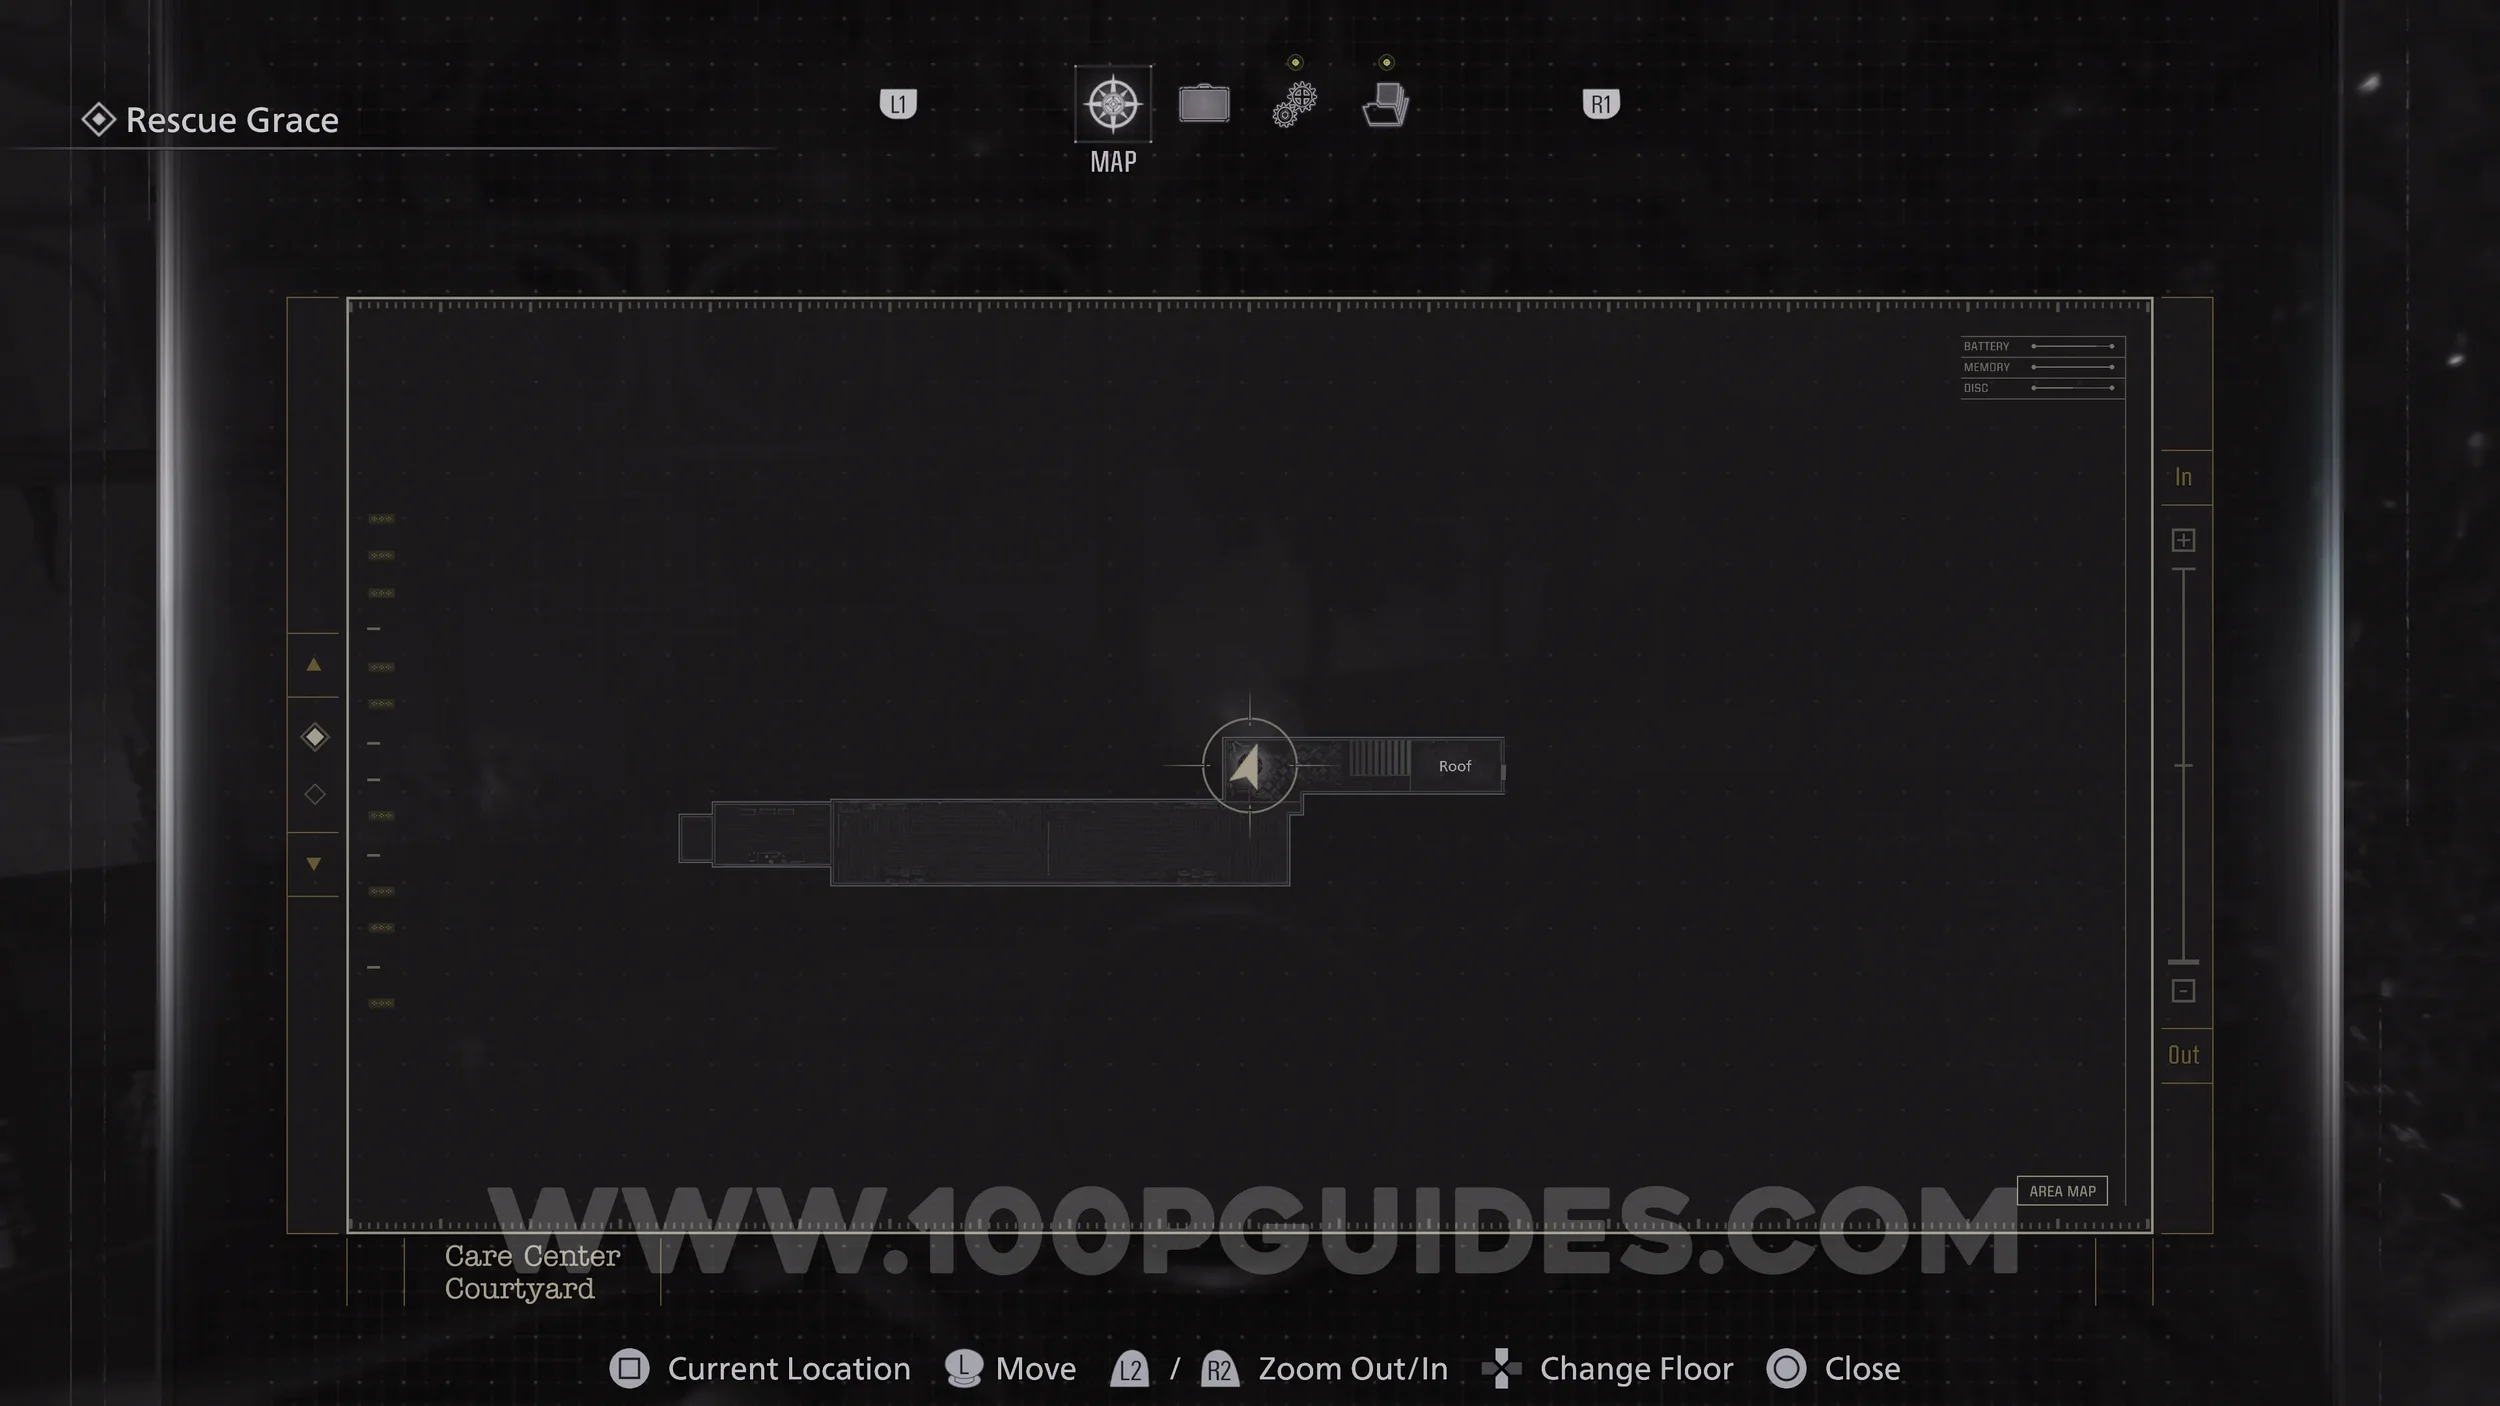
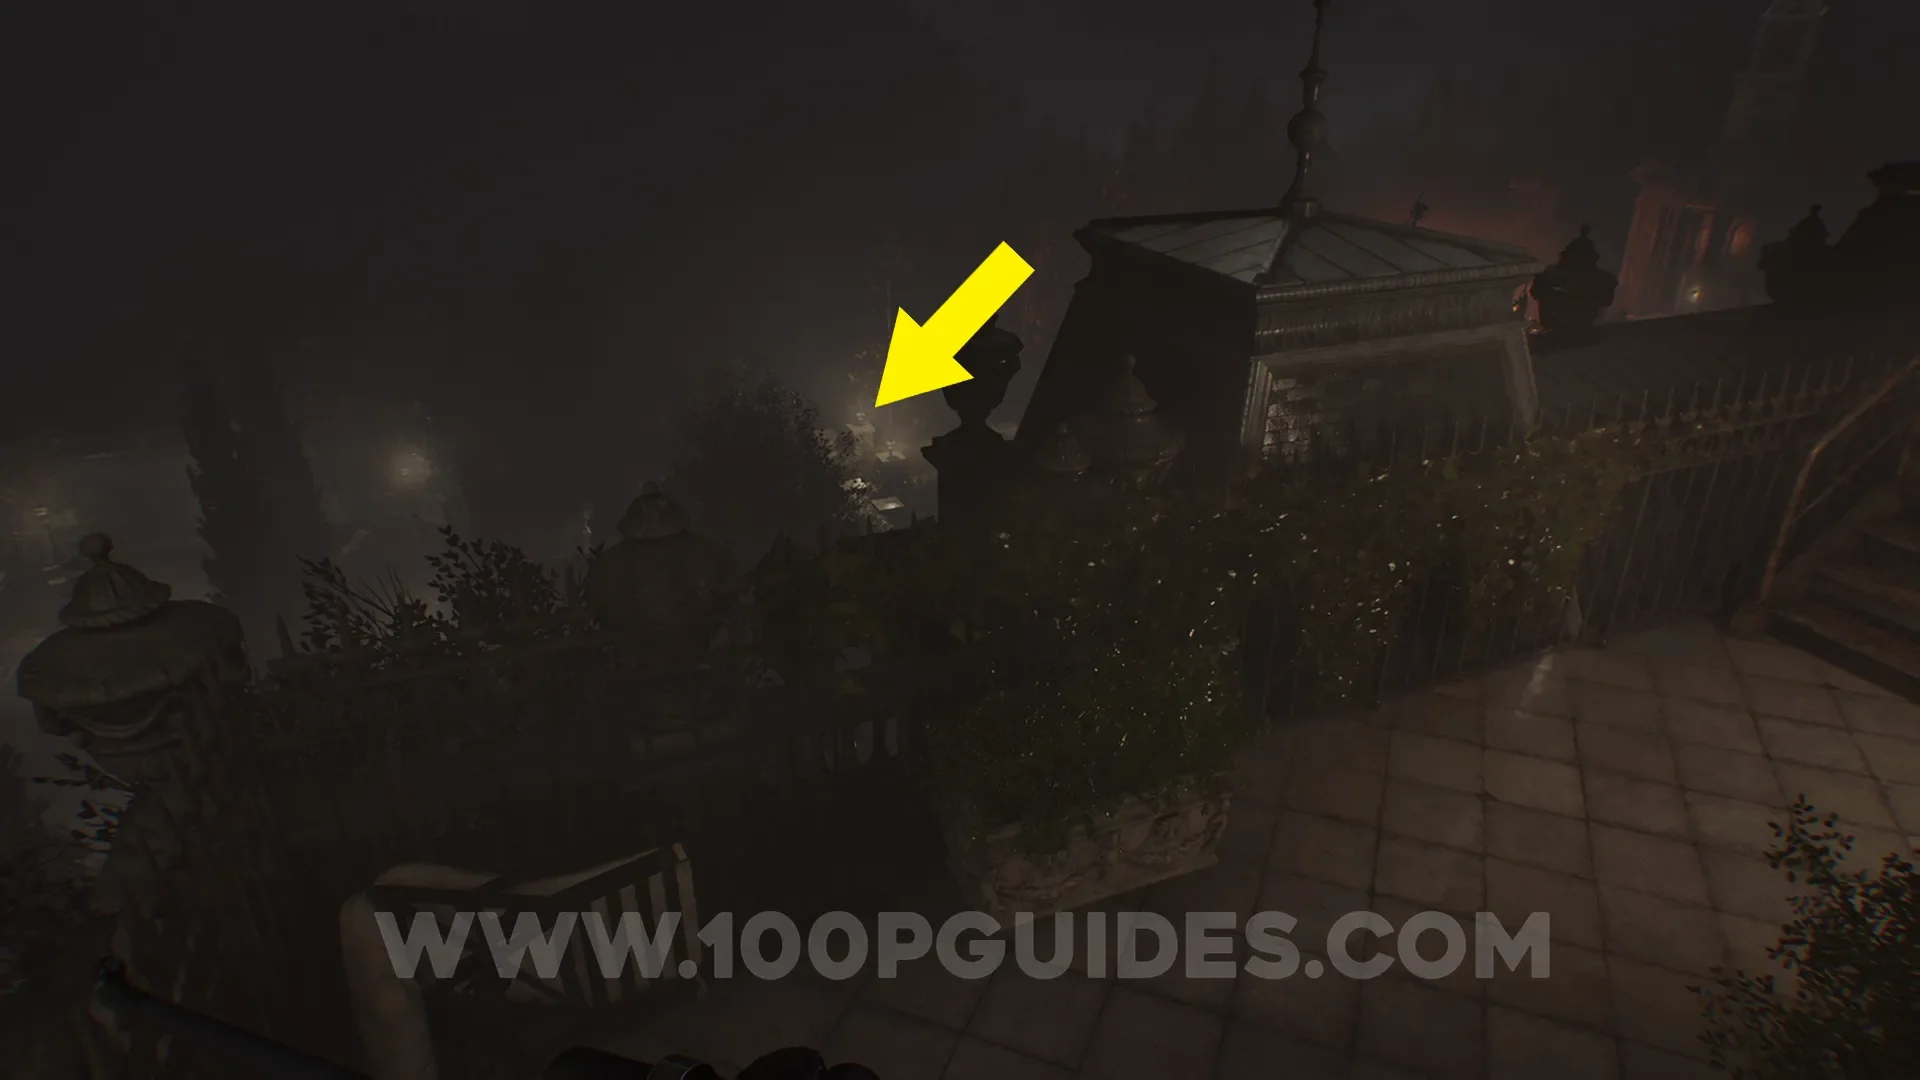
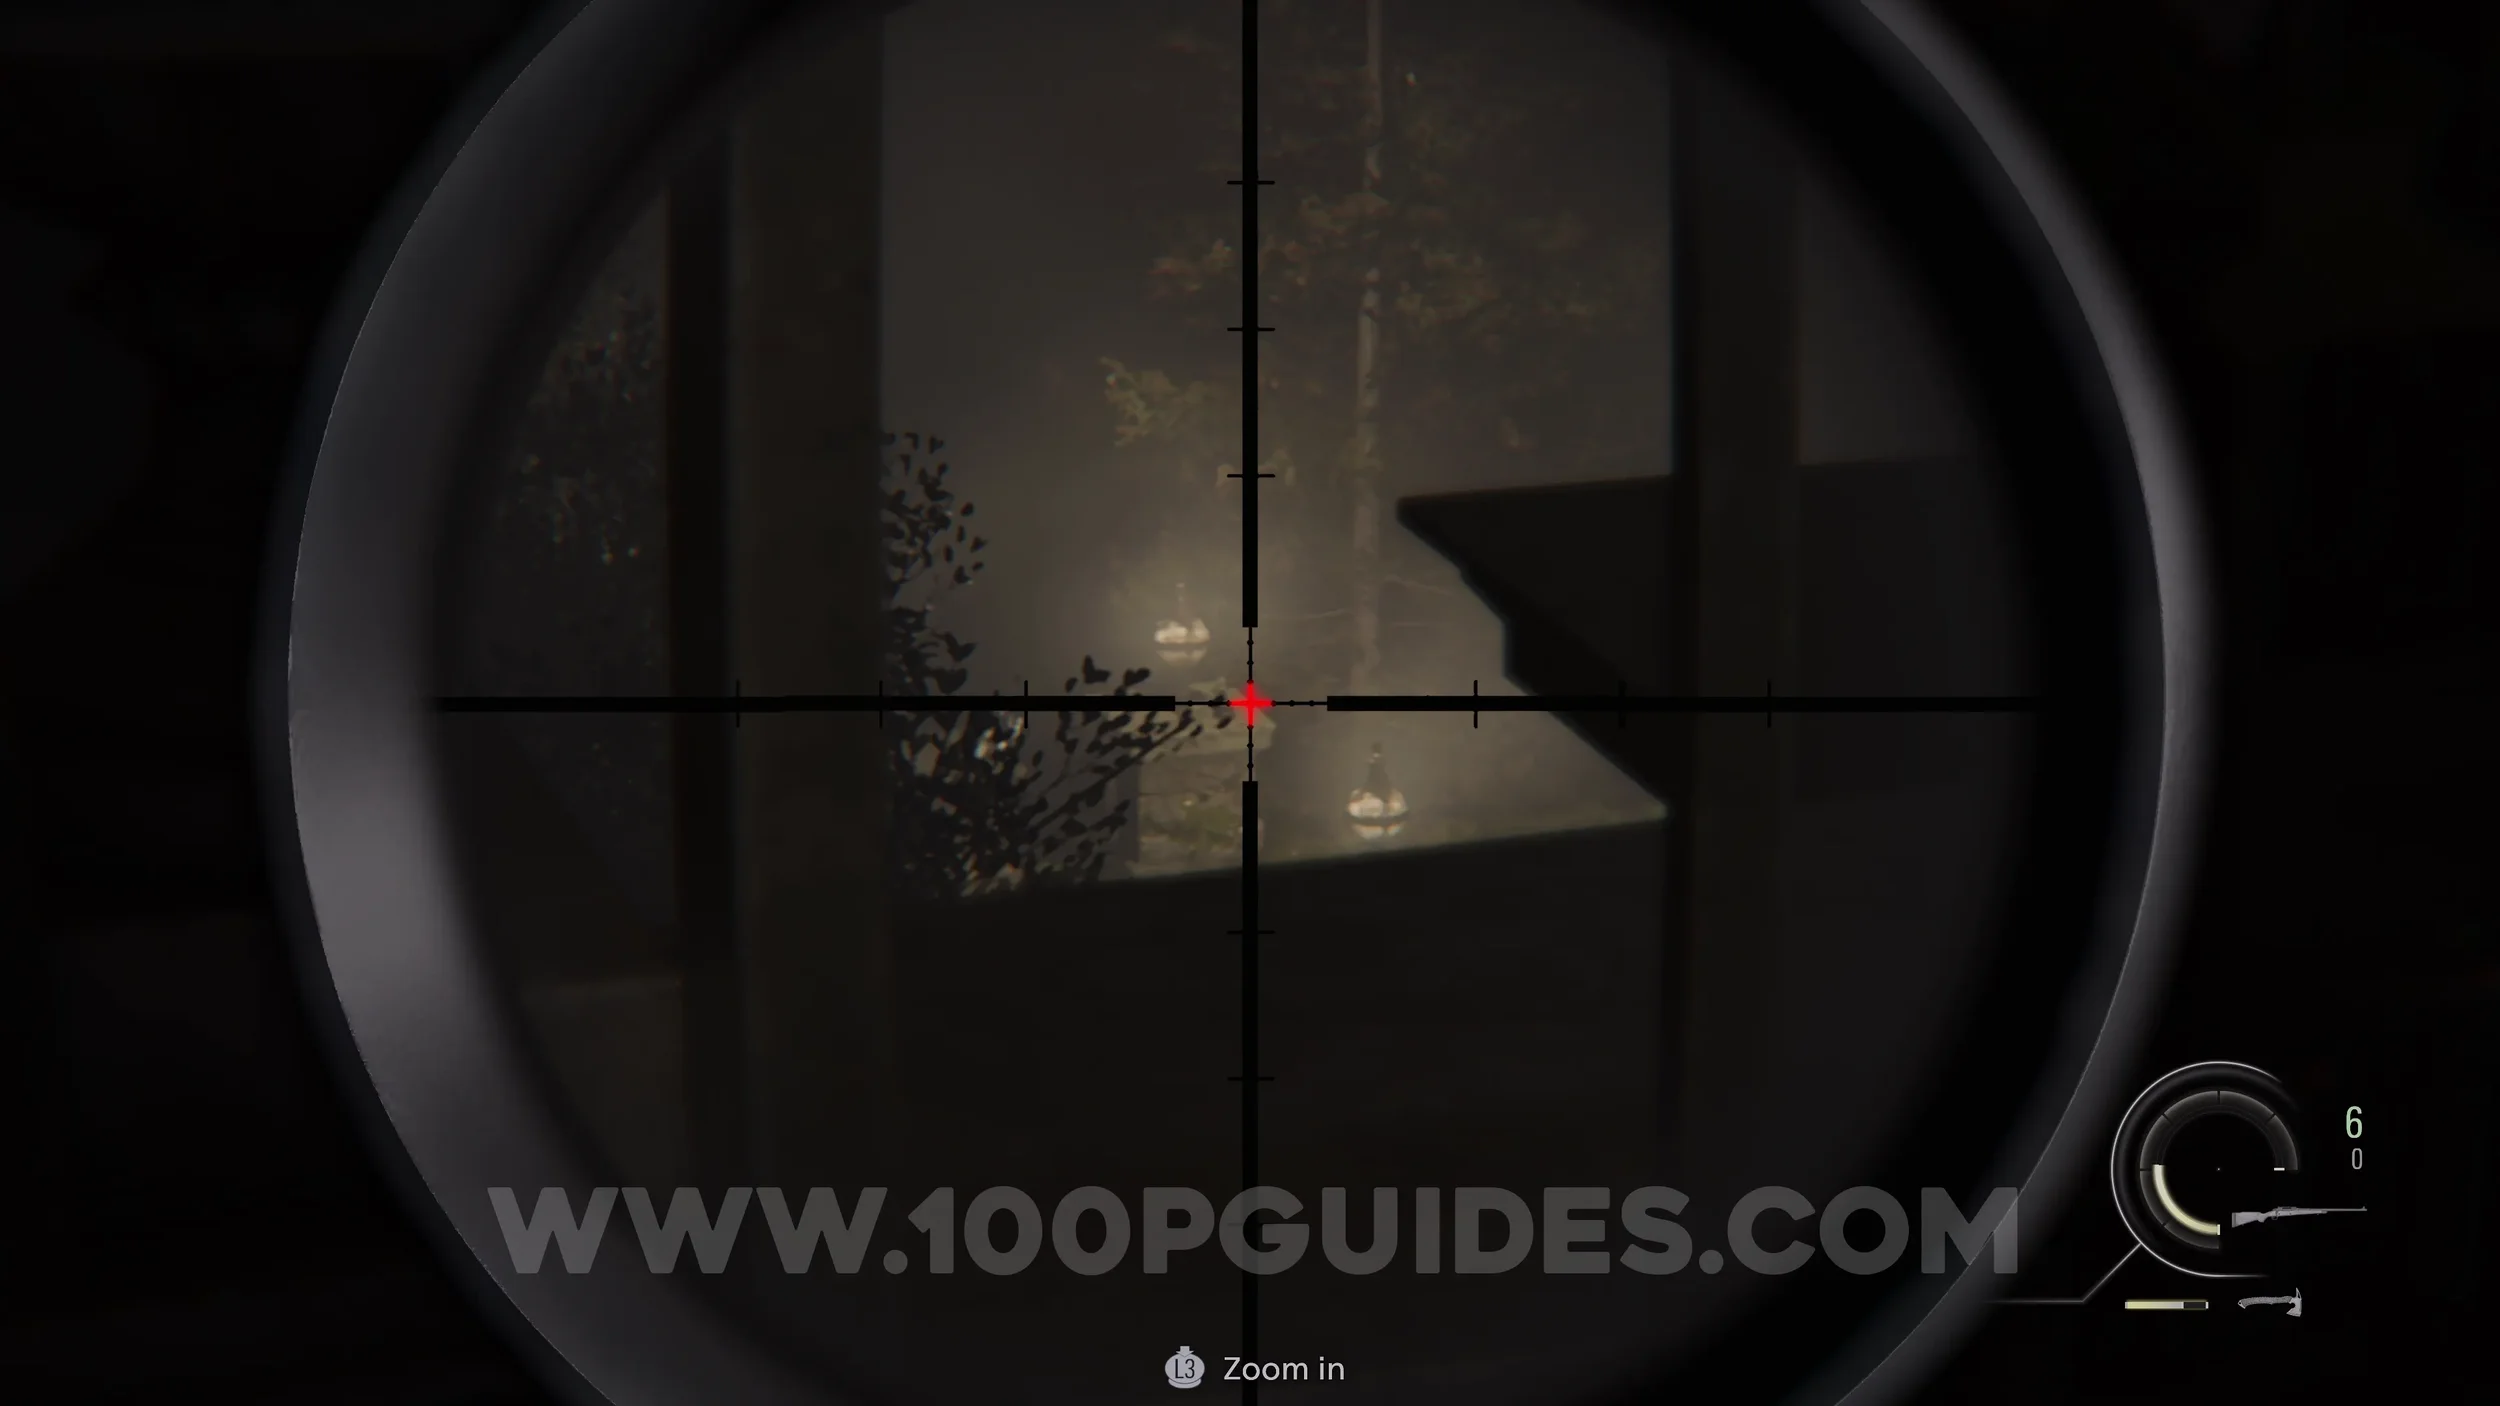
Mr Raccoon #10. As soon as you regain control of Leon, move forward until you drop down to the lower path. From there, look down toward the lights below to spot a Mr. Raccoon.
Rhodes Hill (Water Treatment Plant)
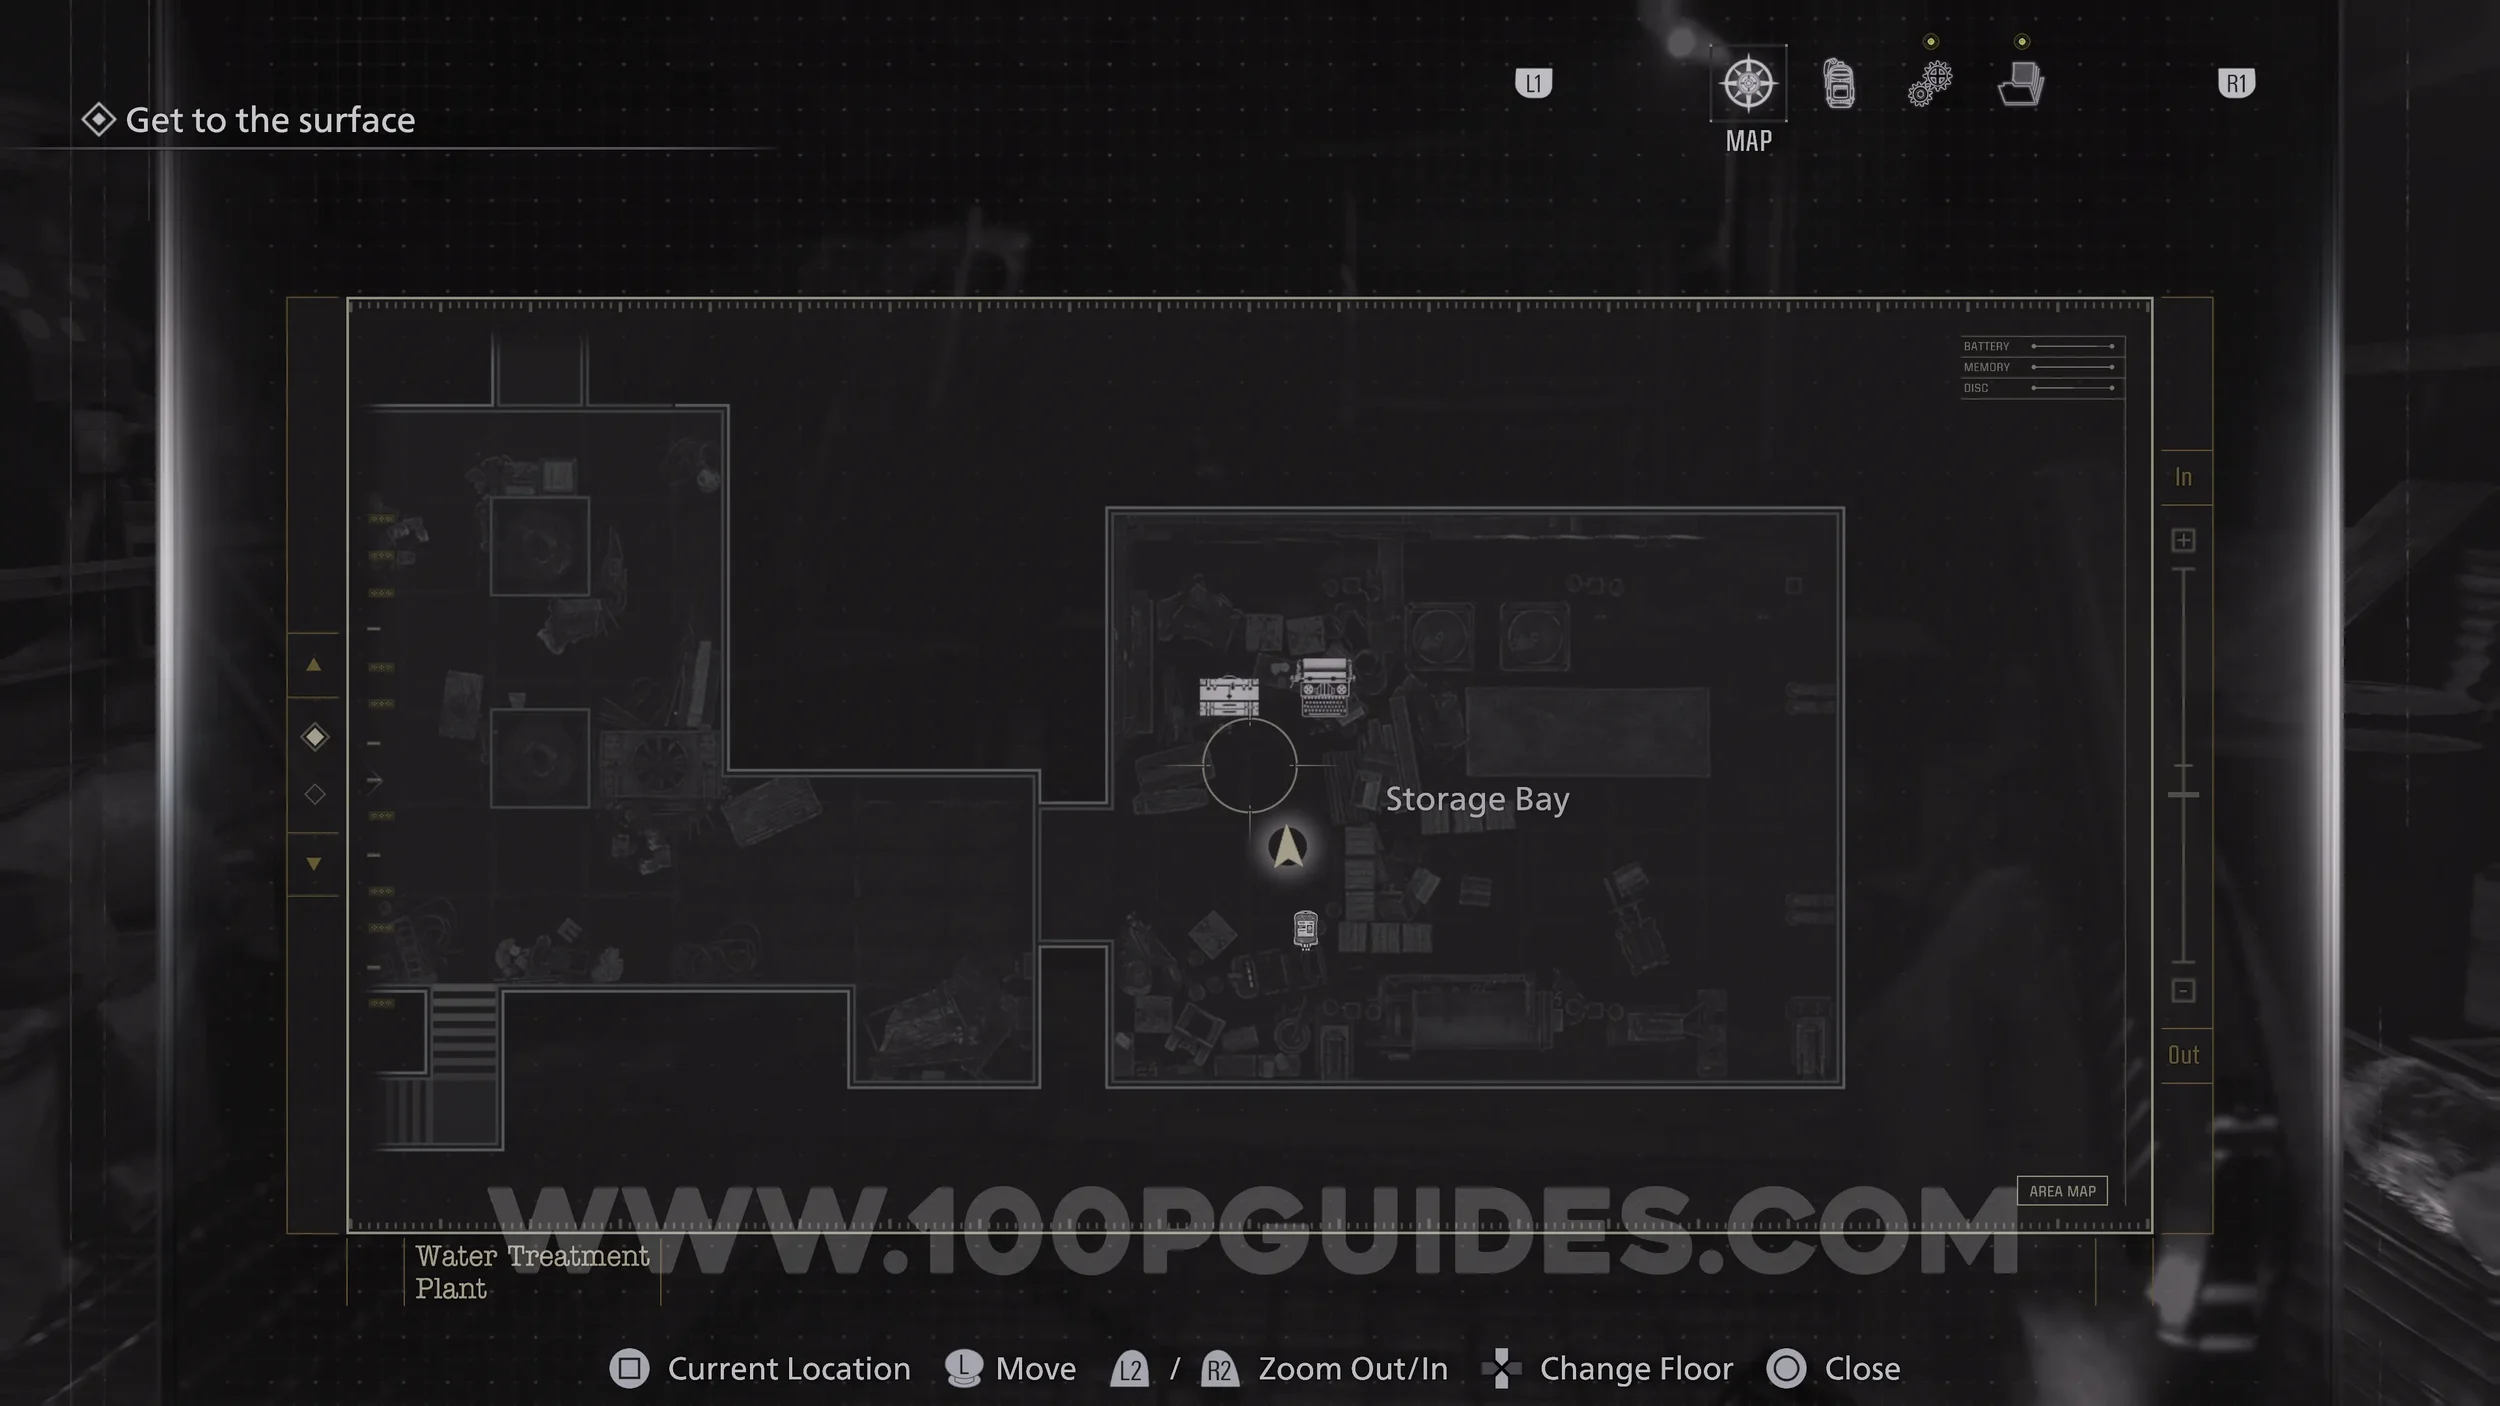
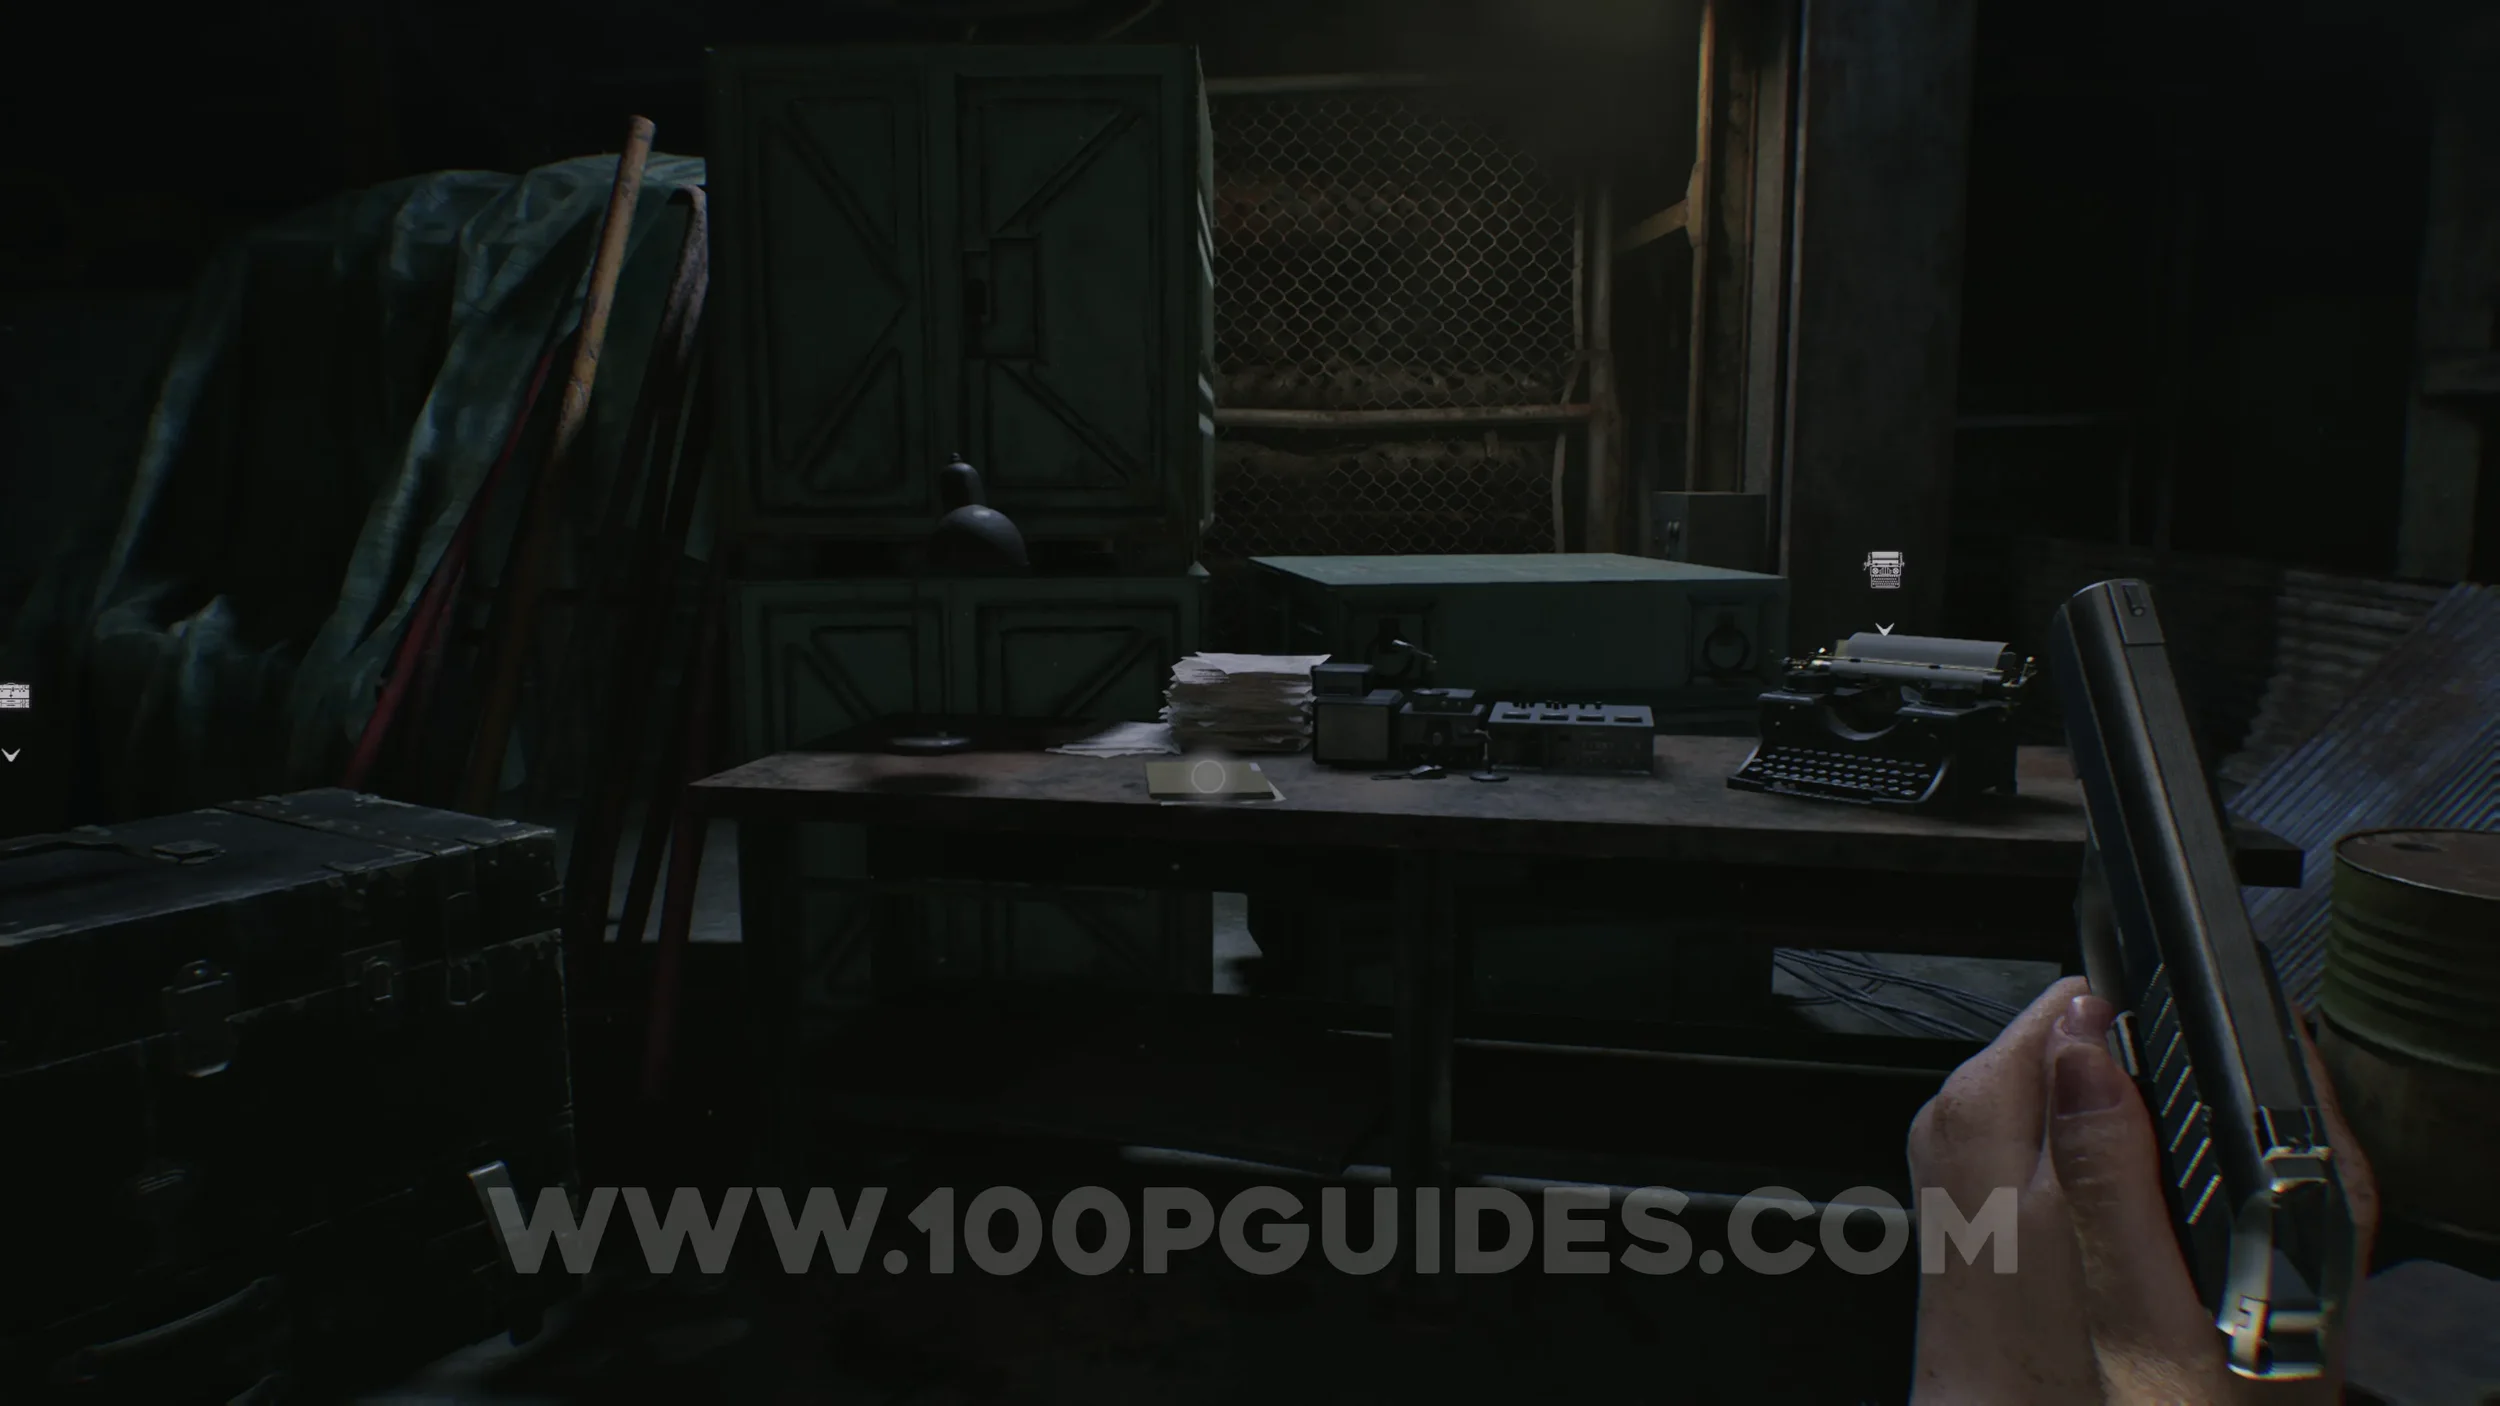
File #47 - Roof Hatch Manual. After regaining control of Grace, continue until you leave Emily in a room. This file is in that same room.
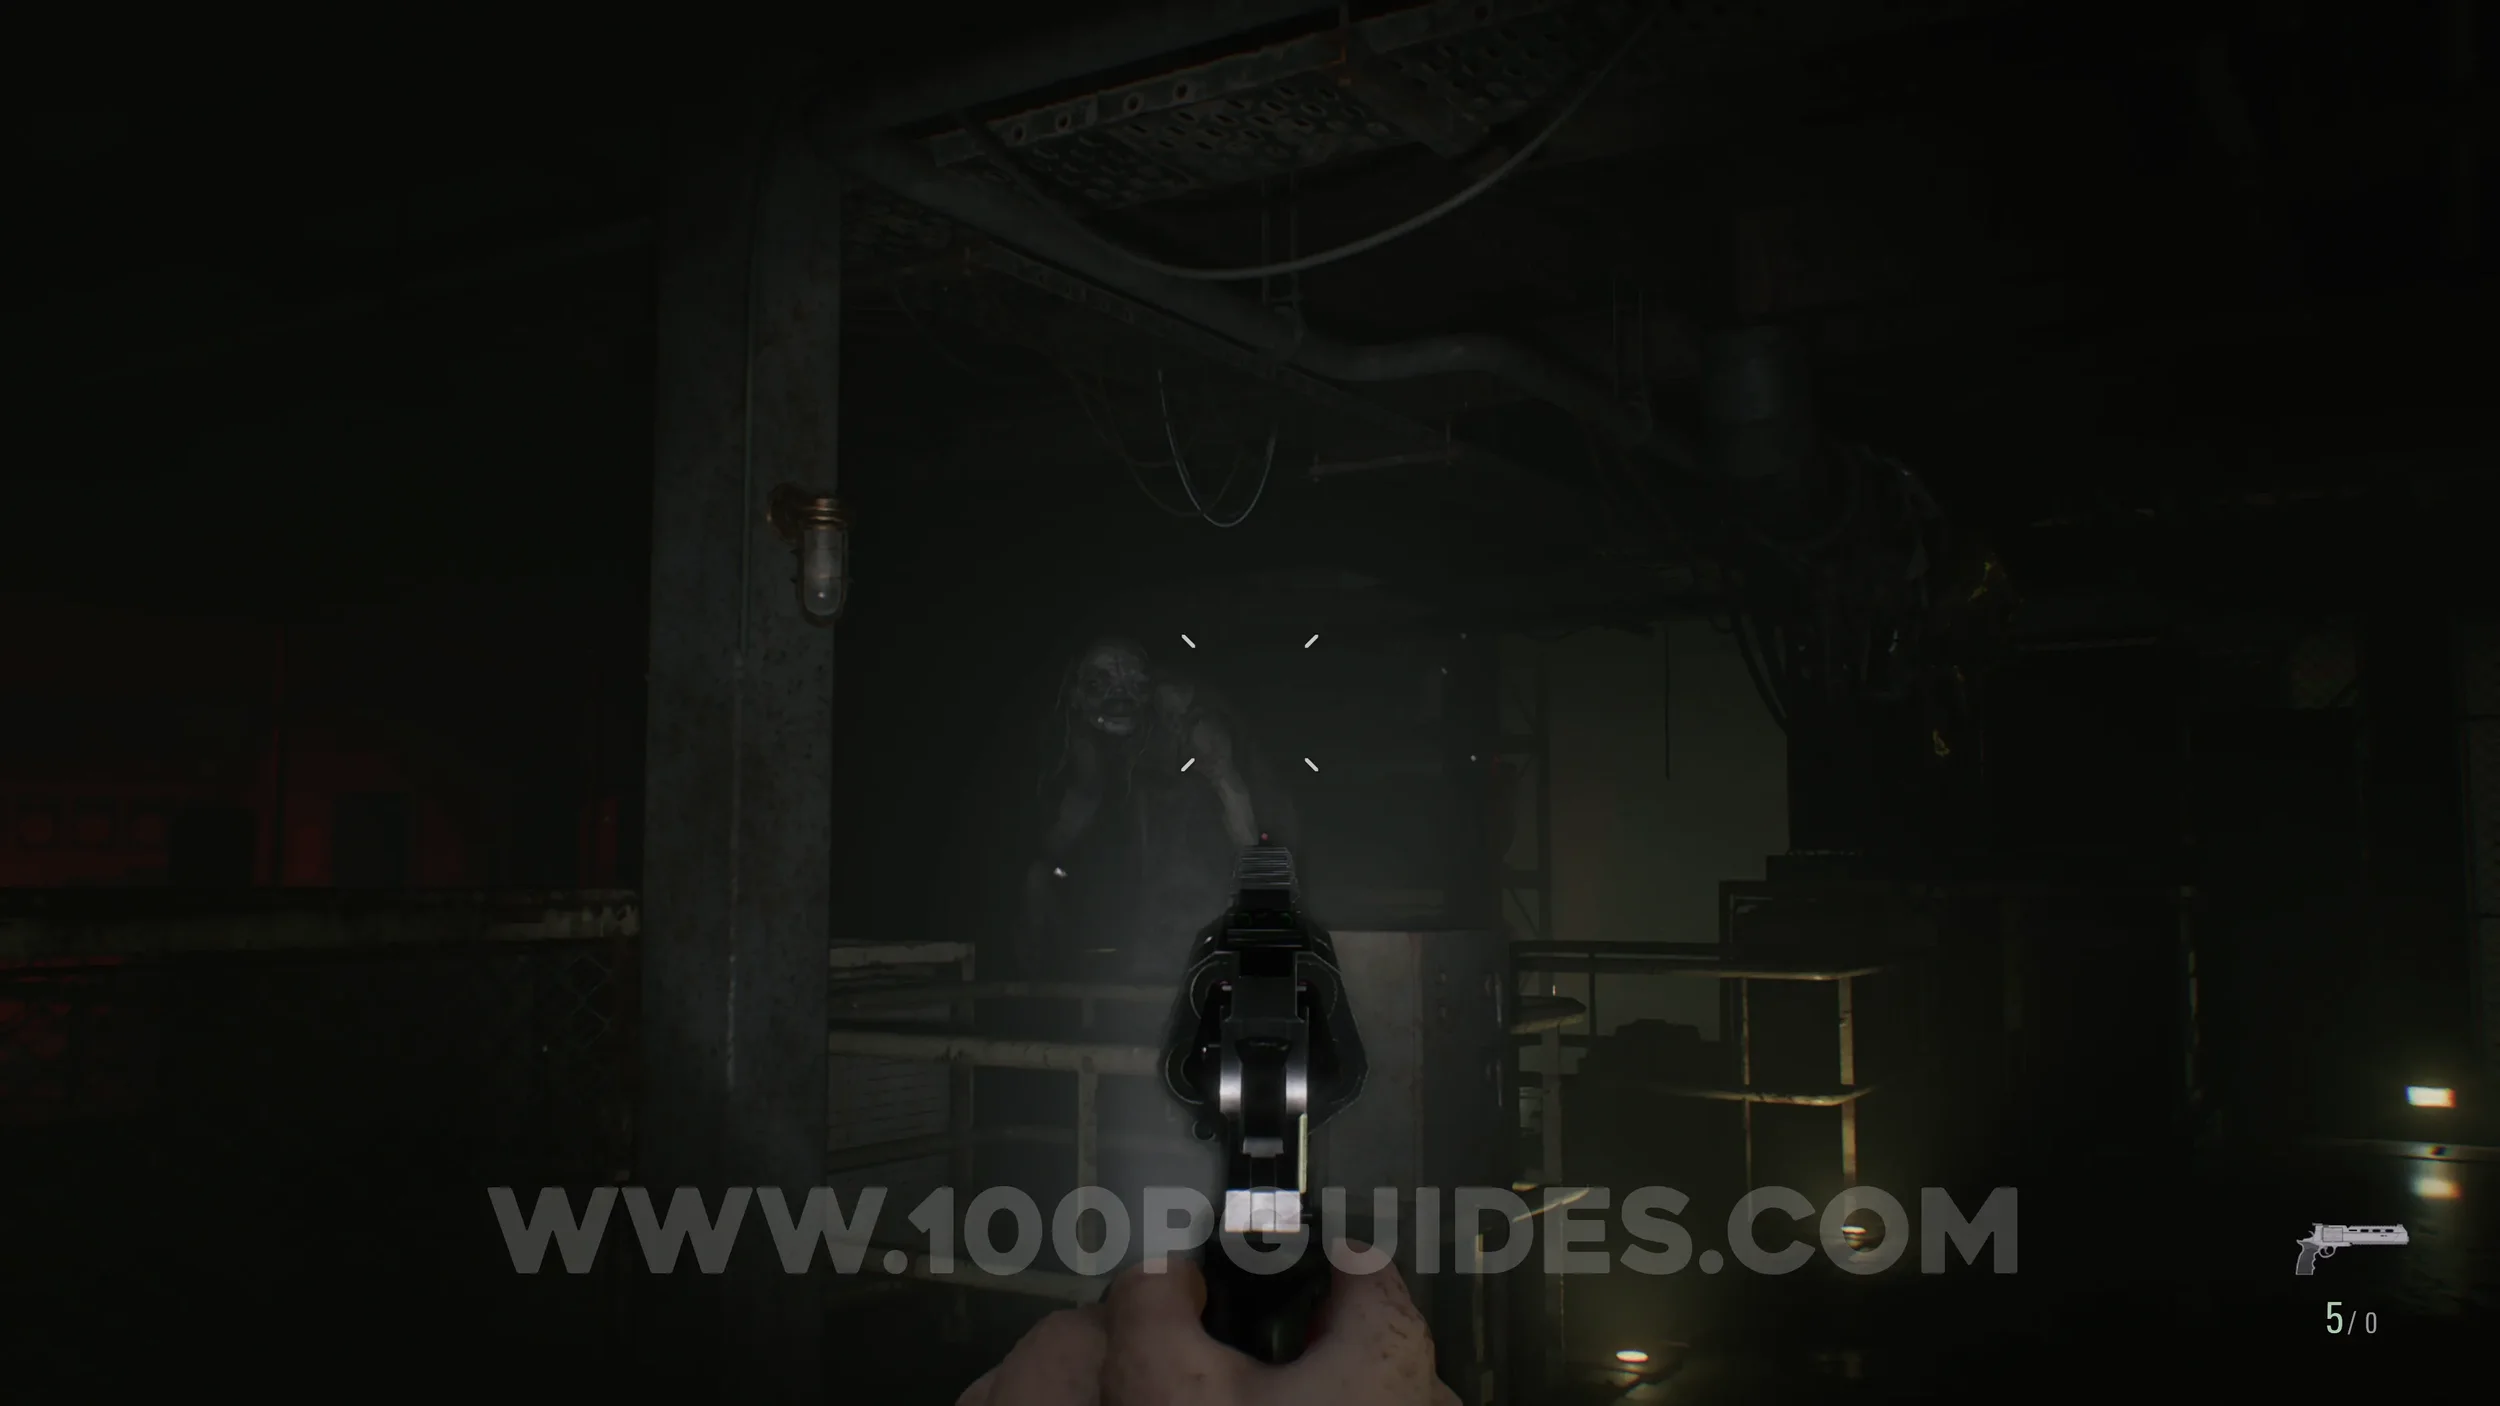
Trophy - Bring Out The Big Guns. Soon after leaving Emily in the Safe Room, you will need to drop down to the area below. Here, “The Girl” will begin hunting you again. Shoot her once with the Requiem to unlock the trophy.
This is an easier opportunity than the first encounter, as you should have more Requiem ammo by this point.
East Raccoon City
File #48 - Report on the Raccoon City Incident. You will unlock this automatically as soon as you regain control of Leon in East Raccoon City.
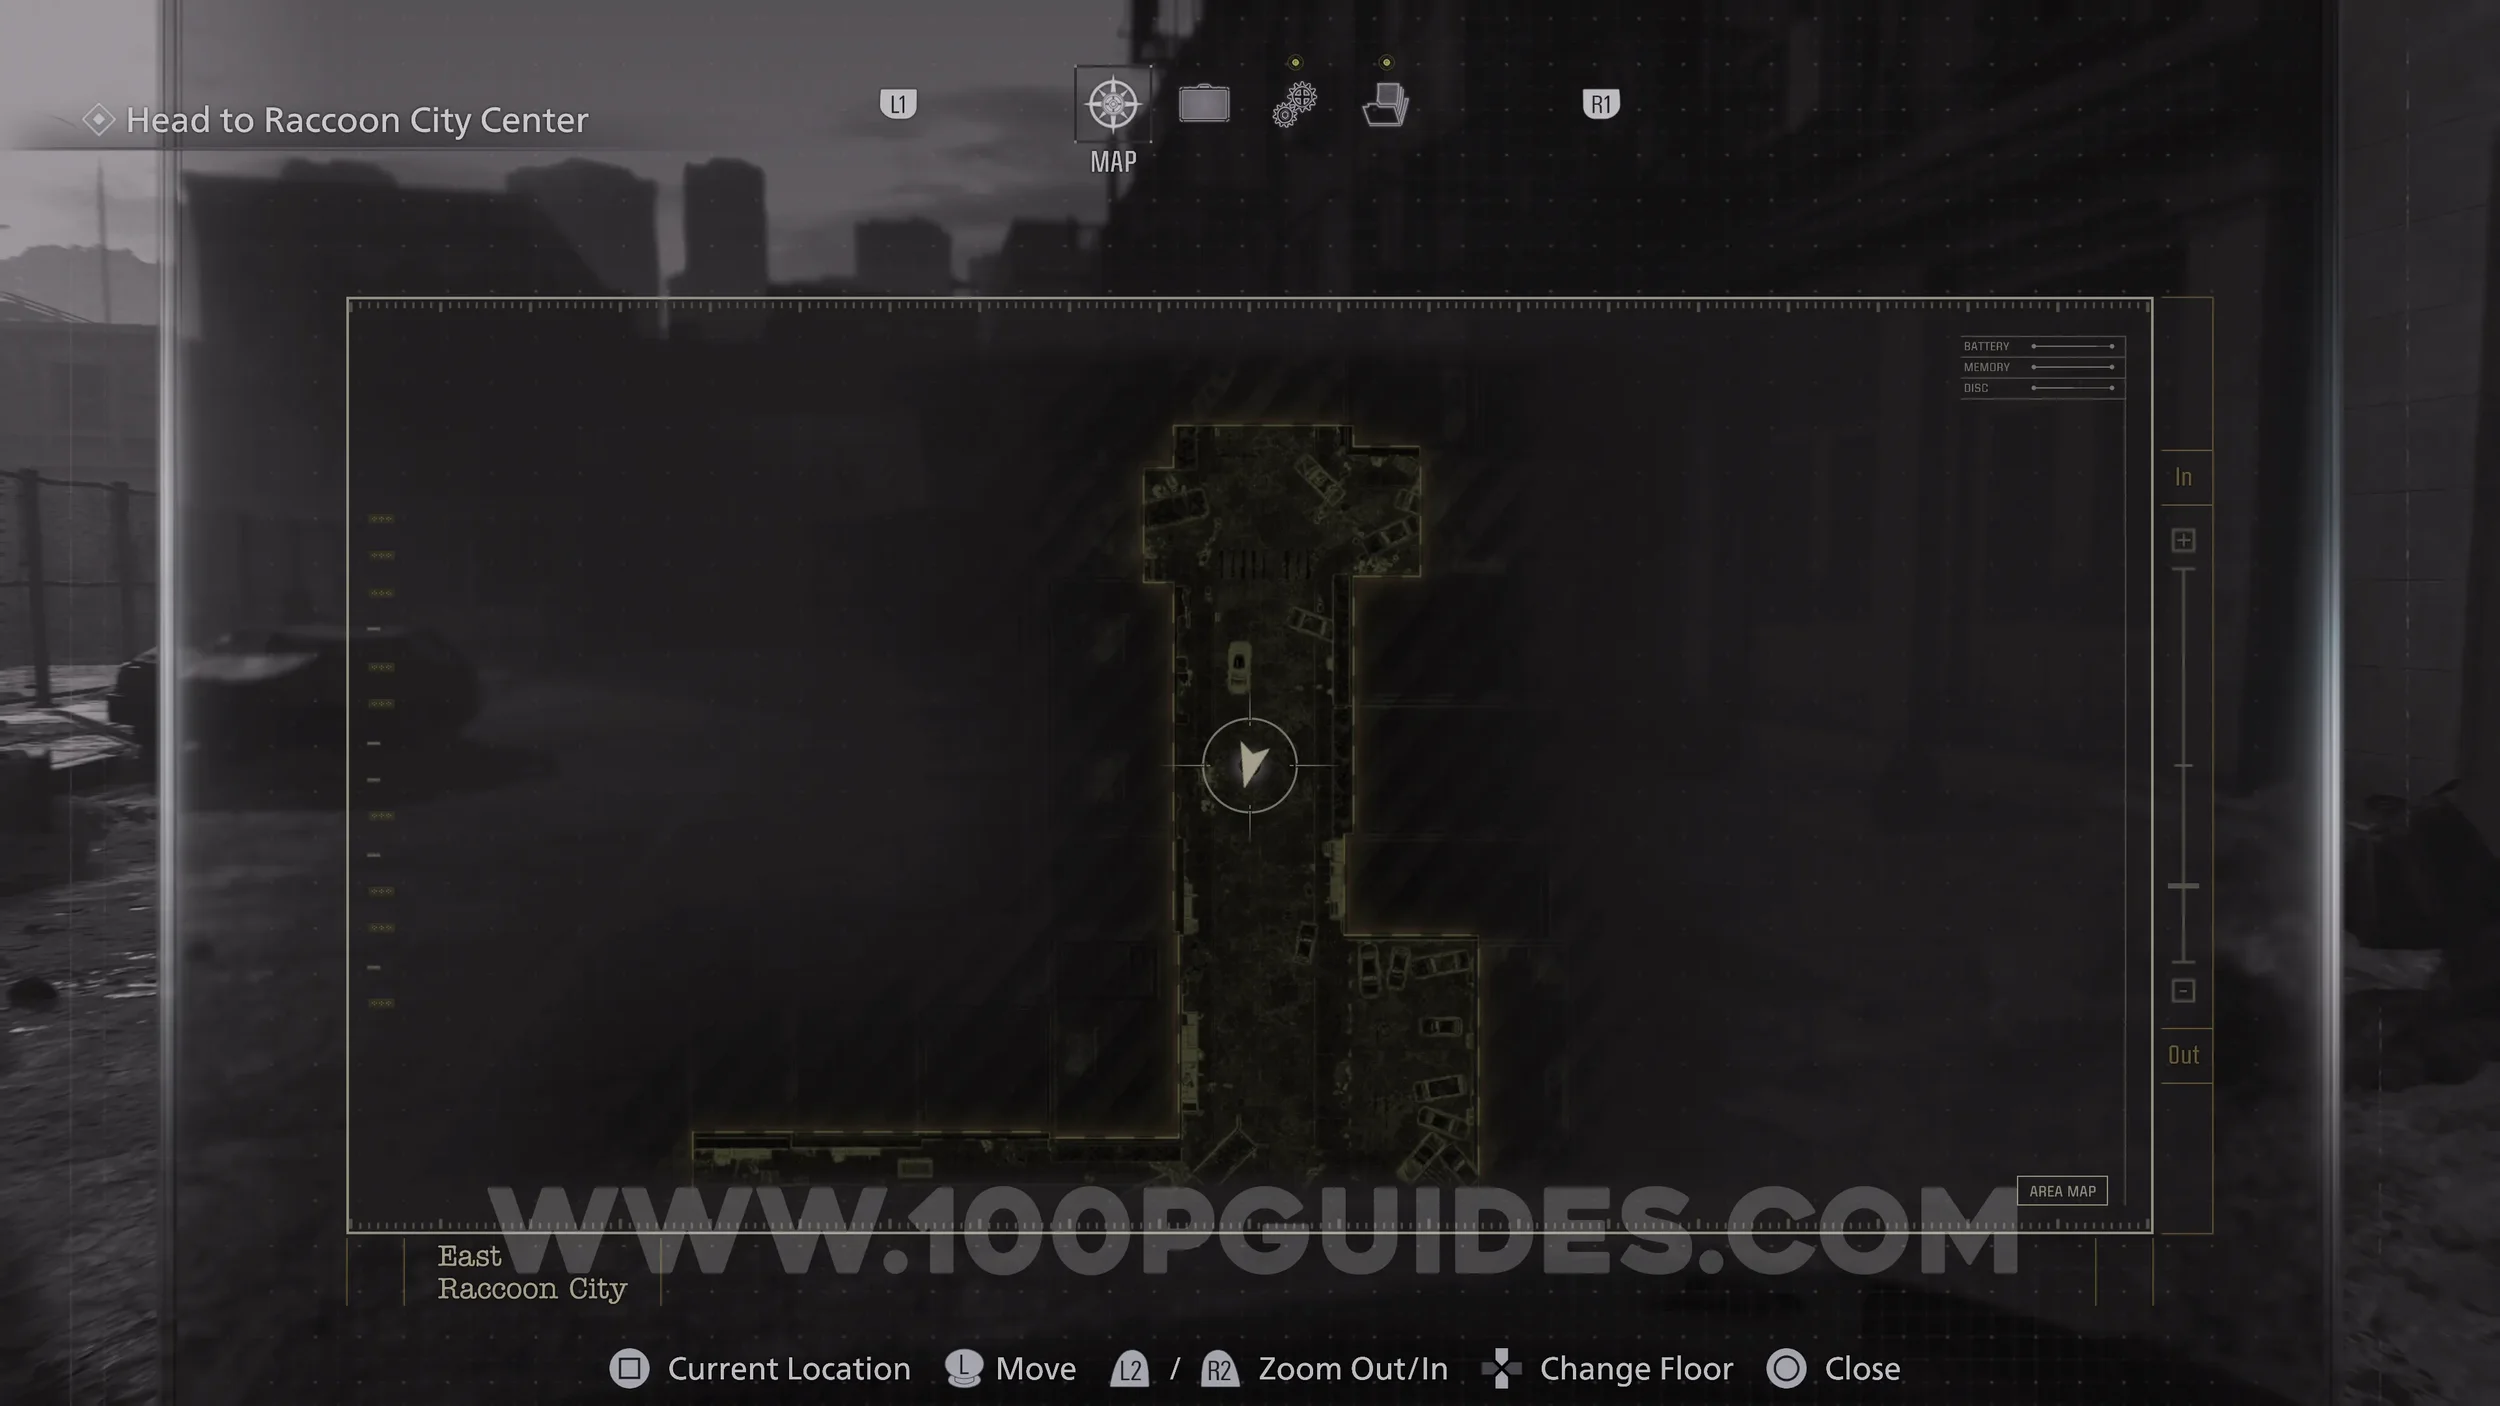
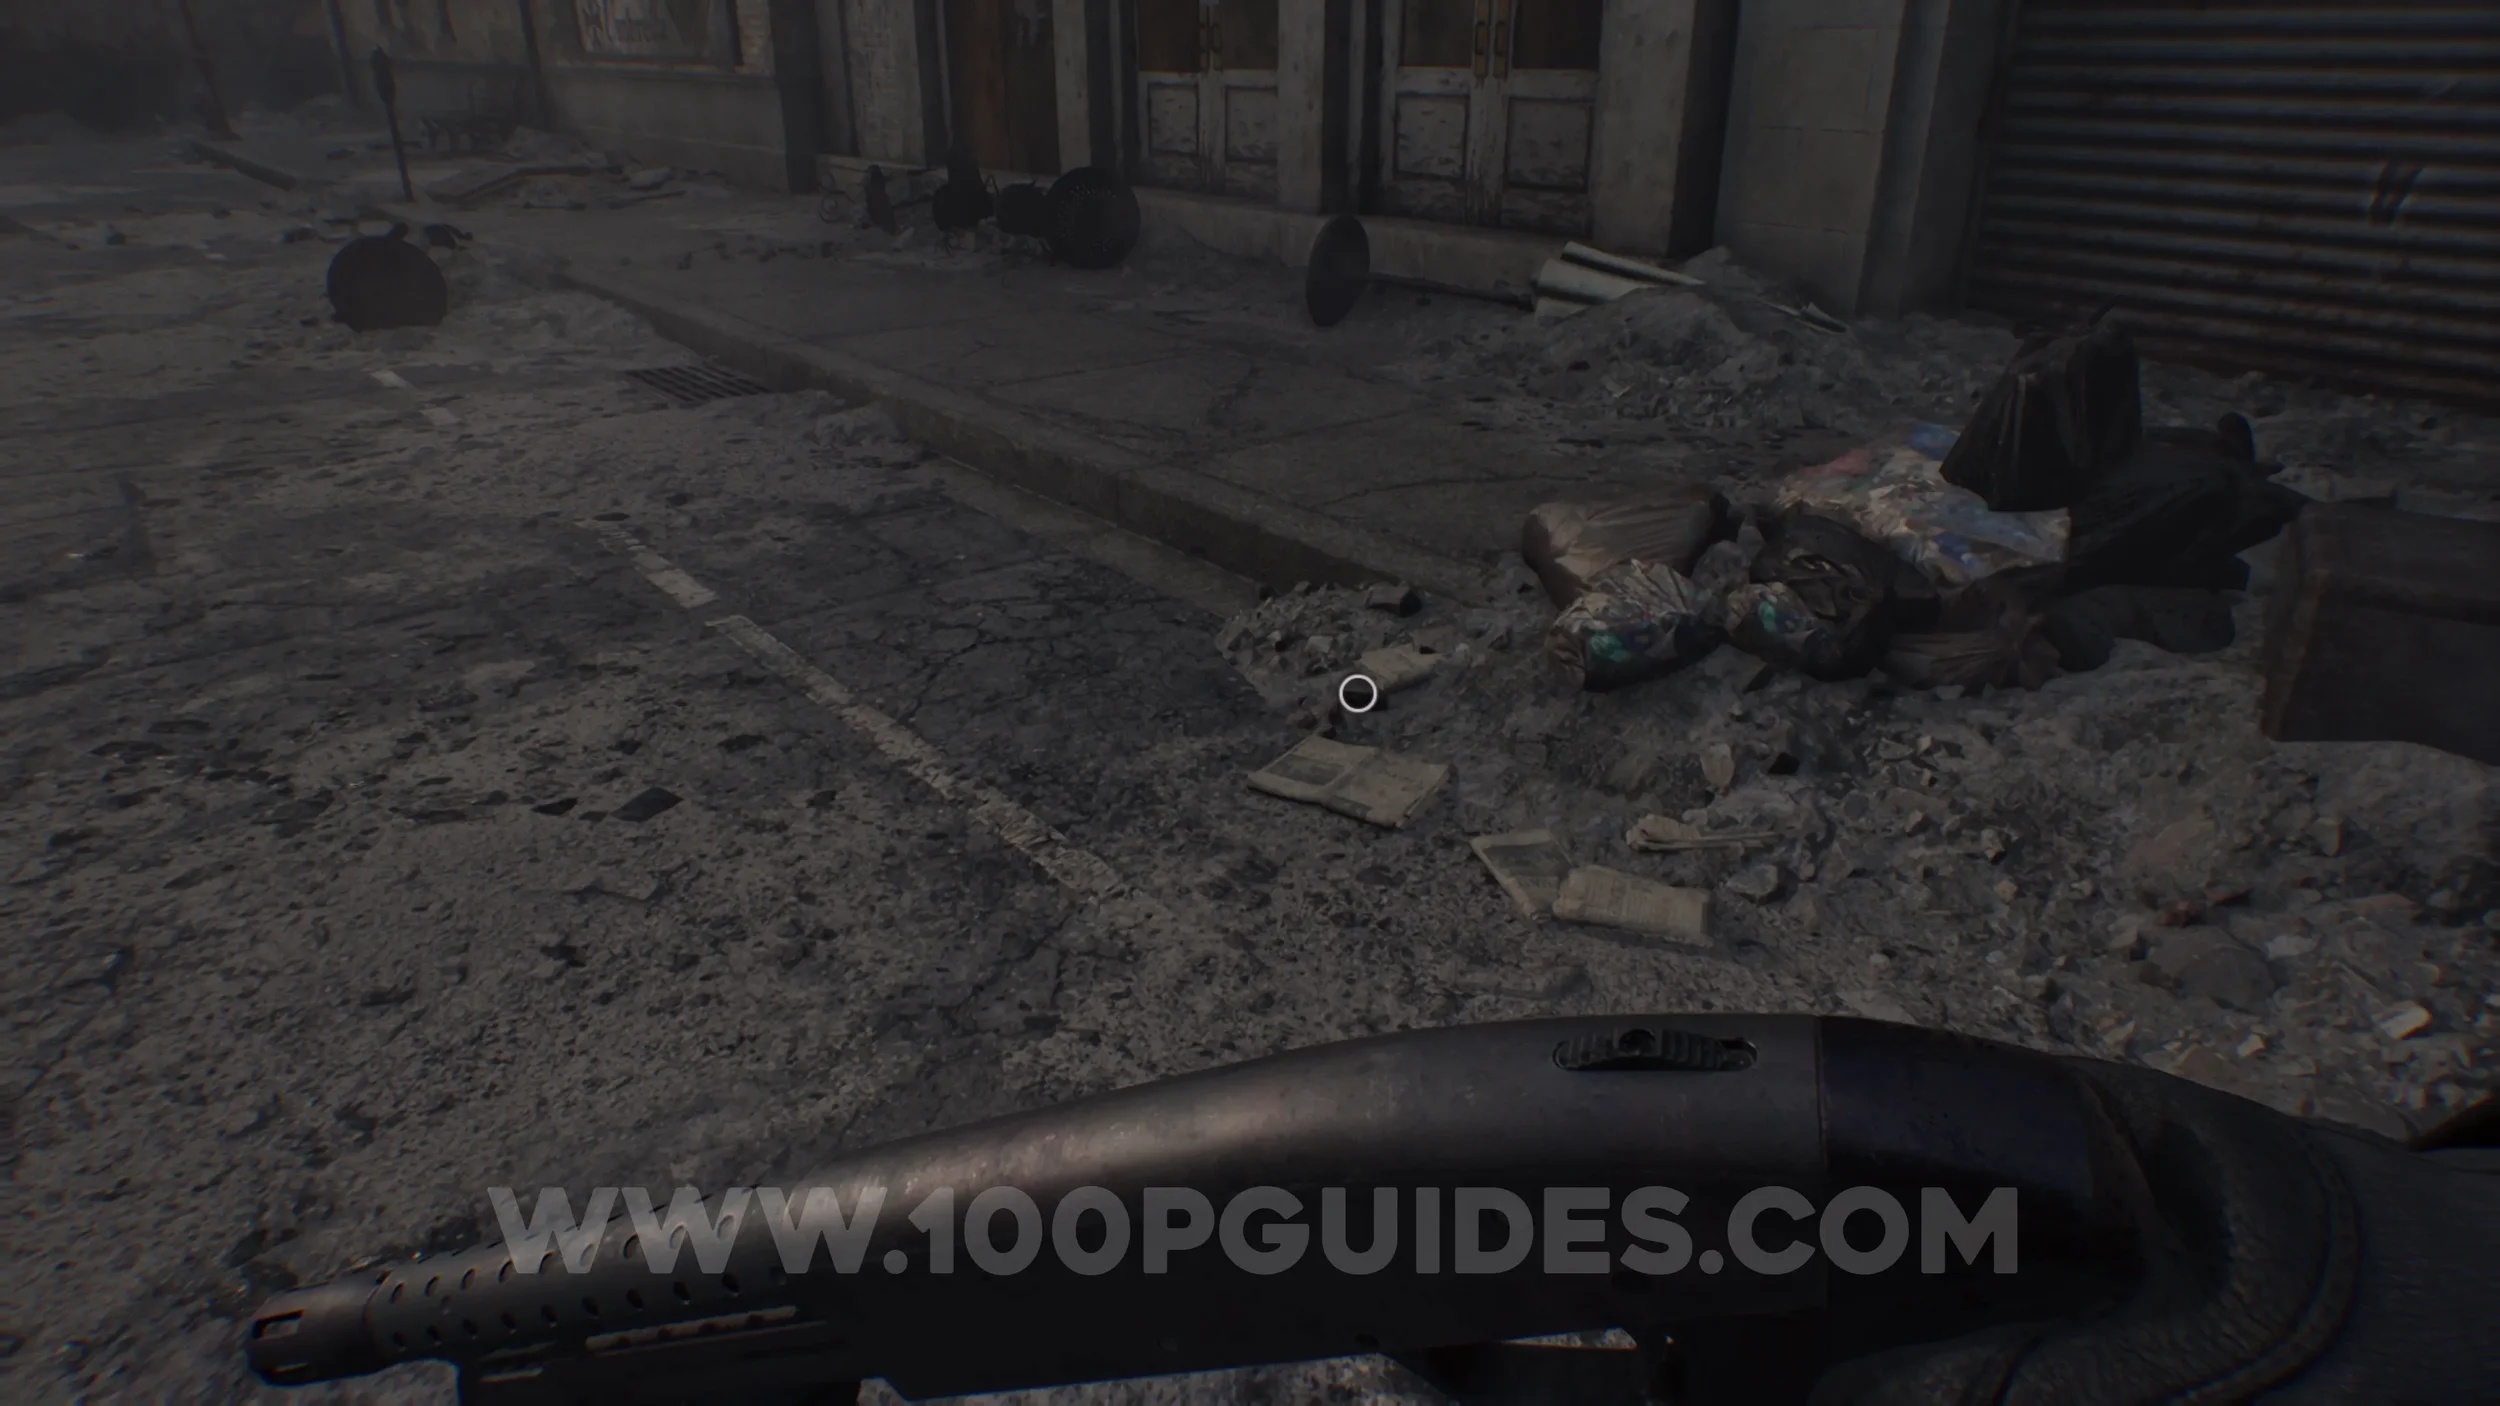
File #49 - Raccoon City Incident Newspaper. On the ground in front of you as soon as you start the area.
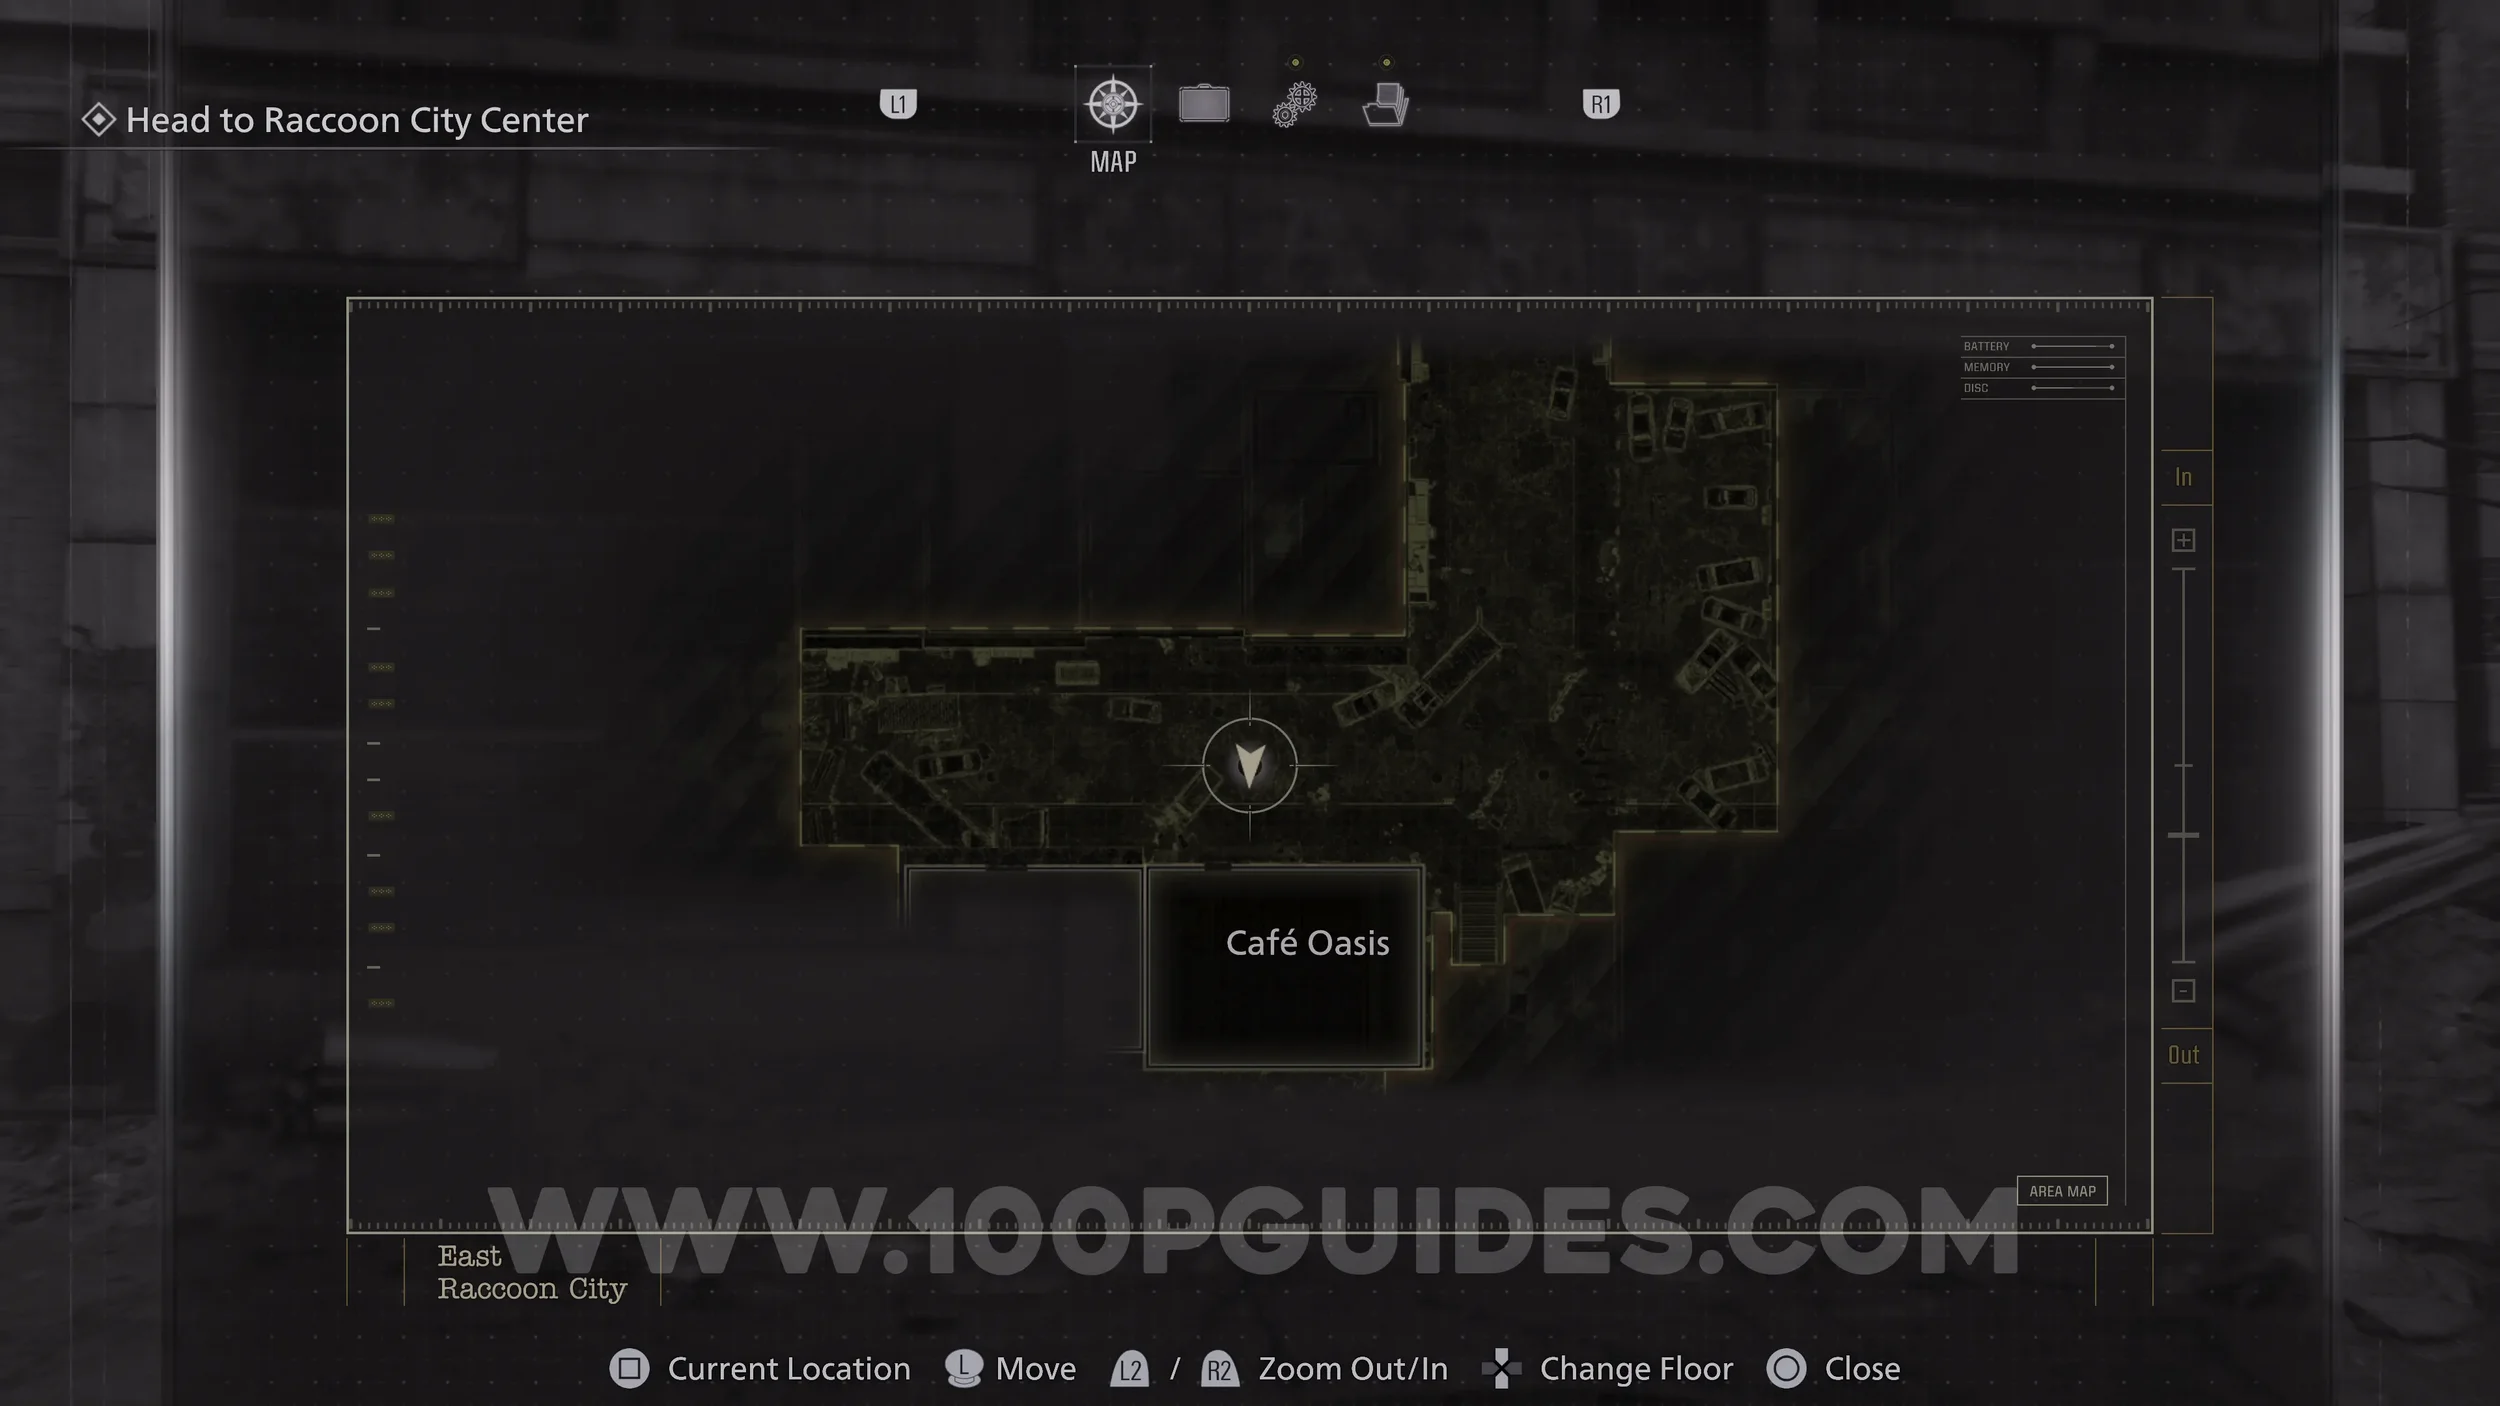
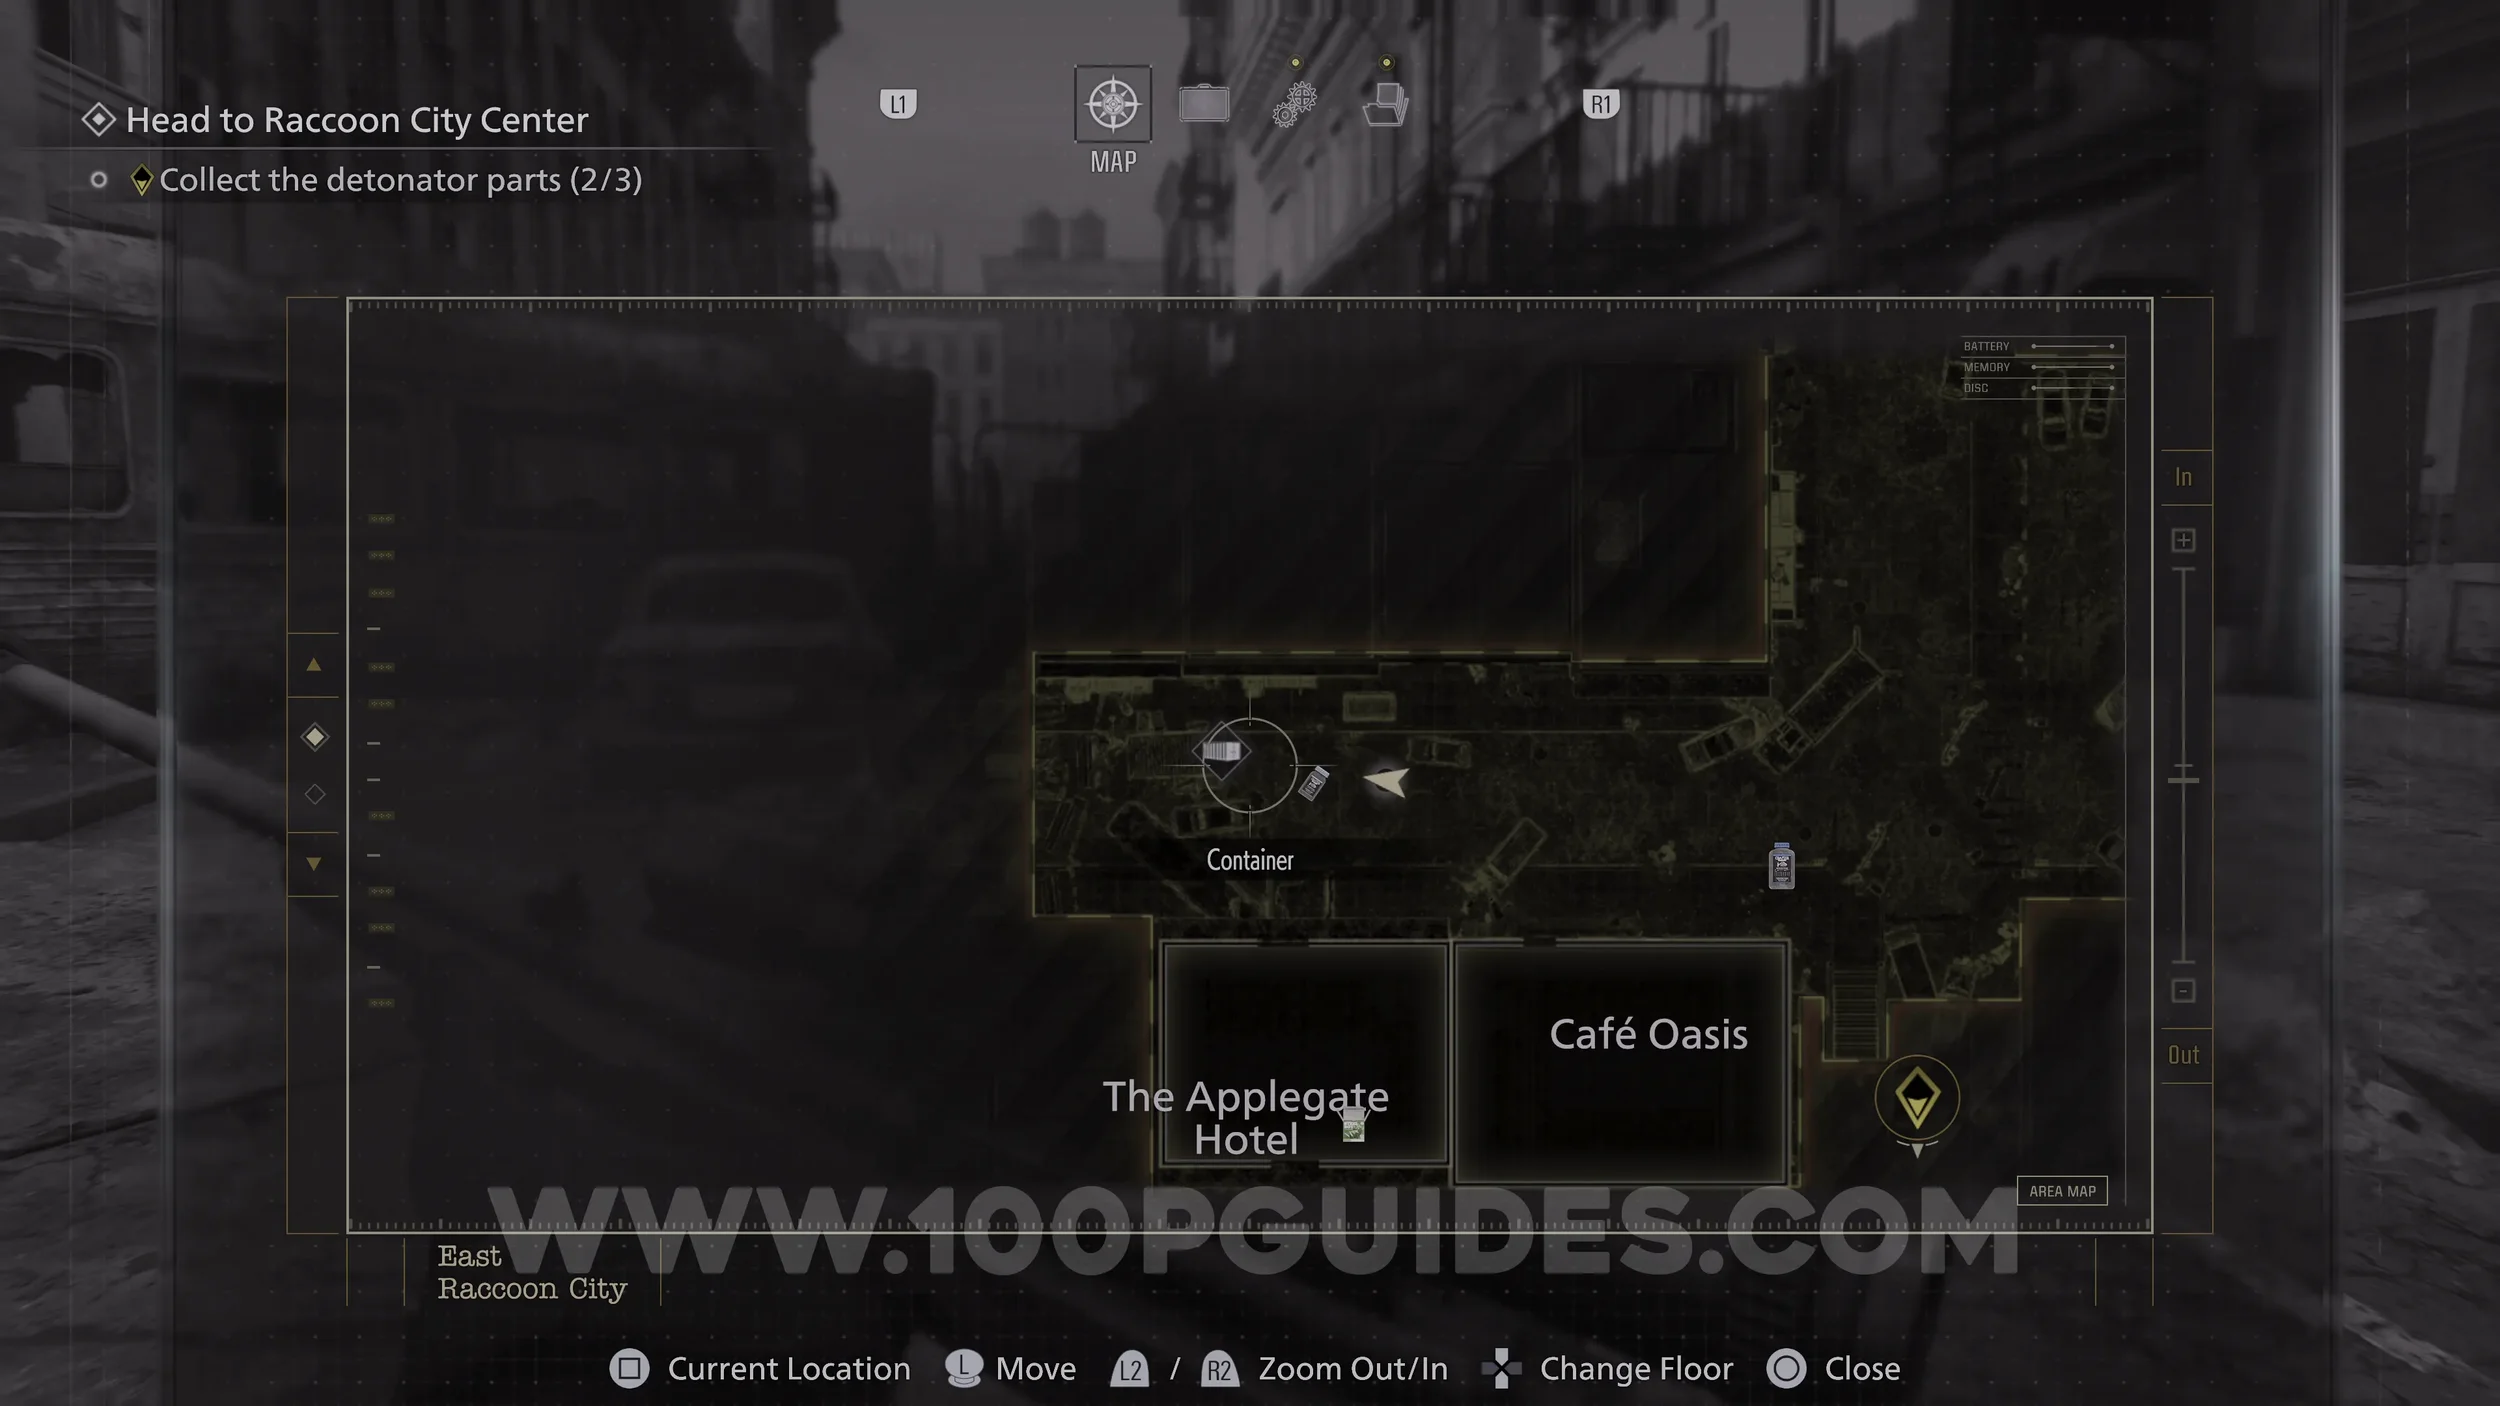
Mr. Raccoon #11. Inside Cafe Oasis, found just south of where you start.

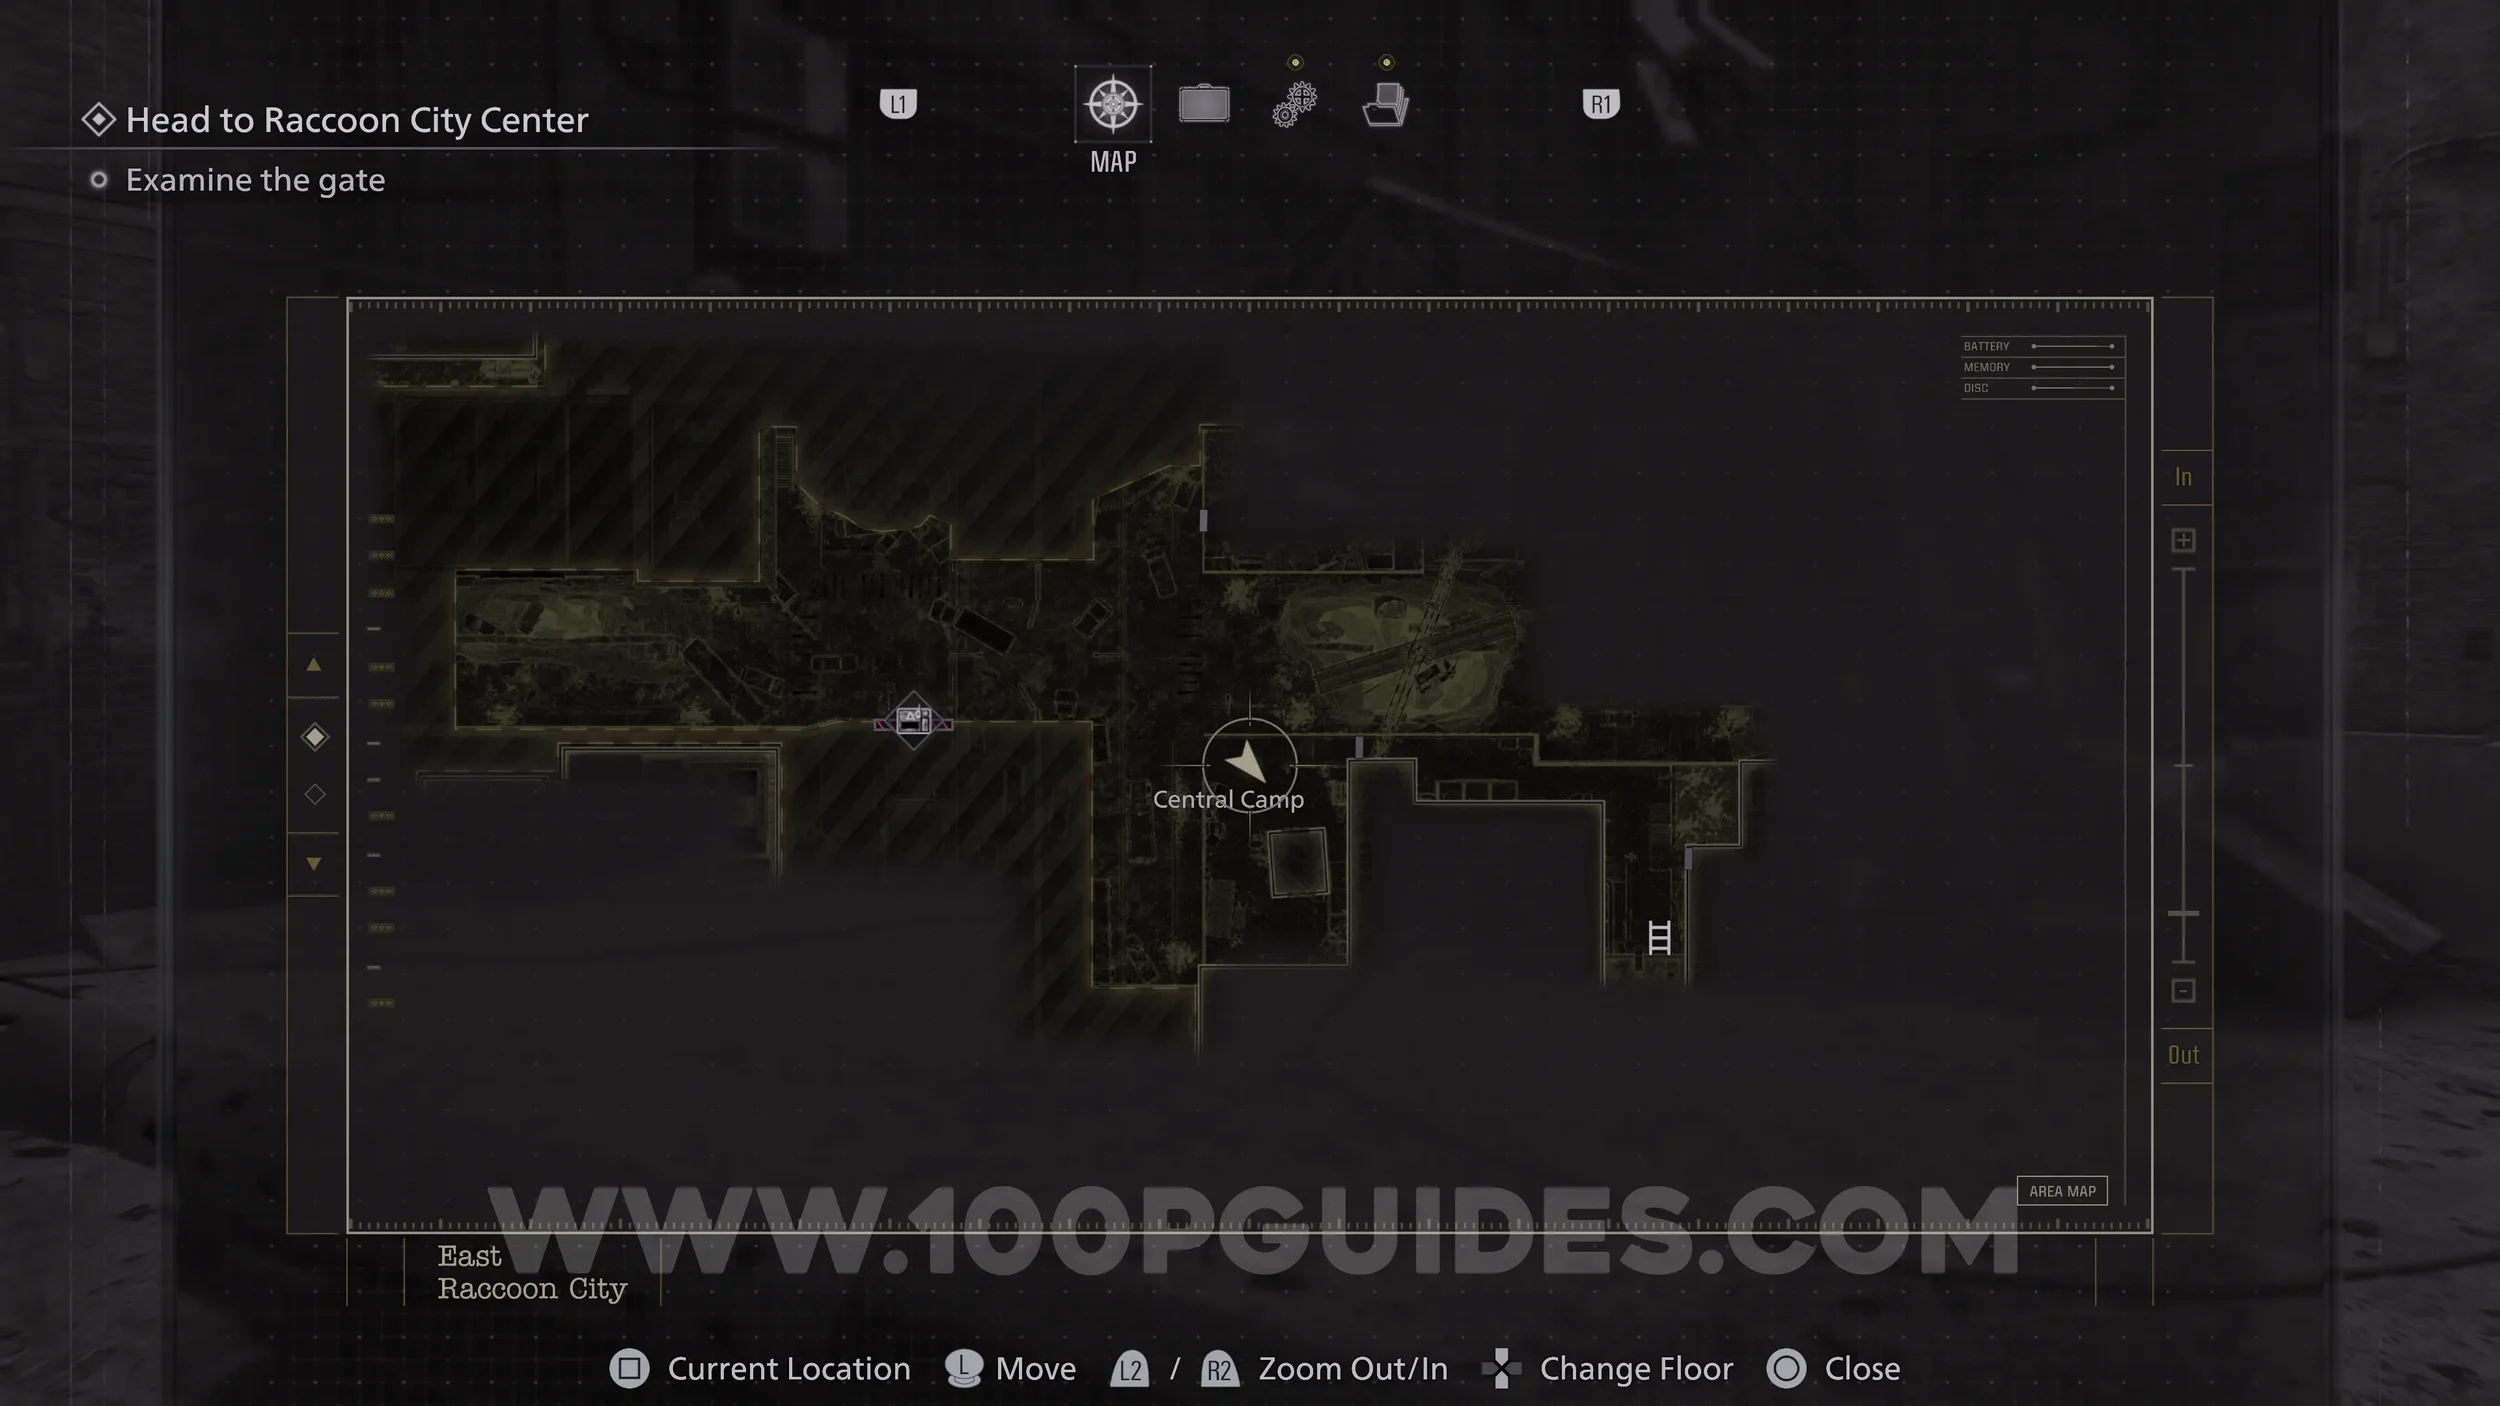
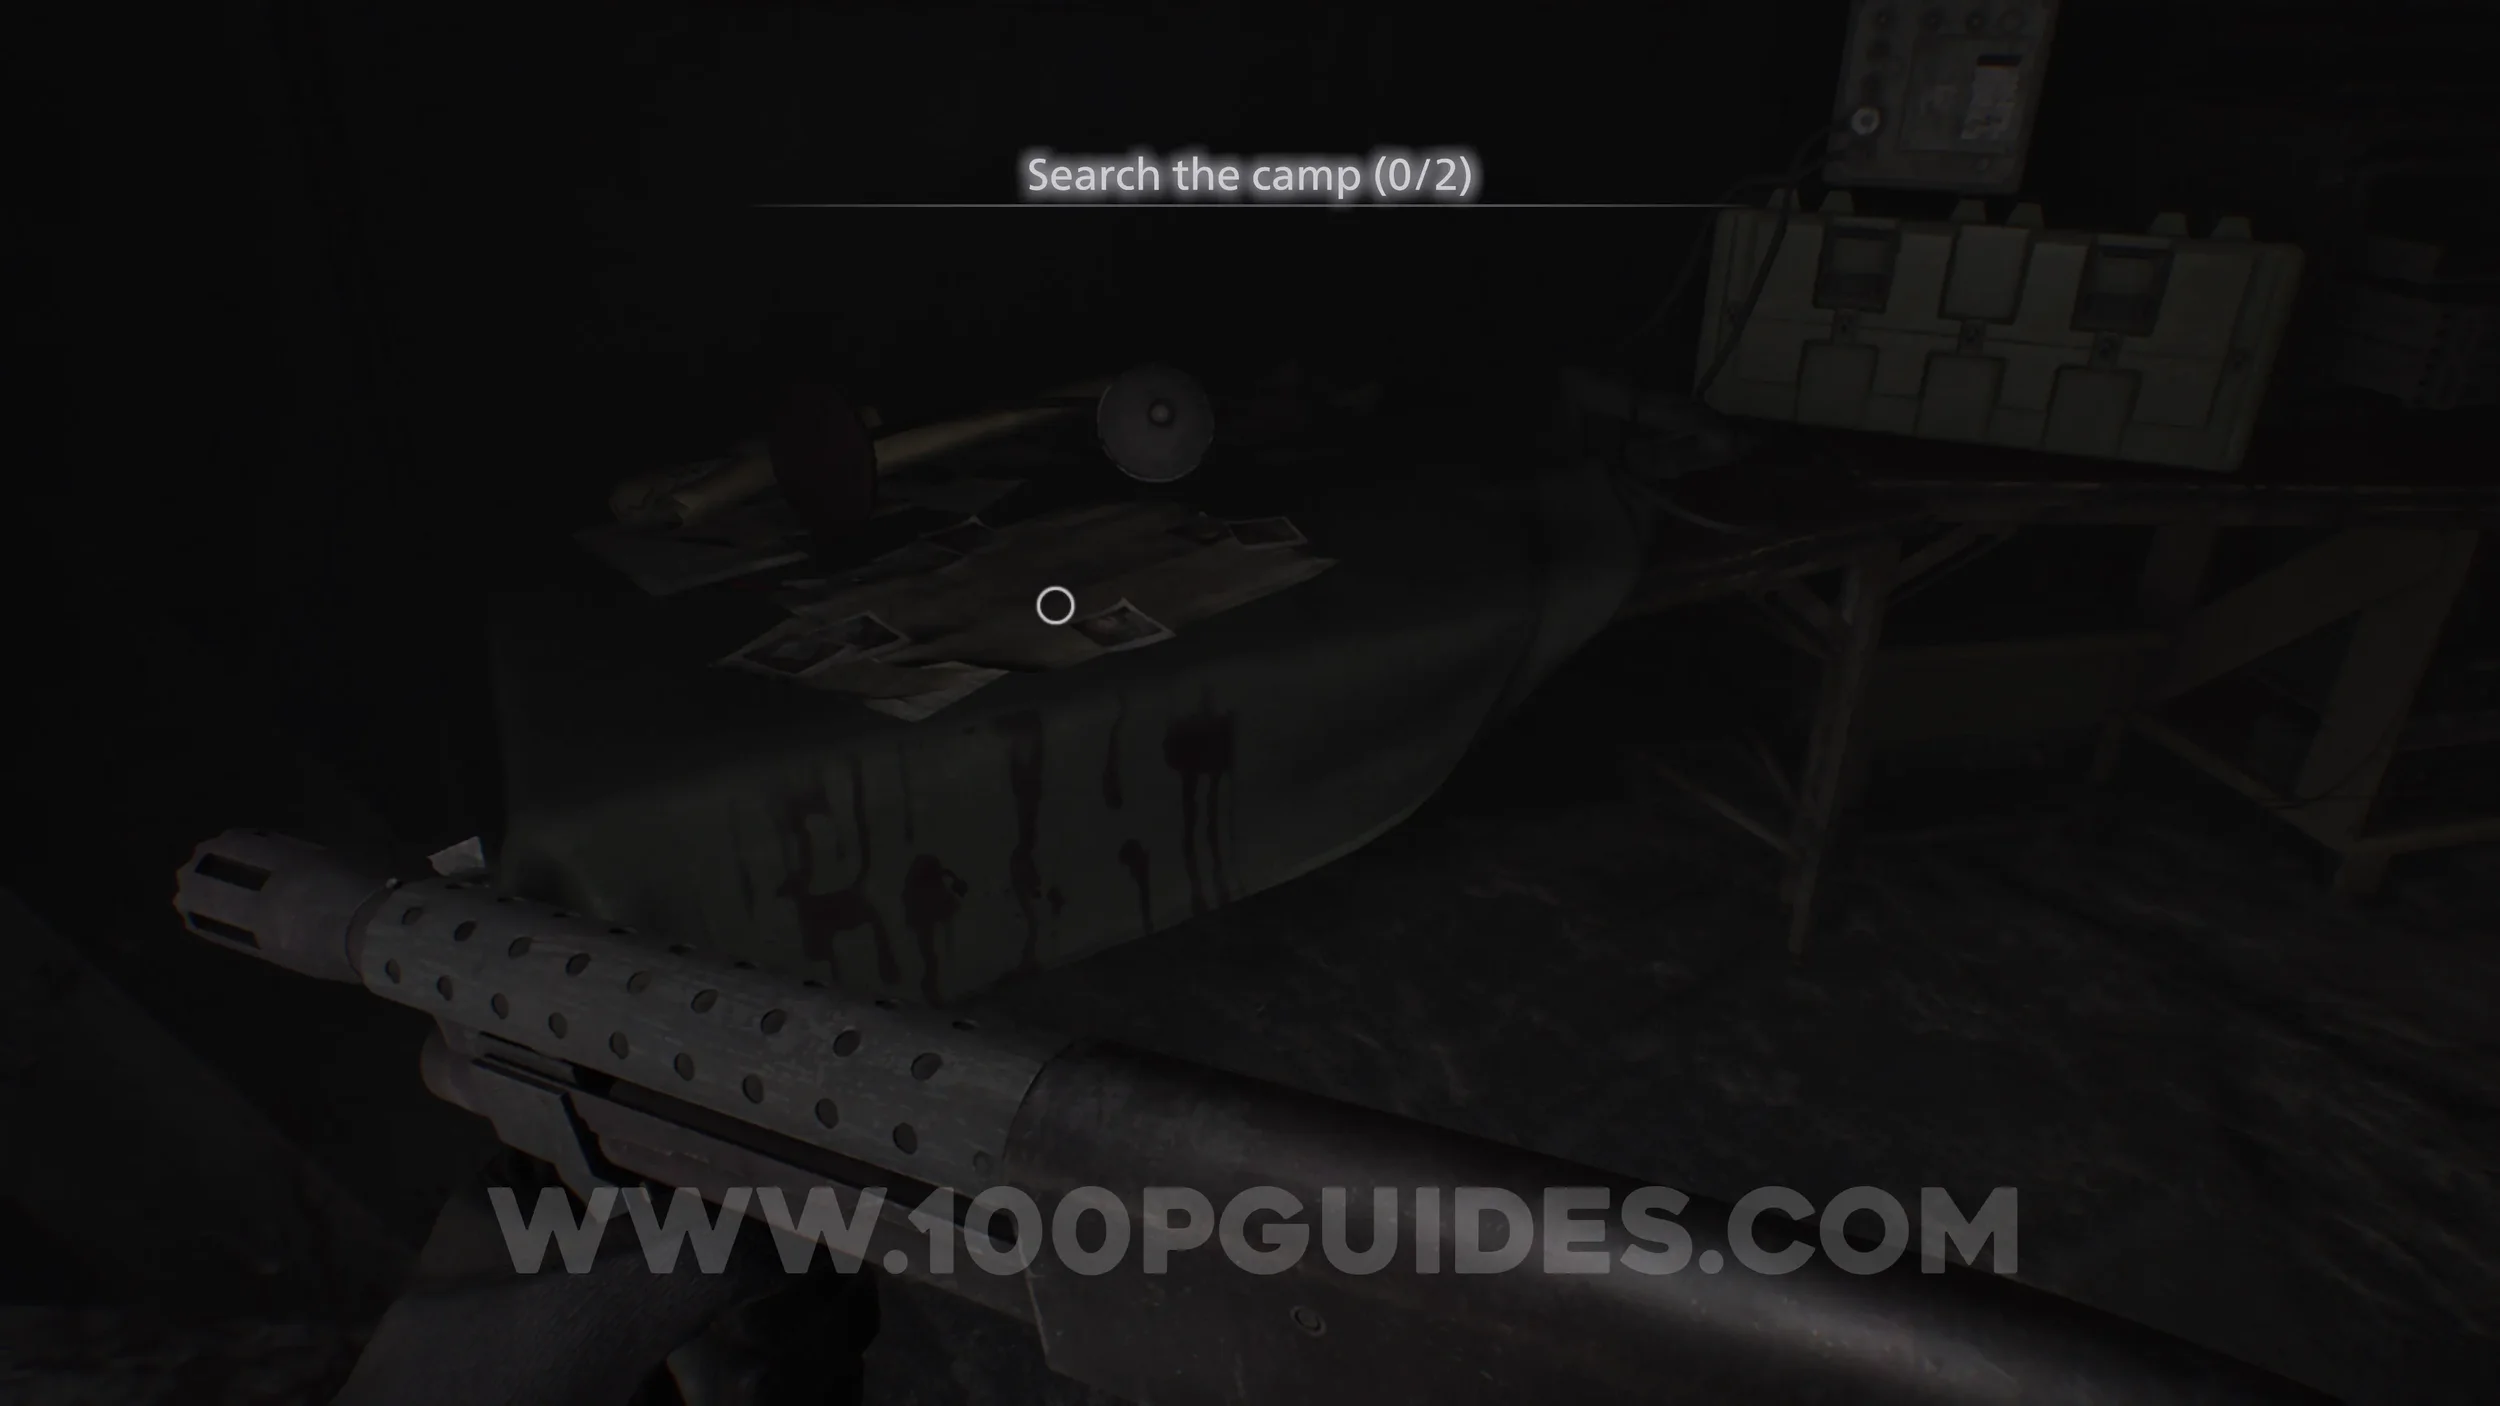
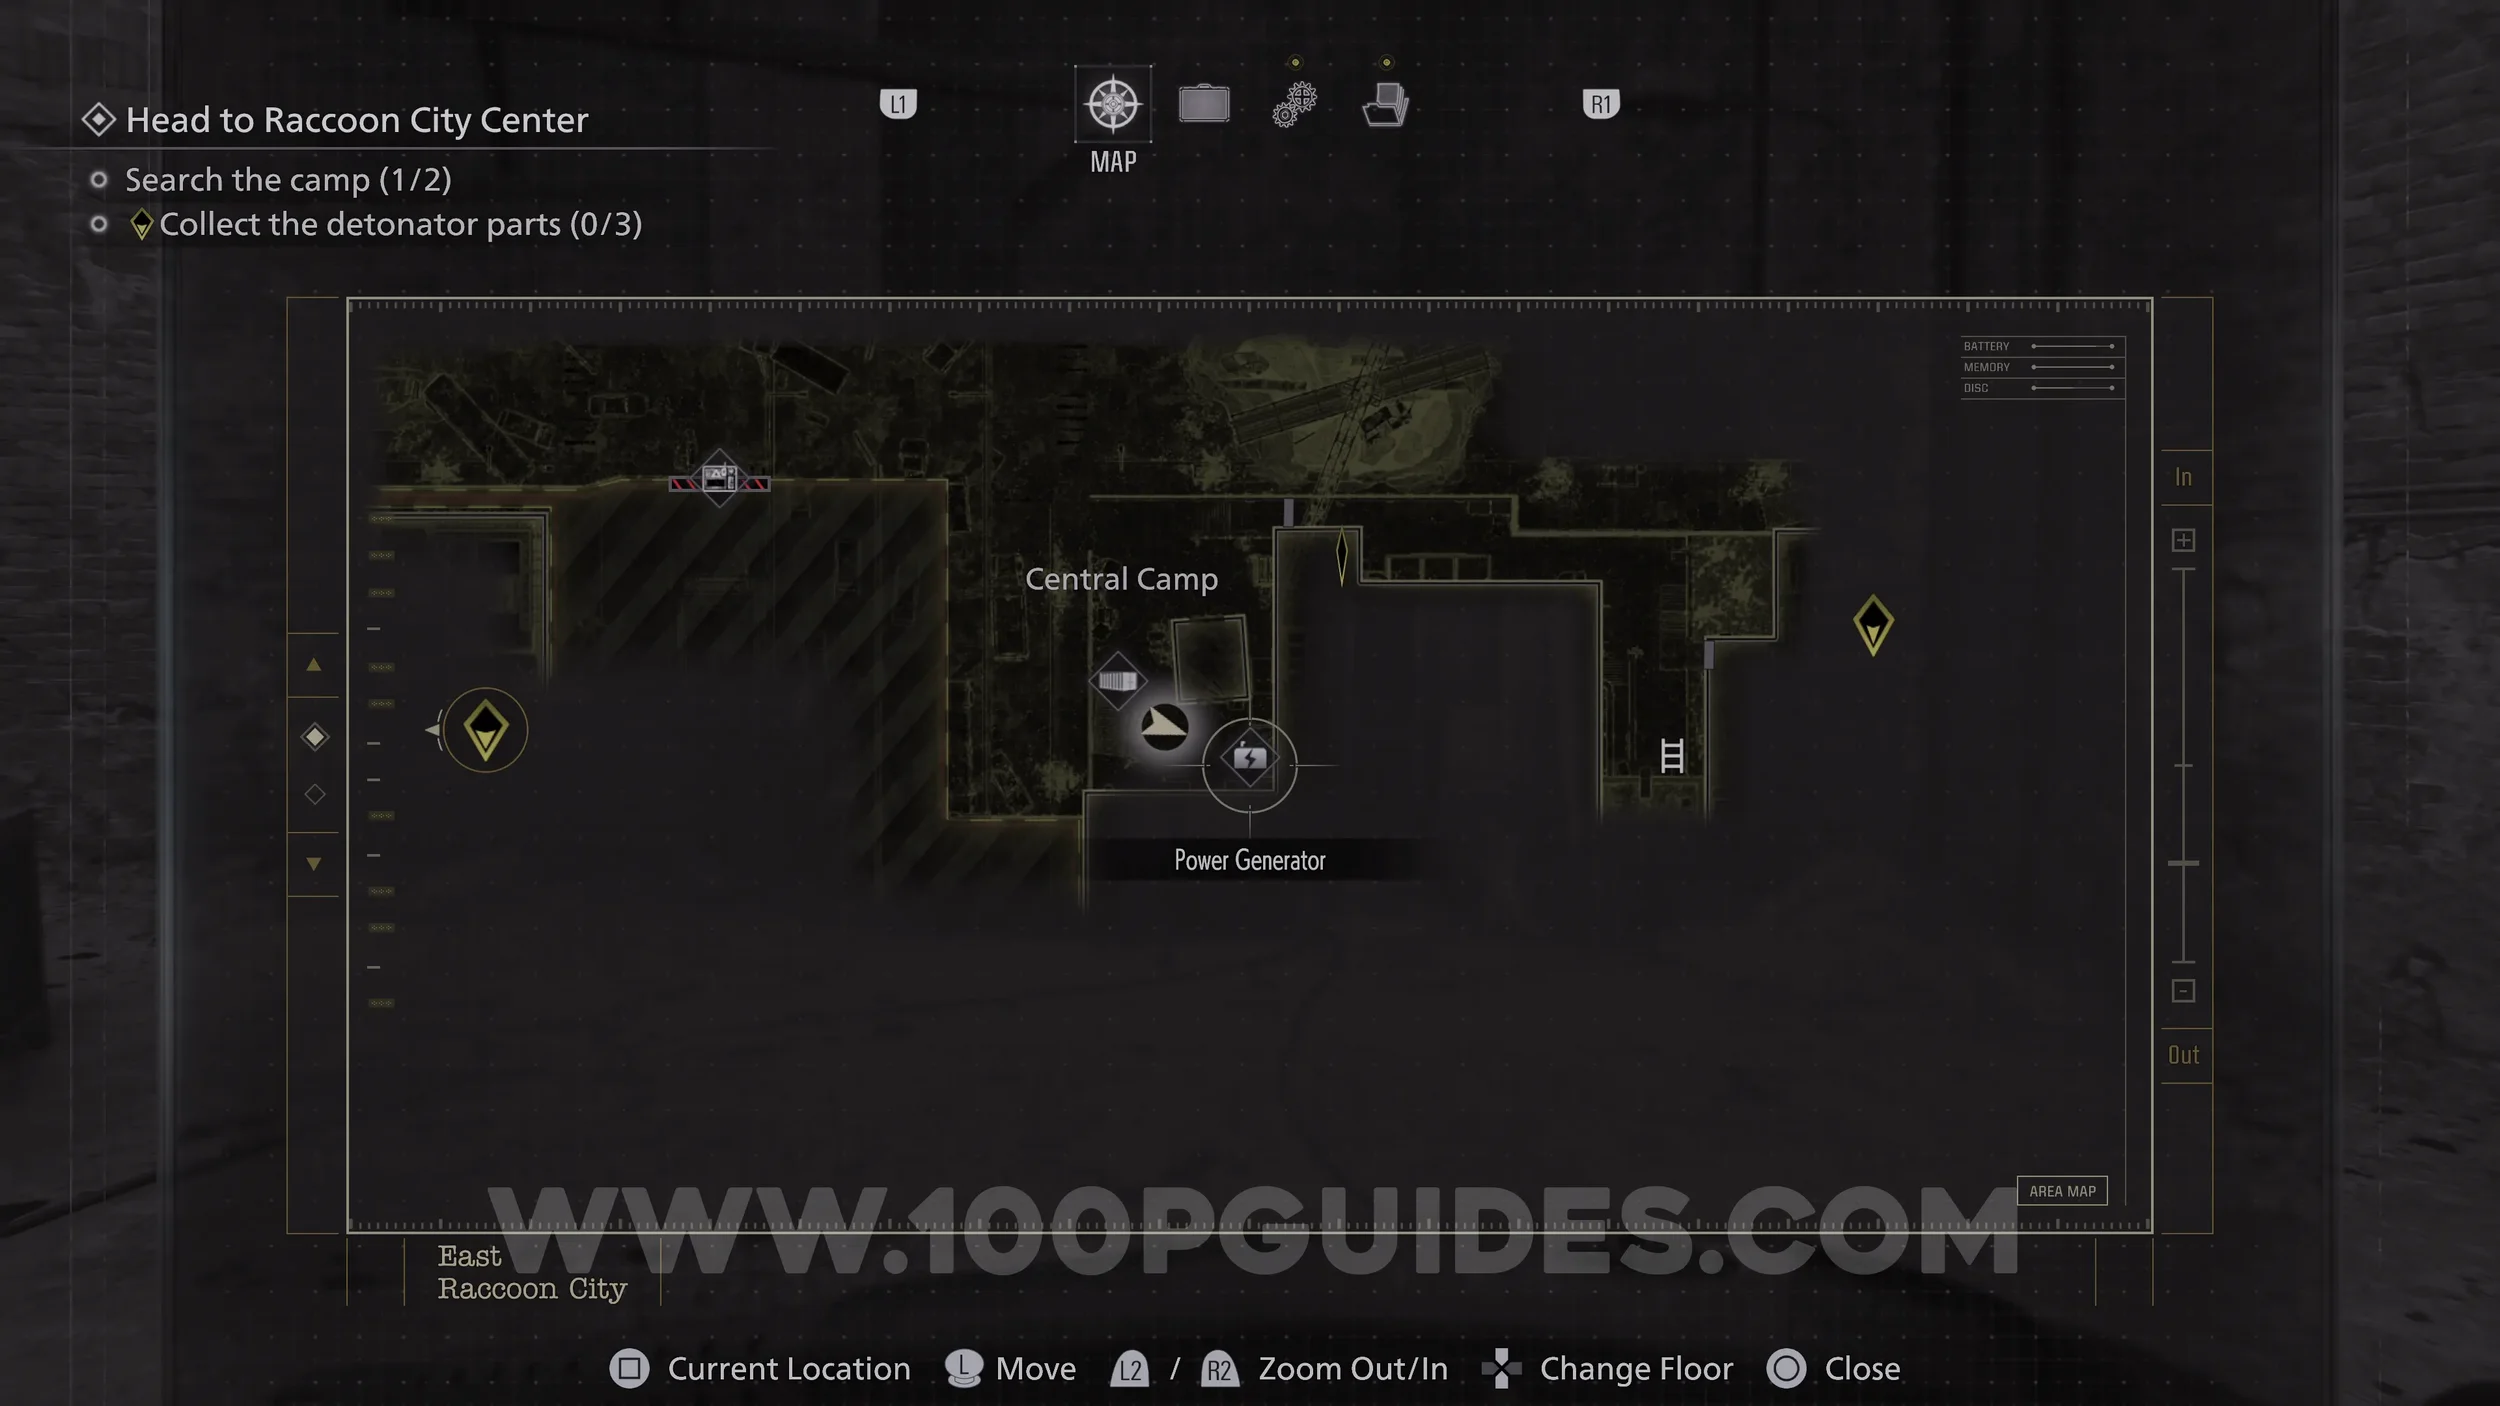
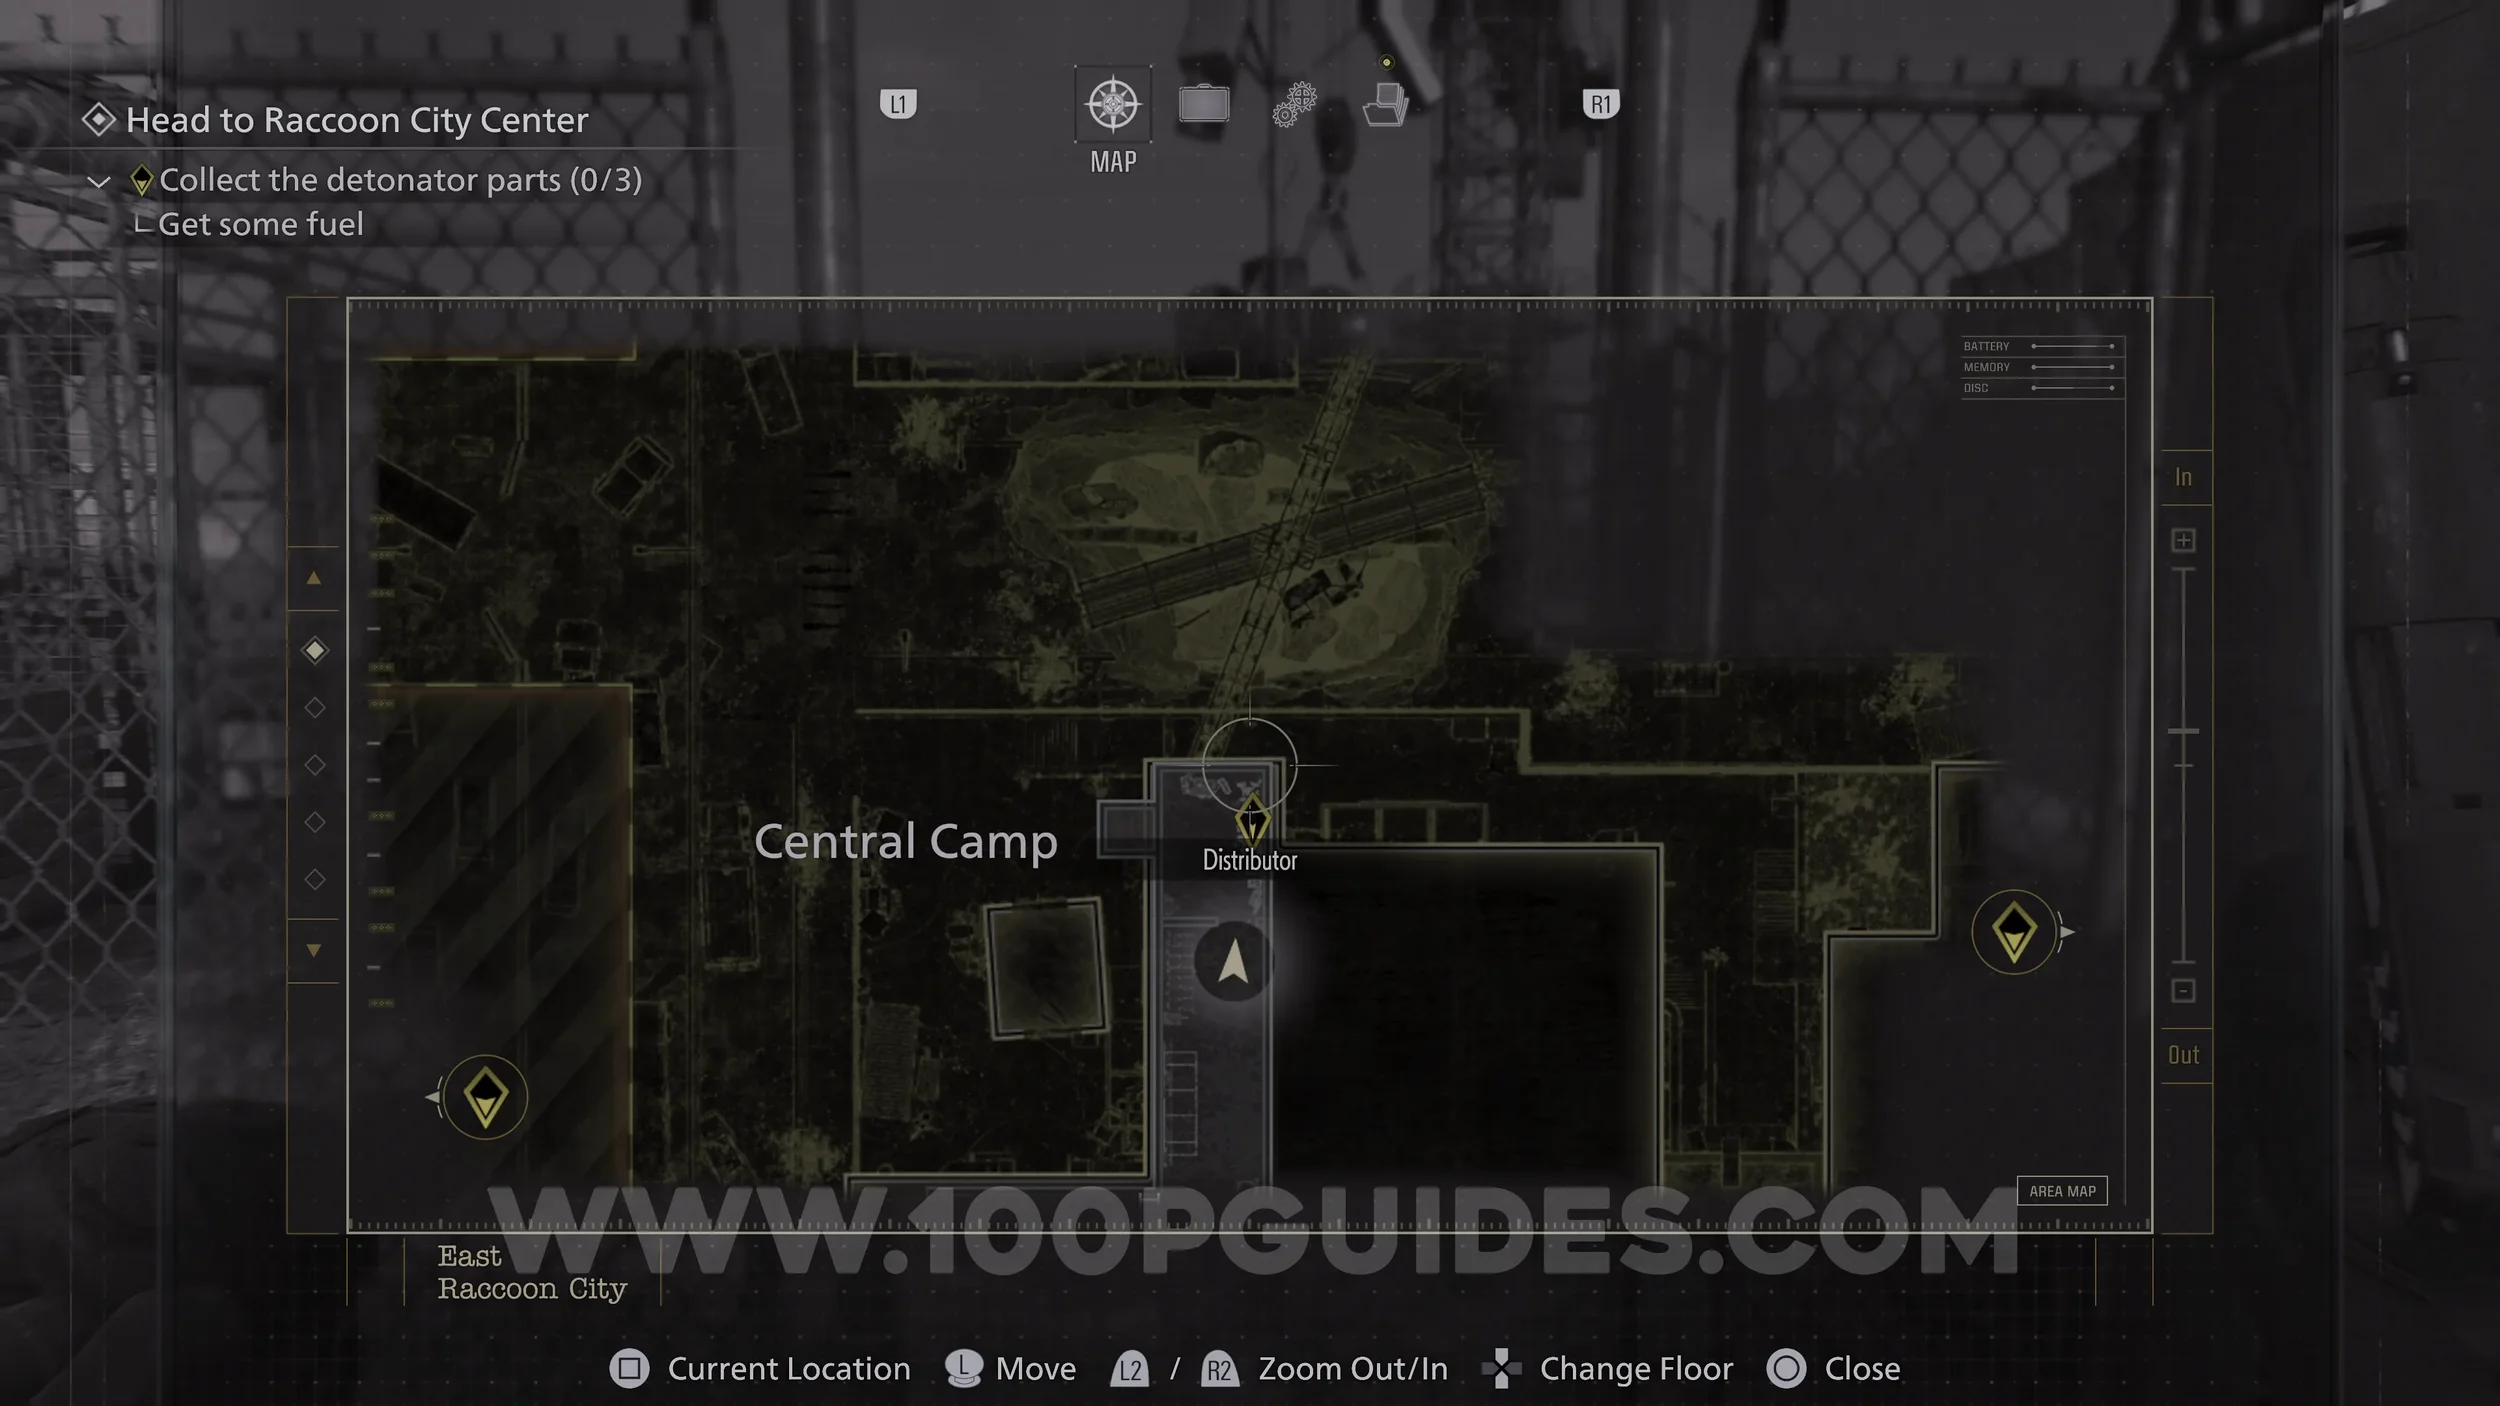
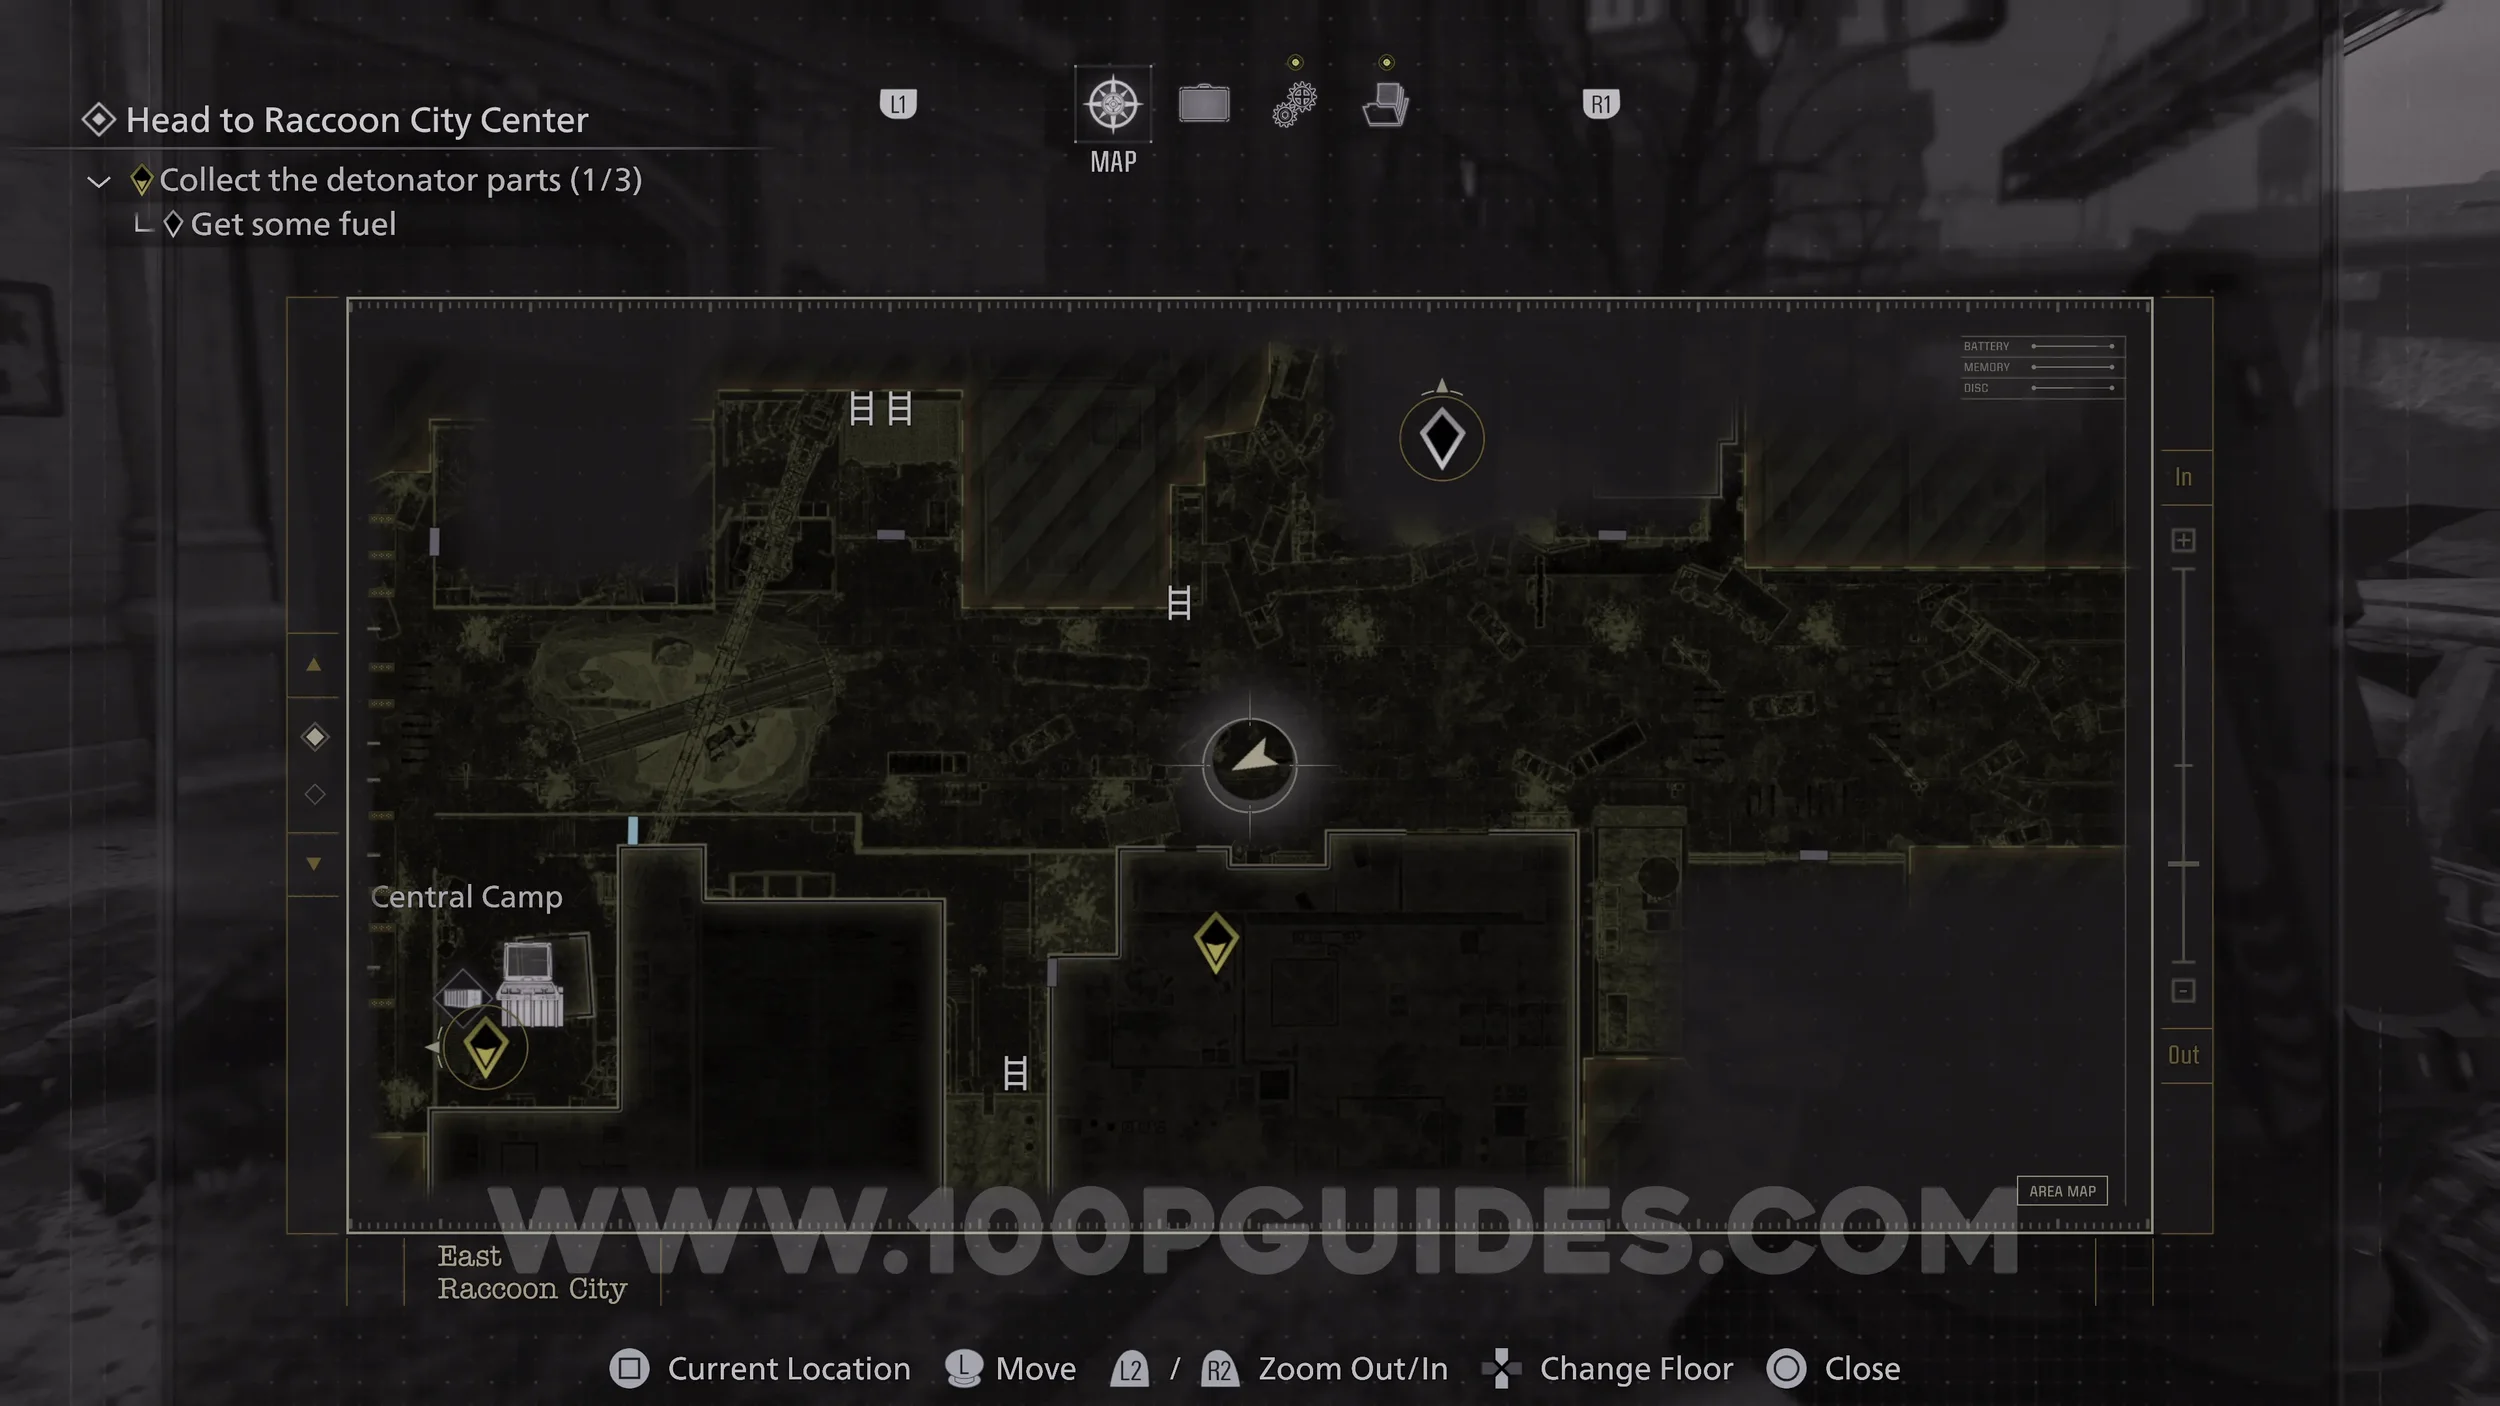
File #50 - Orders For The Engineer Corps. After defeating the spider boss you will reach another street. The file can be found in the tent in the Central Camp to the east.
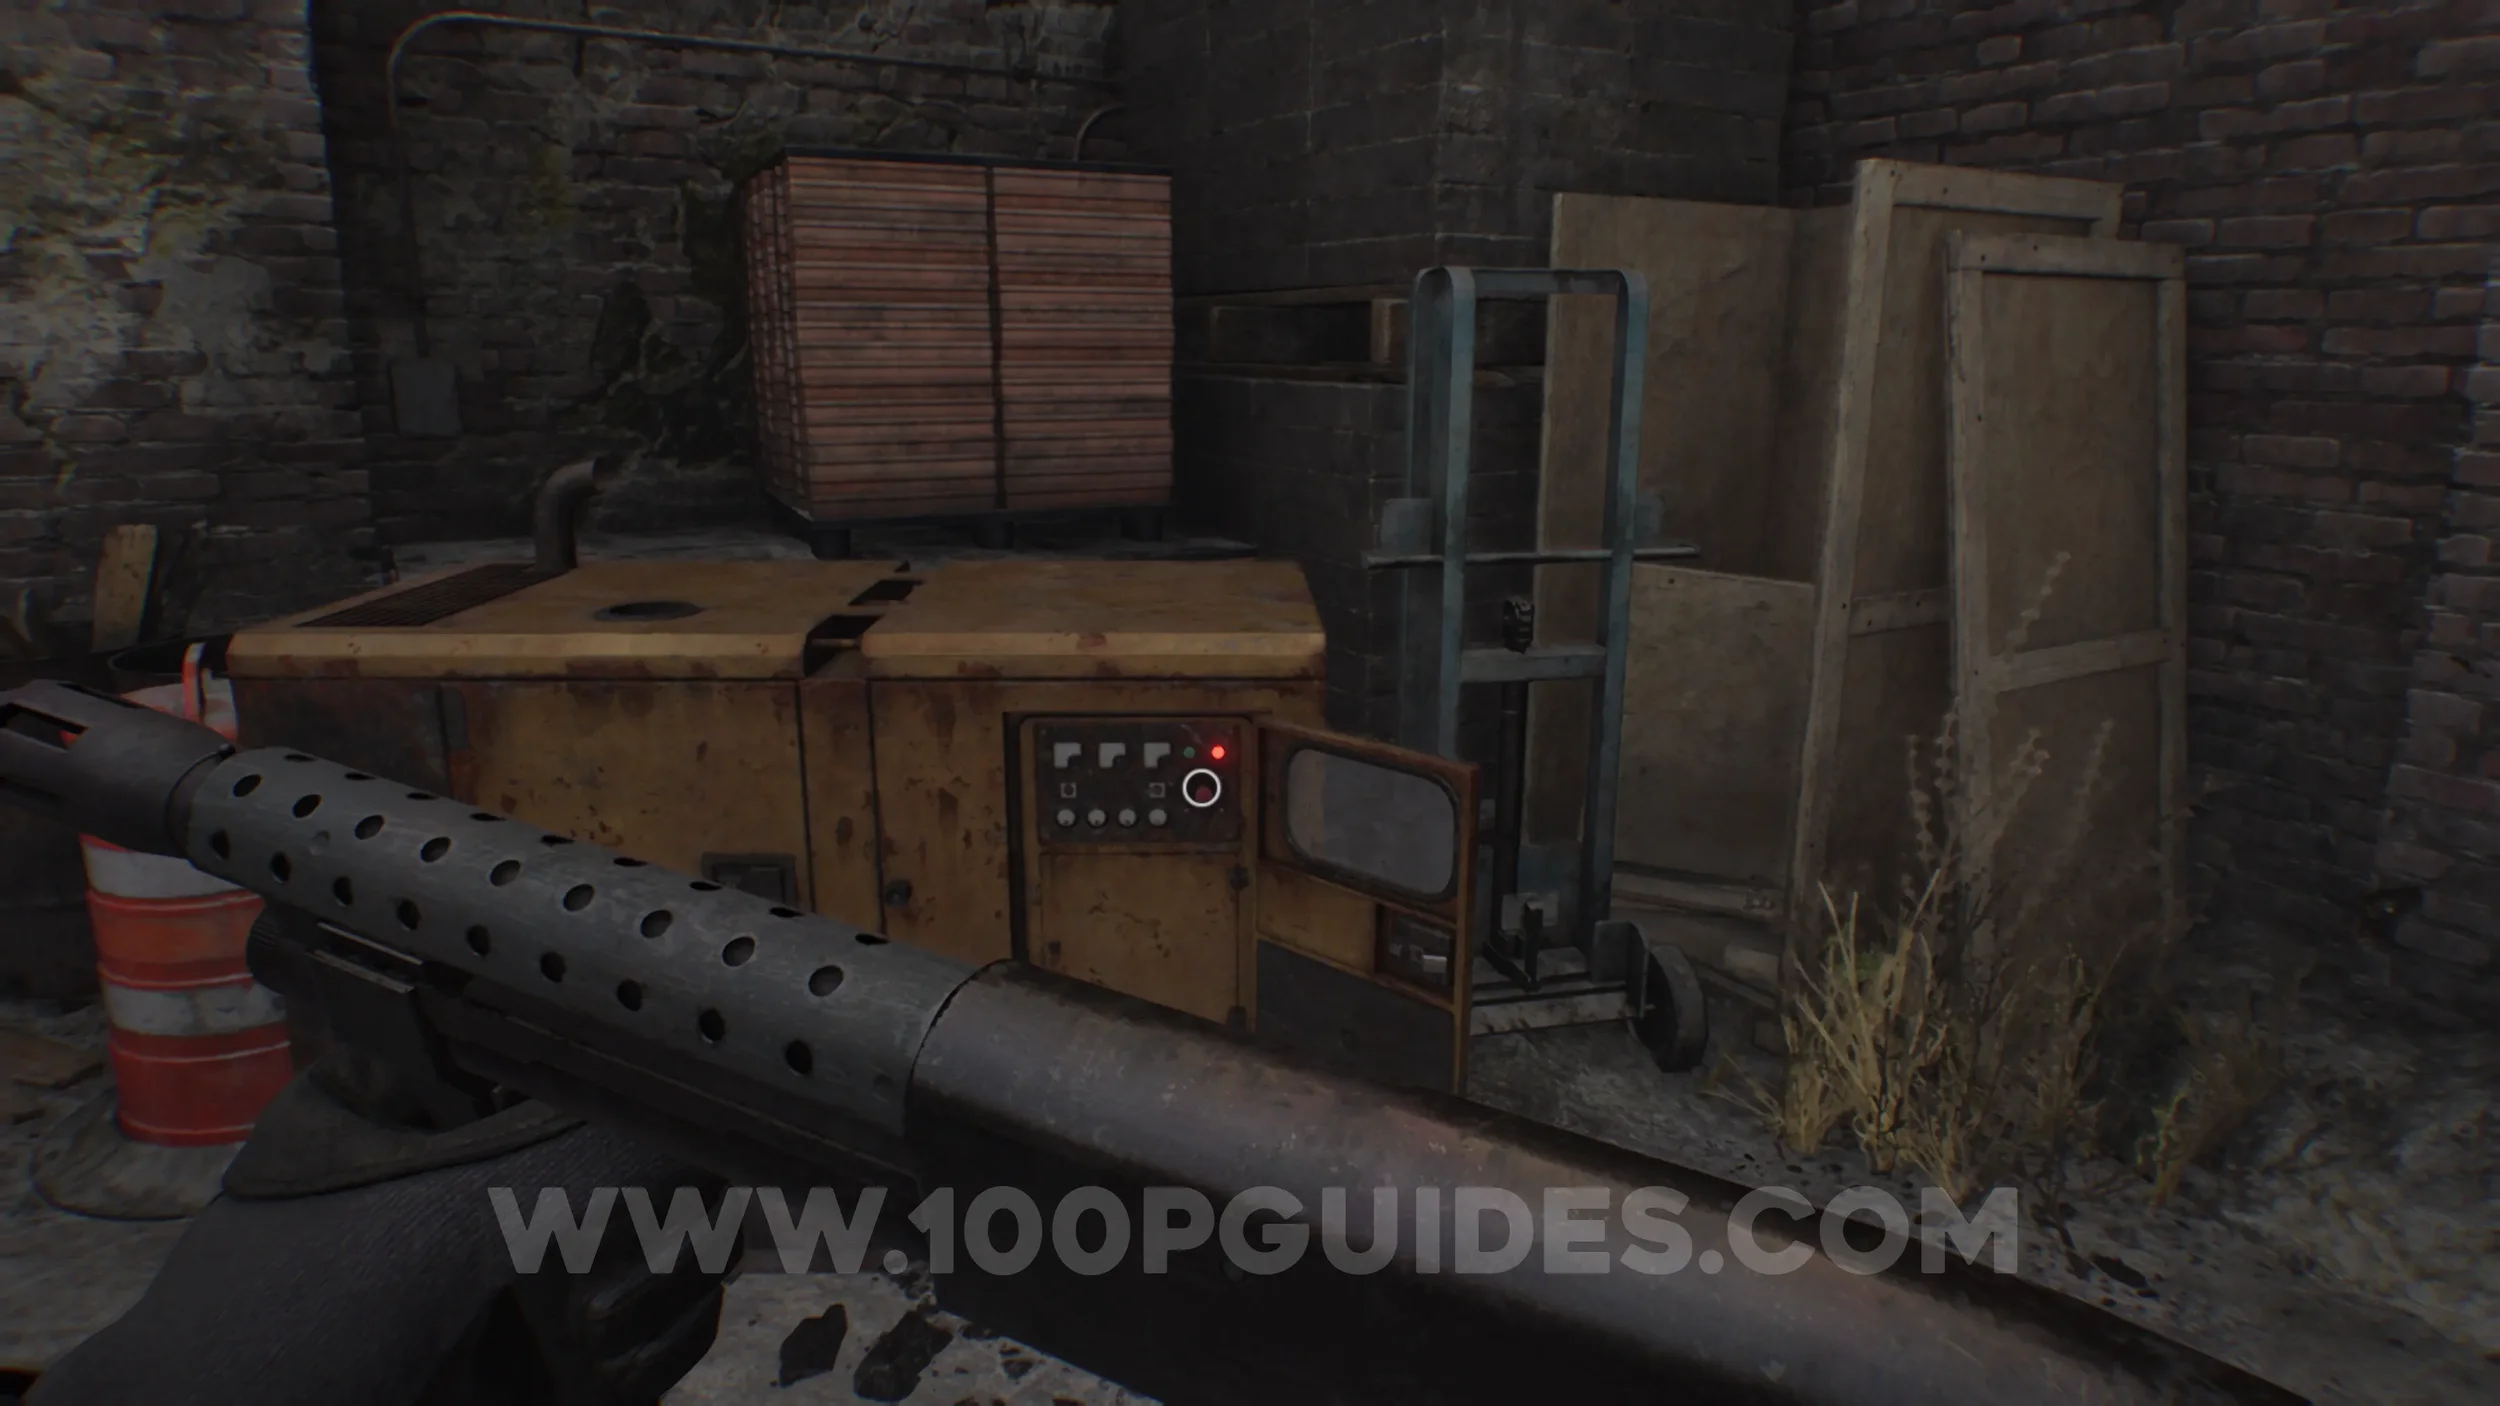
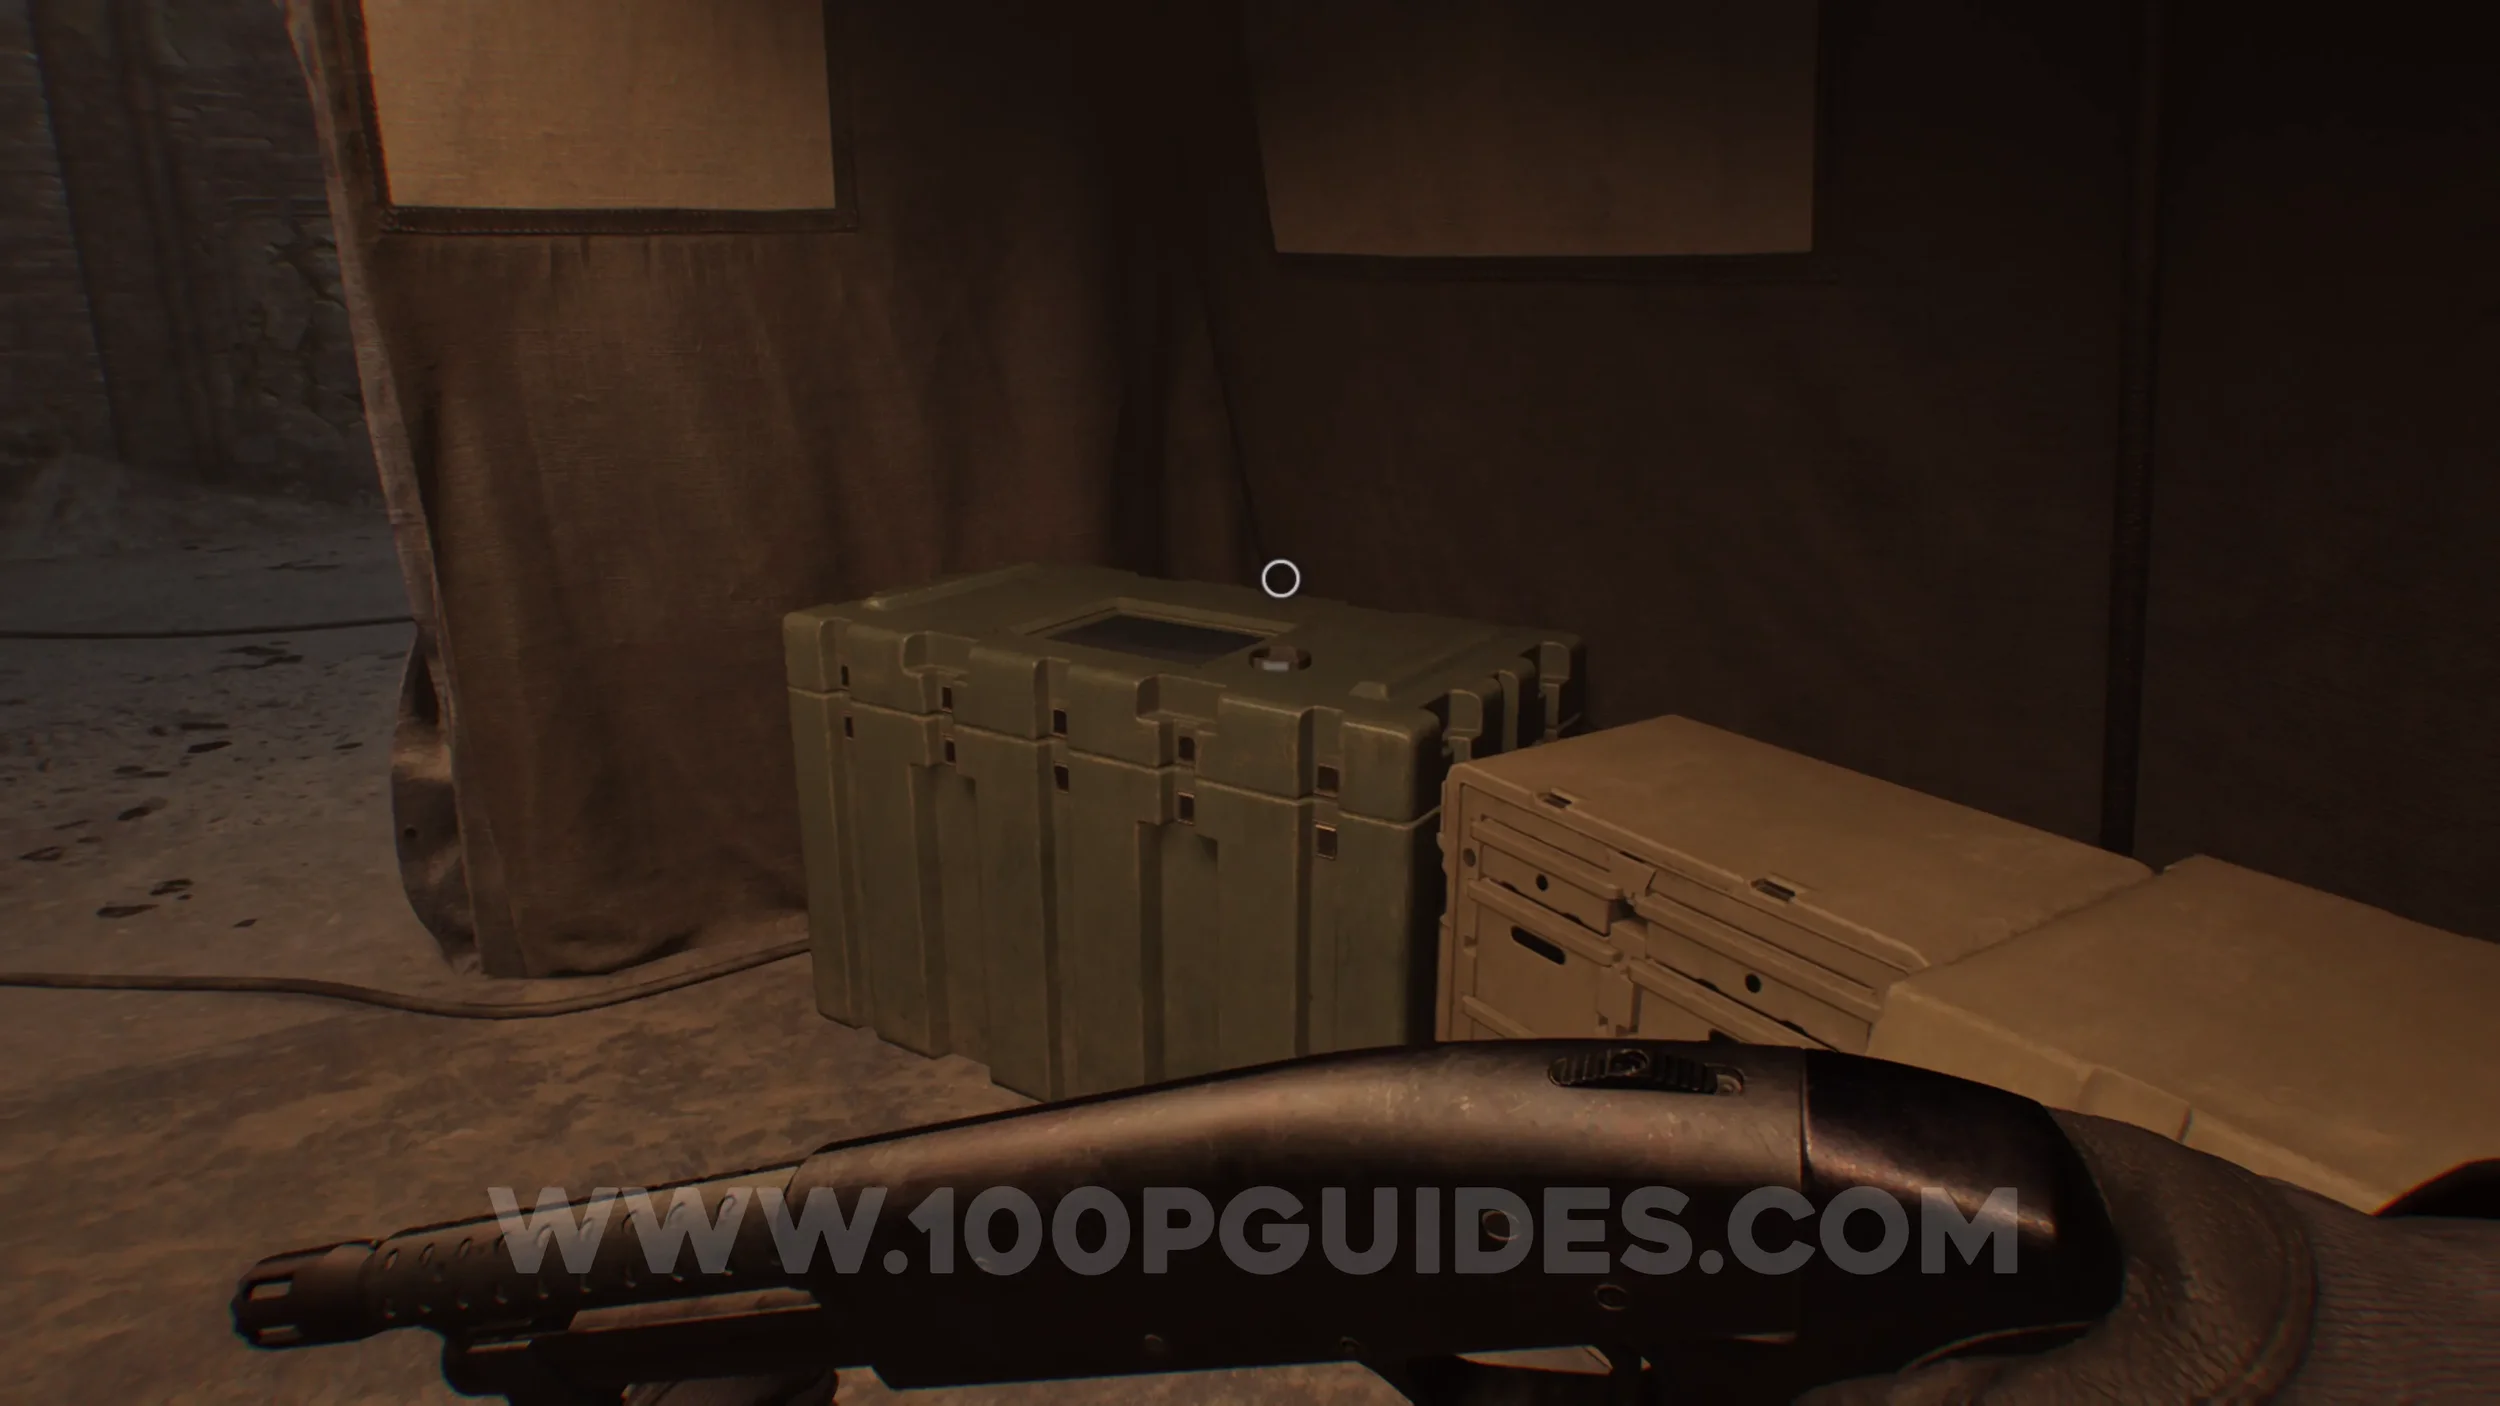
Weapons - Silencer 9, 990-TAC, Stiri REVO3 A1, Body Armor Lv. 1 & Lv. 2 and Case Upgrade. Activate the generator behind the Central Camp tent. Then return inside to find the Tactical Tracker on the Supply Box.
This item allows Leon to earn points for defeating enemies. These points can be spent at any Supply Box, including the one inside the tent.
All of the available items can be purchased from Supply Boxes, but none are required for trophies.
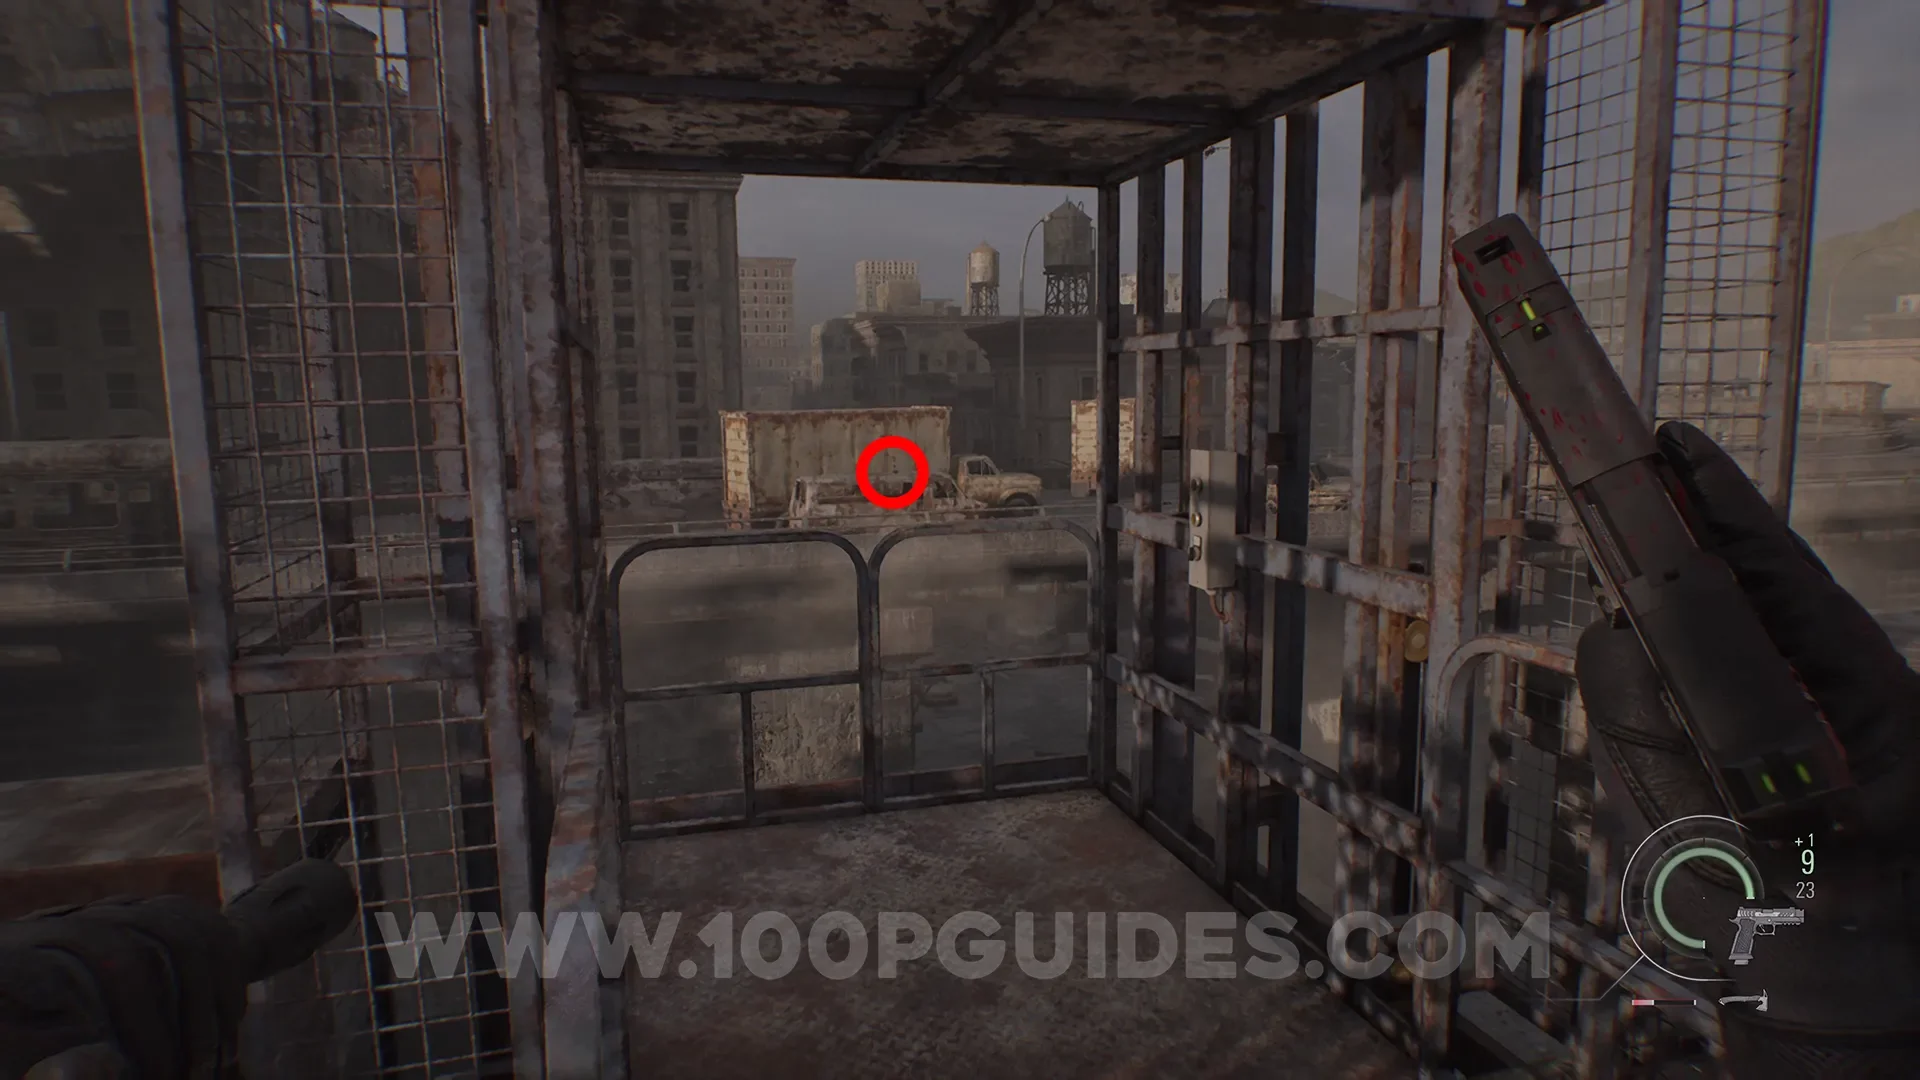
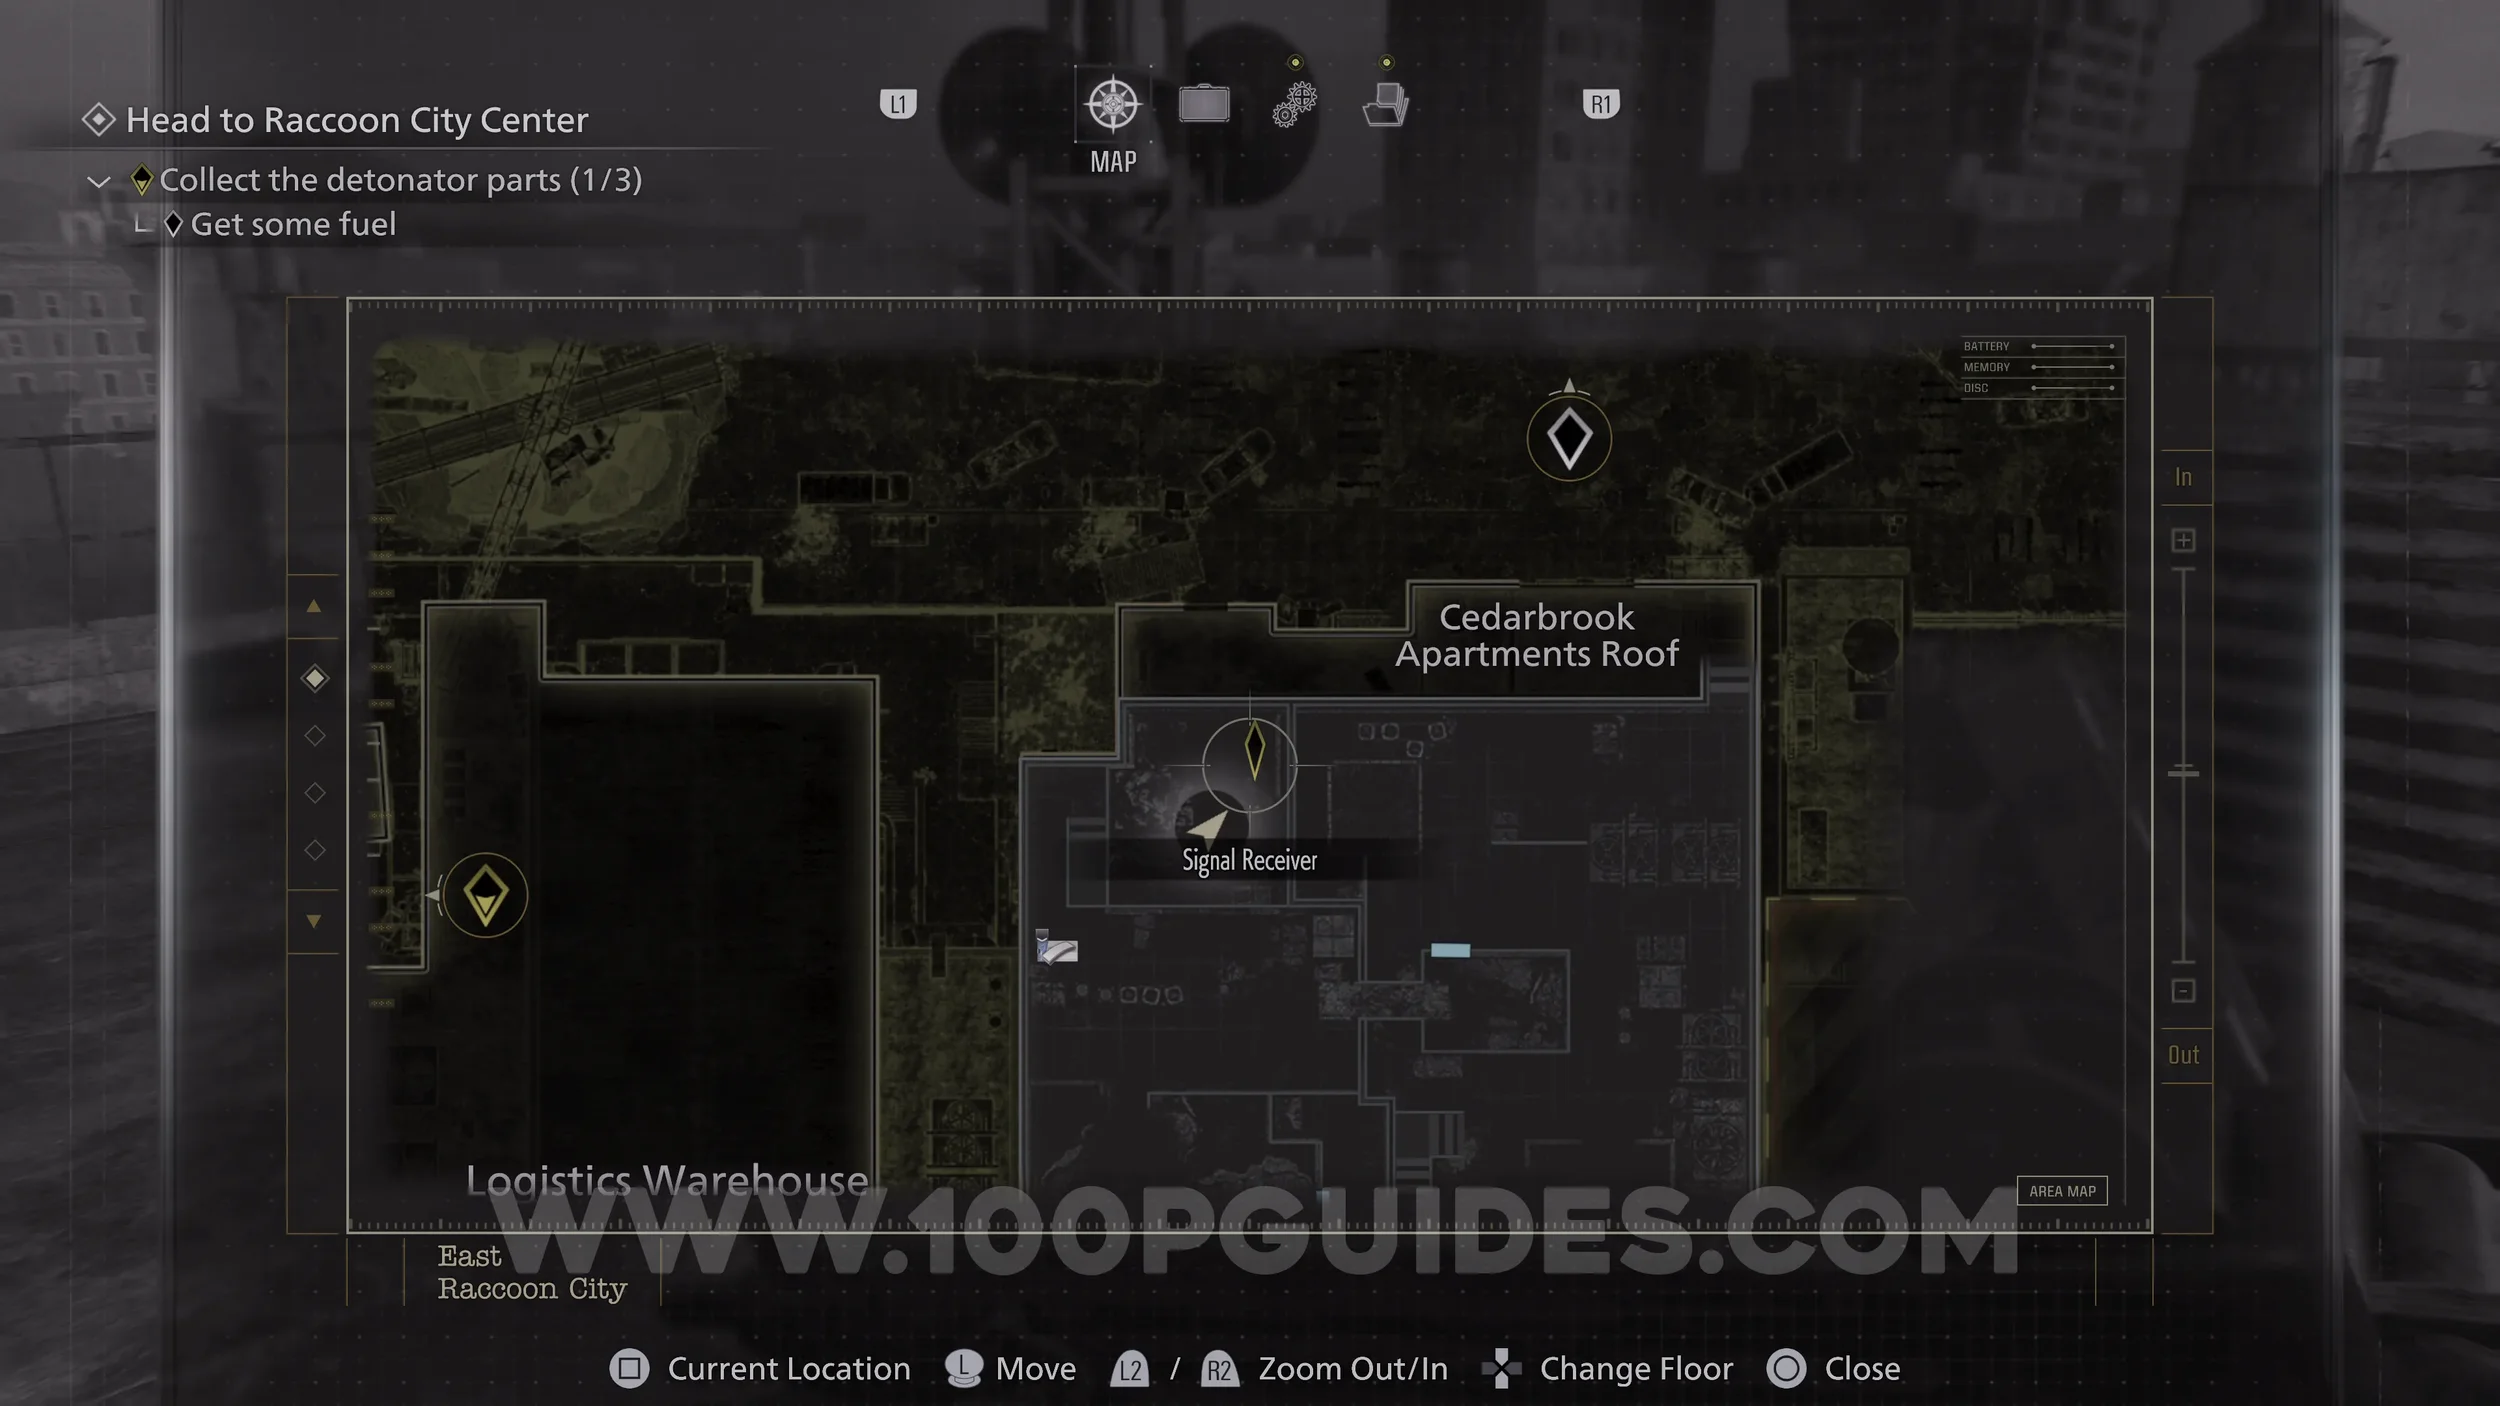
Mr. Raccoon #12. Once you get to the main objective on the Logistics Warehouse Roof, look left to find the Mr. Raccoon on top of the car on the highway.
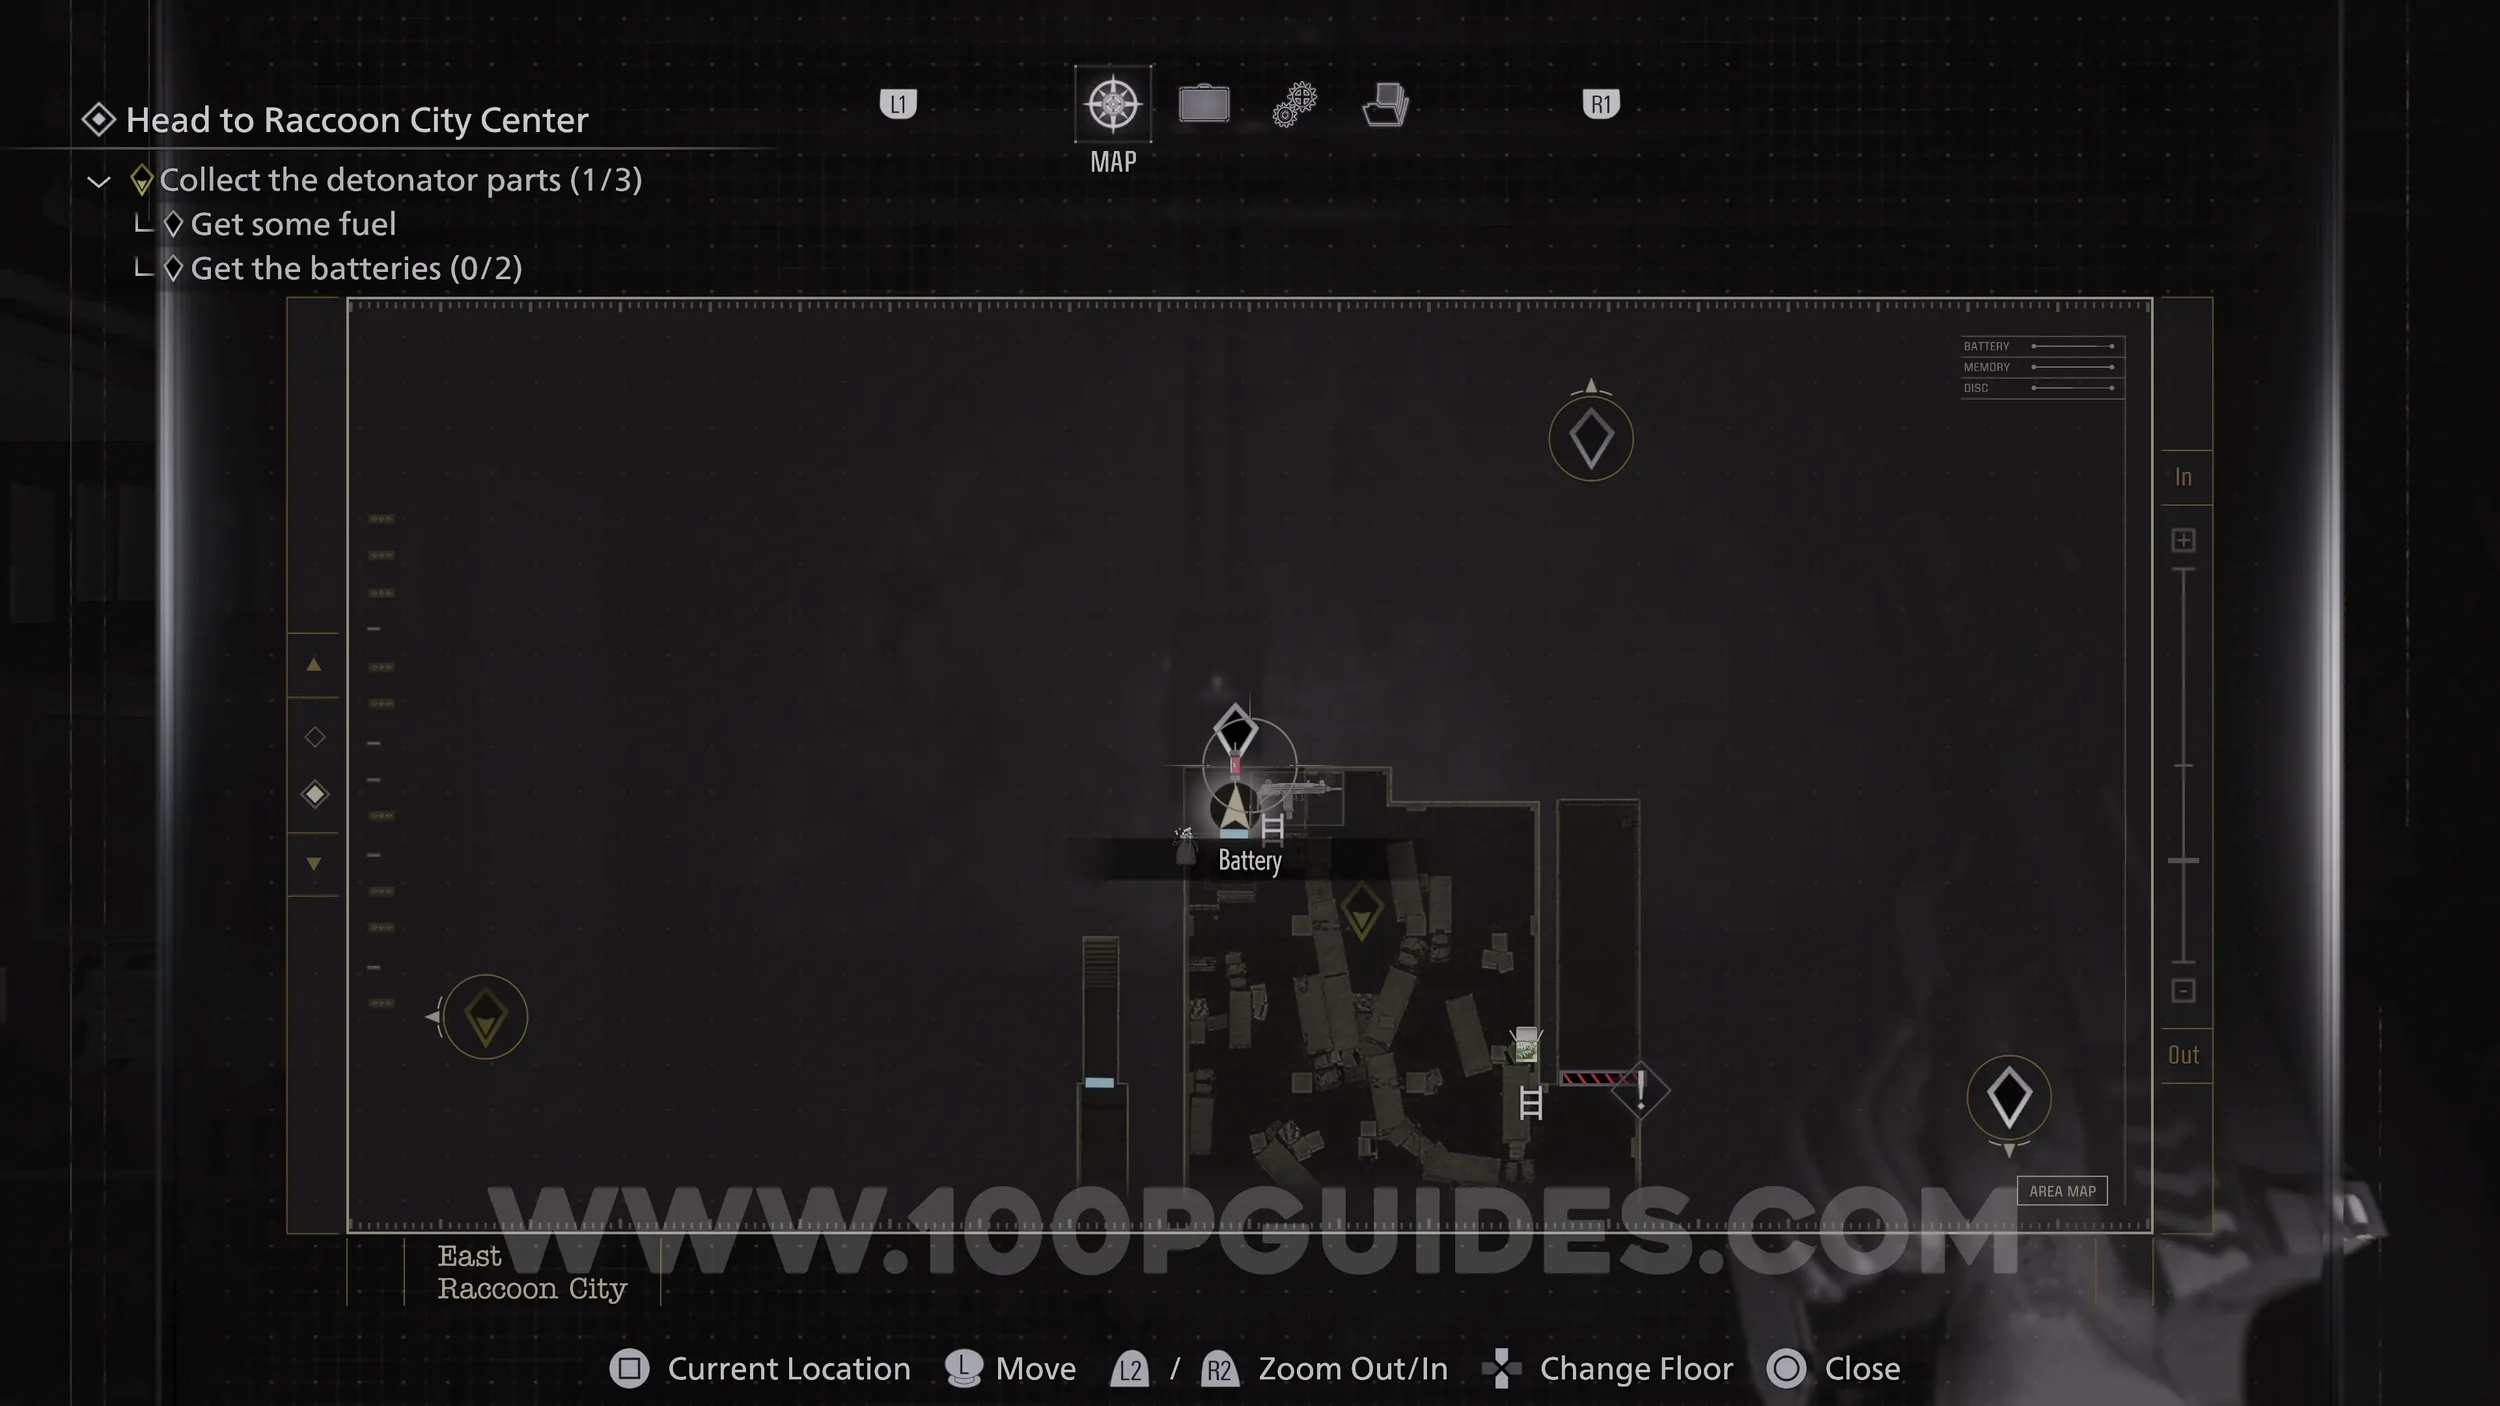
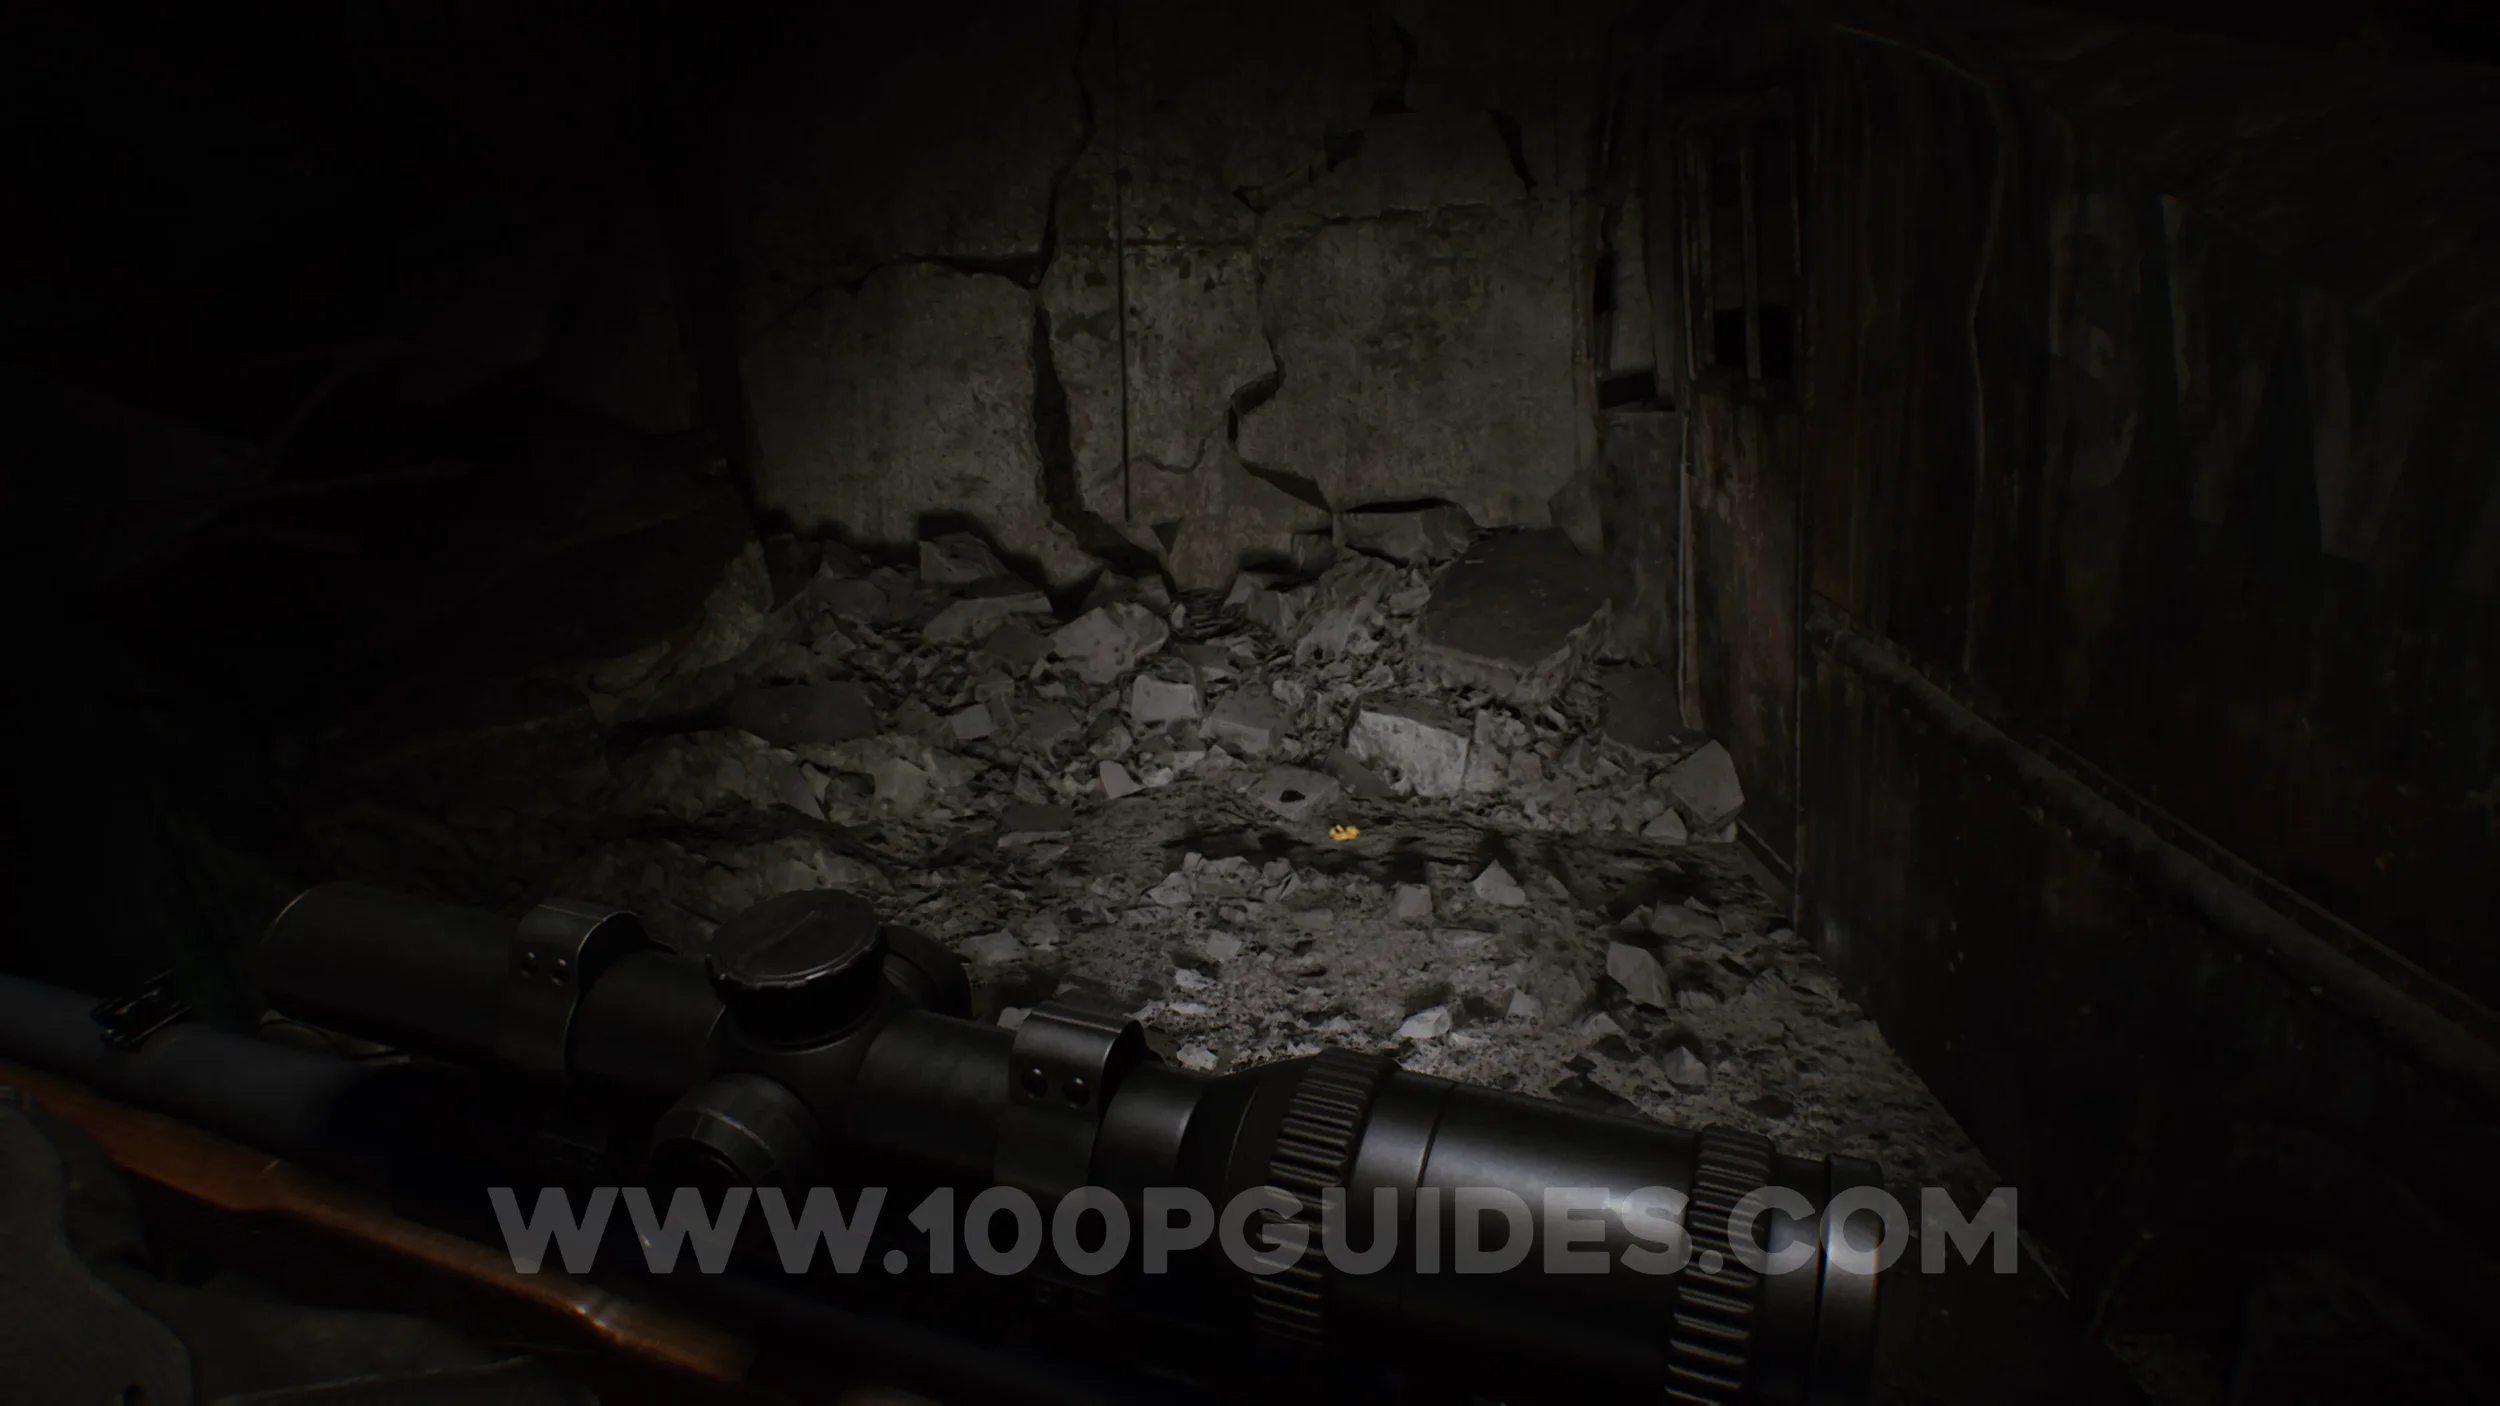
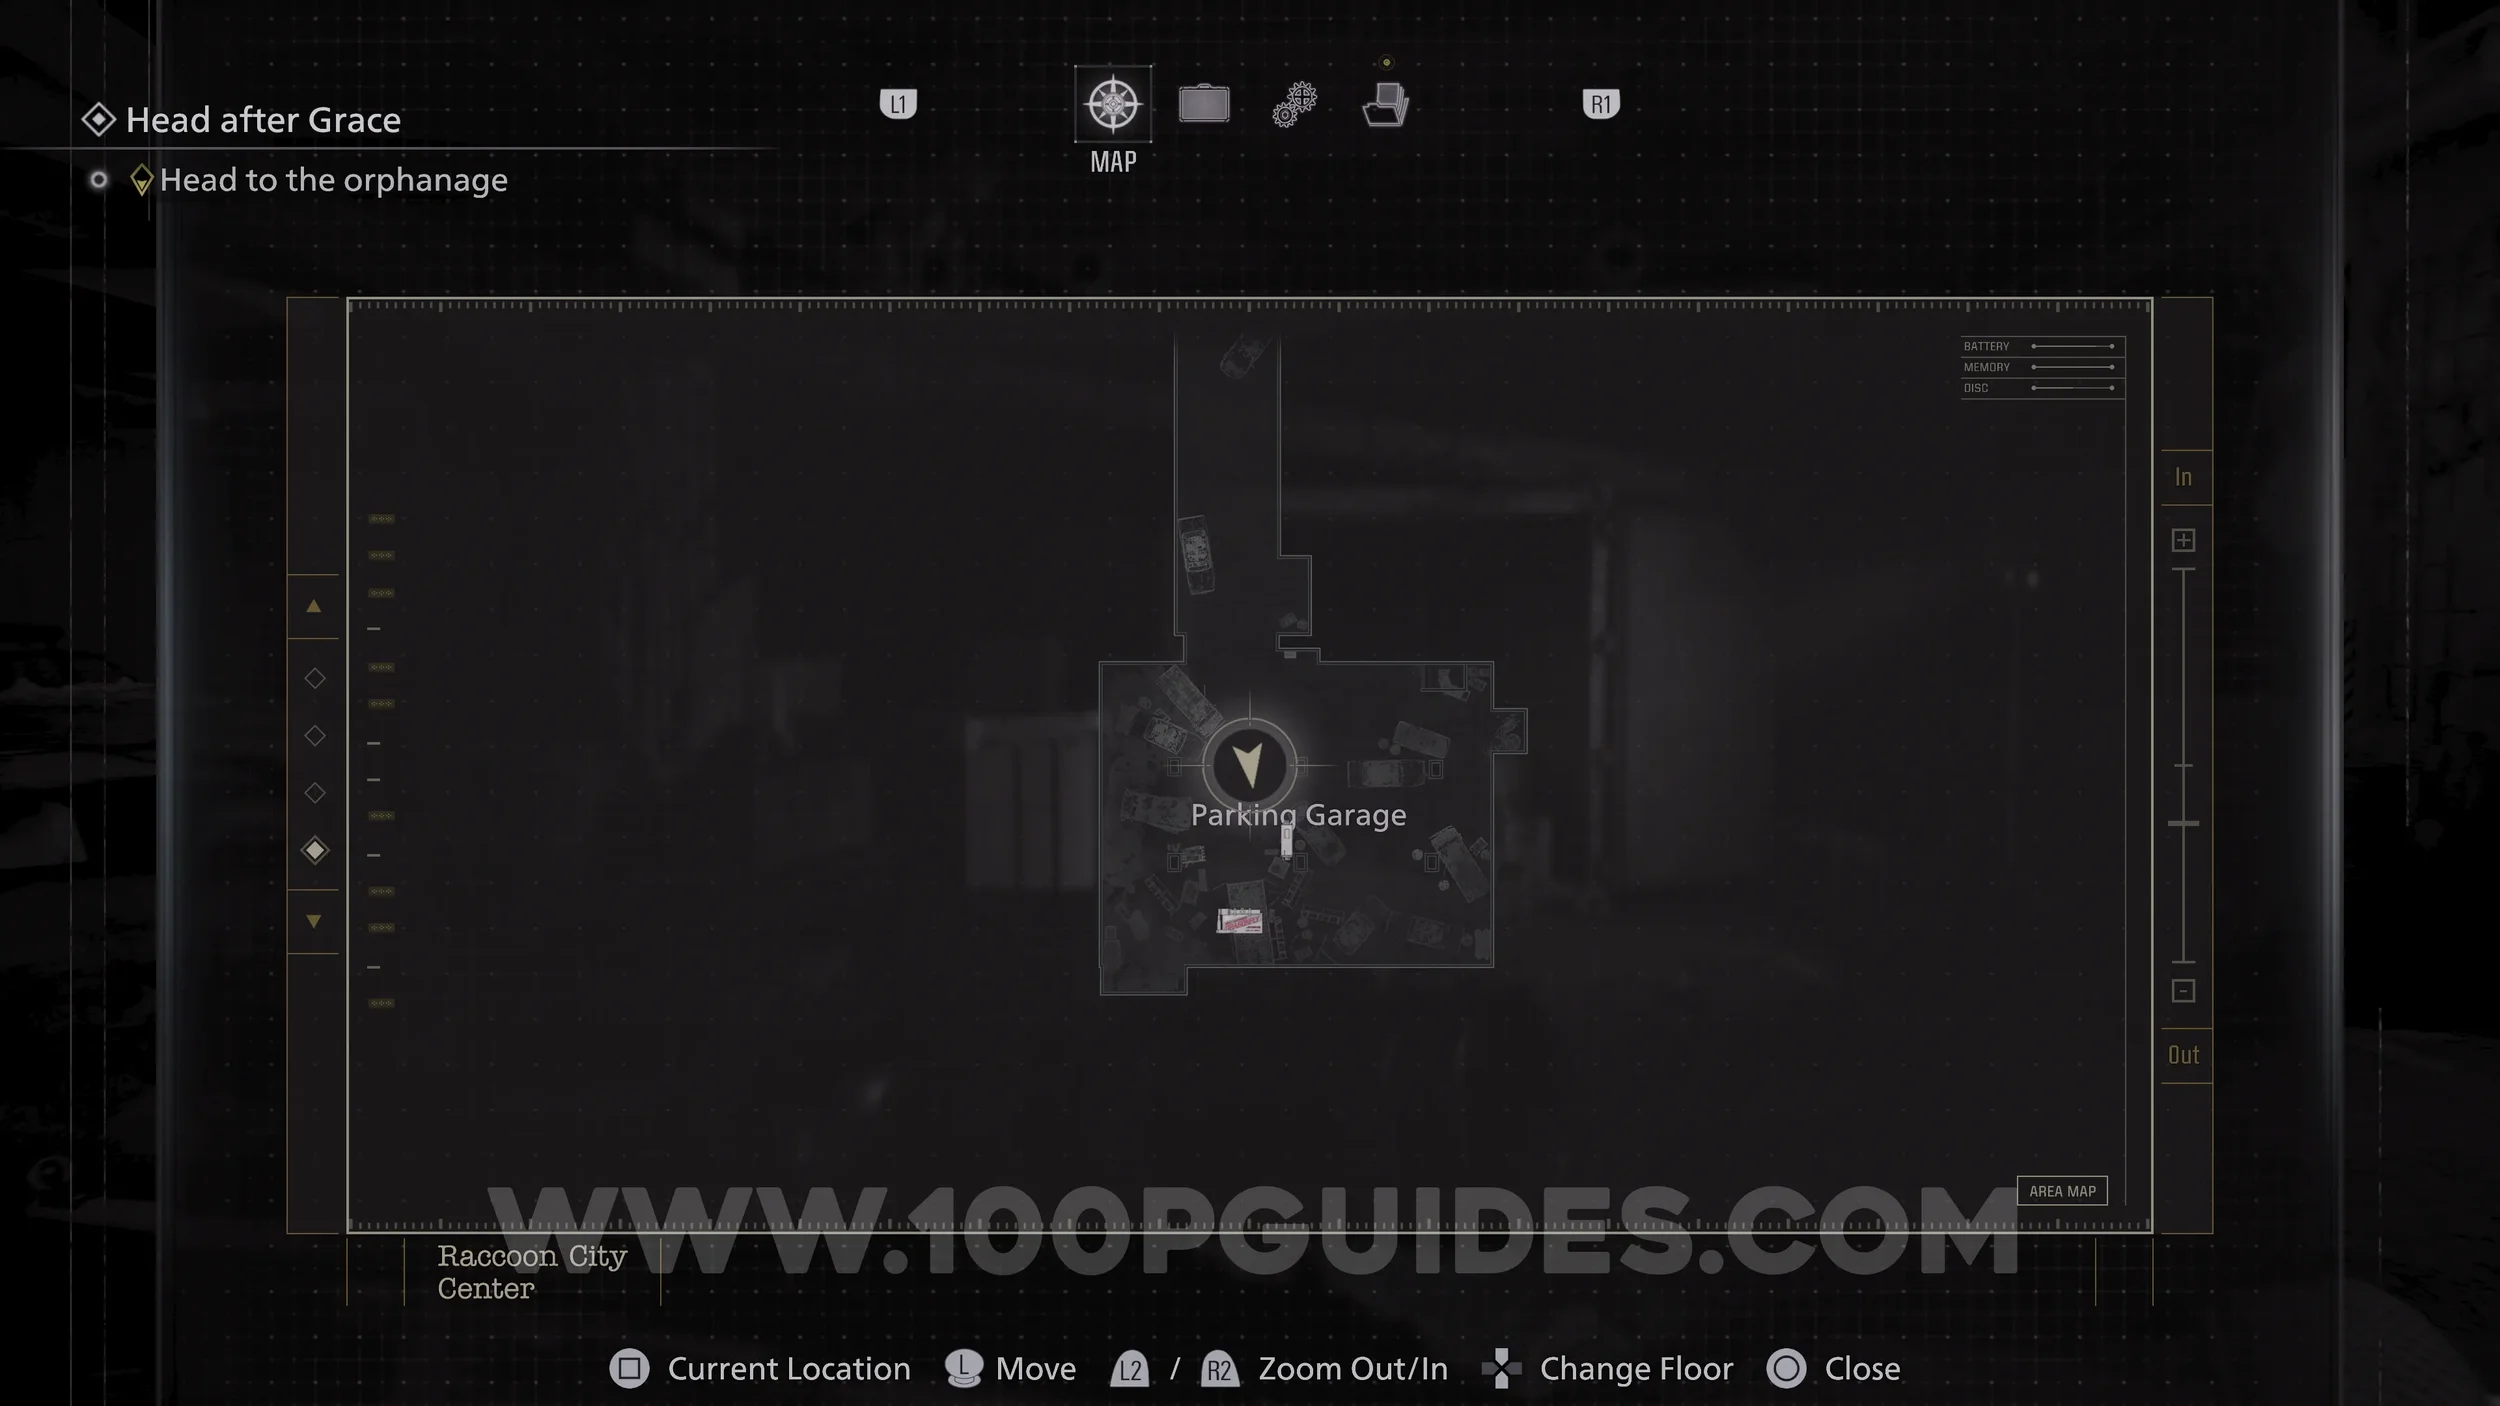
Mr. Raccoon #13. Found in one of the first rooms in the Underground Parking Garage.
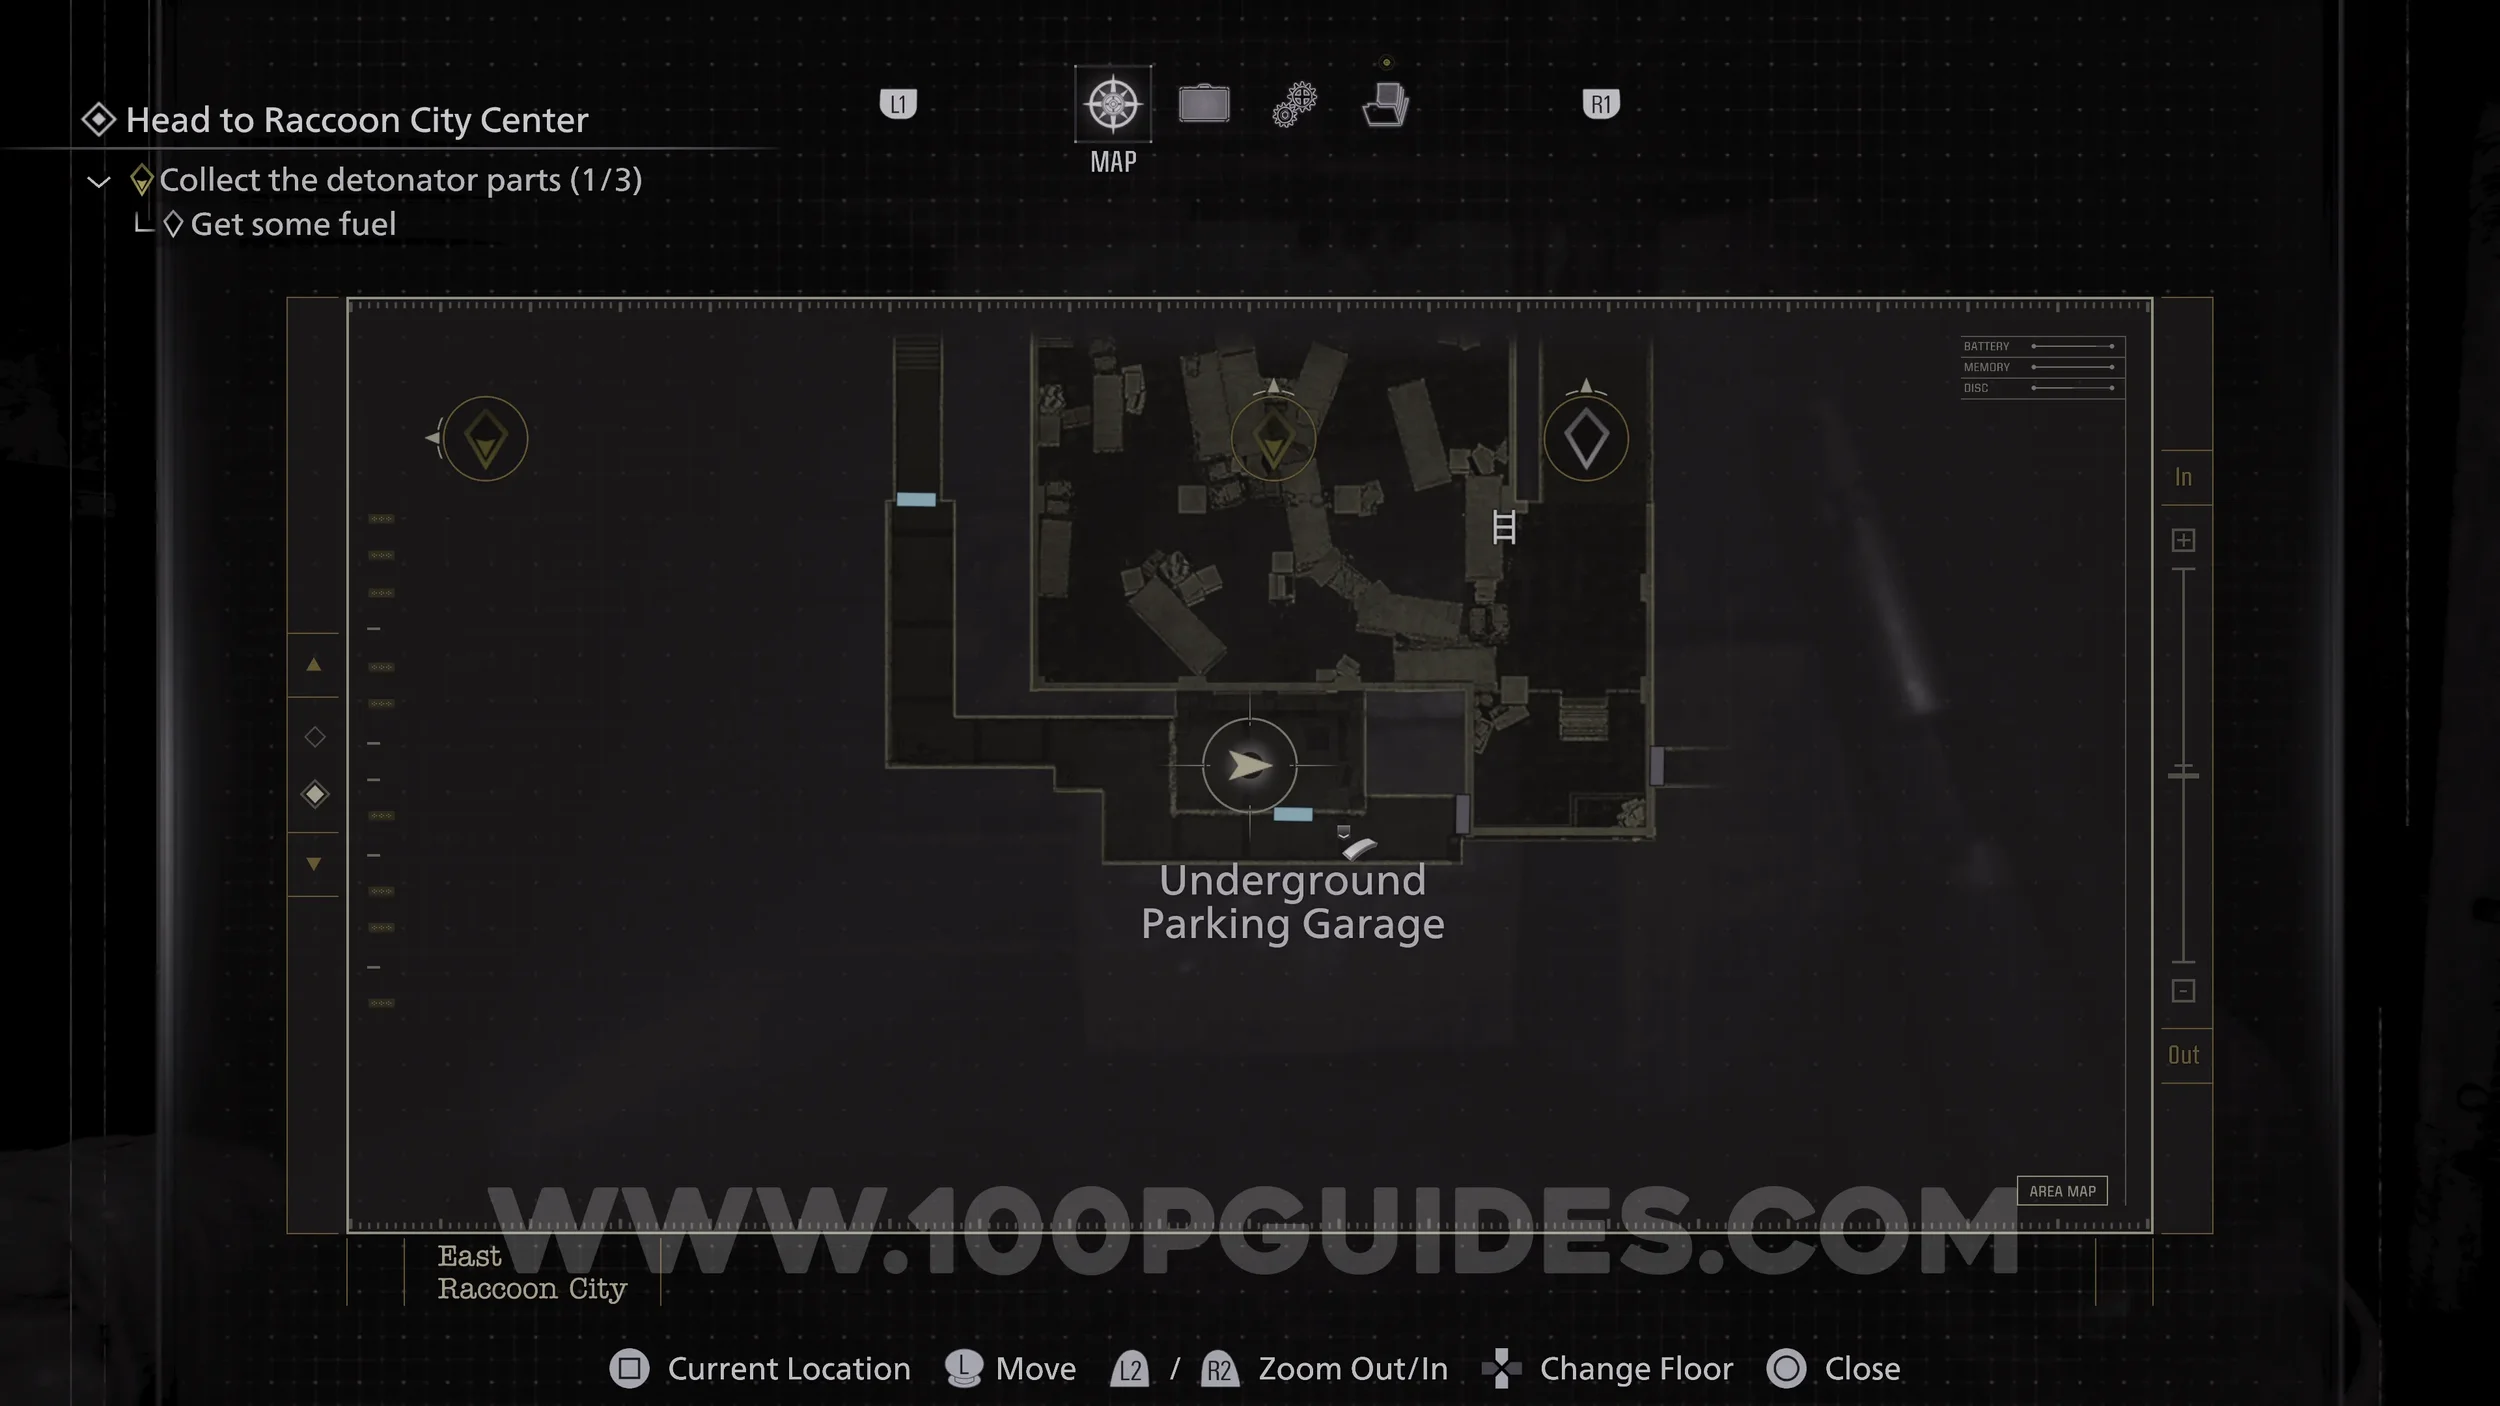

File #51 - Battery Storage Locations. Inside the box where you have to place the batteries in the Underground Parking Garage.
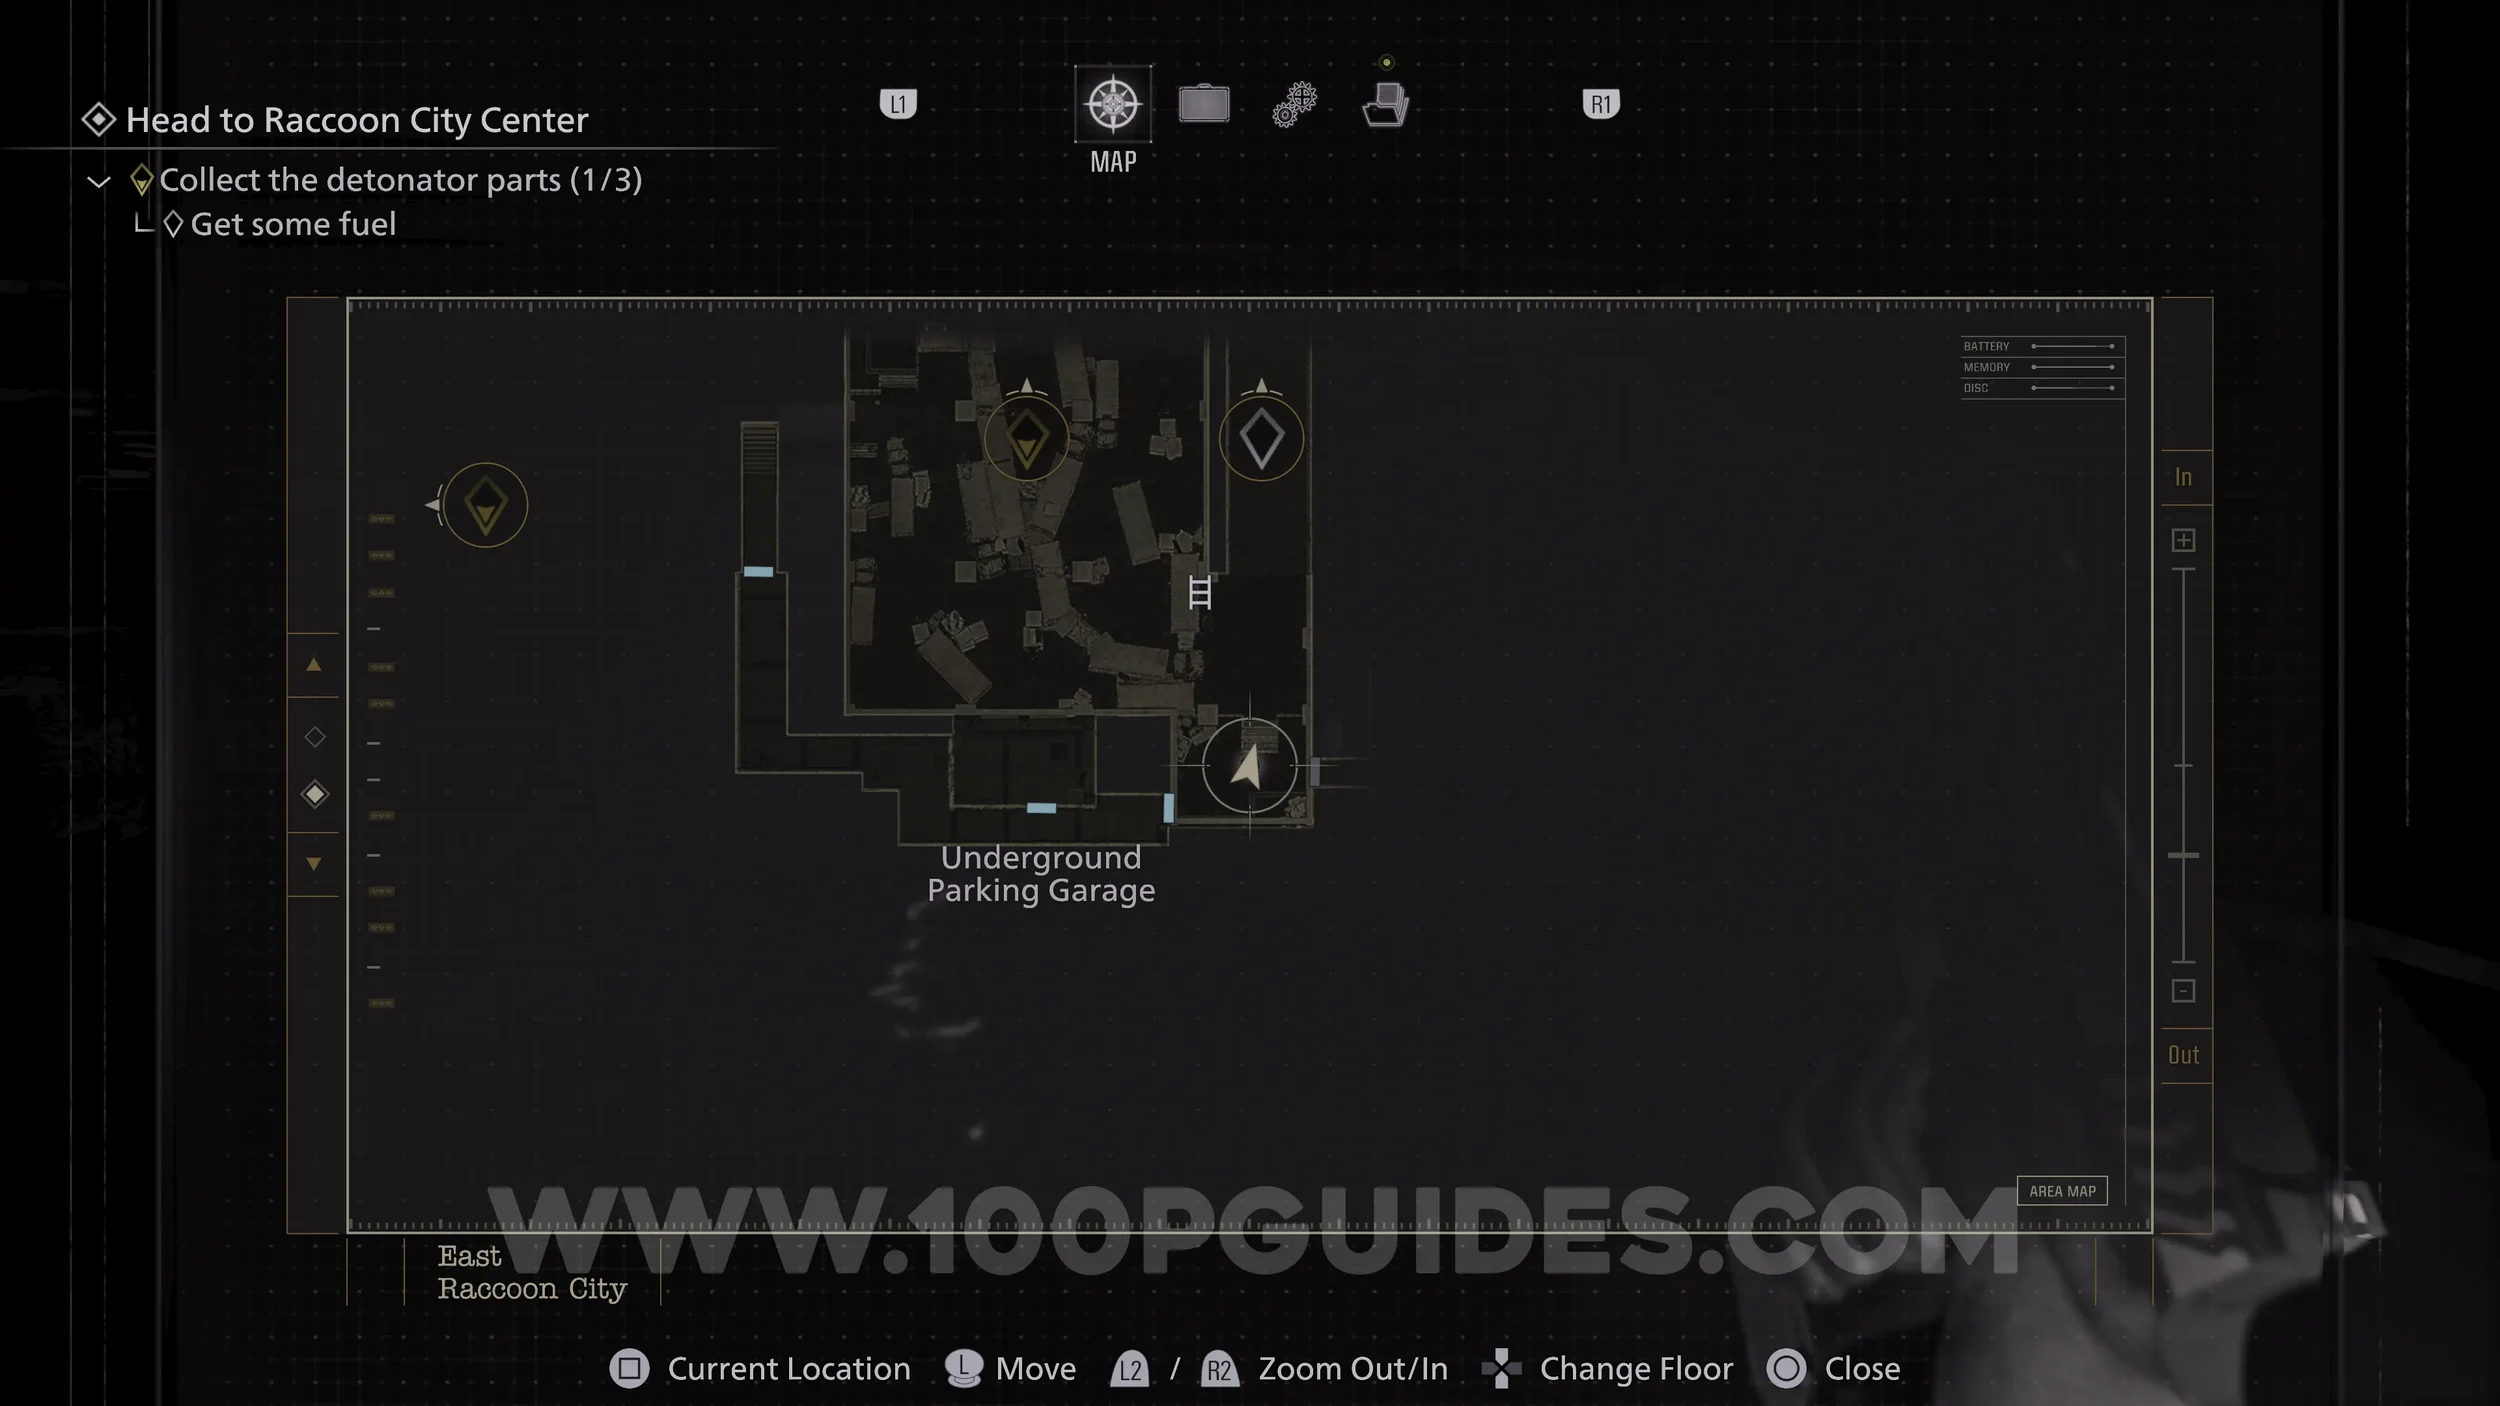

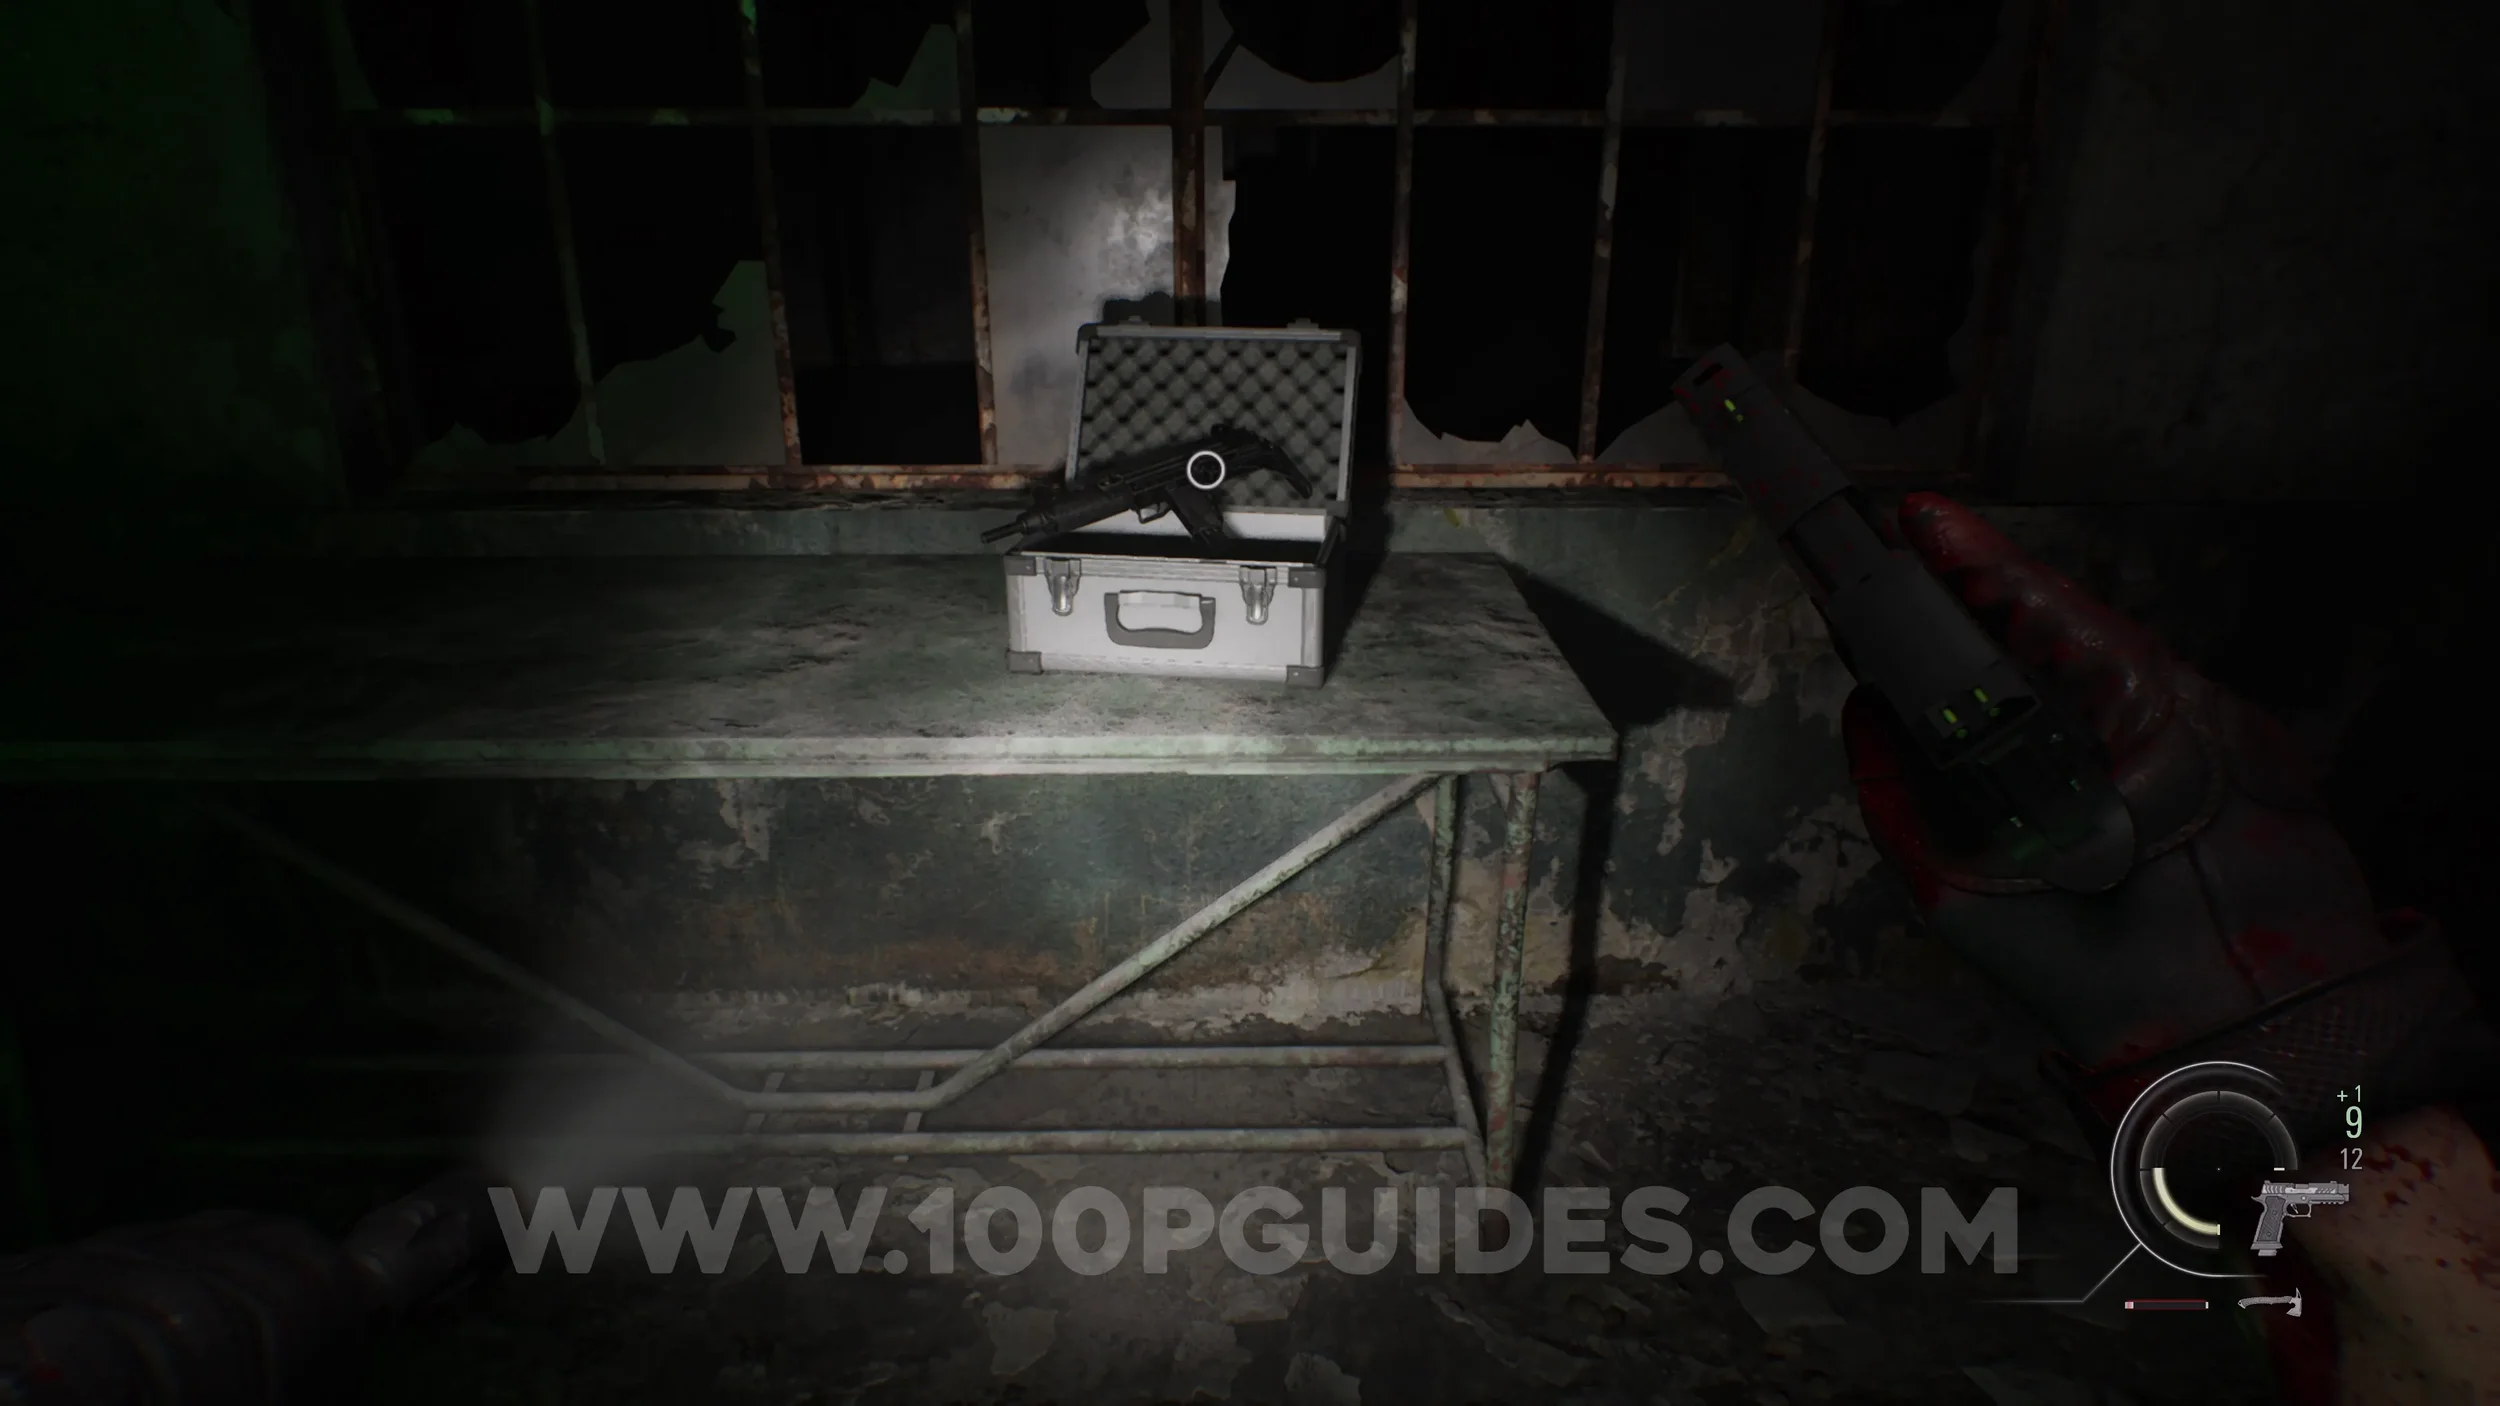
Weapon - Gal. In the same room as the first battery (story objective) in the Underground Parking Garage.
BSAA Container Key. You obtain this automatically after leaving the Underground Parking Garage. You will need this to open the BSAA Containers.
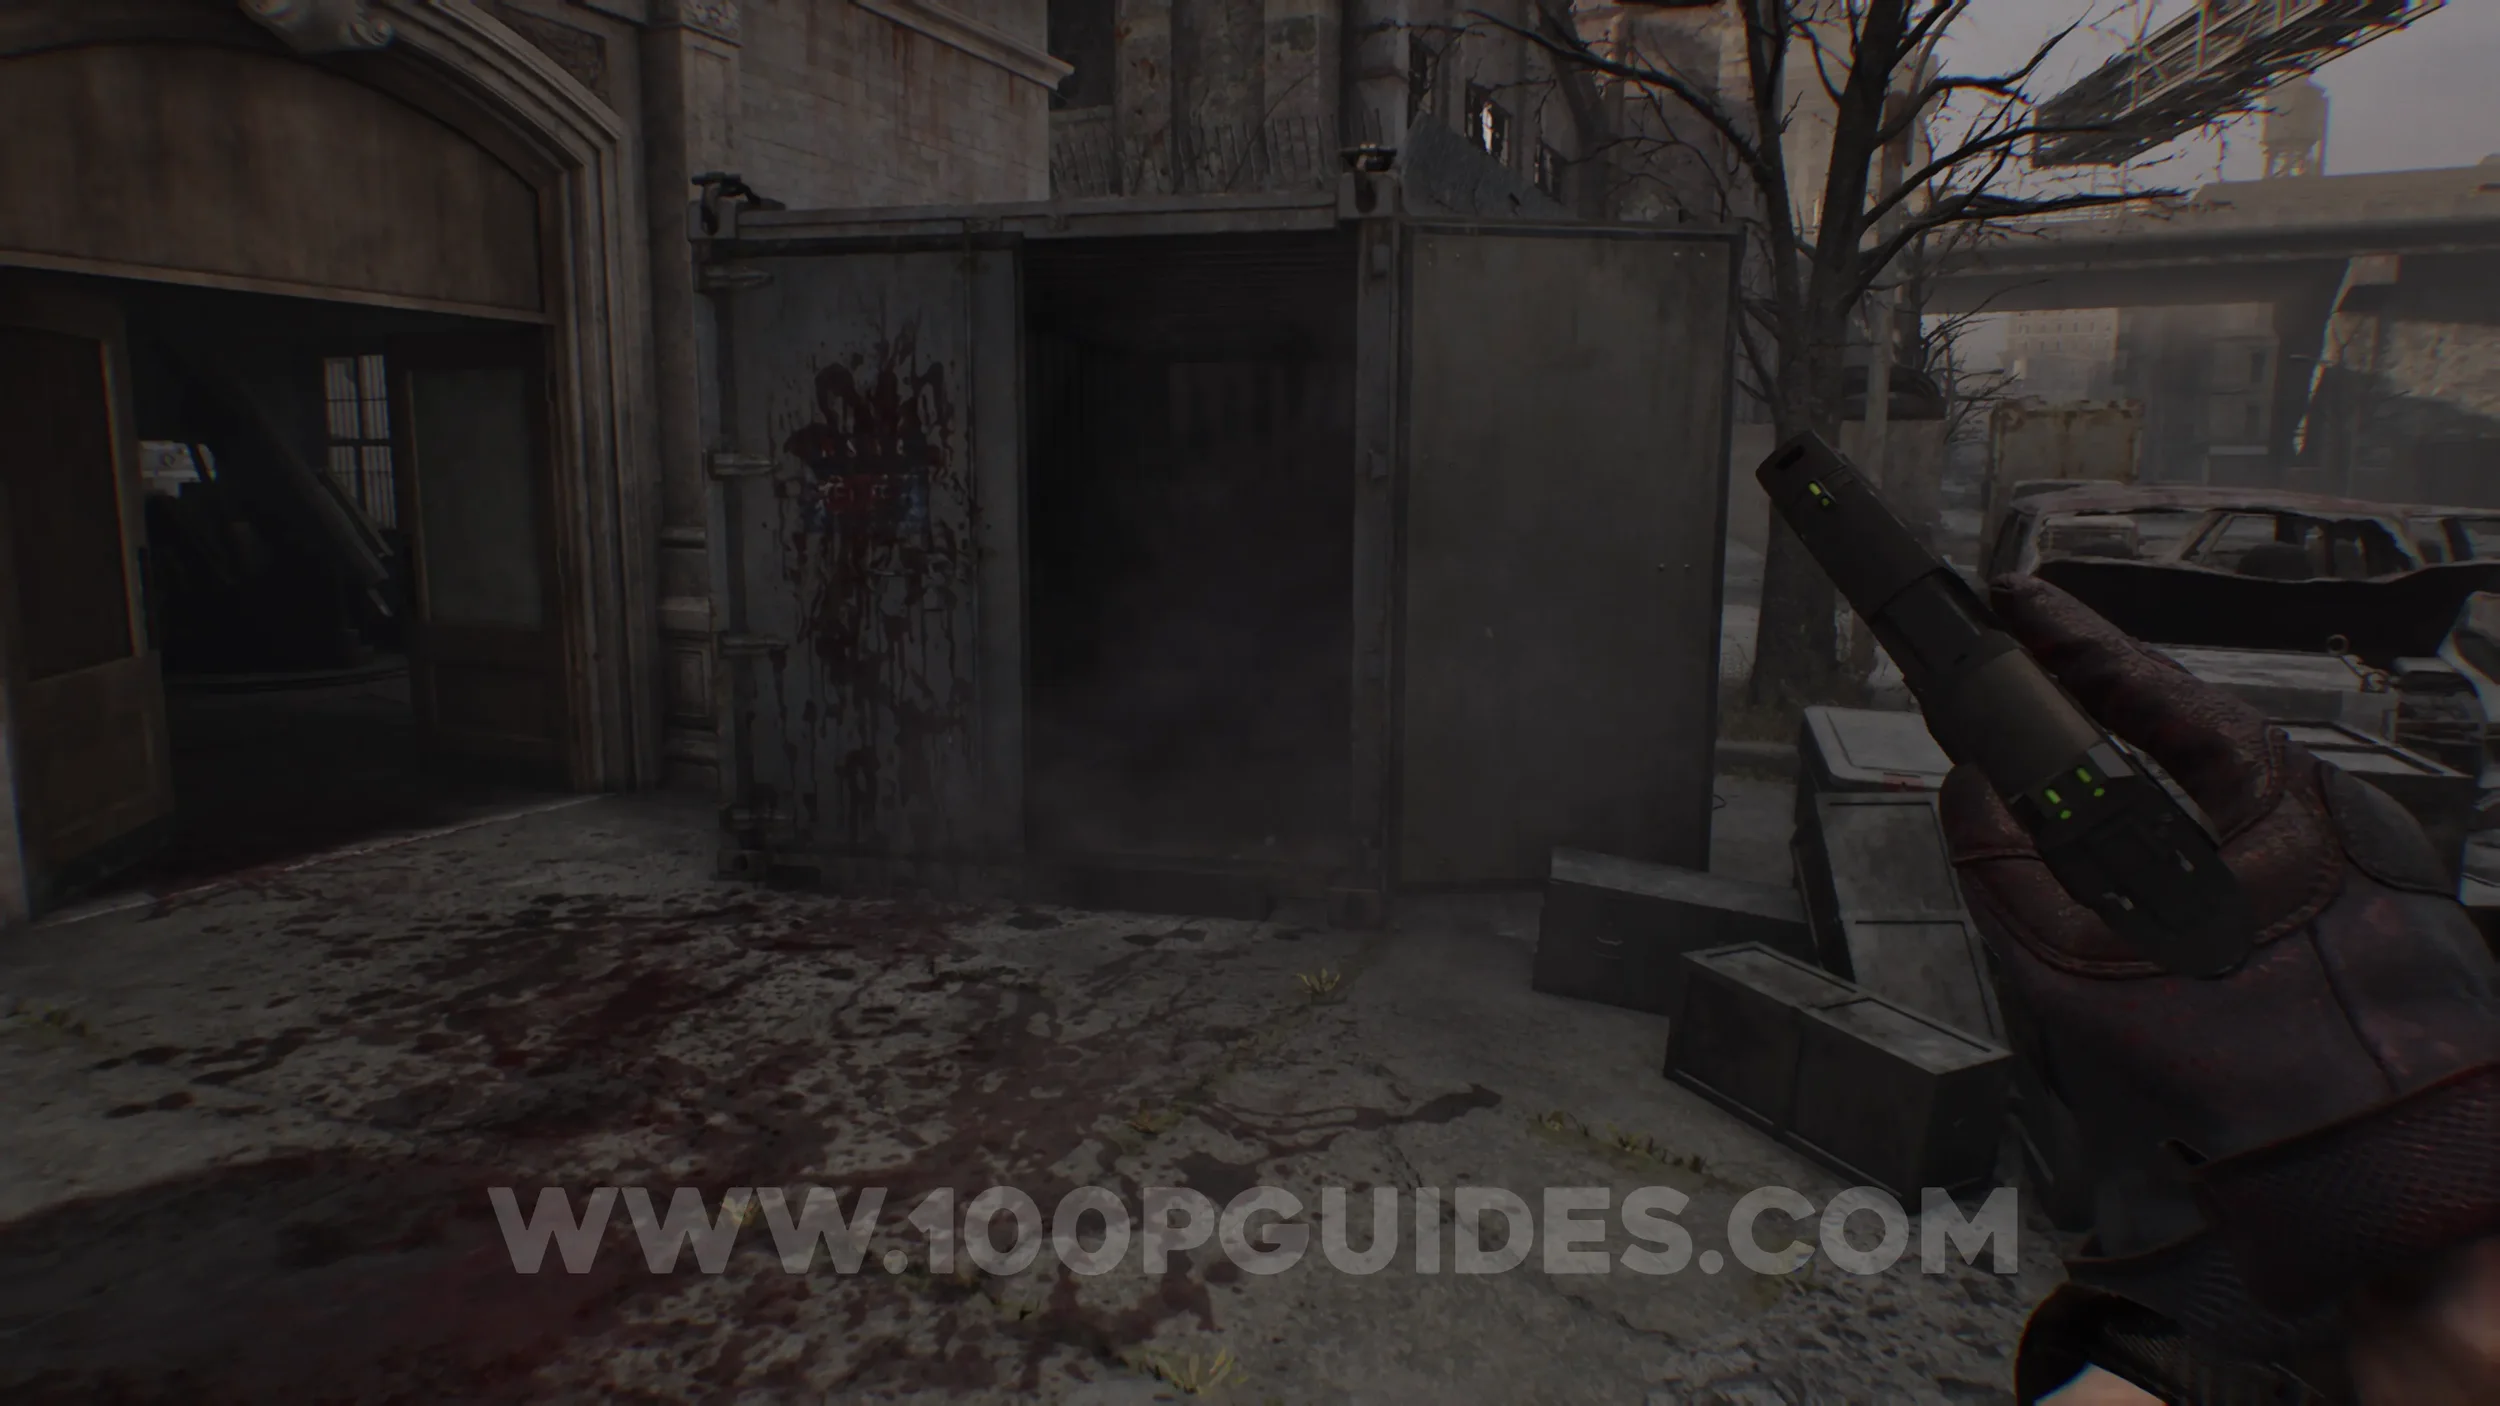
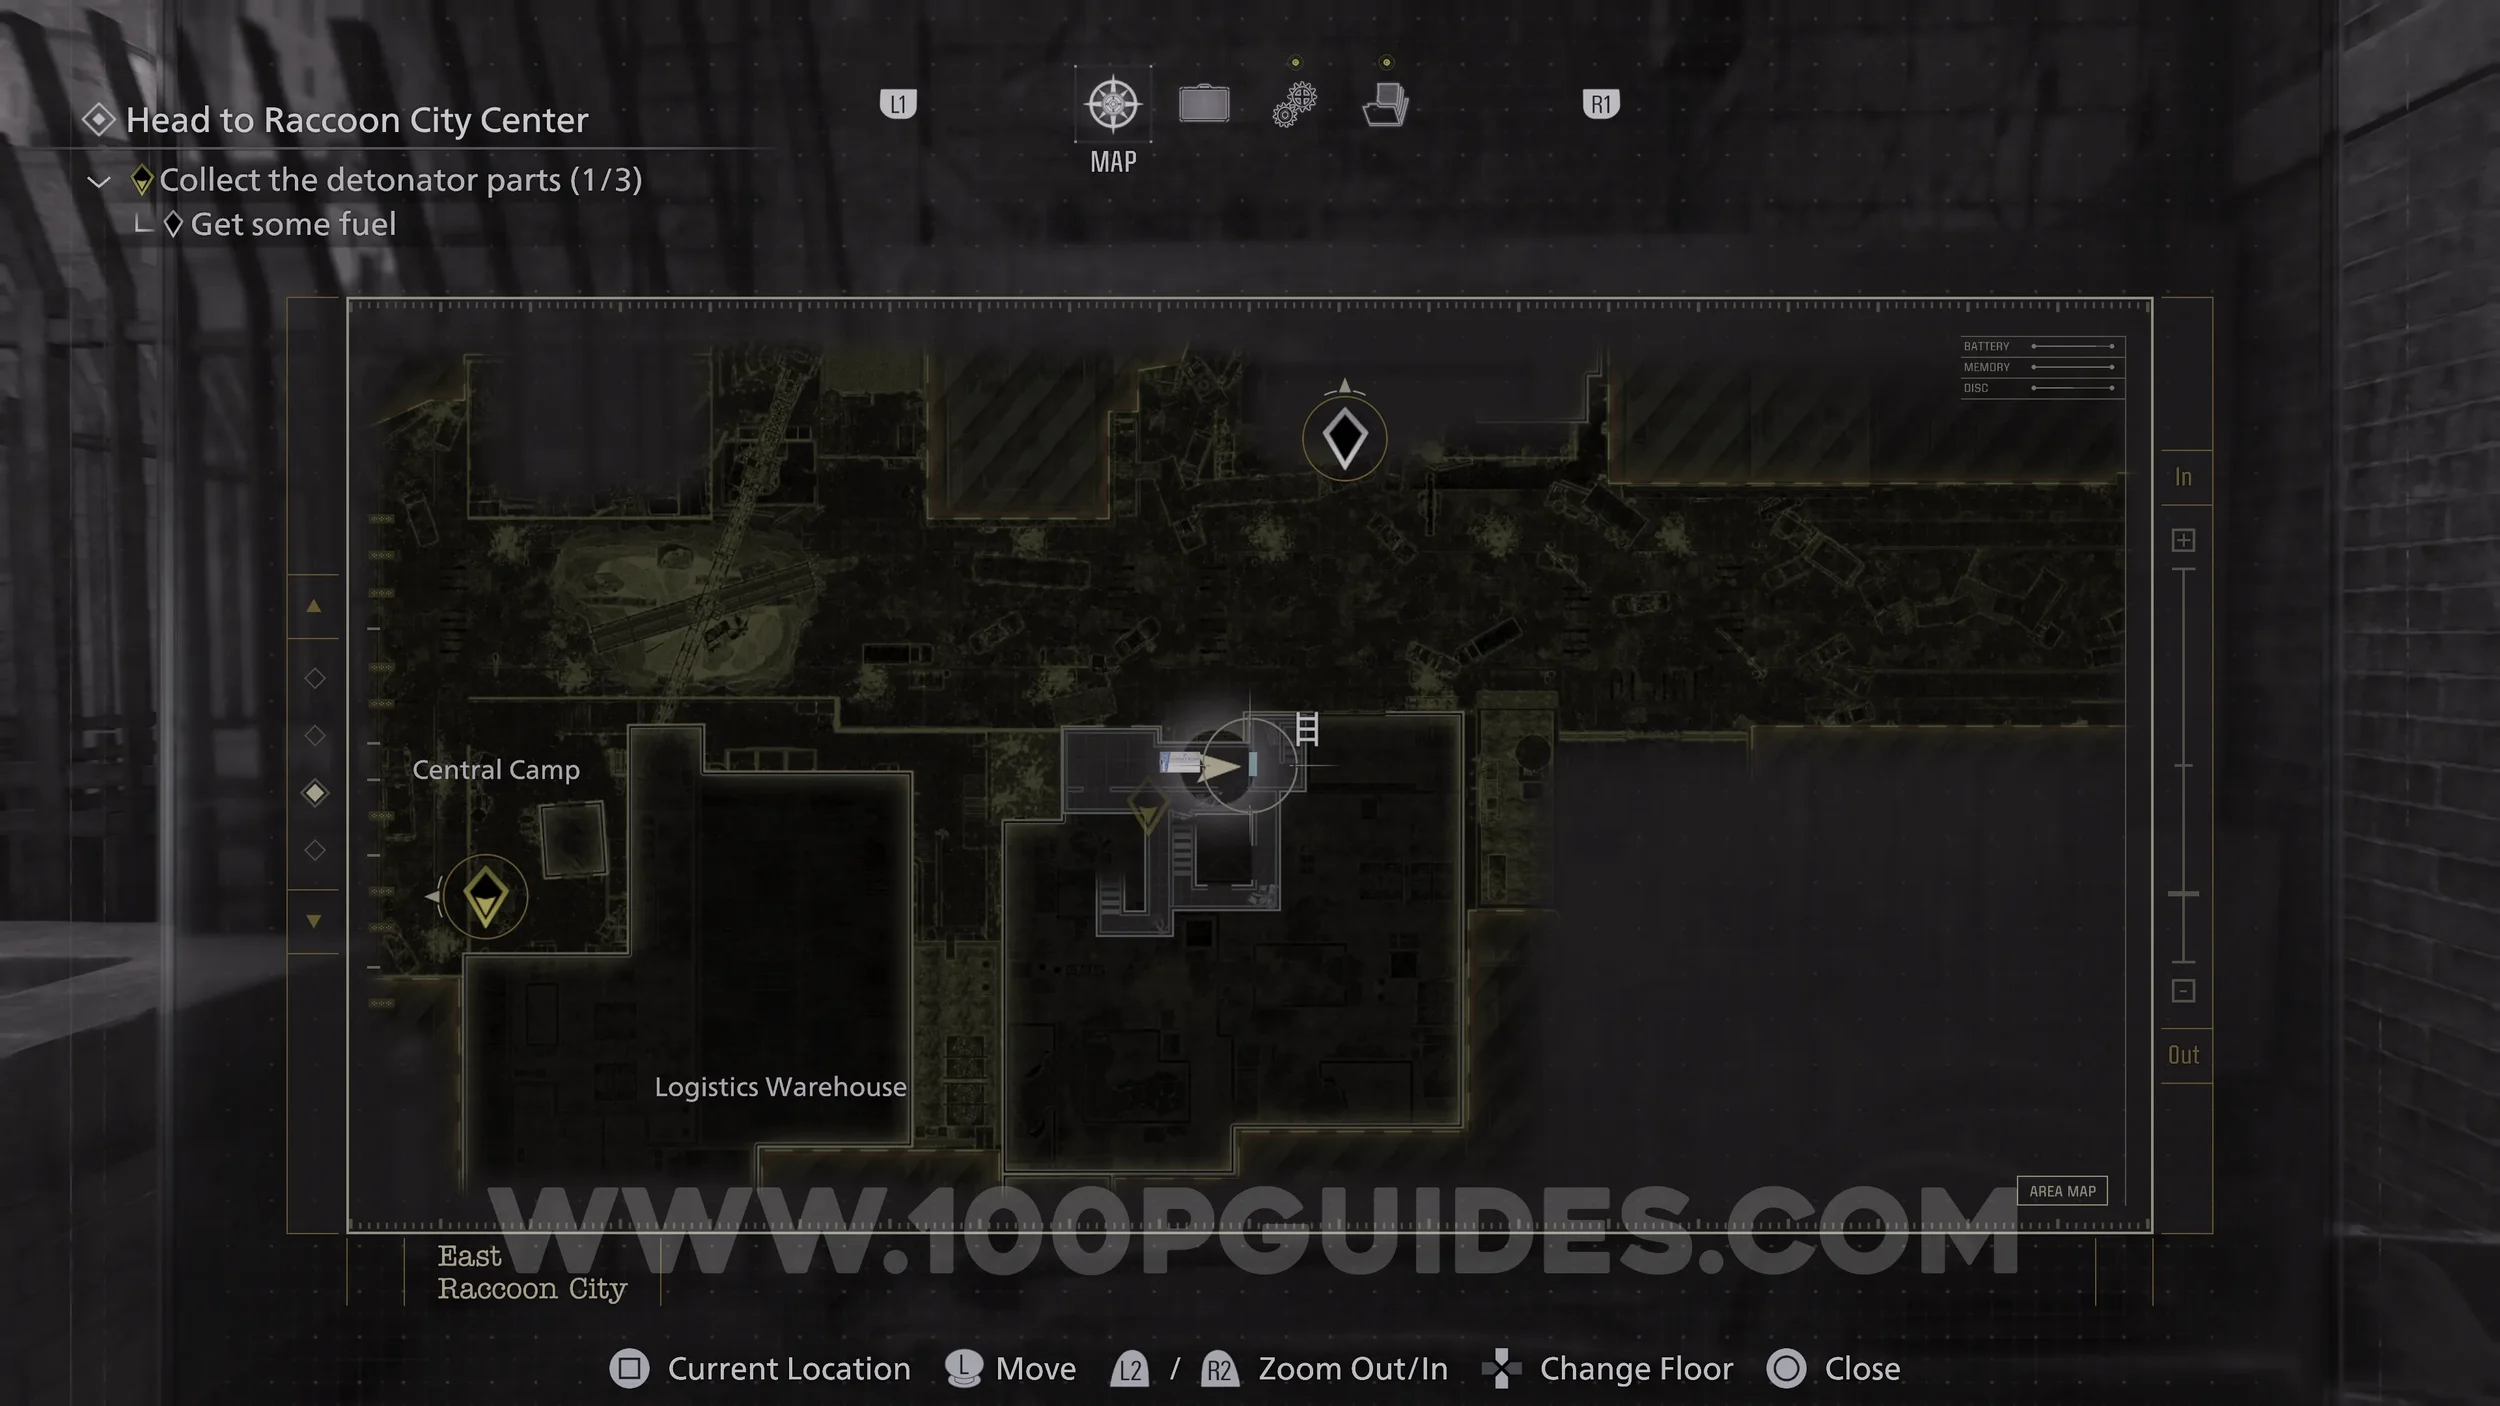
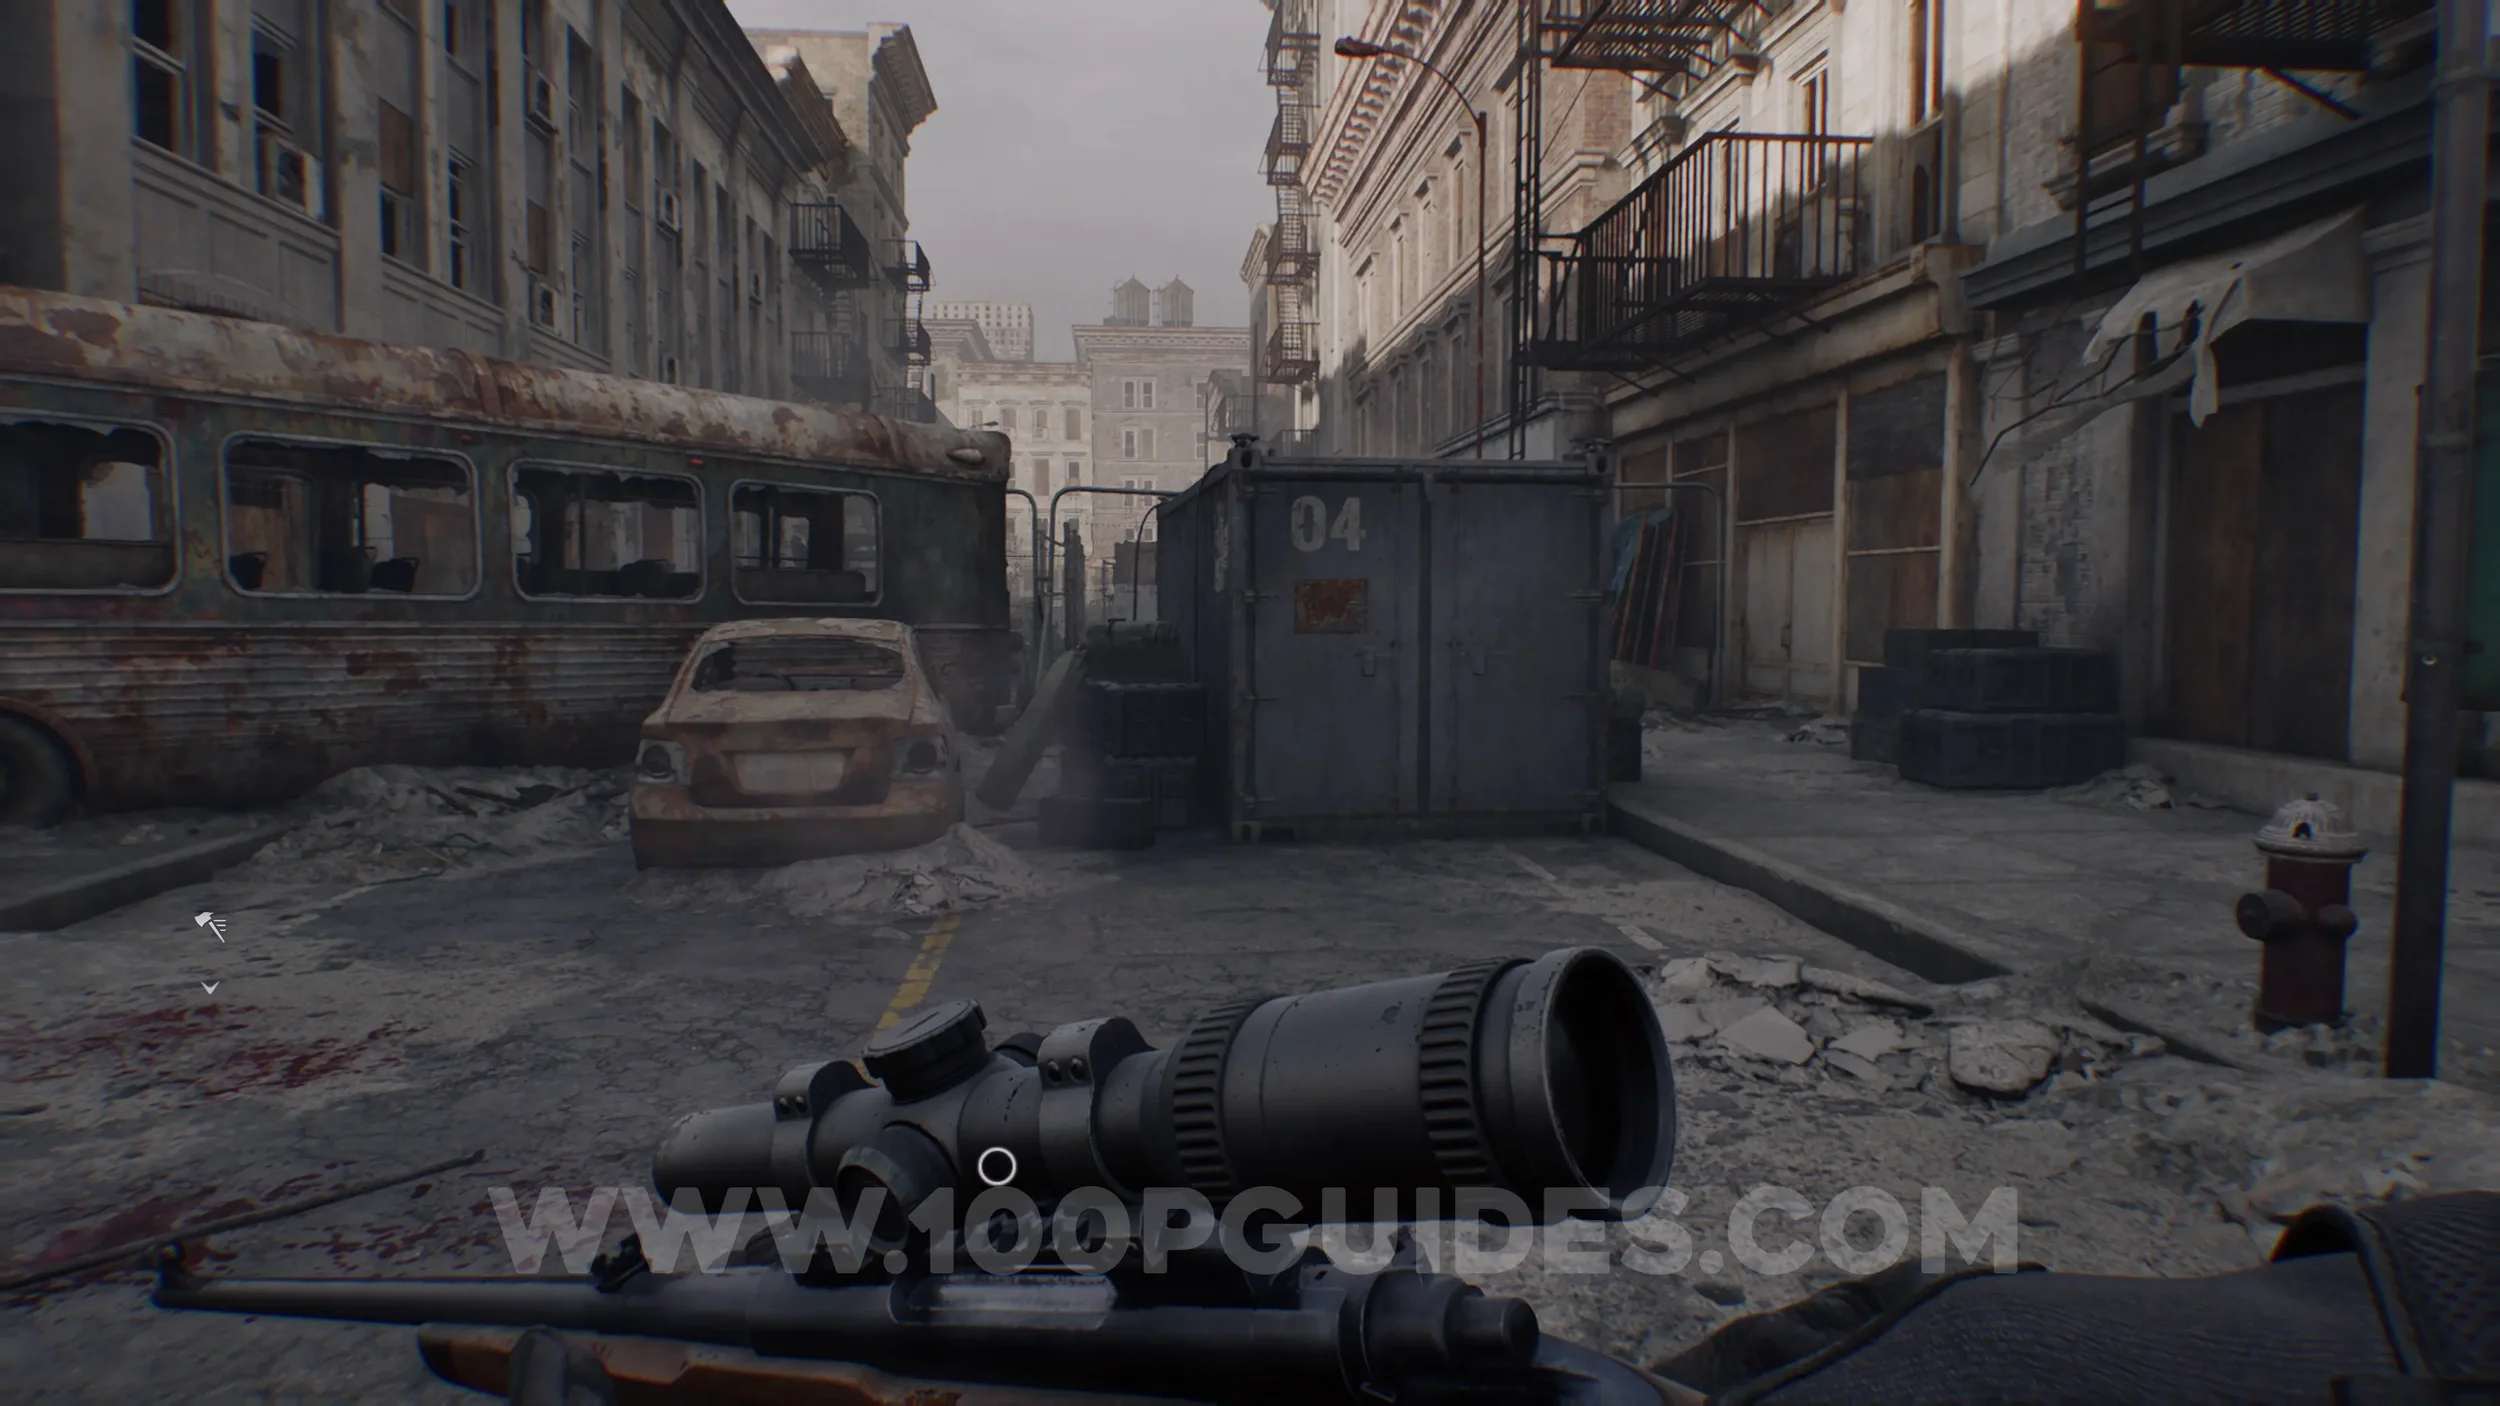
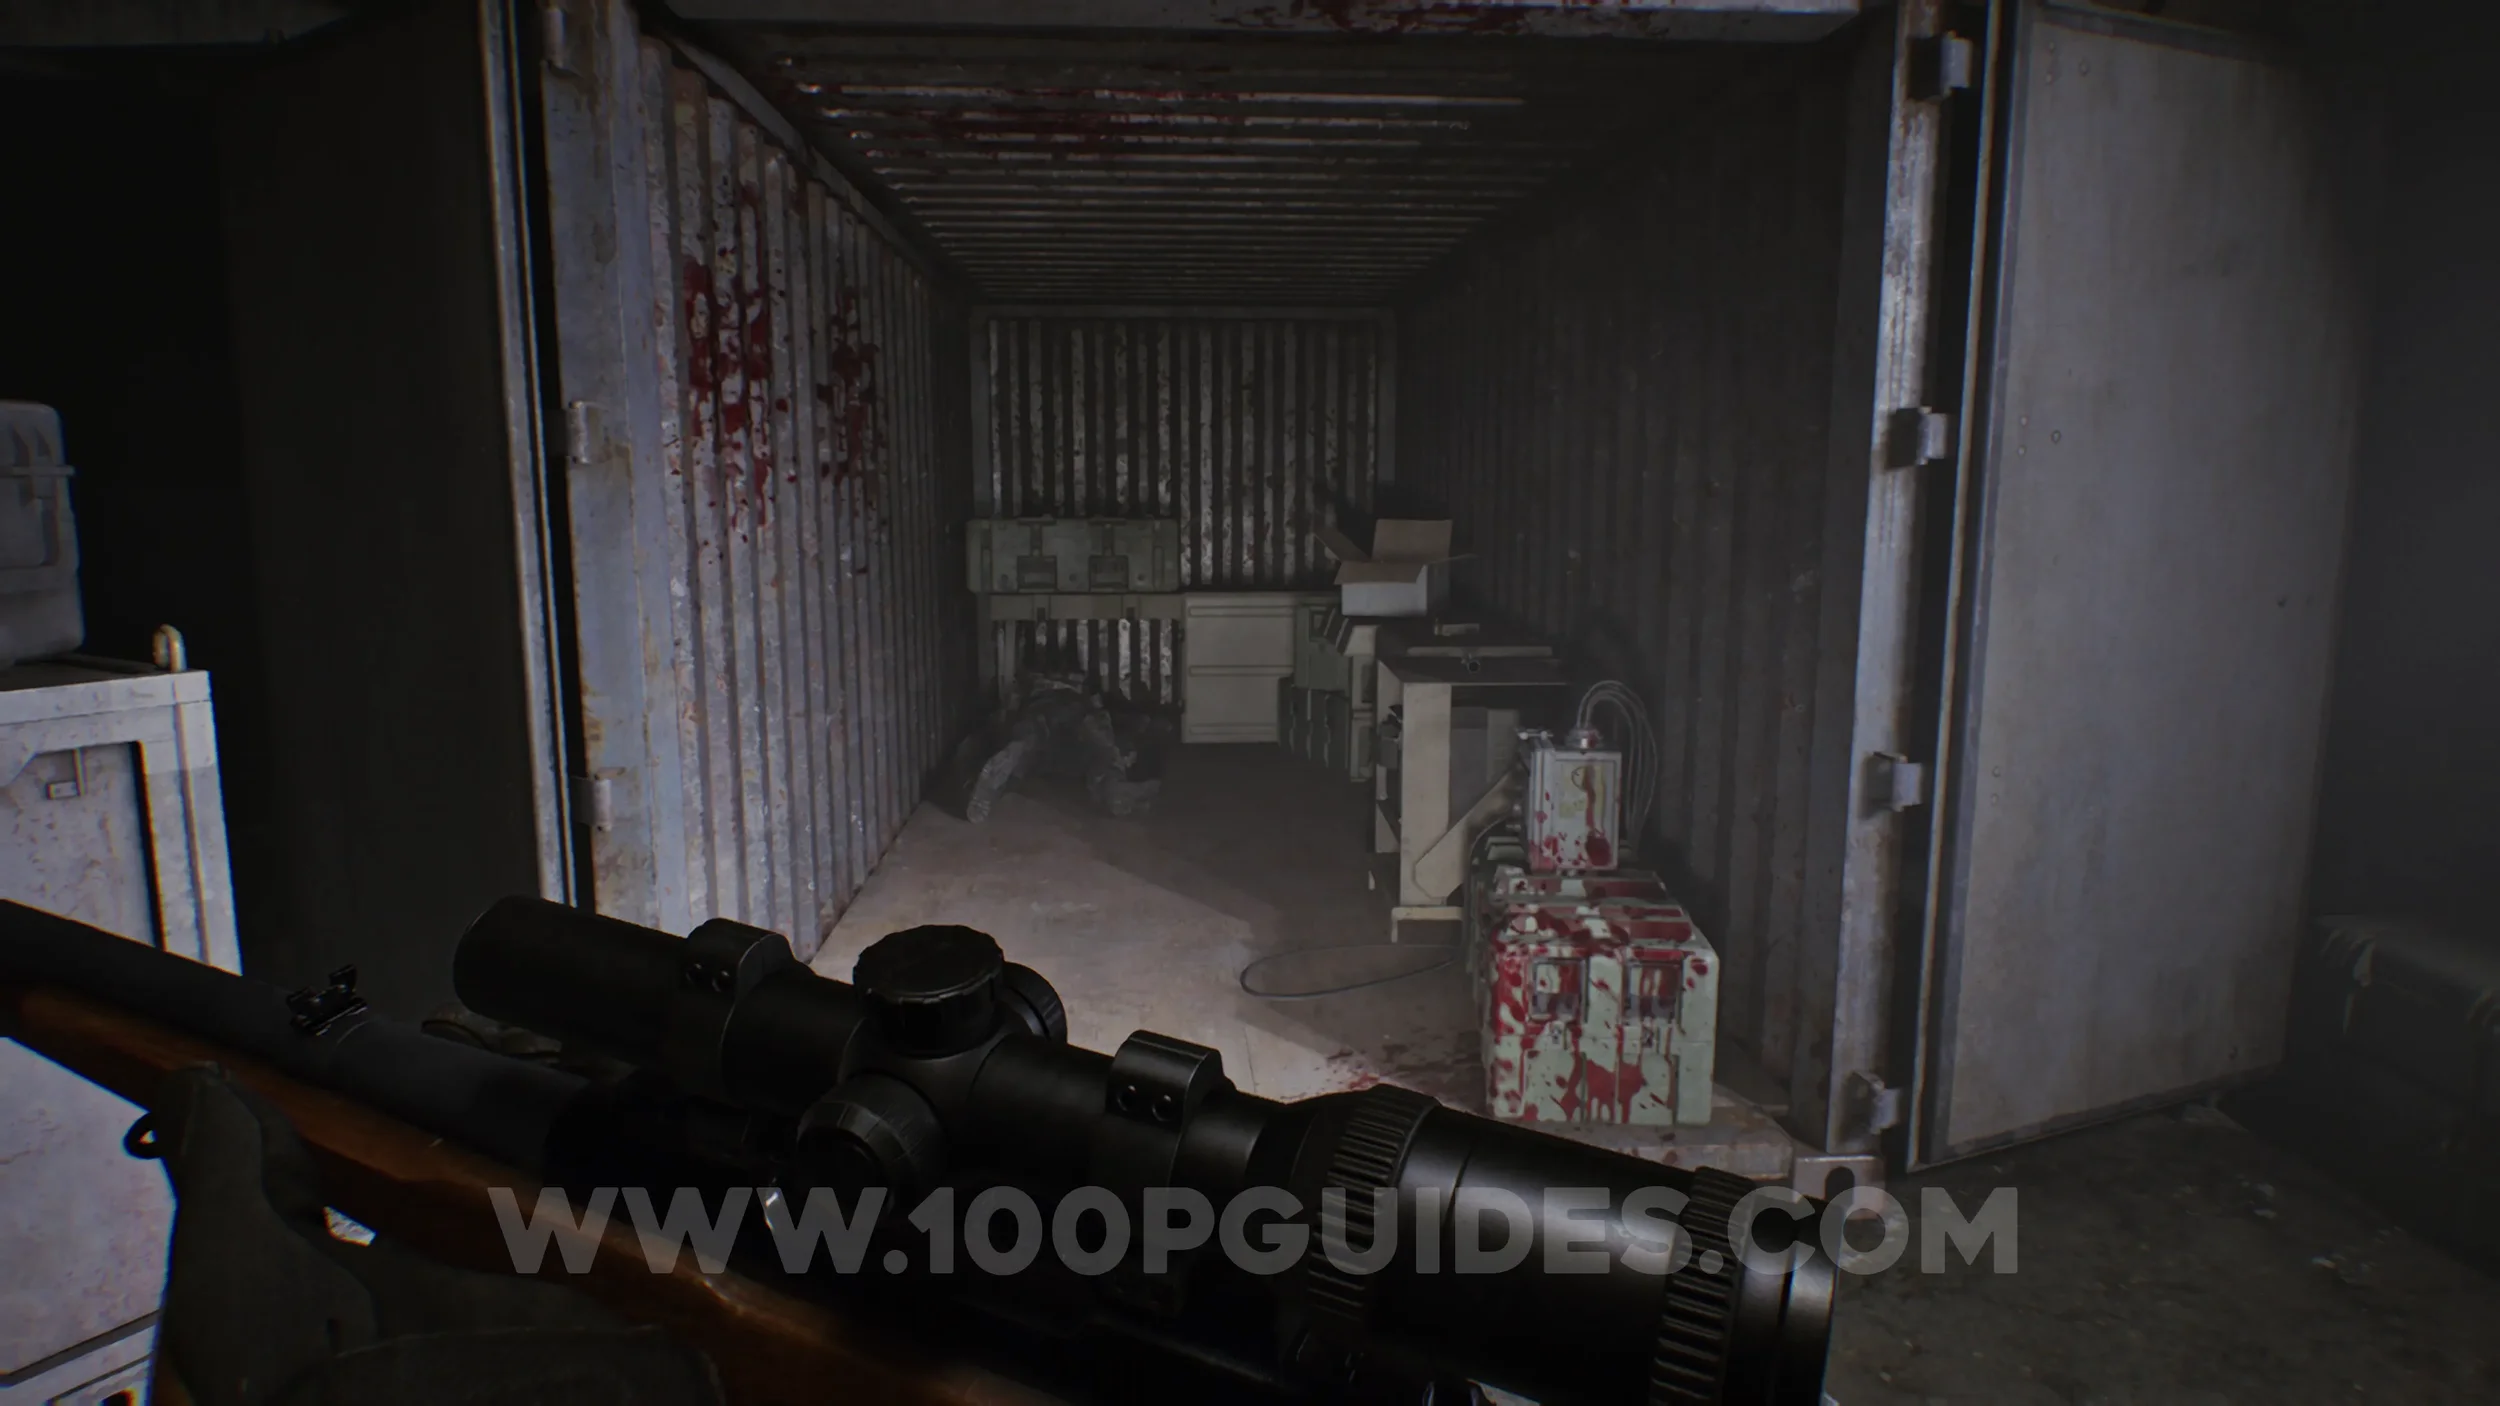
File #52 - Inventory List. Found in the container to the west of the Underground Parking Garage exit.
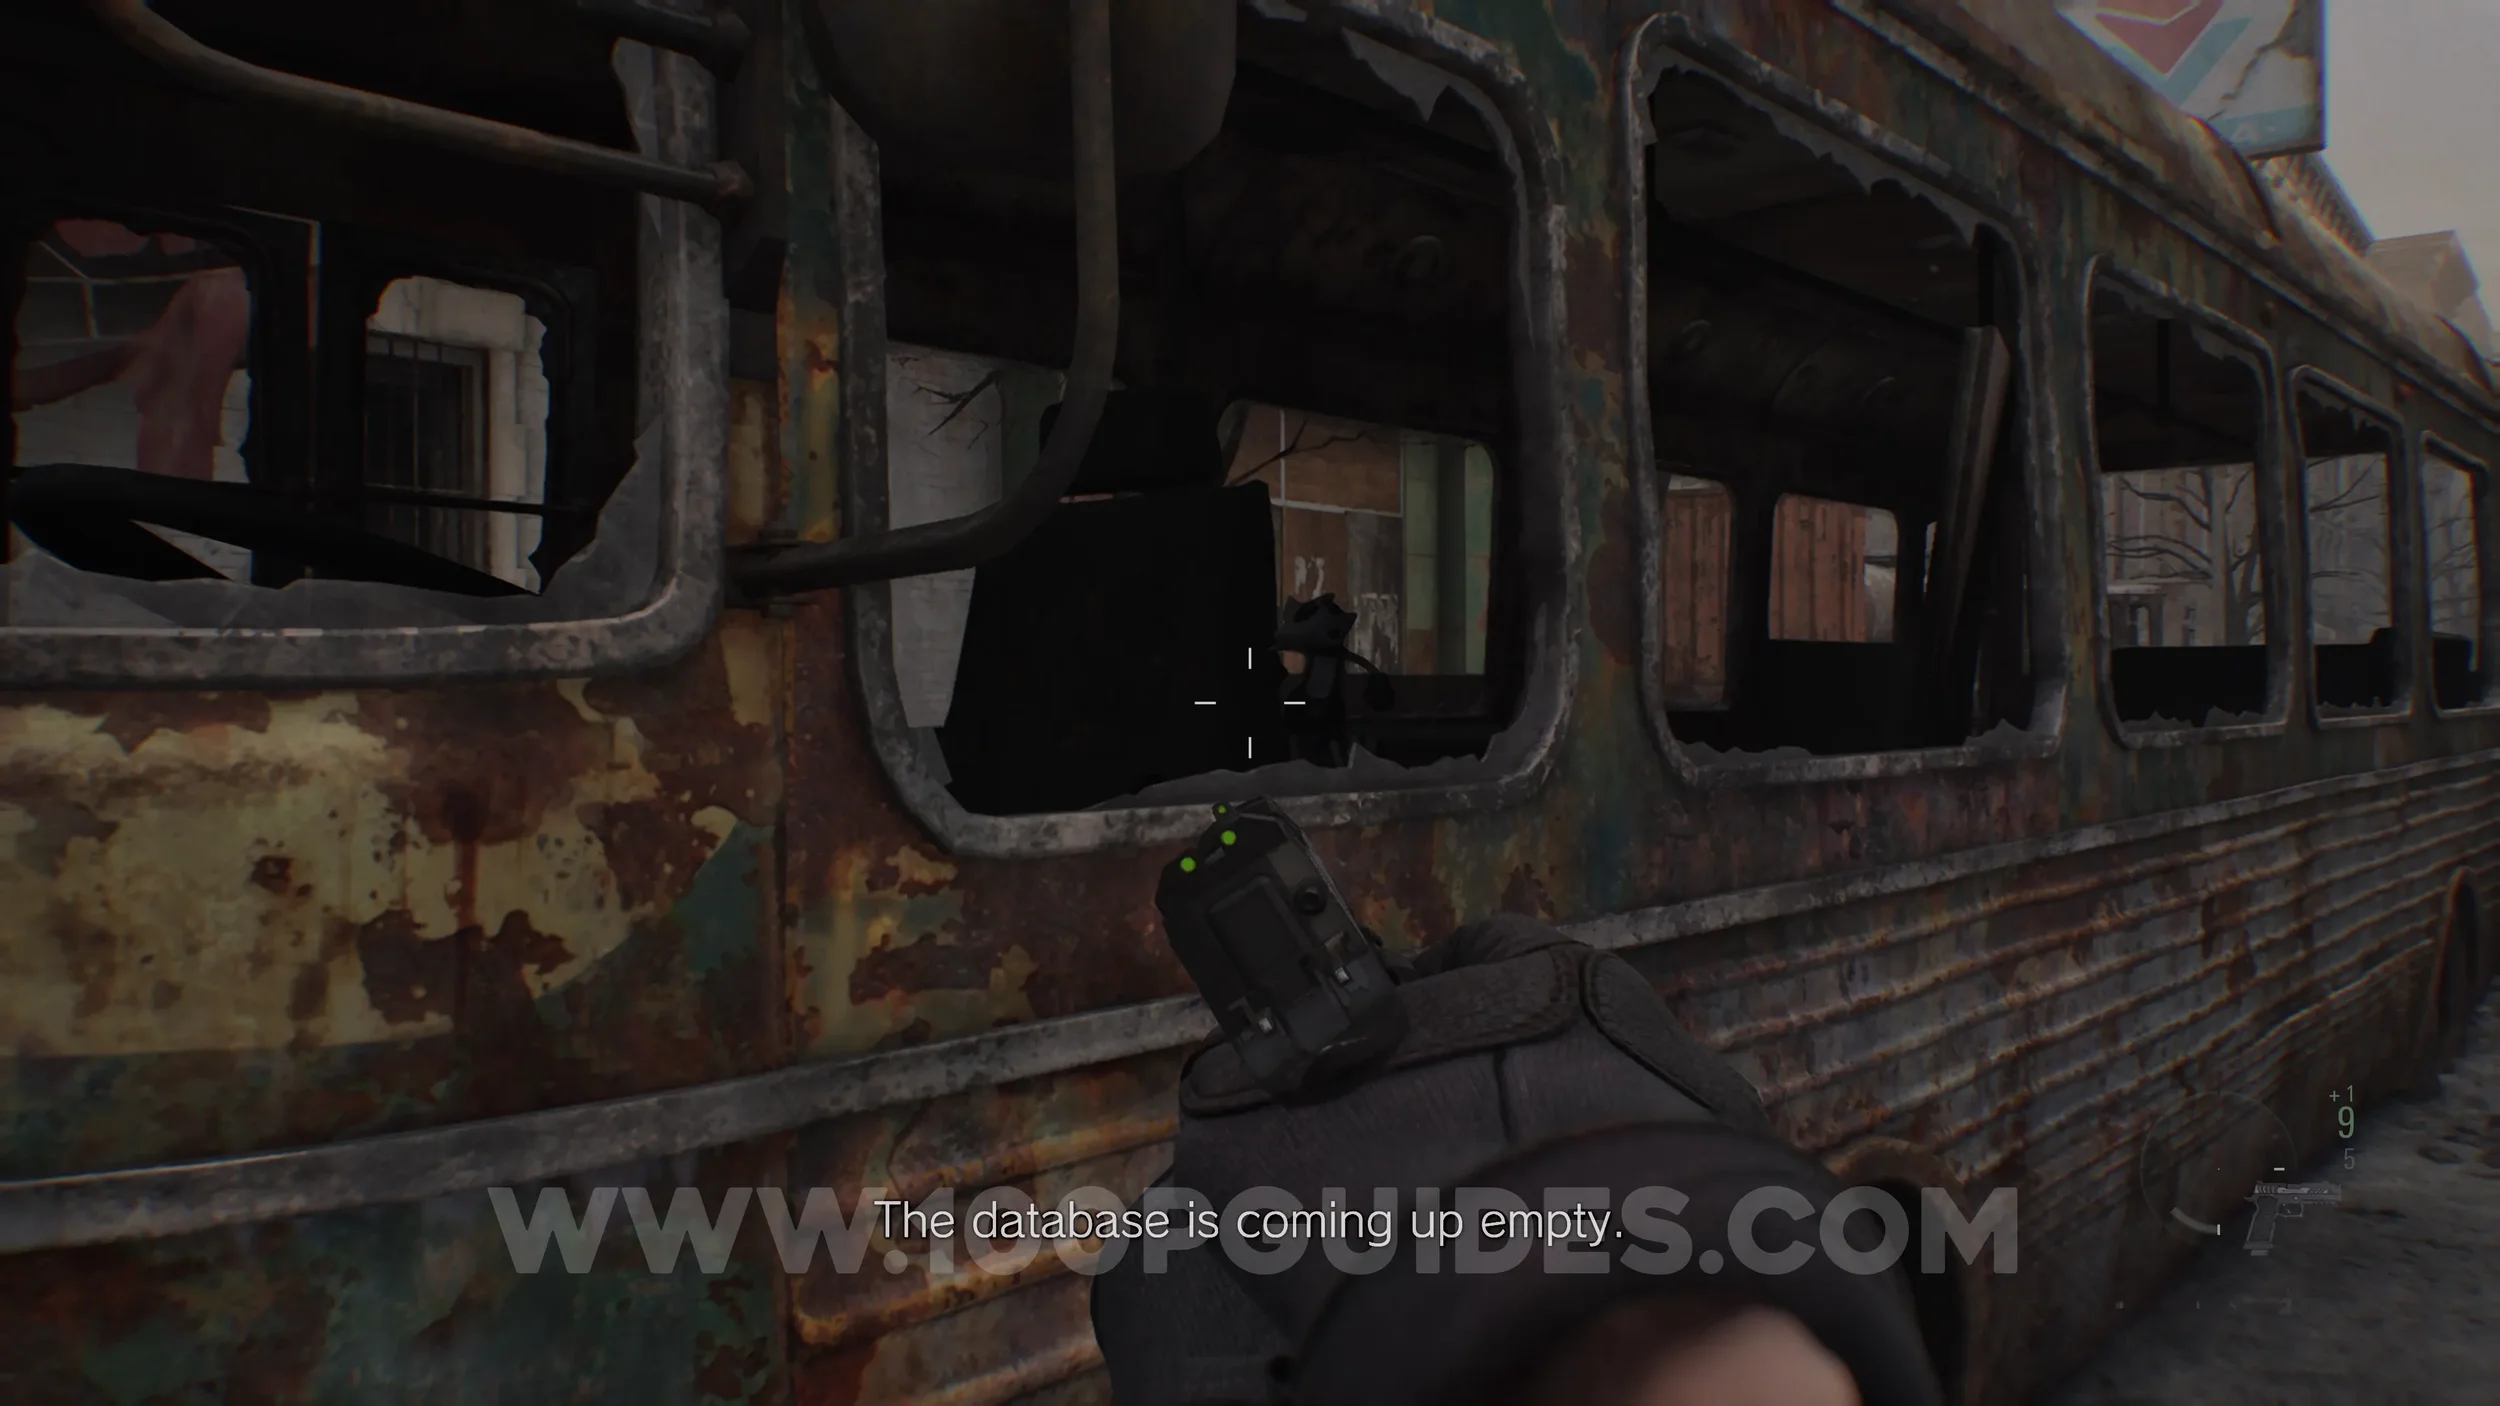
Mr. Raccoon #14. In the bus in the same area as the previous File.
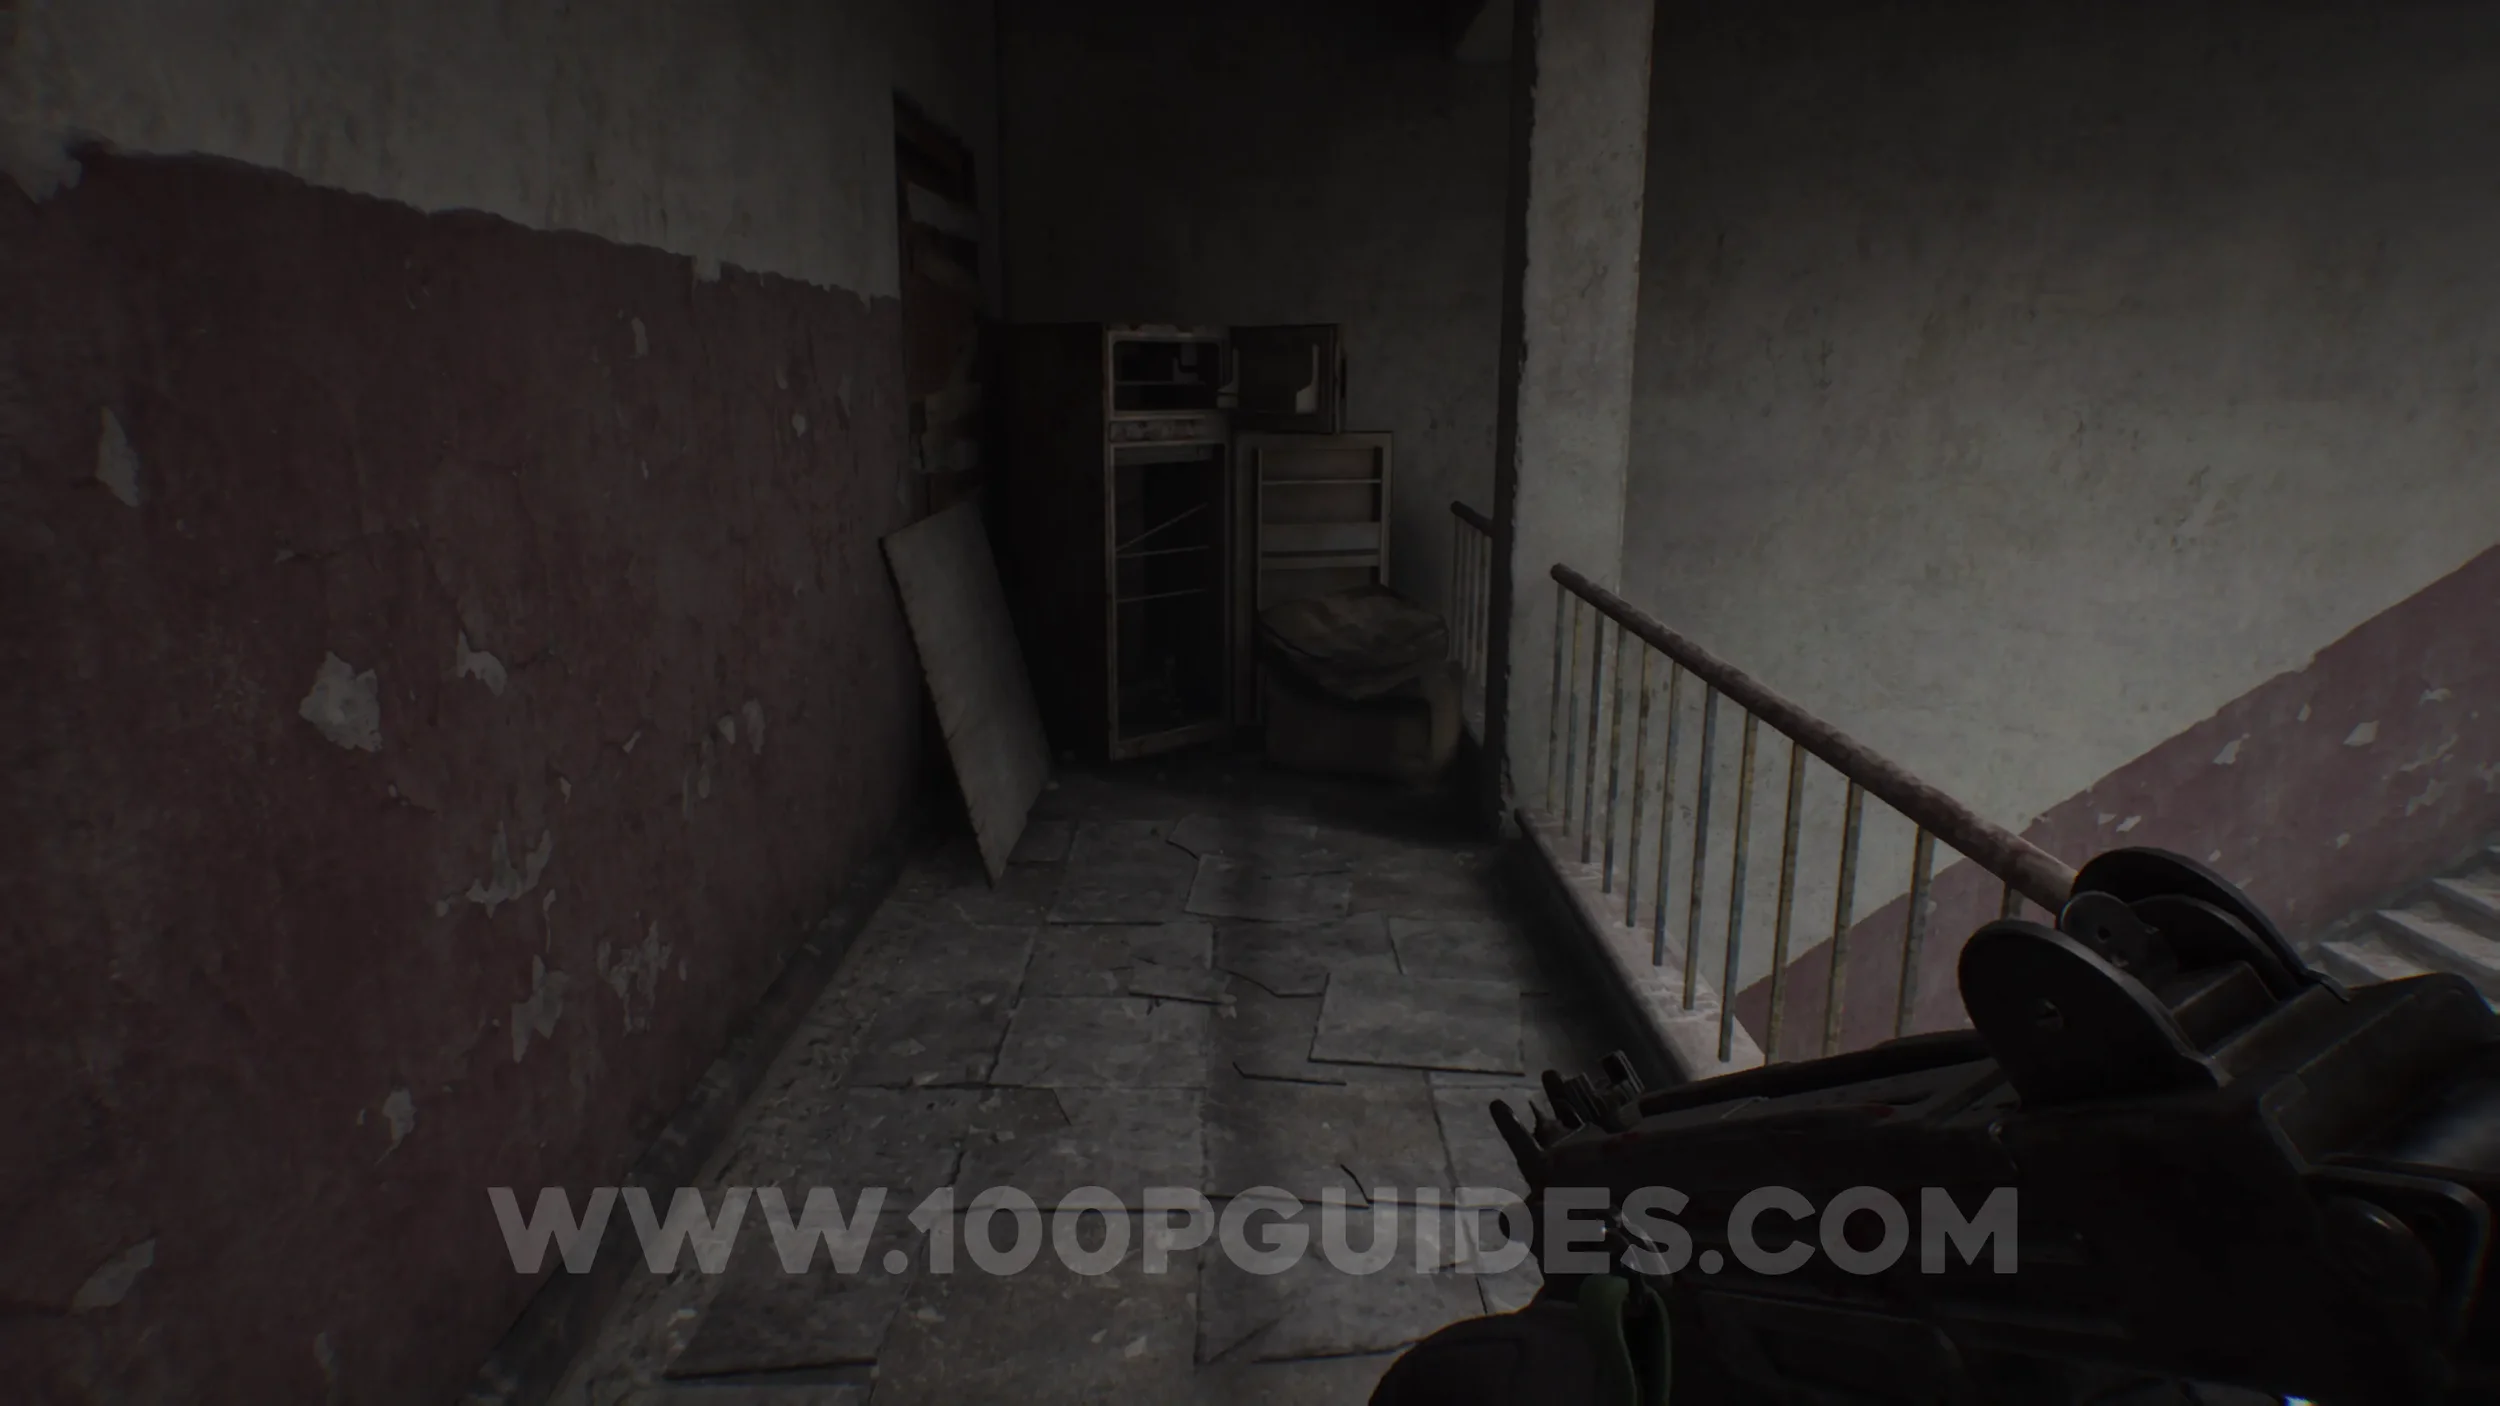
Mr Raccoon #15. After using the Rusty Crank in the Cedarbrook Apartments, climb the ladder and enter the door on your right. Once inside, turn right again to find a Mr. Raccoon inside a fridge on the stairwell.
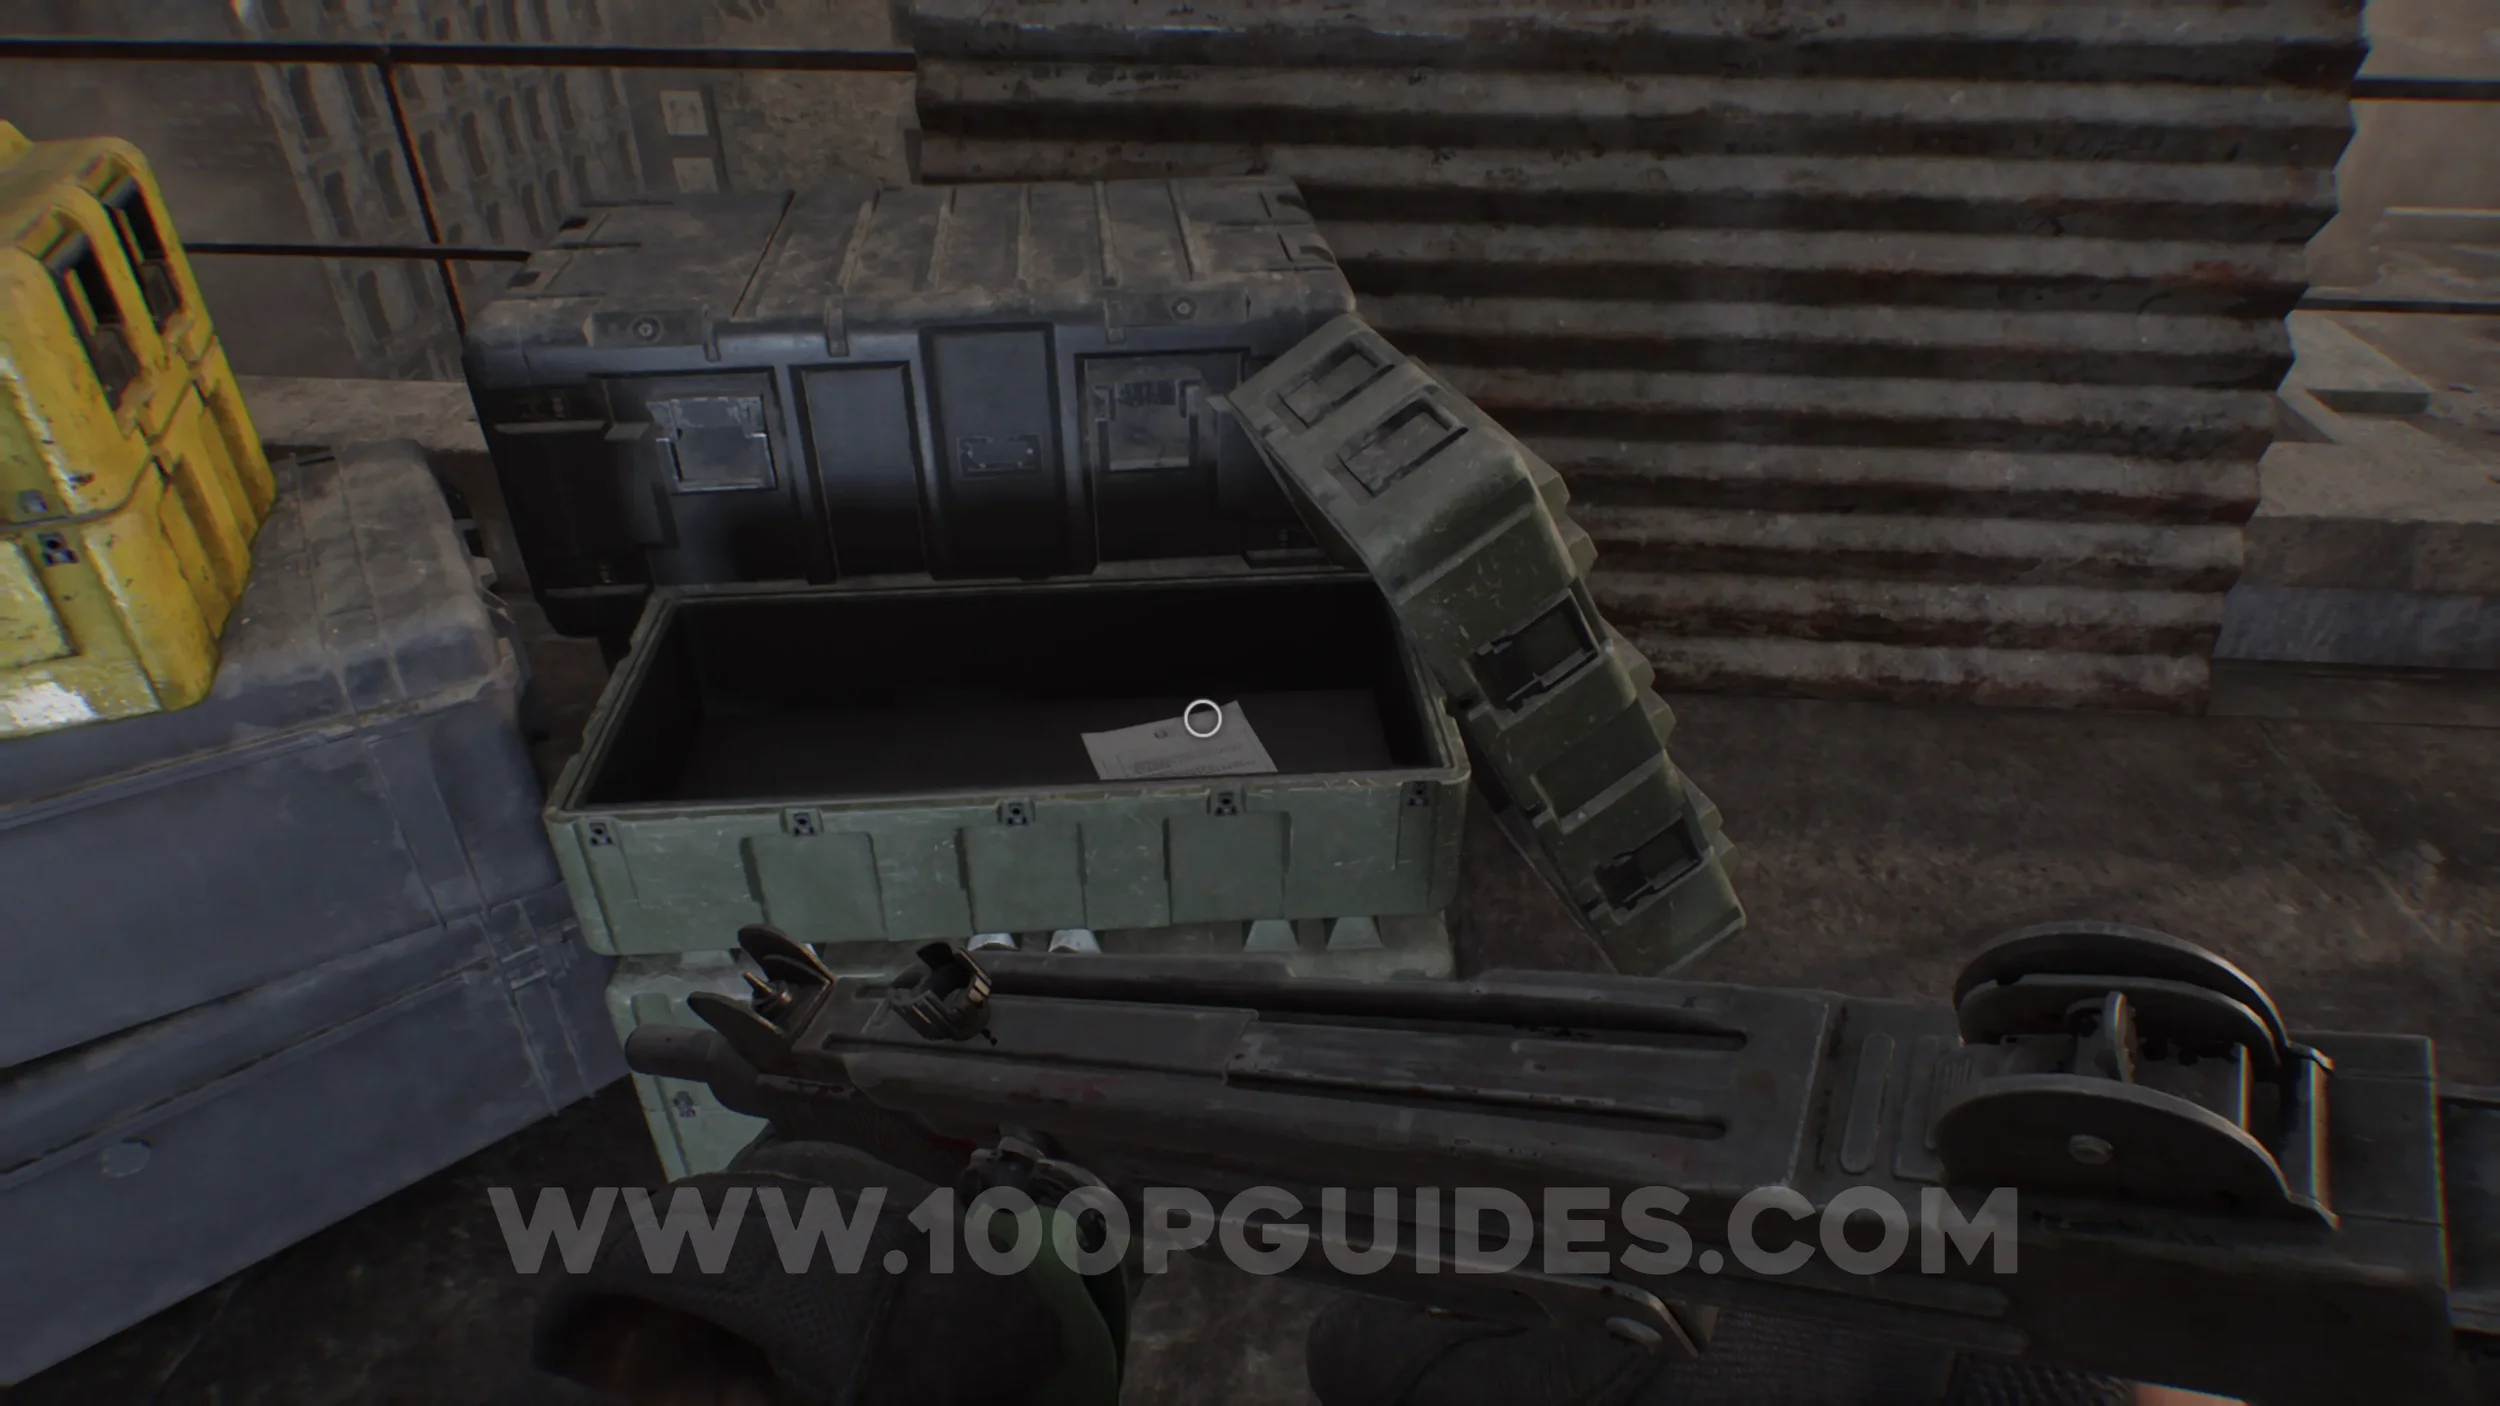
File #53 - Engineer Corps Note. Next to the yellow box (main objective) on the Cedarbrook Apartments Roof.
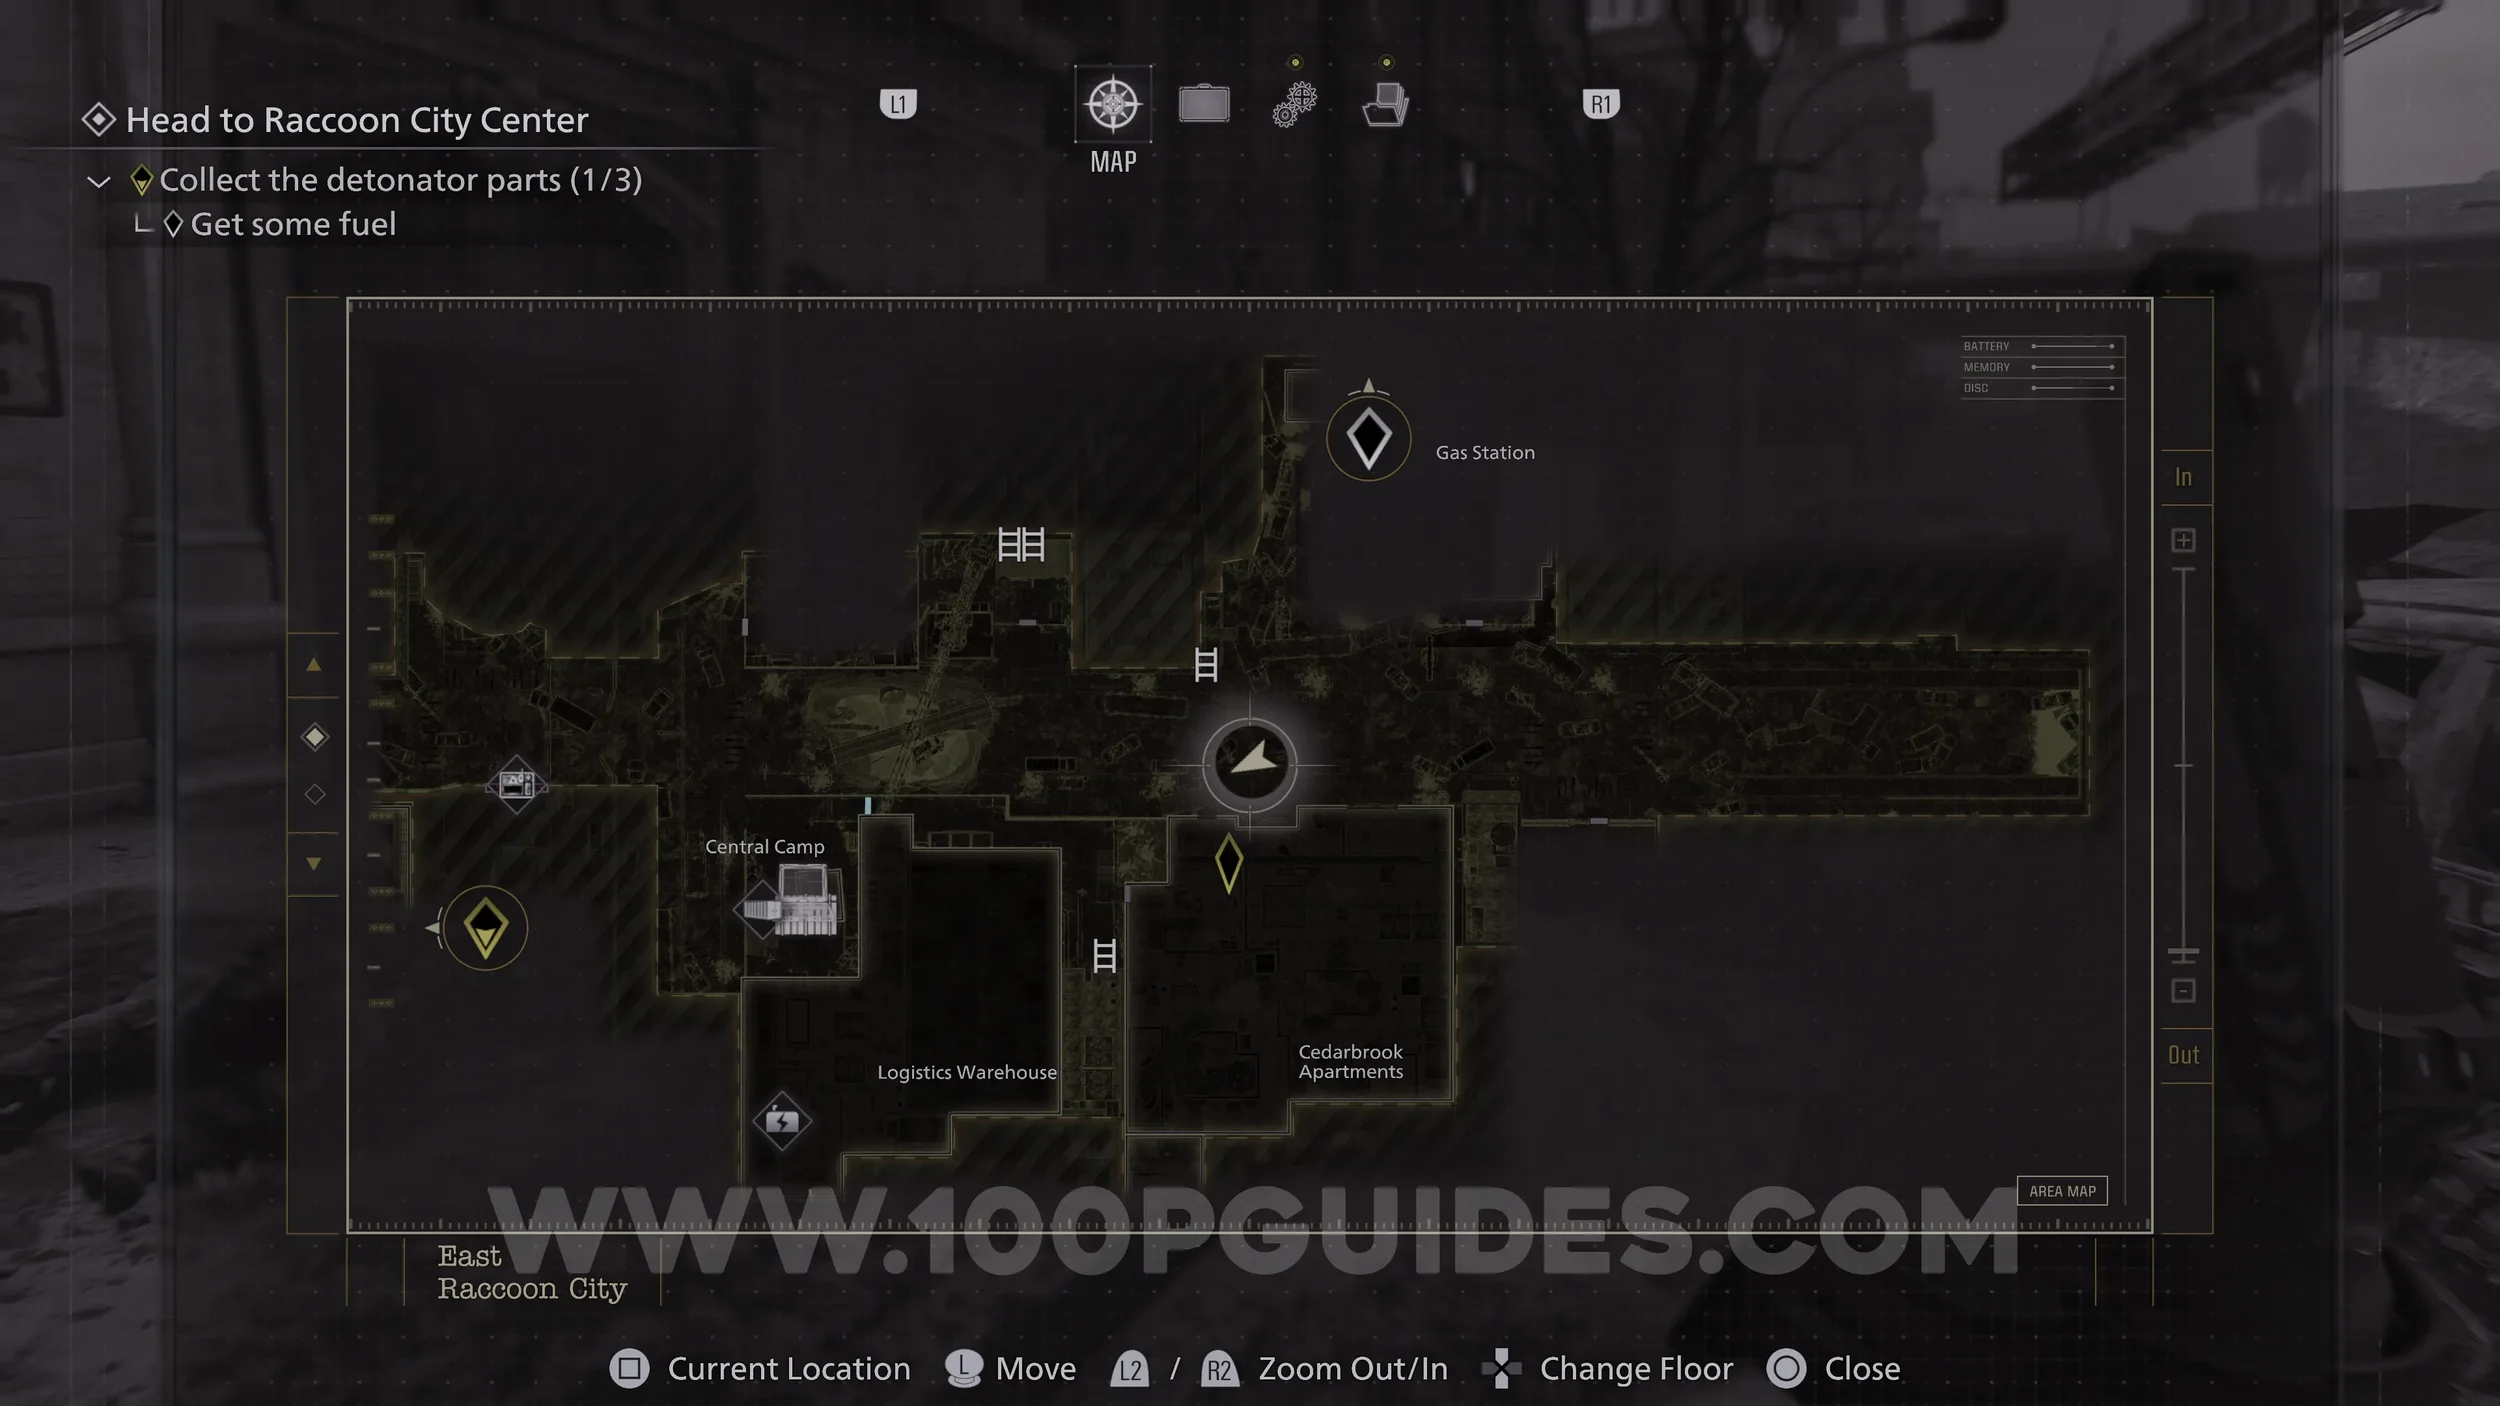
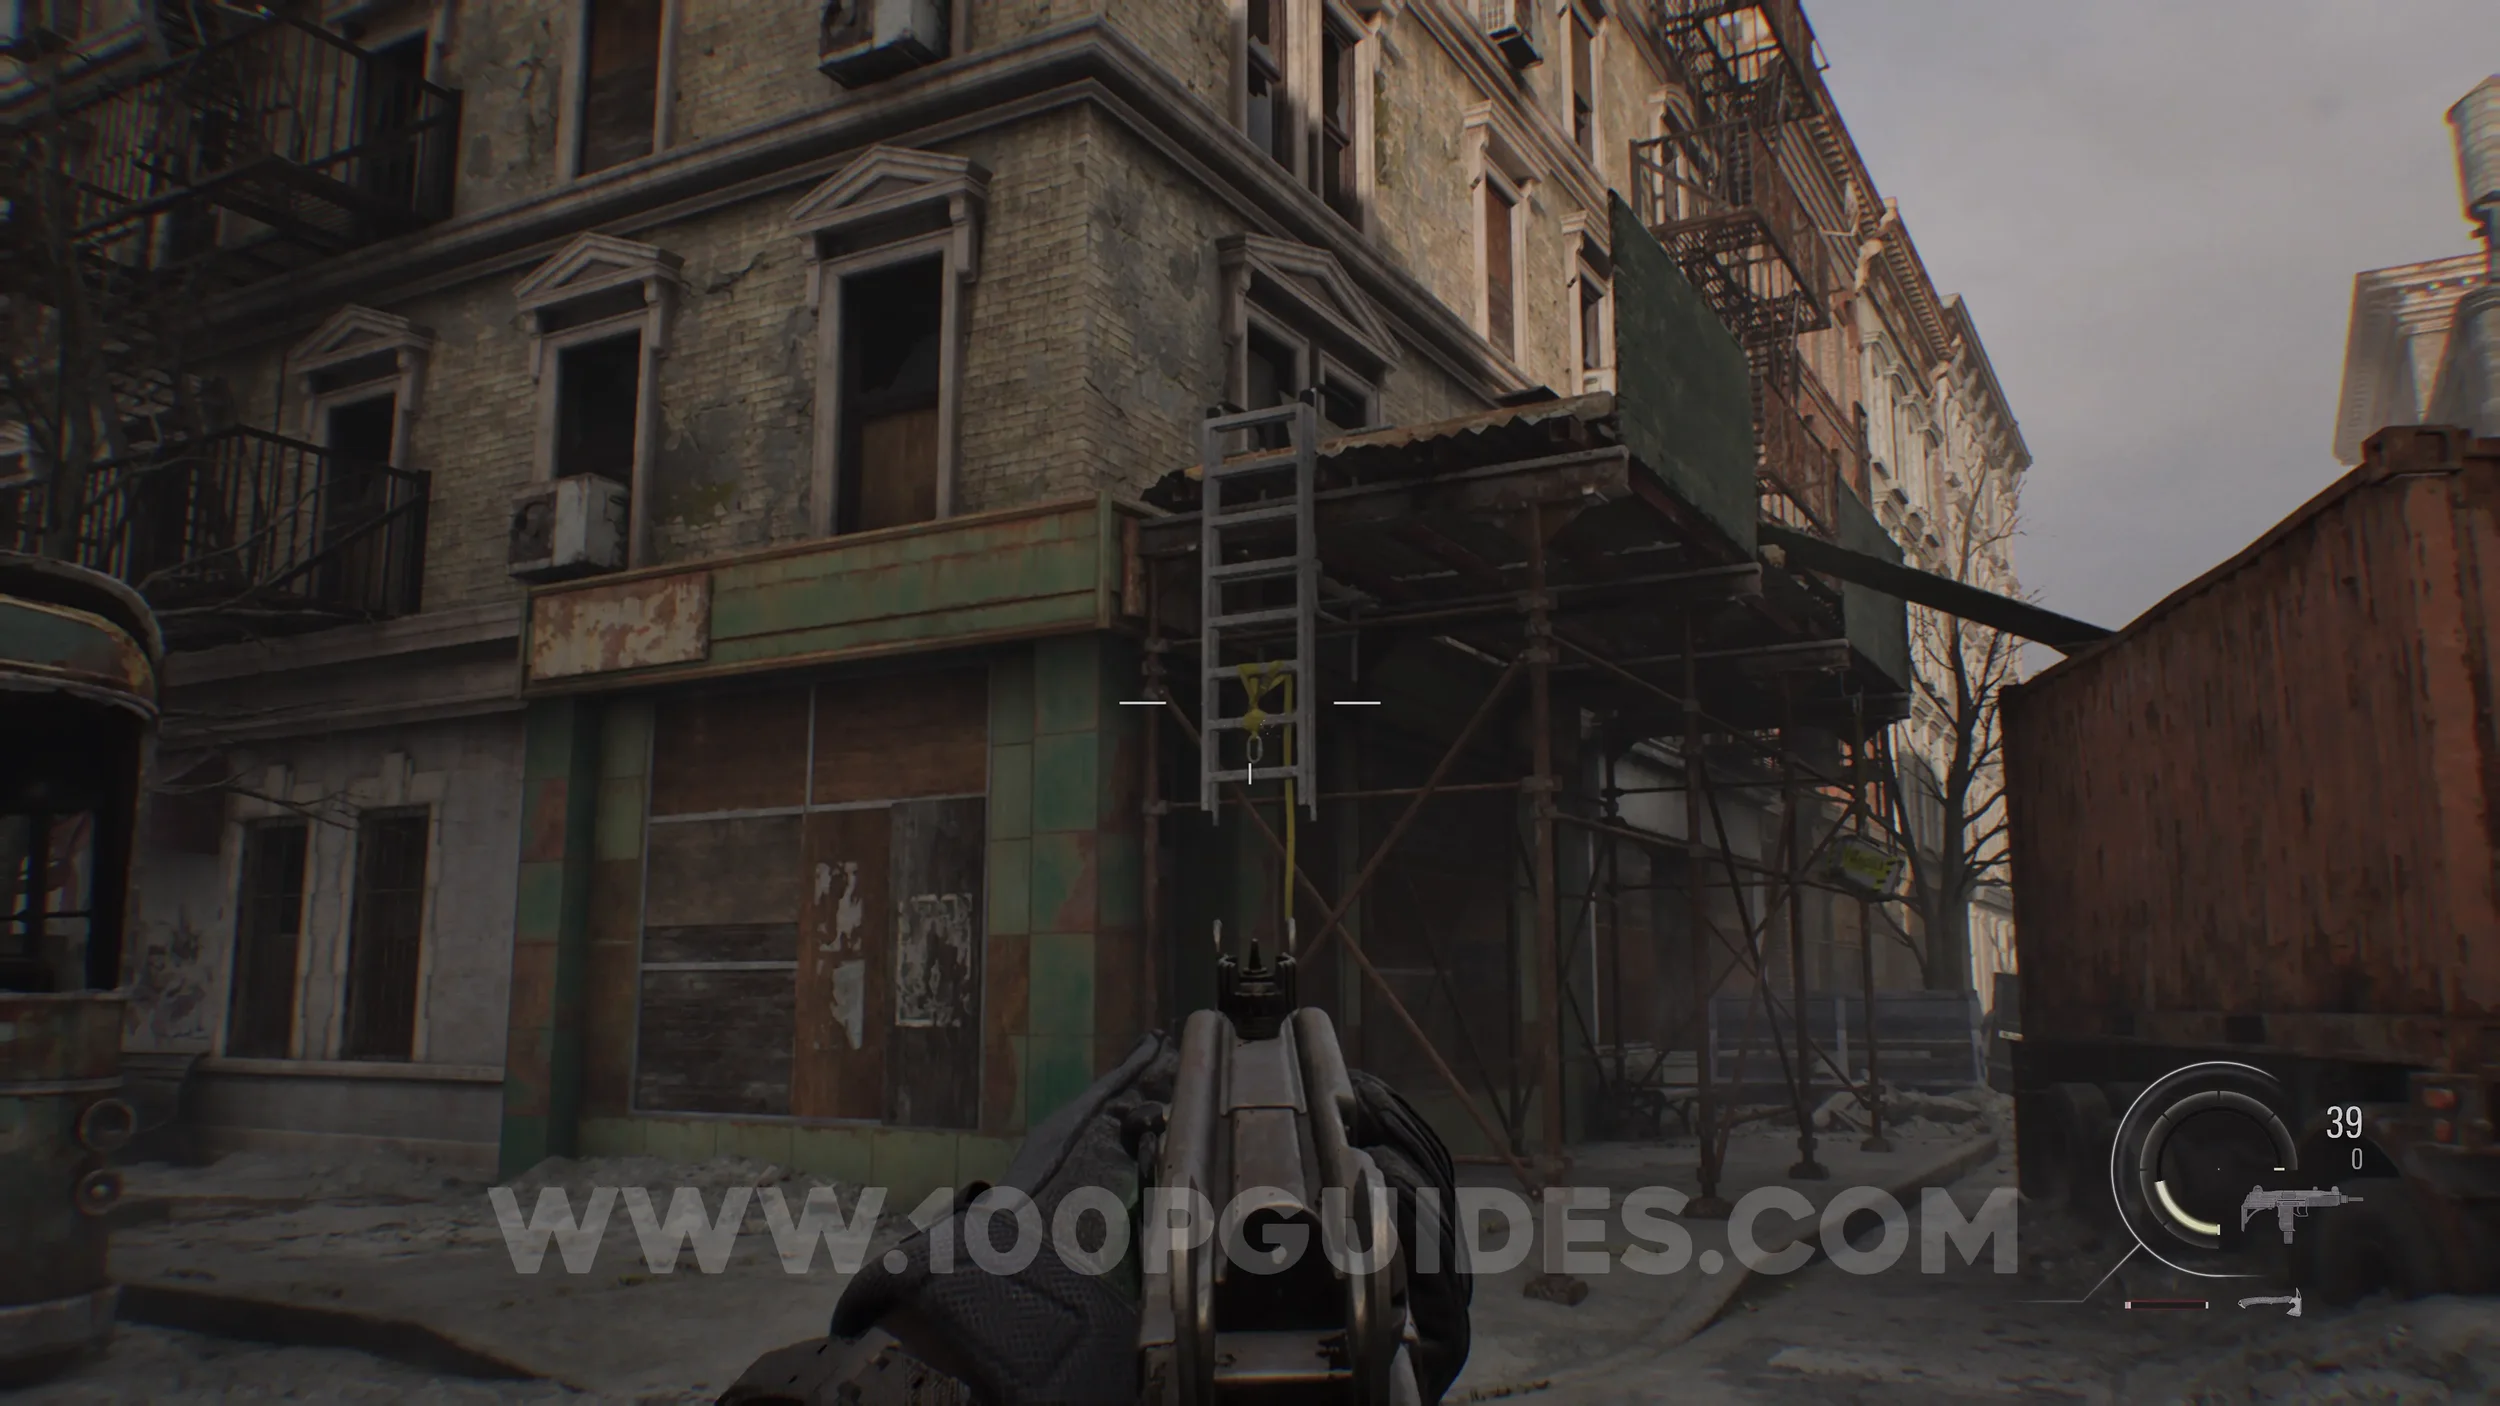
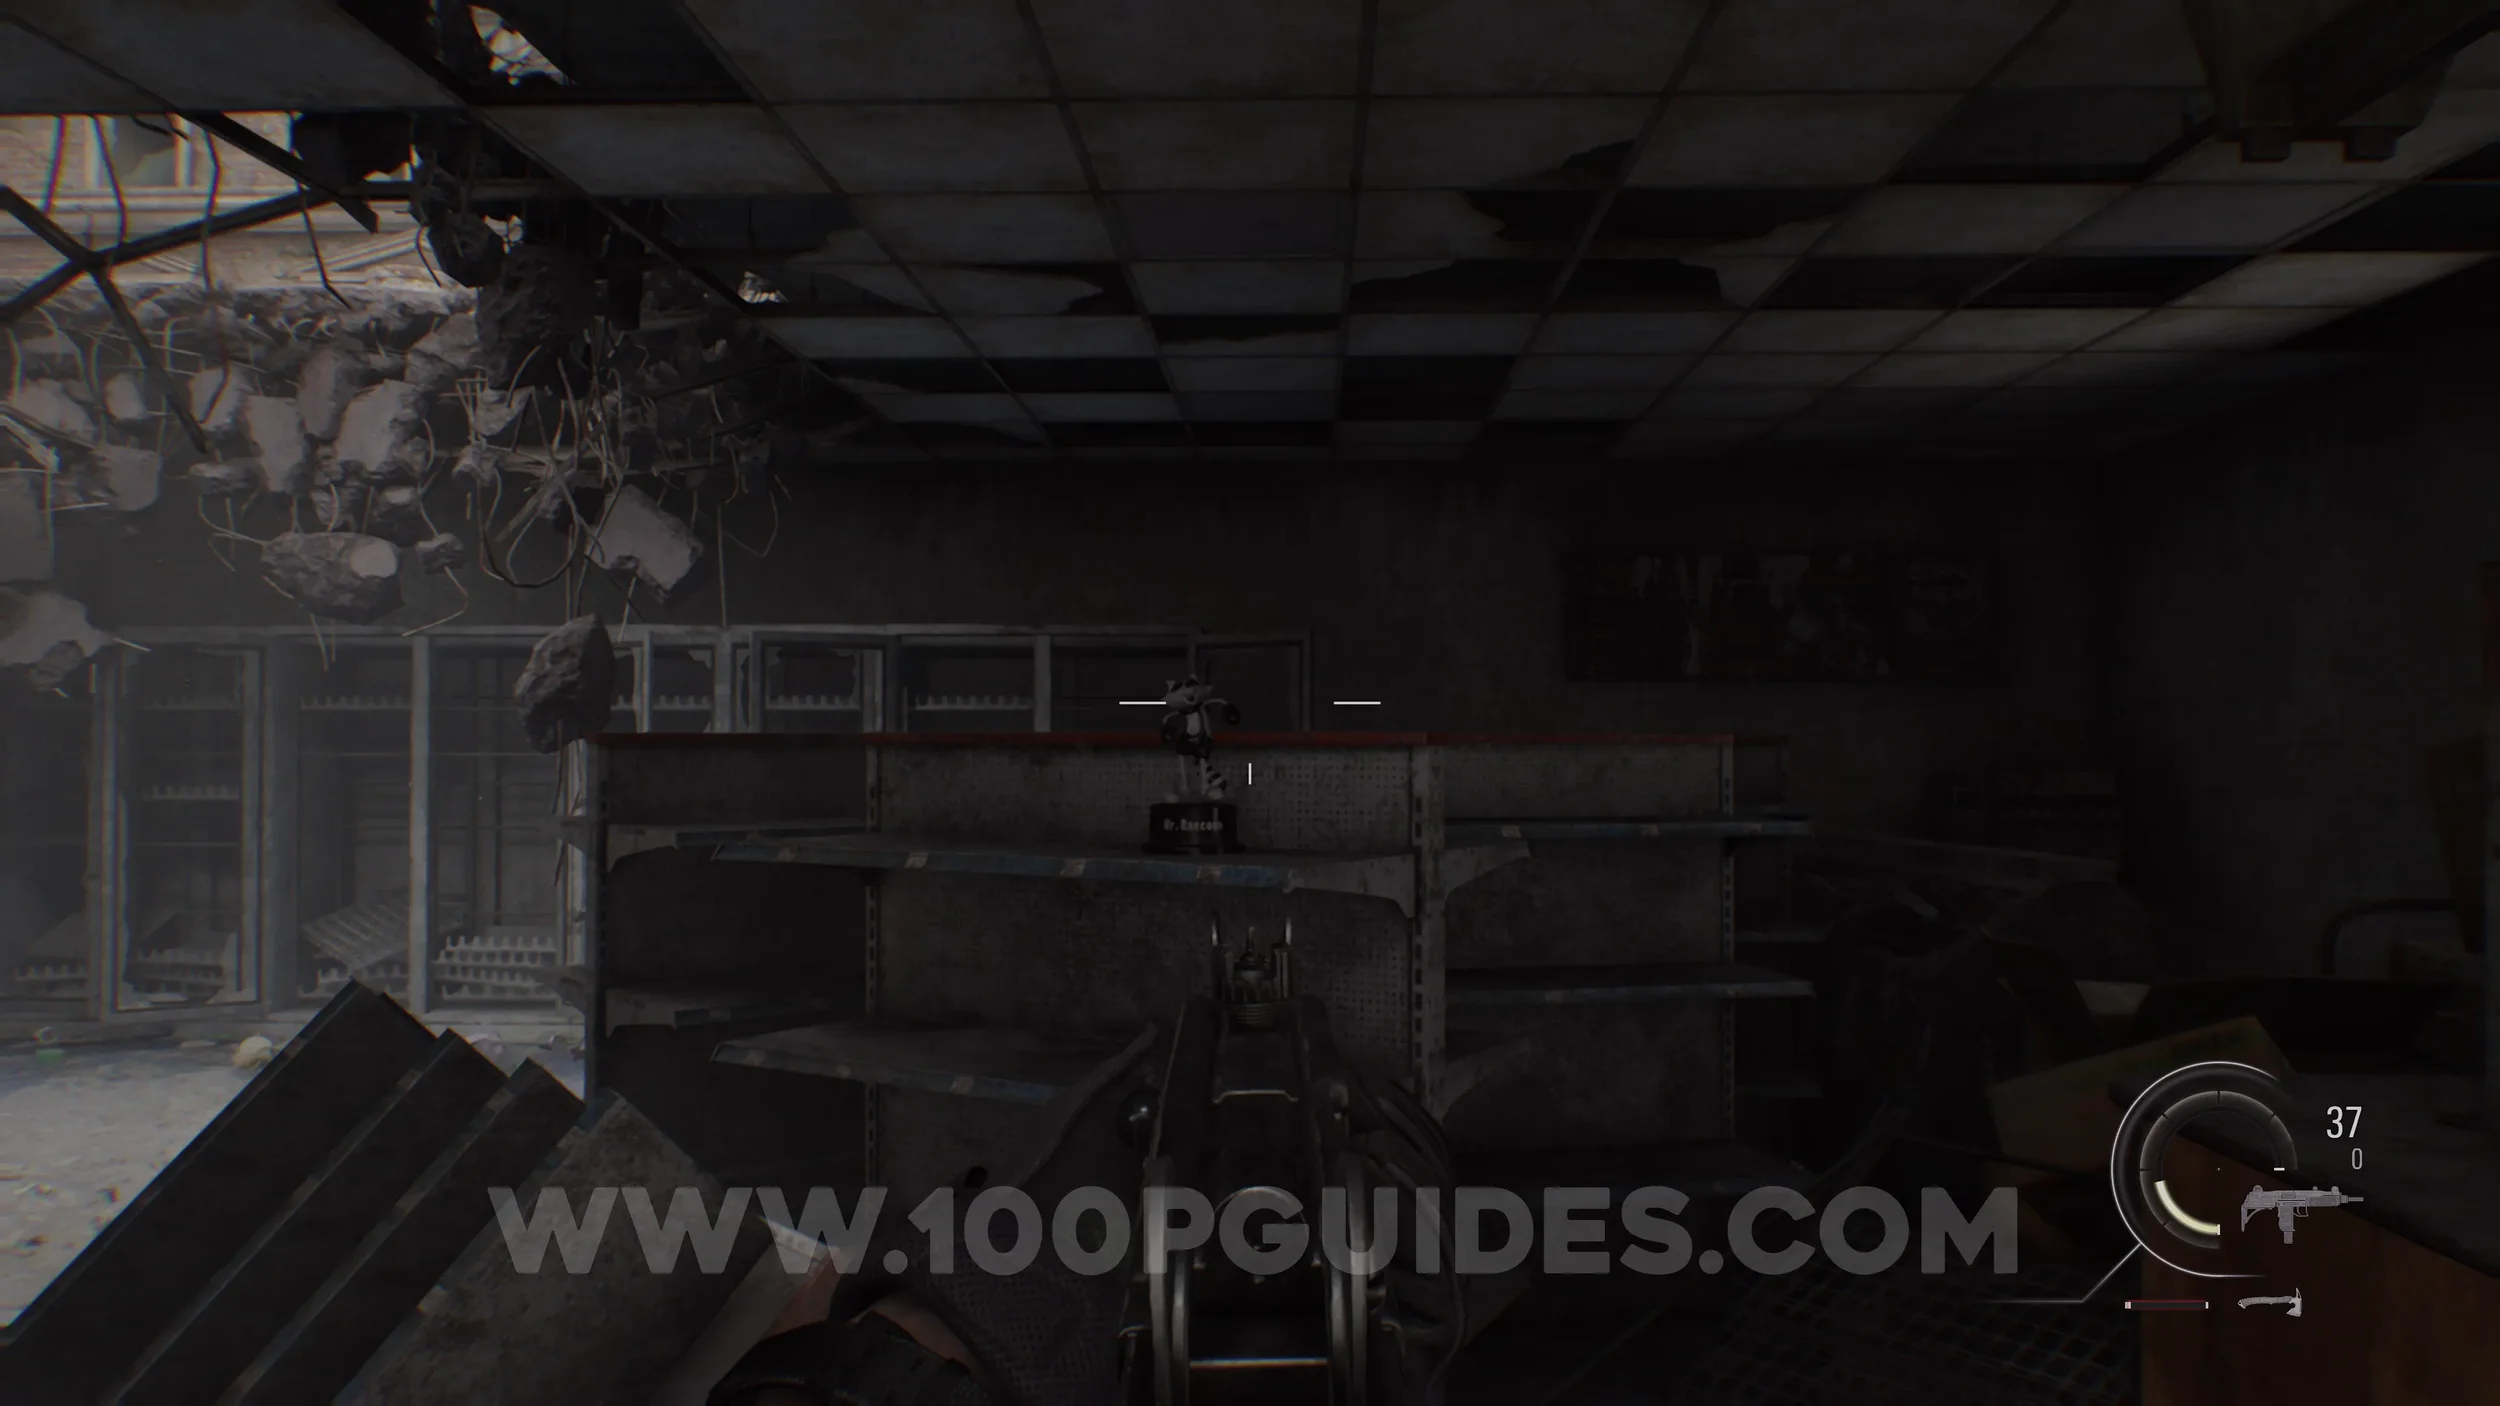
Mr. Raccoon #16. Once you return to the street where you obtained the BSAA Container Key, shoot the ladder on the other side of the road to get to the Gas Station. The Mr. Raccoon will be in front of you once you get inside.

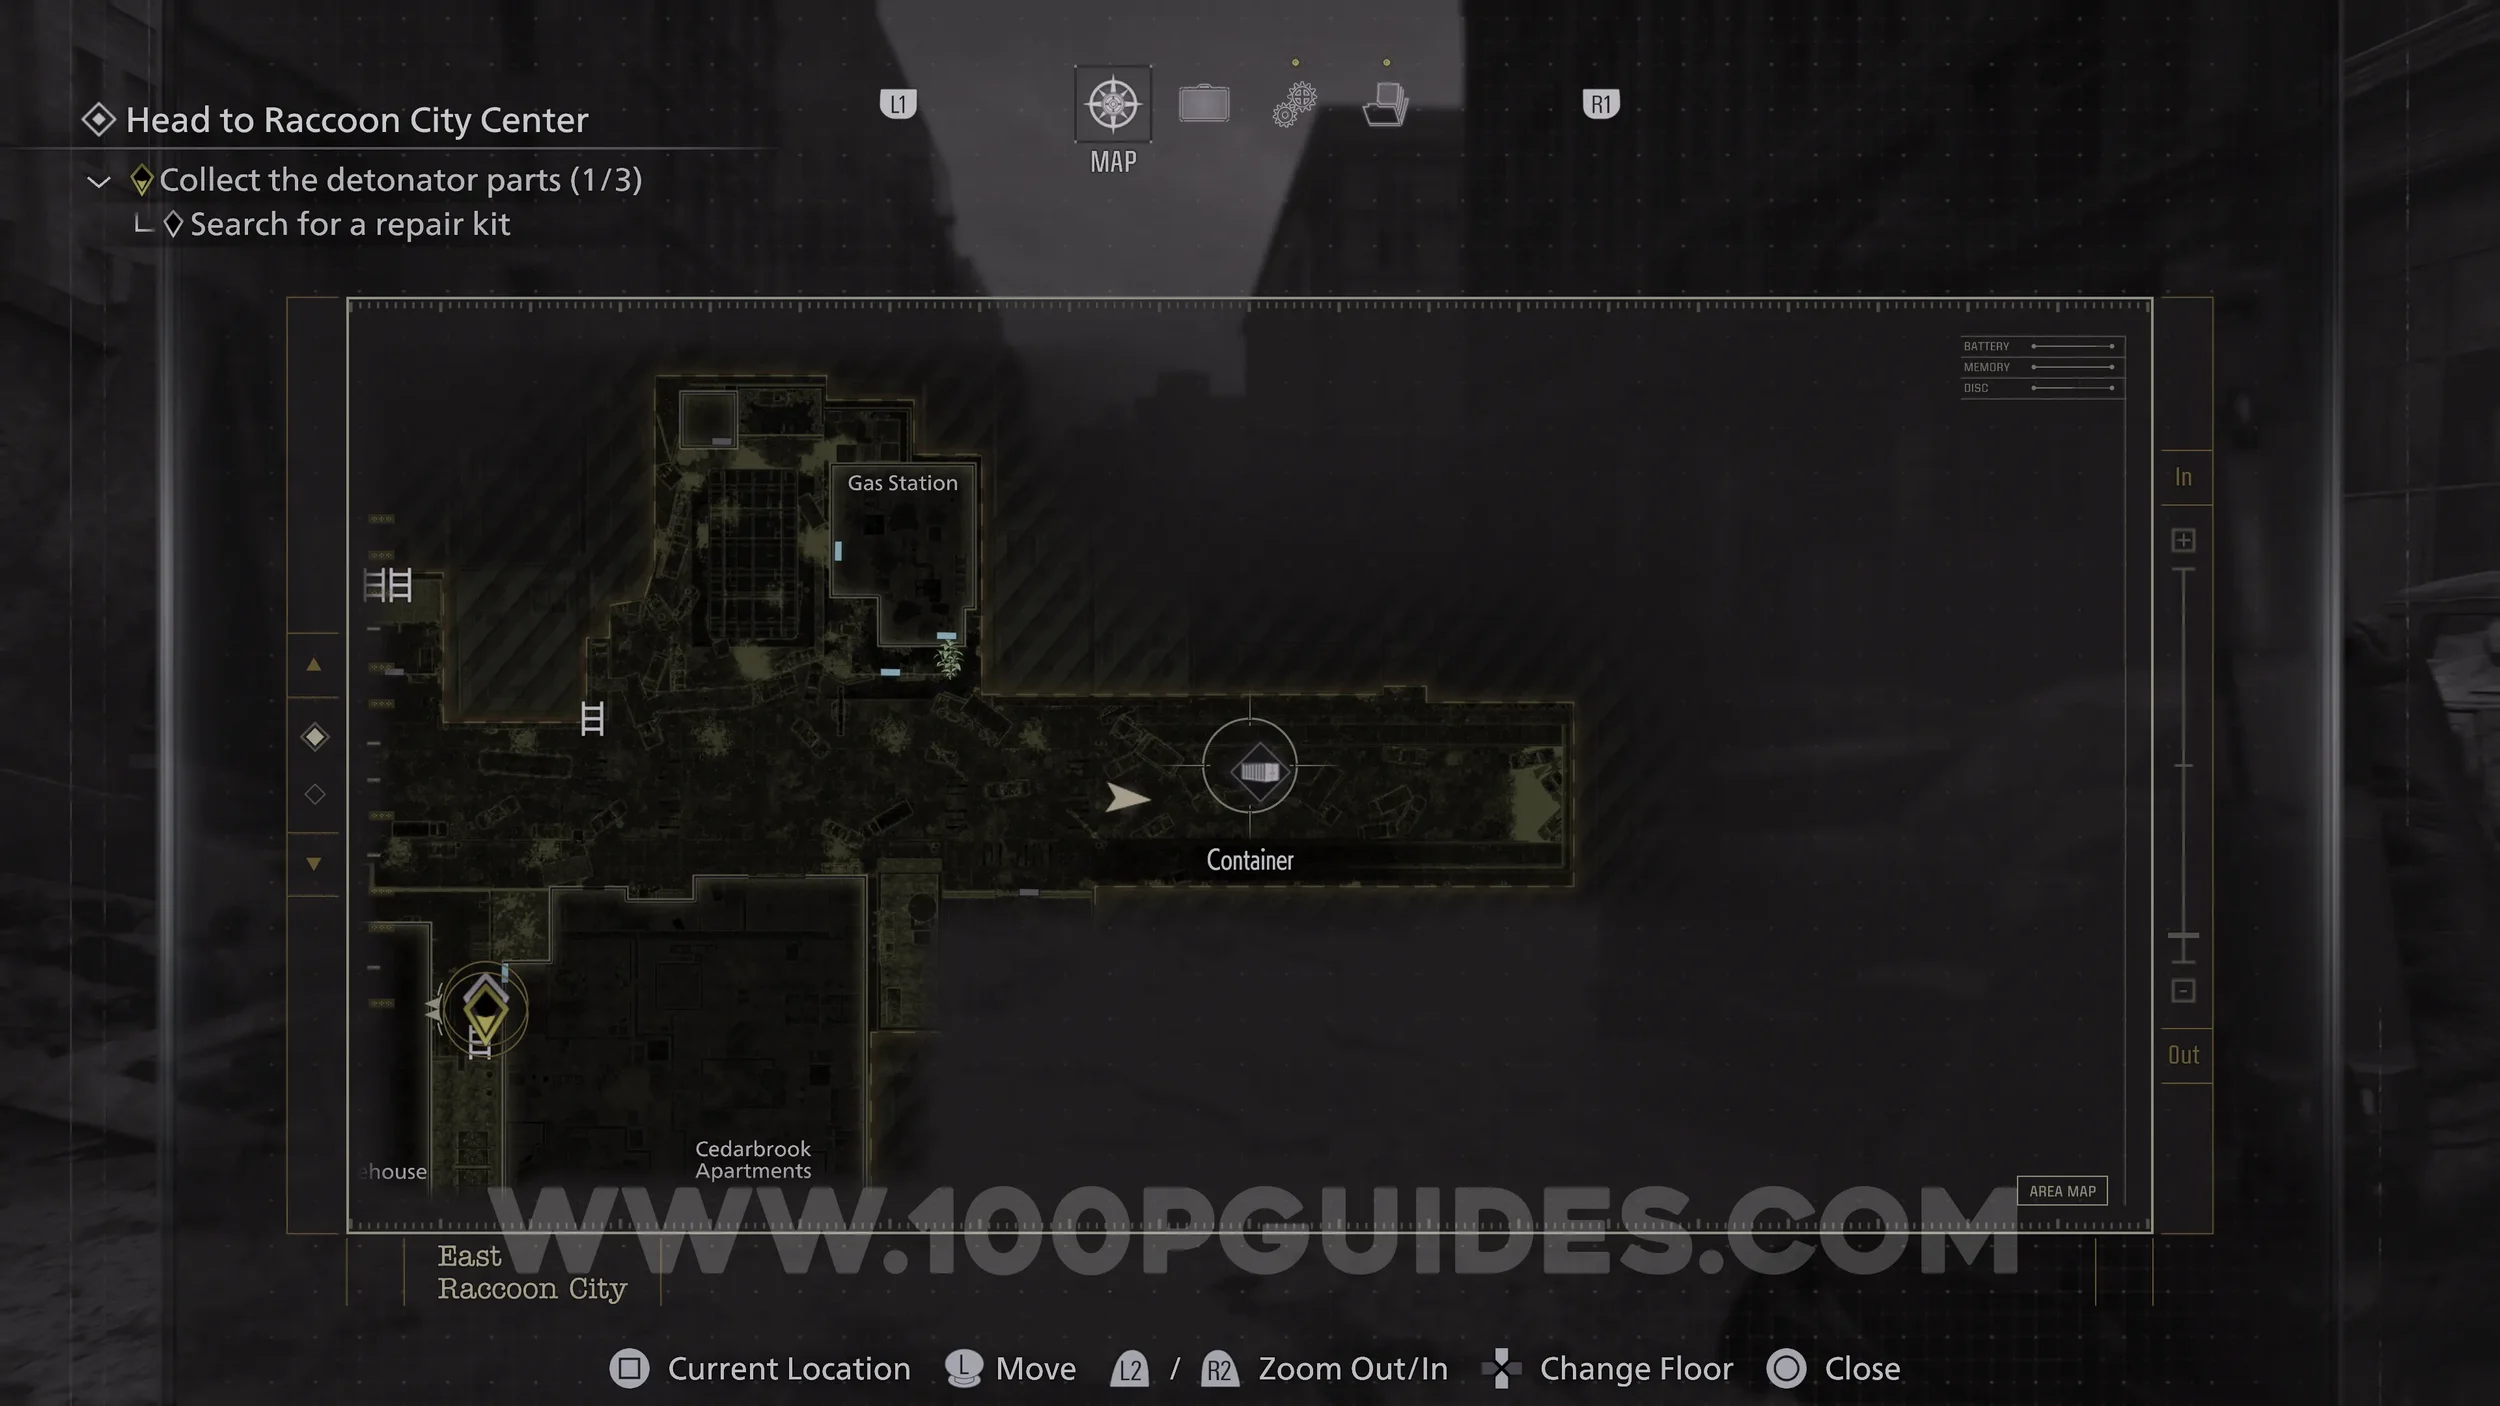
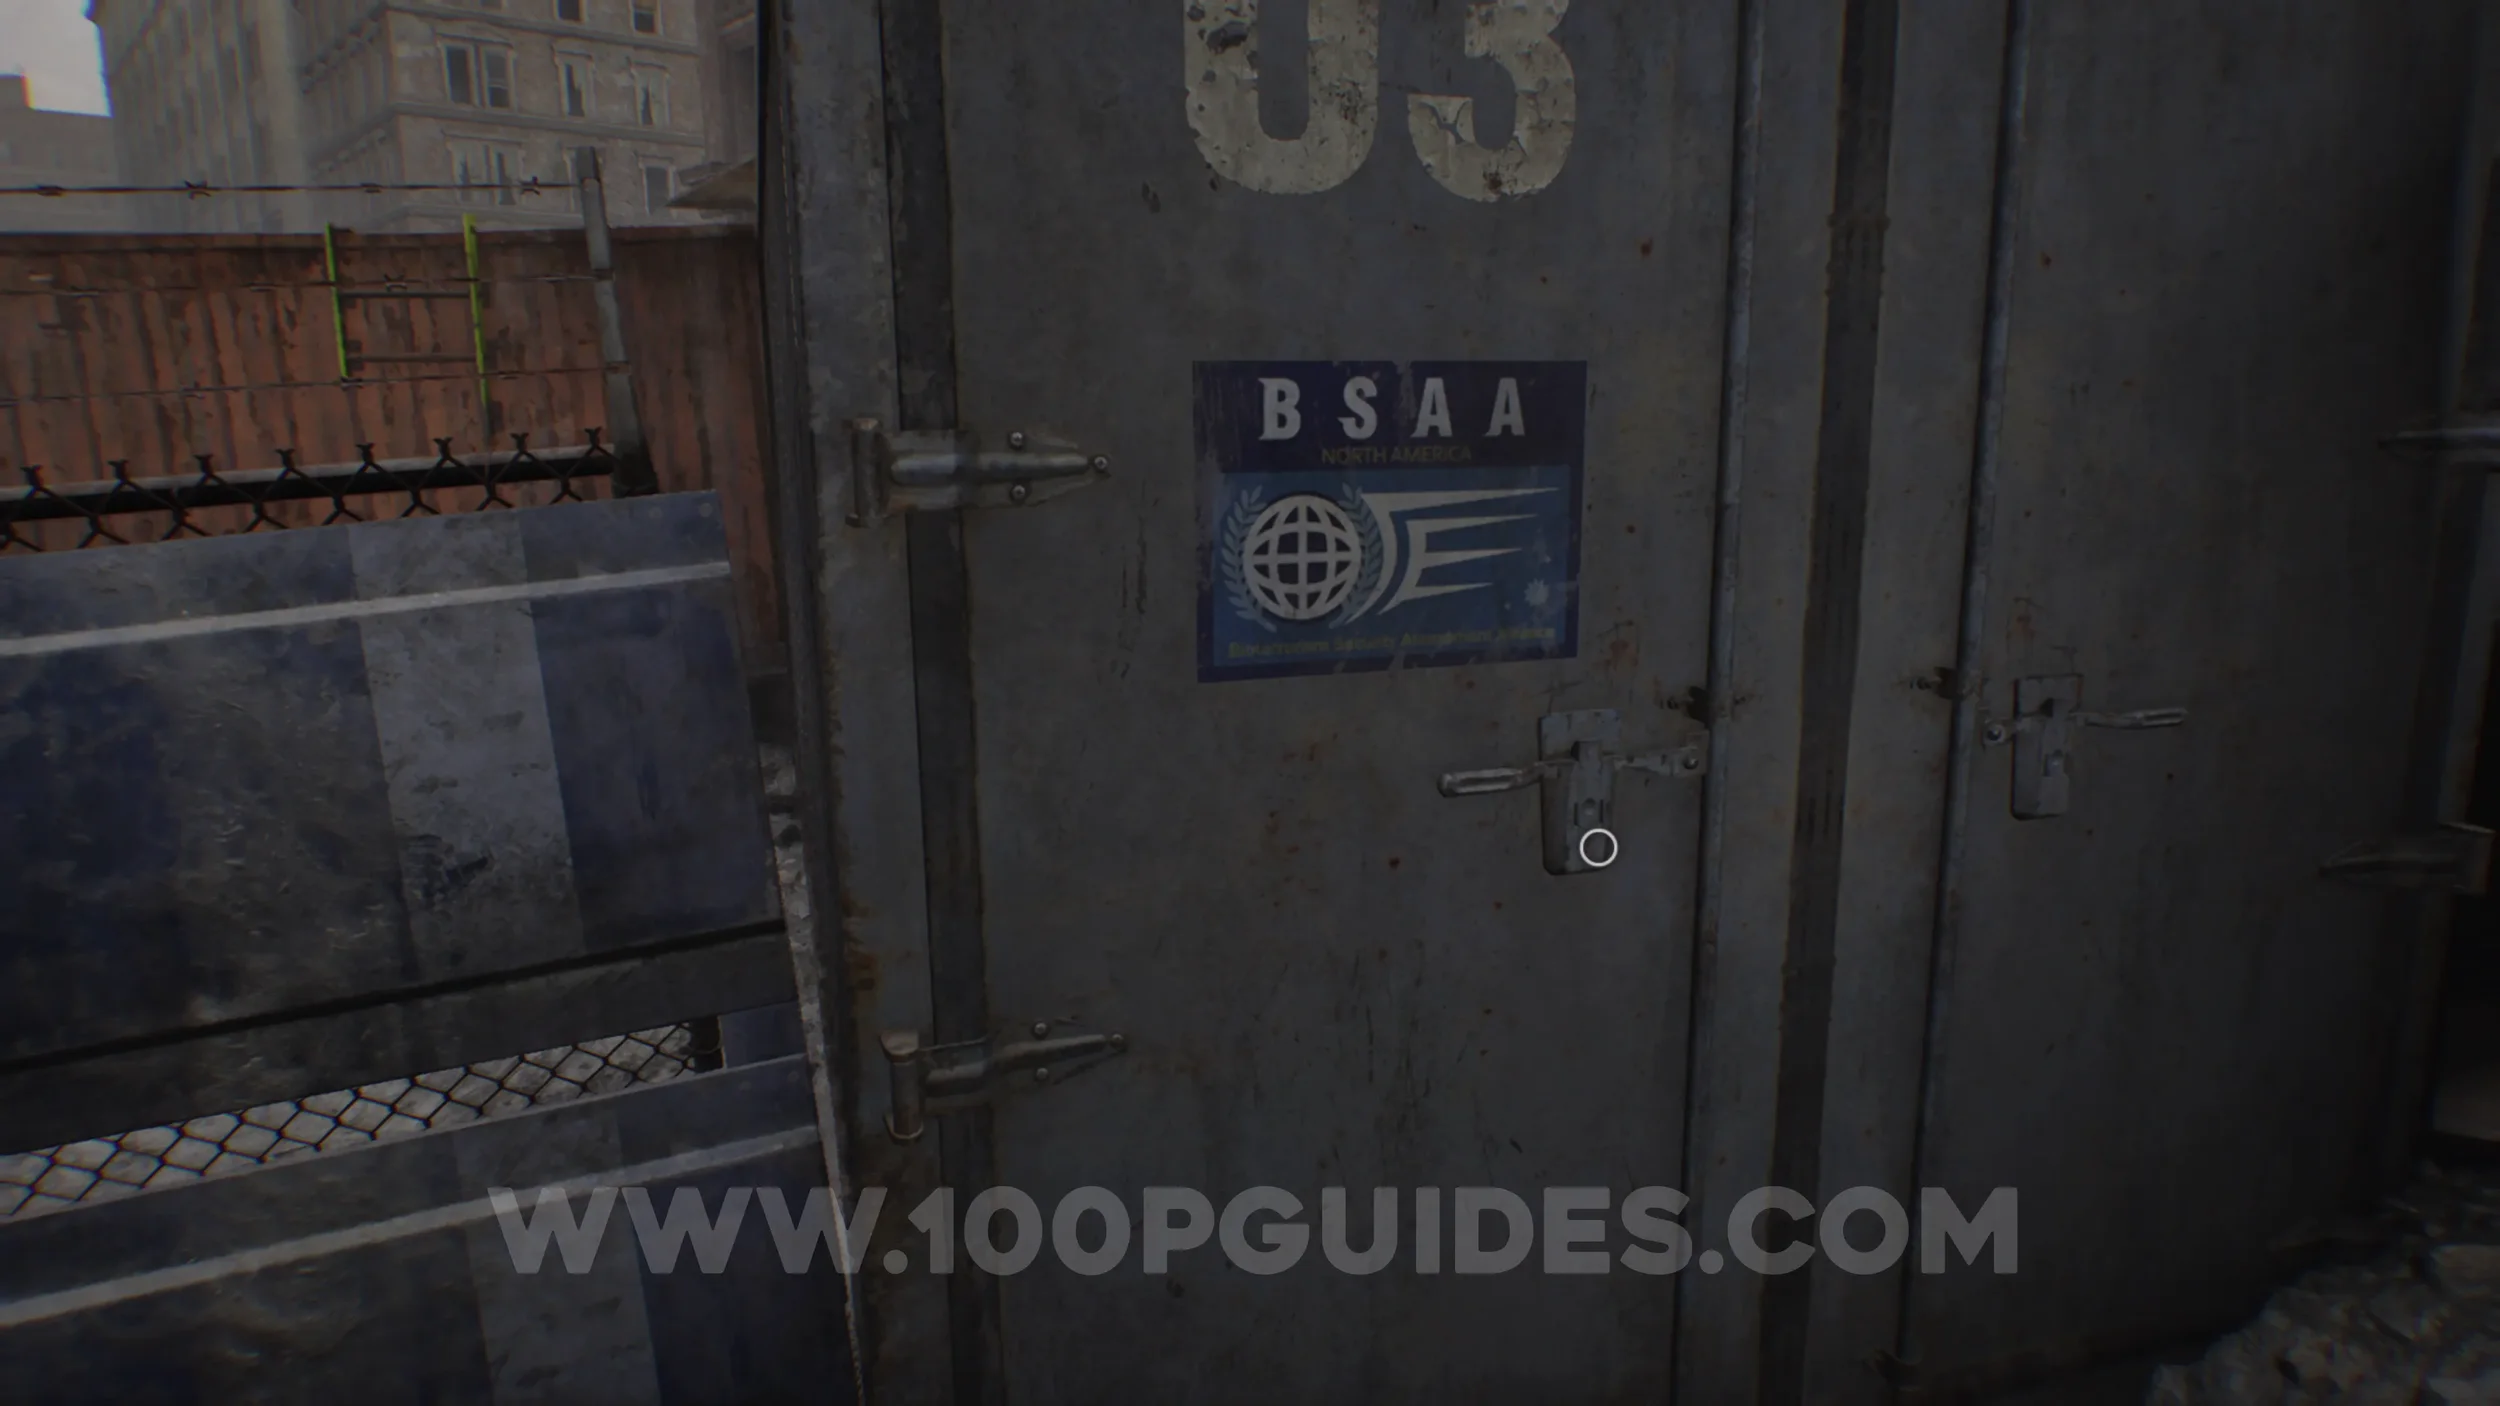
BSAA Container #1 & Weapon - Marksman 1A. Found at the end of the road to the East of the Gas Station. Go around the back of the truck and then climb on top of it to get to the Container on the other side.
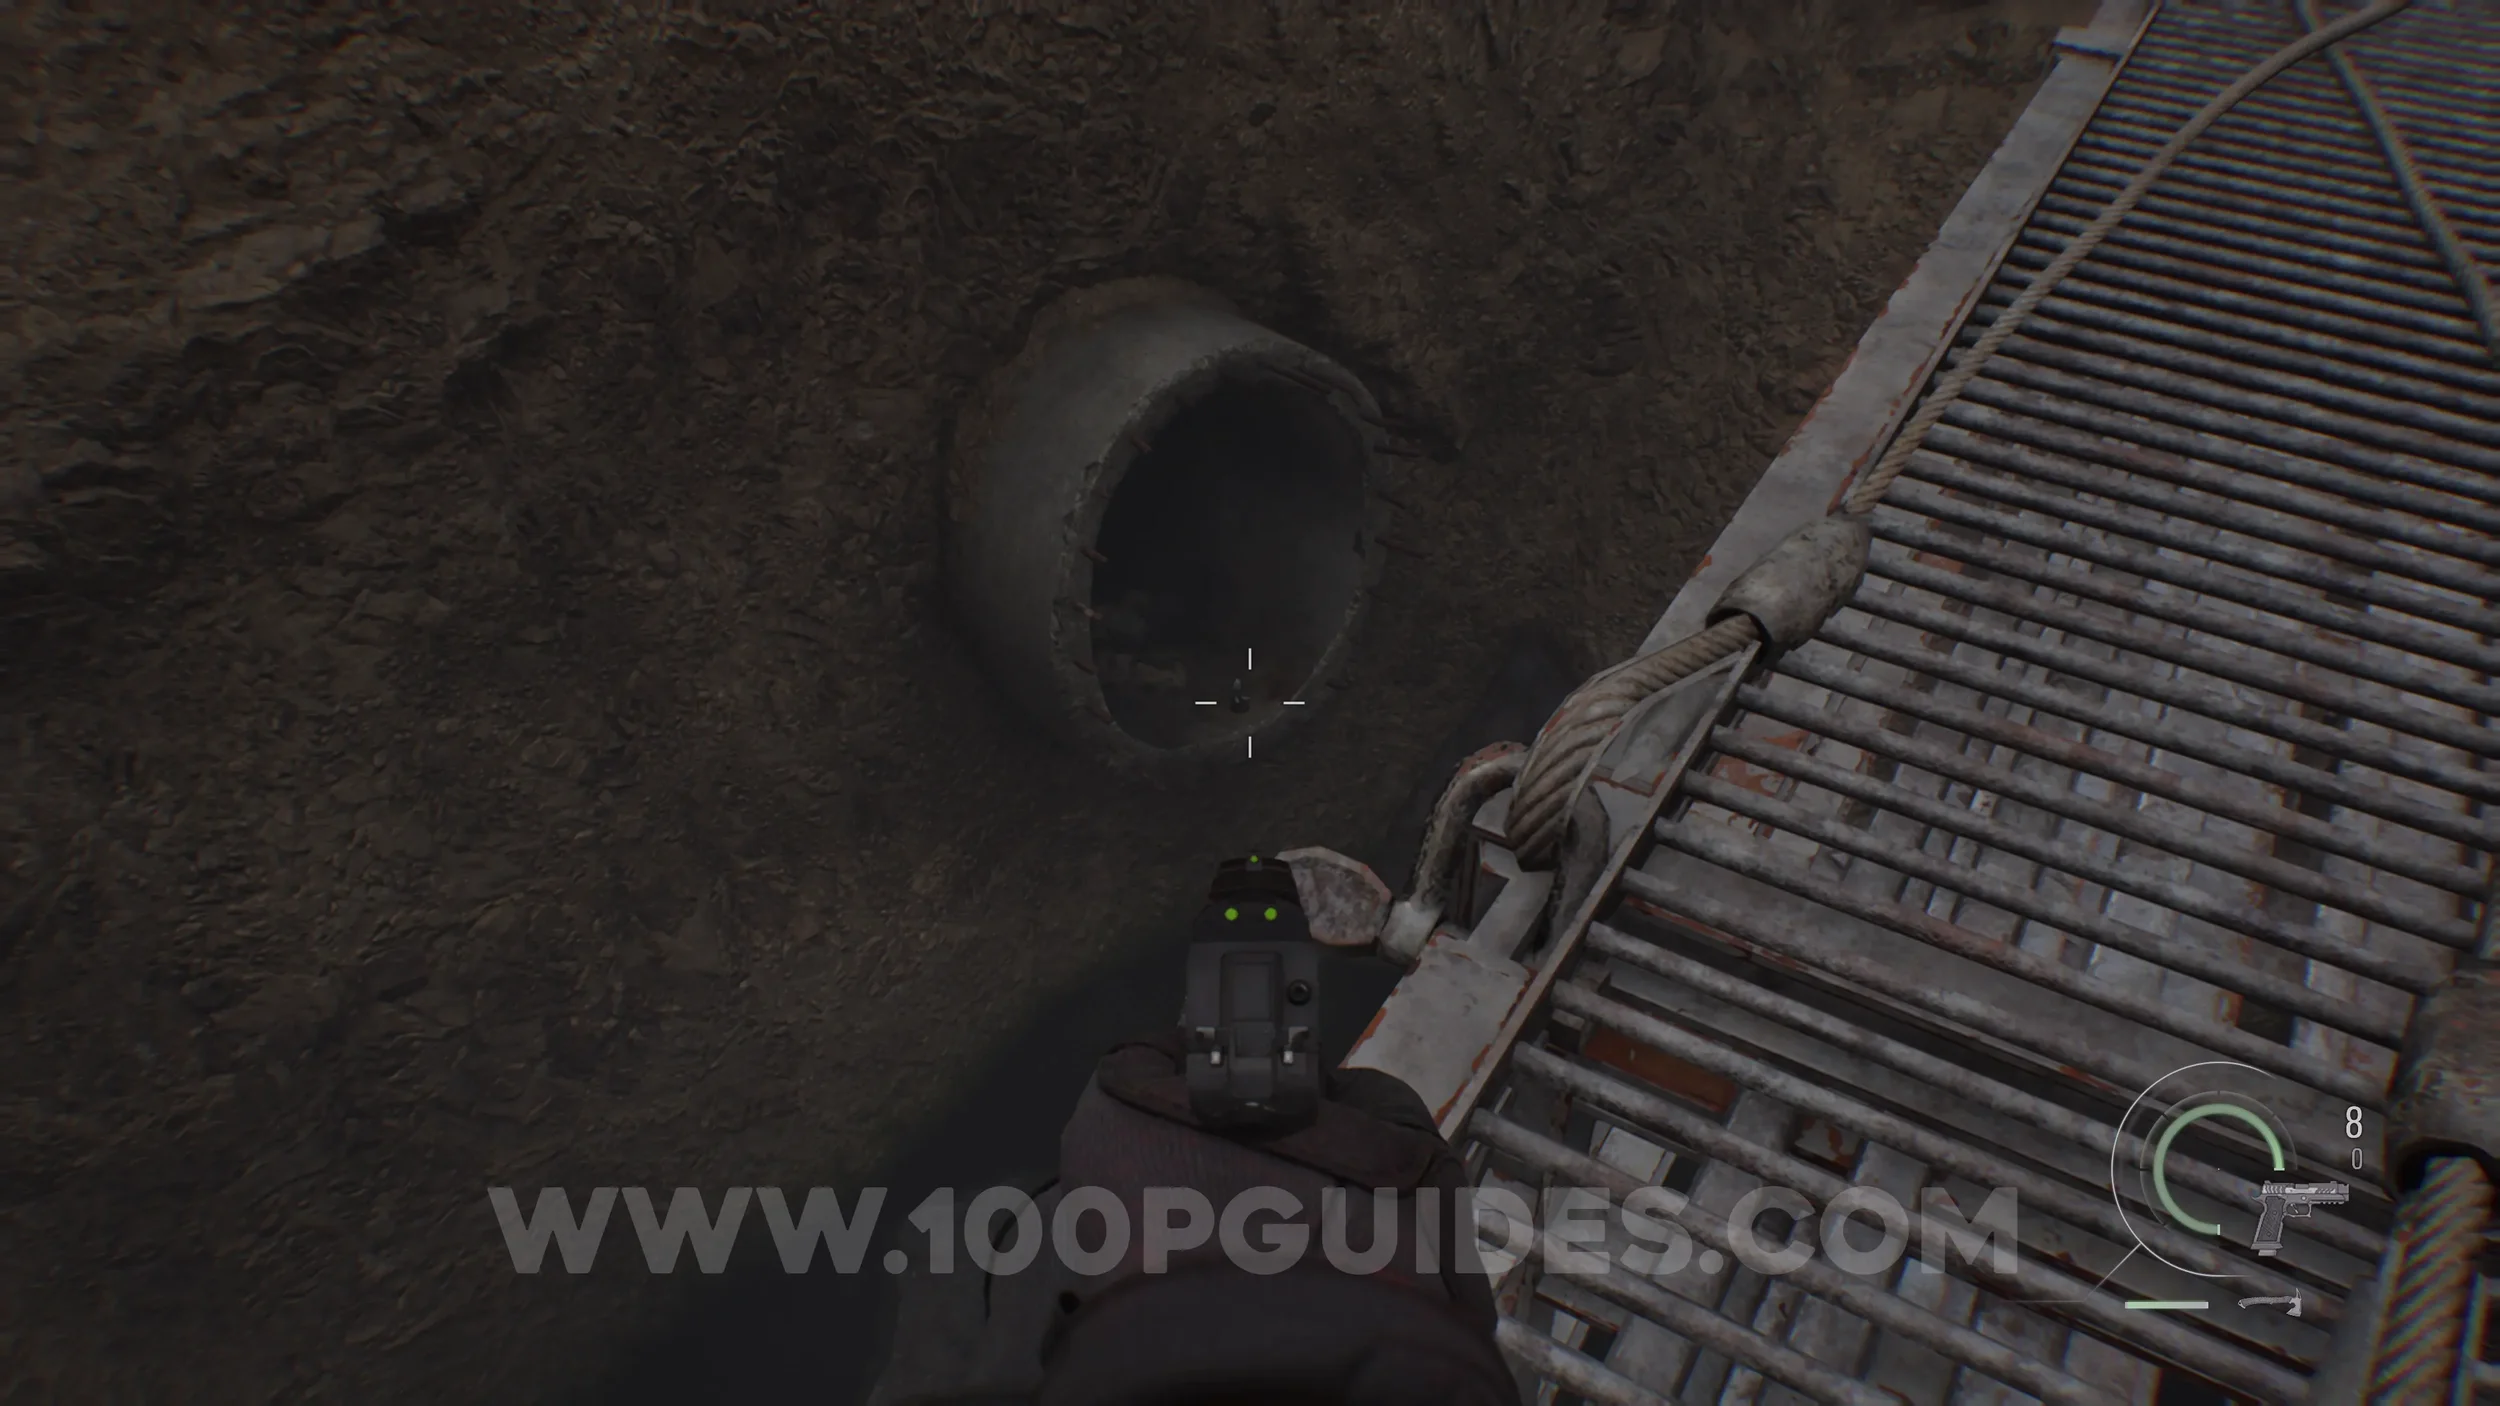
Mr. Raccoon #17. Look down to the pipe on your left as you cross over the shortcut back to Central Camp.
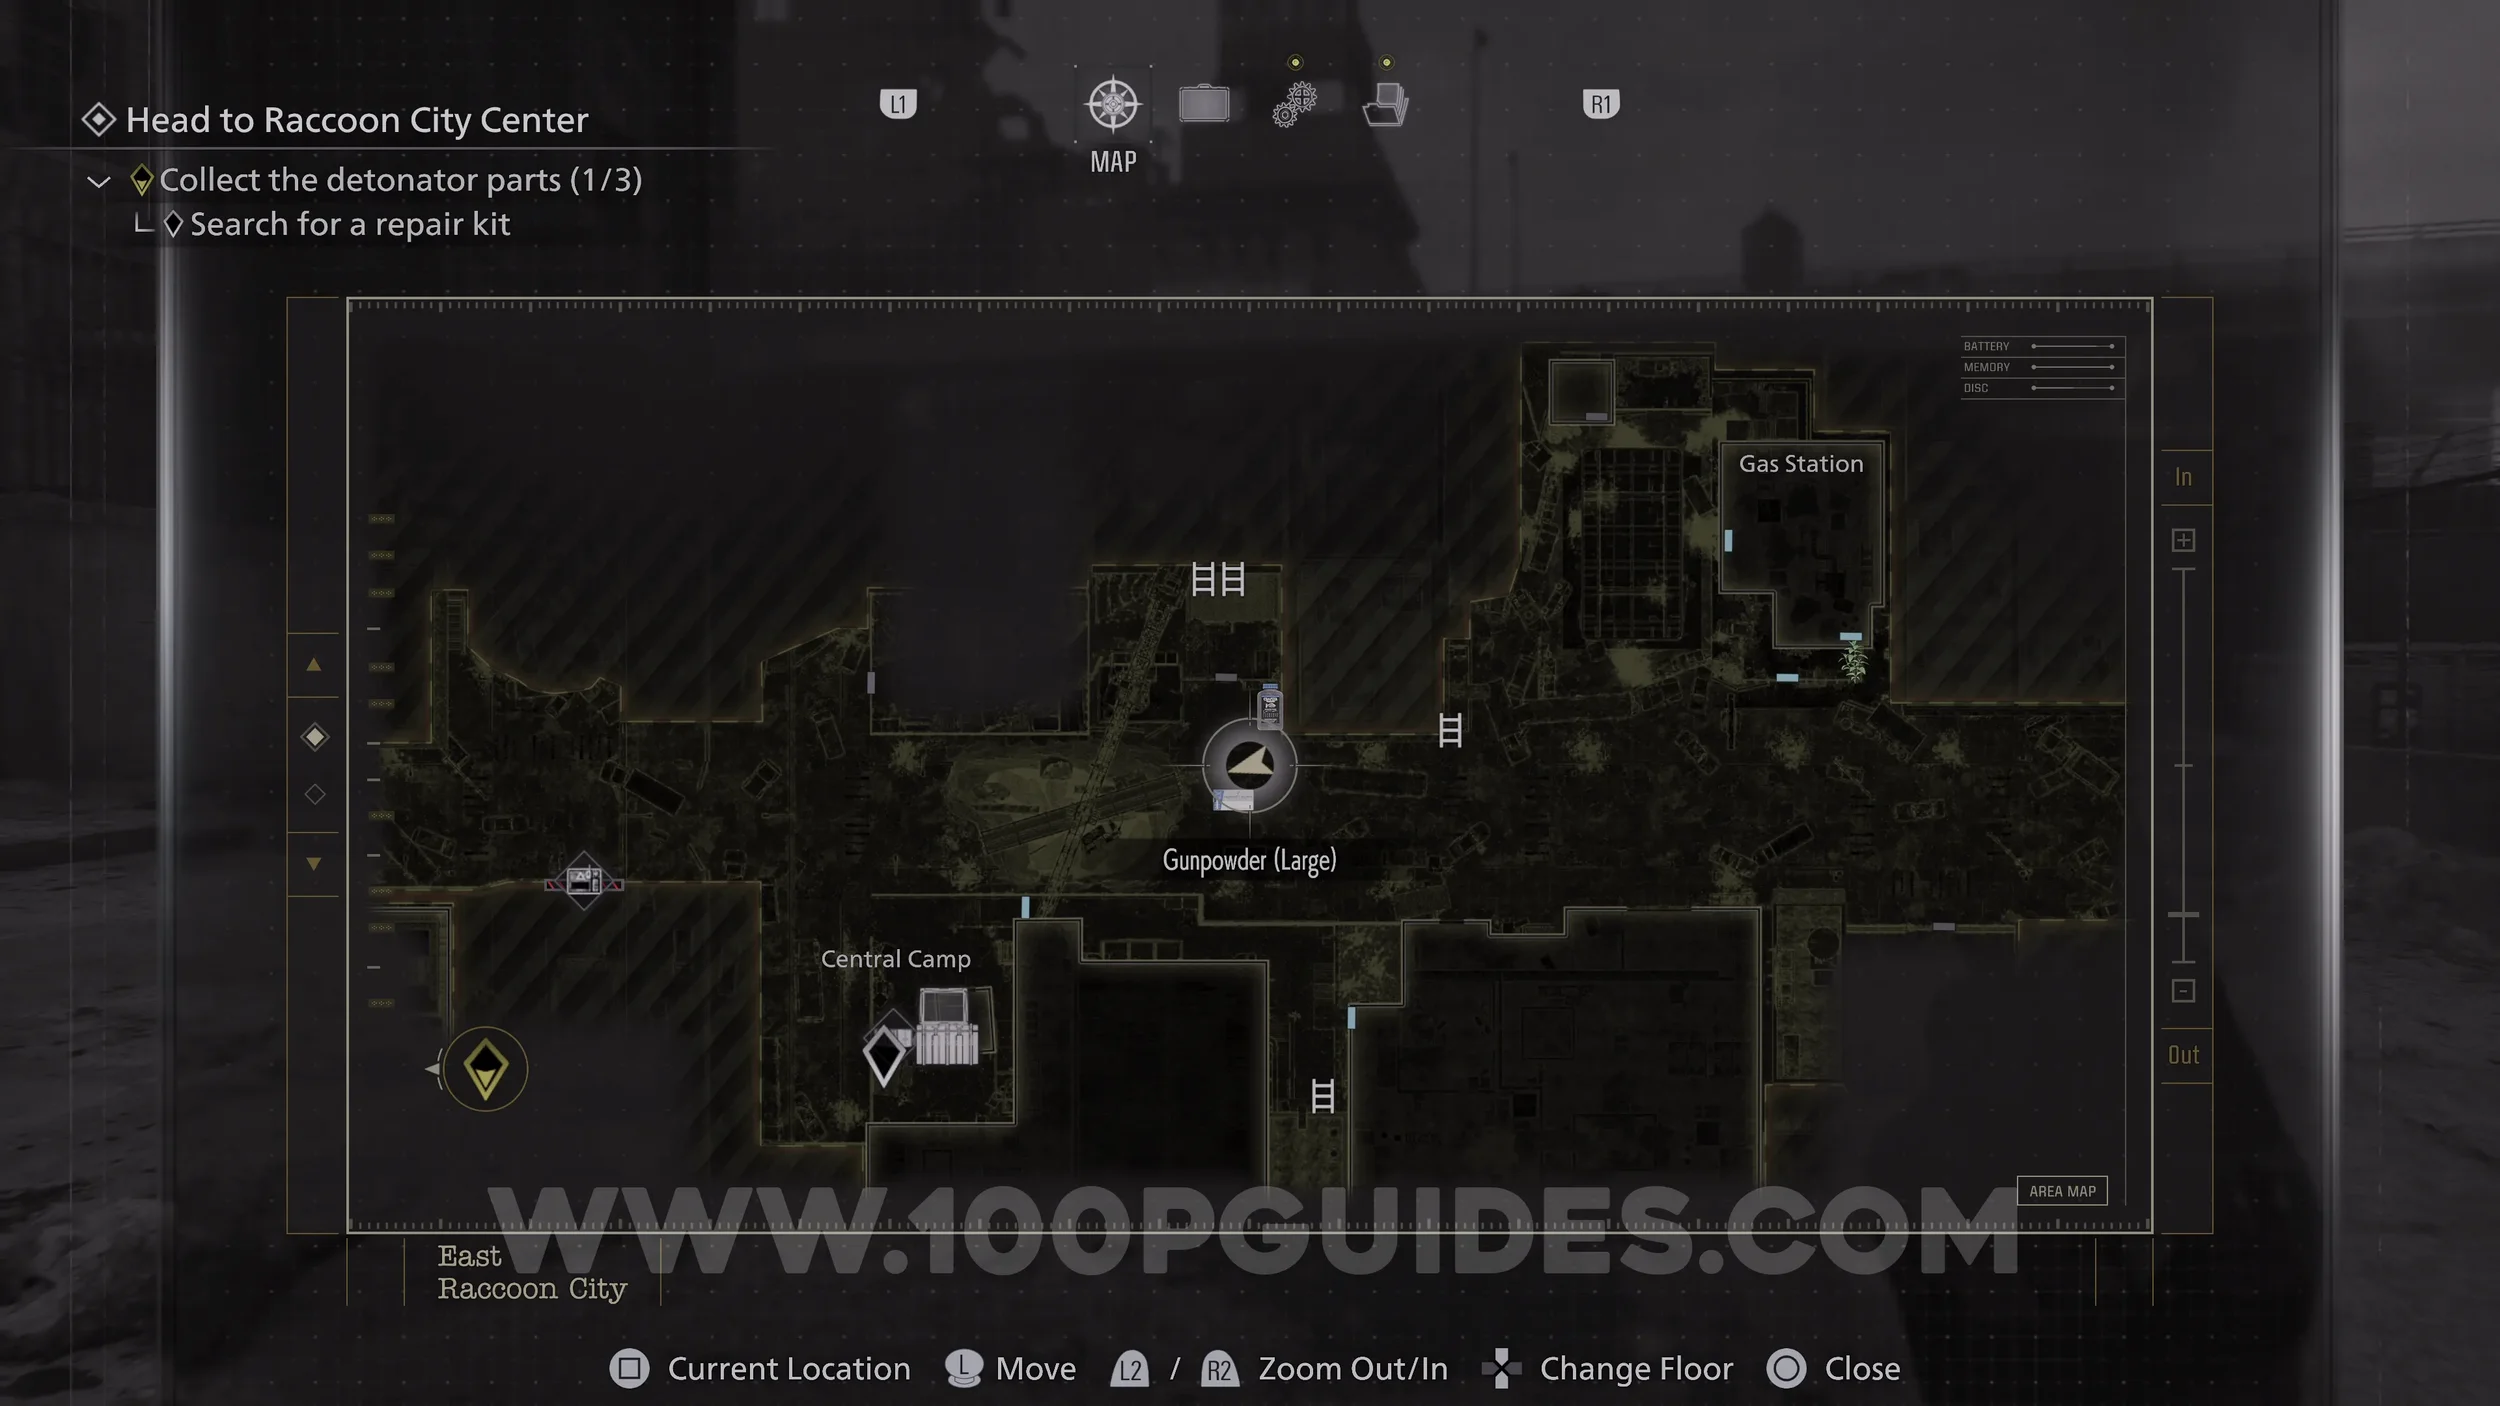
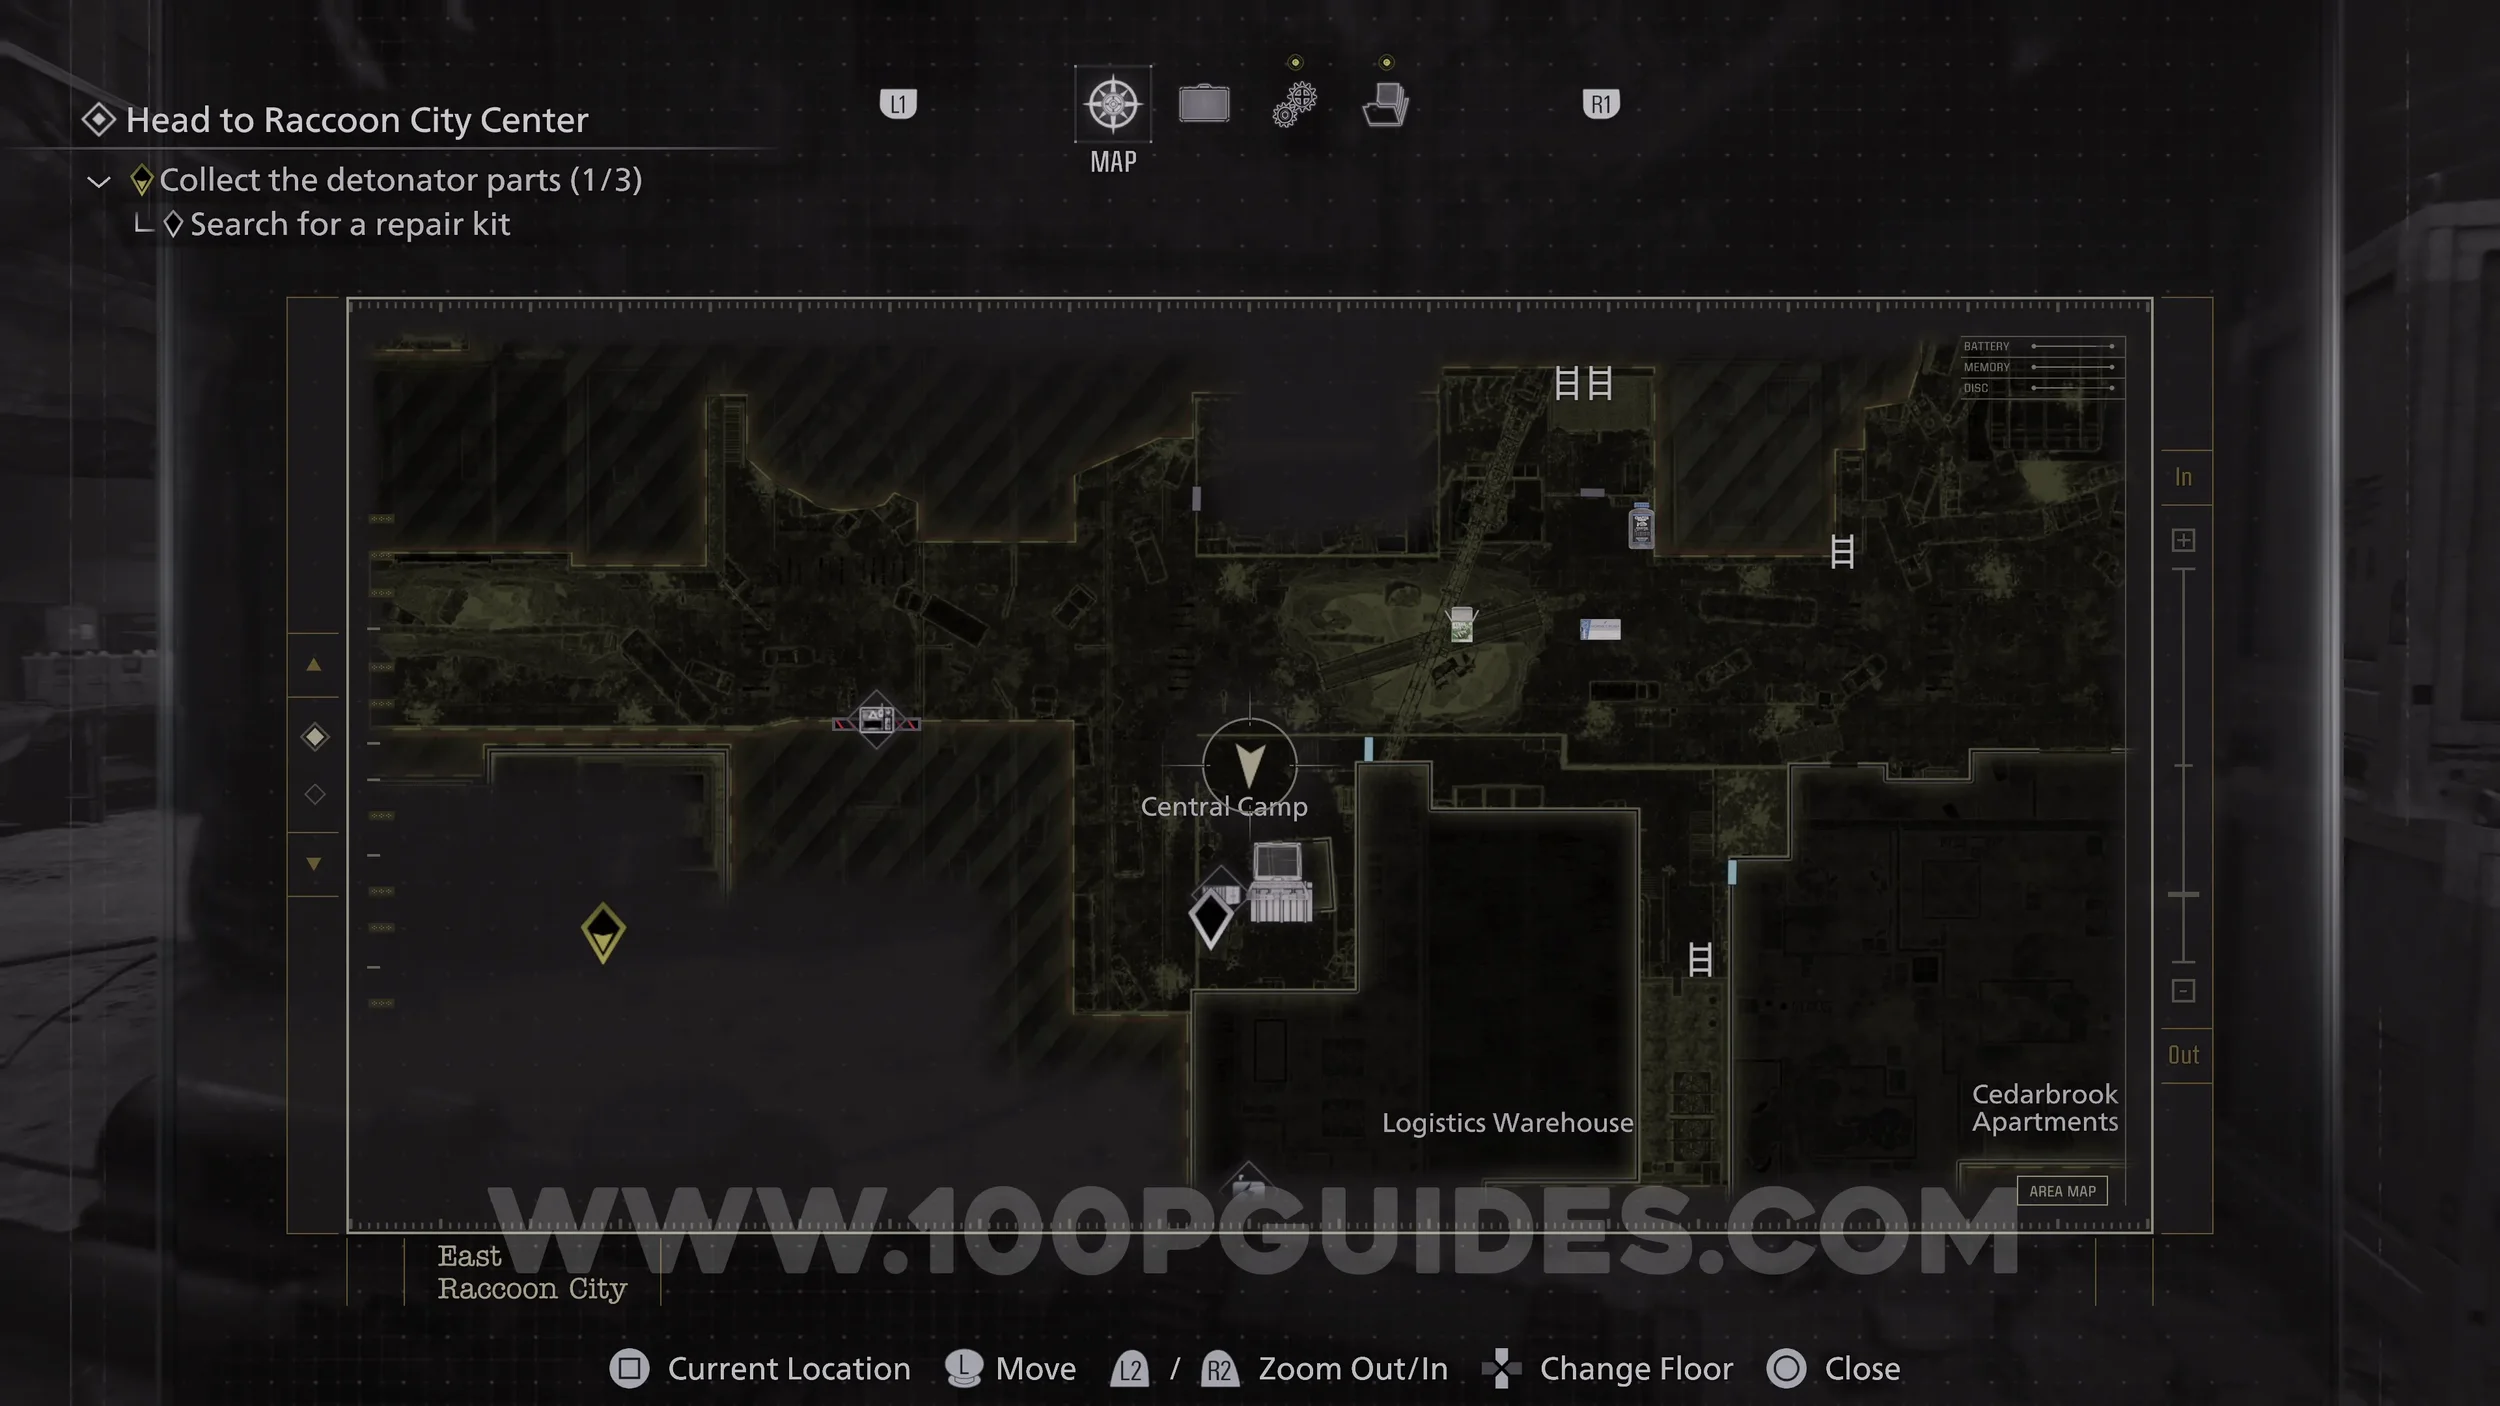
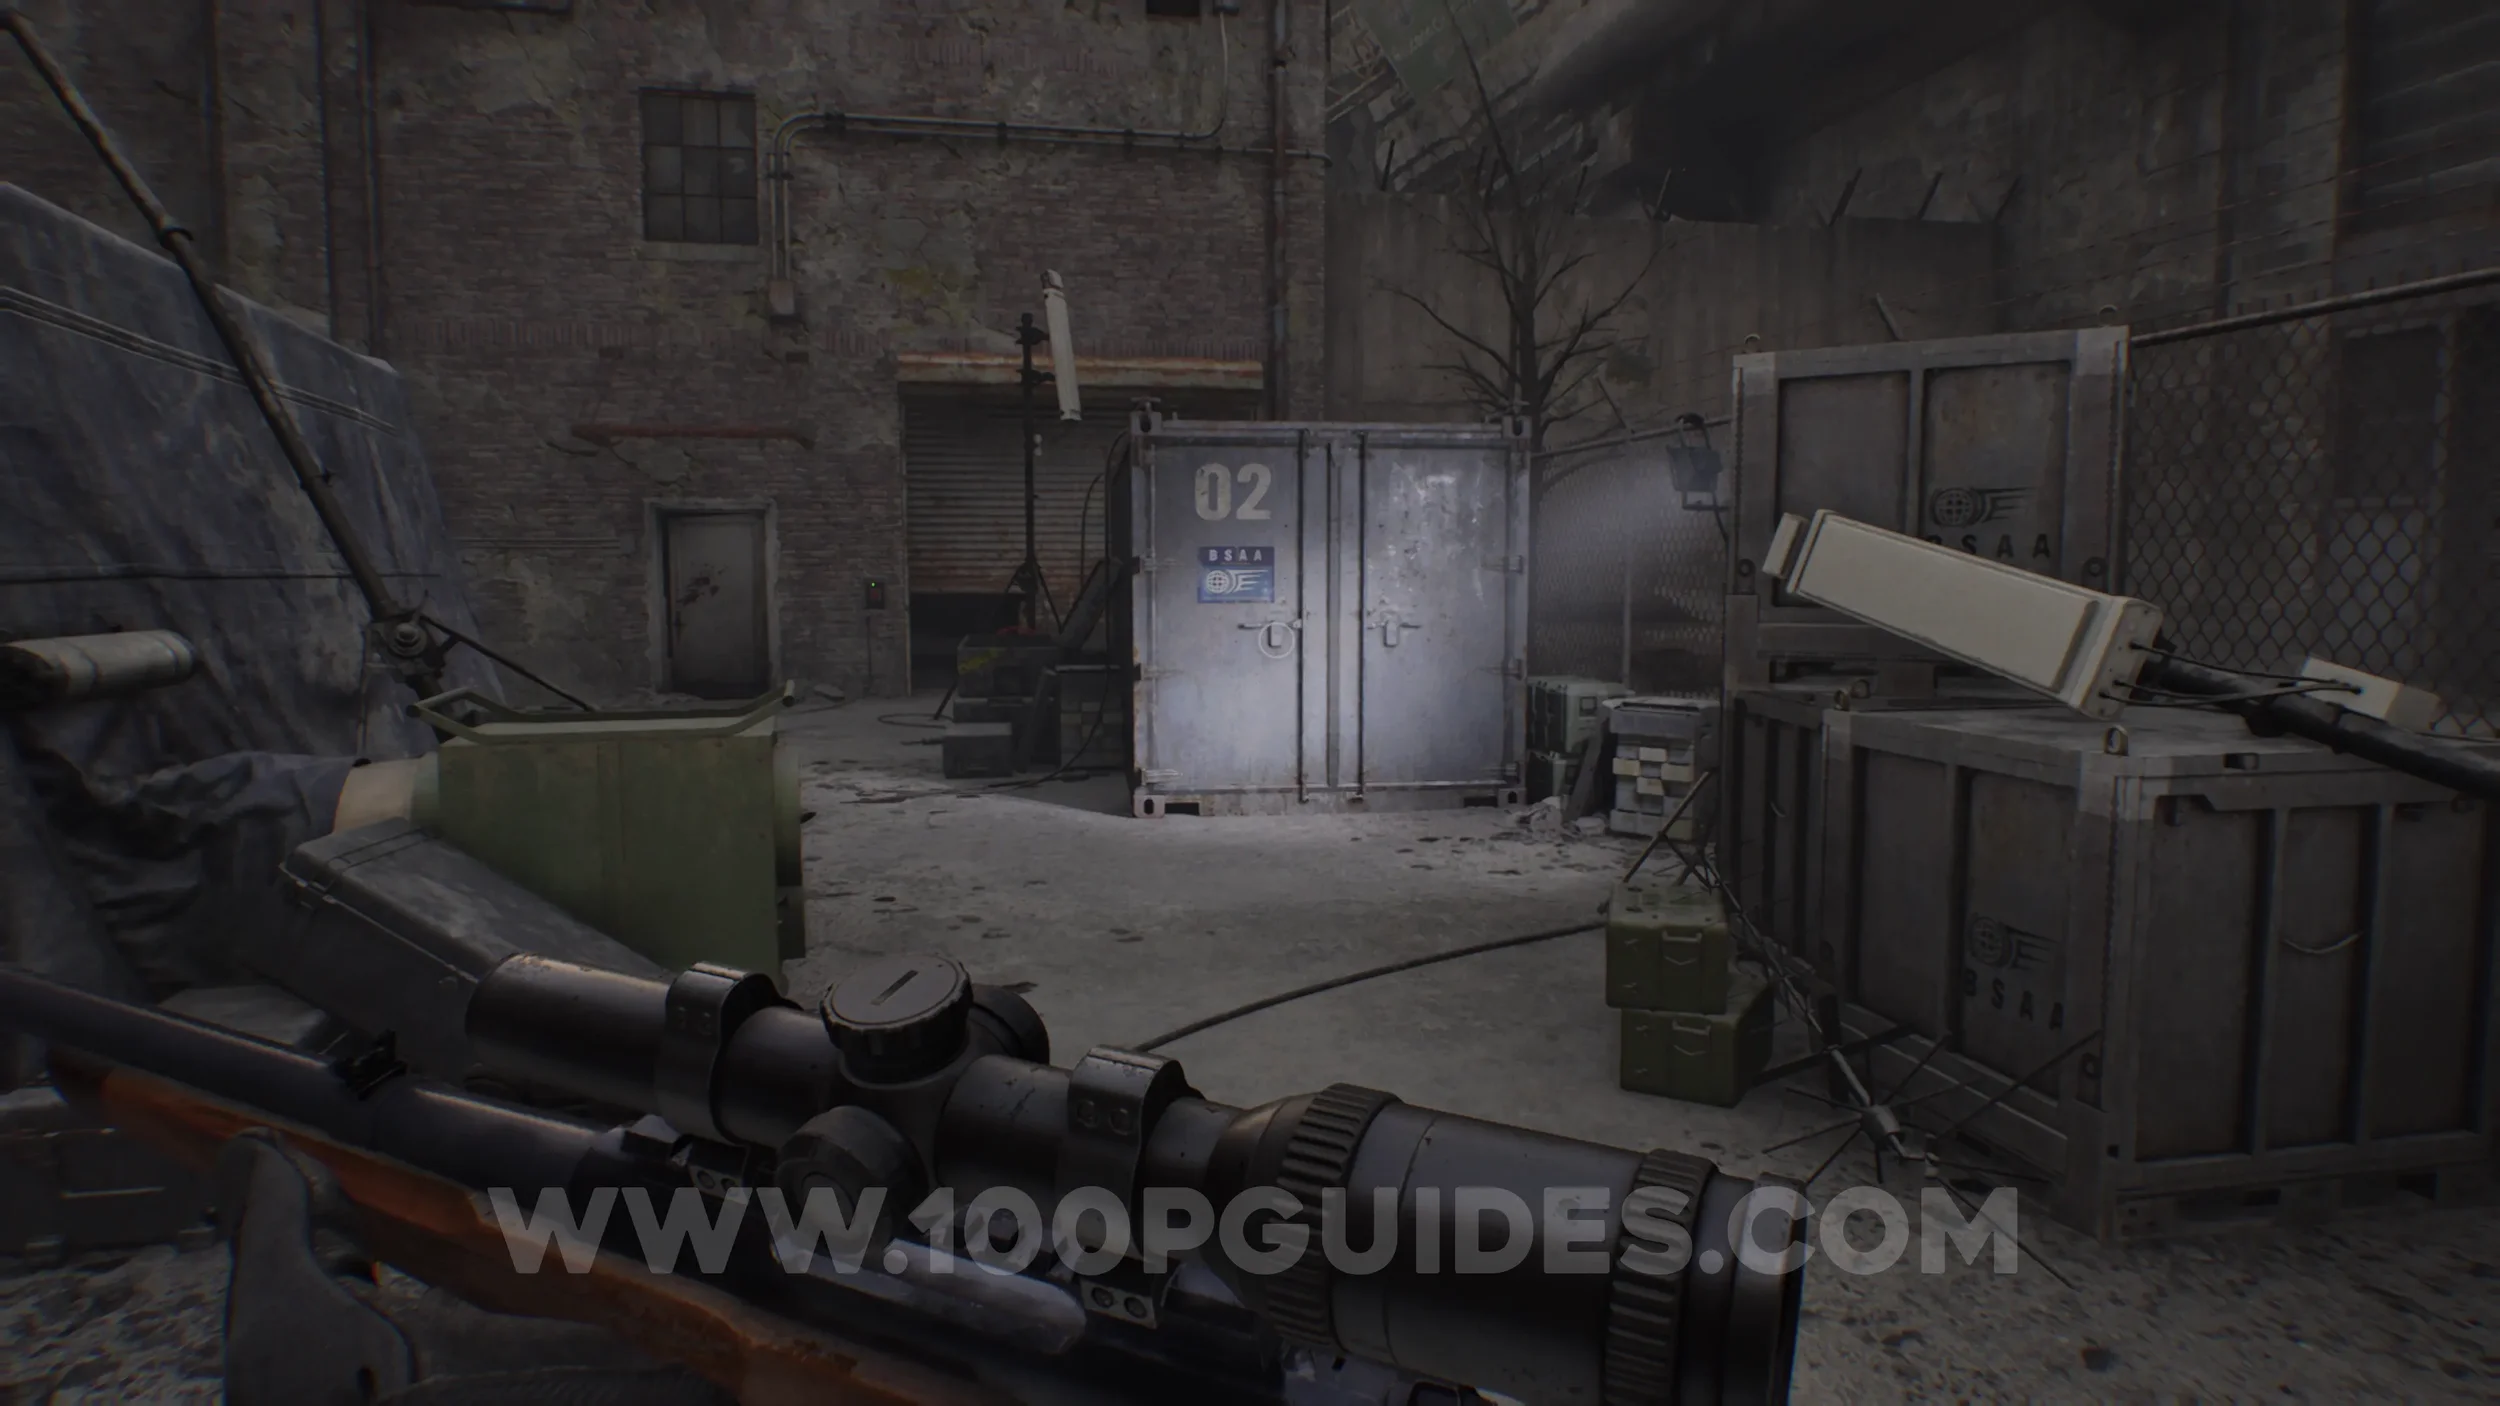
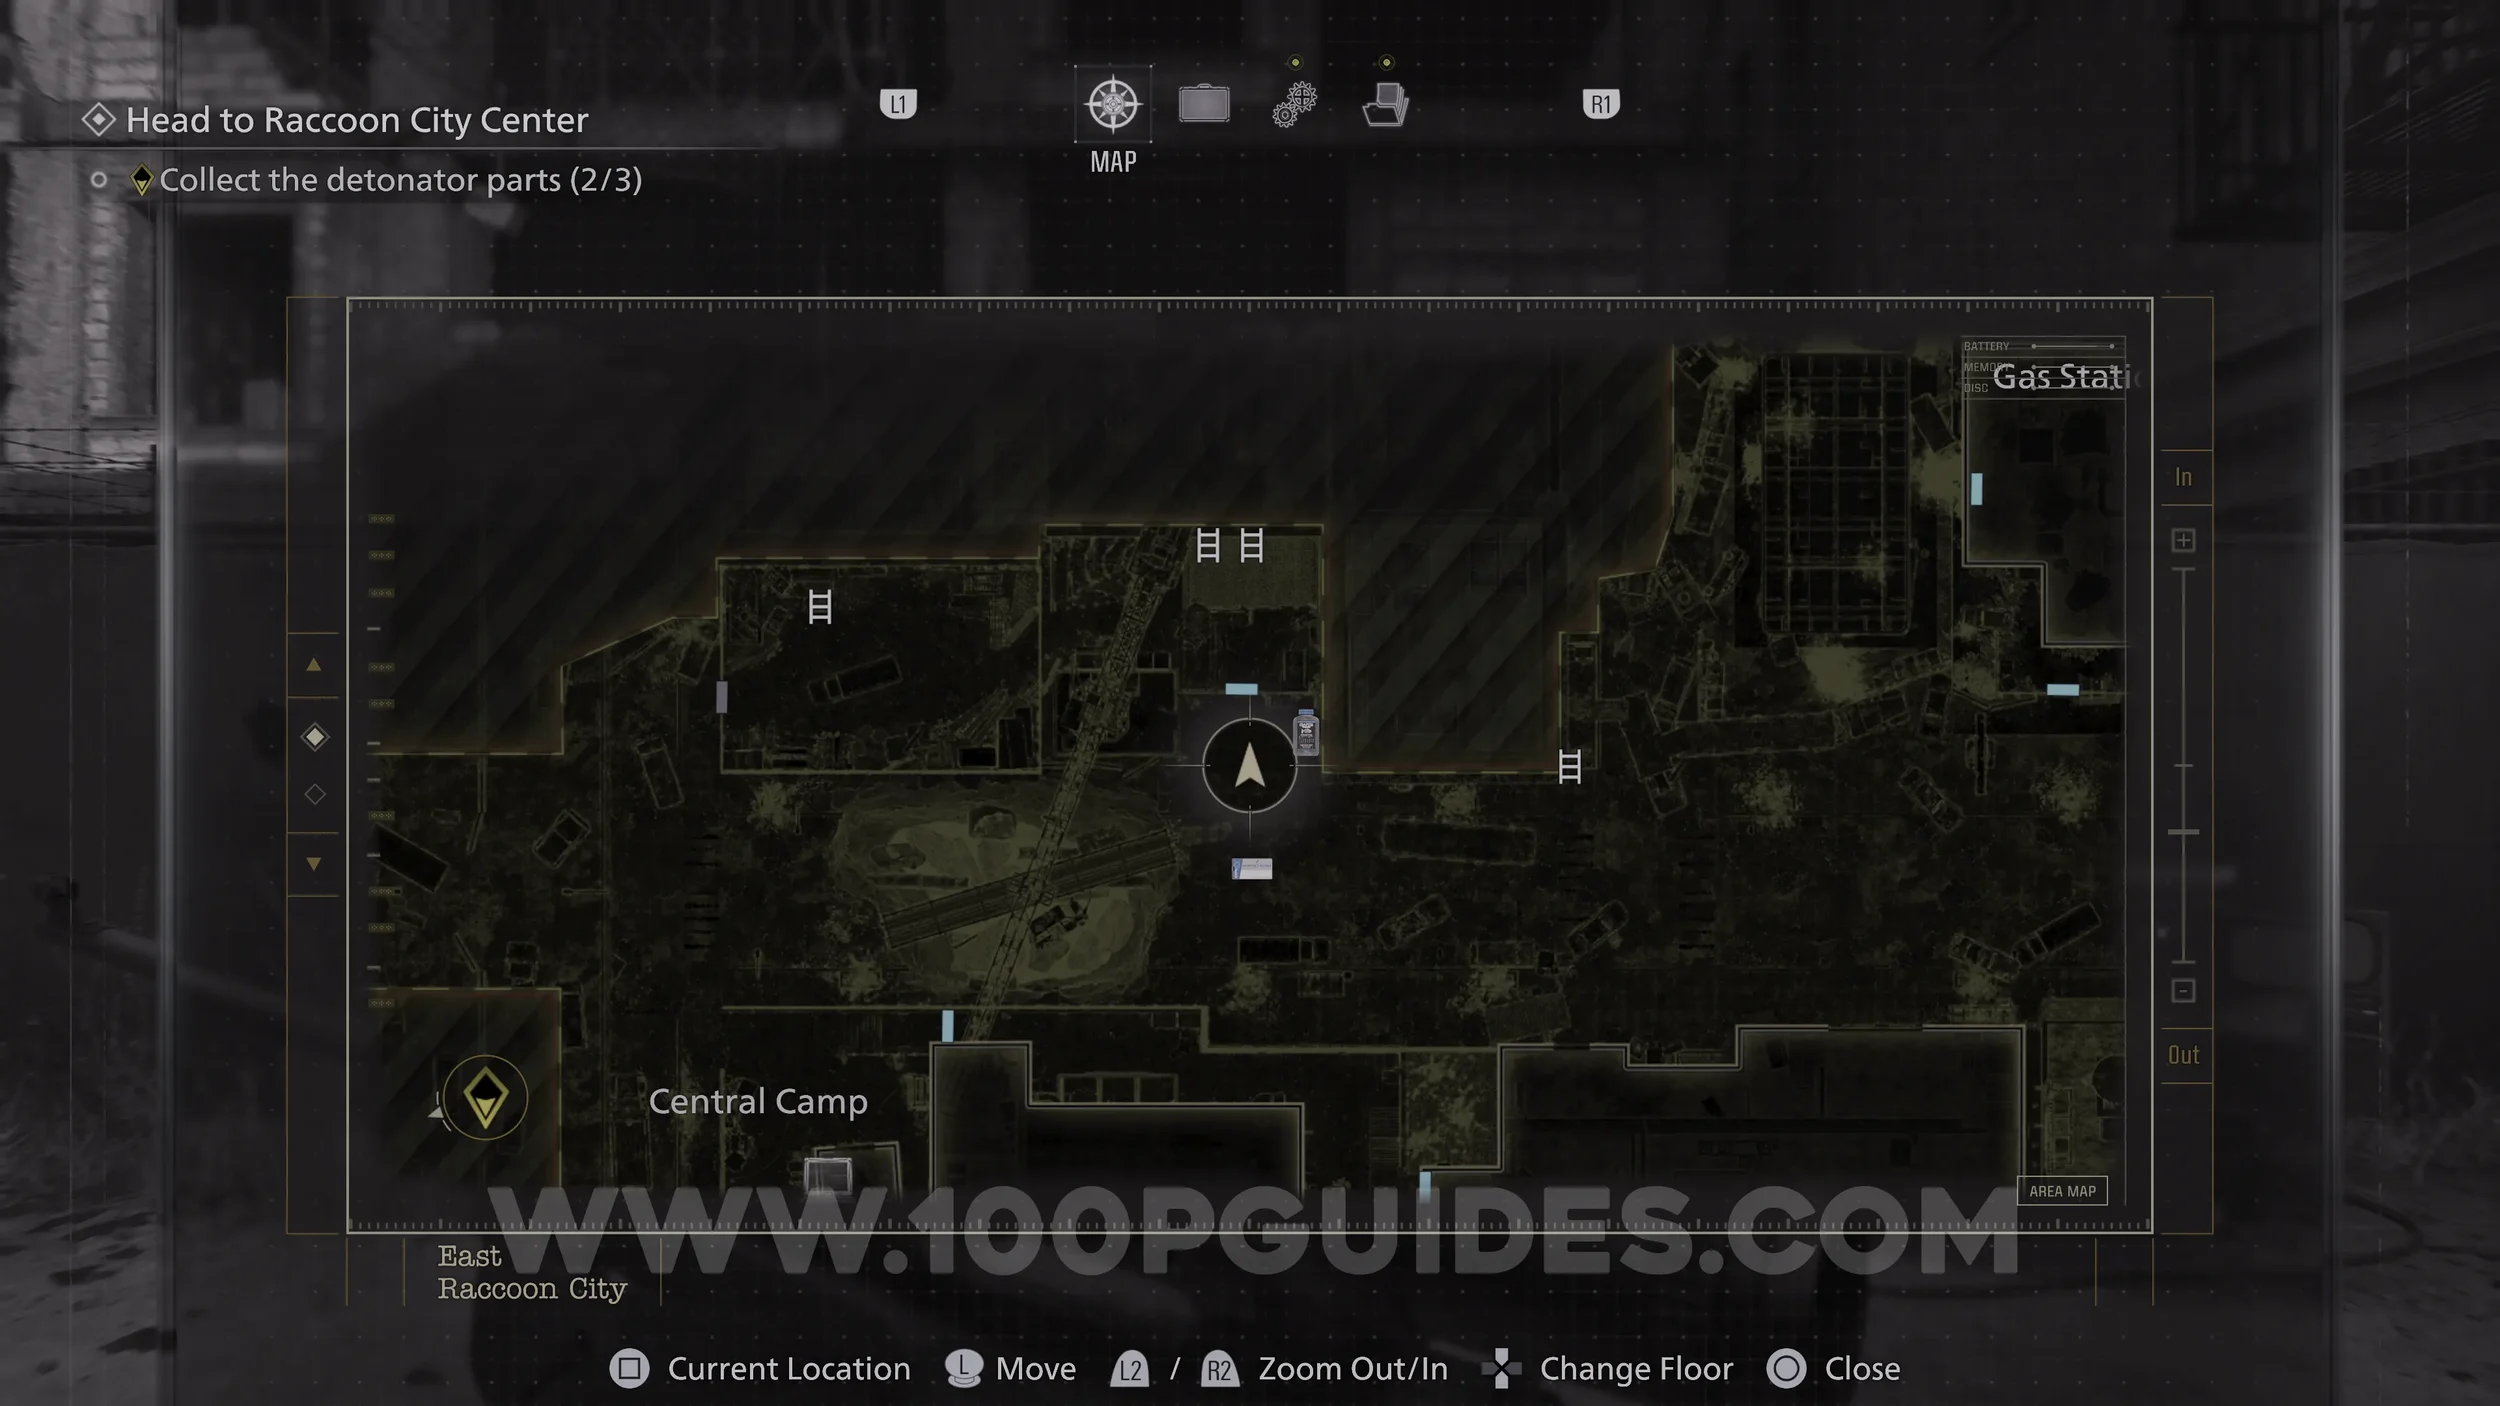
BSAA Container #2. Behind the tent in Central Camp.
Mr. Raccoon #18. Return across the shortcut and use the Full Gas Can to power the yellow generator, which will open the gate. Proceed through to reach the subway.
A Mr. Raccoon can be found inside the second train car you pass through.

BSAA Container #3 & Charm #4 - BSAA Emblem Charm. From the previous collectible, continue through the subway and exit on the other side to return to the starting area. You should now have the BSAA Container Key, which can be used to open the final container located west of Café Oasis.
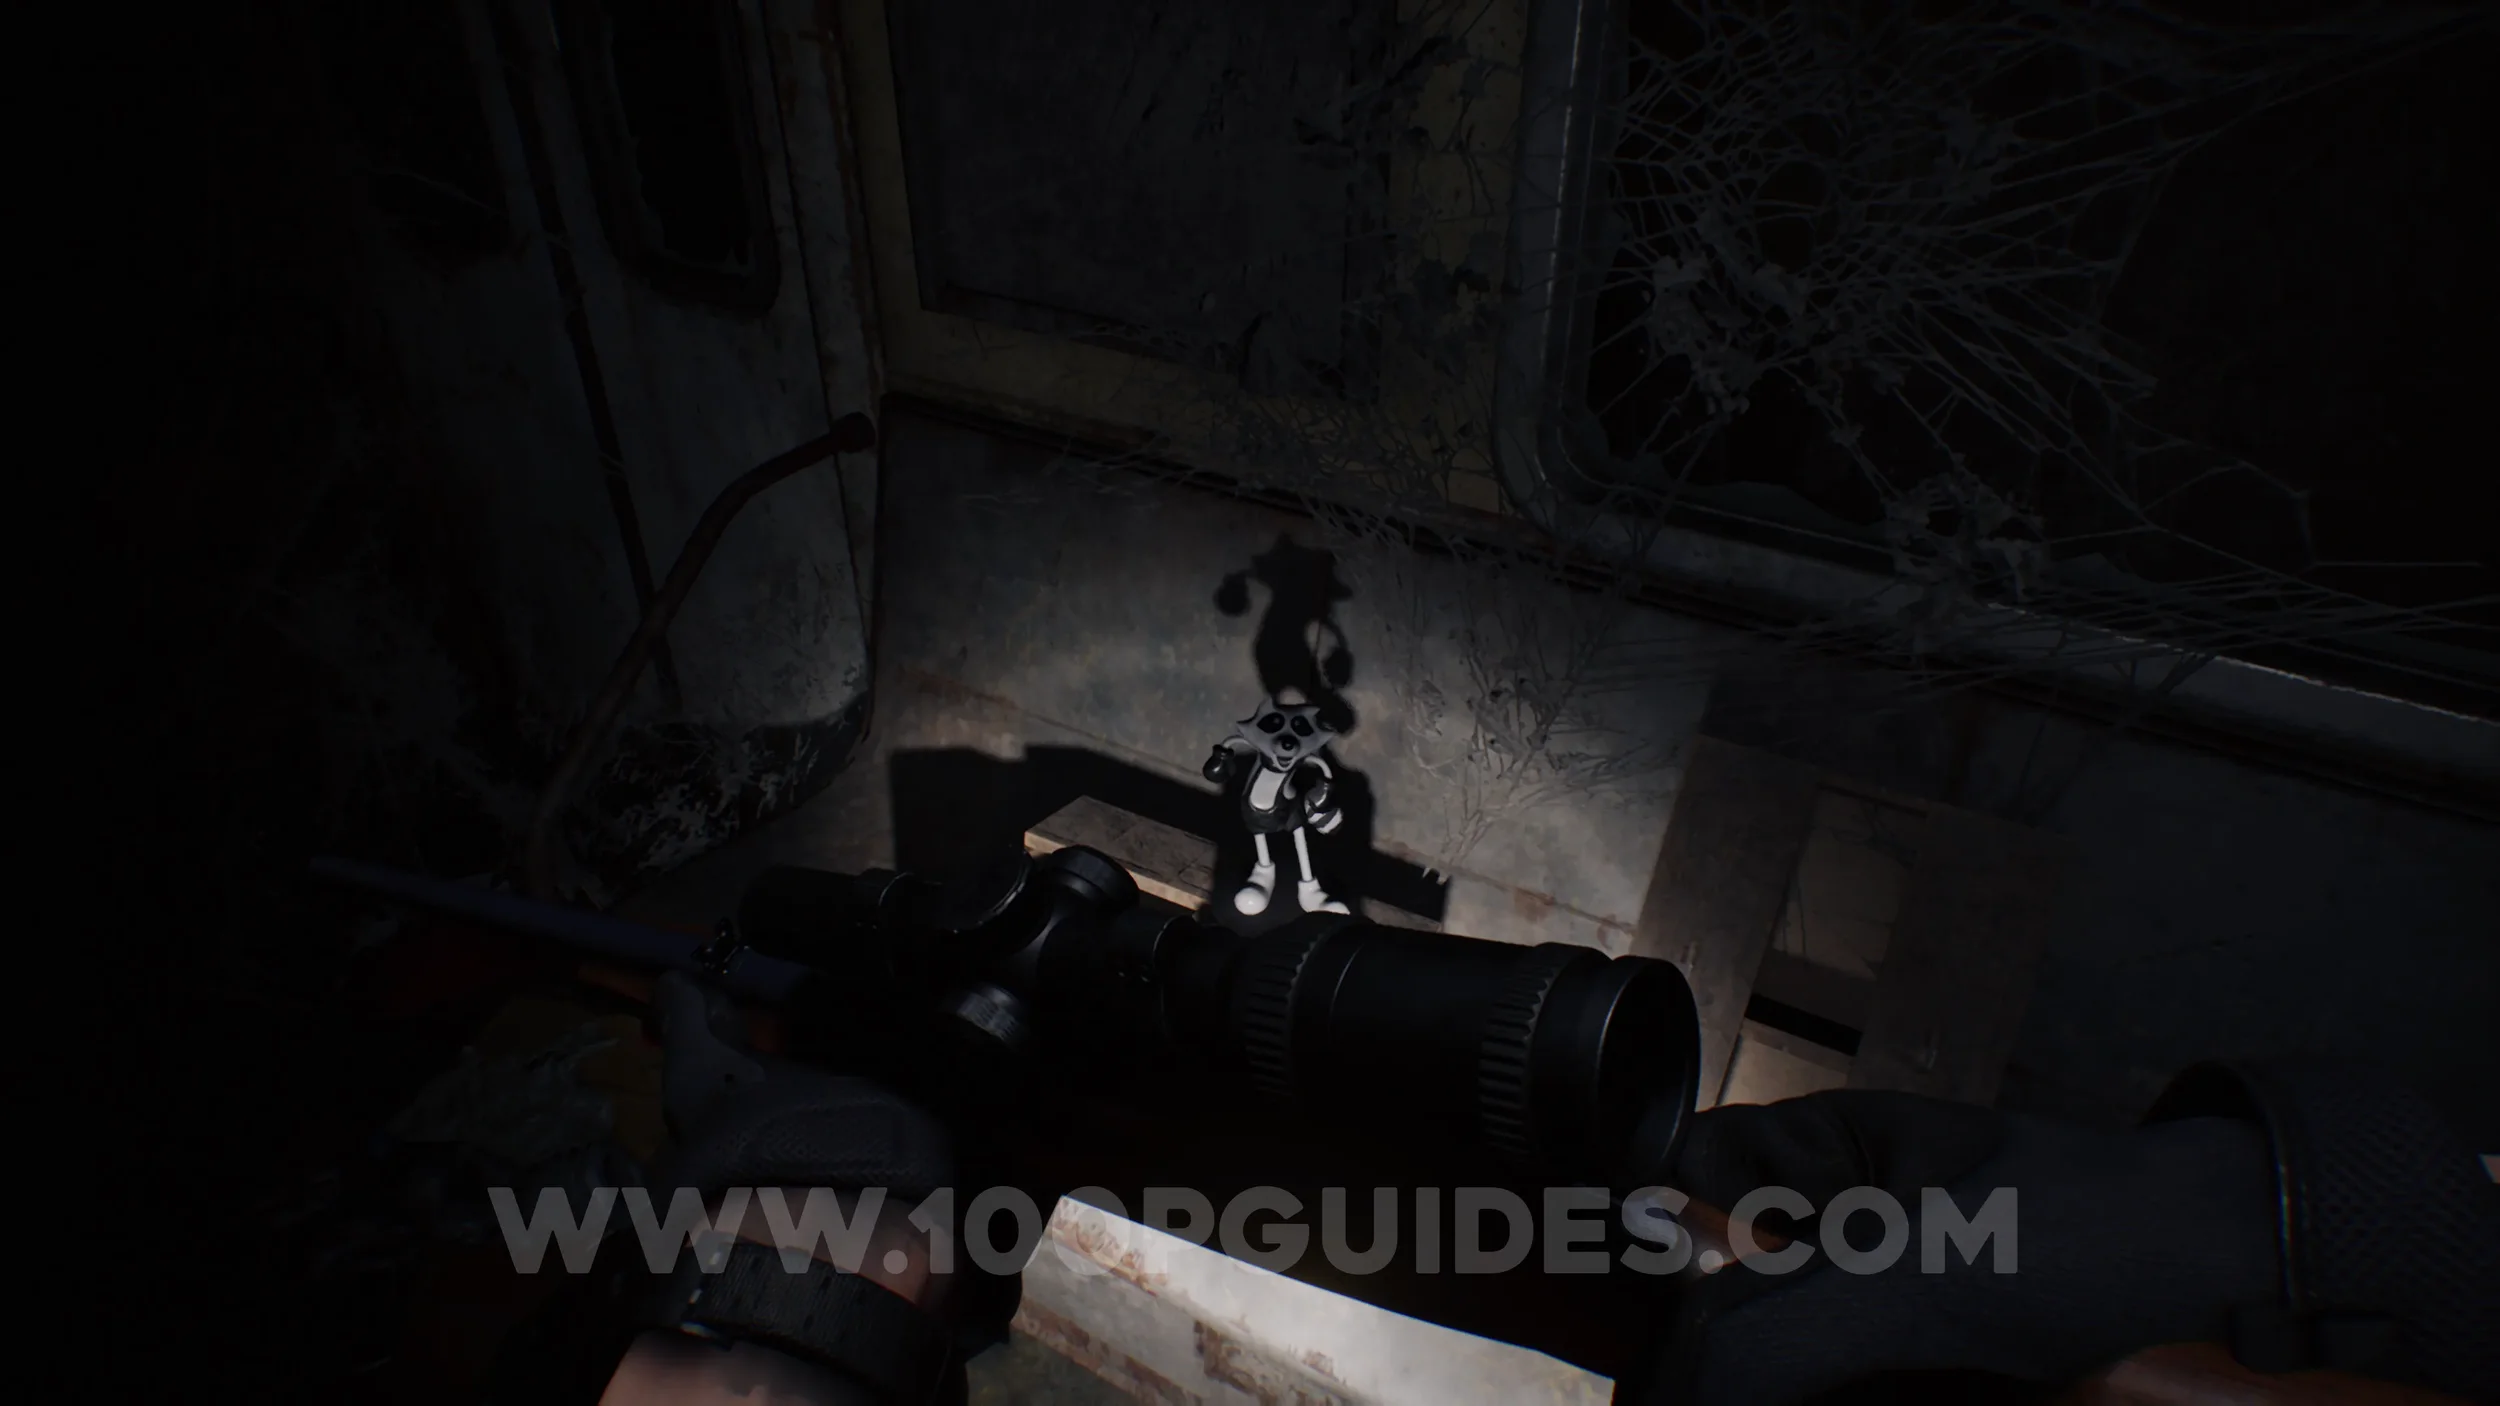
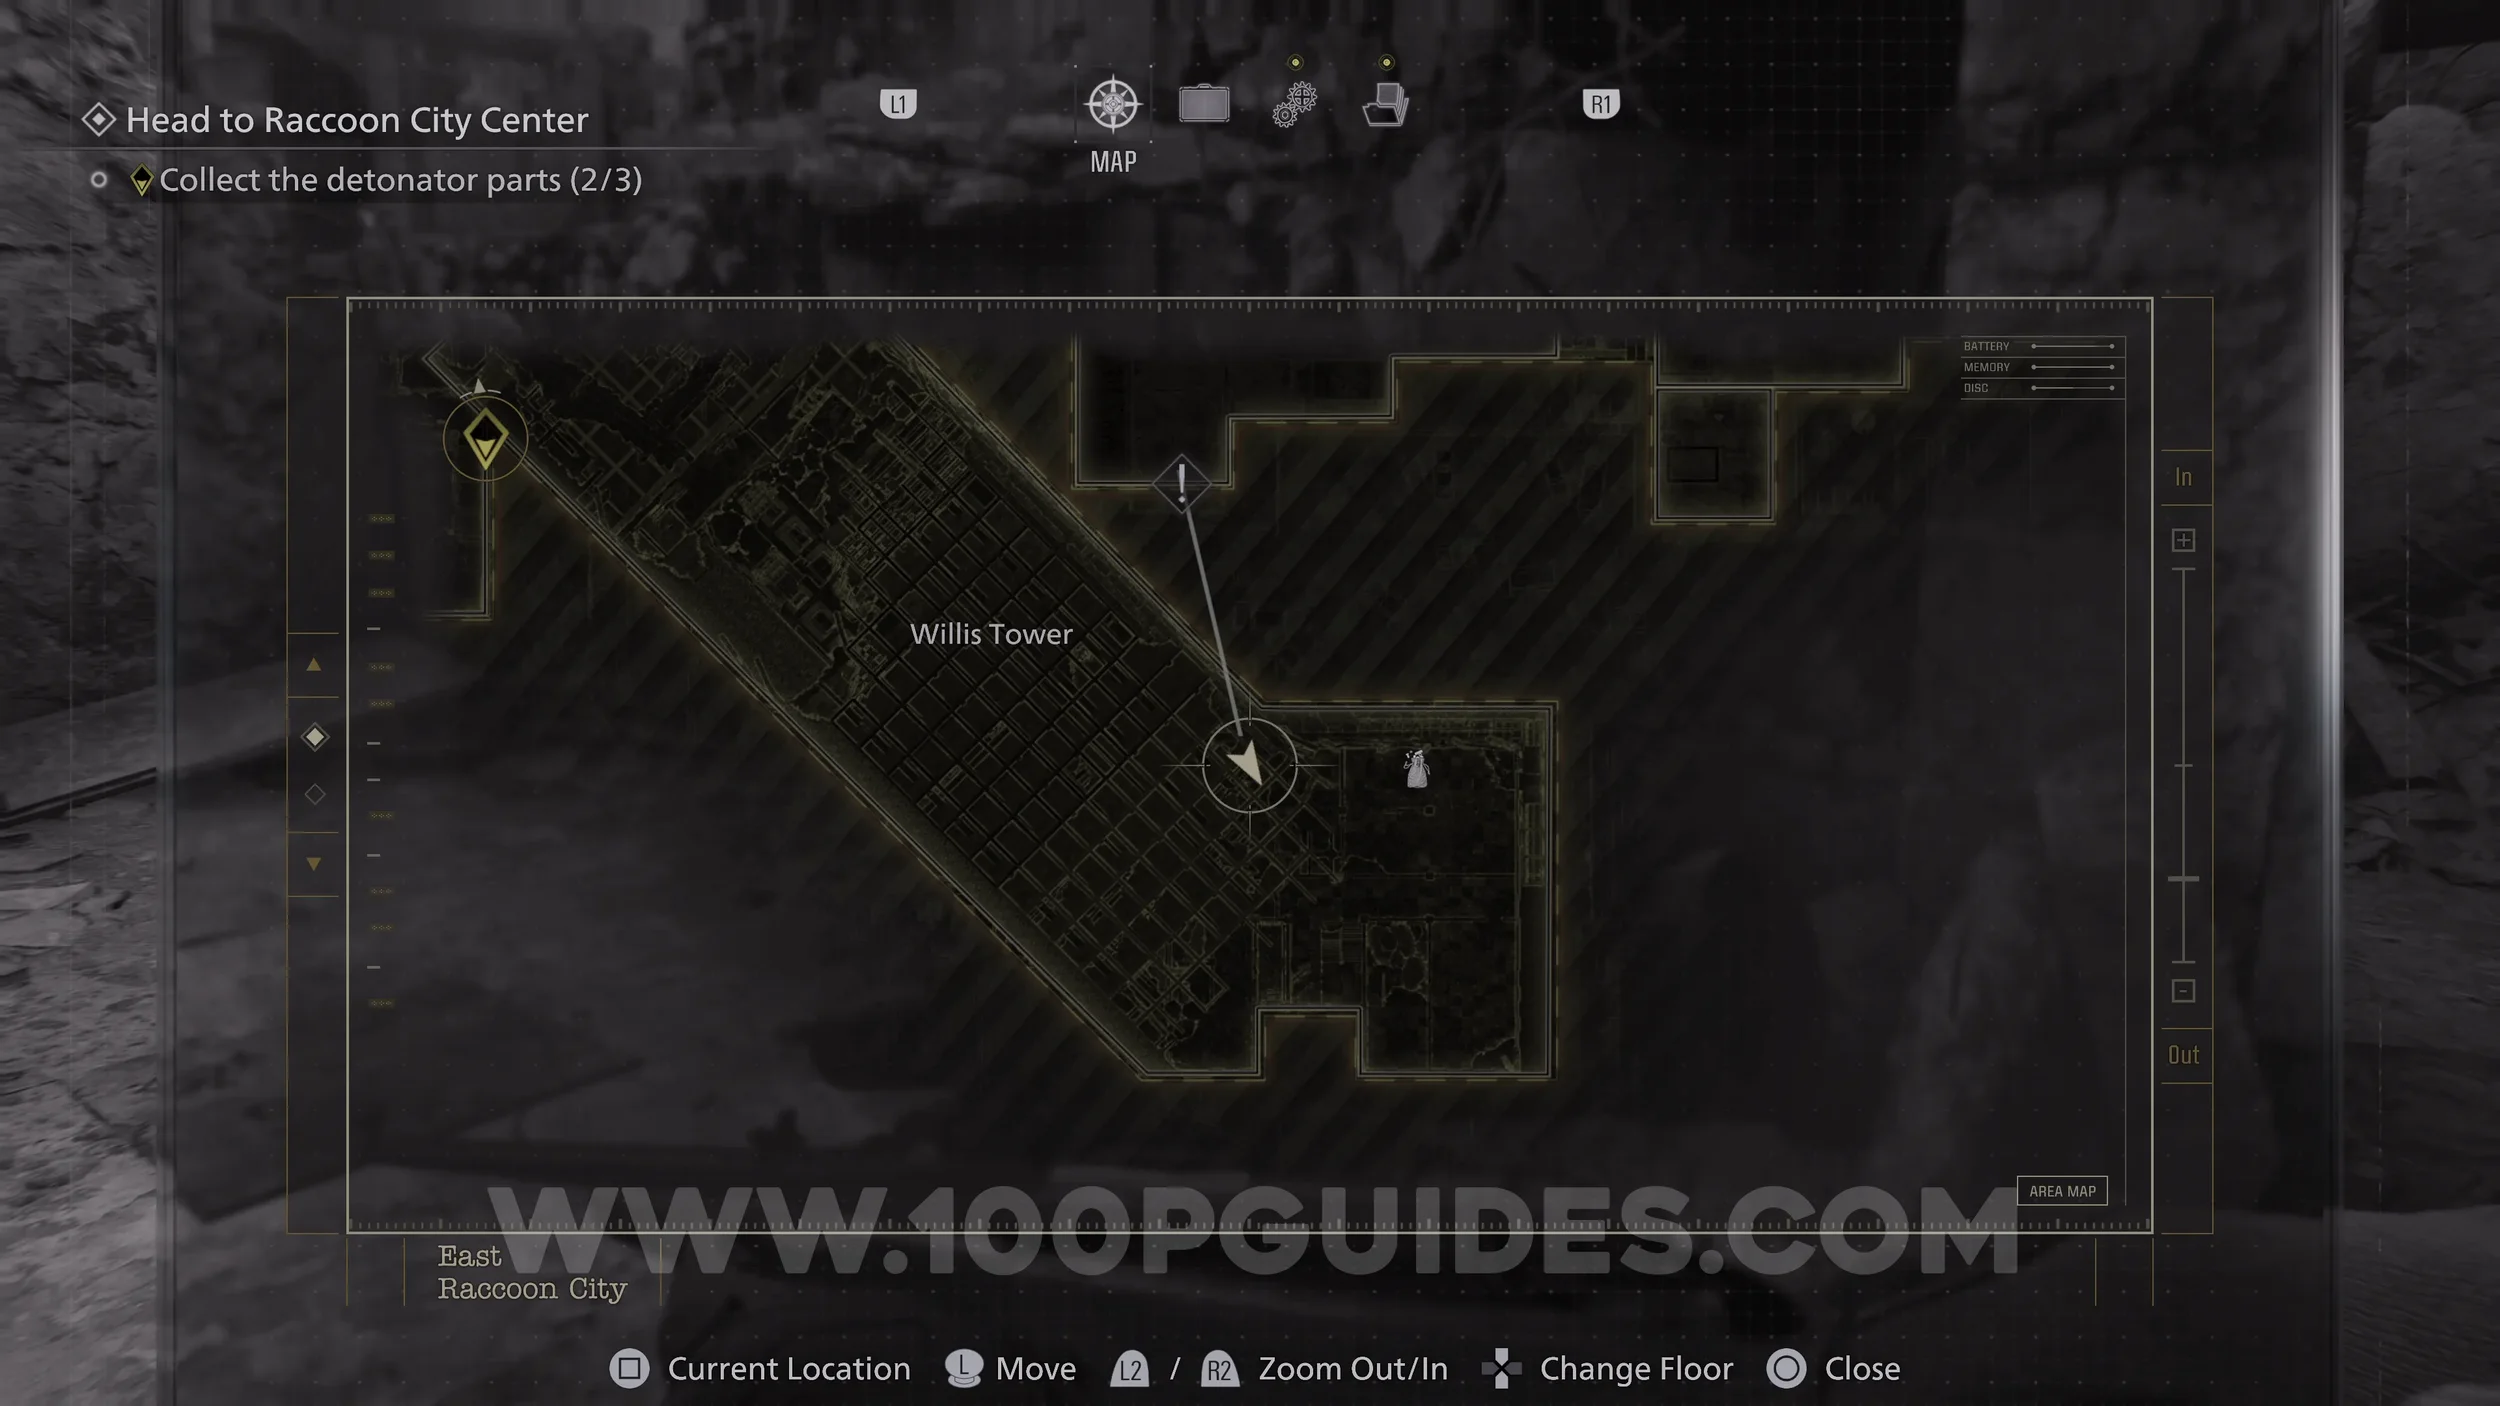
Mr. Raccoon #19. After using the Zipline to reach Willis Tower, go up the stairs and then go right. At the end you will find the Mr. Raccoon on a shelf.
Trophy - Road Rage. During the bike chase, Victor will eventually appear on another motorcycle and begin attacking you. Watch for a red arrow above his head, which indicates that he is about to fire a rocket launcher.
Shoot him while he is taking aim to unlock the trophy.

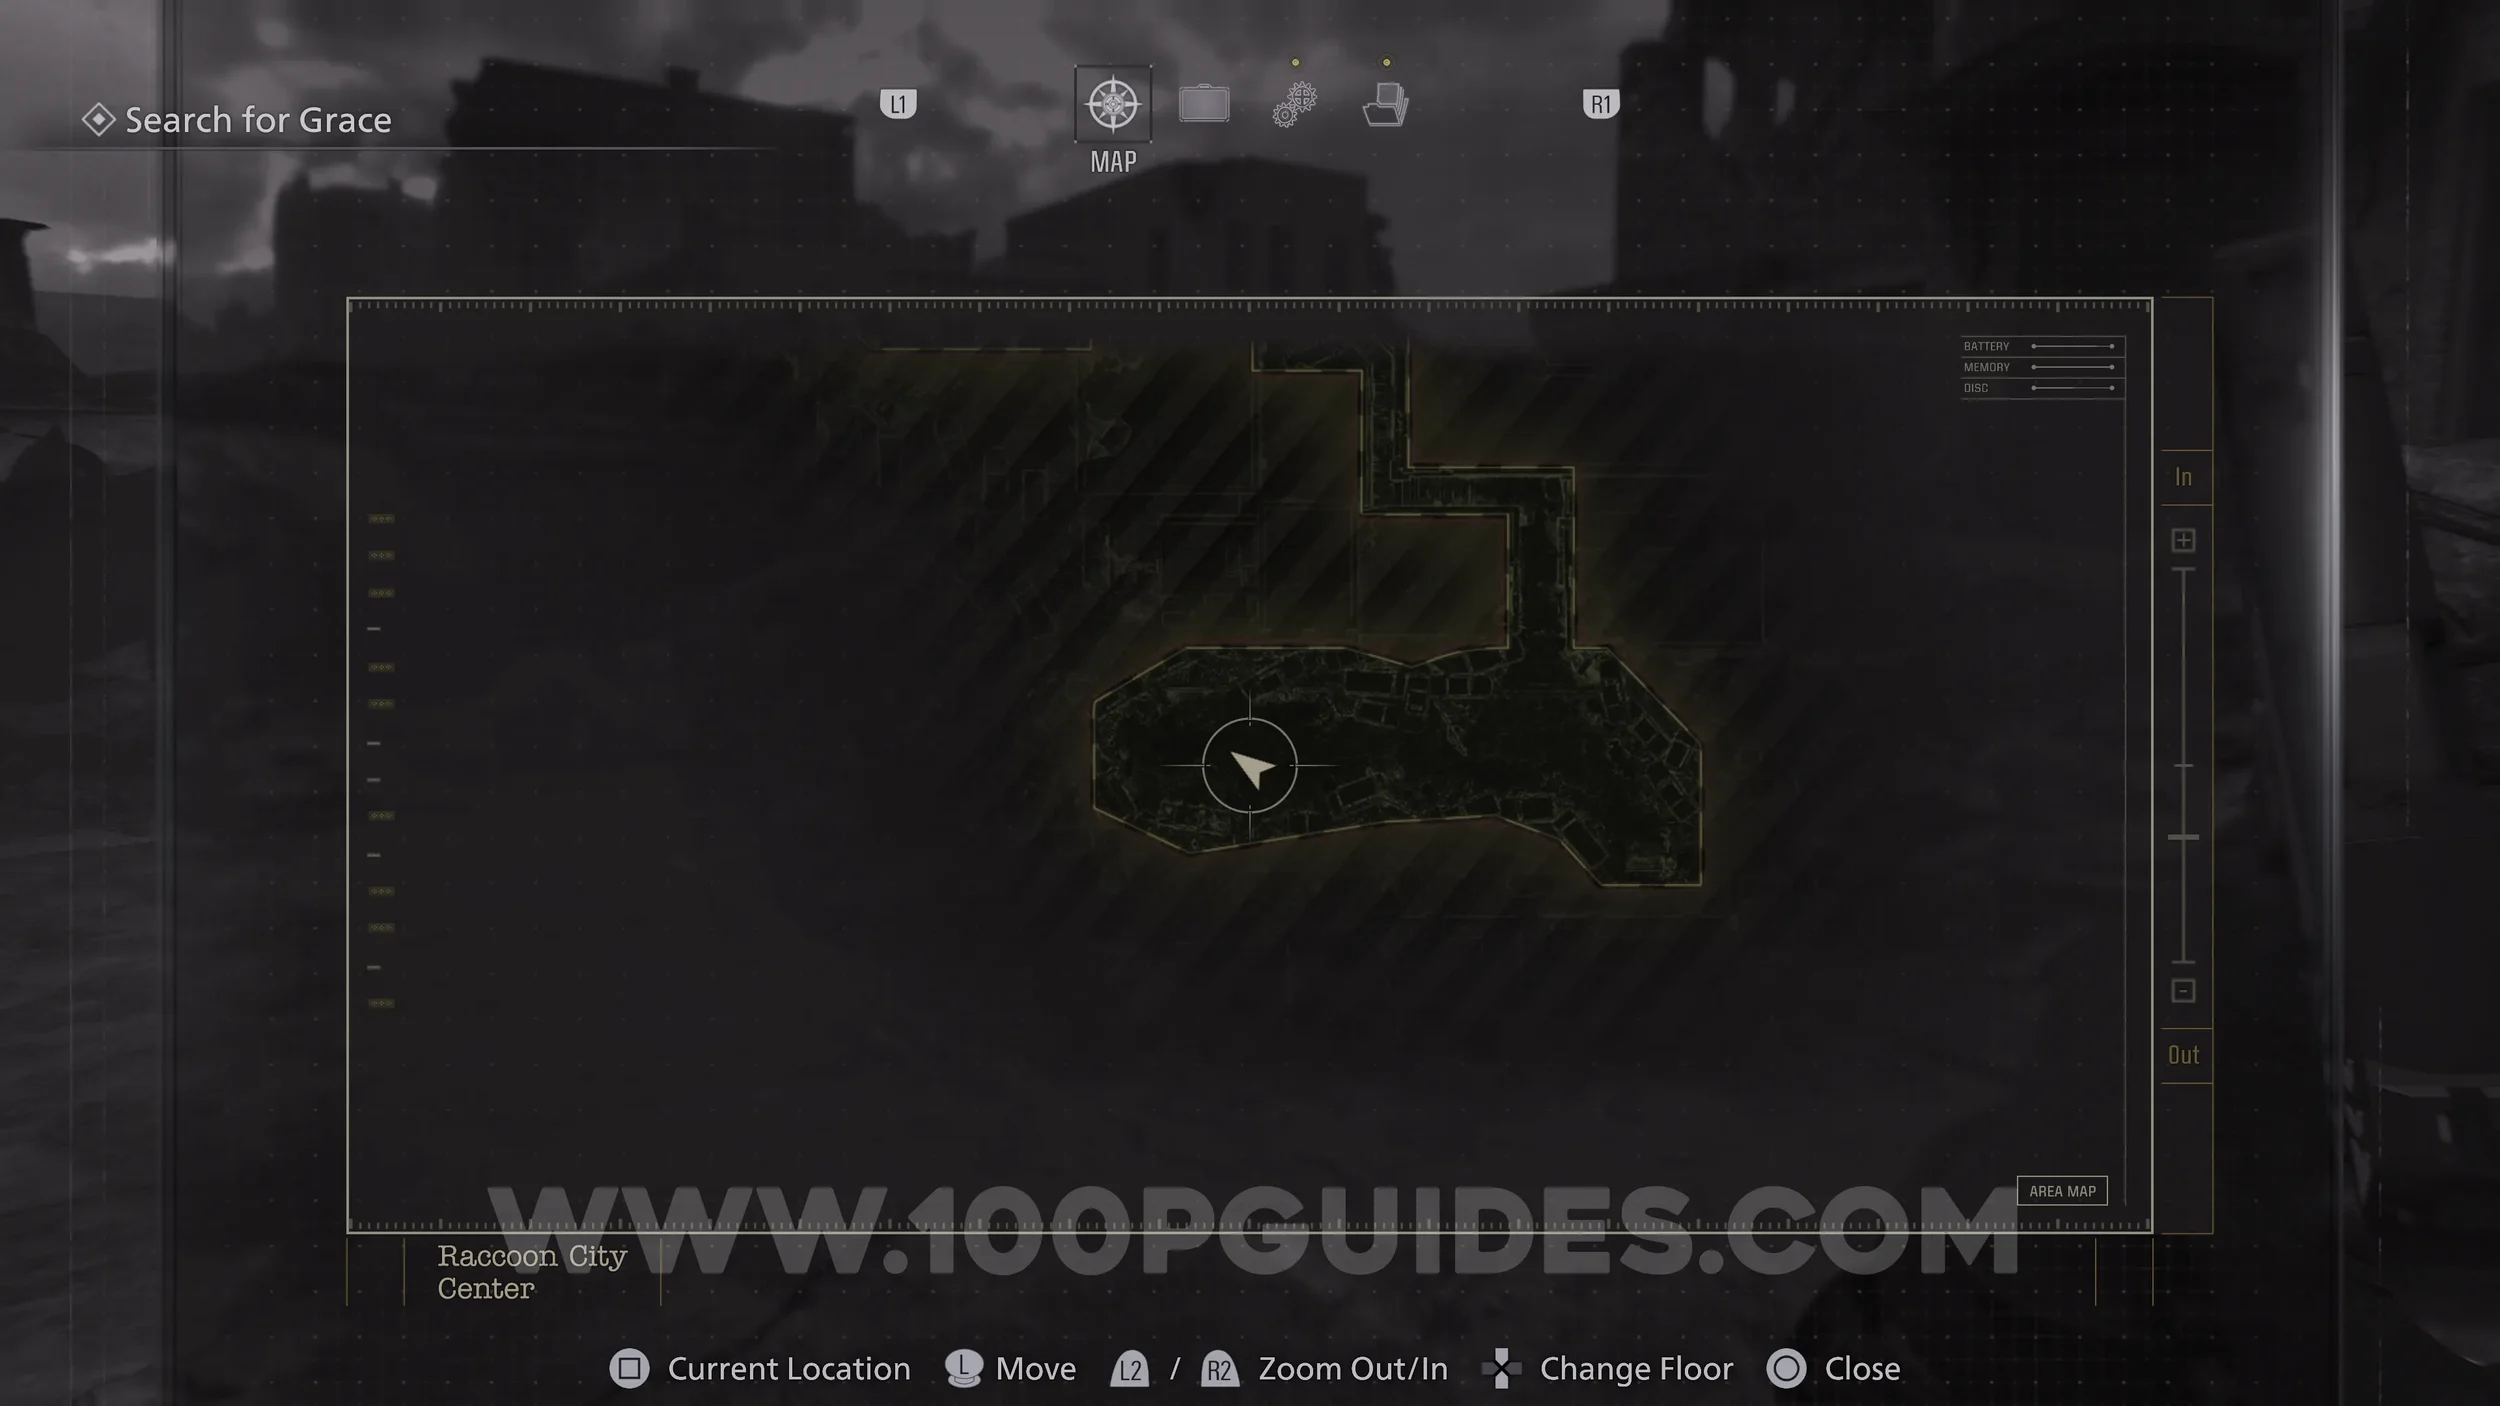
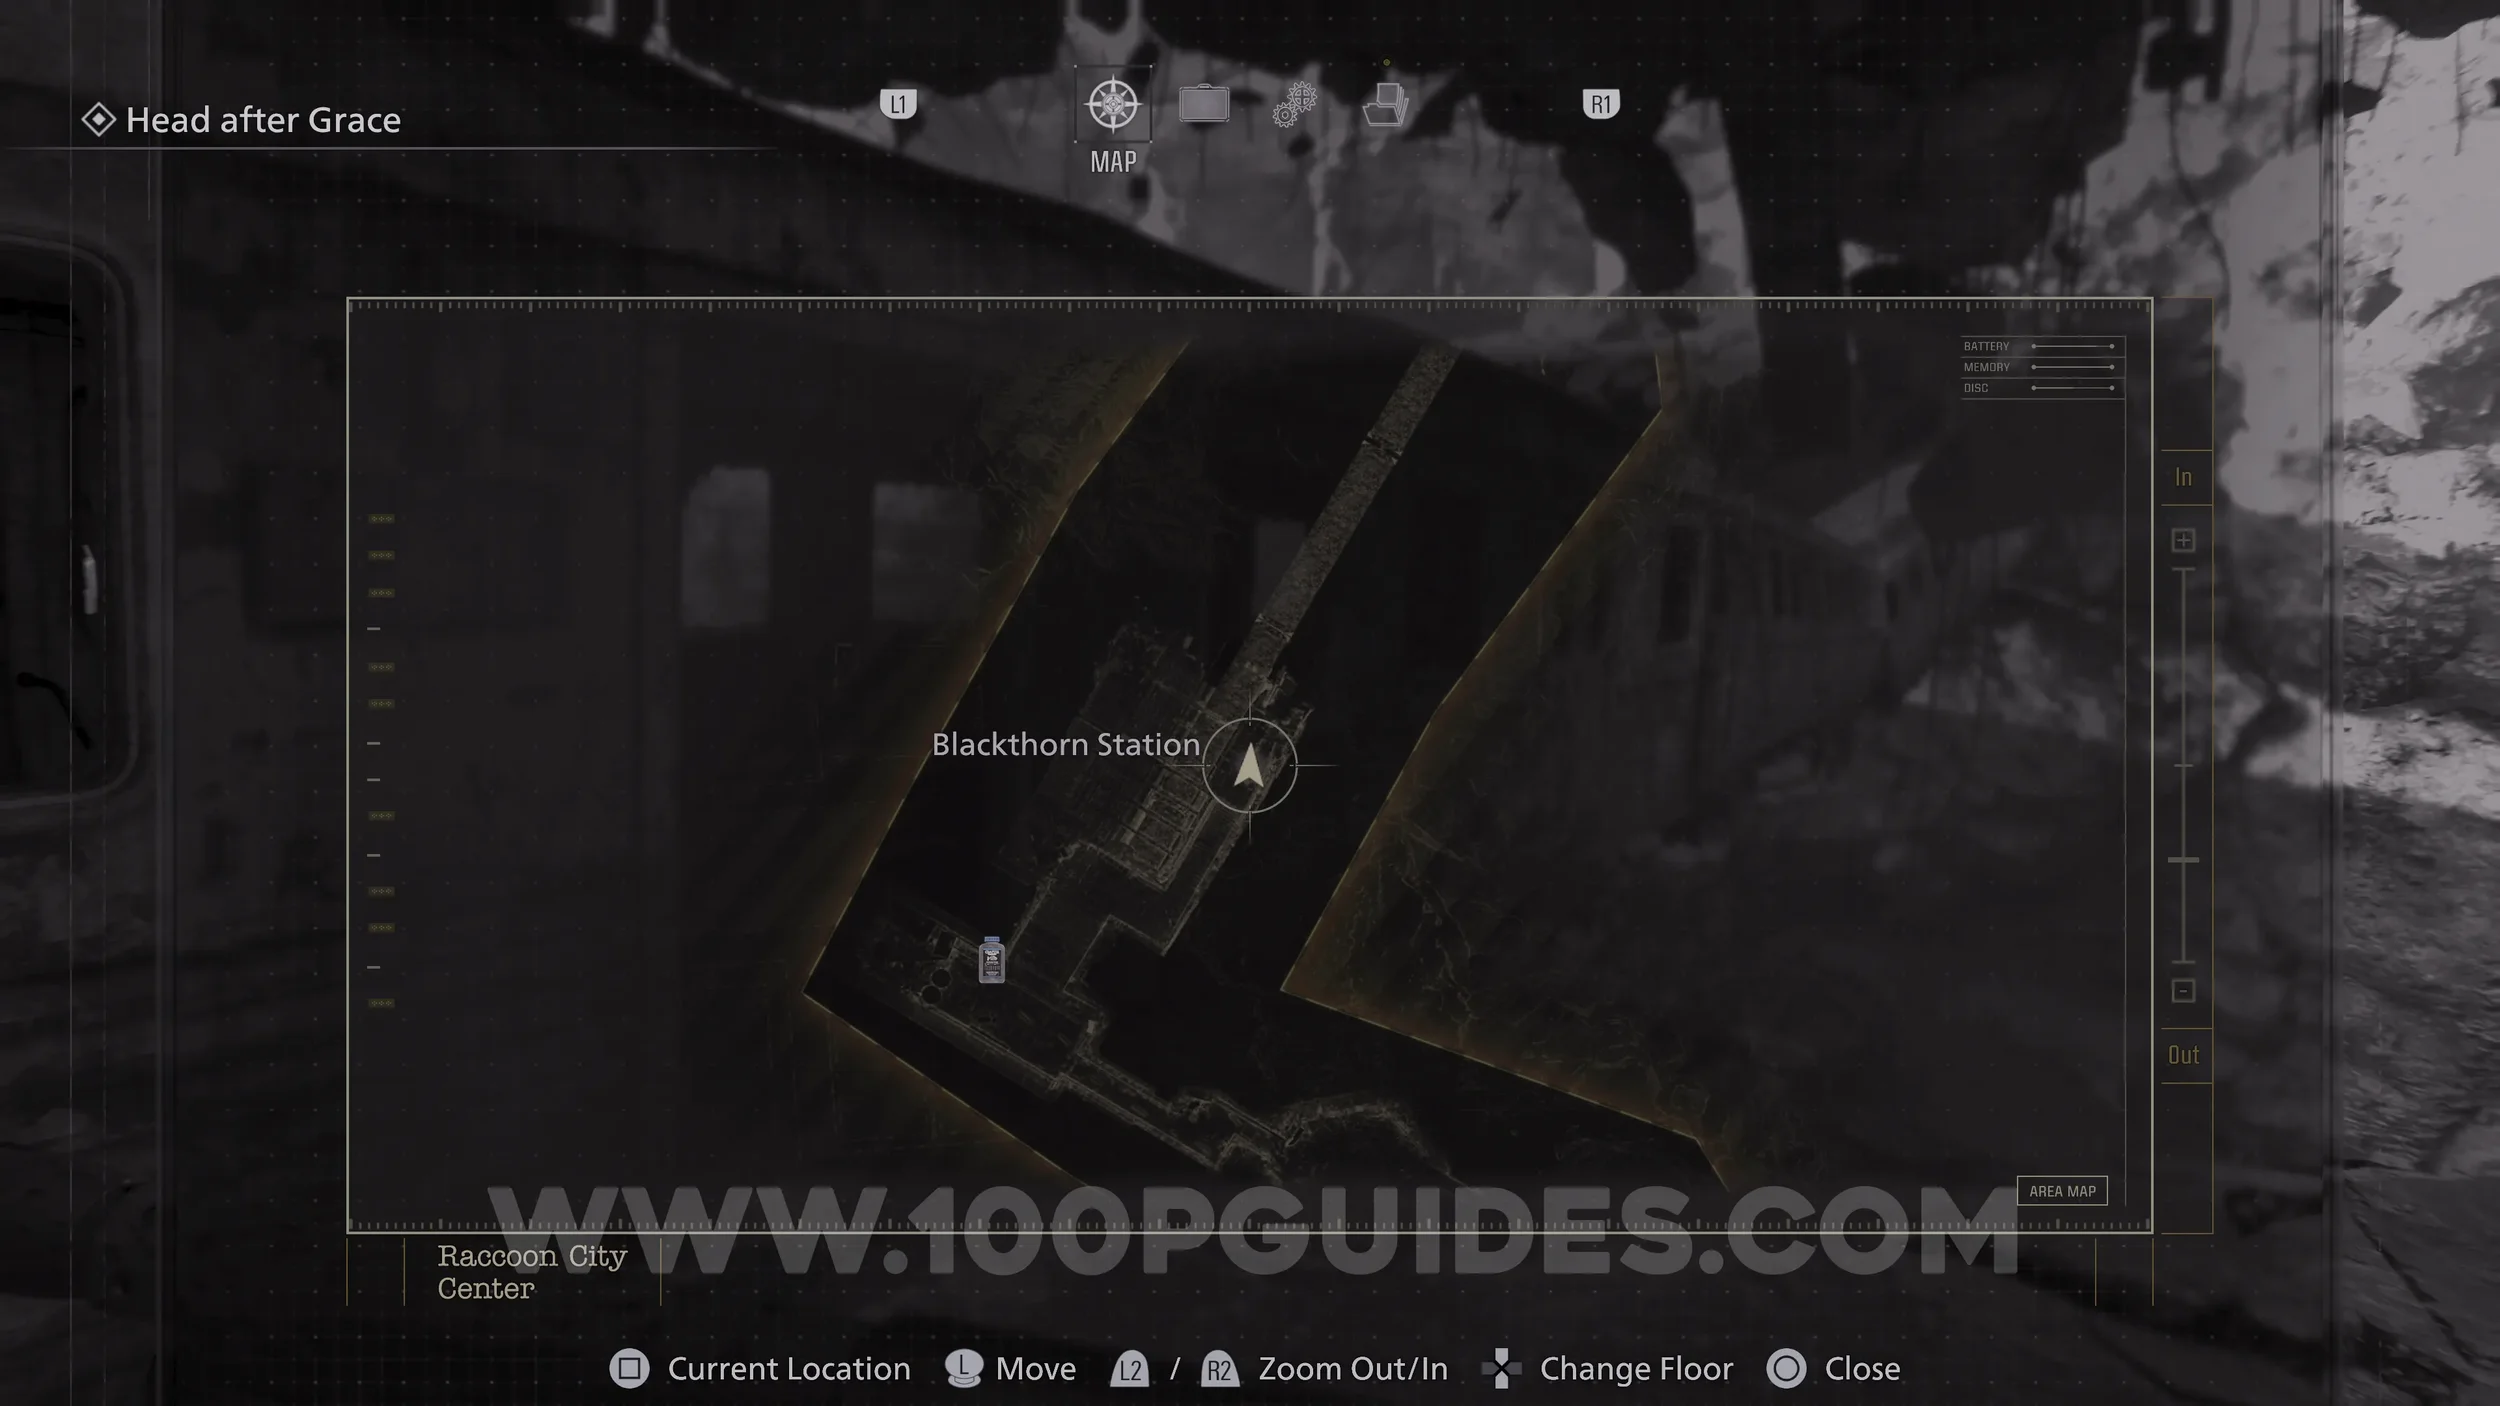
Raccoon City Center
Mr. Raccoon #20. On your left as soon as you finish the bike scene.

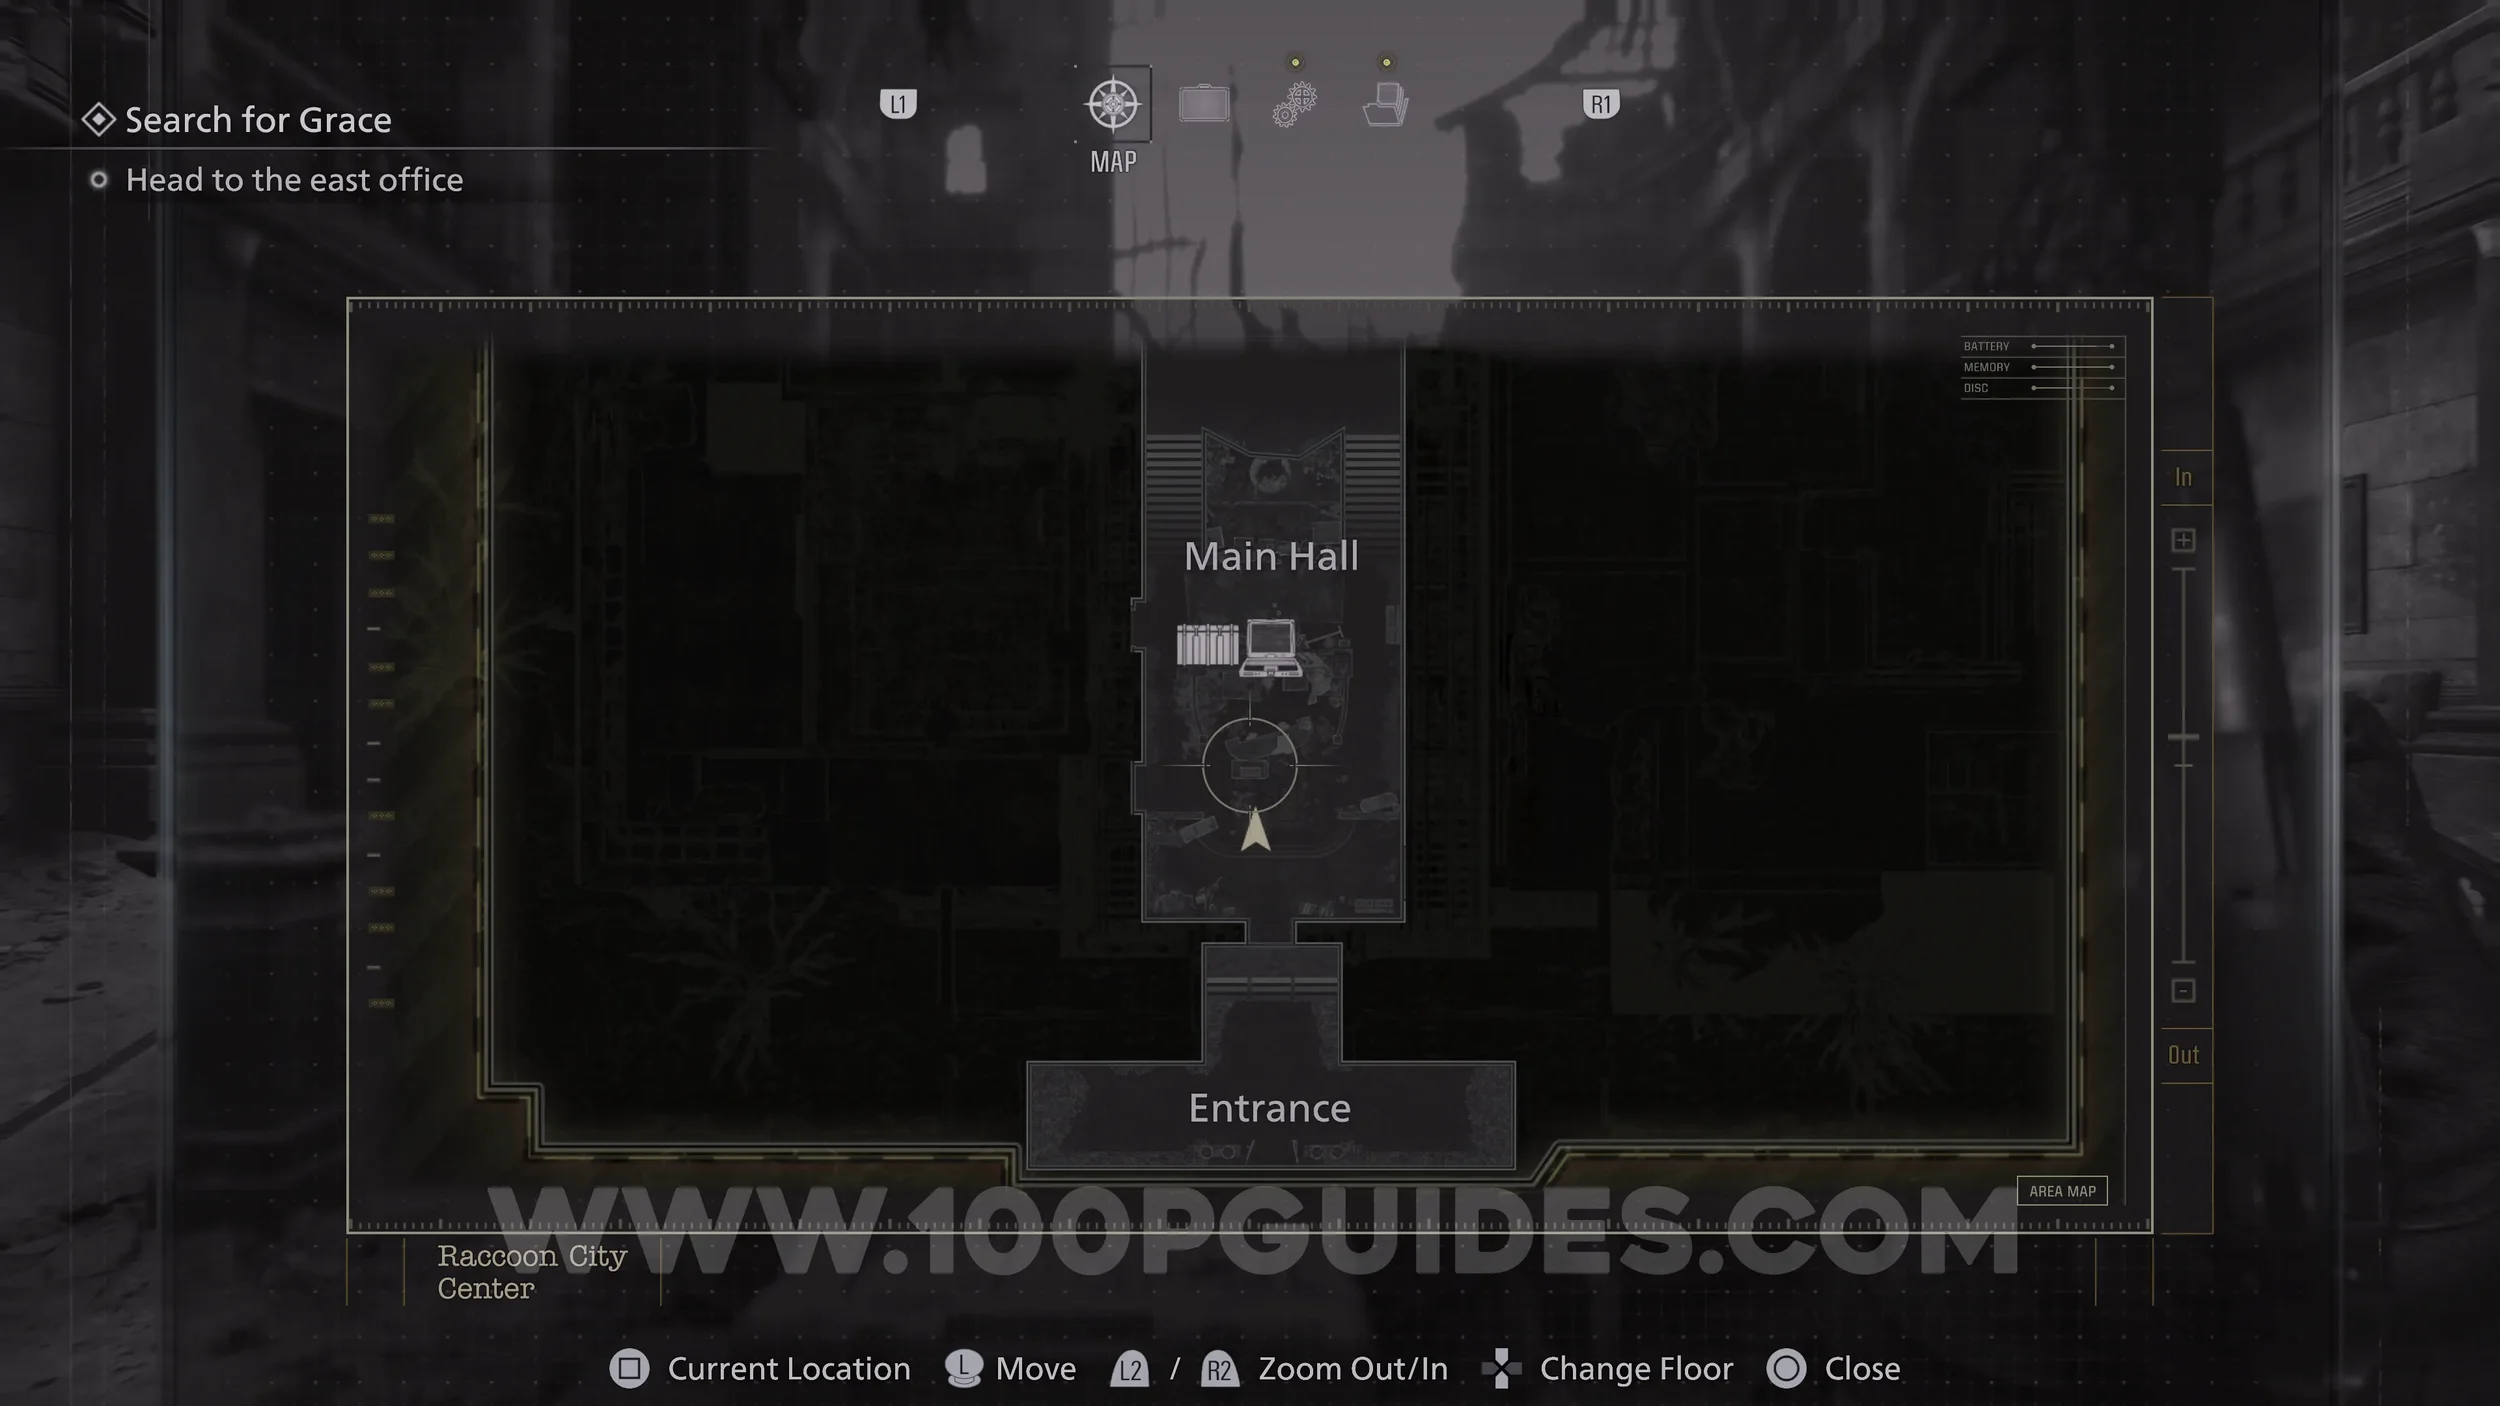
File #54 - R.P.D Perimeter Report. In the main Hall once you get to the R.P.D. building.
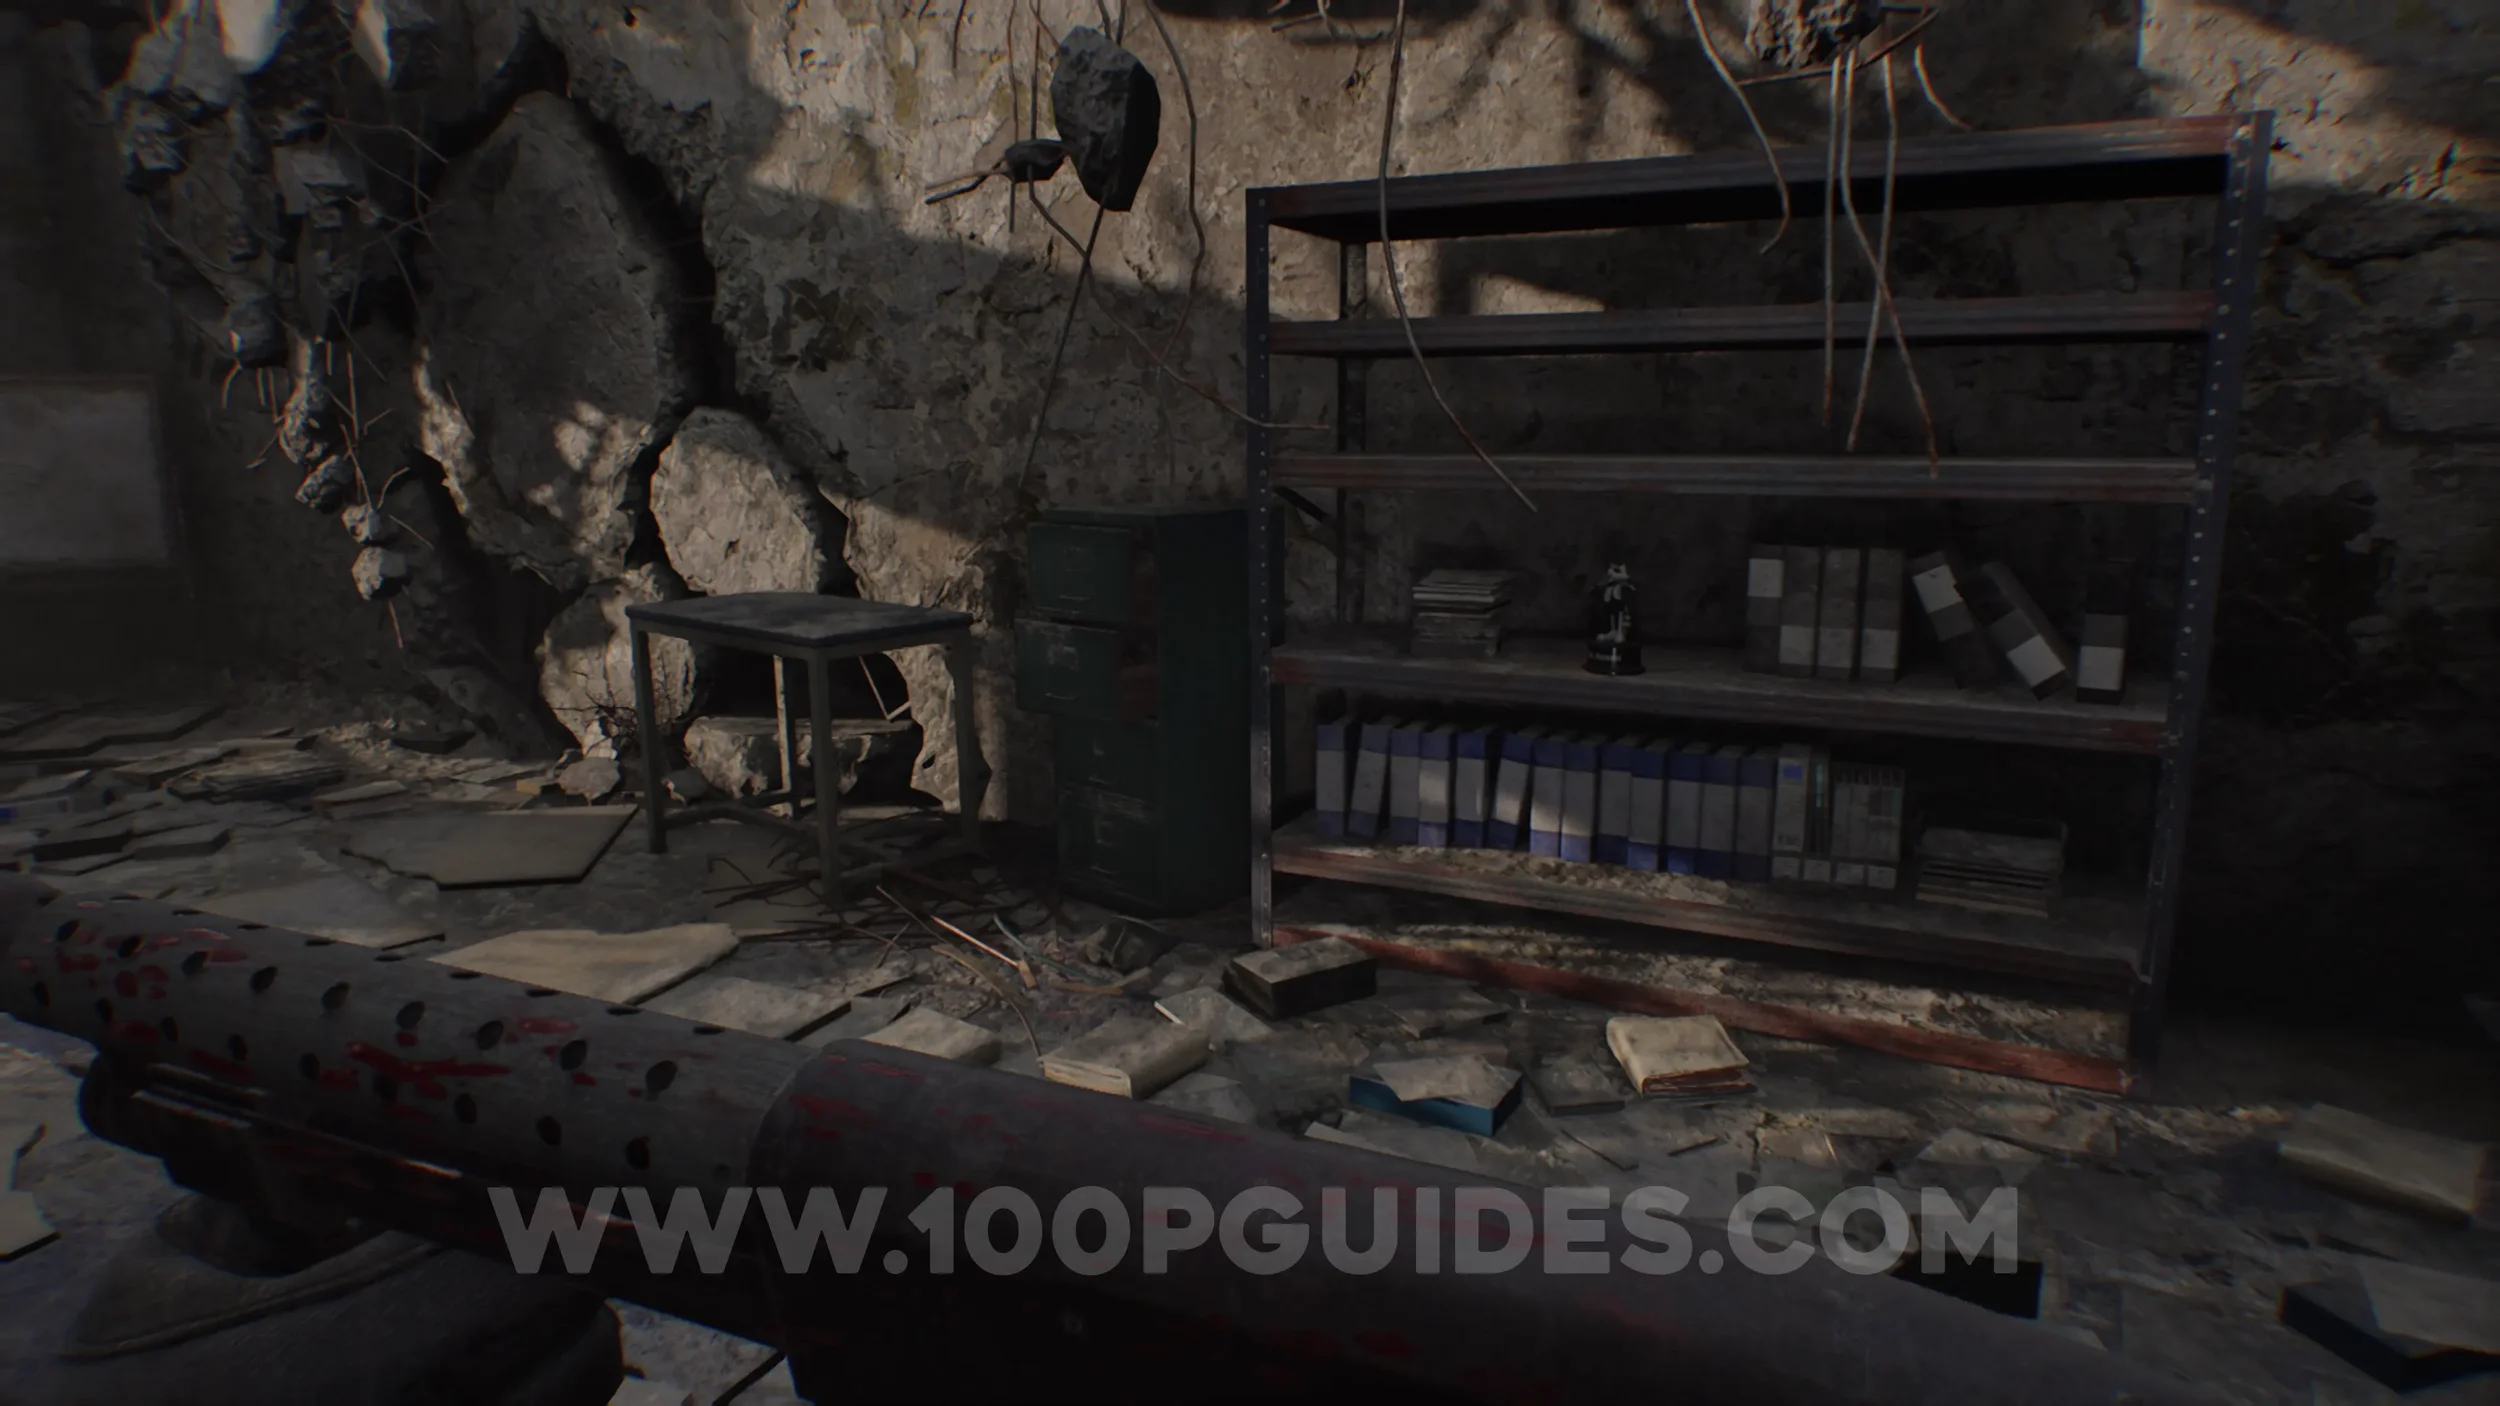
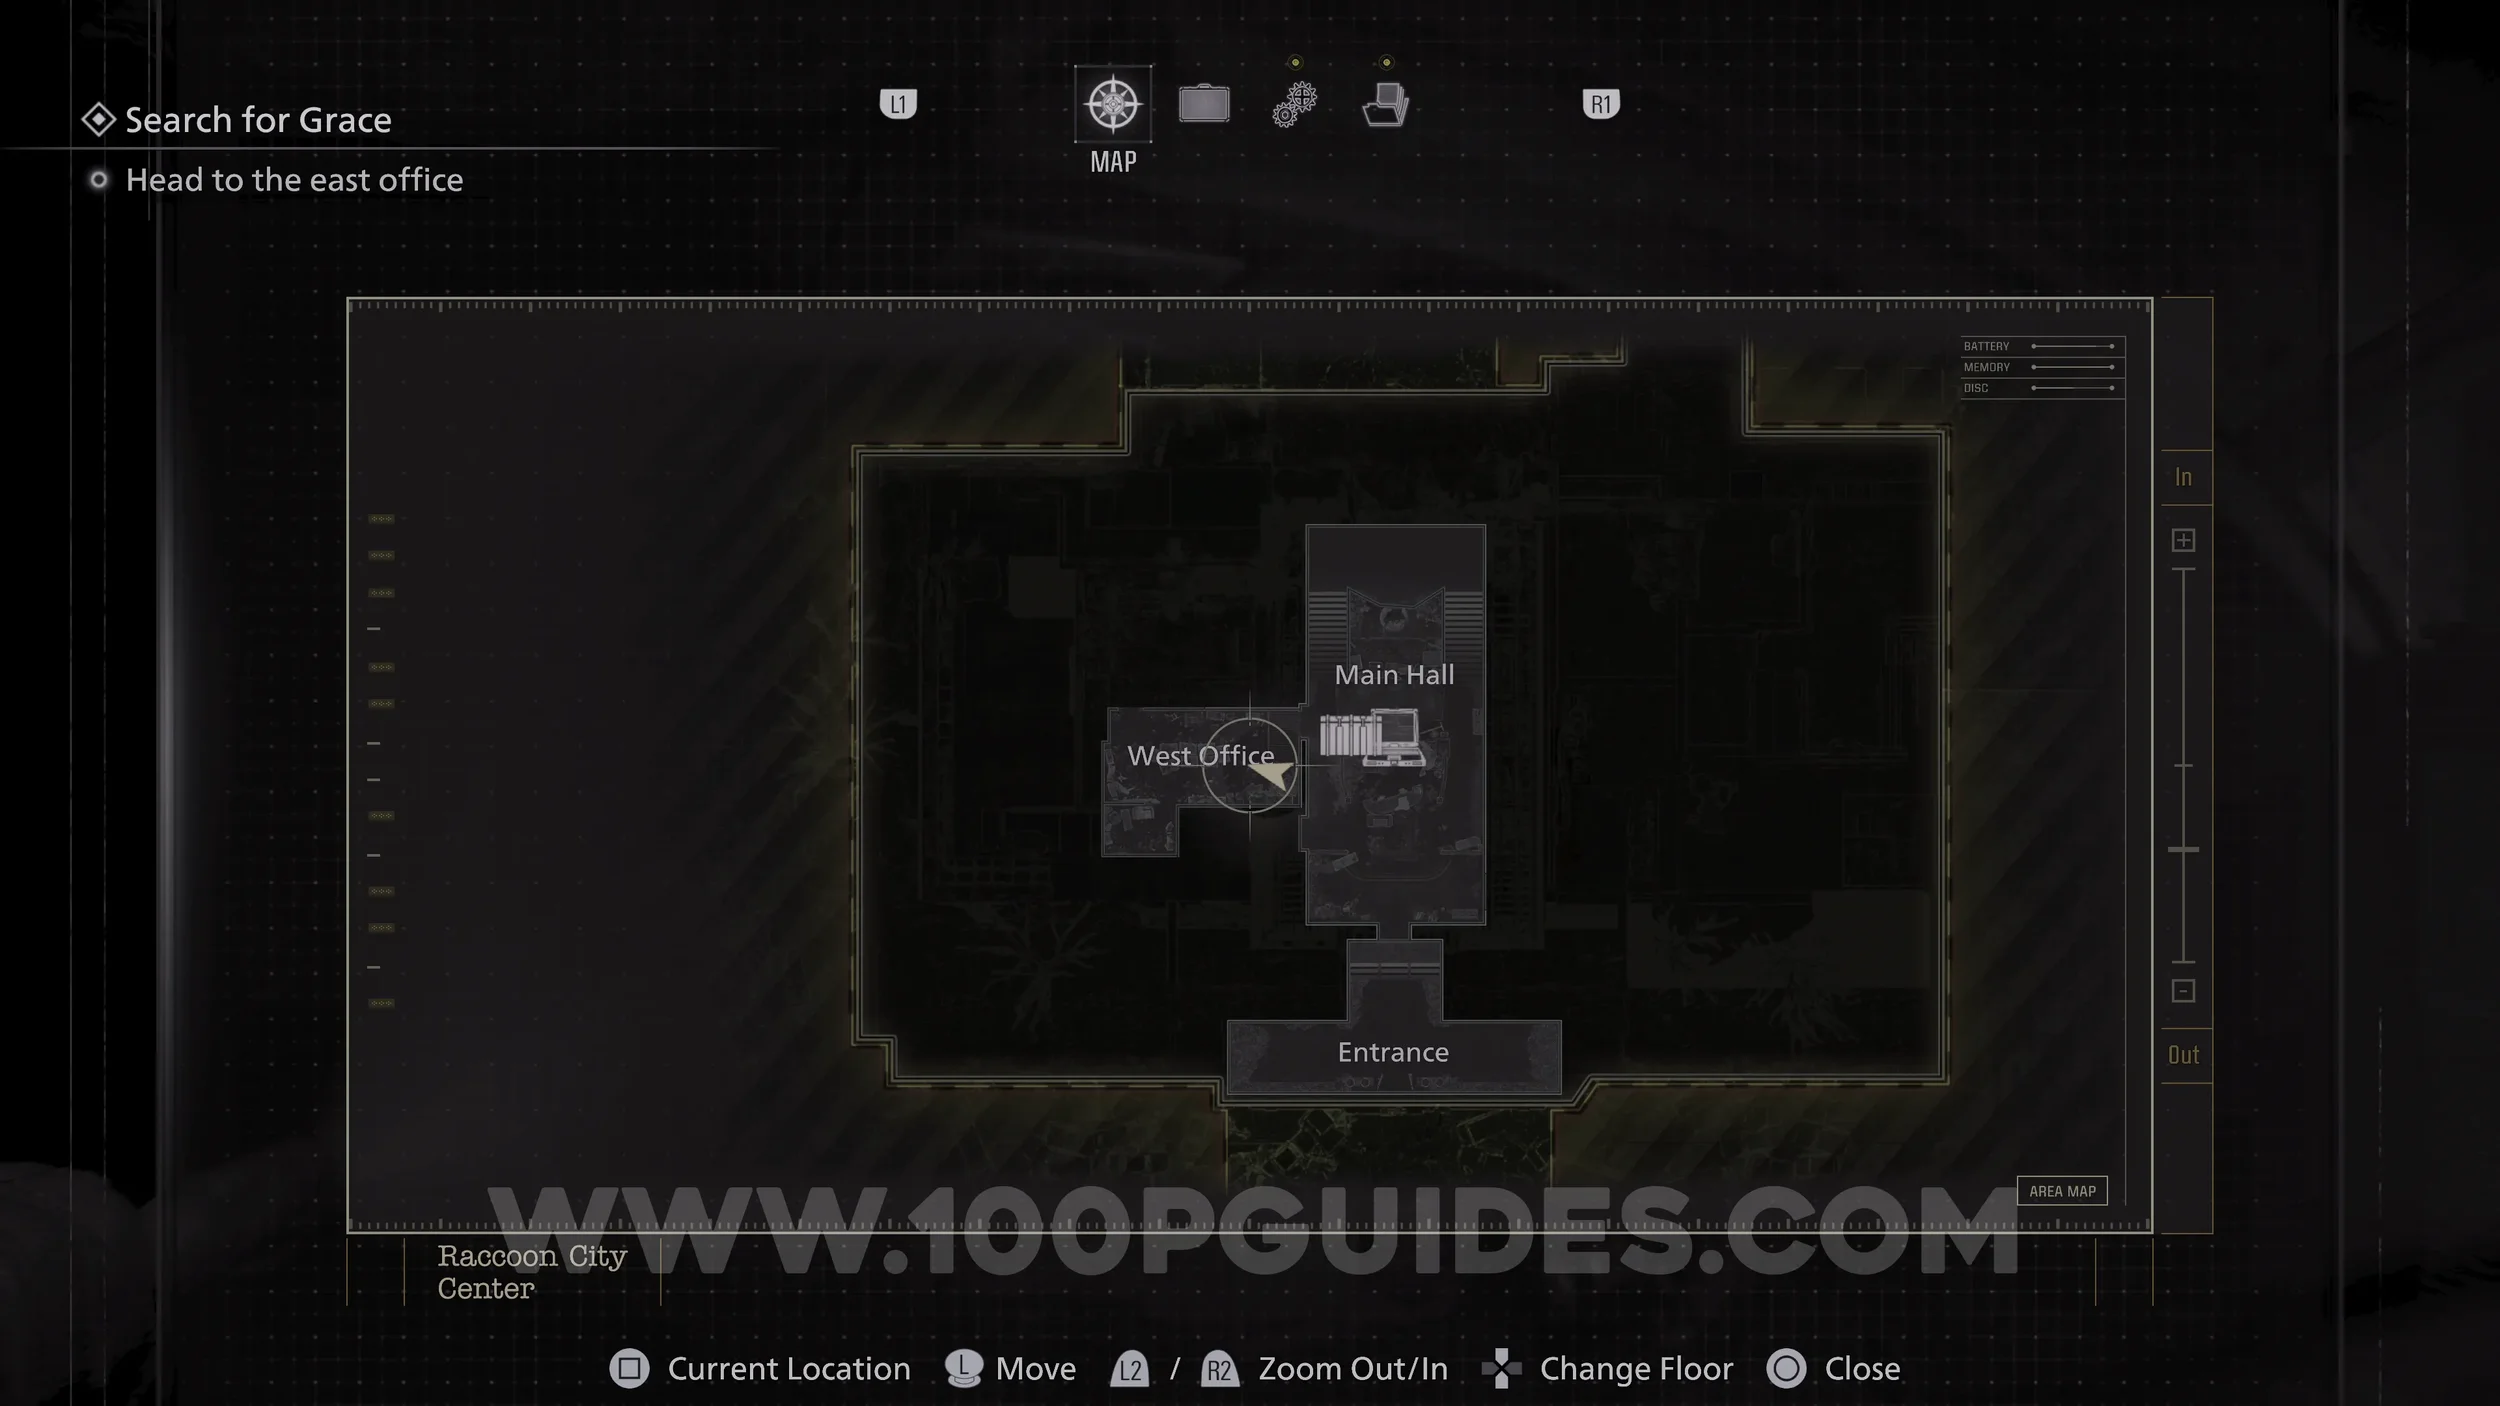
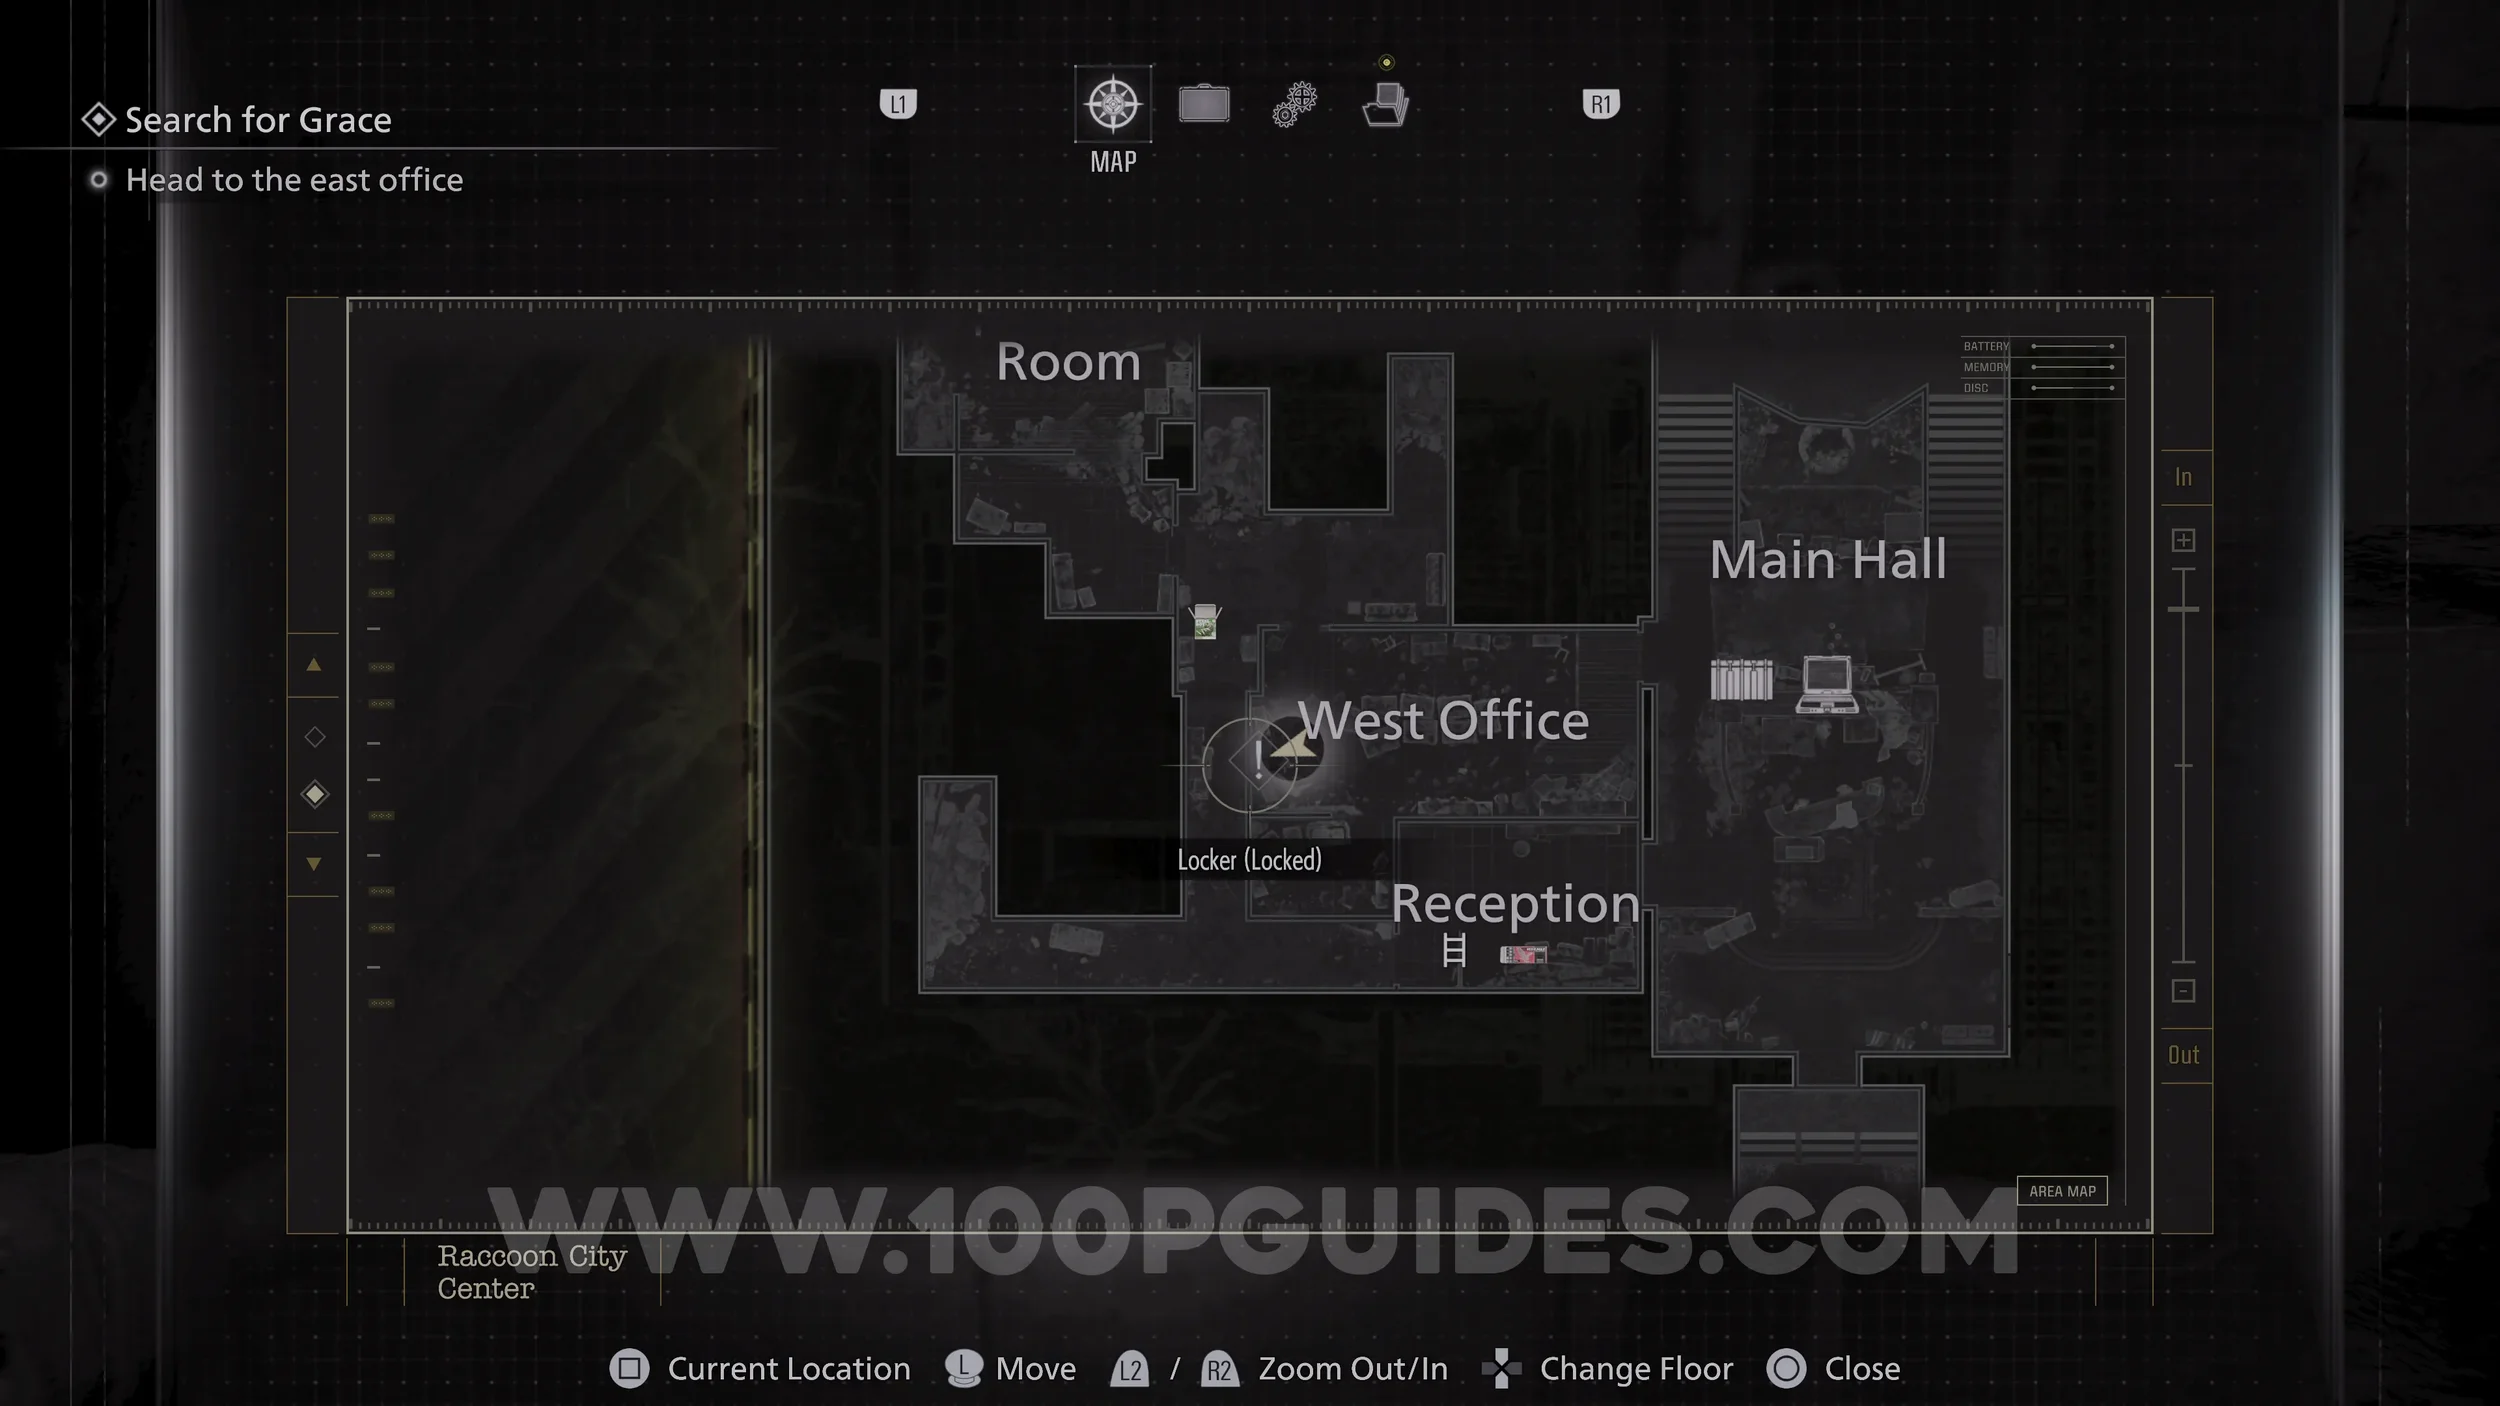
File #55 - Top Secret Operation. In the West Office.
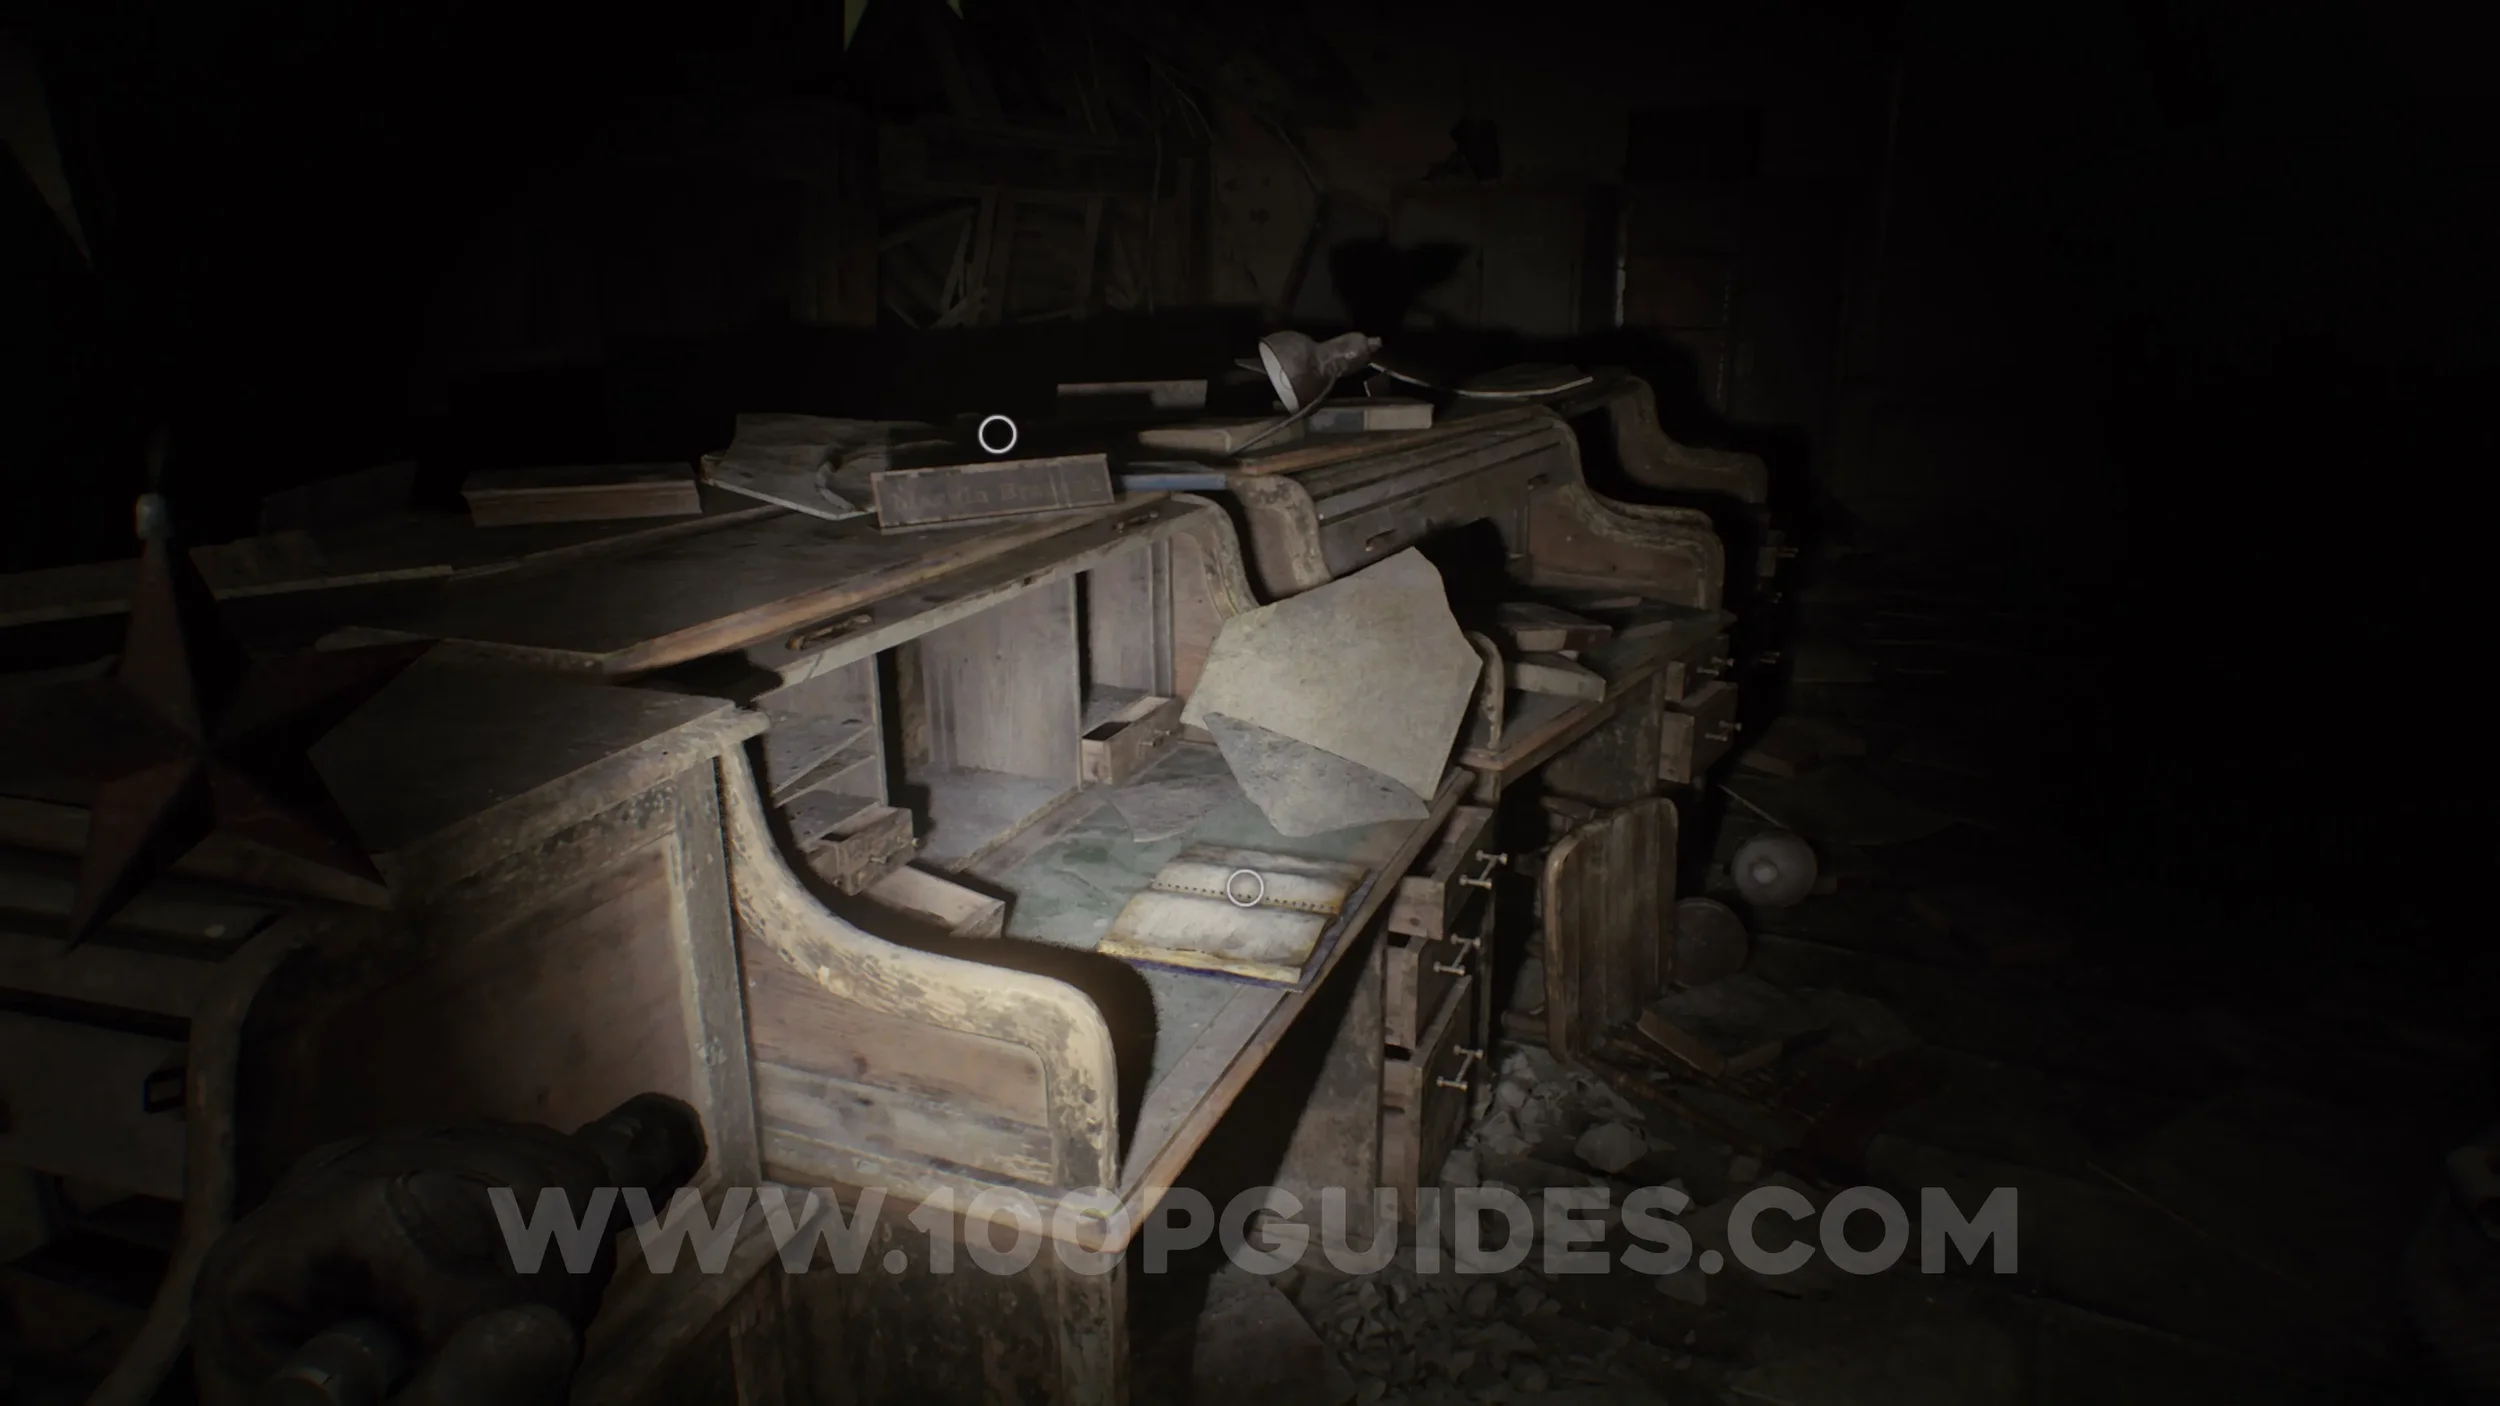
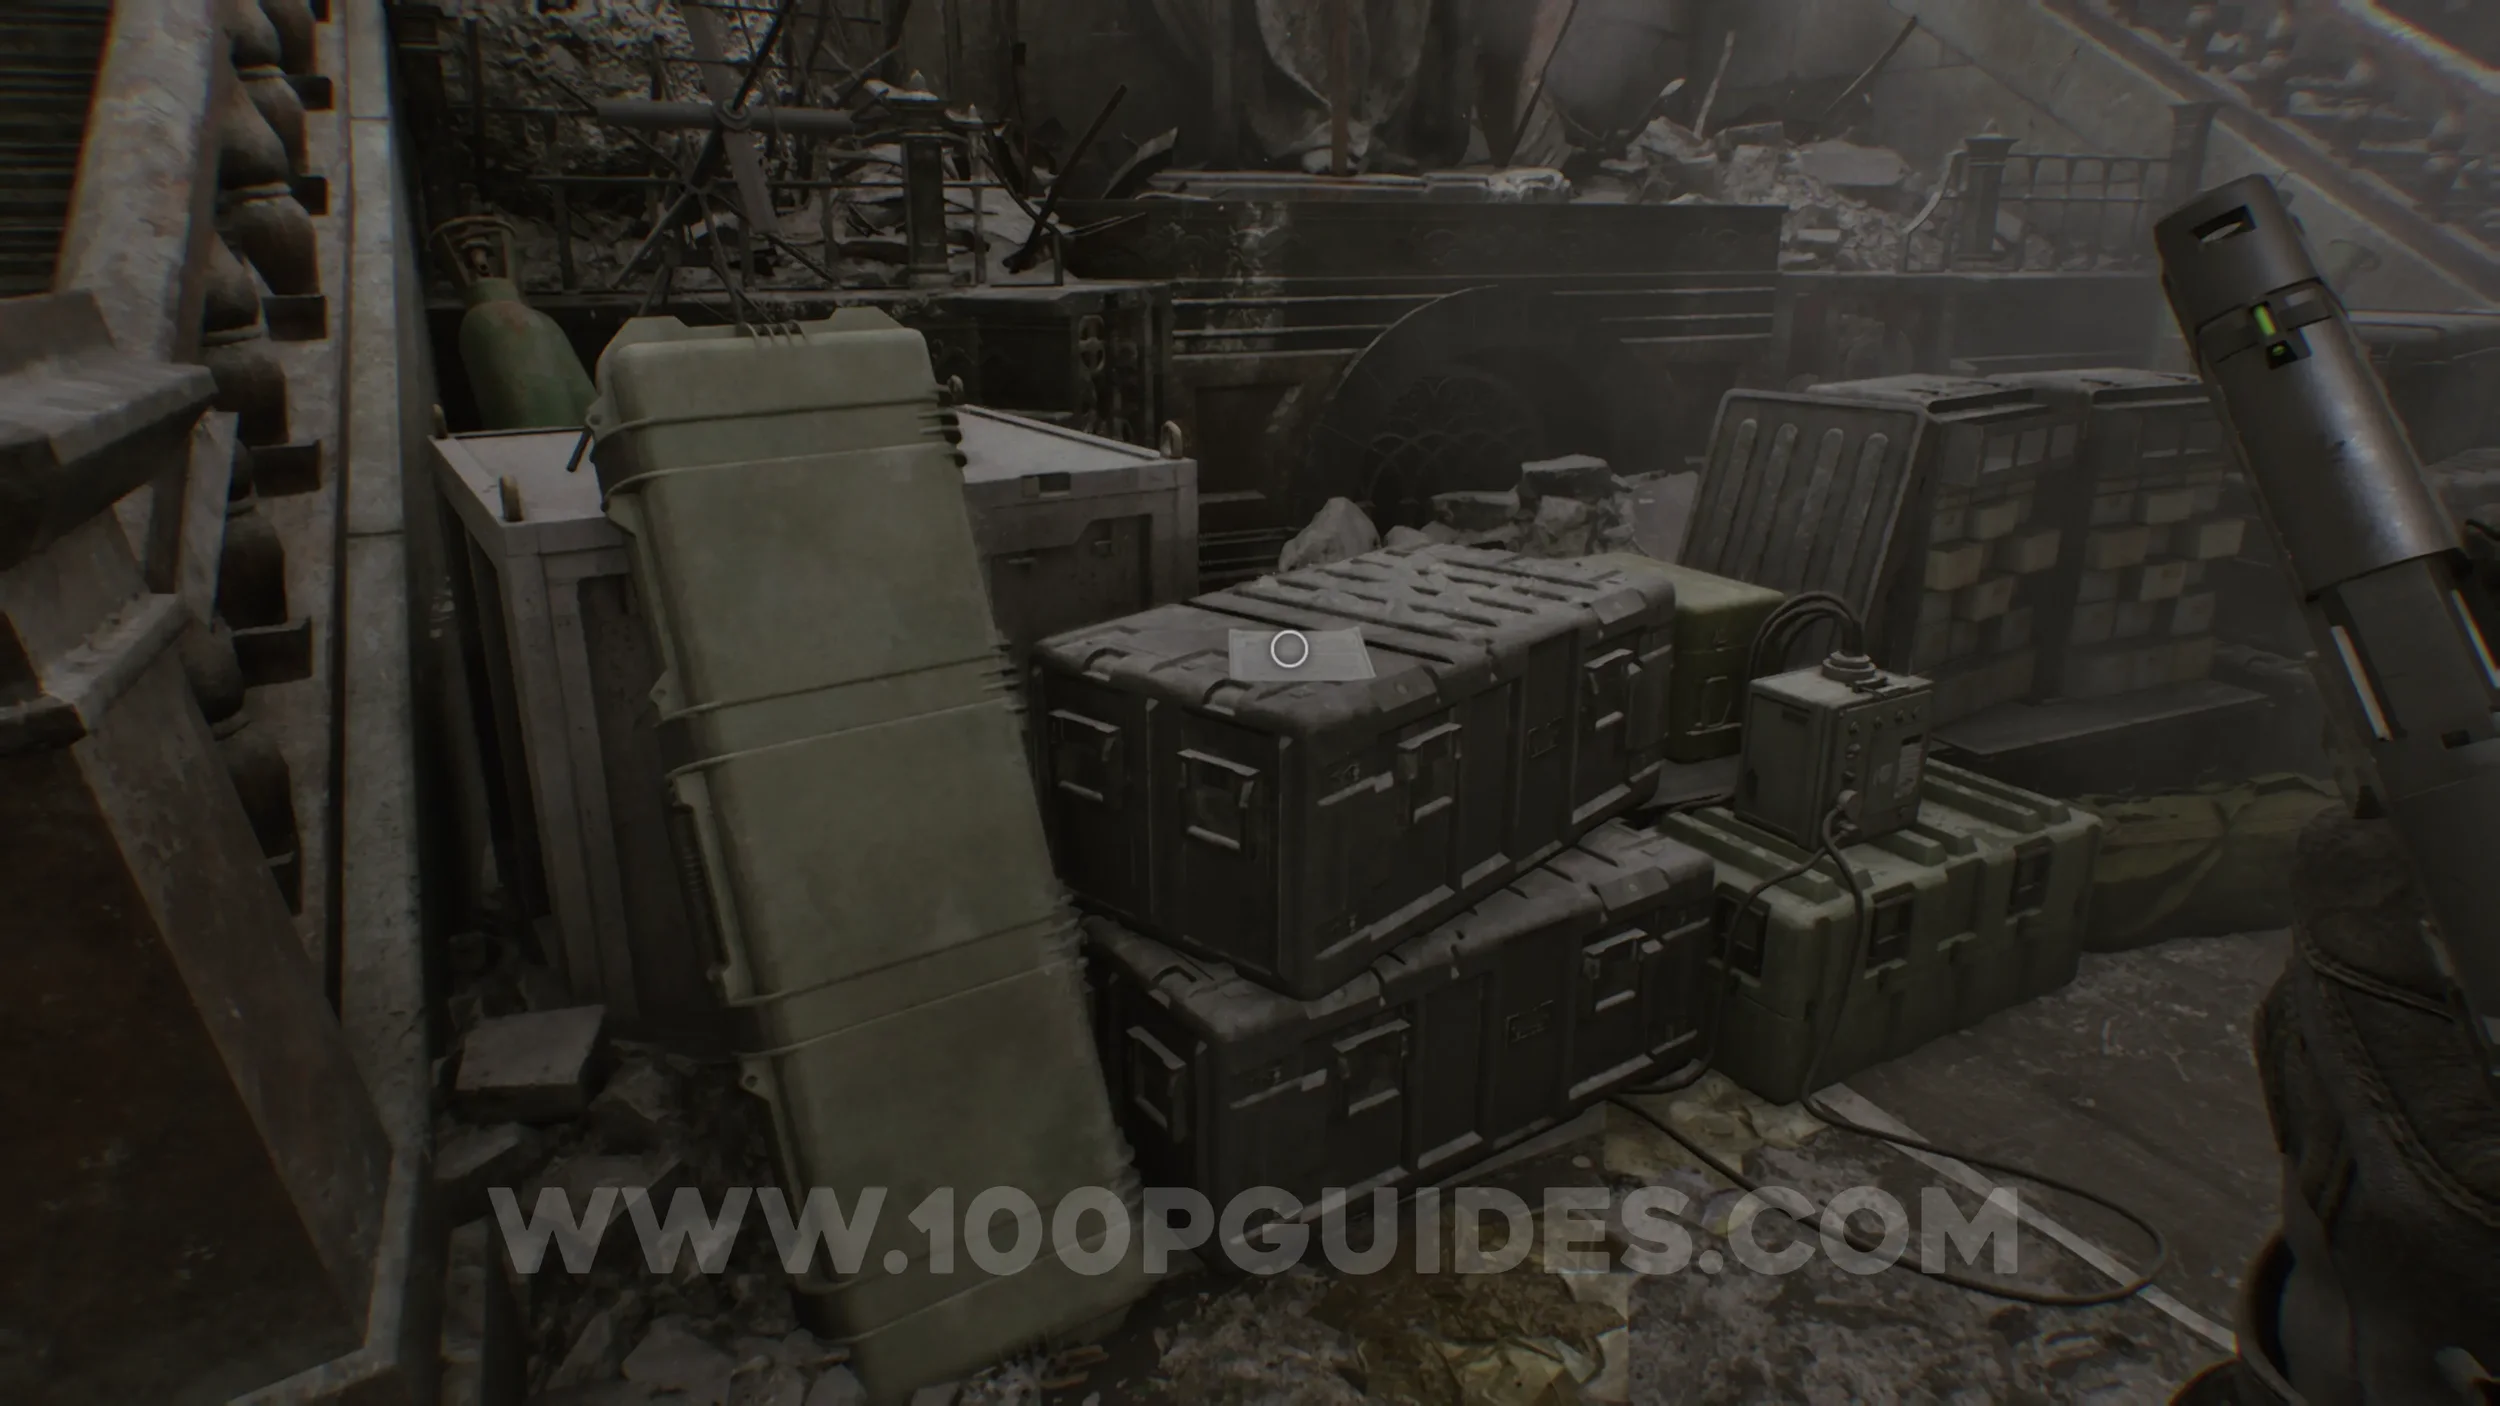
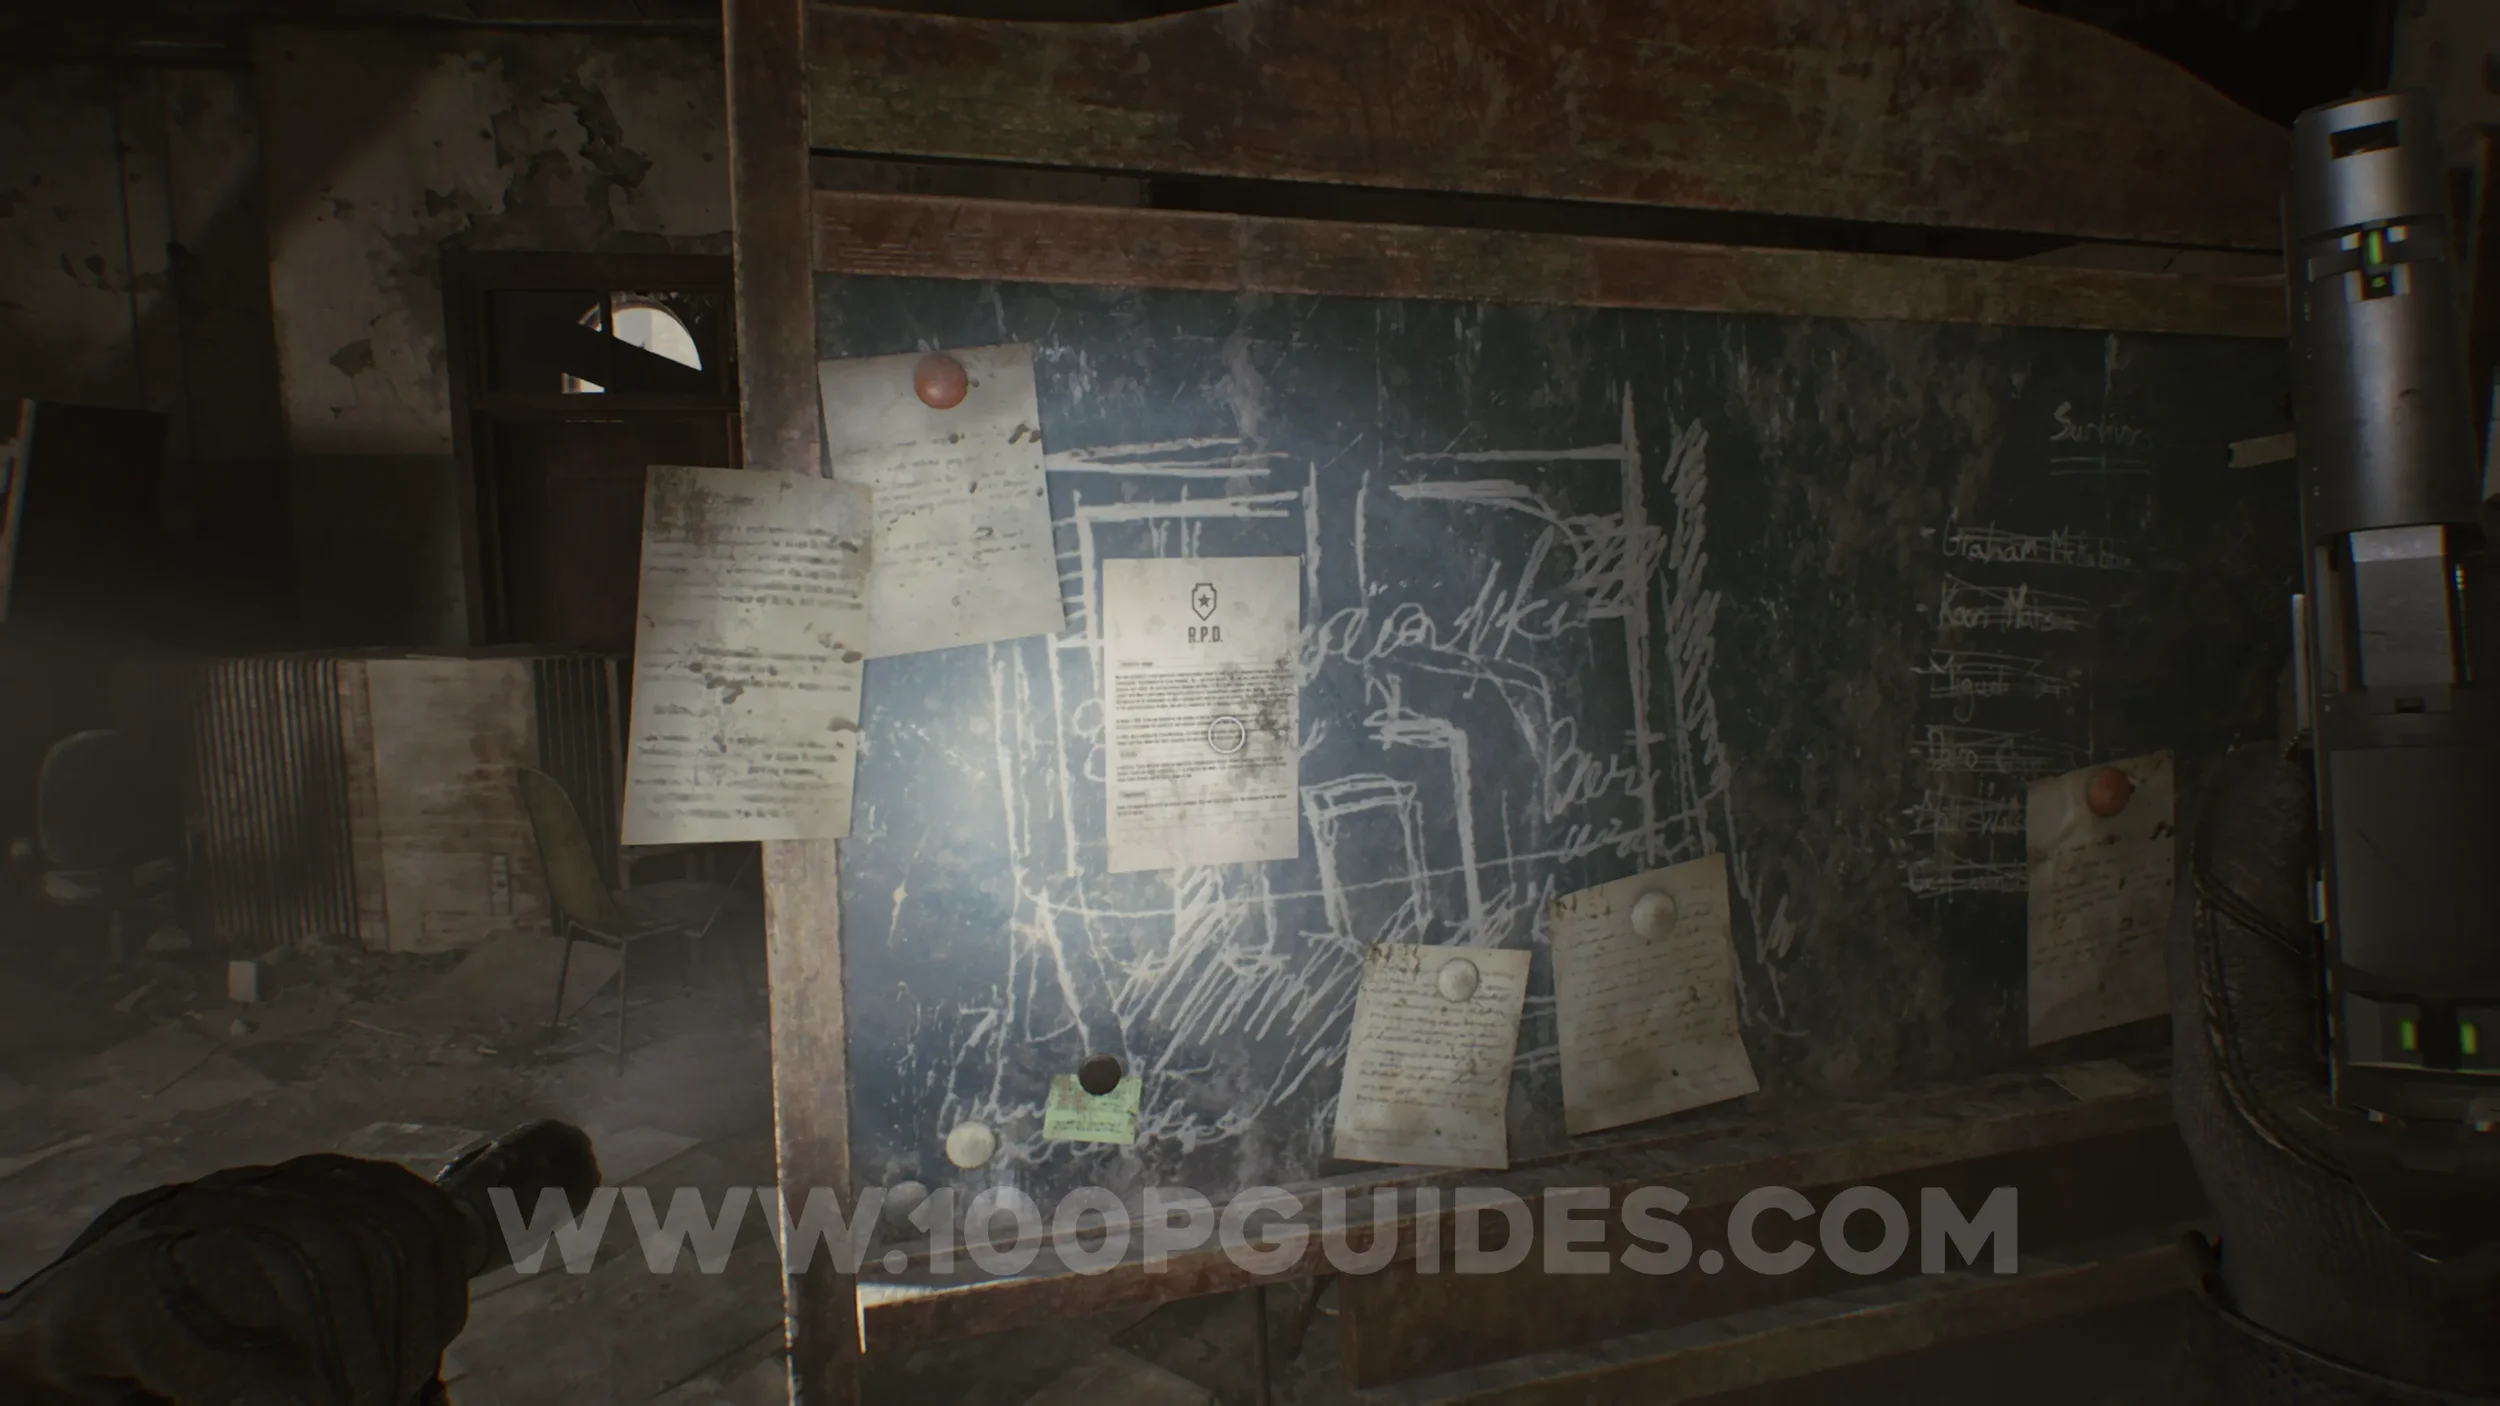
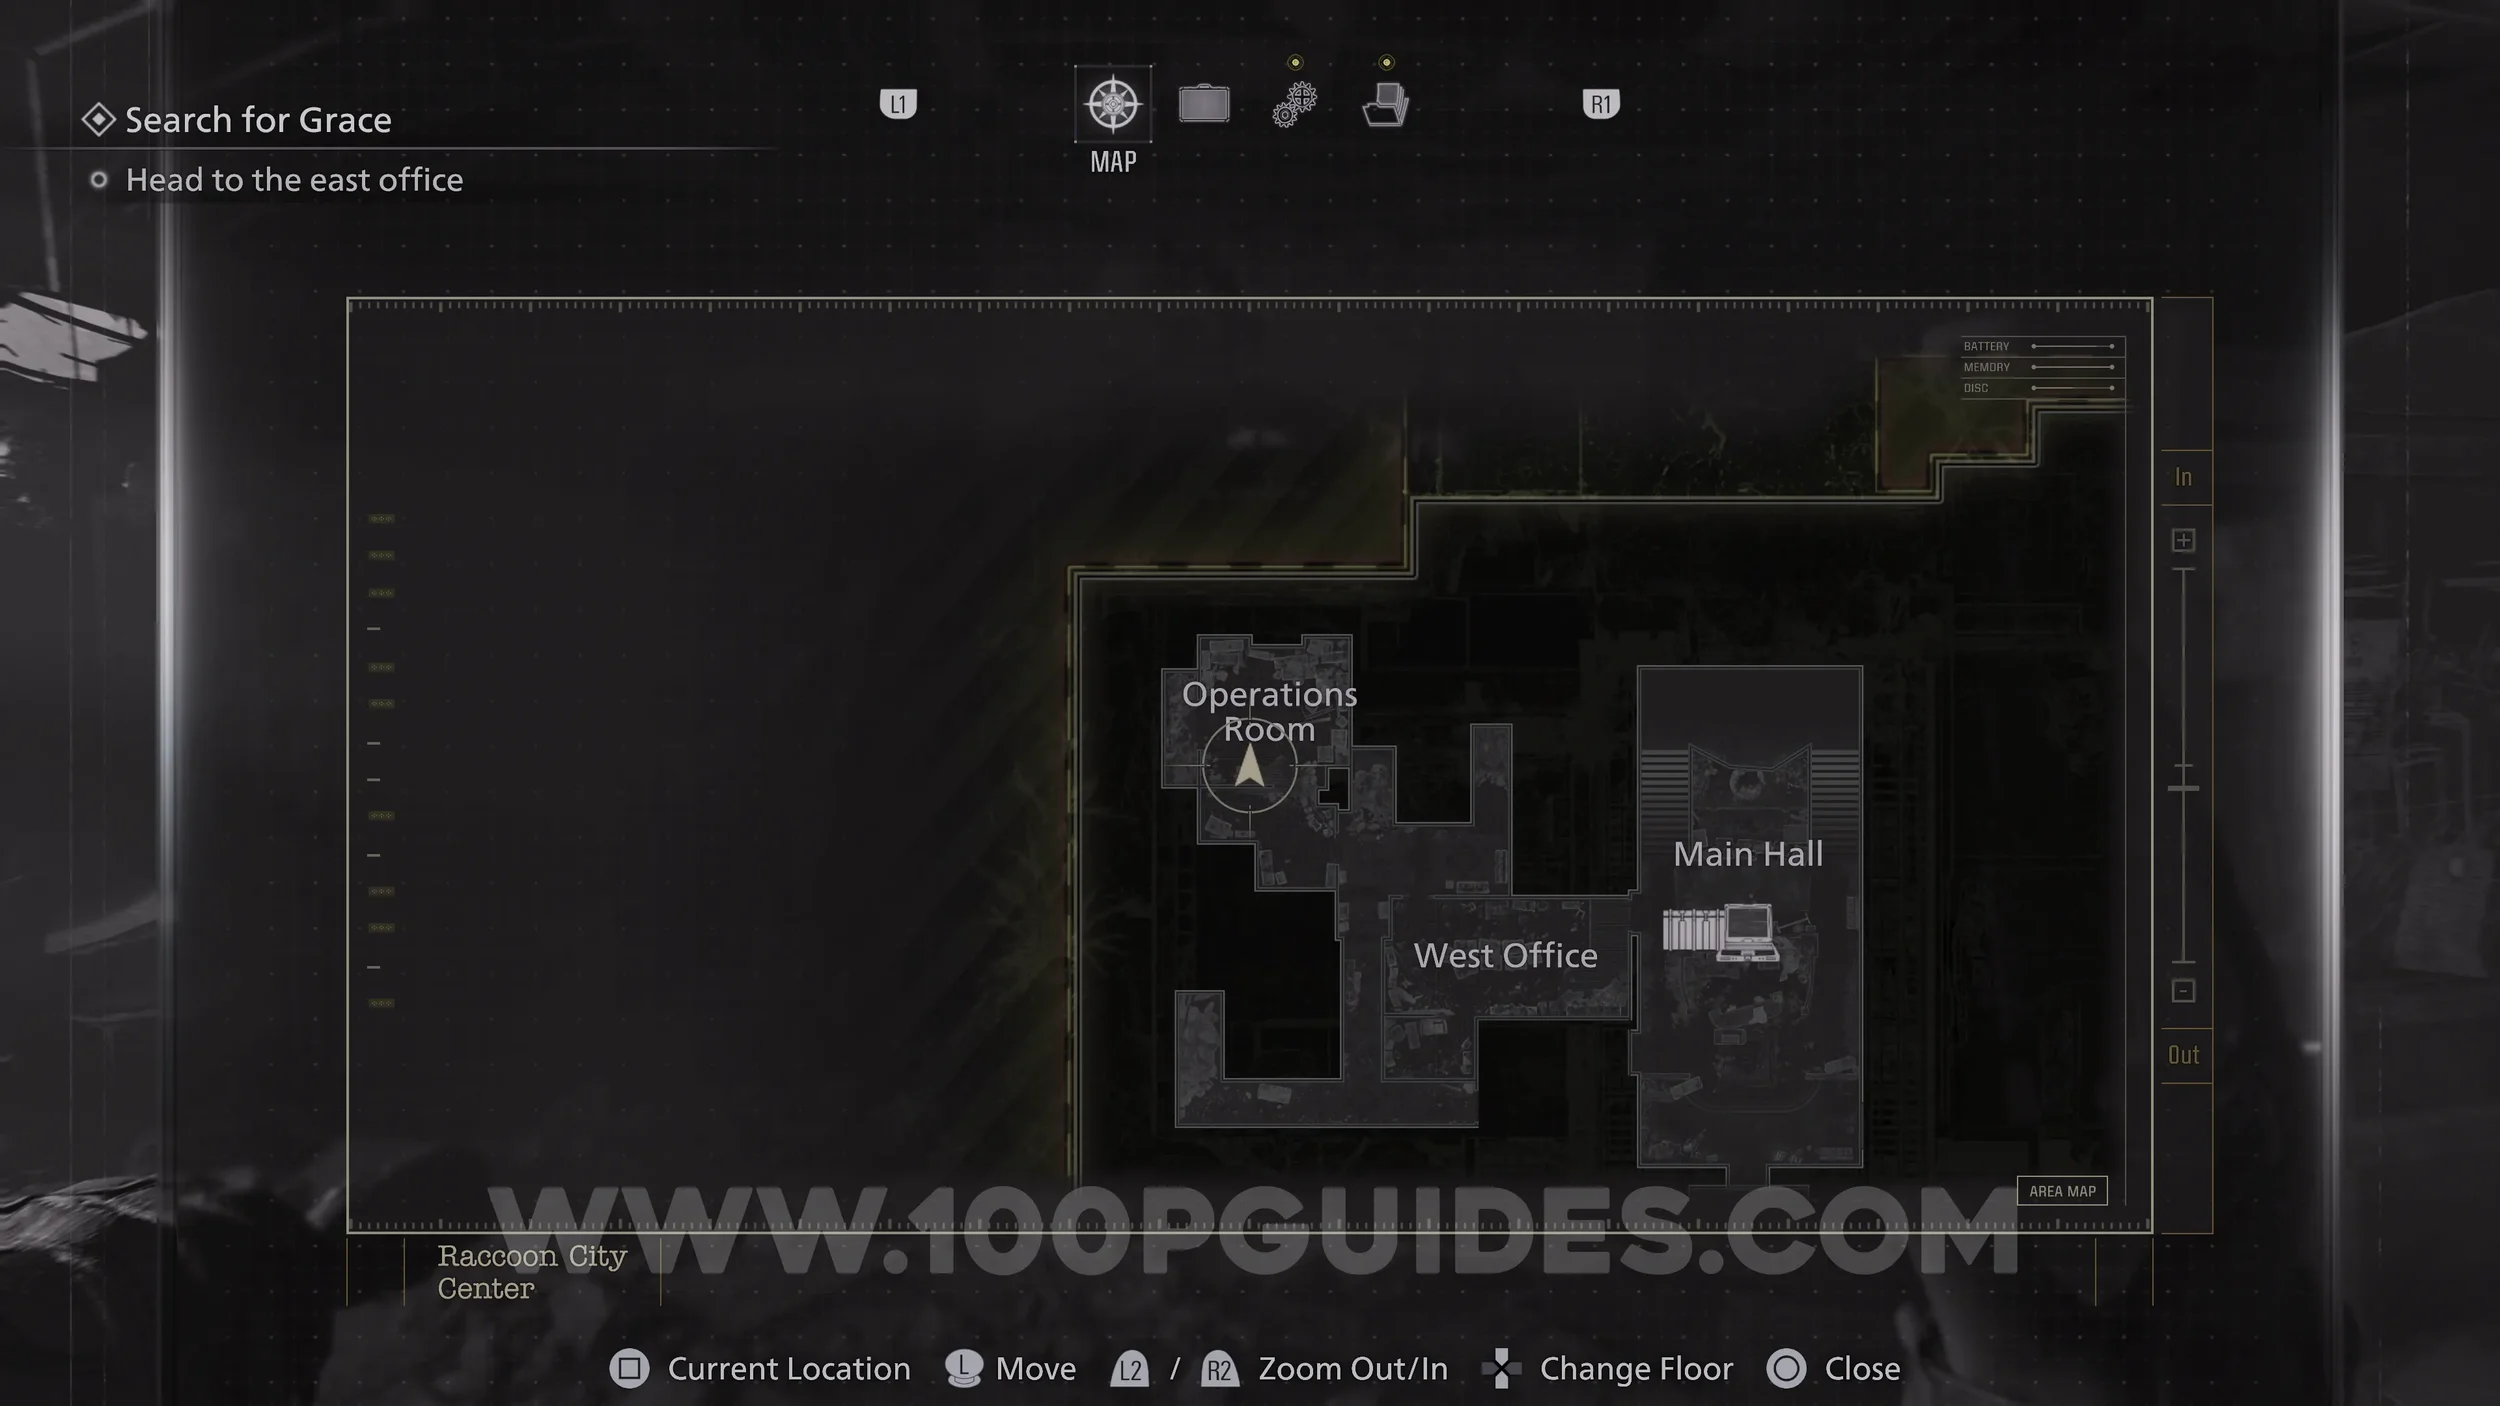
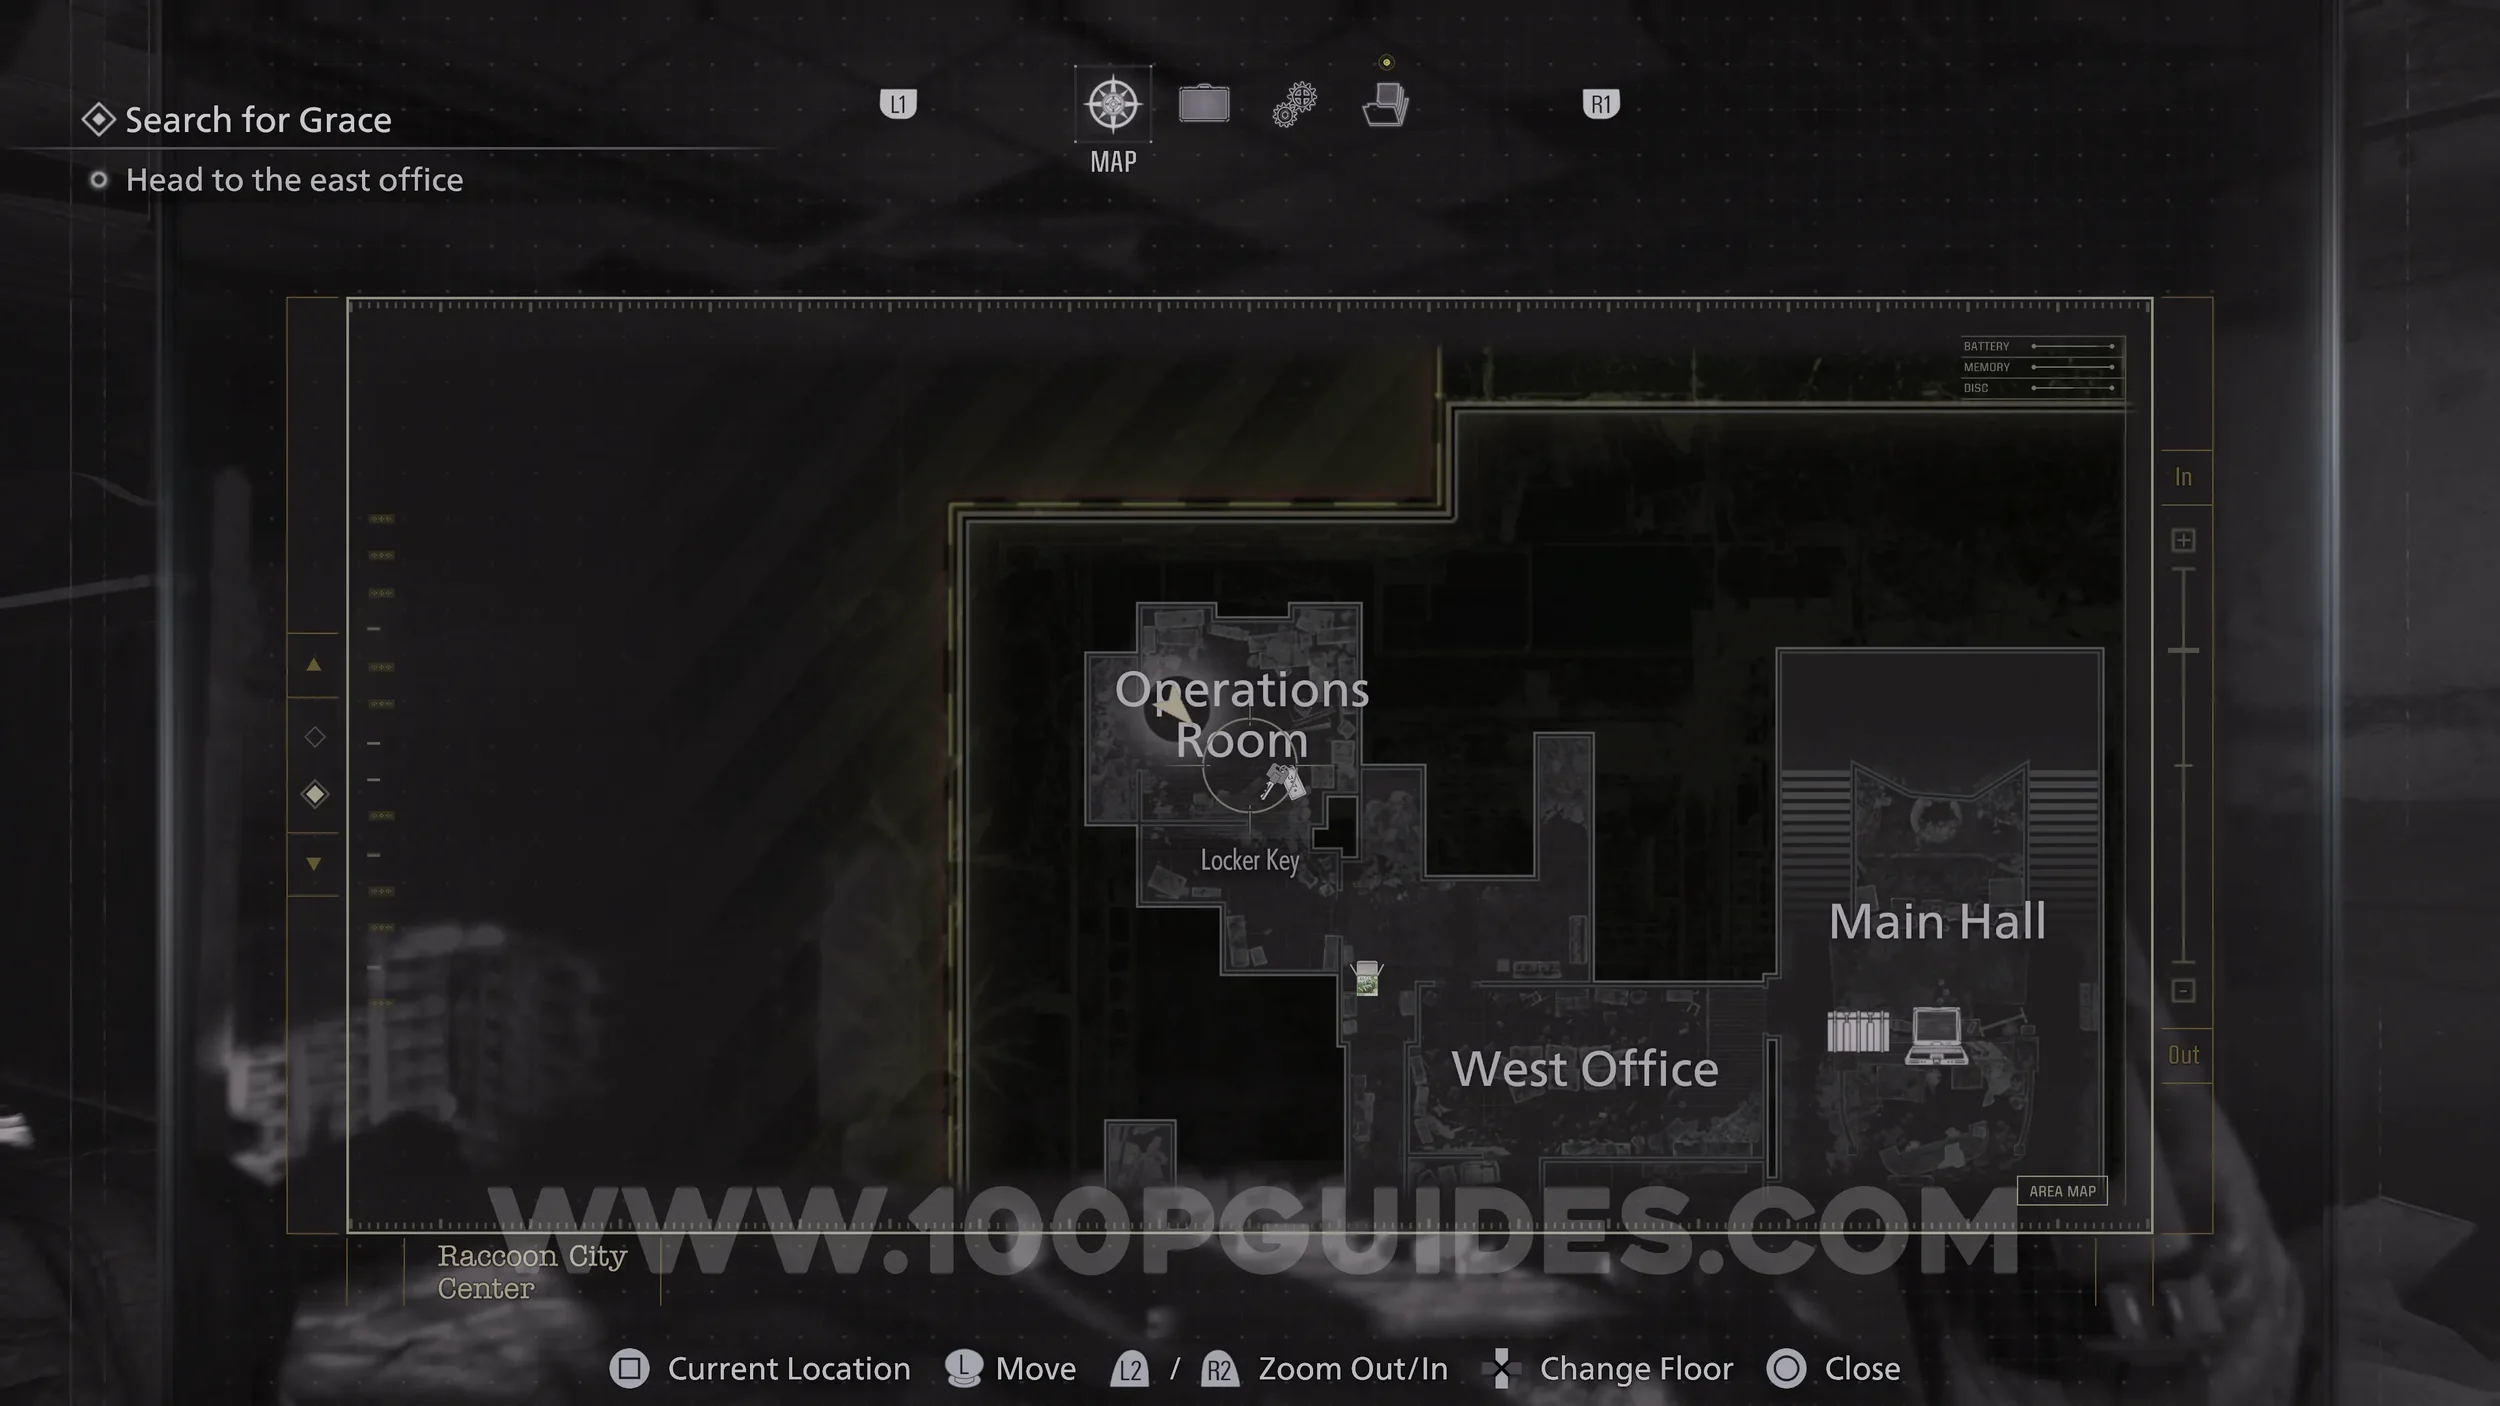
File #56 - Record of Events. In the Operations Room.
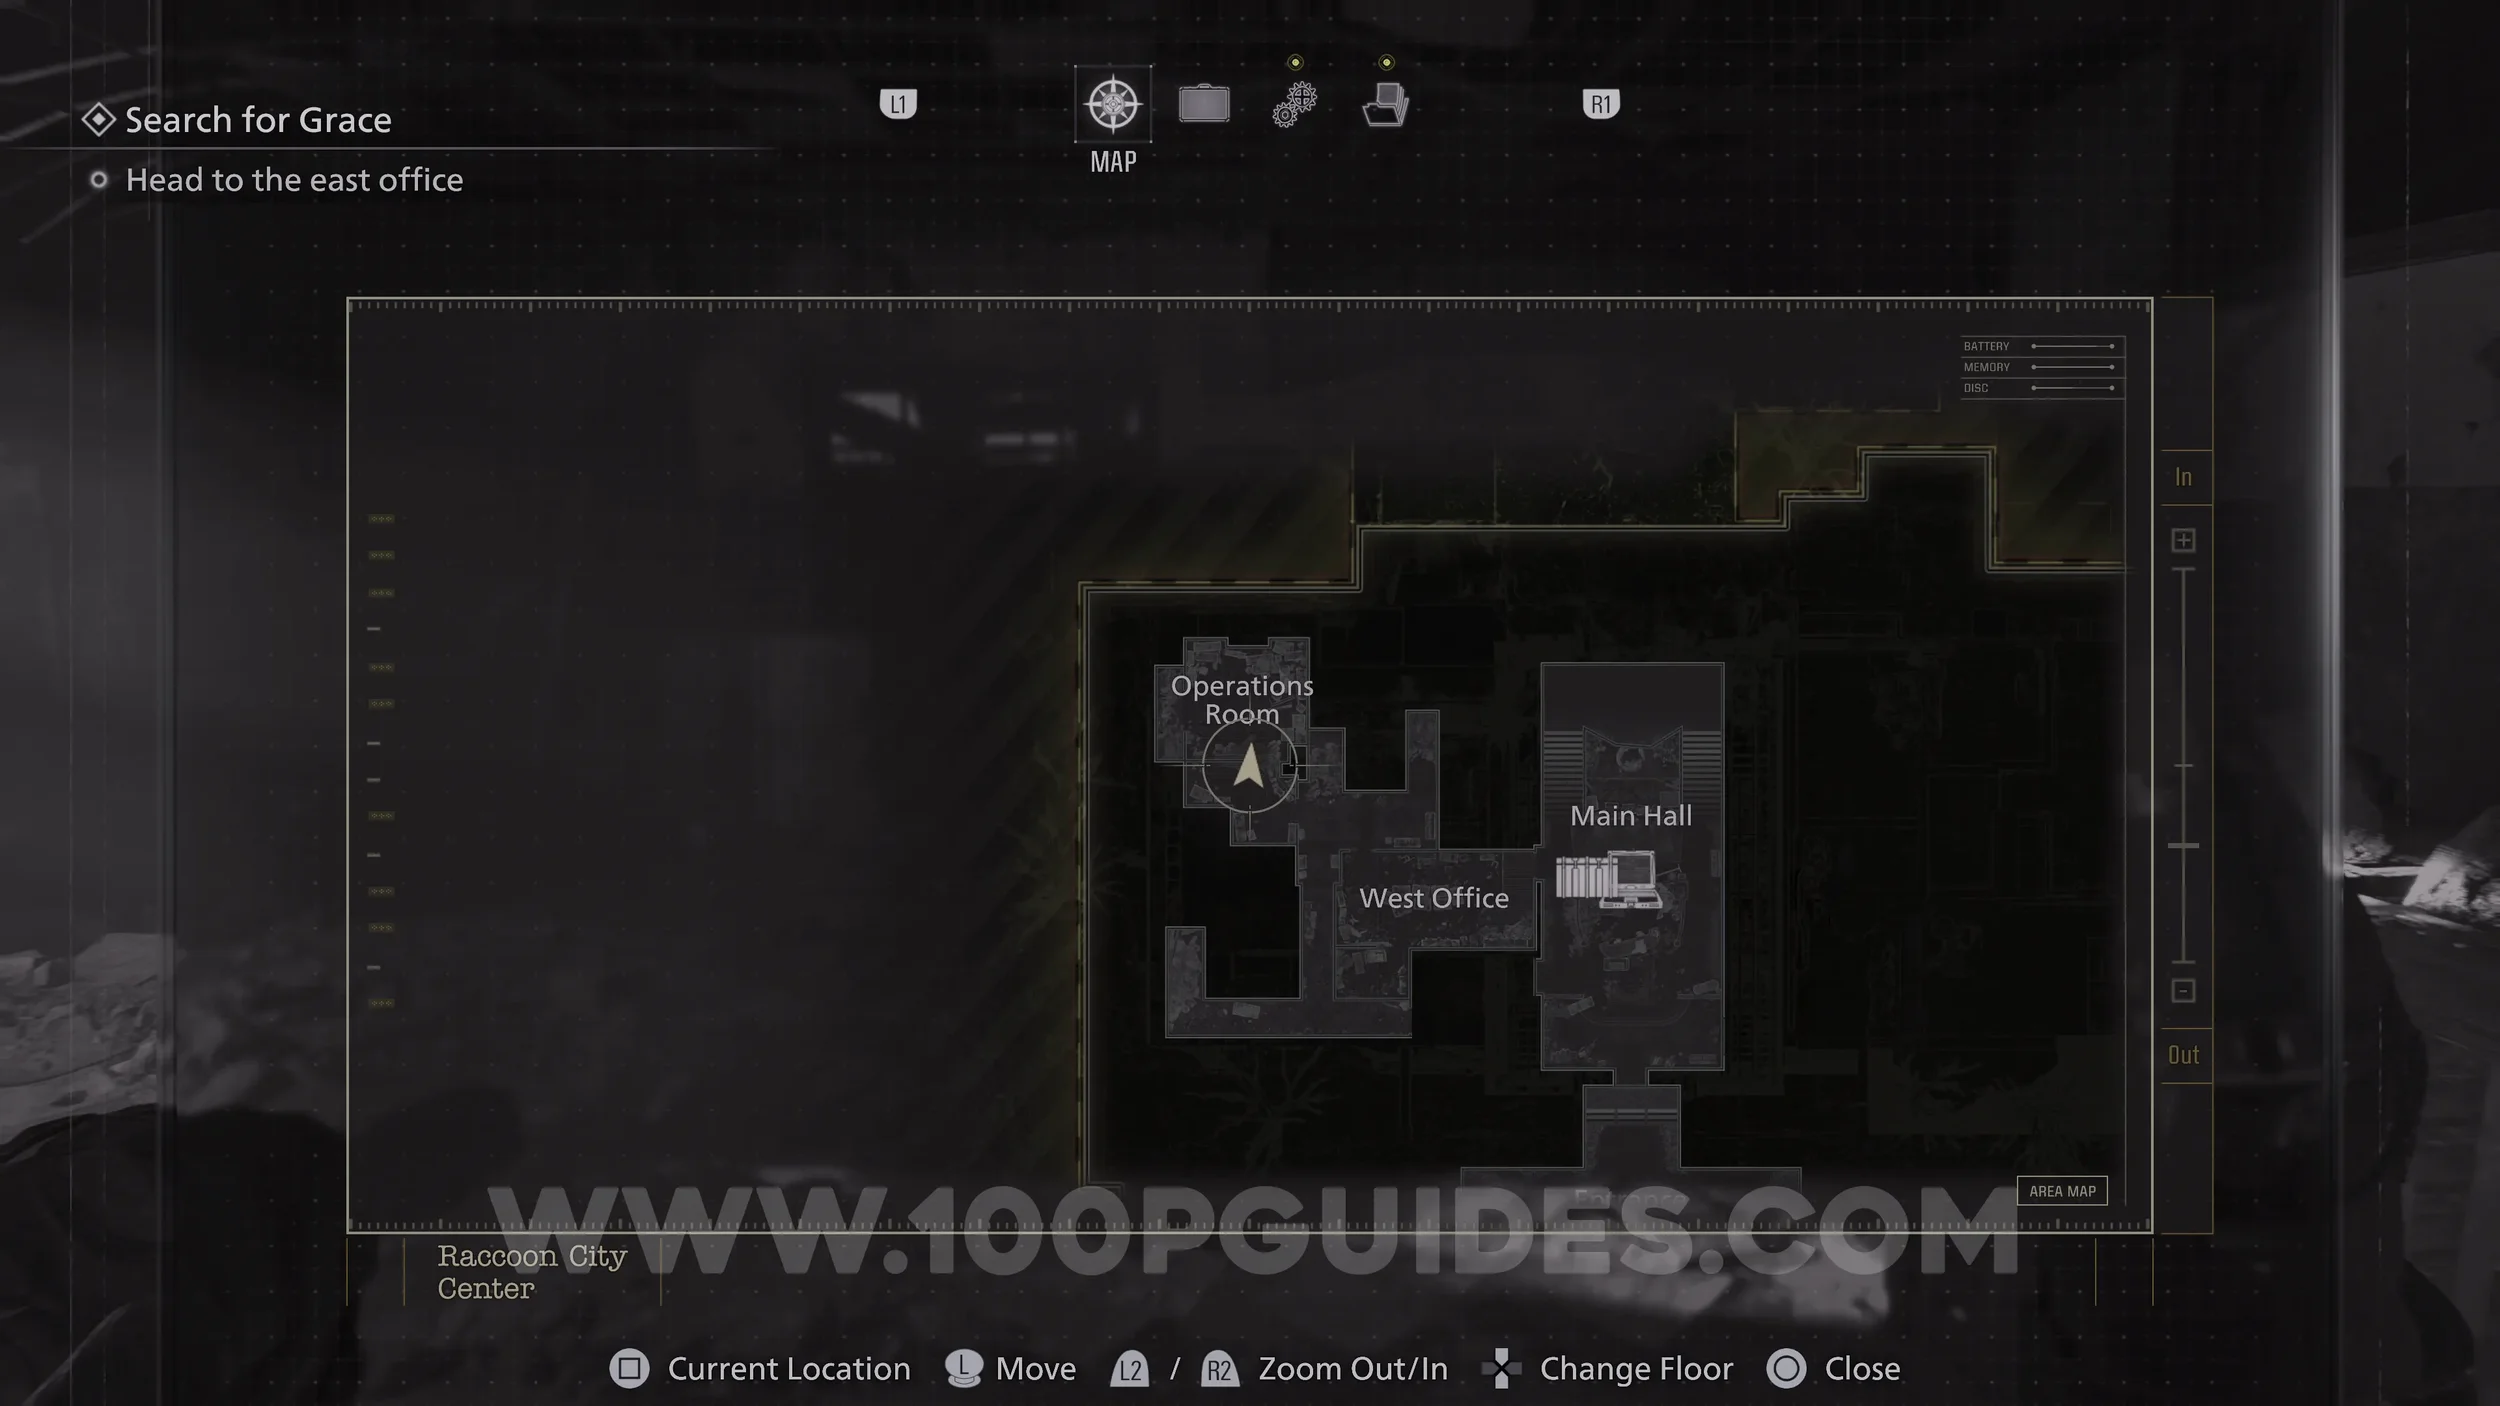
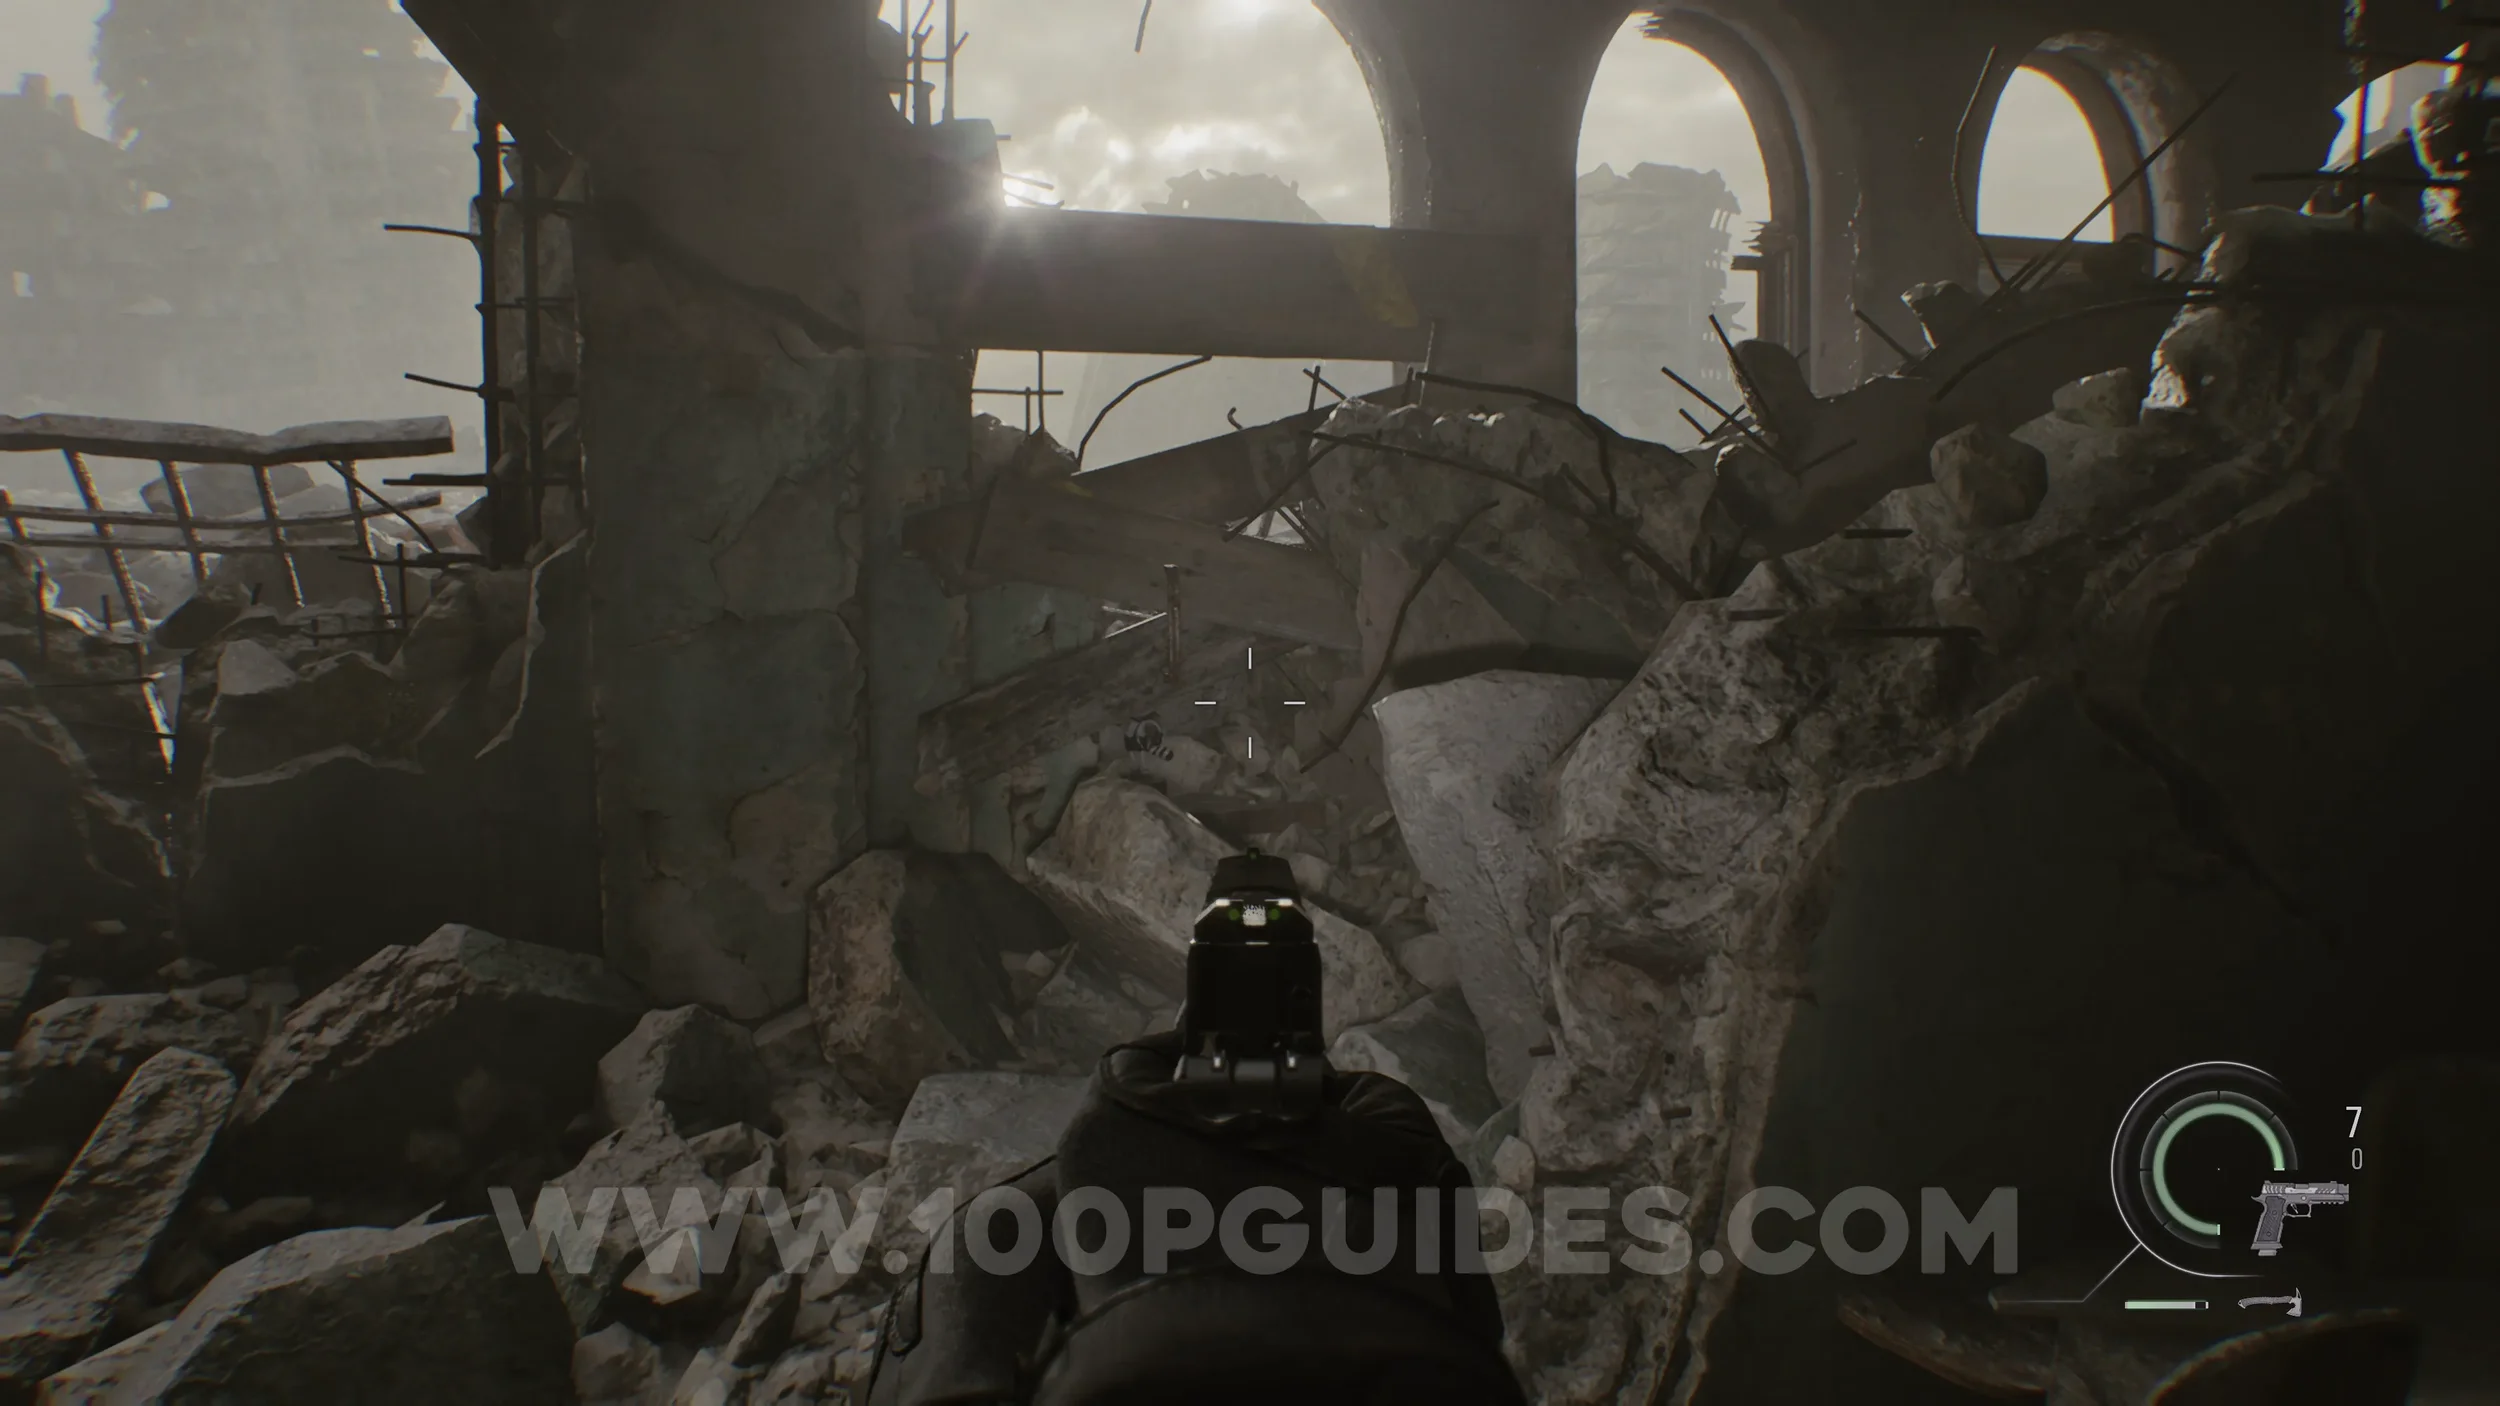
Mr. Raccoon #21. In the Debris in the Operations Room.
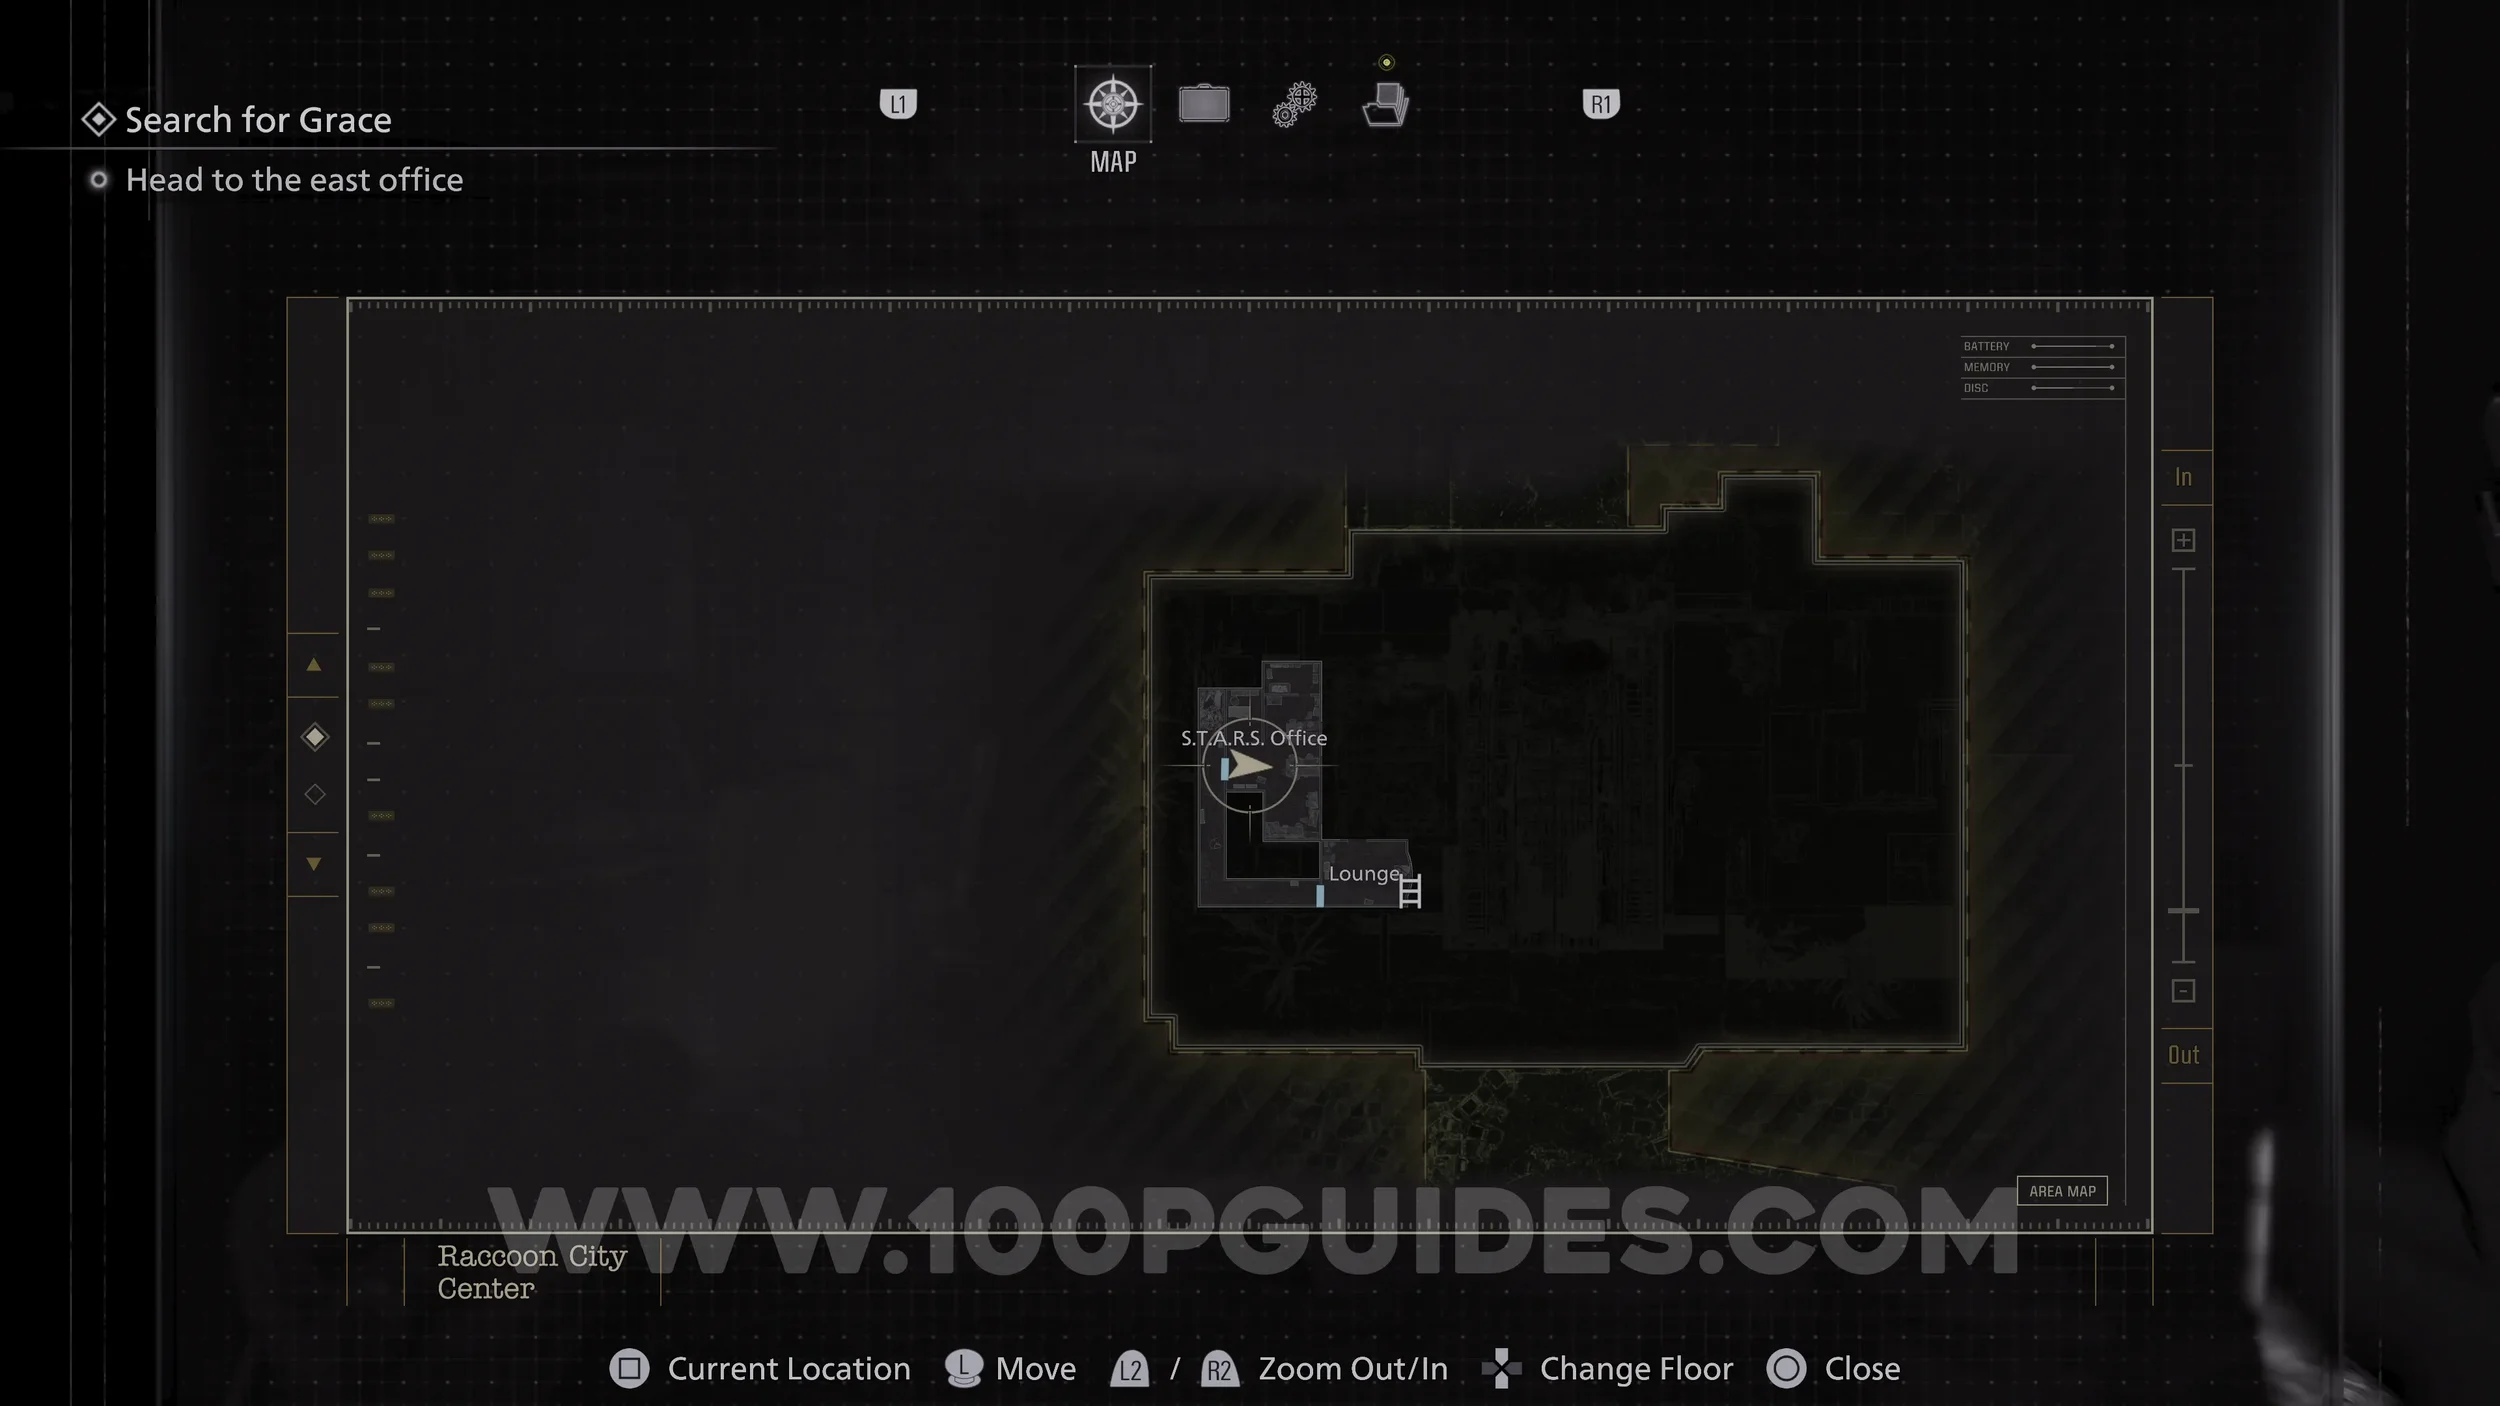
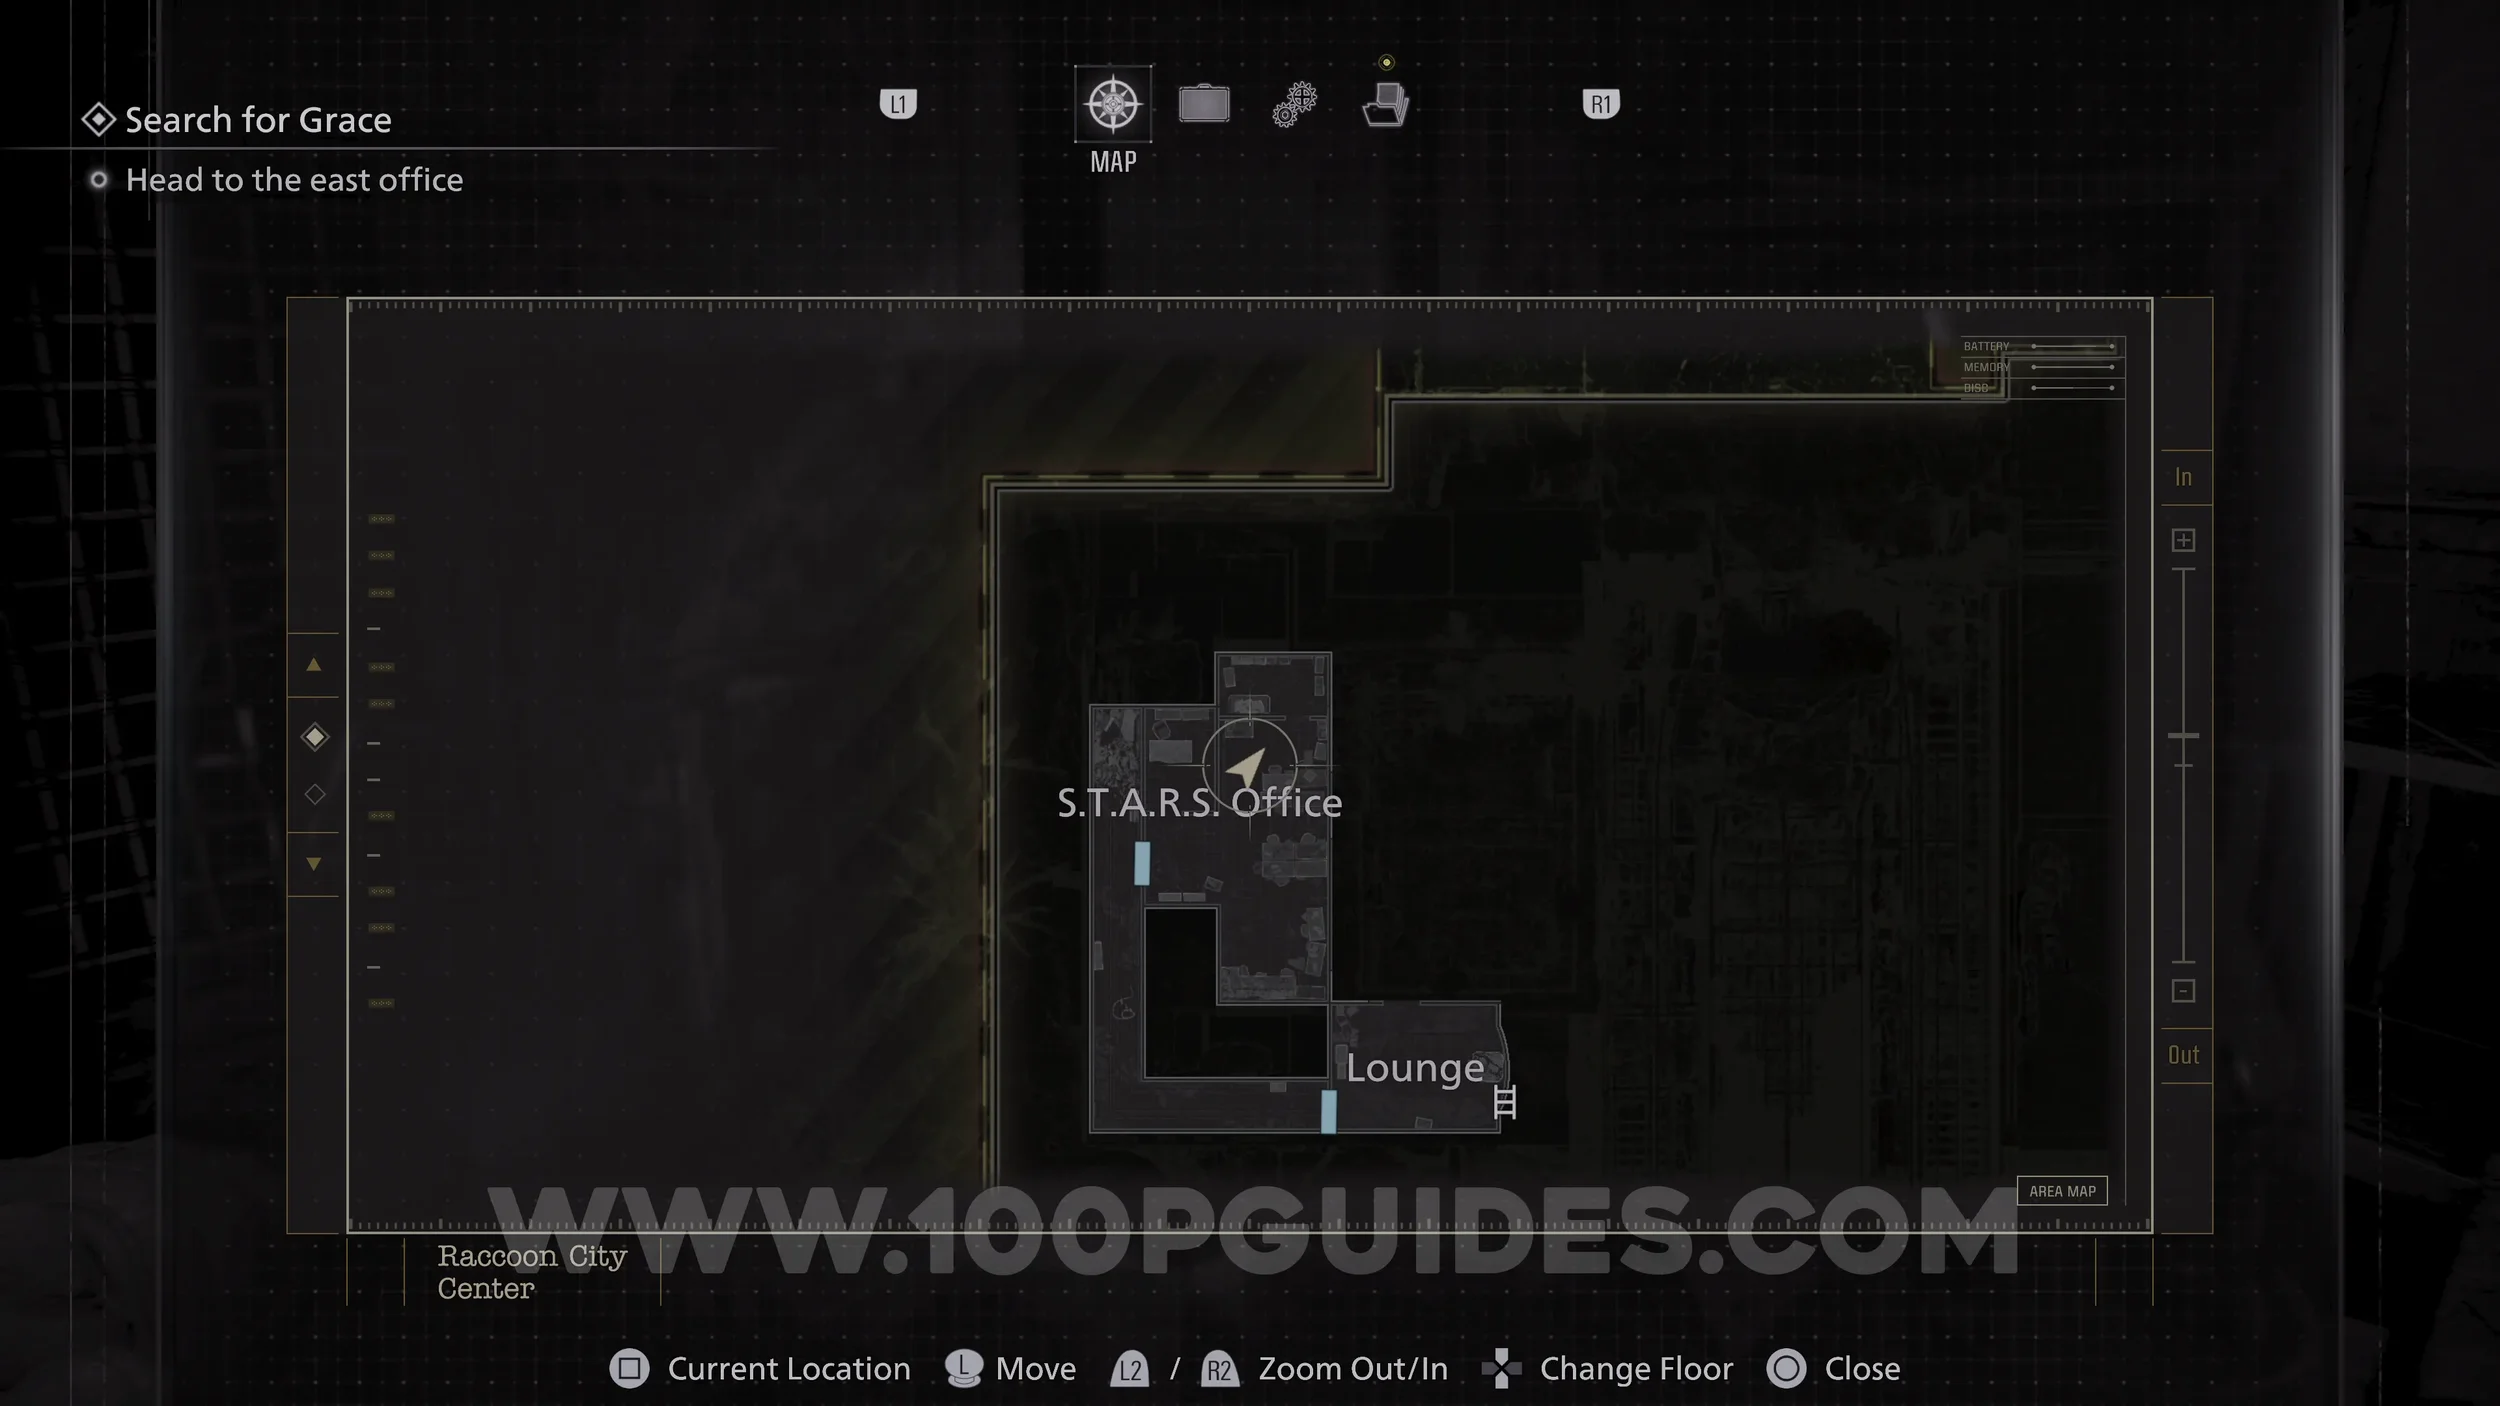
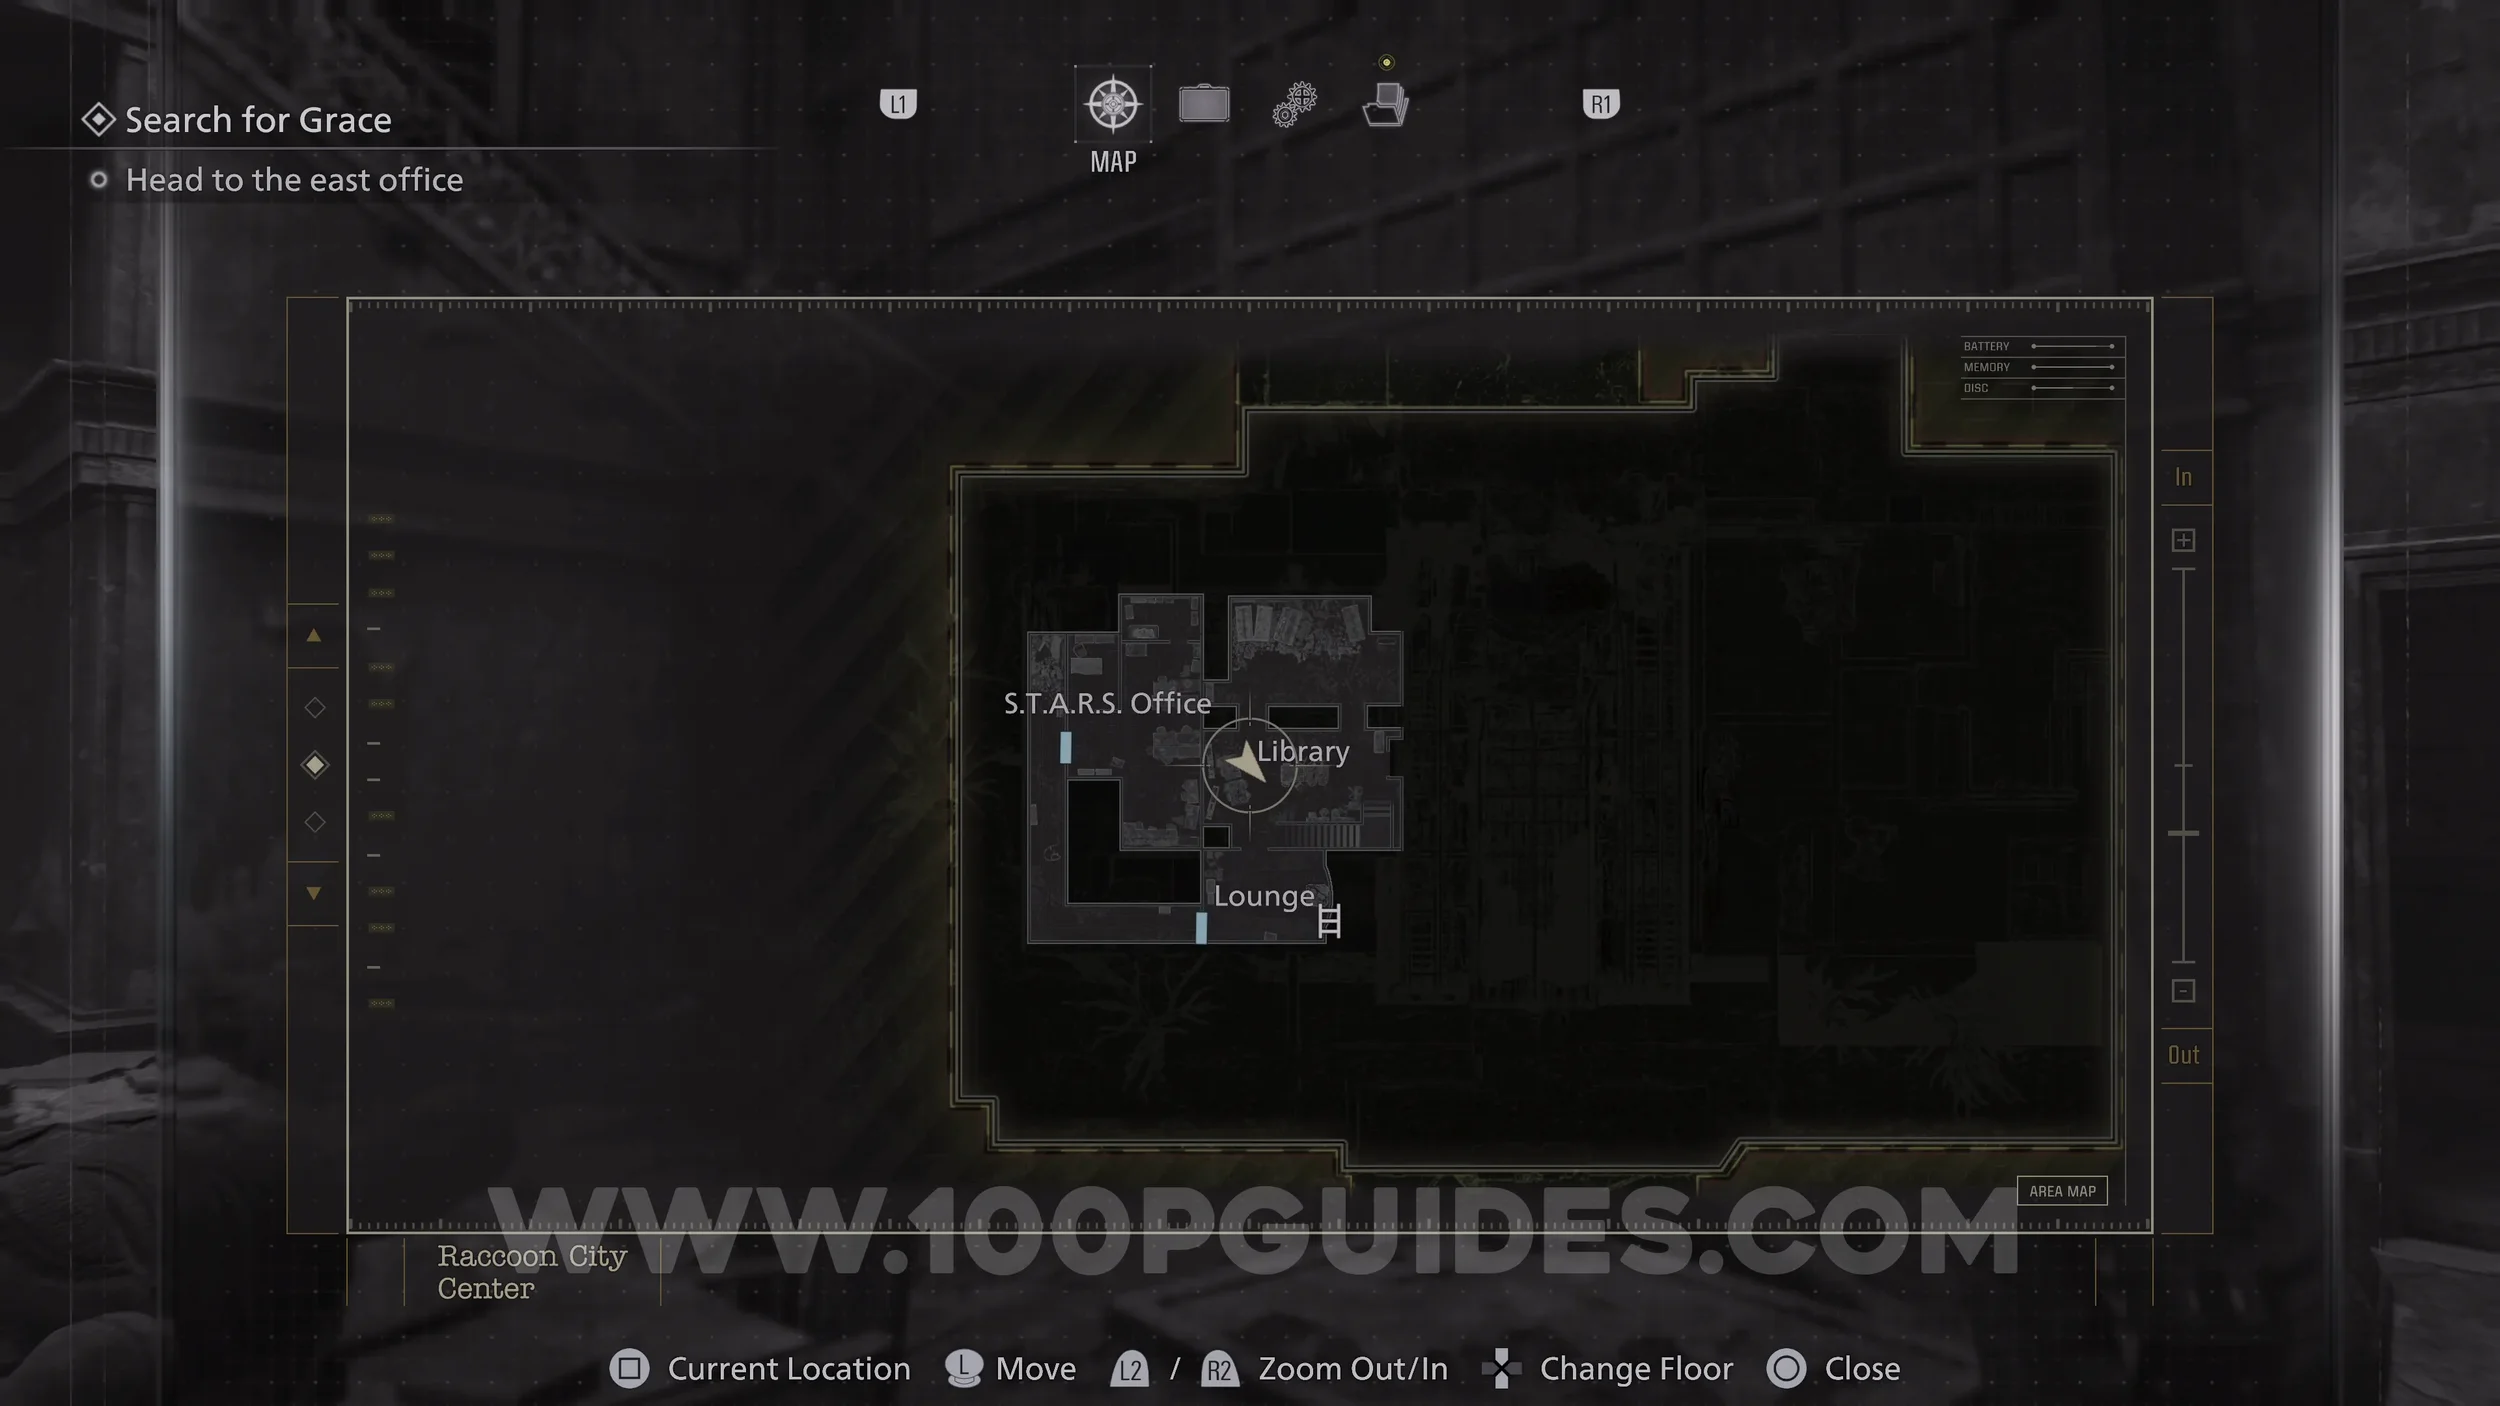
File #57 - Scavenger Hunt - Clue 2. In the S.T.A.R.S. Office on the top floor of the RPD building.
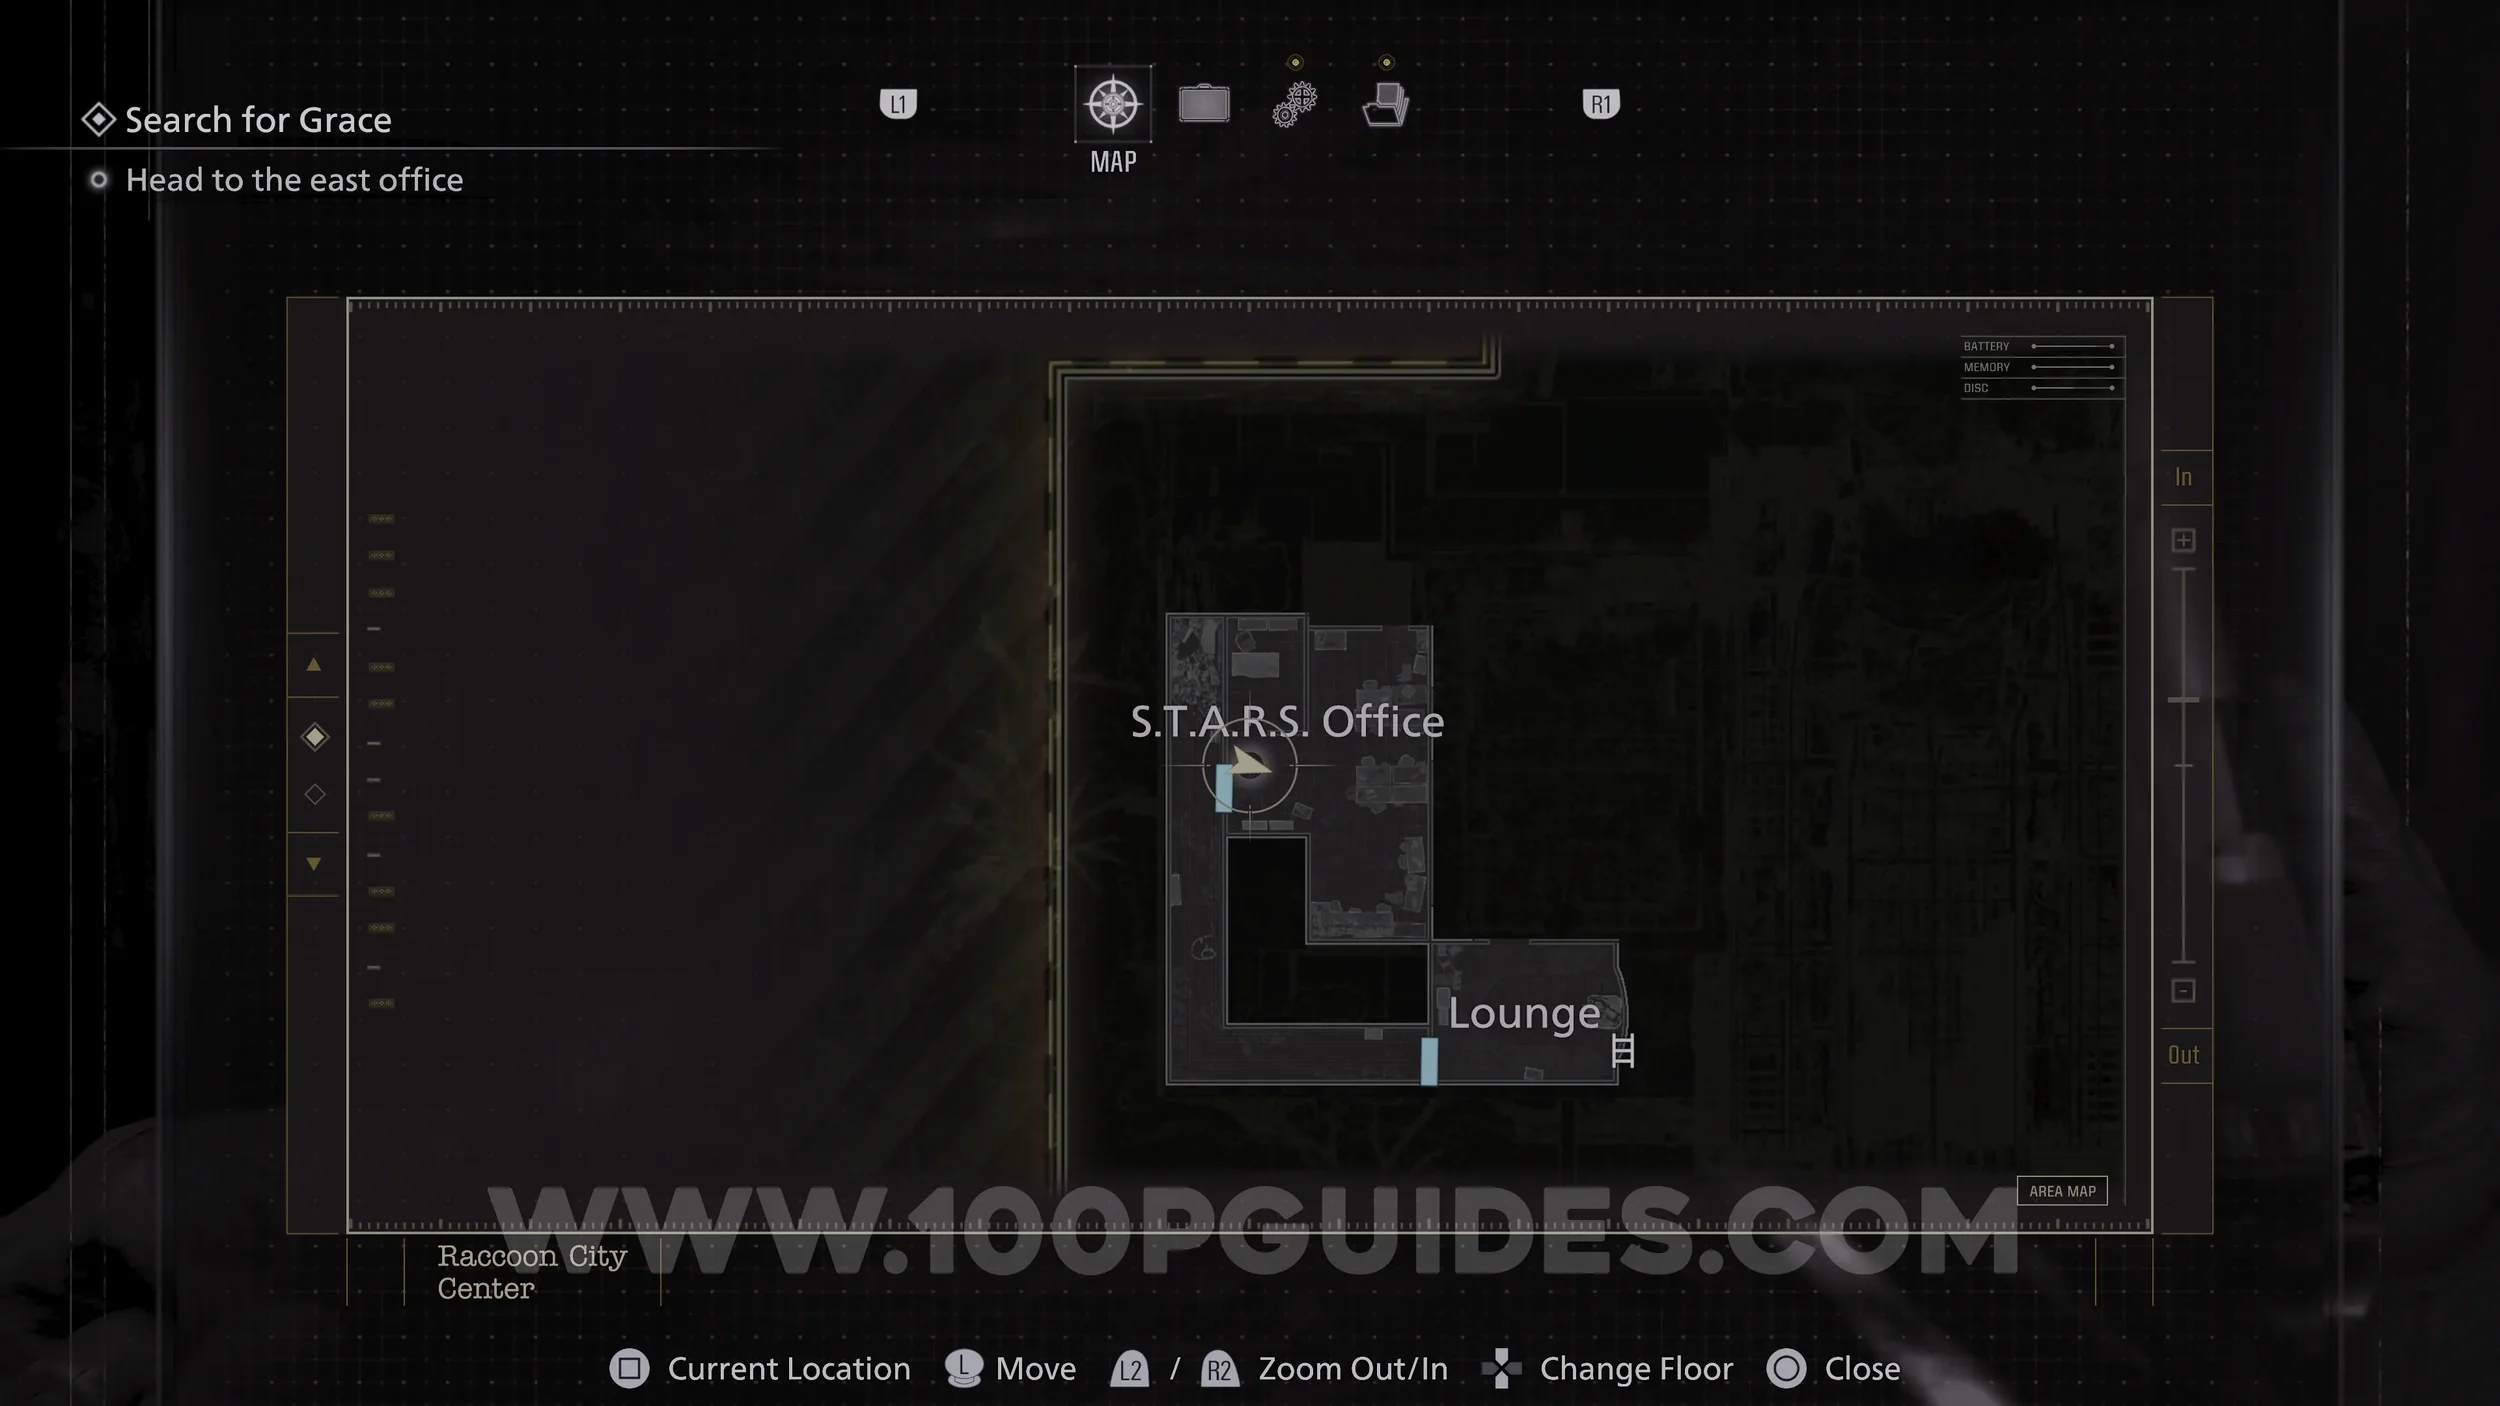
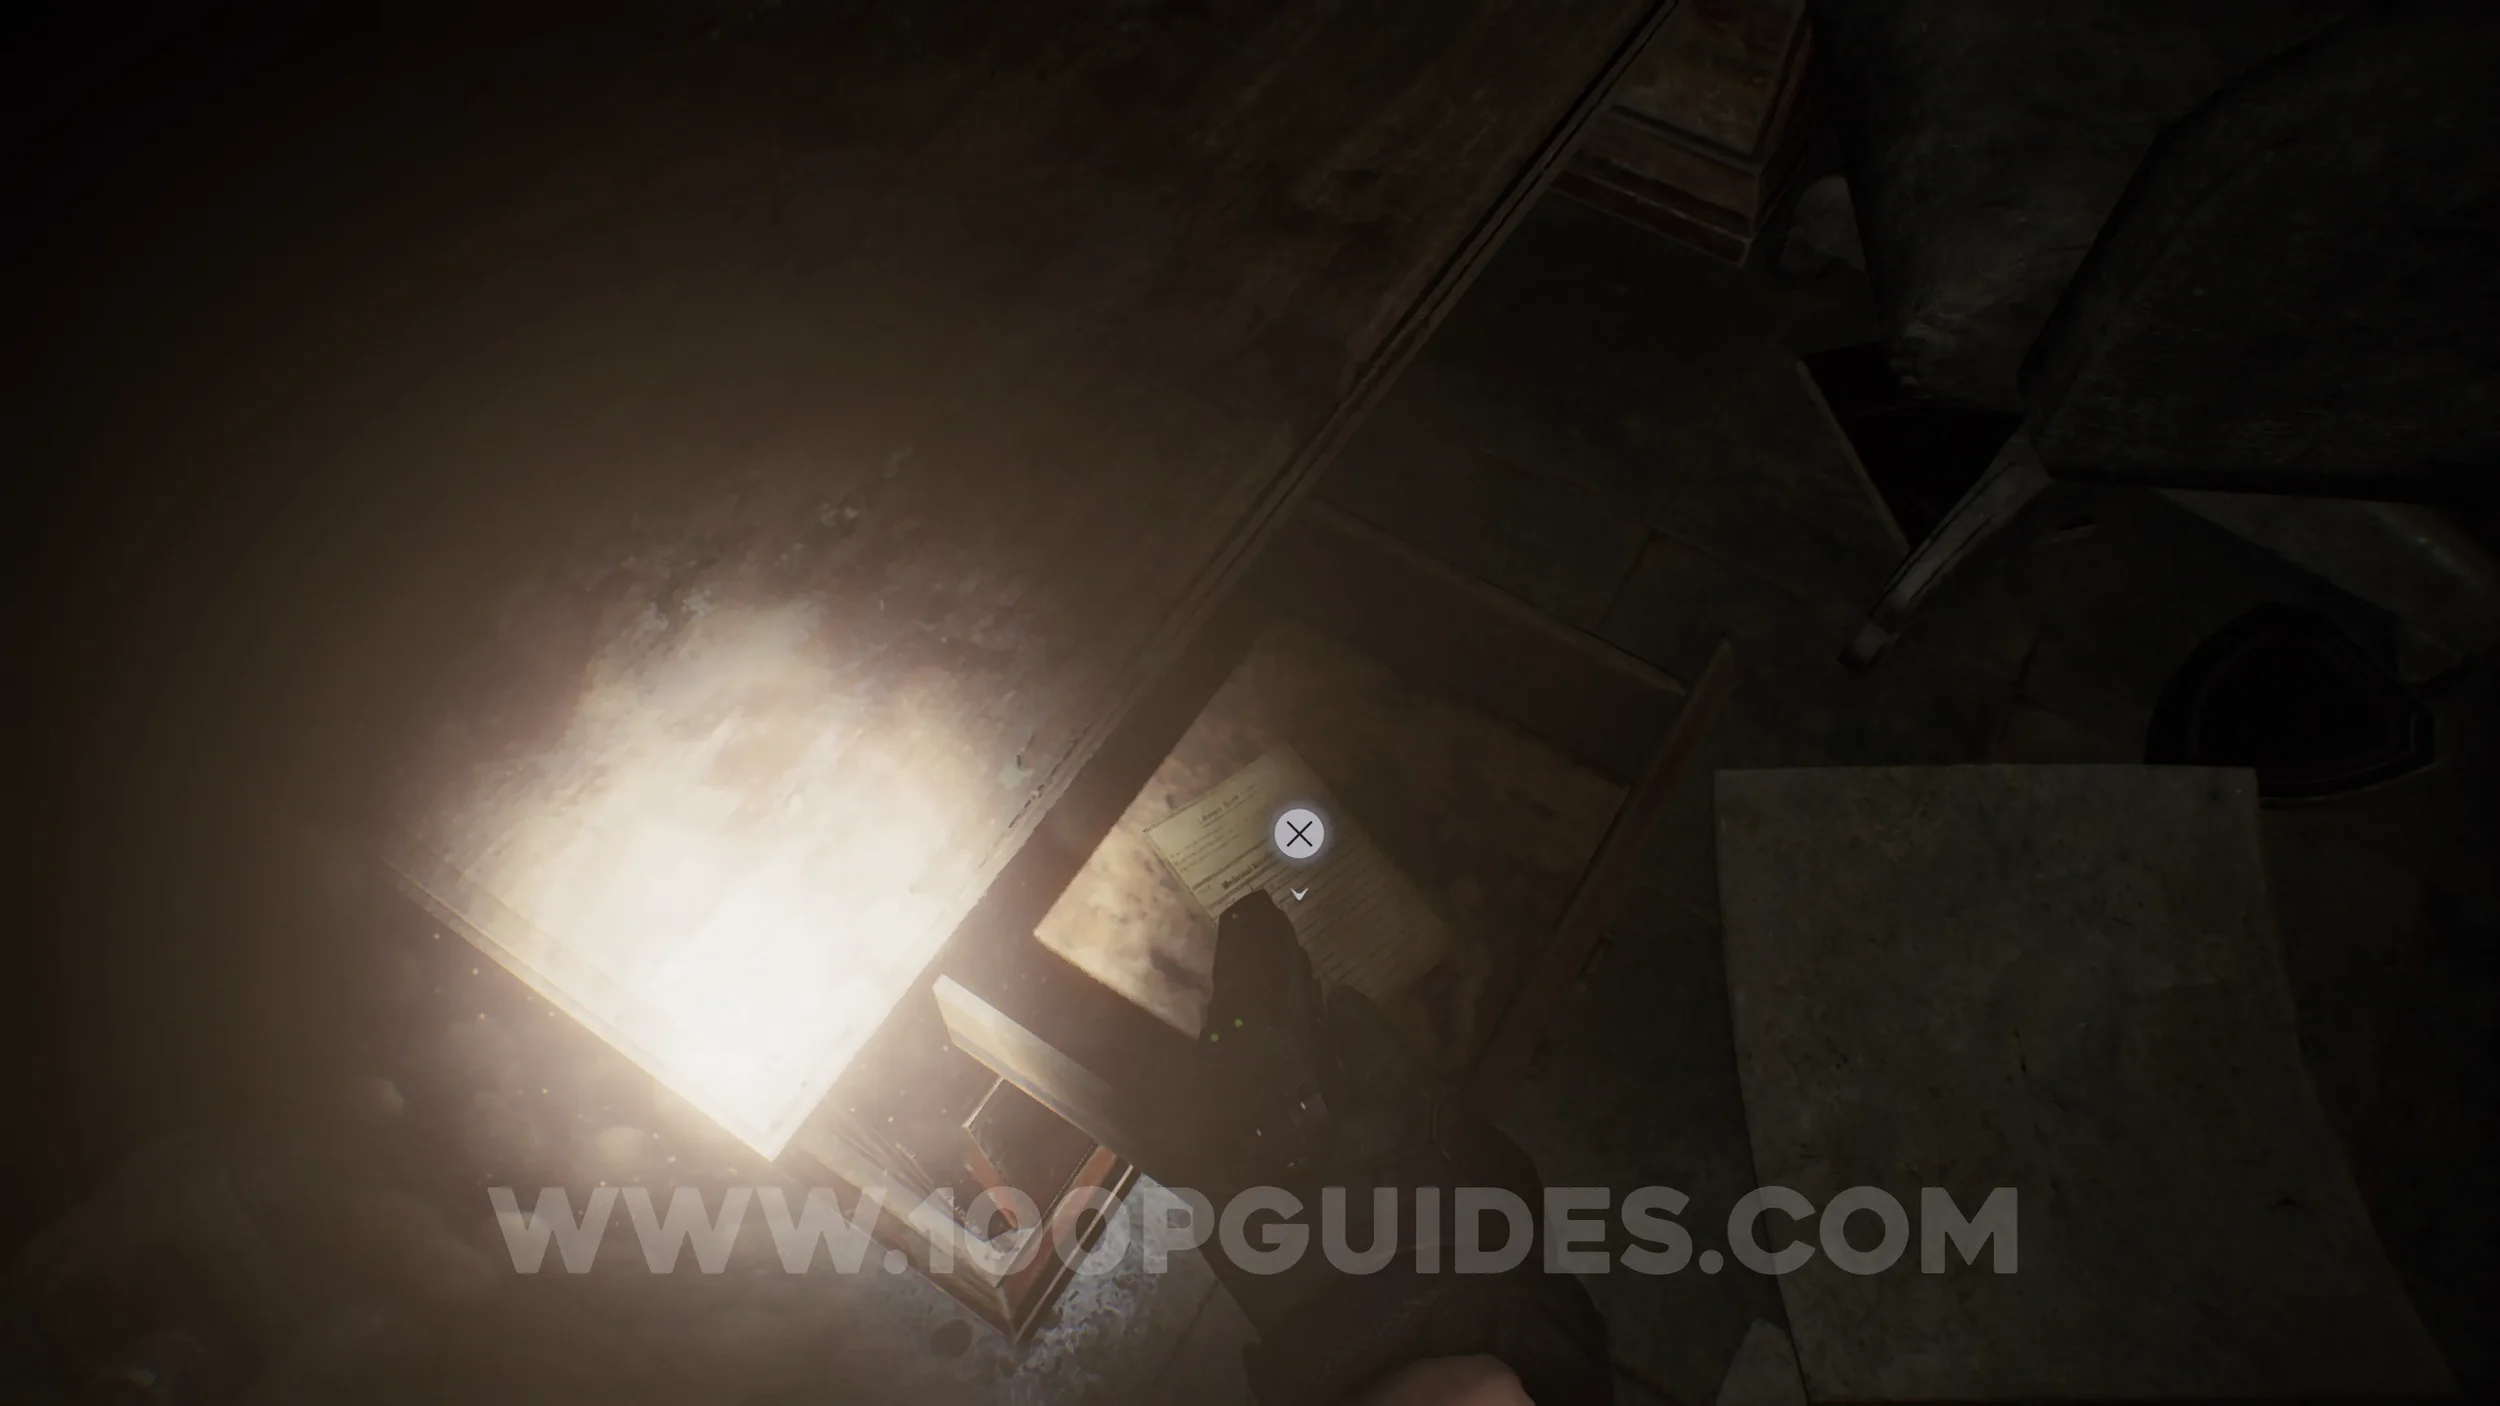
File #58 - Library Card. In the drawer in the small office in the S.T.A.R.S. Office. You have to wait a while after opening the drawer.

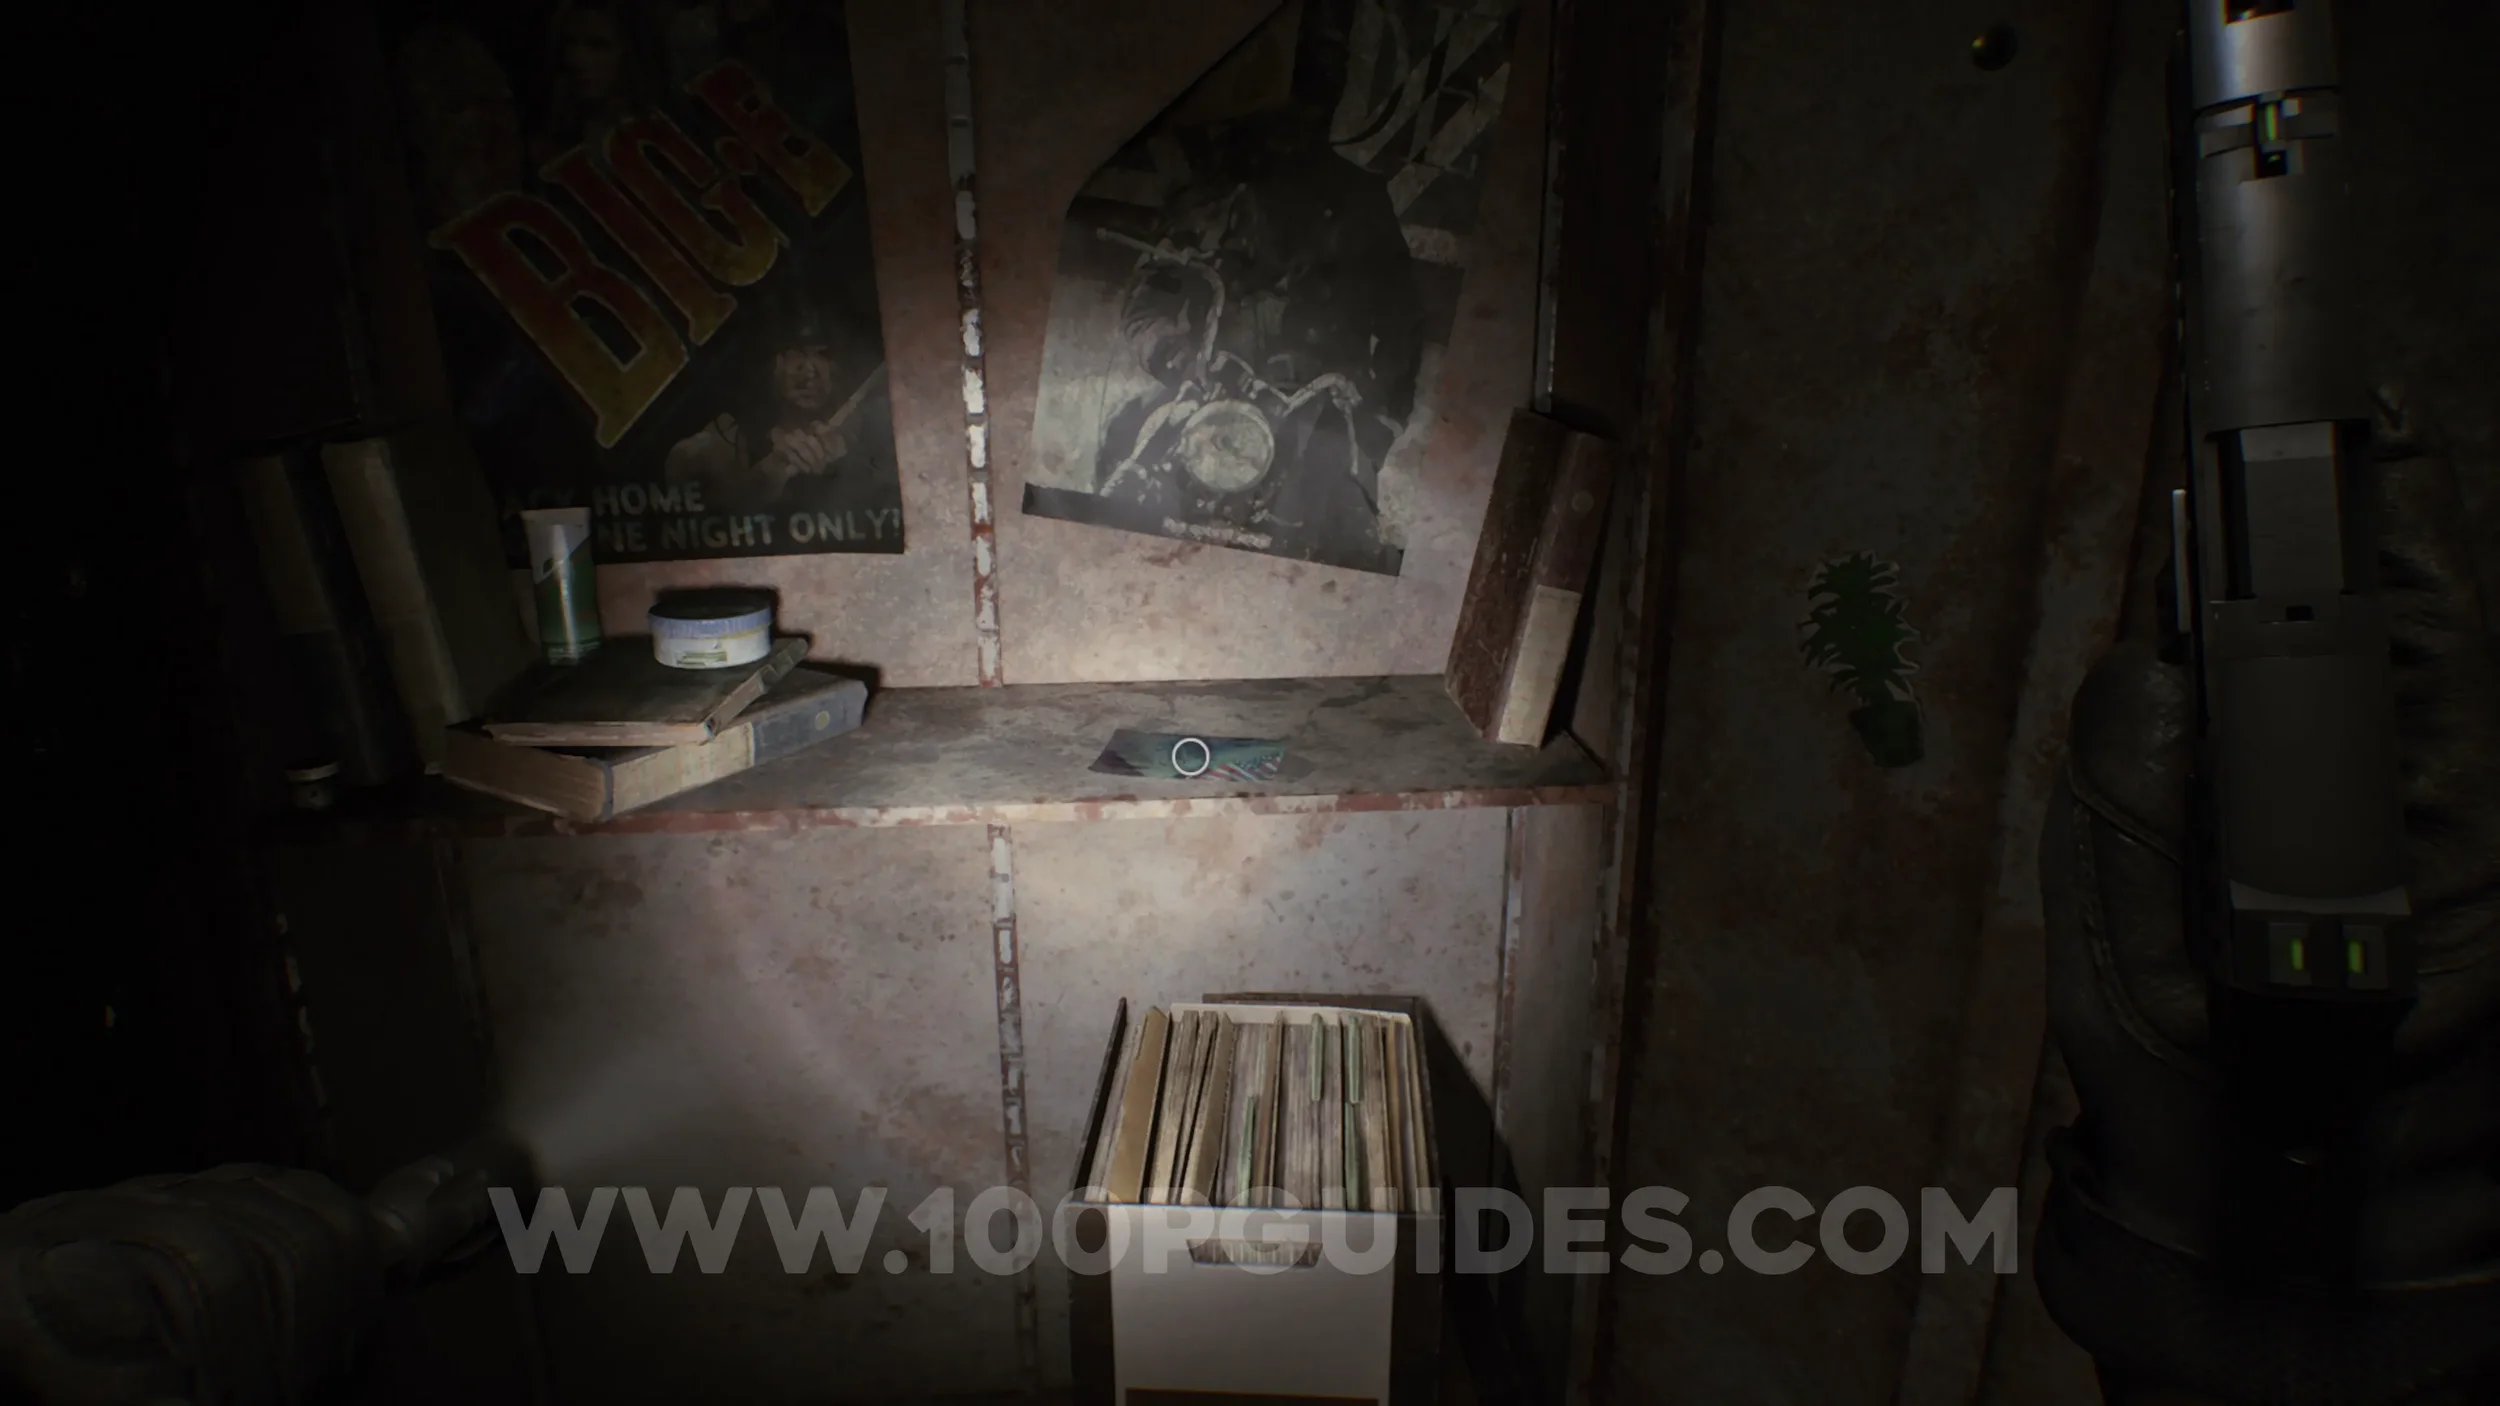
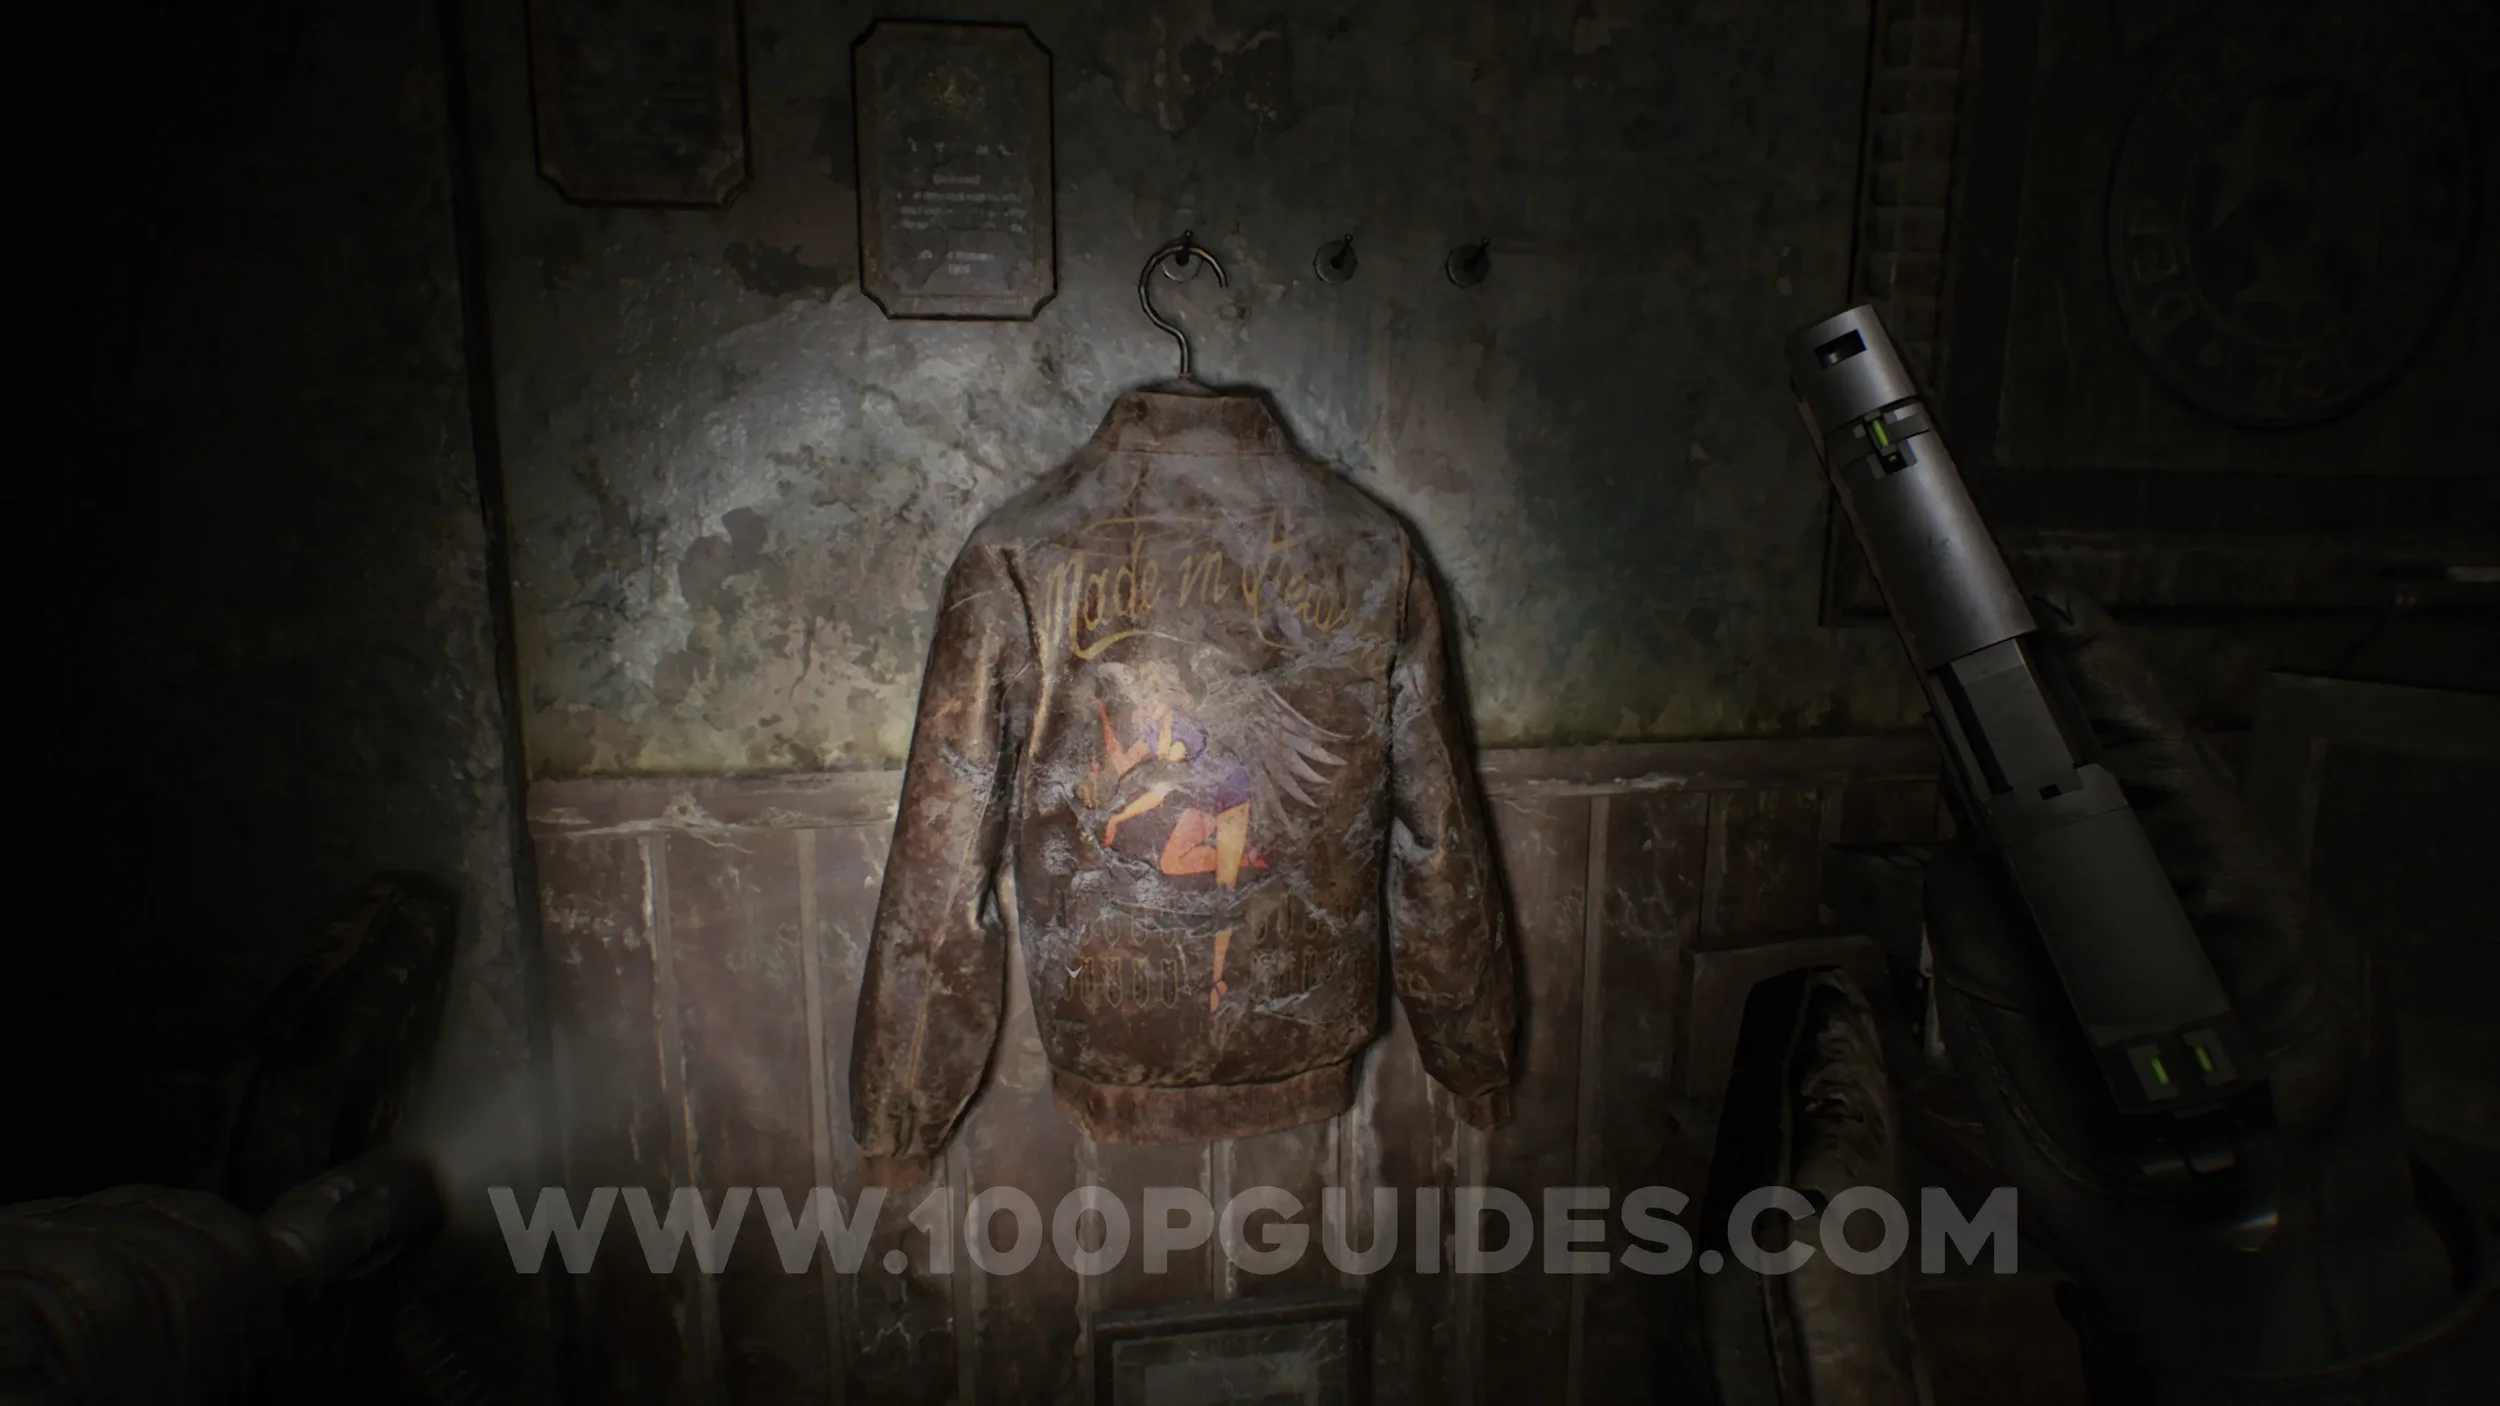
File #59 - Scavenger Hunt - Clue 1. In the jacket in the S.T.A.R.S. Office.
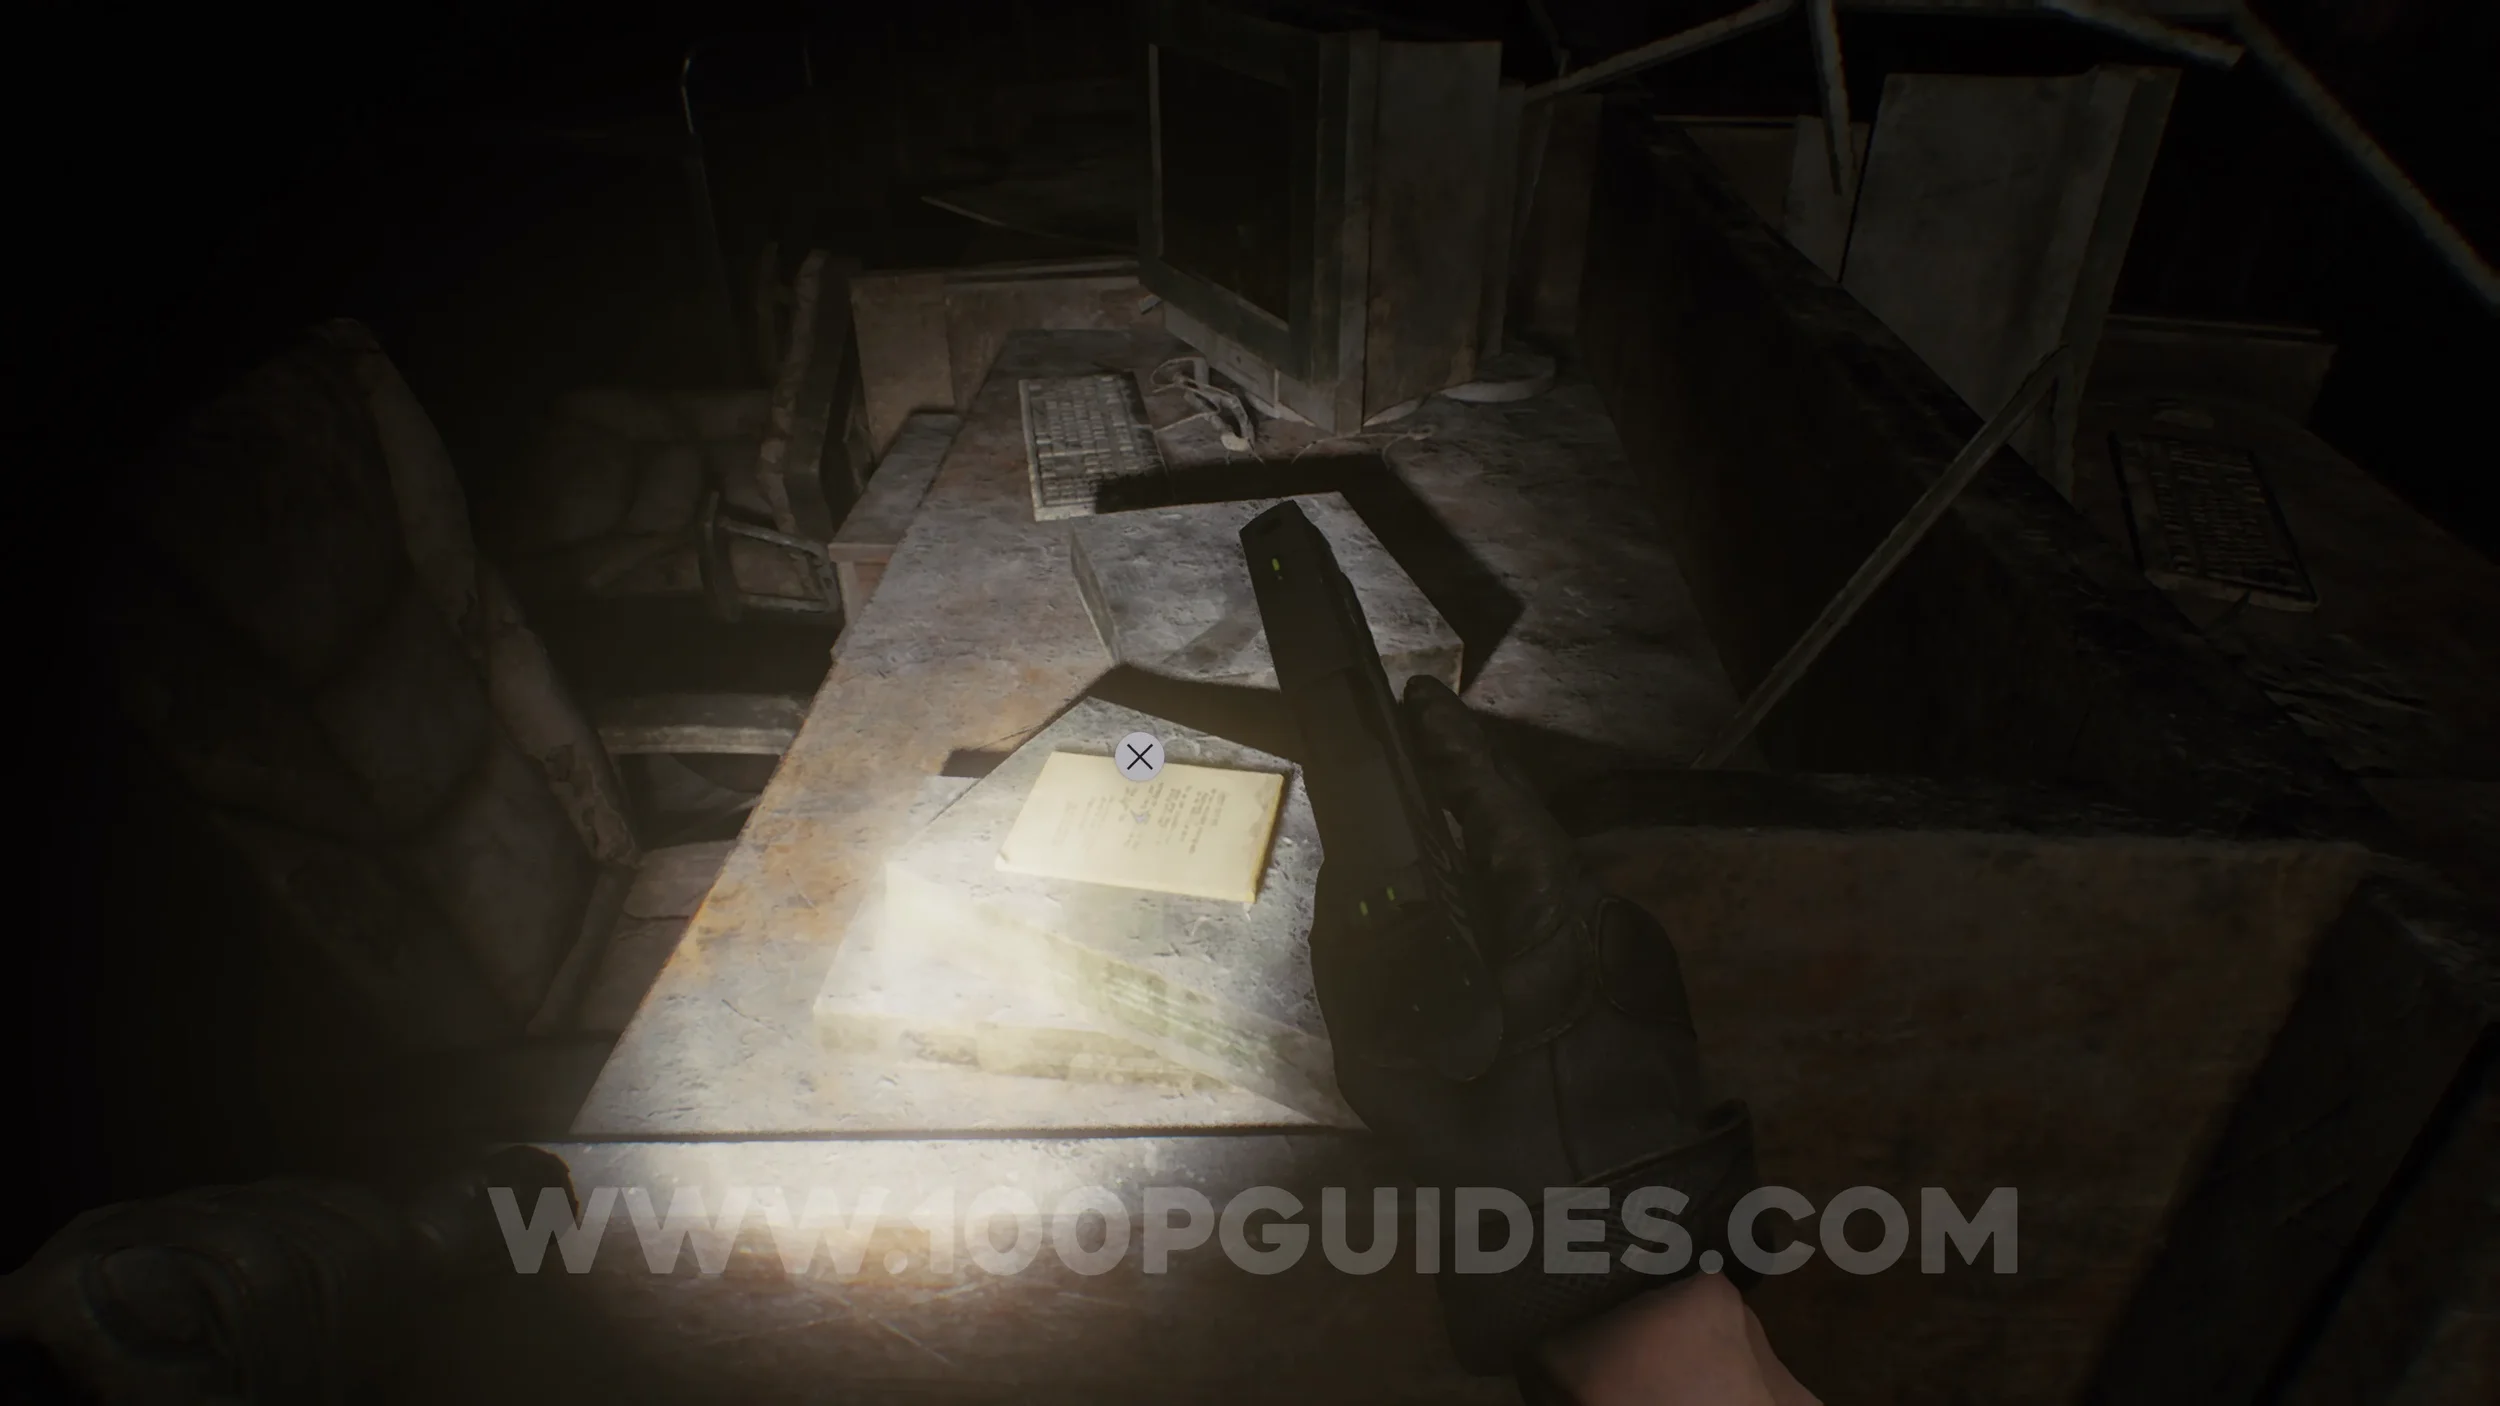
File #60 - Barry’s To Do List. On the a desk in the S.T.A.R.S. Office.

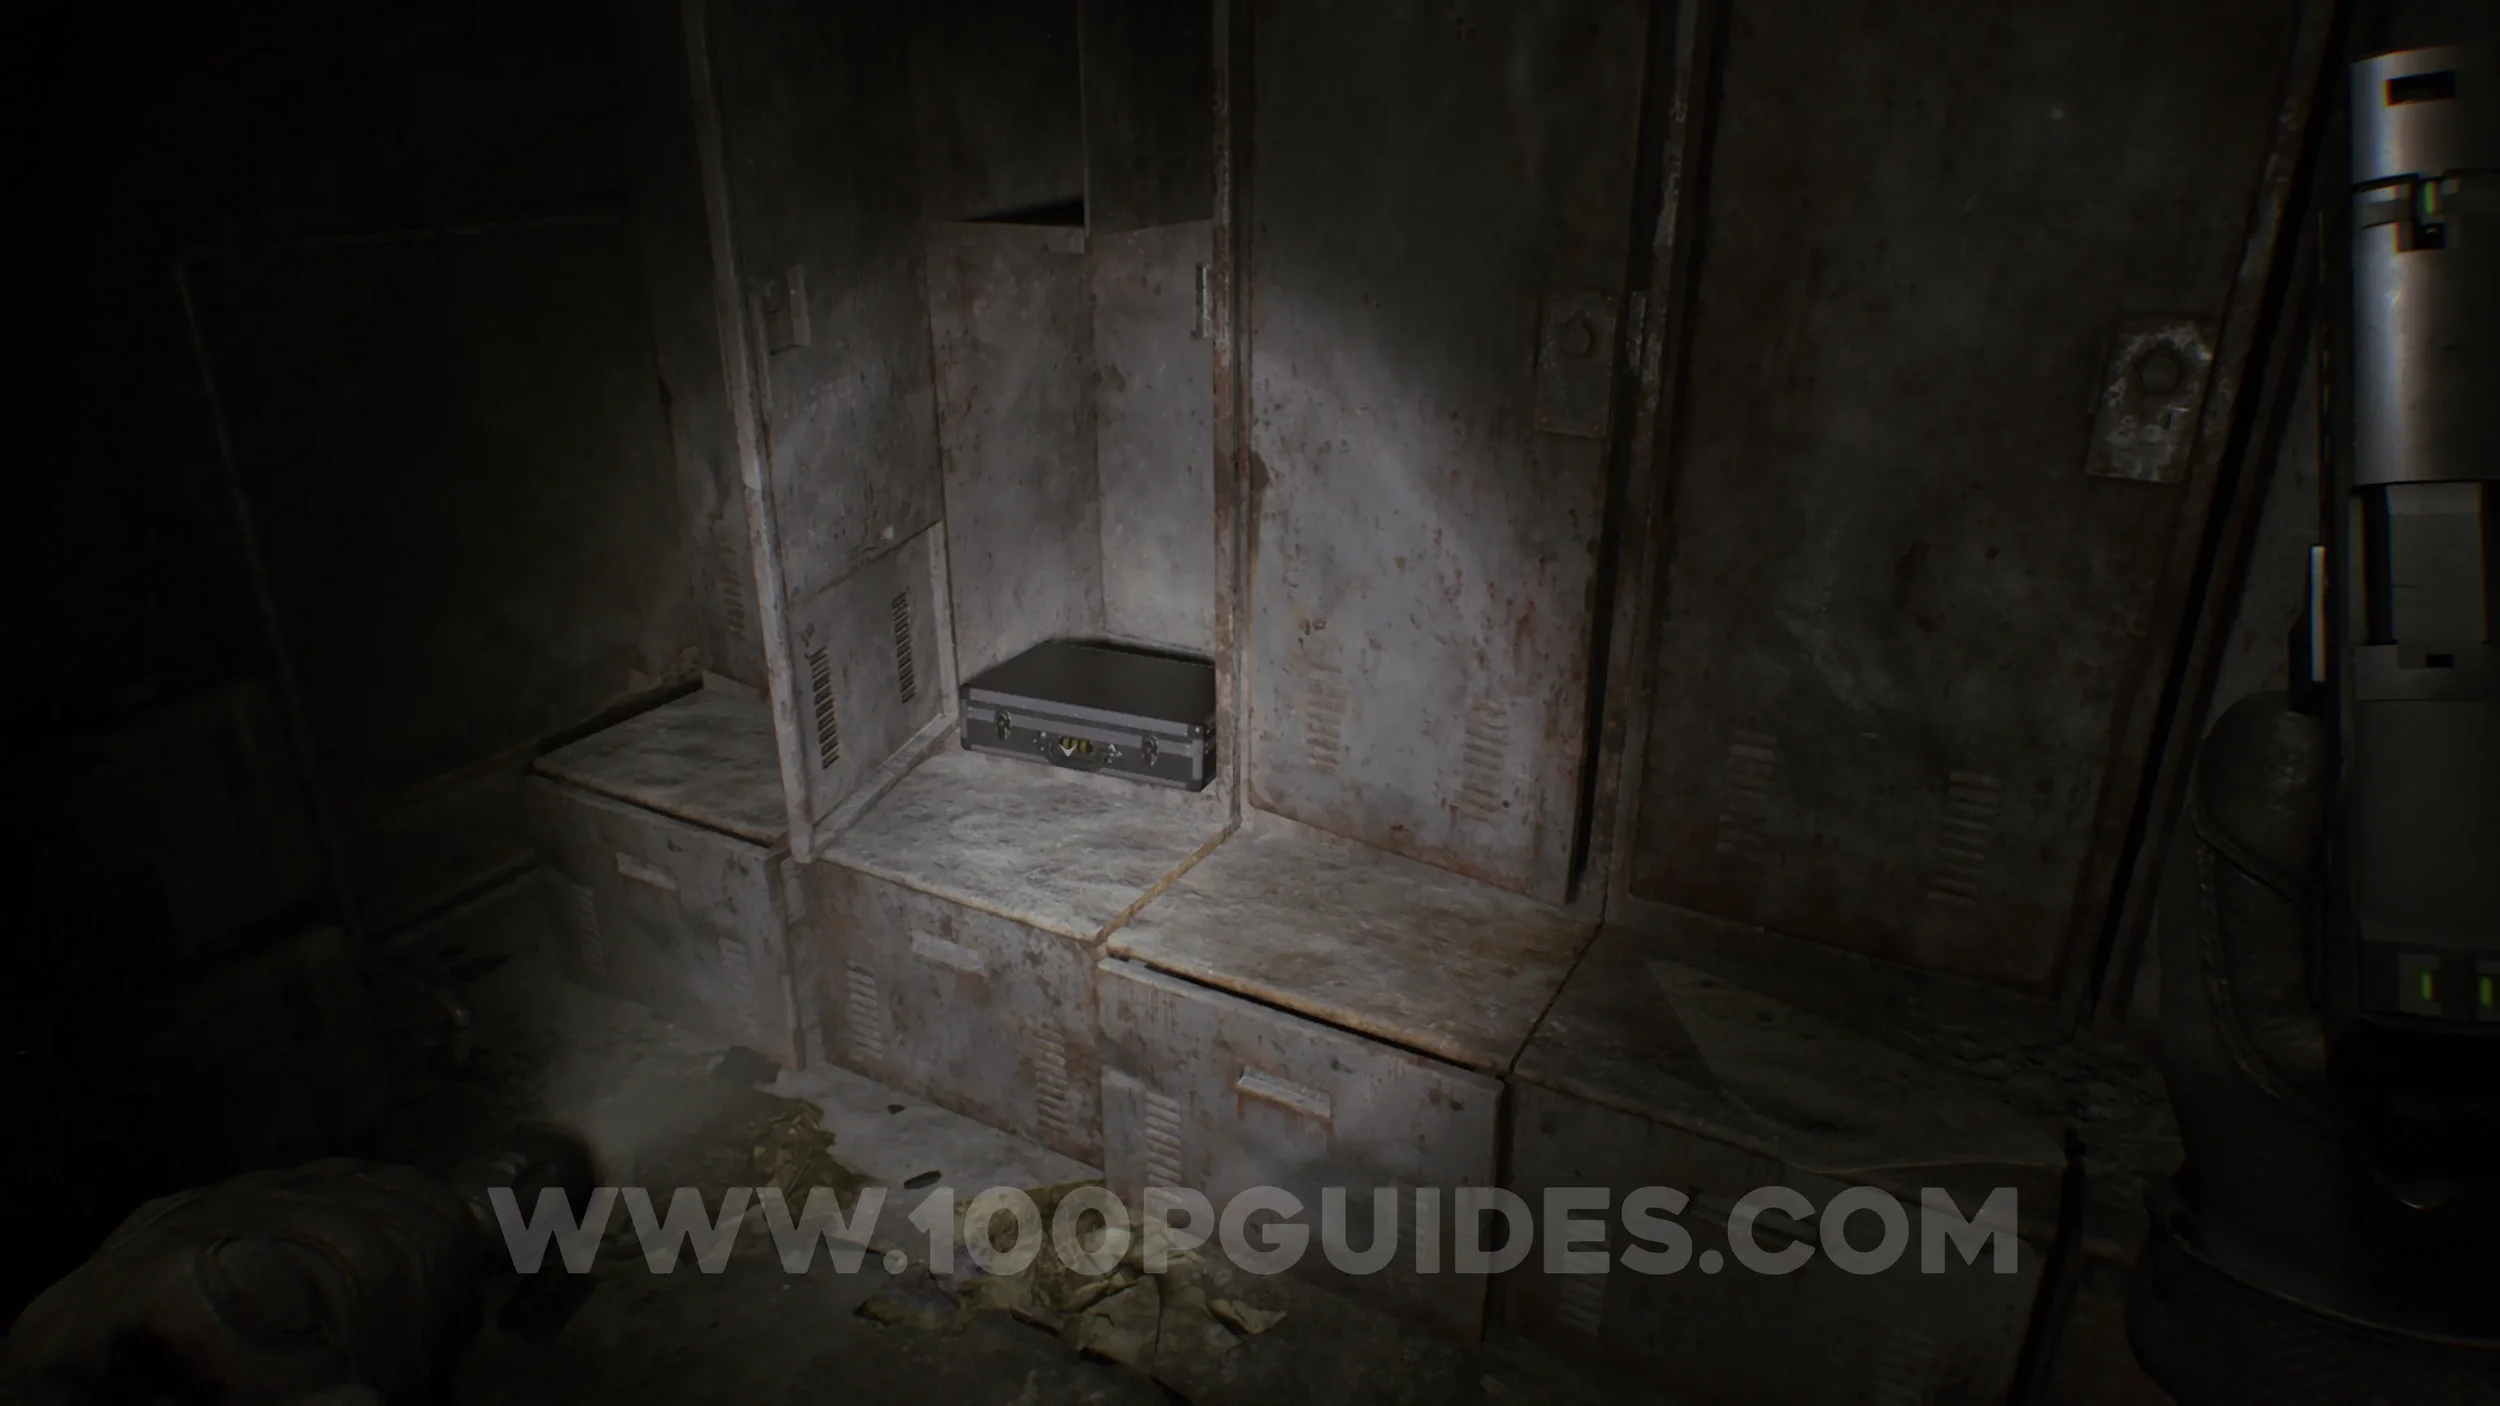
Charm #5 - Power Shades Charm. In the small room to the north of the S.T.A.R.S Office in a briefcase. Open it with code RRR.
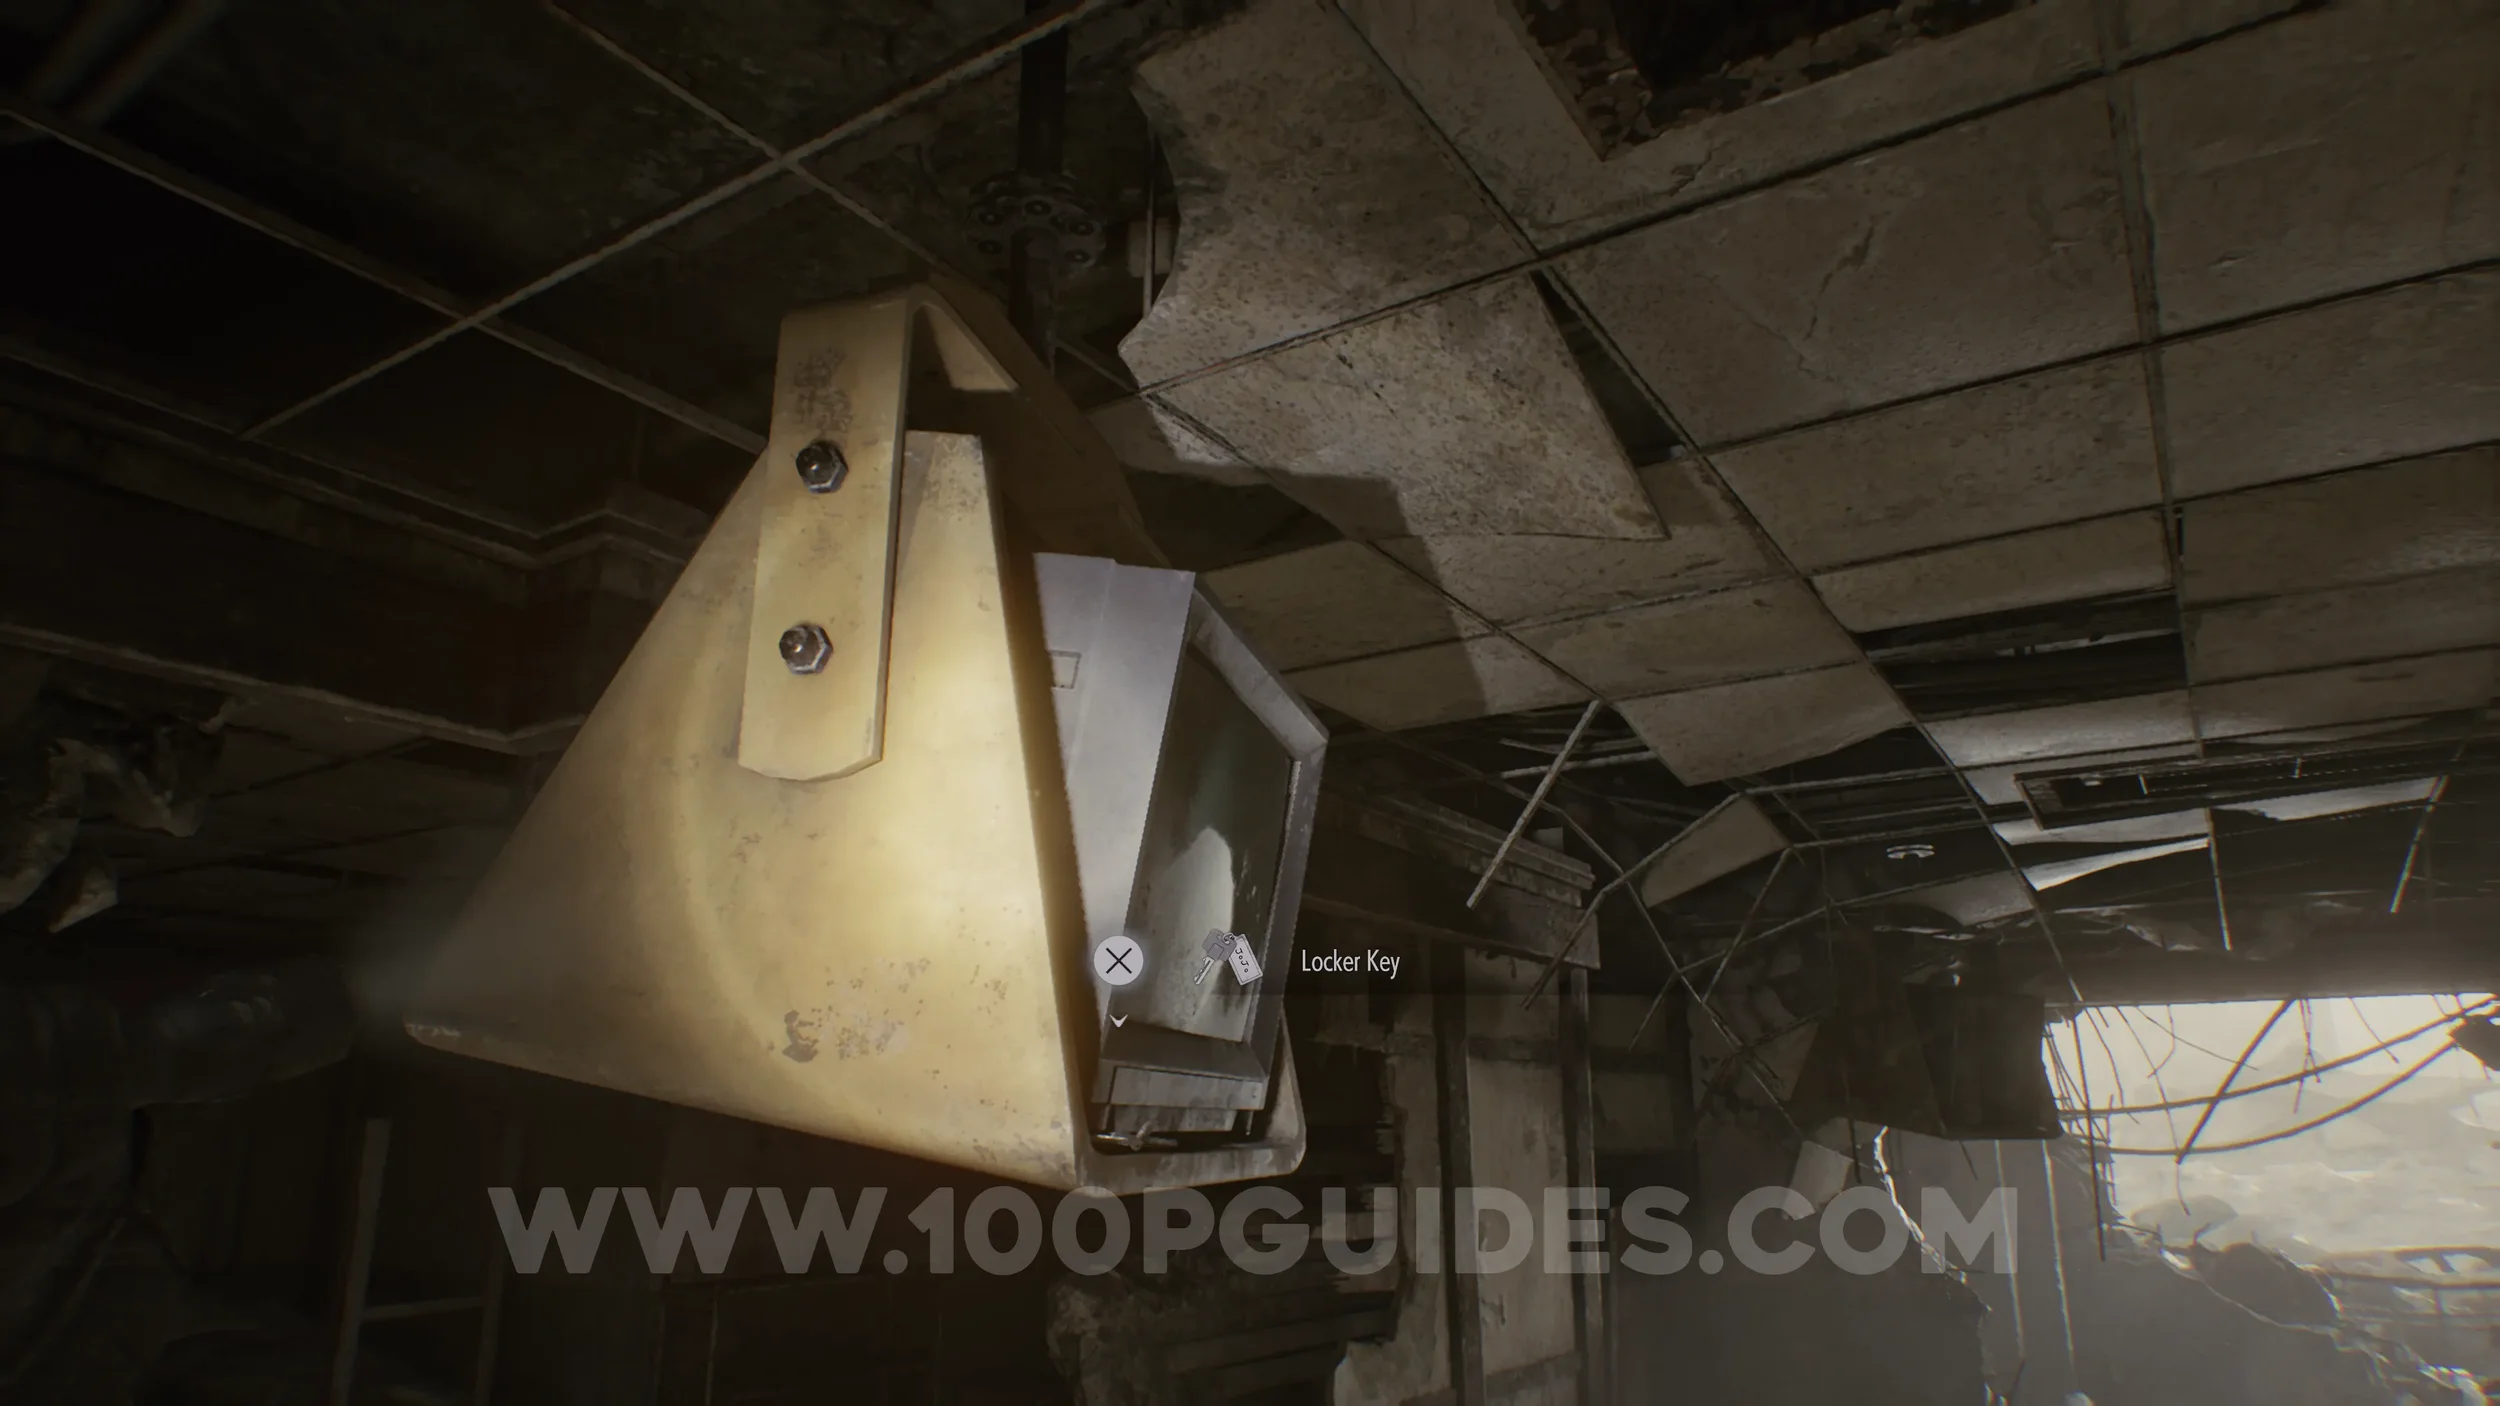
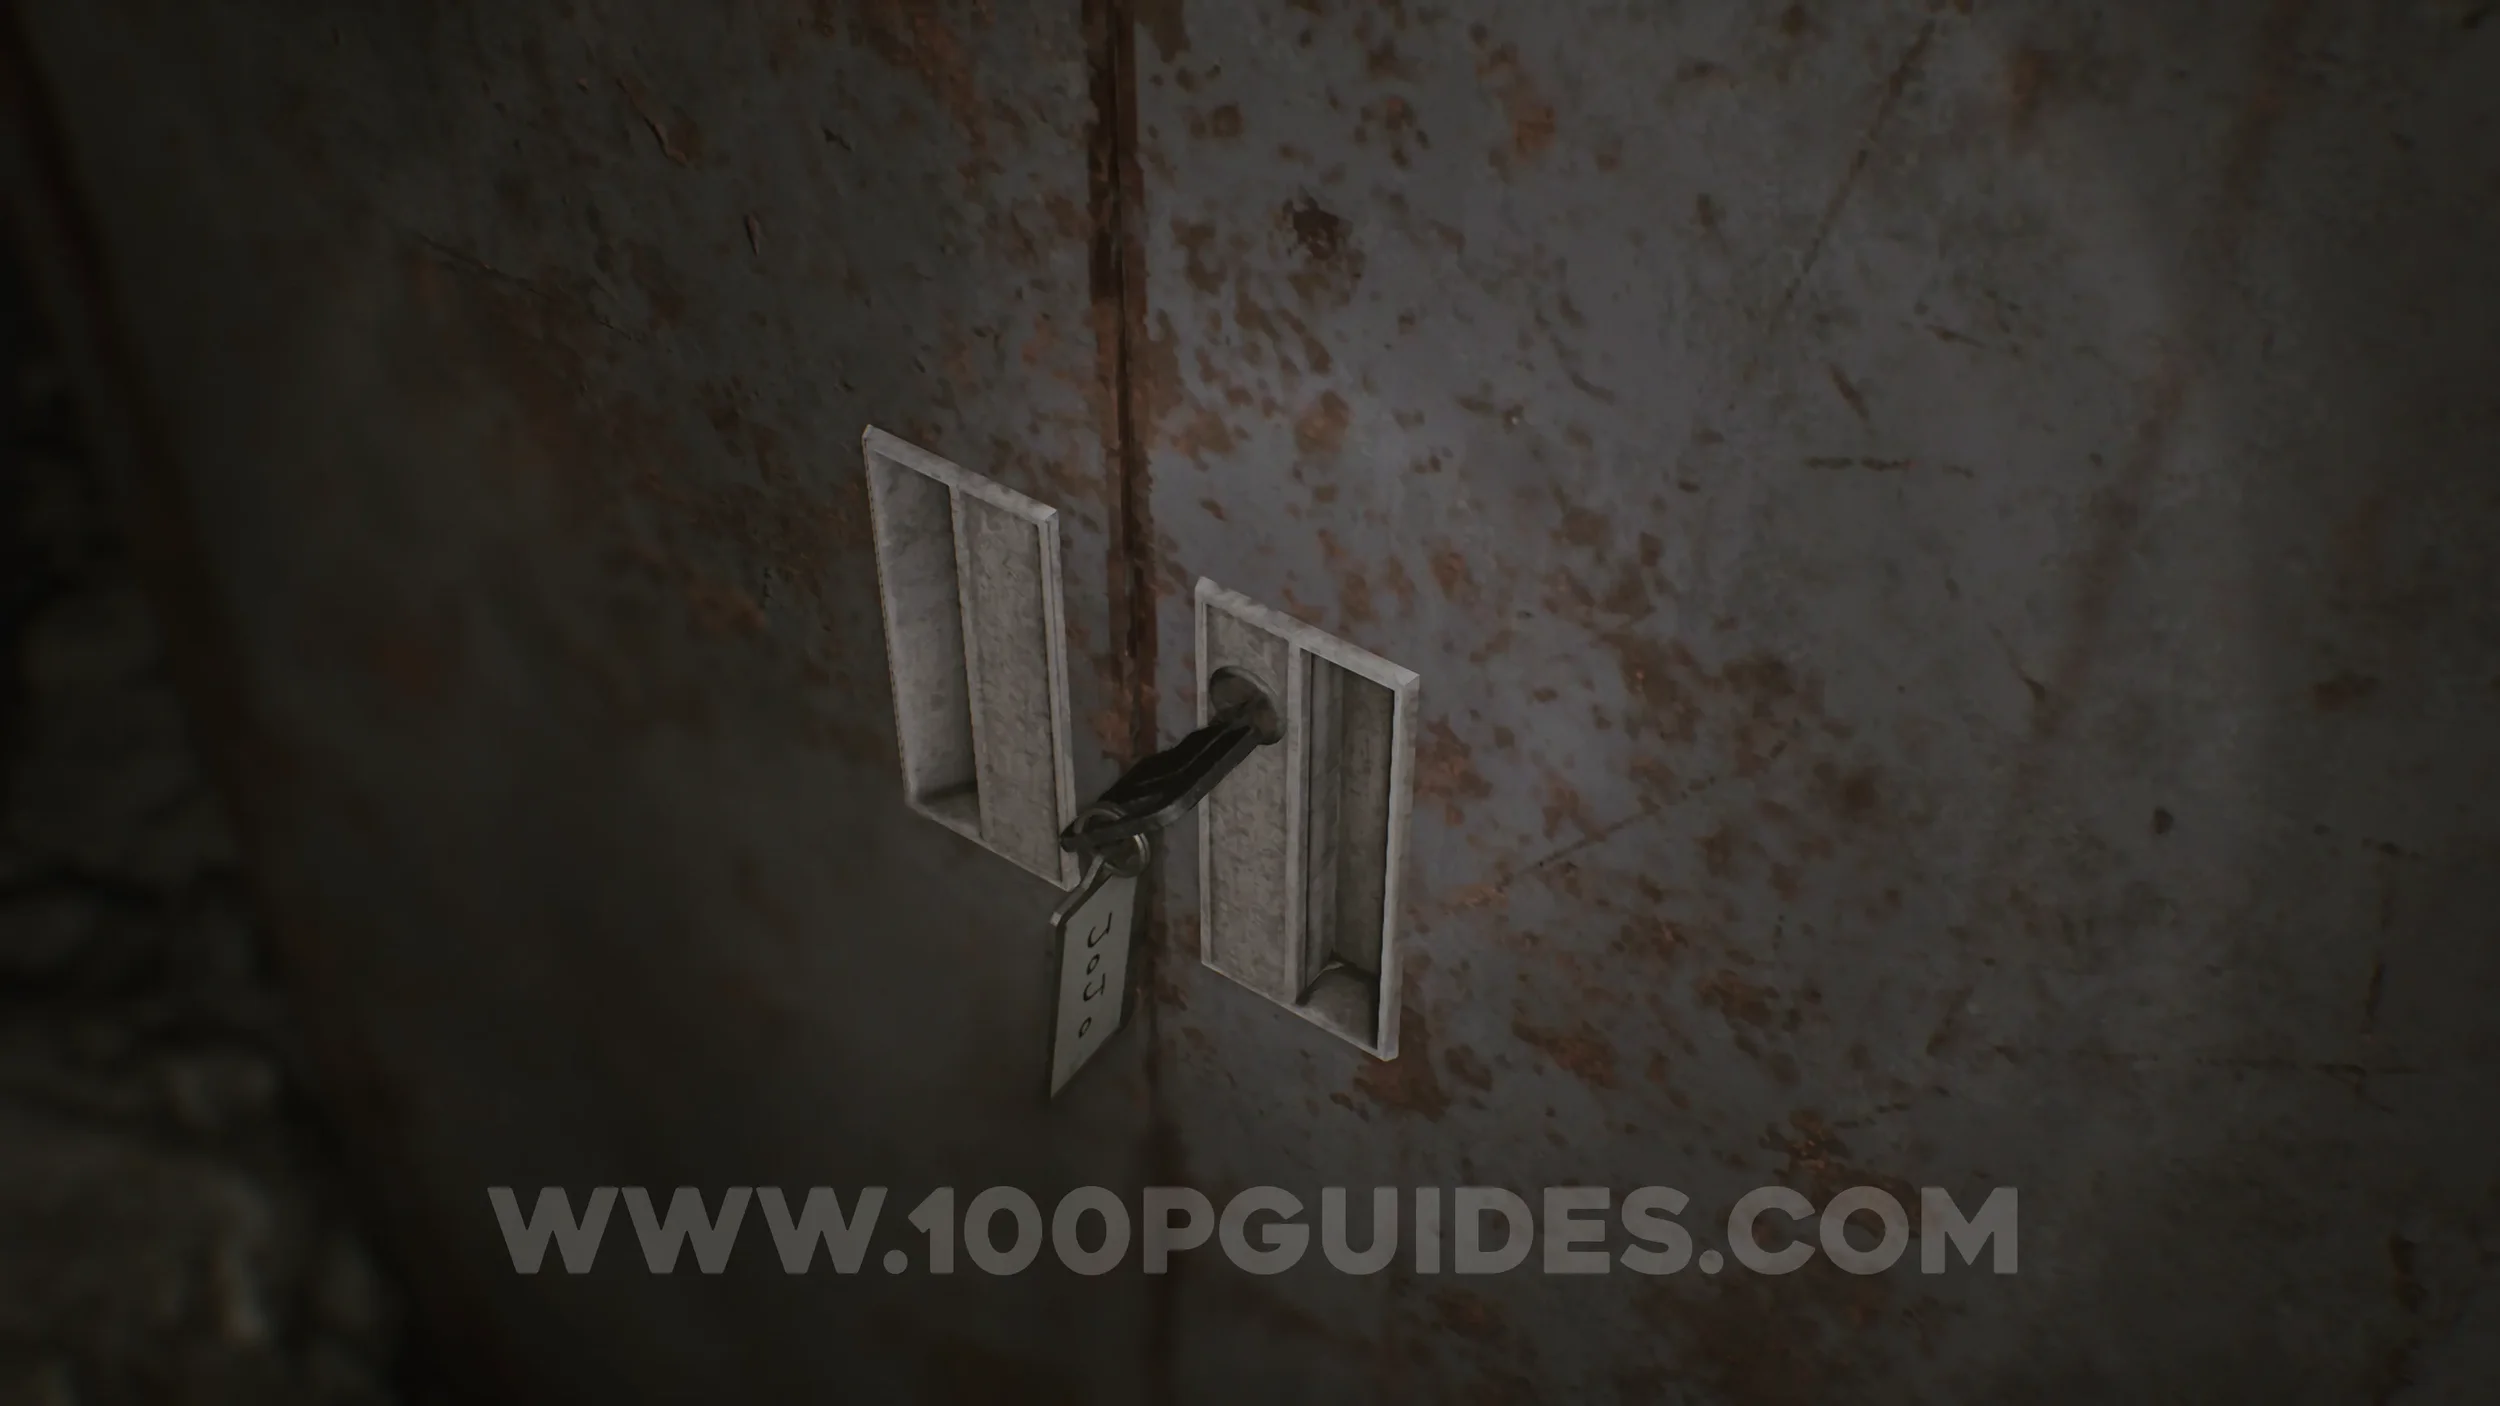
Charm #6 - S.T.A.R.S. Emblem Charm. After collecting the two Scavenger Hunt files in the S.T.A.R.S. Office, return to the Operations Room on the ground floor. Climb on top of the boxes beneath the TV to find the key resting on it. After that, open the locker in the West Office.
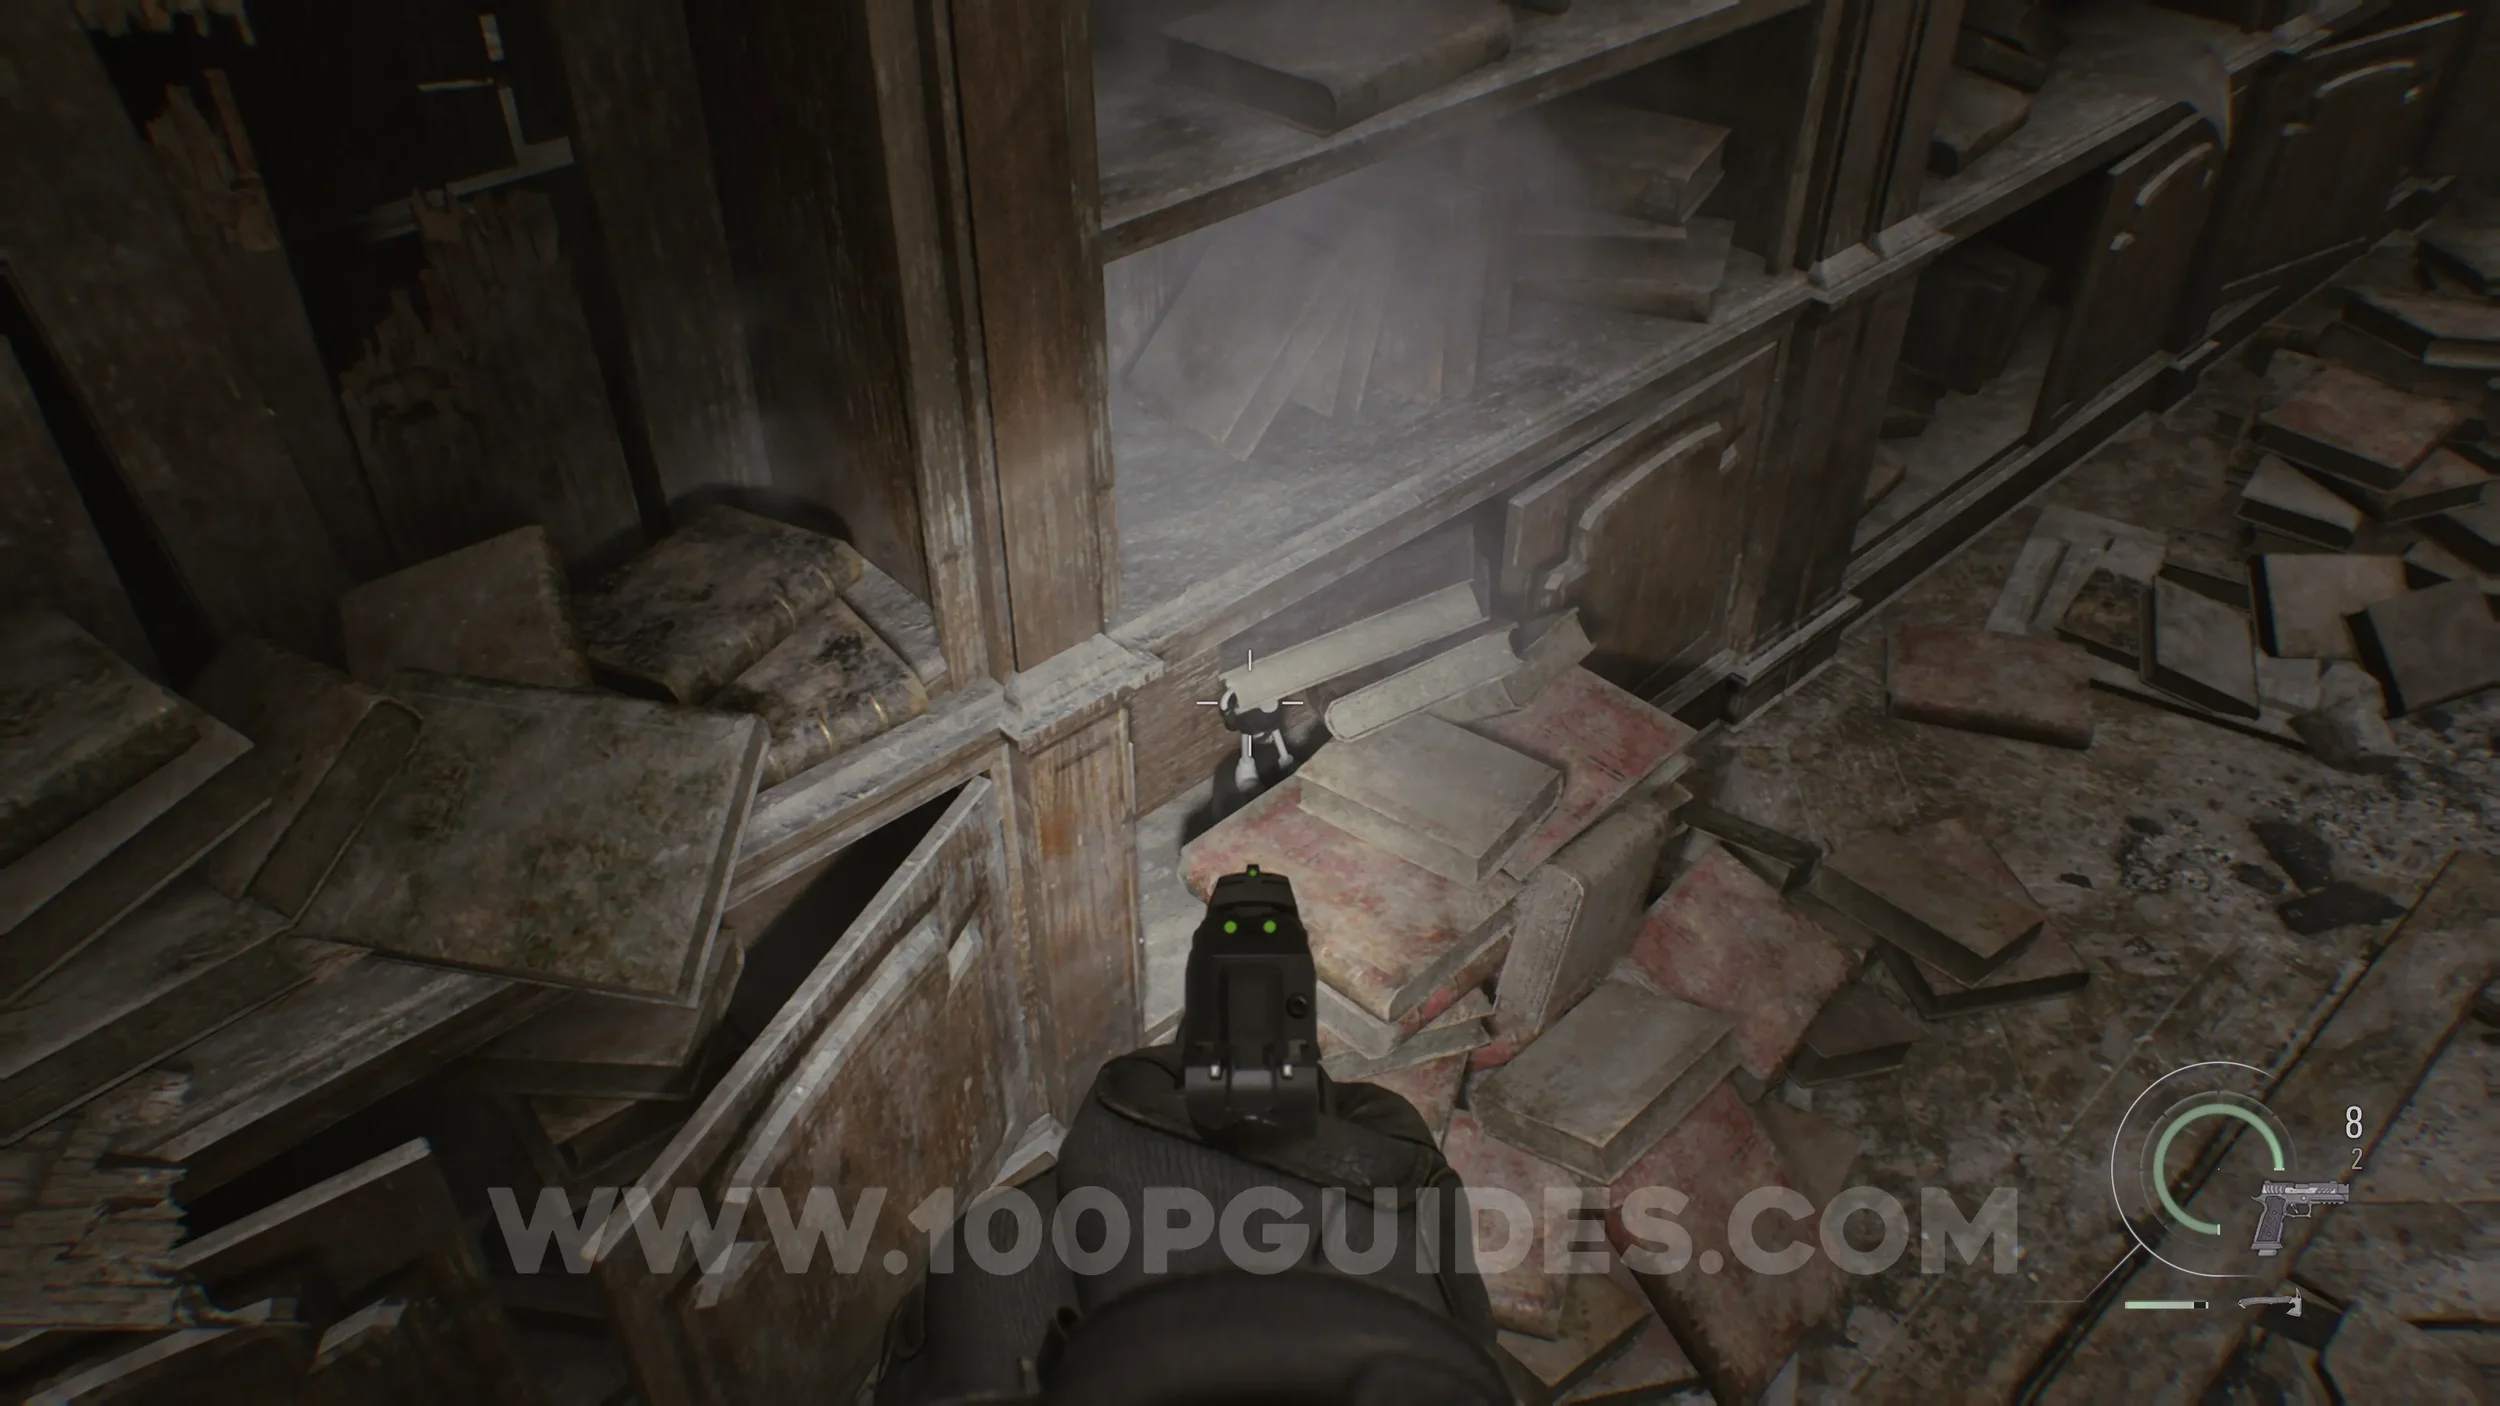
Mr. Raccoon #22. Behind some books behind the northern bookshelf in the Library.
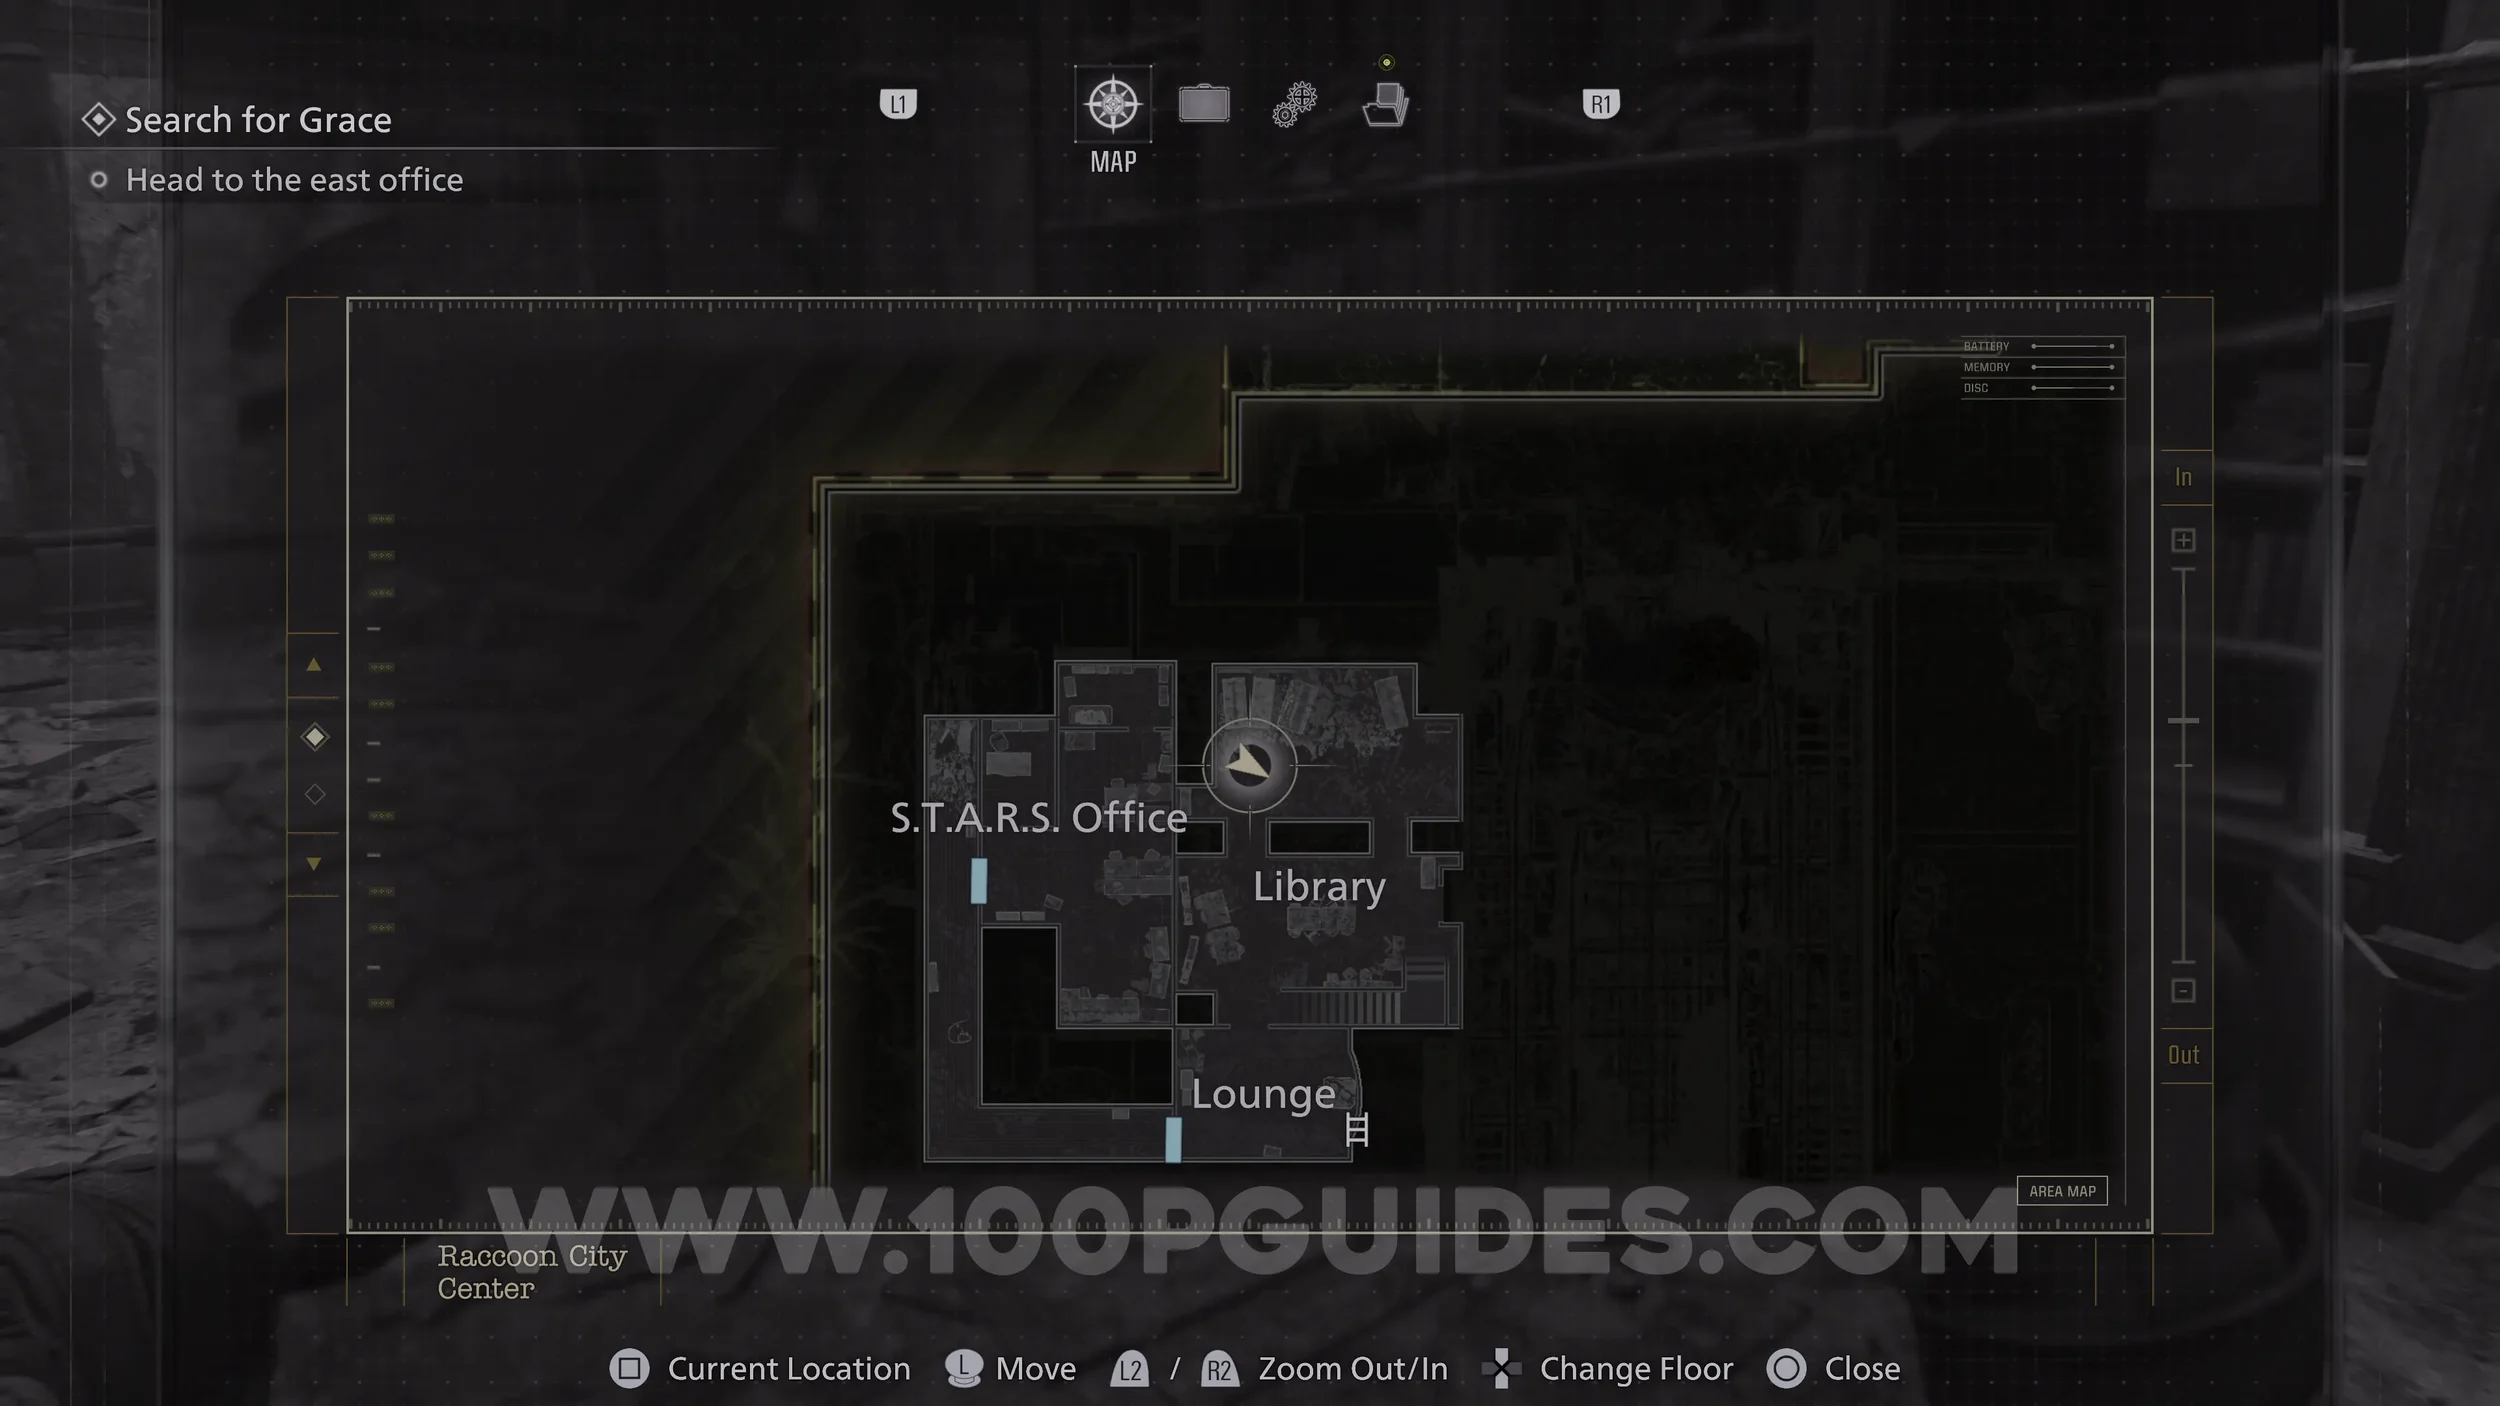

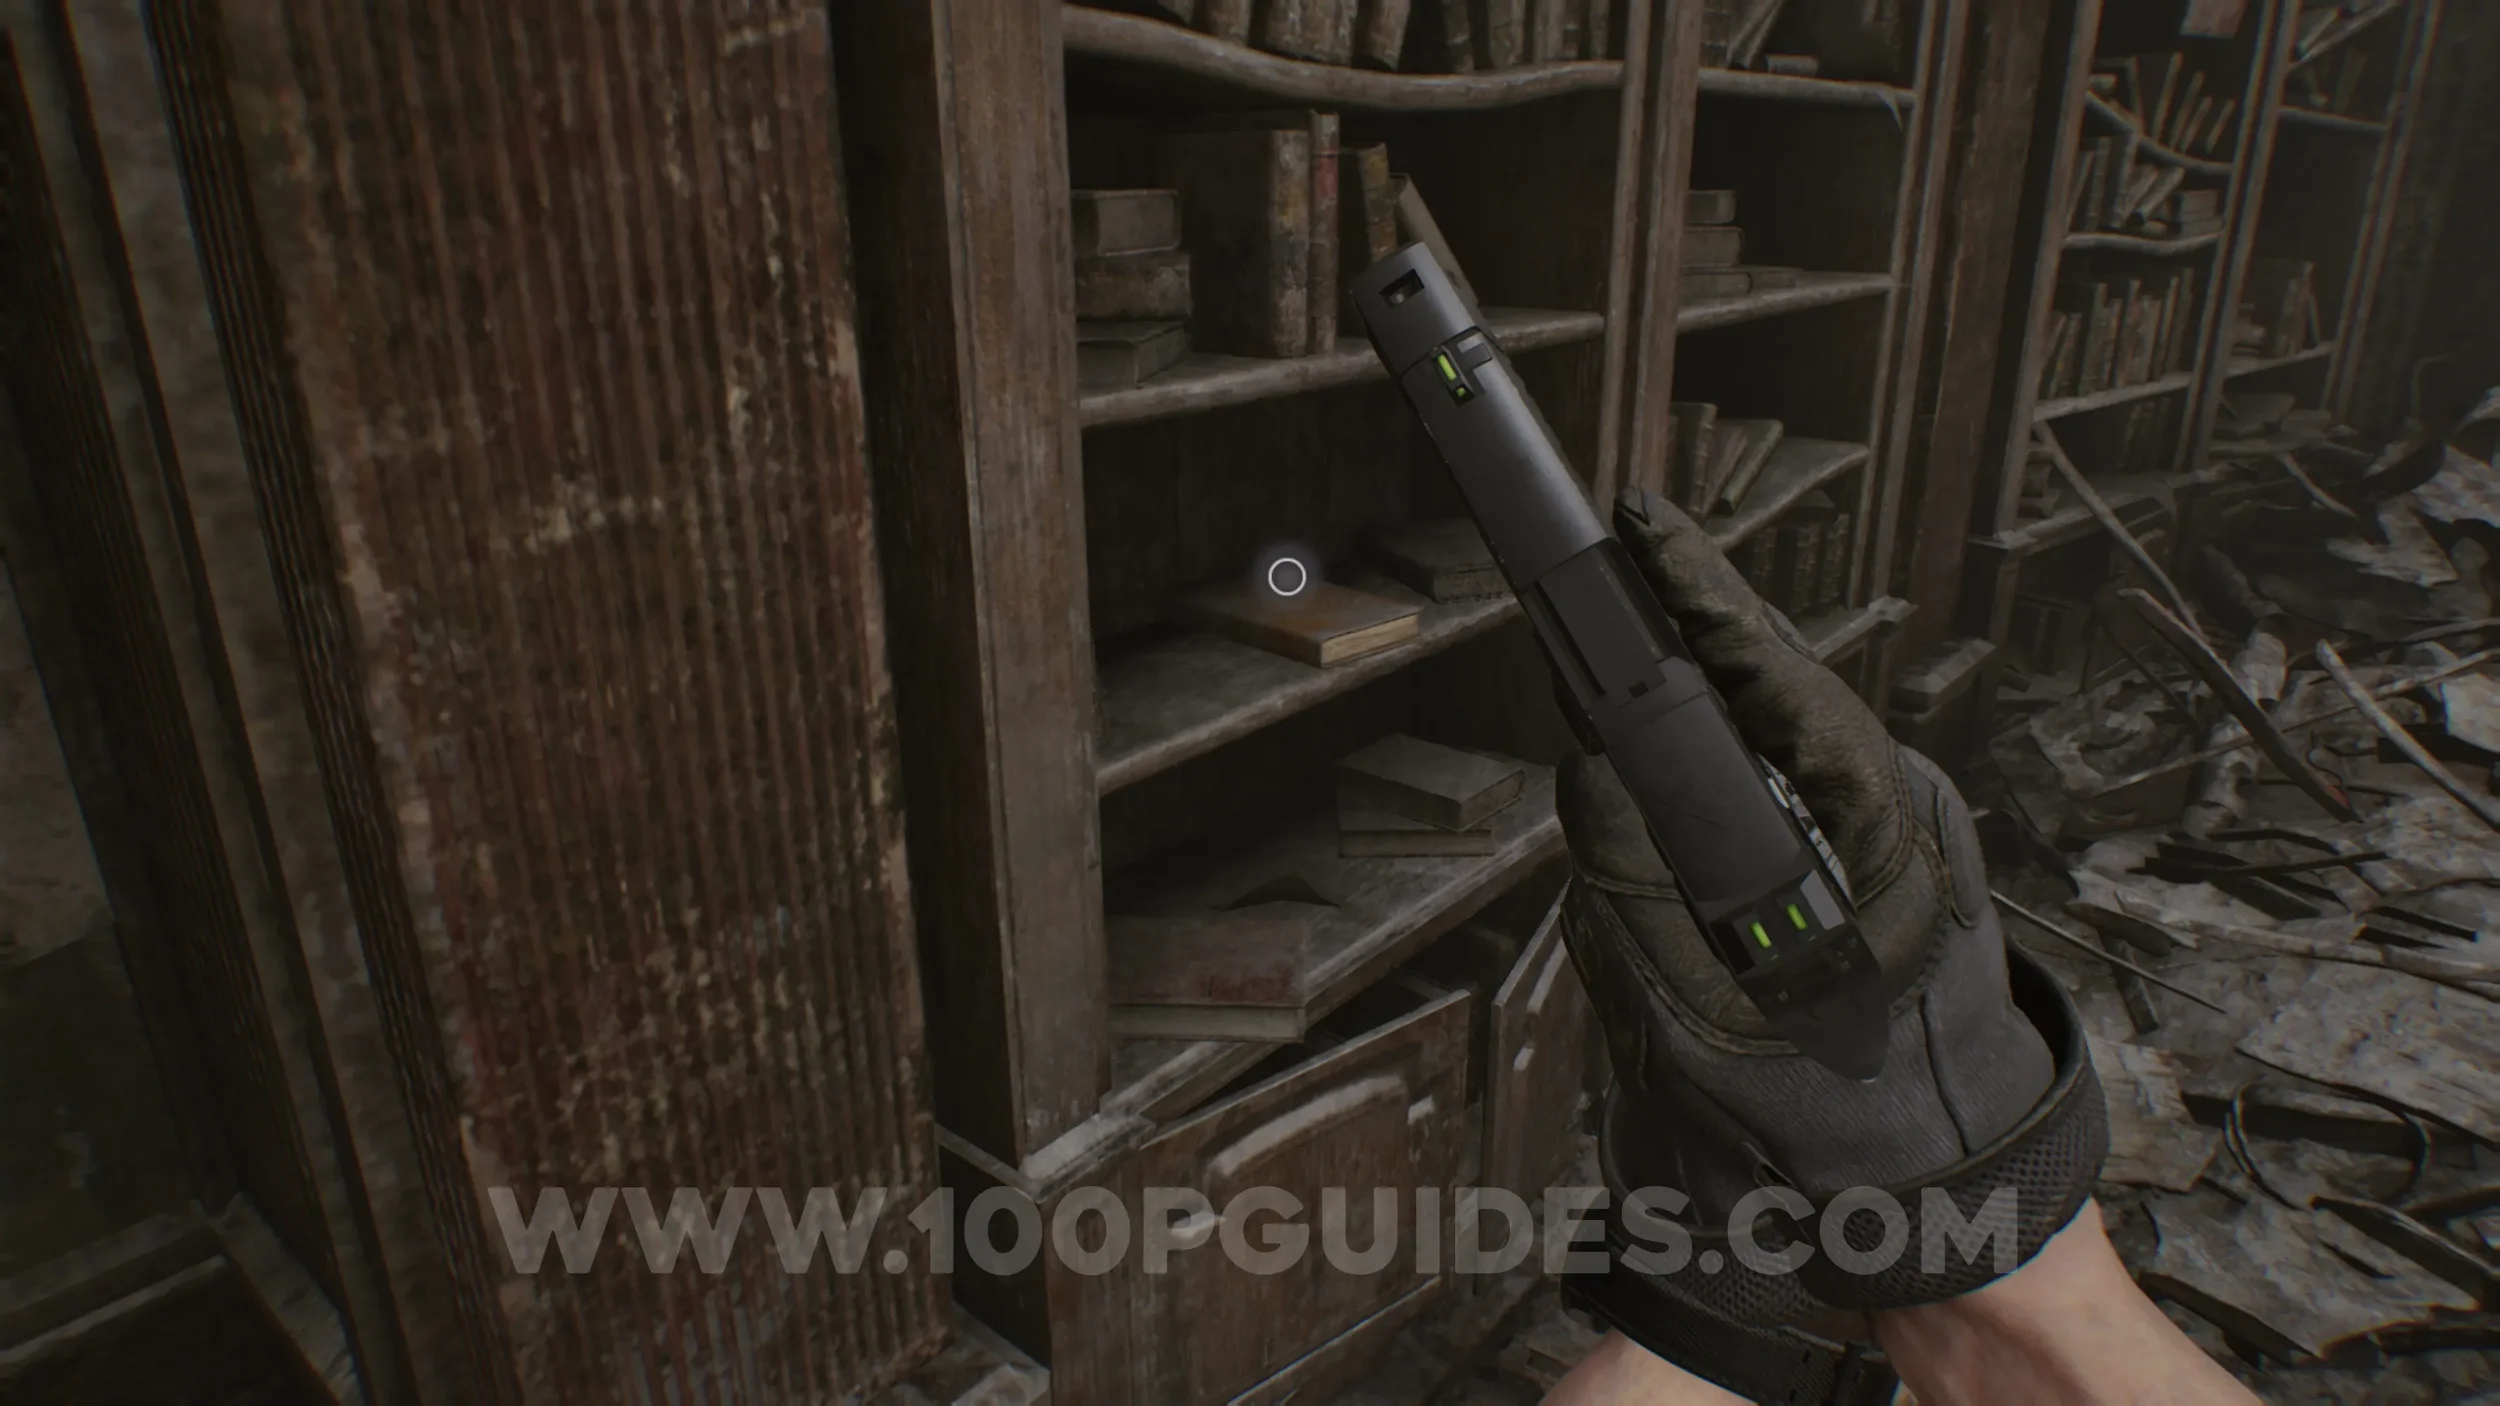
File #61 - Photograph. Cross the walkway on the top floor of the Library to find the file inside a book on the bookshelf to the right of the wooden door.
Orphanage
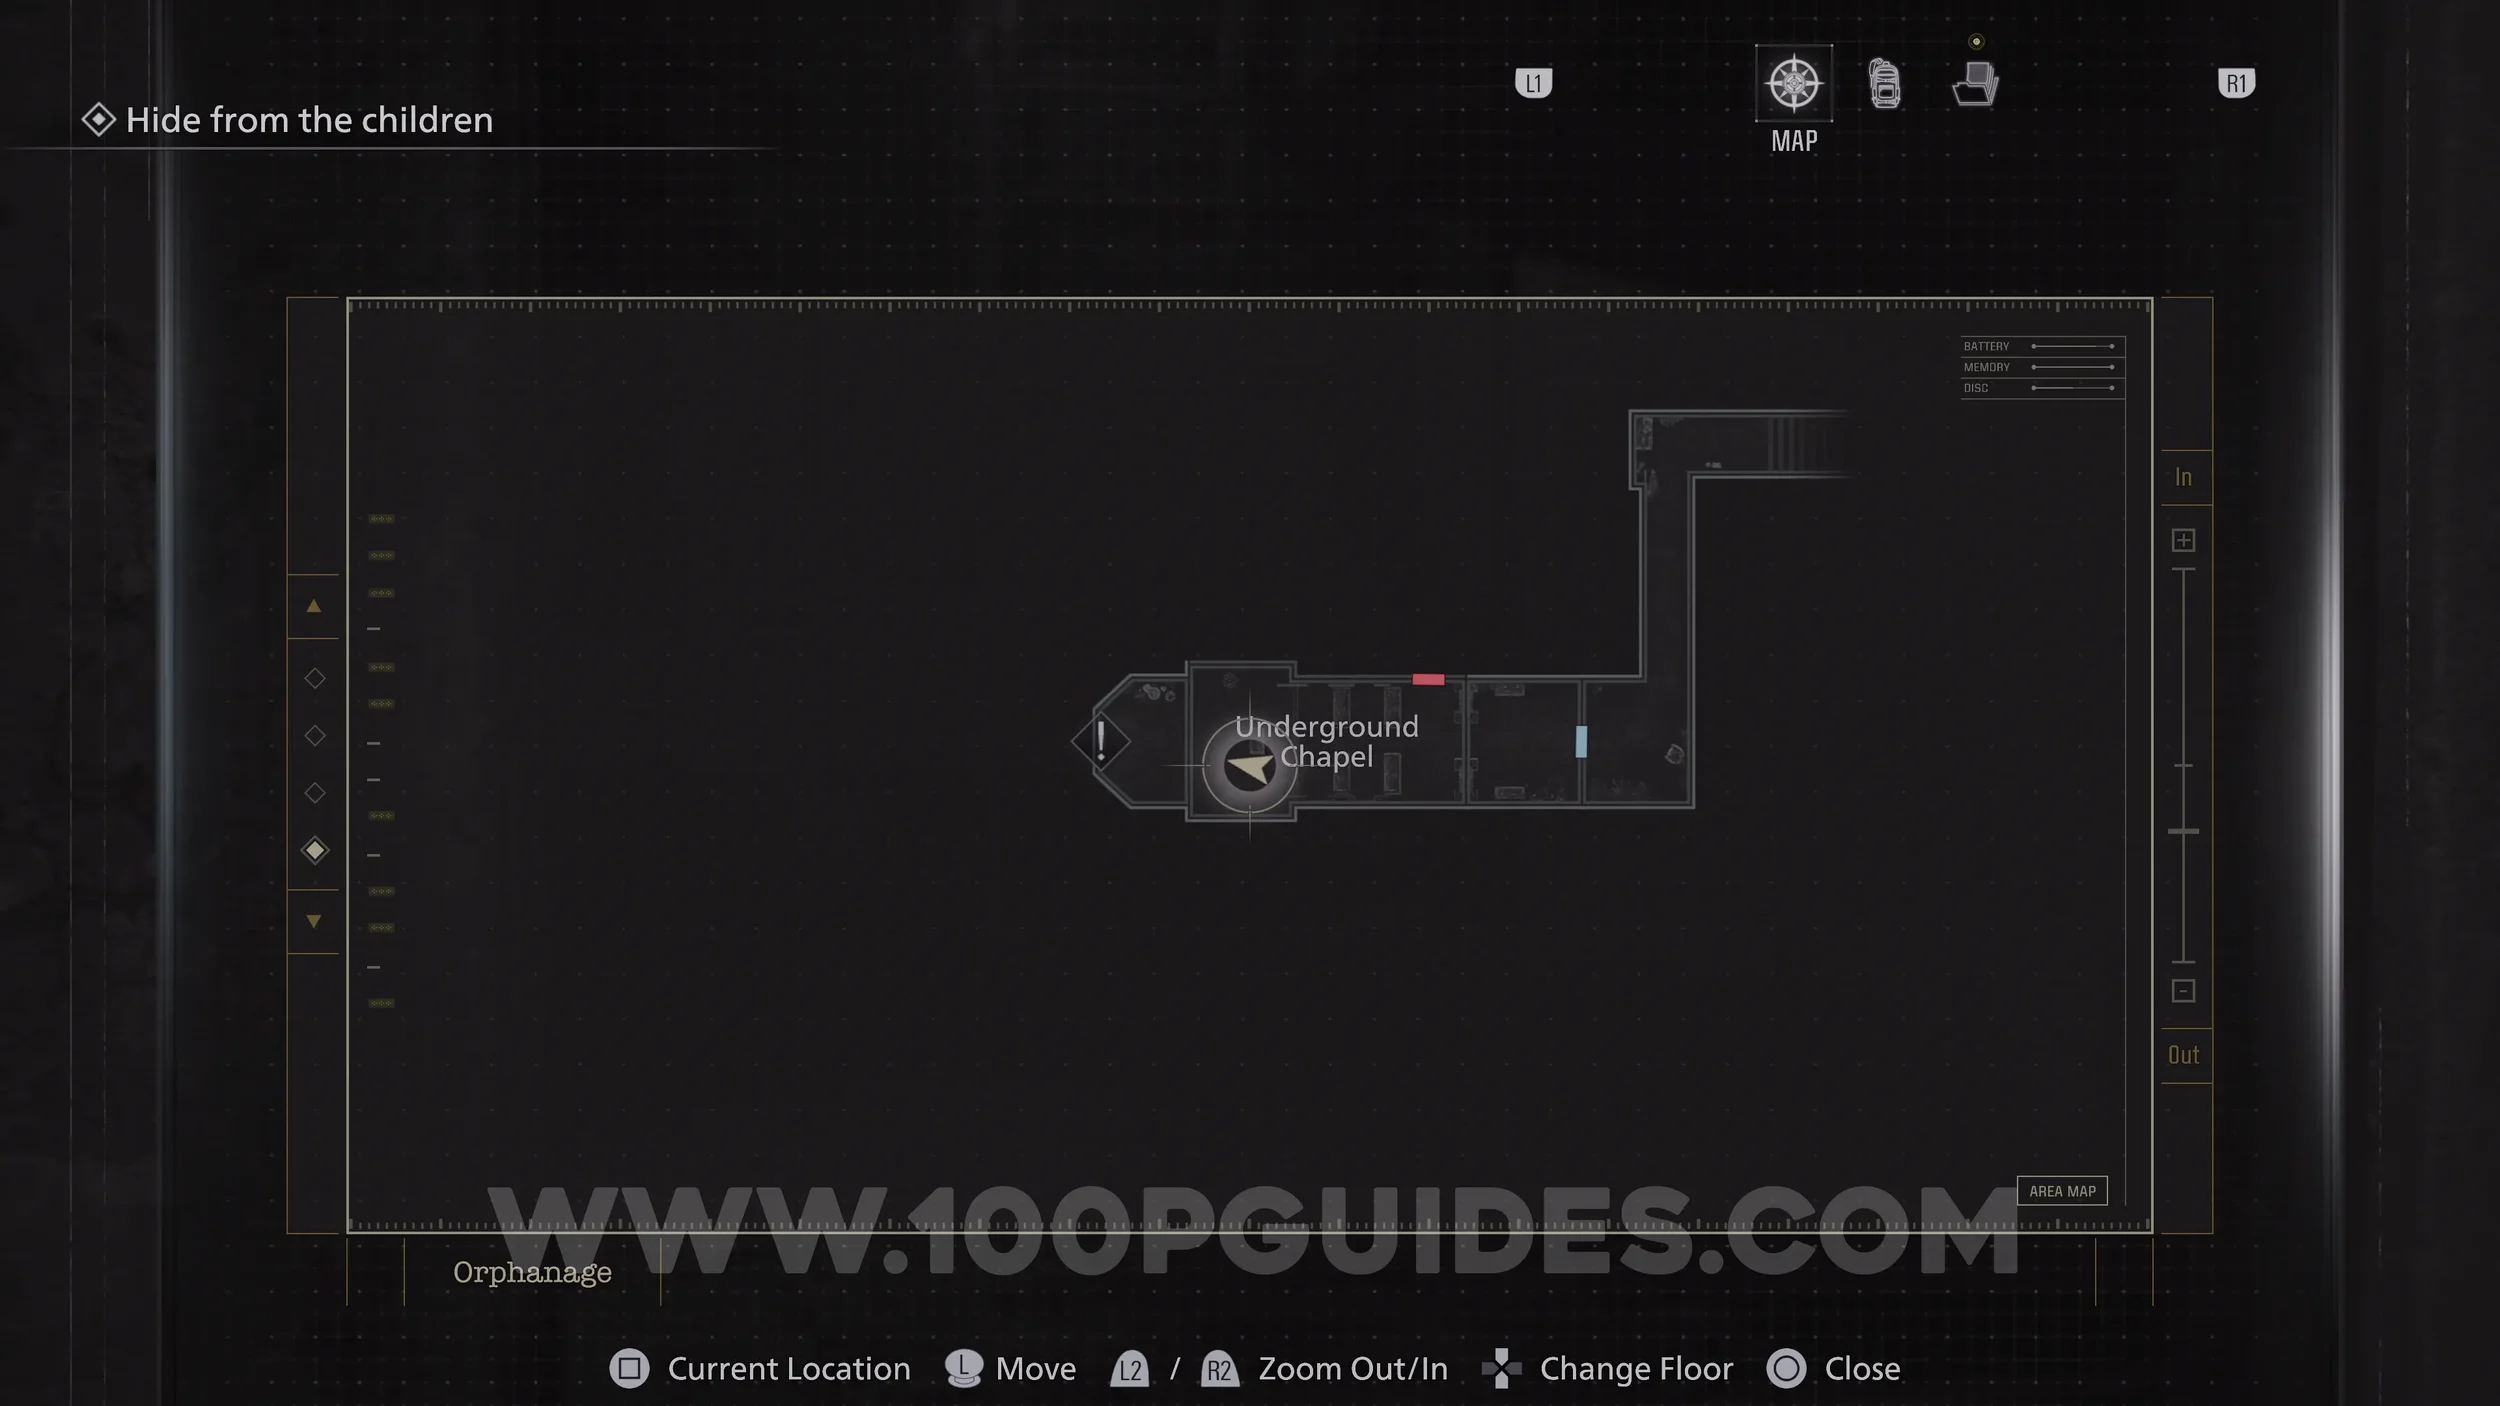
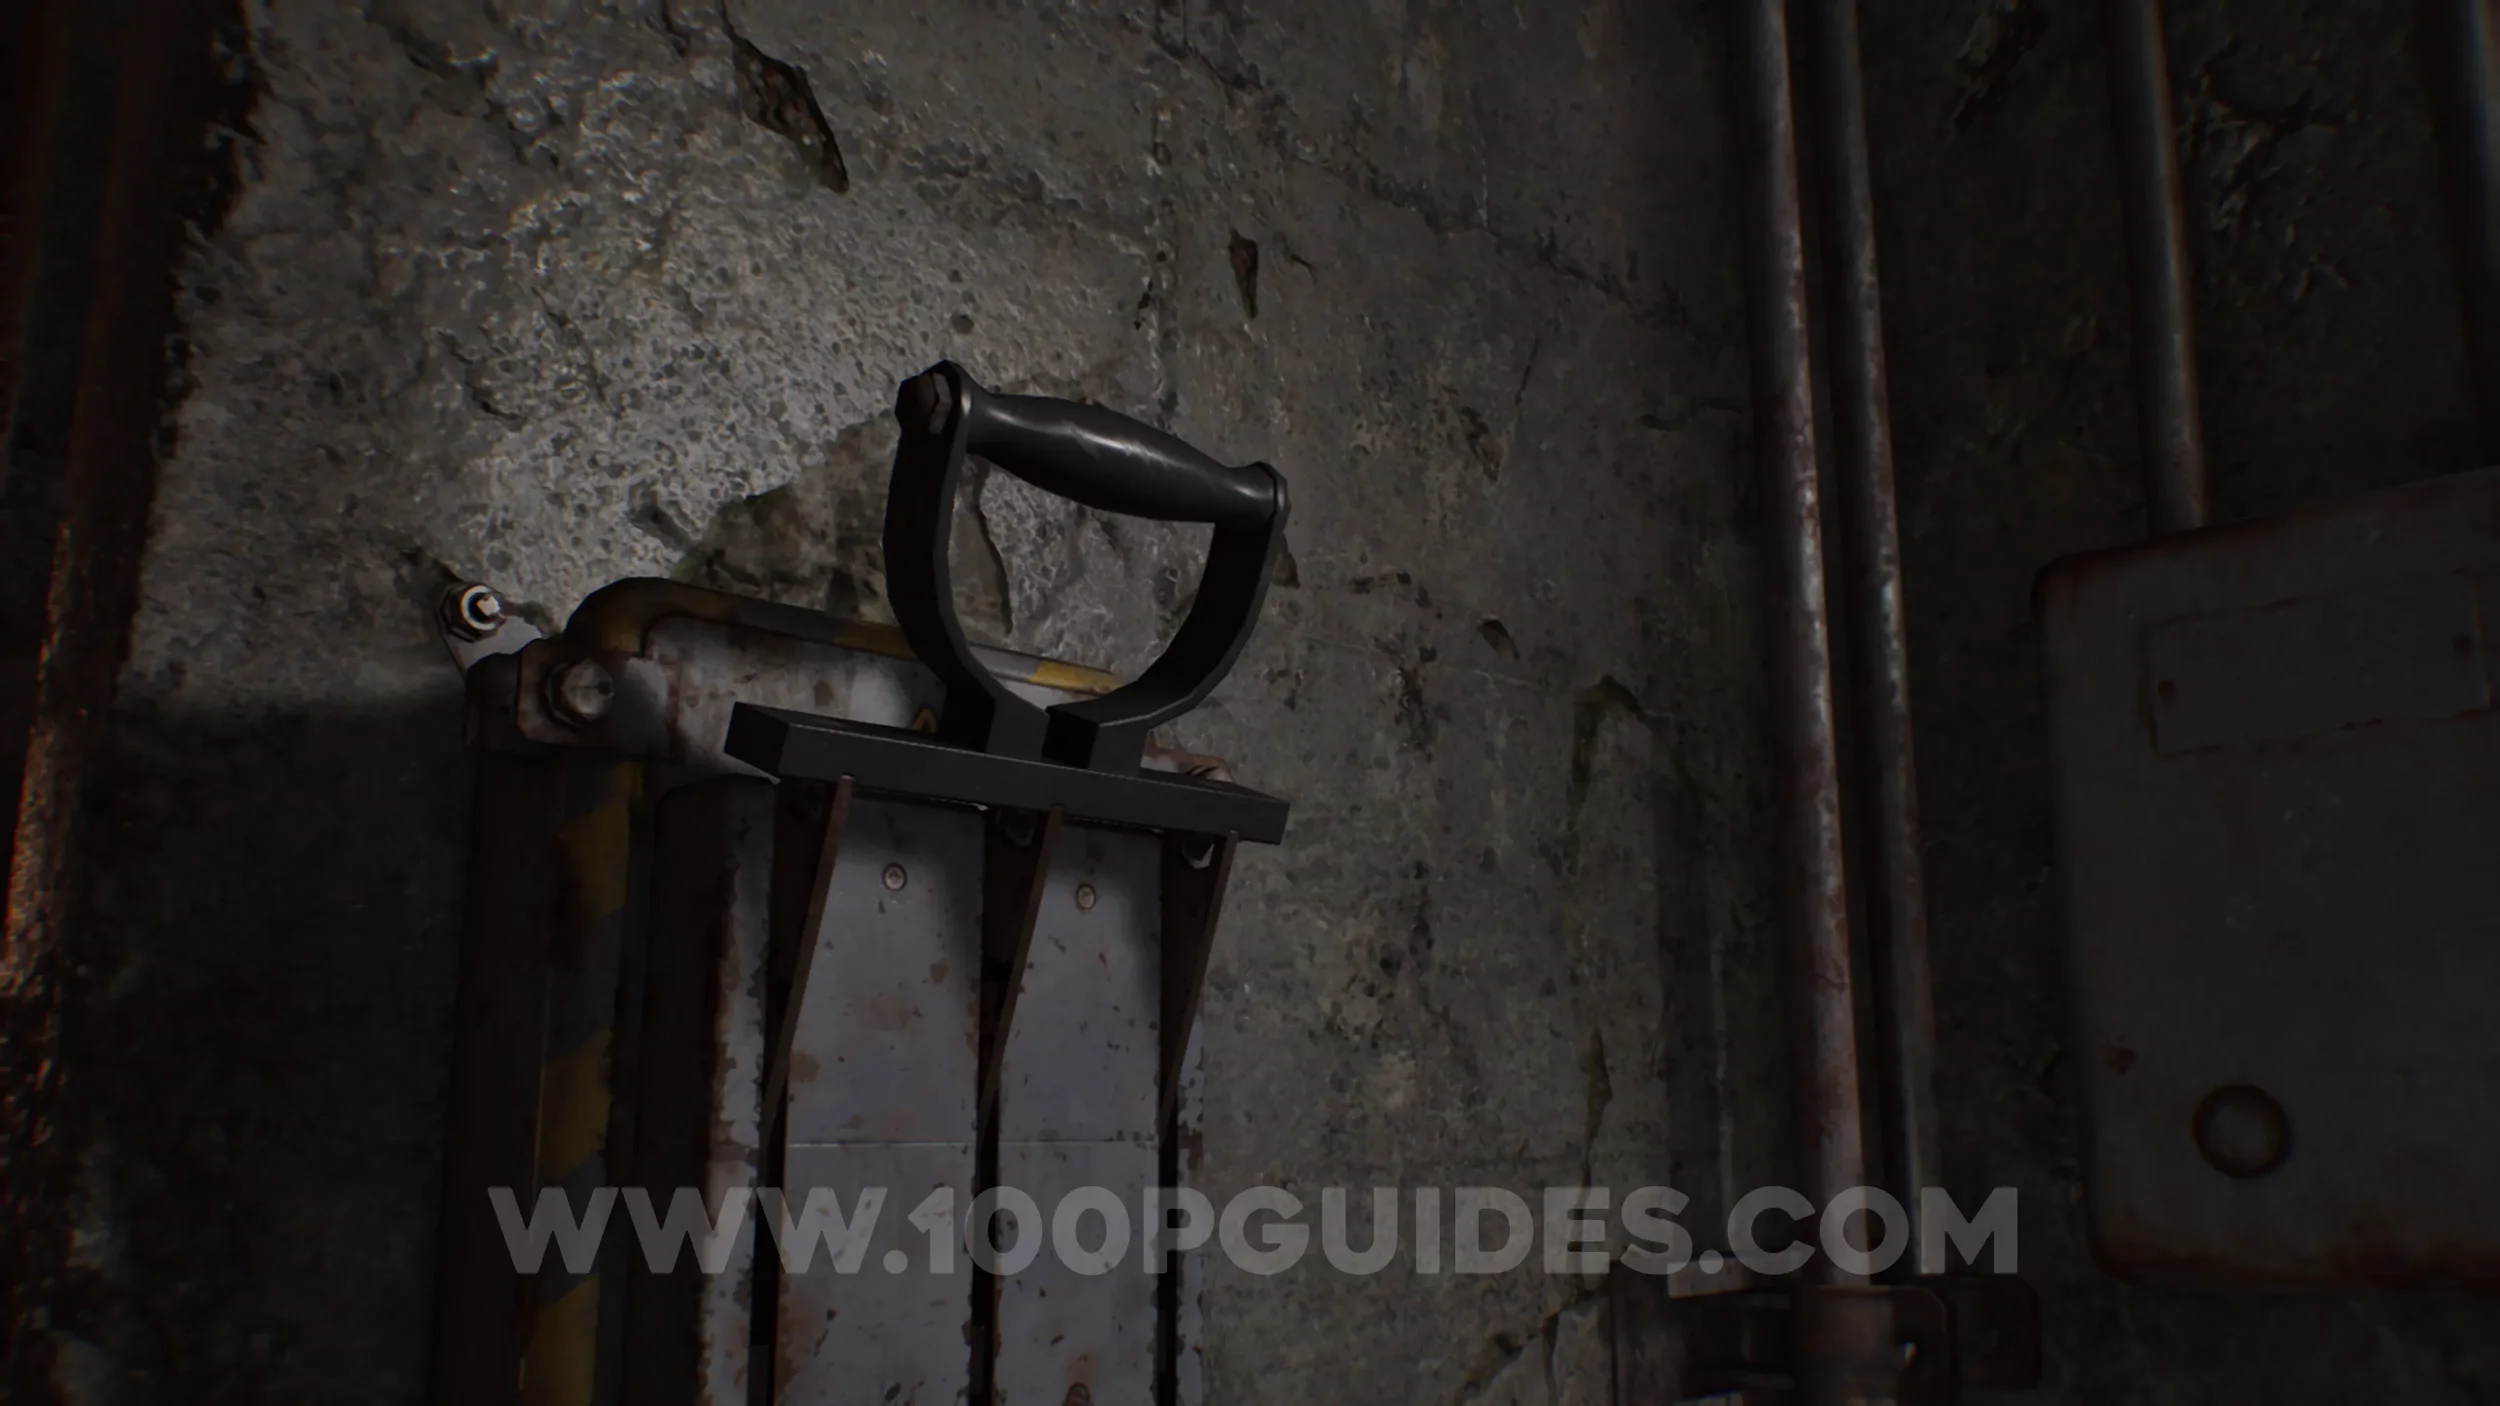
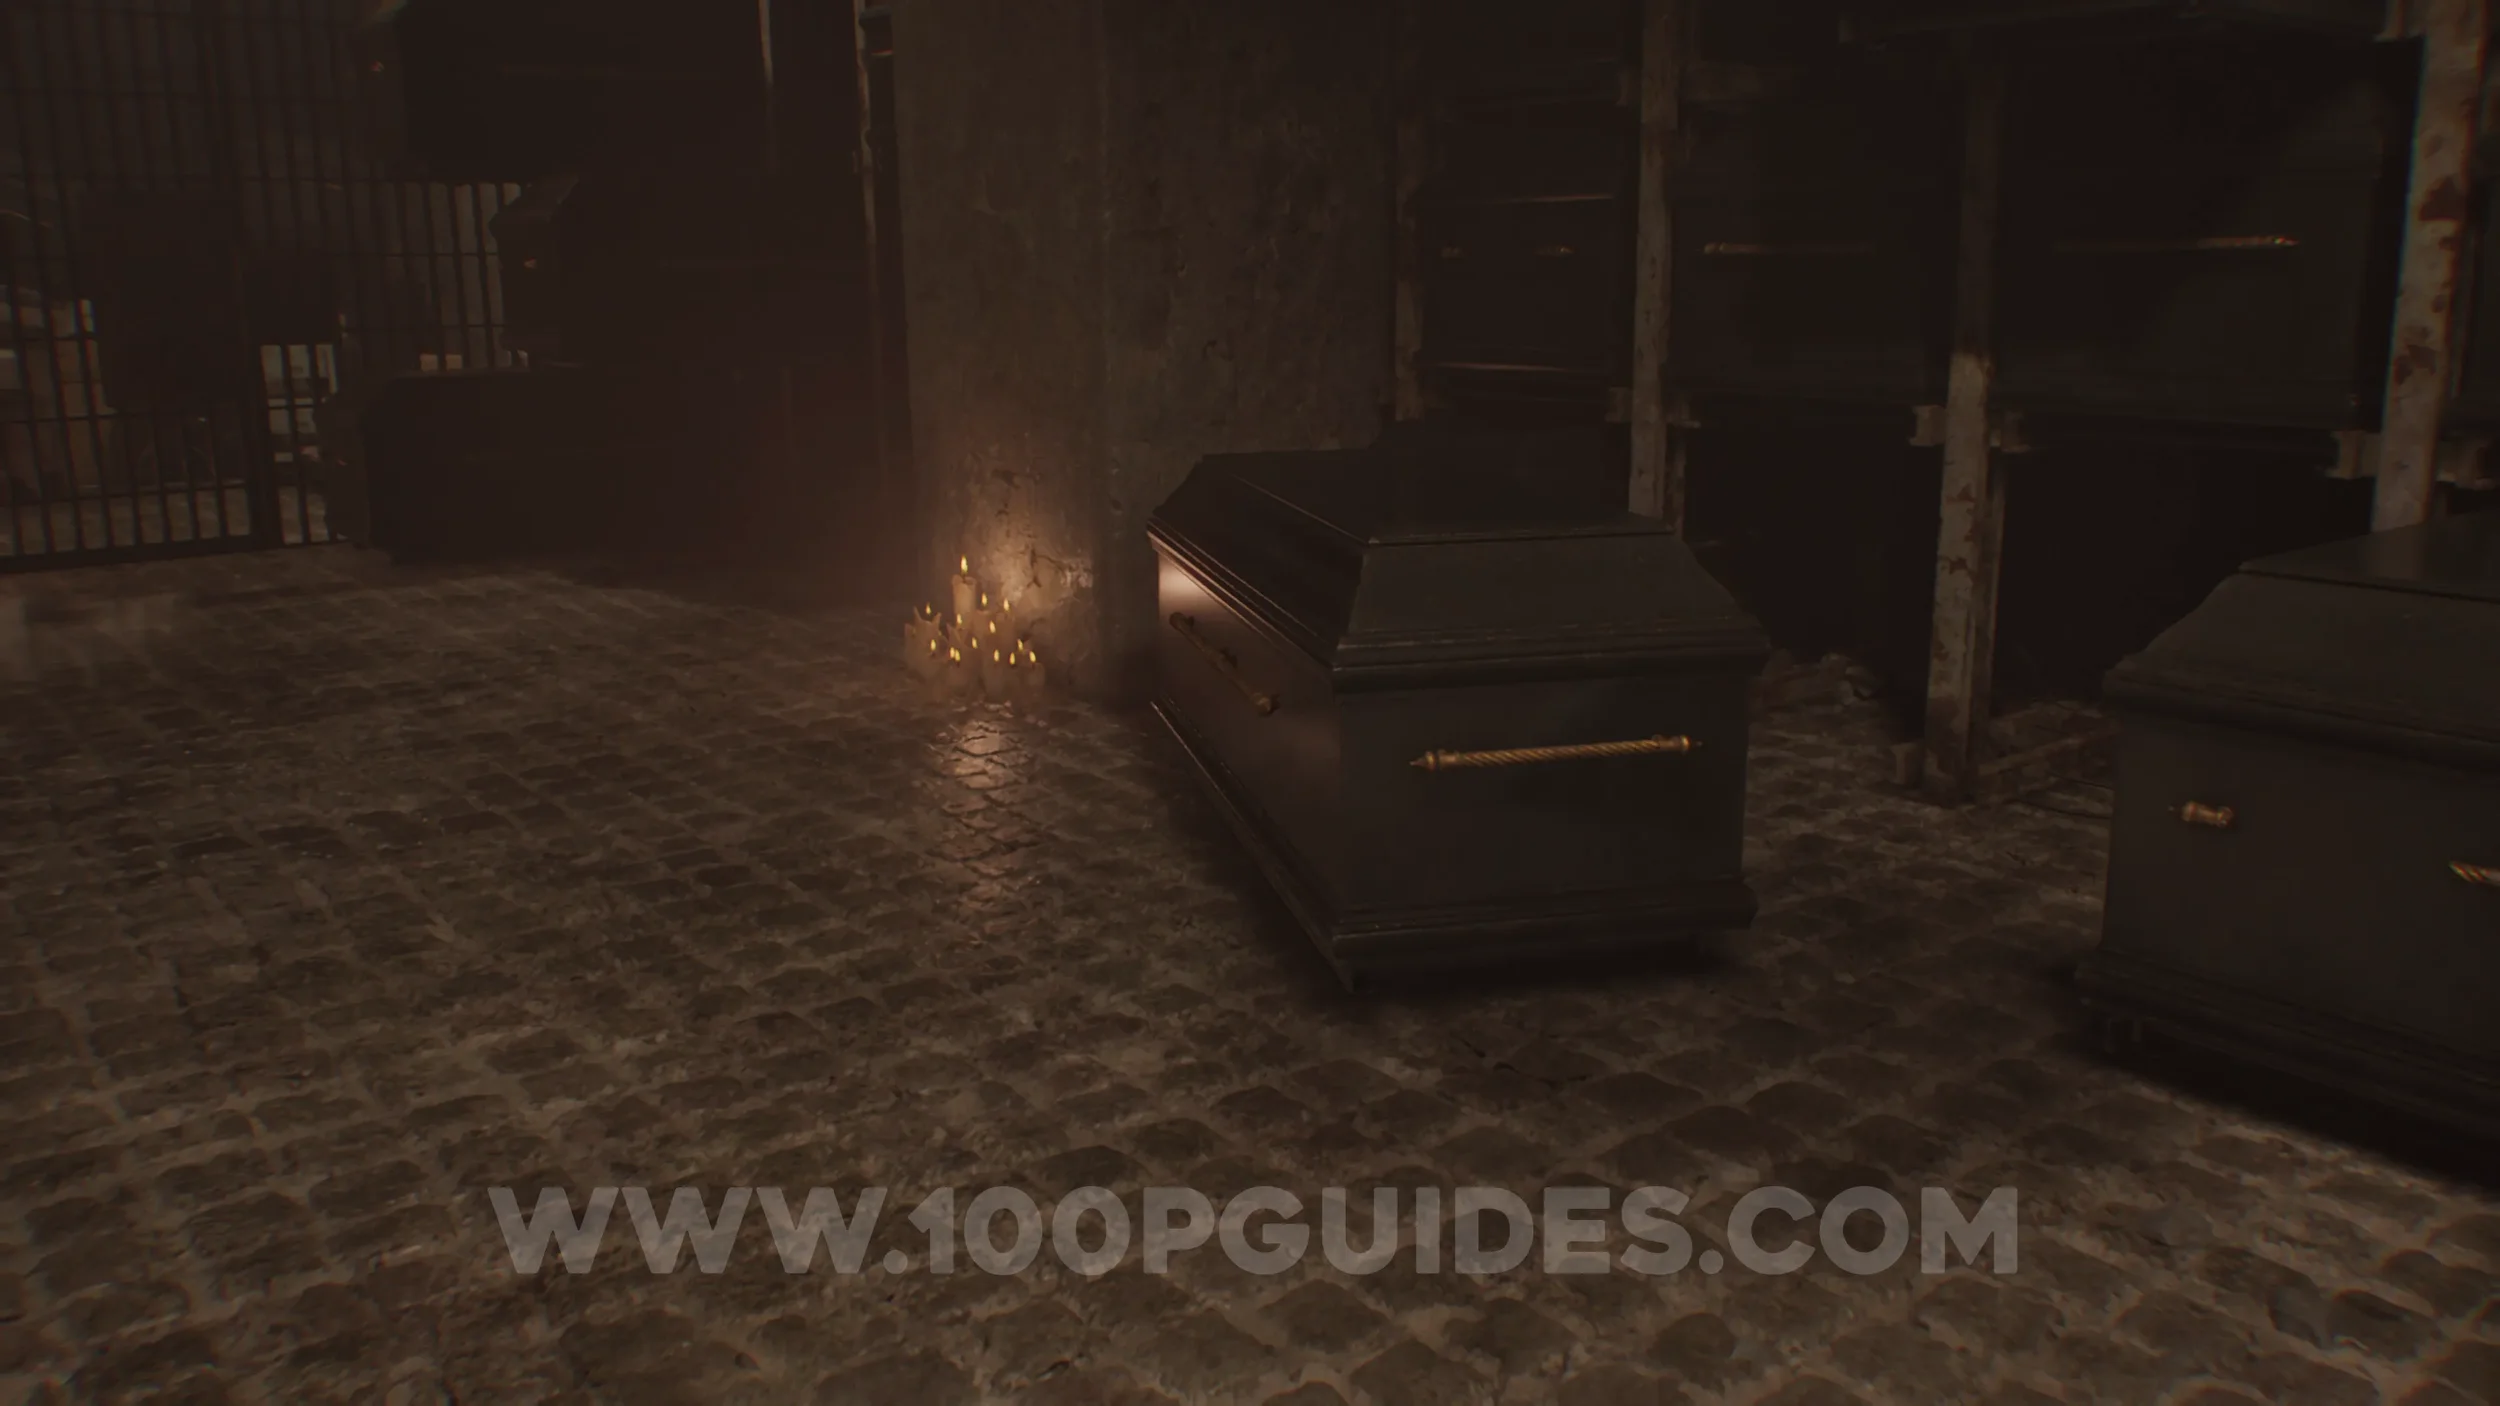
File #62 - Toe Tag. After escaping the main Orphanage building through the trap door, you will eventually reach a chapel. Press the switch on the wall beneath the ladder you cannot reach, then proceed through the northern gate, which opens.
Inside, open the coffin on the right to find the collectible.
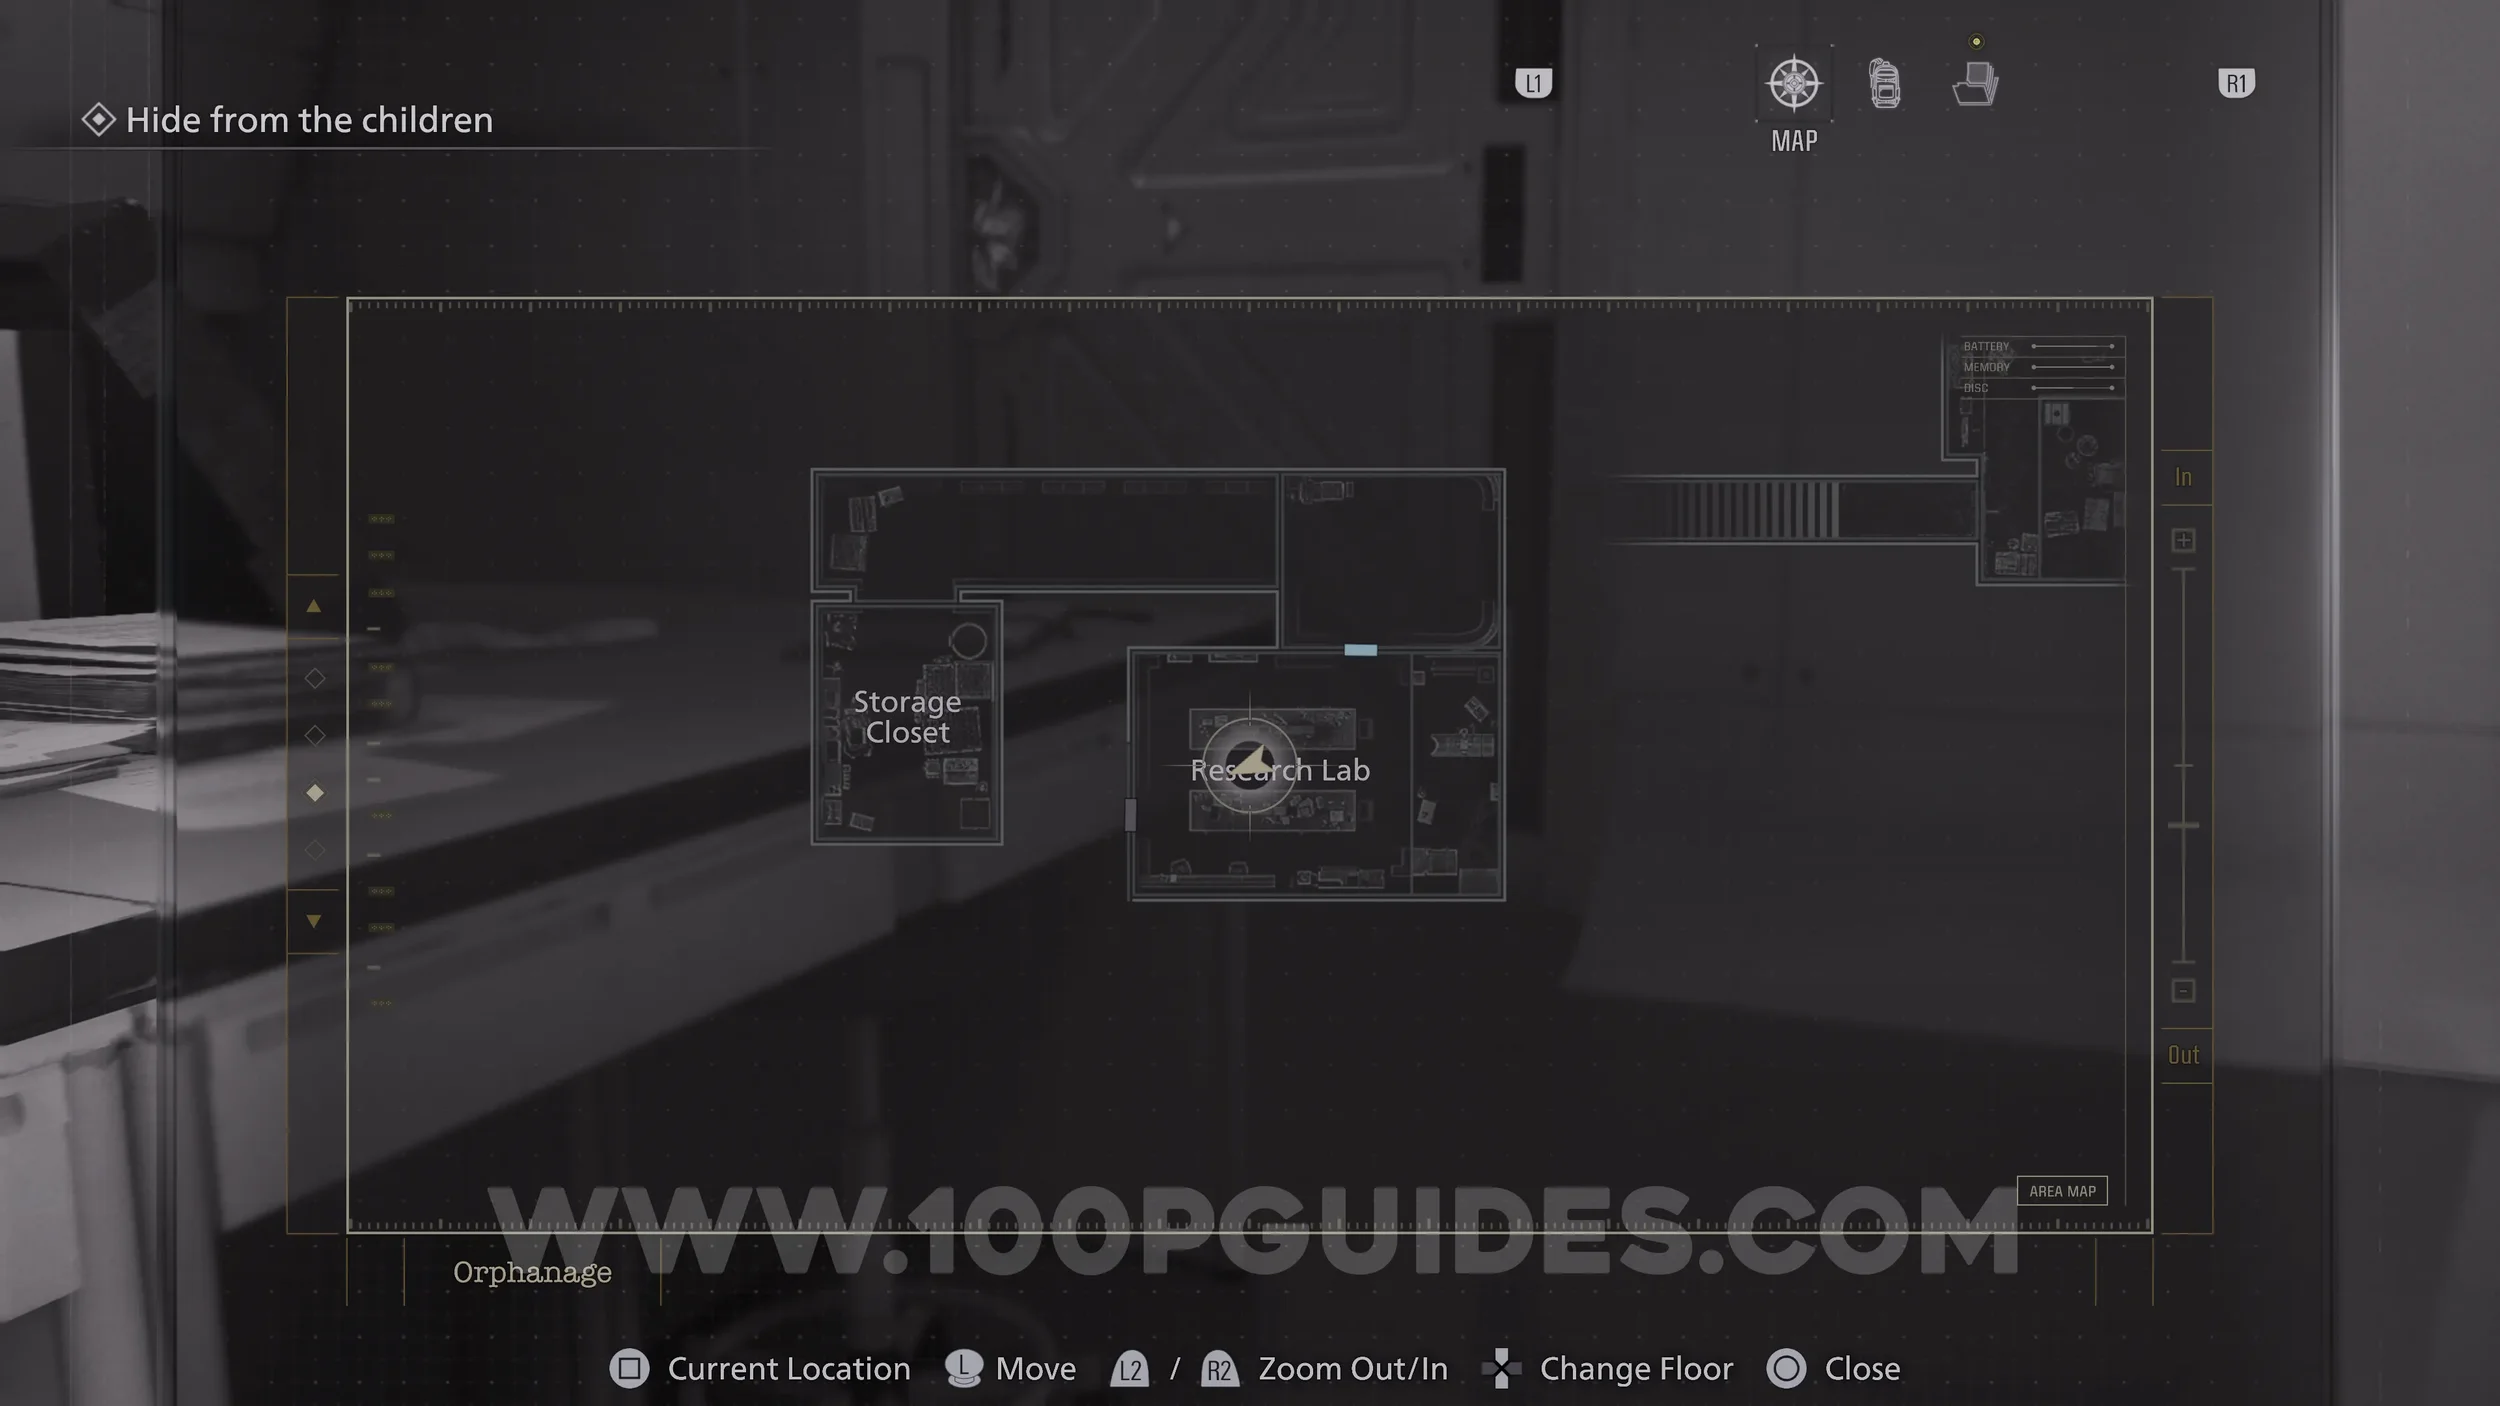
File #63 - Series 60 Results. After escaping from the Chapel you will reach a Lab. The file can be found in the Research Lab.
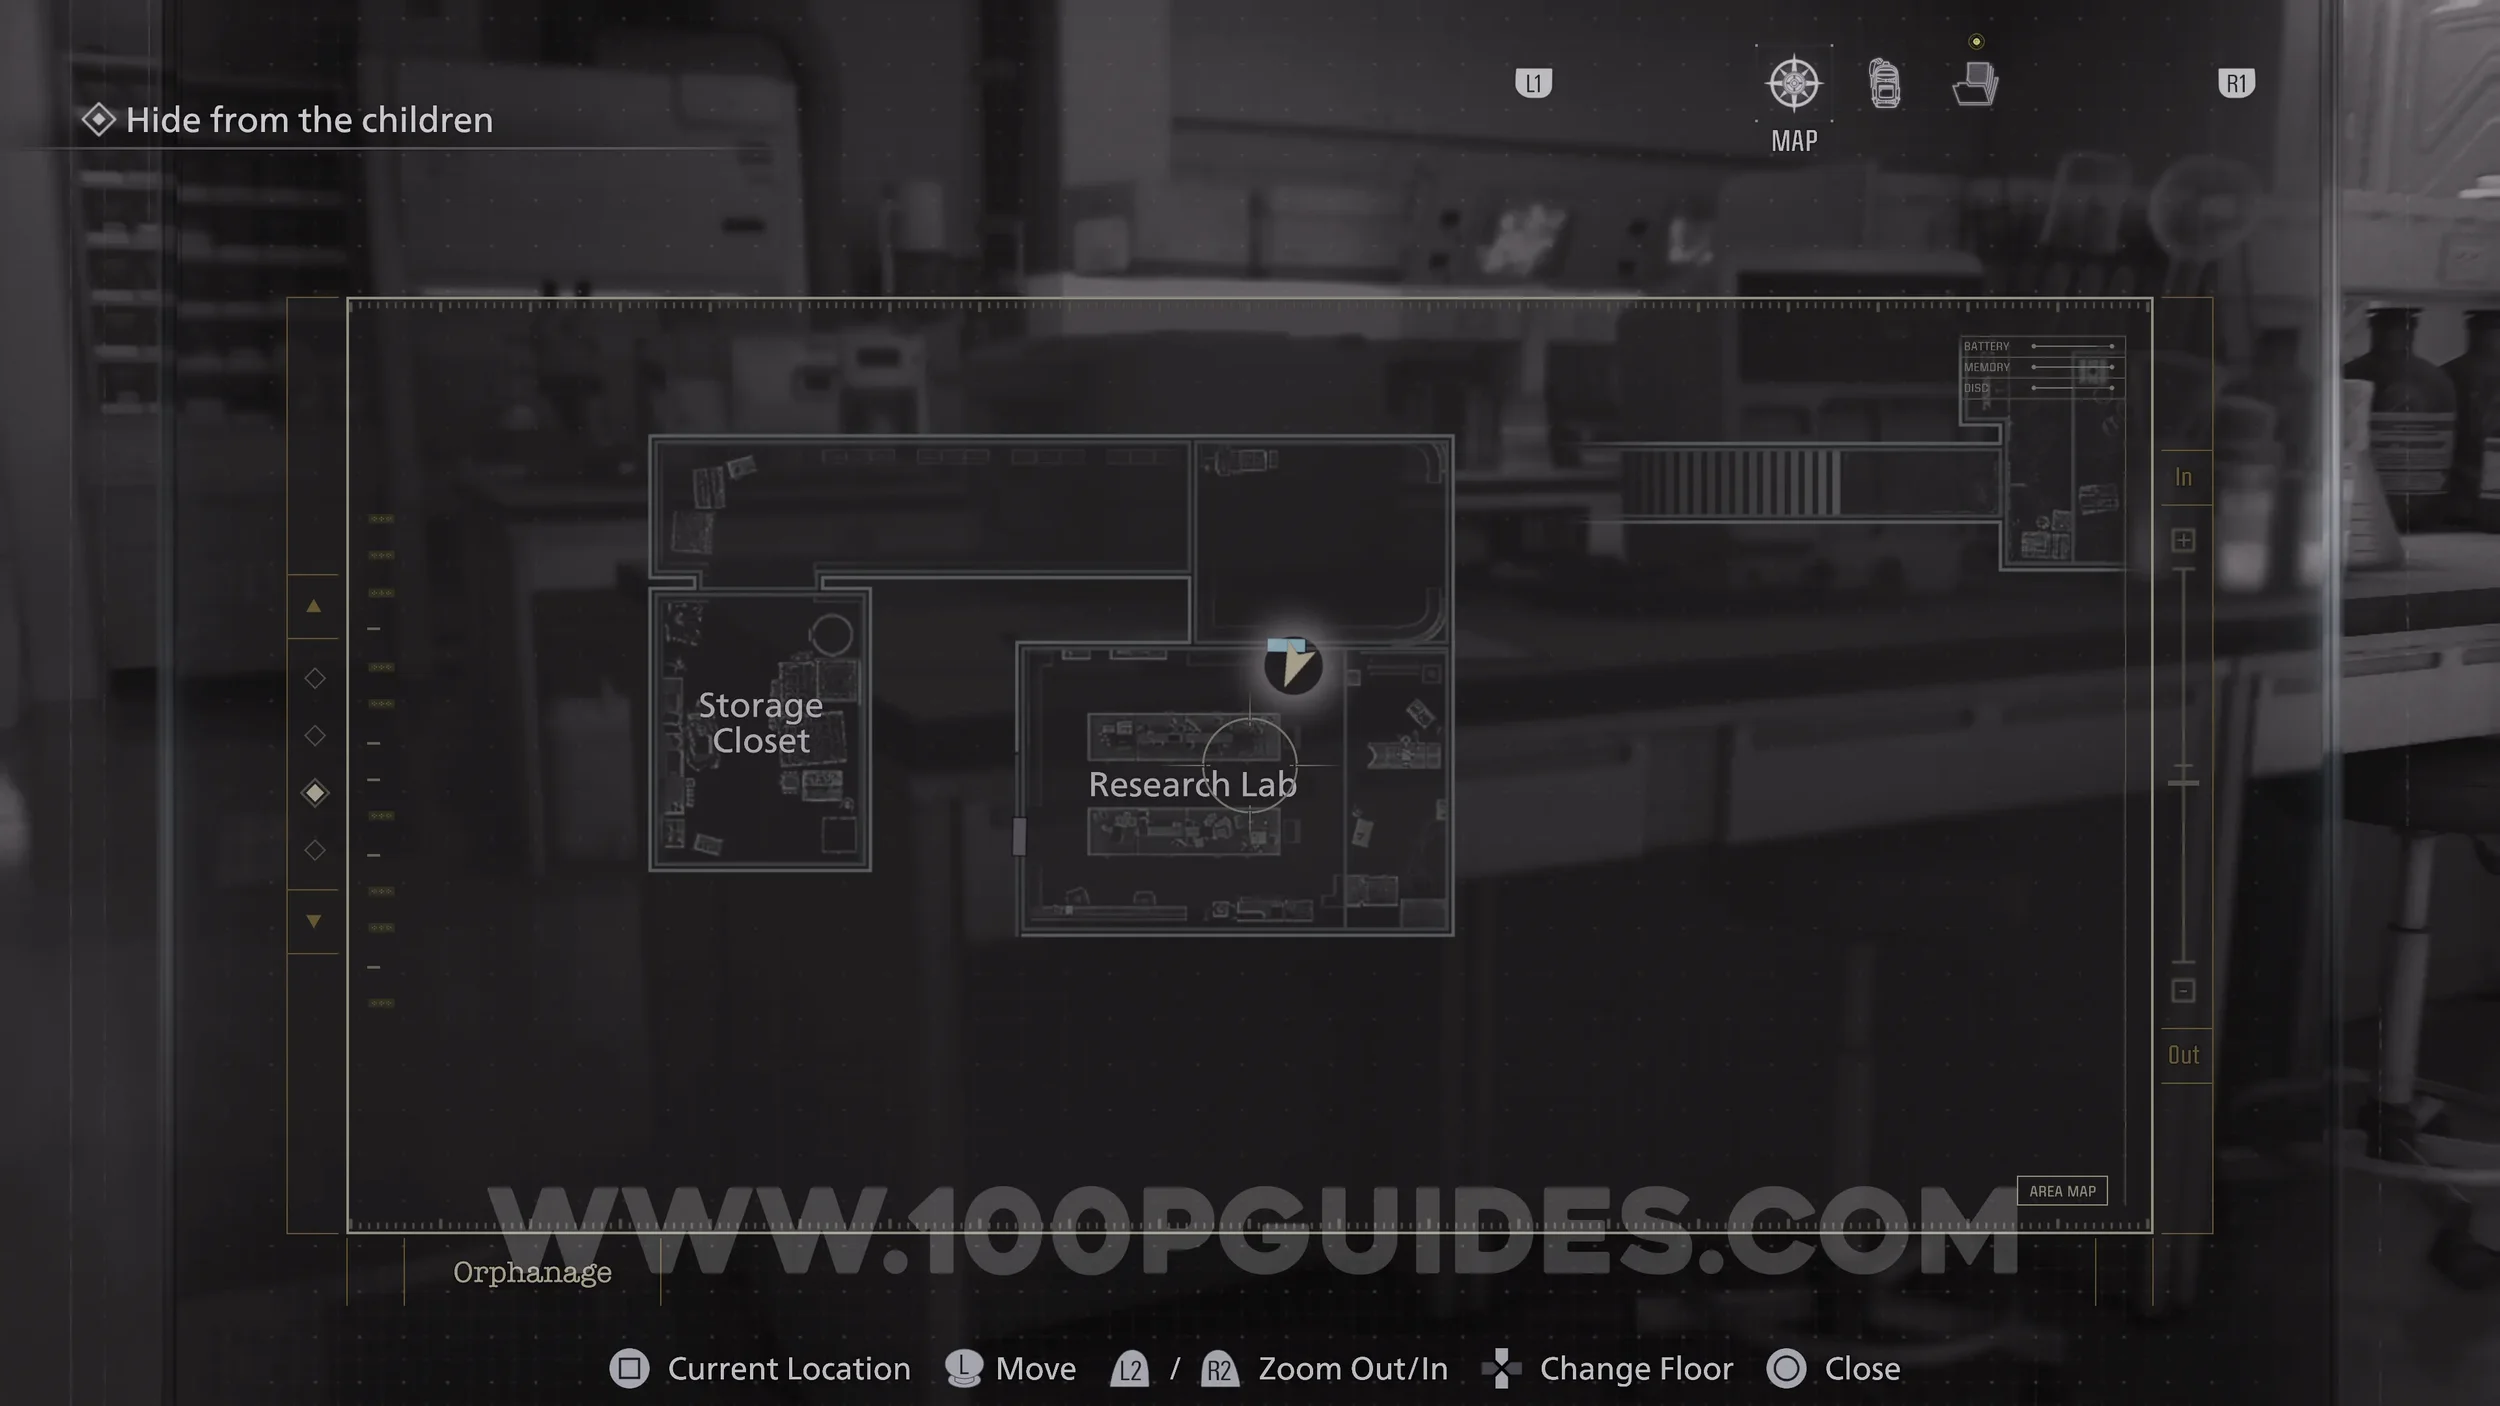
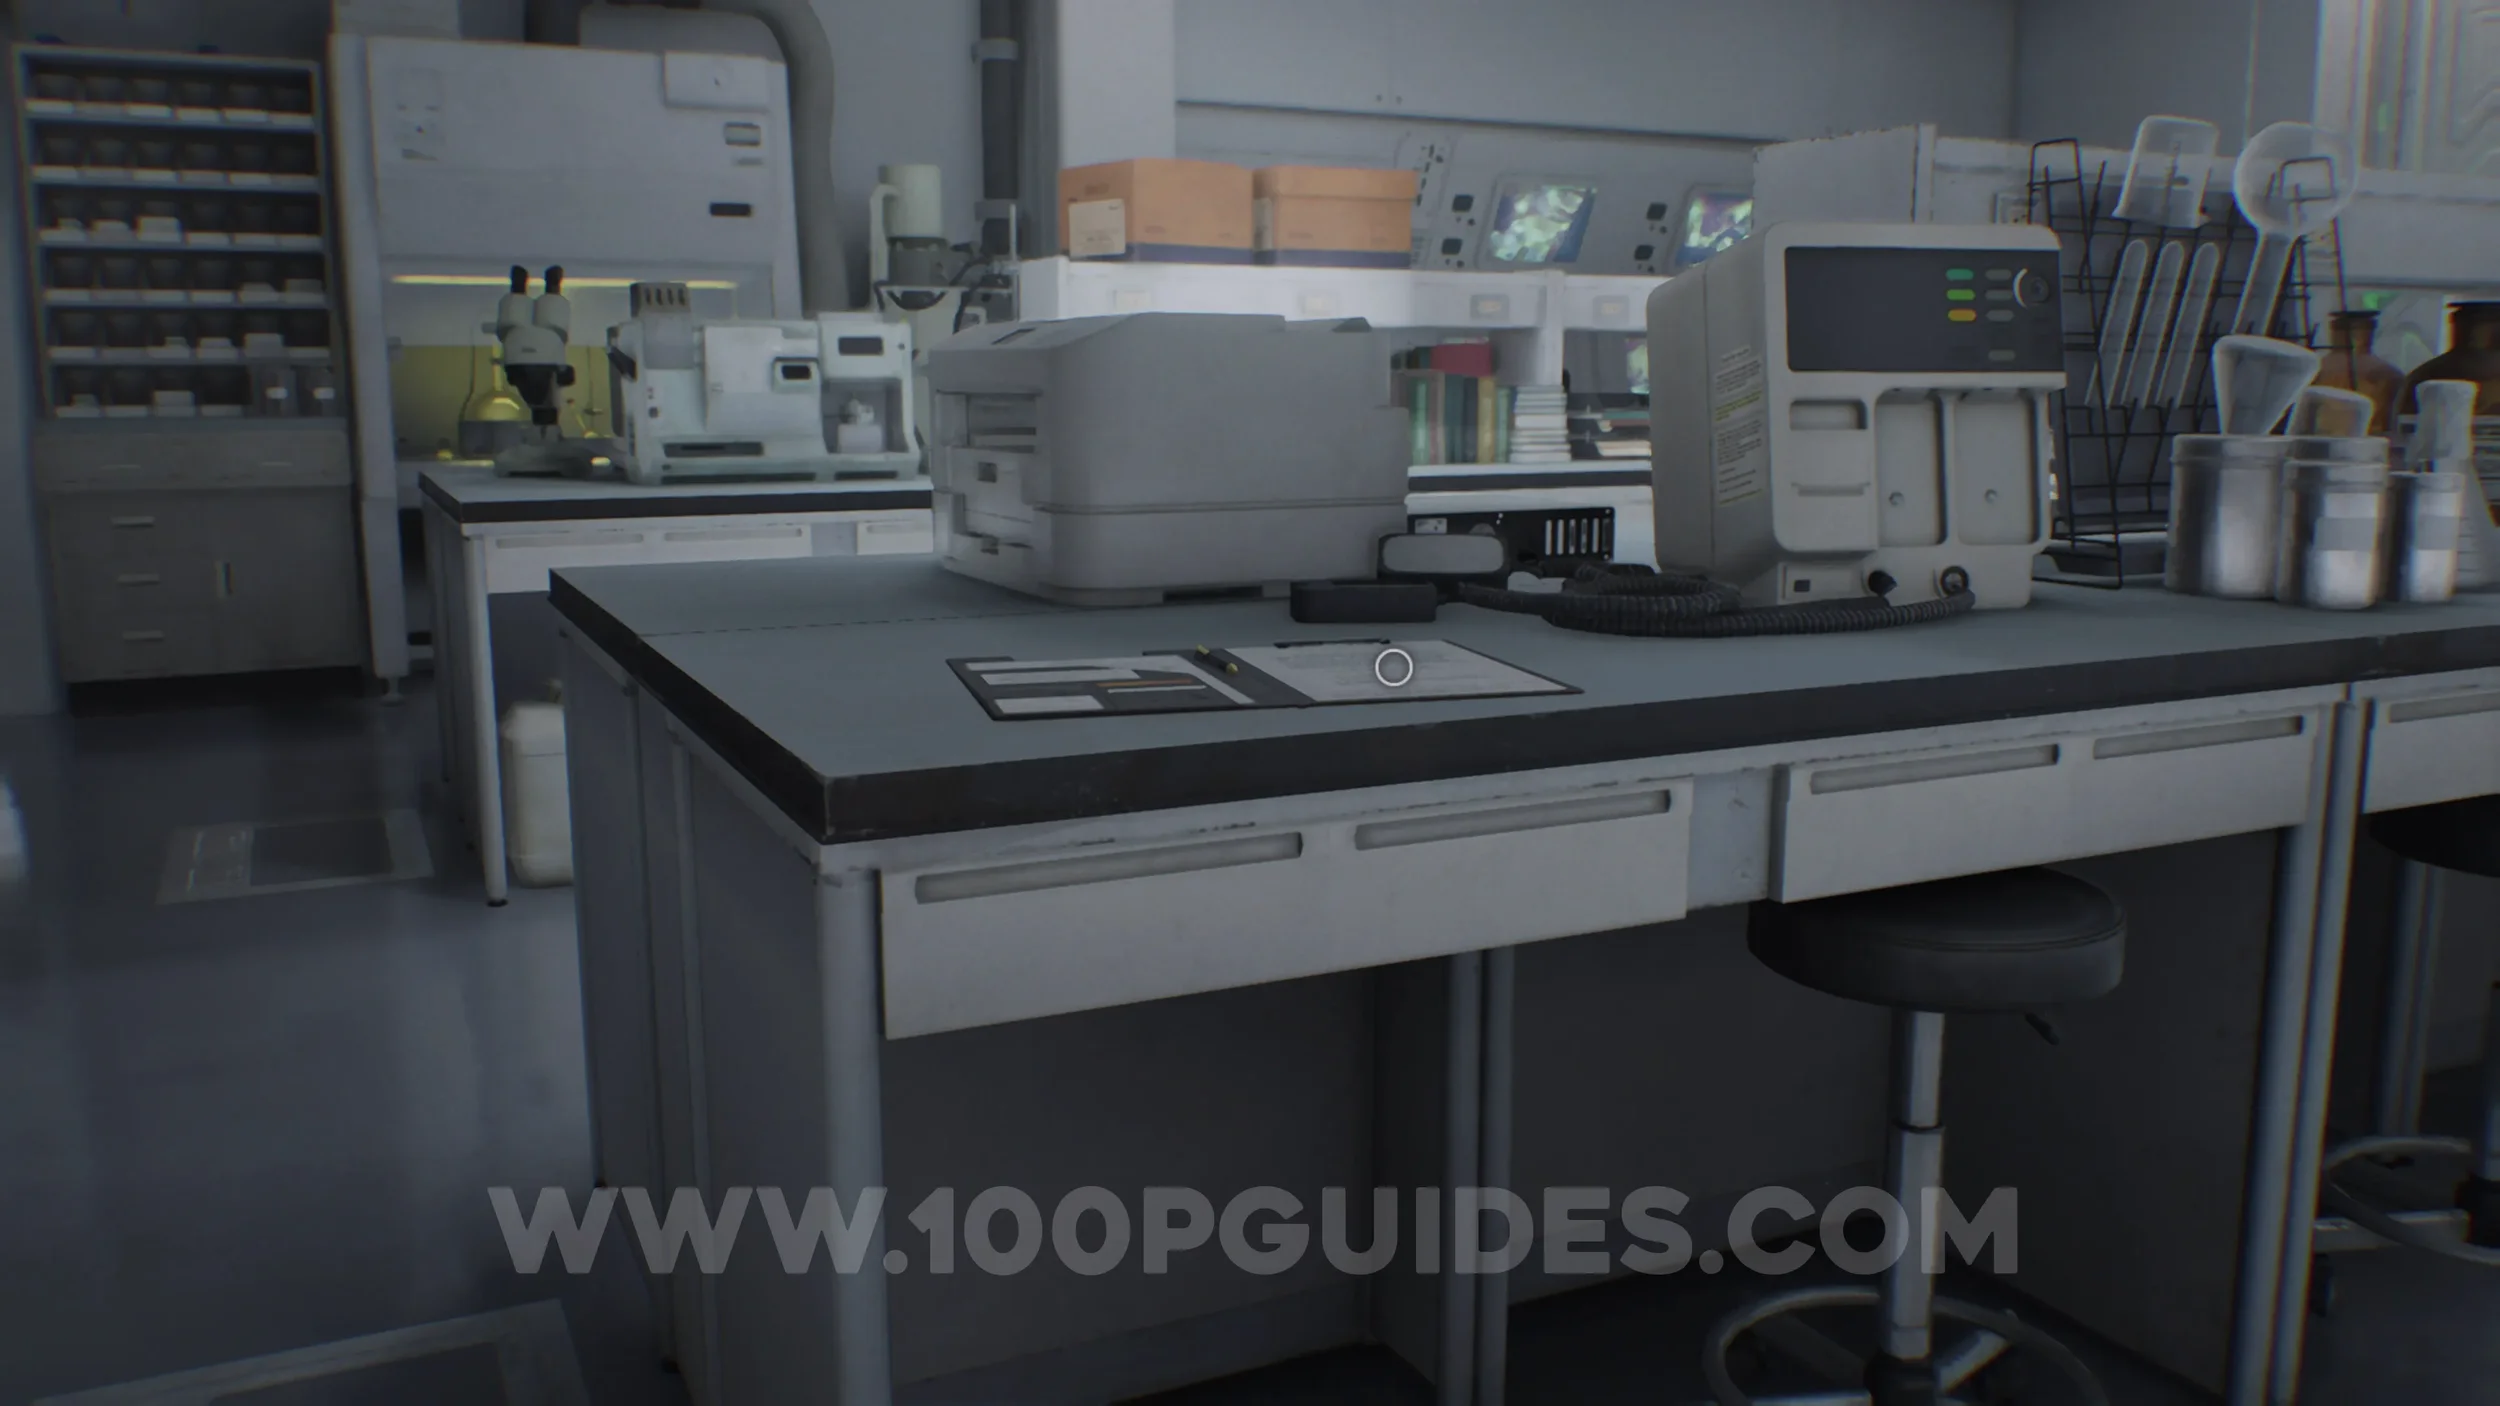
File #64 - New Researcher’s Notebook. Also in the Research Lab.
Raccoon City Center (After Orphanage)
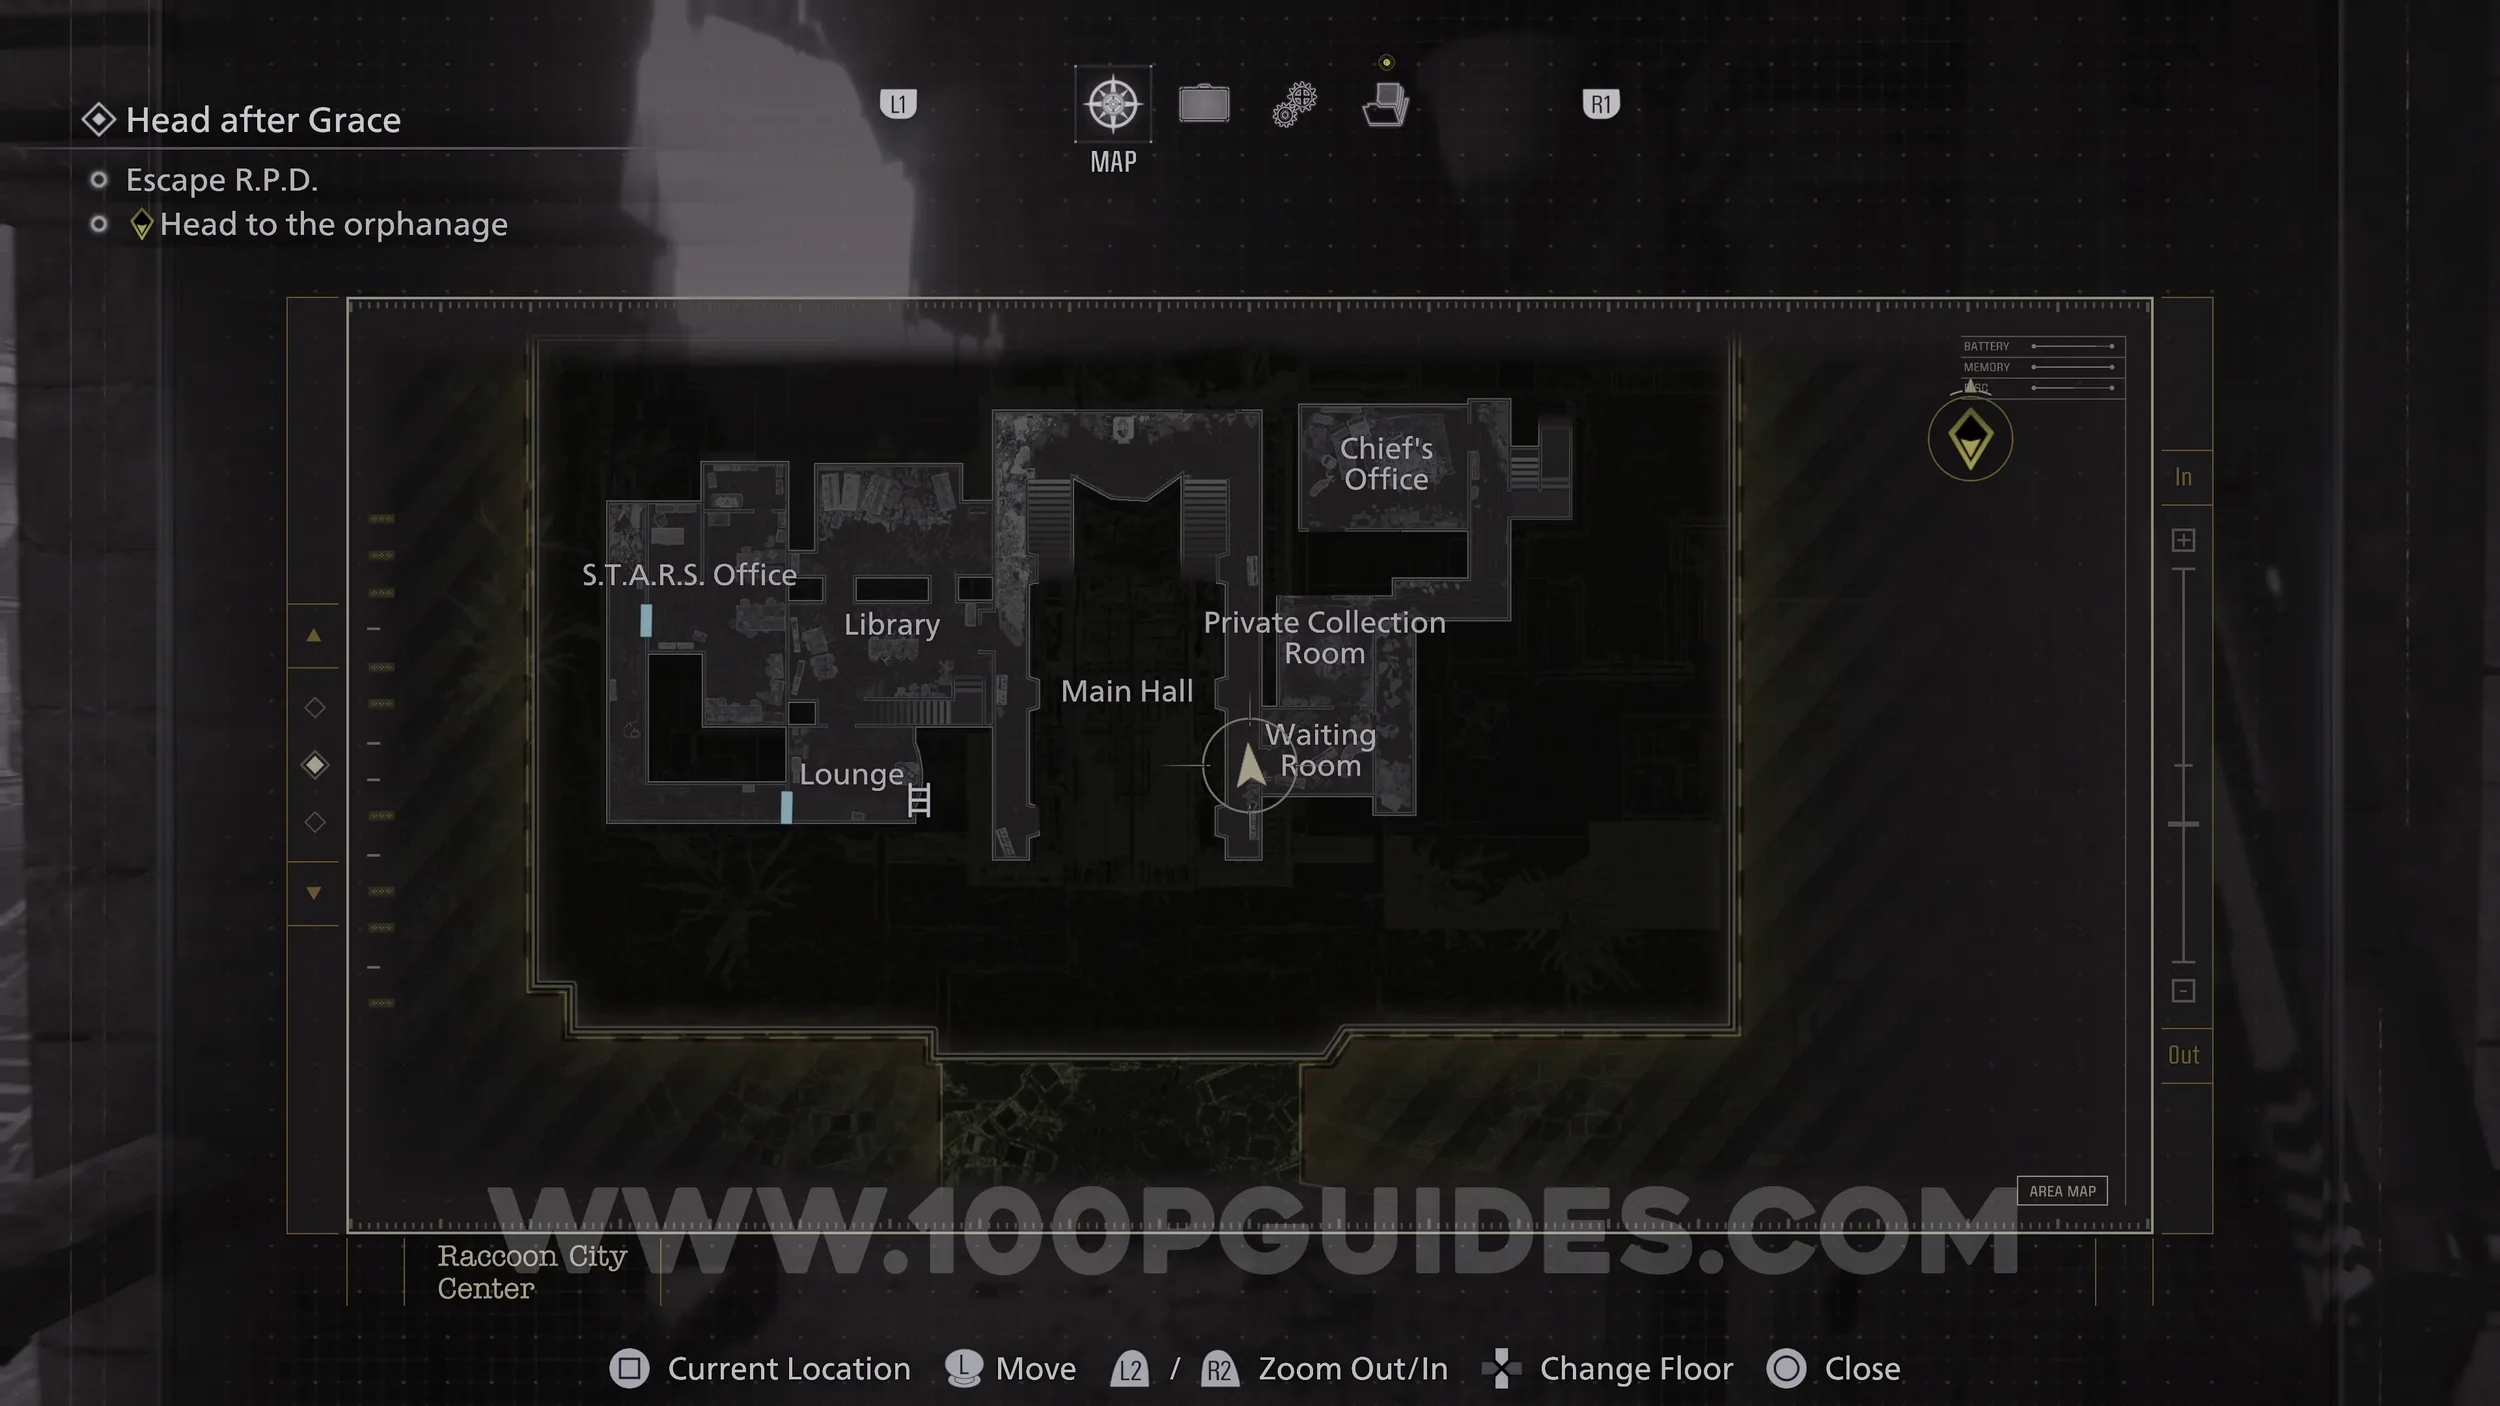
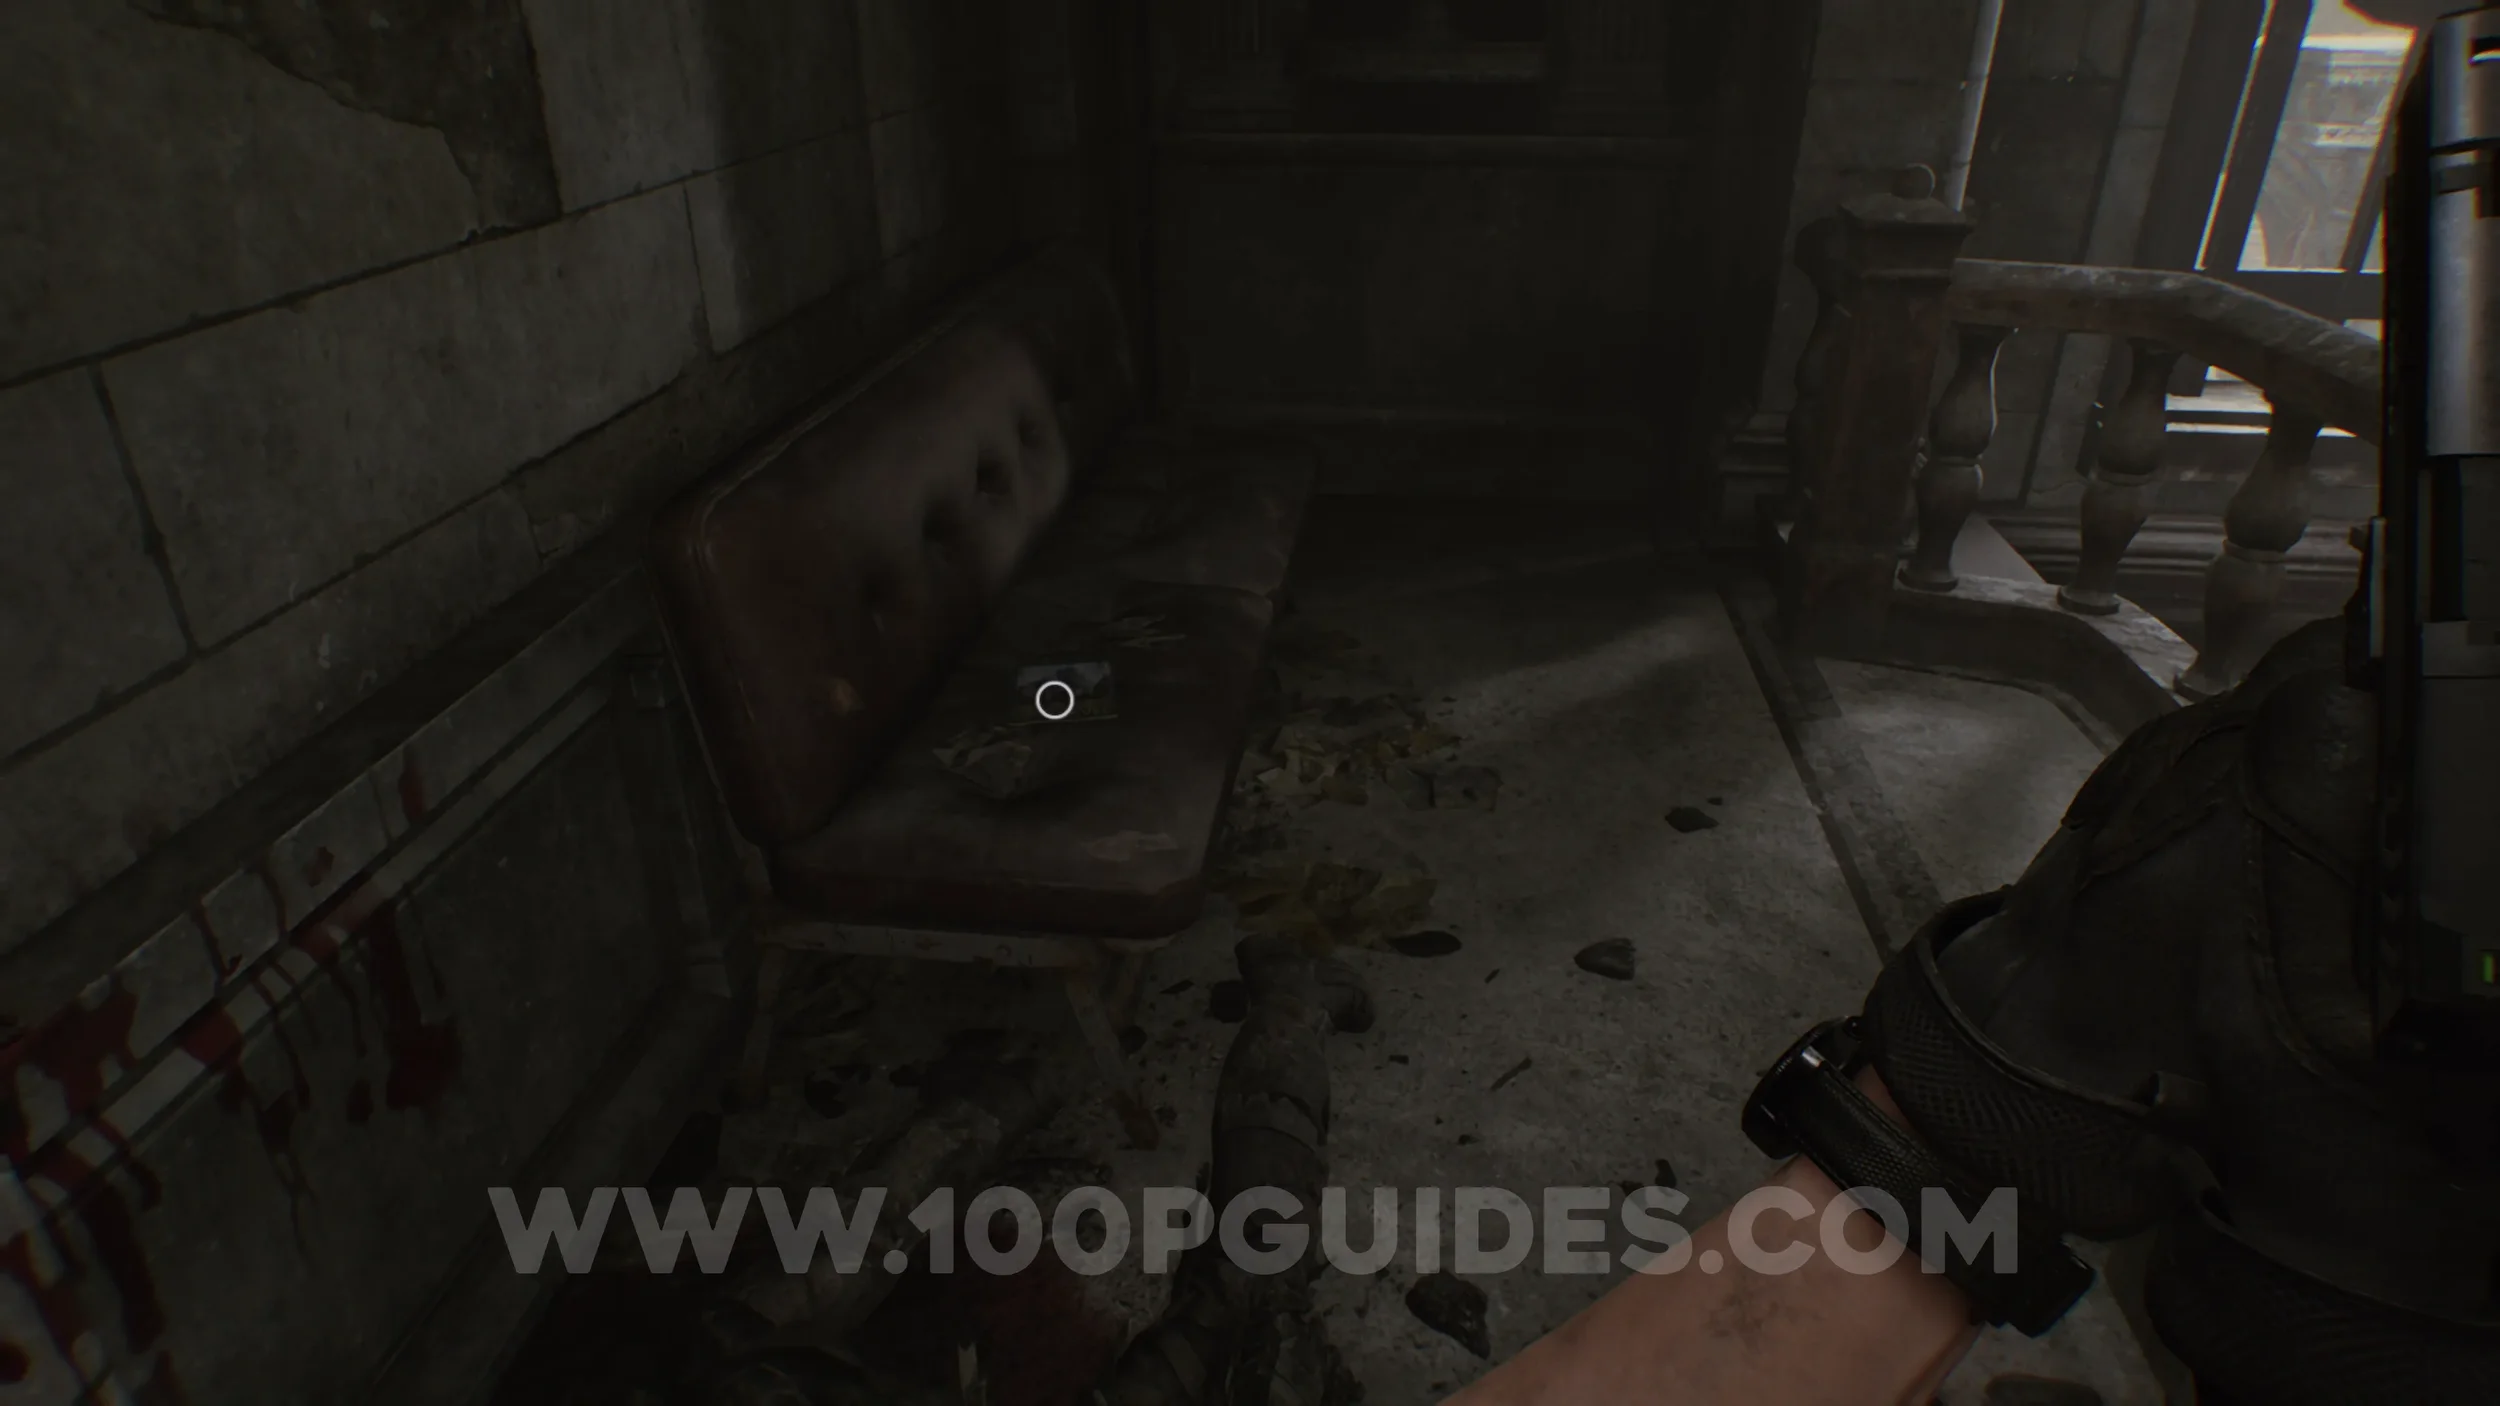
File #65 - Guide Pamphlet. Once you regain control of Leon in the R.P.D. building, you will have to escape from a large enemy. After that, you will be in the top floor of the Main Hall. Turn around to find the file on the sofa.
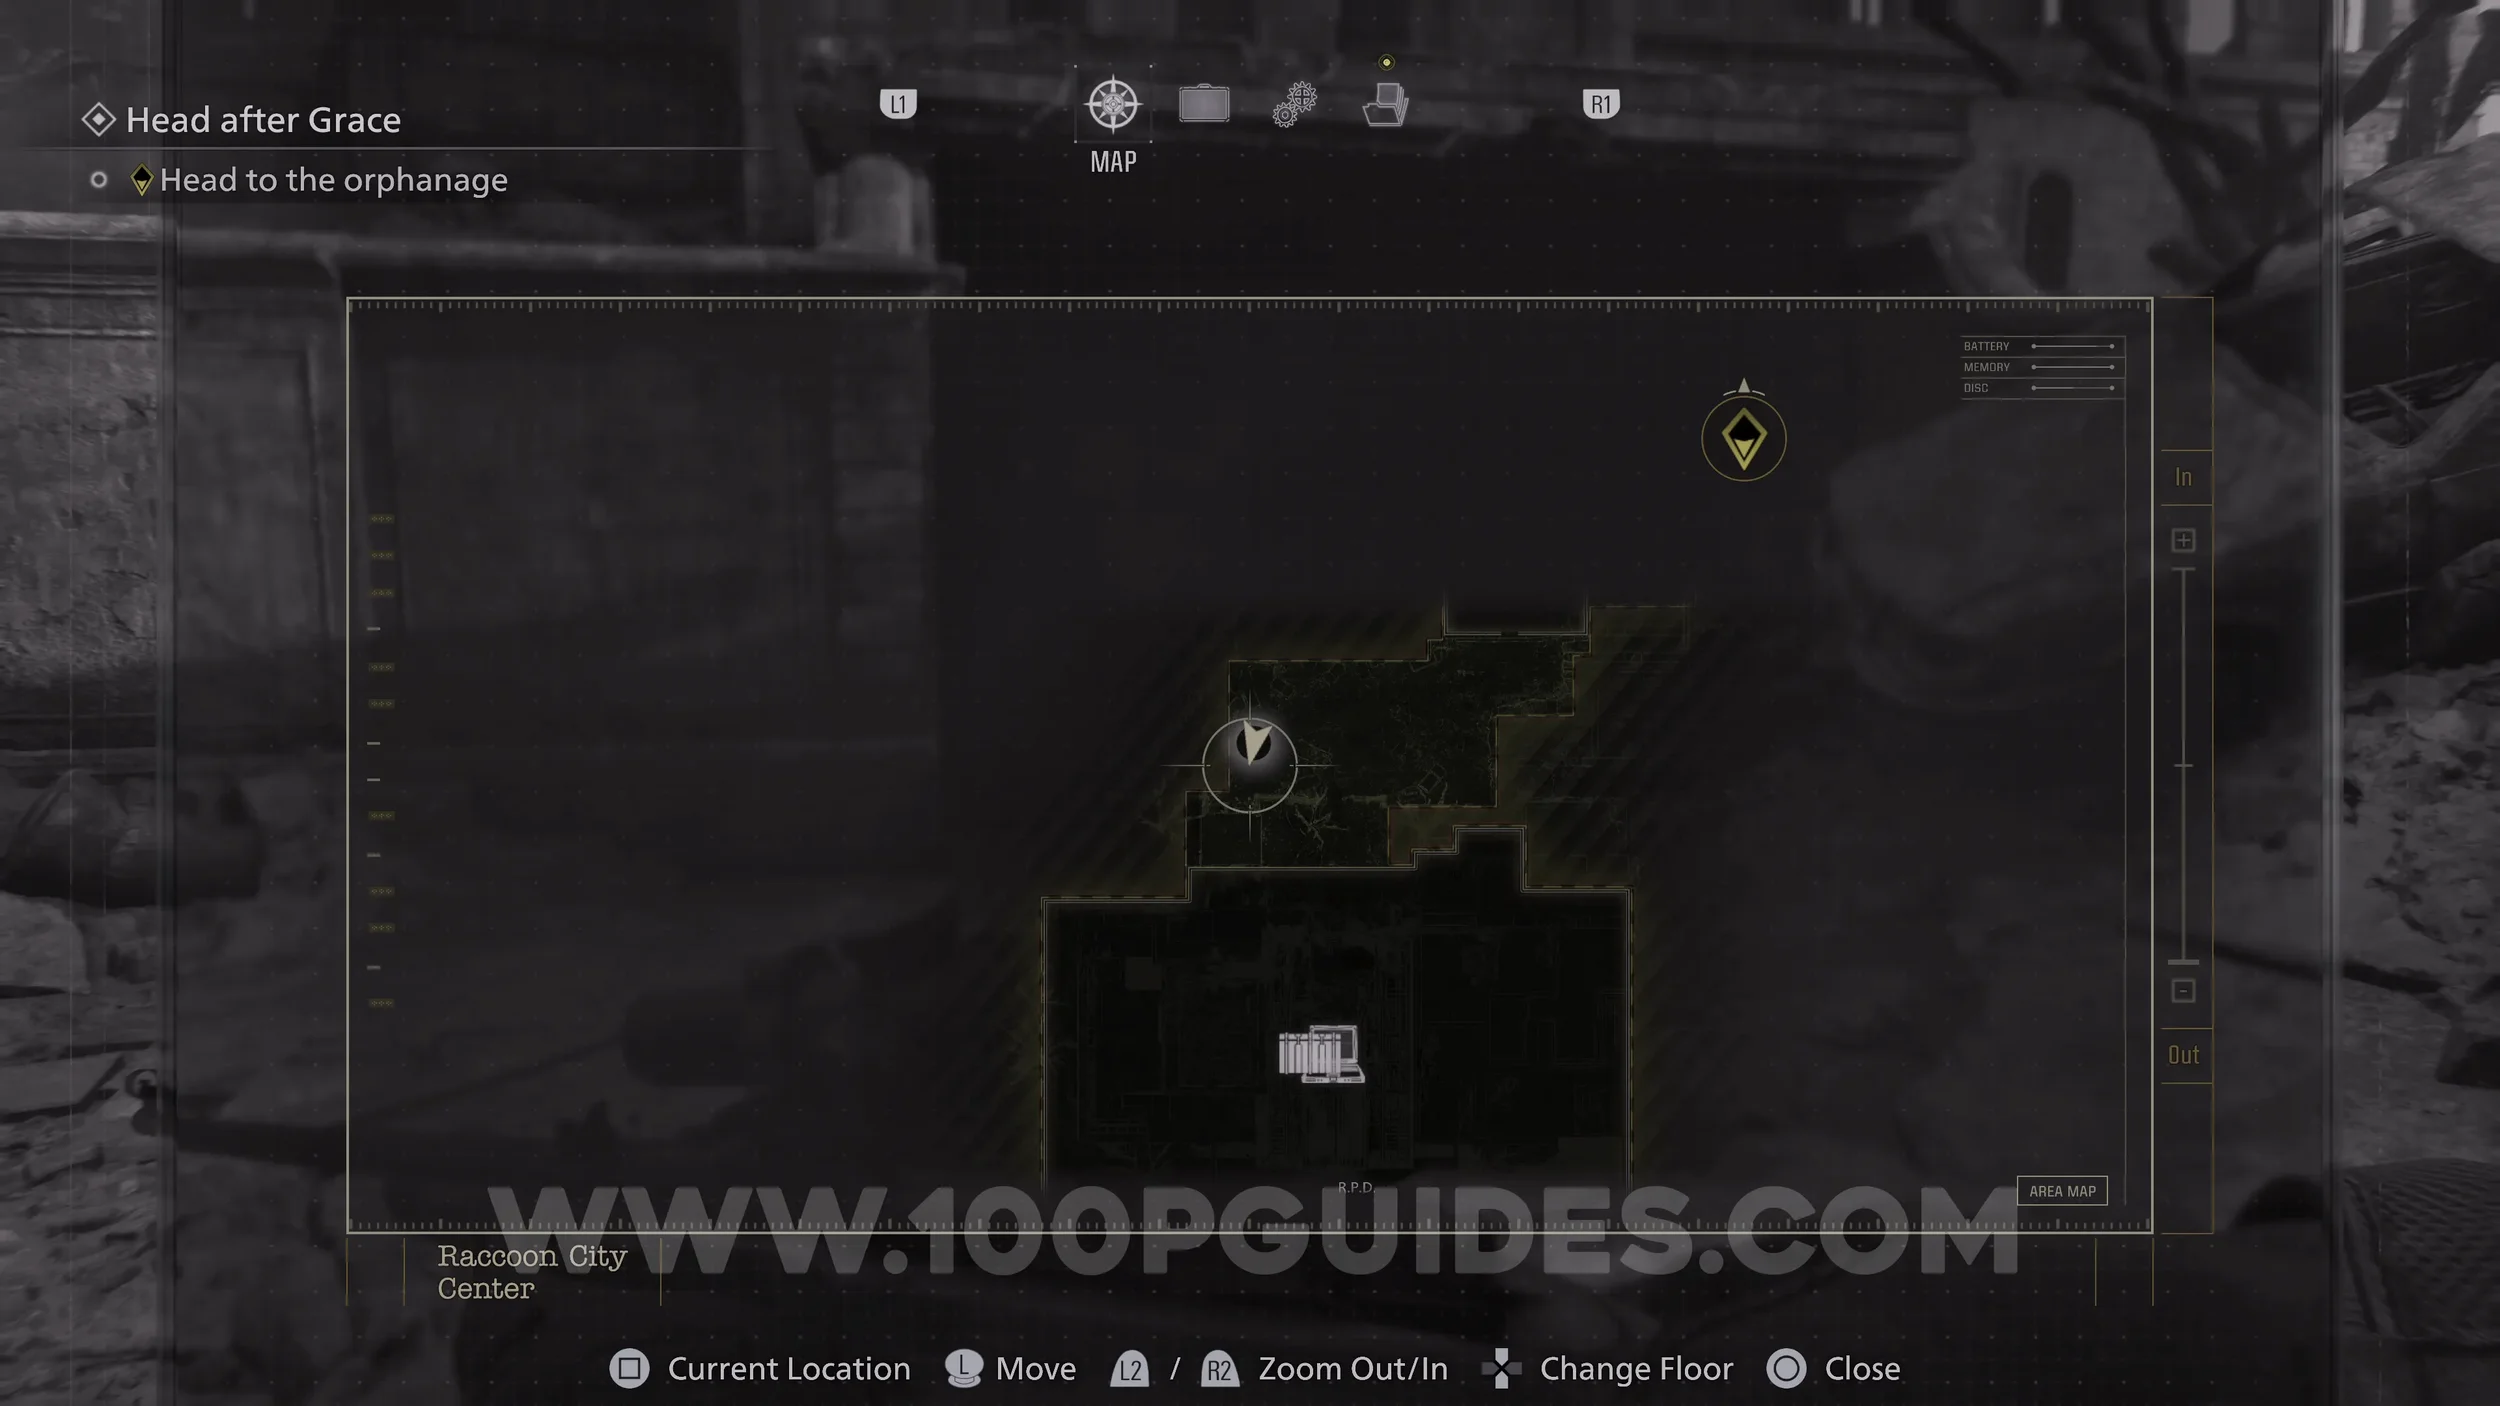
Charm #7 - Cute Bear Charm. Once you leave the R.P.D. Building, go left and into the underground garage. Then, just before the open container, look to your right to find the charm on the ground.
Weapon Accessory - Silver Finish Scope. Inside the open container in the underground garage.
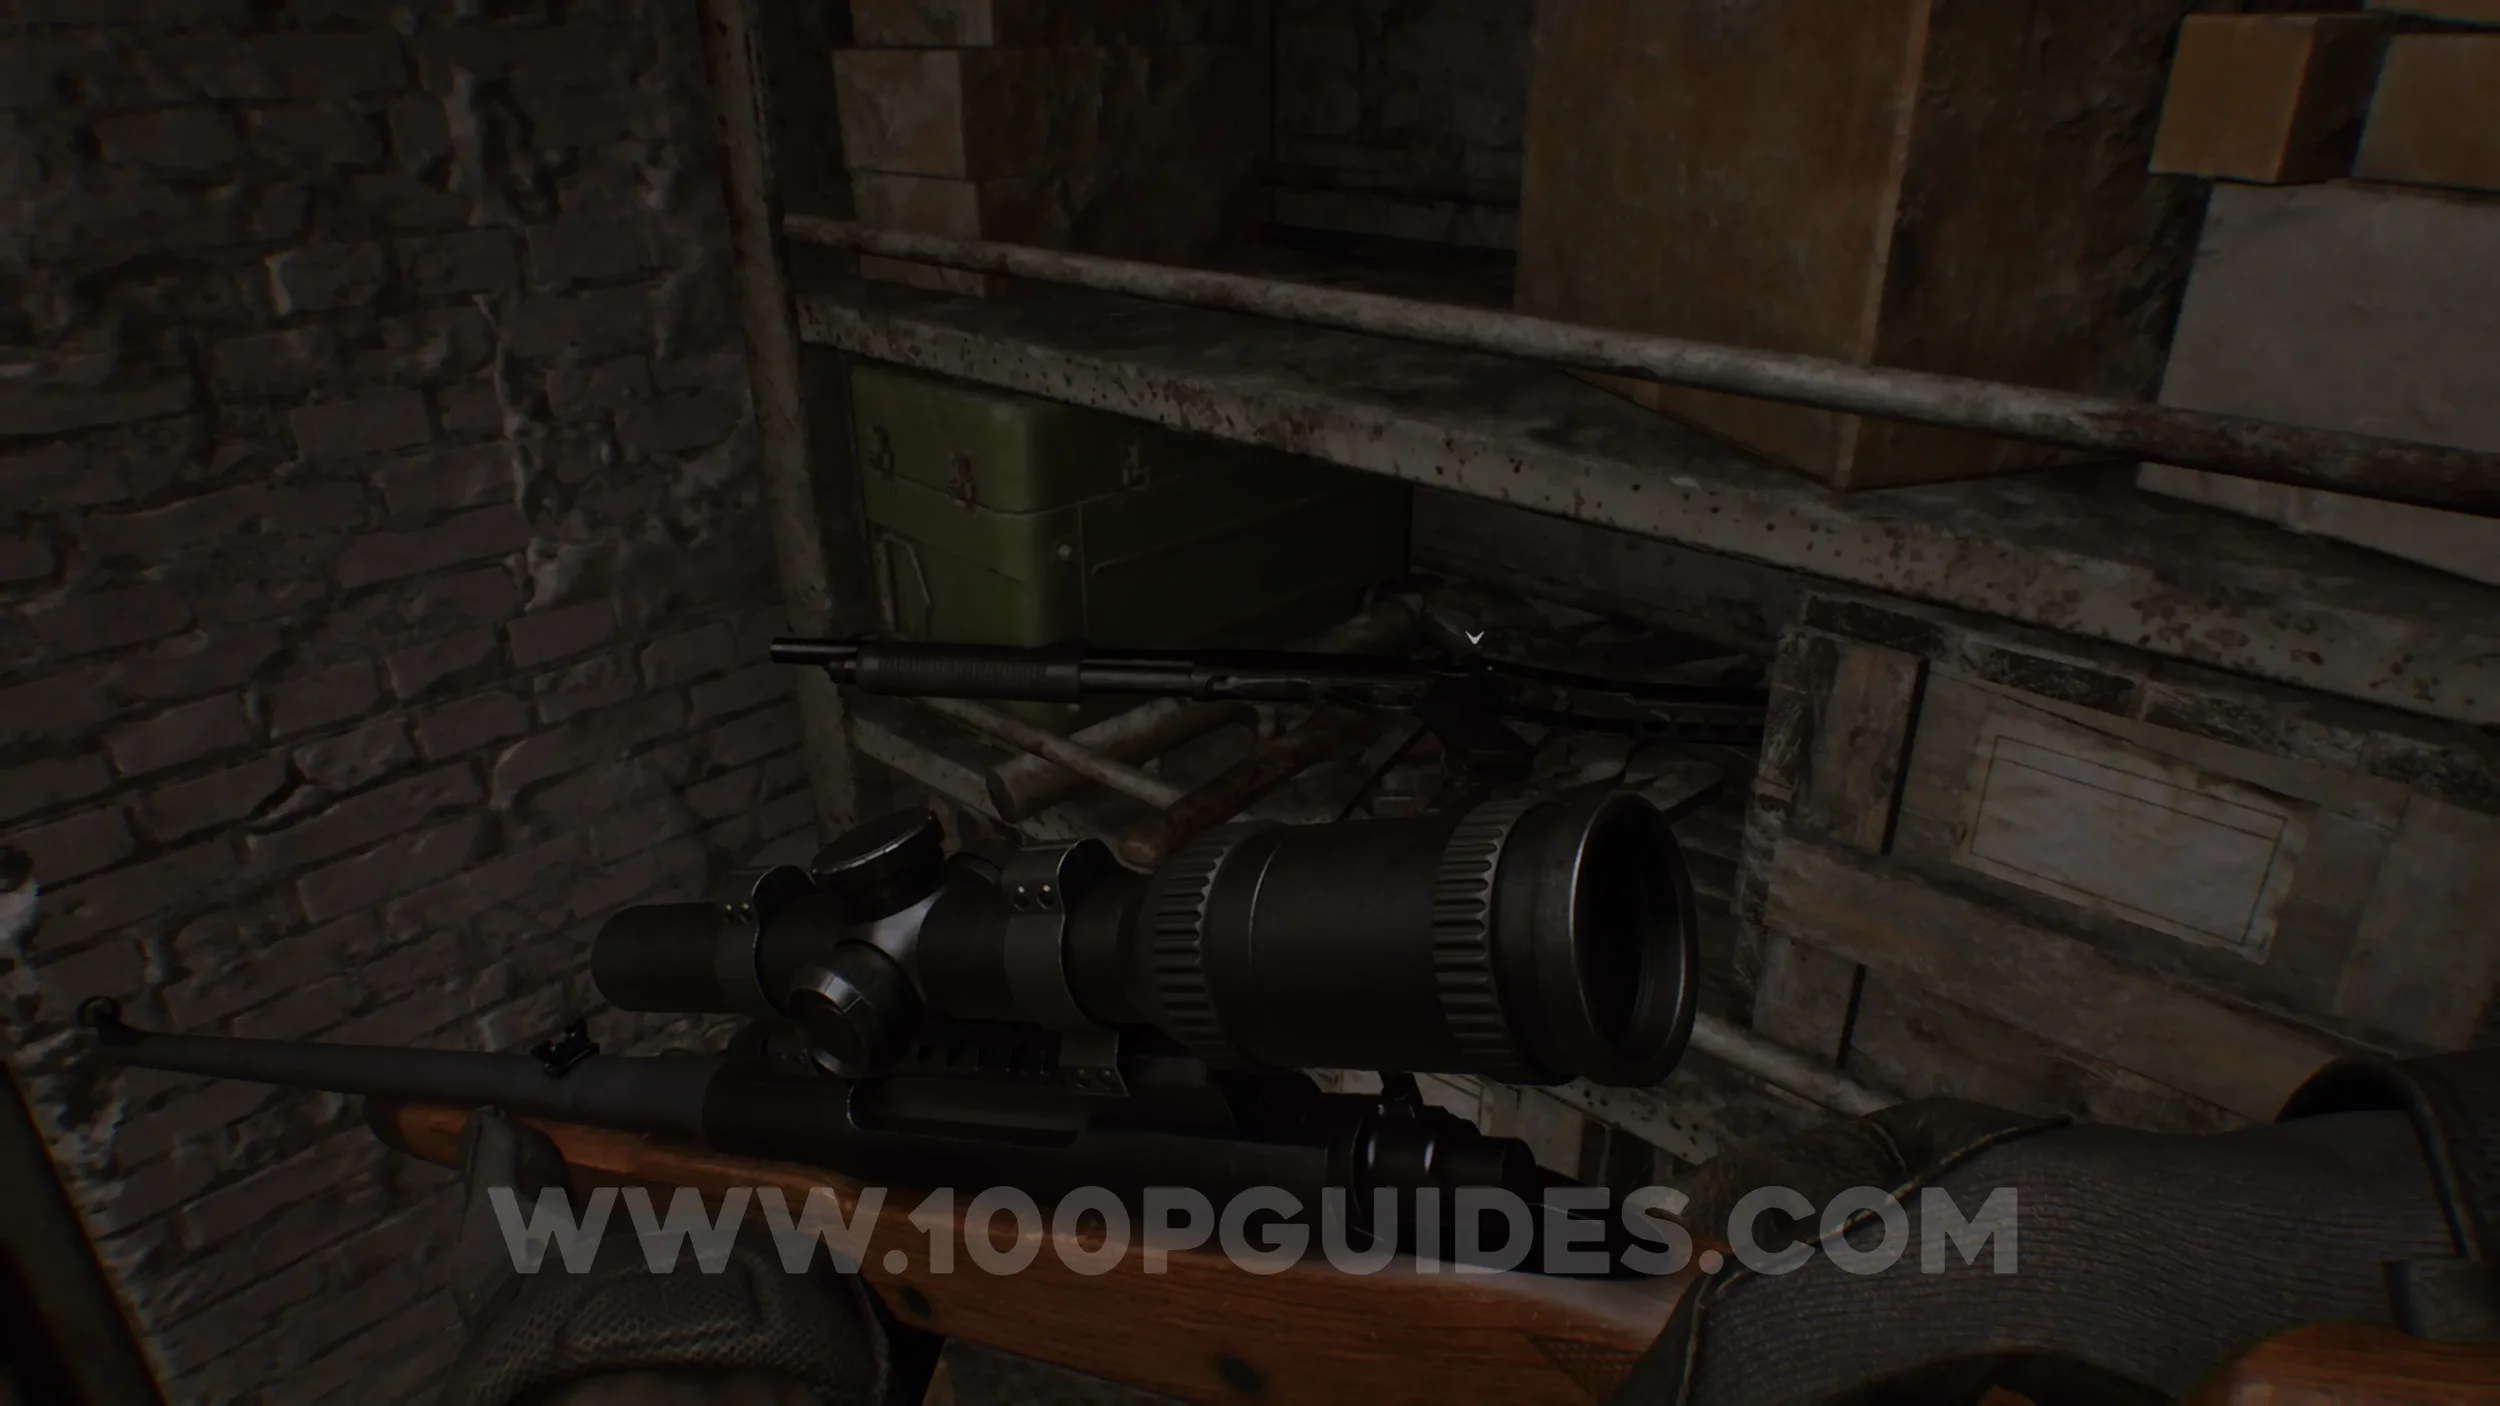
Weapon - W870 Police. Found on a shelf behind you after the cutscene in Gun Shop Kendo.

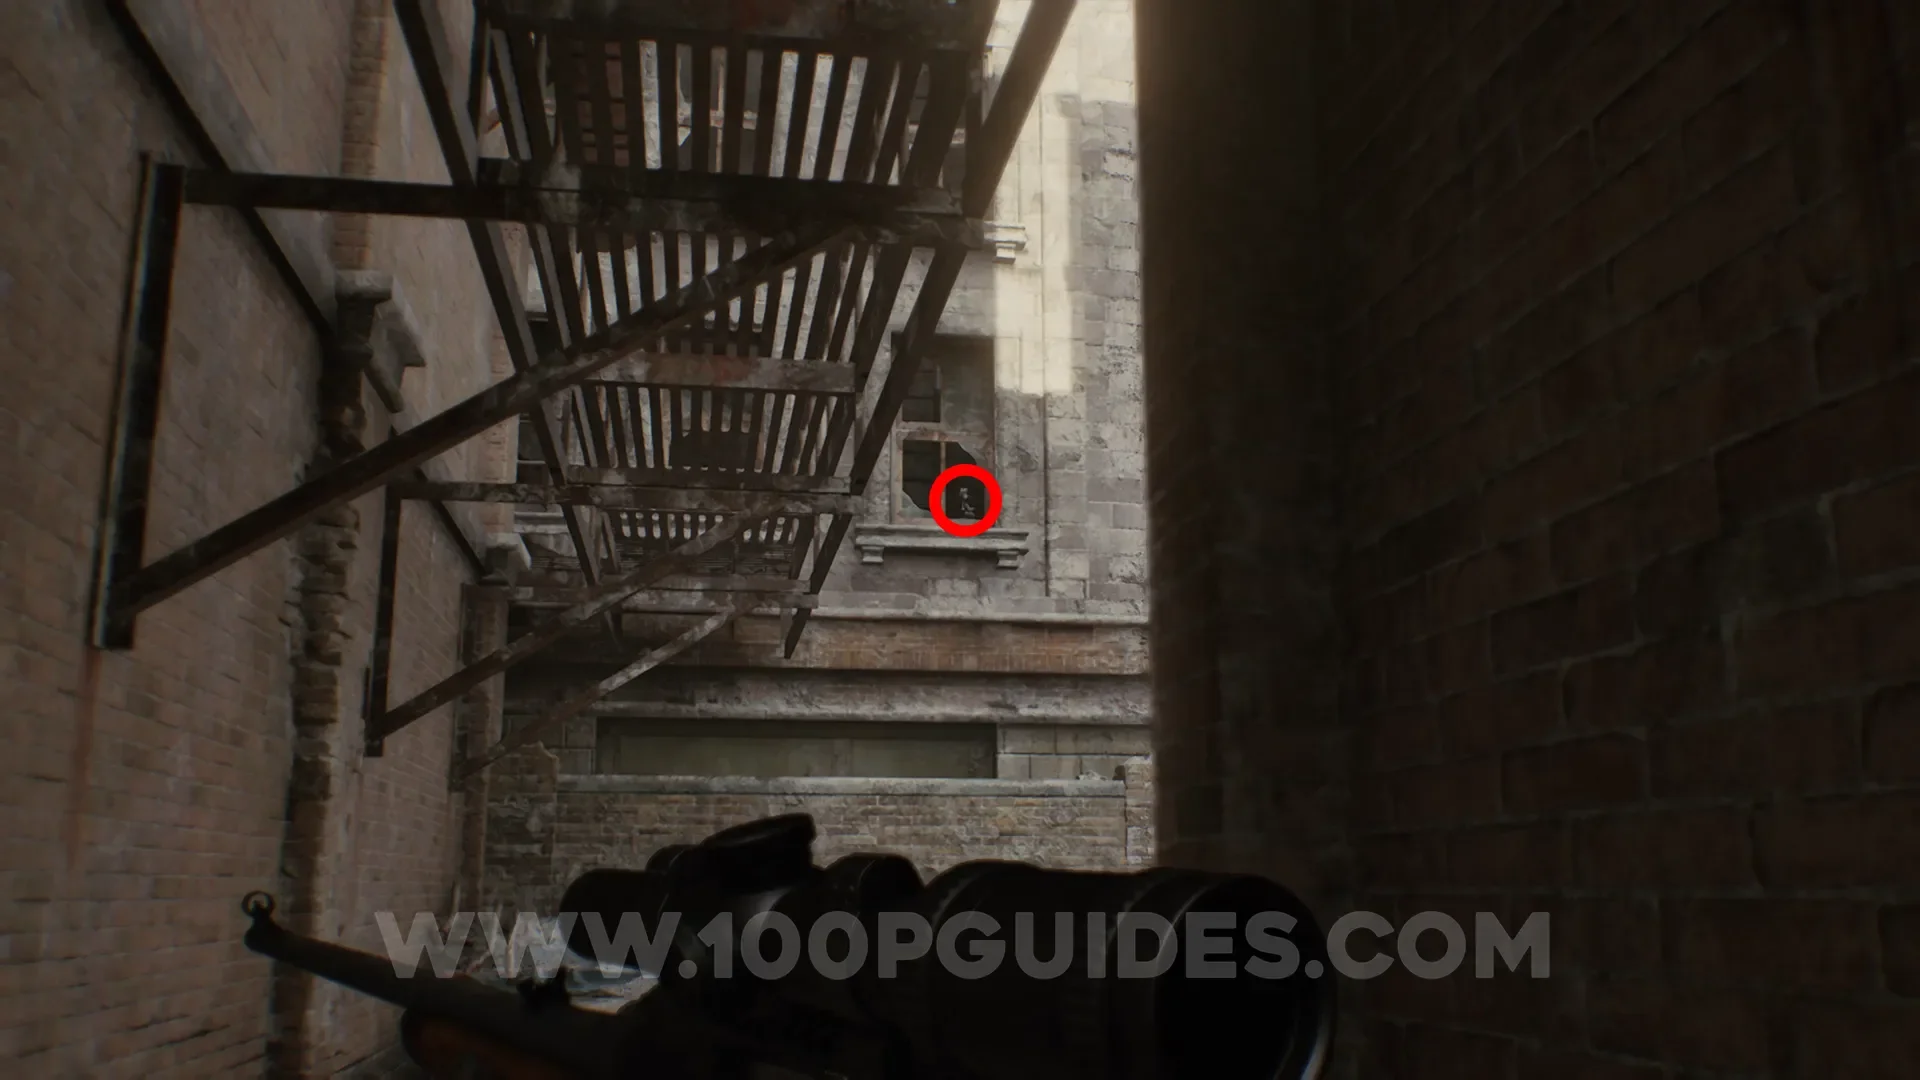
Mr. Raccoon #23. After the cutscene in Gun Shop Kendo, turn around and then go down the alley on your left. The figurine will be in the window above.

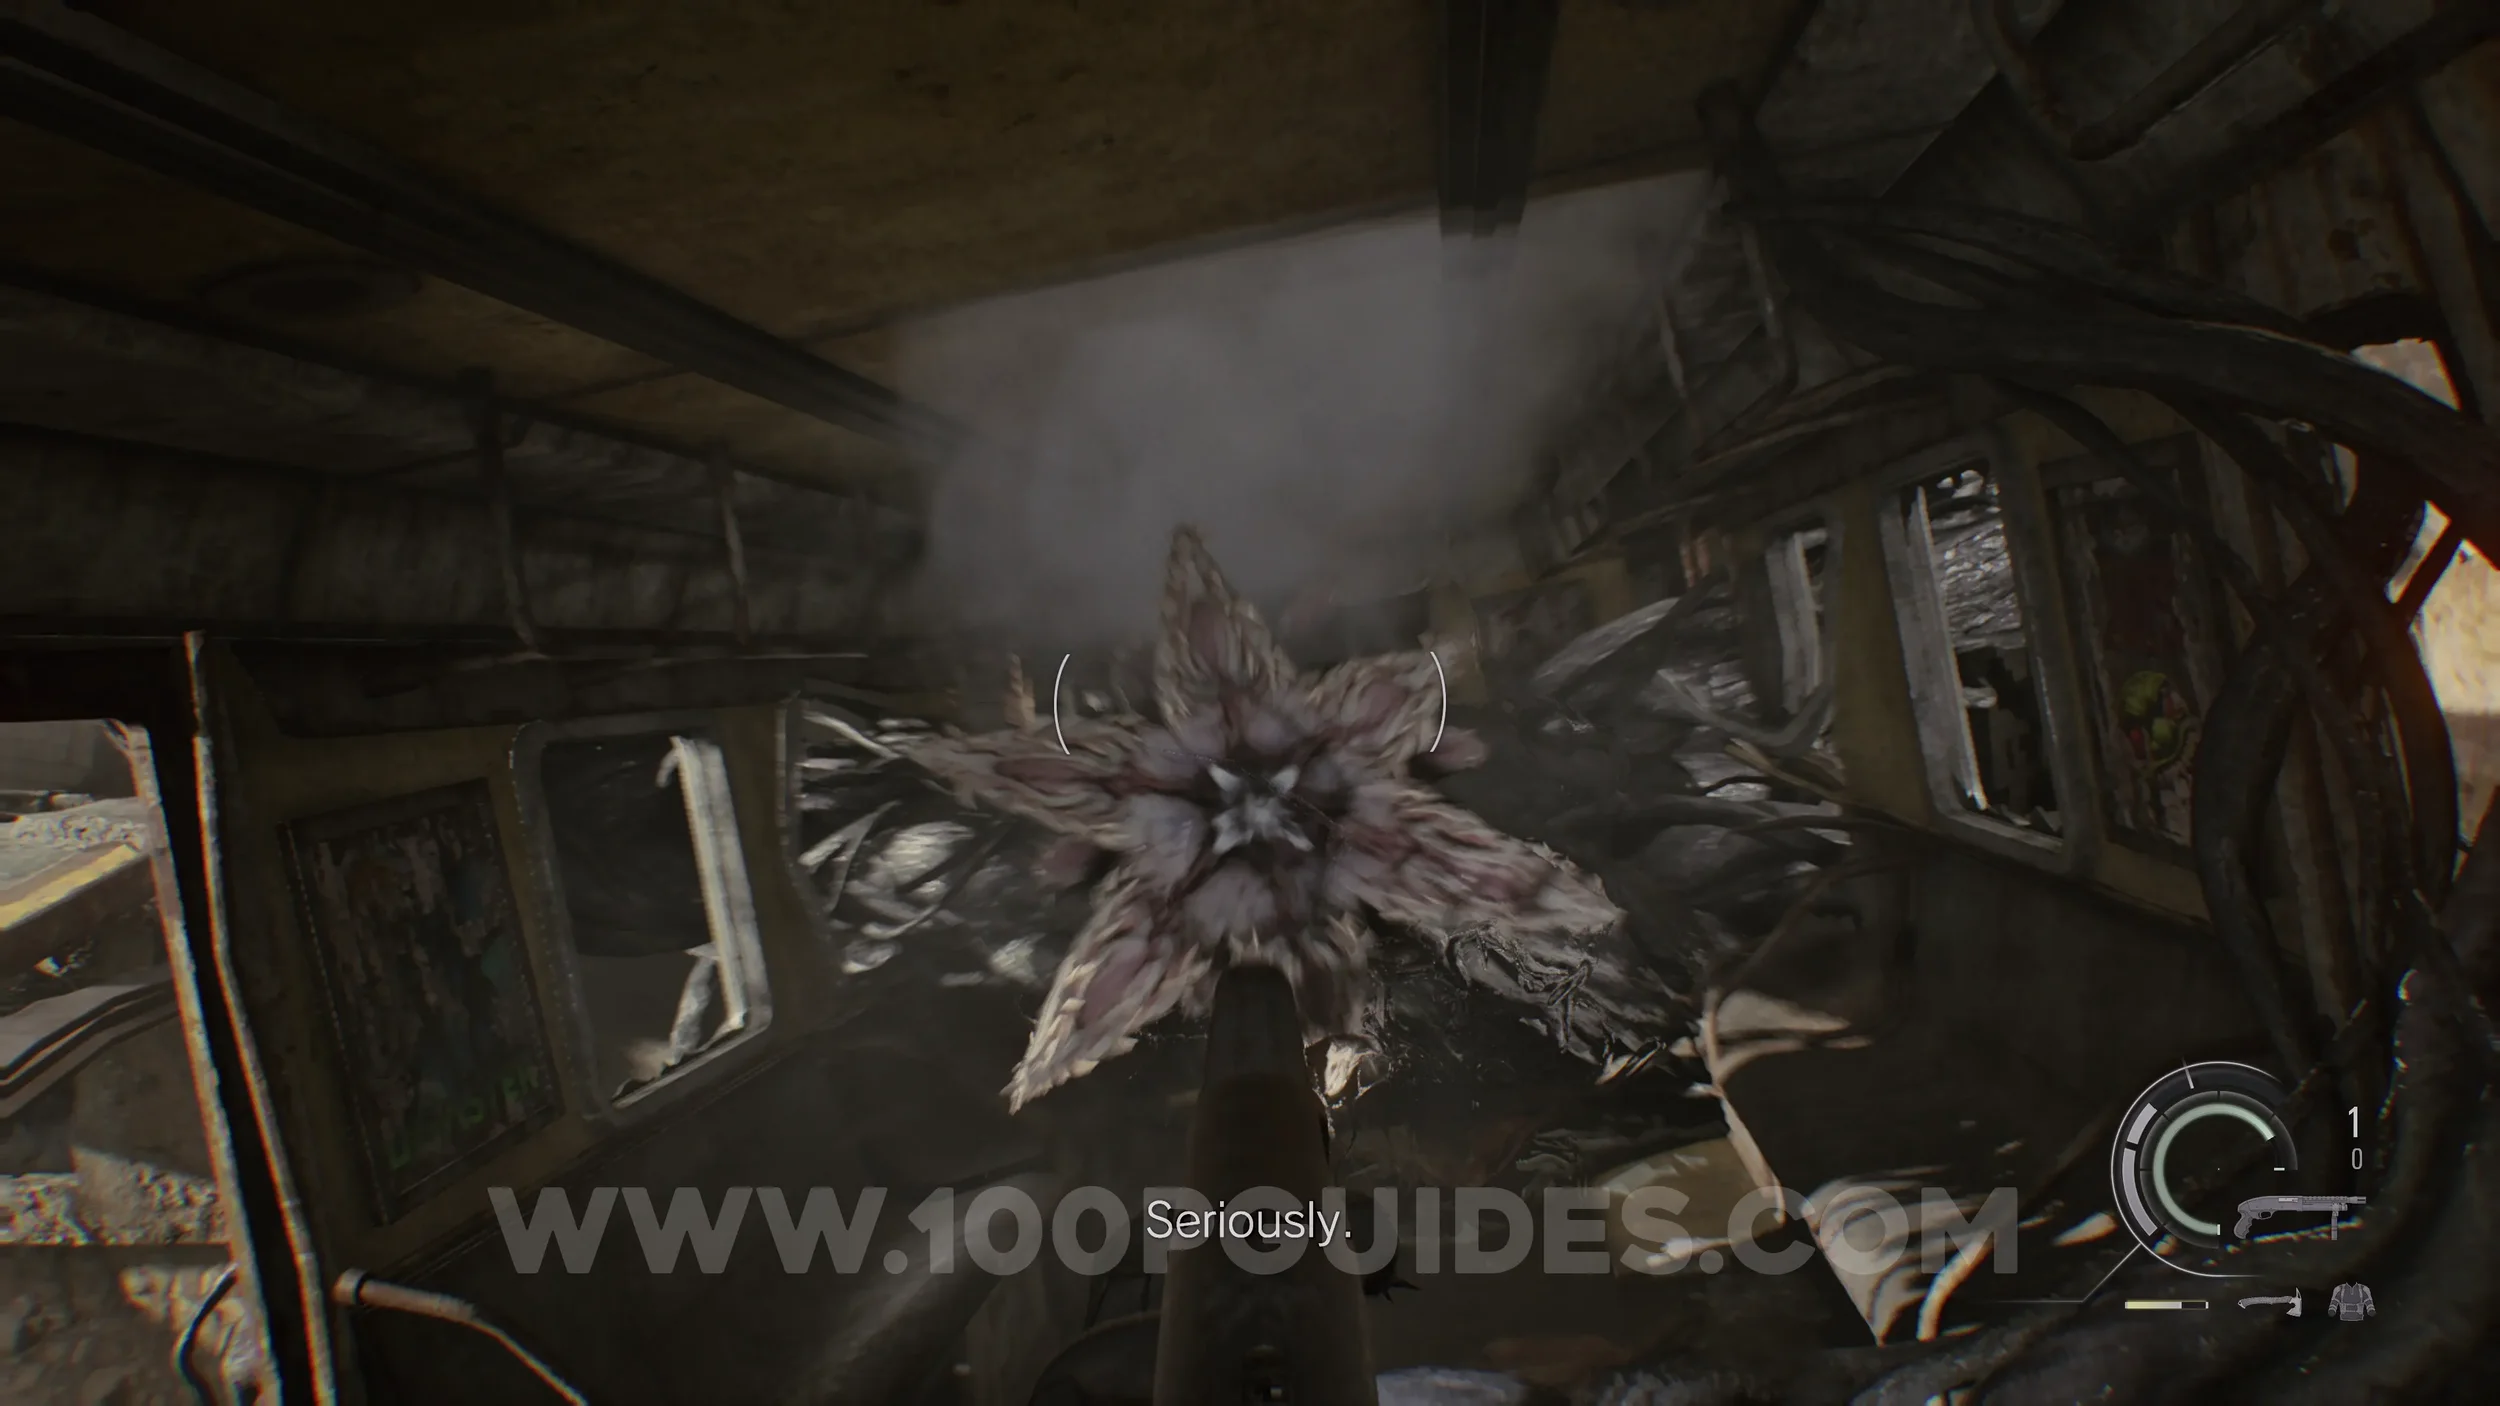
Trophy - Not Today, Buds! After defeating the Super Tyrant Boss, you will pass through a train and be attacked by a plant-type enemy. This is the first of eight Seedlings you must defeat for the trophy.
After this encounter, you will enter a cave. The second Seedling appears shortly after crawling through a short pipe. The third and fourth Seedlings will attack you along the main path soon after.
For the fifth Seedling, enter the optional room to the left of where you encountered the previous two. The sixth Seedling is found on the main path shortly after the third and fourth. The seventh Seedling is also on the main path, just to the left of the previous one.
The final two Seedlings will attack you on the main path just before reaching the end of the cave.
Ark
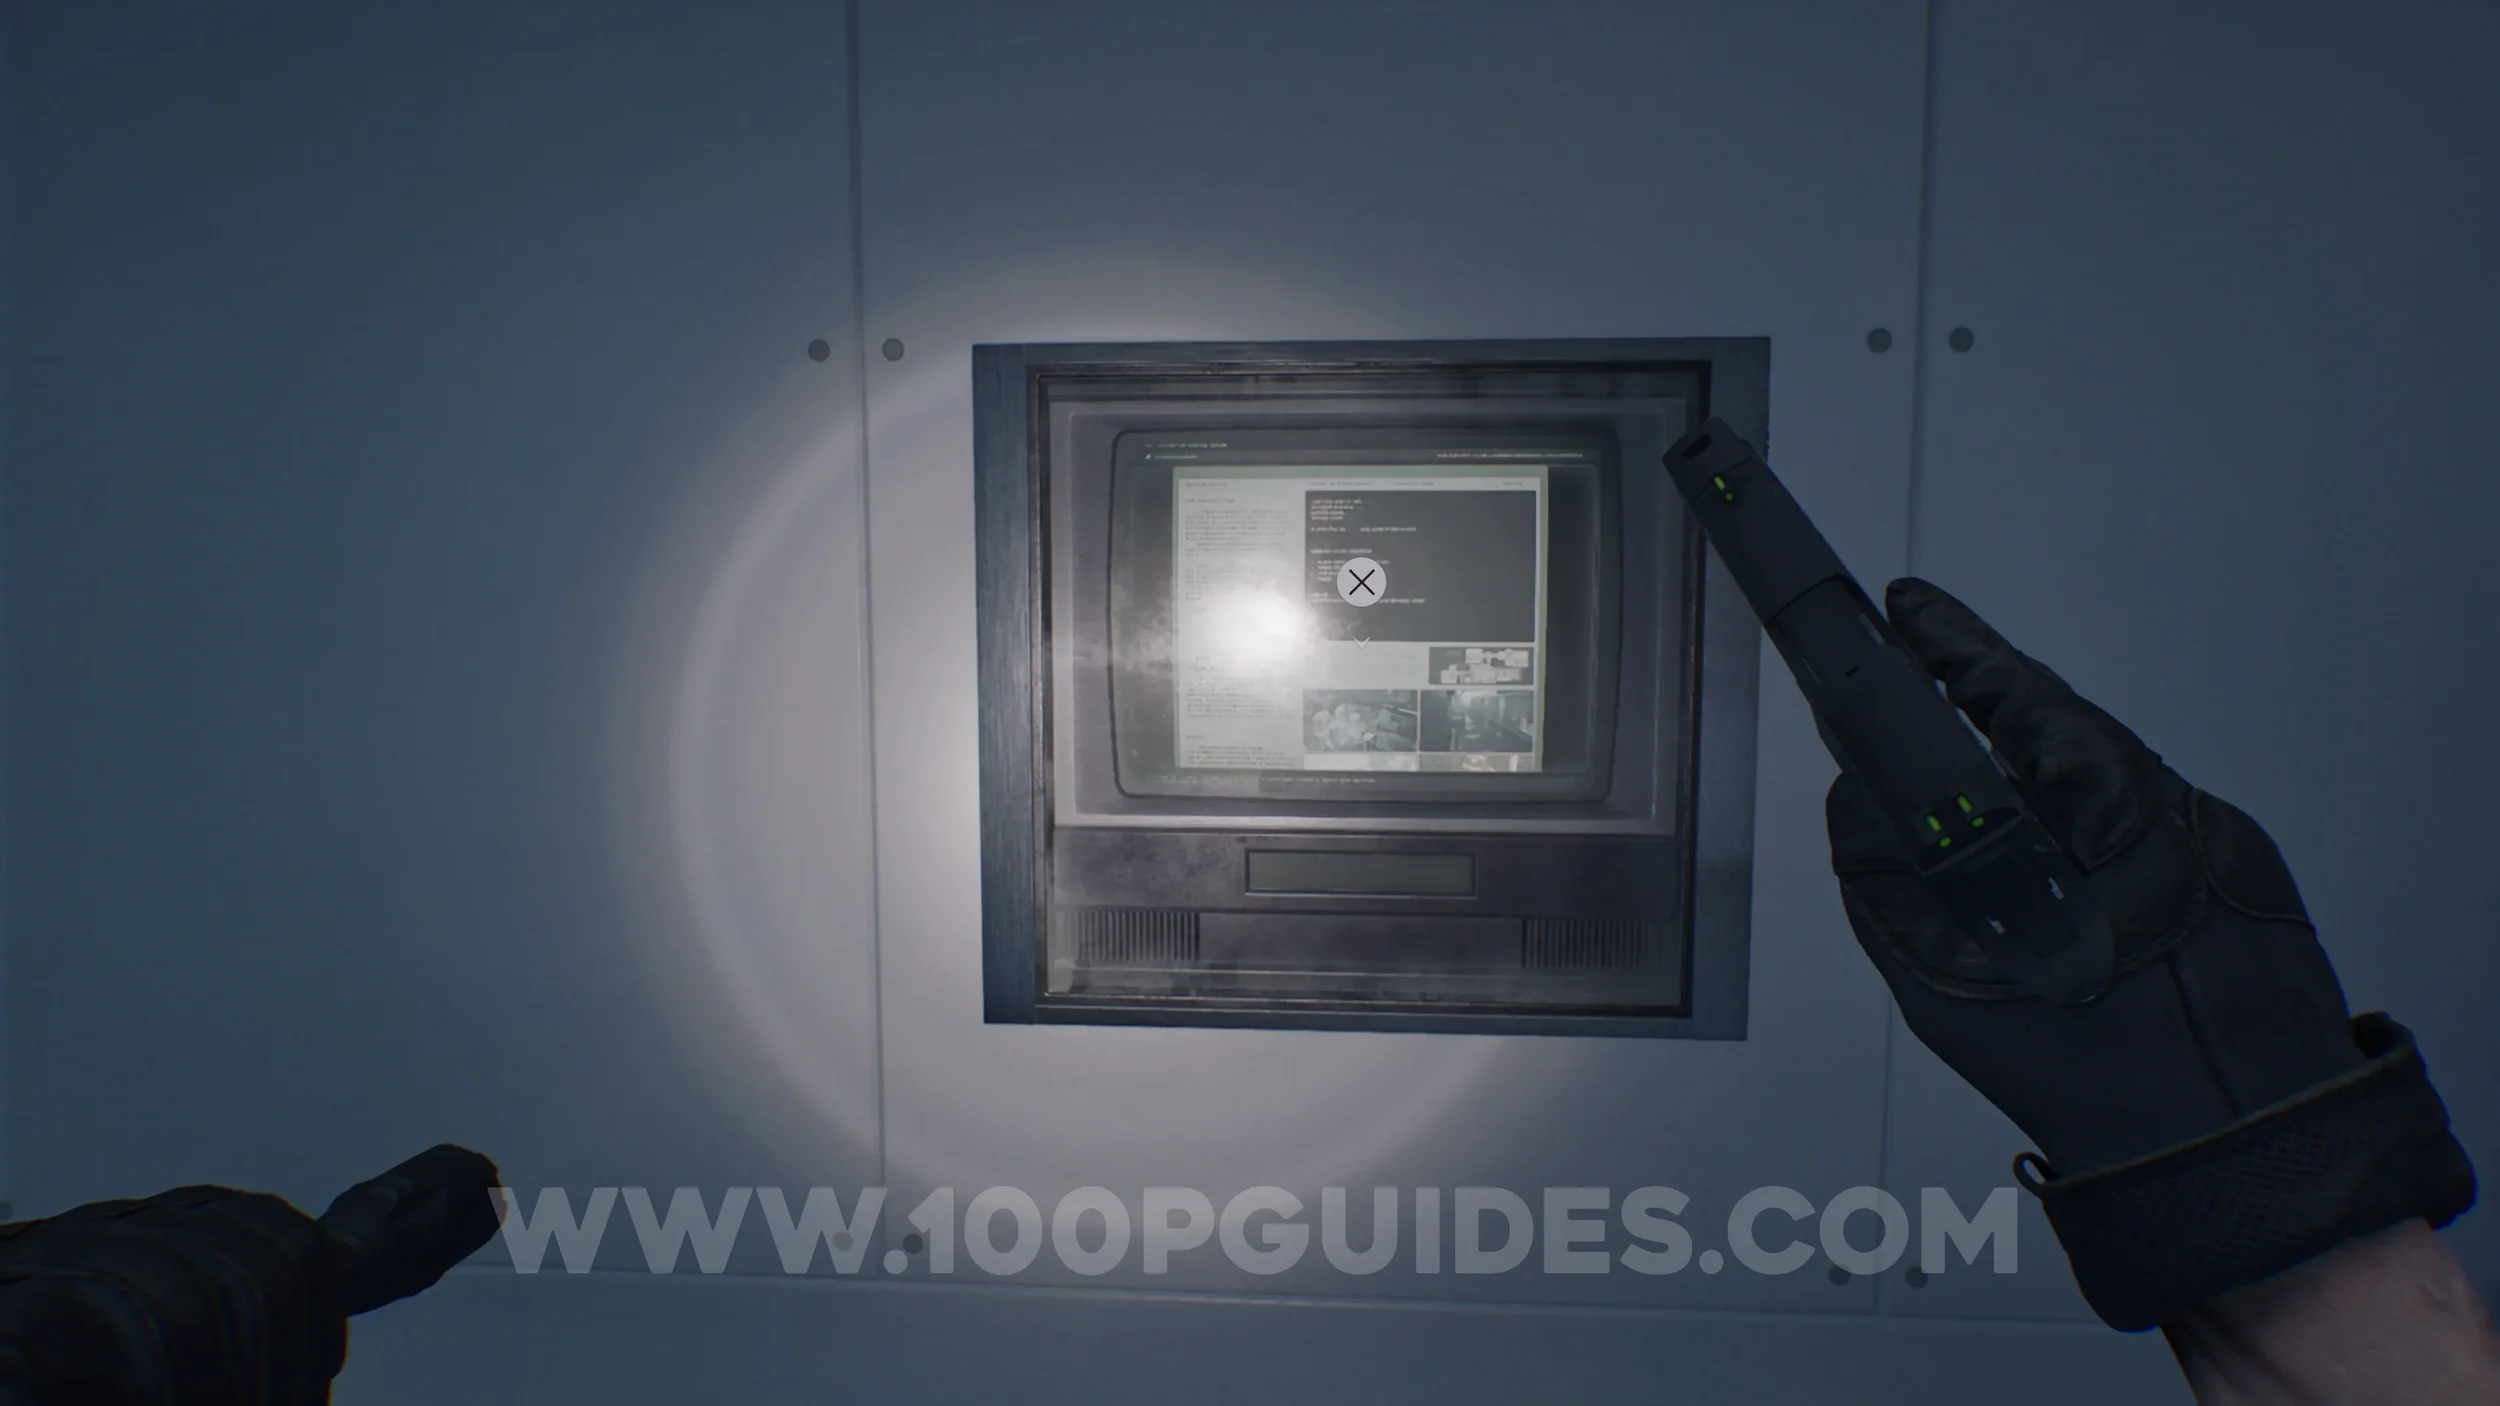
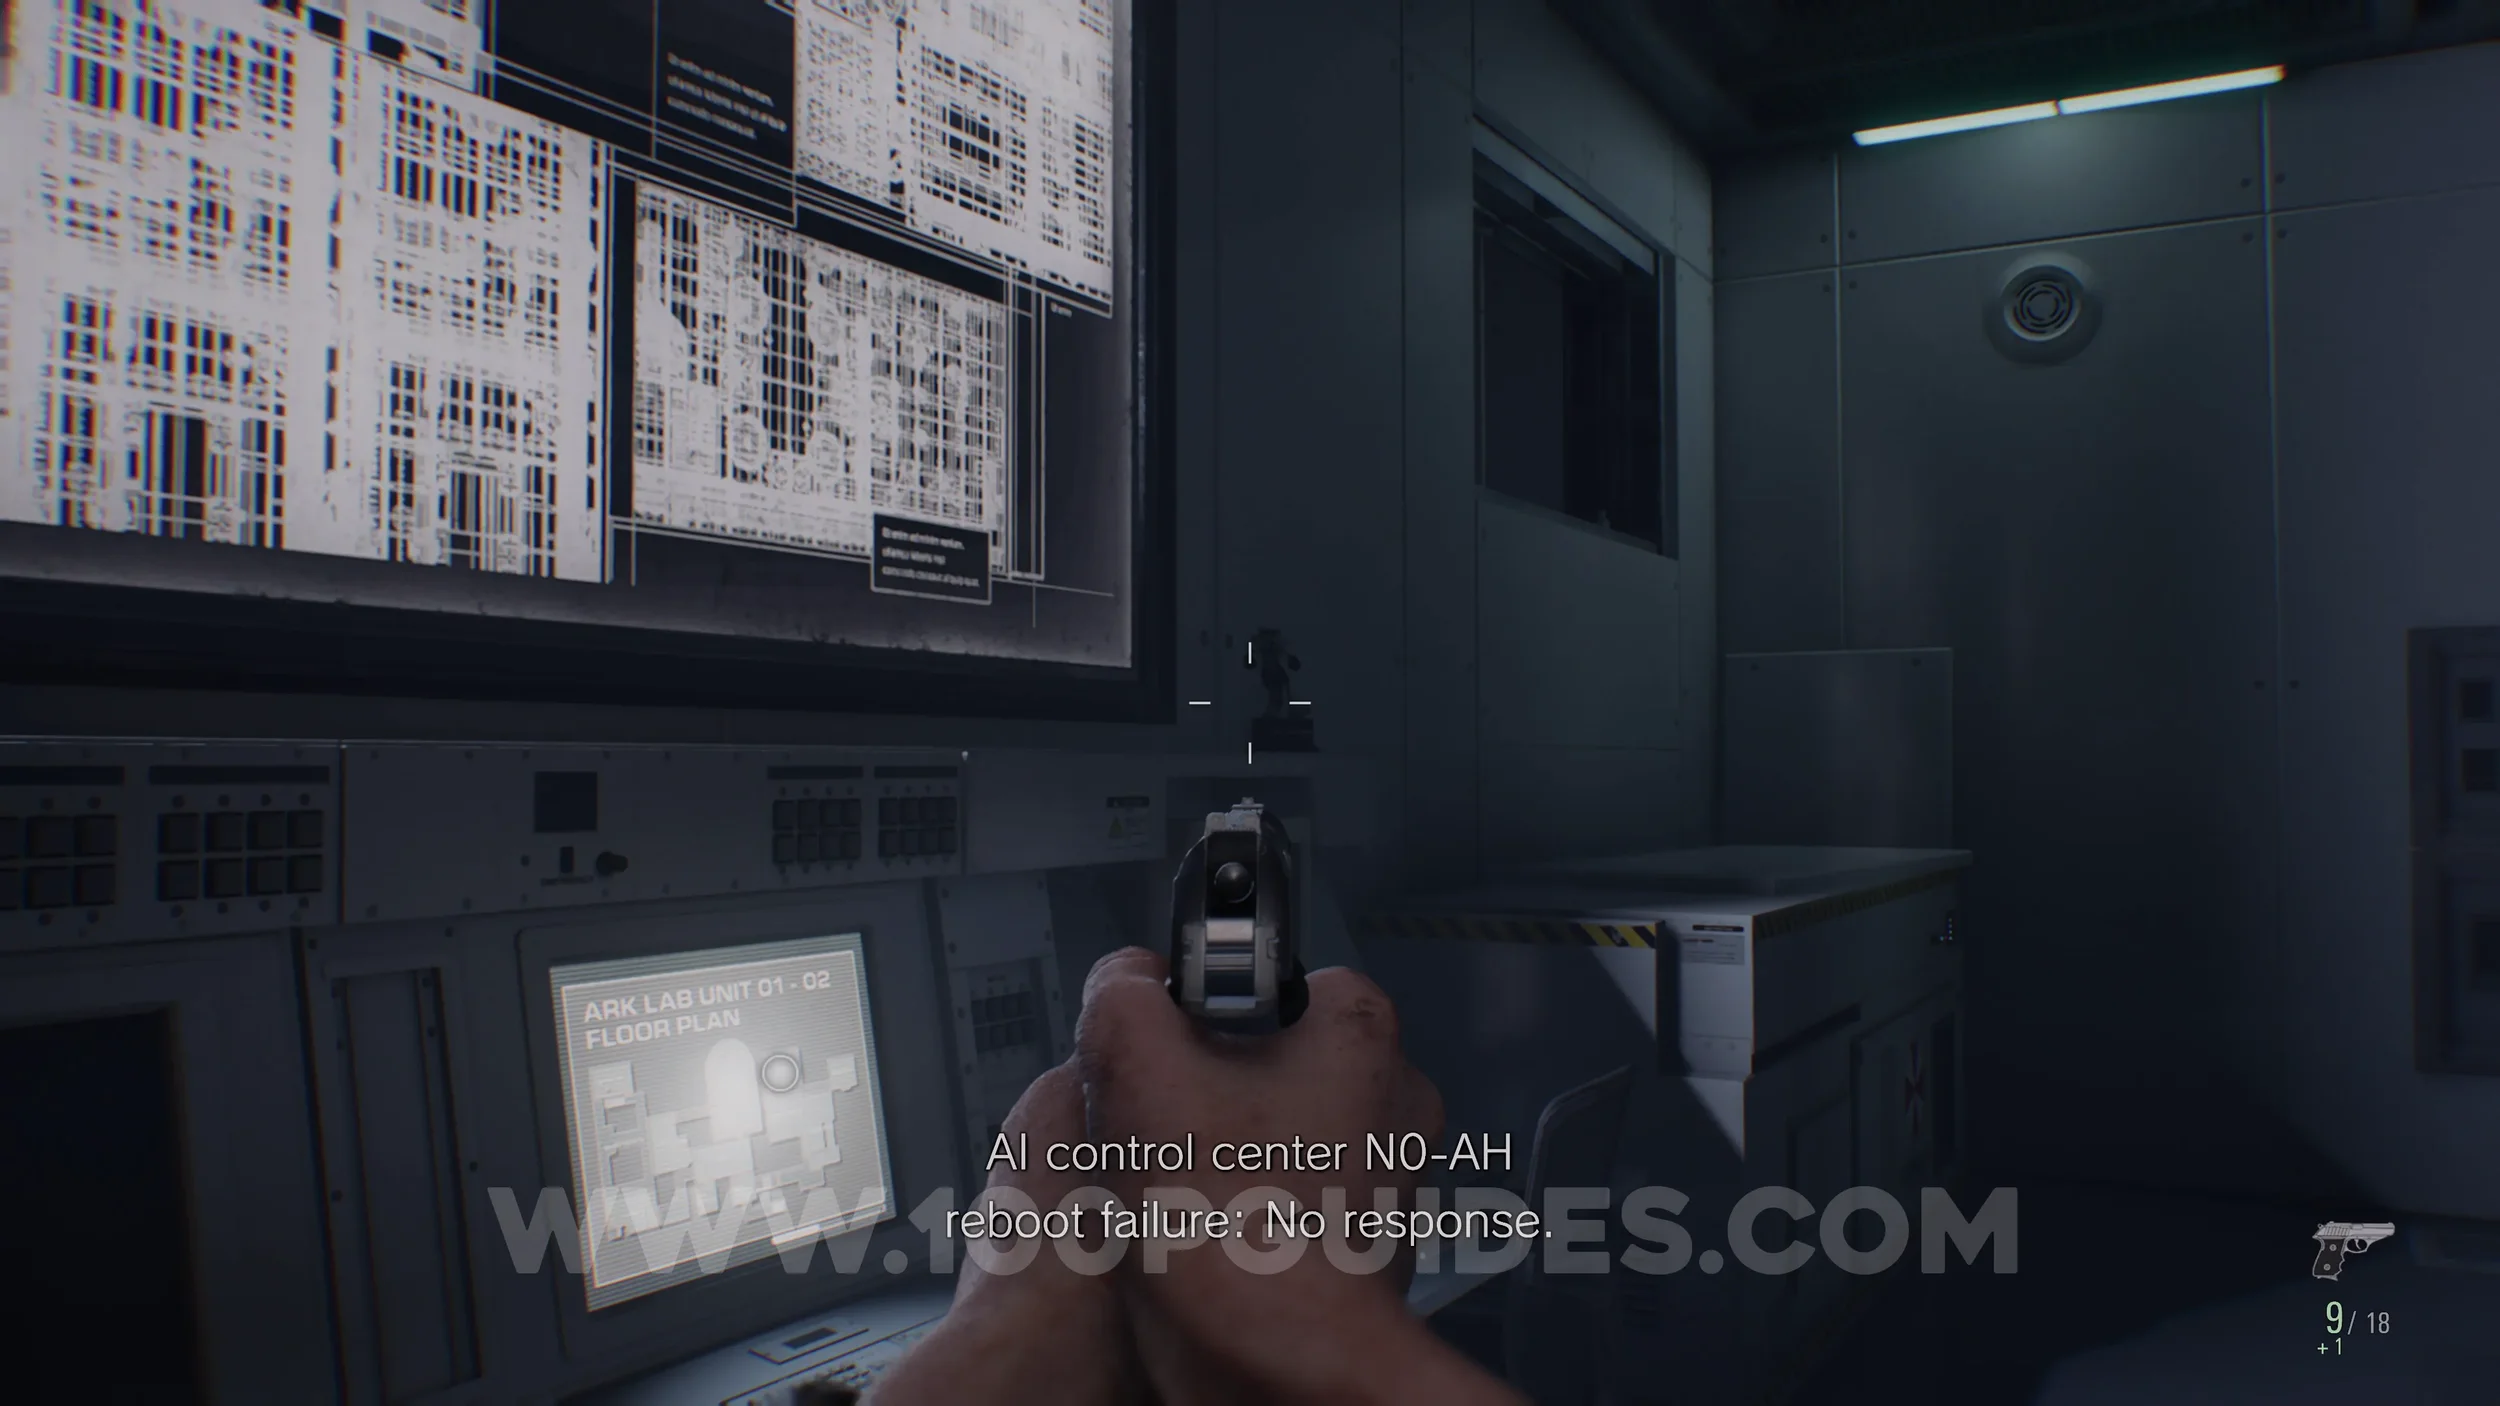
File #66 - N0-AH Status Report. Examine the screen on the wall in the Staff room close to the start of the area.
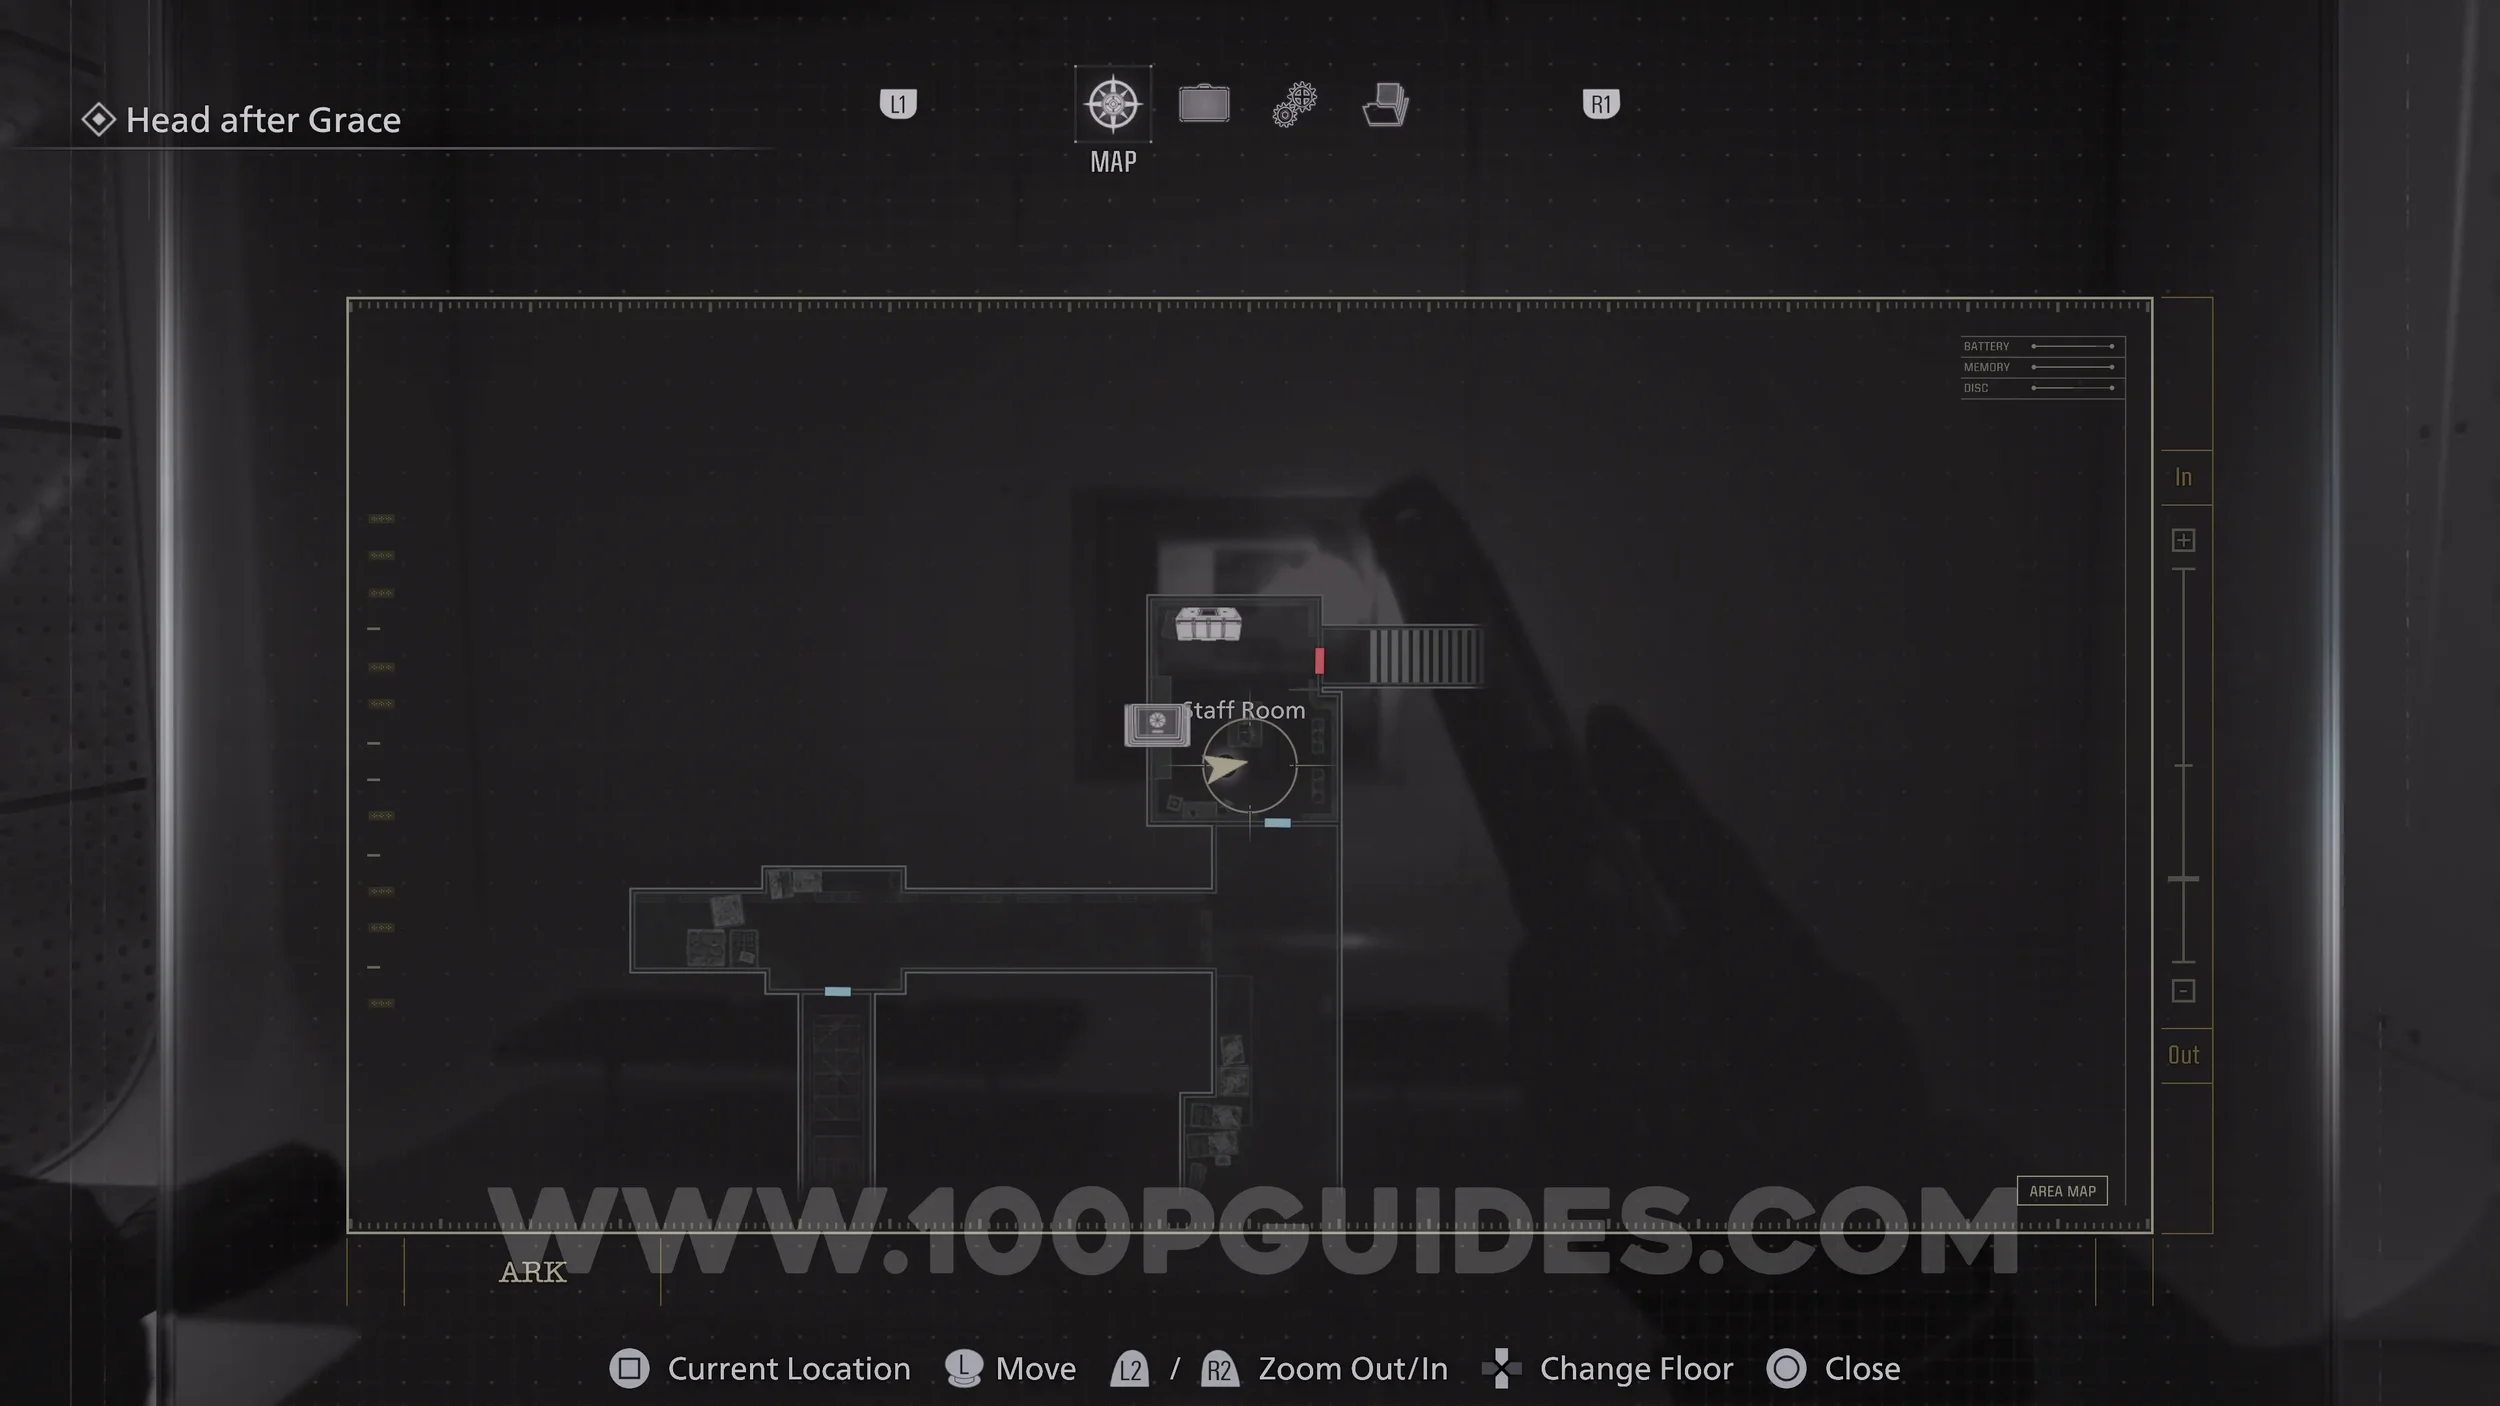
Mr. Raccoon #24. In the corridor to the south of the Staff Room.


File #67, File #68 & File #69. All three are found on screens around the Guest Lounge. After going up stairs, go through the door on your right just before the boss fight.


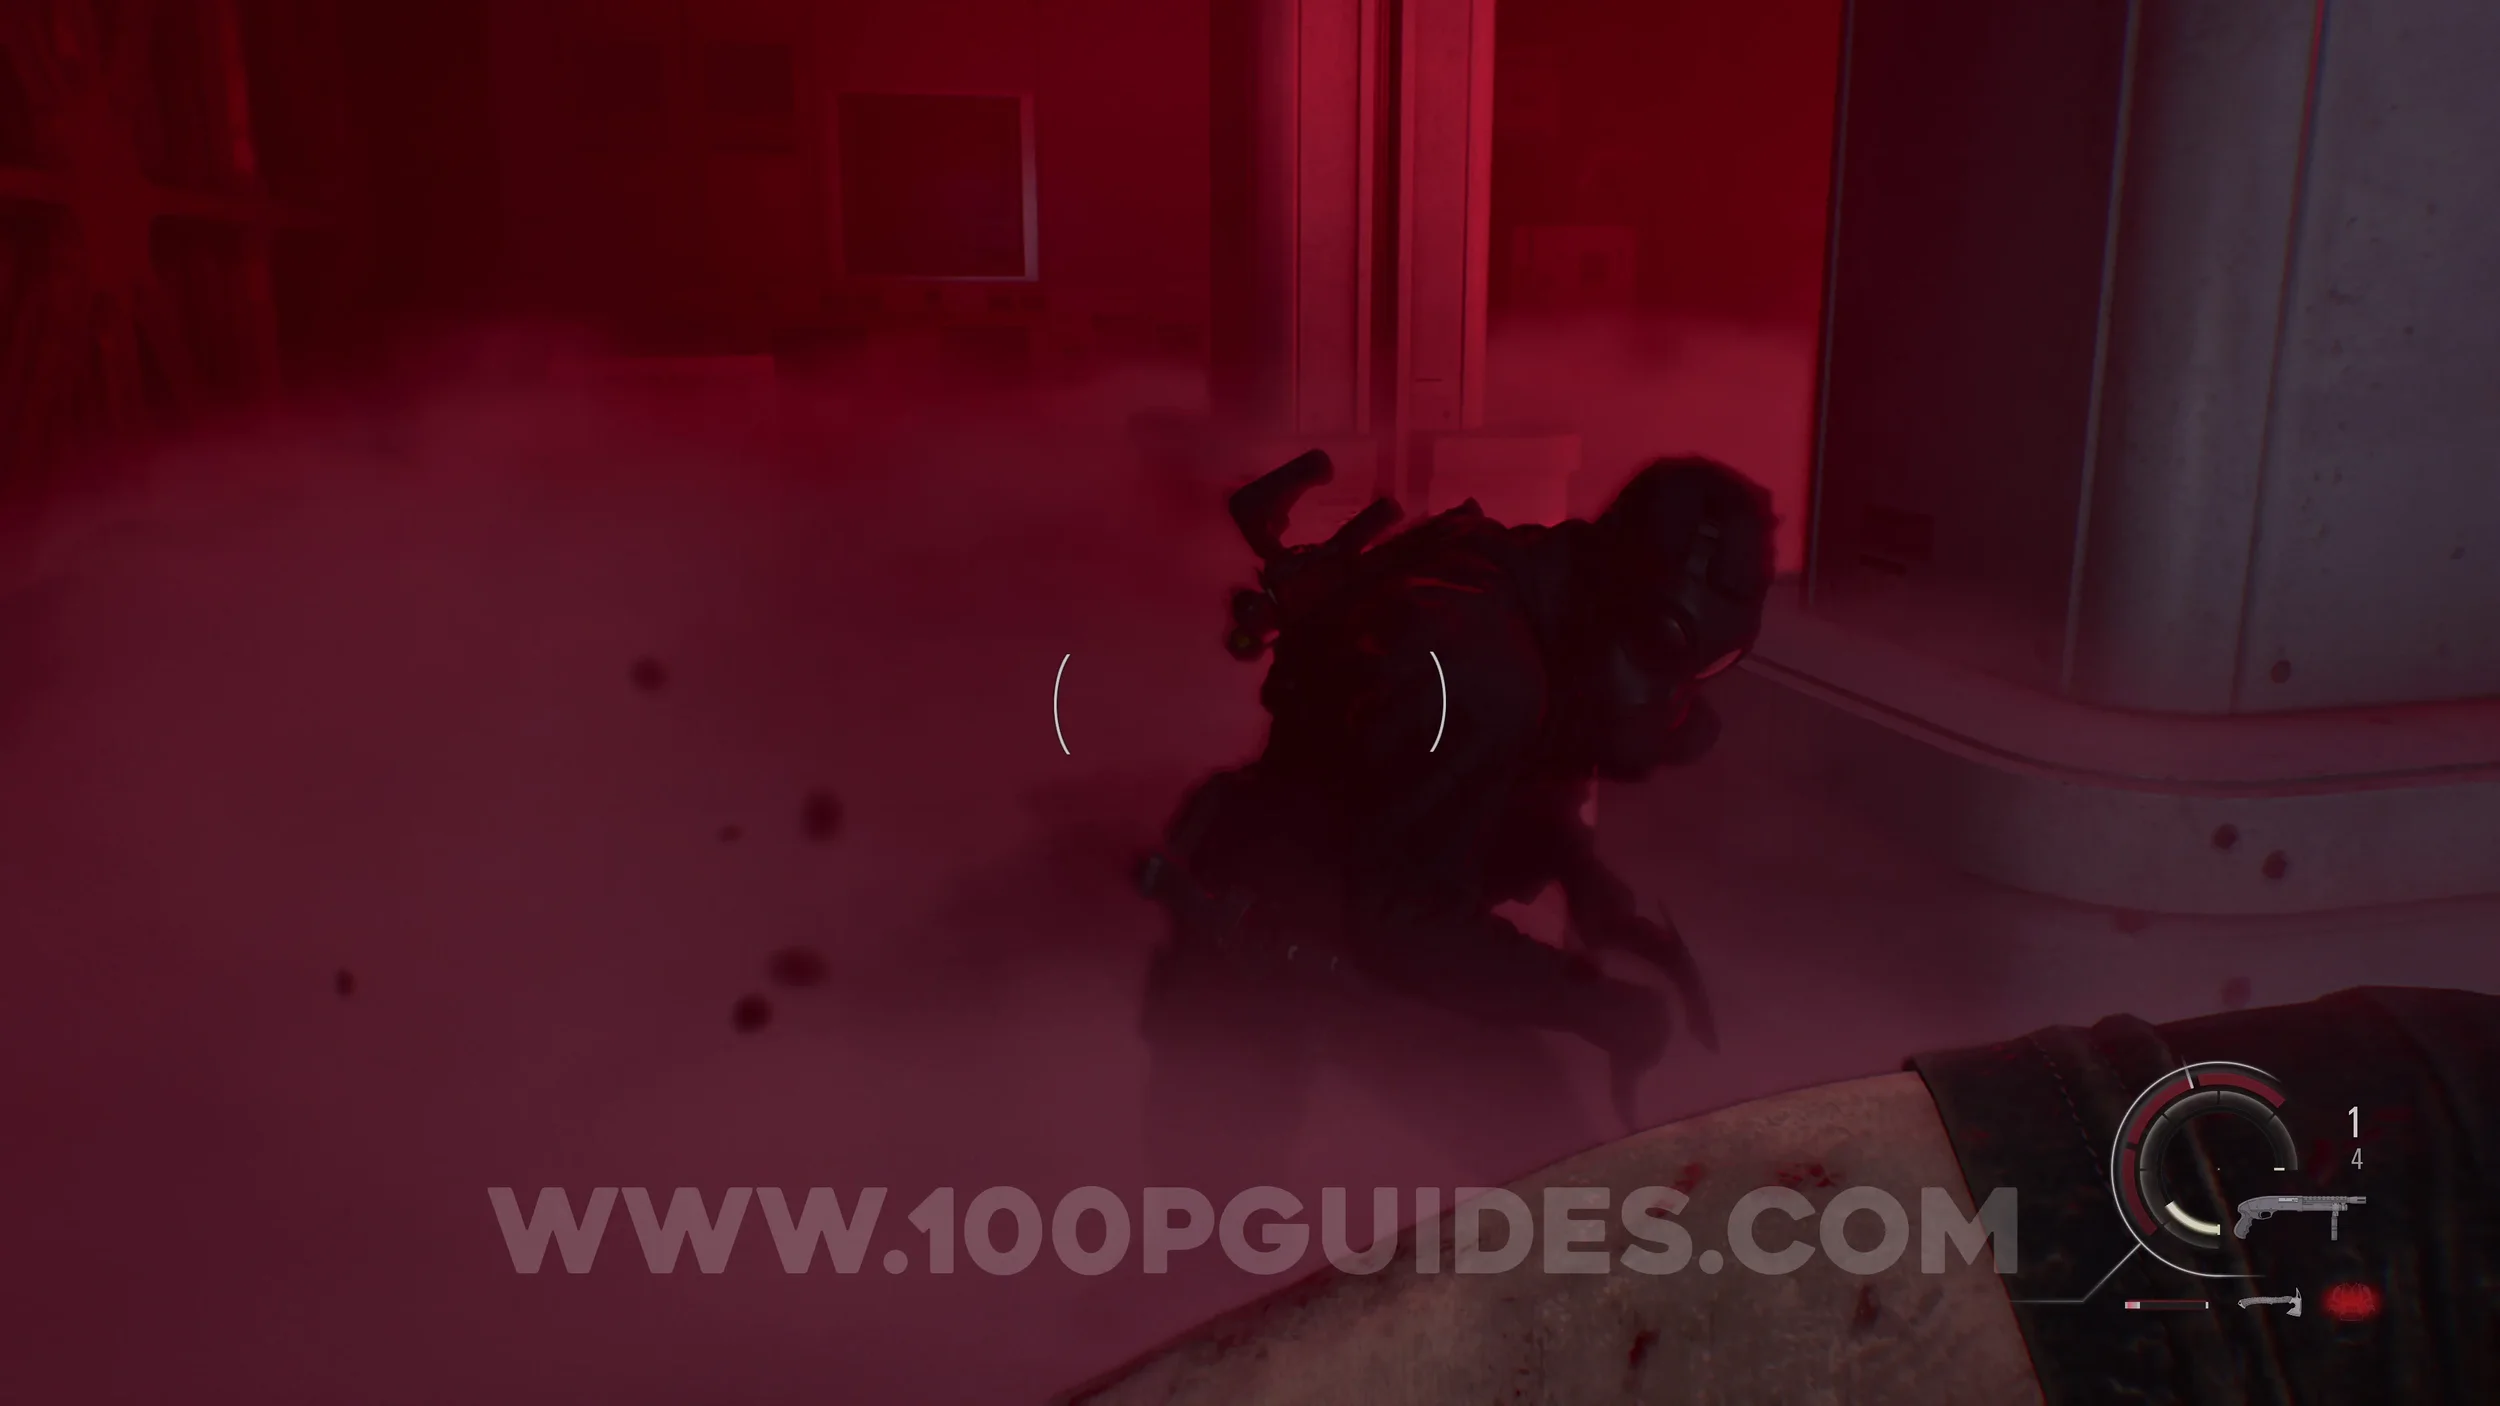
Weapon - Mortal Edge. Dropped by the Commander boss.
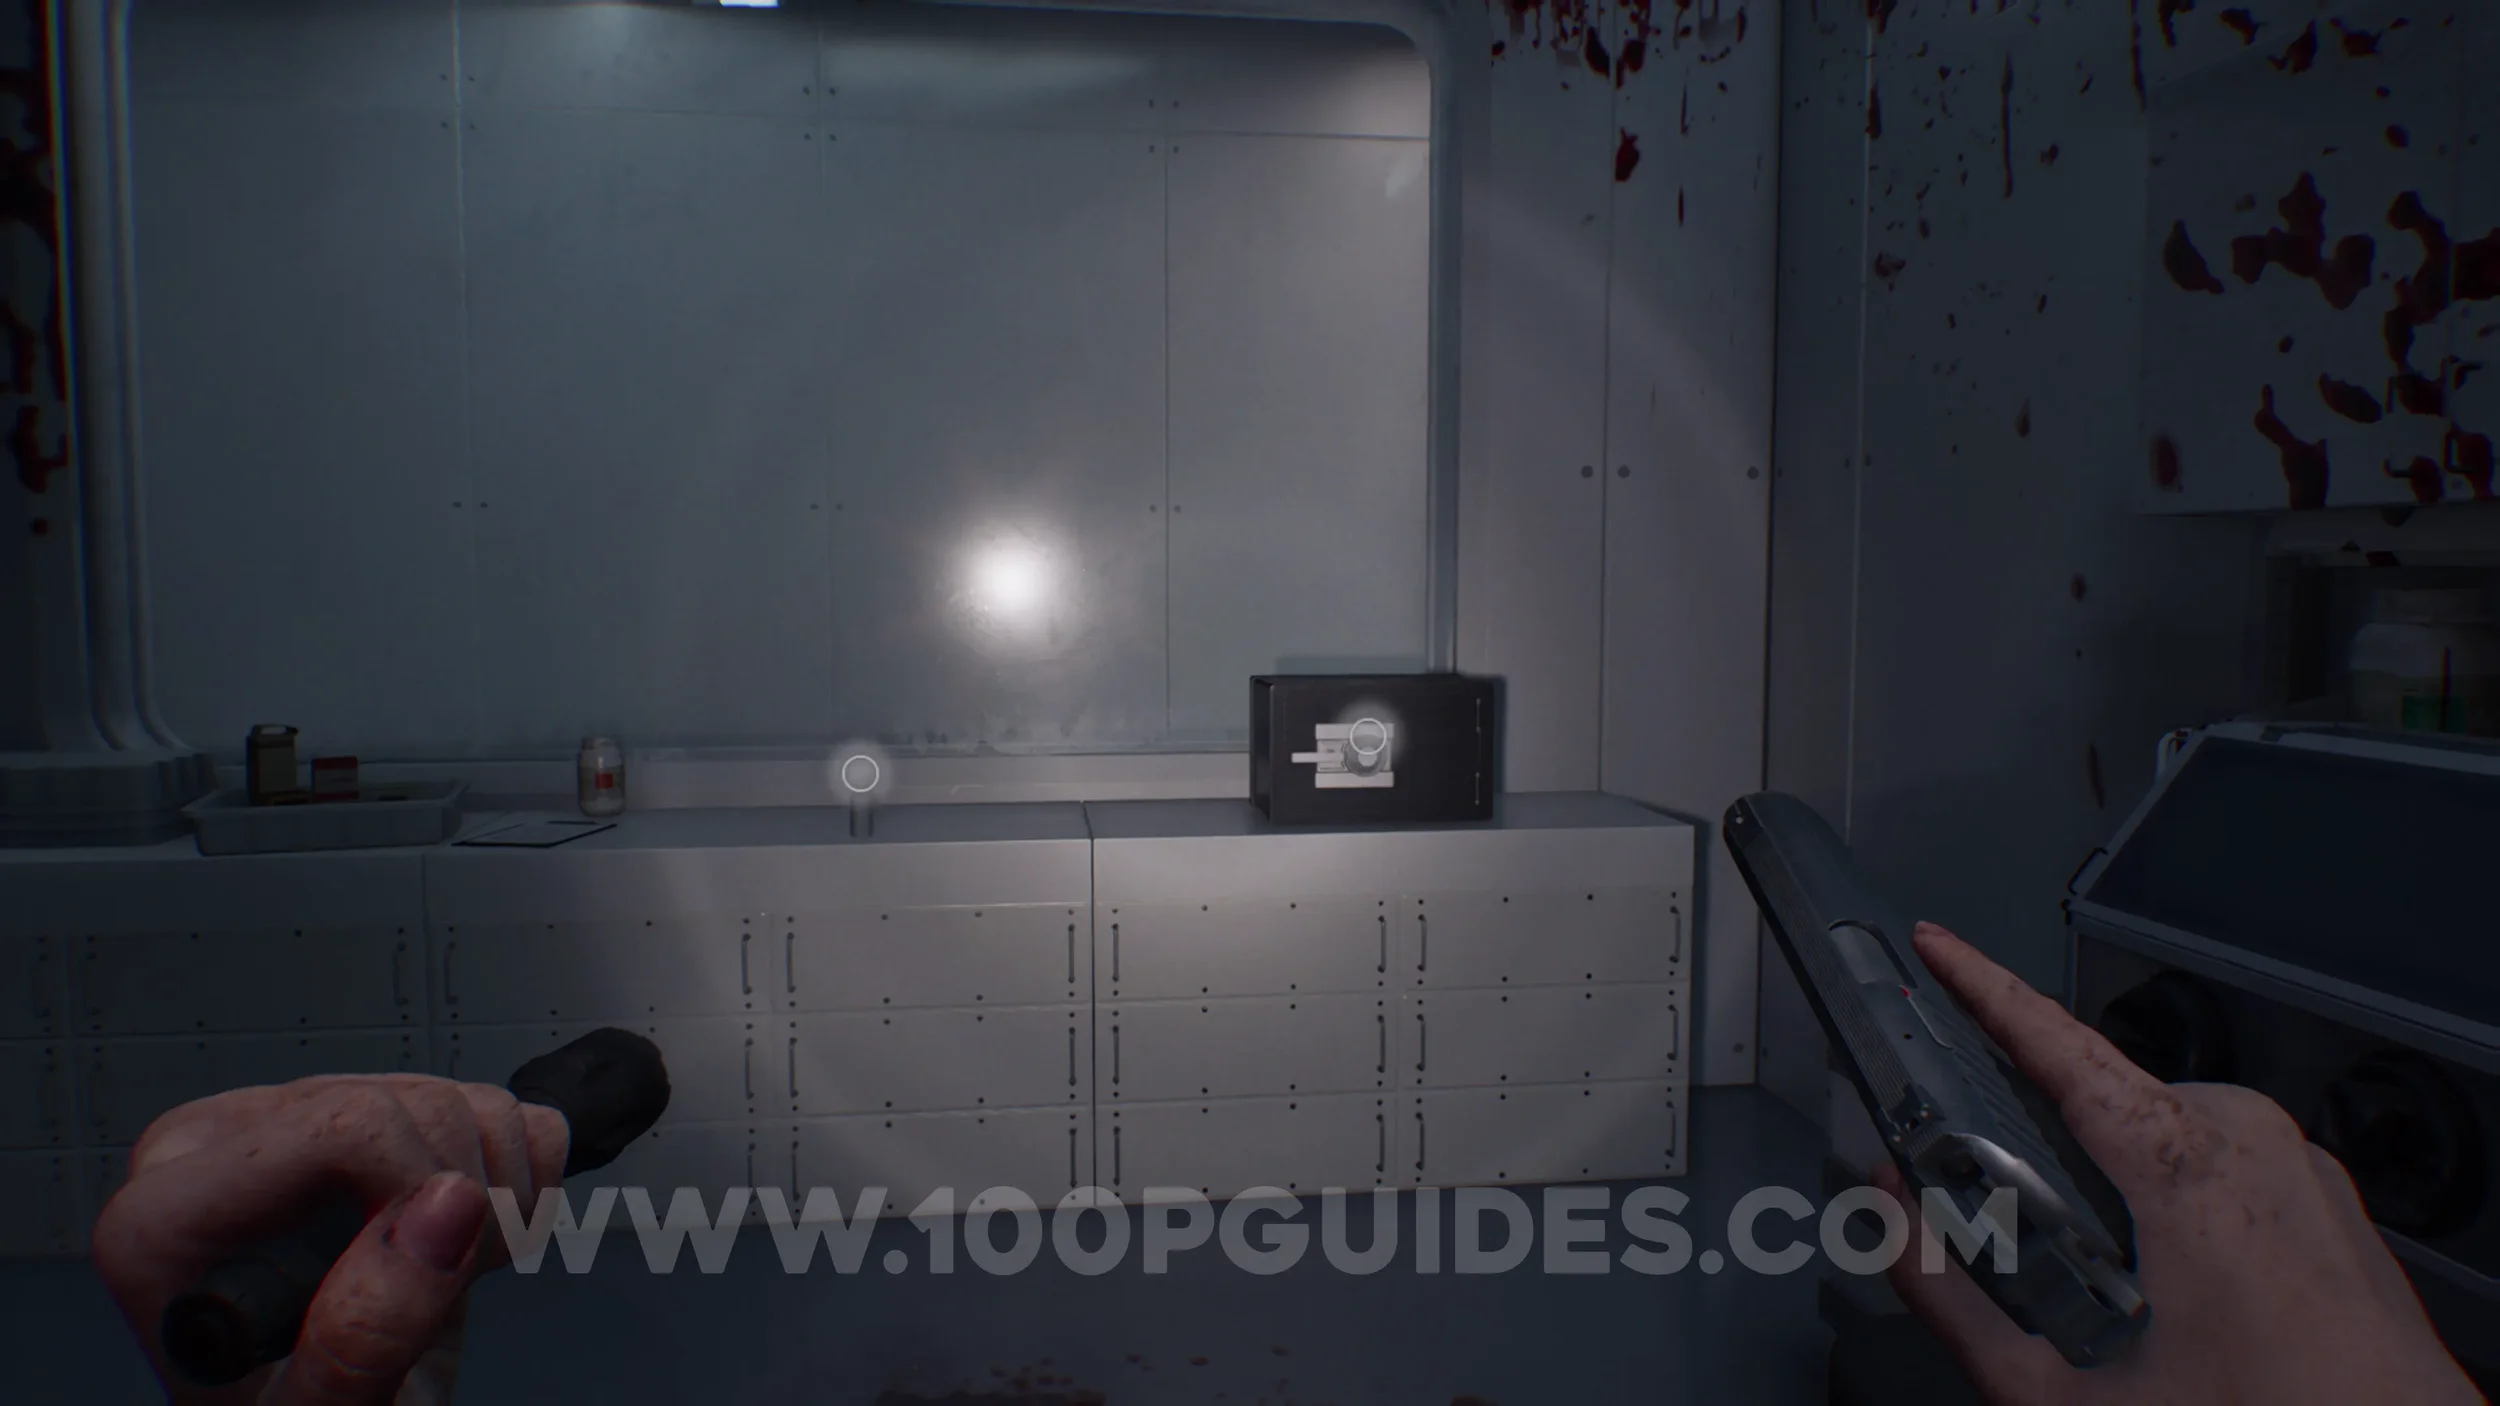
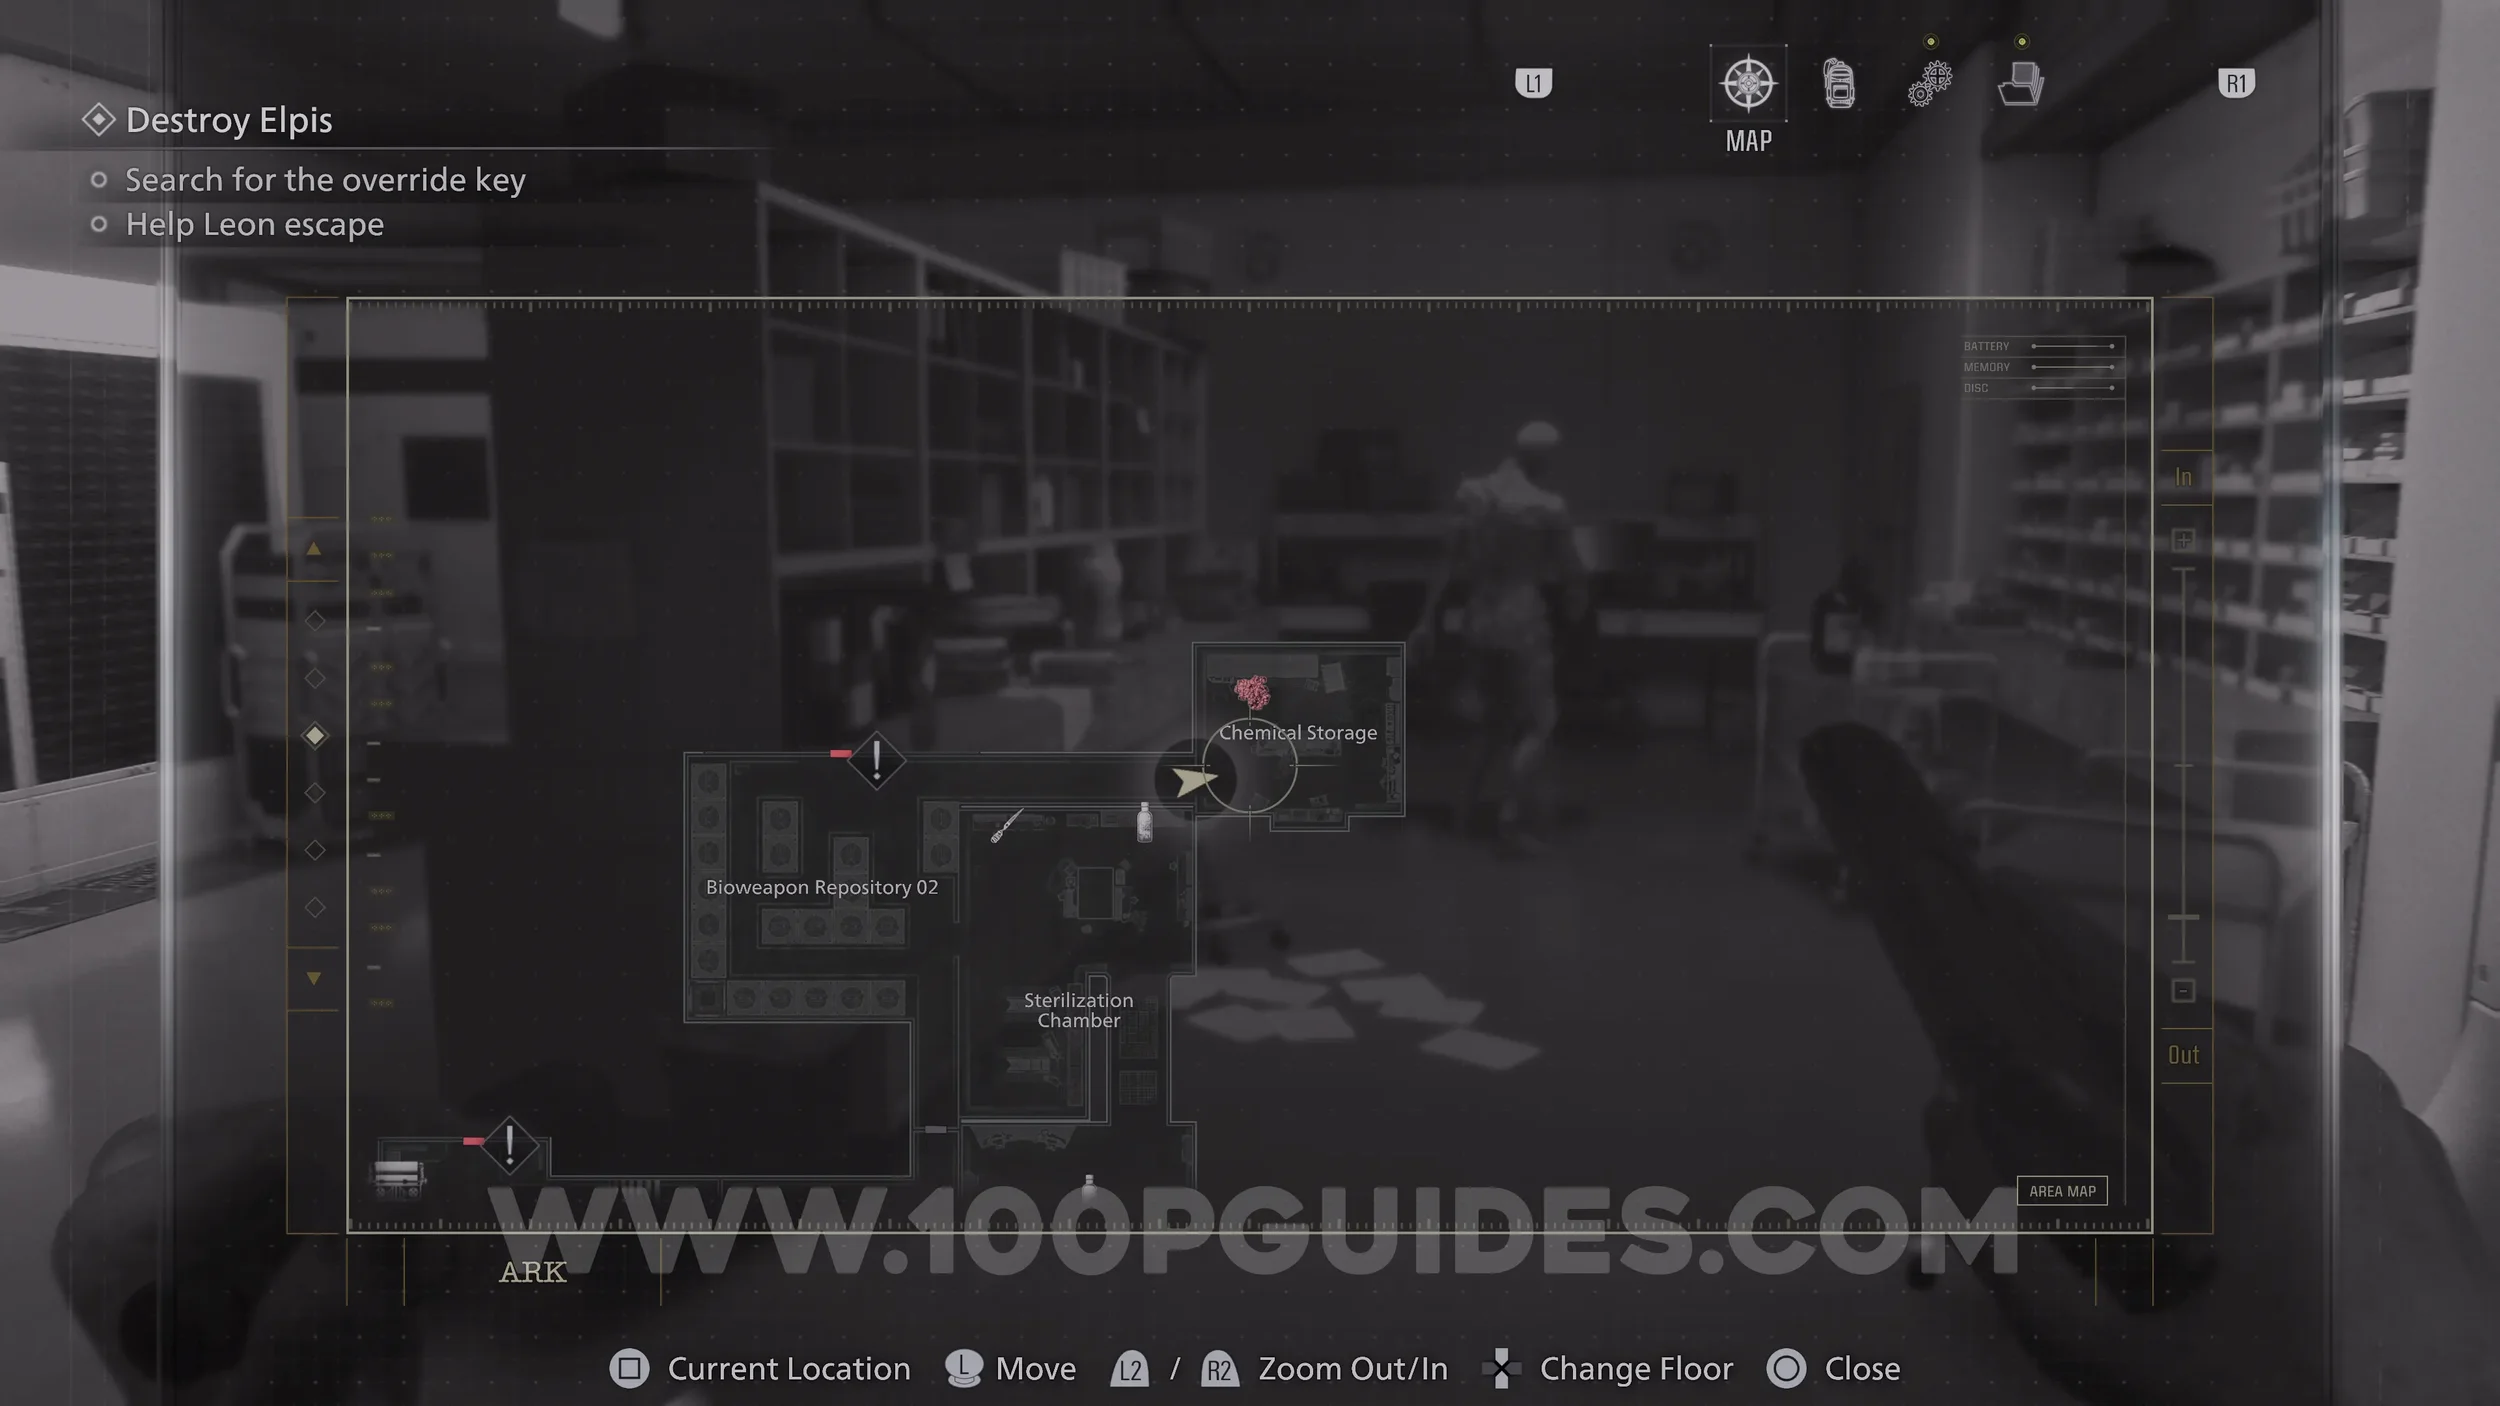
Safe #4. Once you take control of Grace in the Ark, continue until you get to the Sterilization Chamber to find the safe. Open it with code:
Casual/Standard:
10 Right, 90 Left, 20 Right
Insanity:
80 Left, 50 Right, 0 Left

Weapon - Bottle of Acid. Found in the Chemical Storage Room.

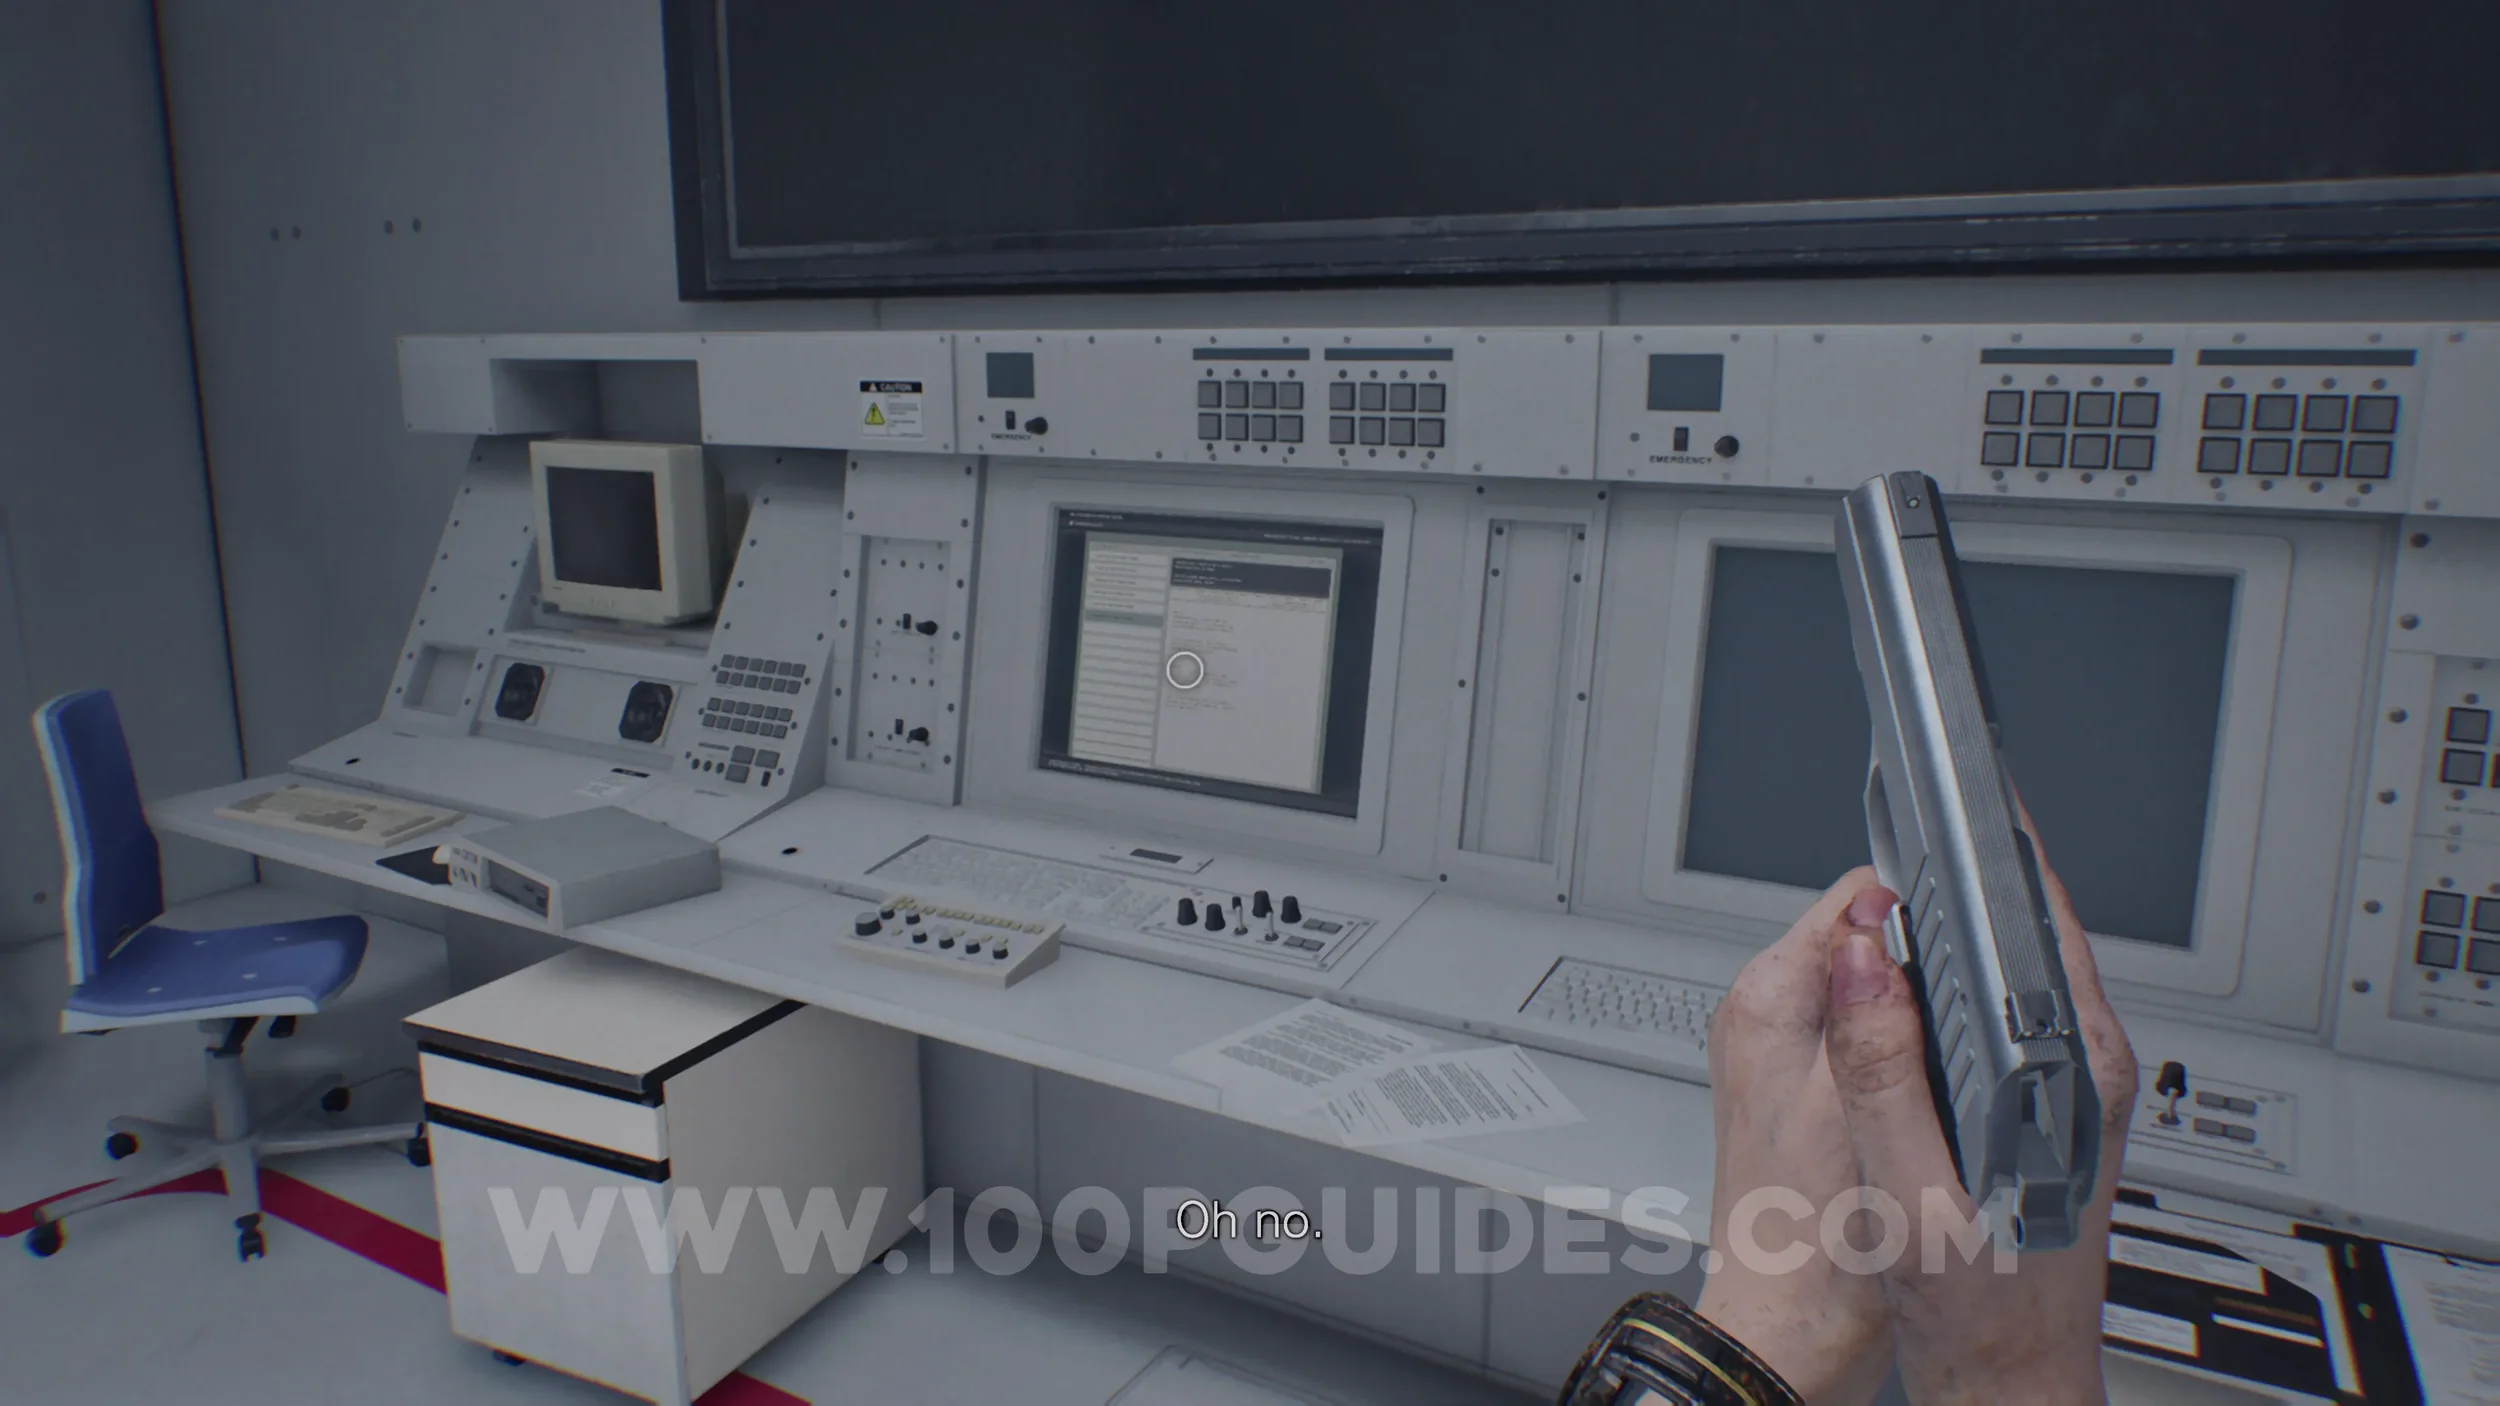
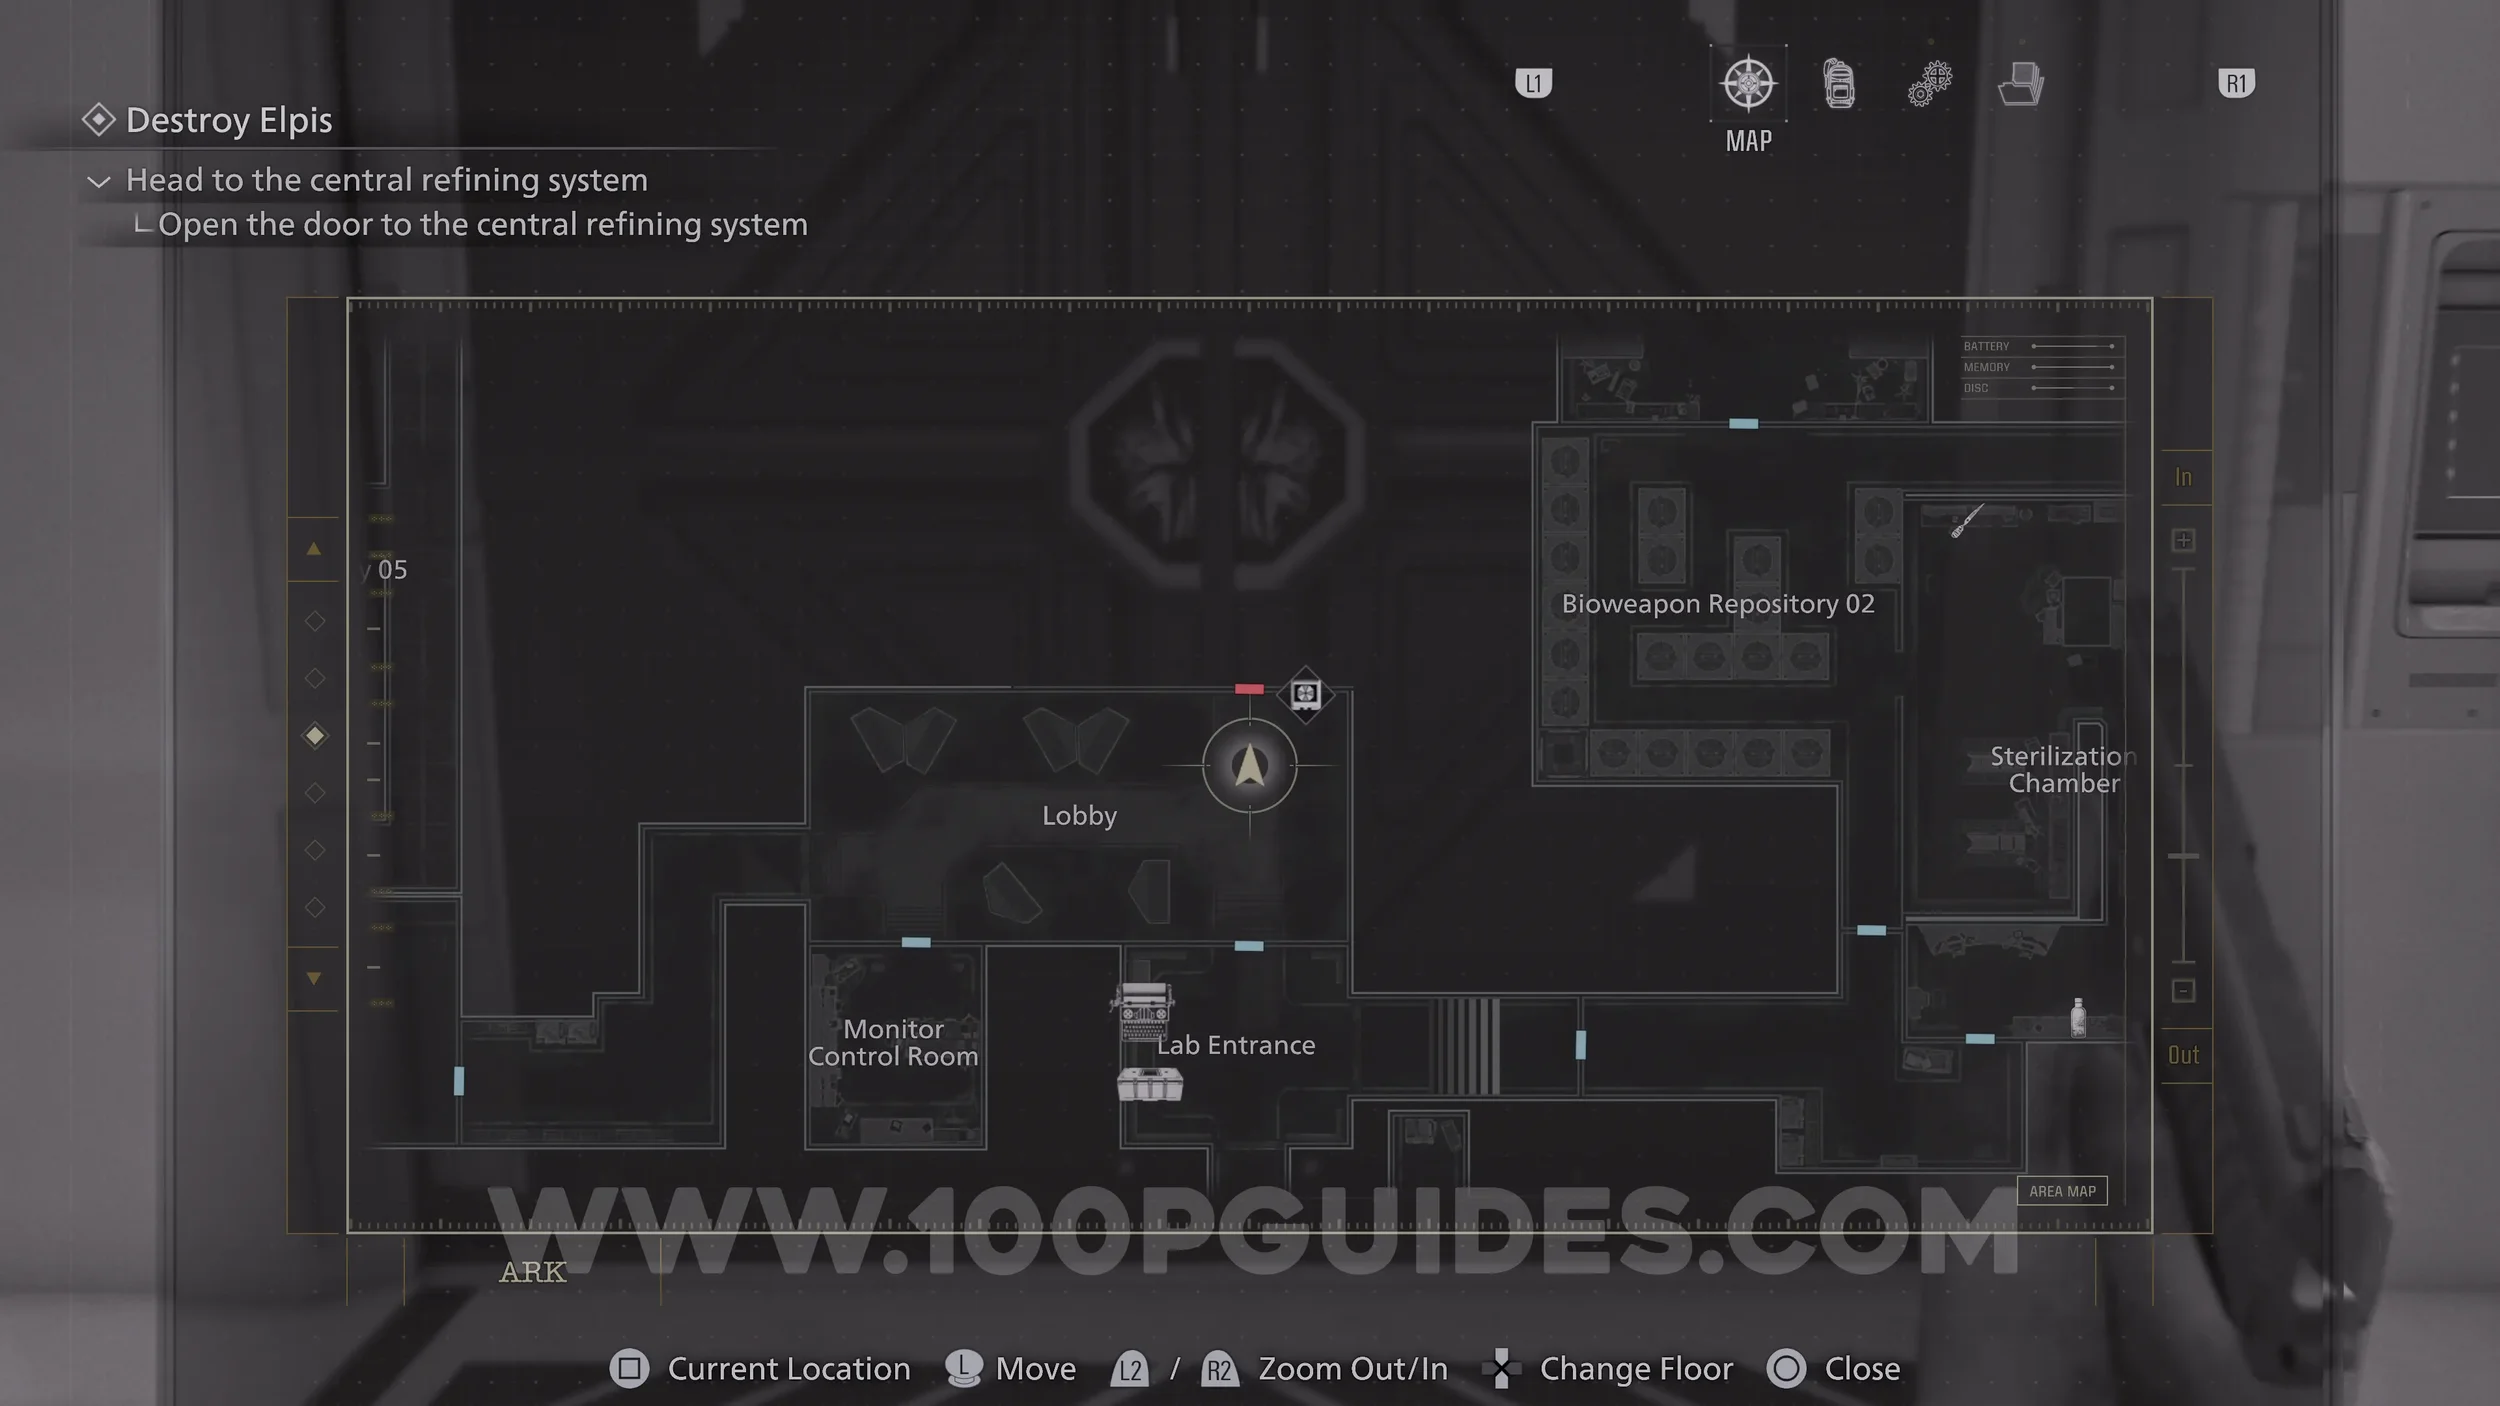
File #70 - Access Log: 51st Assembly Minutes. In the Monitor Control Room. This is the small room to the south of the Lobby.
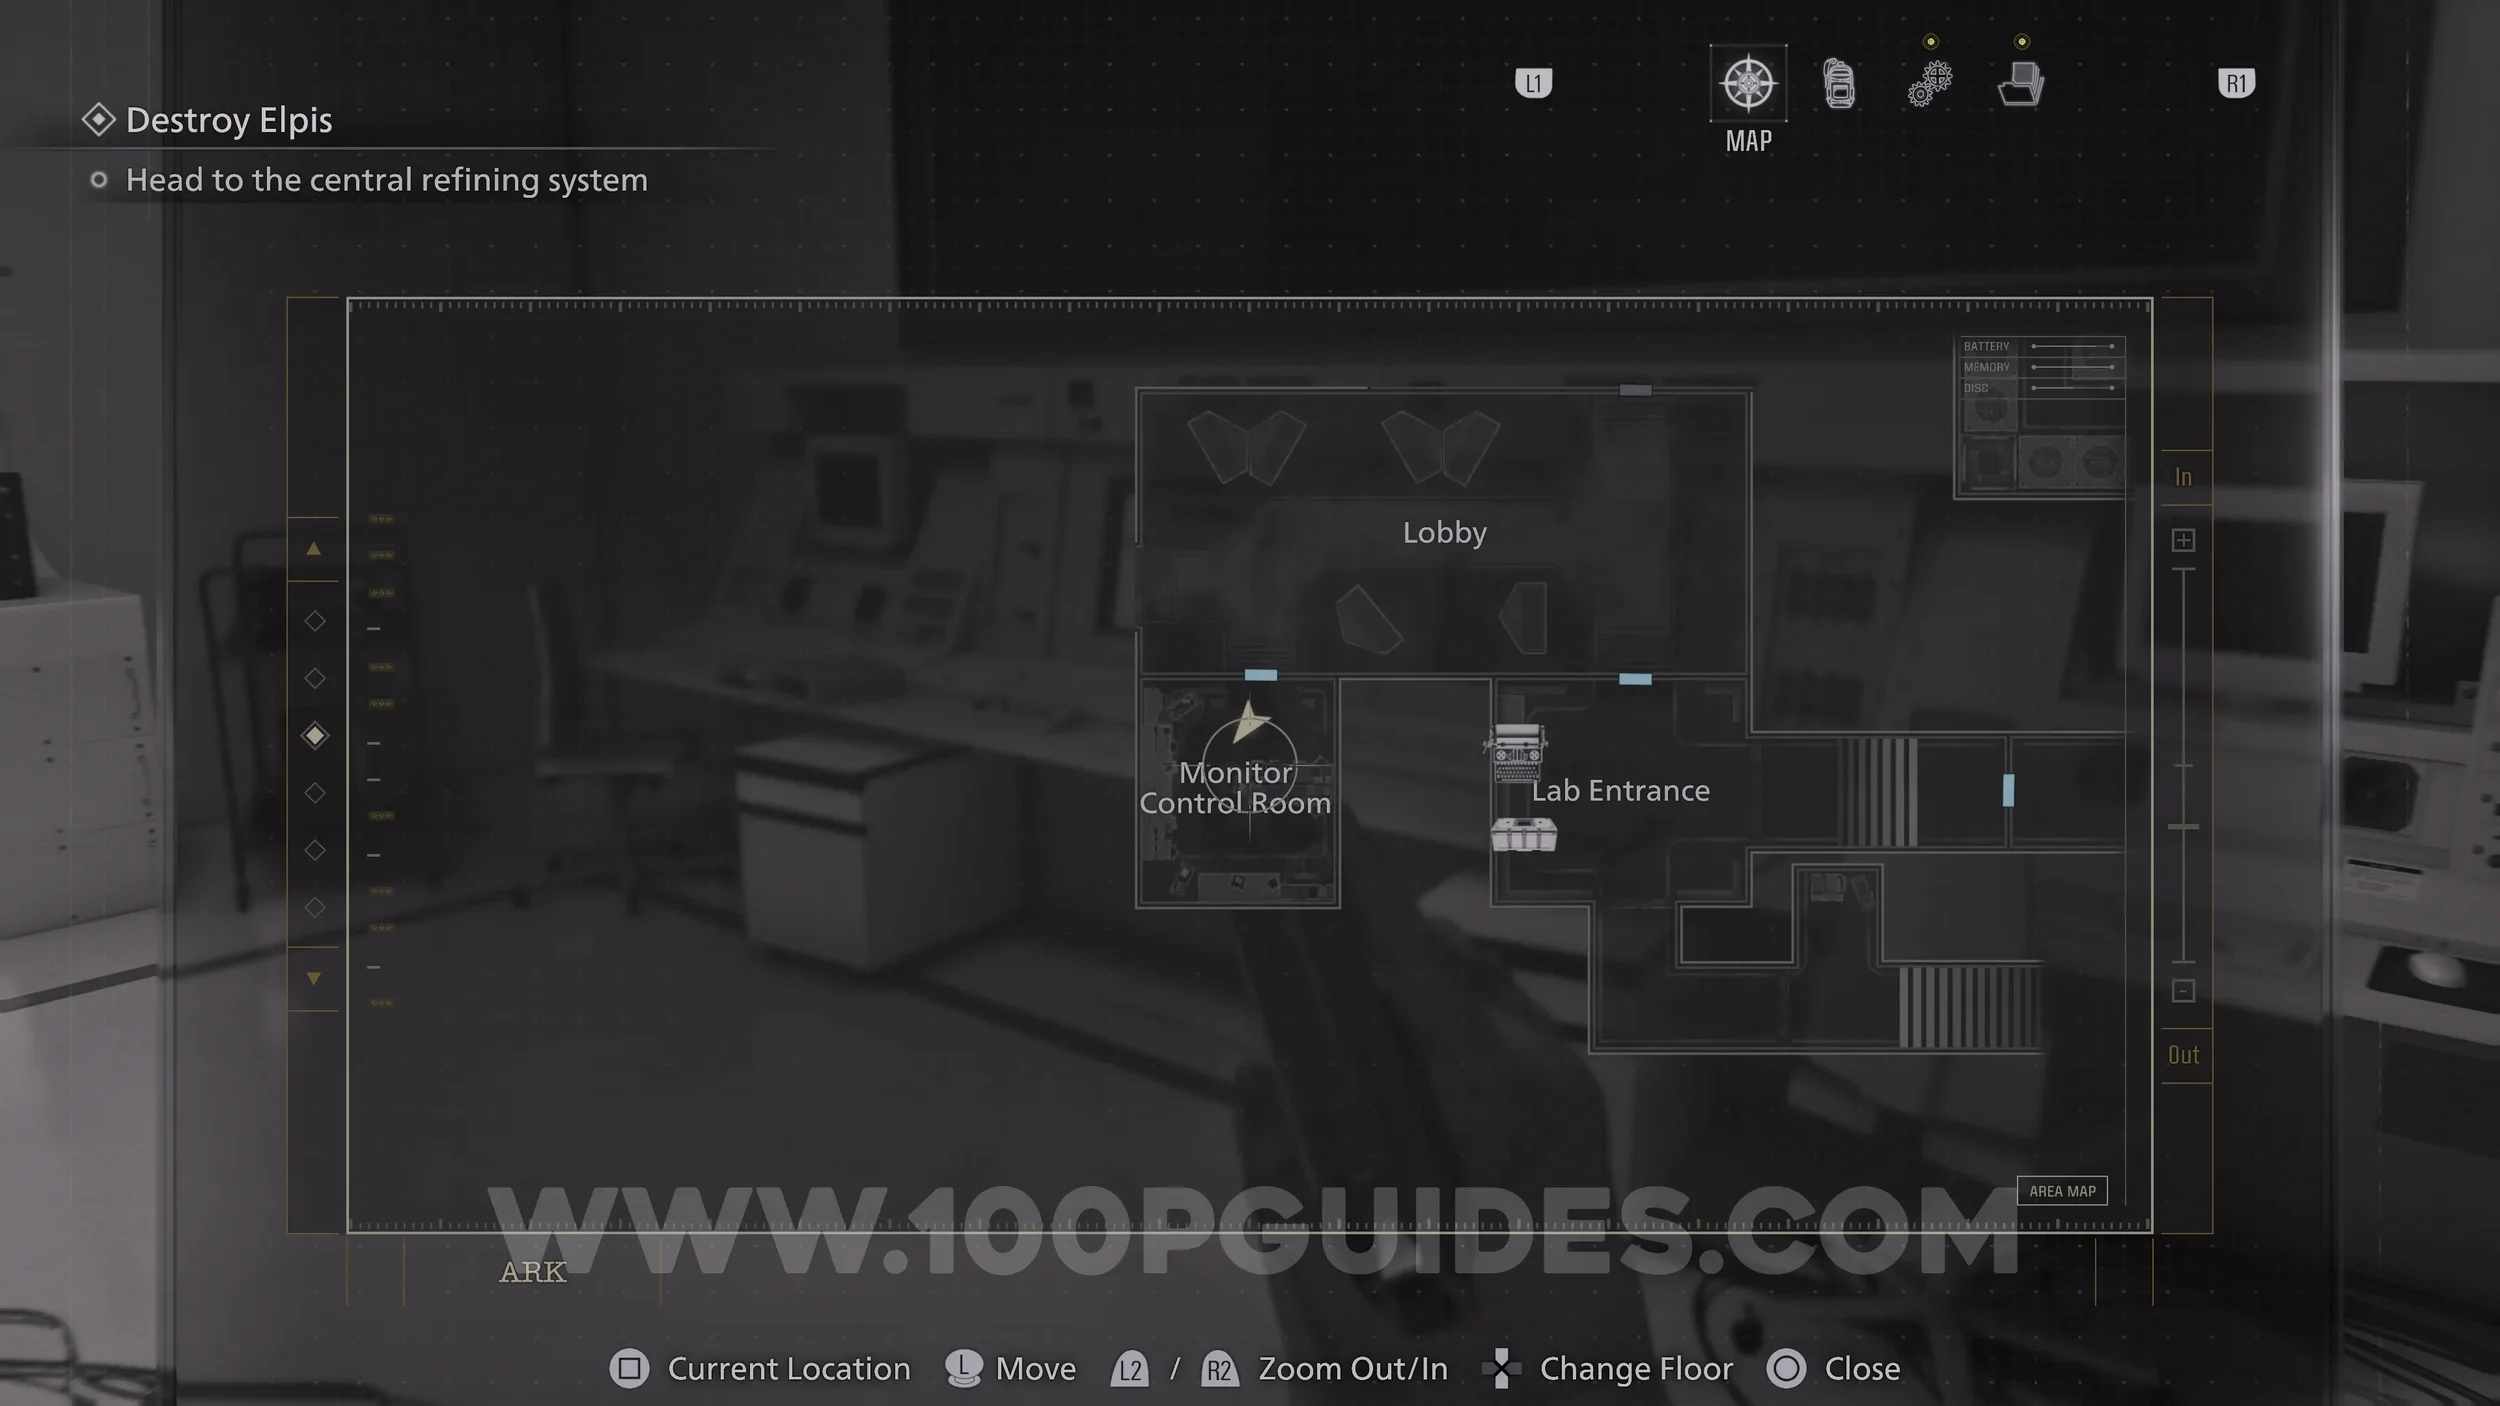
Safe #5. Found in the Monitor Control Room. Open it with code:
Casual/Standard:
50 Left, 60 Right, 80 Left
Insanity:
20 Right, 0 Left, 70 Right
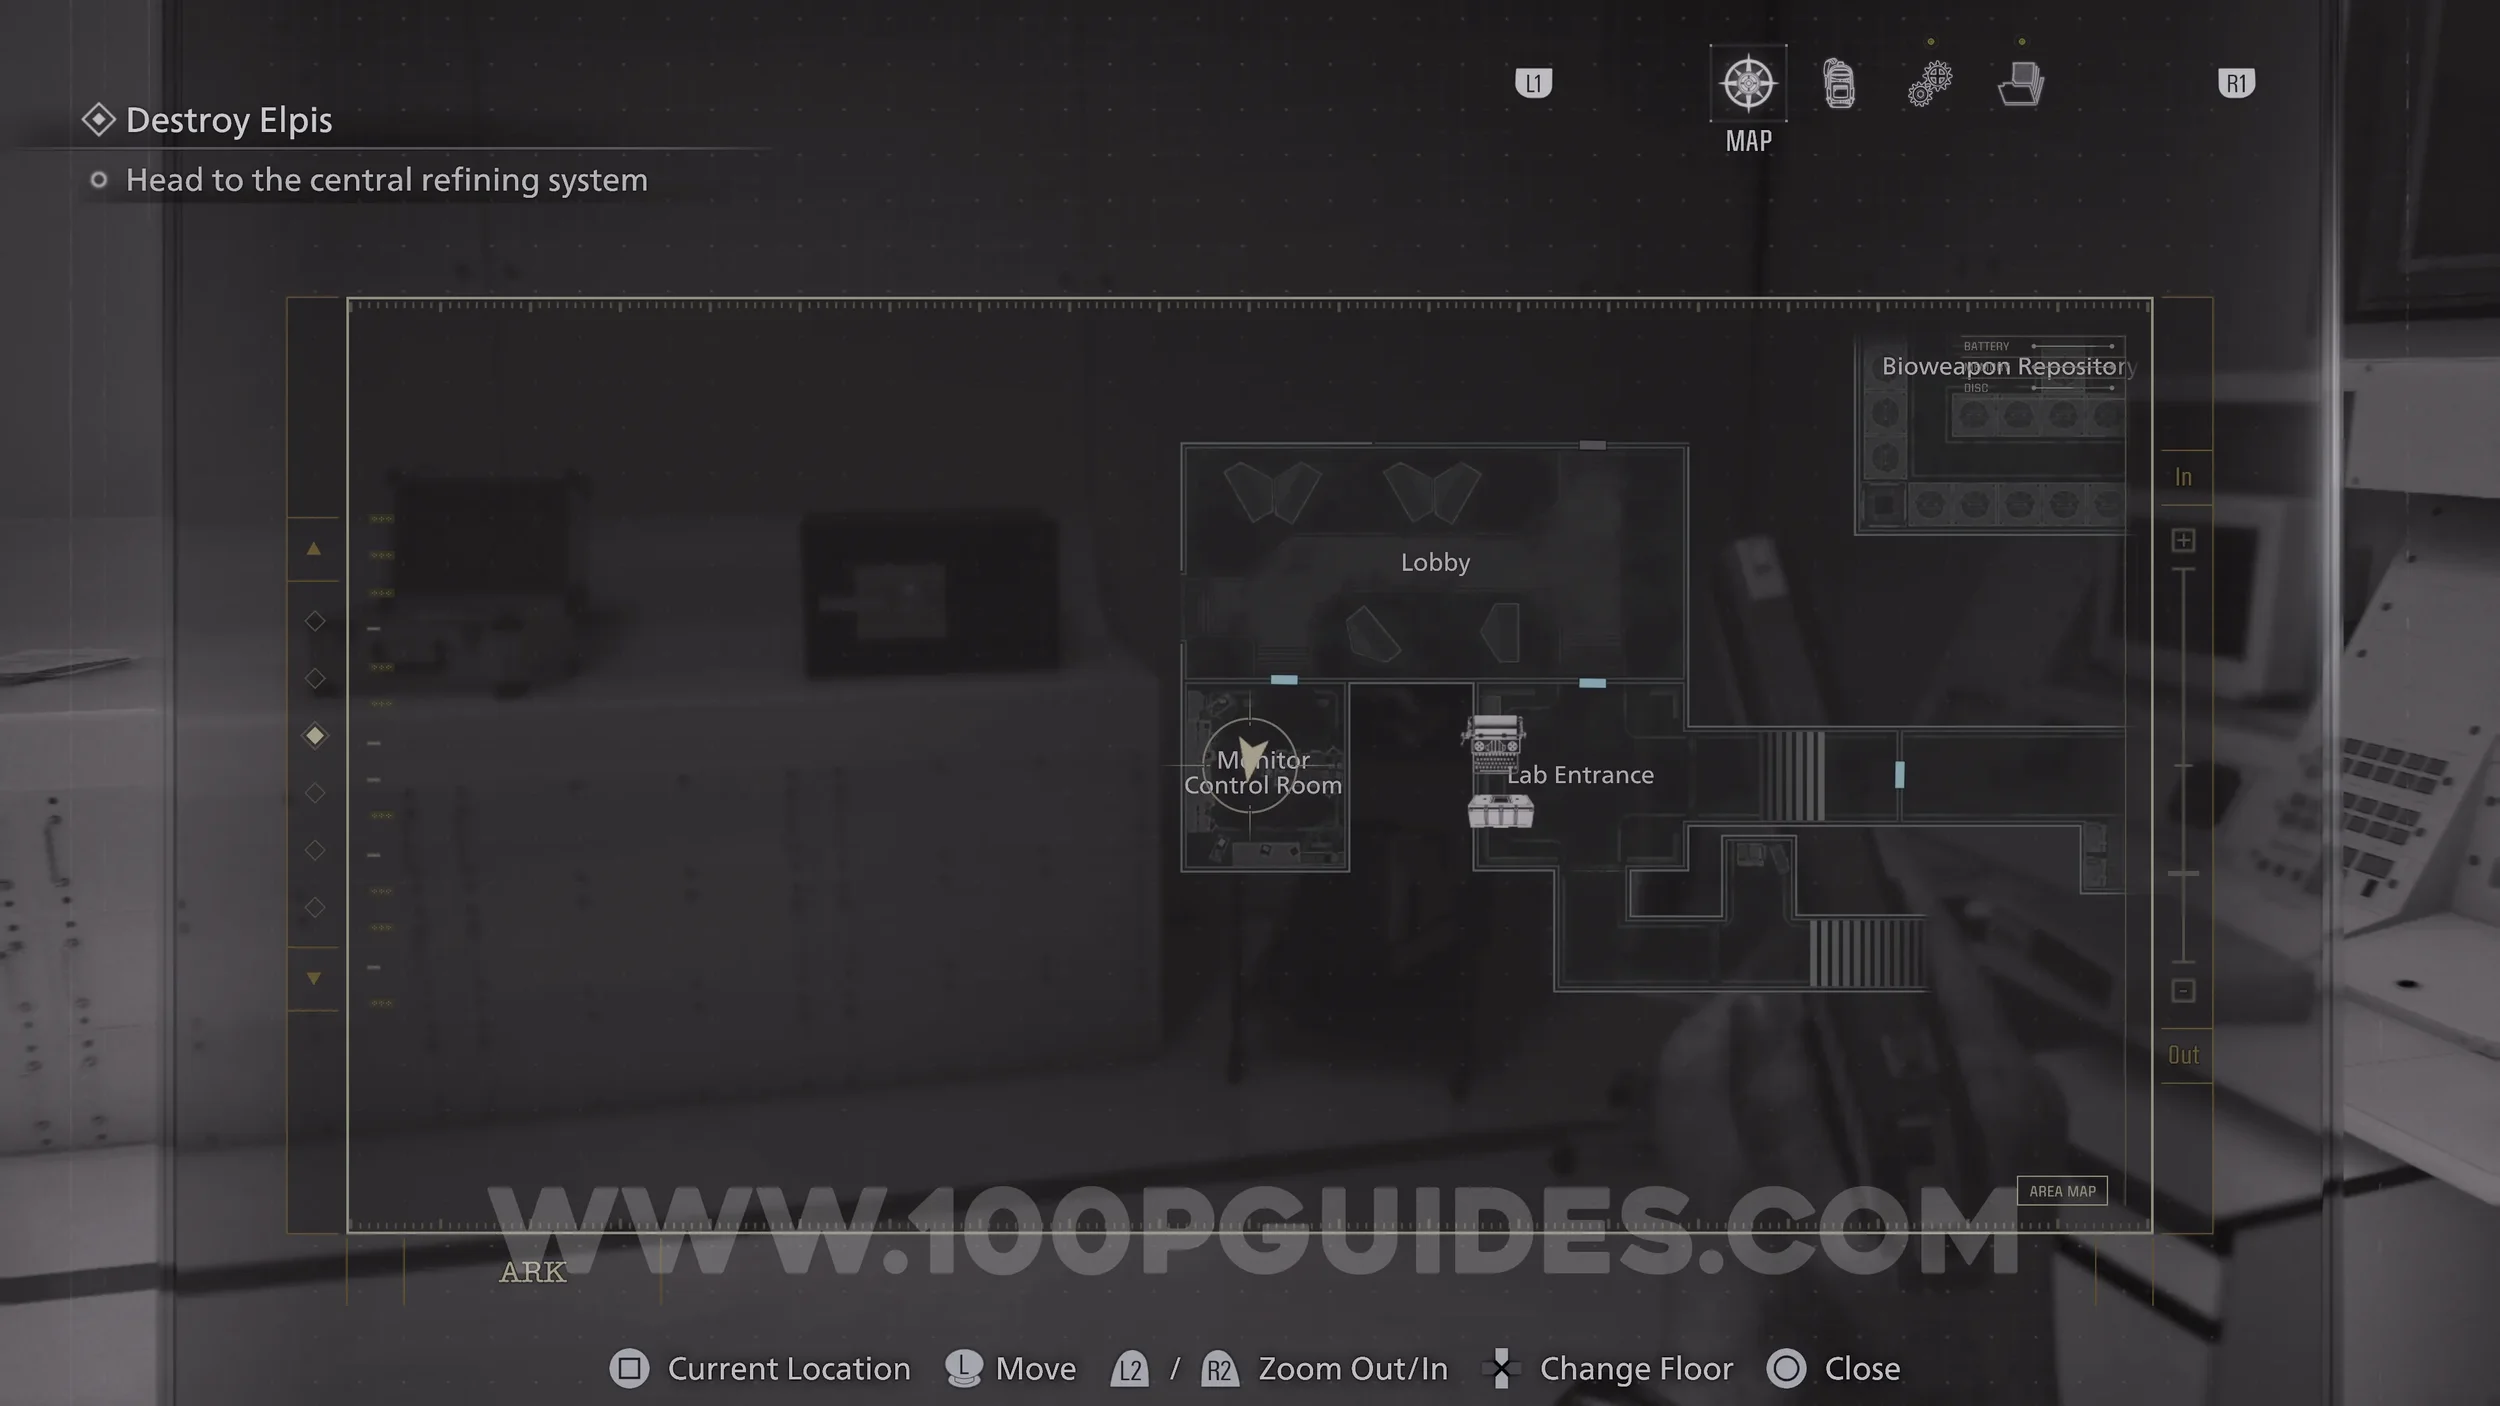

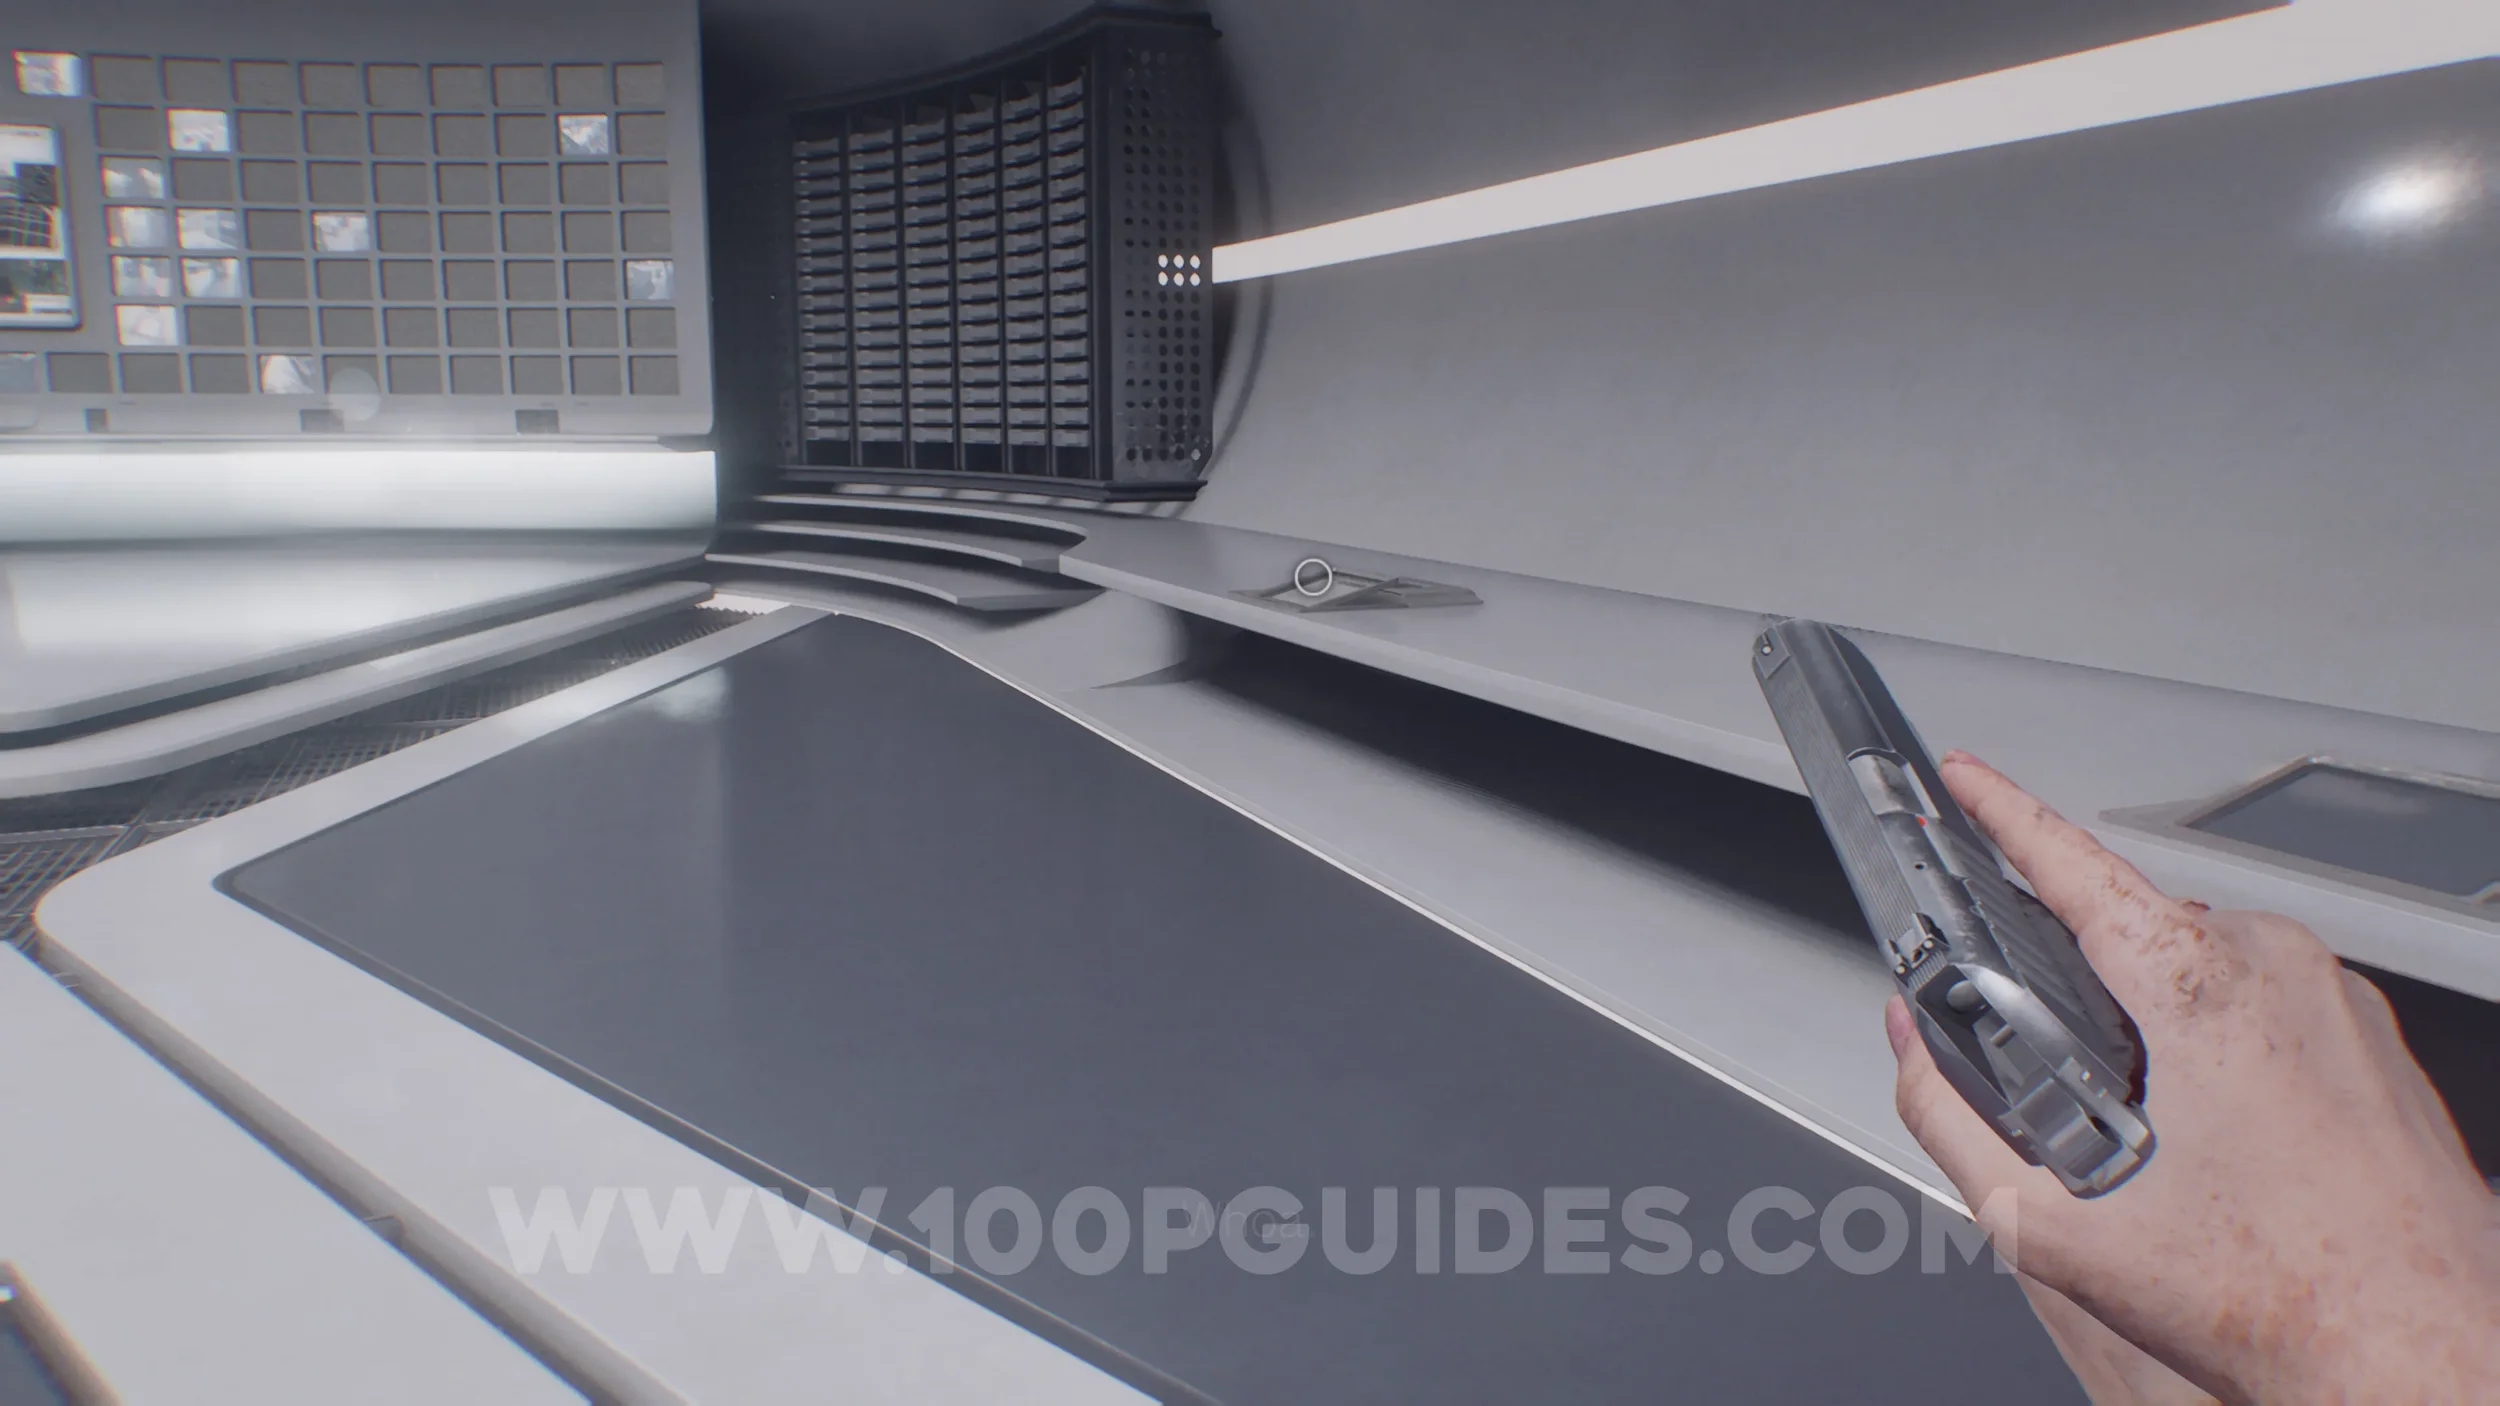
Crafting Recipe - Bottle of Acid. in the briefcase to the left of the previous safe.
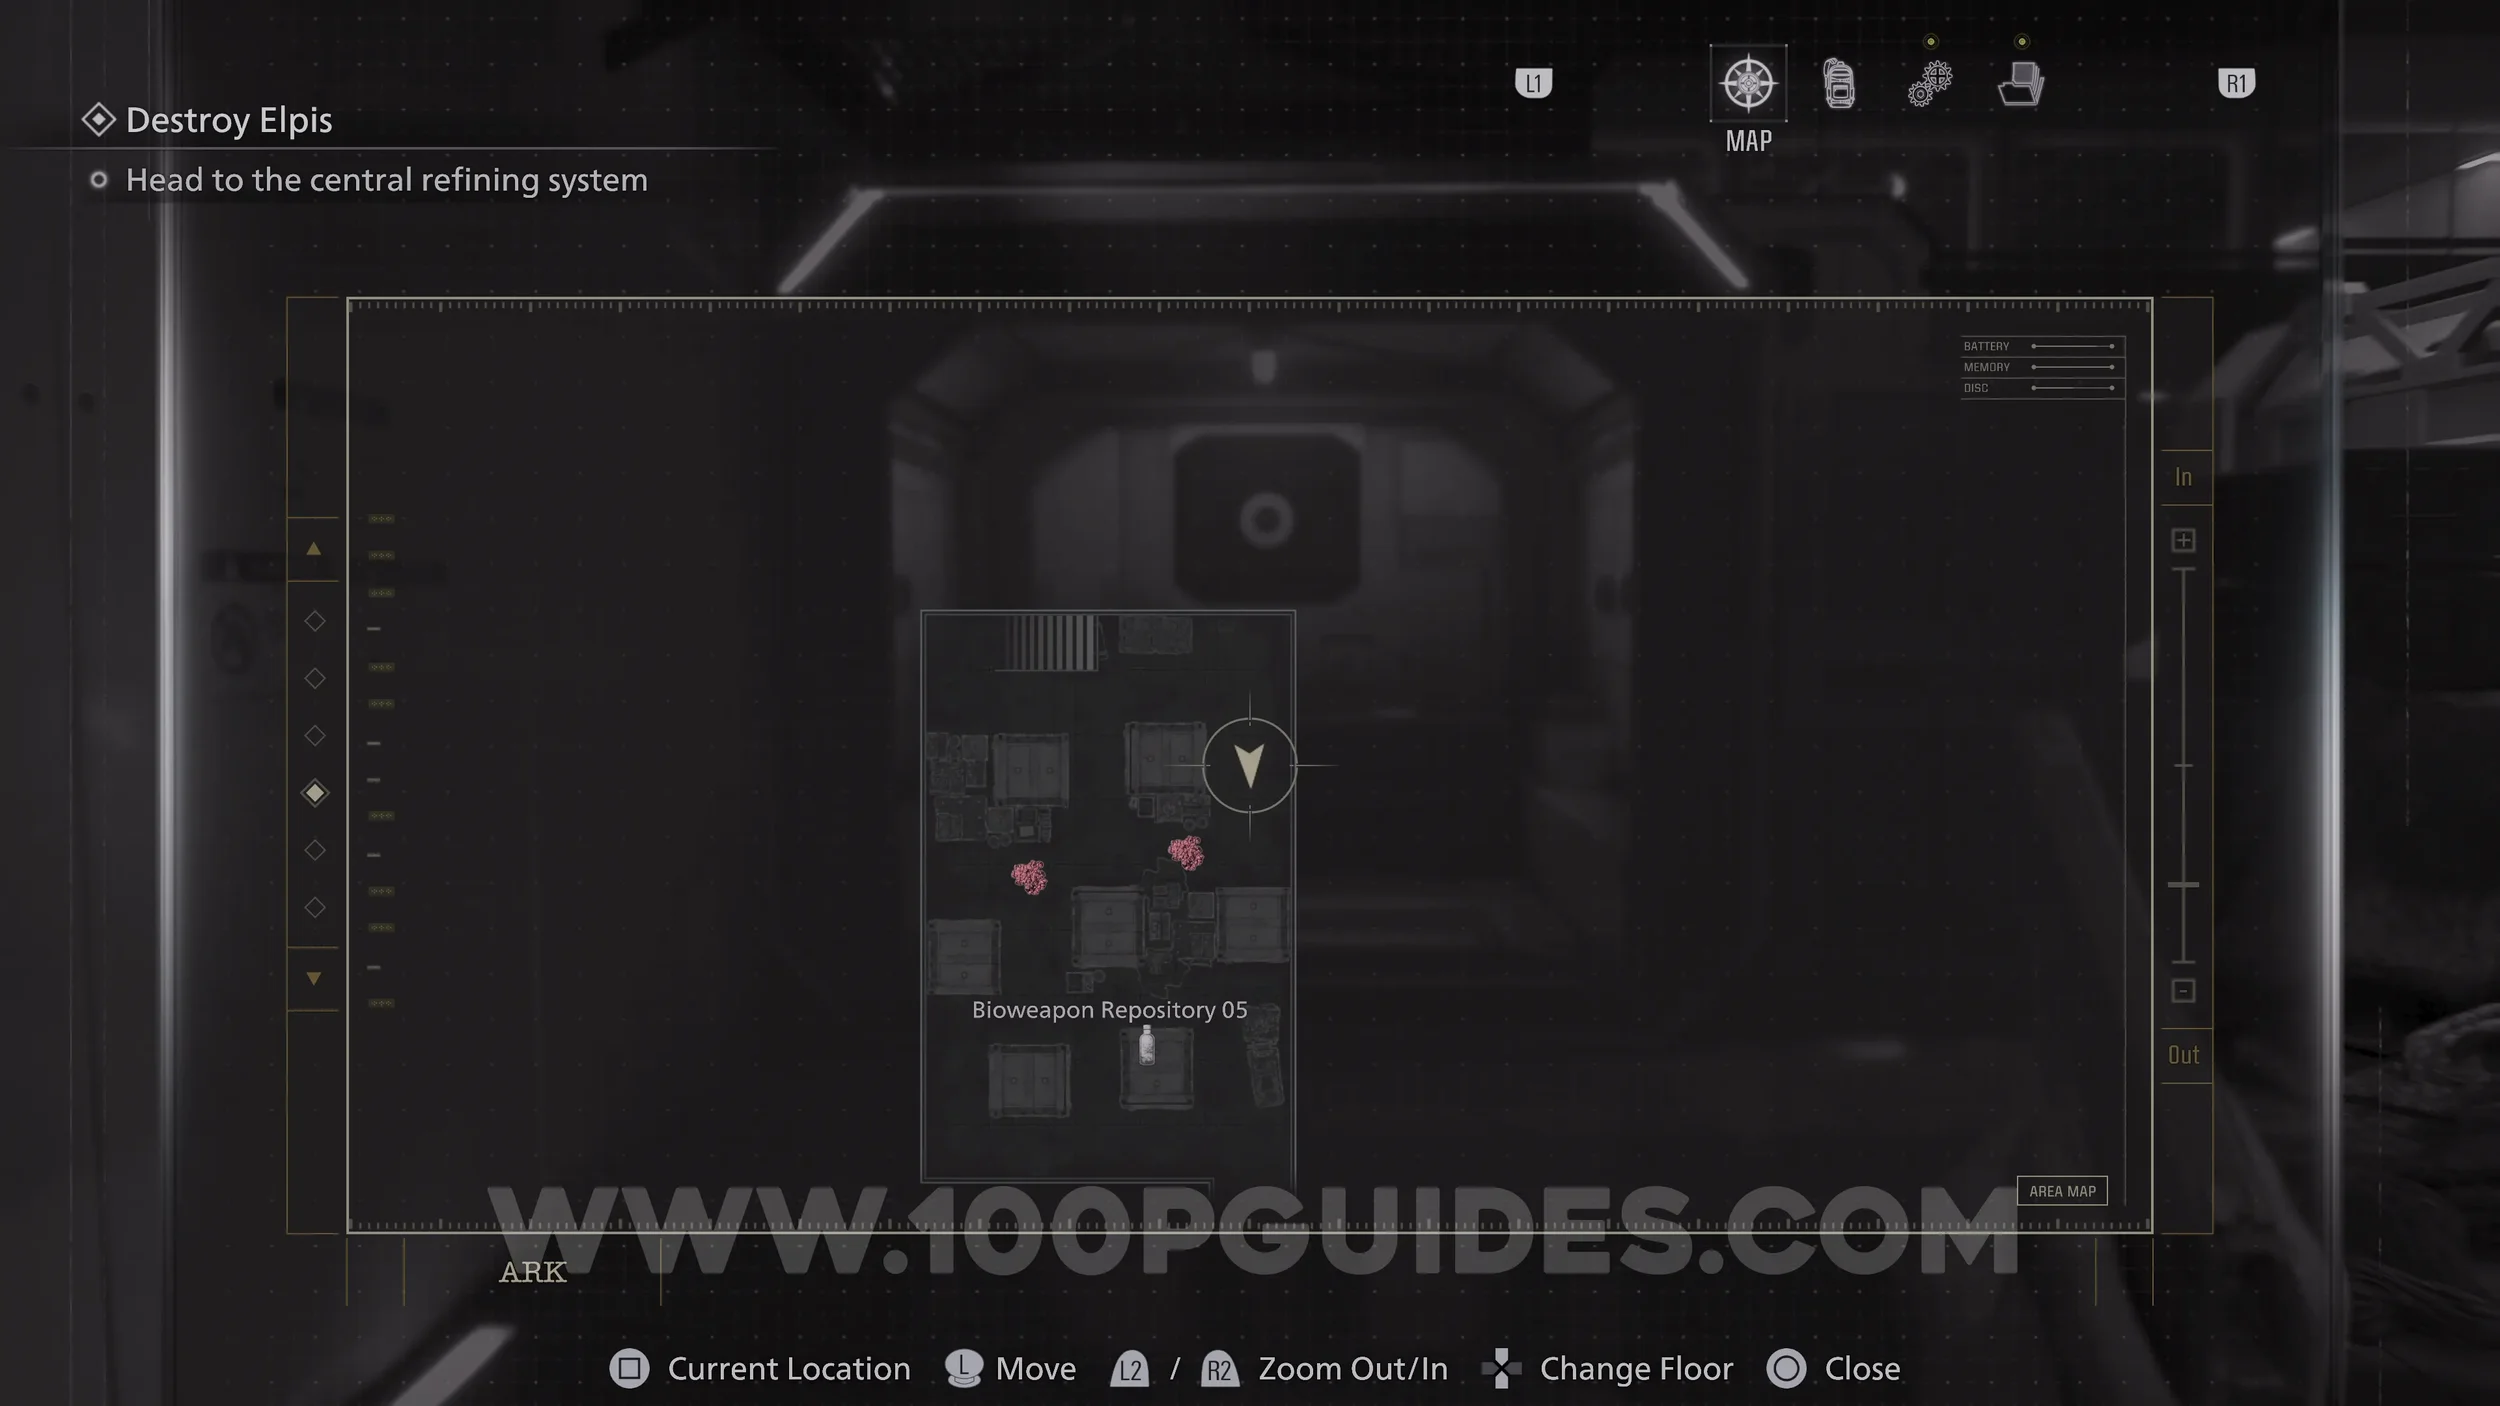
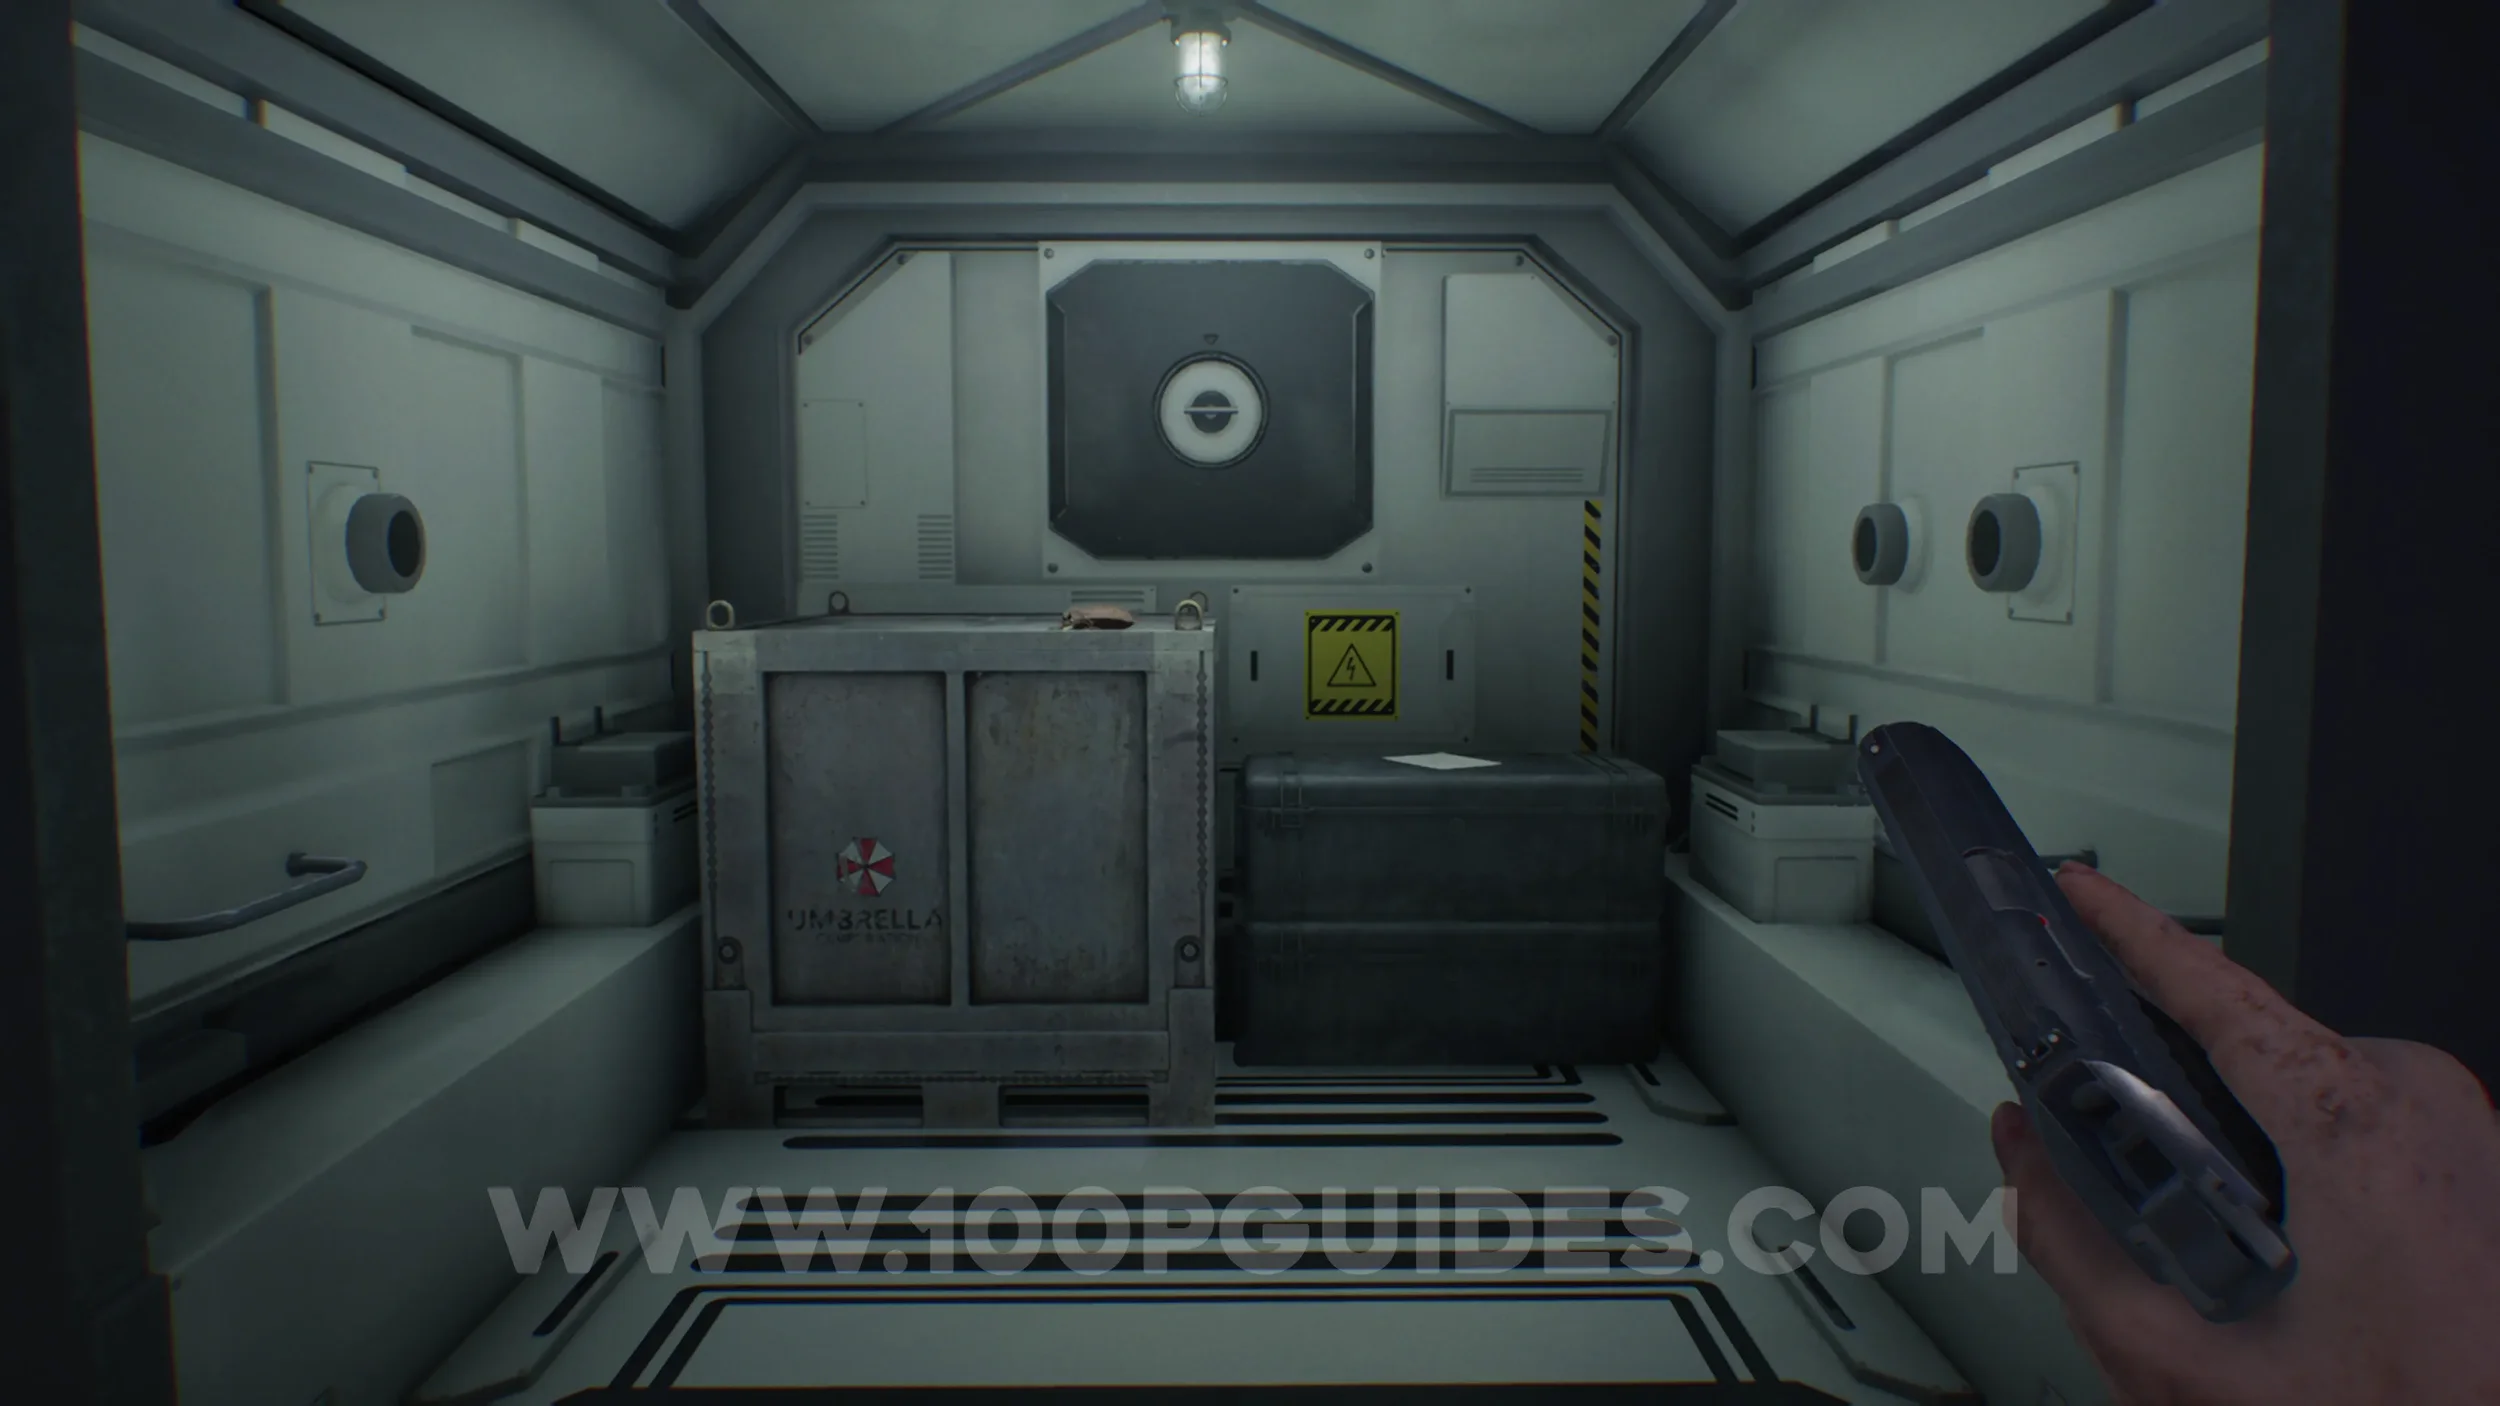
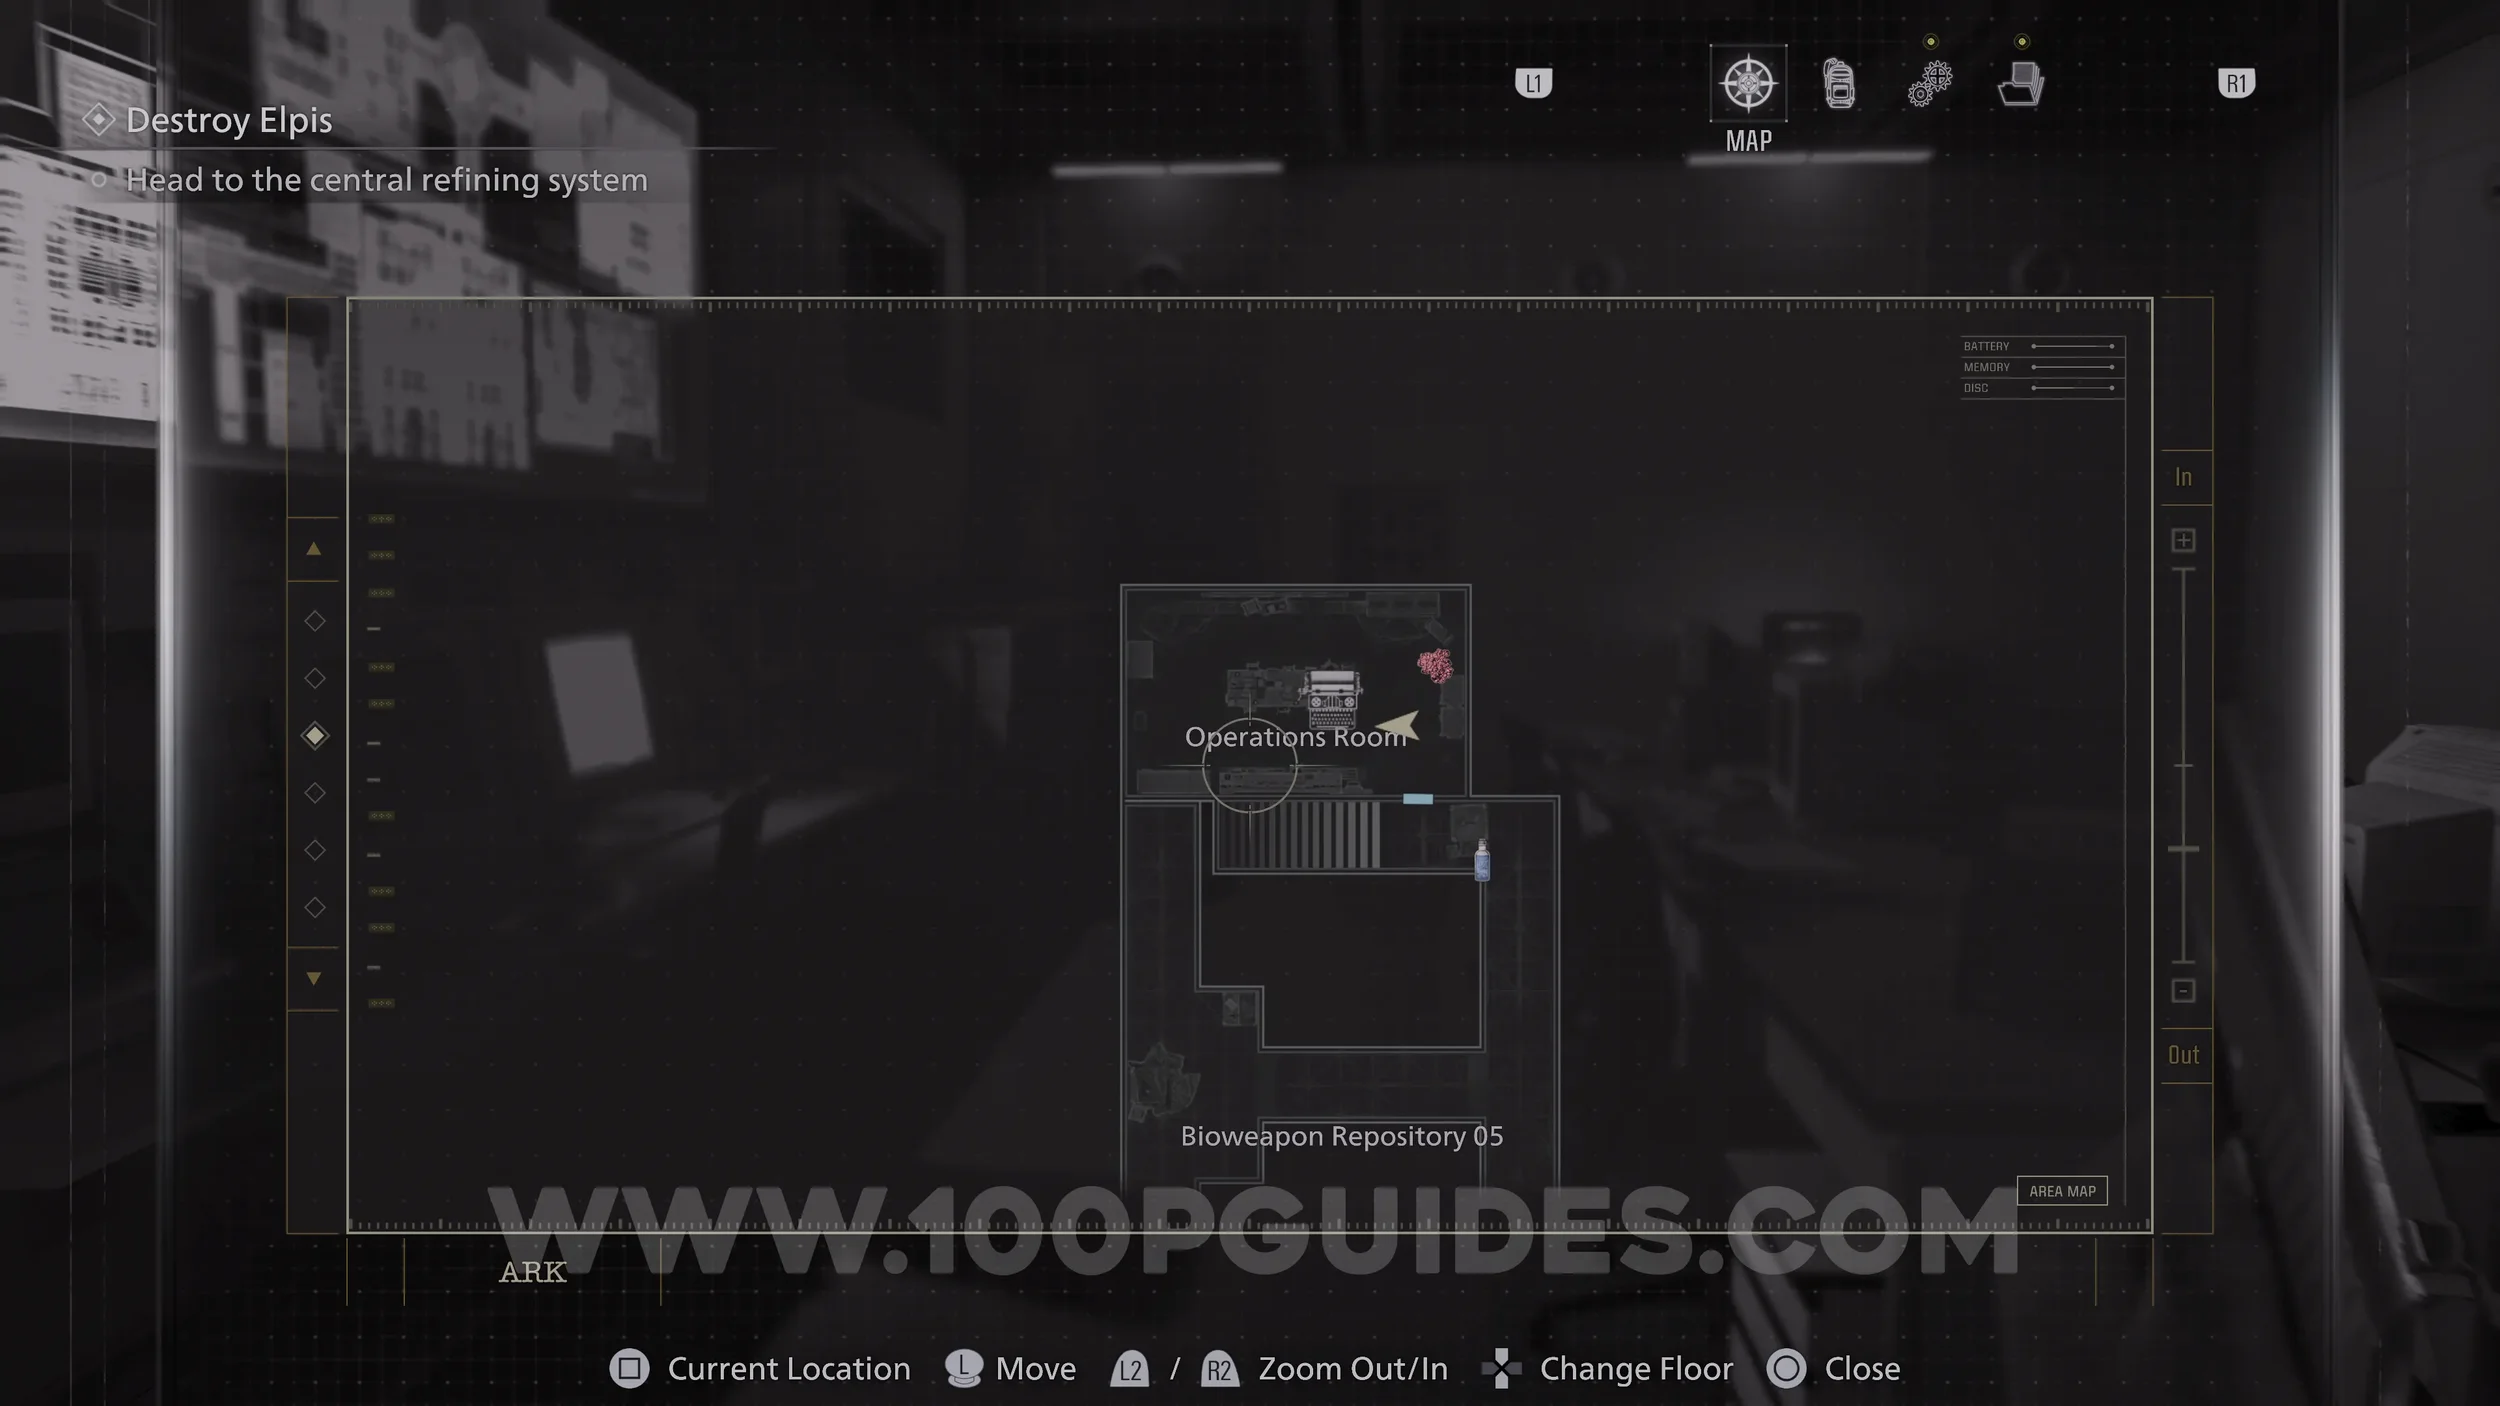
File #71 - Sterilization Chamber Safe. In the south-east corner of the Bioweapon Repository 05 area.
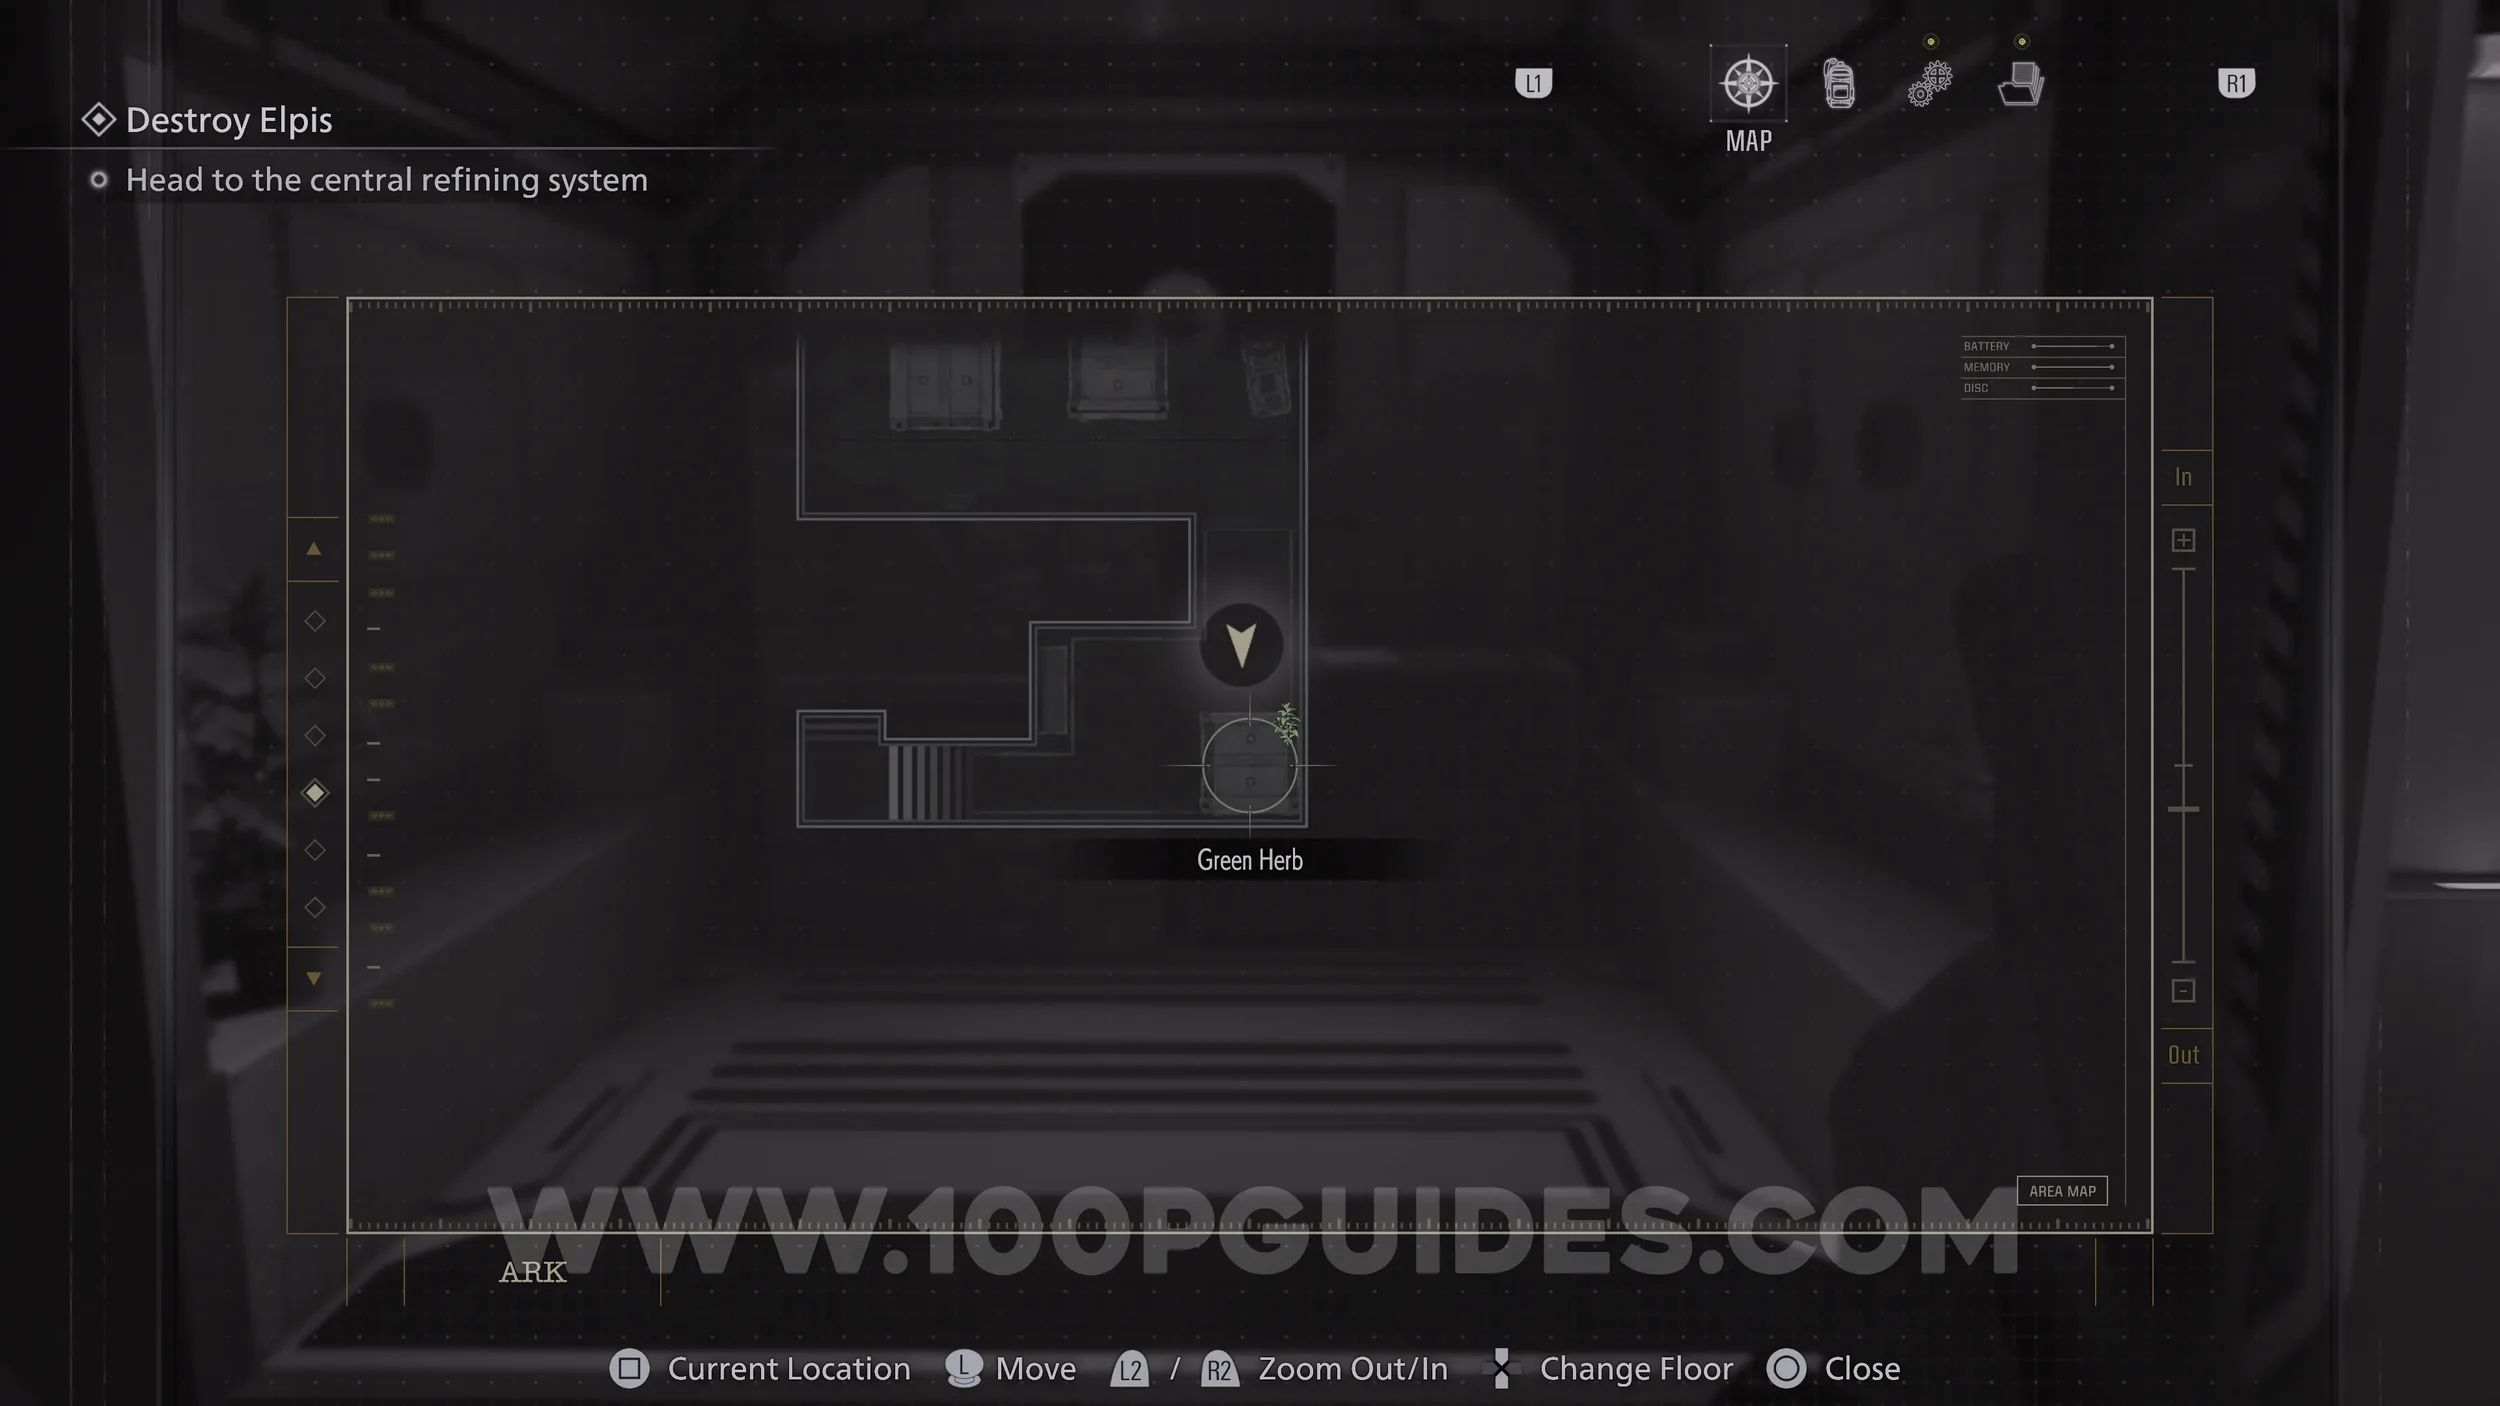

Hip Pouch #4. In the southern container in the Bioweapon Repository 05 area.

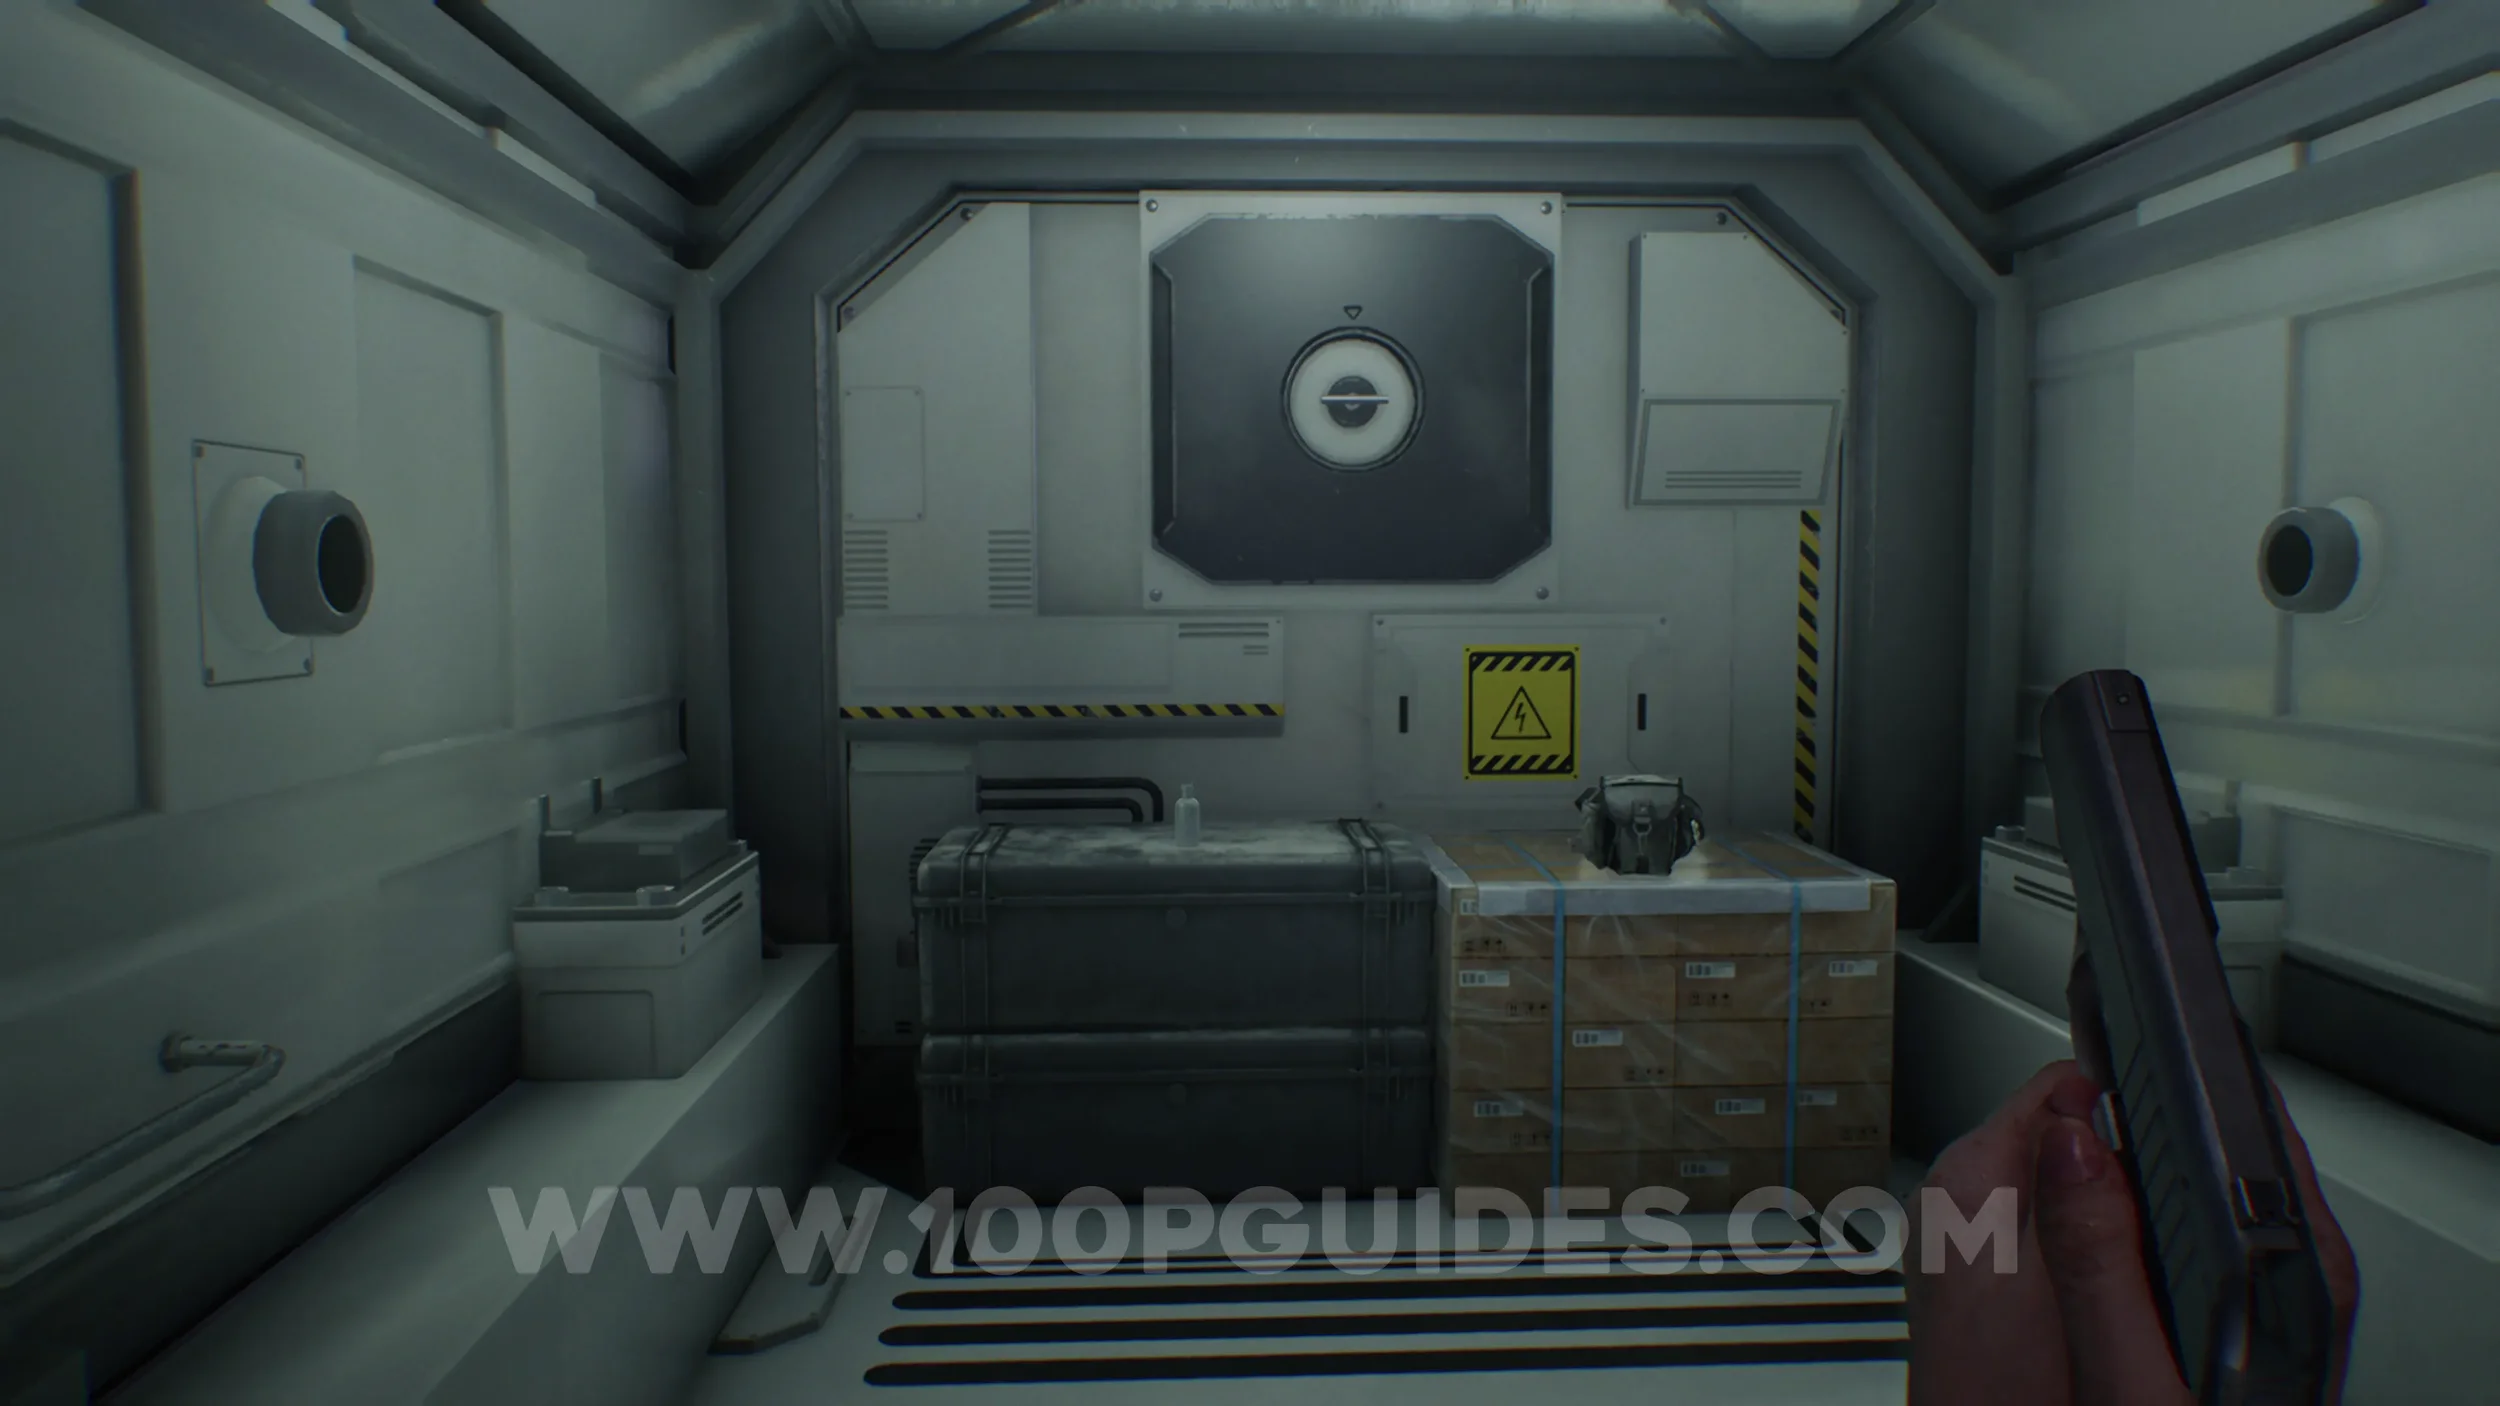
File #72 - Monitor Control Room Safe. In the eastern container in the Bioweapon Repository 05 area.
Mr. Raccoon #25. Next to the screens in the Operations Room. You will have to come to this room to pick up the Noblesse Orb.
File #73 - Access Log: First Assembly Minutes. After opening the door in the Lobby with the two orbs, look for a screen on the right side. Make sure you examine it before interacting with the large console.
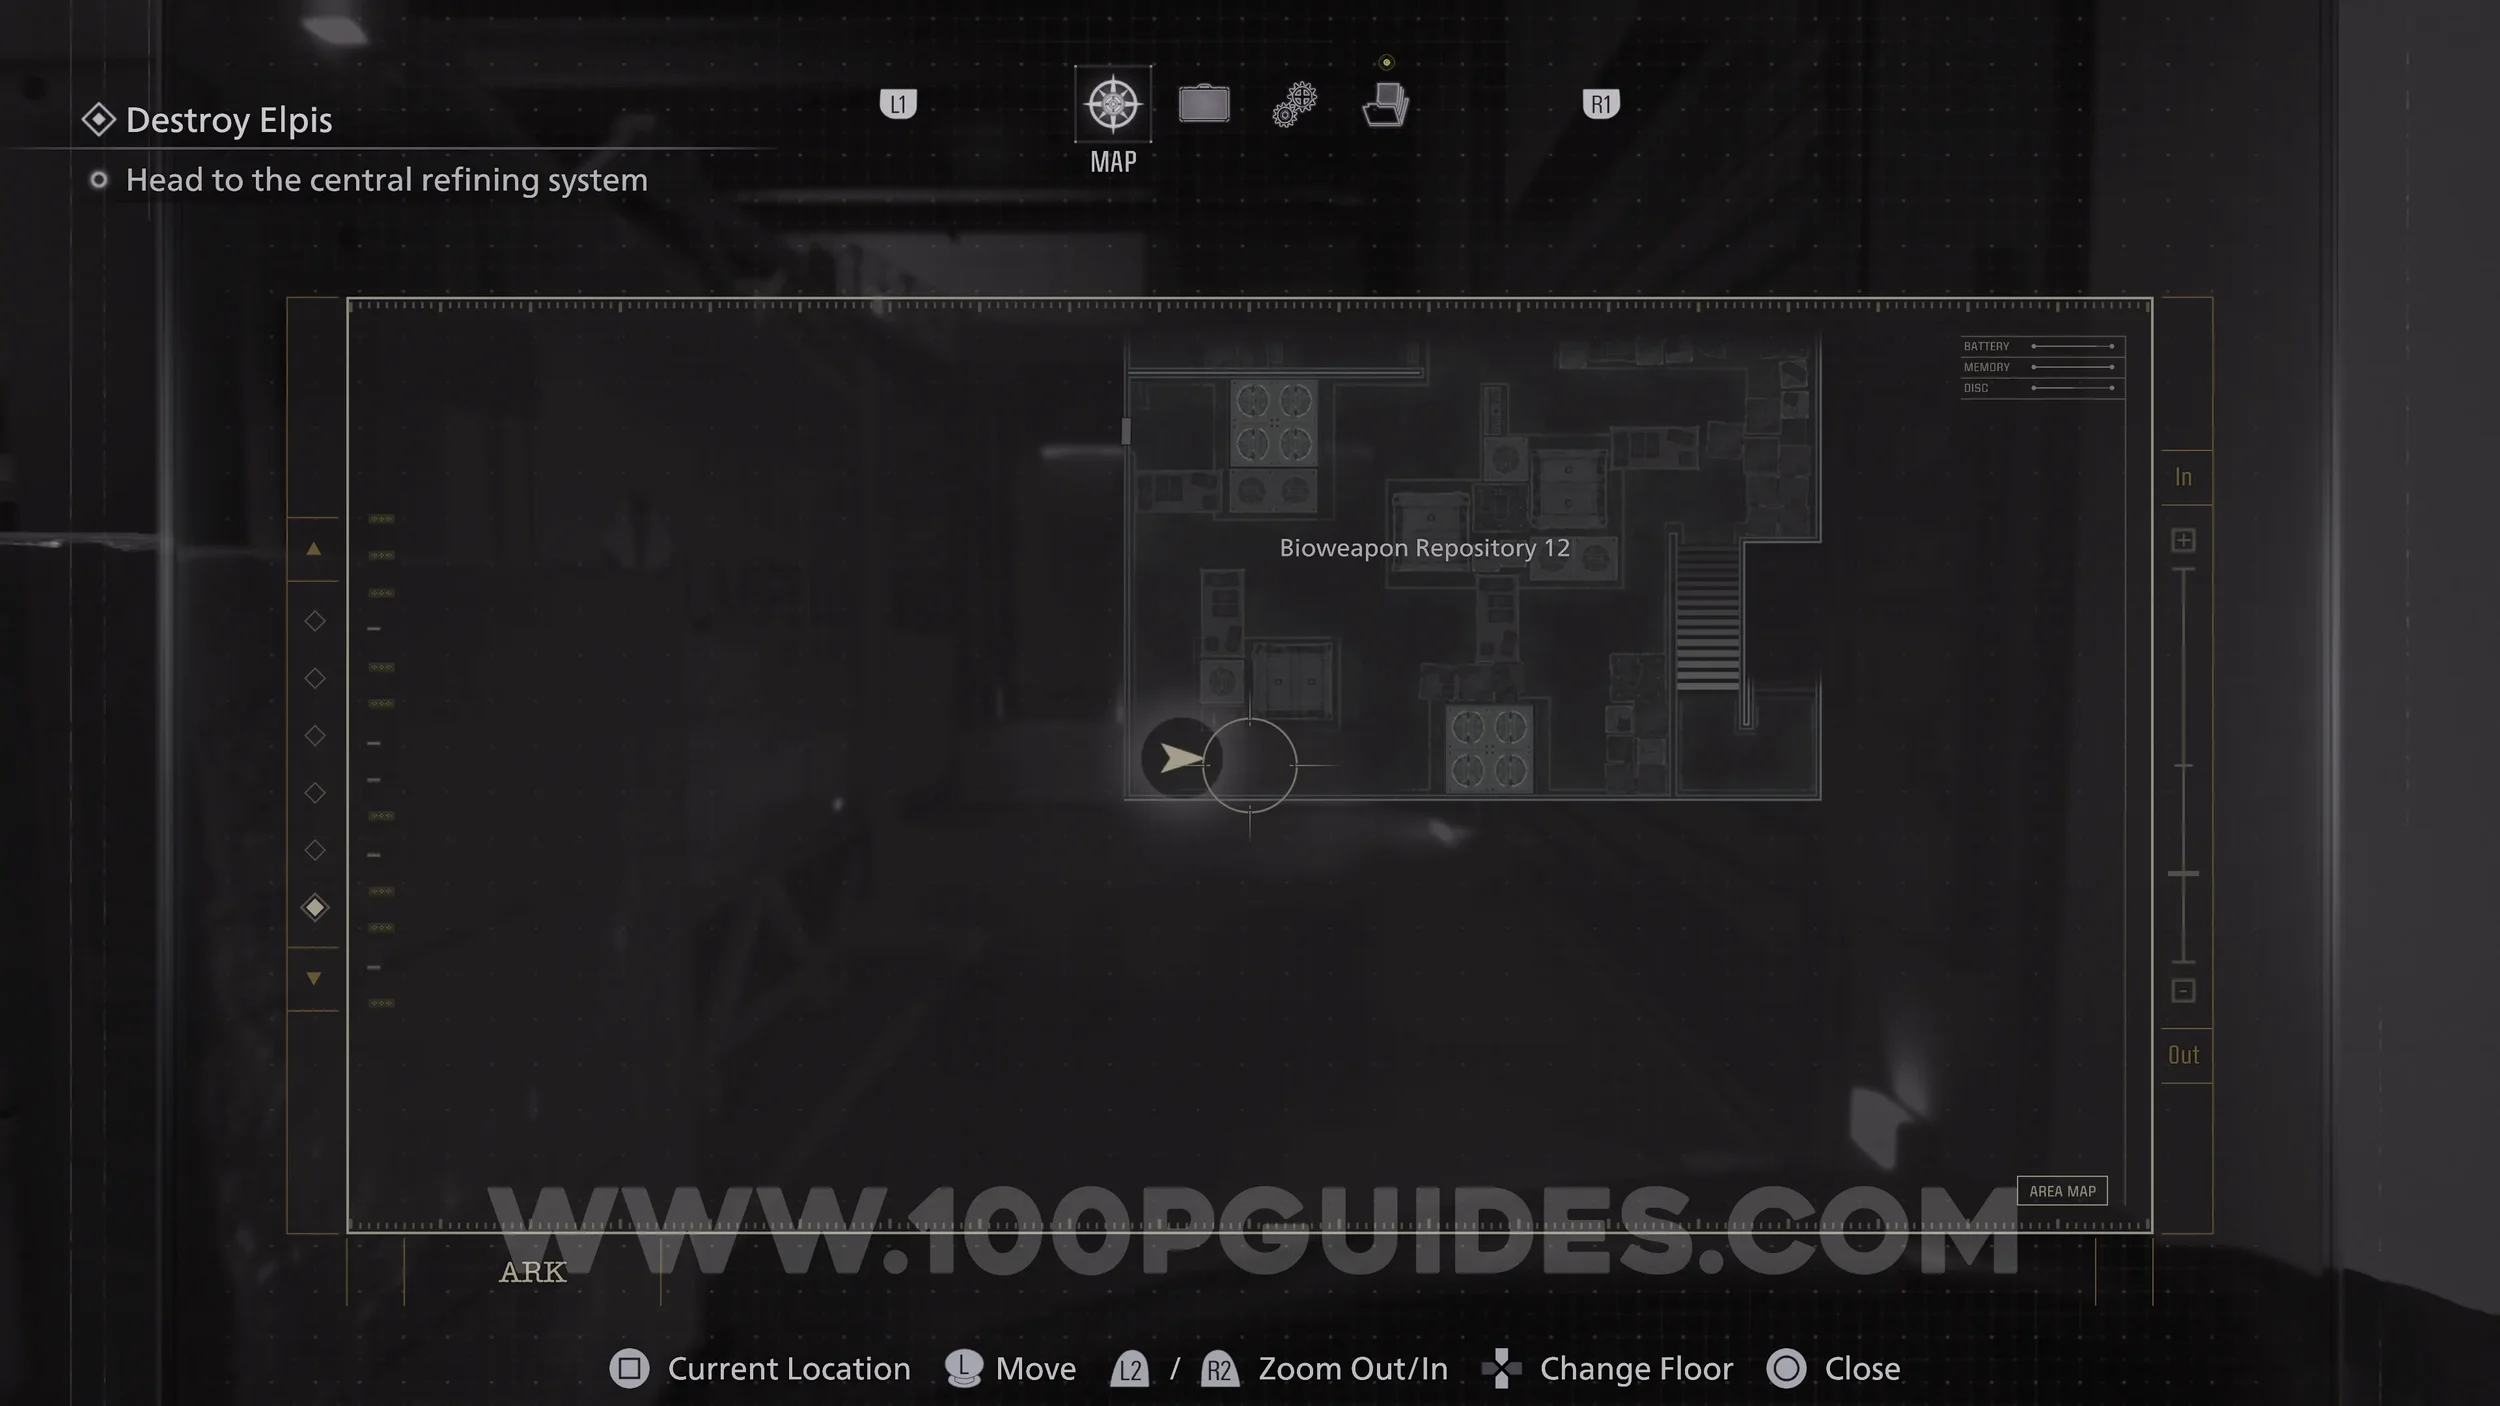
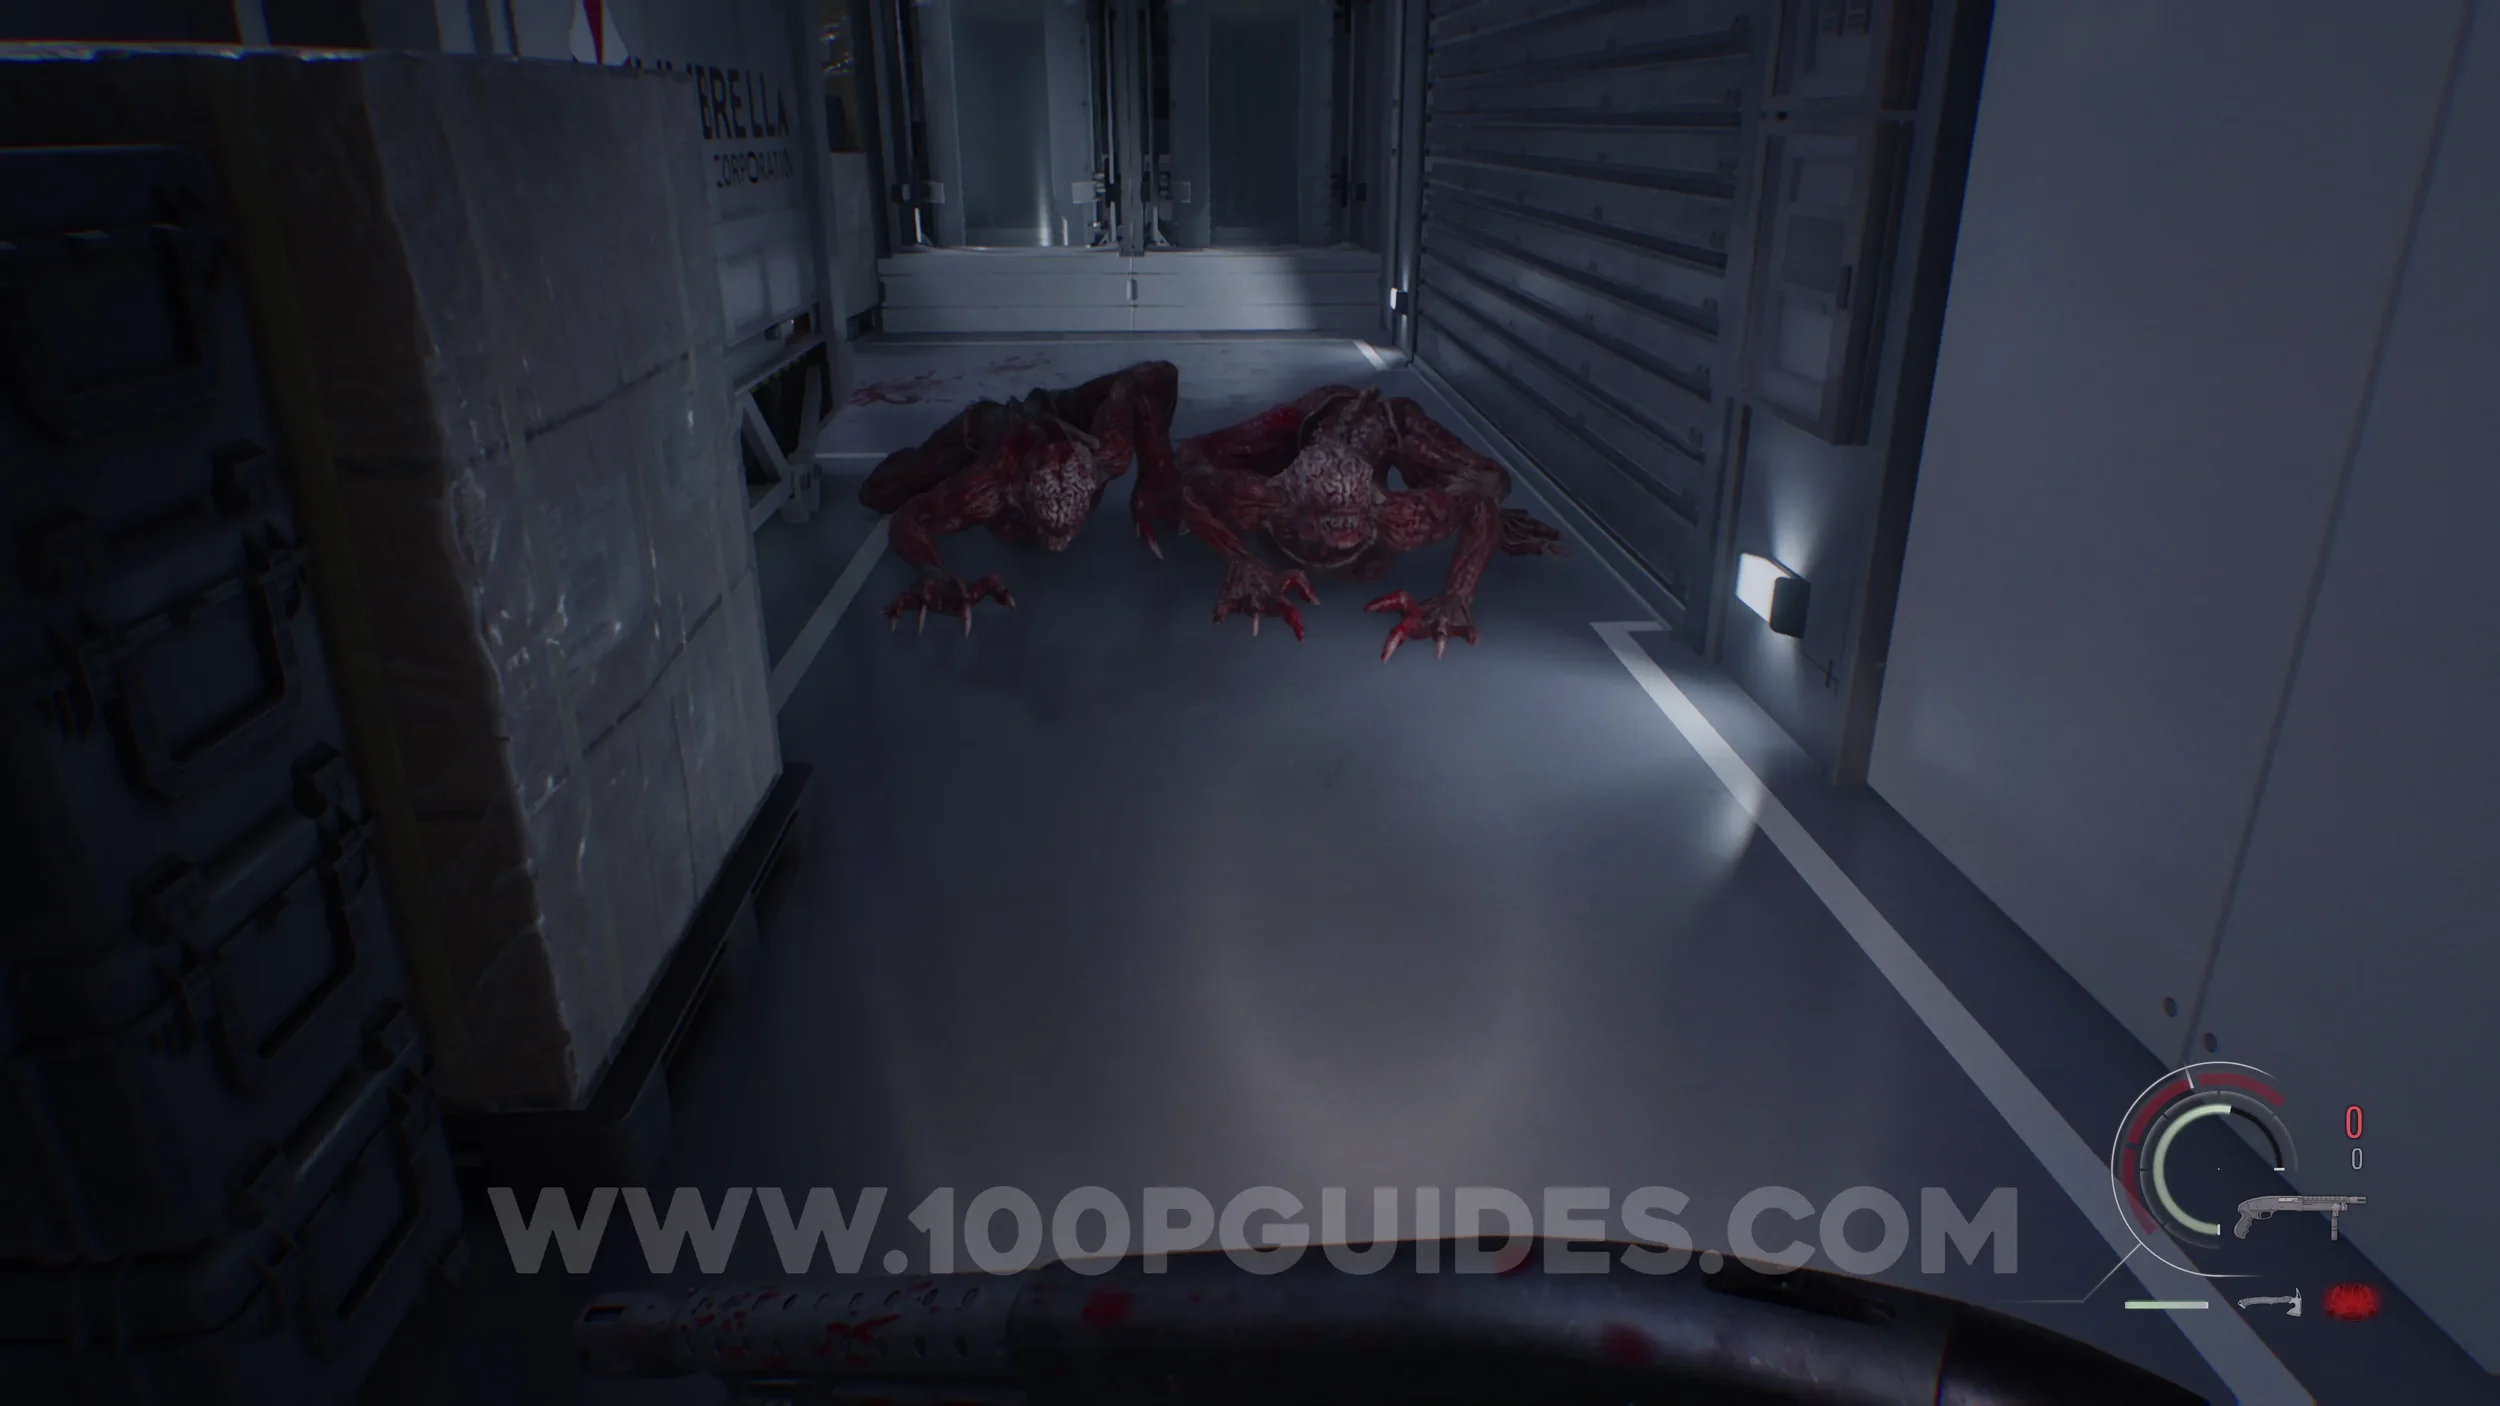
Trophy - Cat Got Your Tongue? Advance until you reach Bioweapon Repository 12 while playing as Leon. Here, you will encounter a large group of Lickers.
To unlock this trophy, wait for one to attack you with its tongue, then press L1 just before it connects to parry the attack.
File #74 - Alyssa’s Interview Notes & File #75 - Letter from Patrick. Obtained automatically during a cutscene close to the end of the game.
Trophy - Hope And Requiem. Once you reach Leon with Grace you will have to make a choice. Pick “Release Elpis” to get the trophy after the final boss fight.
Video Guide