The Adventures of Elliot All Shards of Life (HP Upgrade) Locations
This guide will show you where to find every Shard of Life (HP Upgrade) in The Adventures of Elliot.
This guide will show you where to find every Shard of Life (HP Upgrade) in The Adventures of Elliot.
For every 4 you collect, you will get another HP Container. Once you reach 10 containers, you will unlock the "Great Radiance of Life" trophy.
There are a total of 60 Shards of Life, taking you all the way up to 20 containers. None are missable, and they can all be collected after finishing the game.
Below you can find all Shards ordered by region (Age).
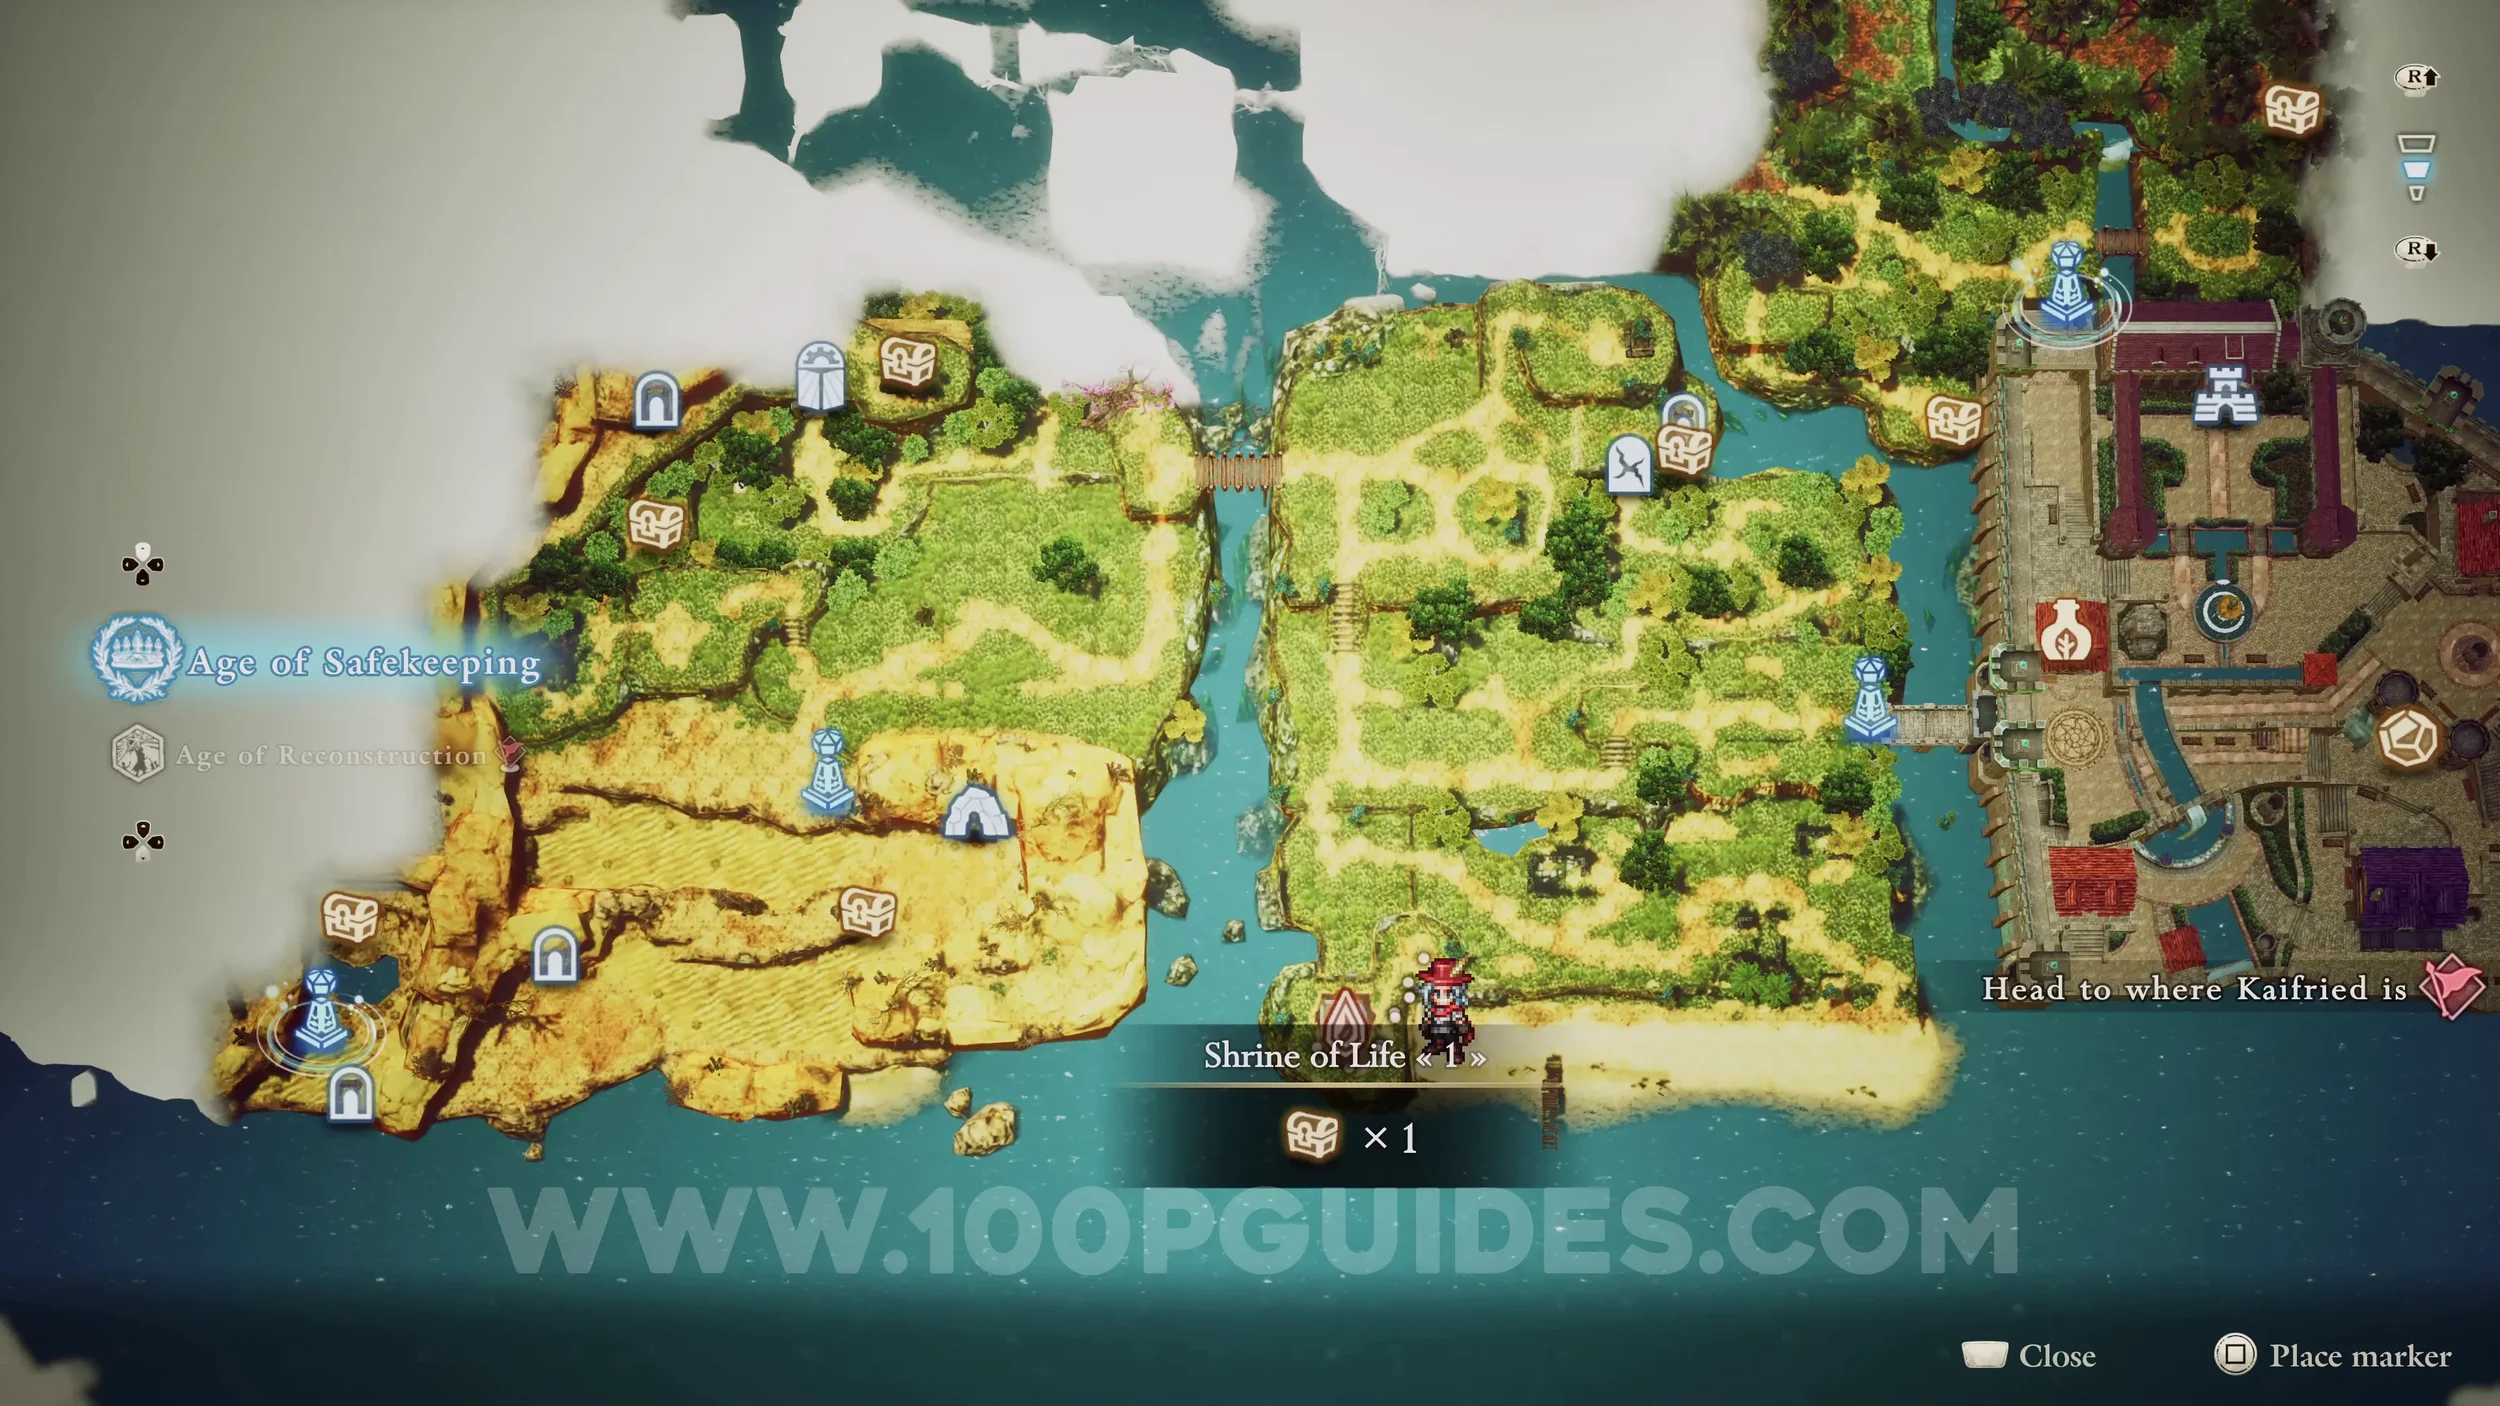
AGE OF SAFEKEEPING
Shard of Life #1. Climb the Ladder at the end of the beach and finish the Shrine of Life. Just dodge the arrows and get to the end.


Shard of Life #2. Enter Secret Shortcut 1 and exit through the right side to find the chest containing the Shard of Life.


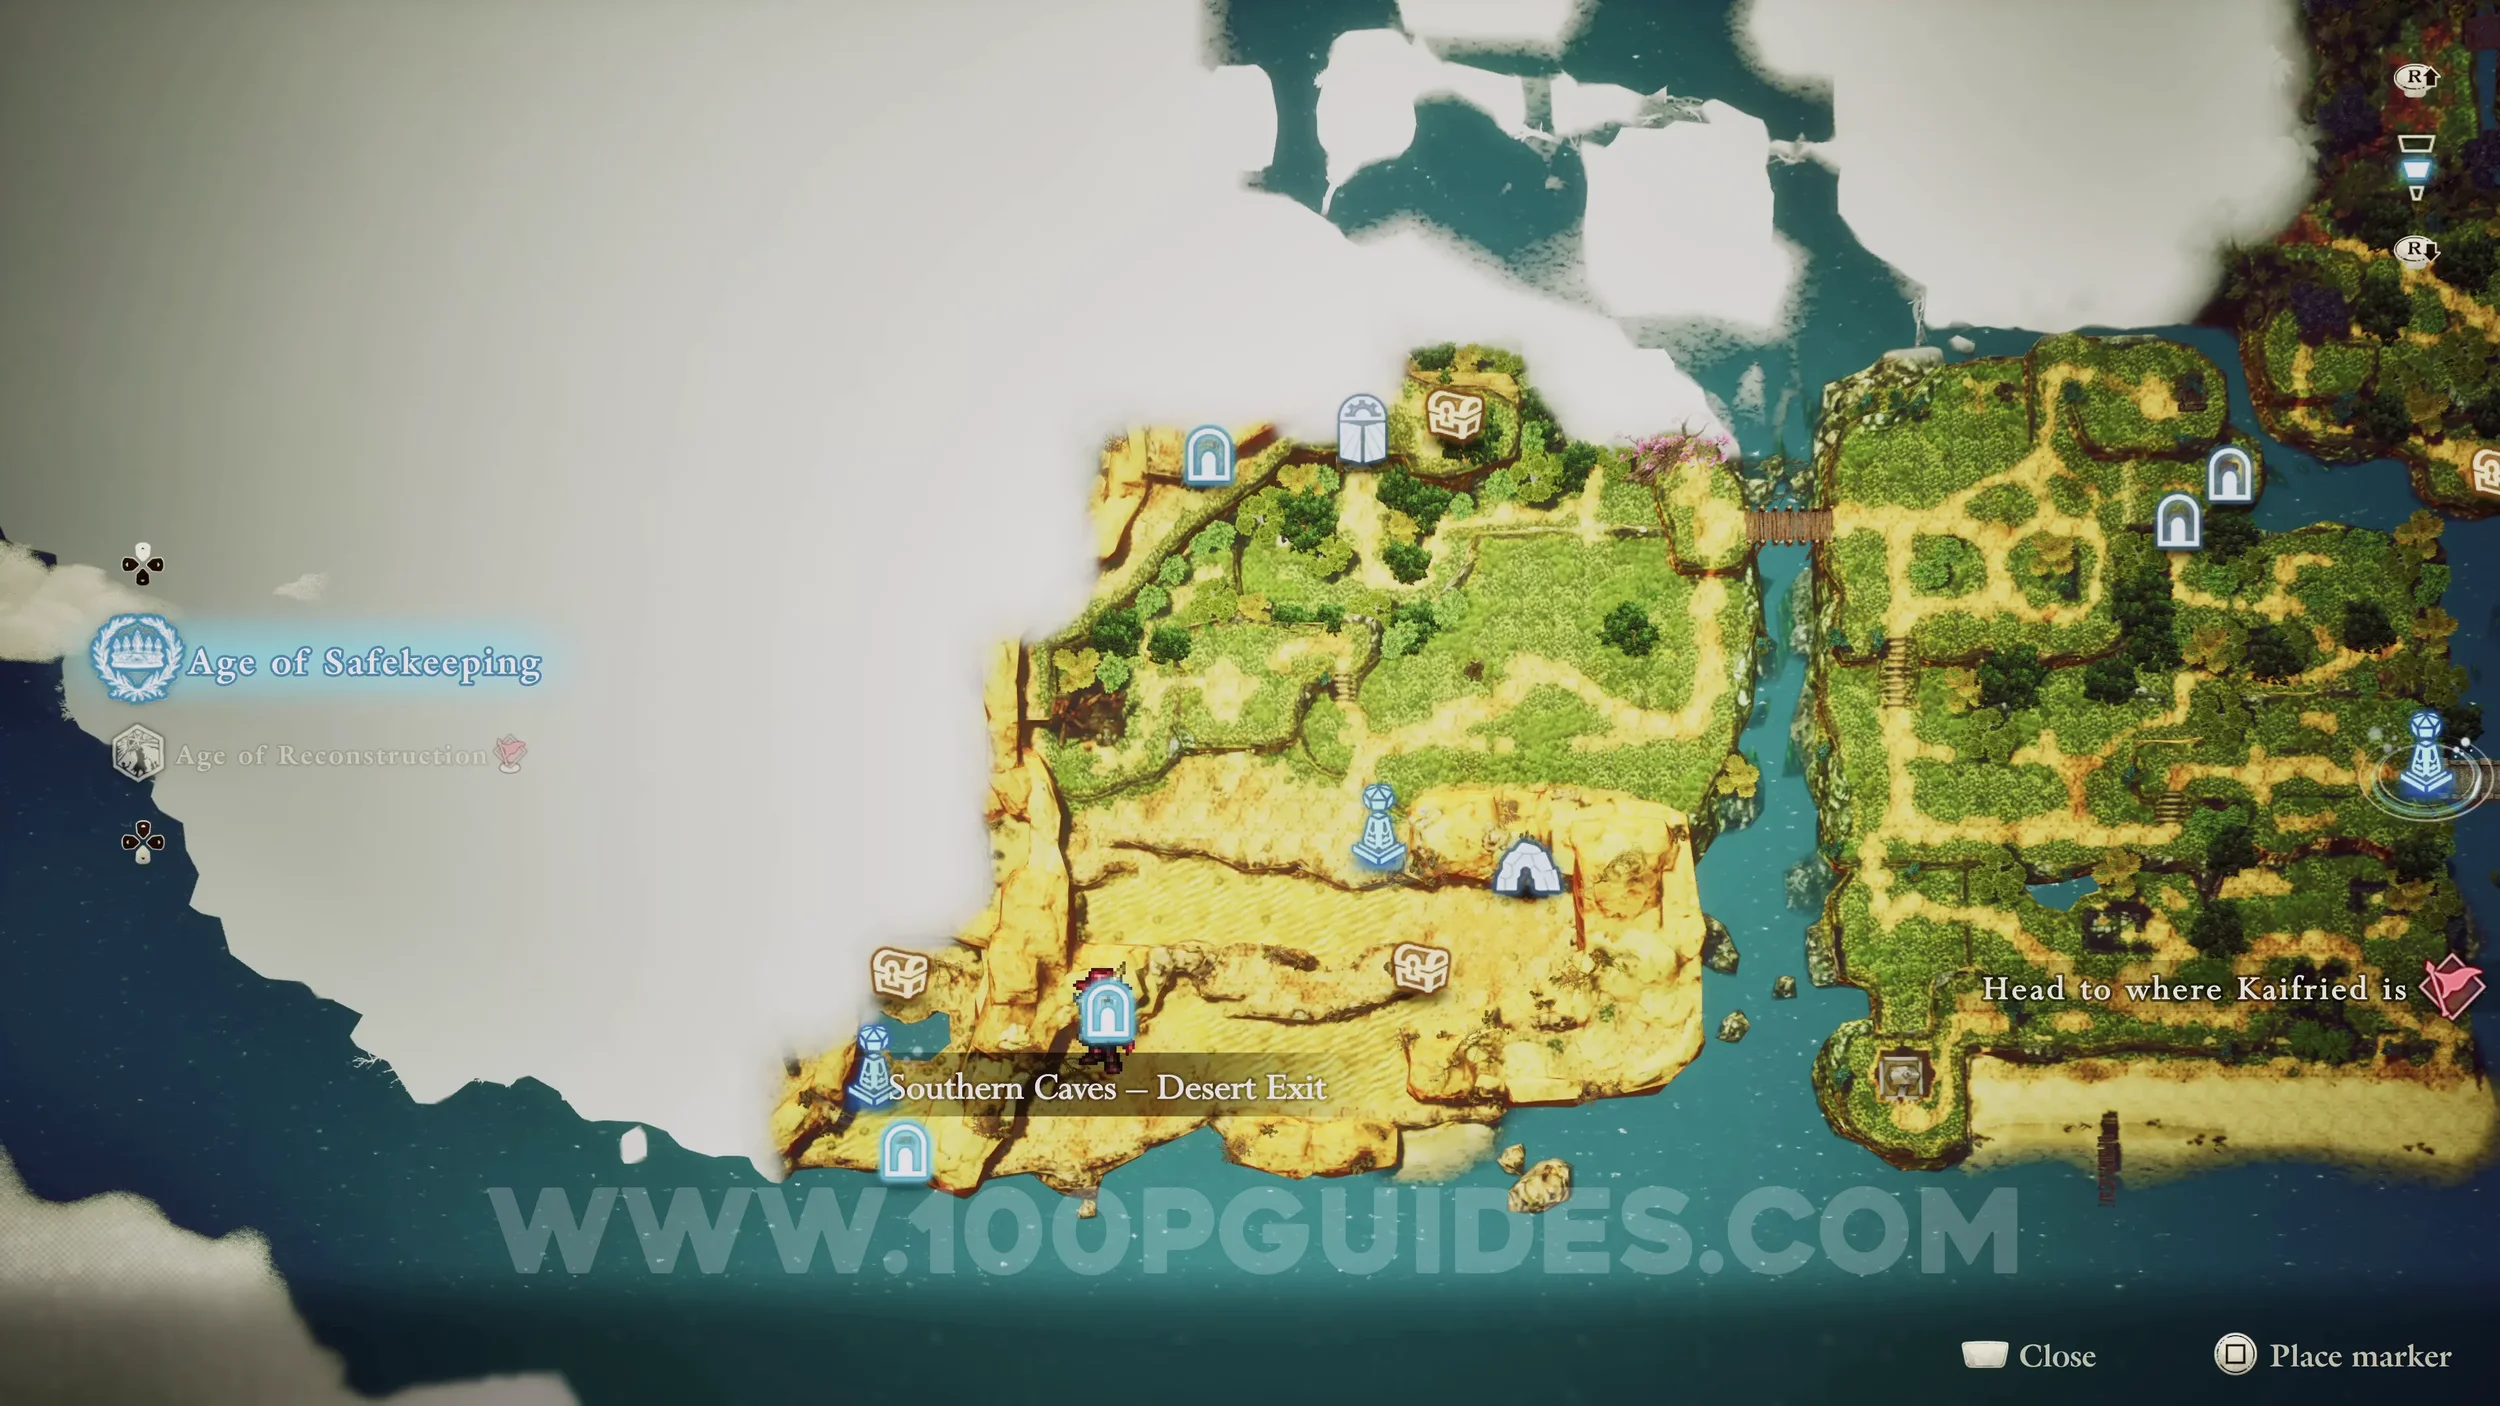
Shard of Life #3. Go through the Southern Caves and leave through the left-side exit to reach a small area with water. Open the chest to get the Shard of Life.


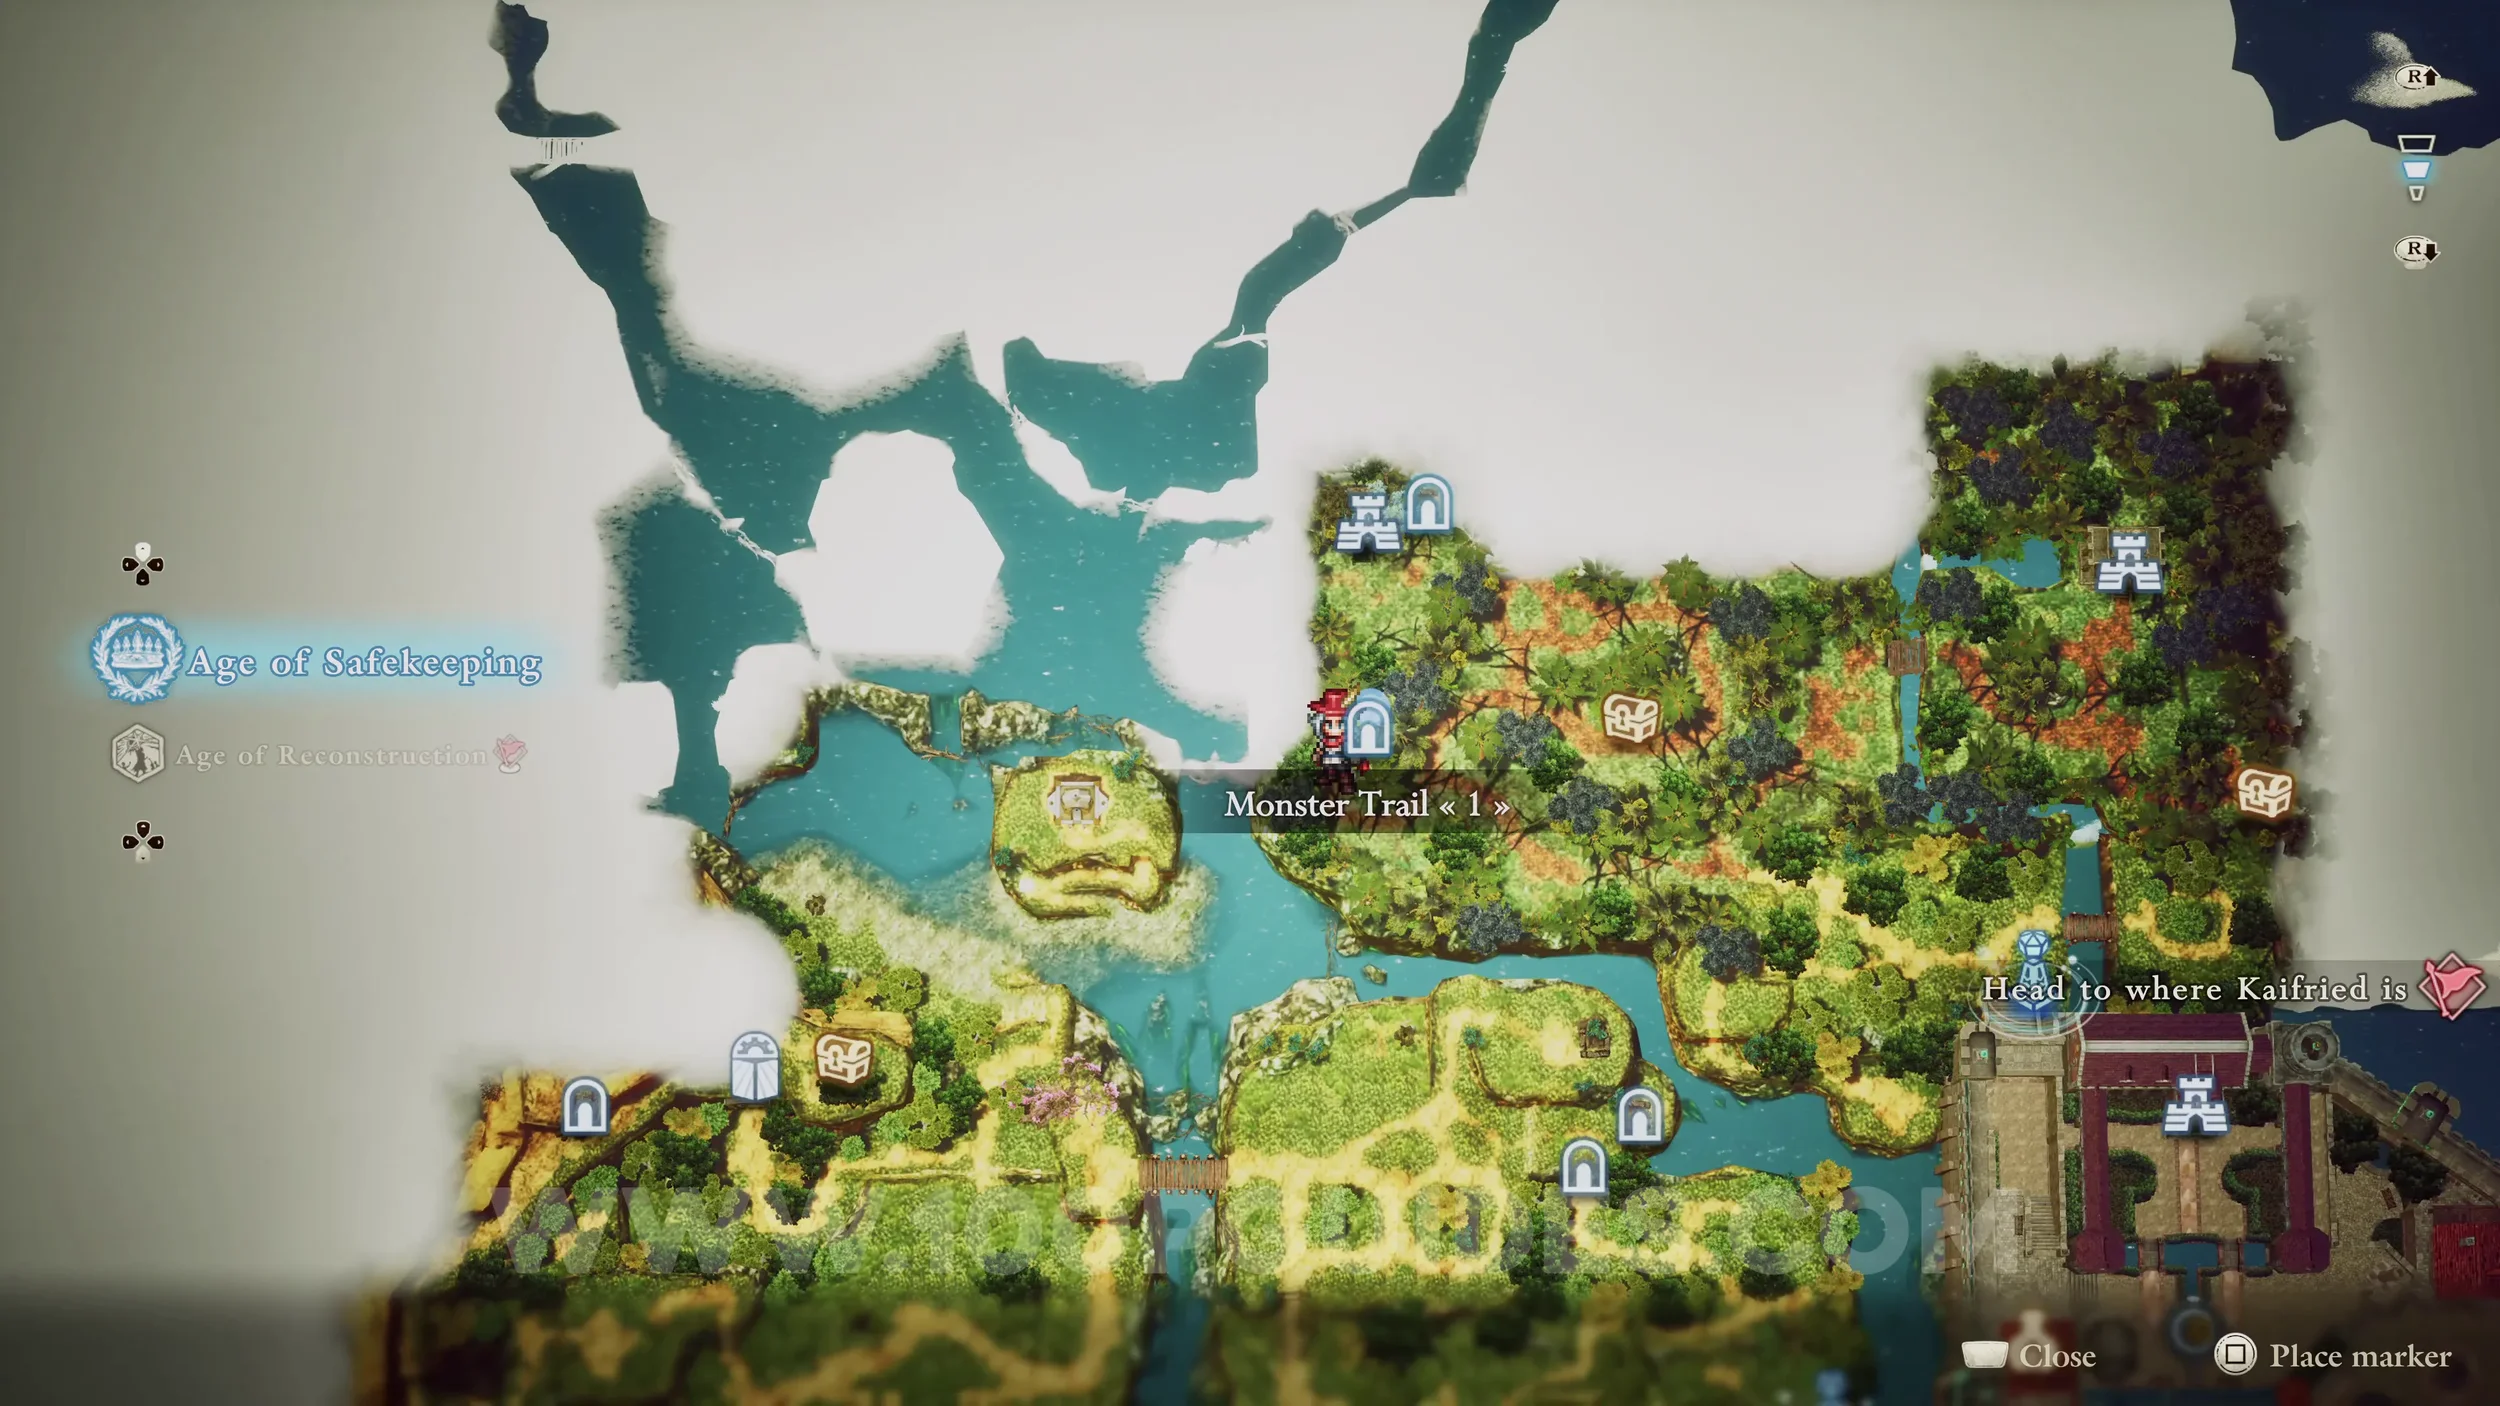
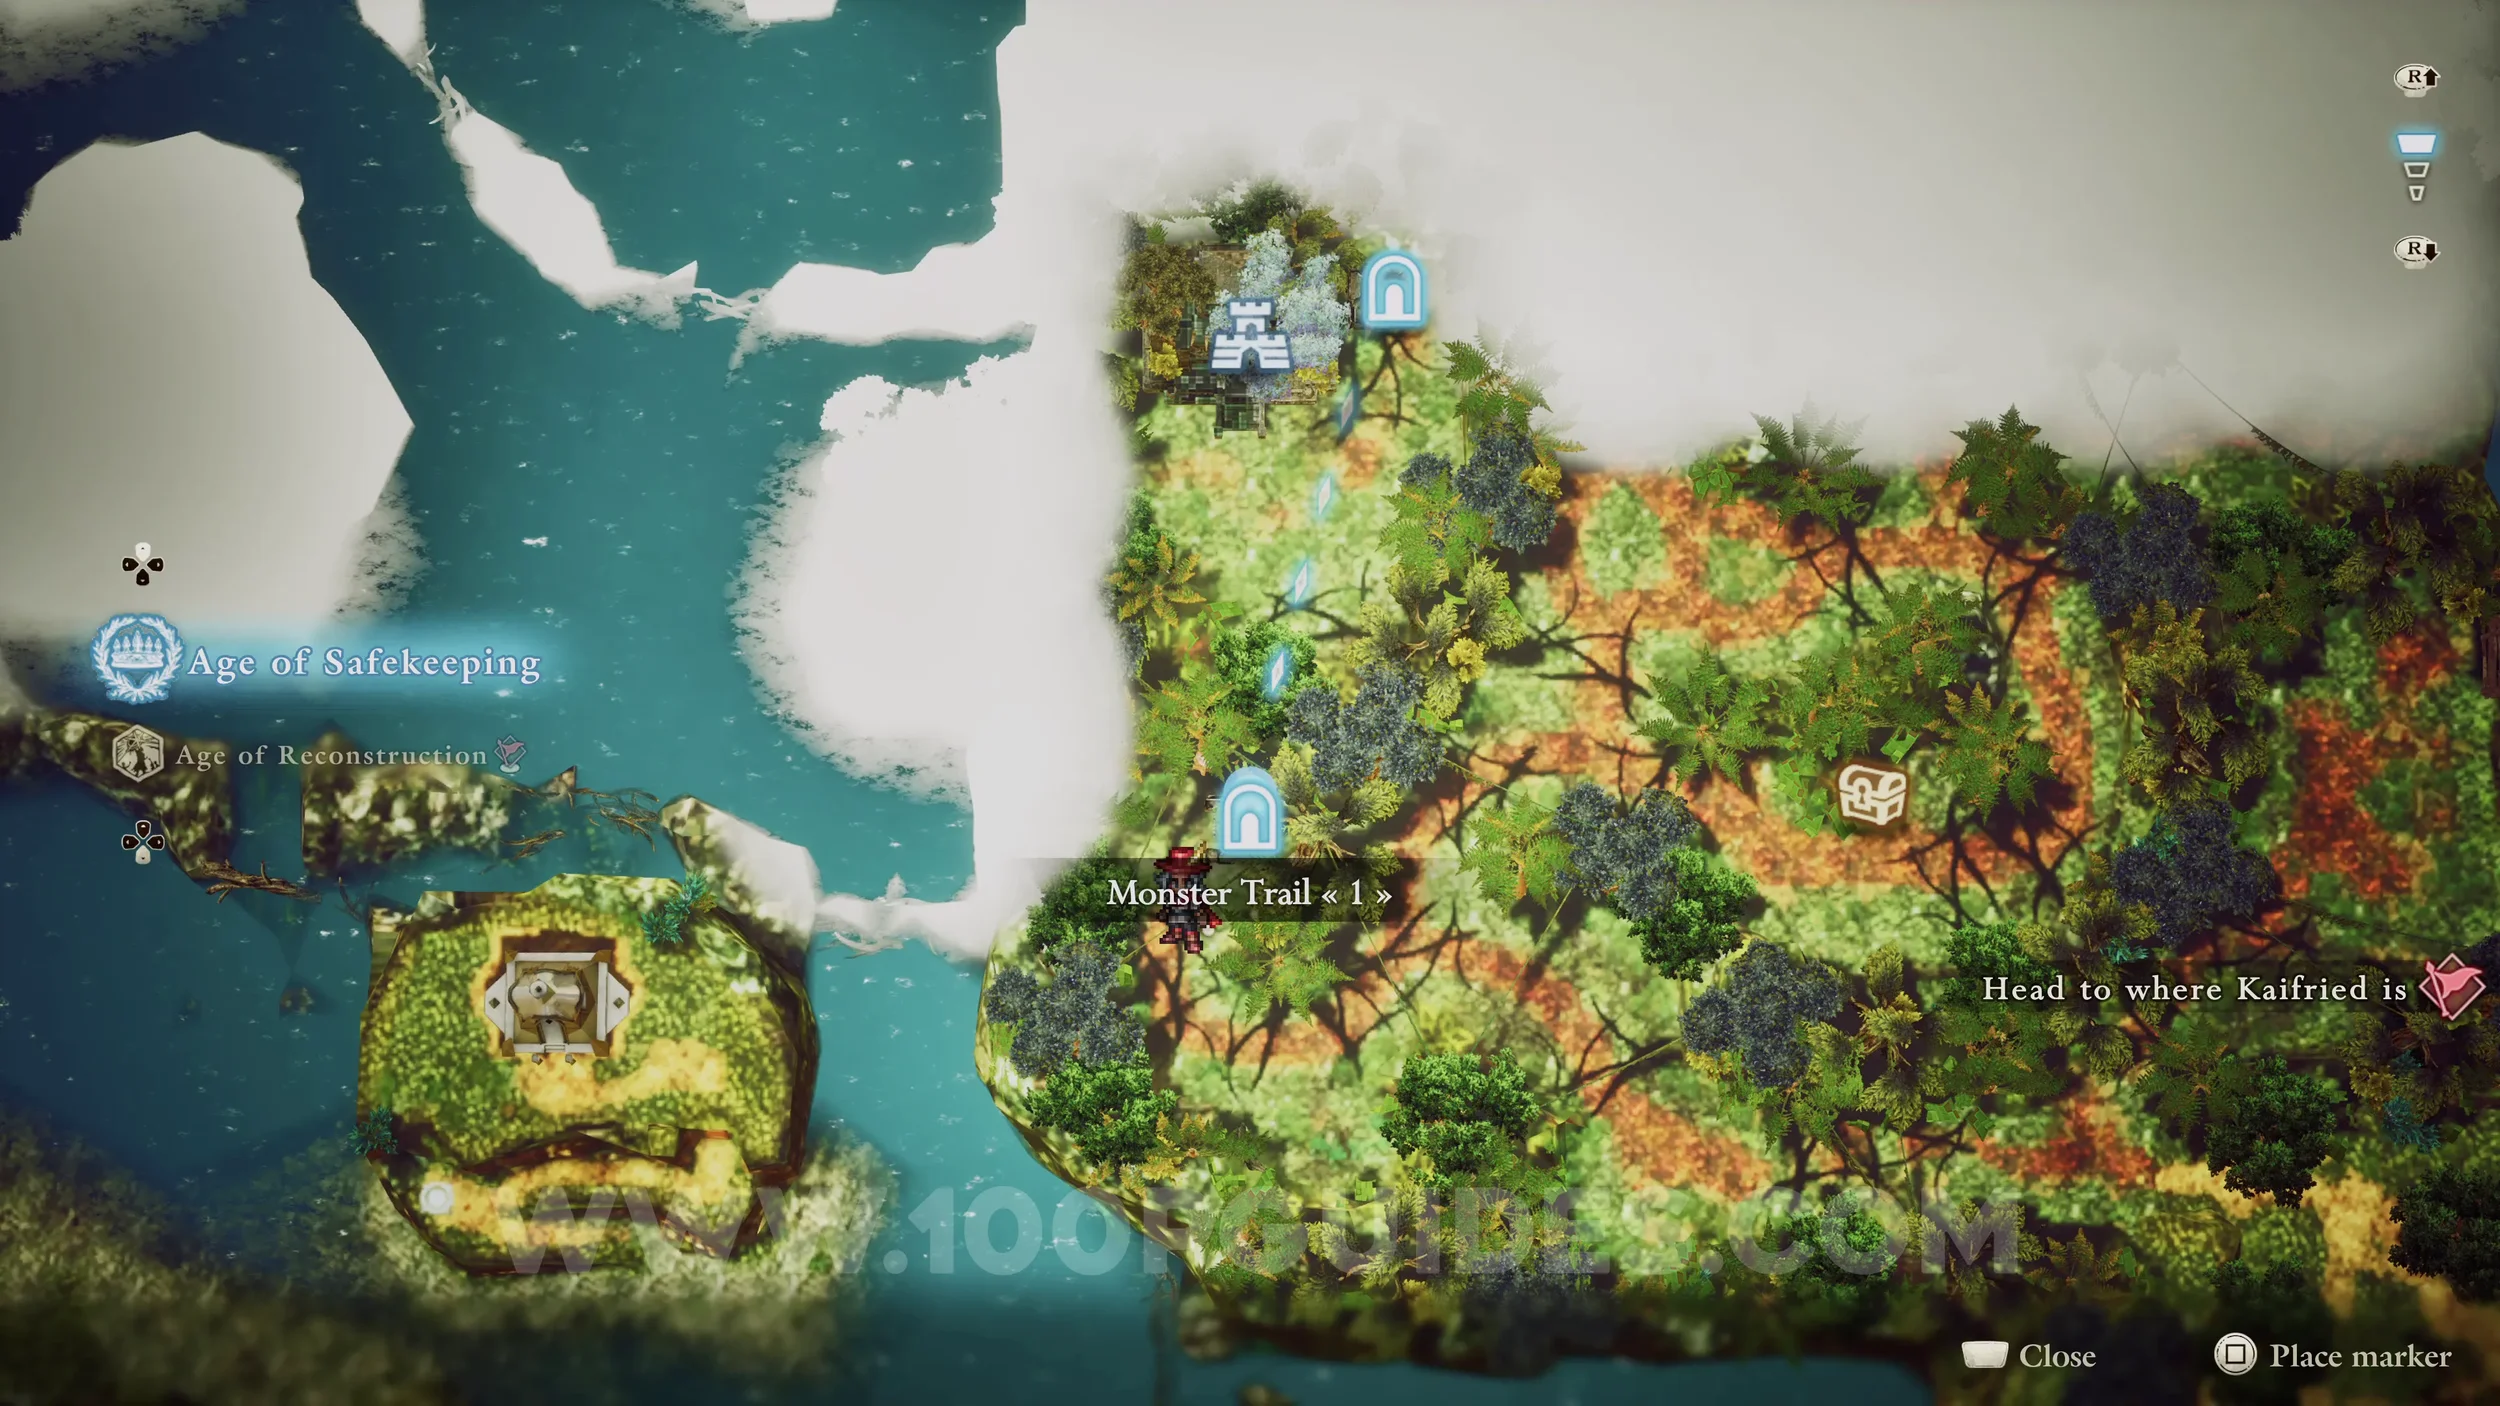
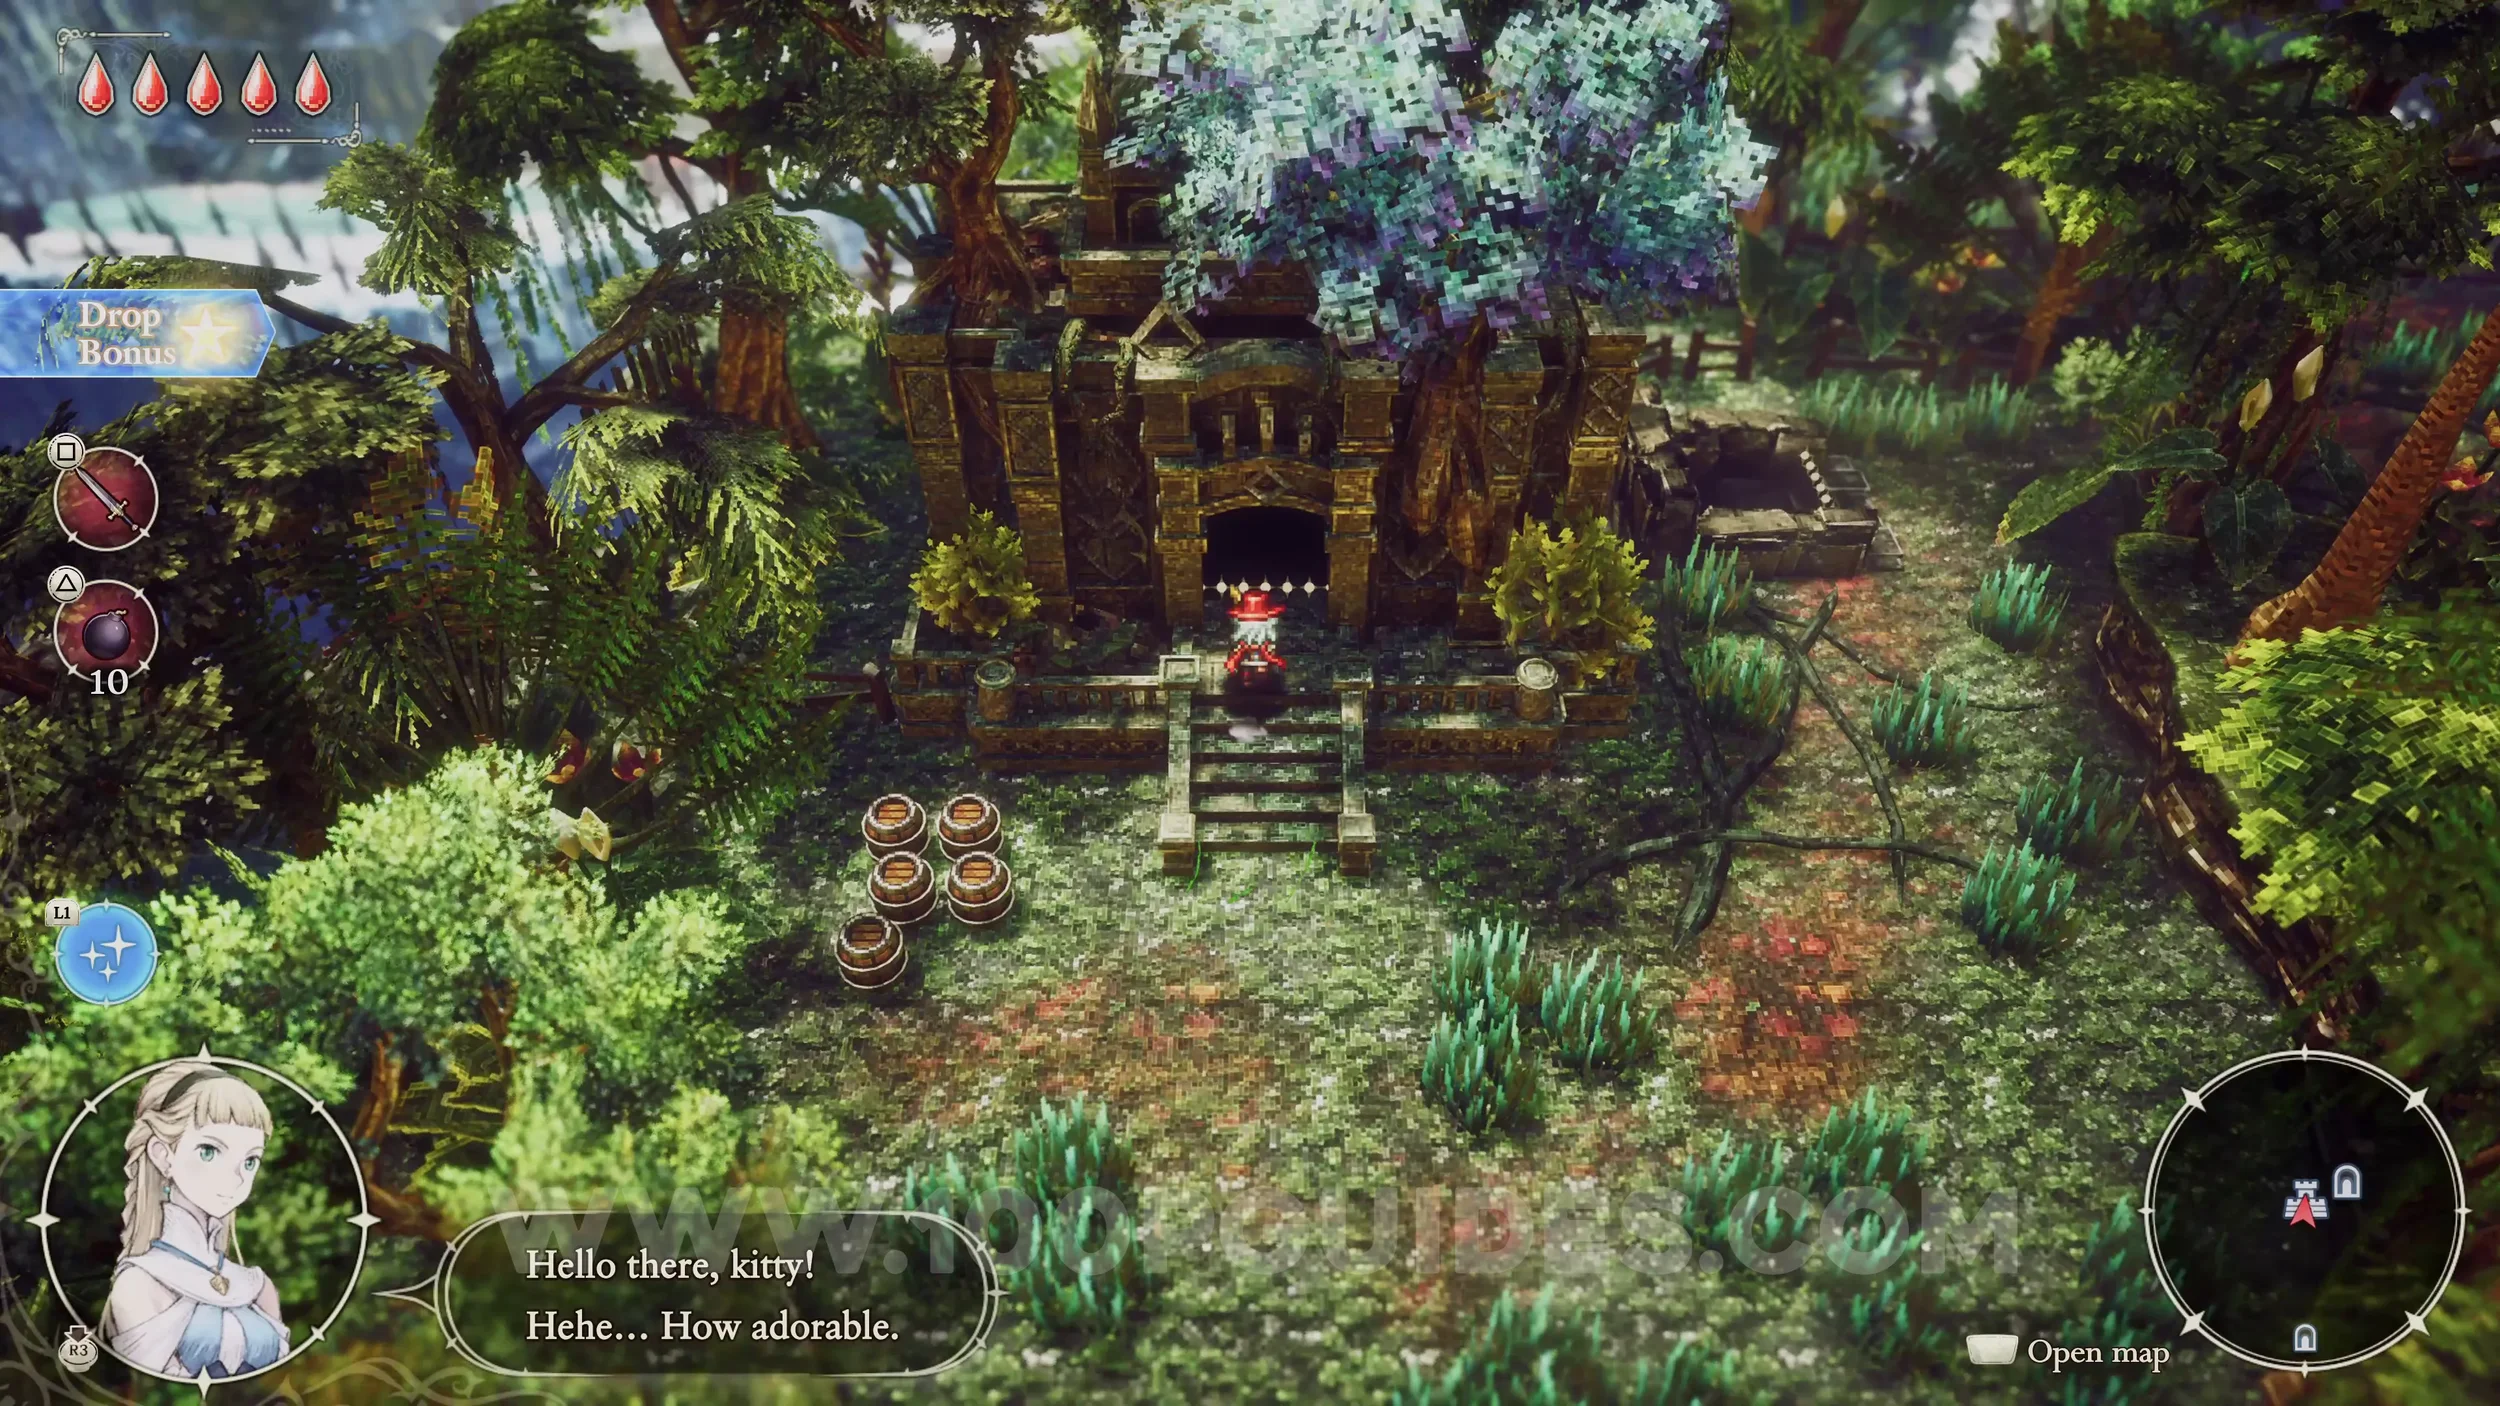
Shard of Life #4. Go through Monster Trail 1 to reach the Forest Ruins. Then, once inside, head left at the start and continue to the Second Level. Here, cross the moving platforms and use the jump pads on your left to reach the chest with the Shard of Life inside.

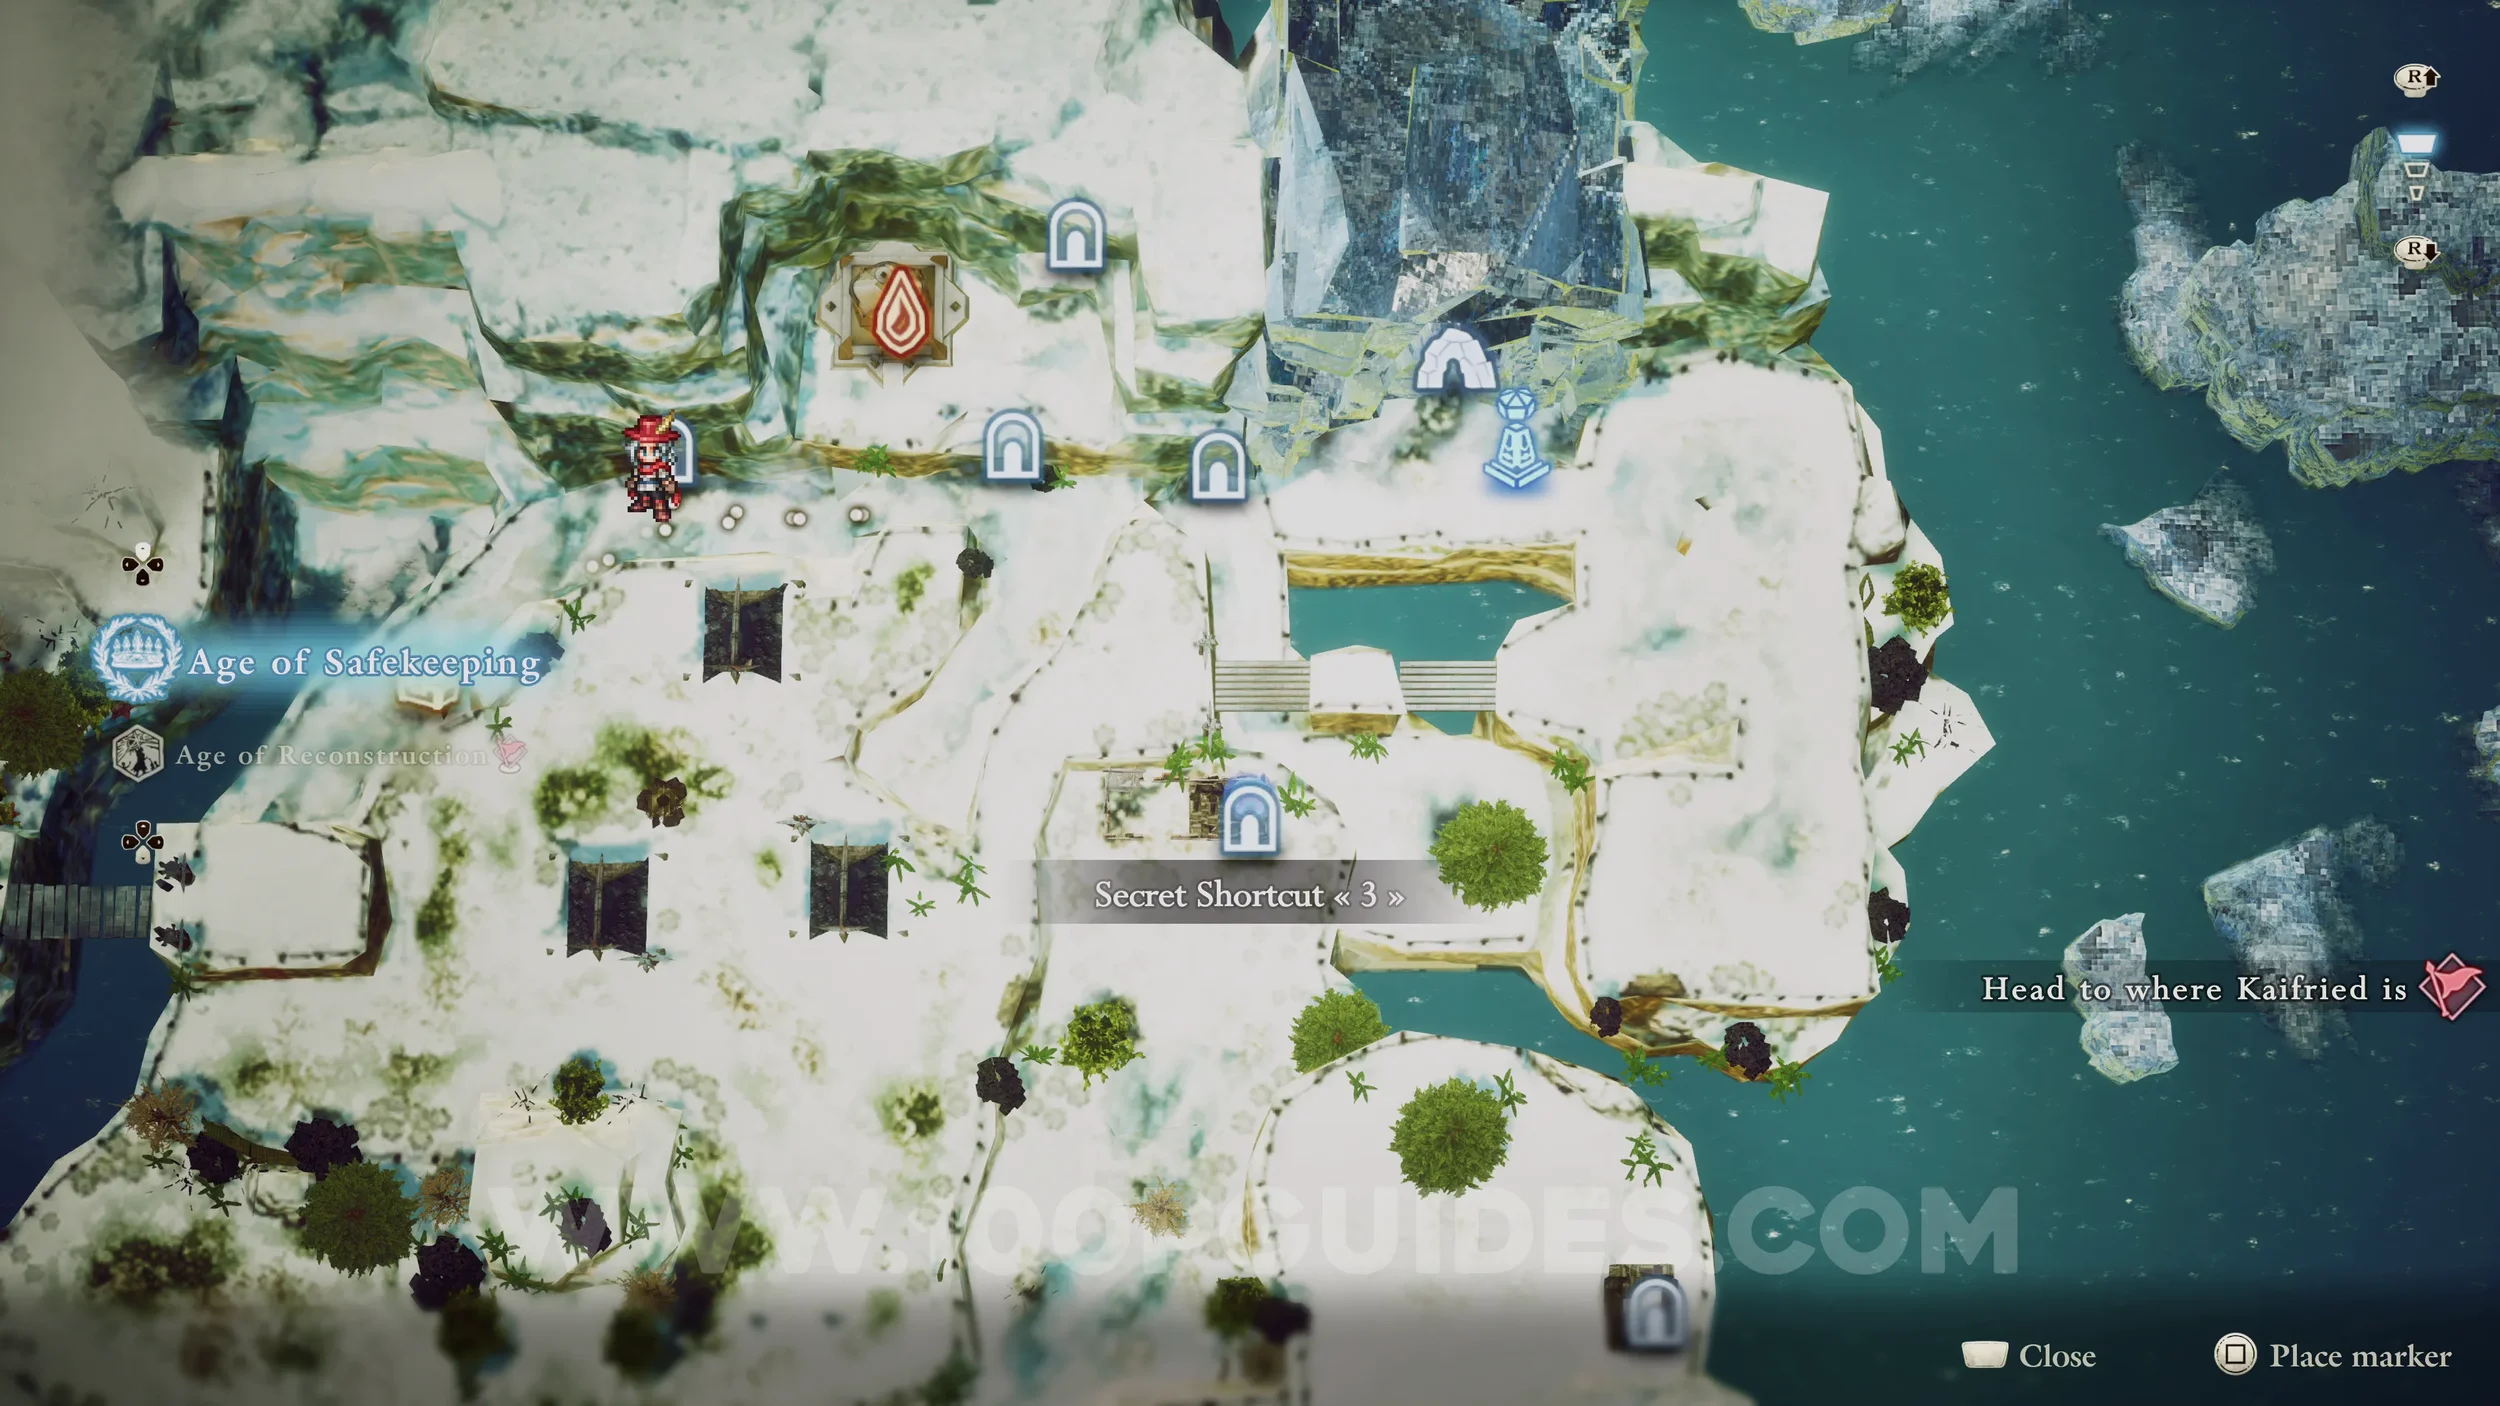
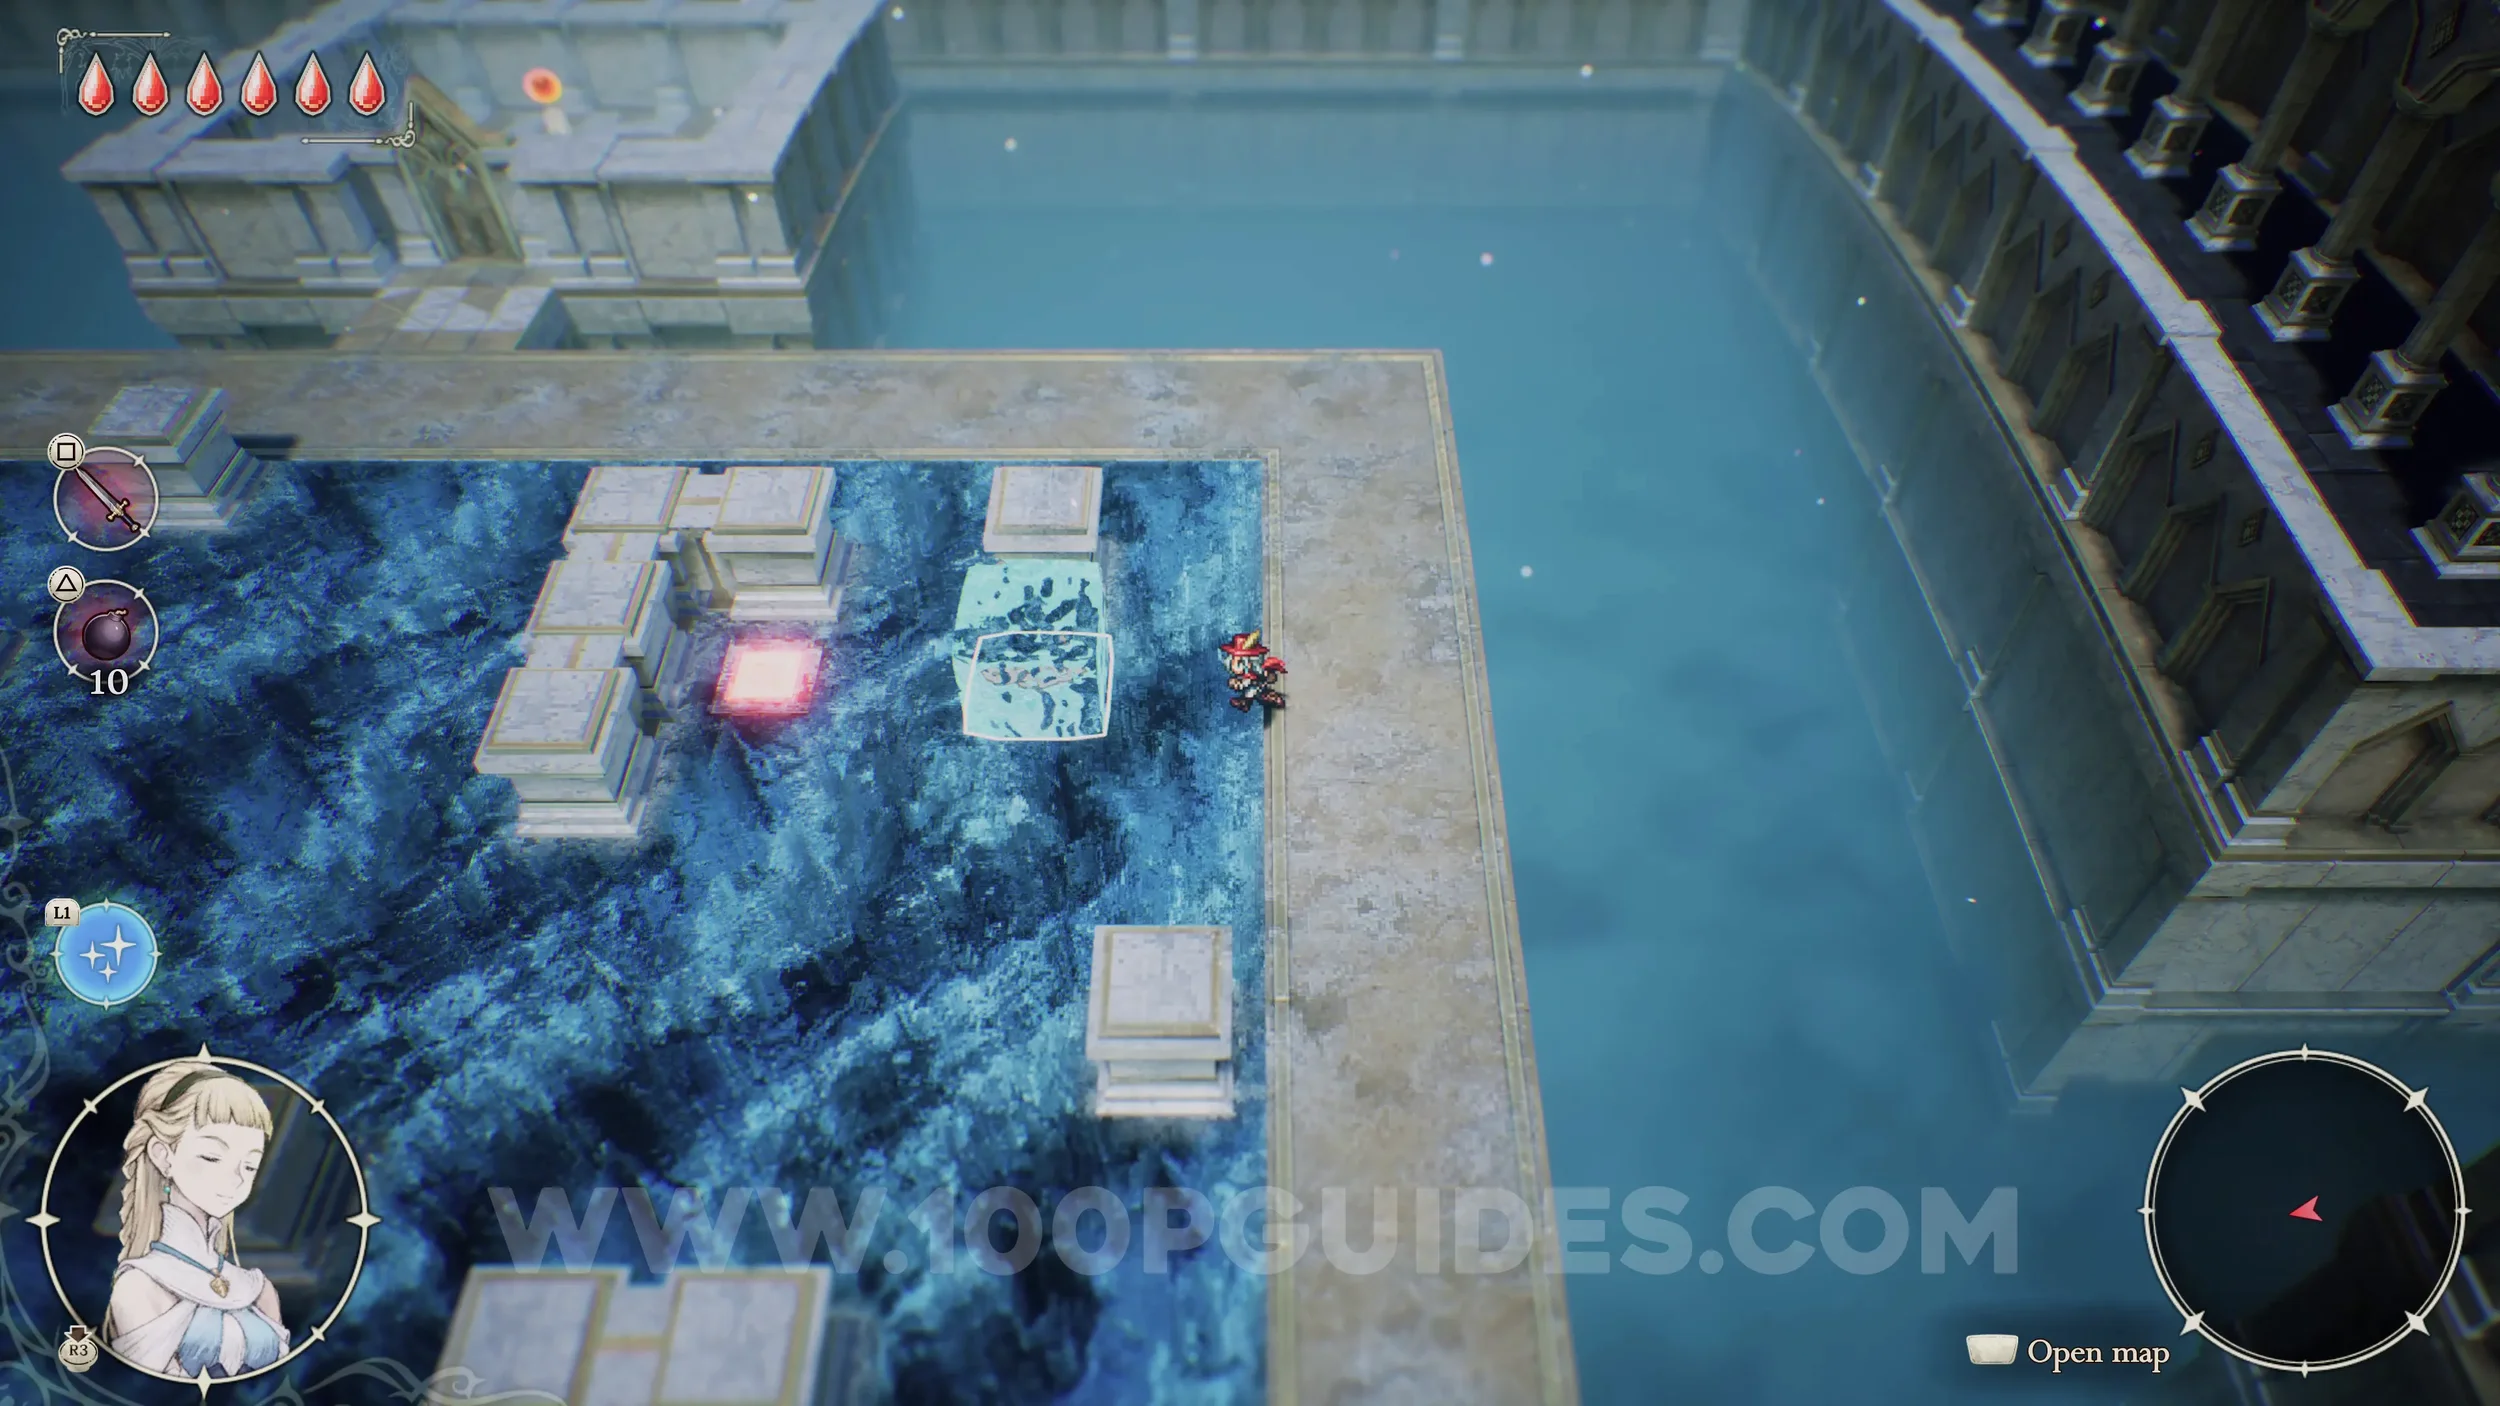
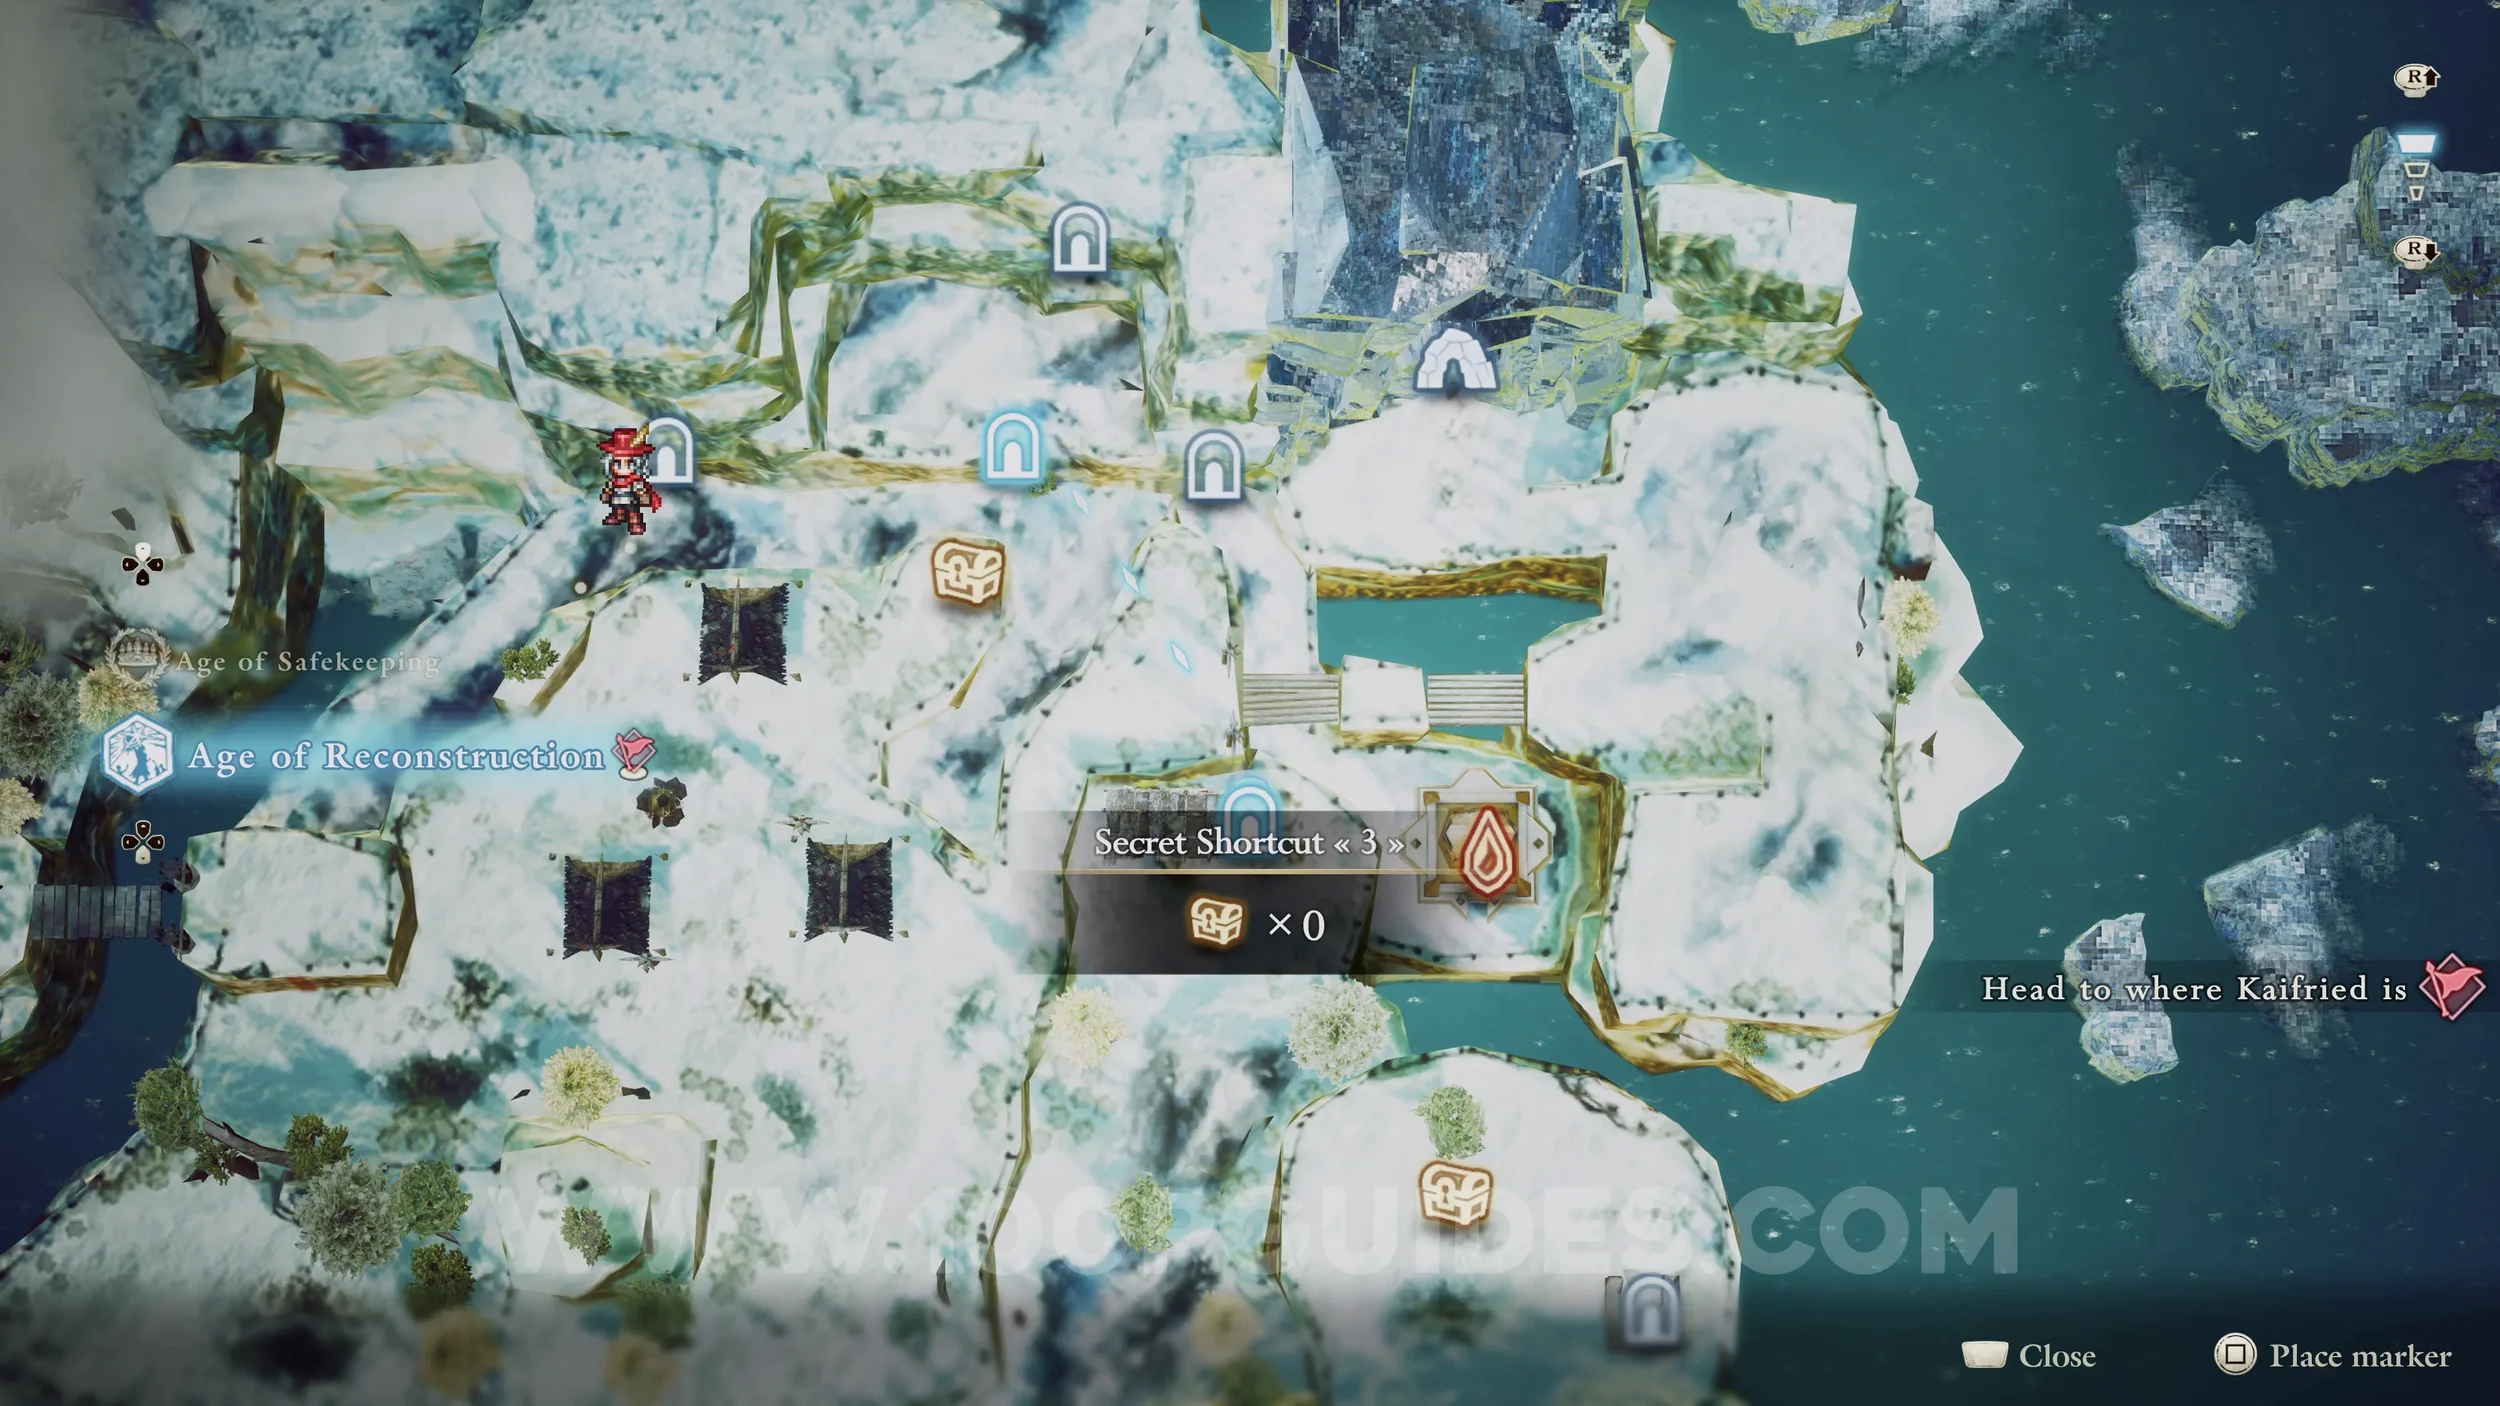
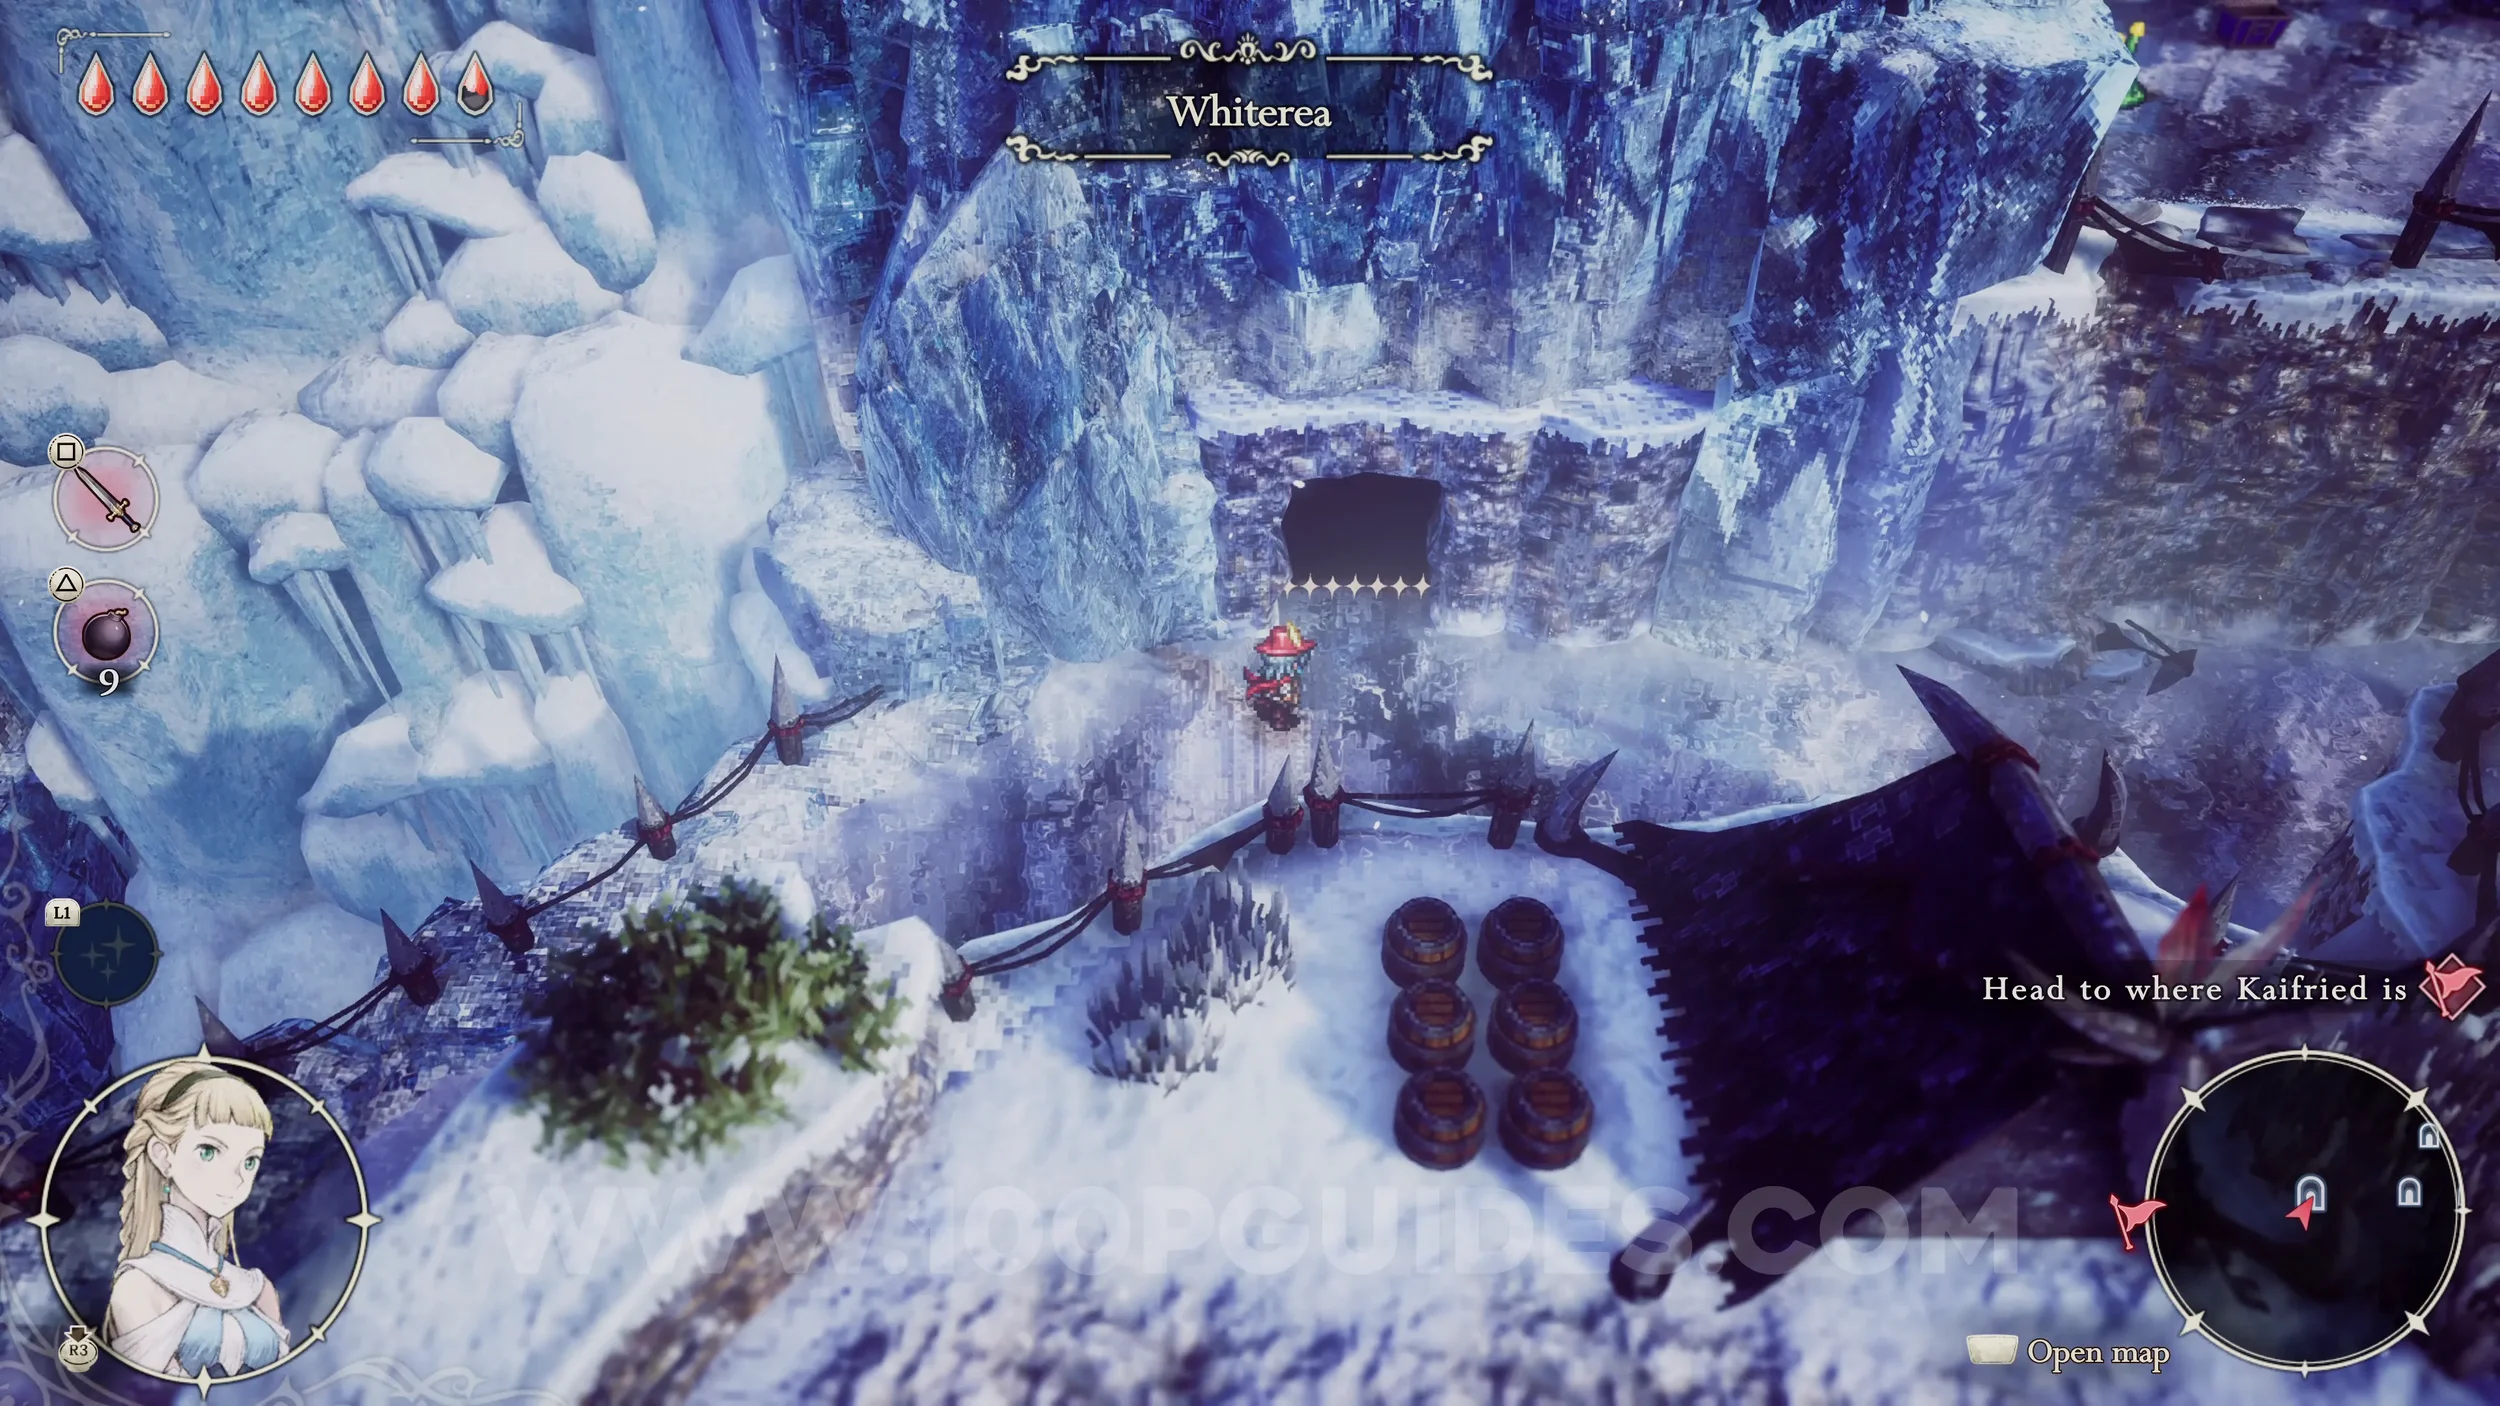
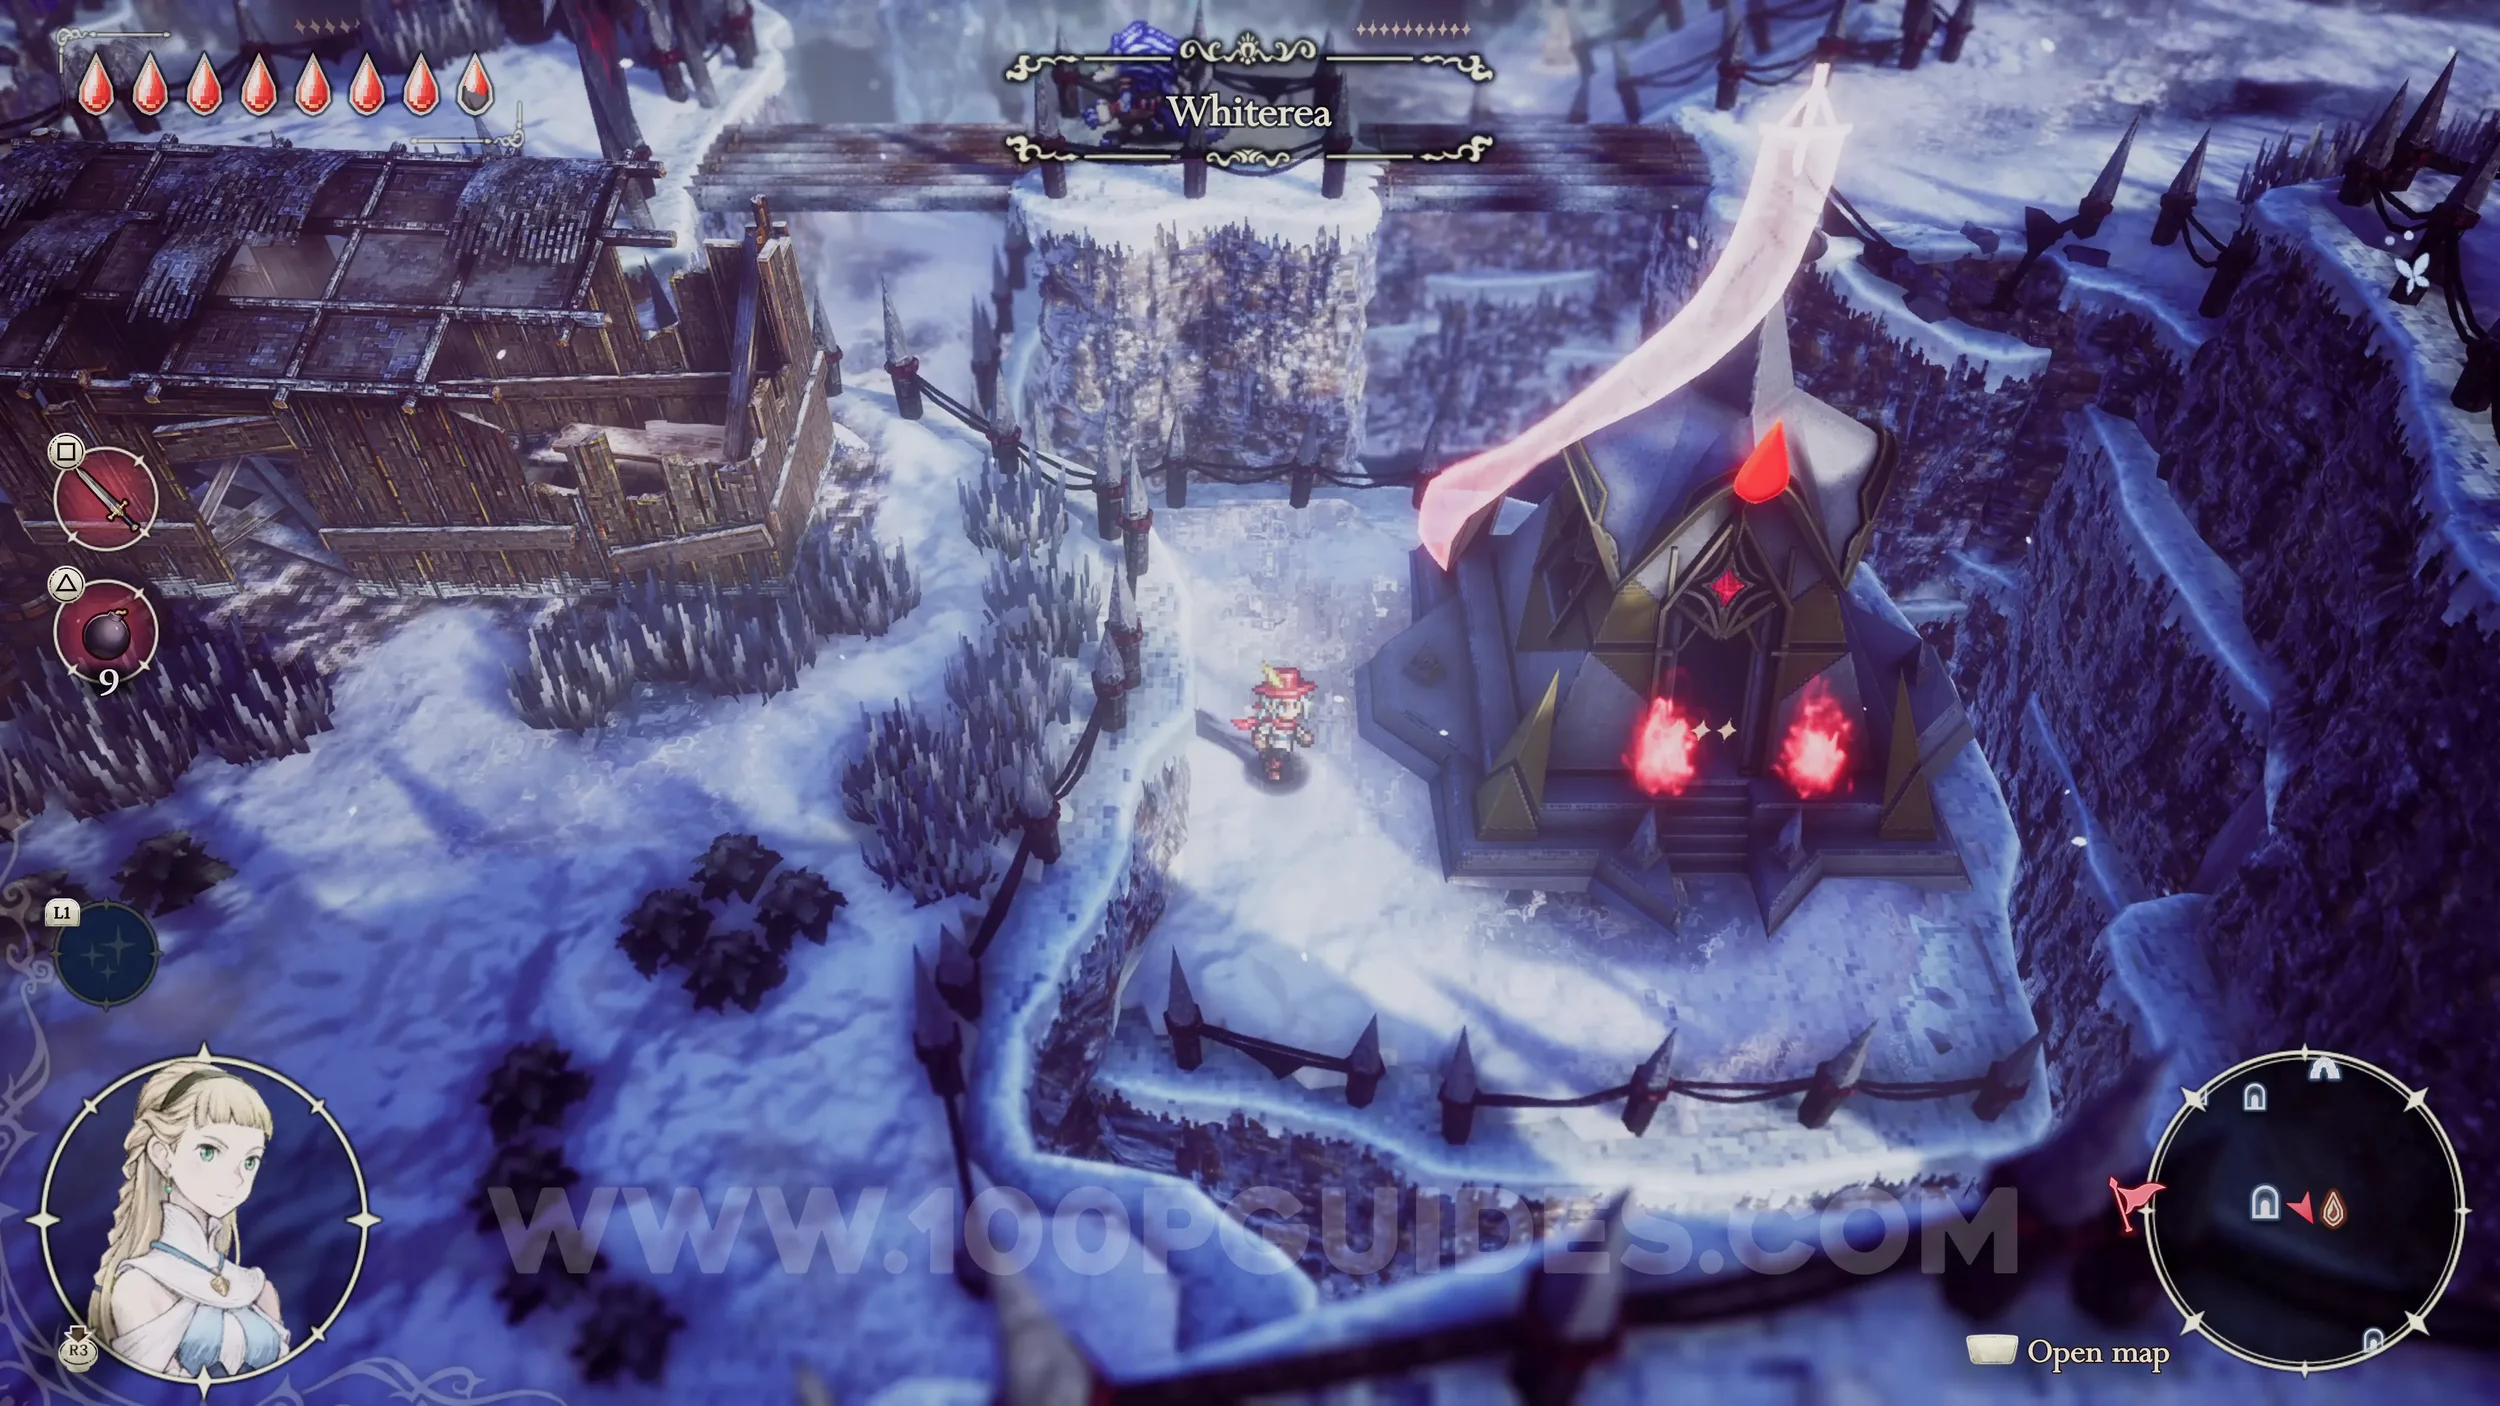
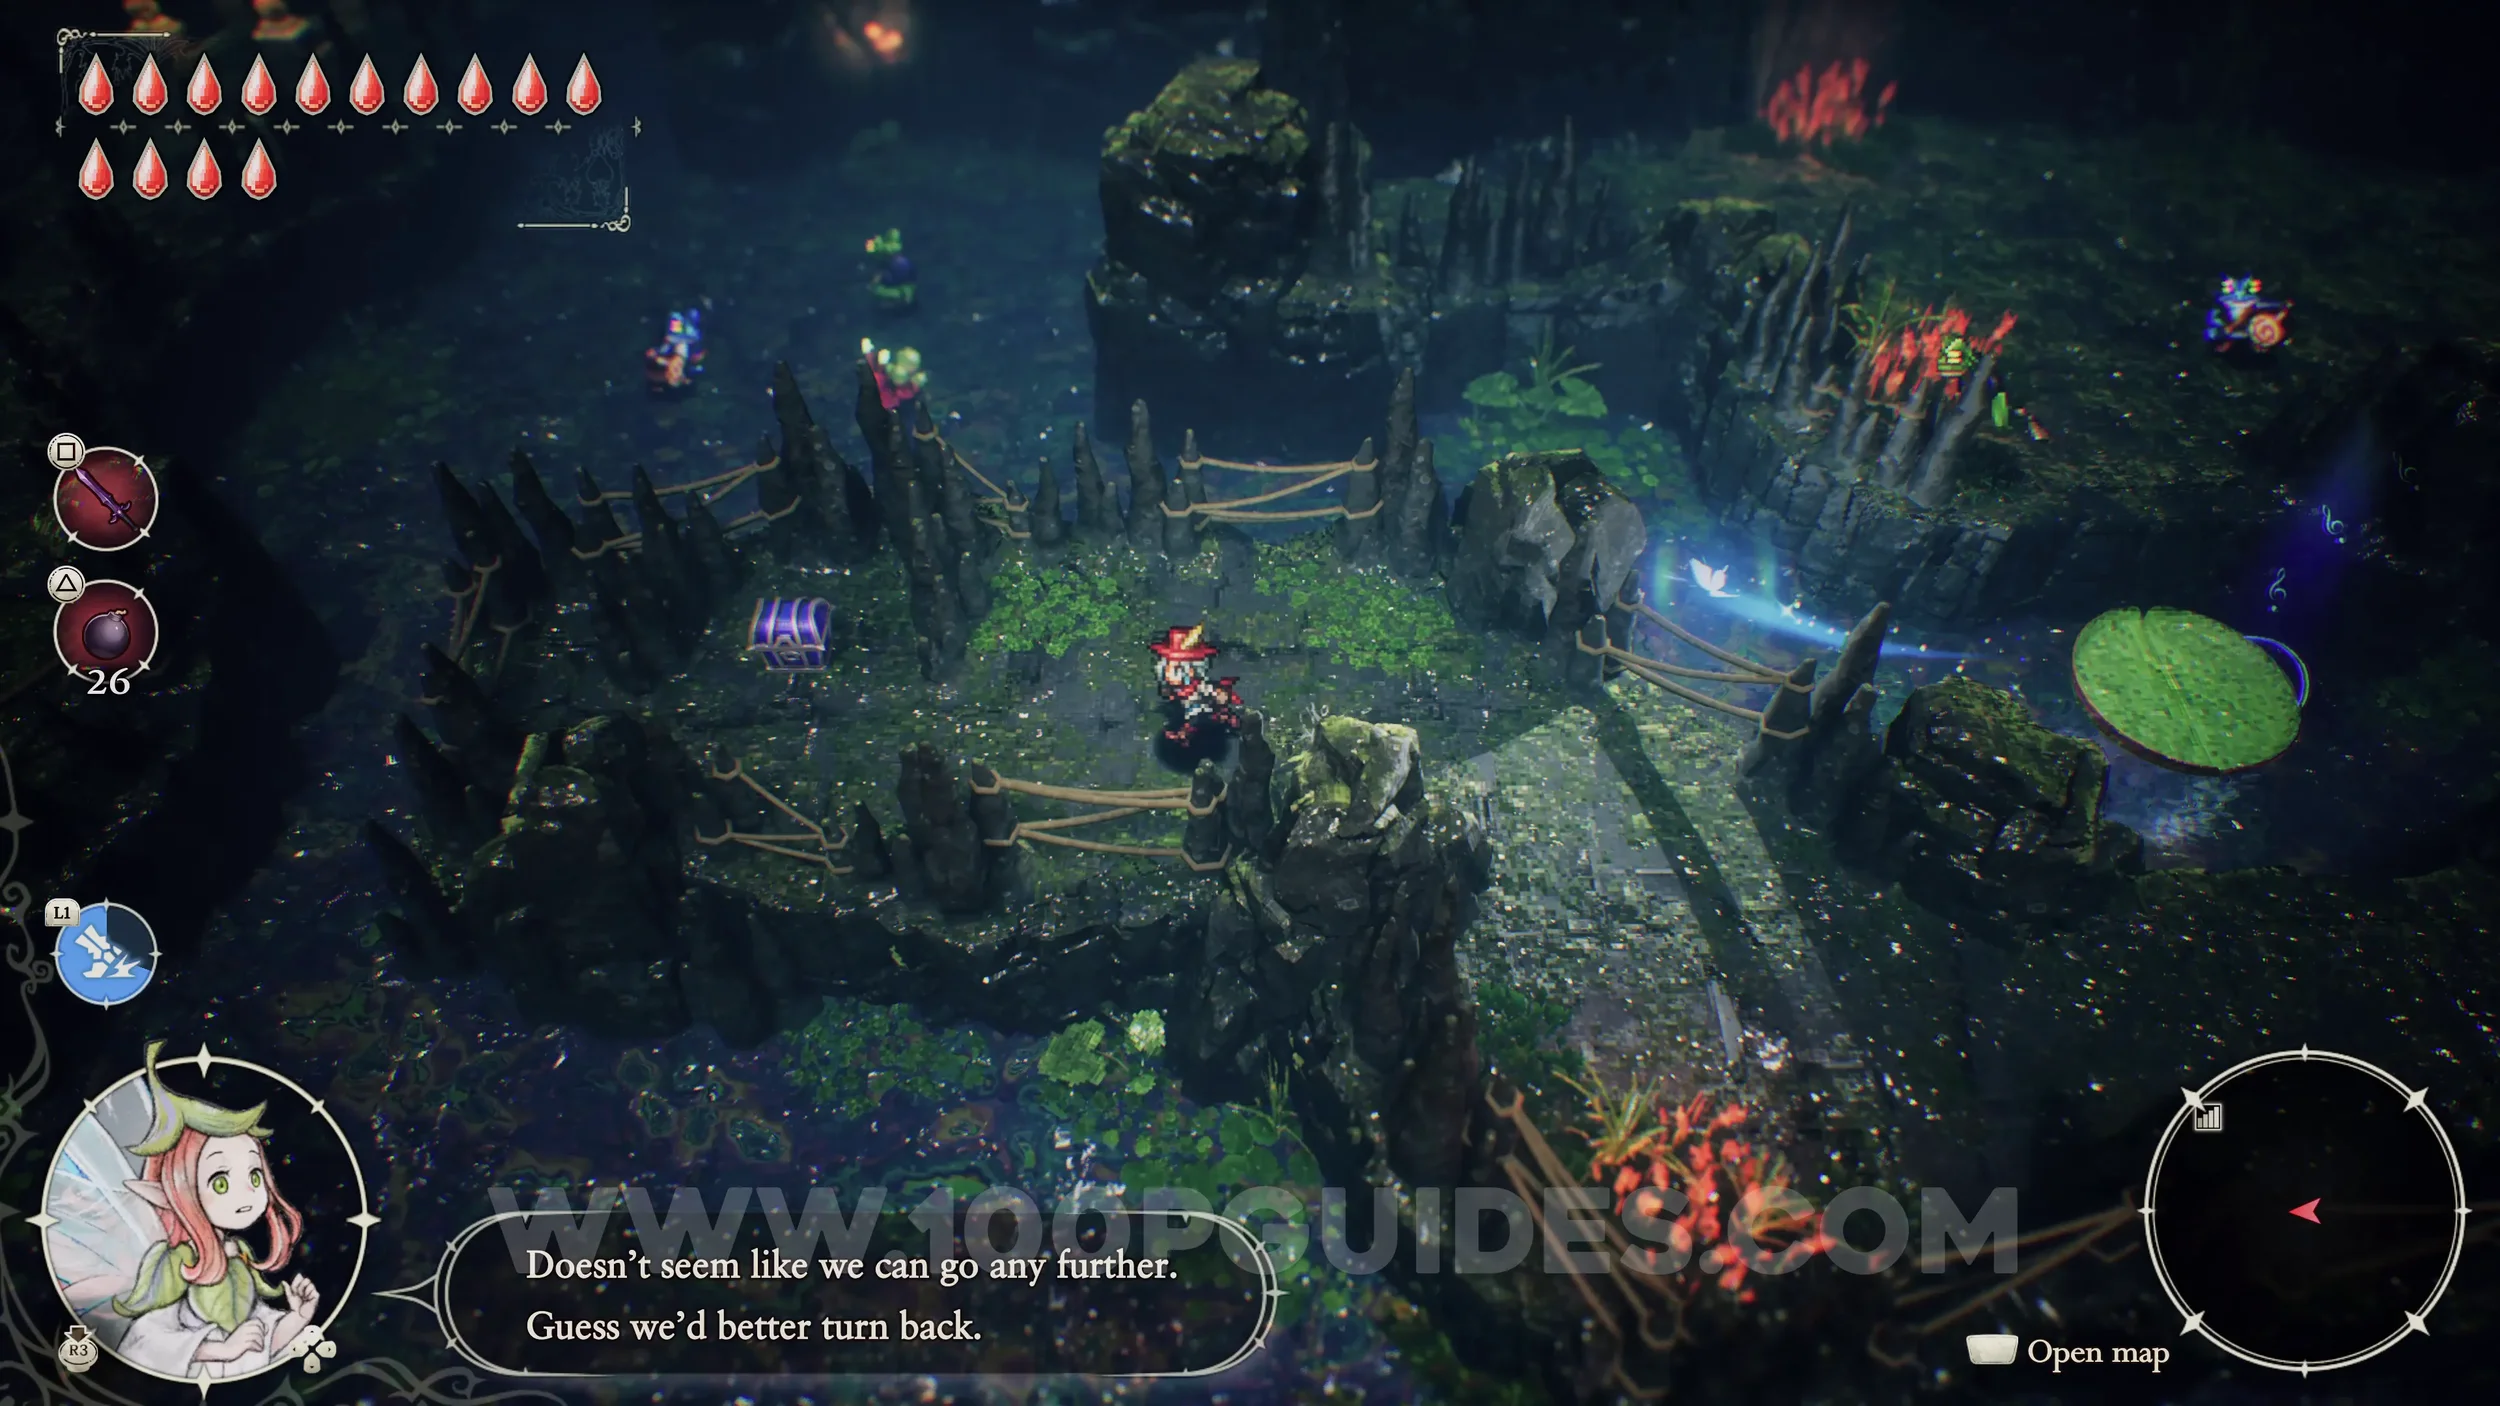
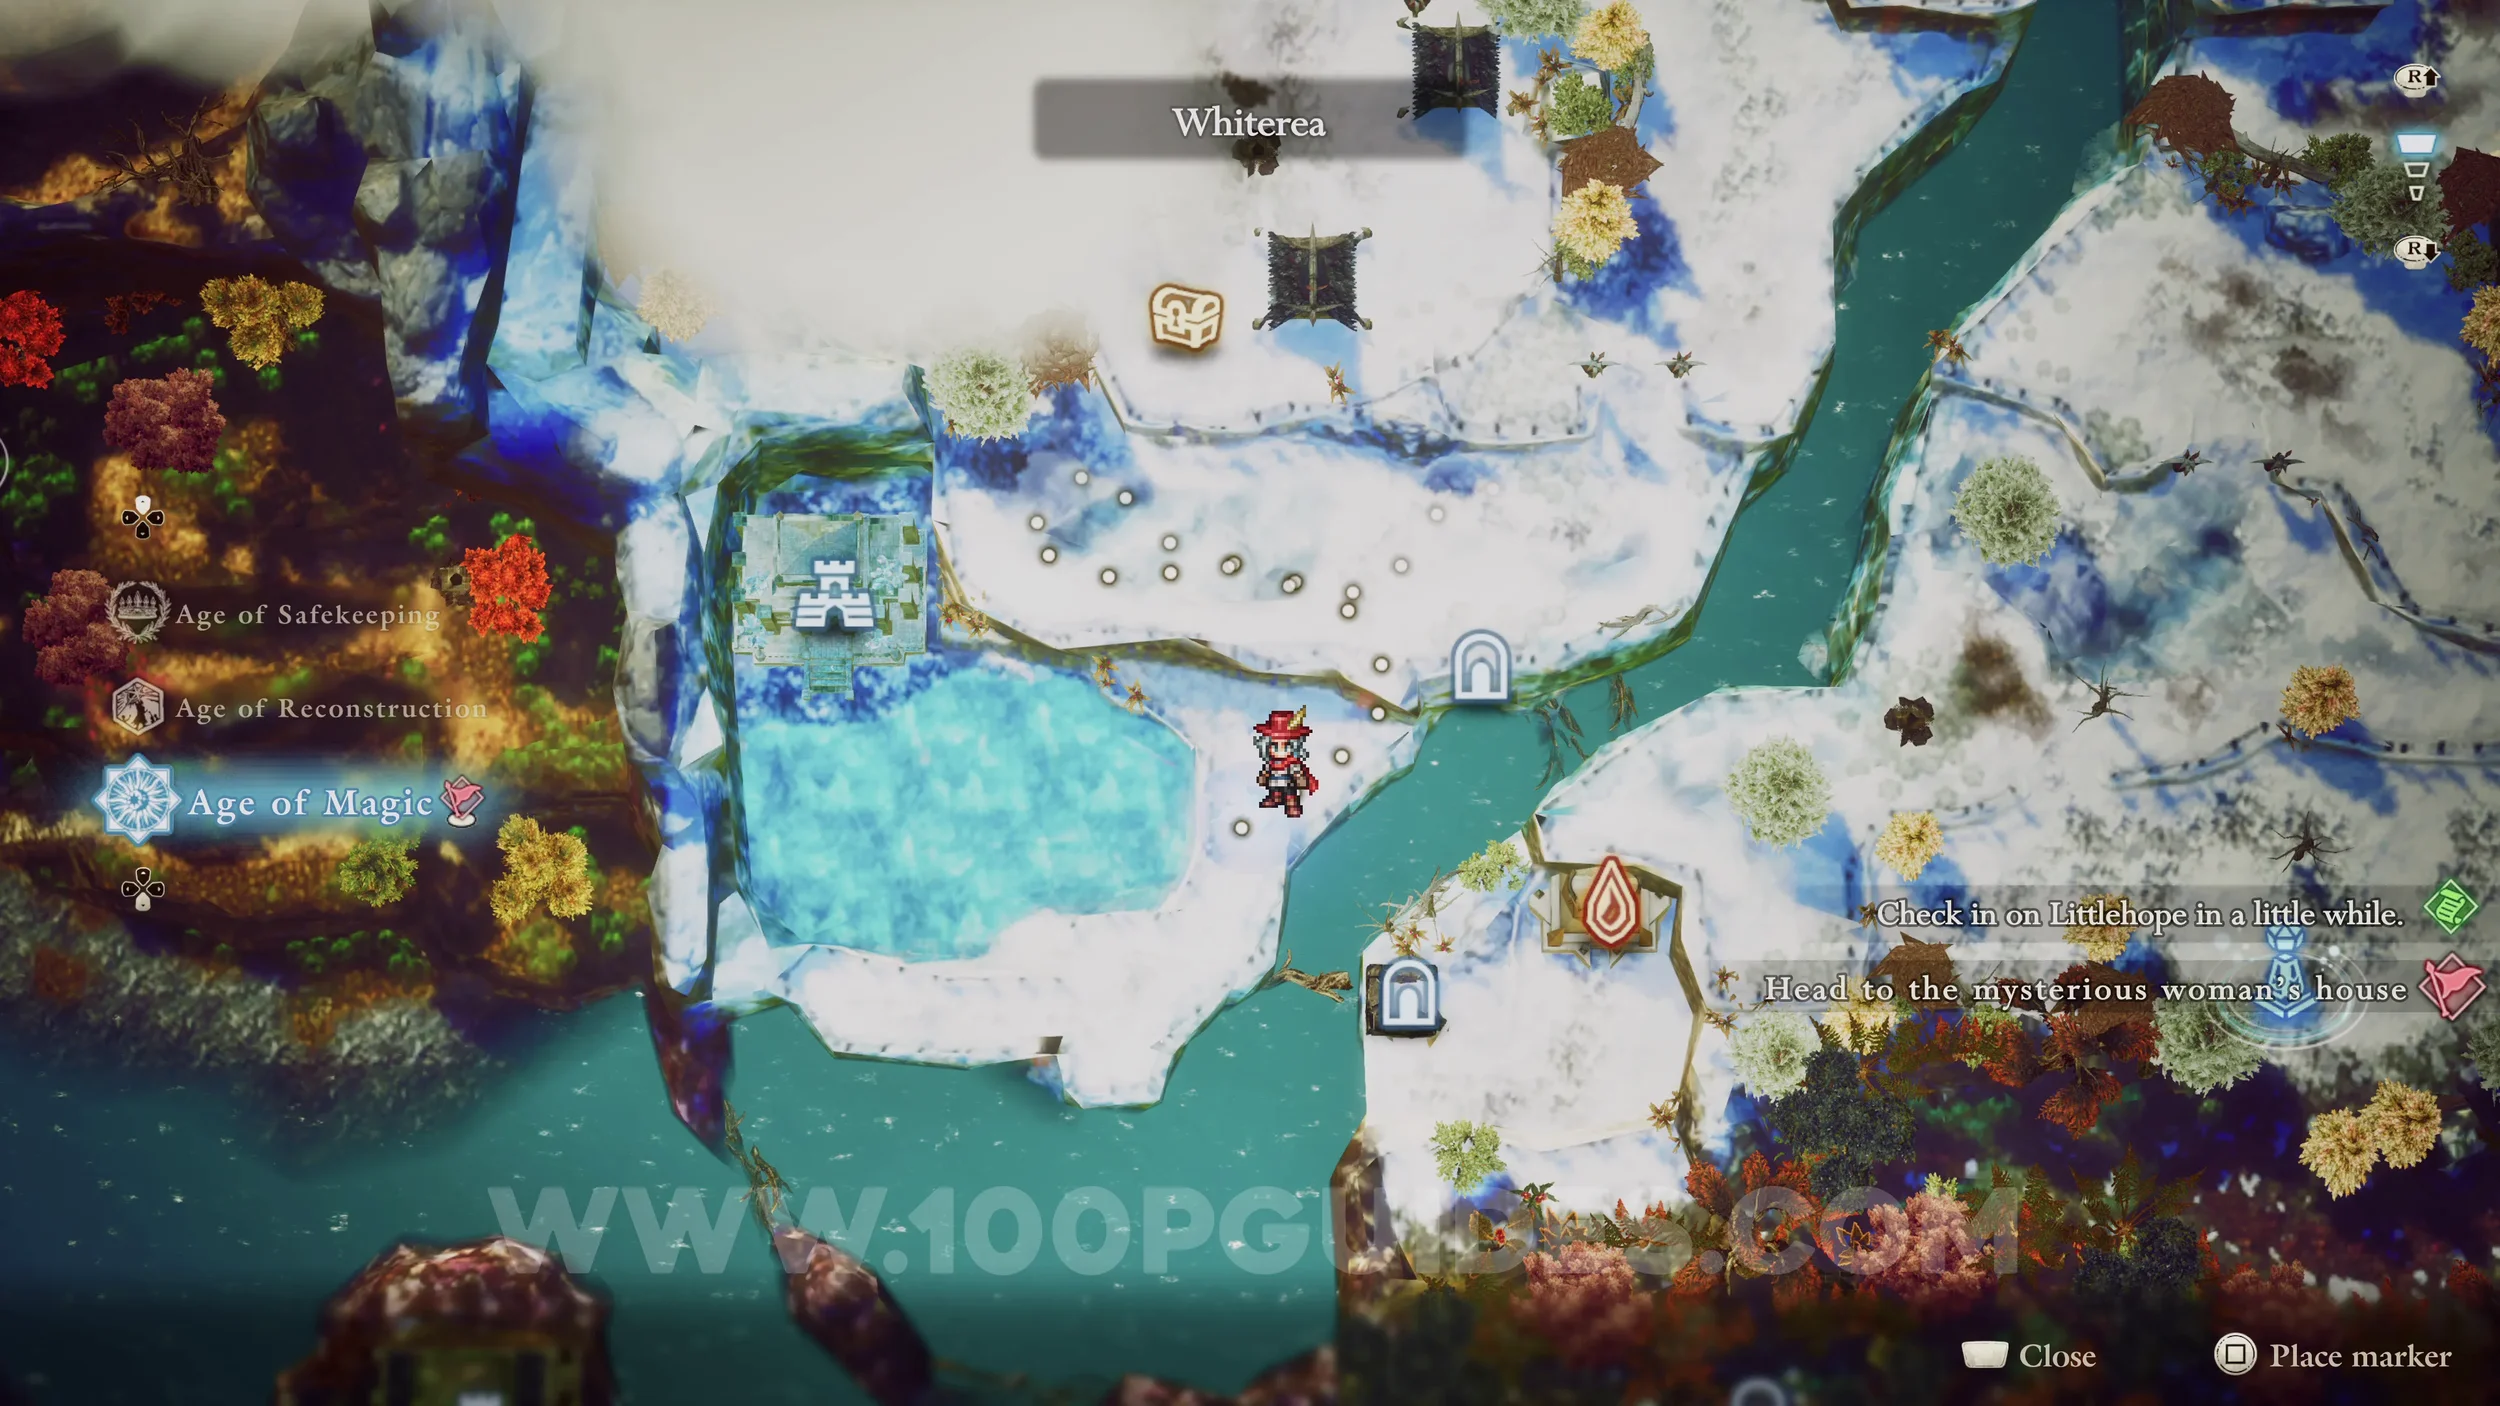
Shard of Life #5. In Whiterea, go through Secret Shortcut 3 and come out the other side. Then, head all the way left to find the chest with the Shard of Life inside.

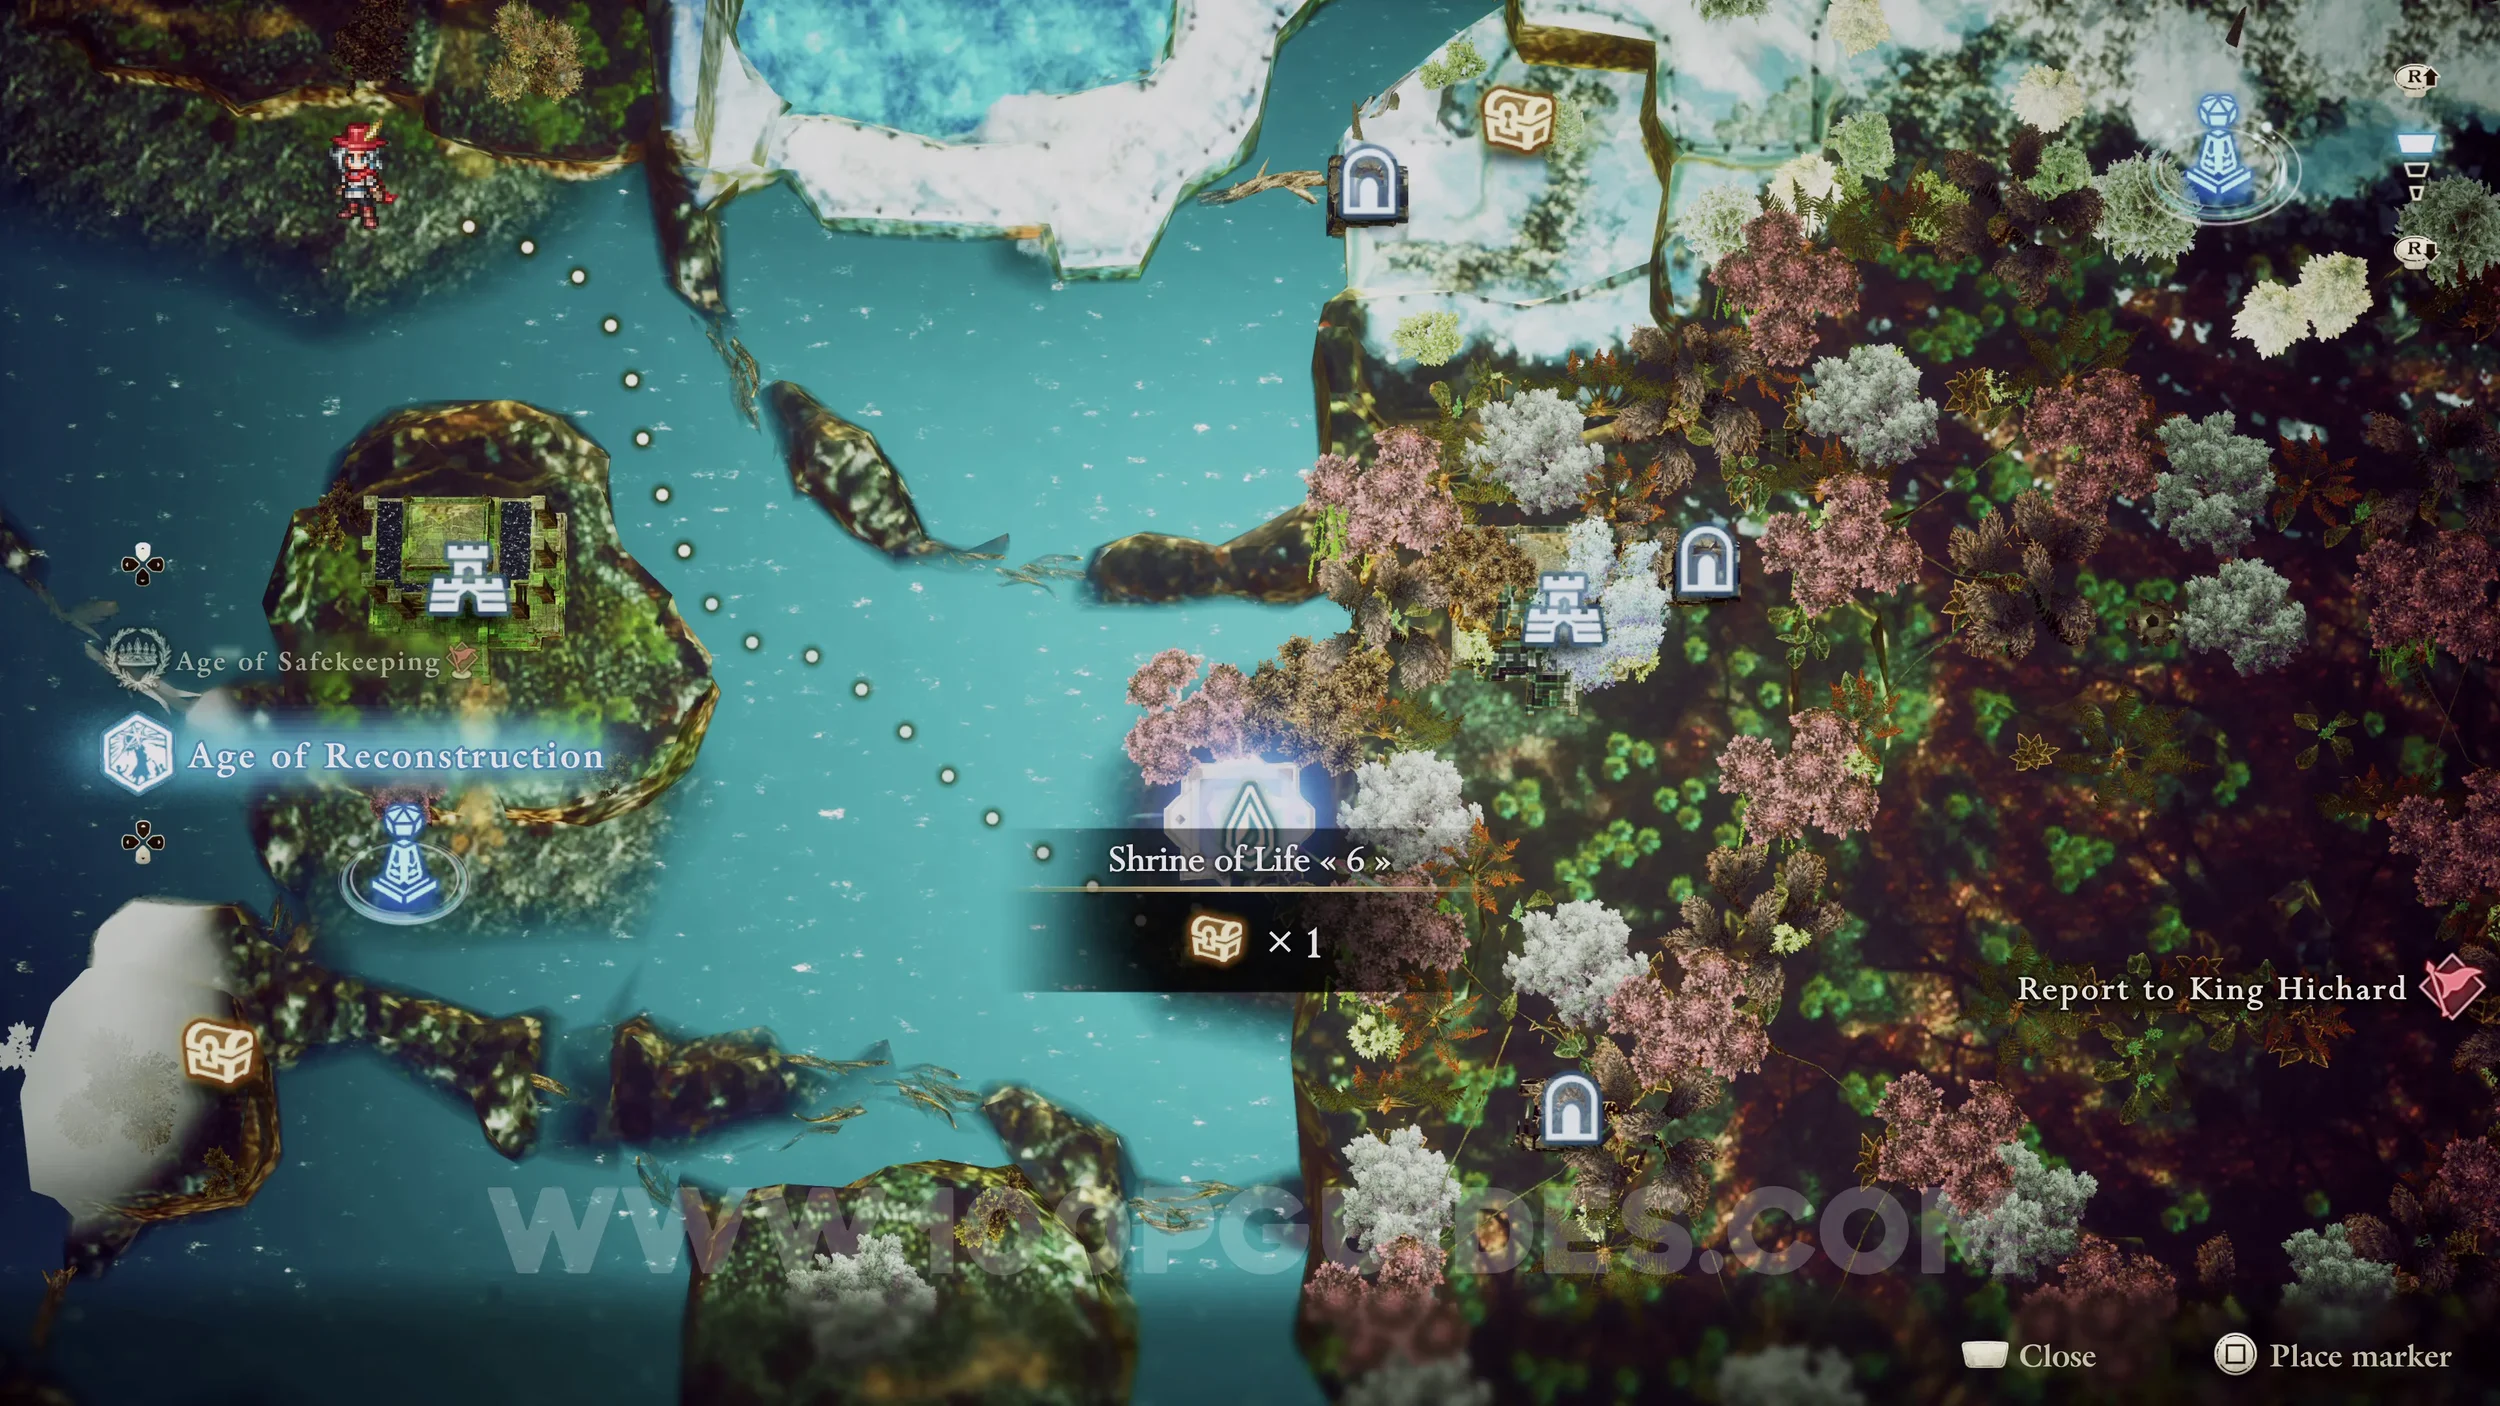
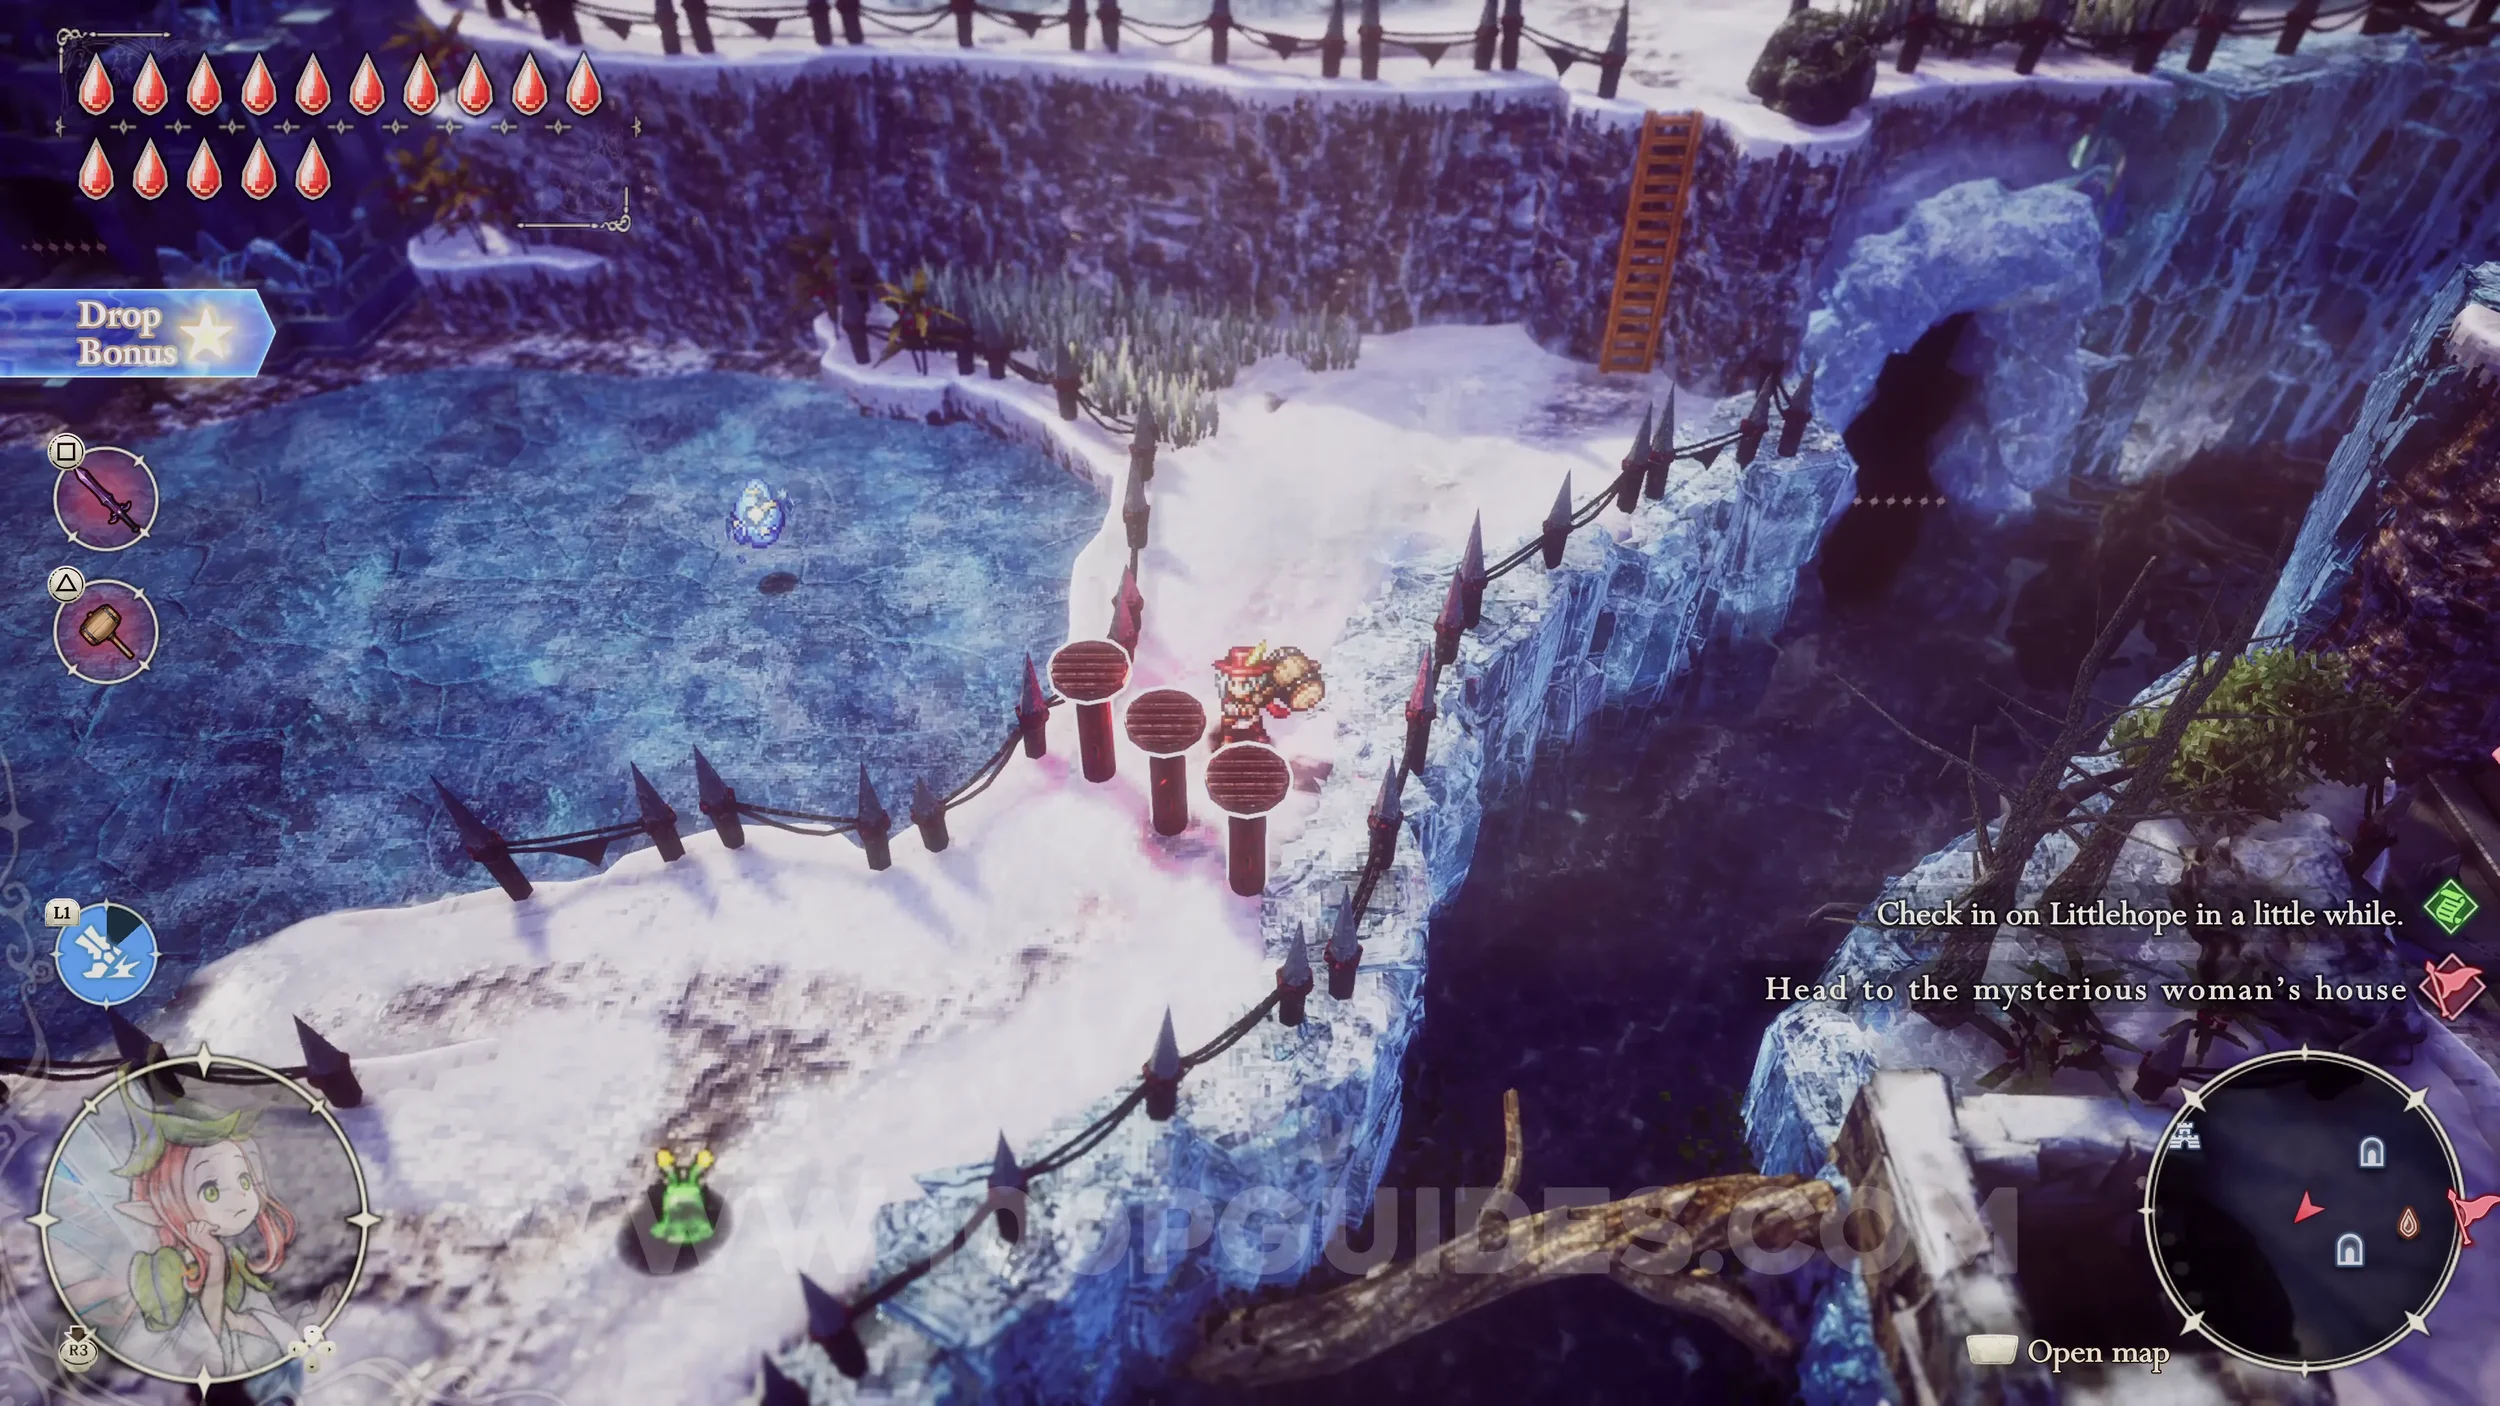
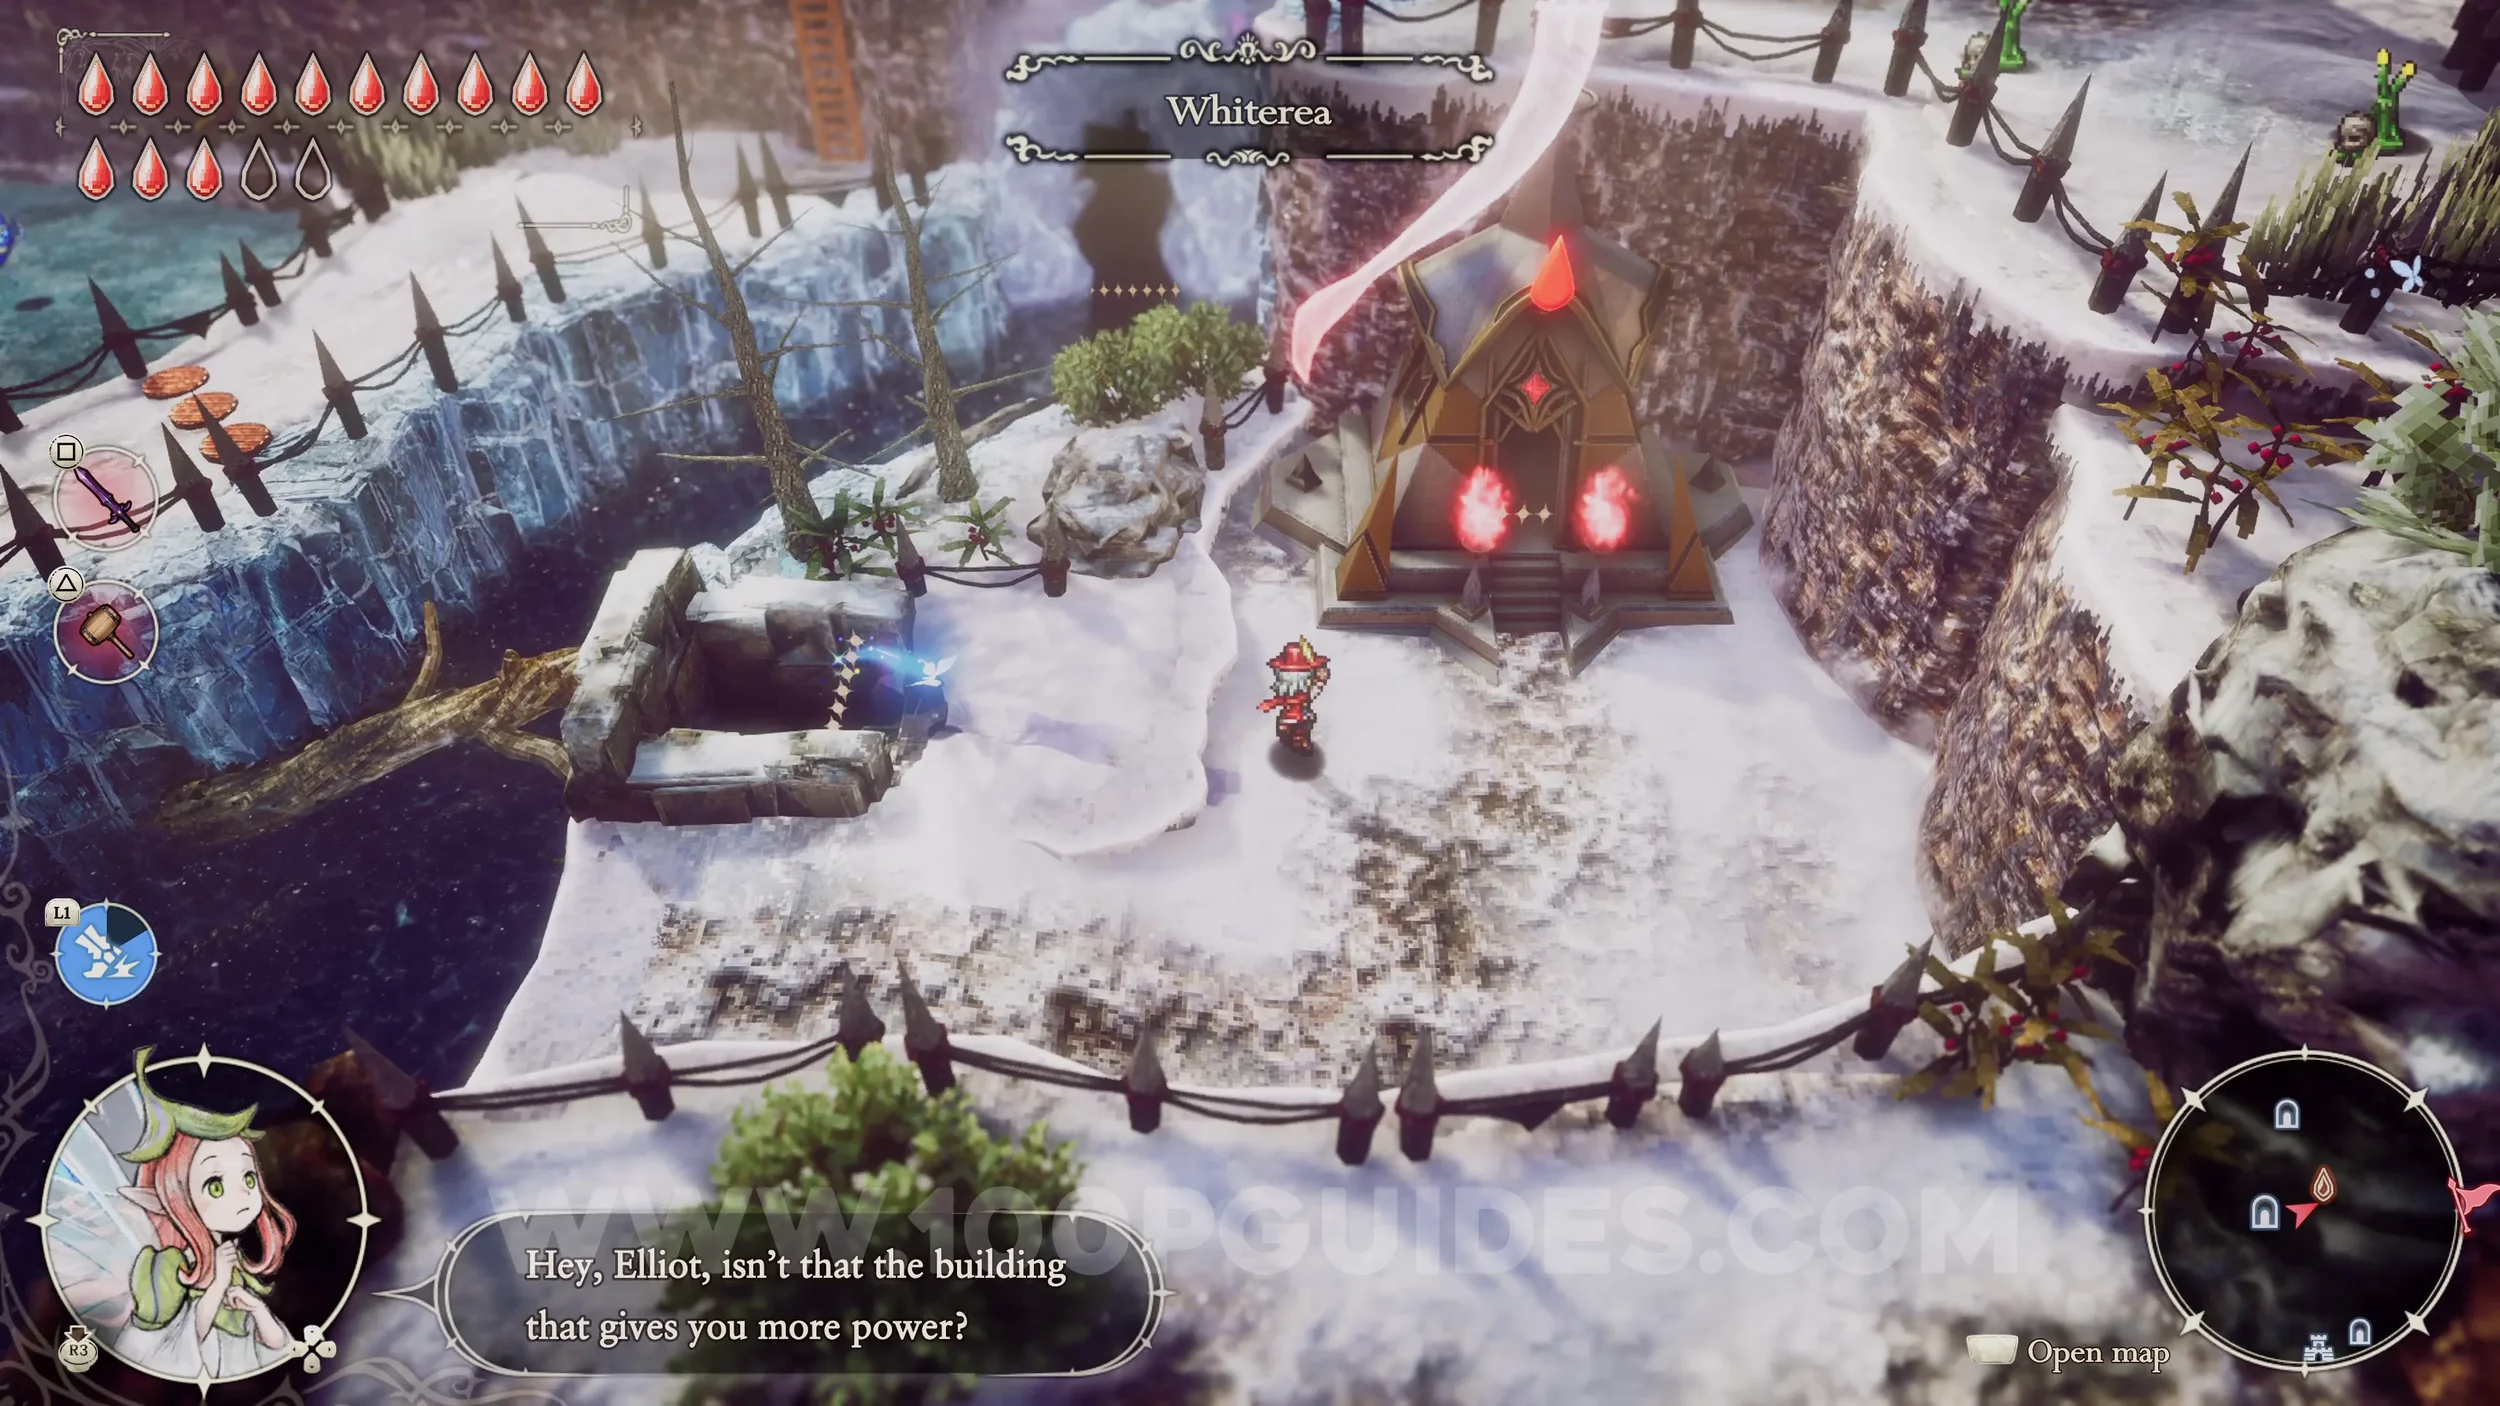
Shard of Life #6. From the previous chest, head through the cave on the left side of the wall to the north and come out the other side to find a Shrine of Life. Solve the ice block pushing puzzle to get the Shard of Life. If you need help solving it, check out this video guide.


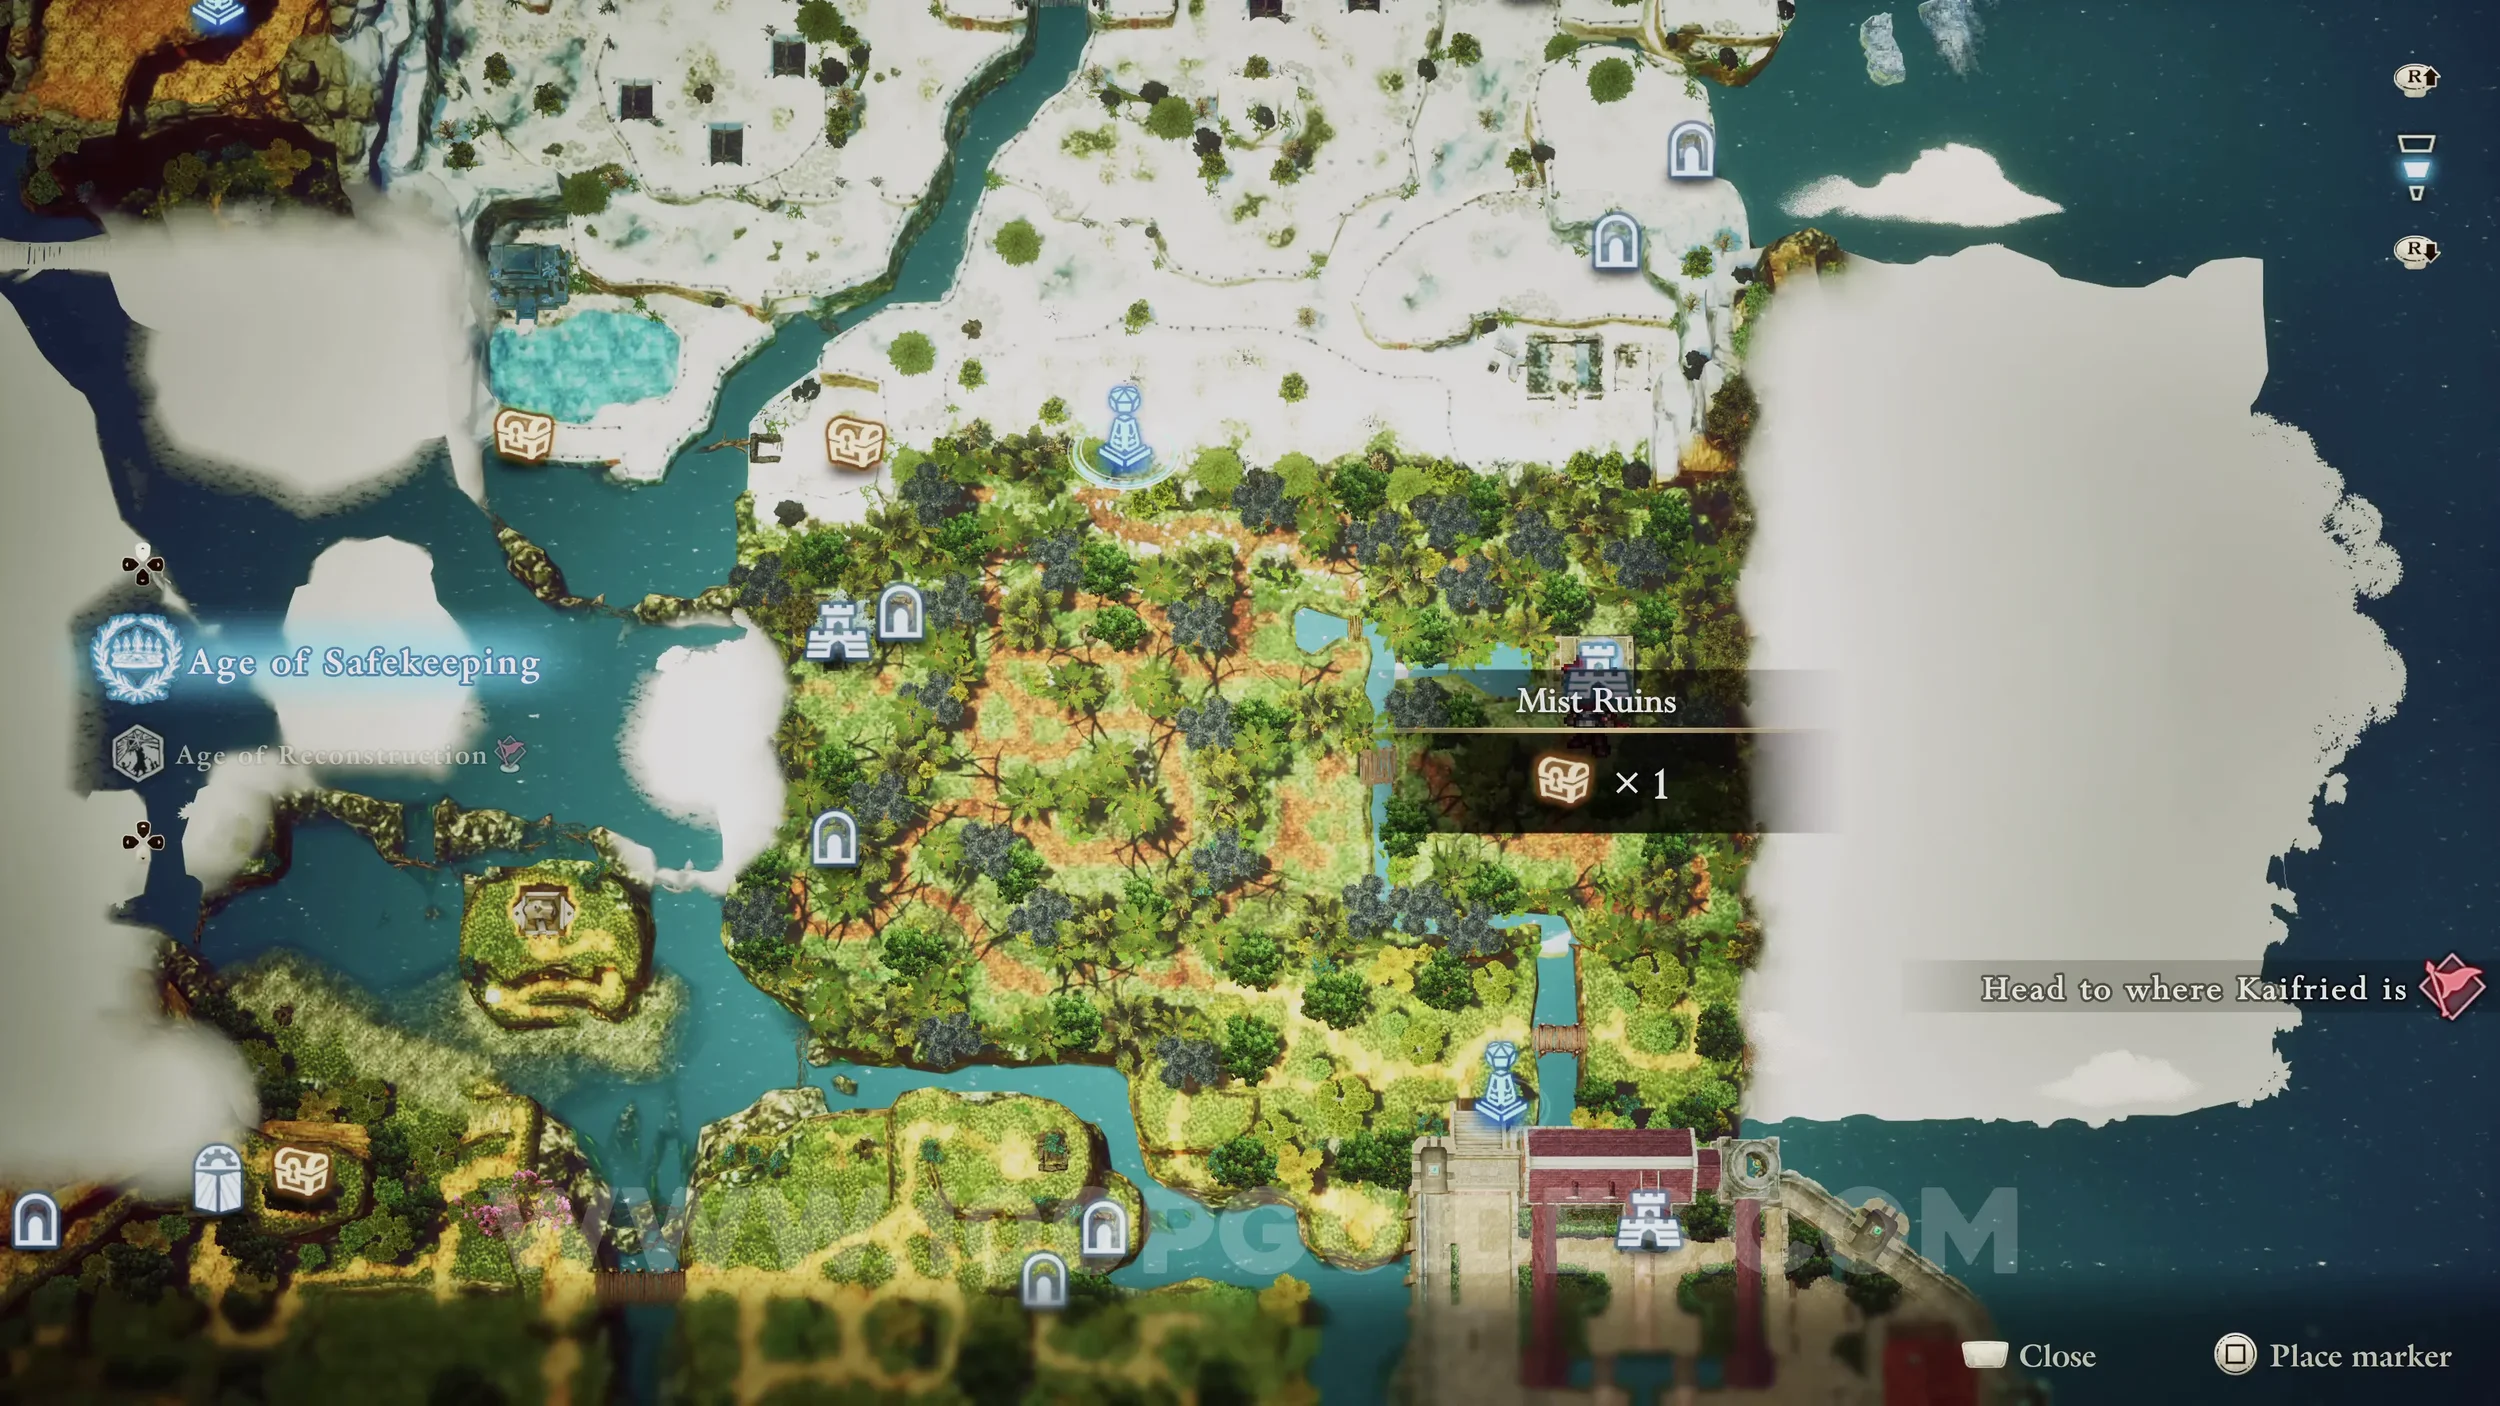
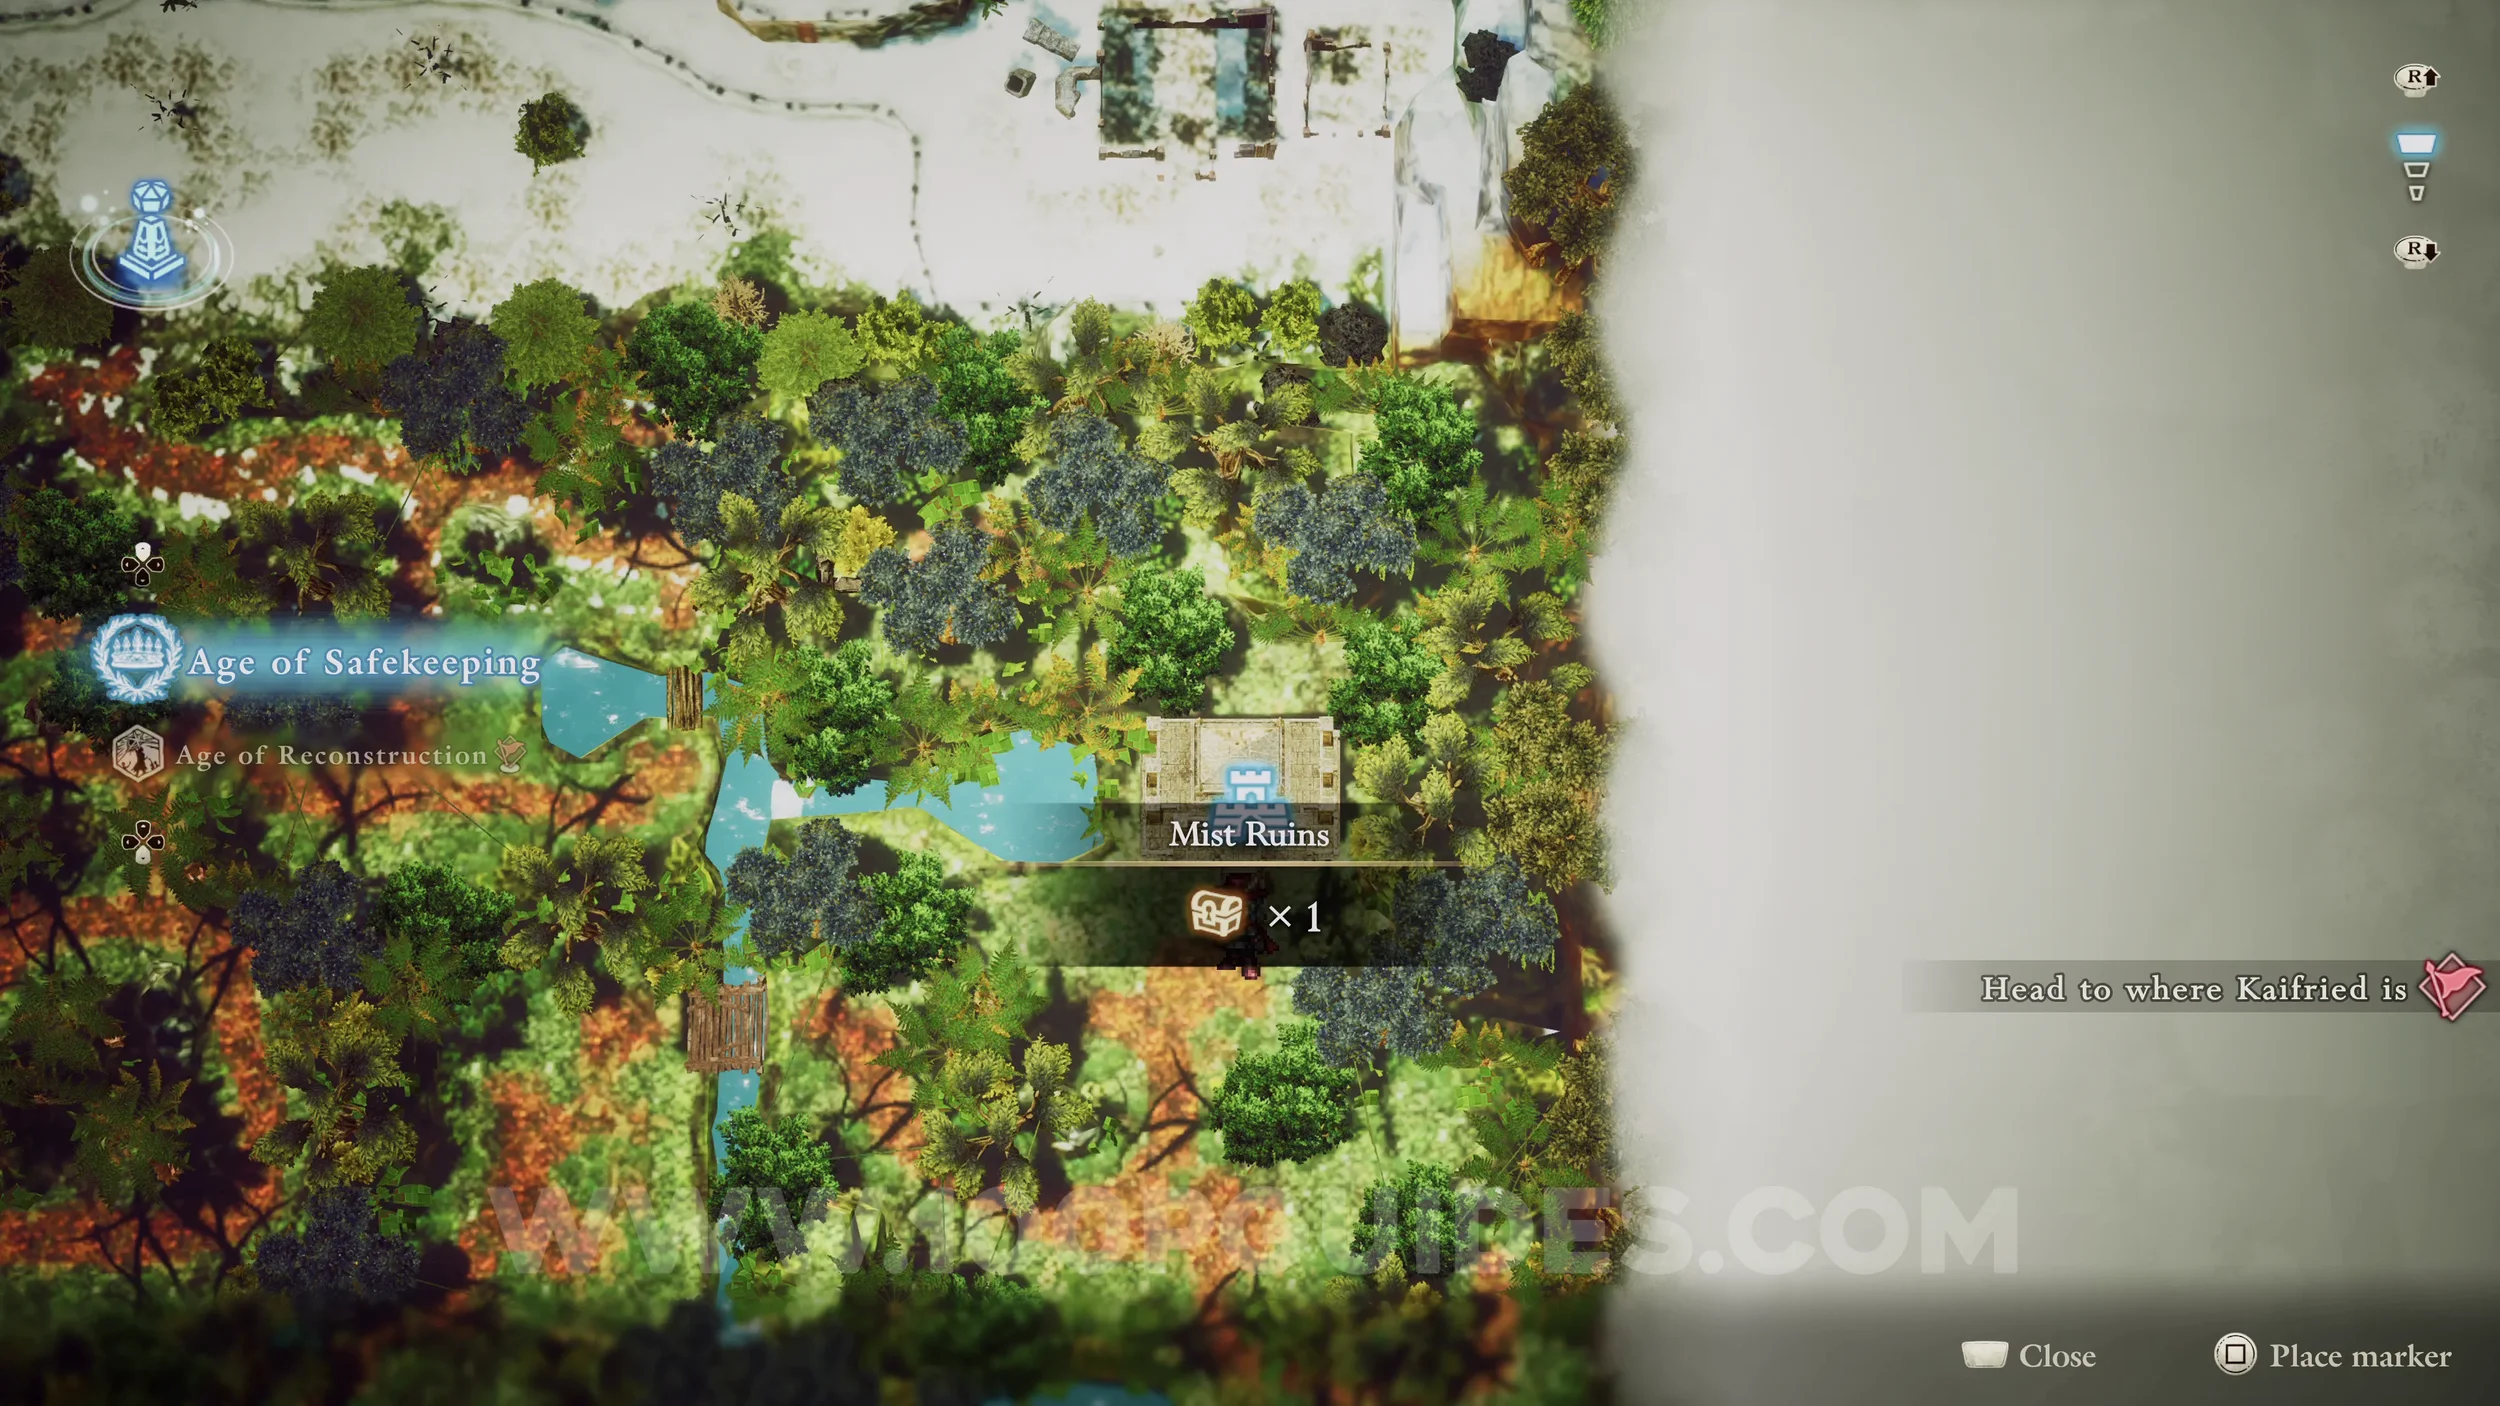
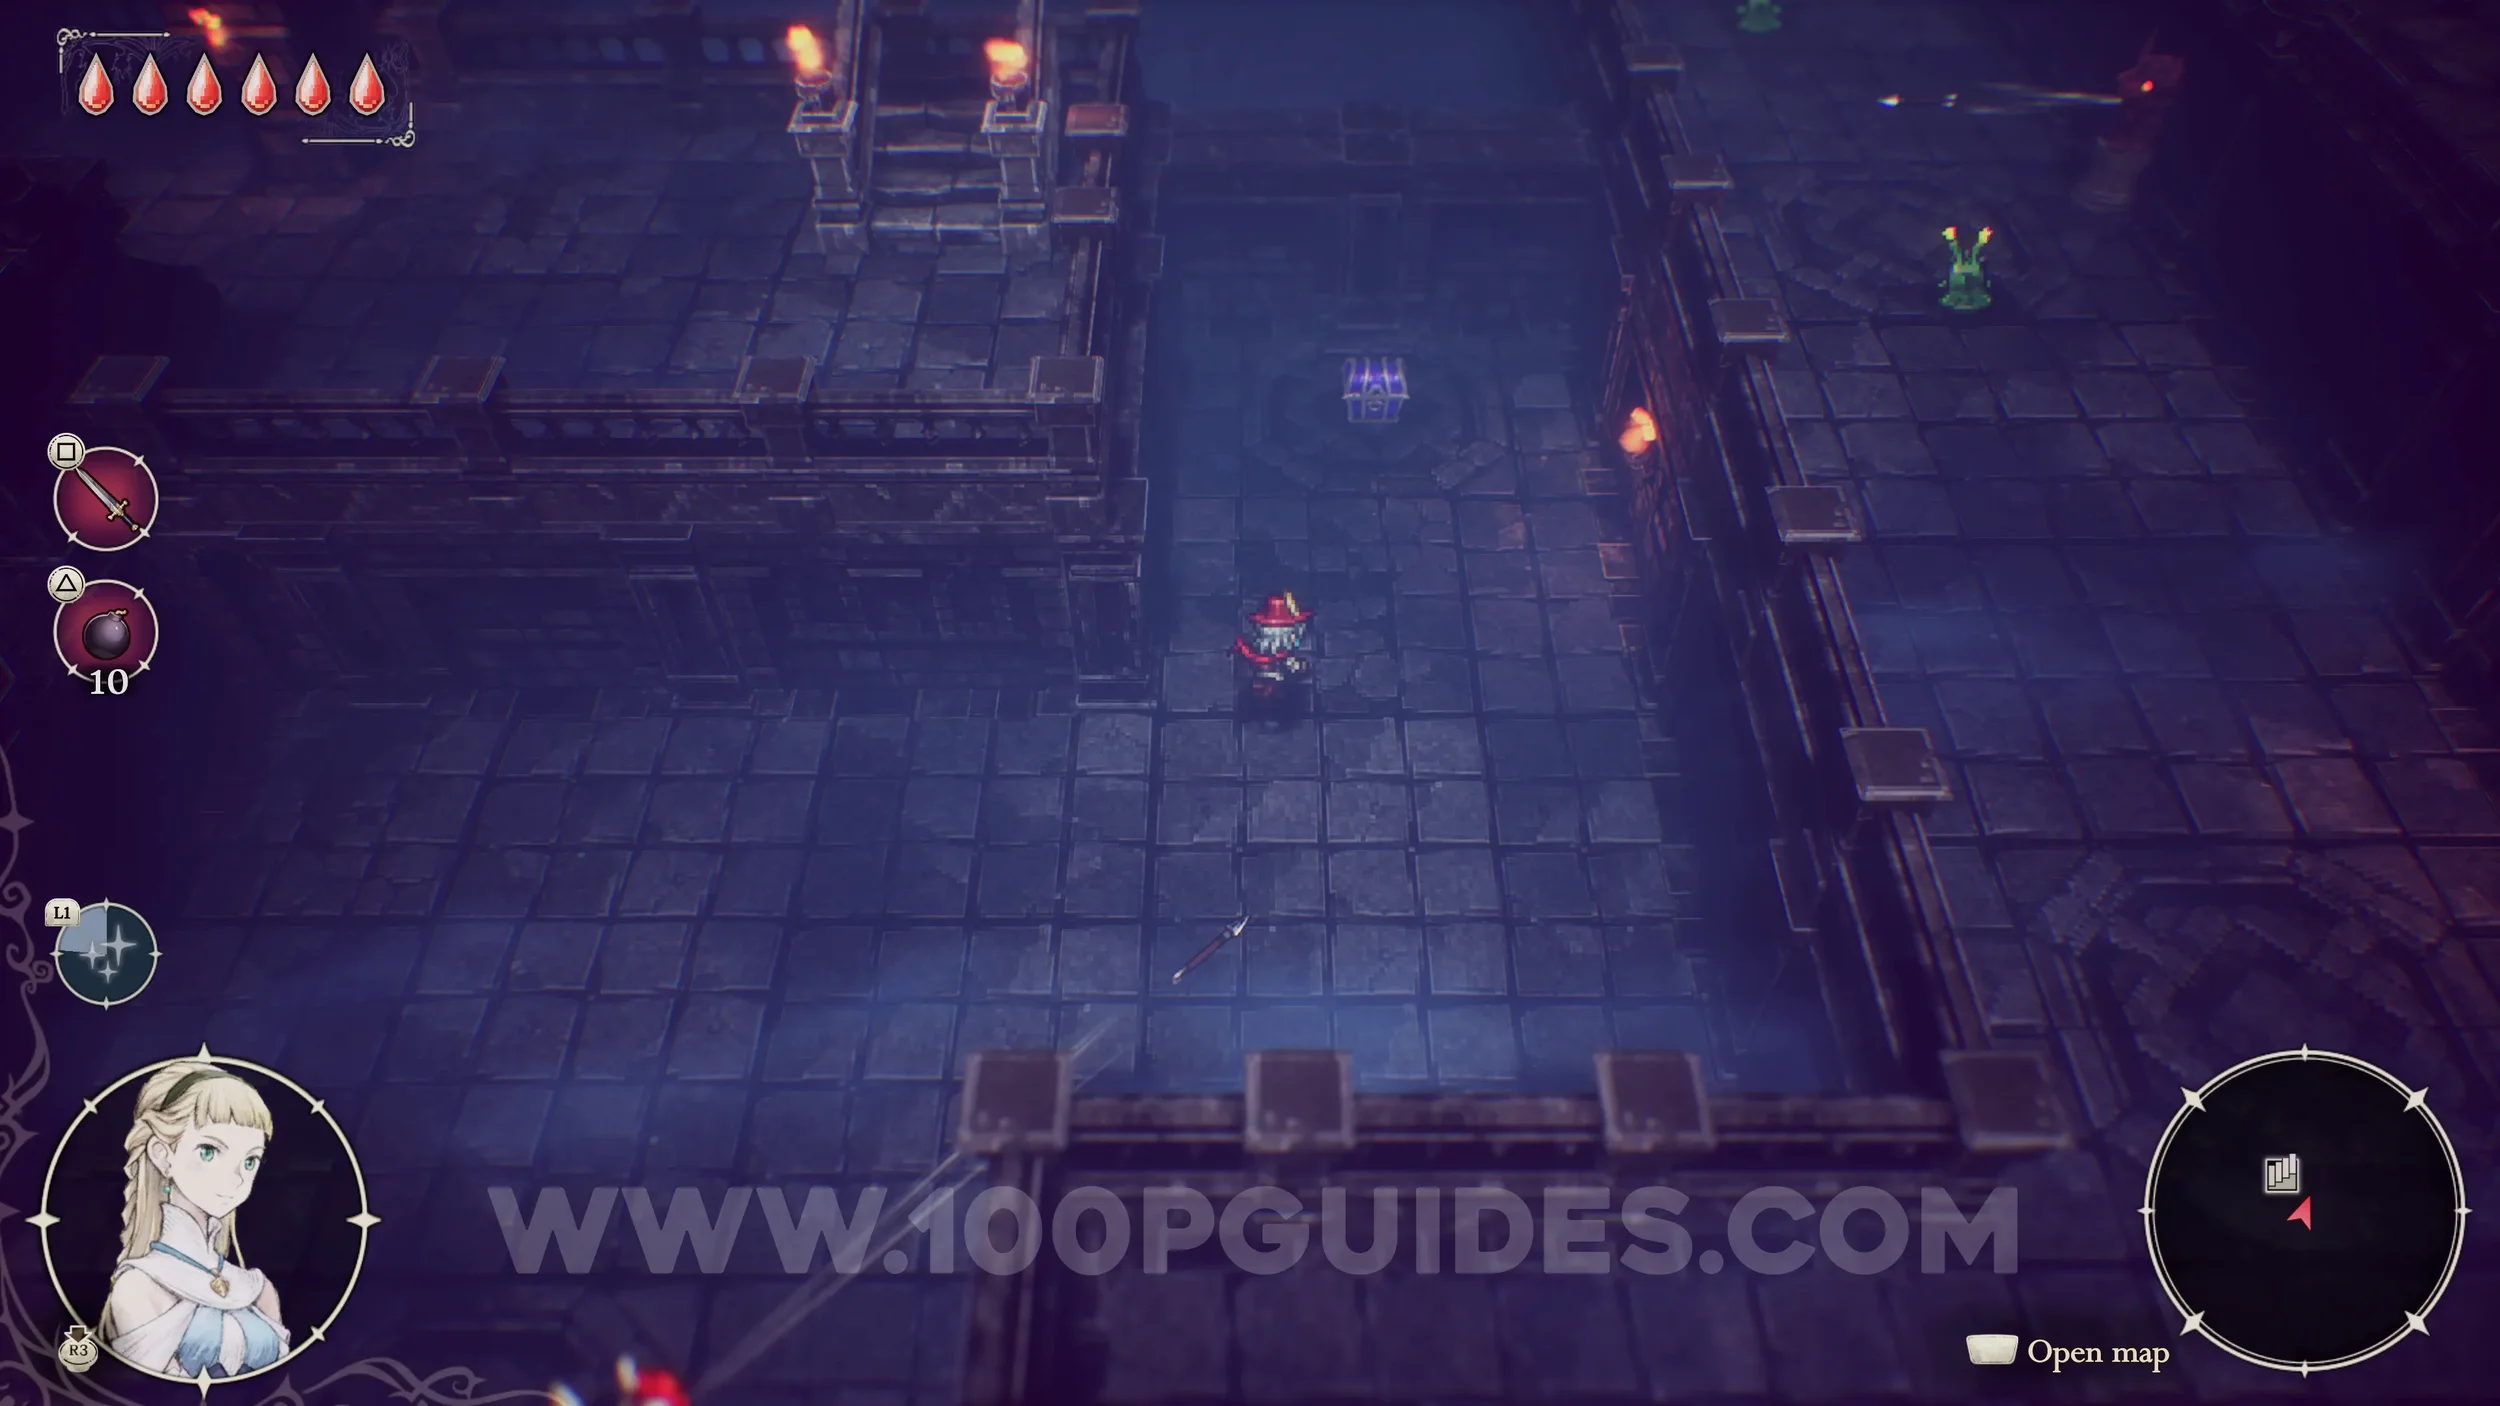
Shard of Life #7. Found in the Mist Ruins. Proceed through the dungeon until you reach Sublevel Two. Here, stick to the right and dodge the arrows. Go down the ladder and look for the chest to the north containing the Shard.
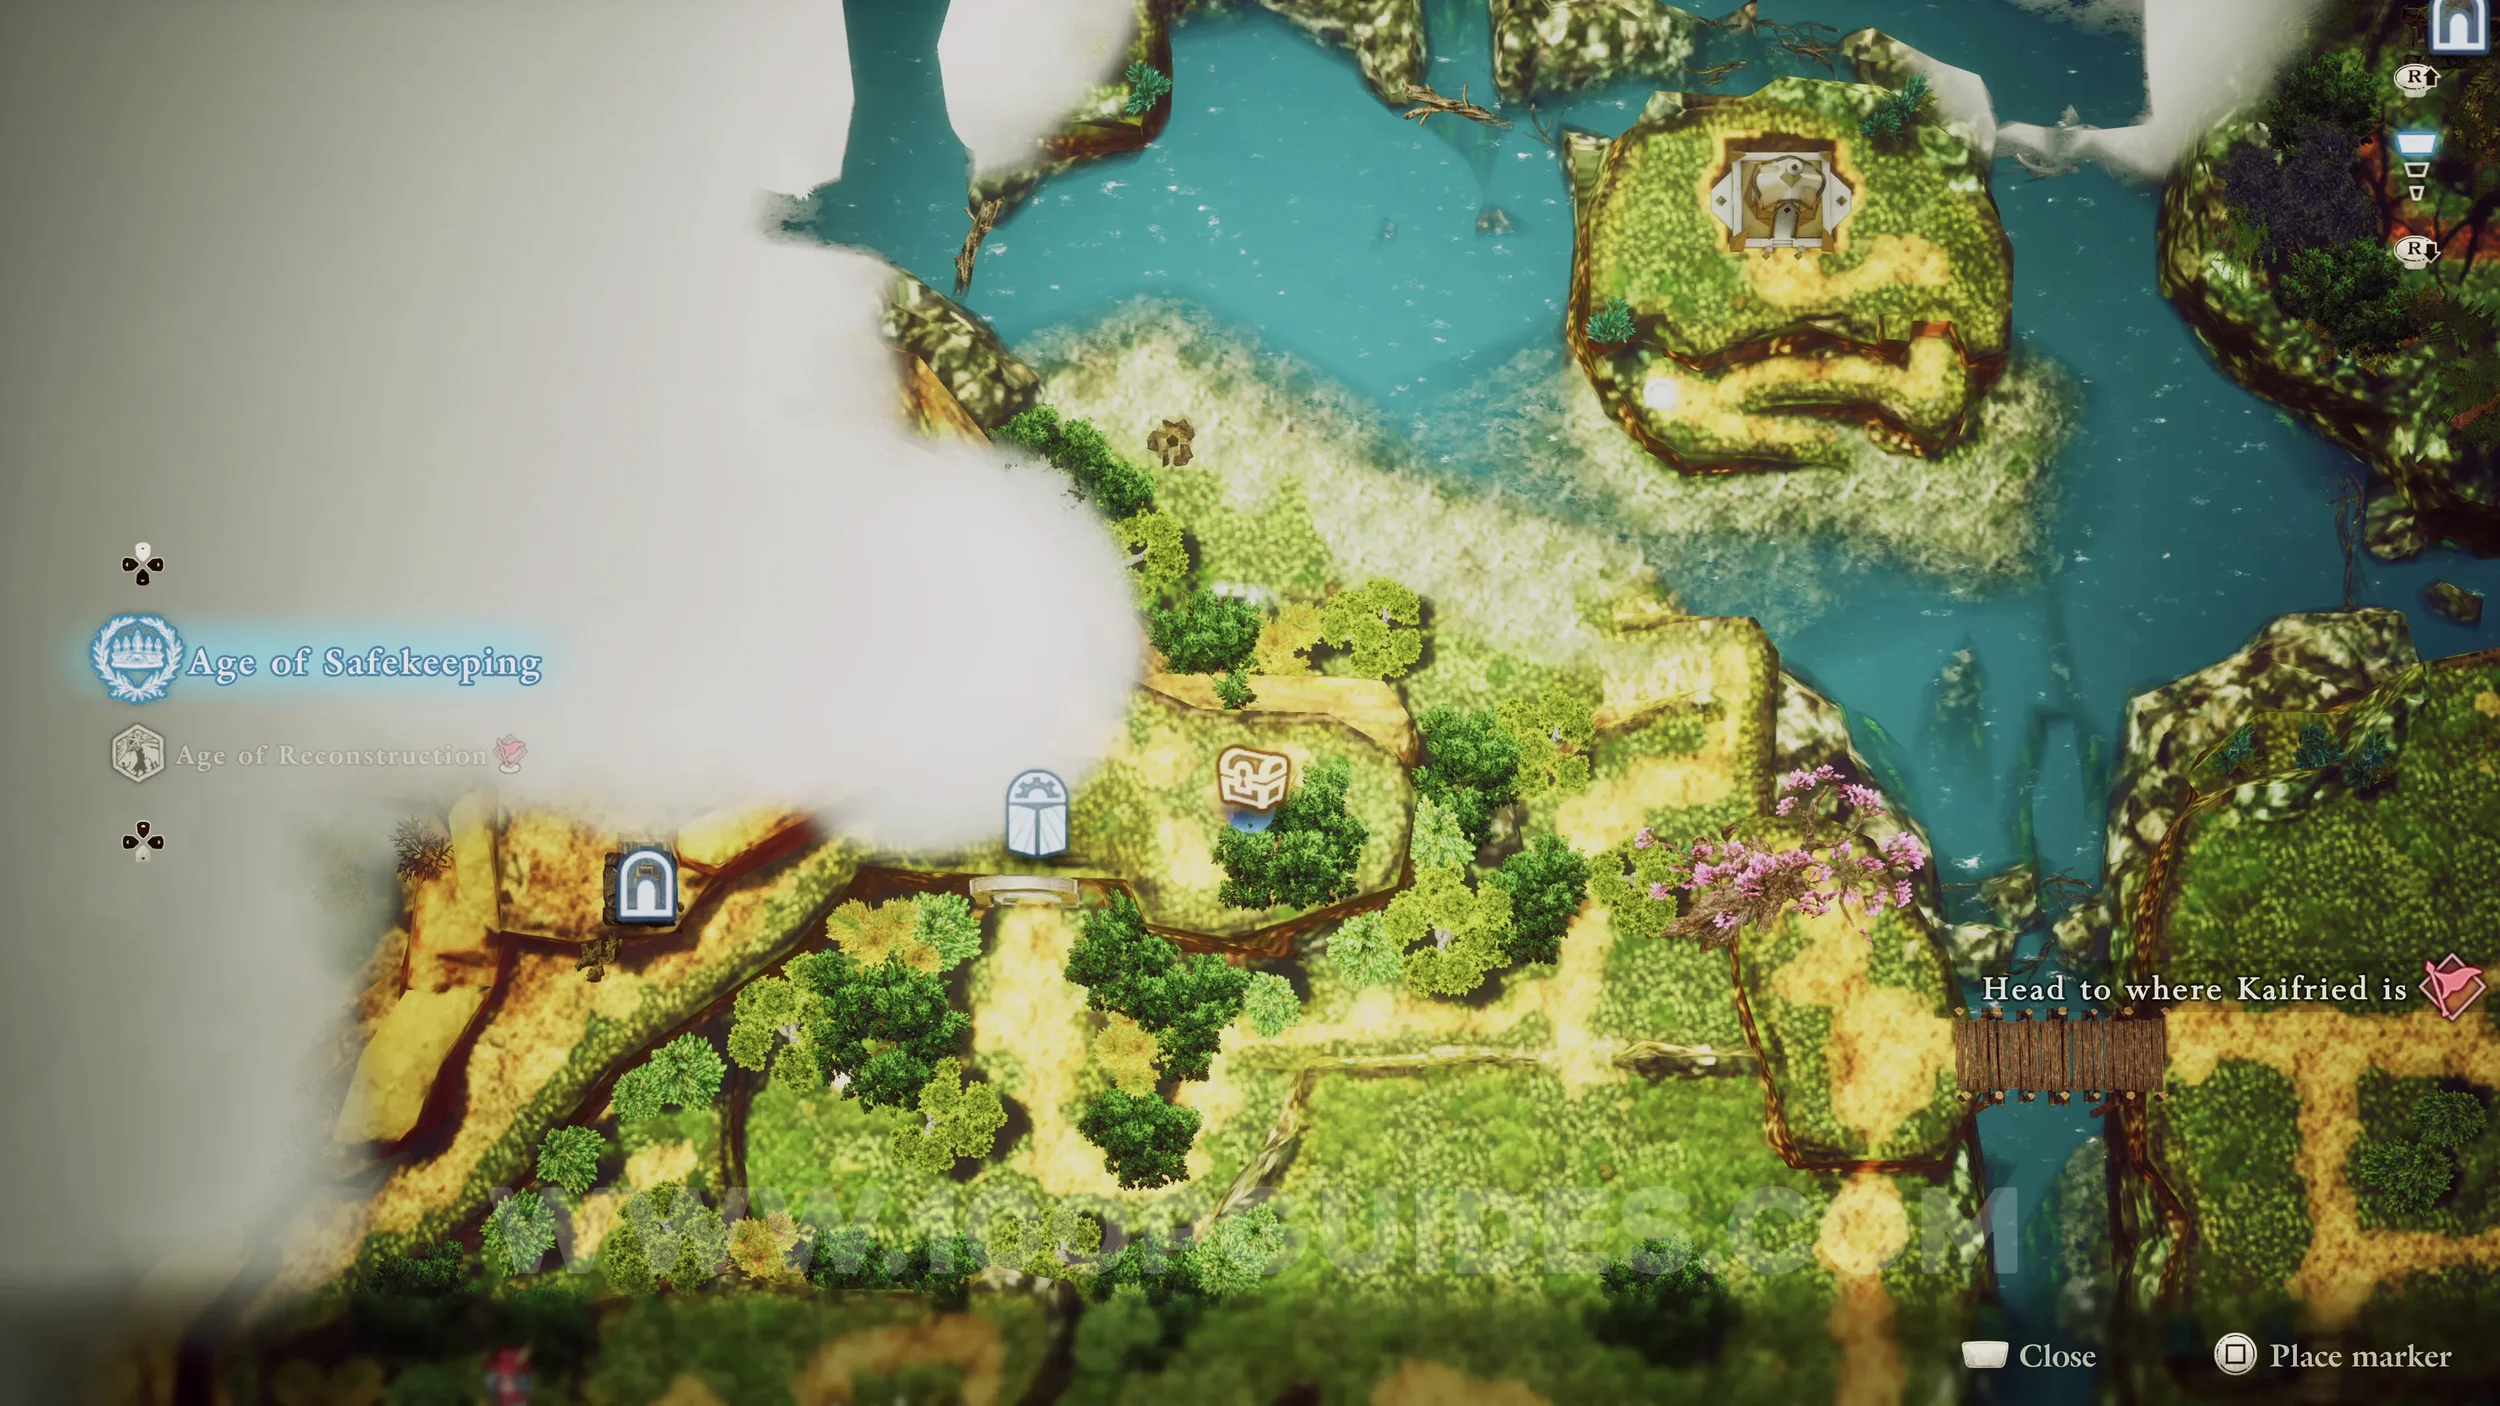
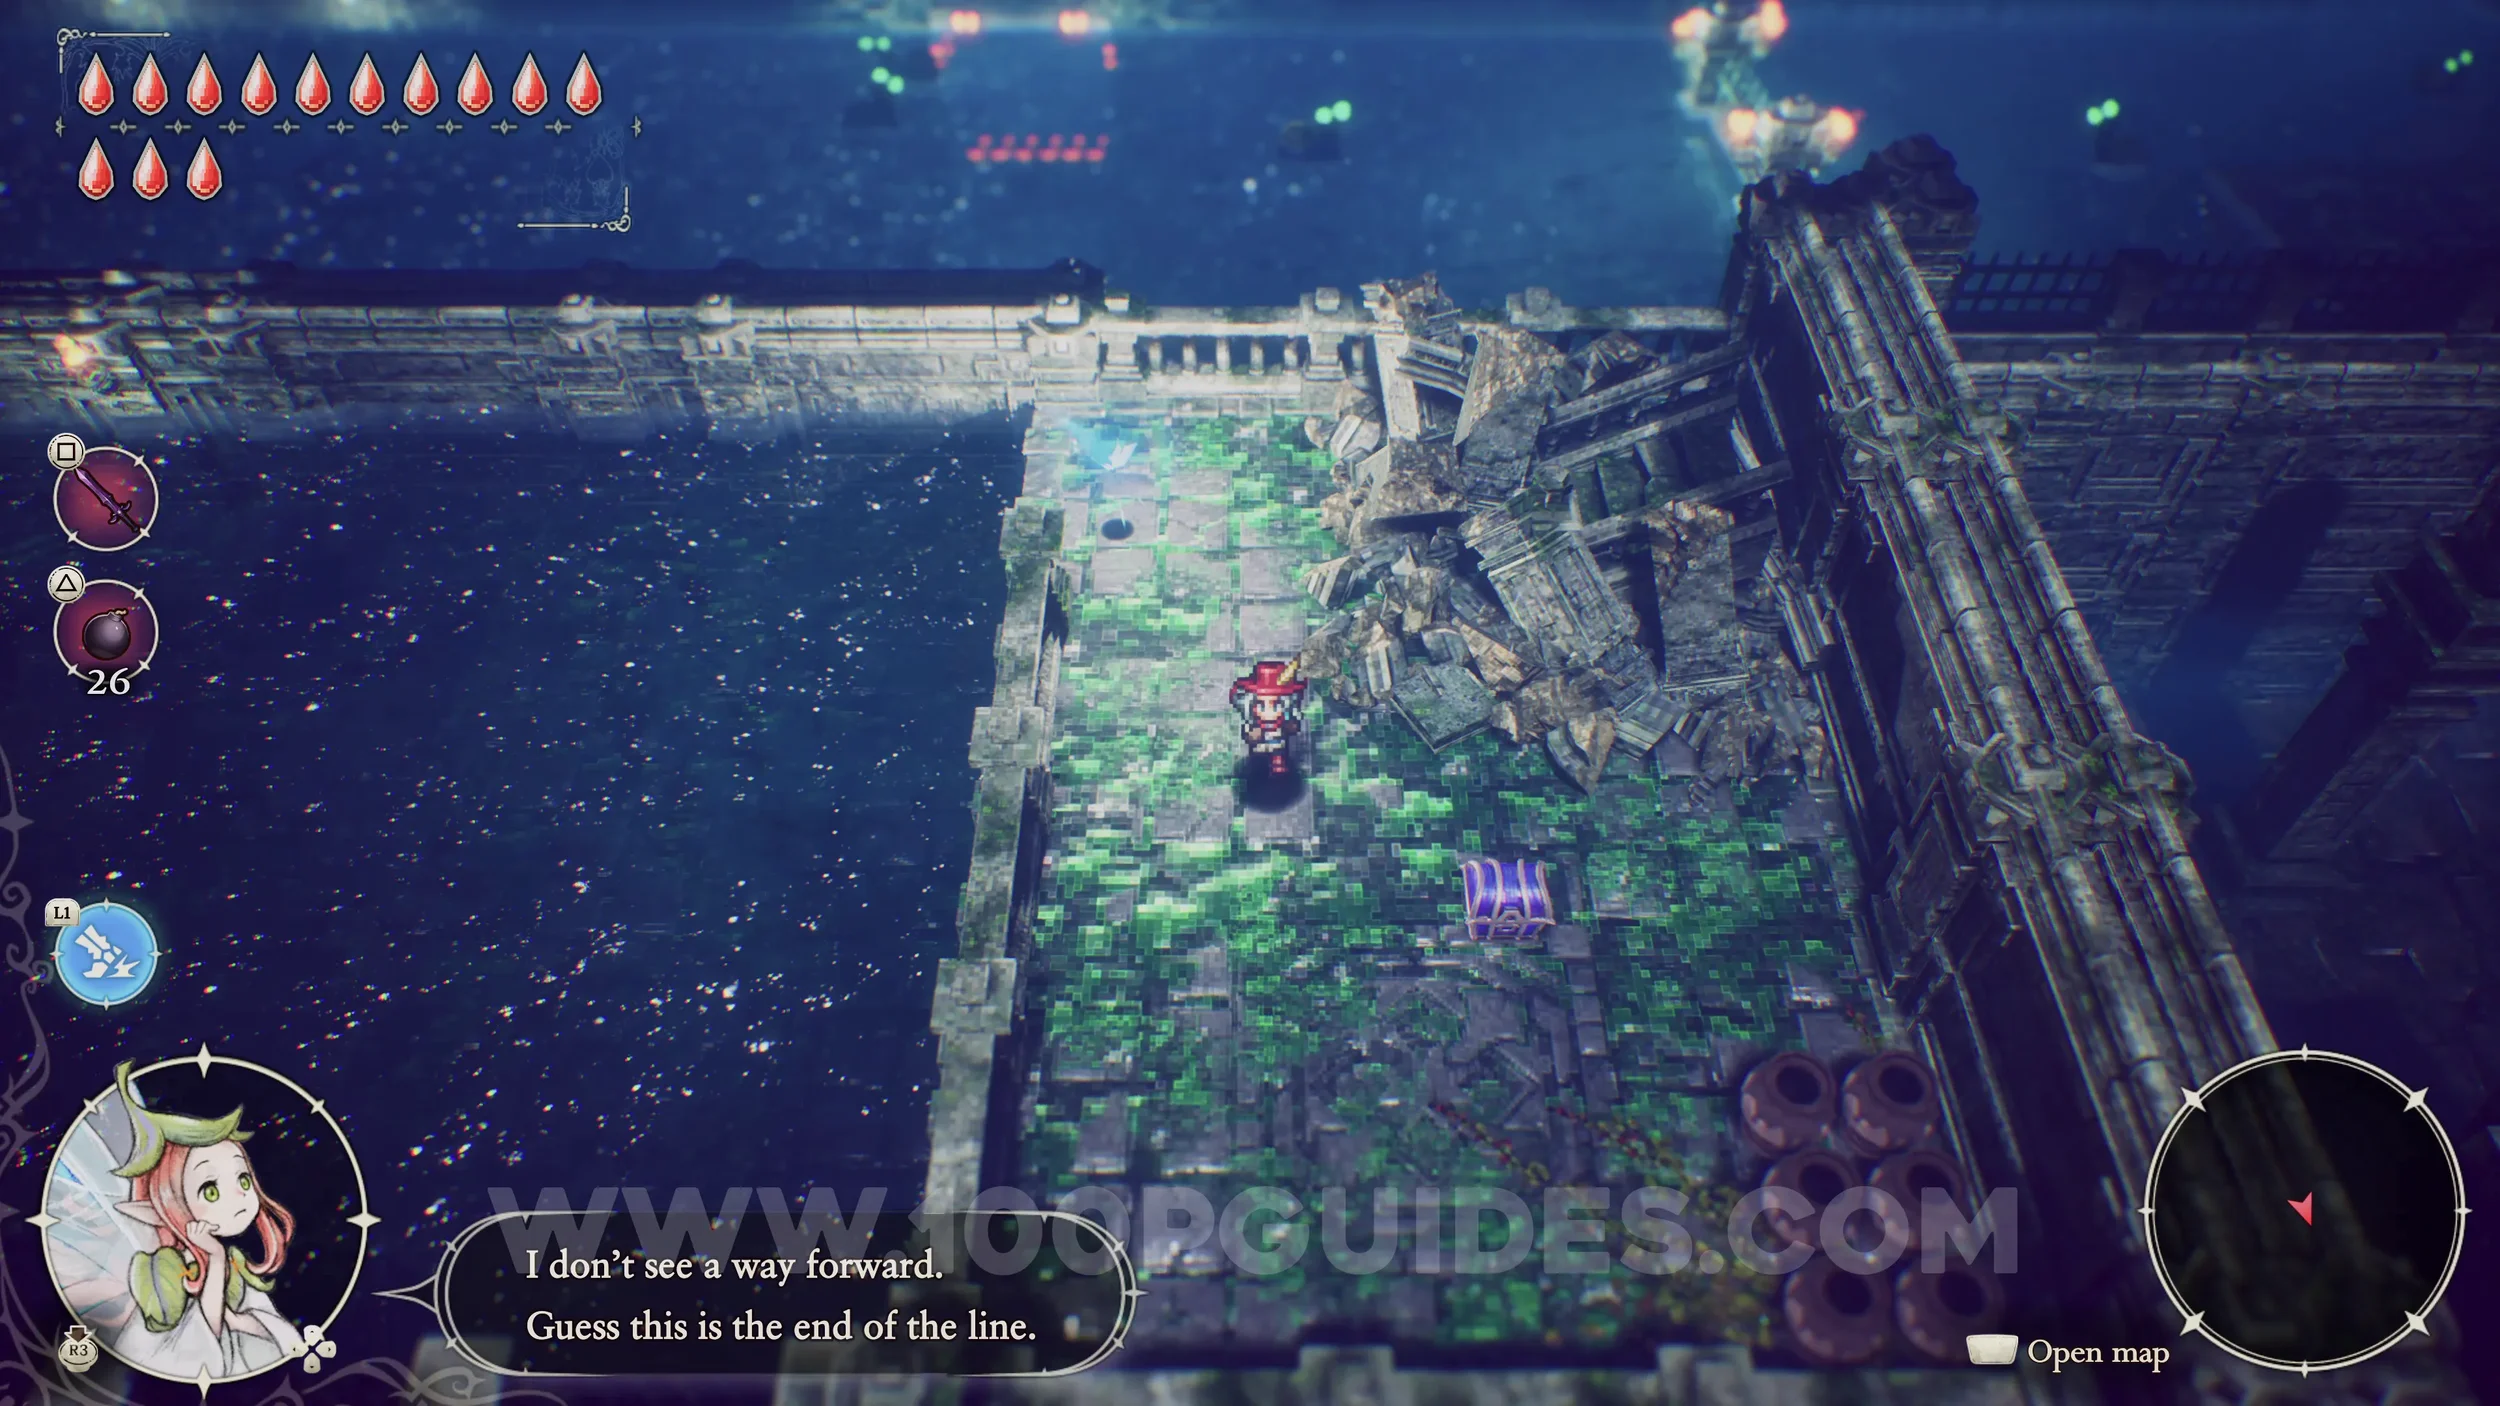
Shard of Life #8. Use the destroyed house as a ramp to reach the upper path. Then go all the way to the end to find the chest just above the Doorway of Time.


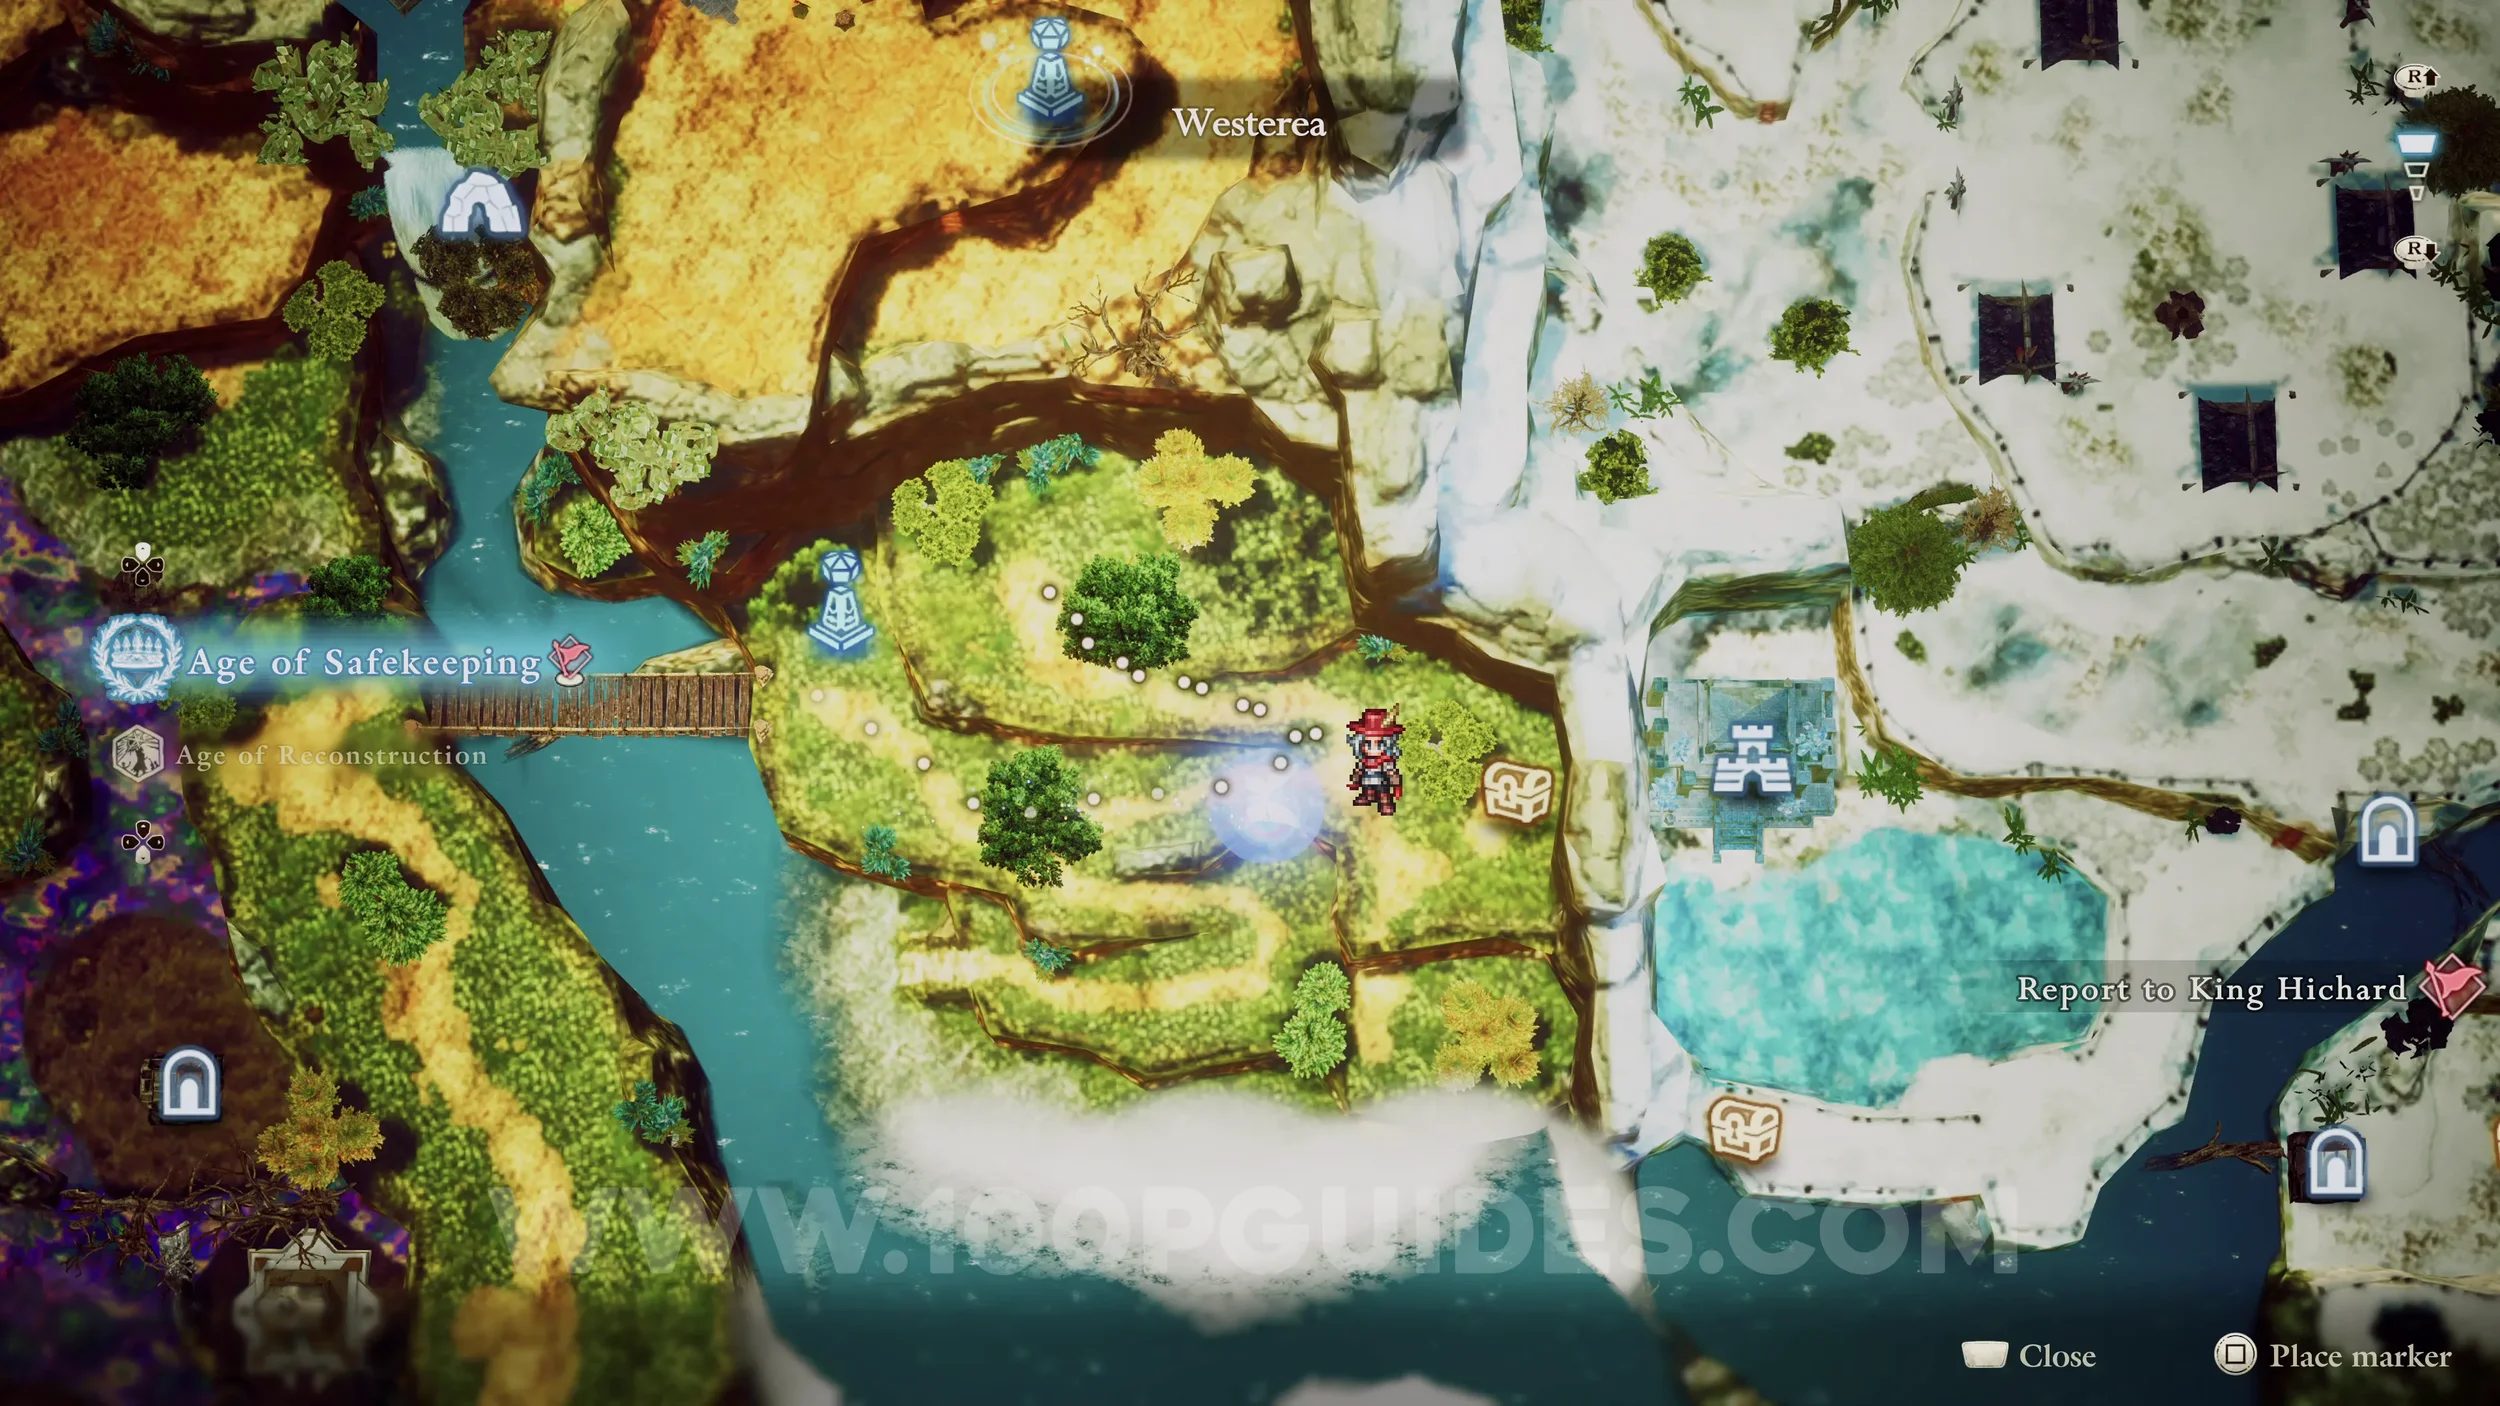
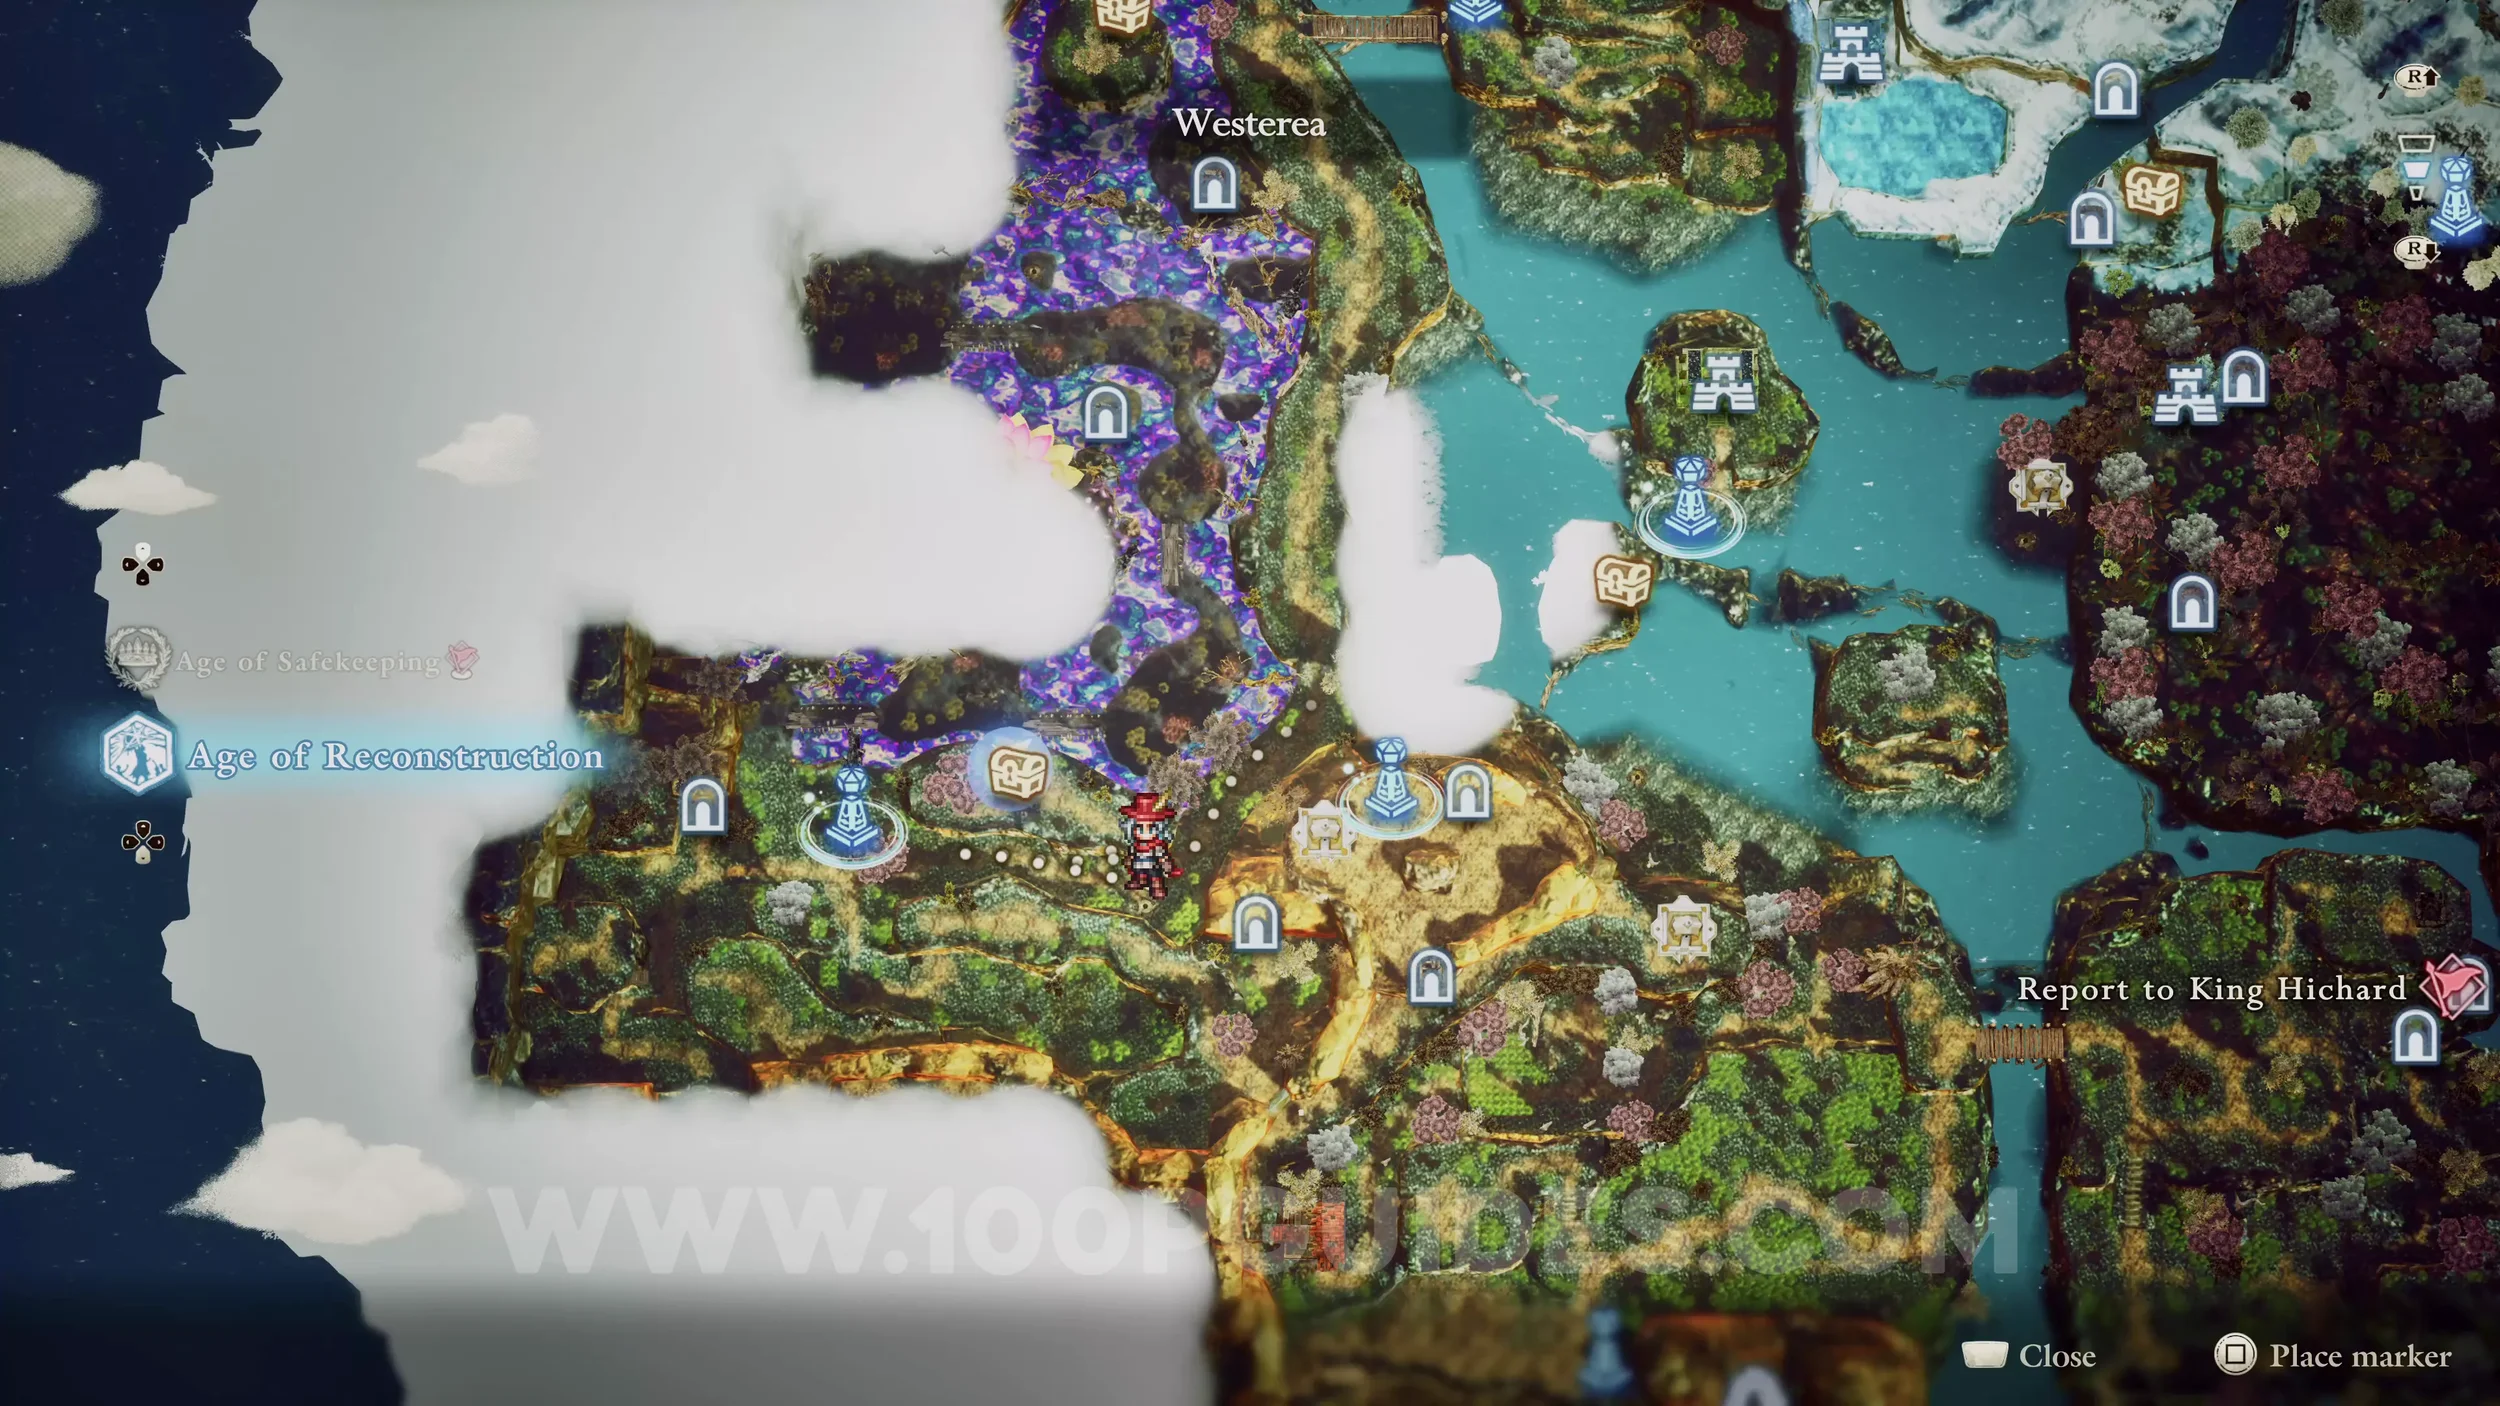
Shard of Life #9. Obtained by finishing Shrine of Life 9, found just west of the Fast Travel point in Westerea, north of the desert. To complete the shrine, just finish the short platforming section.


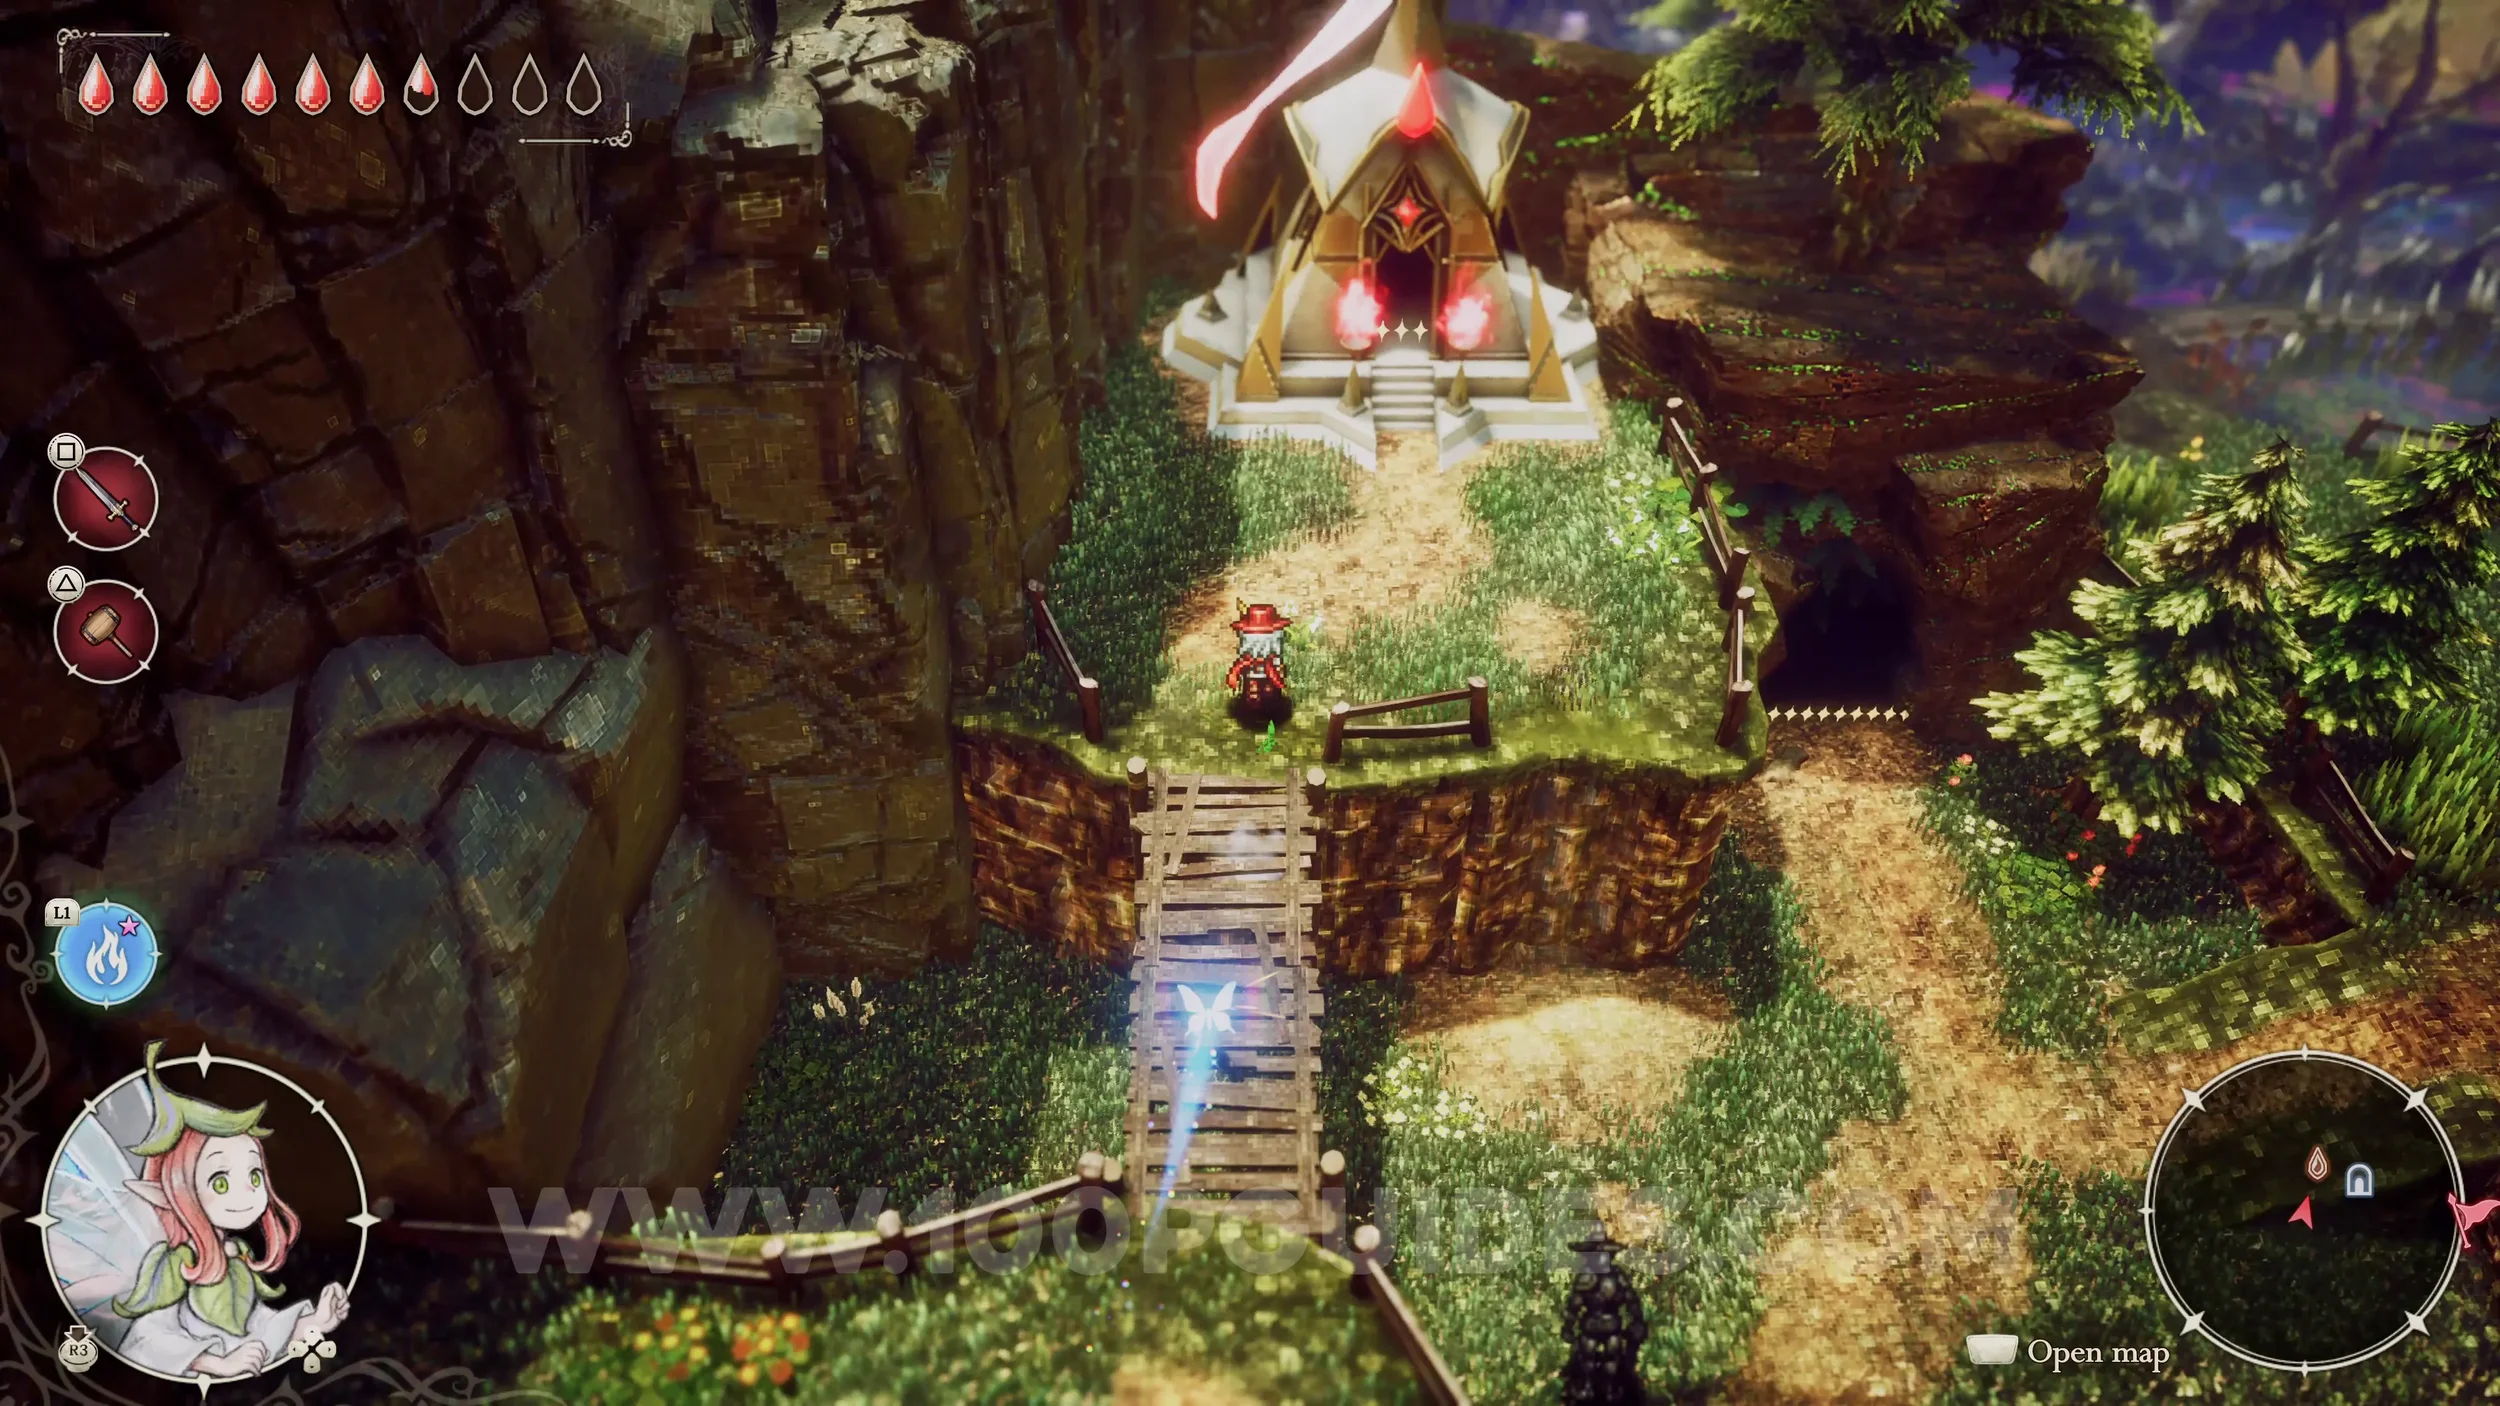

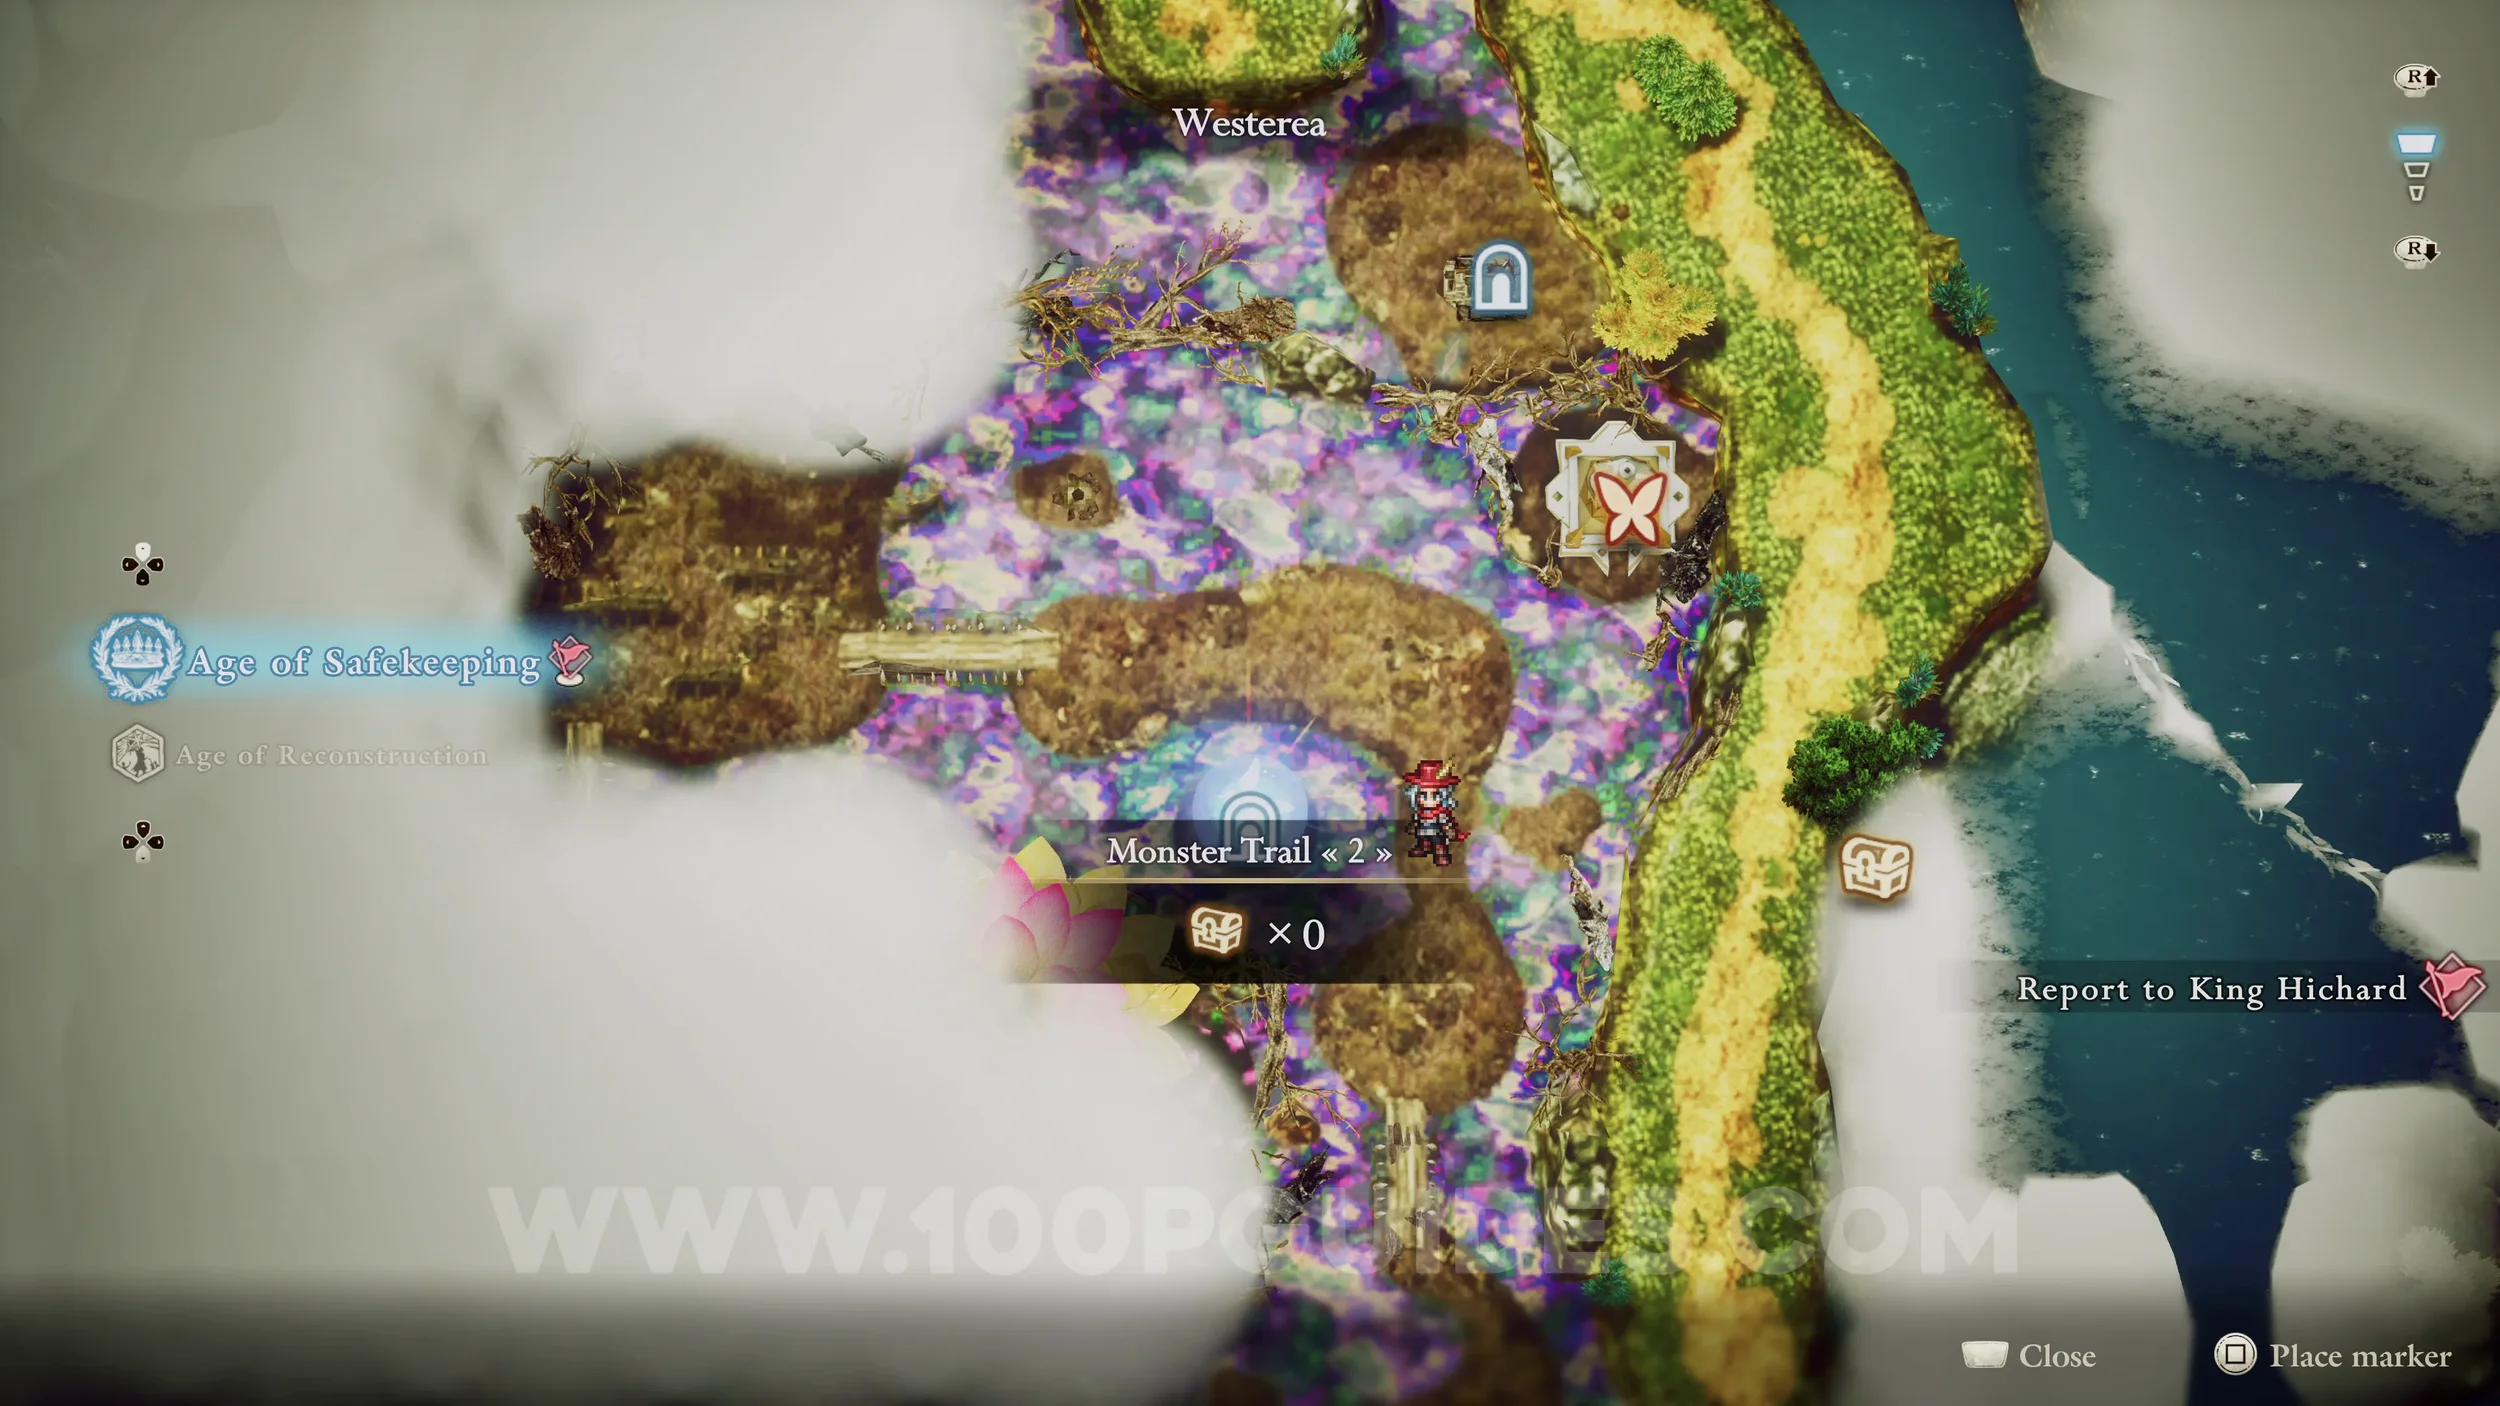
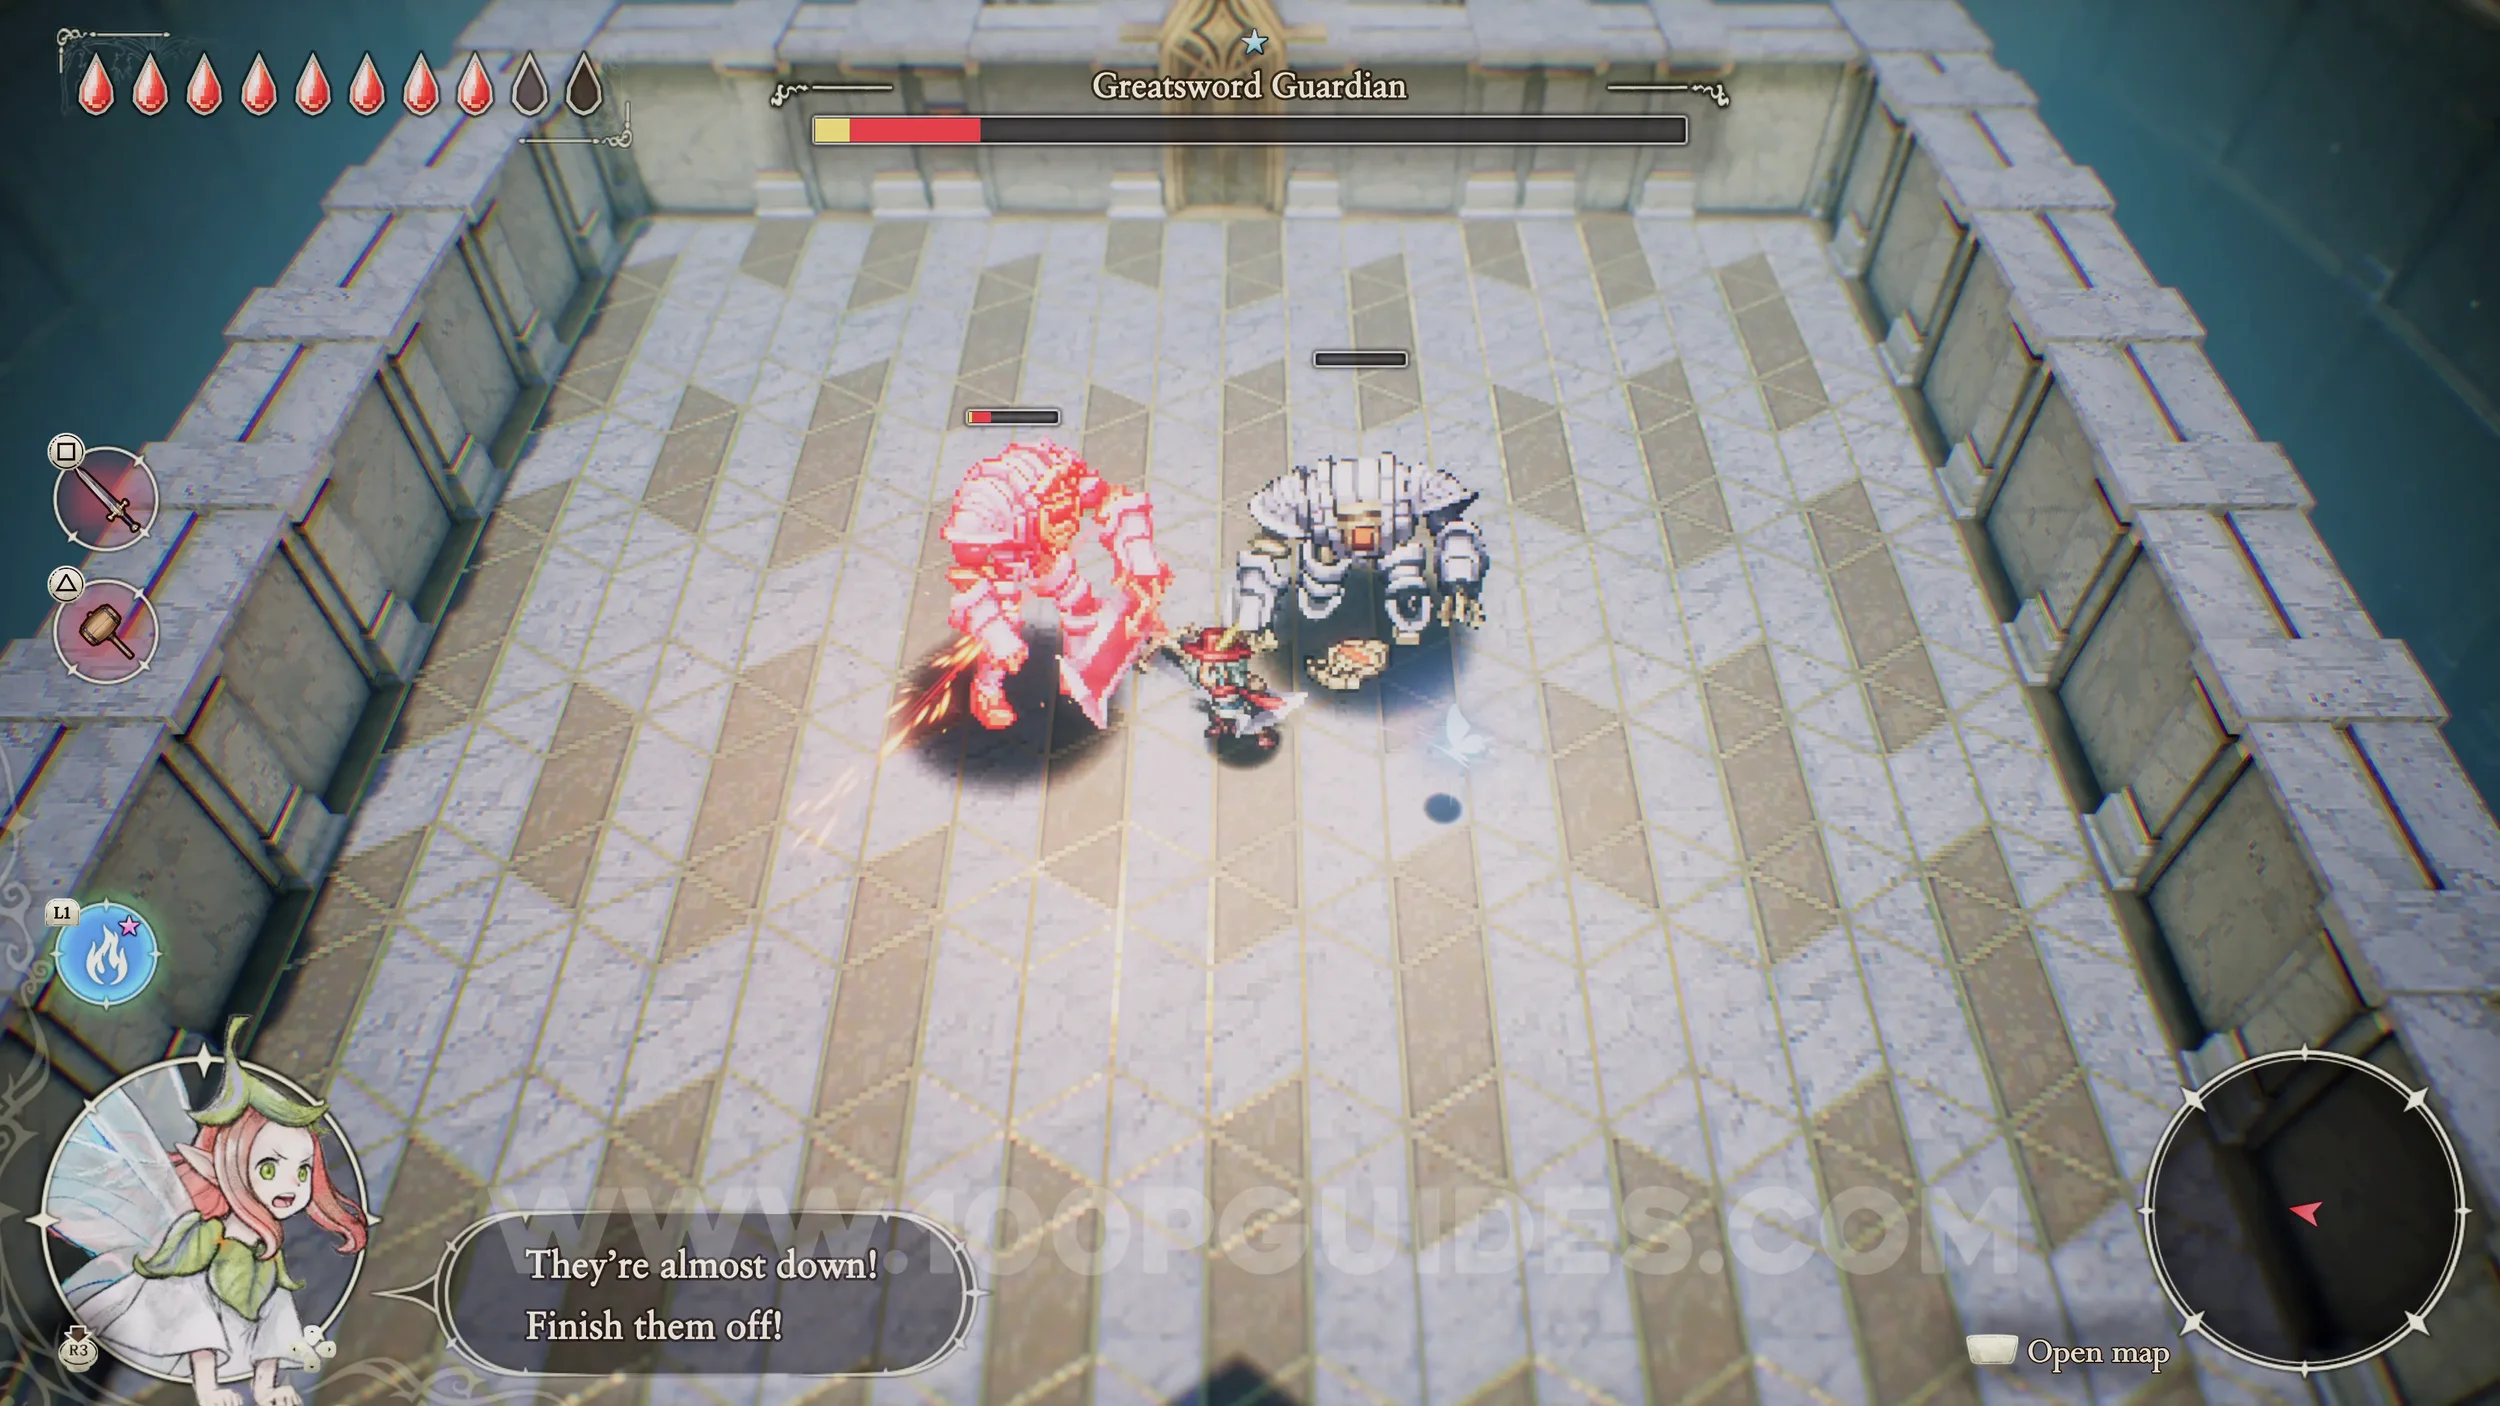
Shard of Life #10. Go through Monster Trail 2 near the Rainbow Lotus dungeon, and once you come out the other end, you see a Shrine of Life. Finish it by defeating the two bosses to get the Shard of Life.


Shard of Life #11. Go through Secret Shortcut 6 (found just northwest of the Rainbow Lotus dungeon), then enter Monster Trail 3. Once you come out the other end, you see the chest containing the Shard of Life.


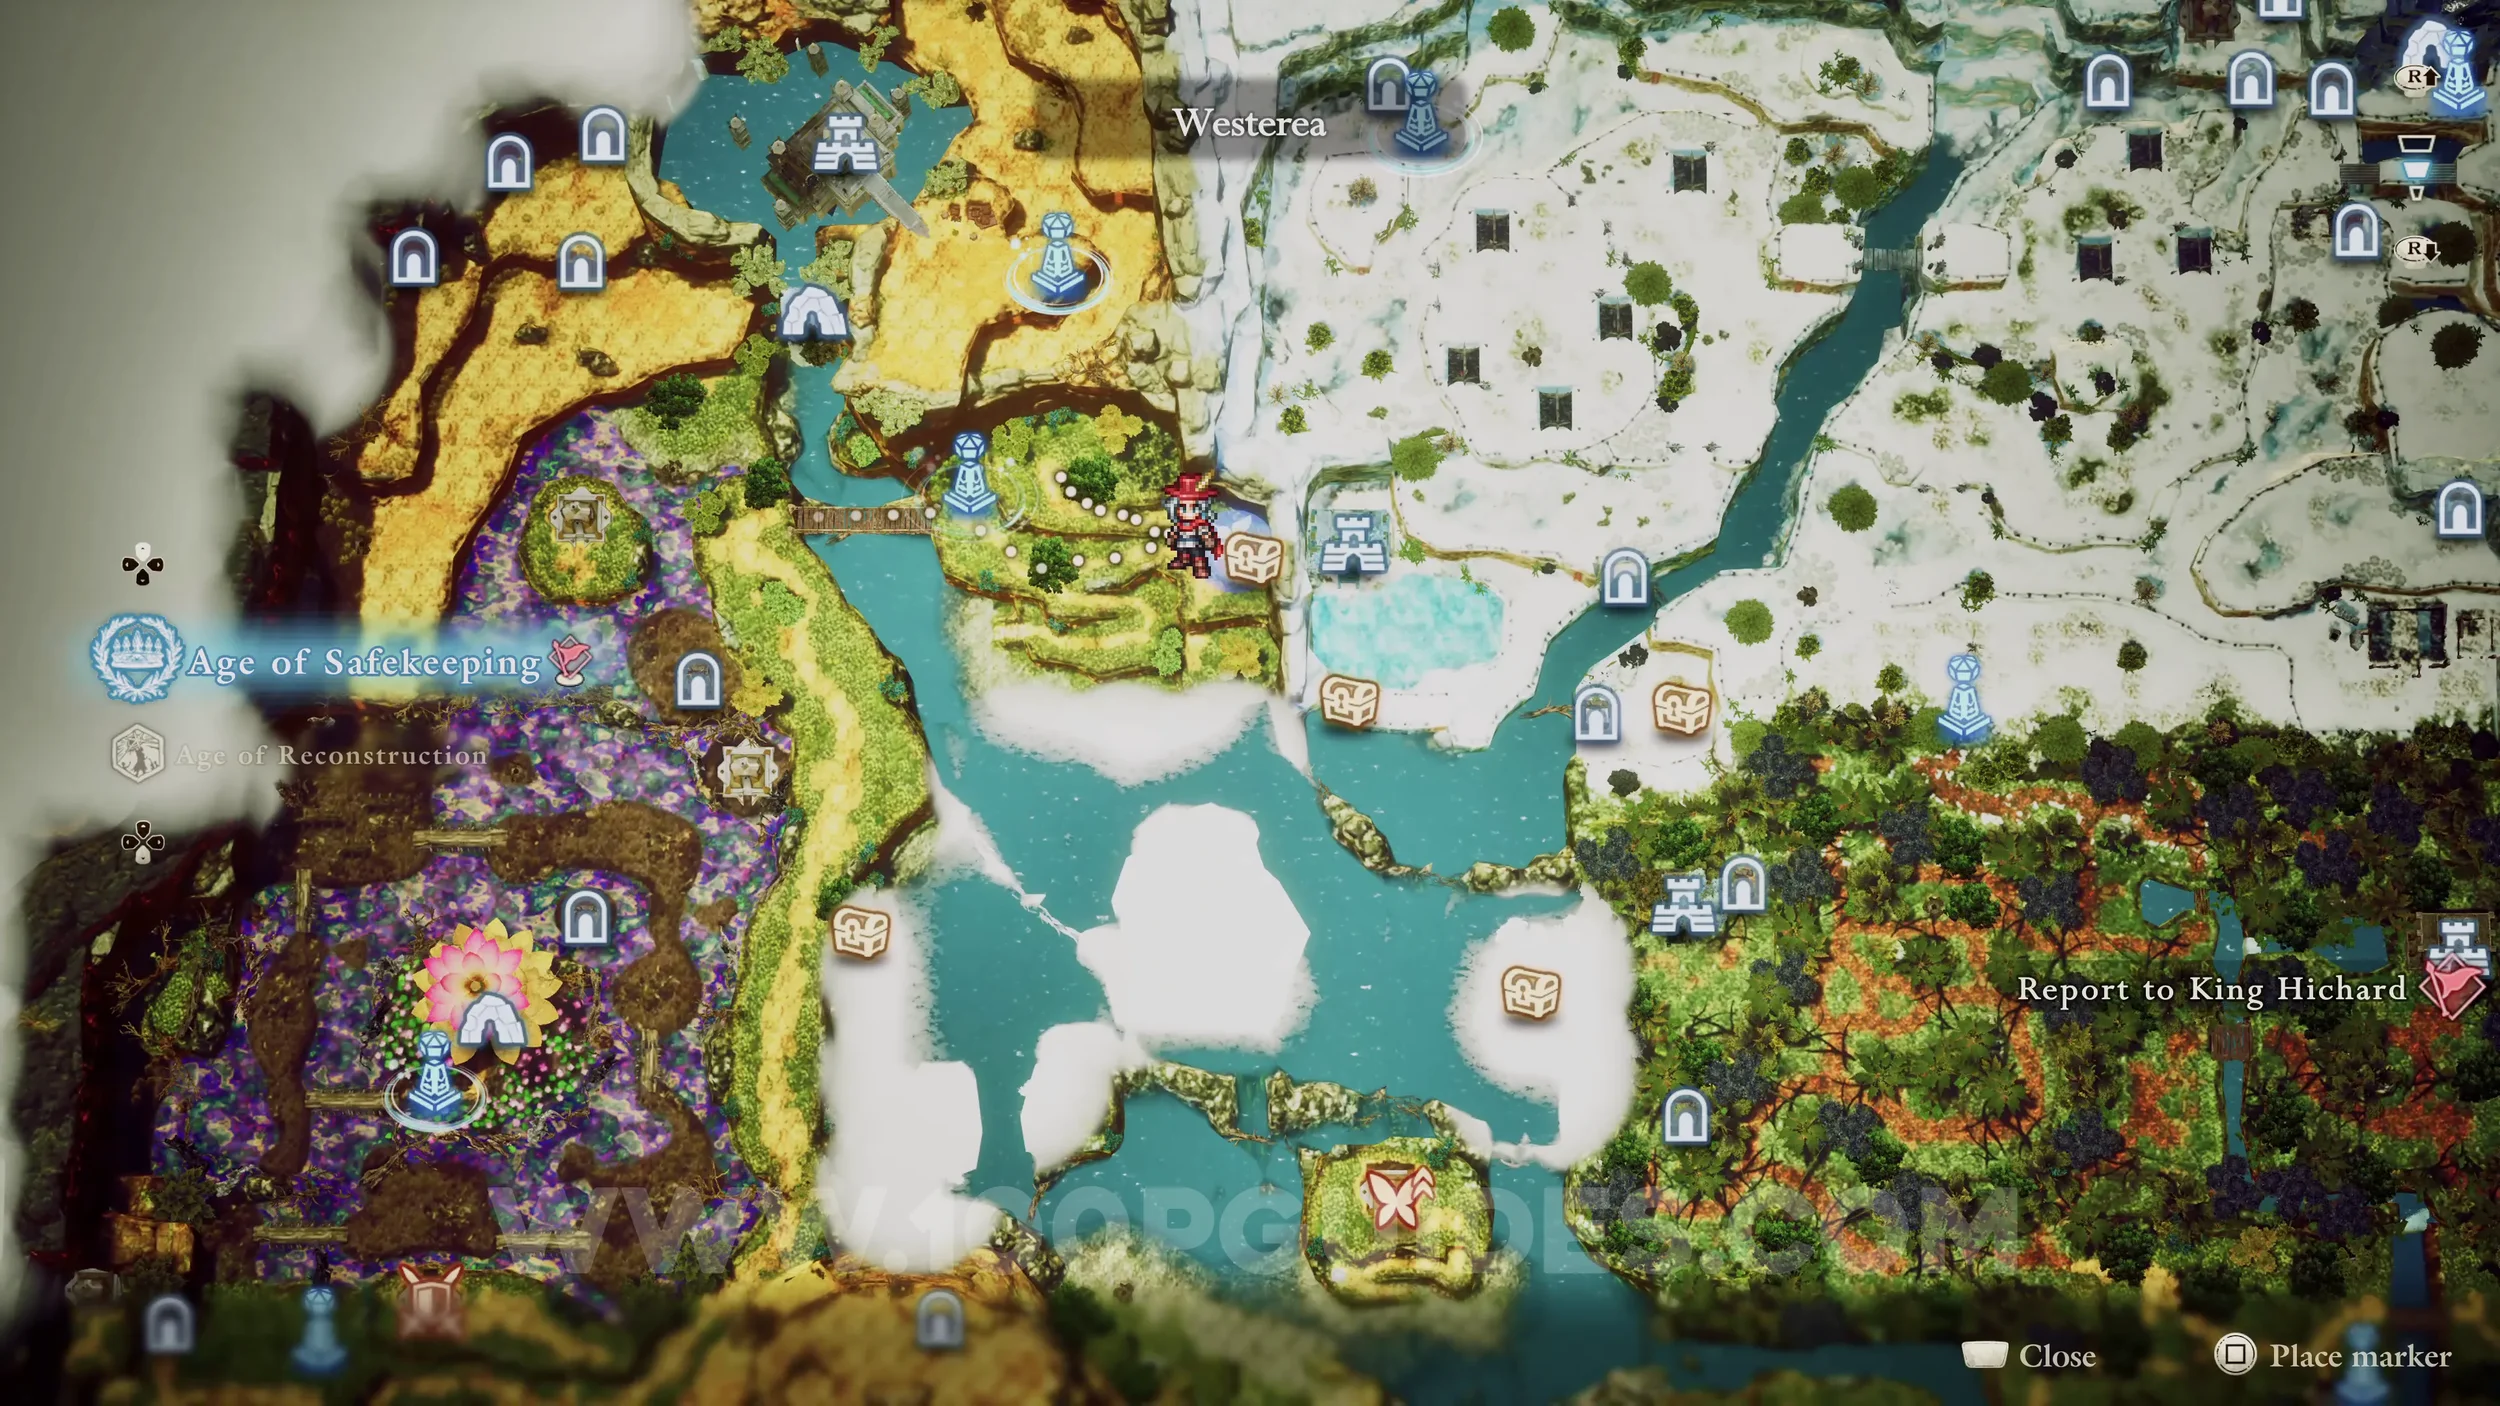
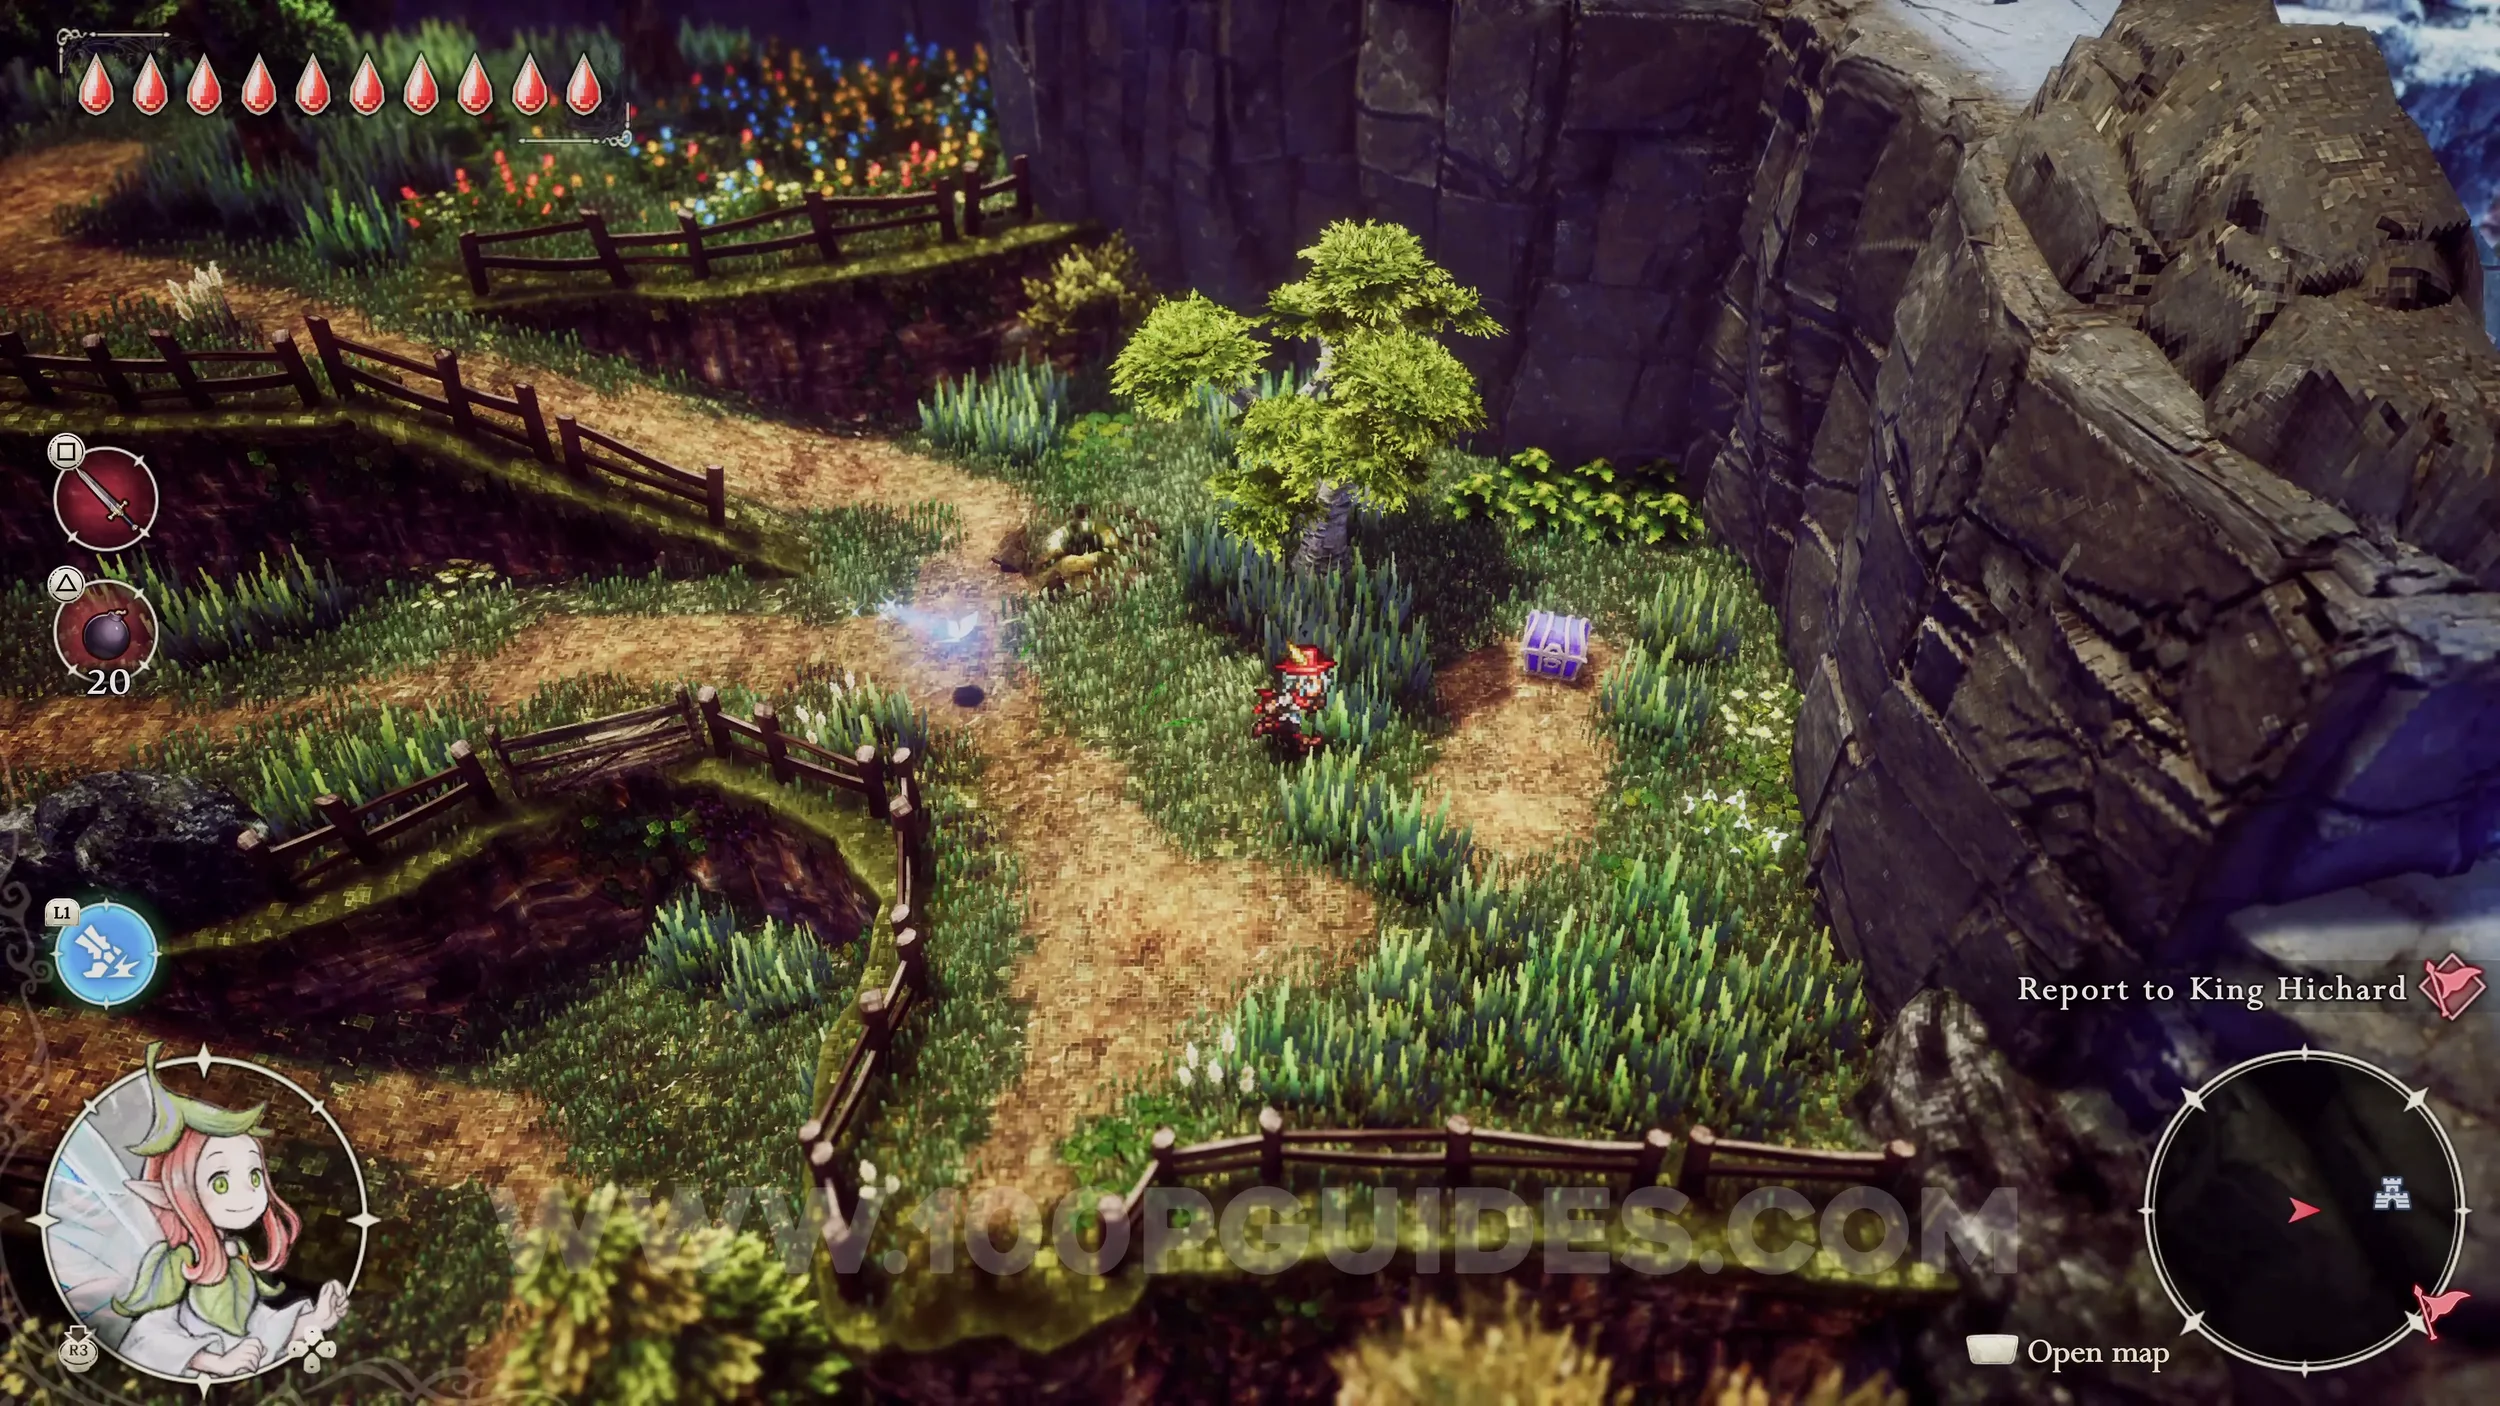
Shard of Life #12. Found in a chest in the green area to the northeast of the Rainbow Lotus dungeon after crossing the wooden bridge.
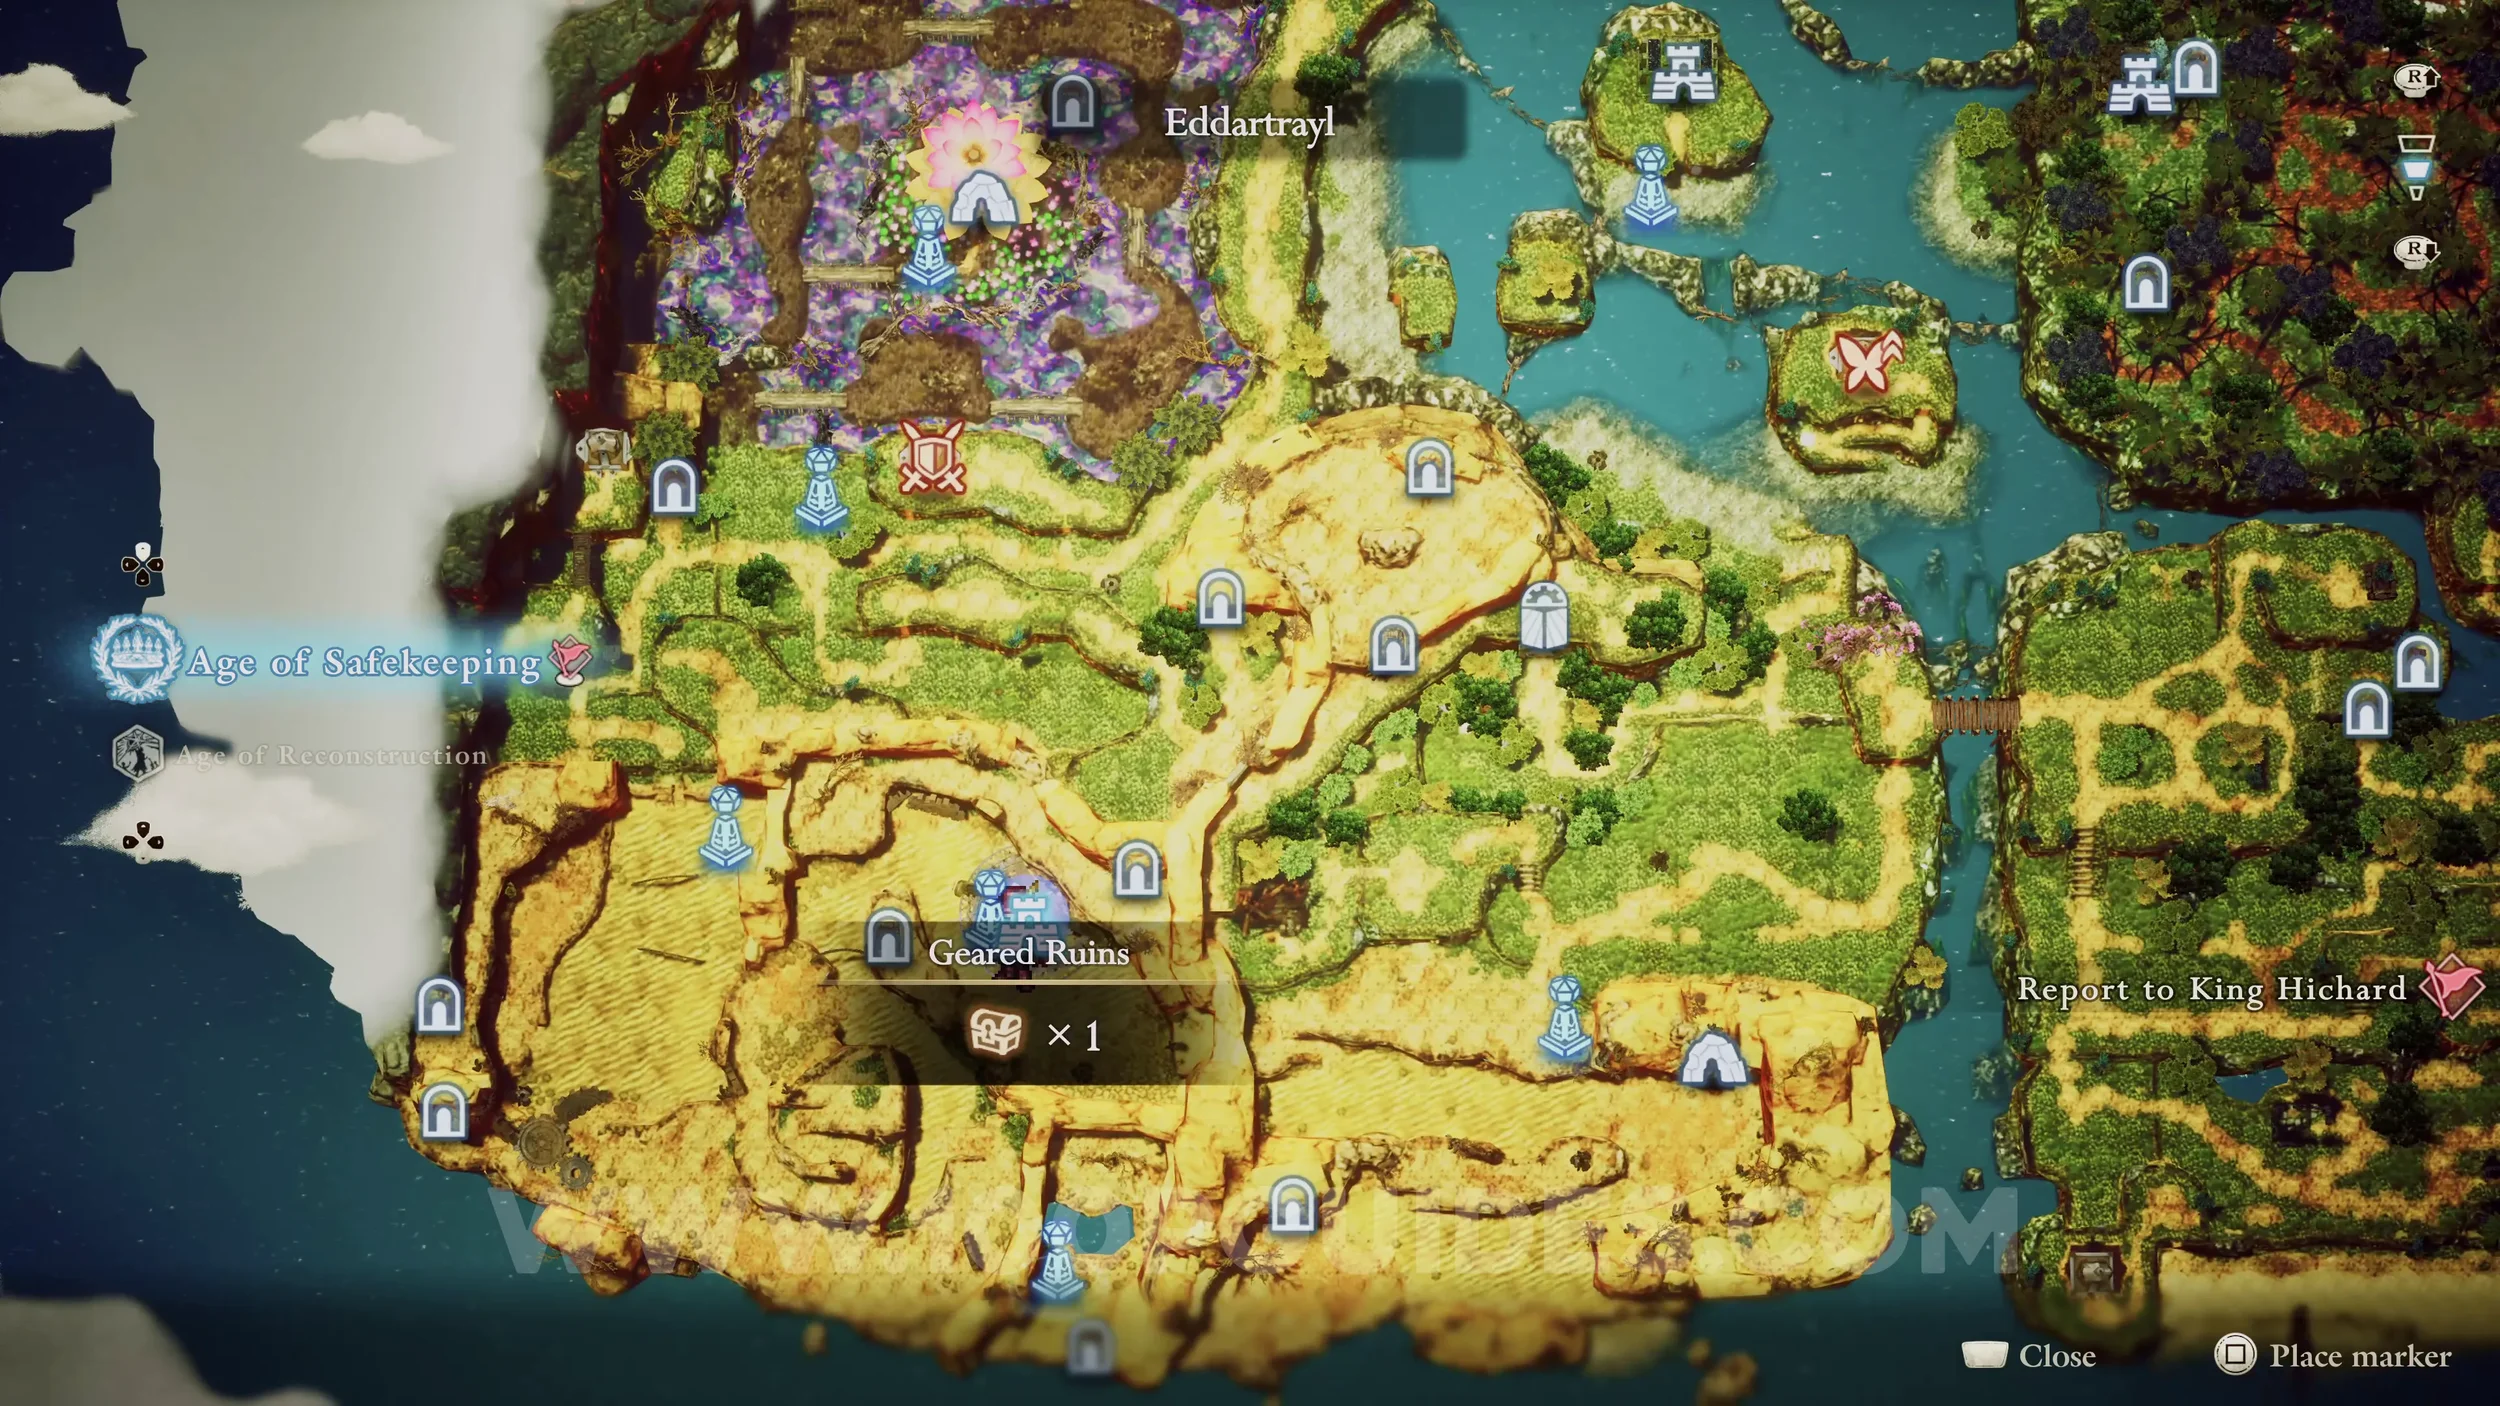
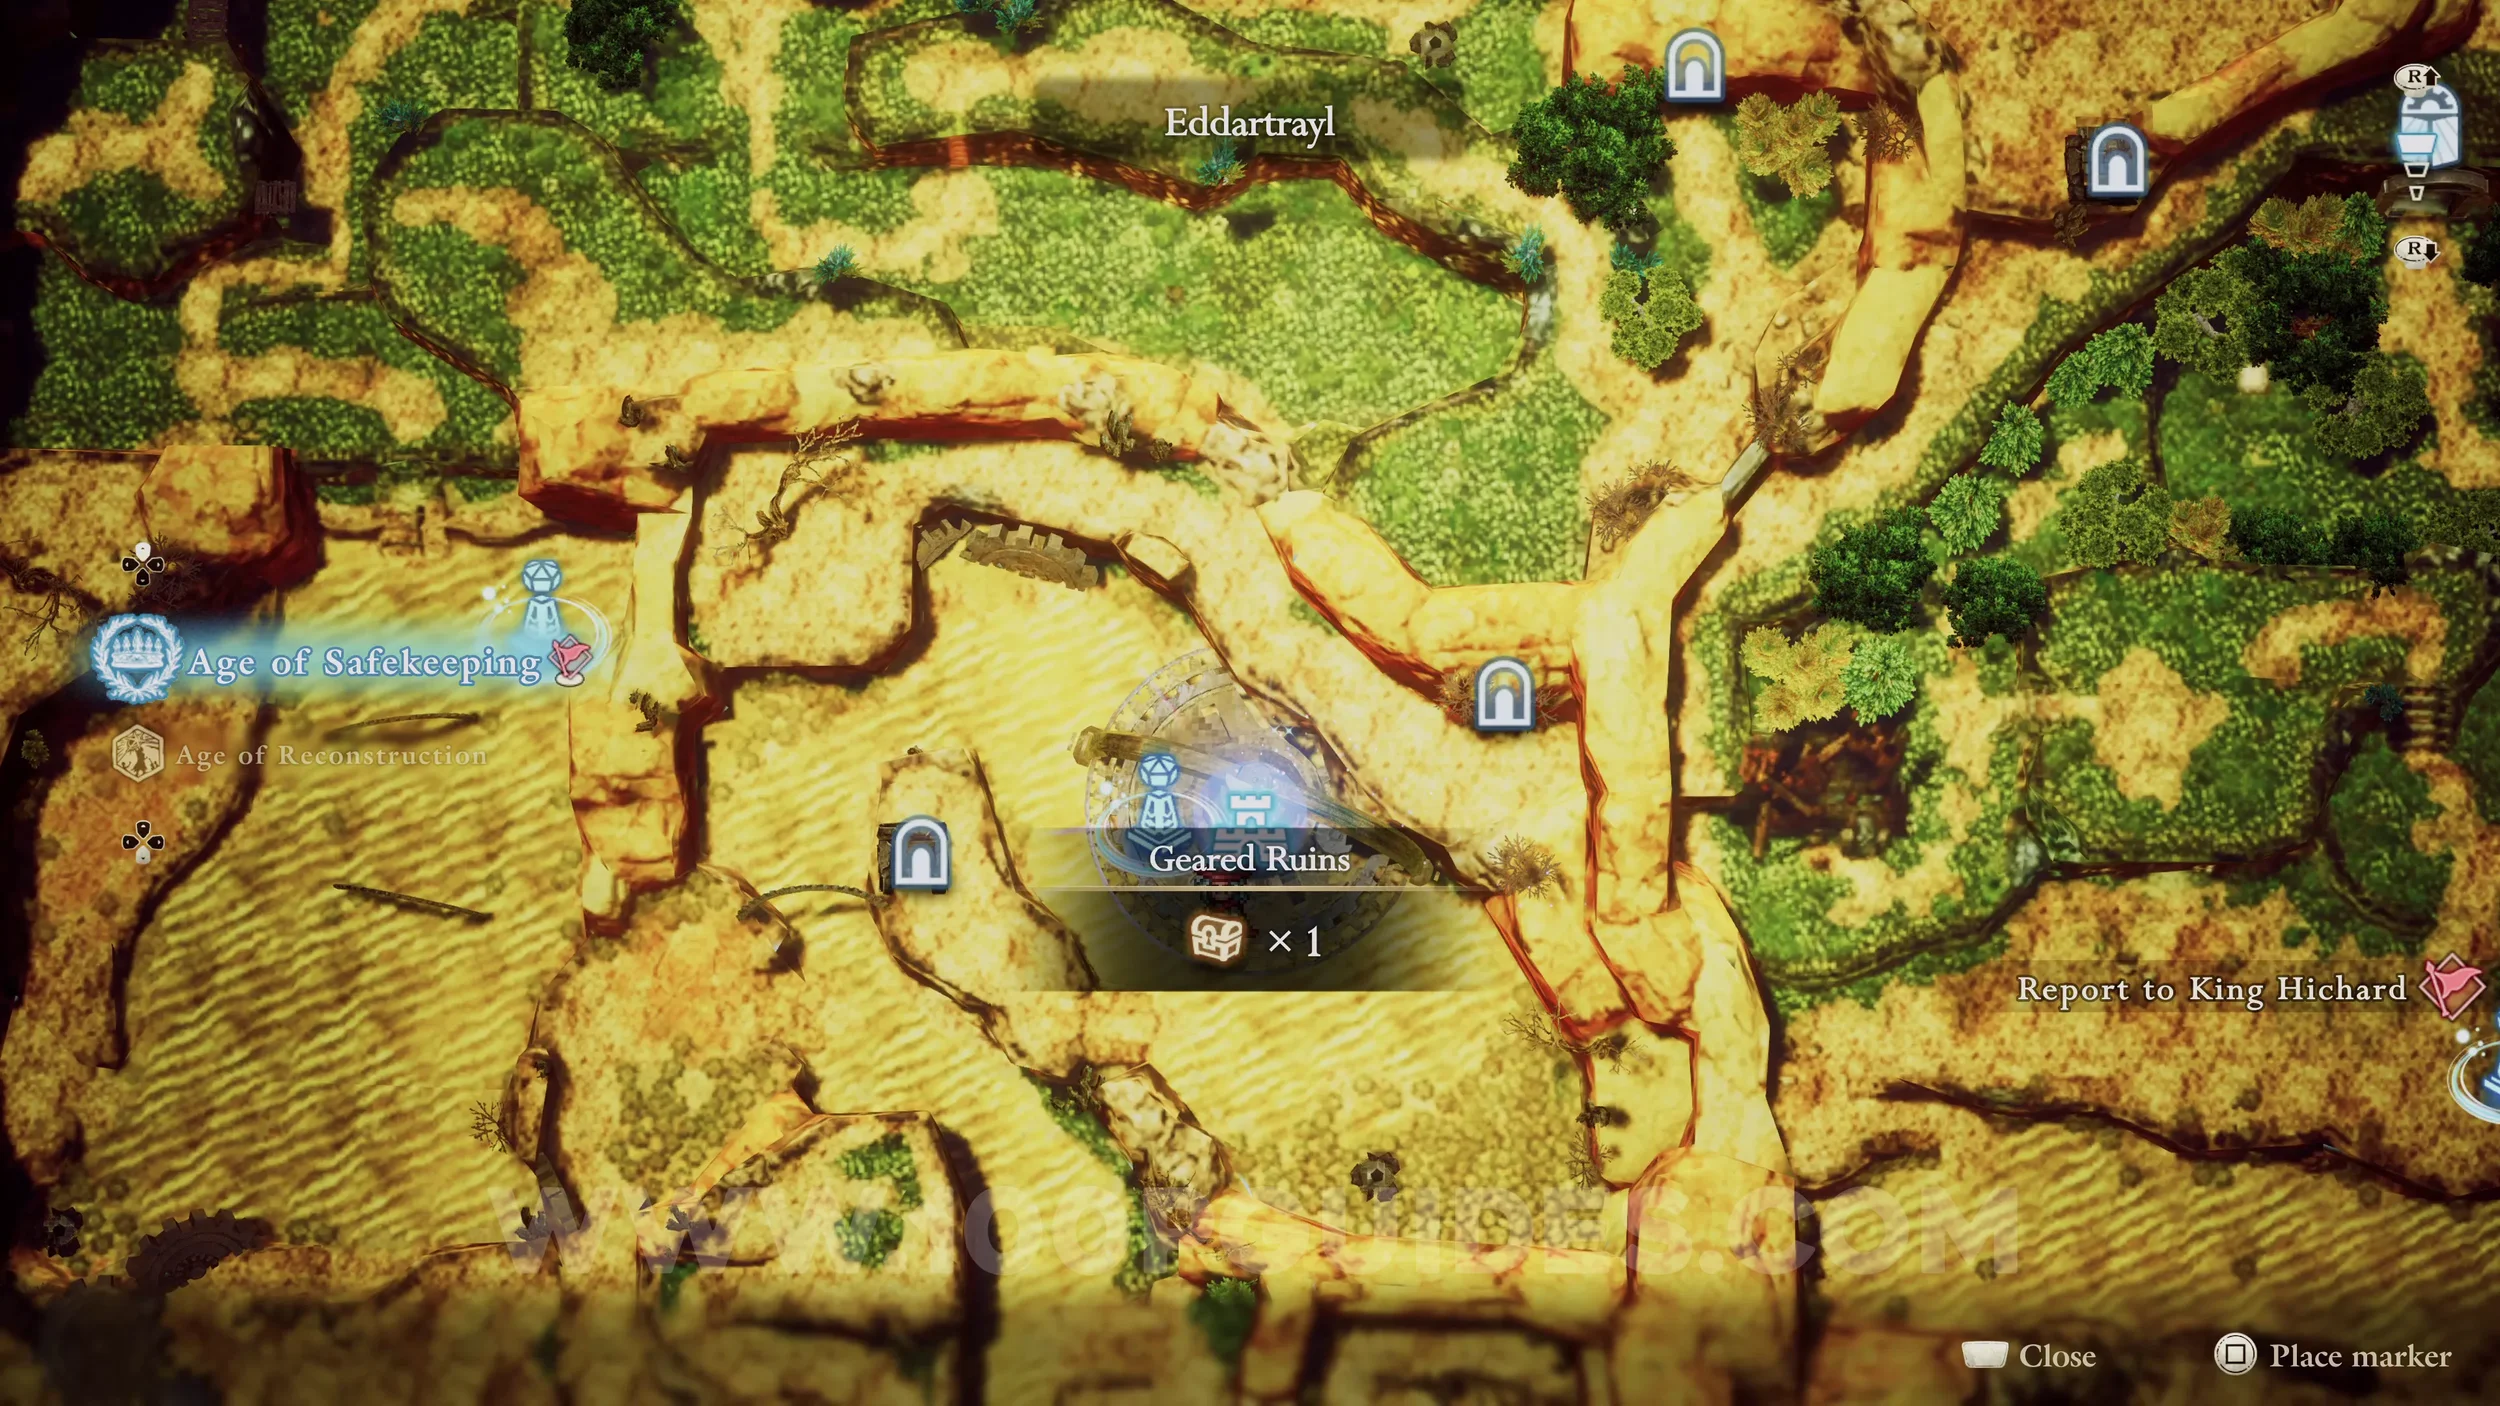
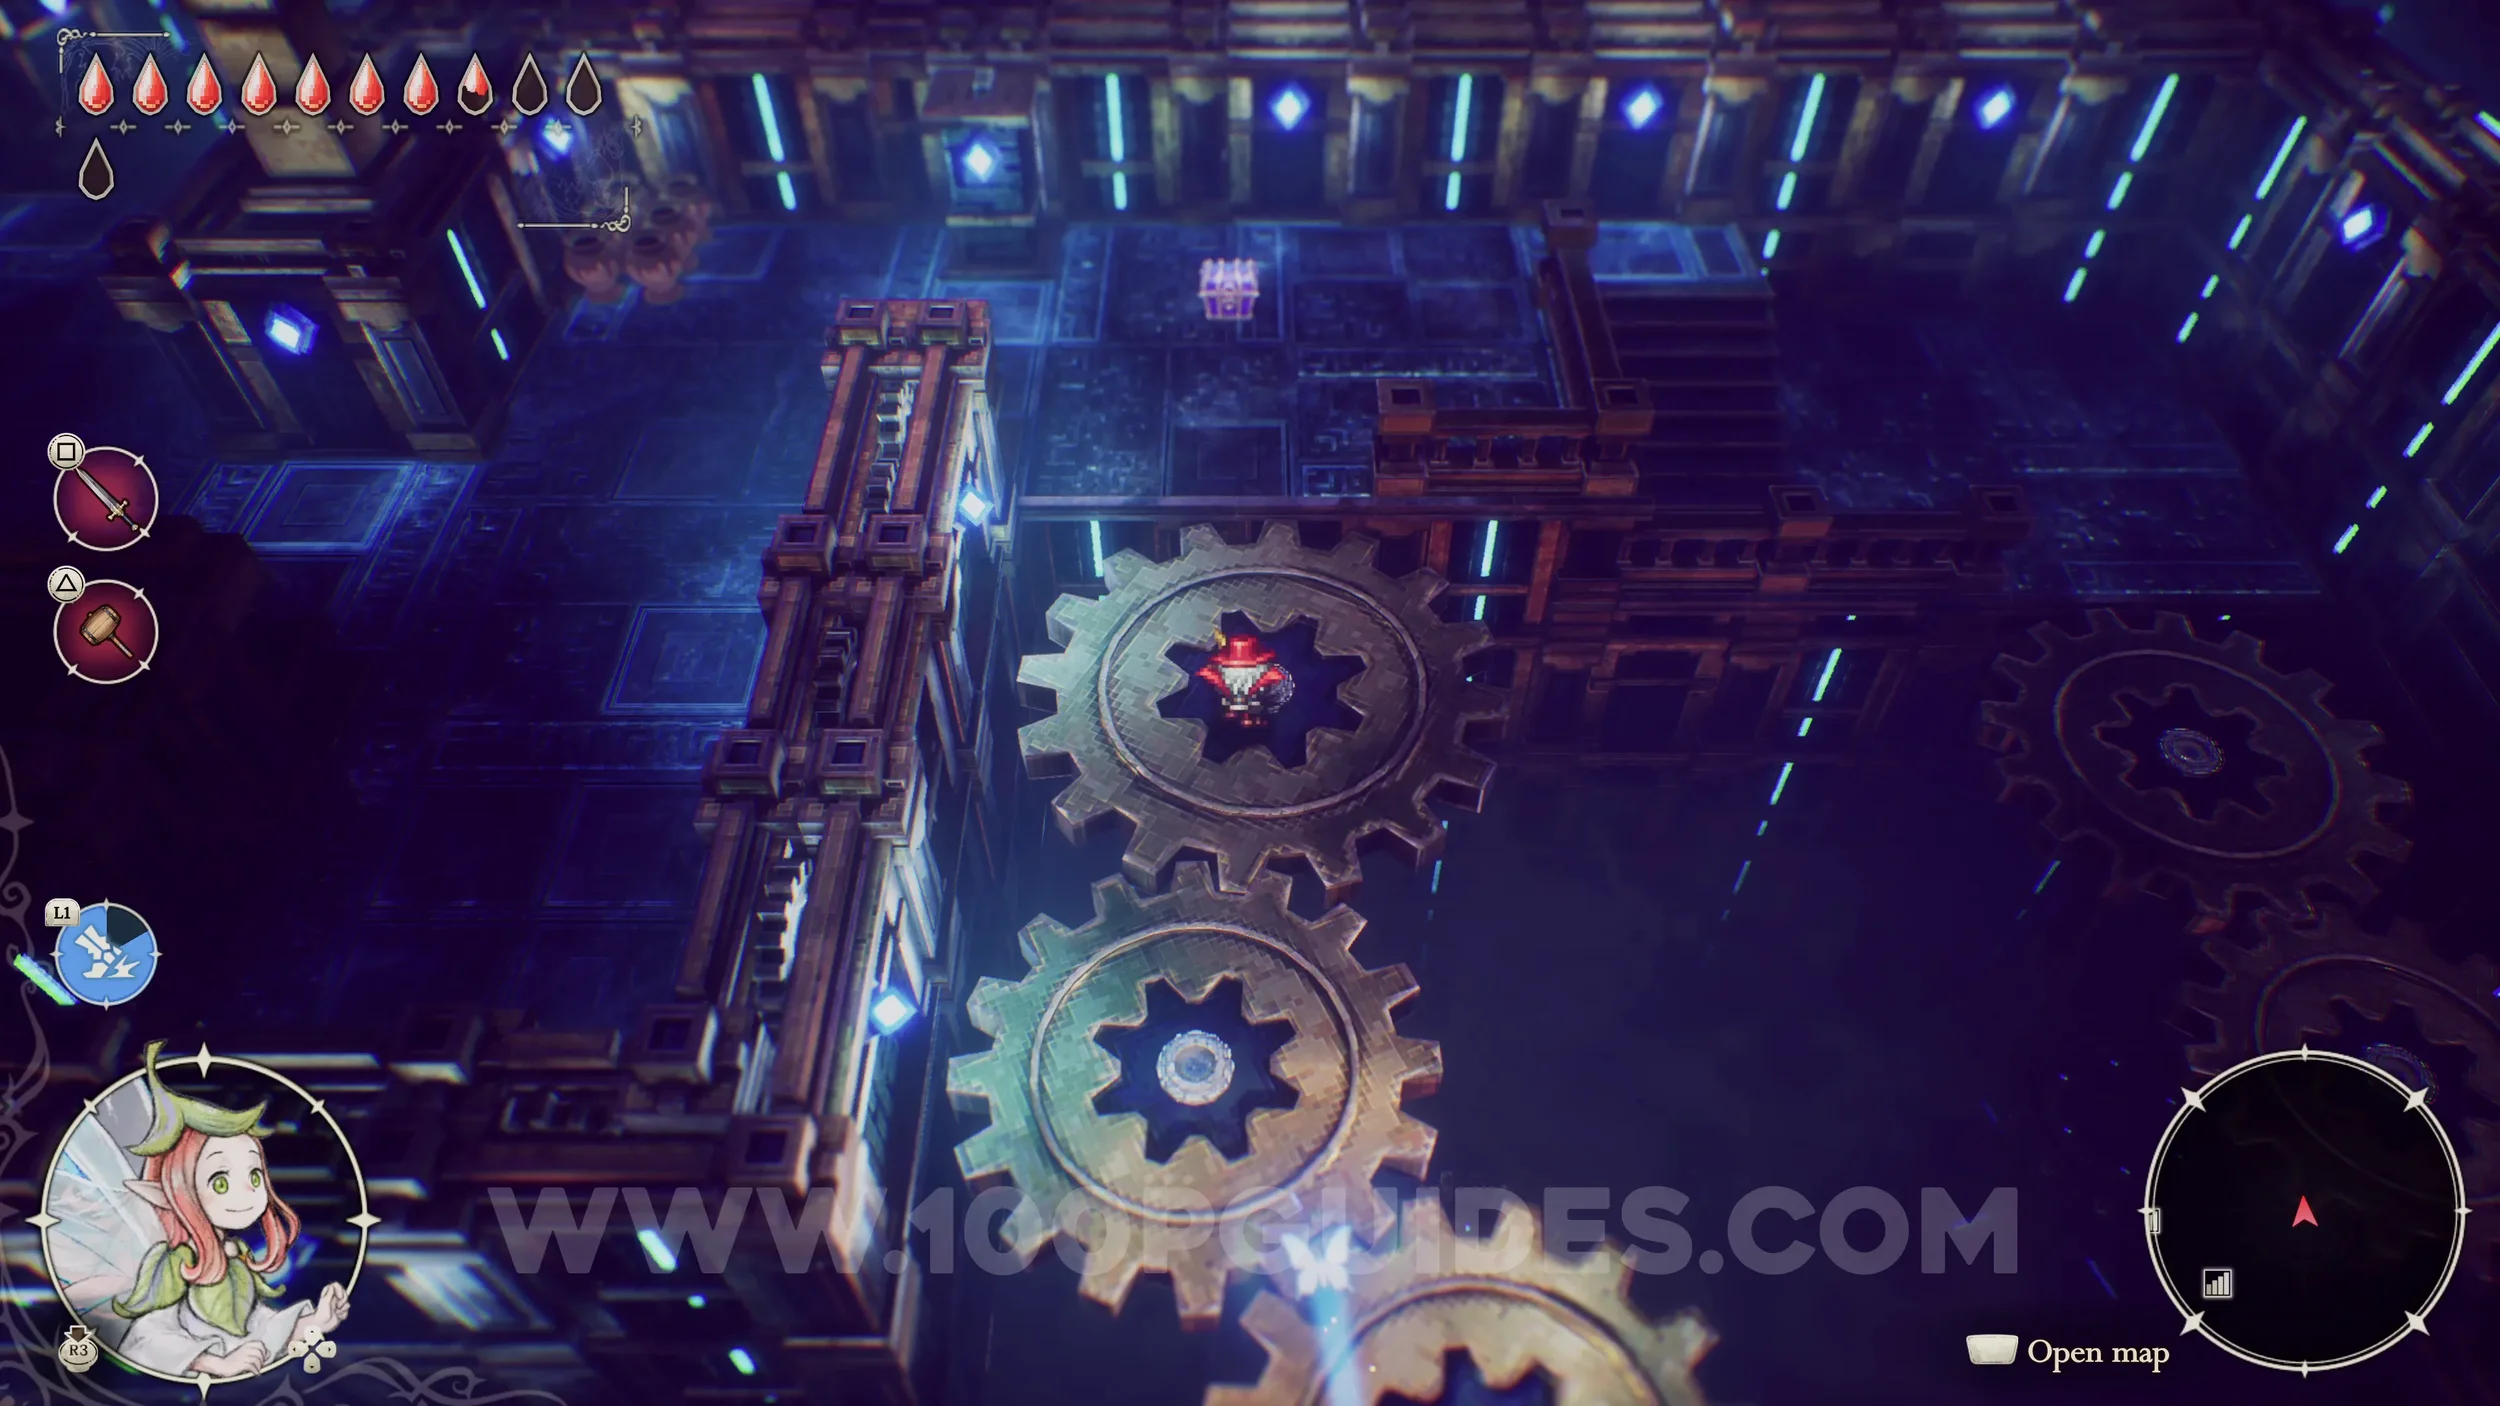
Shard of Life #13. Found at the end of the Geared Ruins dungeon.
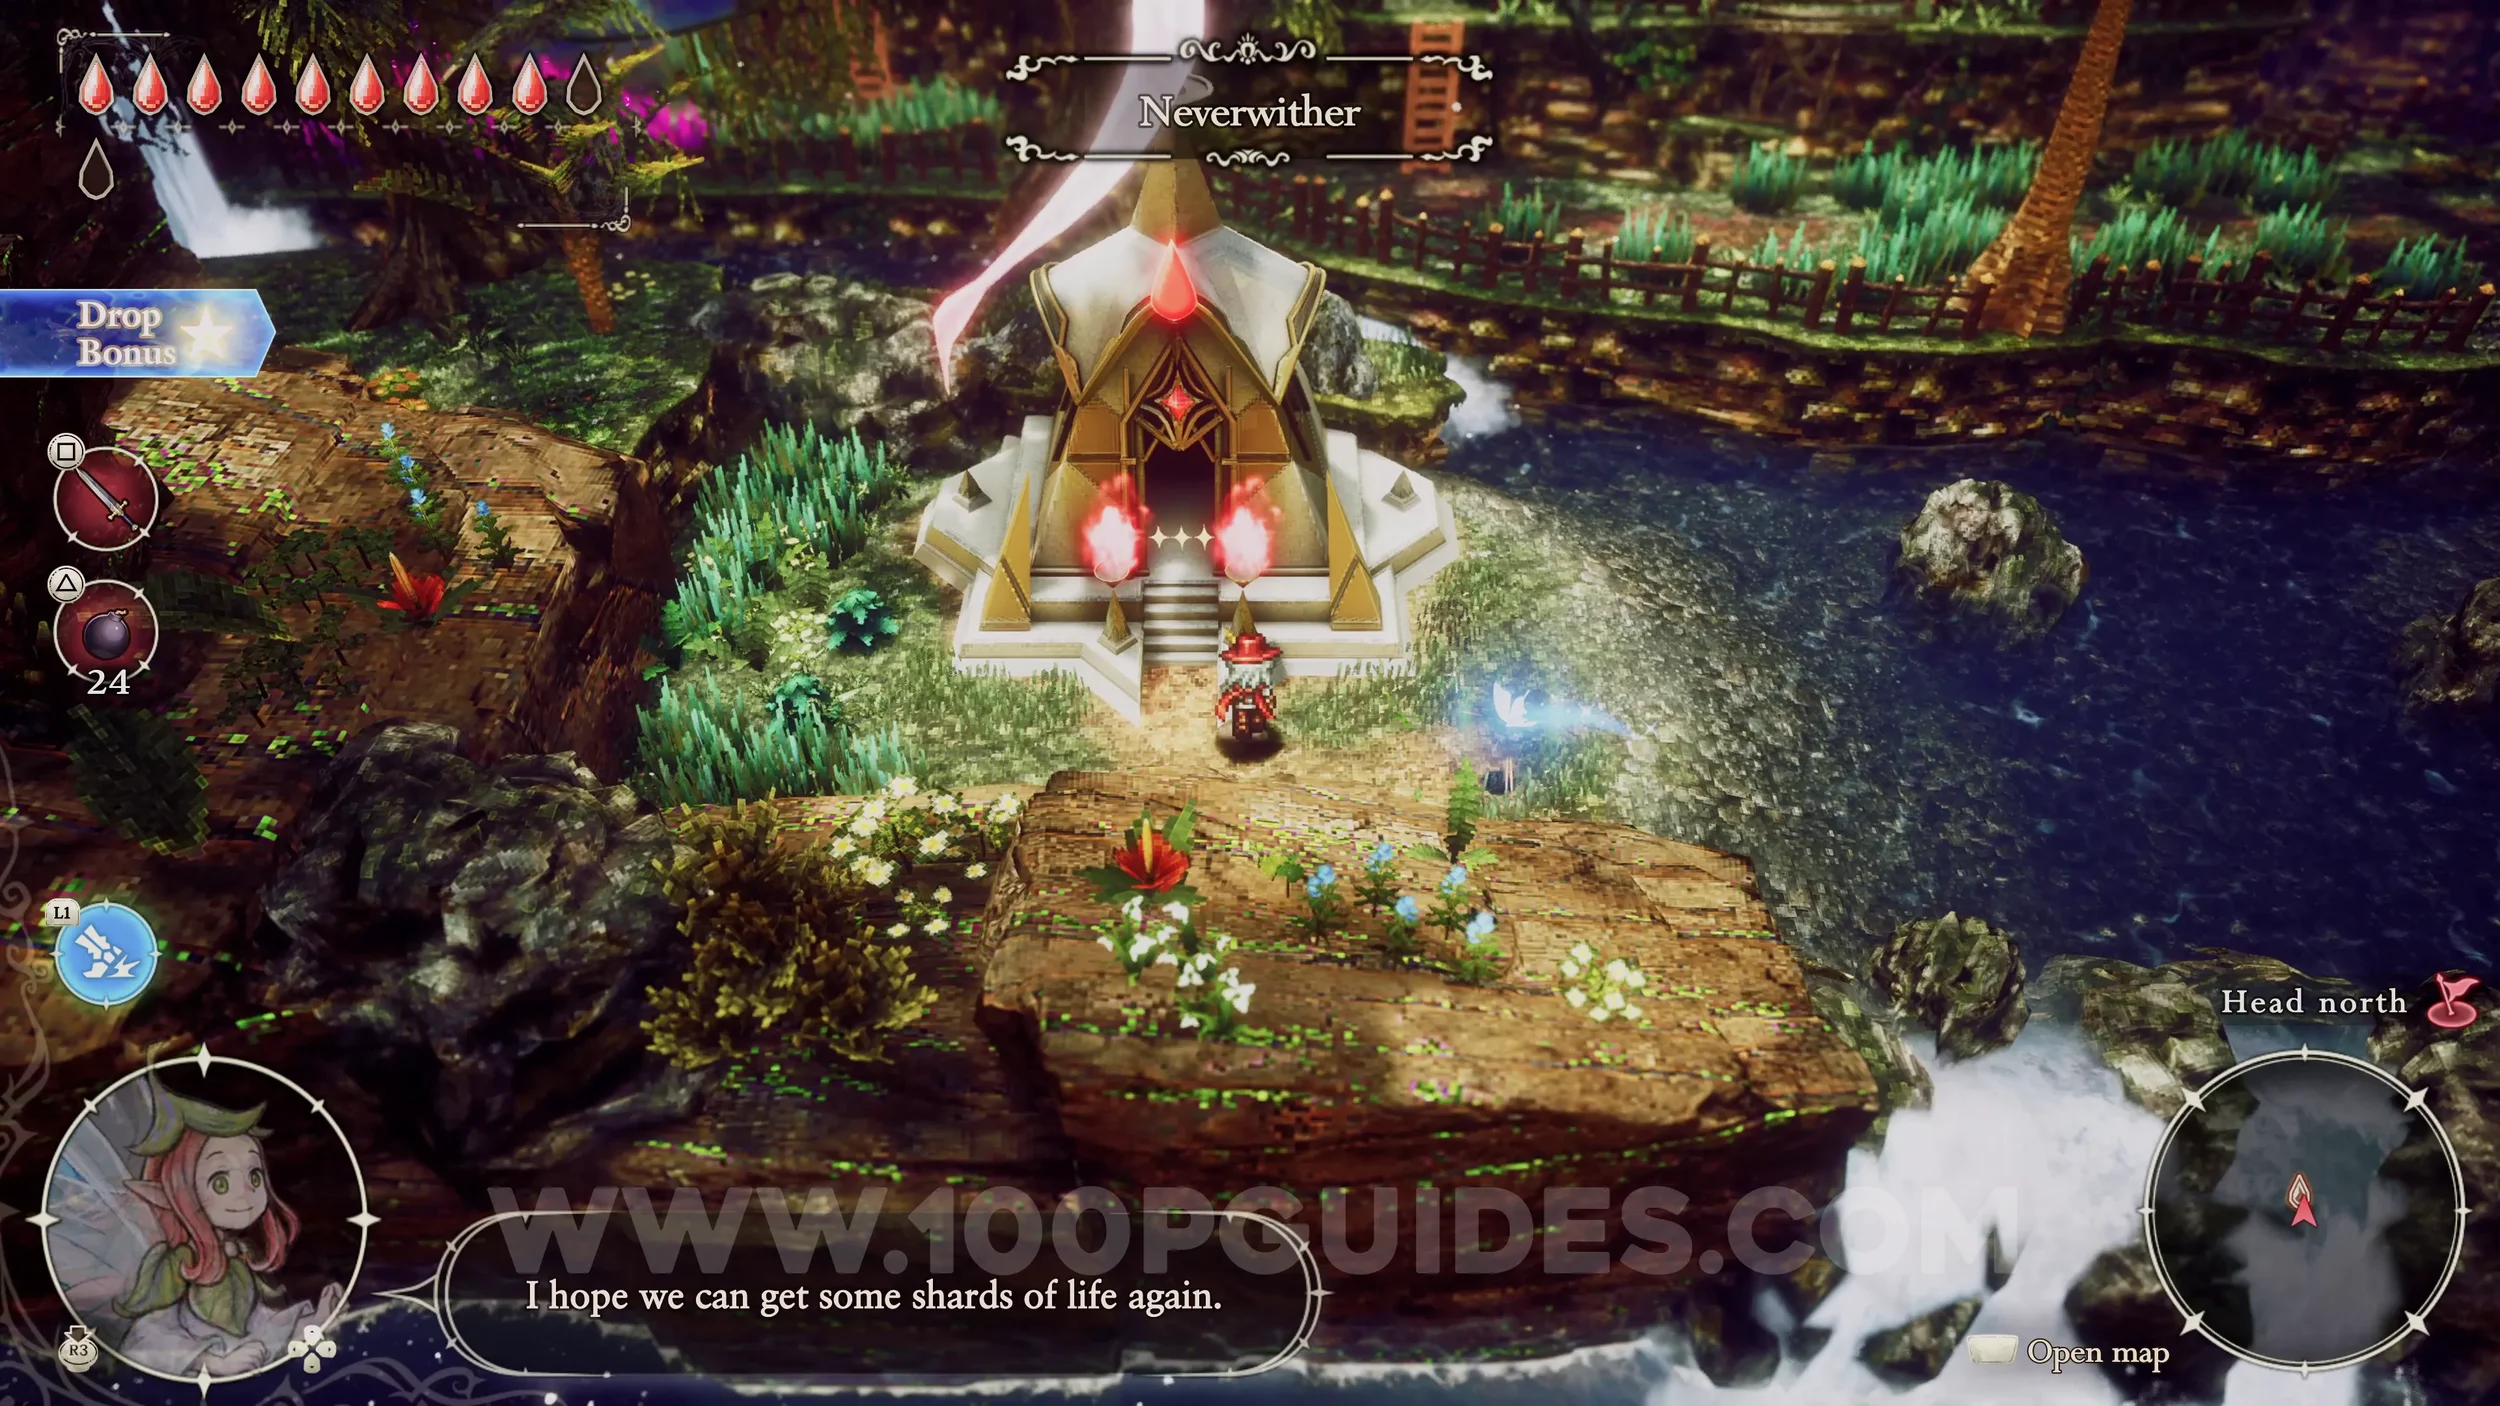
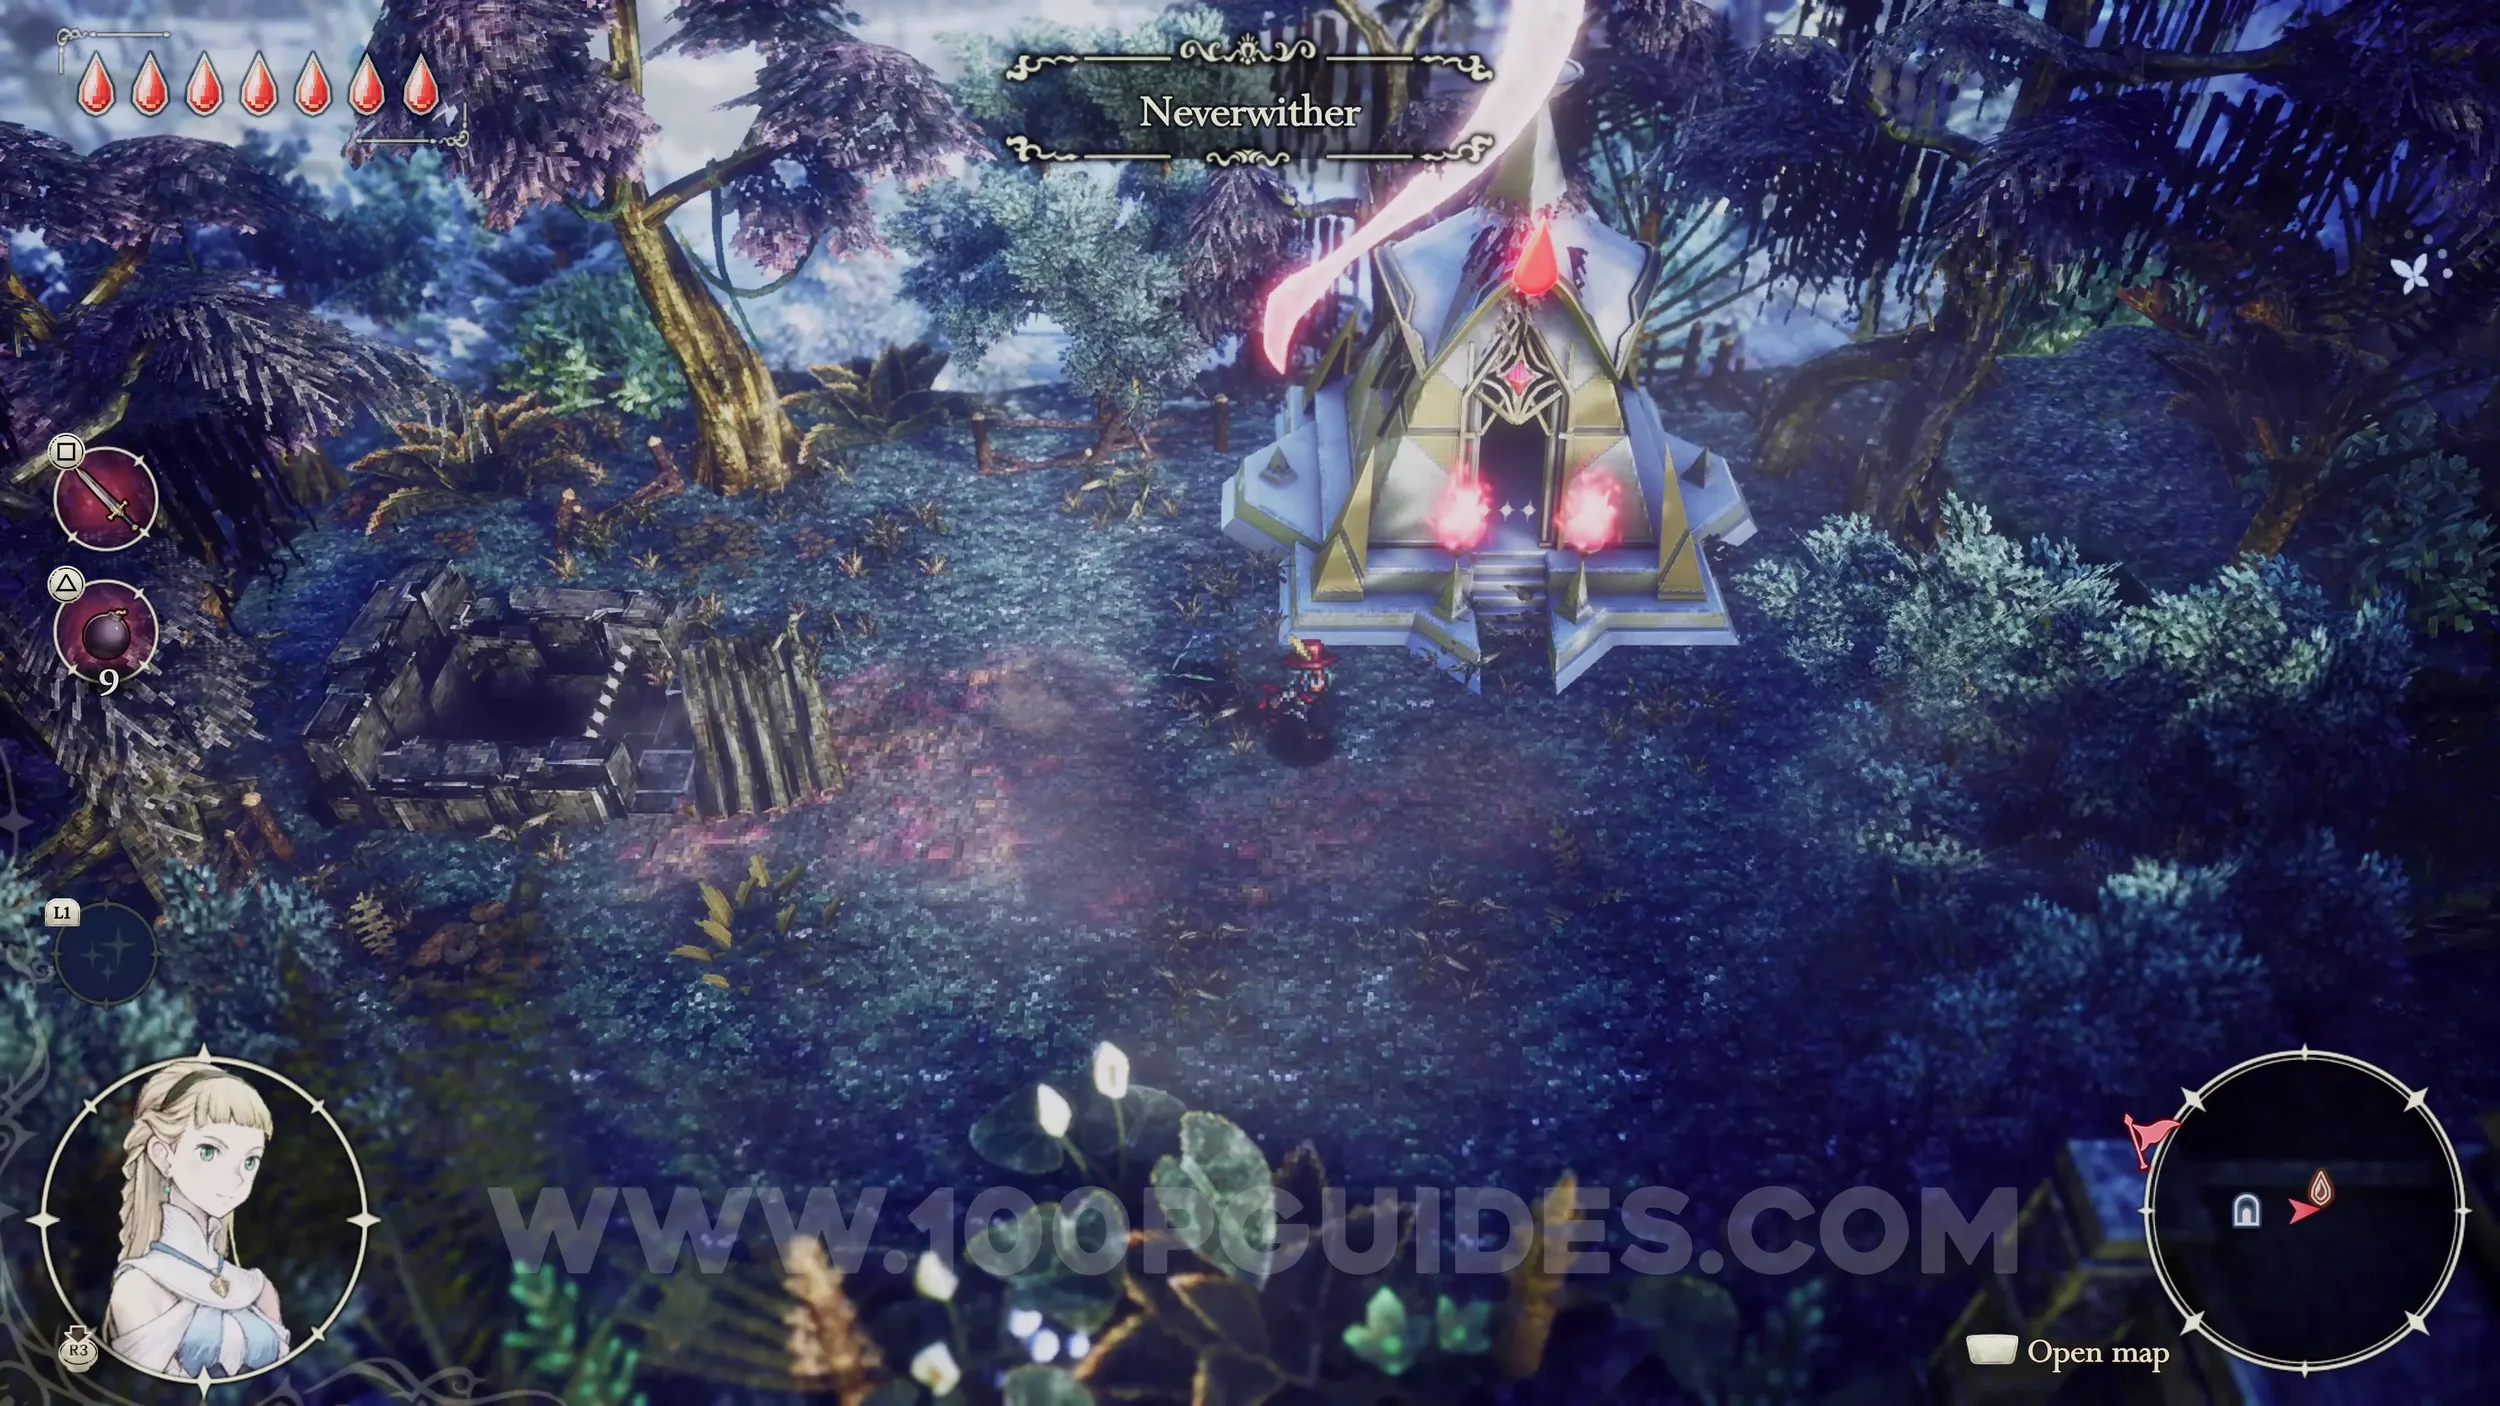
Shard of Life #14. Finish Shrine of Life 16 in the southeastern corner of Neverwither. You can reach this area through the Eastern Caves after you get the key during the main story. To solve the puzzle, press the crystals in the following order: R>Y>R>B>R>Y>G>Y.


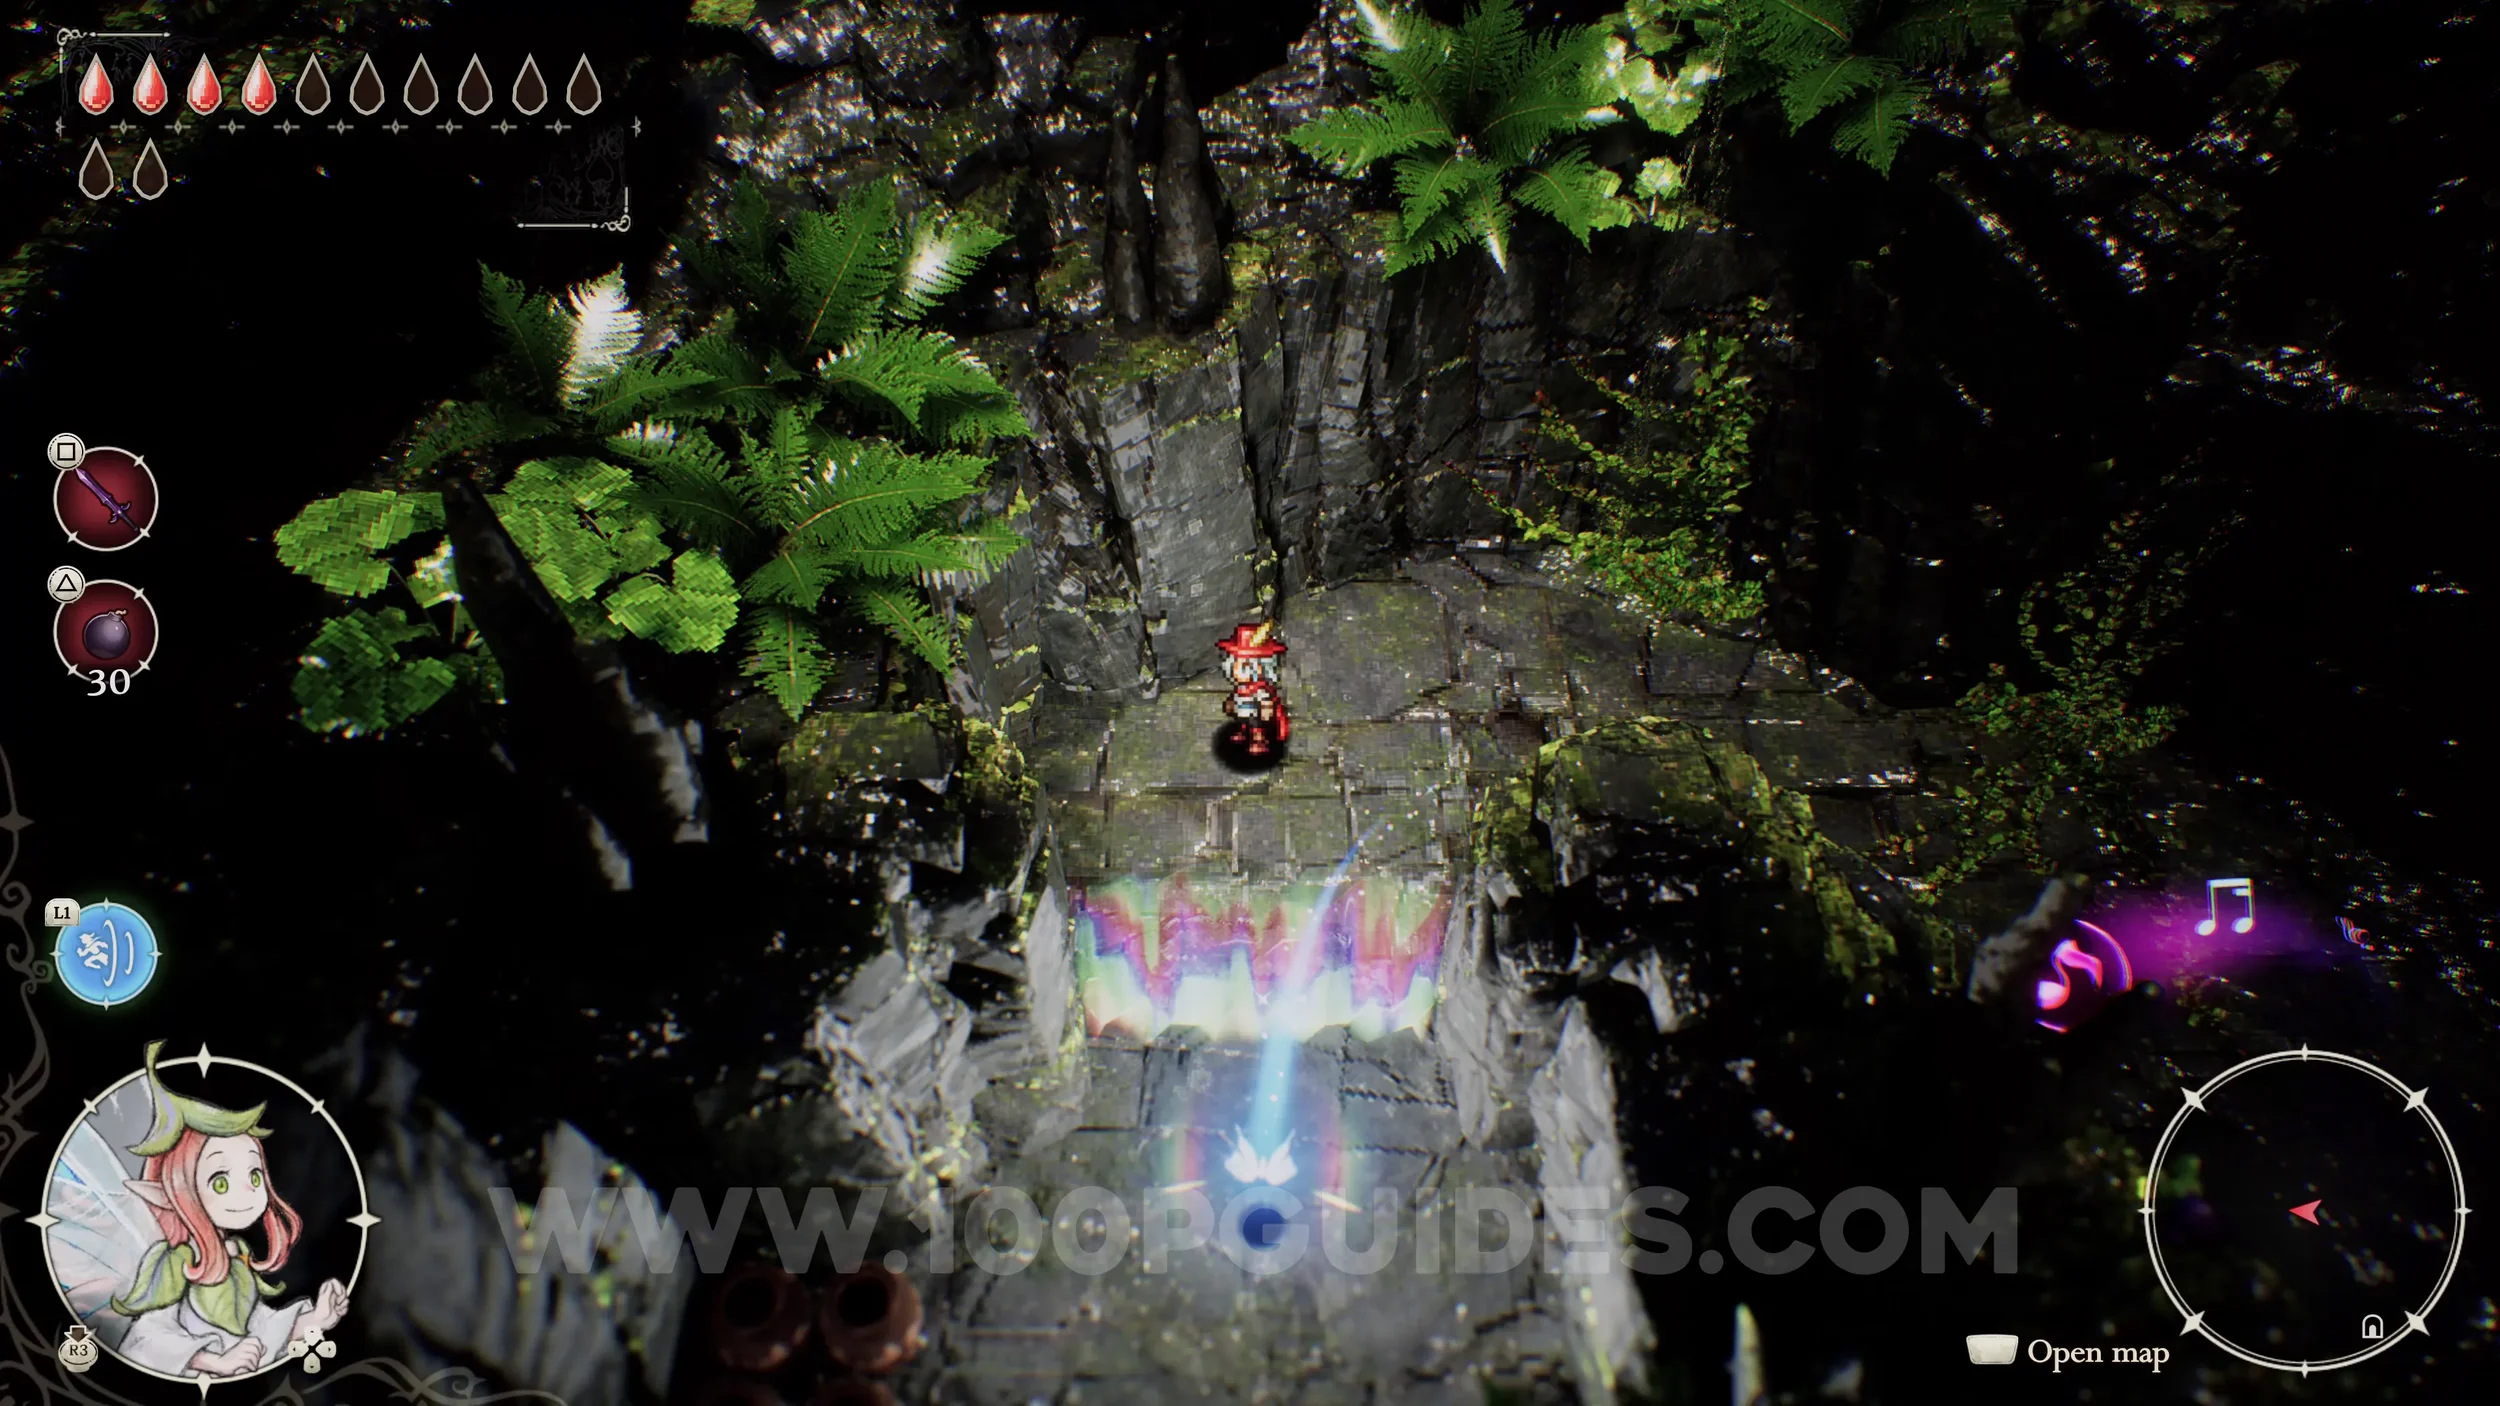
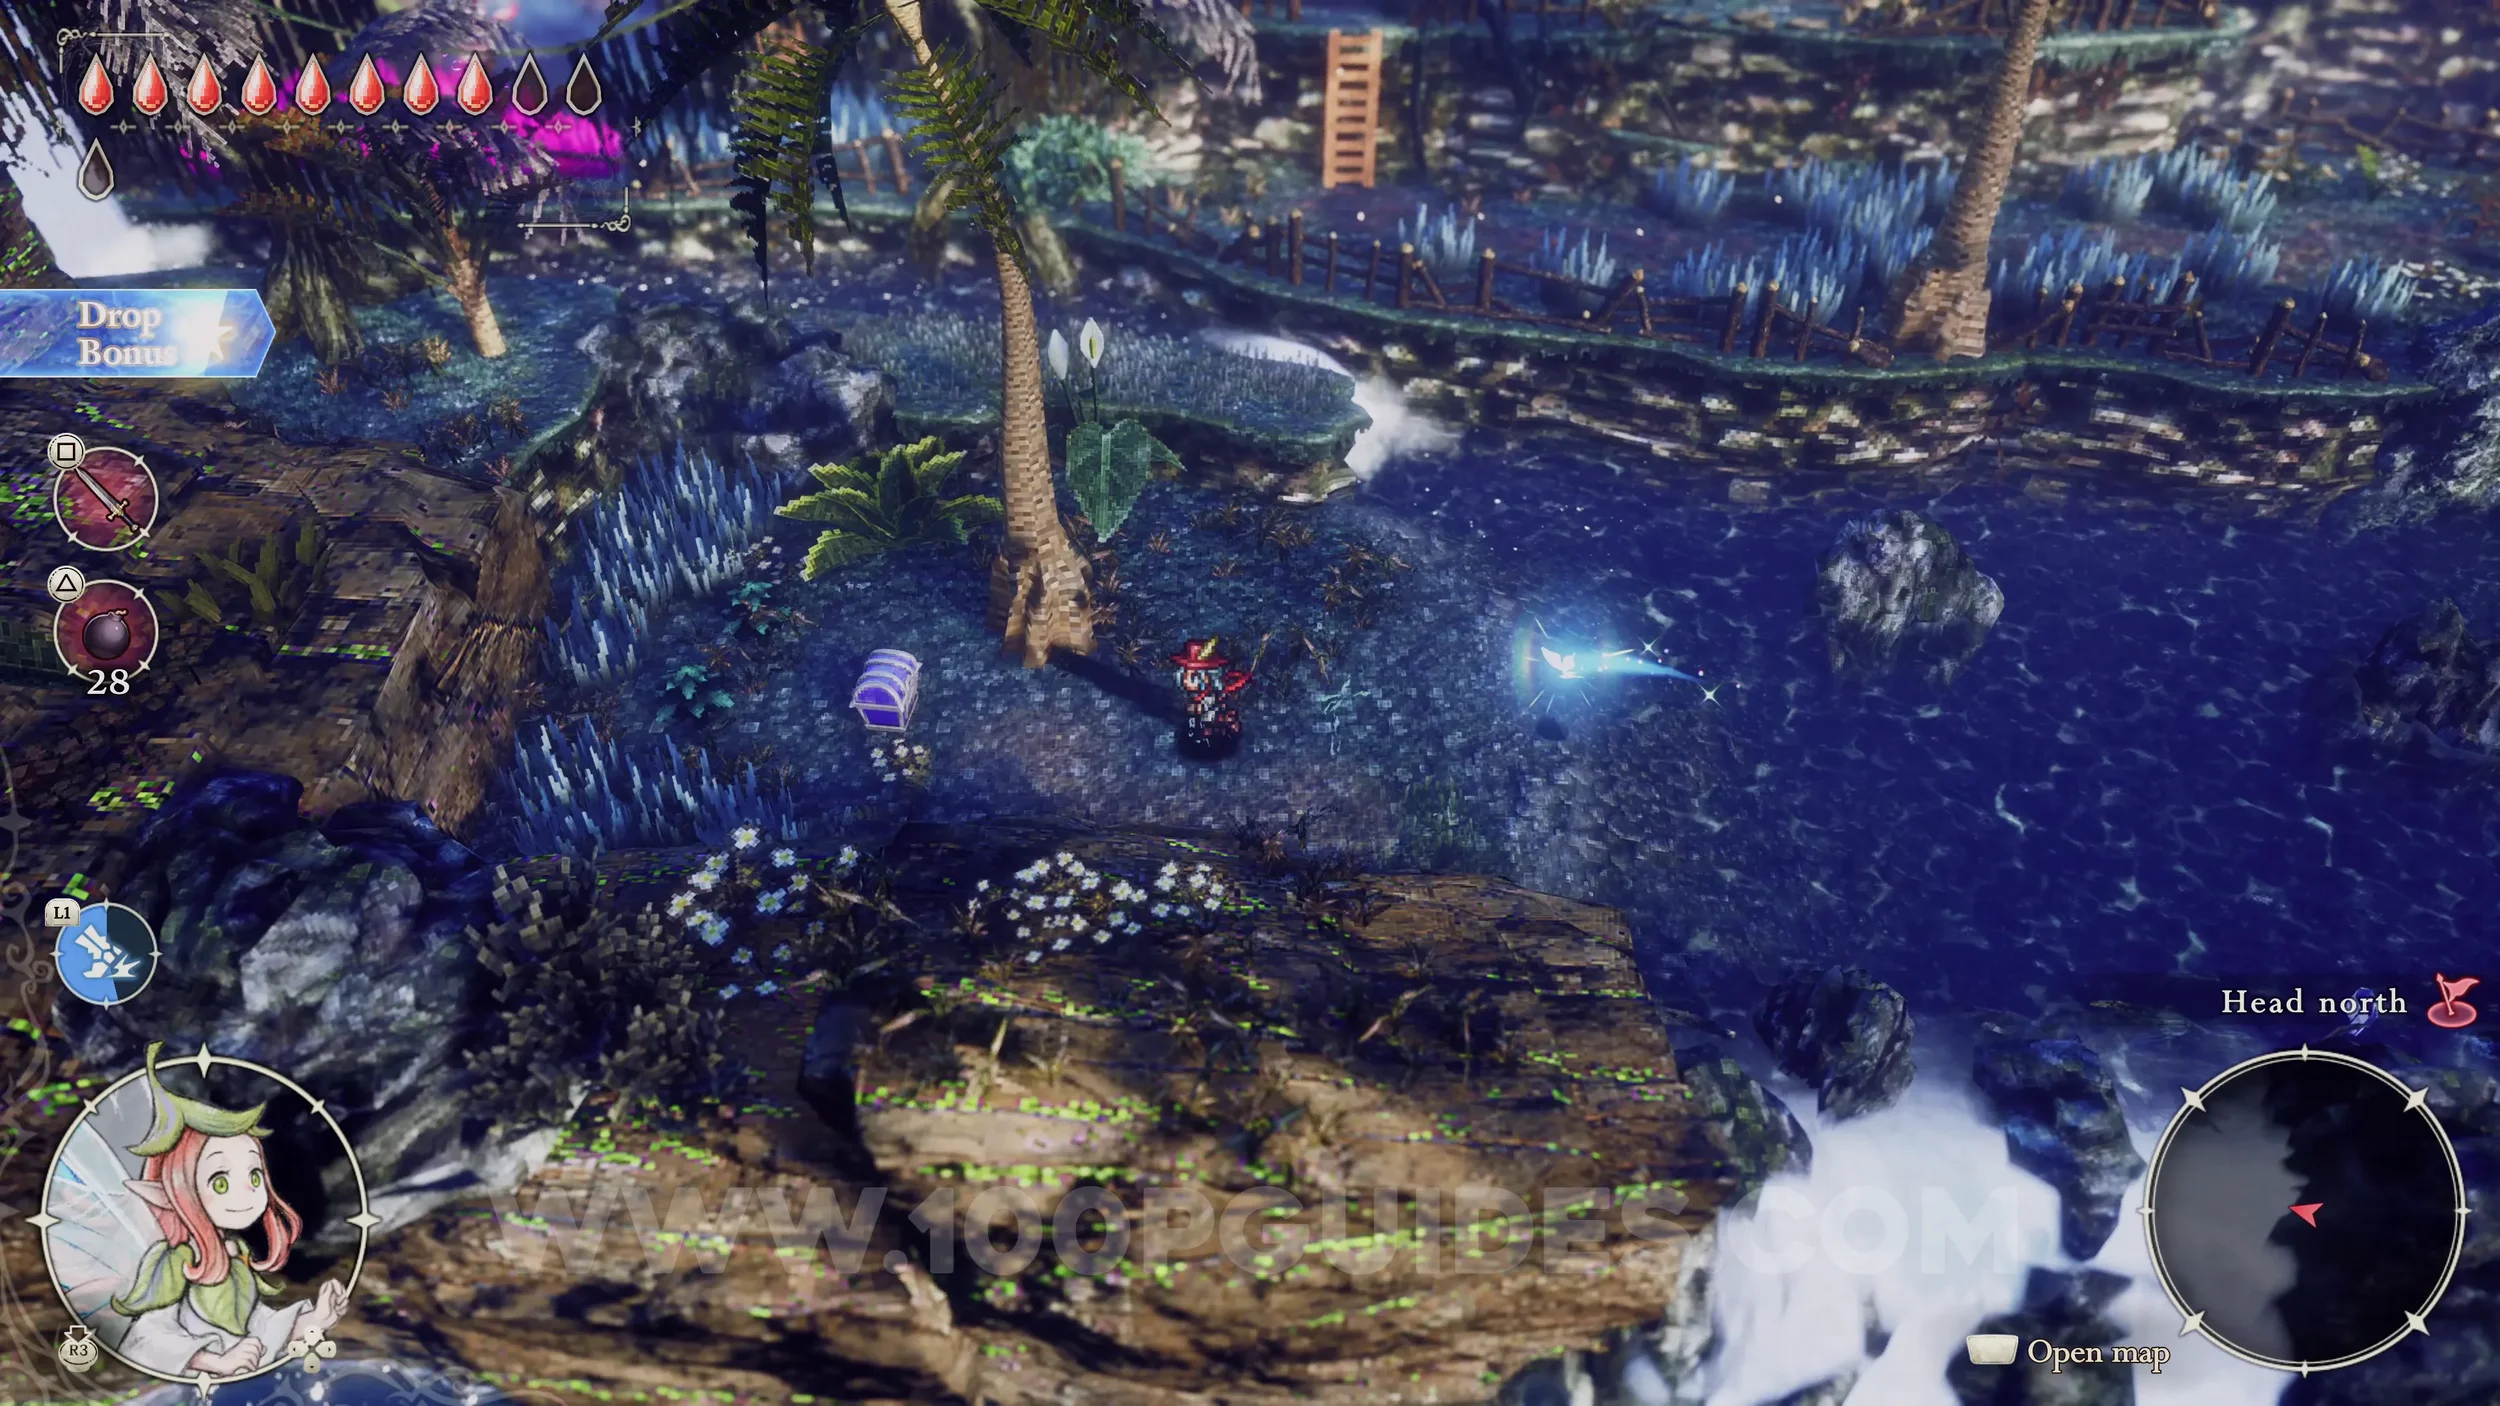
Shard of Life #15. Found inside the Falls Caves. You can get there by swimming from the green plot of land just to the south. You will need the dive ability from Age of Reconstruction > Water Ruins to get under the tree in the water. Once inside, head left and then climb the ladders until you reach the Second Floor. Here, you will need the Warp Fairy Power to get through the barrier of light. After that, continue to the end to find the Shard of Life in a chest.


Shard of Life #16. Once you get the key to the Western Caves during the story, you can reach the western side of the map. Here, go through Monster Trail 5. Then, once you come out the other side, drop down to the Shrine of Life just below the Fast Travel point. Inside, defeat all the enemies in the dark, and the Shard of Life will be waiting for you at the end.


AGE OF RECONSTRUCTION
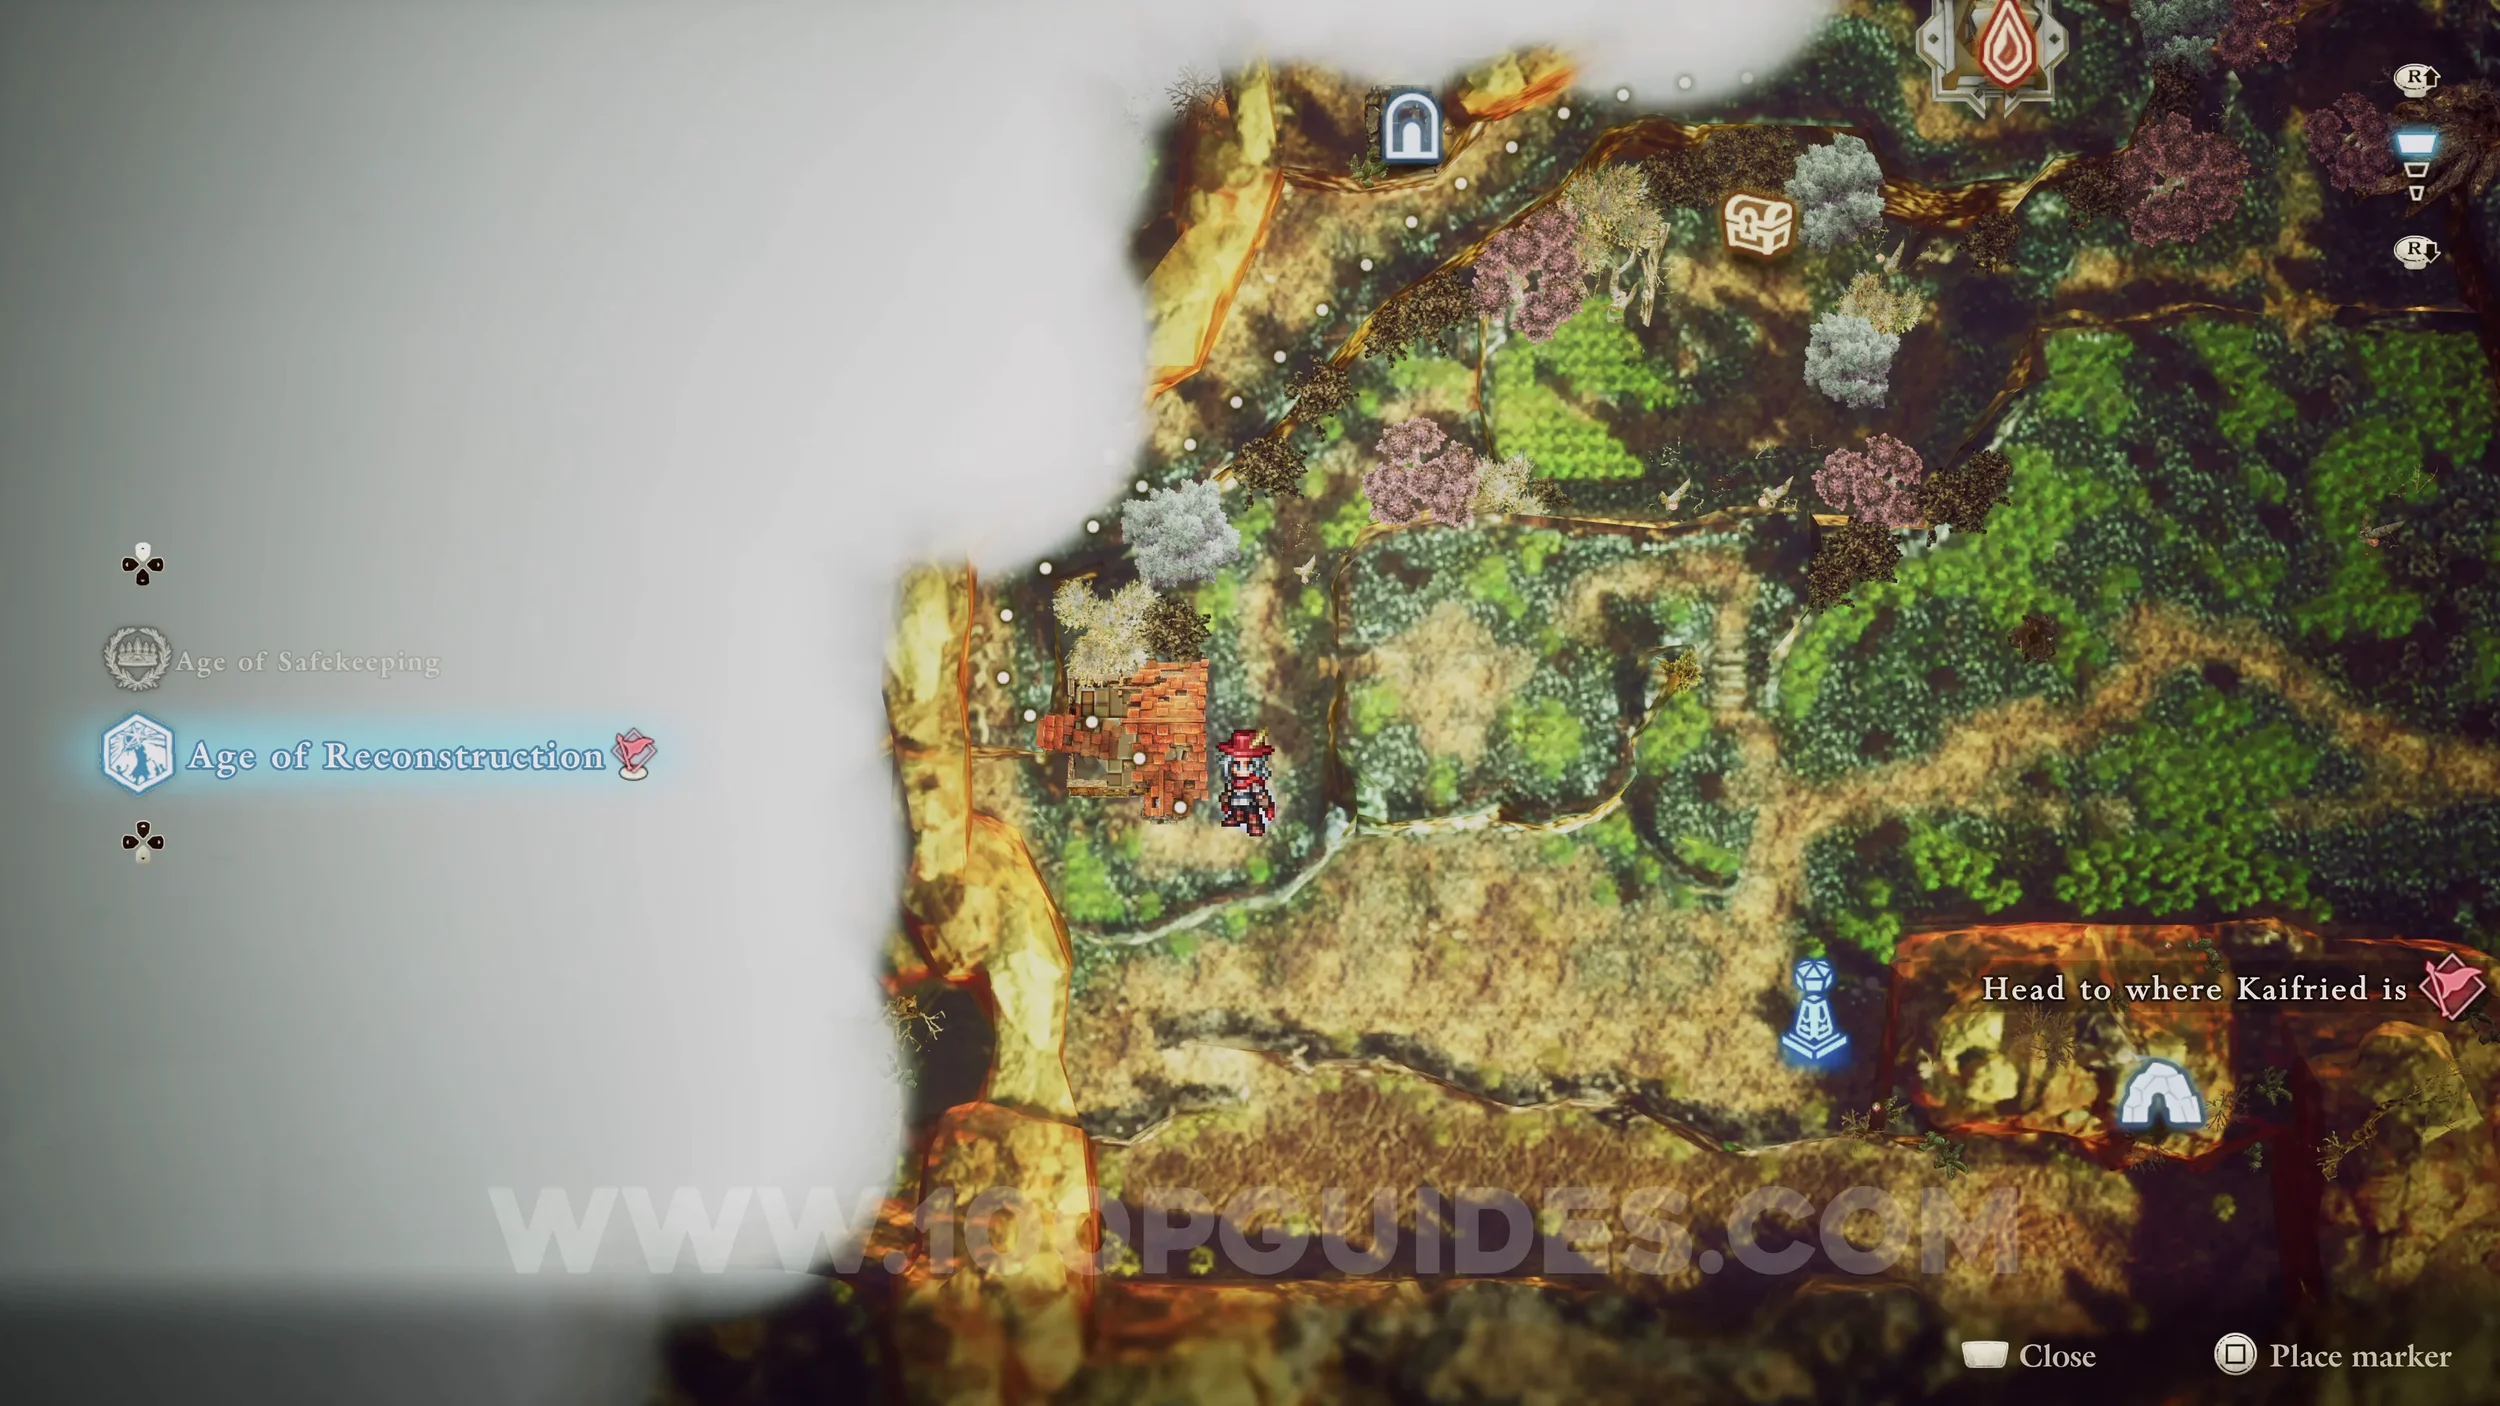
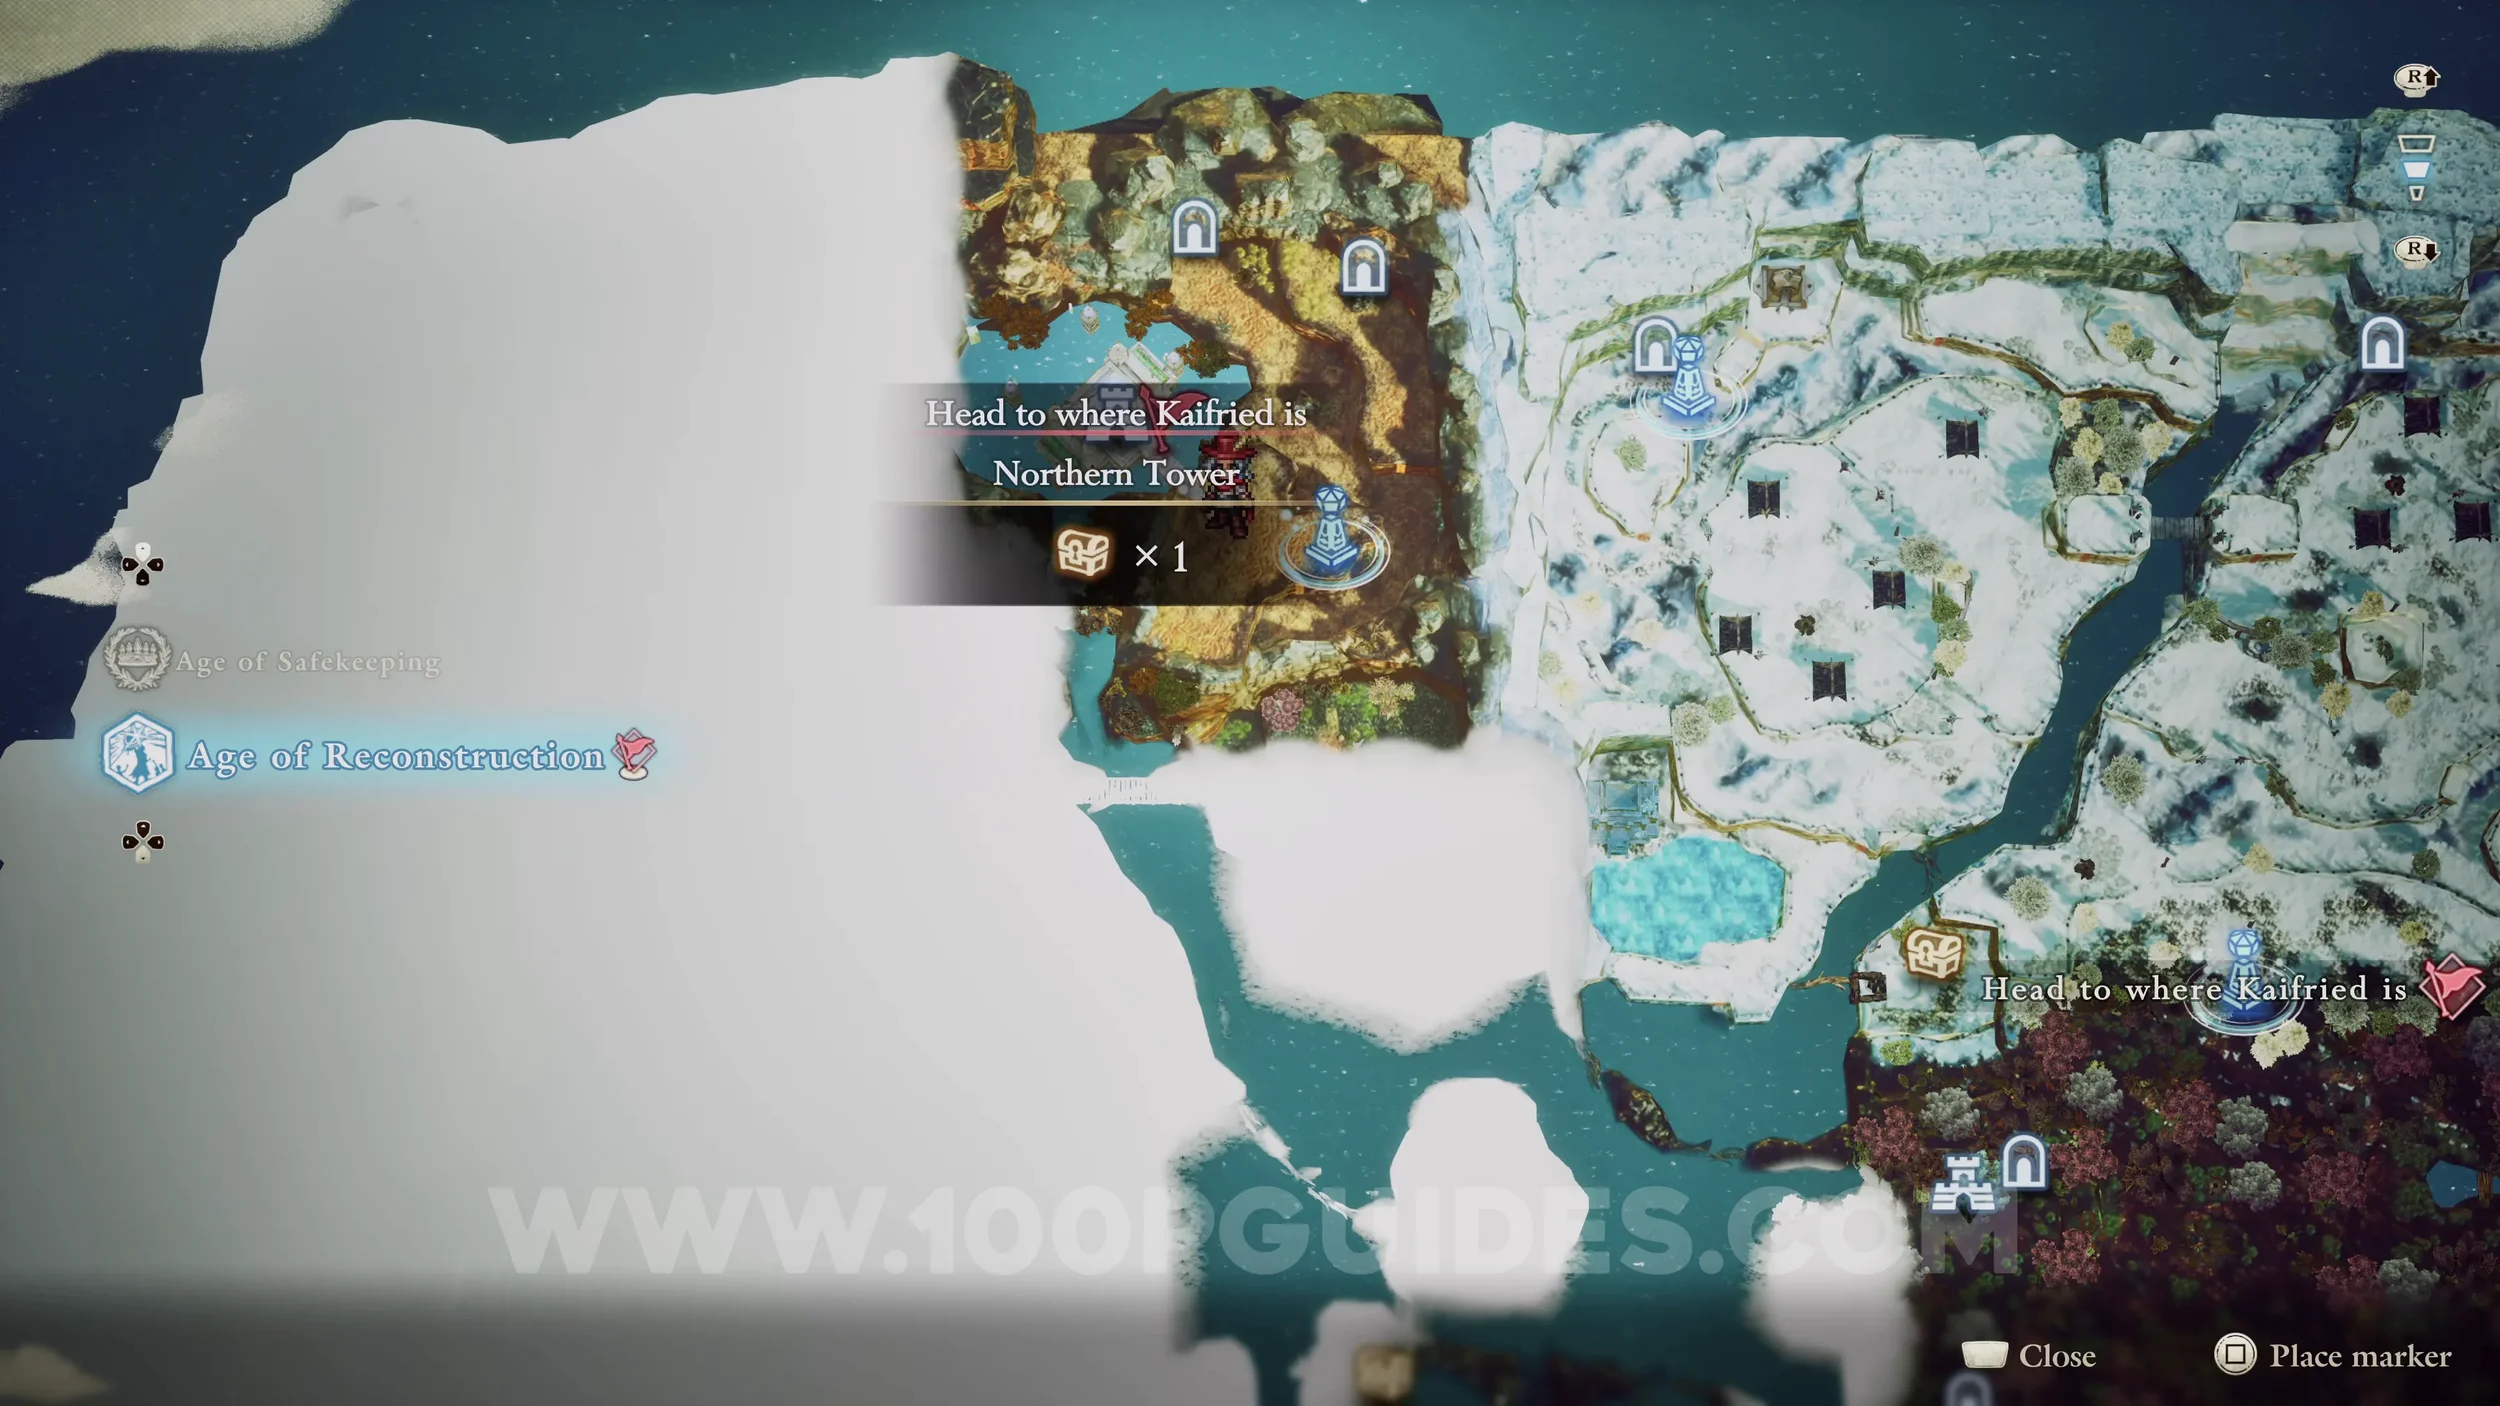
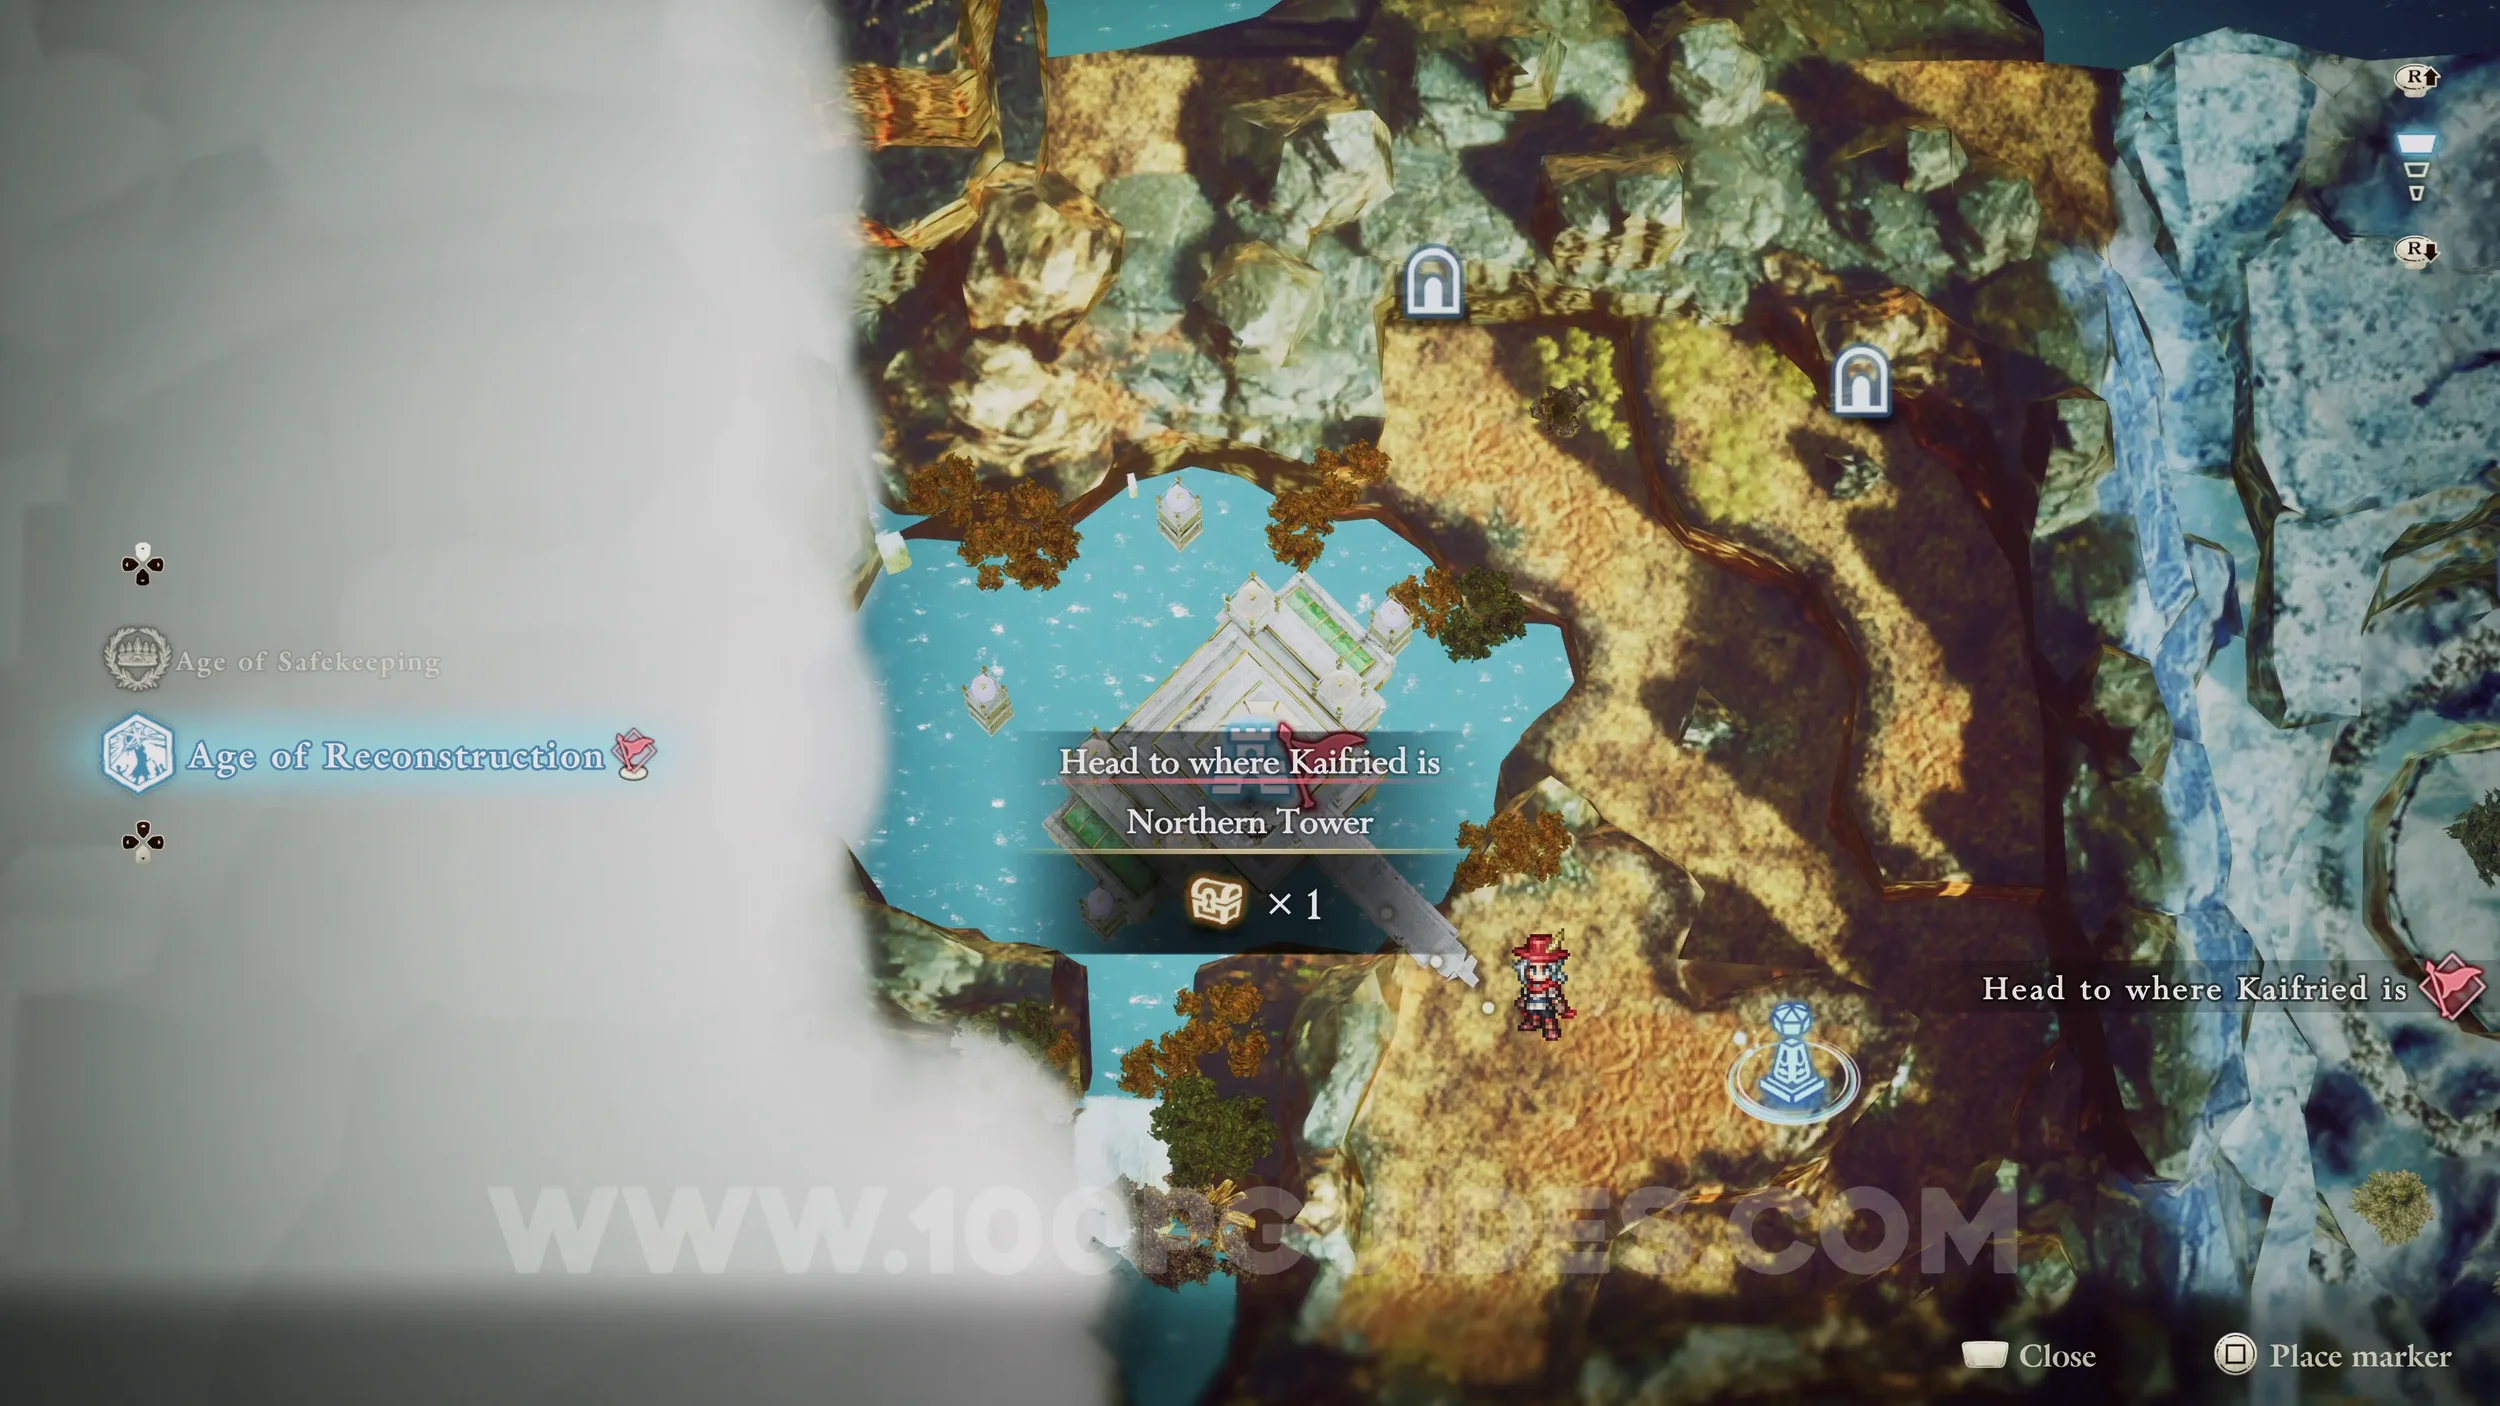
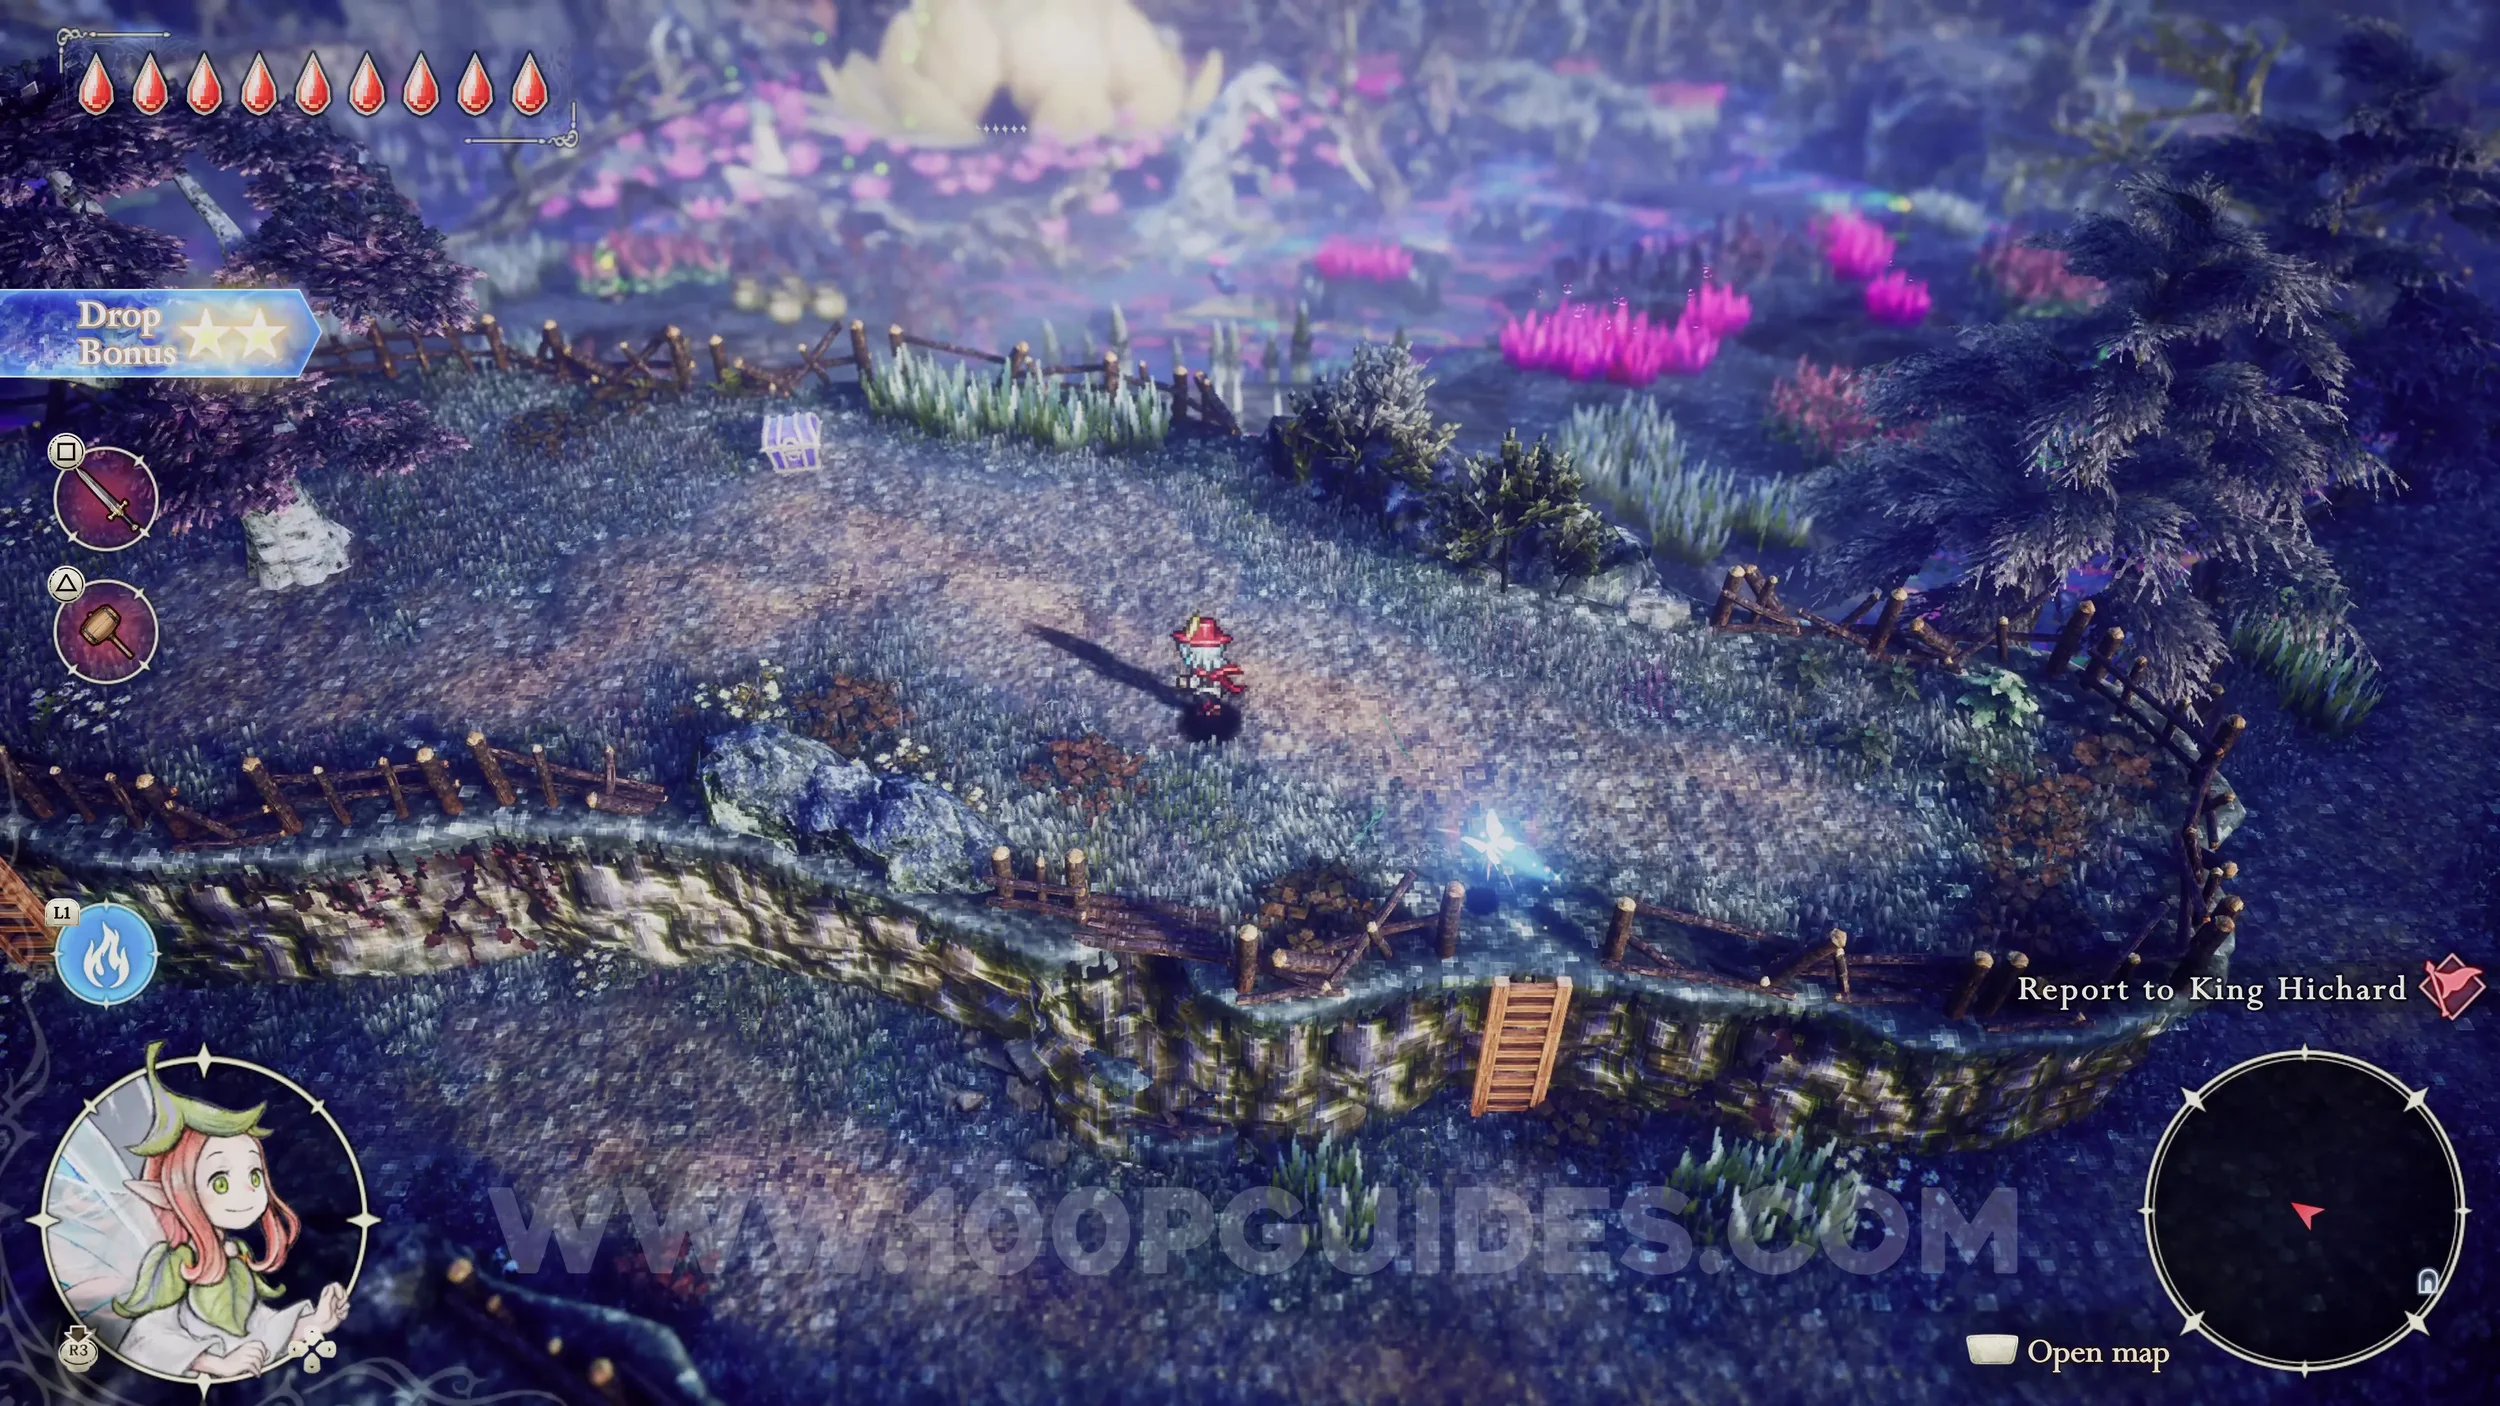
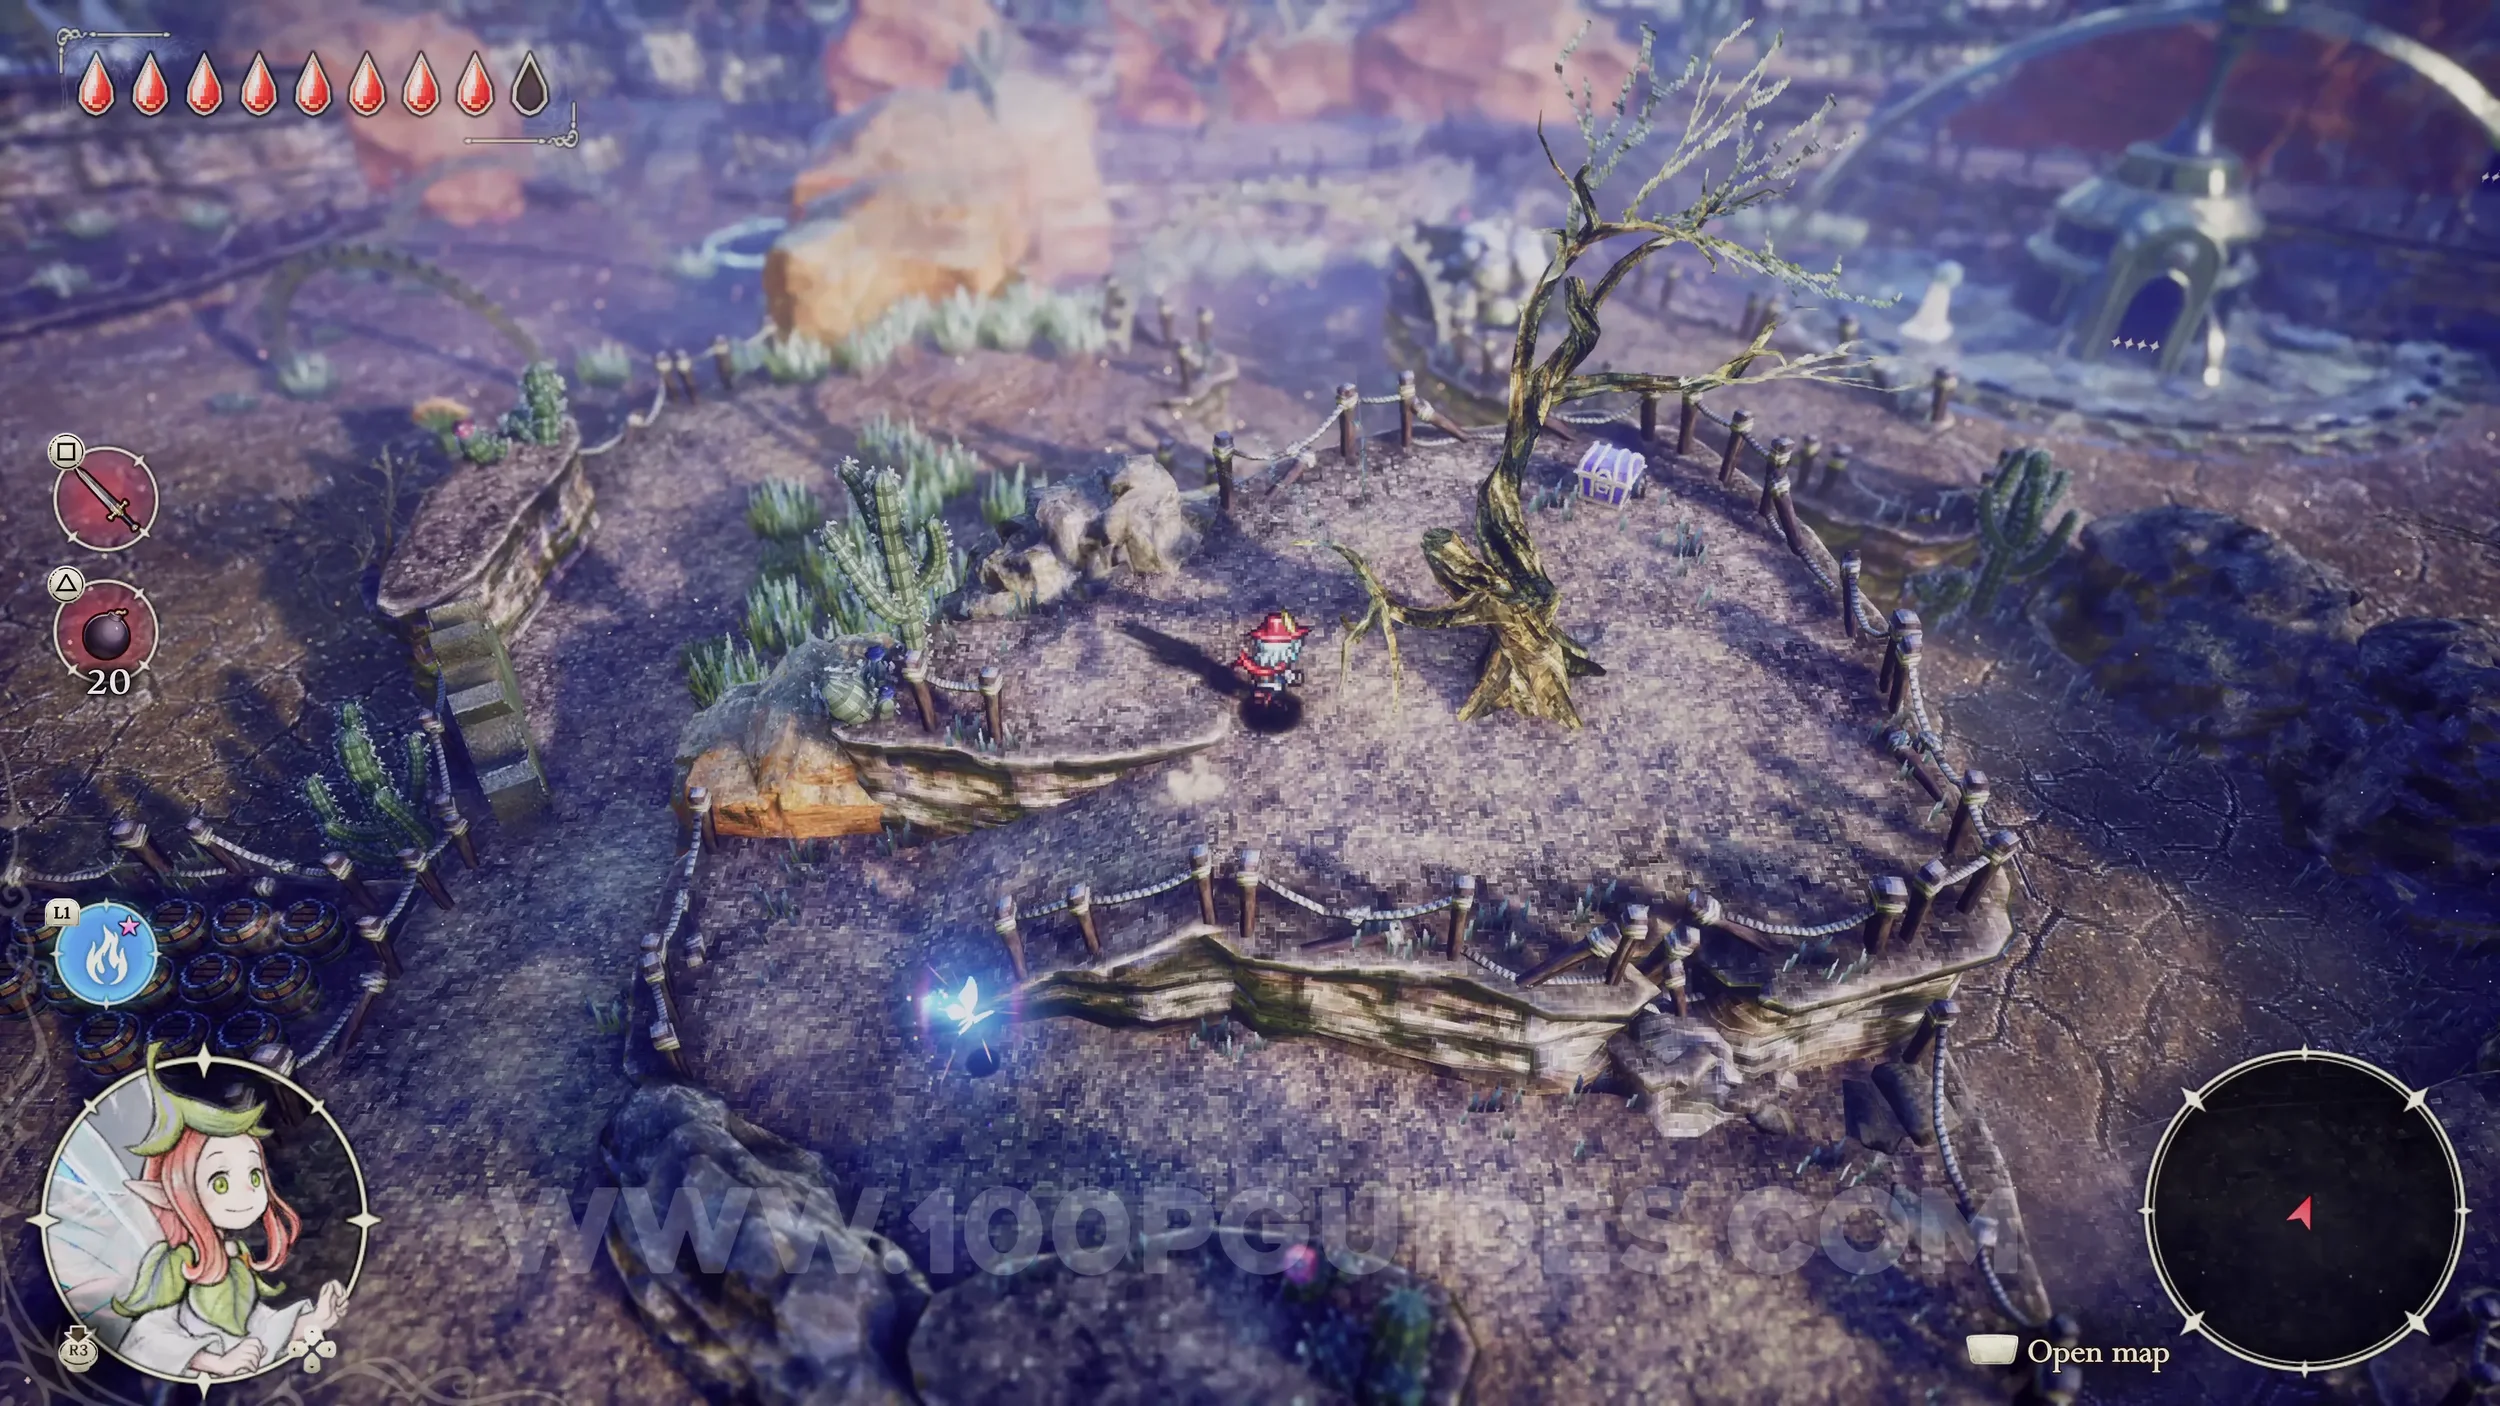
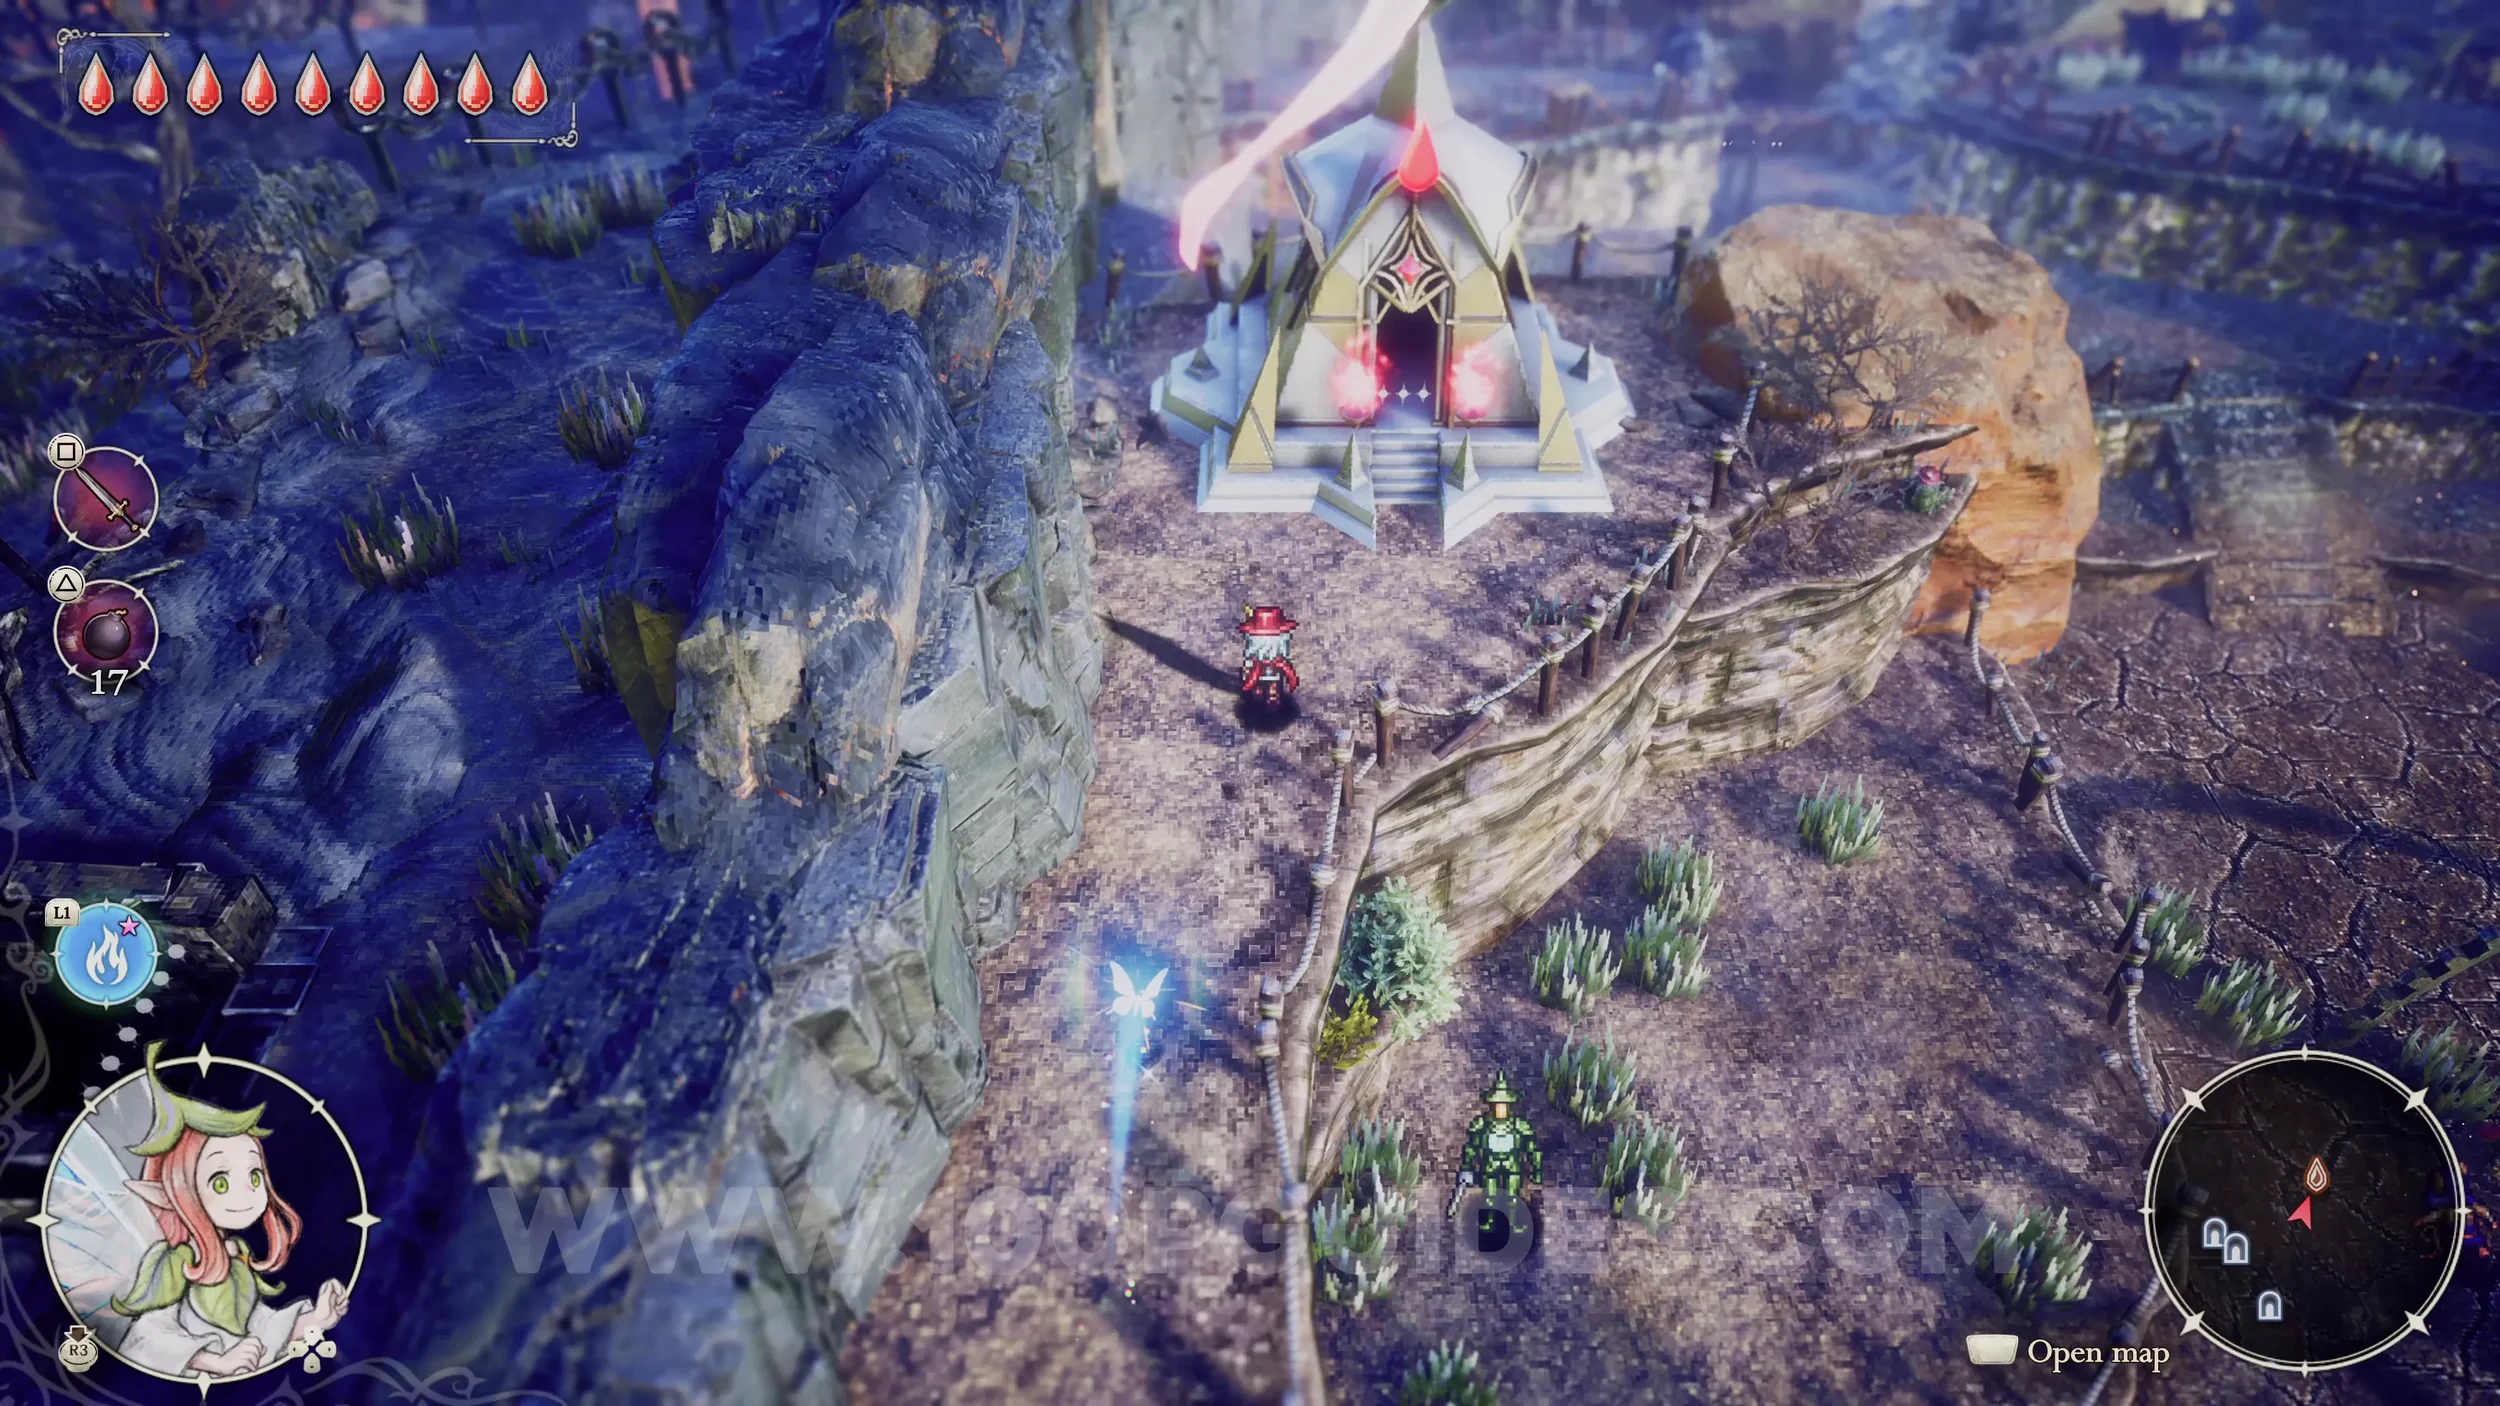
Shard of Life #17. Found at the top of the small hill in the middle of the map. To reach it, use a bomb to blow up the rocks in Westeria.


Shard of Life #18. Use the destroyed house as a ramp to reach the upper path. Then go to the end to find a Shrine of Life. Inside, finish the platforming section.


Shard of Life #19. Blow up the wall in the area to the right of the wooden bridge as soon as you leave Littlehope through the northern exit. Then go through the cave and come out the other end to find a Shrine of Life. Inside, defeat the enemies to get the Shard of Life.


Shard of Life #20. After leaving Littlehope through the northern exit, go left and use a bomb to destroy the rocks below you. The chest can be found in the area on the other side down the ladder.


Shard of Life #21. In Whiterea, go through Secret Shortcut 3, then once you come out the other side, enter the cave on the left. Exit through the bottom to reach the area with the Shrine of Life. Inside, finish the platforming section.
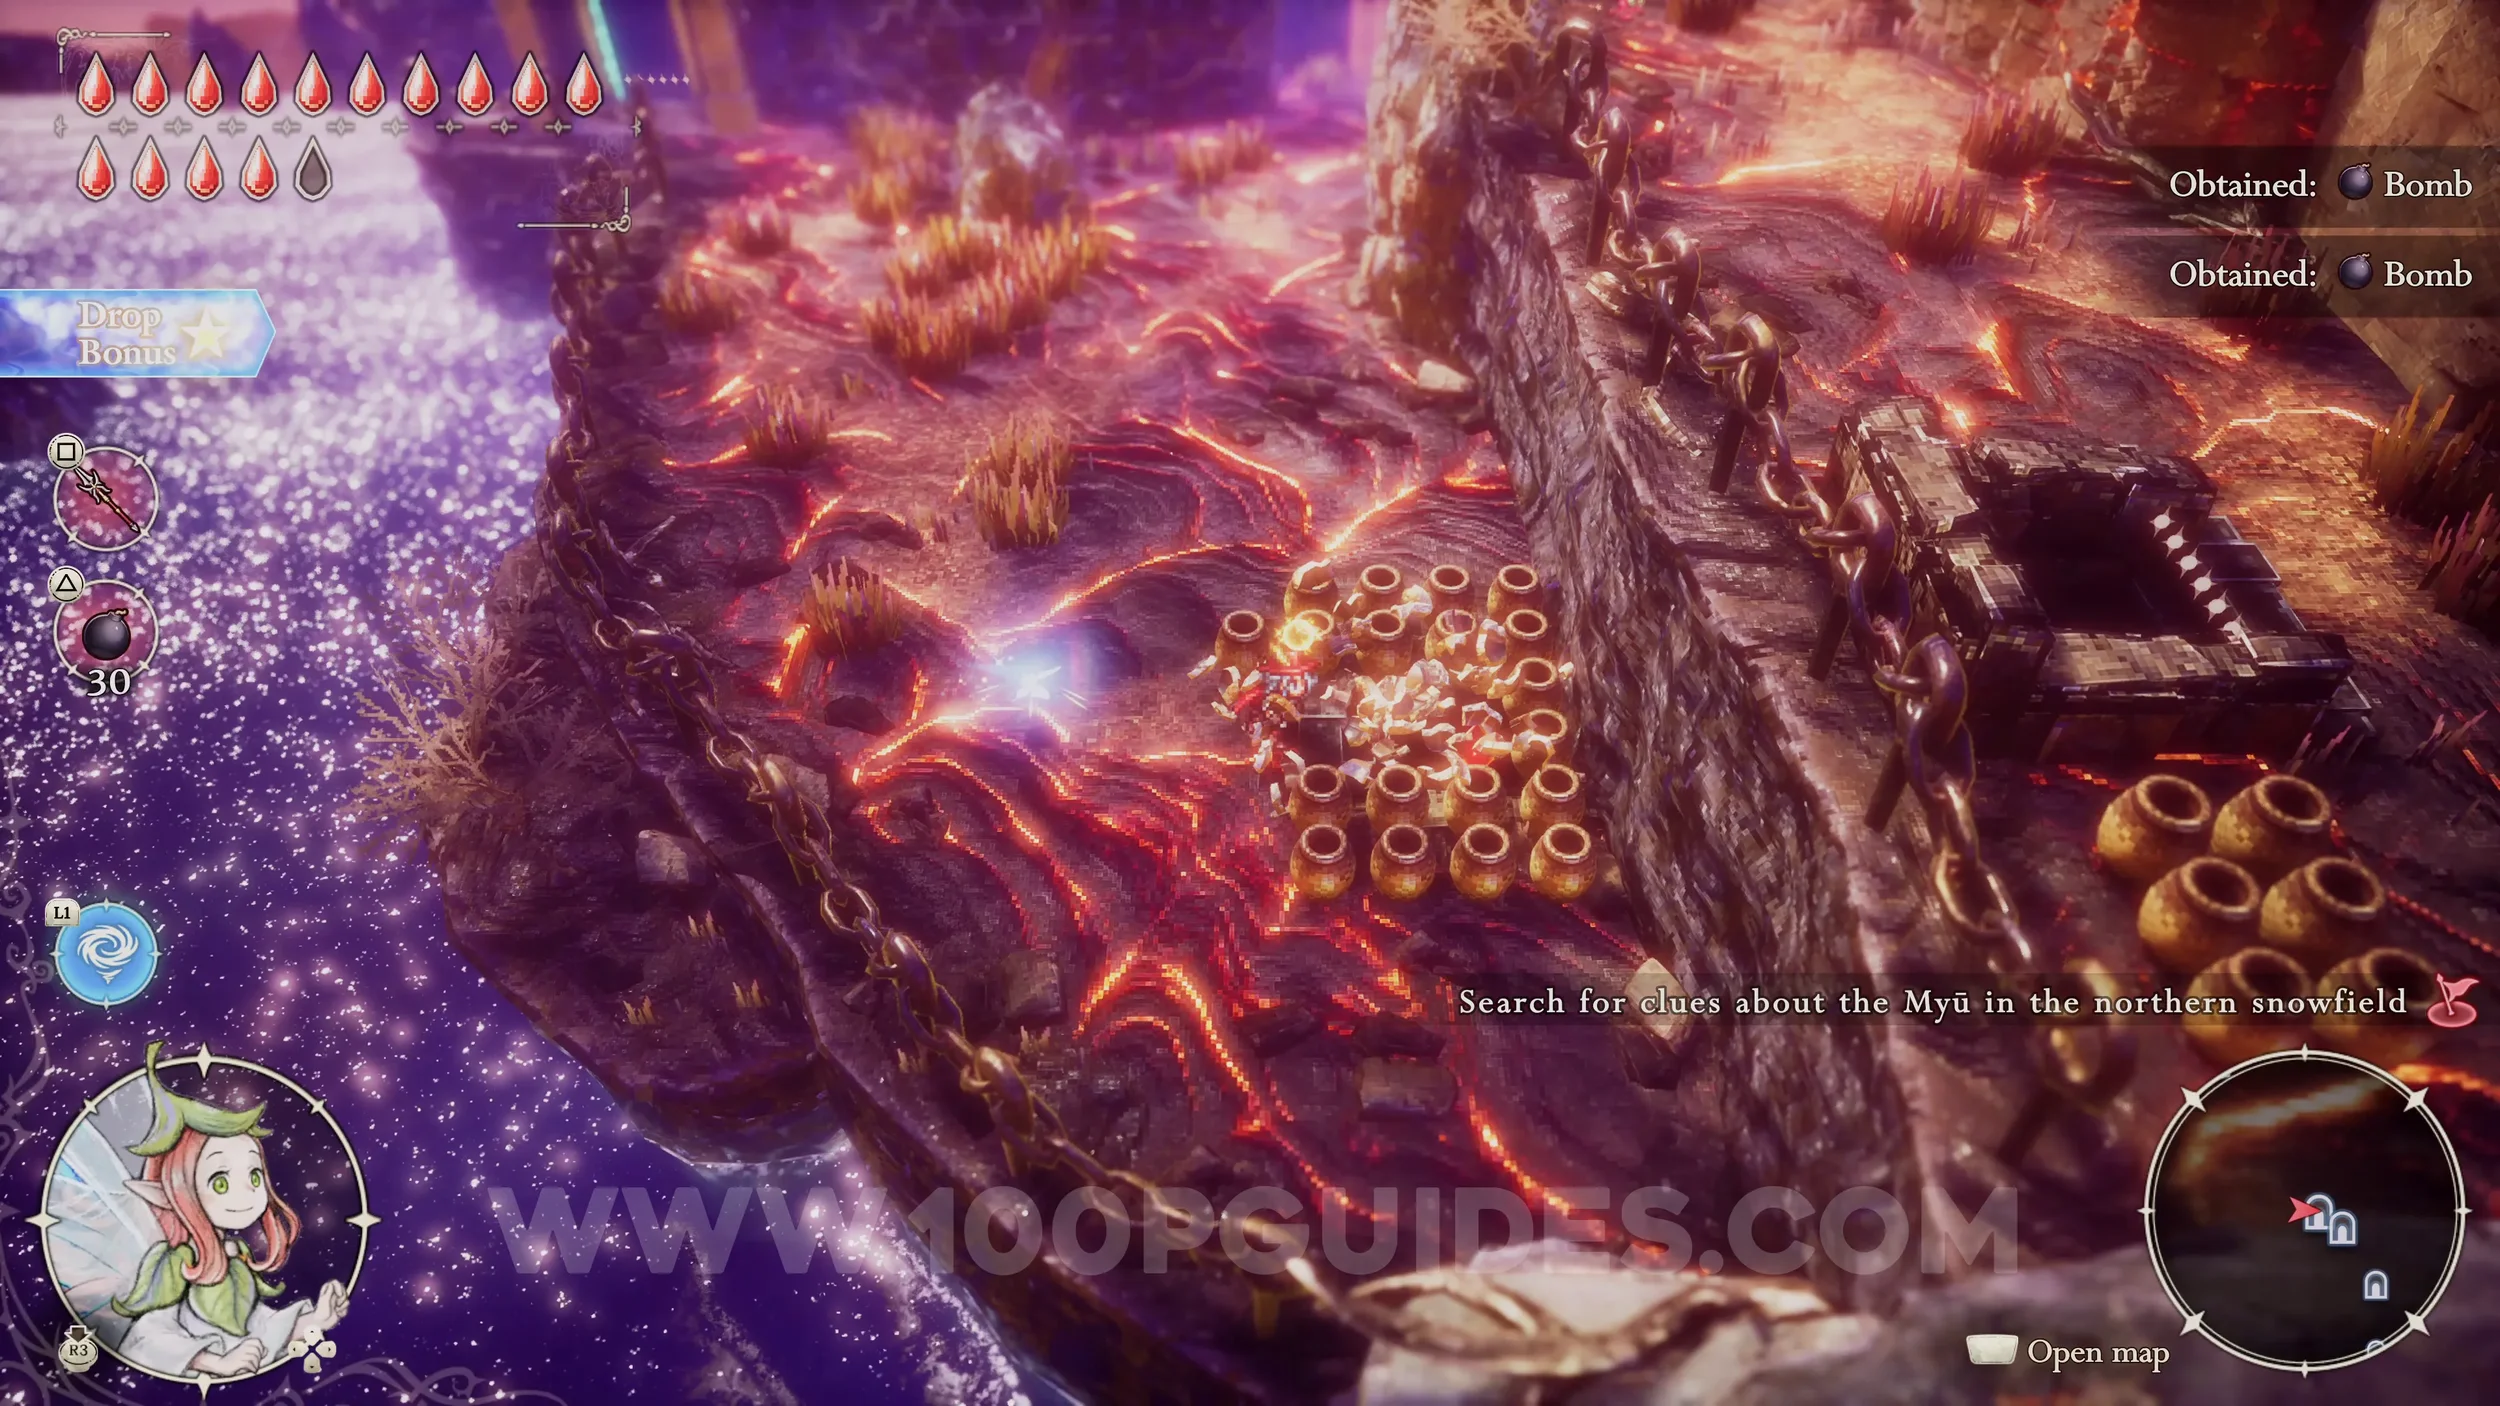
Shard of Life #22. Found inside the Northern Caves. Go all the way left, then circle back around to the start via the upper path. At the end, time a bomb throw to destroy the pots and reach the chest.


Shard of Life #23. Found inside the Northern Ruins. From the start, head down the lift to Sublevel One, then take the left path until you reach a room with two columns you can push around. Place them so you can jump across to reach the chest with the Shard of Life inside.

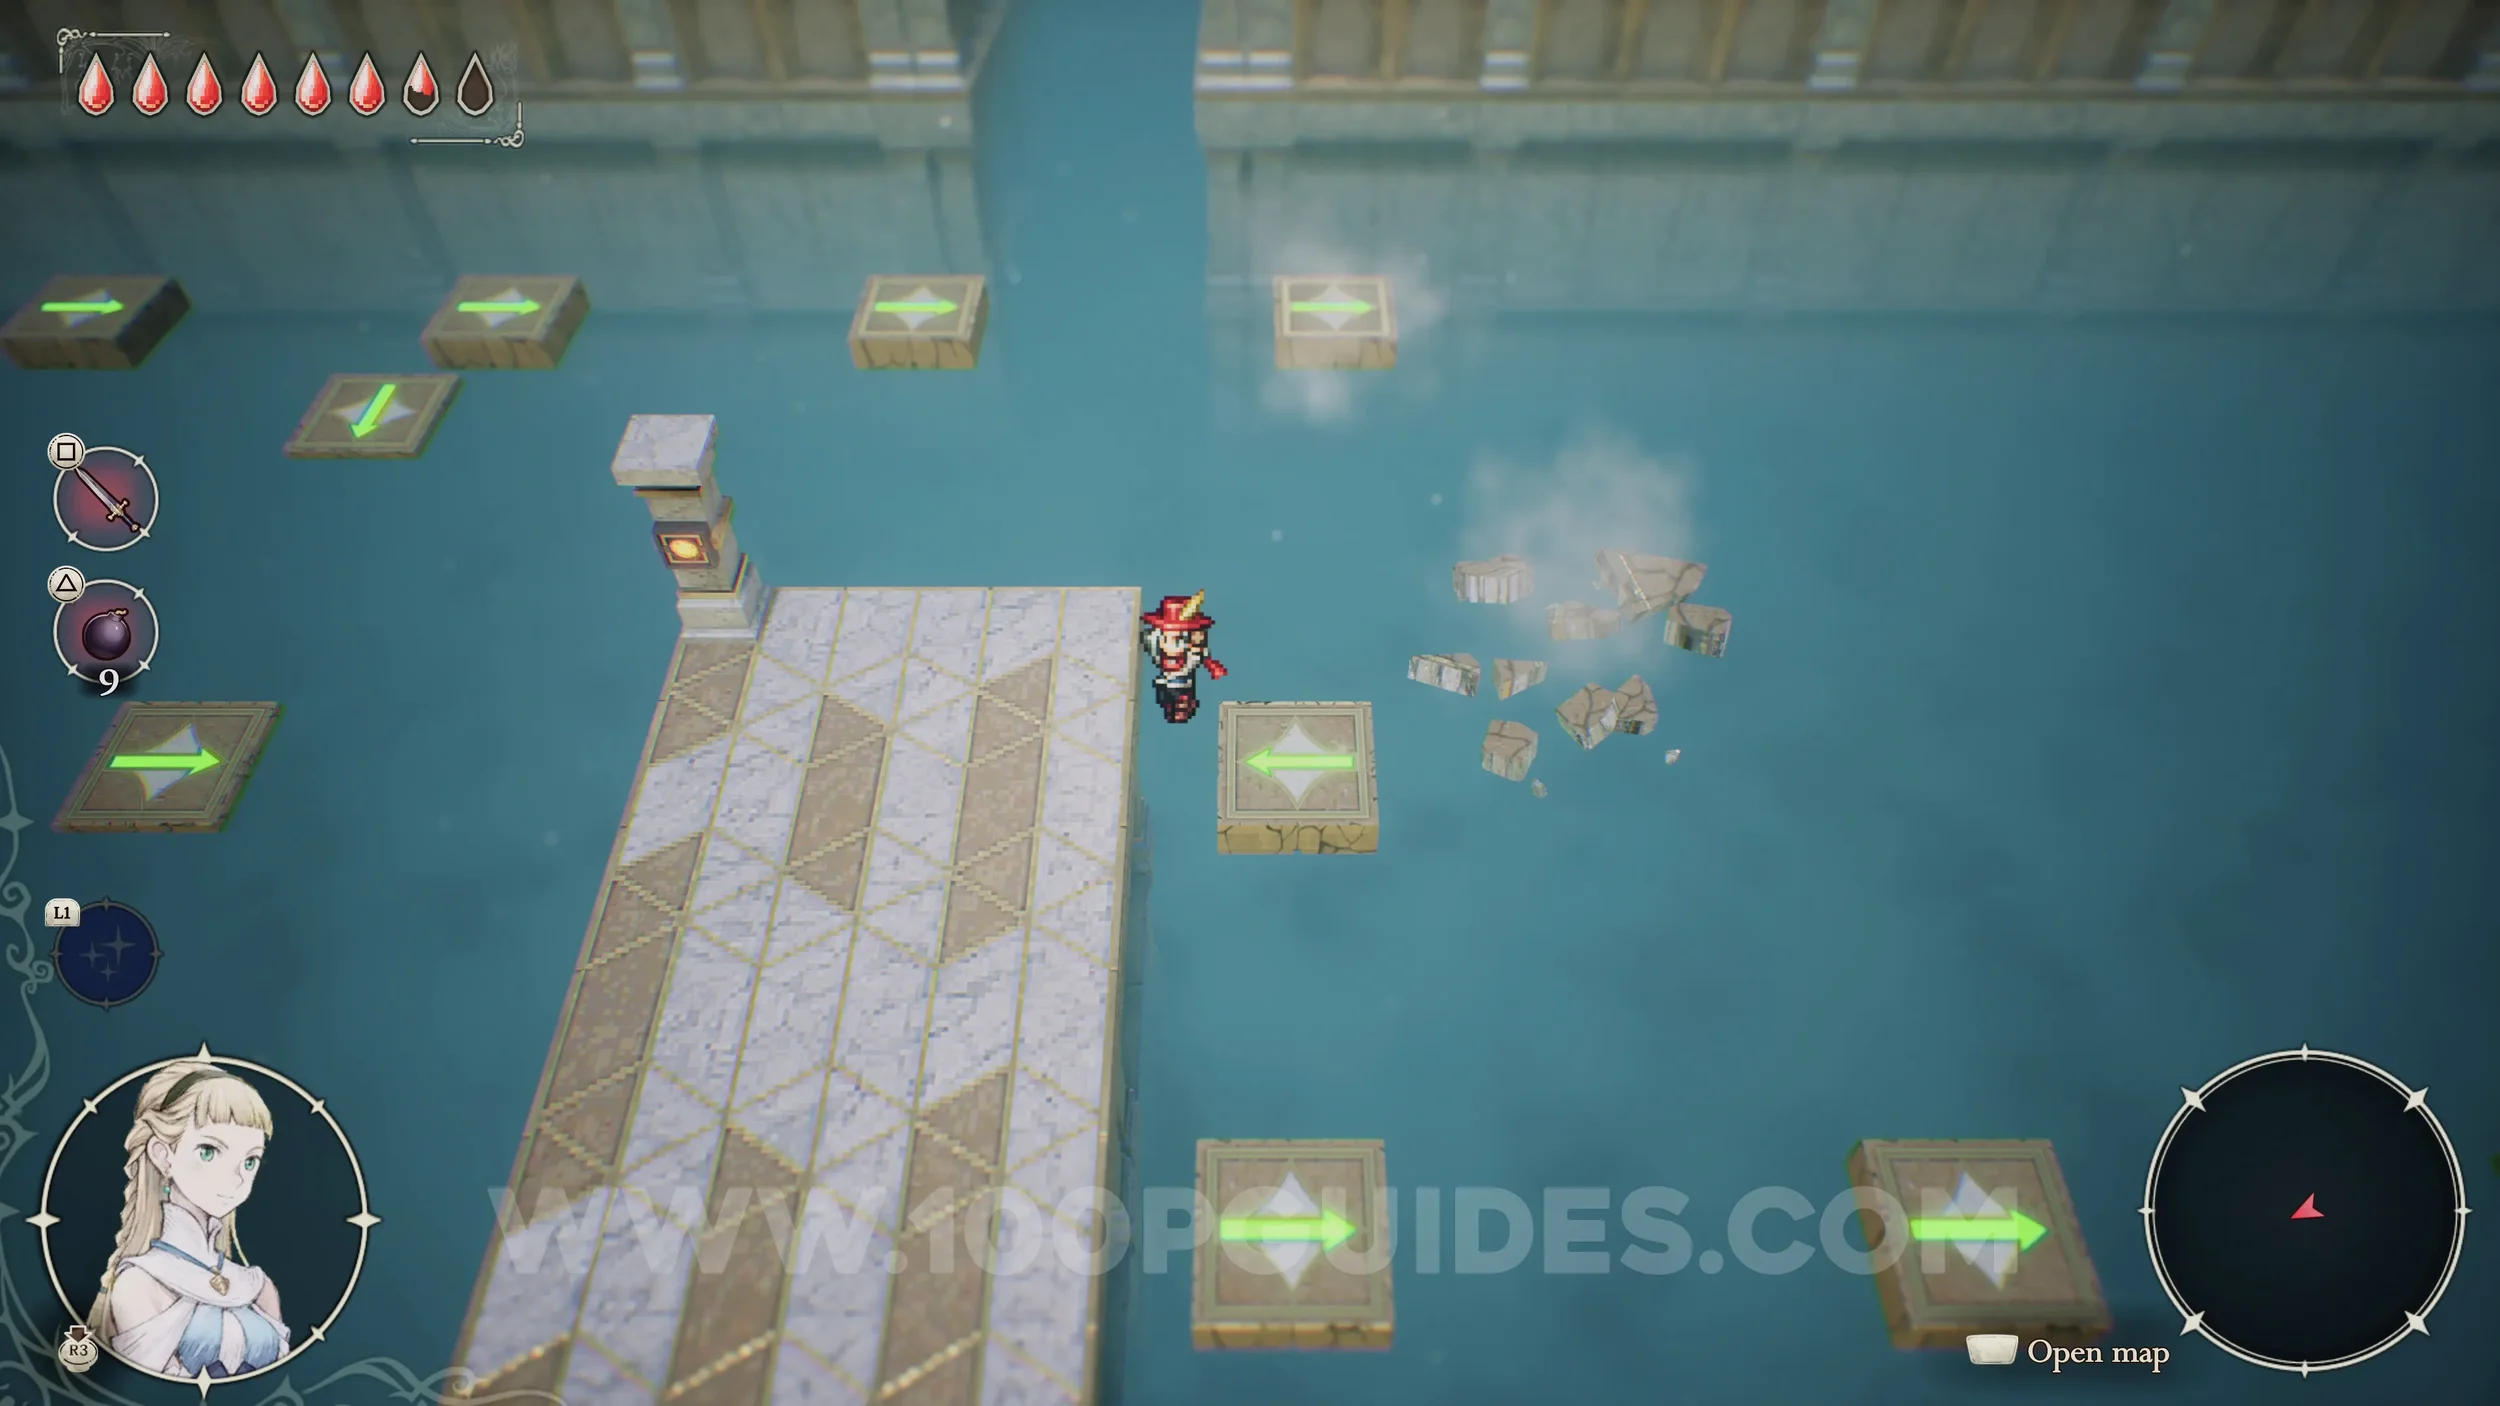
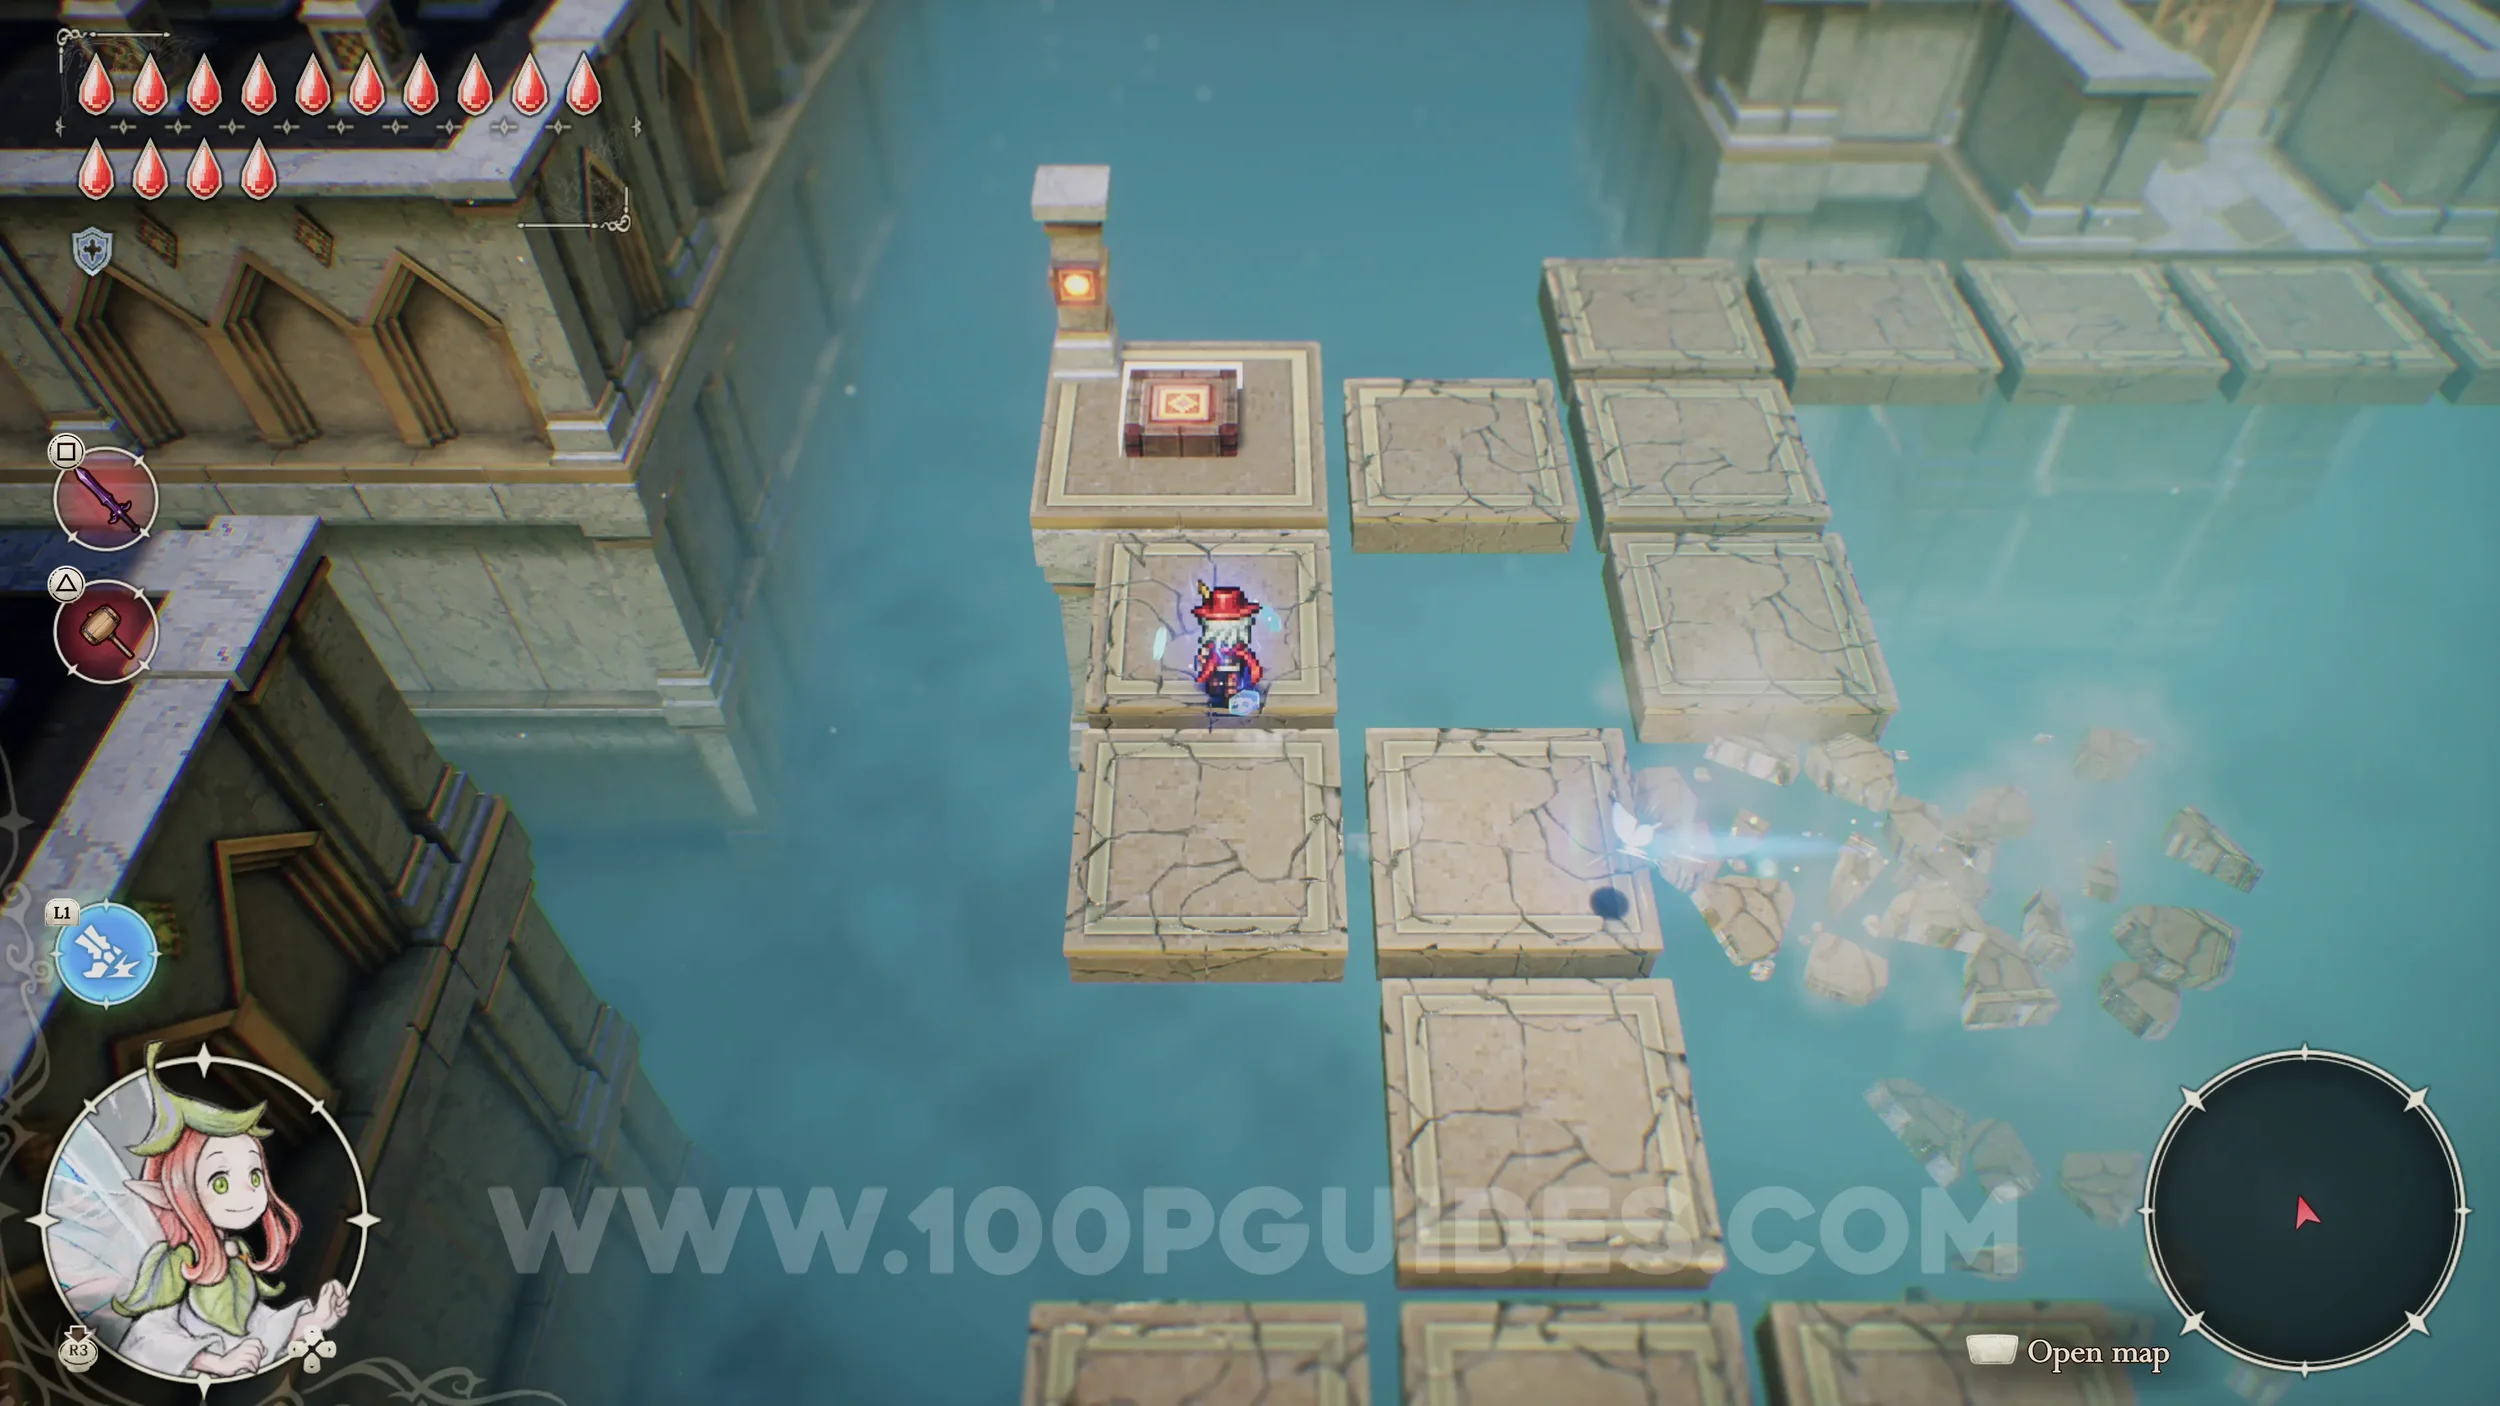
Shard of Life #24. Found in the Shrine of Life on the plot of land in the middle of the map, to the right of the Water Ruins. You can swim there from the northern shore where you wake up with the Fairy for the first time. Once inside, just reach the other end of the room by standing on the blue arrows.


Shard of Life #25. Found in Westerea. Just climb the ladder to reach the chest.

Shard of Life #26. On top of the hill just west of the Geared Ruins.


Shard of Life #27. Go through Secret Shortcut 4 in the southwestern corner of the desert to reach a Shrine of Life. Defeat the enemies inside to get the Shard of Life.


Shard of Life #28. Found in the Southern Caves. Take the upper path inside and use the hammer to get rid of the nails. Then jump across the top of the rocks to reach the chest.


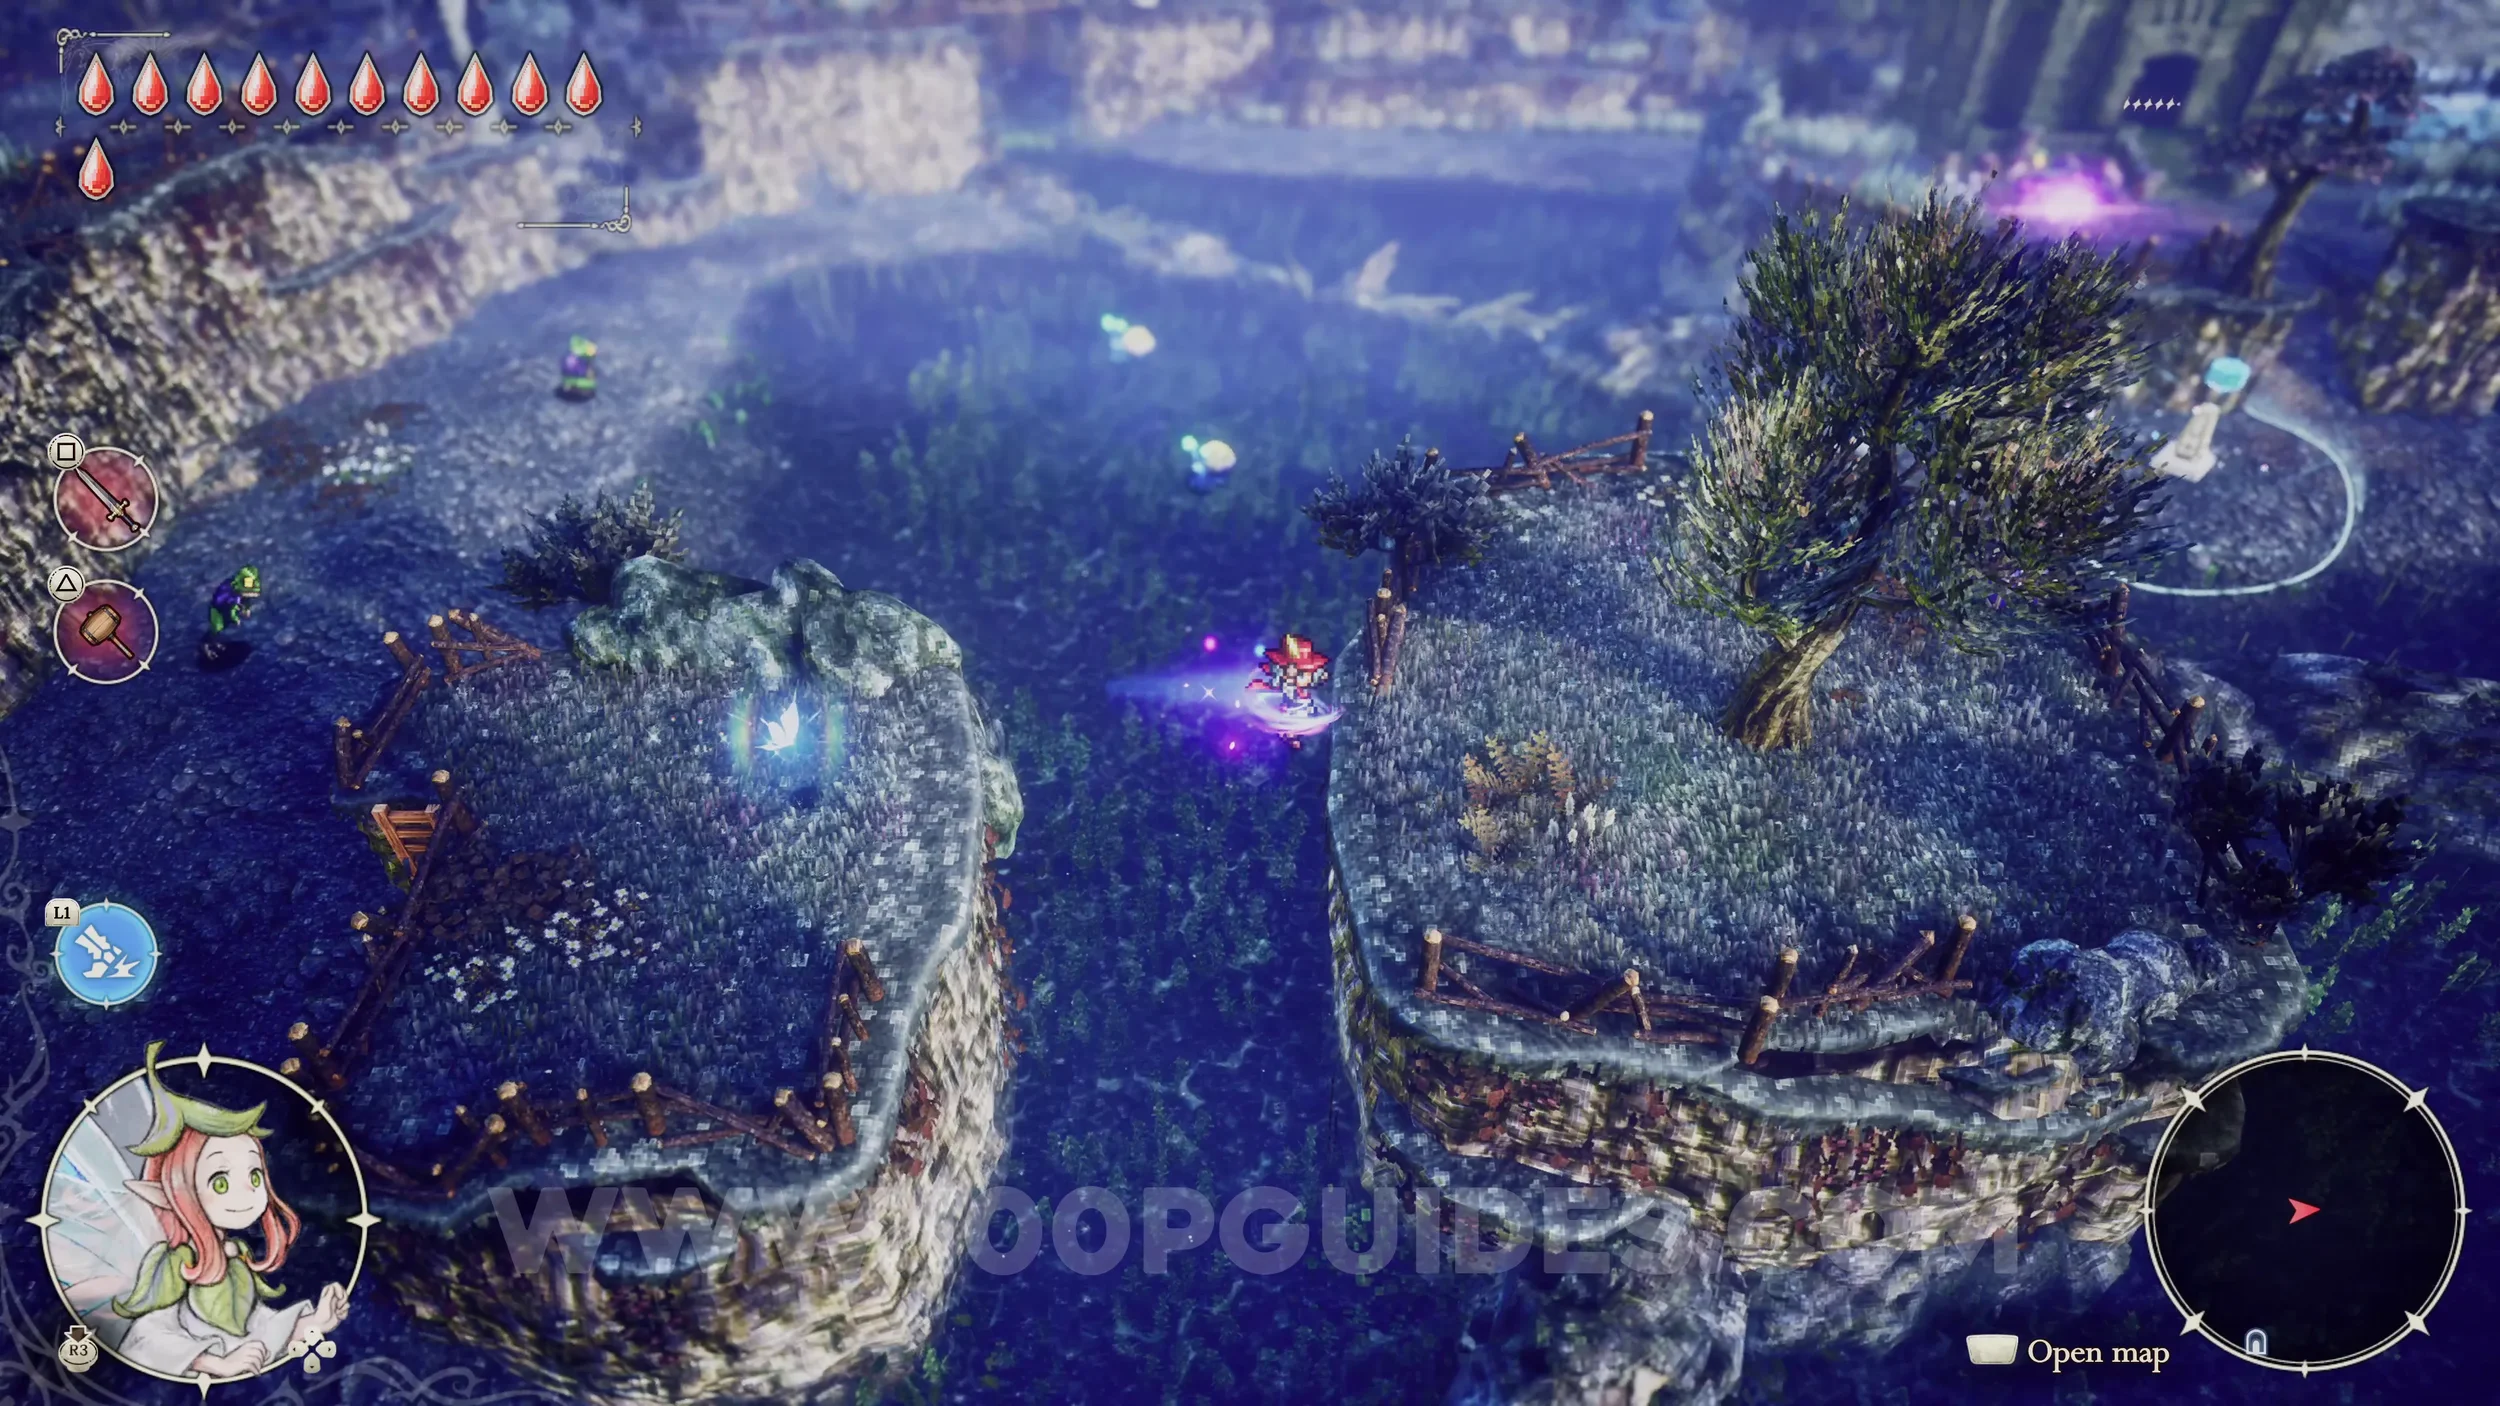
Shard of Life #29. From the center of the map, use the dive ability (obtained from the Water Ruins in the Age of Reconstruction) to get under the tree in the water to the left. Then climb the ladder and use the Warp Fairy Power to reach the chest on the right.


Shard of Life #30. Found in a chest in the bottom right corner of Neverwither. You reach this area through the Eastern Caves. You get the key during the main story.


Shard of Life #31. Found in the Grandtree. Make your way through the dungeon until you reach the Second Floor. Then, once you reach the platforms covered with tall grass, drop down the gaps to the room below. Here, head north to find the Shard in a chest.


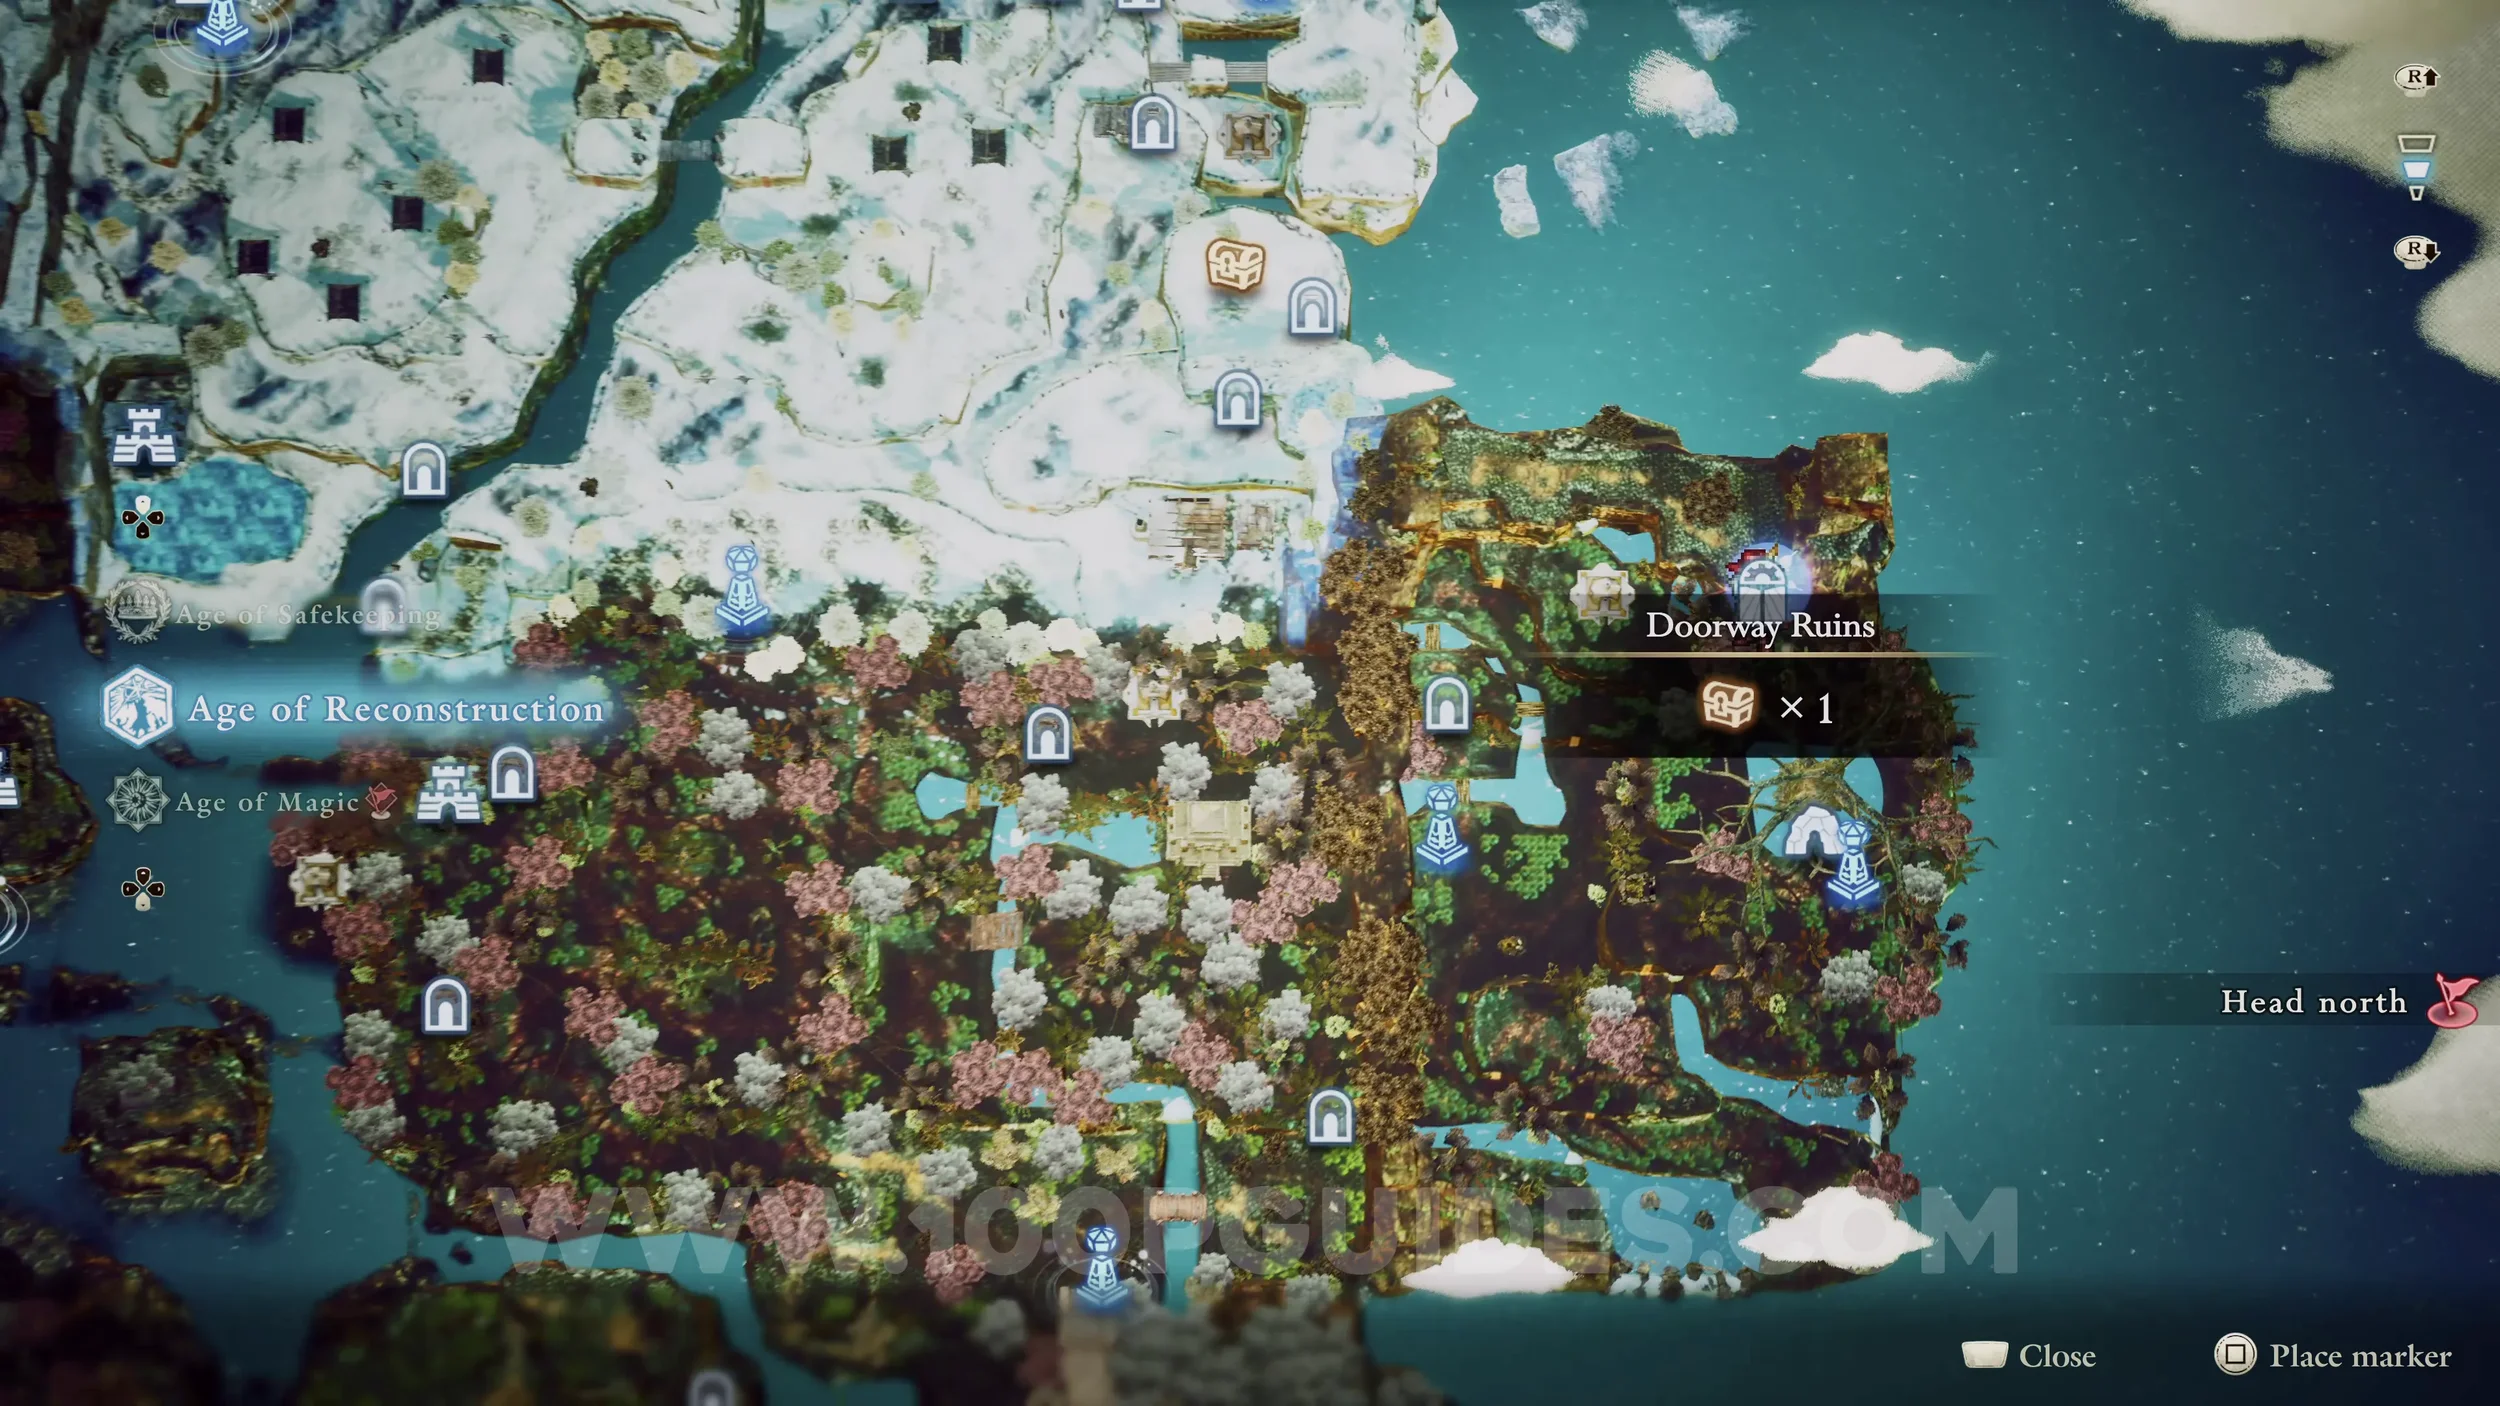
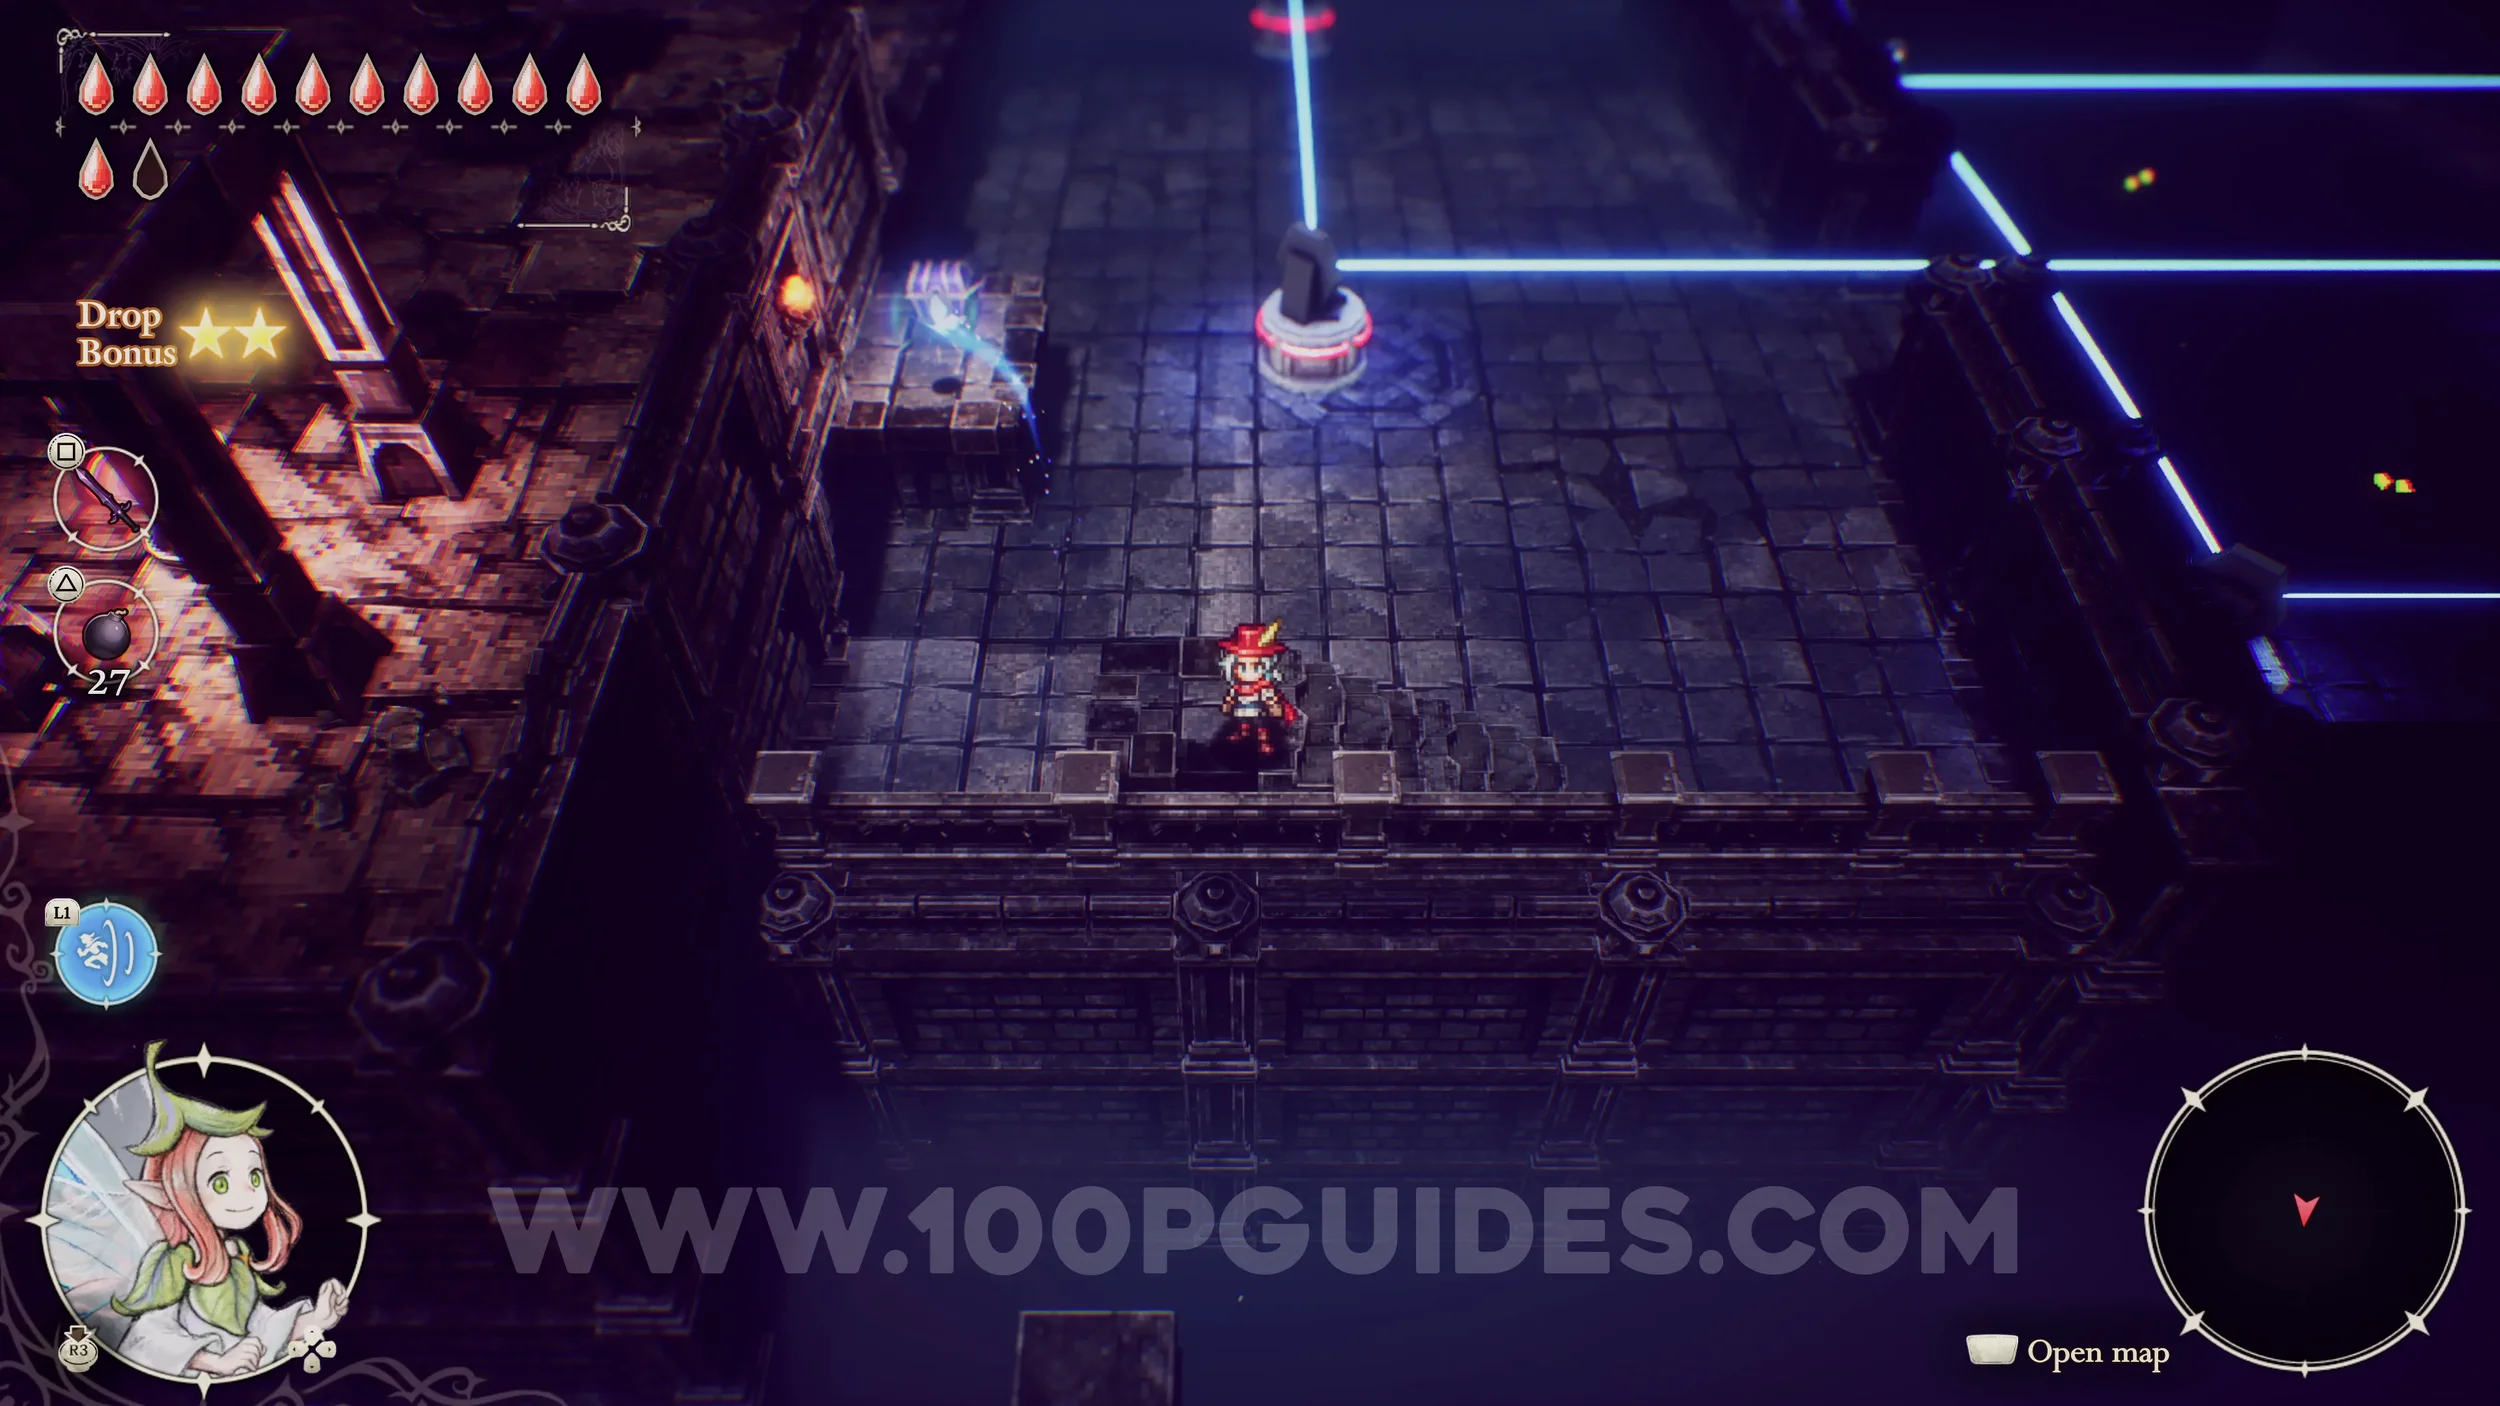
Shard of Life #32. Found in the Doorway Ruins. Head left and continue to Sublevel Two. Then head left again to reach a room with a mirror that can bounce the light around. Go to the bottom of this room and up the stairs that lead nowhere. From here, send the Fairy across and use her Warp Power to reach the chest.

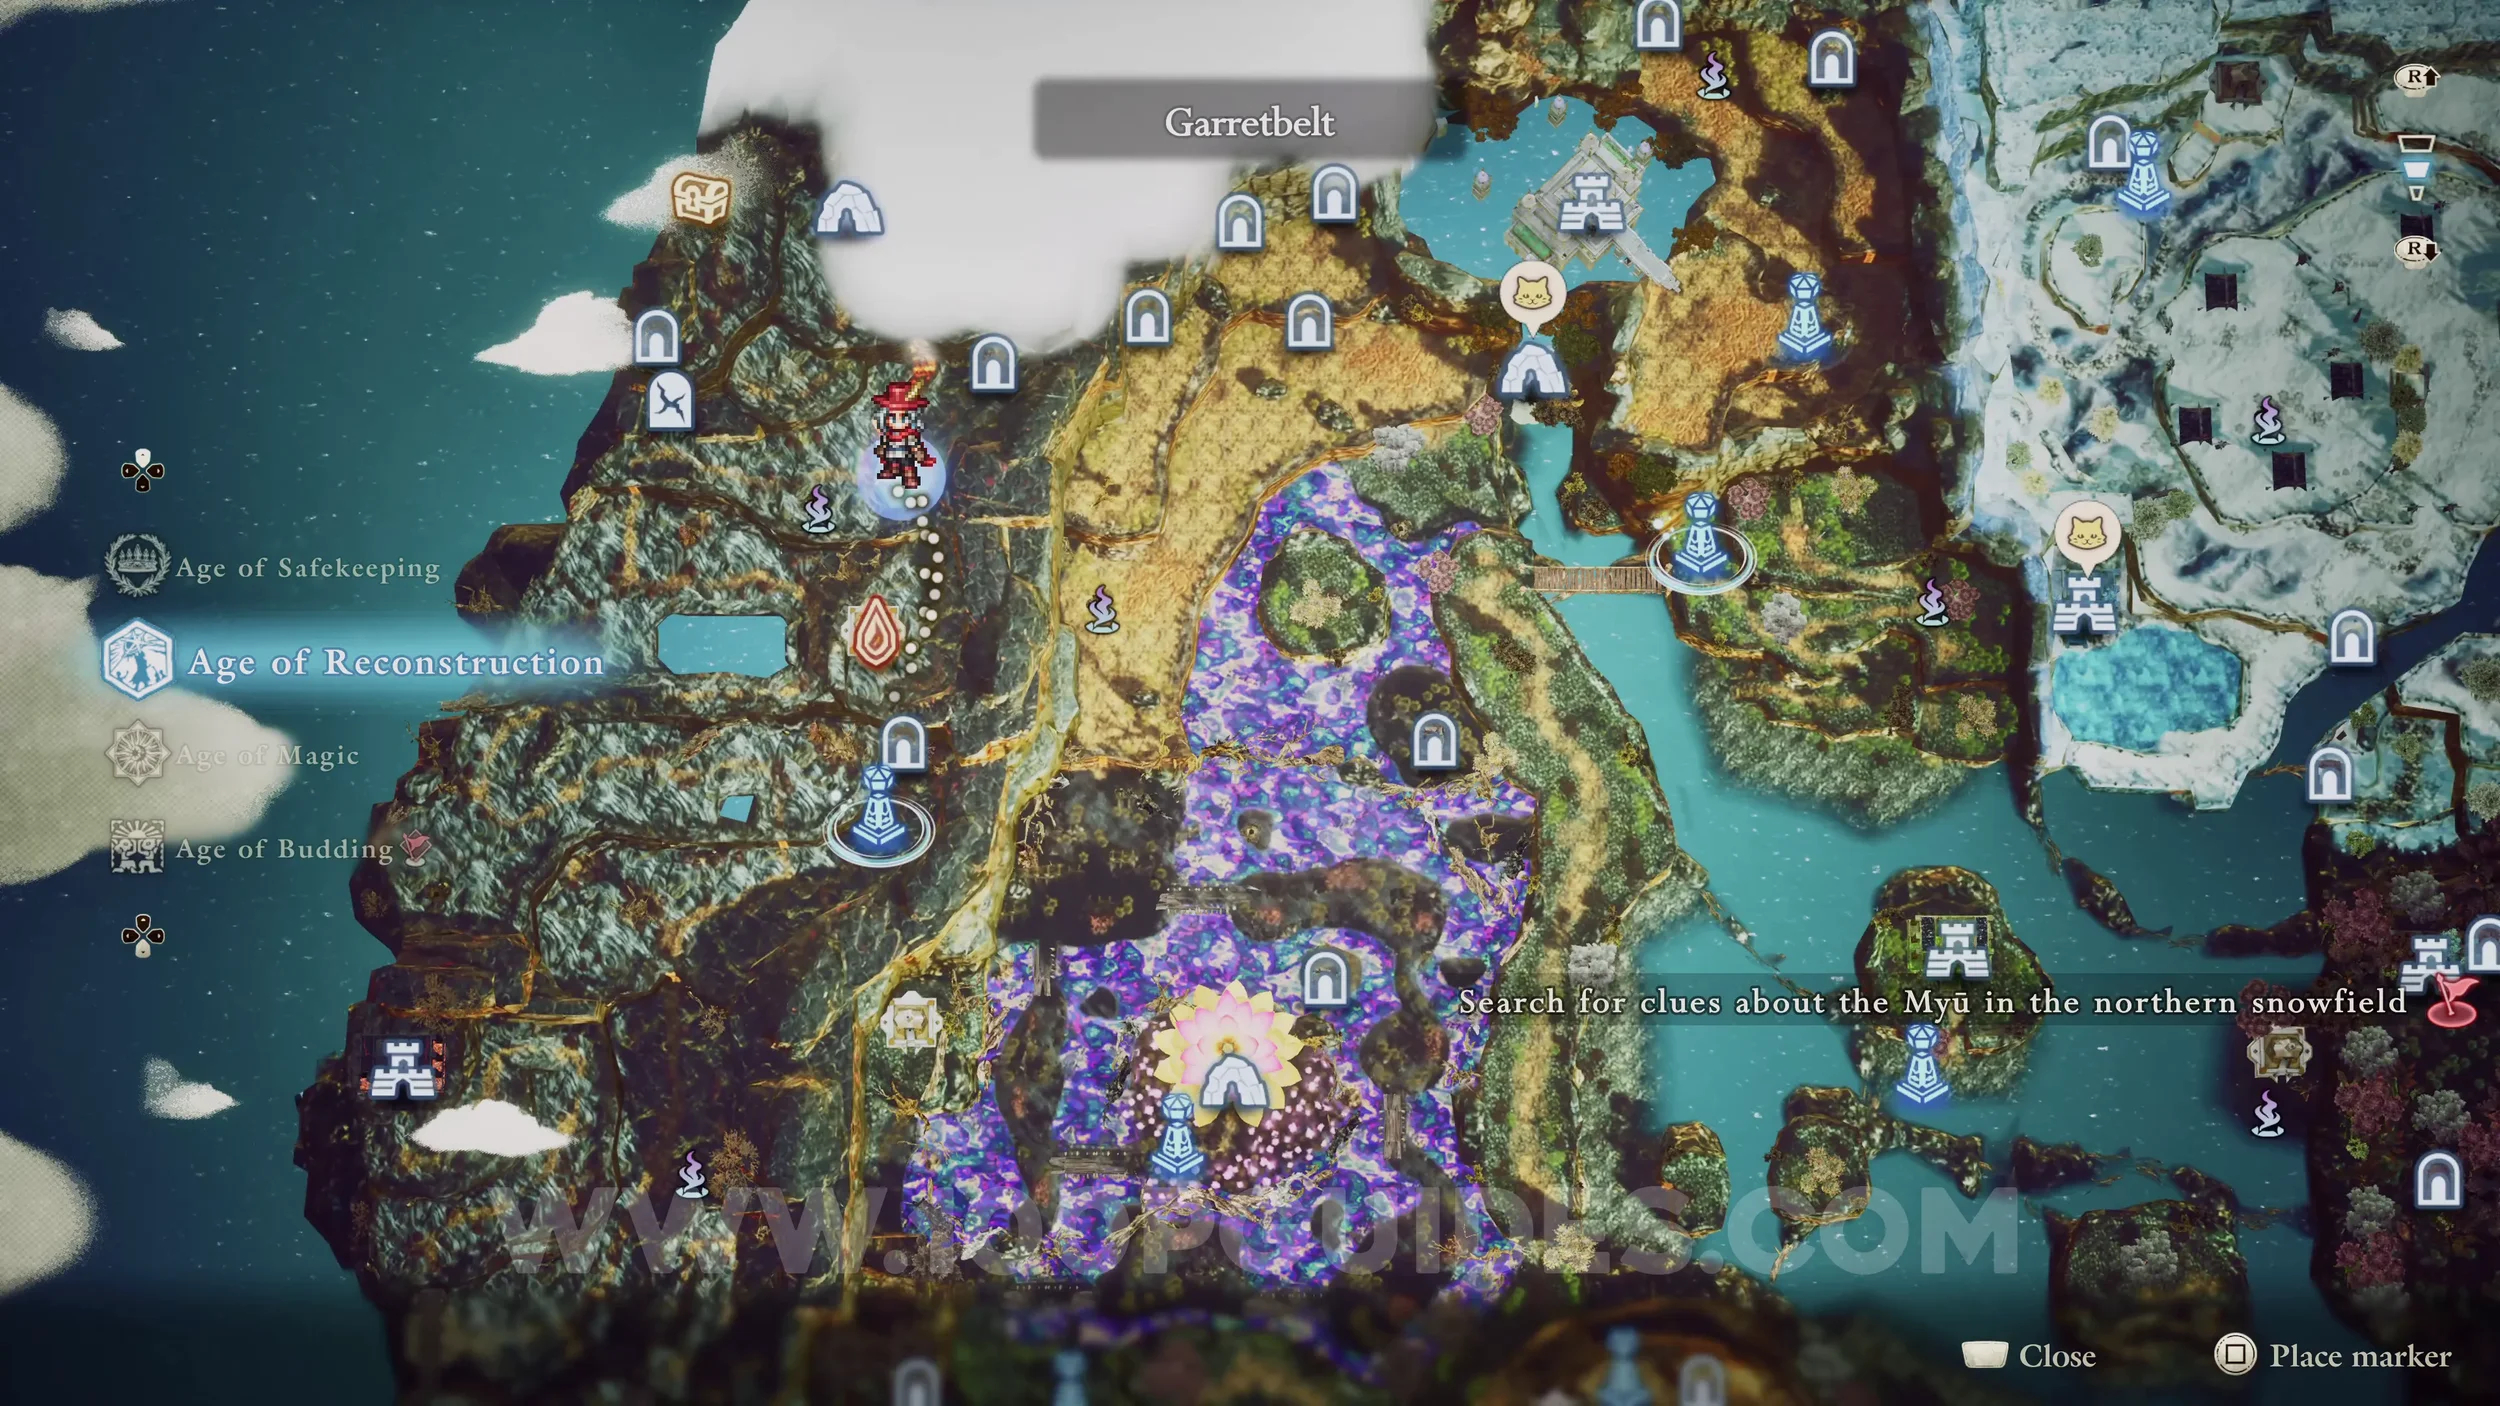
Shard of Life #33. Found in Dragonpillar. From the start, head to the top of the room and use the Warp Fairy Power to get through the light wall. Then follow the path to the end, where you find the chest with the Shard inside.


Shard of Life #34. Found in Shrine of Life 7 in the western part of the map. You reach this side of the map during the story through the Western Caves once you get the key. Inside, stand on the switch in the middle of the platforms to move them into the space until you reach the door. If you get stuck, you can use this Video Guide.


AGE OF MAGIC
Shard of Life #35. Found in the chest in the area just west of the village.


Shard of Life #36. Go through Secret Shortcut 1 to reach the Shrine of Life. Then solve the puzzle inside. You will need the Warp Fairy Power to do so. If you need help, you can watch this Video Guide.


Shard of Life #37. Found at the end of the Water Ruins.


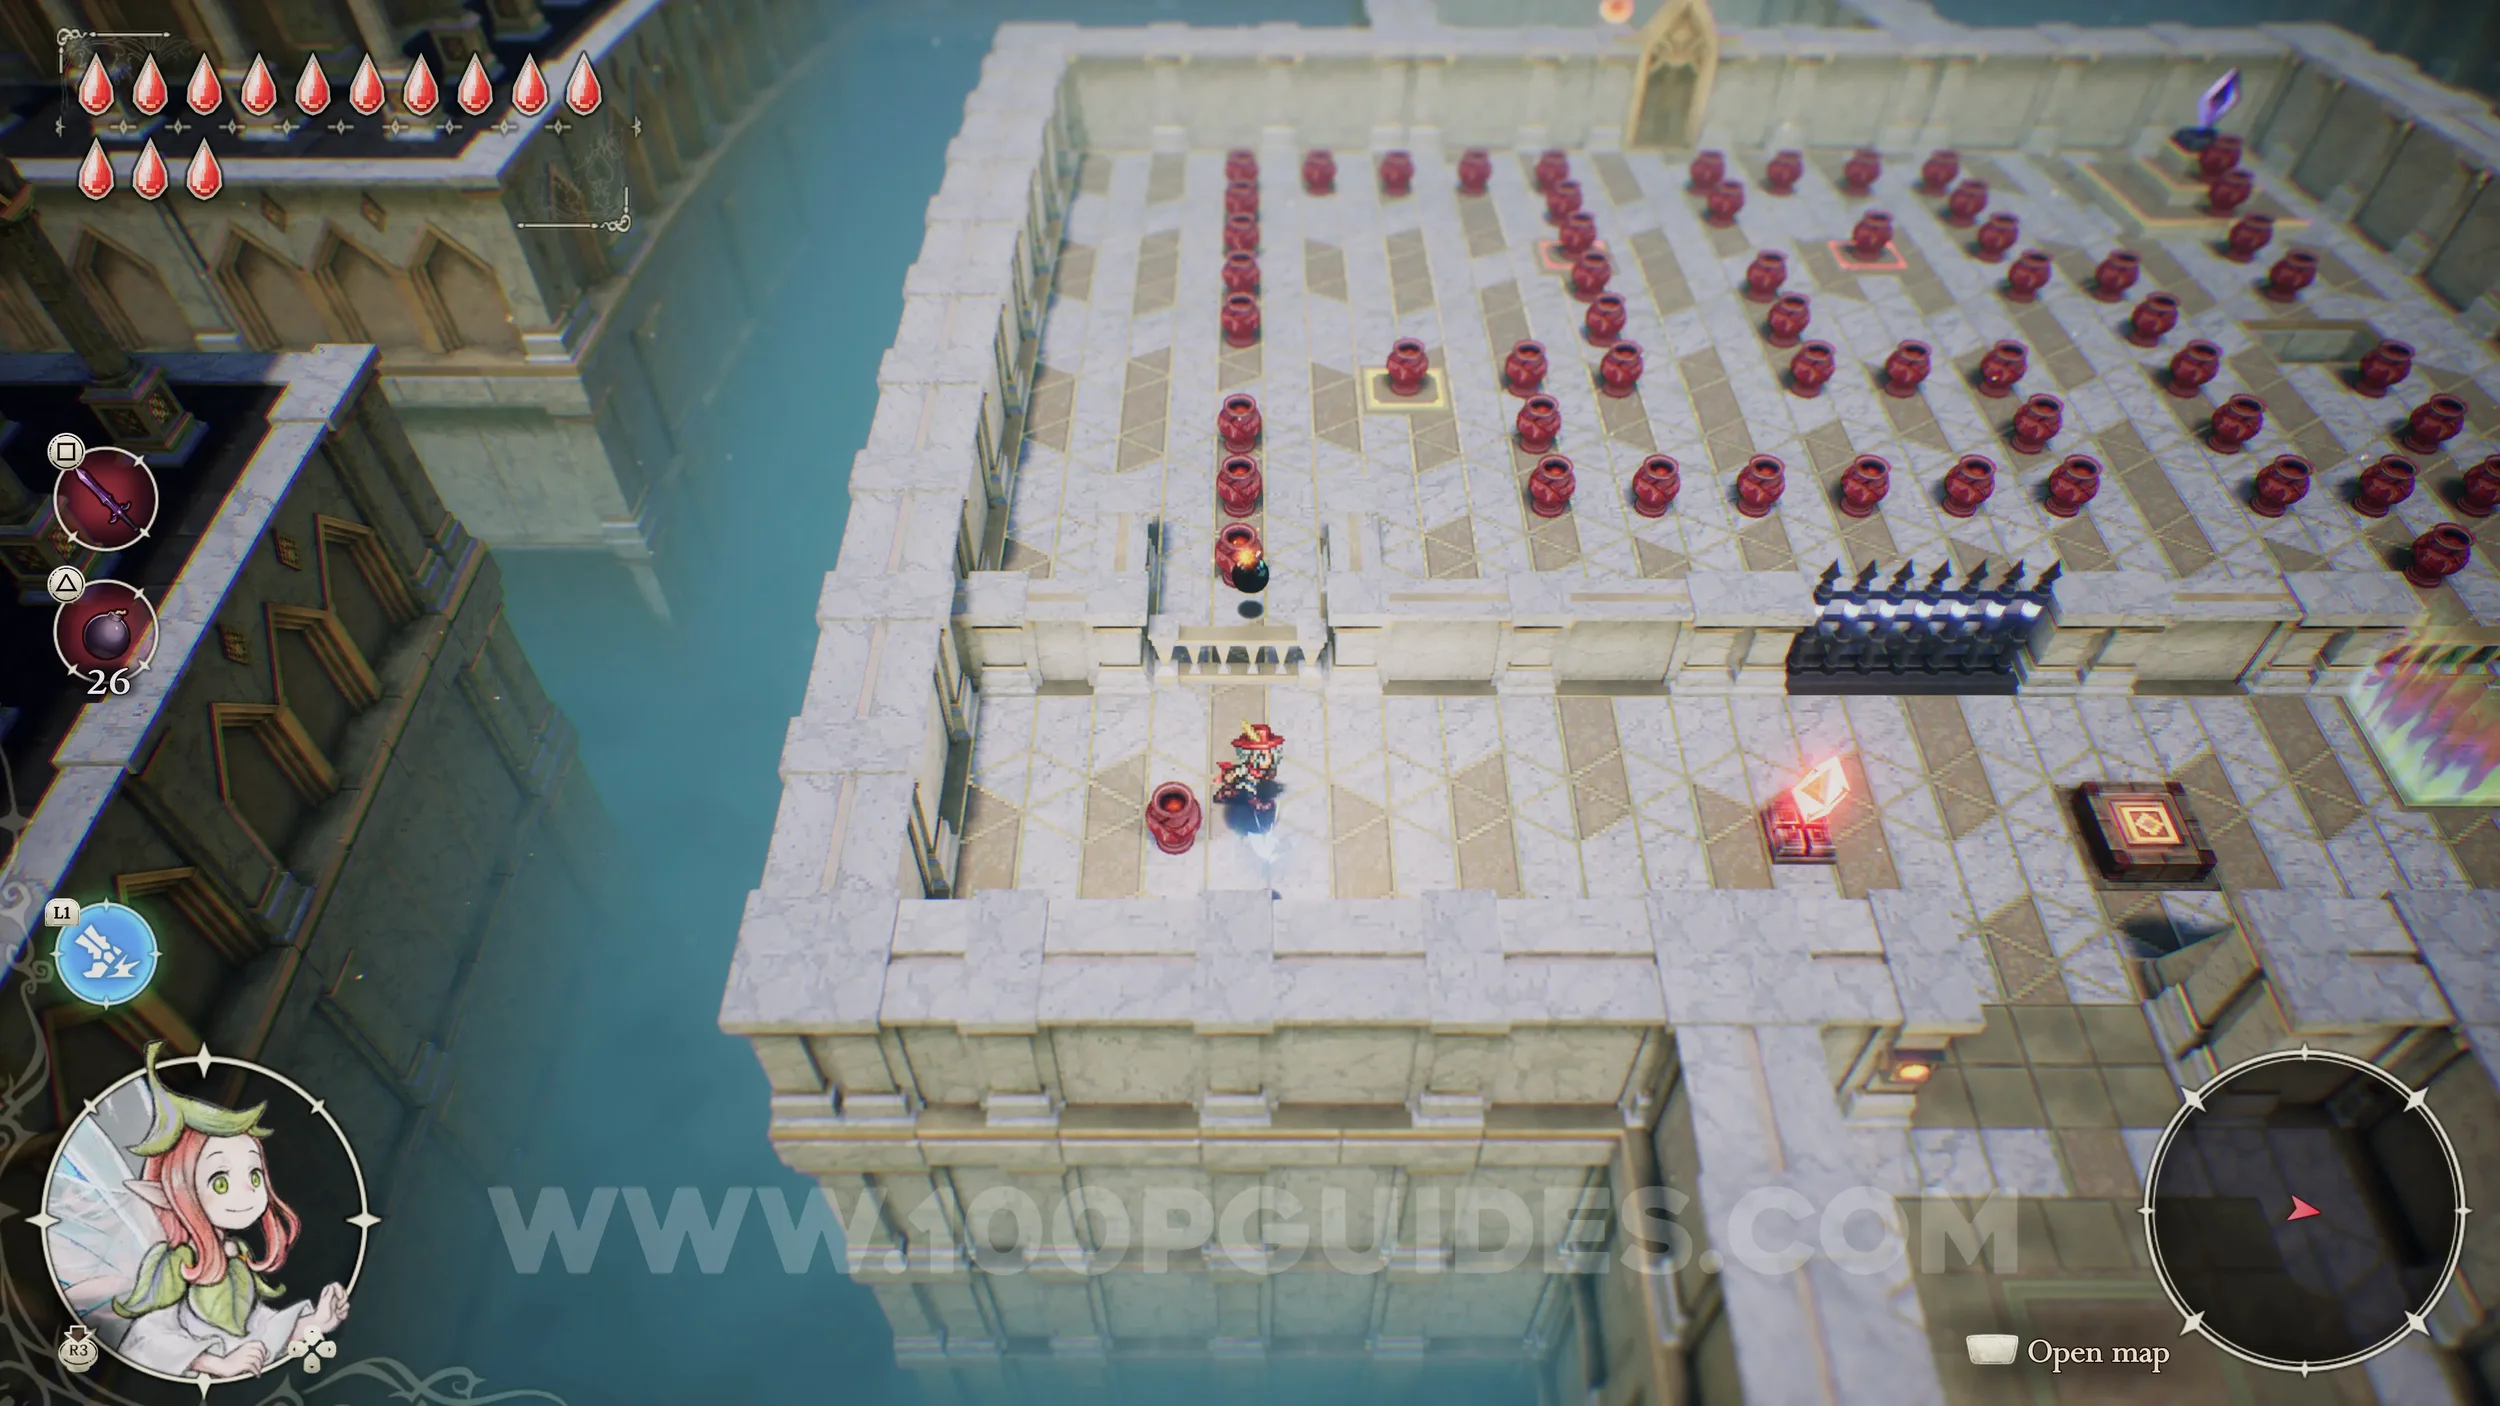
Shard of Life #38. Found in the Shrine of Life. Reach it by climbing the ladder in the southeast of the desert area. Inside, throw the pot (or a bomb) over the wall to start the domino effect against the other pots. Then run over and hit the diamond to line up the next part, then stand on the switch.


Shard of Life #39. Blow up the rocks blocking the cave just west of the Geared Ruins. Then go through and exit out the other end to find a Shrine of Life. Use the bounce pads to reach the end and collect the Shard.


Shard of Life #40. Found in the Shrine of Life just northeast of the Rainbow Lotus dungeon. Get rid of the nails with a charged hammer attack. Inside, just run across the platforms and press the switch.


Shard of Life #41. Found at the end of the Rainbow Lotus dungeon.


Shard of Life #42. Go through Secret Shortcut 3 and once you come out the other end, head through the cave on the left. Then exit through the top to reach the area with the chest.


Shard of Life #43. Use the hammer to get rid of the nails to the right of the Ice Ruins. Then climb down the ladder to the south to enter the water. Go north and dive under the tree to enter a cave. Go through the cave and come out the other side to find a Shrine of Life. Defeat the enemies inside to get the Shard of Life.


Shard of Life #44. Go through the cave covered with pots on the western side of the map. Then, once you come out the other side, use the Warp Fairy Power to cross the gap and reach the Shrine of Life. Inside, defeat the enemies to reach the end.


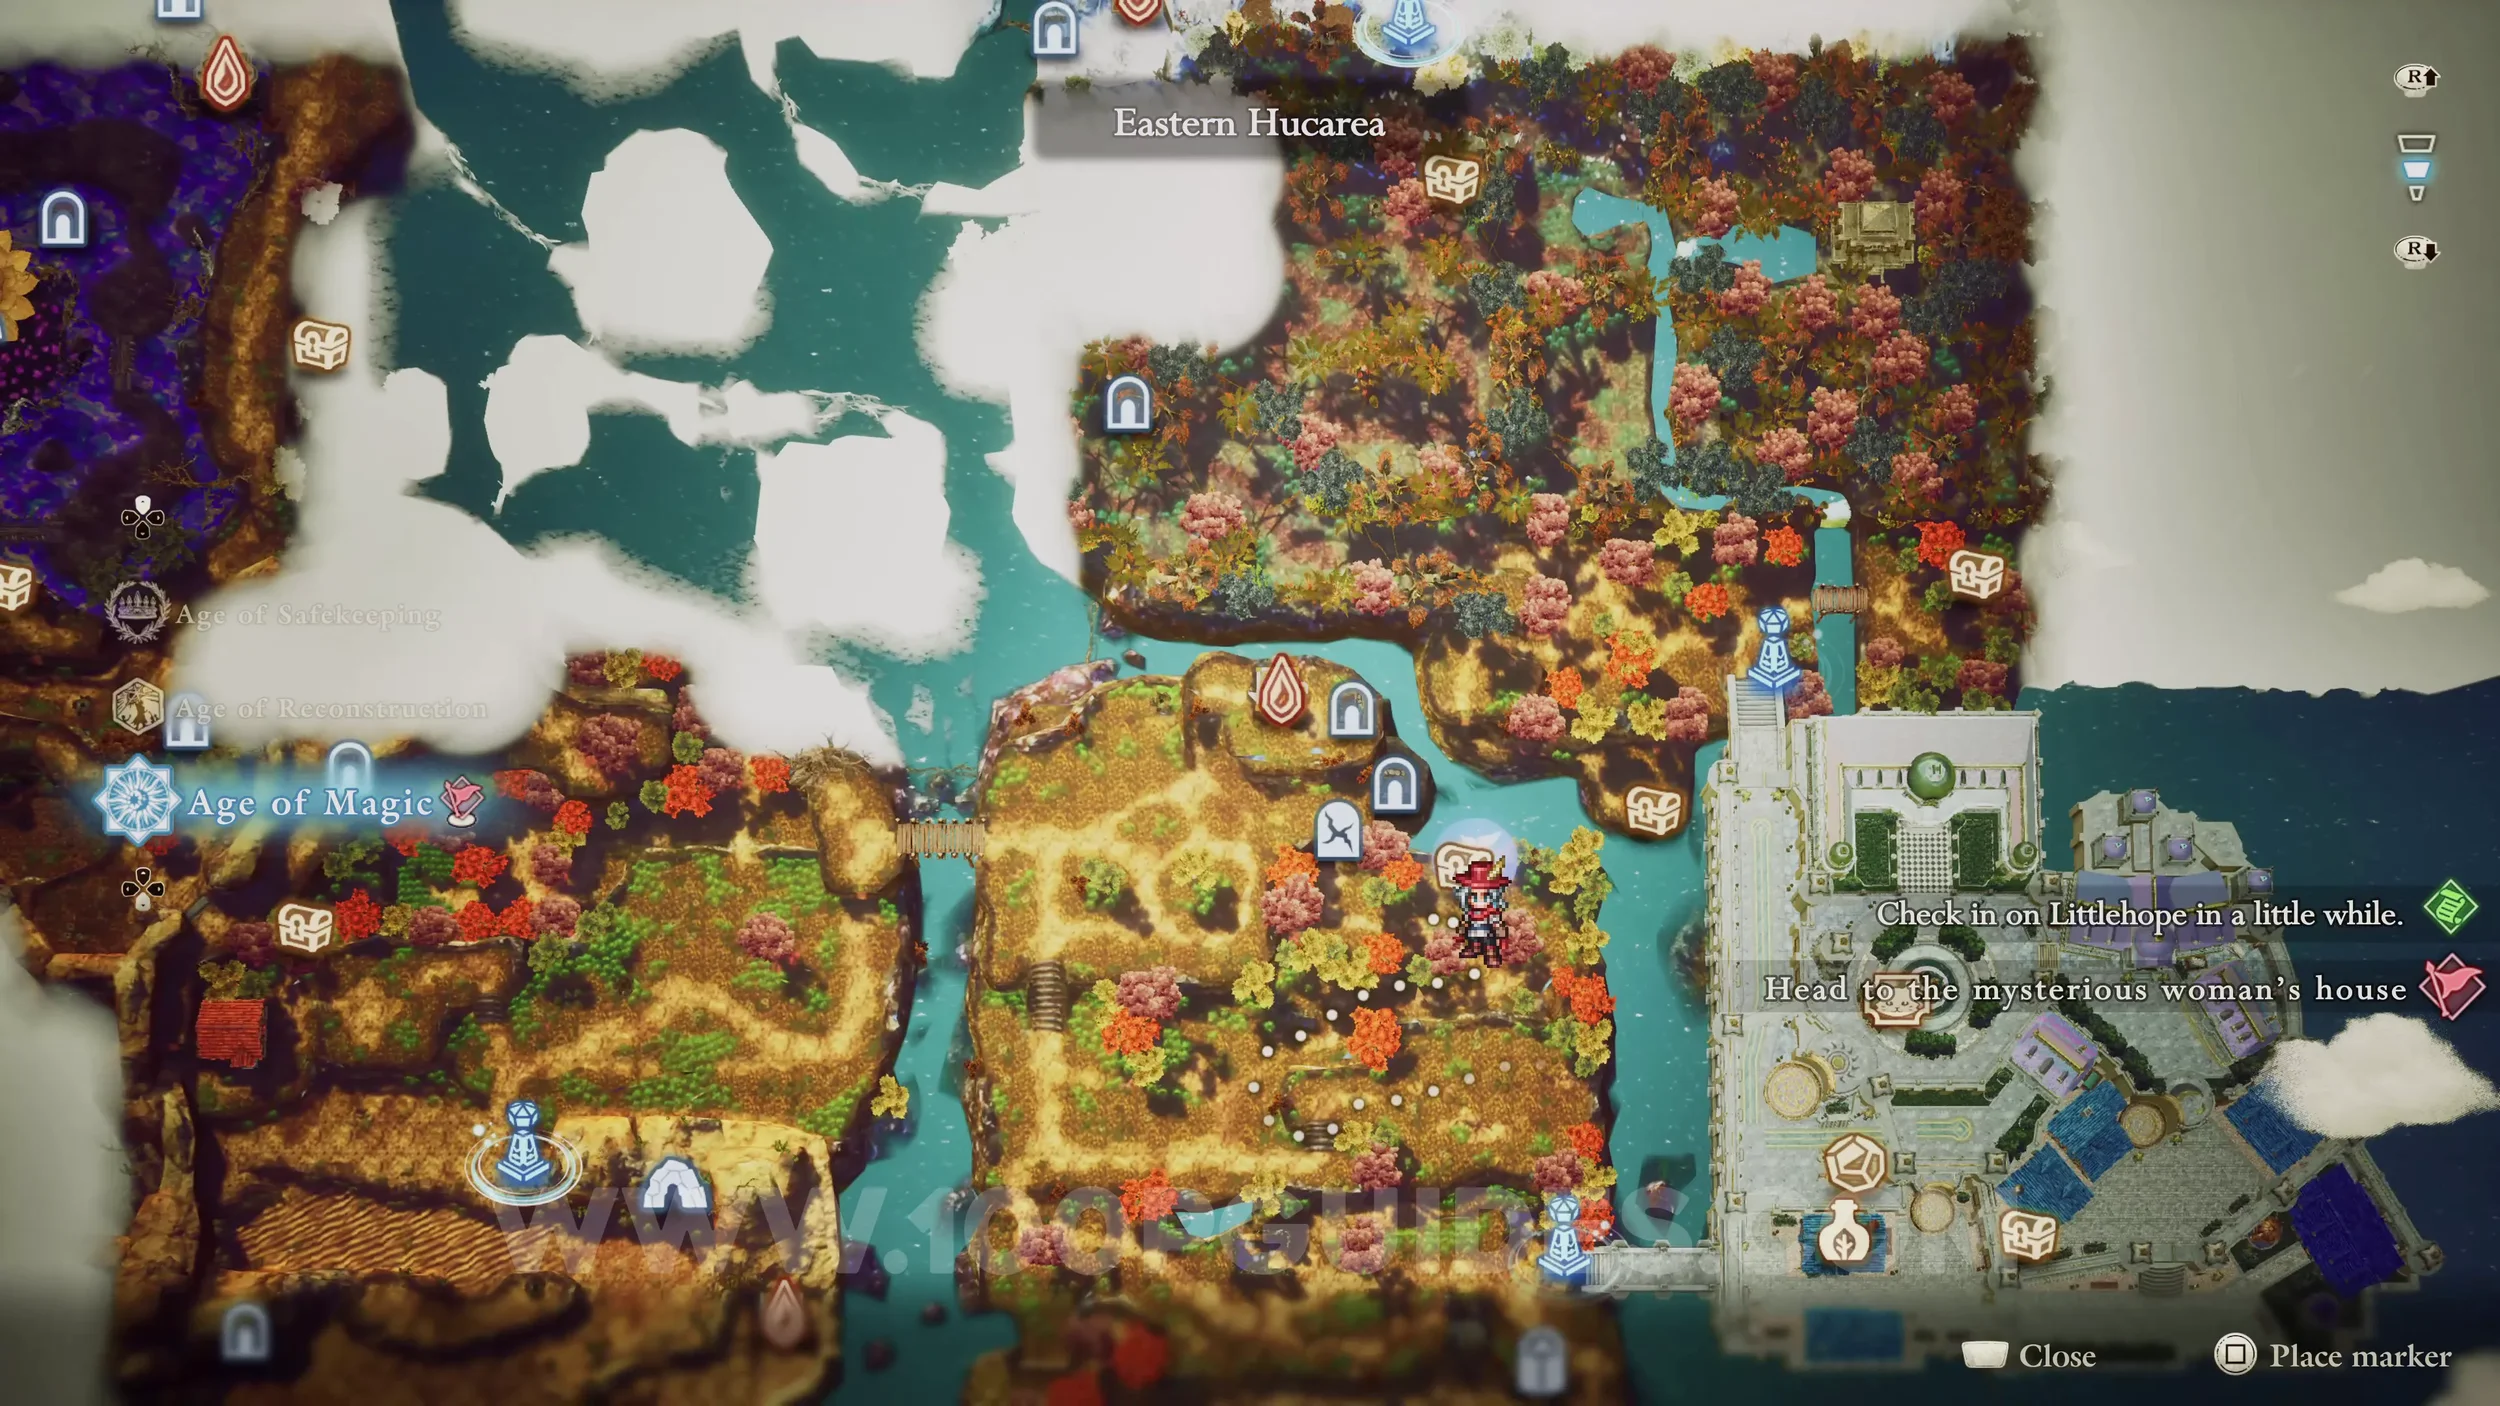
Shard of Life #45. Found at the end of the Fire Ruins.
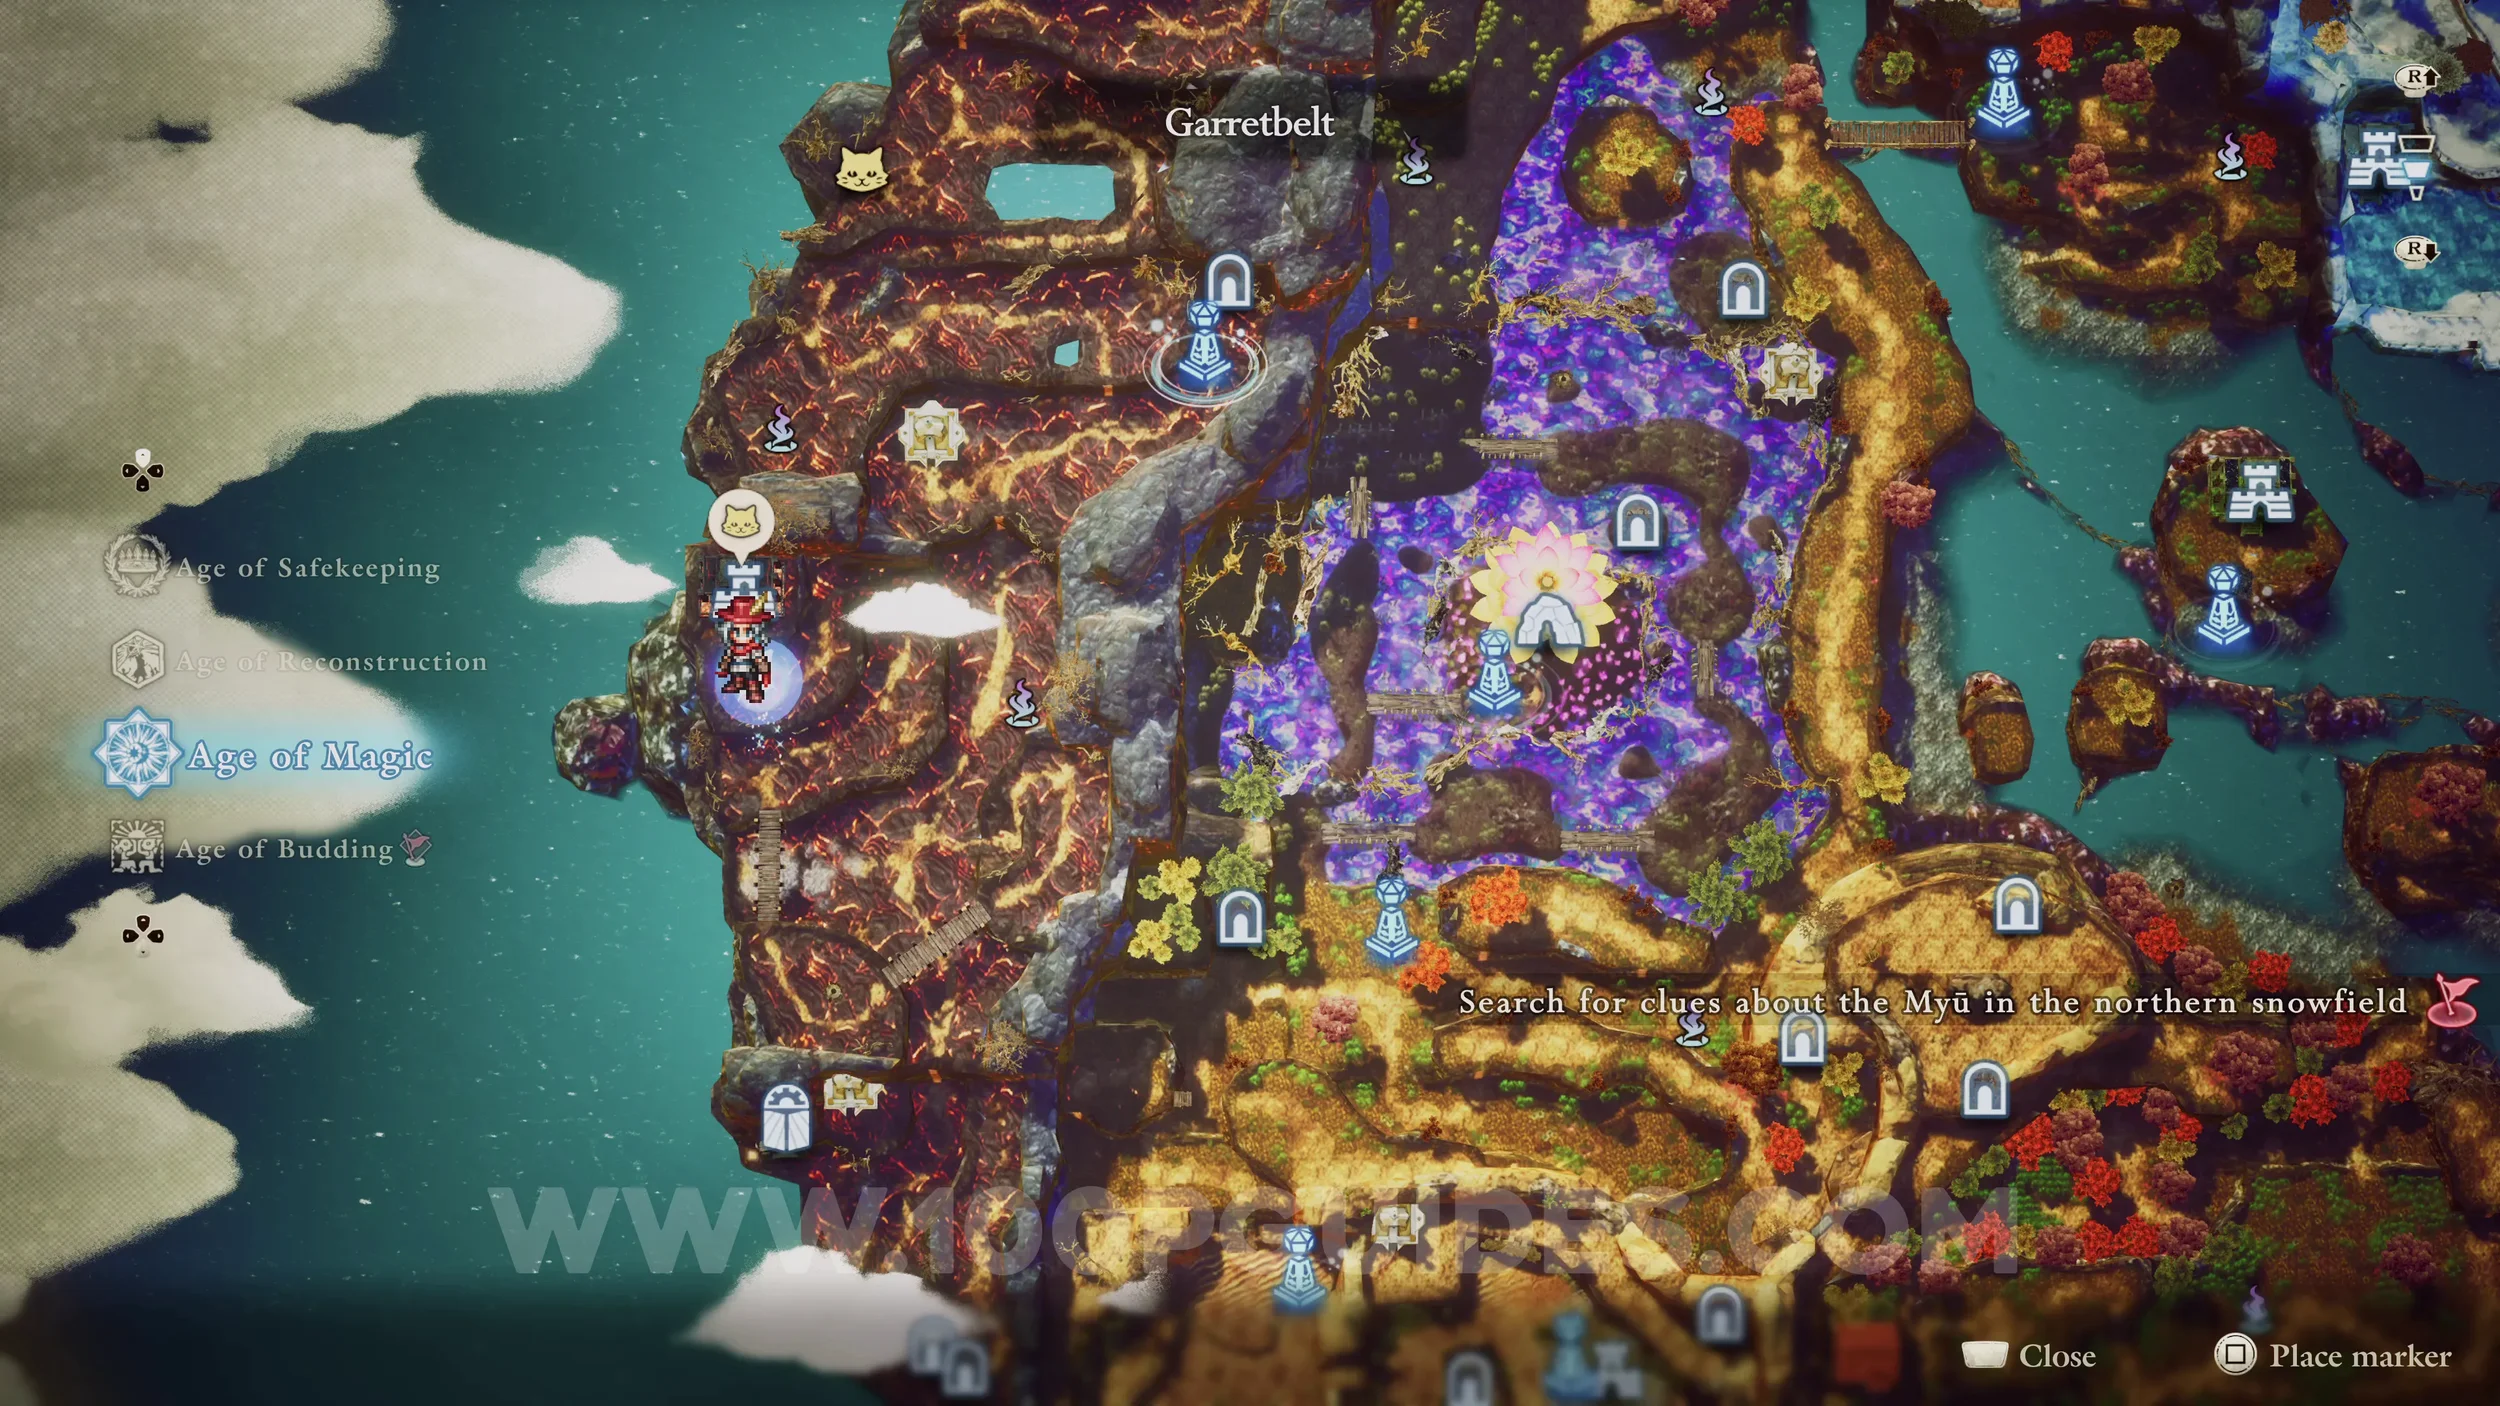


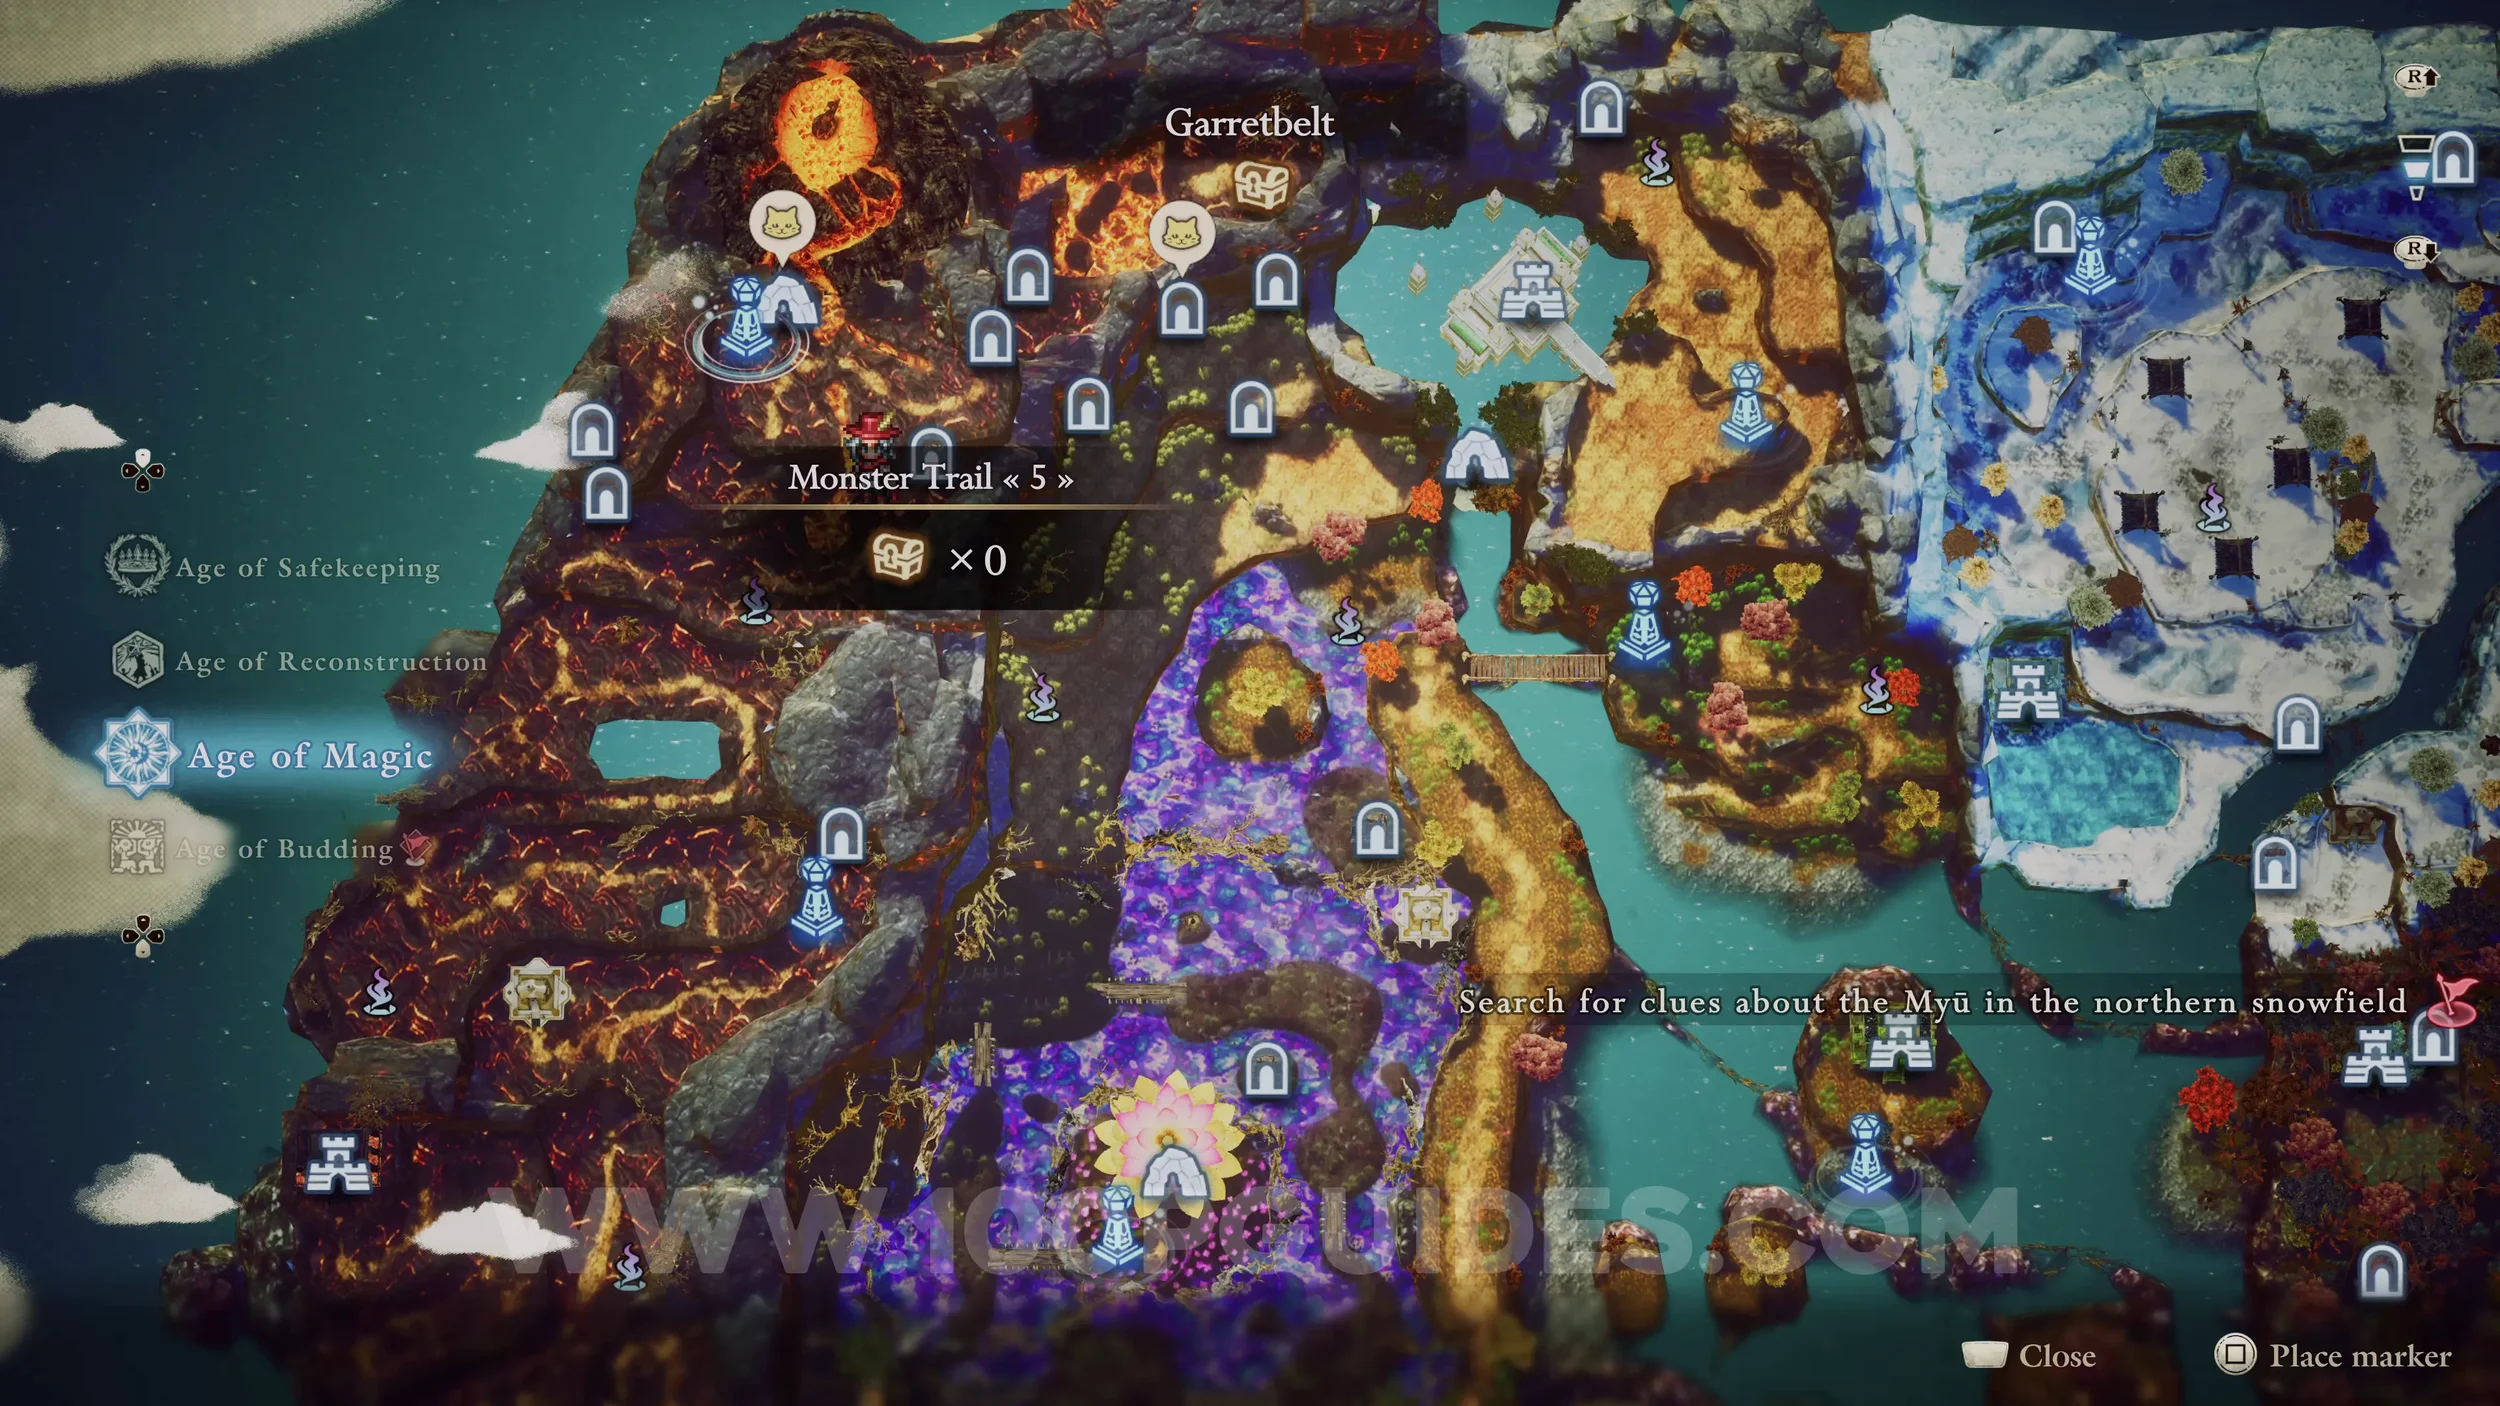
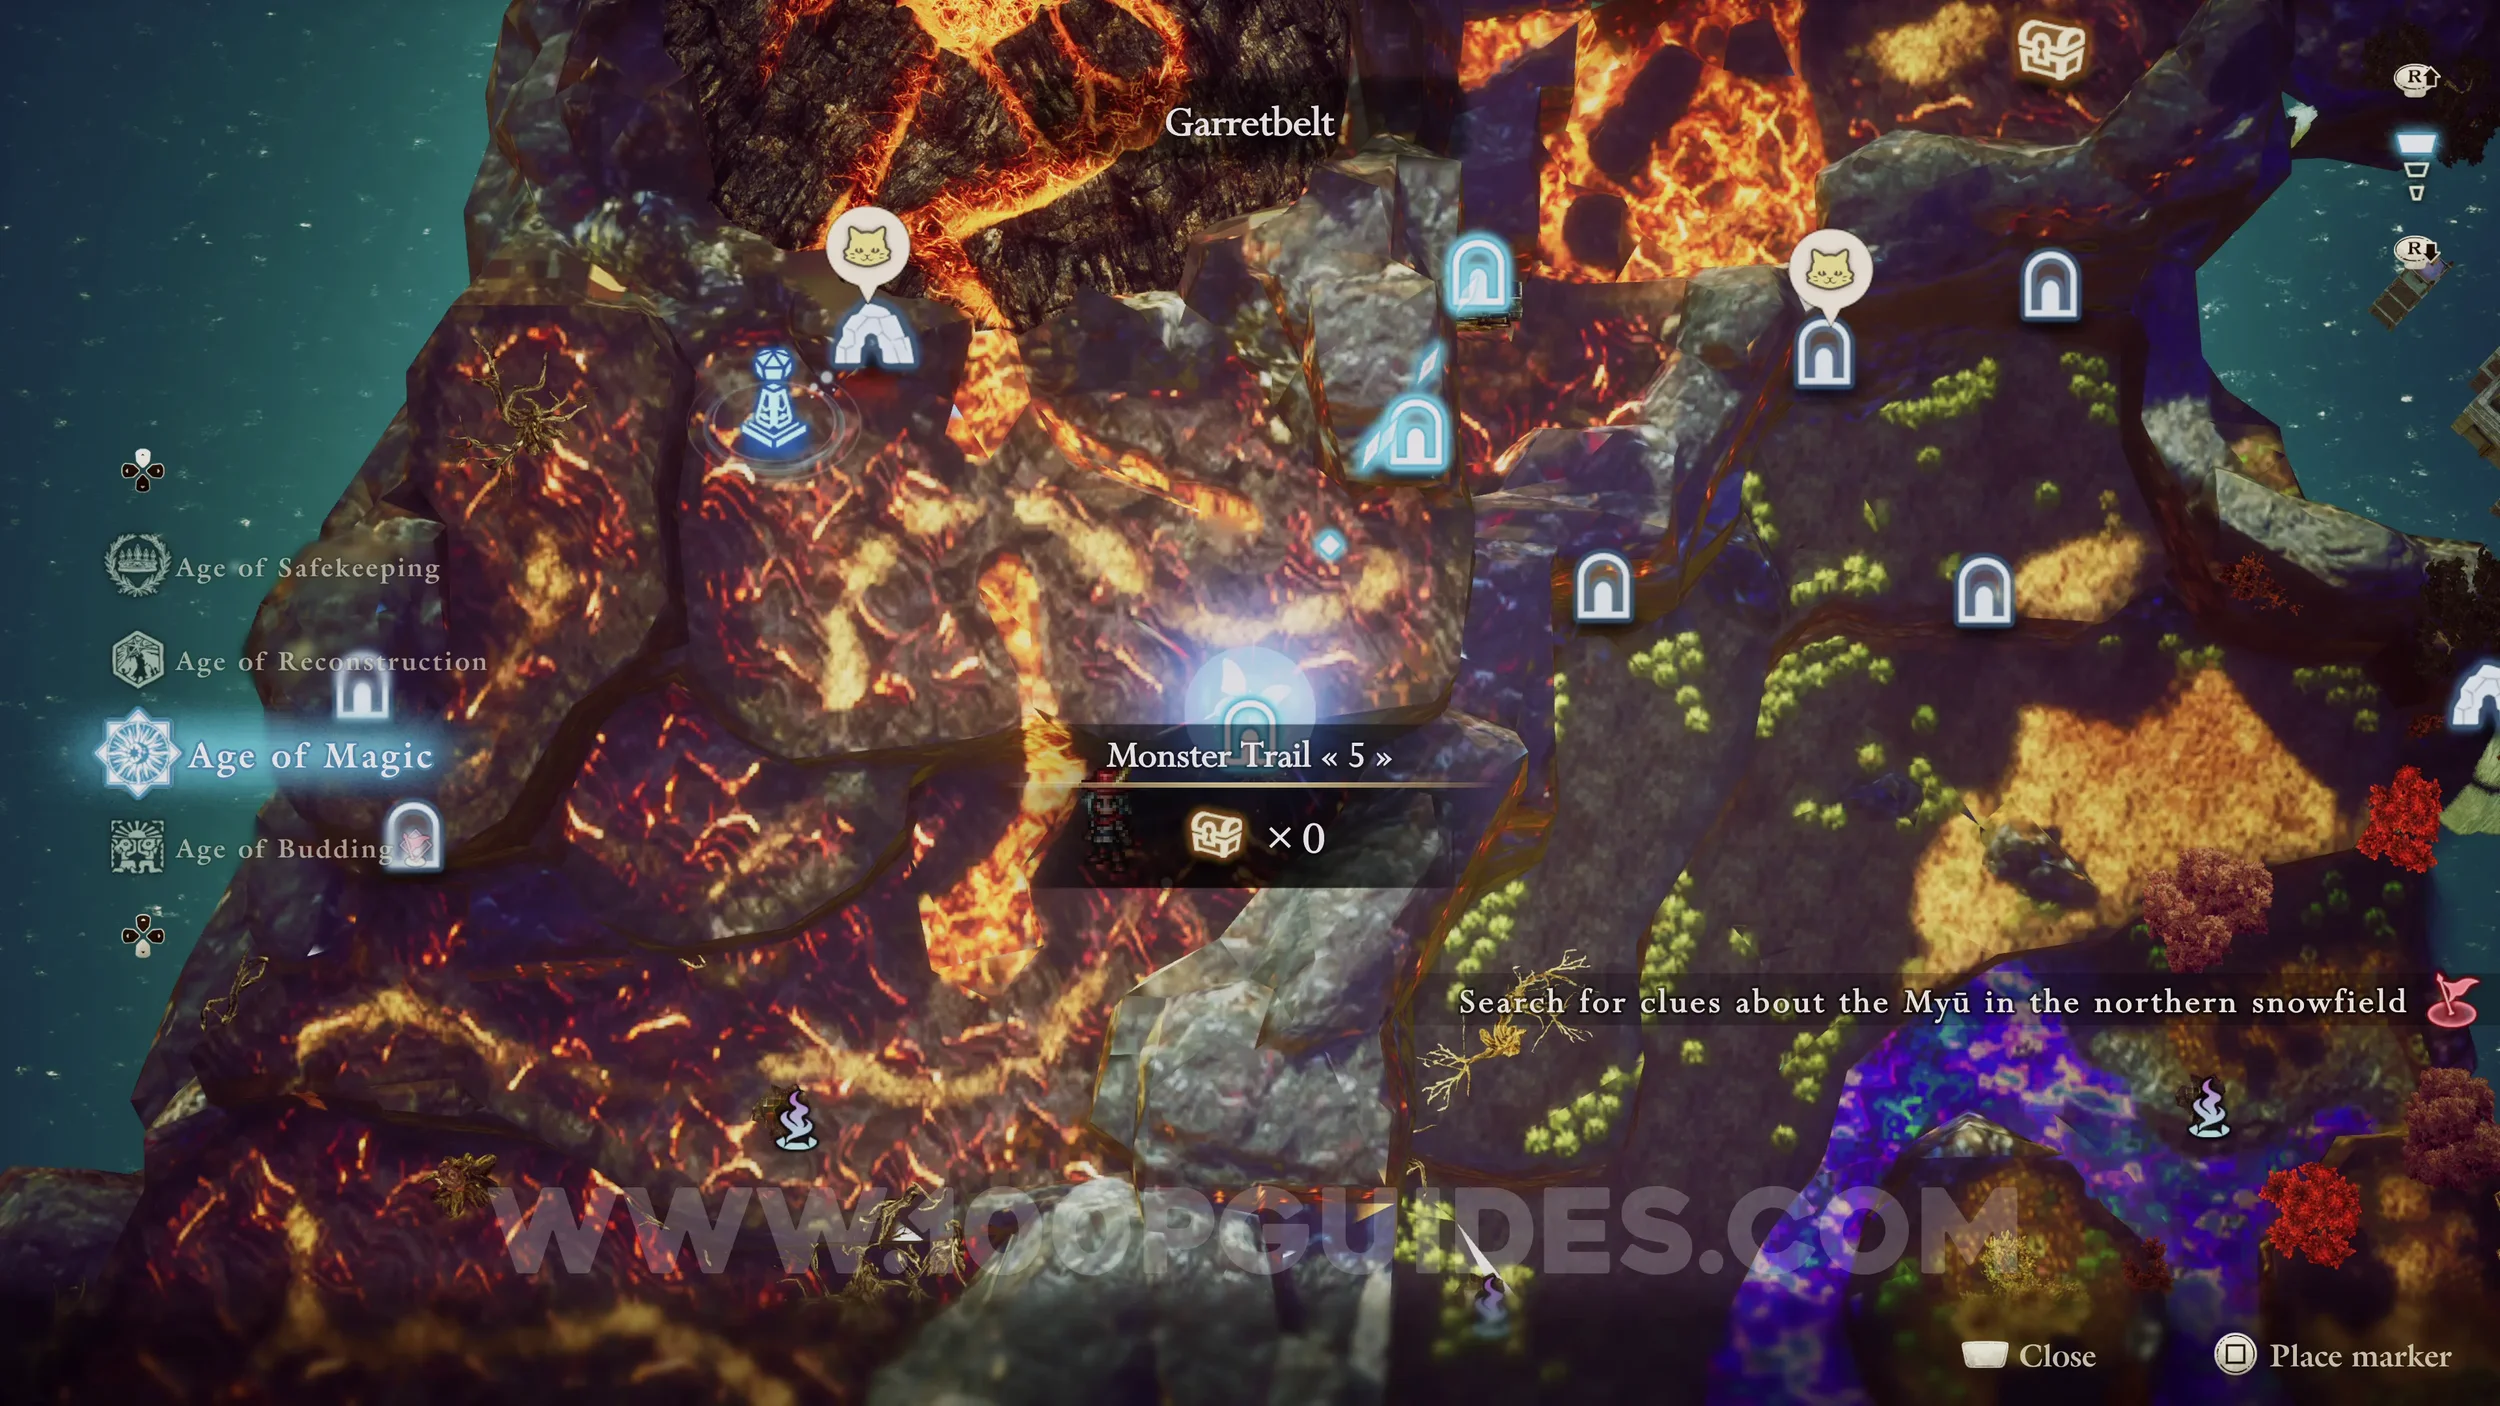
Shard of Life #46. Enter Monster Trail 5 and exit through the northeast exit. The chest will be in this outside area.


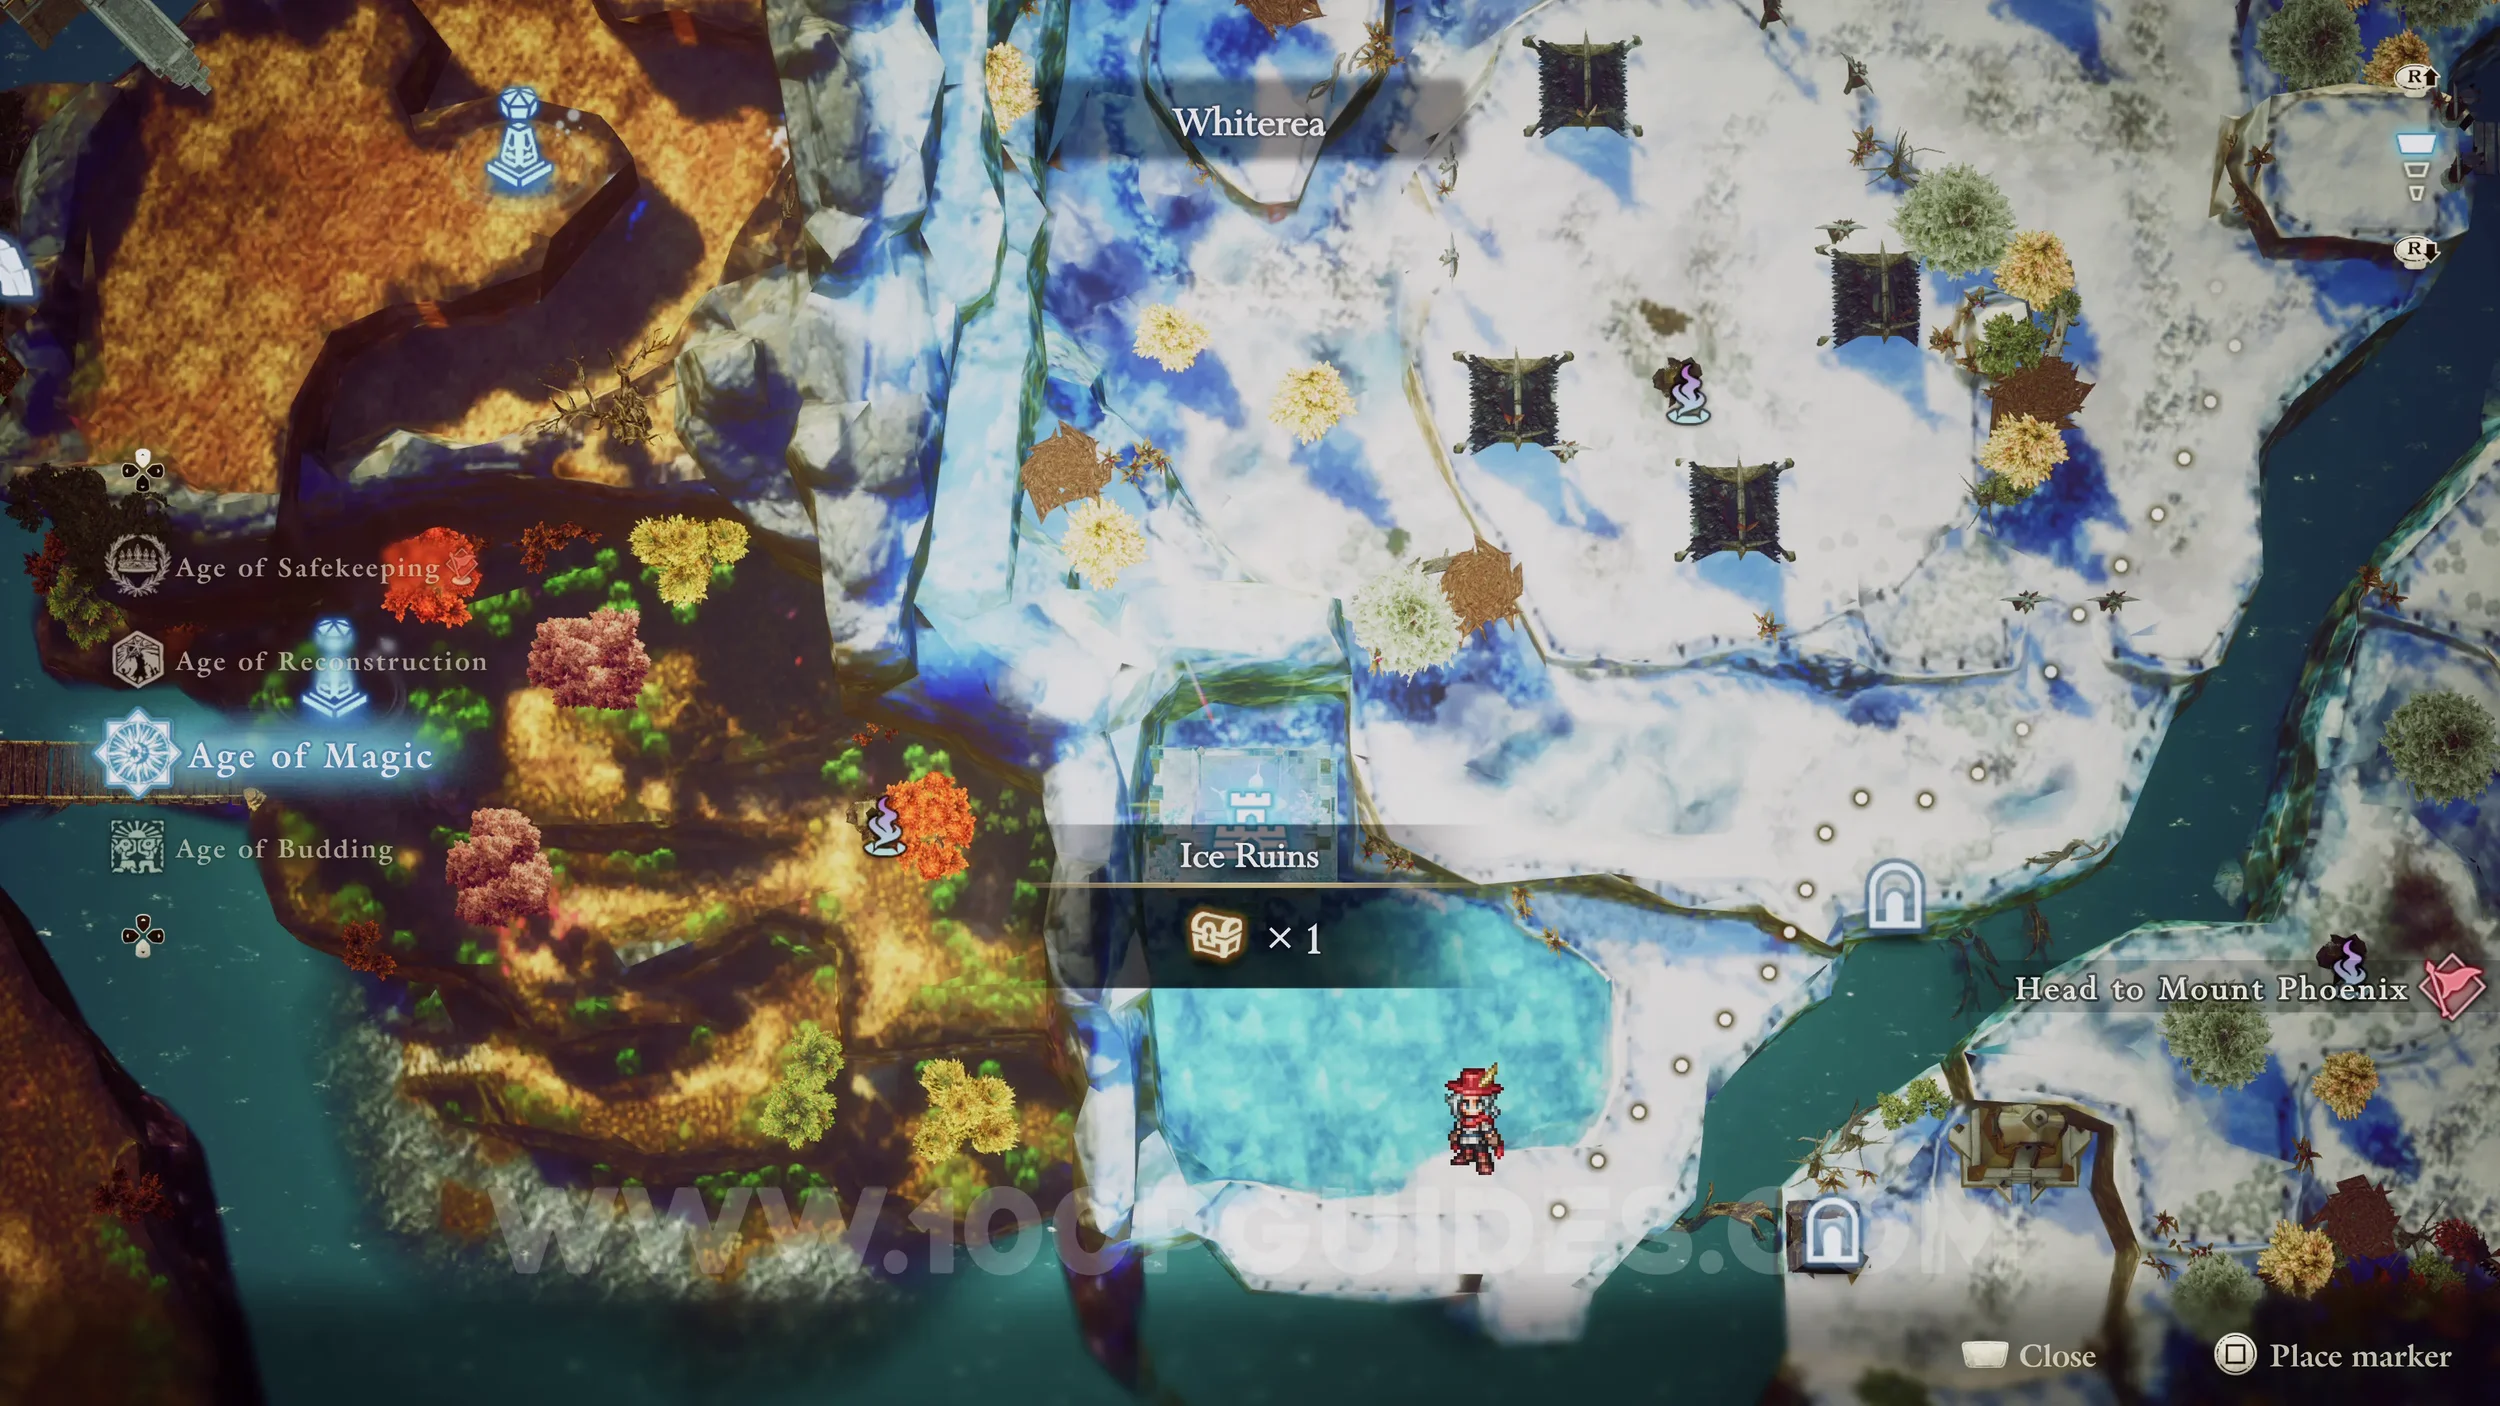
Shard of Life #47. Found in the Ice Ruins. At the start, go left and use the Vacuum Fairy Power to place the orb into the hole. Then go up and right to find the chest with the Shard inside.


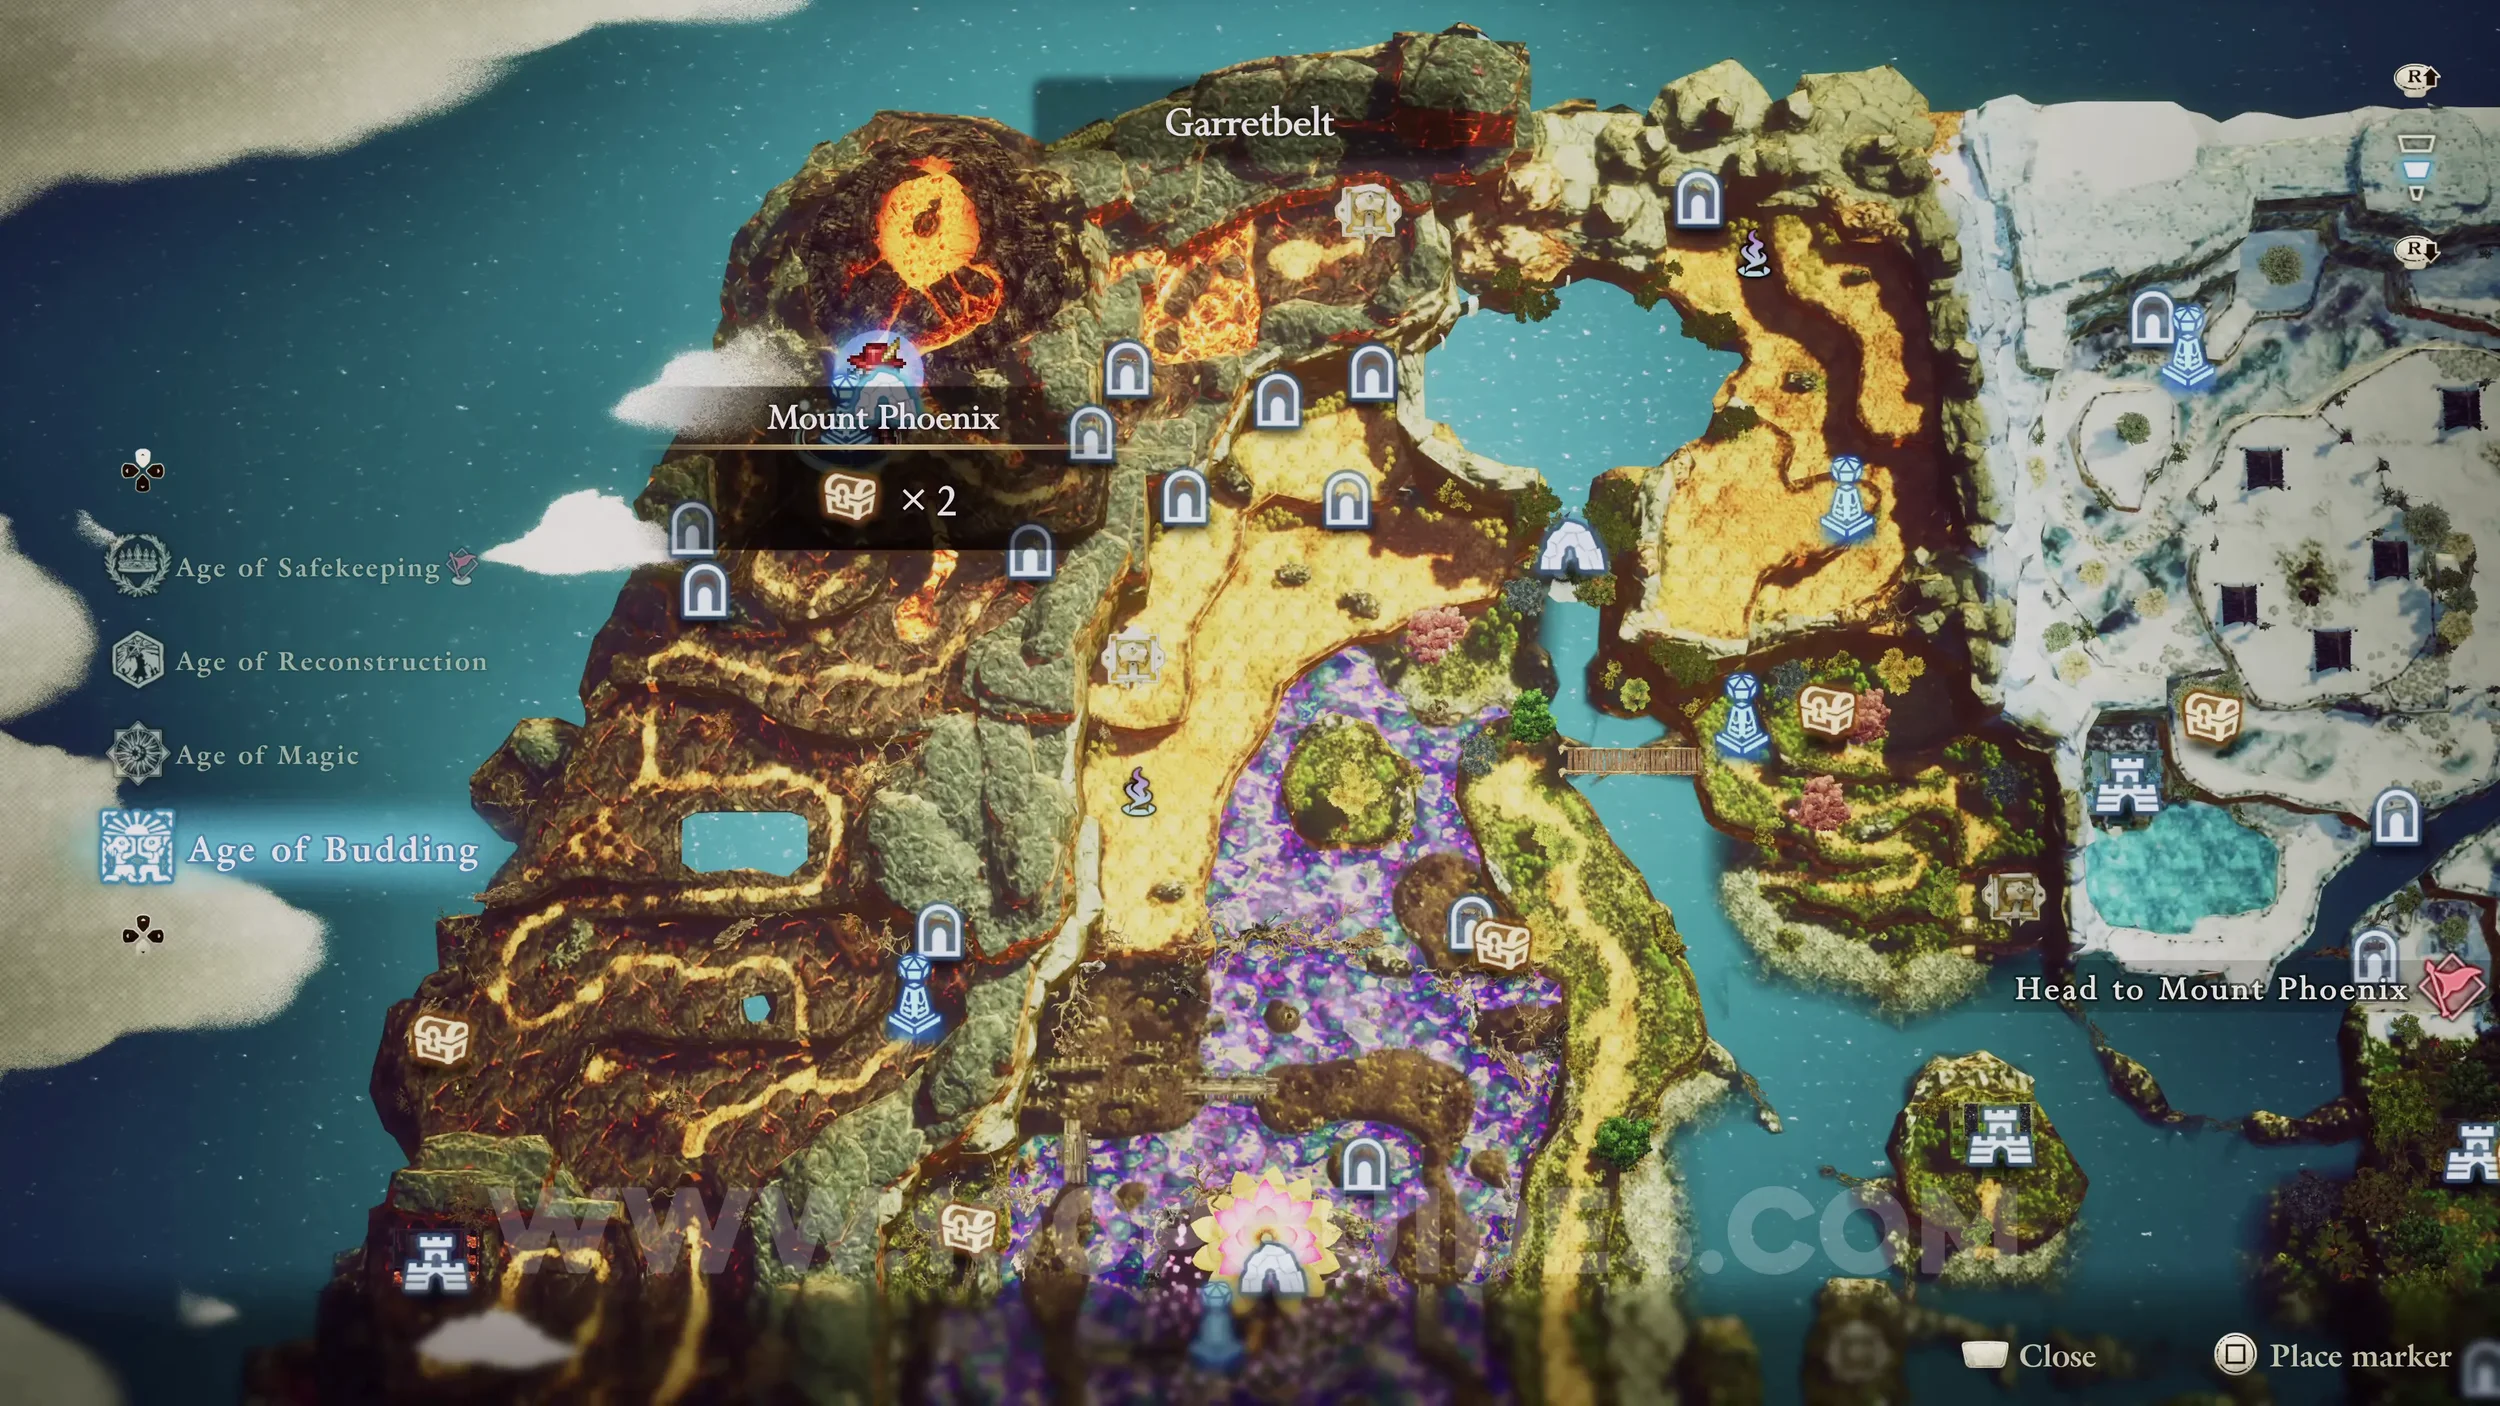
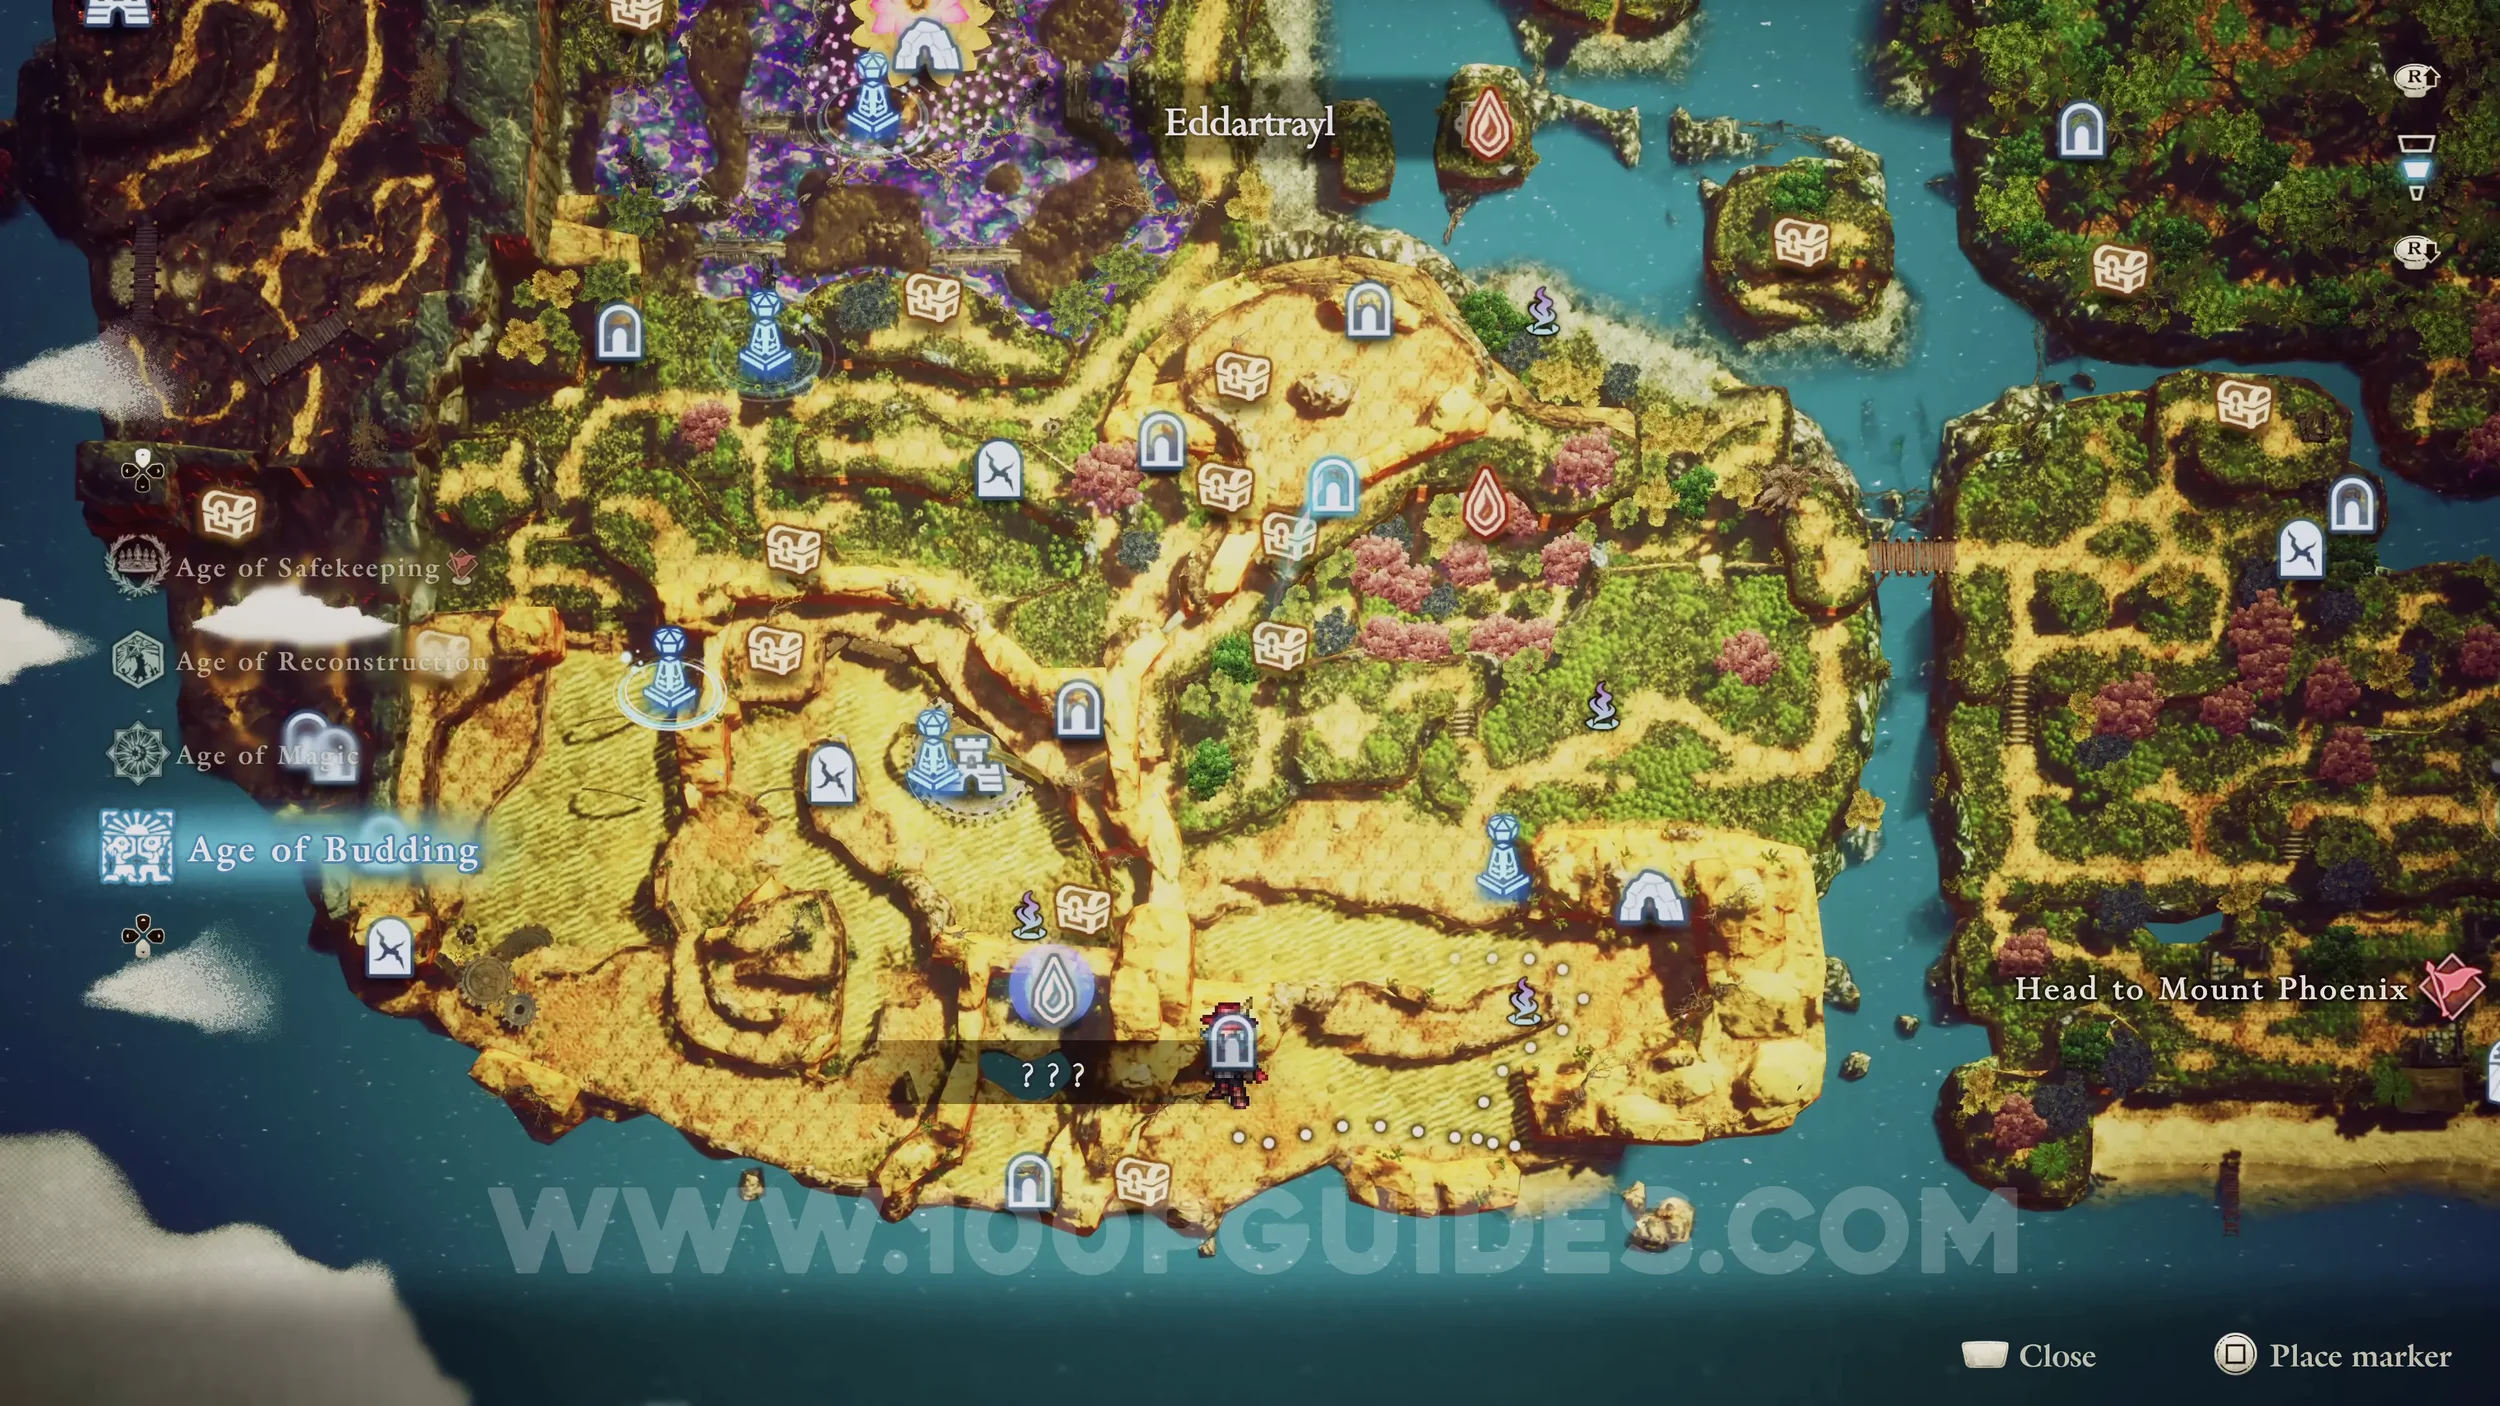
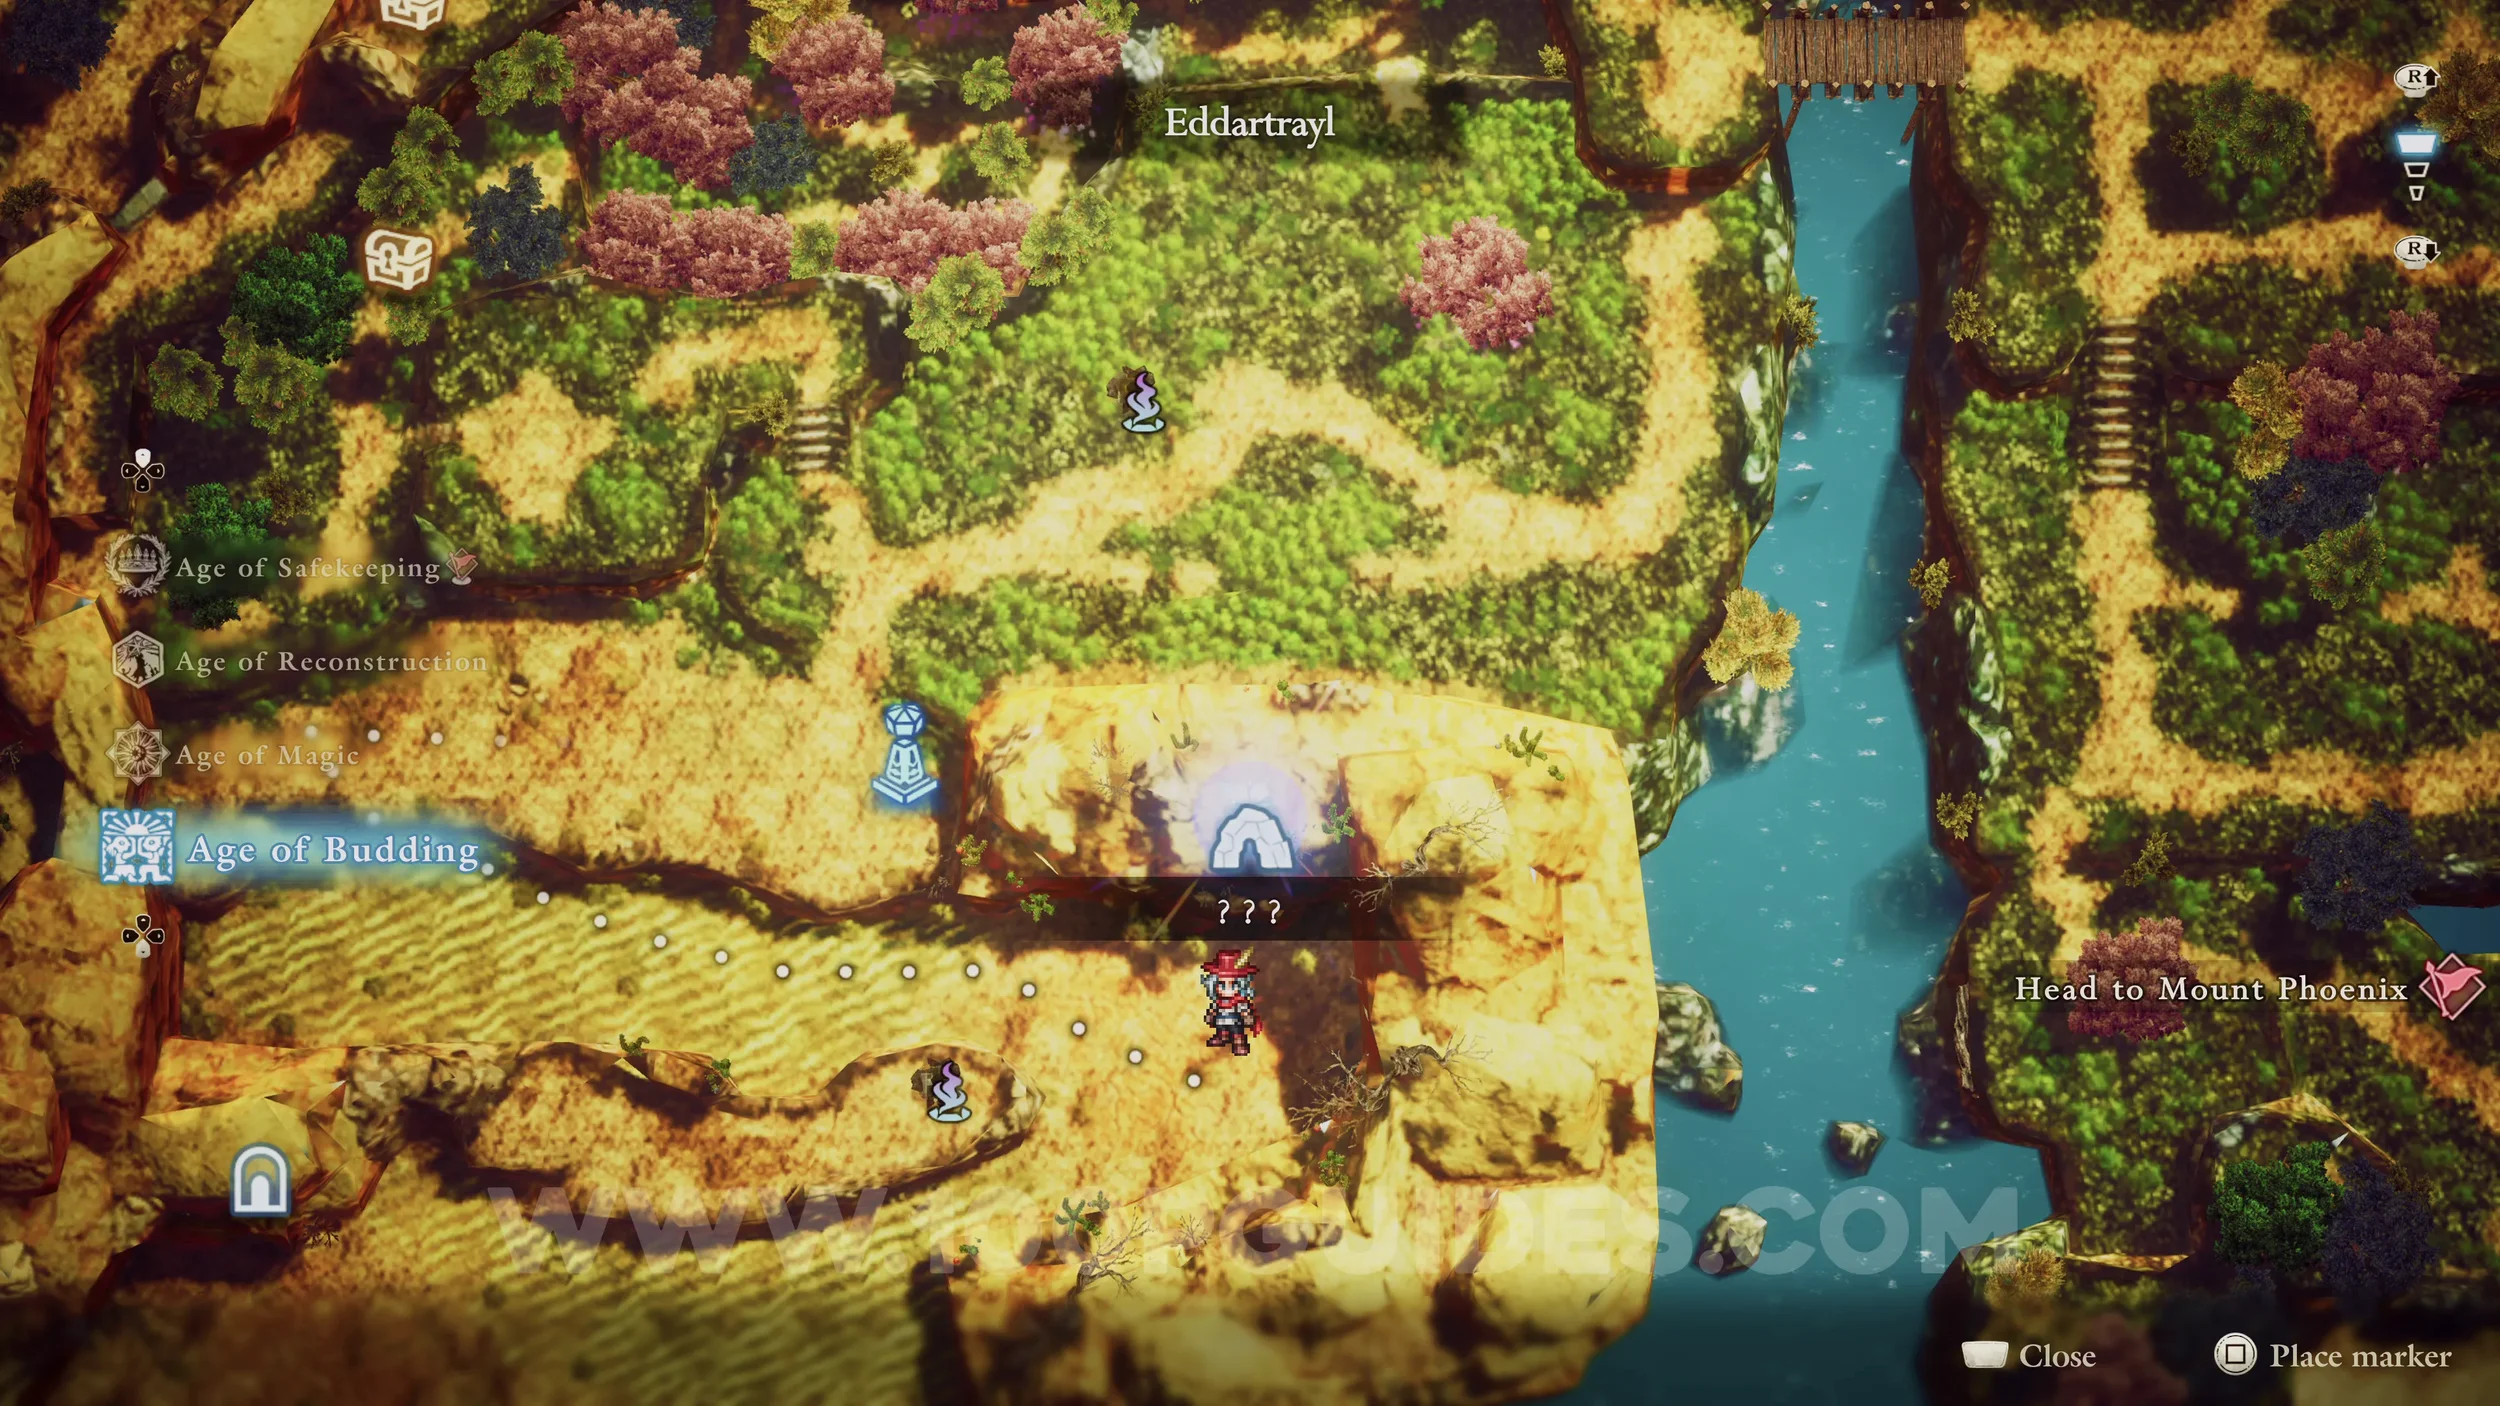
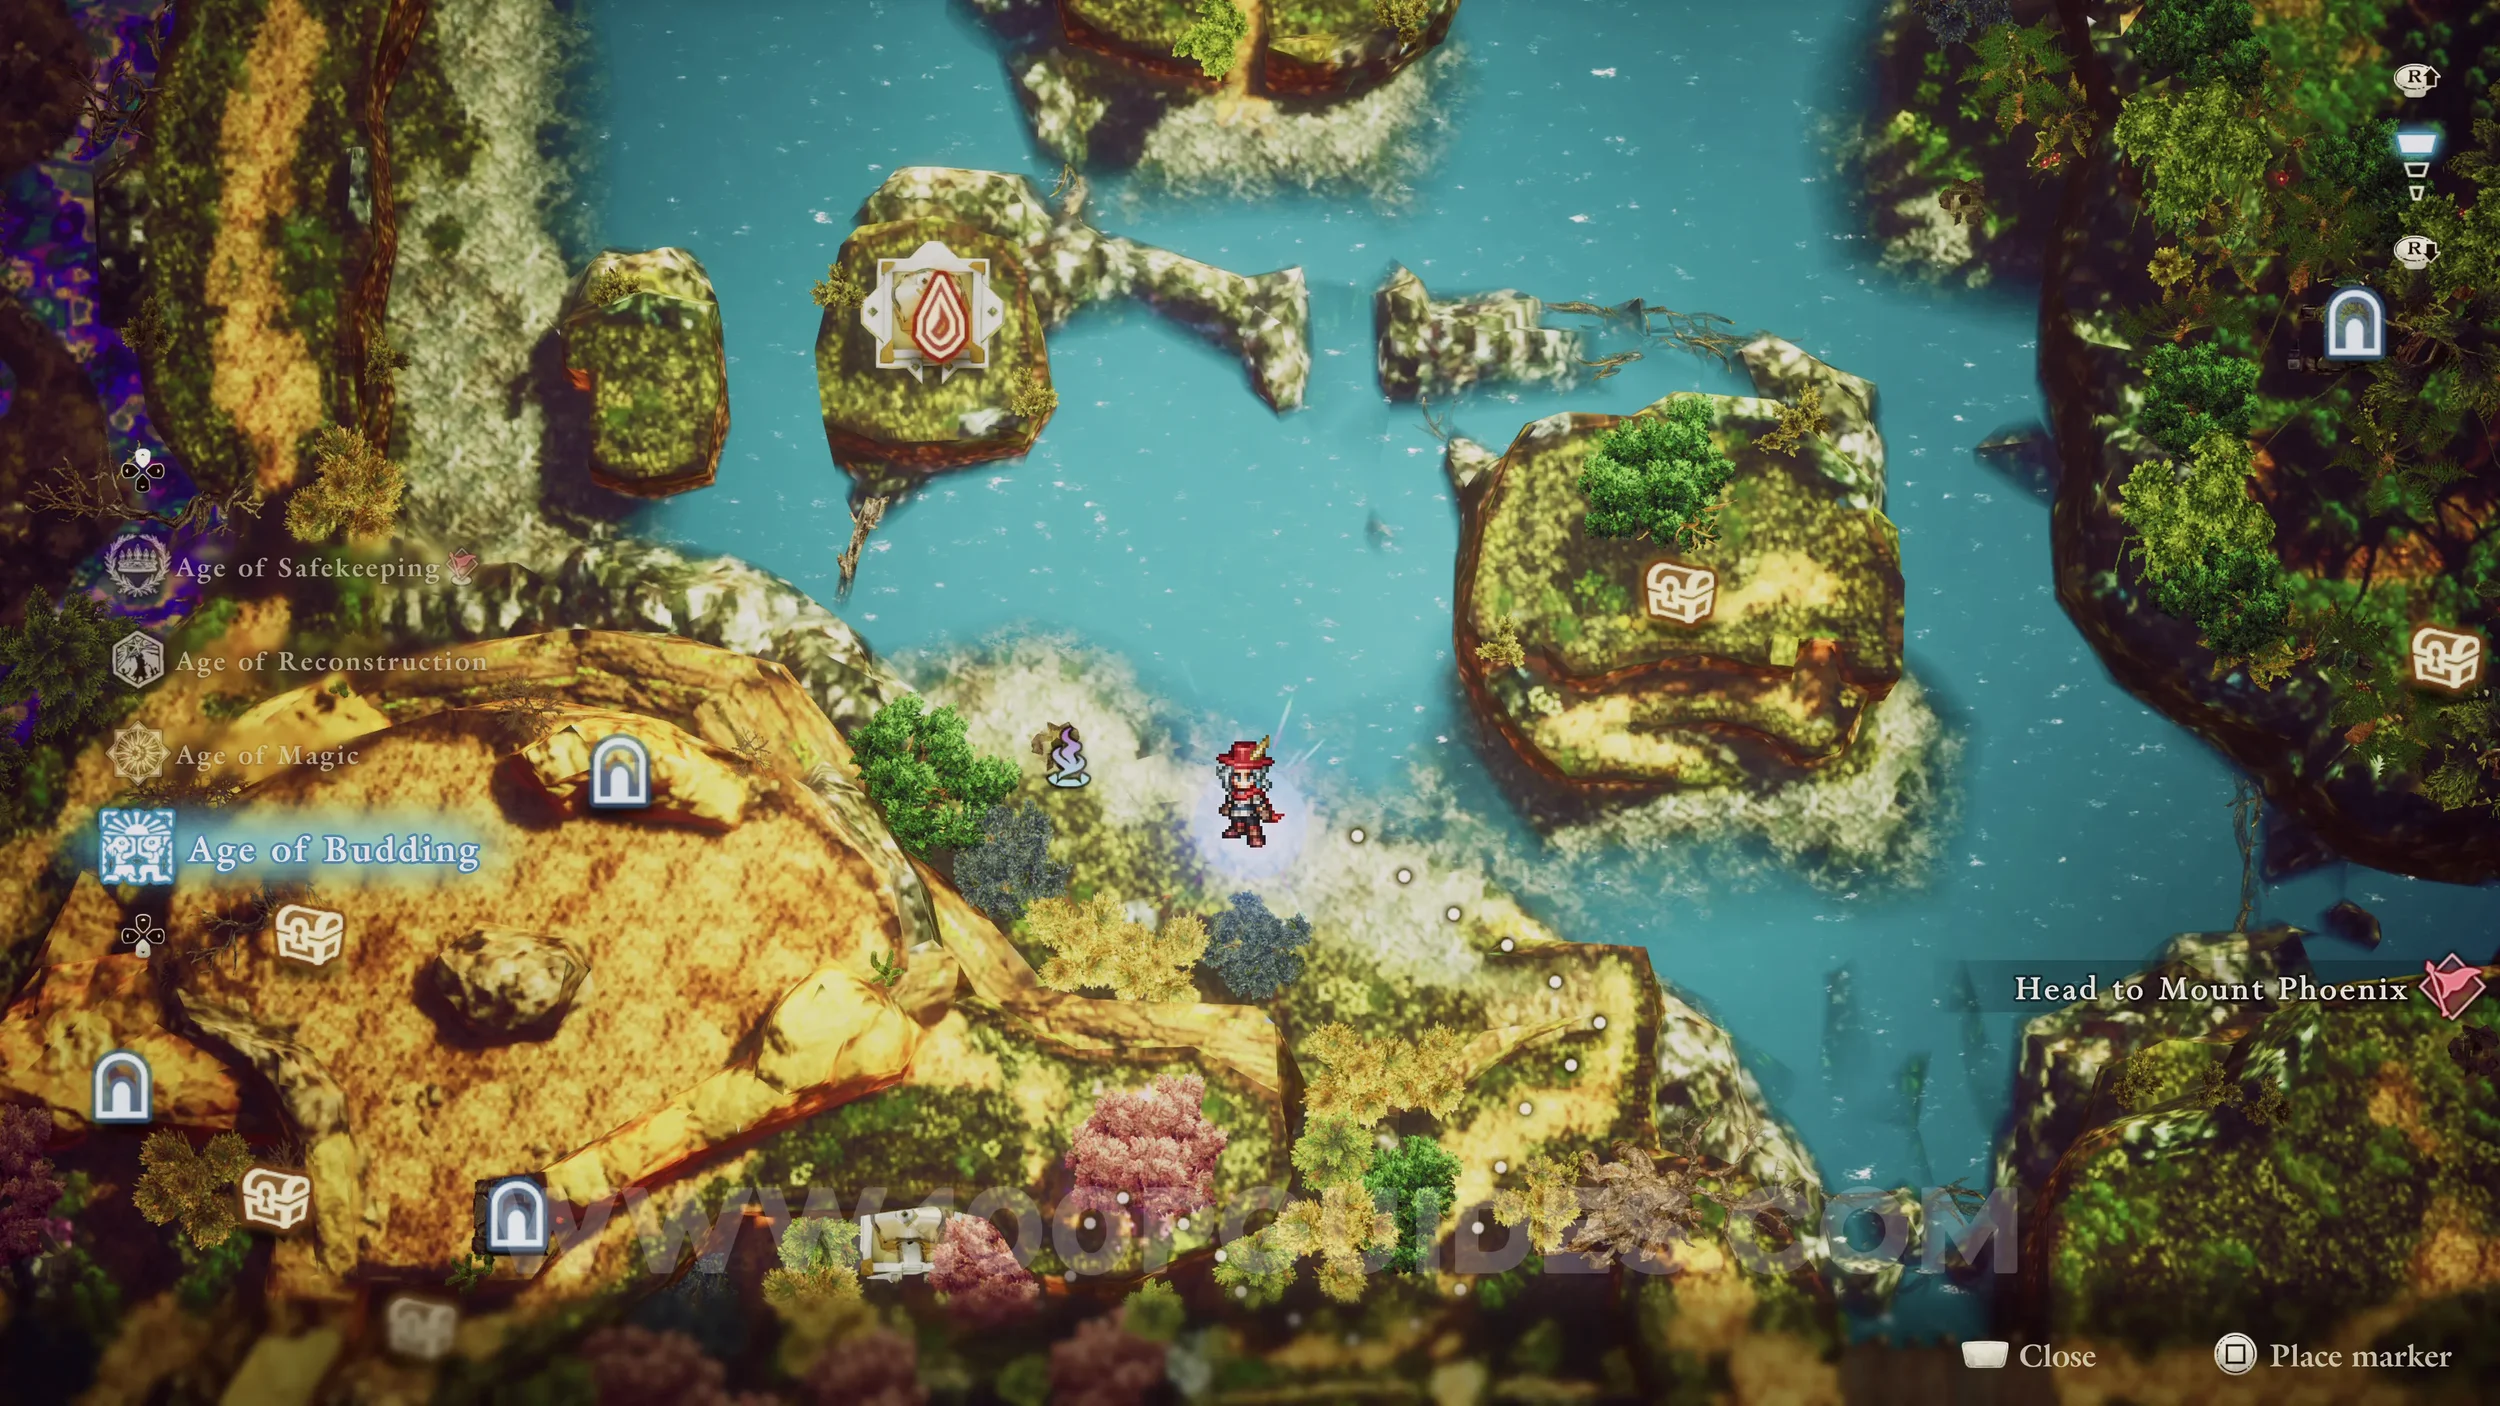
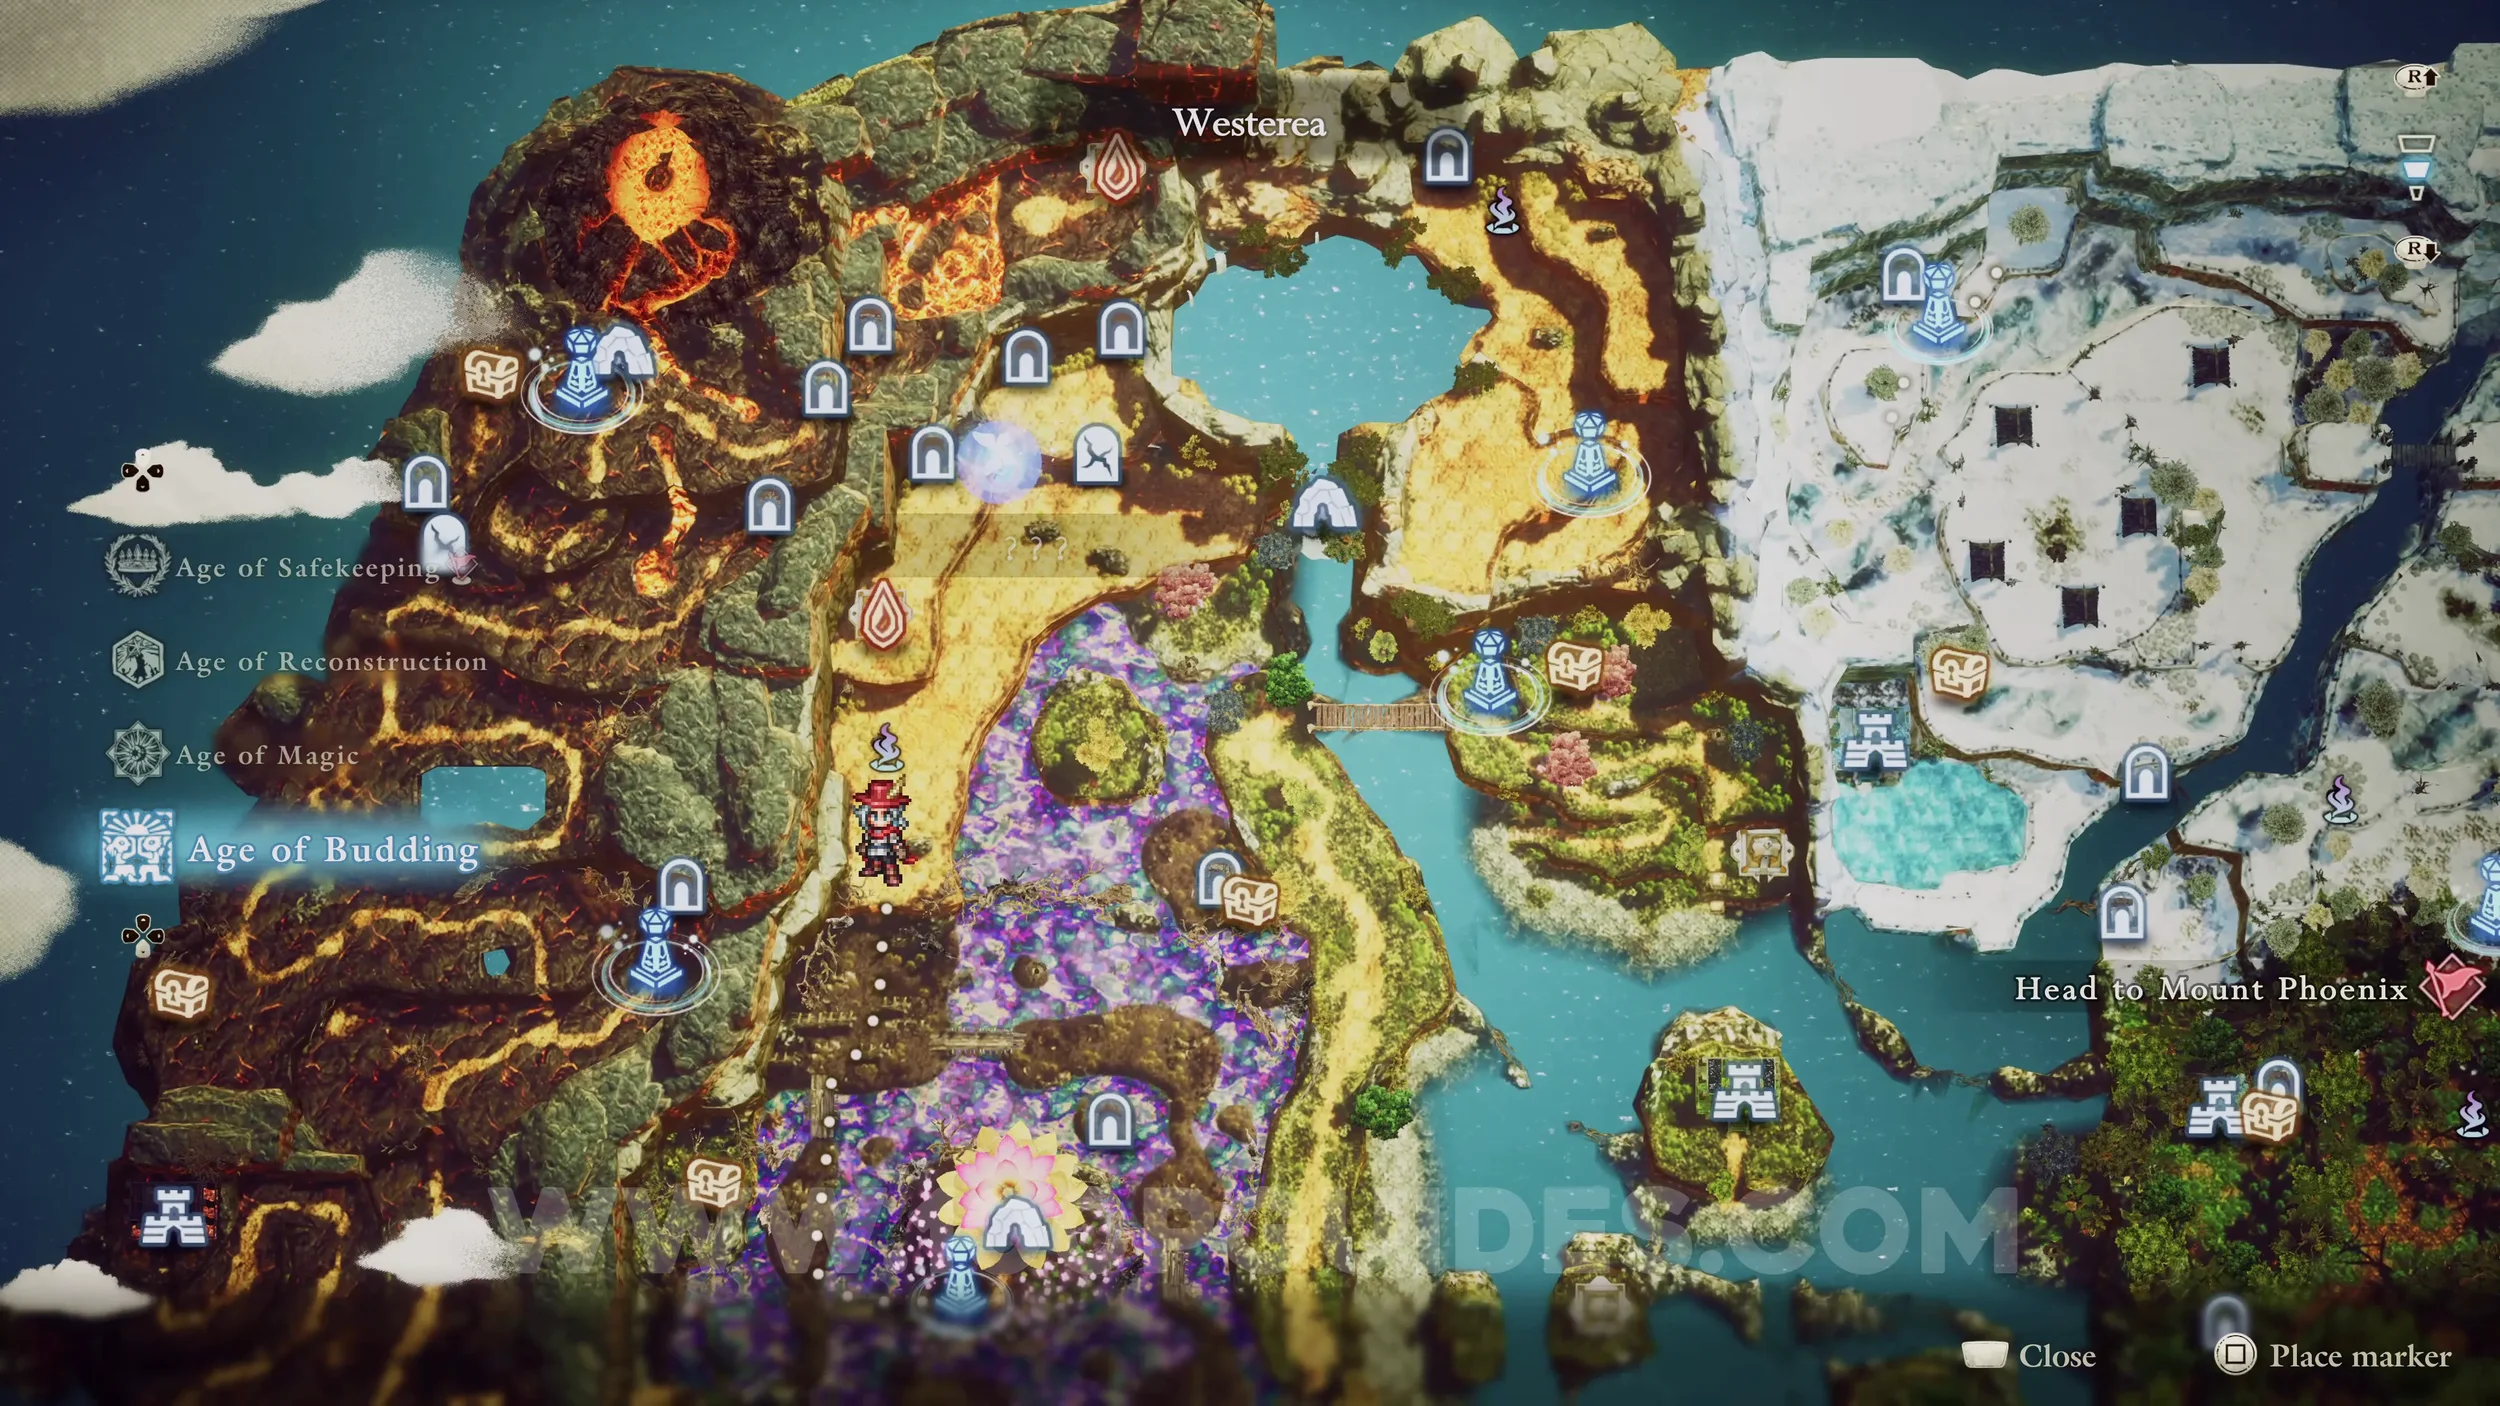
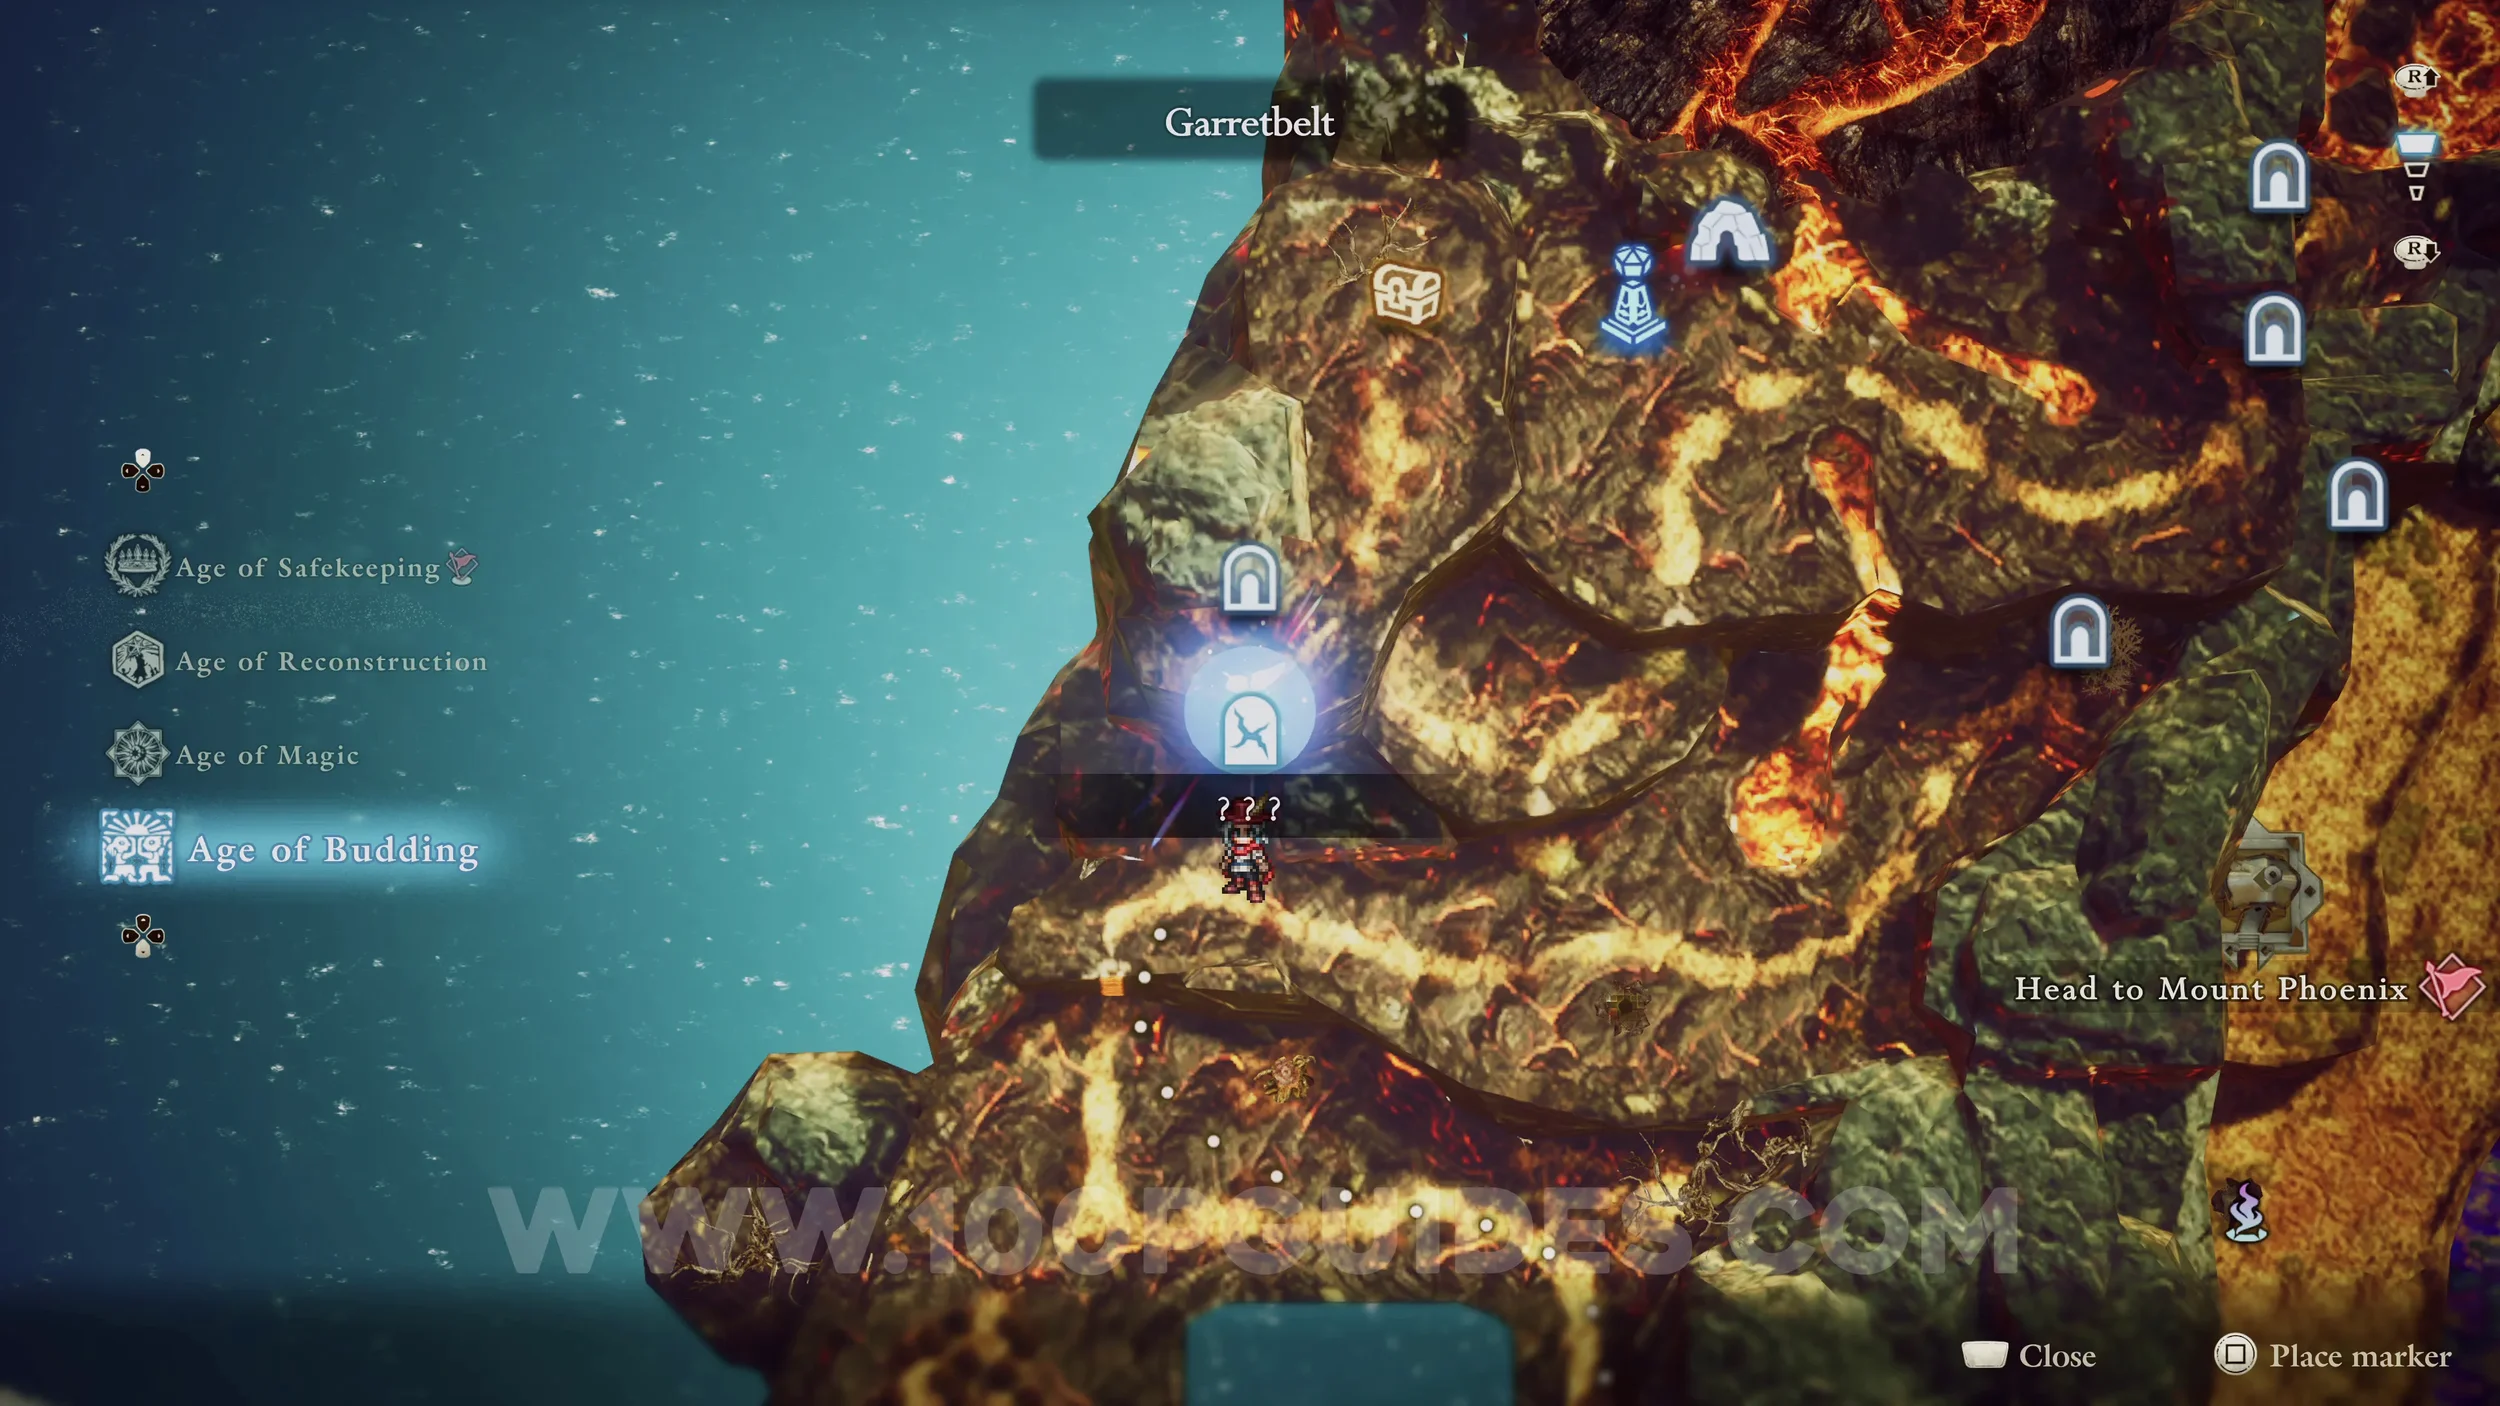
AGE OF BUDDING
Shard of Life #48. Go through the Southern Caves and exit through the left side to reach the small oasis. Then enter the Shrine of Life and defeat the enemies.


Shard of Life #49. Found at the end of the Desert Caves.


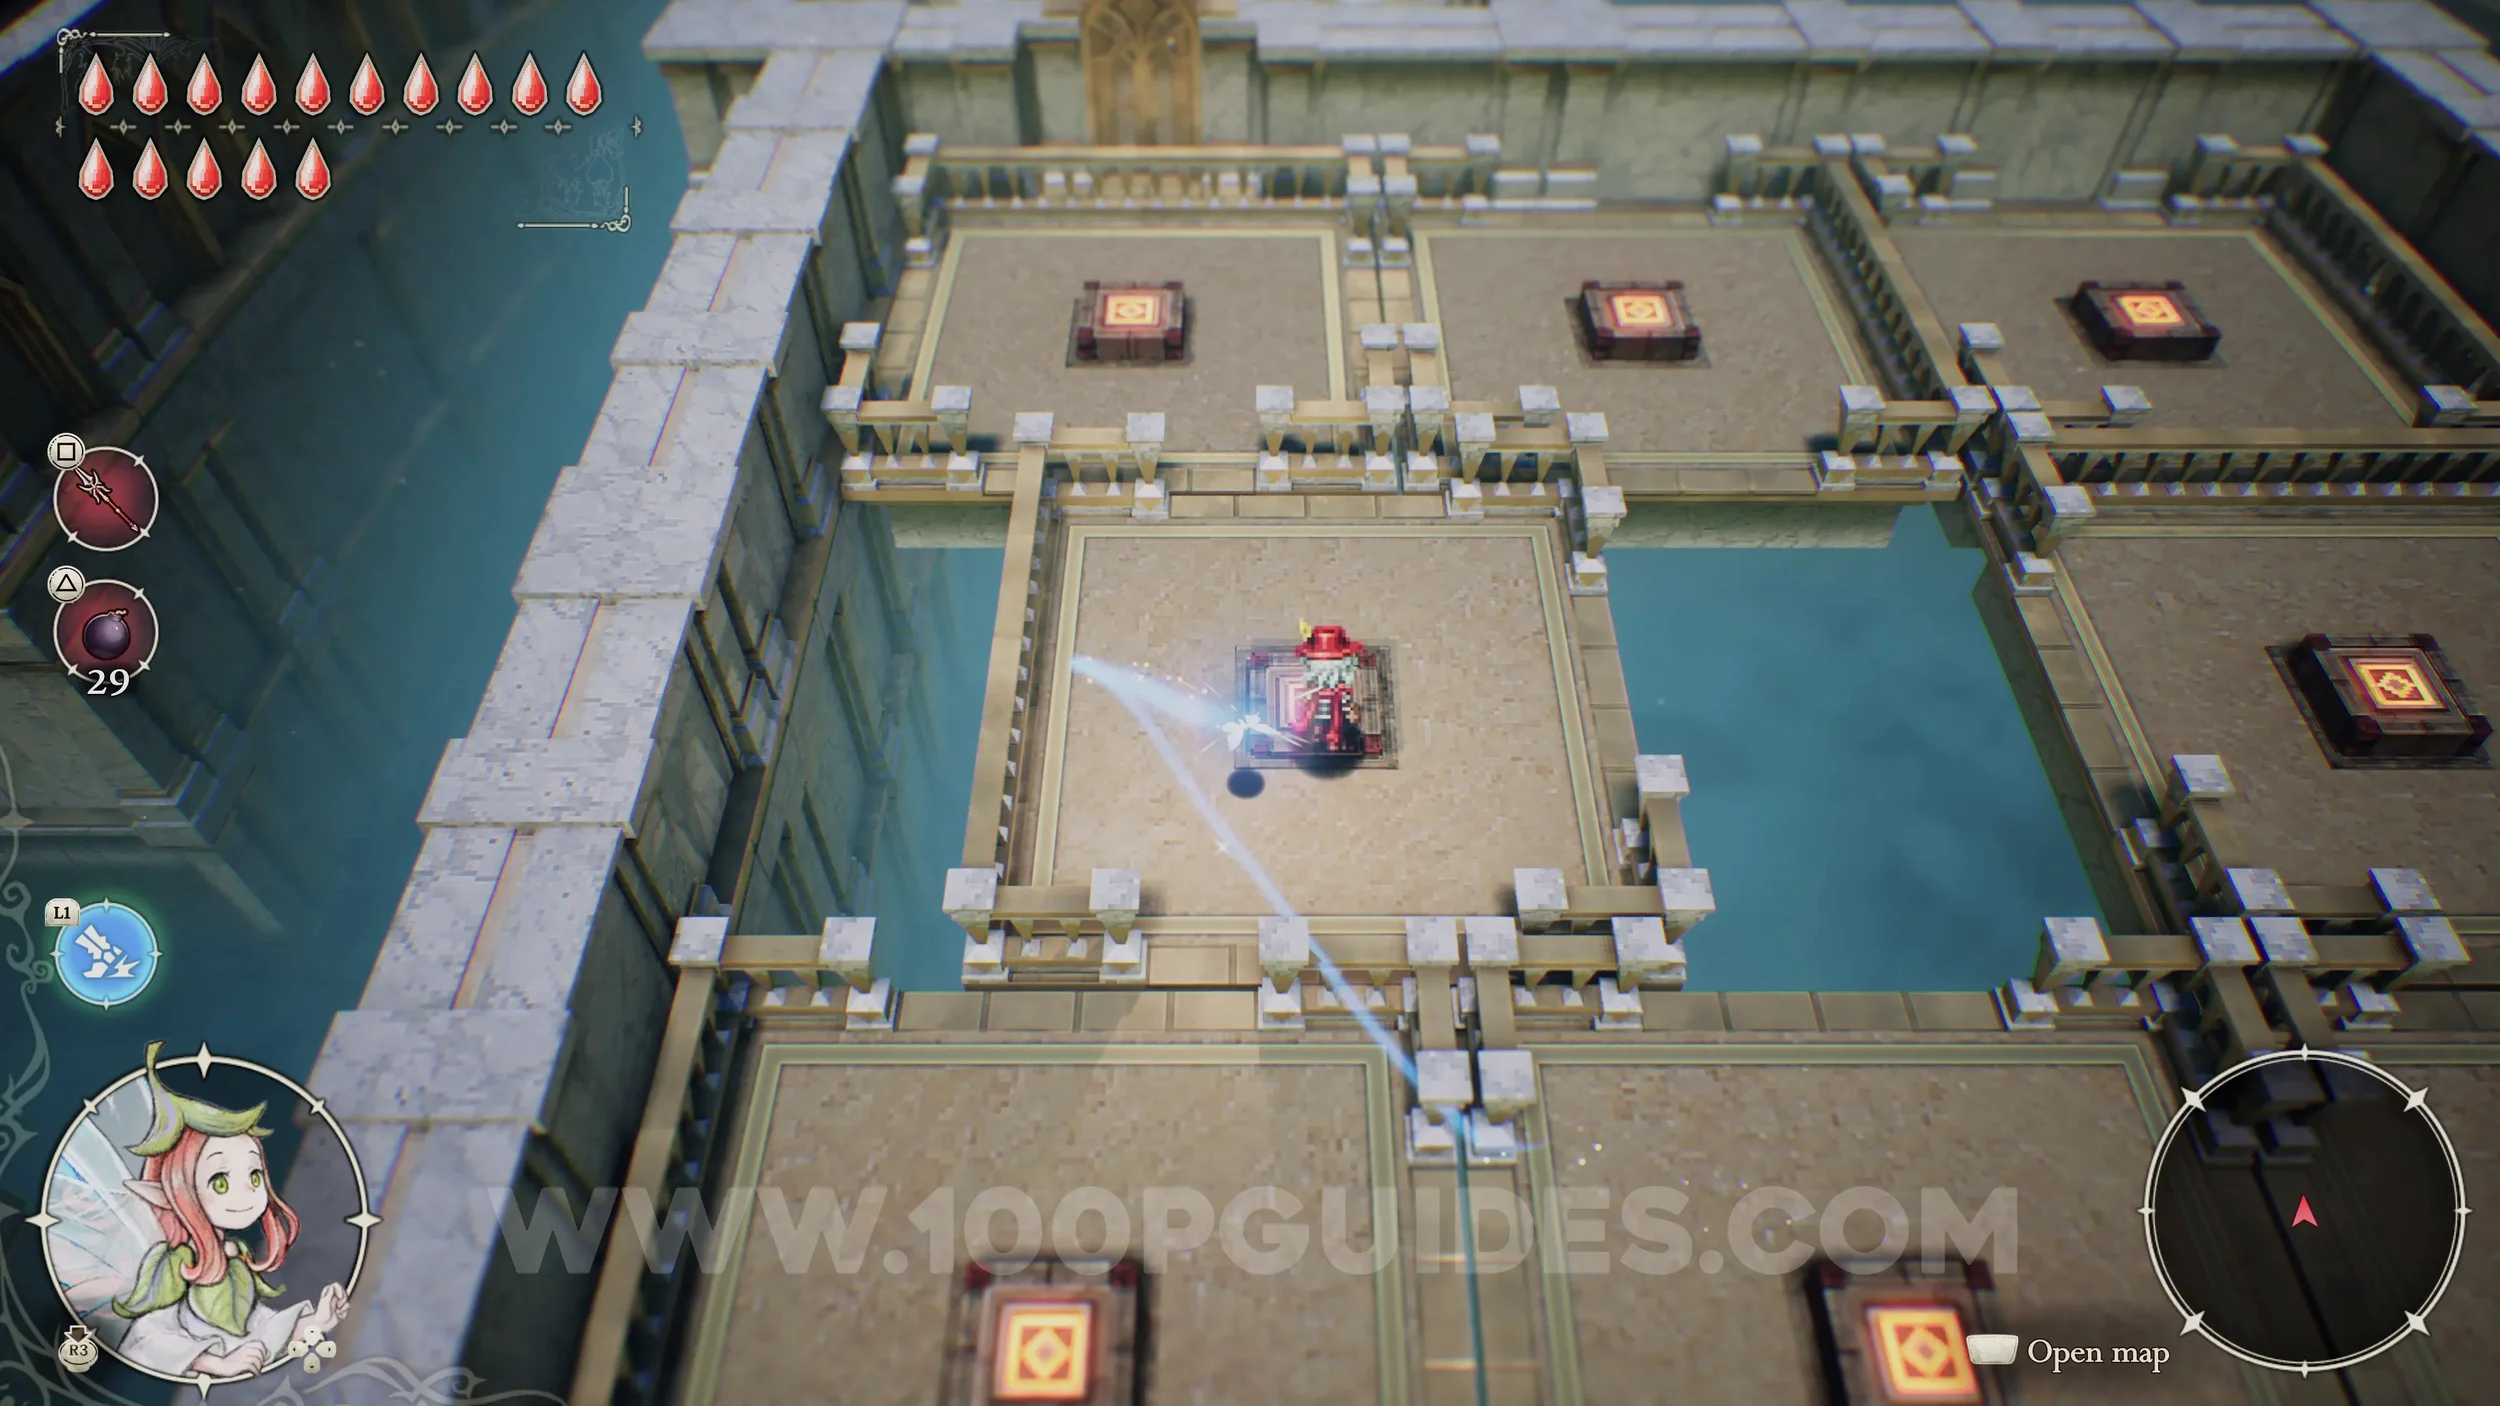
Shard of Life #50. Found in the Shrine of Life. To reach it, first drop down from the left side, climb the left ladder, then go right and climb down the right ladder. To finish the shrine, simply ride the platform and shoot every crystal.


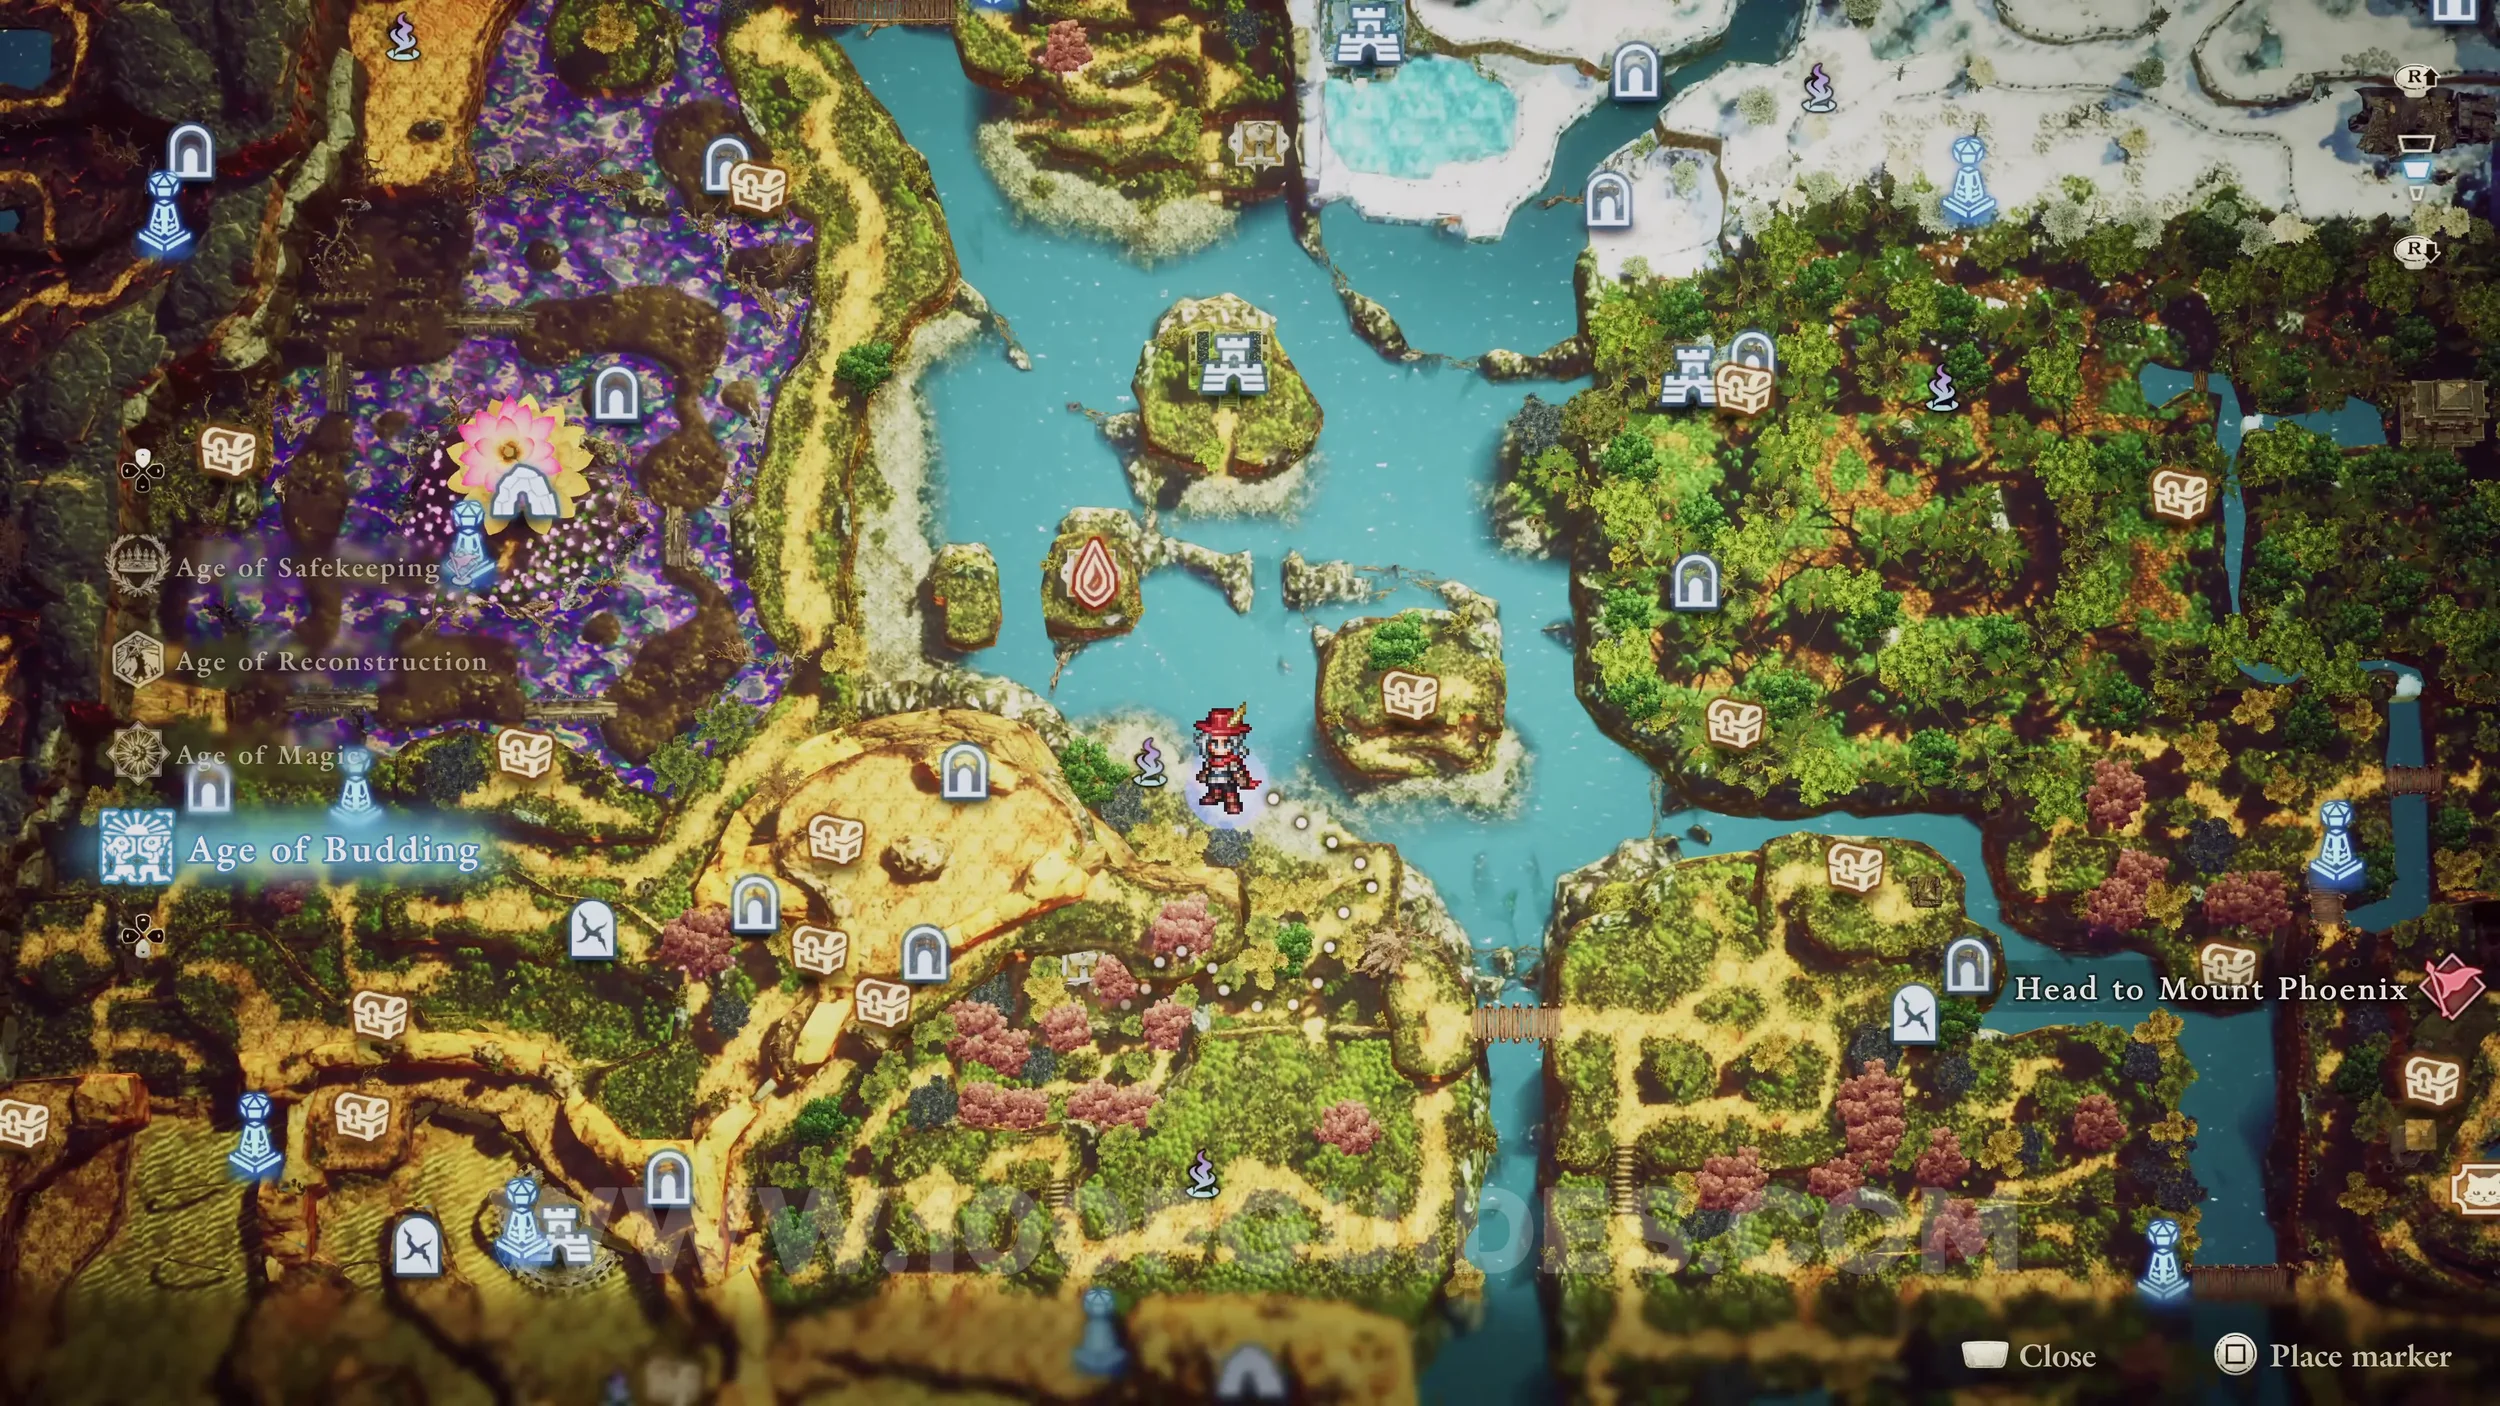
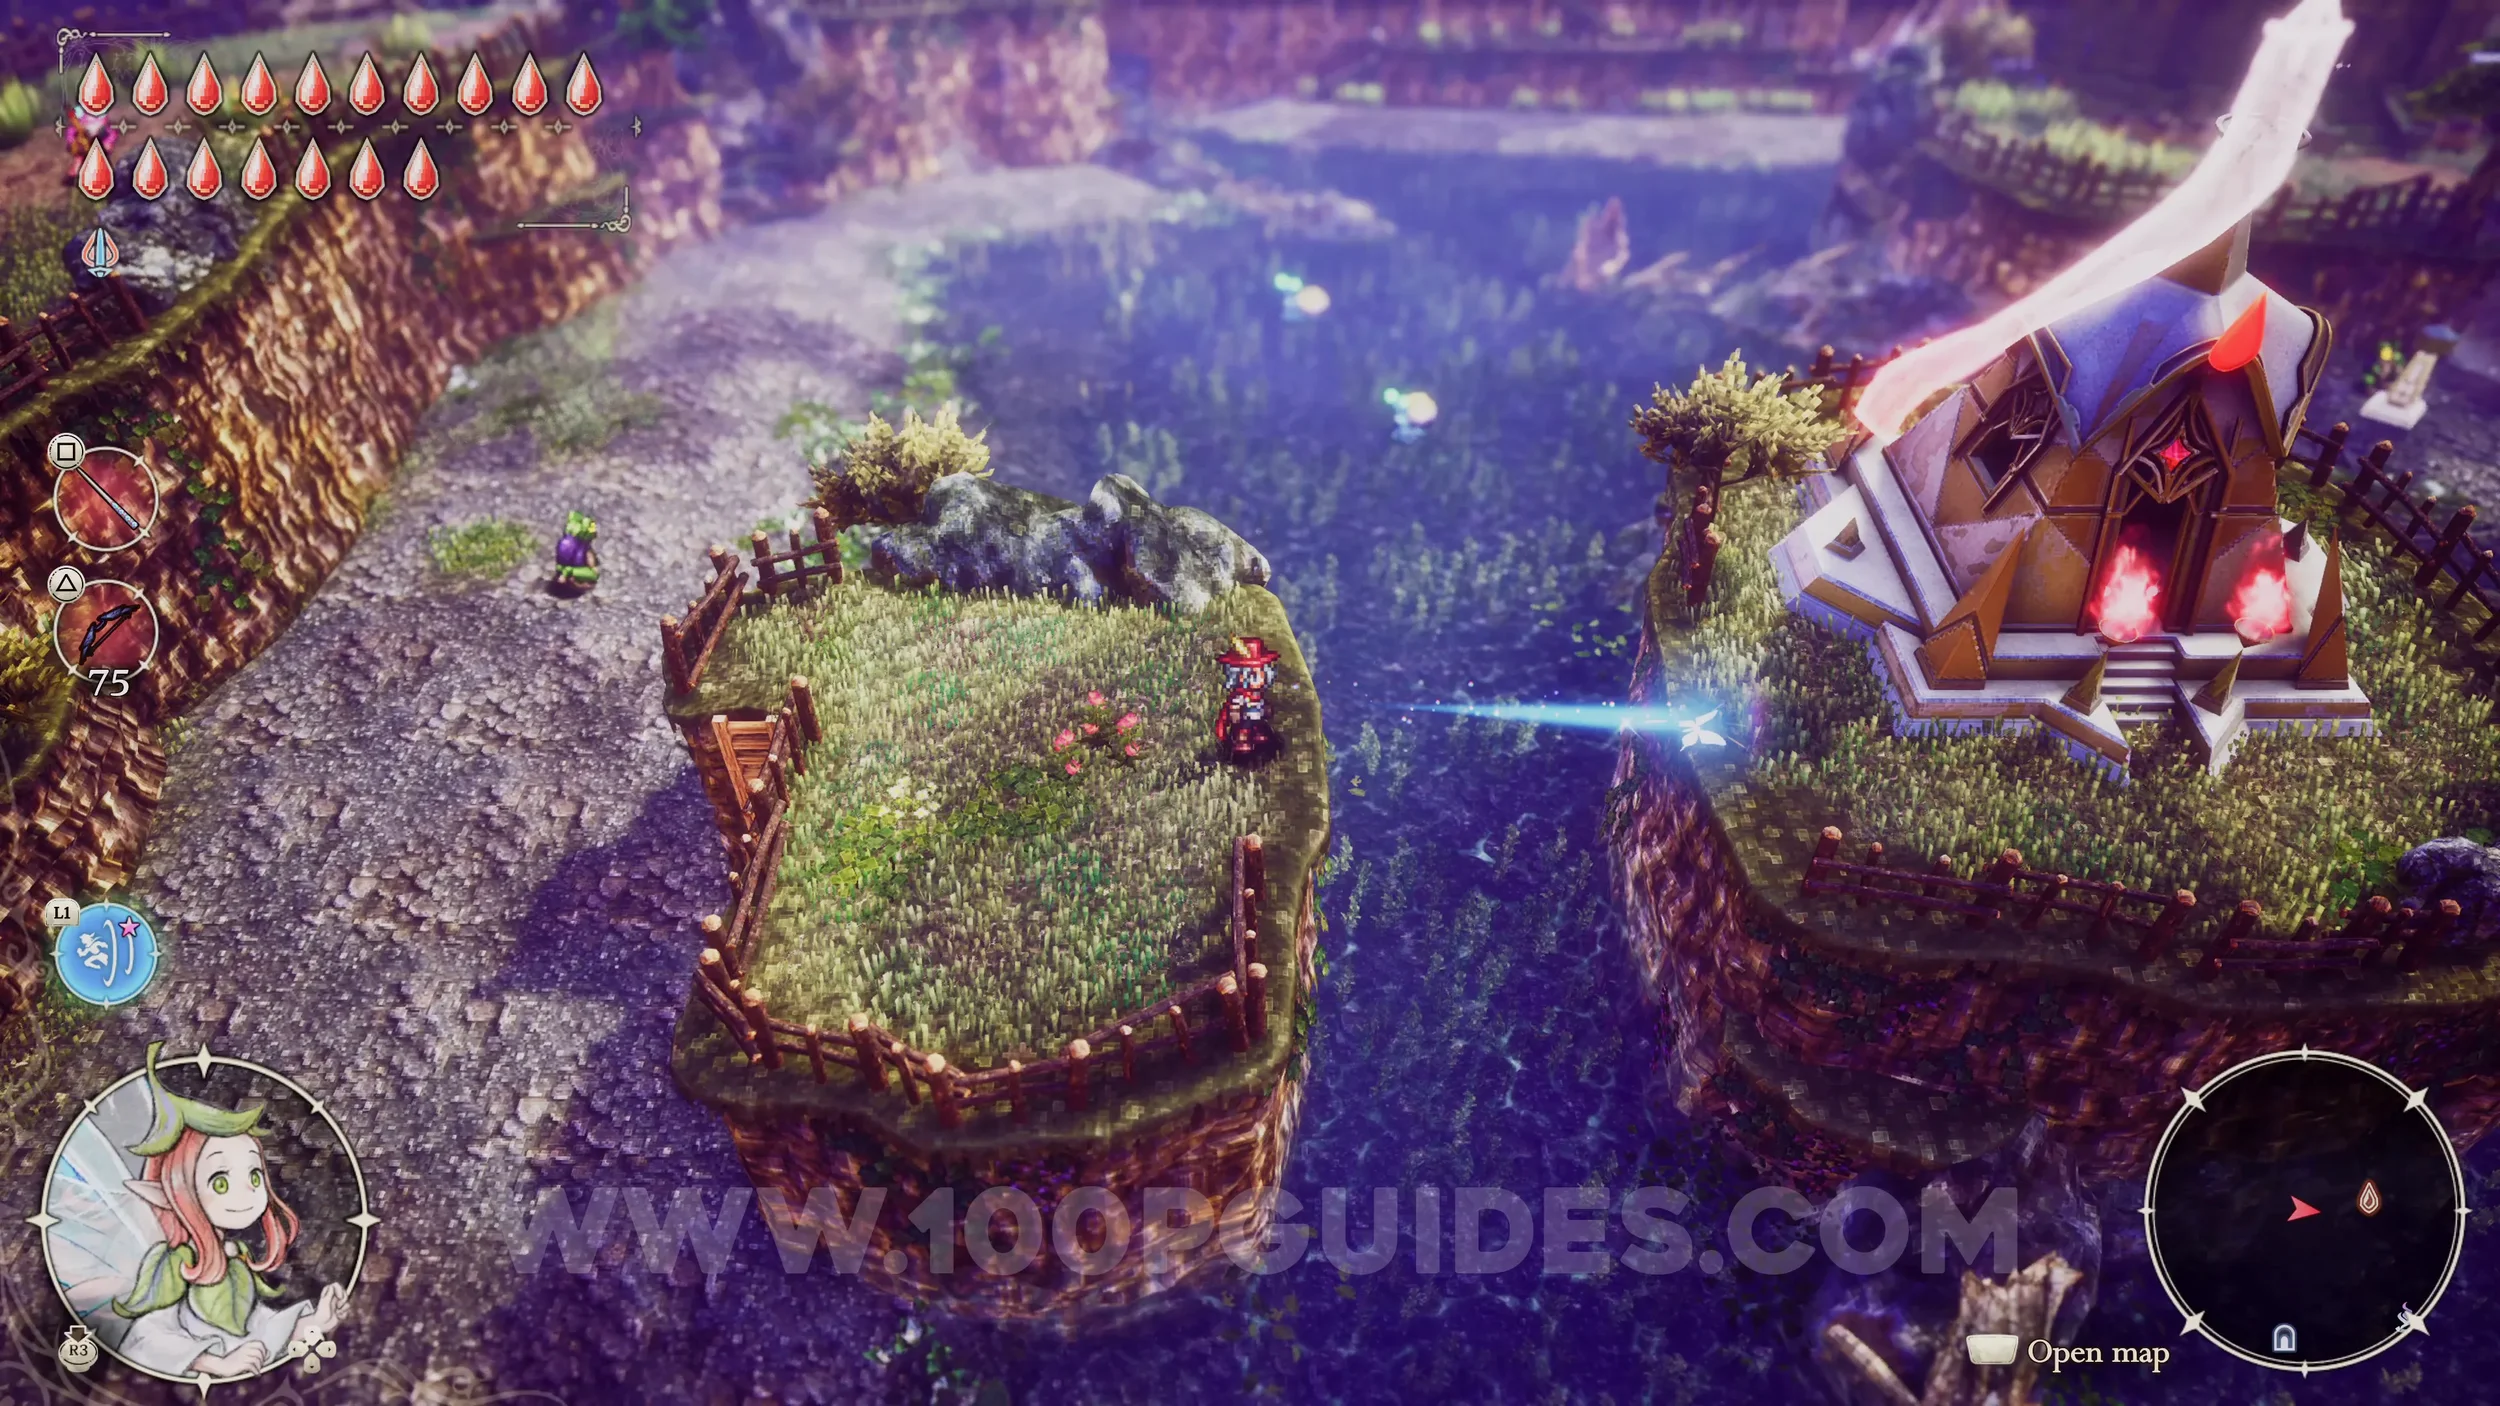
Shard of Life #51. From the middle of the map, dive under the tree to the left, then climb the ladder and use the Warp Fairy Power to reach the Shrine of Life. Inside, defeat all the enemies.

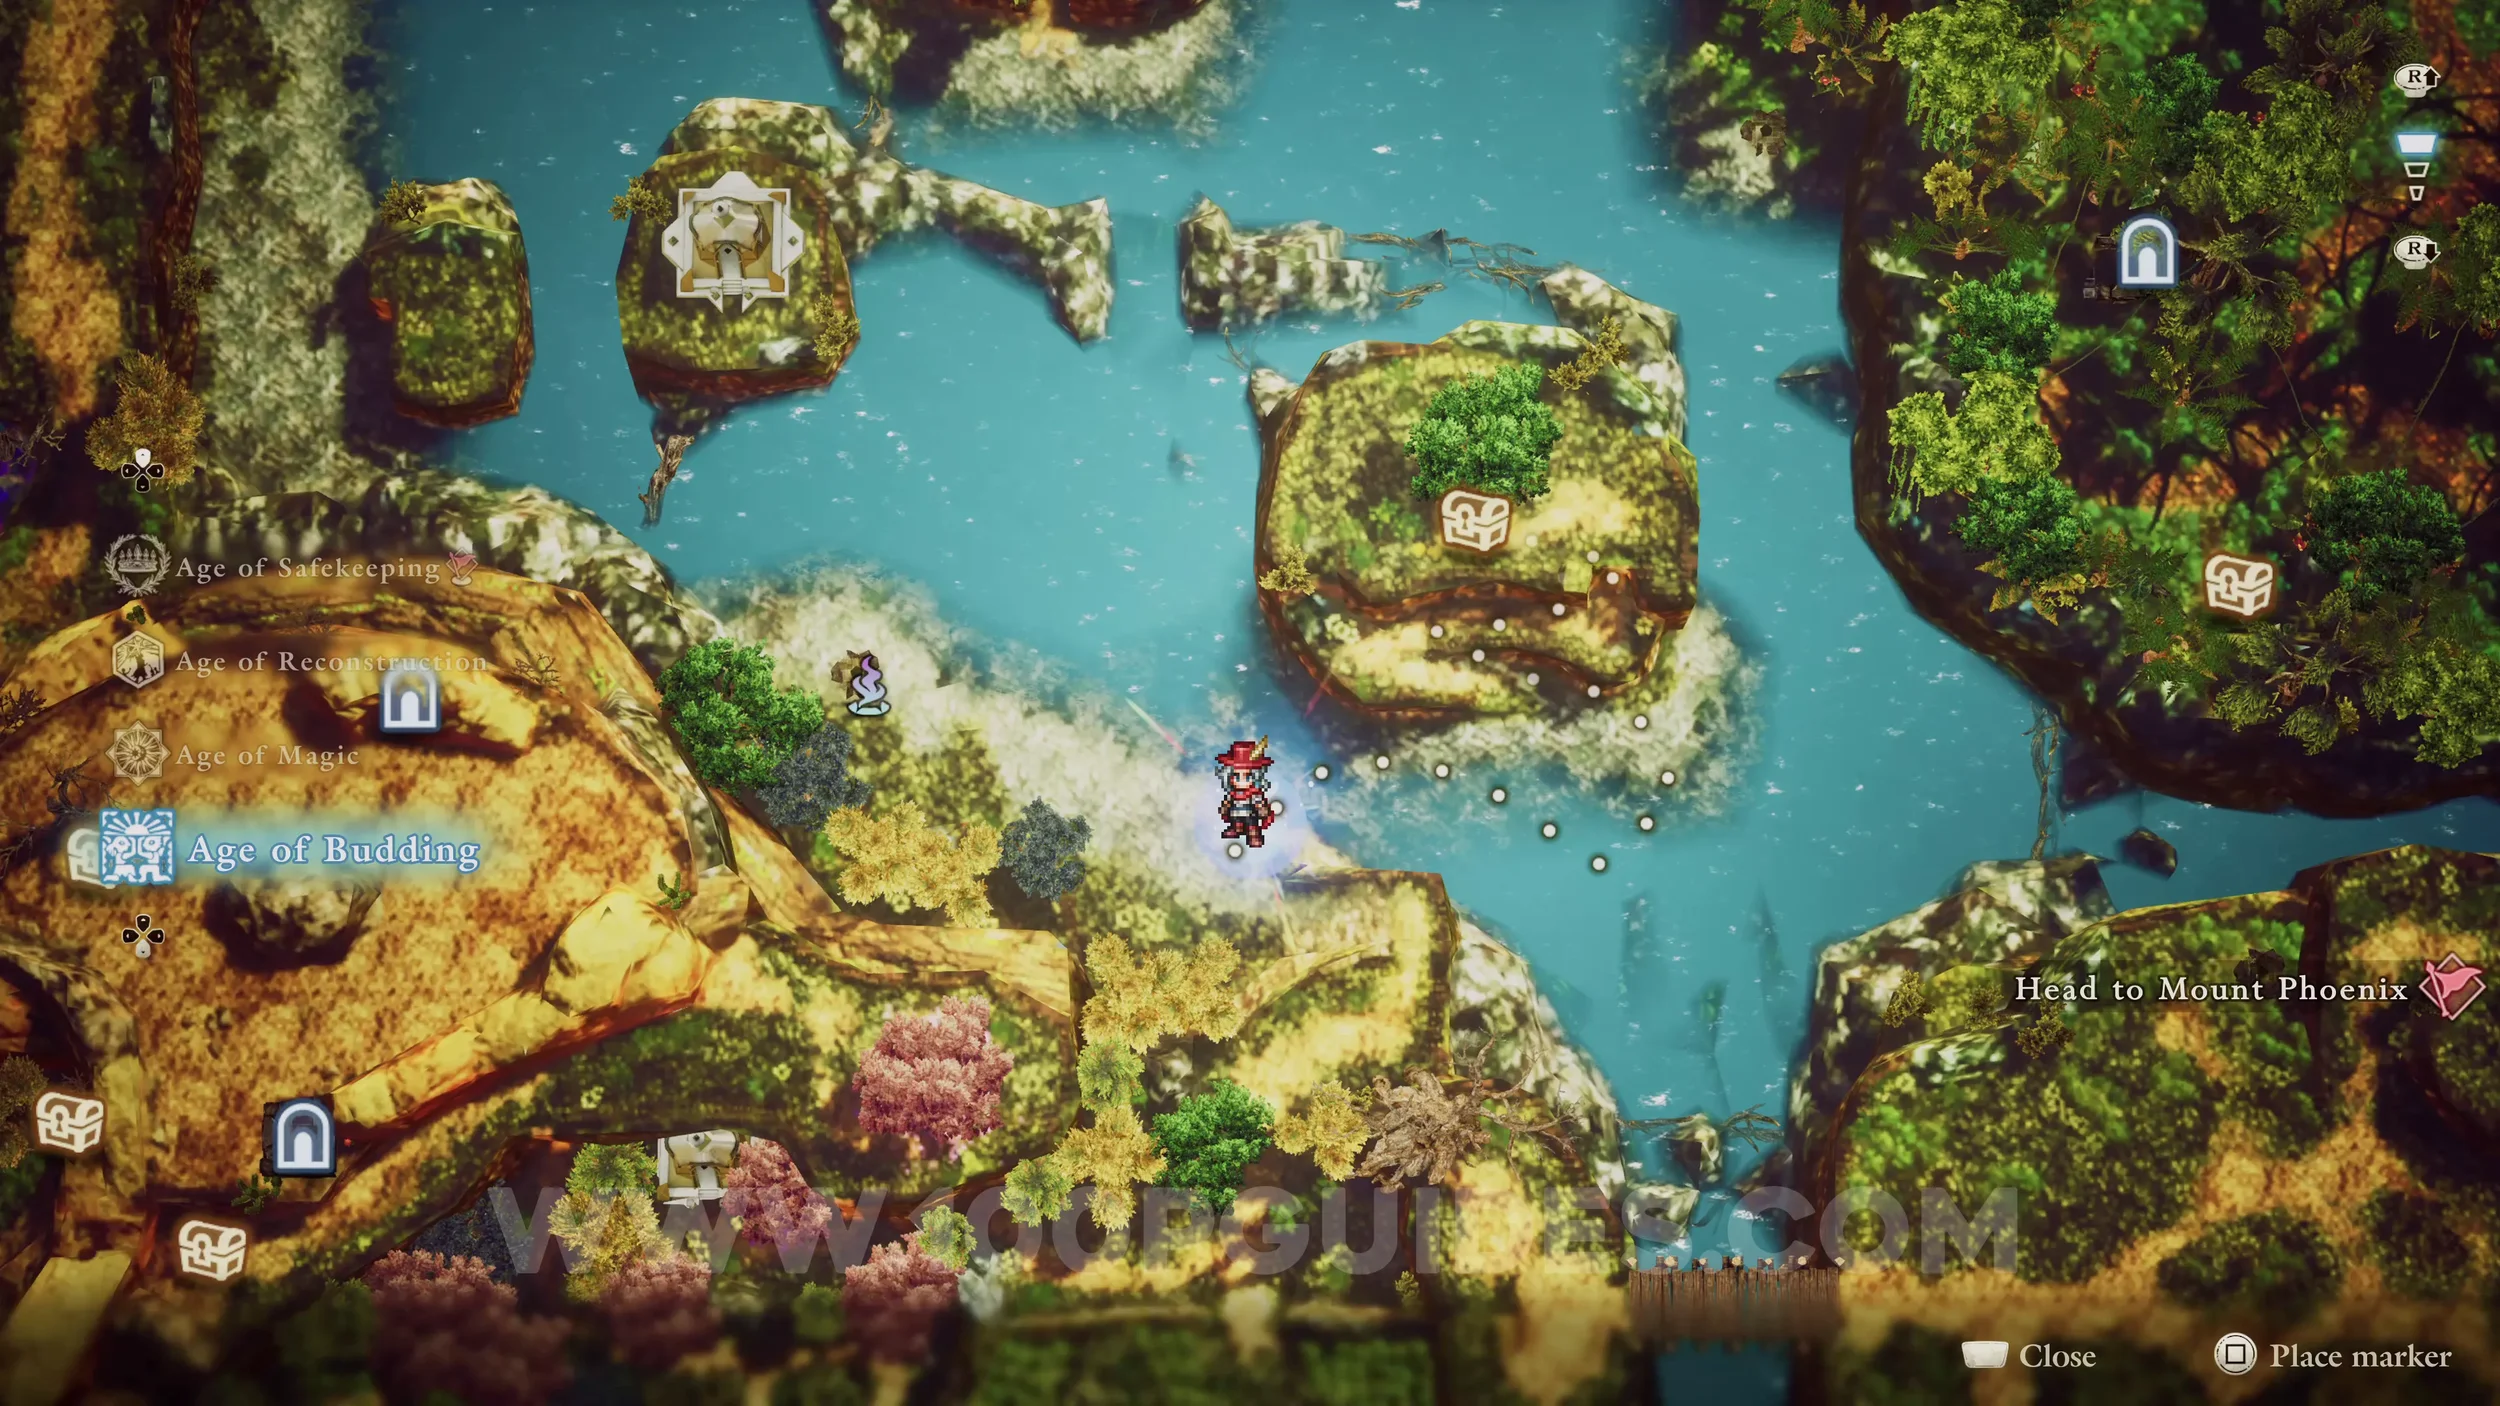
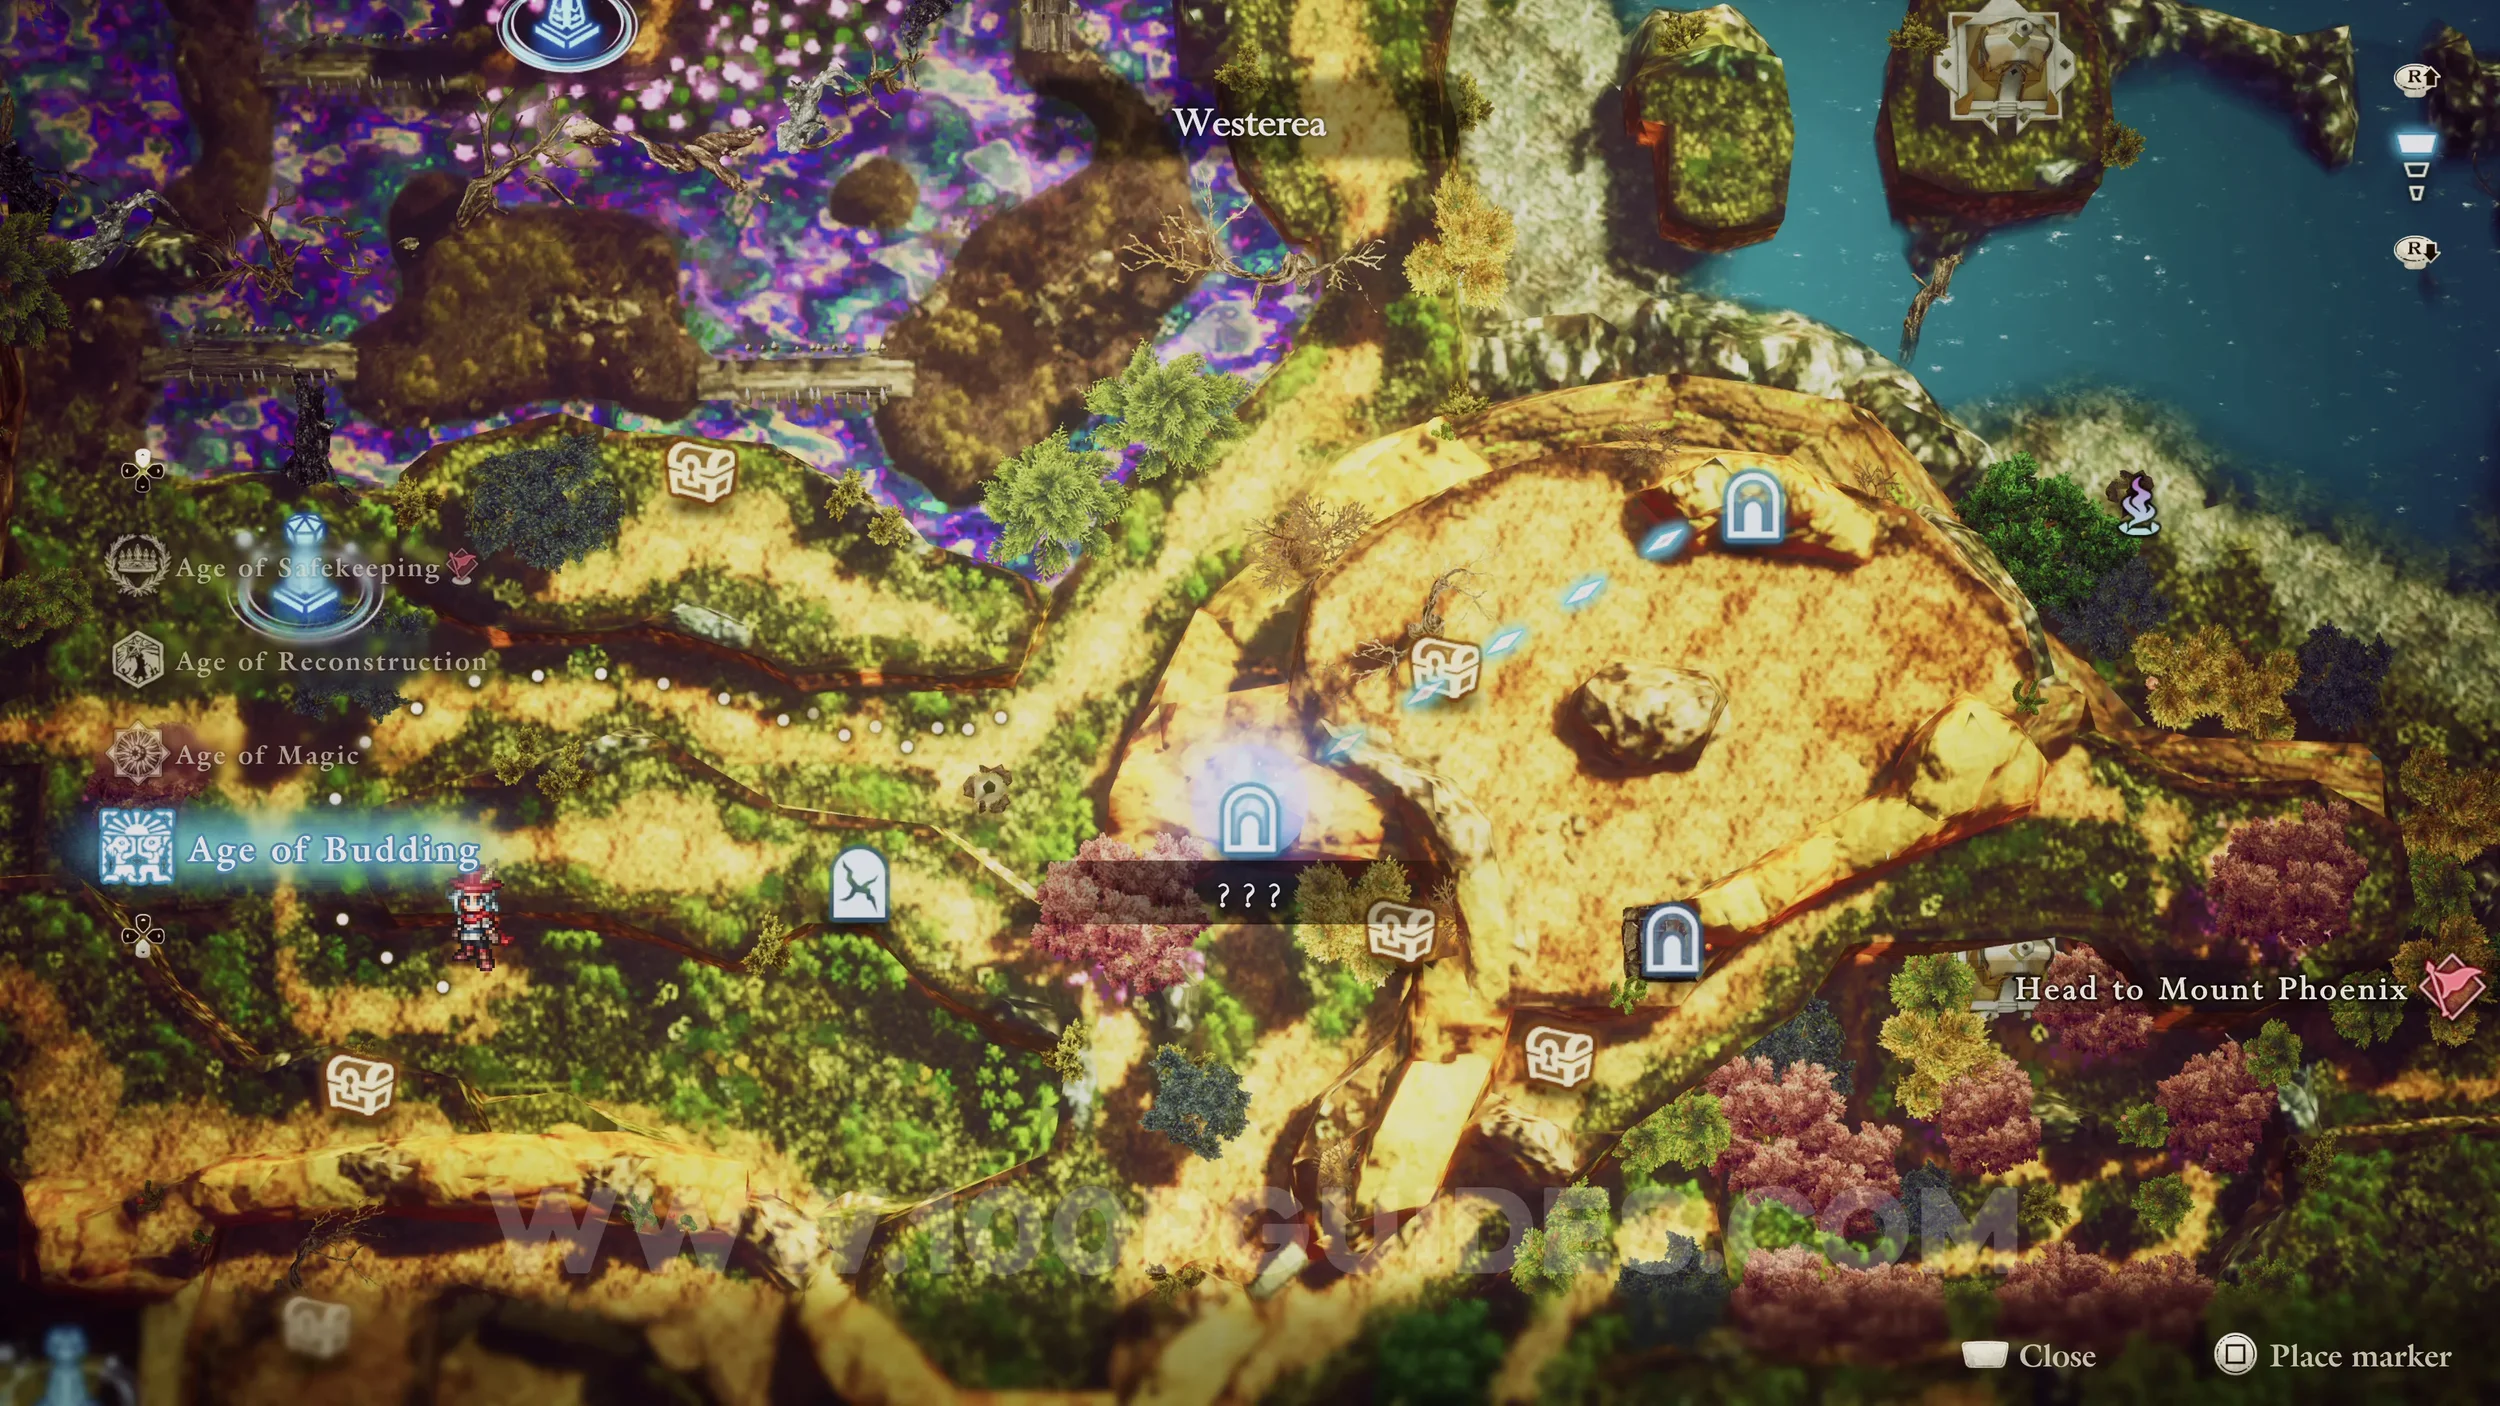
Shard of Life #52. Found at the top of the hill in the middle of the map.


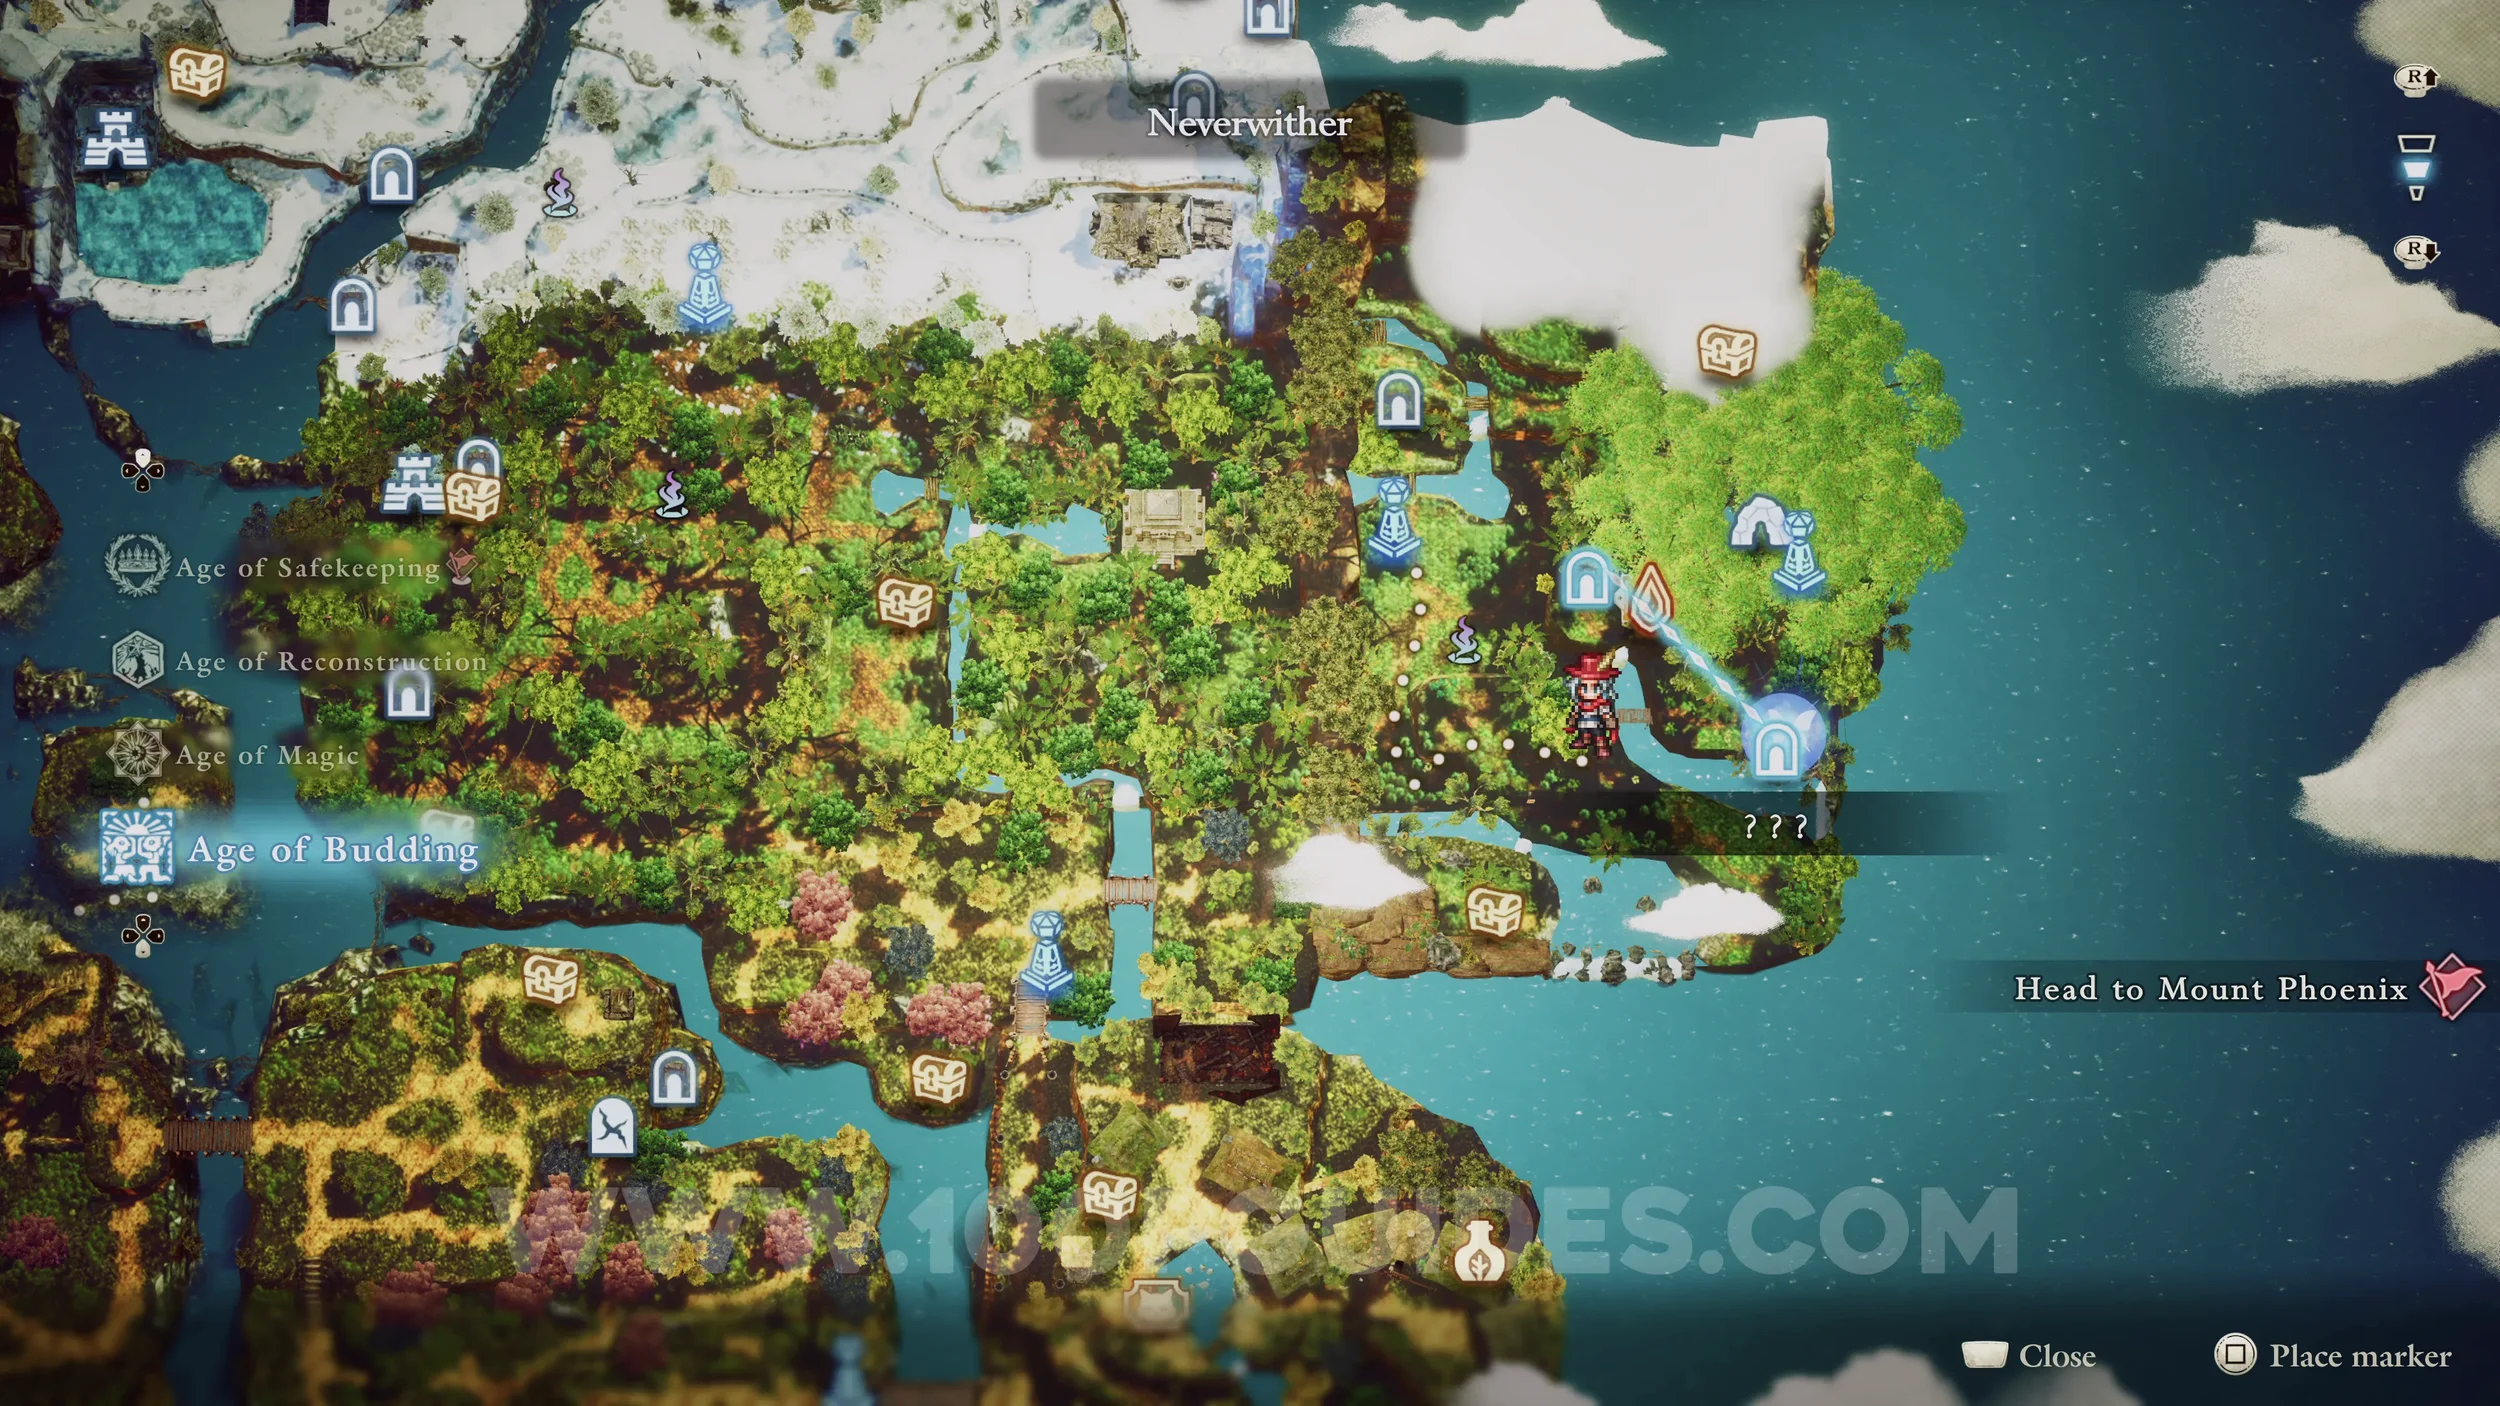
Shard of Life #53. Jump into the water from the wooden bridge in the southeast of Neverwither and swim to the cave on the right. Once you come out the other side, enter the Shrine of Life and bounce the light around the room with the mirrors to hit the activators.


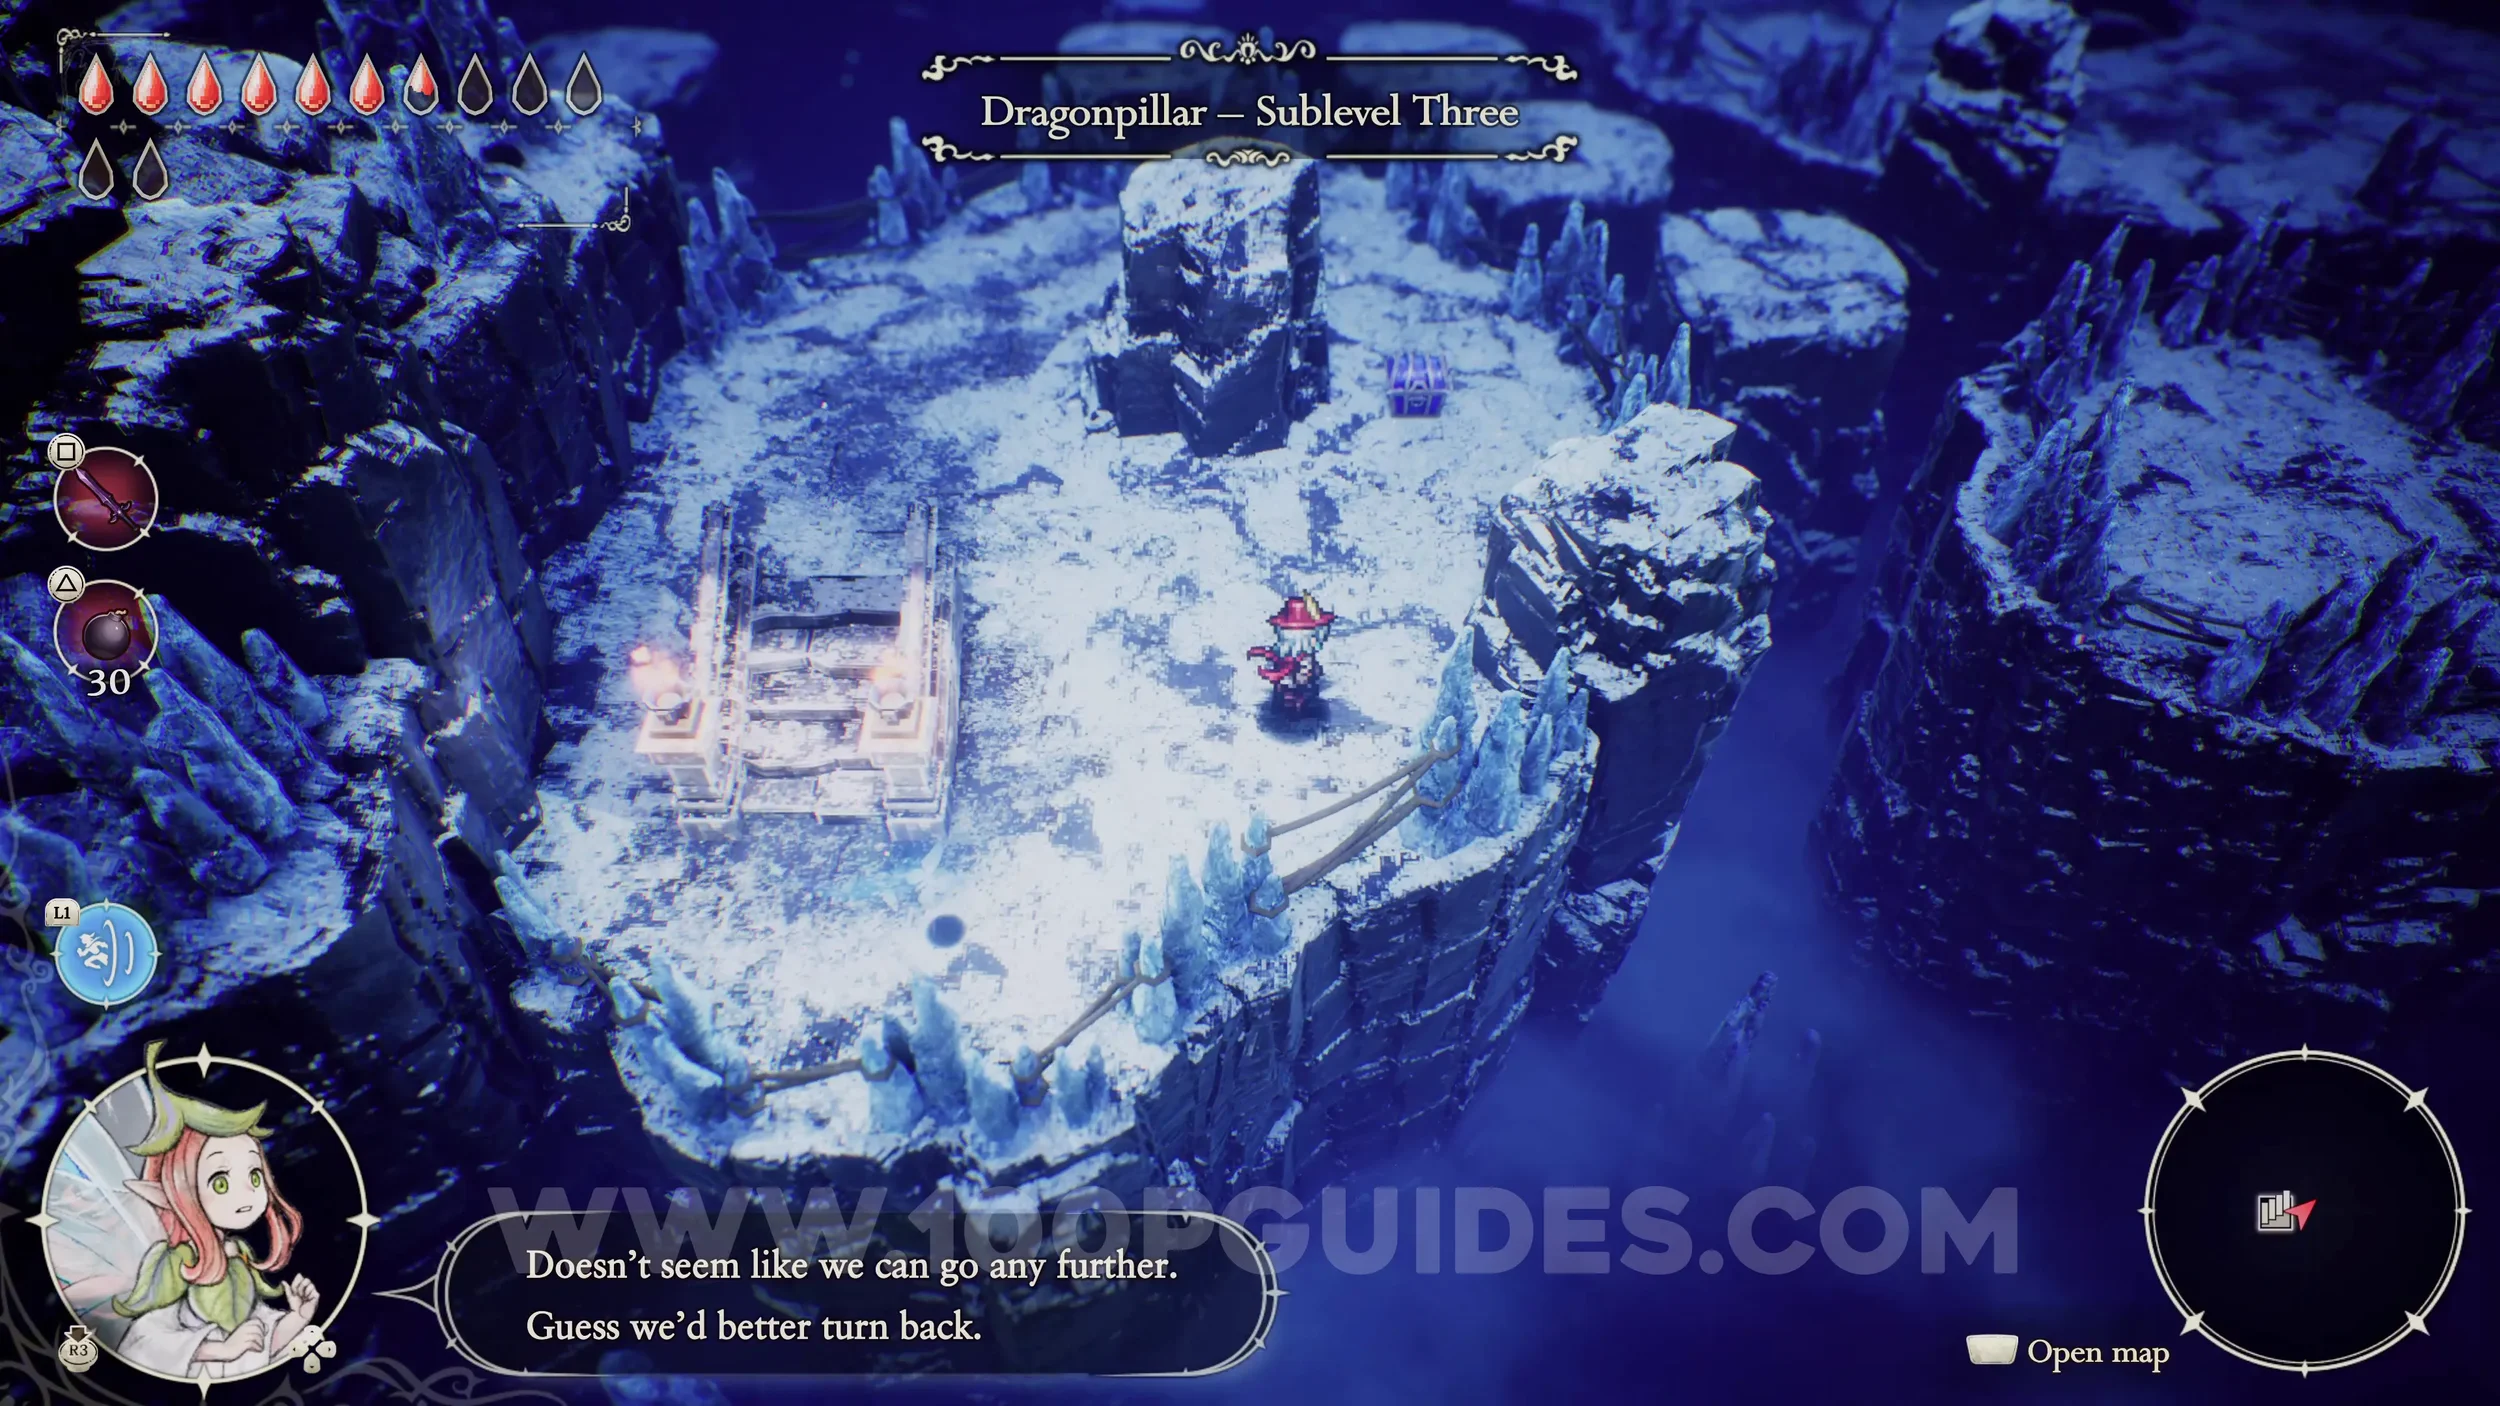
Shard of Life #54. Found in Dragonpillar on Sublevel Three.

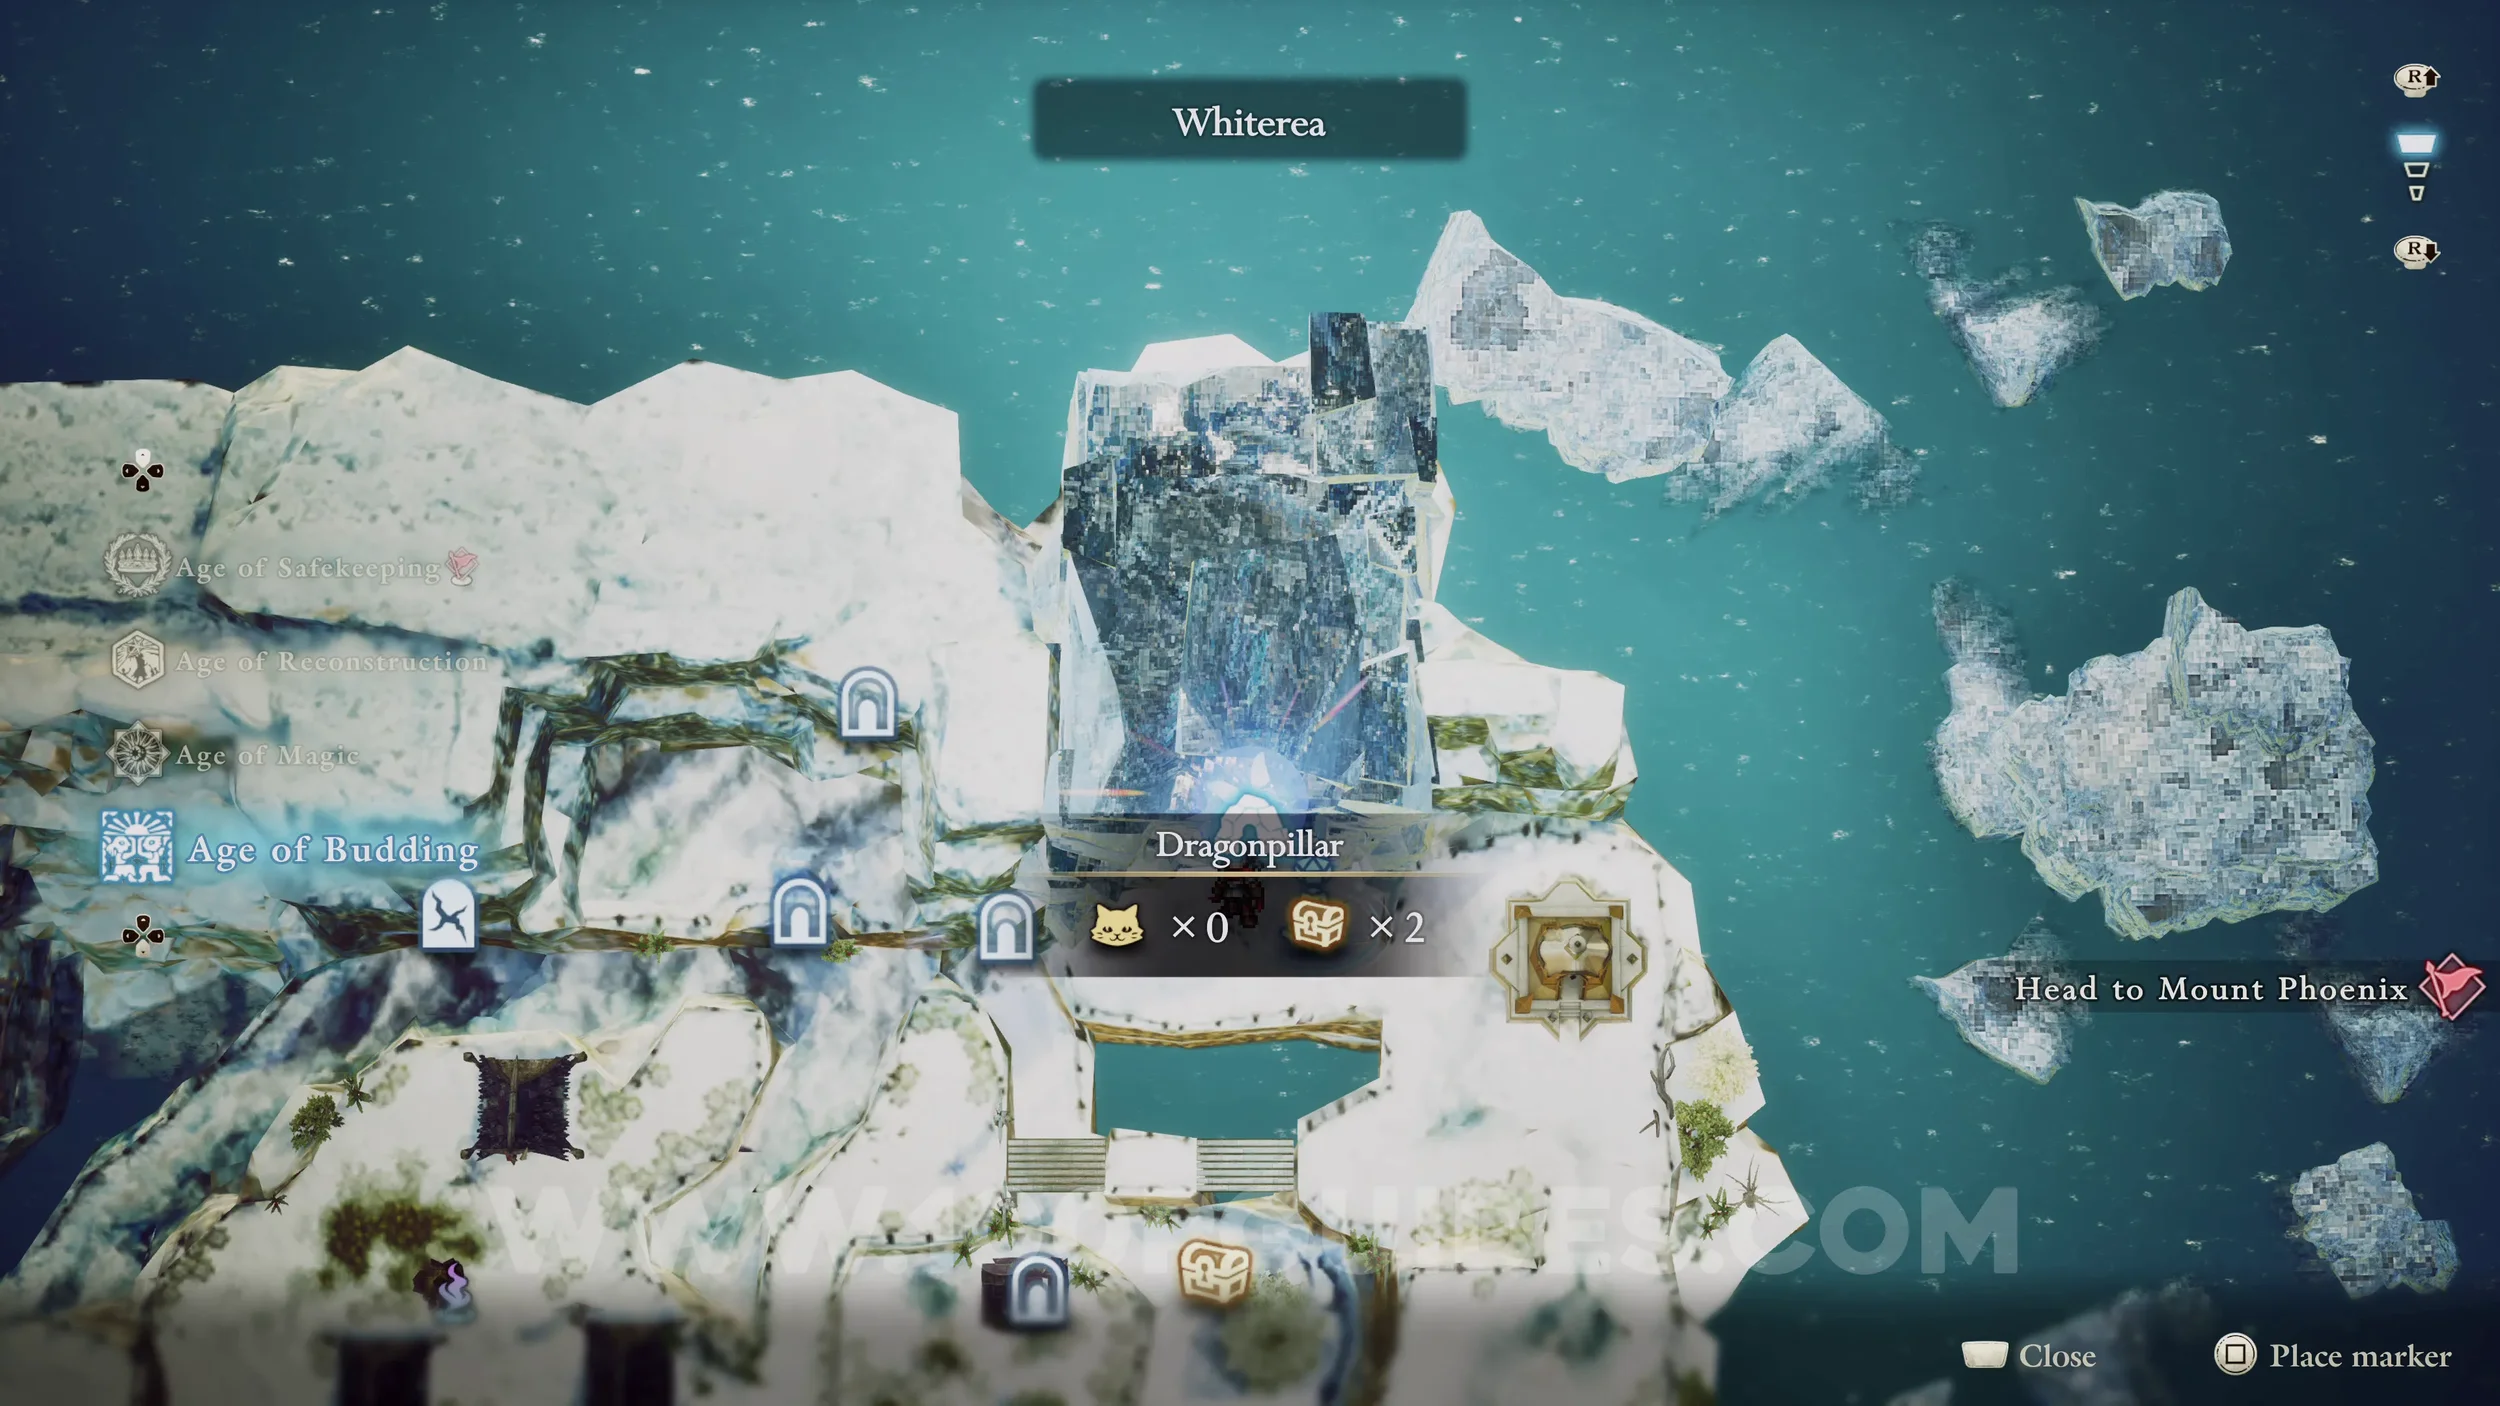
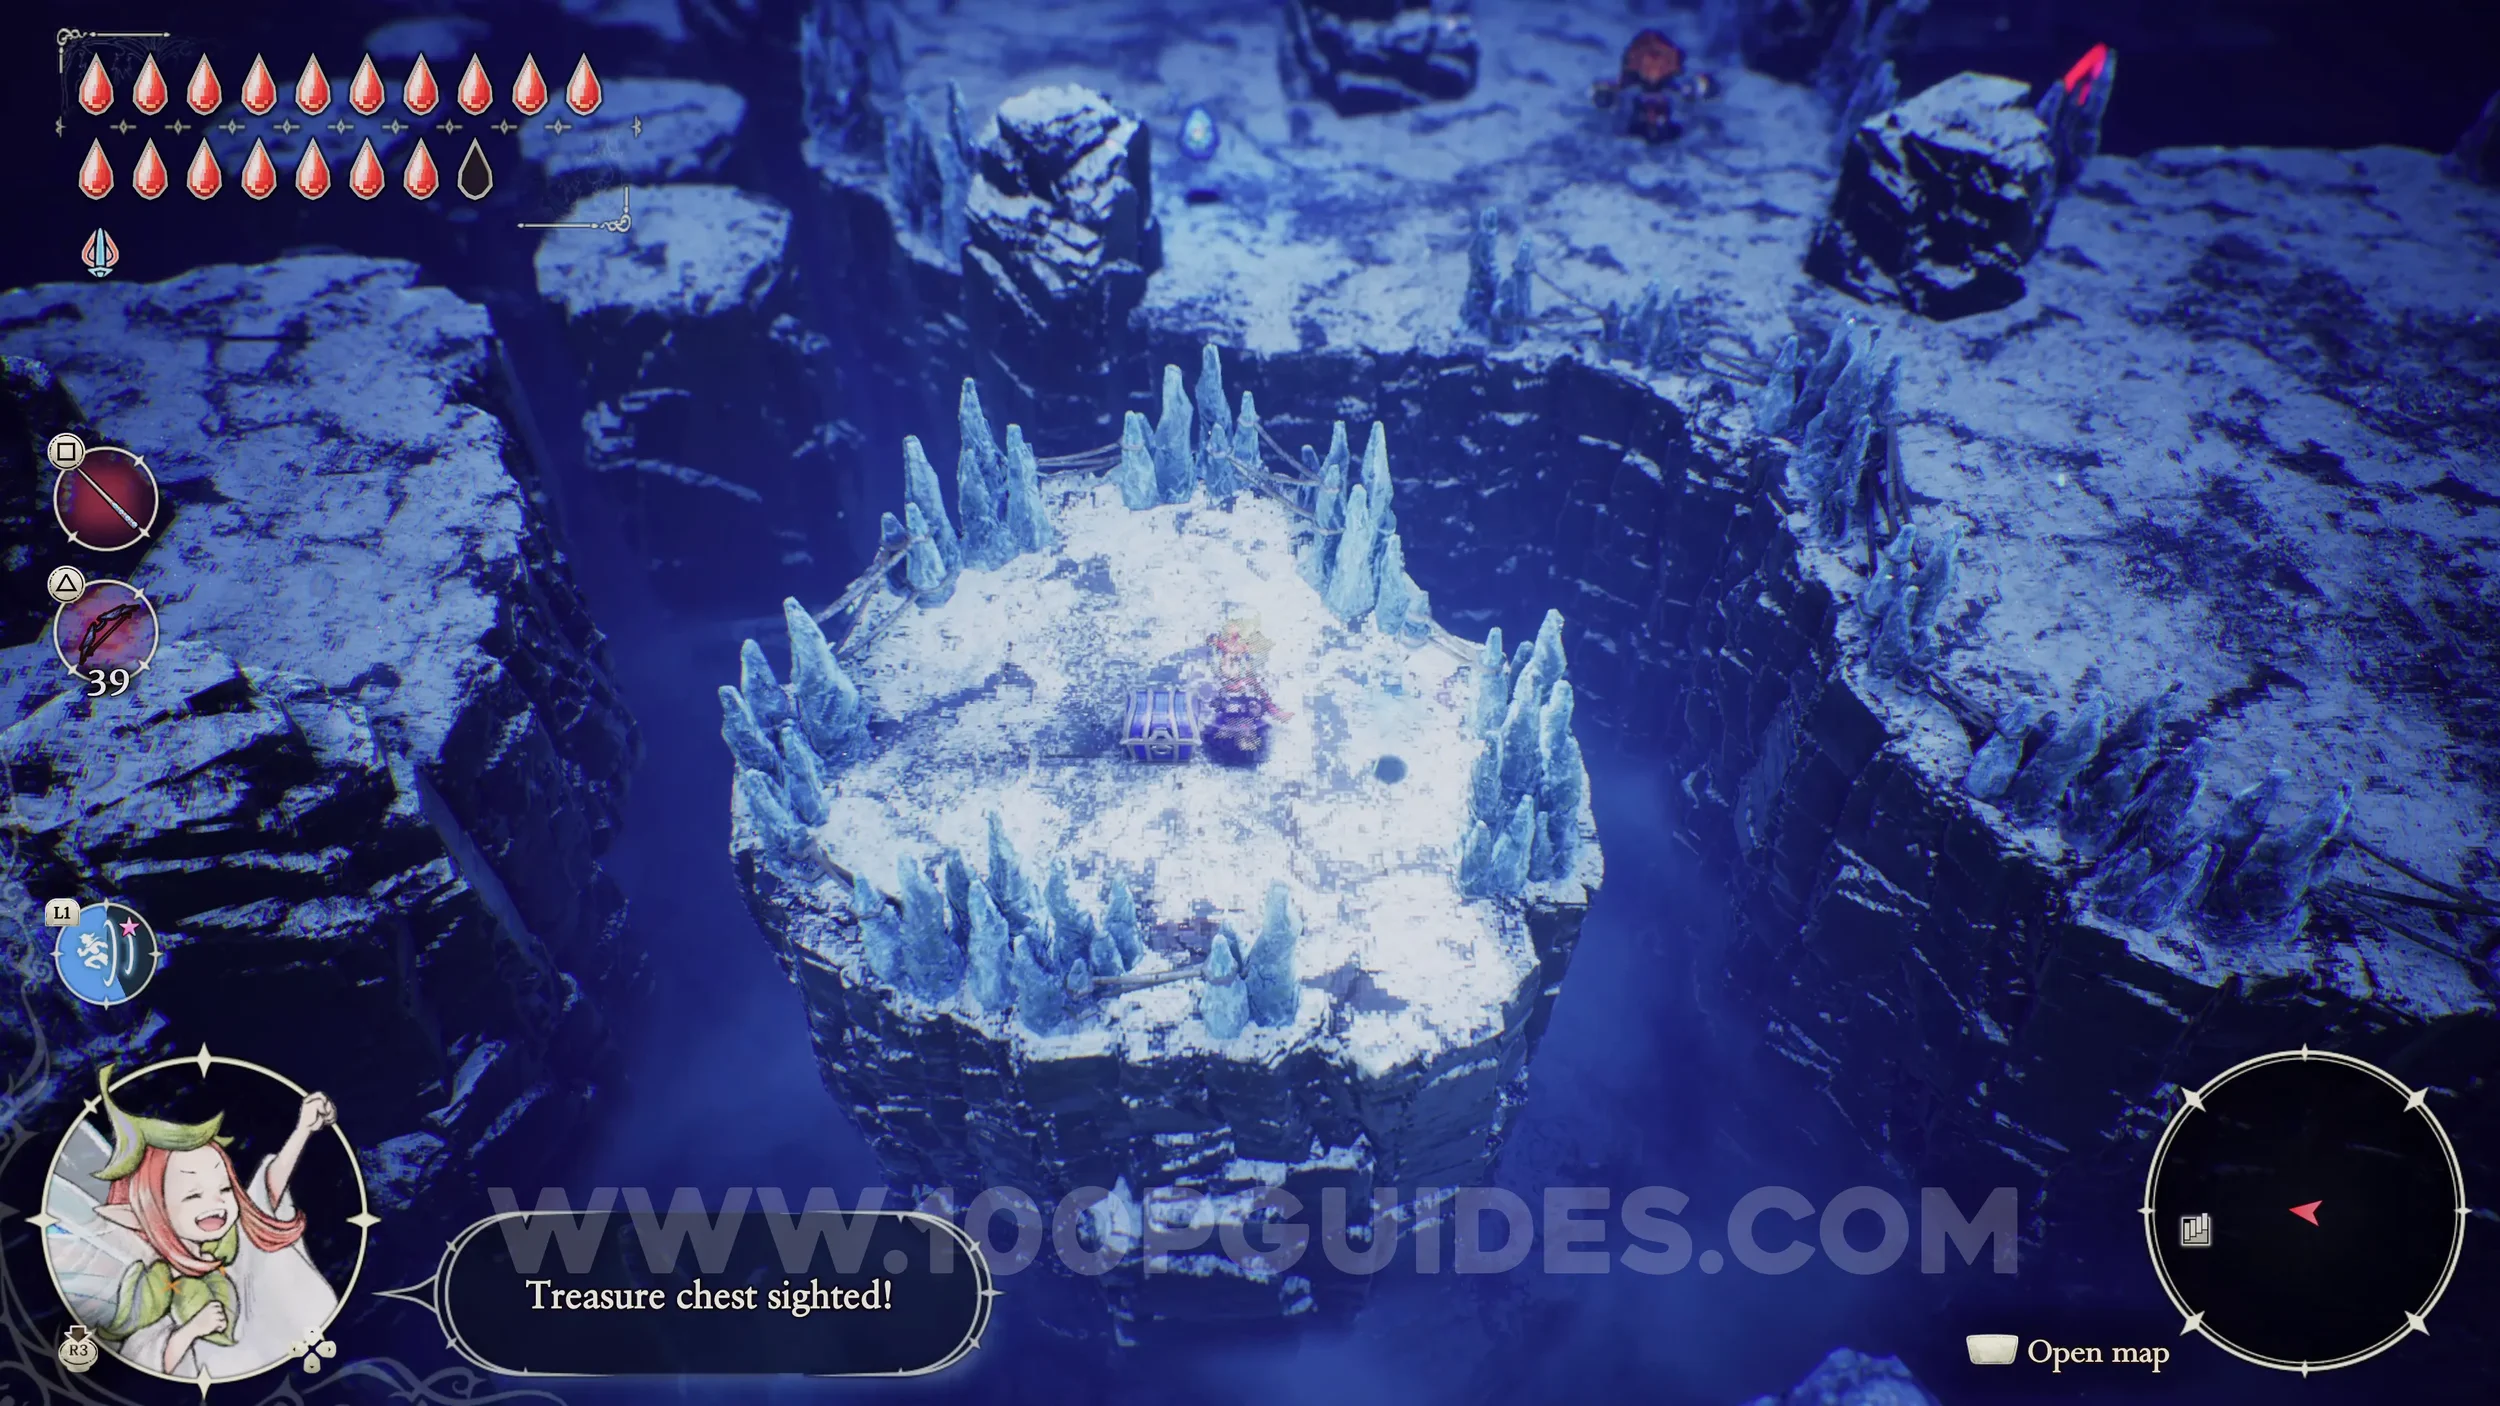
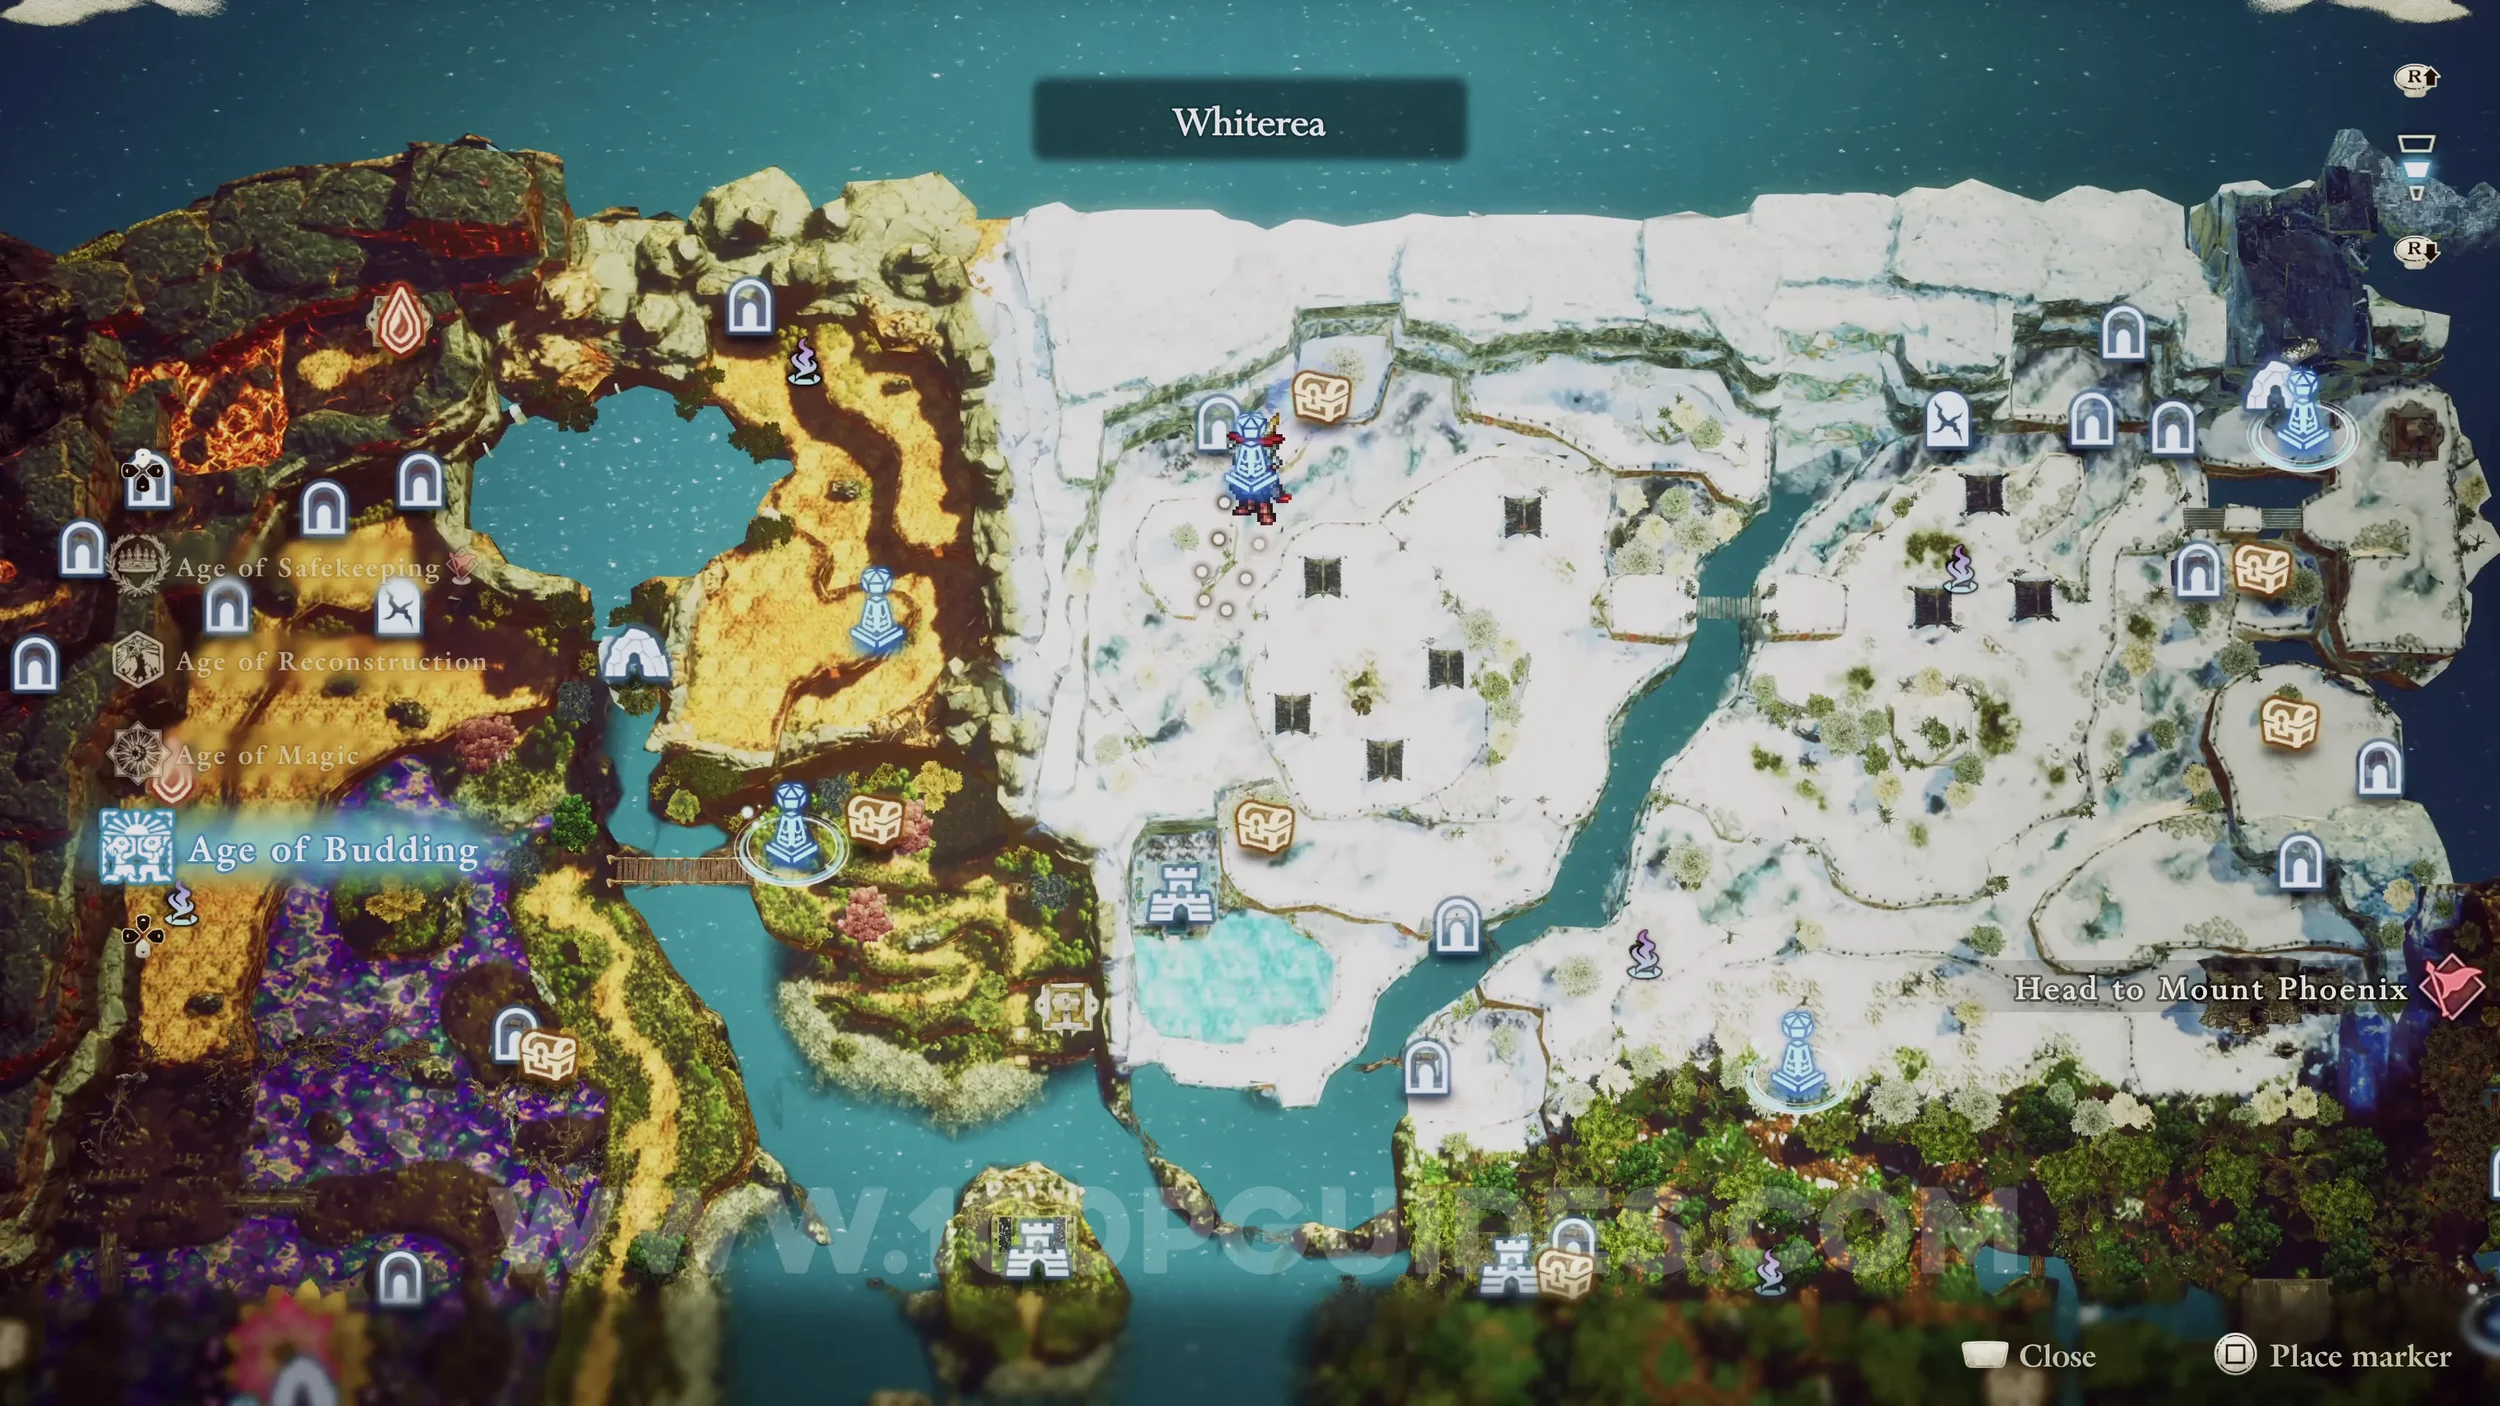
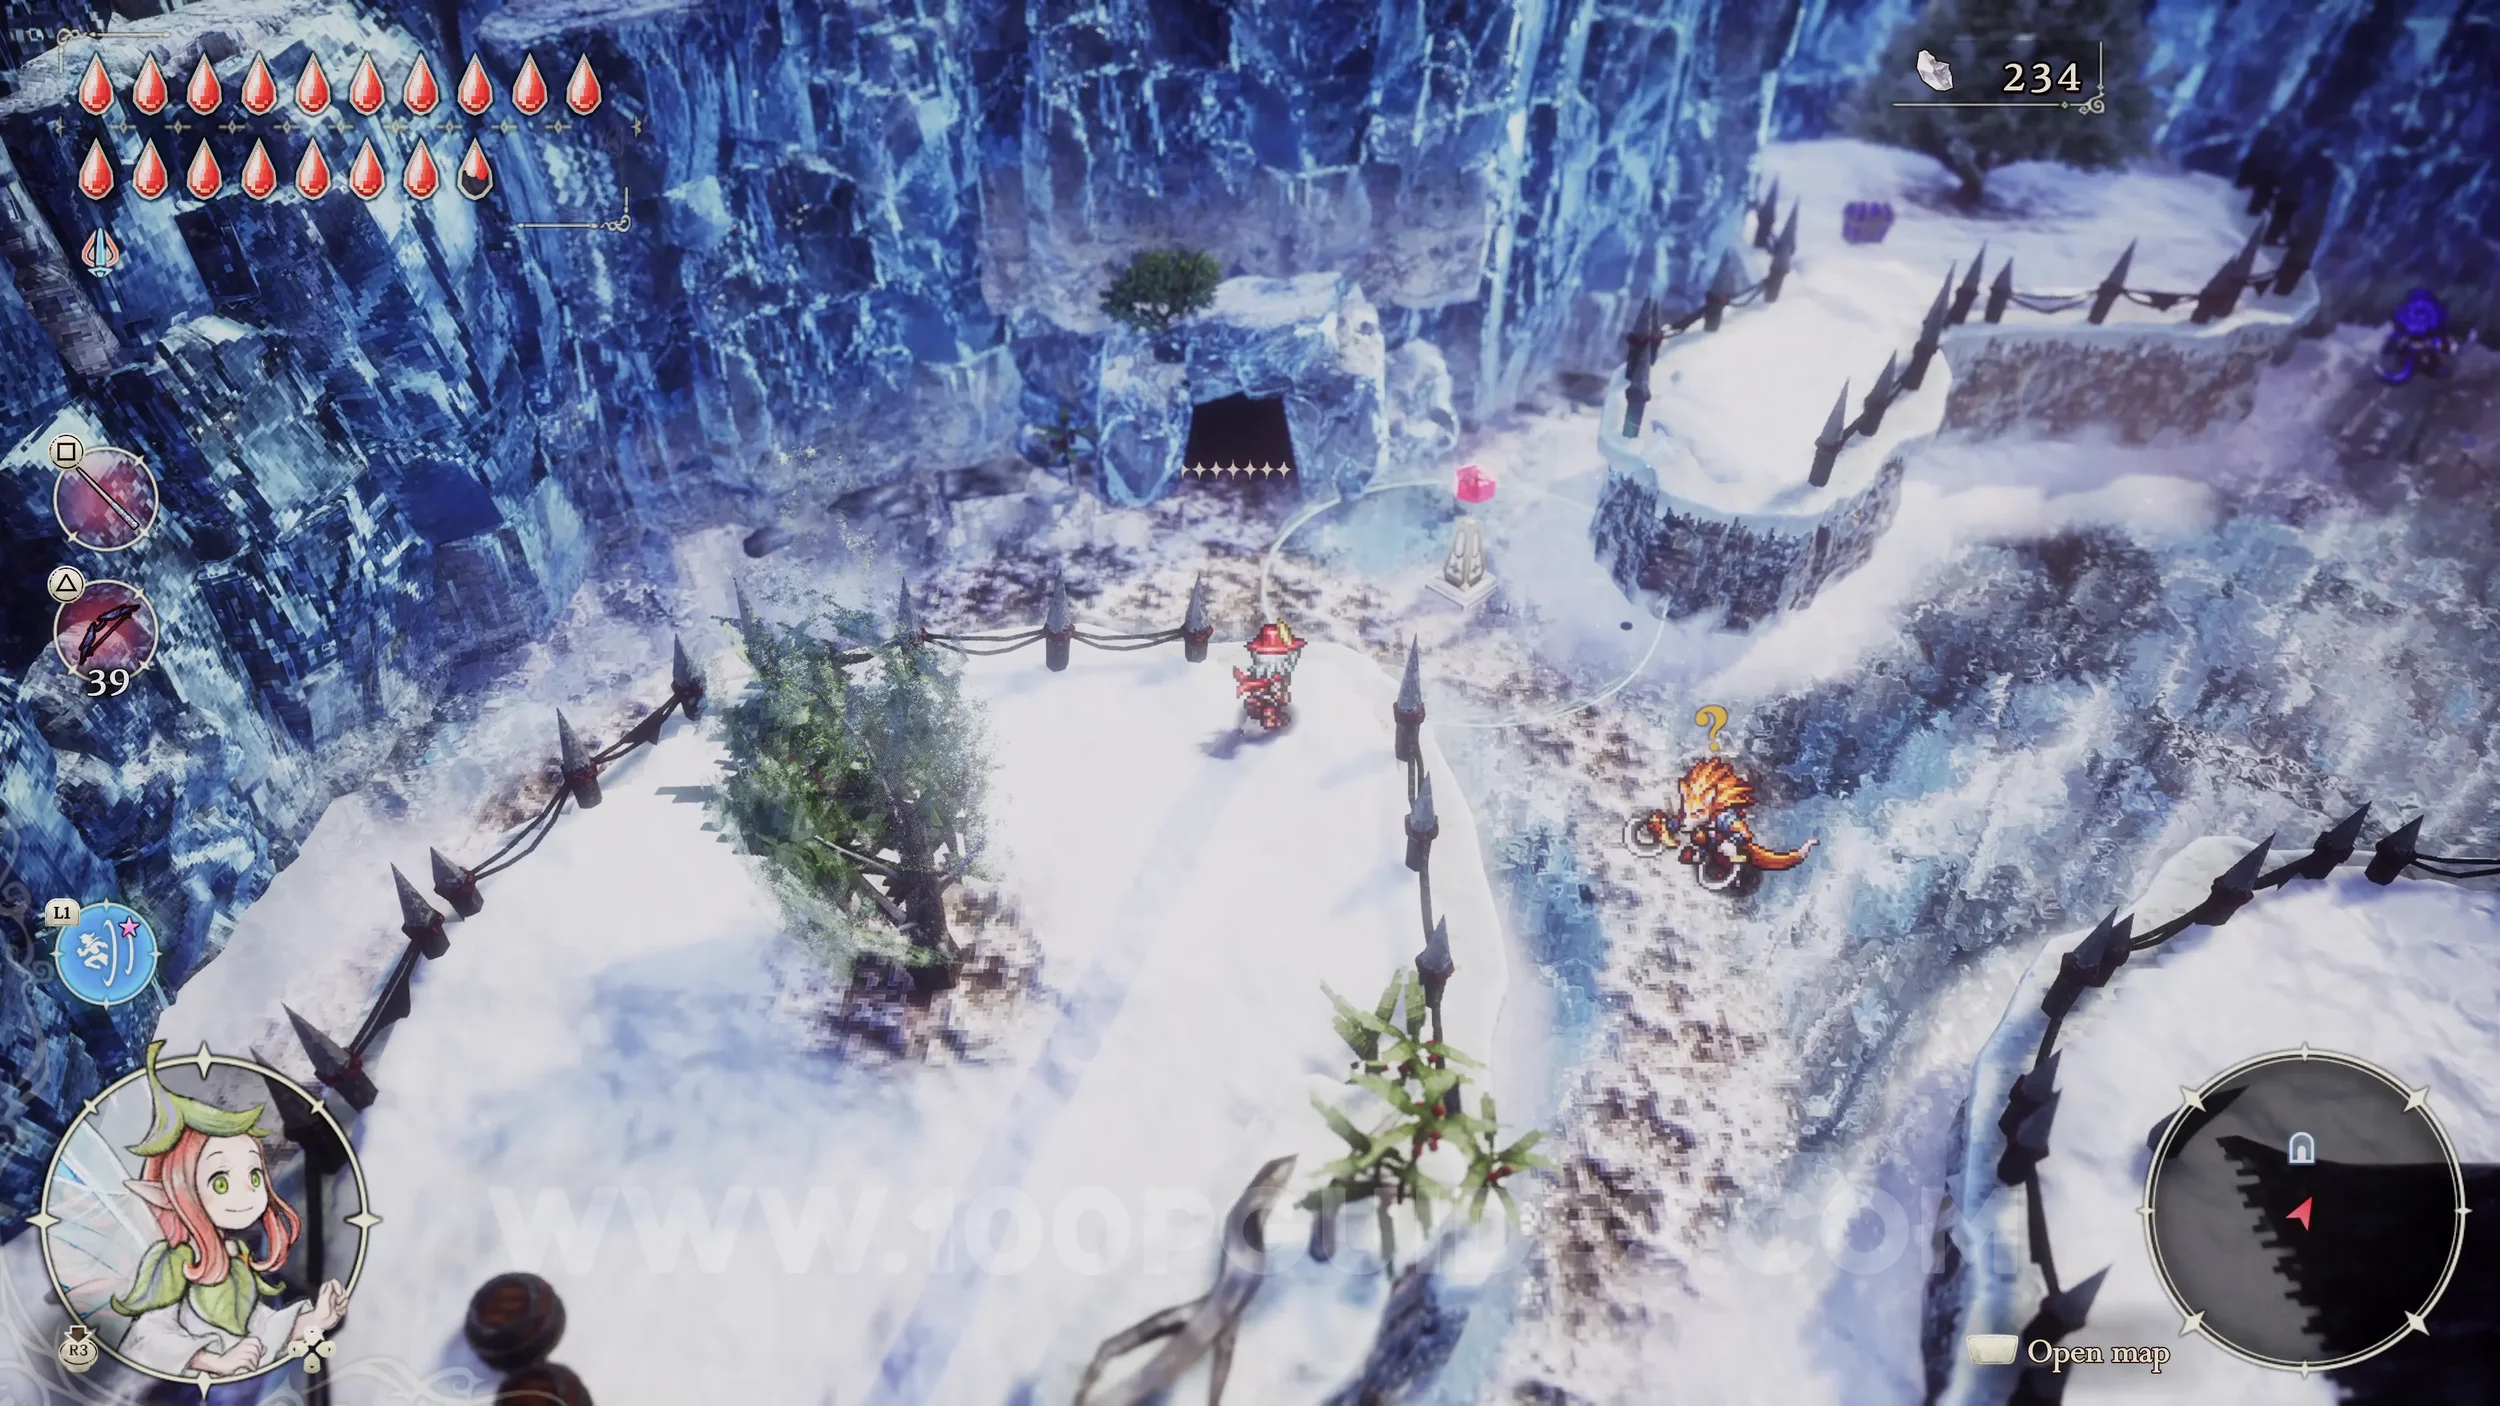
Shard of Life #55. Use the Warp Fairy Power to cross the gap above the Fast Travel point in Whiterea and get the Shard from the chest.

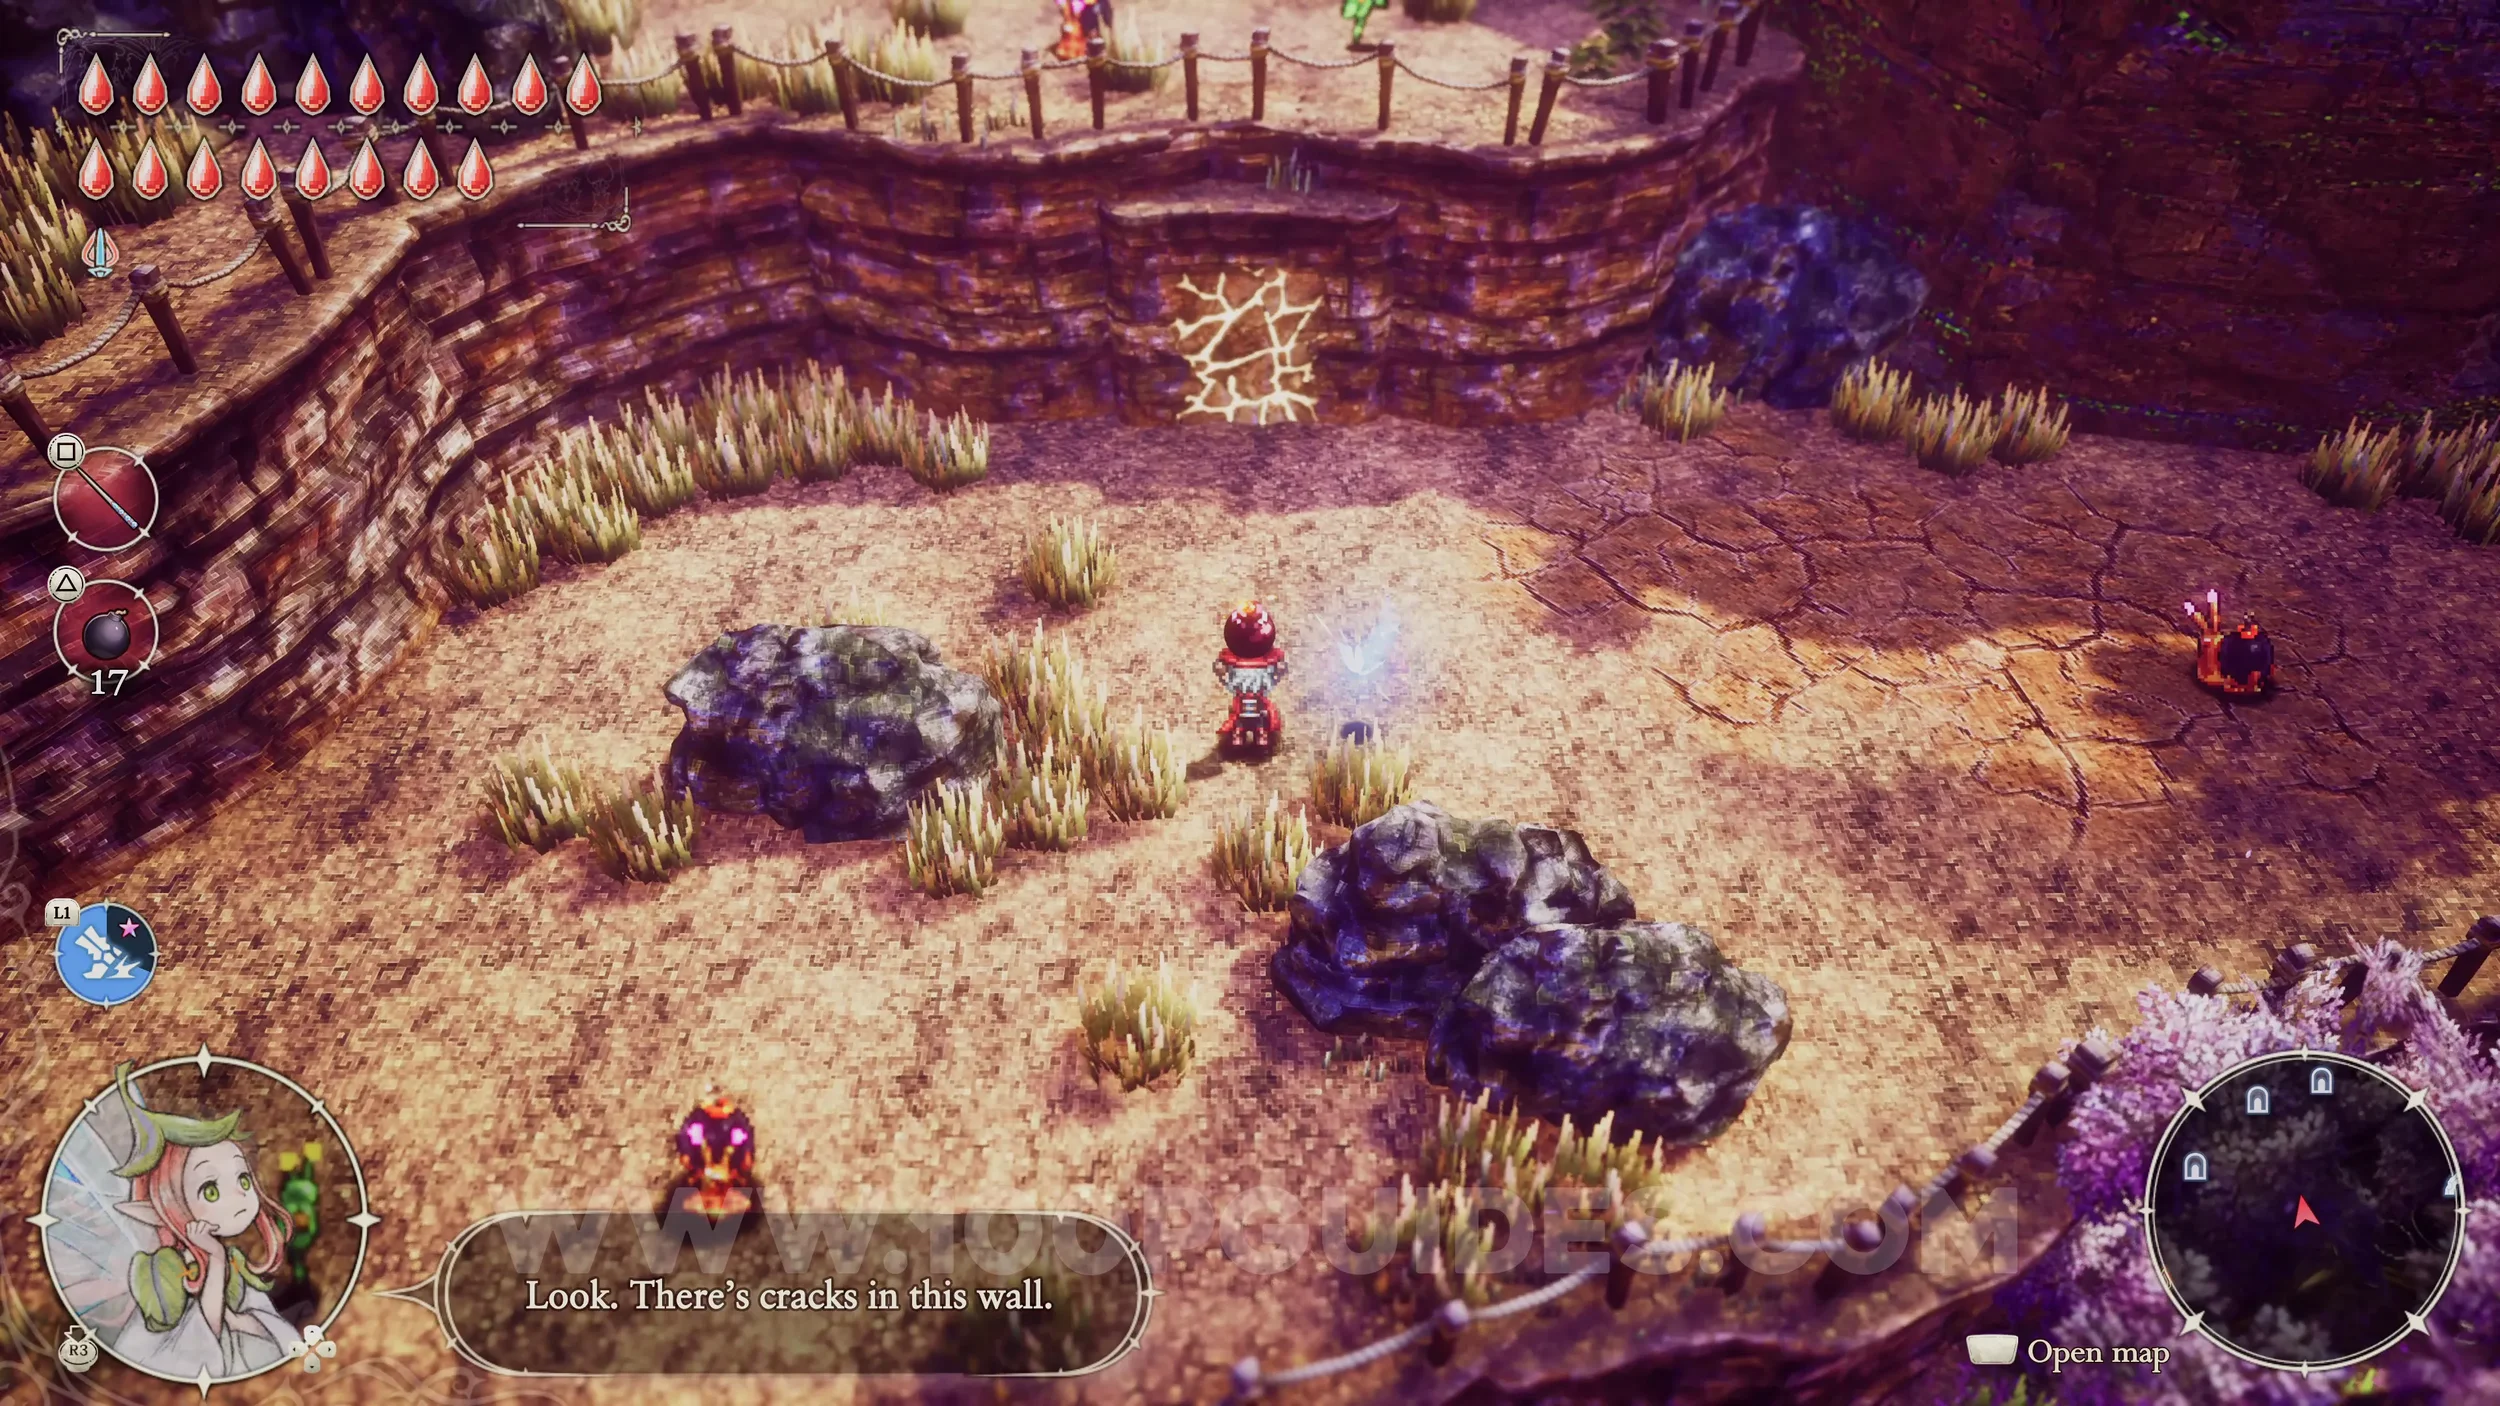
Shard of Life #56. Blow up the wall to the northwest of the Rainbow Lotus dungeon and go through the cave until you come out the other side. Then enter the next cave, go through, and exit out the other side to find the Shrine of Life containing the Shard.


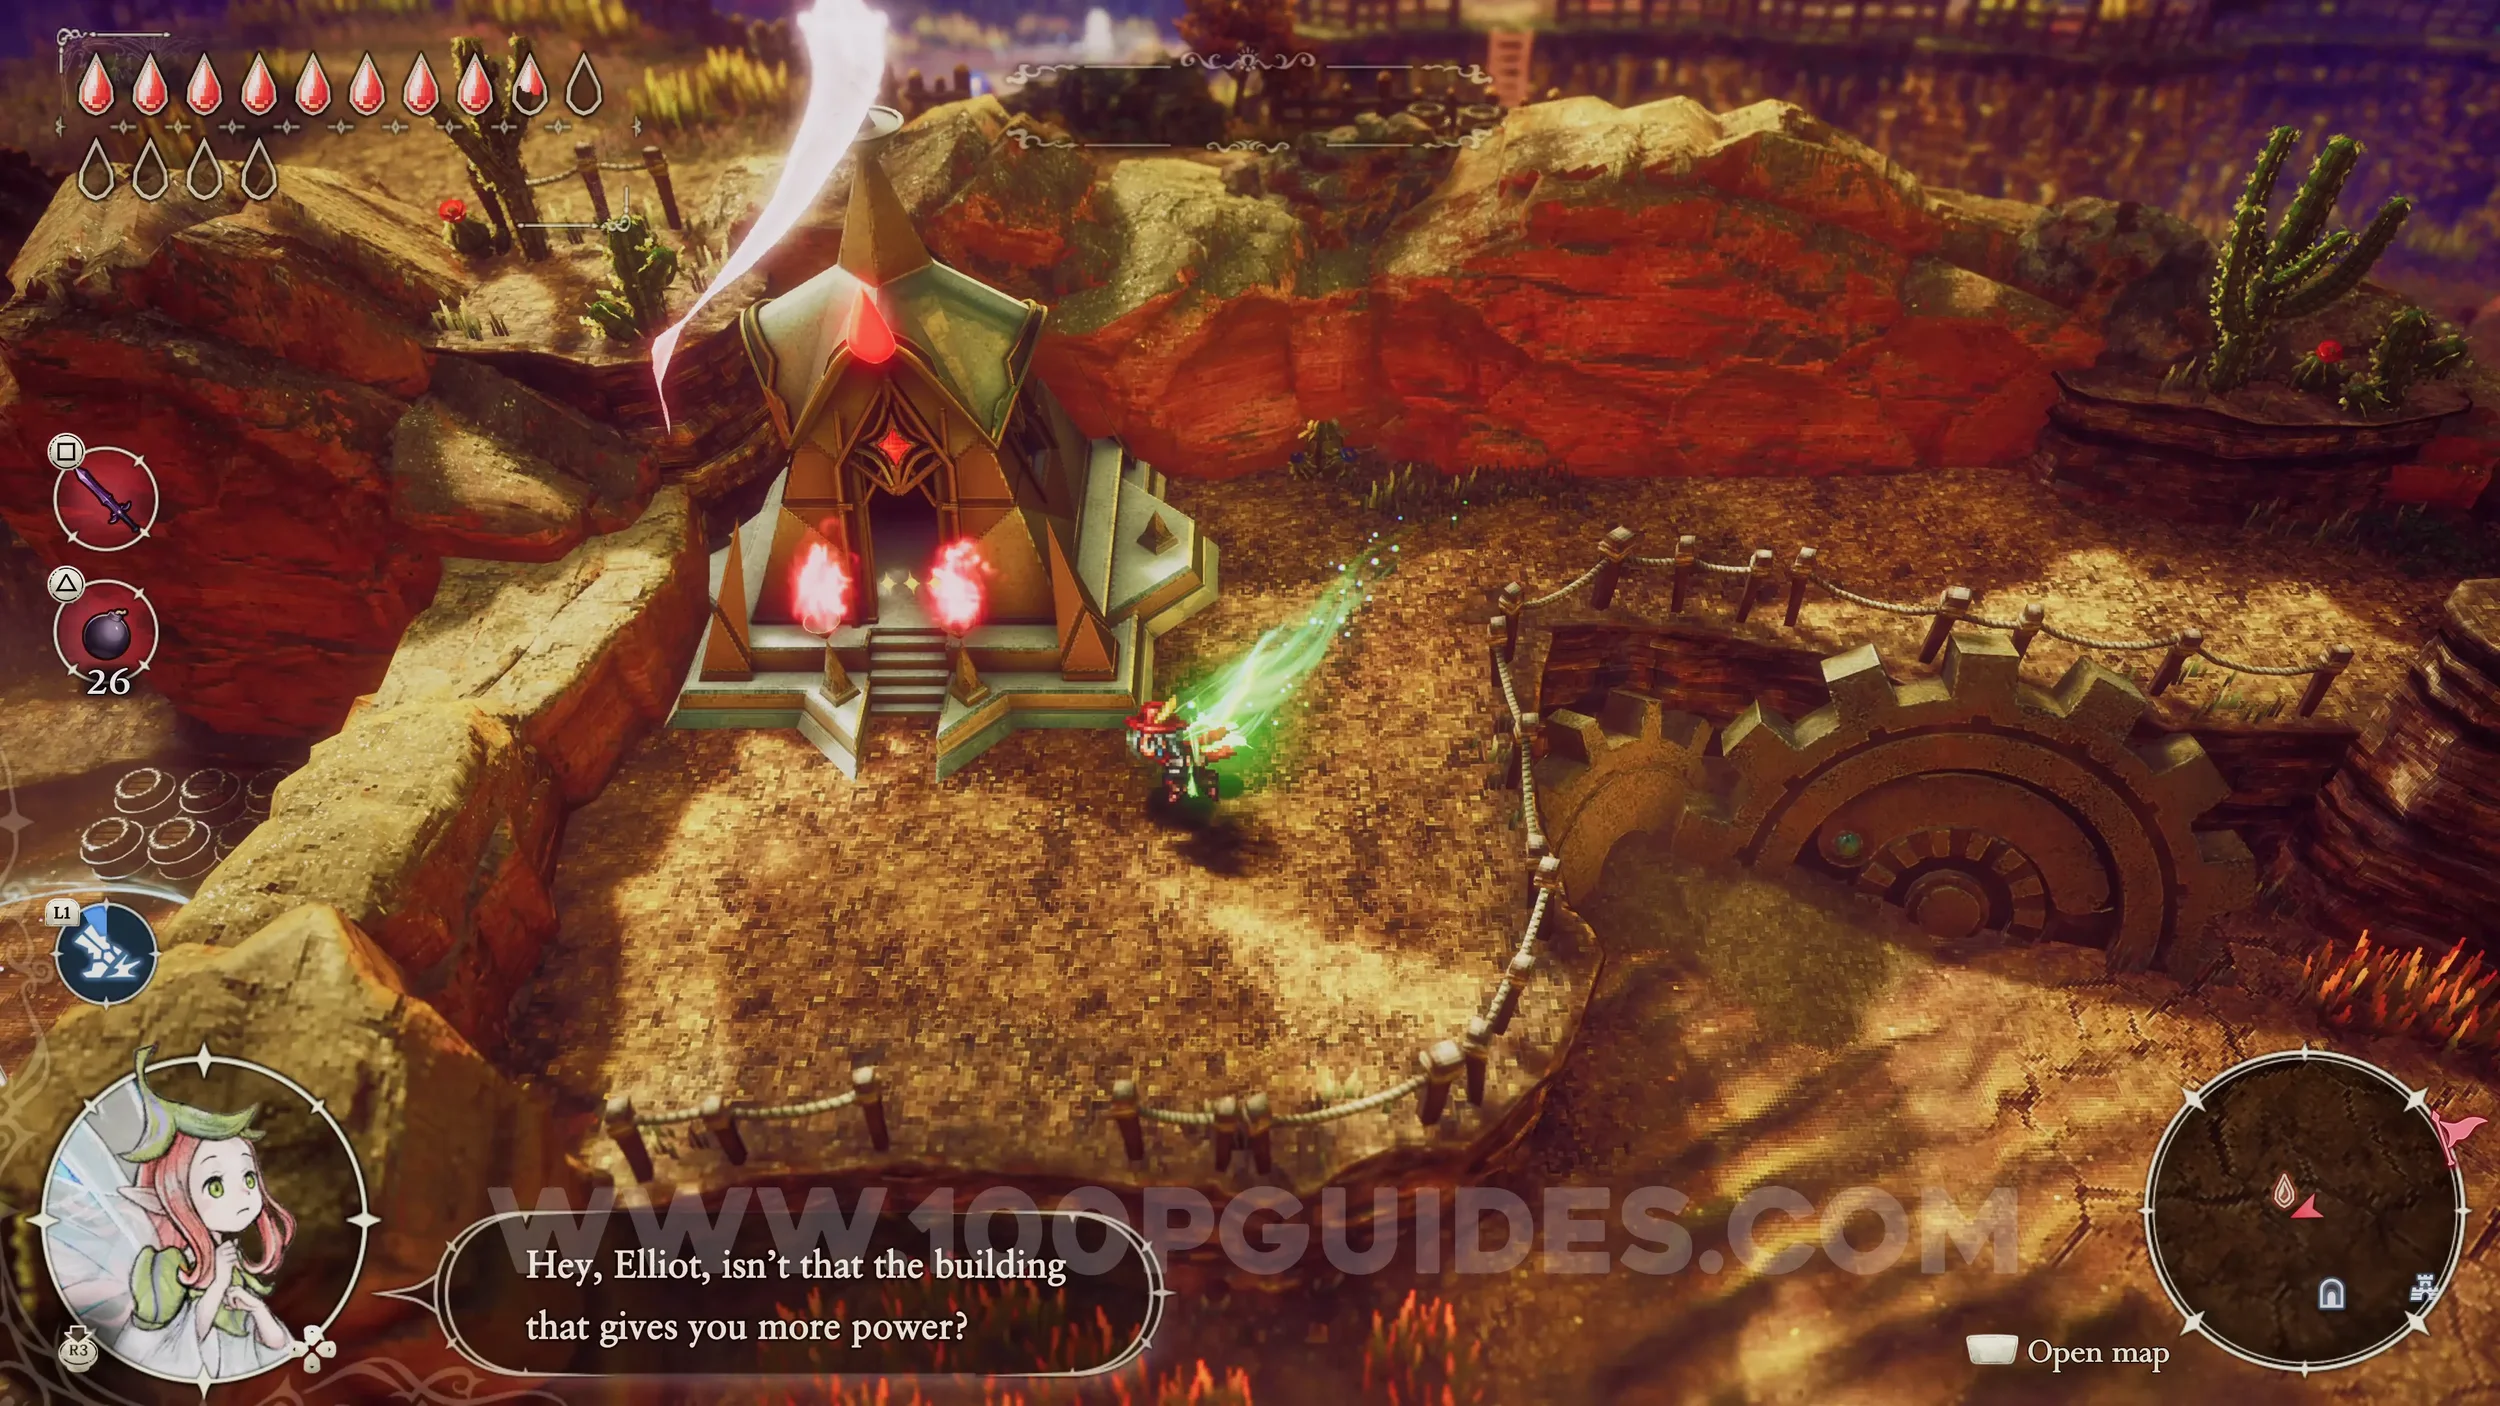
Shard of Life #57. Found on top of the hill where you get Ignite in the Age of Reconstruction.

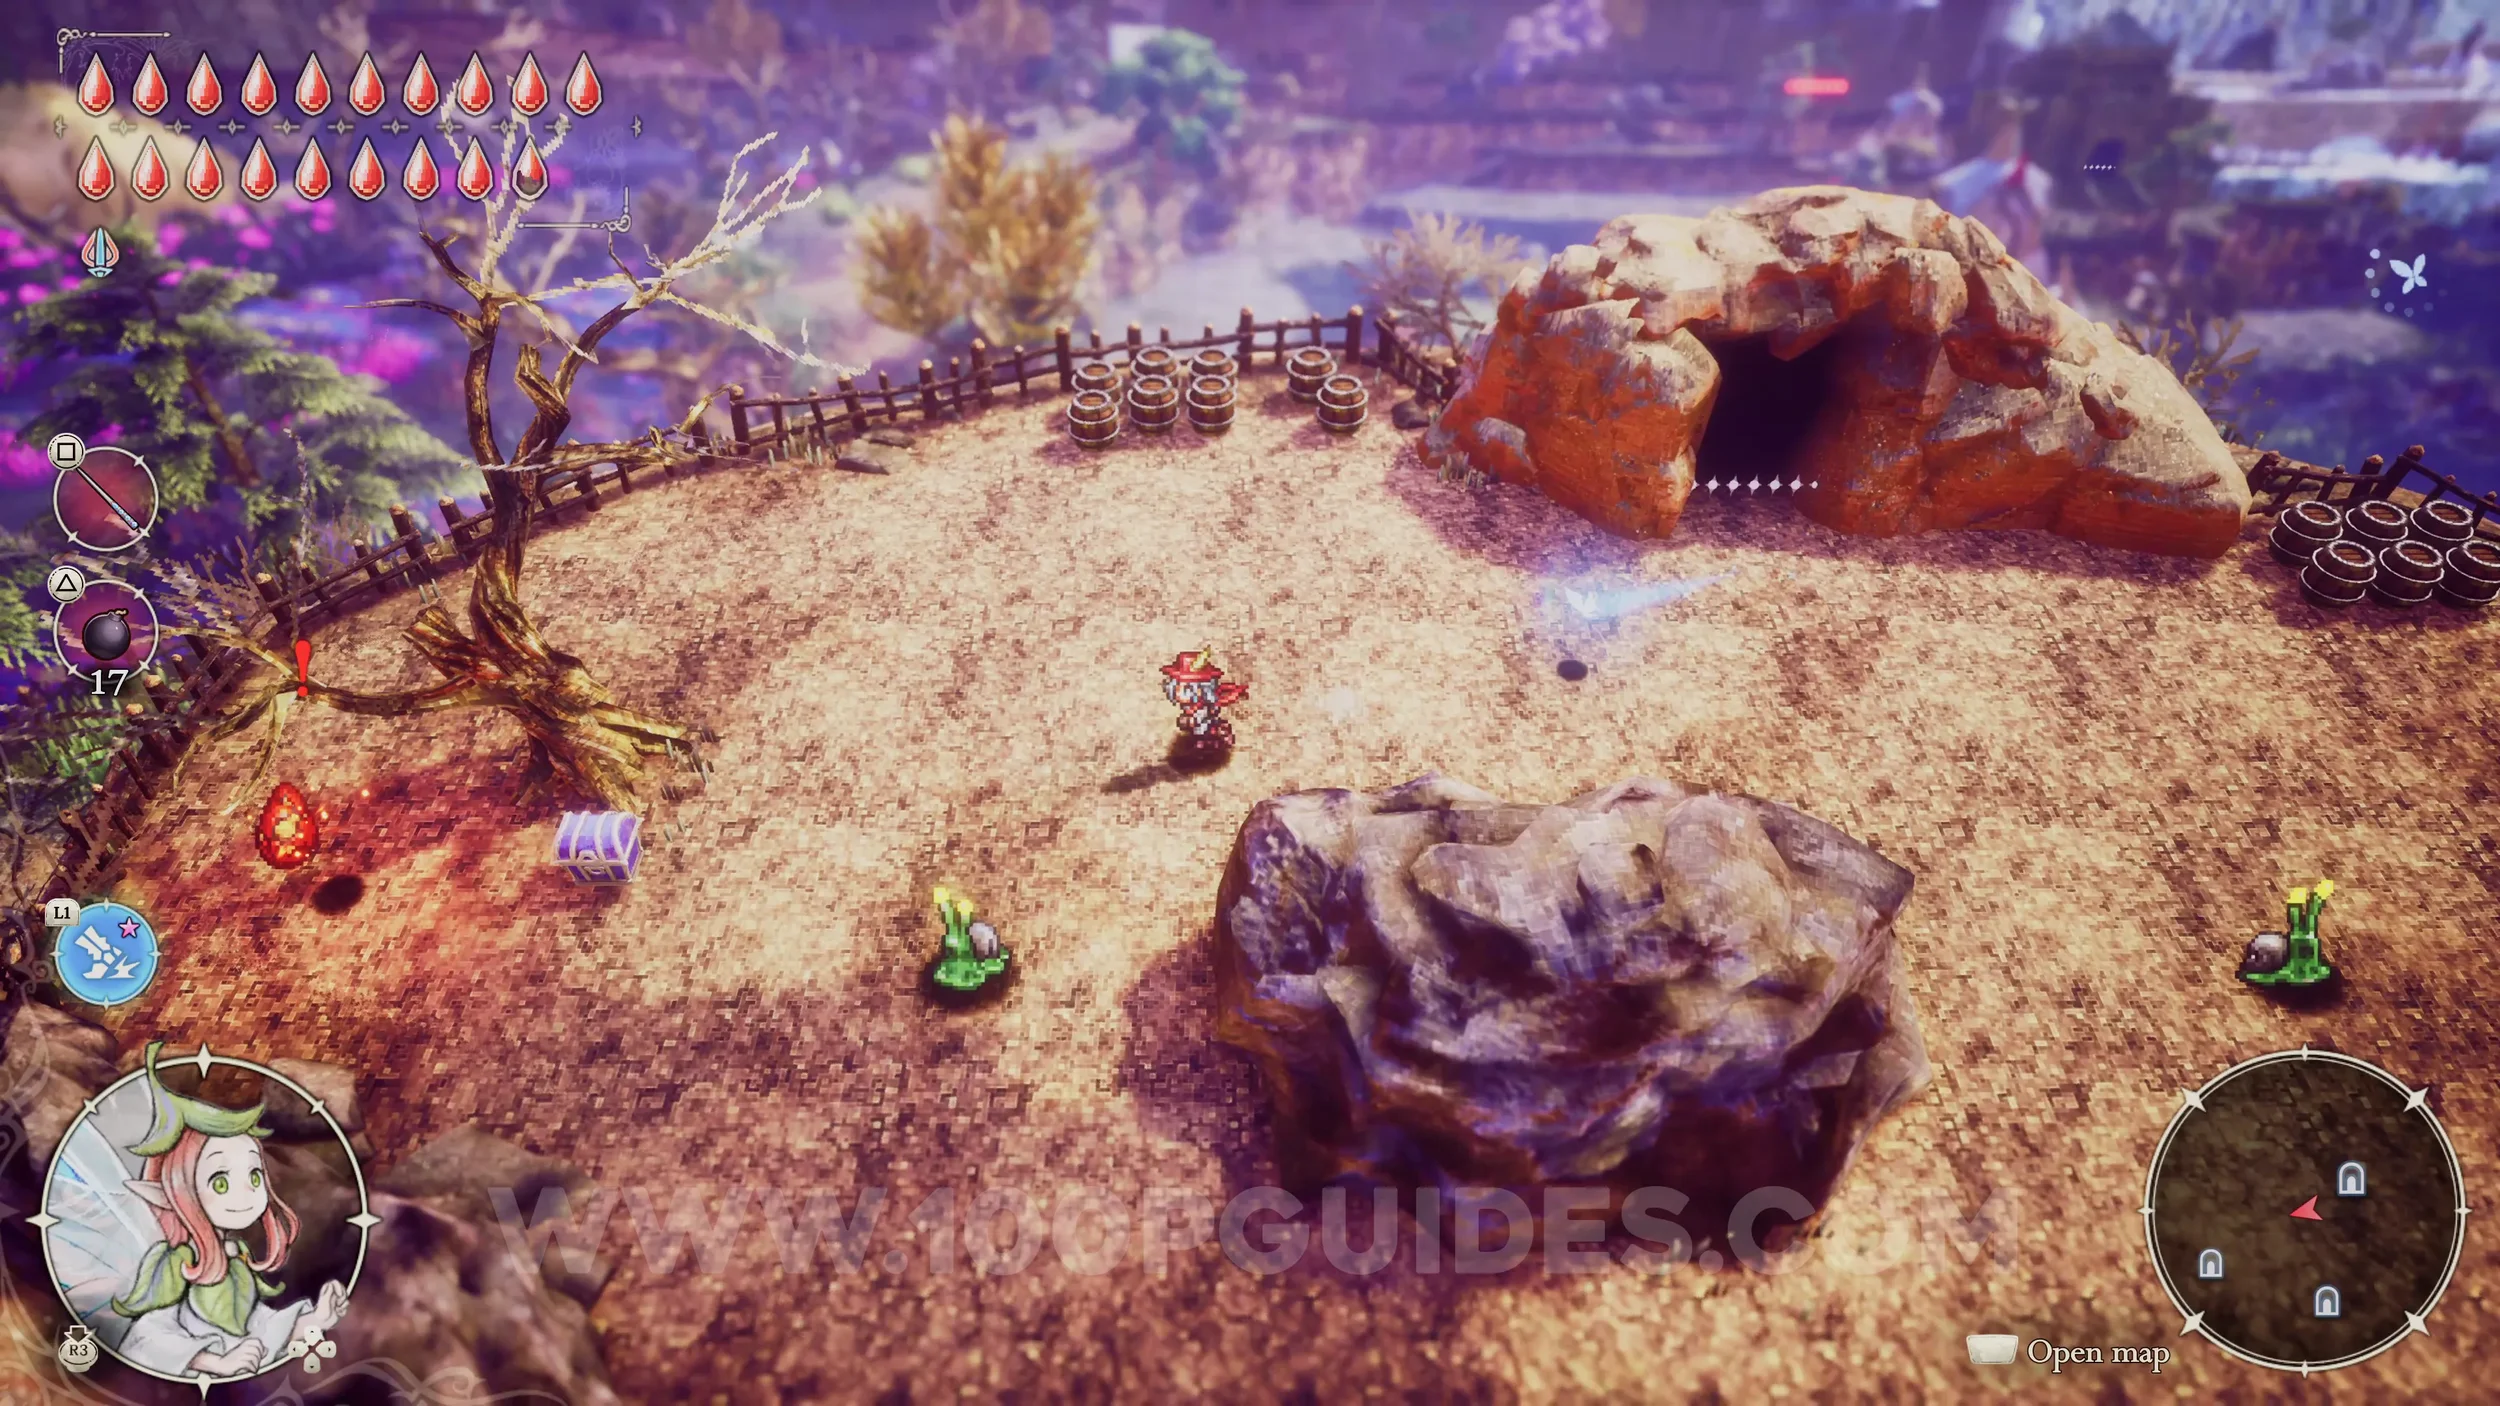
Shard of Life #58. Use a bomb to blow up the entrance of the cave in the western part of the map. Then go through it and come out the other side to find the chest containing the shard.


Shard of Life #59. Go through Monster Trail 5 and exit thorugh the northeastern exit to find the Shrine of Life. Inside, make your way through the maze until you come out the top where you will find the shard.


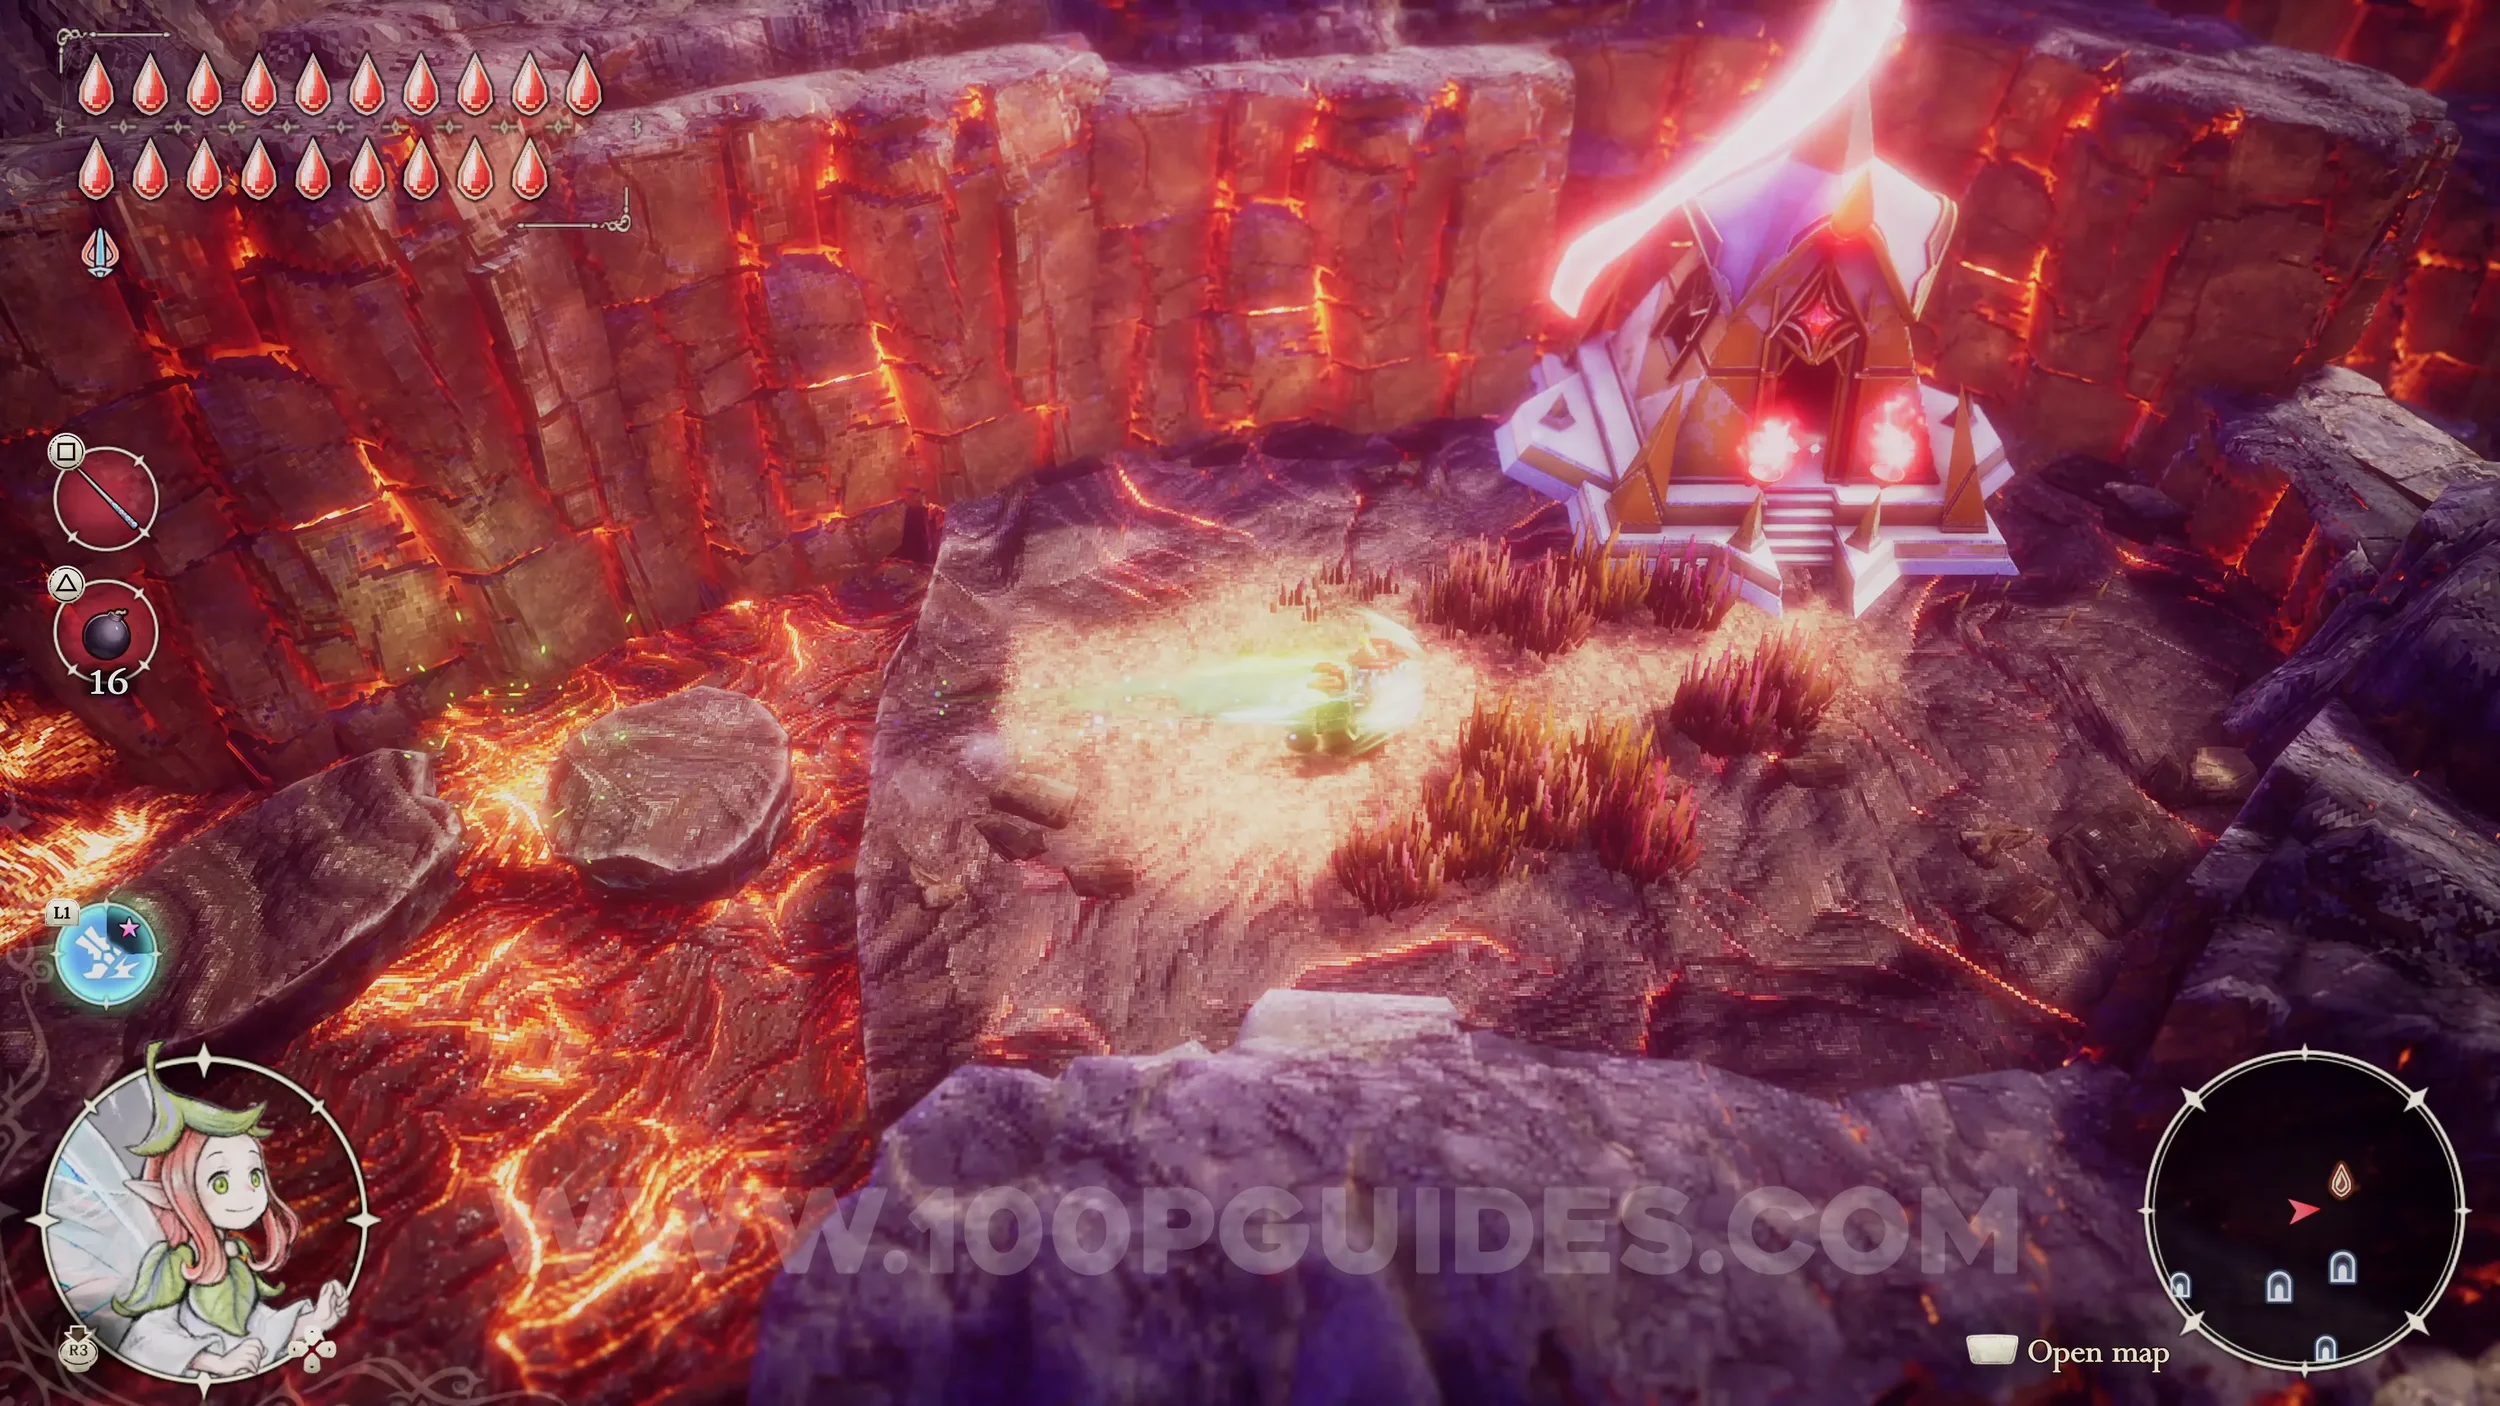
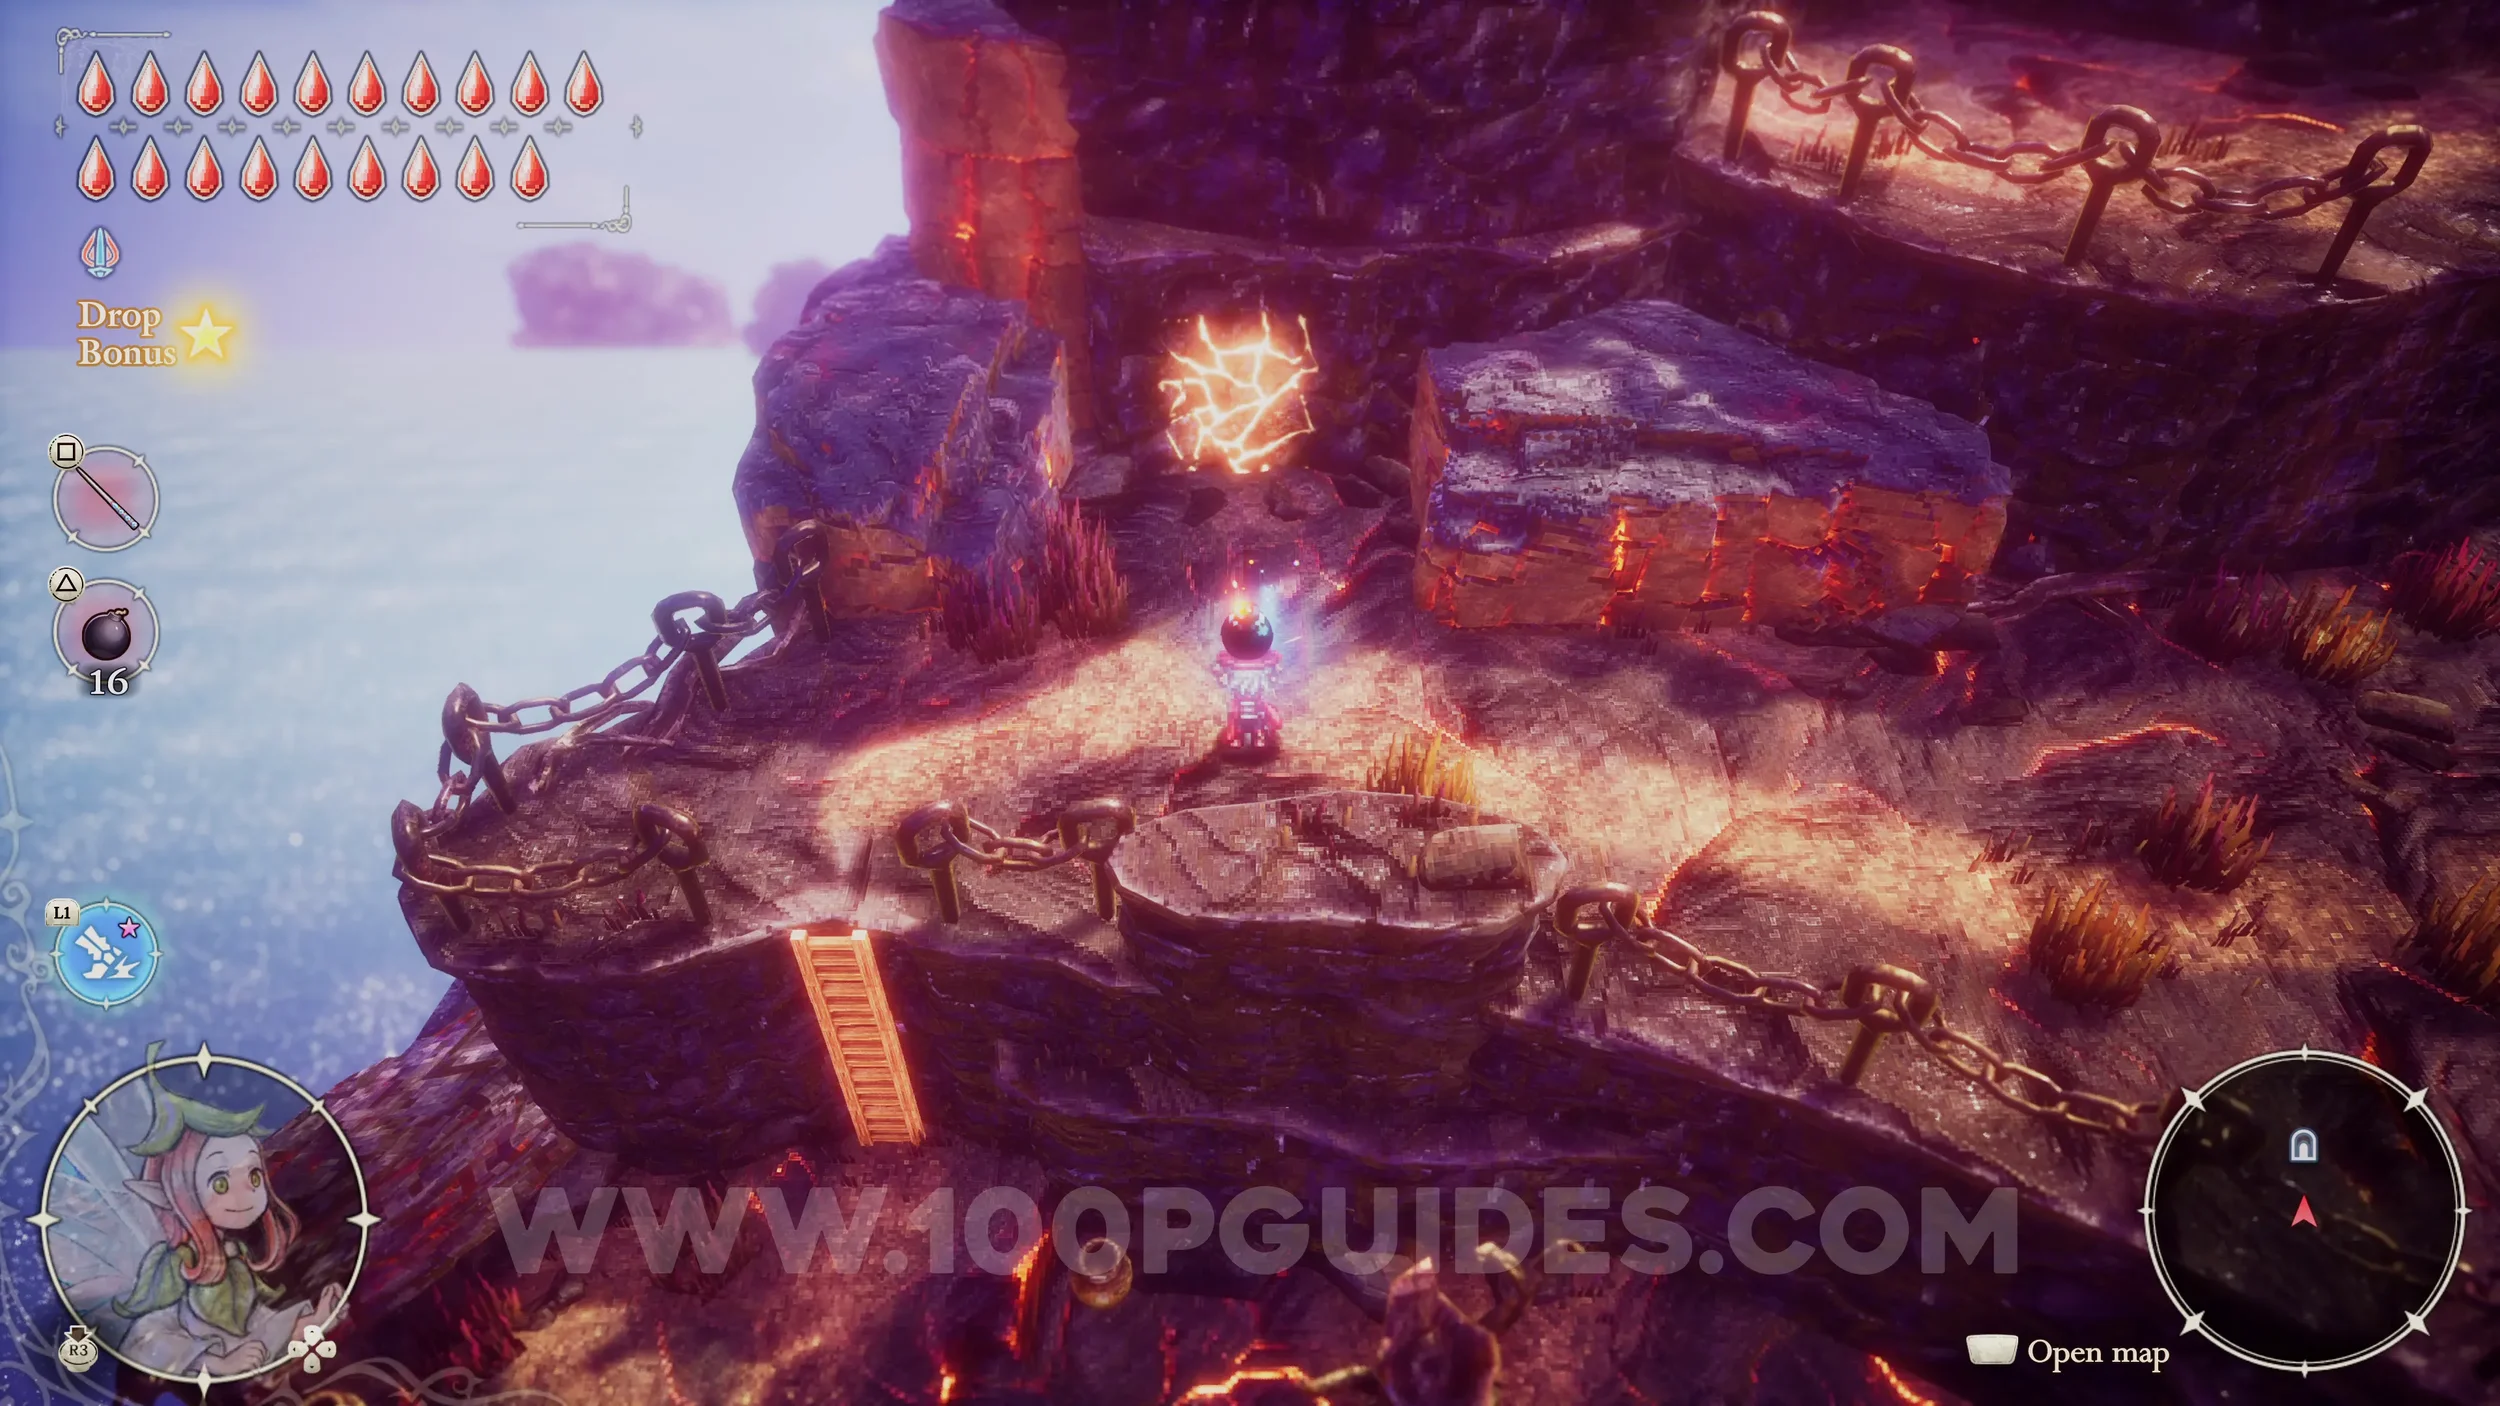
Shard of Life #60. Found in Mount Phoenix. First, go right and jump across the sinking platforms, then go left and up the ladders and use Ignite to light the torch. Continue up past the torch and follow the path until you reach the First Level, where you find the chest.