Metroid Prime 4 All Energy Tank Locations
This guide will show you where to find every Energy Tank in Metroid Prime 4.
Find more Metroid Prime 4 guides here.
Author 100% Guides.
This guide will show you where to find every Energy Tank in Metroid Prime 4. These are HP upgrades. Each one will give you 1 extra health bar. Here are the locations.
Energy Tank #1 - Prologue. Obtained automatically as you make your way through a vent above some soldiers fighting enemies.
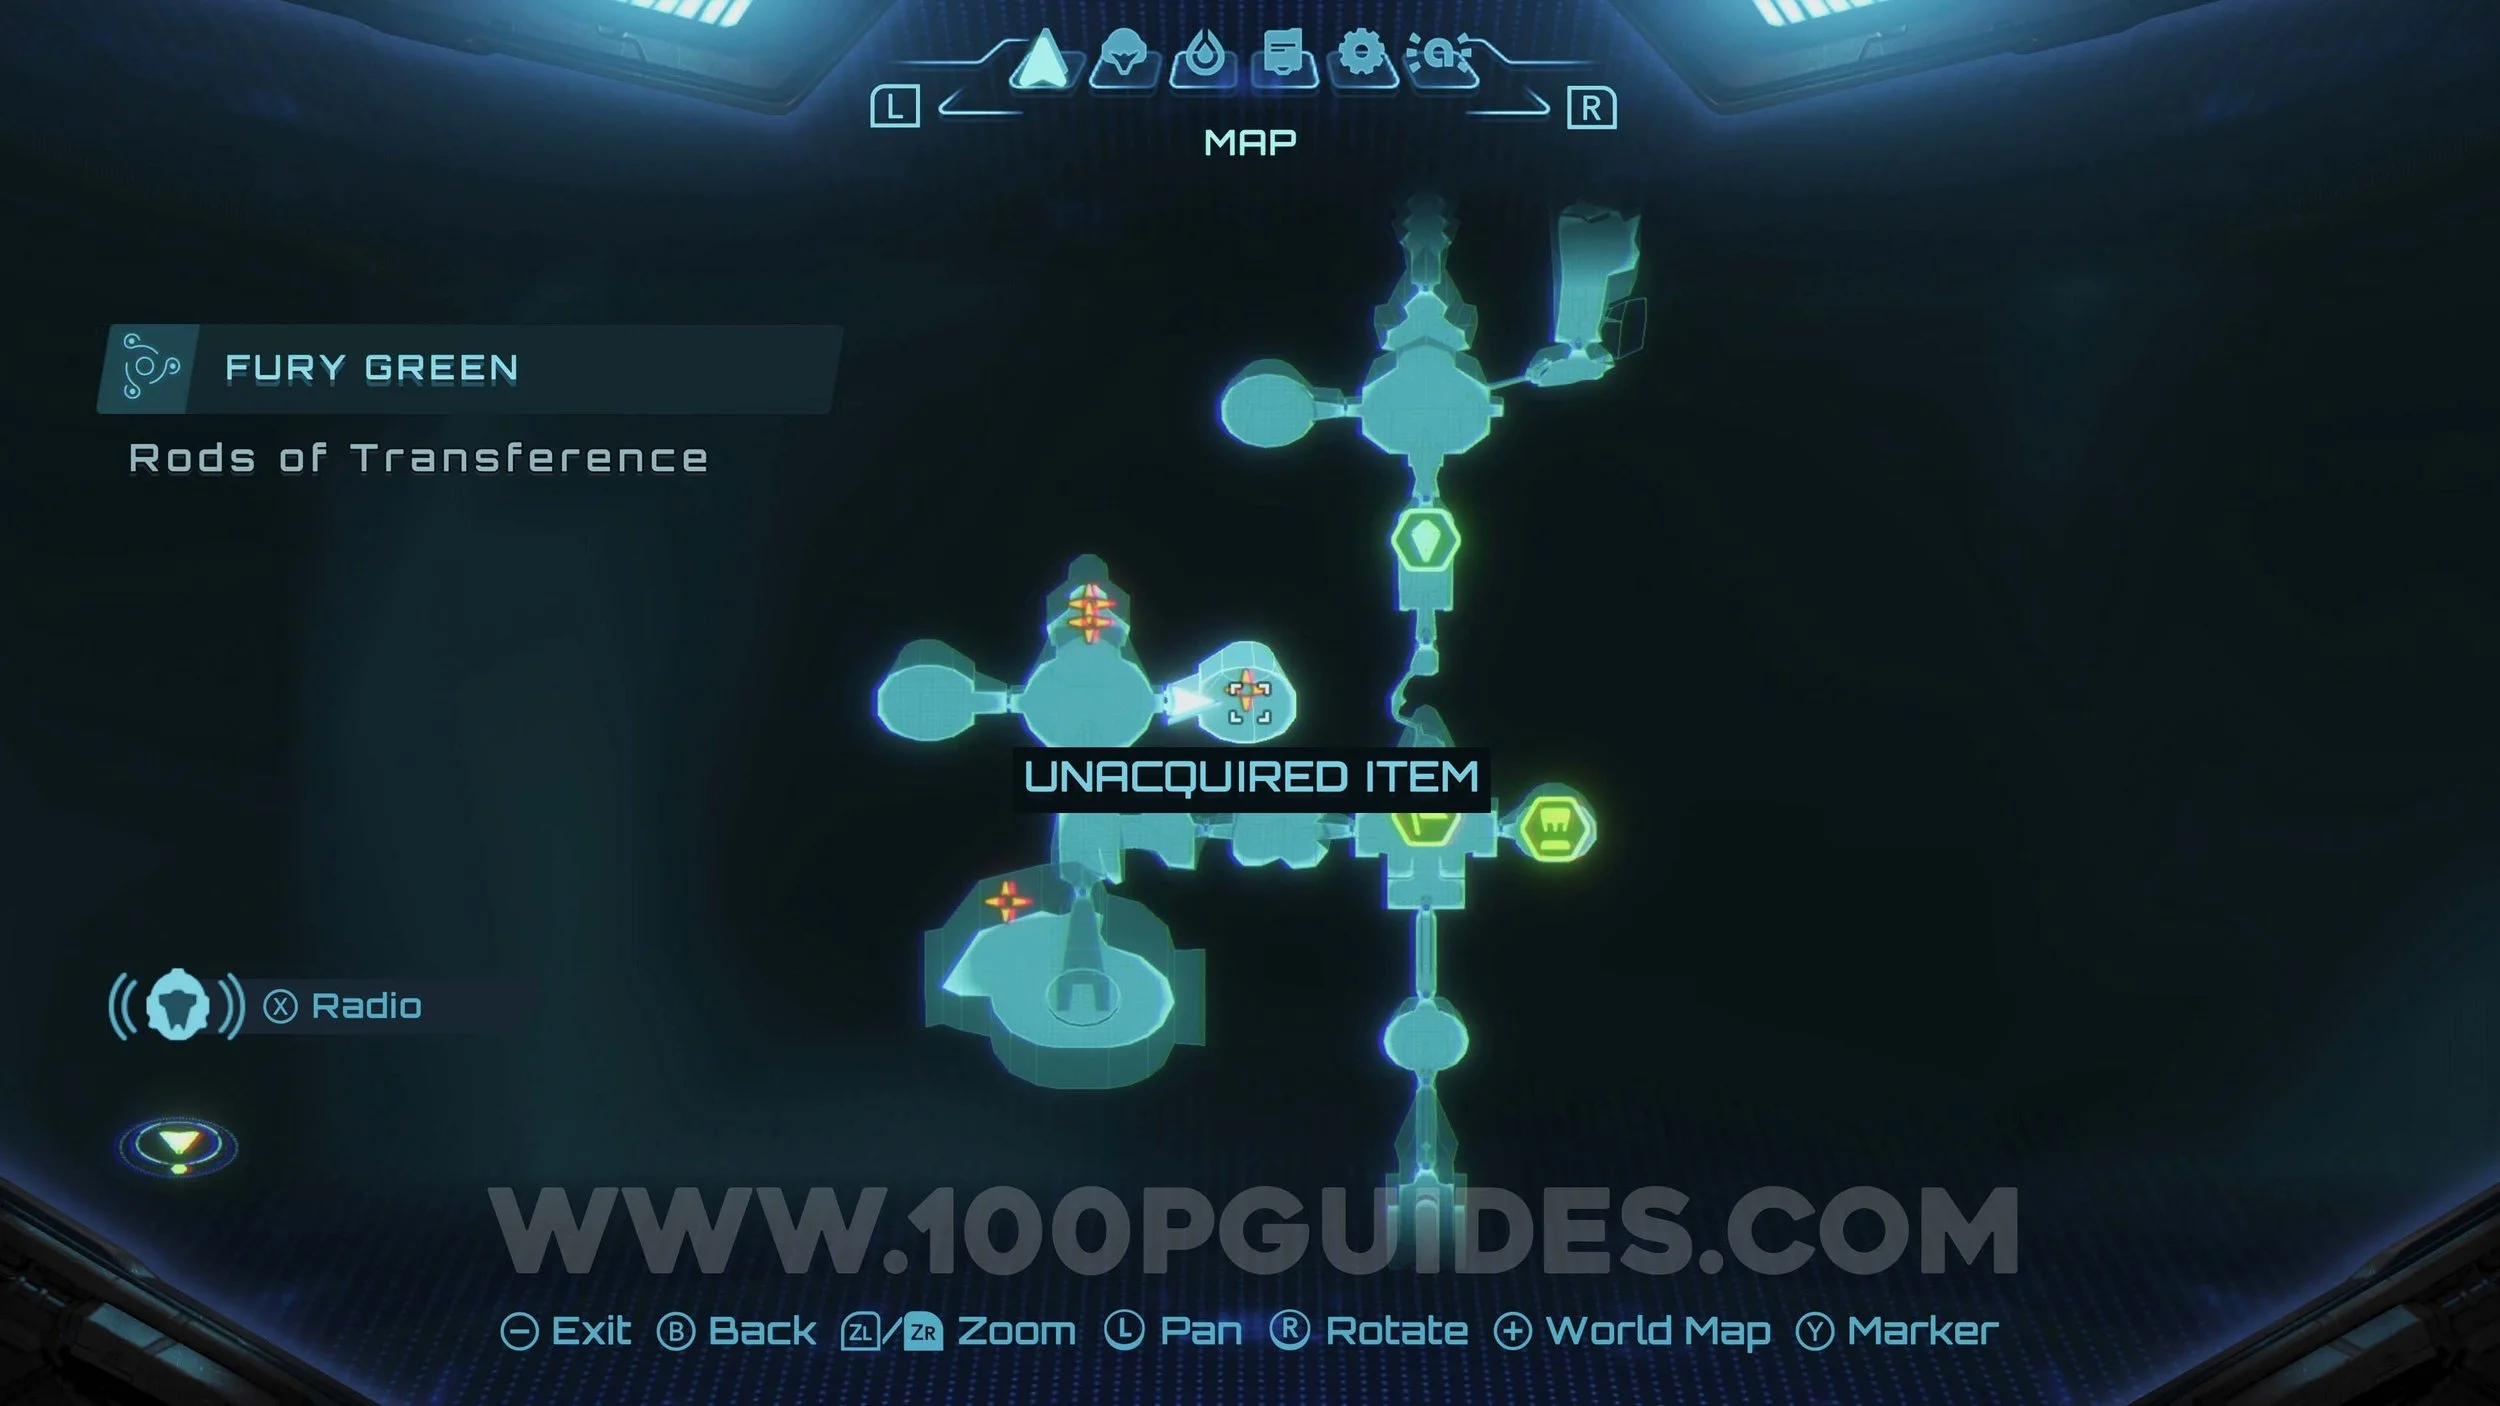
Energy Tank #2 - Fury Green. After gaining the Psychic ability to move the purple orbs around you will come across a pod on the main path. Use the new ability to open it by scanning the orb in the pod and following the path.


Energy Tank #3 - Fury Green. Obtained for solving all 3 of the elemental puzzles in the 3 circular rooms. For the one on the left, you will need the Ice Beam (all required abilities are story-related). Place the purple orb in the platform on the left and freeze the water. Then move the orb to the platform on the right, and then freeze the water under that platform. You will then be able to reach the collectible. For the room on the right, you will need the Thunder Shot. Scan the 3 mechanisms around the central structure and drag them down to their lowest point. Then point them at the central structure. Finally hit all 3 of them with thunder shots. For the final puzzle in the middle room, you will need the Fire Shot. Drag the mirror-looking device around the room until it’s in front of a closed bud statue. Then, shoot a fire shot through it to ignite that statue. Do this with every bud to finish the final puzzle and reveal the Energy Tank.


Energy Tank #4 - Volt Forge. Obtained automatically after defeating Sylux during the main story.
Energy Tank #5 - Volt Forge. Obatined automatically after defeating Sylux for the second time during the main story.
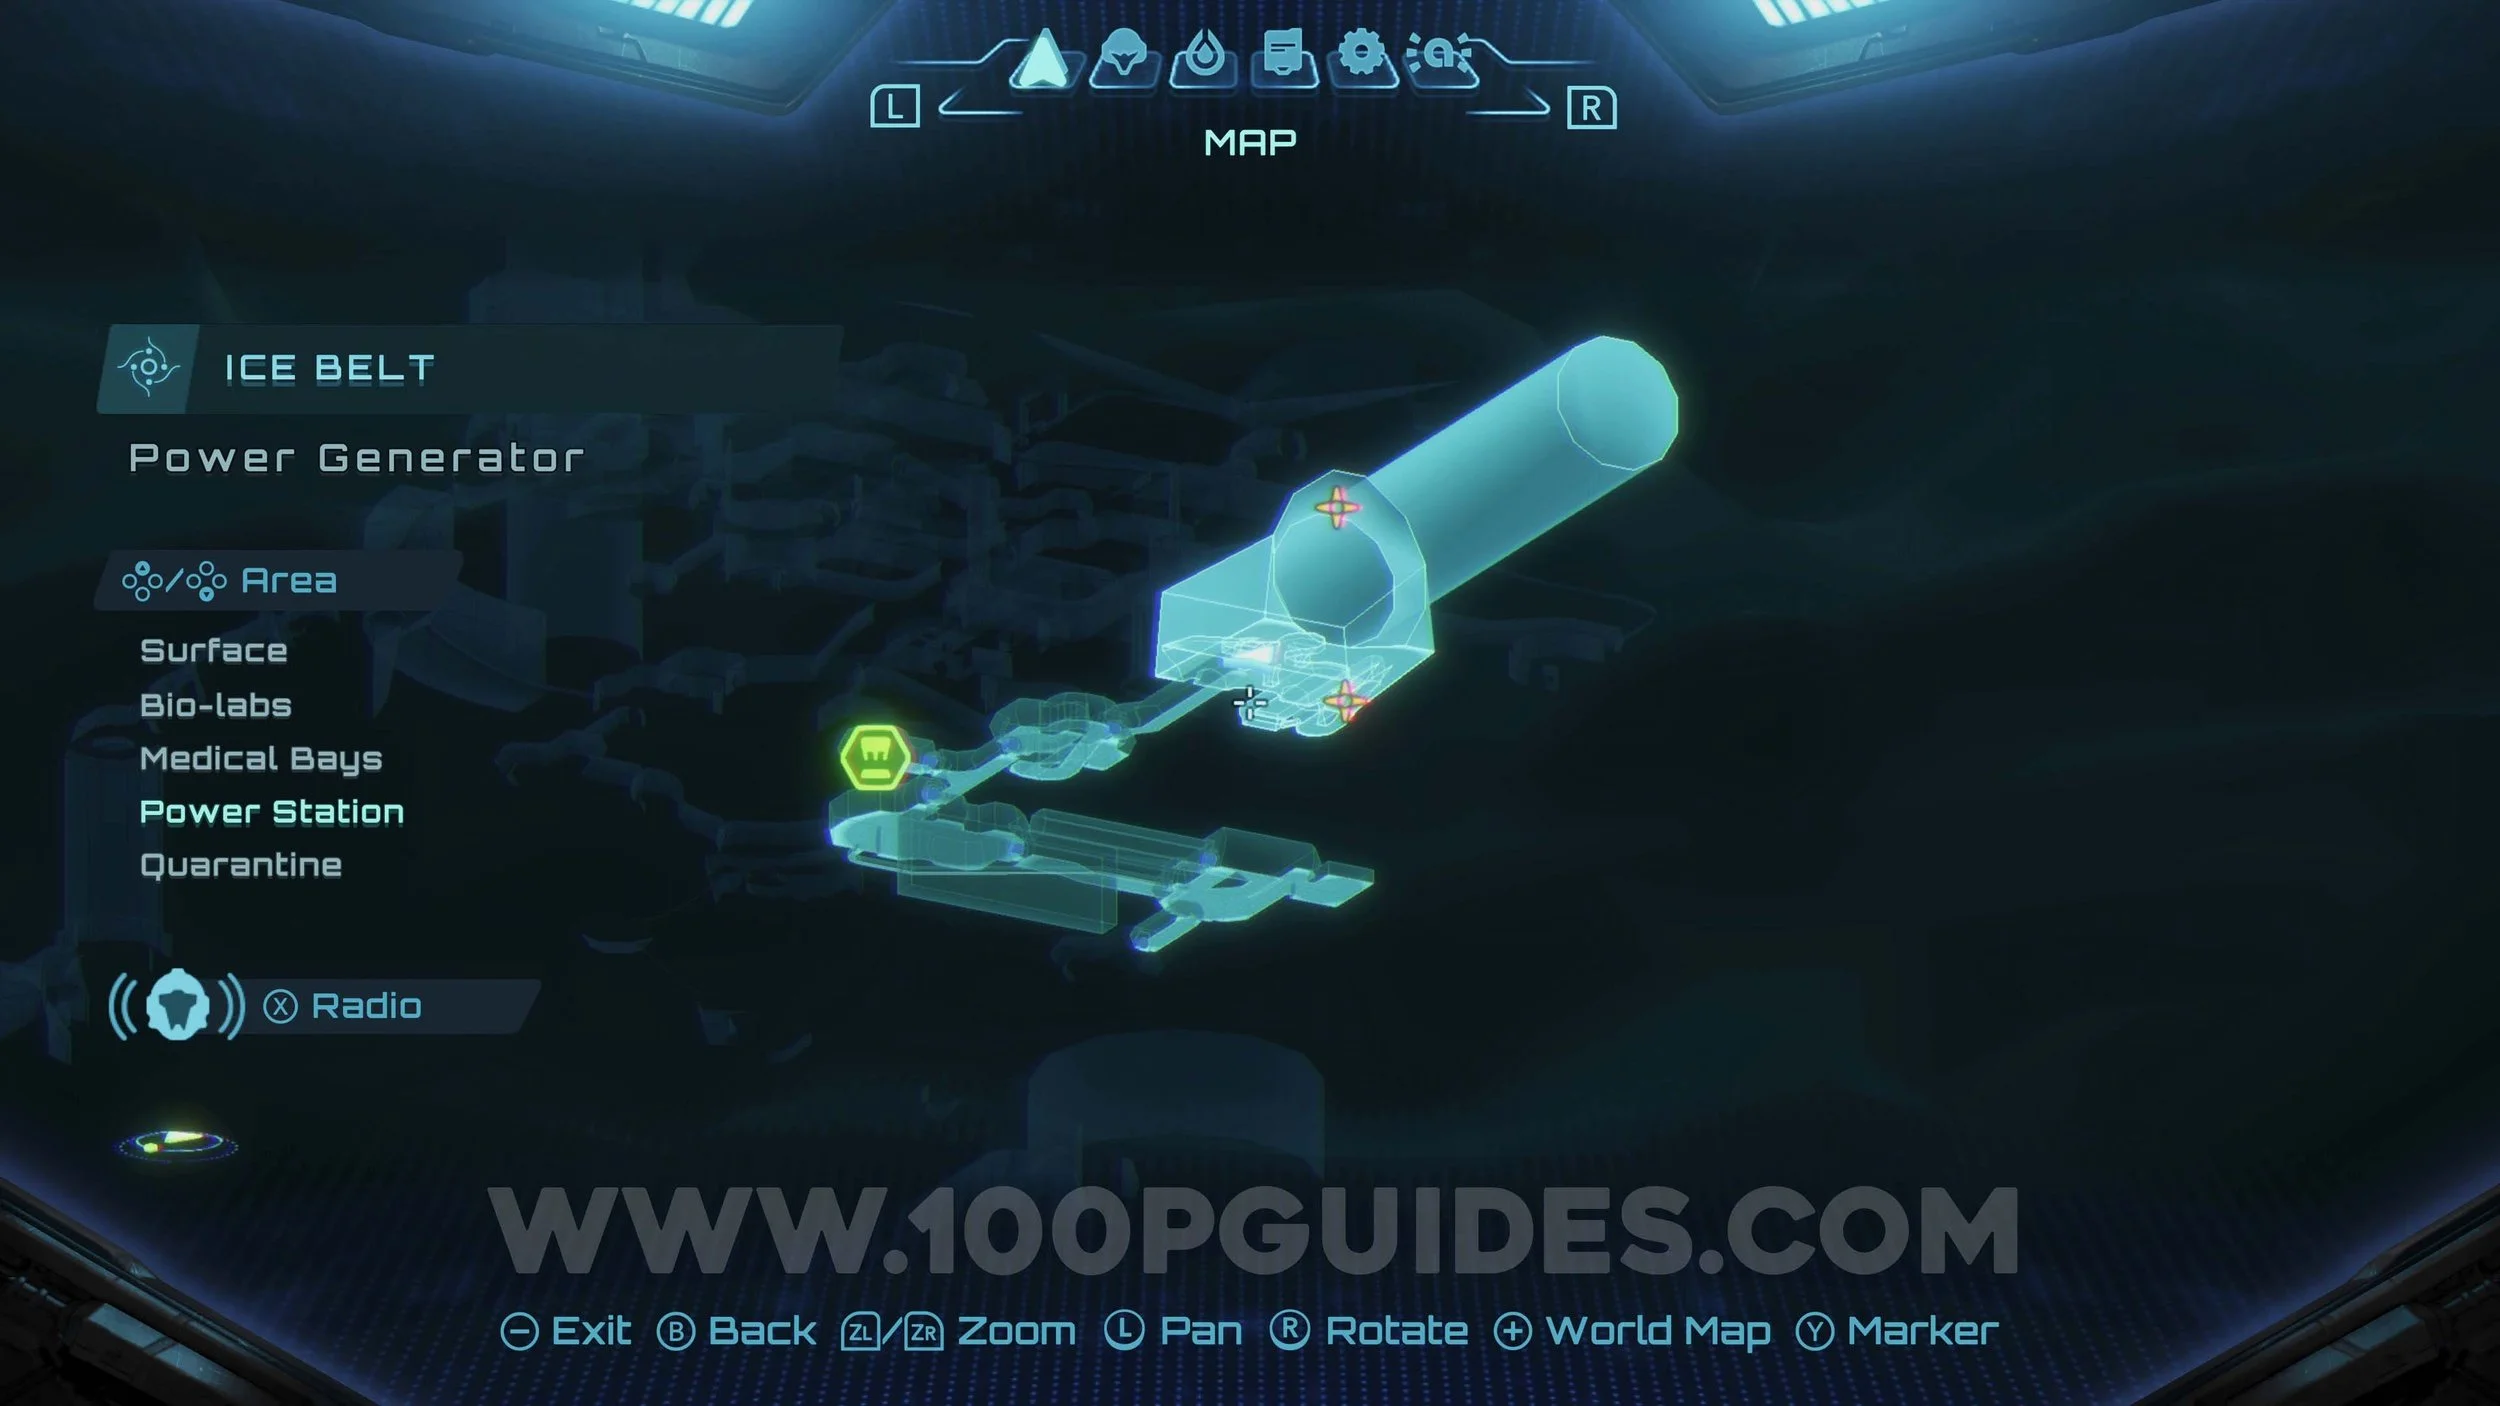
Energy Tank #6 - Ice Belt. On a lone platform in the outside area with strong winds. Scan the purple mist to reveal some grappling points allowing you to reach it.


Energy Tank #7 - Ice Belt. Look for a ramp on the right side of the generator room that leads down. Here, follow the path to the end to find the Energy Tank.

Energy Tank #8 - Flare Pool. After defeating the boss at the end of the dungeon, return to the boss room and look for a box on a lone rock in the lava. Shoot it and try to collect the Energy Tank. An enemy will take it, and you will have to chase after it and defeat it to get the collectible.


Energy Tank #9 - Flare Pool. Use your scanner to open the pod in the side room of the Subobservation Access area.


Energy Tank #10 - Great Mines. Just off the side of the large bridge outside the main elevator on Level 2, you will find some purple mist. Scan them to reveal some platforms that will allow you to reach the Energy Tank.


Energy Tank #11 - Great Mines. On level 3, you will come across a dead end. You can break this wall with a Psychic Energy Bomb. Then follow the path until you get to the 2d Morph Ball section. On the left side of the second U-shaped section, use another Psychic bomb to destroy the debris and reveal a magnetic point. Use it to get to the Energy Tank above.


Energy Tank #12 - Sol Valley. In the area below the statue on the western side of the desert. After raising the platforms, burn the cobwebs on the right of the door to reveal the path to the Energy Tank.


Energy Tank #13 - Sol Valley. Shoot the pillar on the left side of the entrance to Volt Forge with a few Thunder Shots to reveal the Energy Tank.


Energy Tank #14 - Sol Valley. In a hidden compartment behind the statue.

