The Sinking City 2 All Collectible Locations (100% Walkthrough)
This guide will show you where to find every collectible in The Sinking City 2. There are a total of 224, broken down as follows:
78 Lore Codex - Not required for any trophy.
56 Evidence - Not required for any trophy.
10 Radio Codex - Required for the Mycophile trophy.
5 Weapons - 4 of the 5 have individual trophies attached.
13 Emergency Relief Crates (E.R.C.) - Required for the Behind Every Crate Man… trophy.
13 E.R.C. Activator Pens - Required to open the 13 Emergency Relief Crates.
8 Weapon Accessories - Not required for any trophy.
25 Dream Essence - Required for the What Dreams Are Mode Of trophy. Though you will need multiple playthroughs to collect enough to learn all talents.
8 Ex Oblivione Codex - Required for the From Oblivion trophy. These are only available in NG+ (Ex Oblivione Mode).
6 Inventory Expansions - Not required for any trophy.
In addition, this guide includes all Key Items, Puzzle solutions and miscellaneous trophies, so you can also use it as a 100% Walkthrough.
All collectibles are missable and there is no chapter select. Once you finish a chapter there is no going back to any of its areas. Since the game does allow you to backtrack to pretty much any area within the chapter you are currently playing, I recommend you quickly review the map and make sure everything is blue before advancing to the next one. There is an NG+, however the only things that carry over are your learned talents, so you will have to collect everything else again if you missed any.
Chapter 1 - A New Day
Weapon: Equalizer Mk. II. You start the game with this weapon in your inventory.
Dream Essence x3. Obtained automatically at the start of the game.
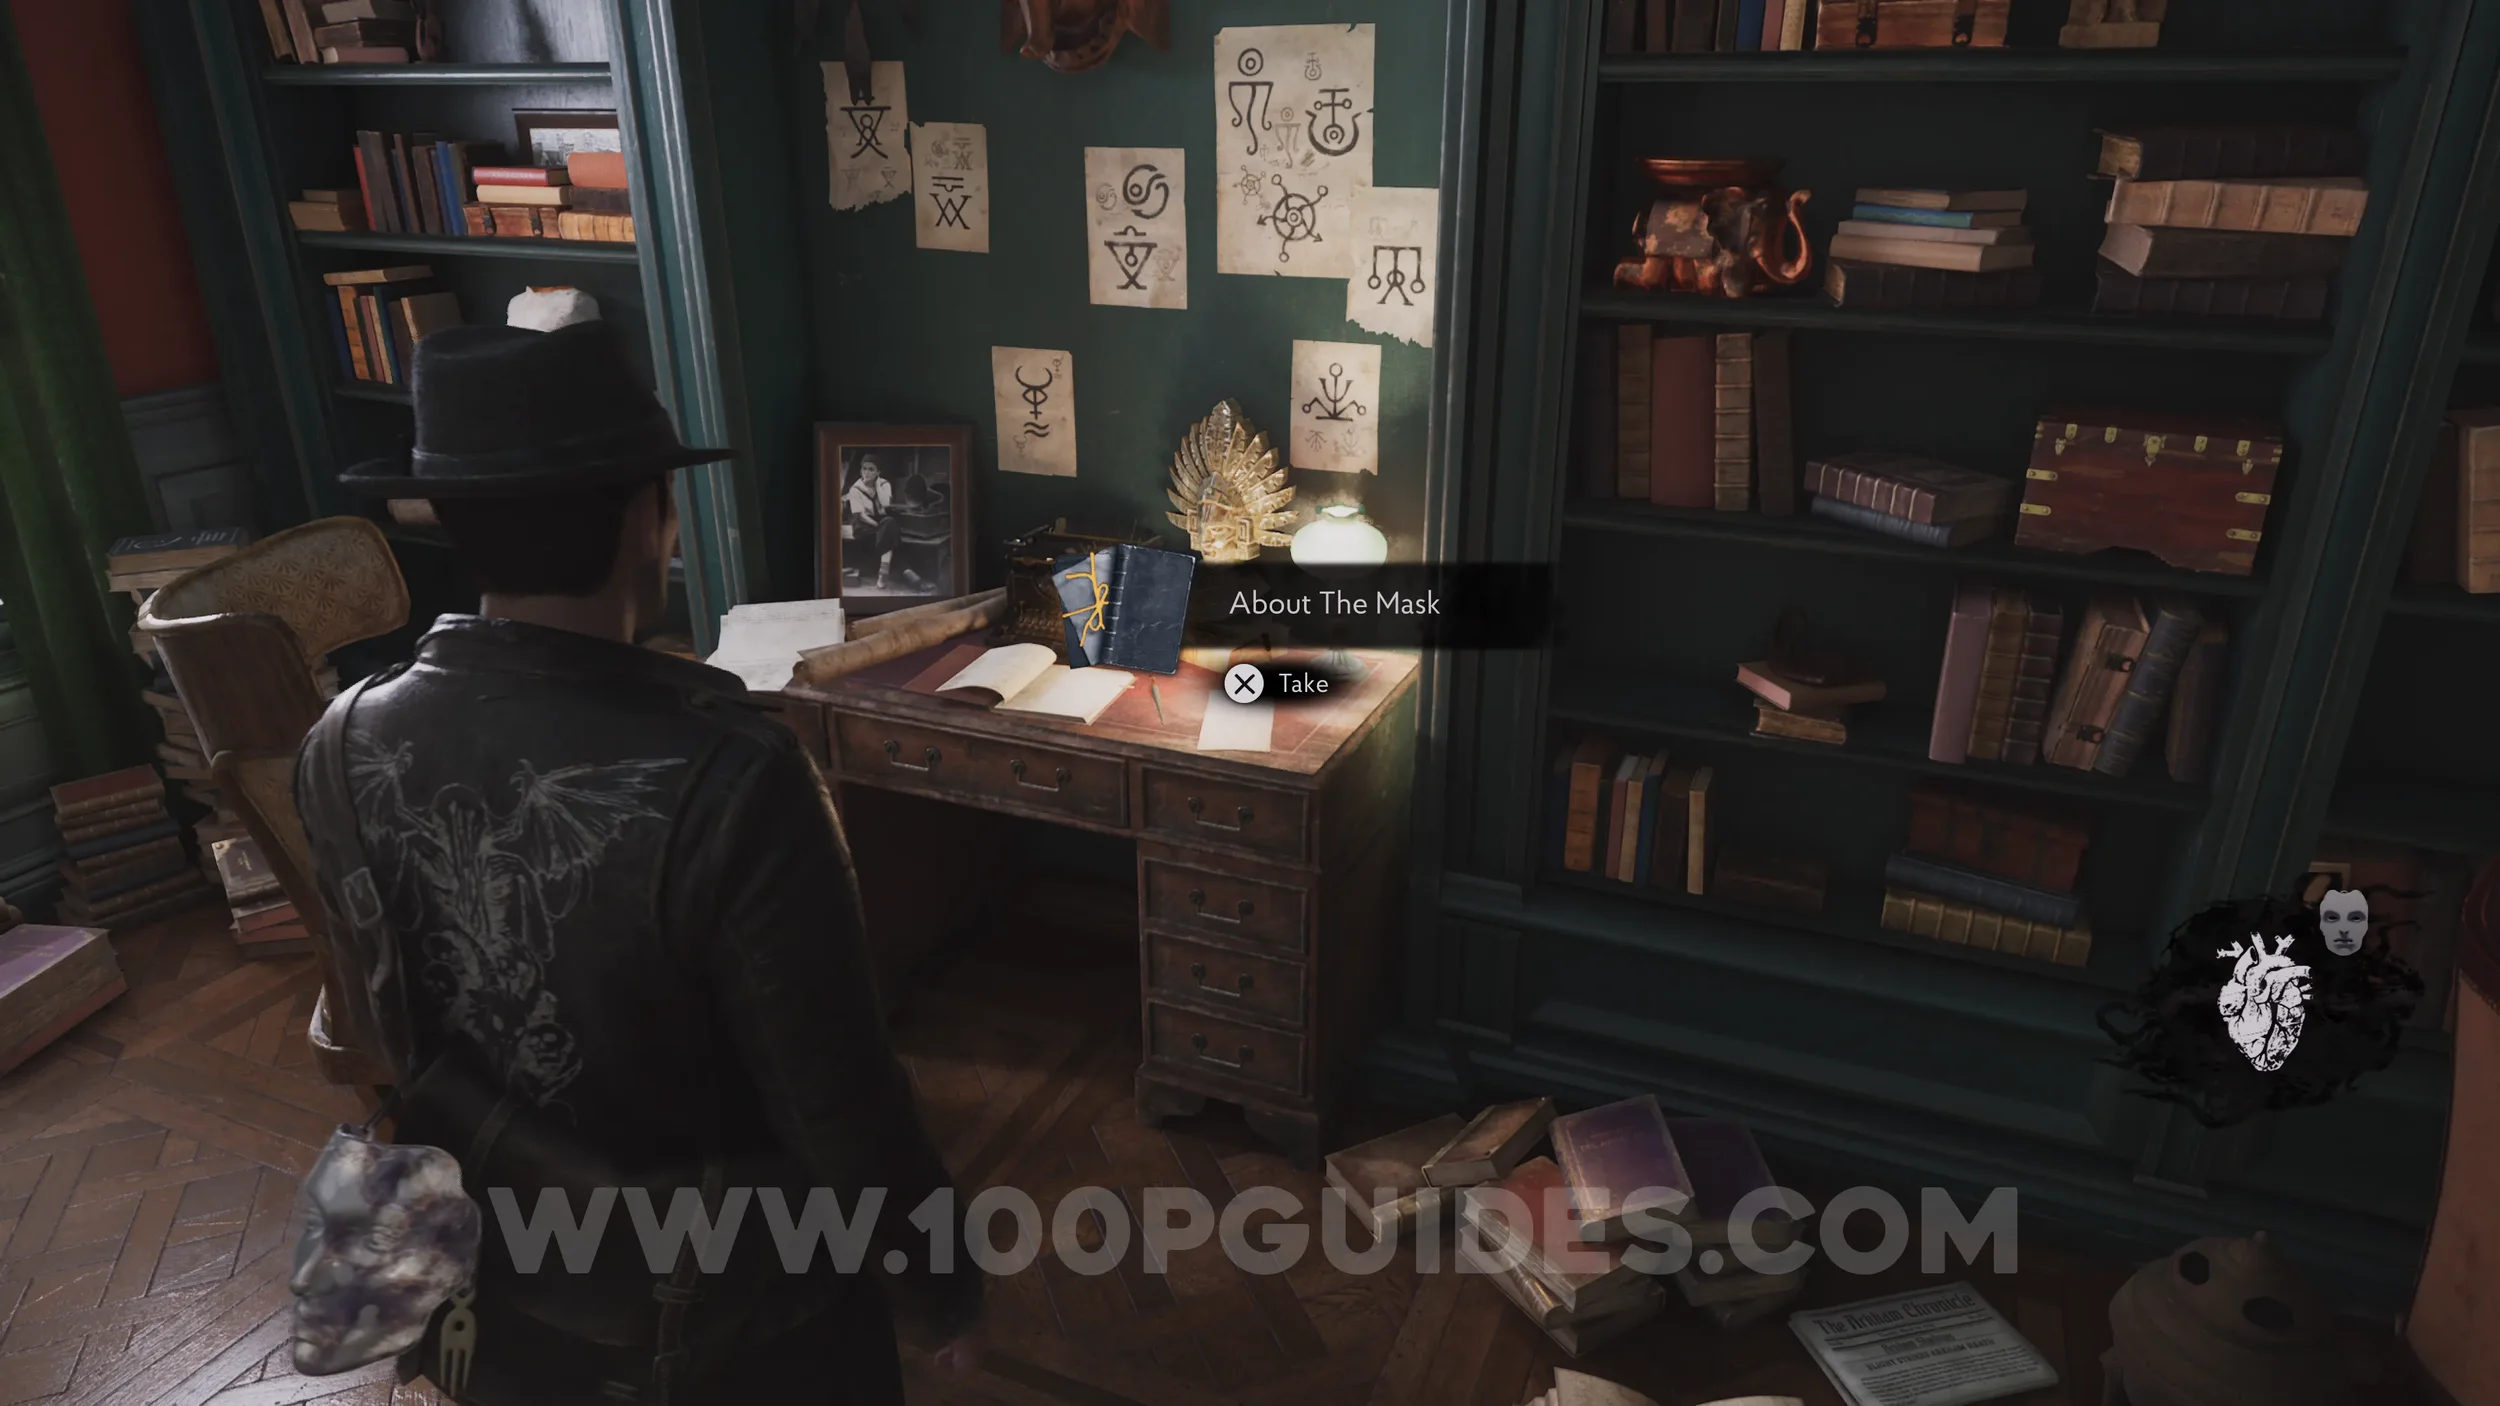
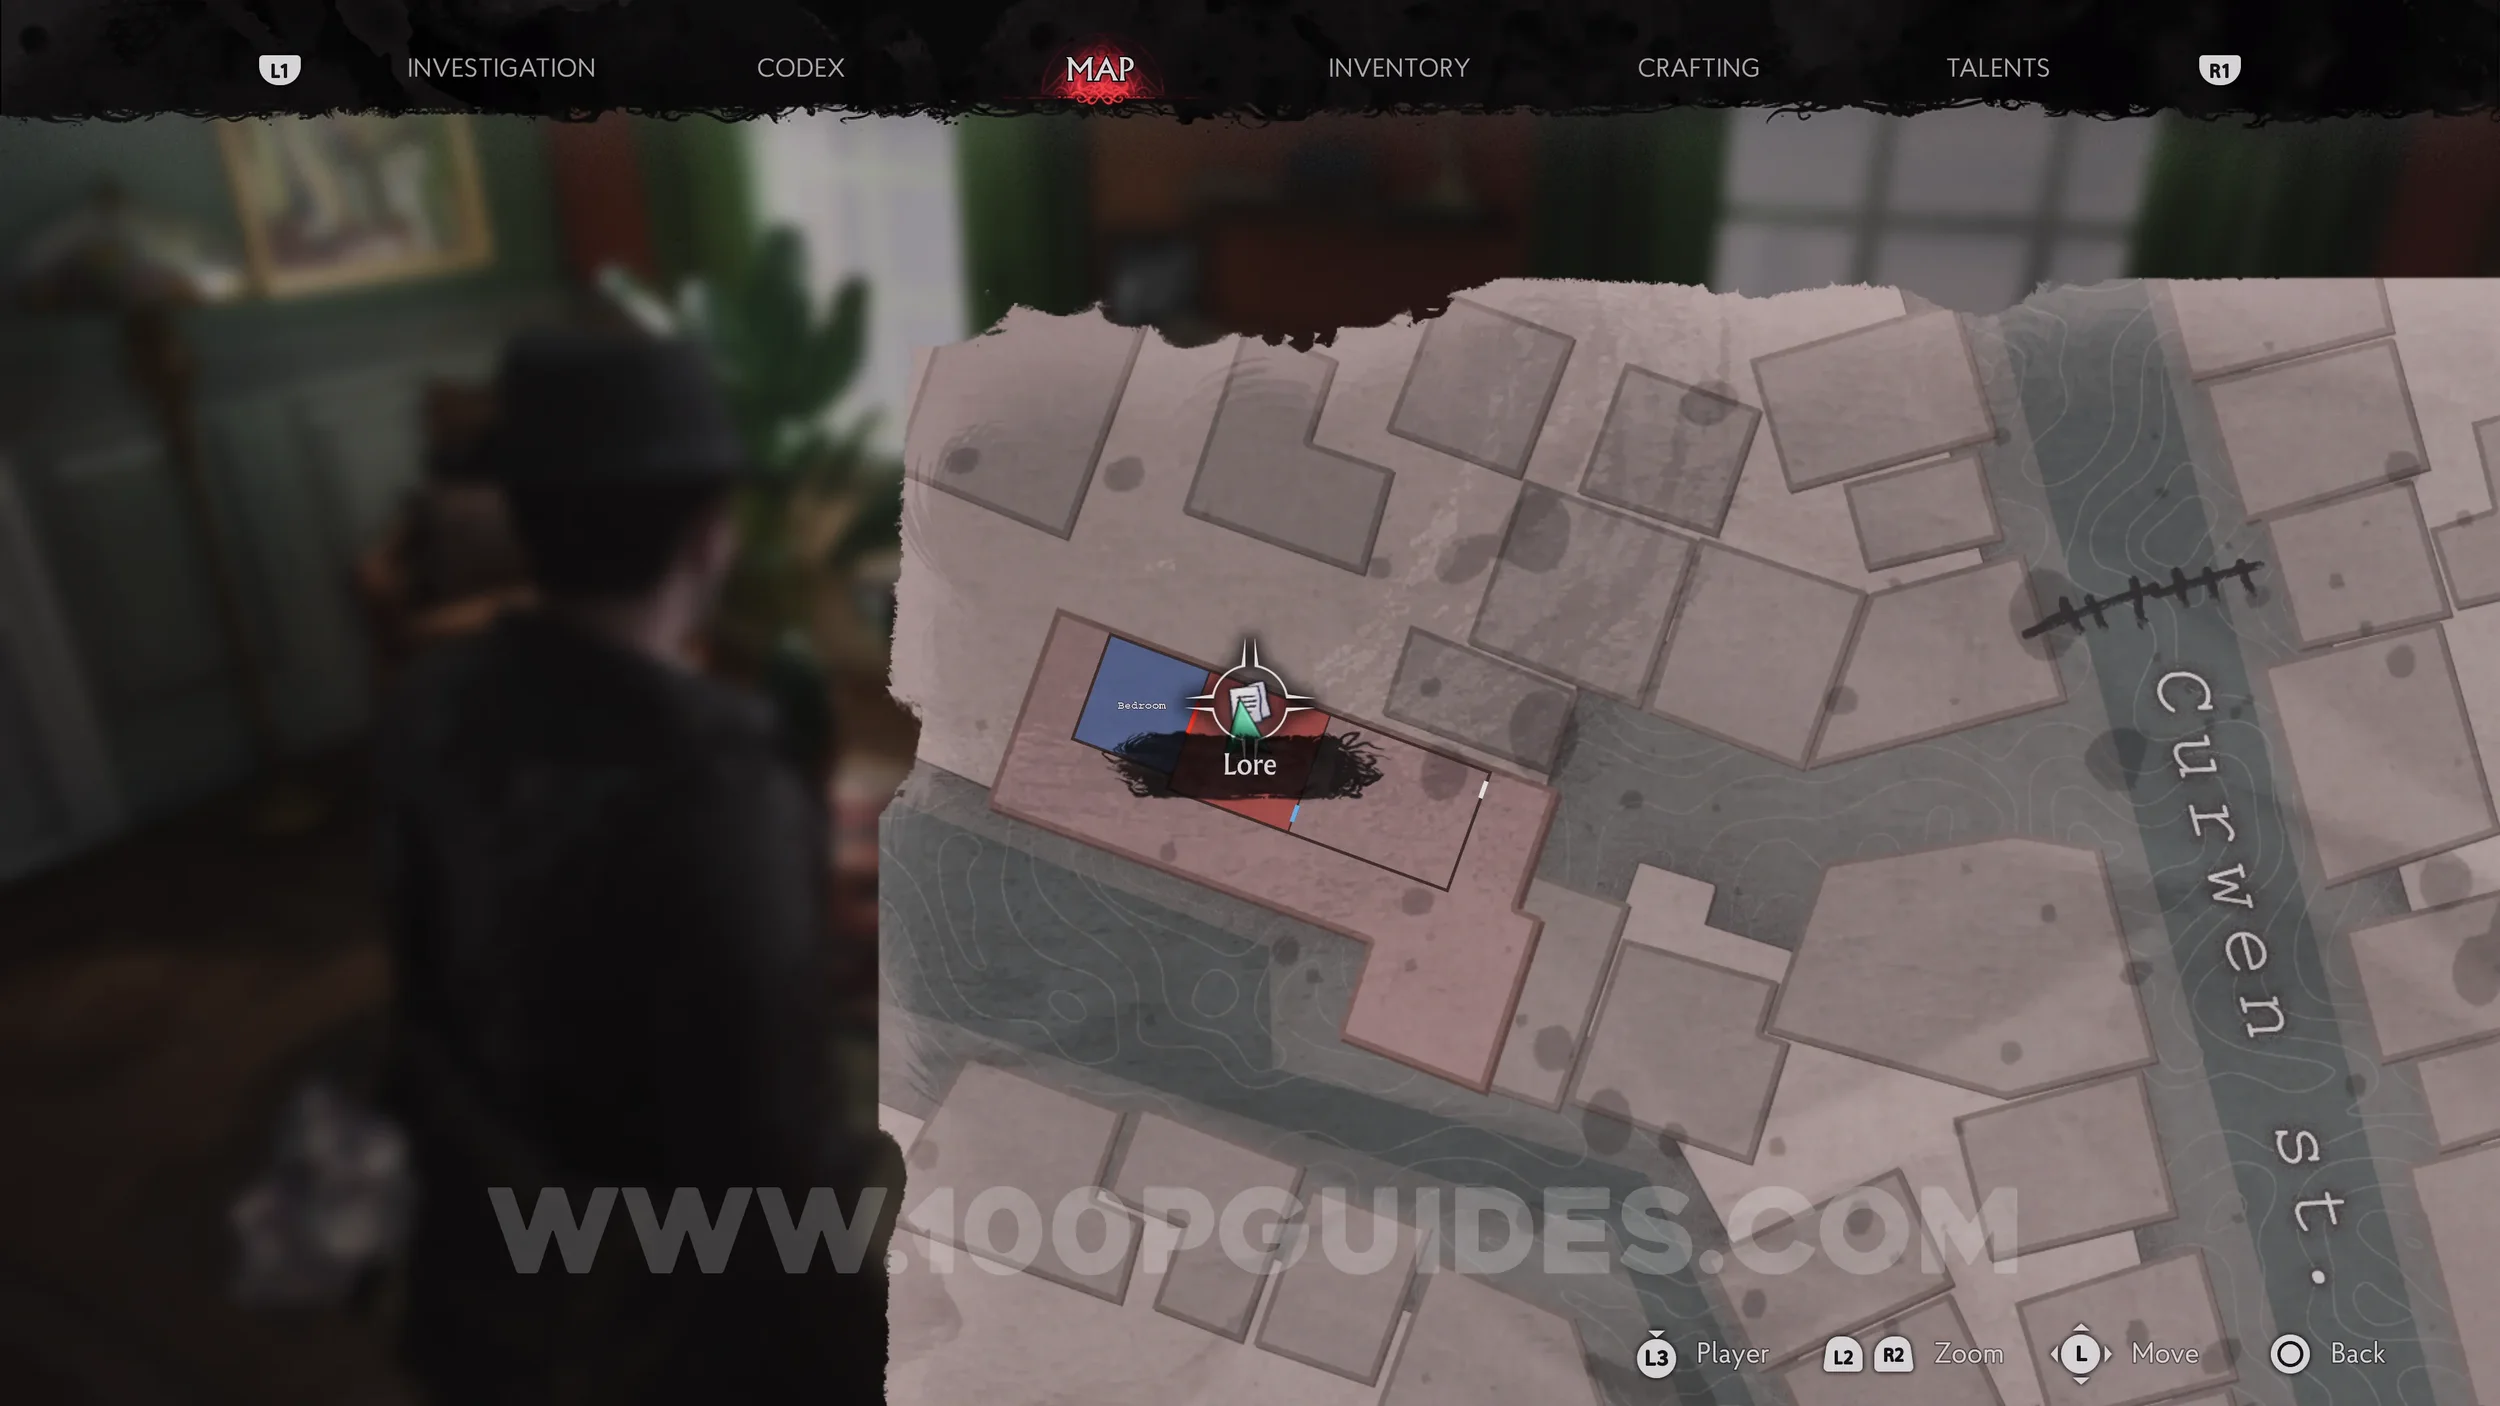
Lore Codex: About The Mask. On the desk in the room where you start.
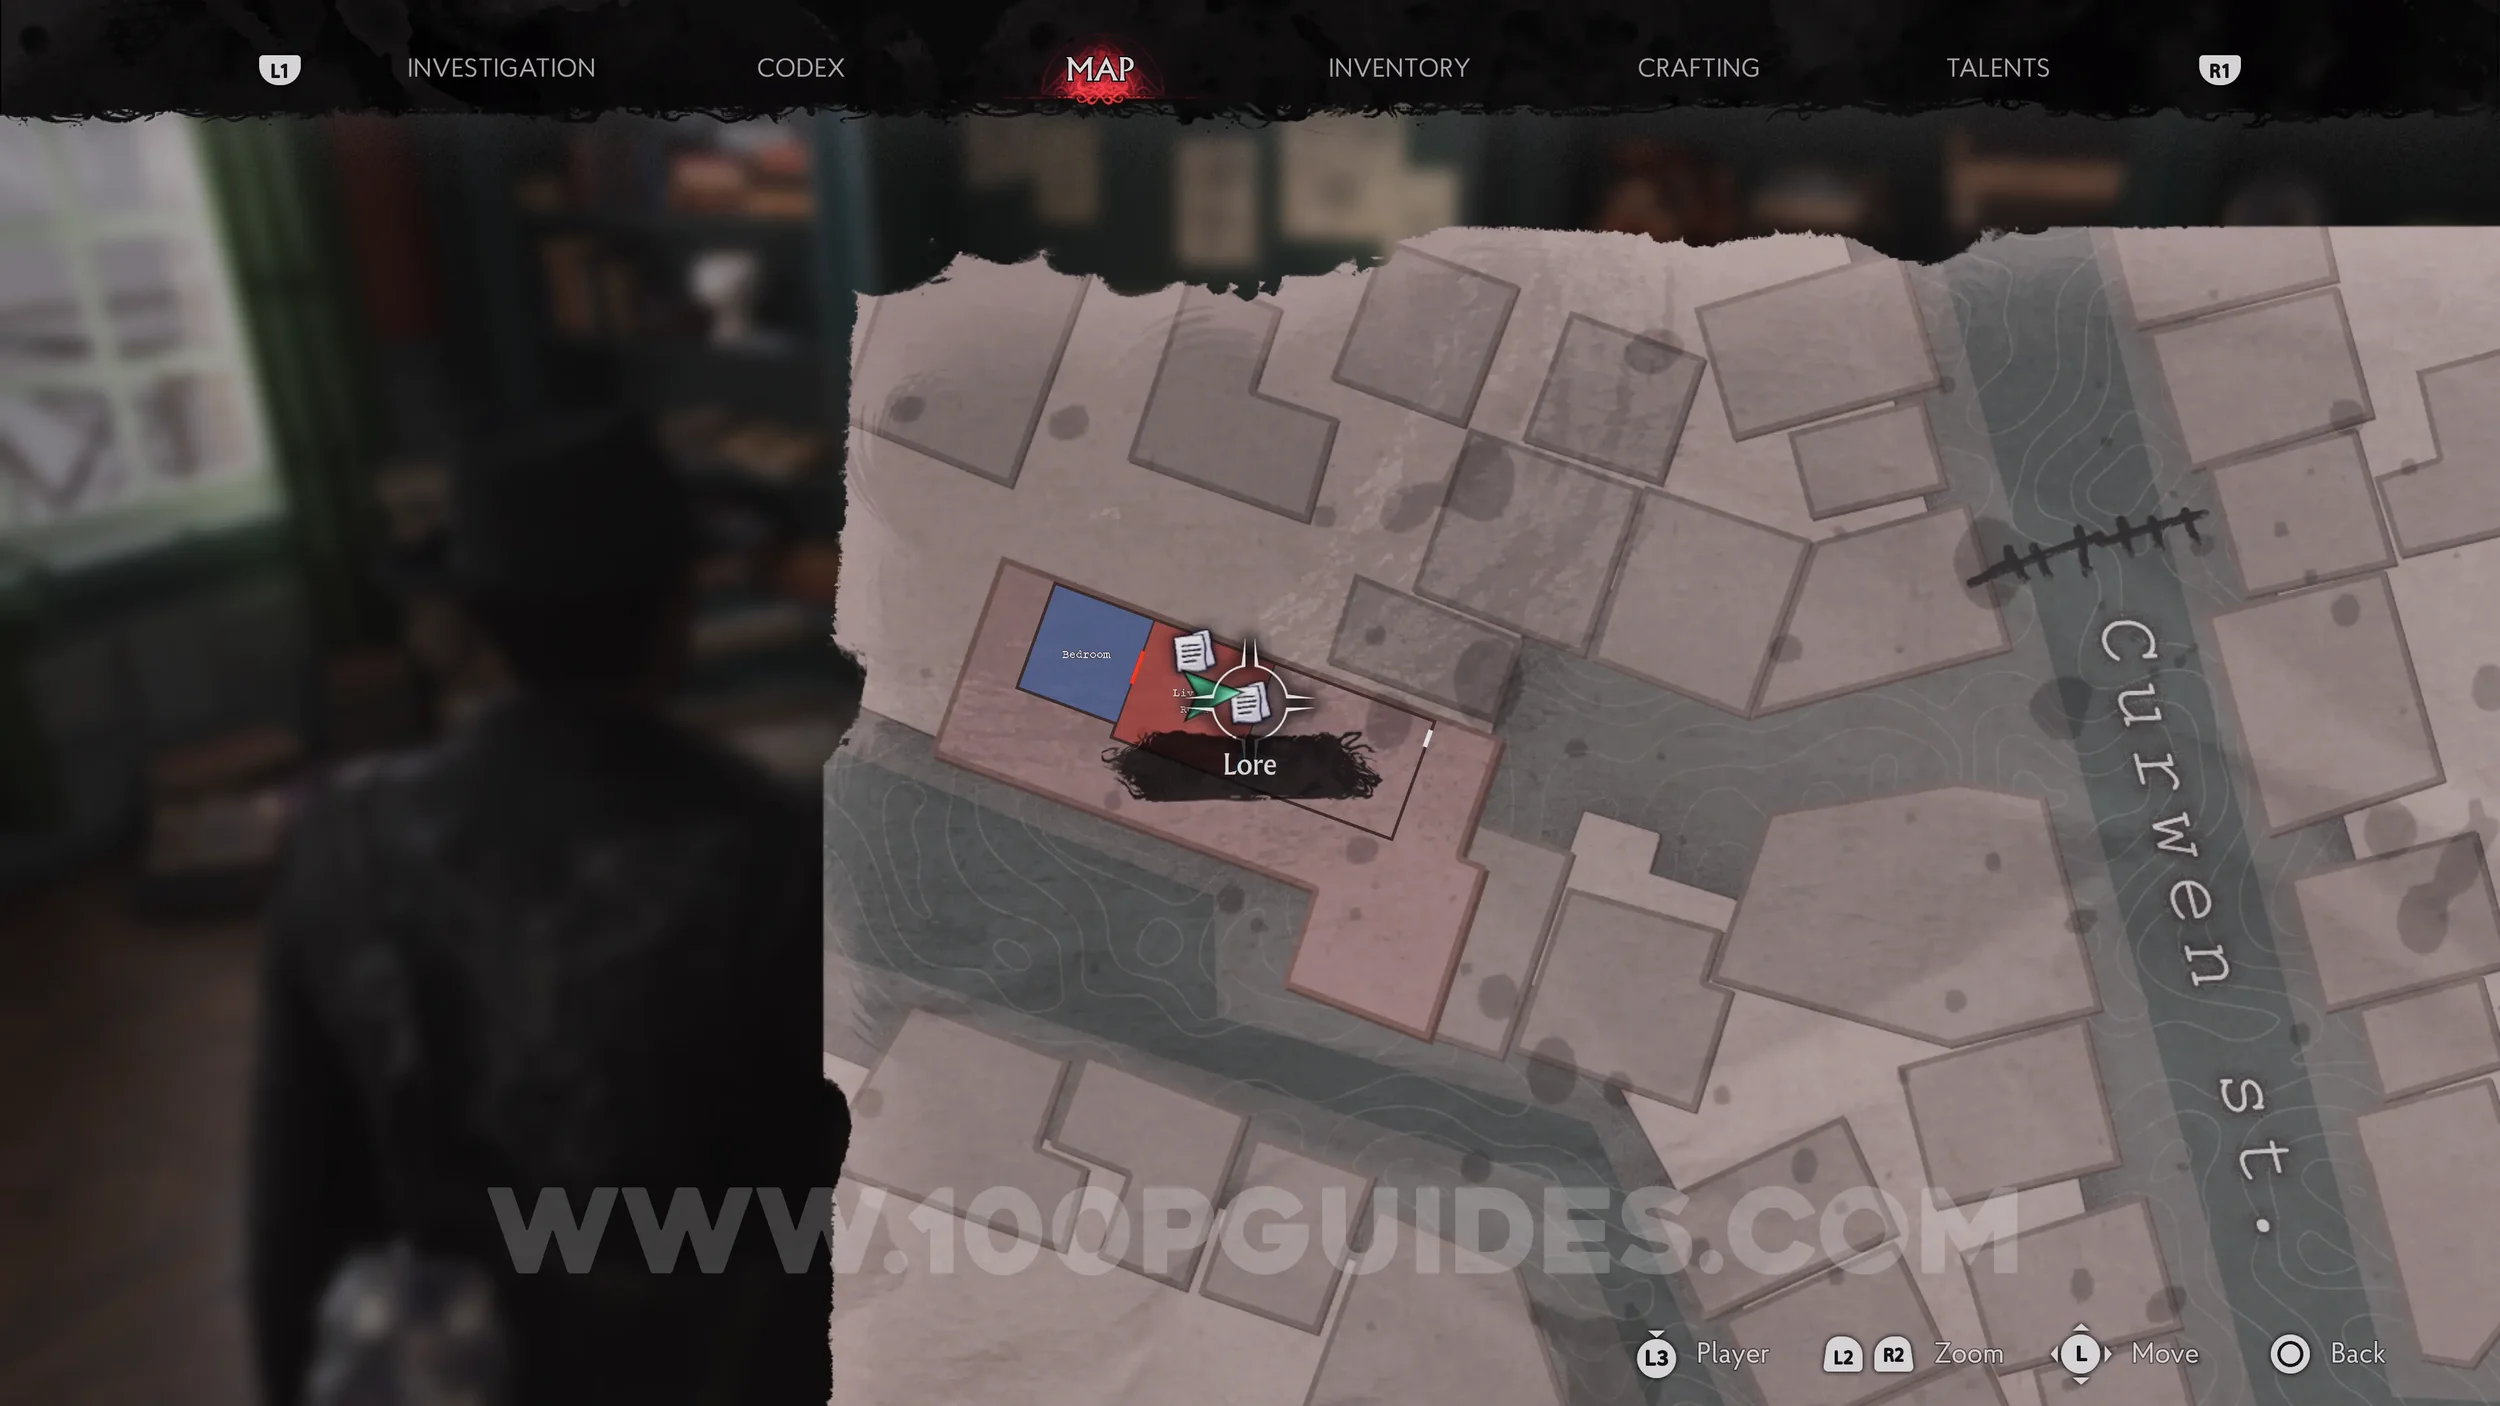
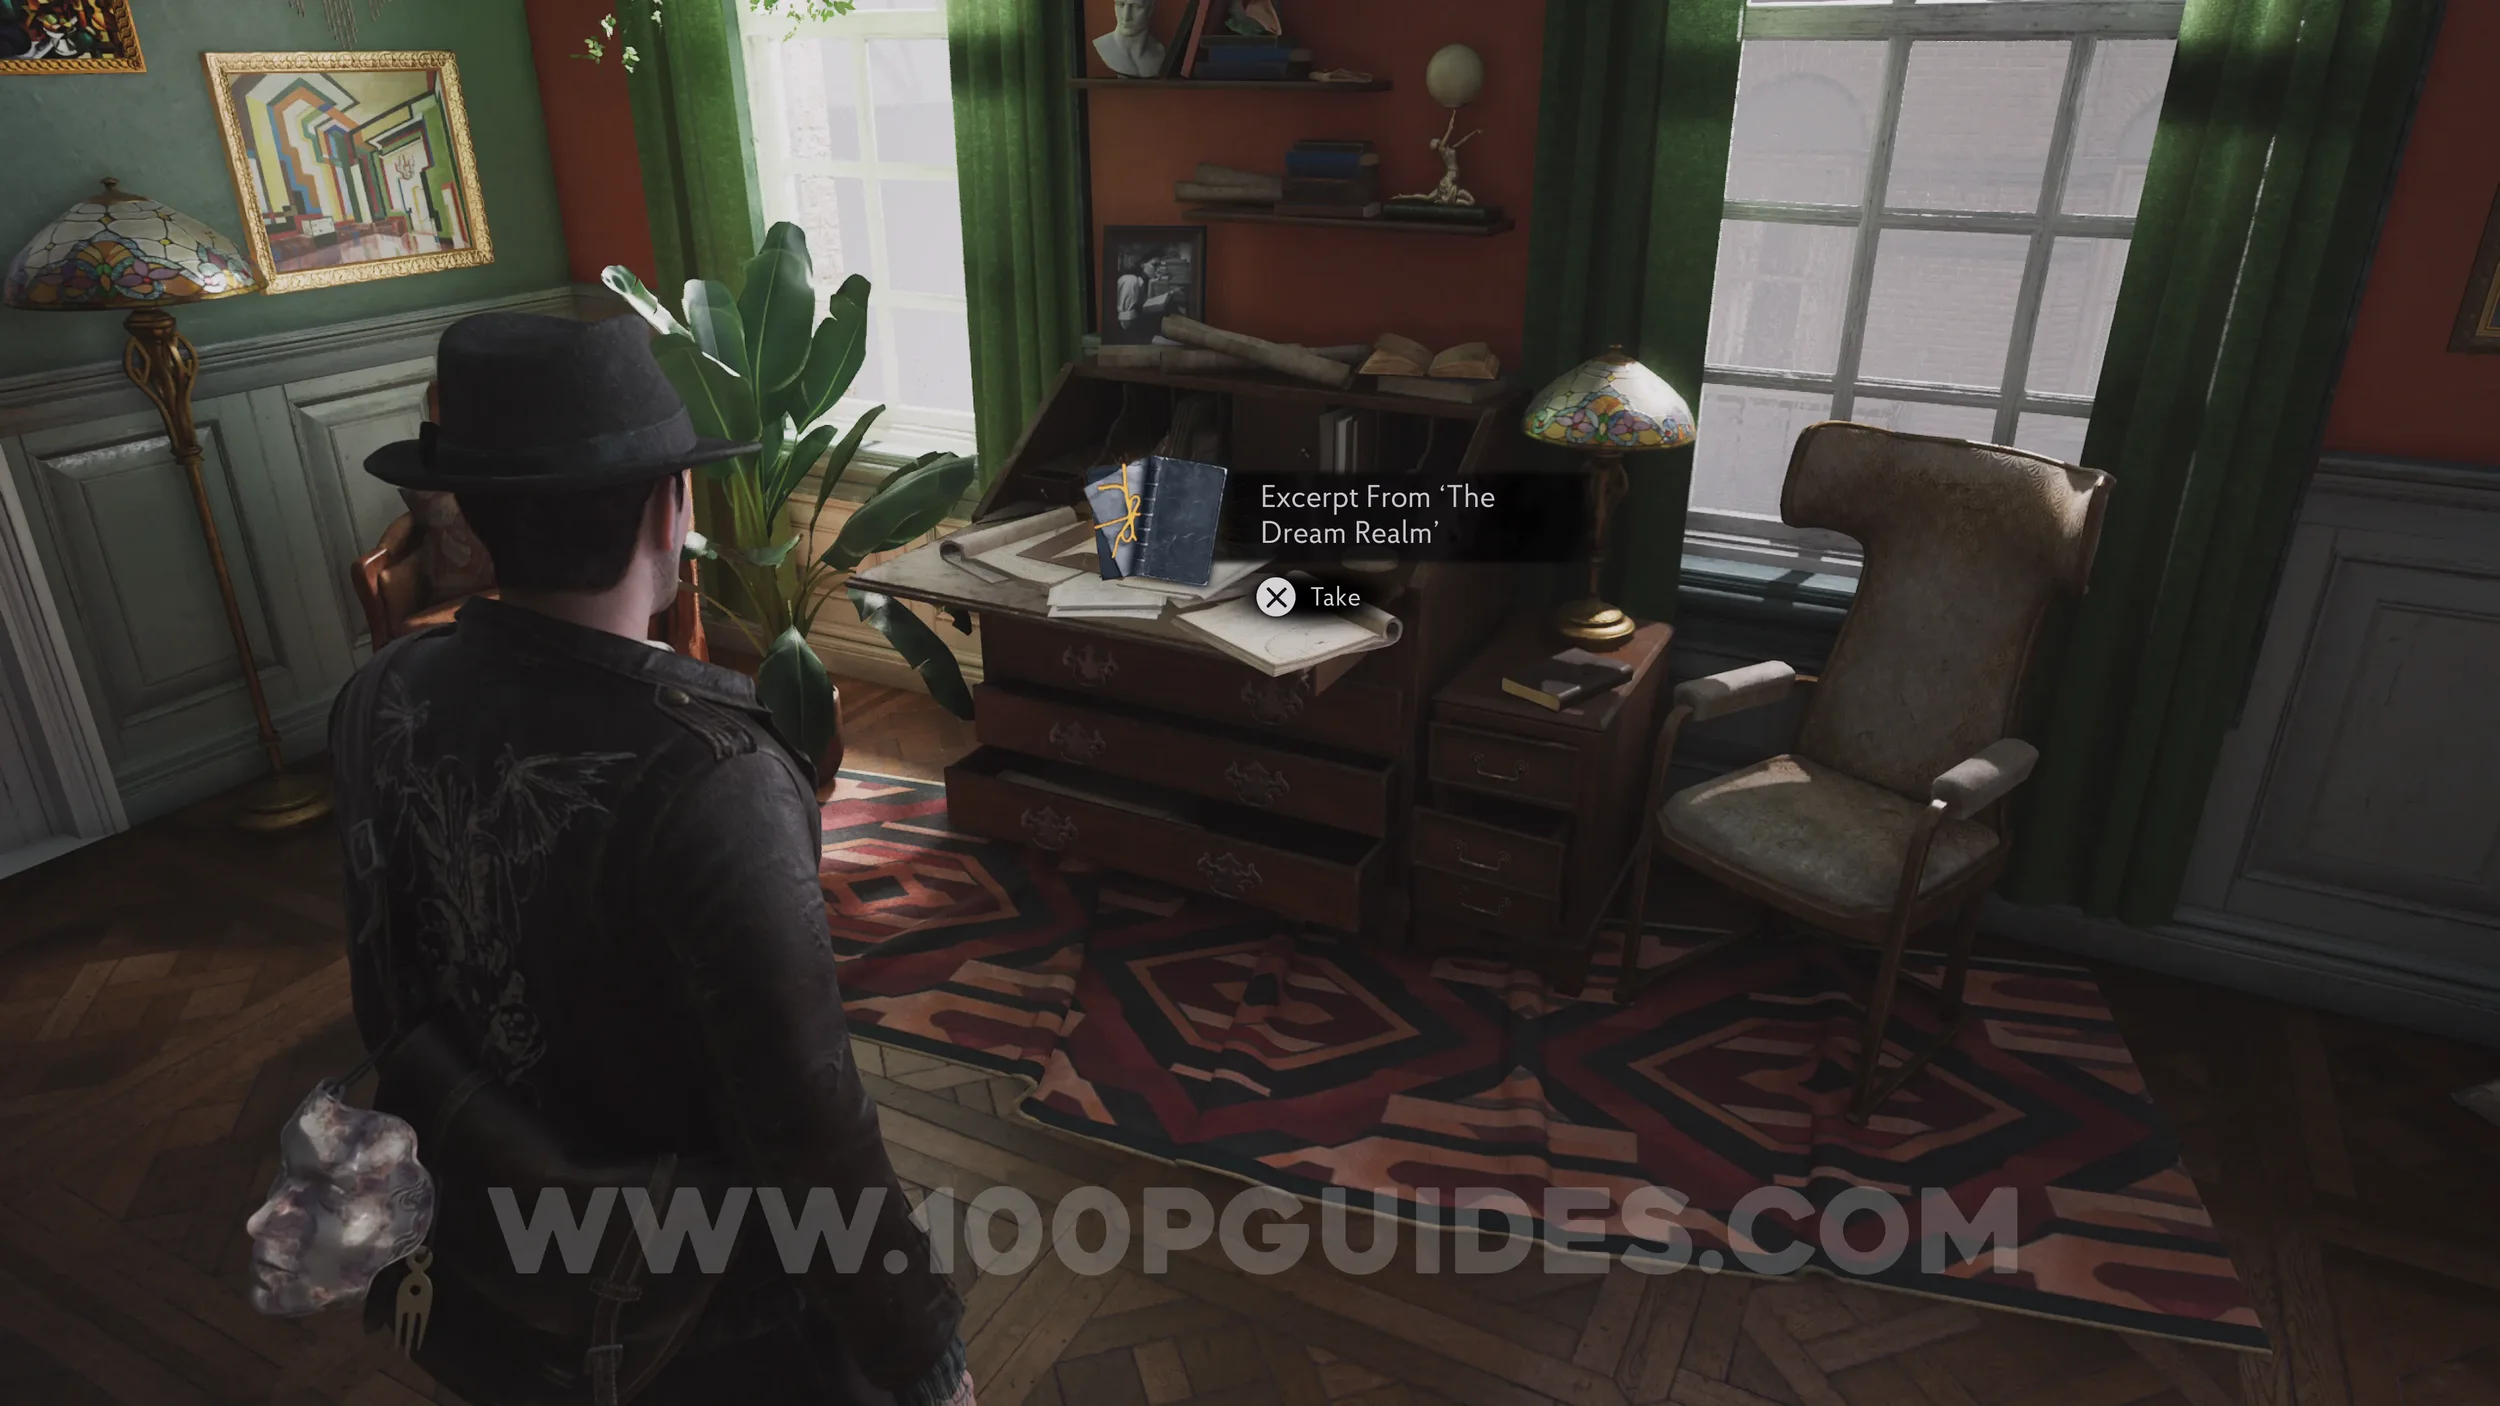
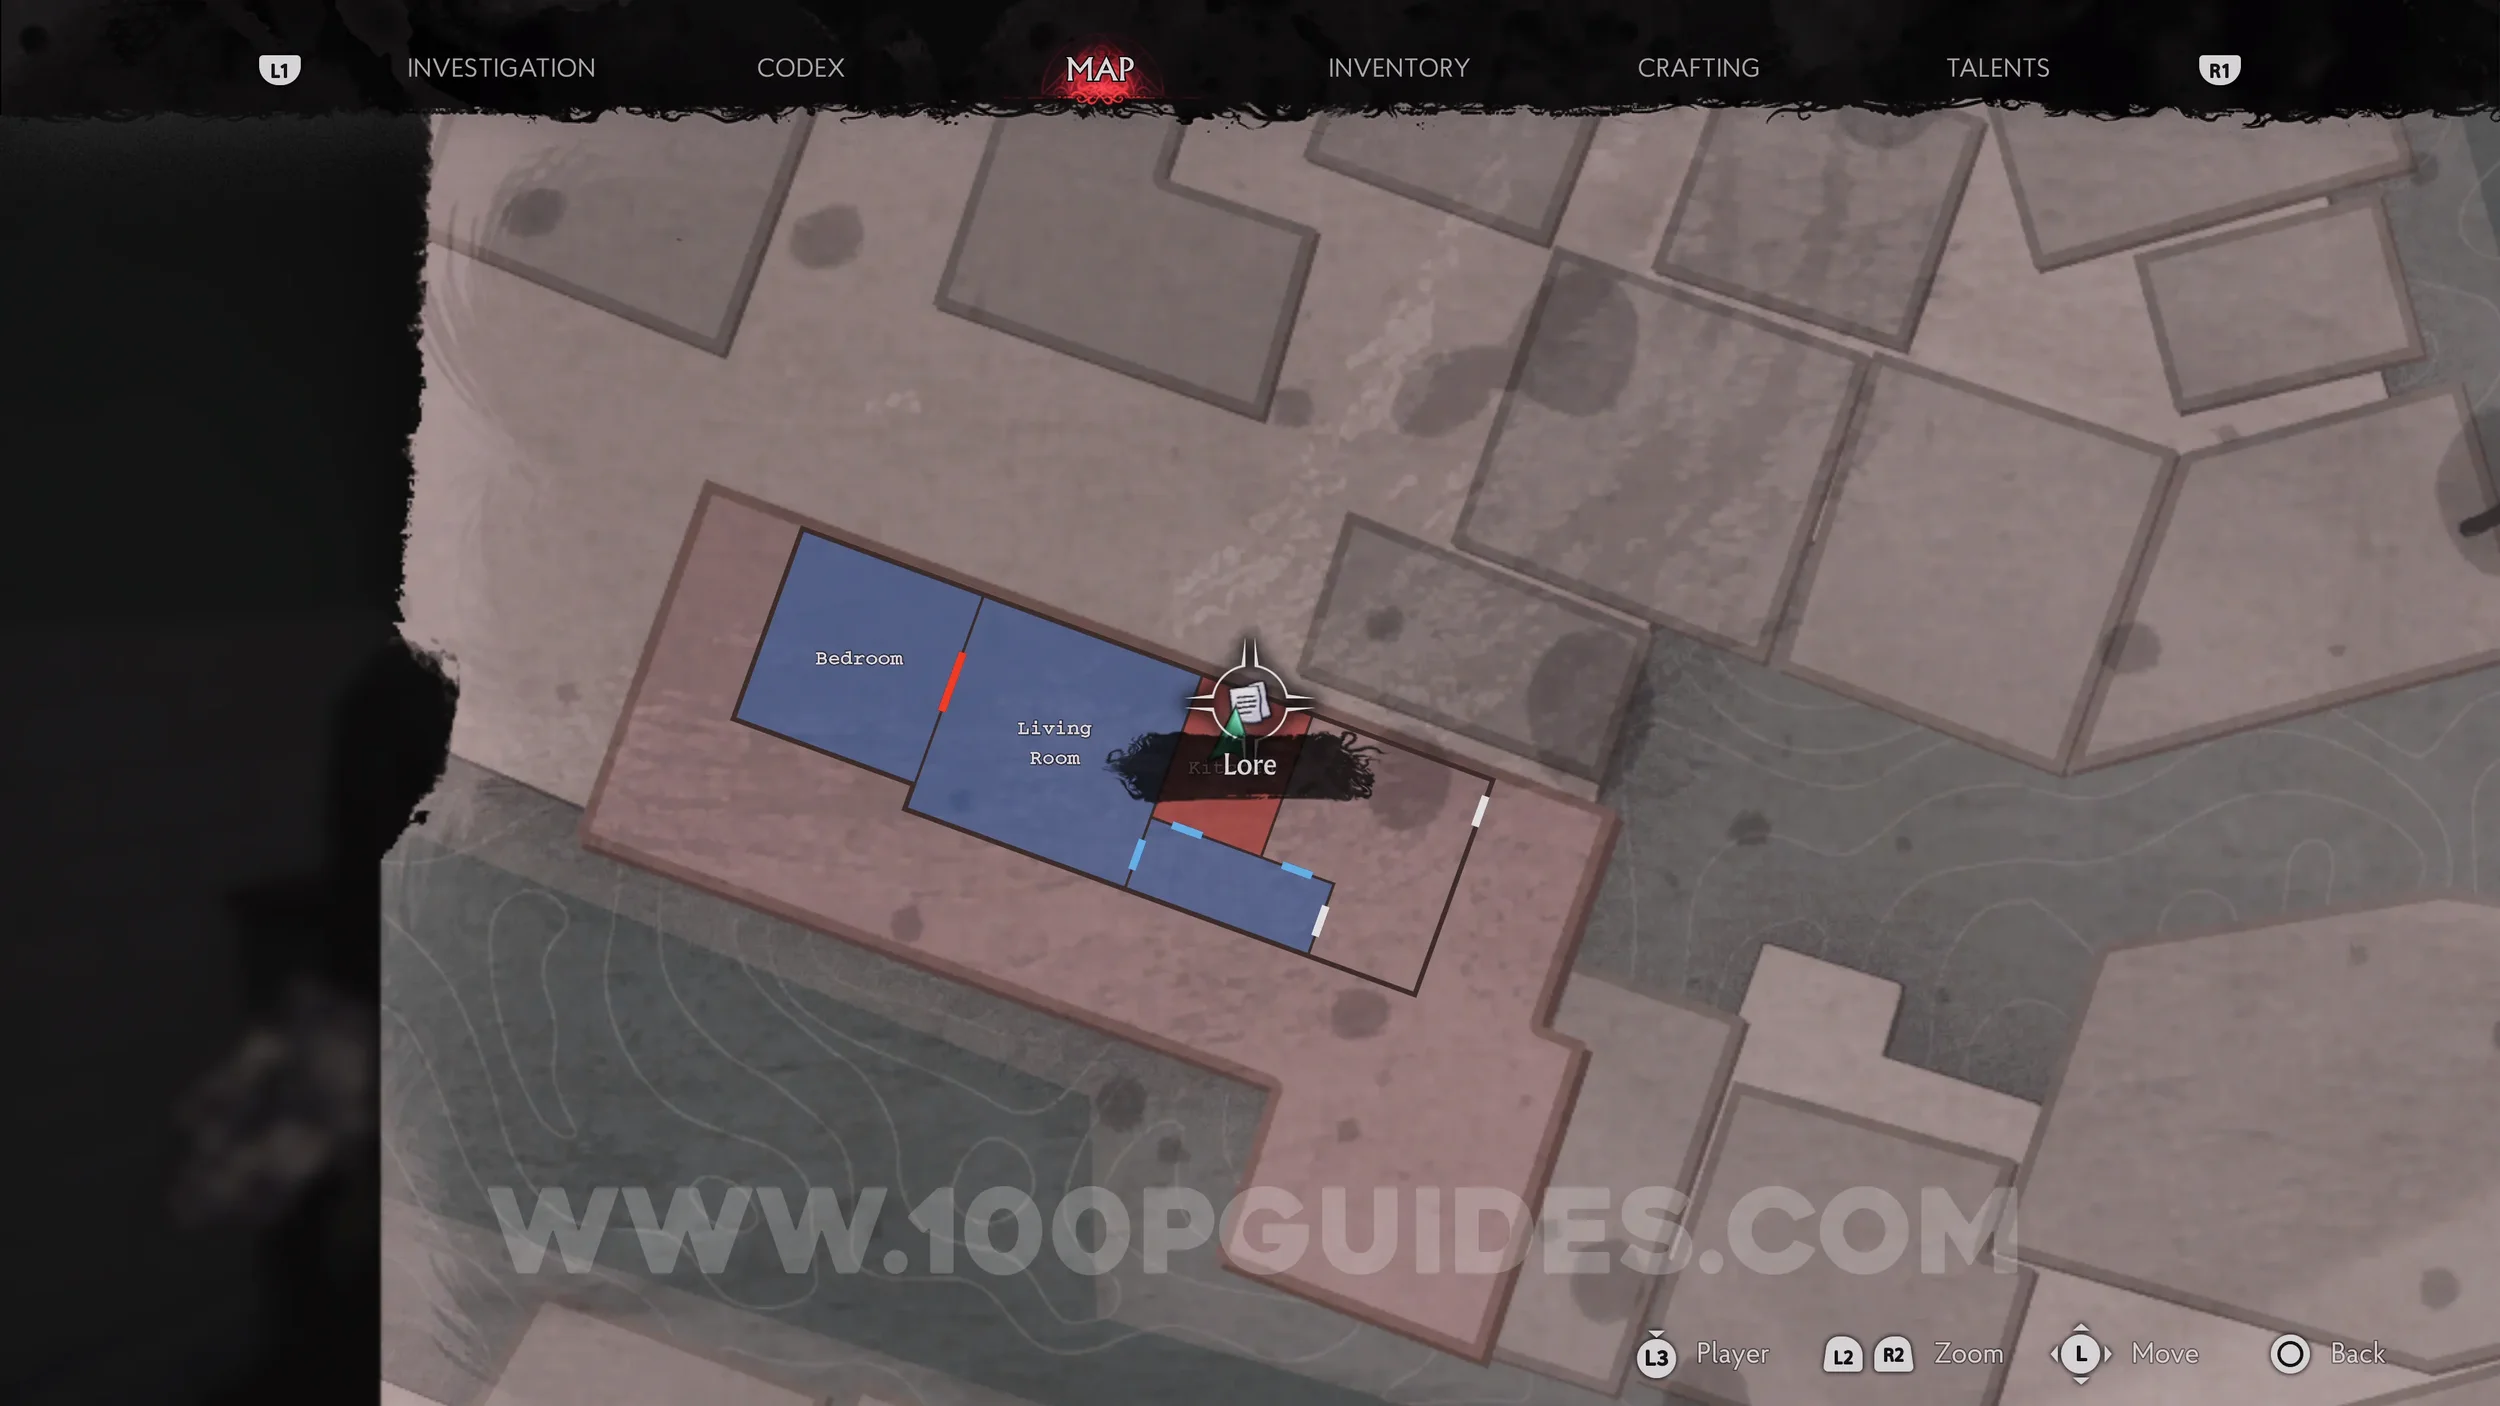
Lore Codex: Excerpt From ‘The Dream Realm’. On the writing desk in the room where you start.
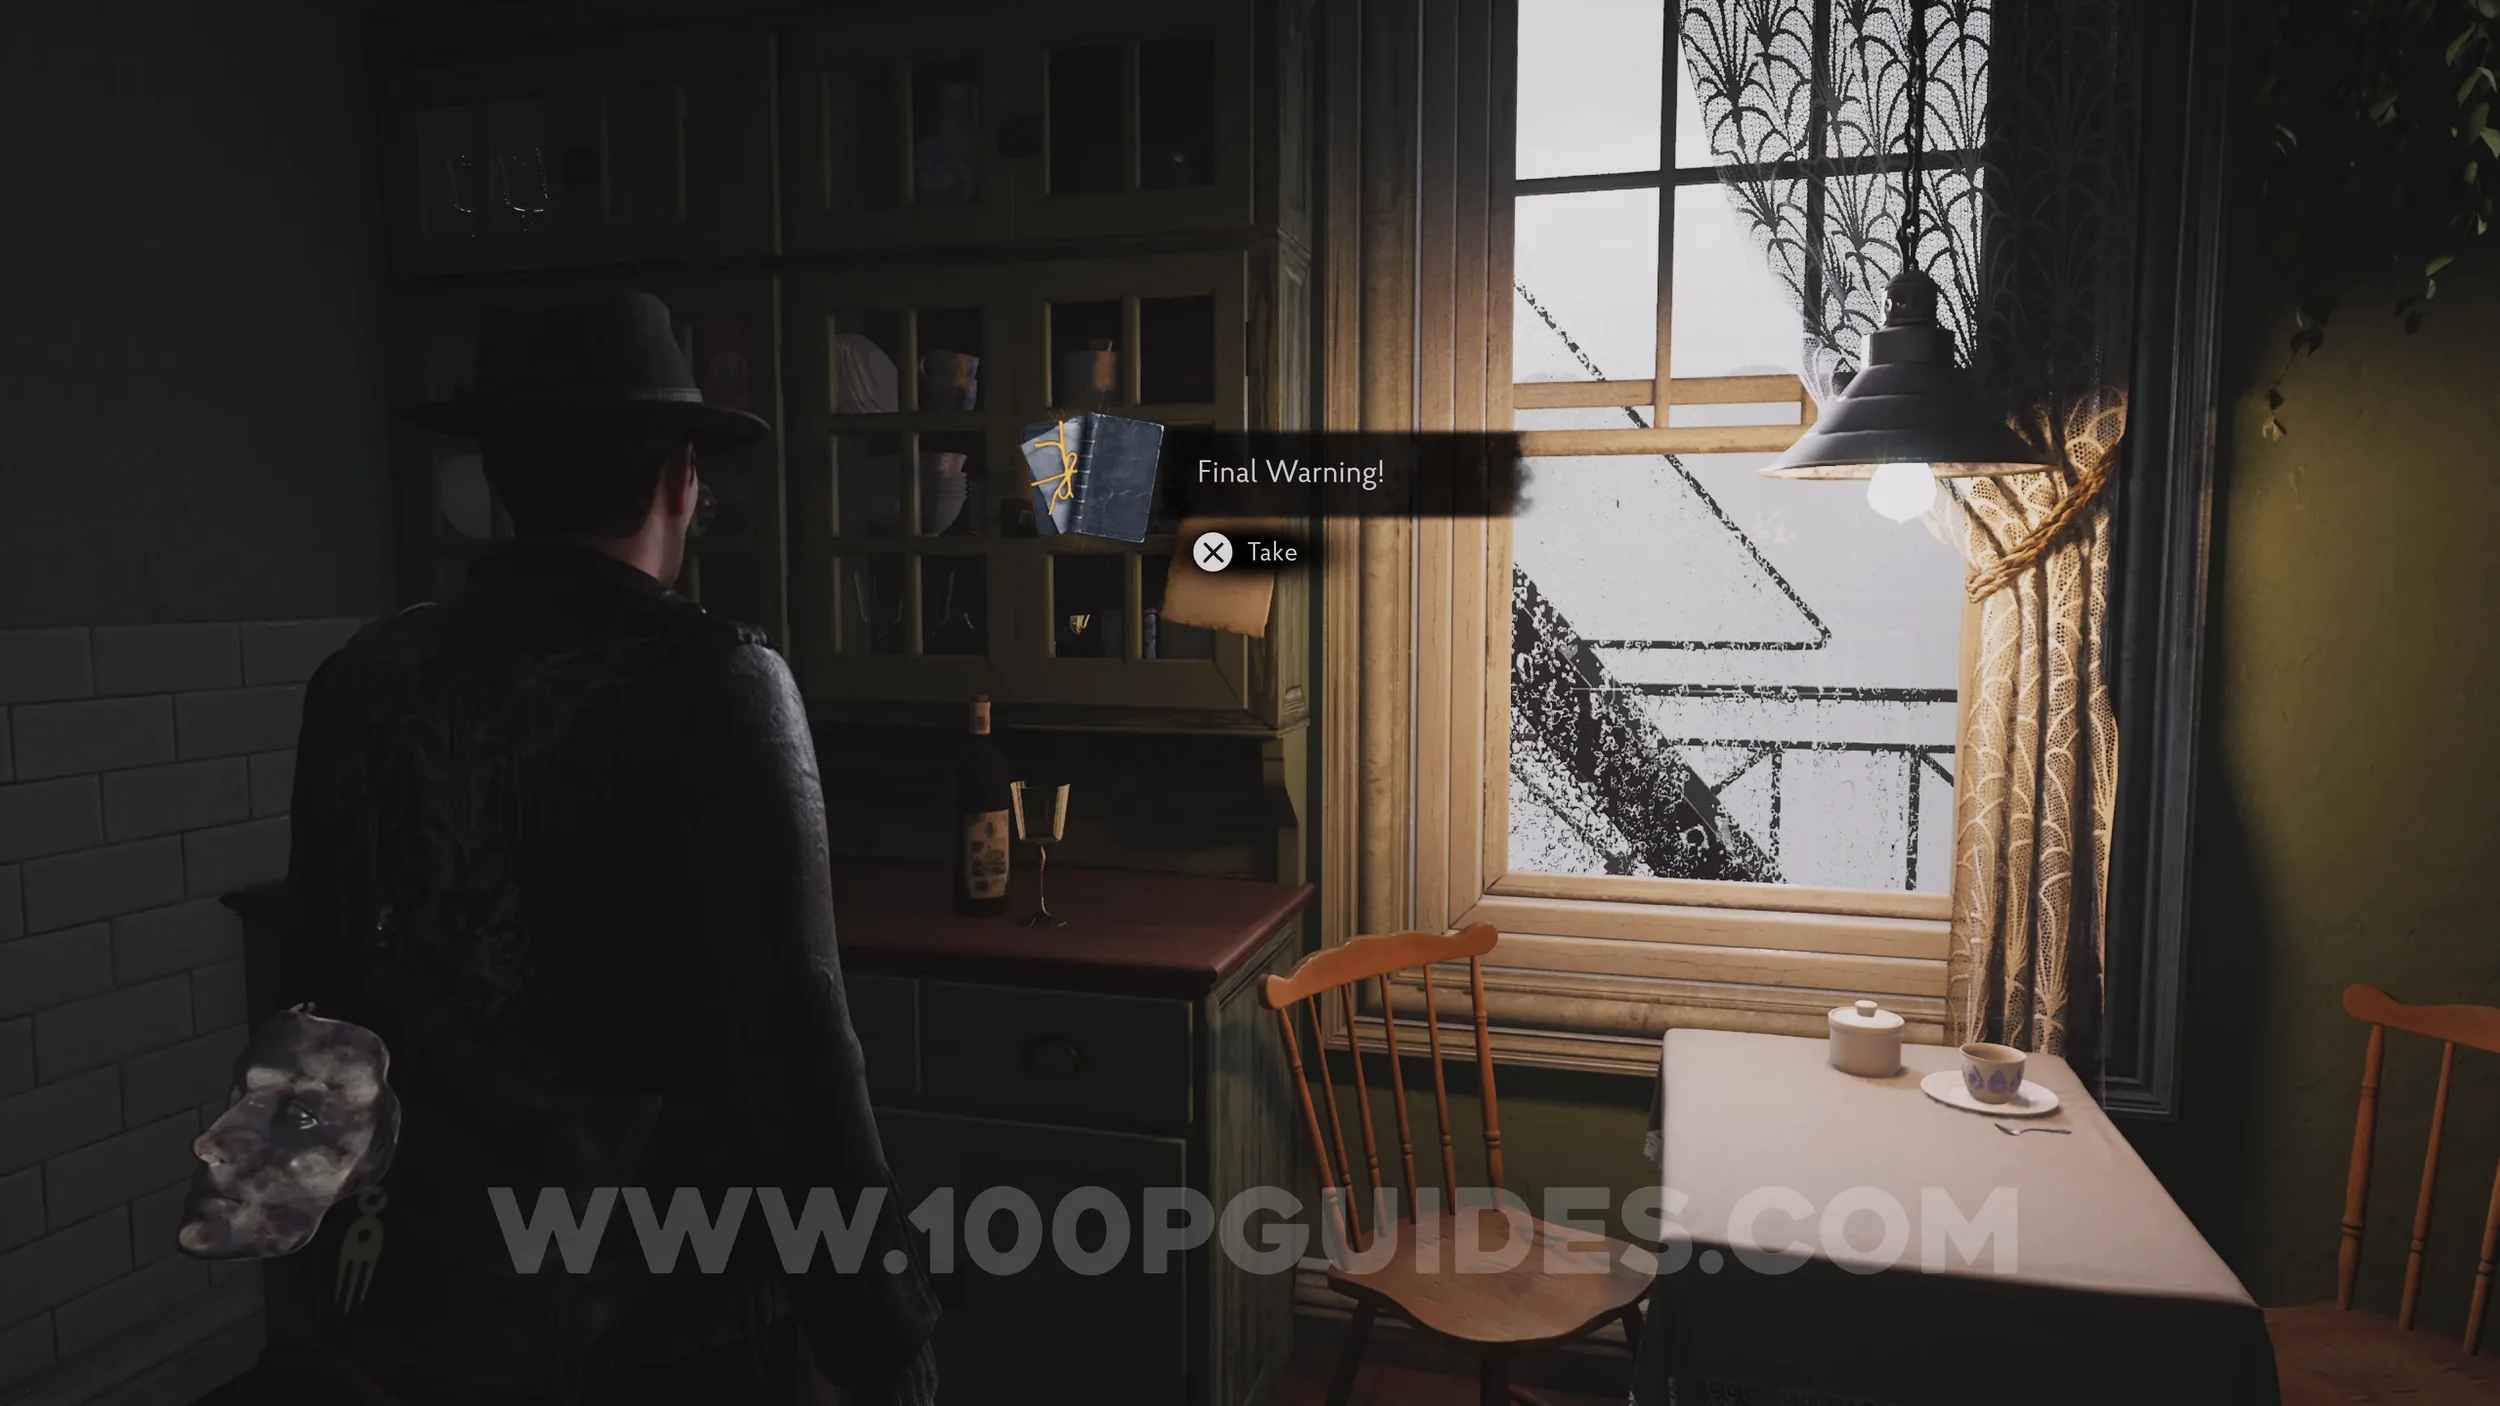
Lore Codex: Final Warning!. Found stuck to the cupboard in the kitchen.
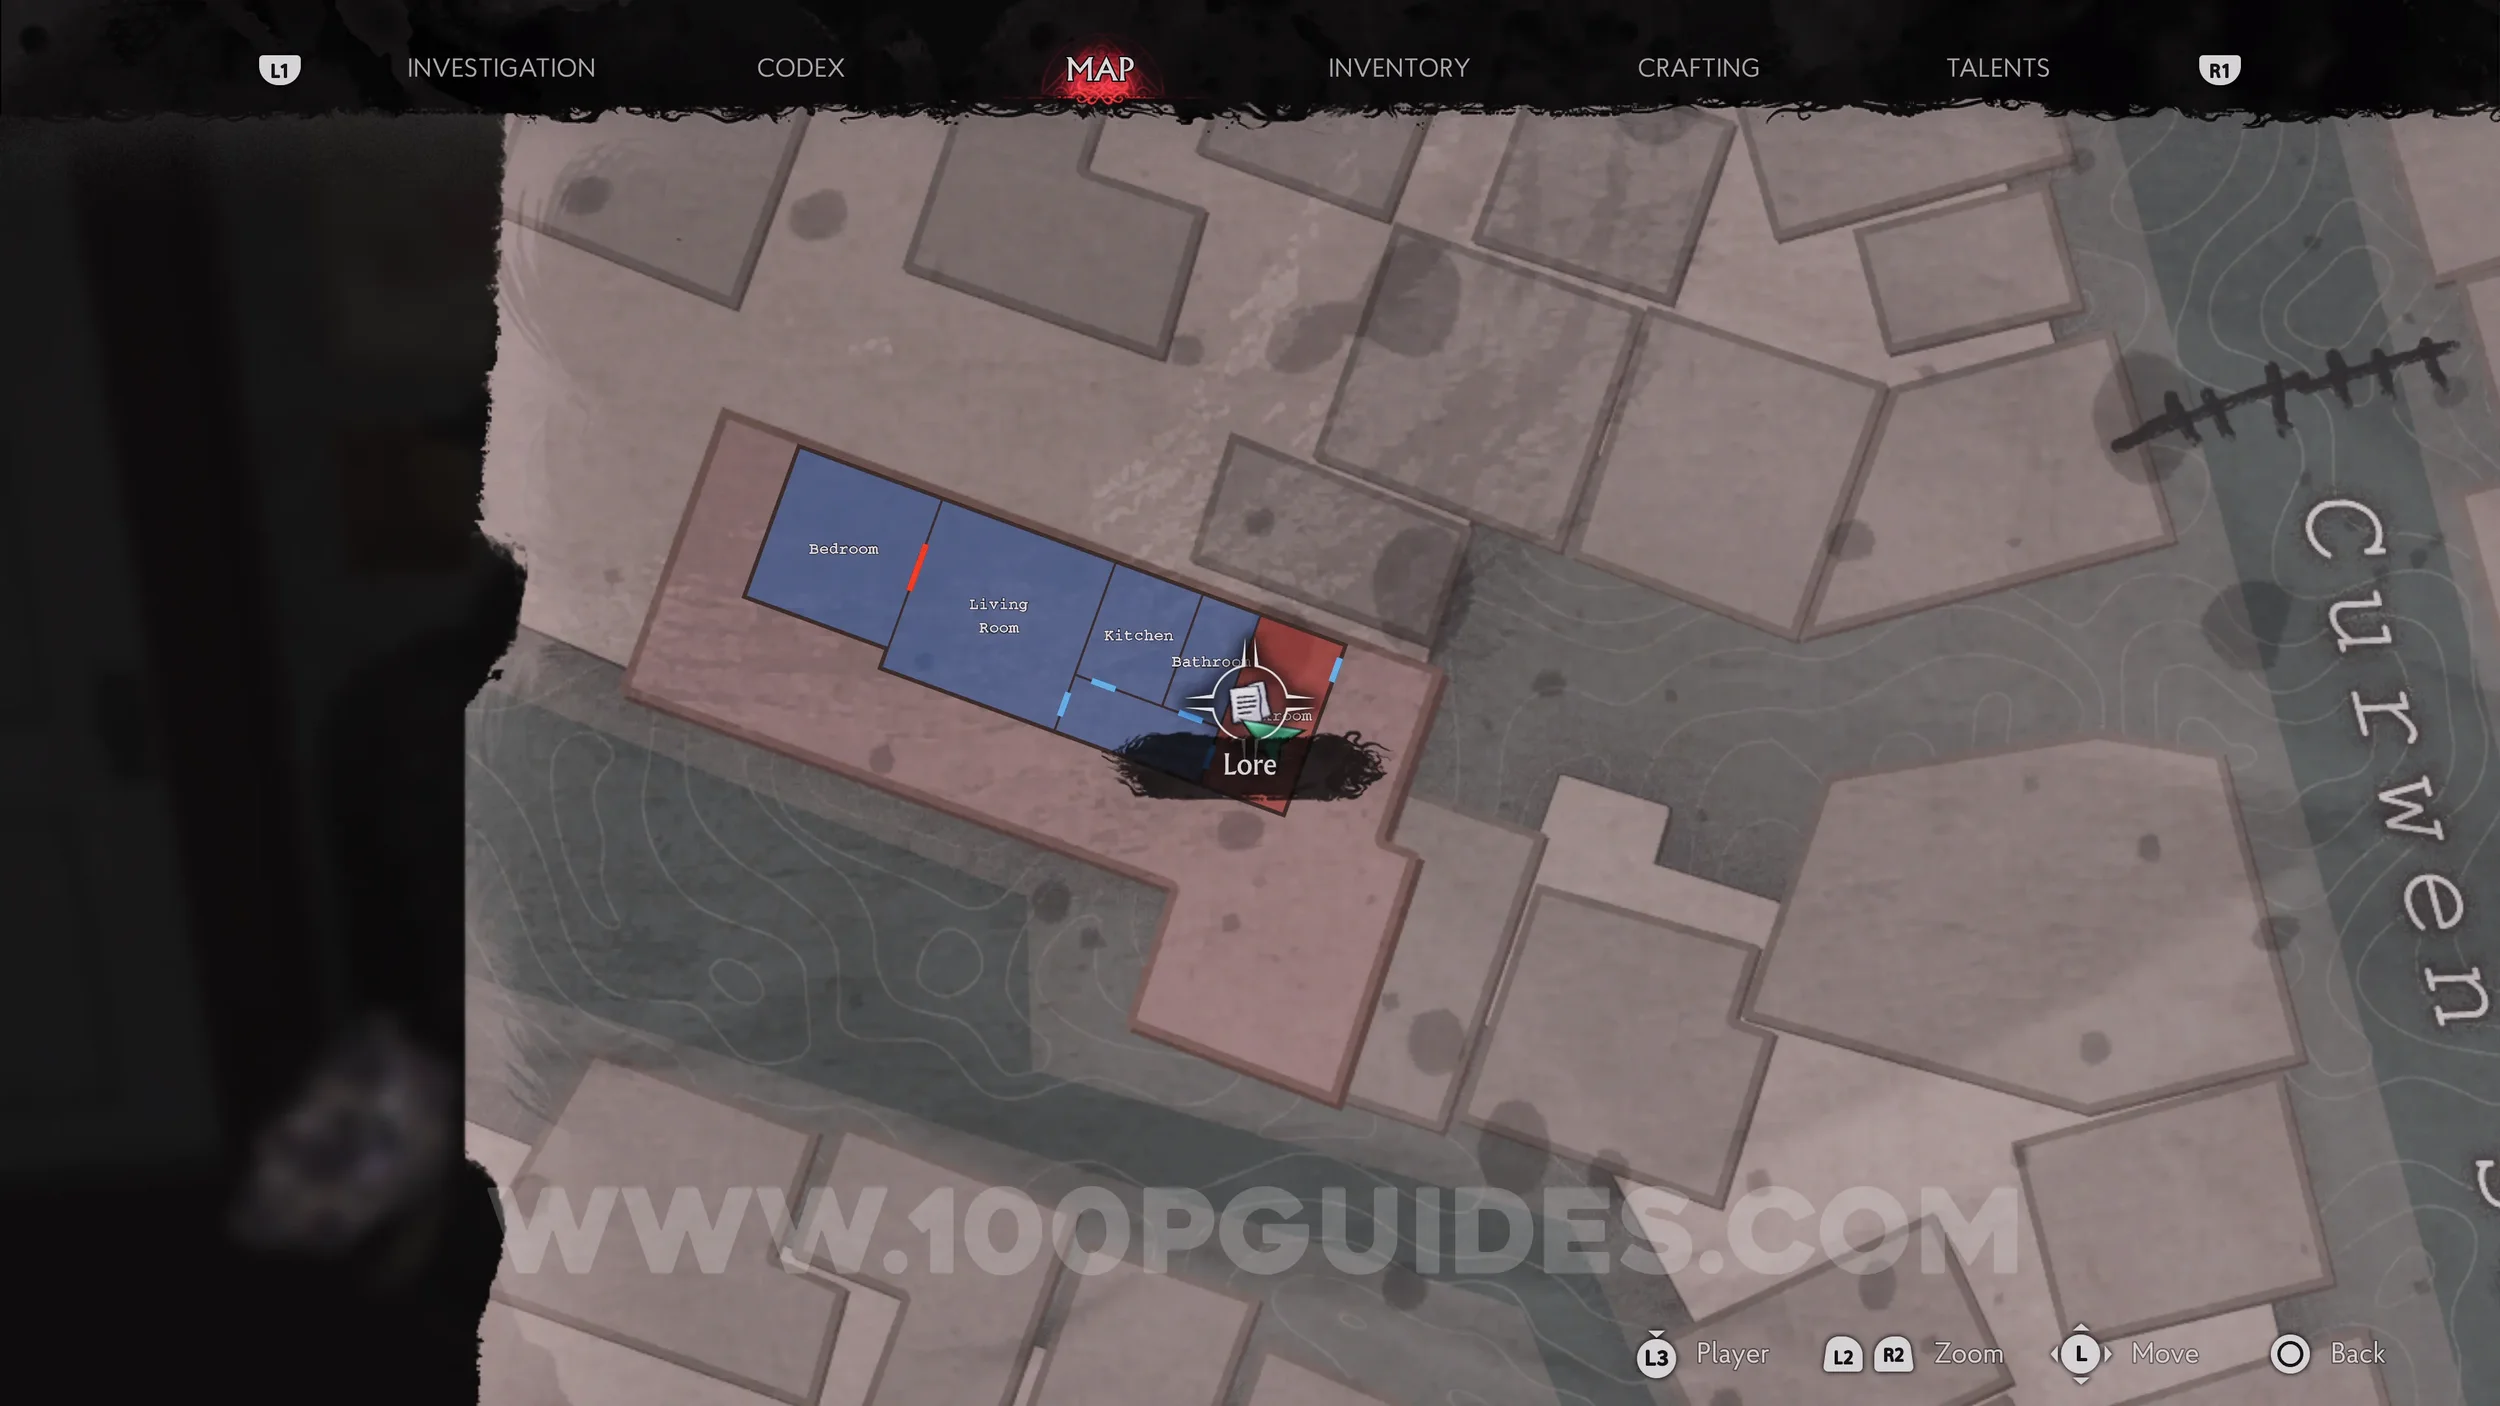
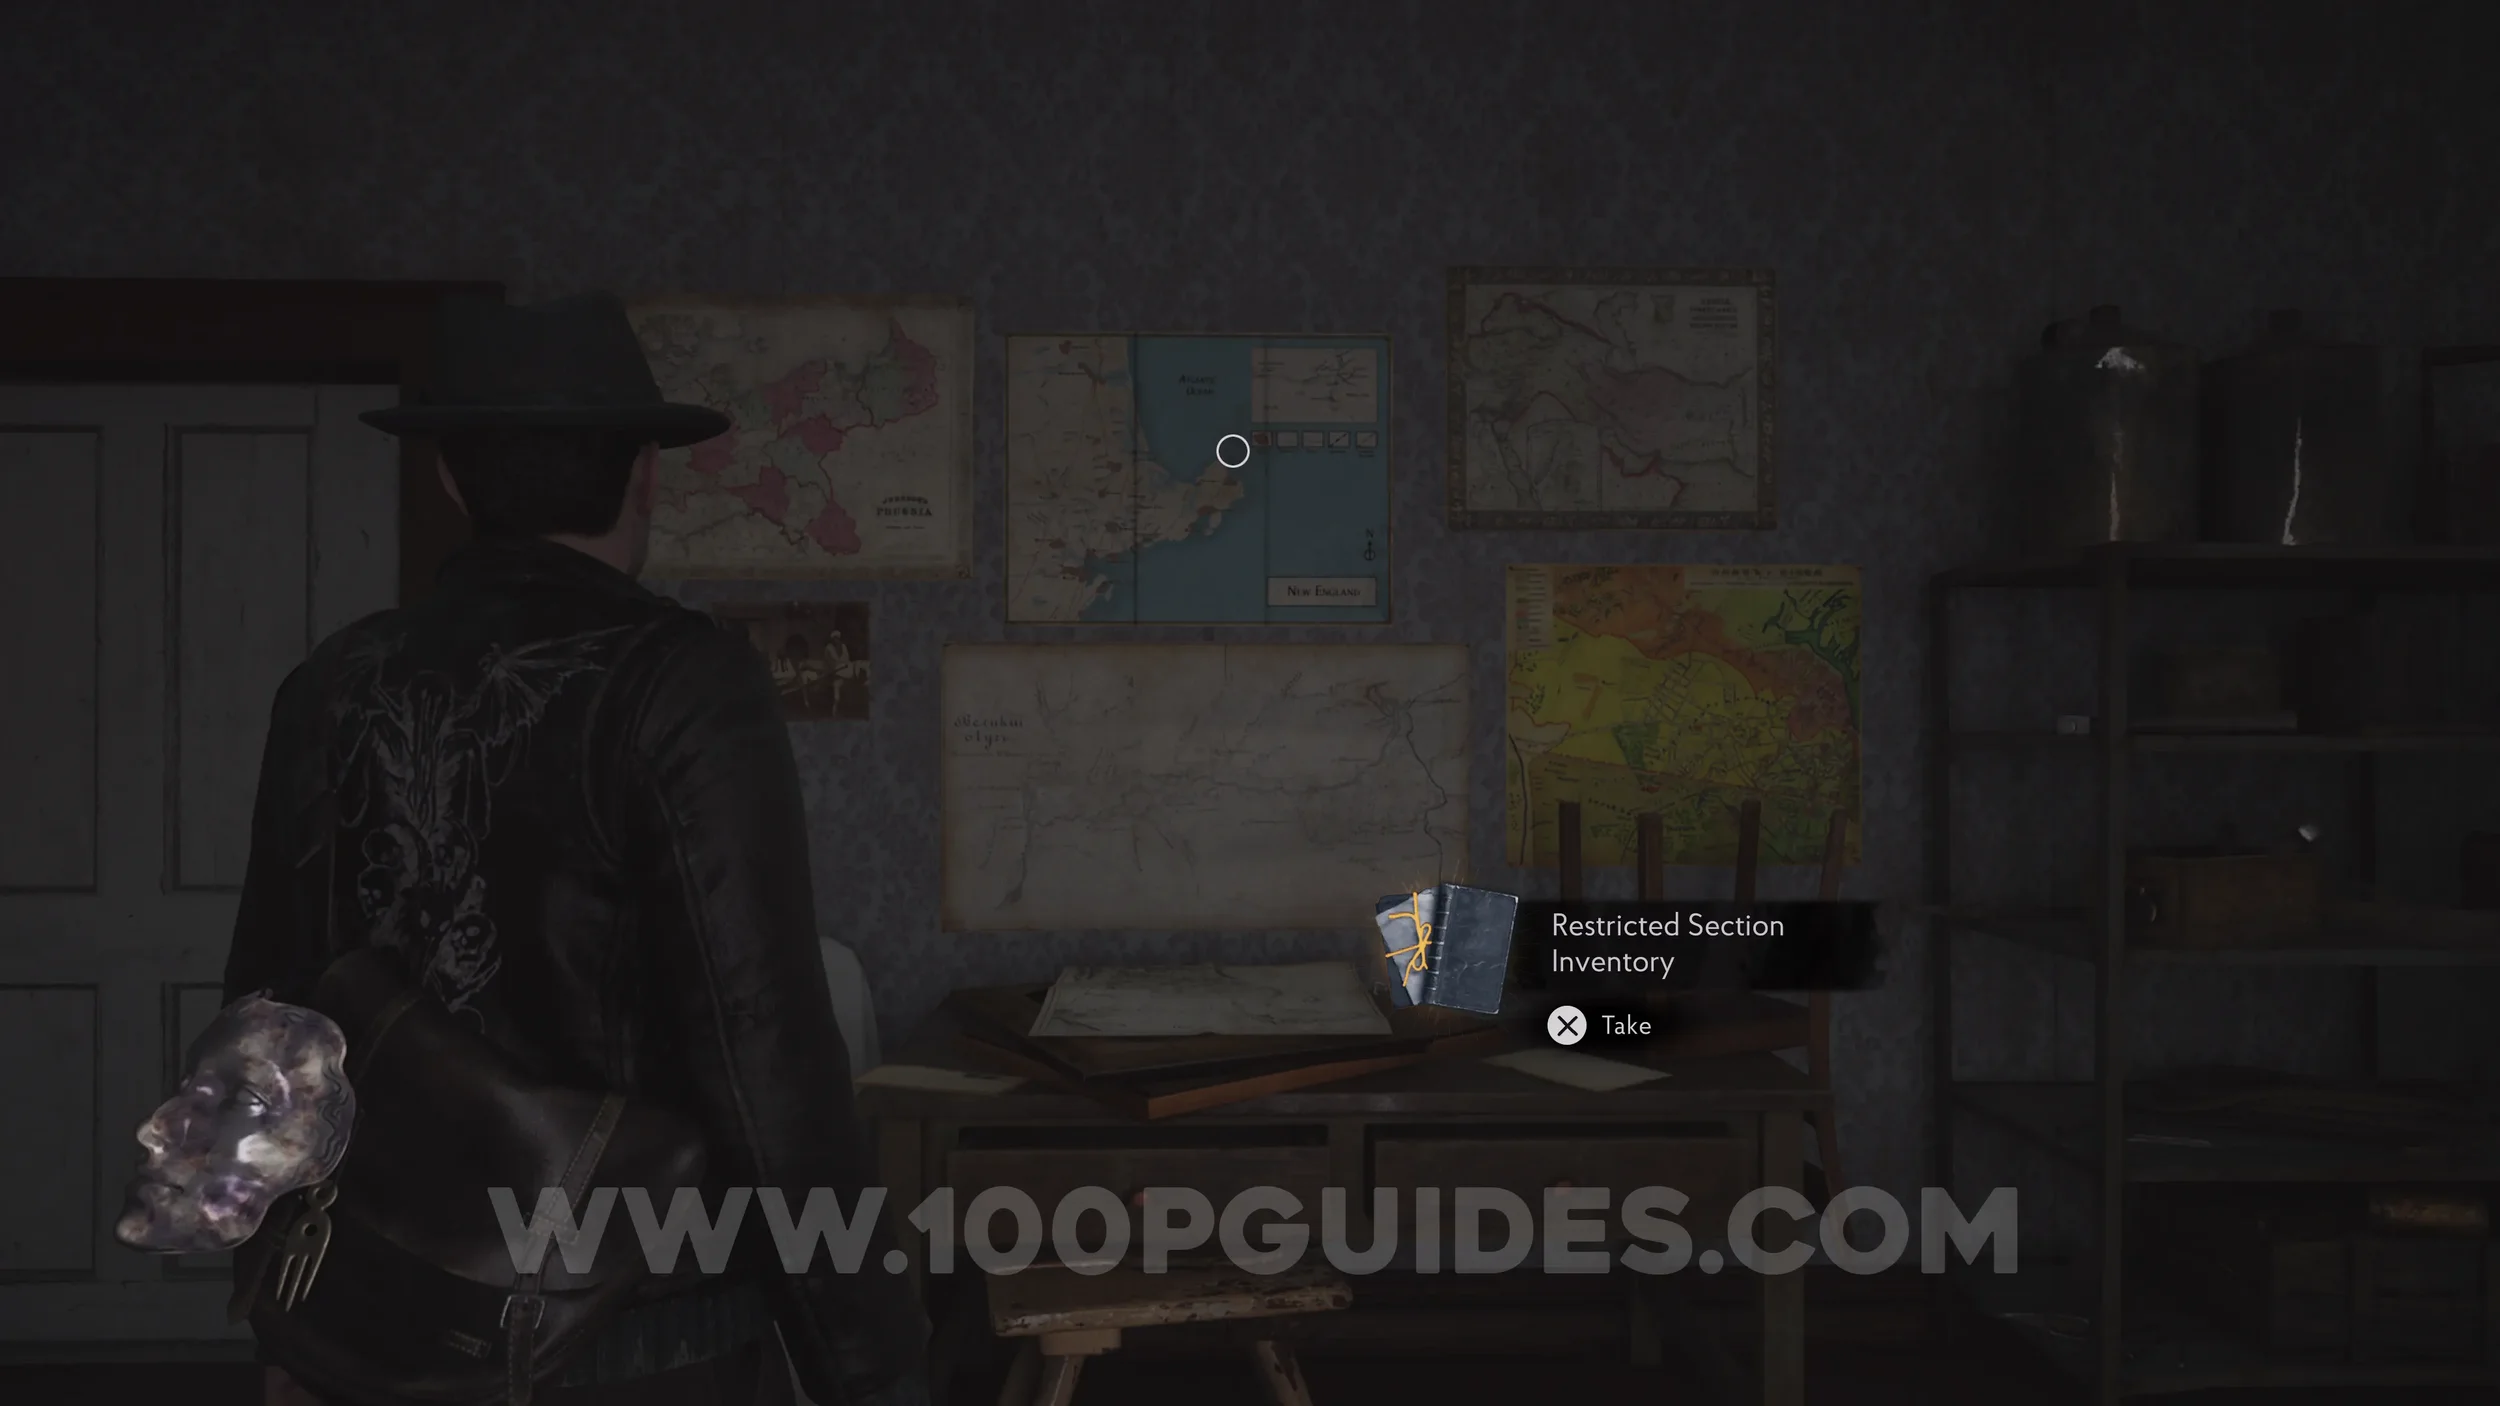
Lore Codex: Restricted Section Inventory. On the desk in the workroom.
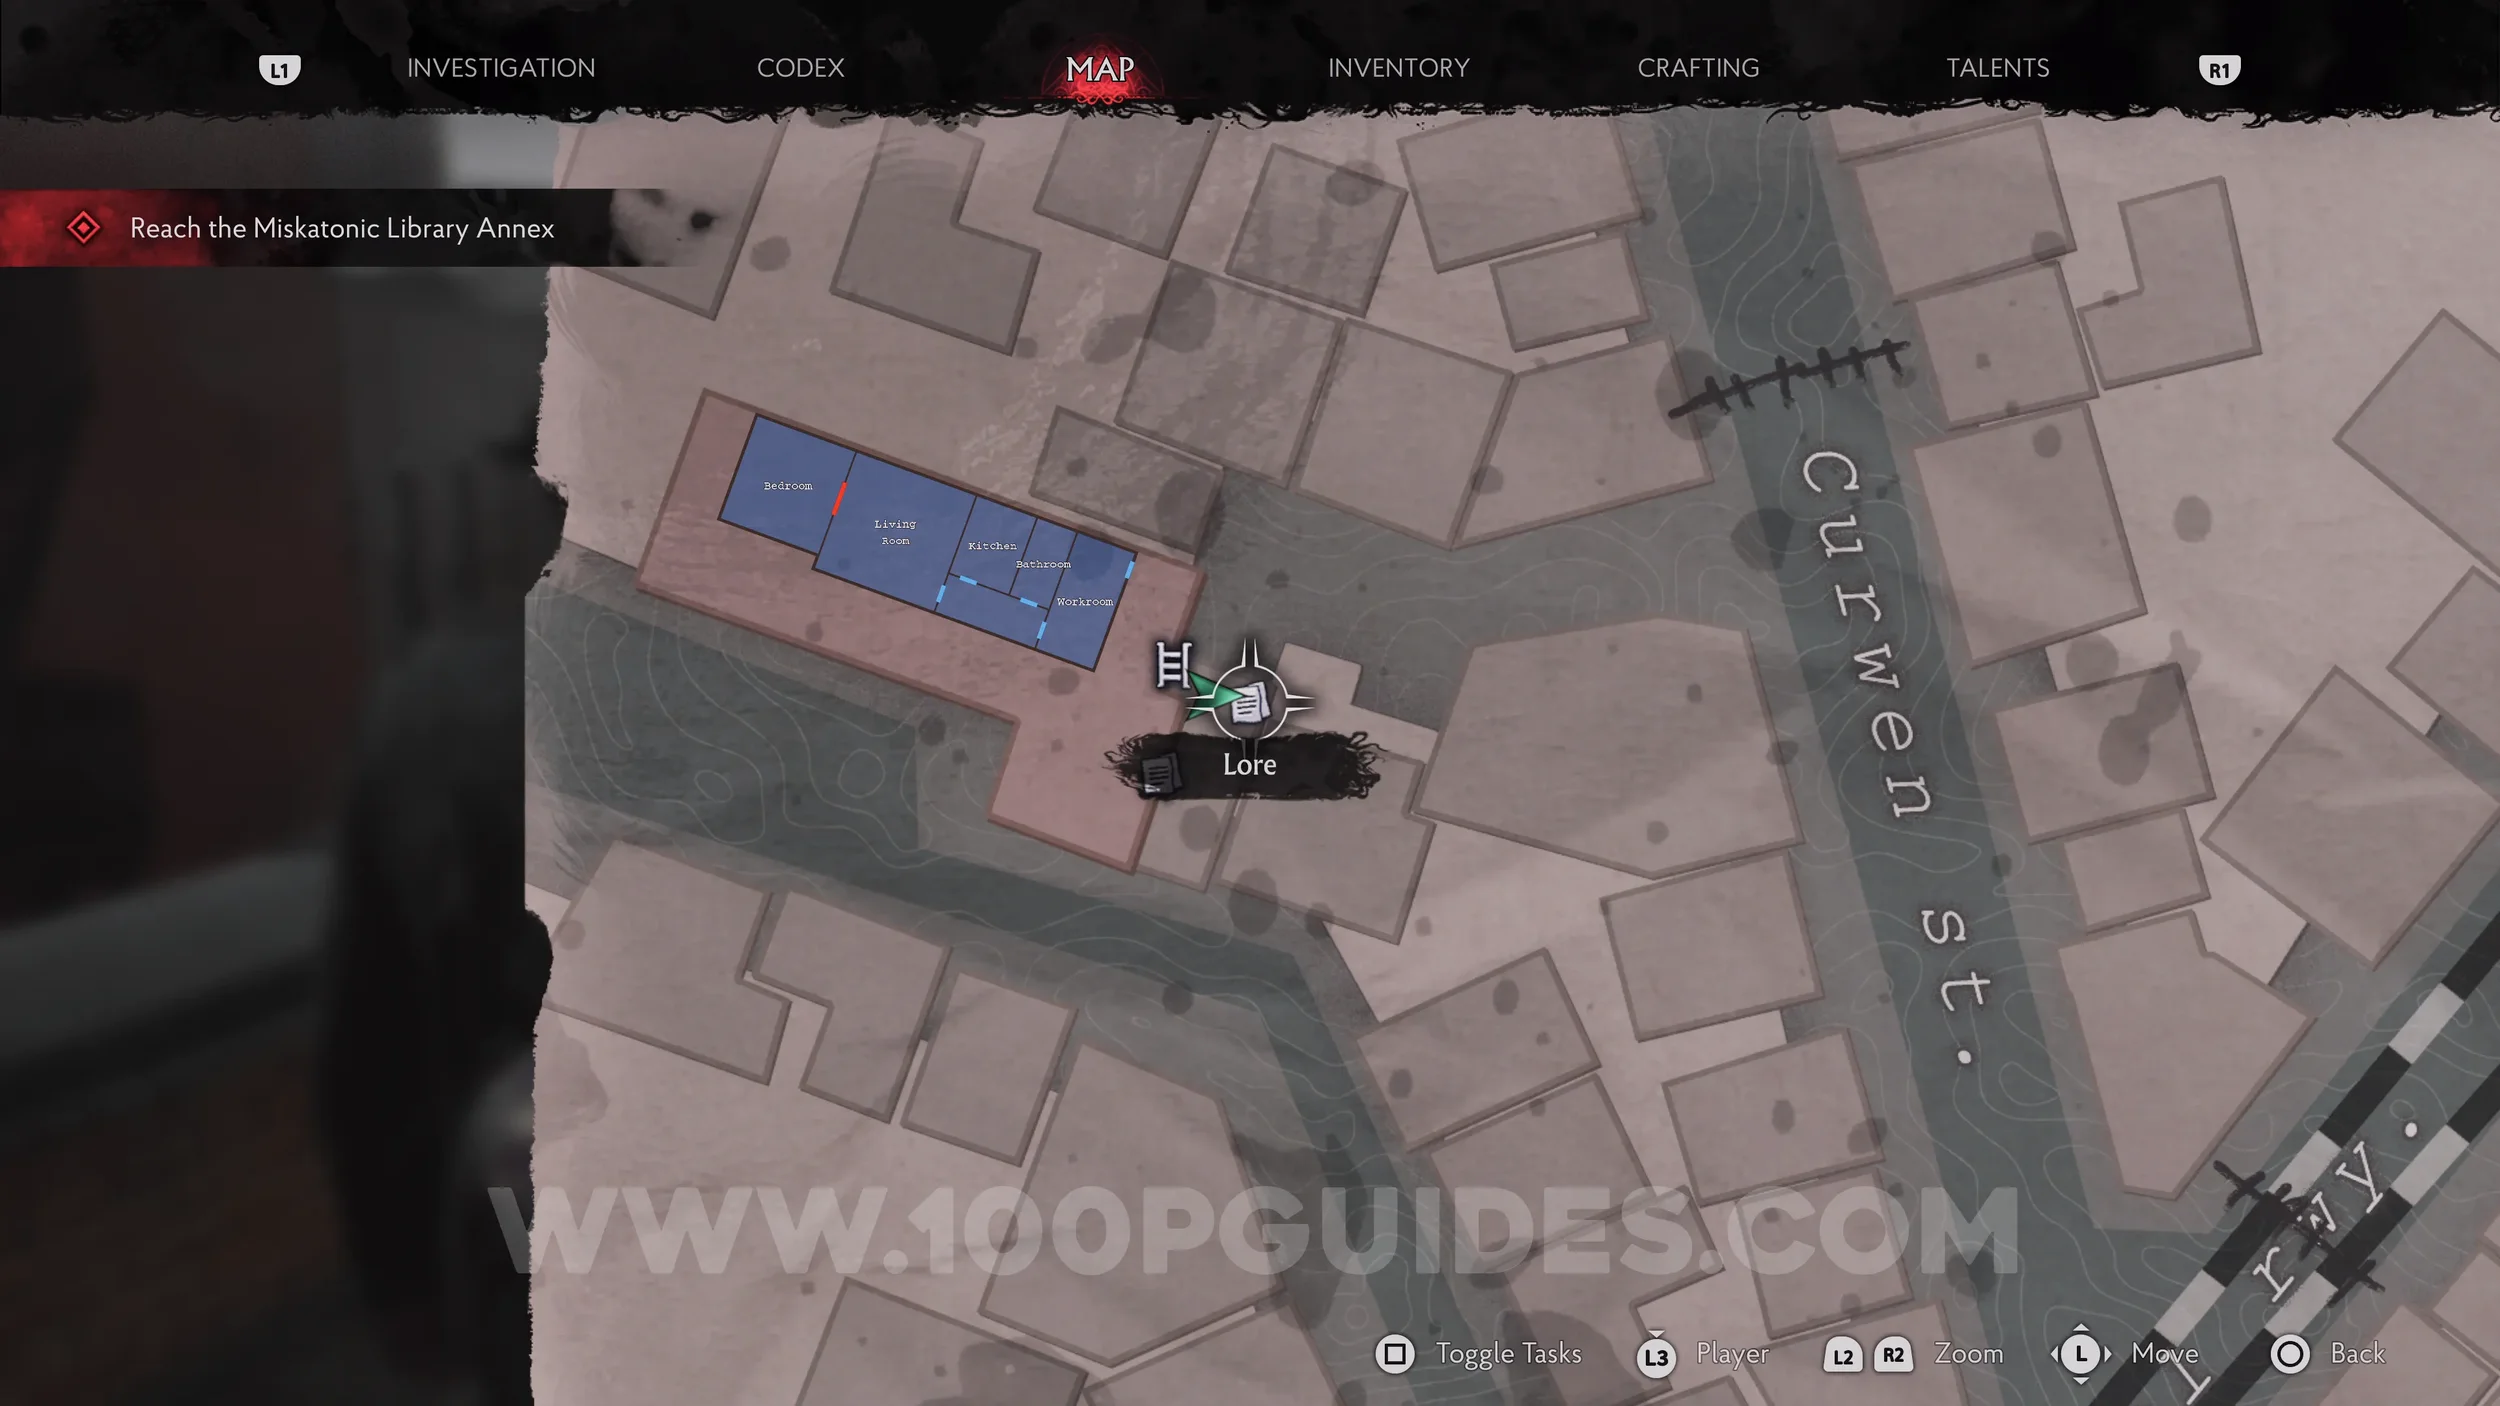
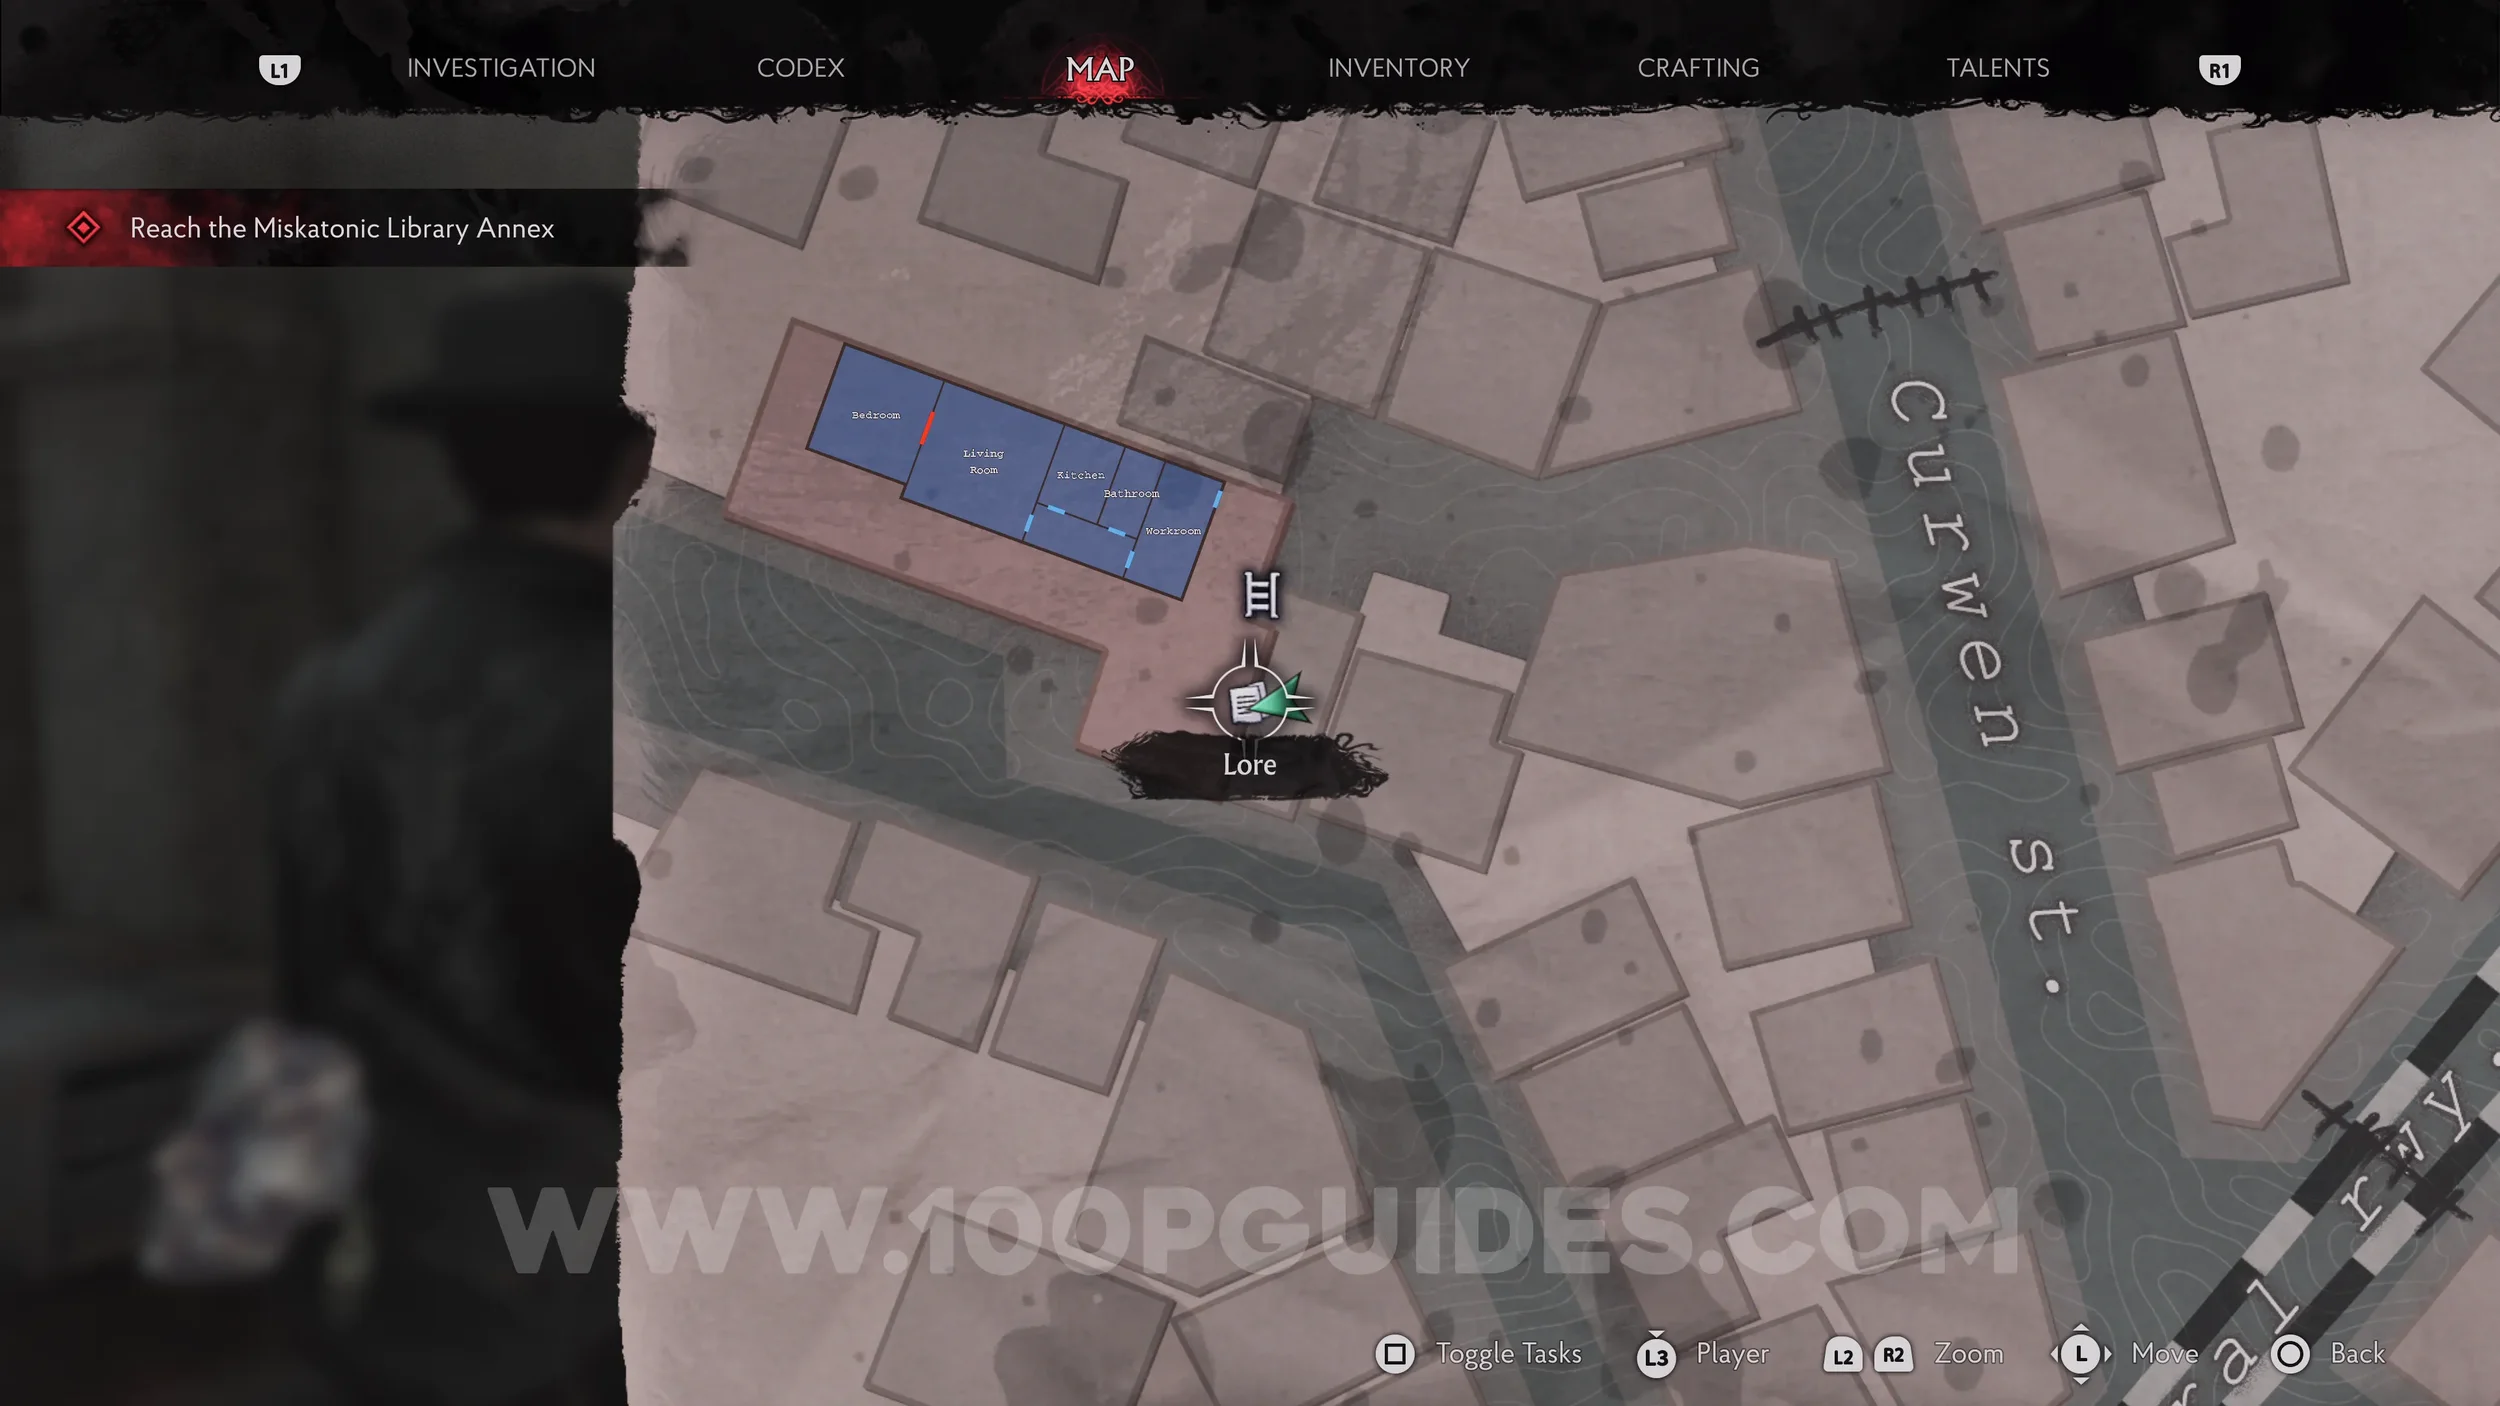
Lore Codex: Farewell, Arkham!. Once you head outside and climb down the ladder, you'll see this codex on the table in front of you.
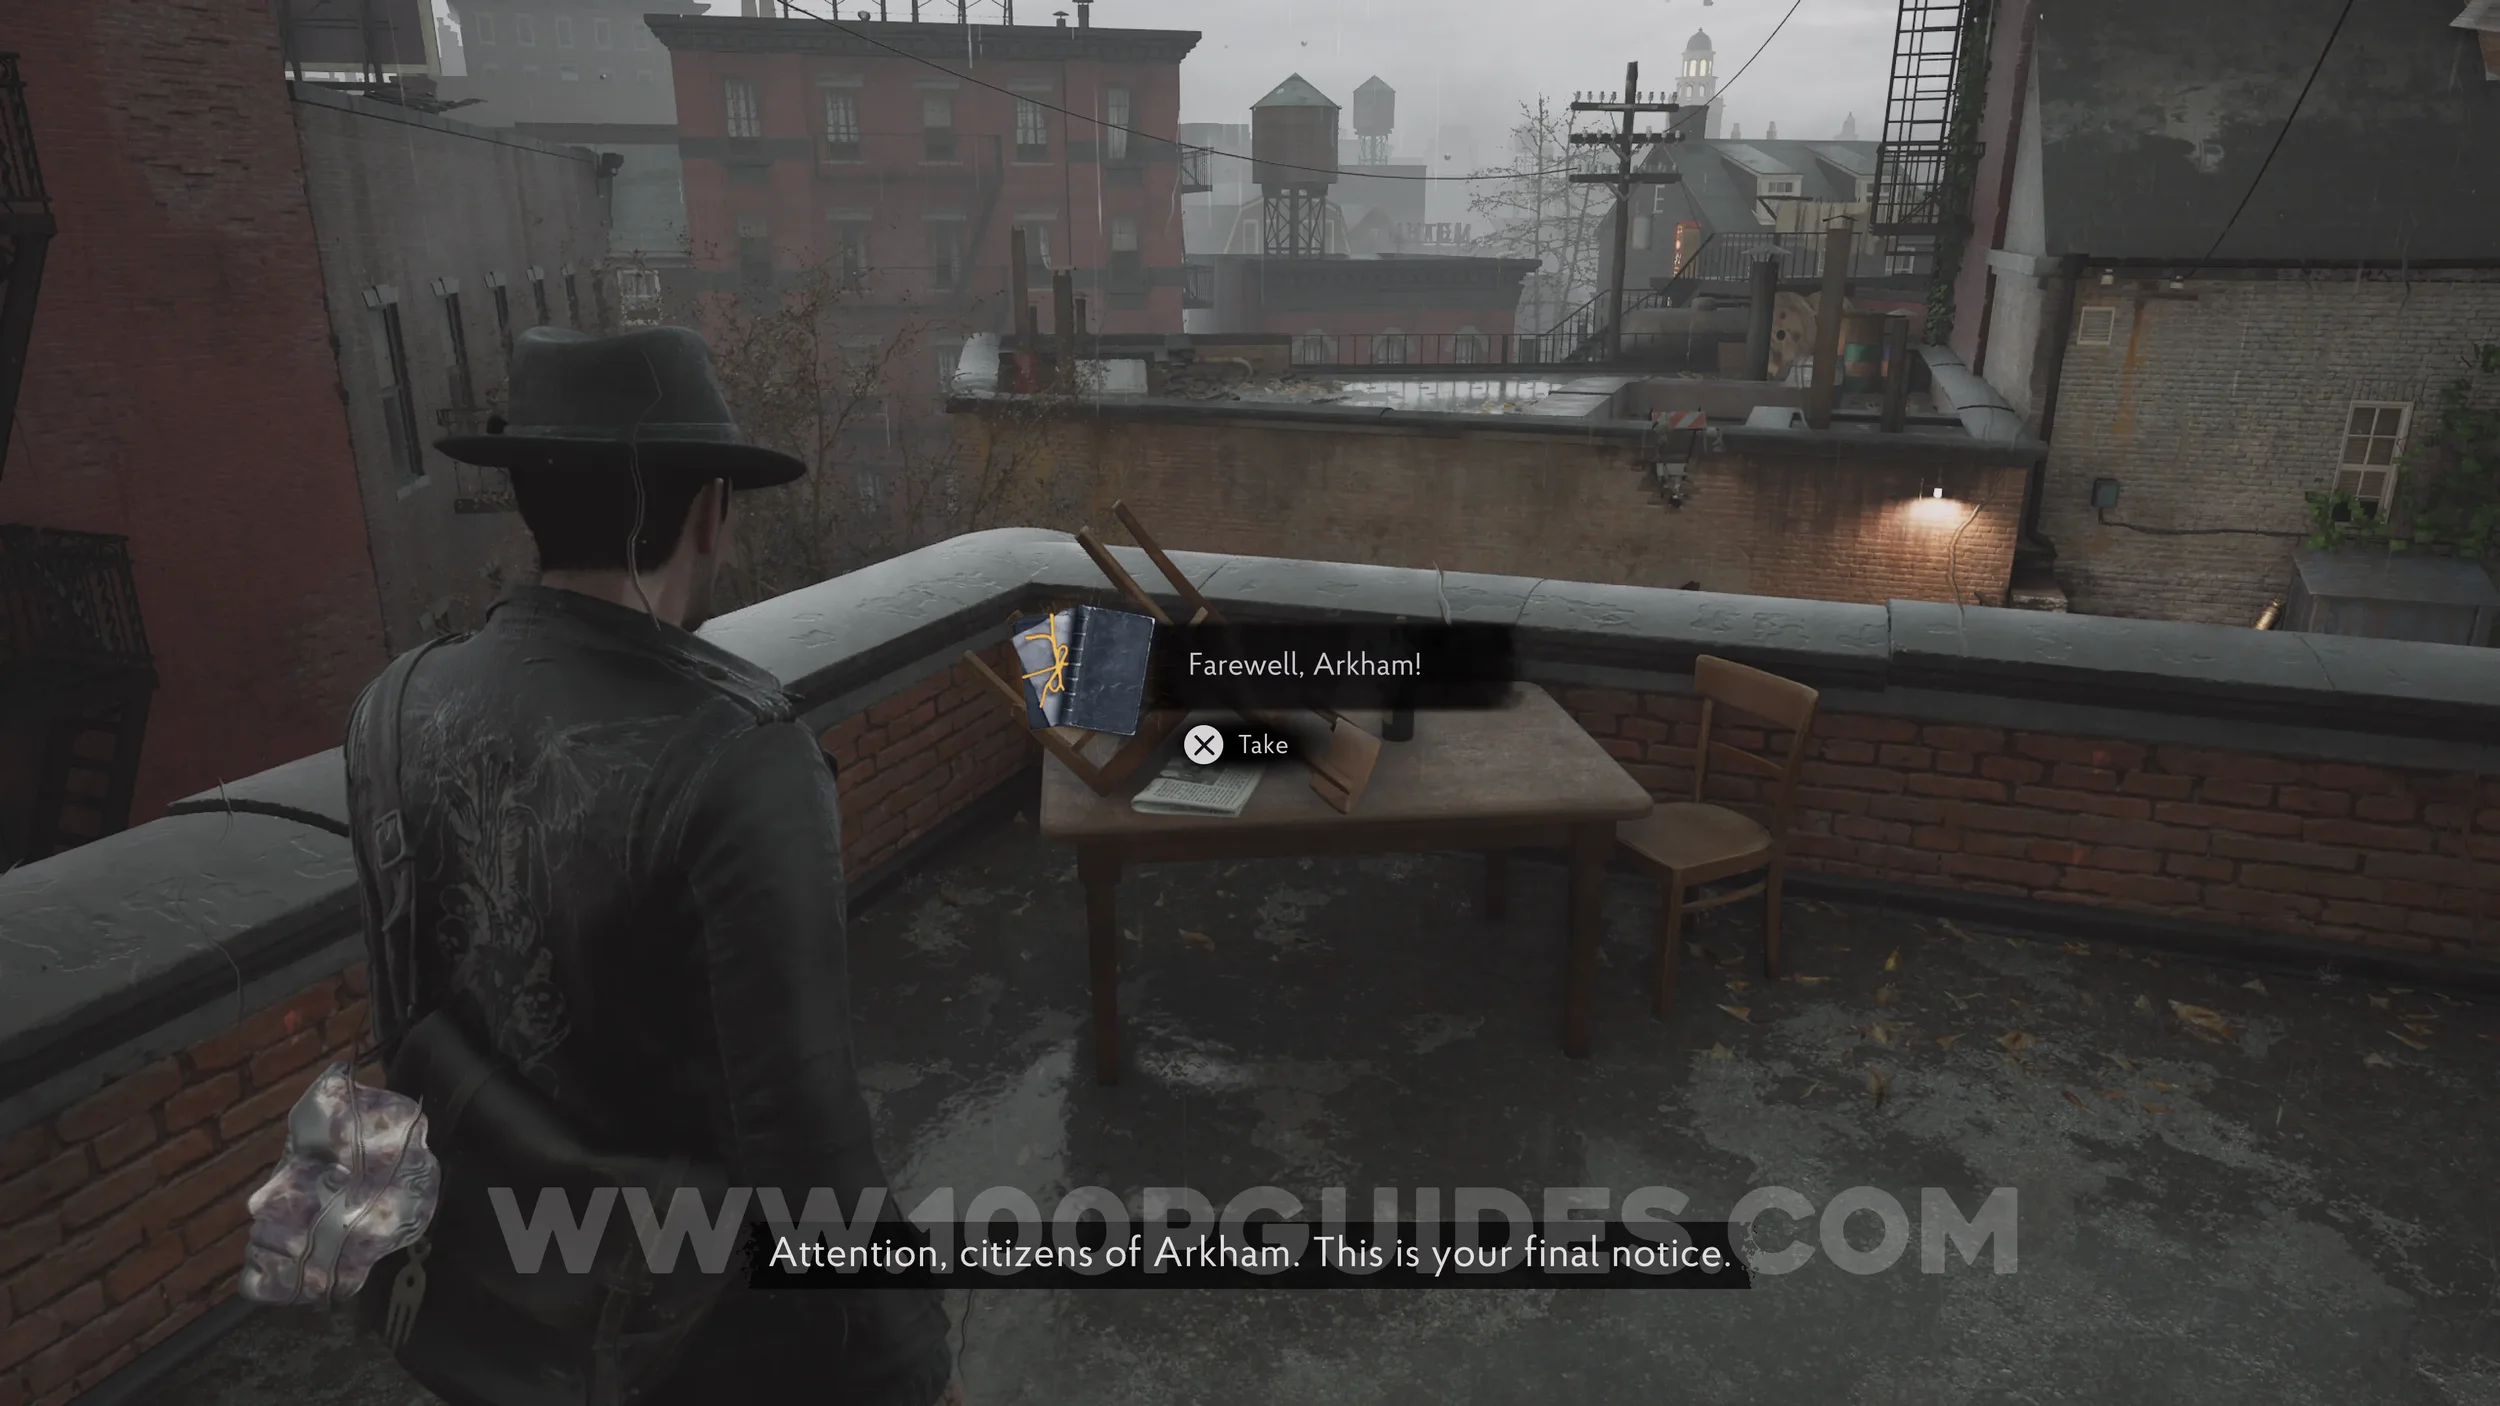
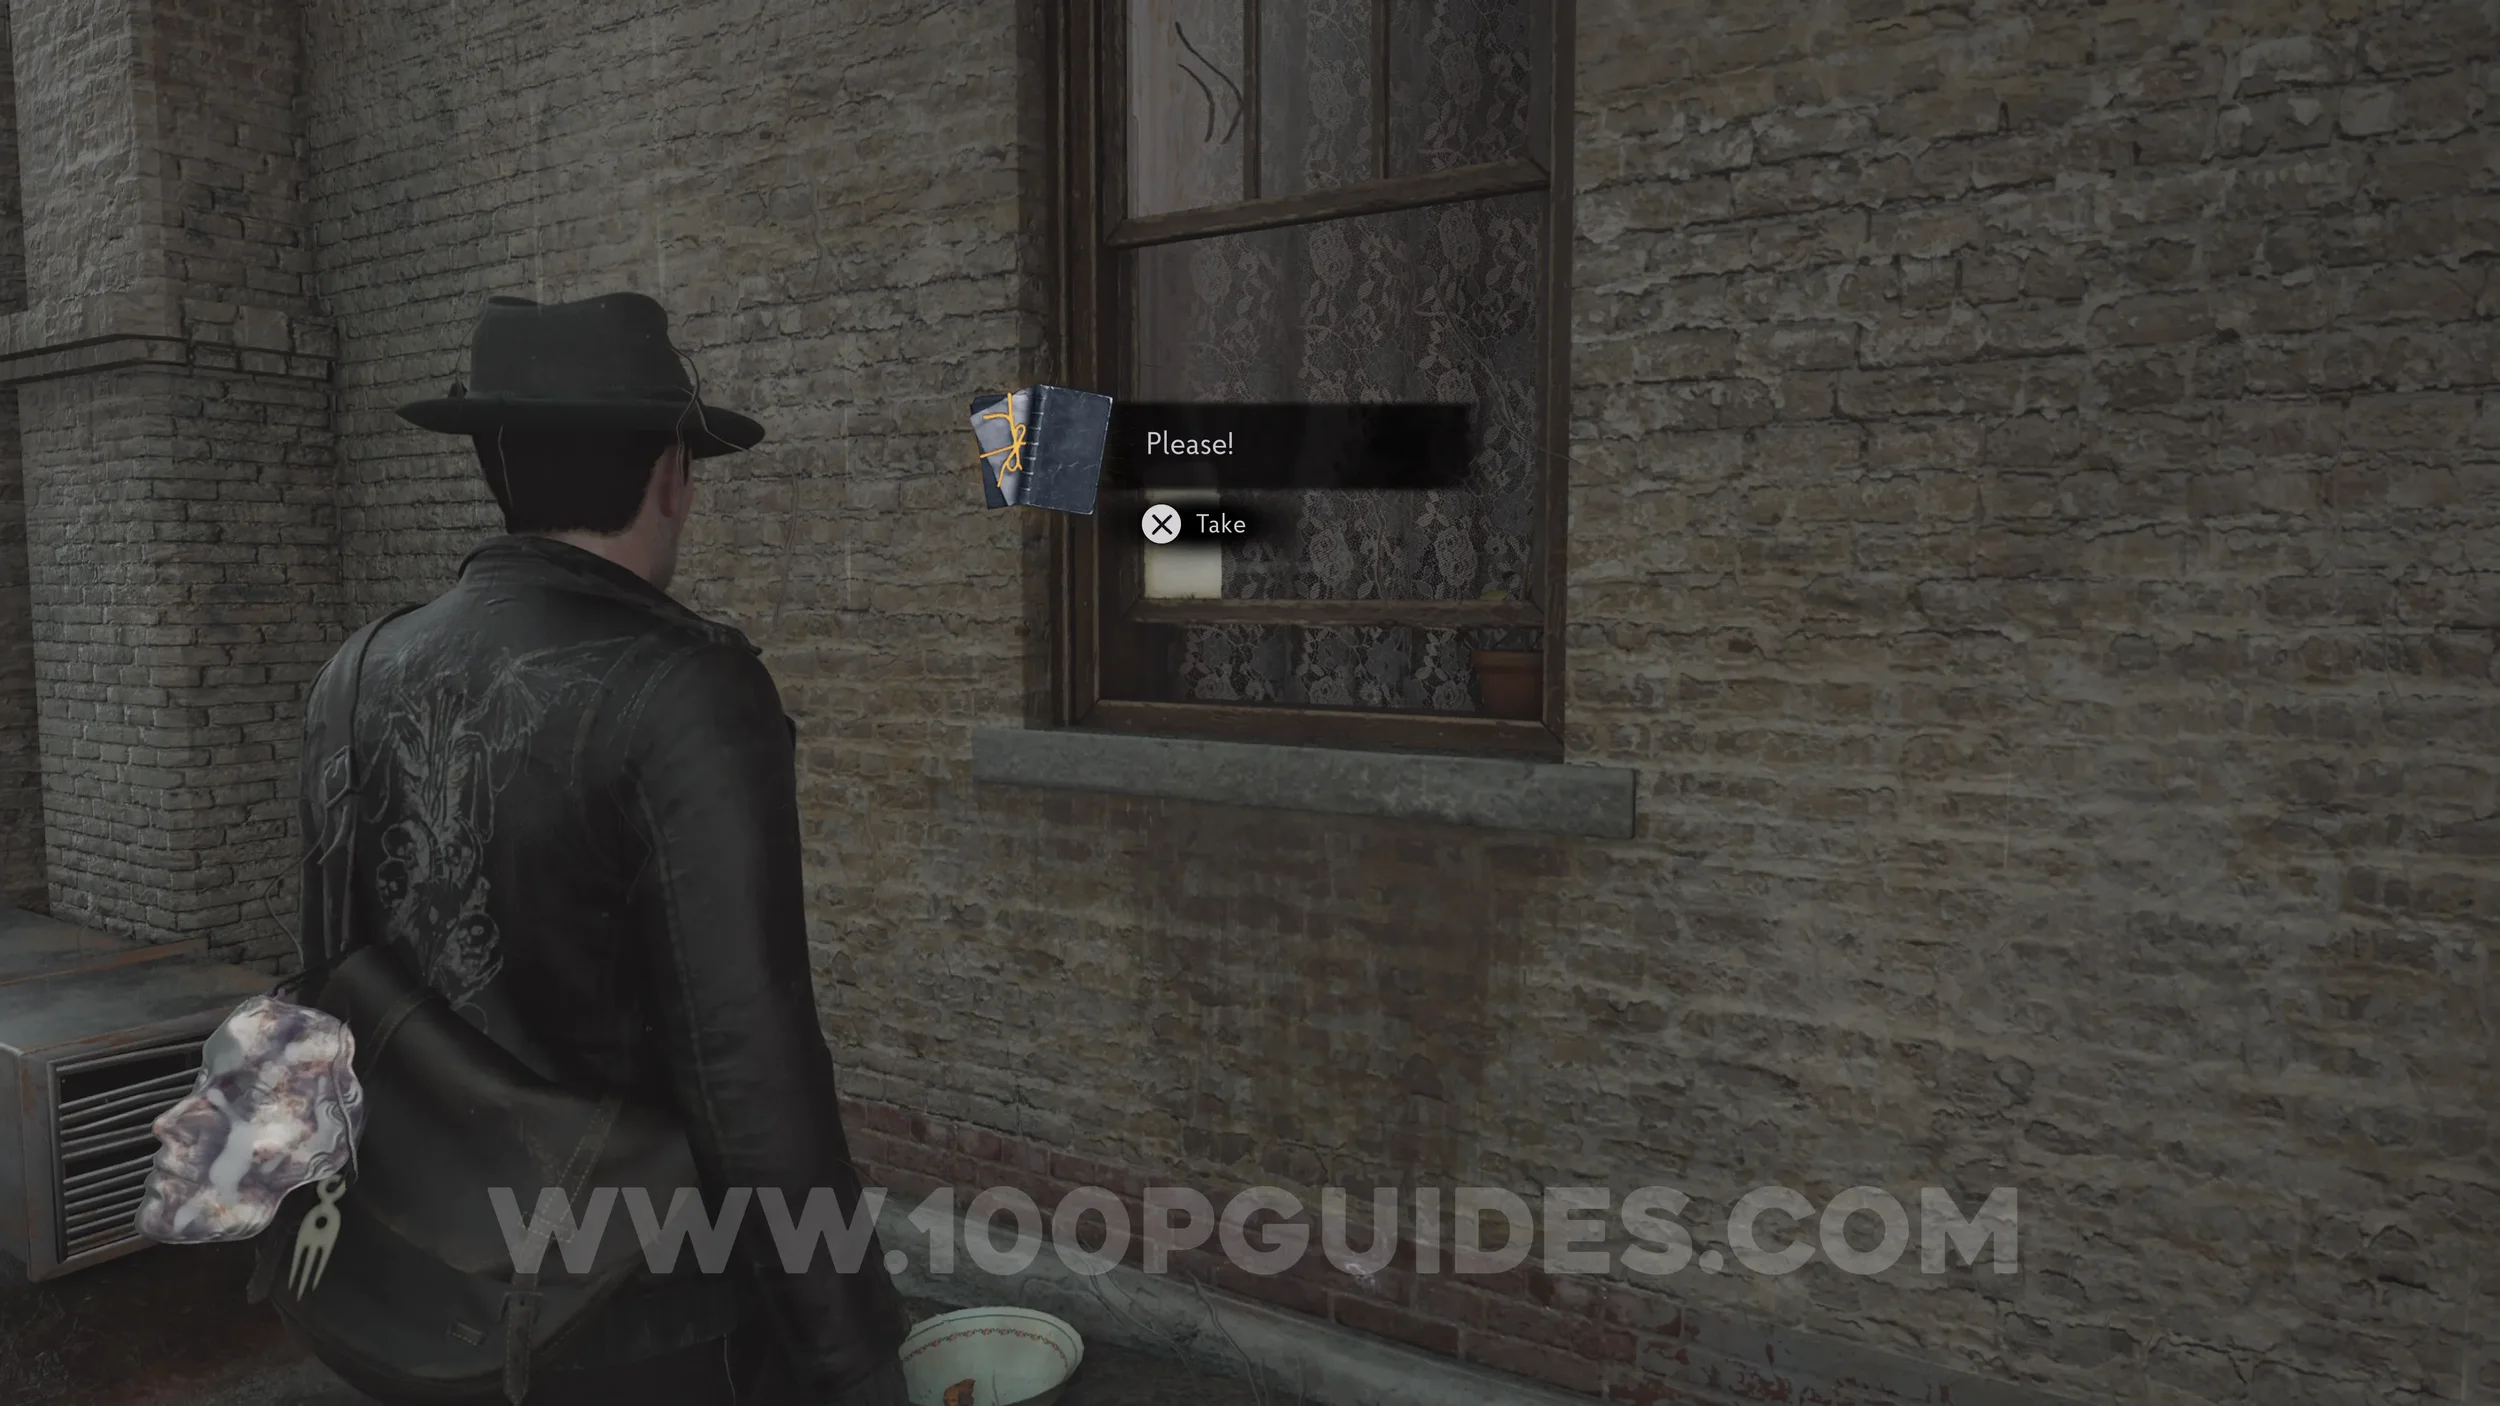
Lore Codex: Please!. On the window next to the previous collectible.
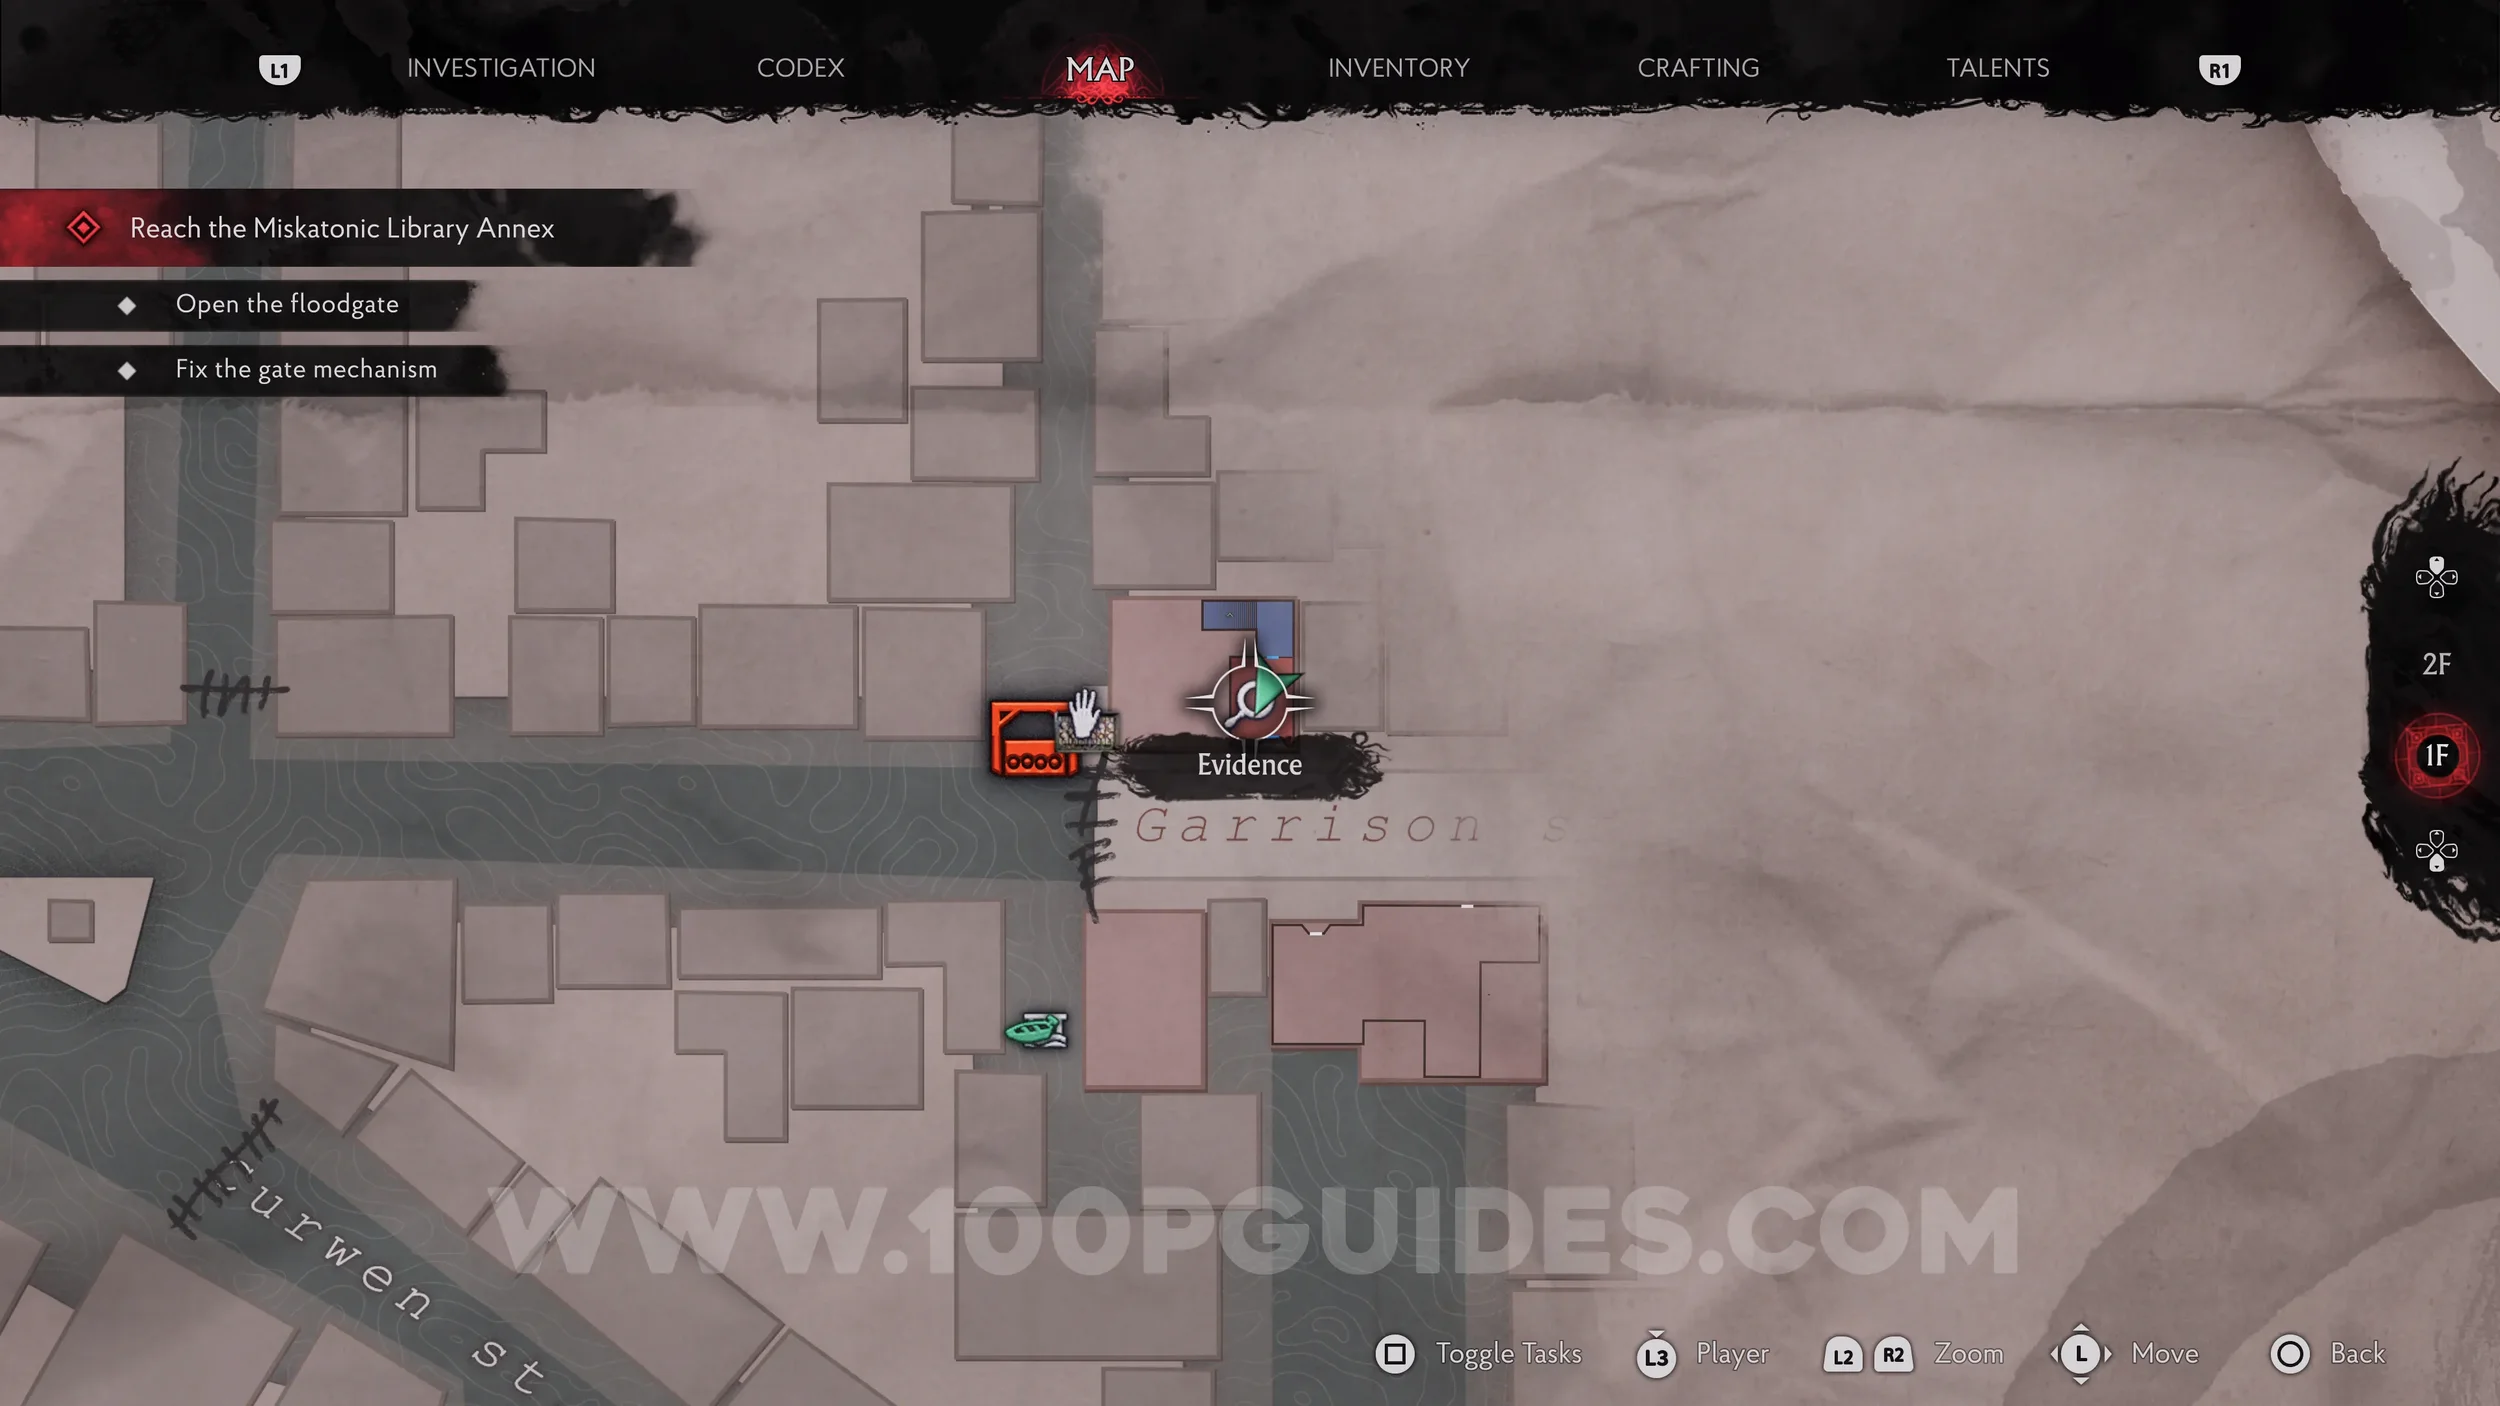
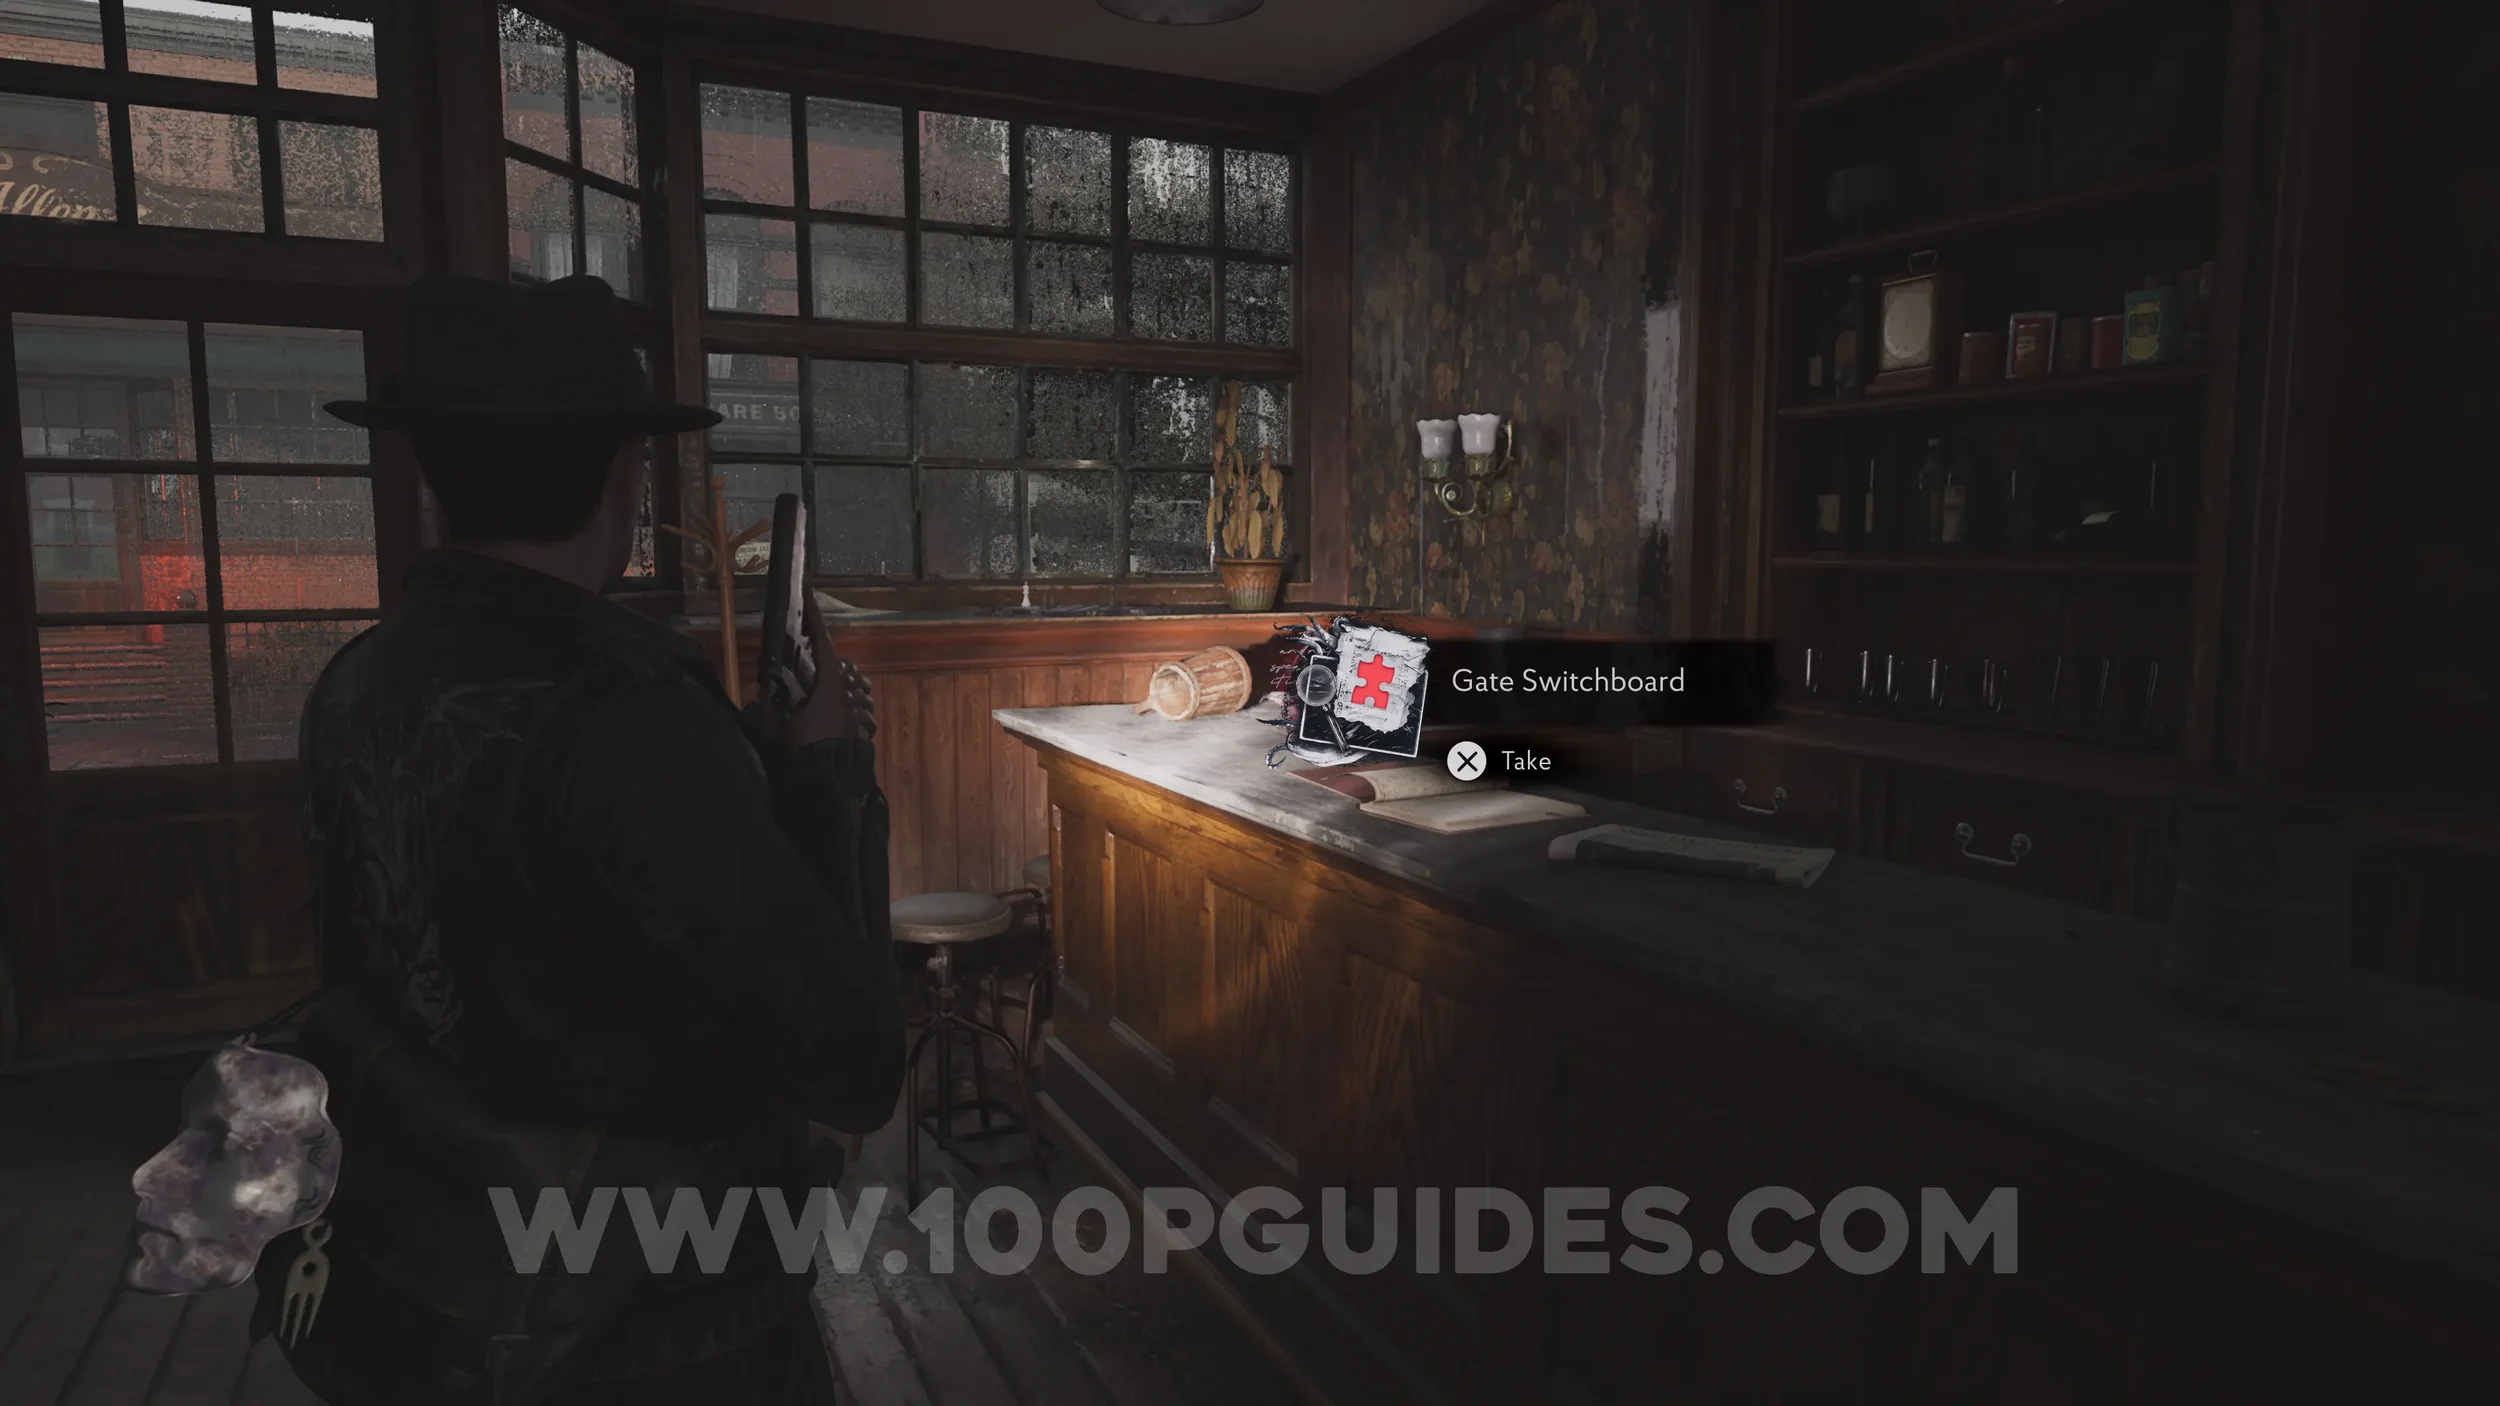
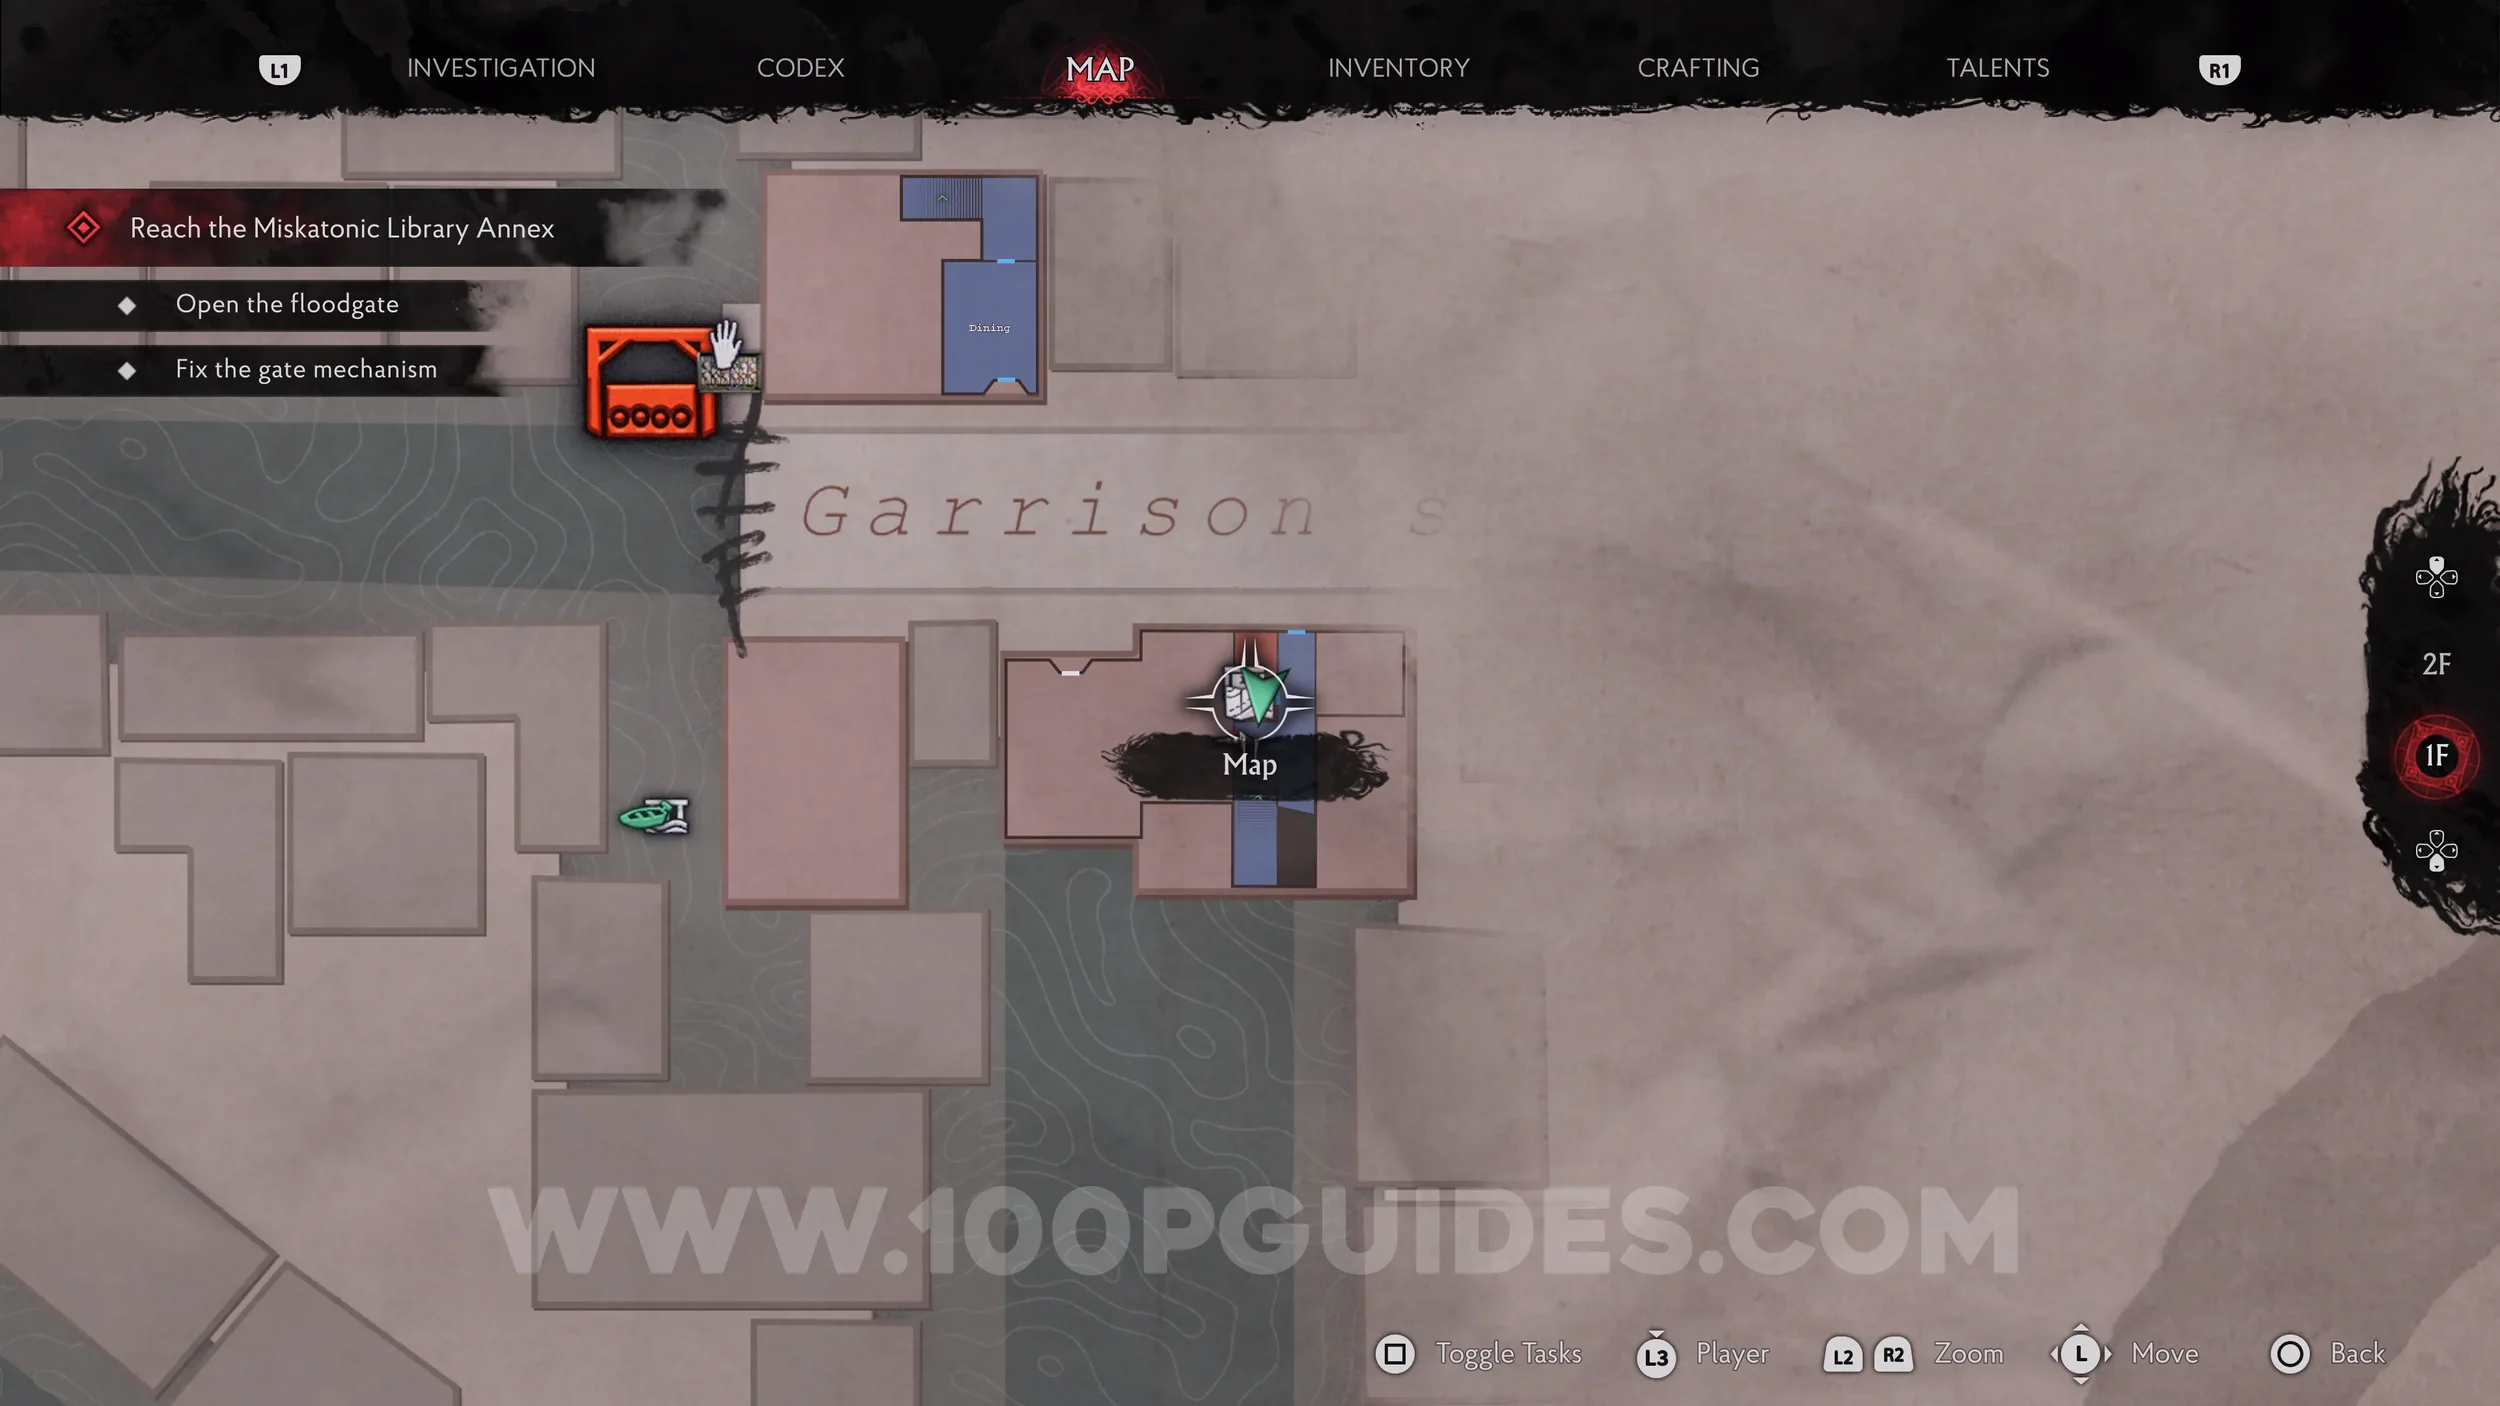
Evidence: Gate Switchboard. After taking the boat to the building where you repair the gate switch, you'll pass through the dining room. The evidence is on the bar.
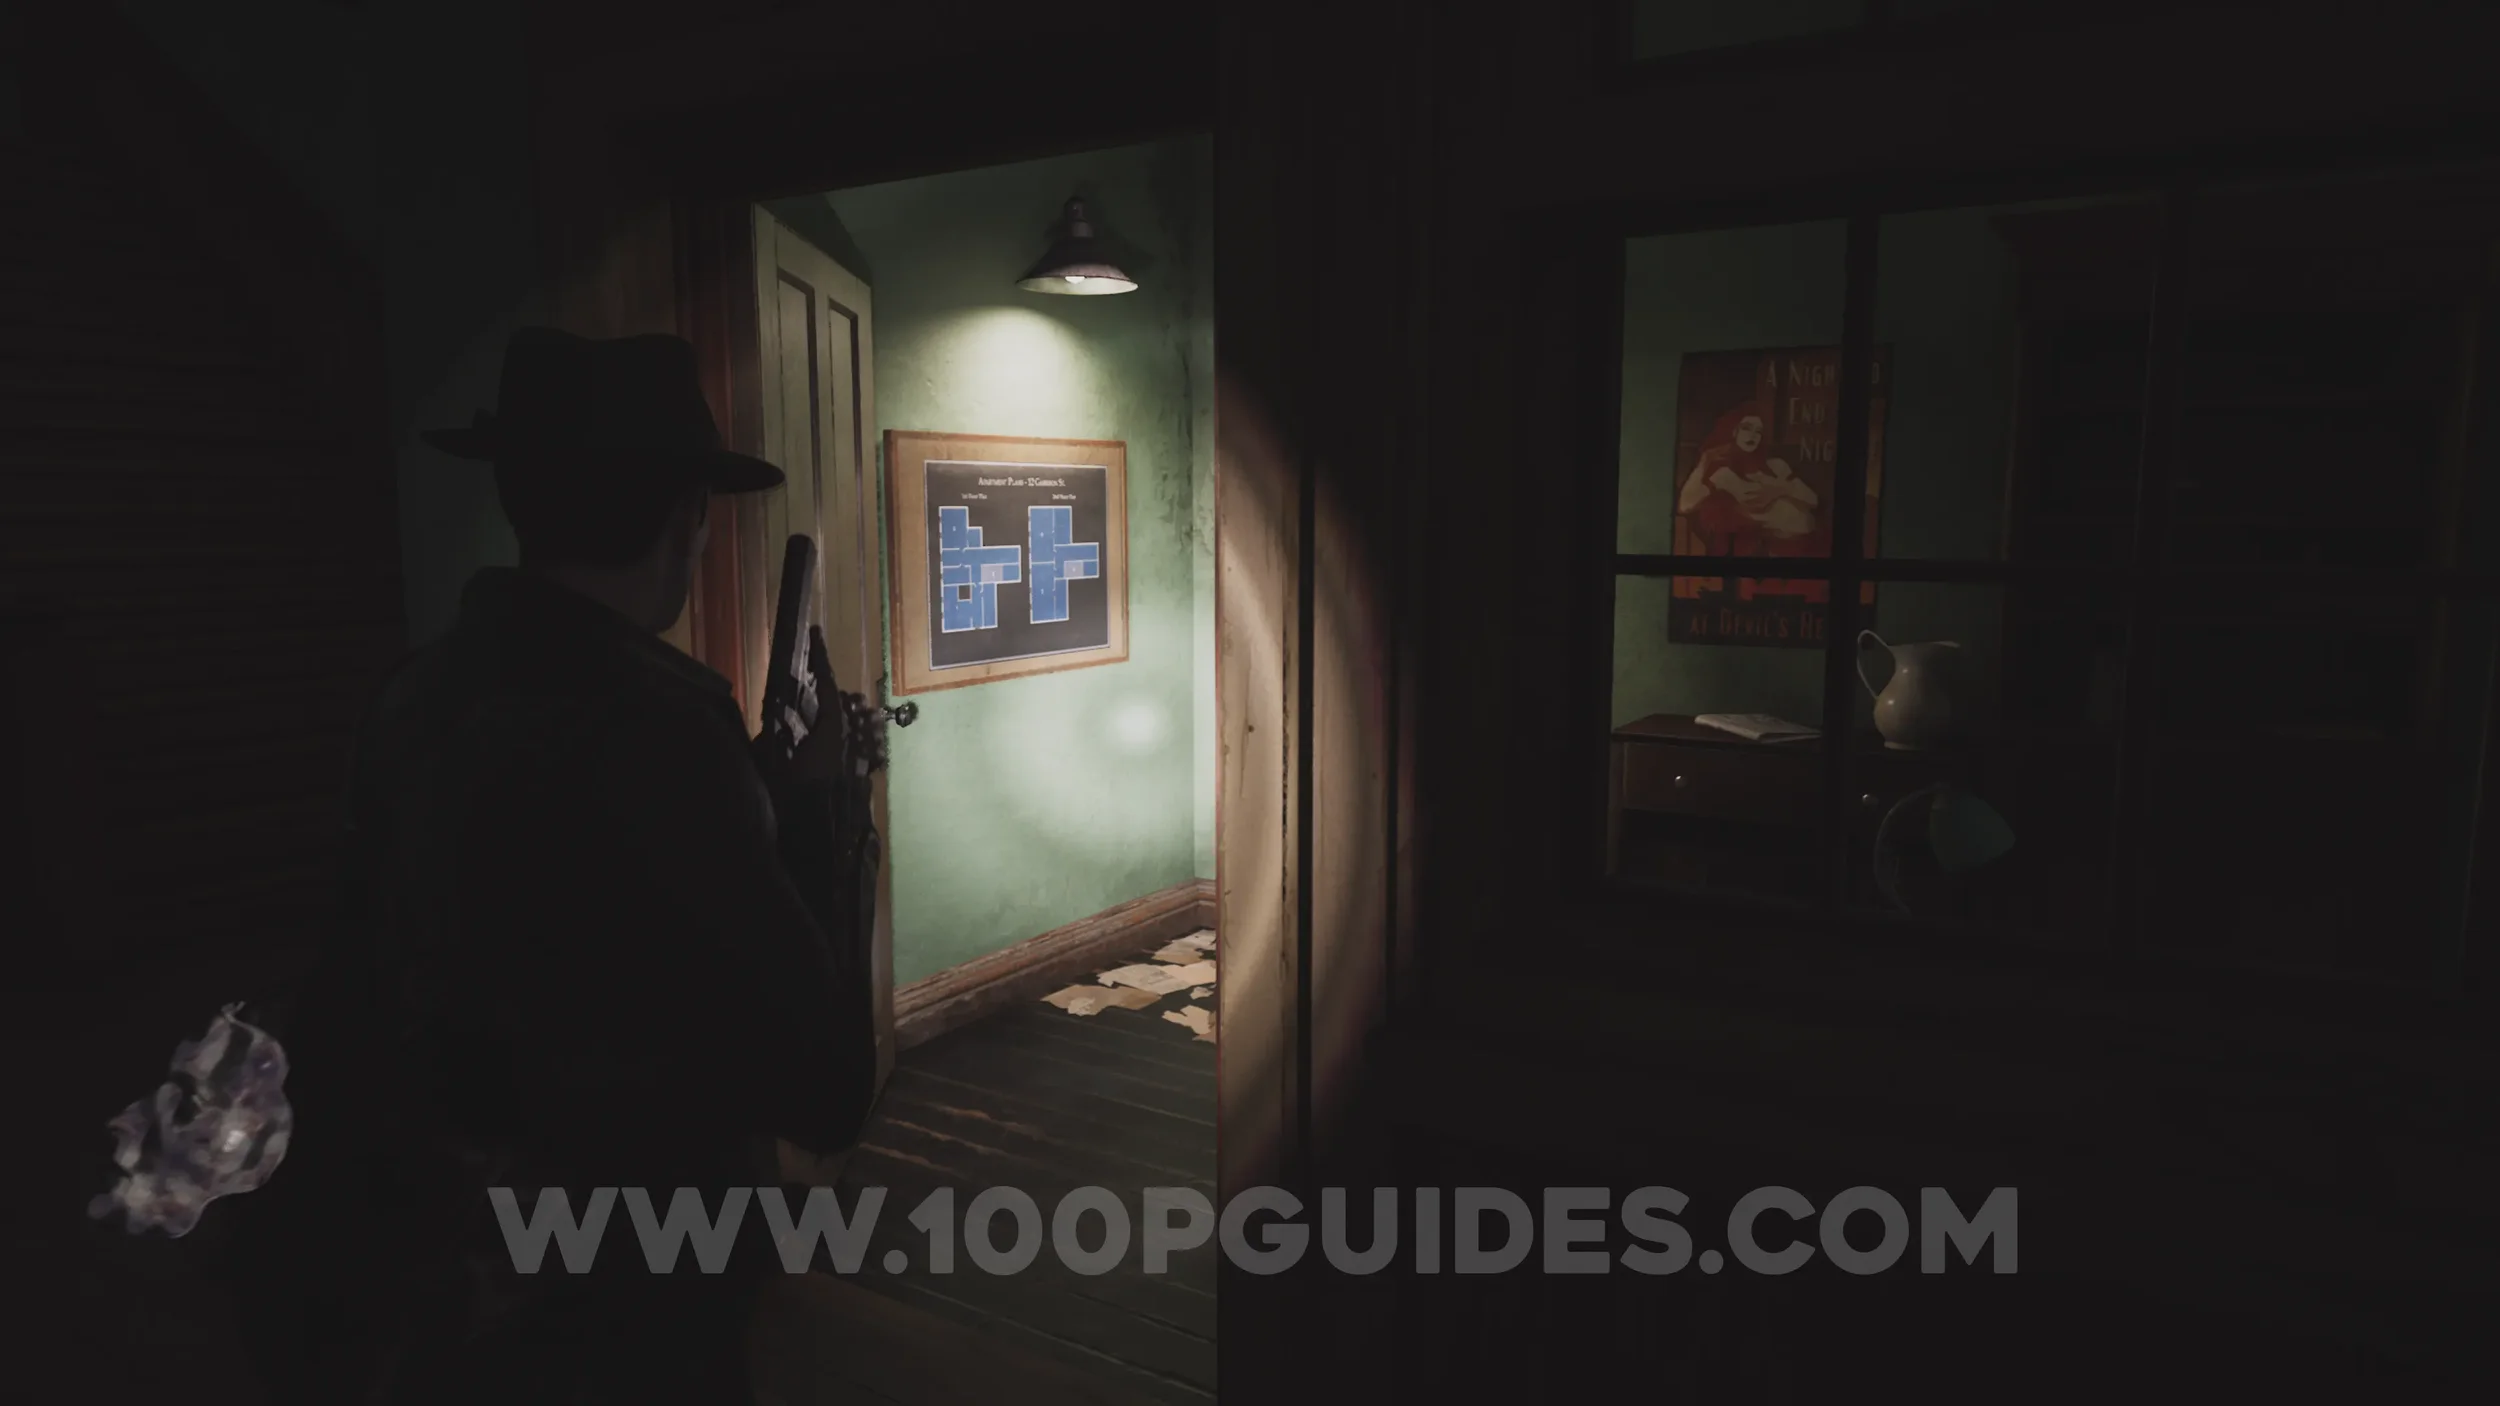
Map: Residential Map, Floor 1-2. From the dining room, cross the street and enter the open residential building. Inside, take the little room on your right to find the map pinned to the board on the wall.
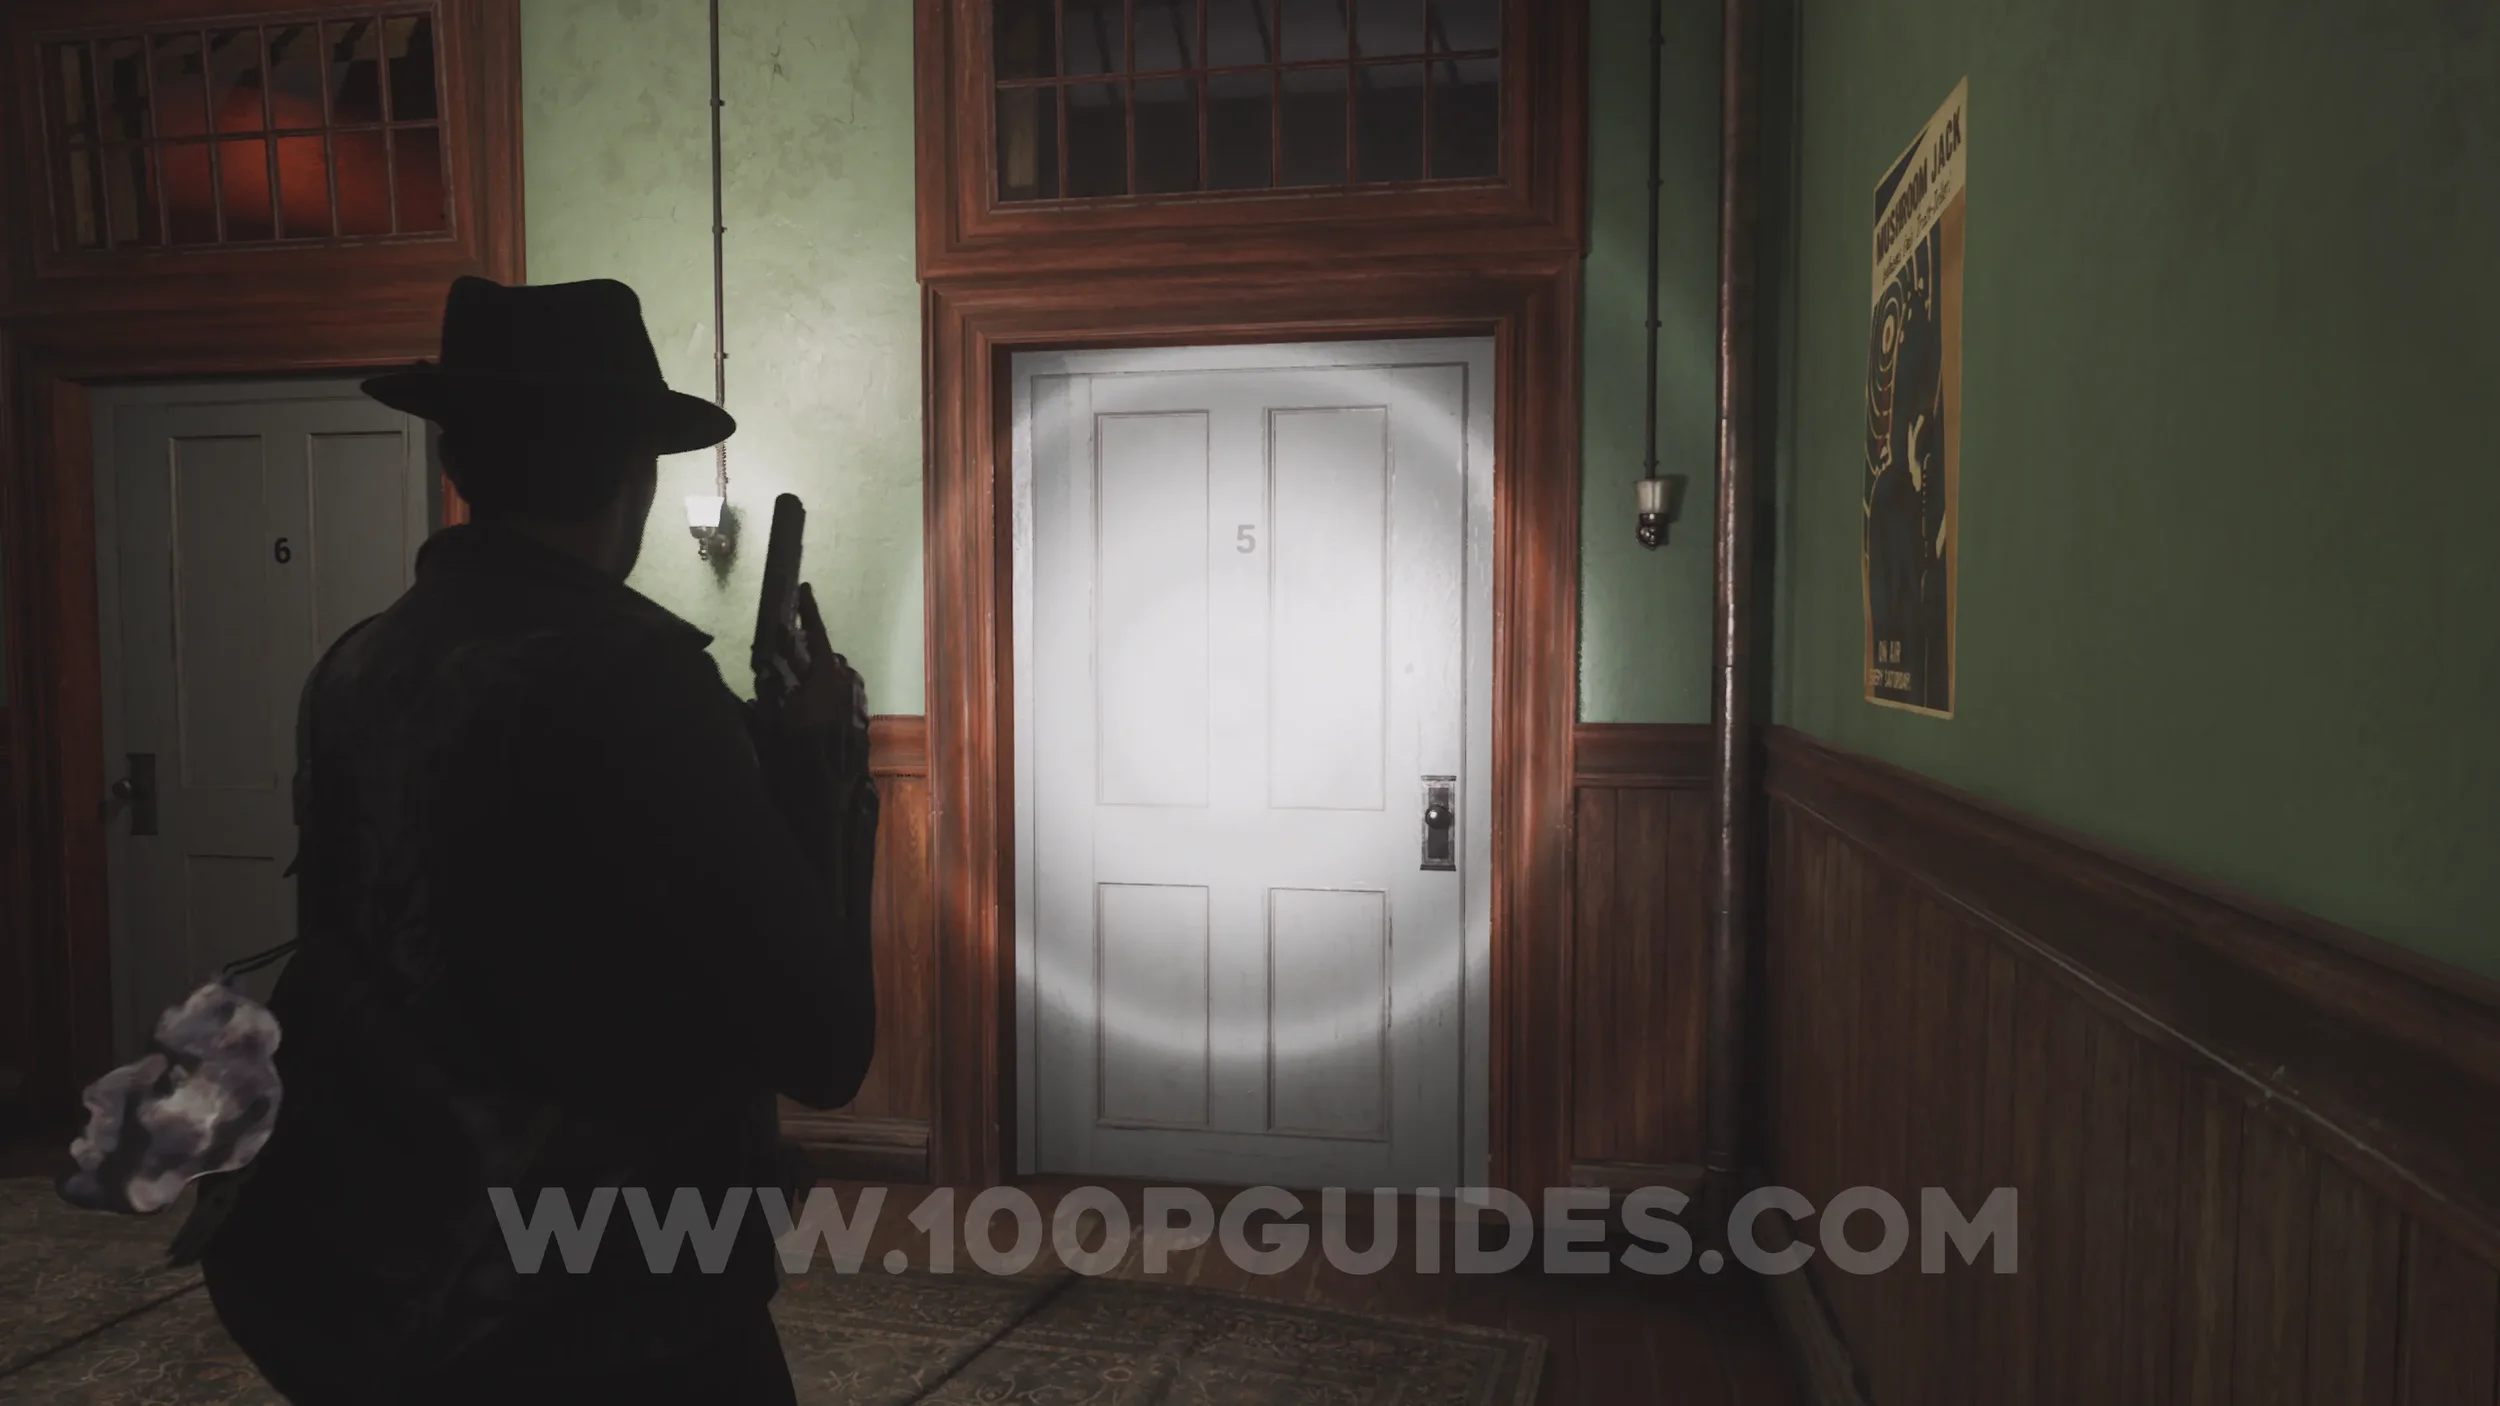
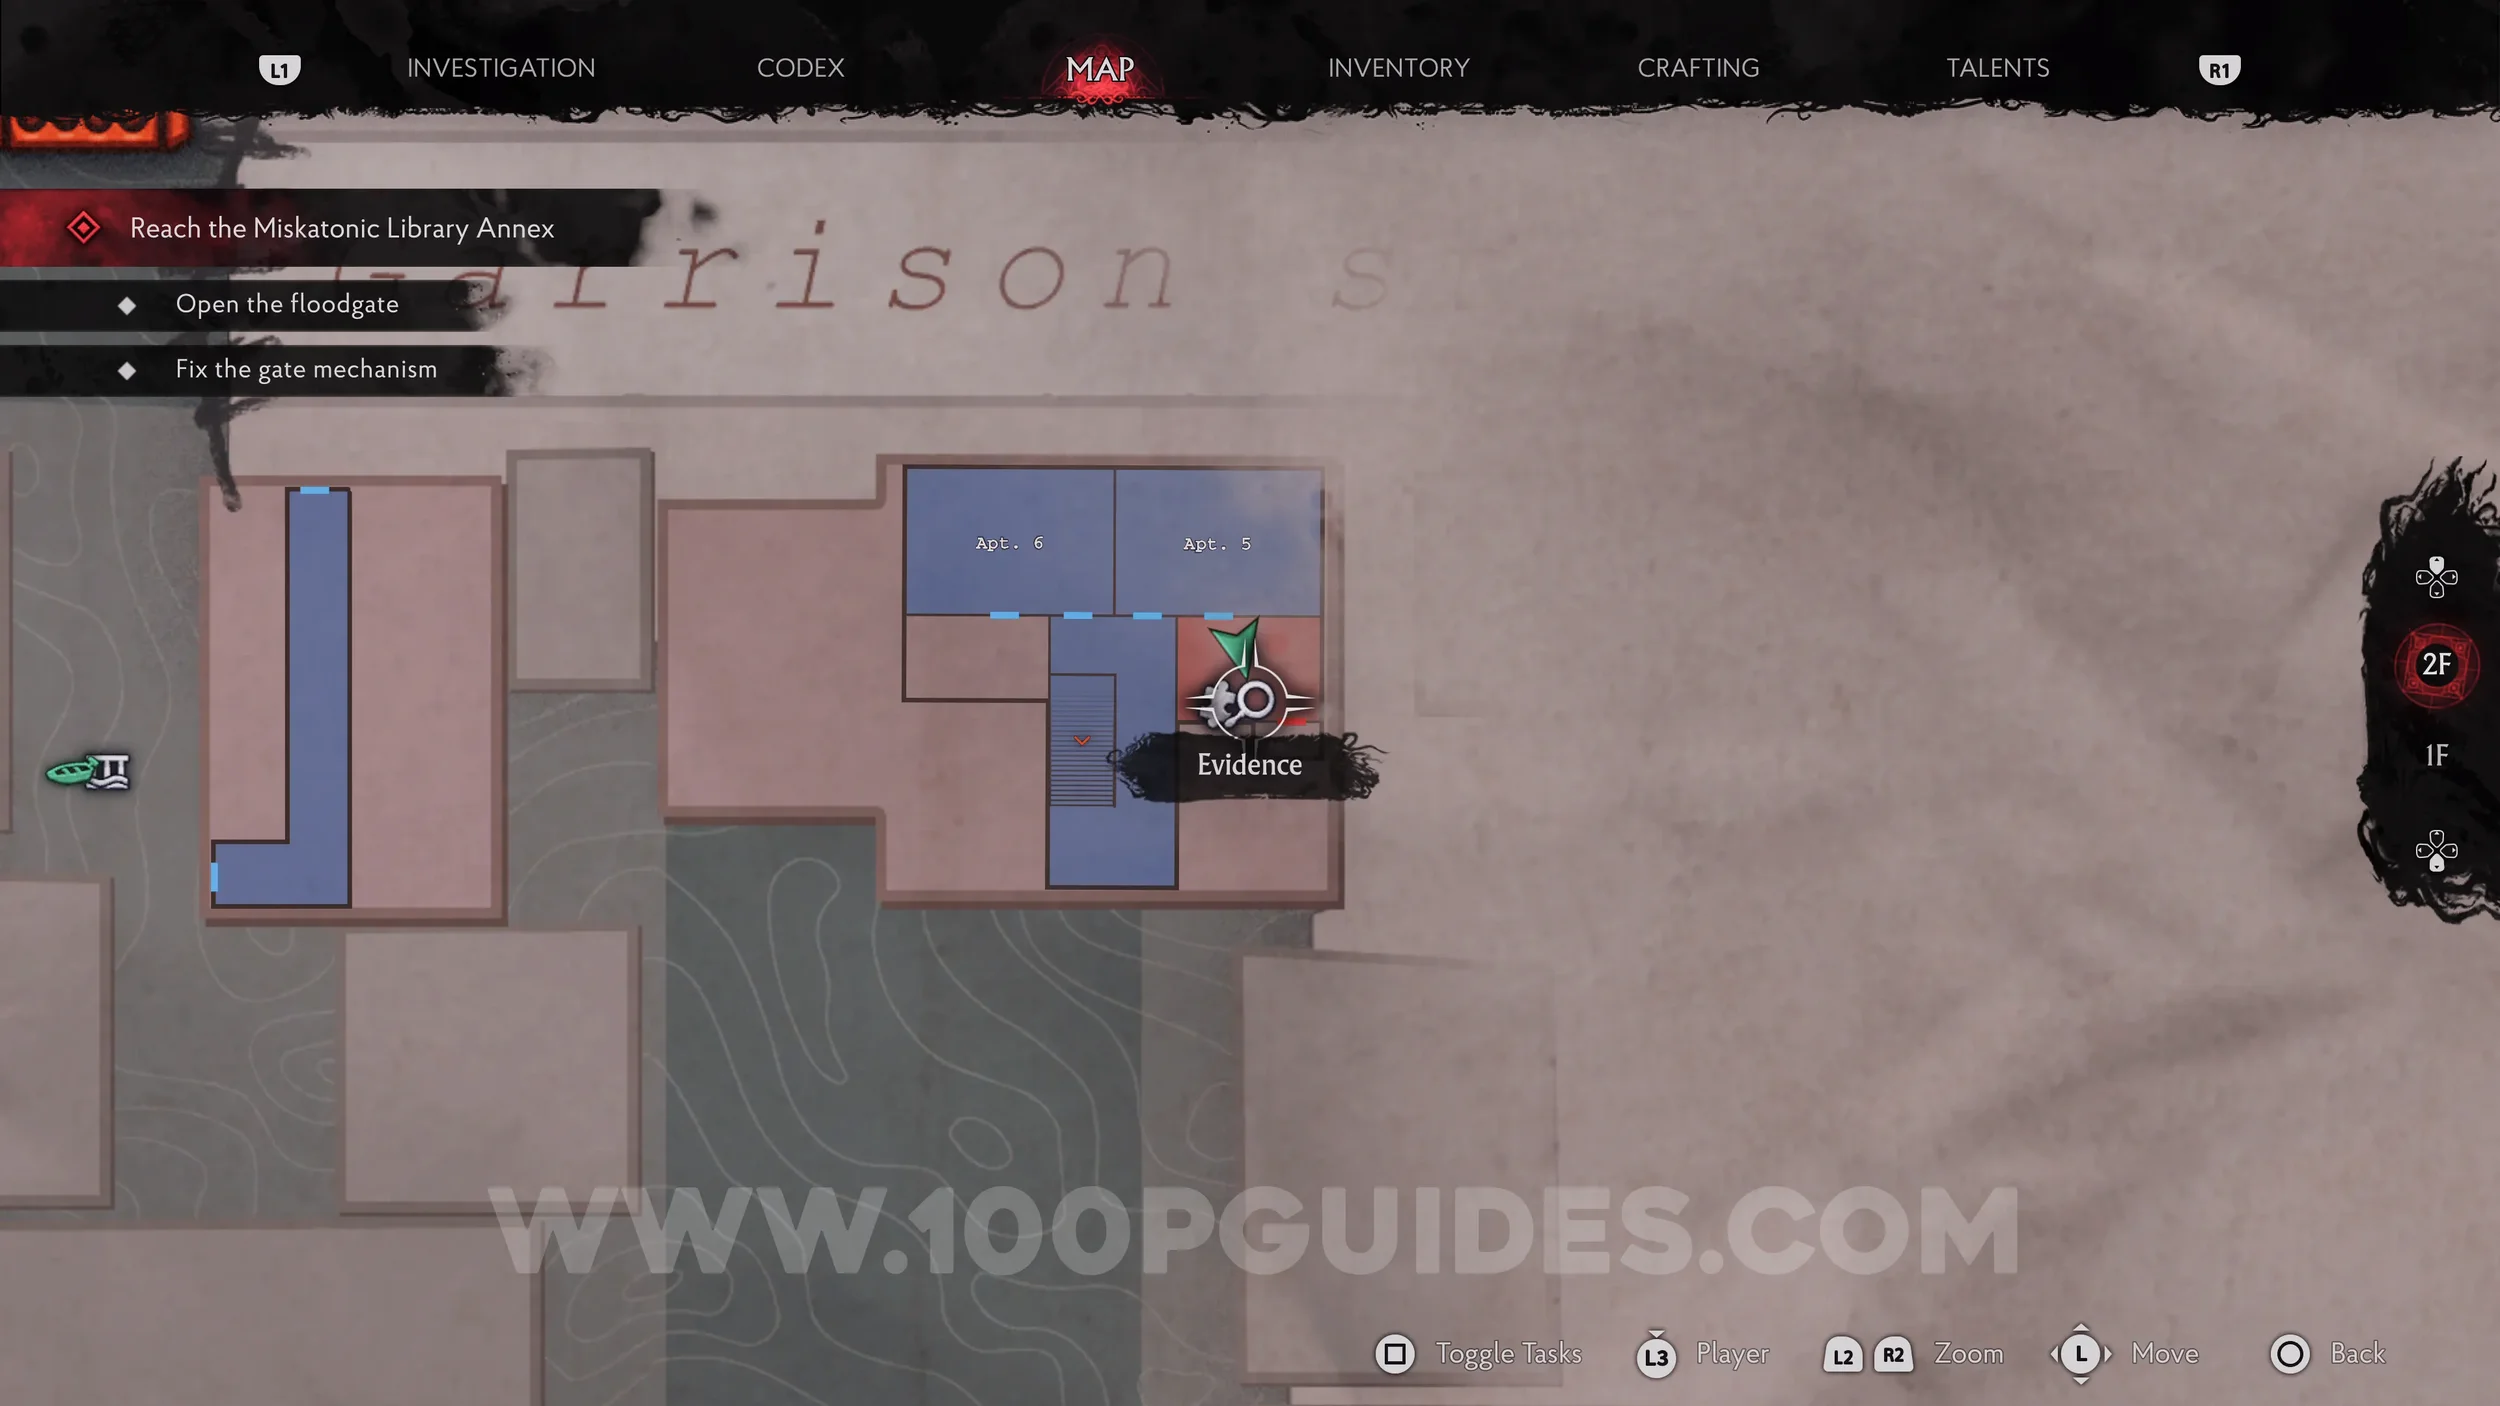
Evidence: To Martin. Head upstairs and enter Apartment 5, the door on the right. Inside, go into the kitchen to find the evidence on the safe.
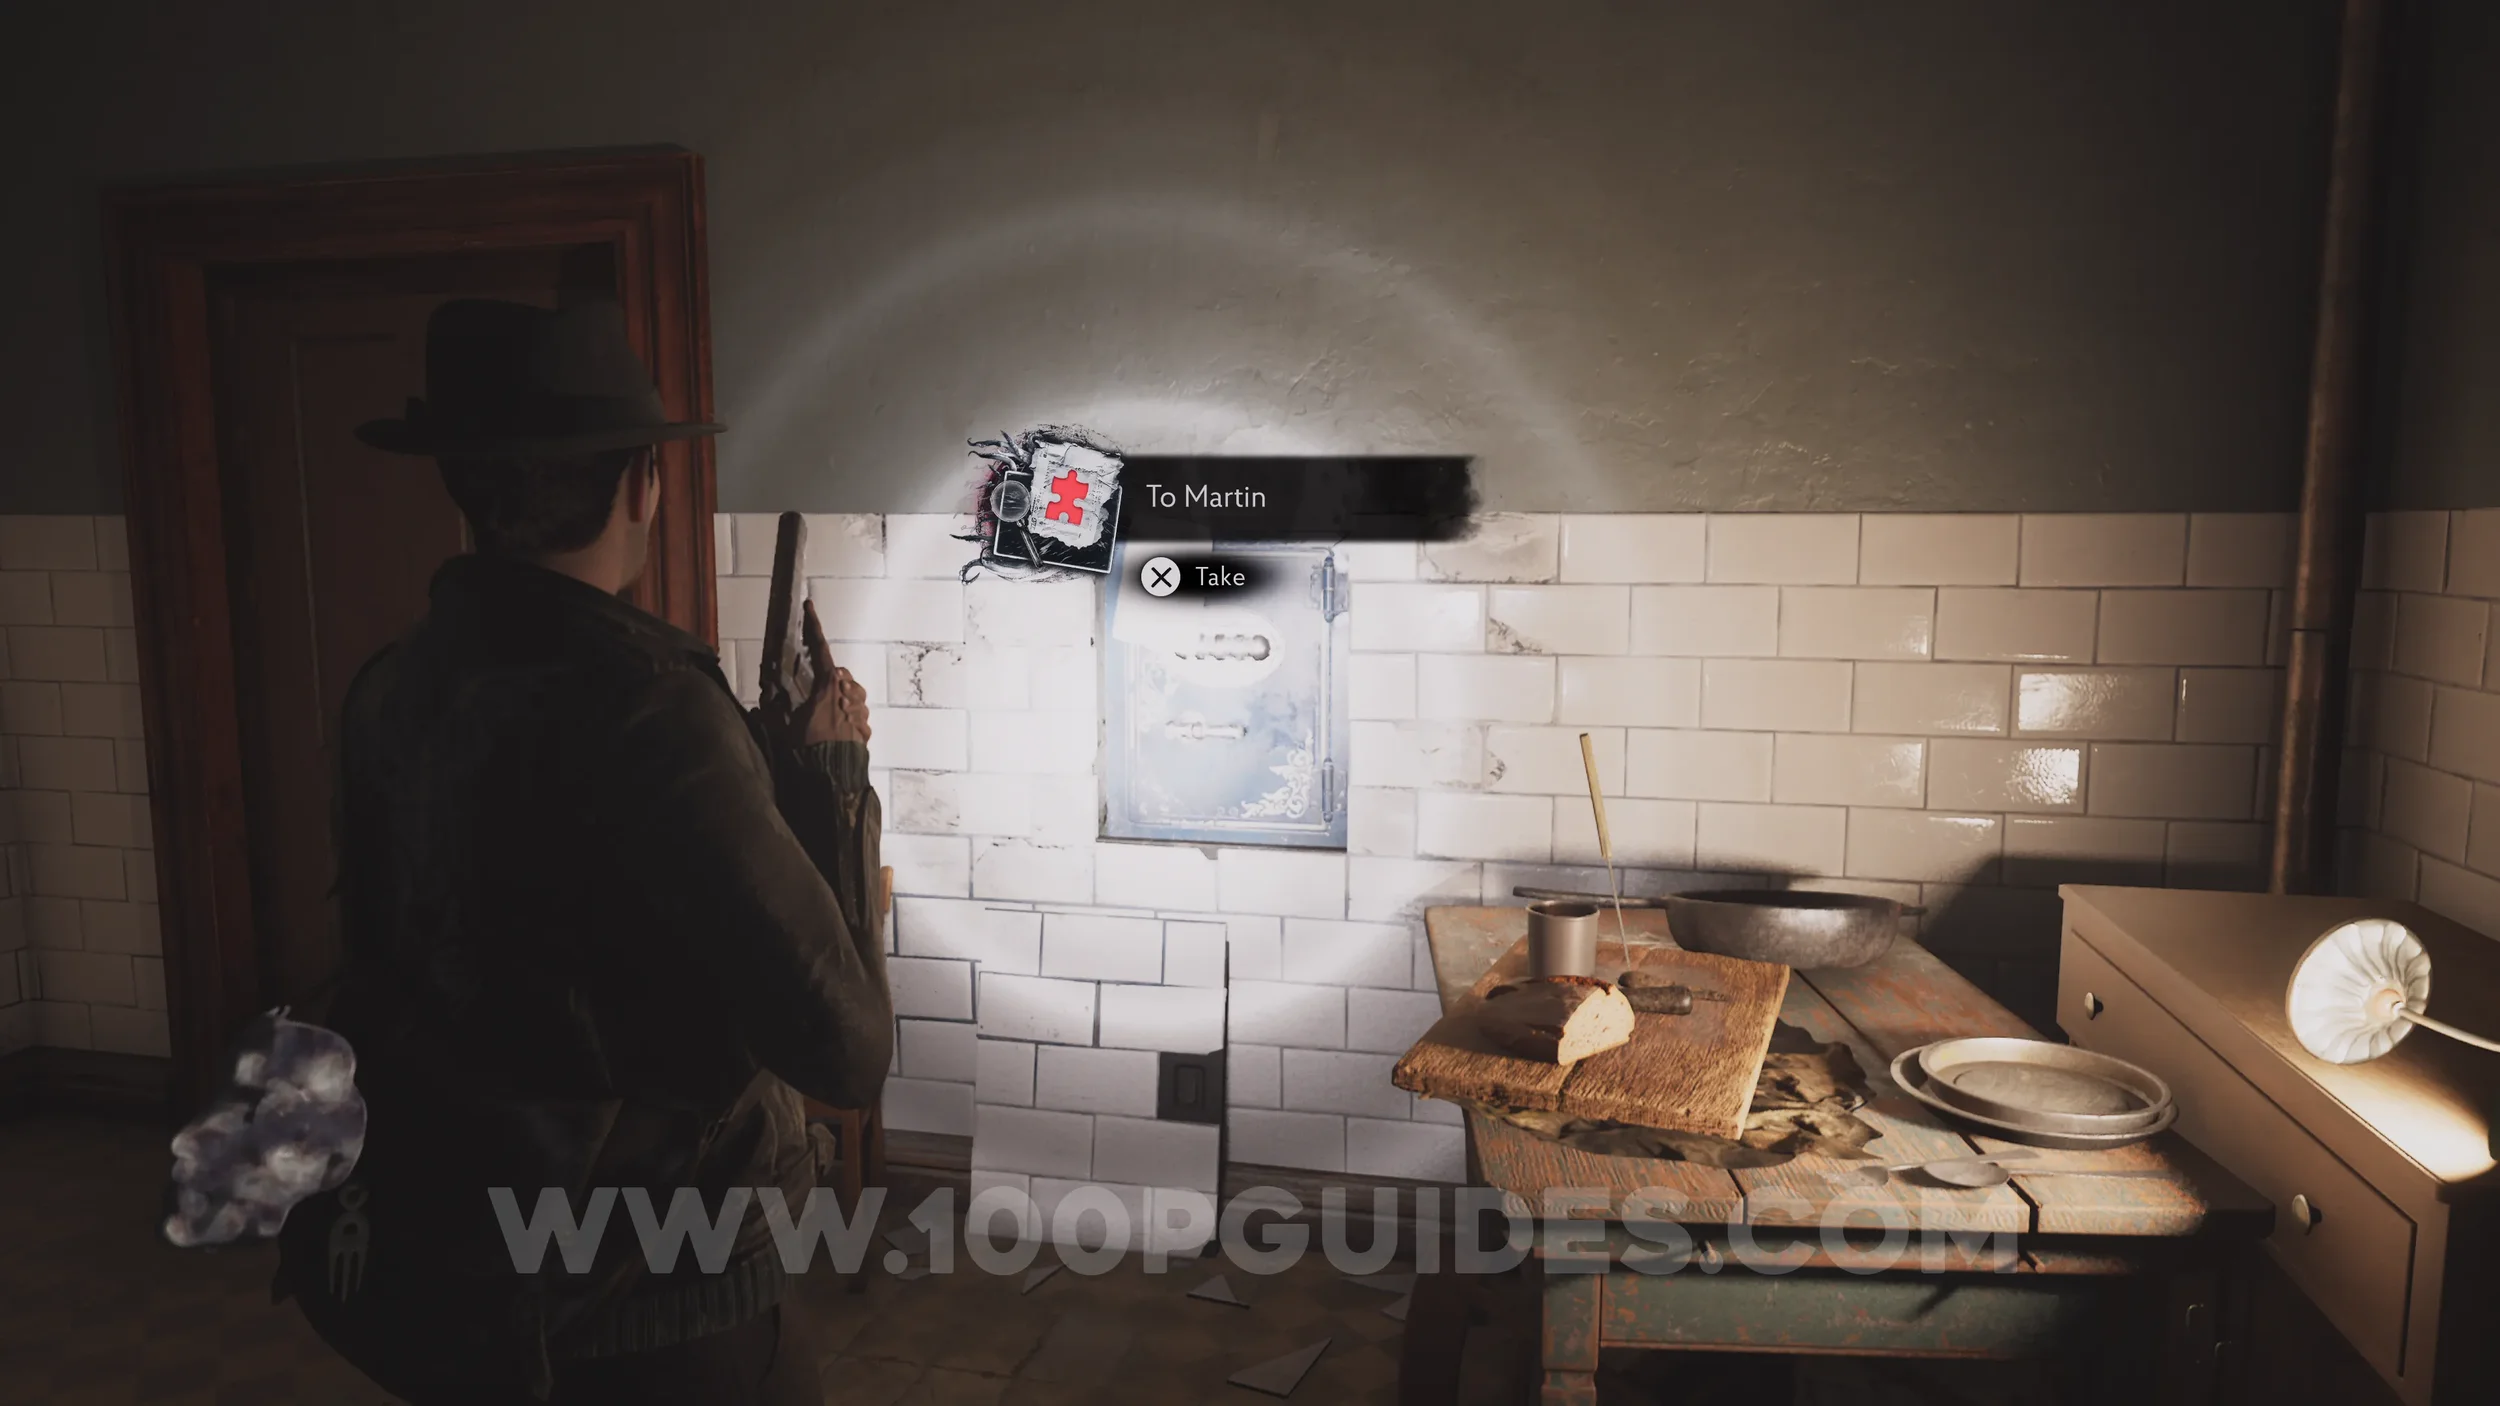
Apartment 5 Wall Safe Code
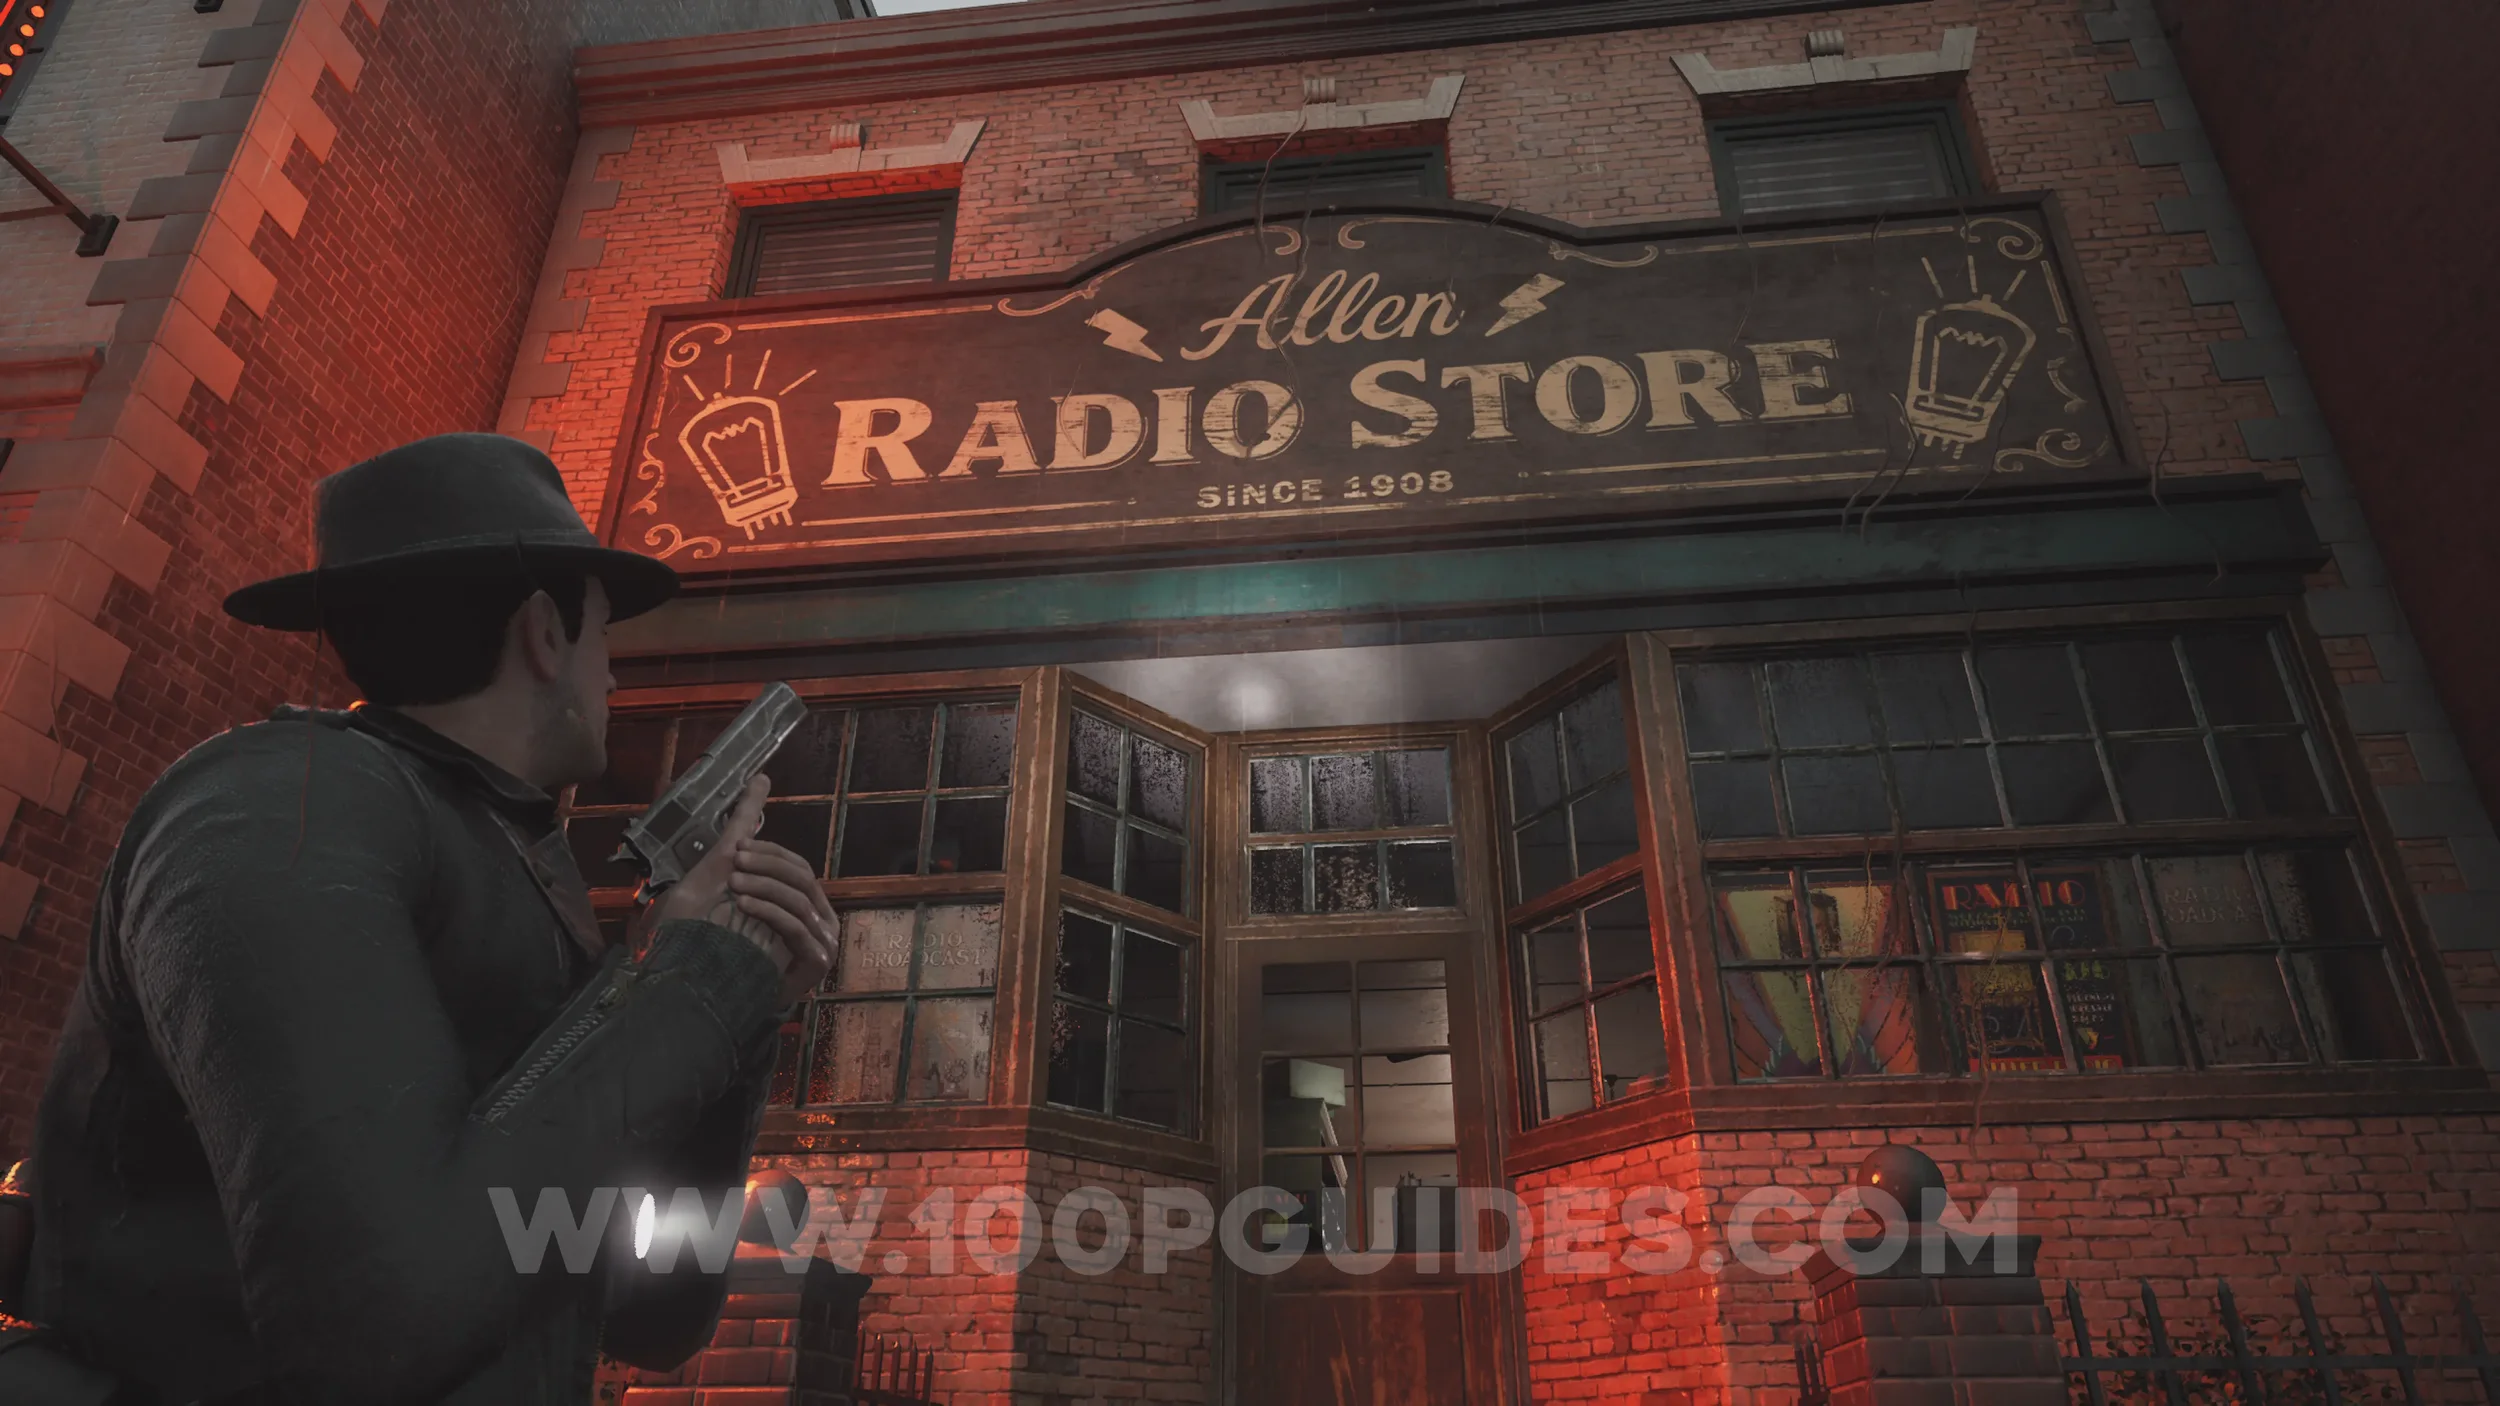
To open the safe in Apartment 5, use the code 1908, the date the Radio Shop opened. You can find it by heading back outside and checking the sign above the entrance.

Trophy: The Inheritance. Obtained after opening the Apartment 5 Wall Safe.
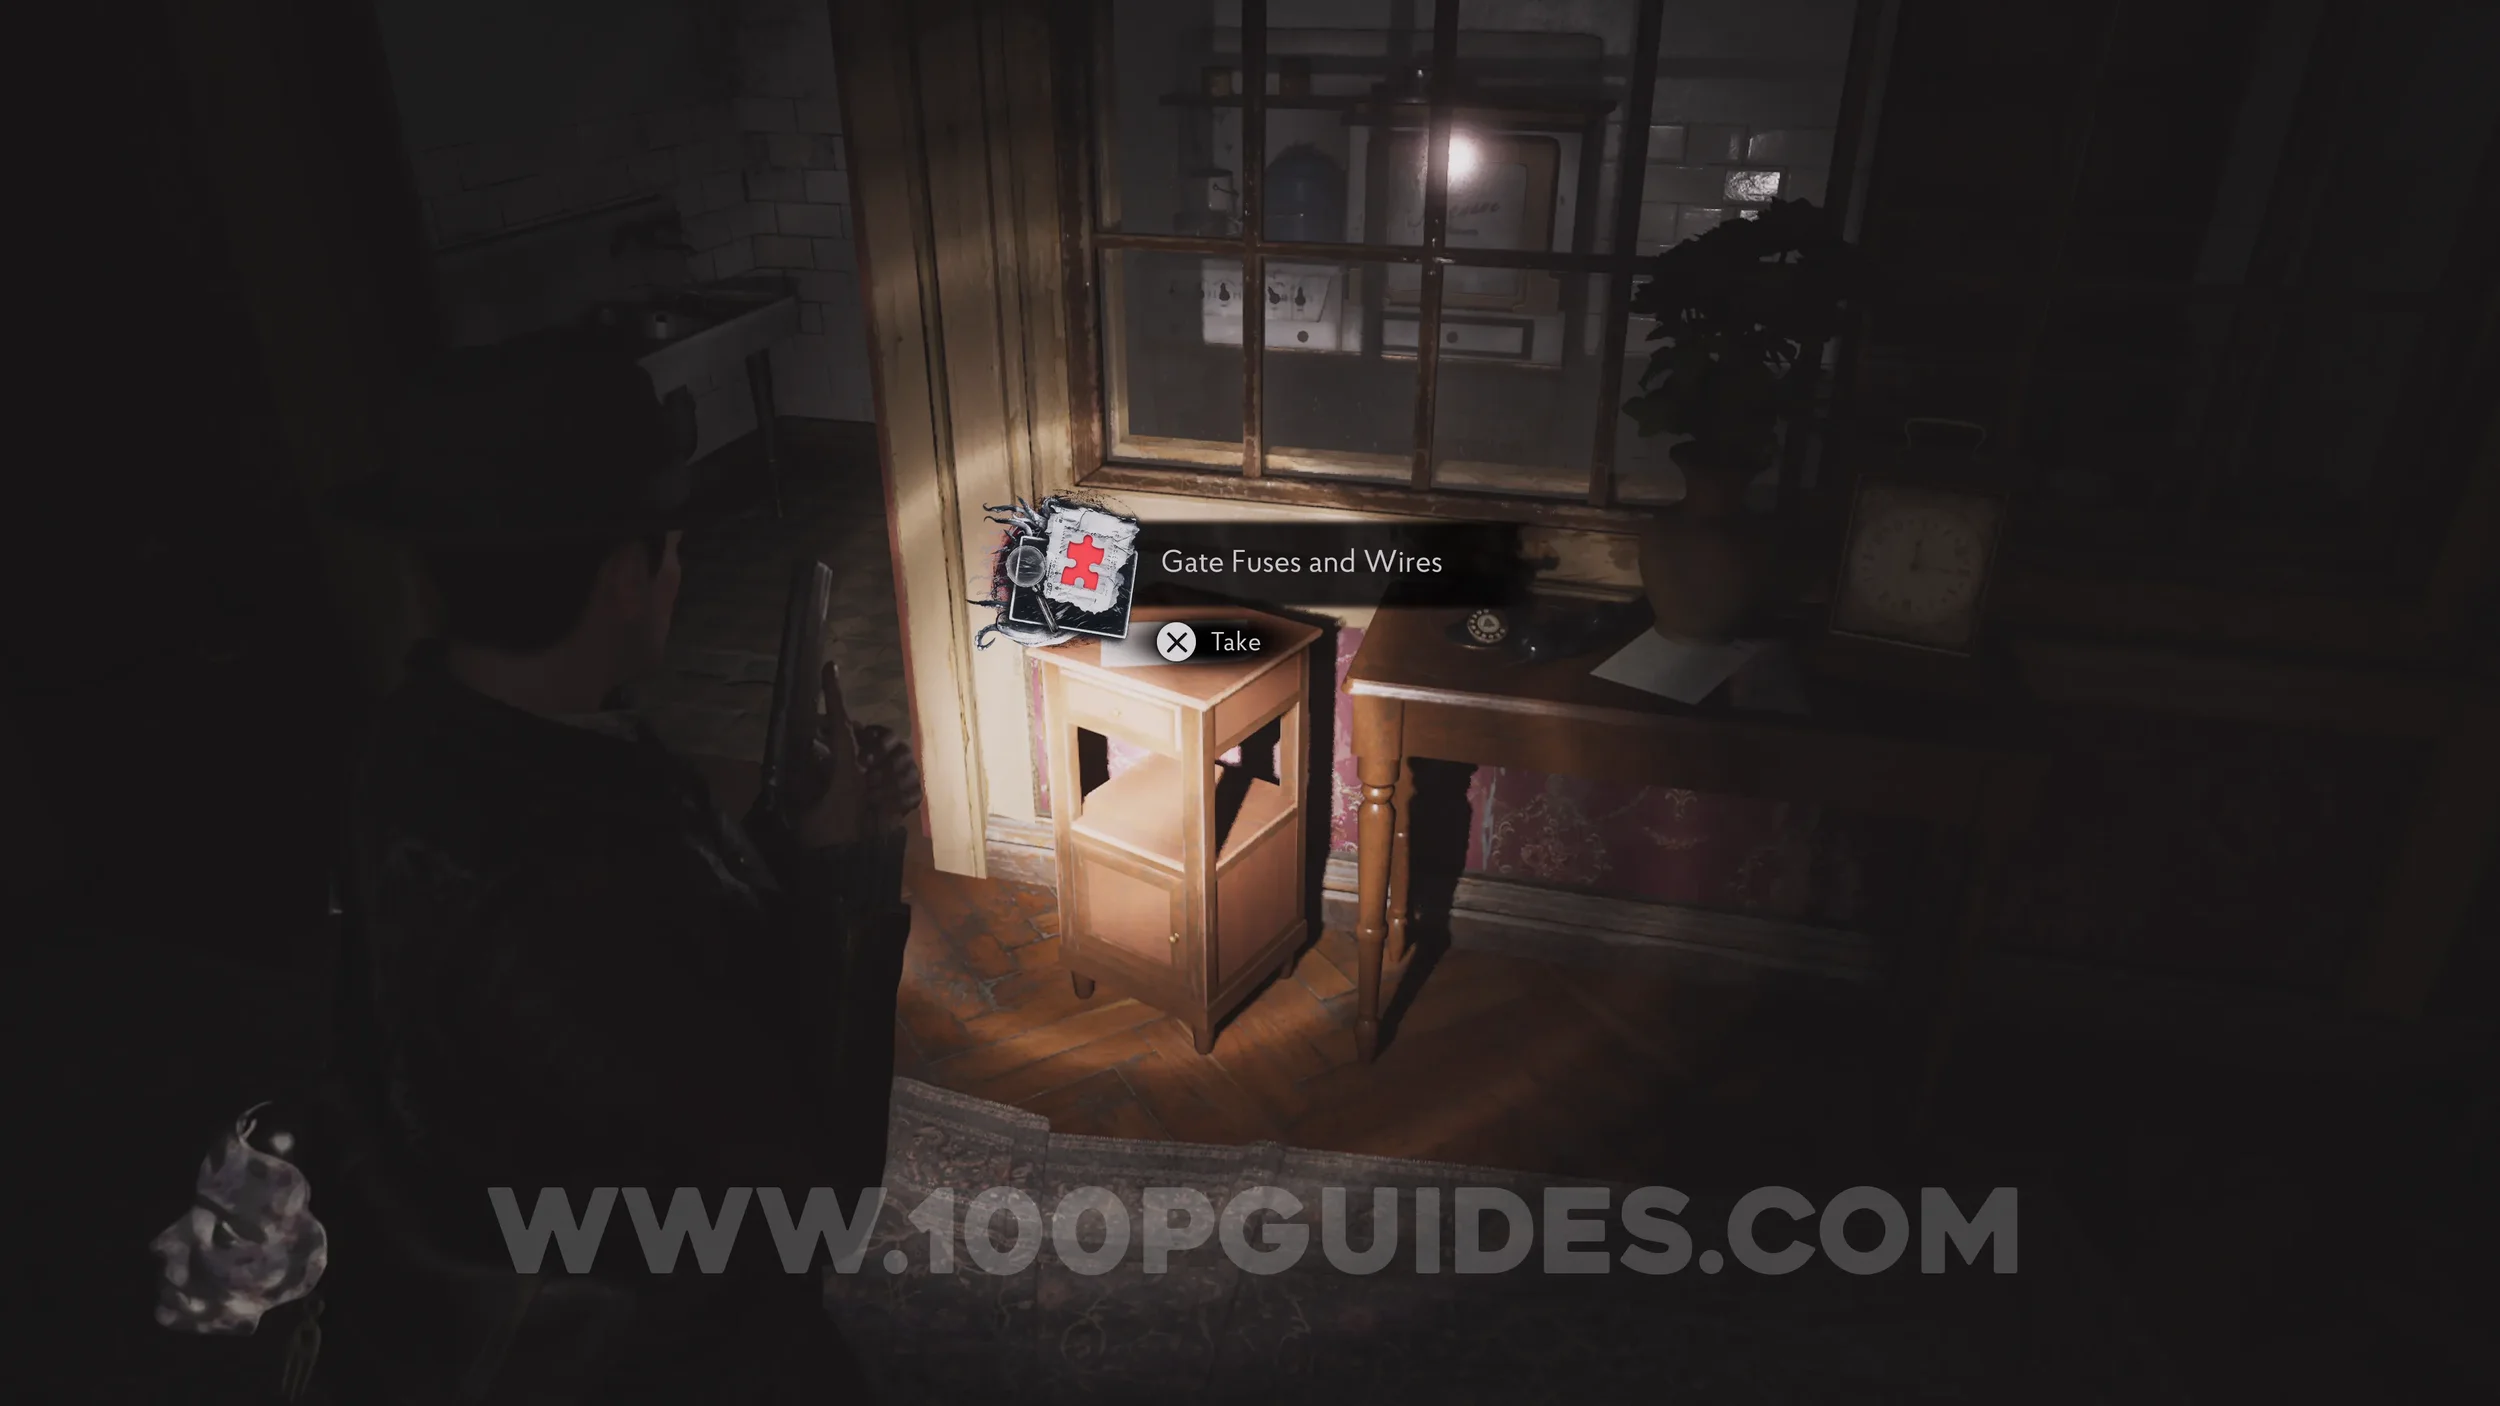
Evidence: Gate Fuses and Wires. After going through Apartment 6 and dropping down the hole into Apartment 2, you'll see the evidence as you enter the hall.
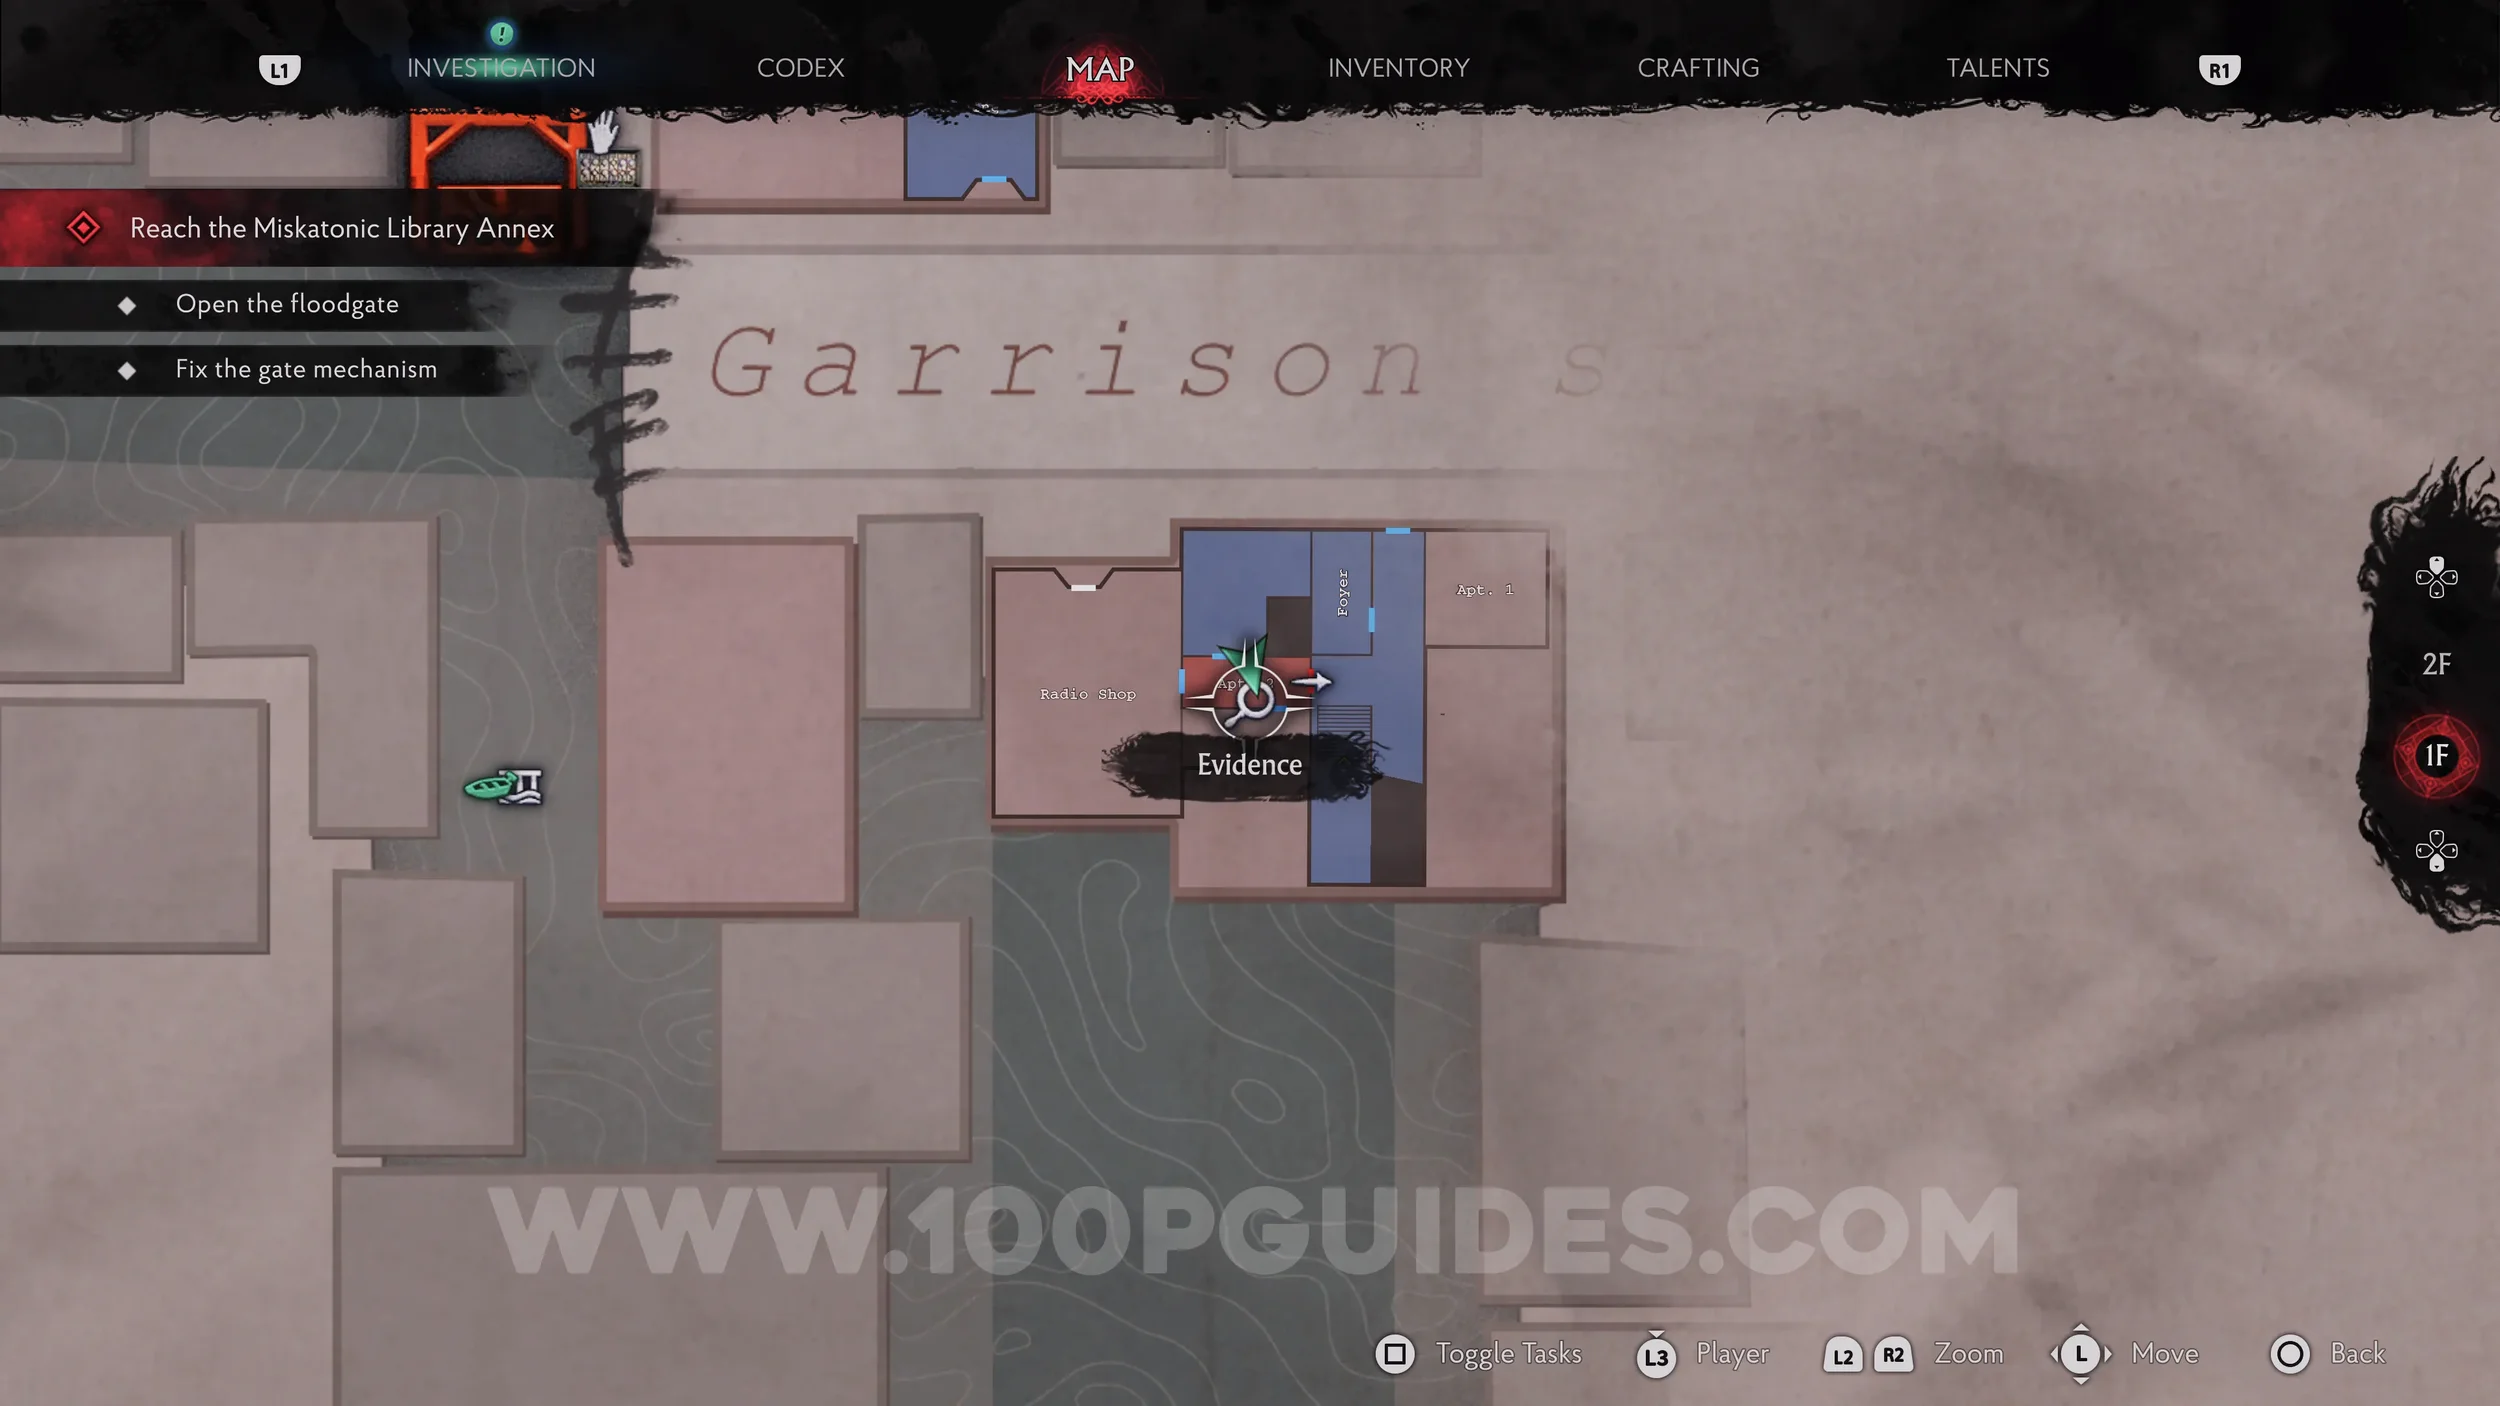
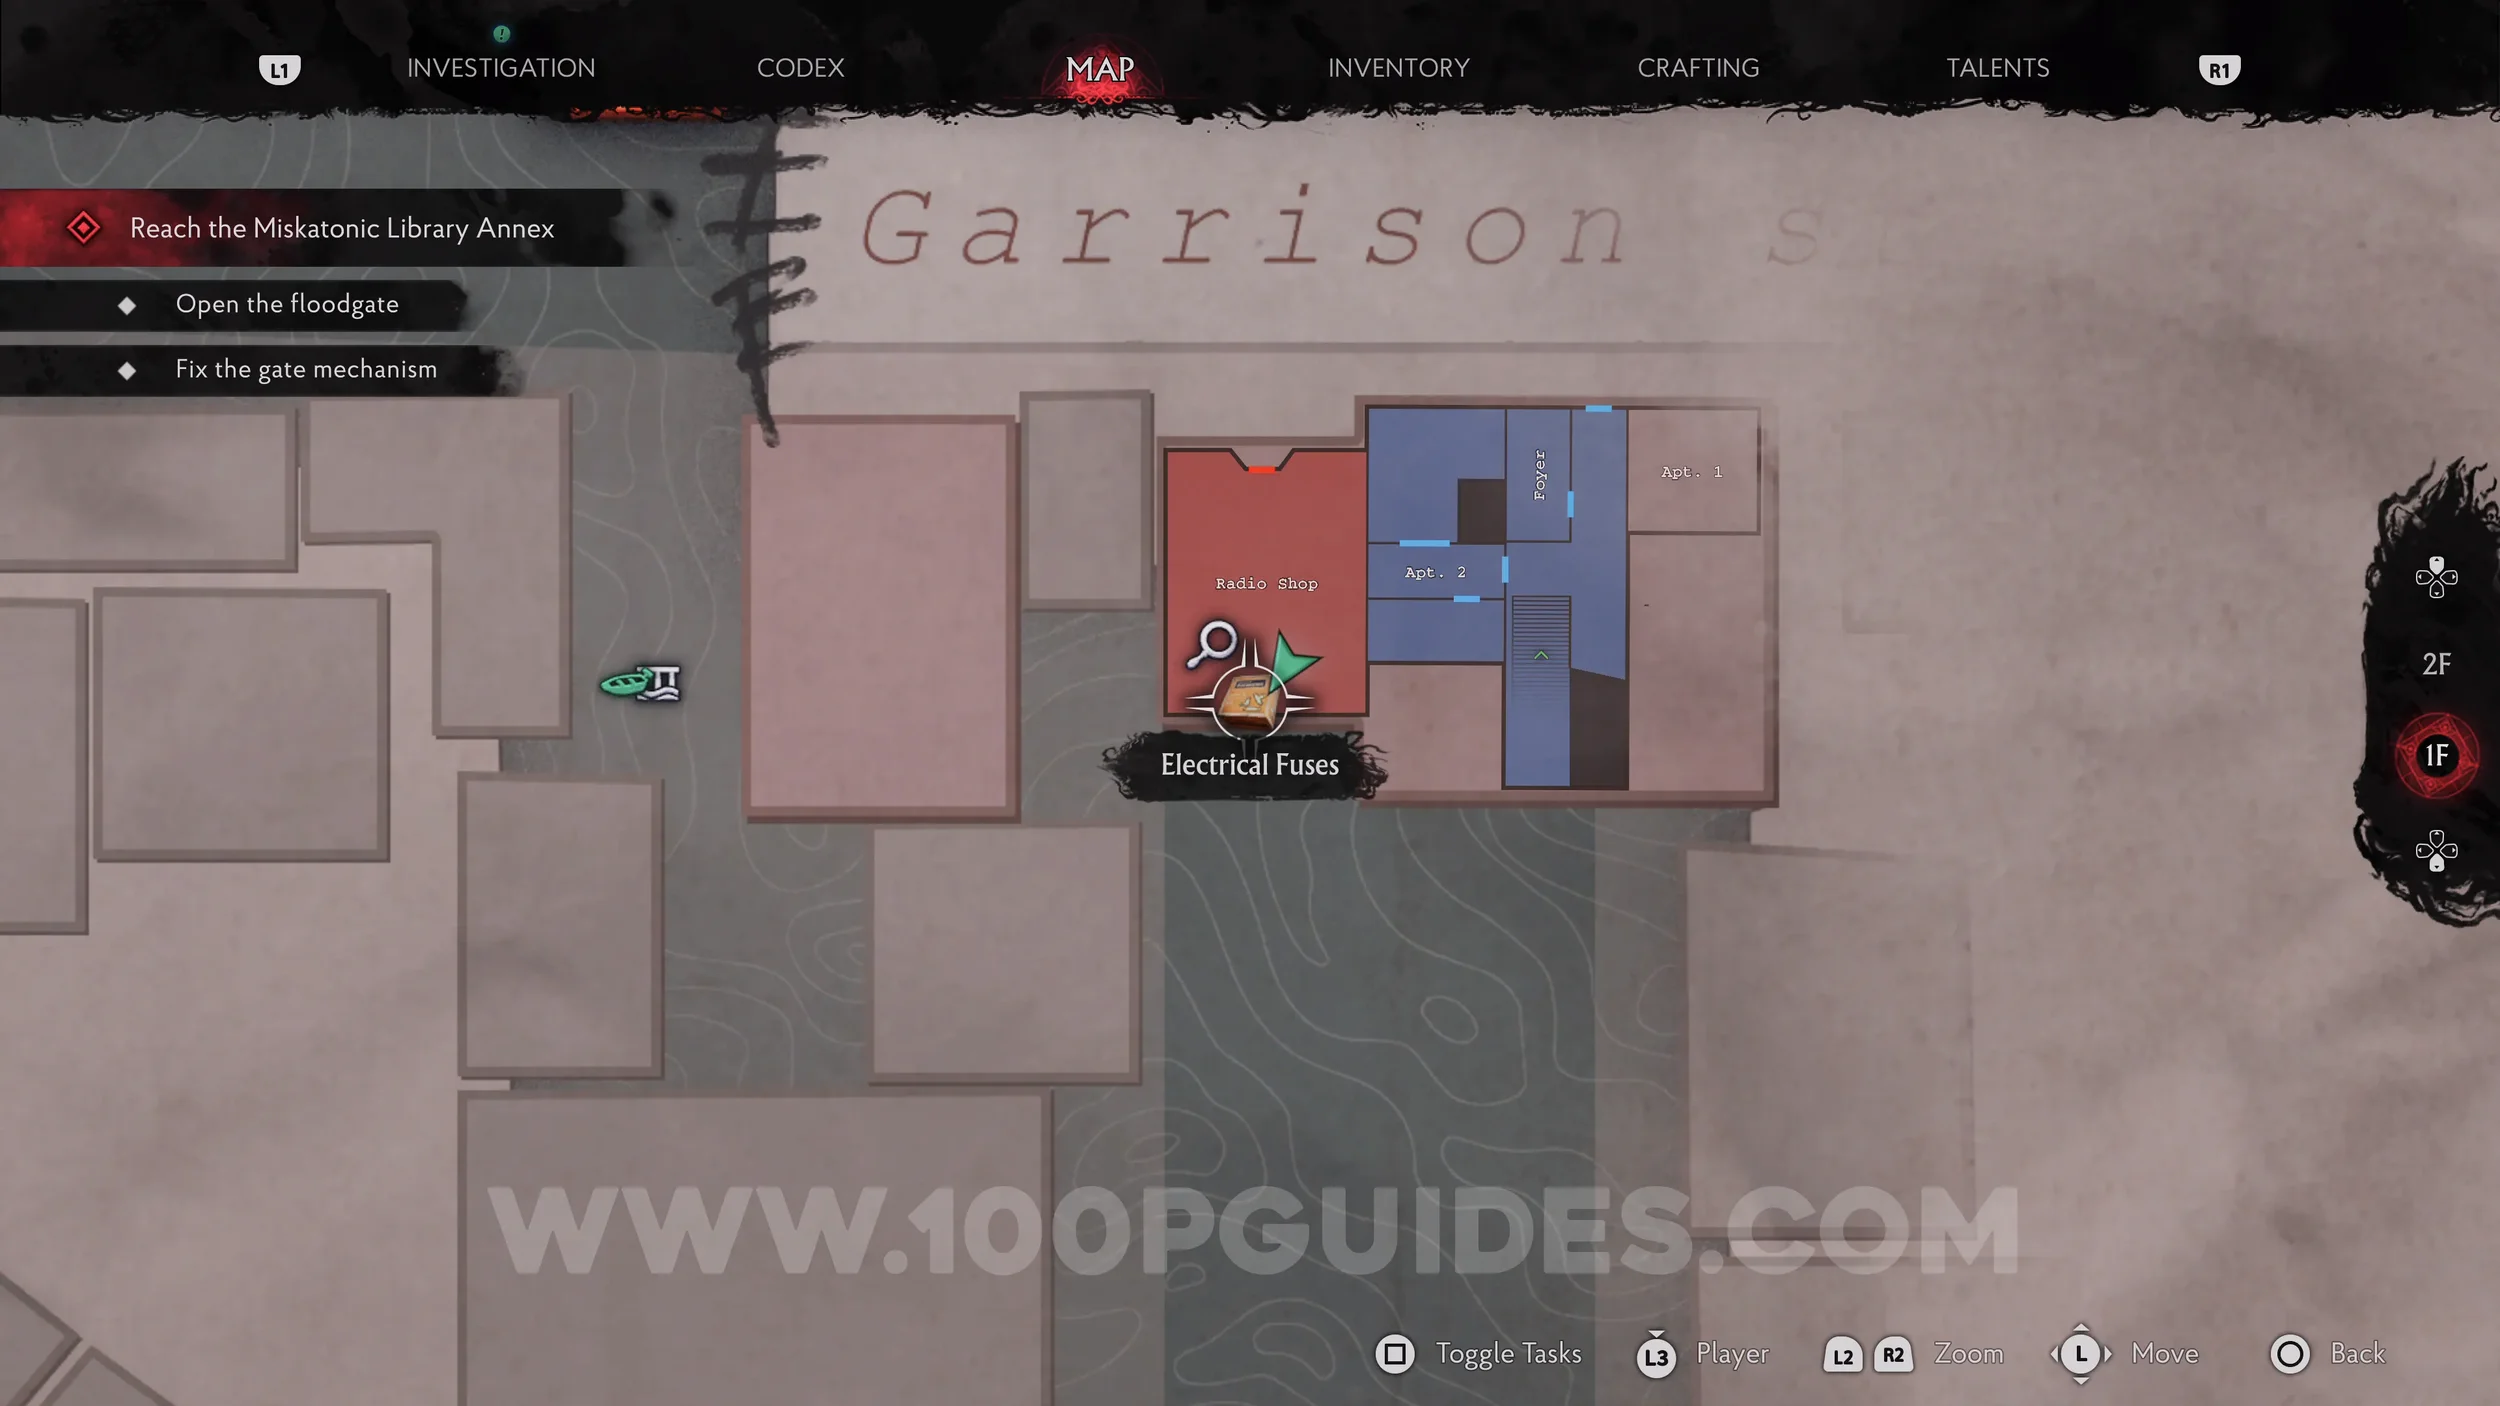
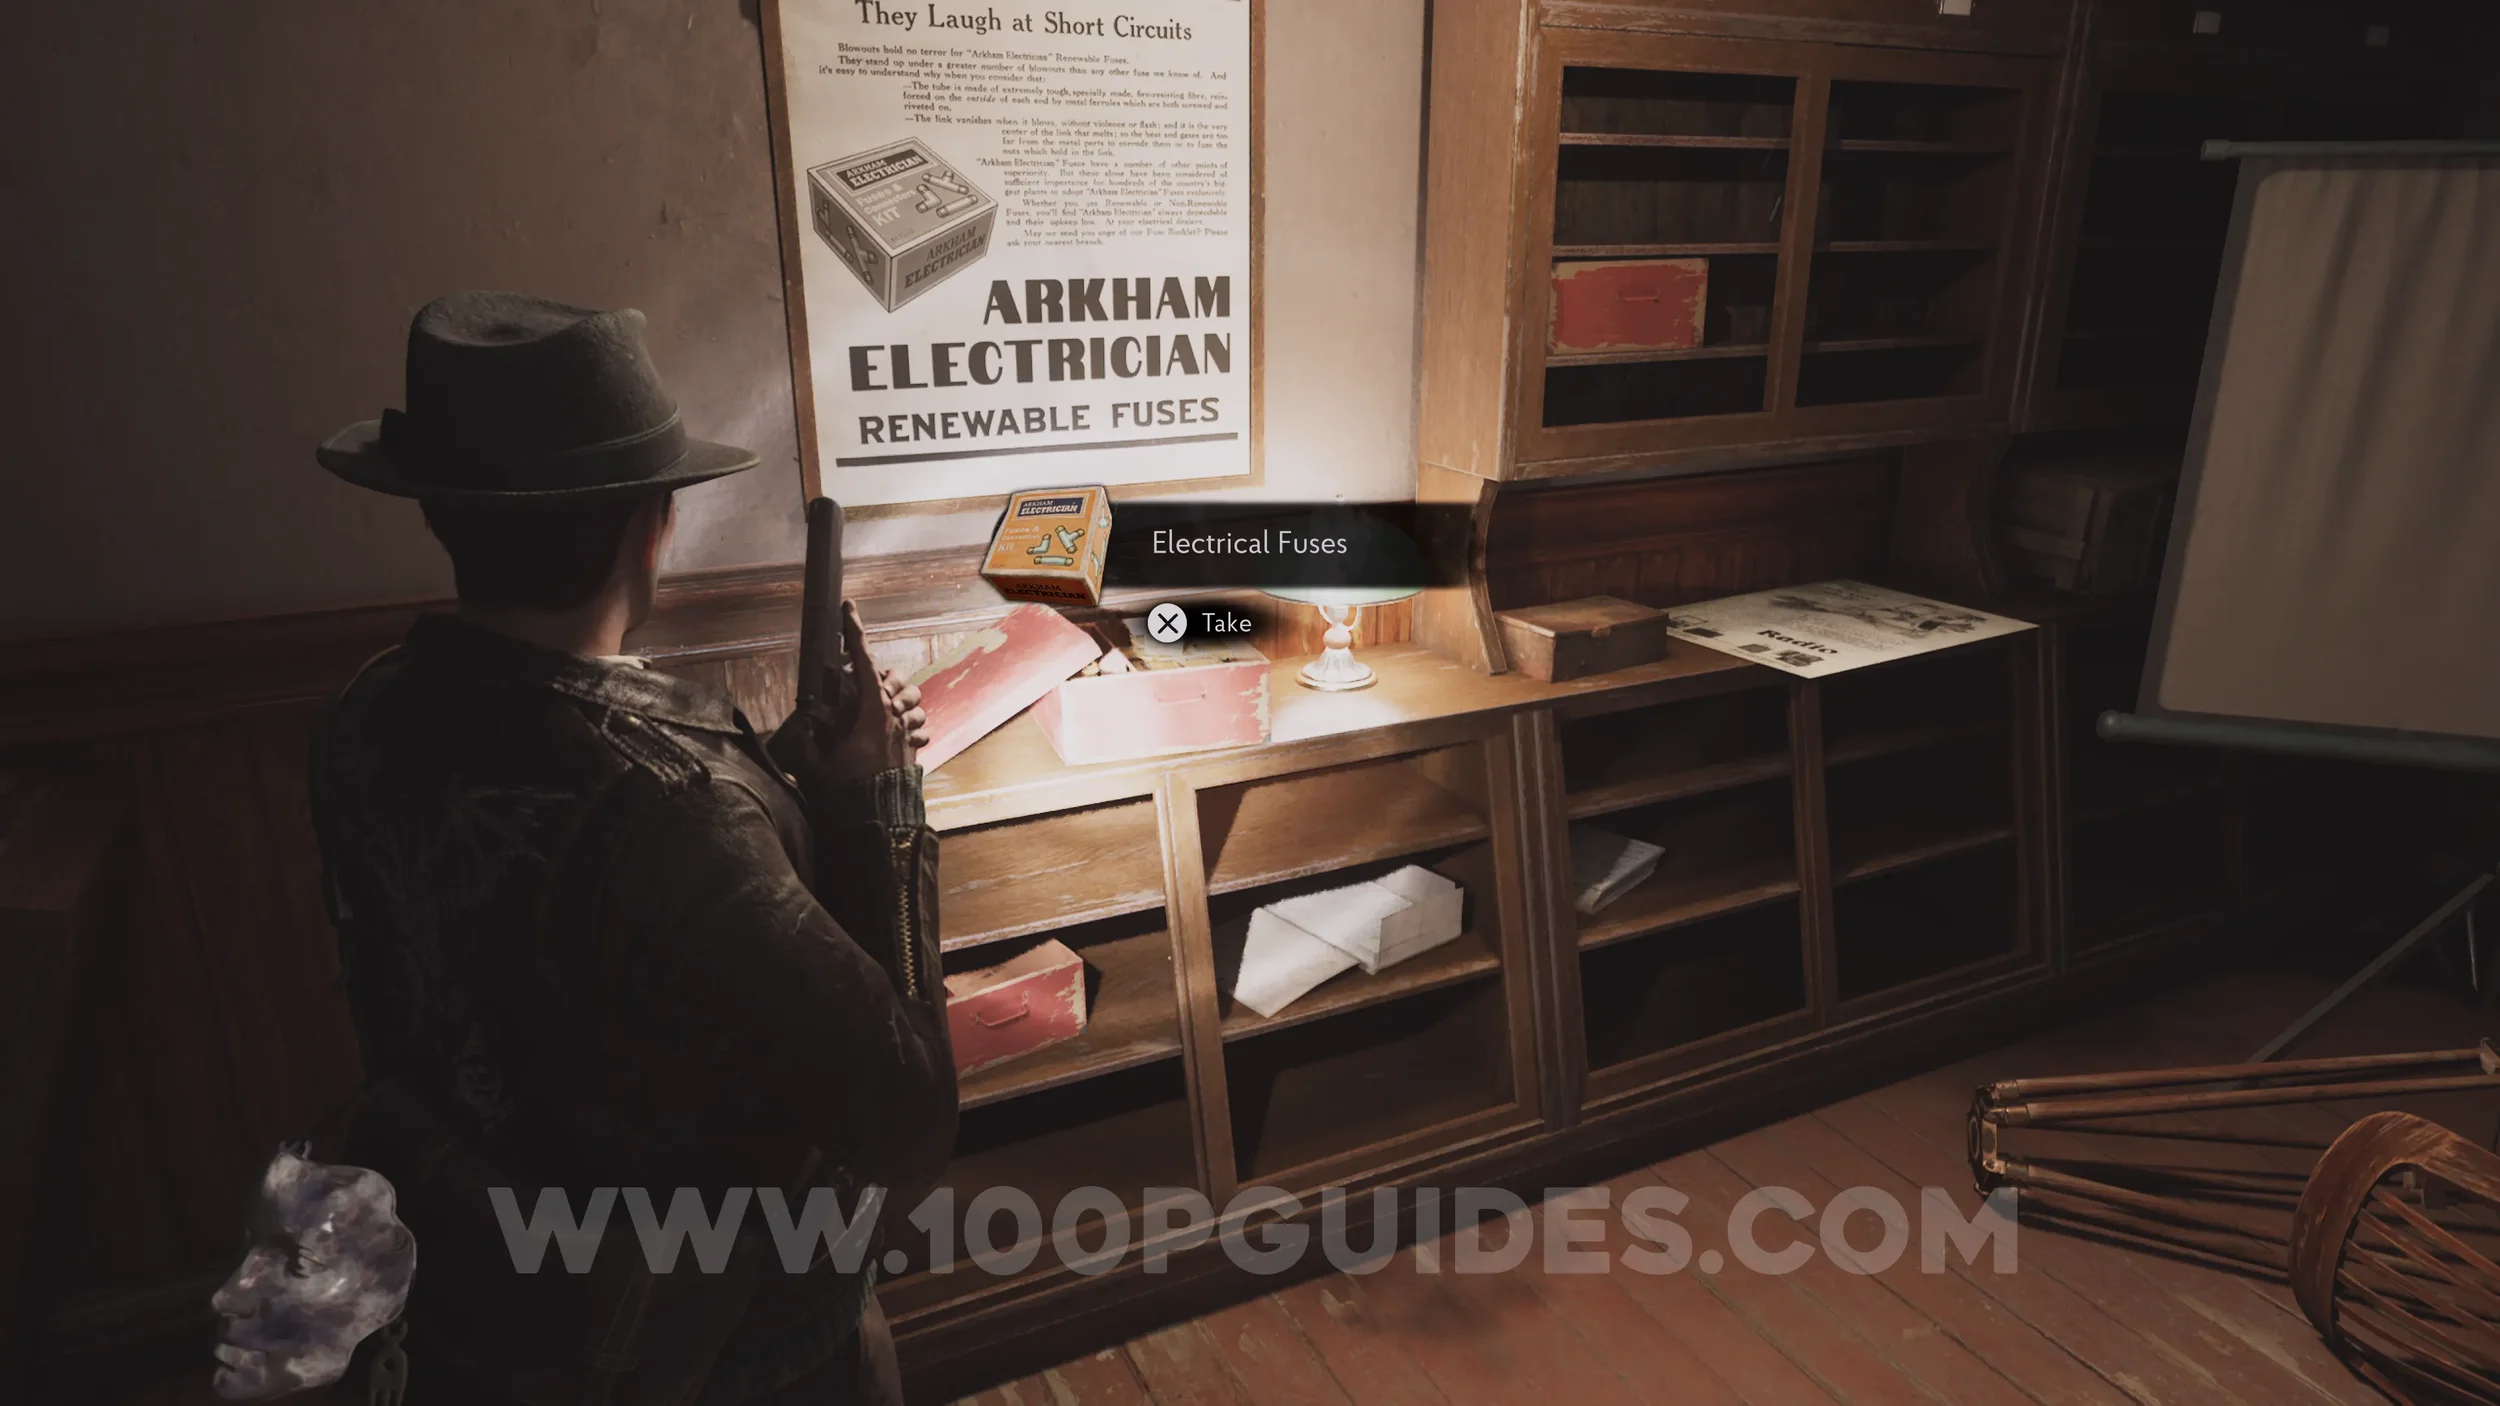
Key Item: Electrical Fuses. From the previous evidence, head through the hole on your right into the Radio Shop. The fuses are in a small box on the southern cupboards.
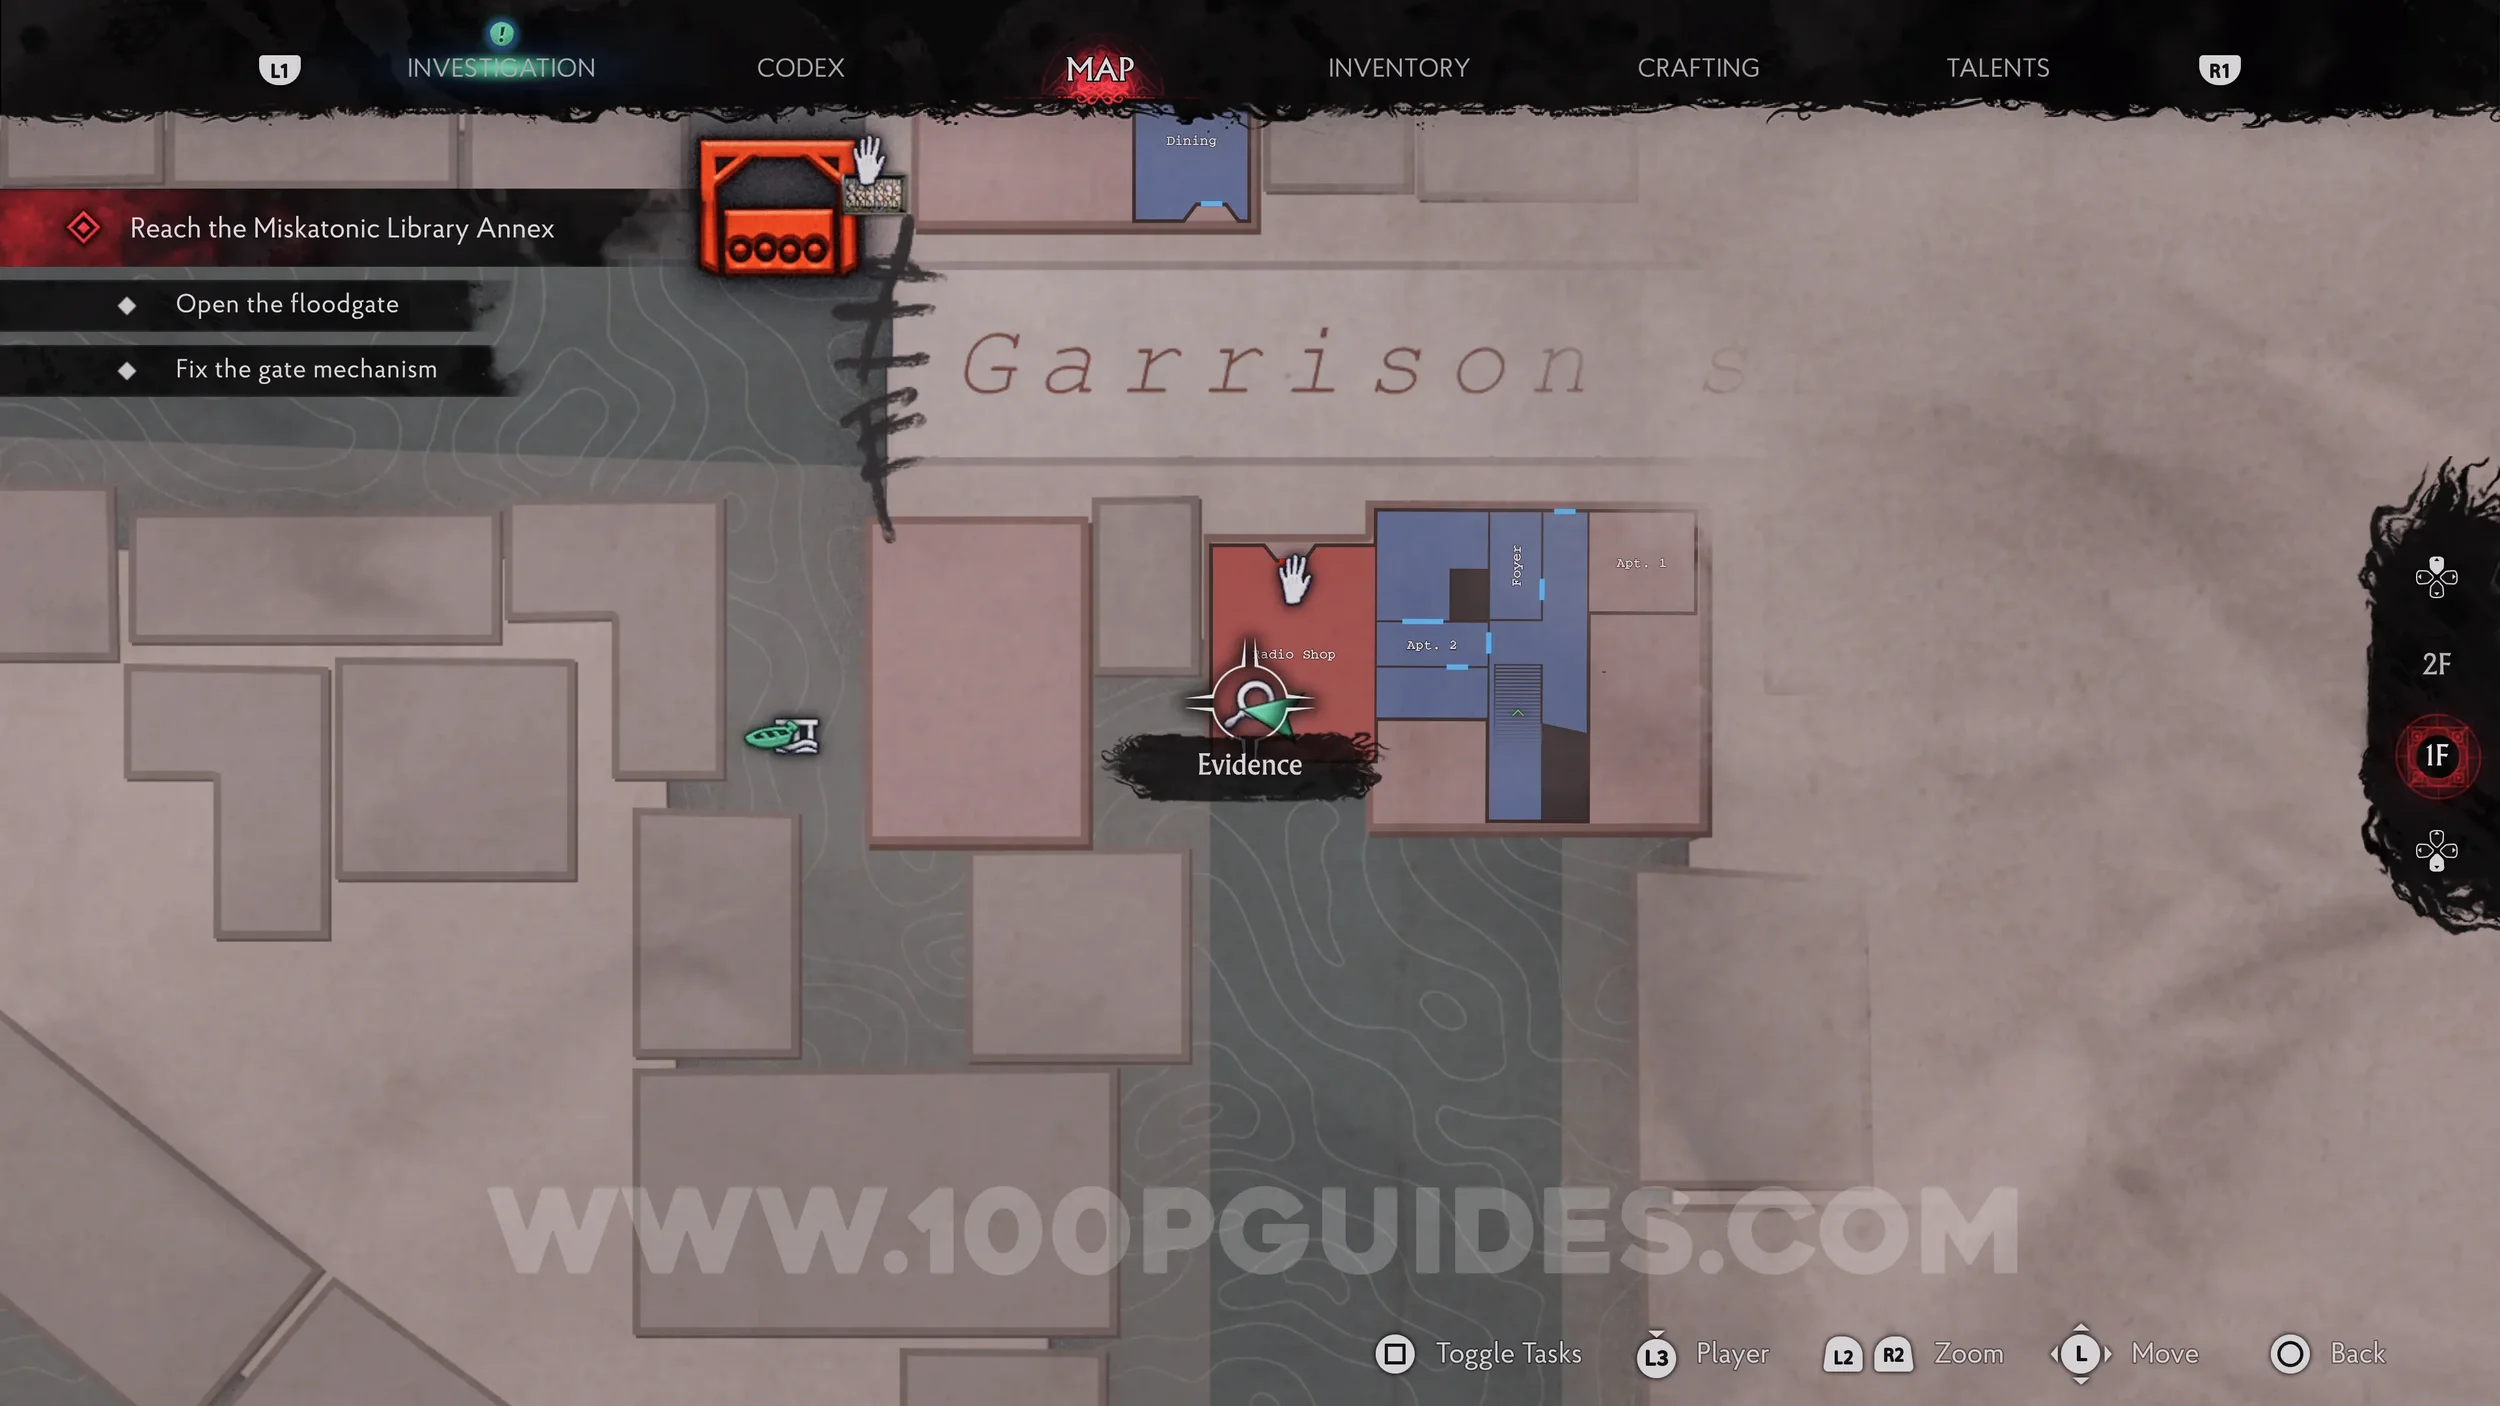
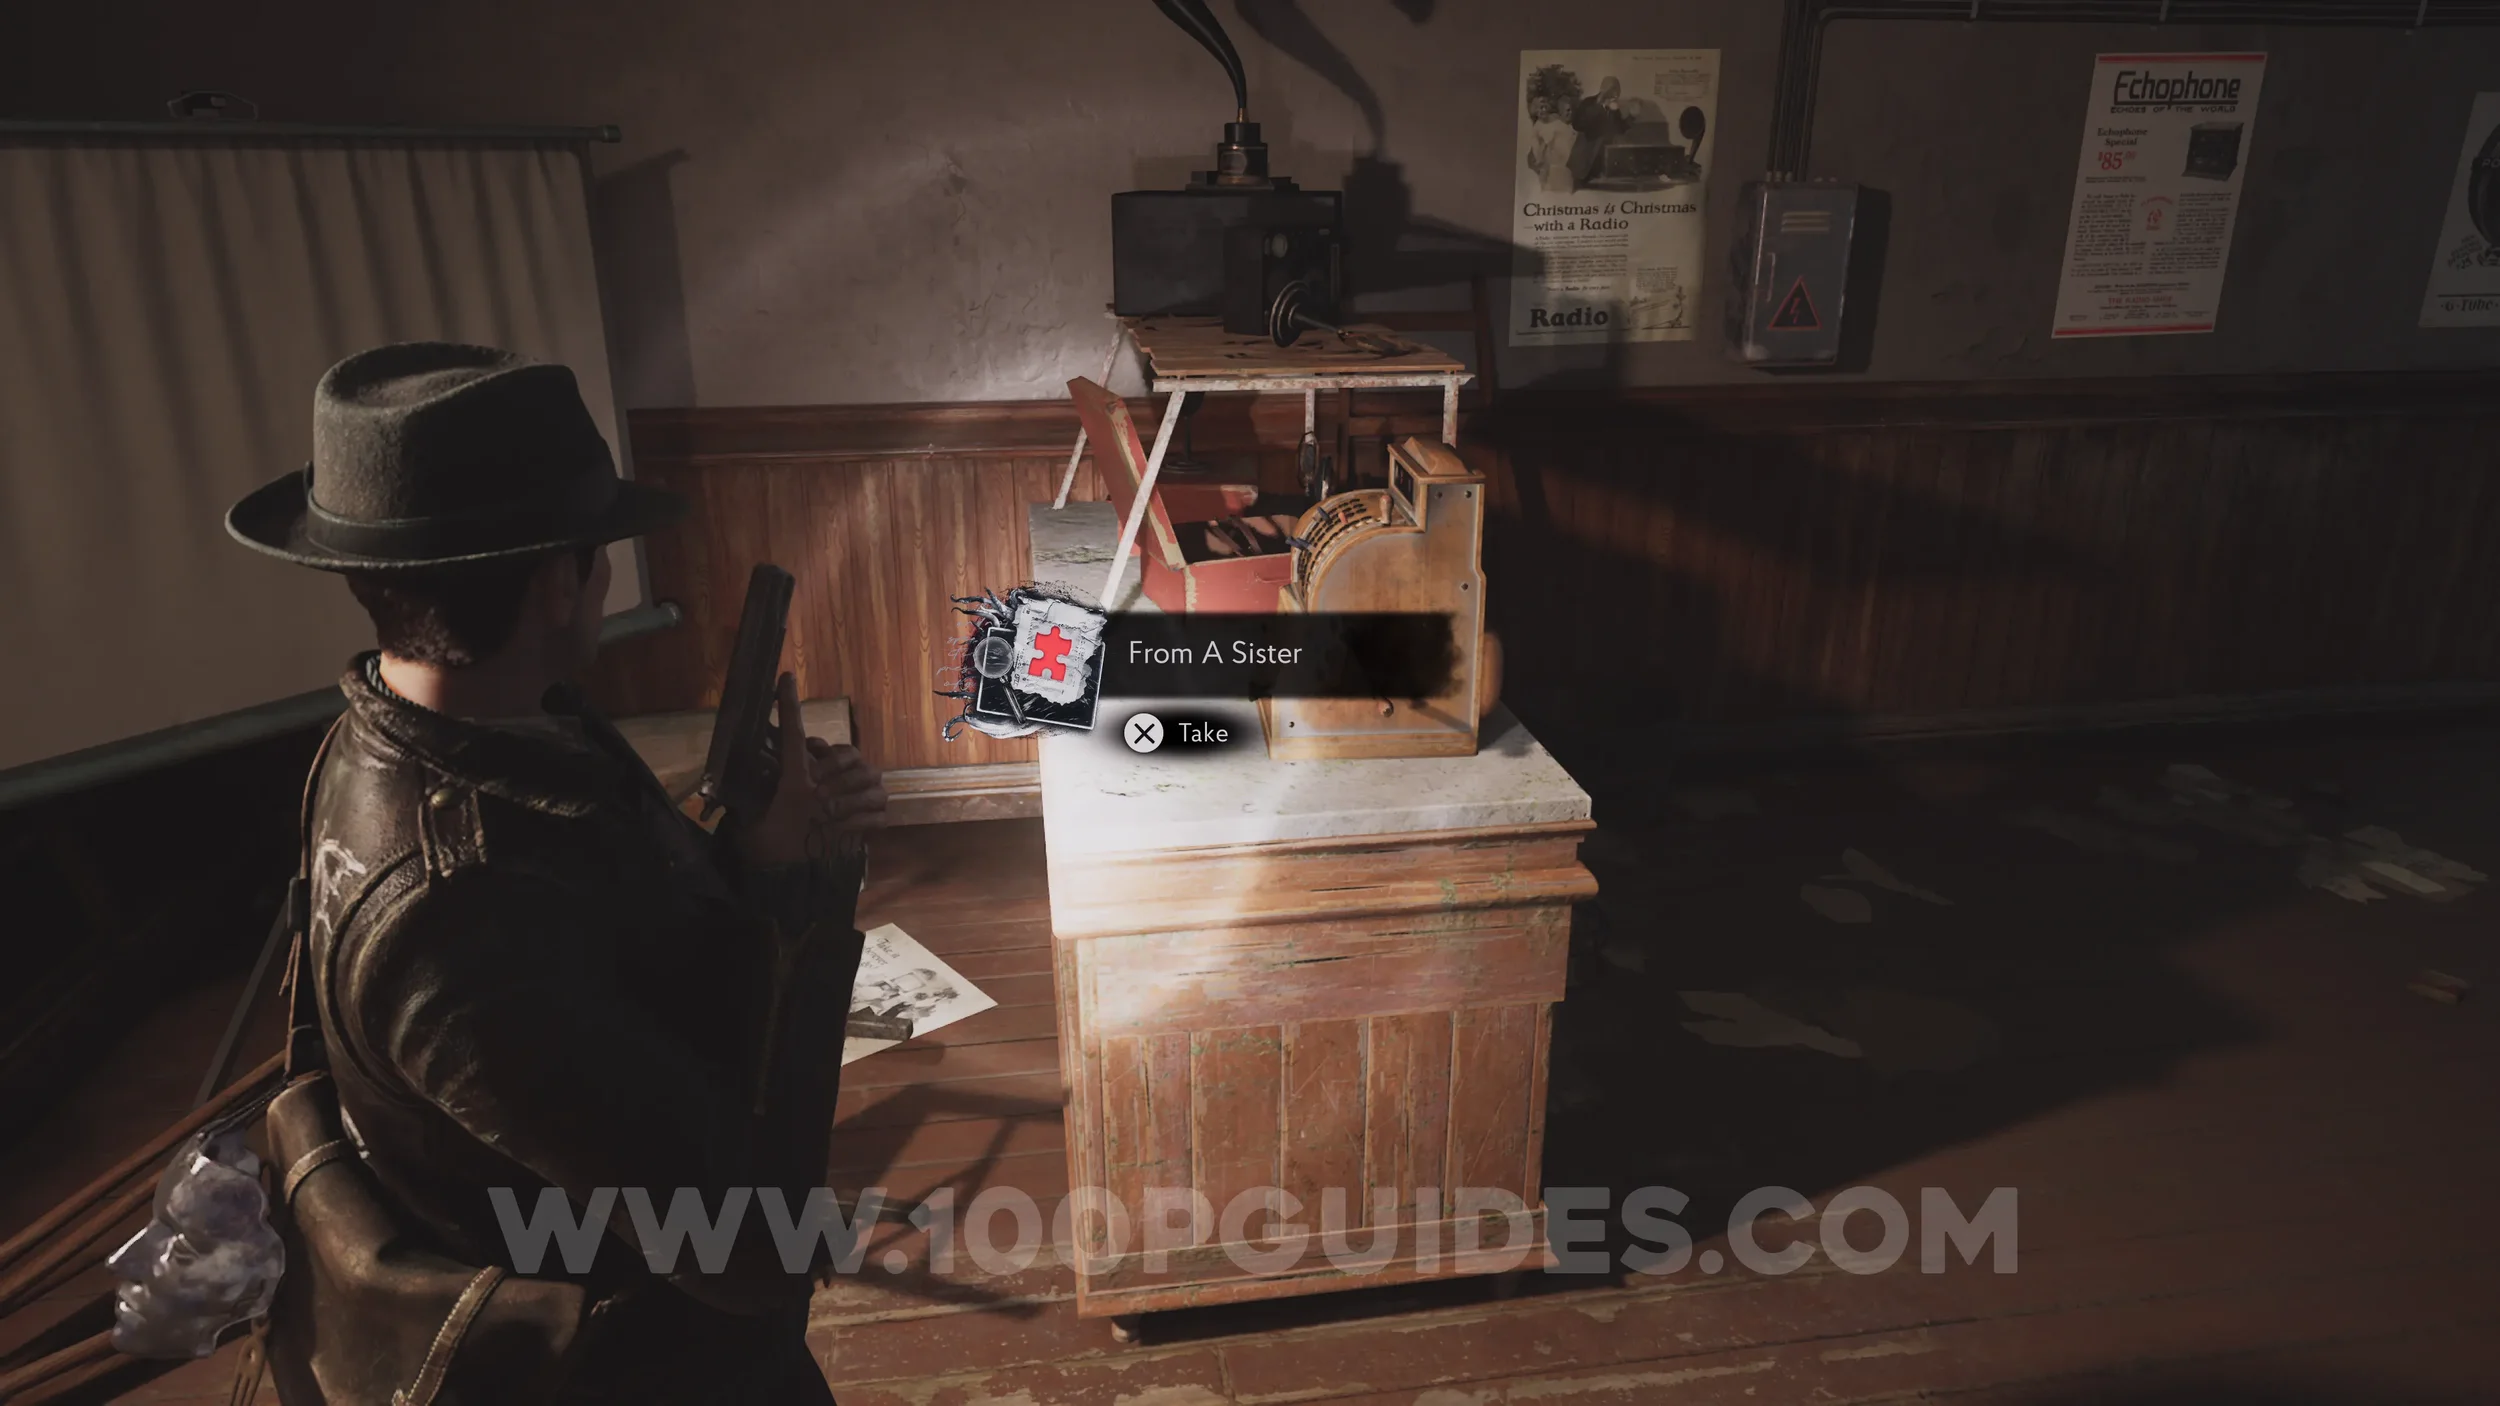
Evidence: From A Sister. Also found in the Radio Shop.
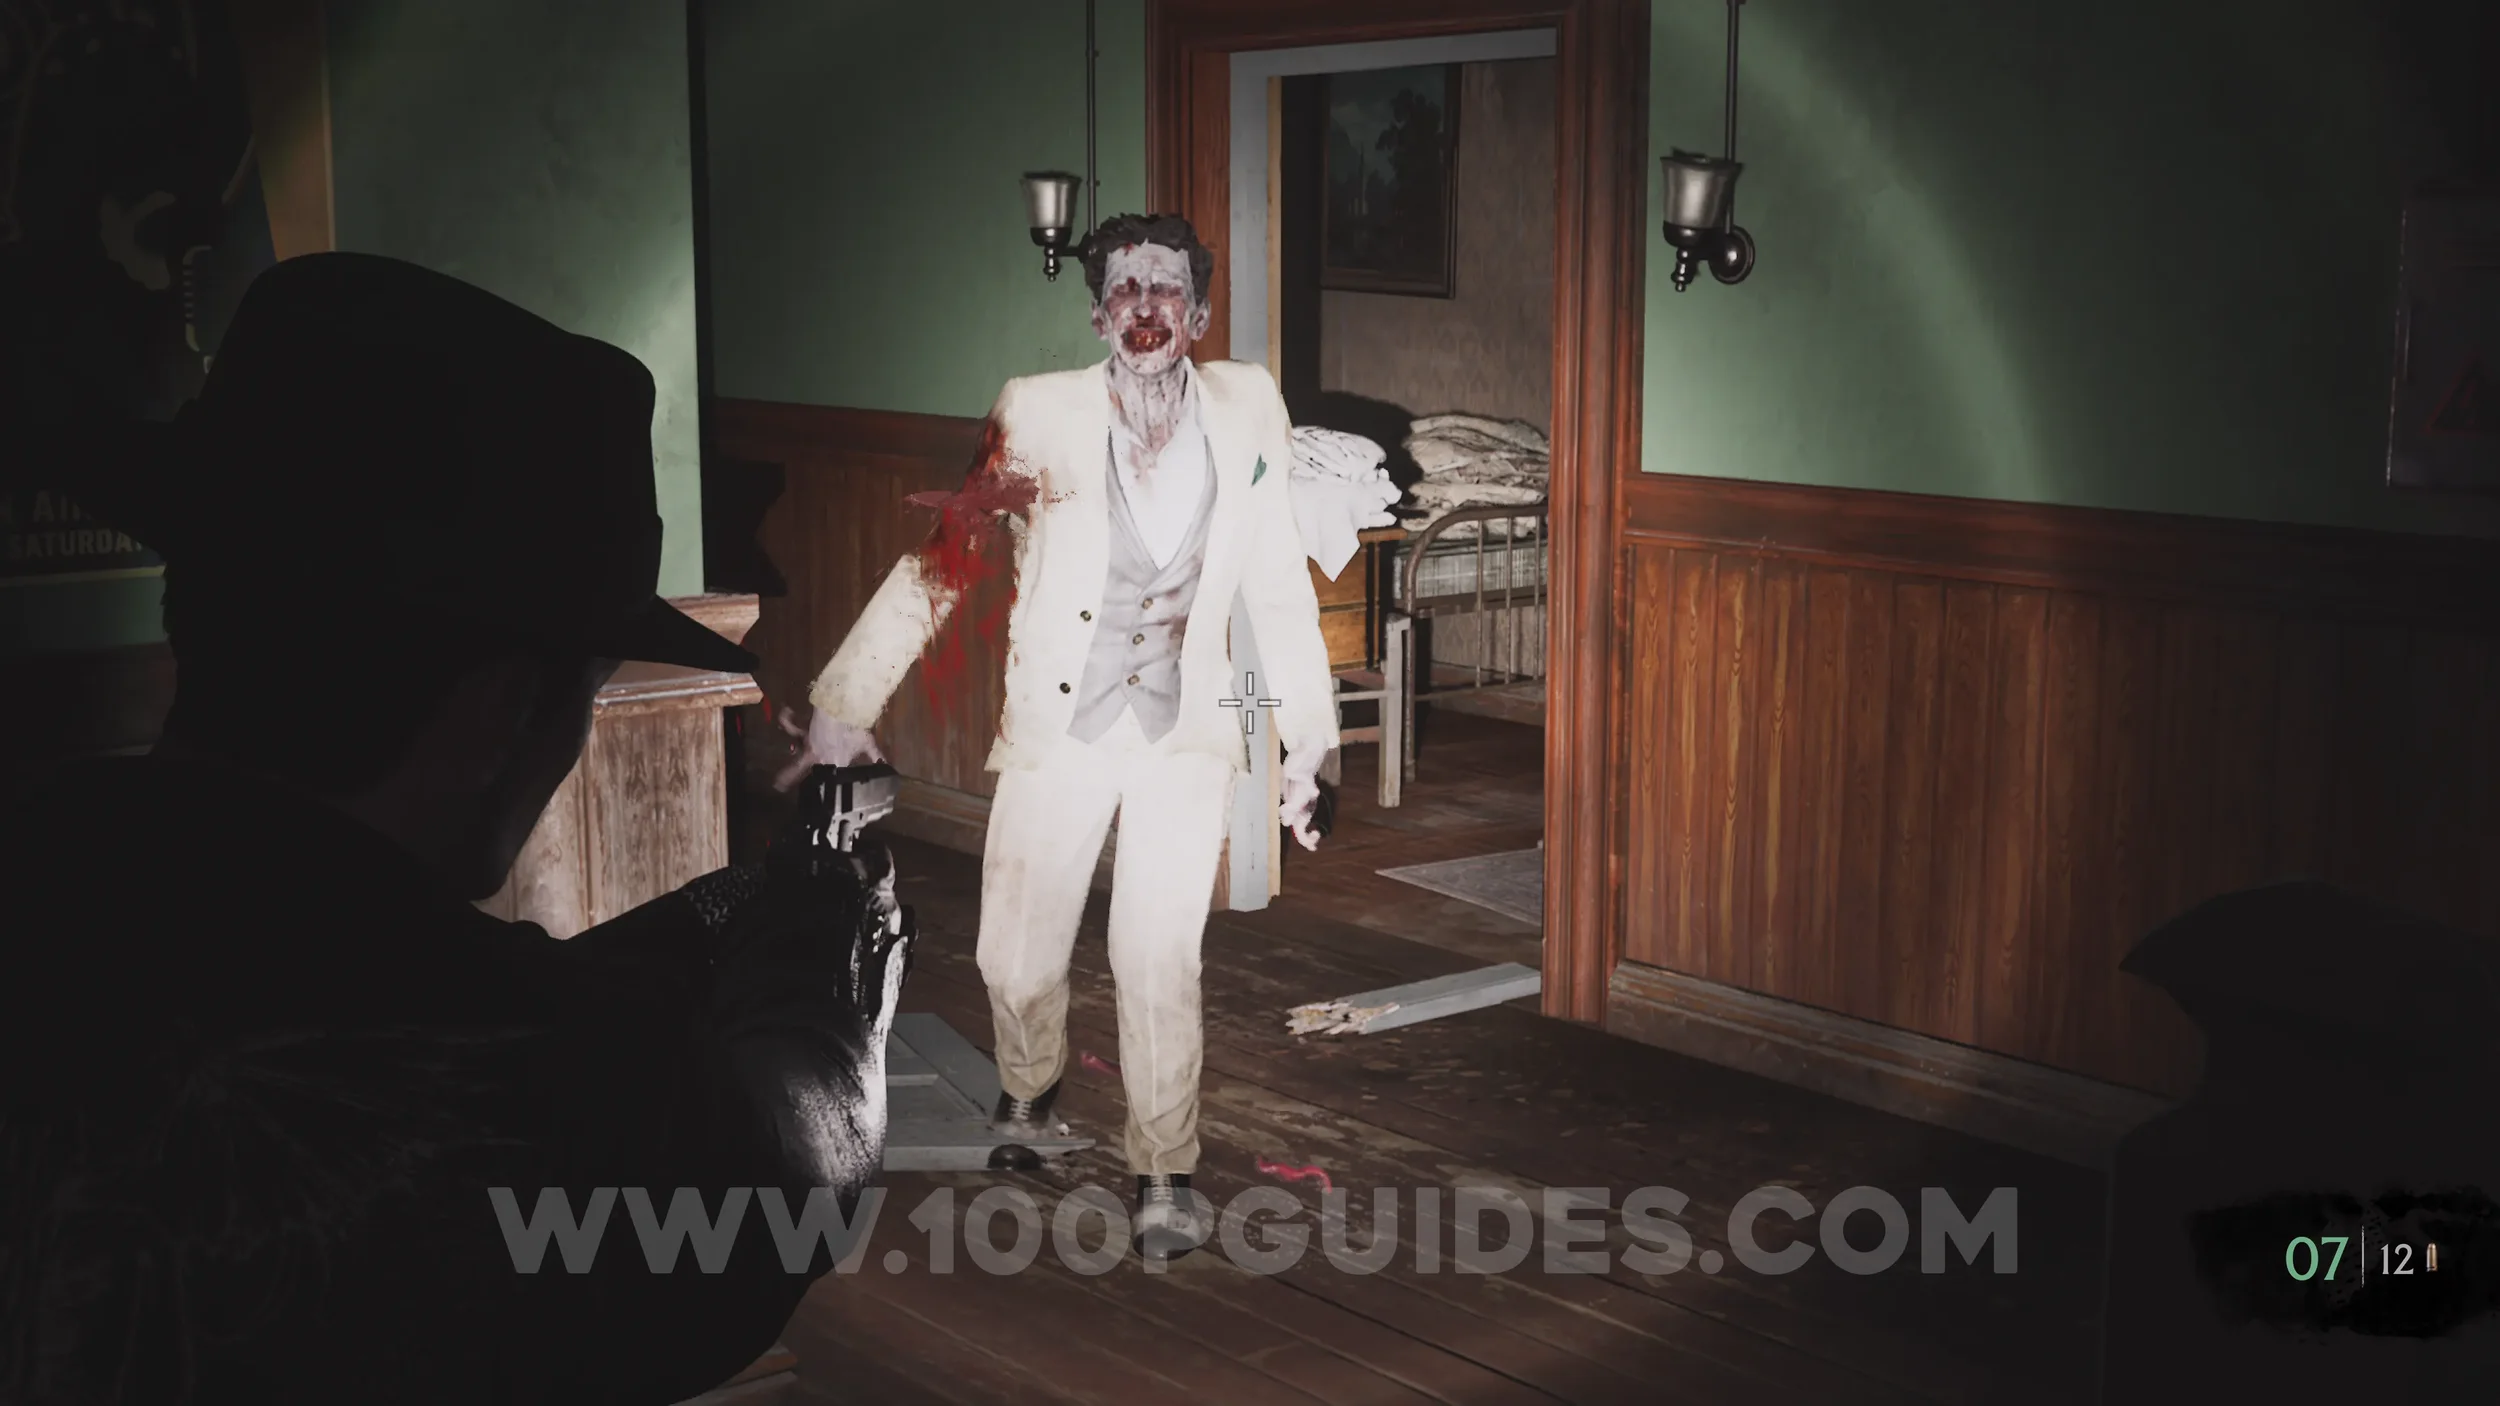
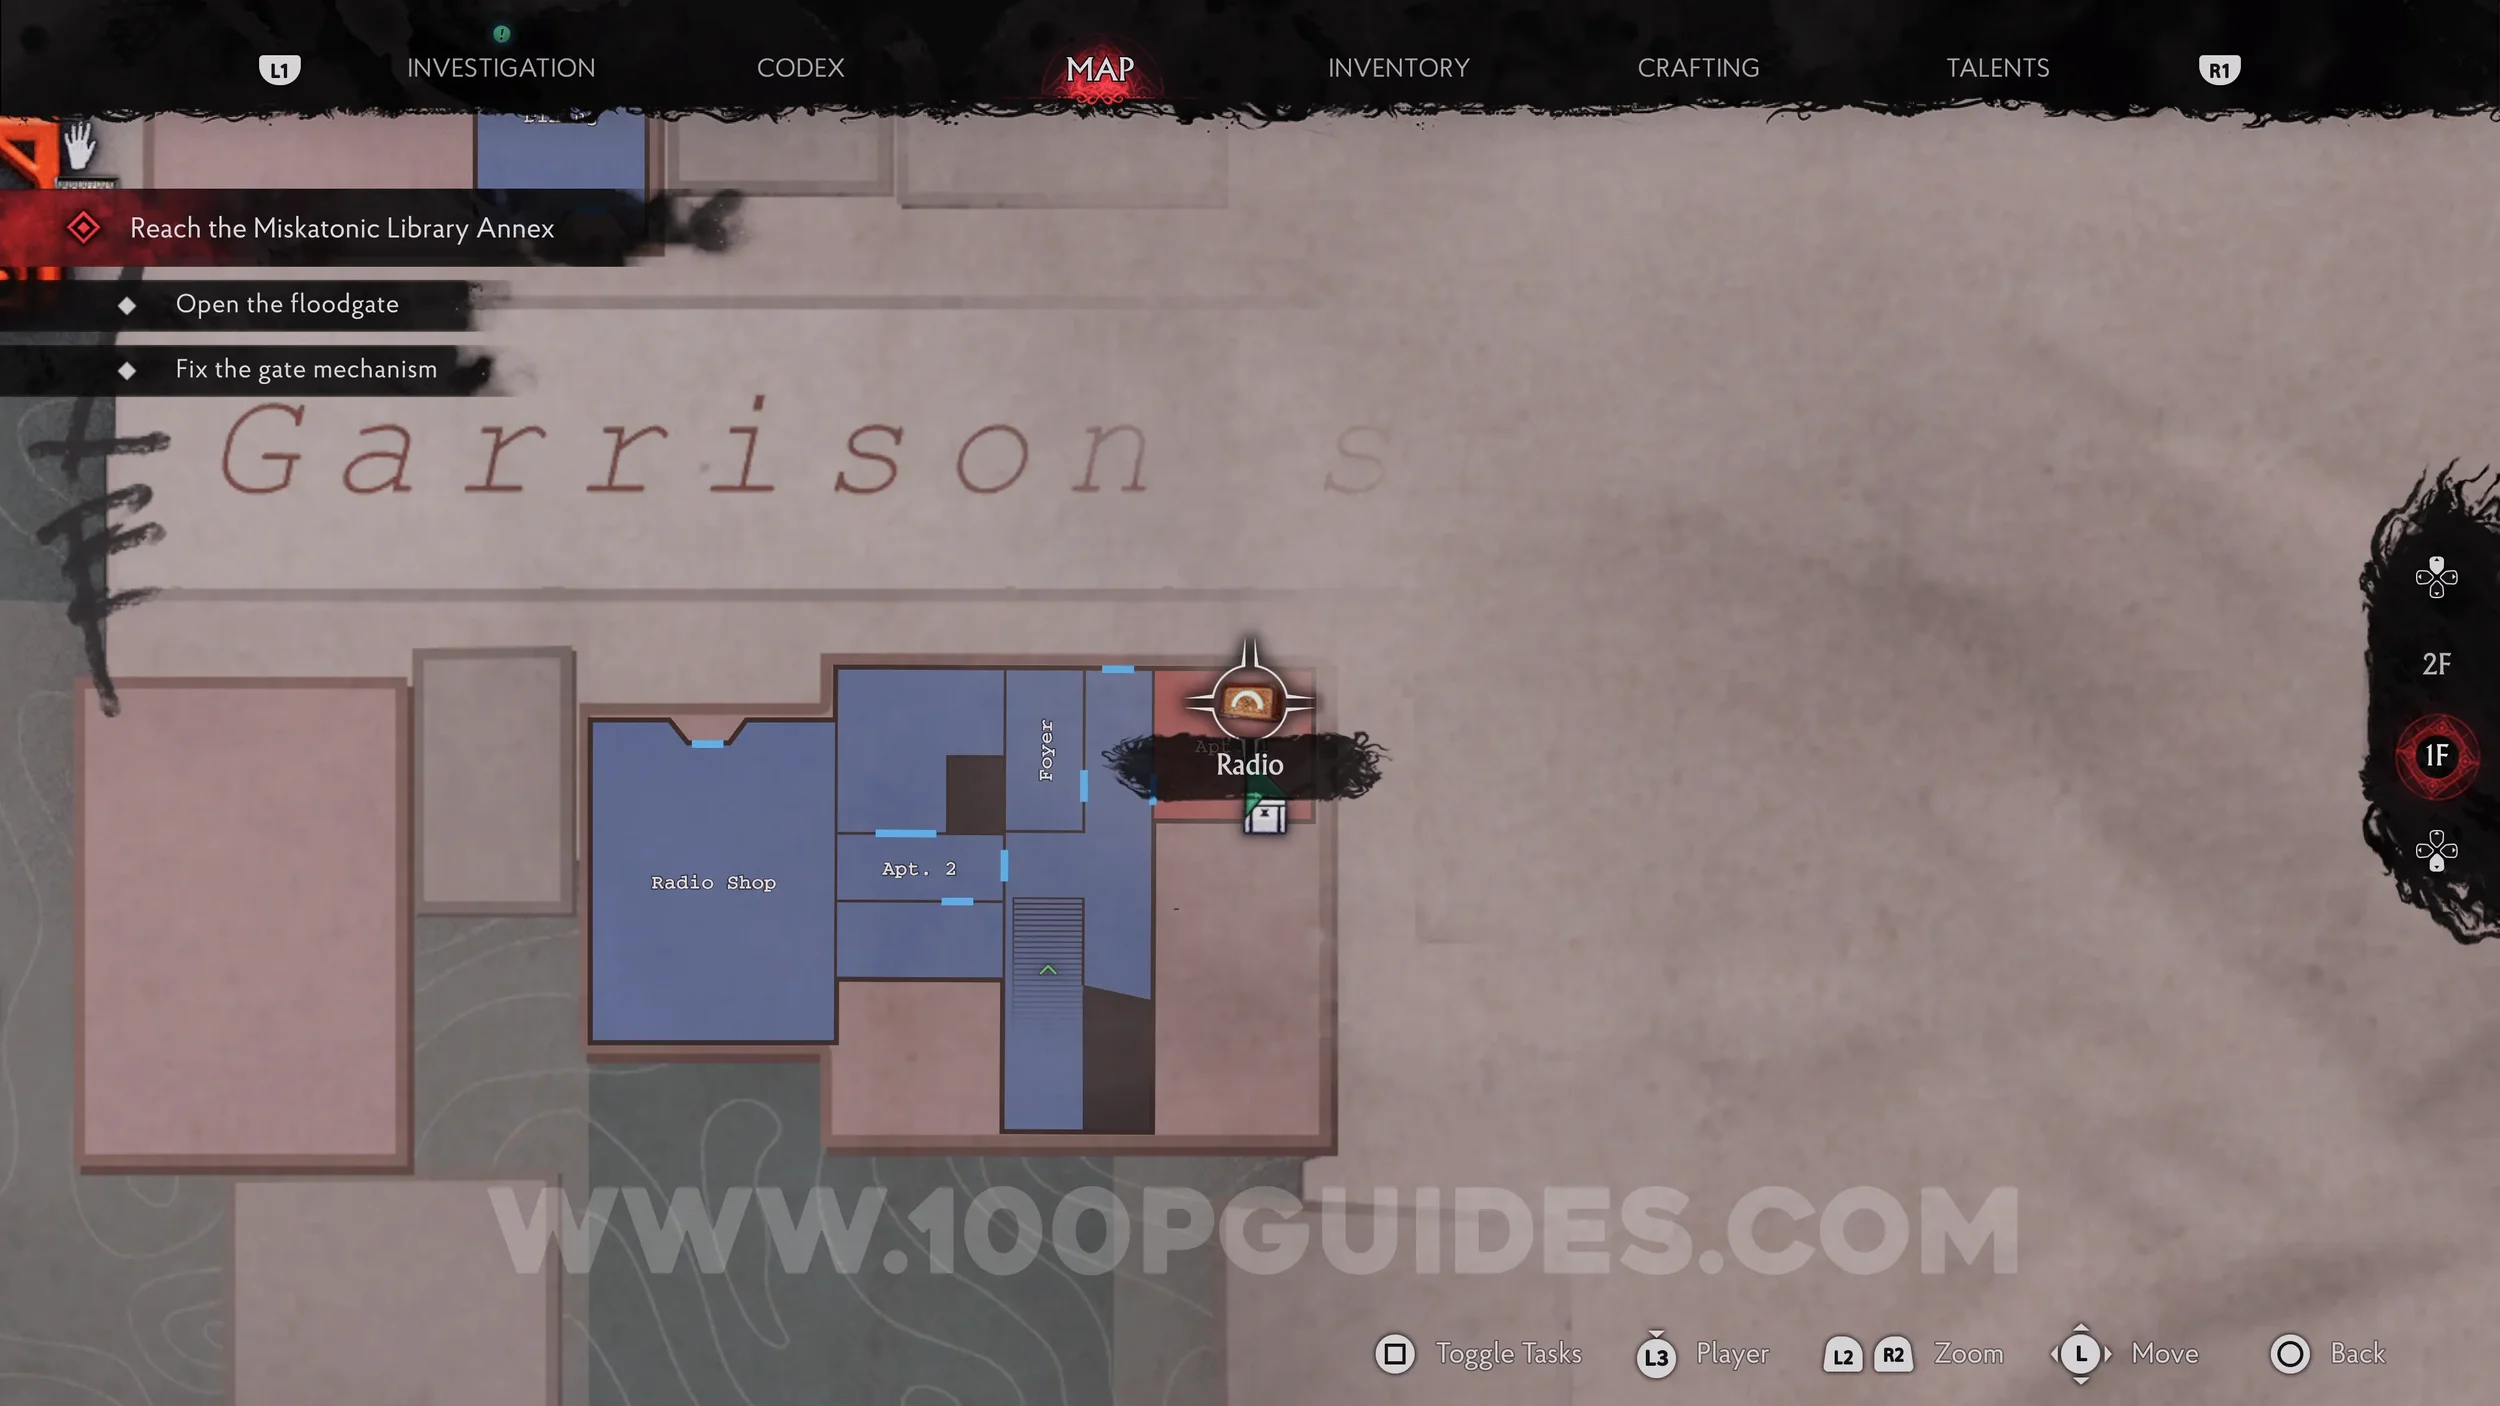
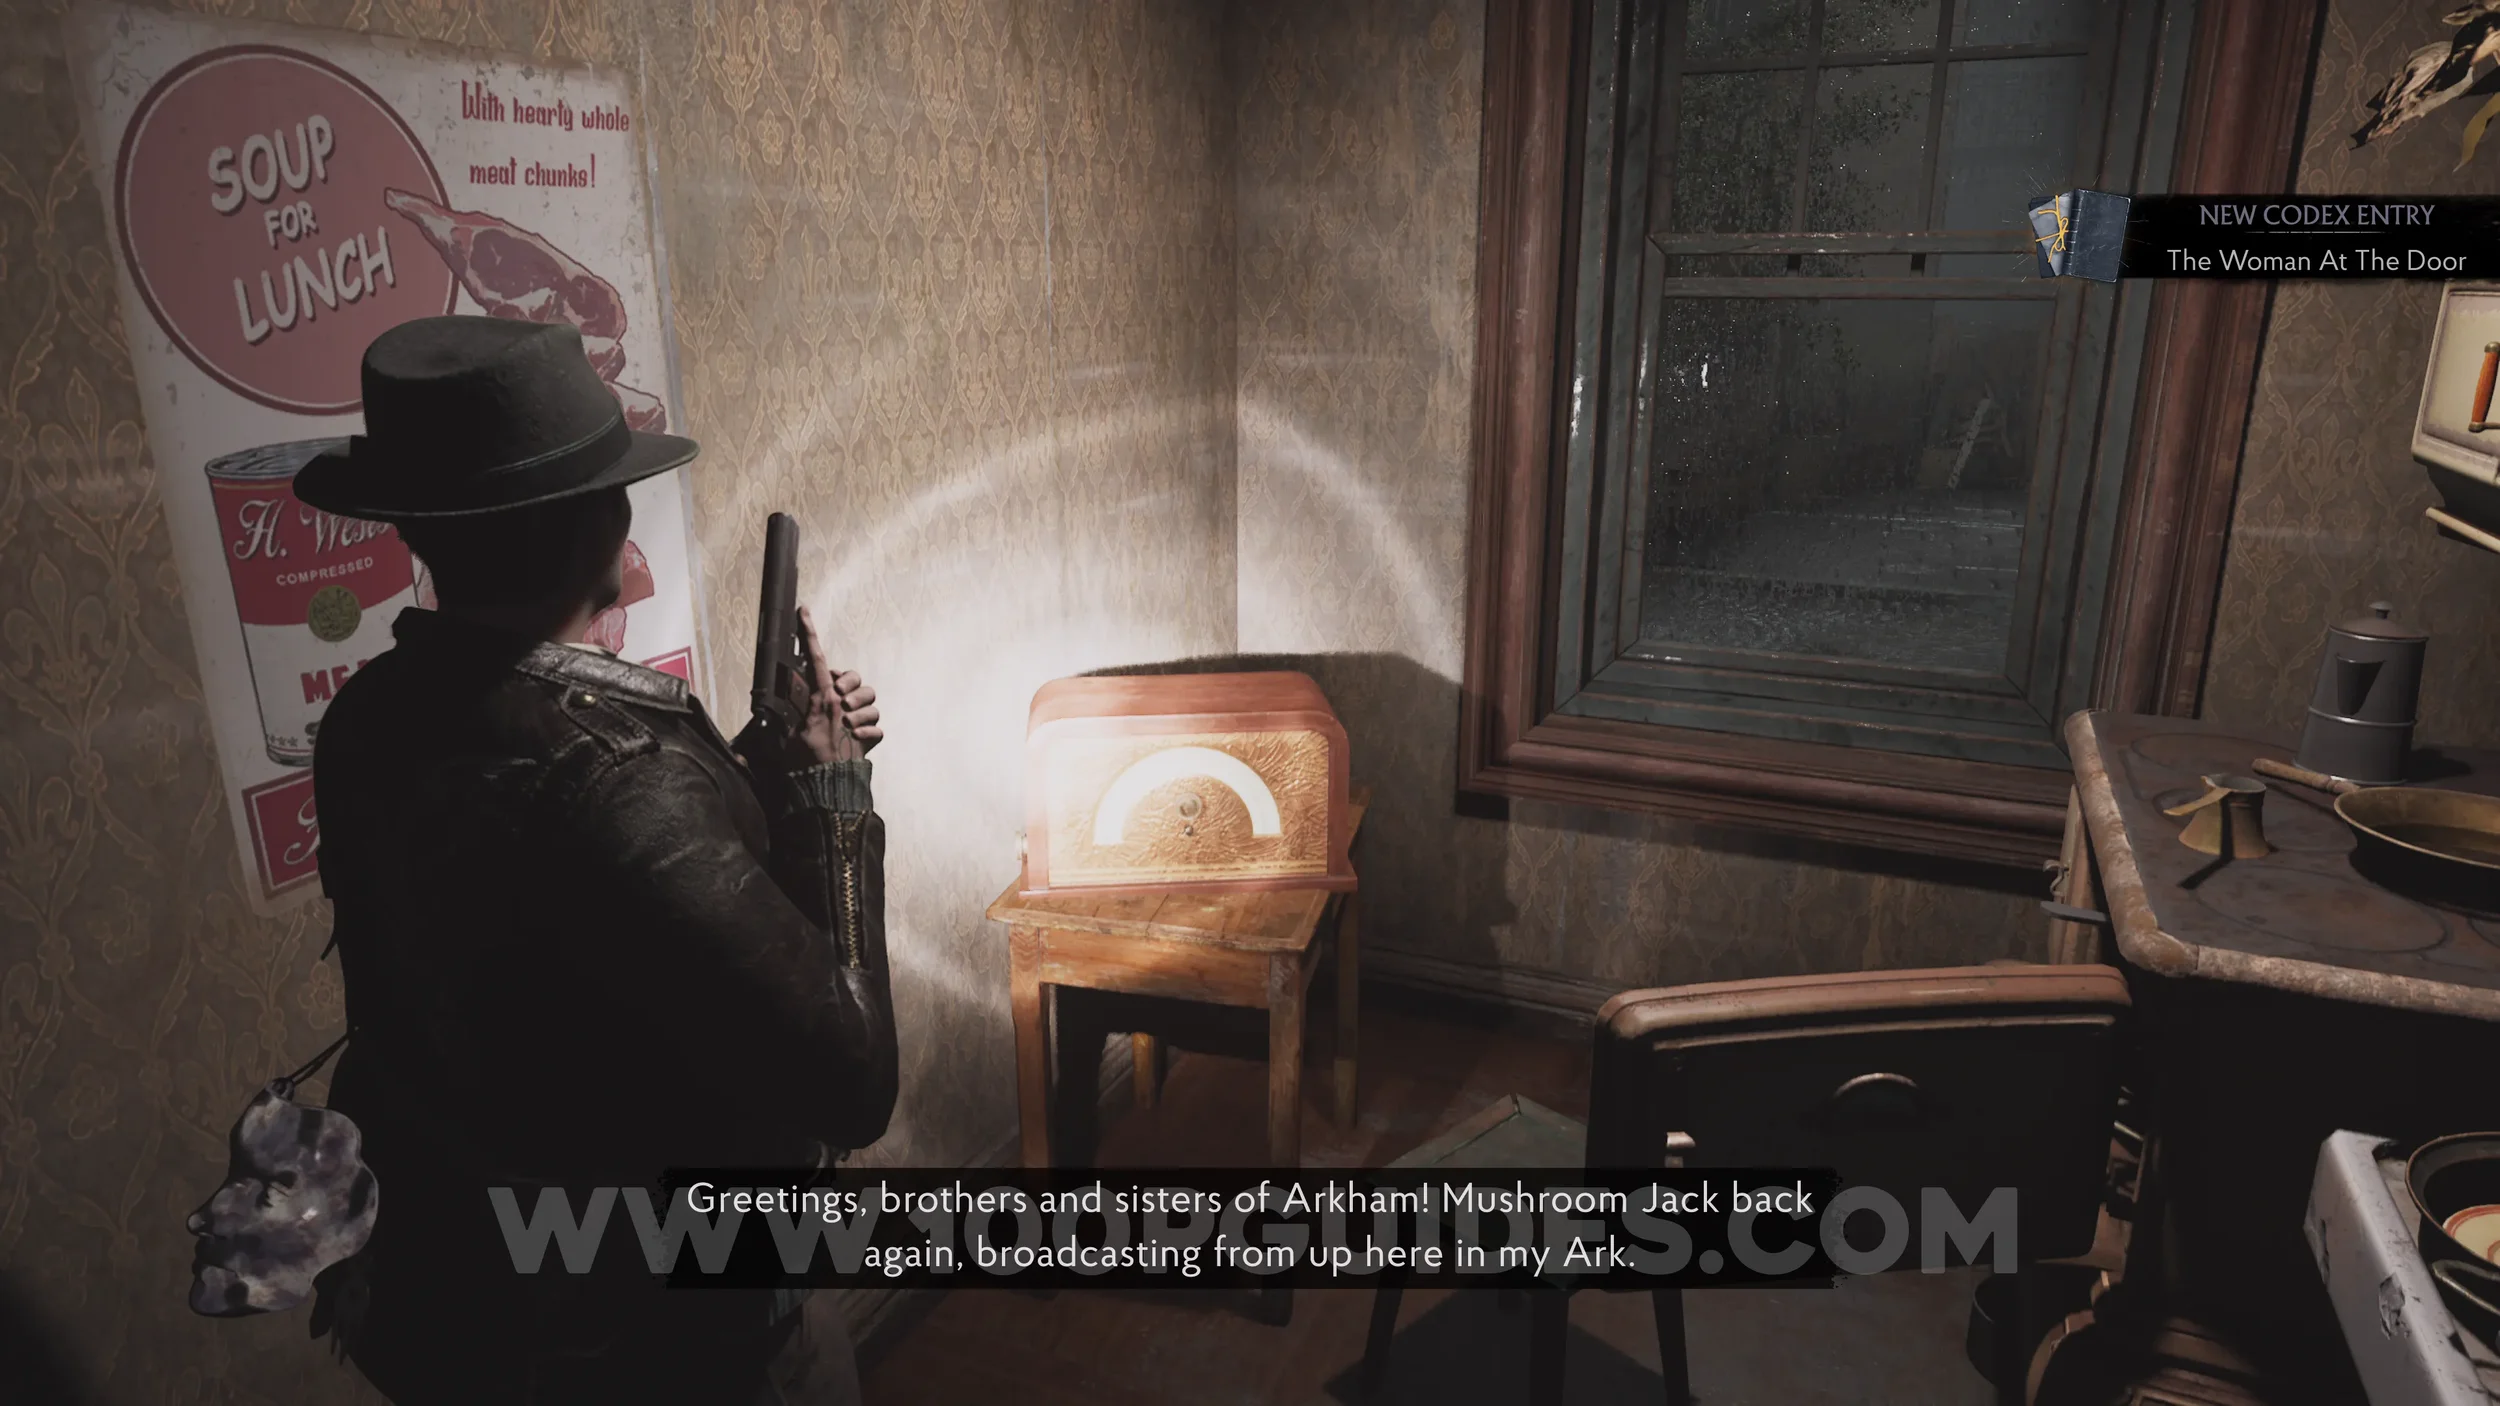
Radio: The Woman At The Door. After picking up the fuses, head outside and back into the apartment building. This time, as you walk past the door on the left, an enemy will burst out of it, letting you into Apartment 1 where the radio is.
Gate Fuse Box Puzzle
Now that you have the fuses and wires, backtrack to the Guard Post area and interact with the electrical box. Insert the fuses in the same position as shown in the image below, then hold to validate. After that, press the lever on the right to open the gate.


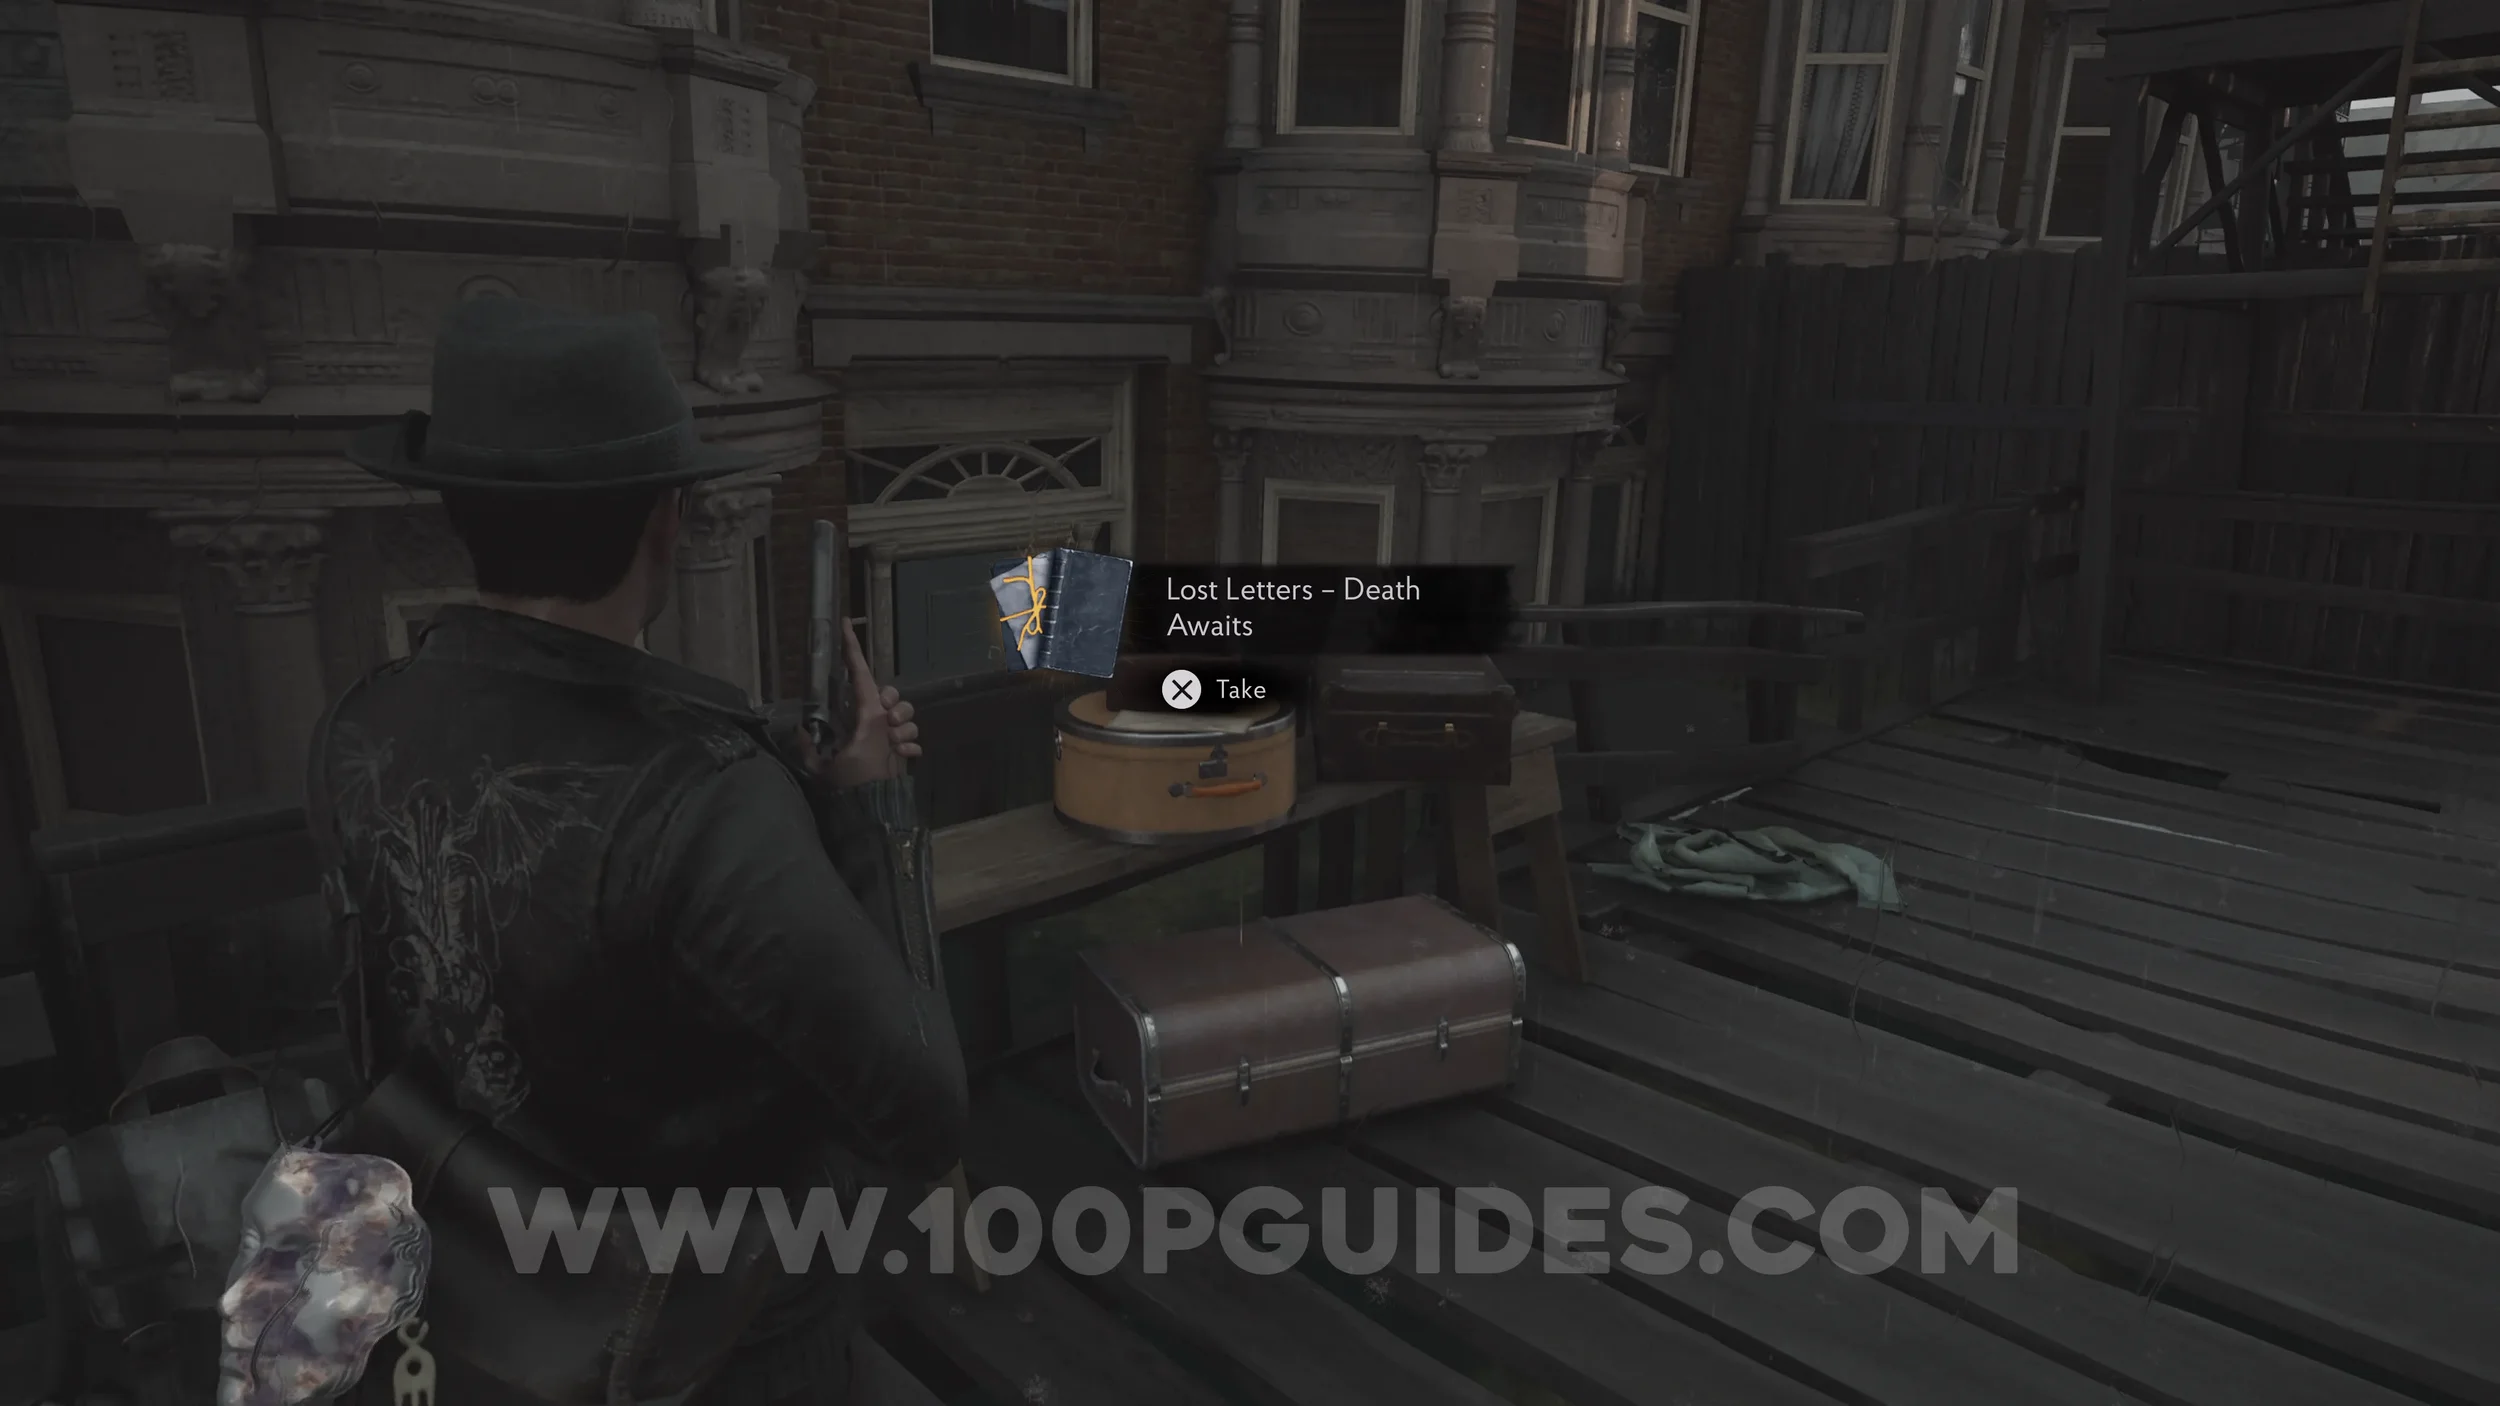
Lore Codex: Lost Letters - Death Awaits. After opening the gate, follow the streets by boat until you reach another closed gate. Dock at the pier to find the codex on the wooden table.
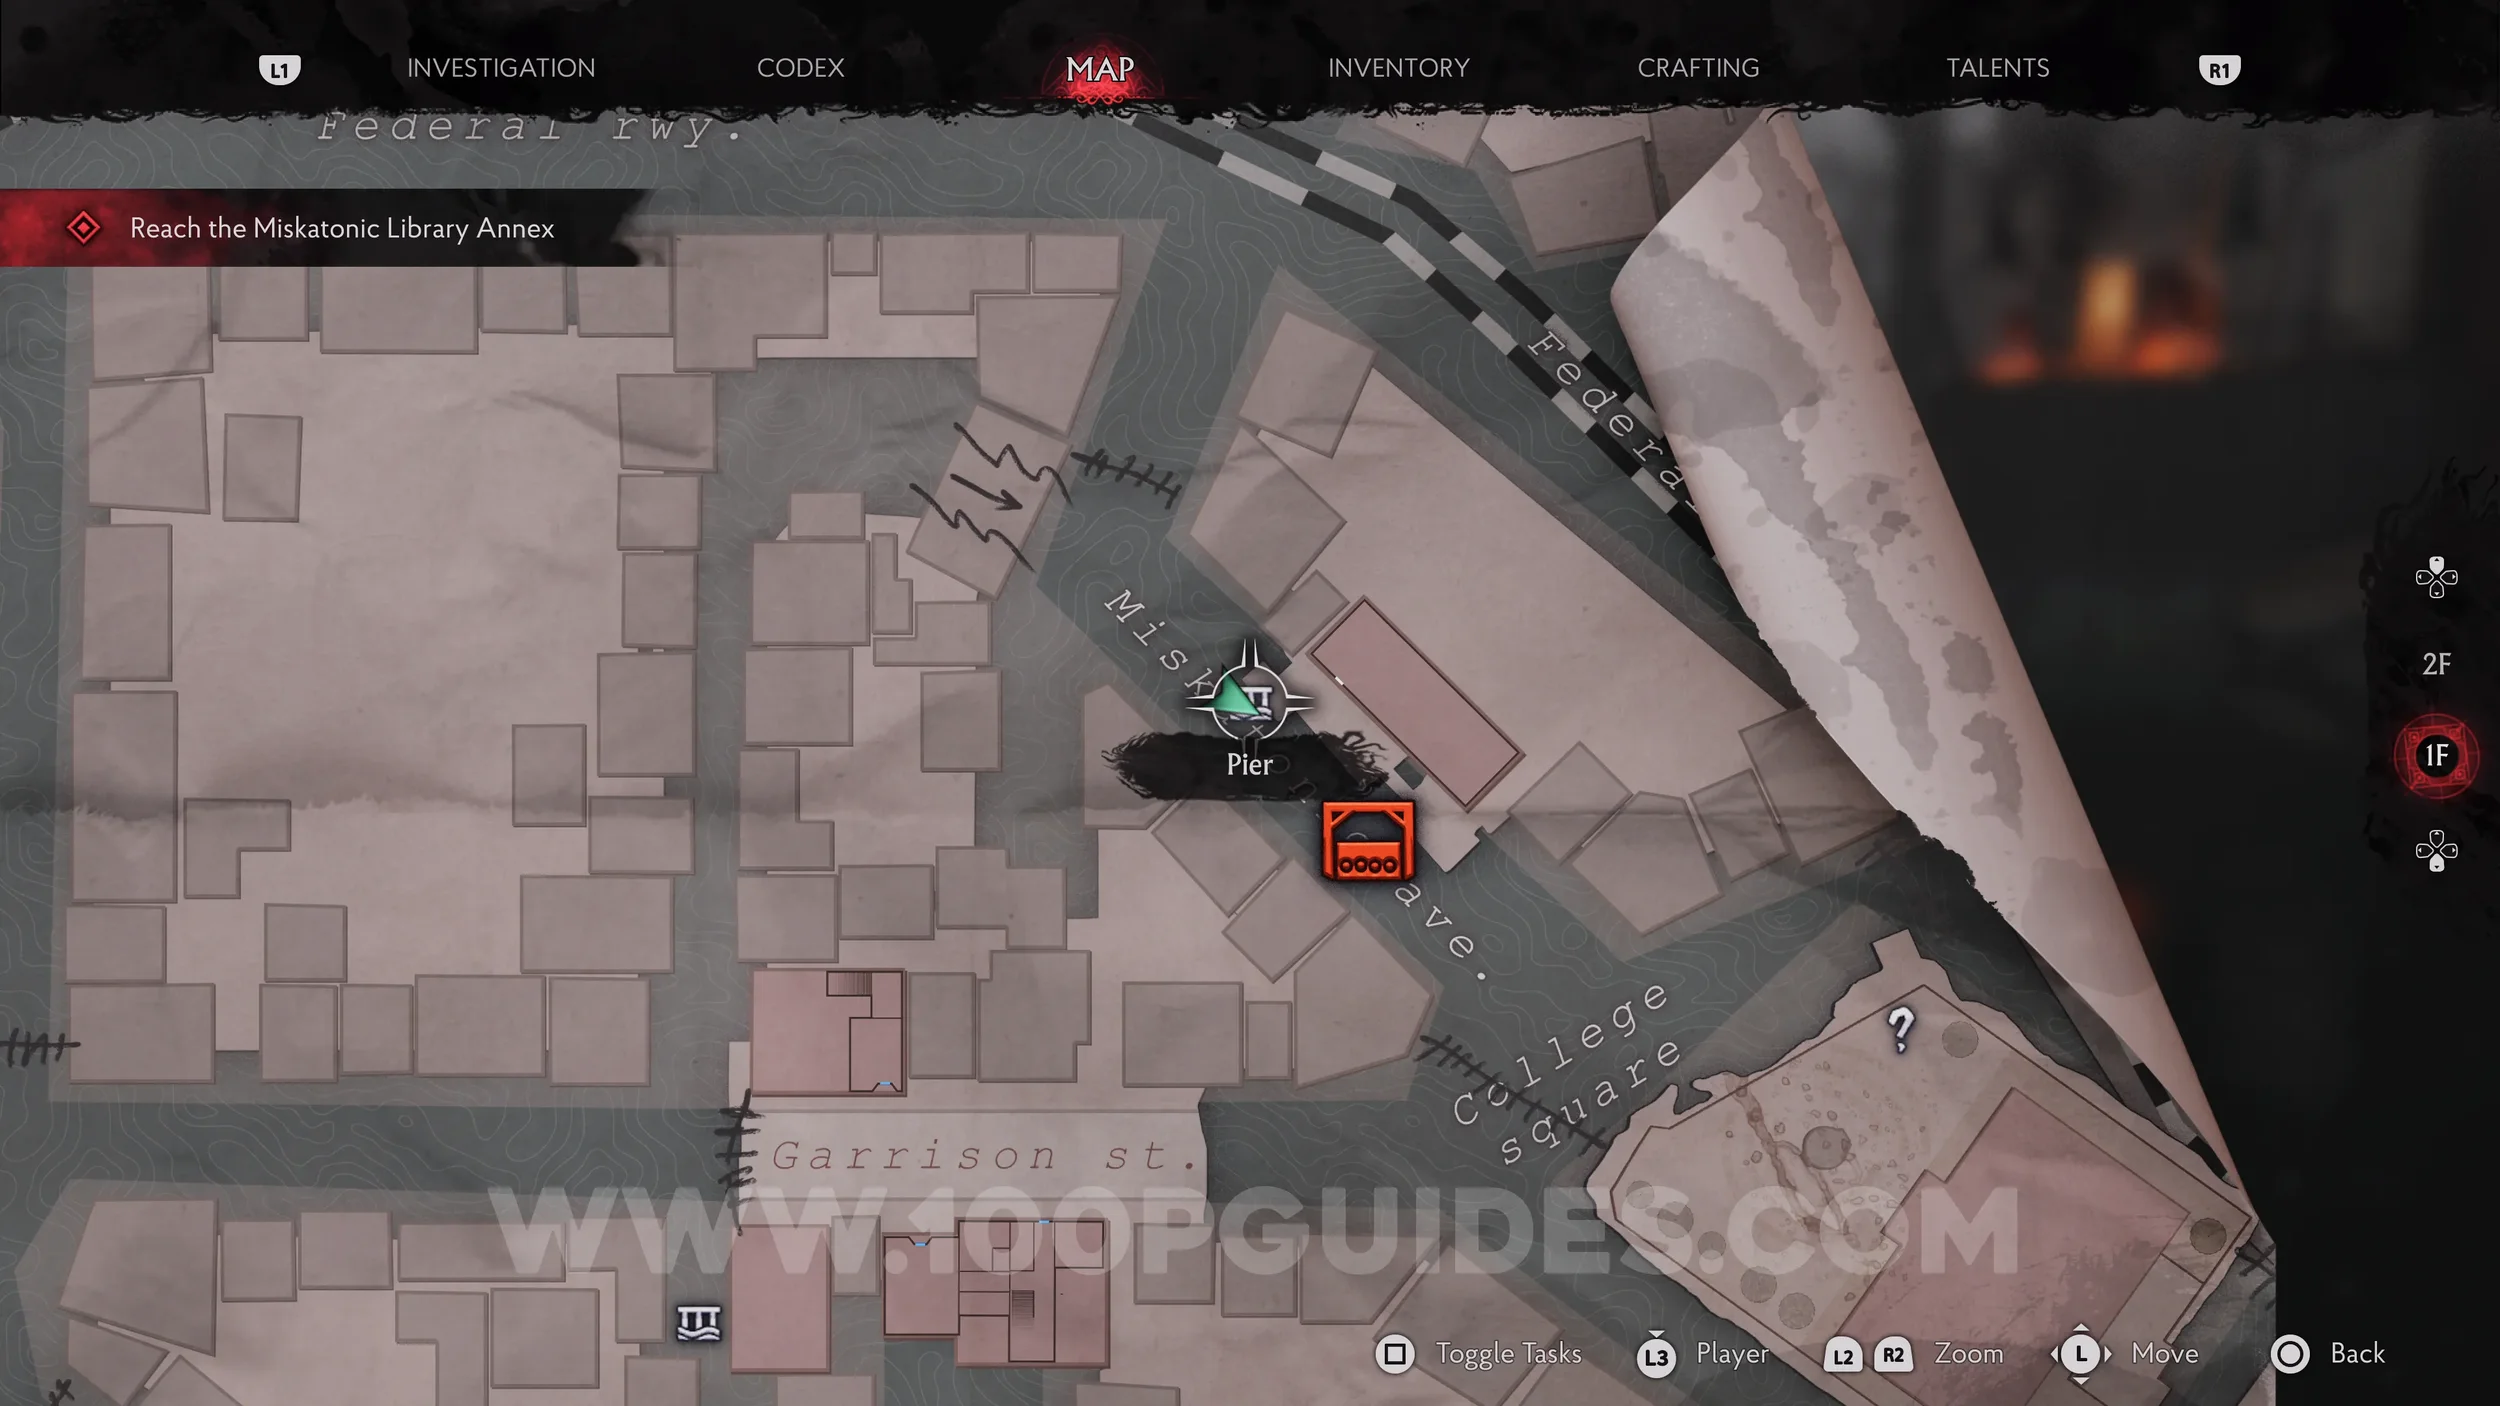
After traversing the small house, you'll emerge above the blockage, where you can press the lever and continue towards the library by boat.
Chapter 2 - The Wake-Up Call
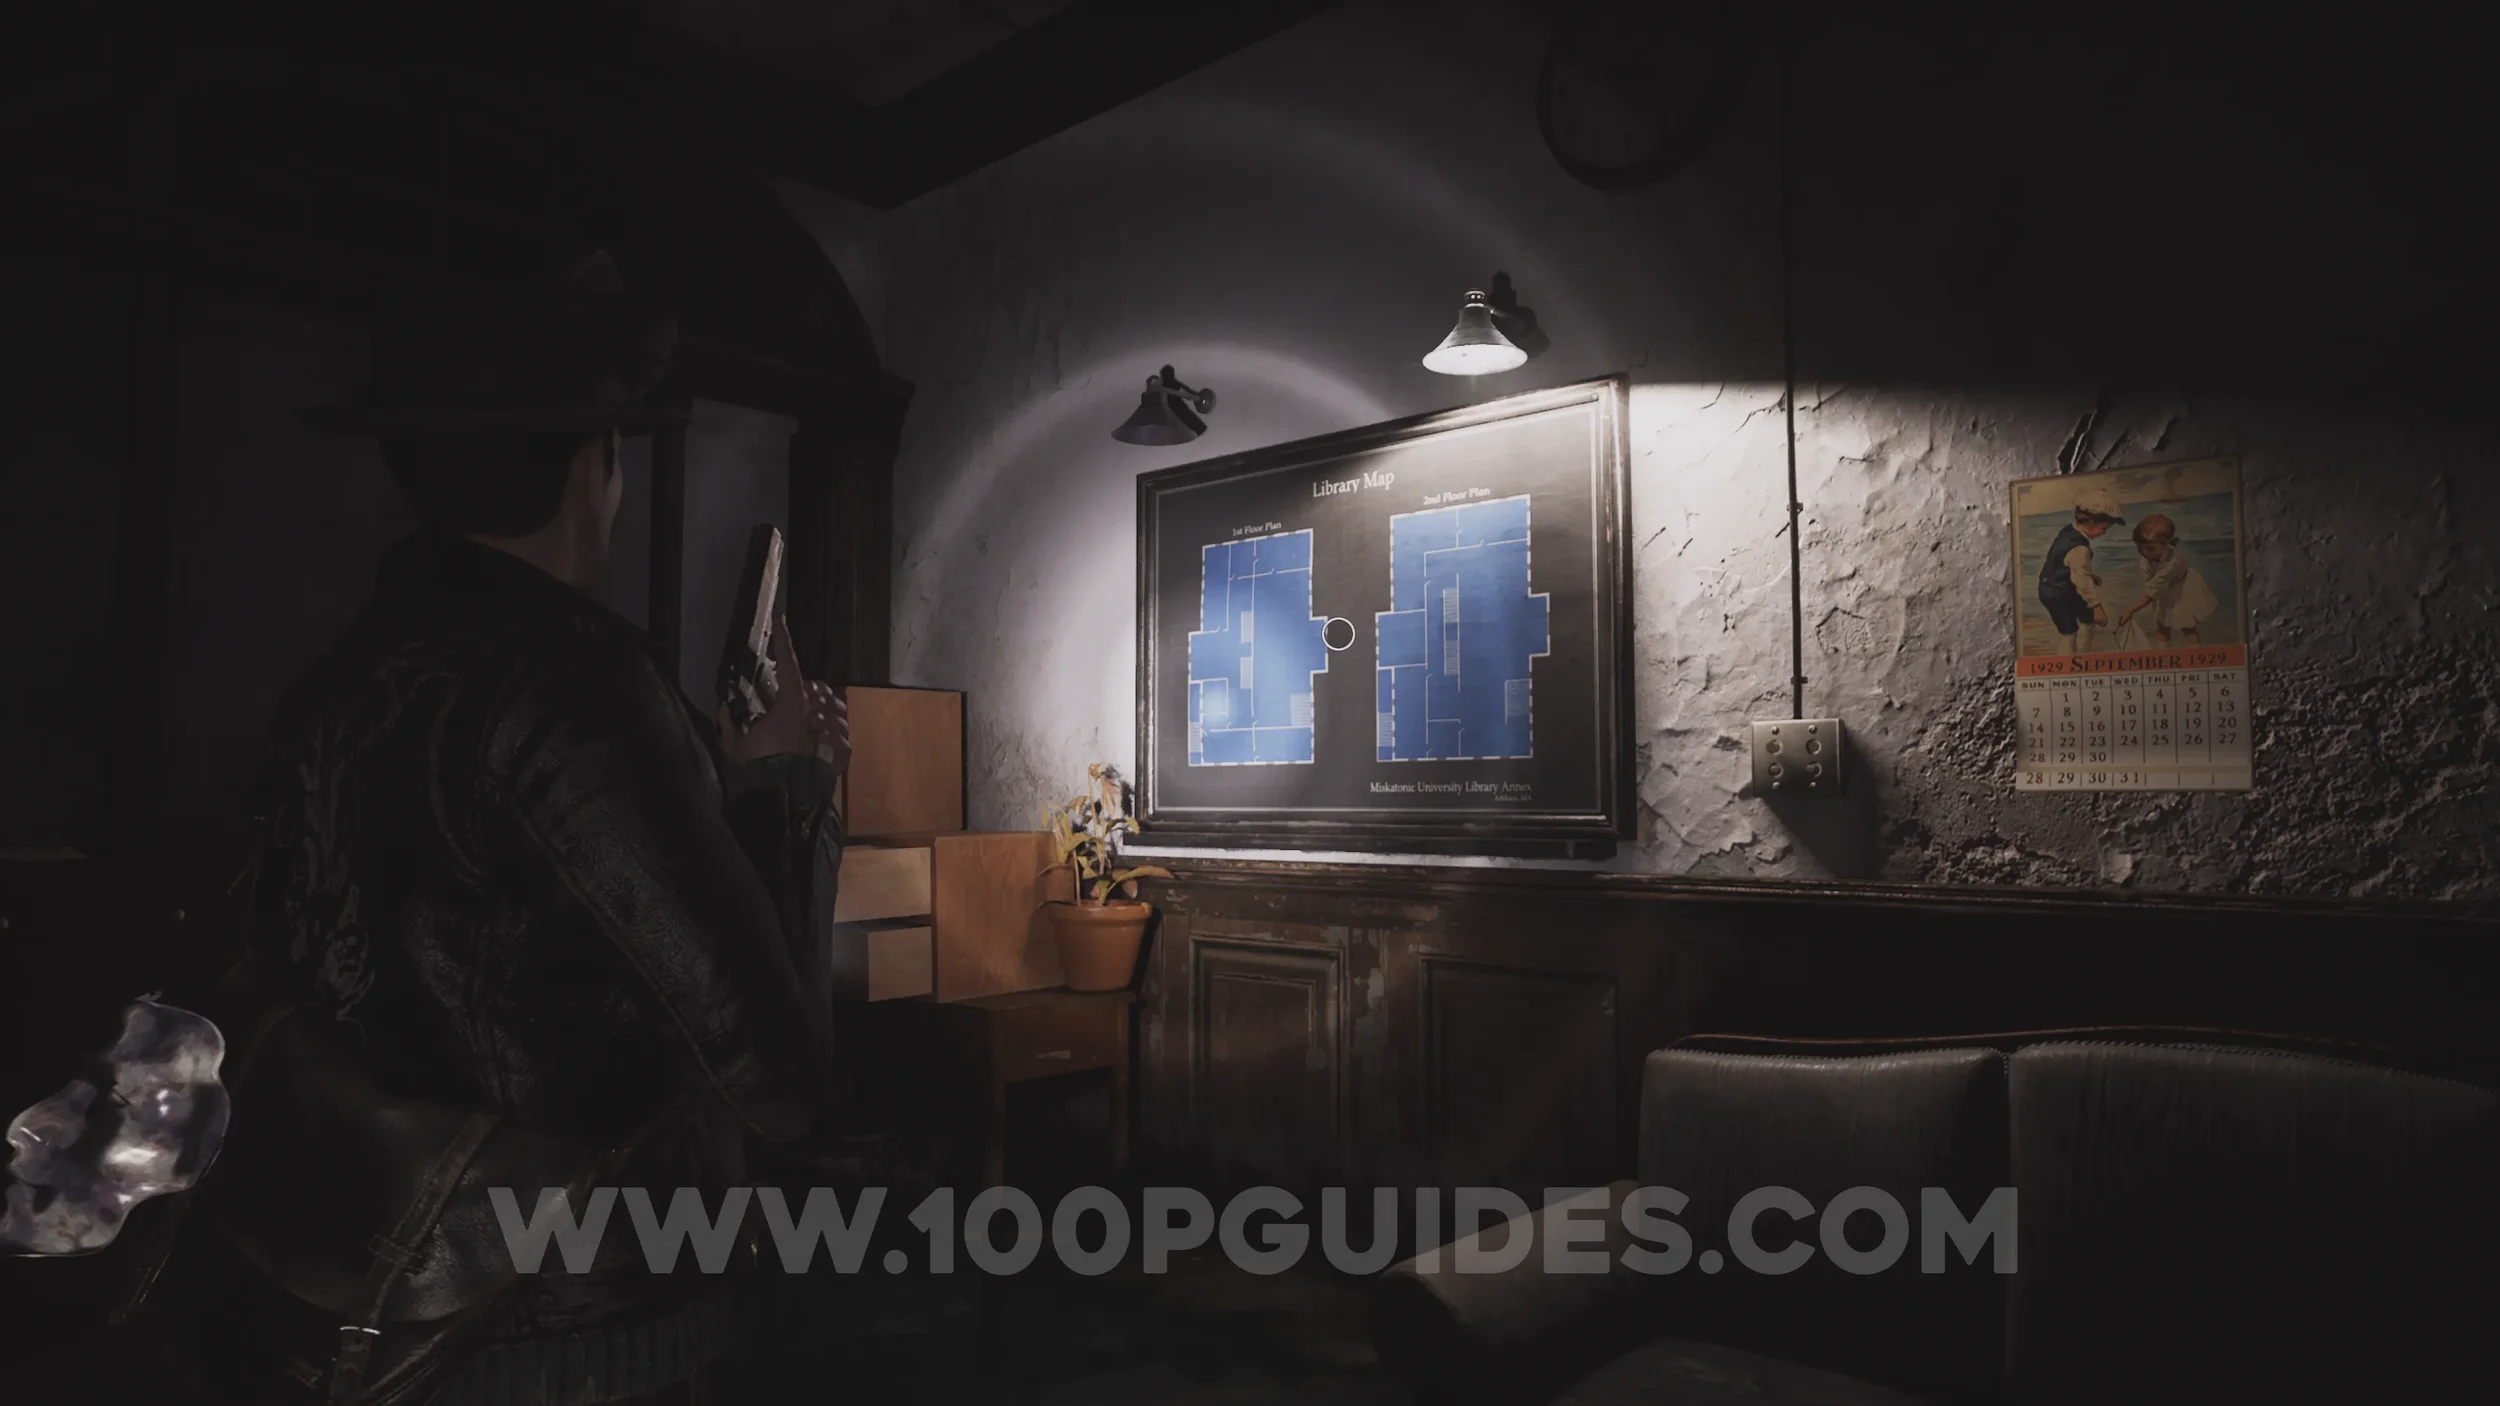
Map: Library Annex. On the wall in the Registry.
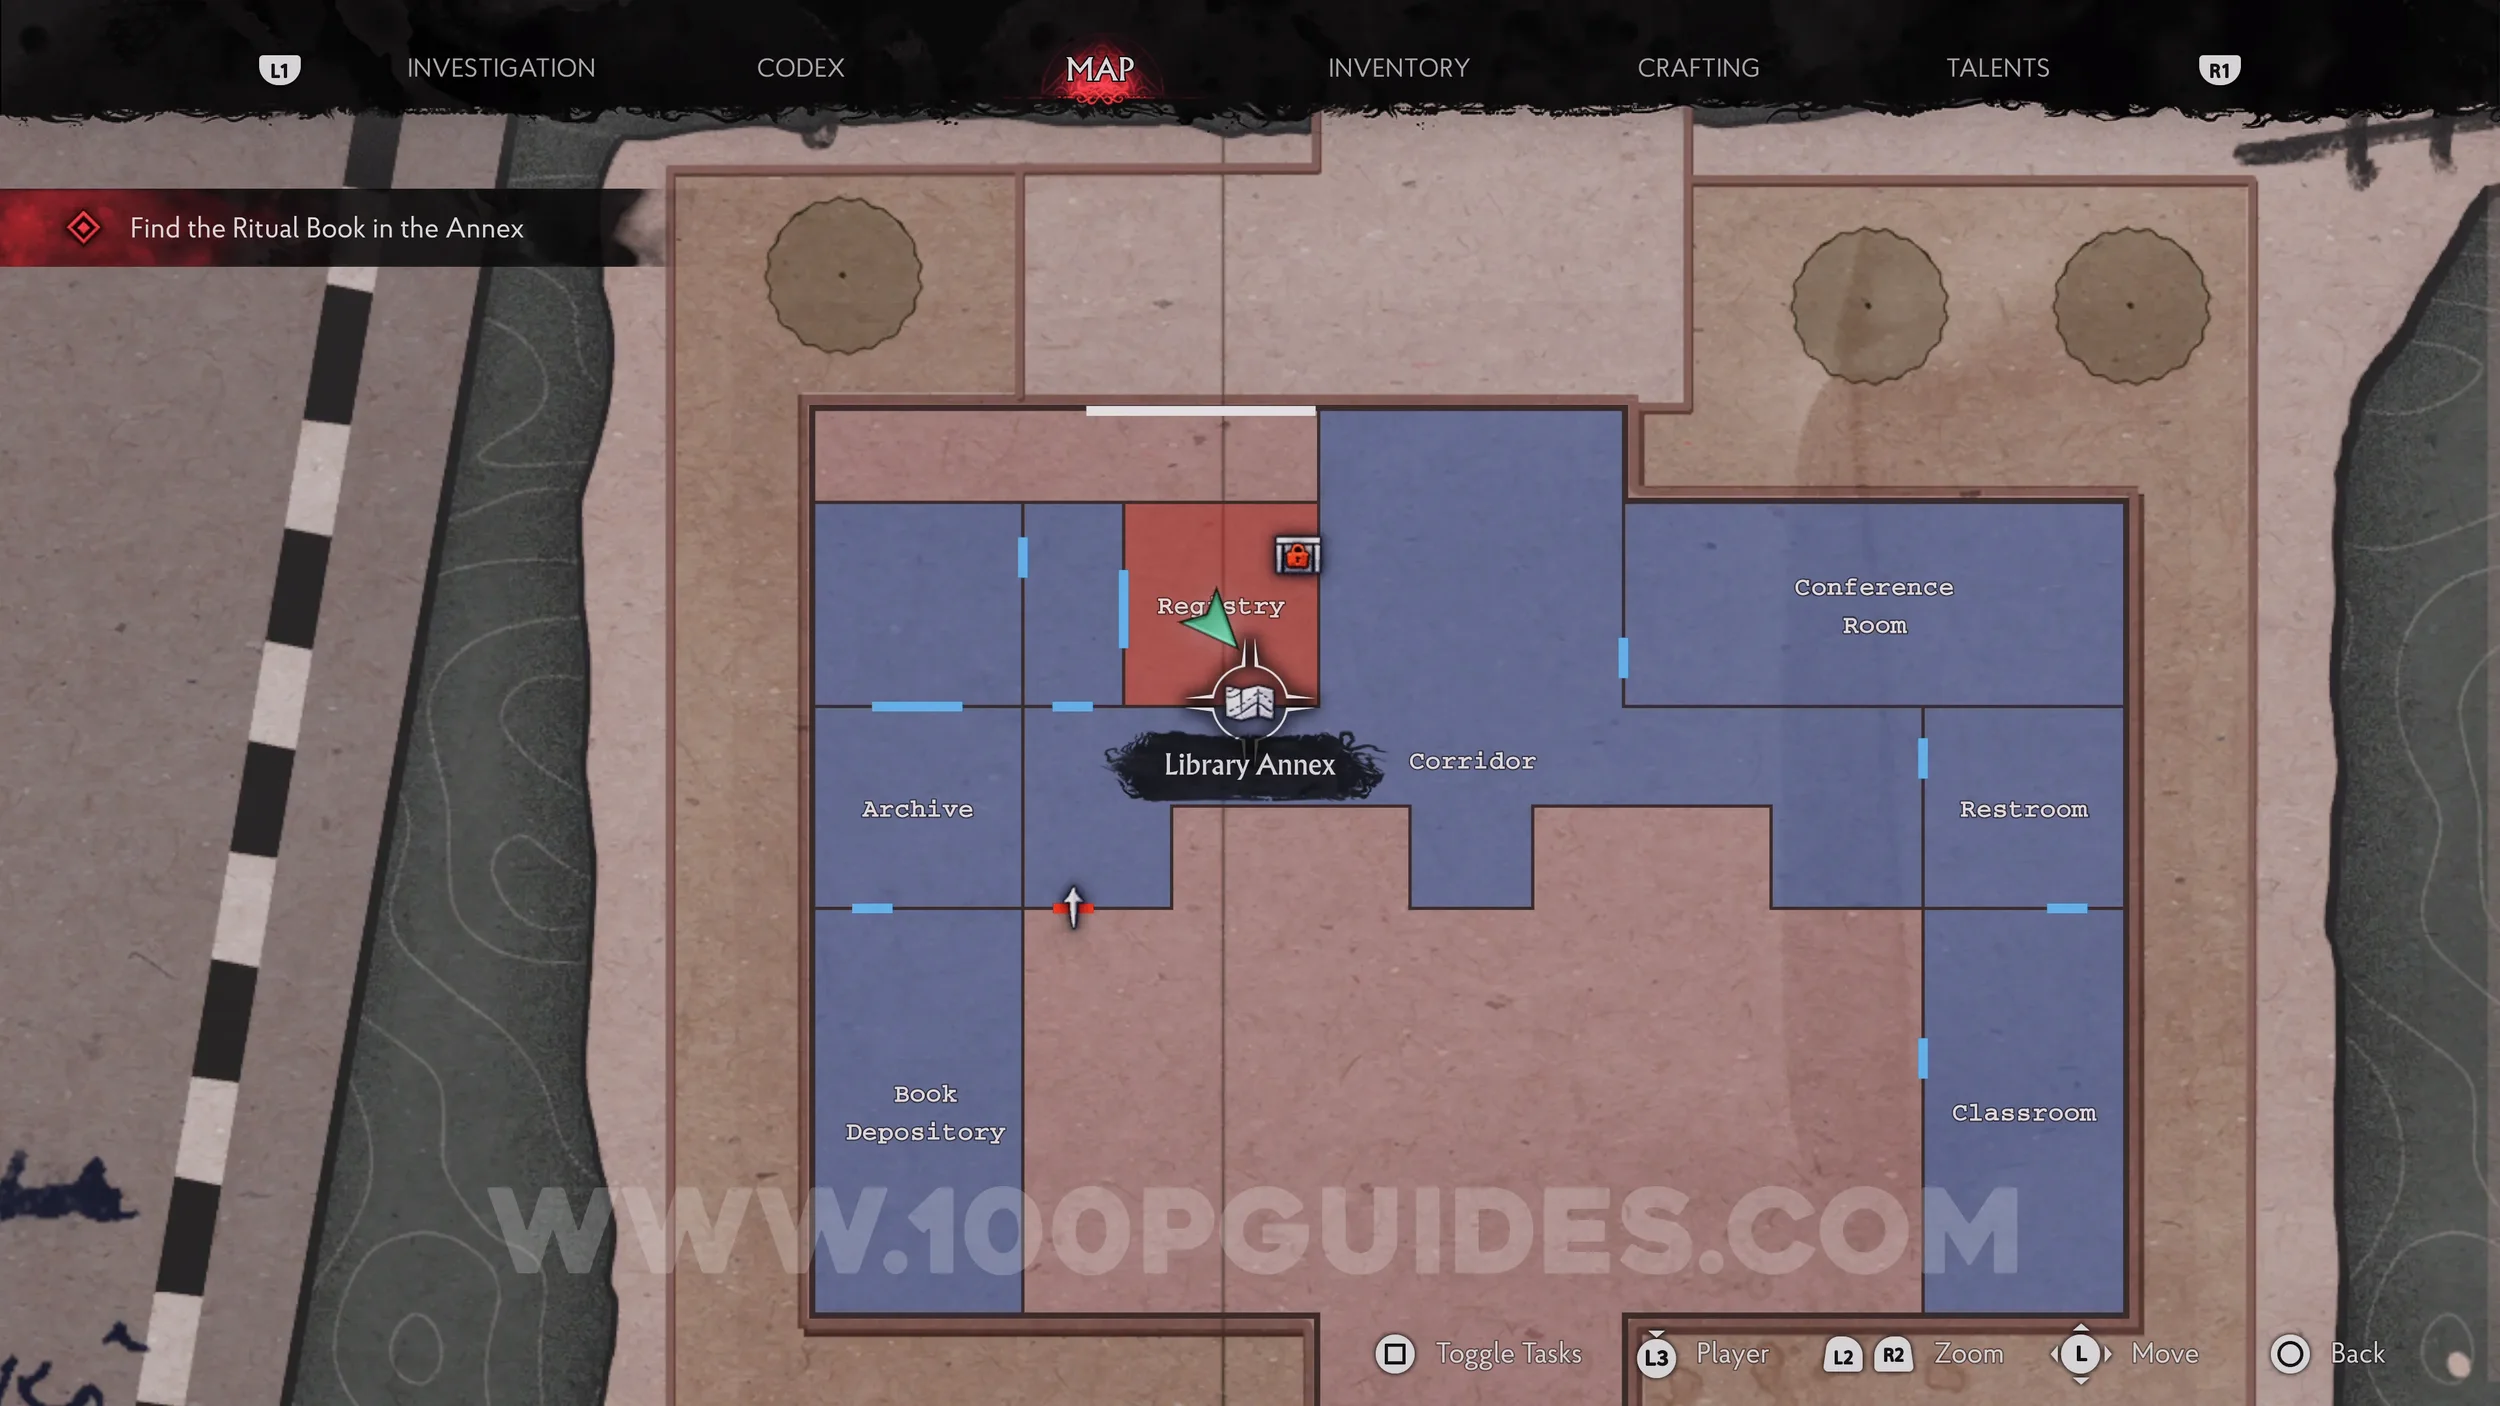
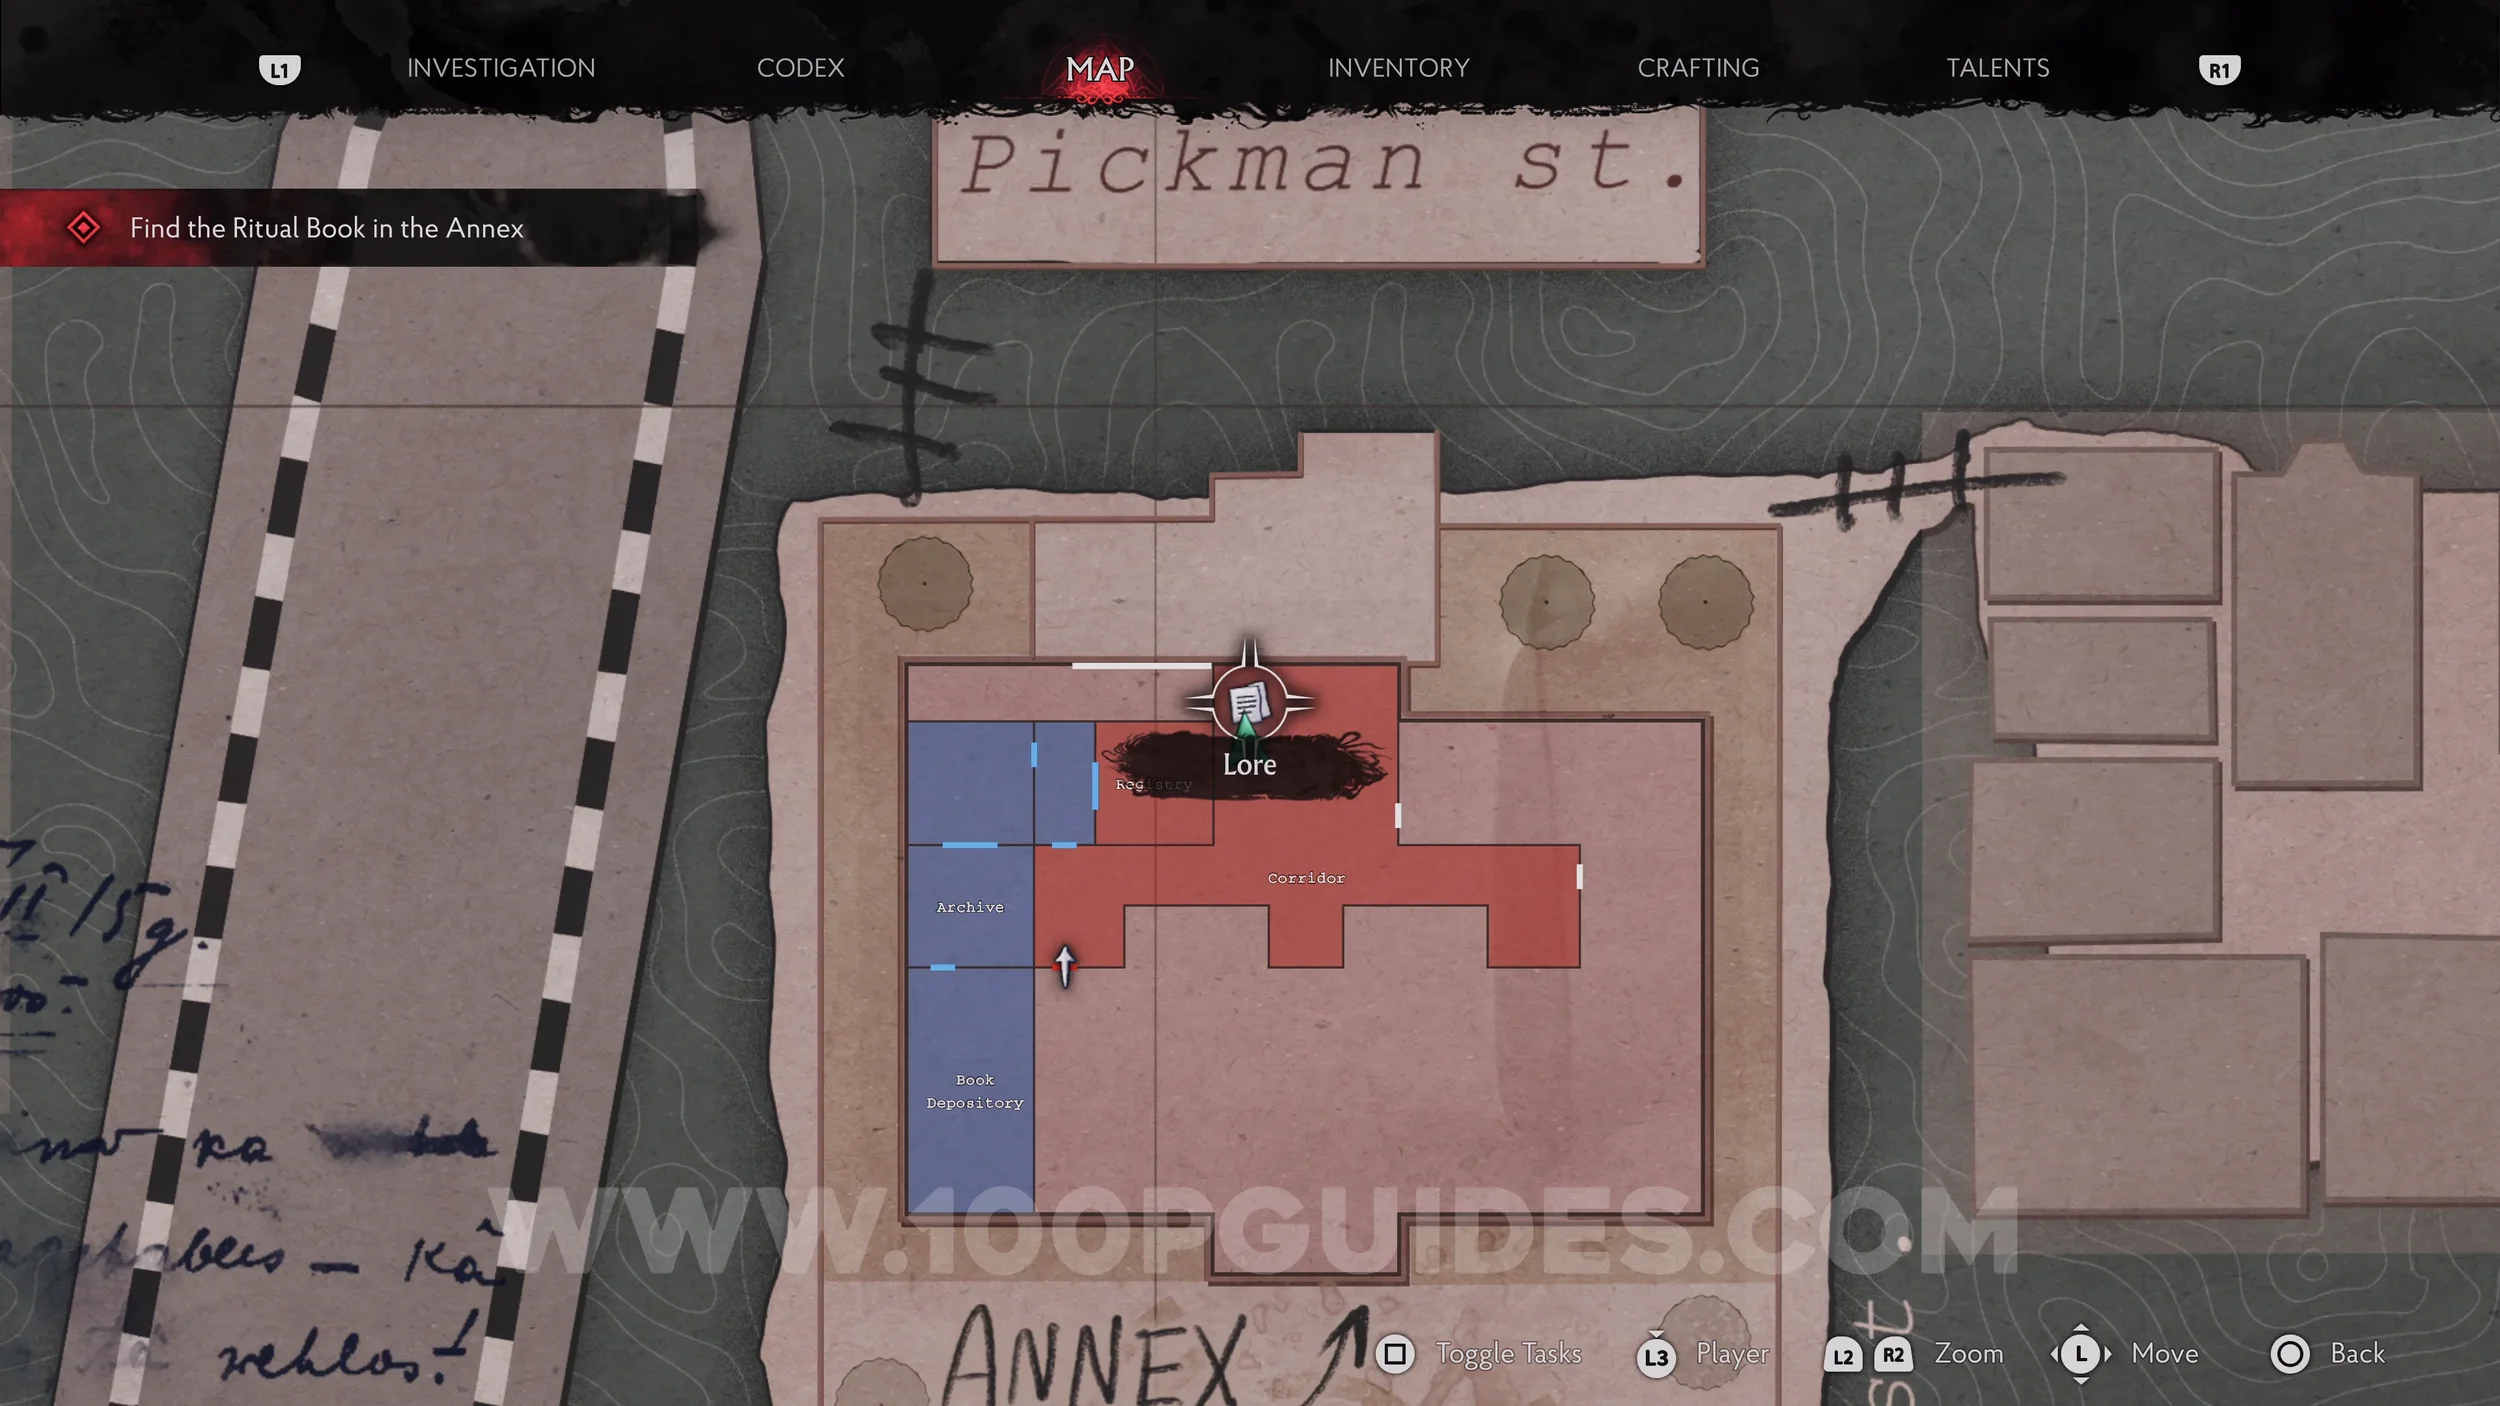
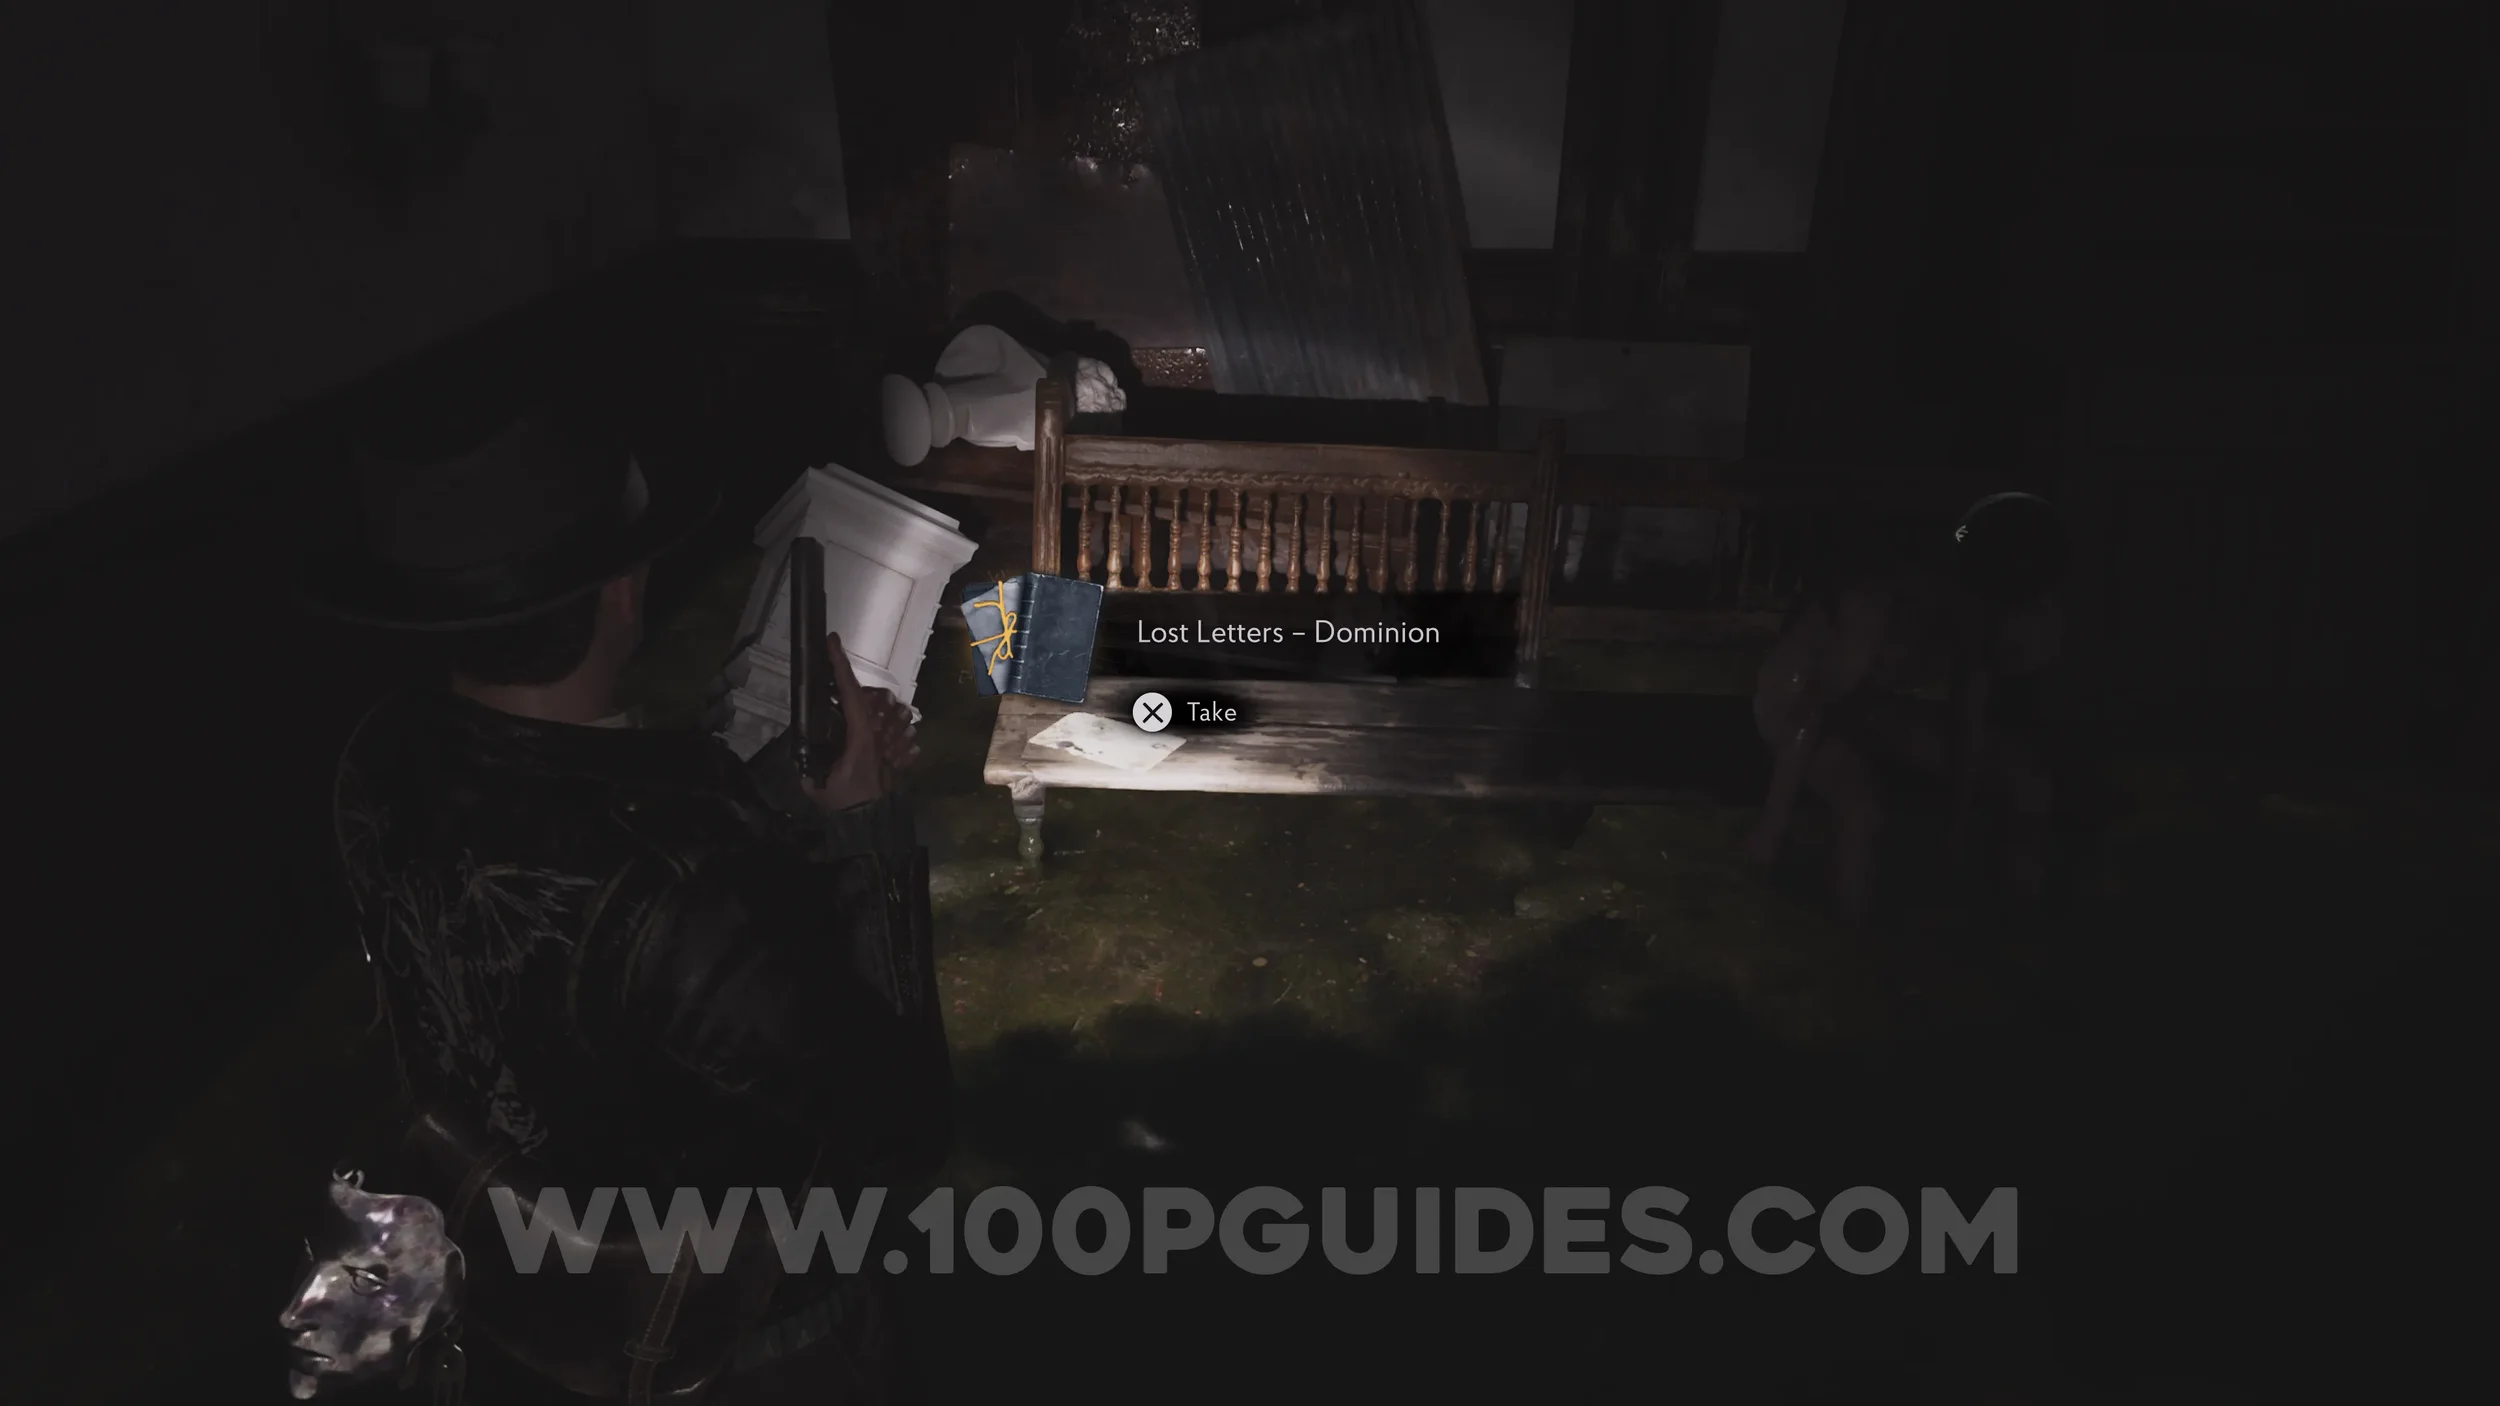
Lore Codex: Lost Letters - Dominion. Found on a bench near the northern wall in the Corridor.
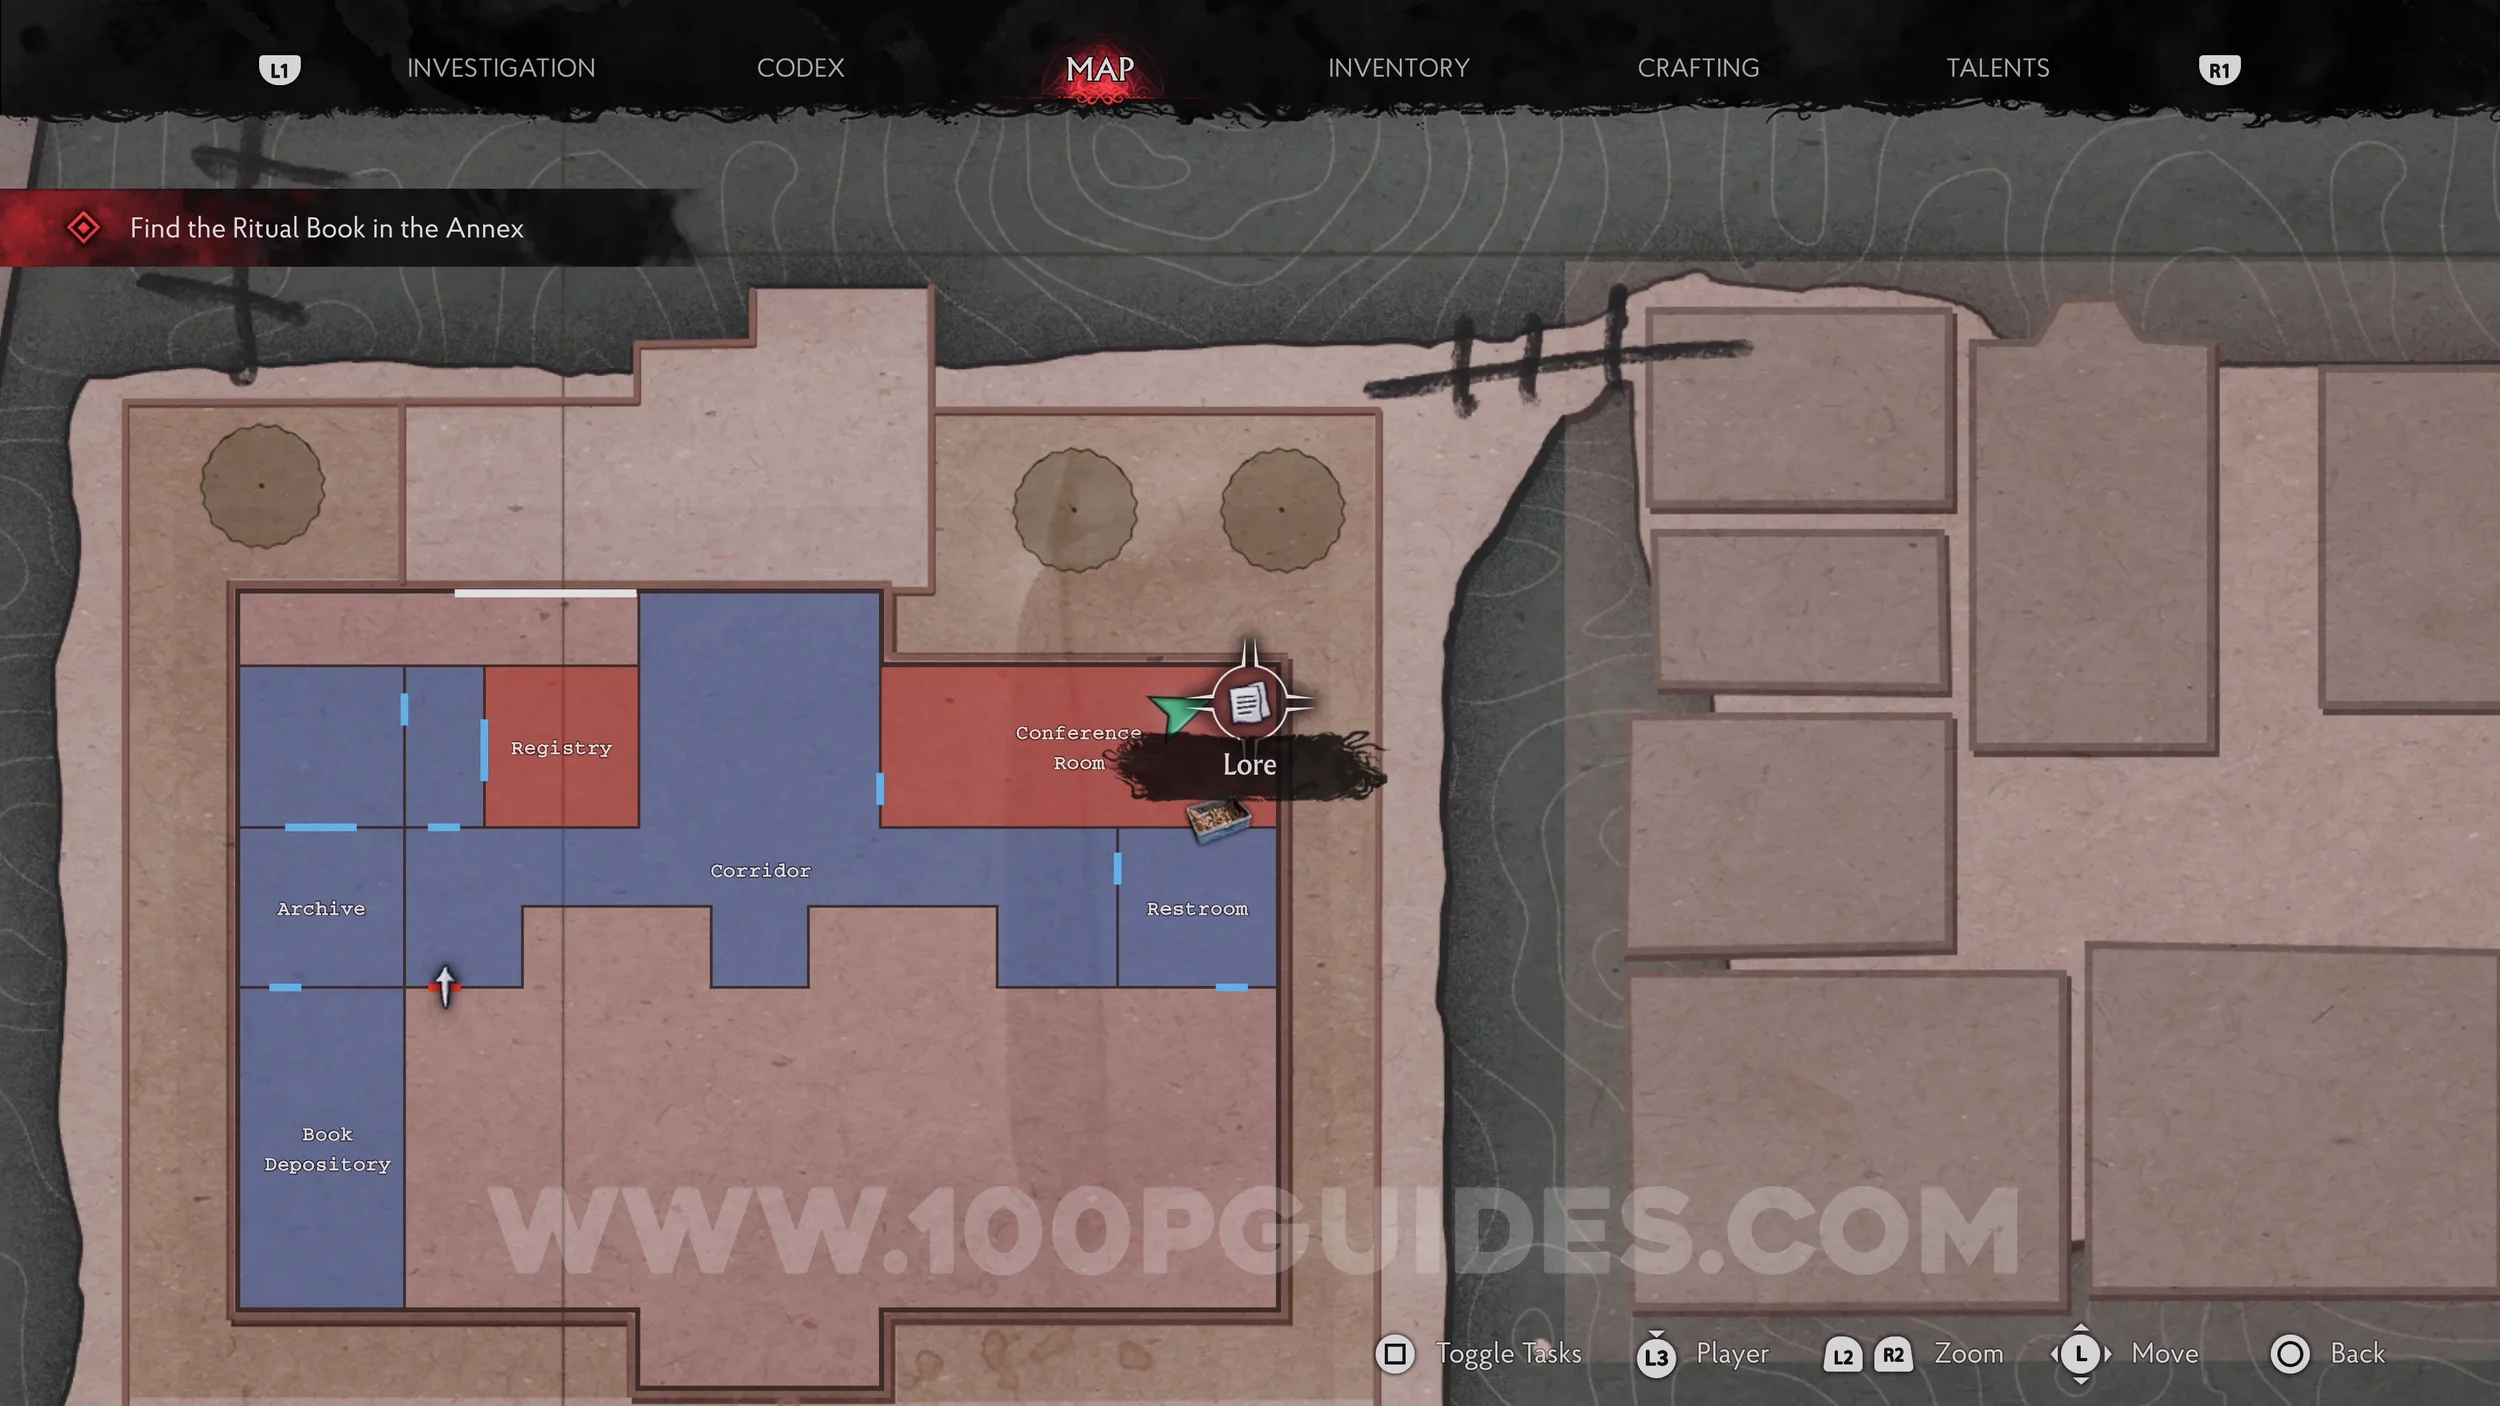
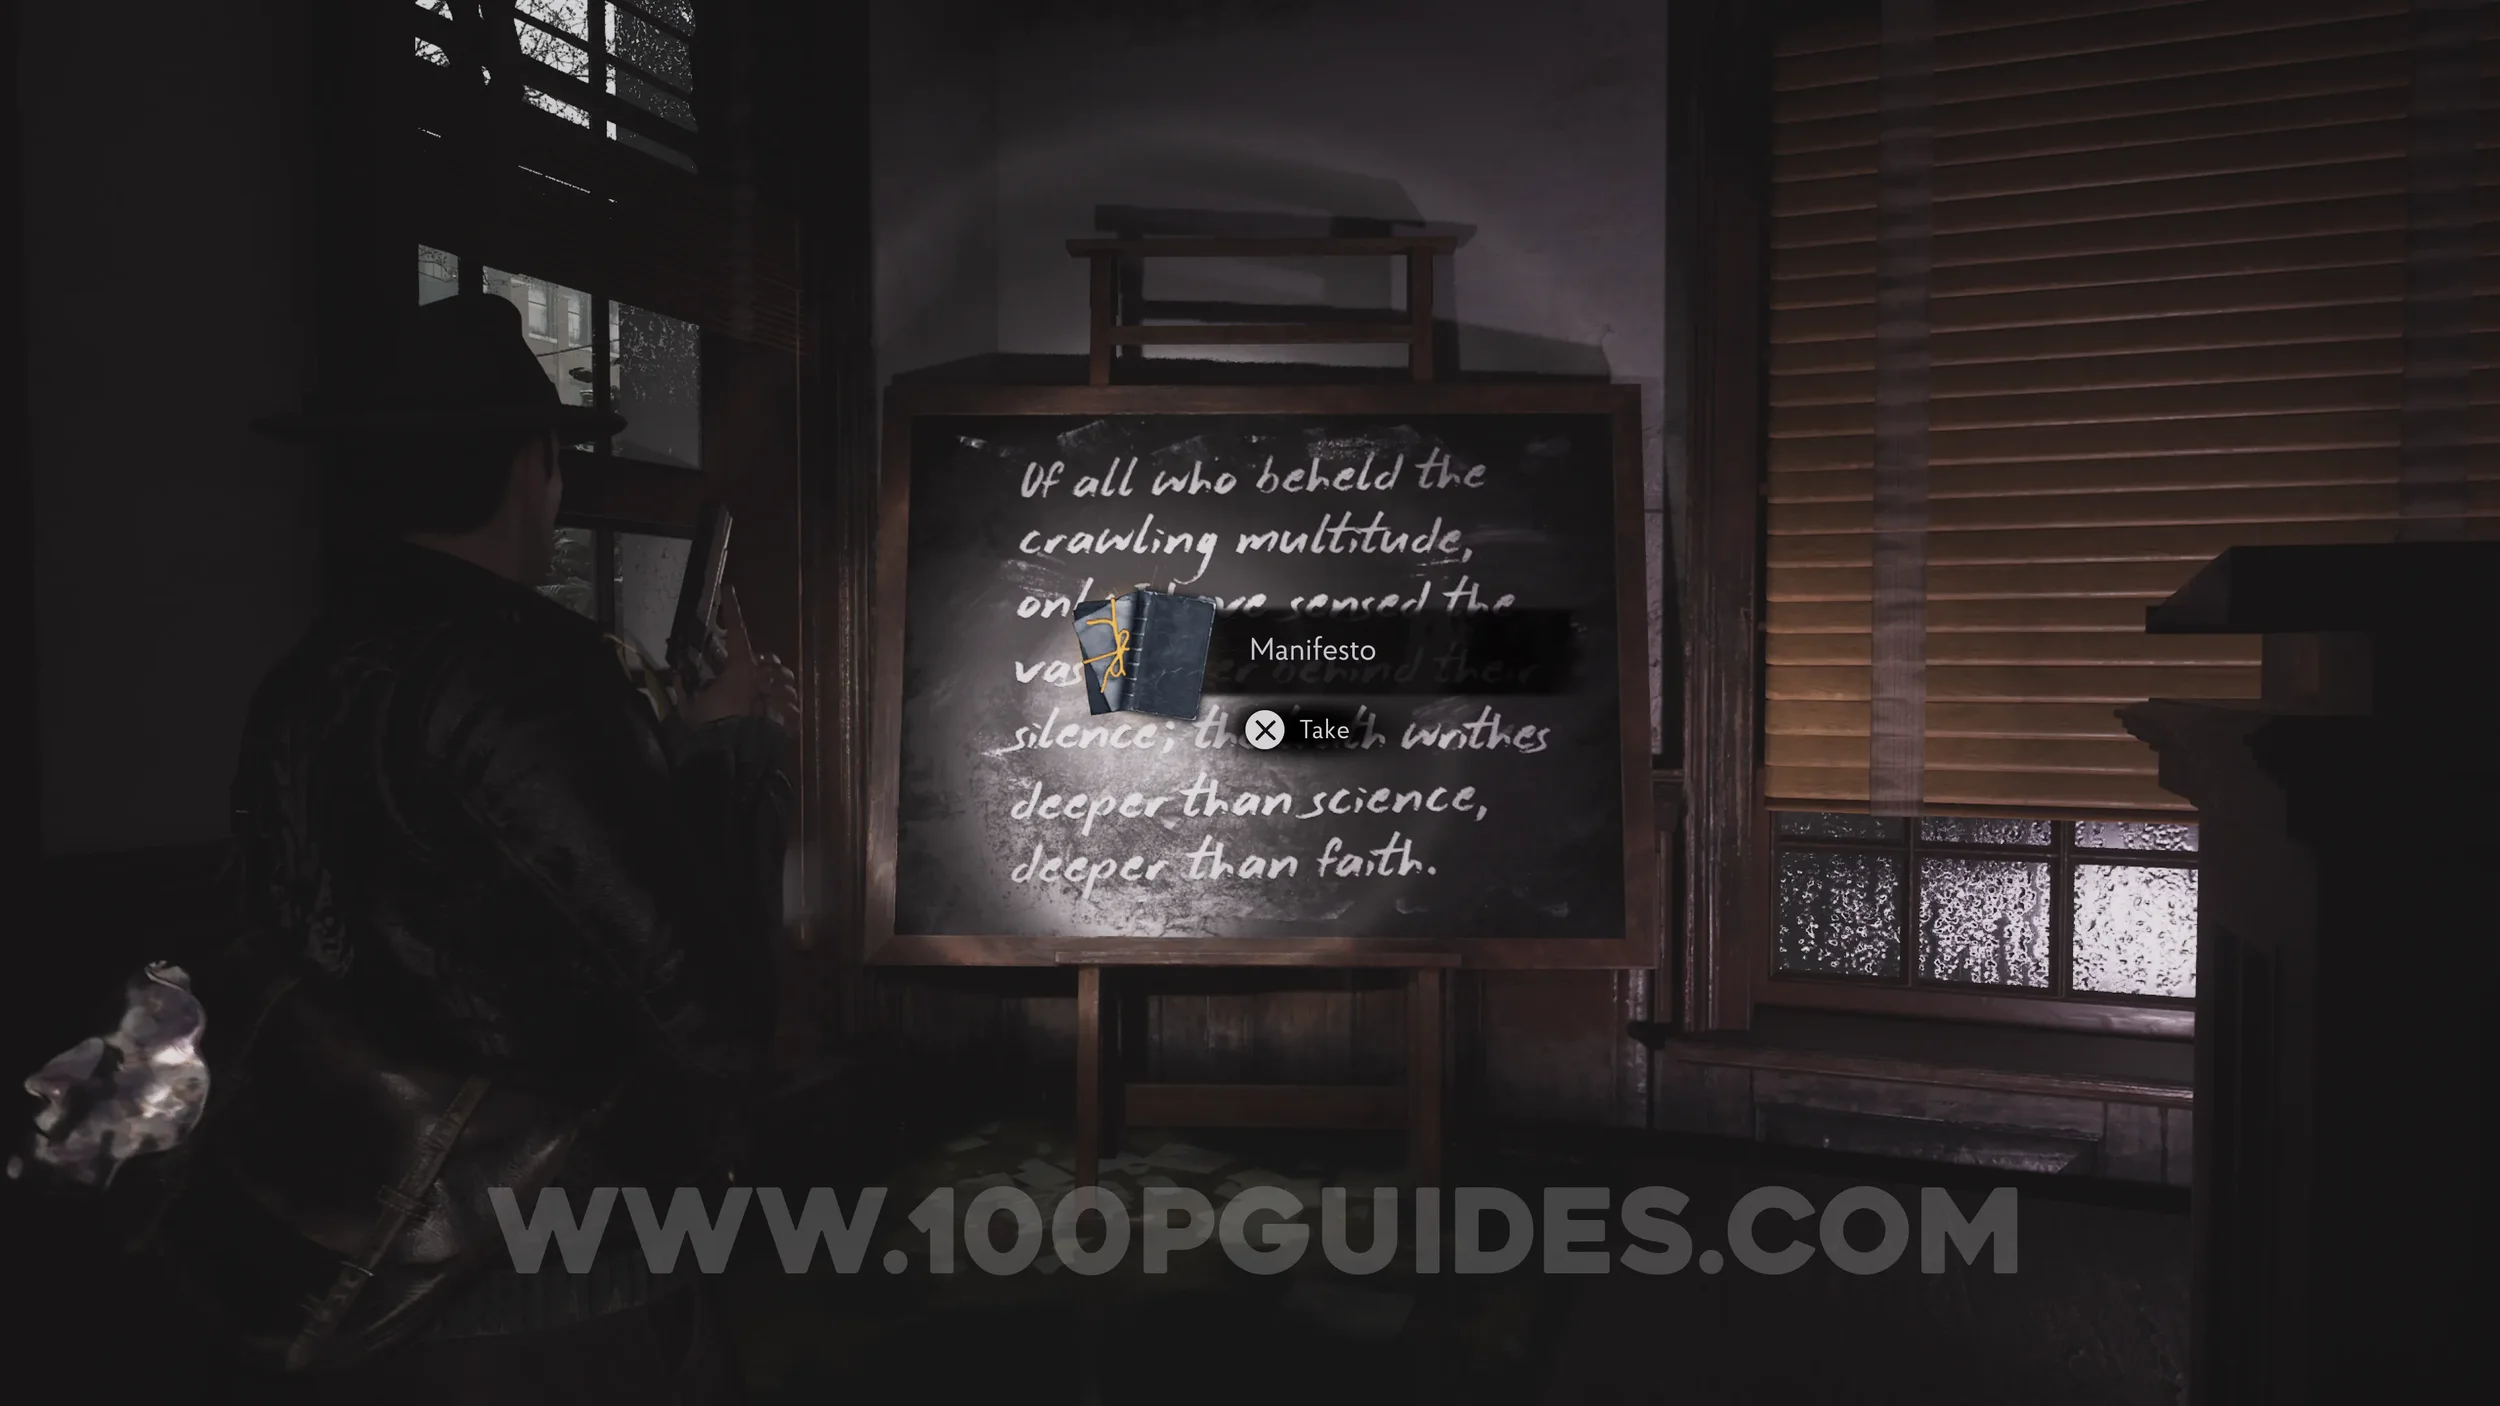
Lore Codex: Manifesto. Examine the board in the Conference Room.
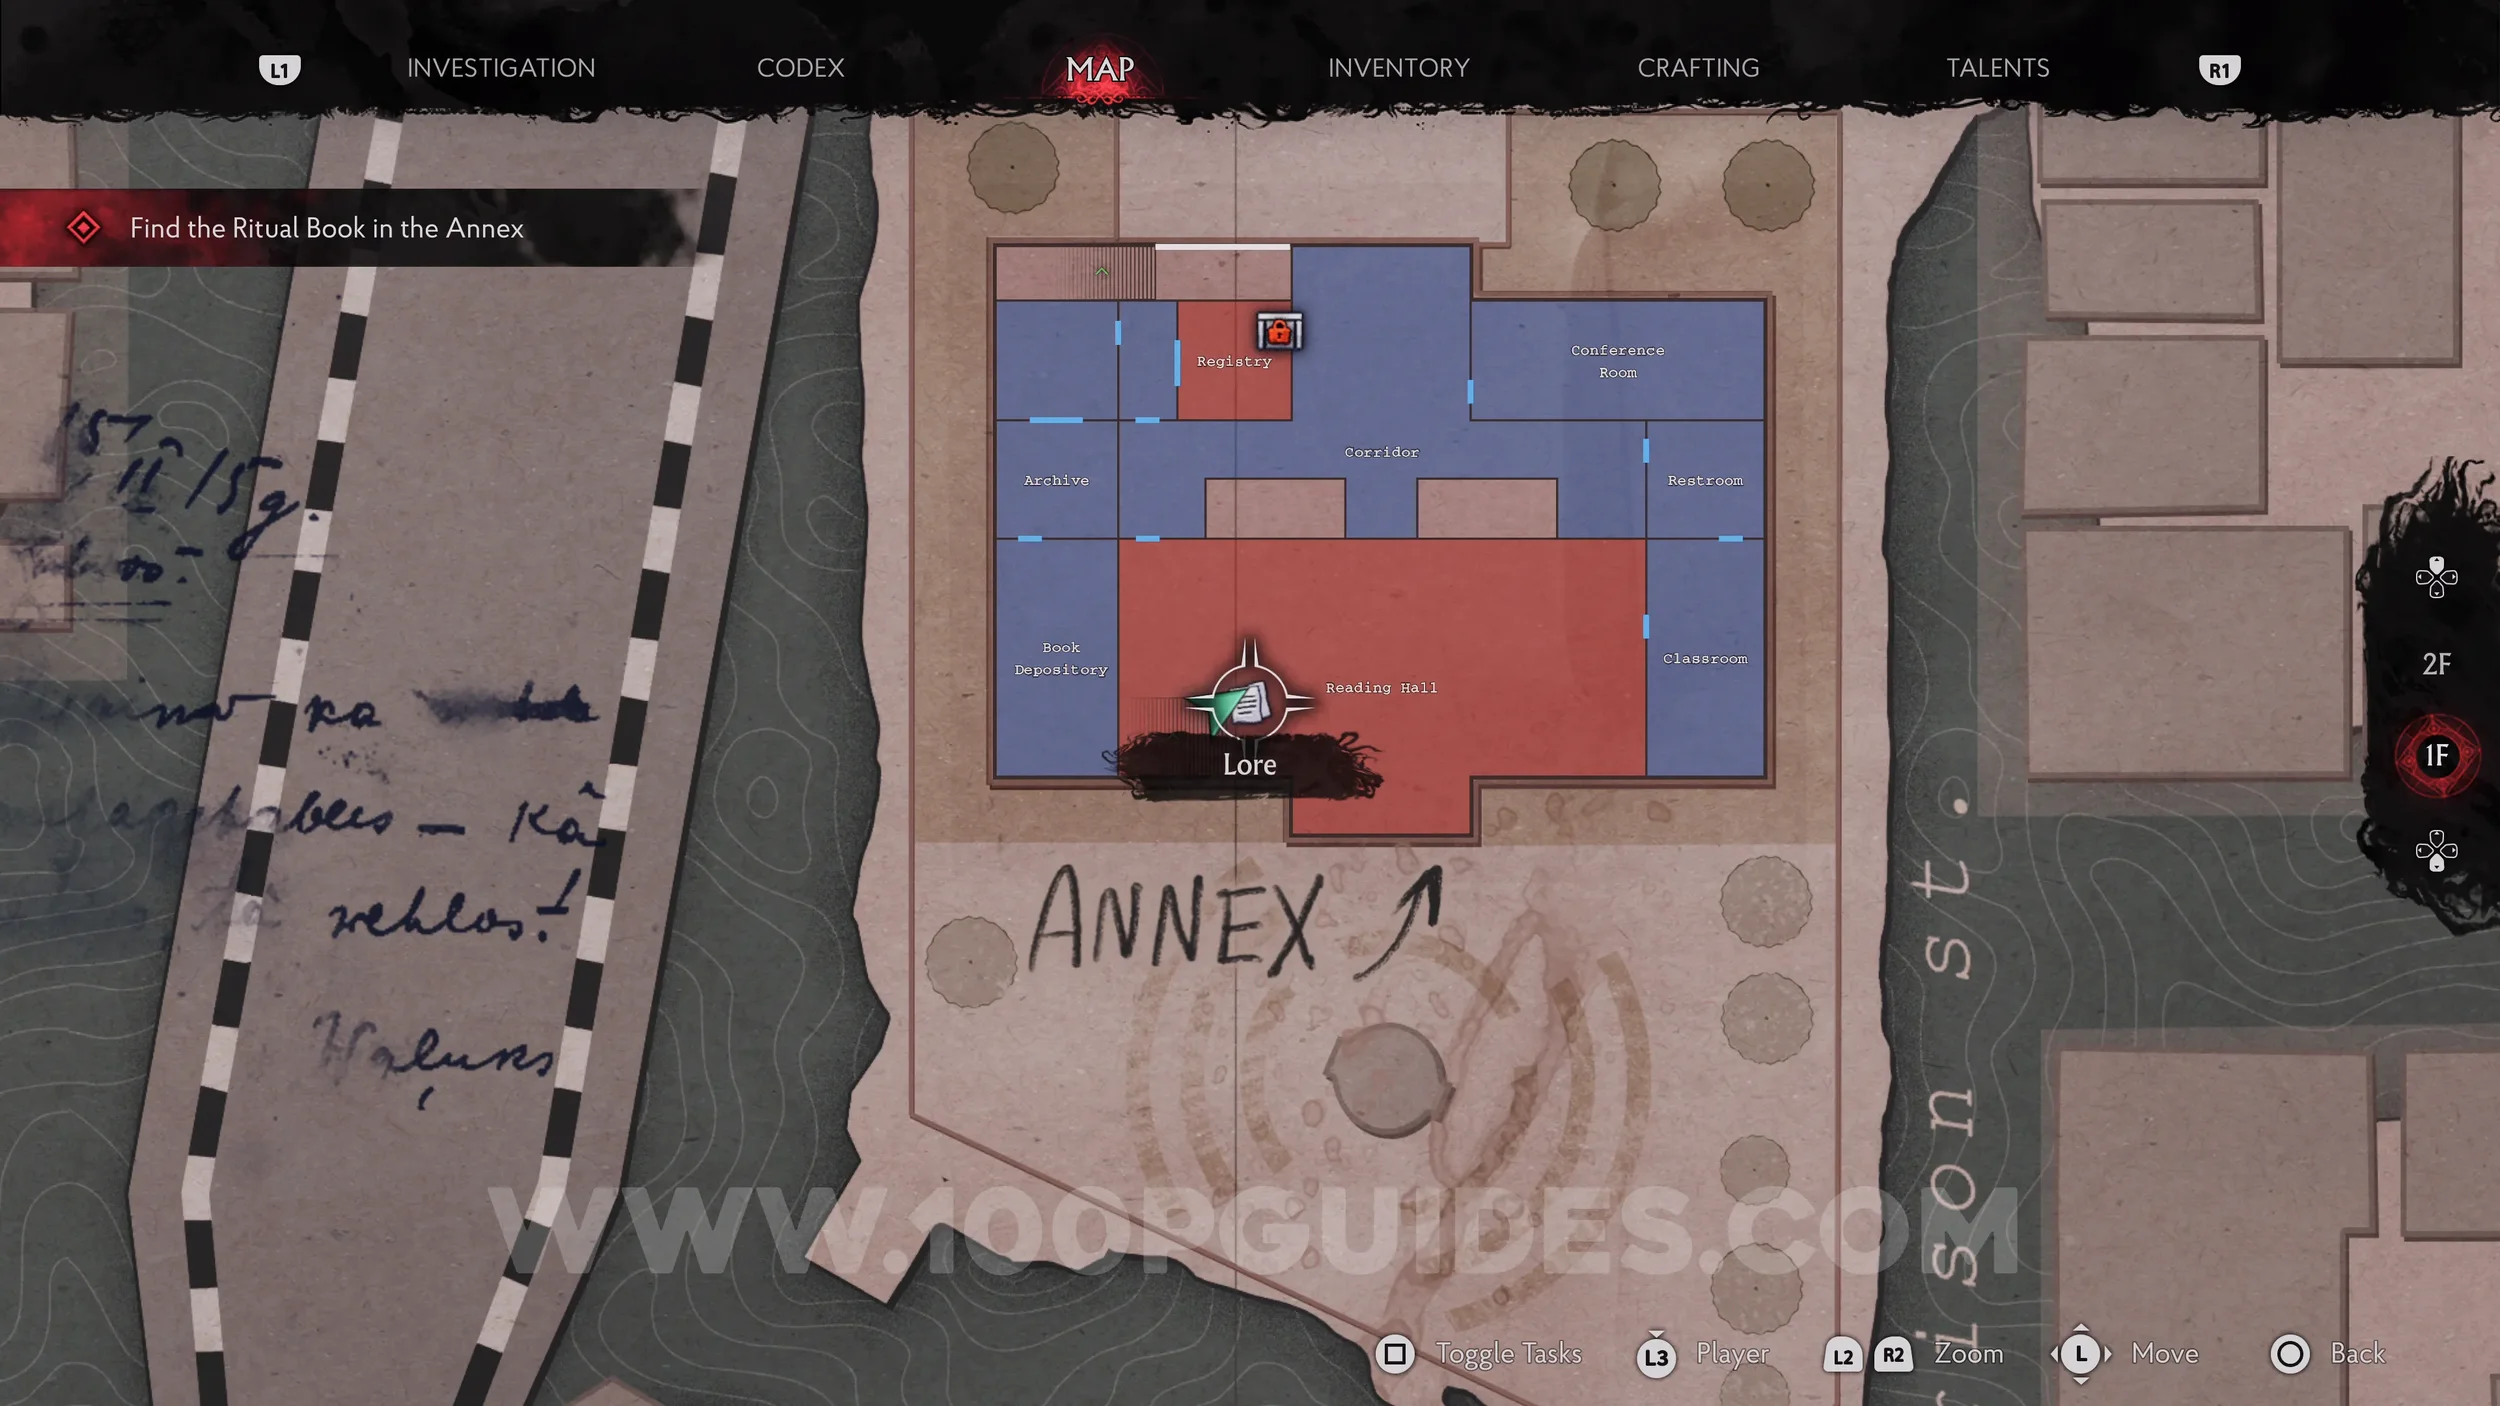
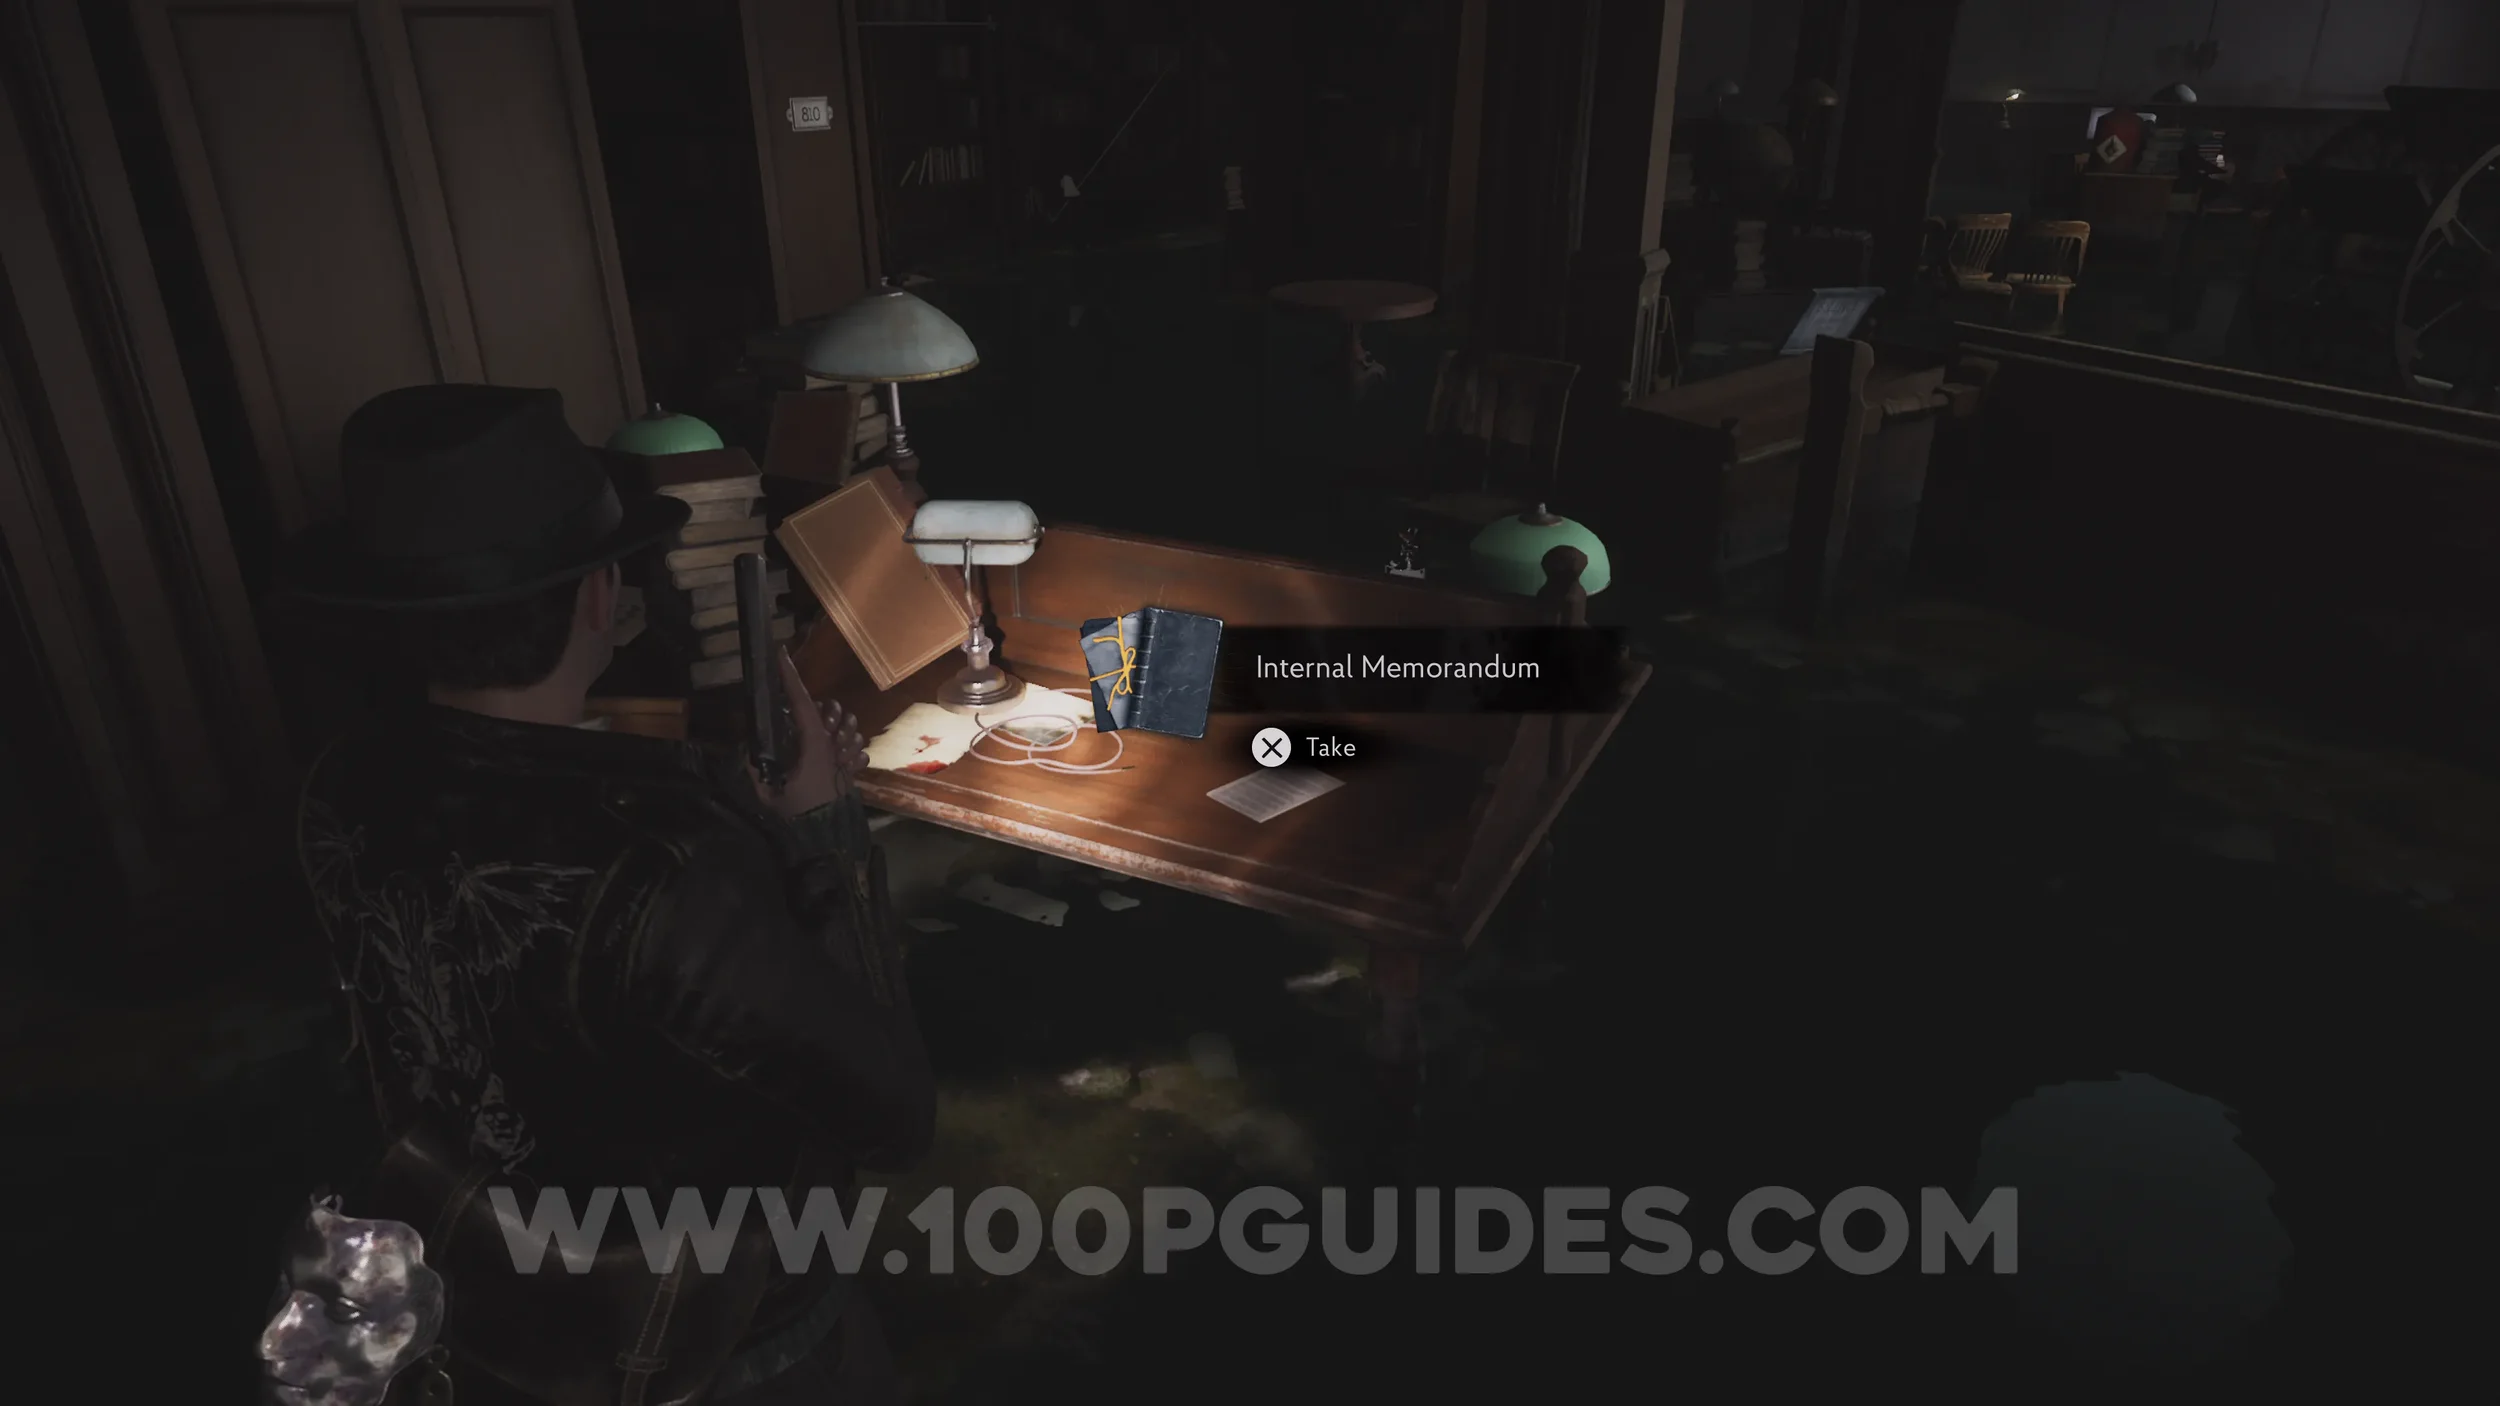
Lore Codex: Internal Memorandum. Make your way through the Restroom and the Classroom to reach the Reading Hall, where you'll find the collectible on a desk.
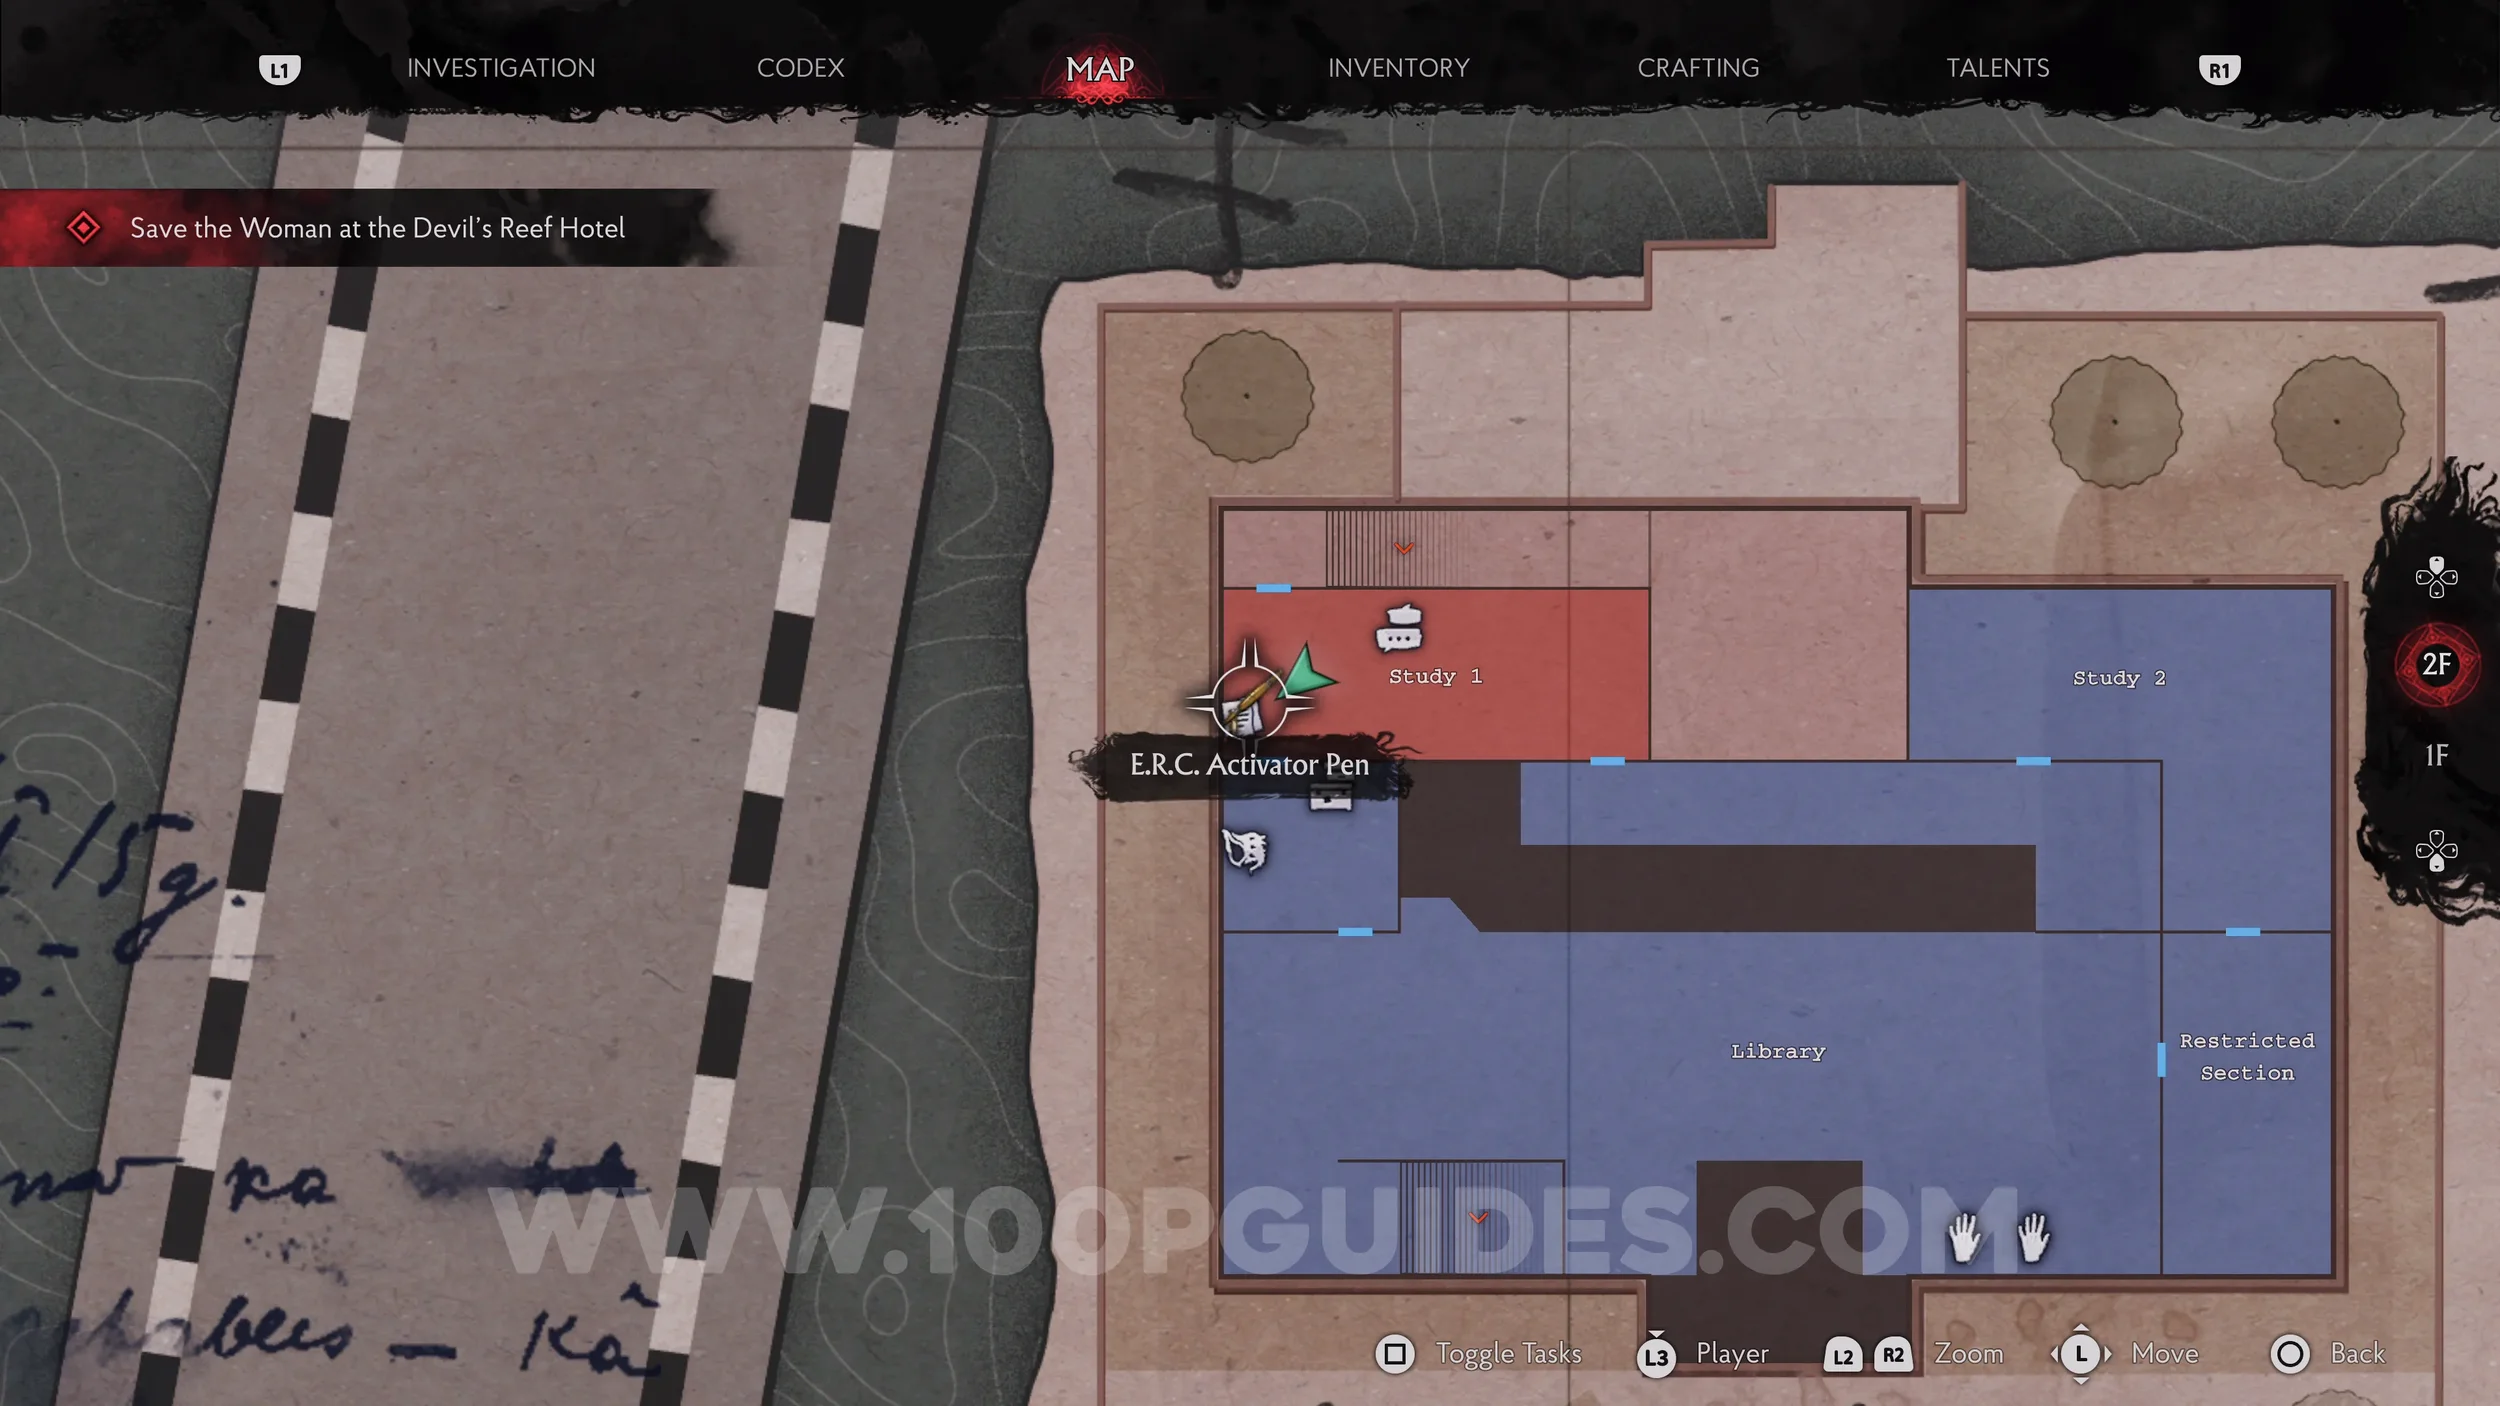
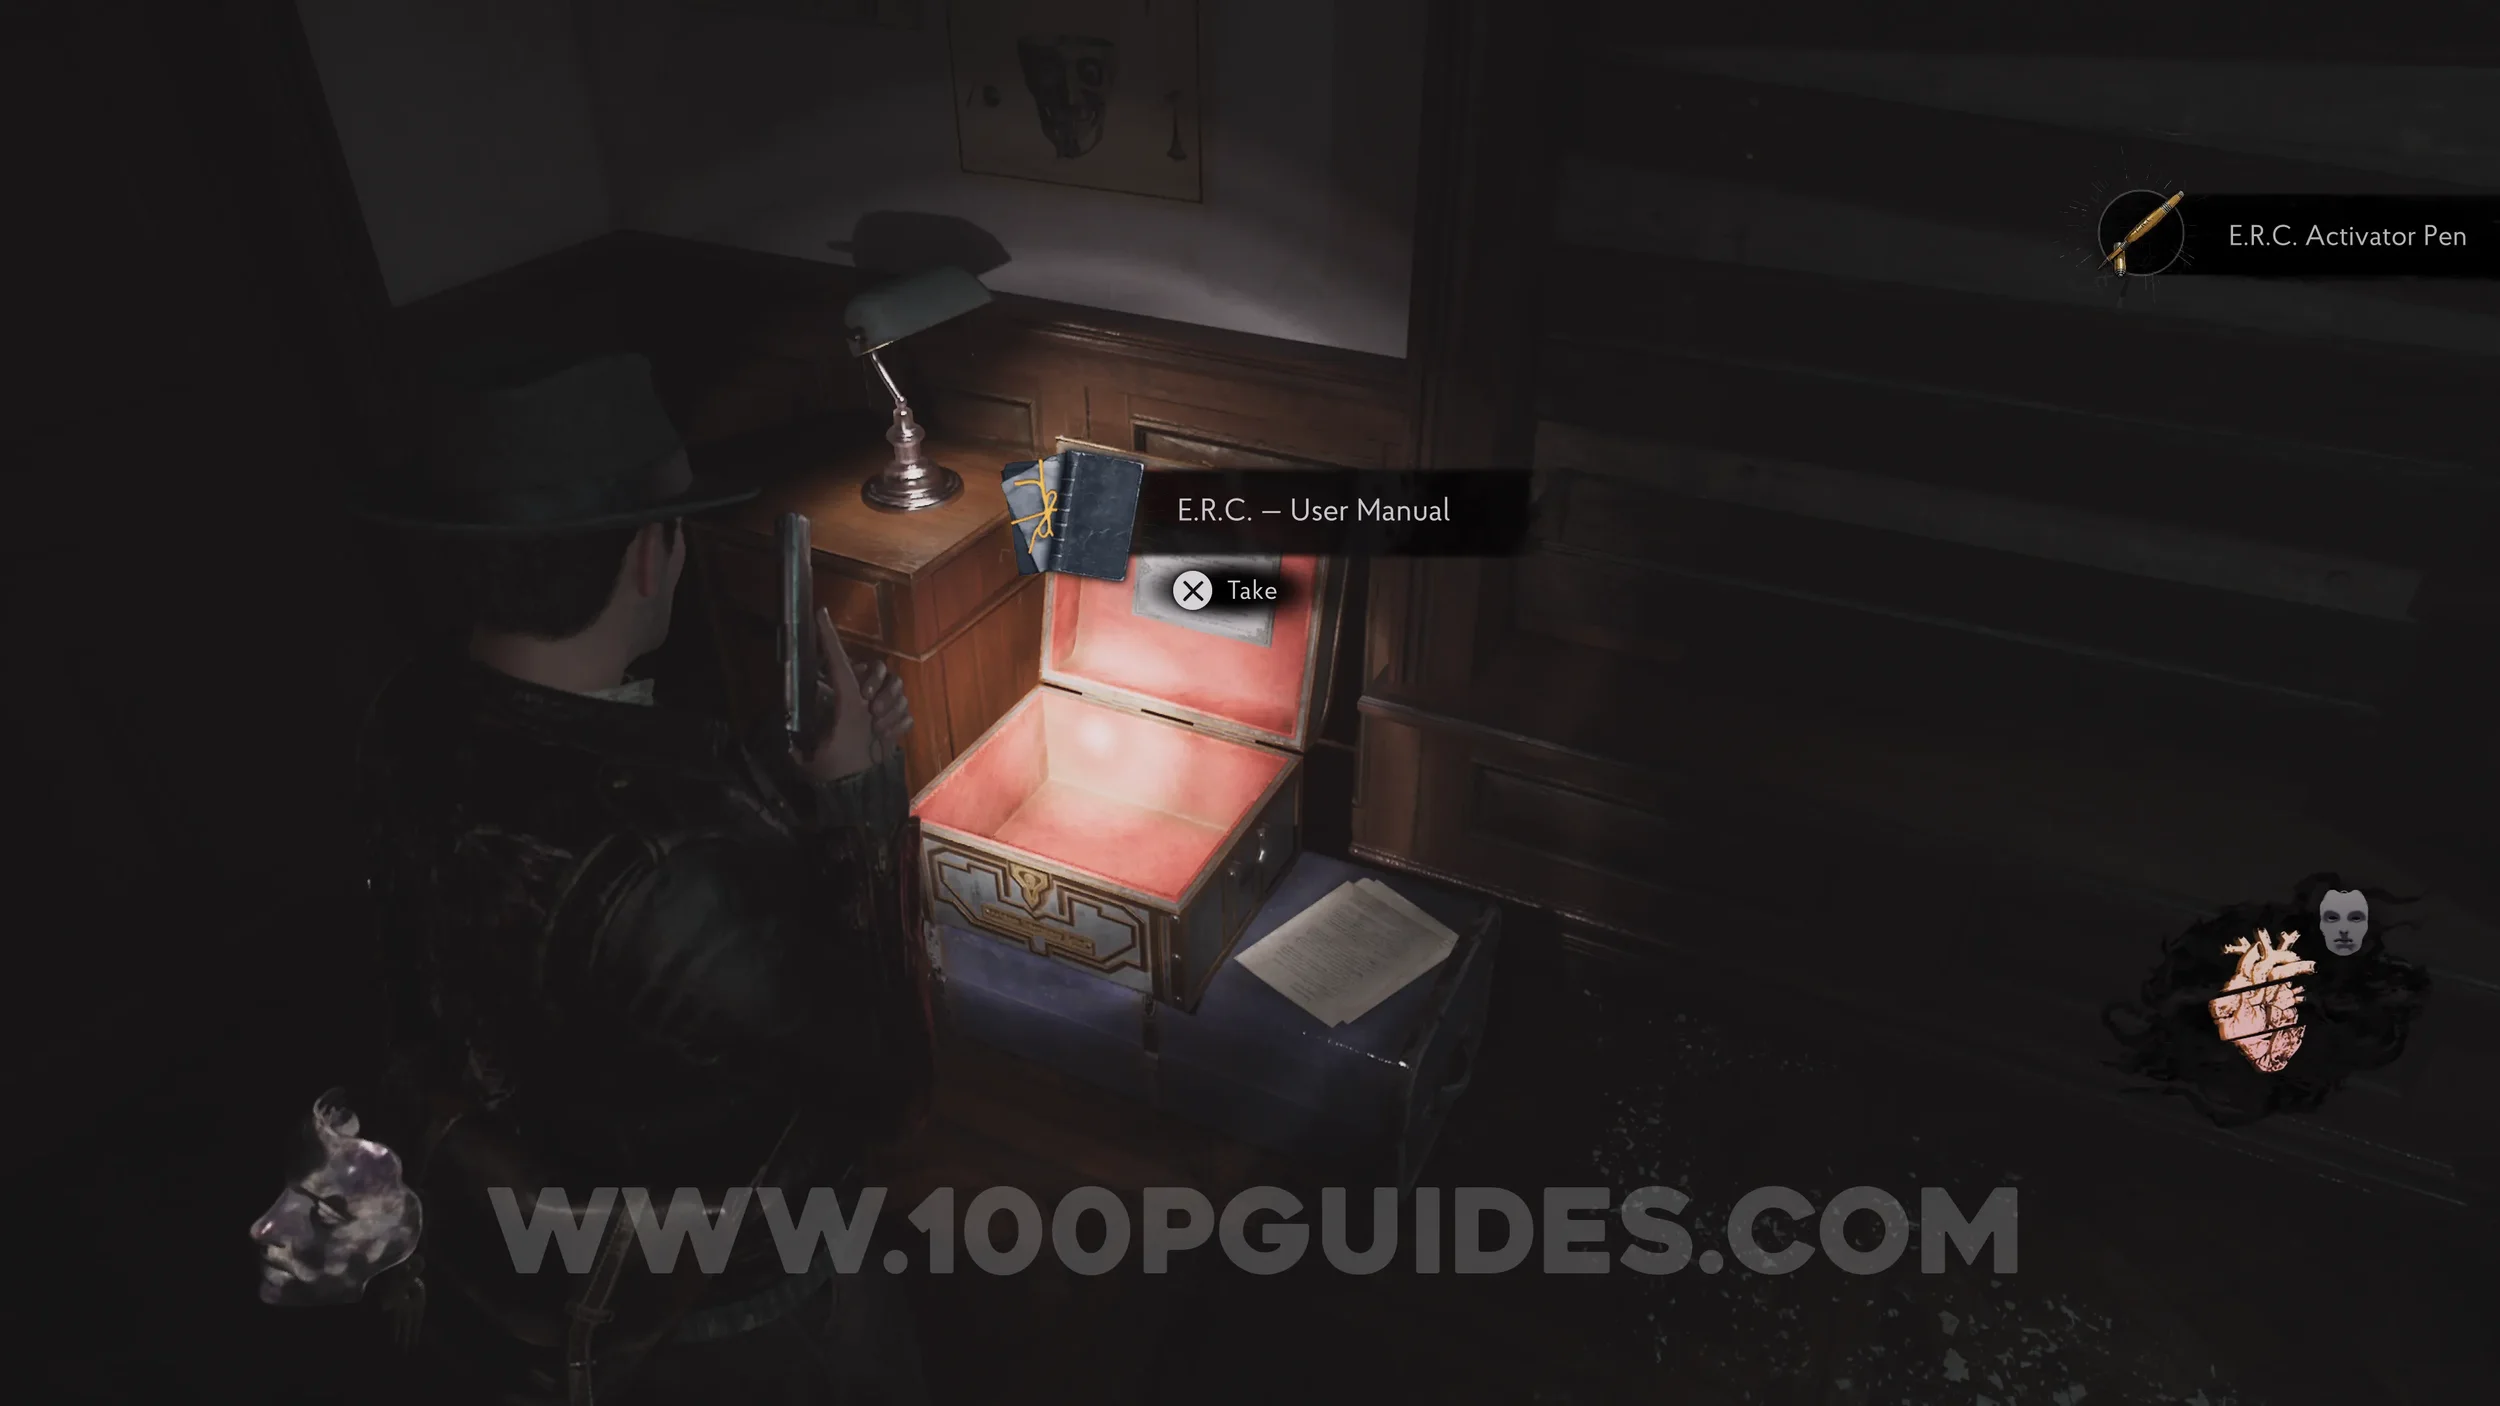
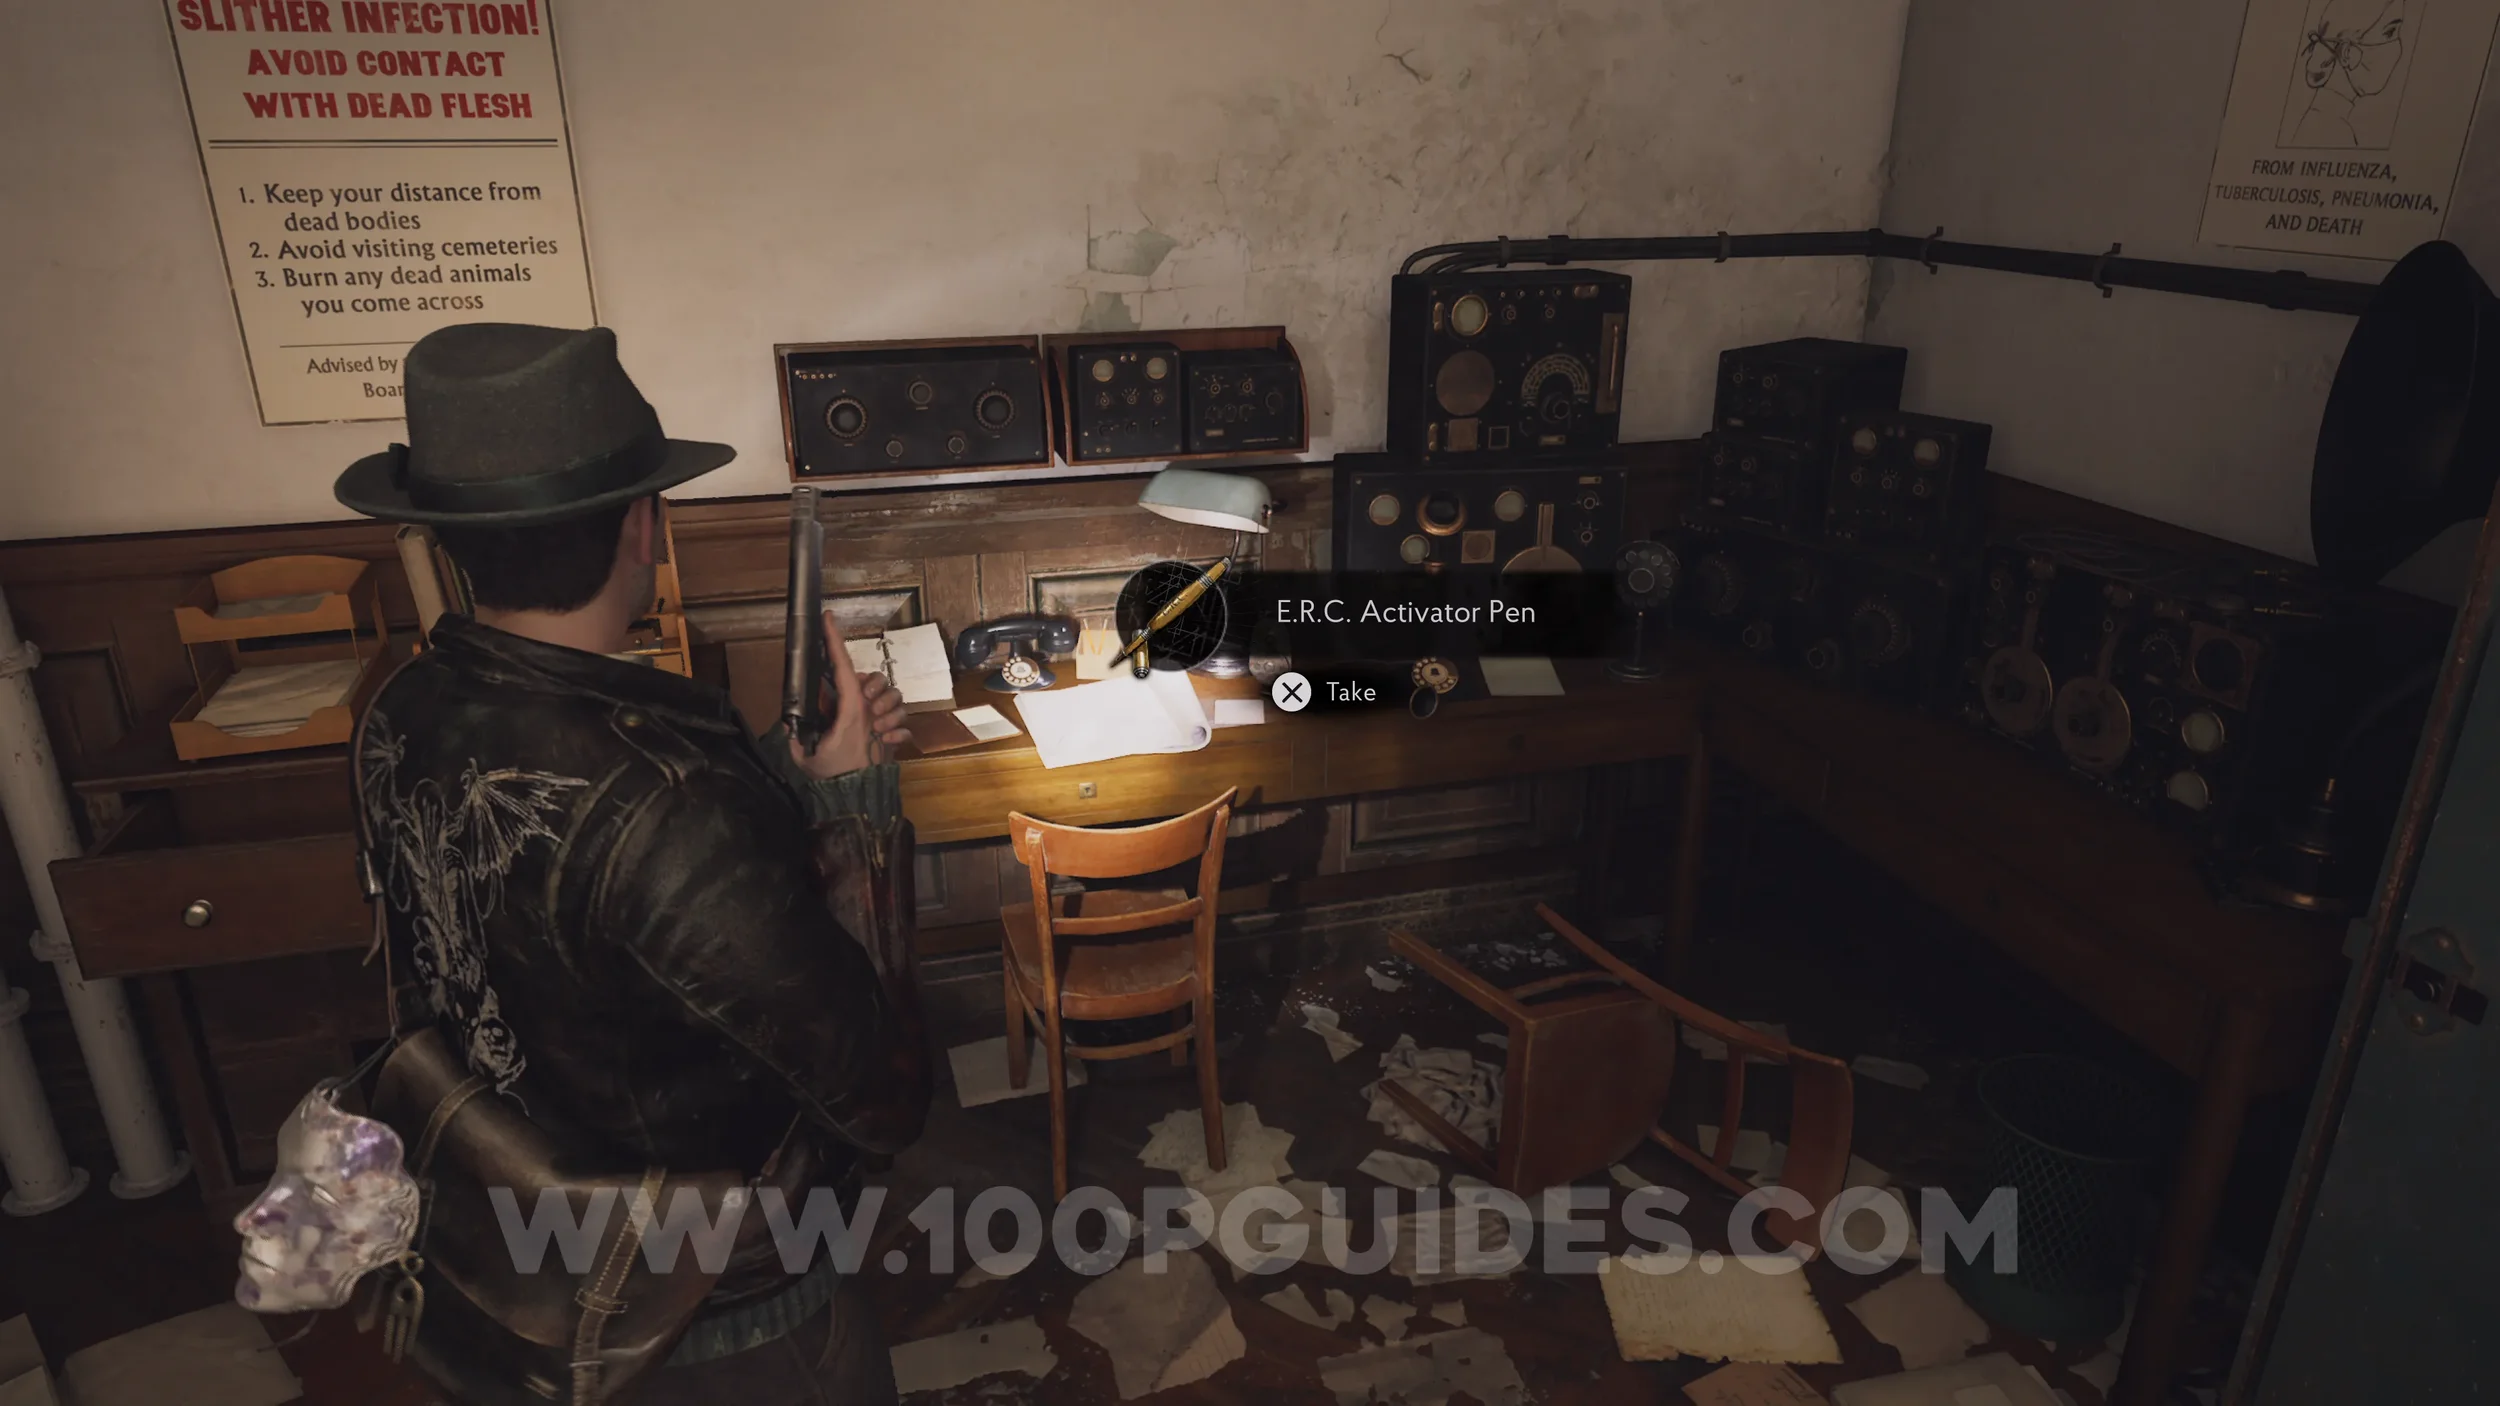
E.R.C. Activator Pen. Next to the open container box in Study 1, the same room where you meet Corentin who sends you after Lorelei. You can use these to open E.R.C. Containers.
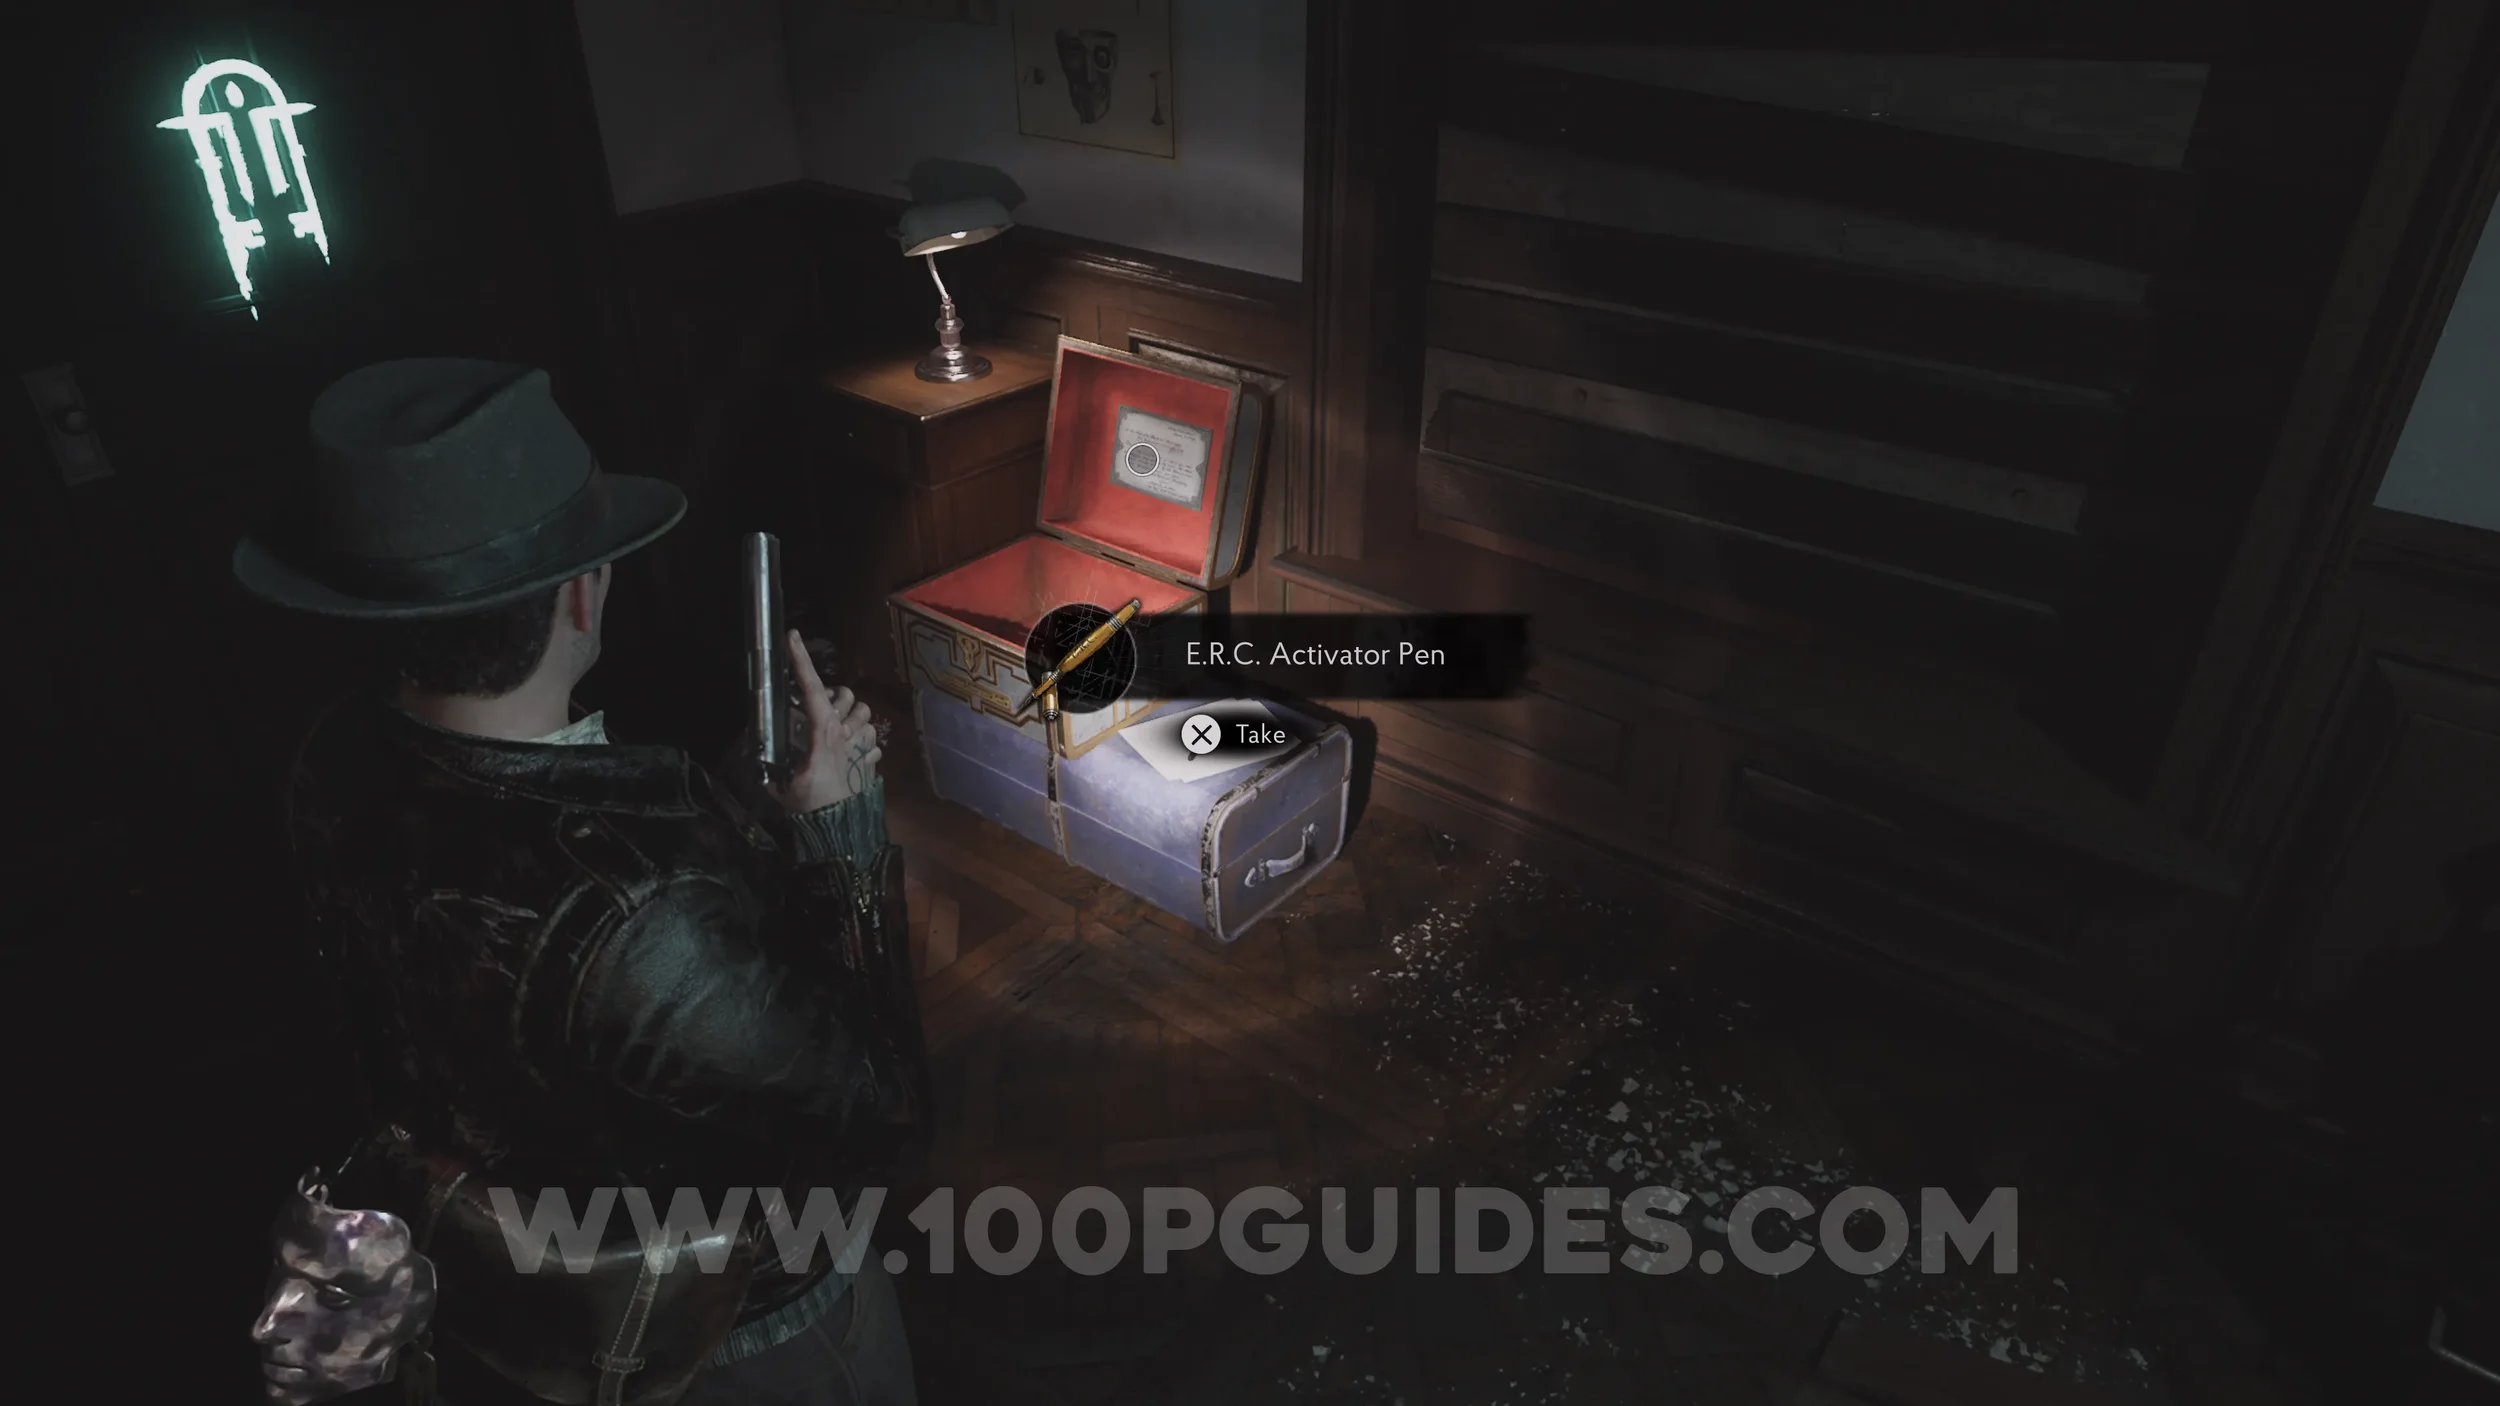
Lore Codex: E.R.C. - User Manual. Inside the open container next to the pen.
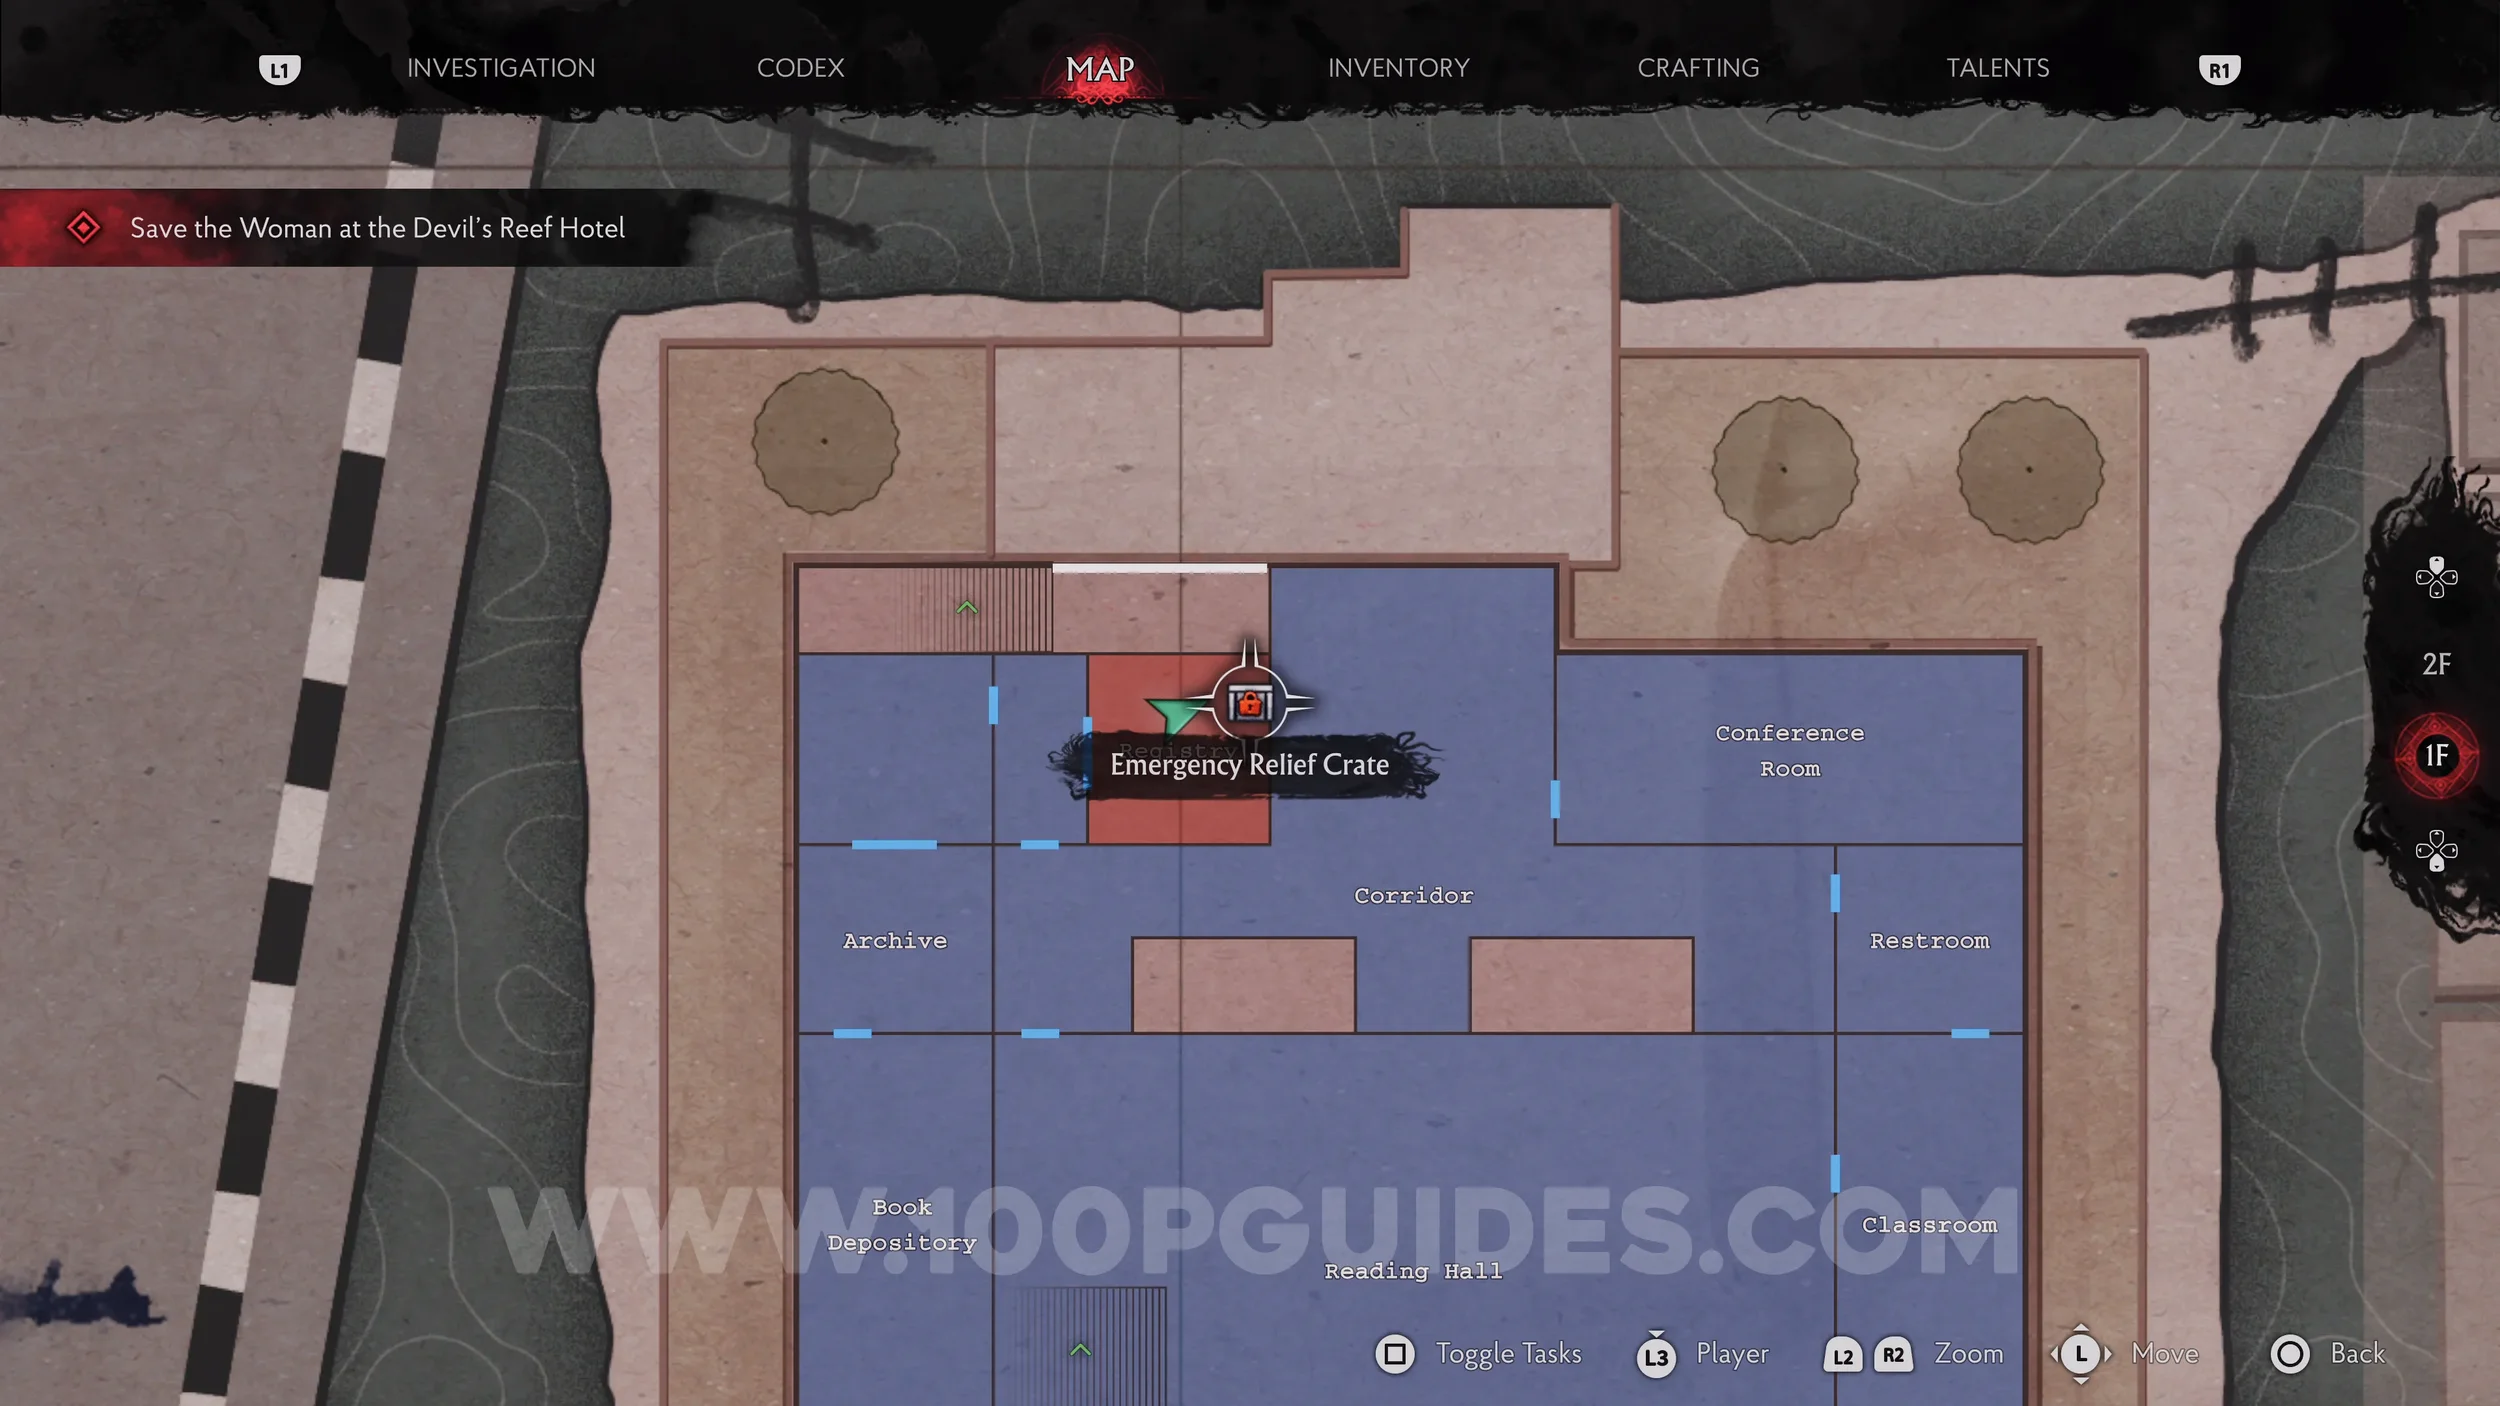
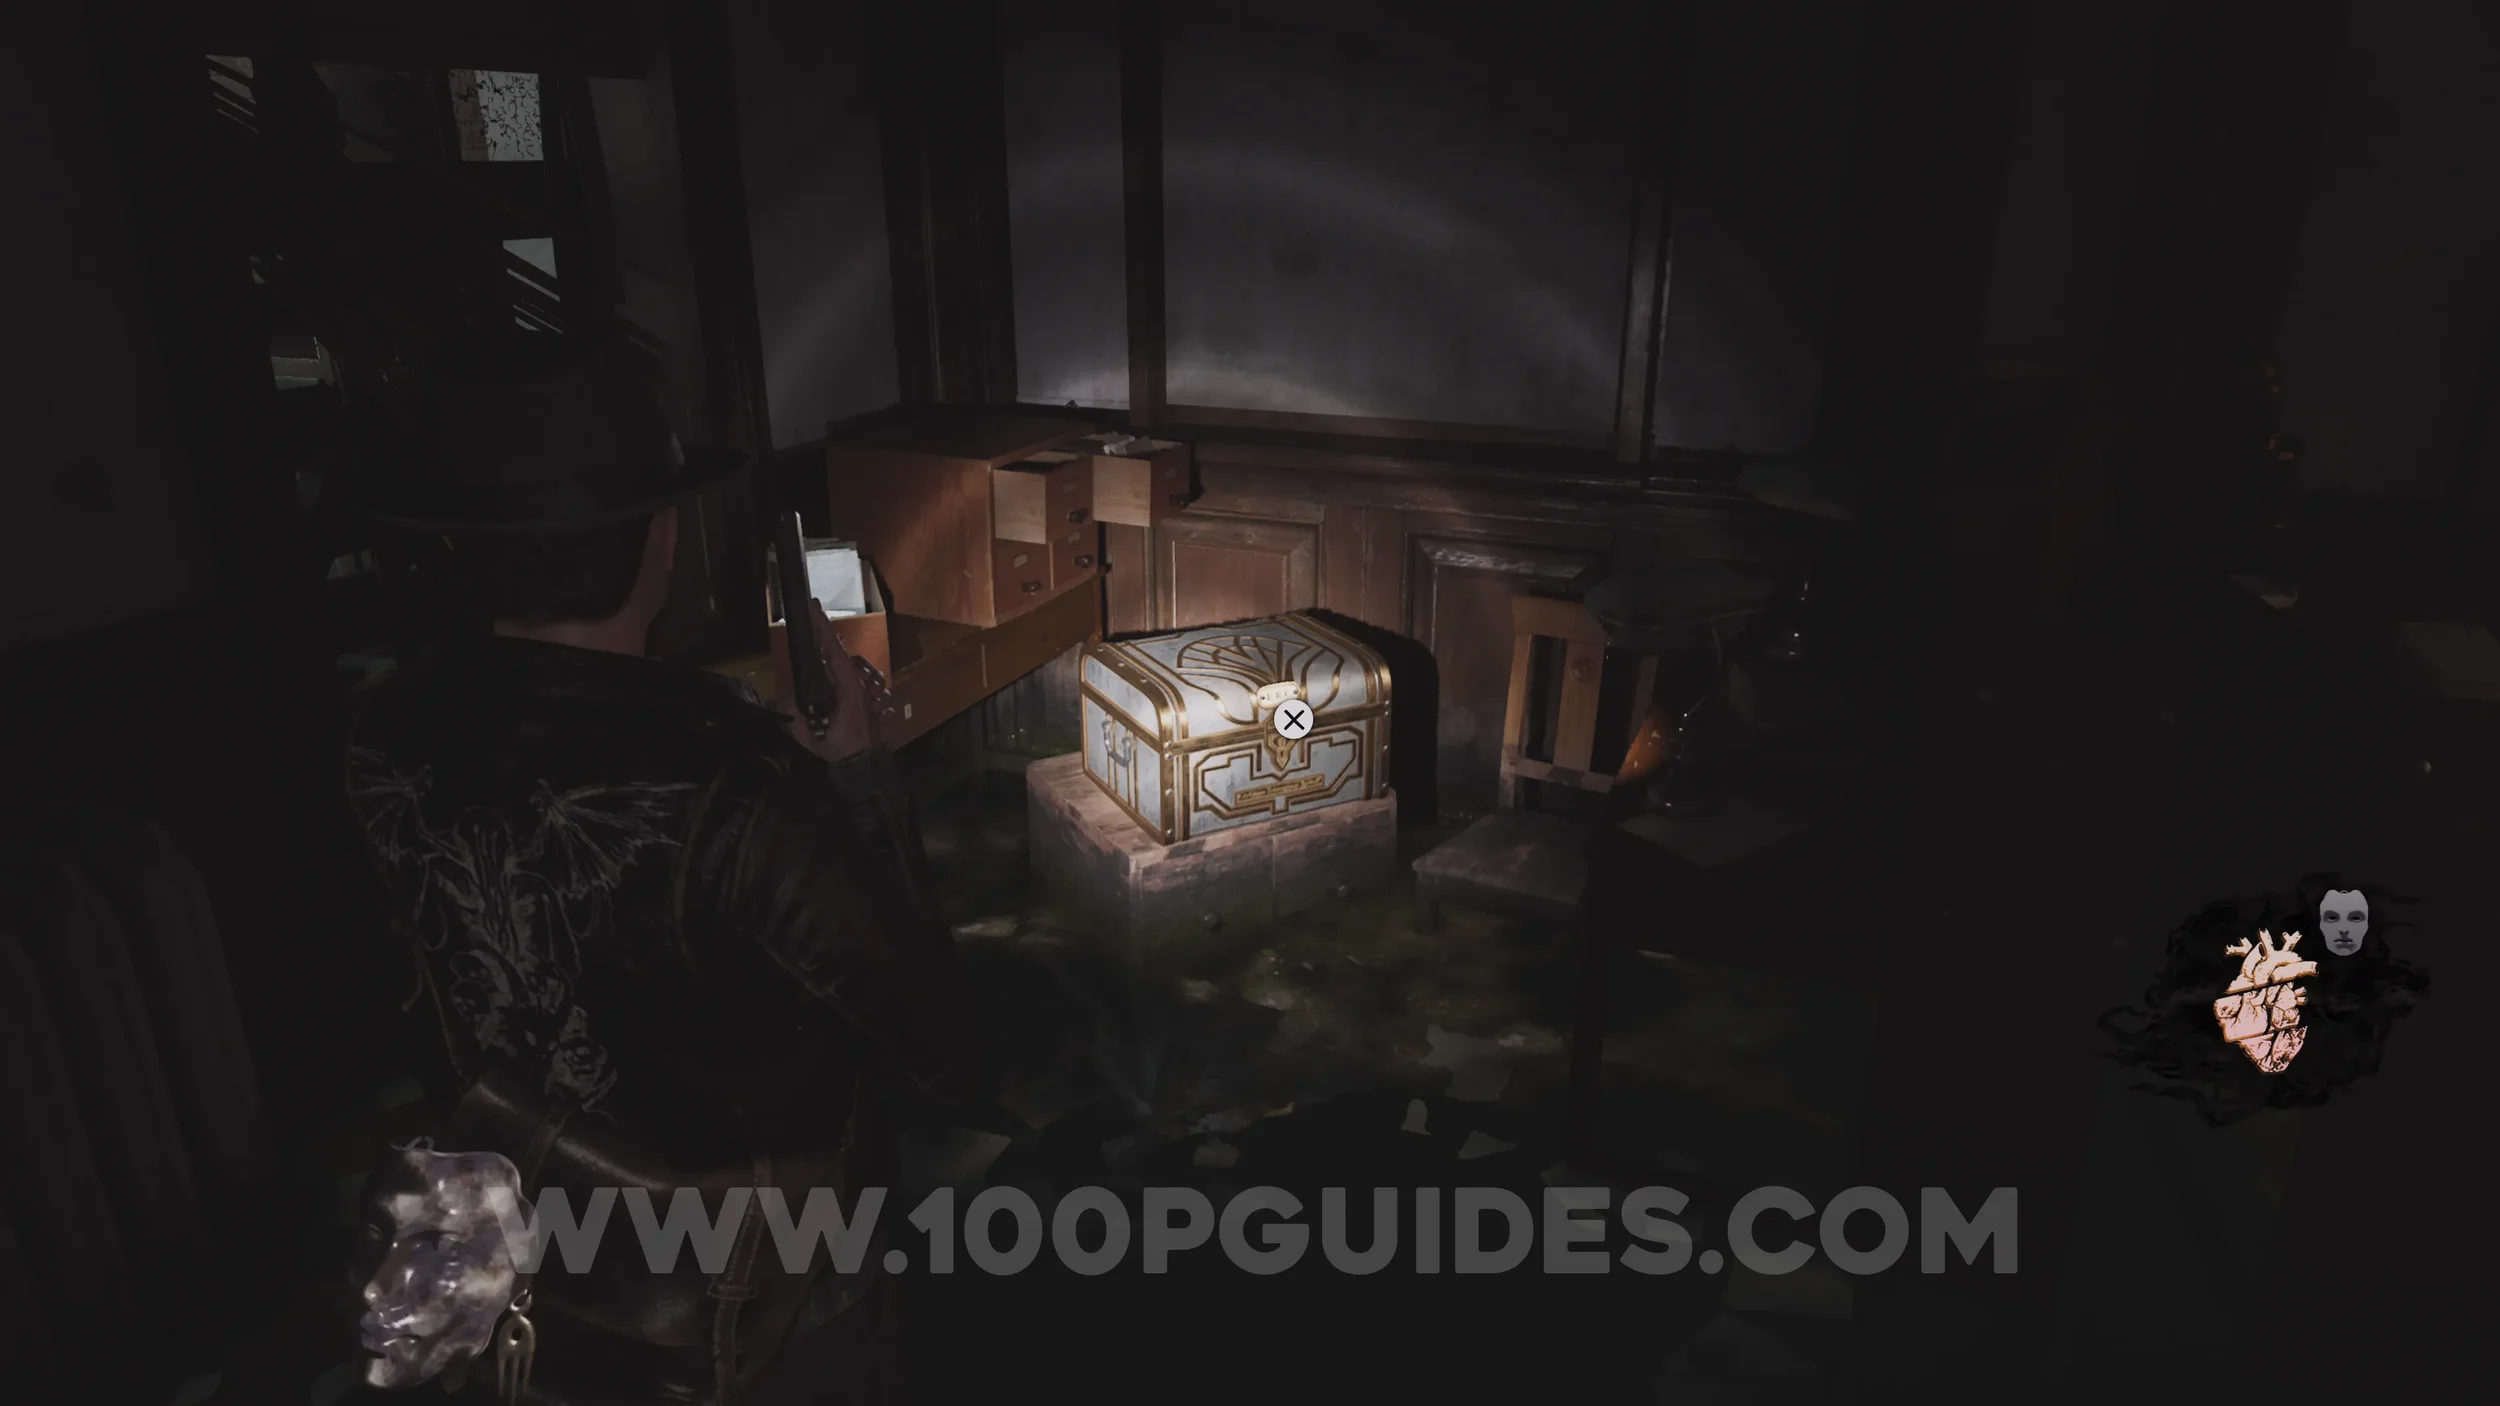
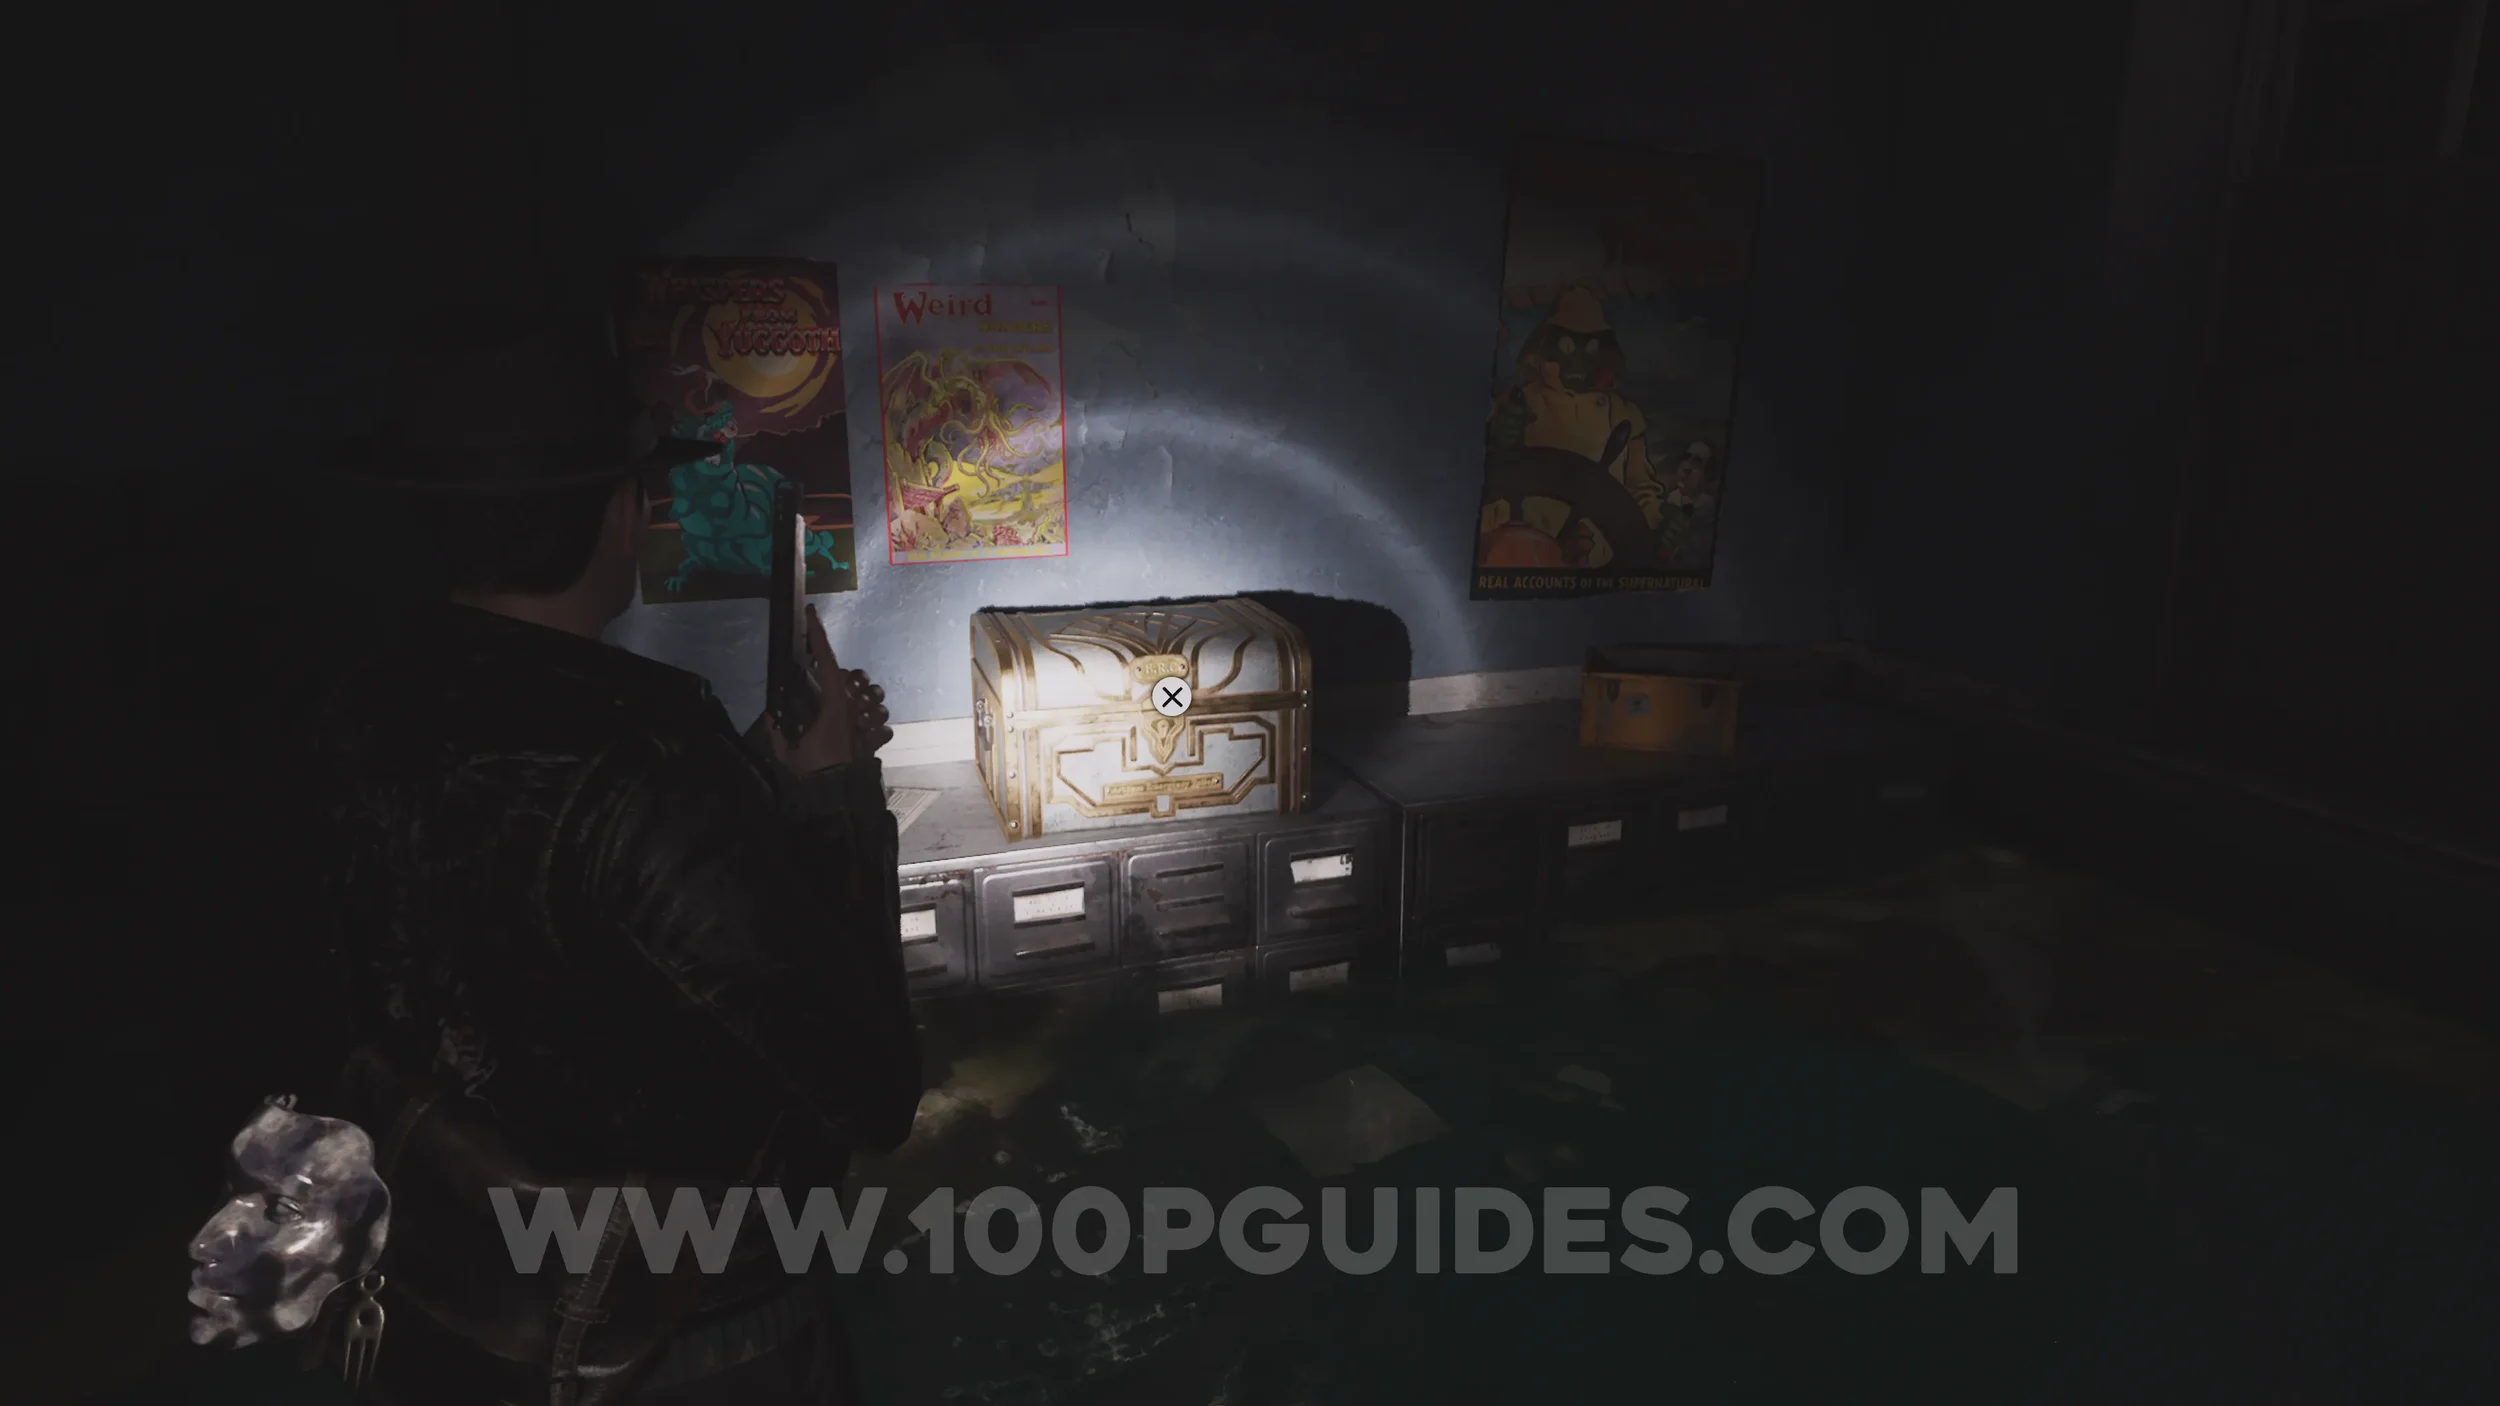
Emergency Relief Crate (E.R.C.) + Weapon Accessory: Voss’s Compensator. Now that you have an E.R.C. Activator Pen, you'll want to head back to the Registry to open the container. You can do this by going through the safe room in Study 1 to get back to the Library, then heading downstairs and through the shortcut in the northwest corner of the Reading Hall.
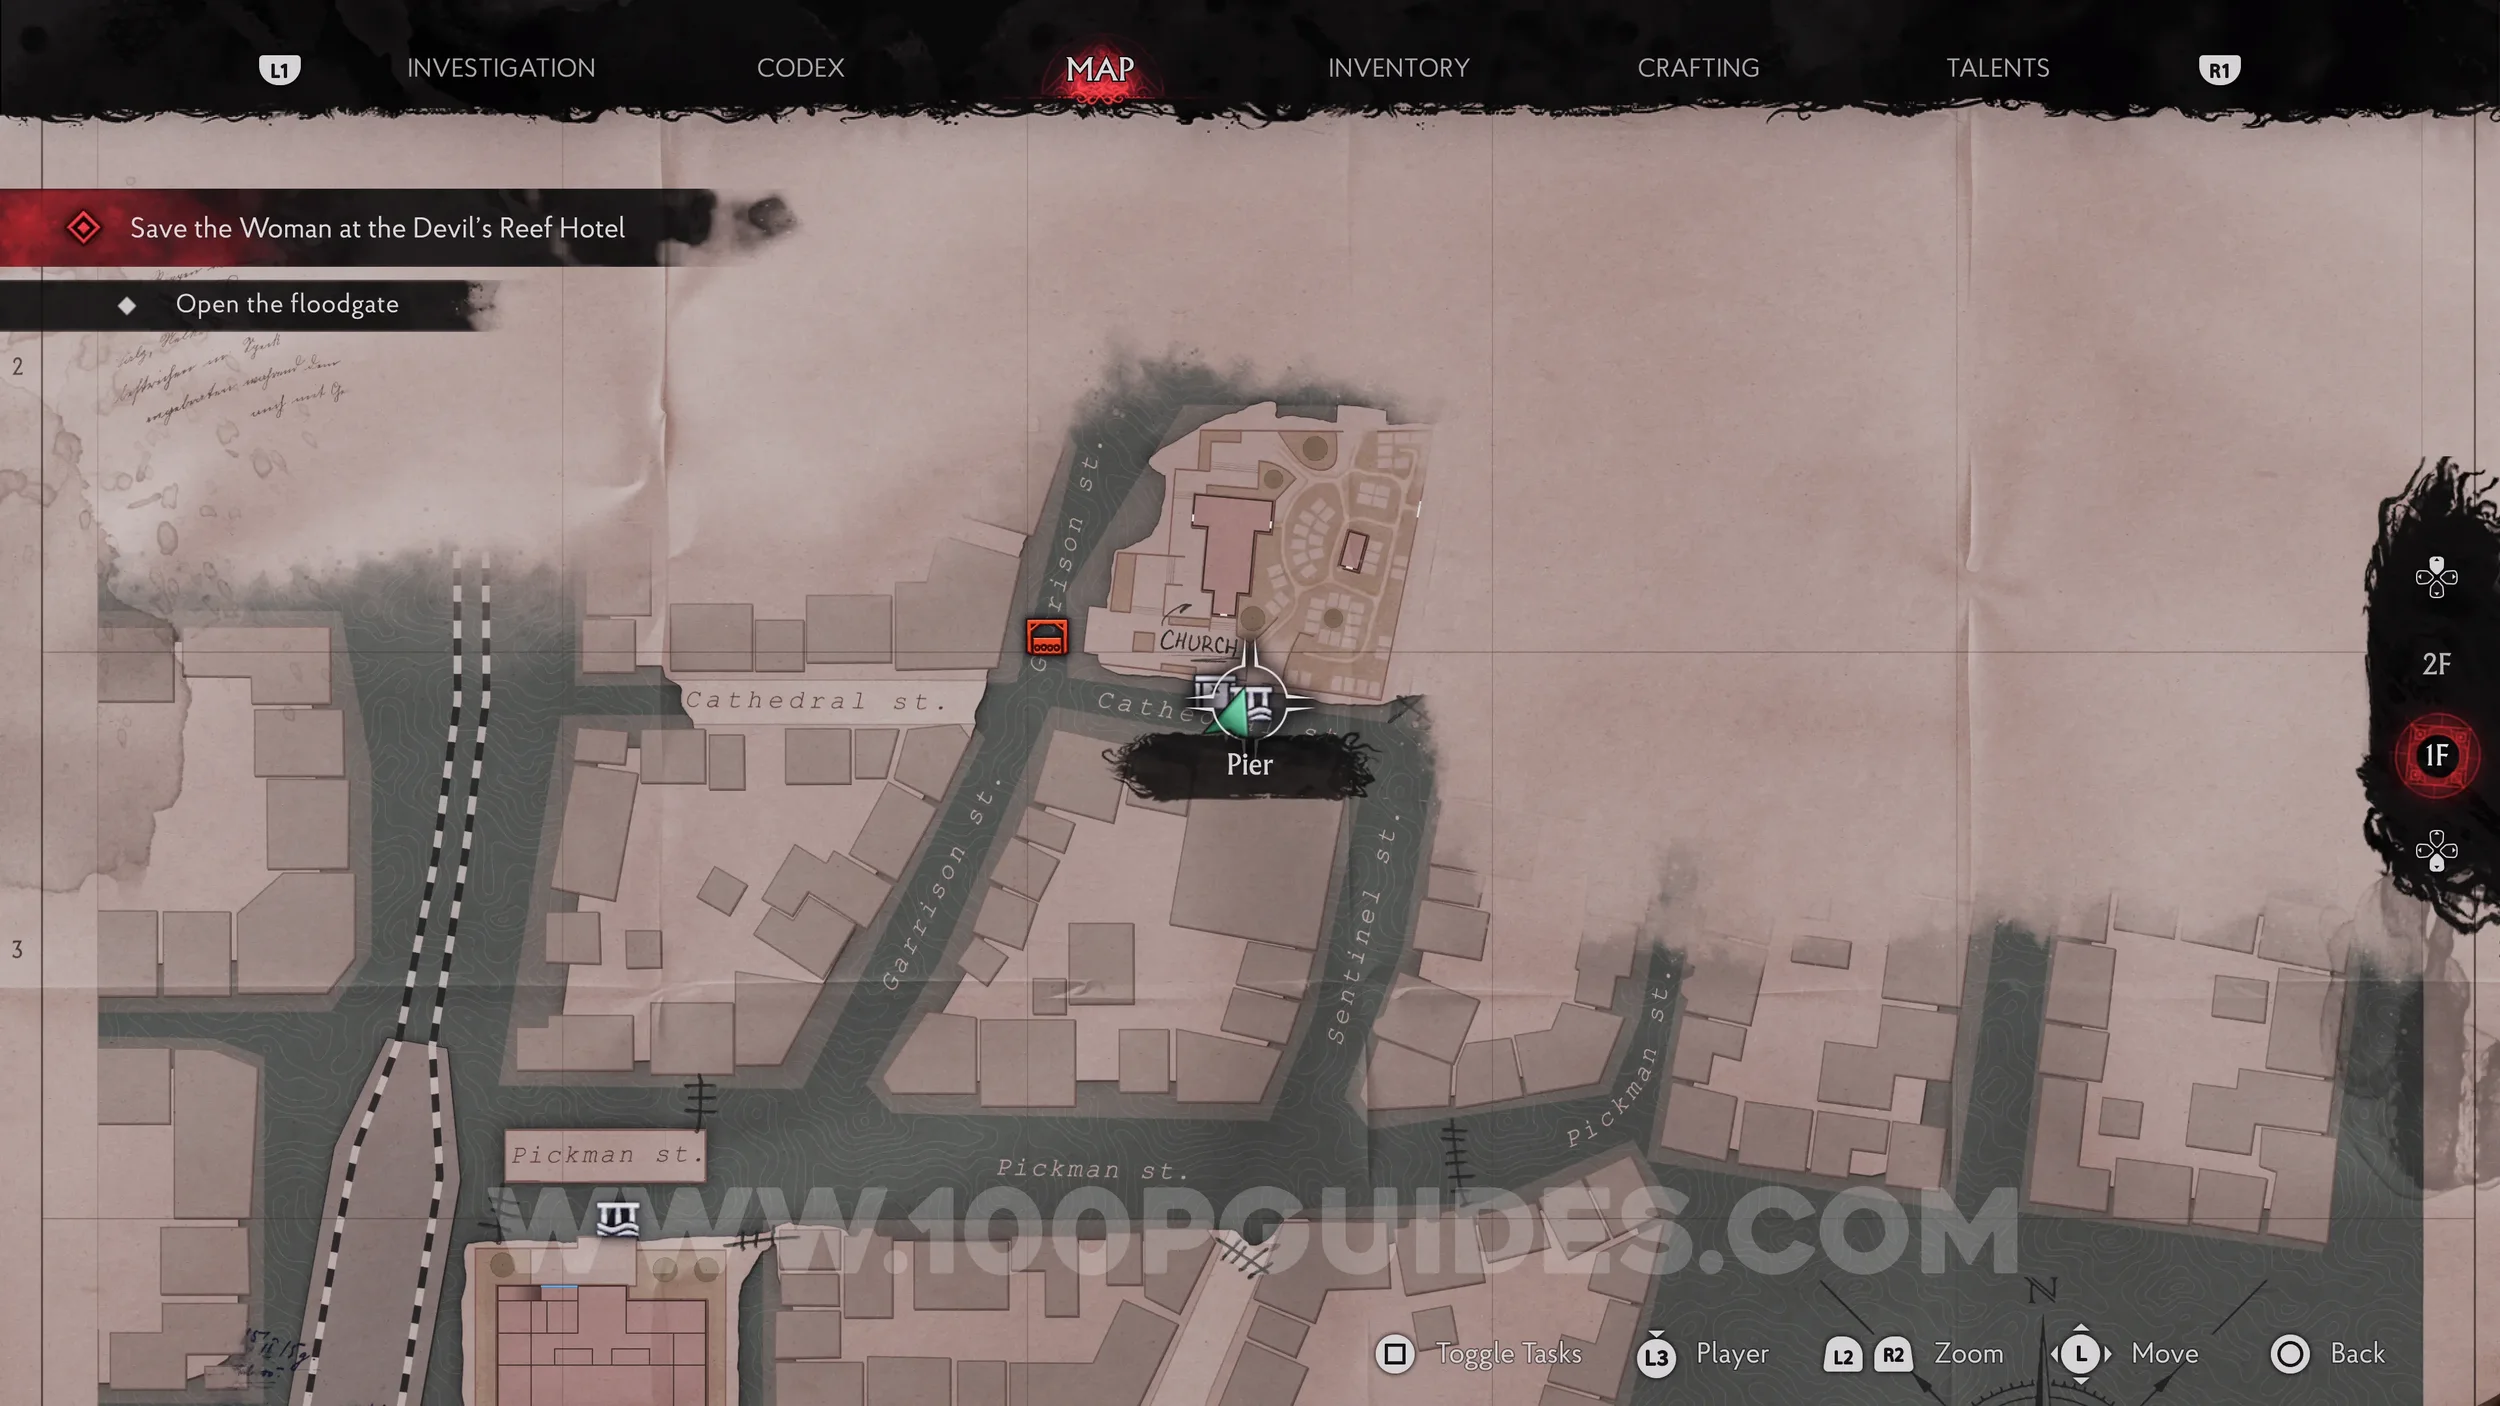
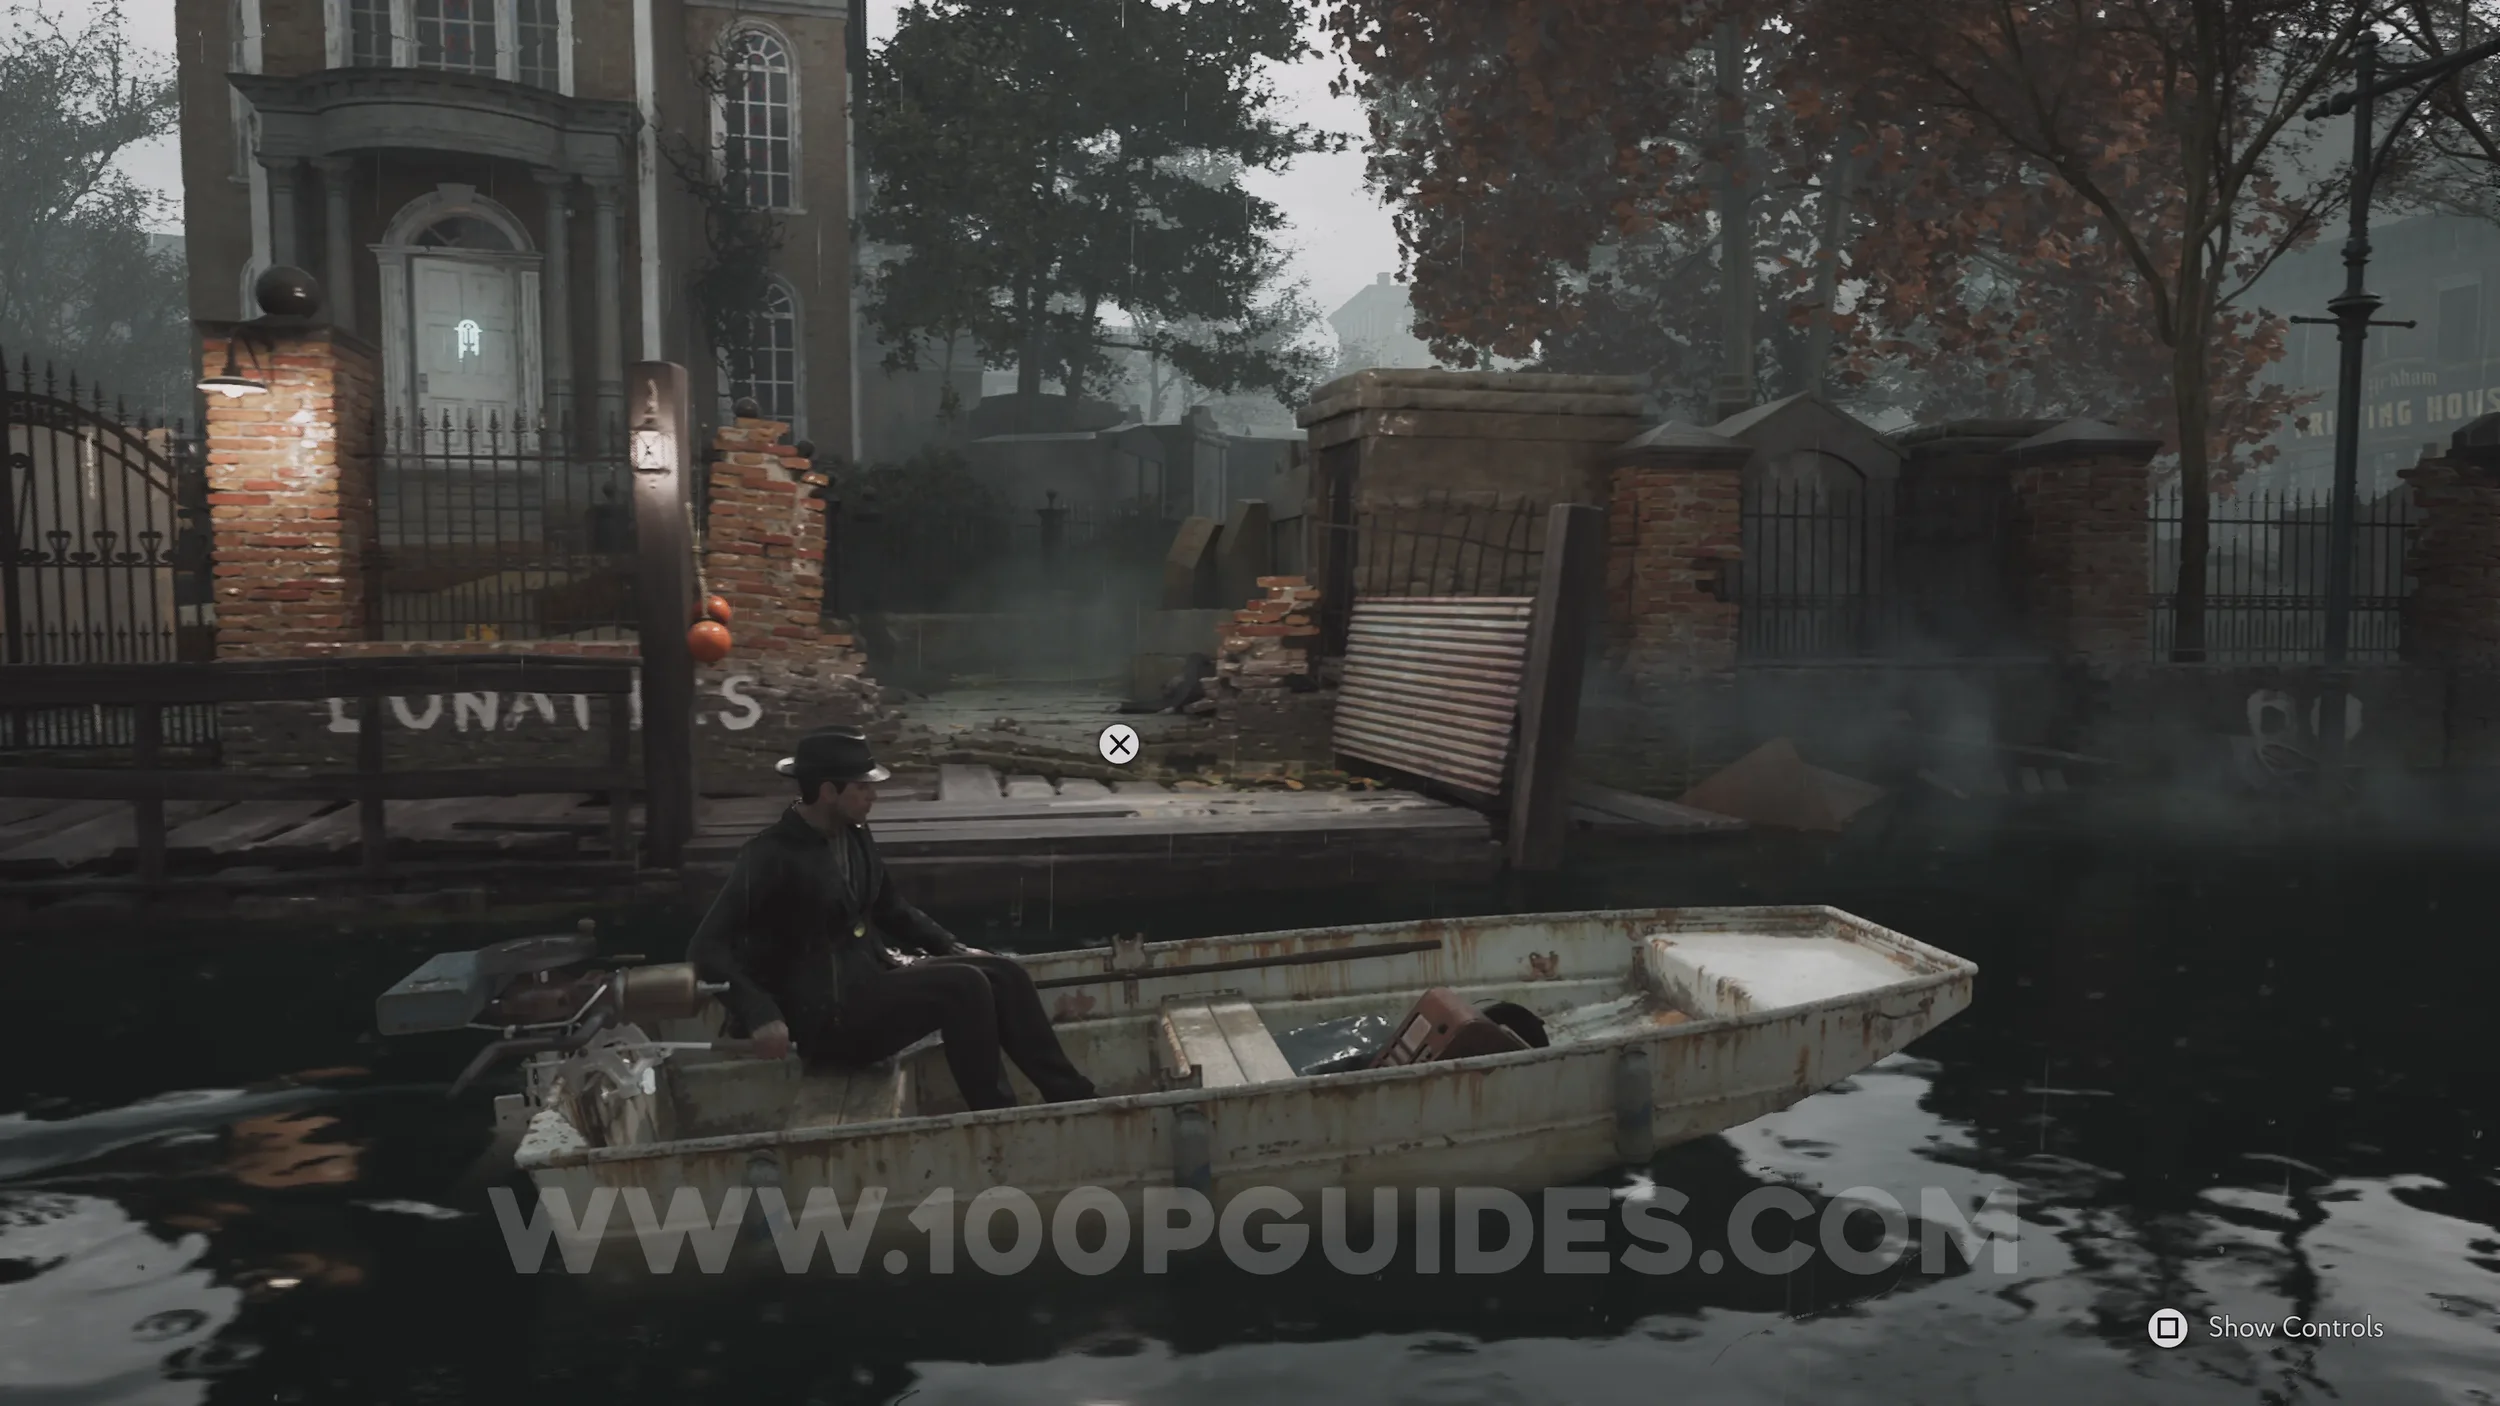
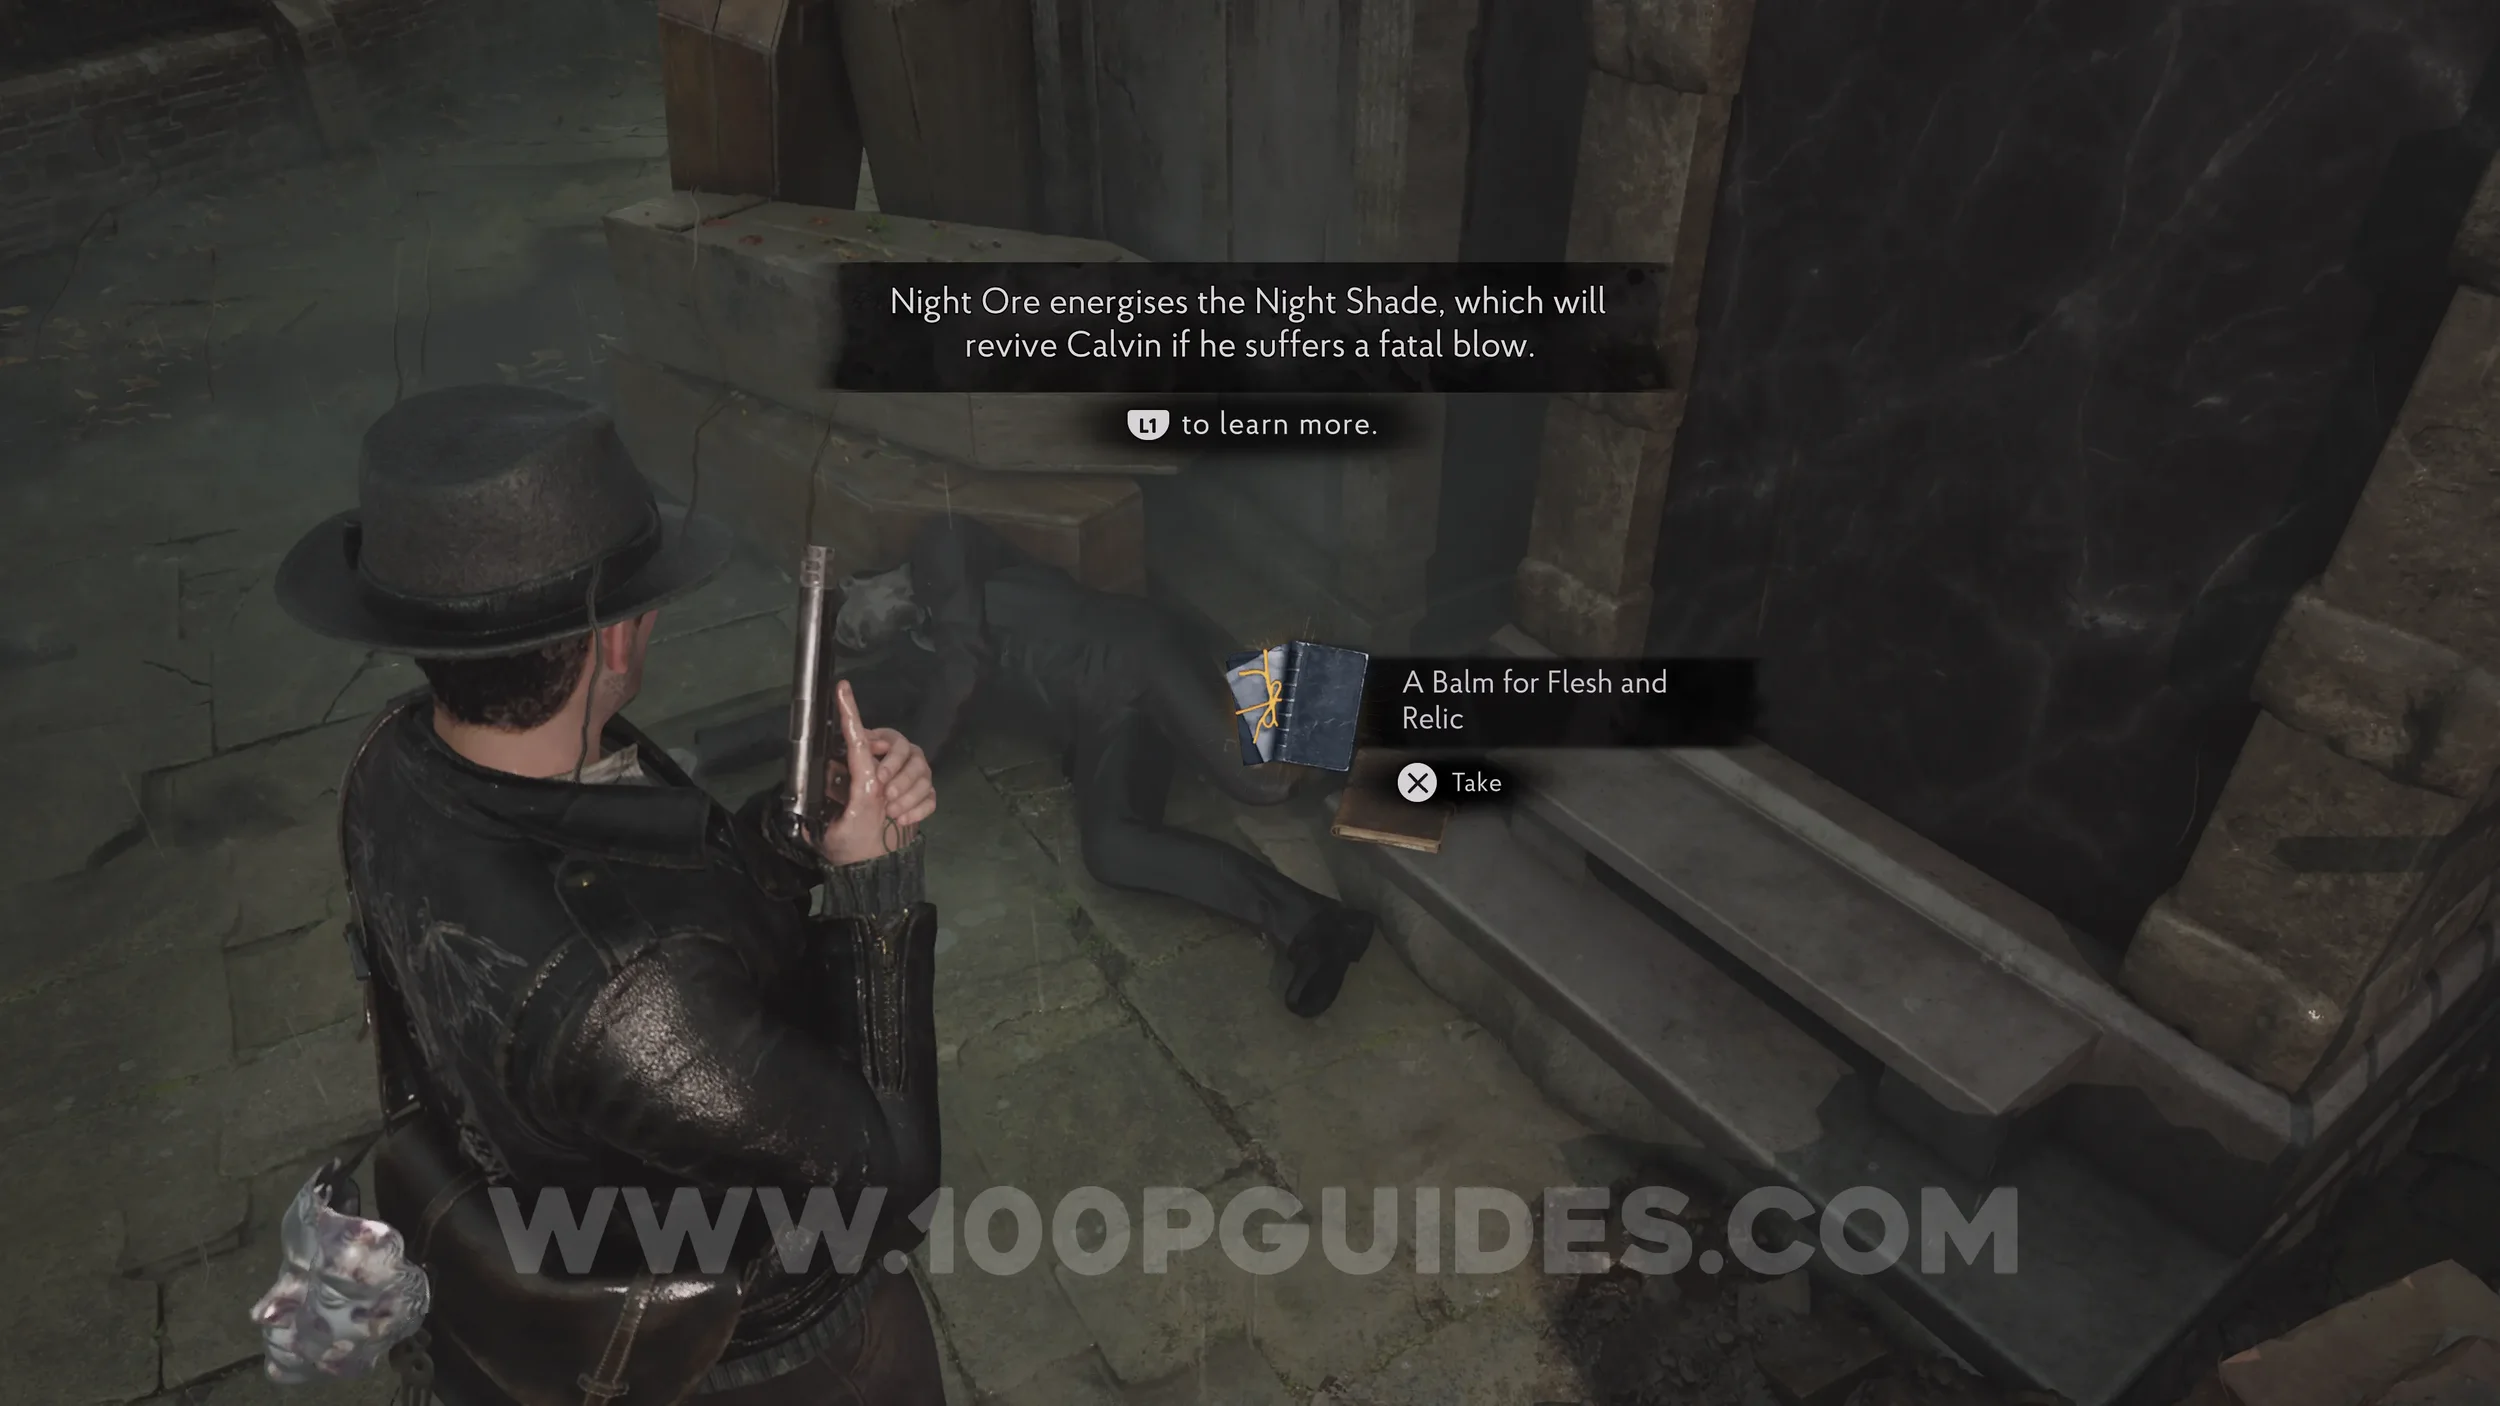
Lore Codex: A Balm for Flesh and Relic. After leaving the library by taking the boat outside Study 1, you'll head to the Church to the northeast (the next story stop anyway). As soon as you dock and step off the boat, you'll see a corpse on the floor to the right of the path. Pick up the Night Ore from it, then the lore codex.
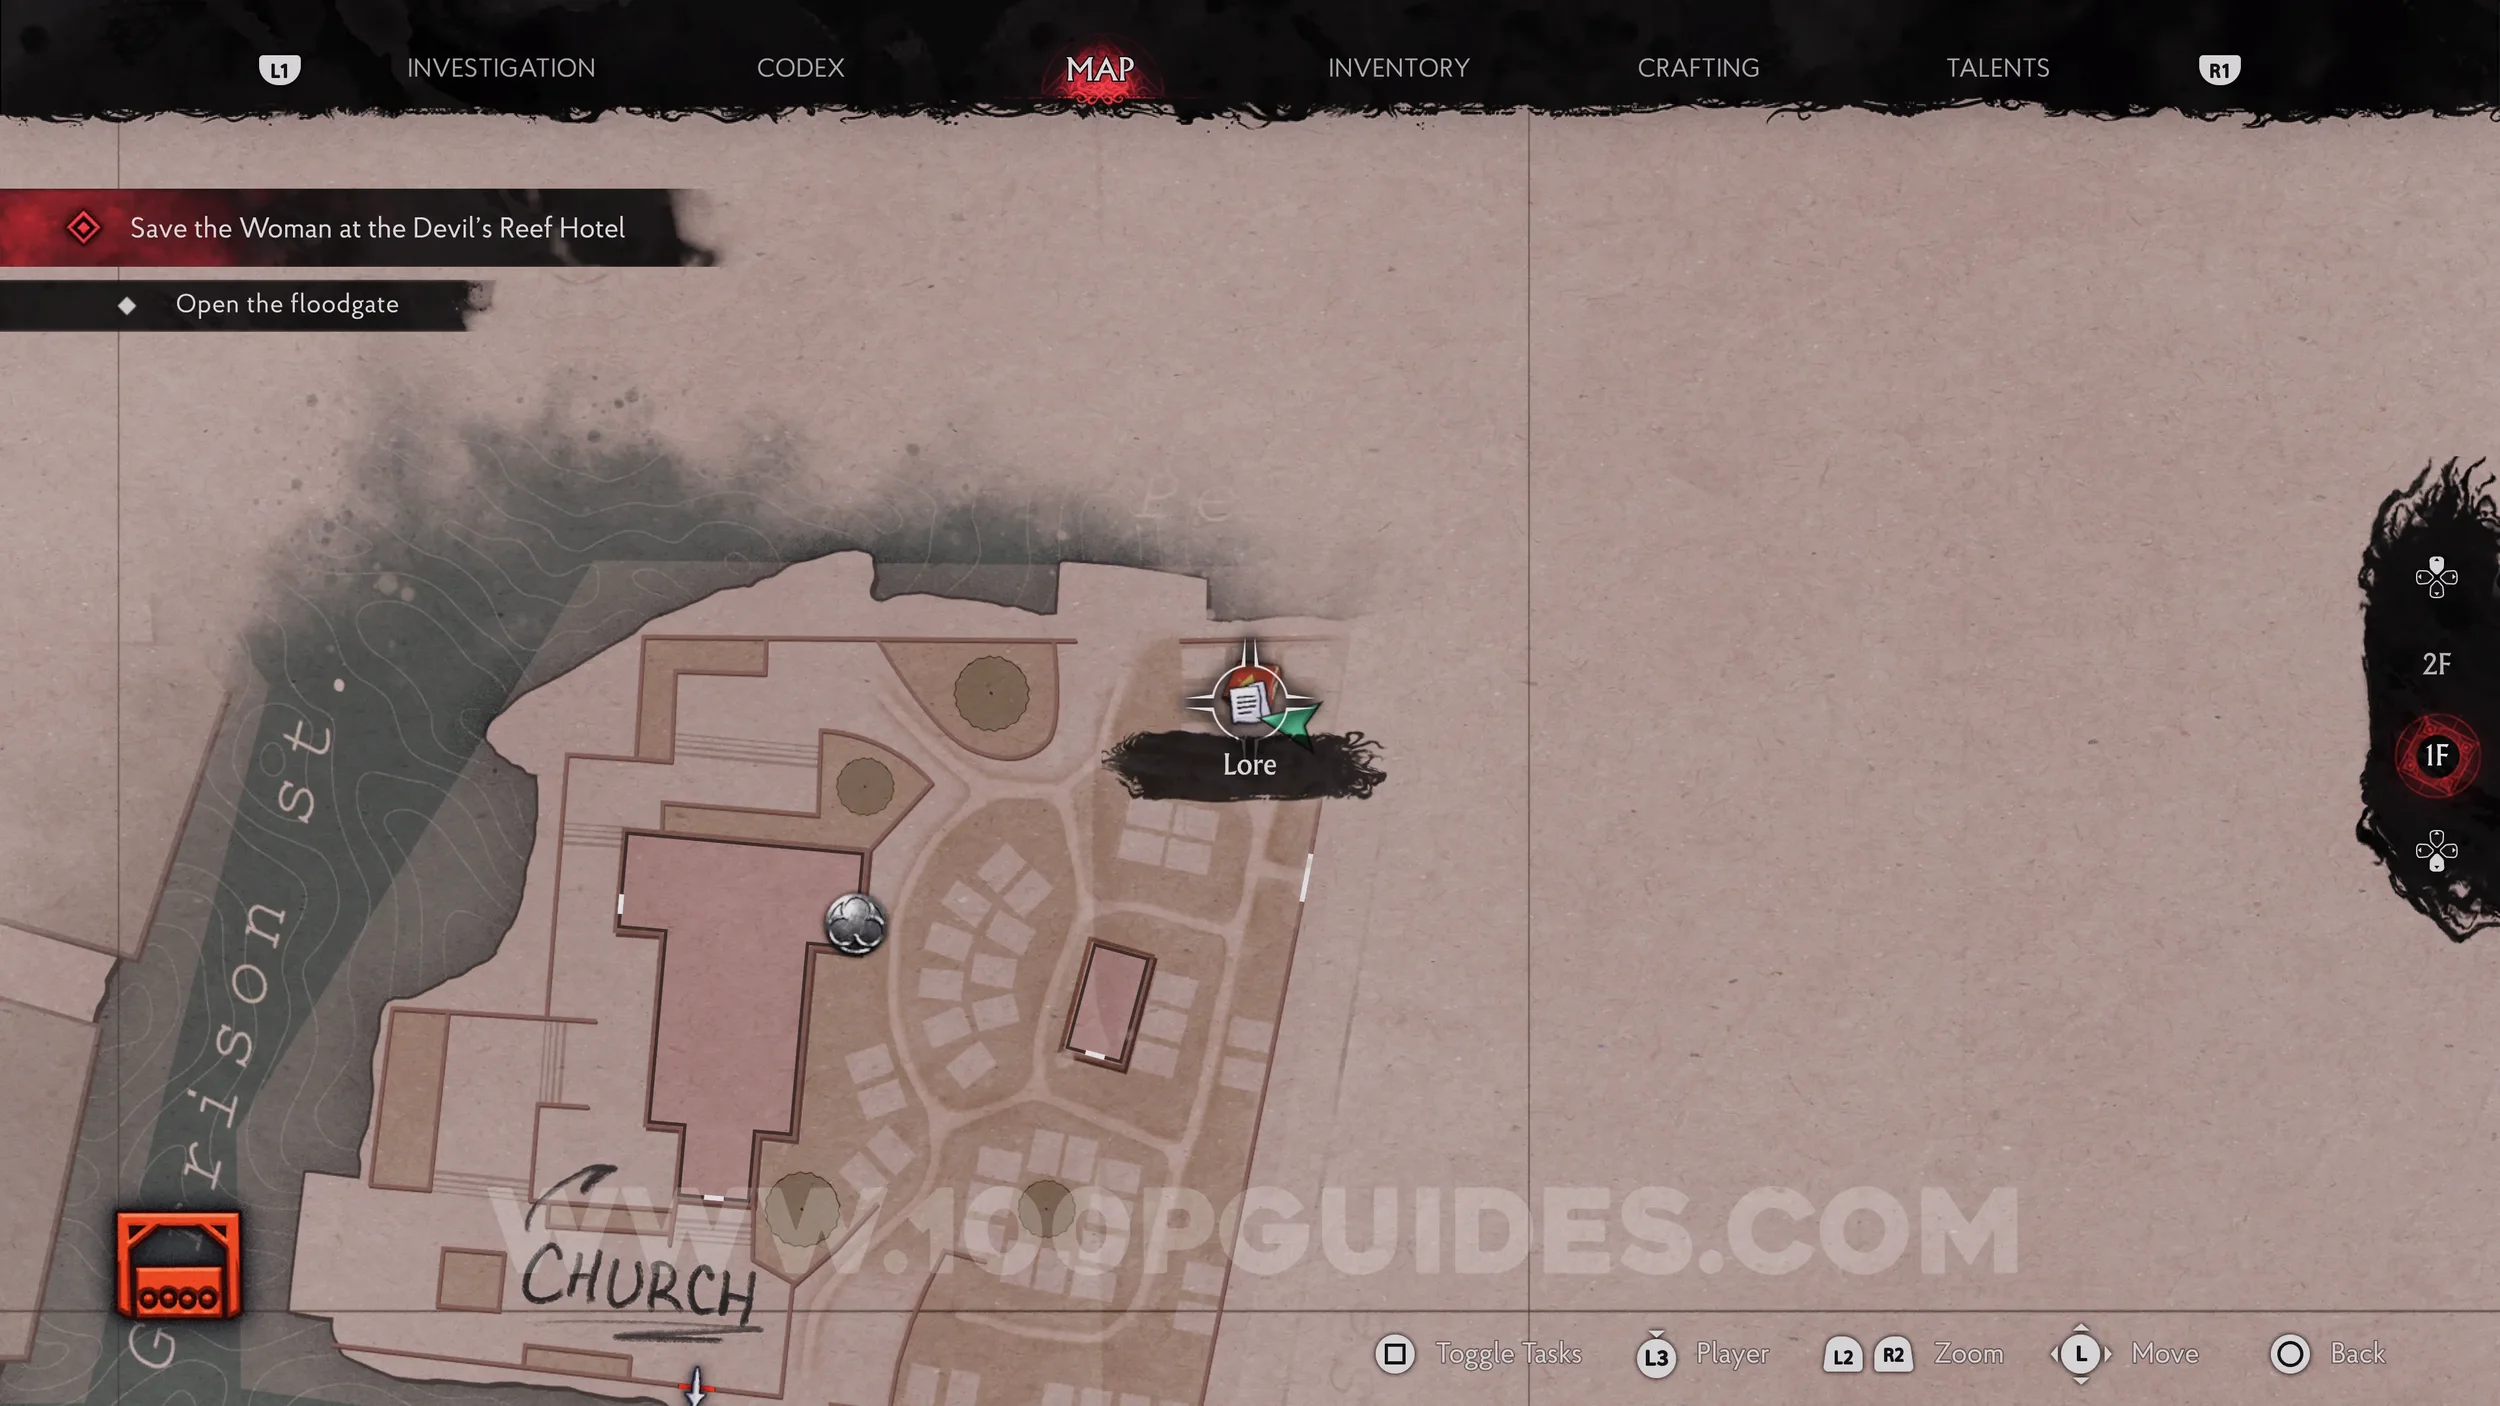
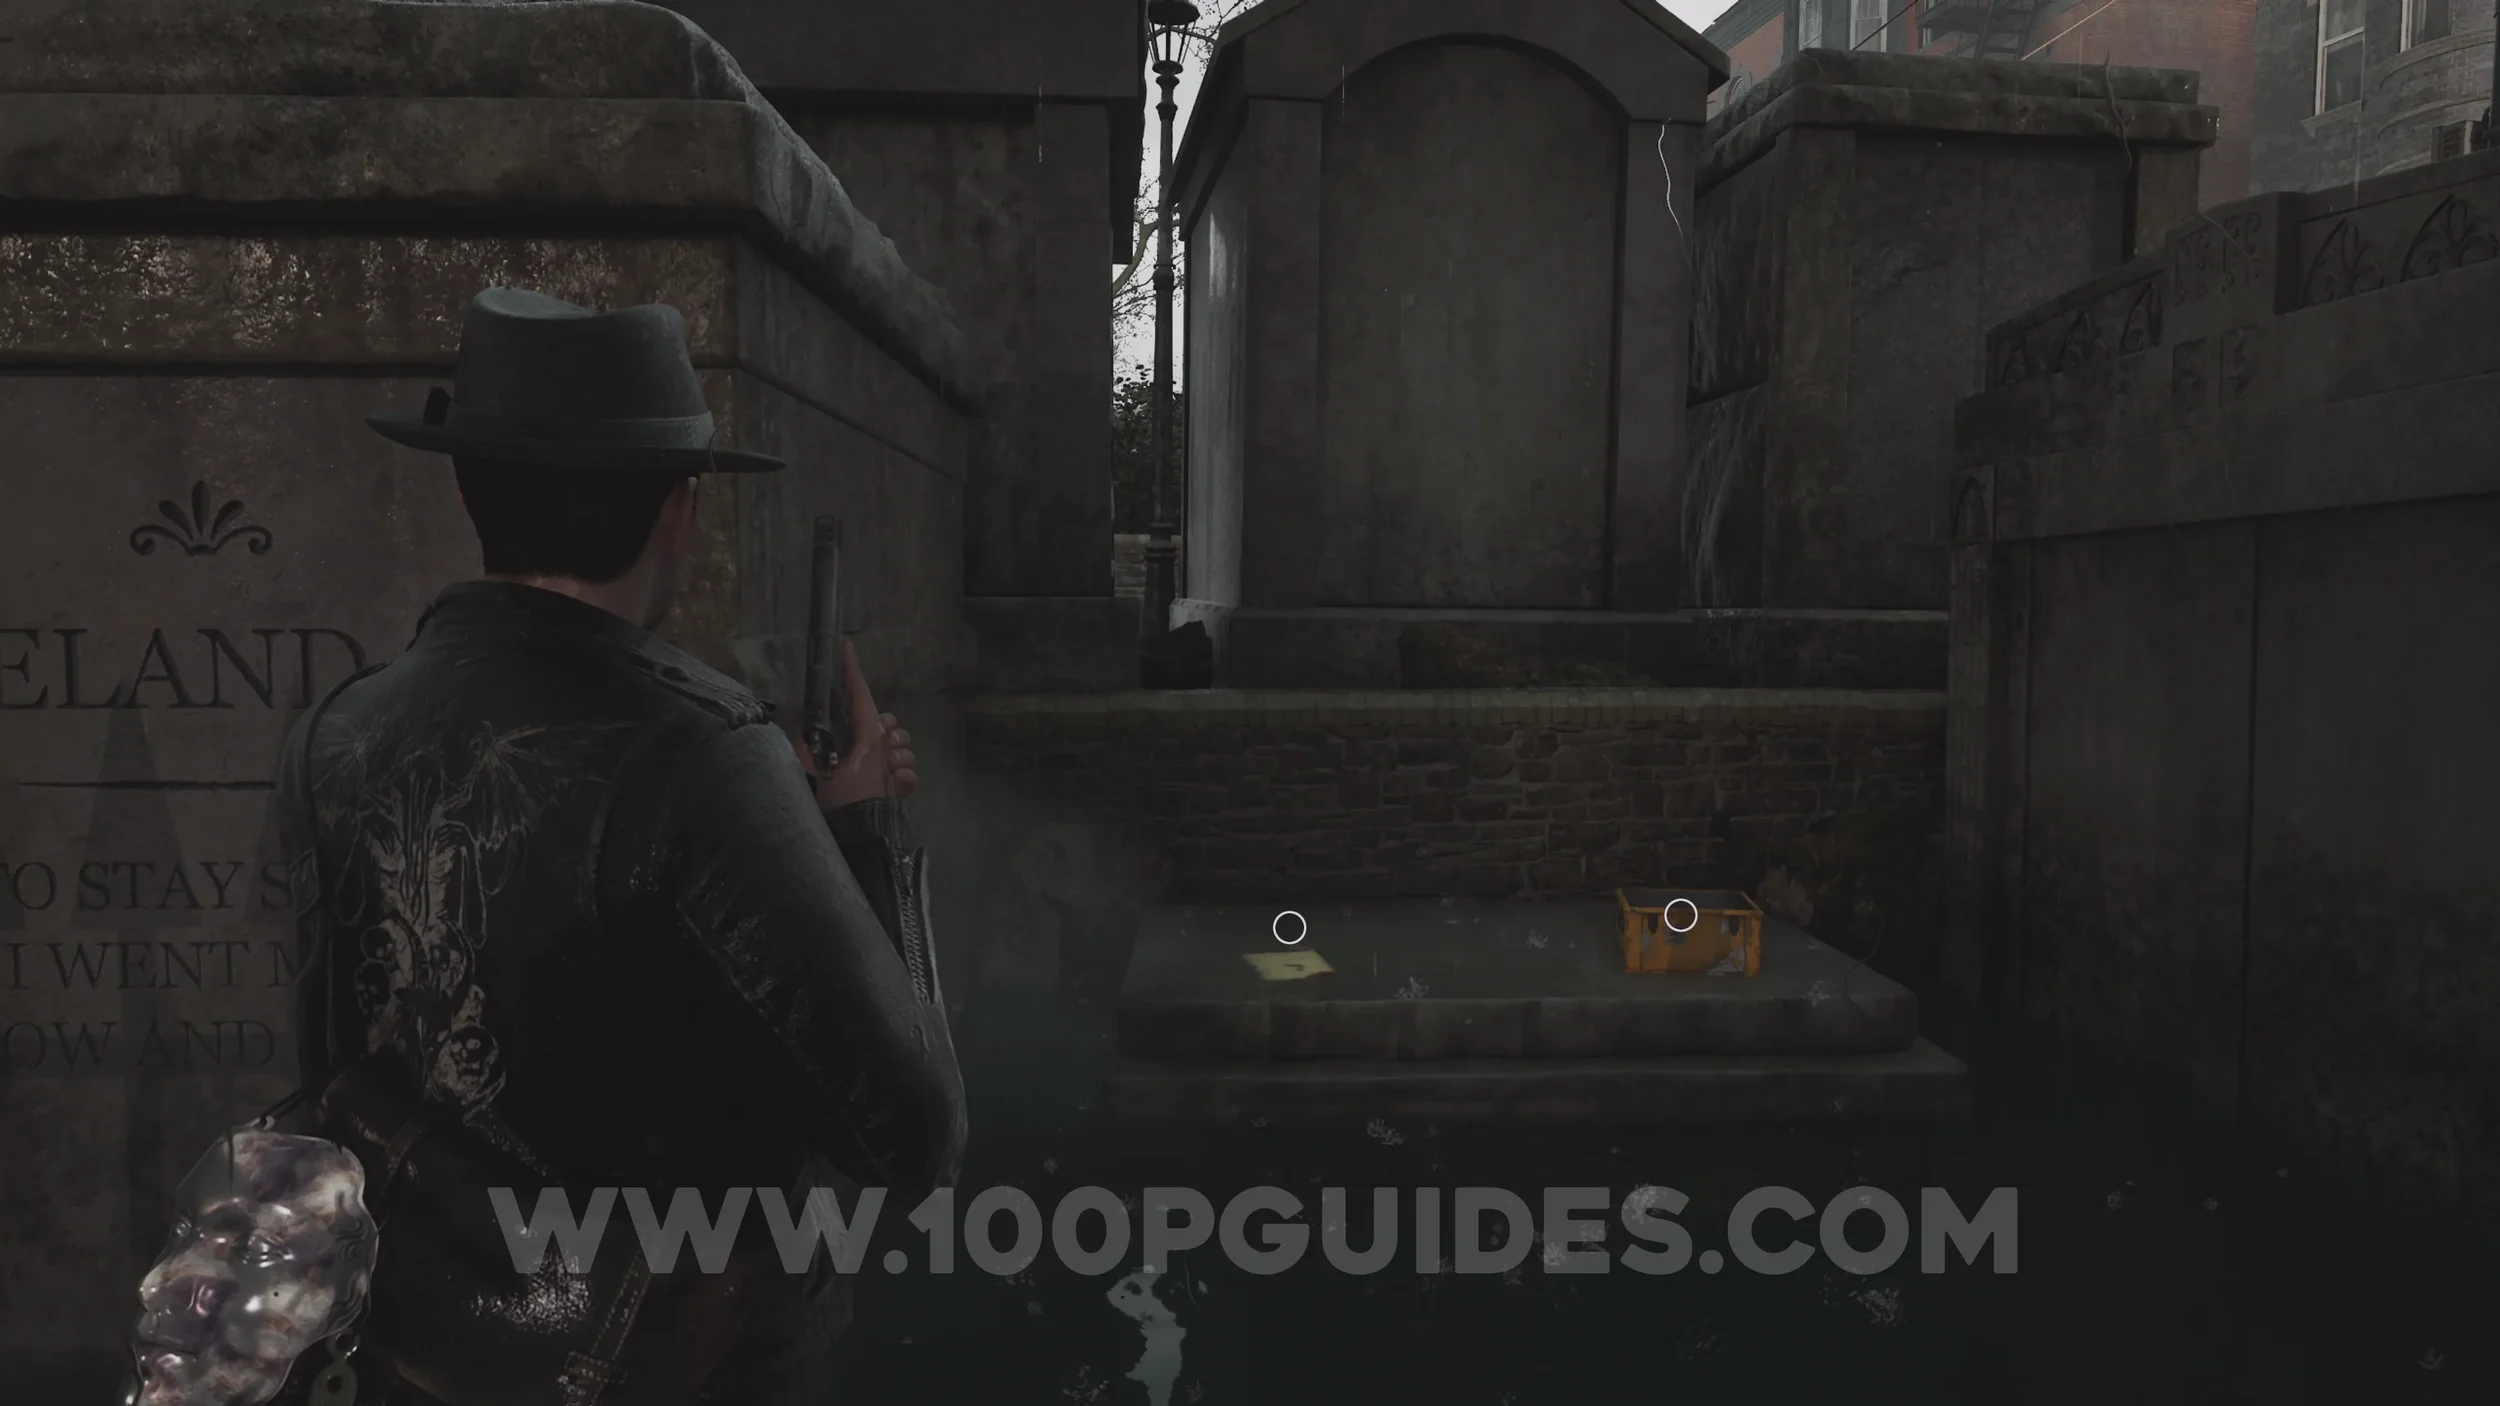
Lore Codex: Stained Note. On a grave at the northern point of the graveyard outside the church.
Key Item: Church Key. At the base of the statue with red flowers in the southeastern corner of the church's graveyard.
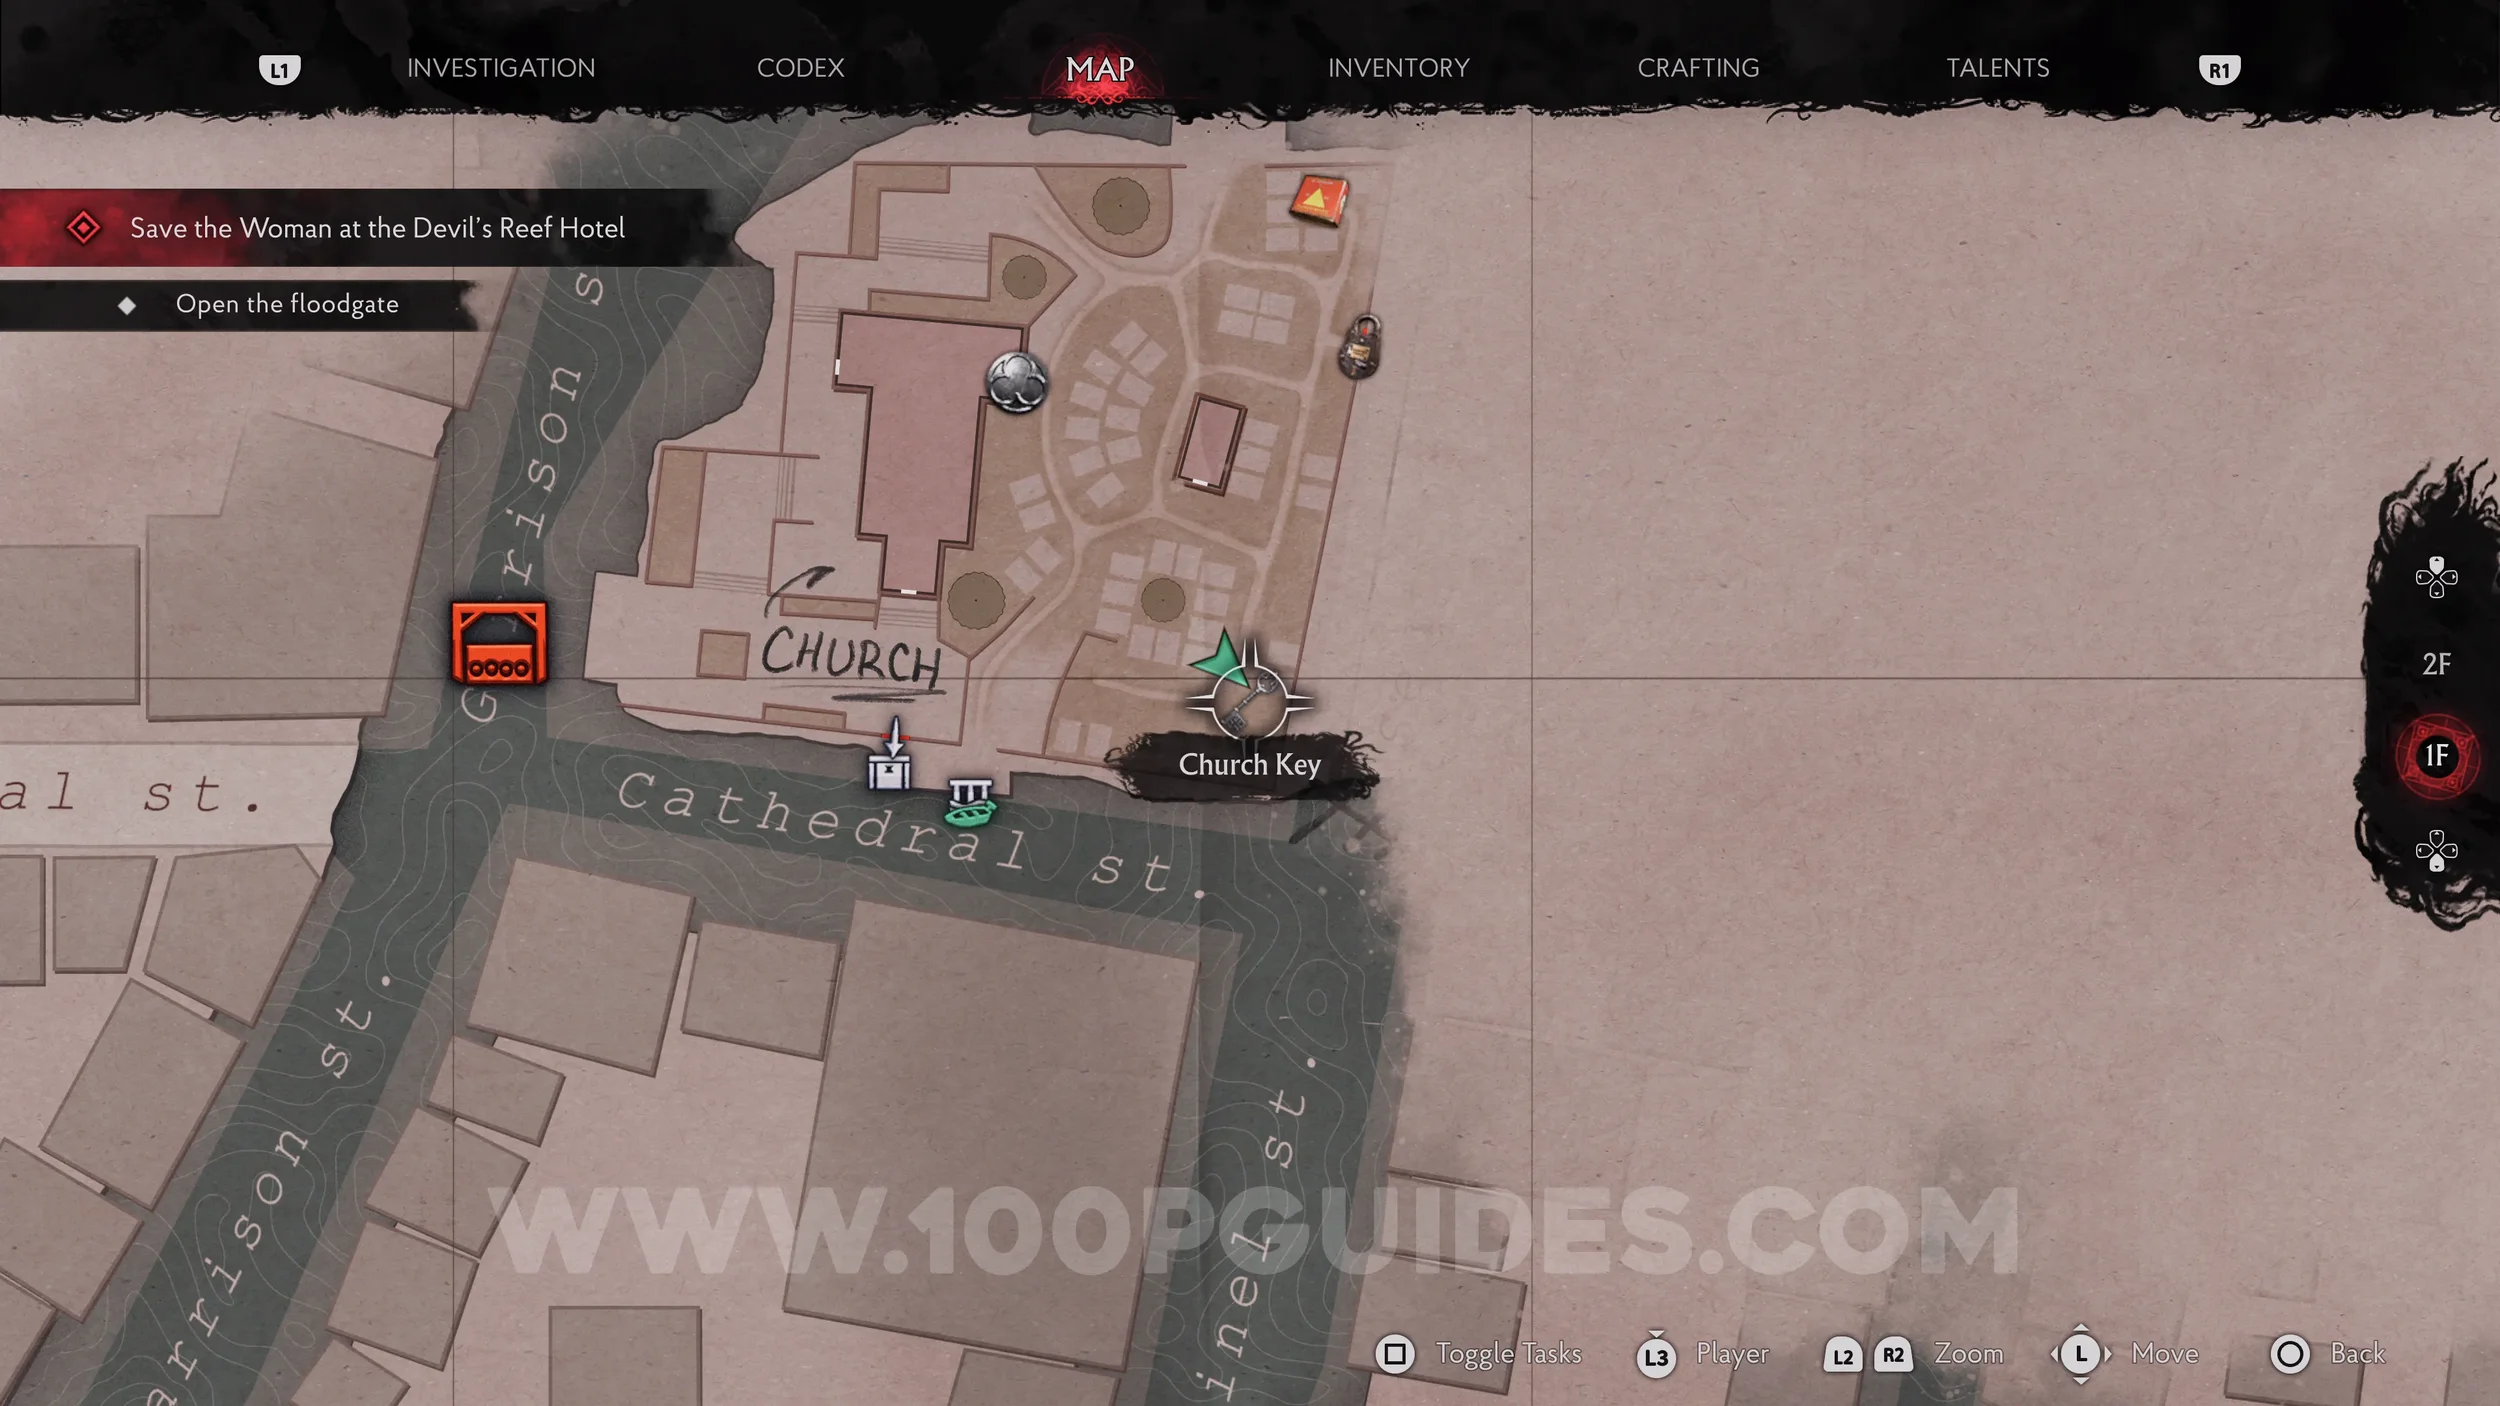
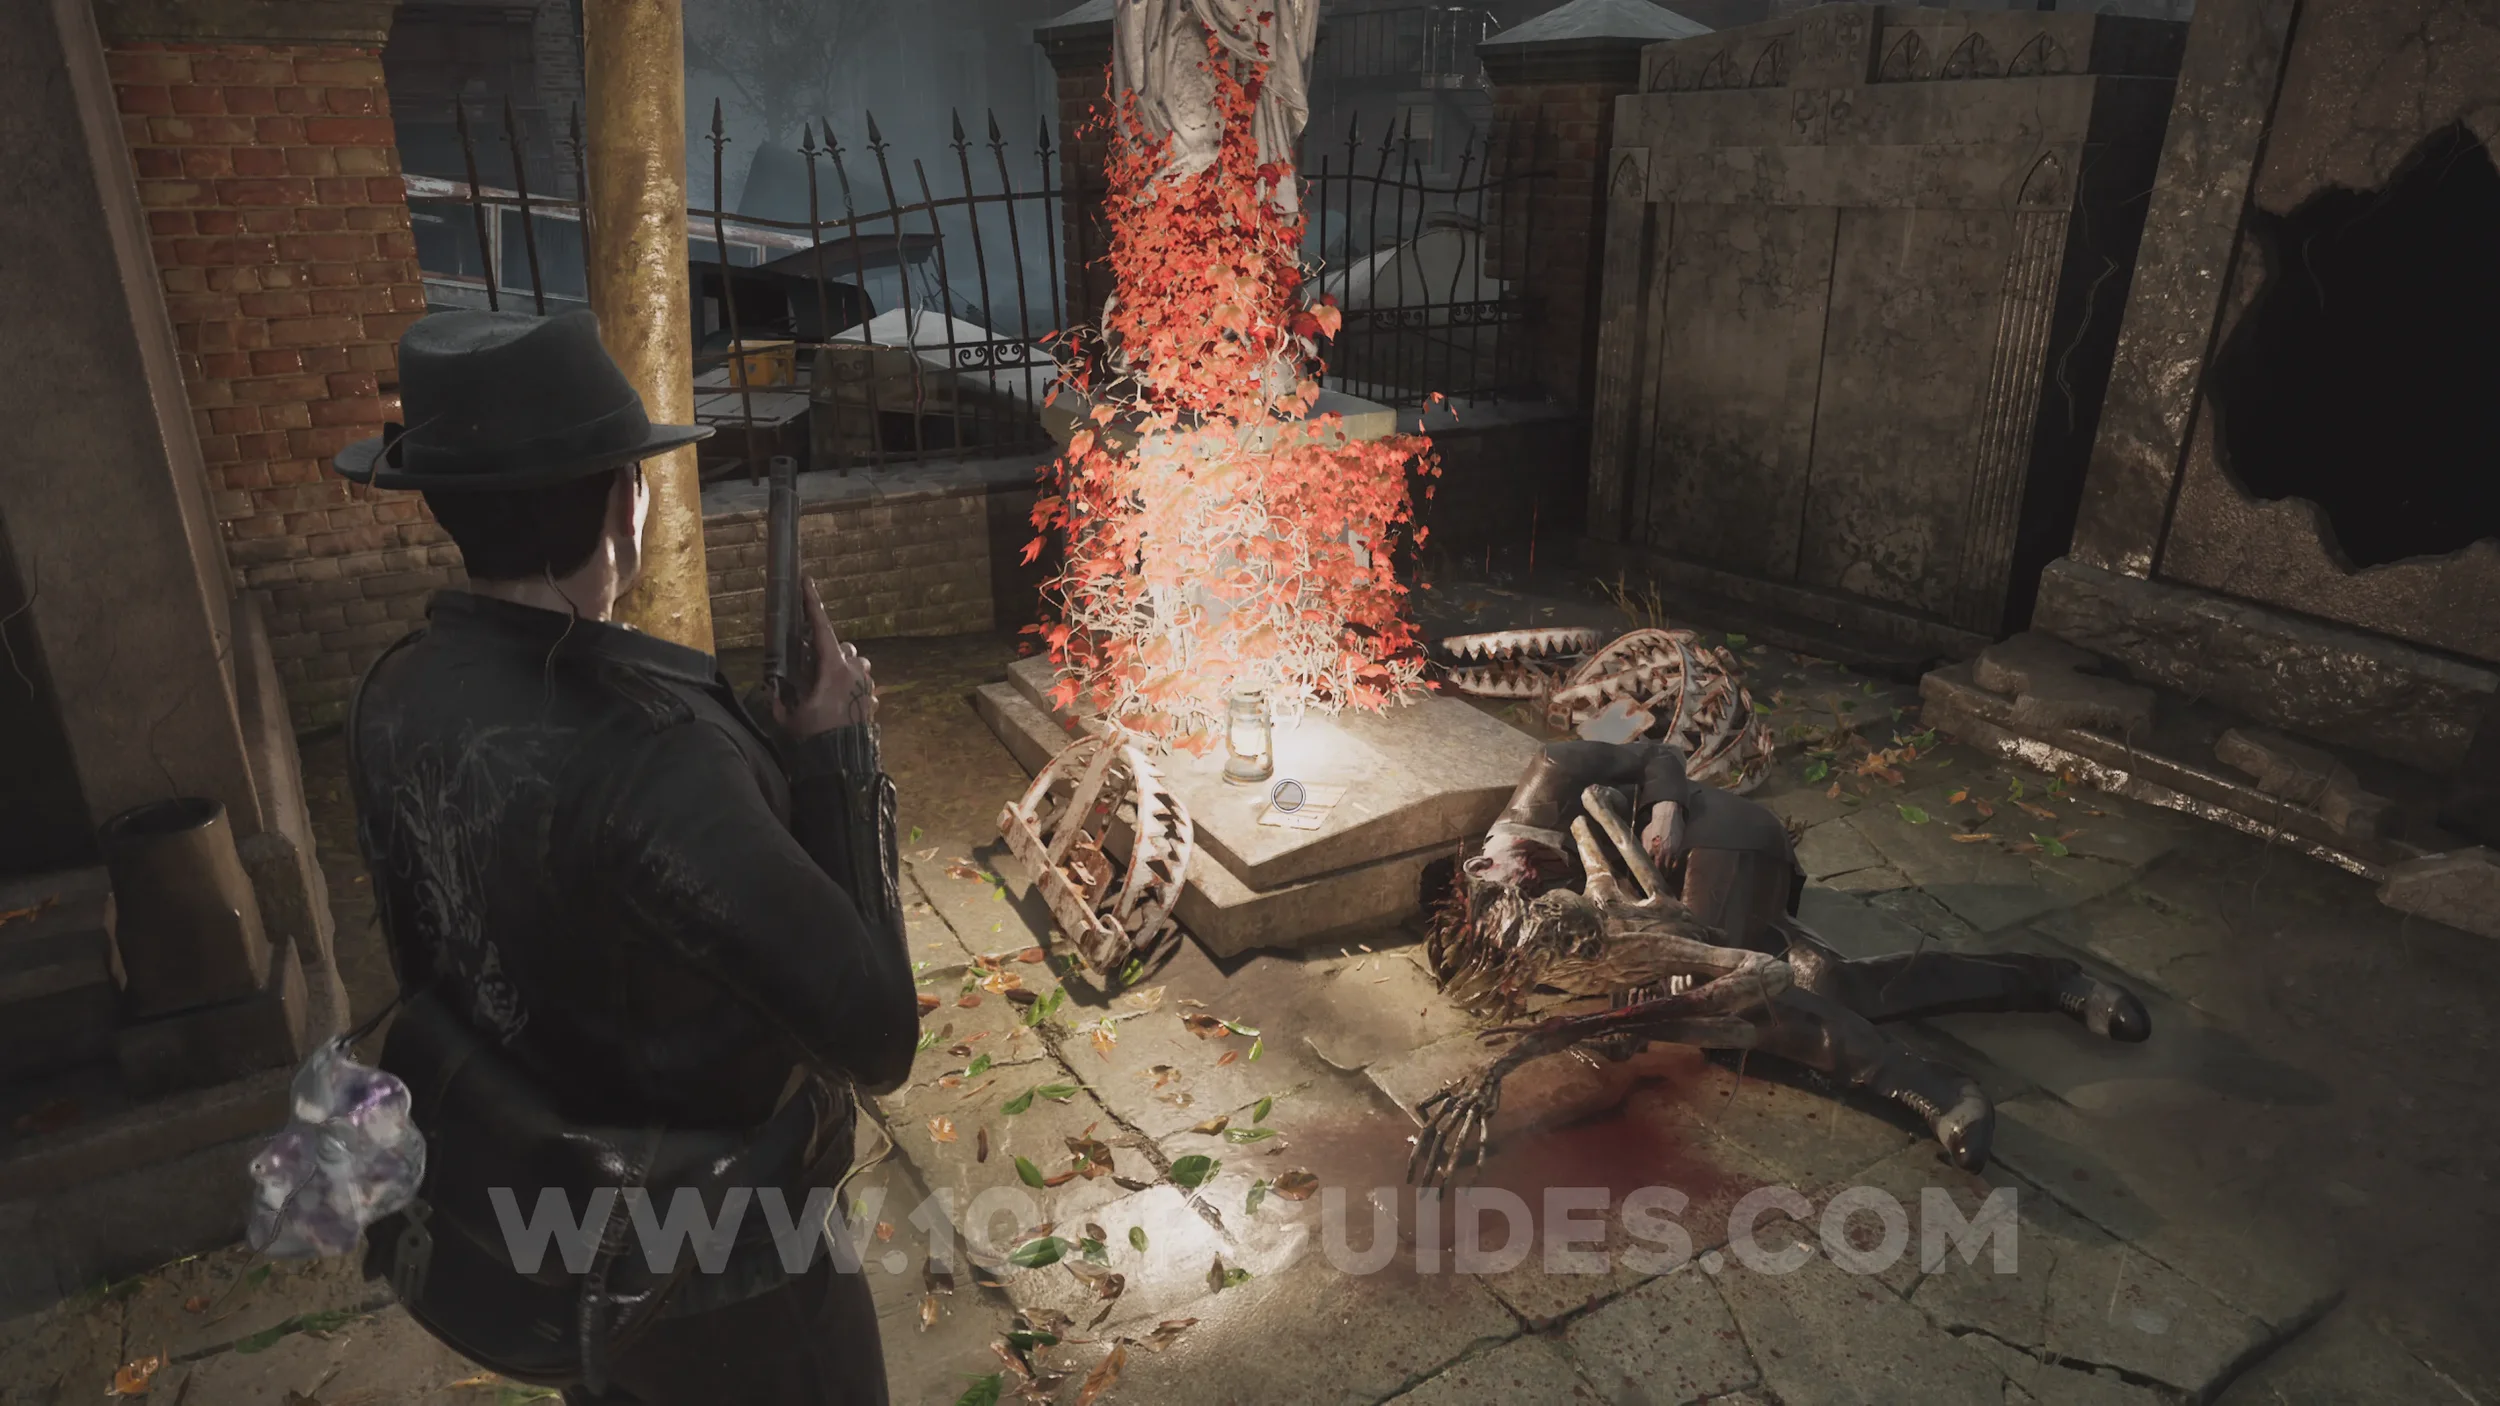
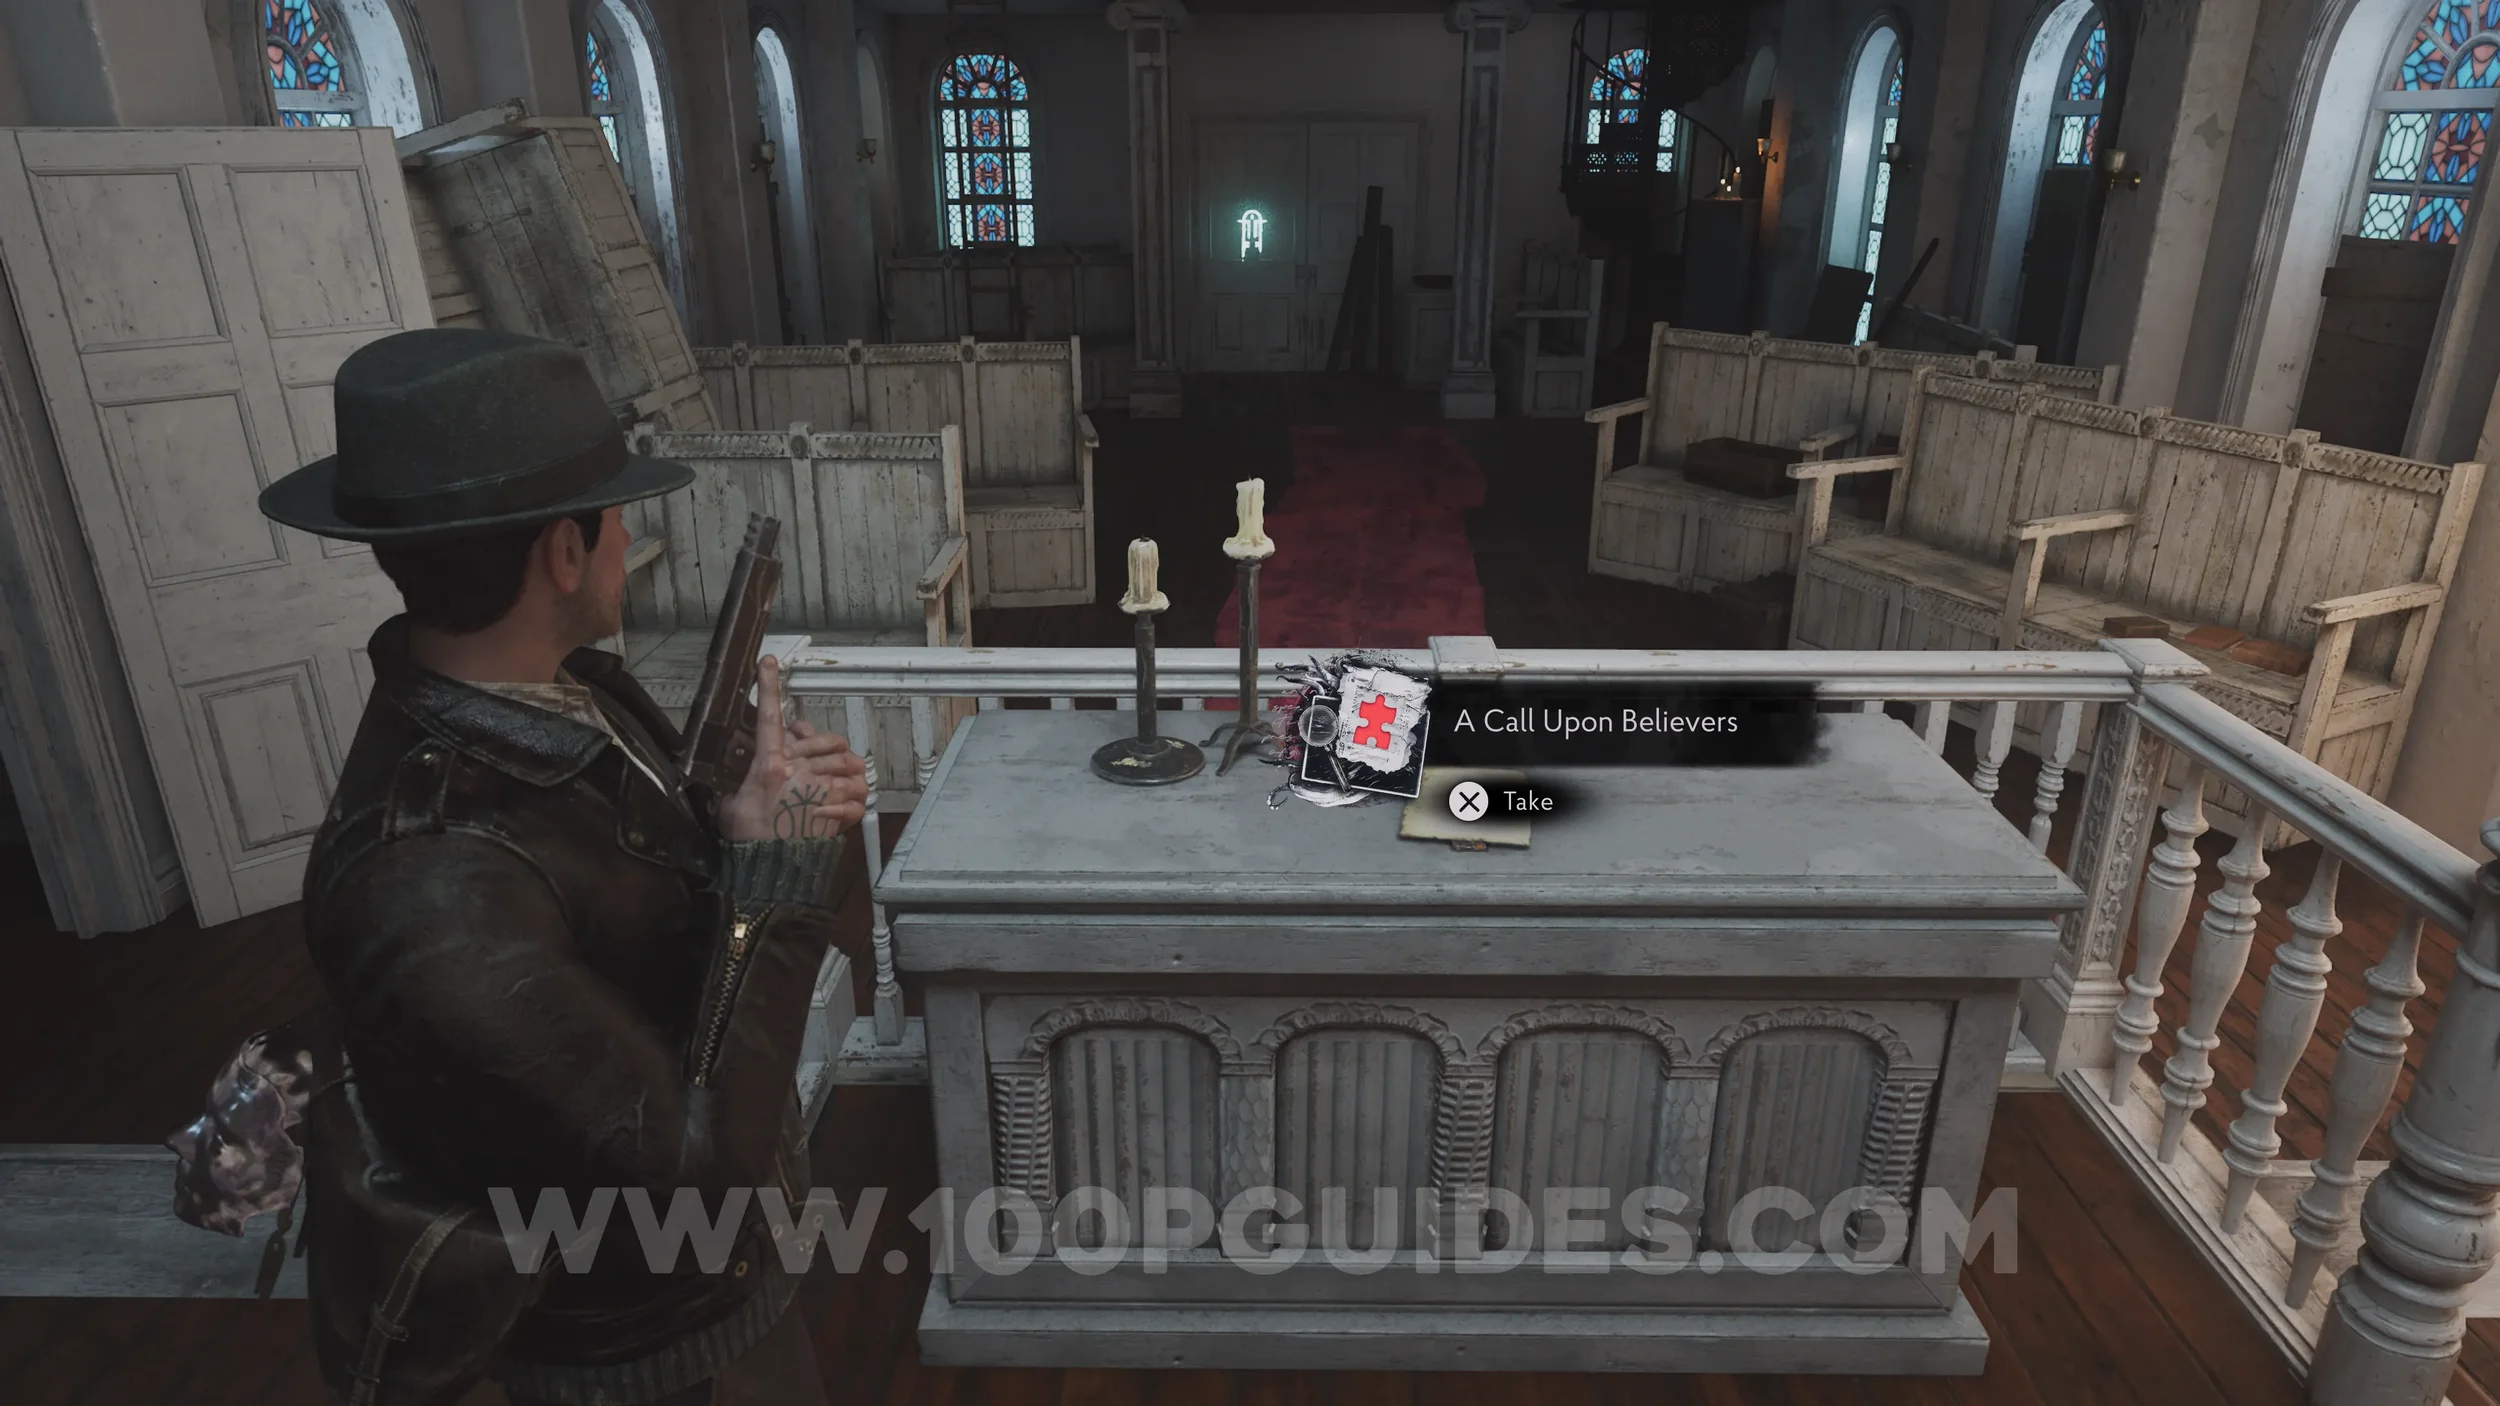
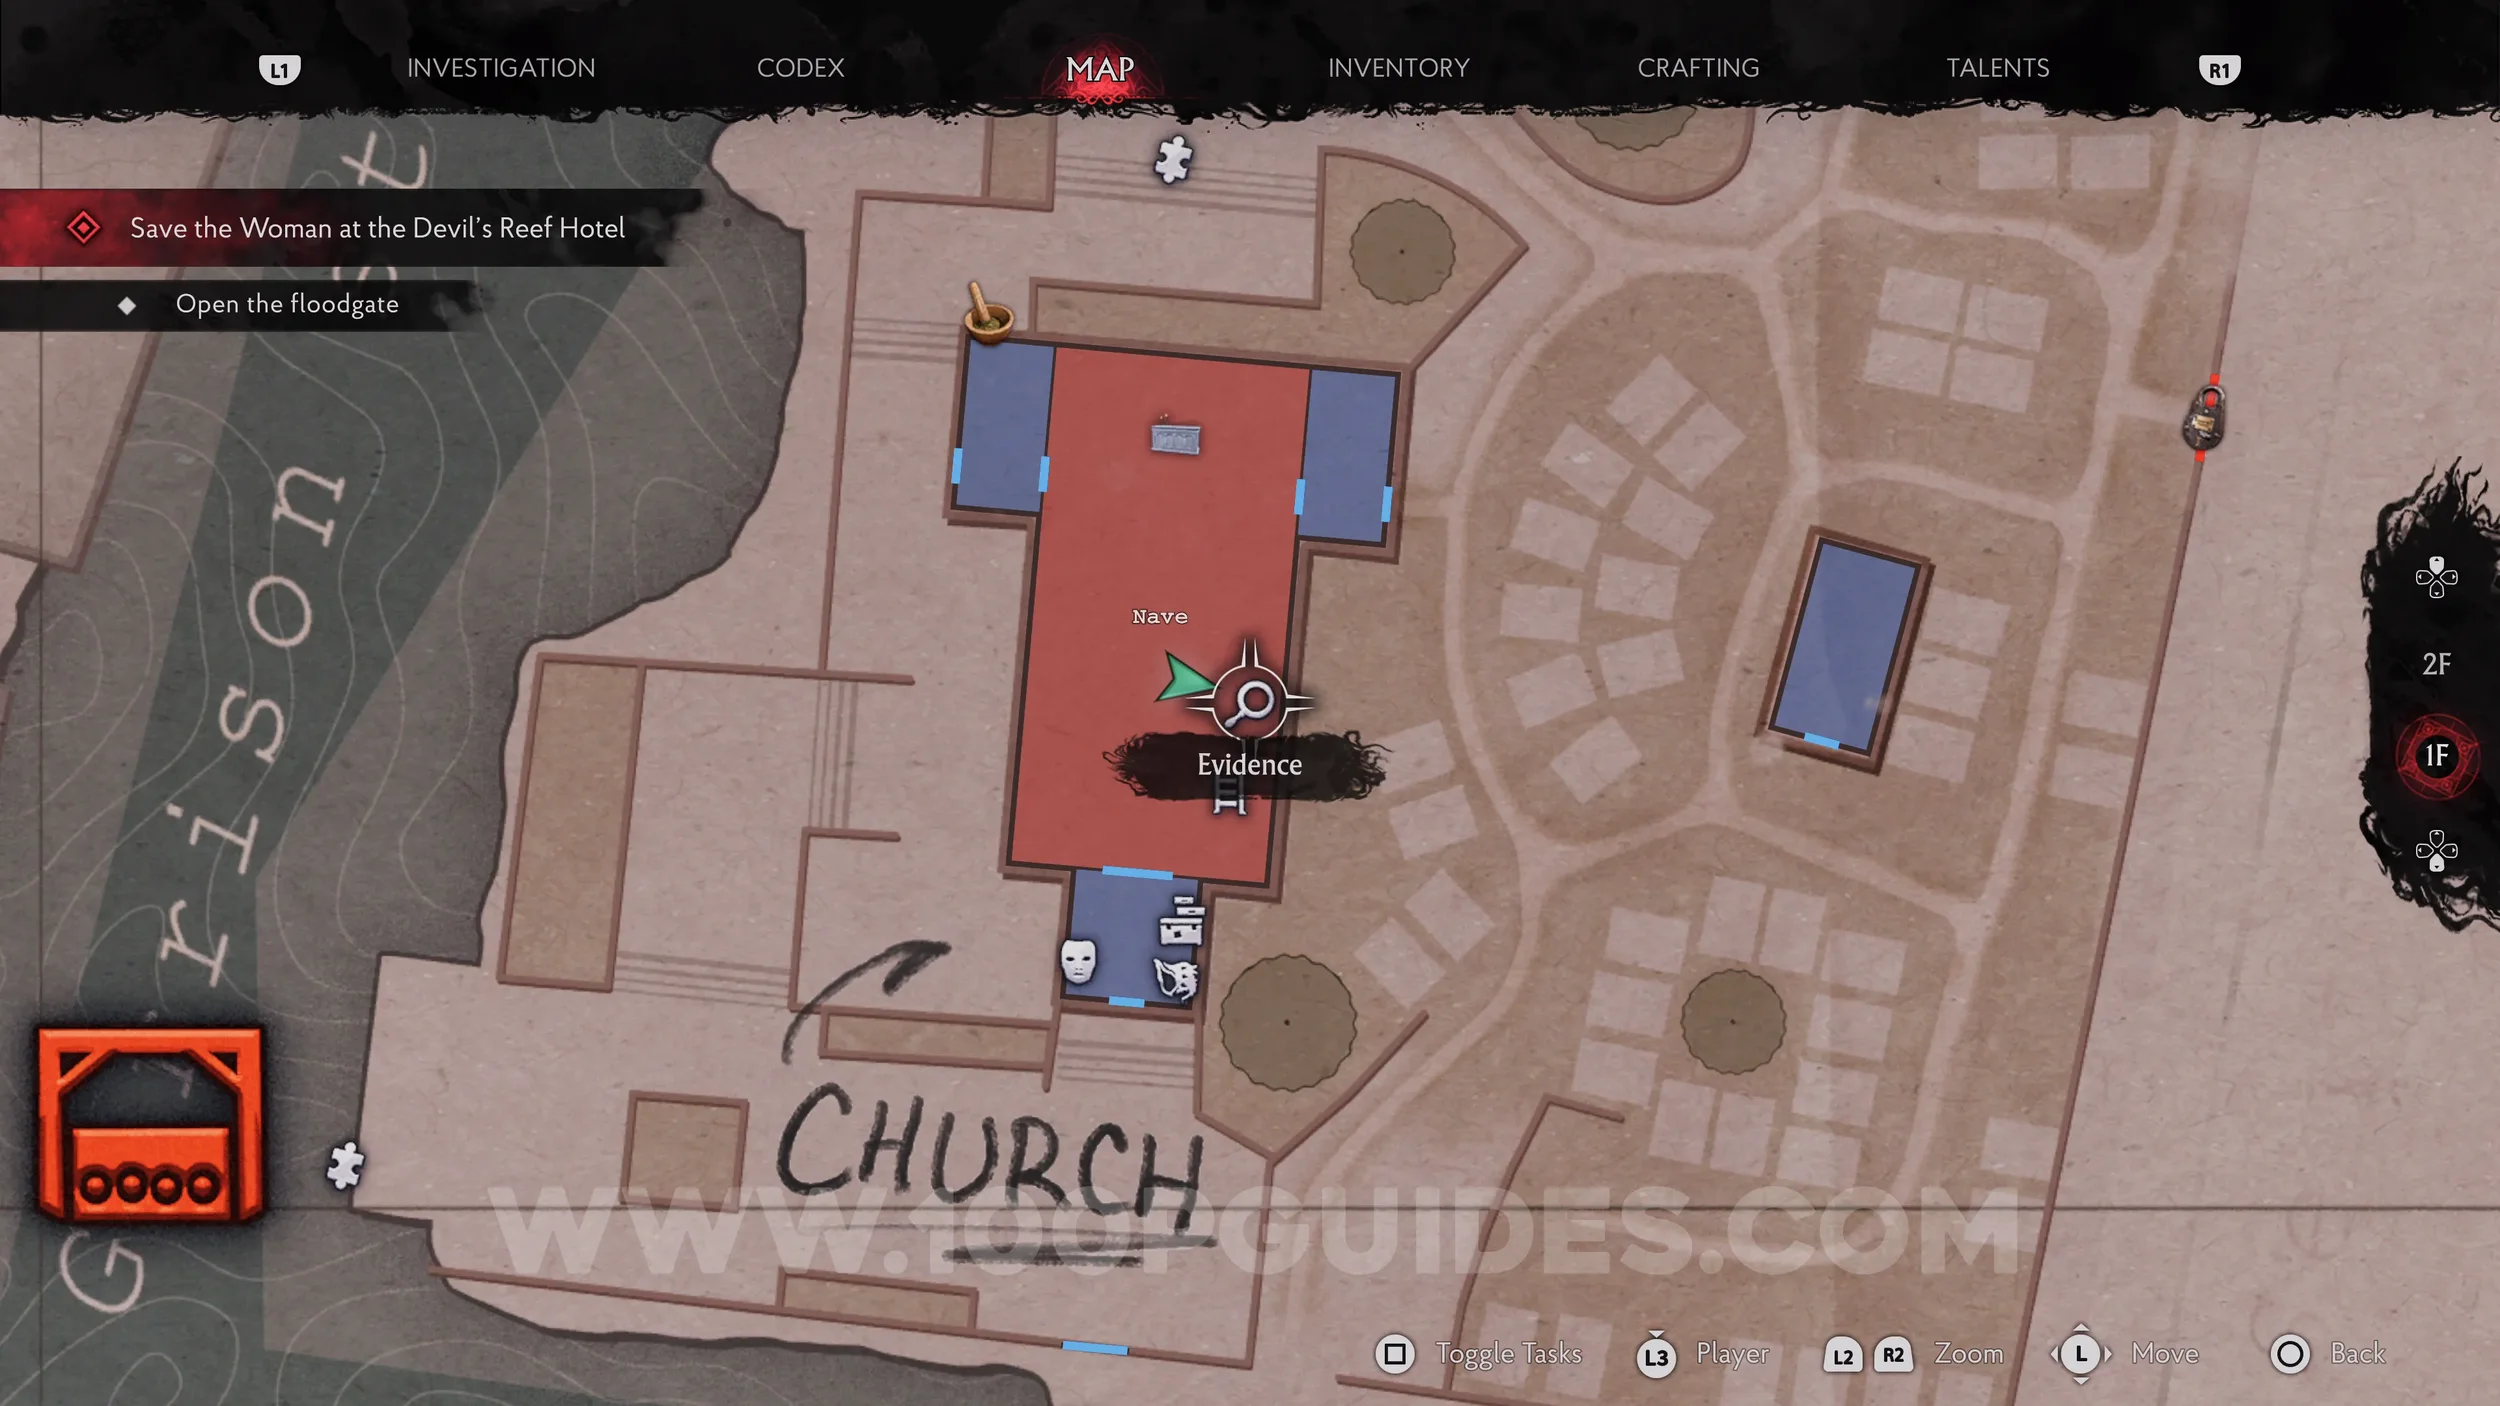
Evidence: A Call Upon Believers. Found on the altar inside the church after you use the key to enter through the white door on the eastern side.
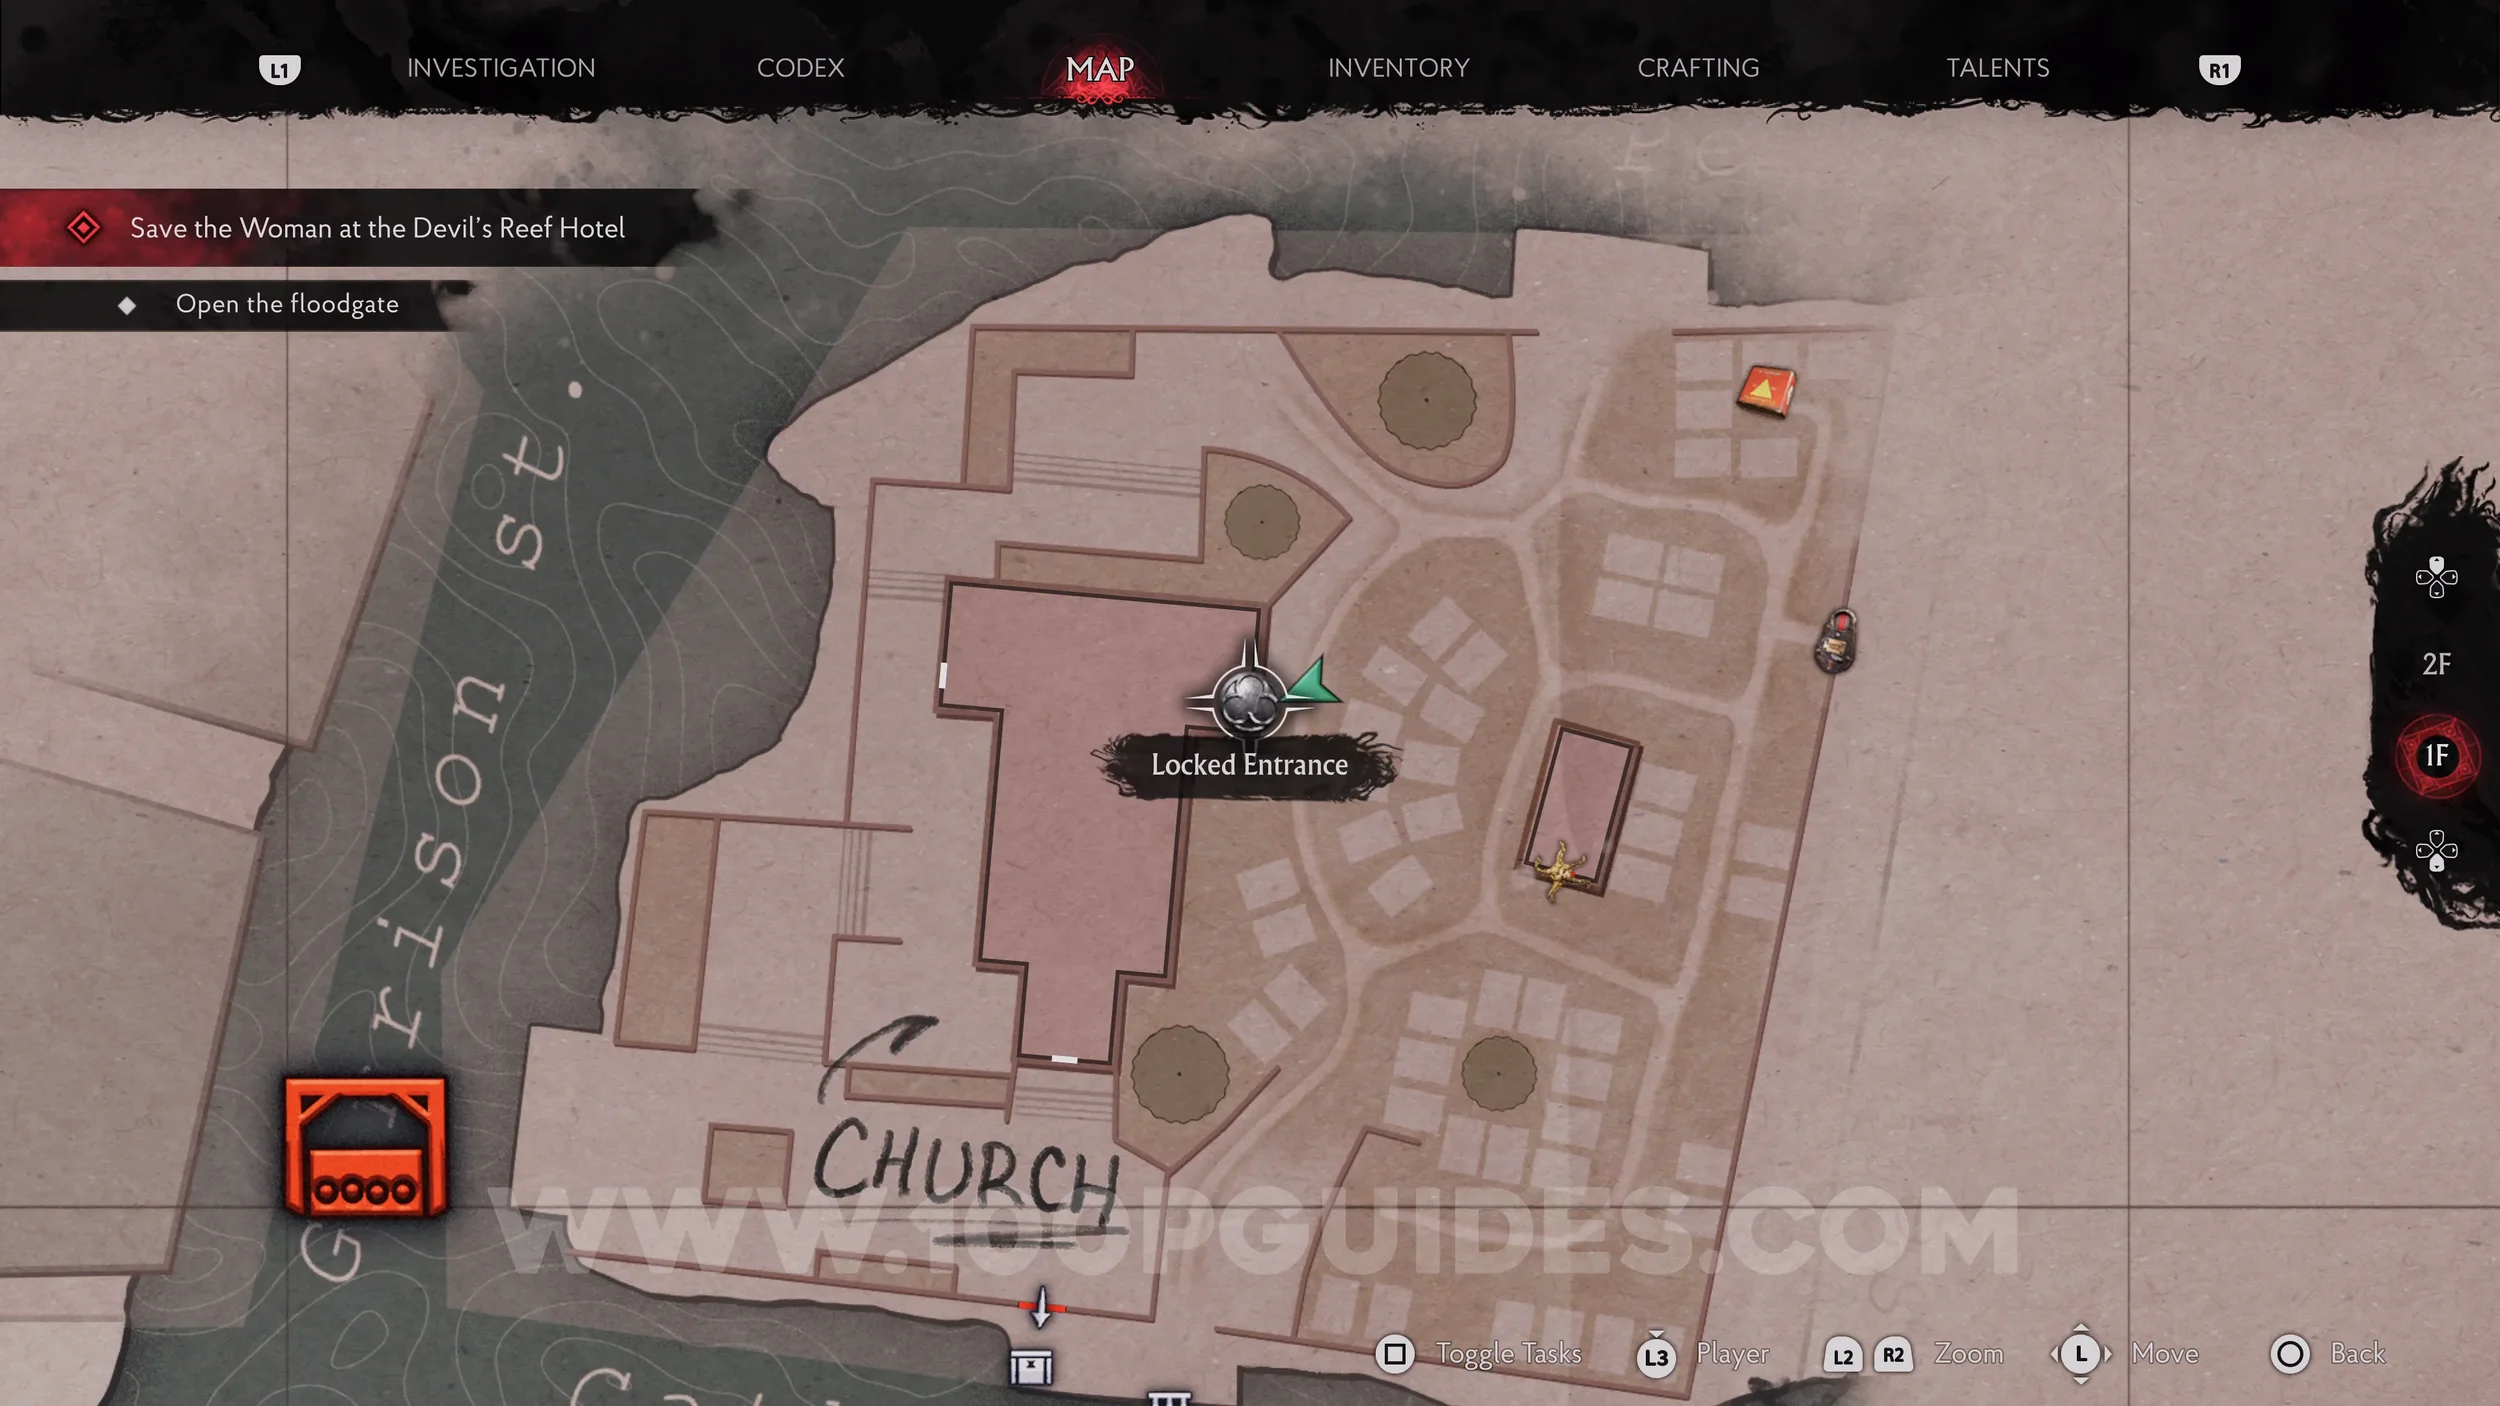
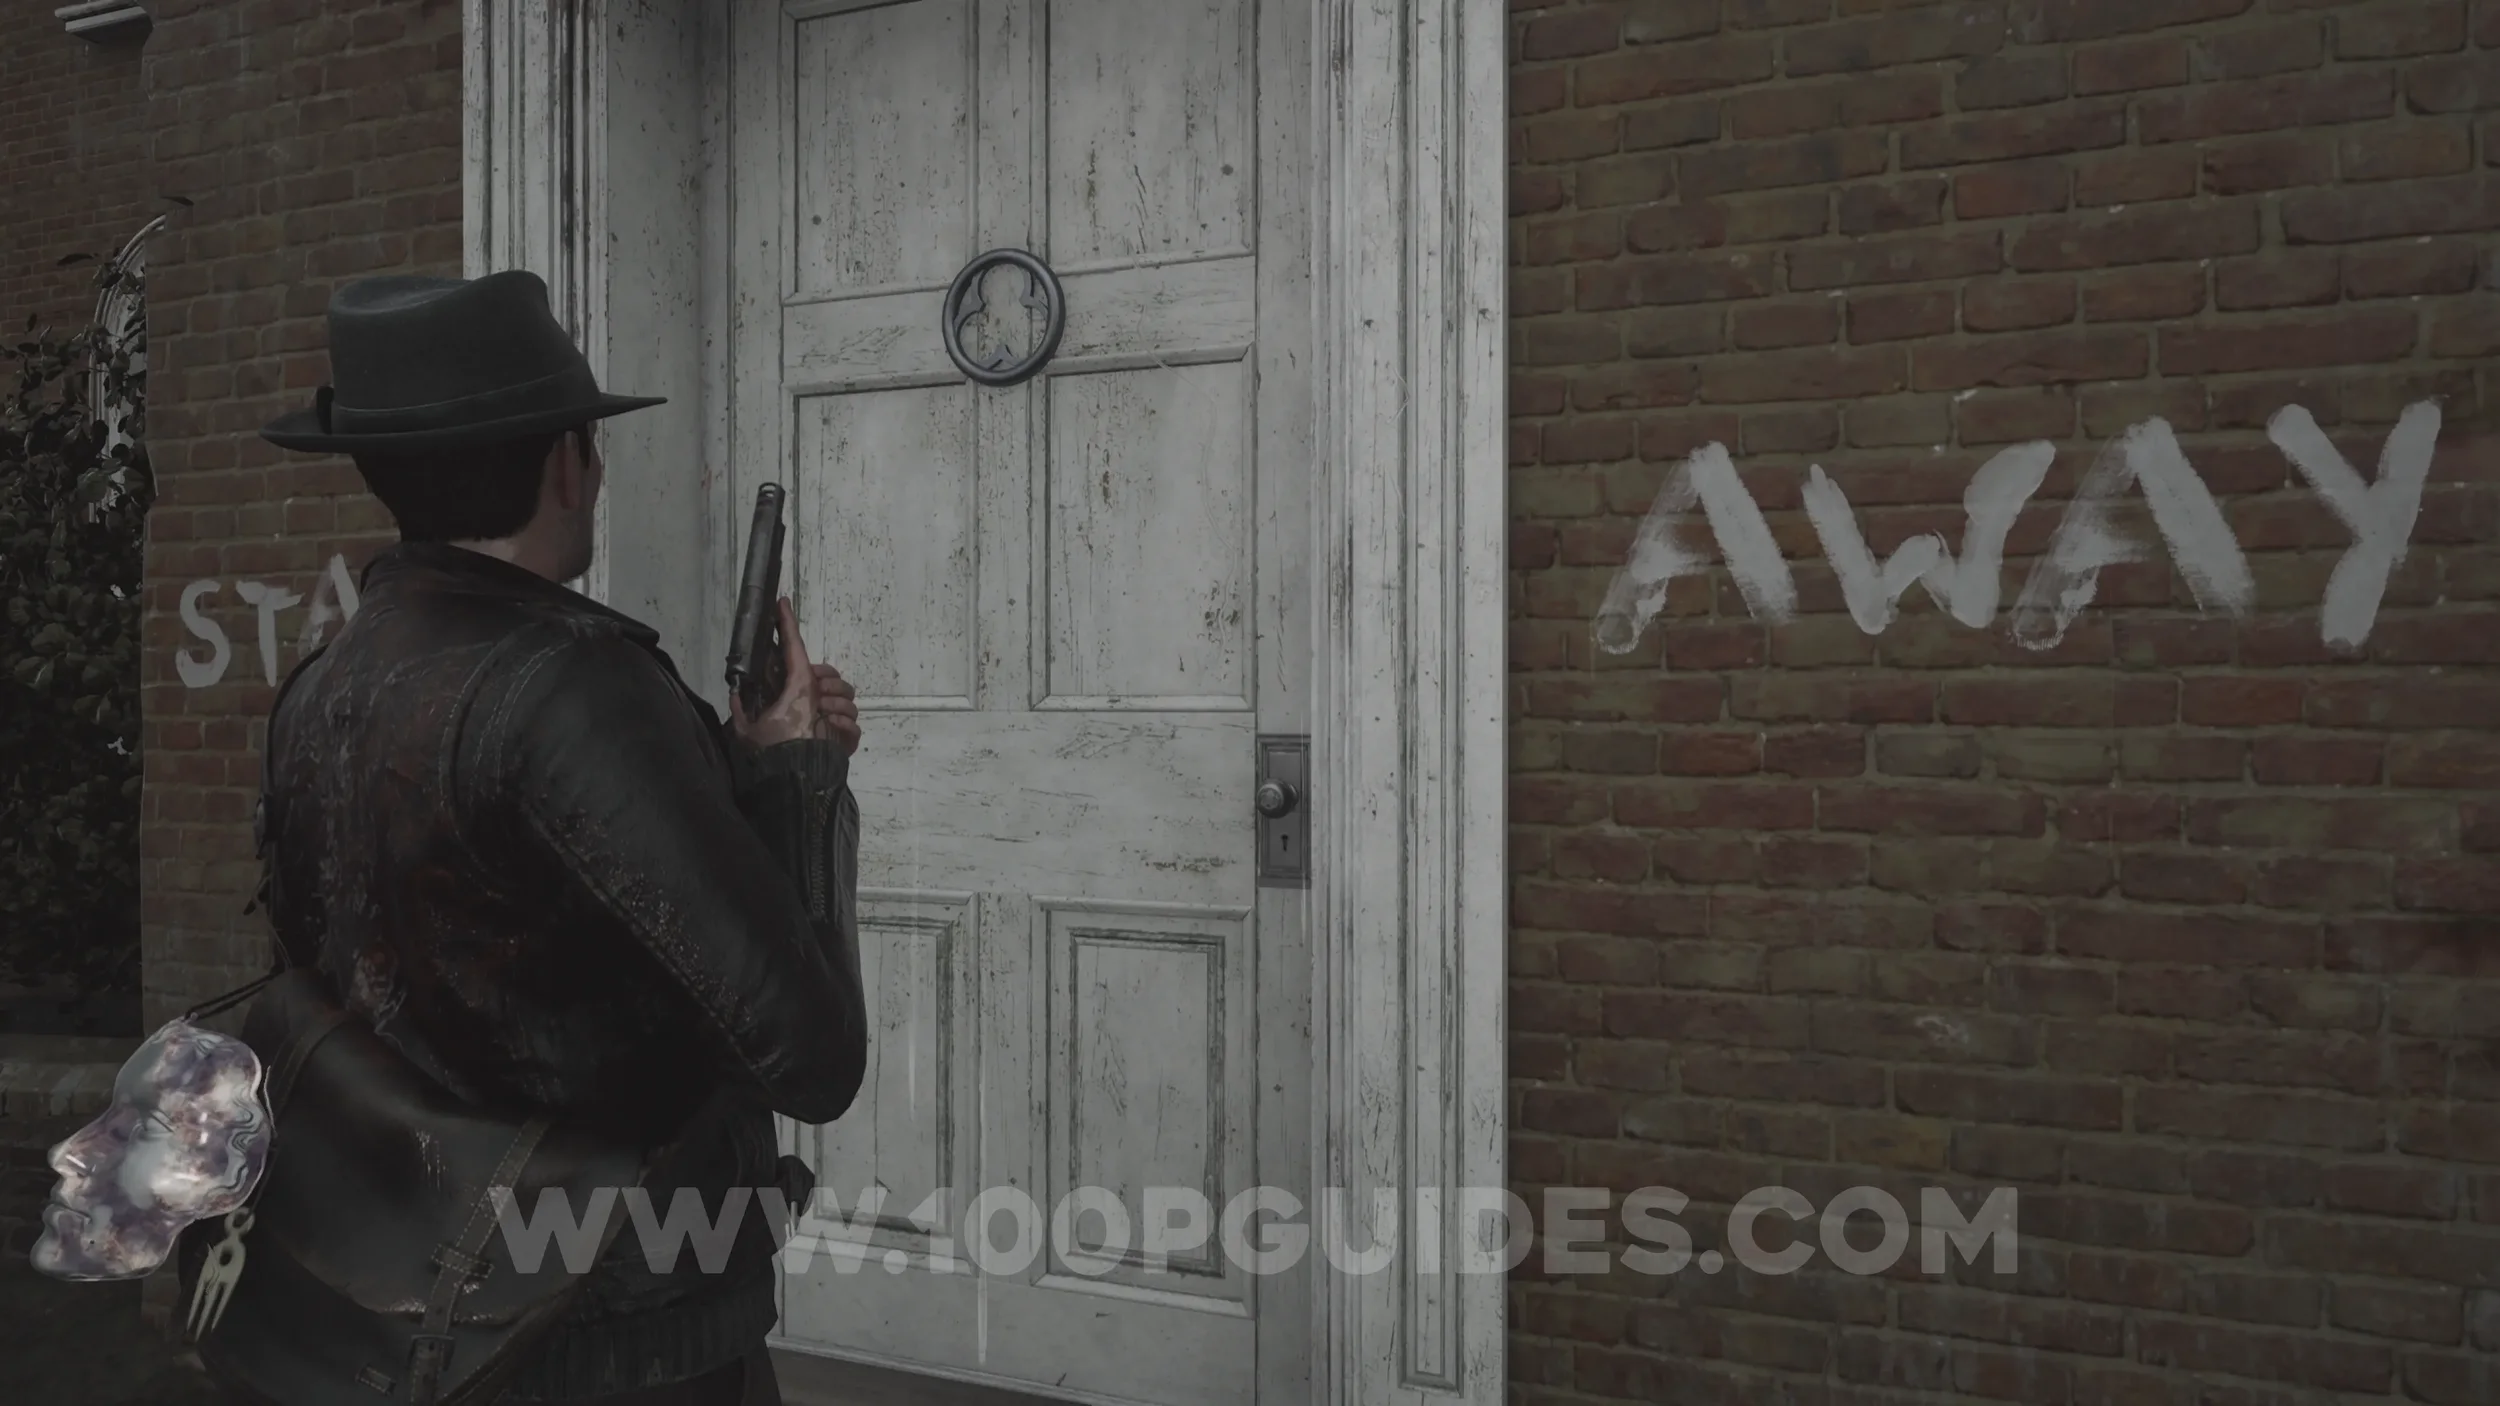
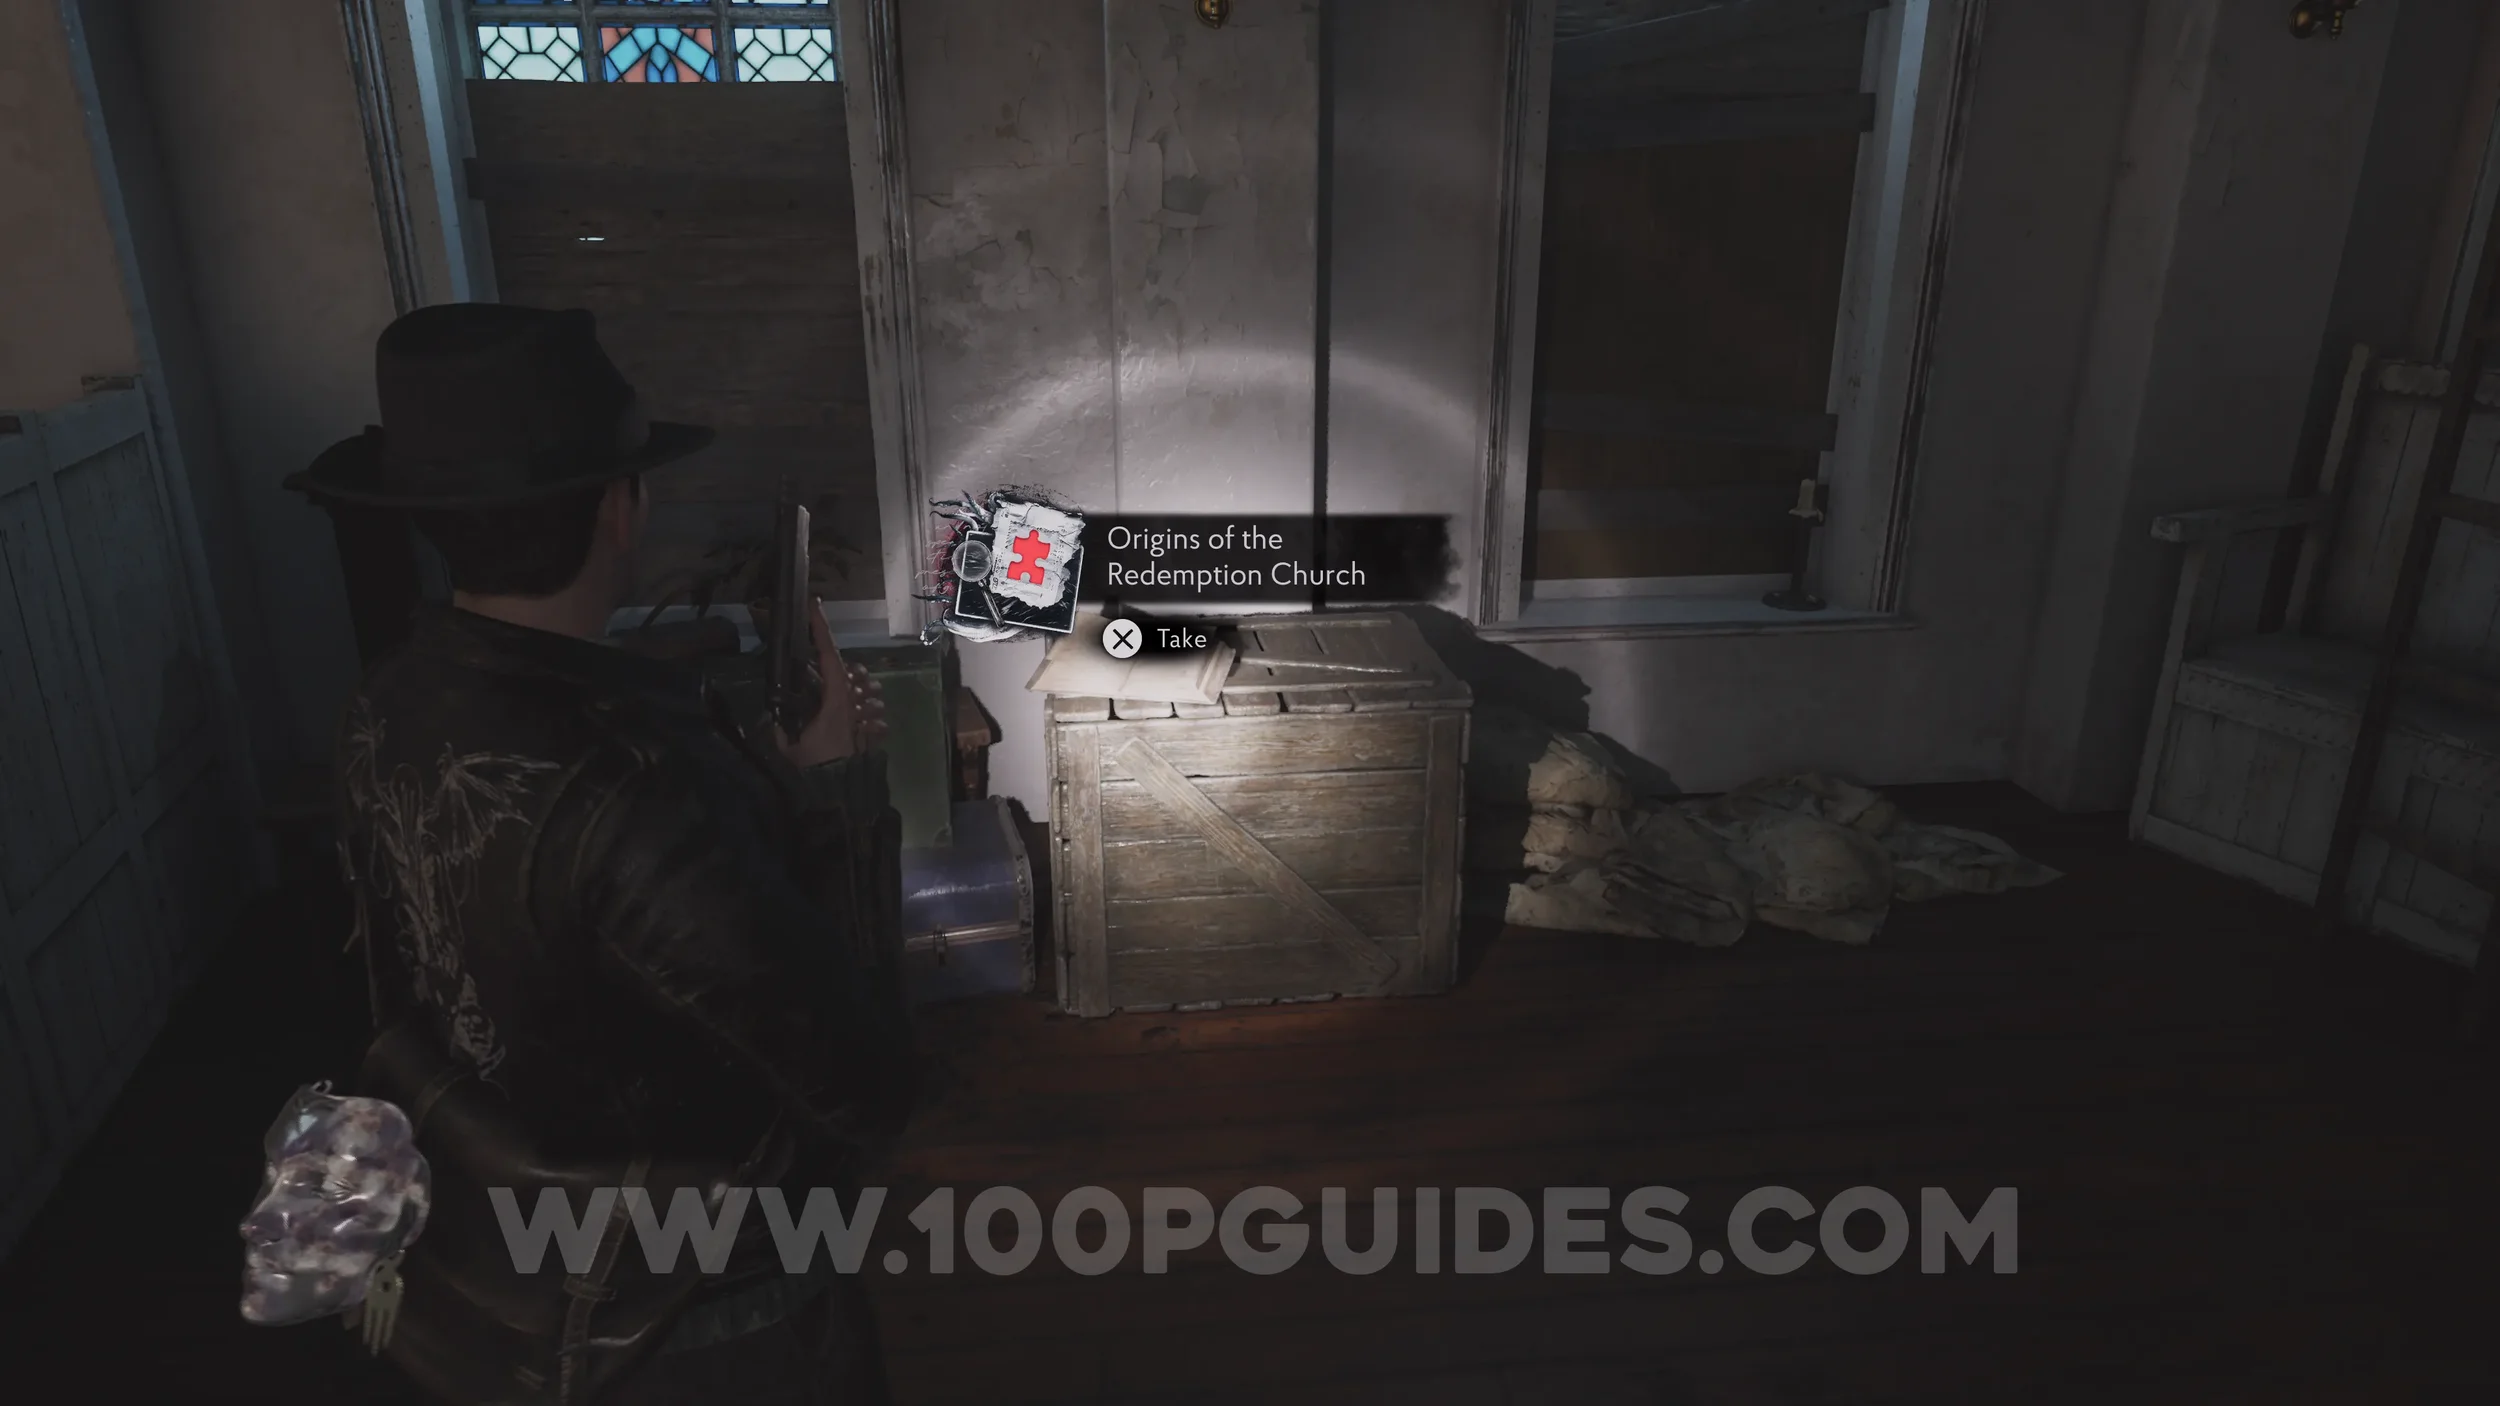
Evidence: Origins of the Redemption Church. On a wooden box inside the church.
Lore Codex: Look for Dream Essence!. On the table in the safe room in the church.
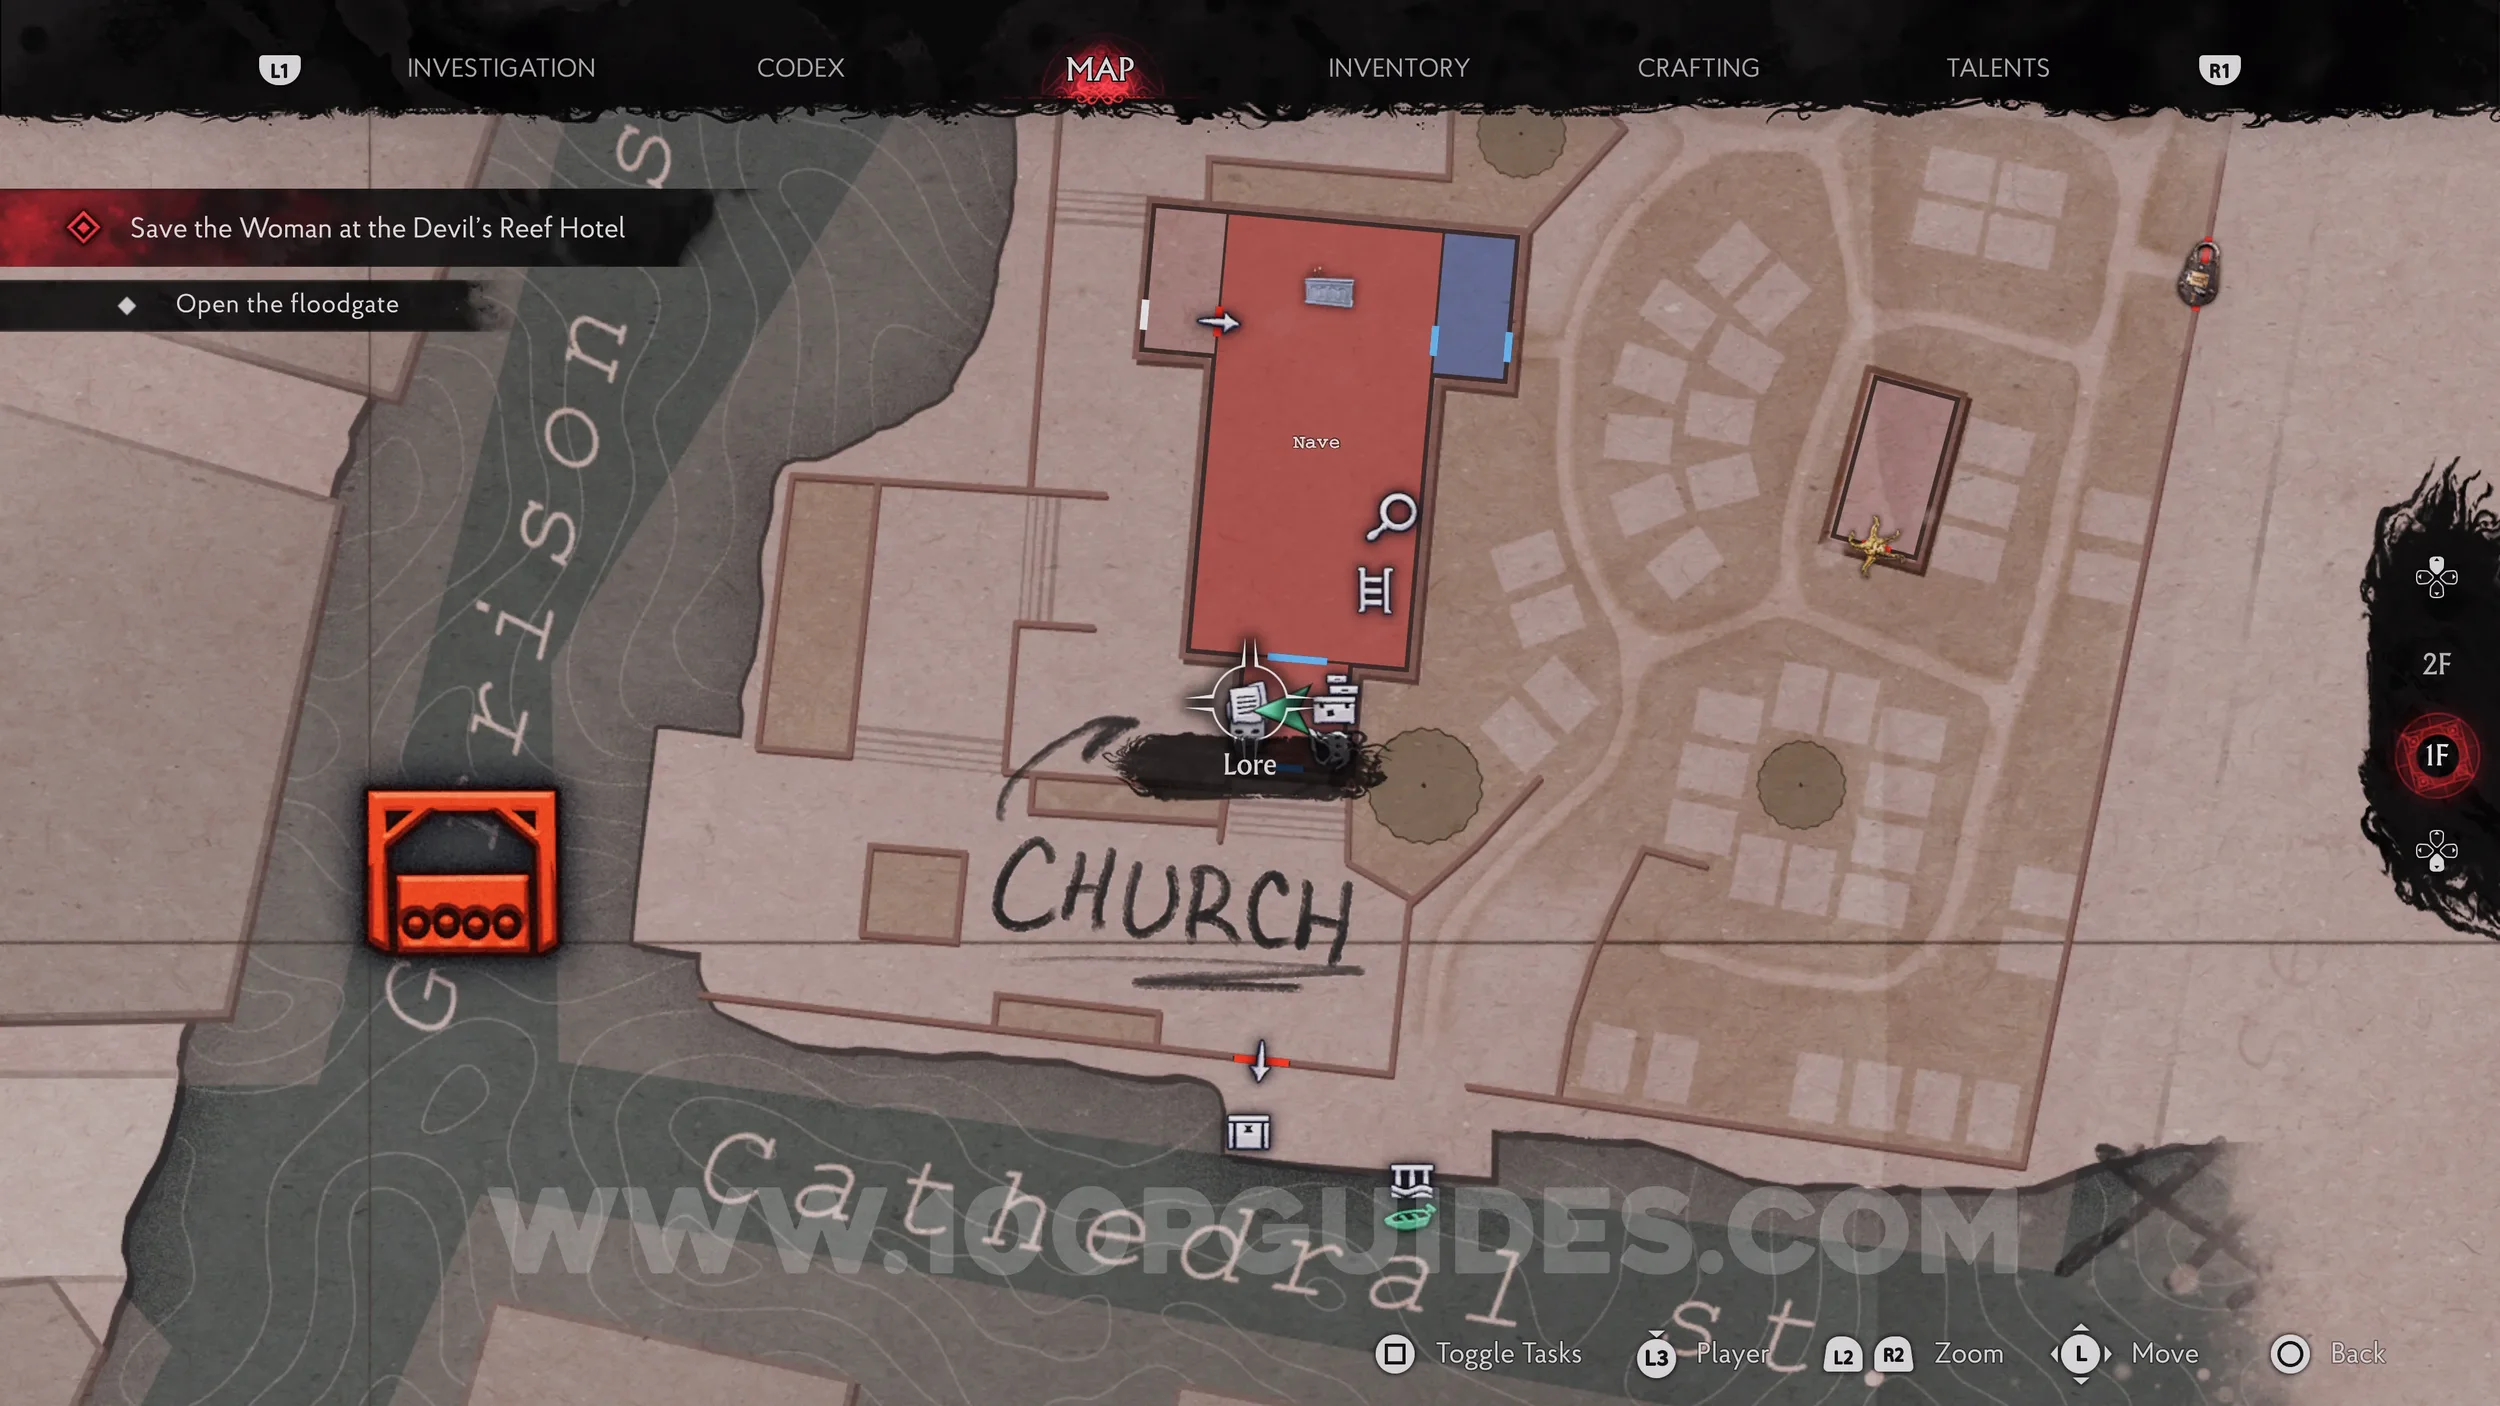
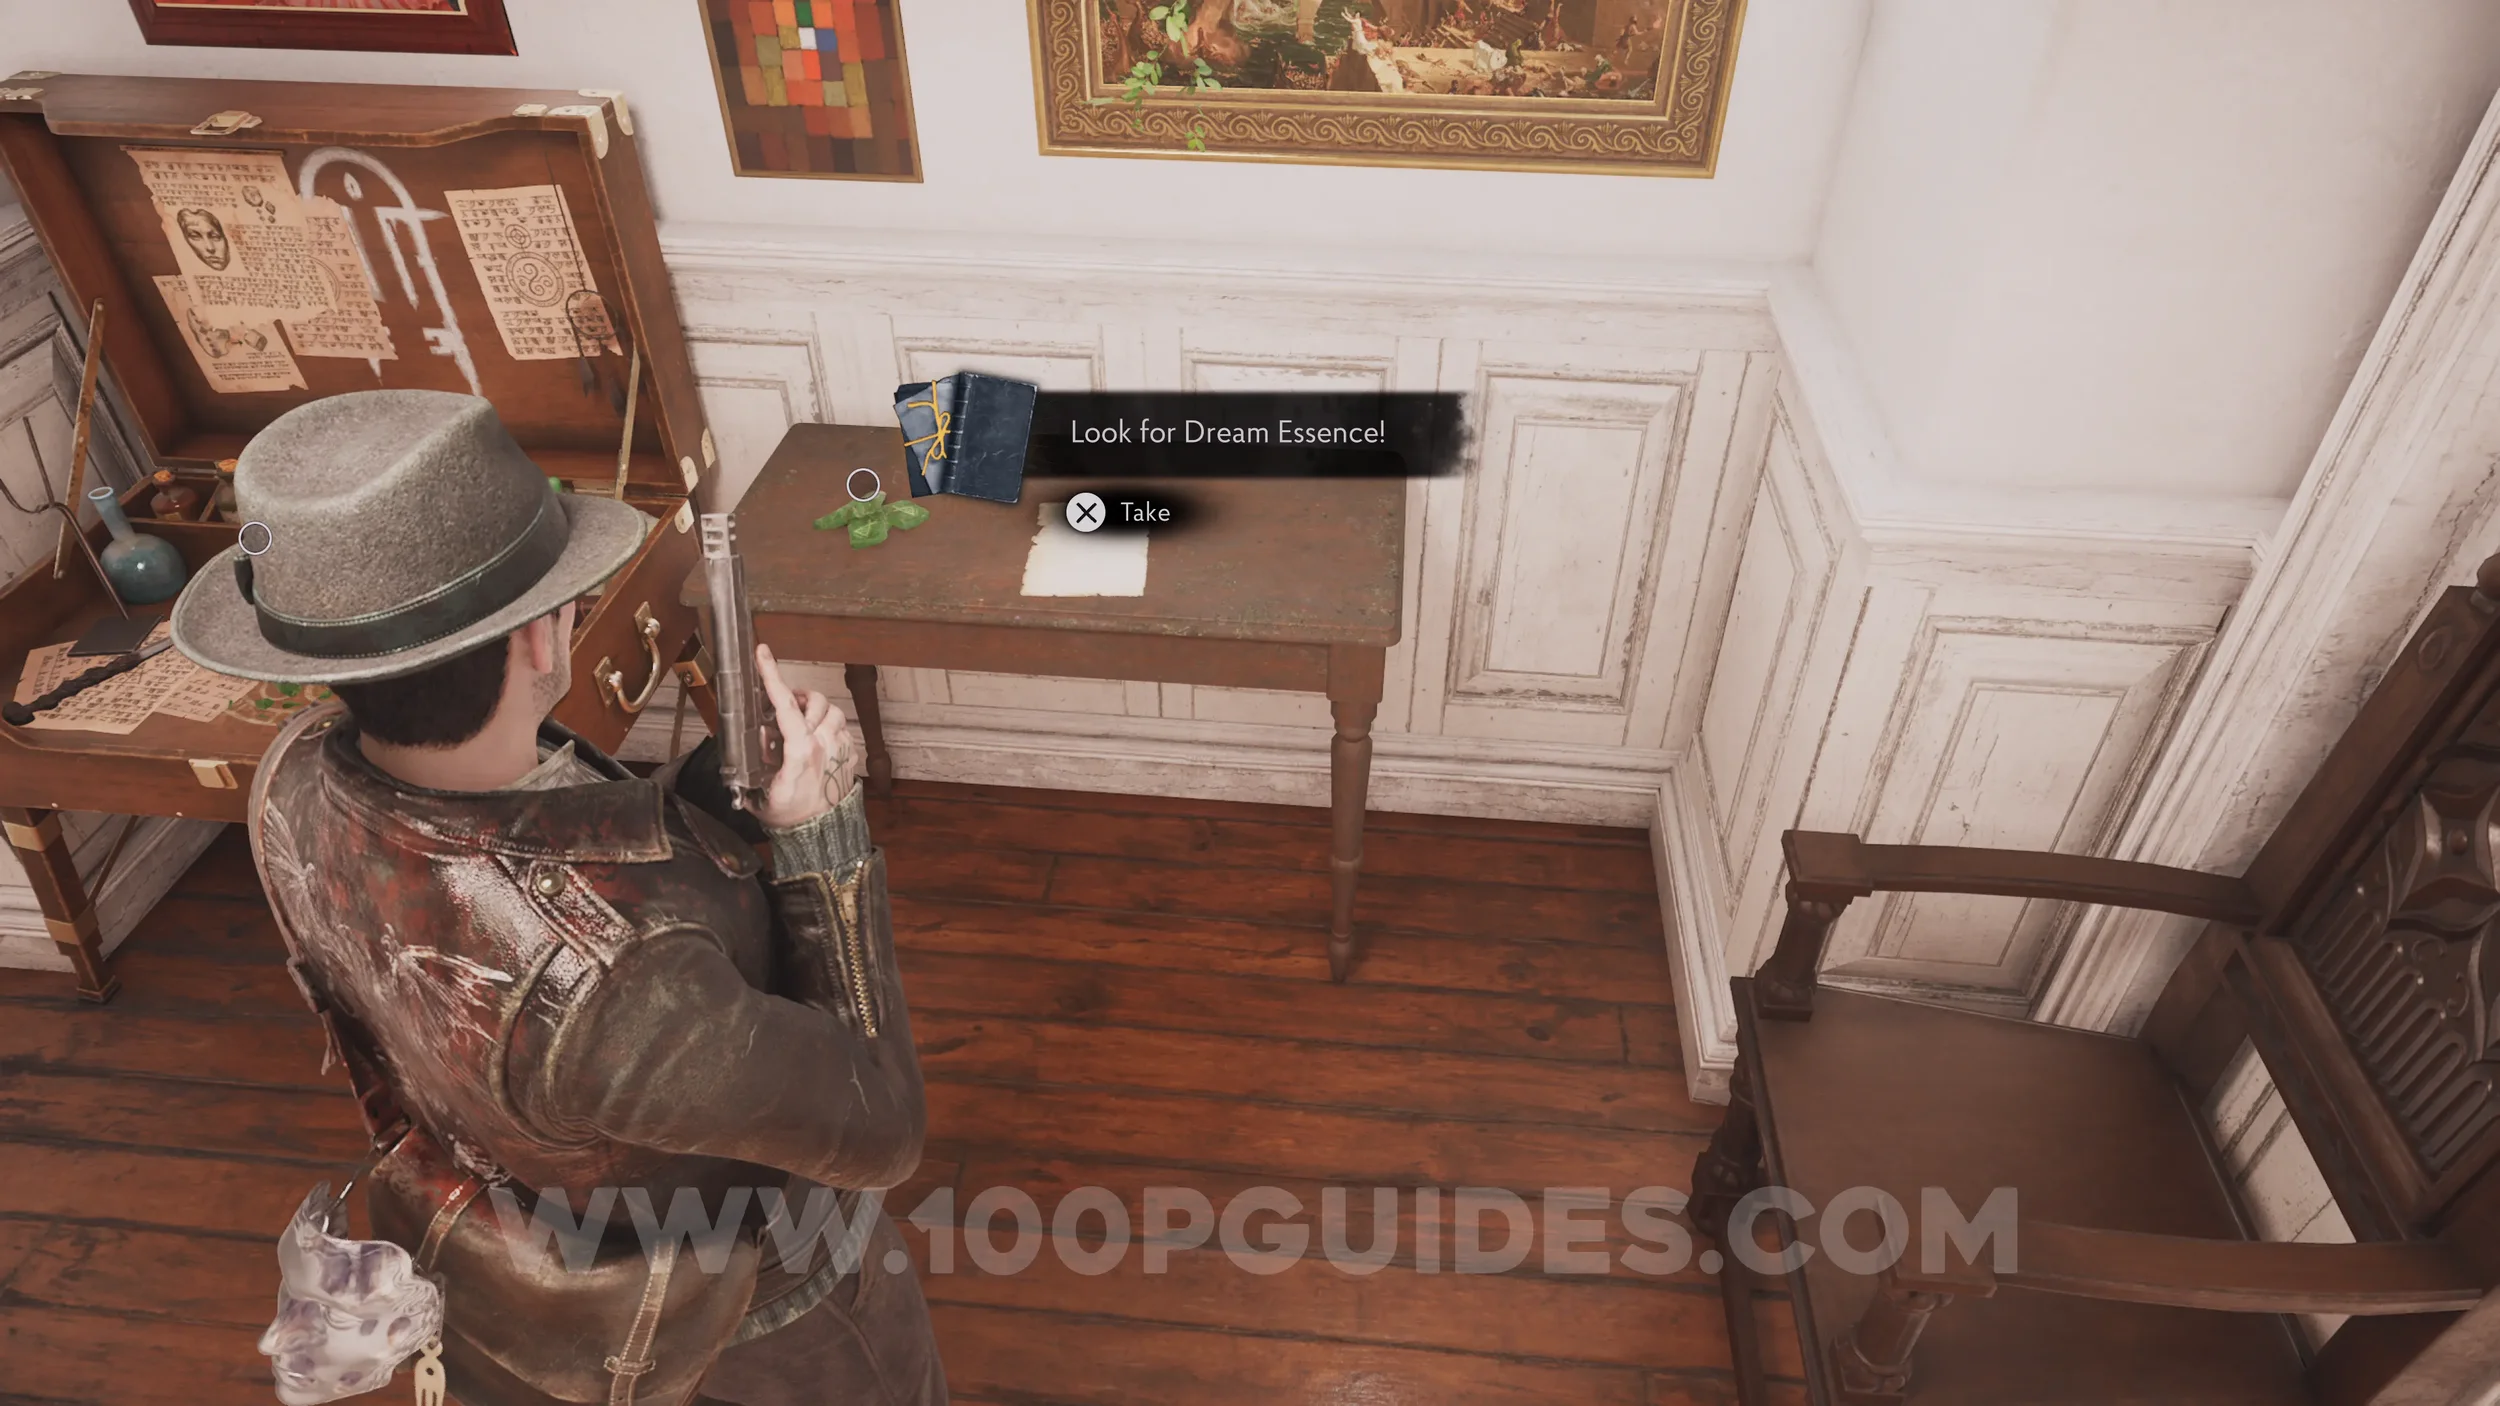
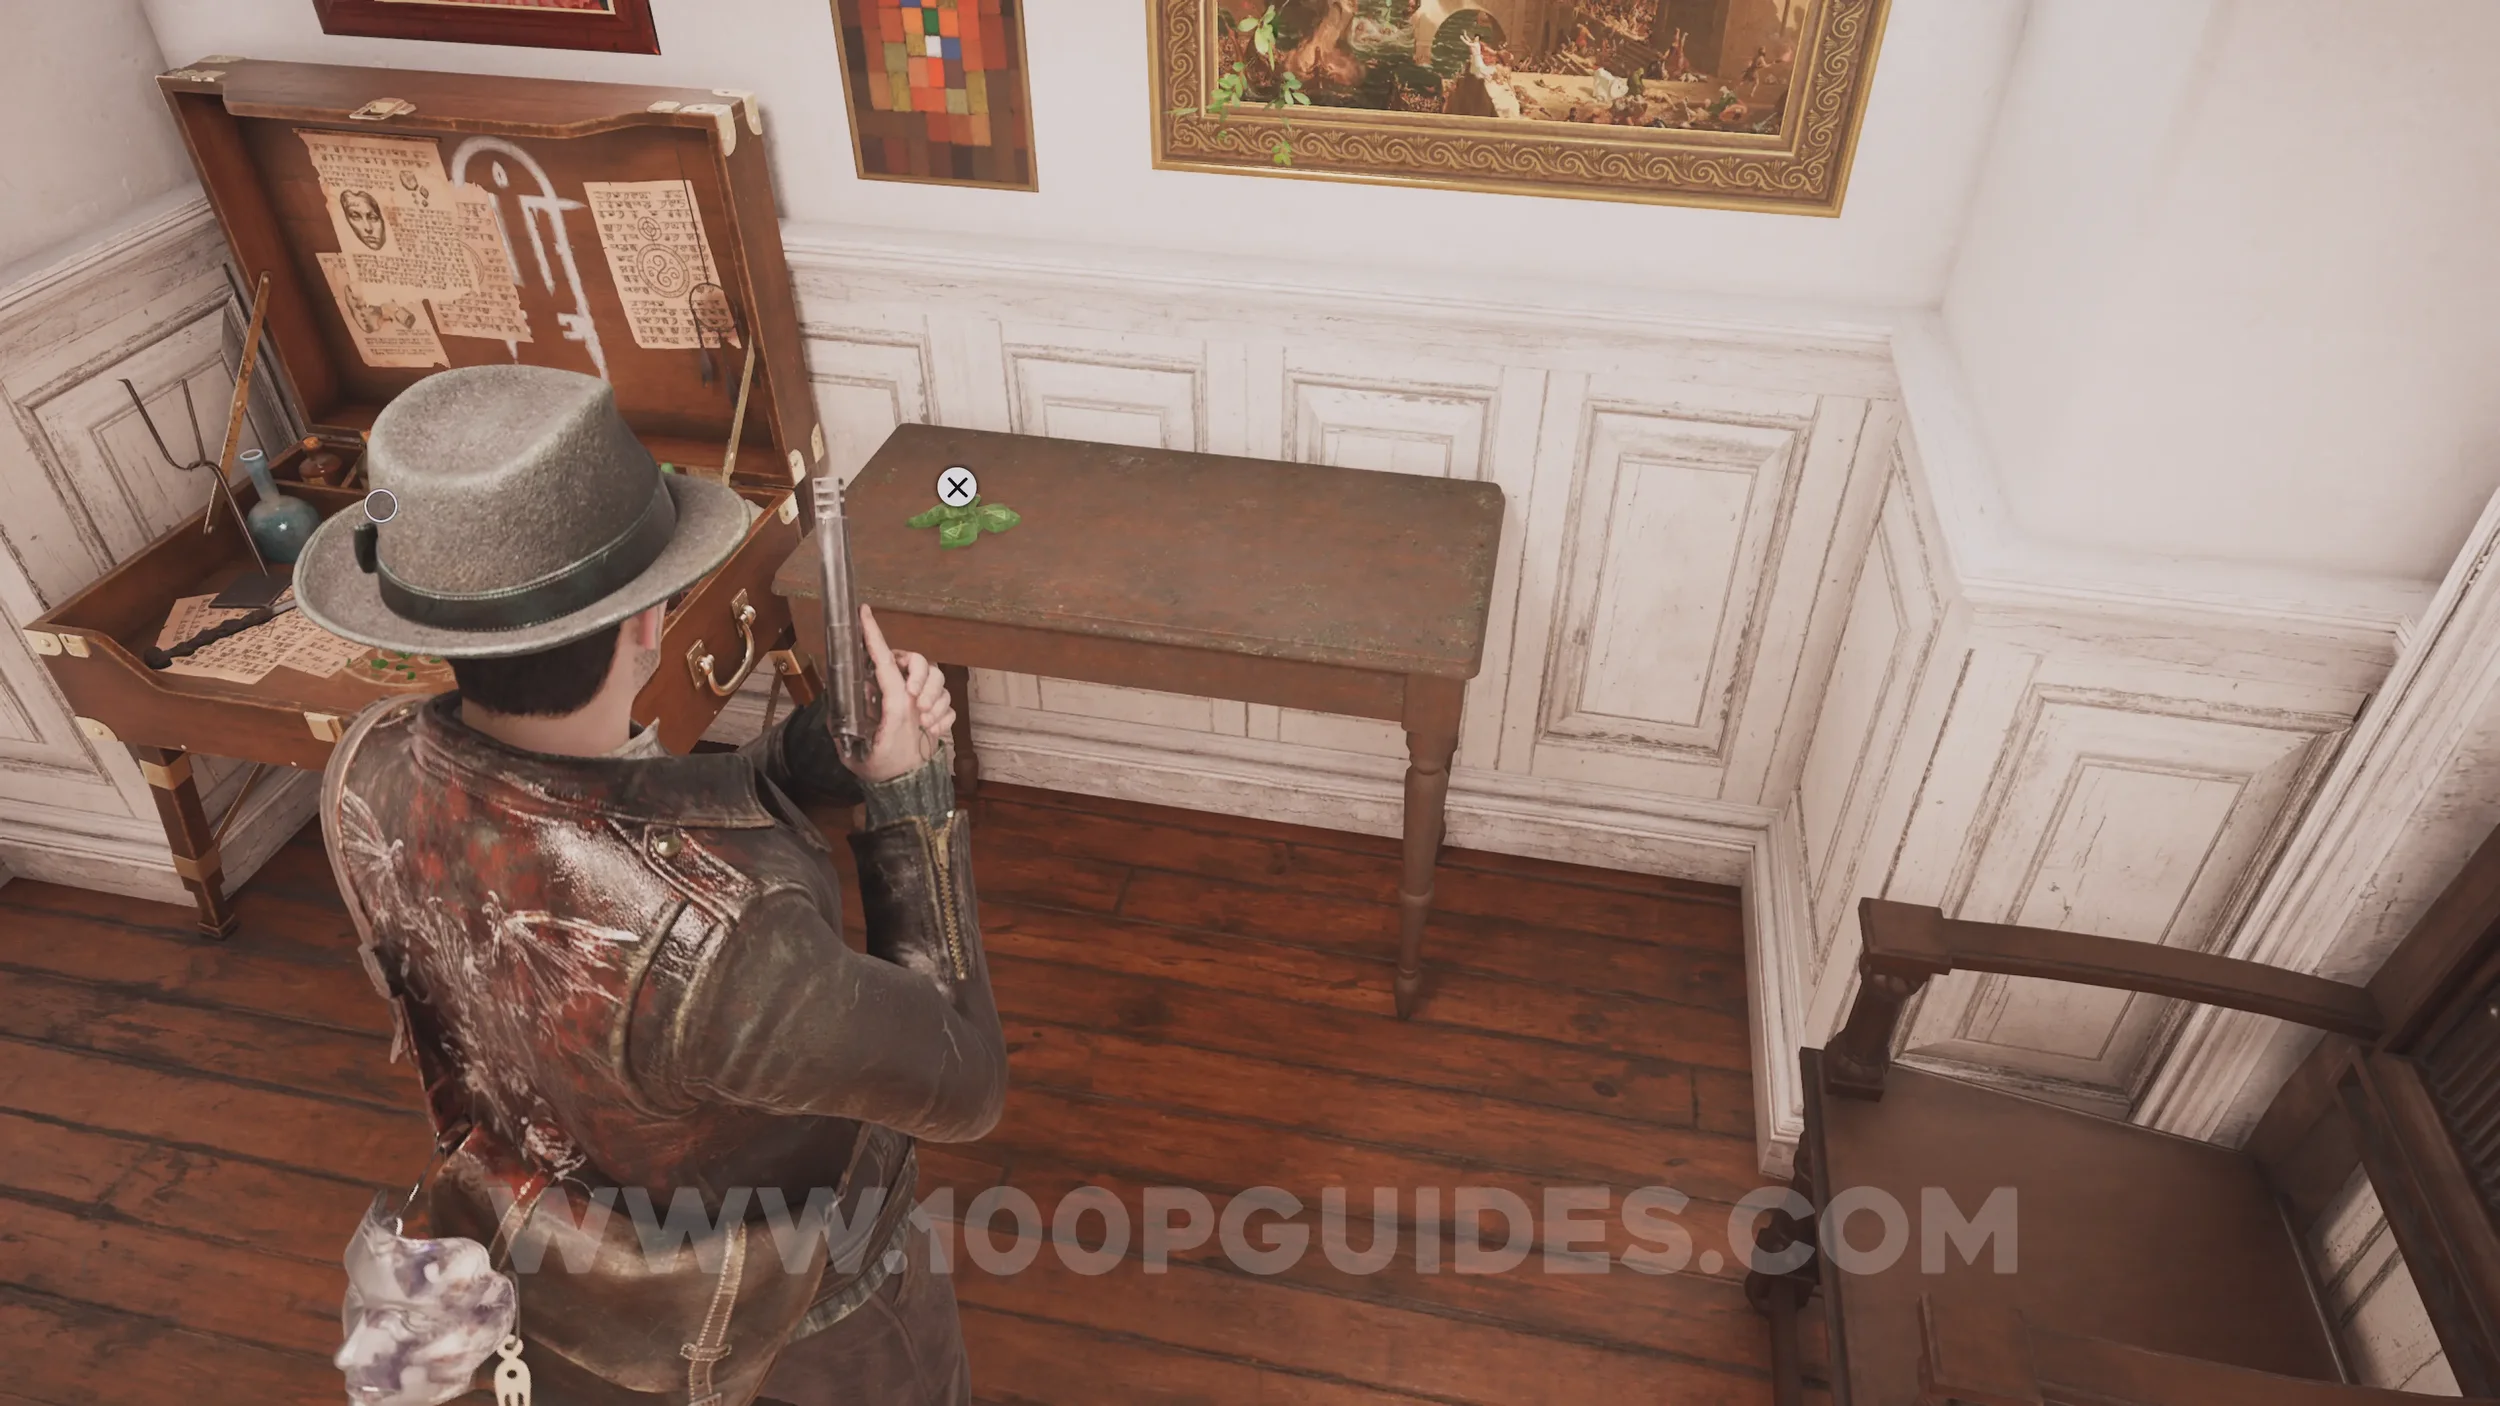
Dream Essence x3. On the same table as the previous collectible.
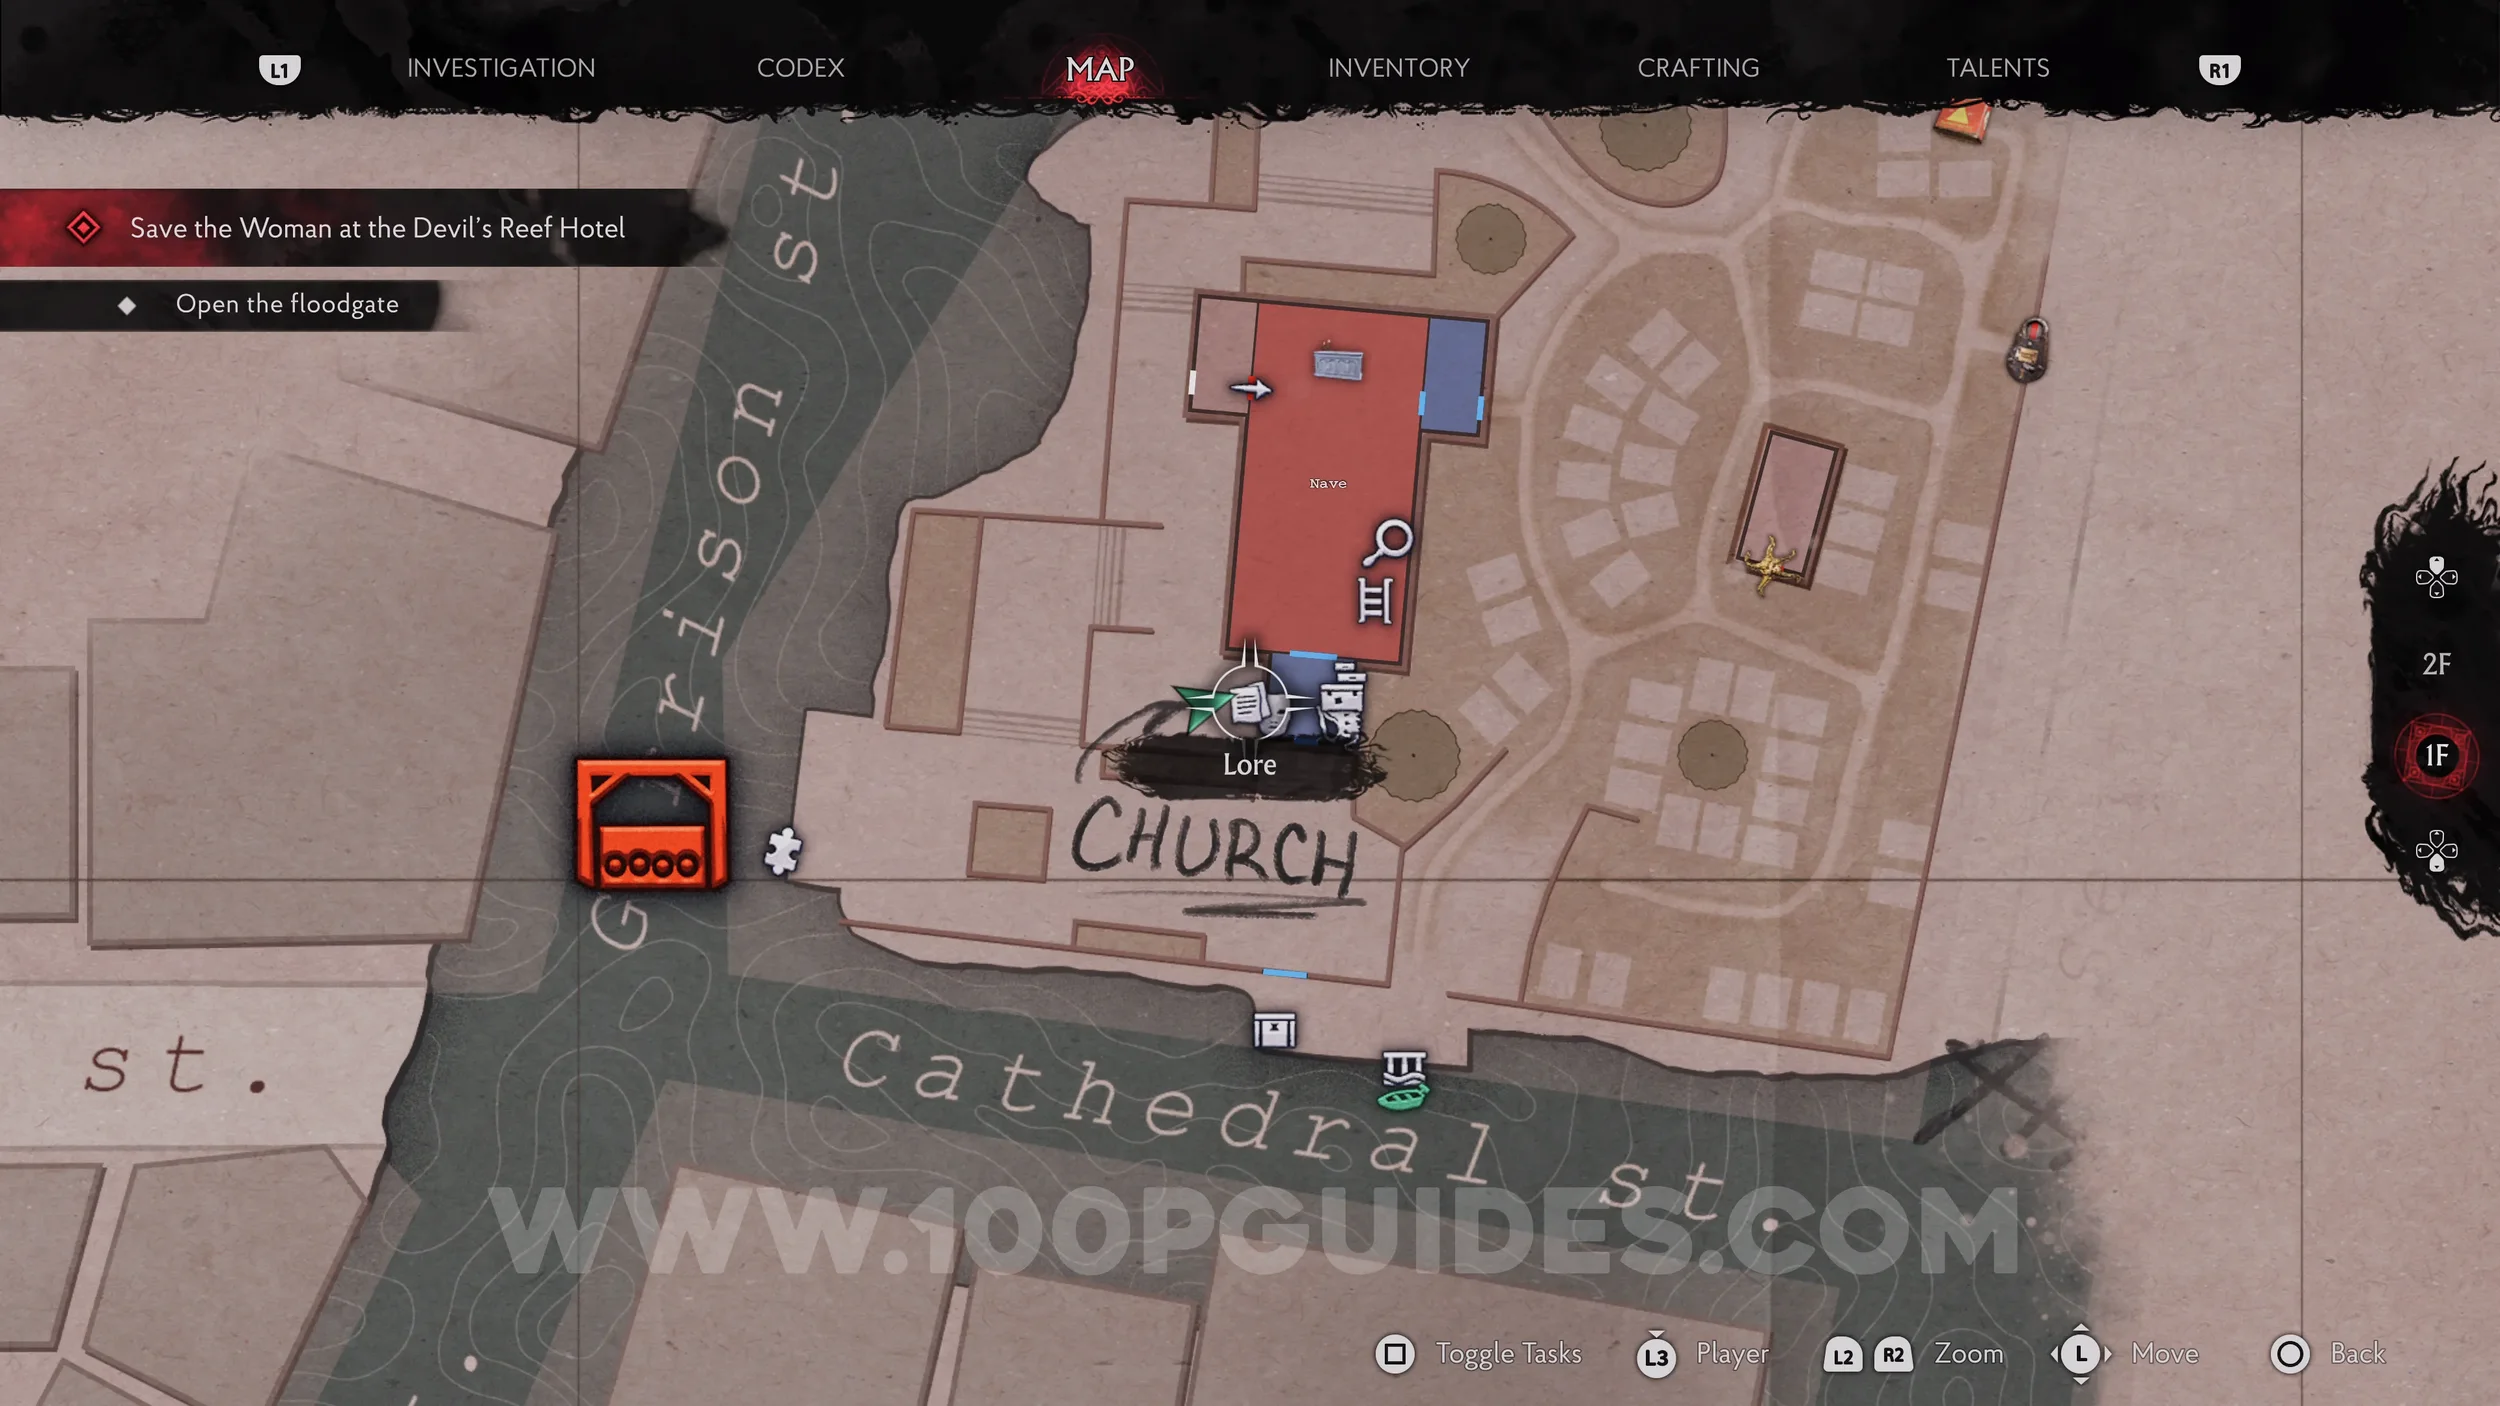
Evidence: Floodgate Lock. Head out the other side of the safe room, then go right to reach the lever you'll have to unlock later to open the next gate. To the right of the lever, you'll find the evidence on the table.
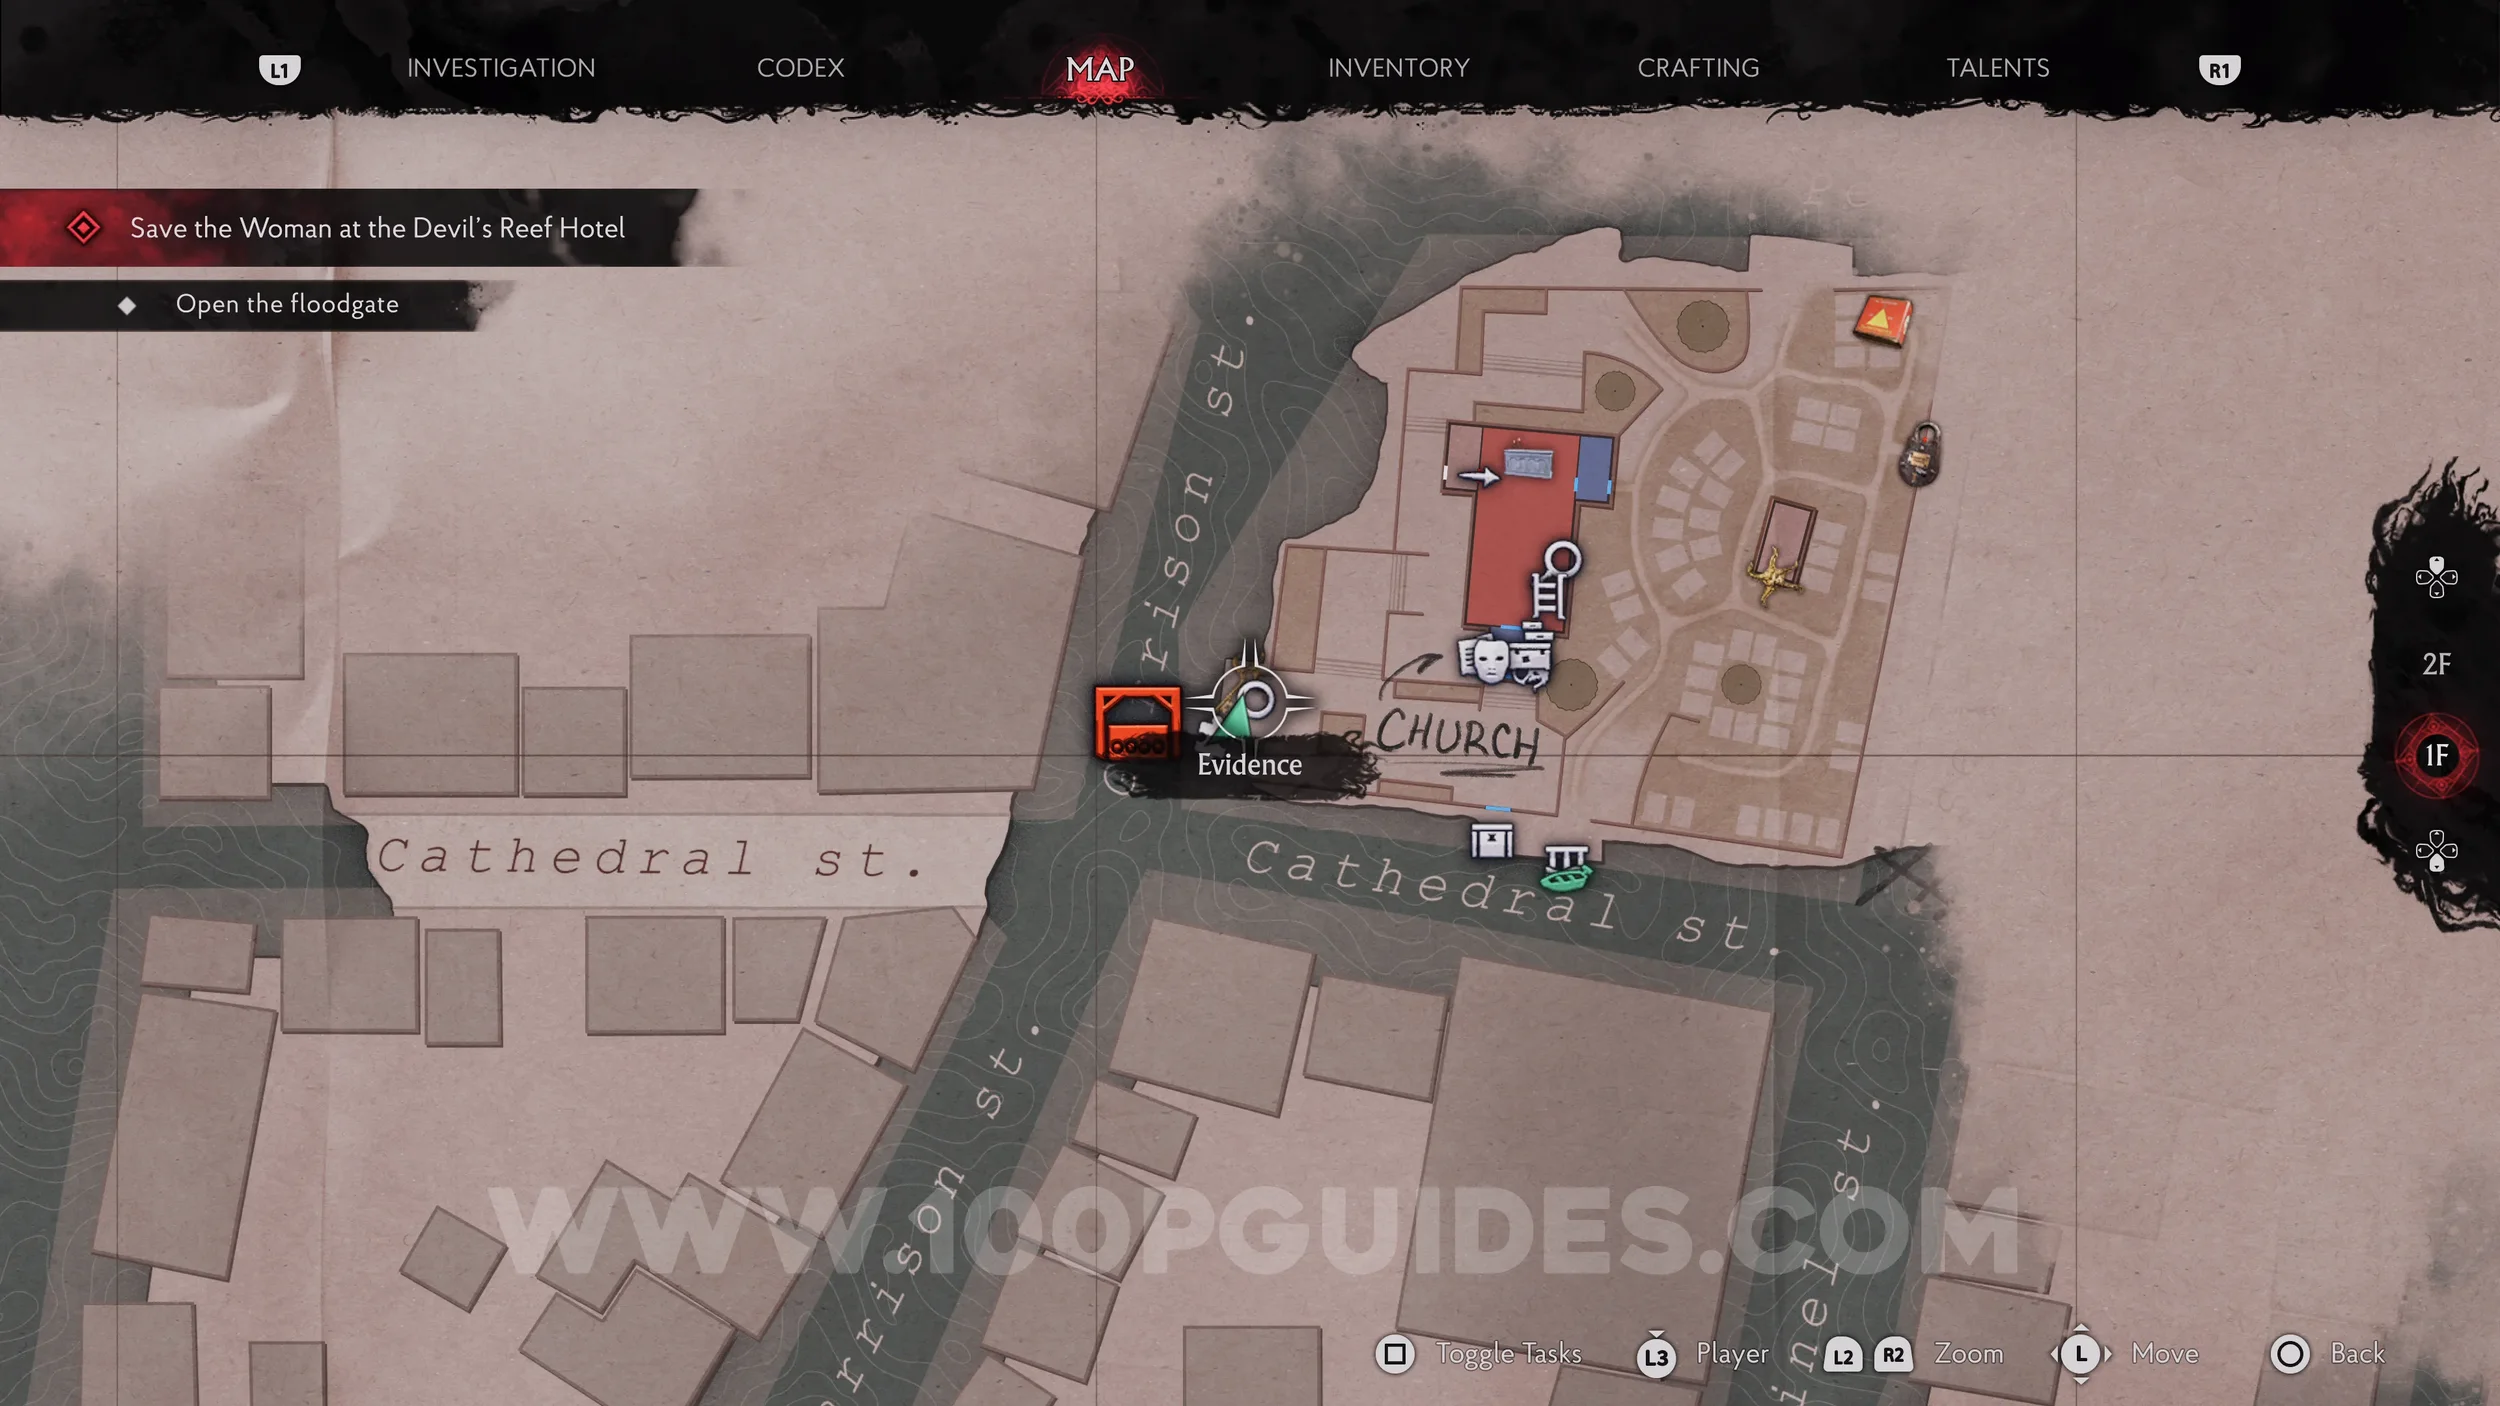
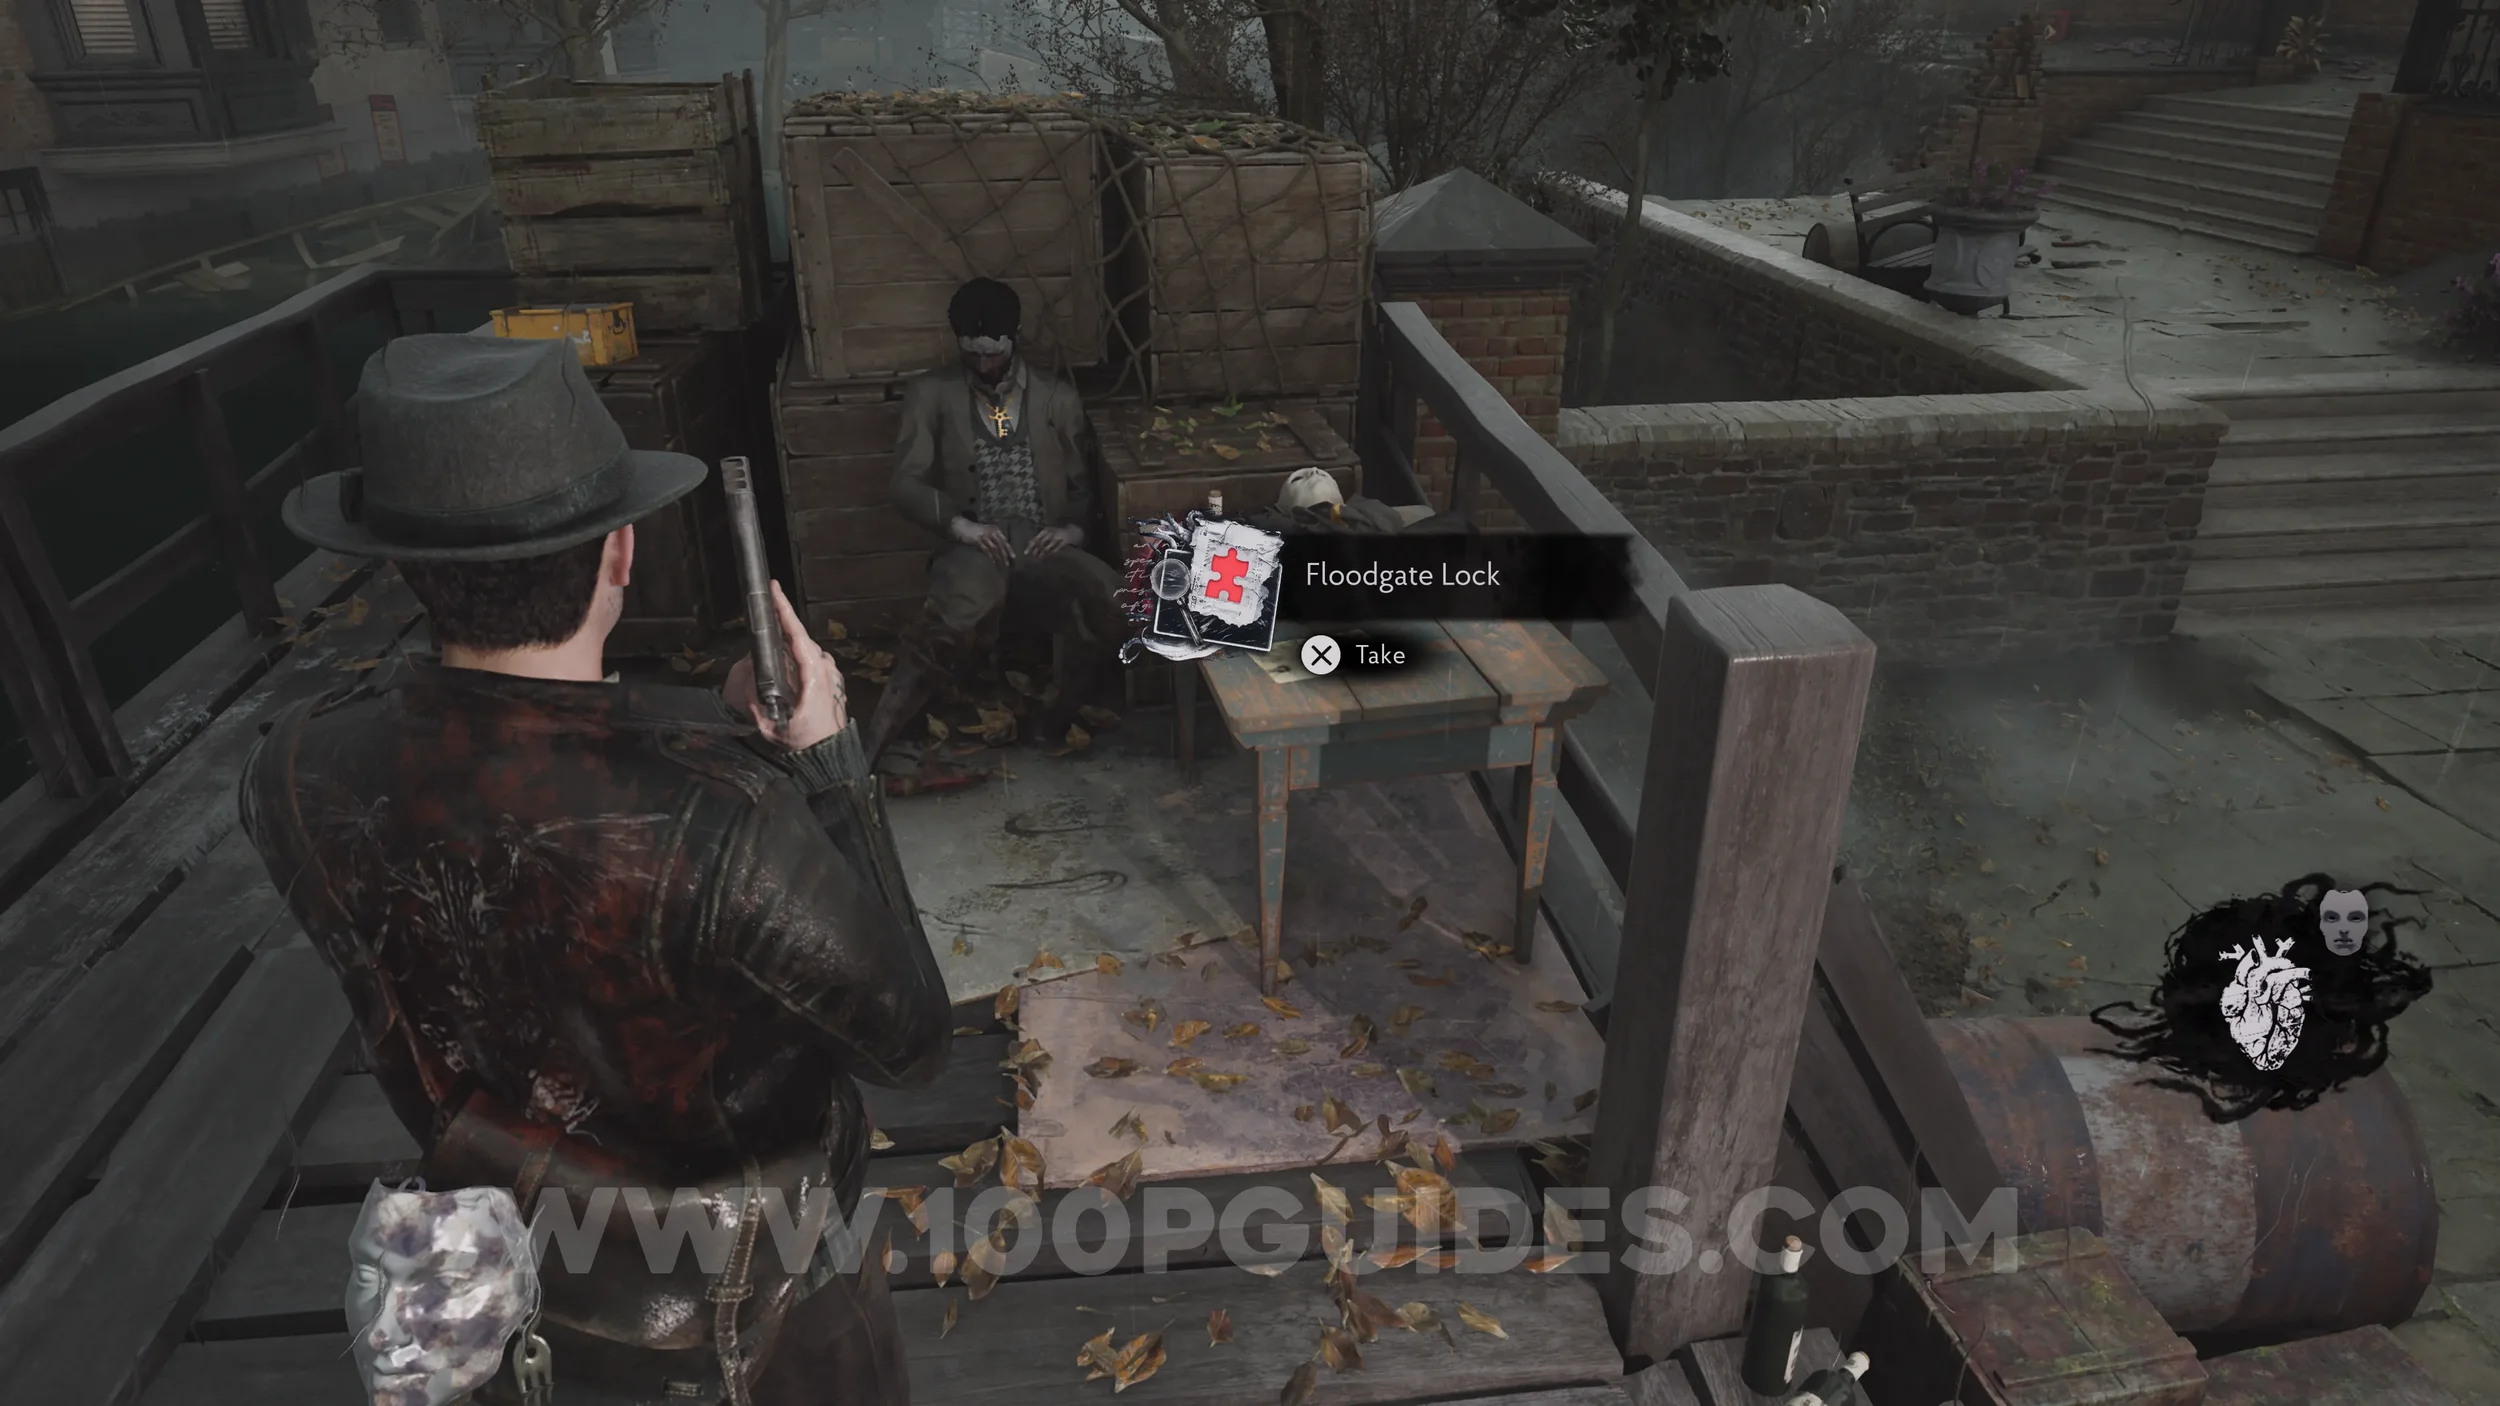
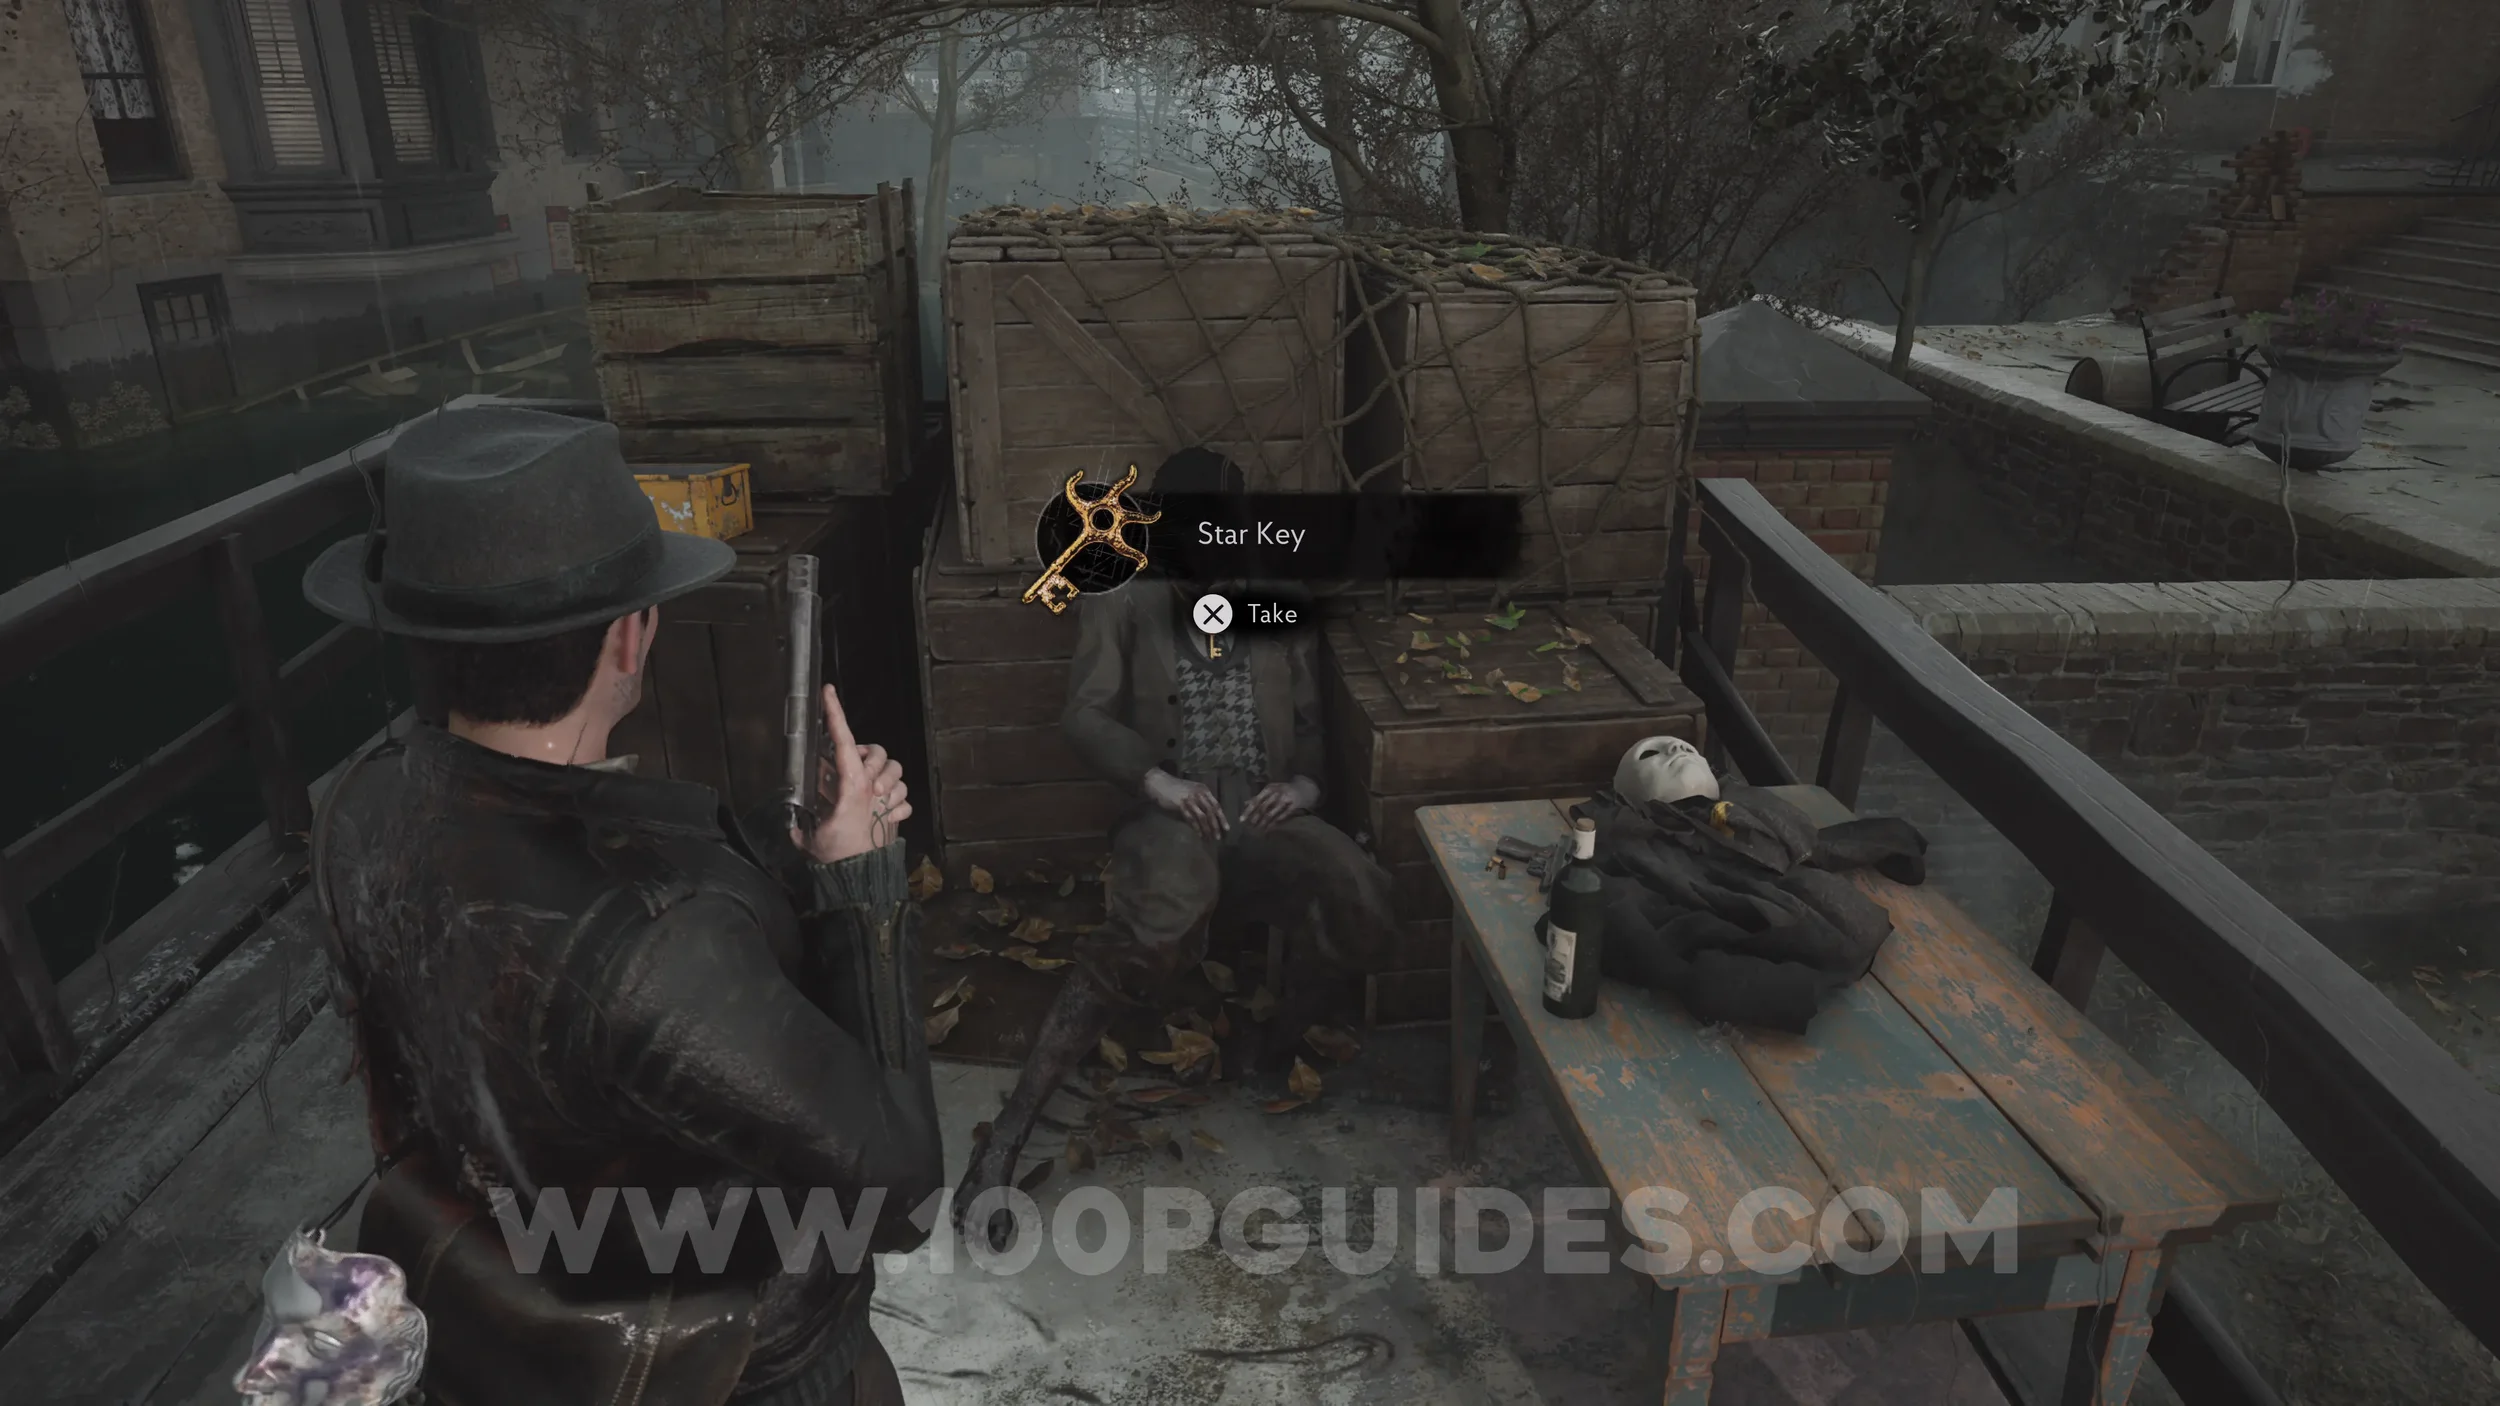
Key Item: Star Key. Around the neck of the corpse near the previous evidence.
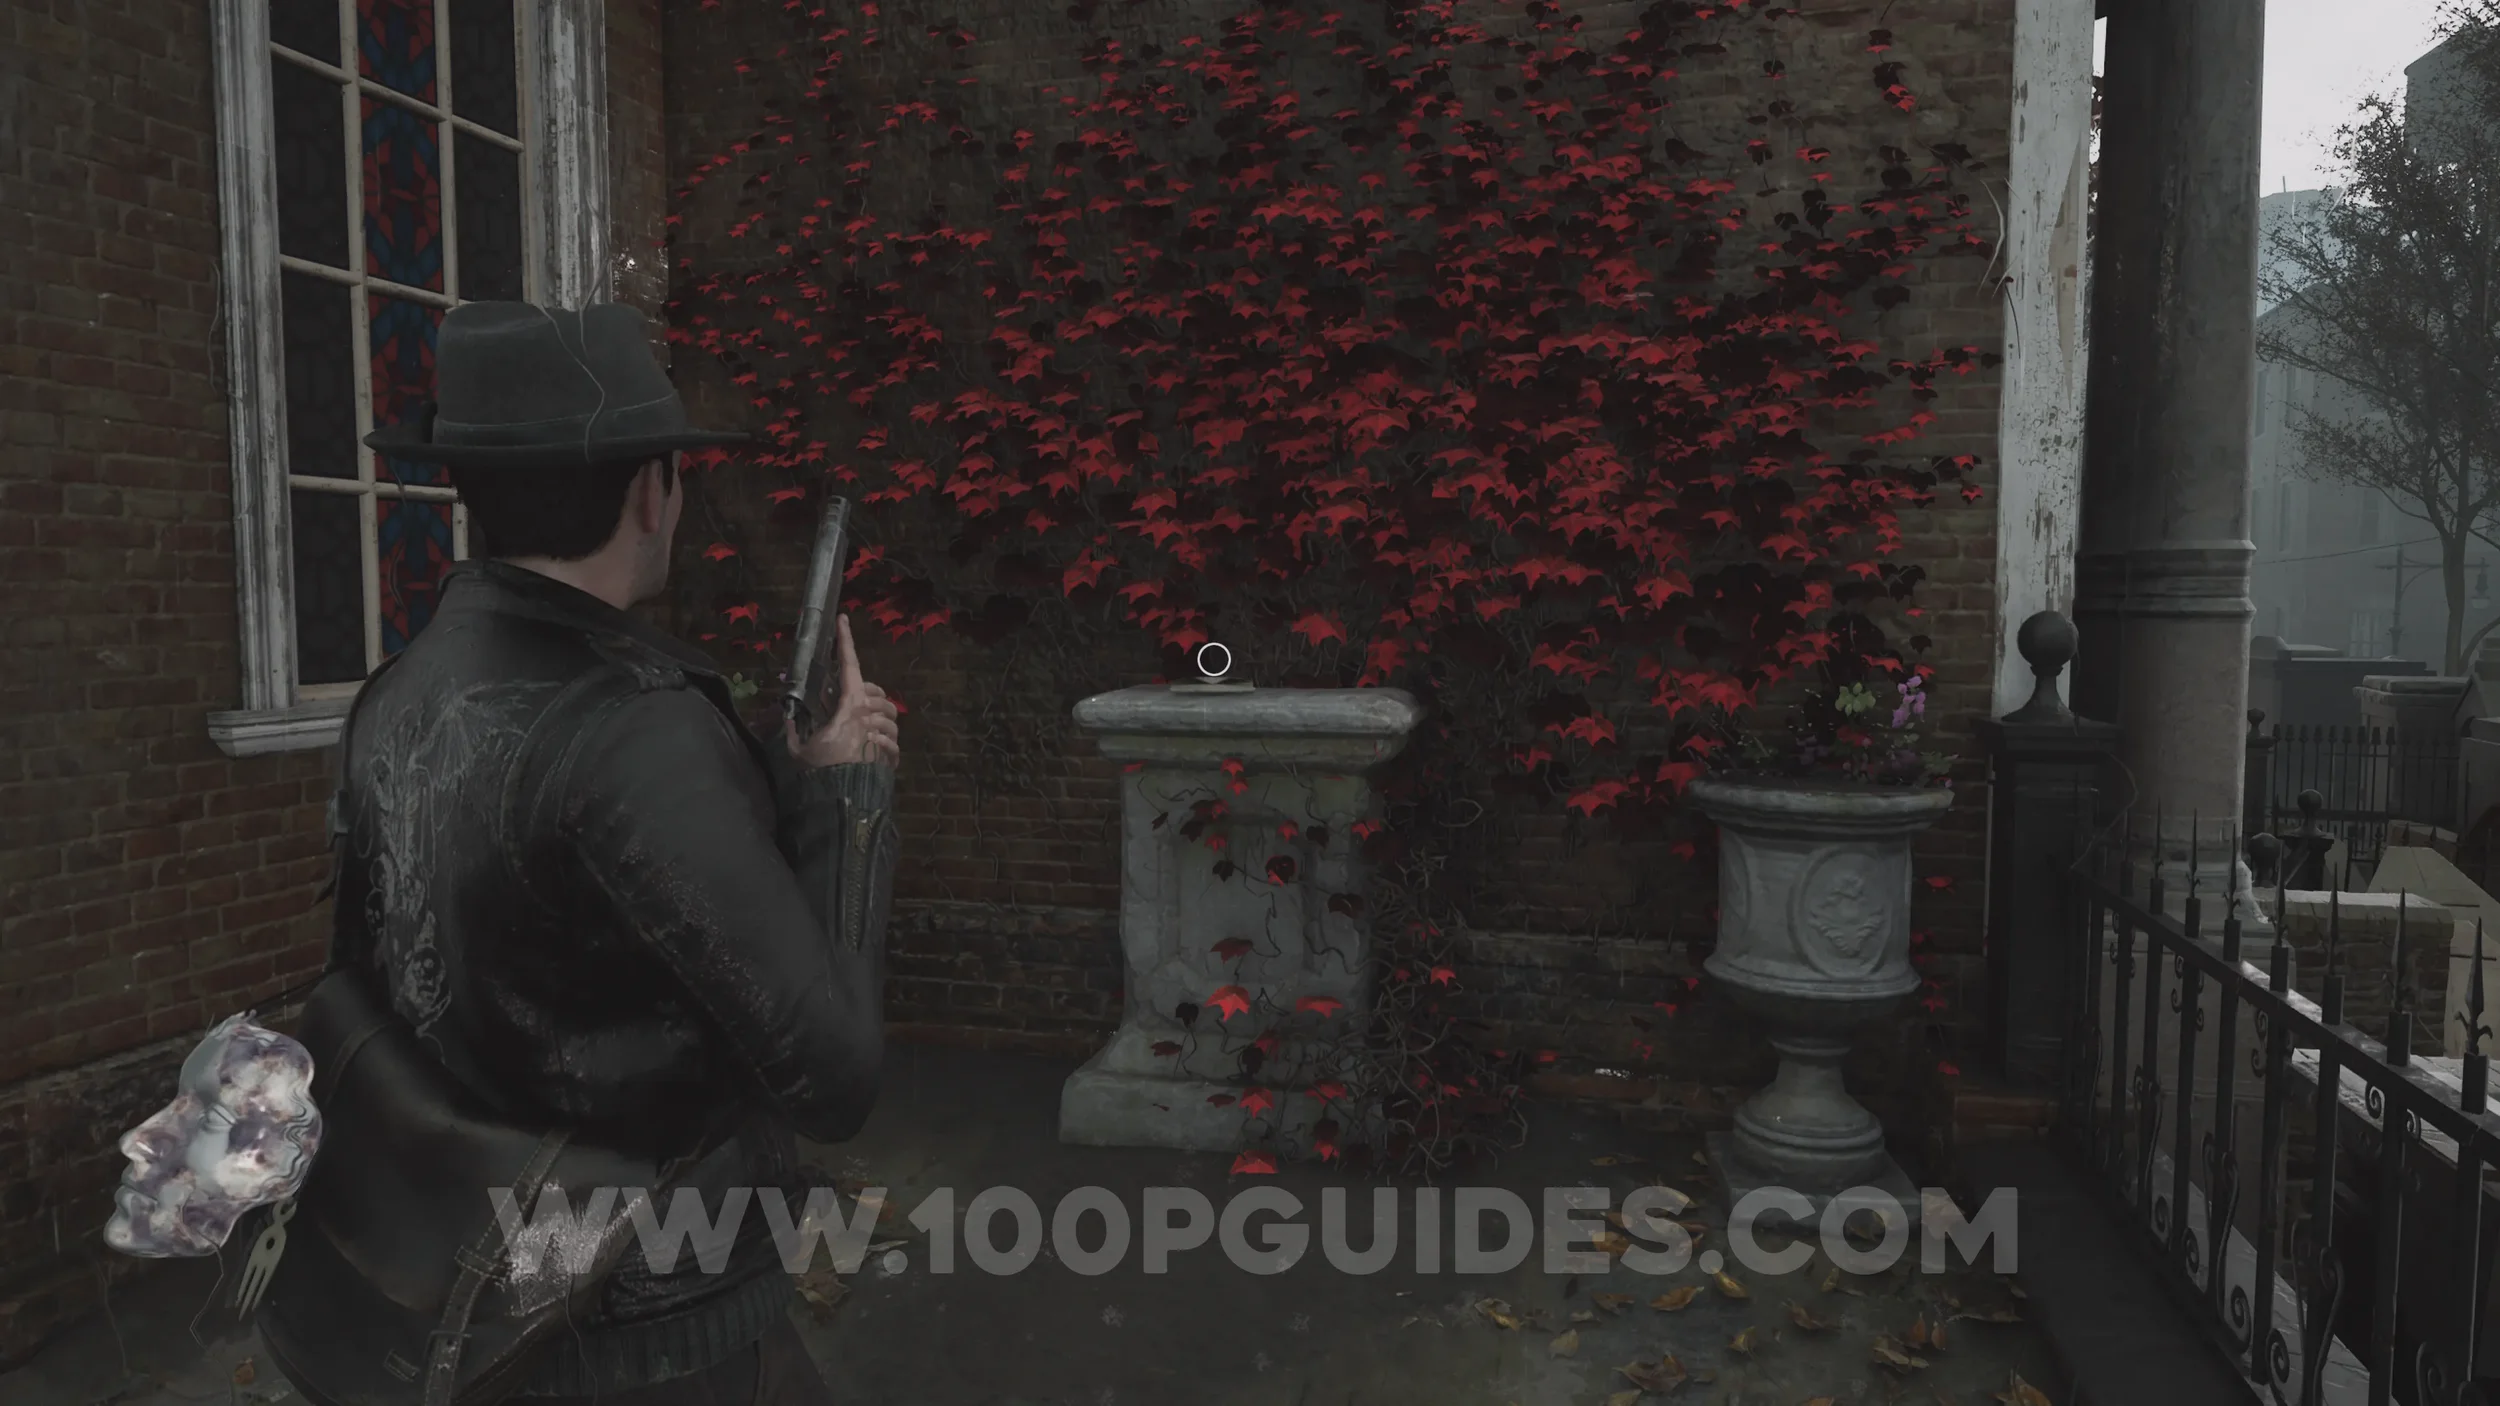
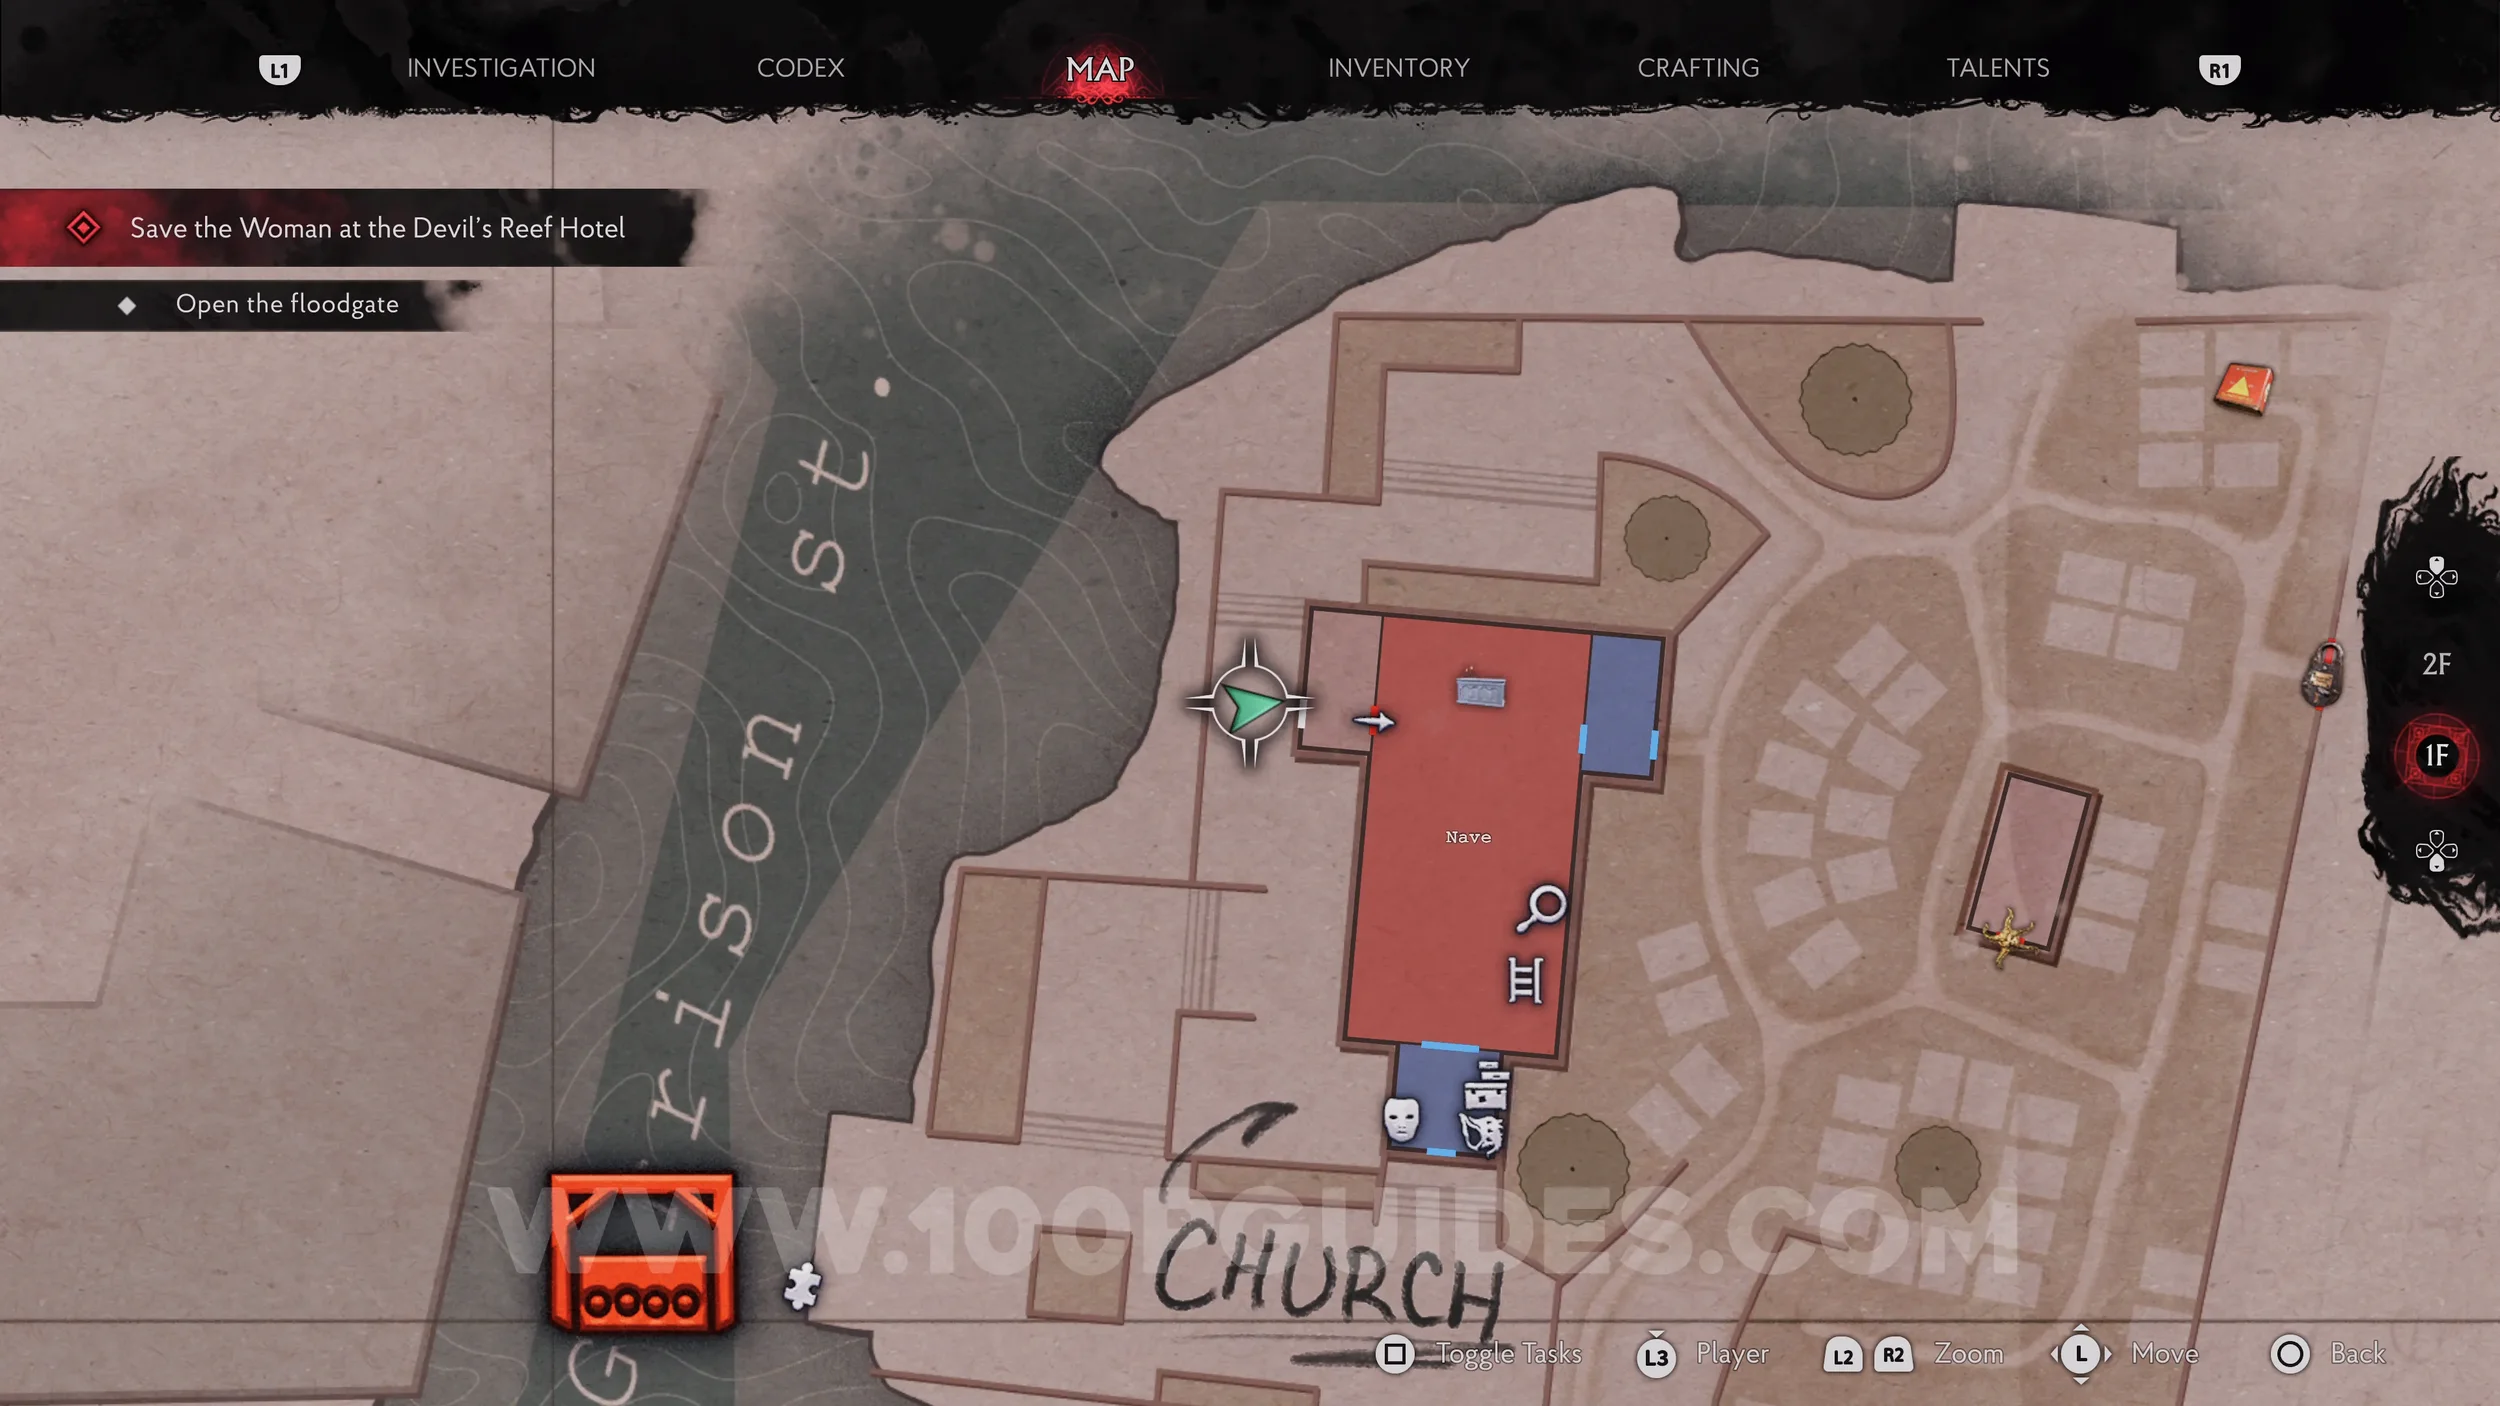
Lore Codex: Lost Letters - The Conduit. Head north from the previous collectibles and up the small set of stairs. Then turn right to find this codex on a pedestal against the wall of the church, covered in red flowers.
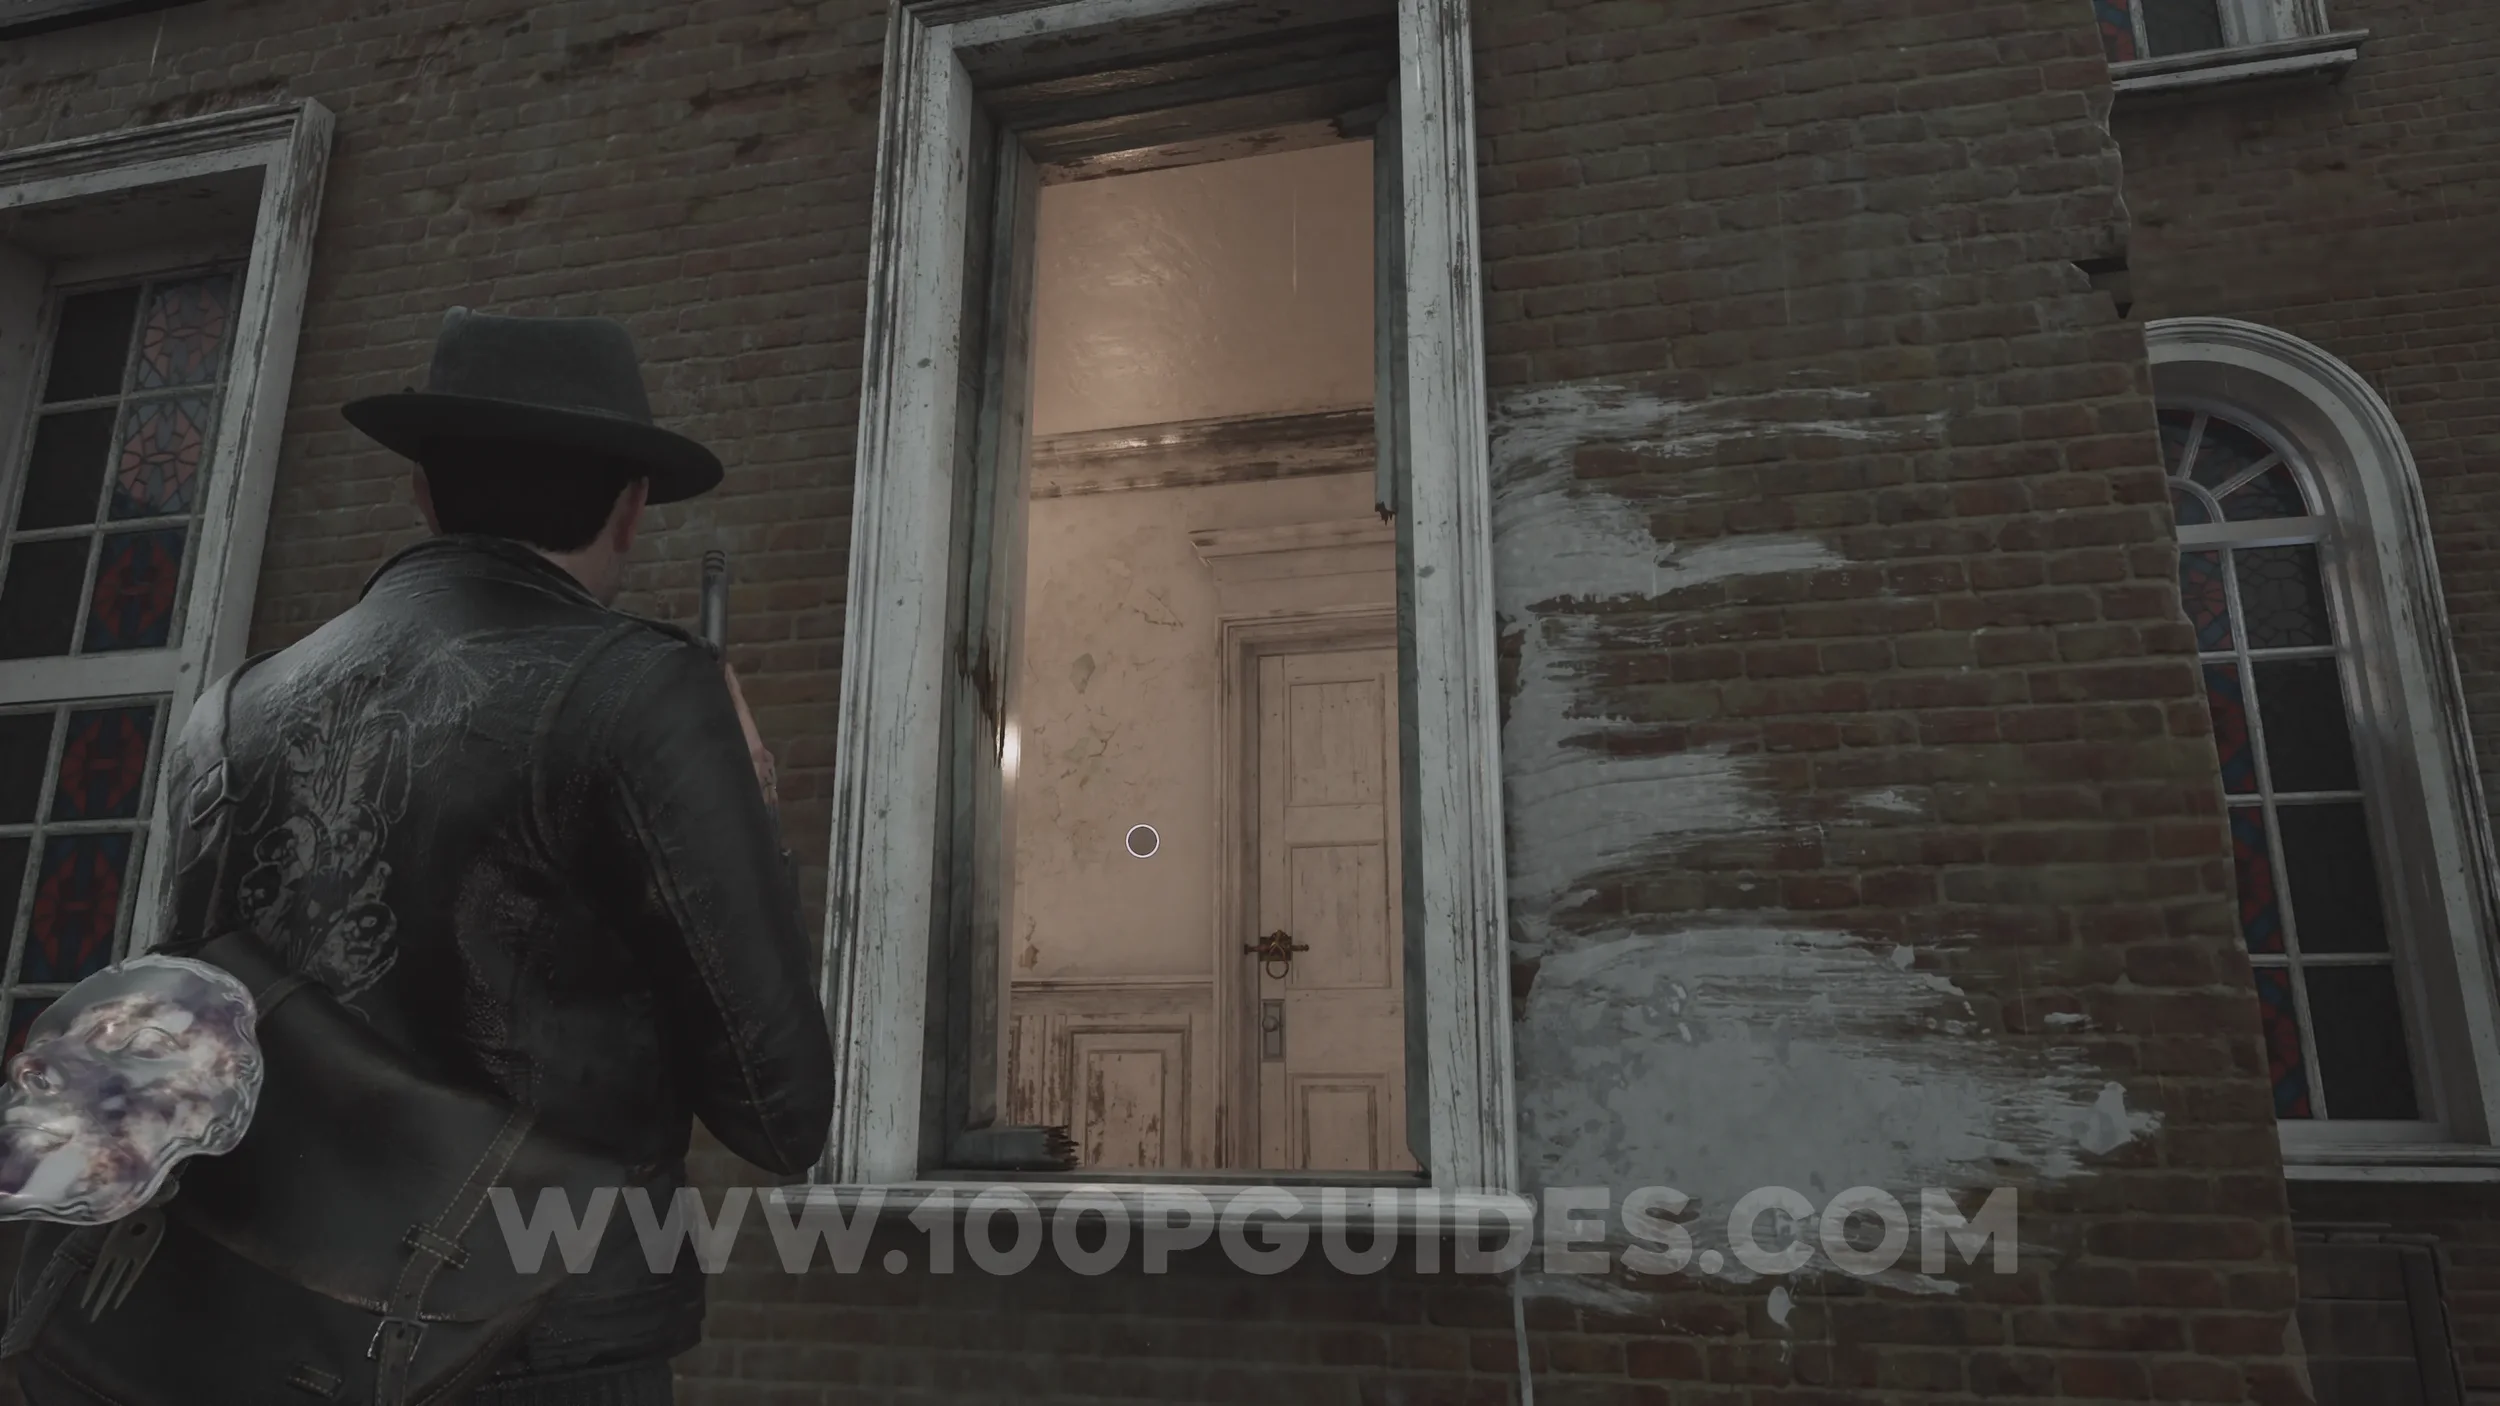
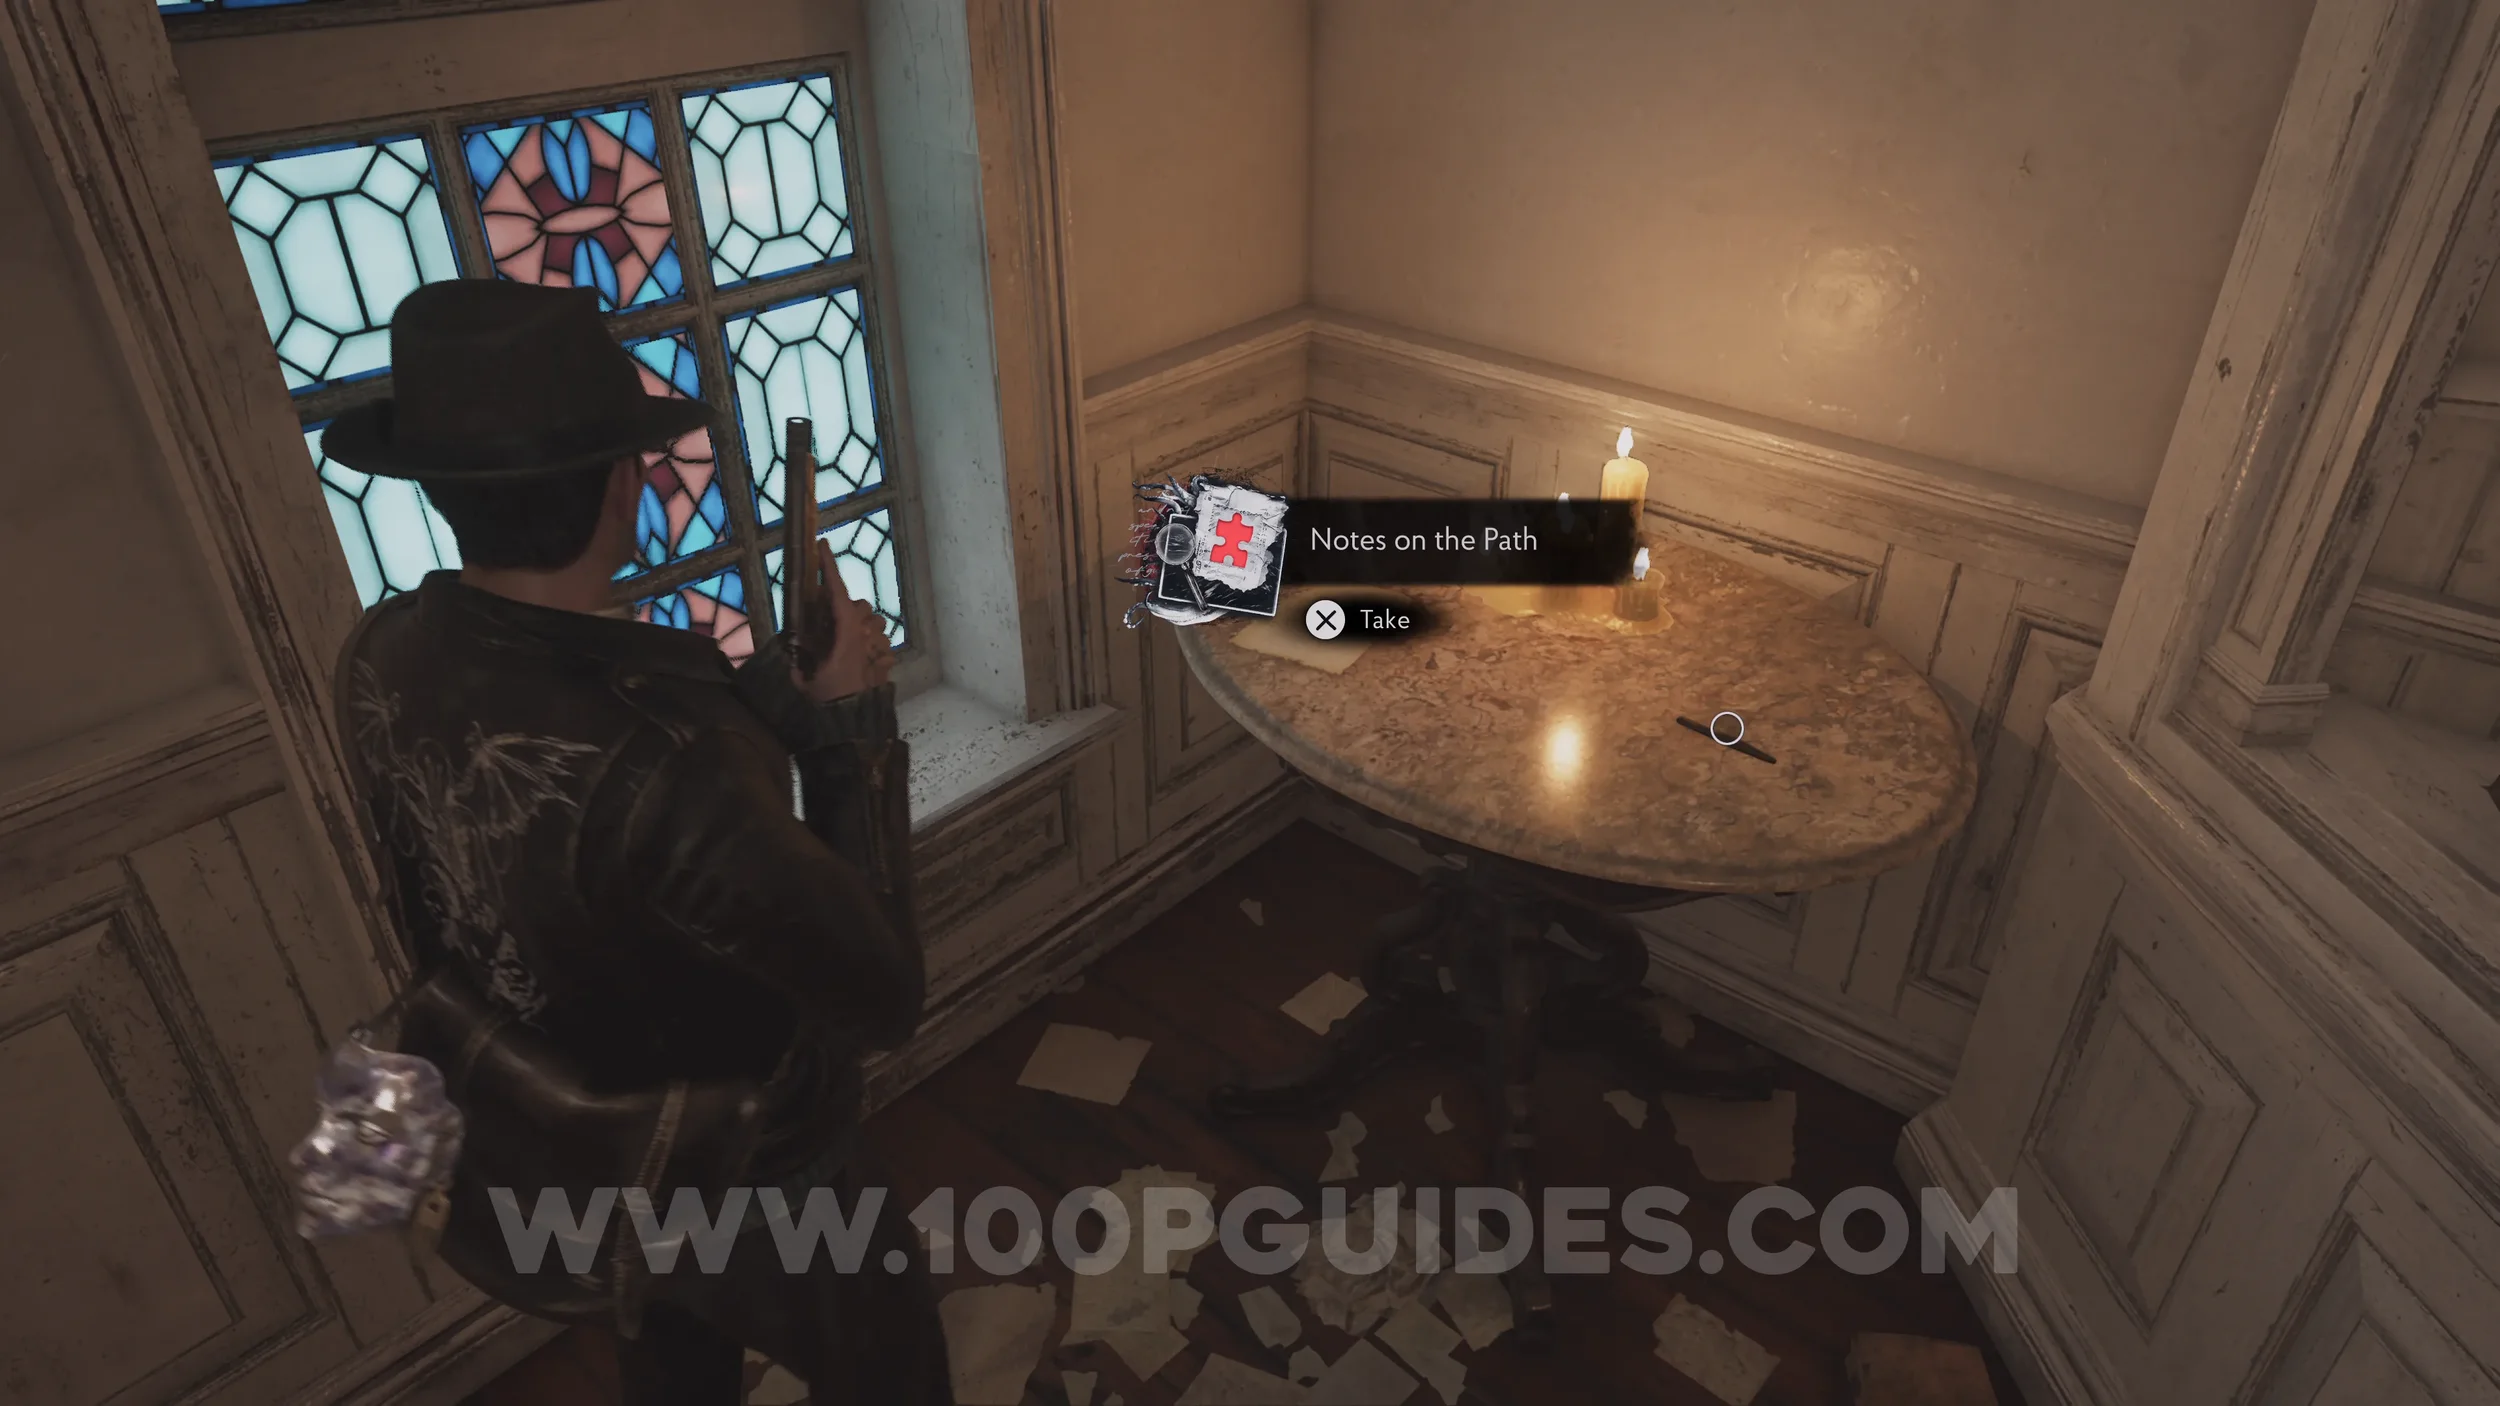
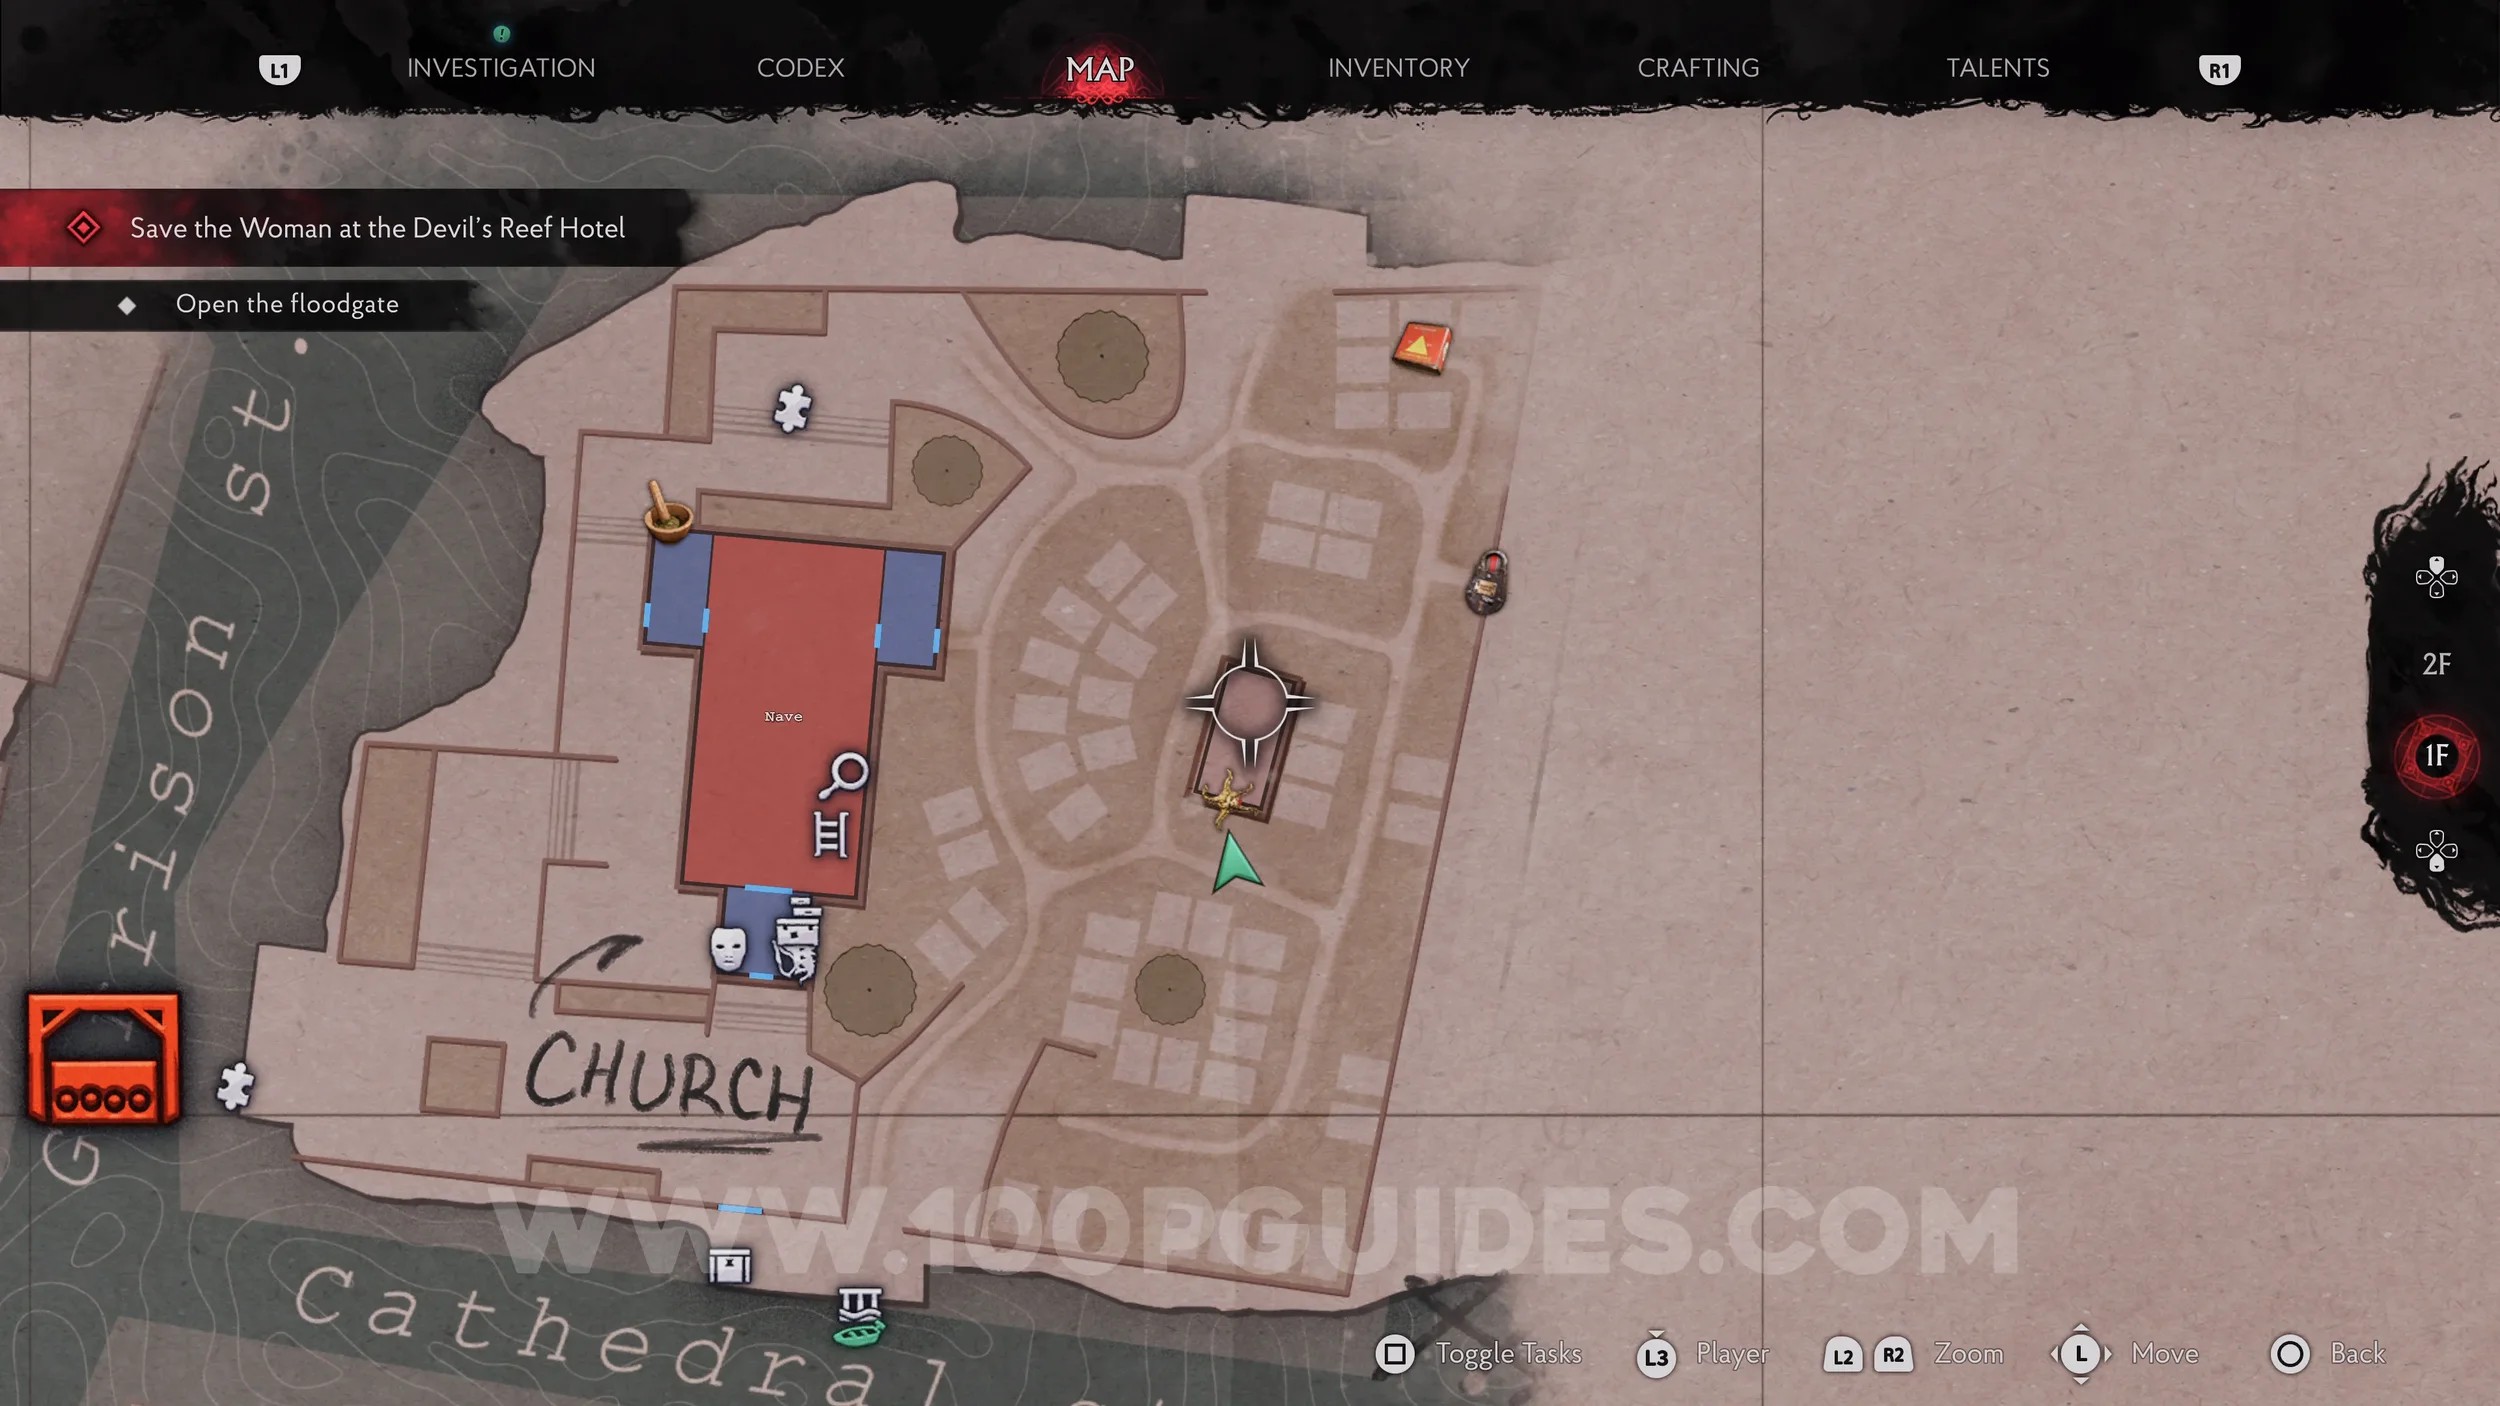
Evidence: Notes on the Path. Continue north up the western side of the church until you see an open window you can climb through. The evidence is on the round table inside.
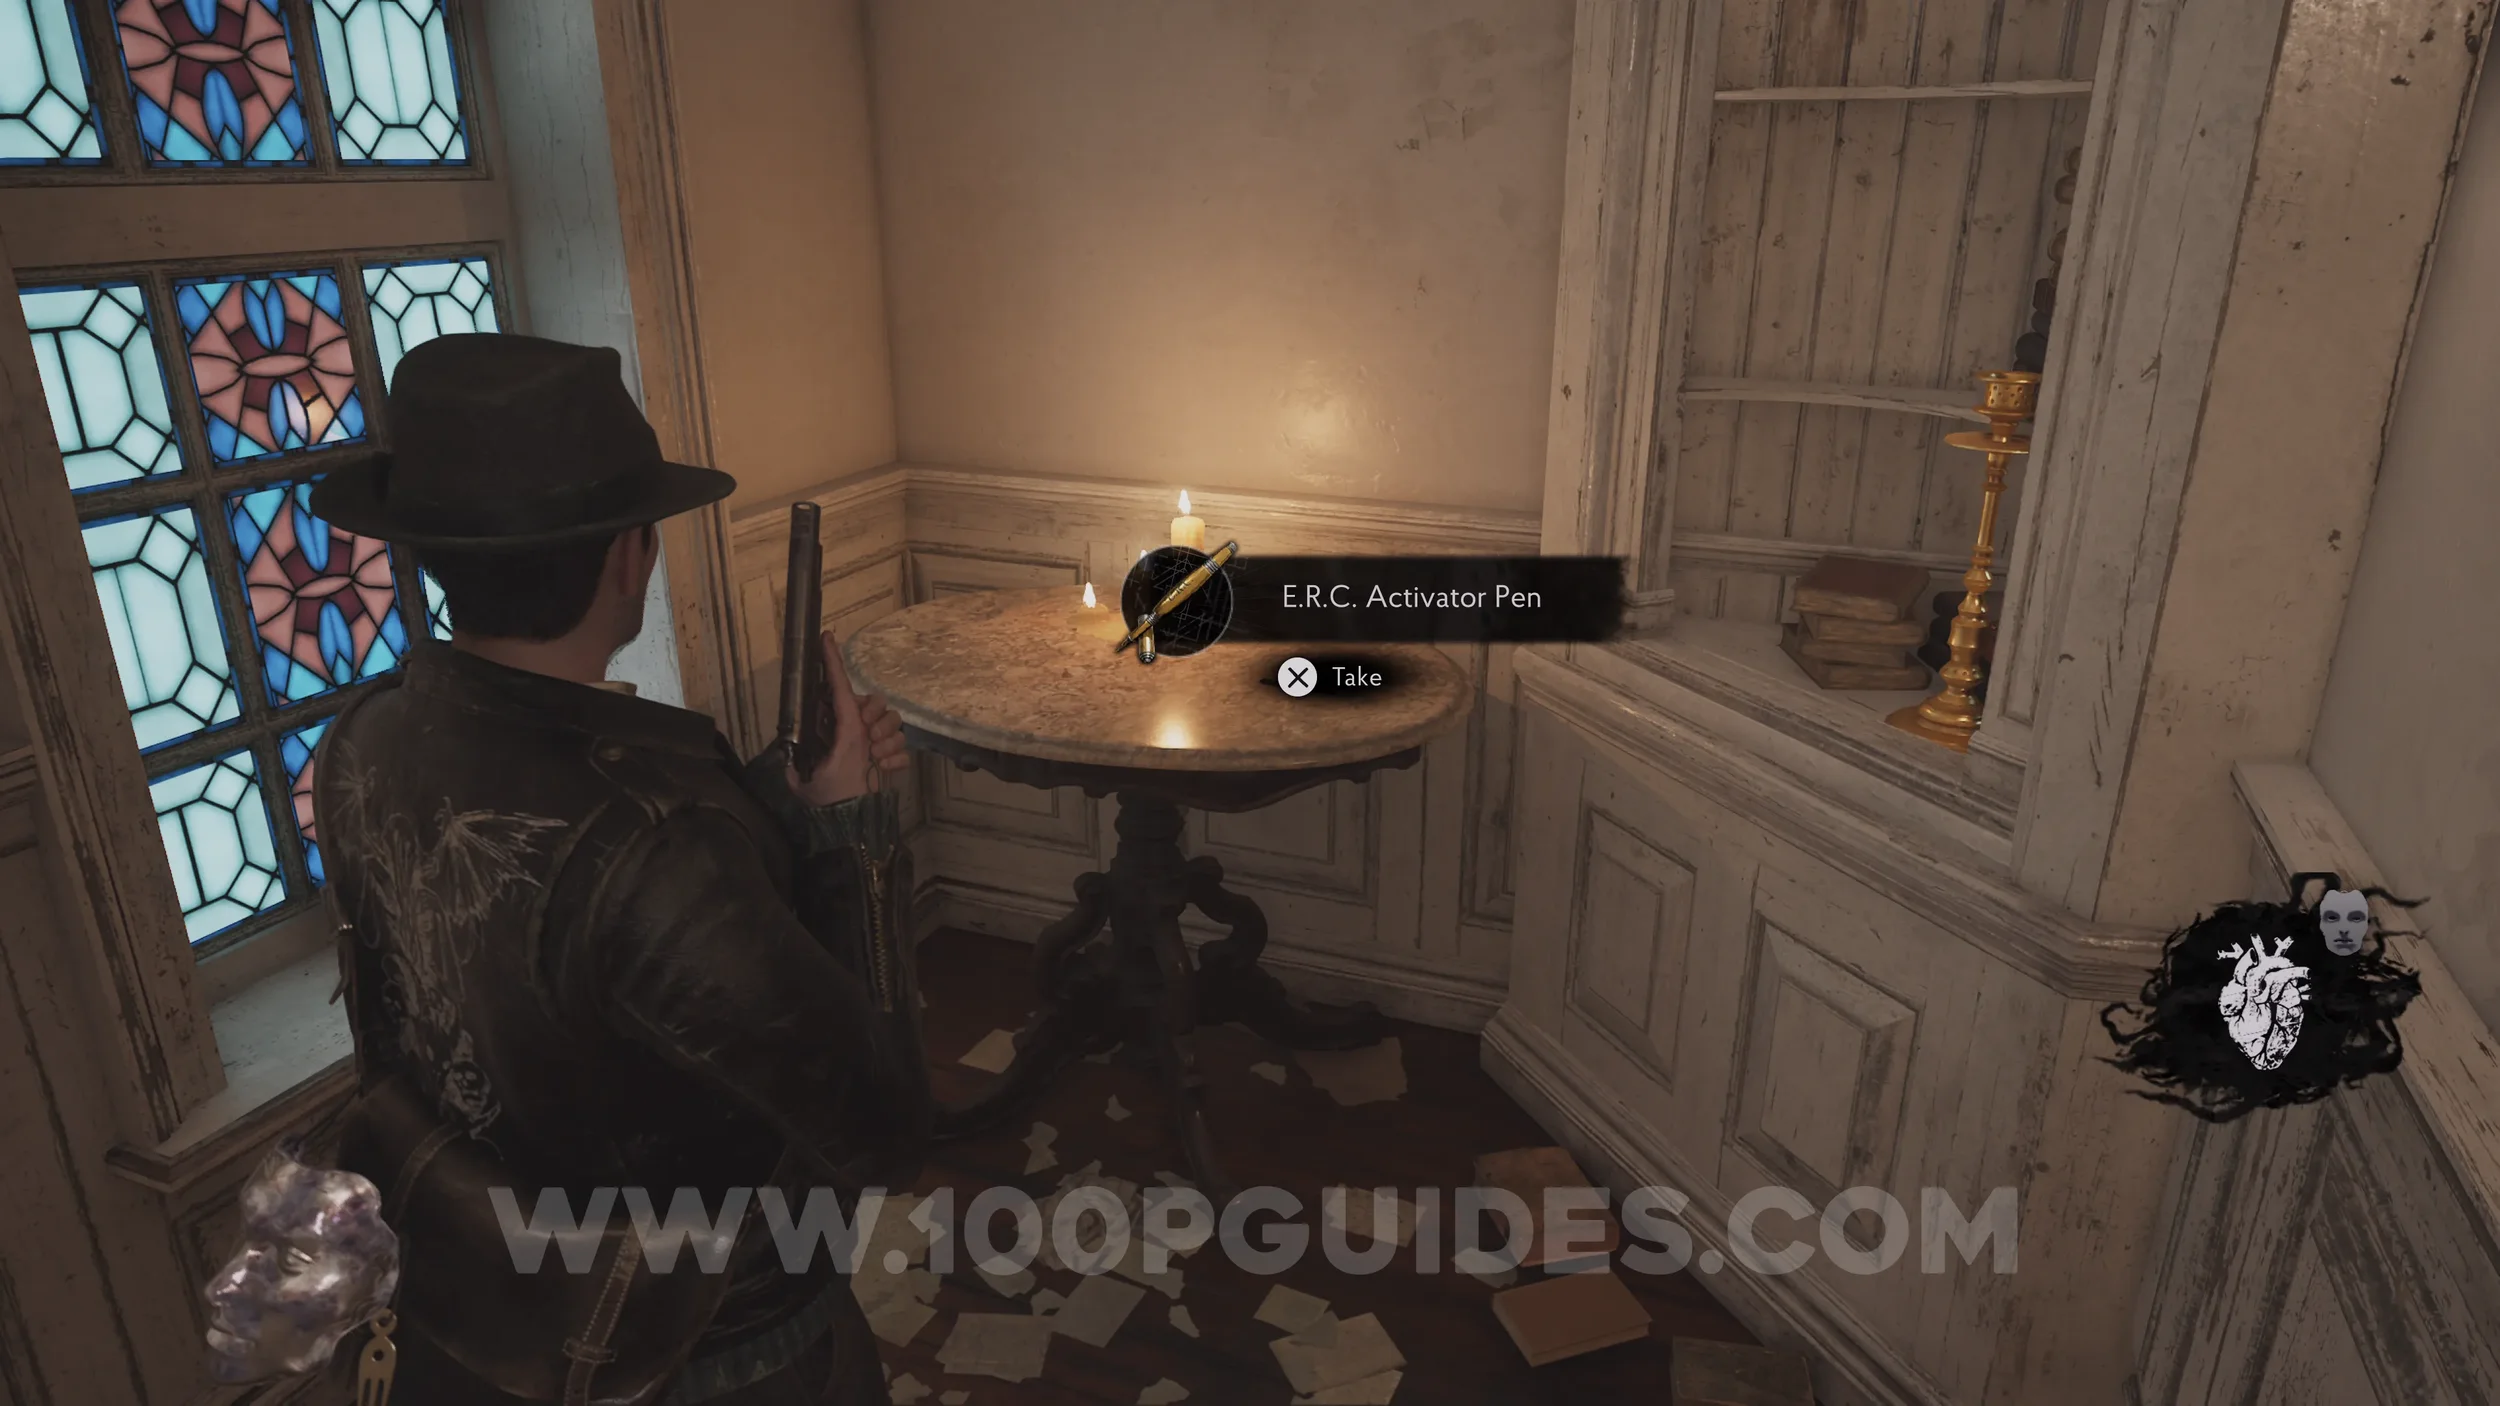
E.R.C. Activator Pen. On the same round table as the previous collectible.
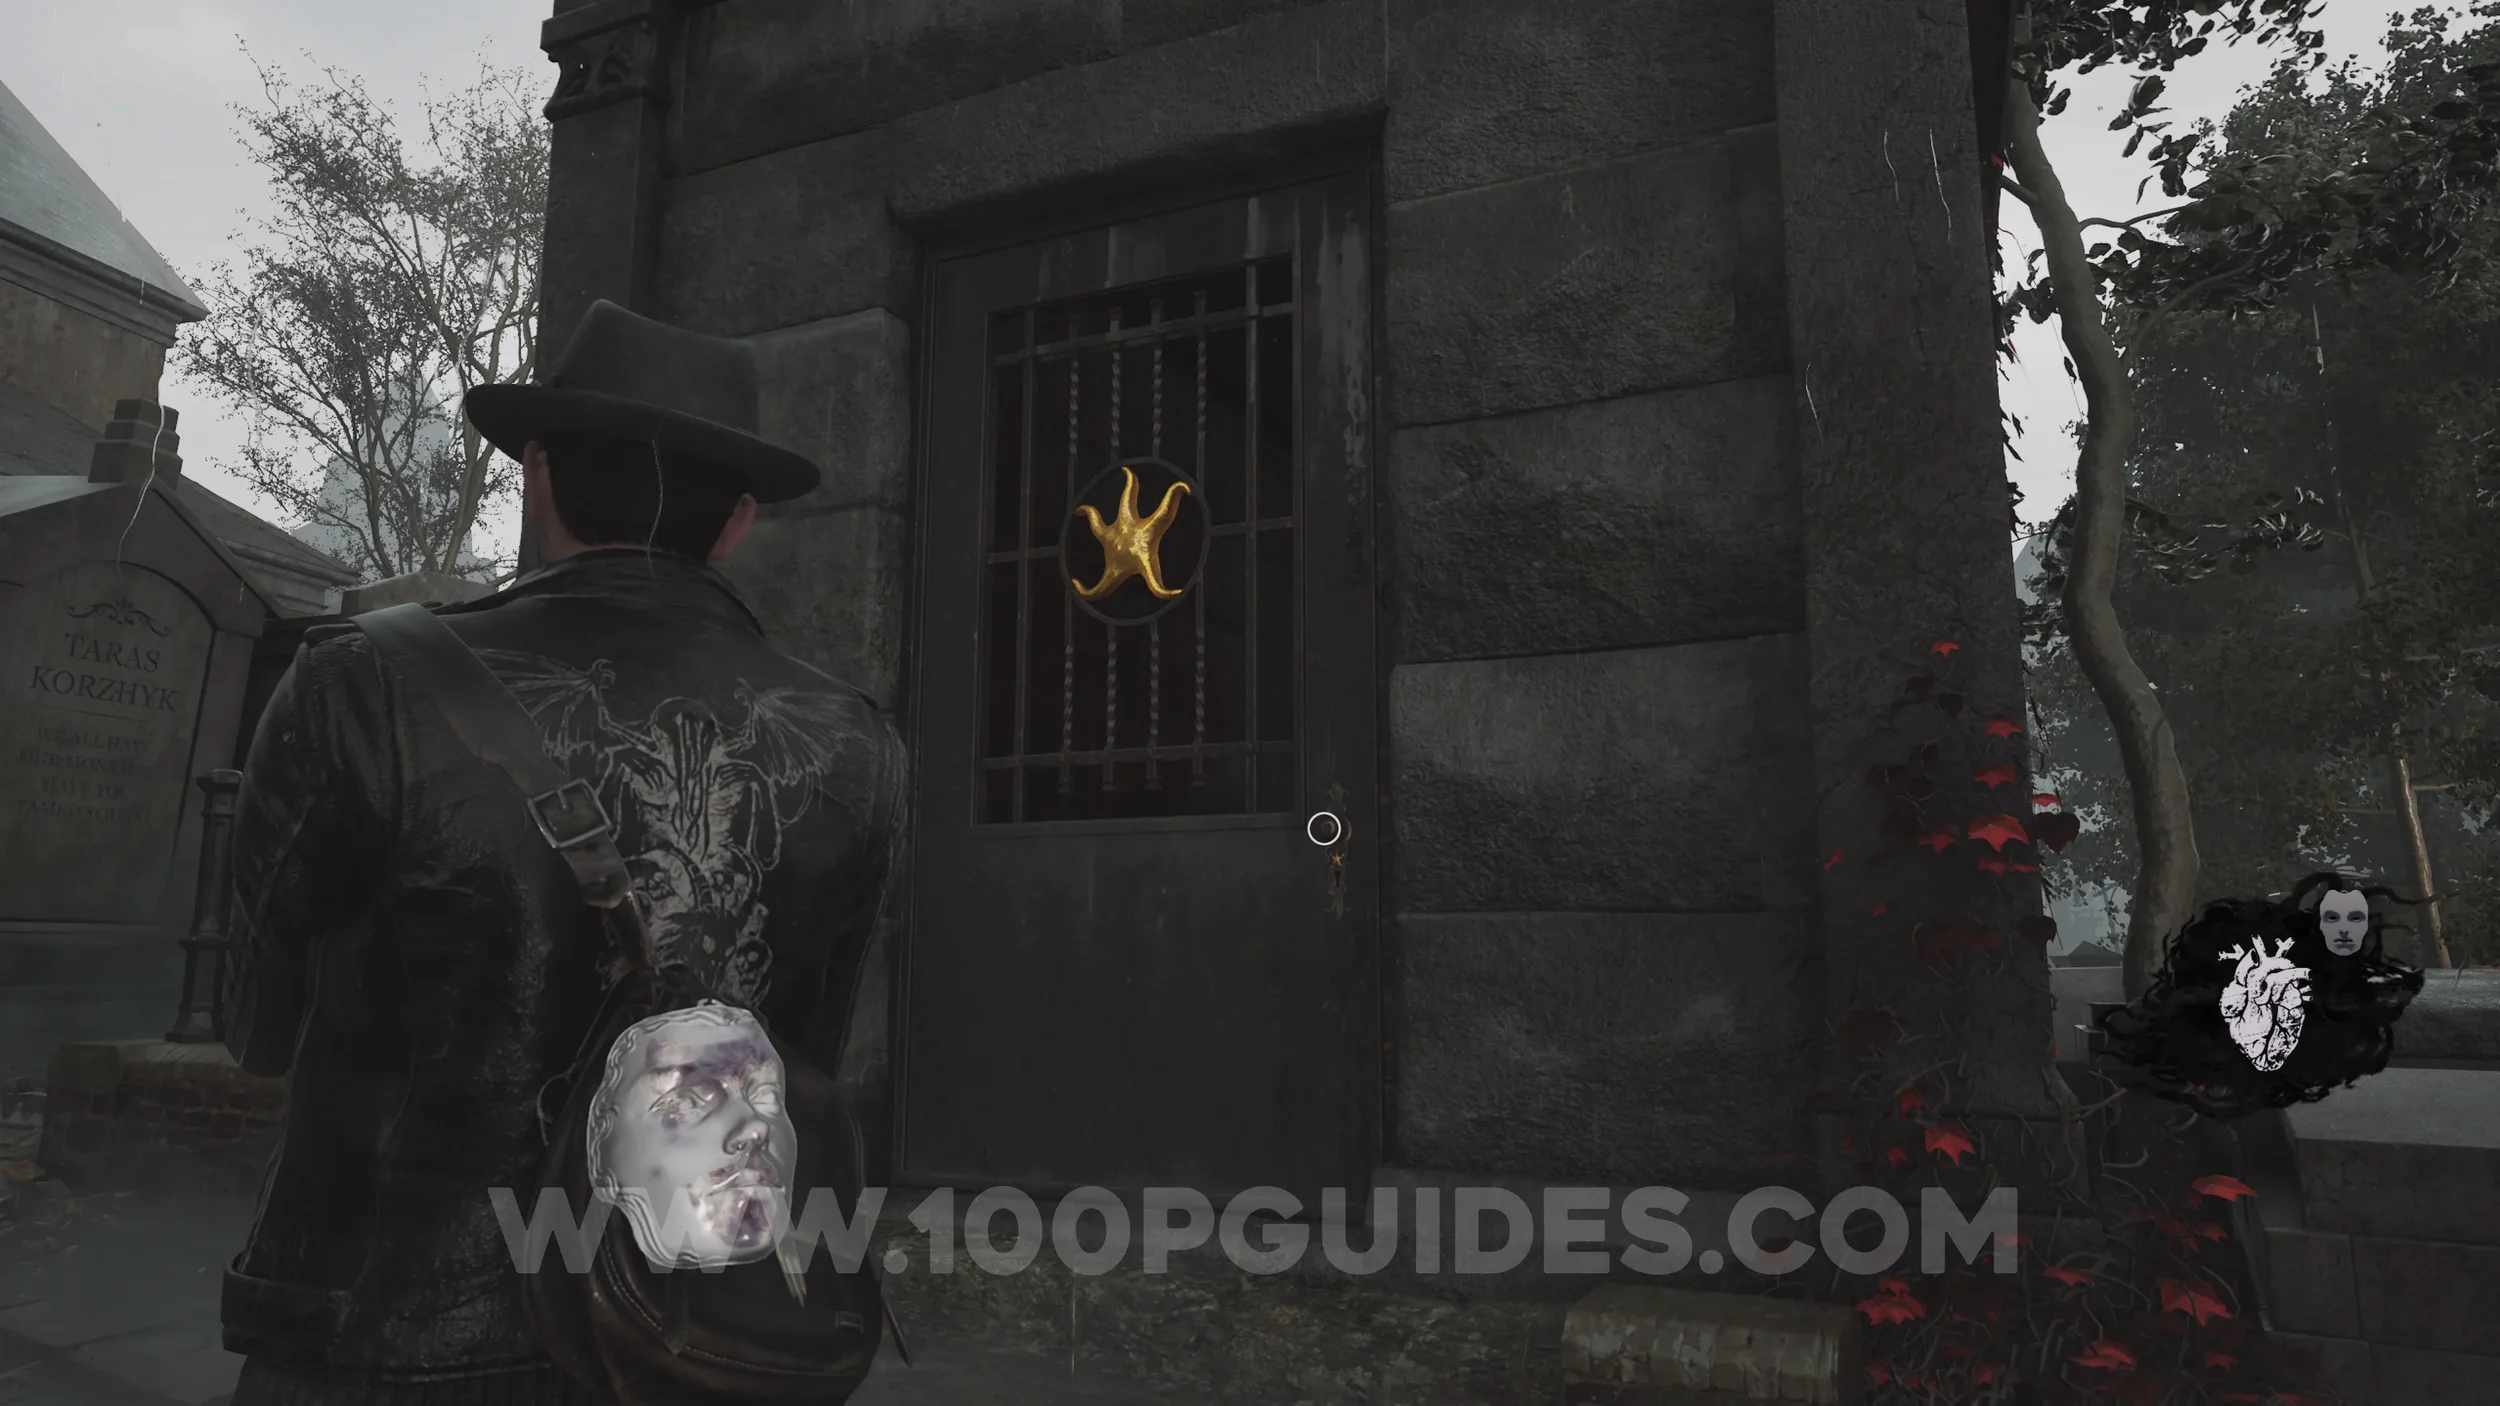
Emergency Relief Crate (E.R.C.) + Inventory Expansion. Now that you have the Star Key, head to the mausoleum in the graveyard and open it. Inside you'll find the E.R.C. Container, which you can now open with the pen to grab the Inventory Expansion.
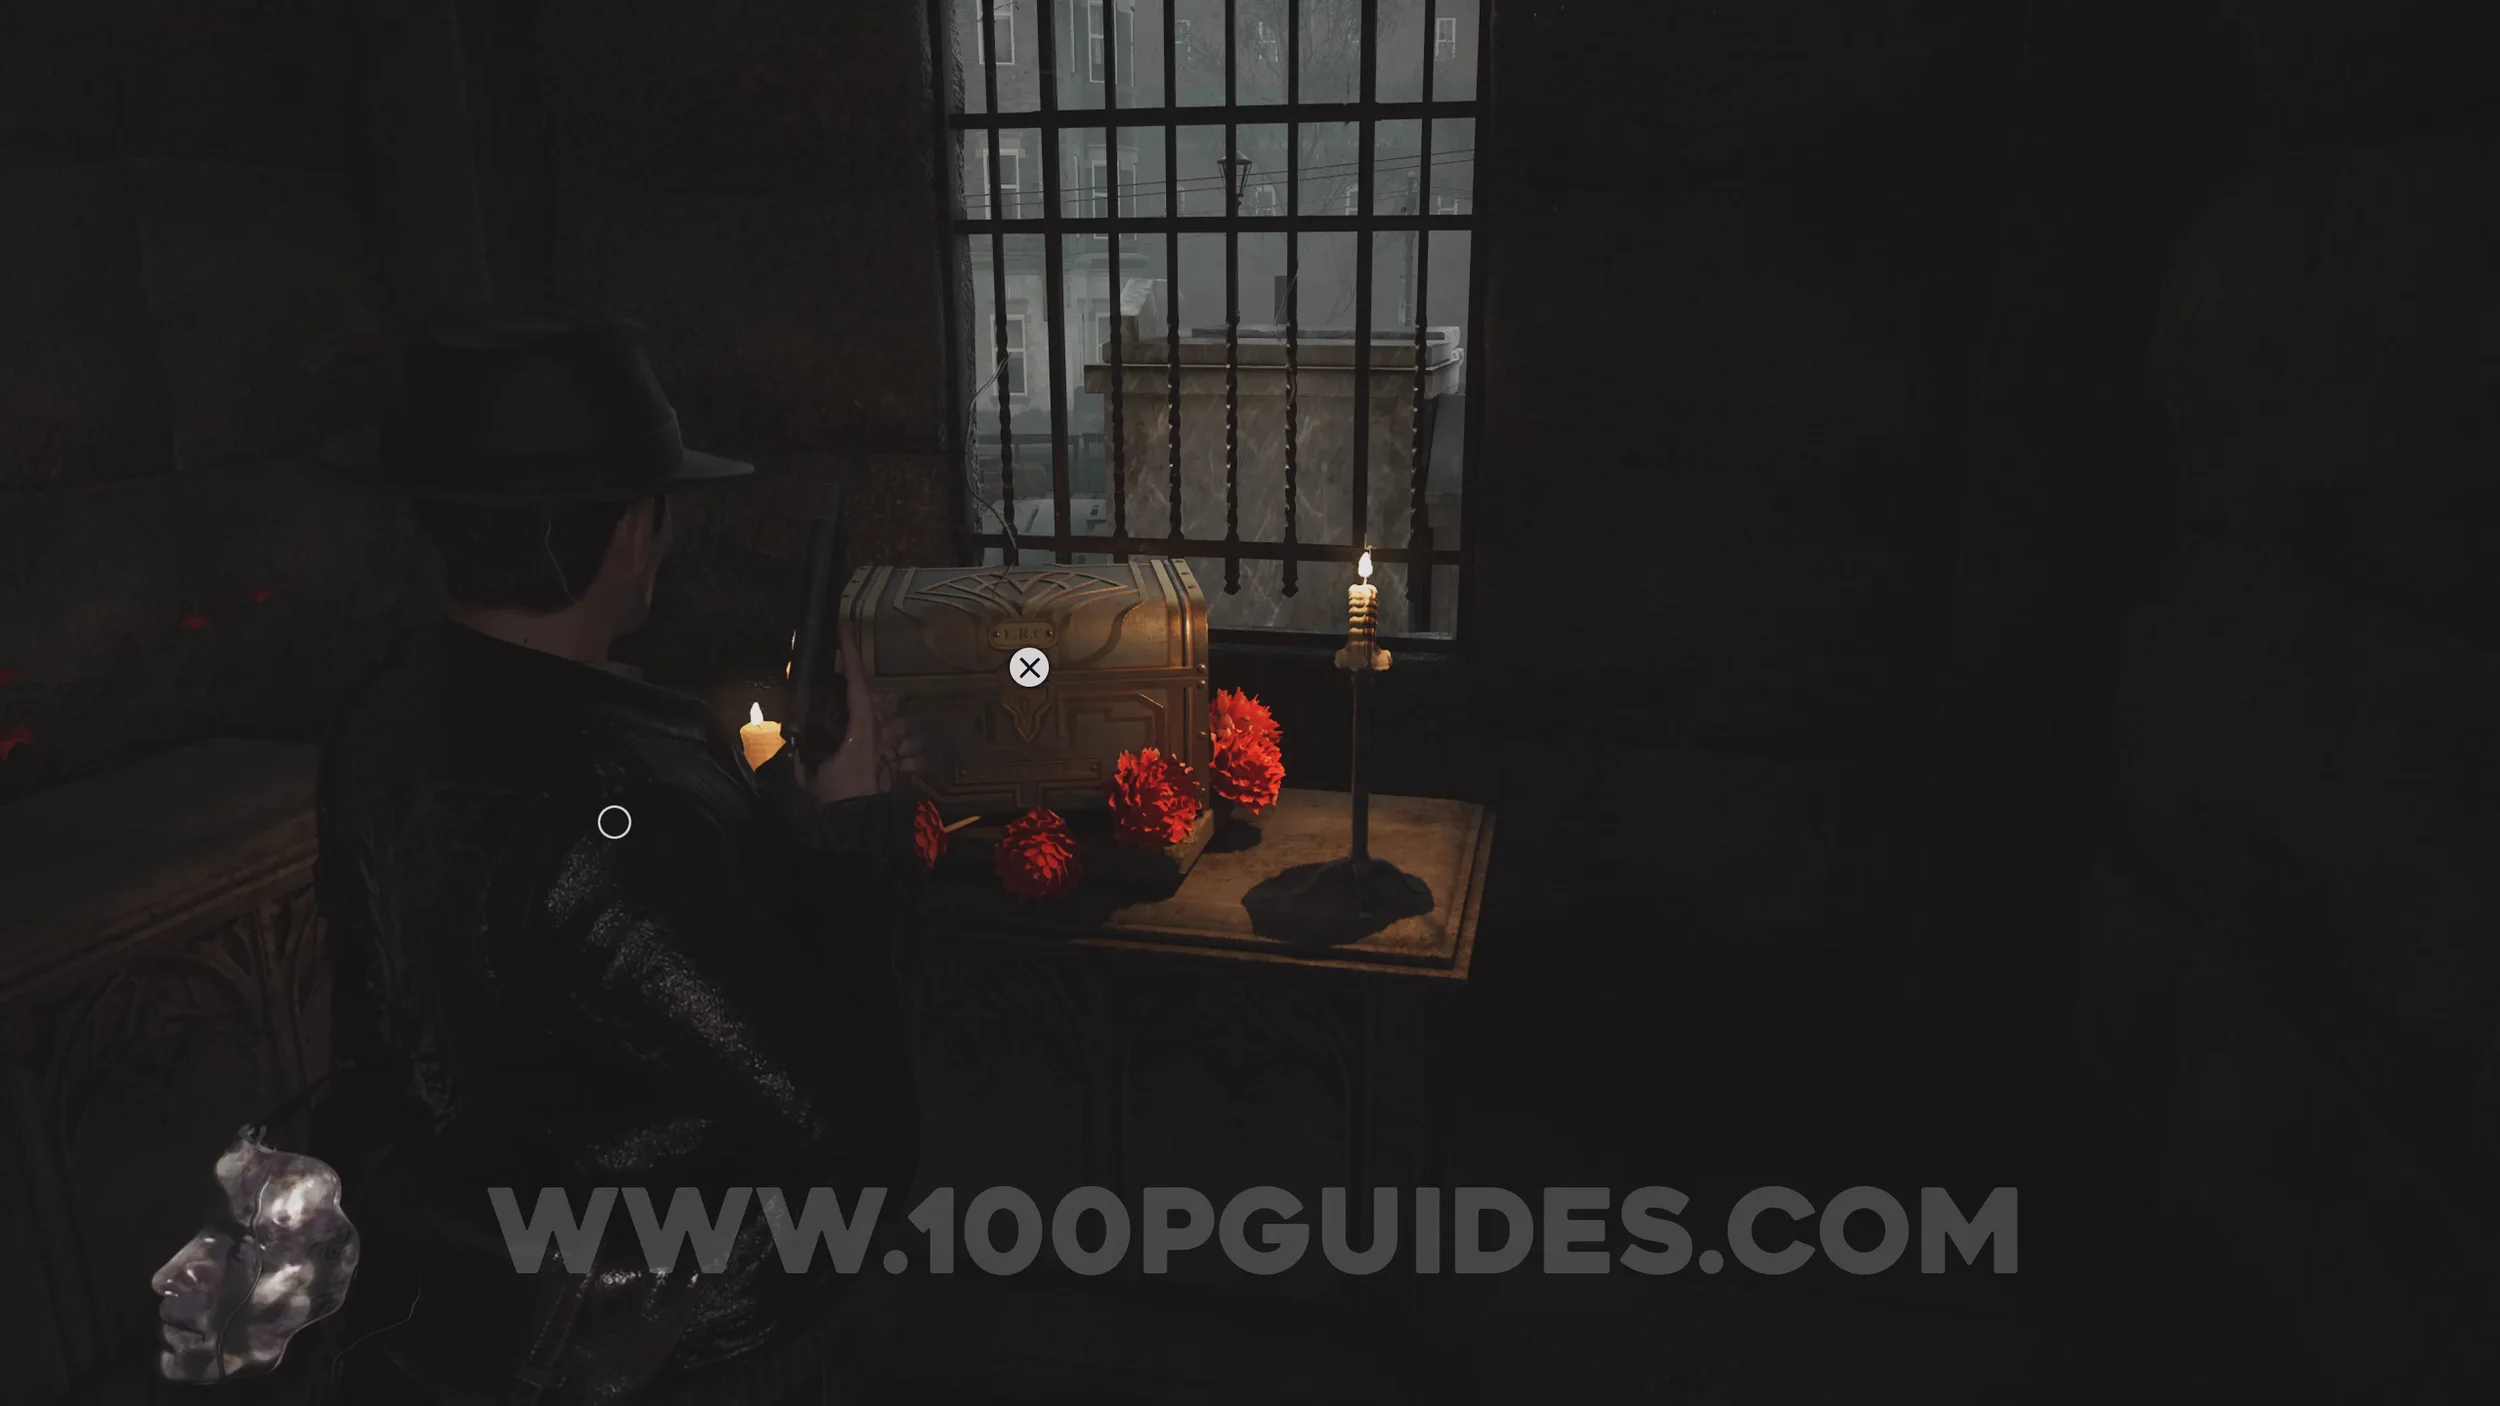
Evidence: The First Vision. On the altar next to the E.R.C. Container.
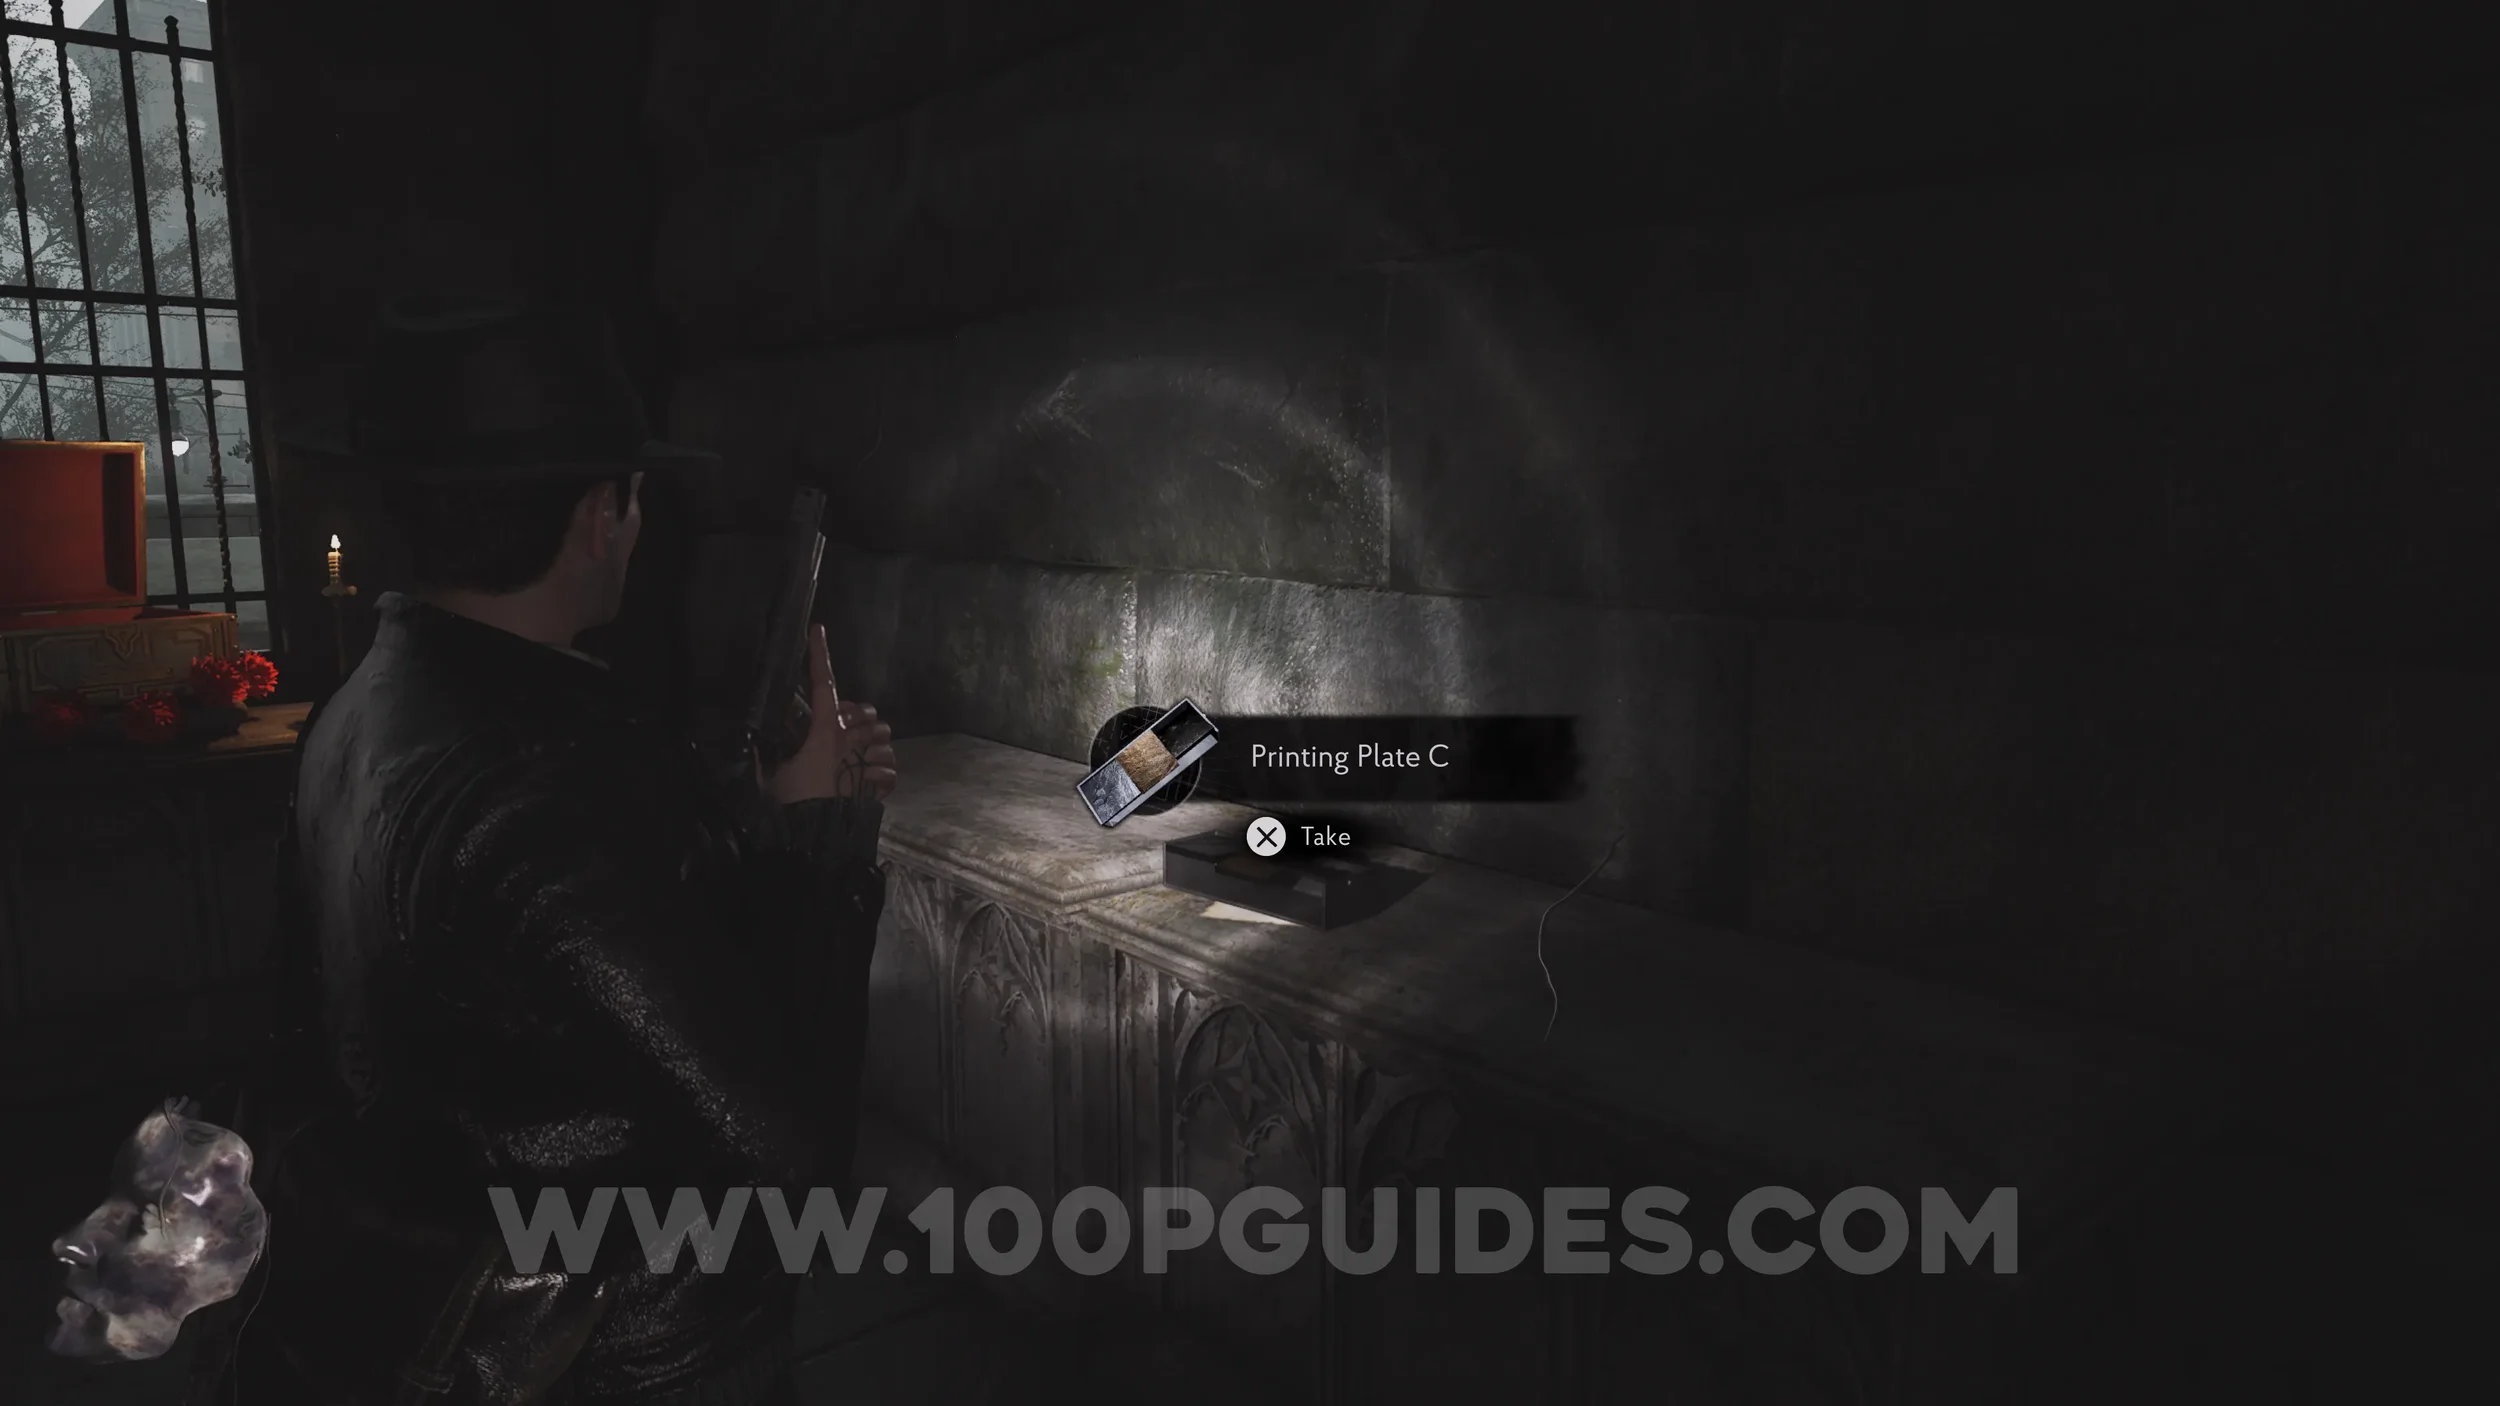
Key Item: Printing Plate C: Also found inside the mausoleum.
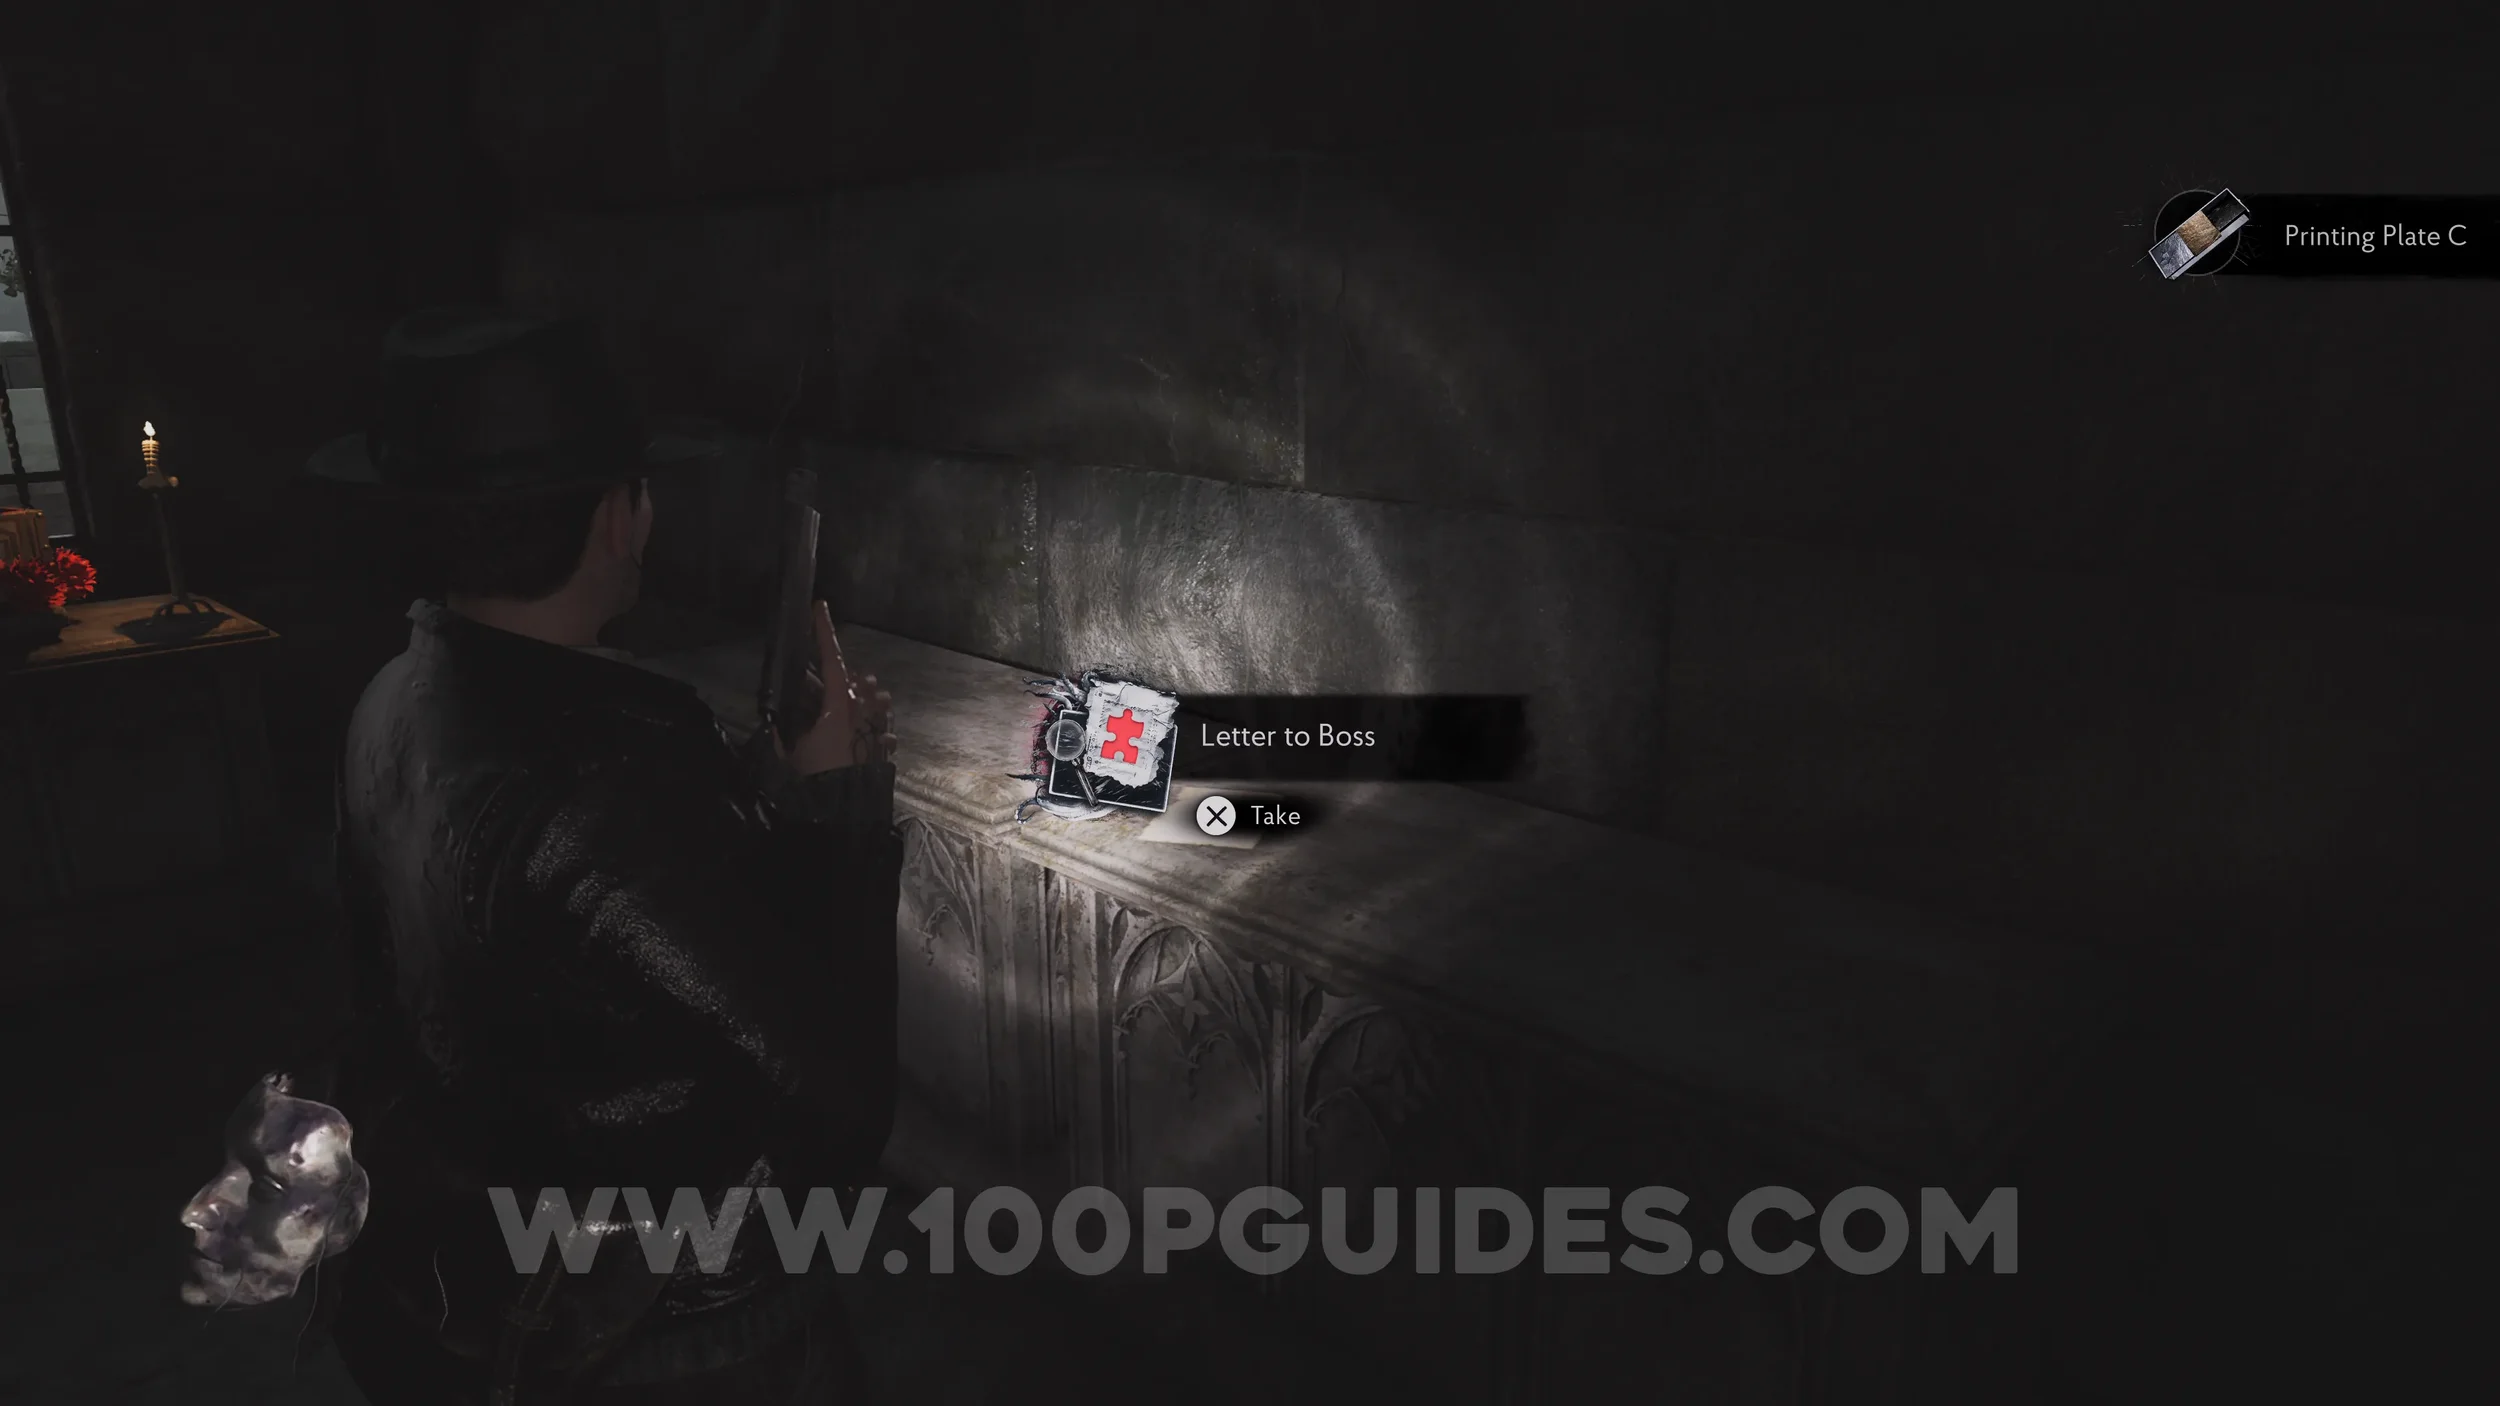
Evidence: Letter to Boss. Under the Printing Plate.
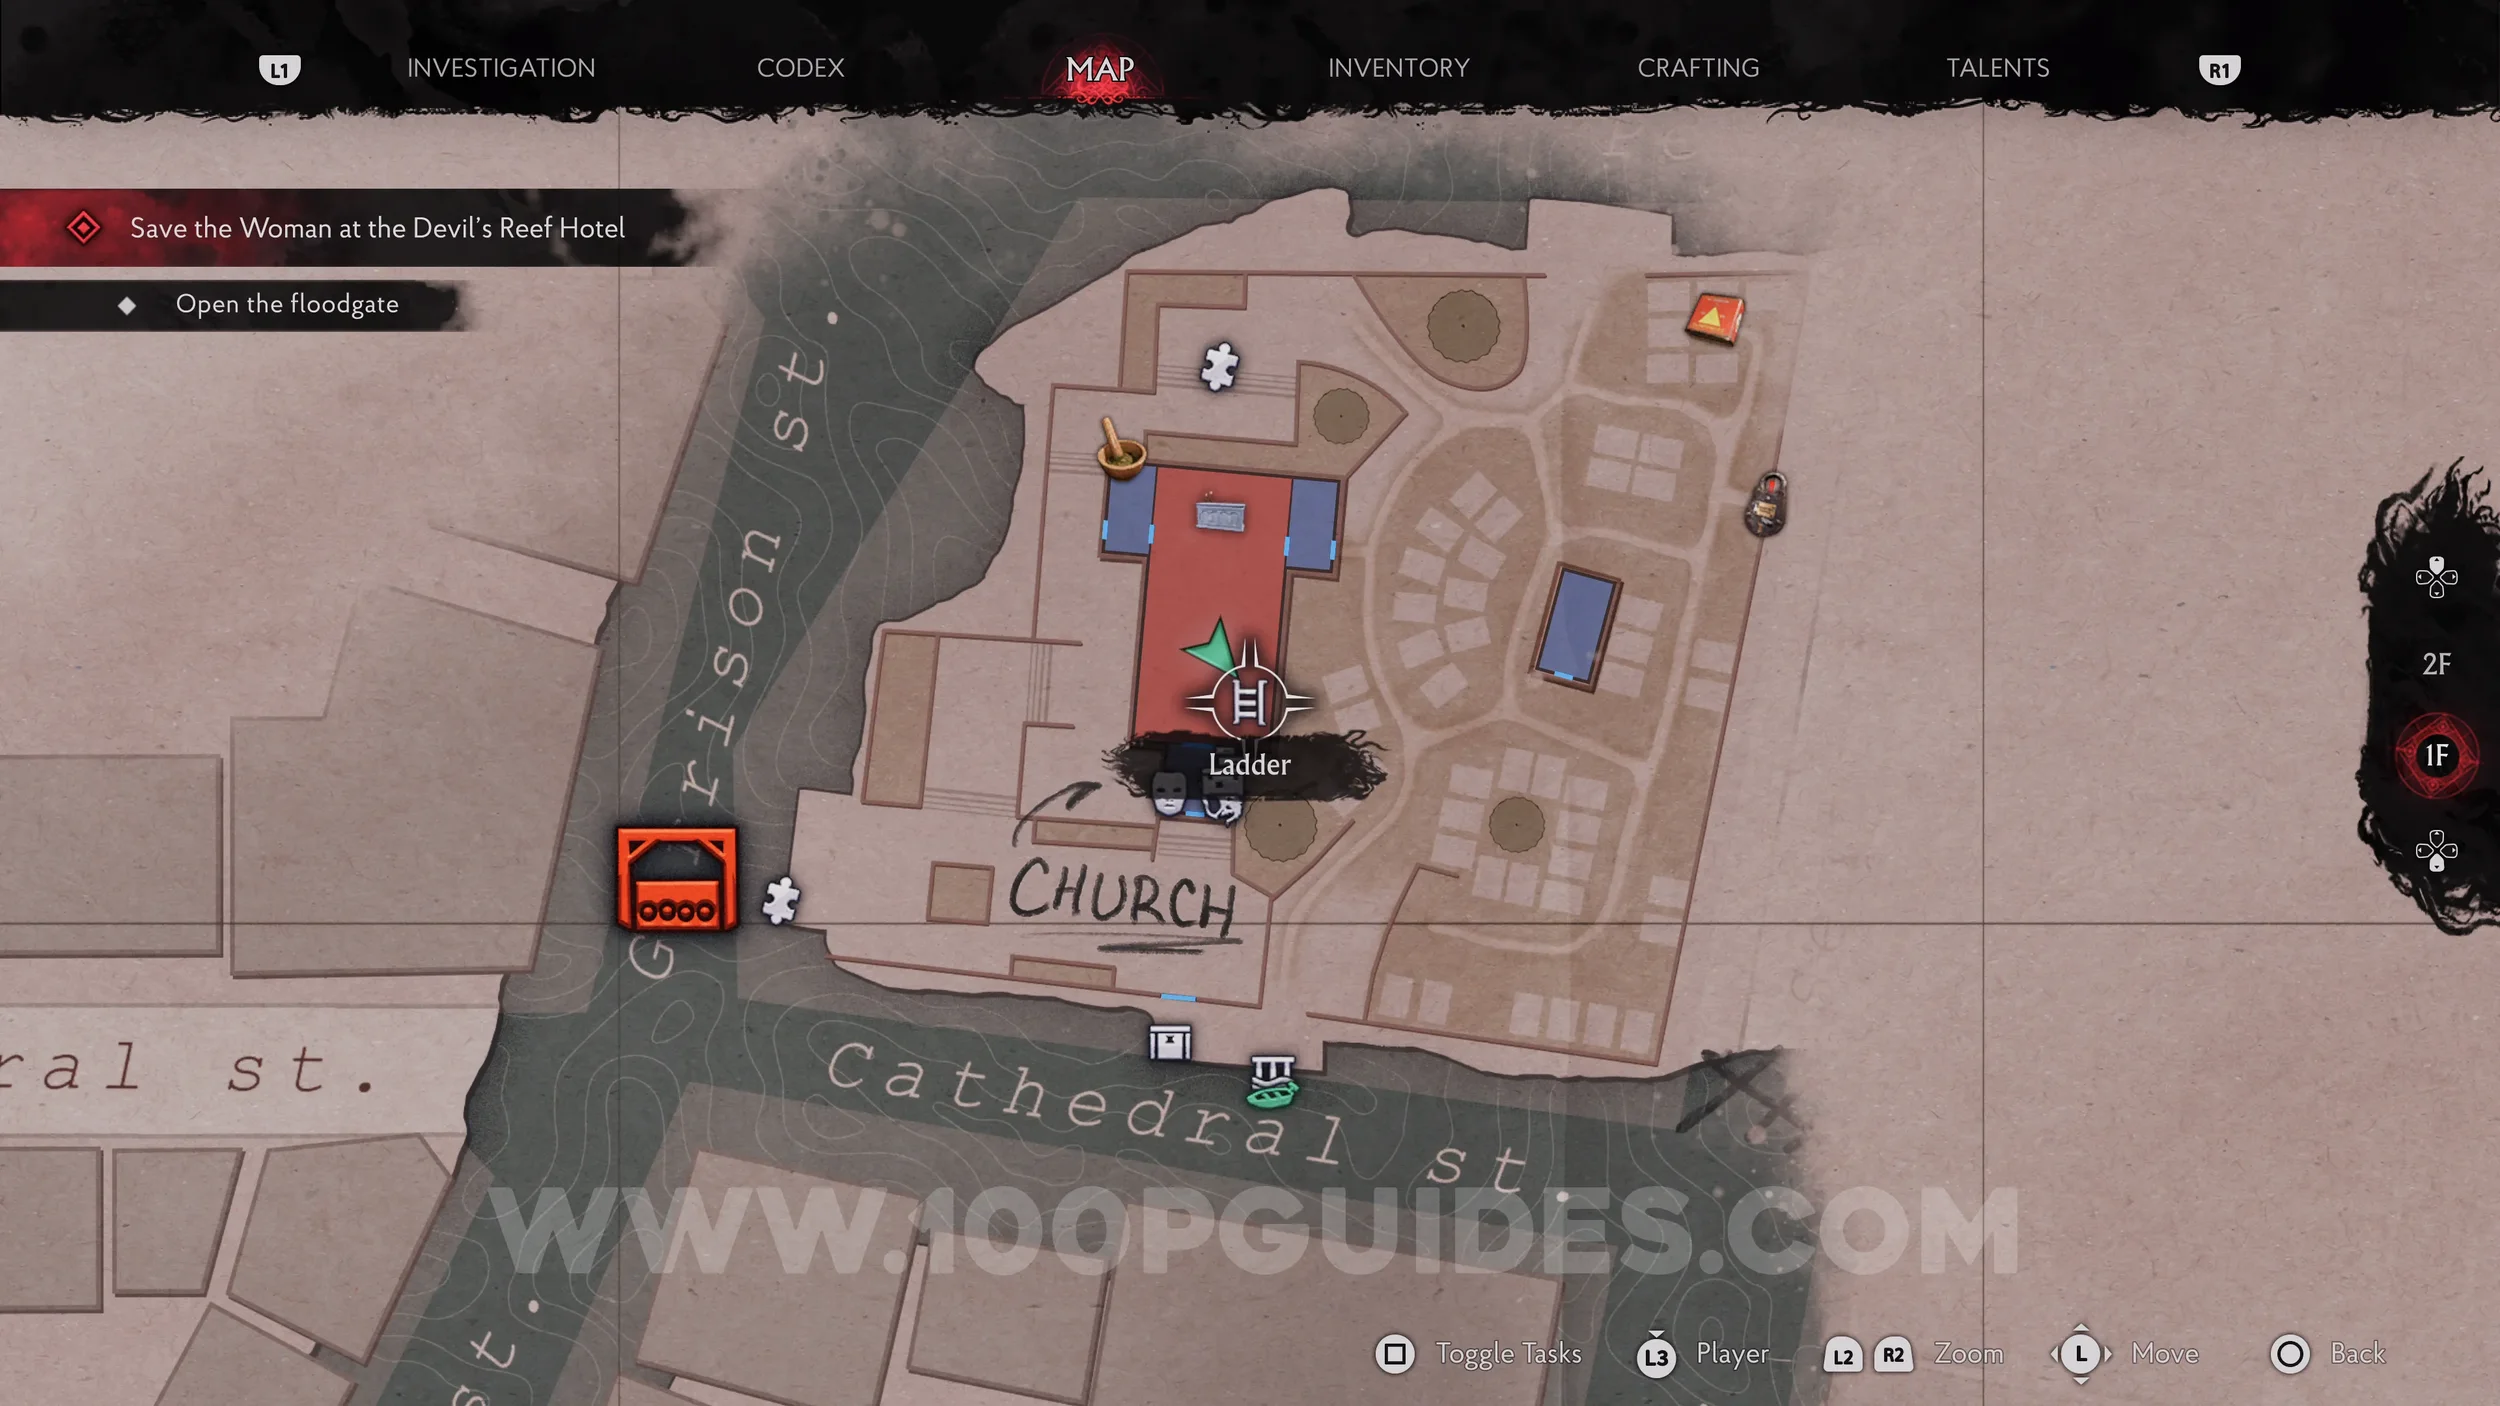
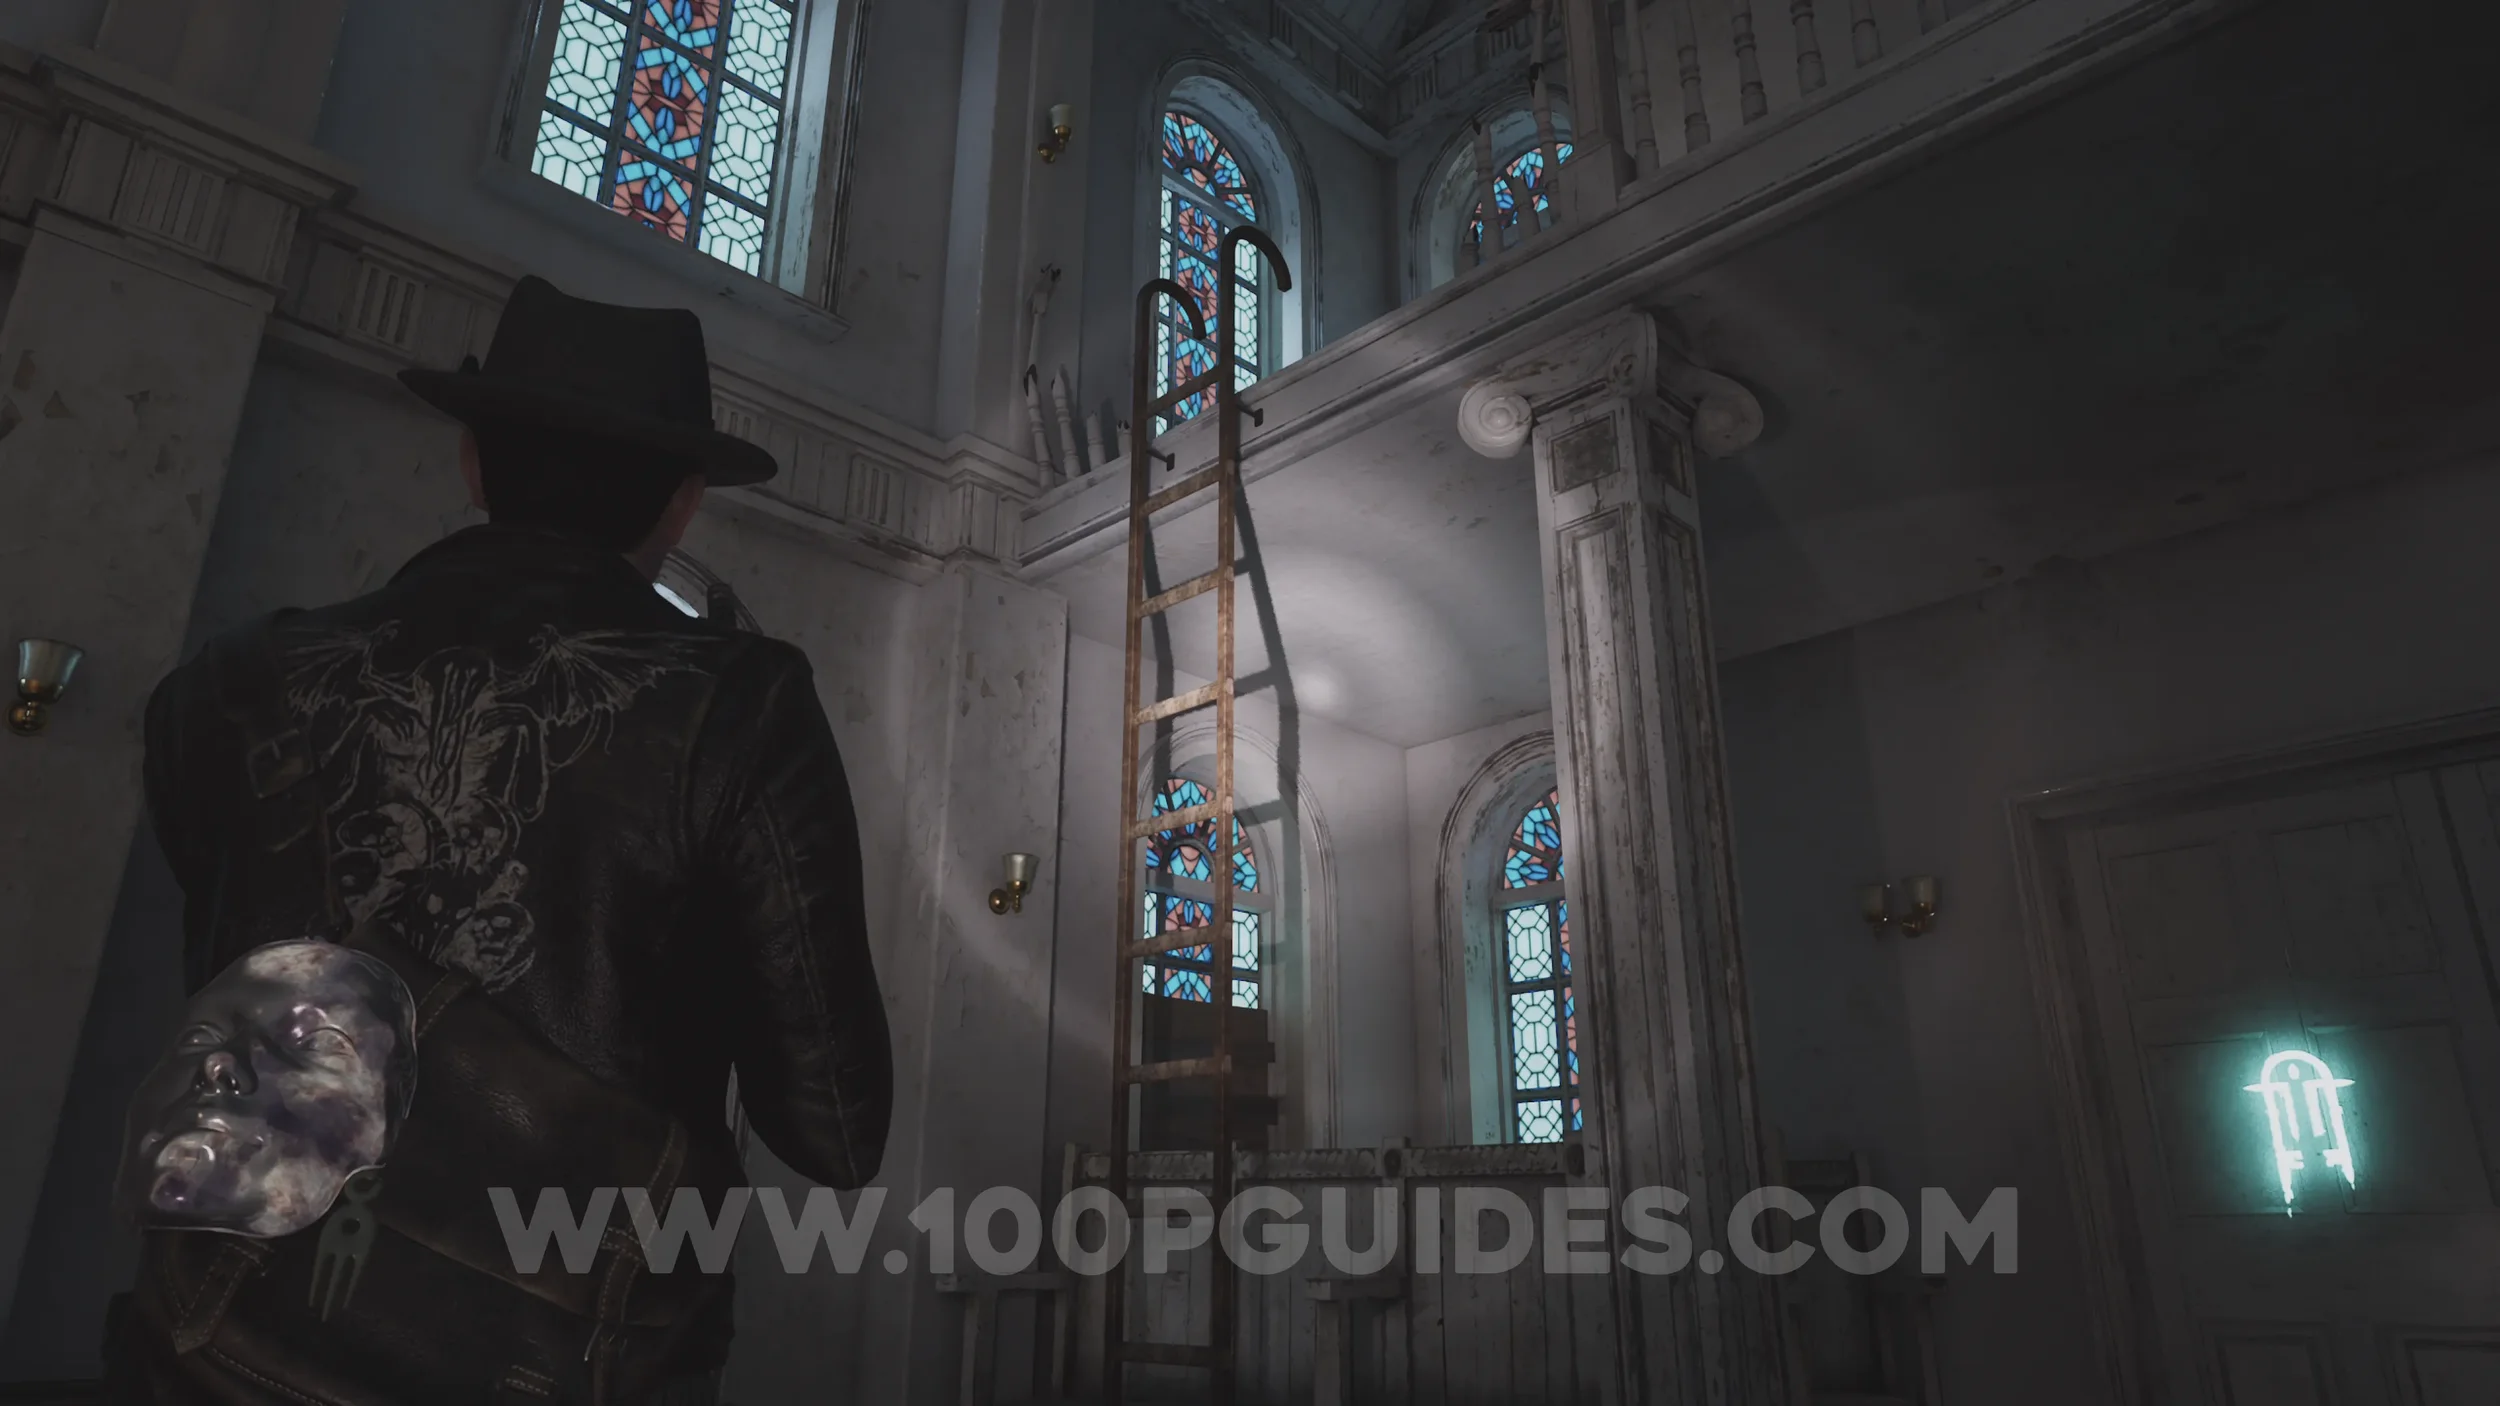
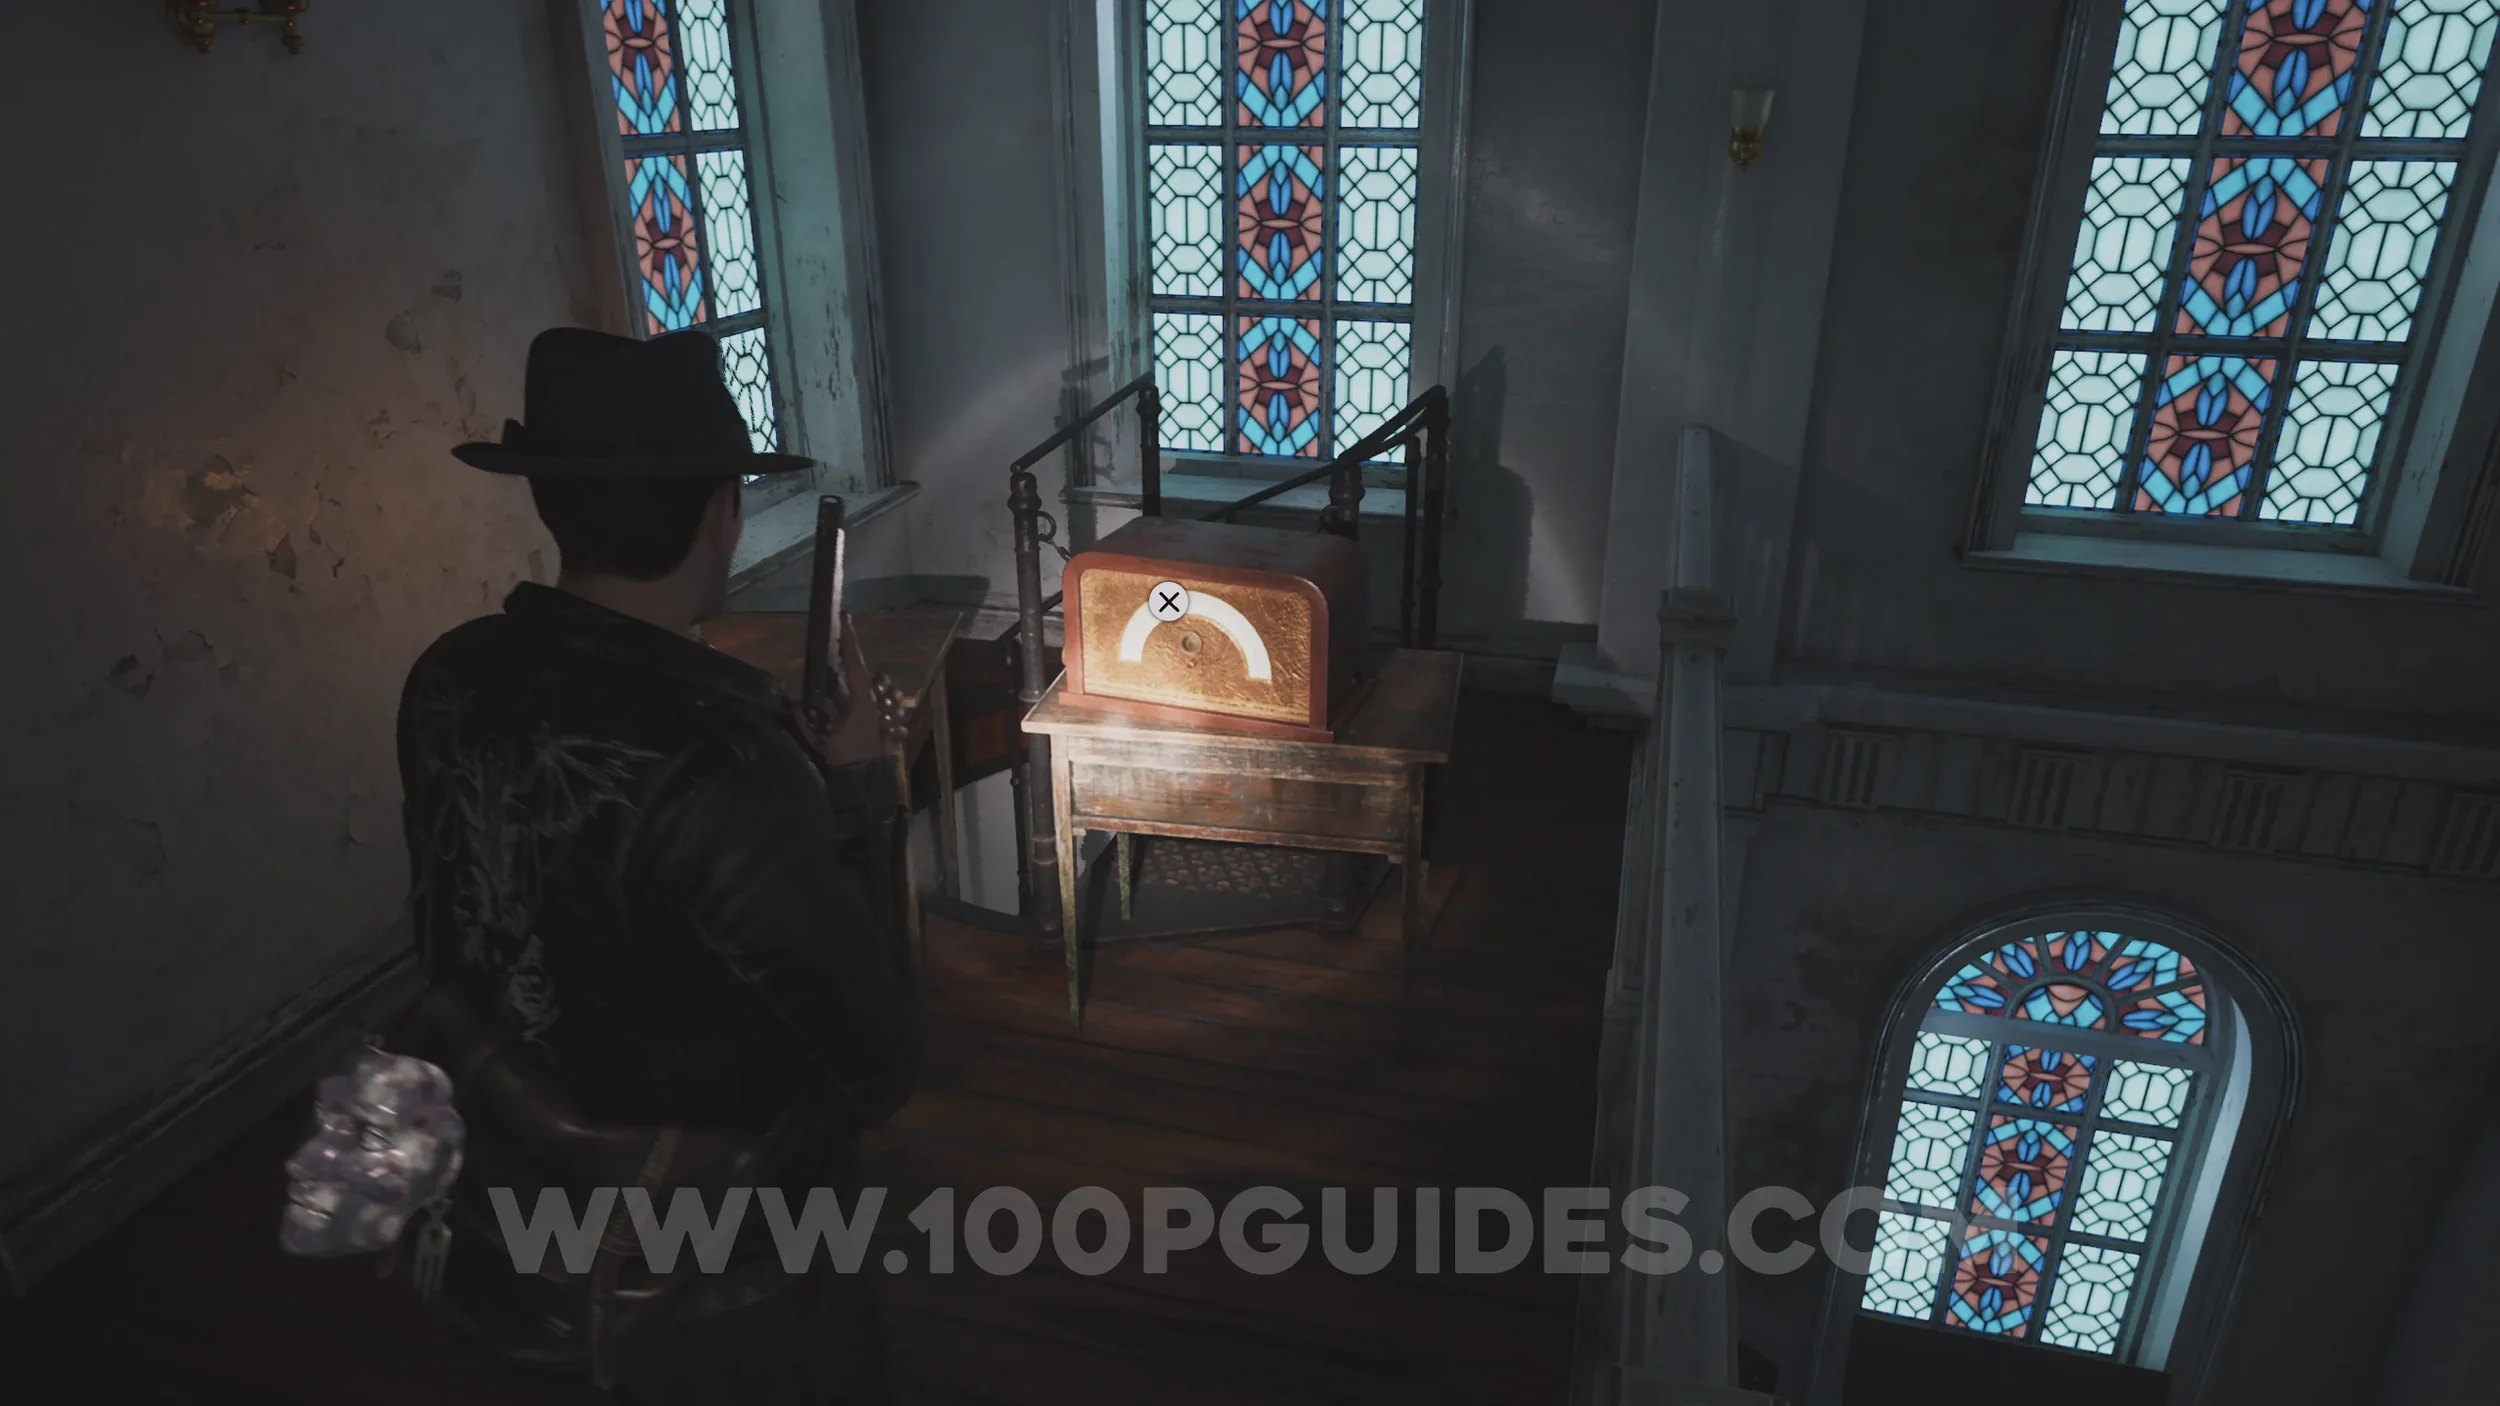
Radio: The Perfect Day. Head back into the church and climb the ladder. The radio is at the top.
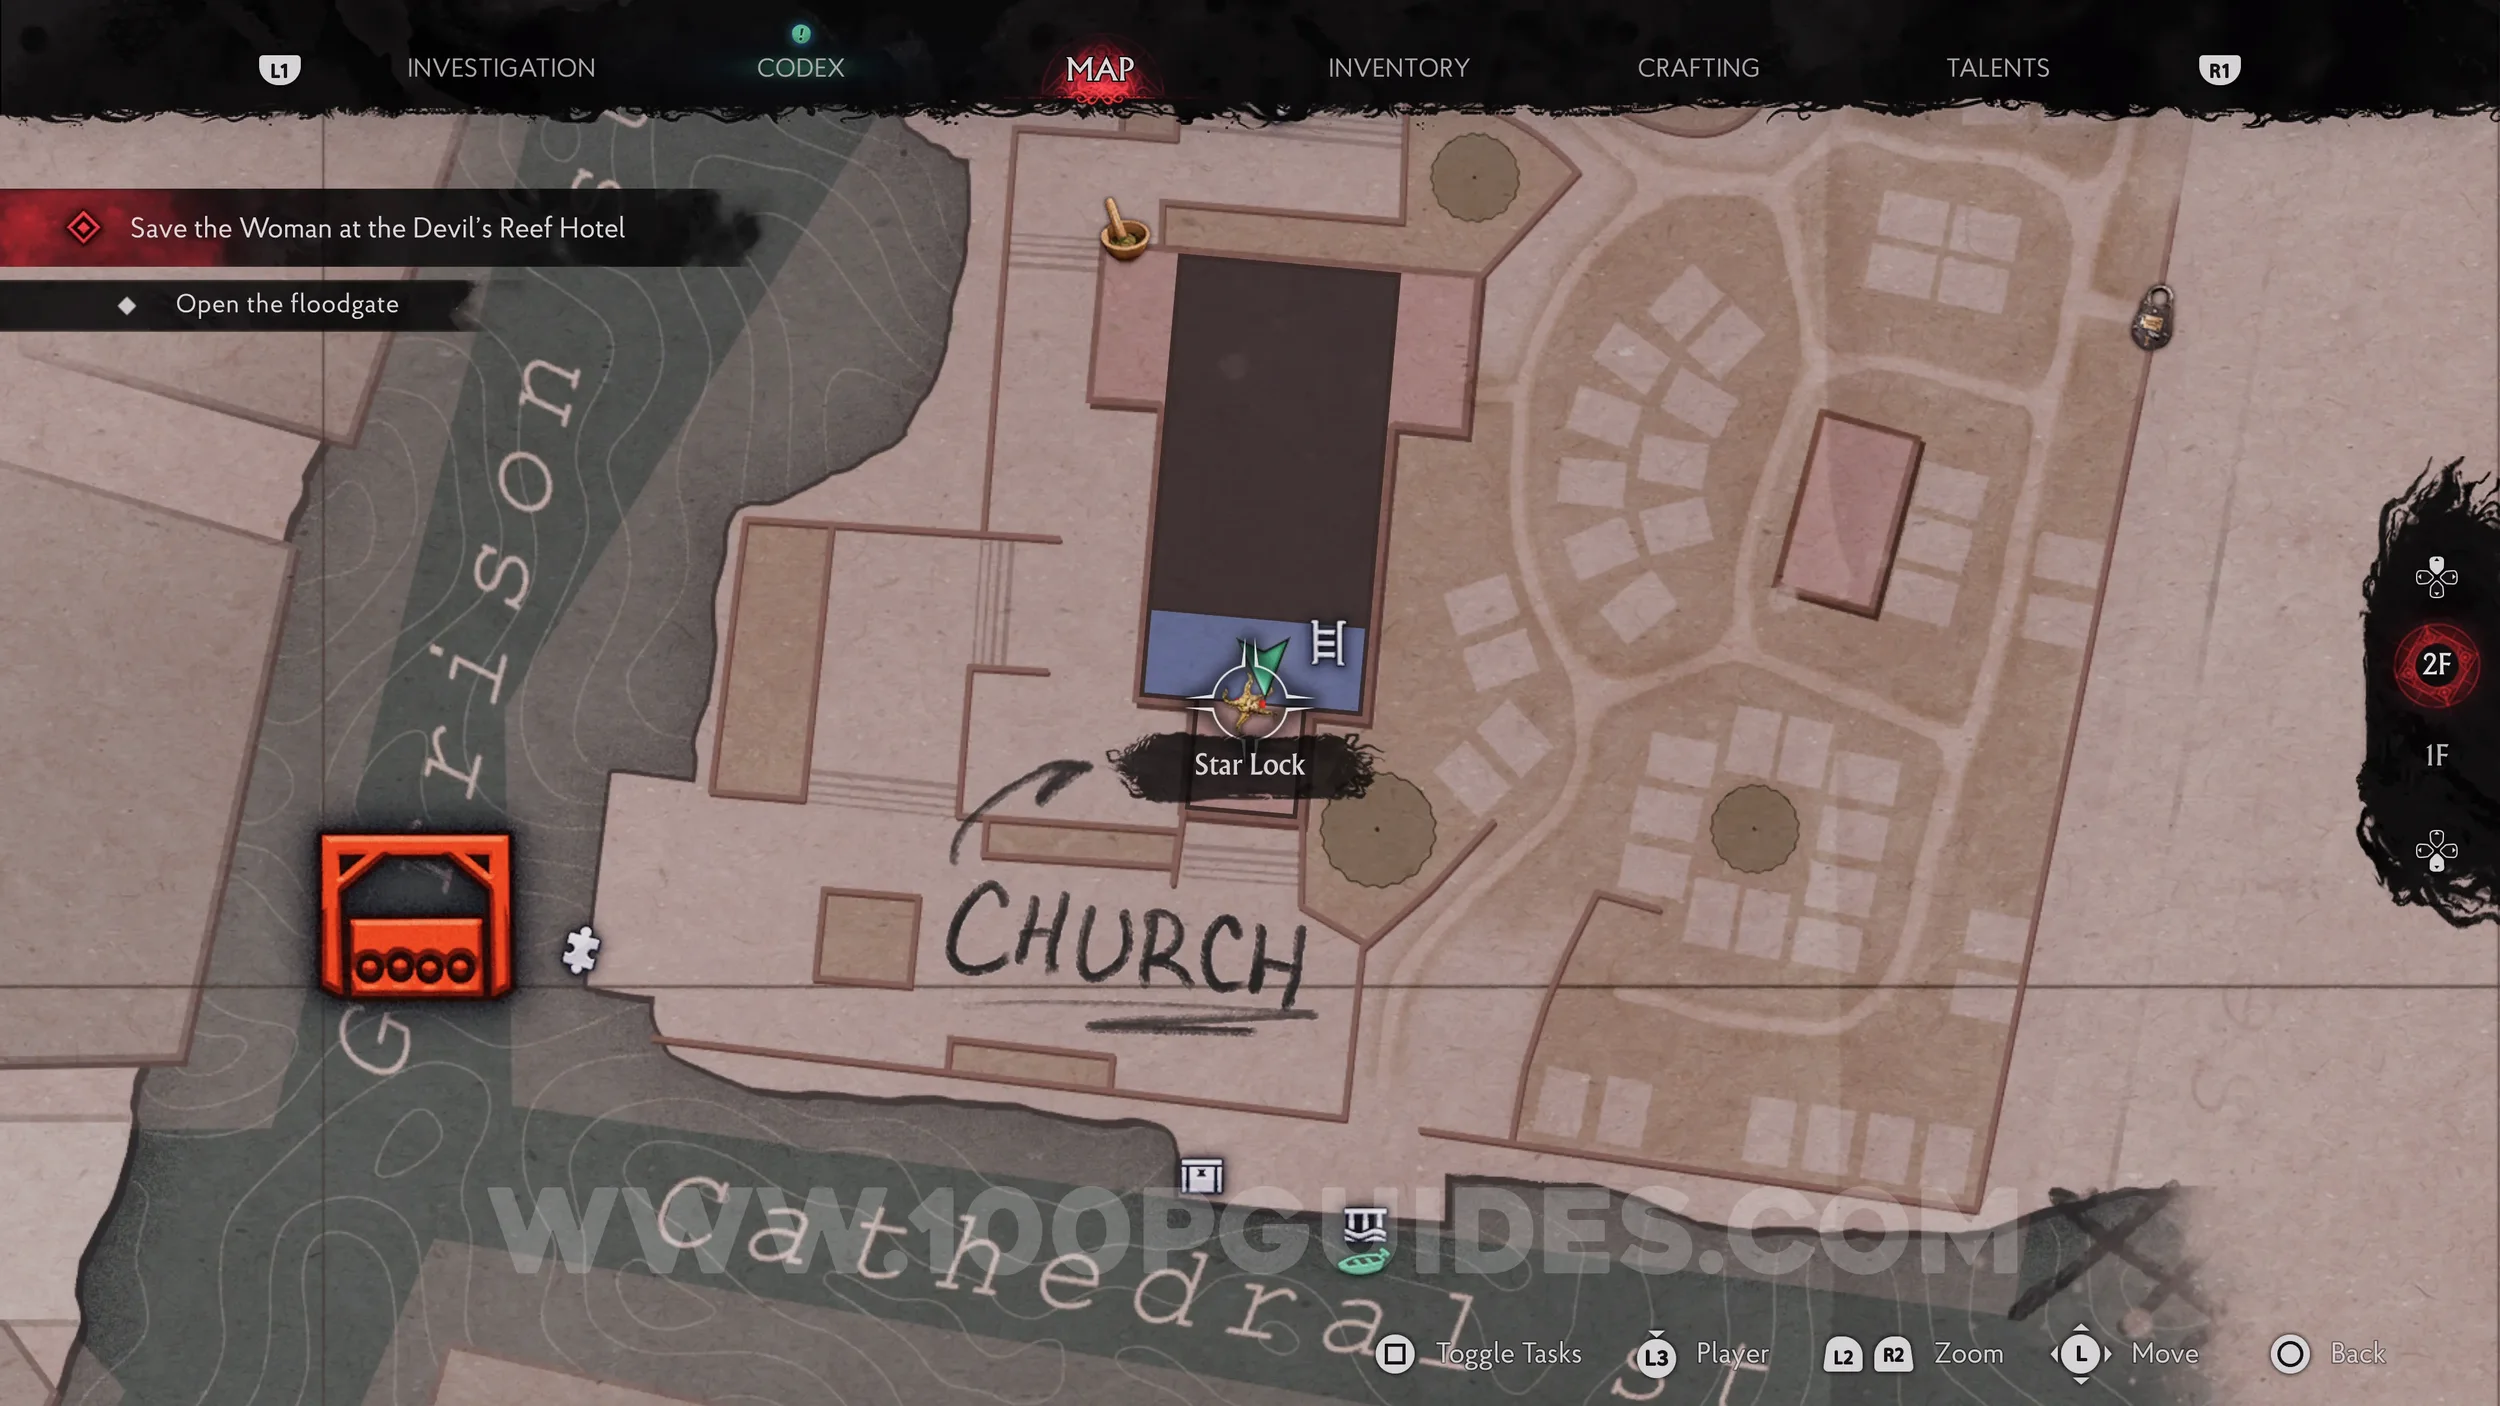
Evidence: Report on the Bell. Use the Star Key to open the door next to the radio, then head inside to find the evidence on the small table to your right.
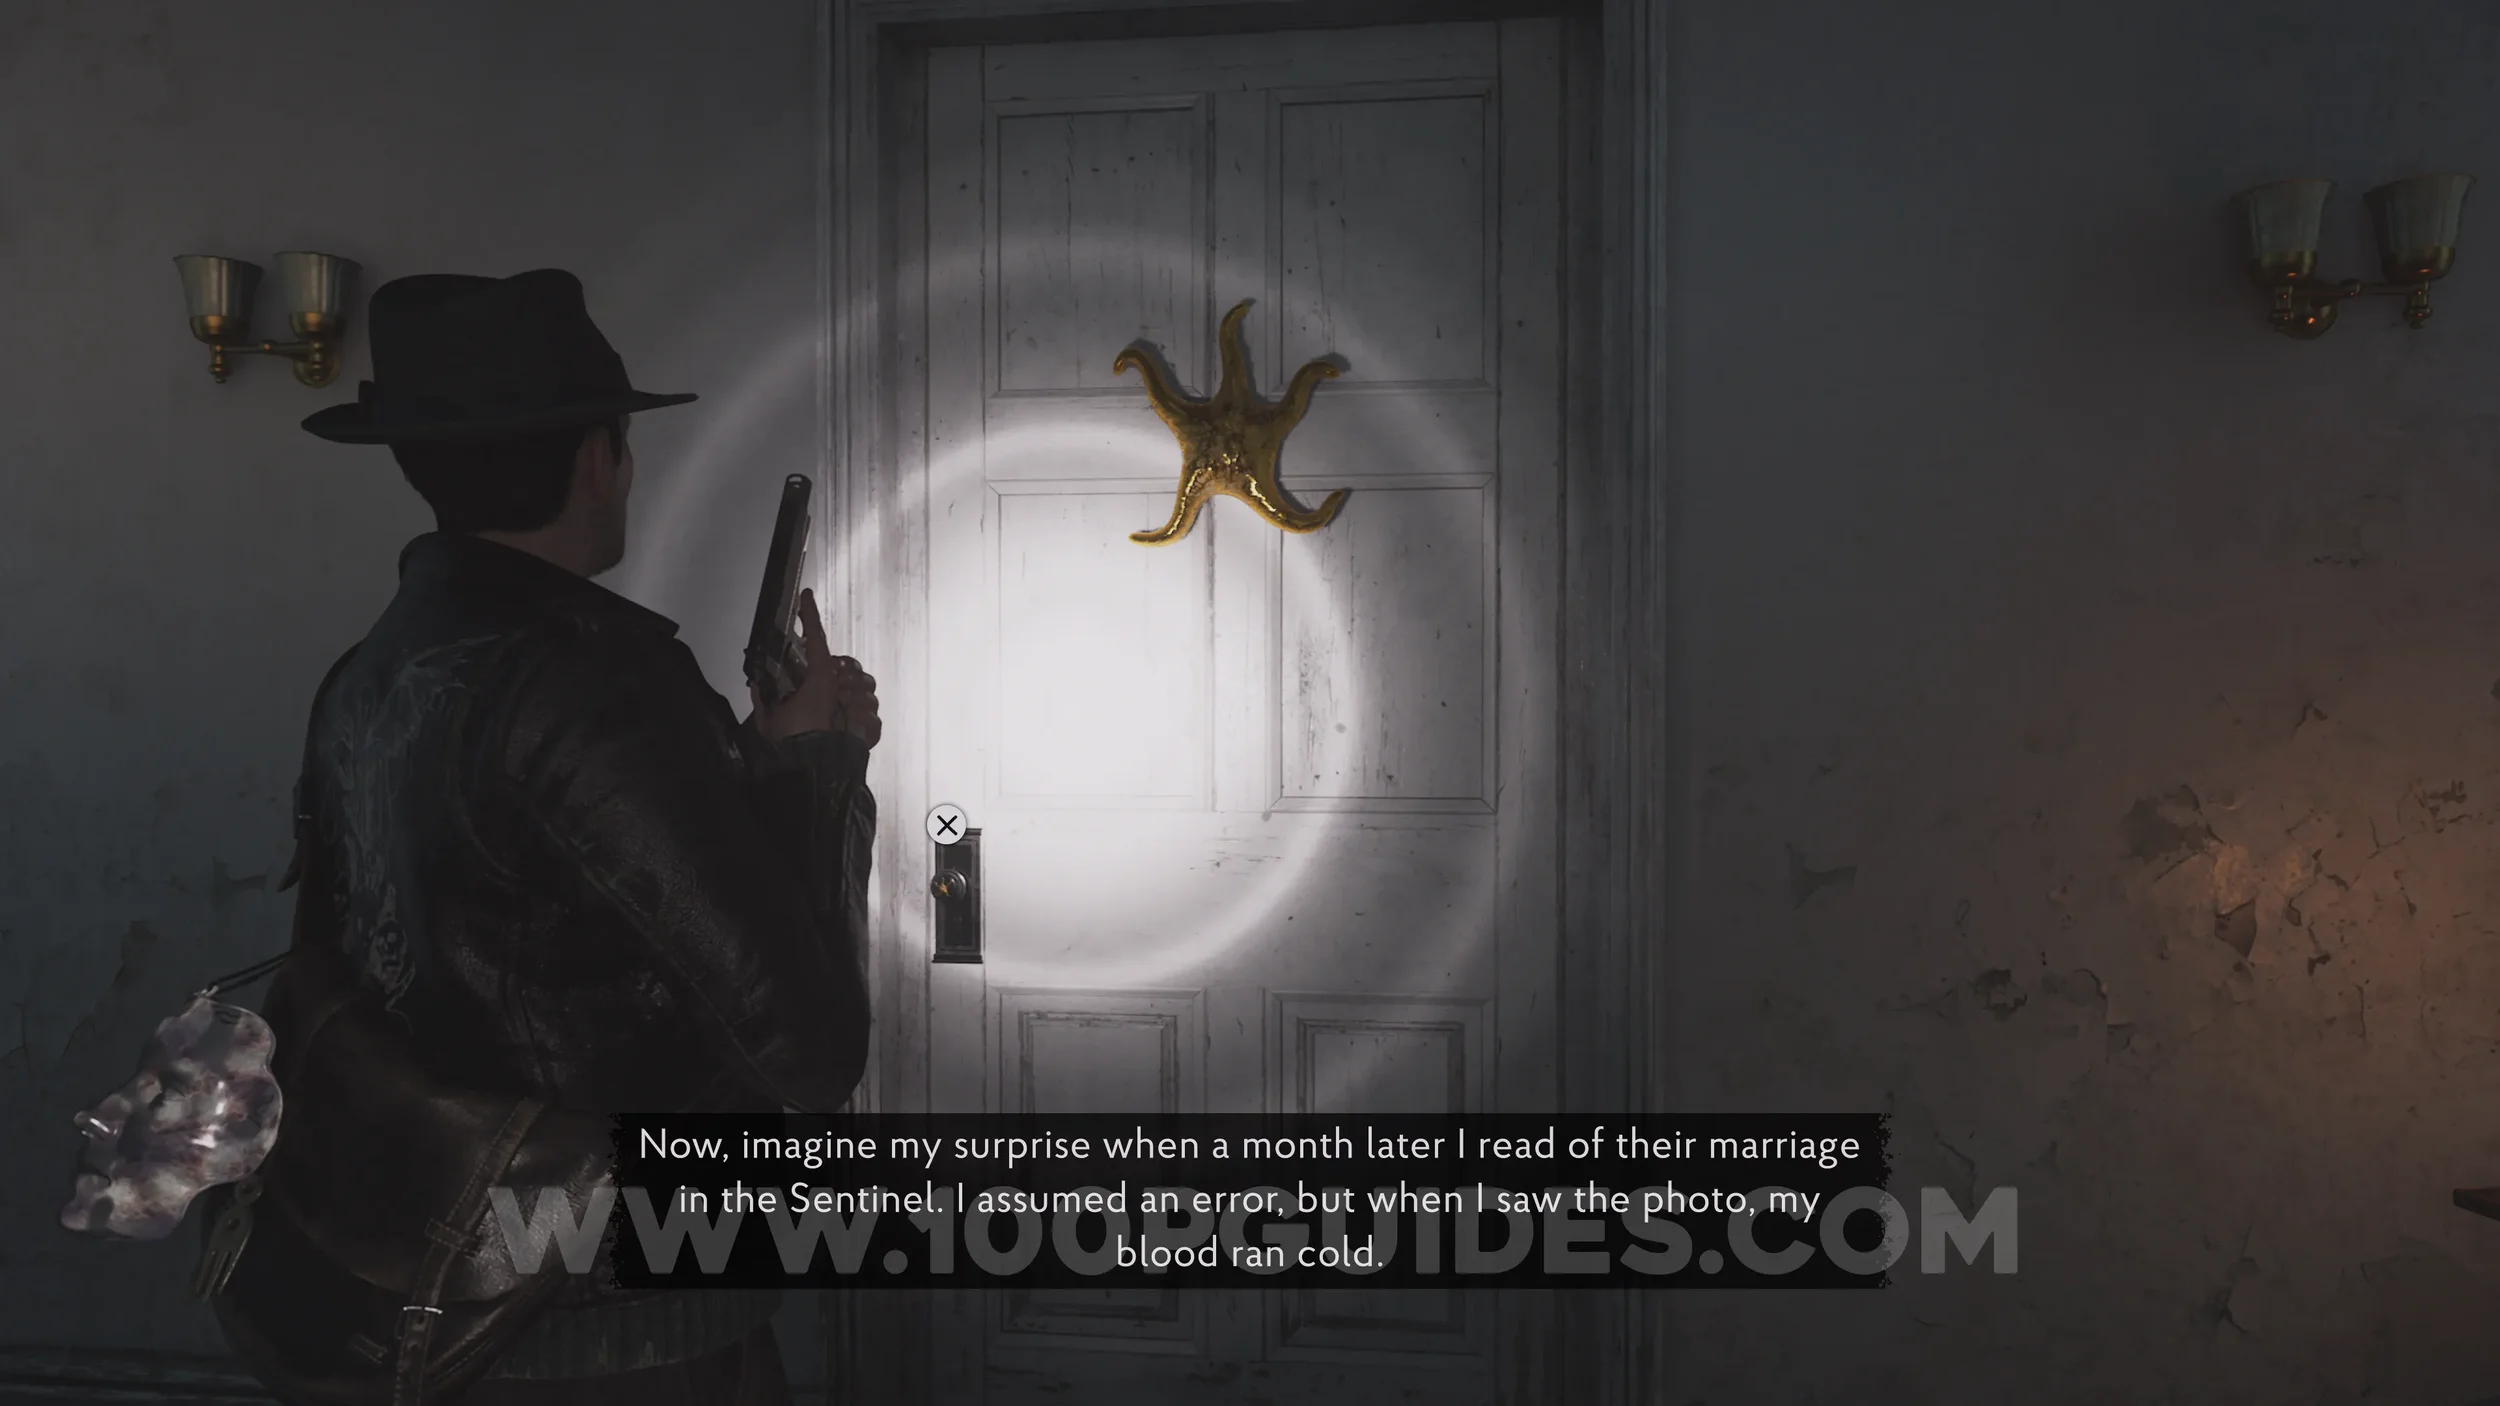
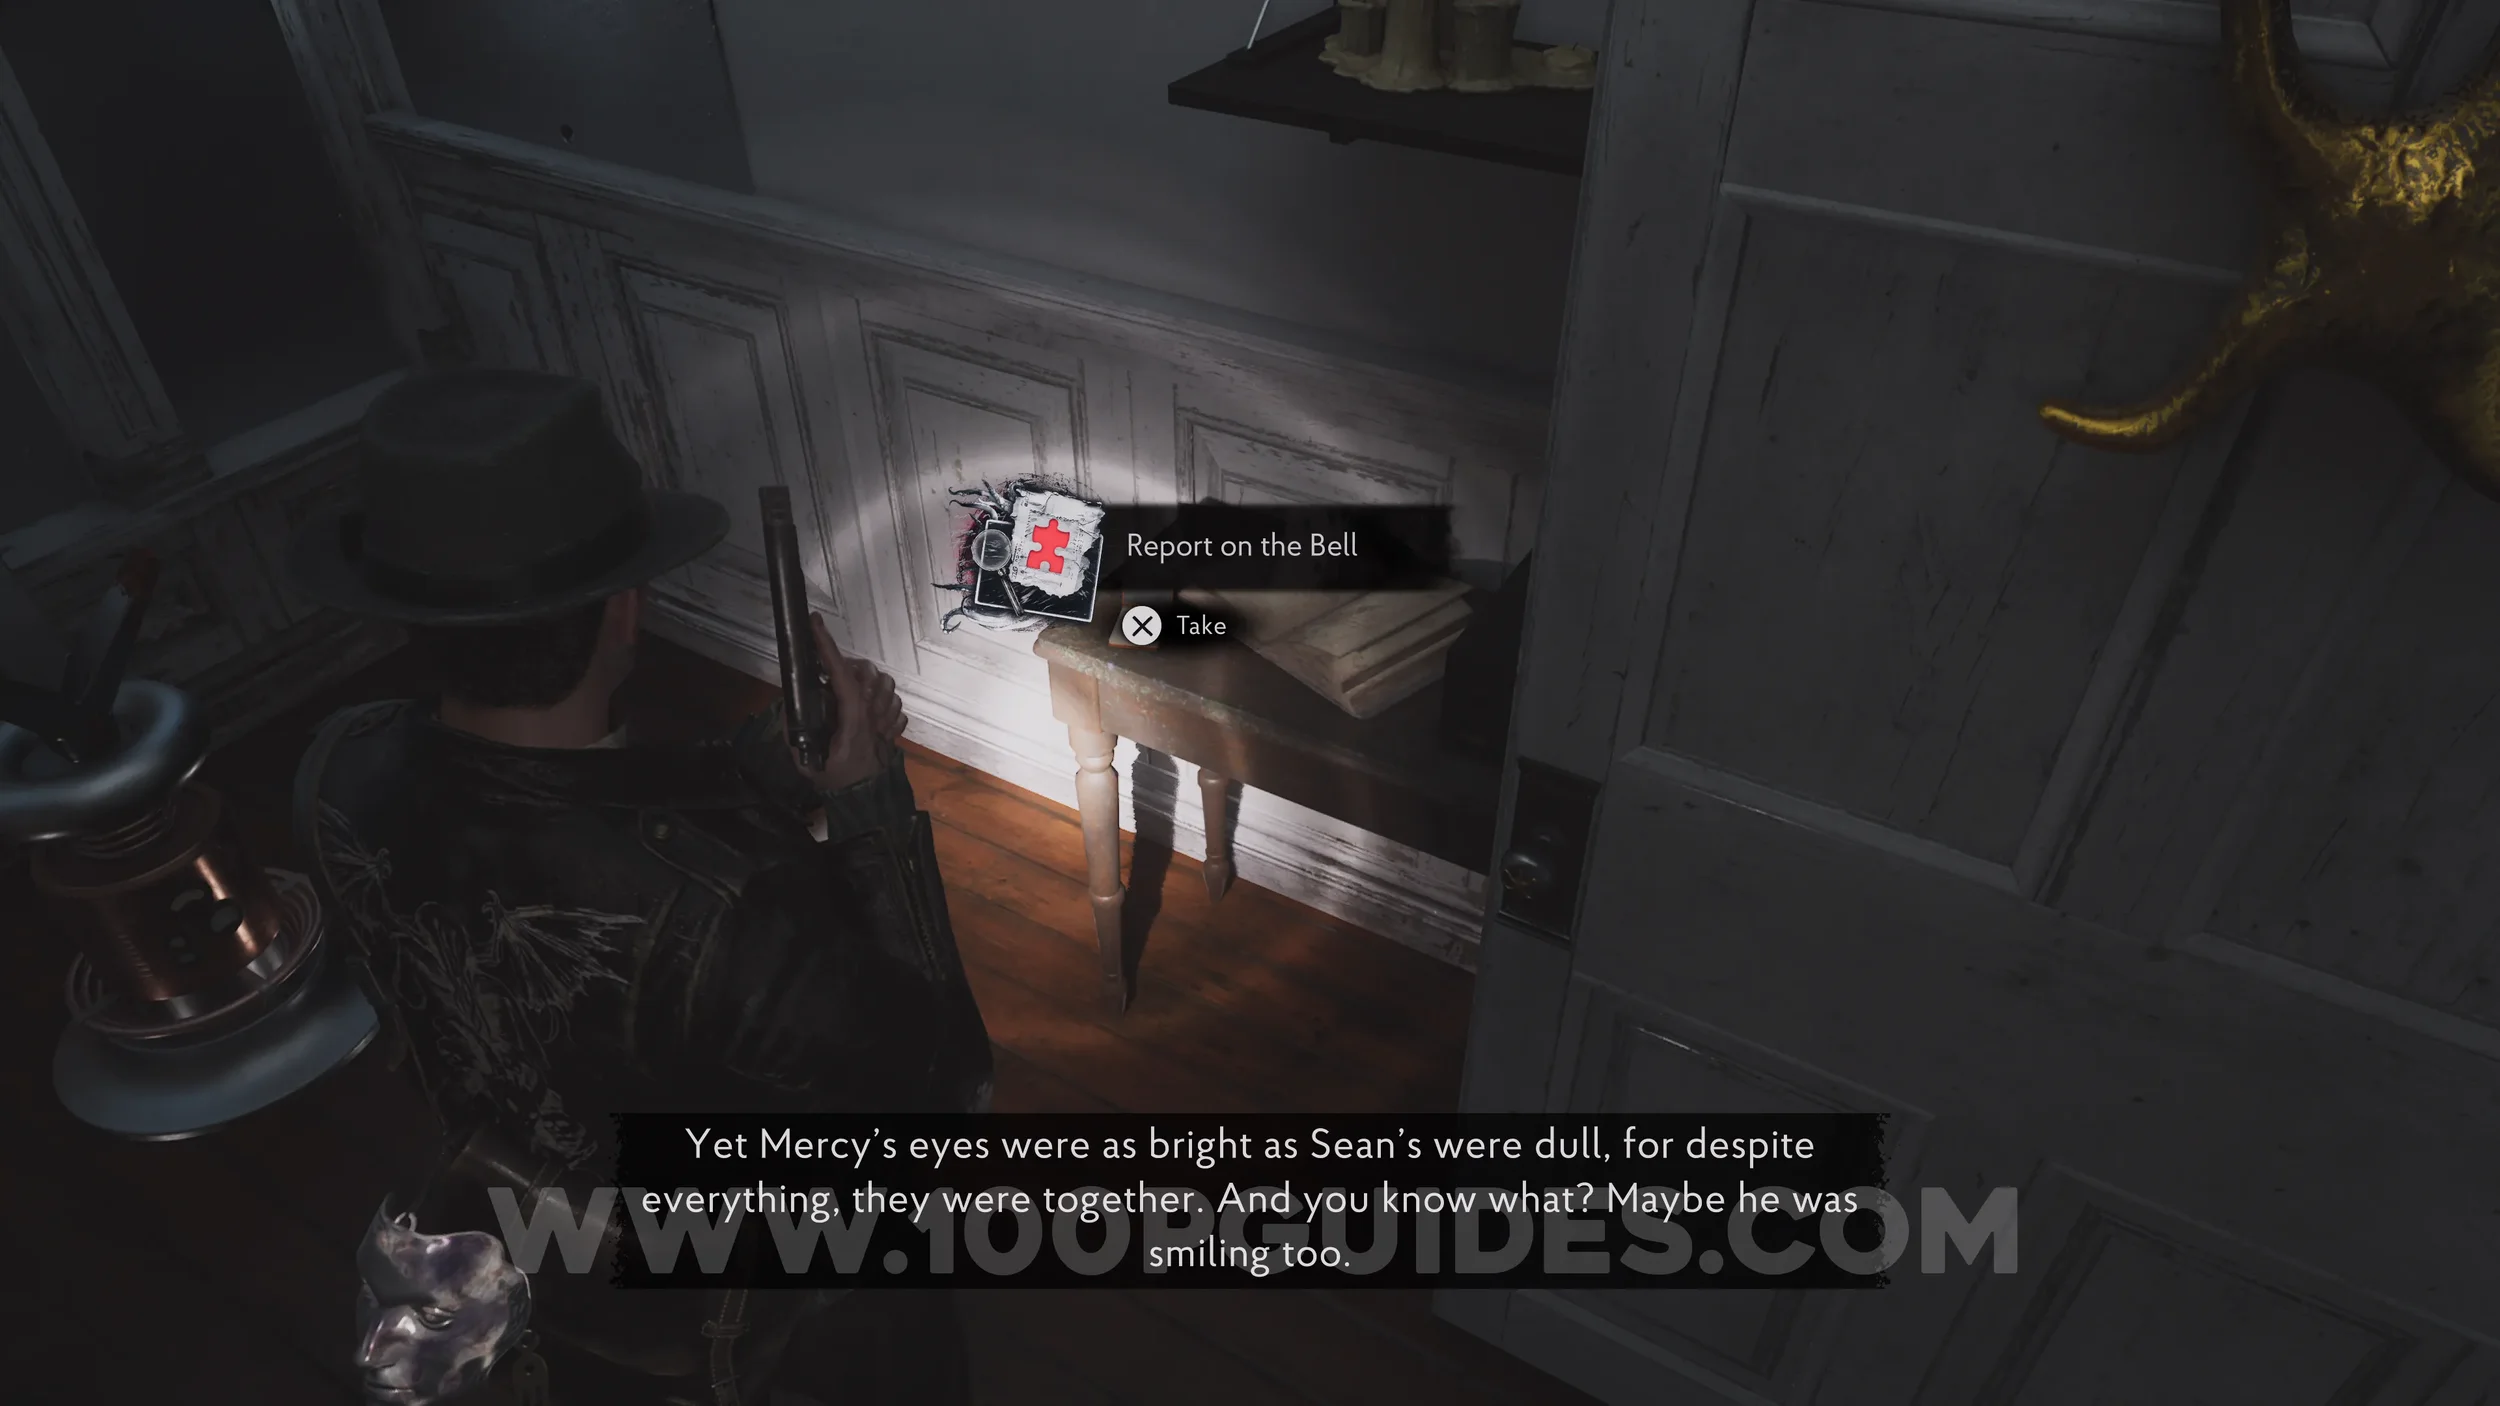
Key Item: Trident. In the same room on the top floor of the church.
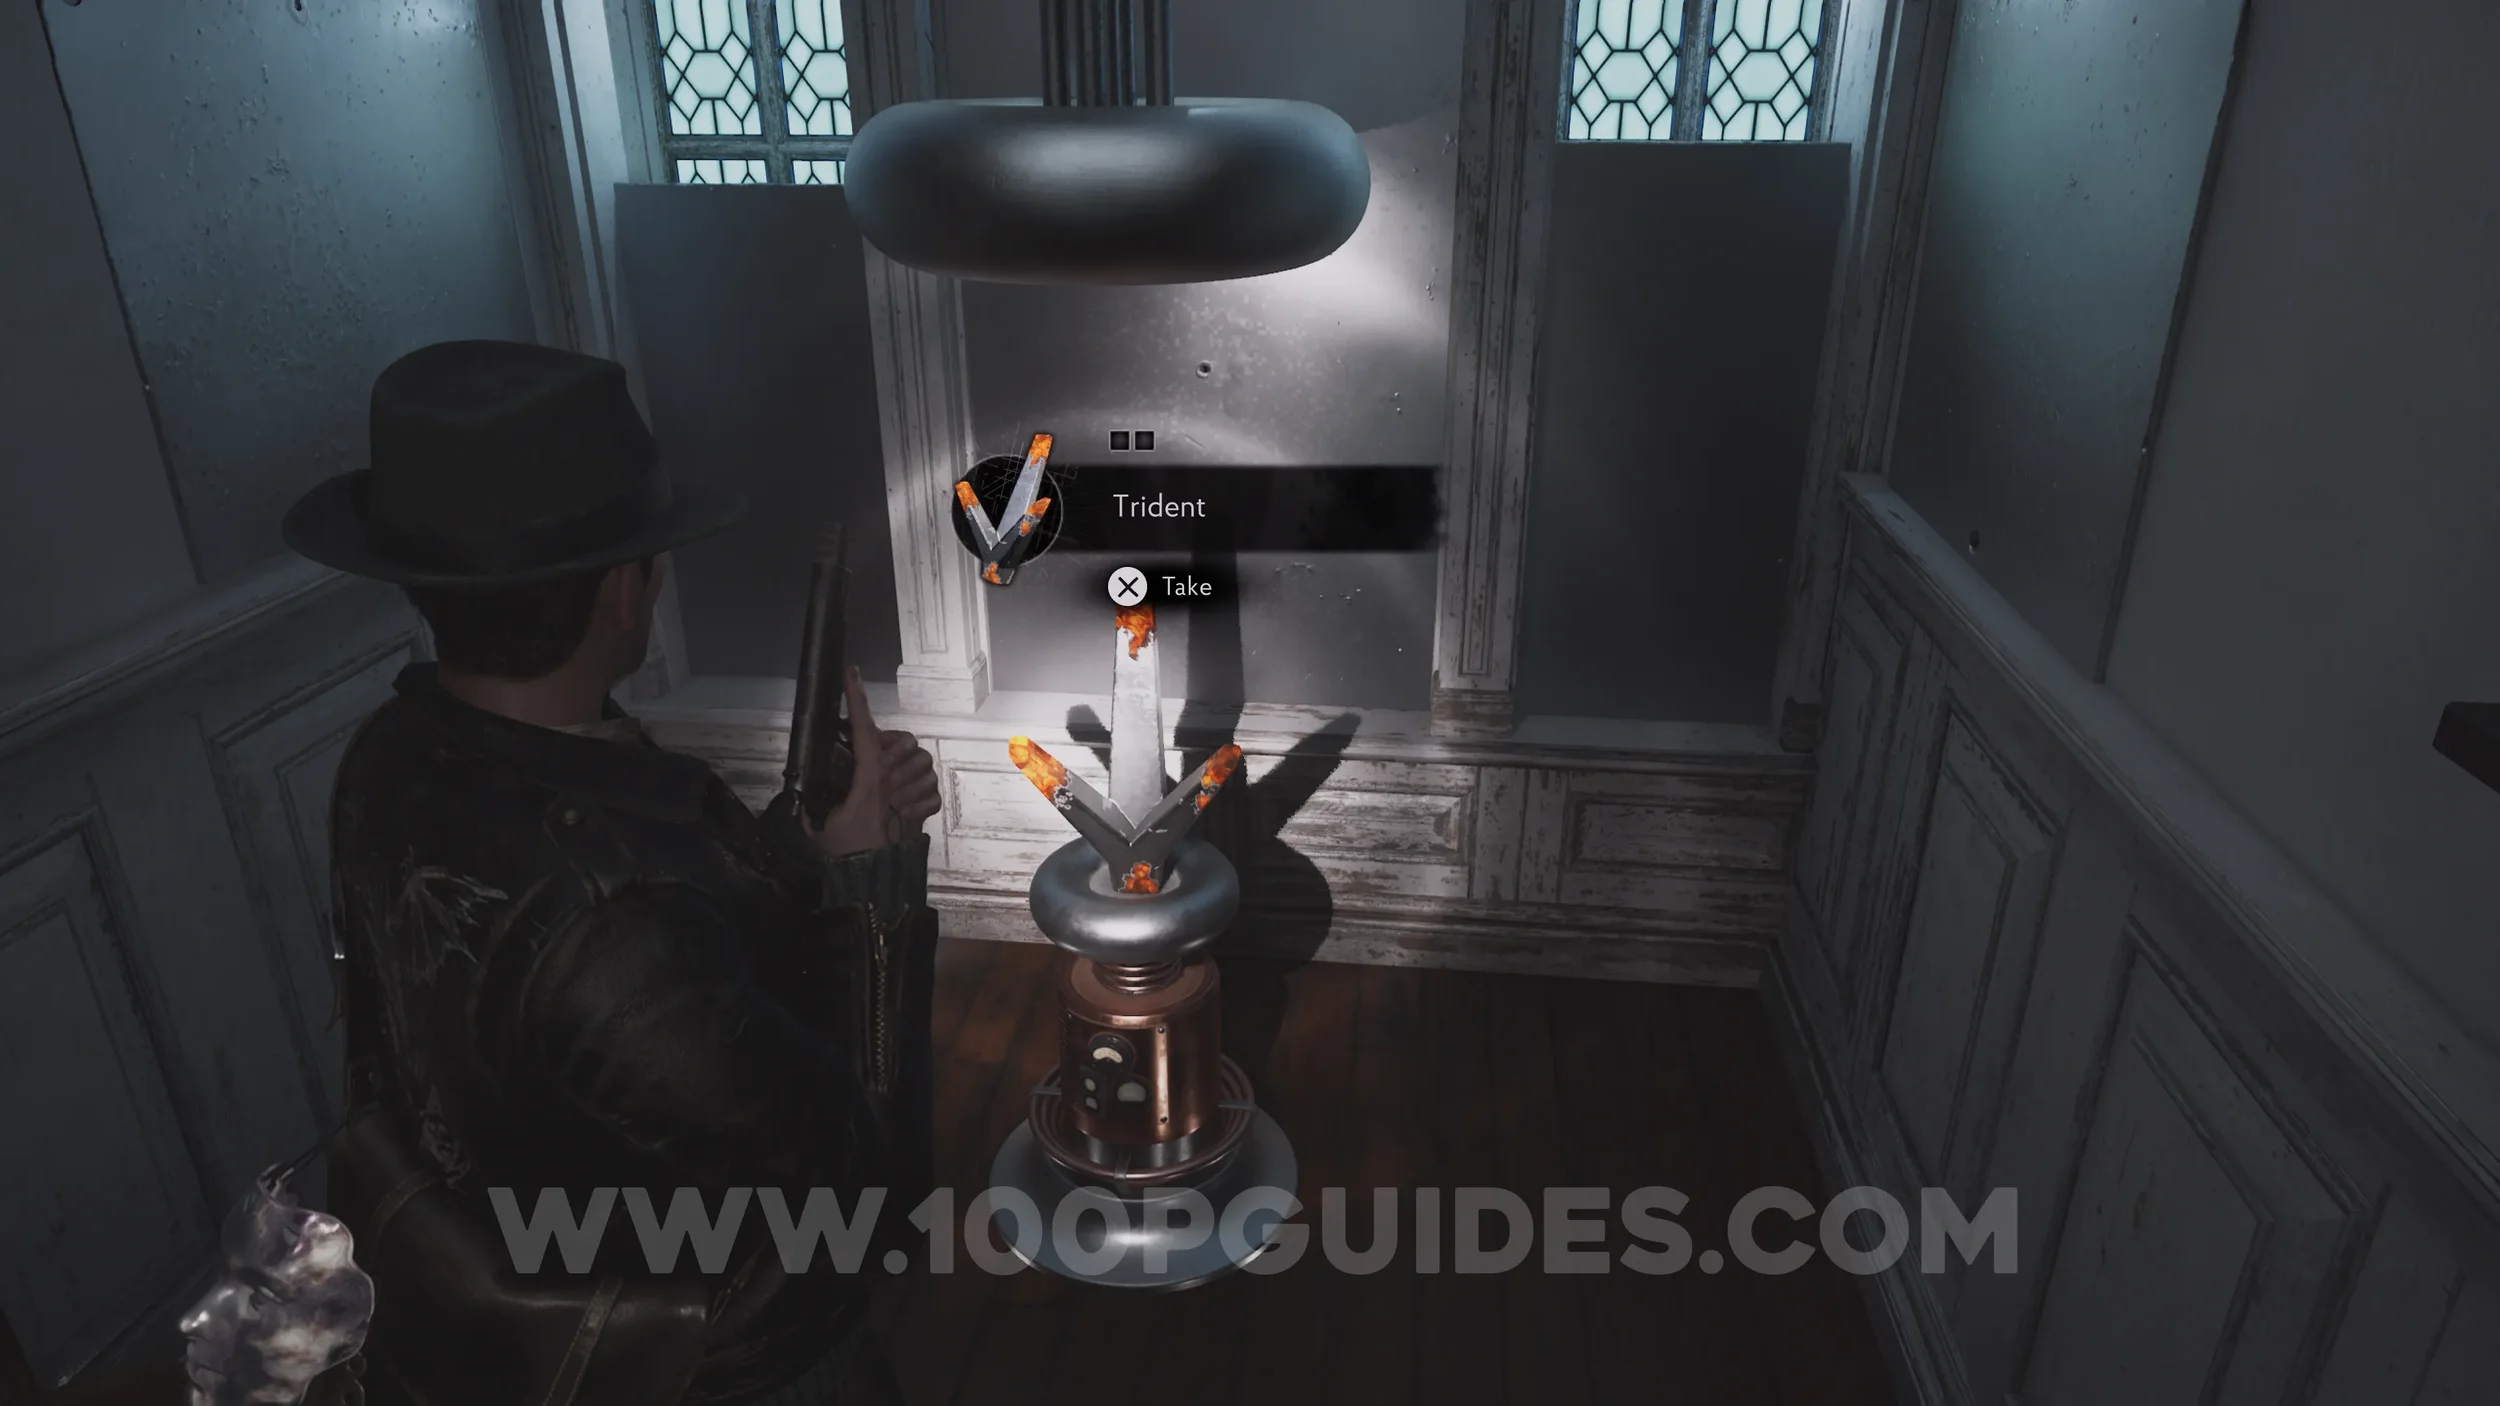
Trident Puzzle/Church Mystery
Now that you have the Trident, head outside to the graveyard and circle around to the north of the church, where you'll find a strange obelisk. Place the Trident on top of it and spin the sections so they match the image below. Once you're done, hold to validate. Then pick up the Trident after the lightning strikes it a few times.


Now that the Trident is charged, take it back to the top floor and place it in its original spot. Then head back down to the bottom floor of the church and interact with the mysterious person closest to the altar, the one holding the dagger. Take the dagger and place it into the slot in the altar. This will take you down to the basement, where you'll have to defeat an enemy.


Trophy: The Other Gods. Obtained after finishing the Trident Puzzle/Church Mystery.
Dream Essence x2. On the church altar after you come back up from solving the Church Mystery.
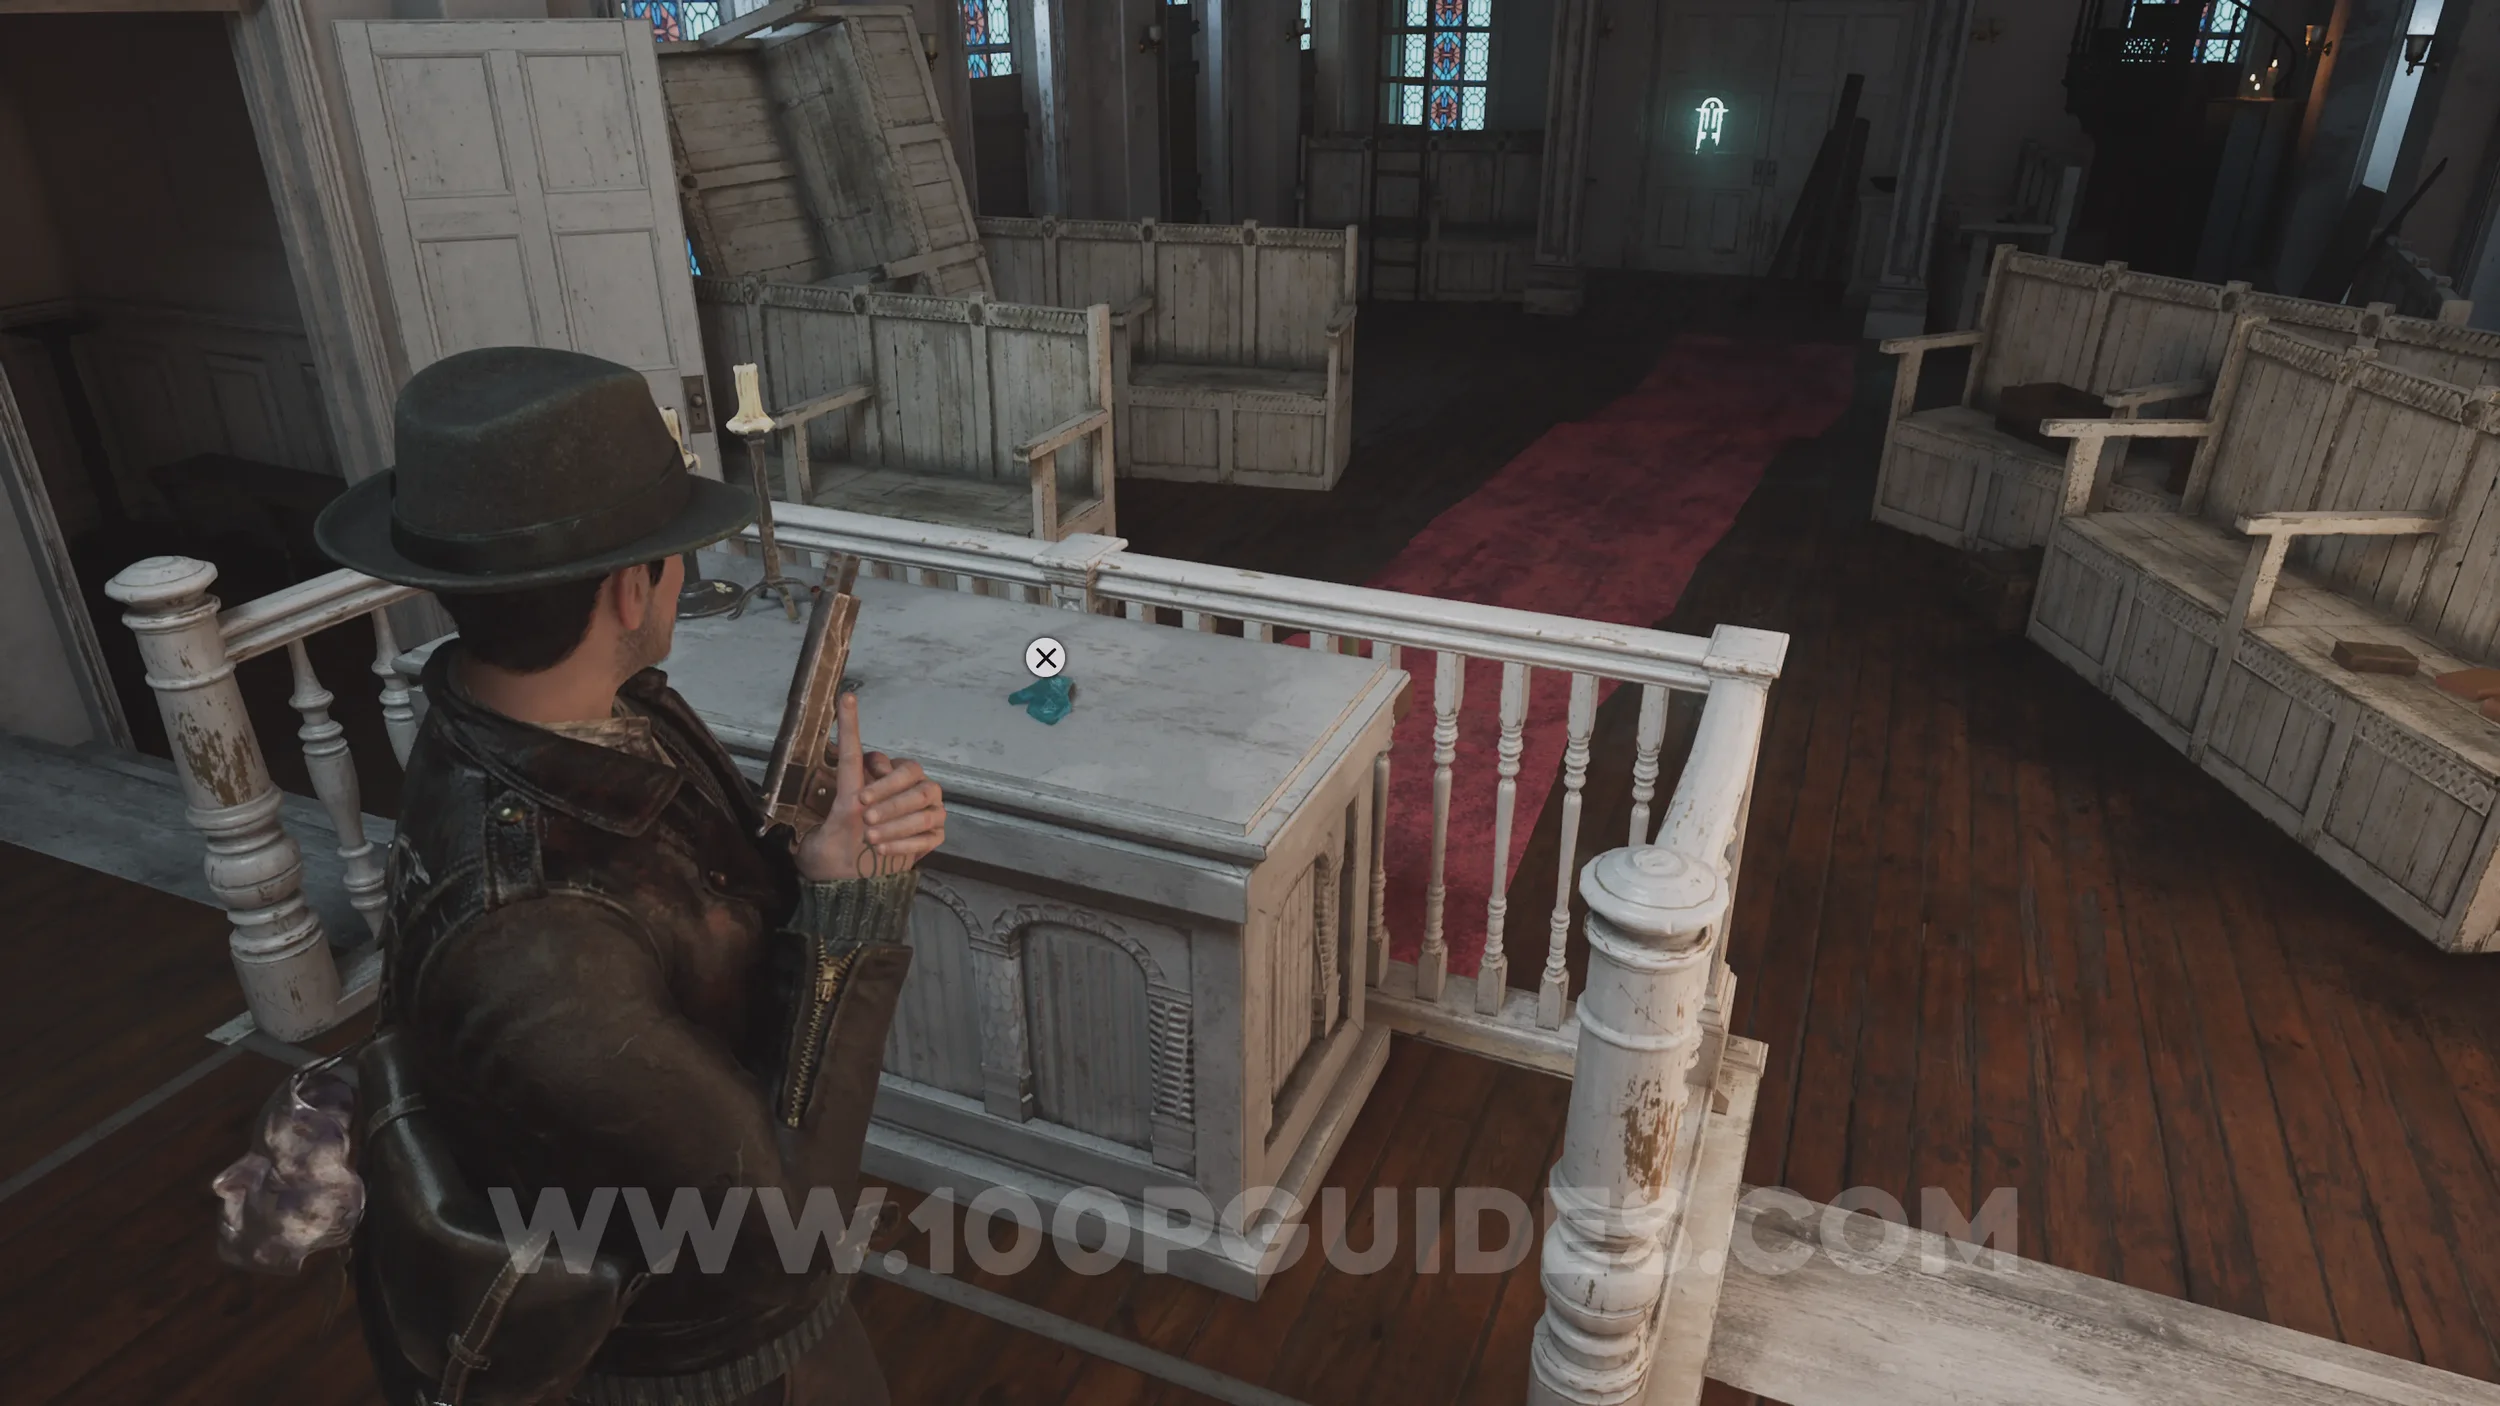
Floodgate Combination Lock
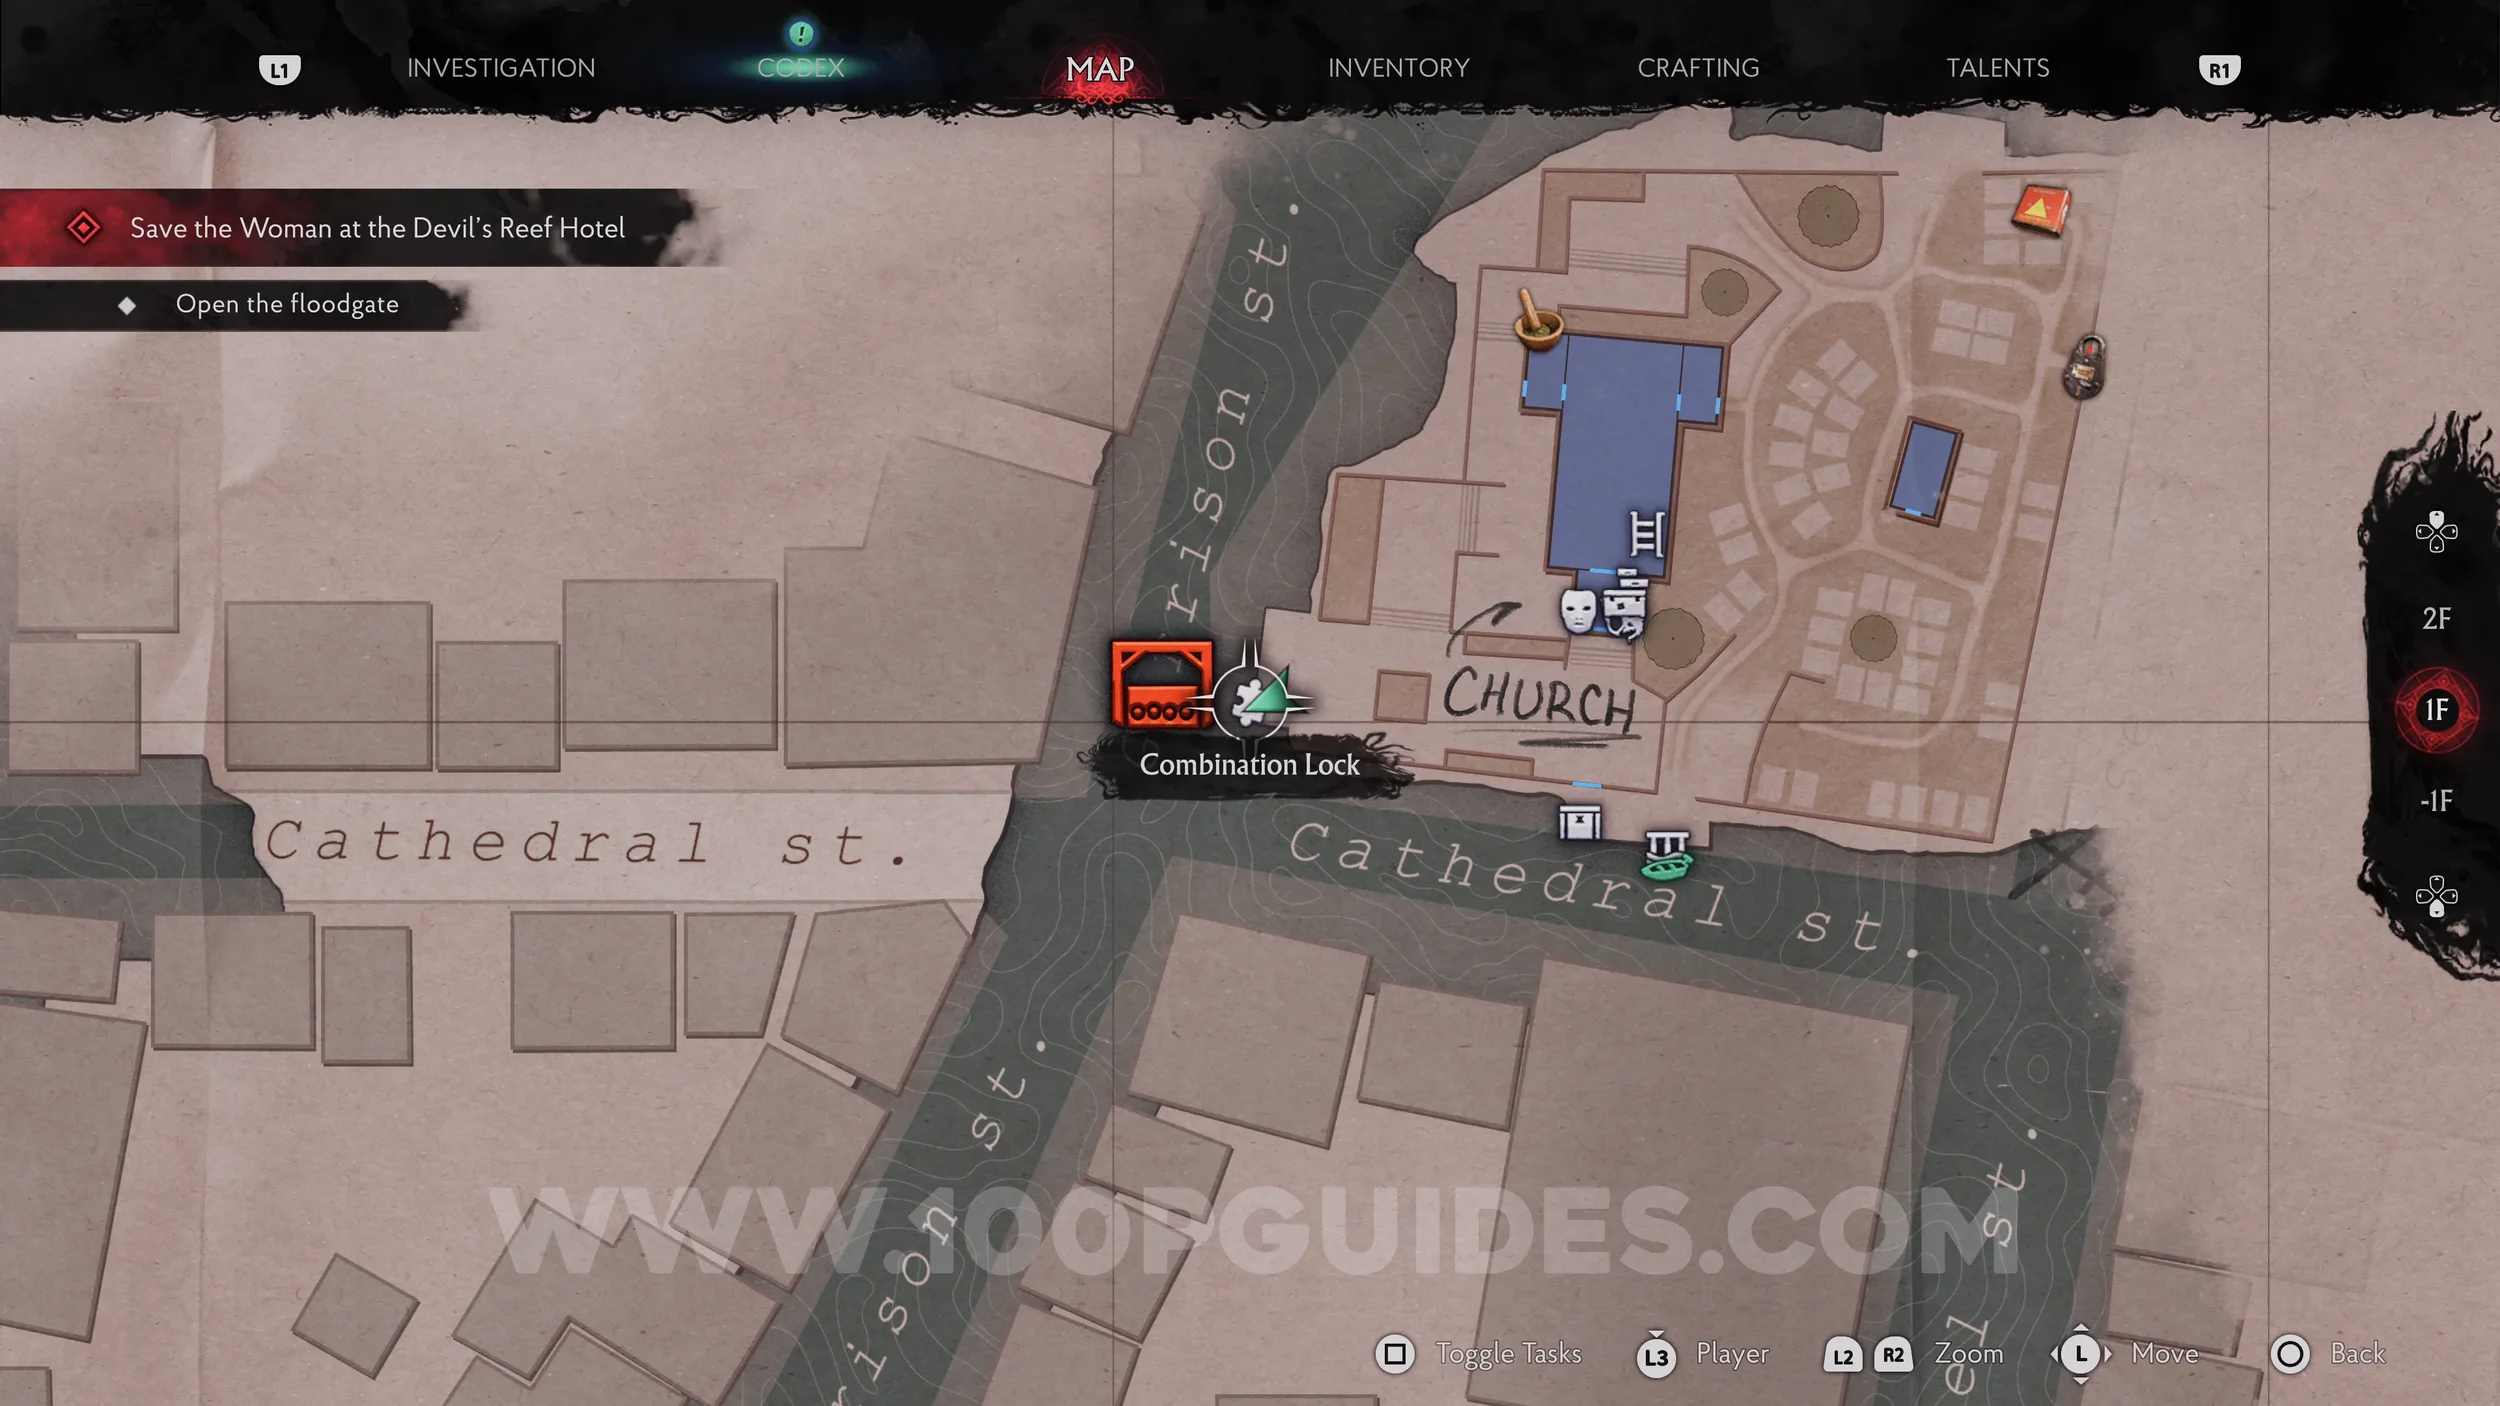
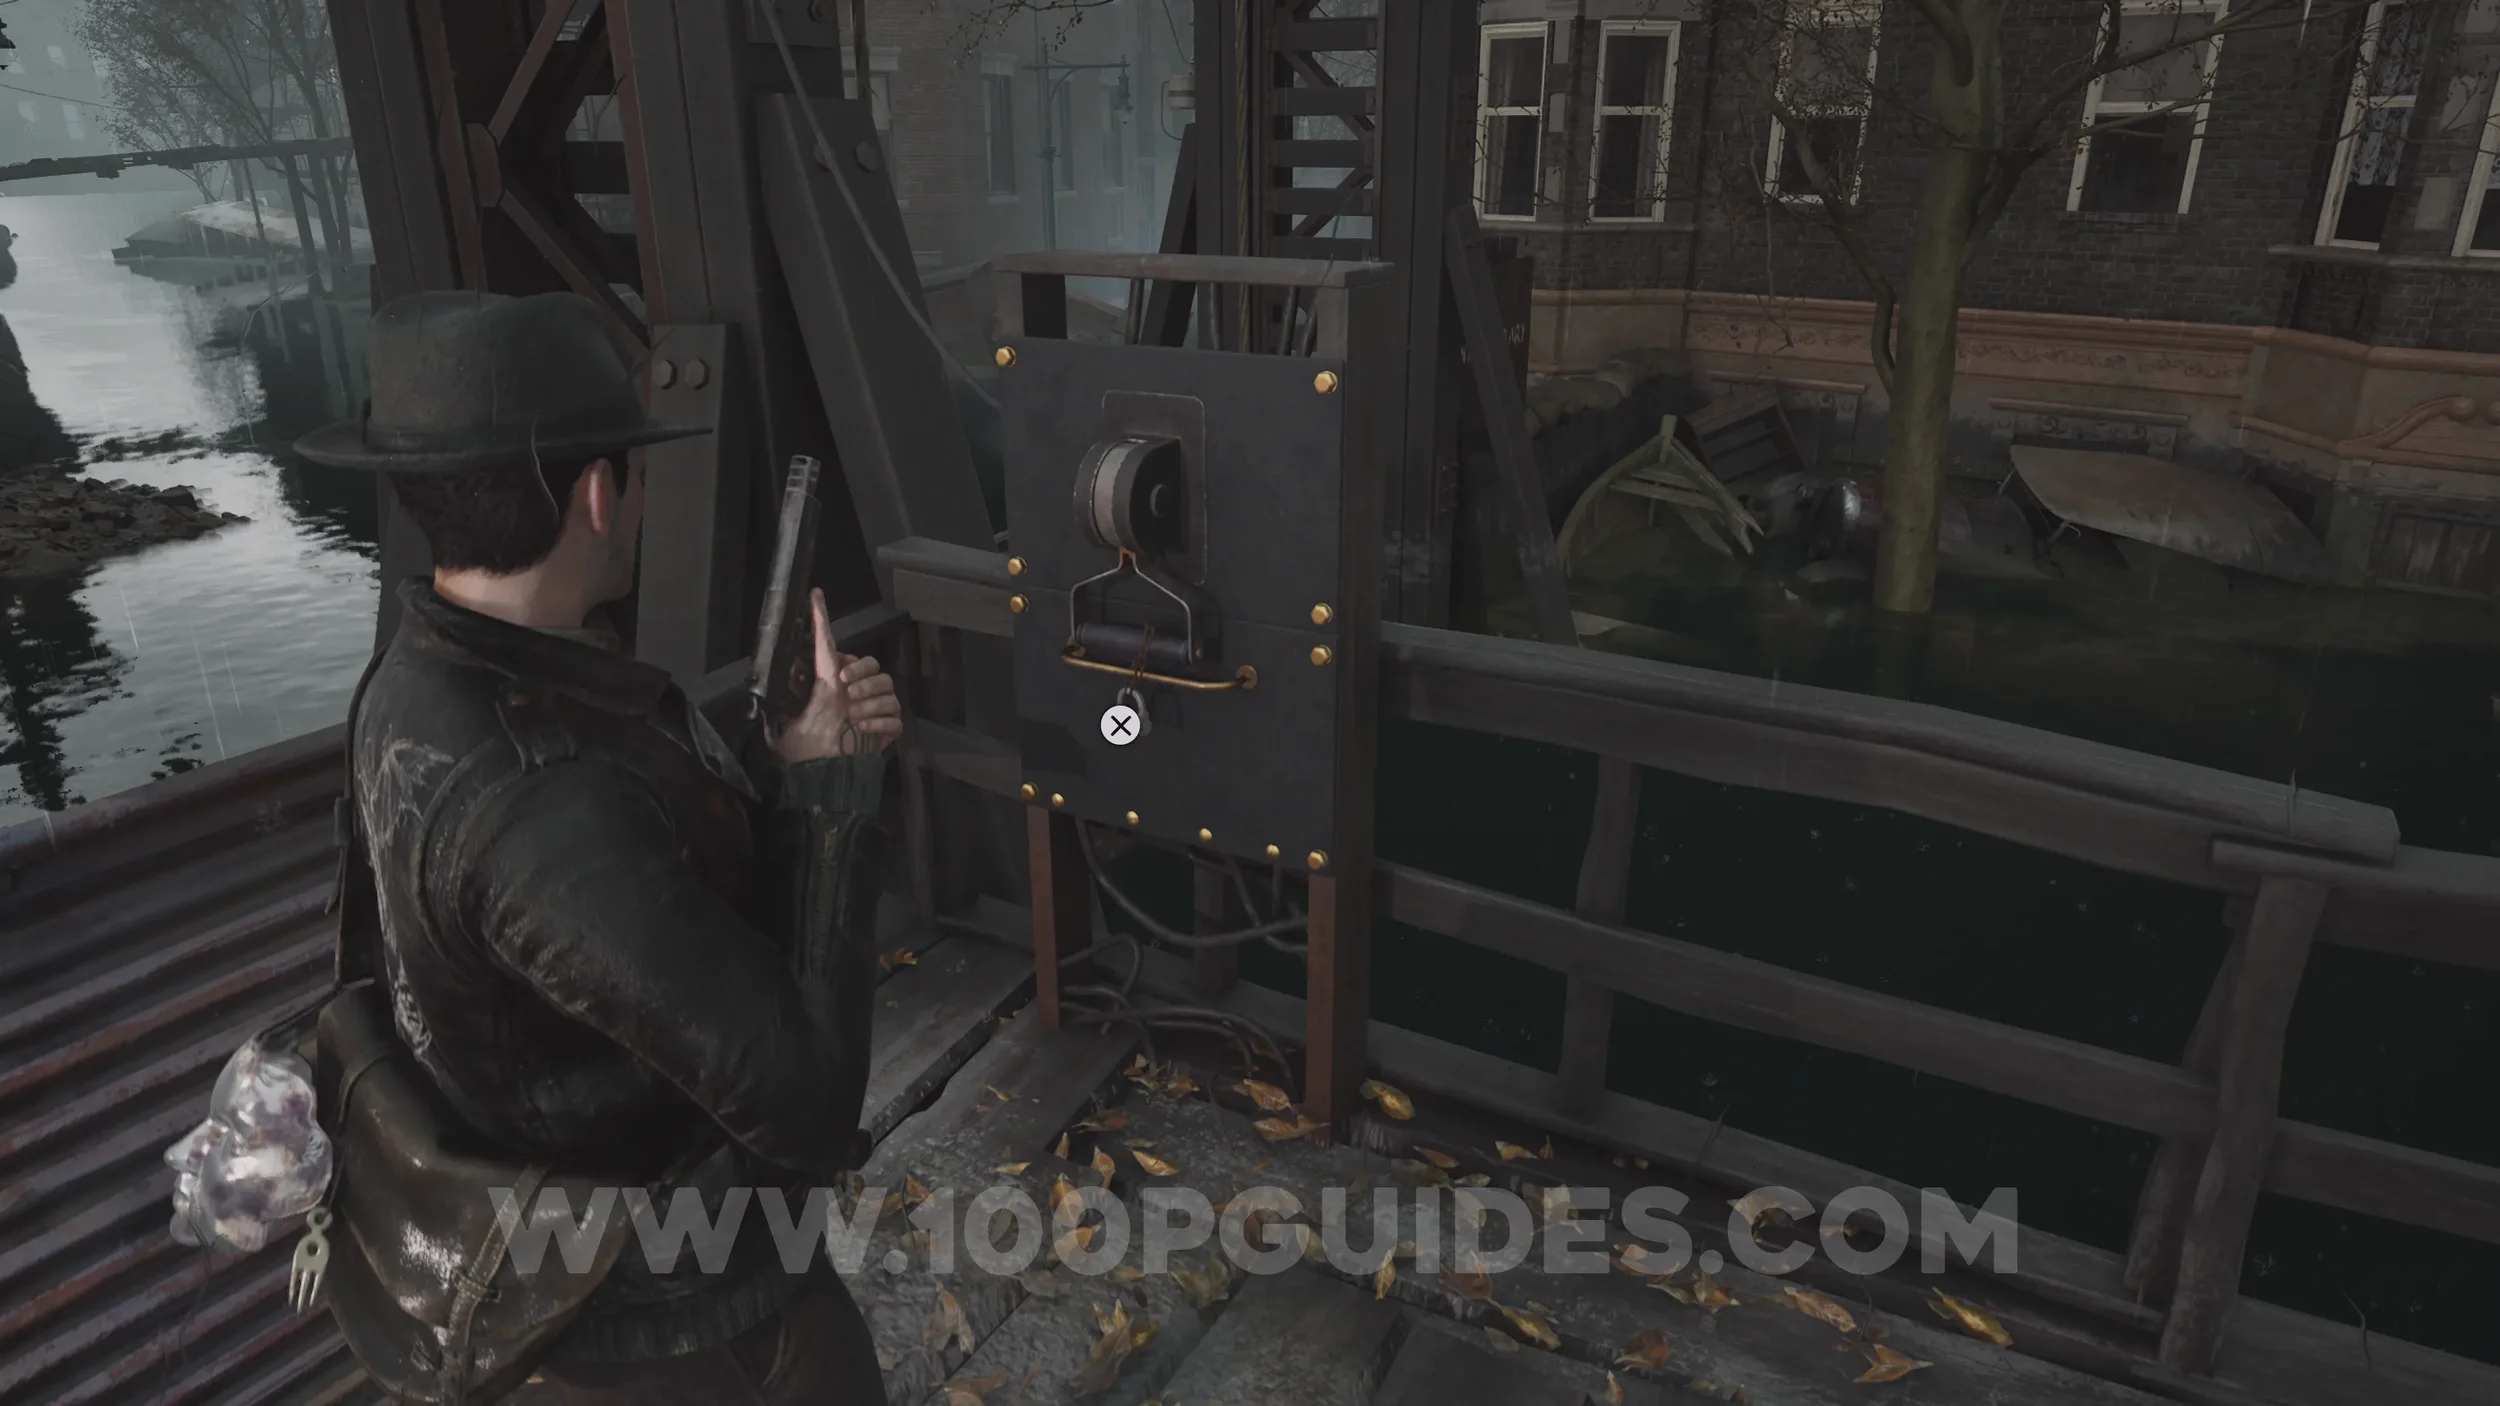
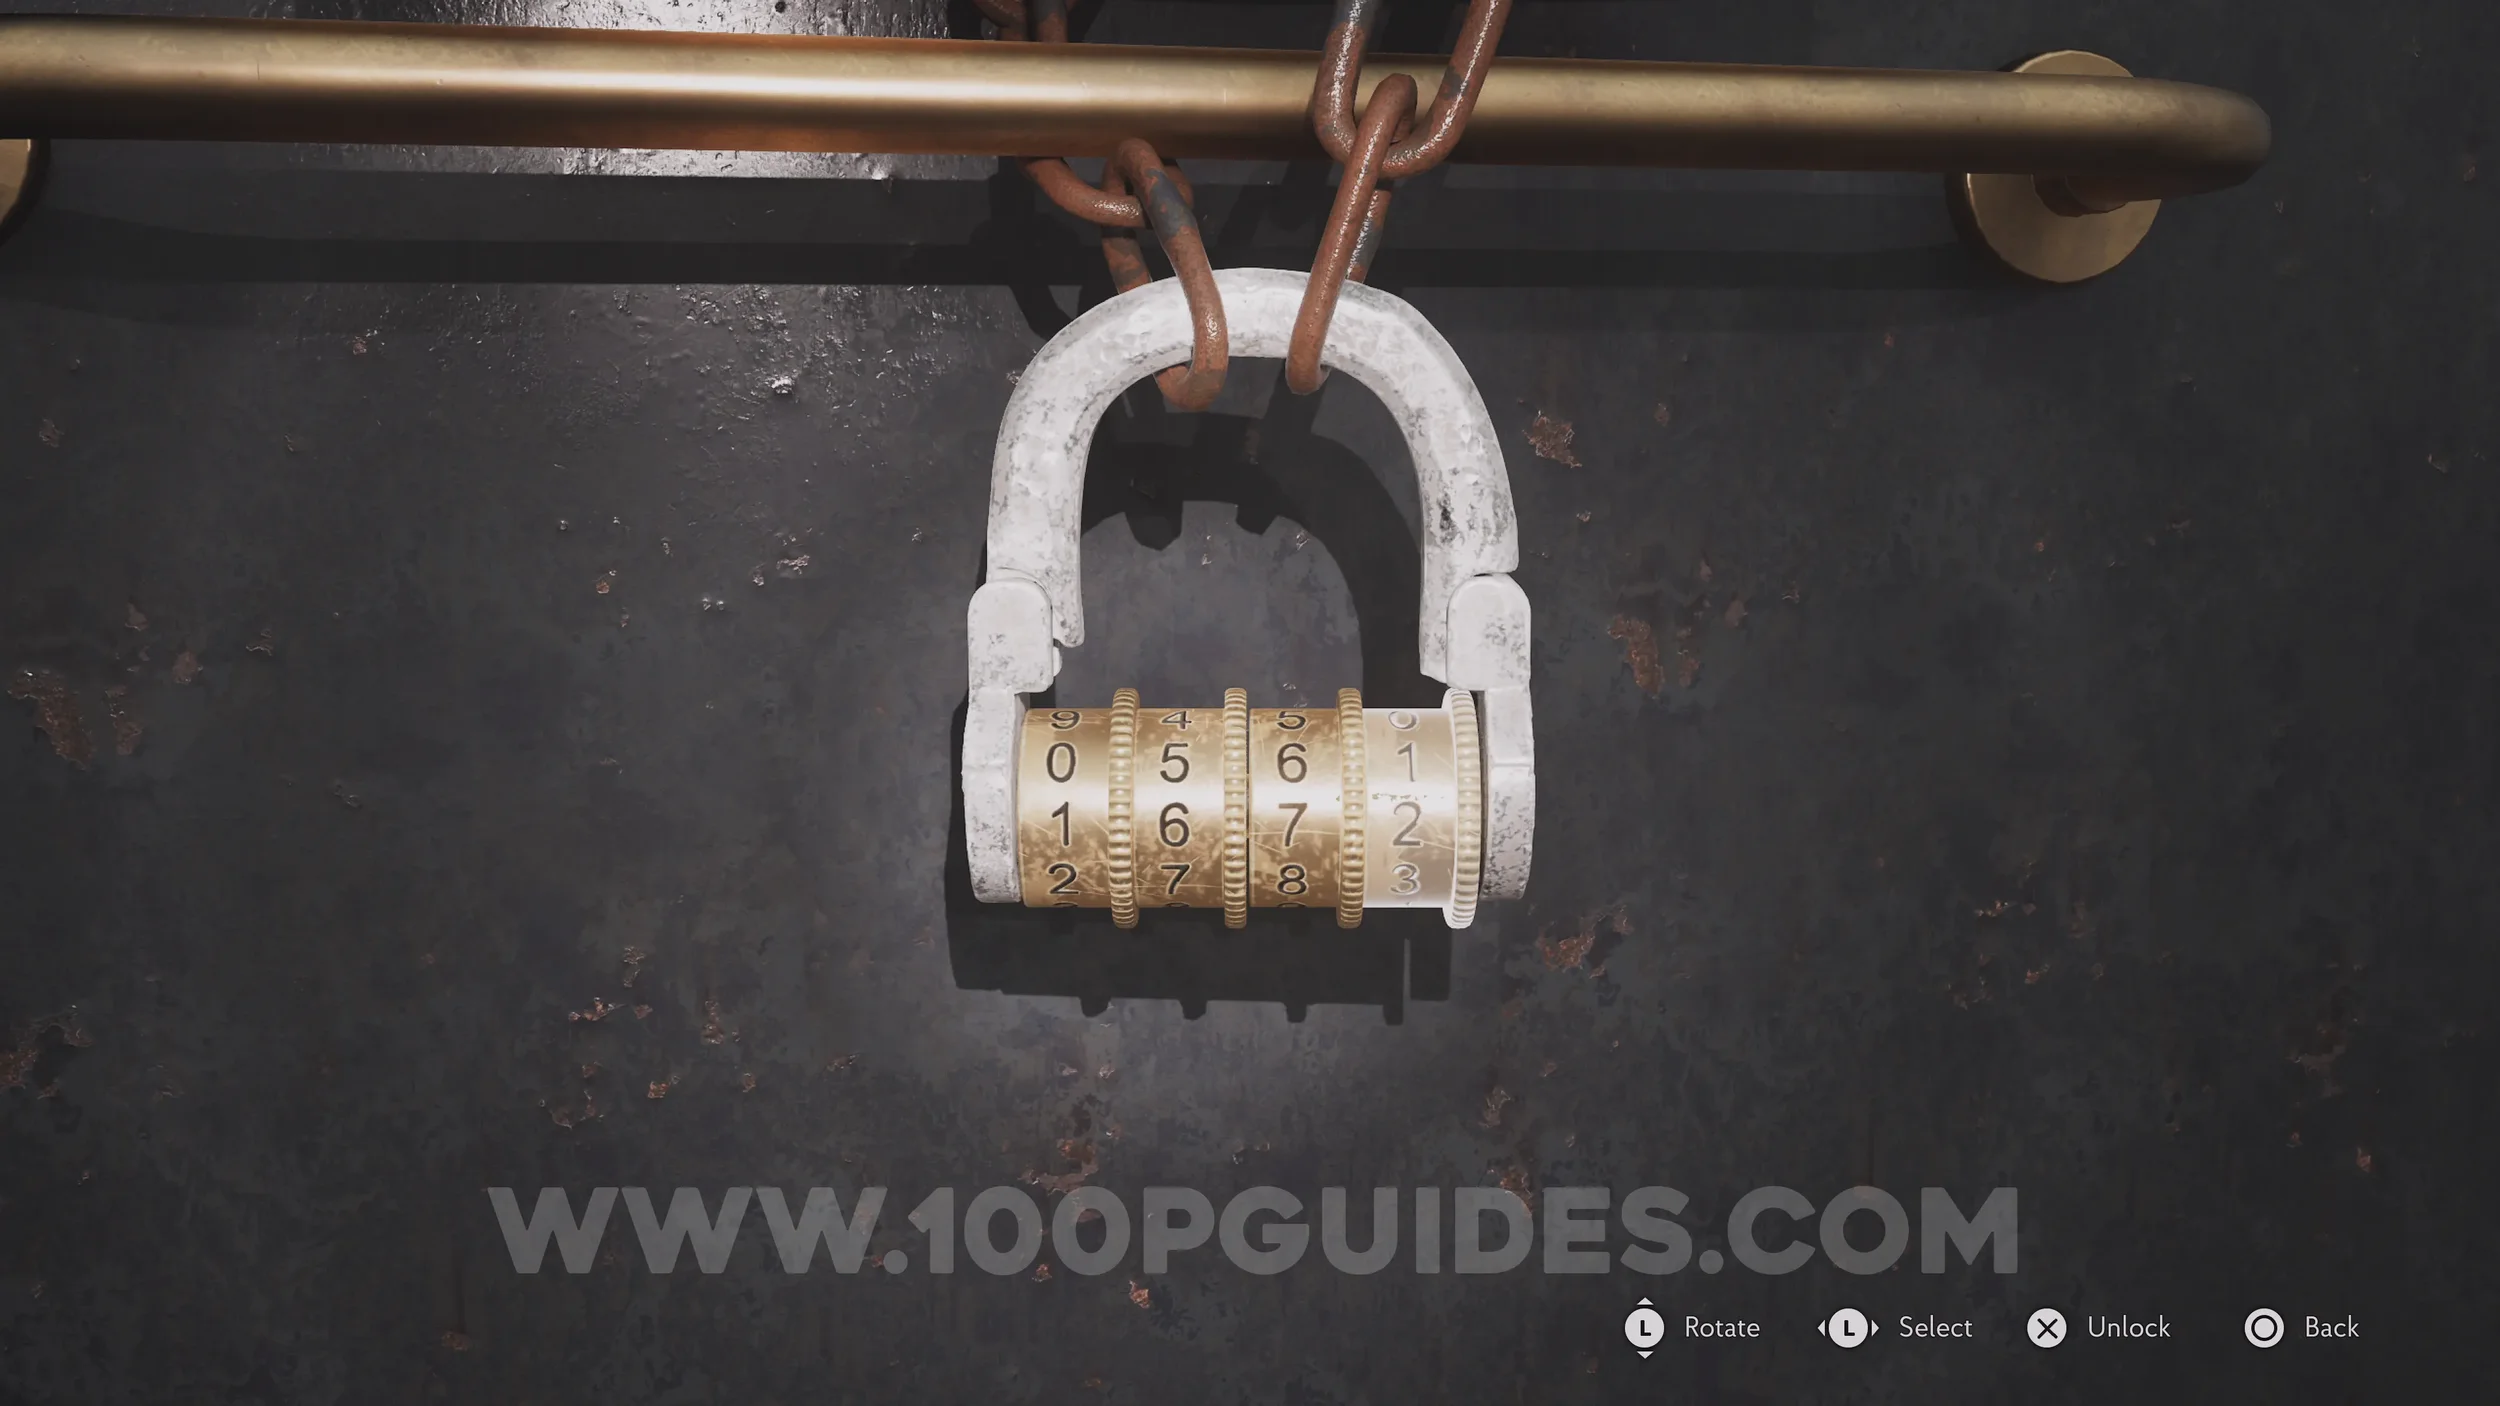
It's now time to leave the church area. Head to the southwest corner outside the church and enter the combination 1672 on the blockage lever. You can work the code out from three pieces of evidence: the "Floodgate Lock" tells us it's the date the bell was placed in the church, the "Report on the Bell" tells us the bell was placed half a decade after the church was built, and the "Origins of the Redemption Church" tells us the church was built in 1667.
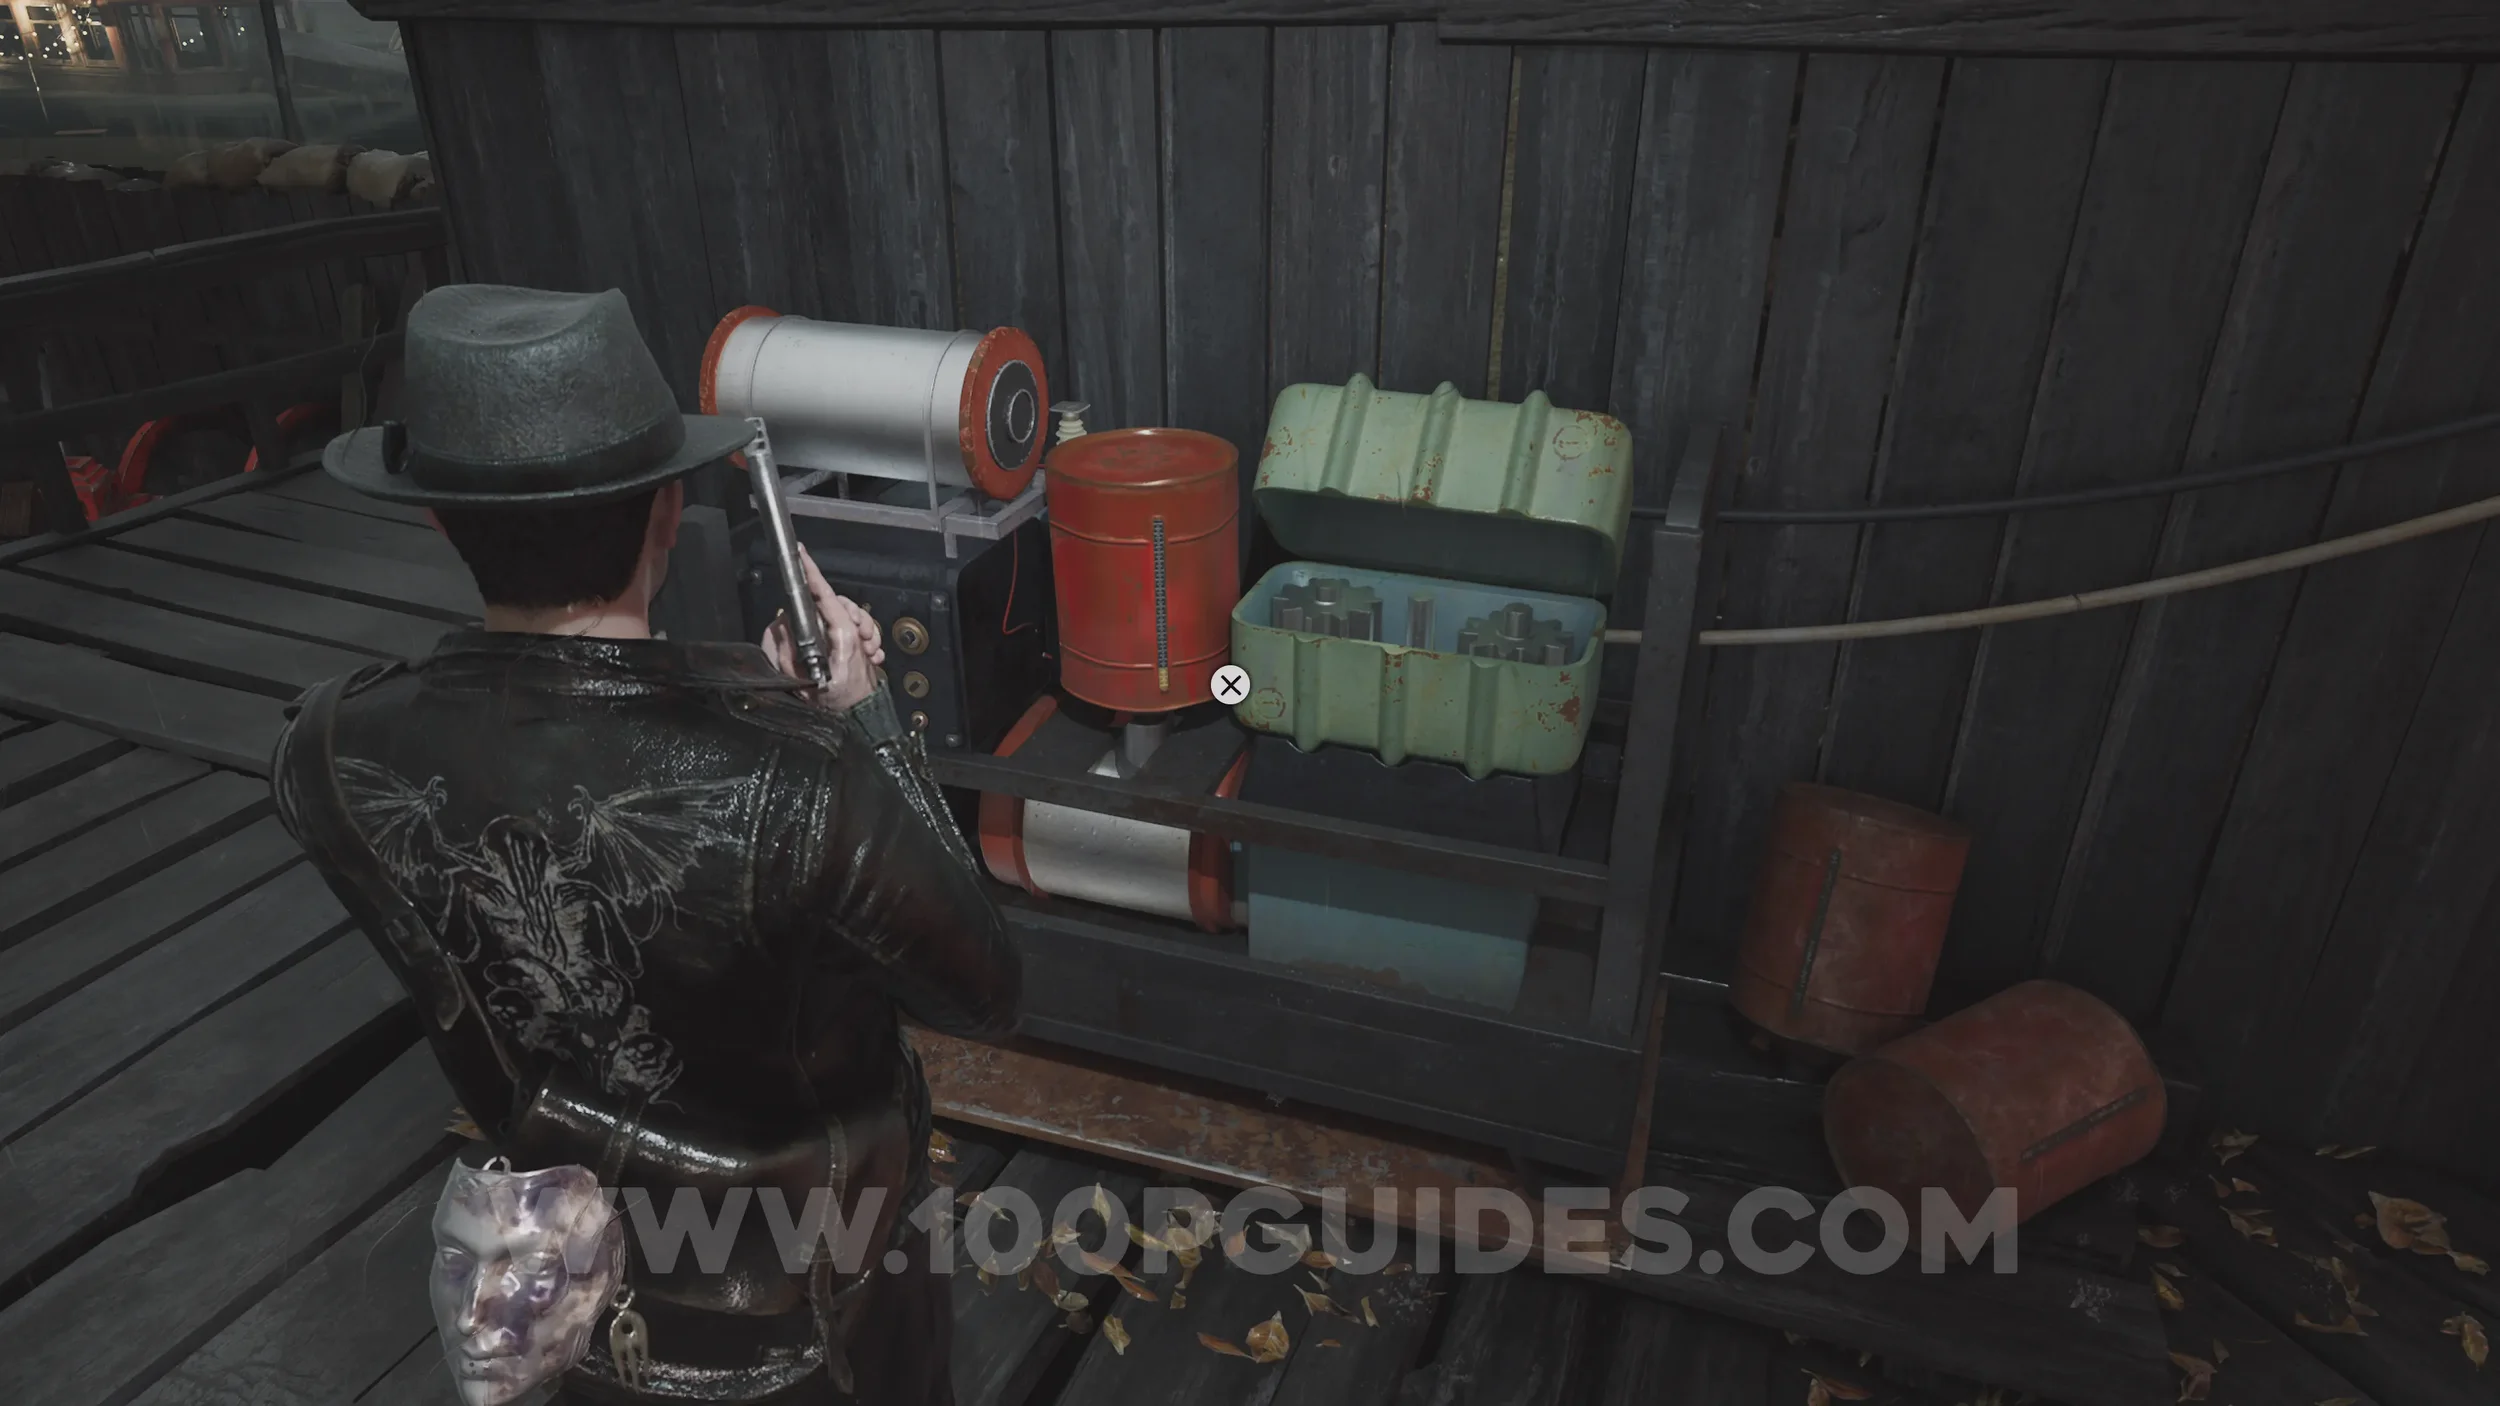
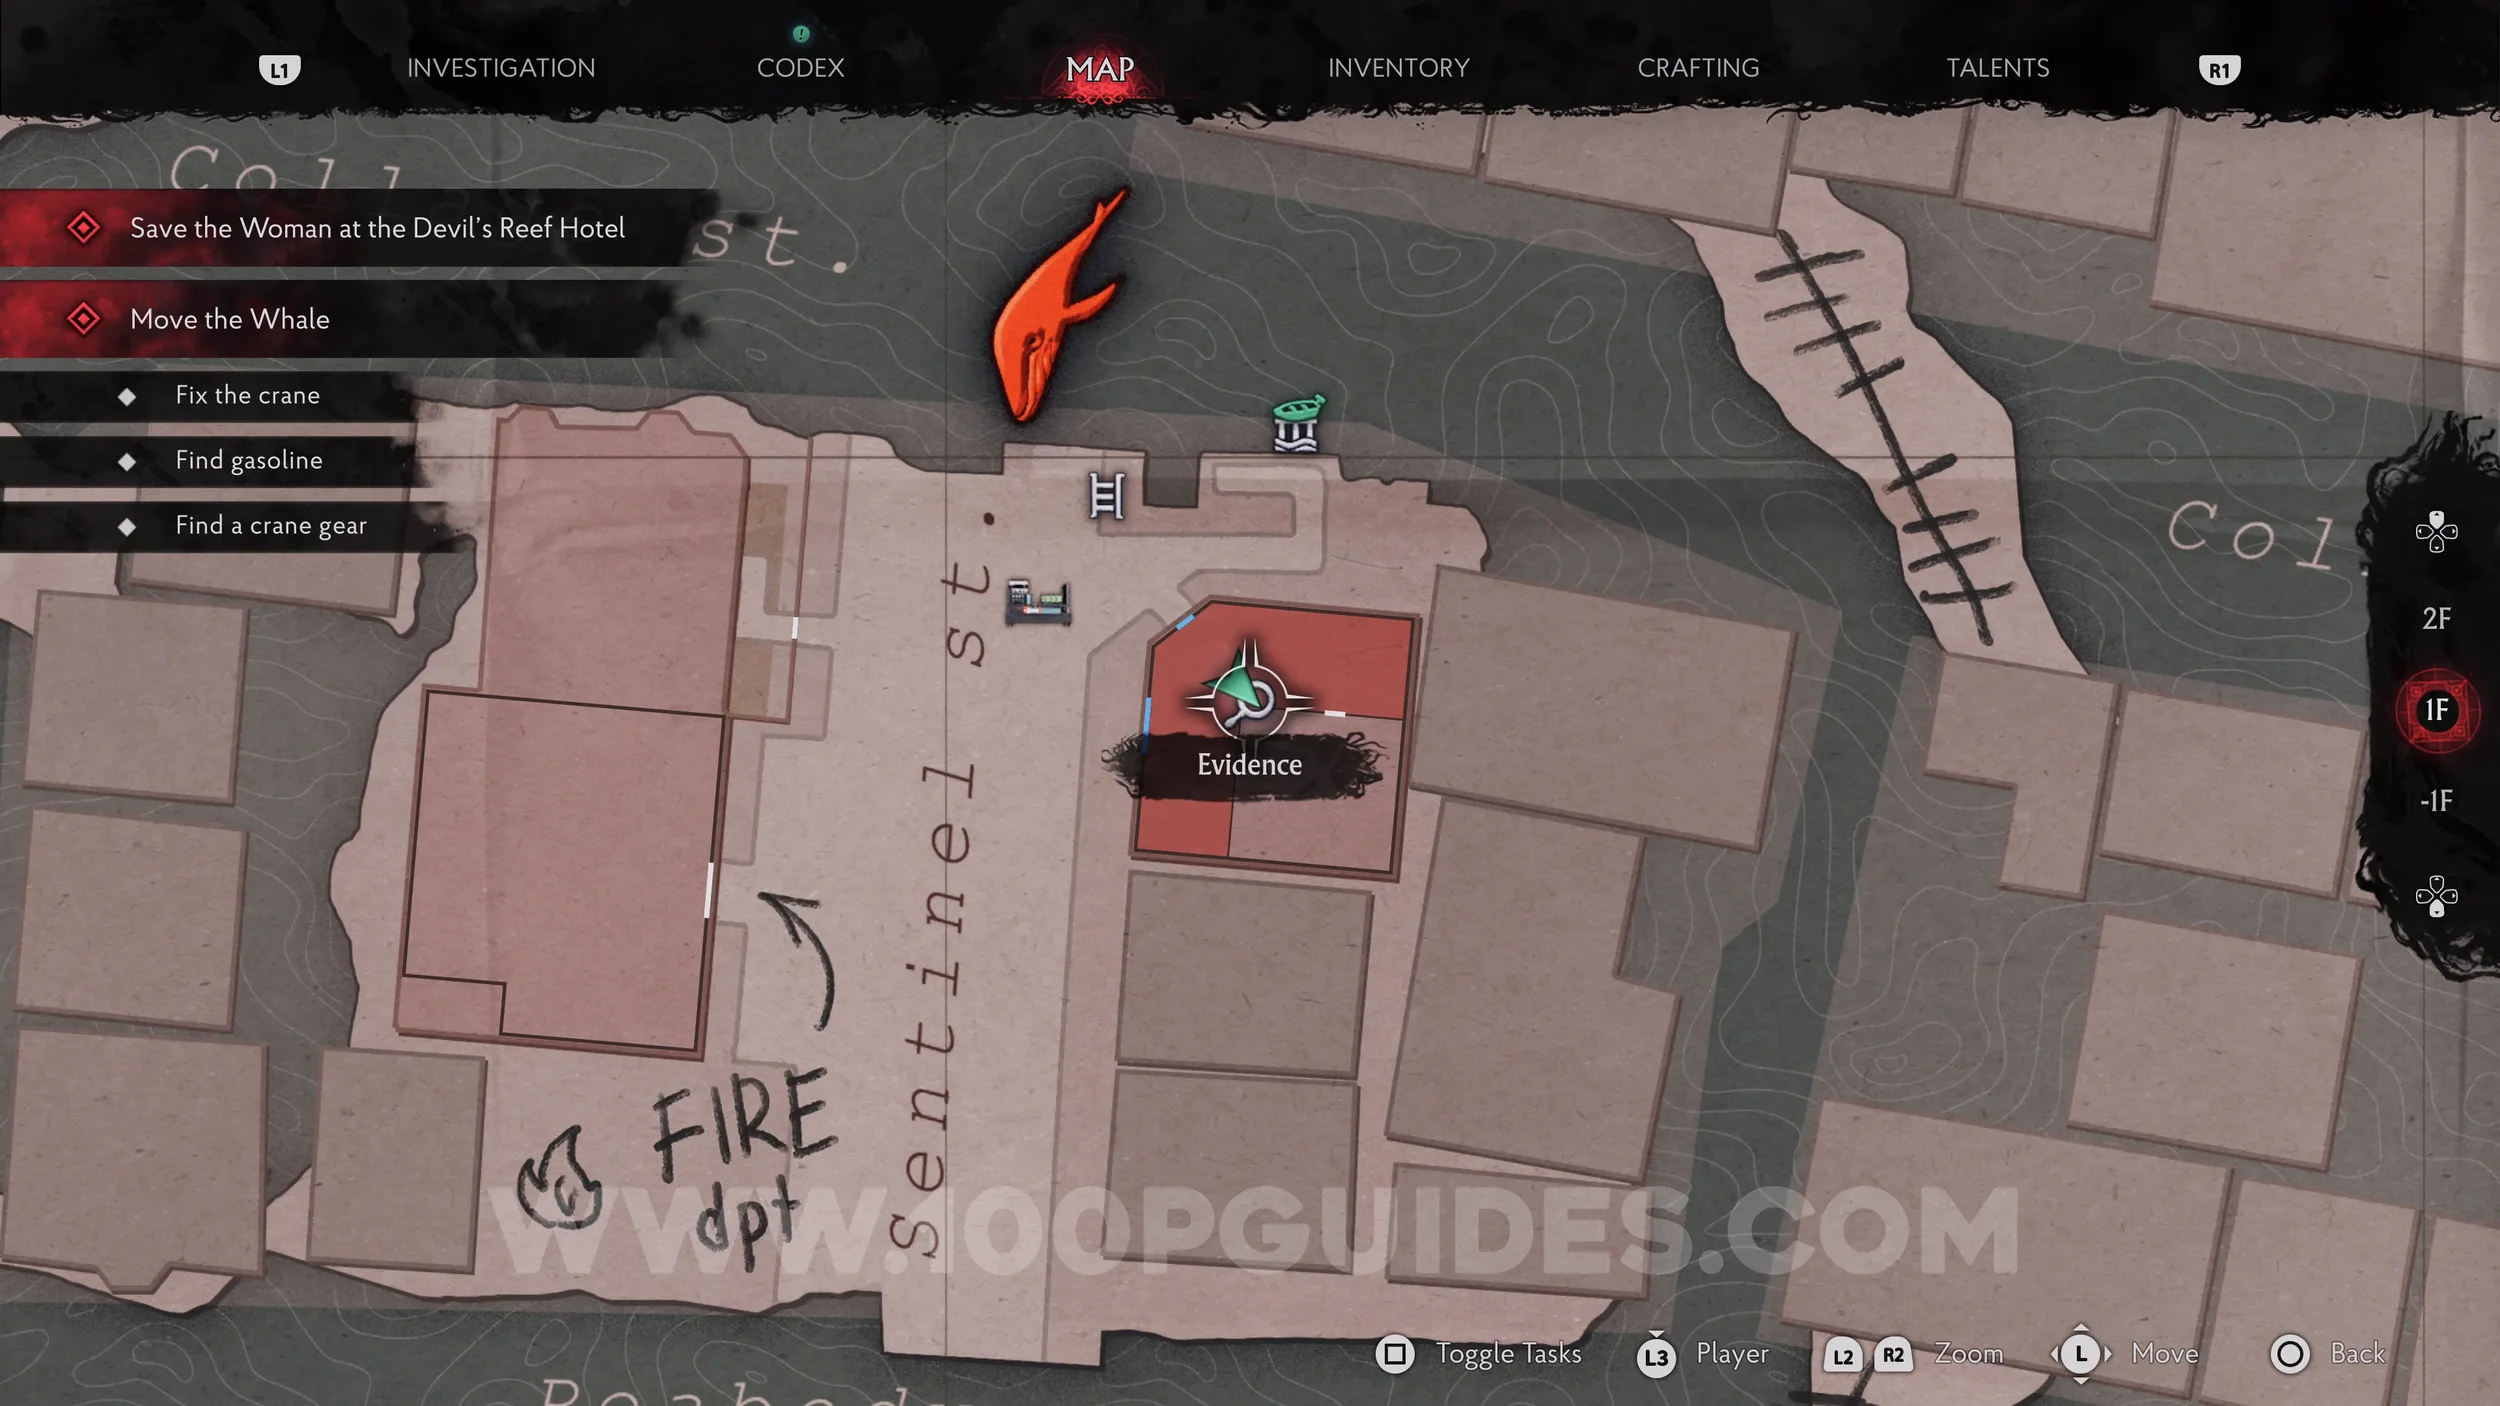
Evidence: The Broken Crane. After getting back in your boat and following the flooded streets, you'll eventually reach a street blocked by a dead whale that you have to move with a crane. Inspect the mechanism below the crane to get the evidence.
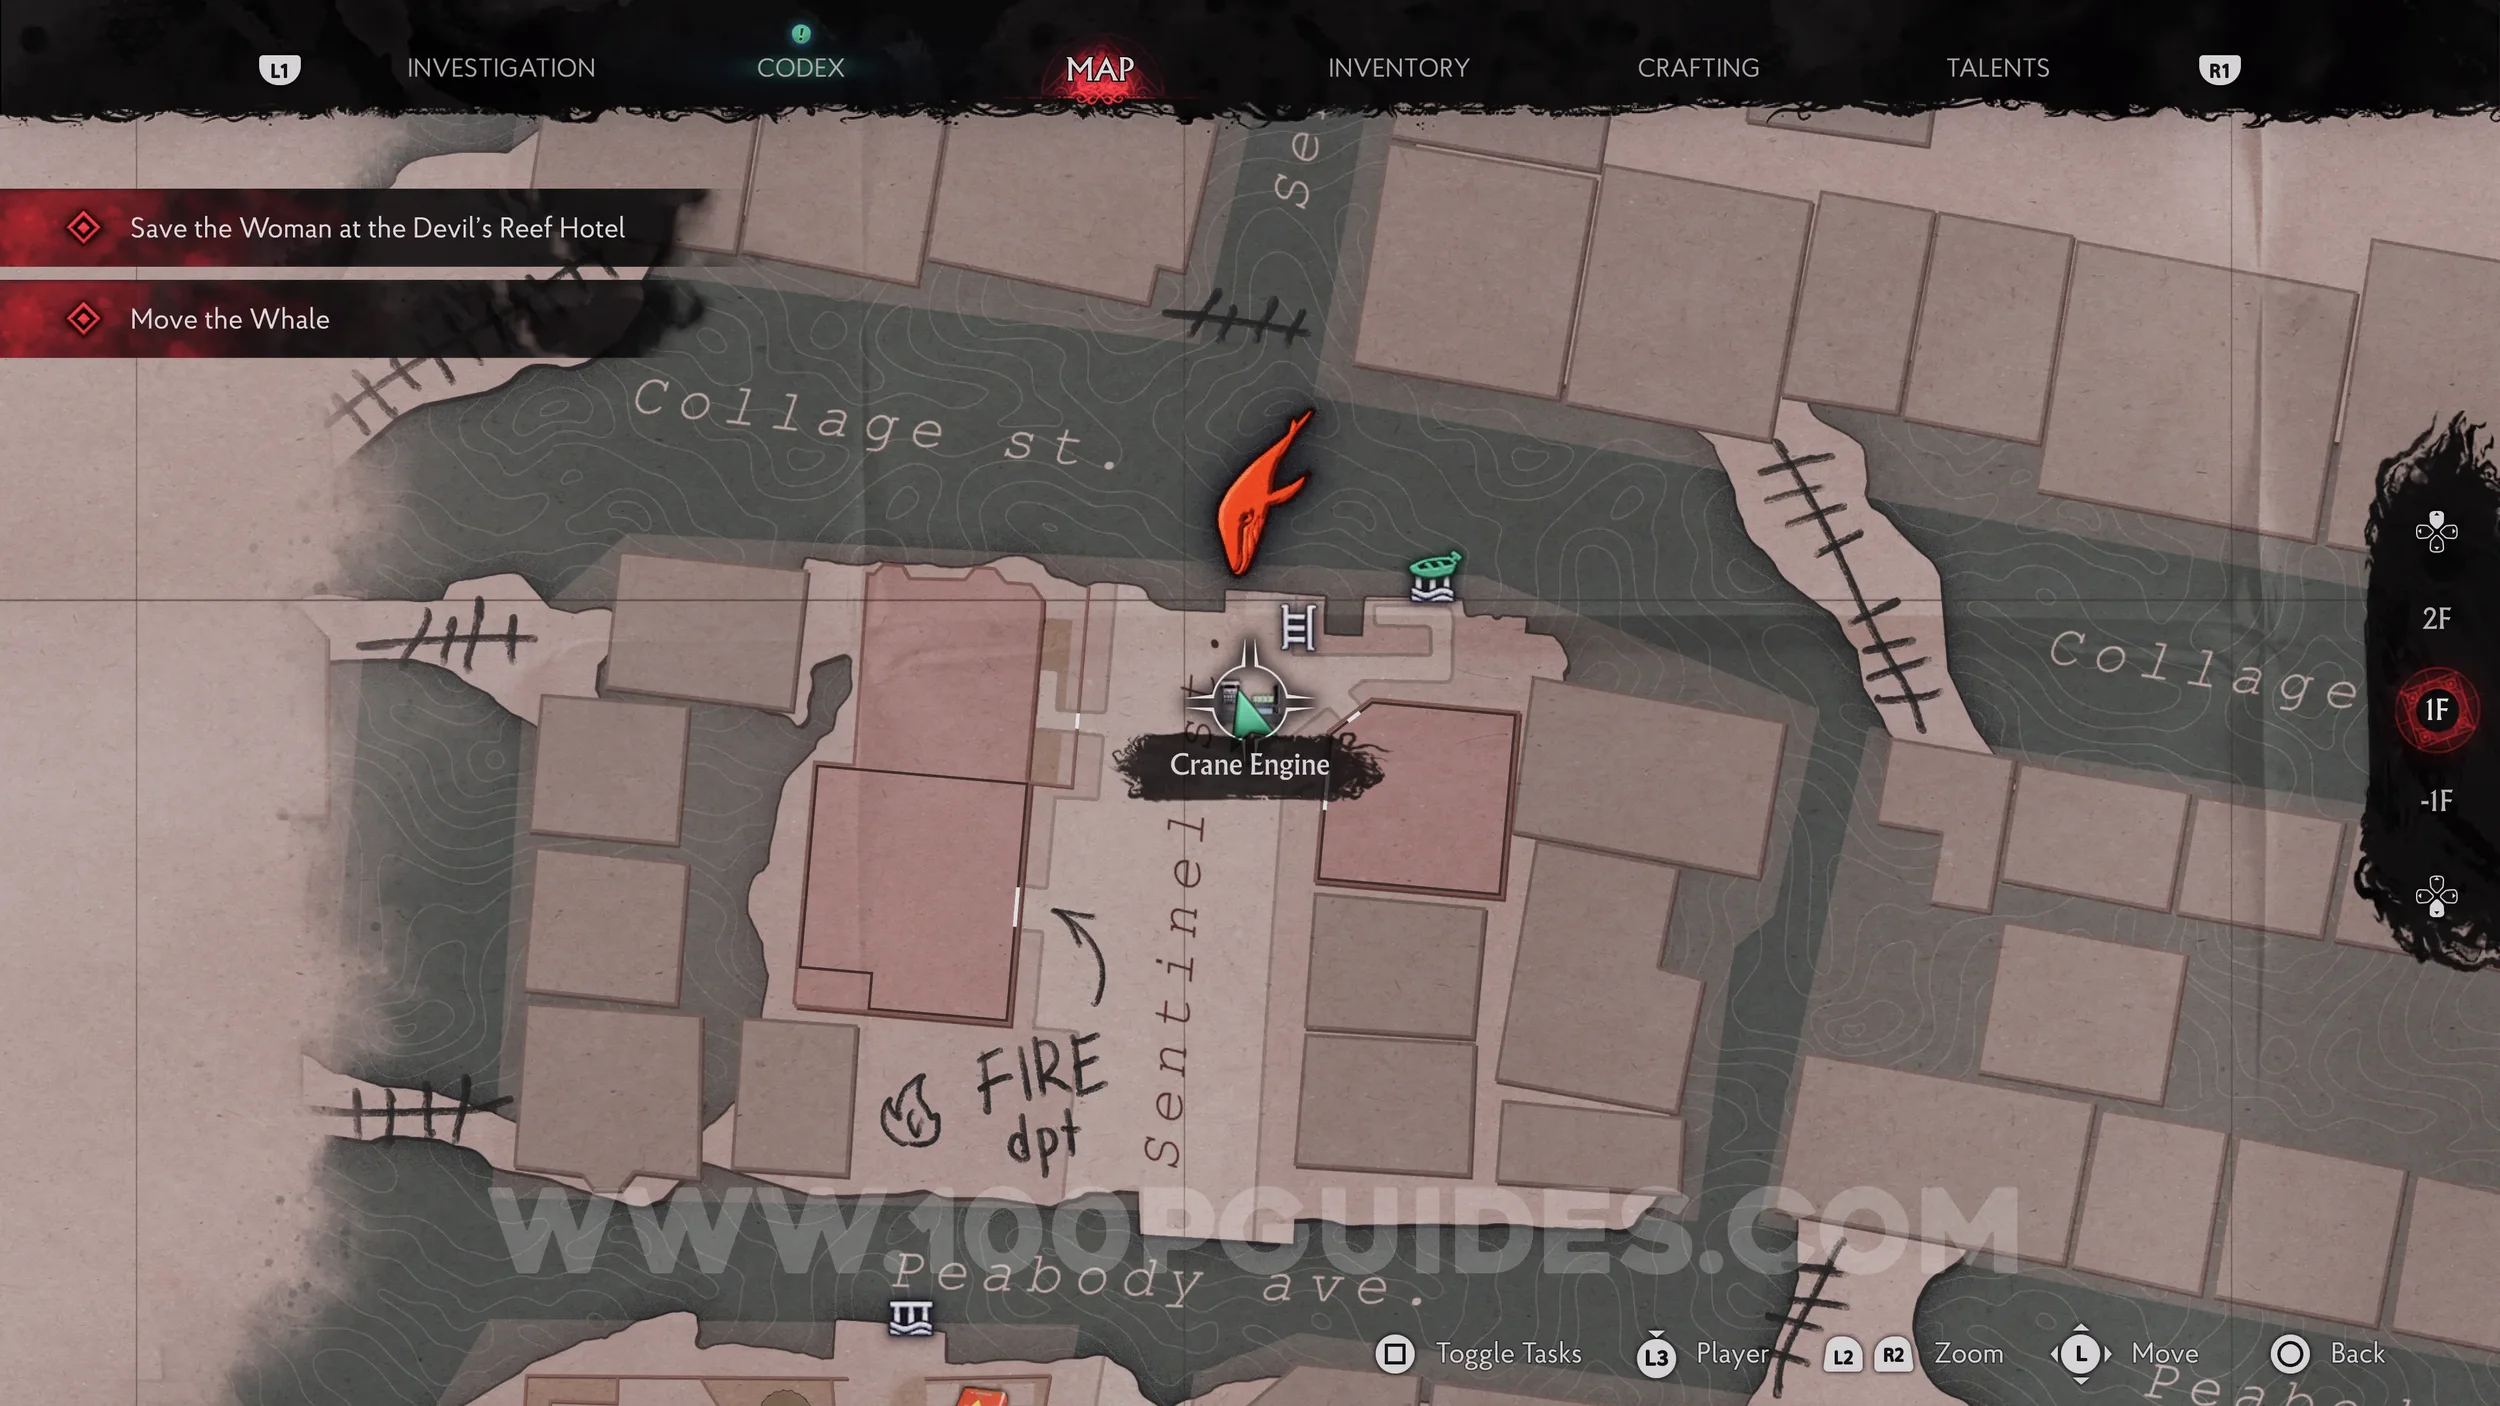
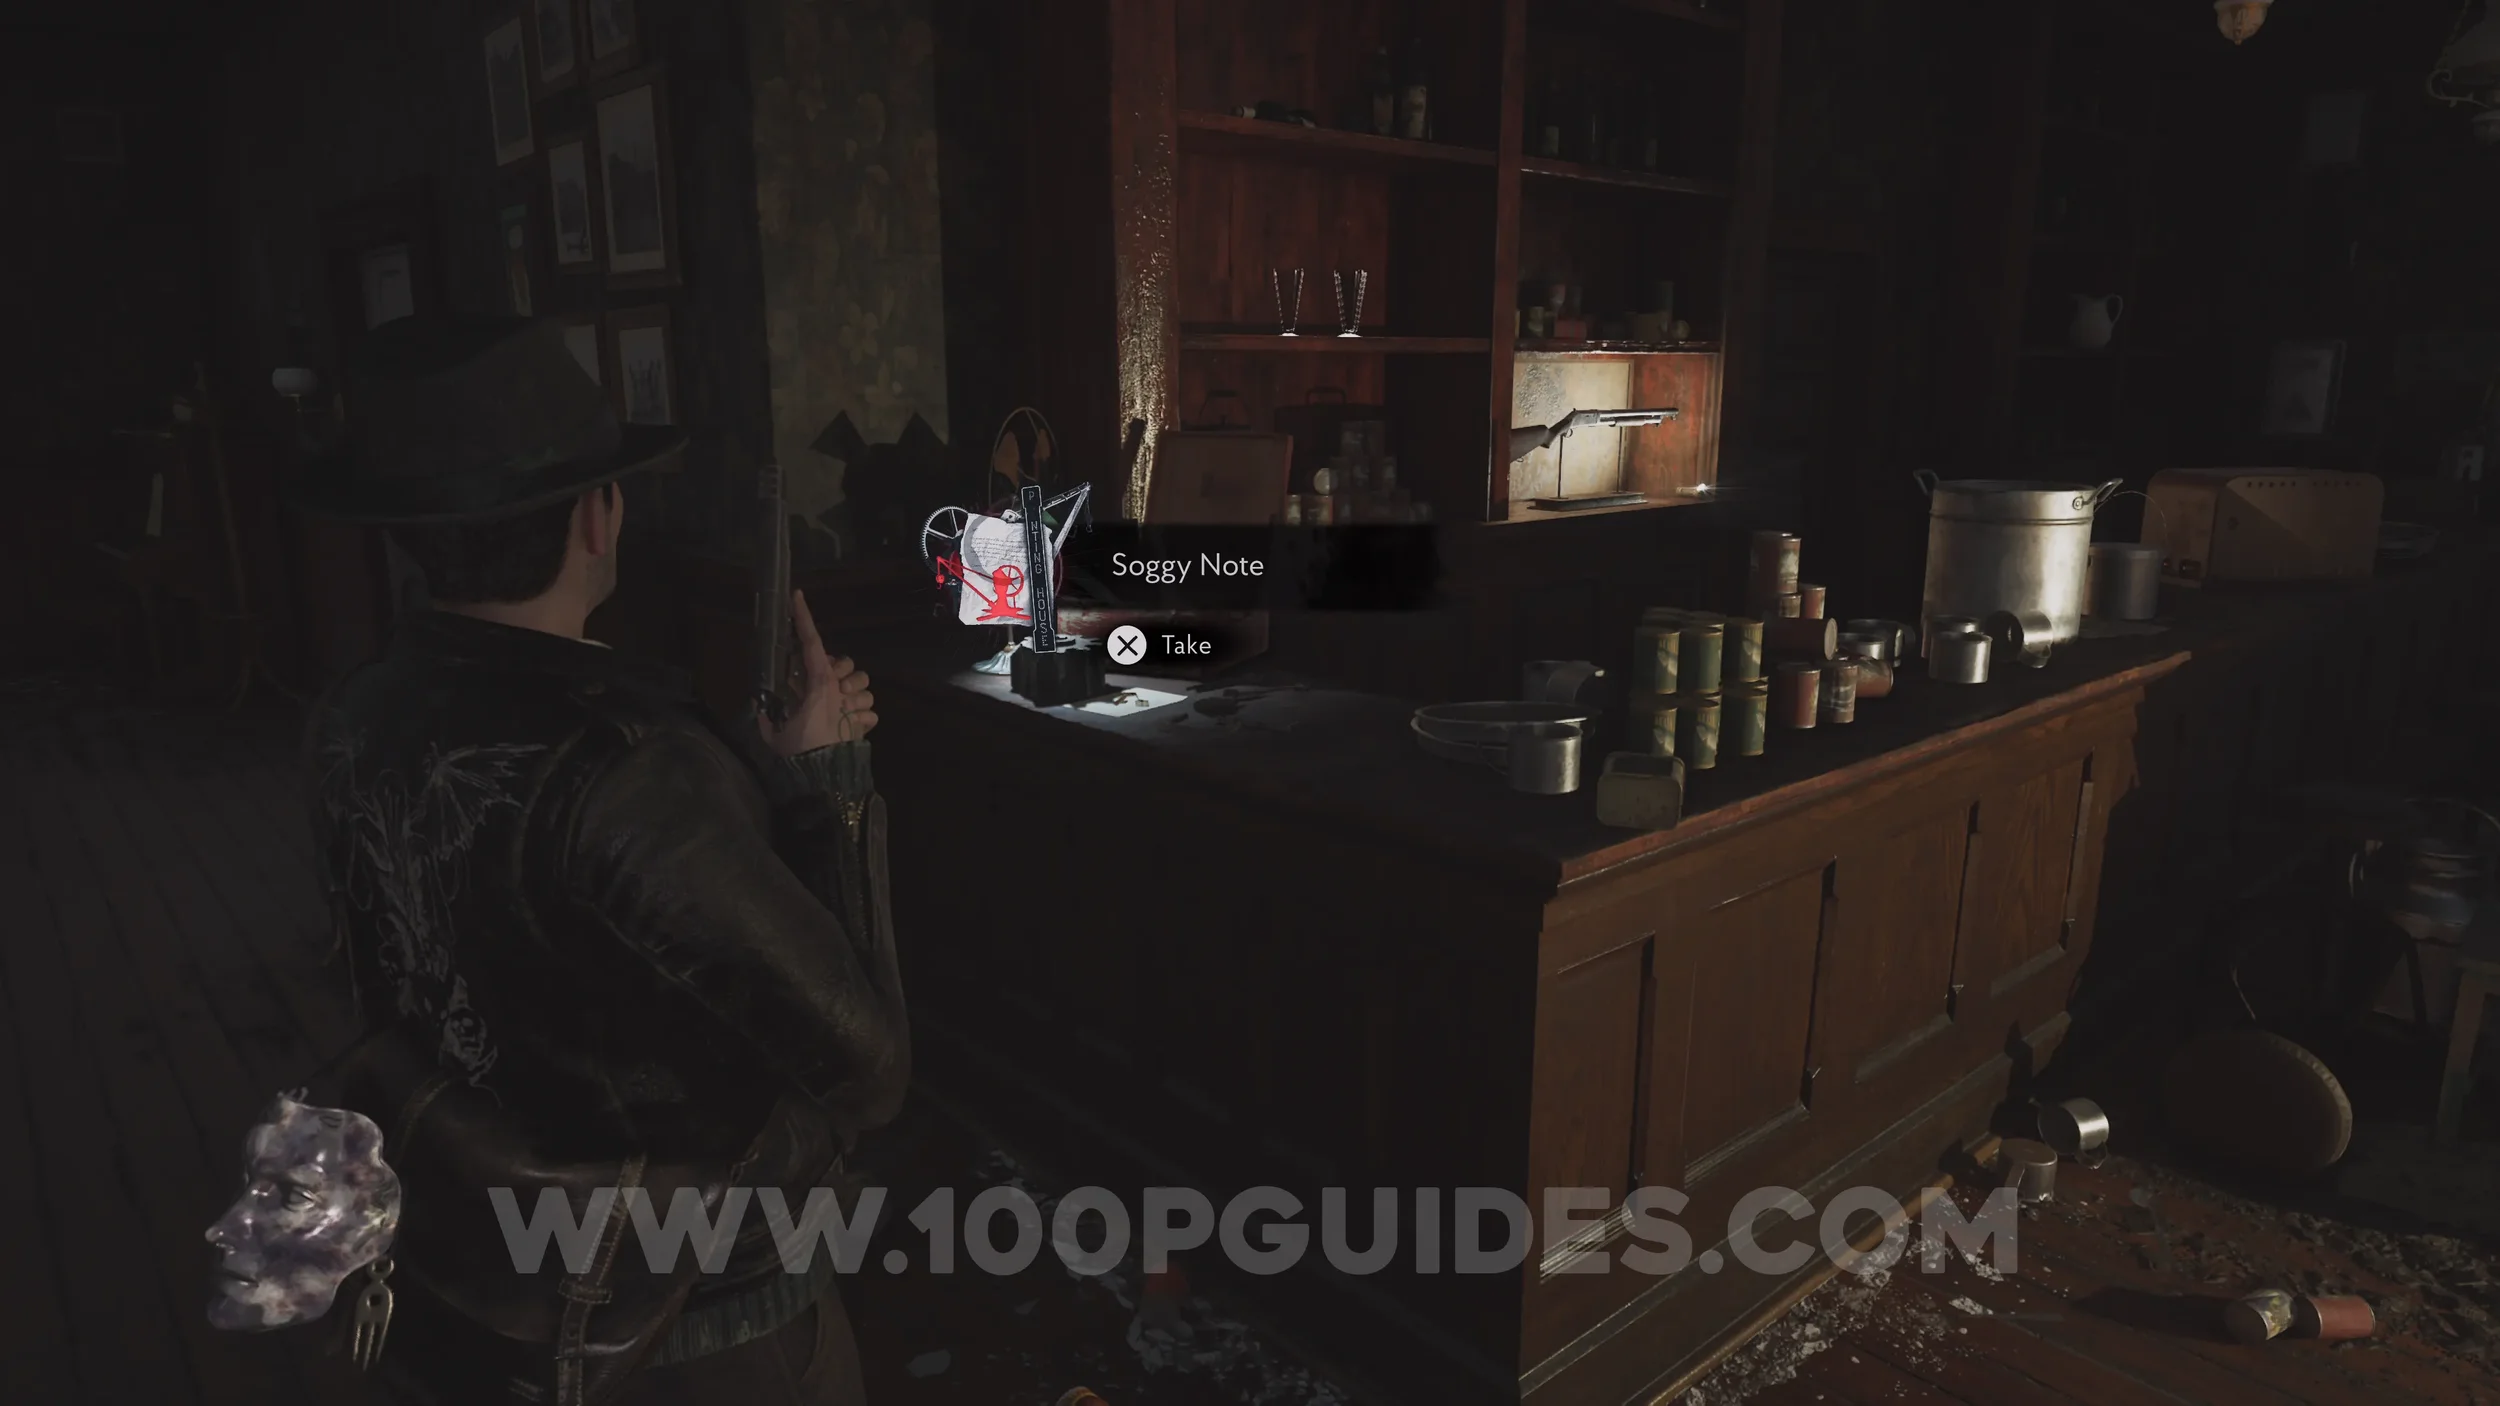
Evidence: Soggy Note. After inspecting the broken crane mechanism, a creature will break a hole in the door behind you. Head inside and pick up the evidence from the bar.
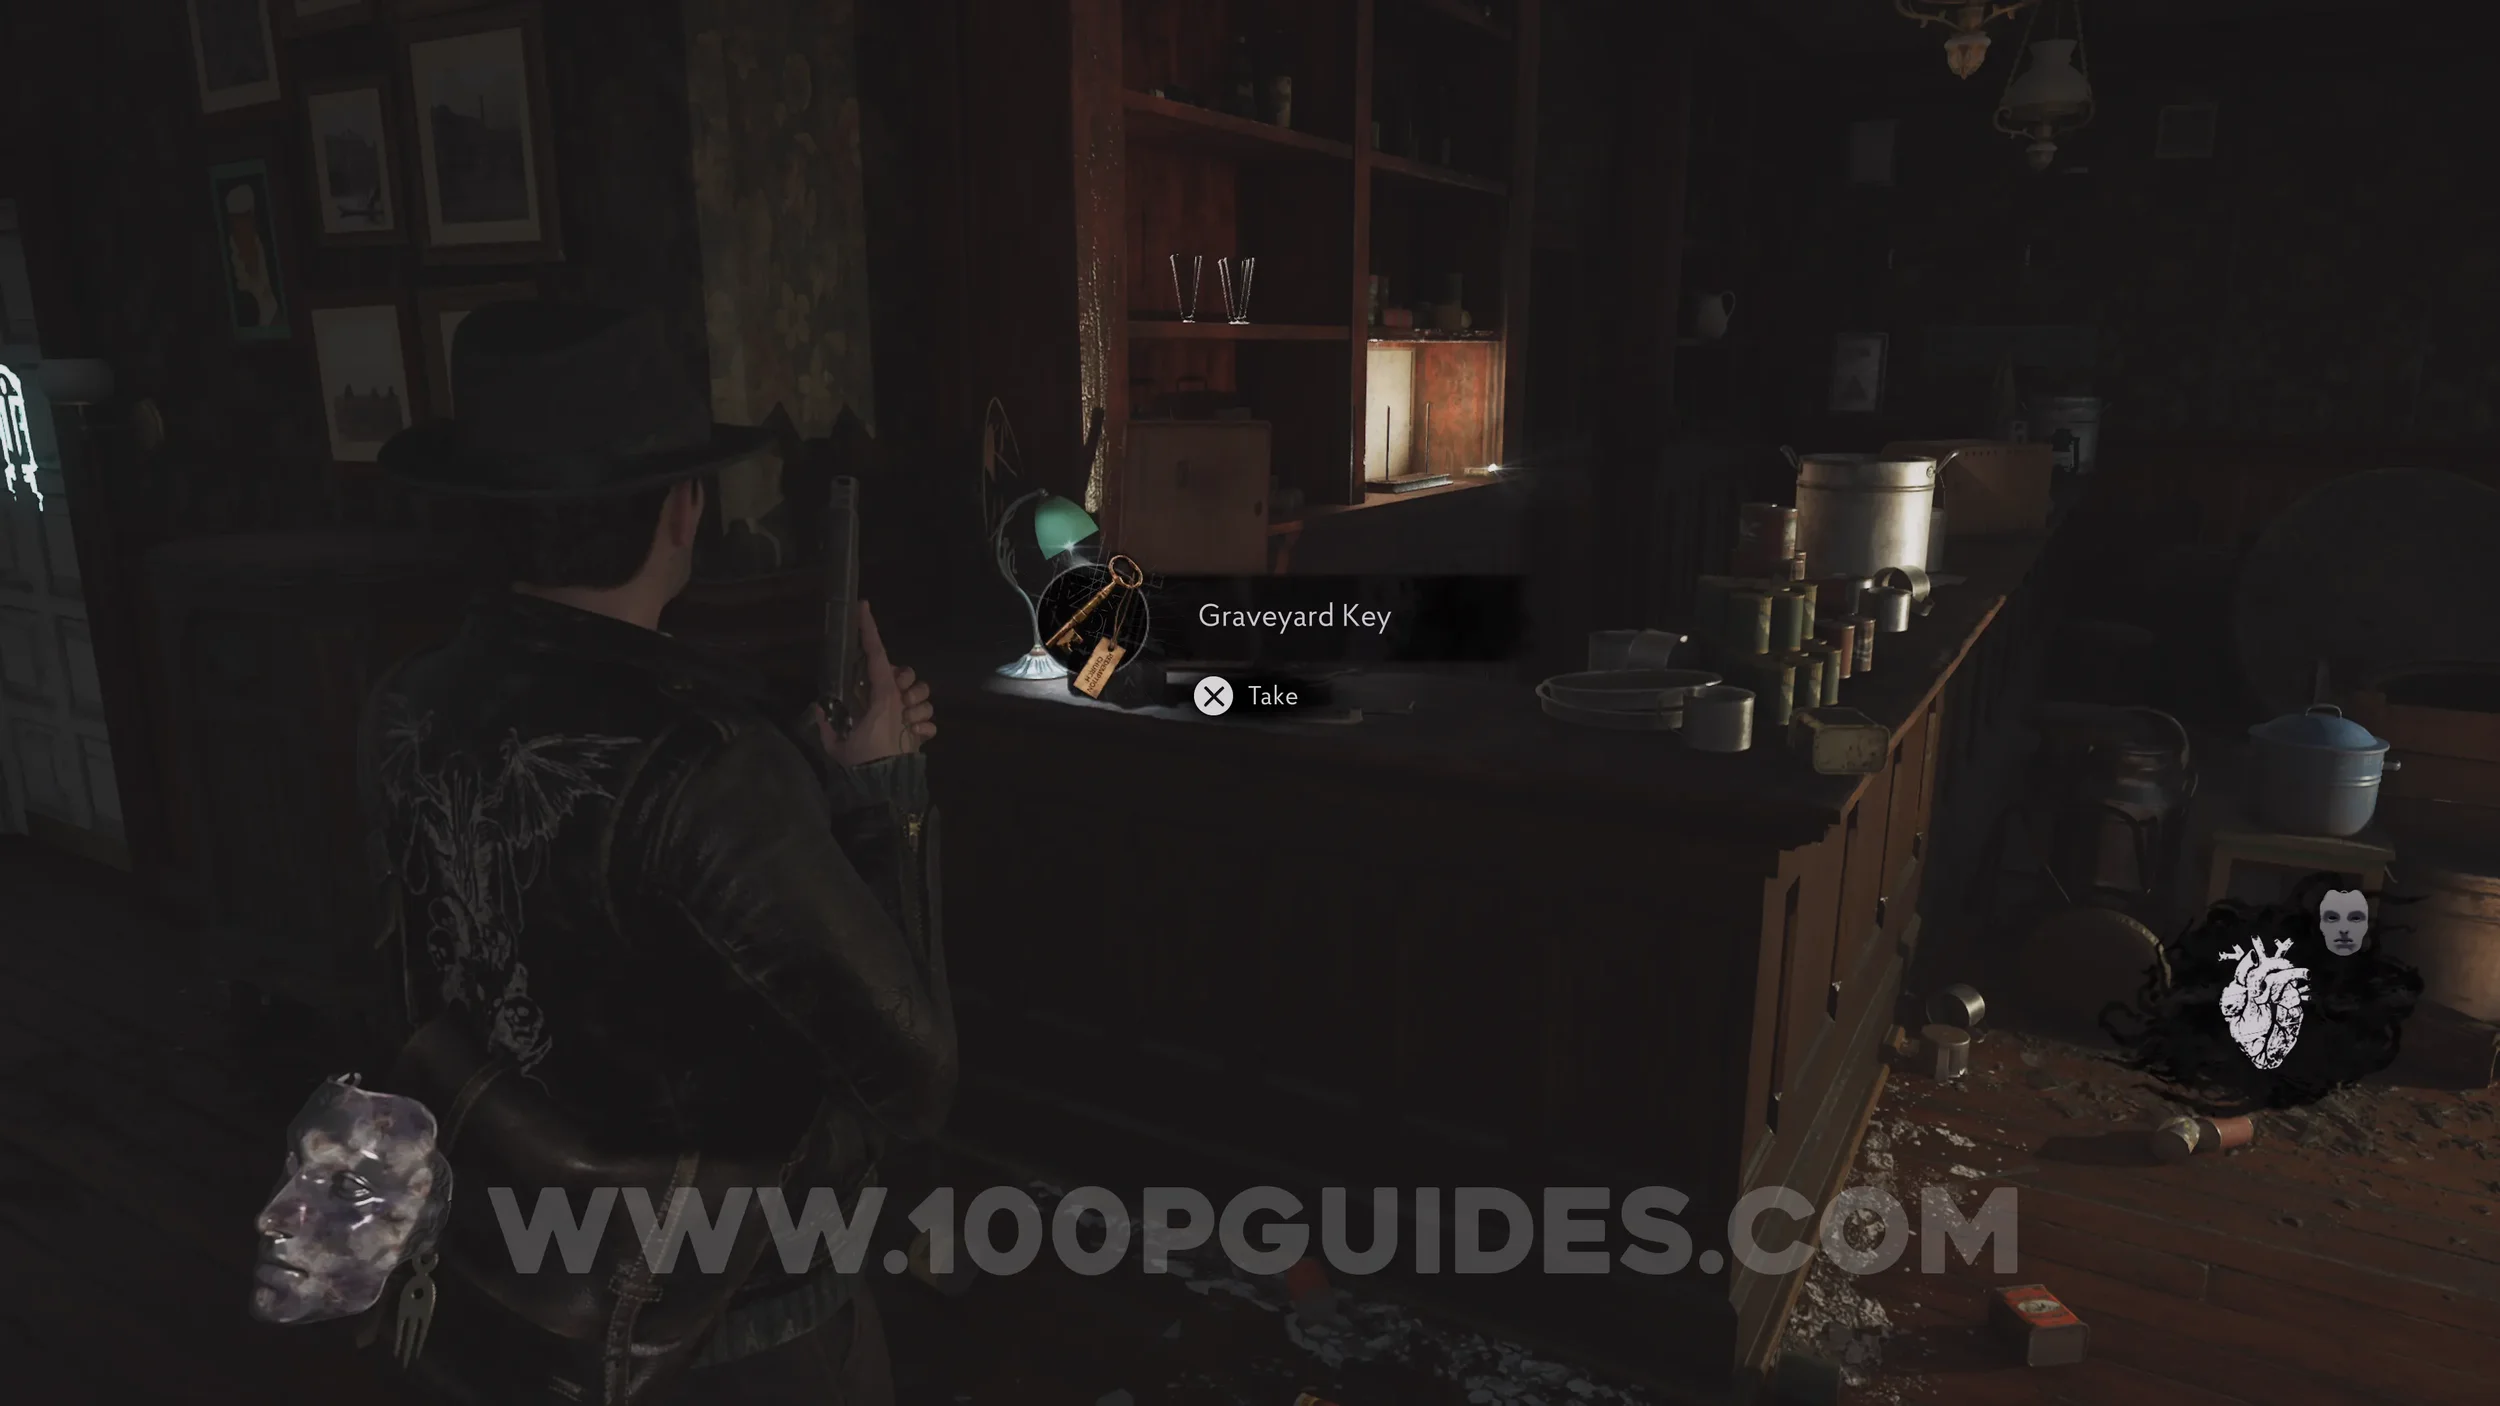
Key Item: Graveyard Key. In the same location as the previous evidence.
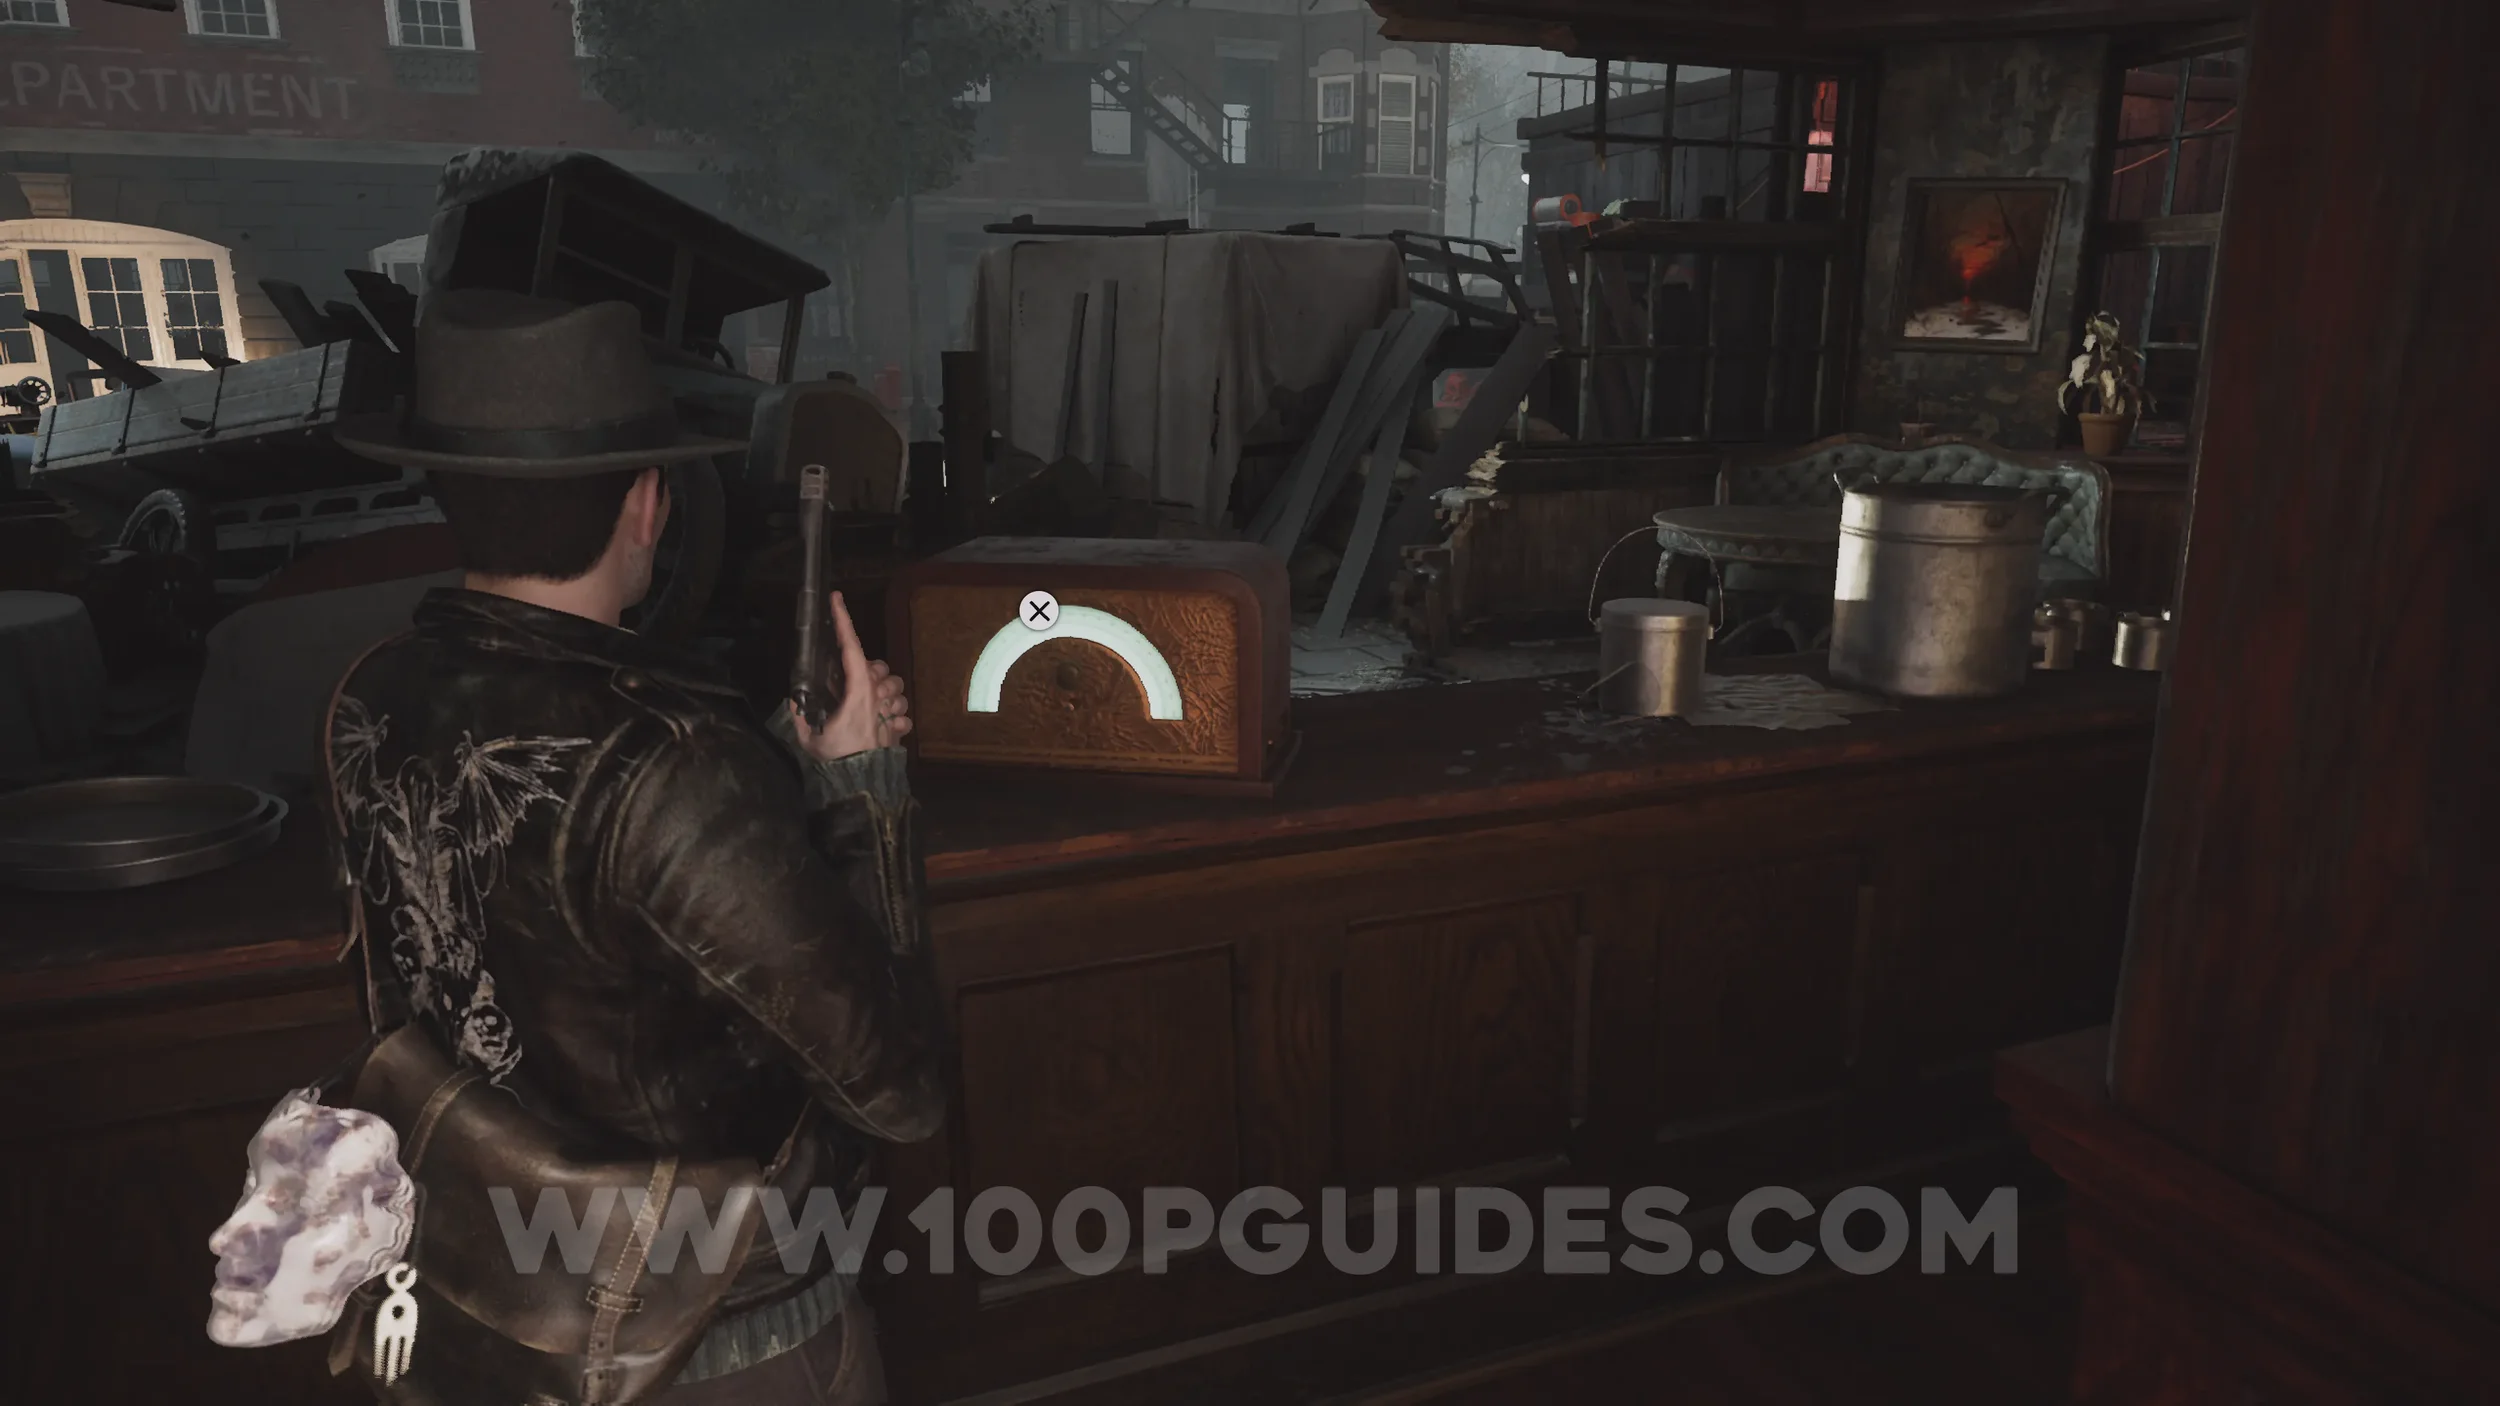
Radio: The Missing Mayor. Head through the safe room to the left of the previous evidence and come out the other side to get behind the bar. The radio is in front of you.
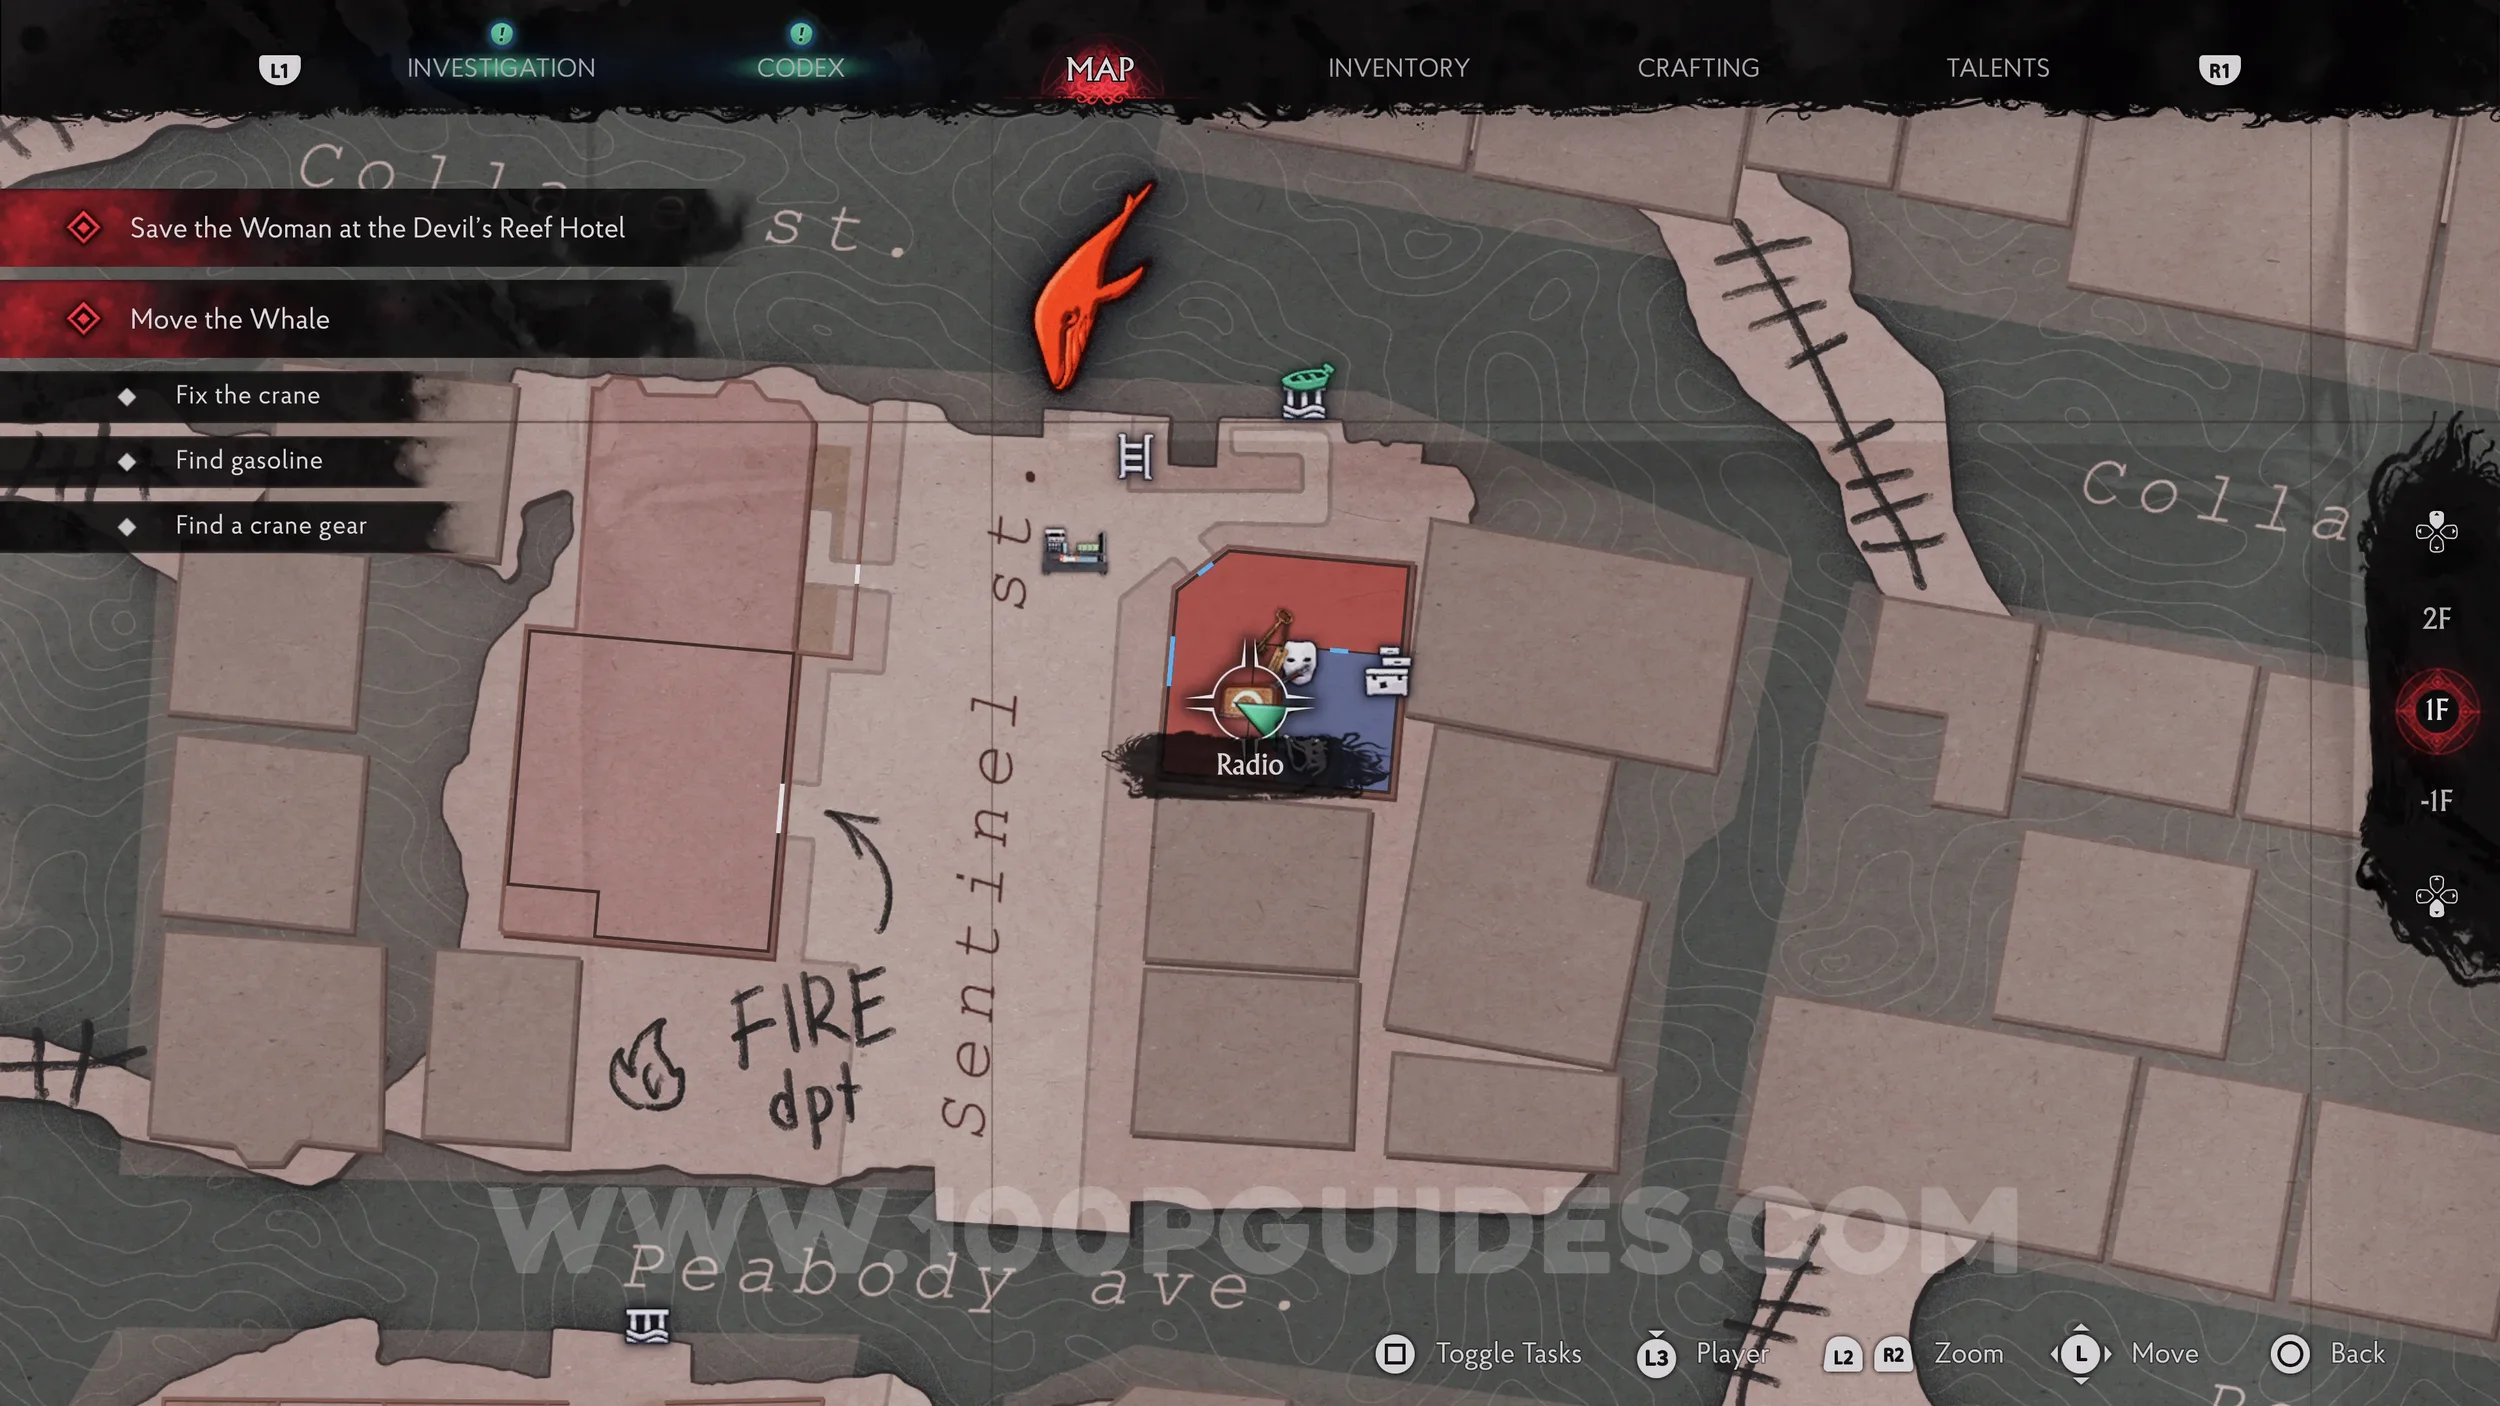
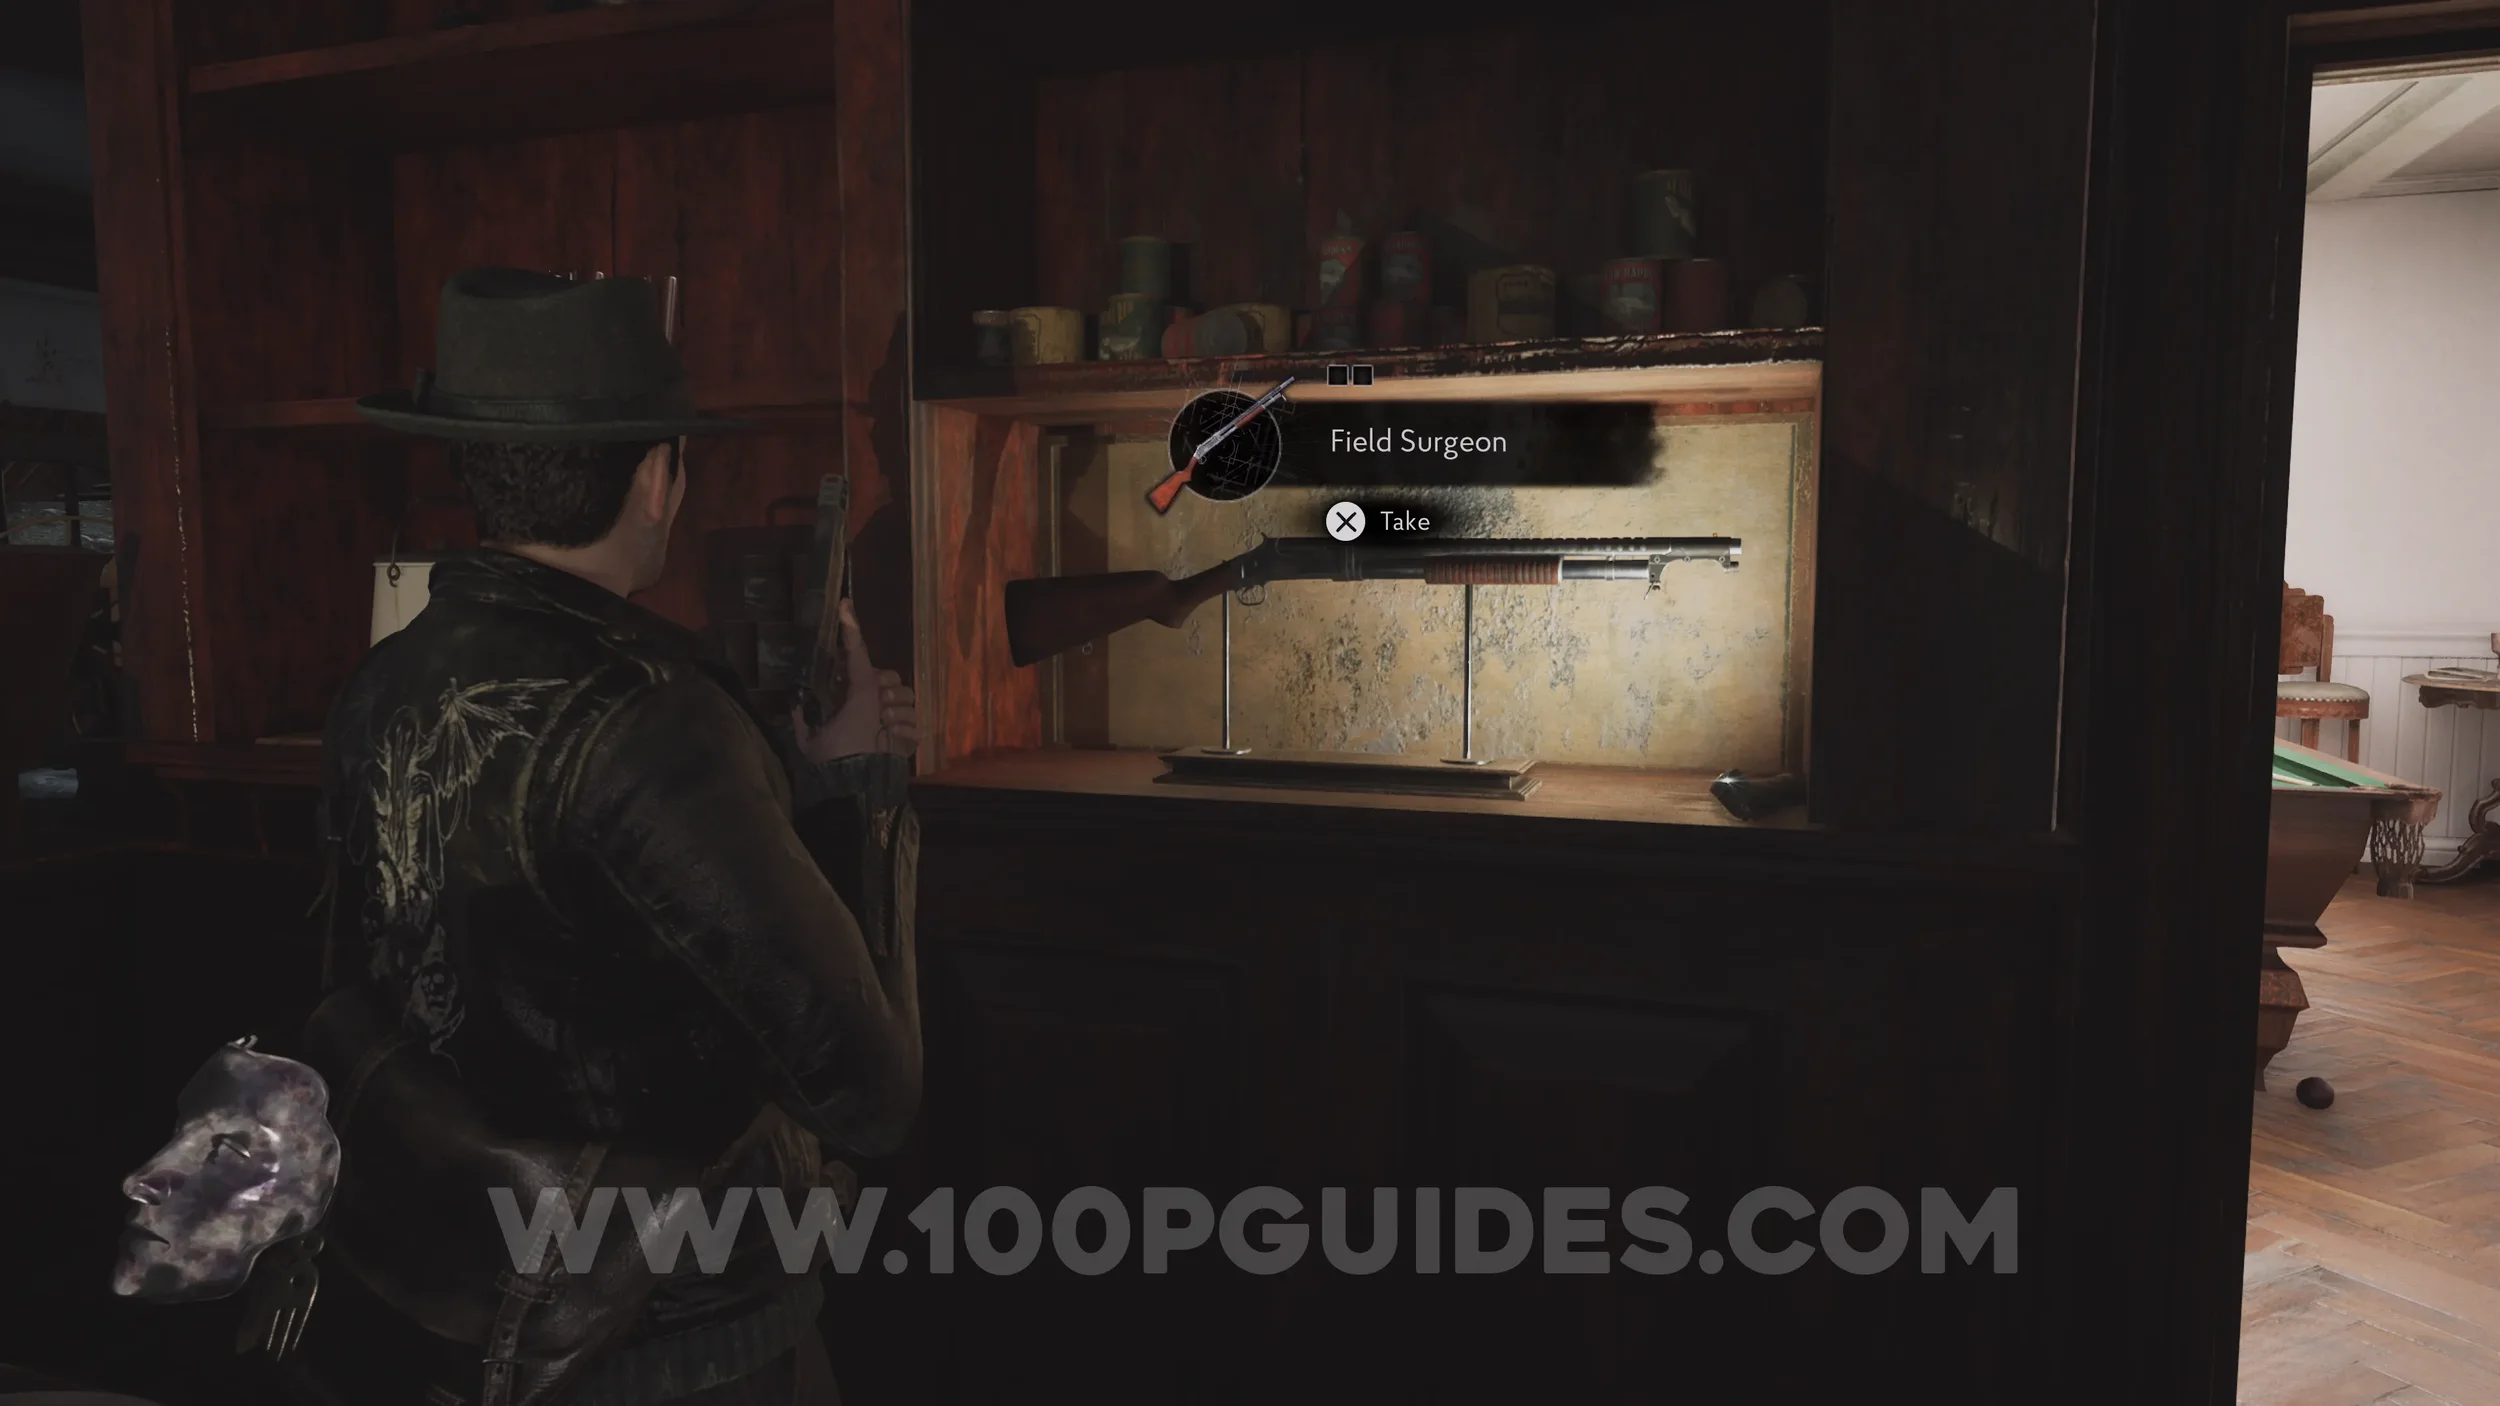
Weapon: Field Surgeon (Shotgun). Also behind the bar.
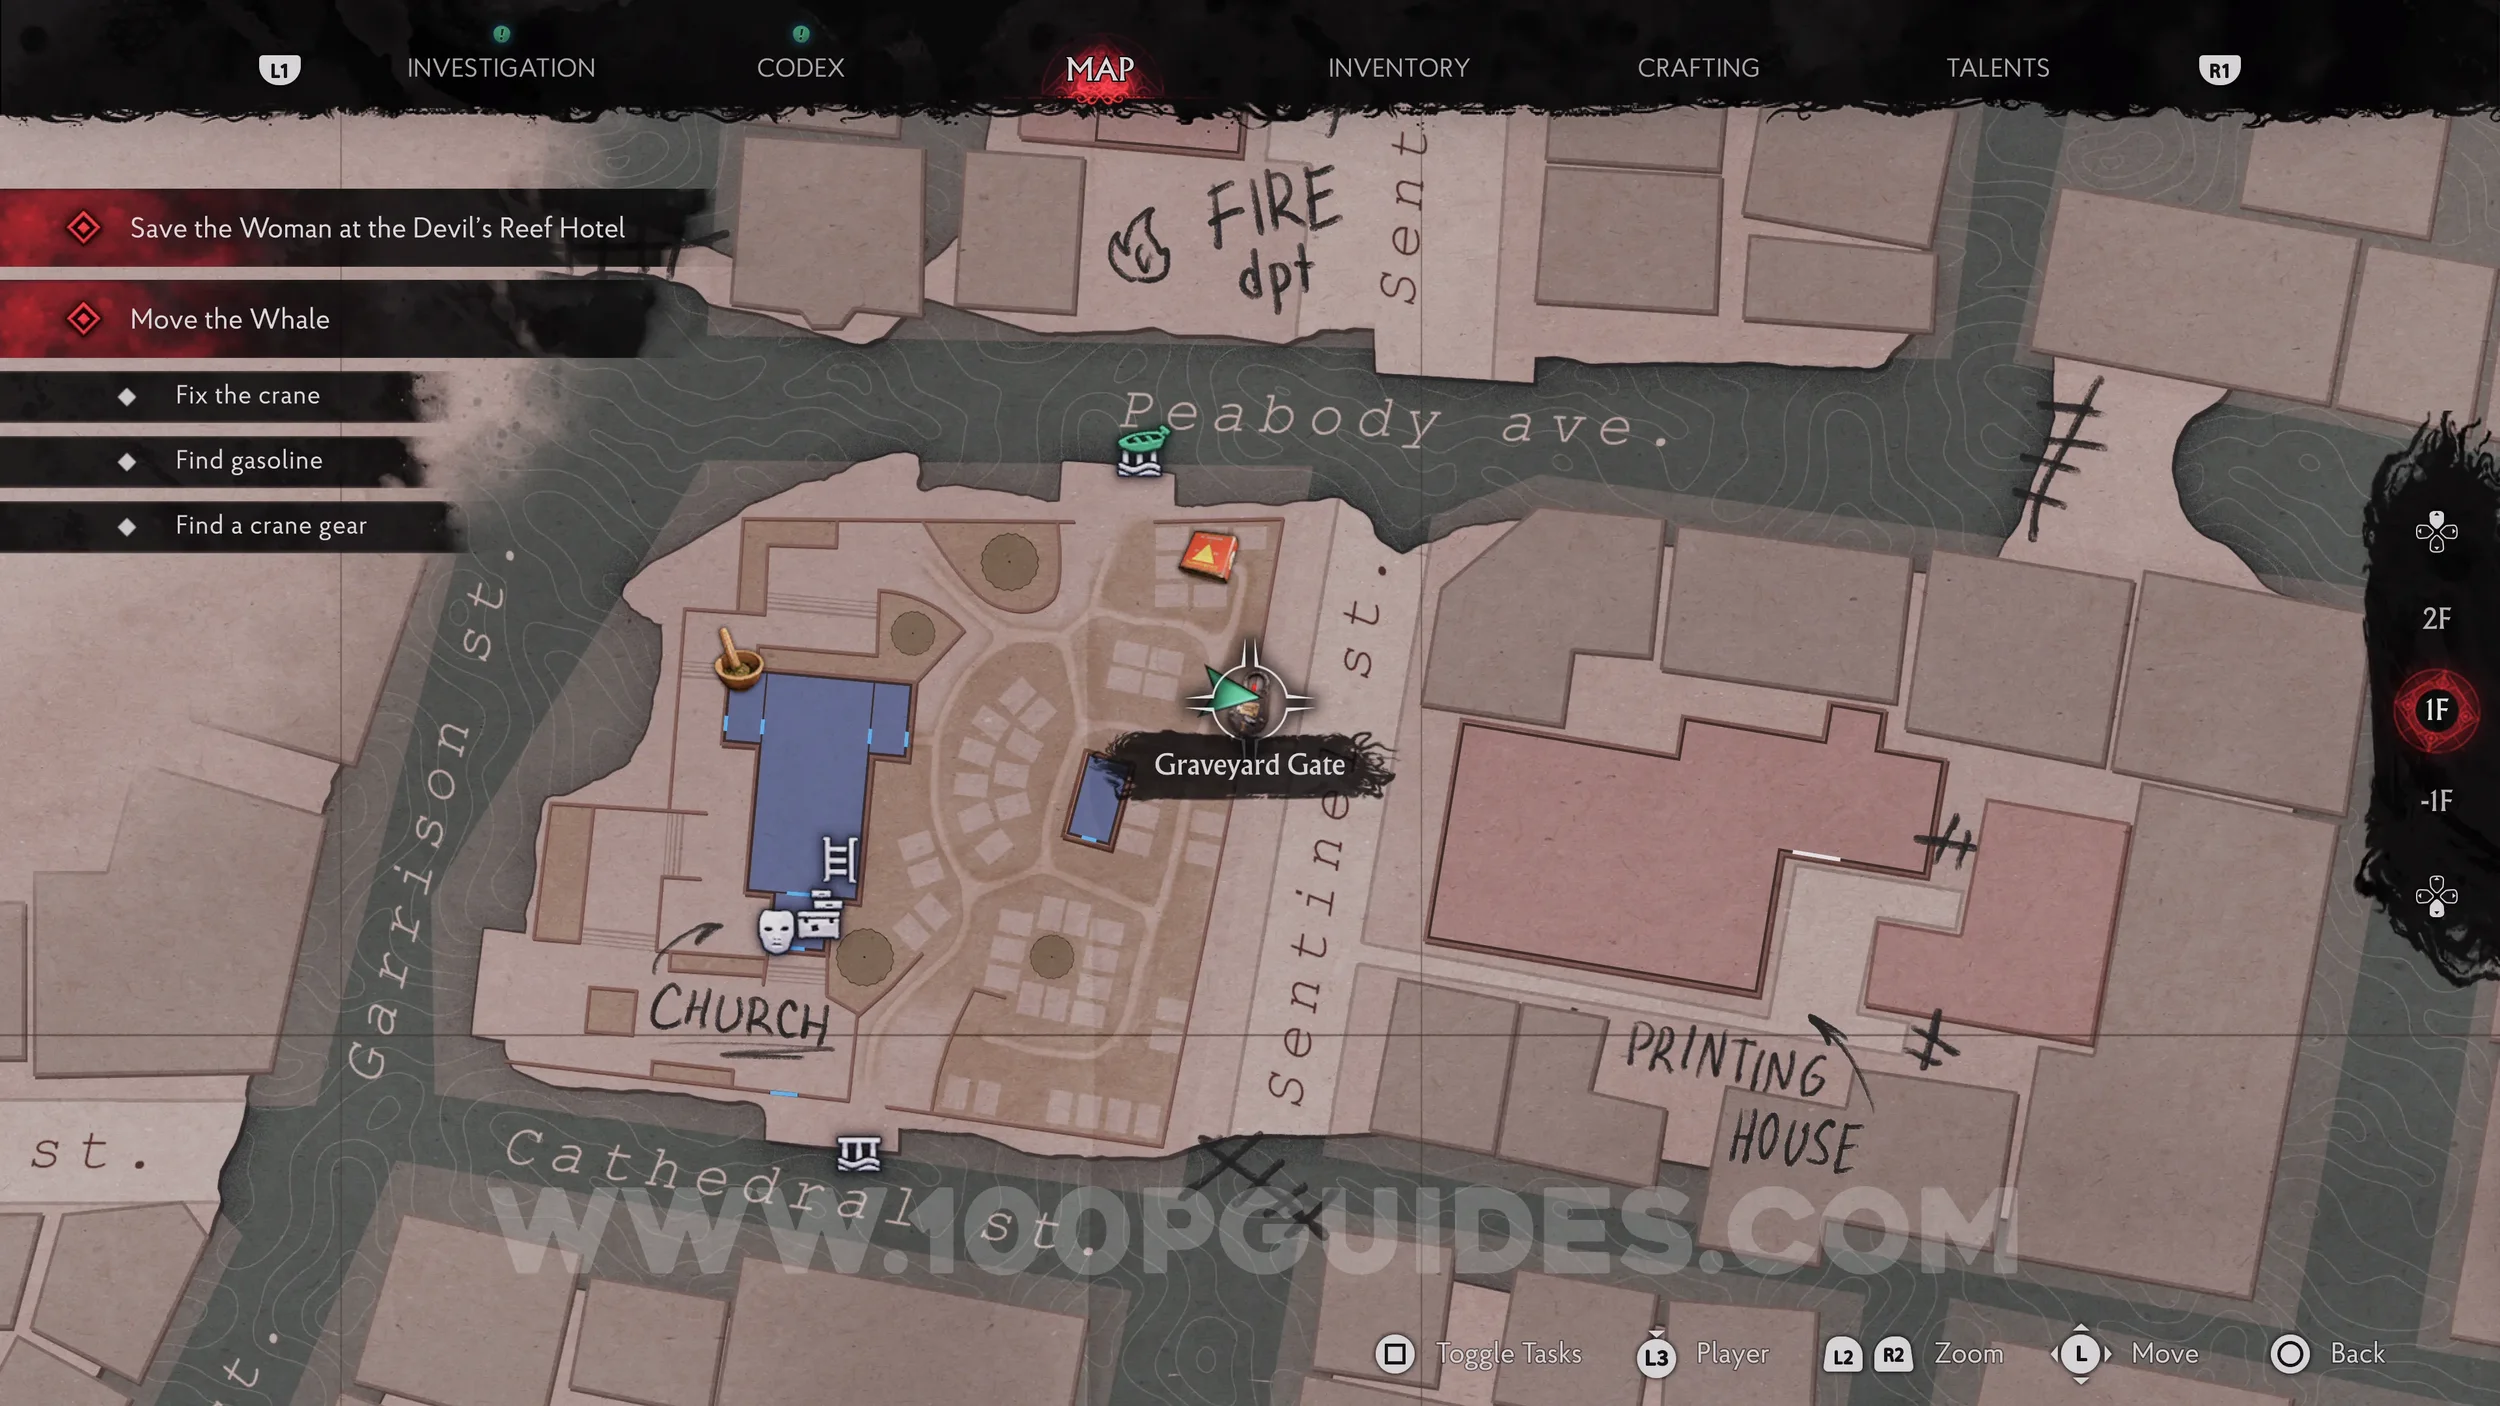
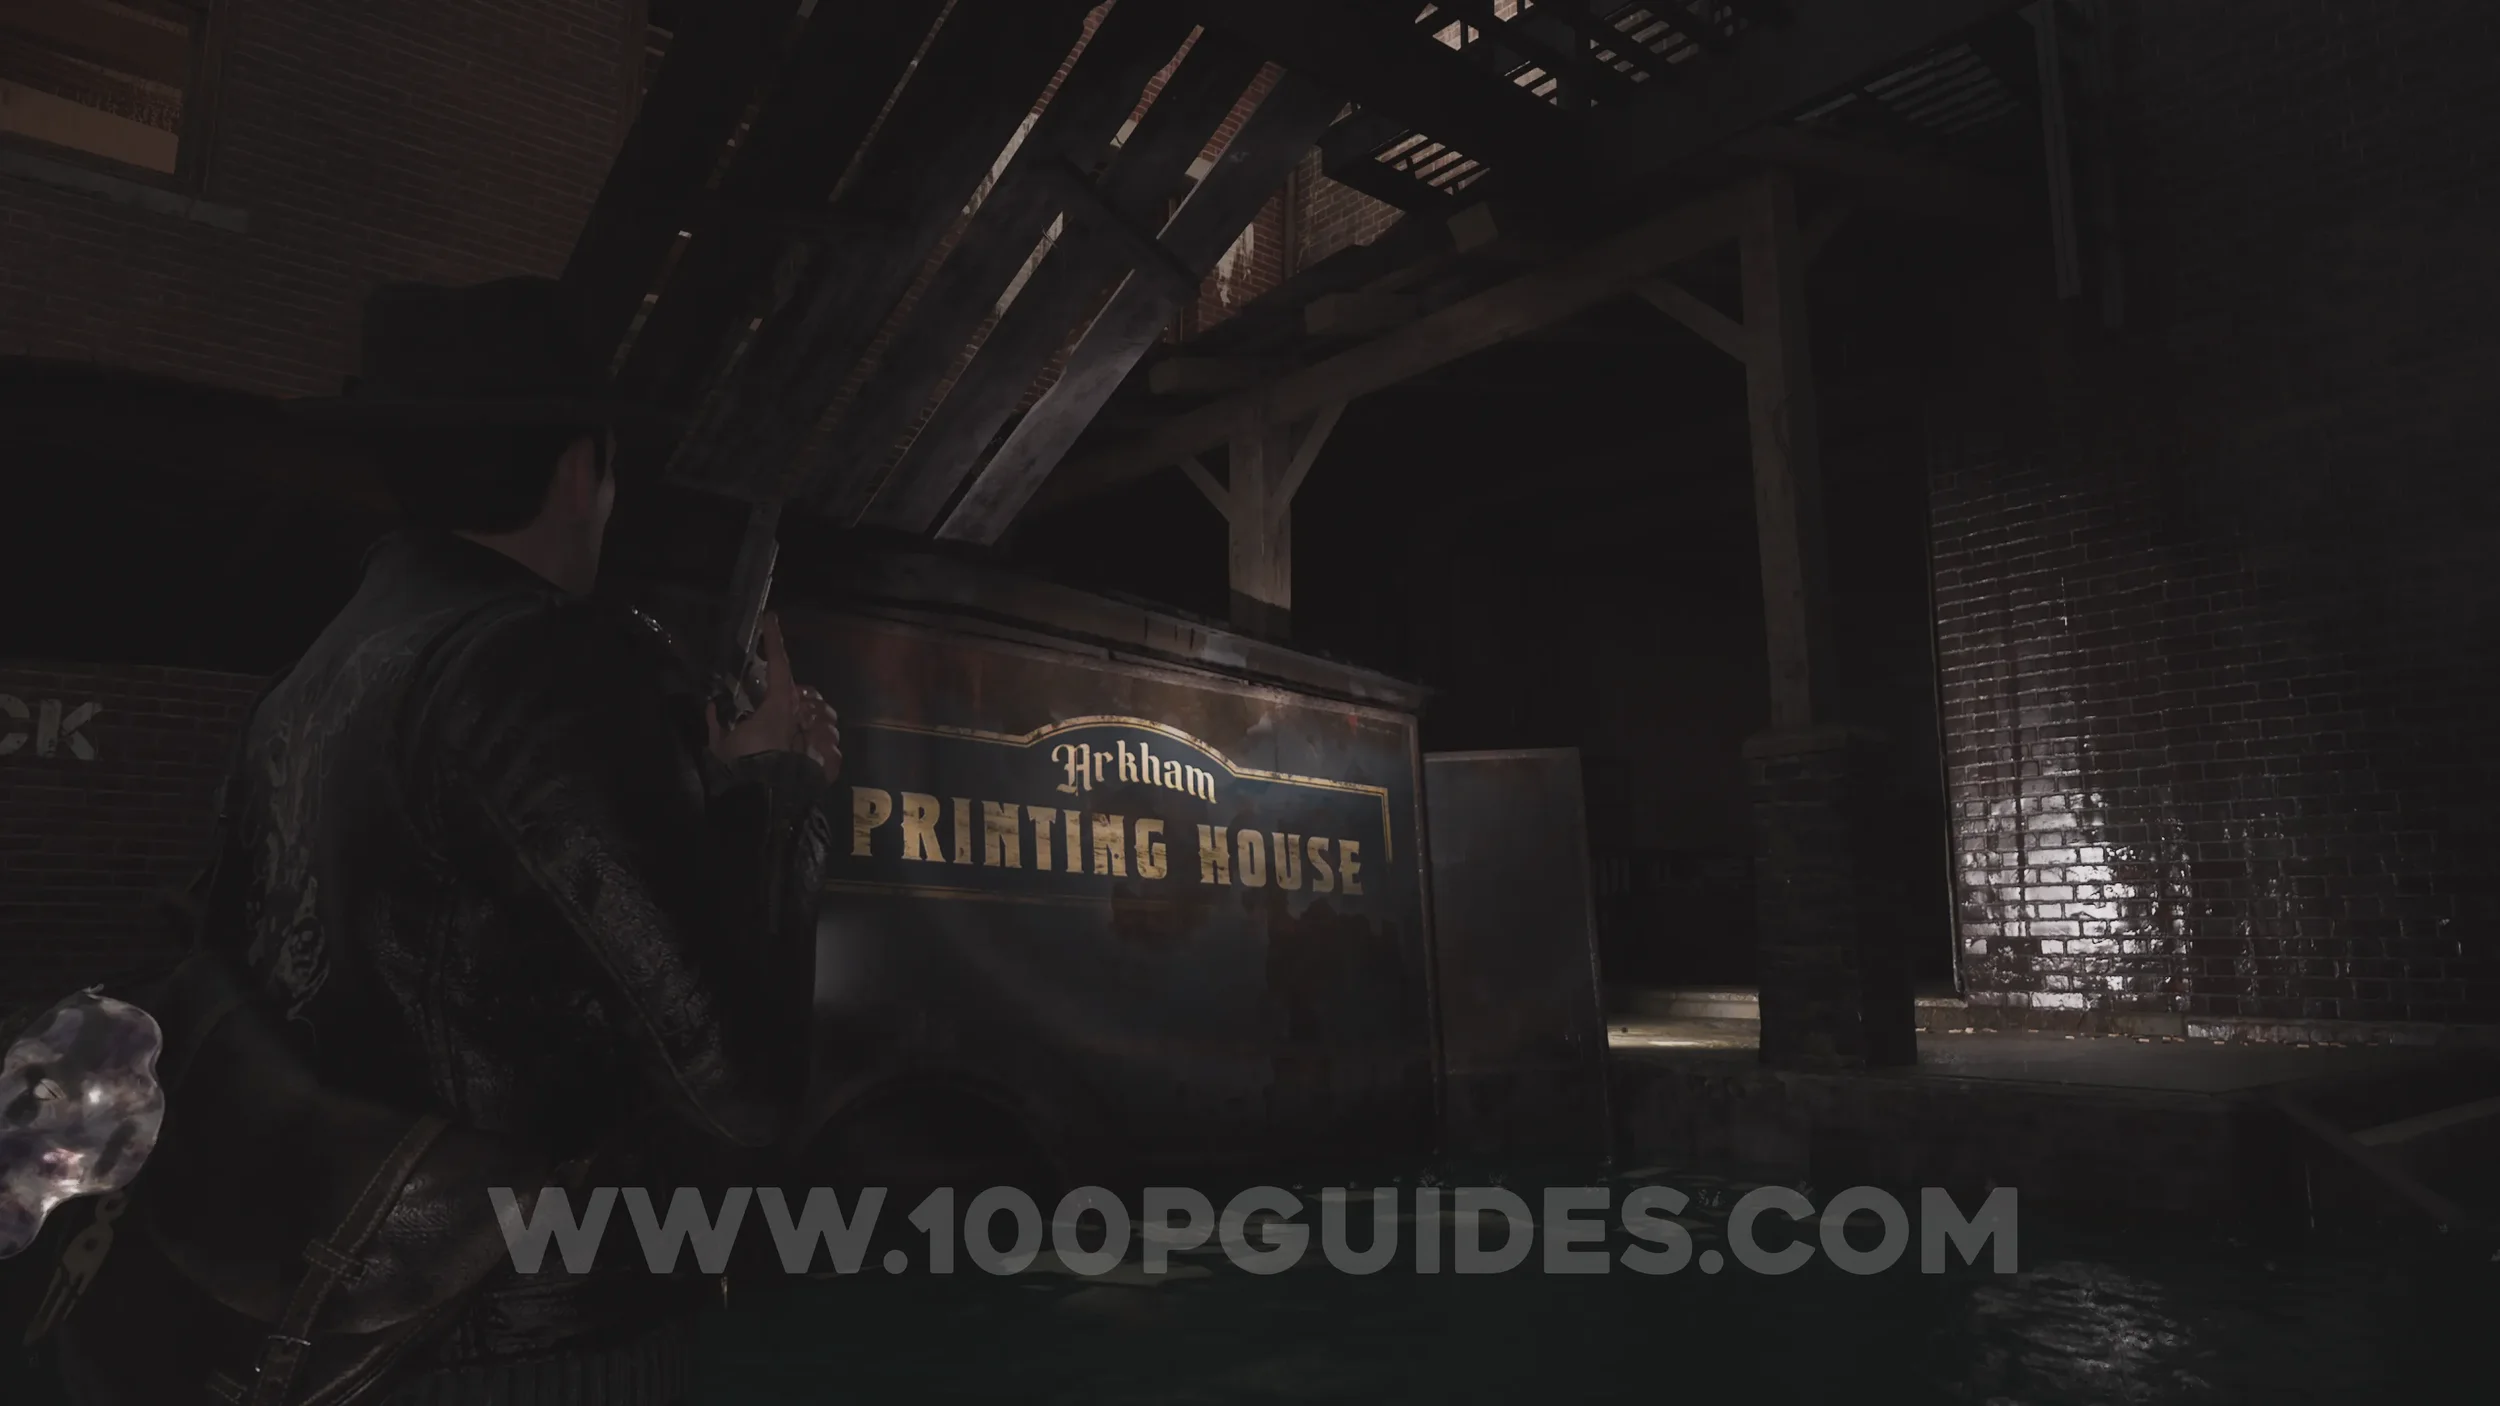
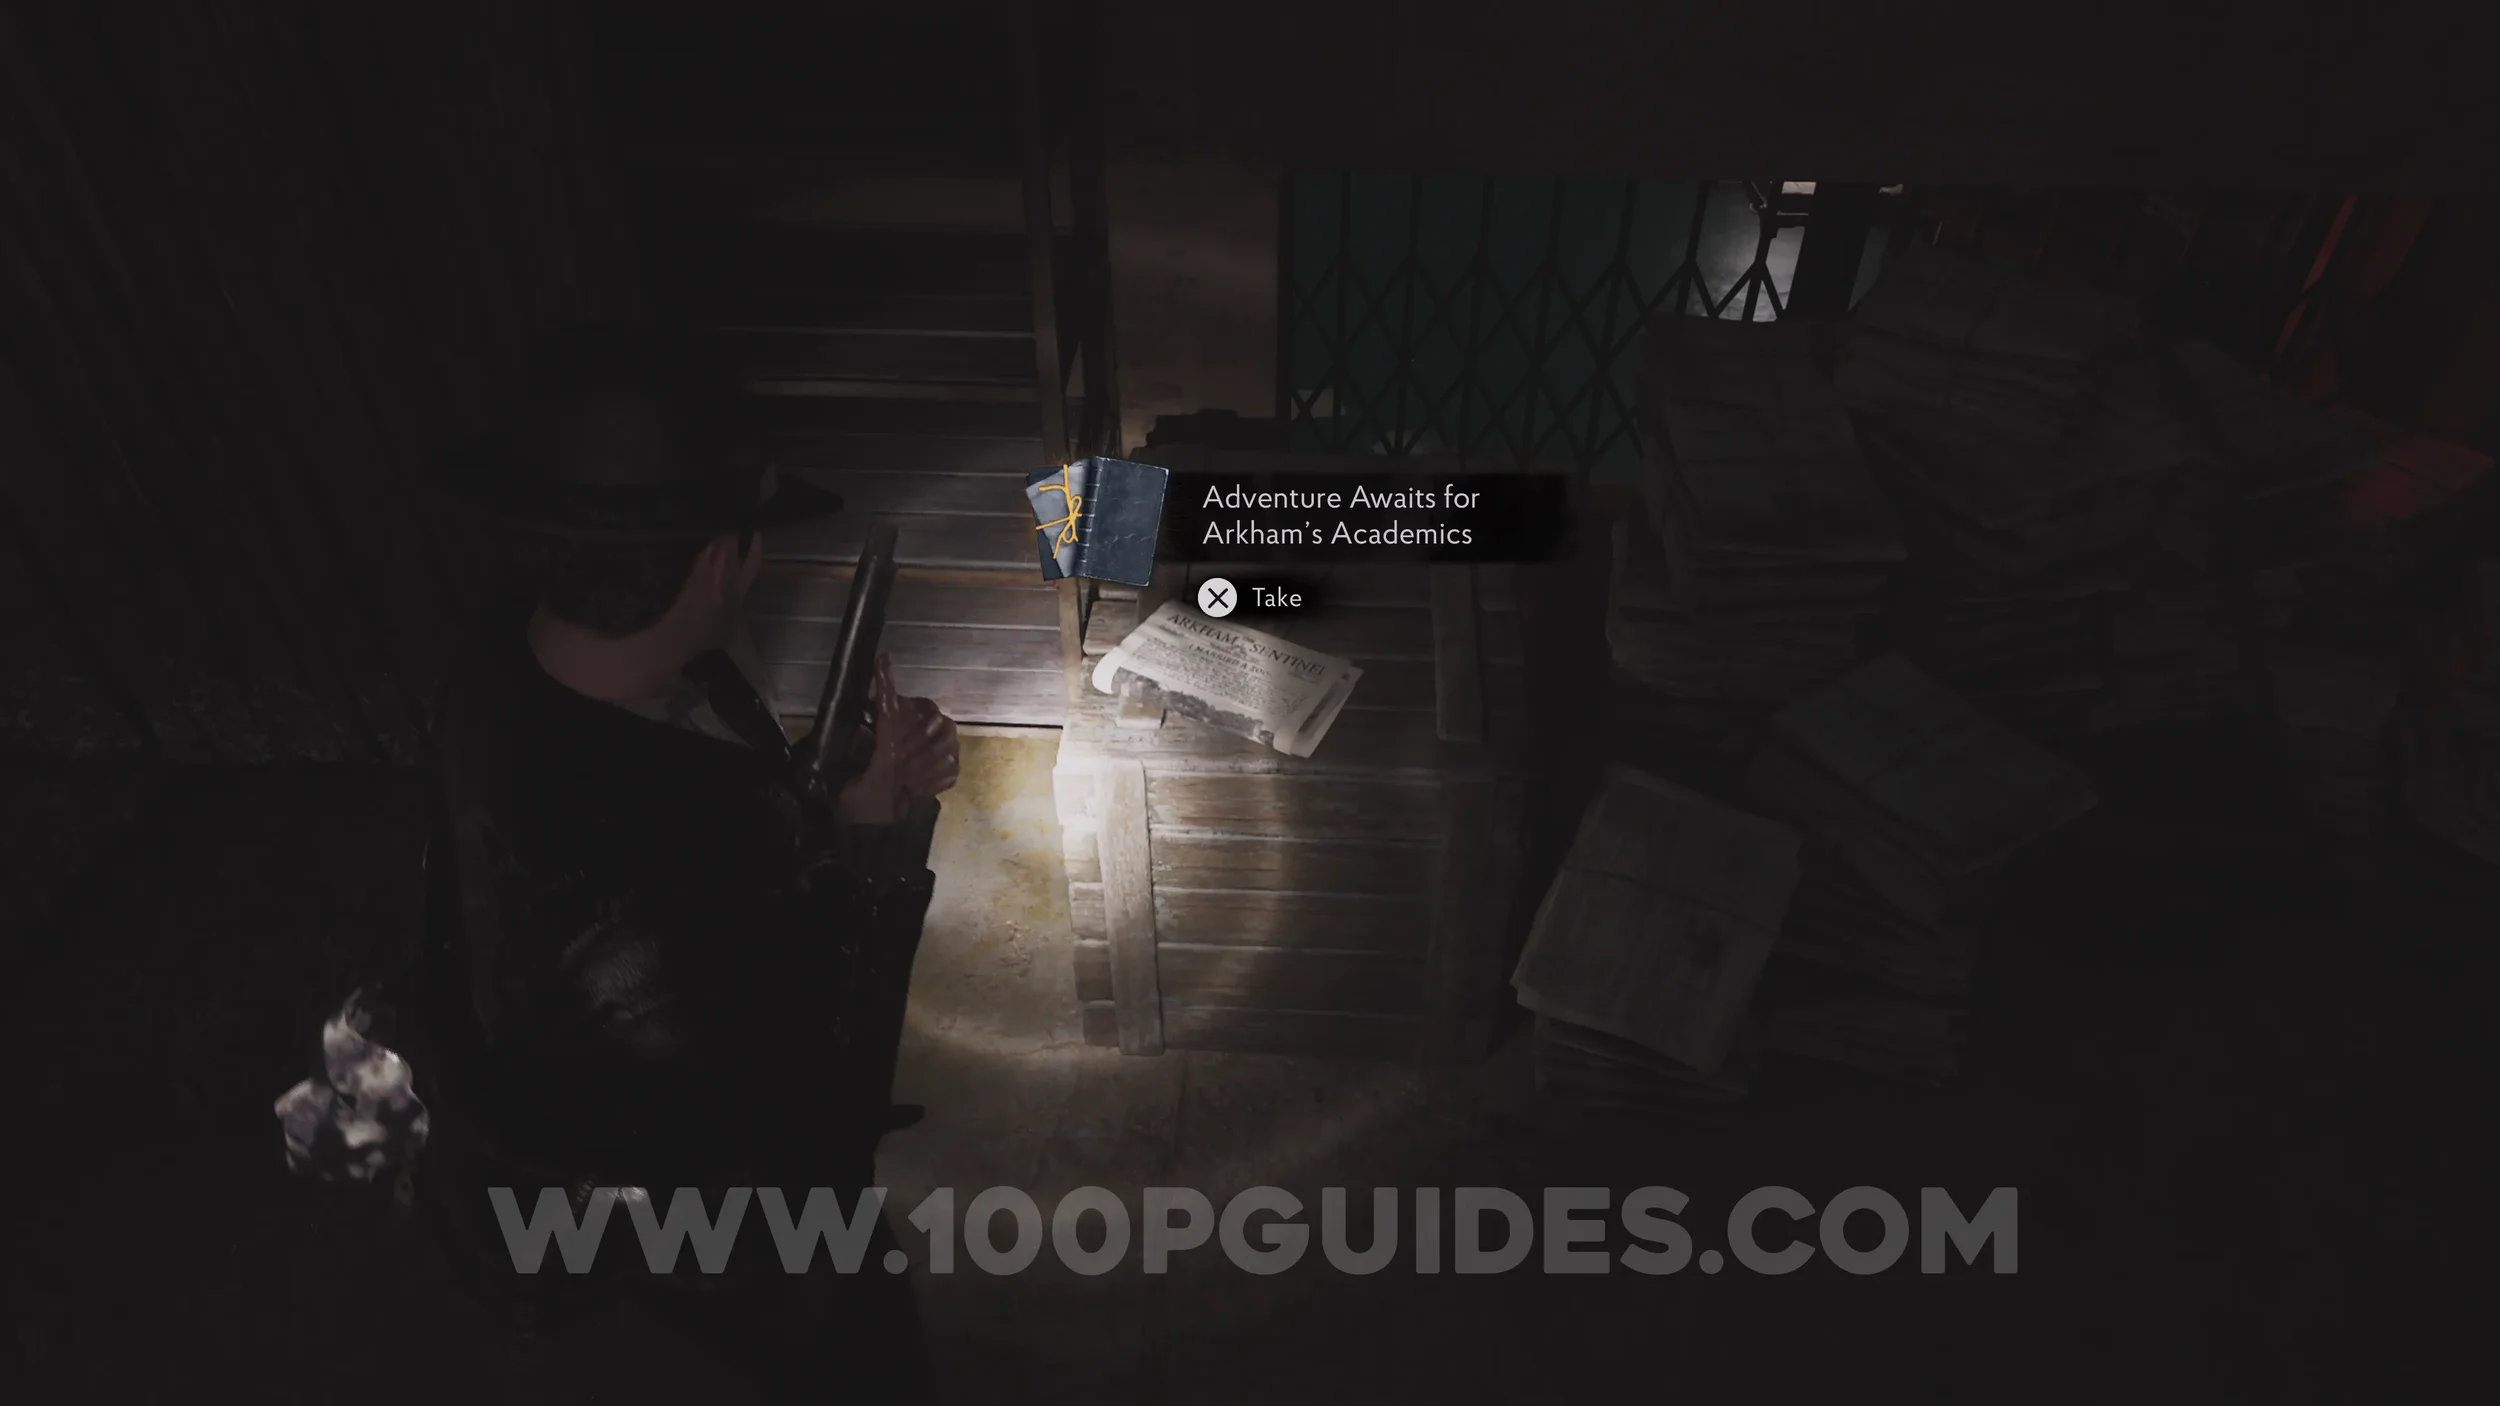
Lore Codex: Adventure Awaits for Arkham’s Academics. Now that you have the Graveyard Key, get back on your boat and return to the Graveyard outside the church. Here, open the eastern gate and follow the path to the Printing House. Keep to the only route available, passing through some flooded streets where multiple enemies attack you. At the end of these streets you'll reach a destroyed Printing House van with wooden planks forming a path over the top of it. Before heading up them, enter the room behind the van to find the lore codex on a box.
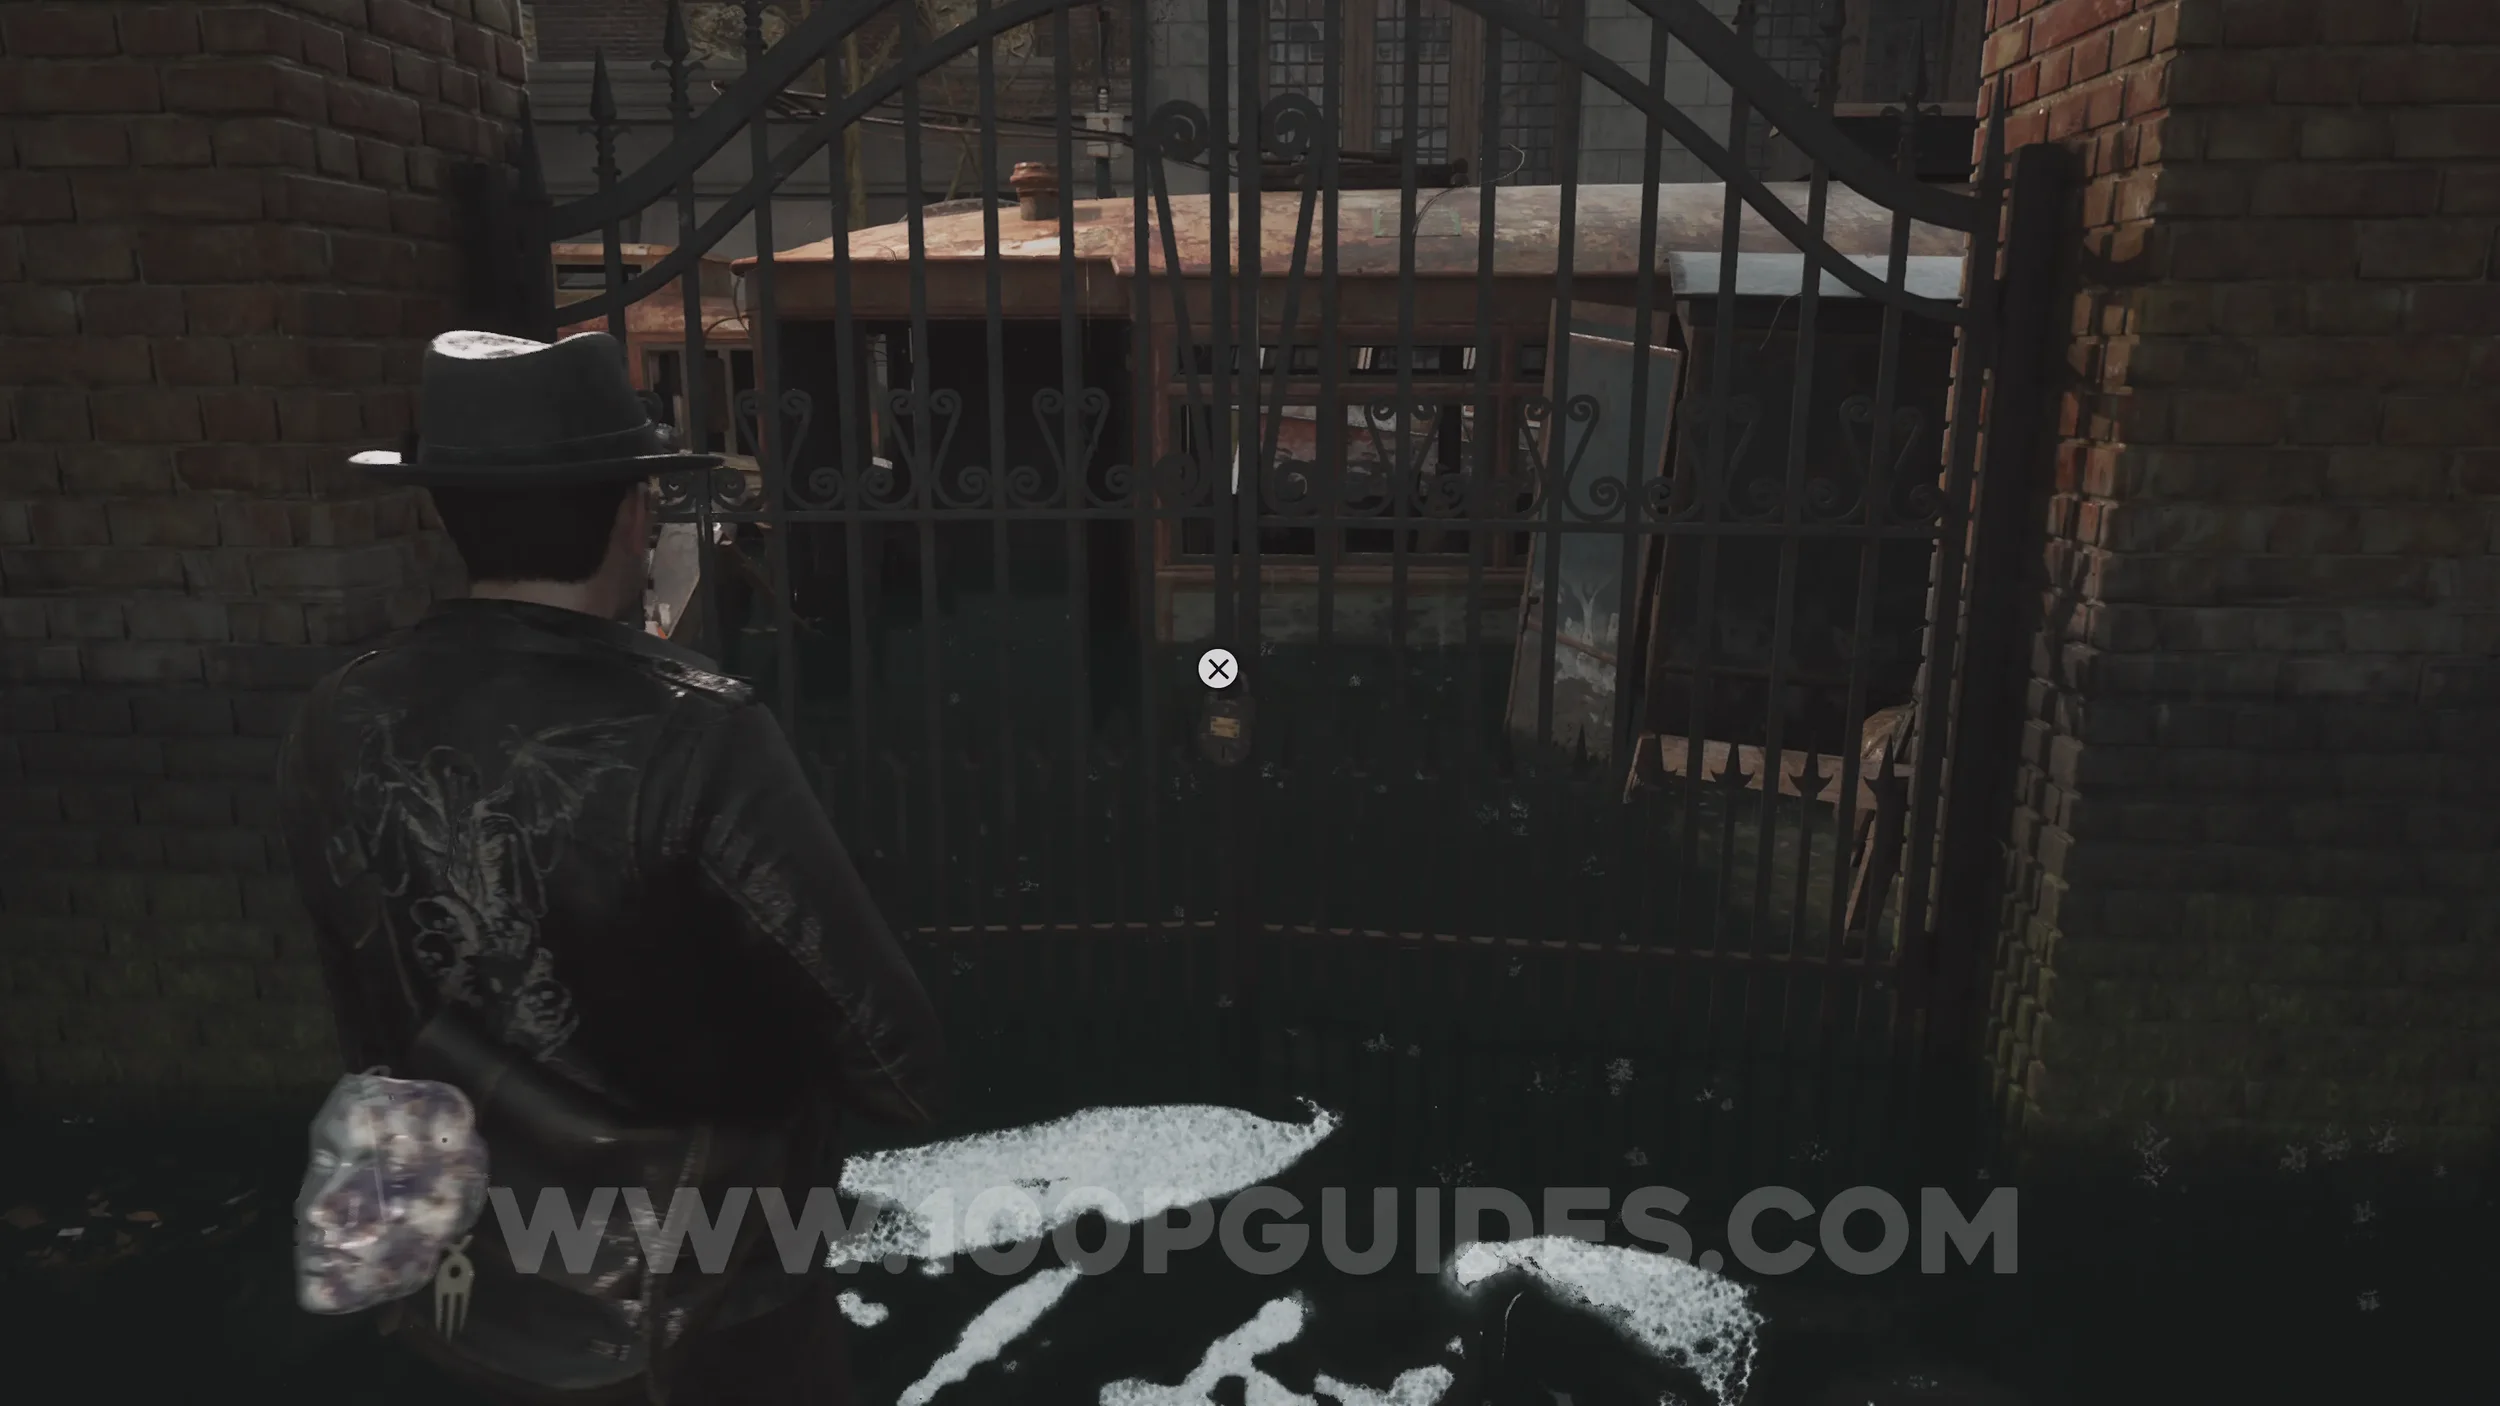
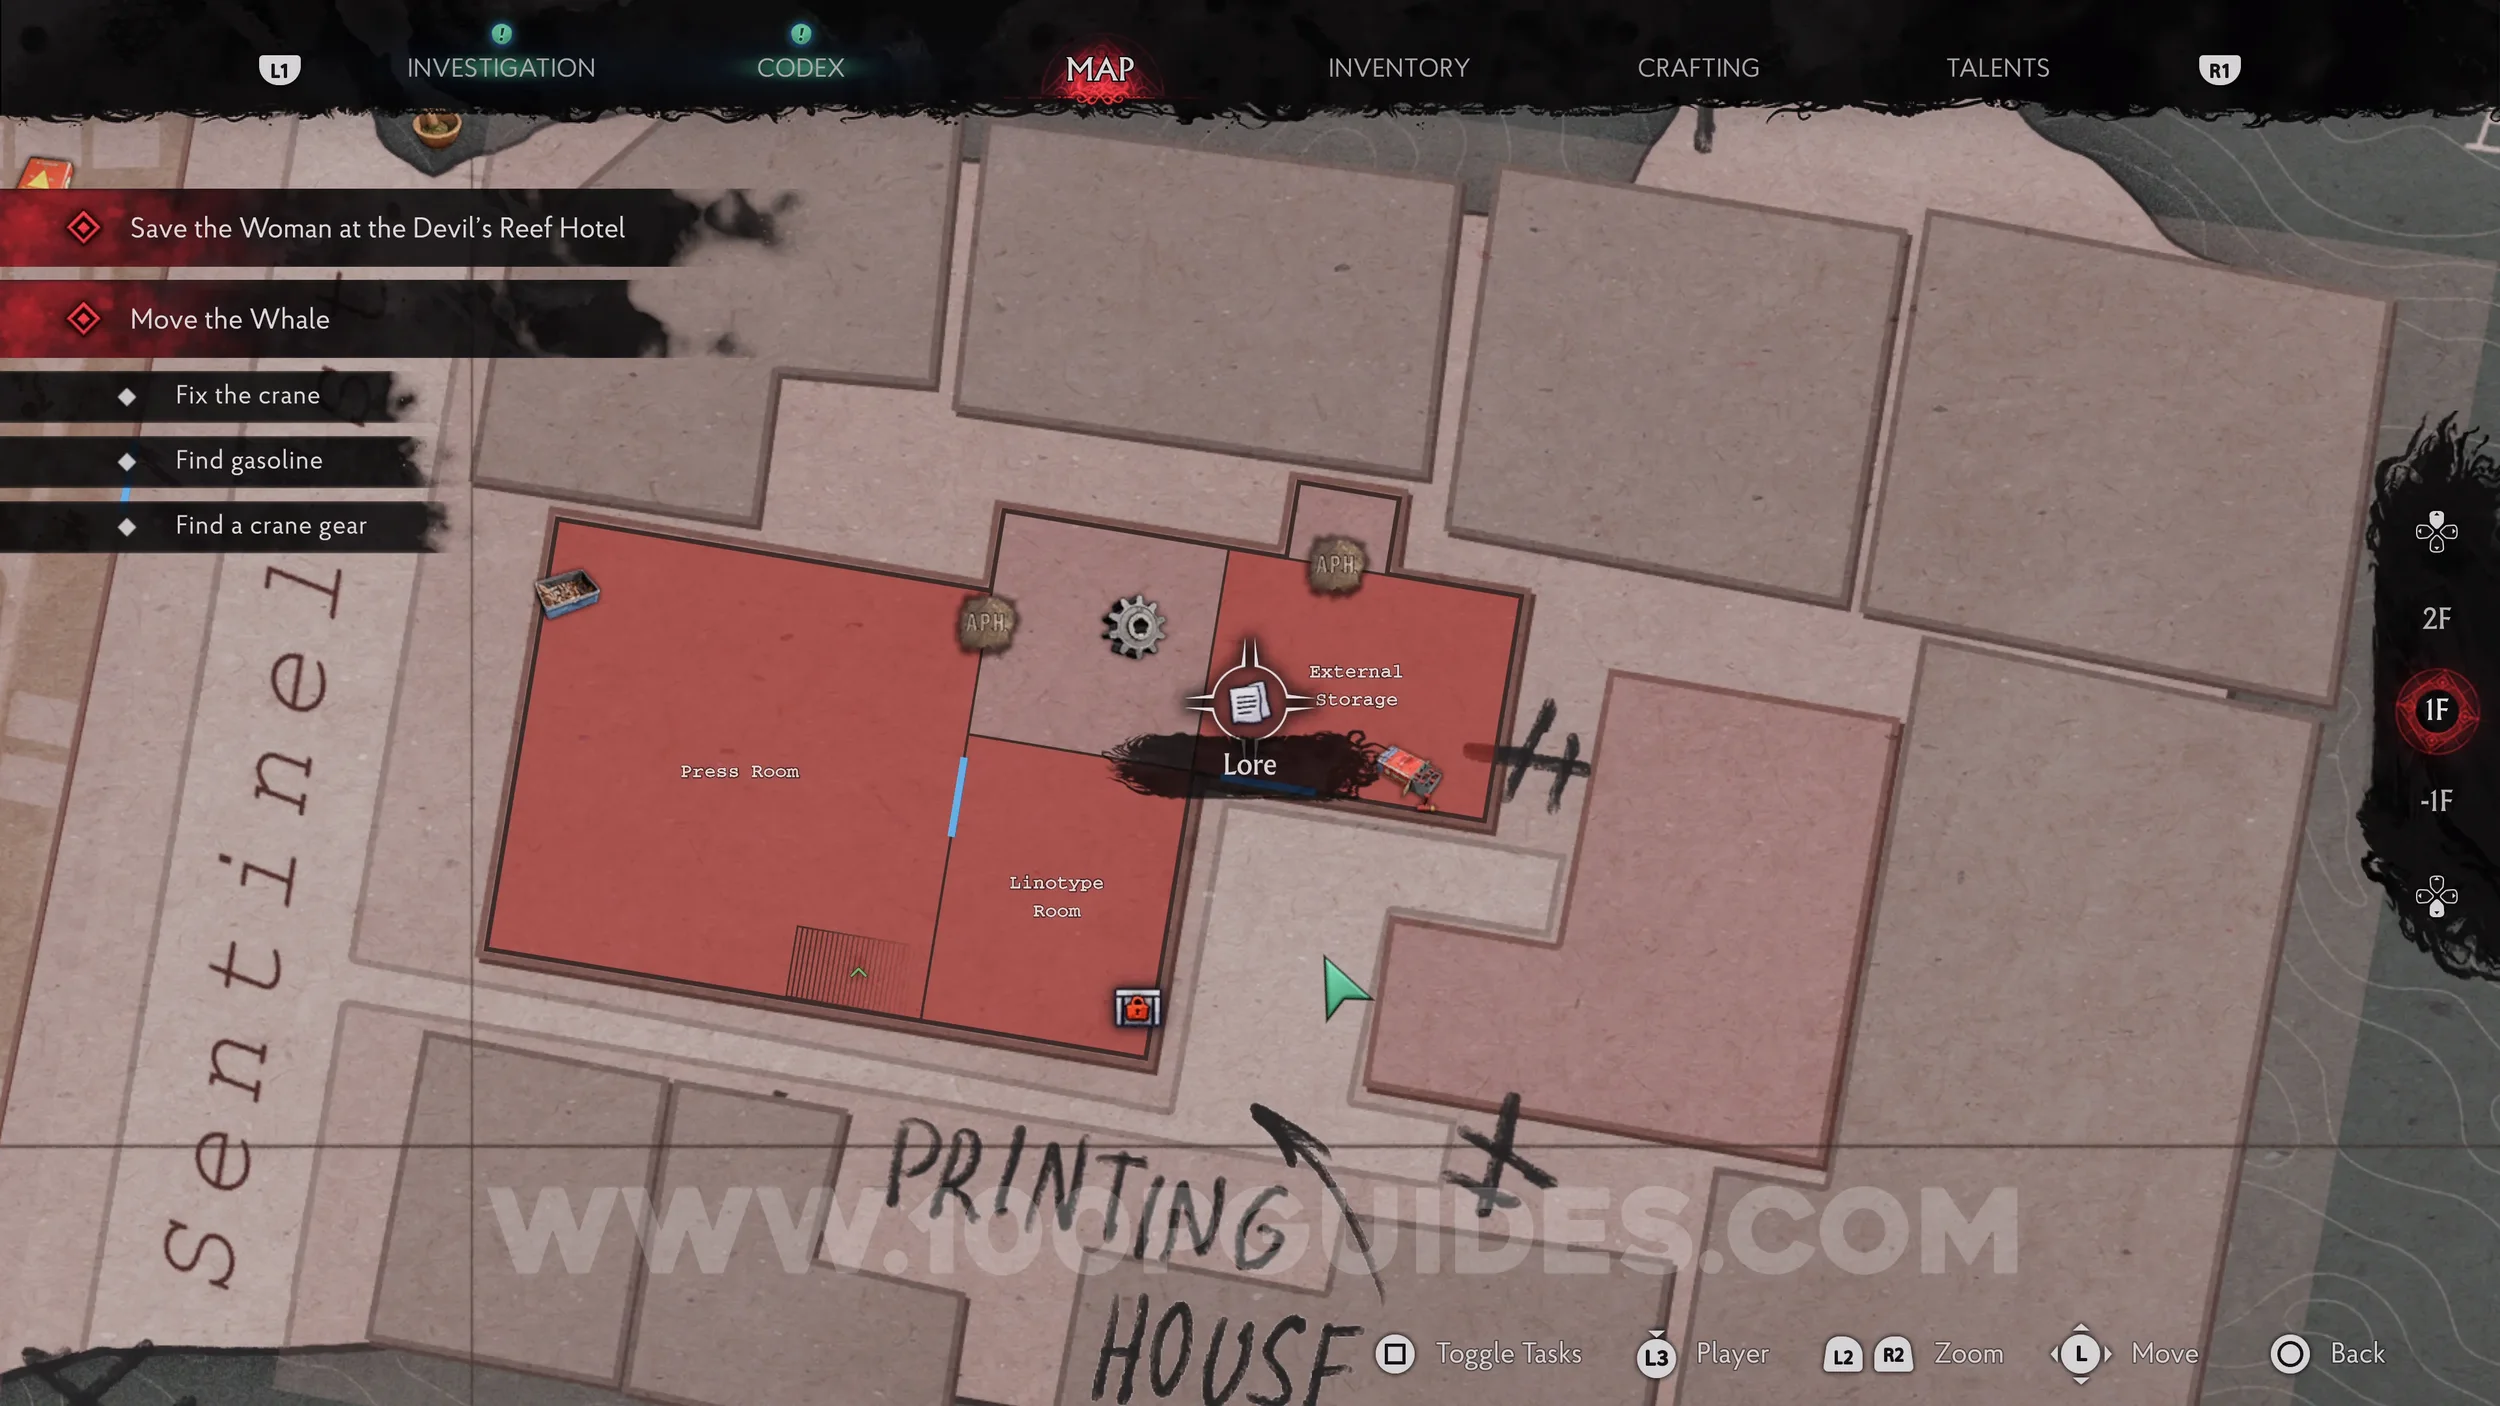
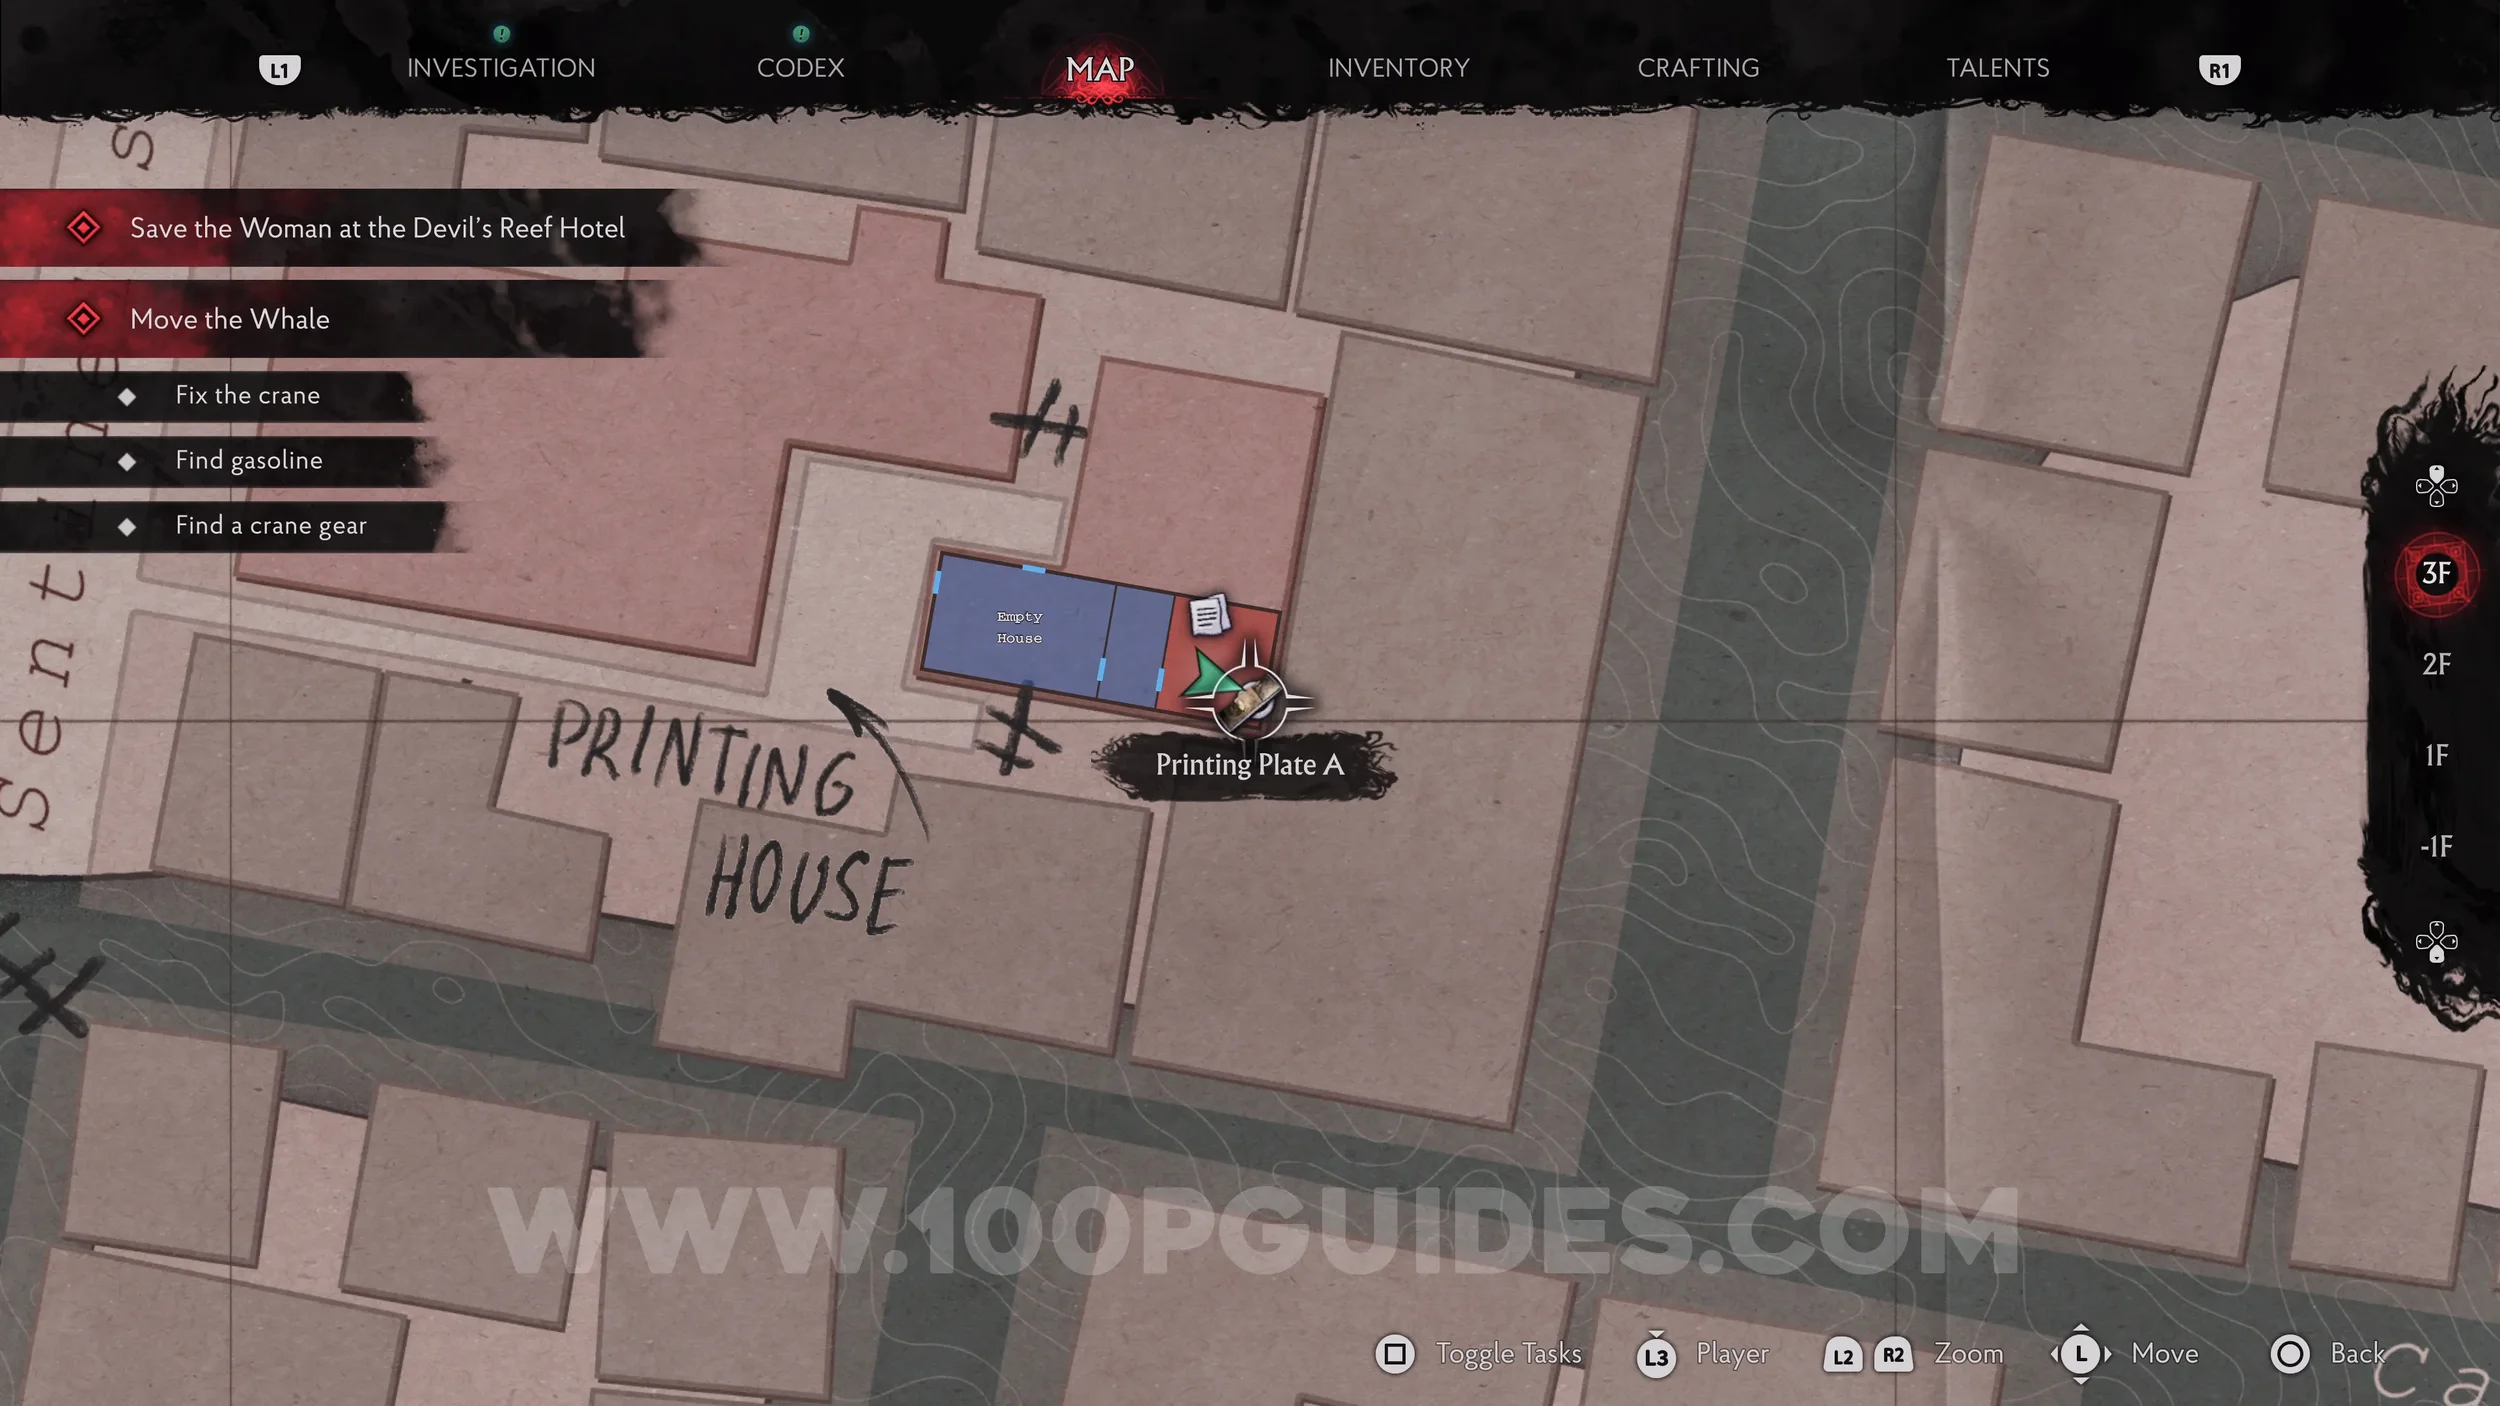
Key Item: Printing Plate A. Follow the planks over the crashed van and climb the stairs to reach an open window into the Empty House. Once inside, head straight ahead into a bedroom where you'll find the printing plate.
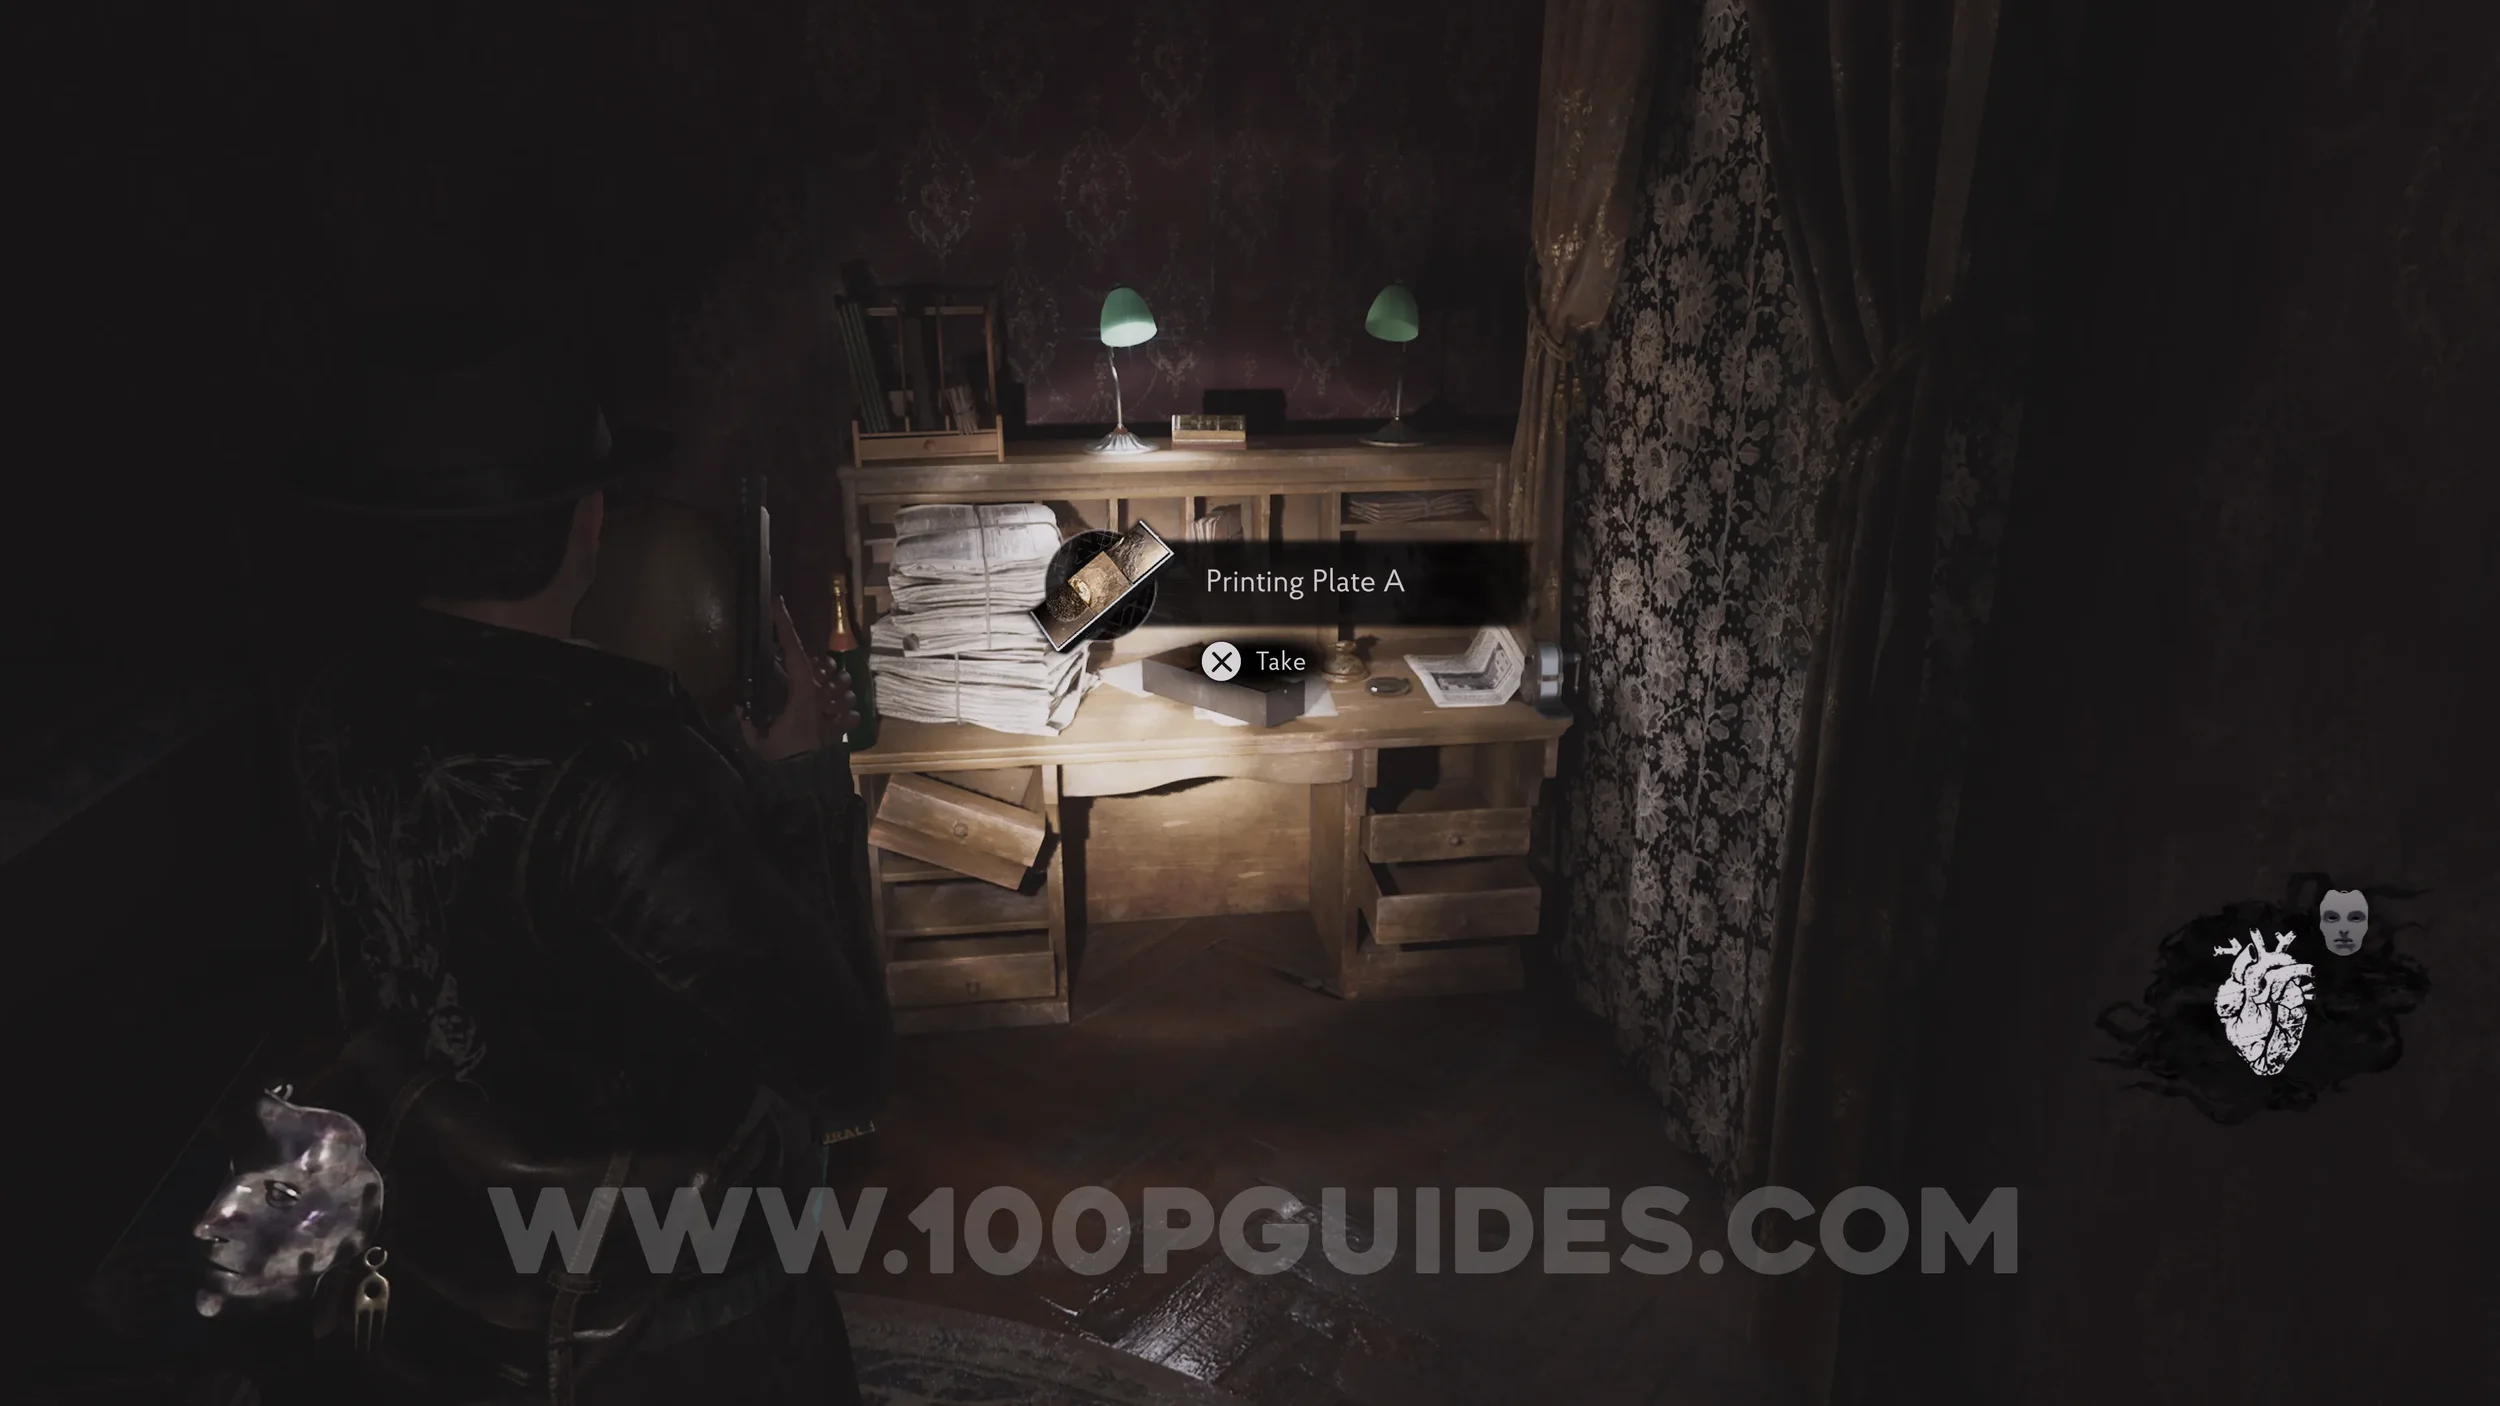
Evidence: Incident During Study. In the same place as Printing Plate A.
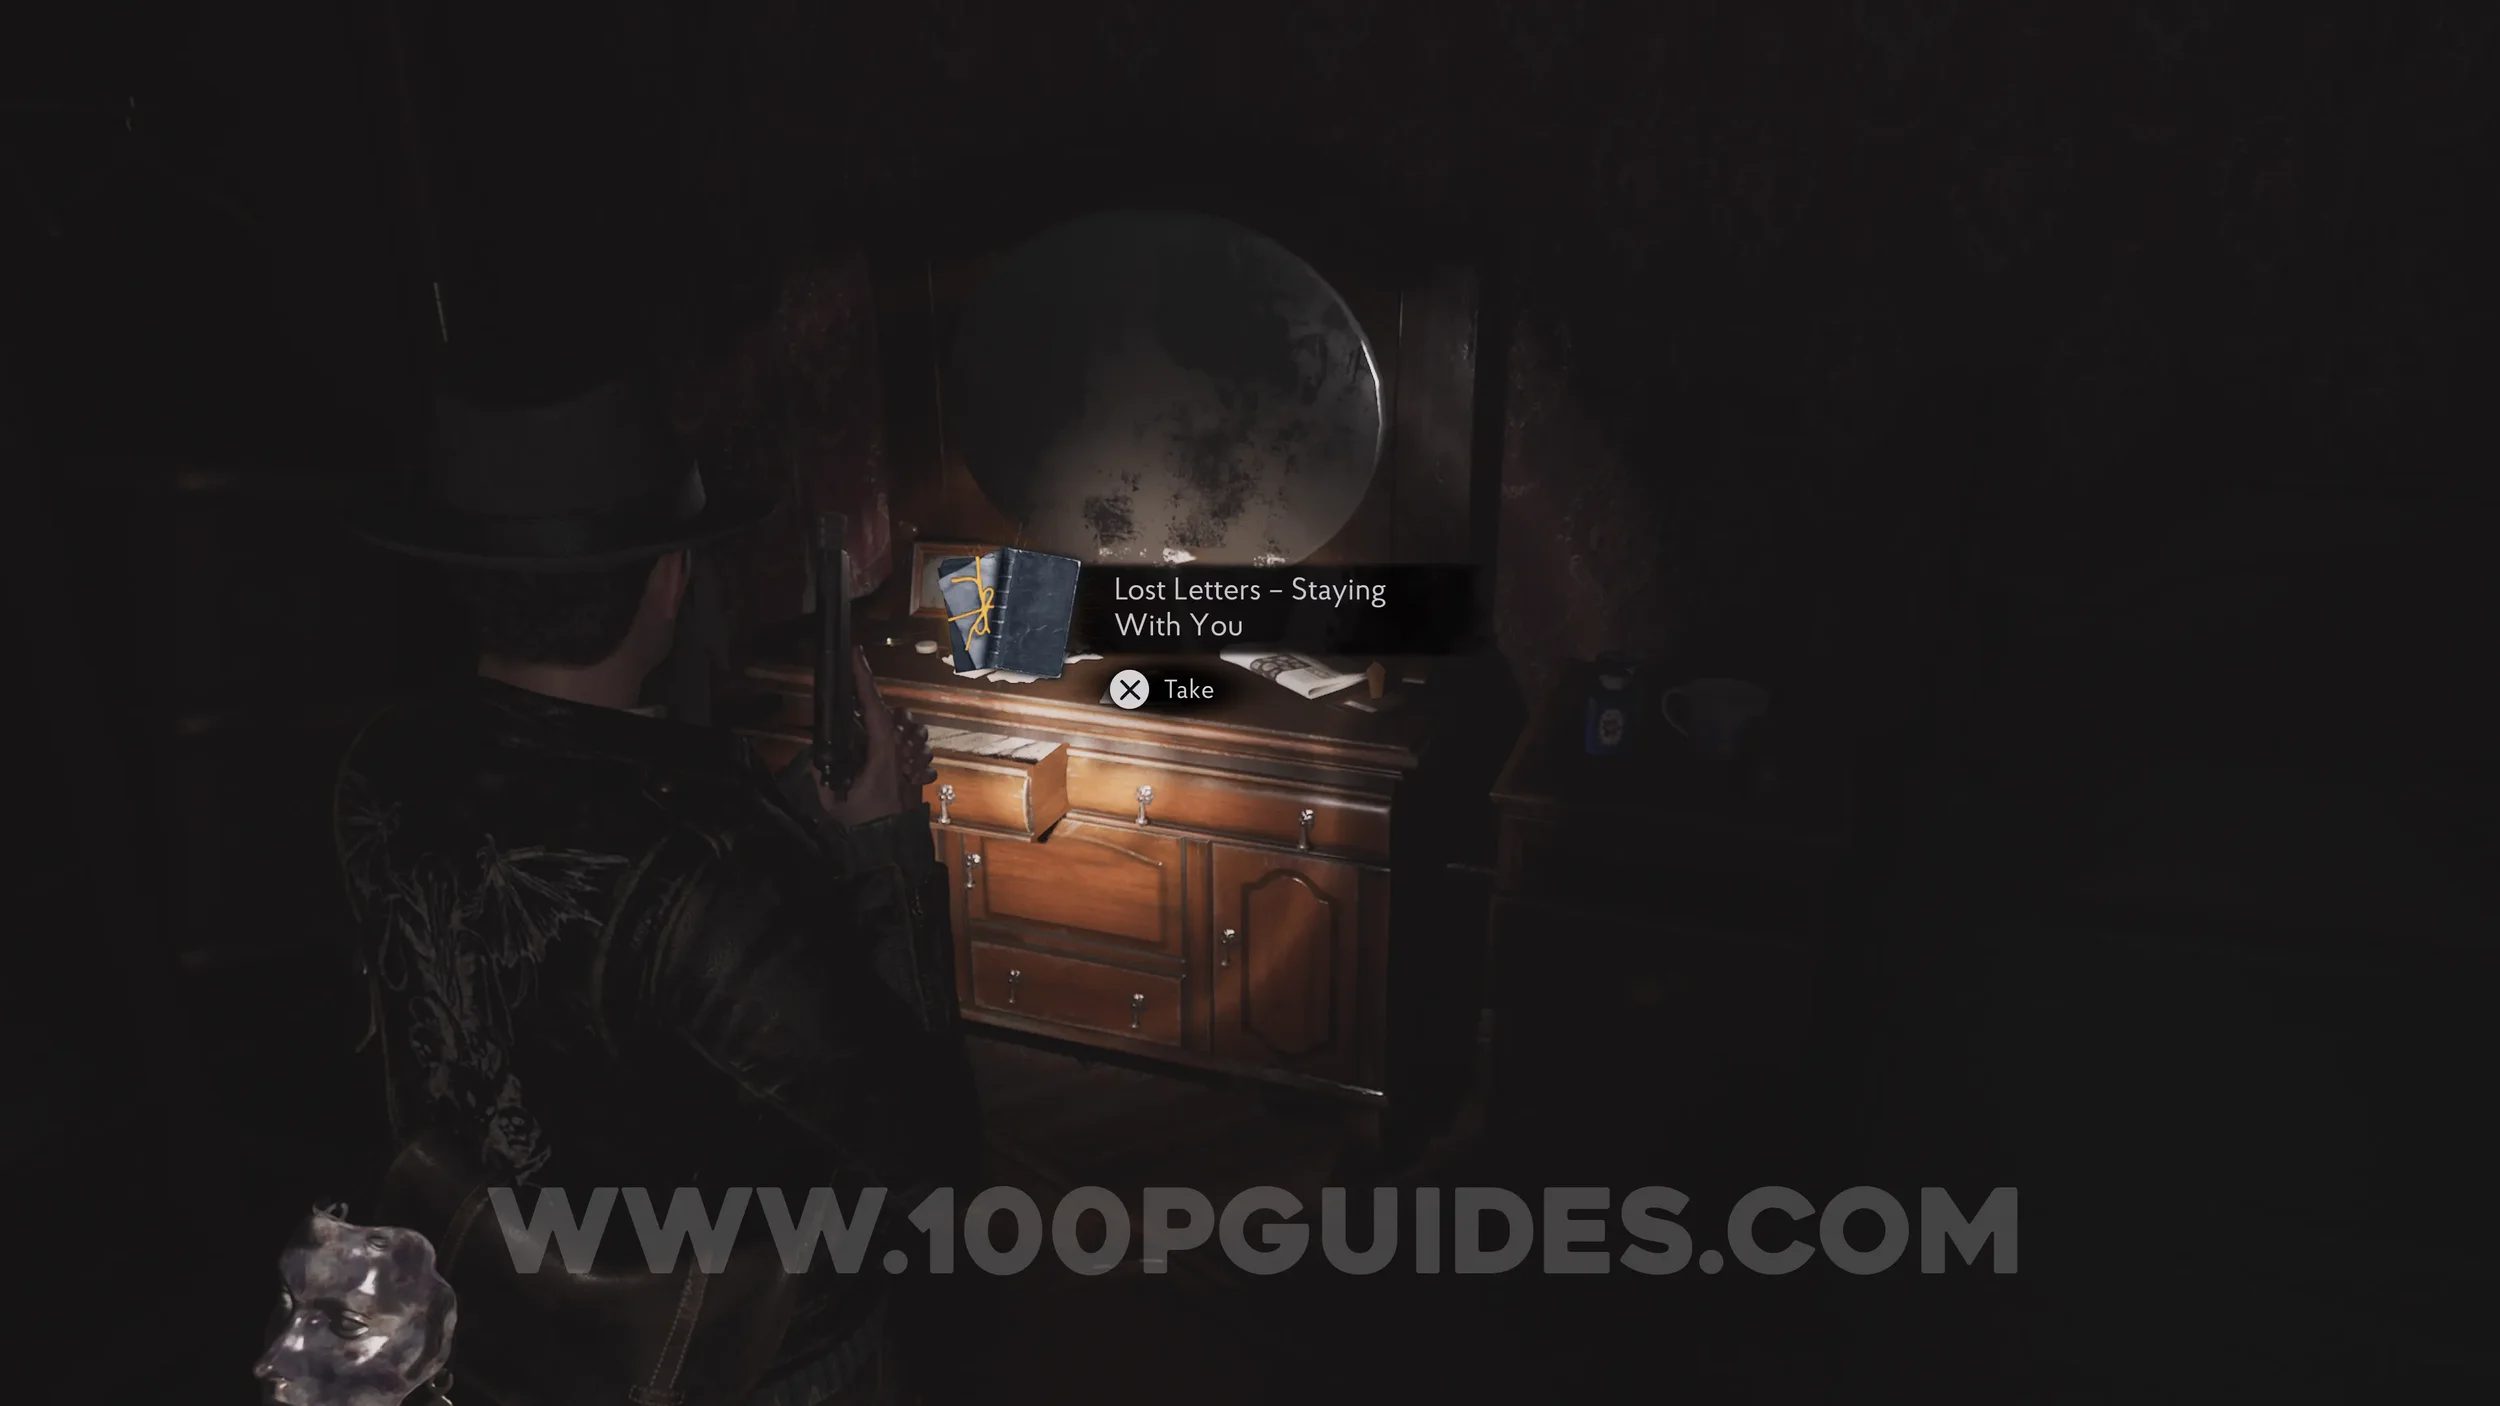
Lore Codex: Lost Letters - Staying With You. Near the mirror in the same bedroom.
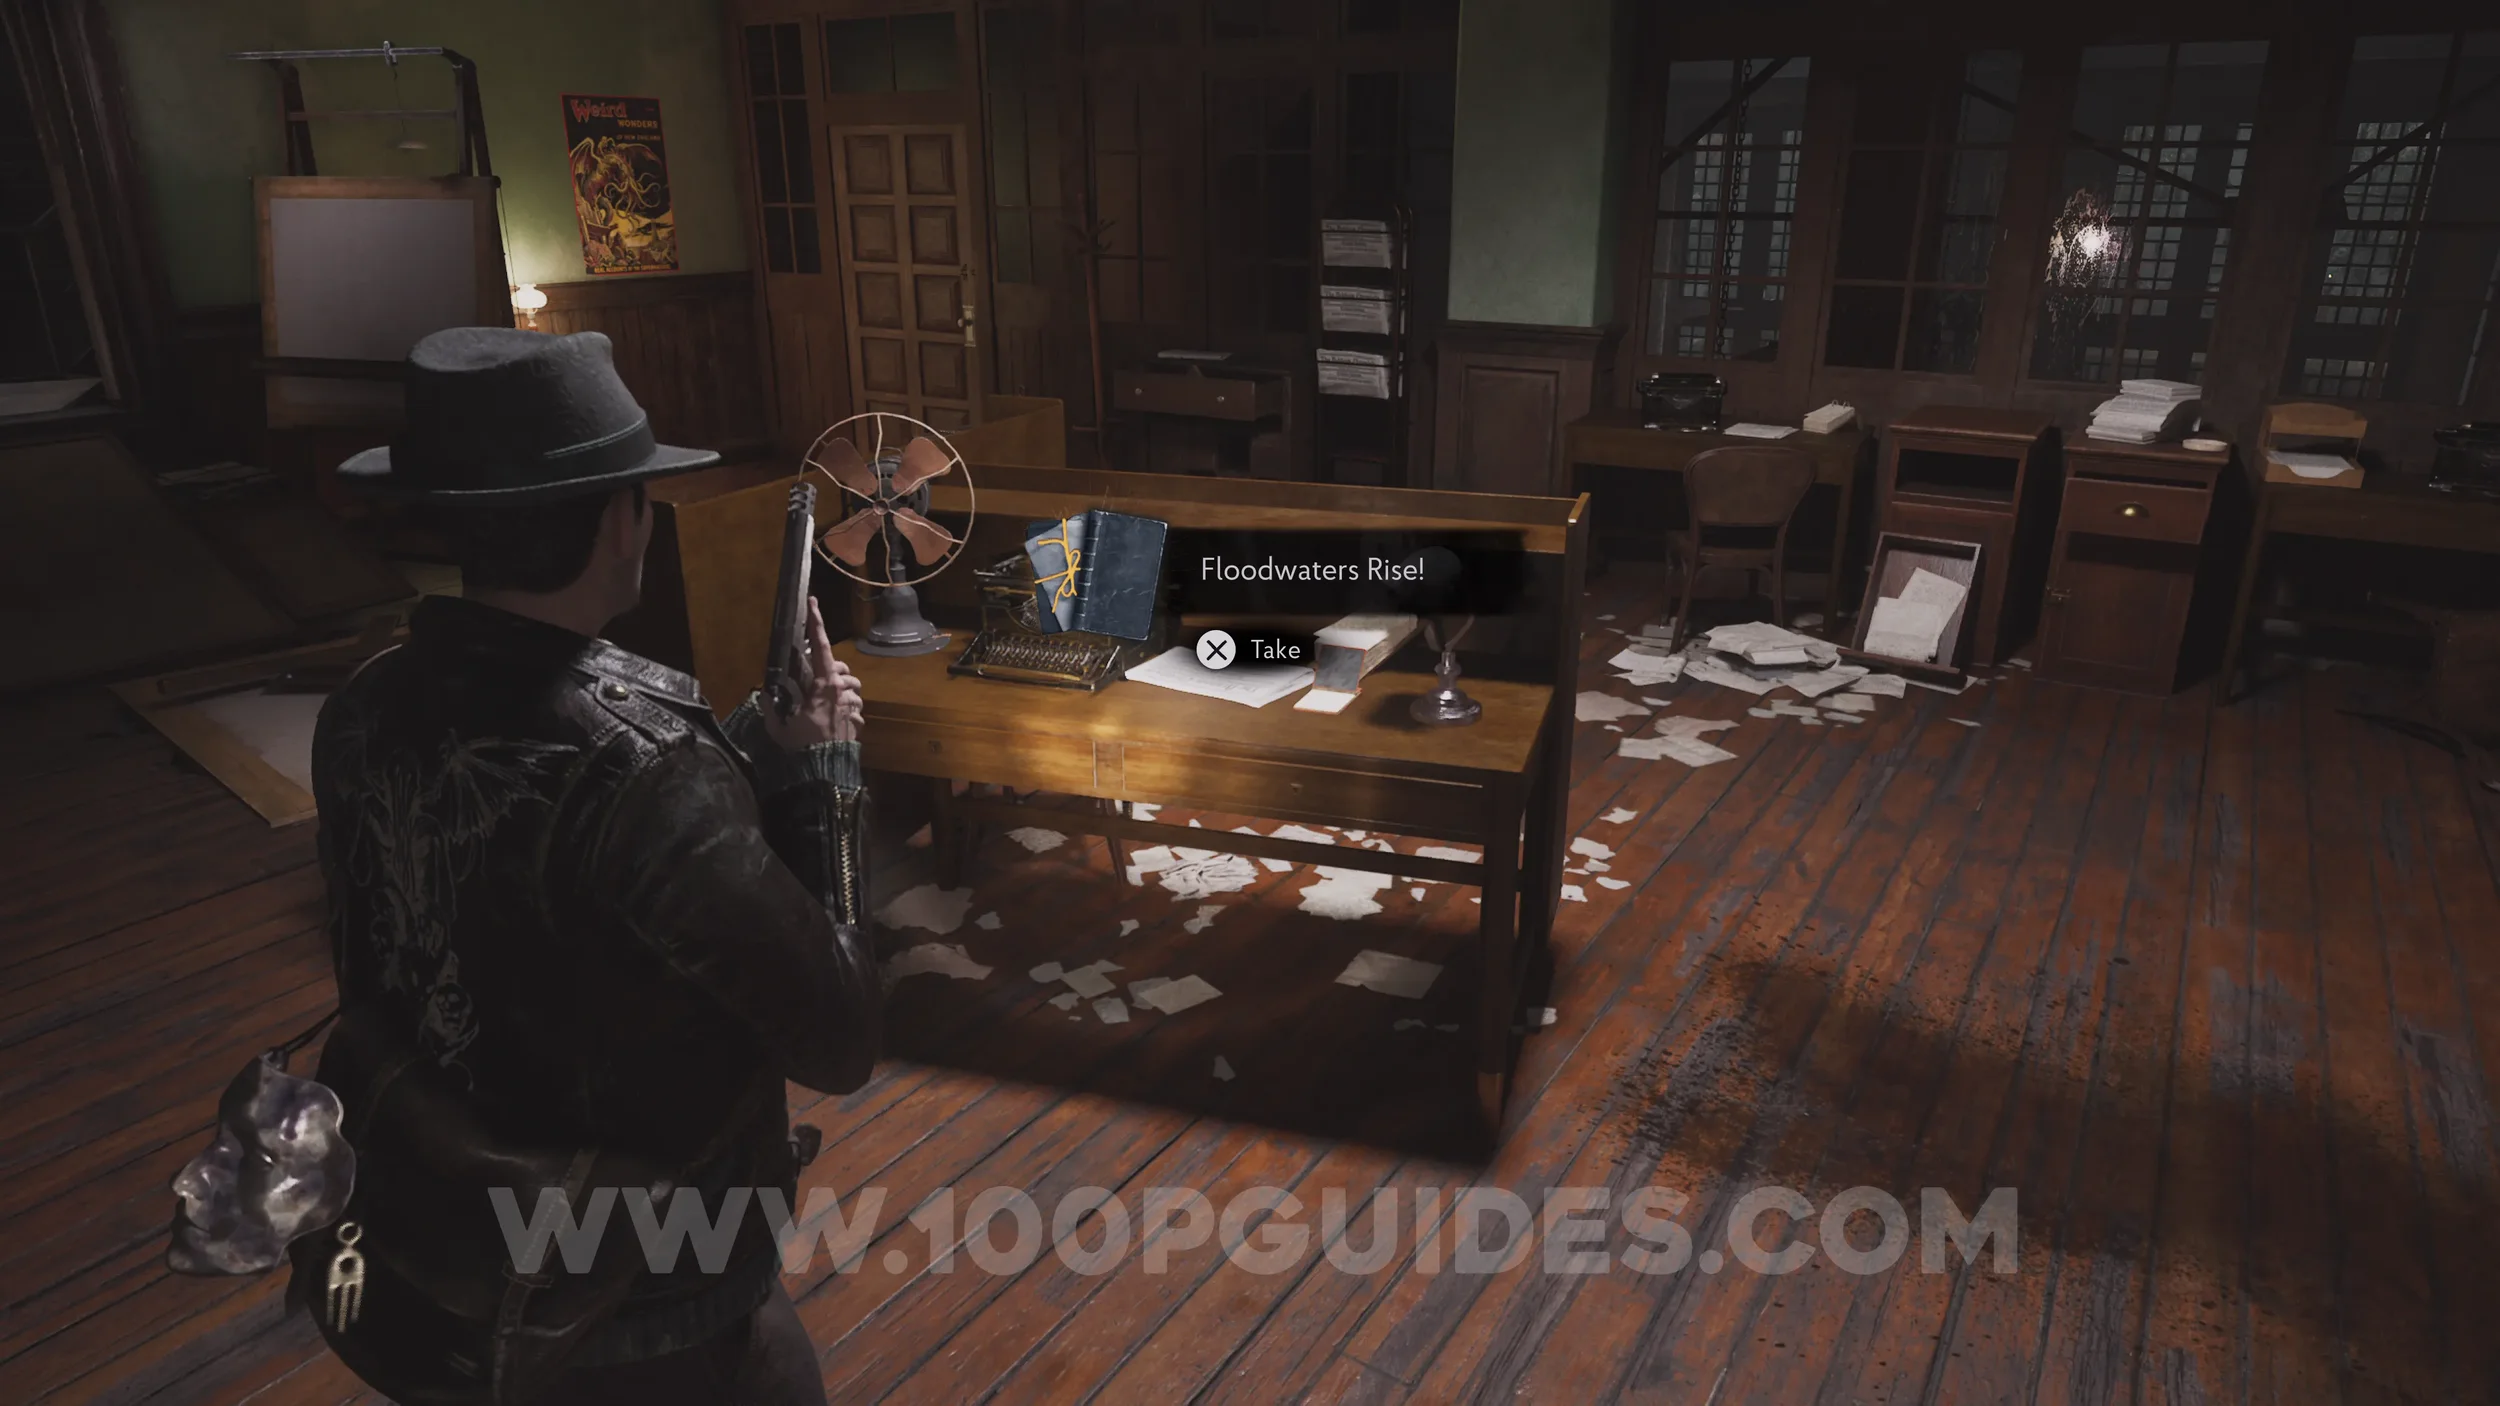
Lore Codex: Floodwaters Rise!. Leave the Empty House via the northern window and cross the pipes to reach another window. This will take you back to the Main Office, the room whose floor you fall through when you first reach the Printing House. You'll find the codex on the desk in the middle of the room.
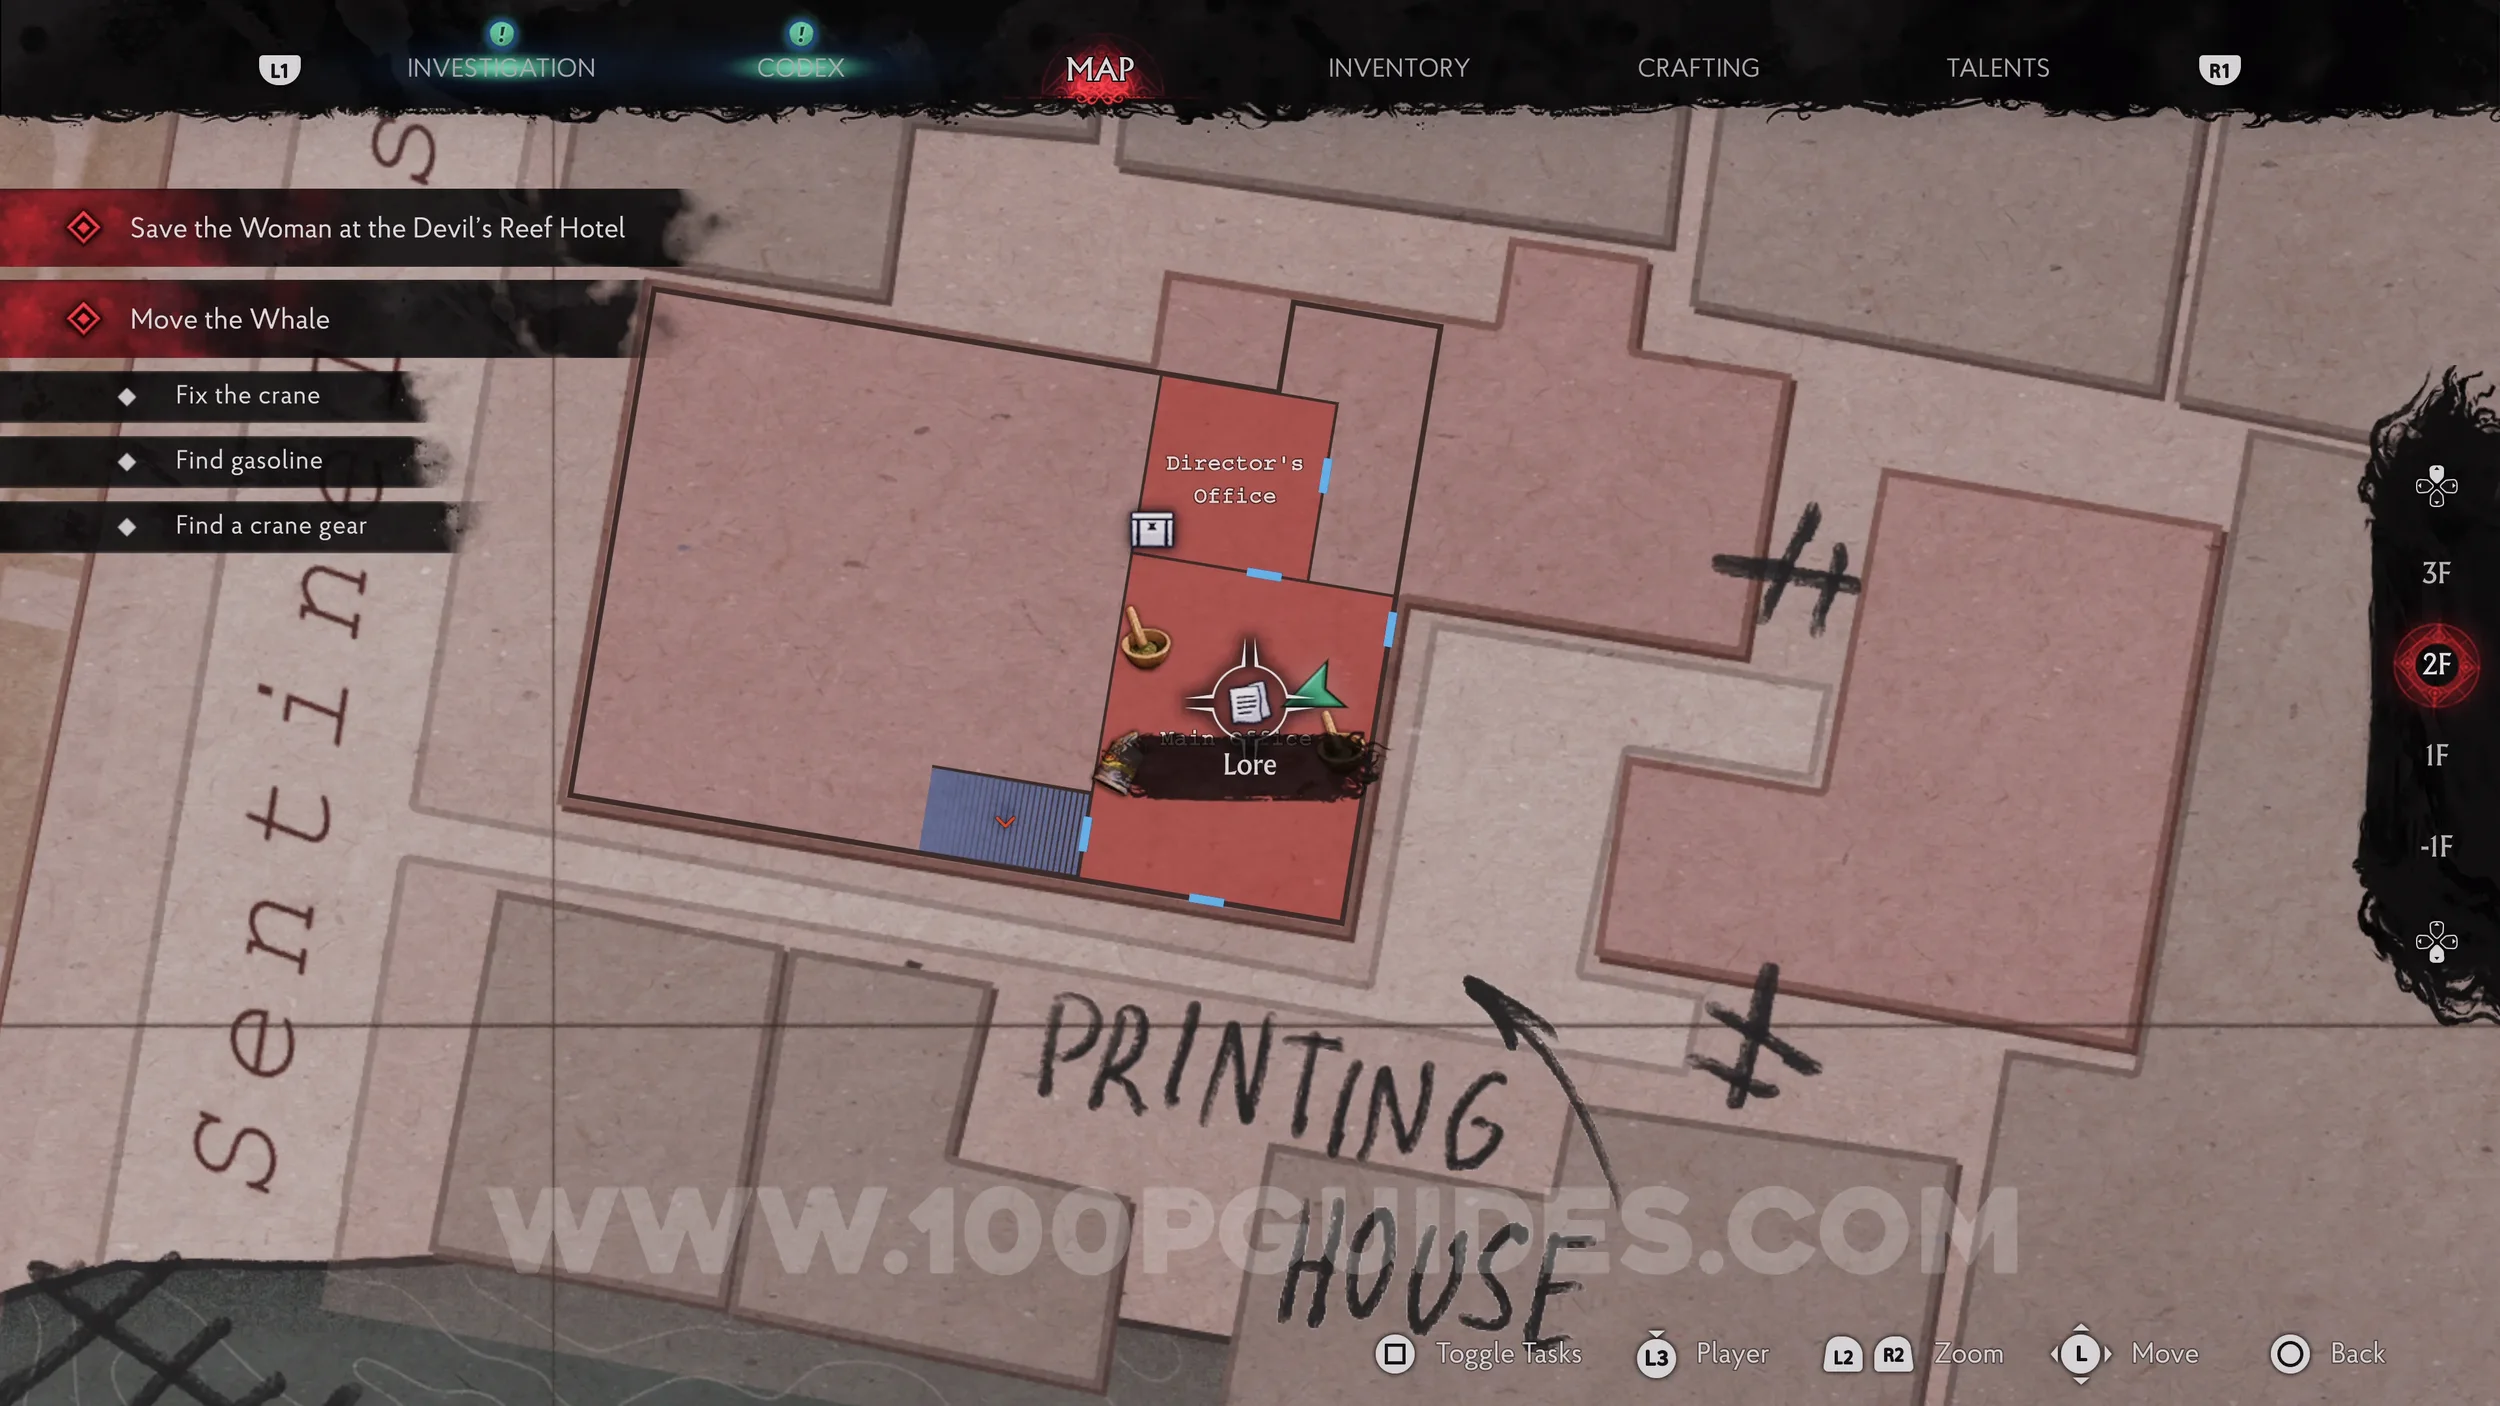
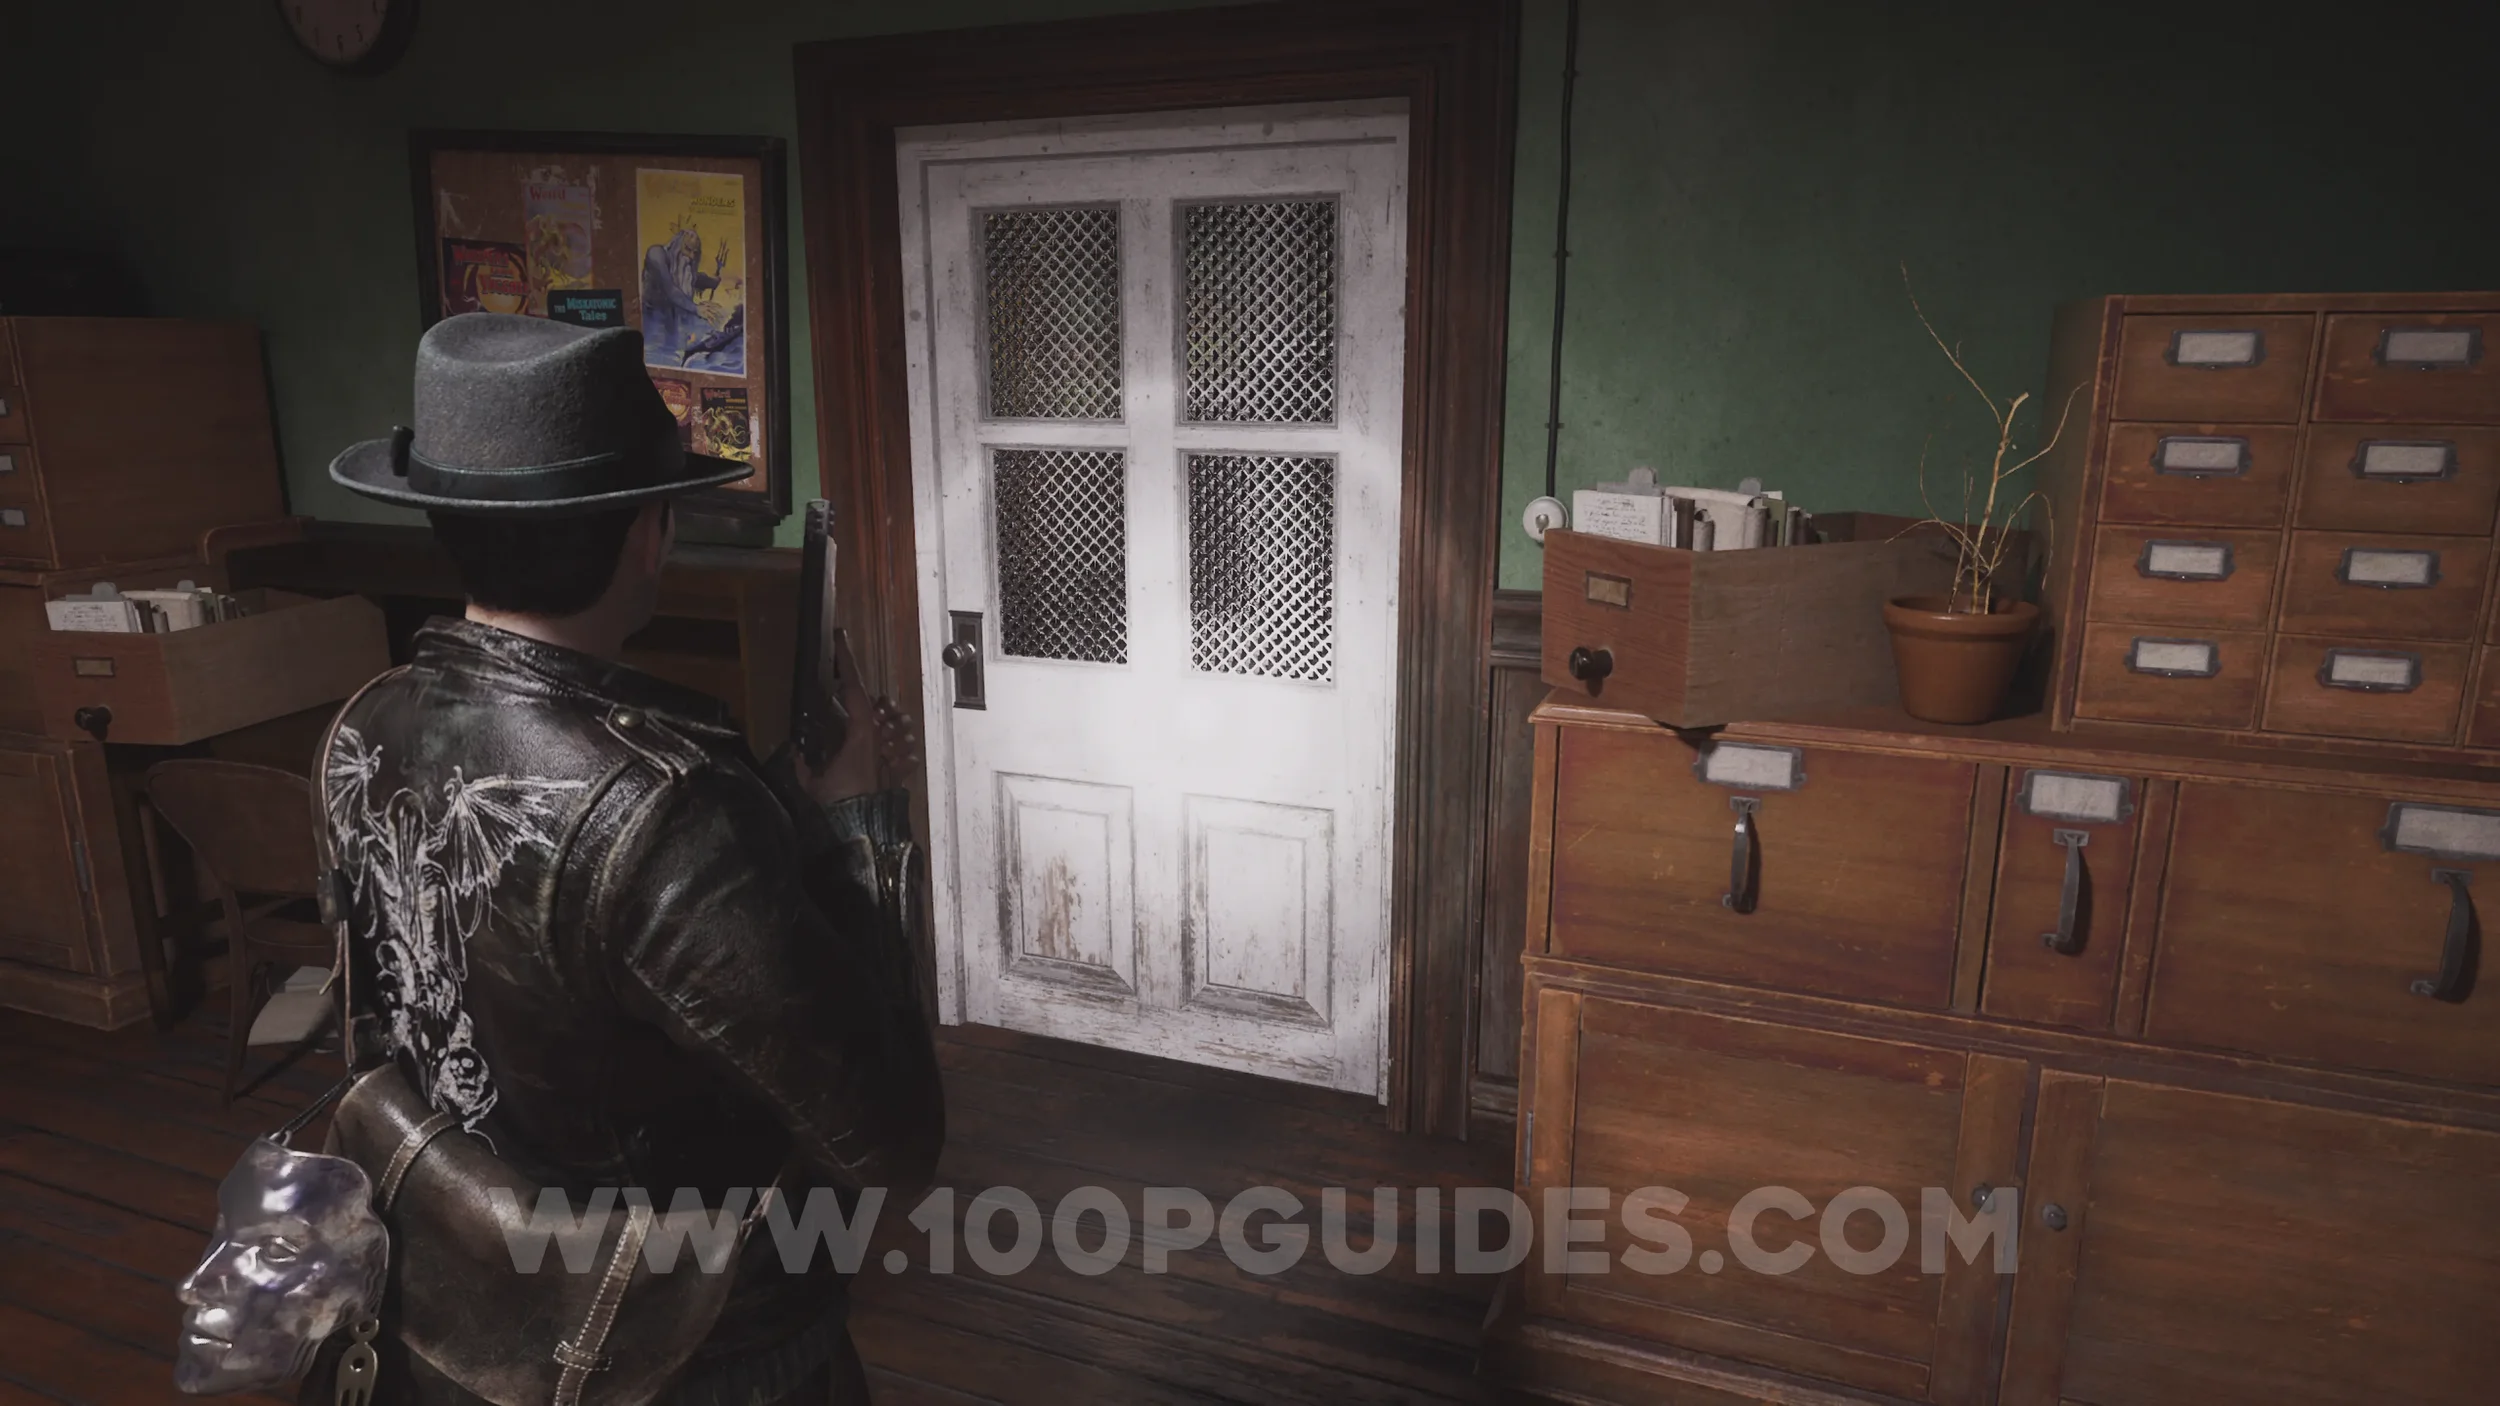
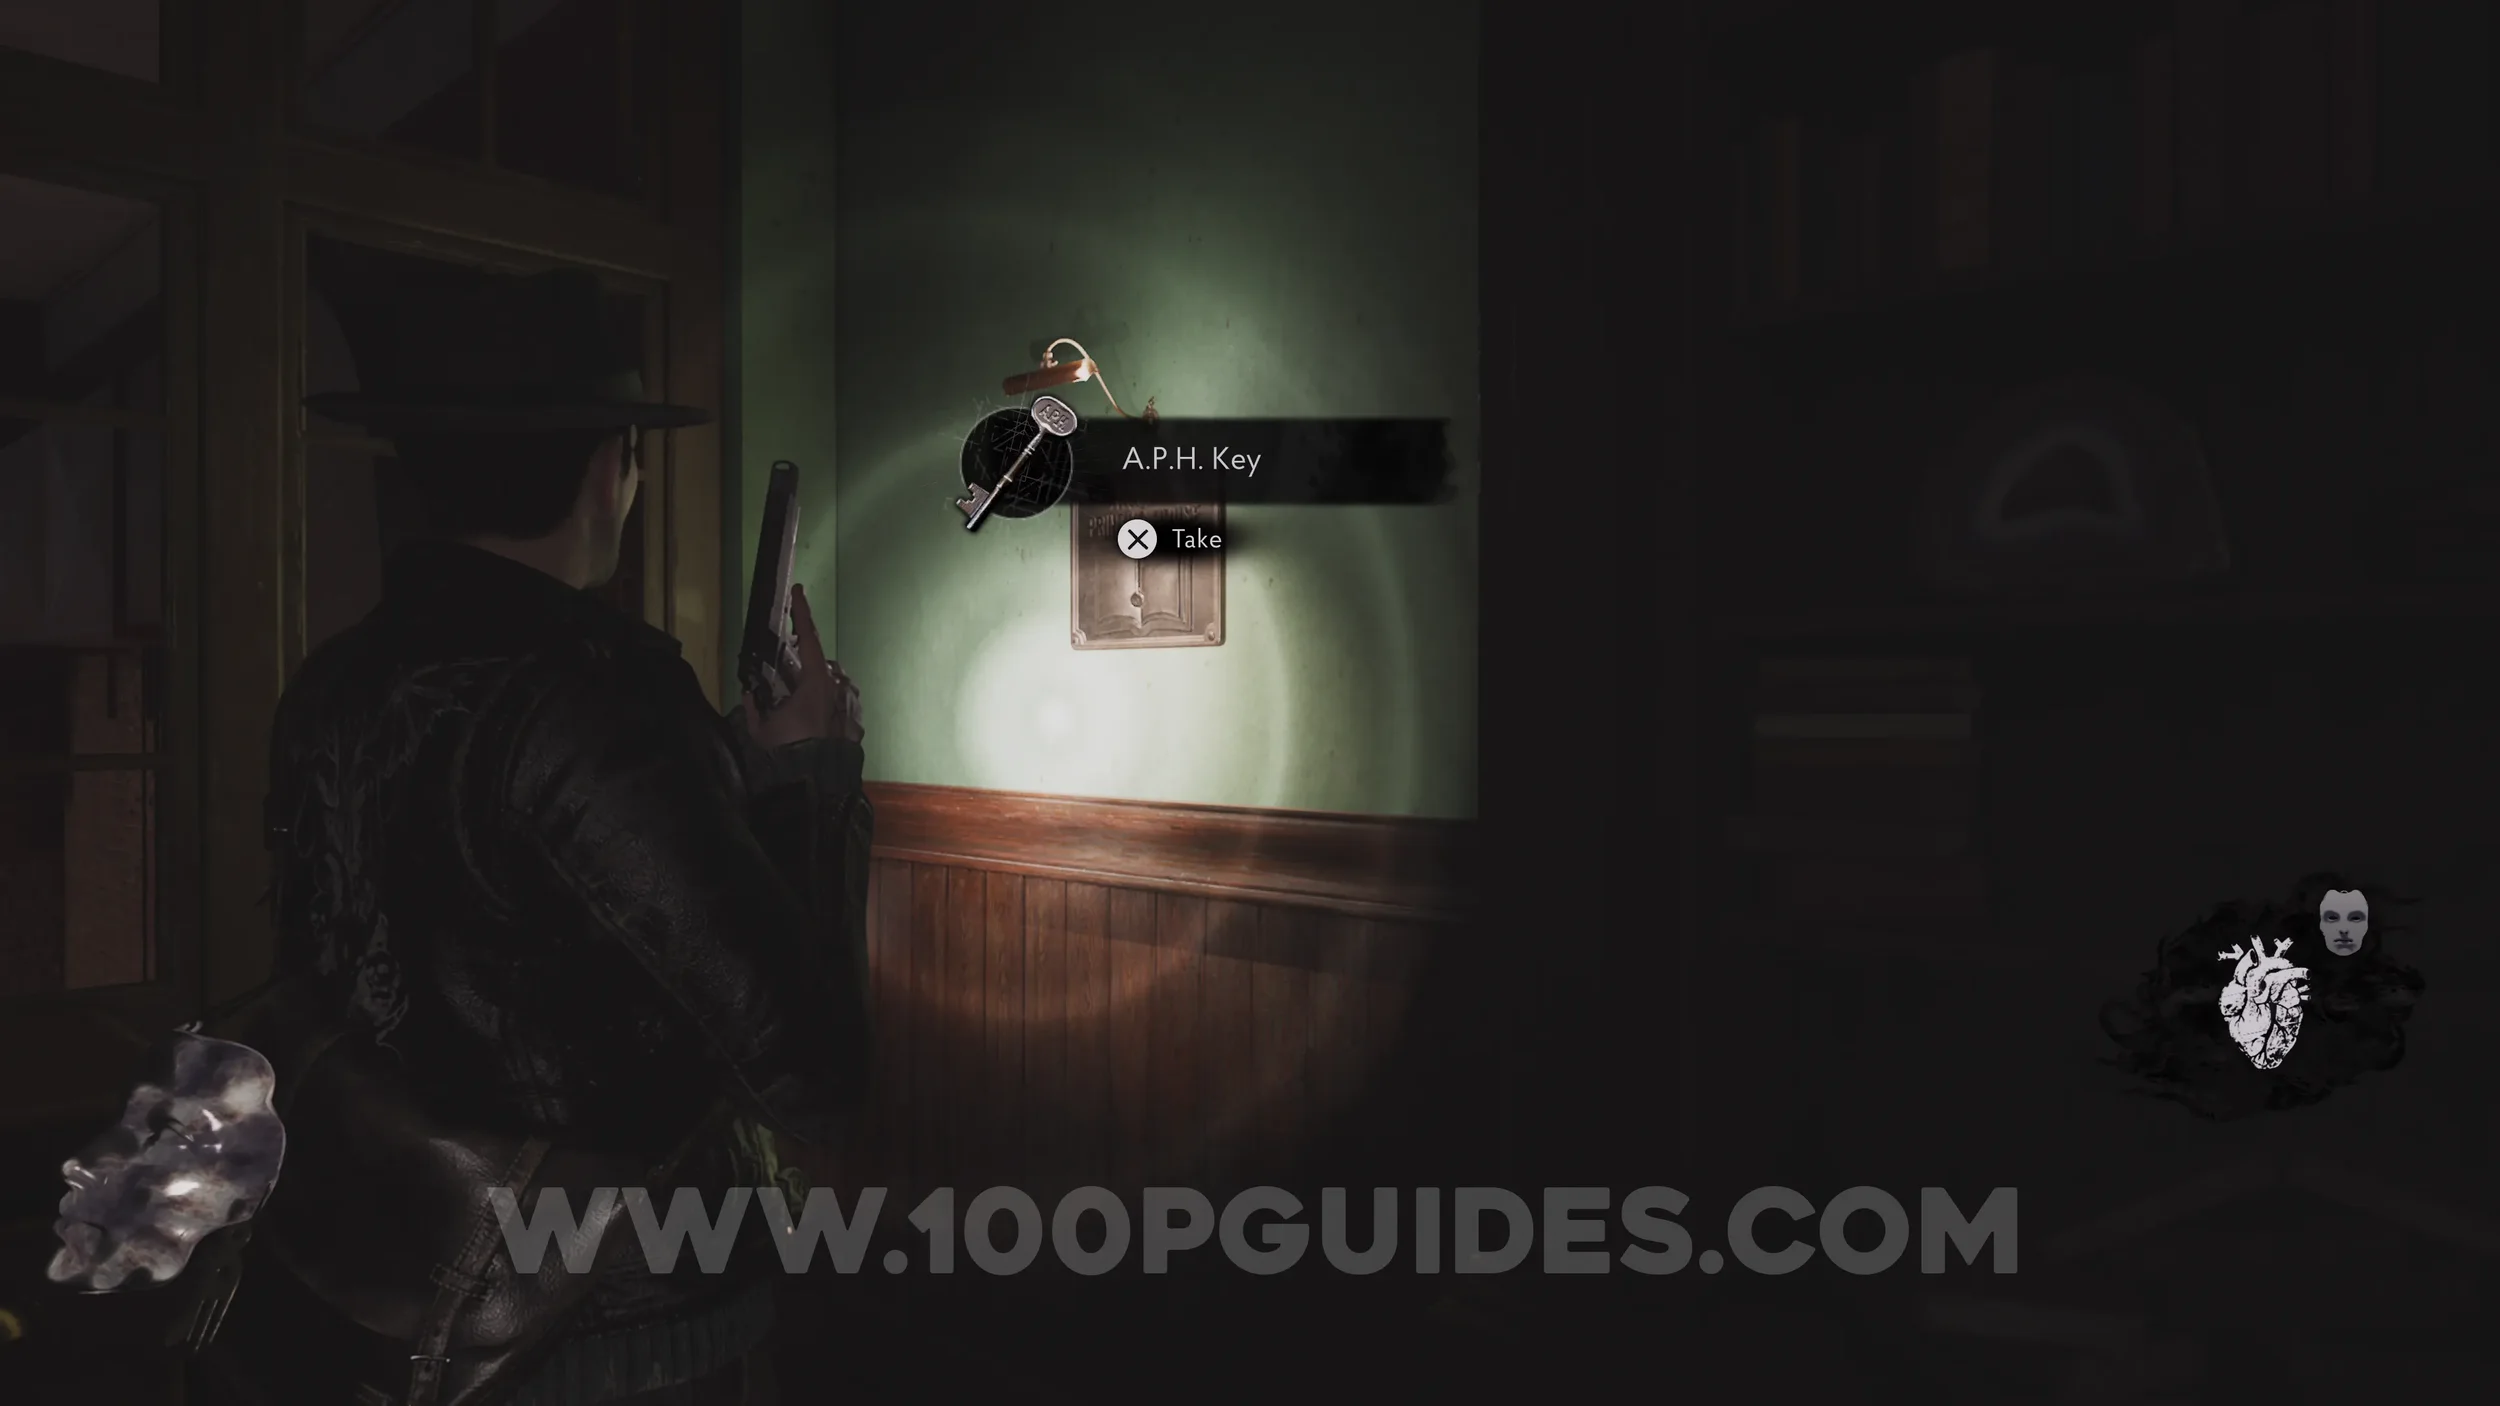
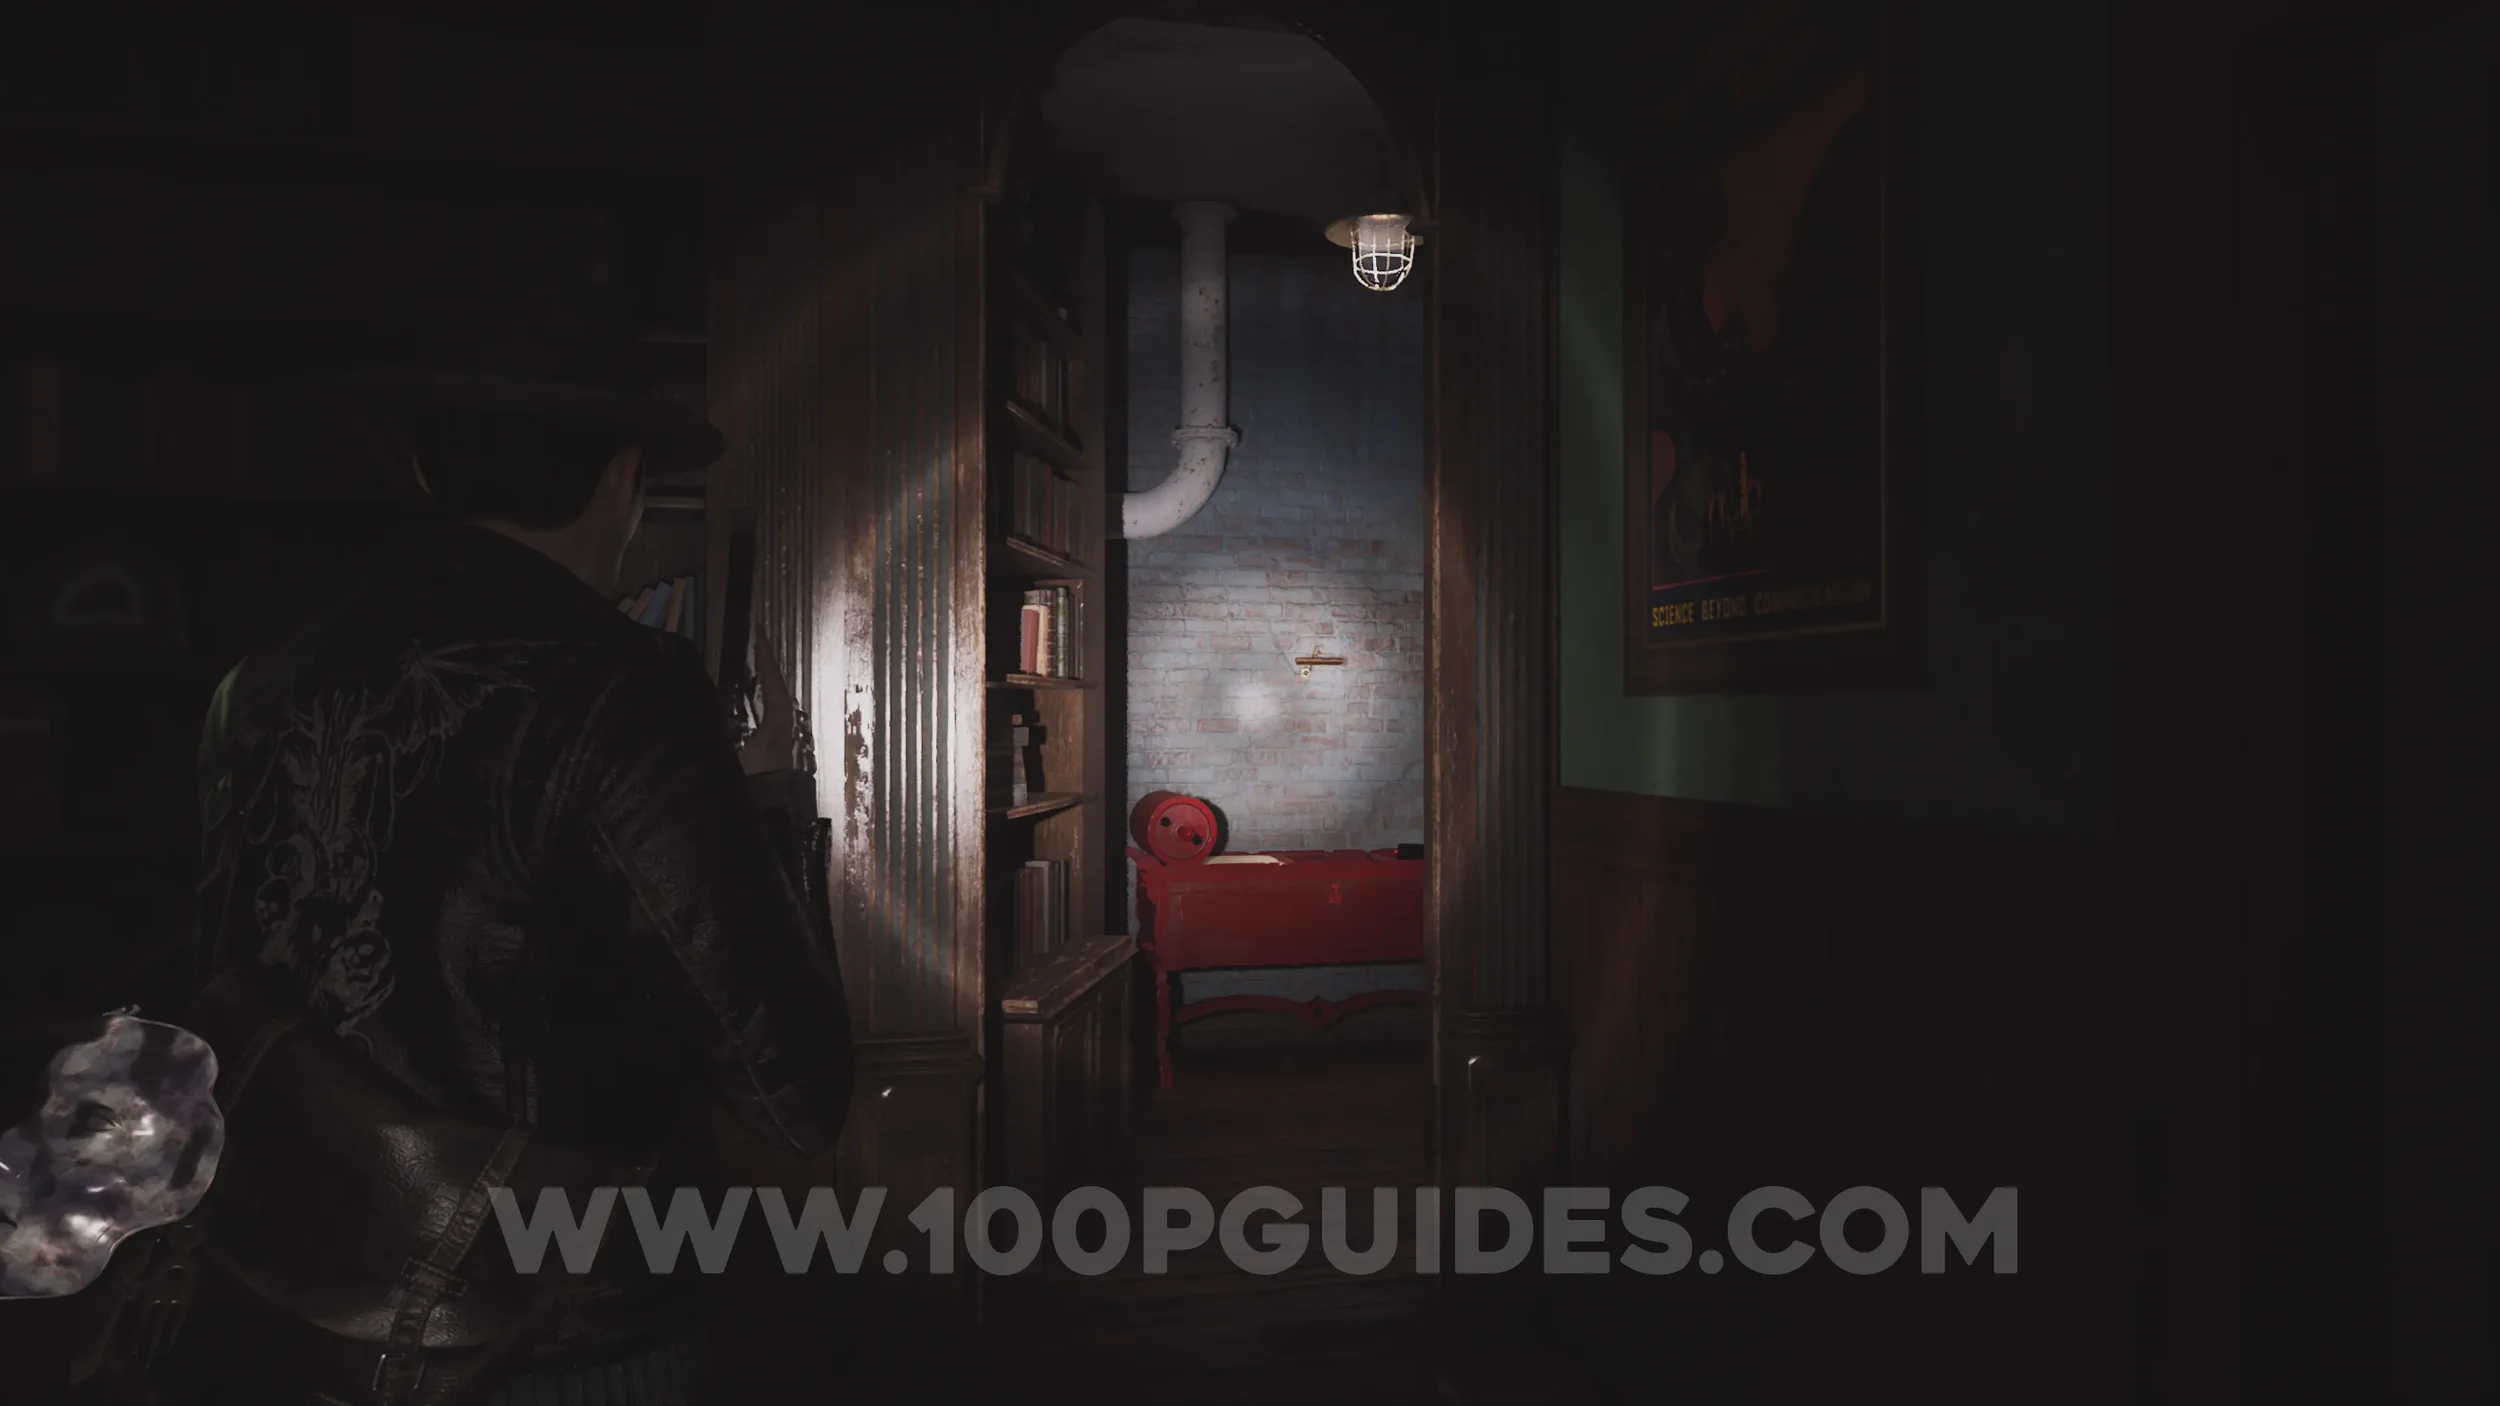
Key Item: A.P.H. Key. Go through the white door to the right of the previous codex and you'll find the key hanging on the wall in the corner. Grabbing the key will also open up the bookshelf in this room. You can't solve the puzzle on the other side yet, but you can place the two Printing Plates there for now, then come back to them later. It's a handy way to free up some inventory space if you're running low.
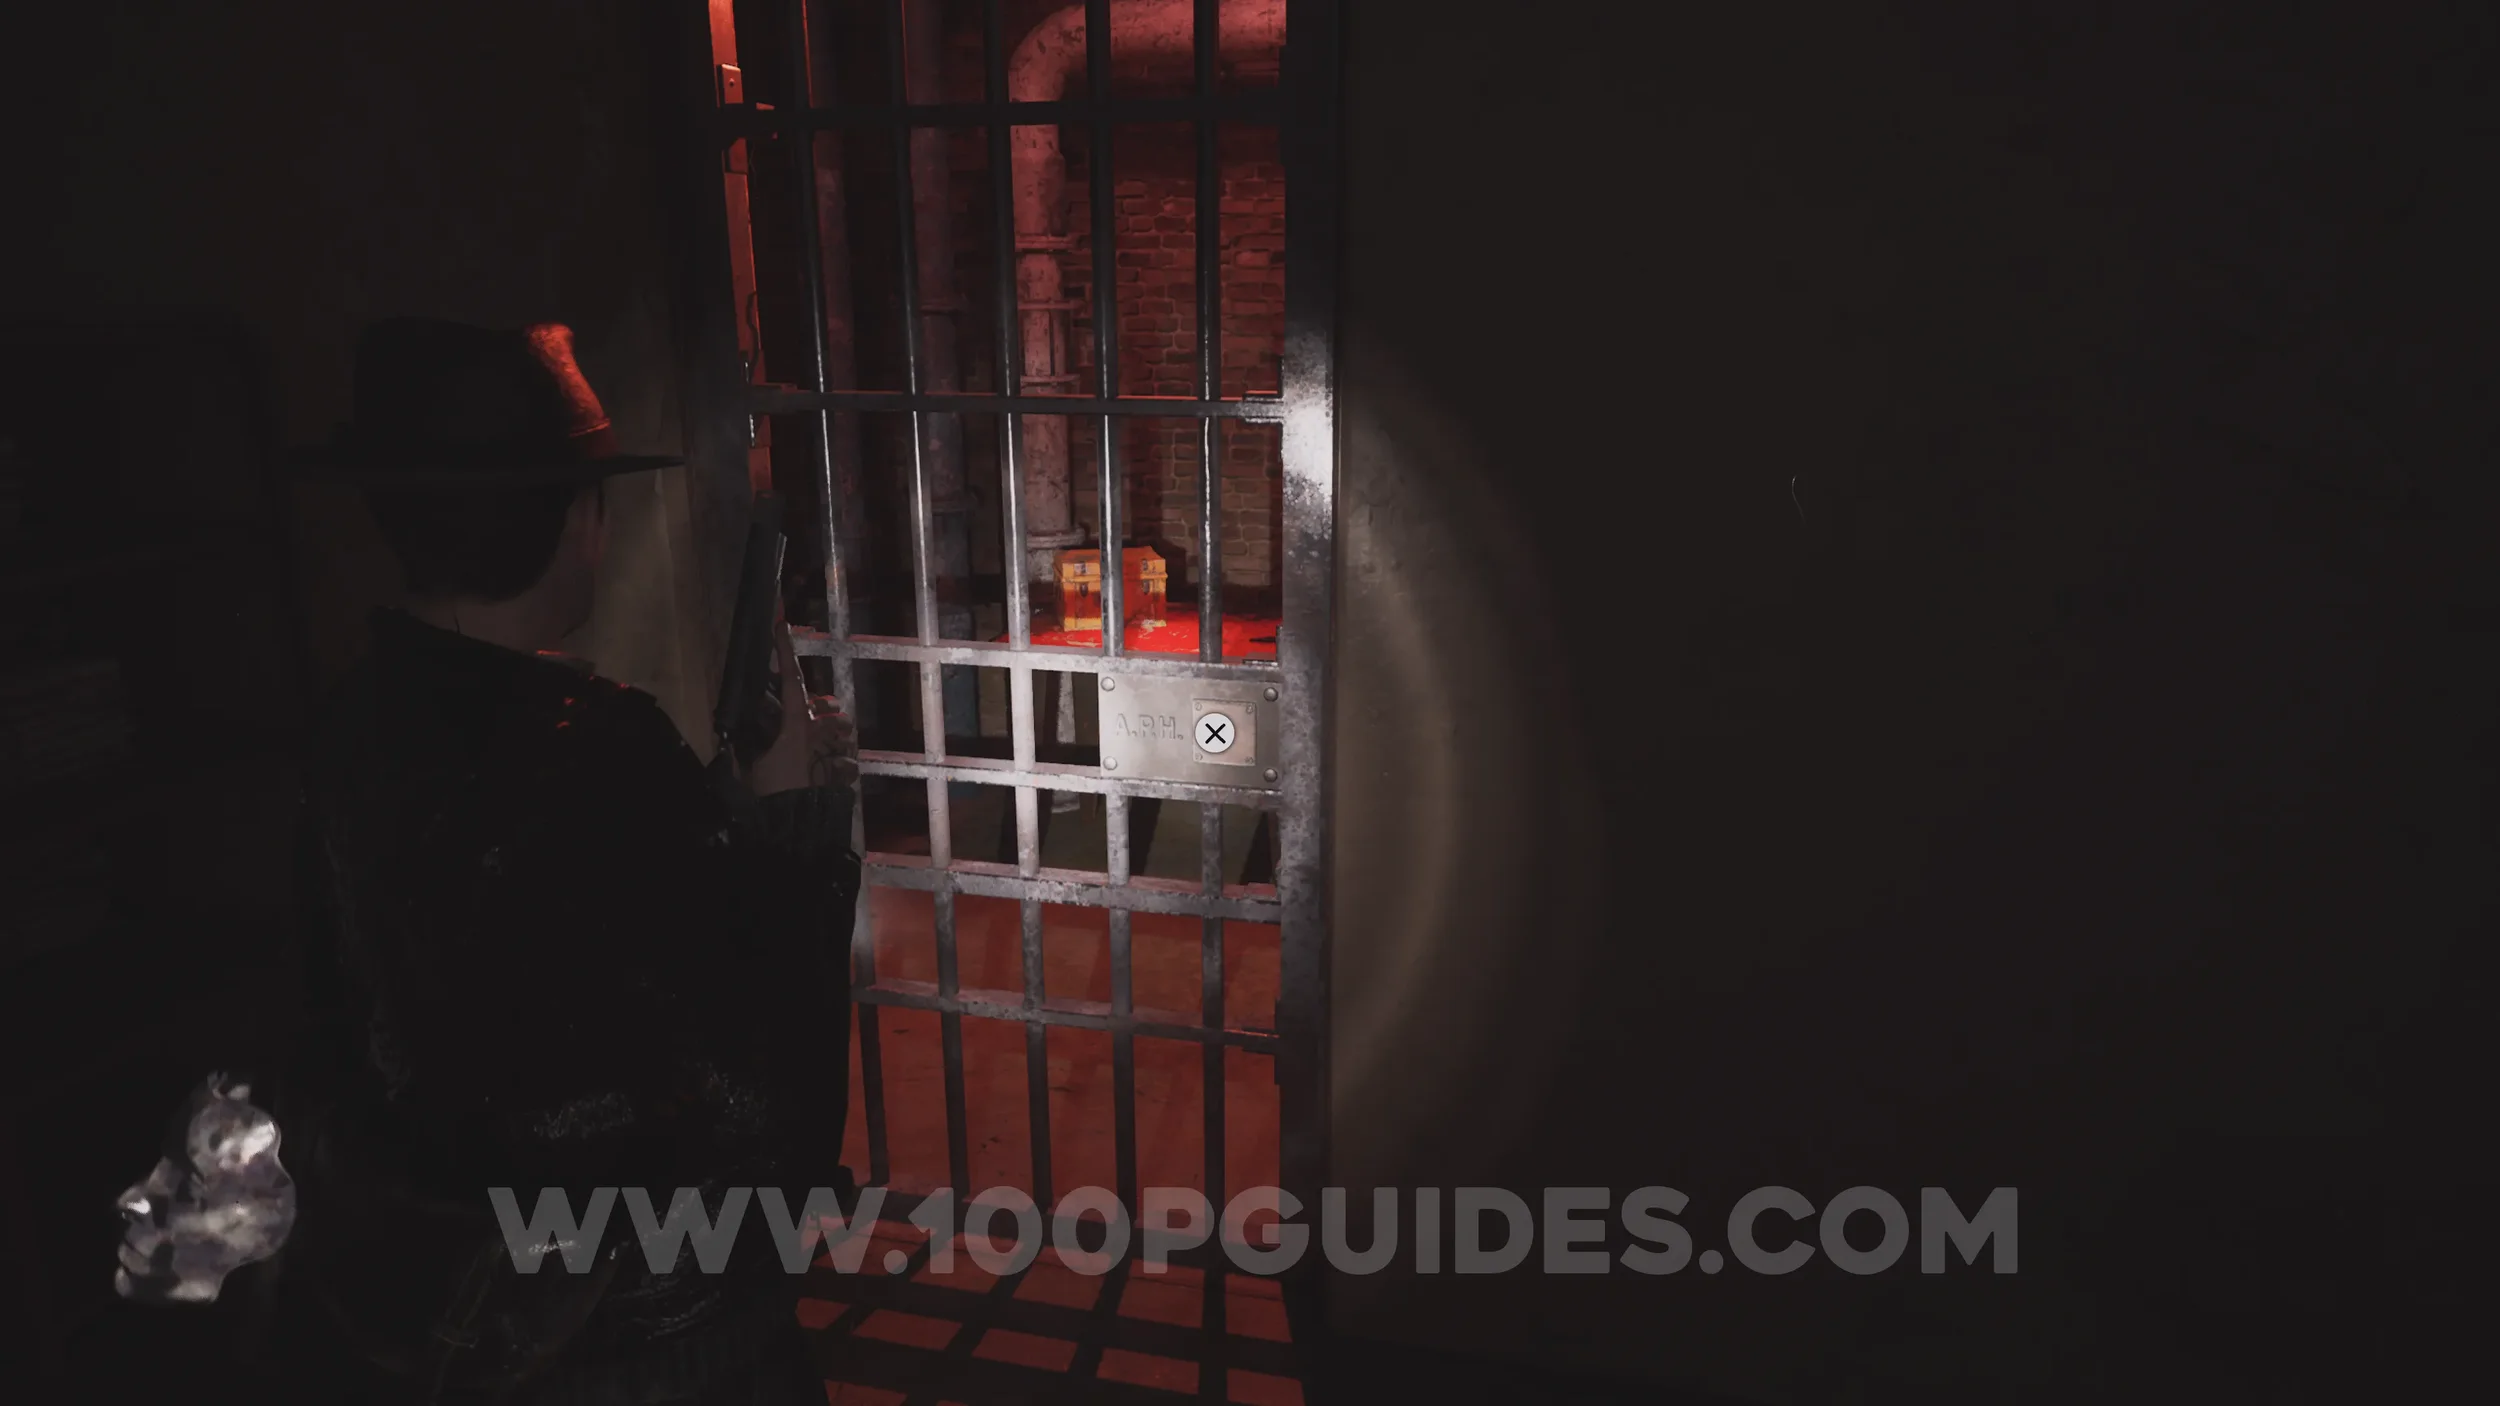
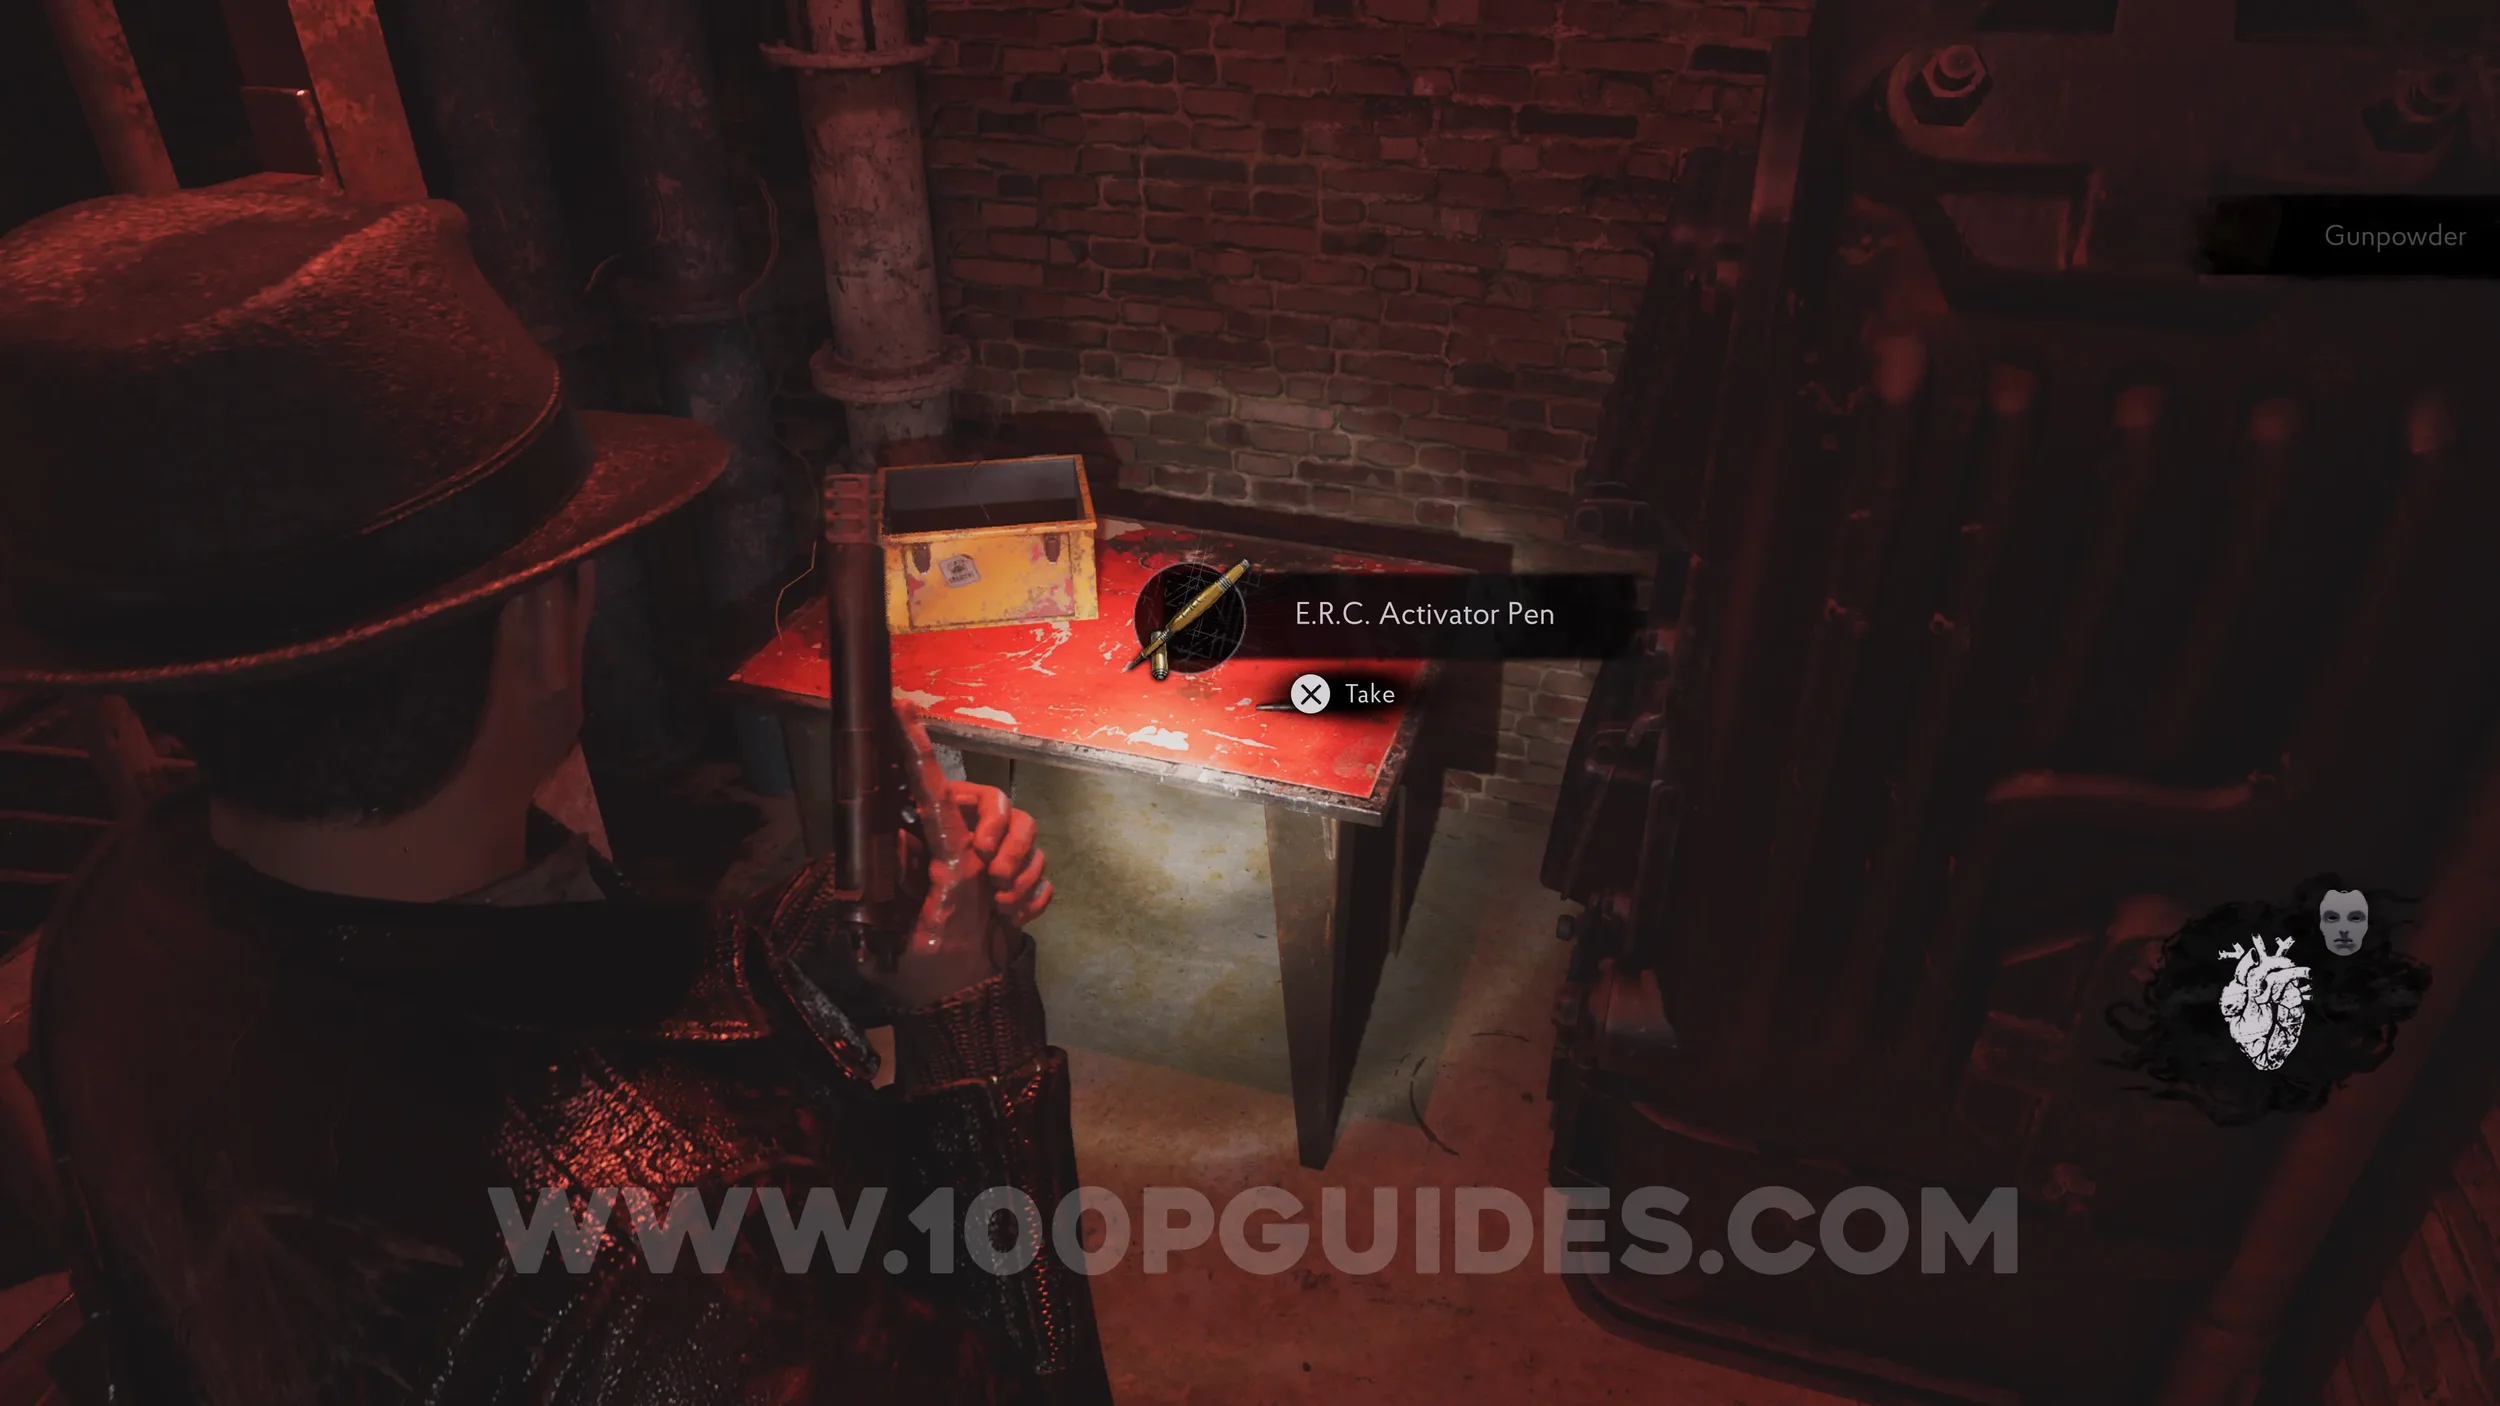
E.R.C. Activator Pen. Now that you have the A.P.H. Key, return to the Main Office and head back out the window you came through. Use the ladder shortcut to get back down to the crashed van and enter the room behind it, the External Storage room. In here, use the key to open the gate and grab the pen on the other side.
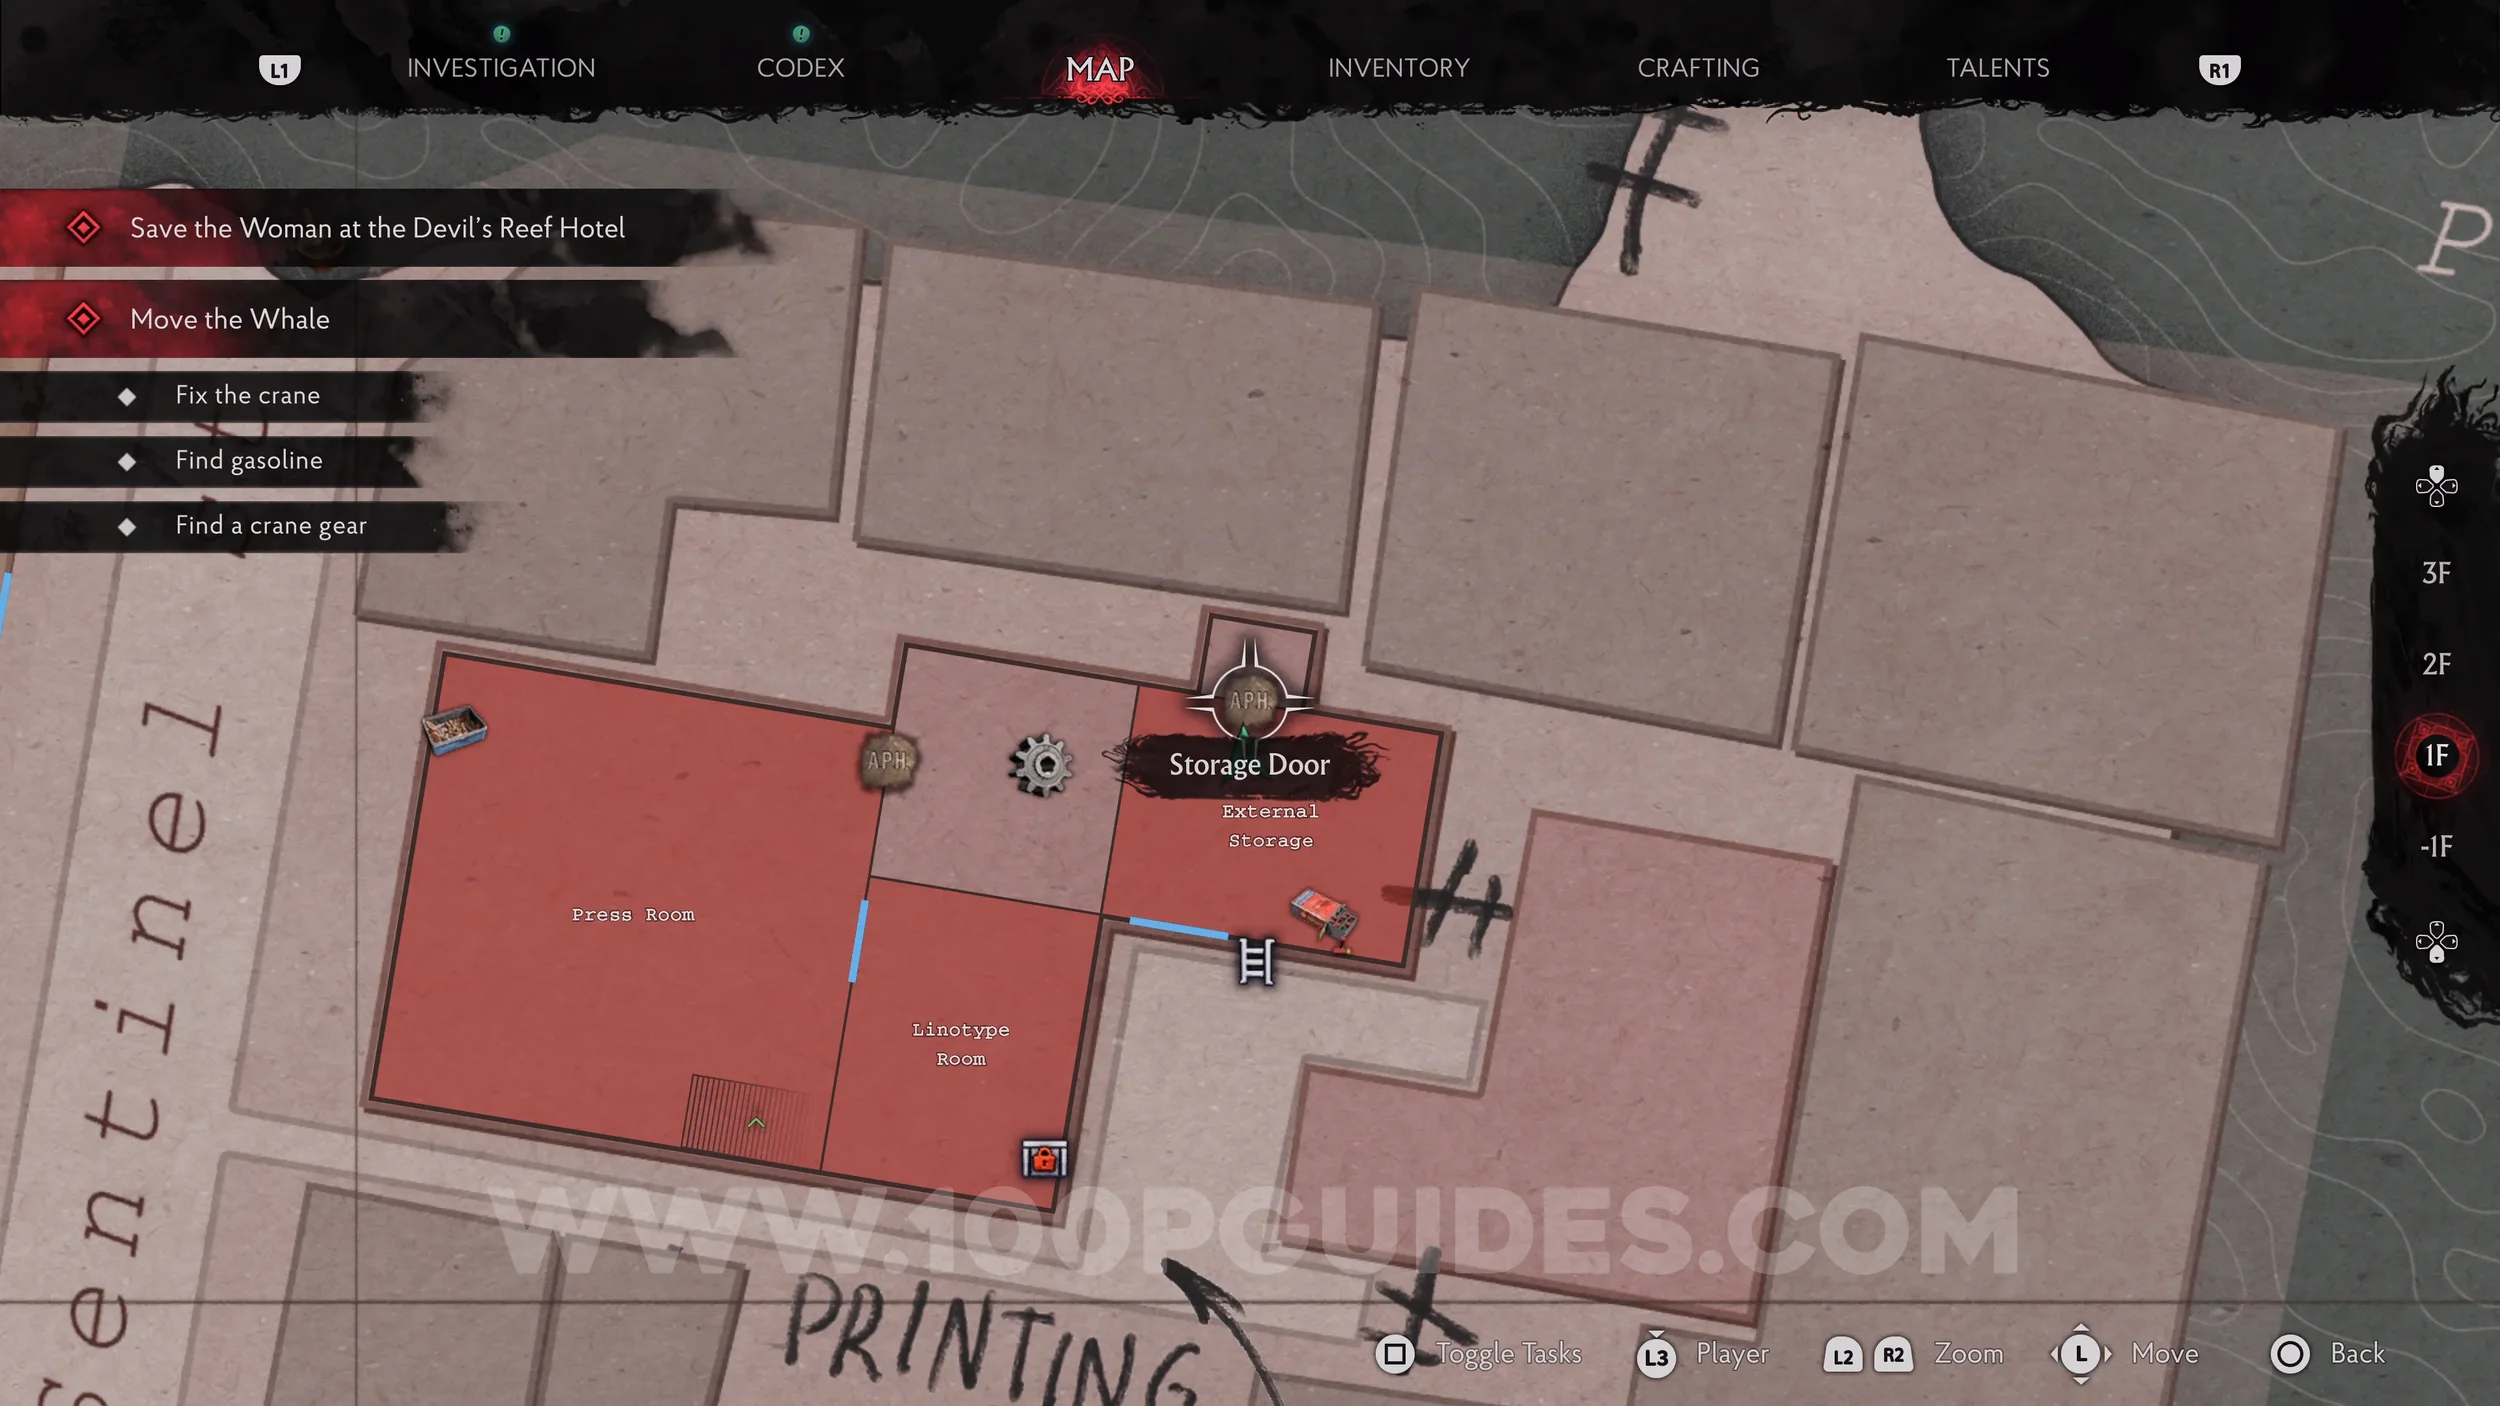
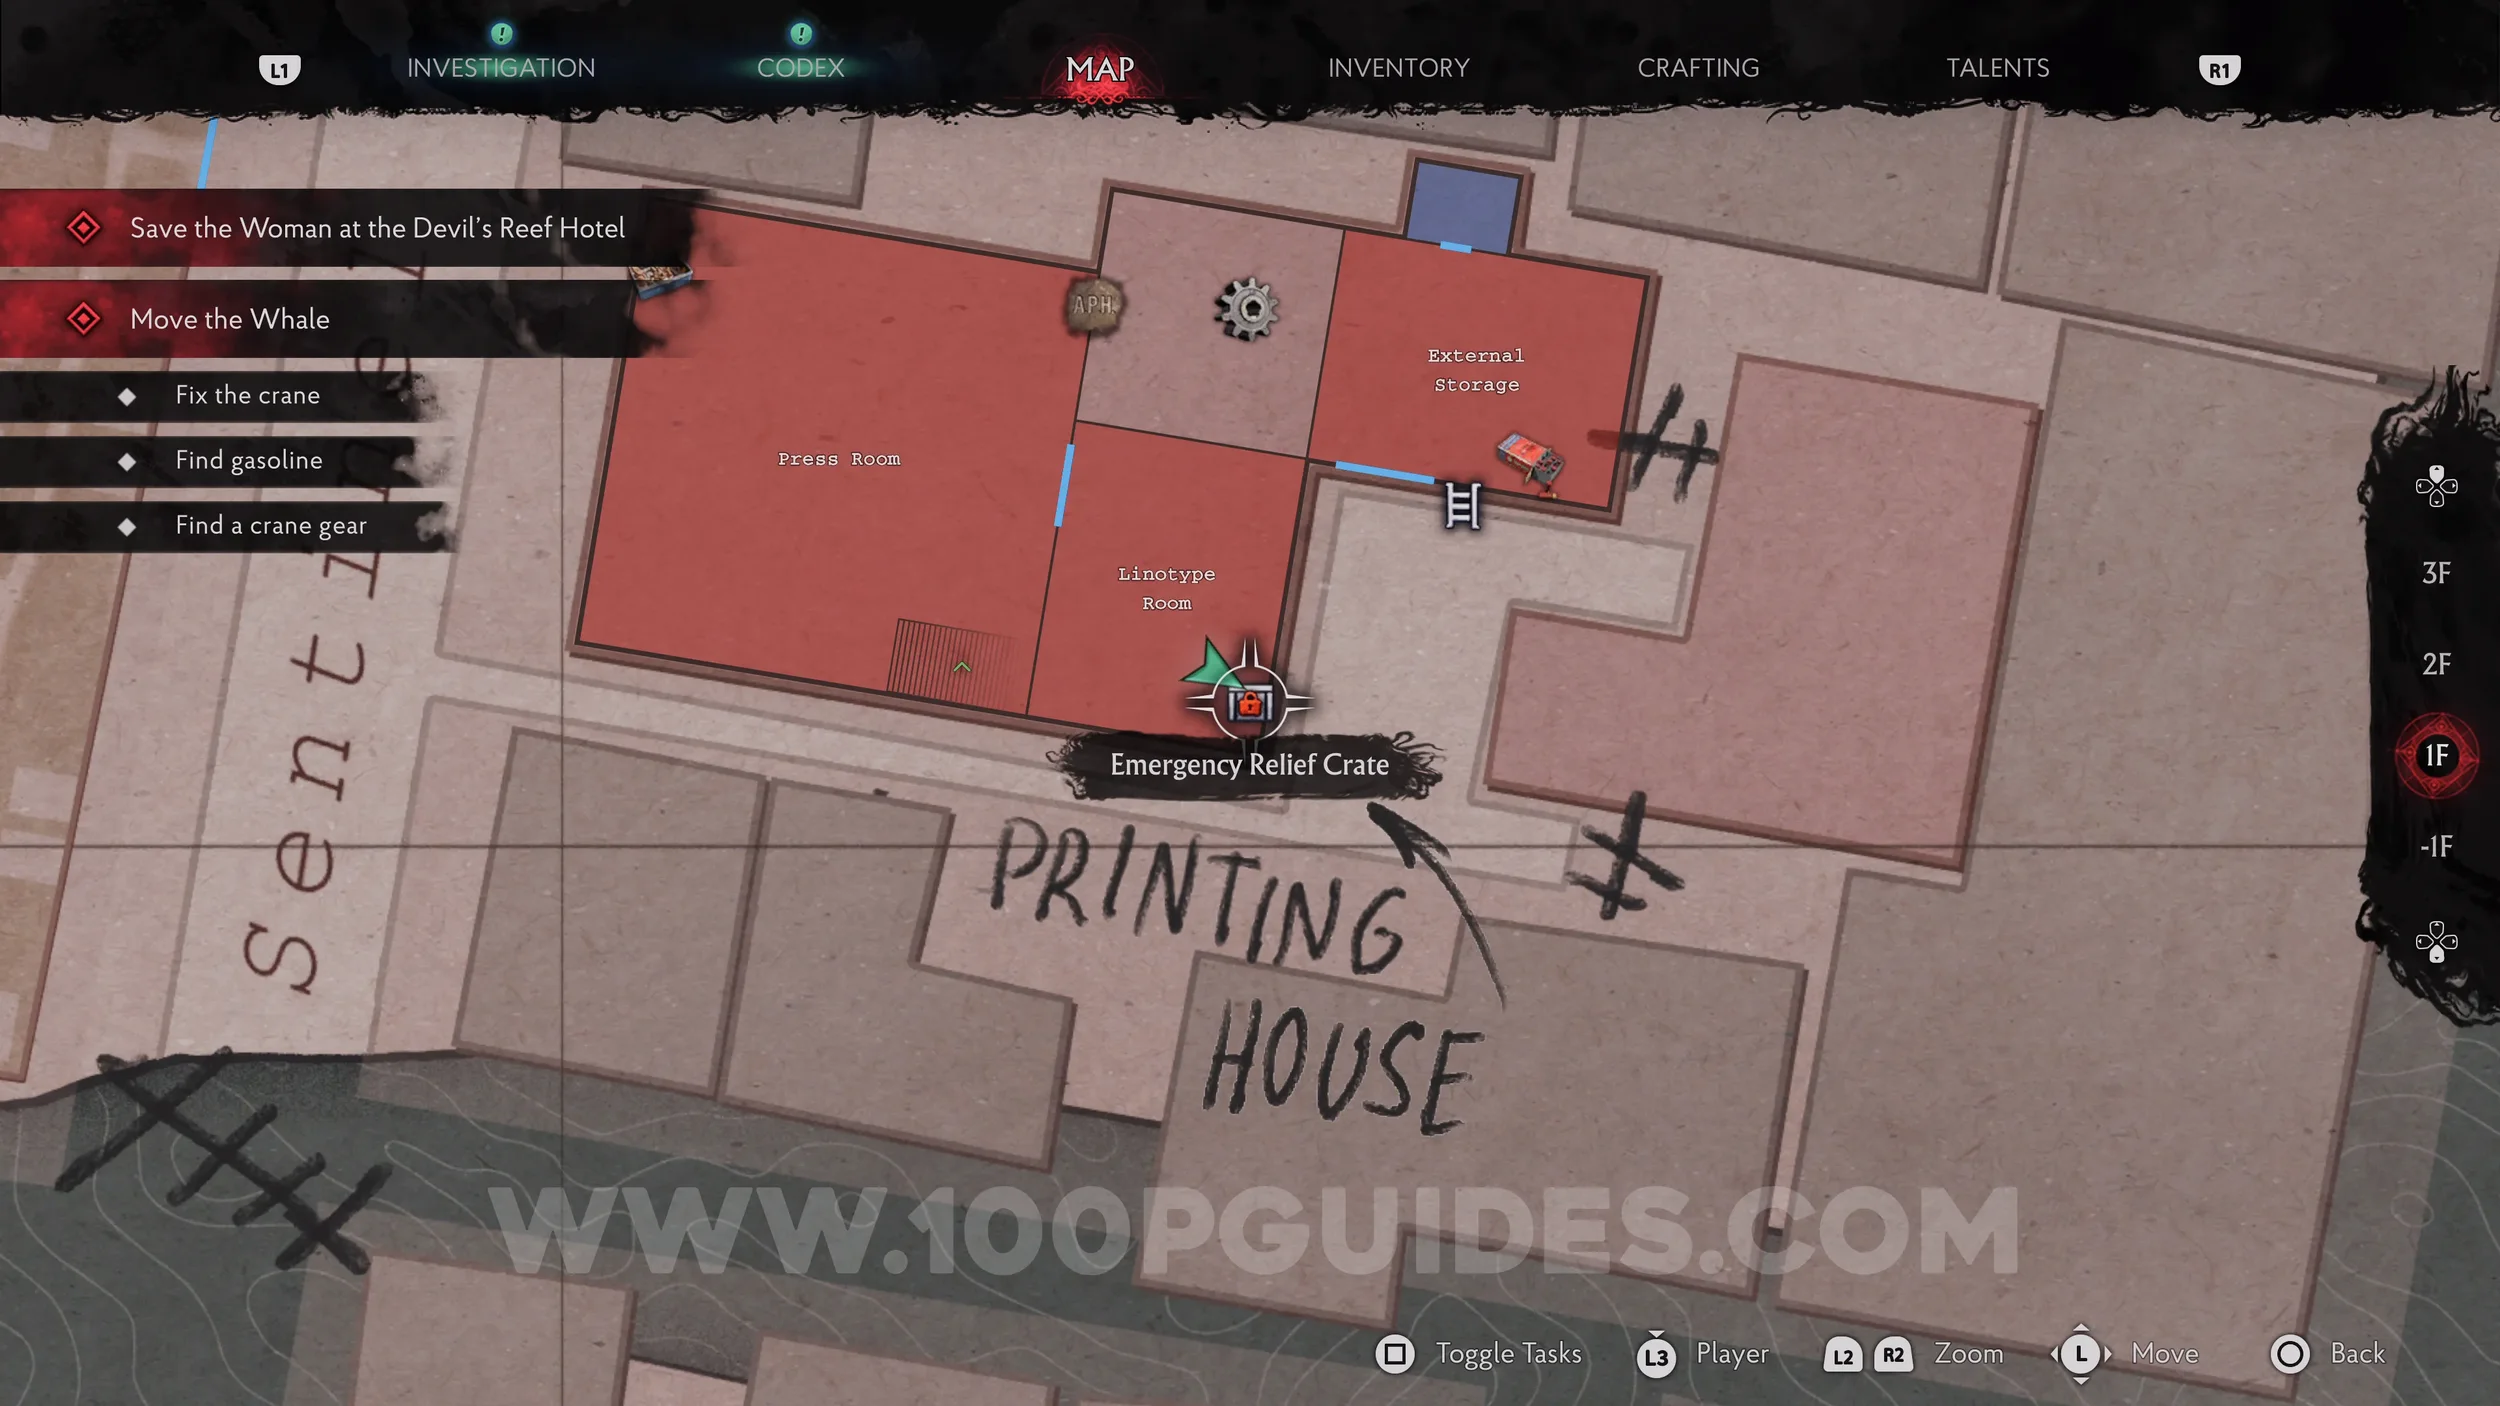
Emergency Relief Crate (E.R.C.) + Inventory Expansion. Head back to the Main Office, then go through the door in the southwestern corner to return to the flooded Press Room. From there, head into the Linotype Room, the room you fell into at the start, to find the container in the corner. Open it to get the Inventory Expansion.
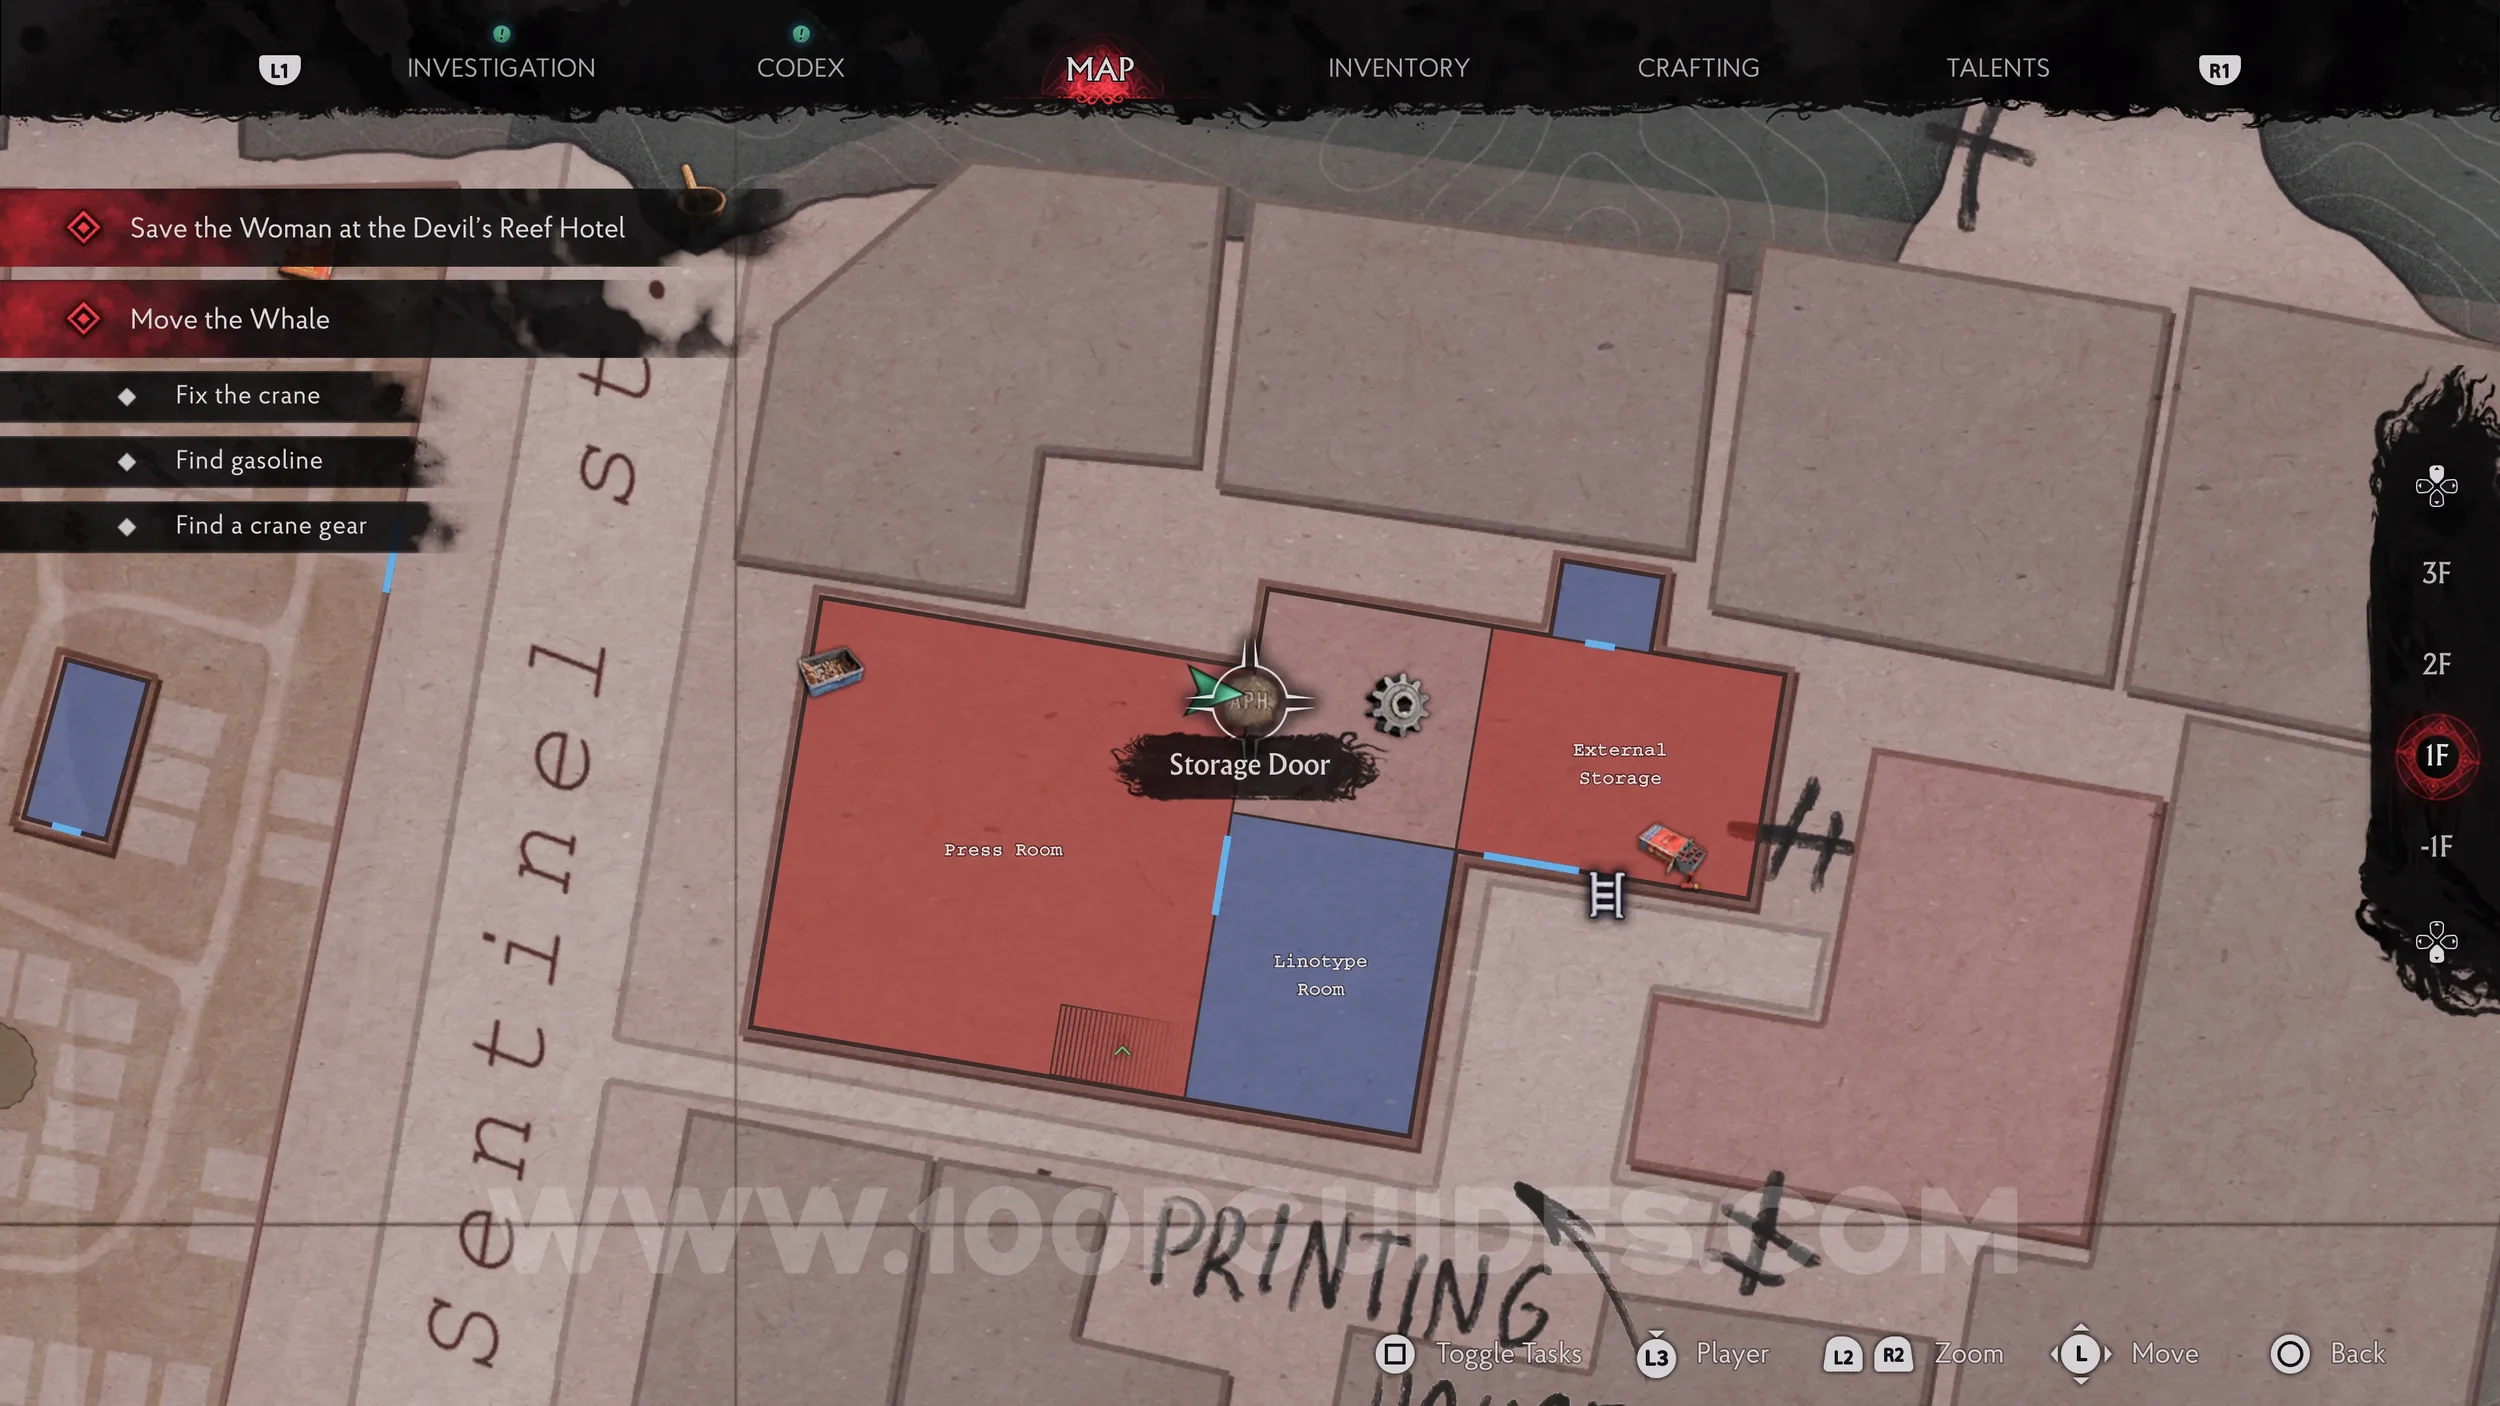
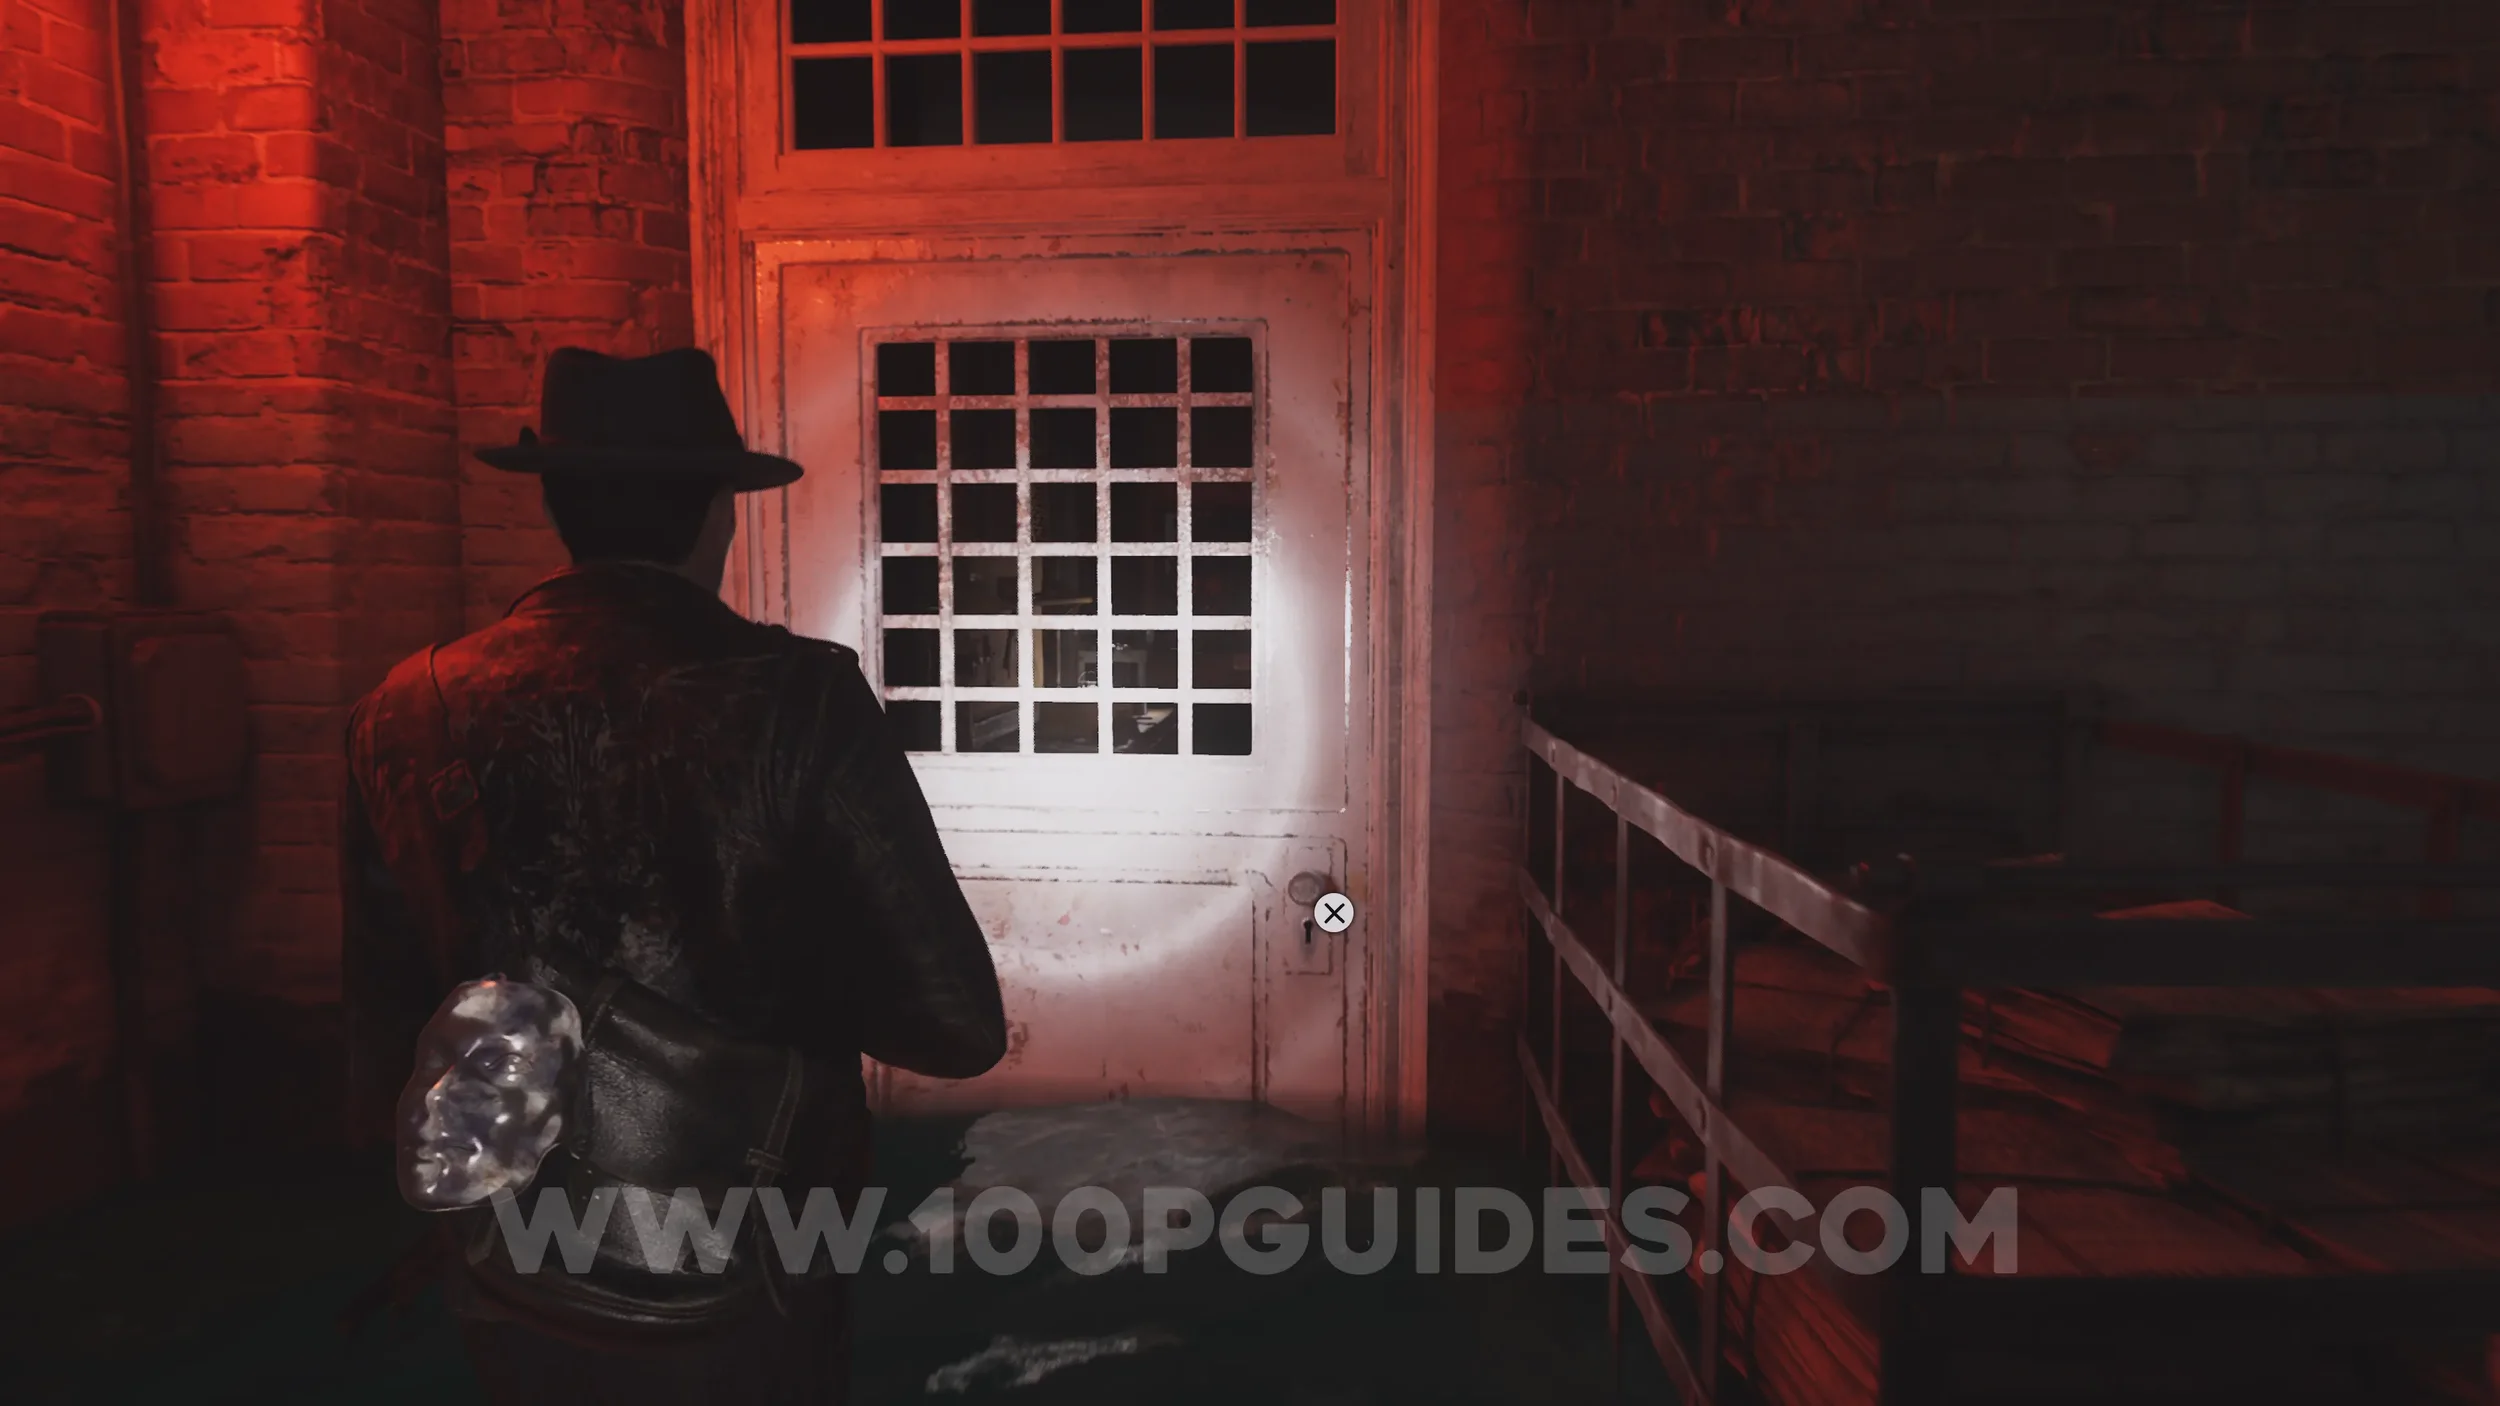
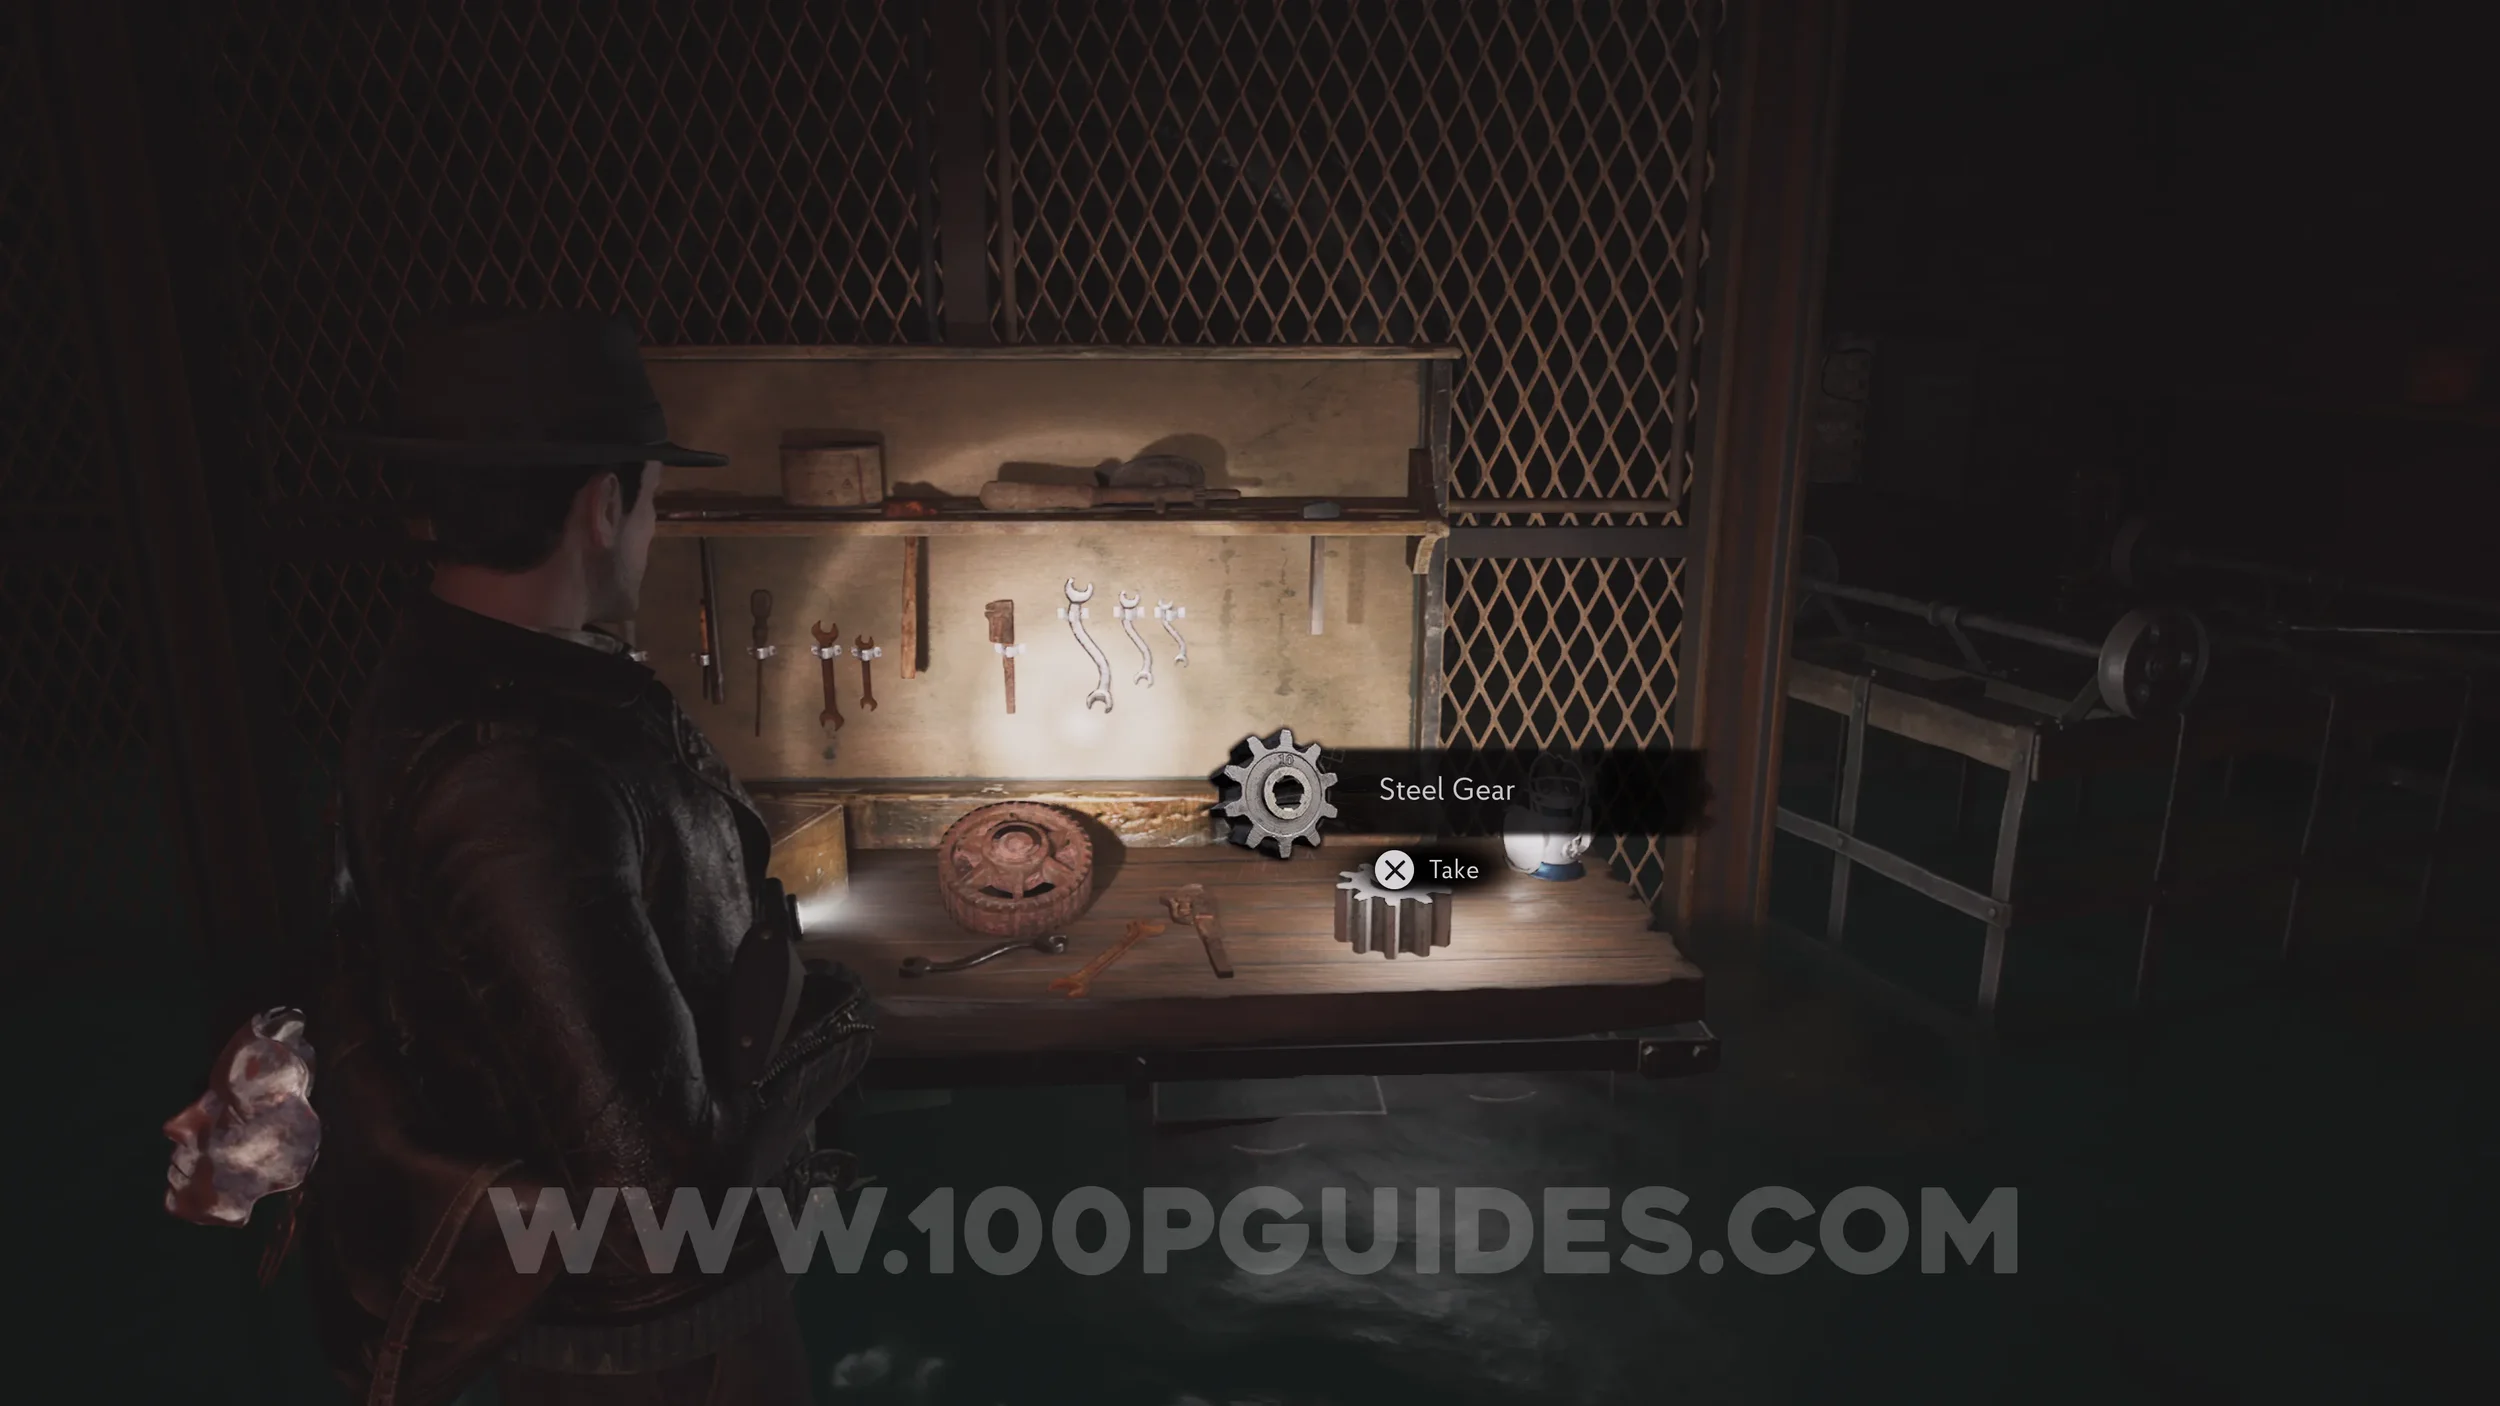
Key Item: Steel Gear. Open the door in the northeastern corner of the Press Room to enter the Storage room, where you'll find the gear, the first of the two items needed to repair the crane.
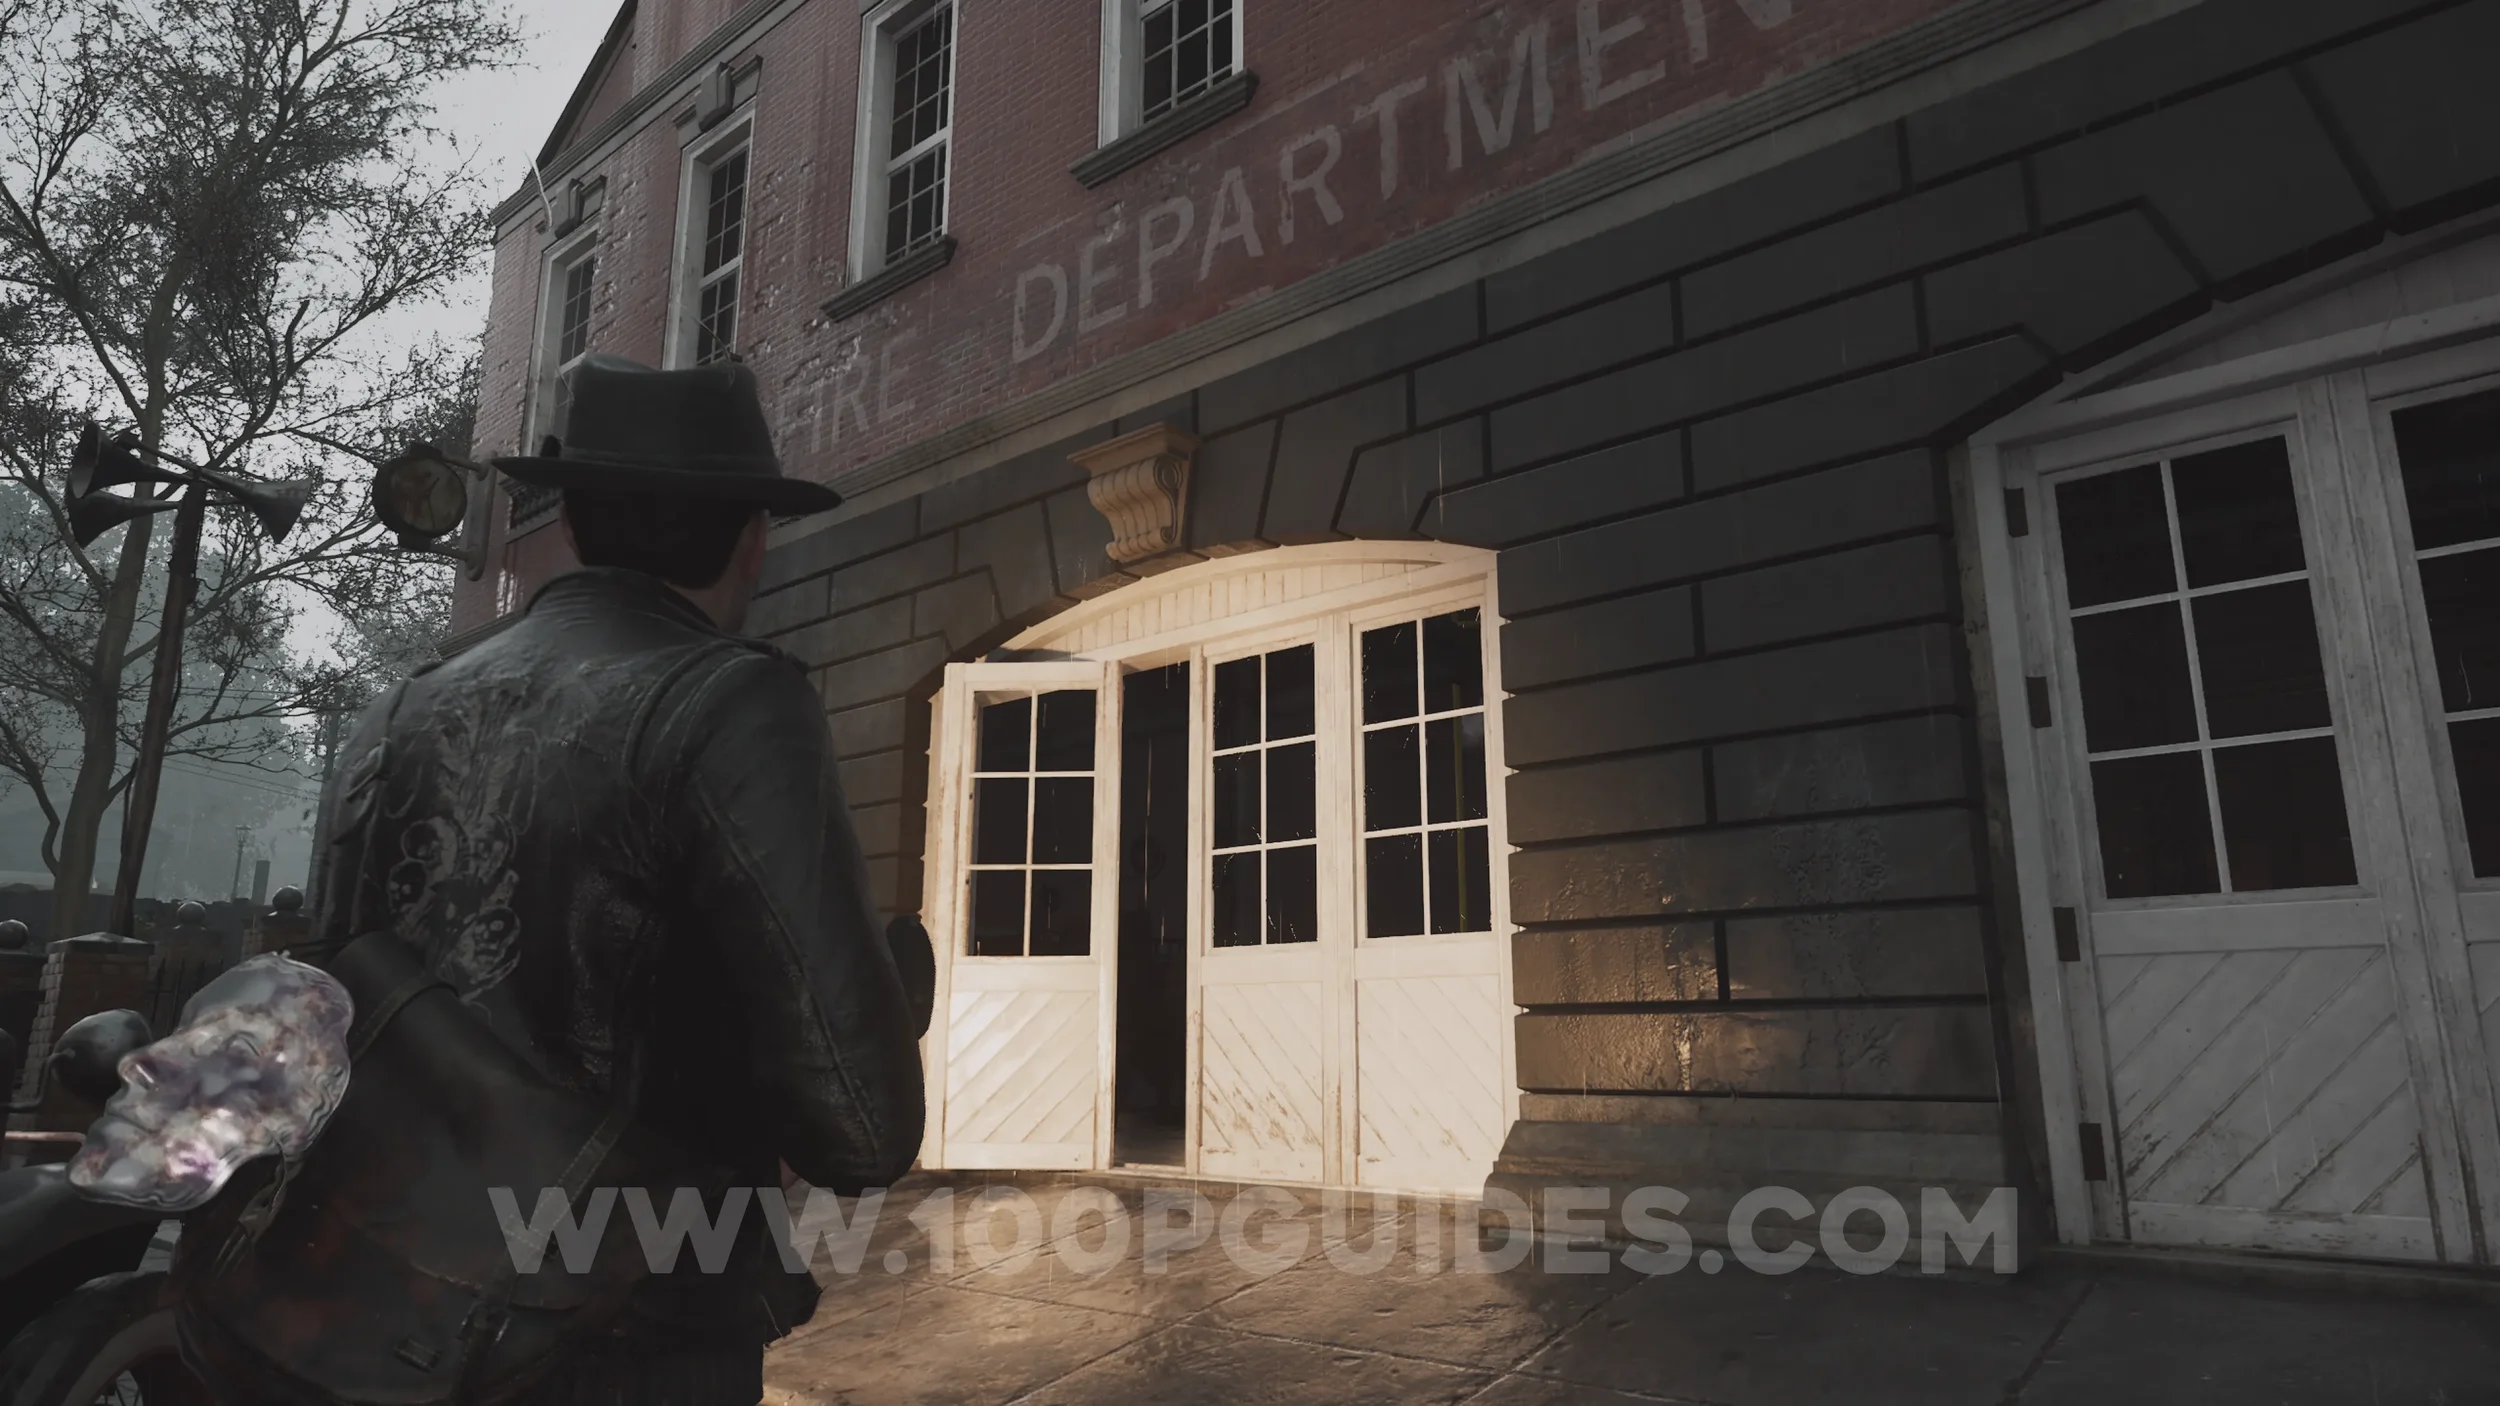
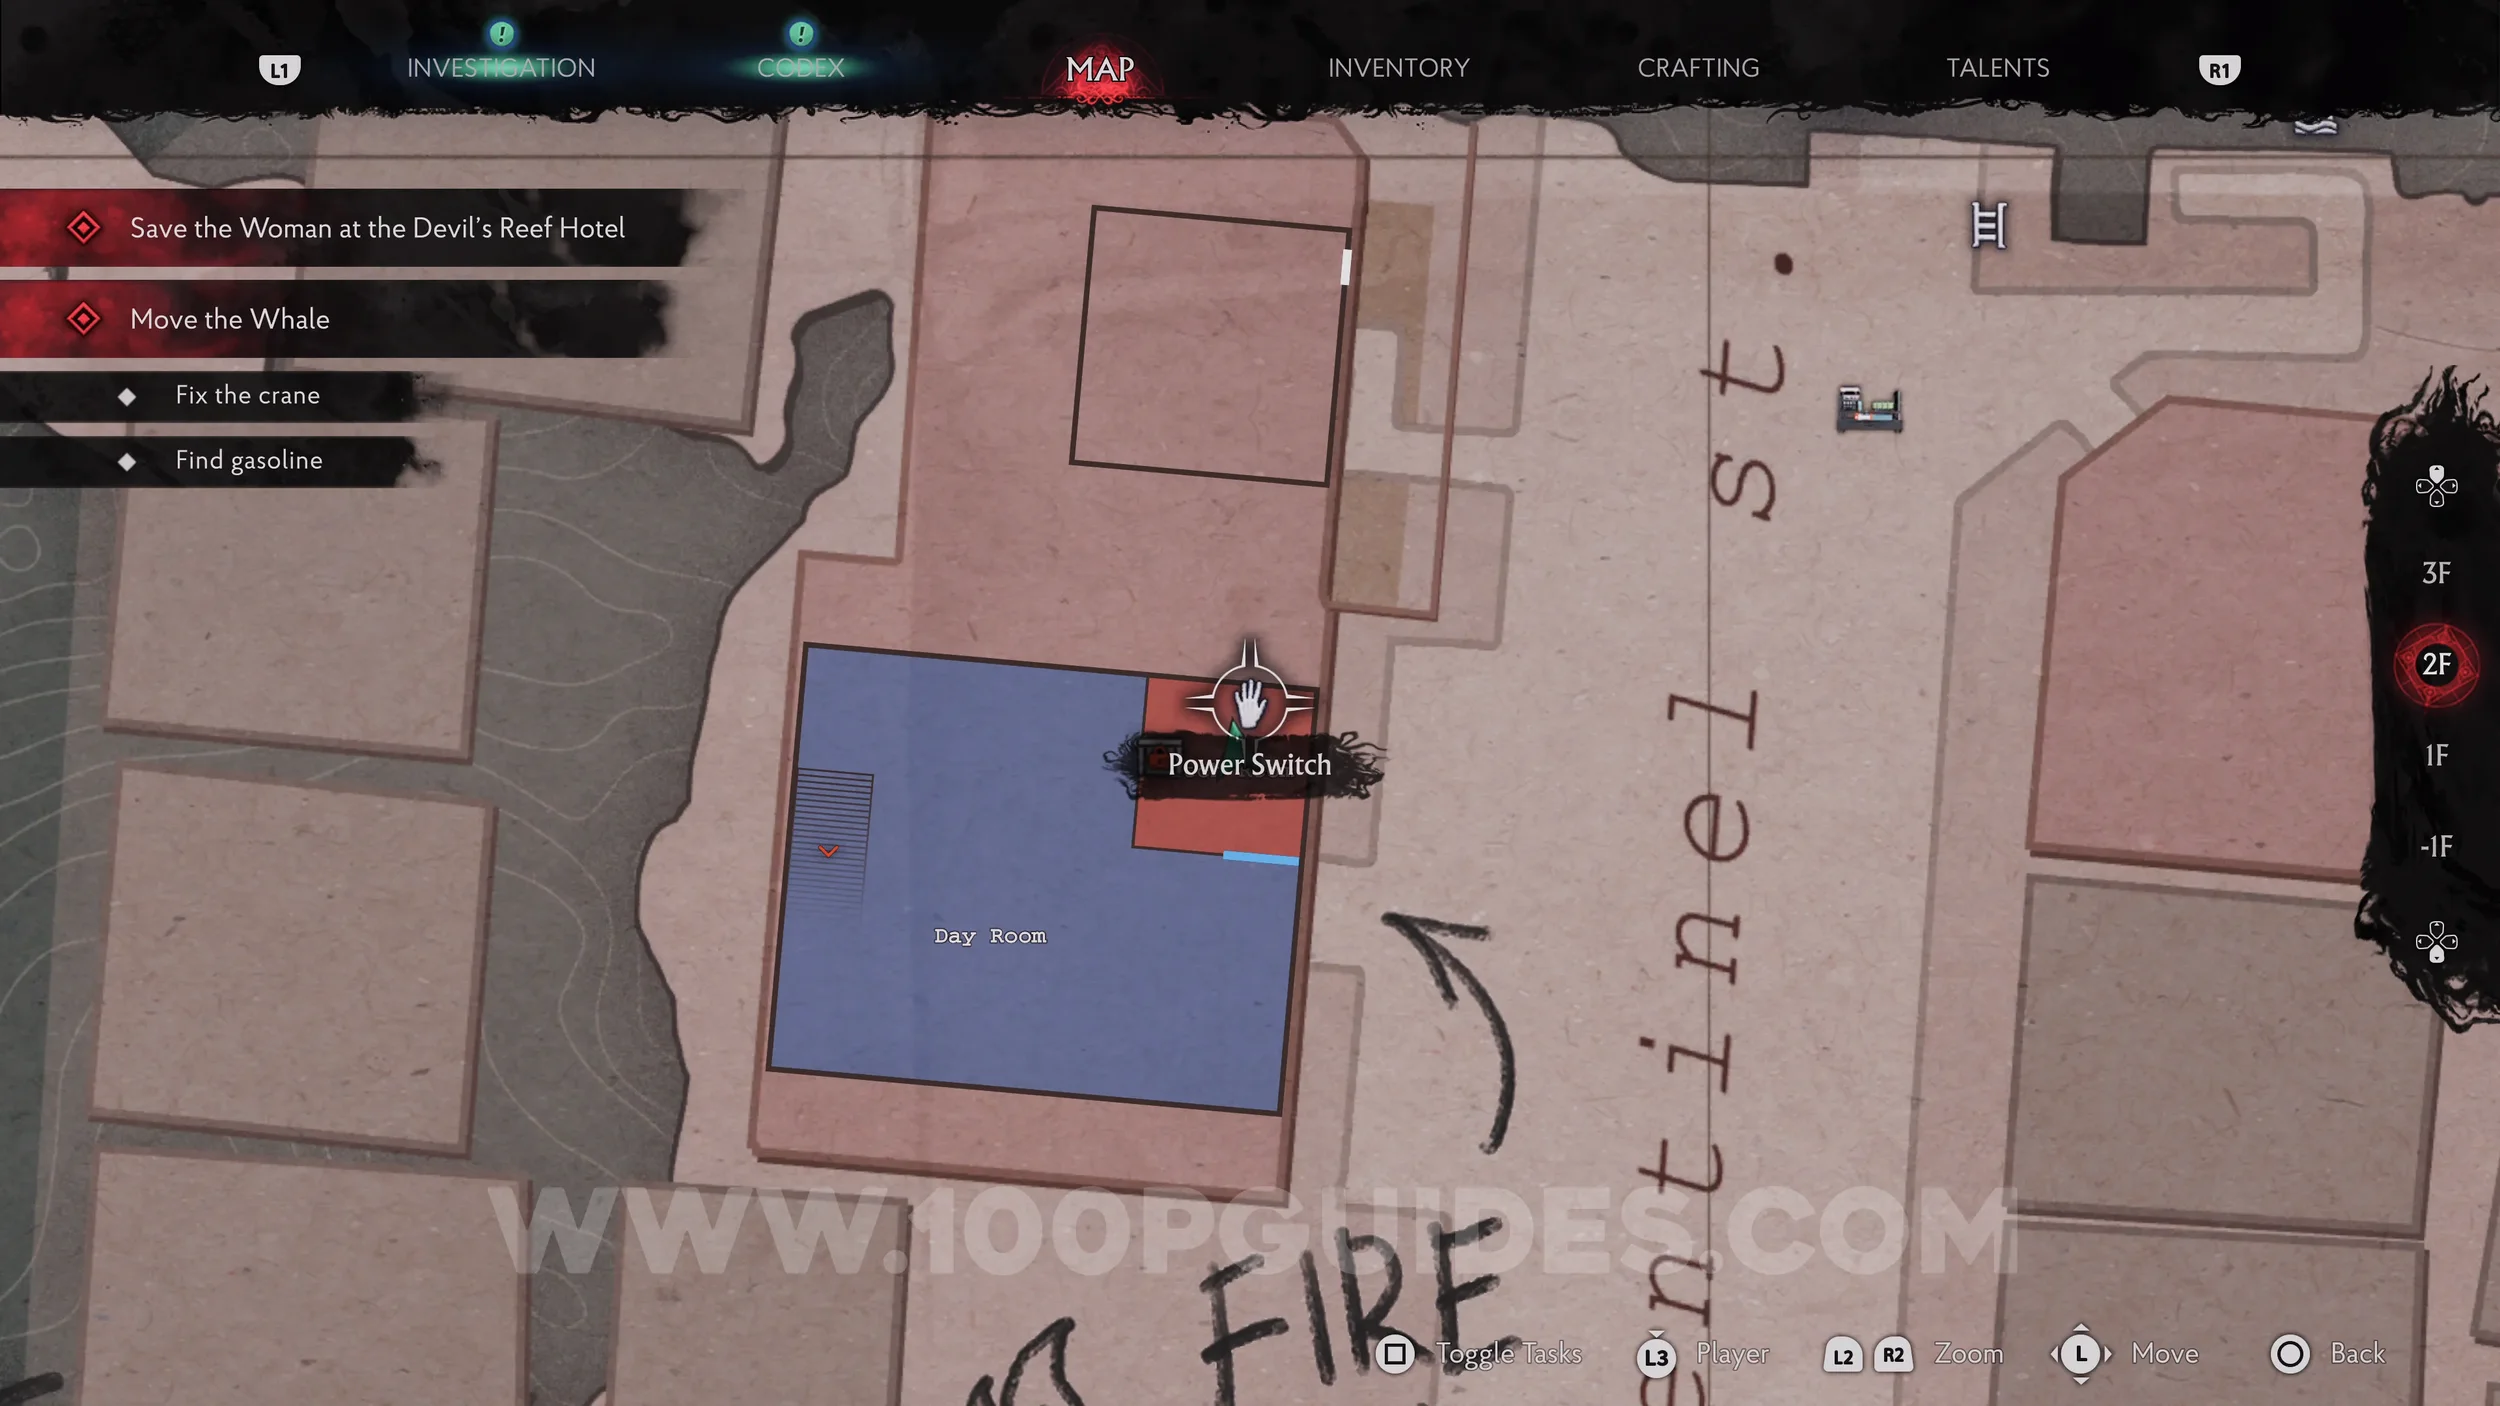
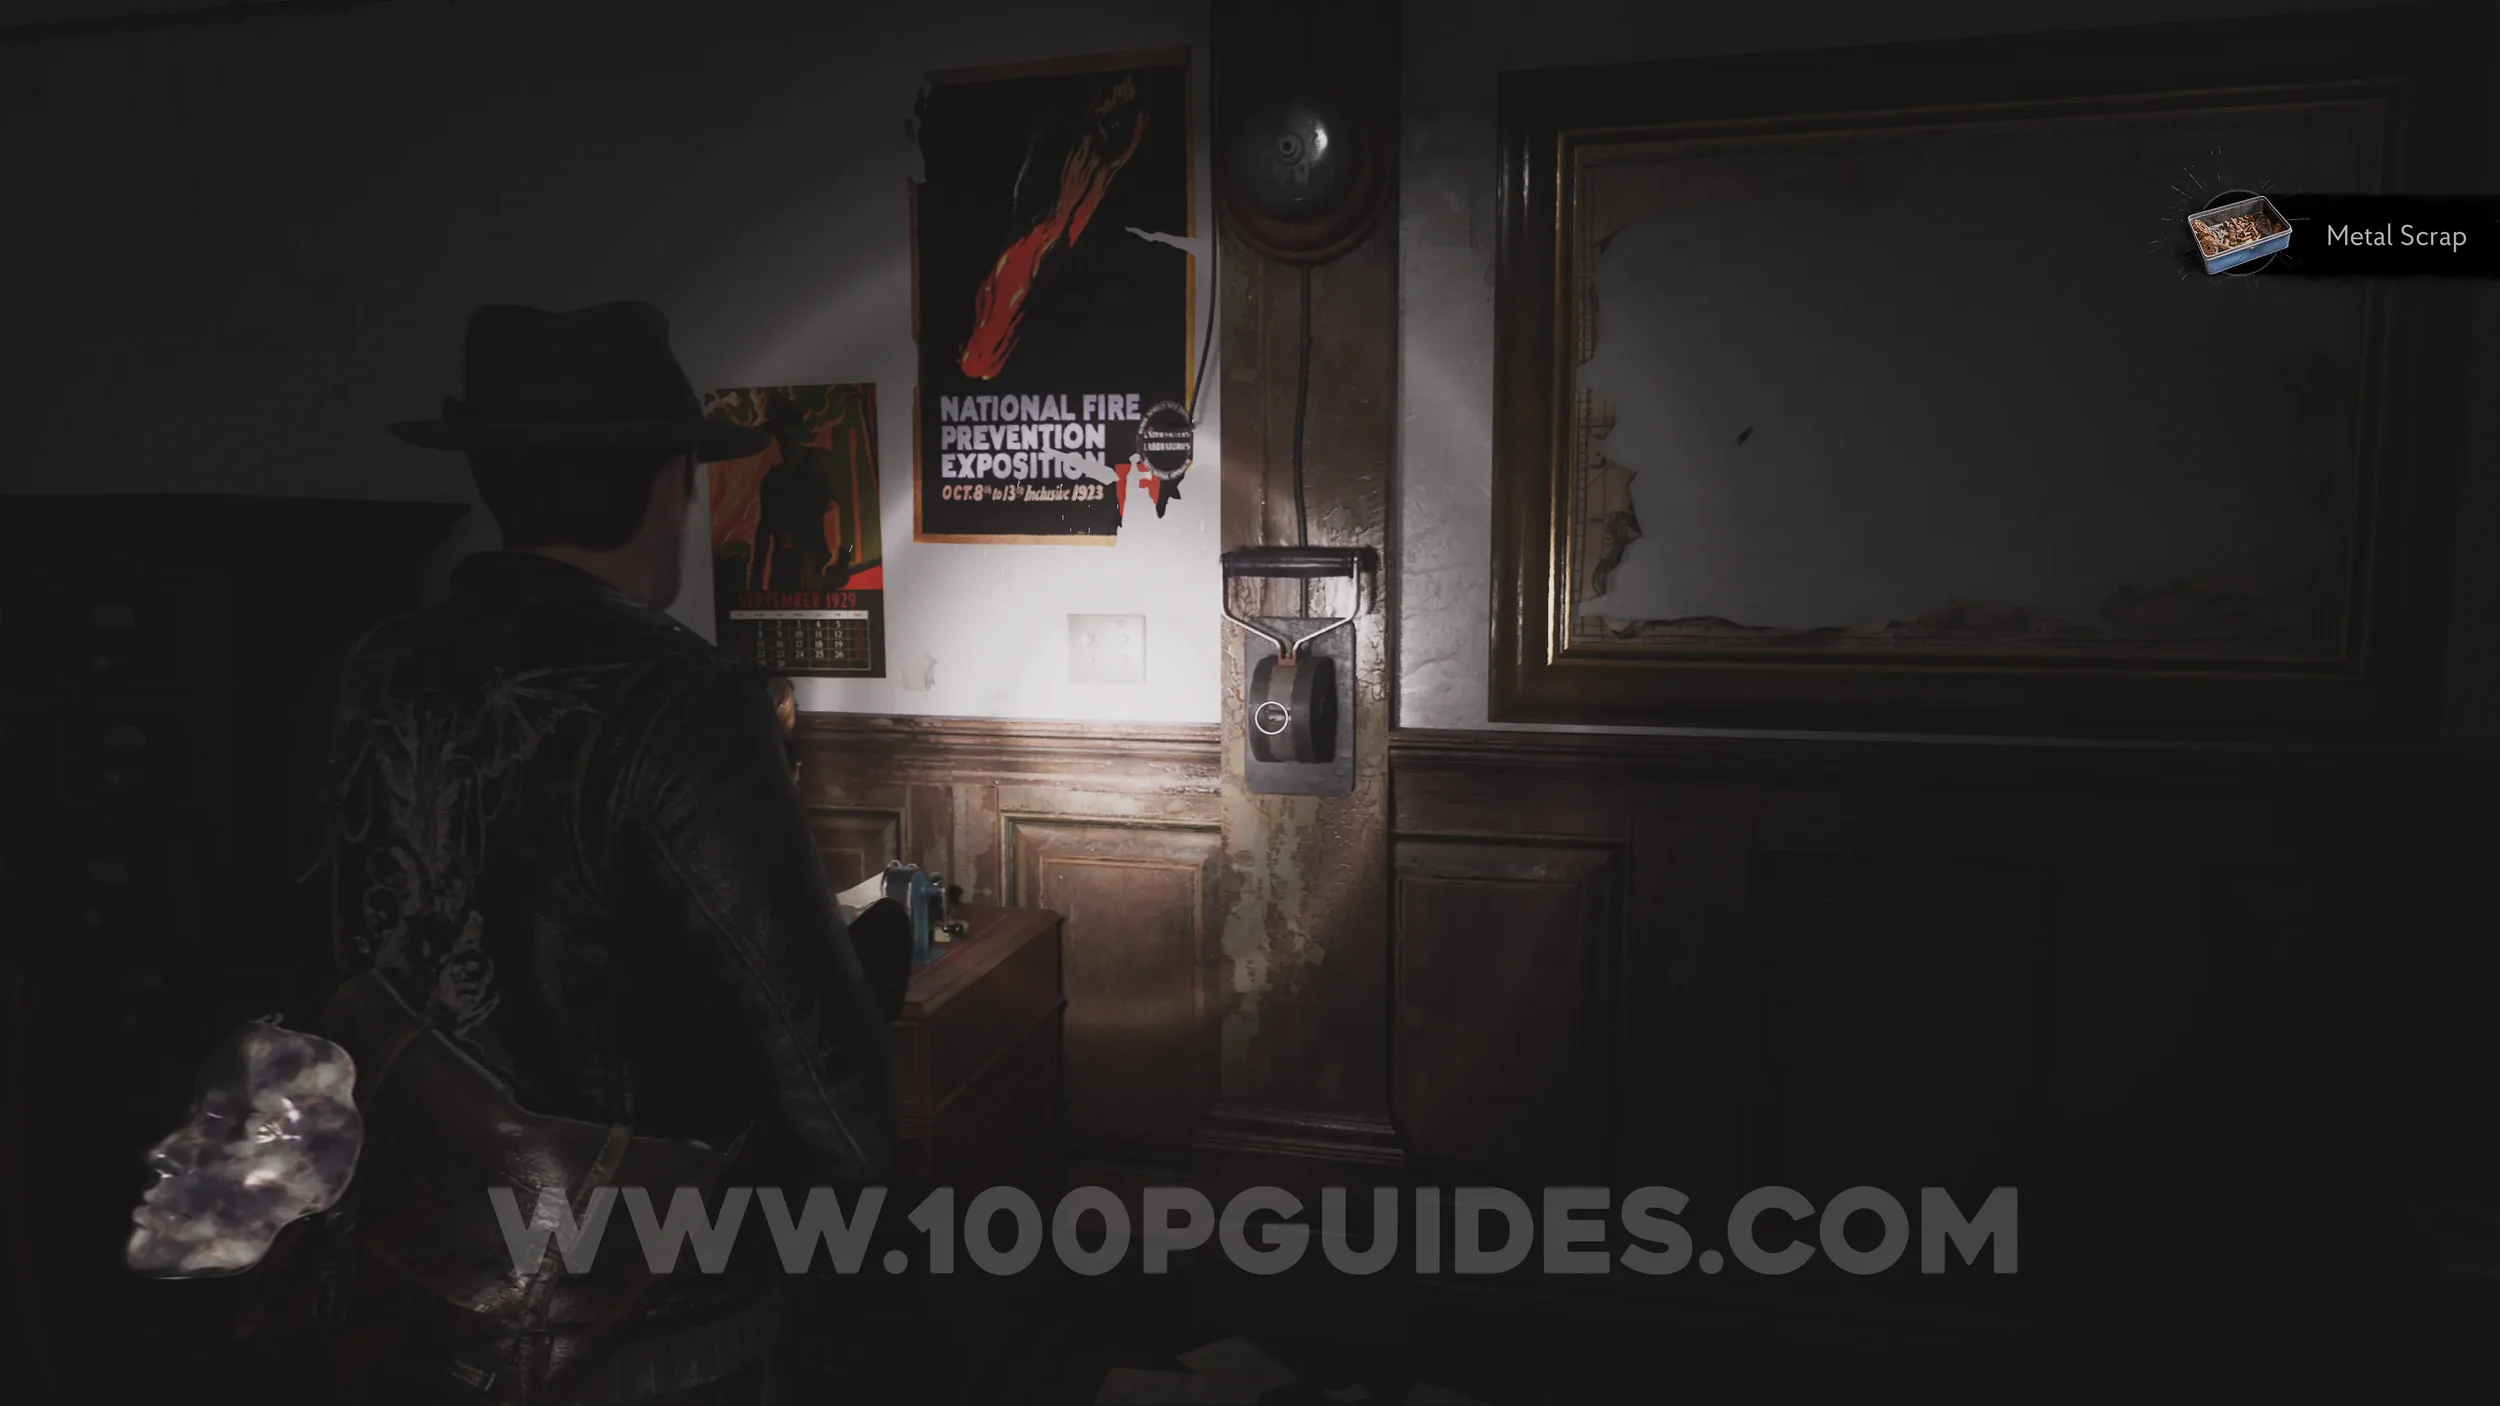
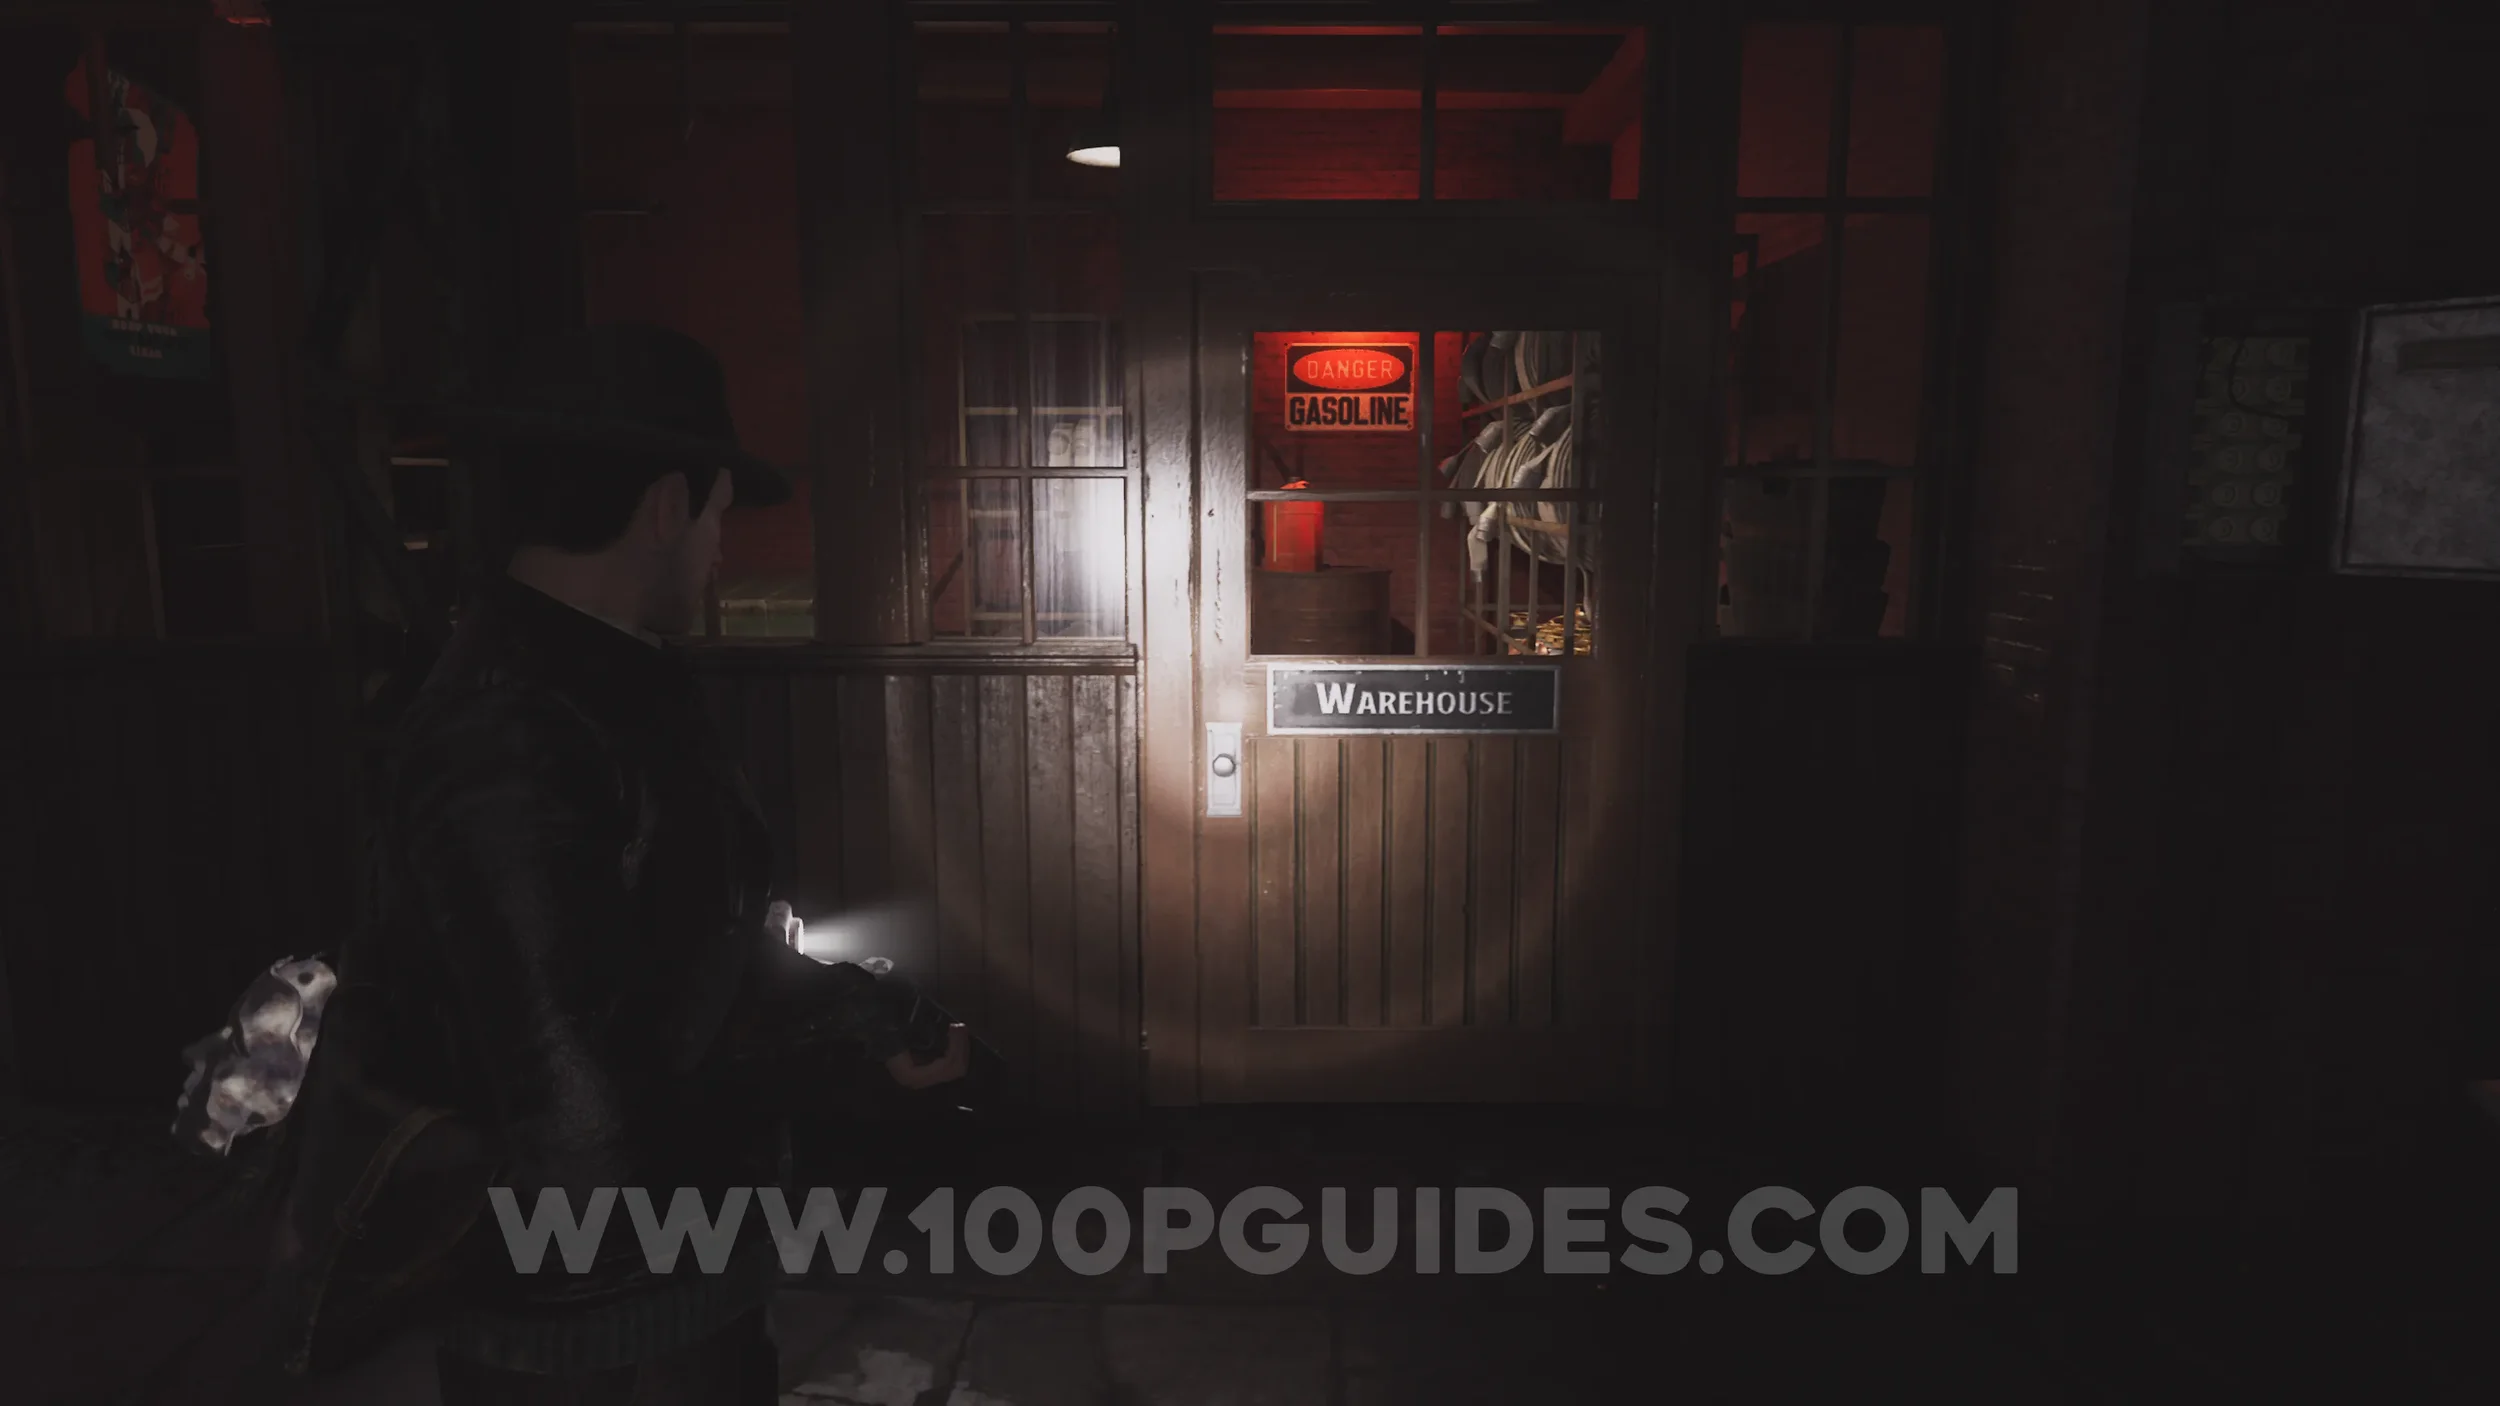
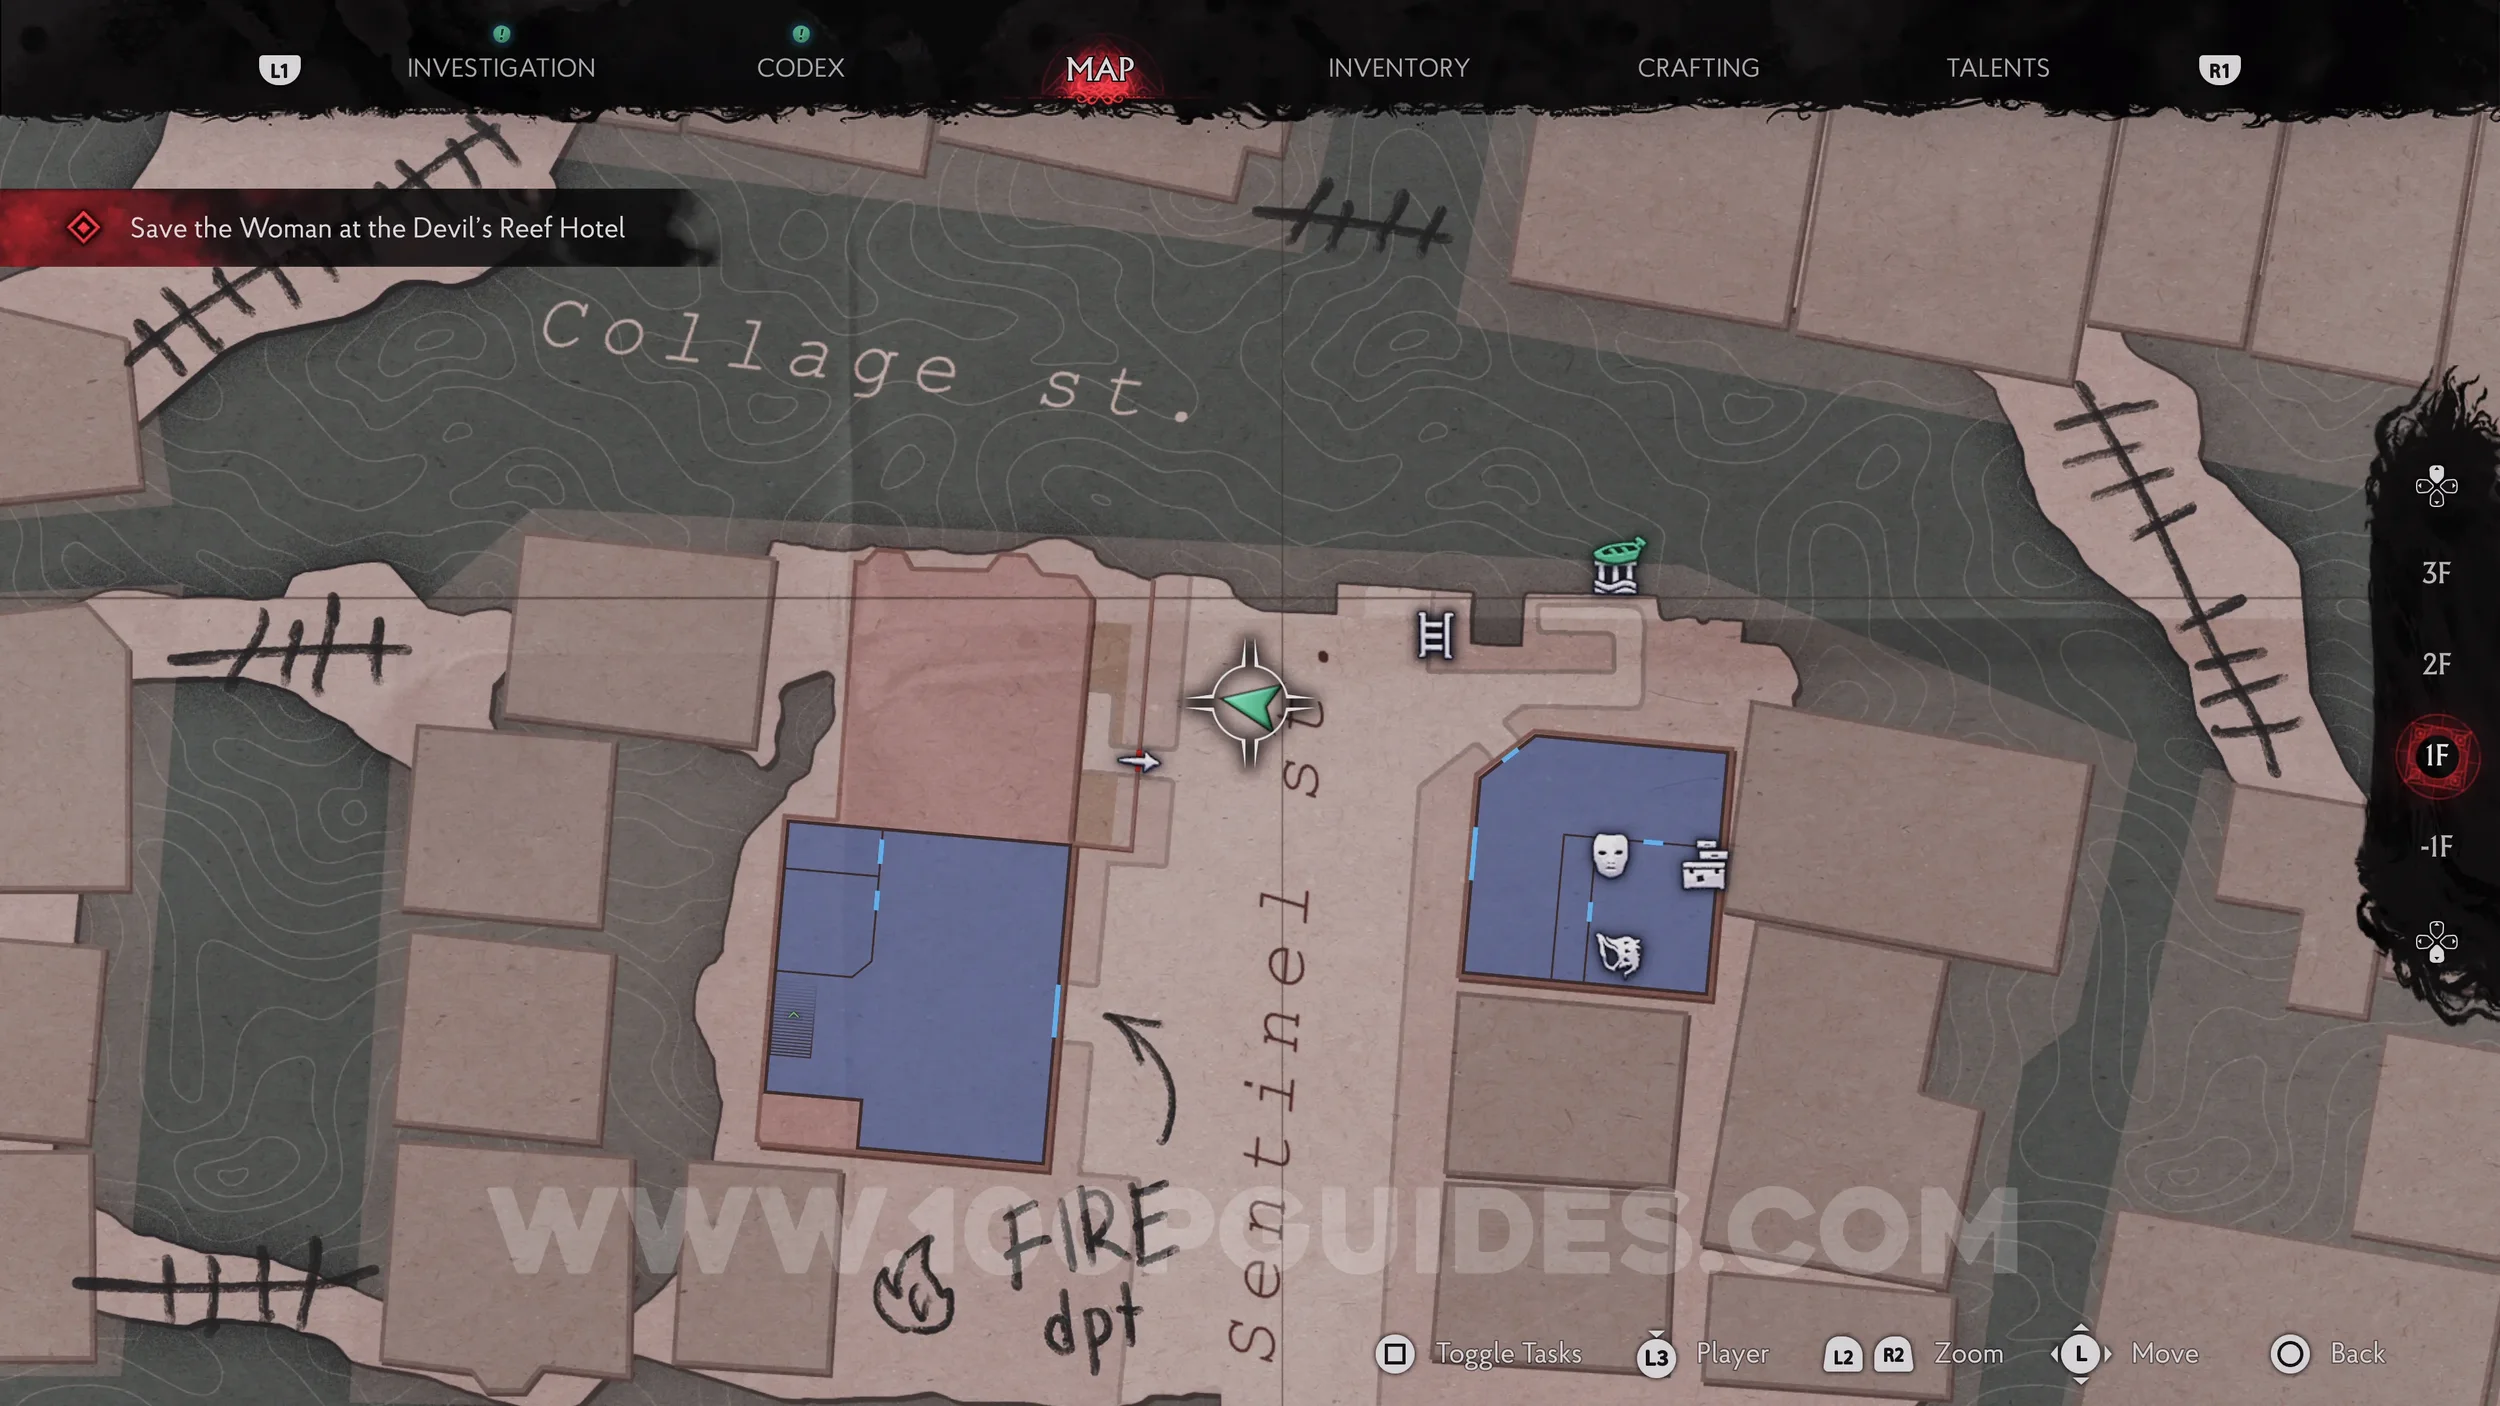
Key Item: Gasoline Can. Get back on your boat and return to the Saloon next to the Broken Crane. Leave the Saloon through the western side to reach the Fire Department. Inside, head upstairs and use the lever in the corner to cut the current running through the water downstairs. Then head down into the Storage area to find the Gasoline Can, the second of the two items needed to repair the crane.
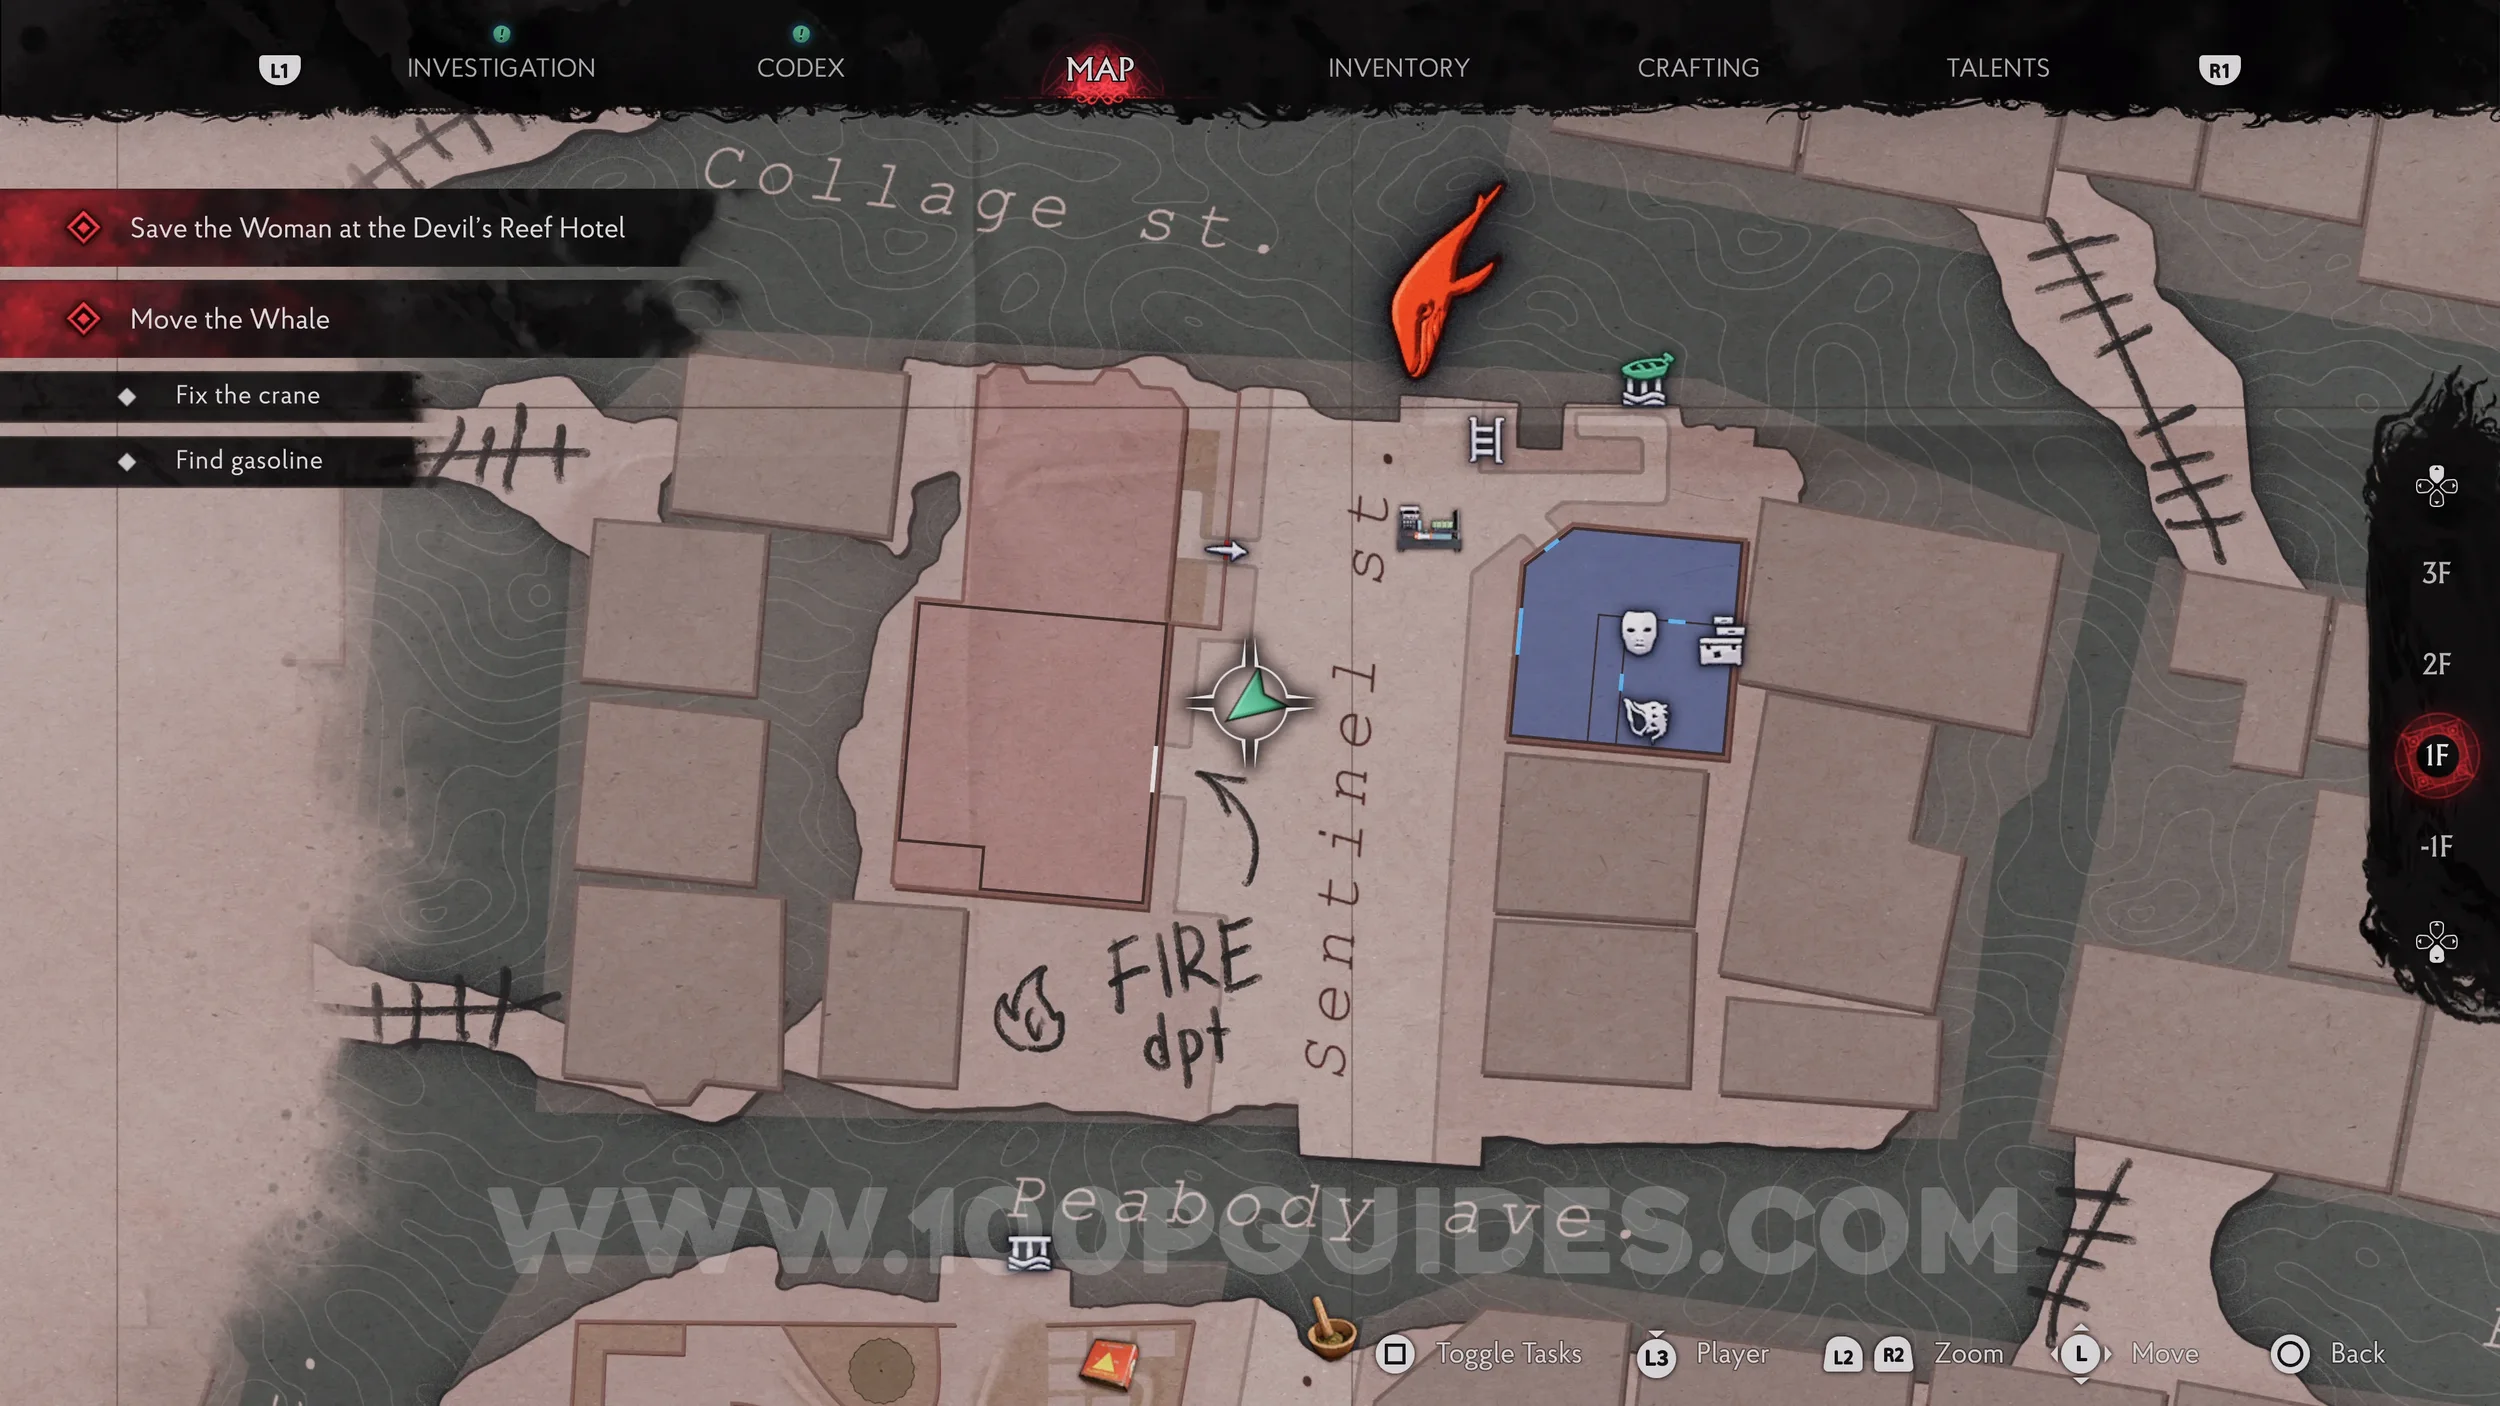
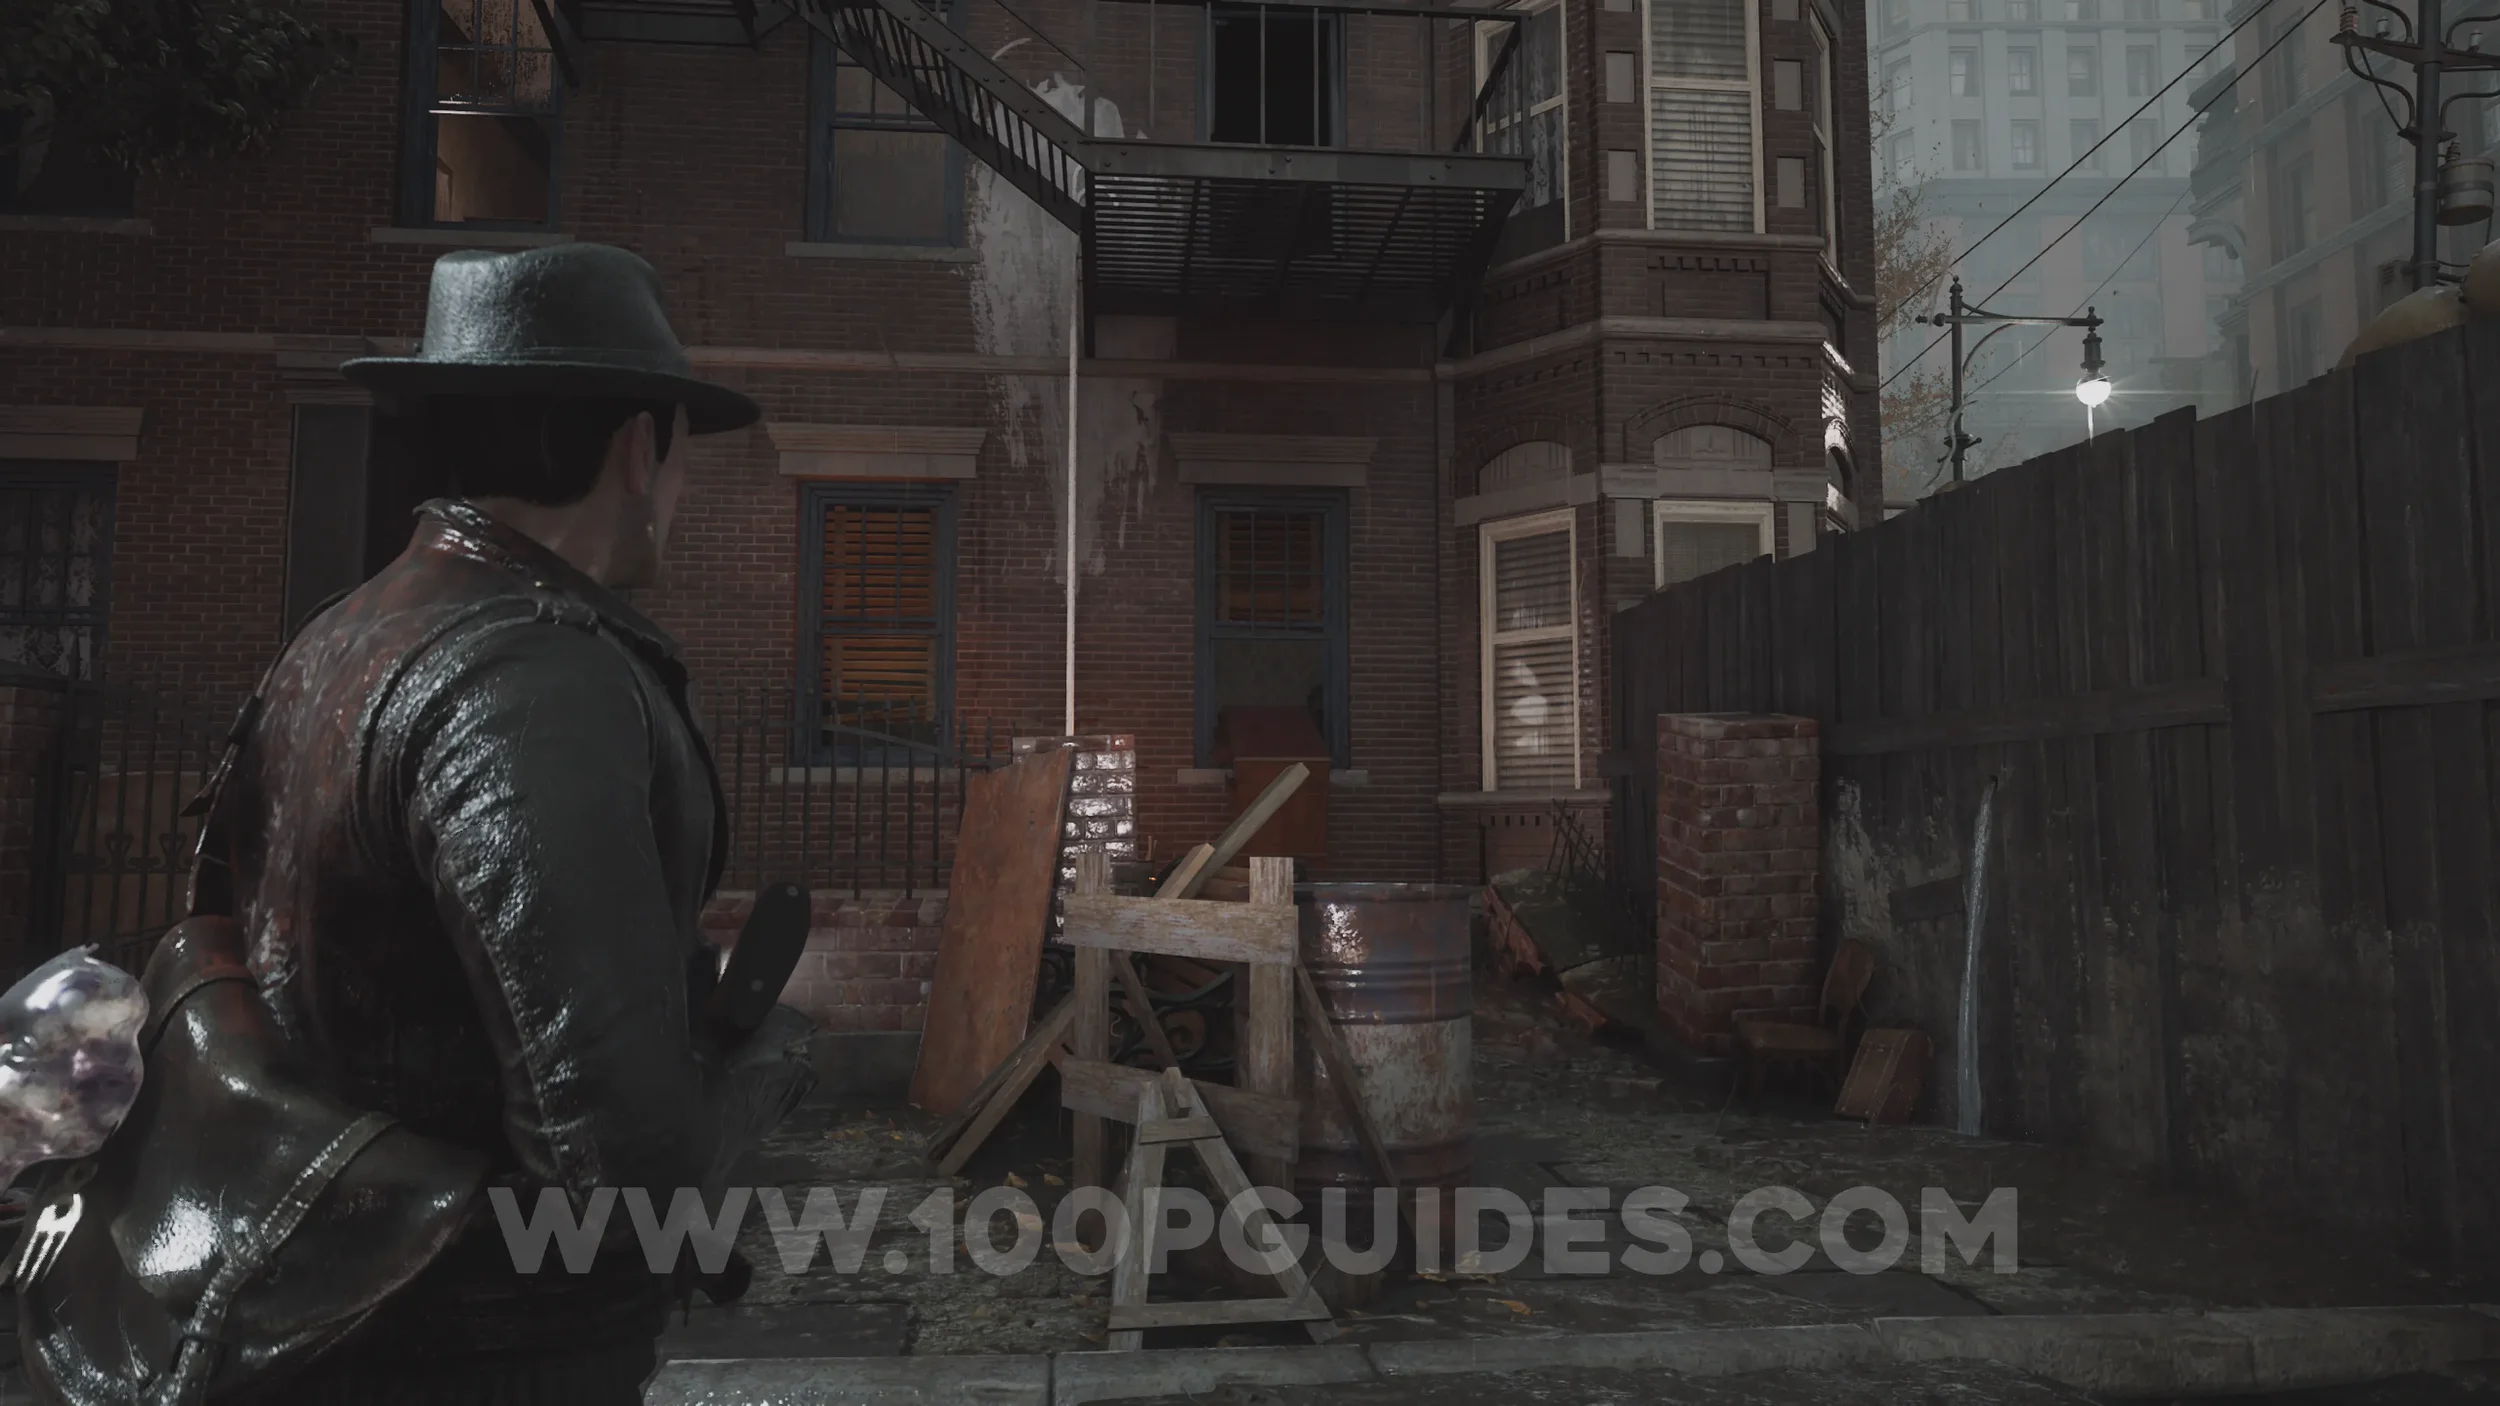
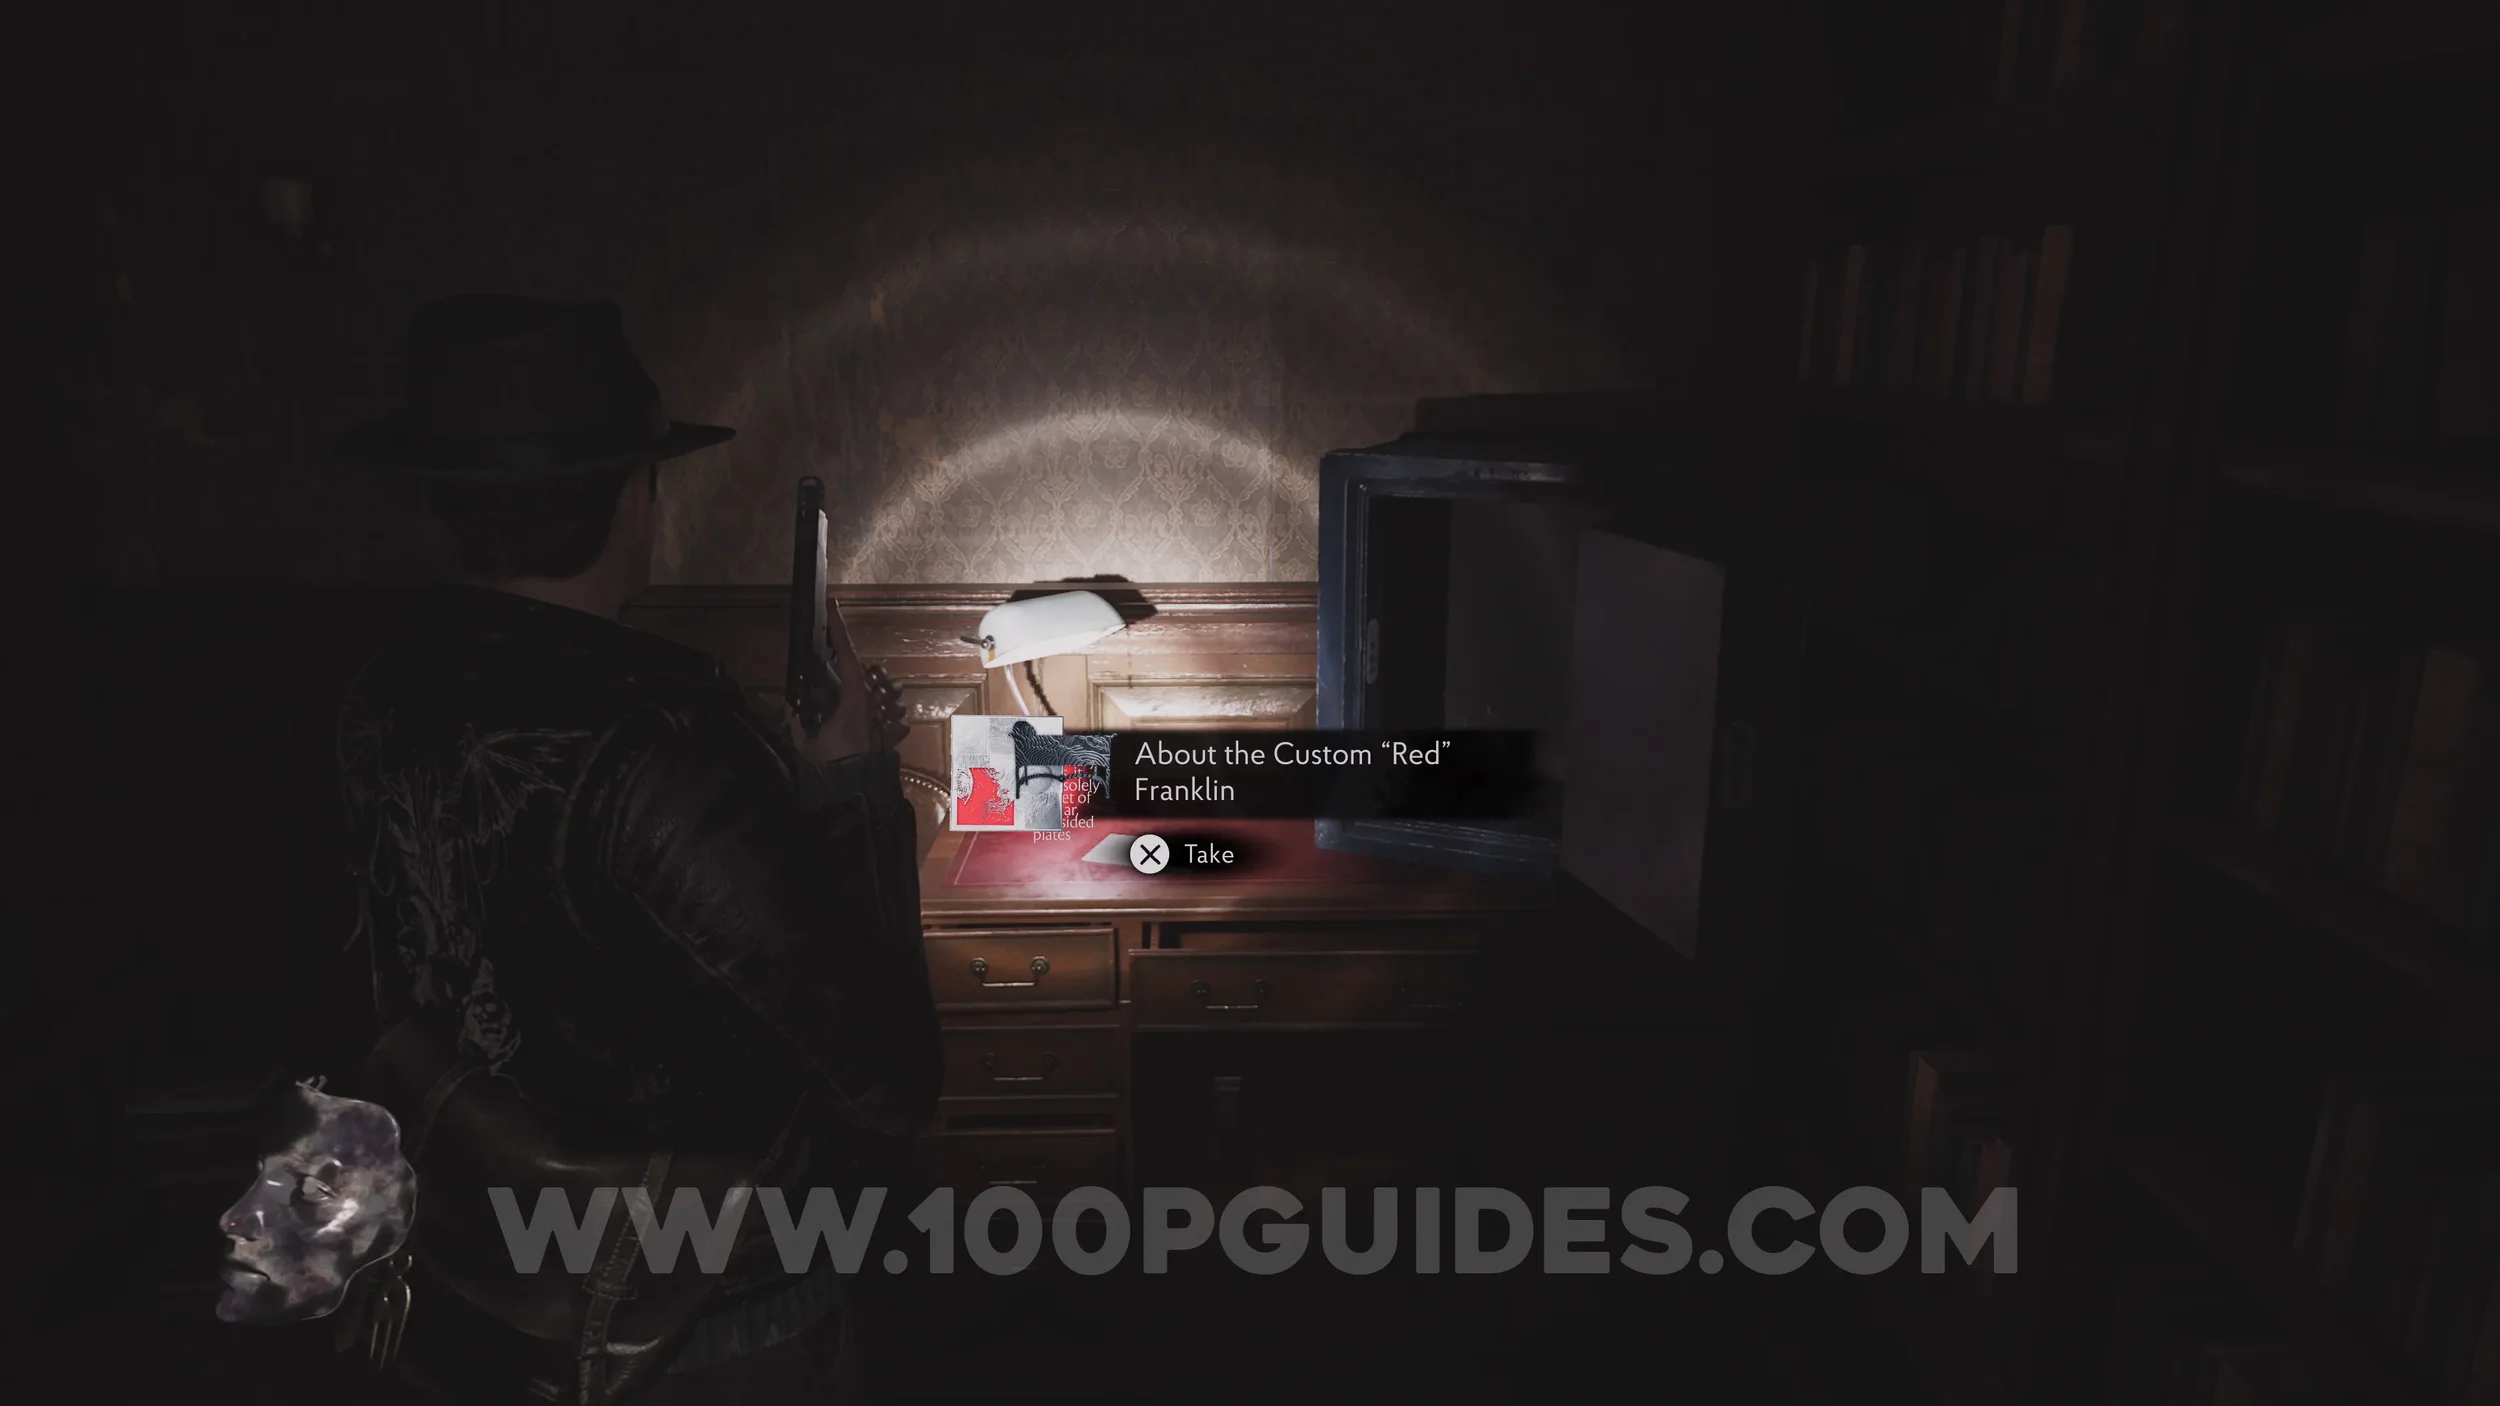
Key Item: Printing Plate B. After fixing the crane and using it to move the whale, you'll be able to enter the house to the north of the Fire Department that was previously blocked by the crane's claw. Climb the ladder outside to get in, and you'll find the printing plate on a desk in the first room.
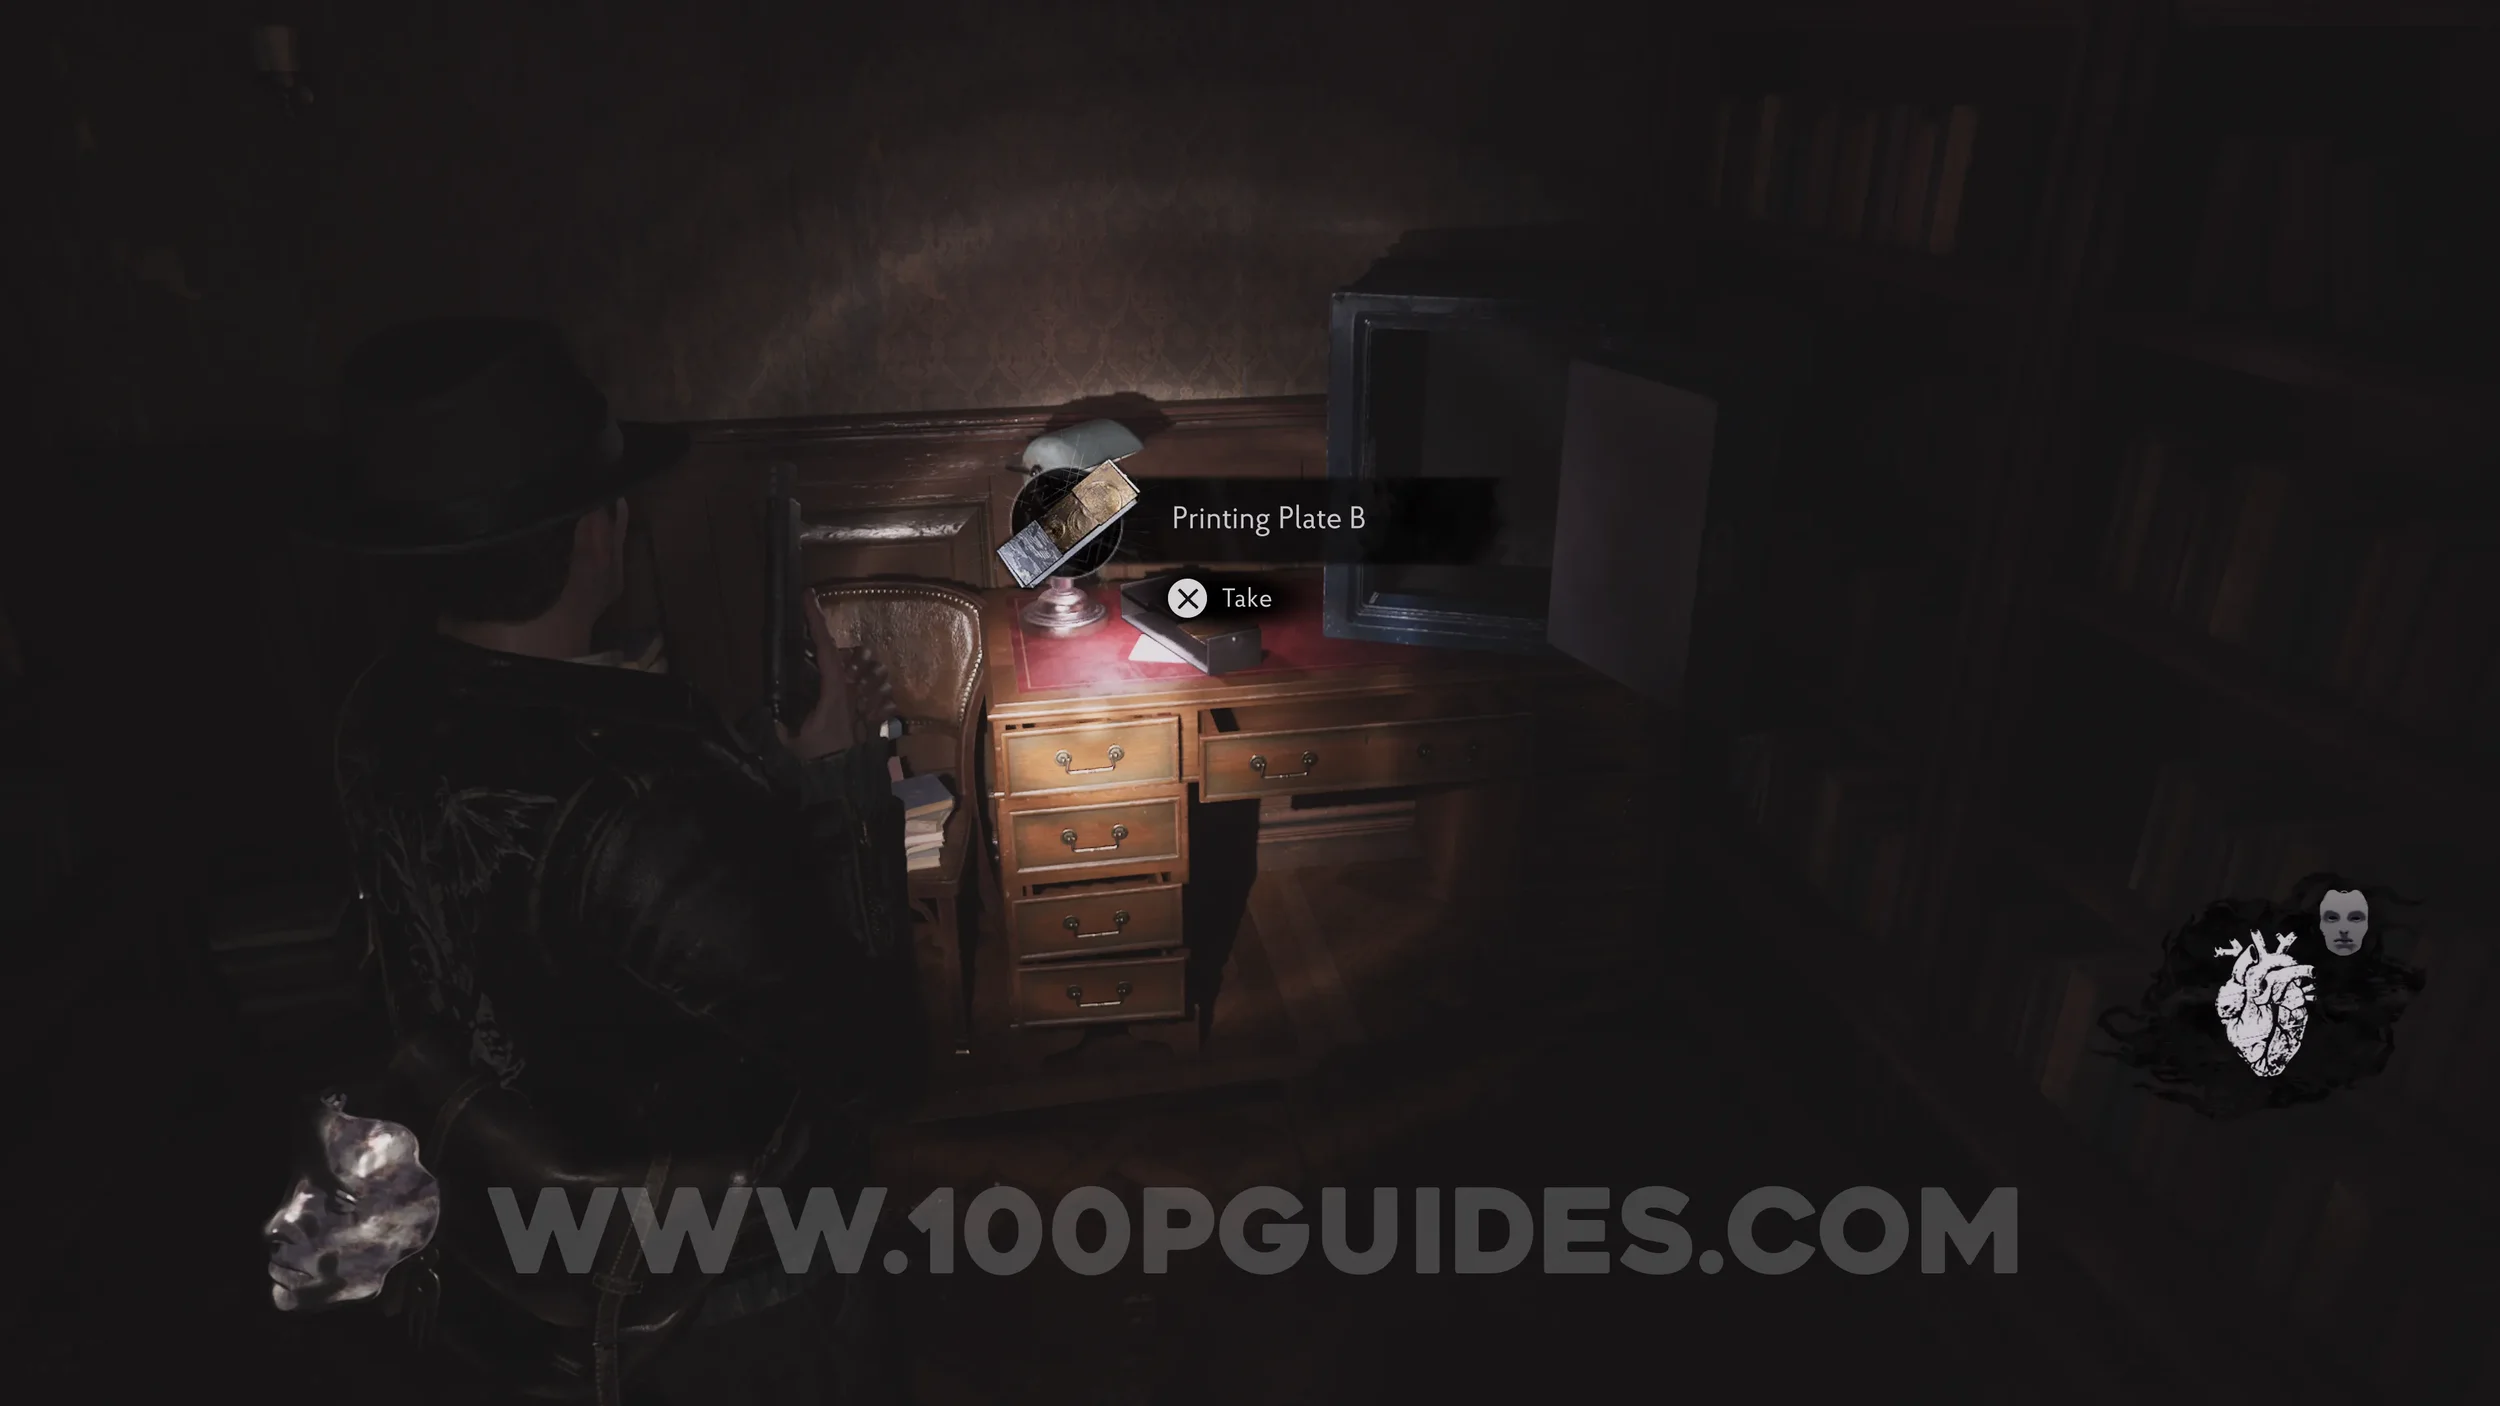
Evidence: About the Custom “Red” Franklin. Found under the Printing Plate.
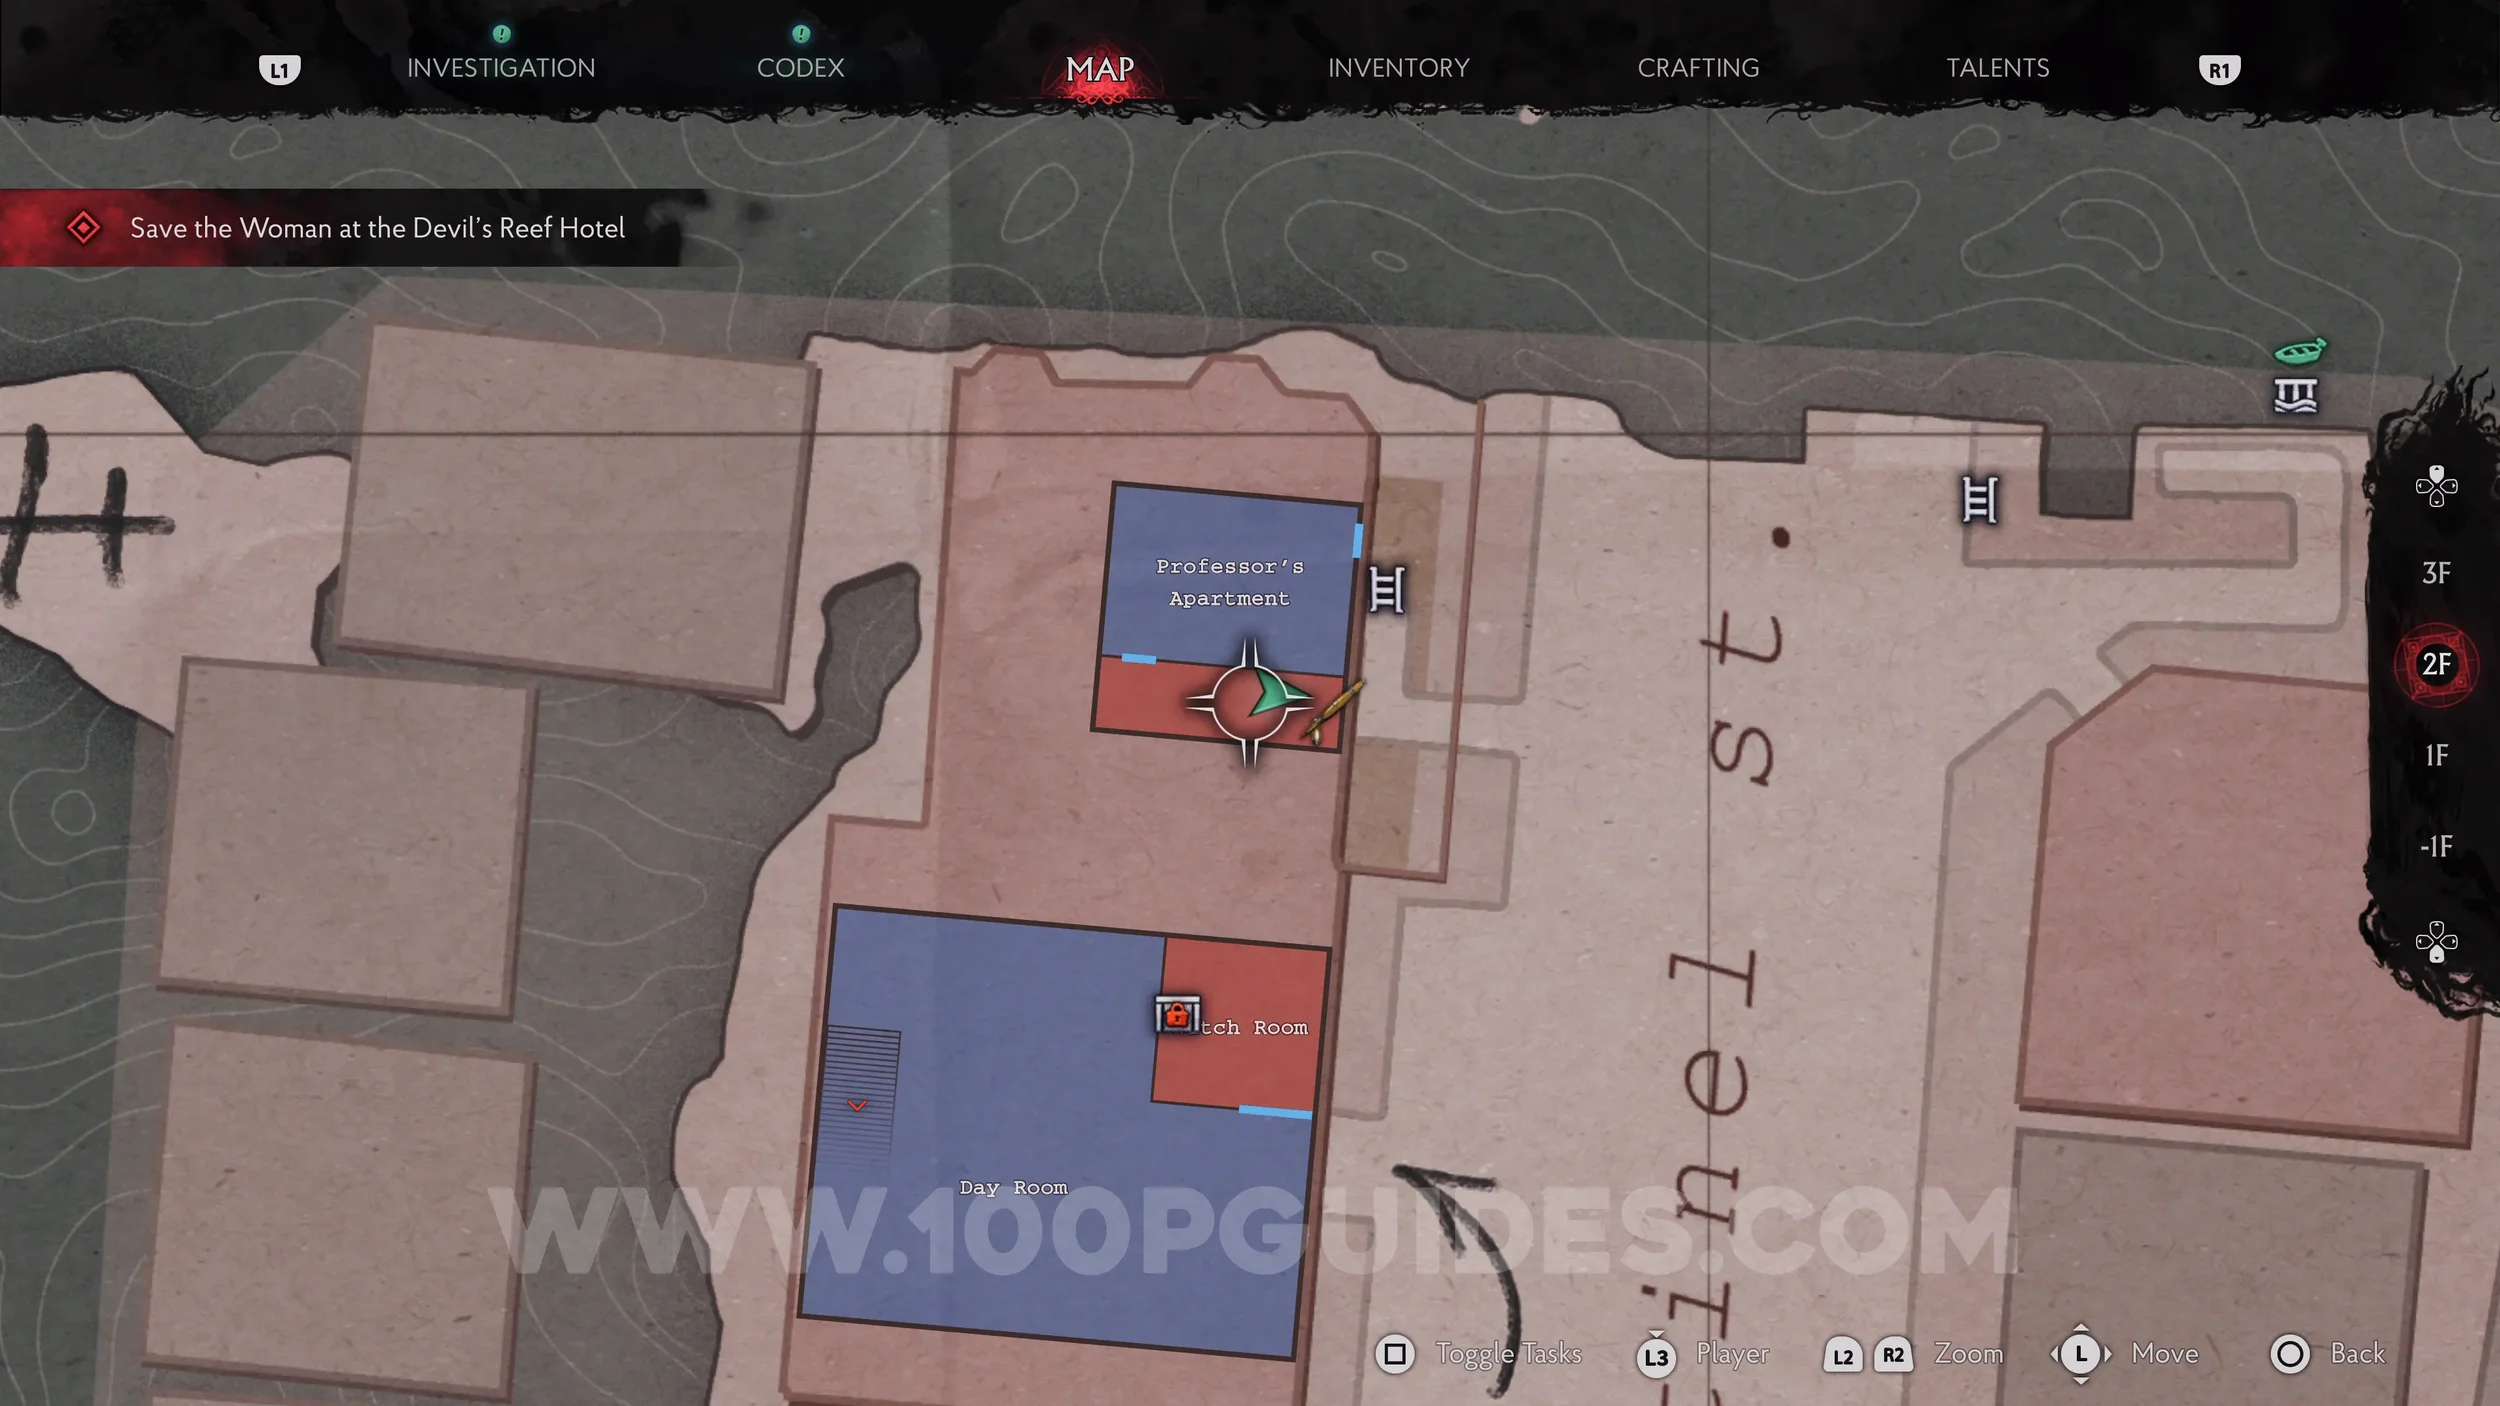
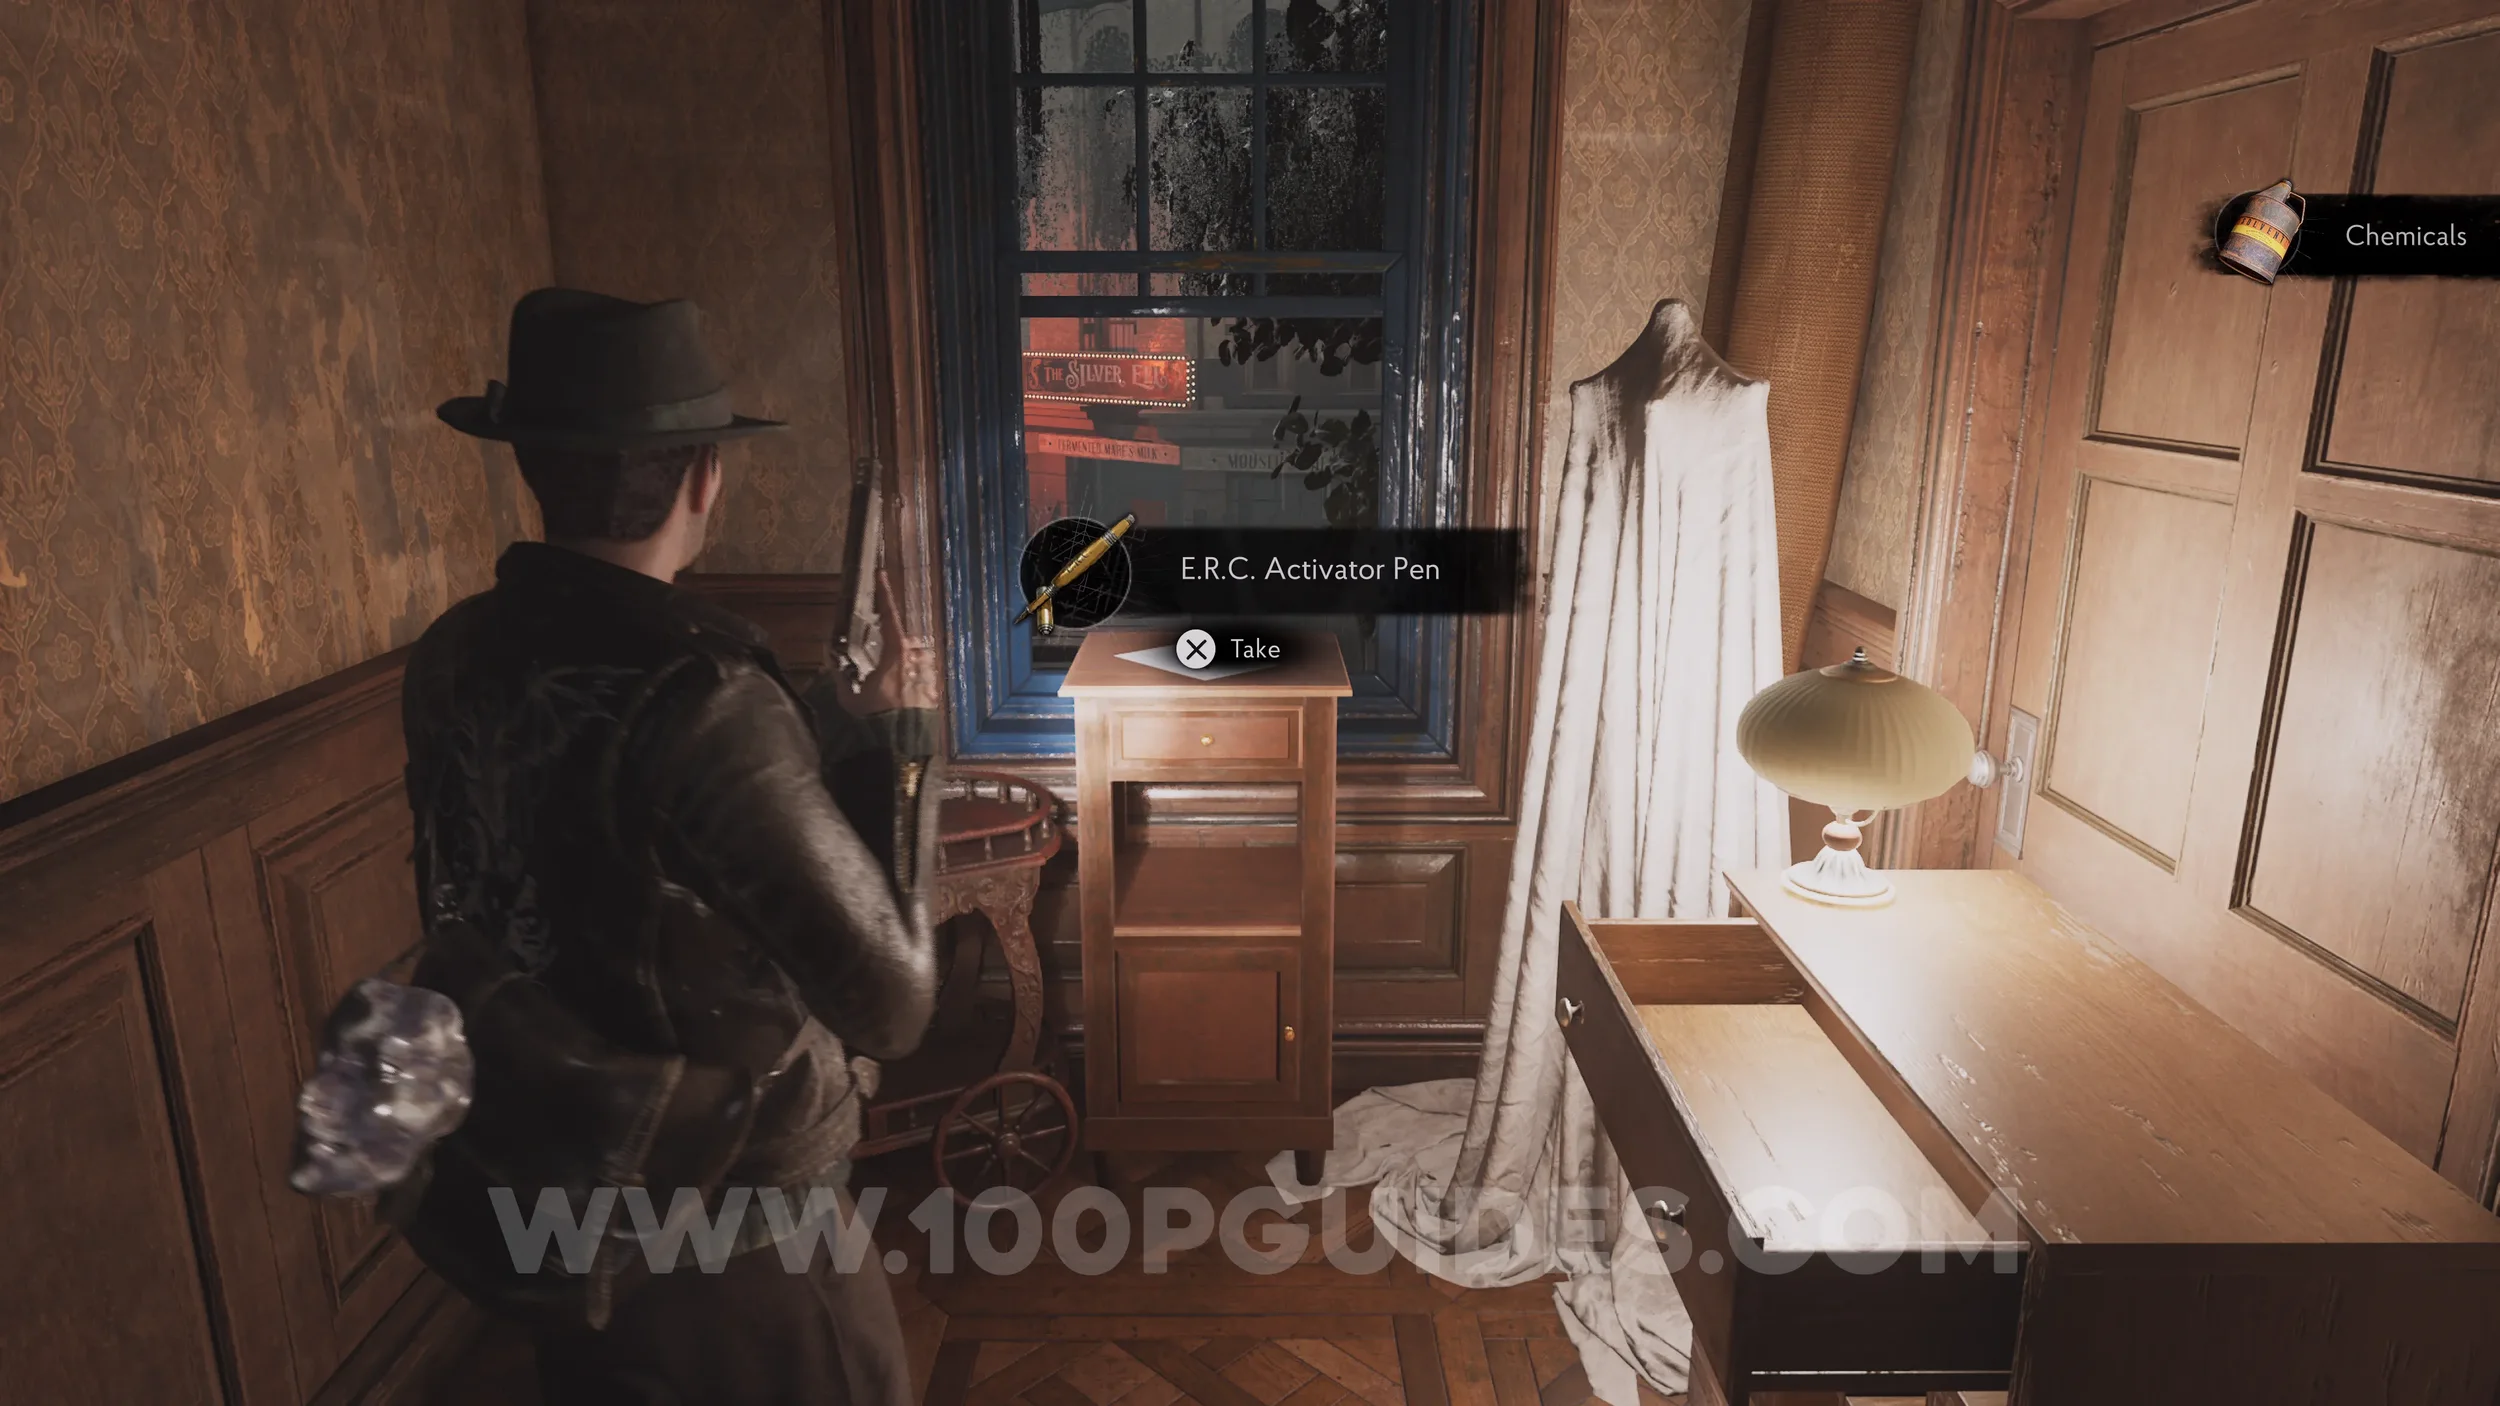
E.R.C. Activator Pen. In the corridor on the top floor of the house next to the Fire Department.
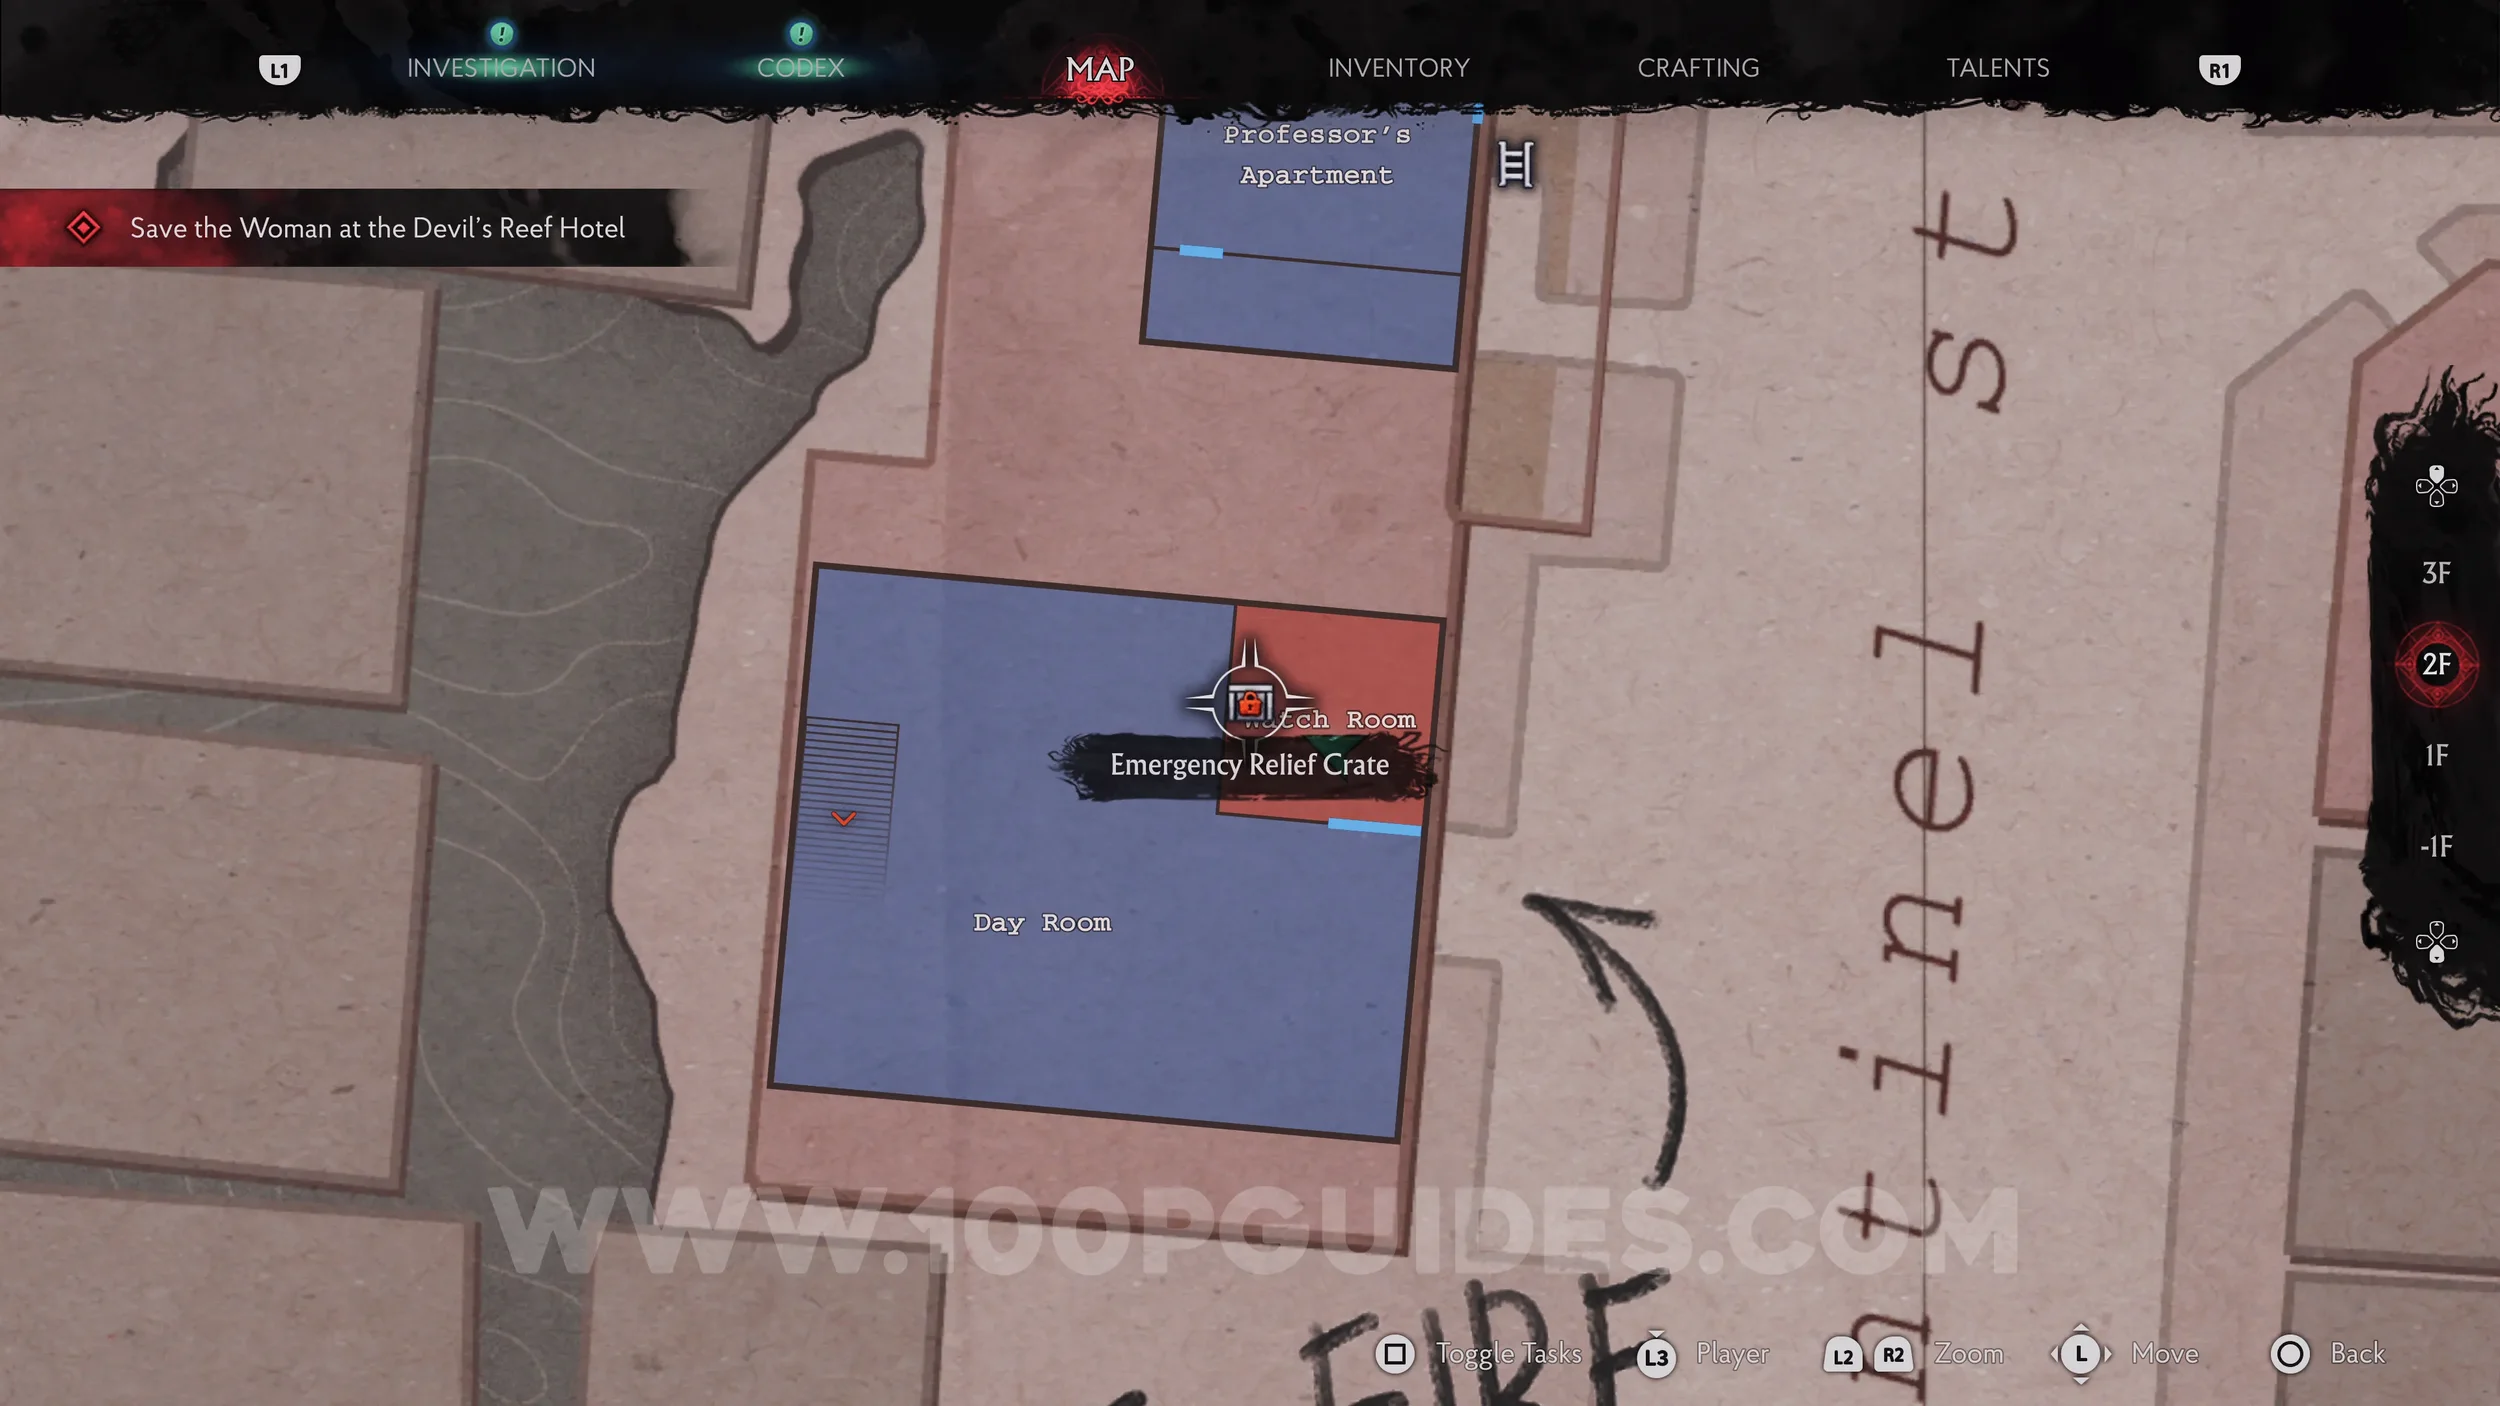
Emergency Relief Crate (E.R.C.) + Dream Essence x2. Return to the Watch Room on the top floor of the Fire Department and open the E.R.C. to find the Dream Essence inside.
The Cursed Press Puzzle
Now that you have the three Printing Plates, head back to the Printing House and into the small room next to the Director's office, the one that was revealed when you grabbed the keys off the wall. Place all three plates, then turn every square gold or silver. There are two solutions depending on which you go for: turn them all gold for a shotgun accessory, or turn them all silver for two Dream Essence. You can only keep one, since the puzzle can only be solved once. The accessory isn't needed for any trophy, but it does extra damage to enemies when you hit them from behind. The Dream Essence counts towards the "All Talents" trophy. It isn't strictly required, but grabbing it now can save you some time later. Since you already have to play part of NG+2 to have enough for all Talents, the more you can pick up the better, so it's the recommended pick.
Press the squares in the order shown below for whichever reward you want, then hold to validate. The reward will spawn on the table behind you.


Solution 1 - Gold: the Cutter's Sturdy Stock, a shotgun accessory that does more damage when you shoot an enemy in the back.

Solution 2 - Silver: Dream Essence x2.

Trophy: The Red Press. Obtained after solving the Cursed Press puzzle with either of the 2 solutions.
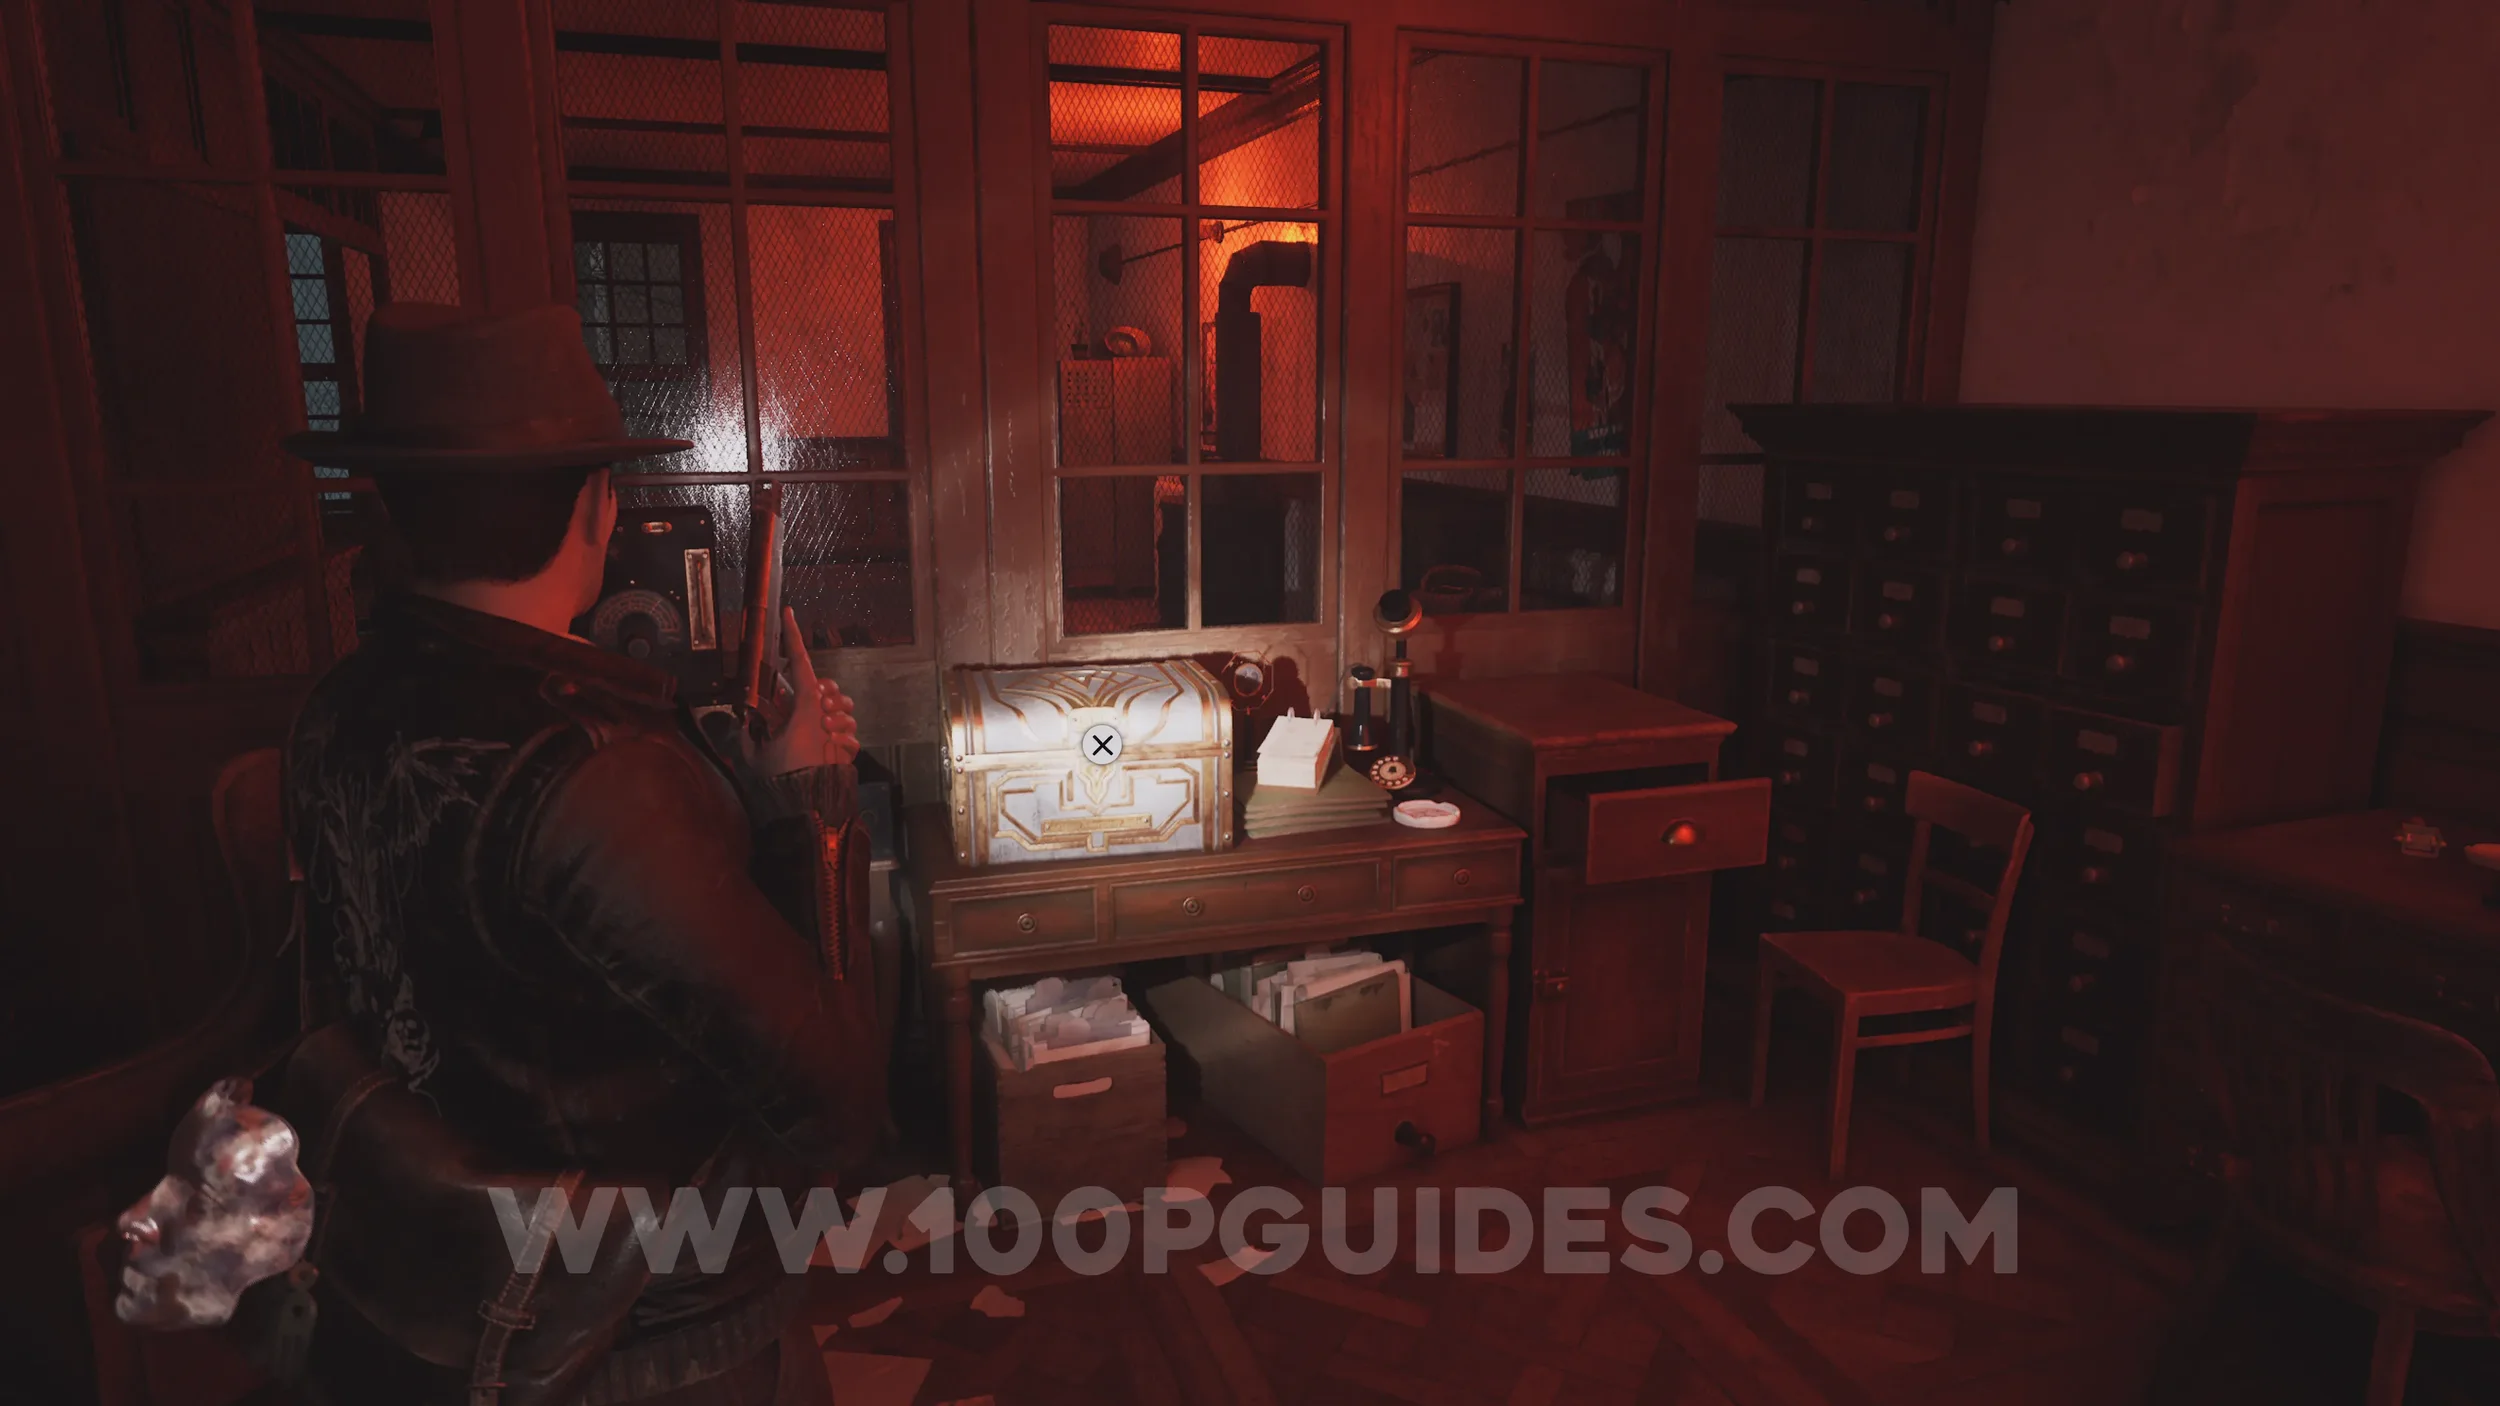
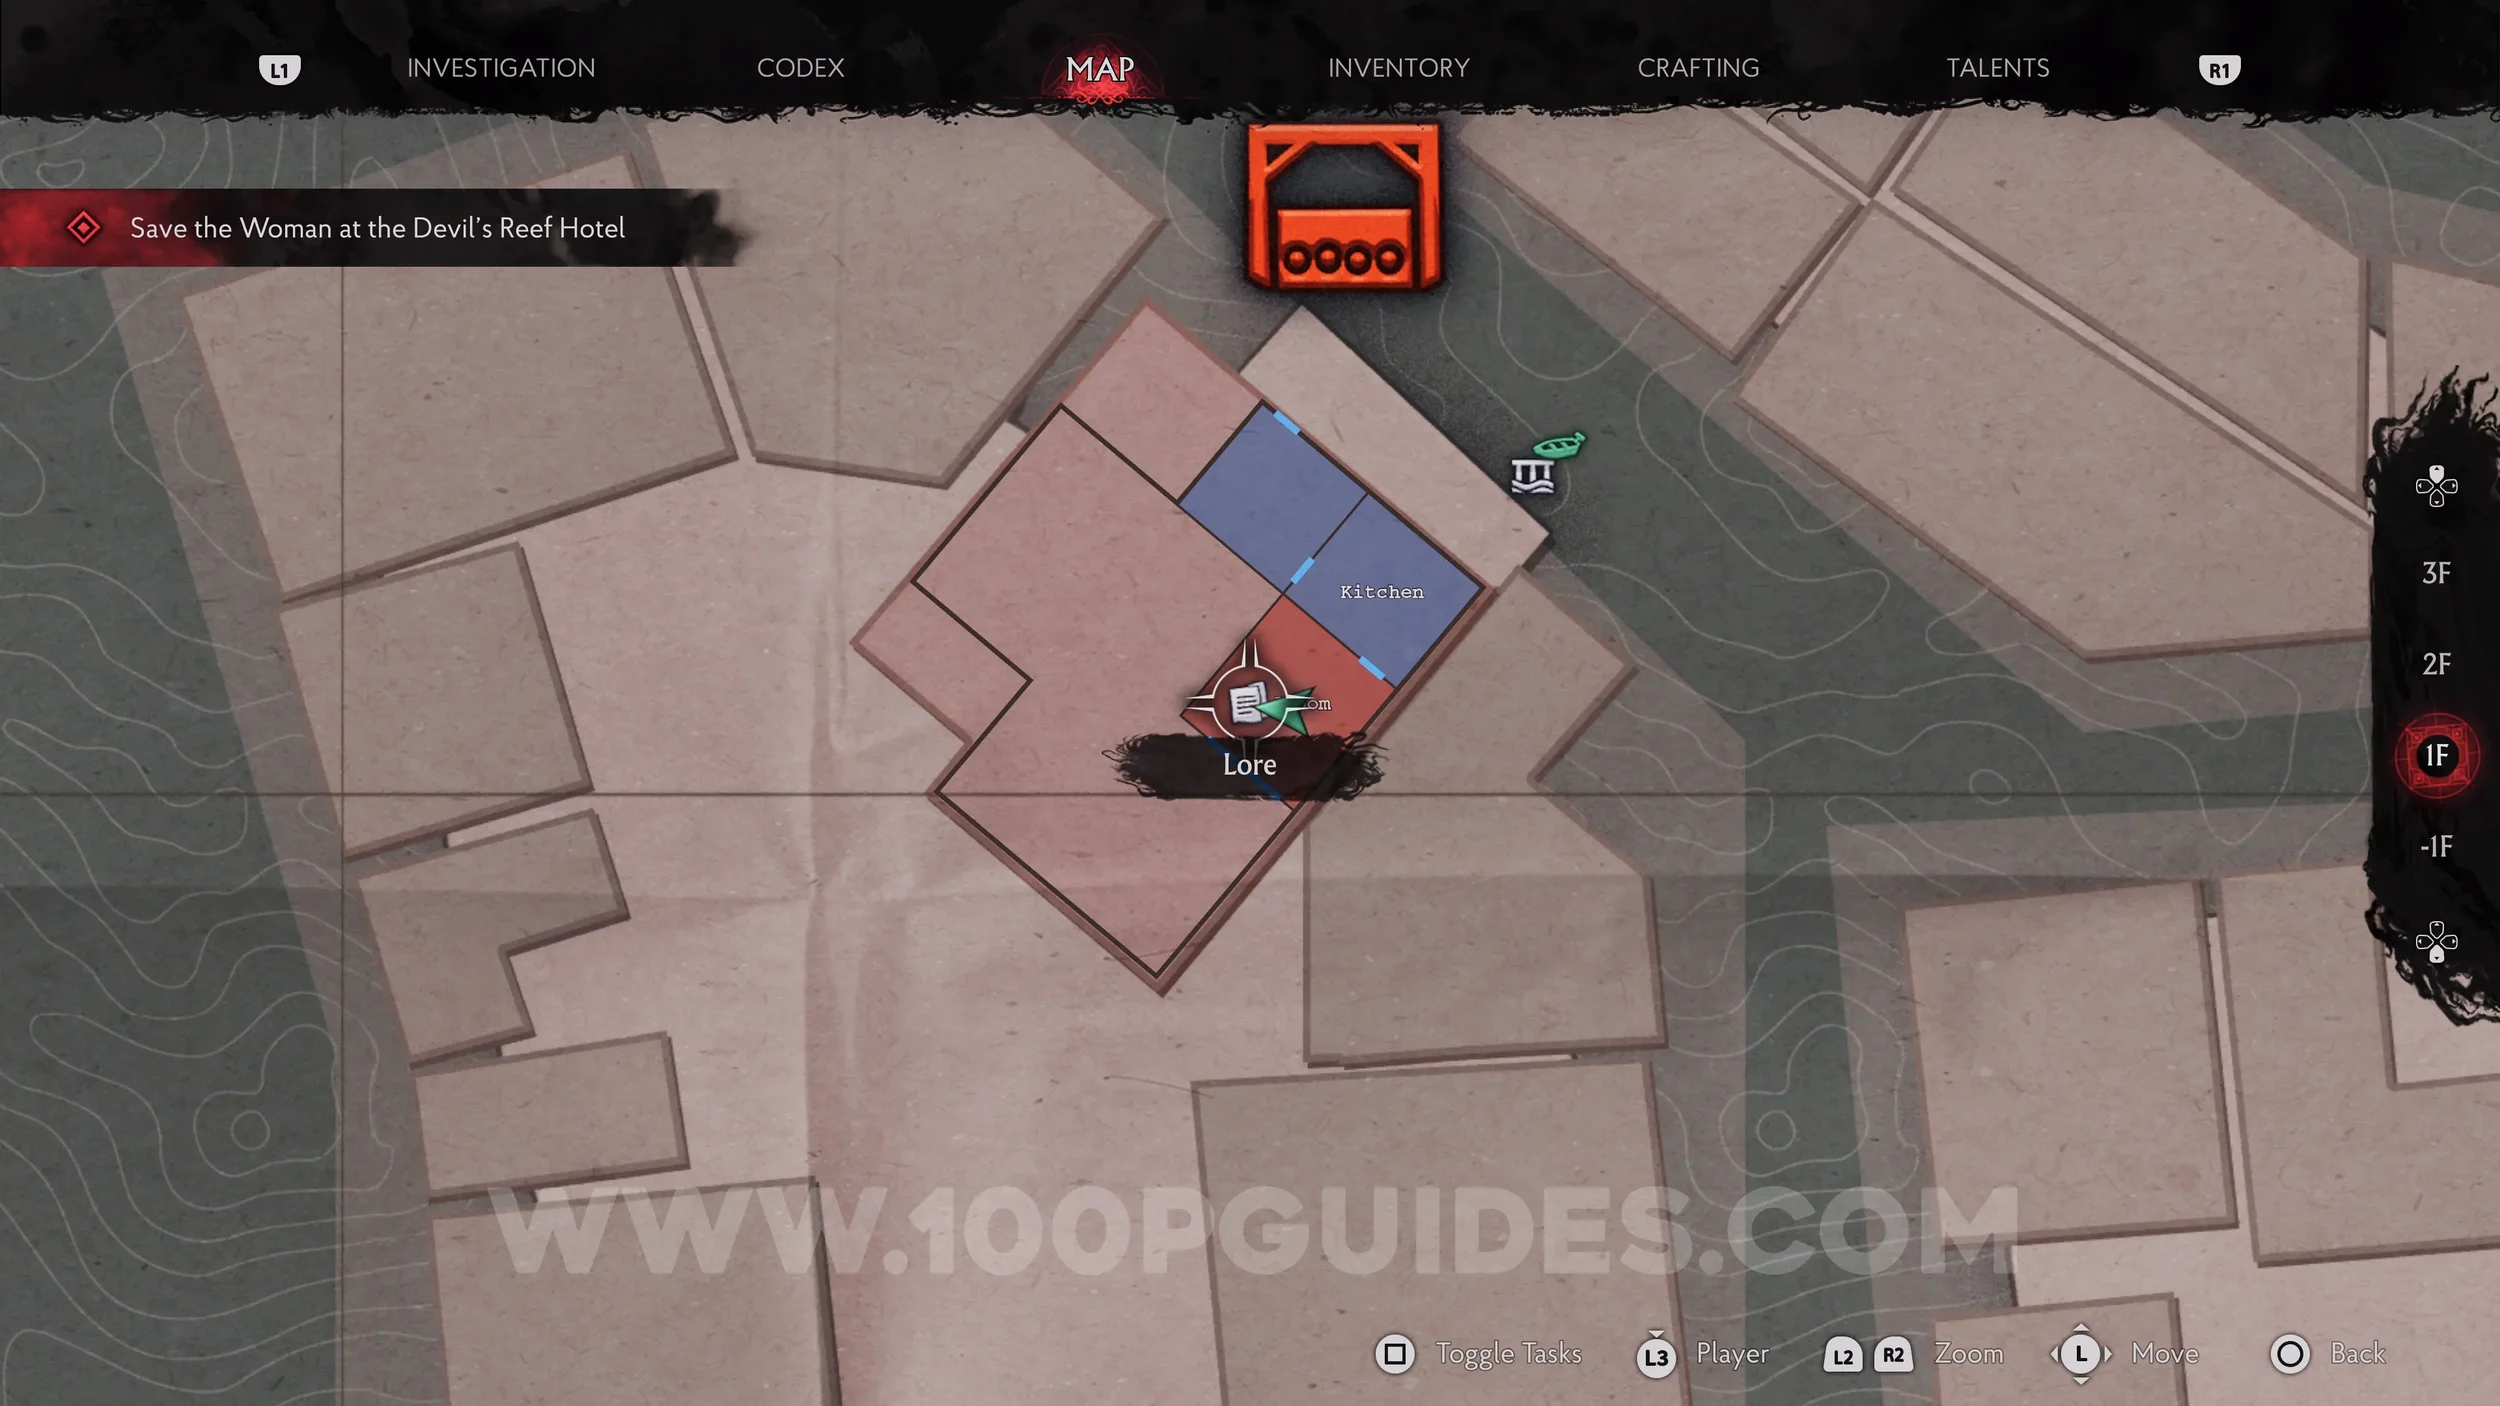
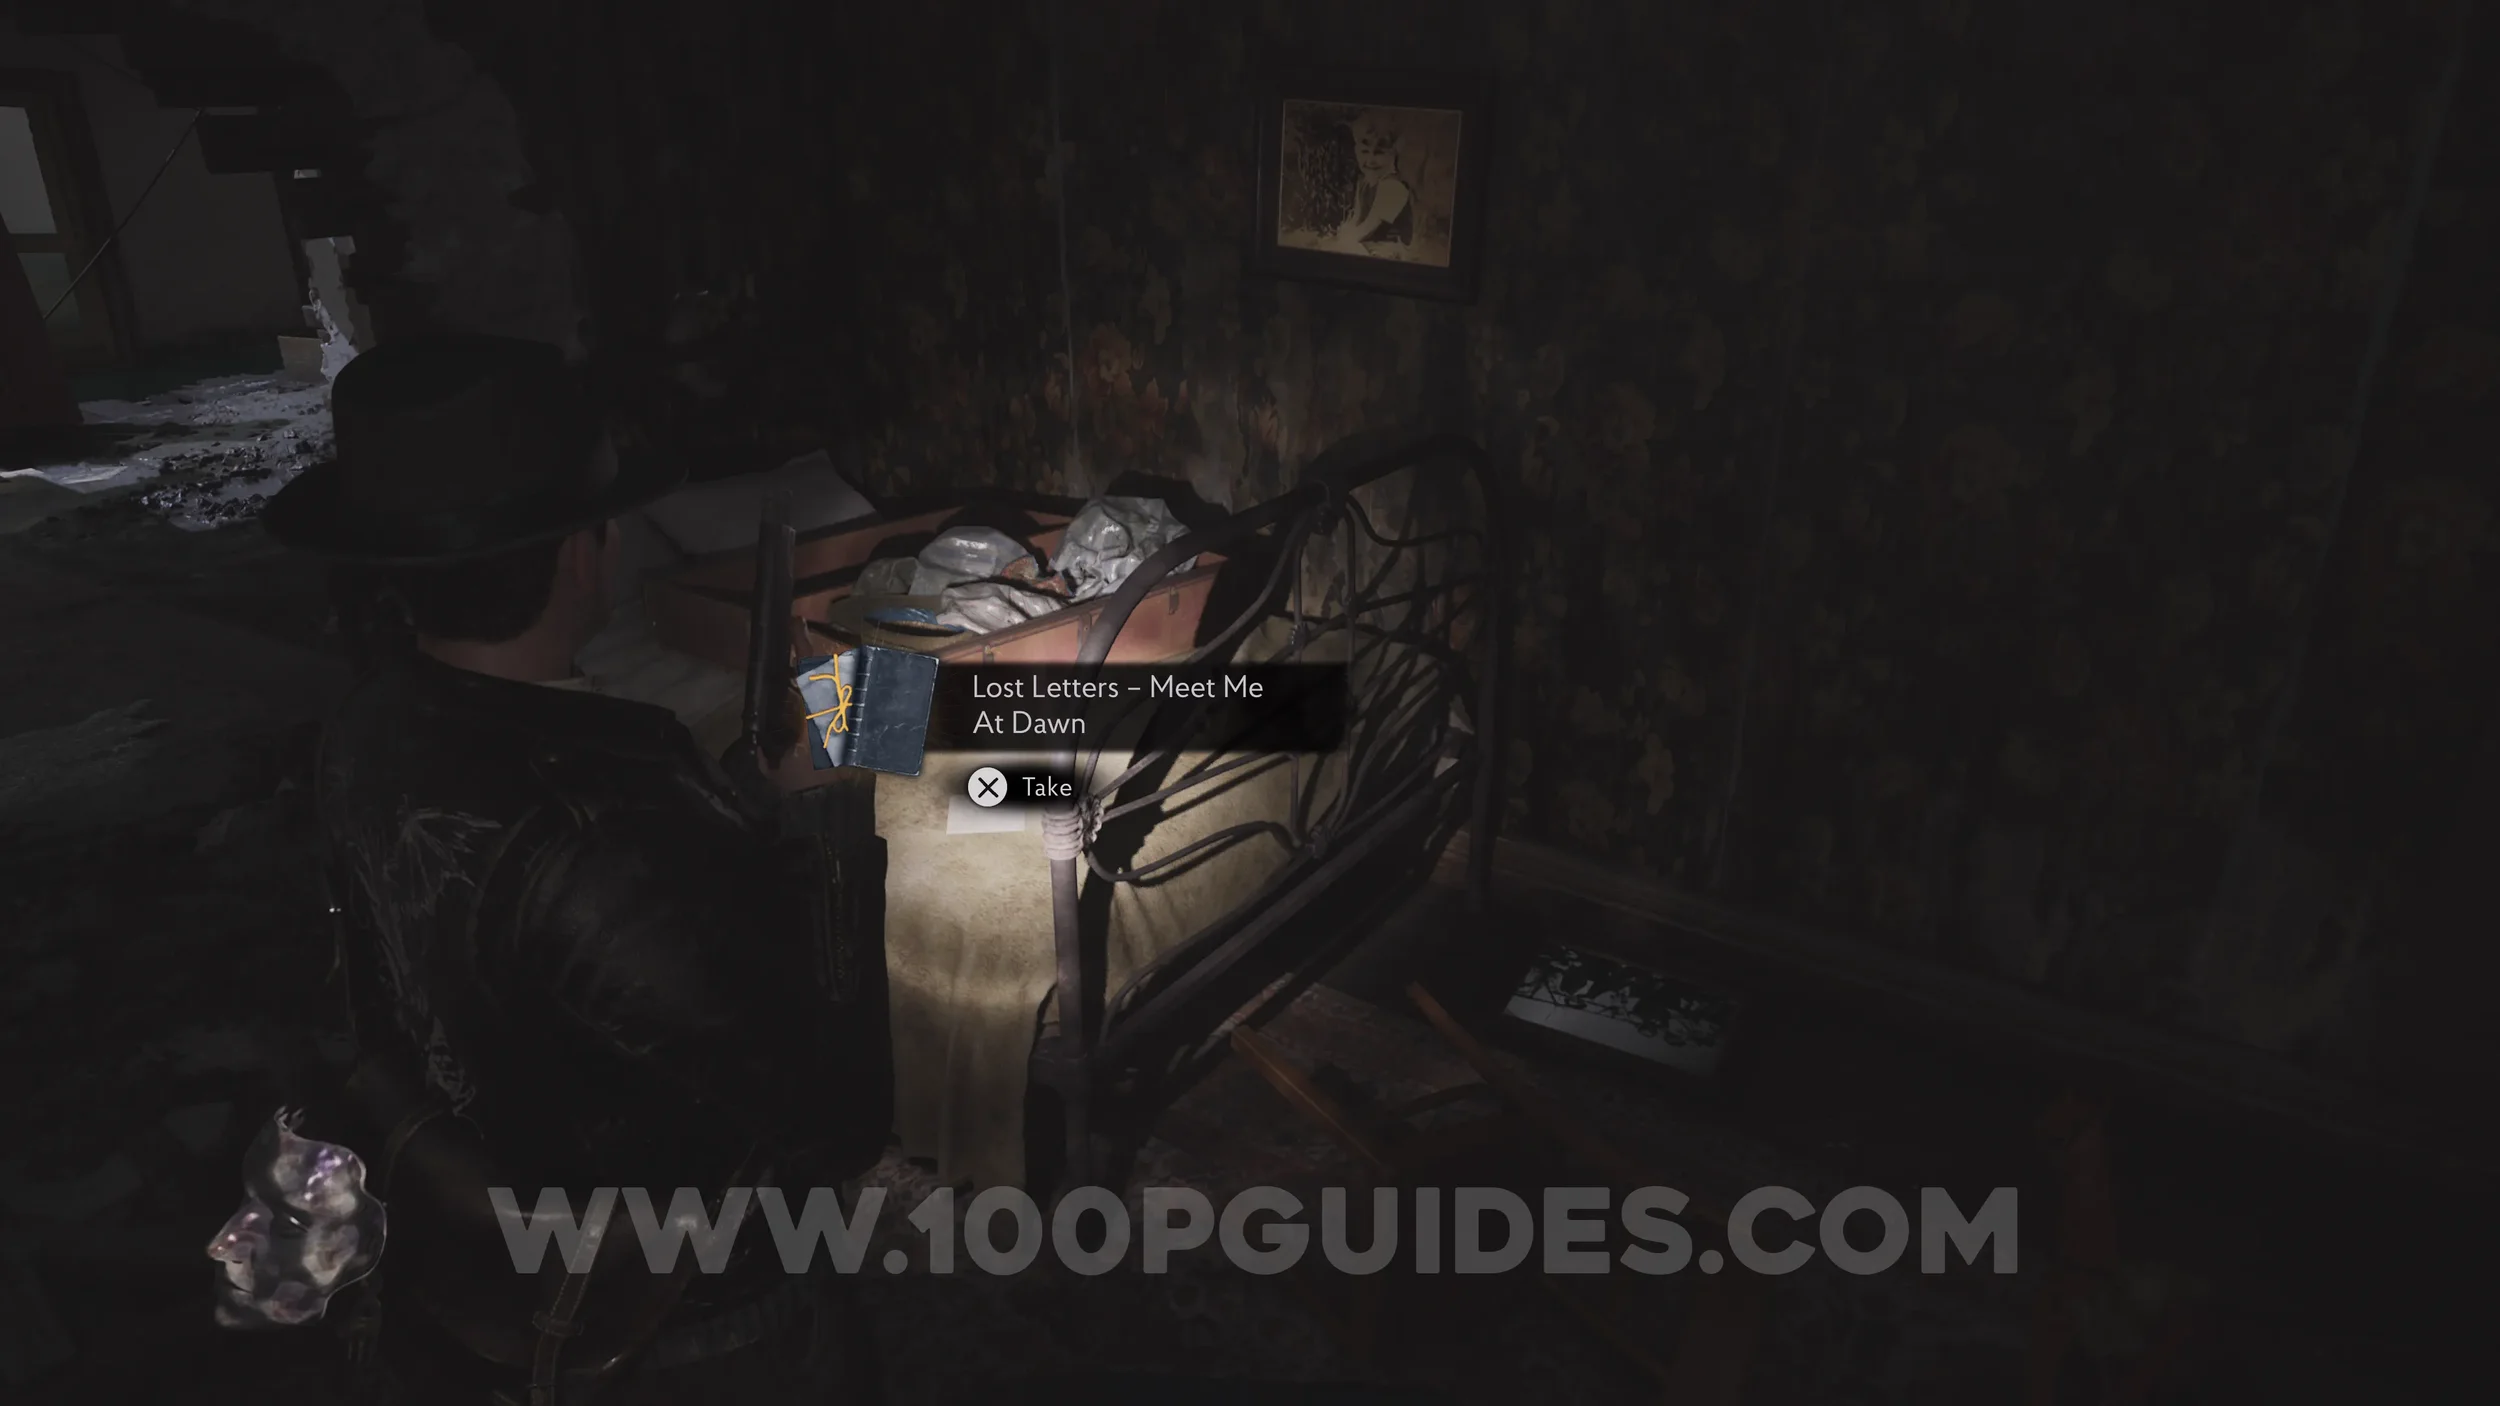
Lore Codex: Lost Letters - Meet Me At Dawn. After getting back on your boat and heading through the street the whale was blocking, you'll reach yet another blockage before the hotel. Dock on the pier and head through the house. As you do, you'll pass through a bedroom, and the codex is on the bed.
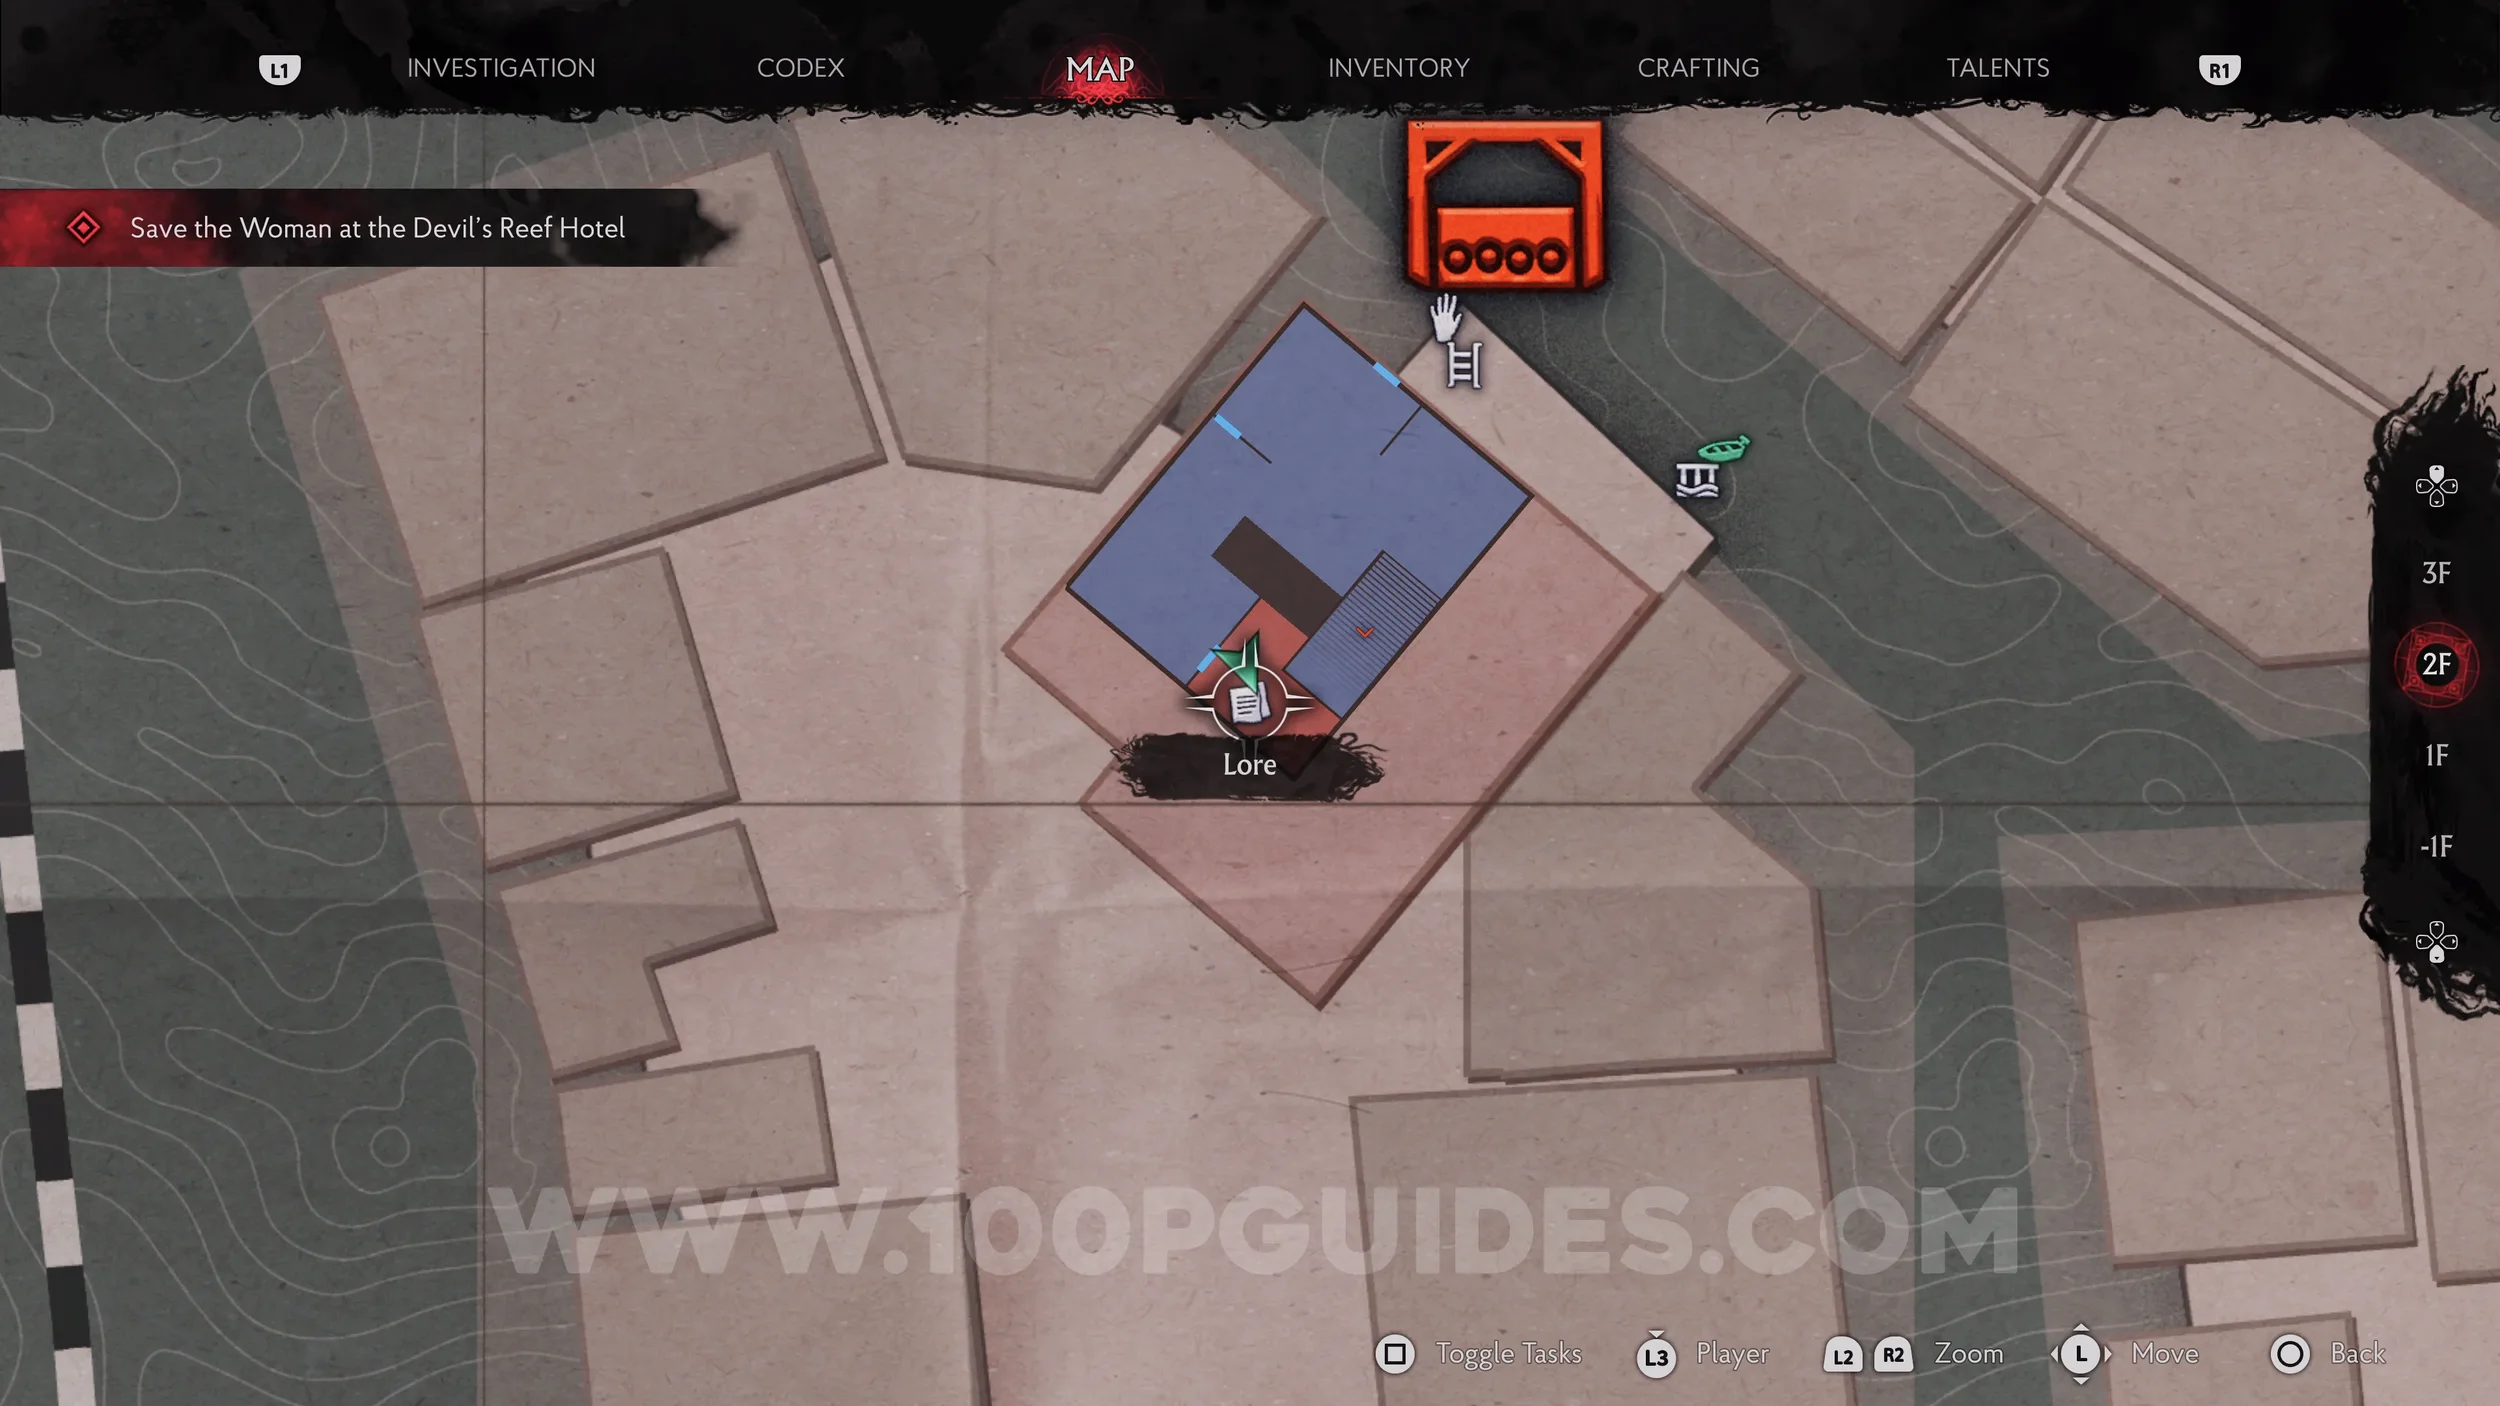
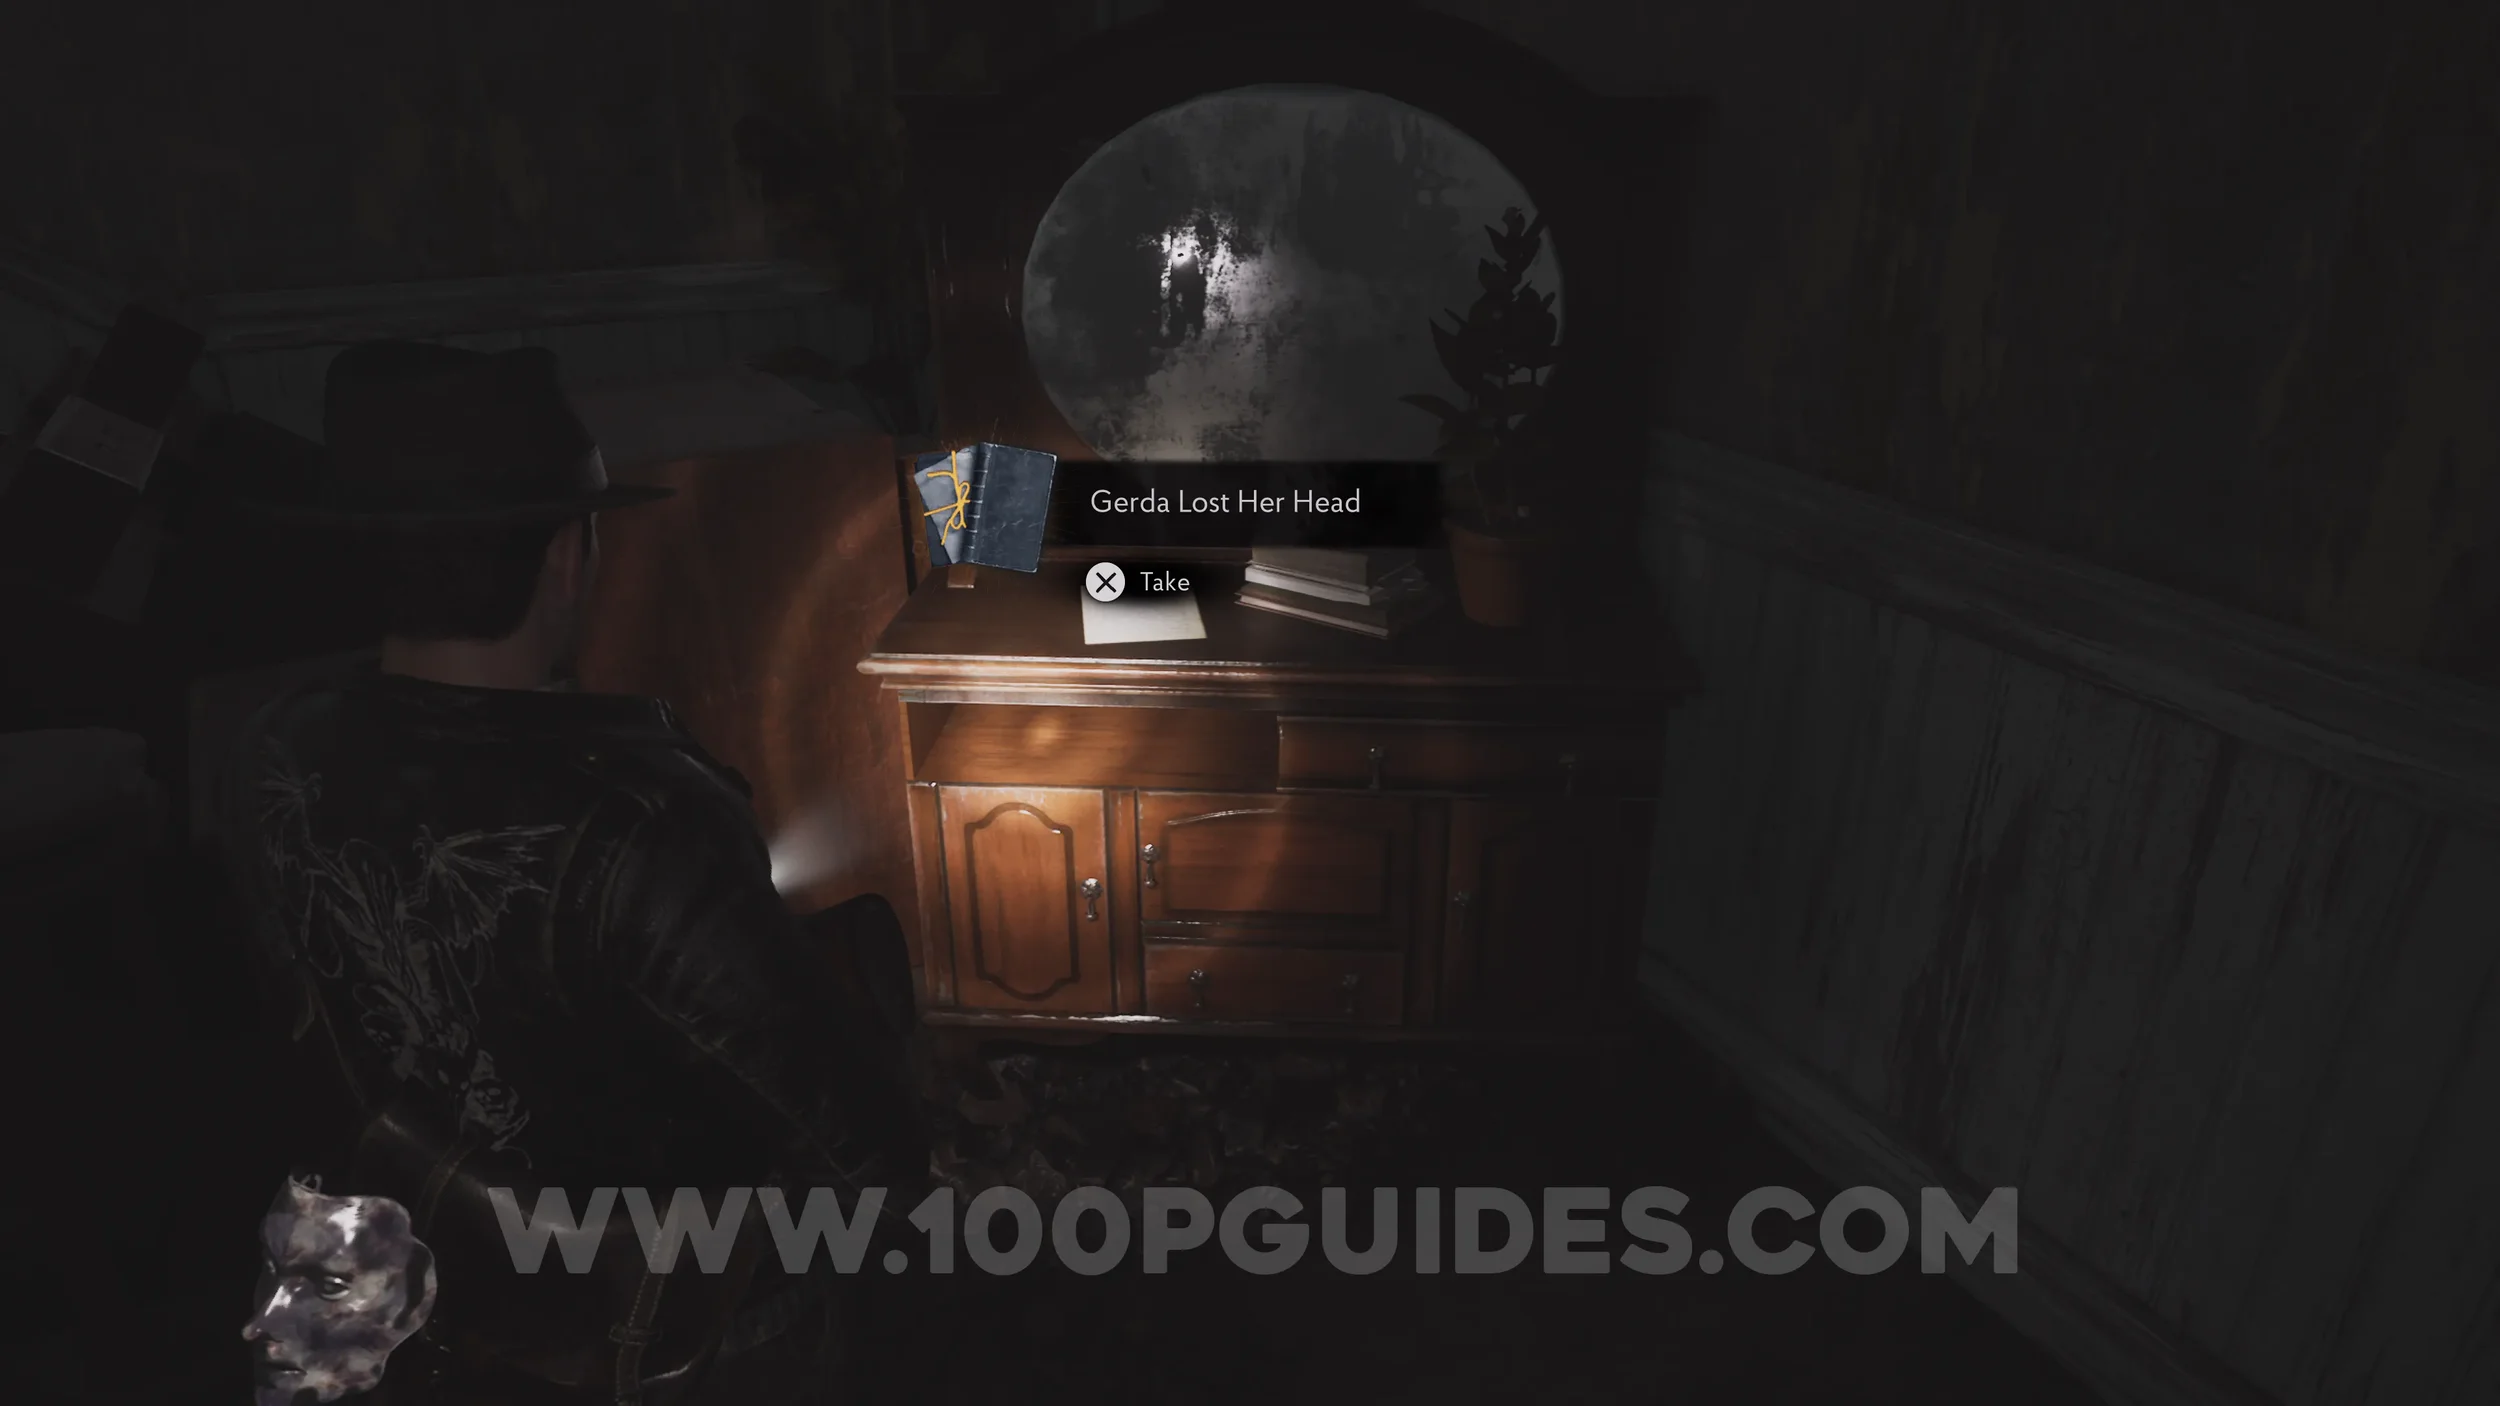
Lore Codex: Gerda Lost Her Head. After heading upstairs, go left and make your way around this floor to find the codex next to a mirror in the southeastern corner. Then head out through the northern window and press the lever to open the blockage.
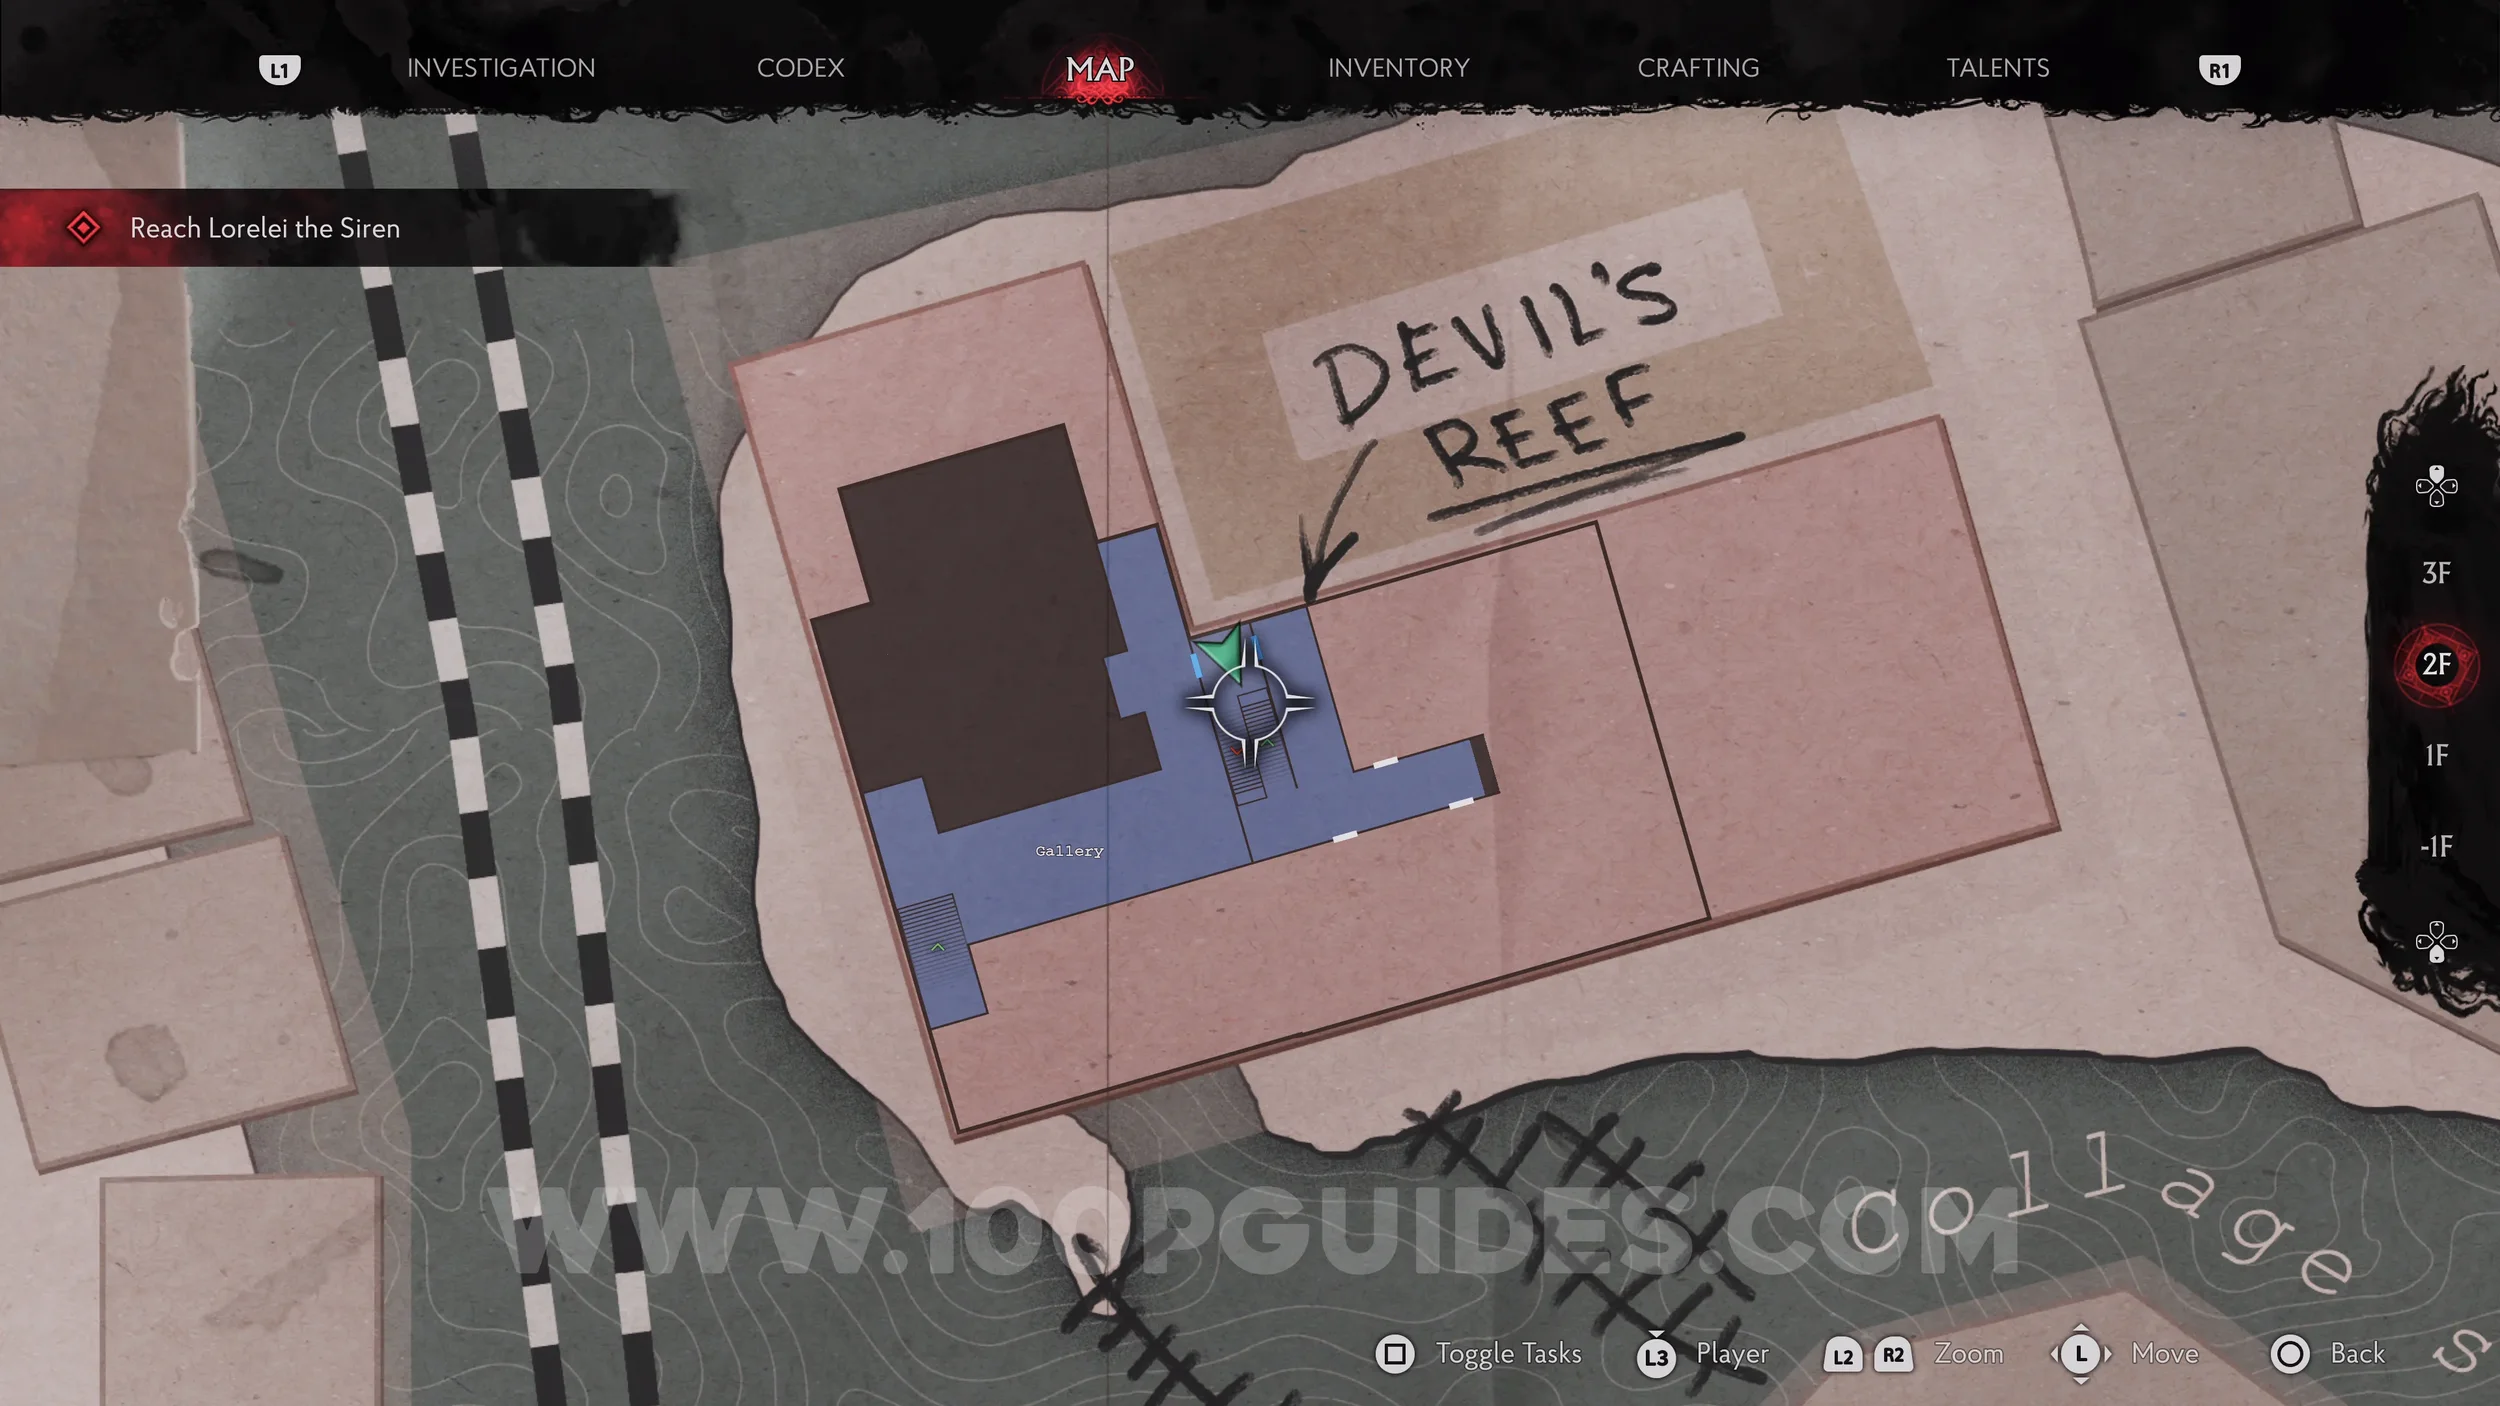
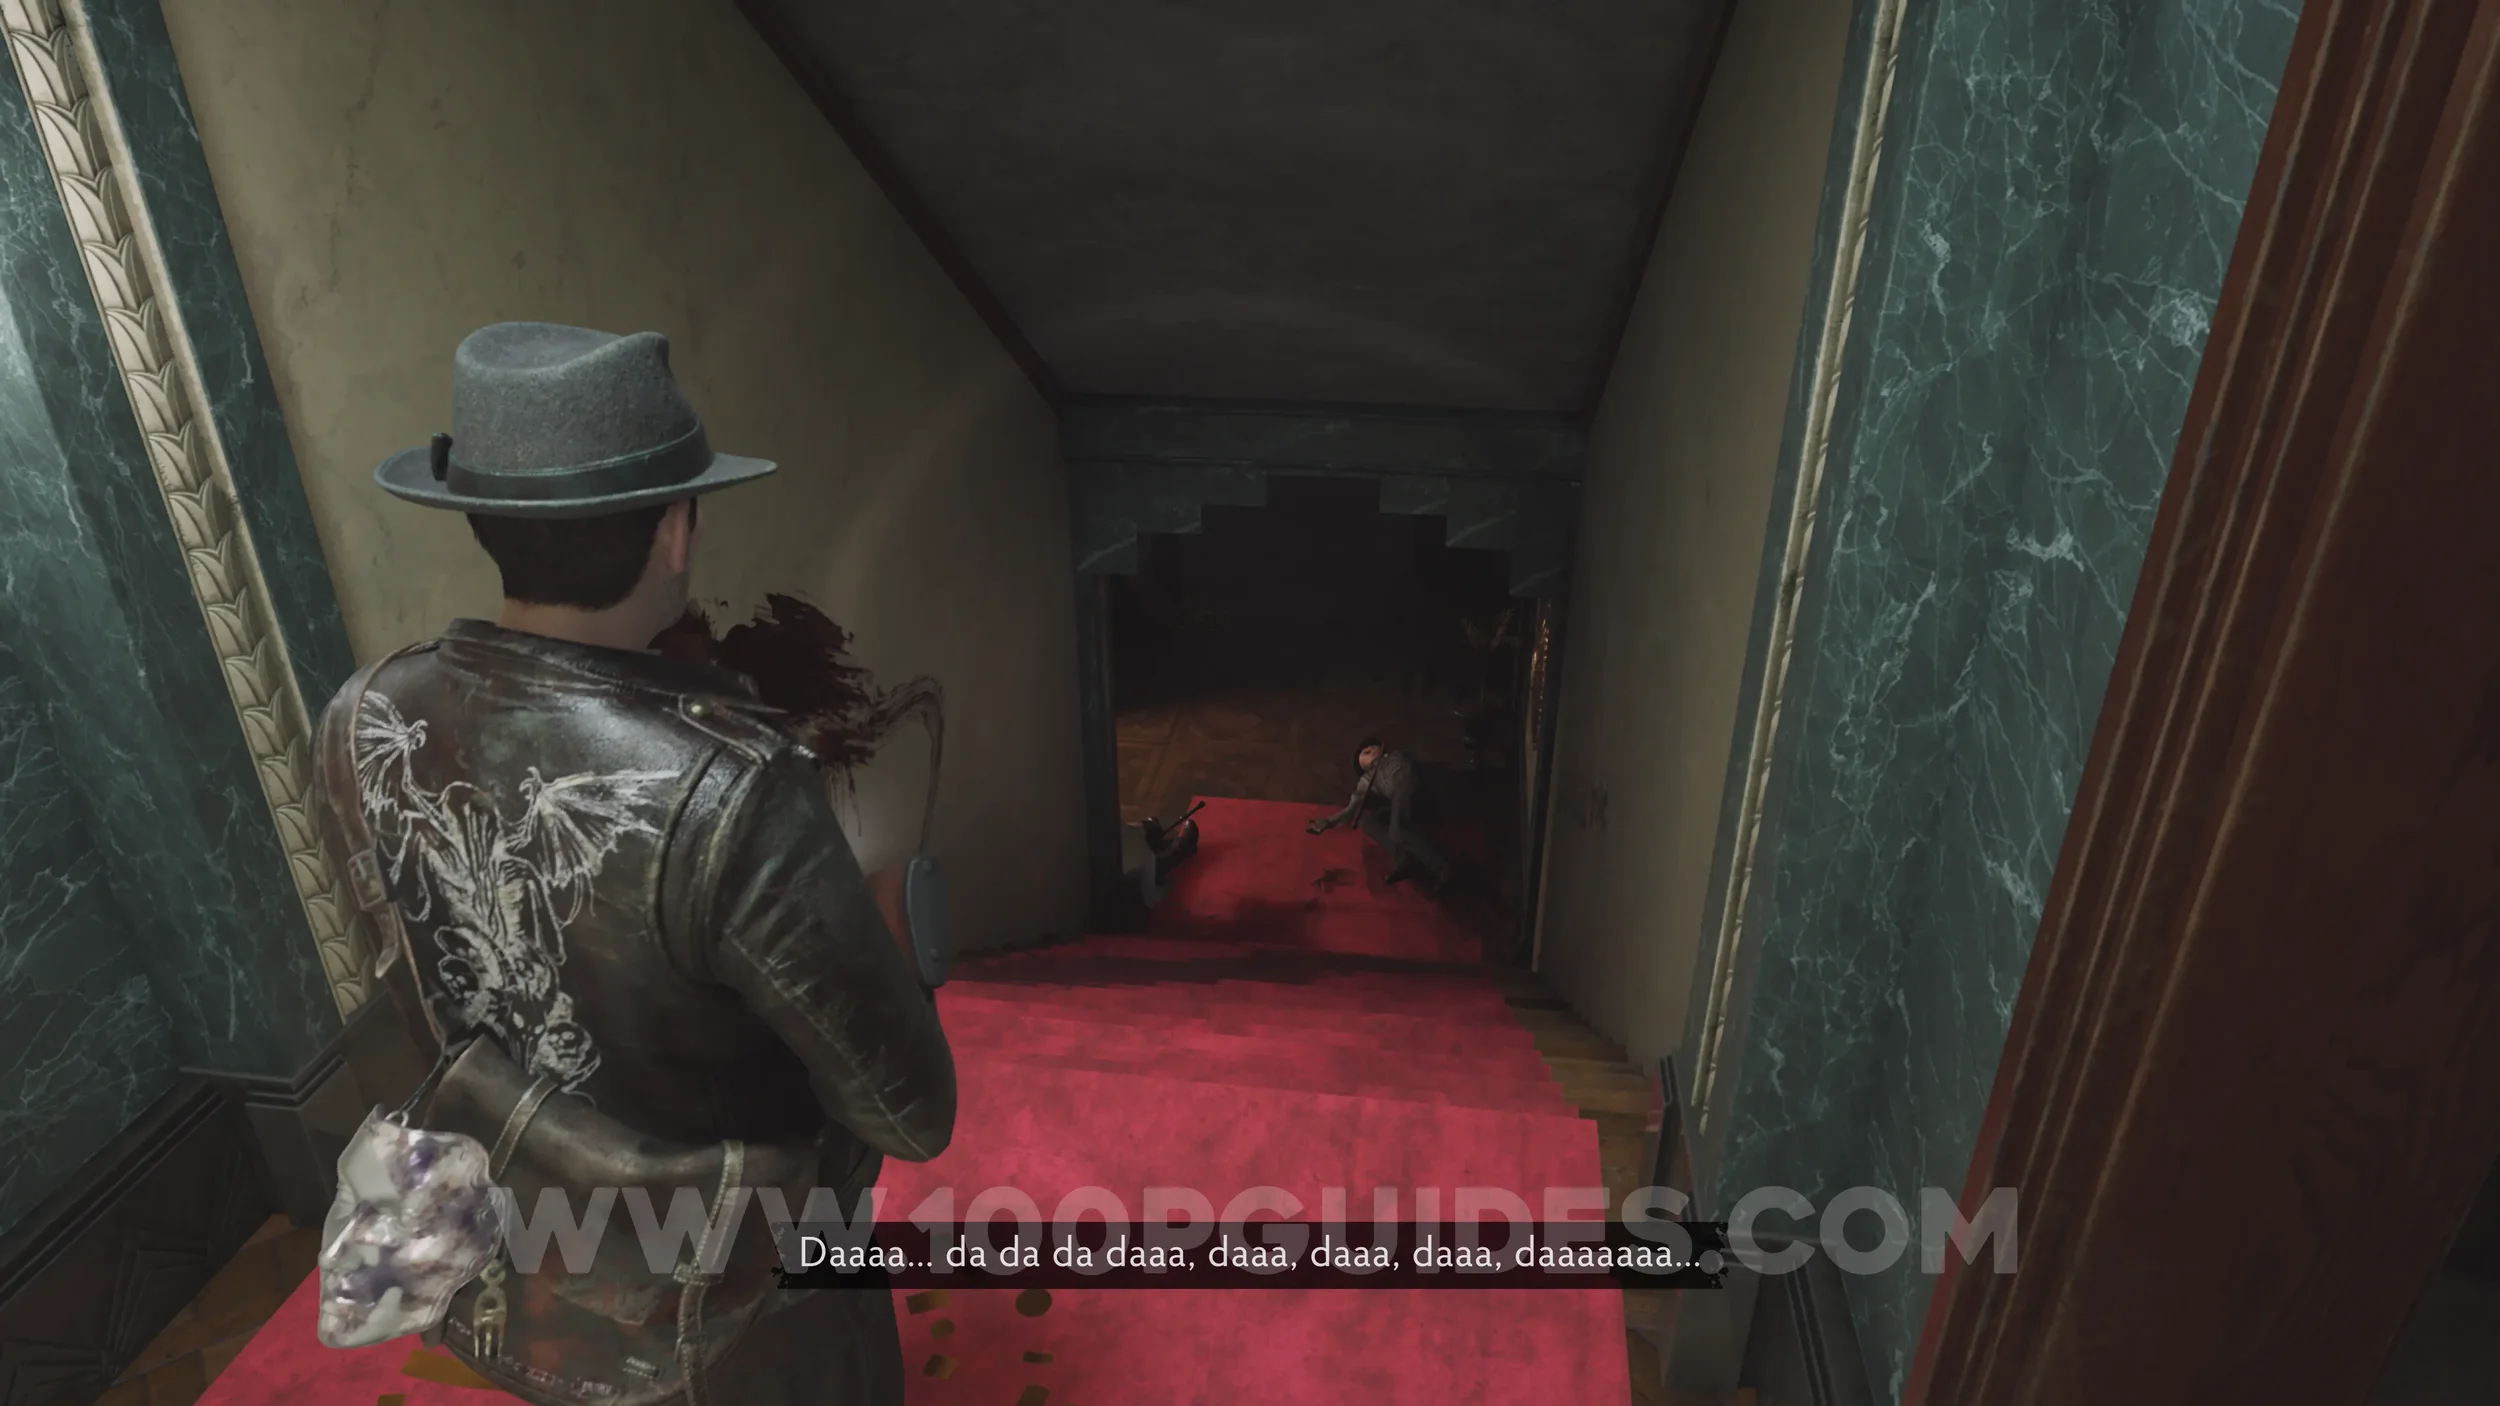
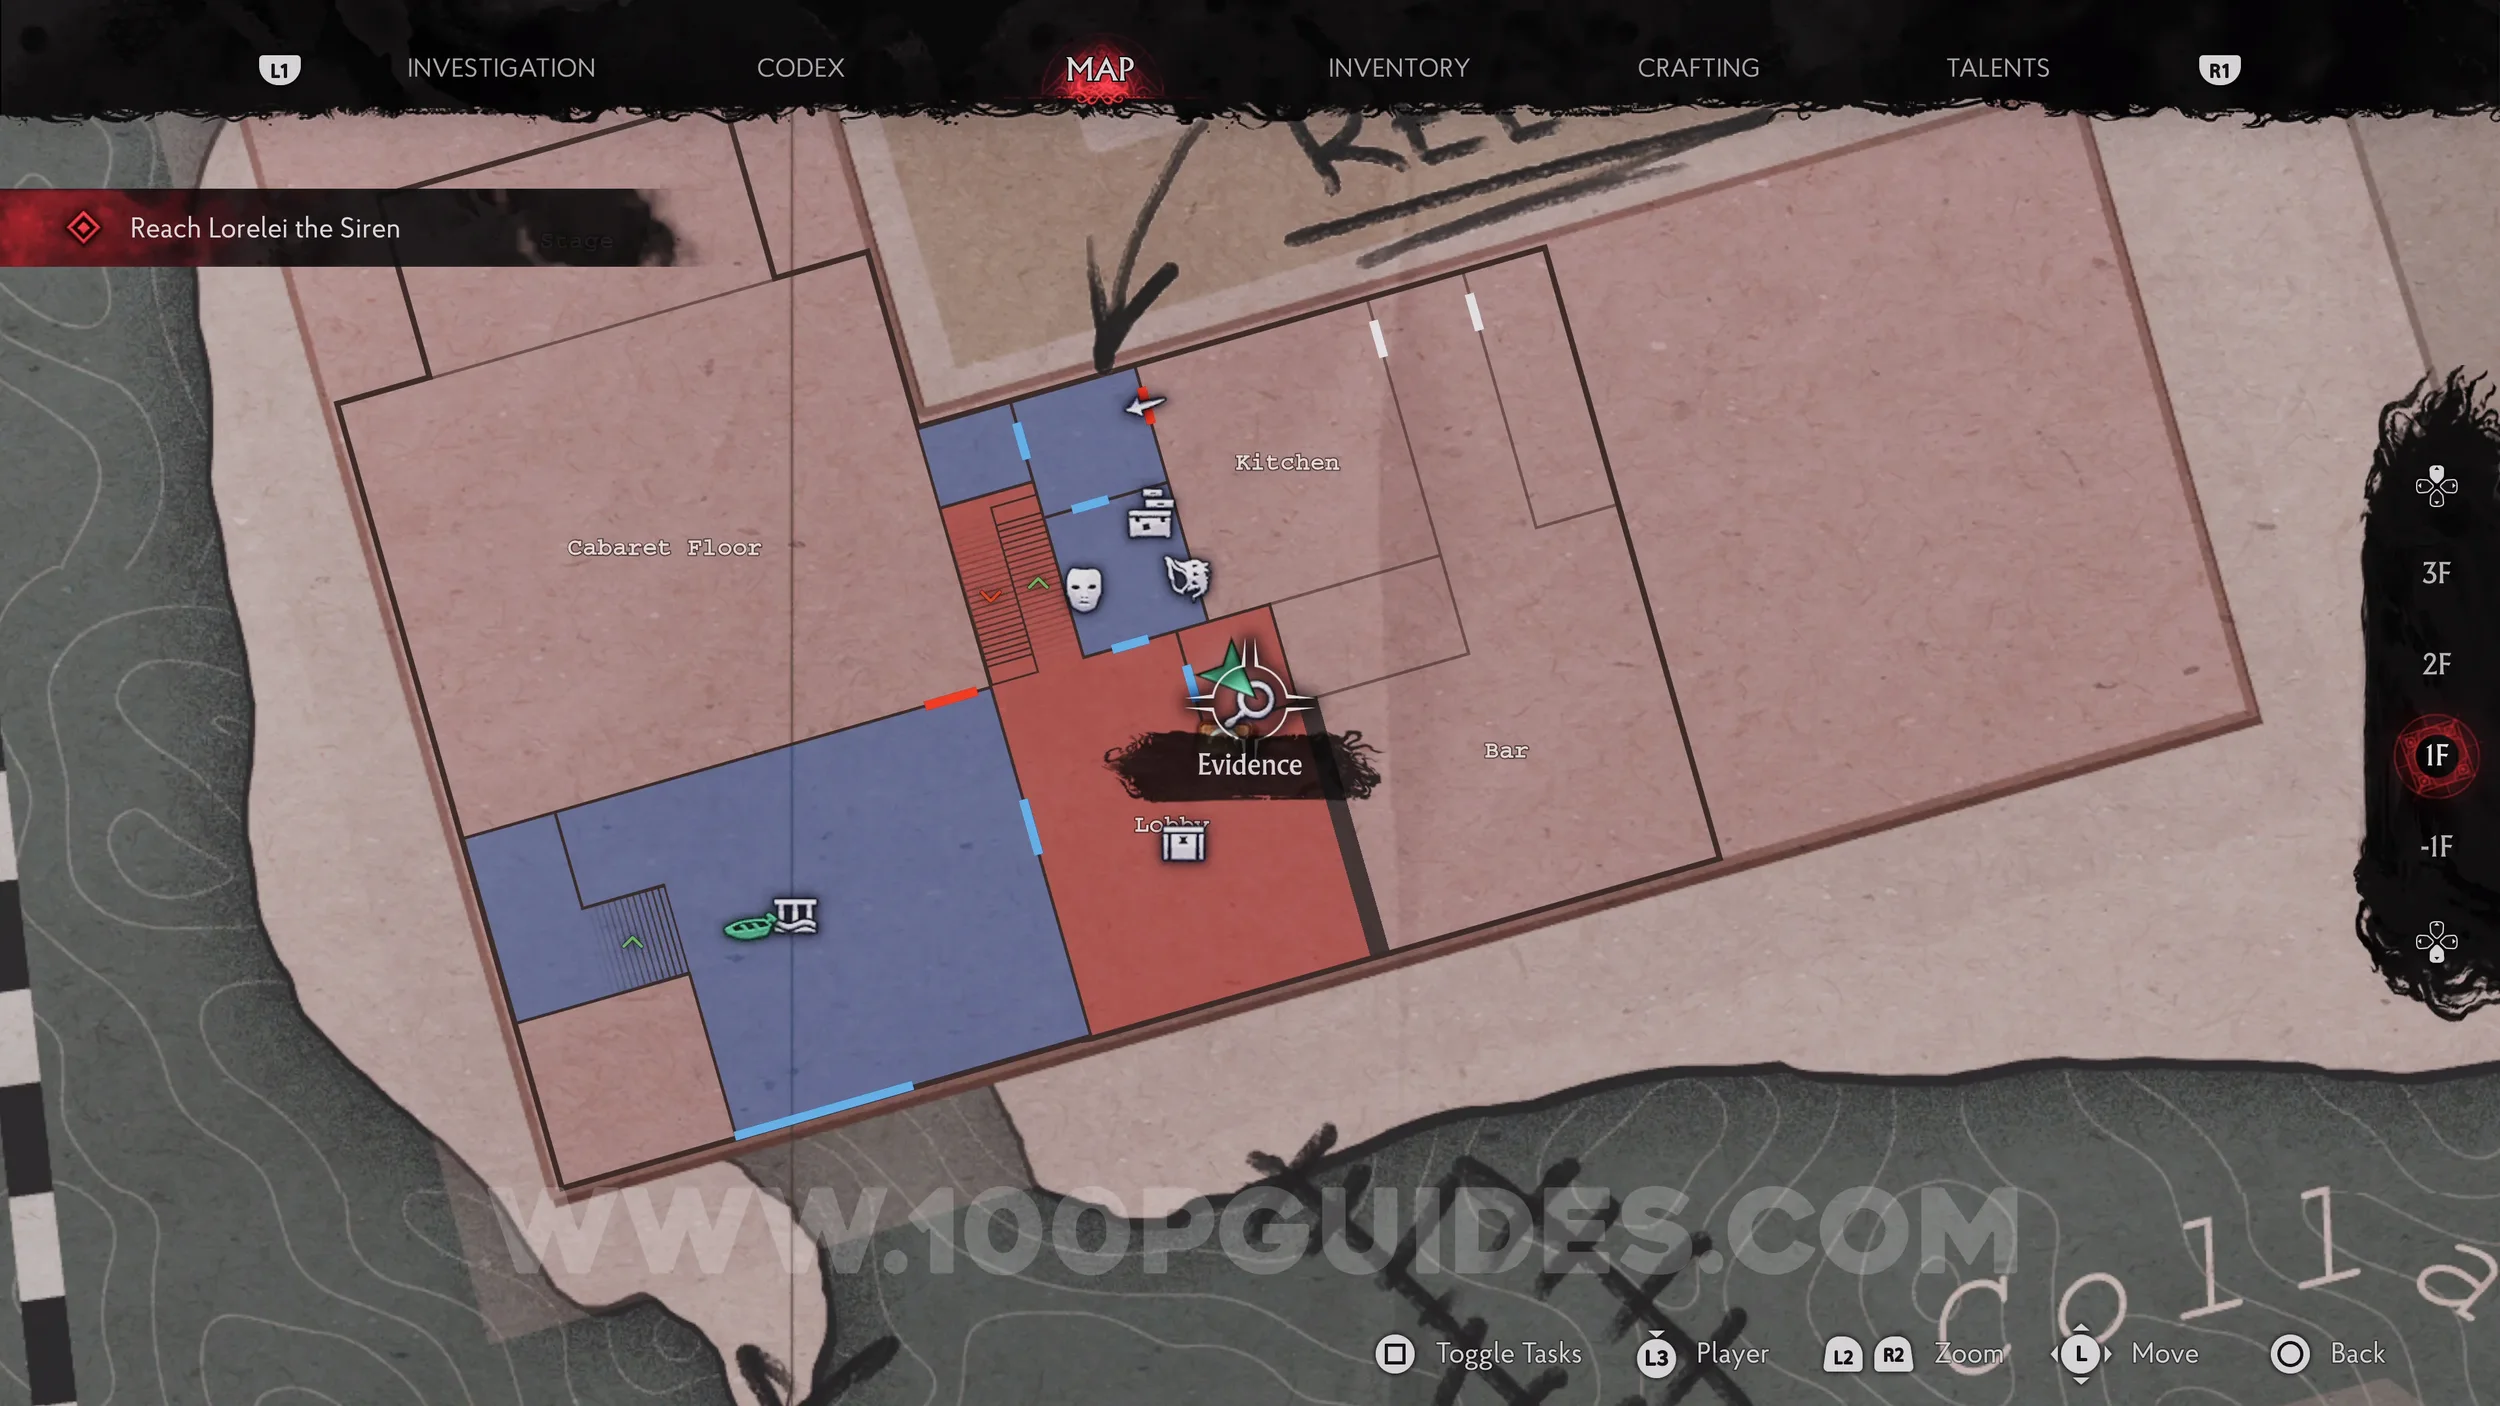
Map: Devil’s Reef Hotel. Once you reach the Hotel and watch the cutscene with Lorelei on the top floor, turn around, head through the door, and go down the stairs on your right. You'll then find the map on the wall in the small room in the Lobby, next to the safe room.
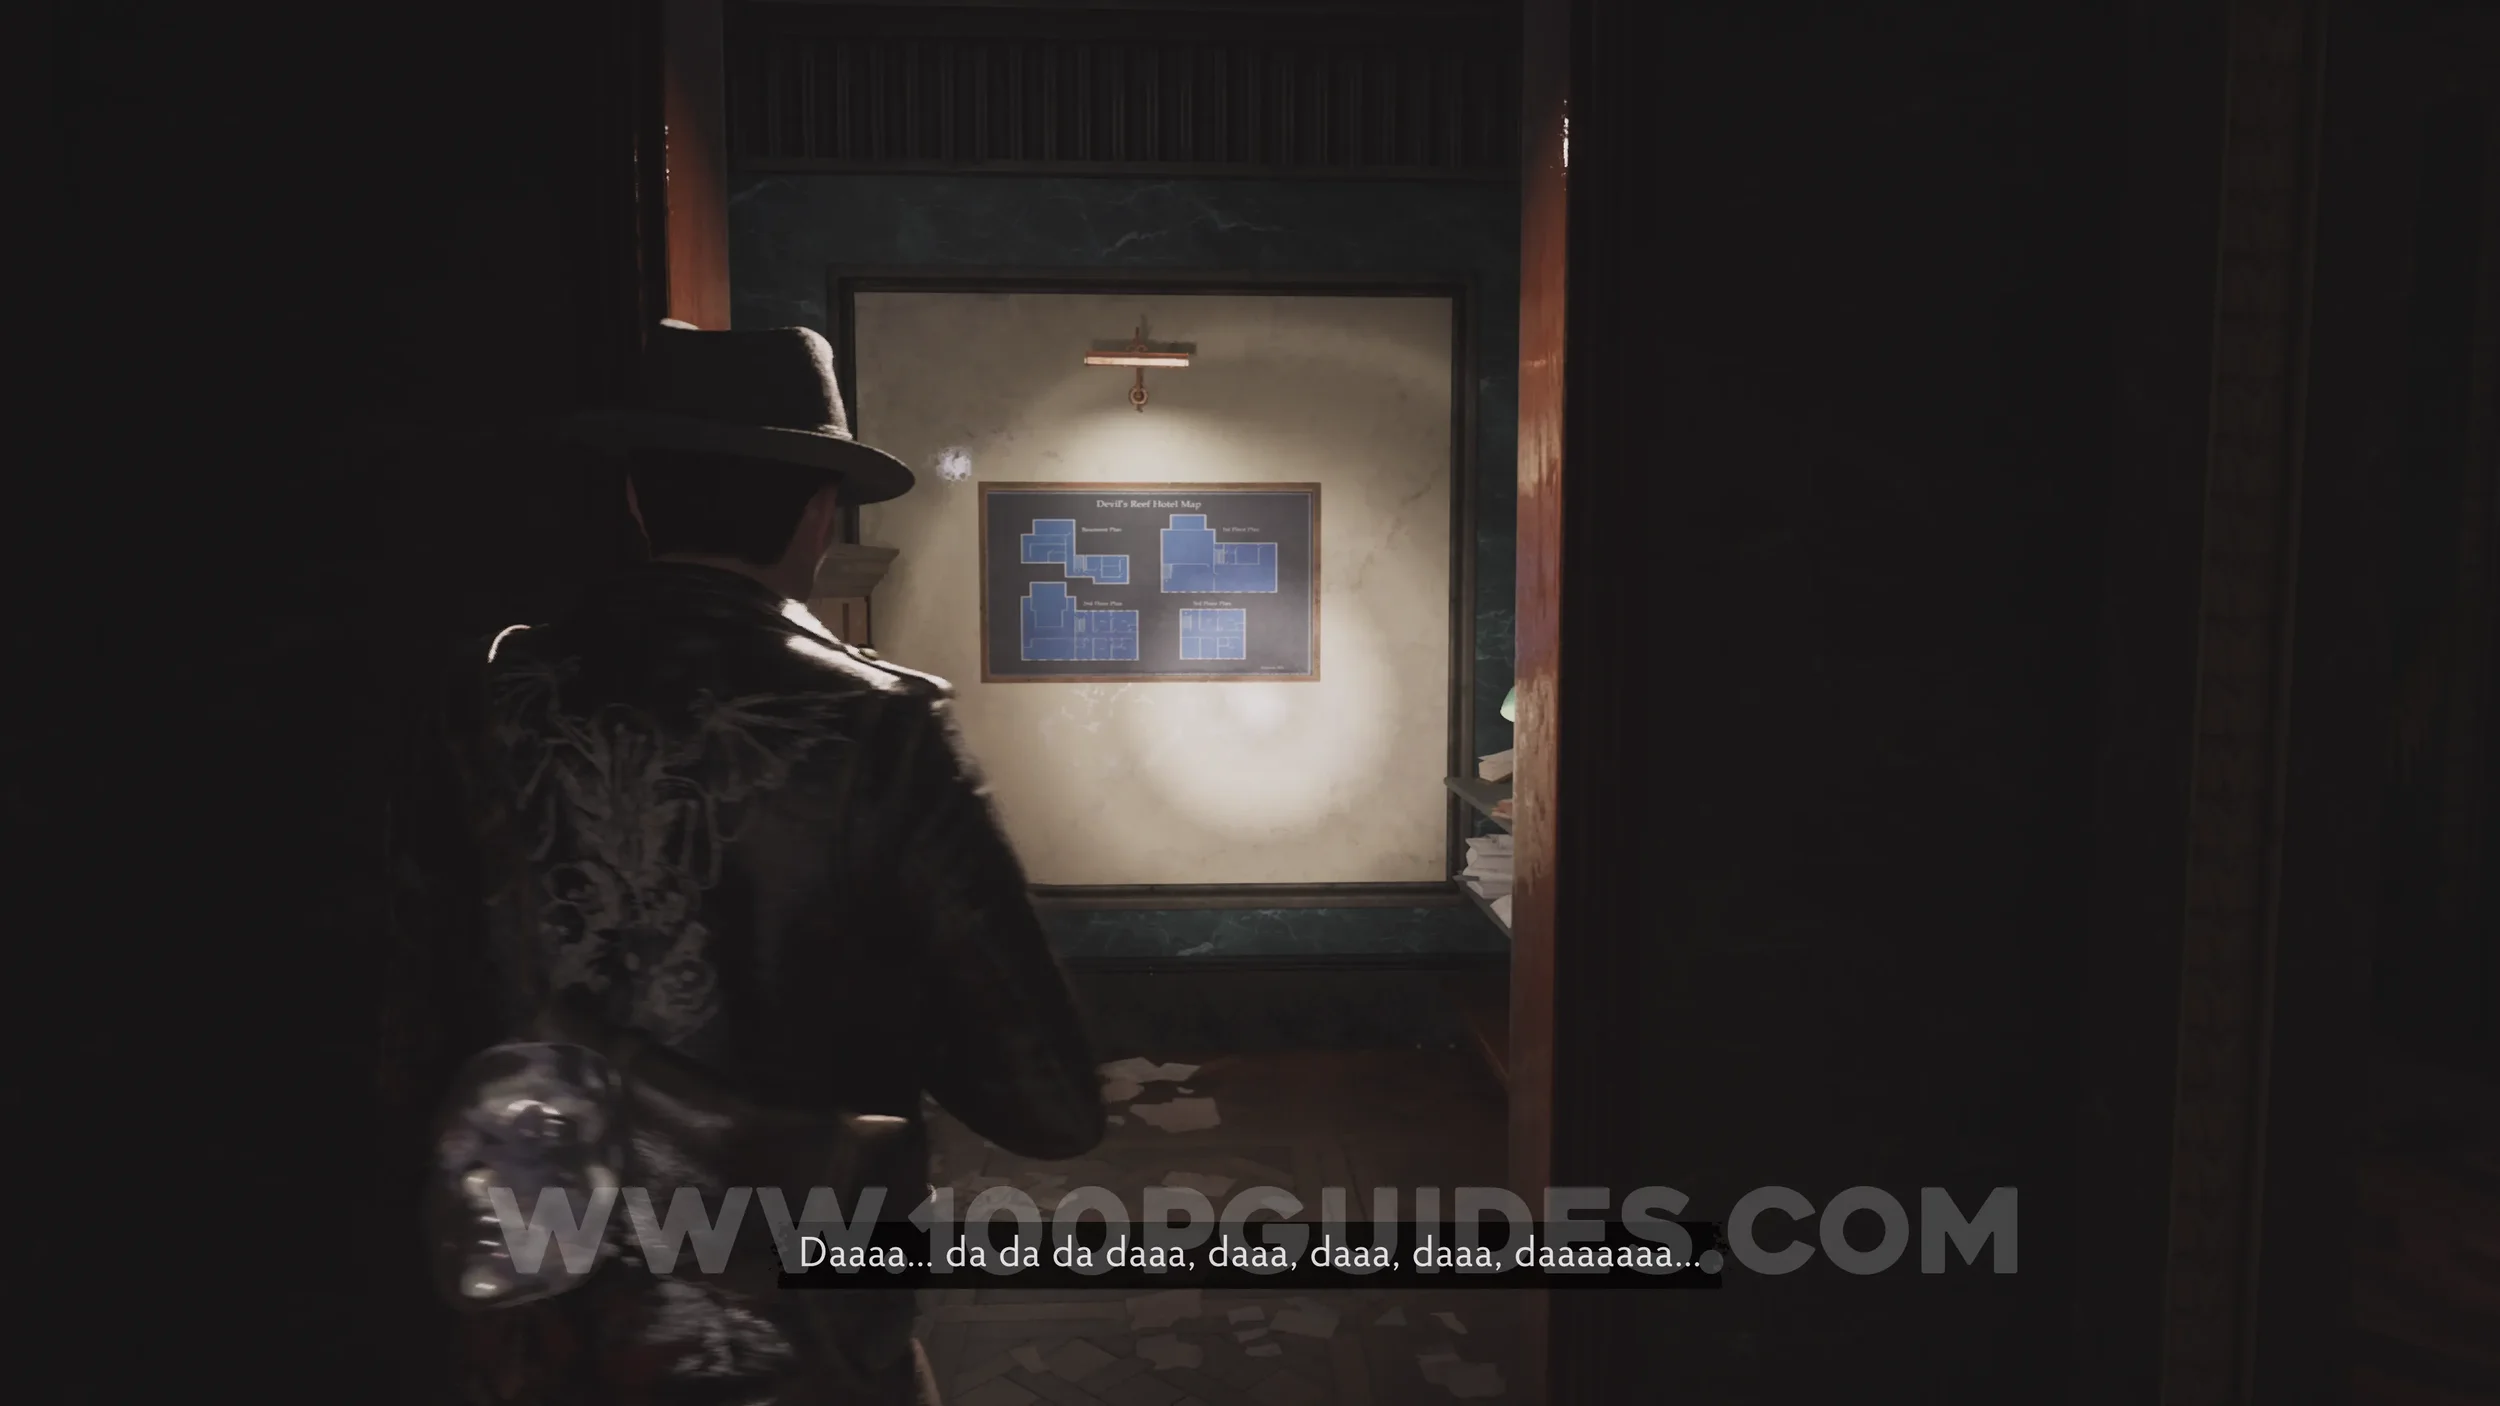
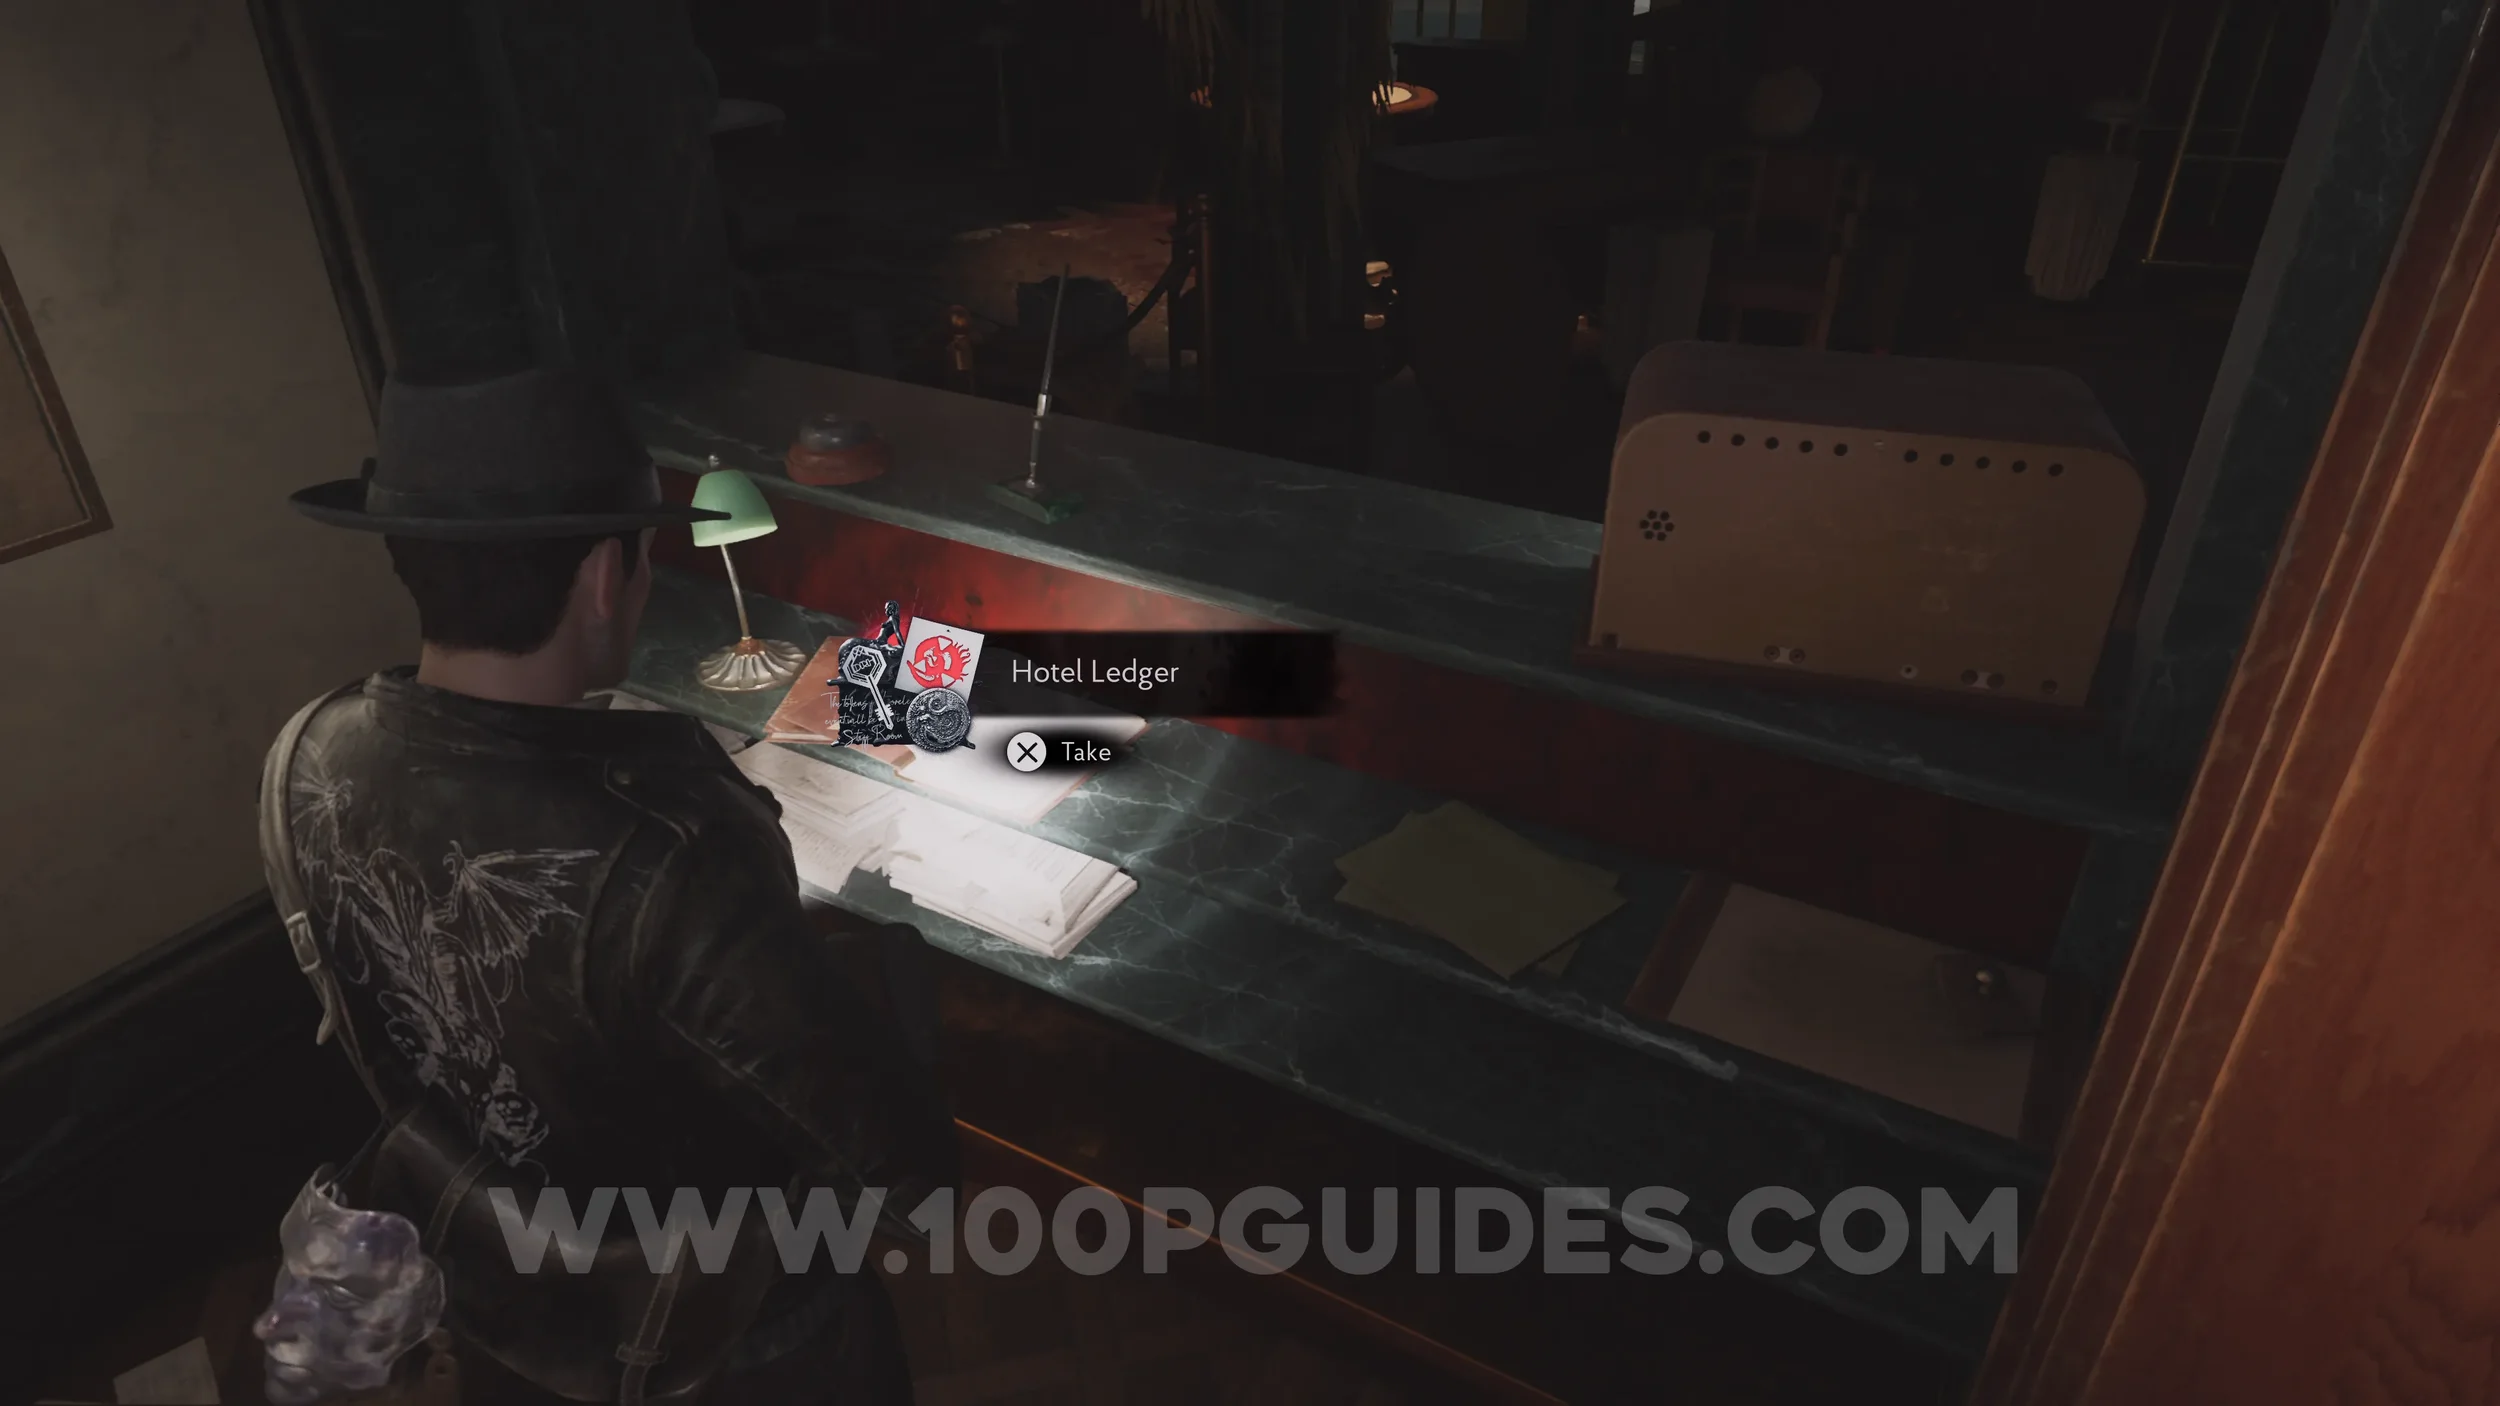
Evidence: Hotel Ledger. Also in the small room where the map was.
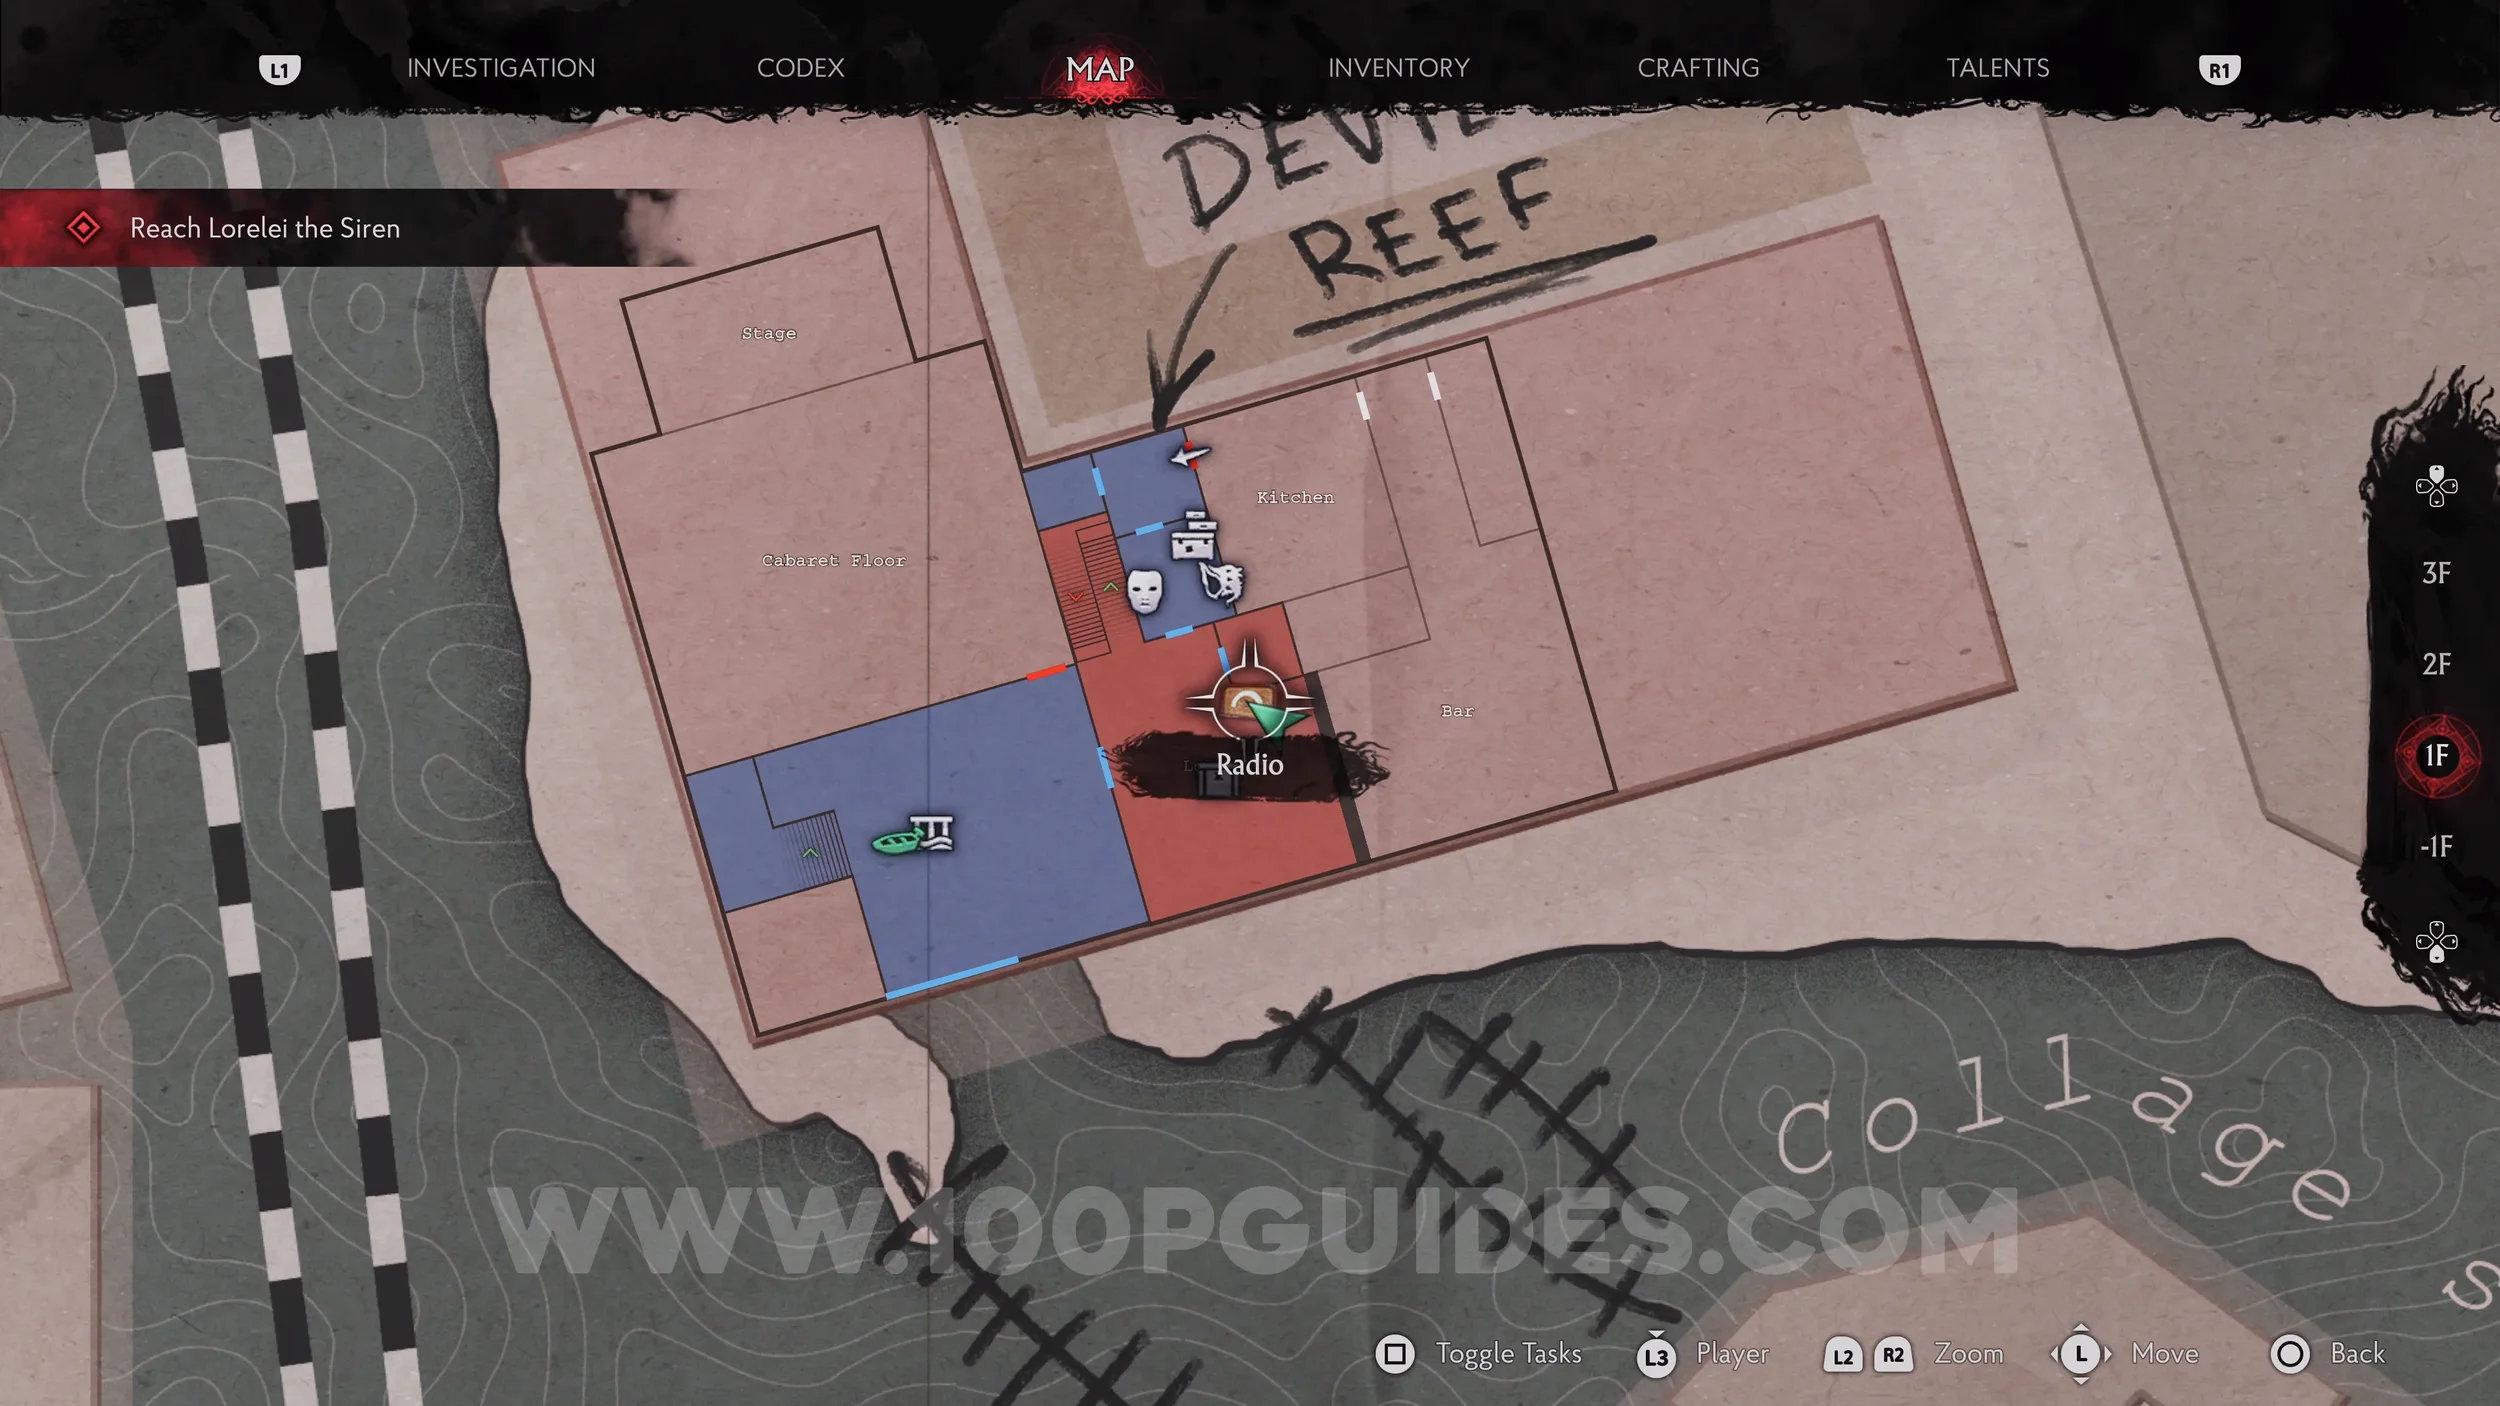
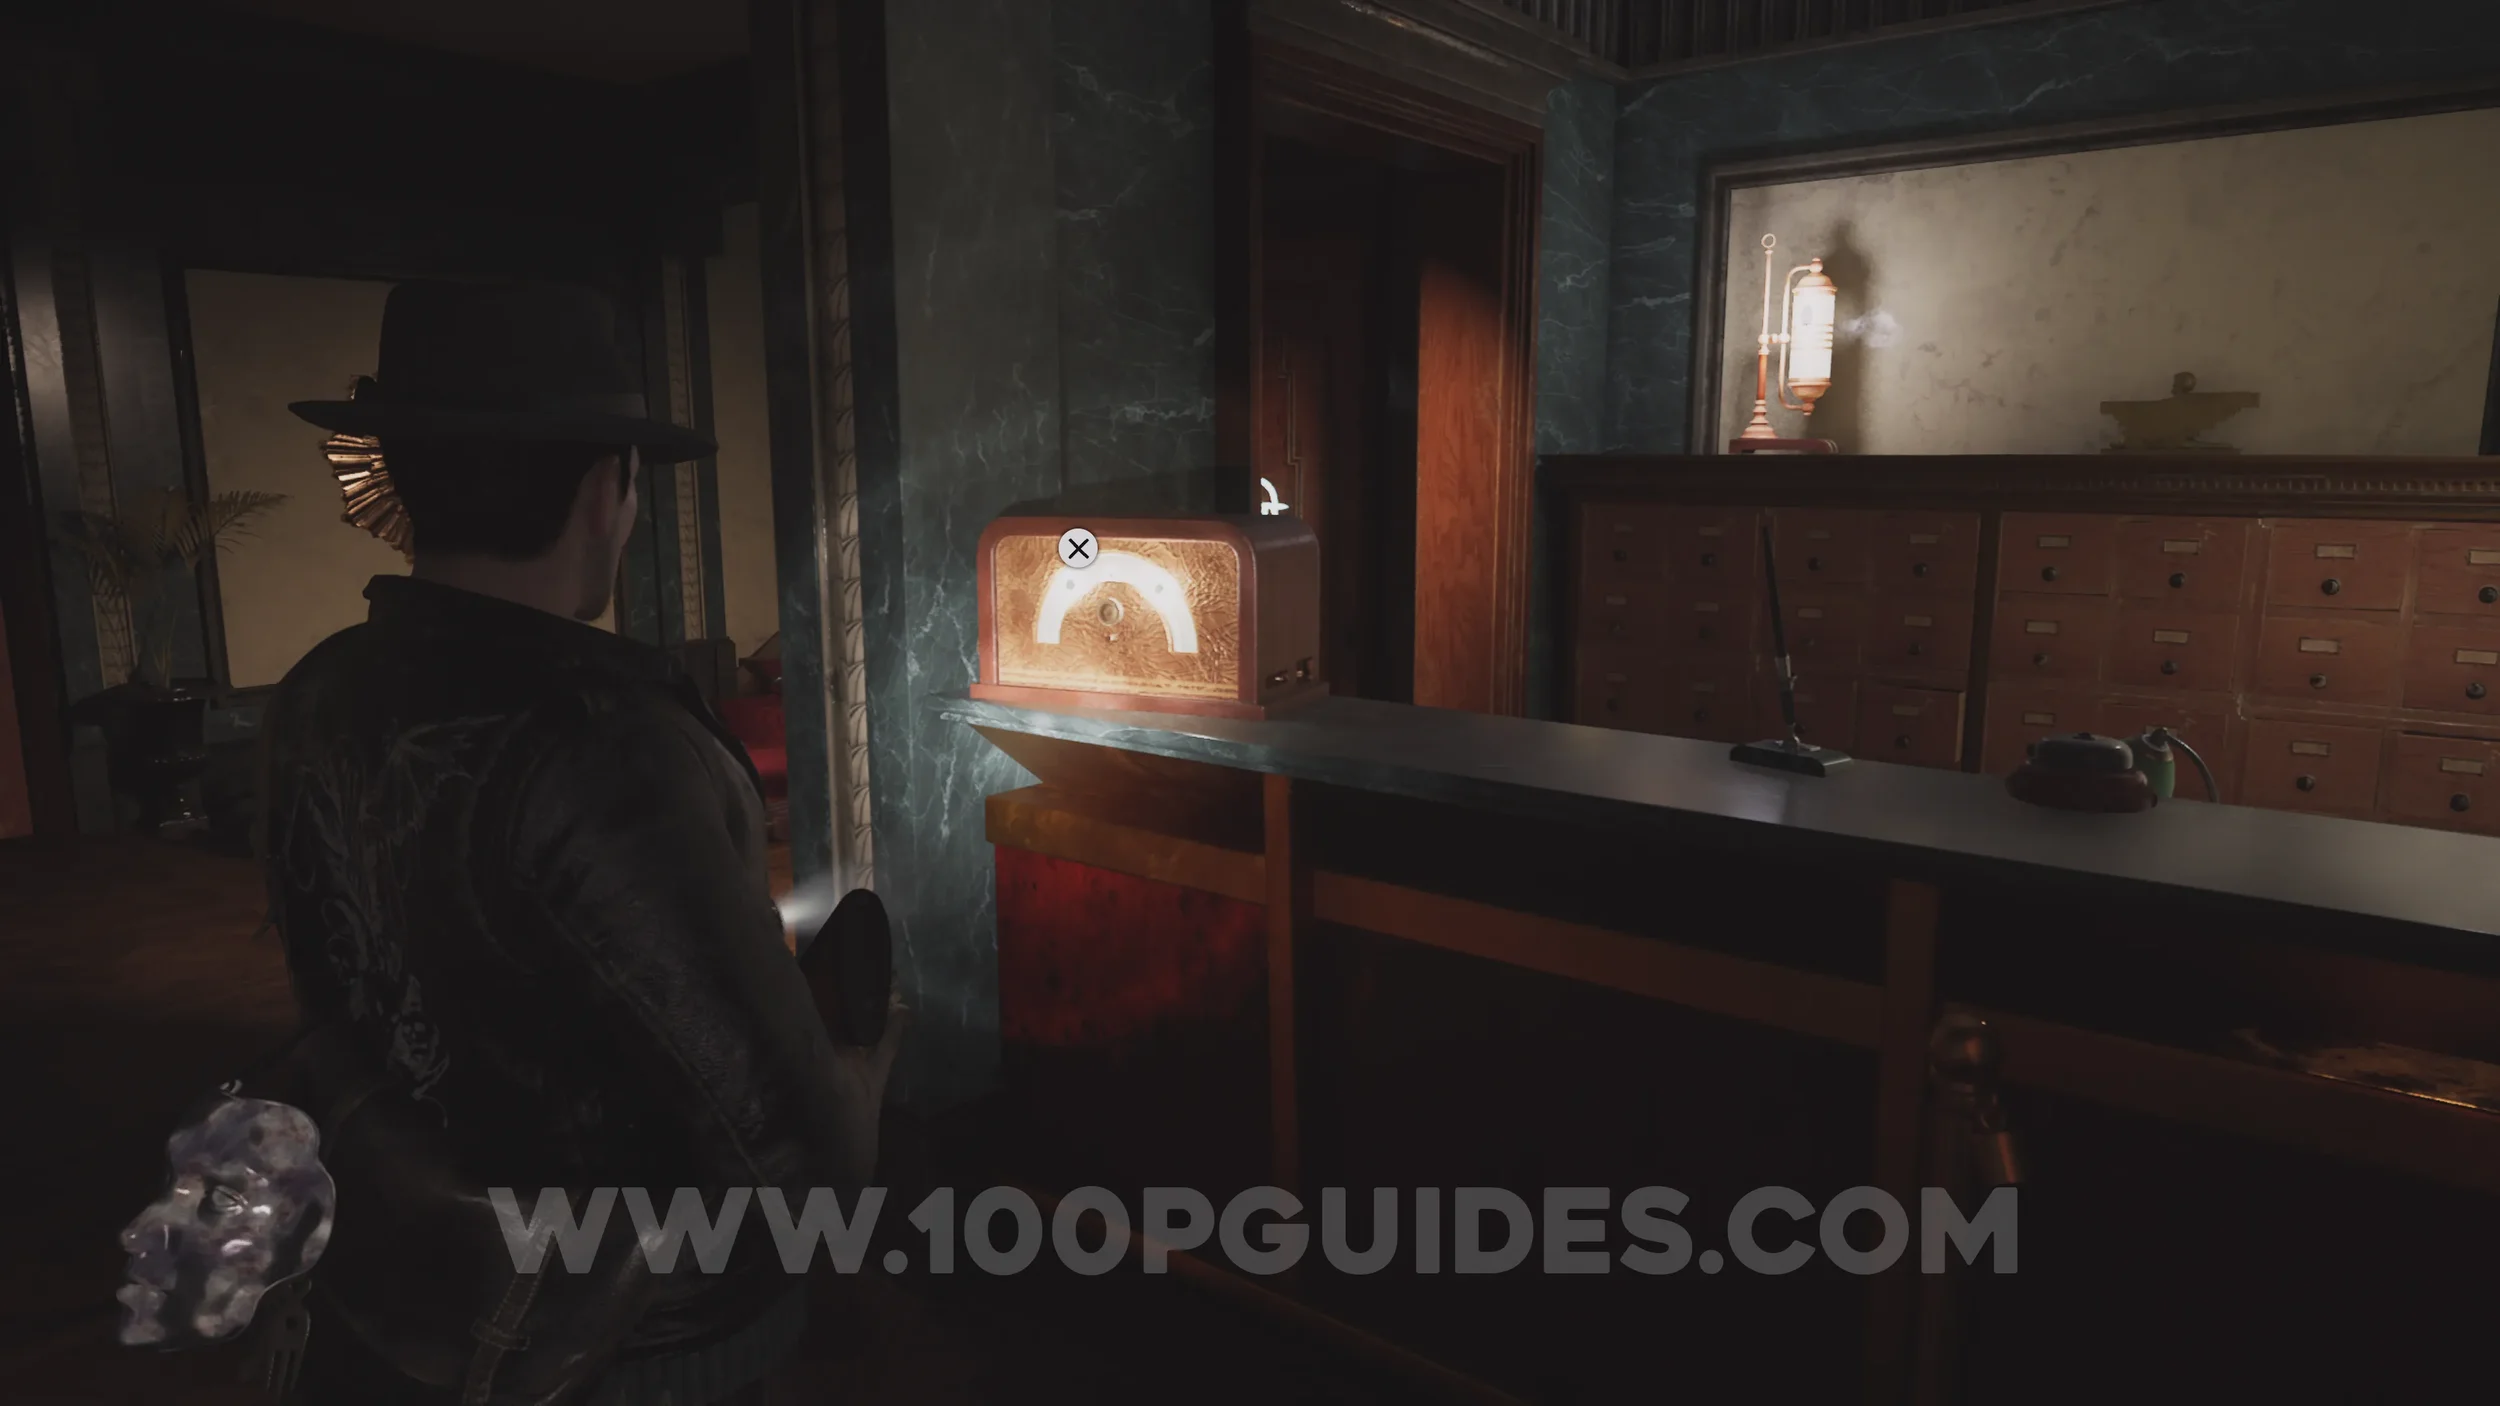
Radio: The Song of the Universe. On the reception desk just above the previous evidence, though you'll have to walk out into the Lobby and activate it from the other side.
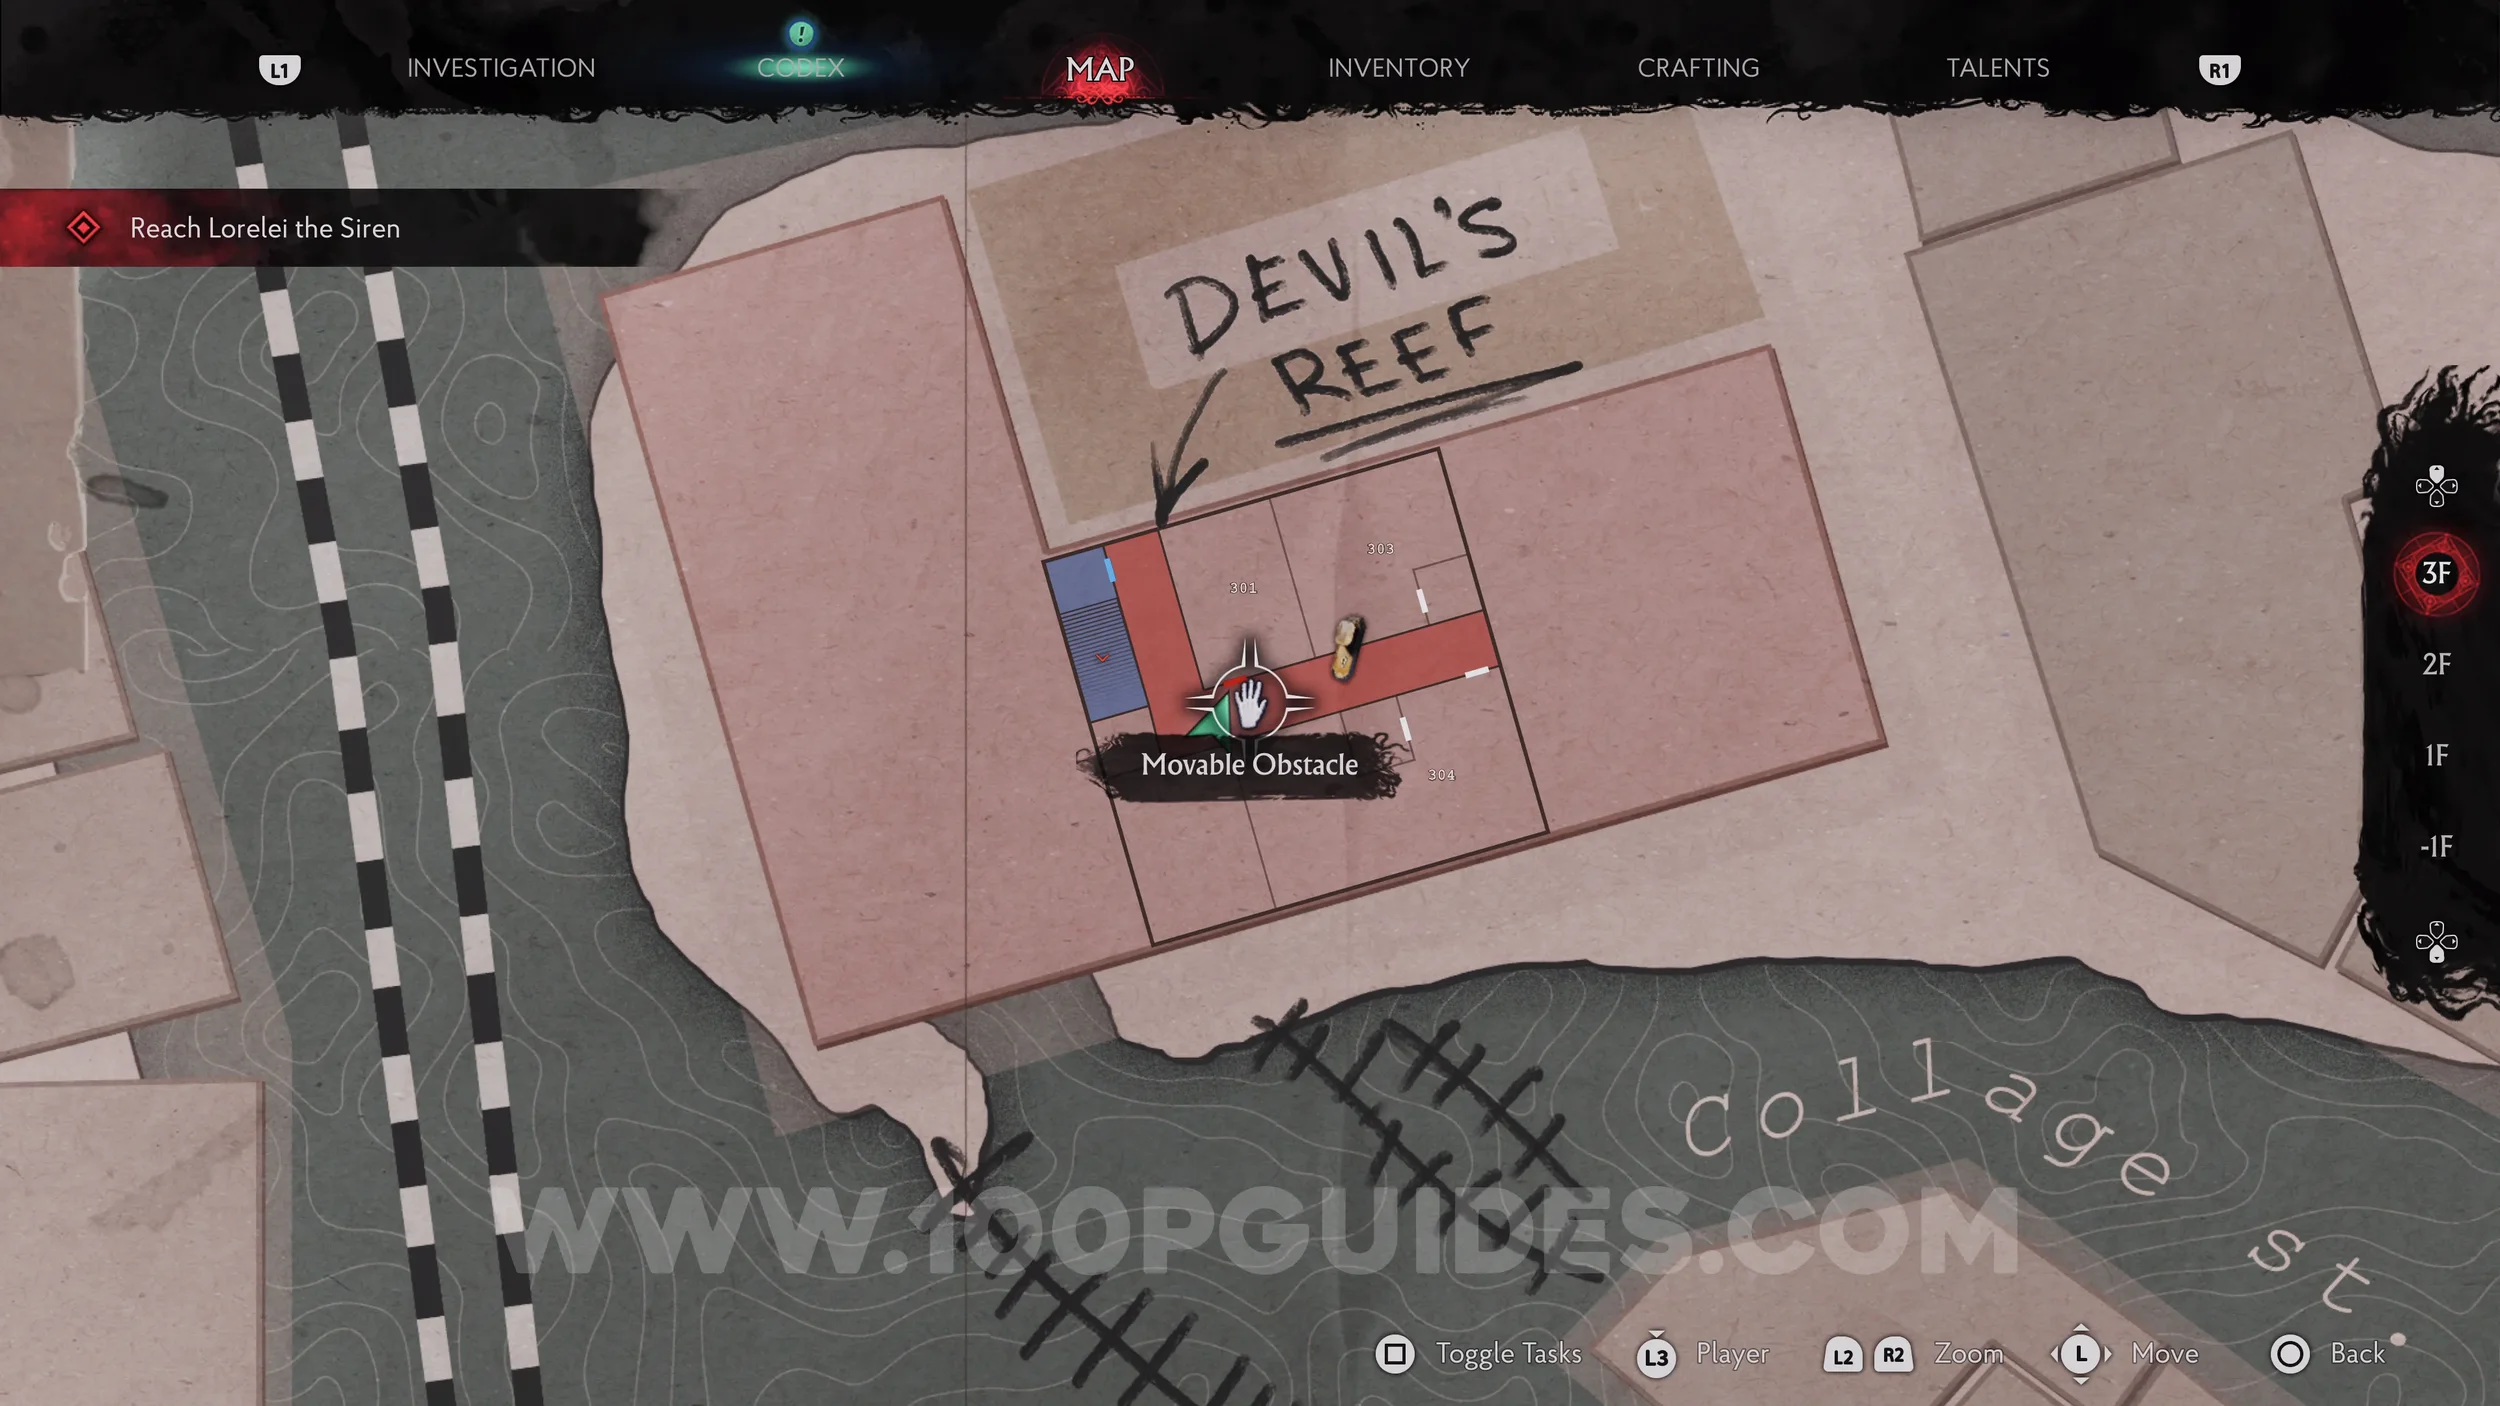
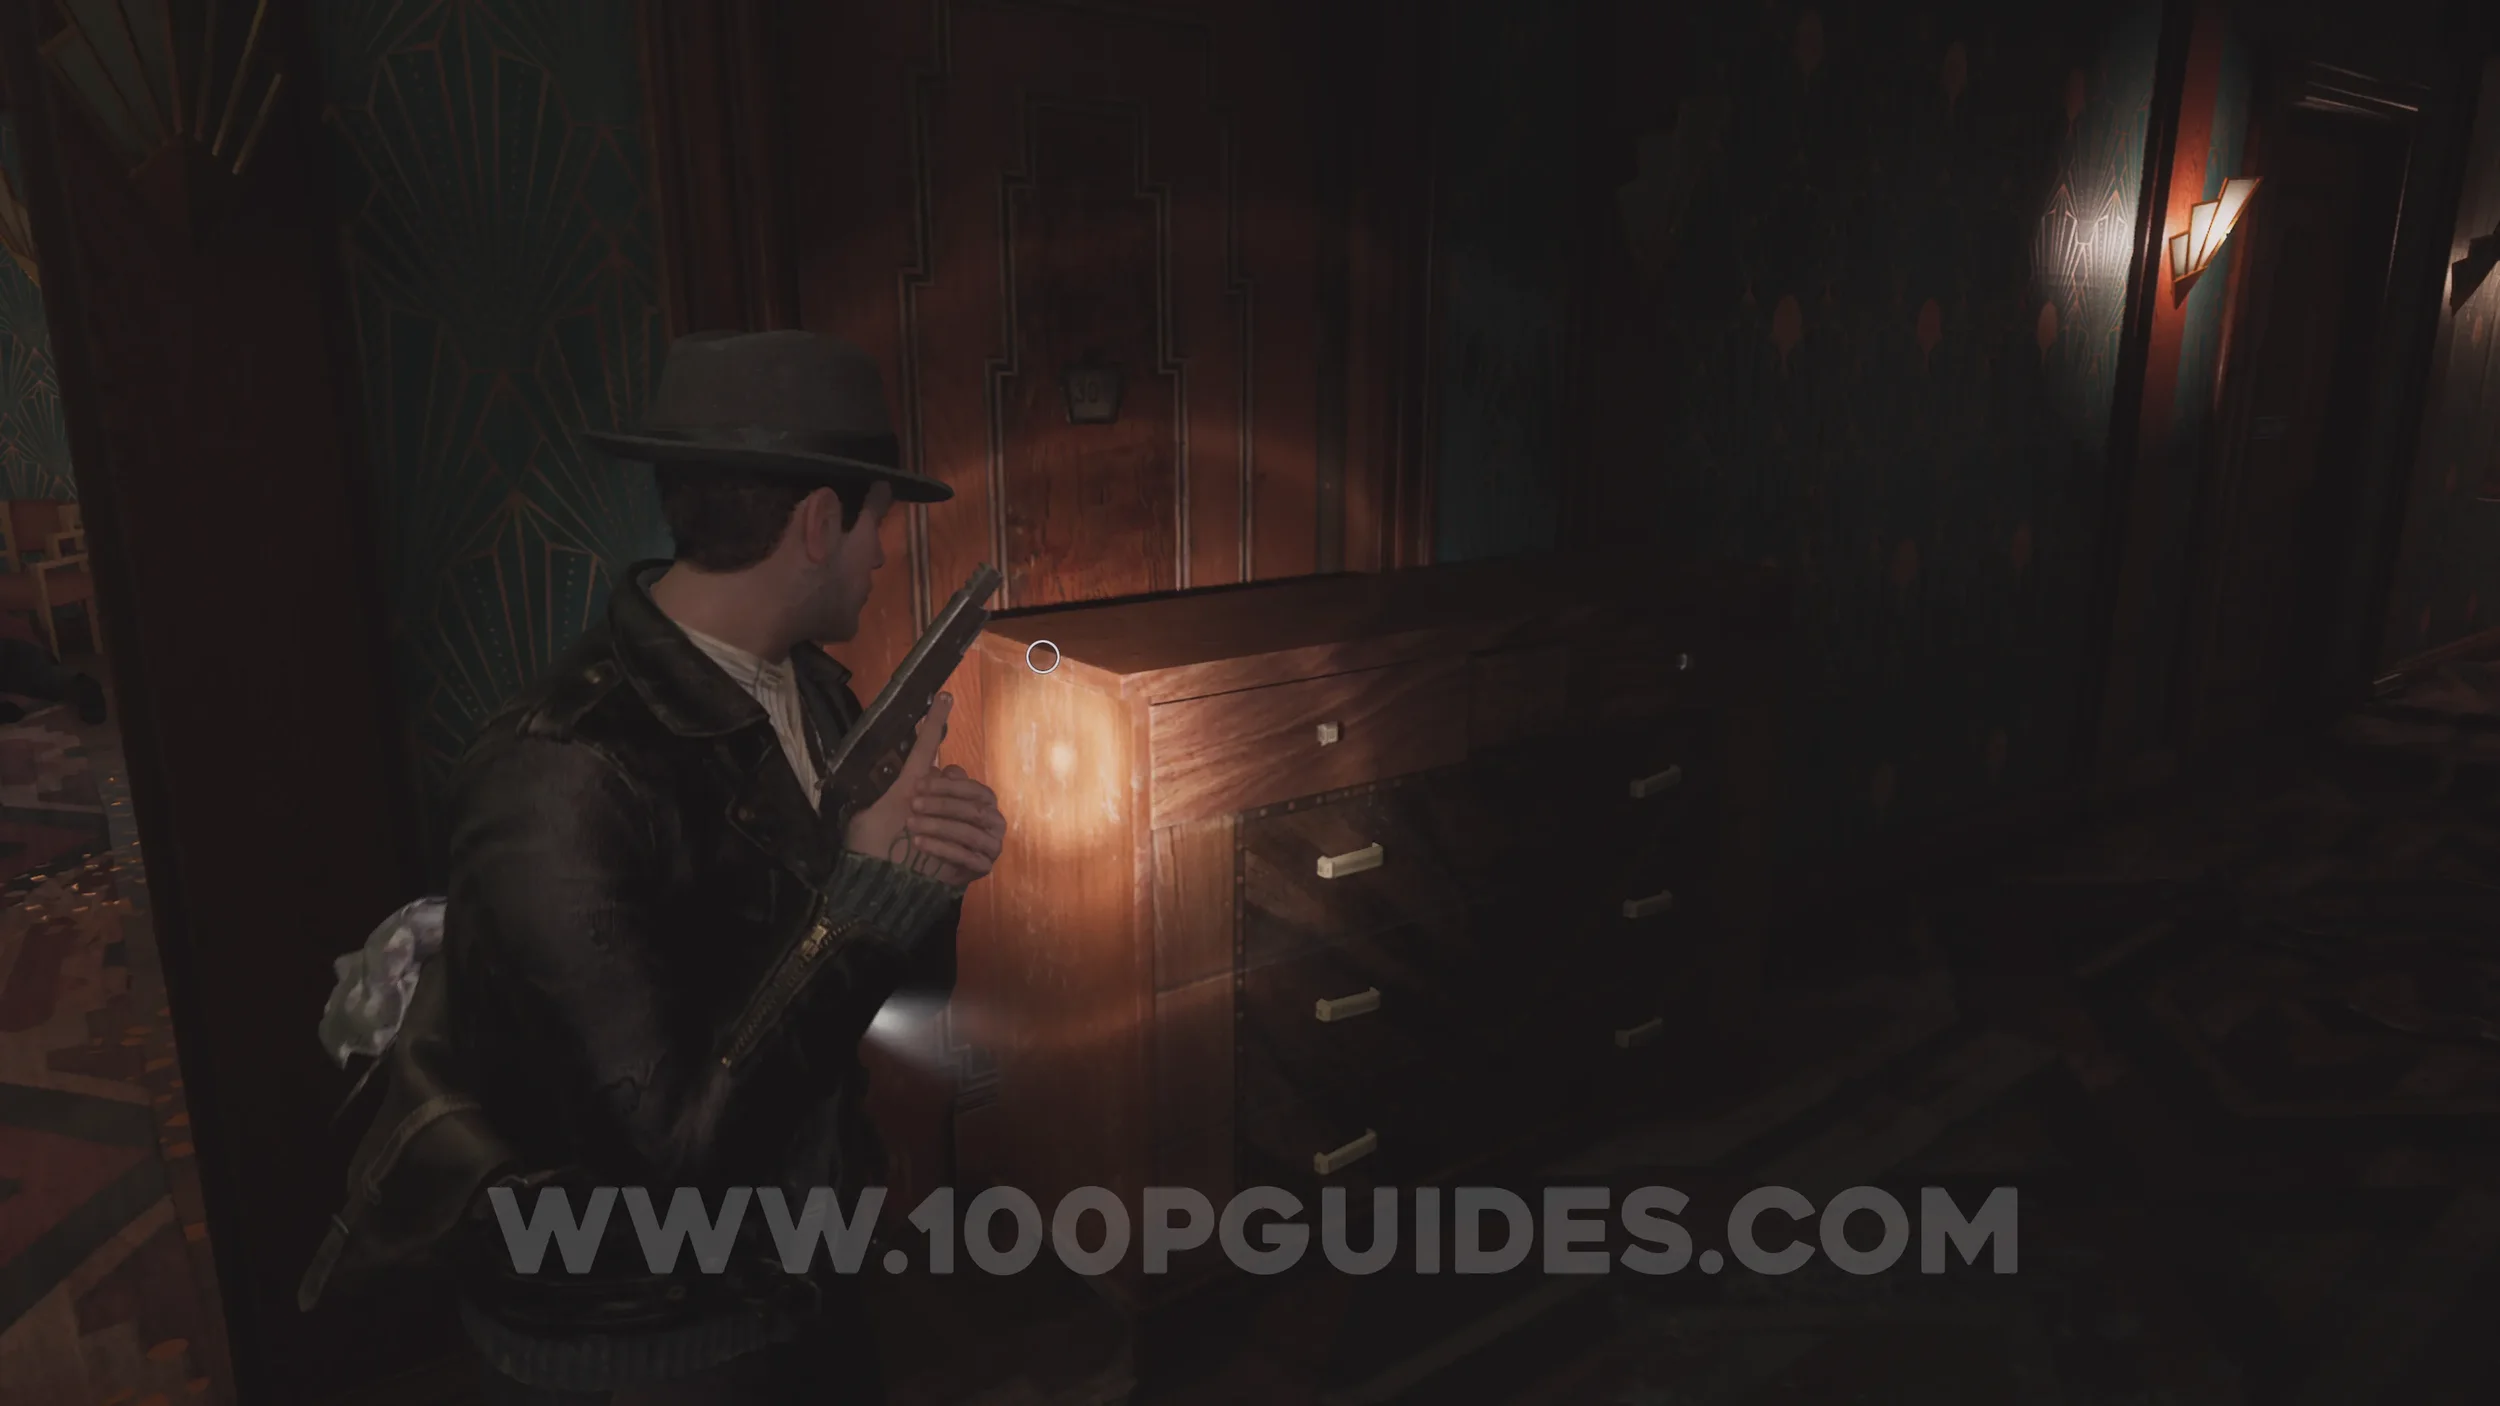
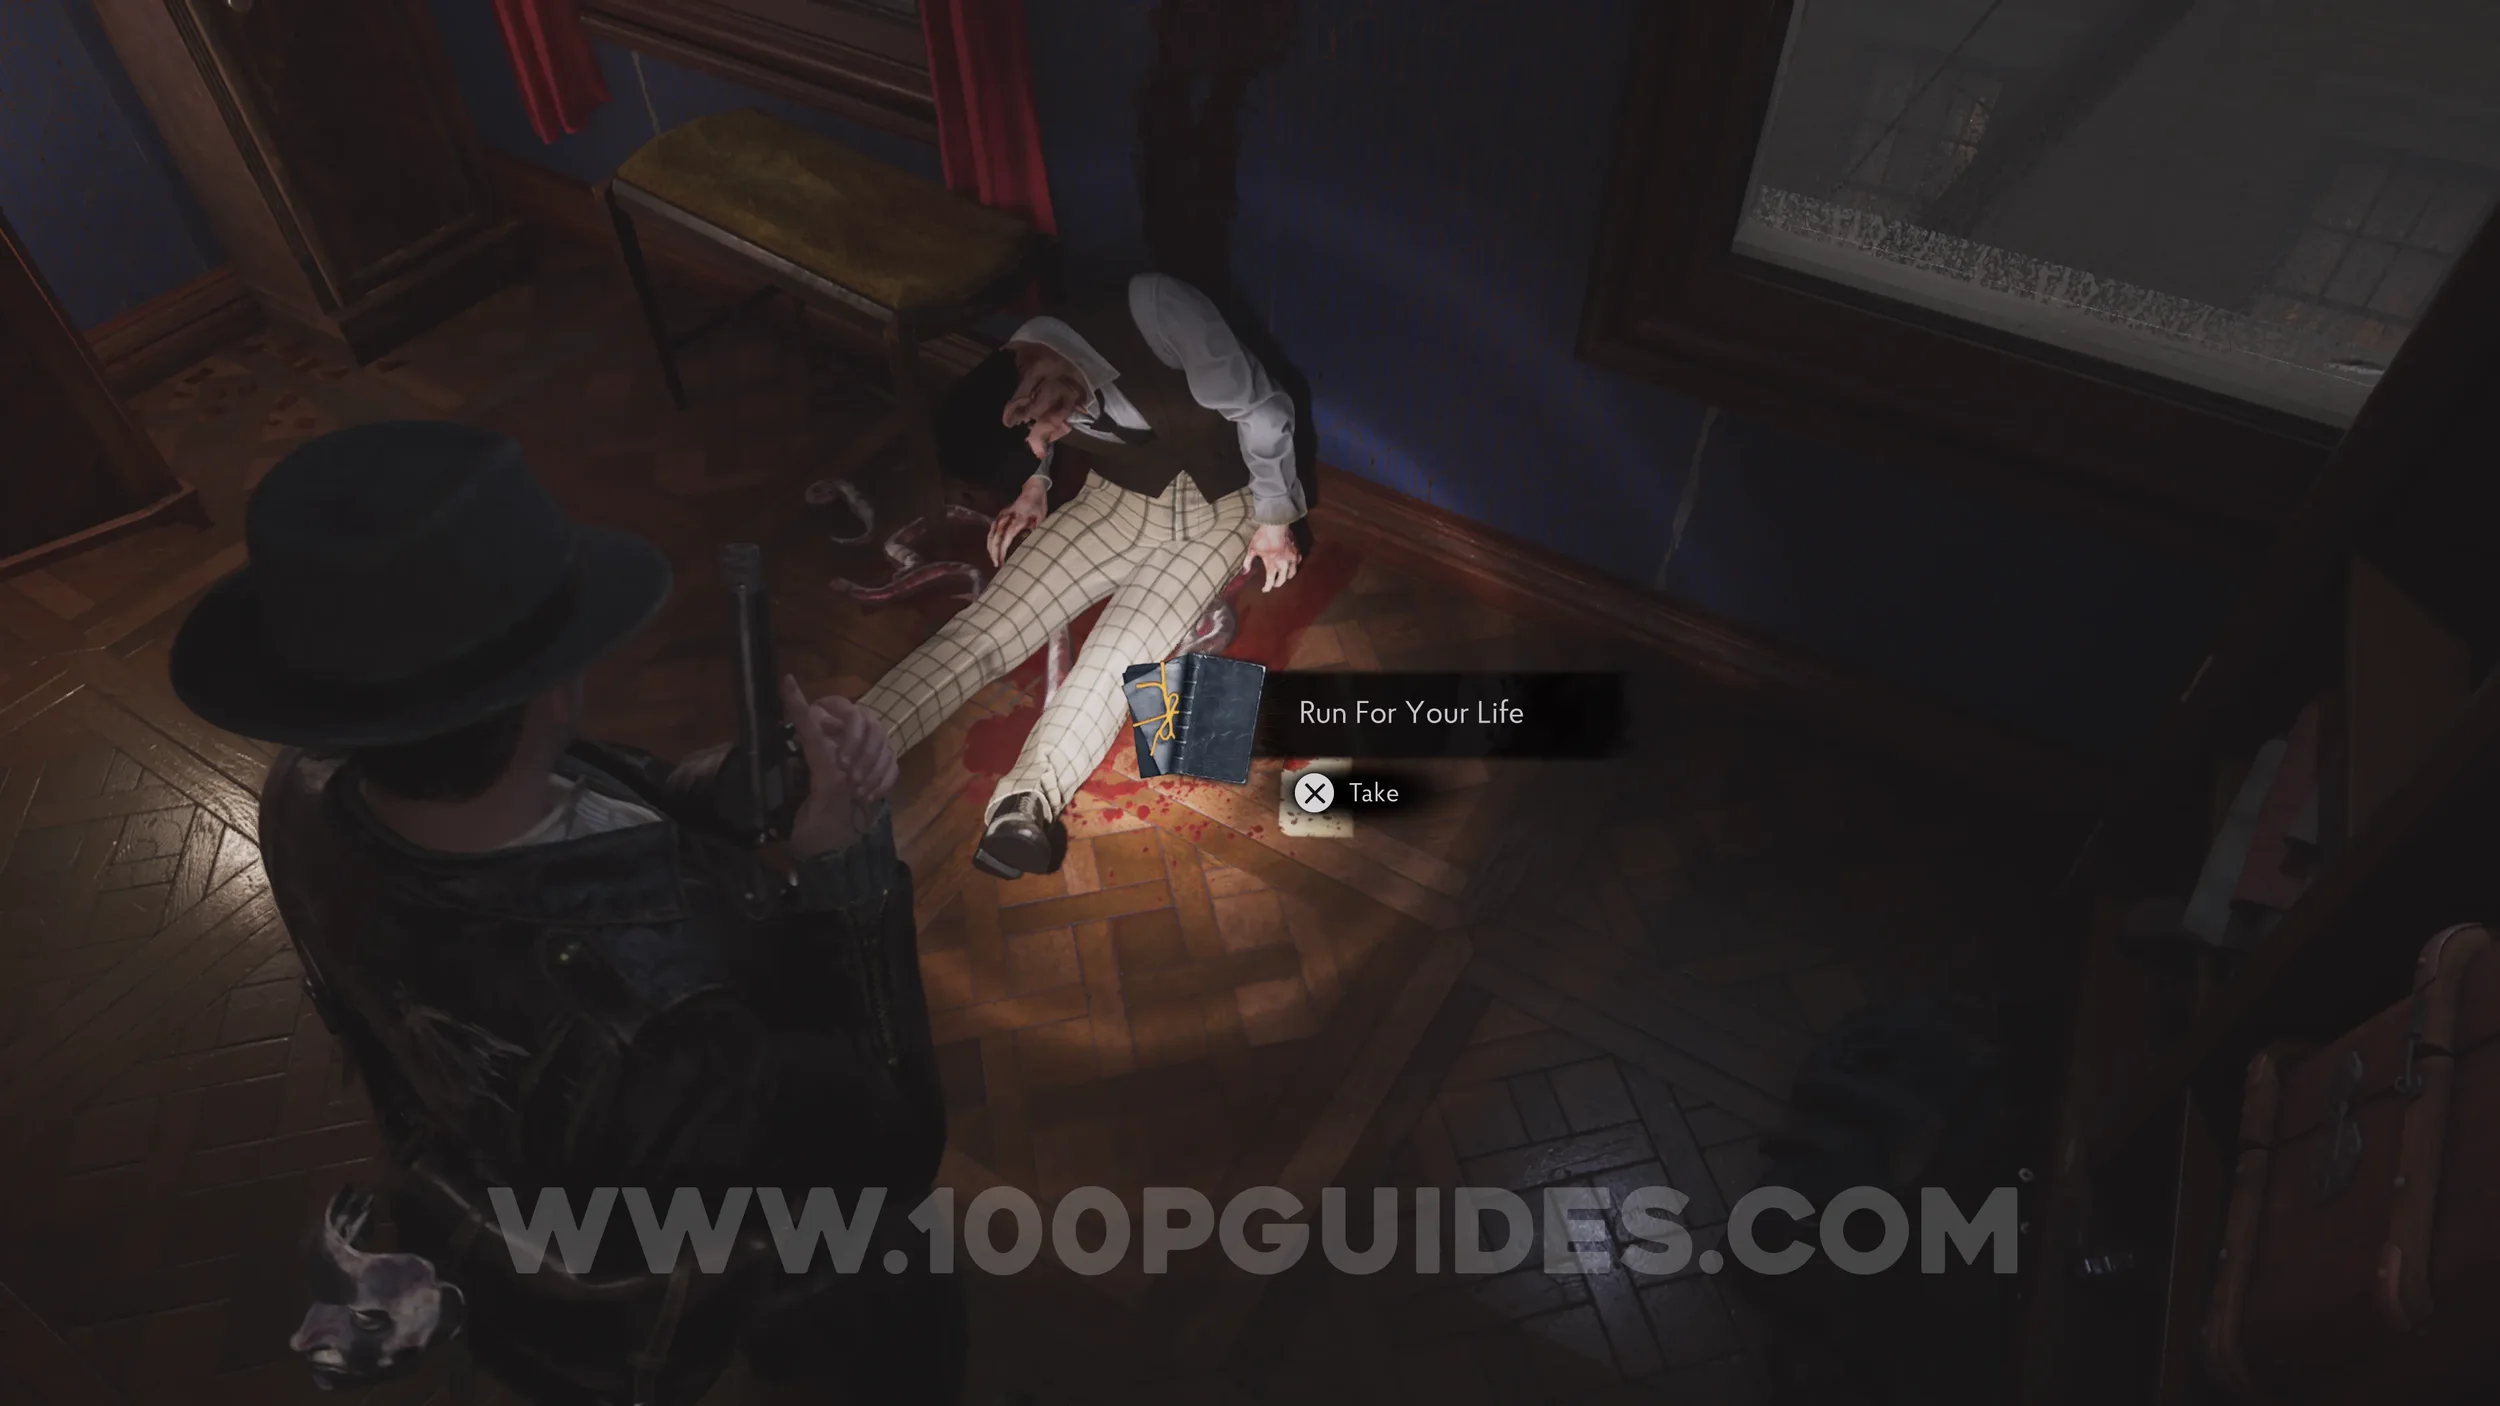
Lore Codex: Run For Your Life. Head back up the stairs and through the door on the right. Then go right at the end of the next hall to continue up to the next floor. Here, move the cupboard away from the first door on the left and enter Room 301, where you'll find the codex next to a corpse.
Room 301 Safe Code/The Alluring Song
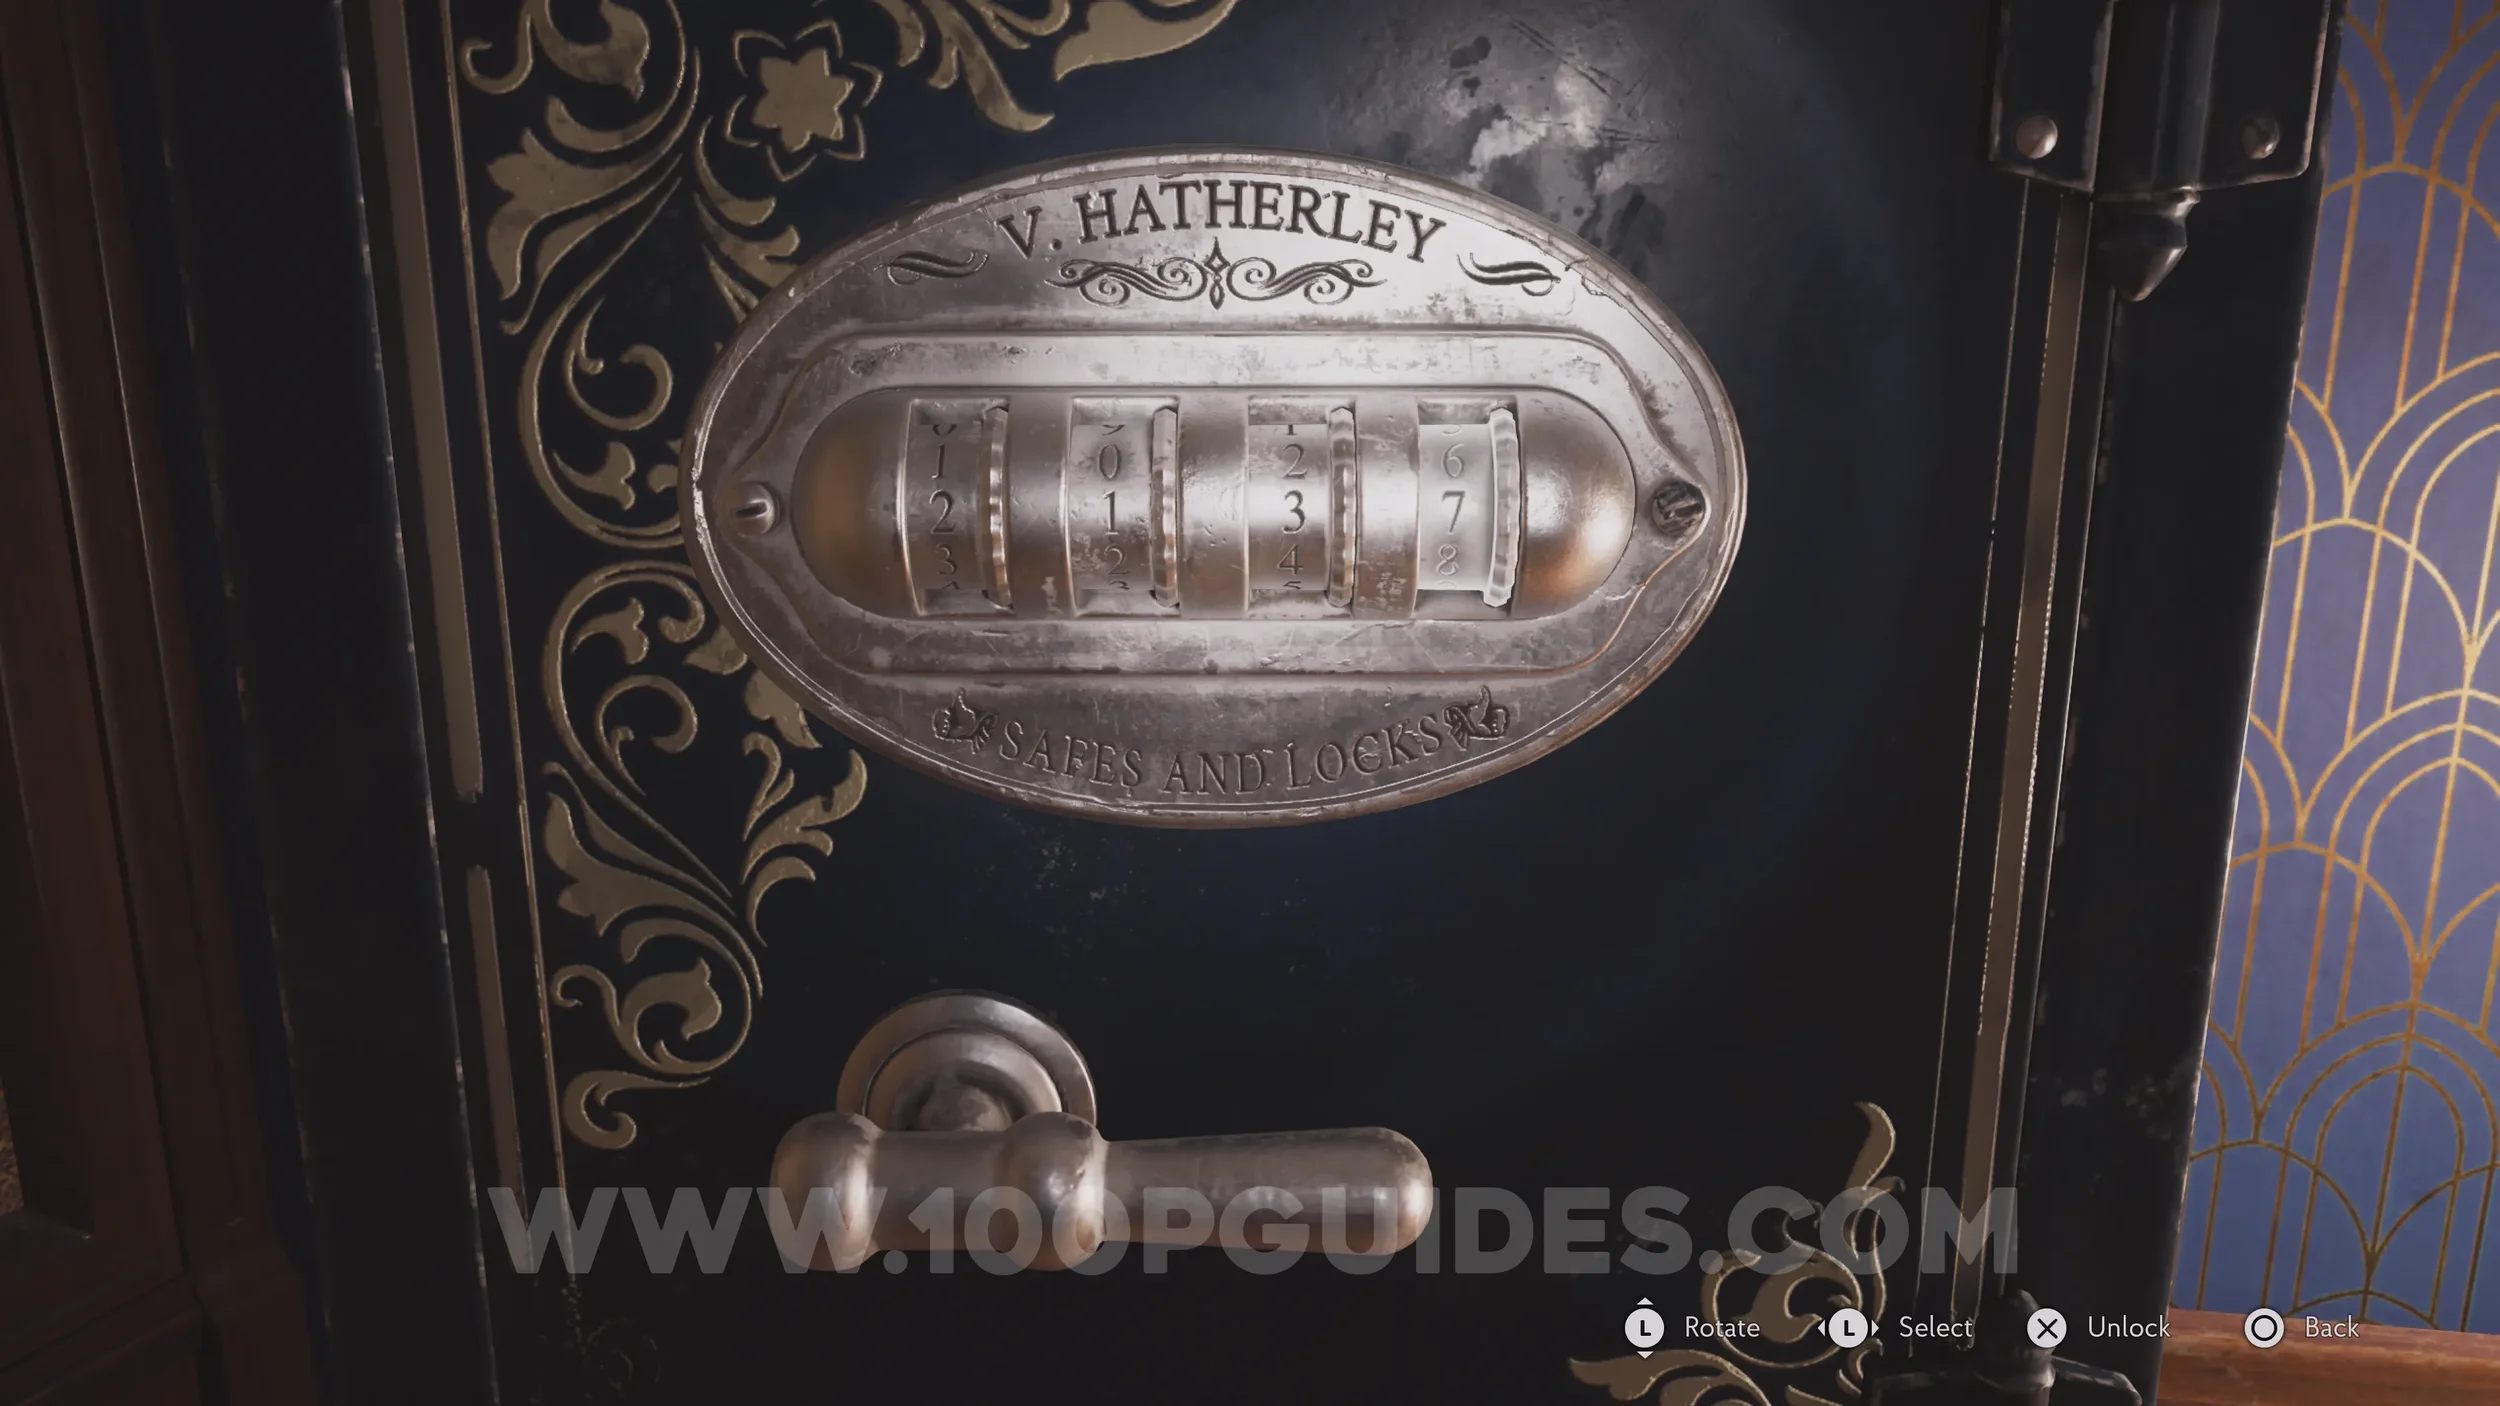
Use the code 2137 to open the safe in Room 301. Technically you wouldn't be able to work this out yet, since it relies on two pieces of evidence you pick up a little later in the Hotel, but as you're already here you may as well open it now to grab the accessory and the trophy.

Weapon Accessory: Voss’s Target Grip. Found inside the safe.
Trophy: The Siren’s Call. Obtained after opening the safe.
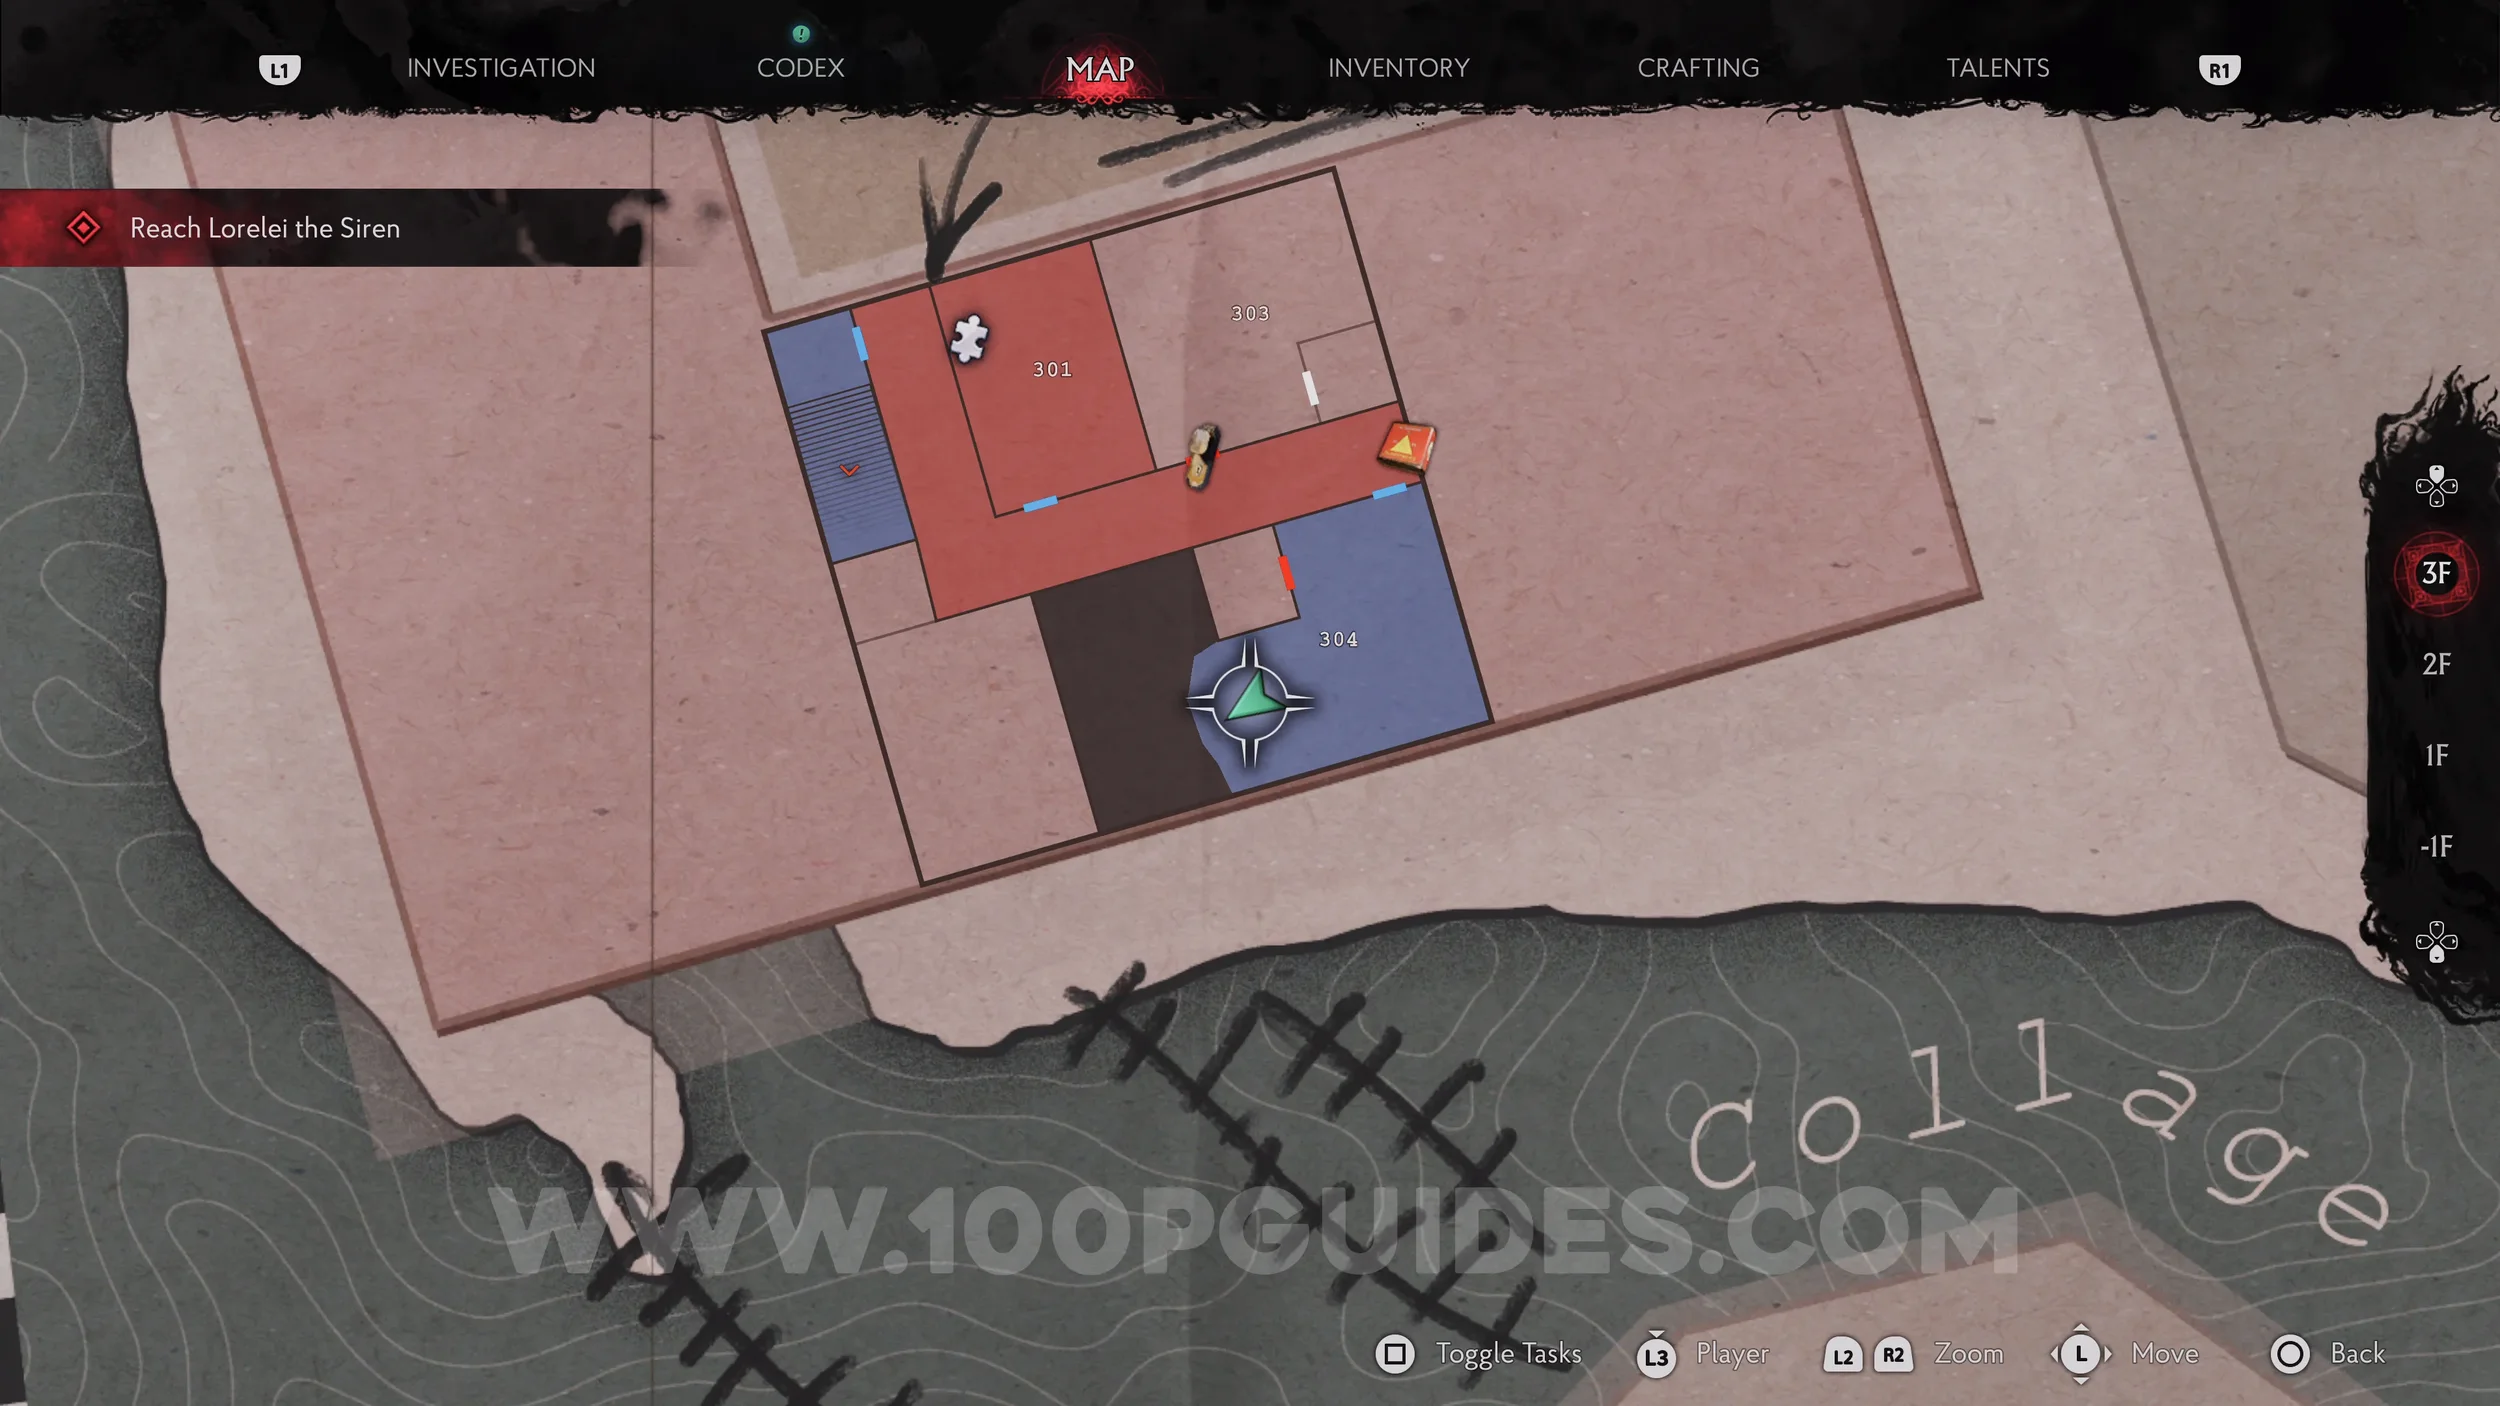
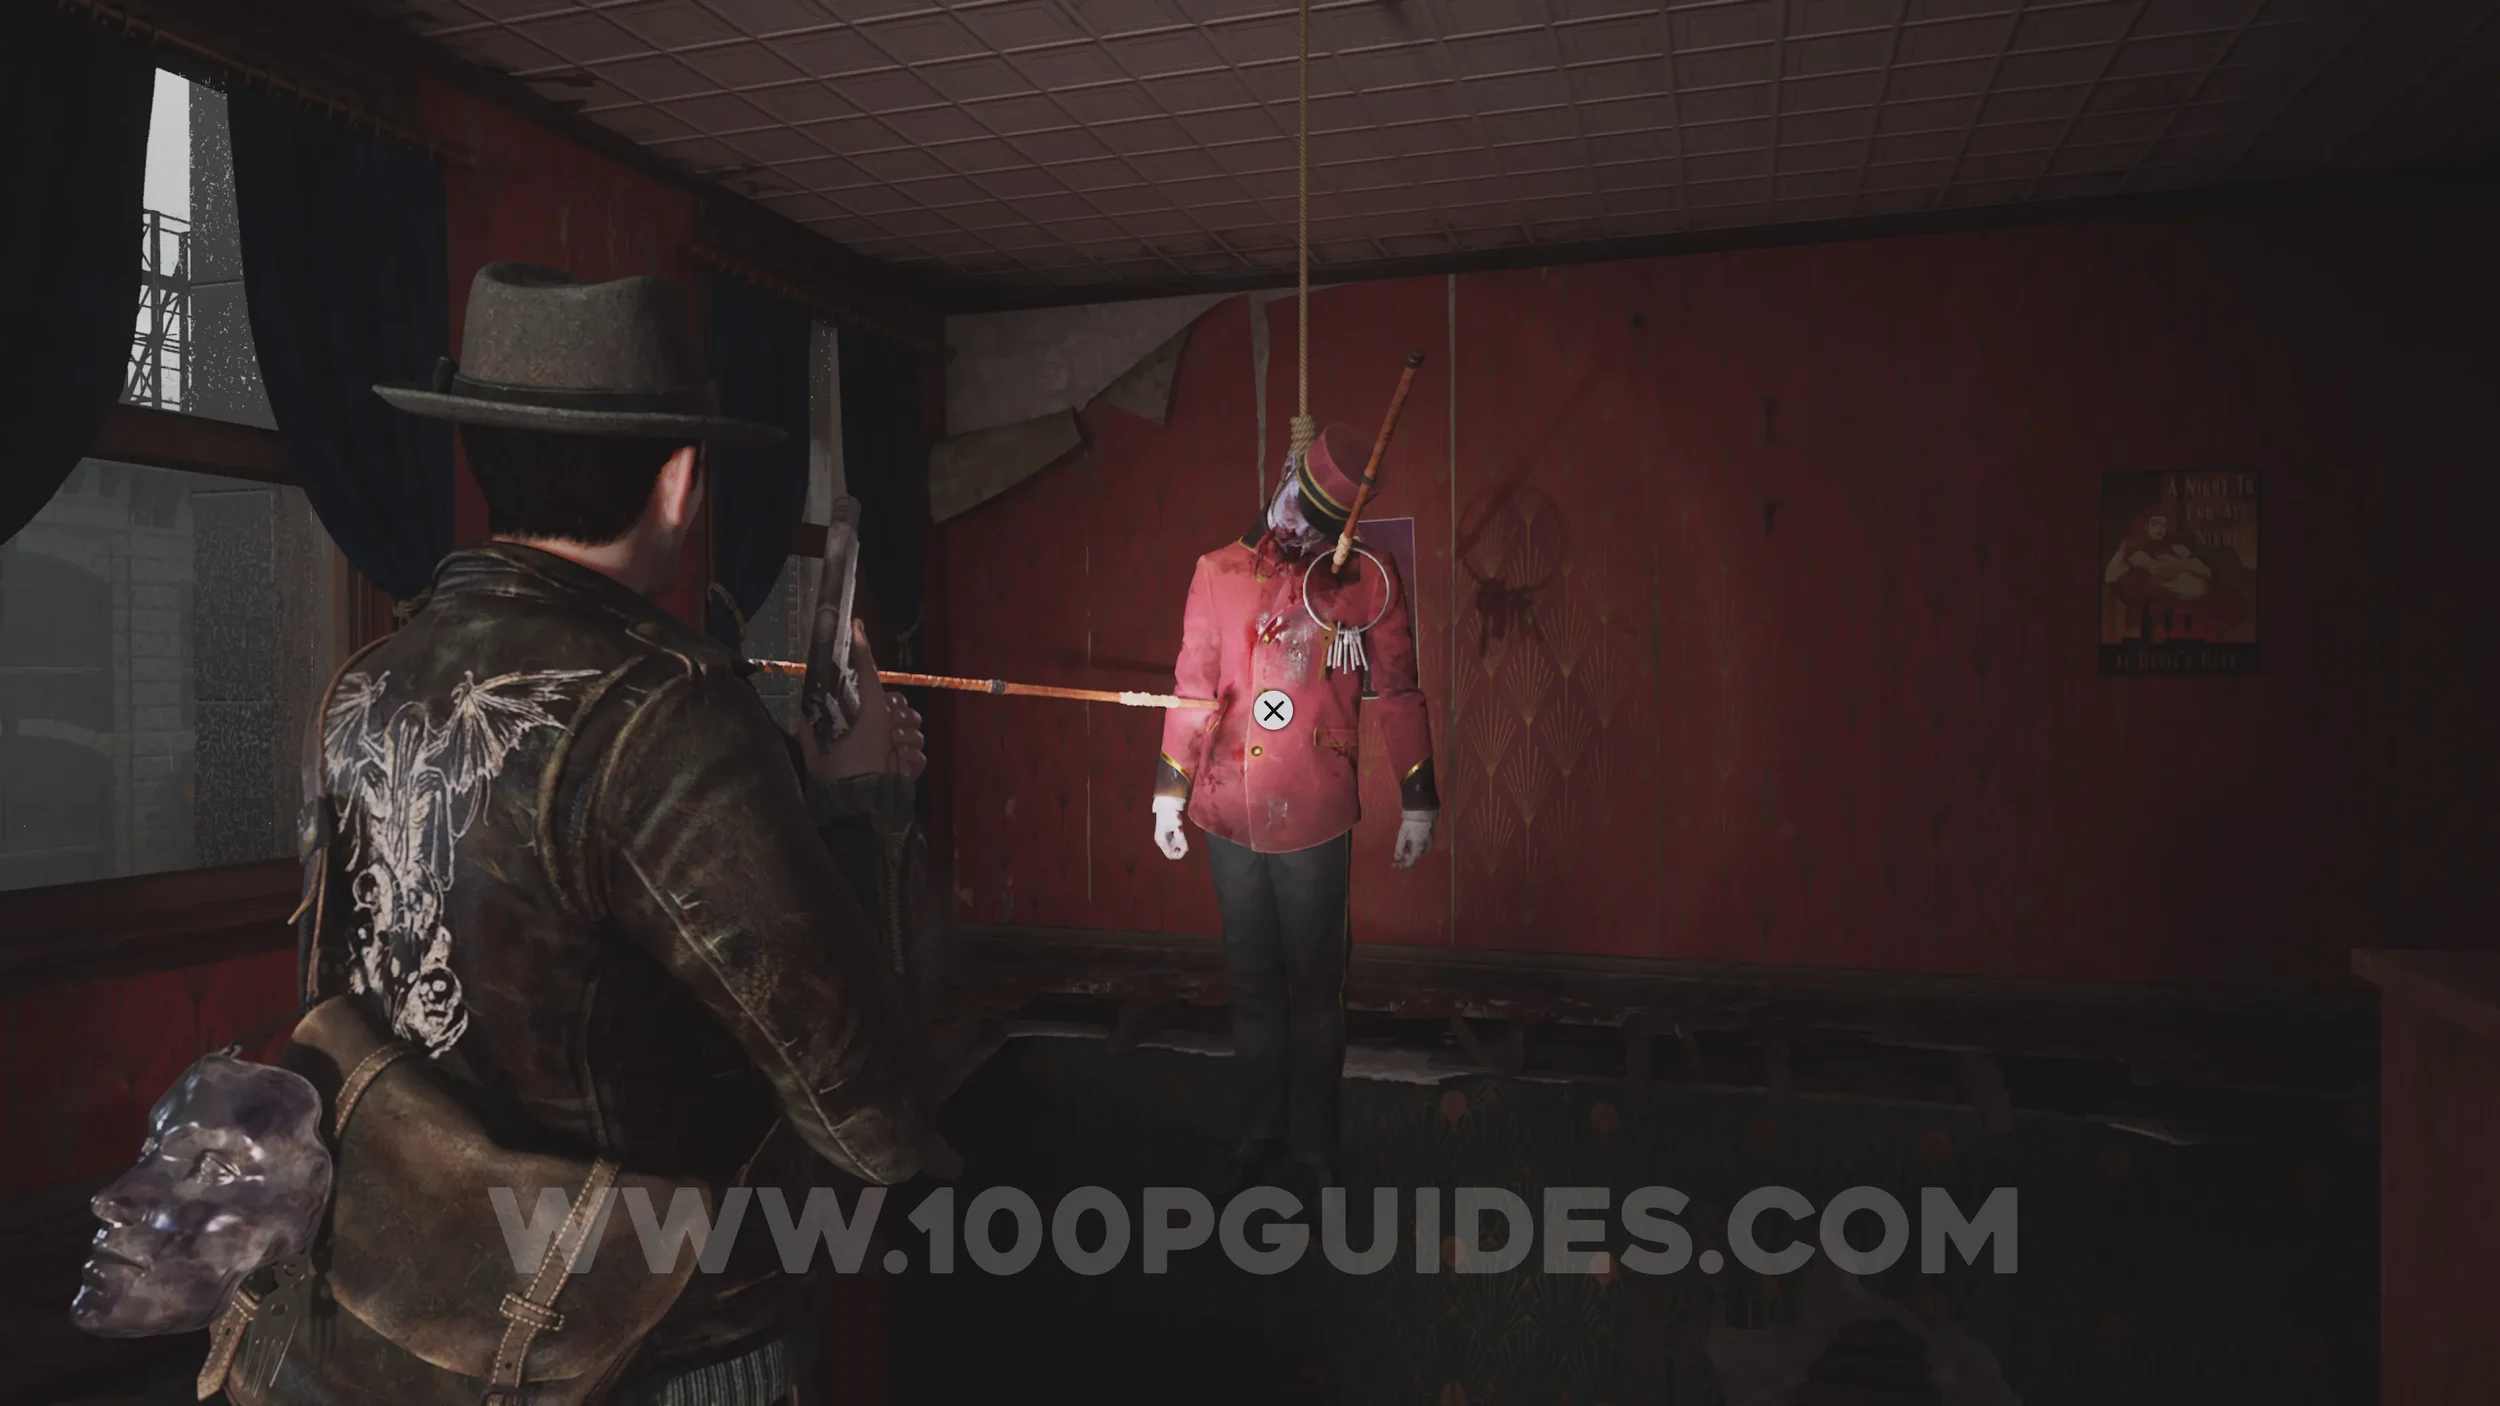
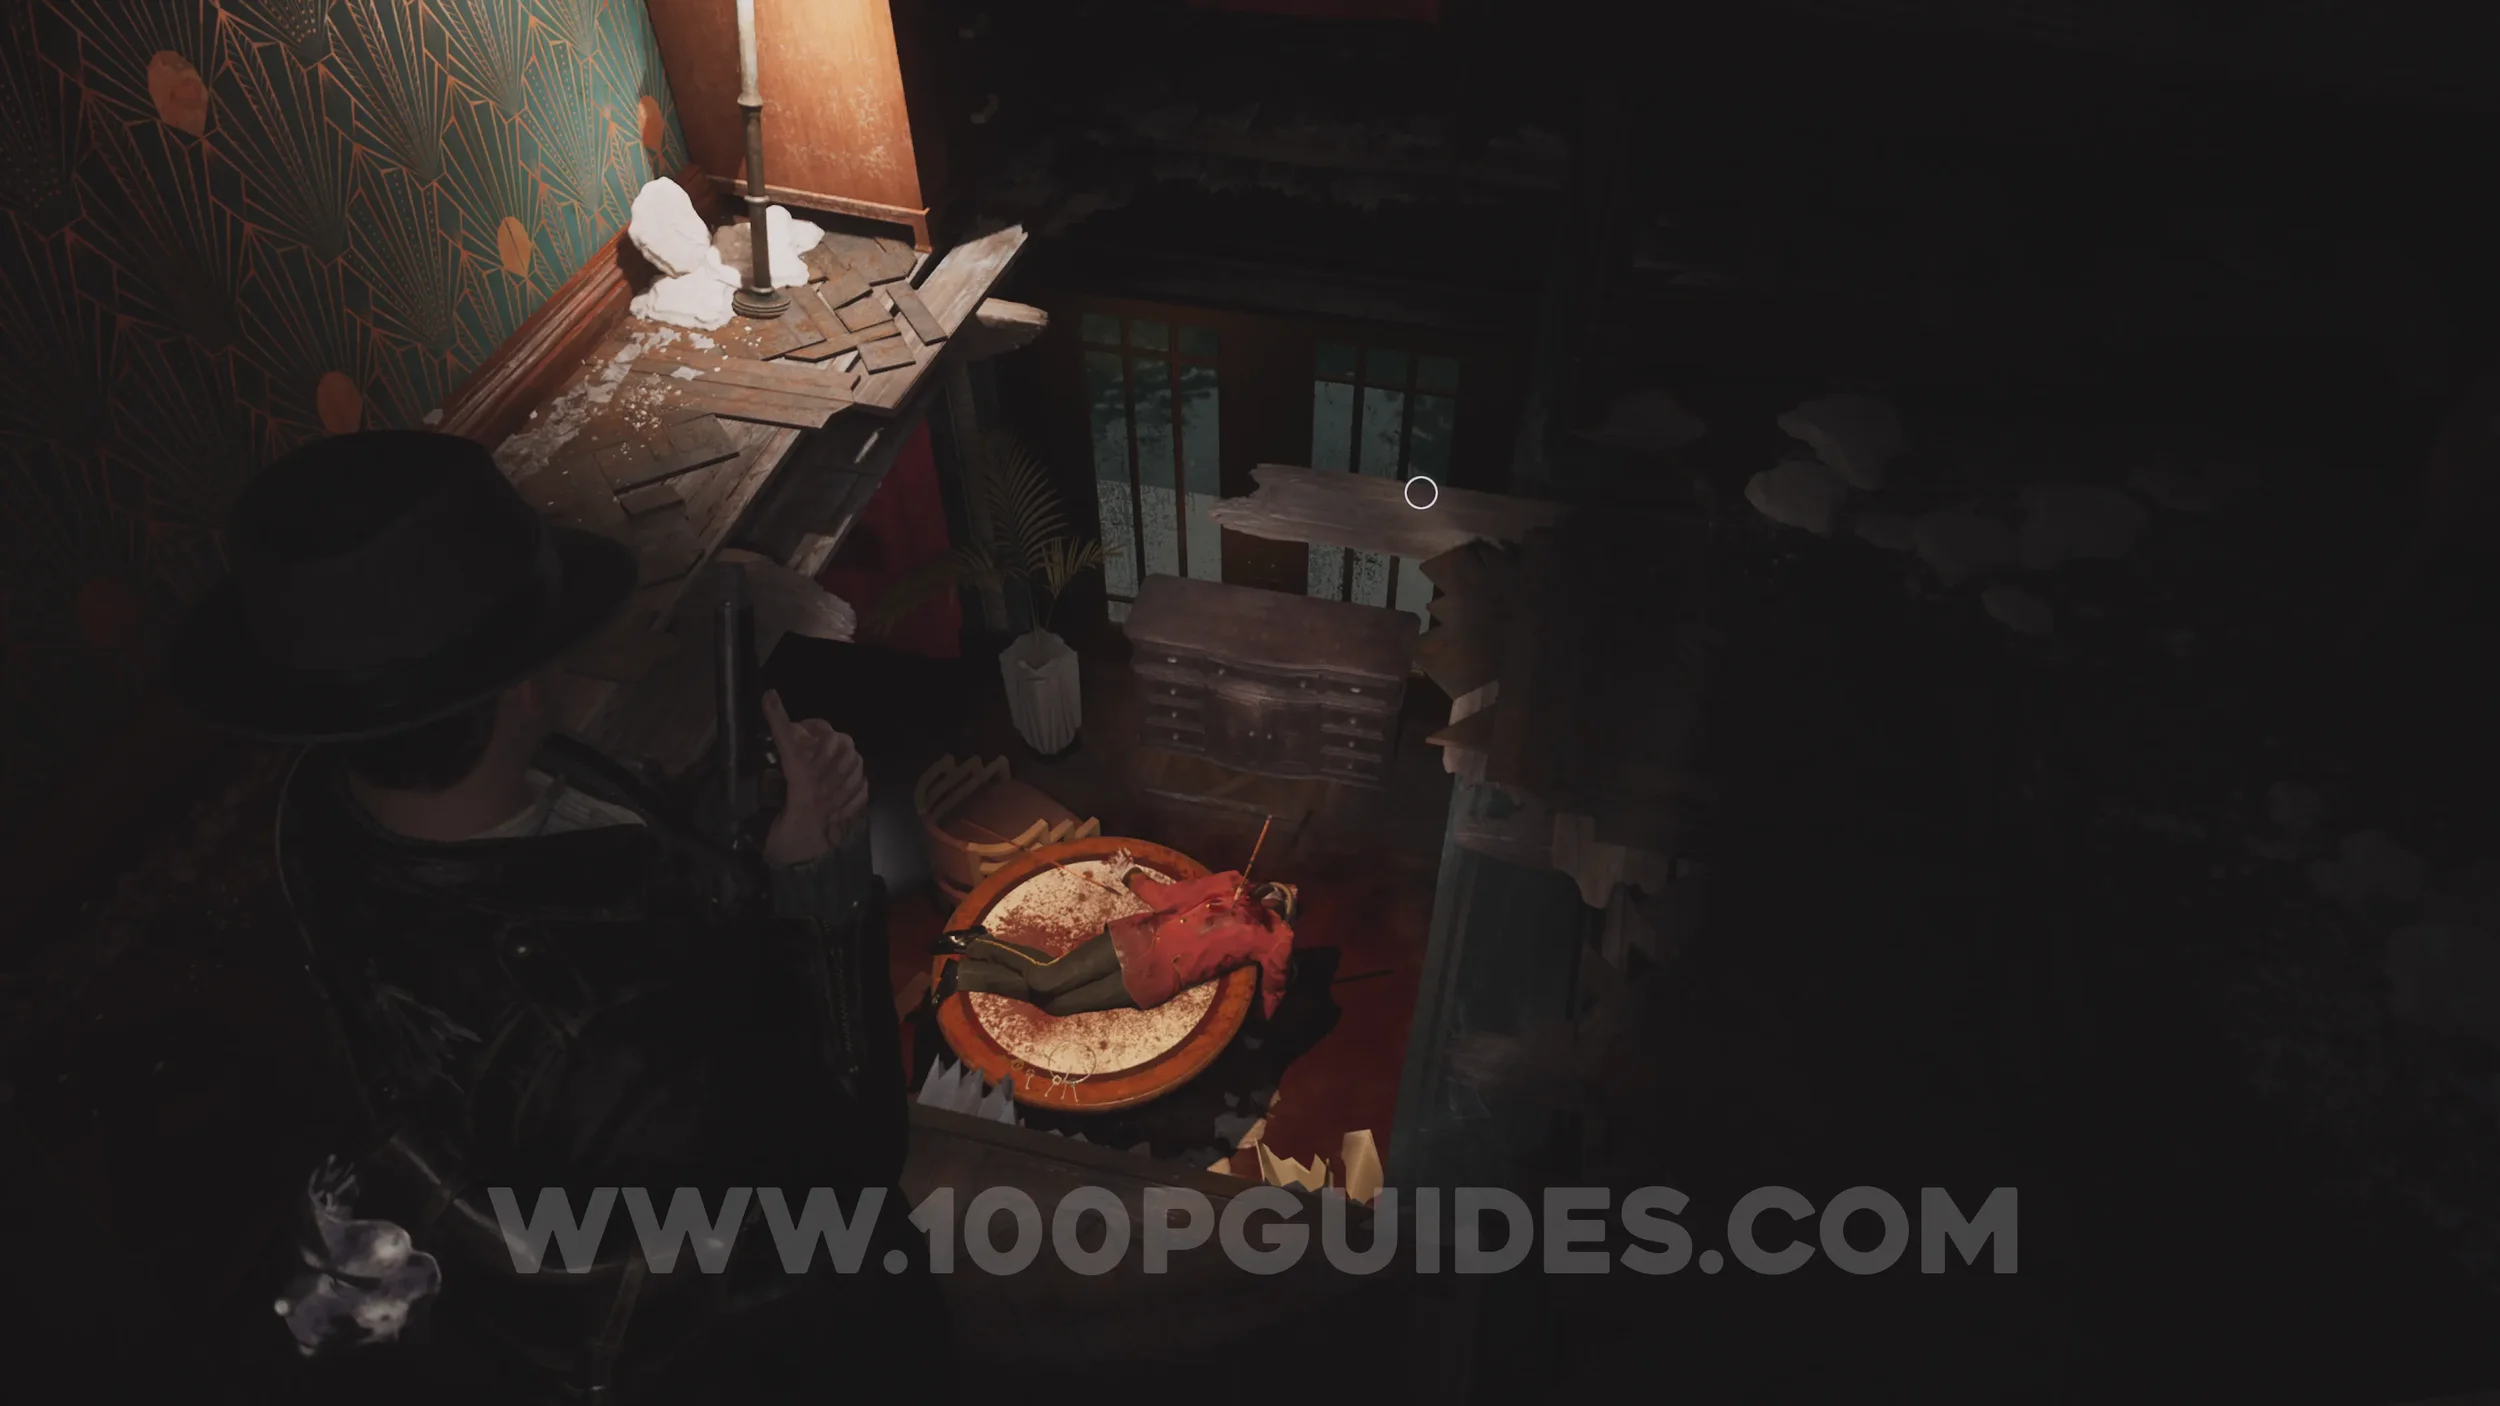
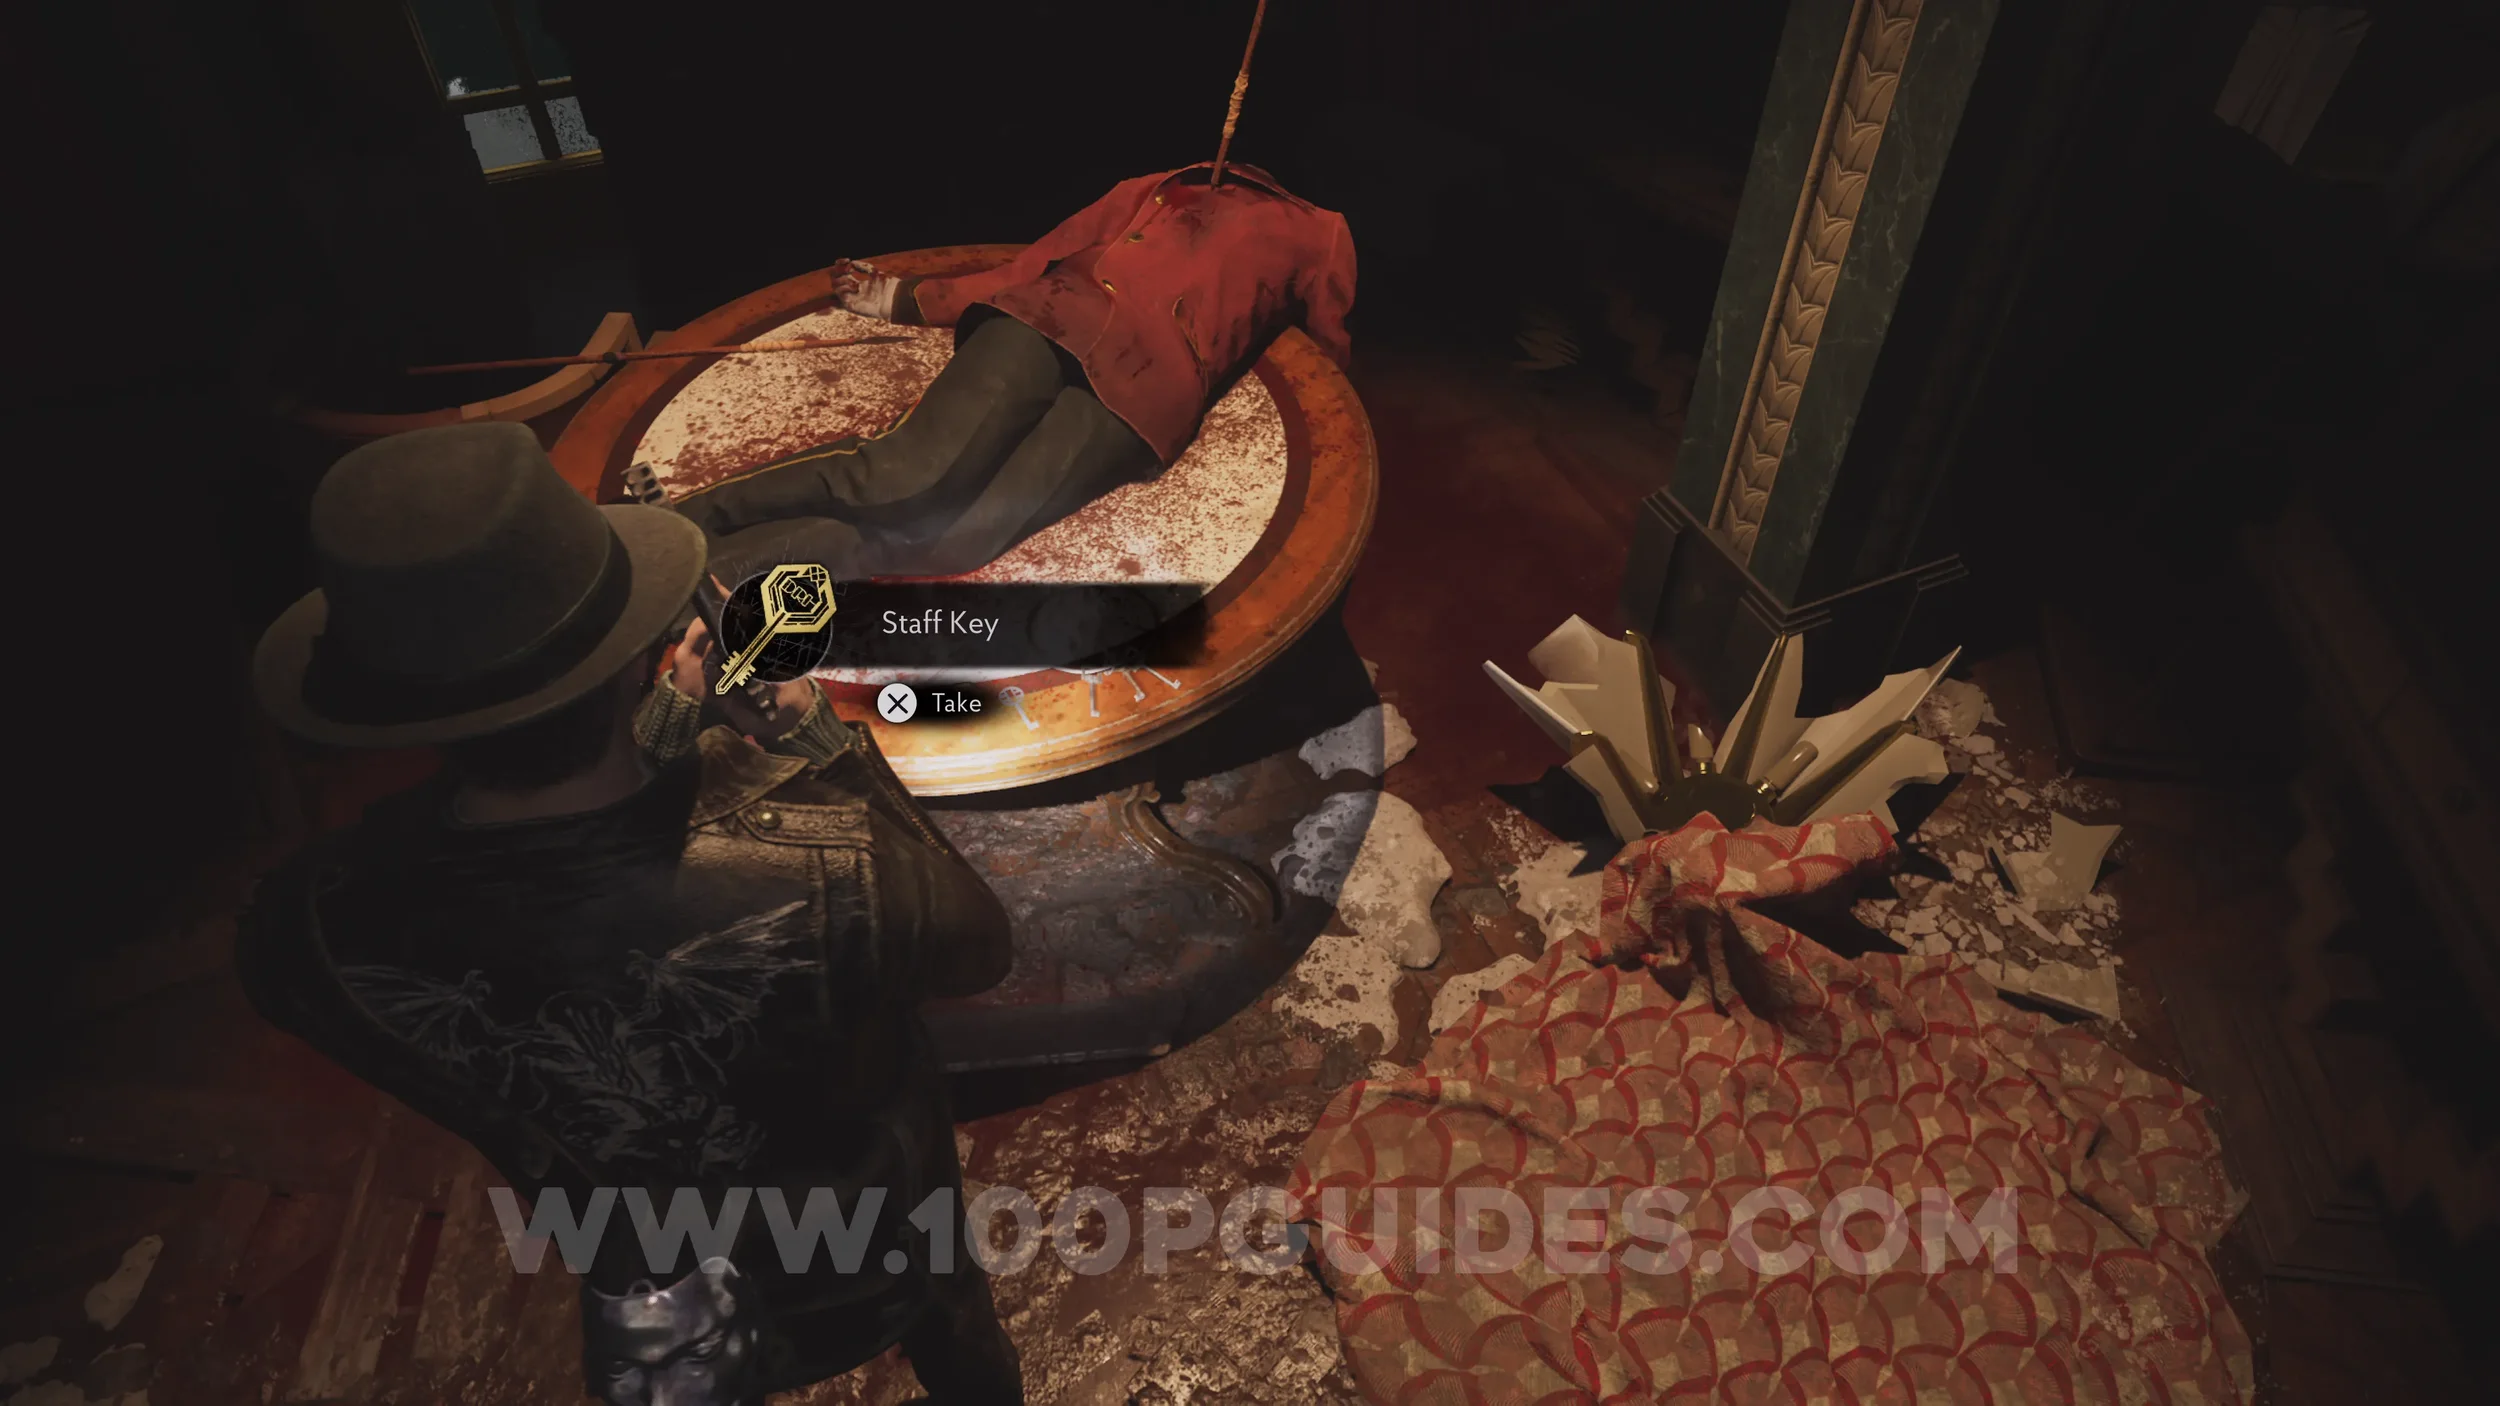
Key Item: Staff Key (Pt. 1). Exit back out to the hall and go left. Then open the last door on the right to enter Room 304. Here, interact with the hanging body and the key will fall down with it. You'll pick it up in a moment.
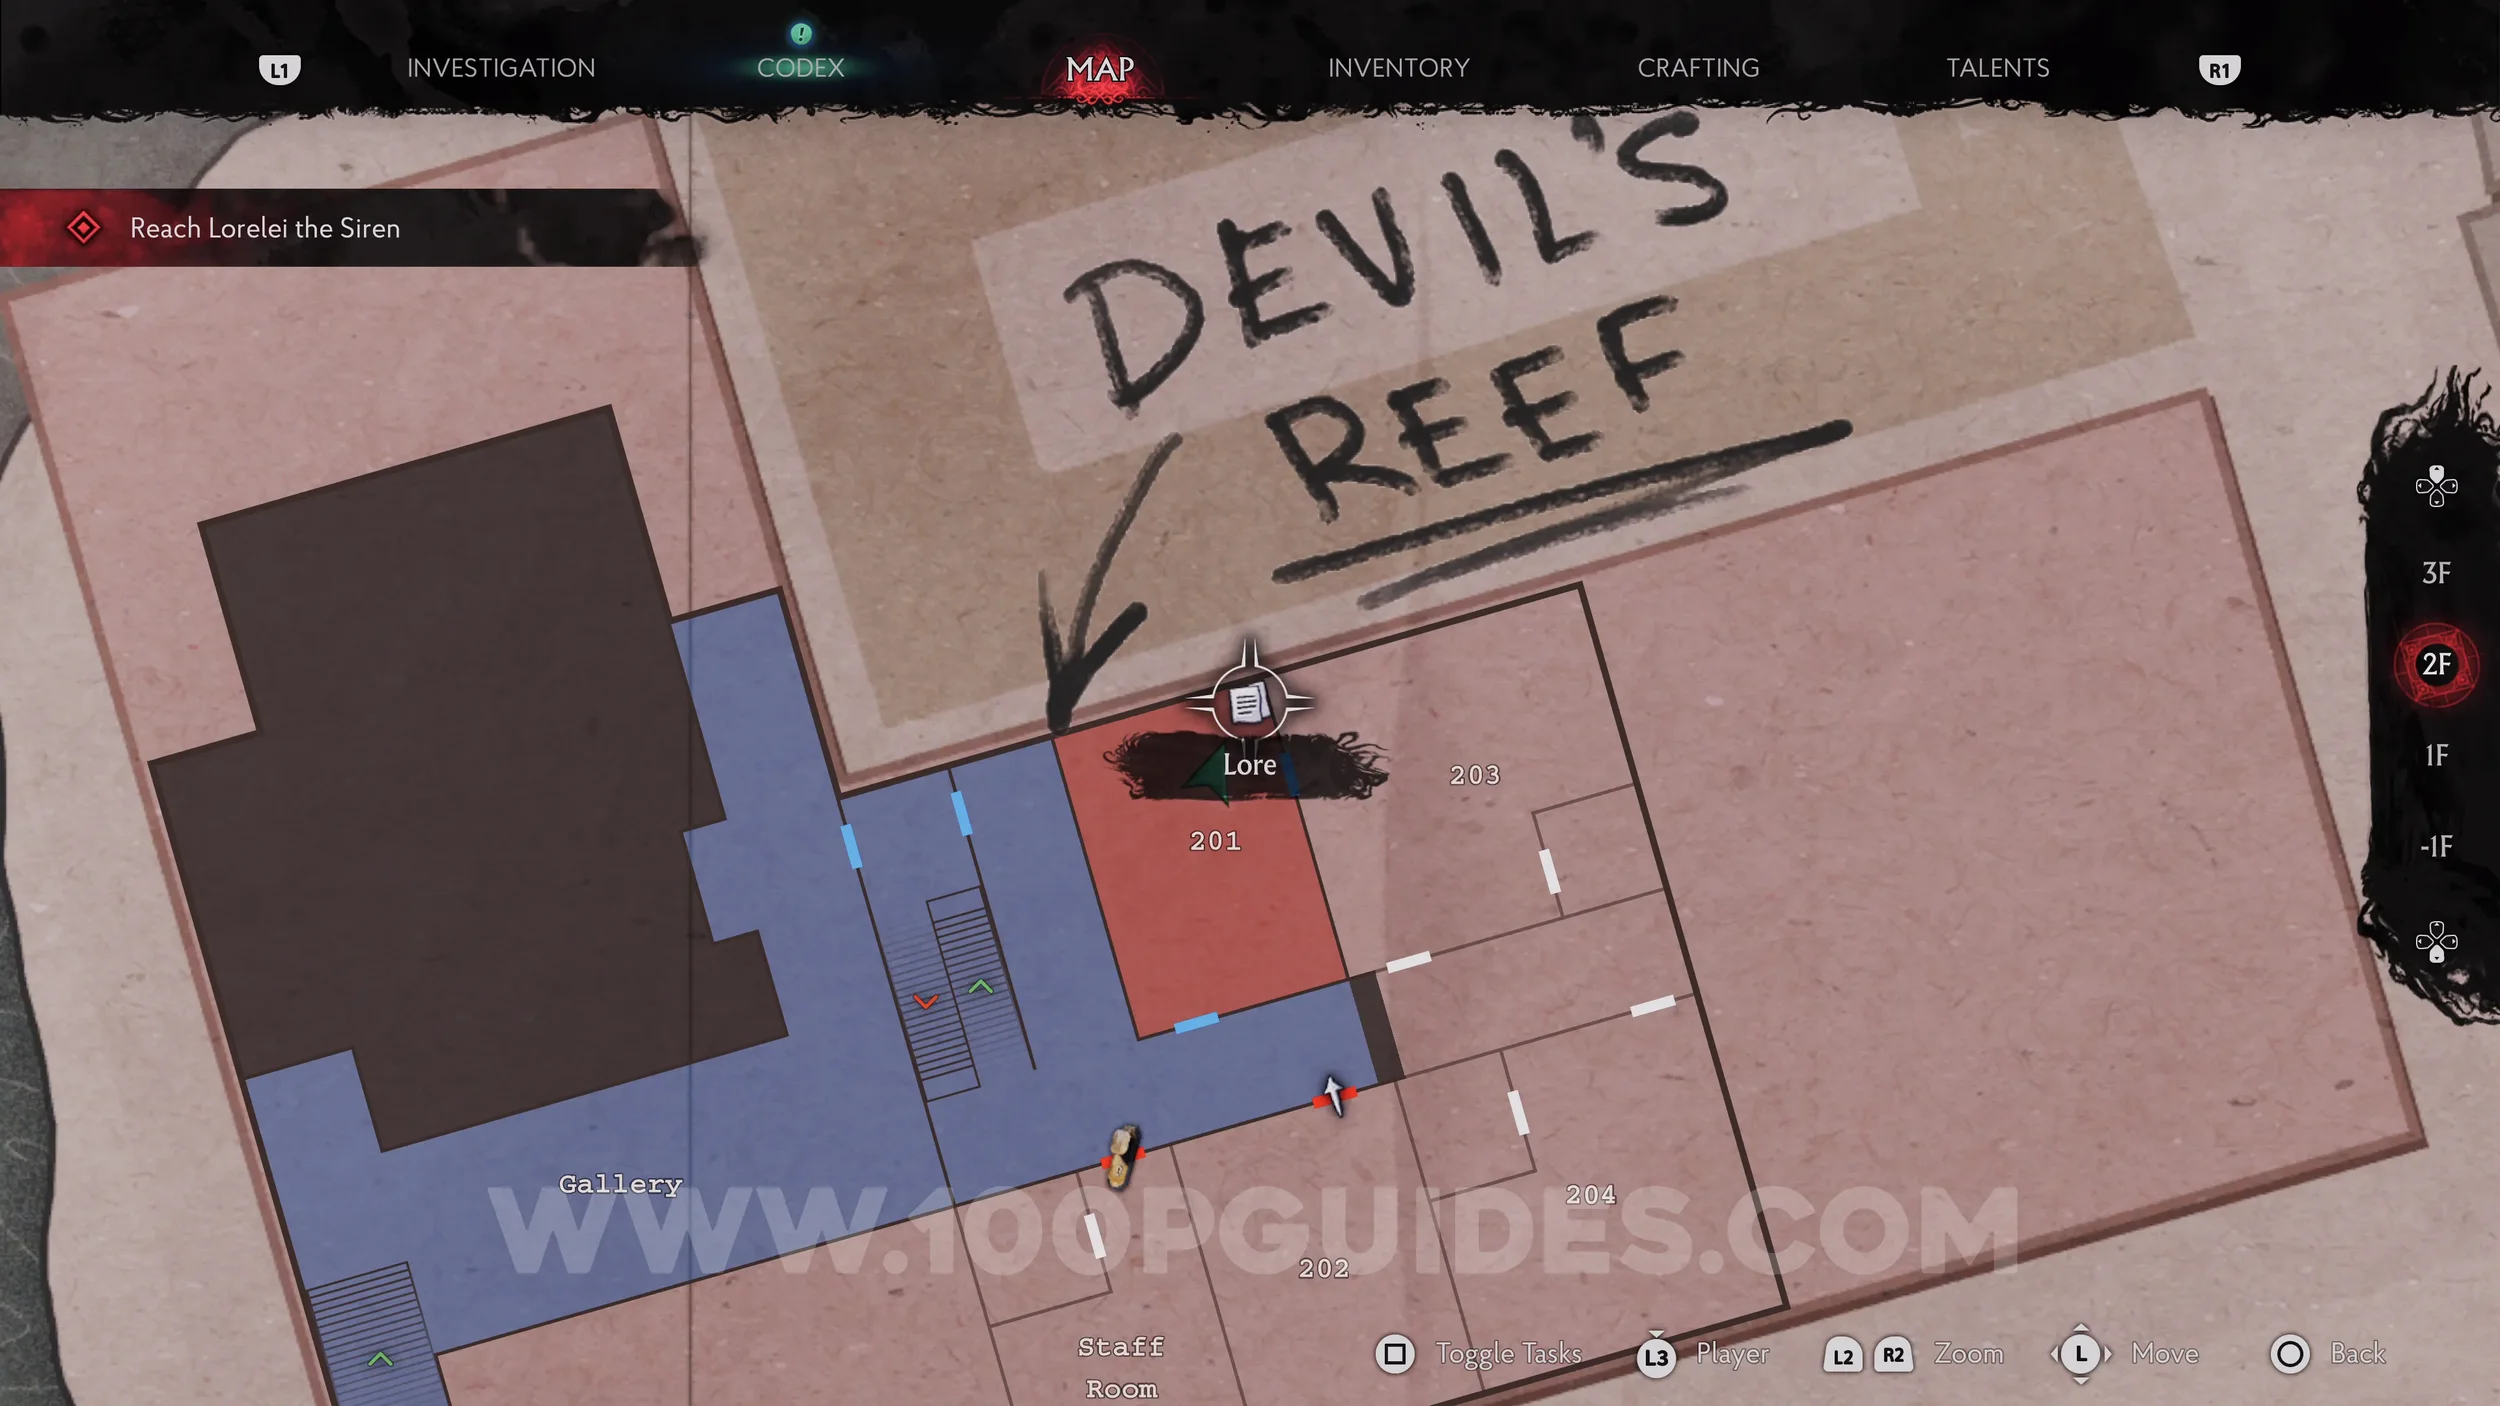
Lore Codex: Your Last Game. Head back downstairs to 2F and enter the door on the left to Room 201. Inside, you'll find the codex next to a corpse.
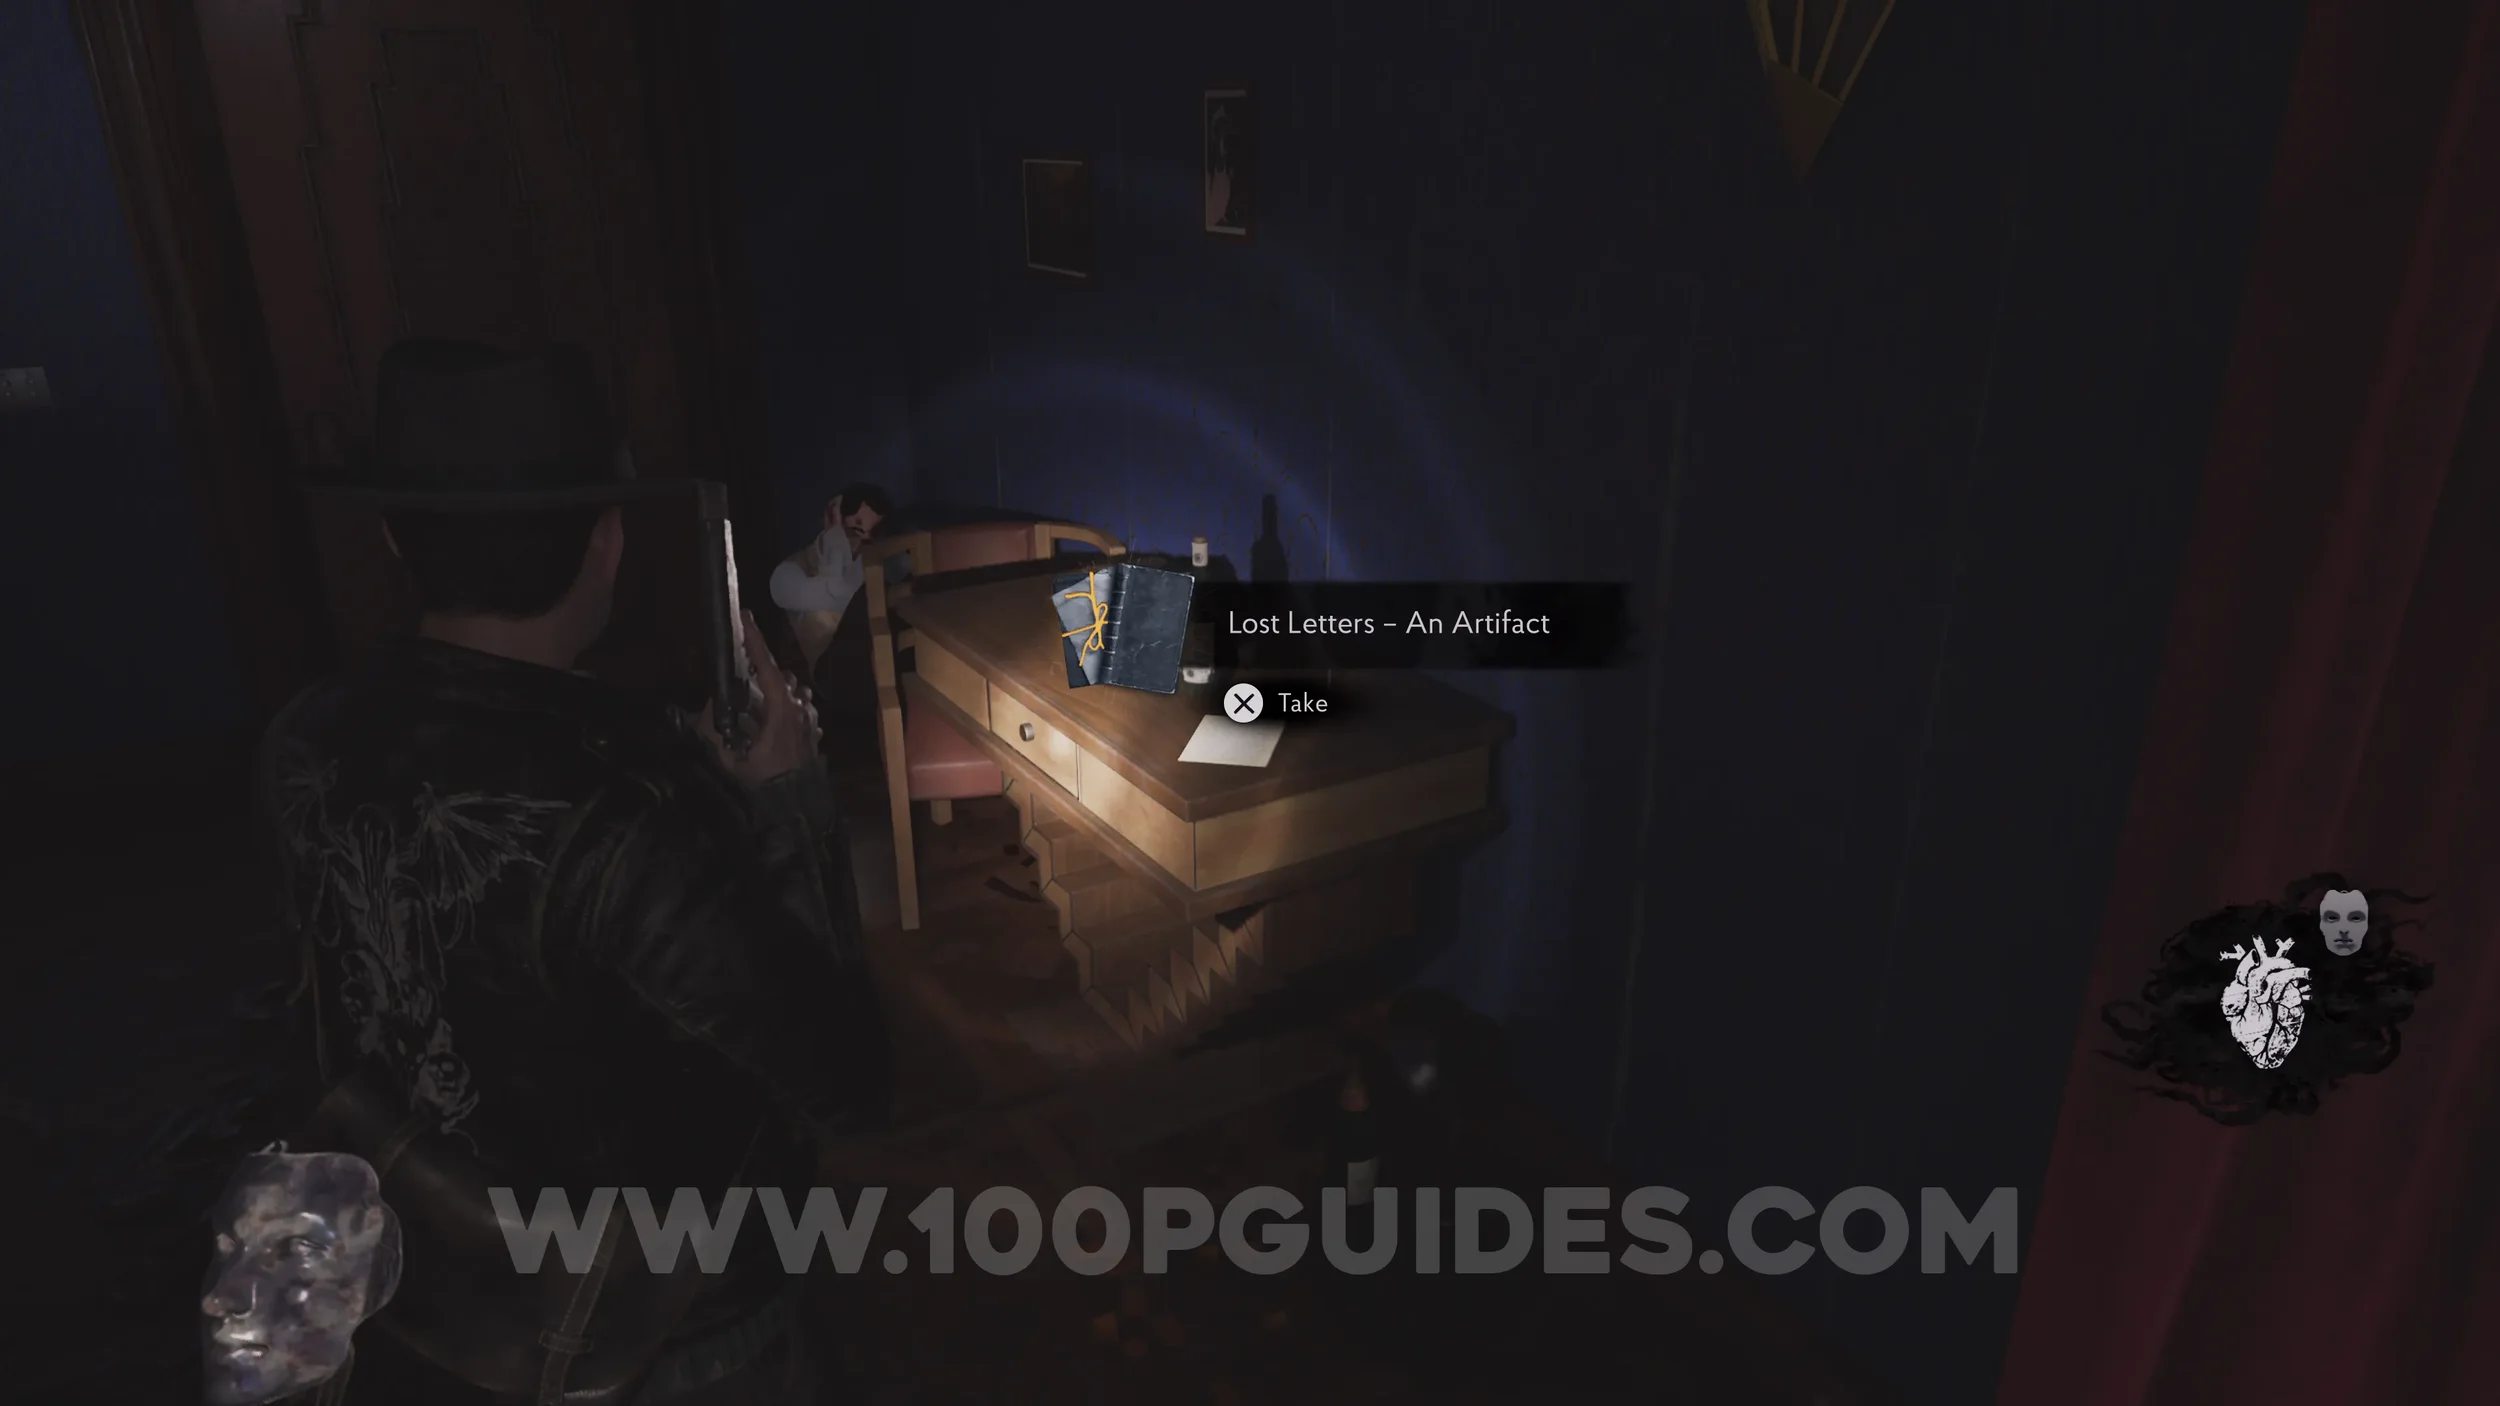
Lore Codex: Lost Letters - An Artifact. In room 203 (the room after room 201).
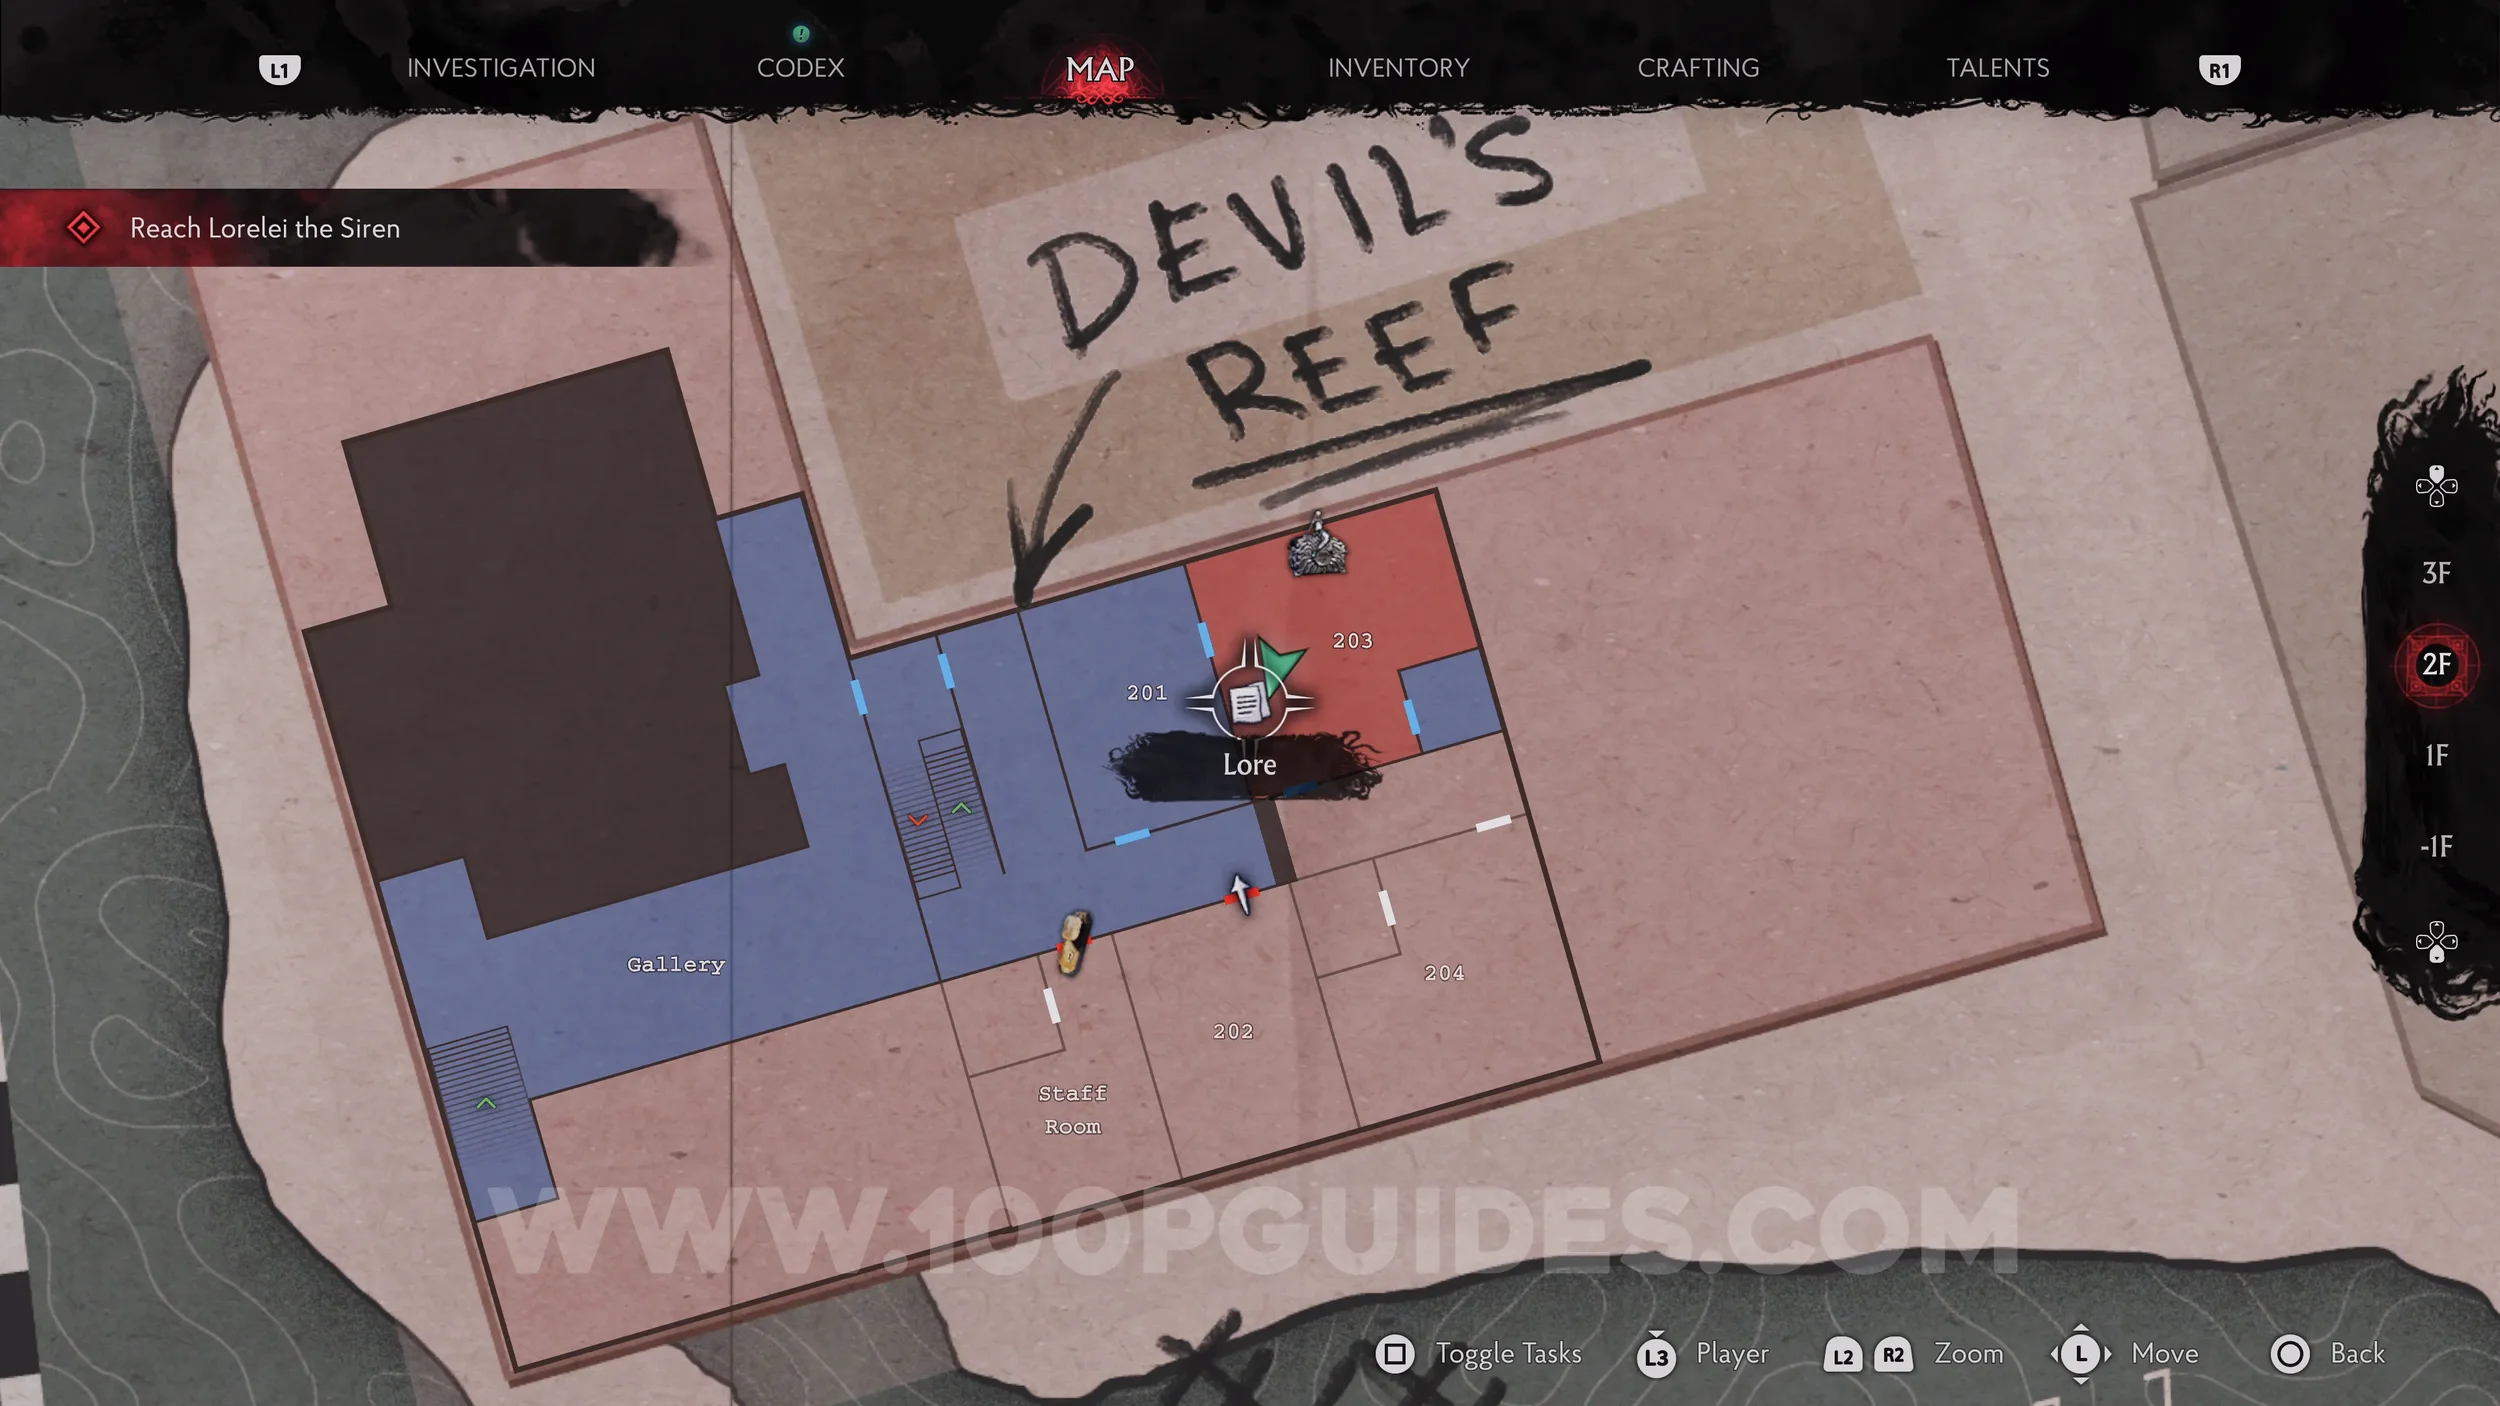
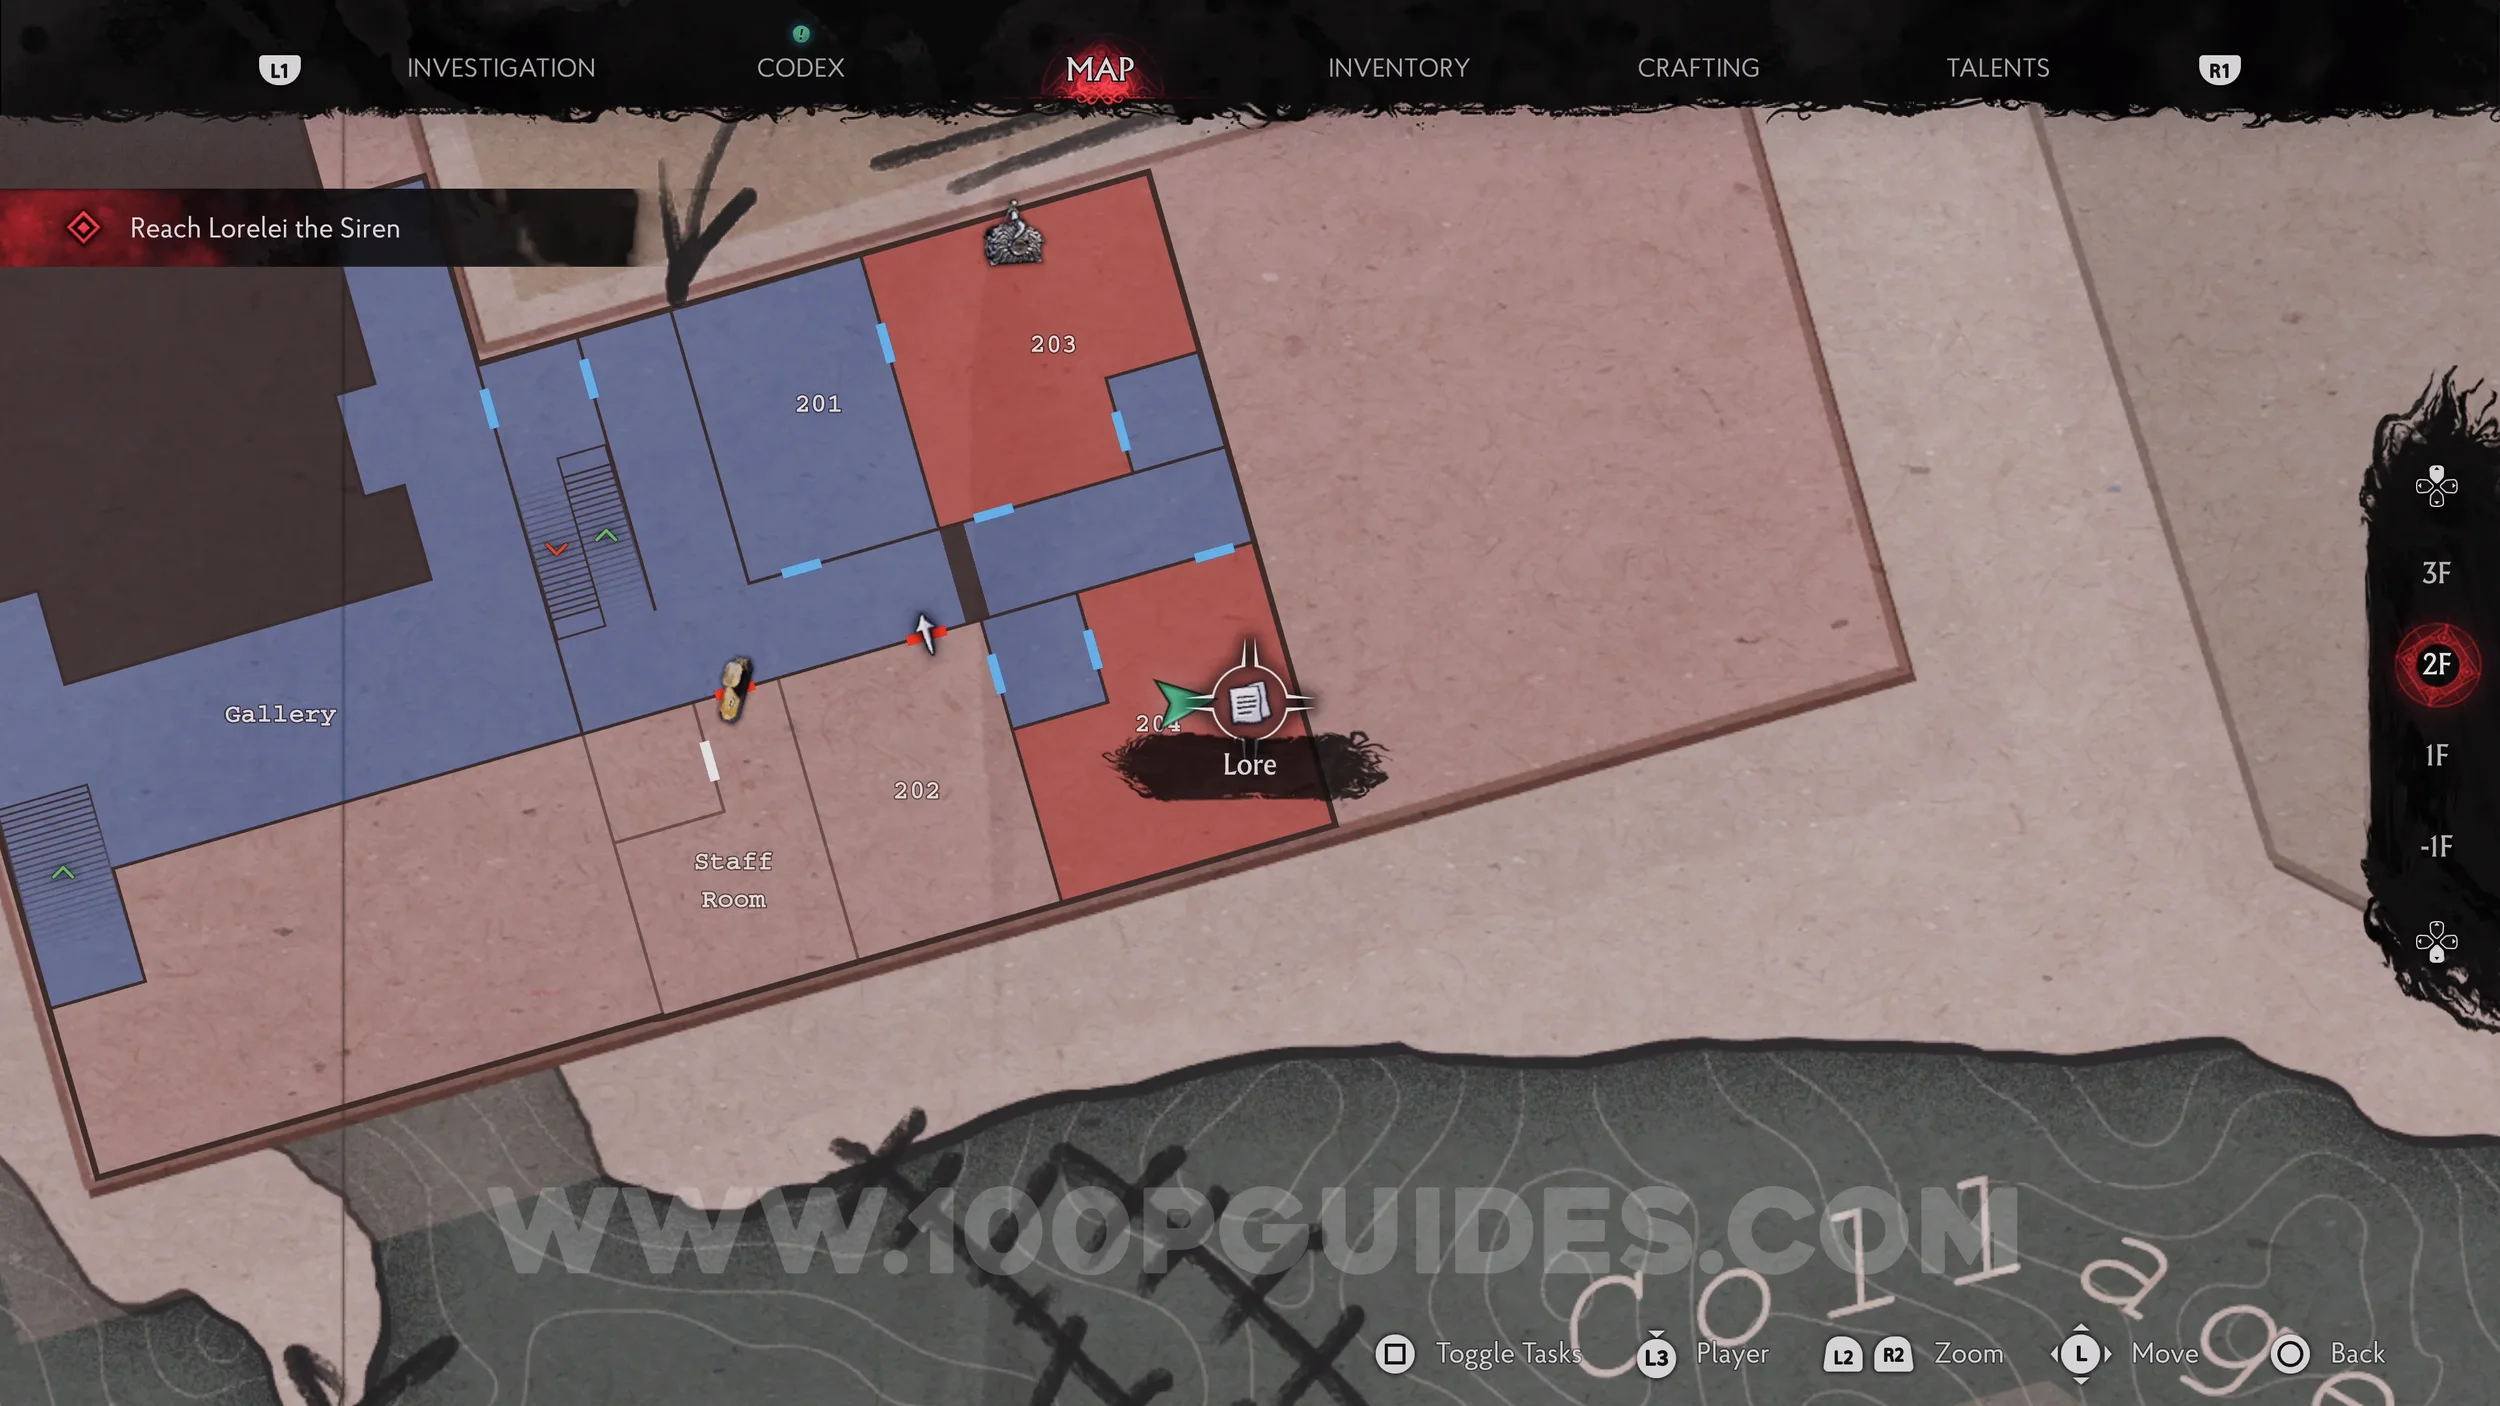
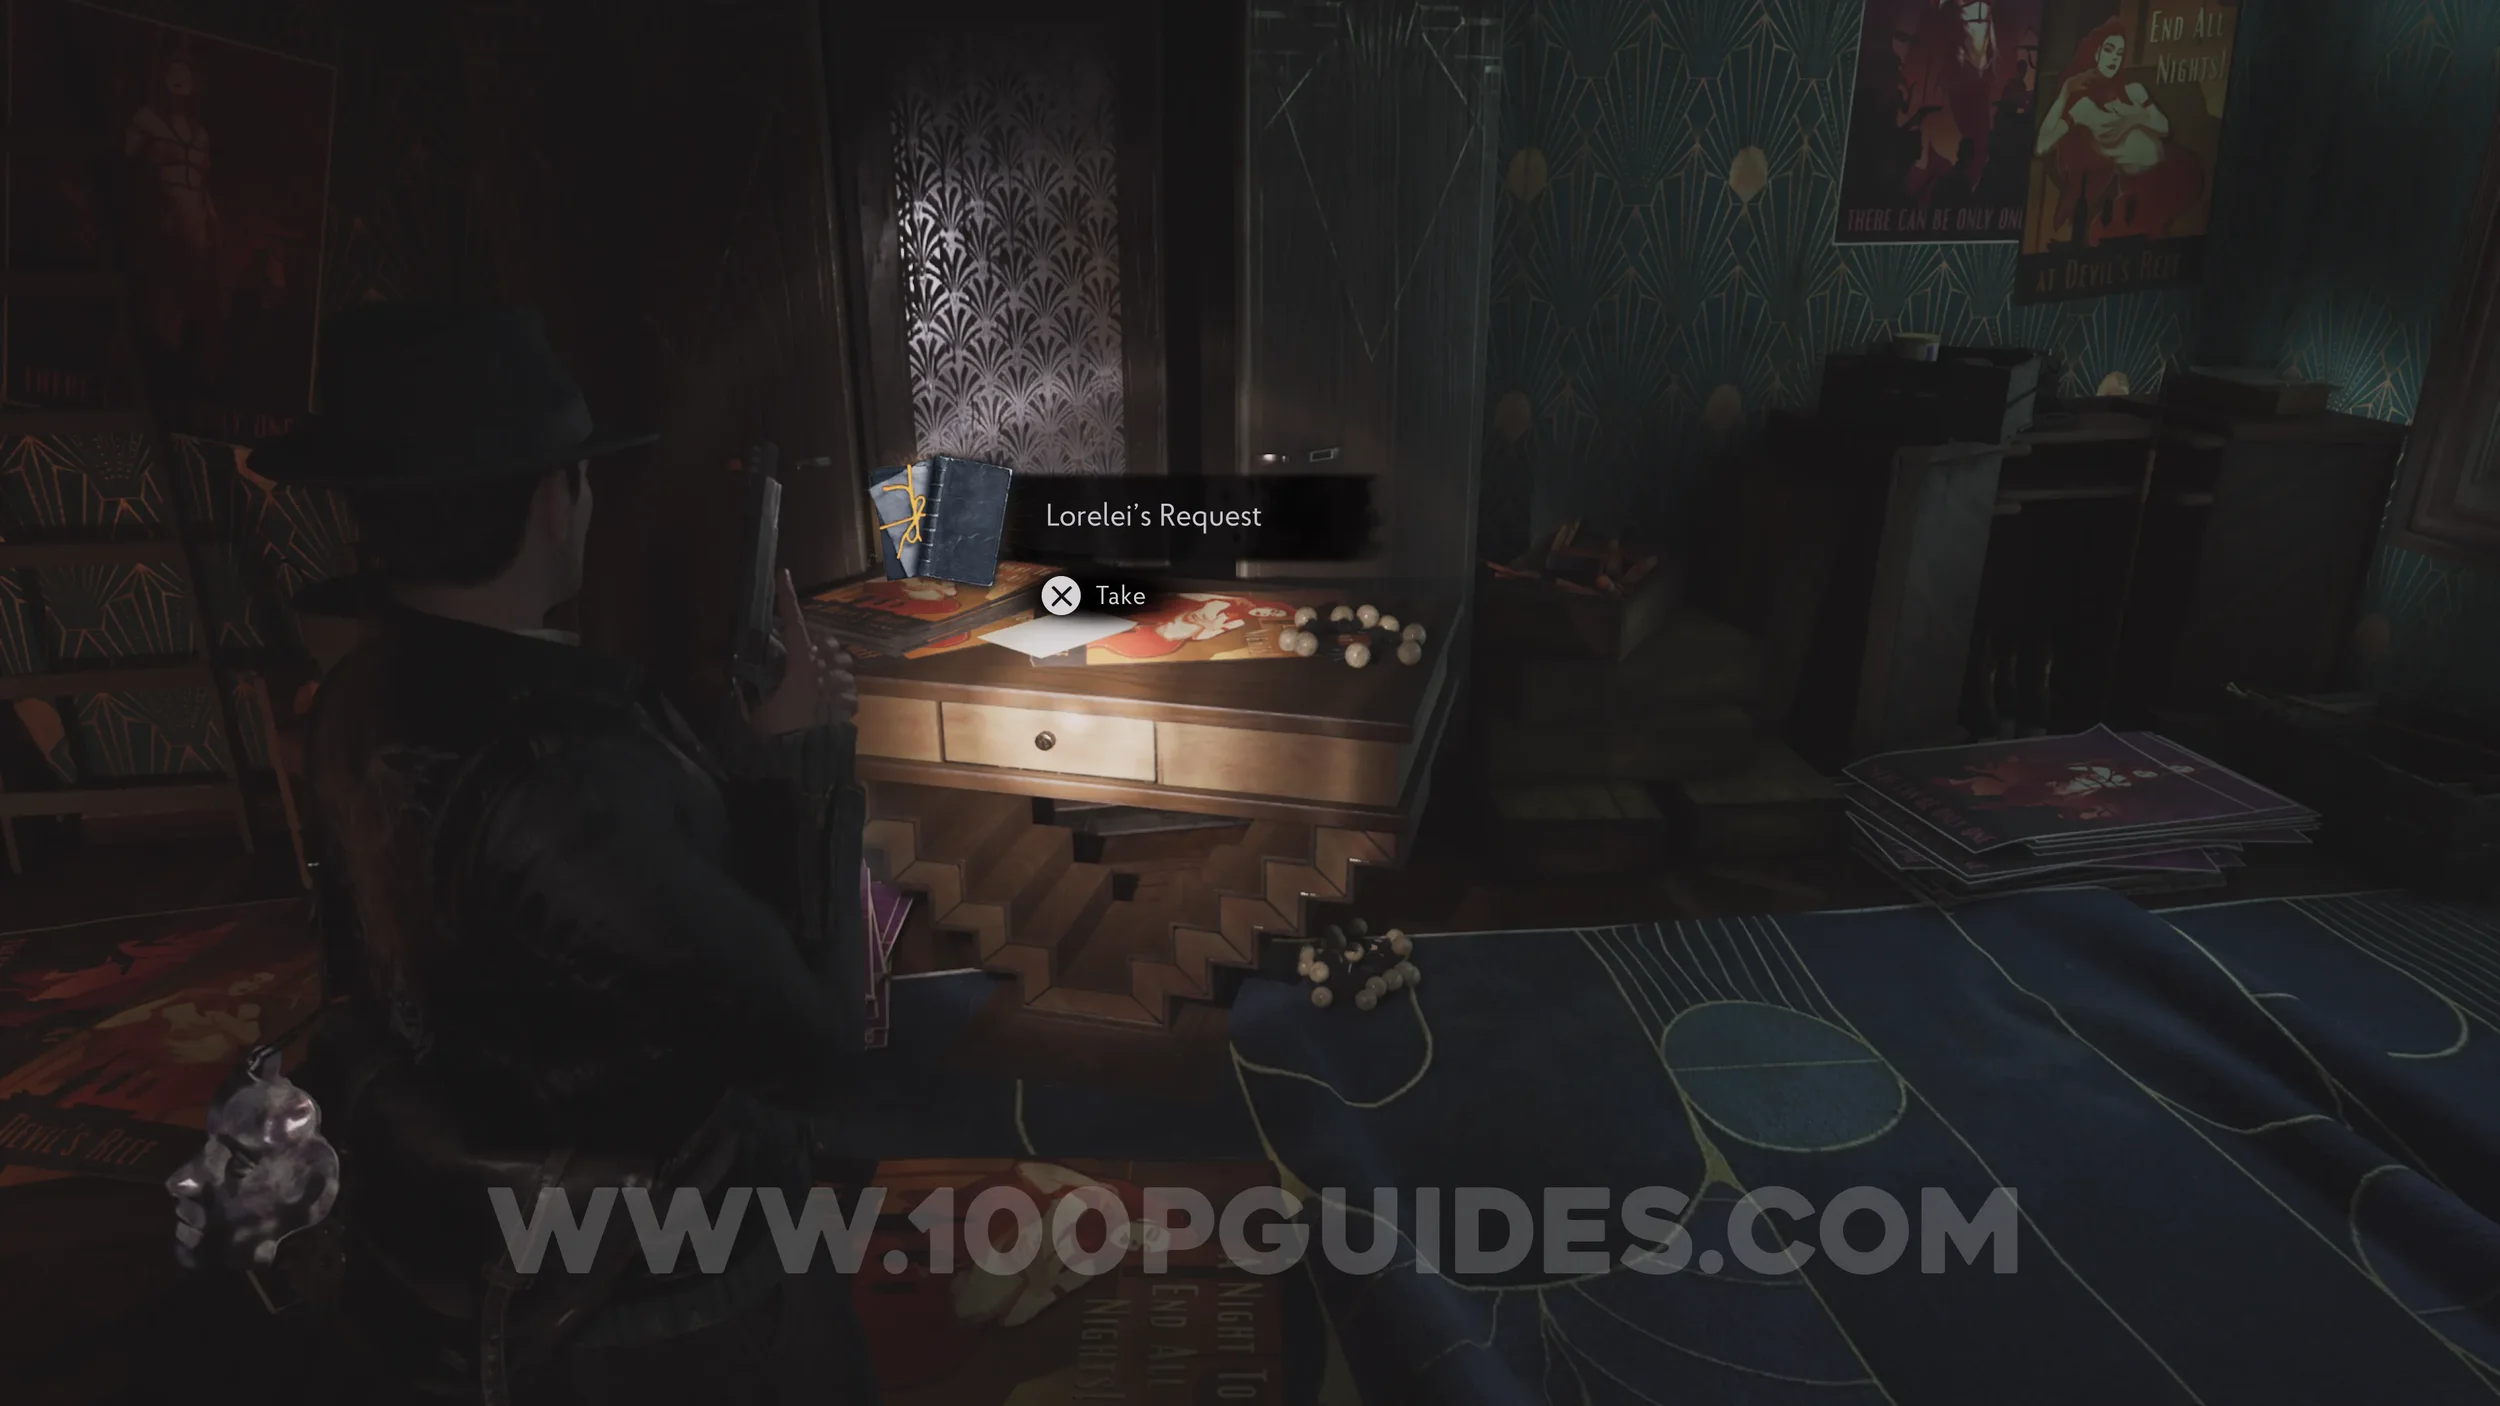
Lore Codex: Lorelei’s Request. Continue along this path until you reach Room 204, where you'll find the codex on a table.
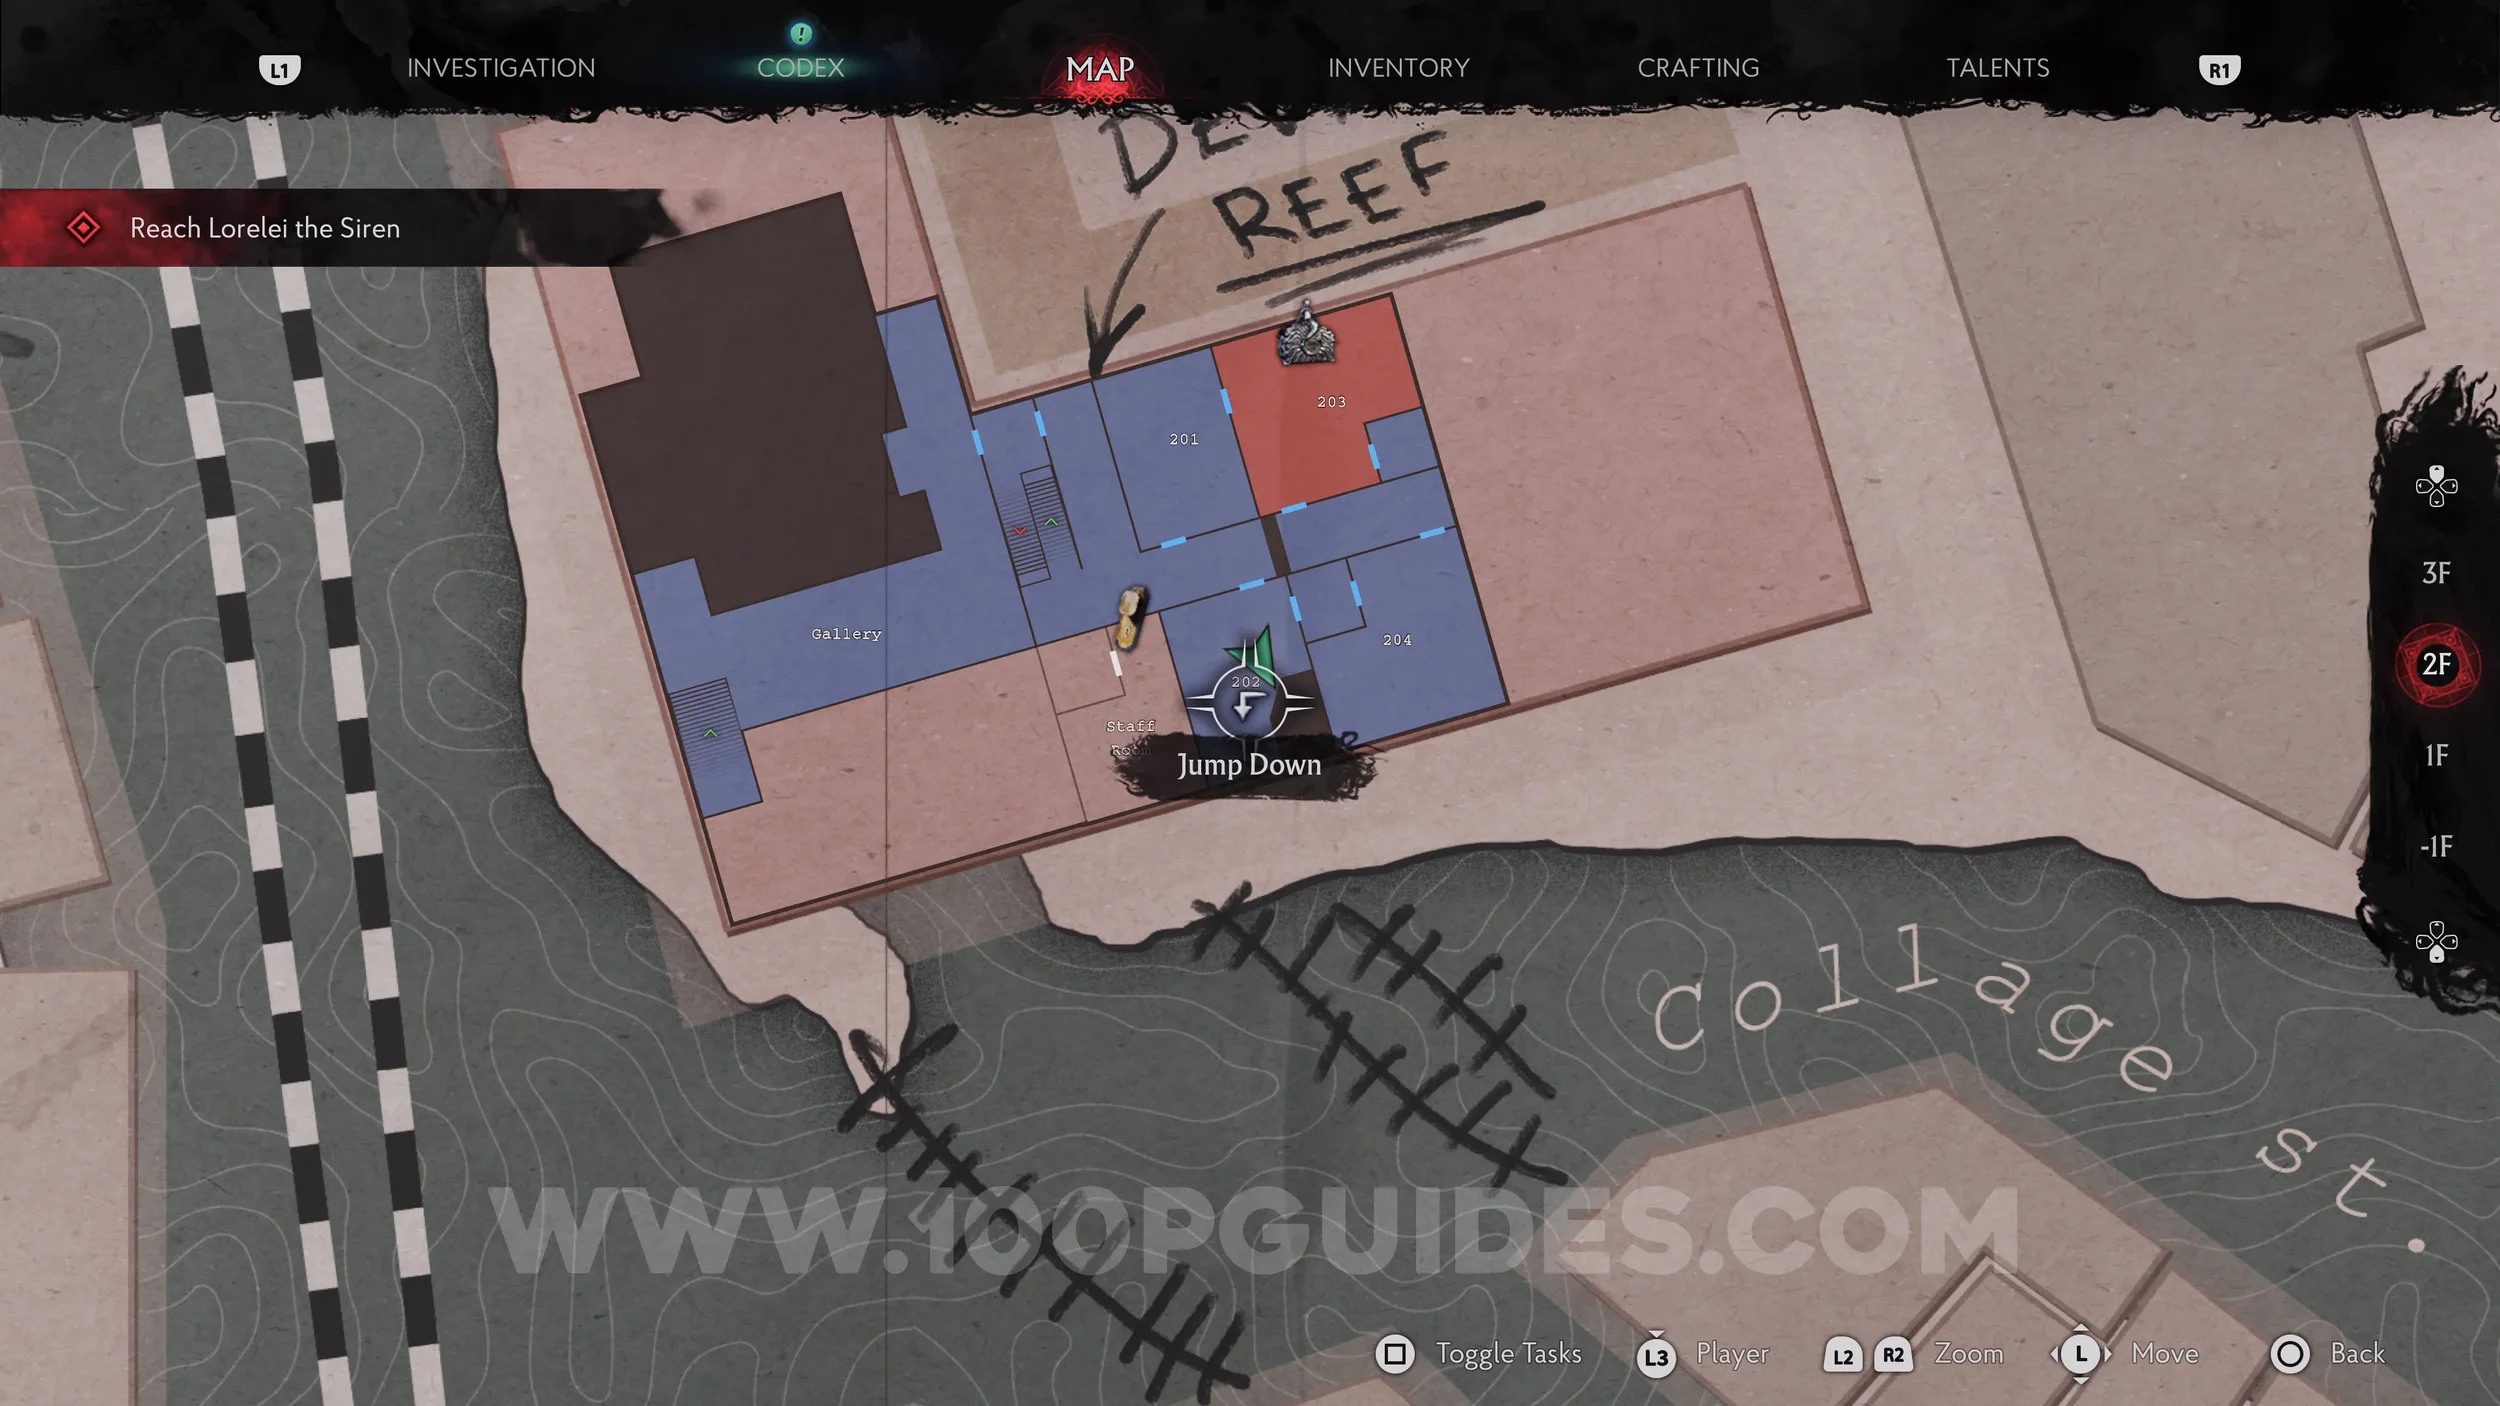
Key Item: Staff Key (Pt. 2). Once you reach Room 202, drop down the hole and examine the corpse that fell down, the same one you examined earlier.
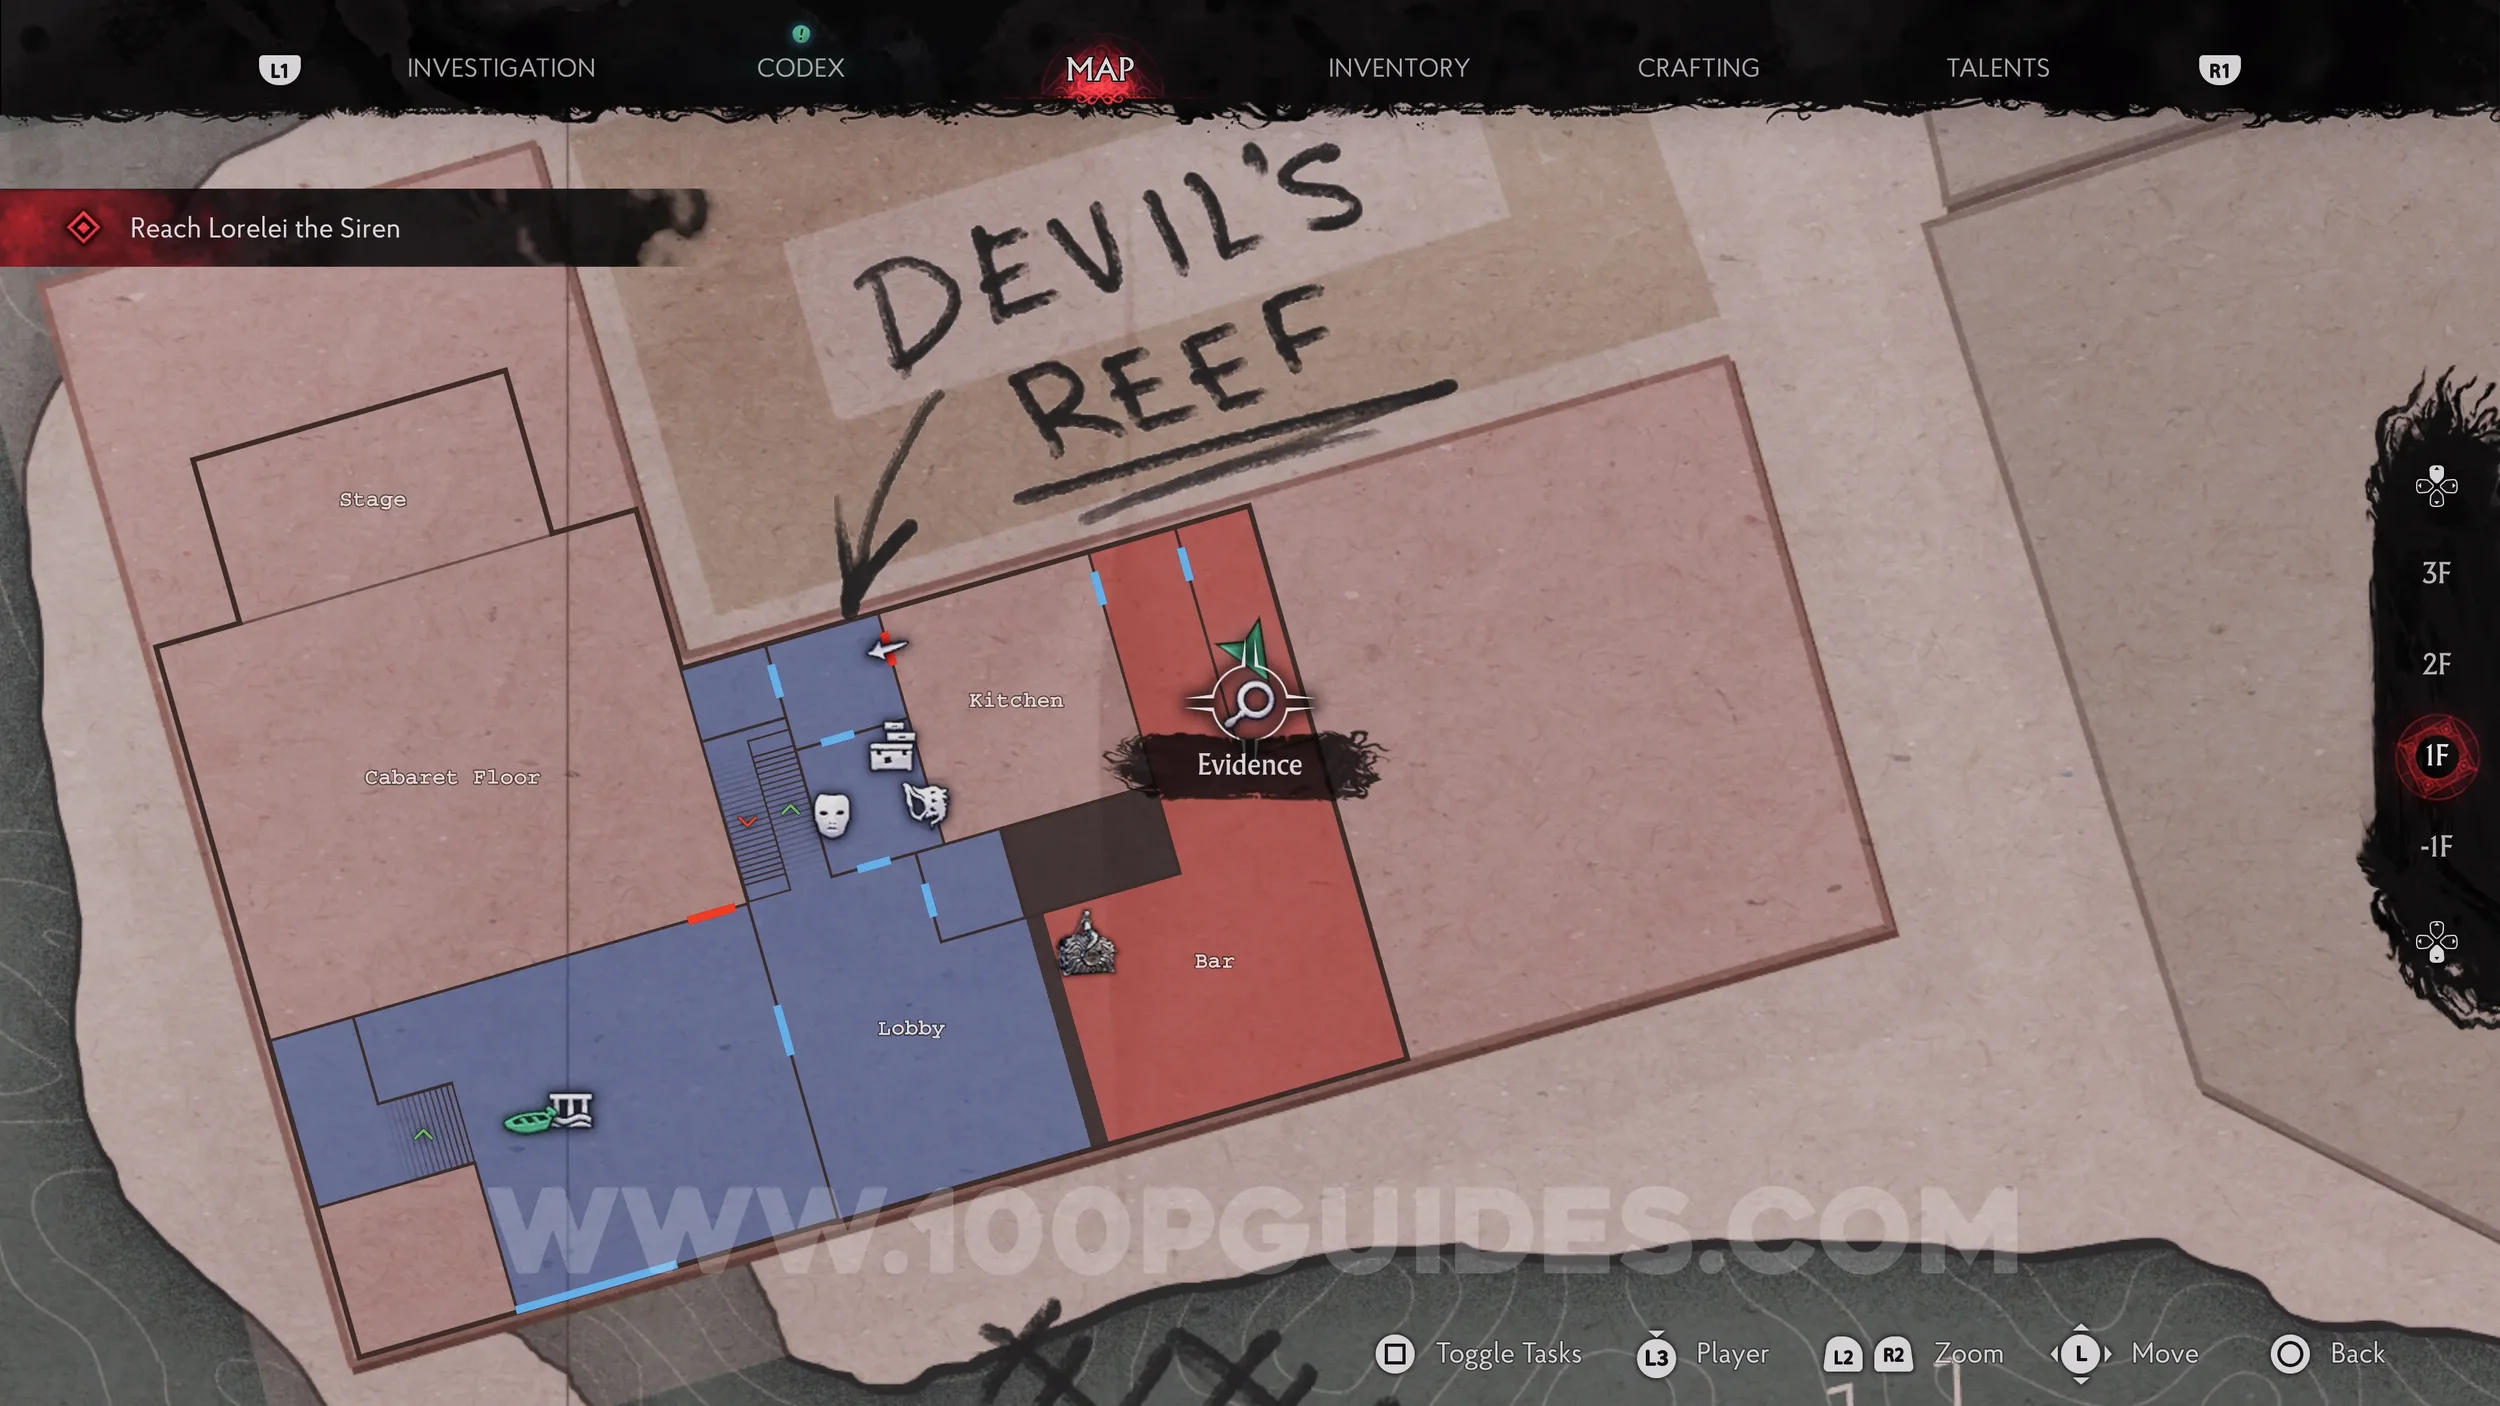
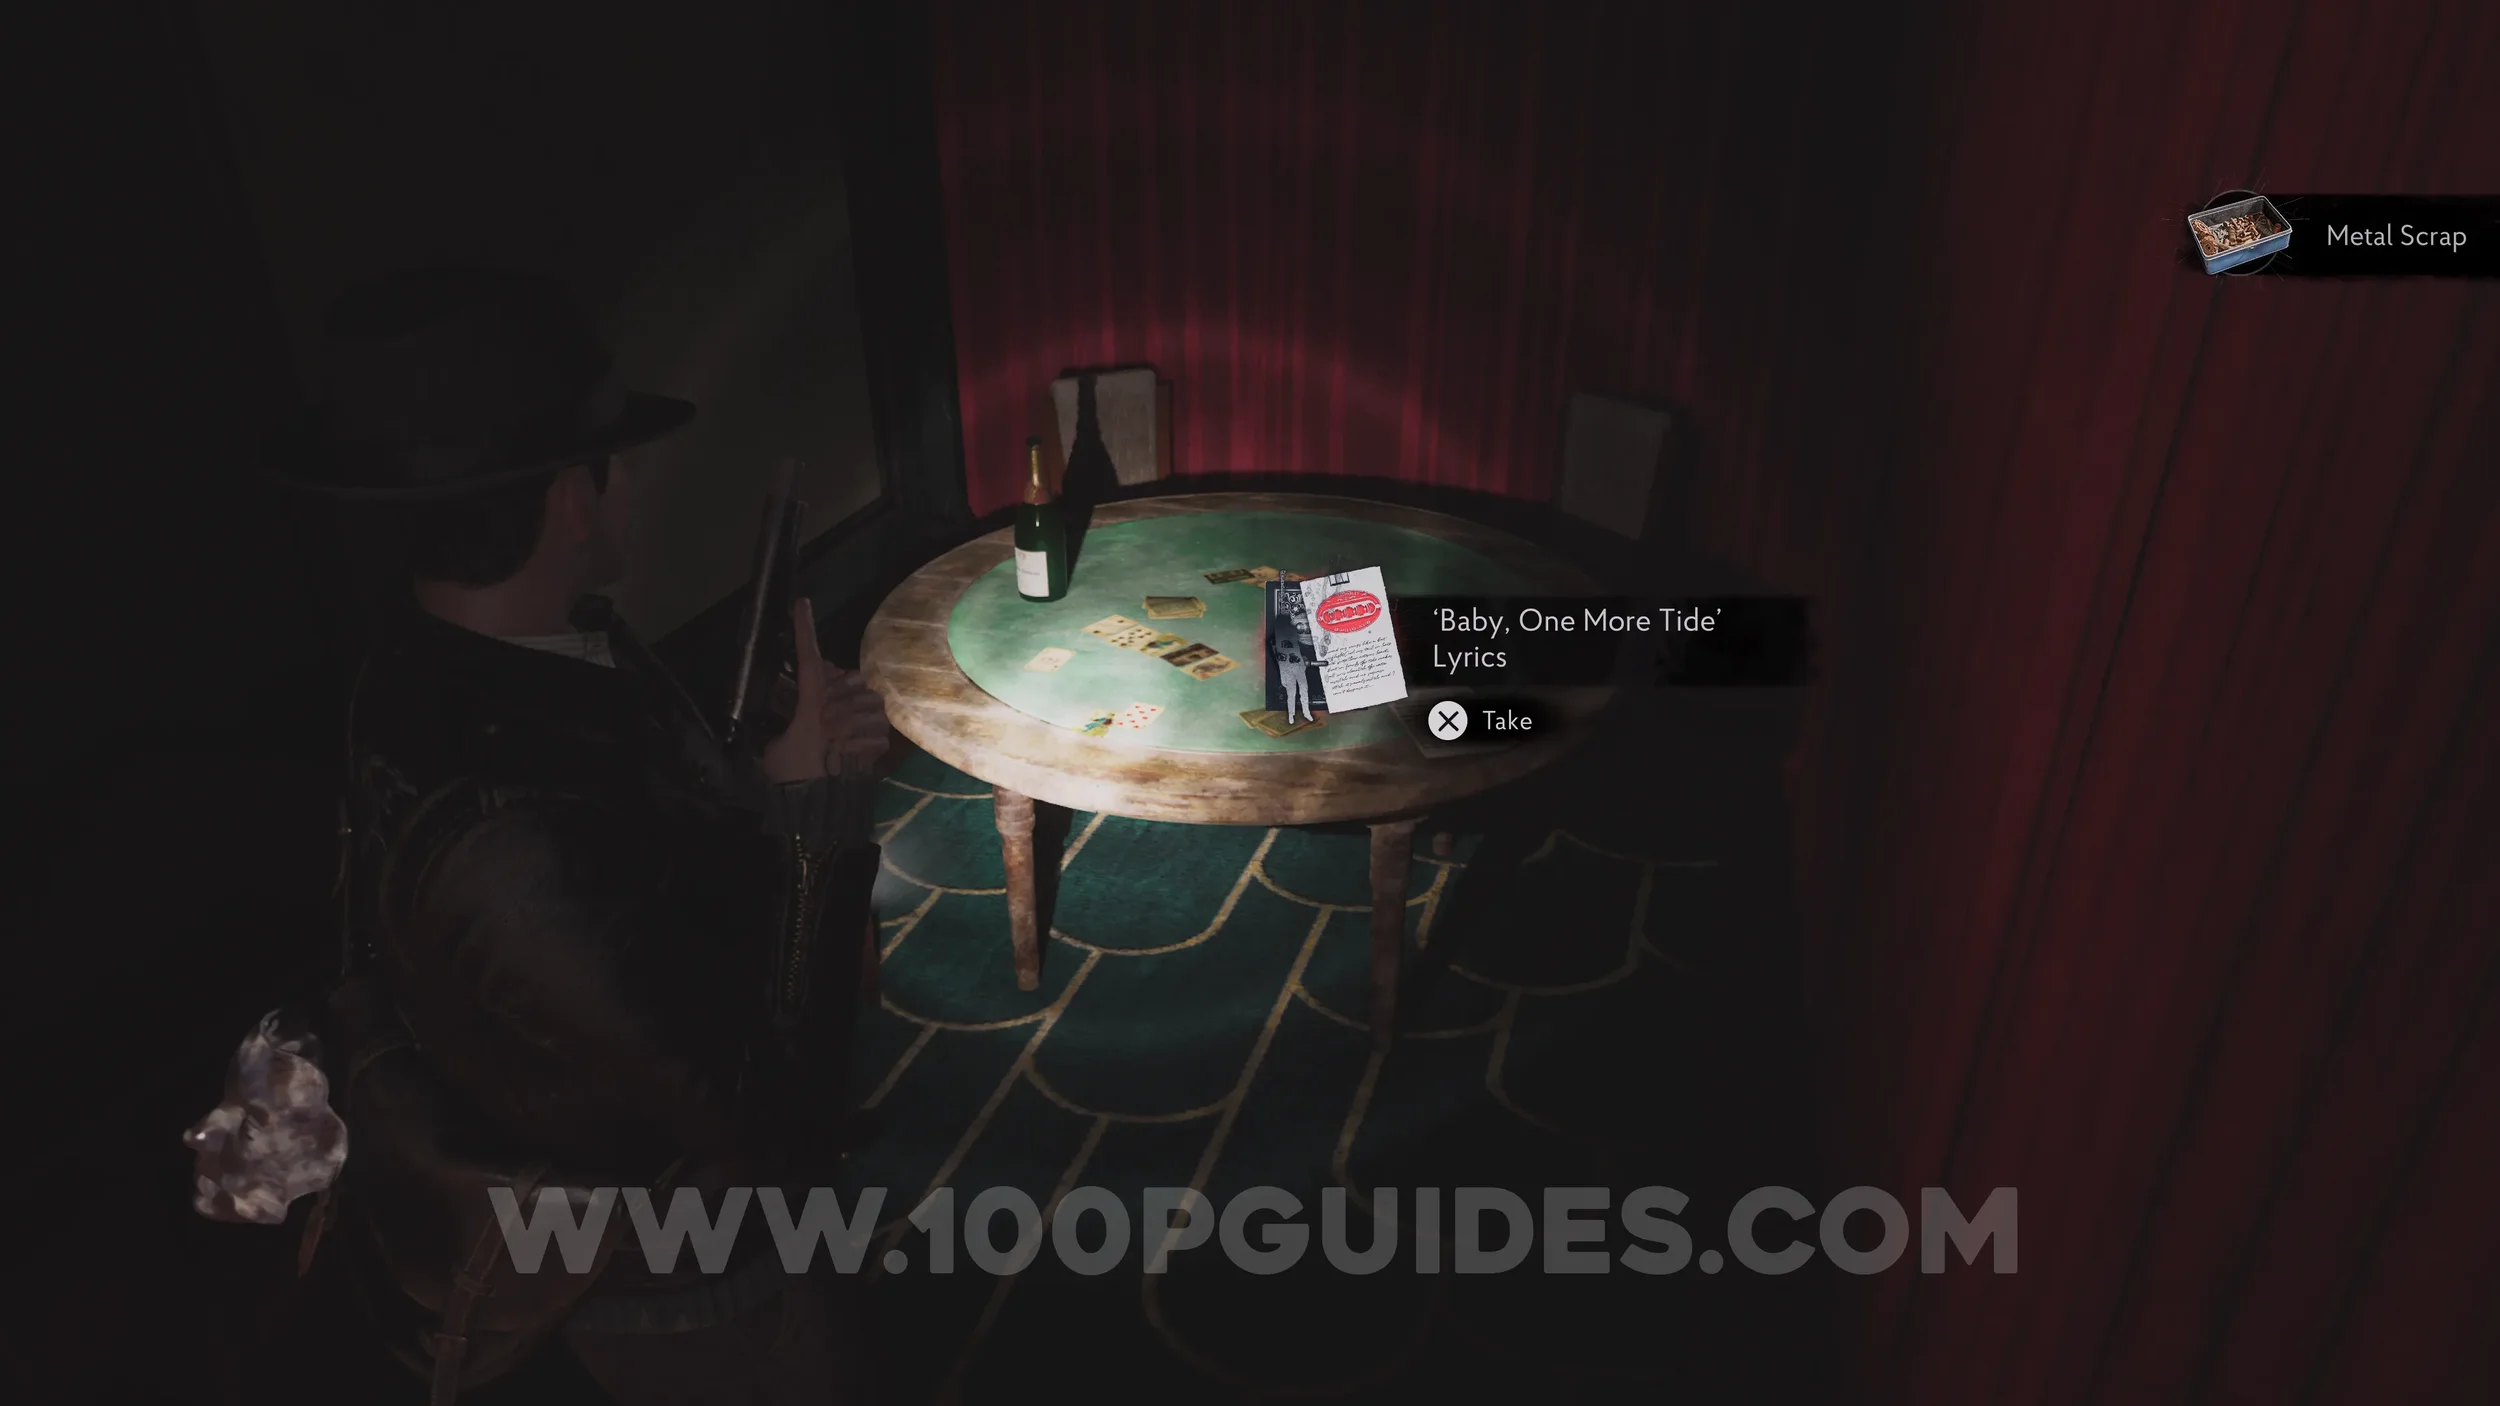
Evidence: ‘Baby, One More Tide’ Lyrics. Found at the end of the small room to the east of the Bar.
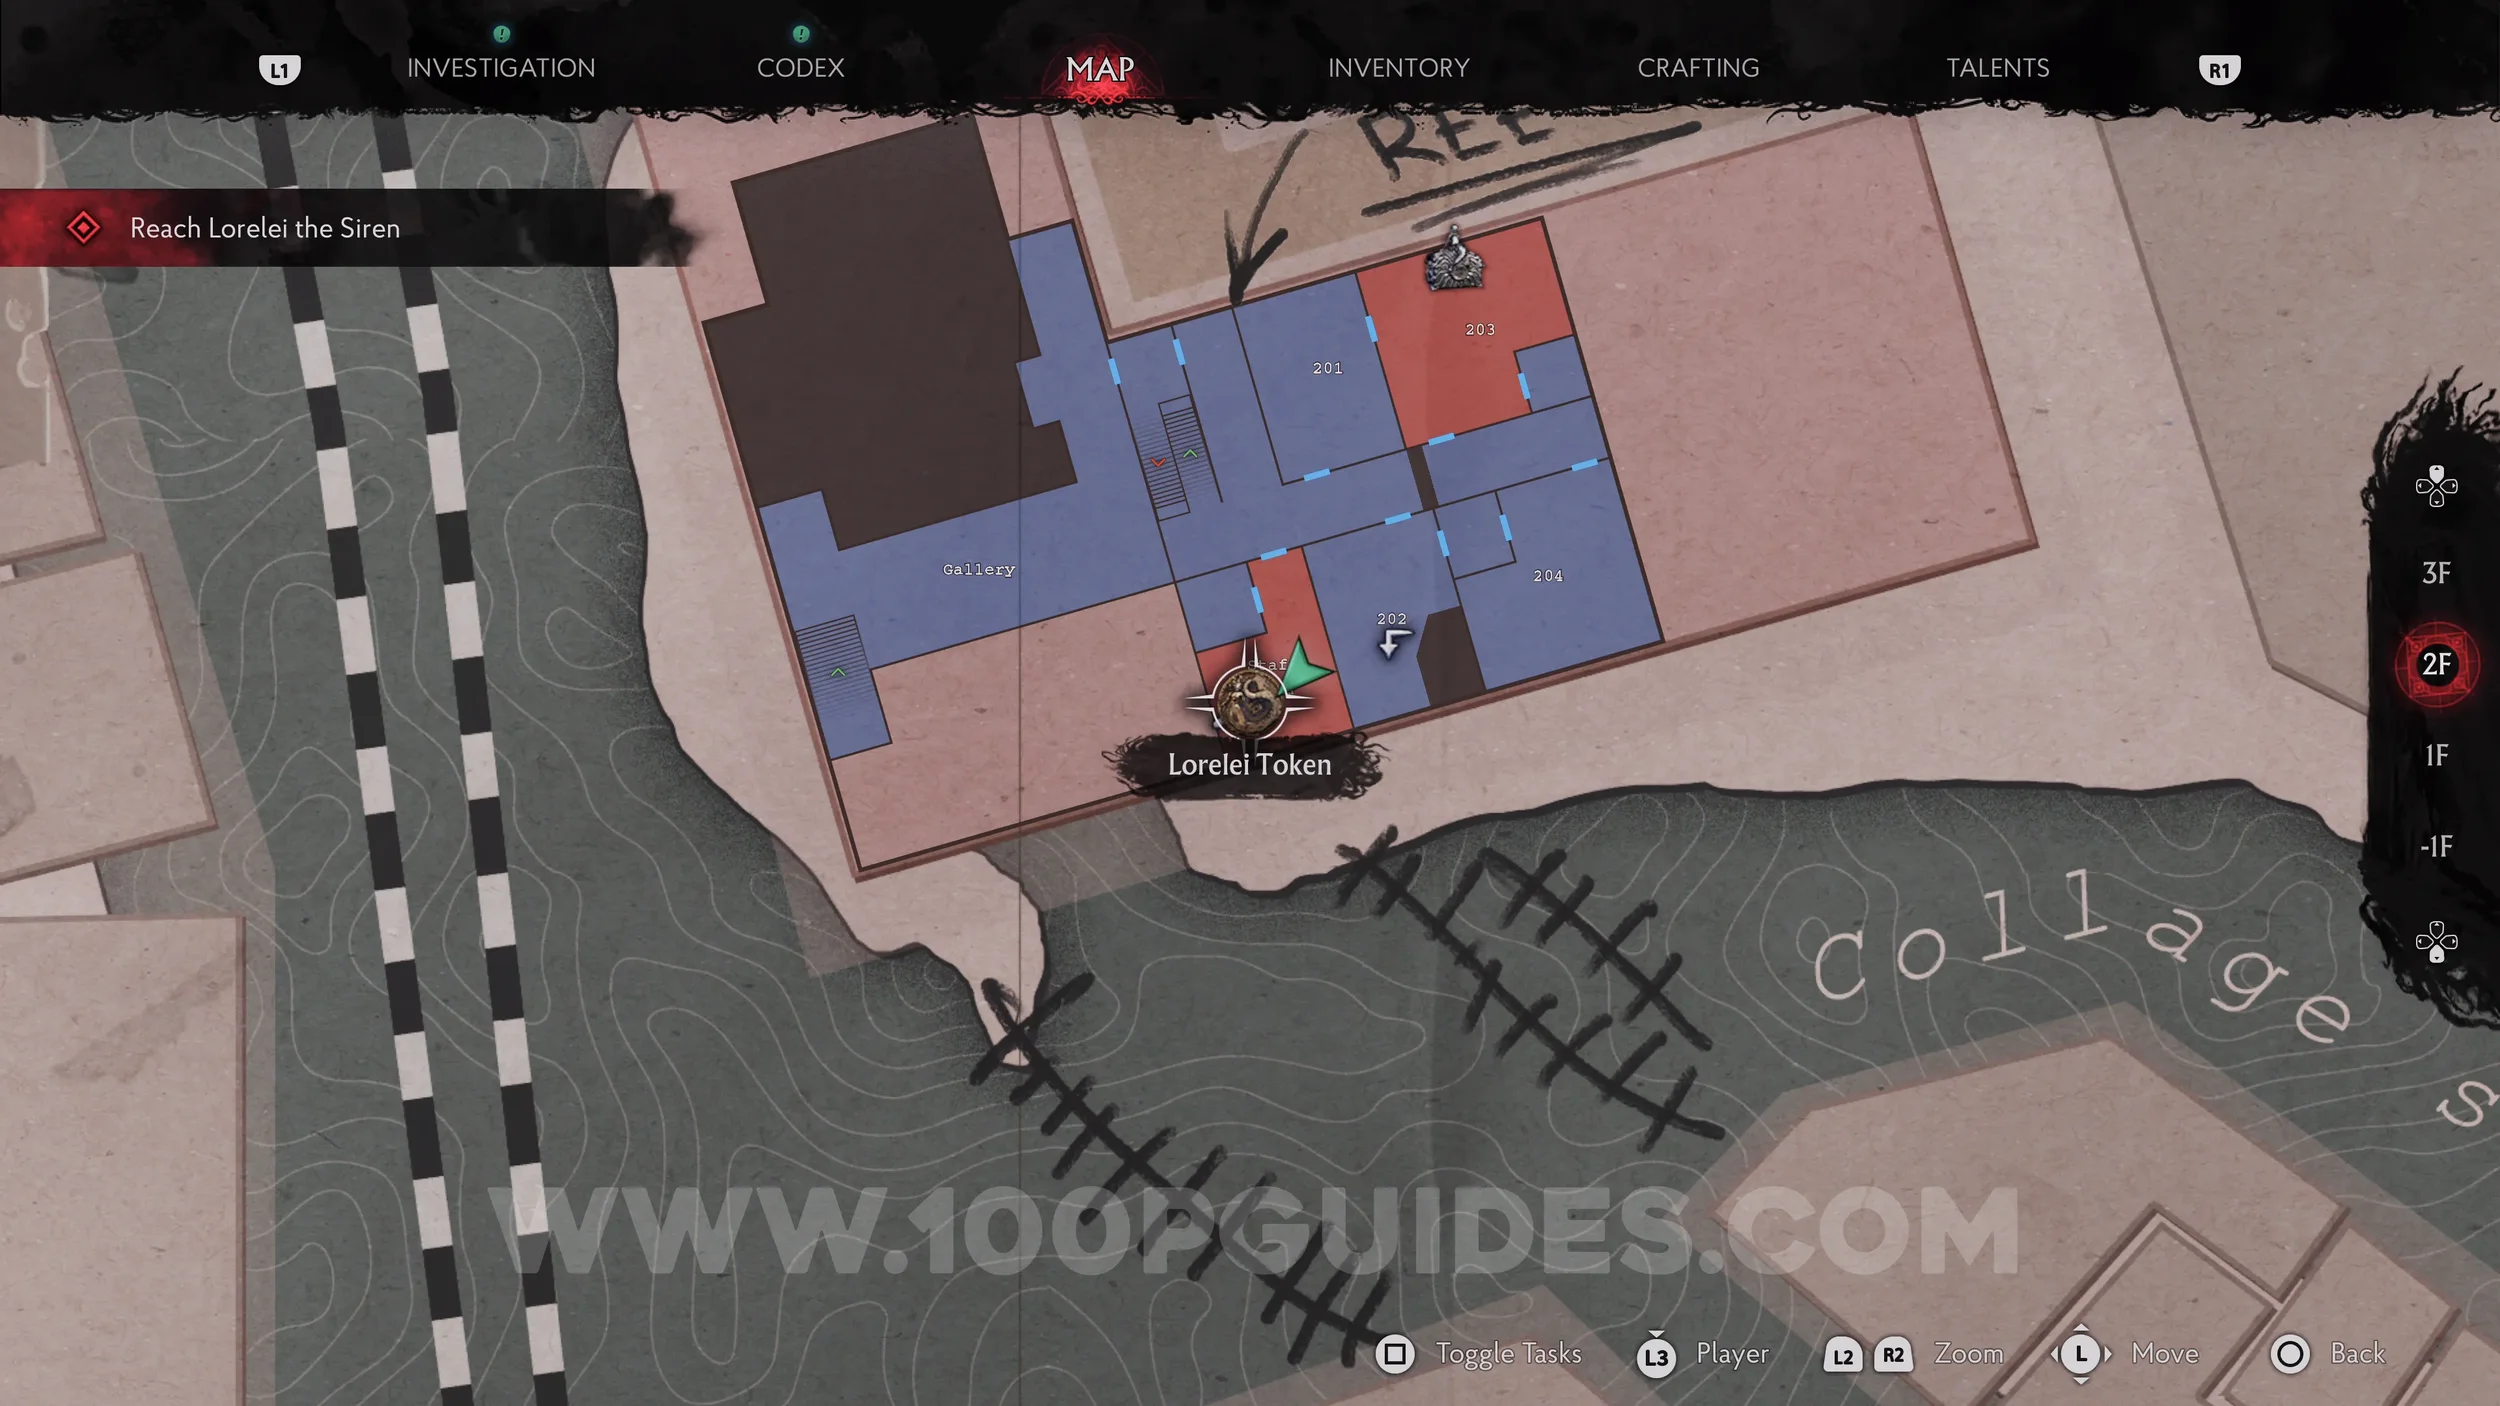
Key Item: Lorelei Token x3. Head back up to 2F and use the Staff Key to open the door to the Staff Room. The tokens are inside. You'll have to use them to open the three chests around the hotel.
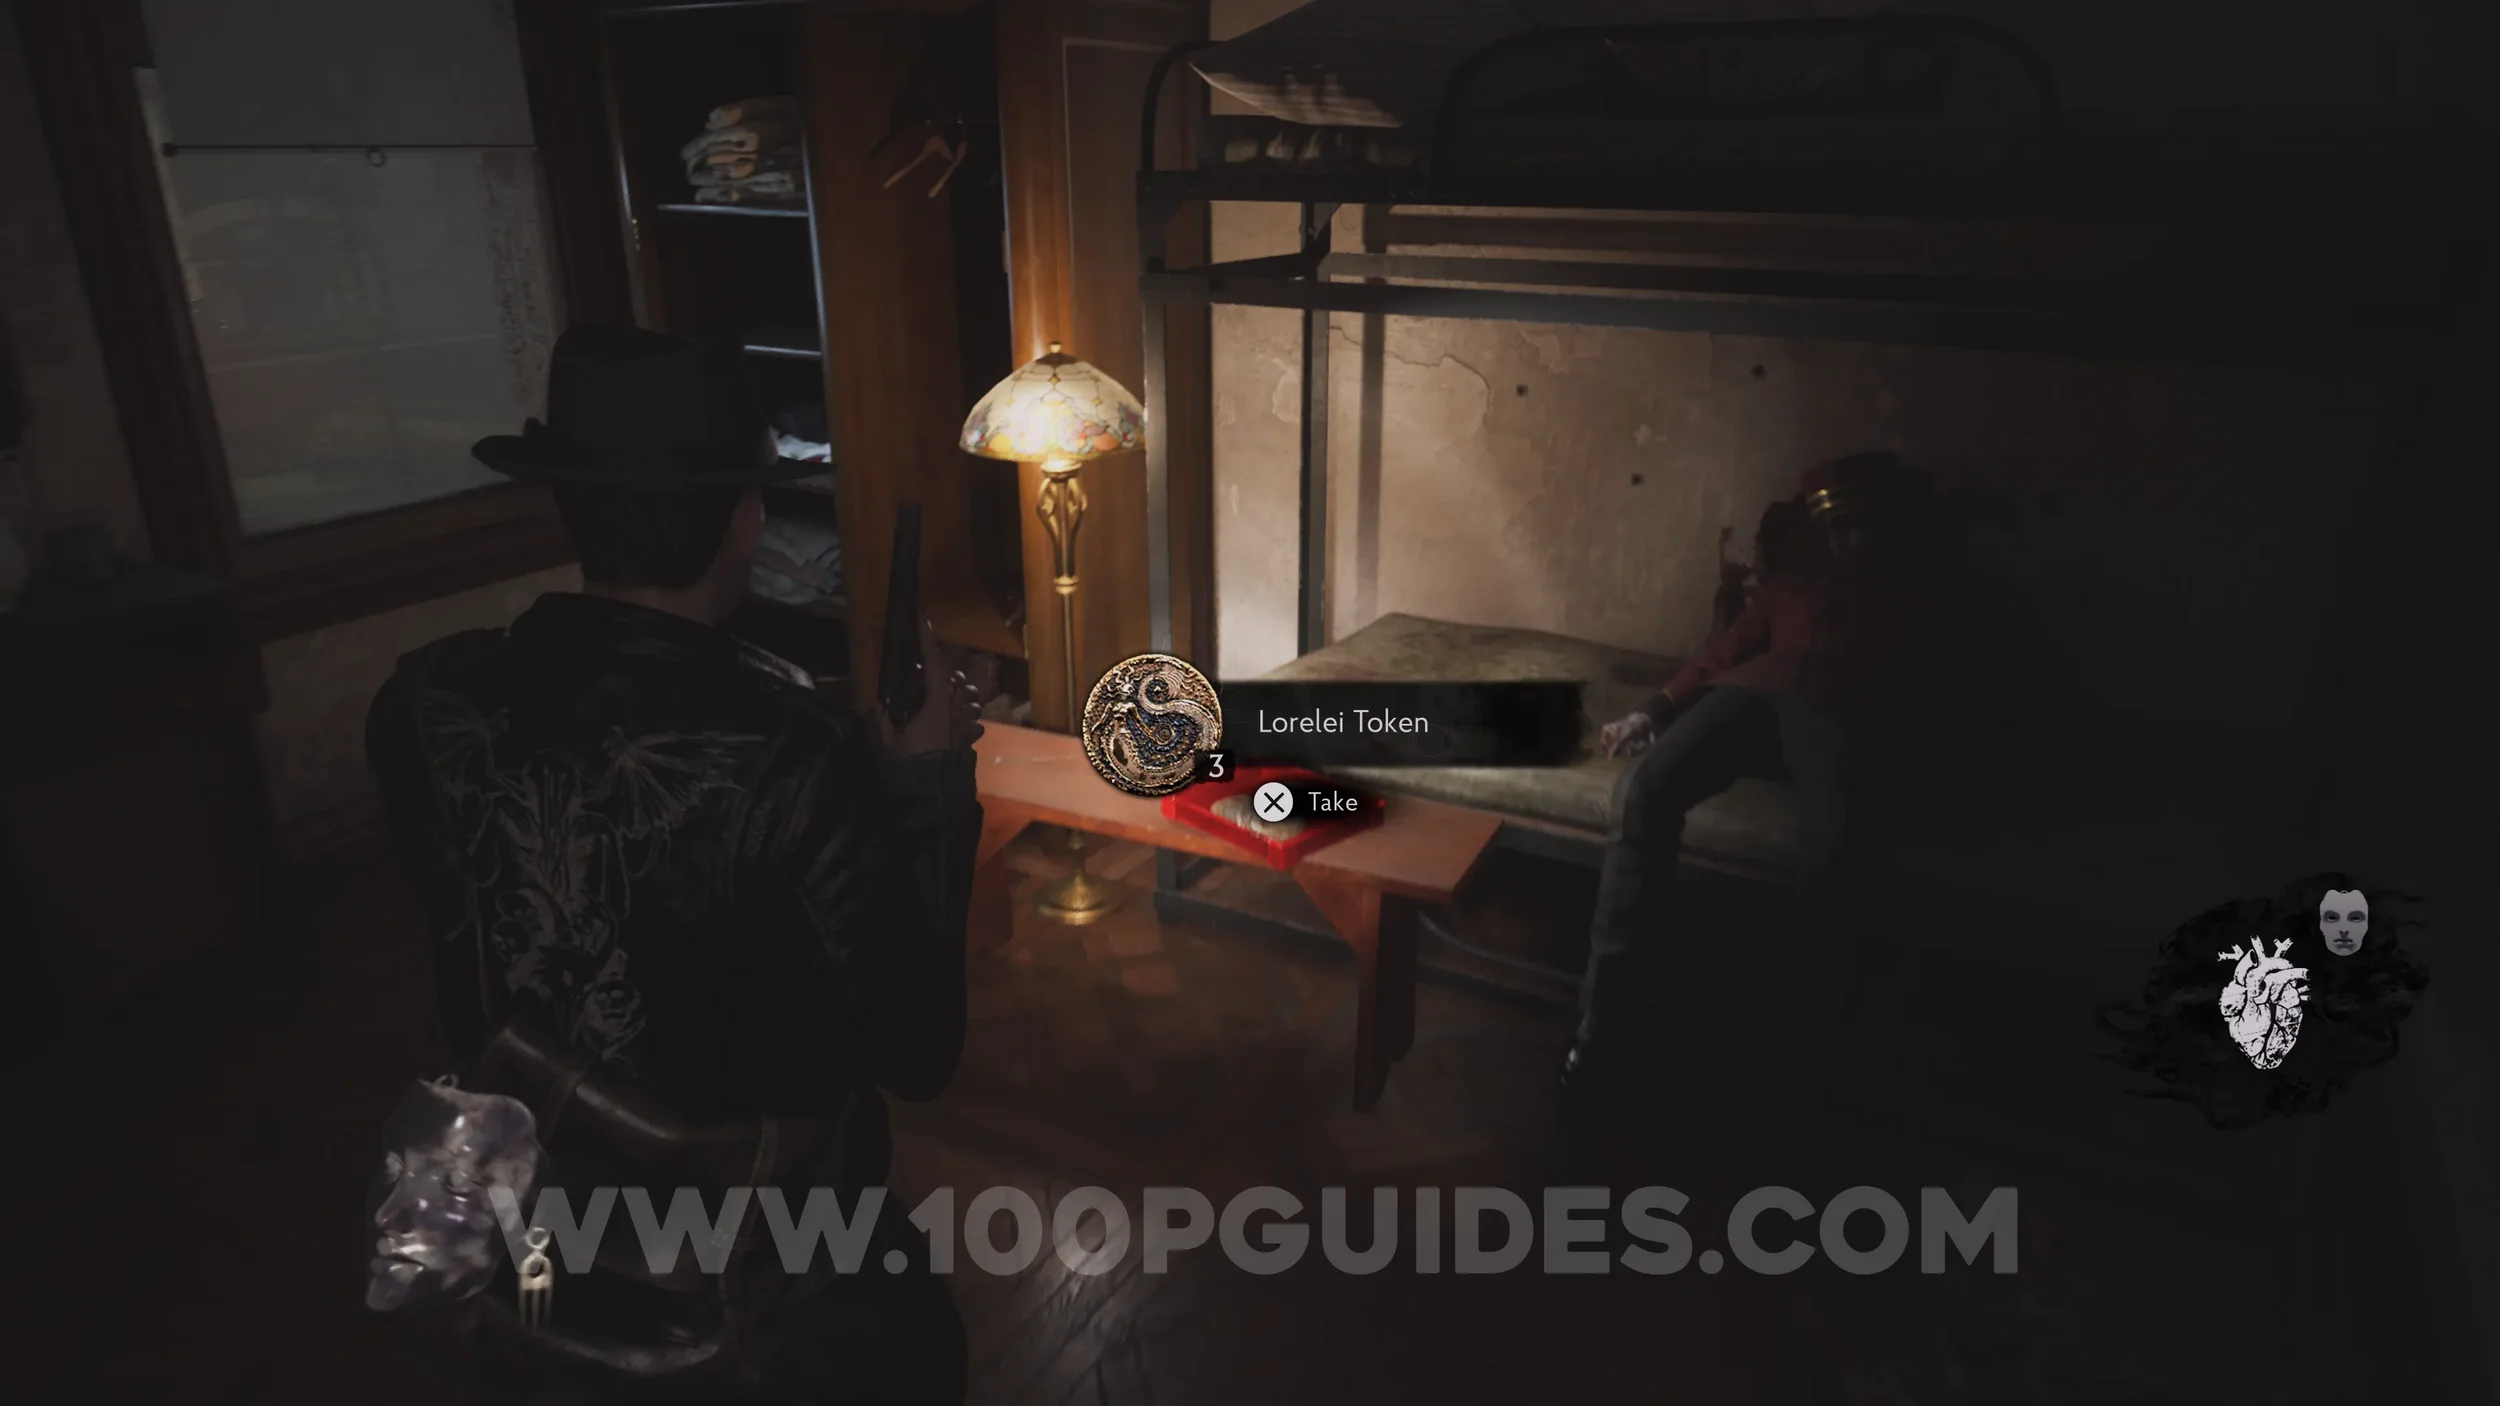
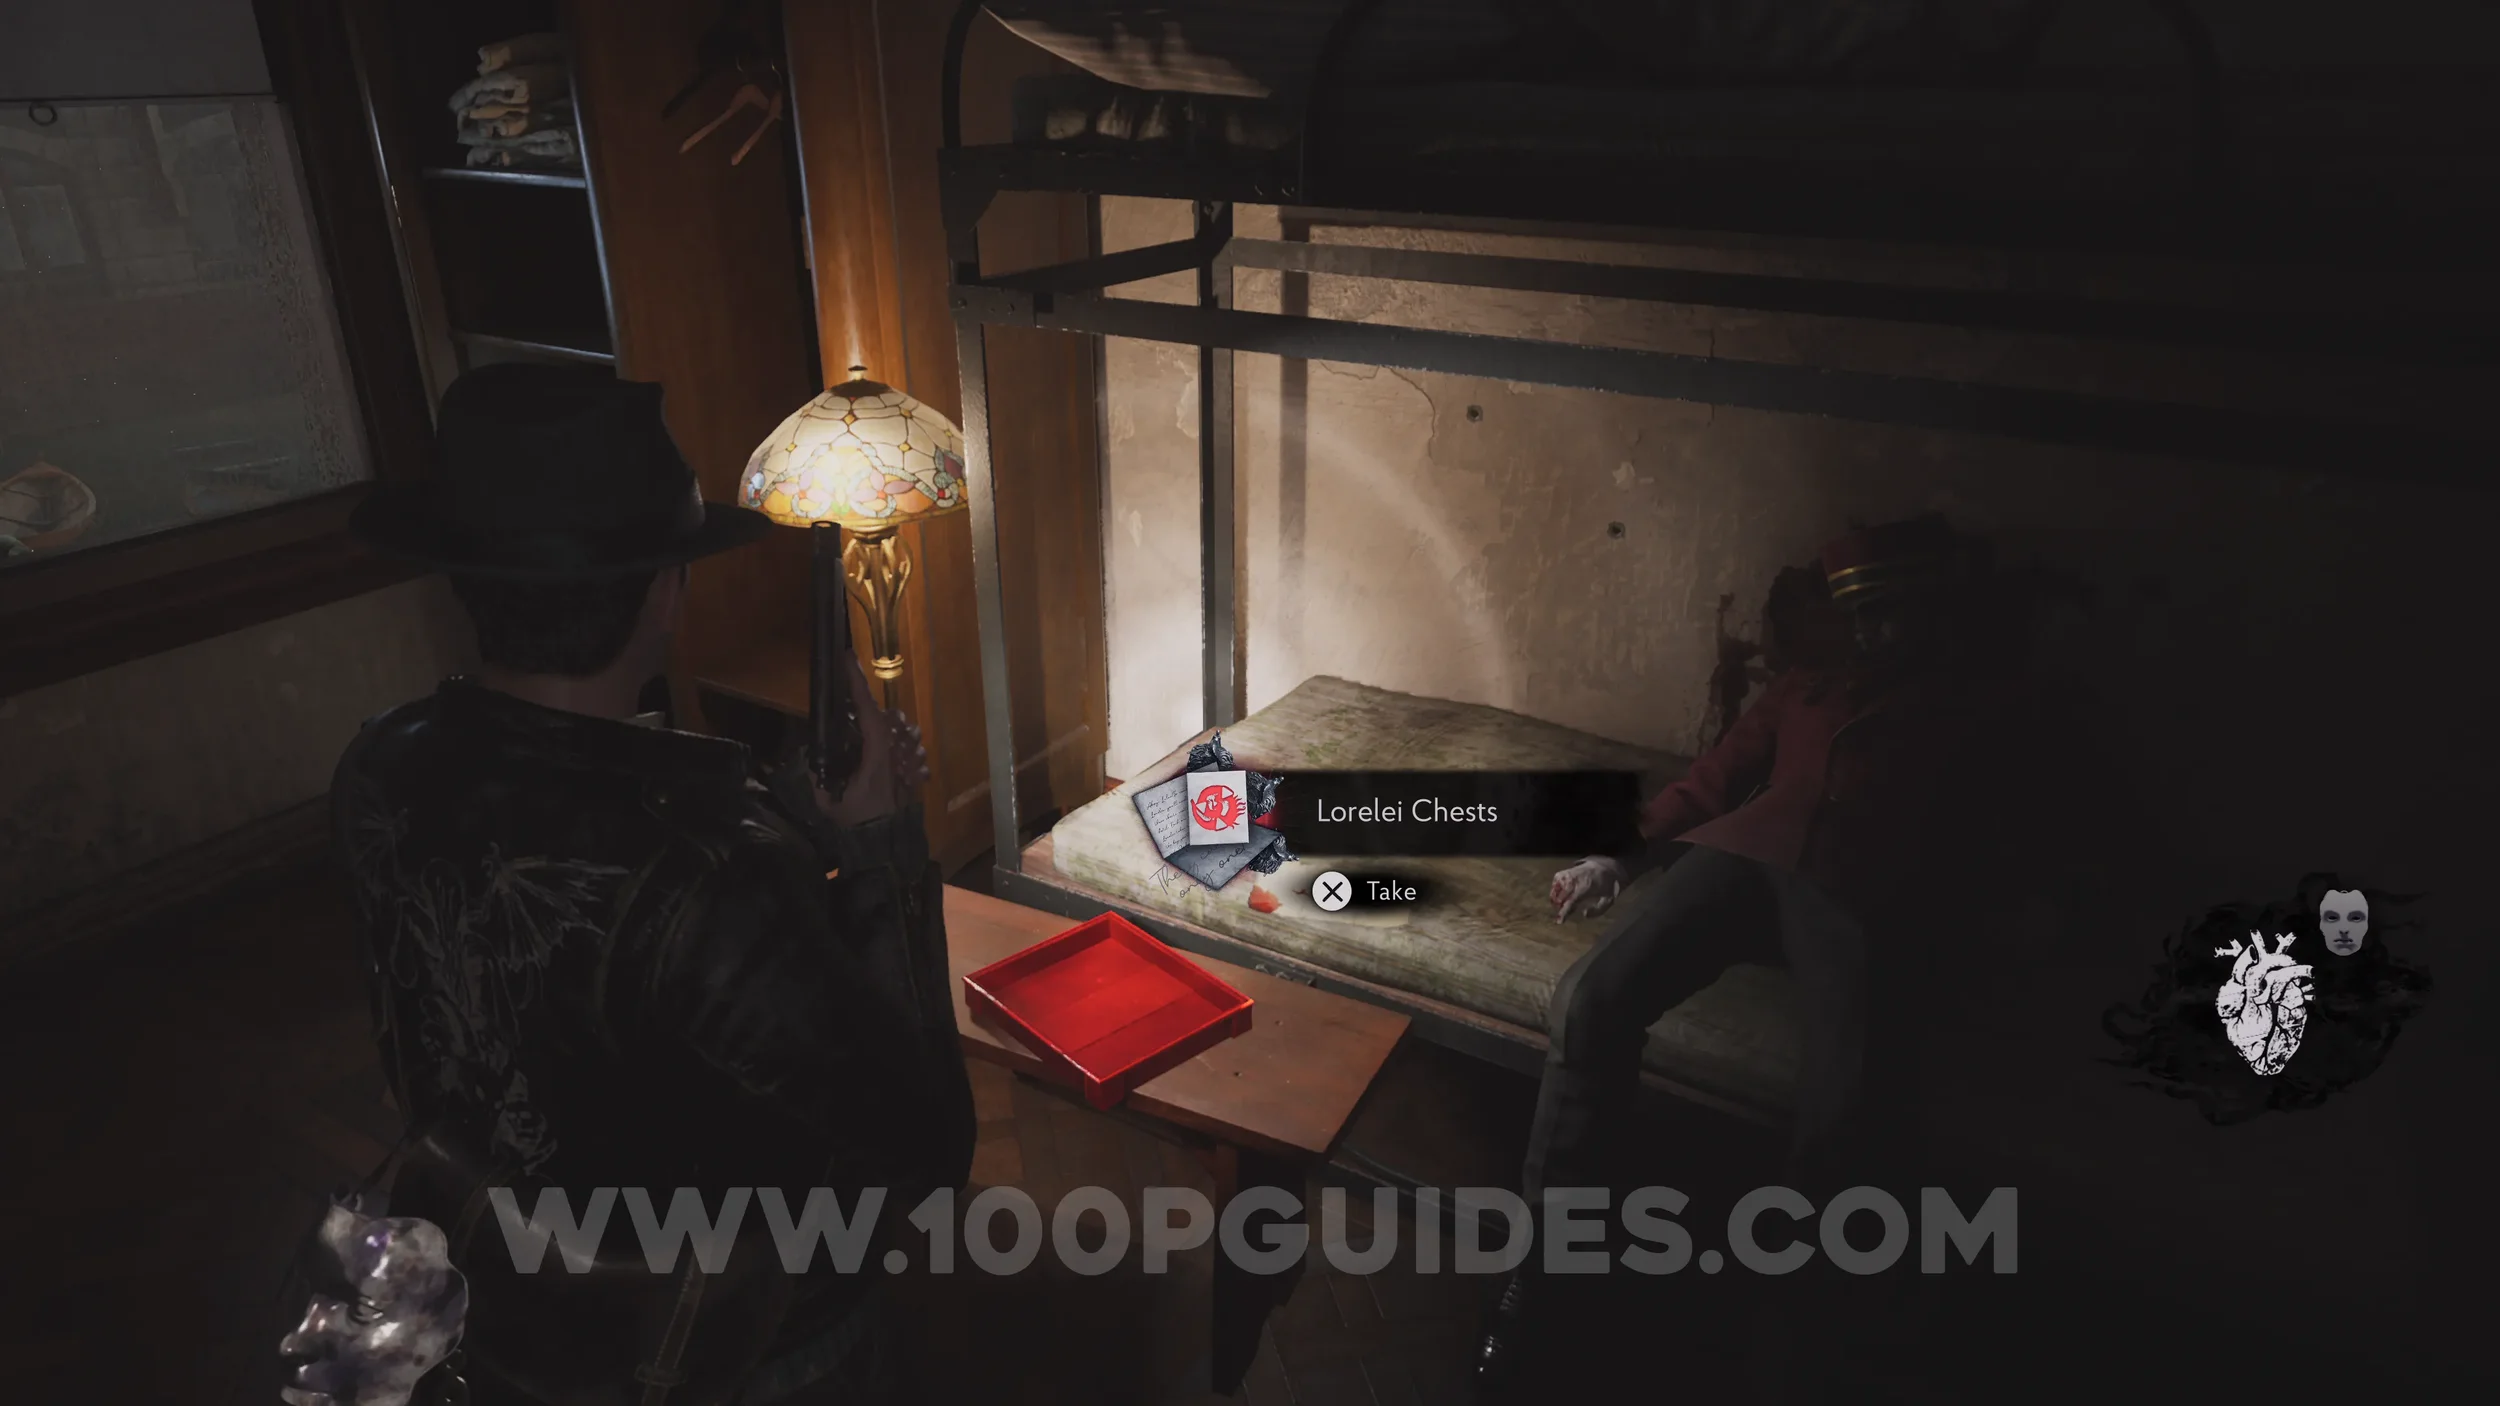
Evidence: Lorelei Chests. On the bed behind the tokens.
Key Item: Key for the Lorelei Lock. Go upstairs to 3F and use the Staff Key to open the door to Room 303. Inside, use one of the tokens to open the chest and obtain the first key.
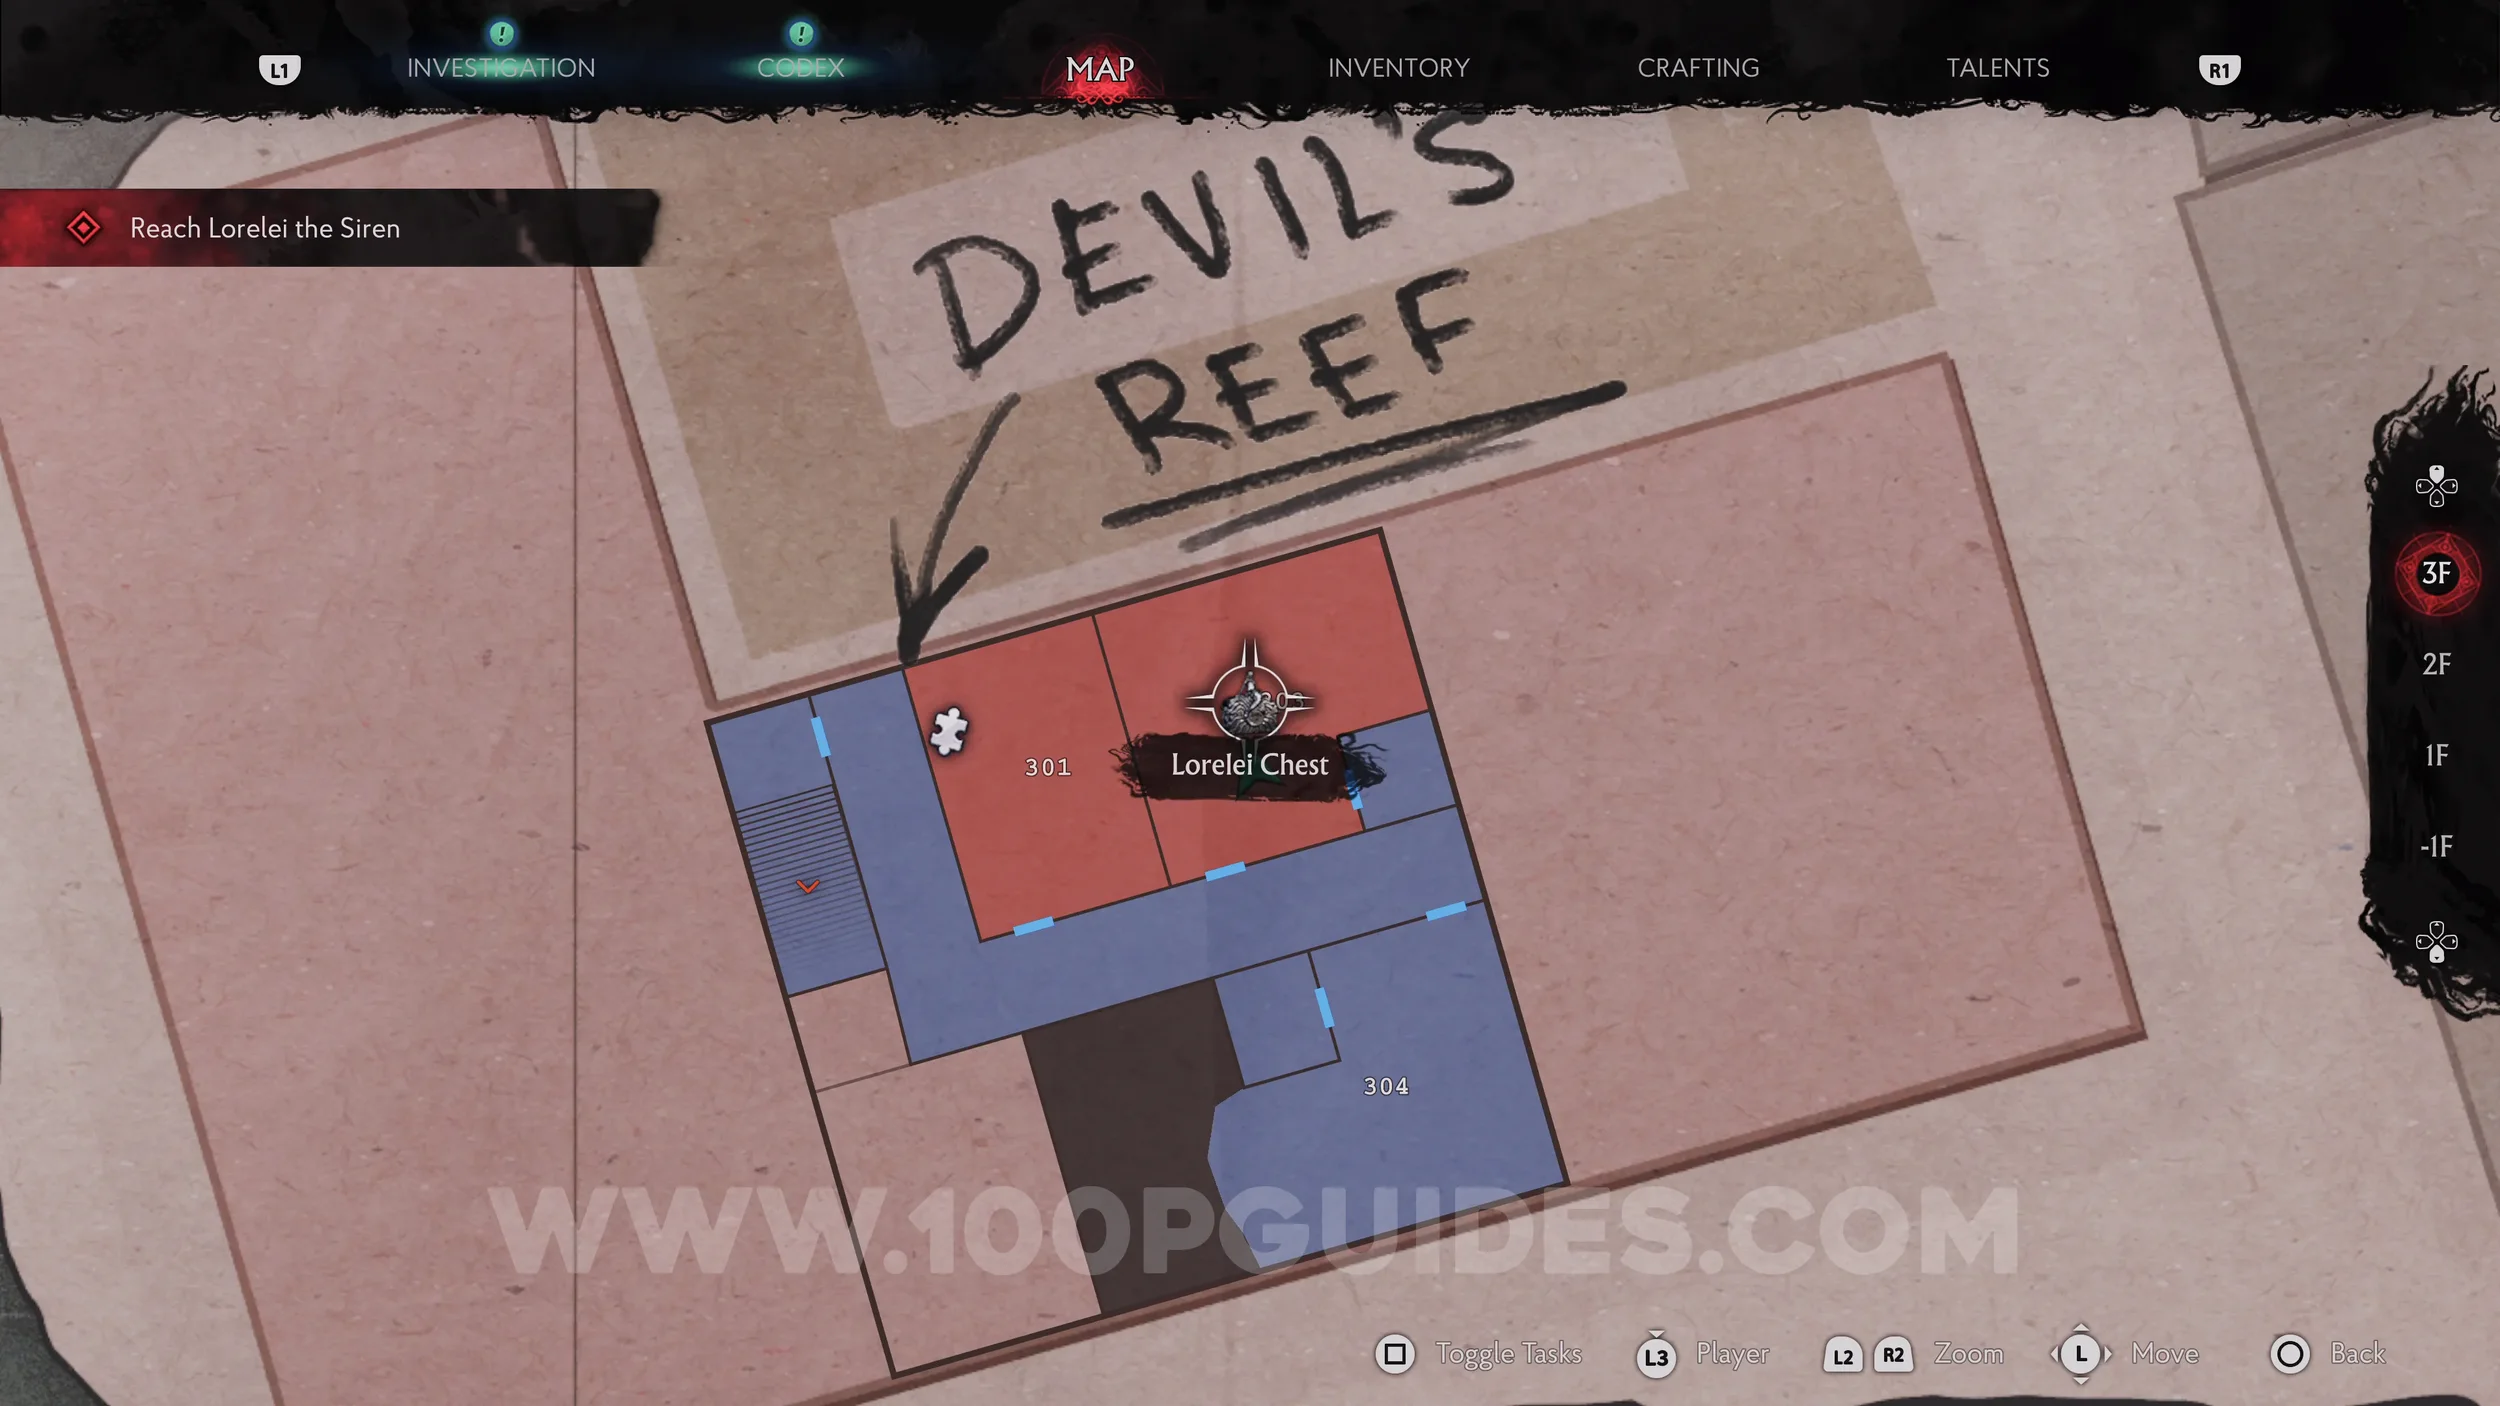
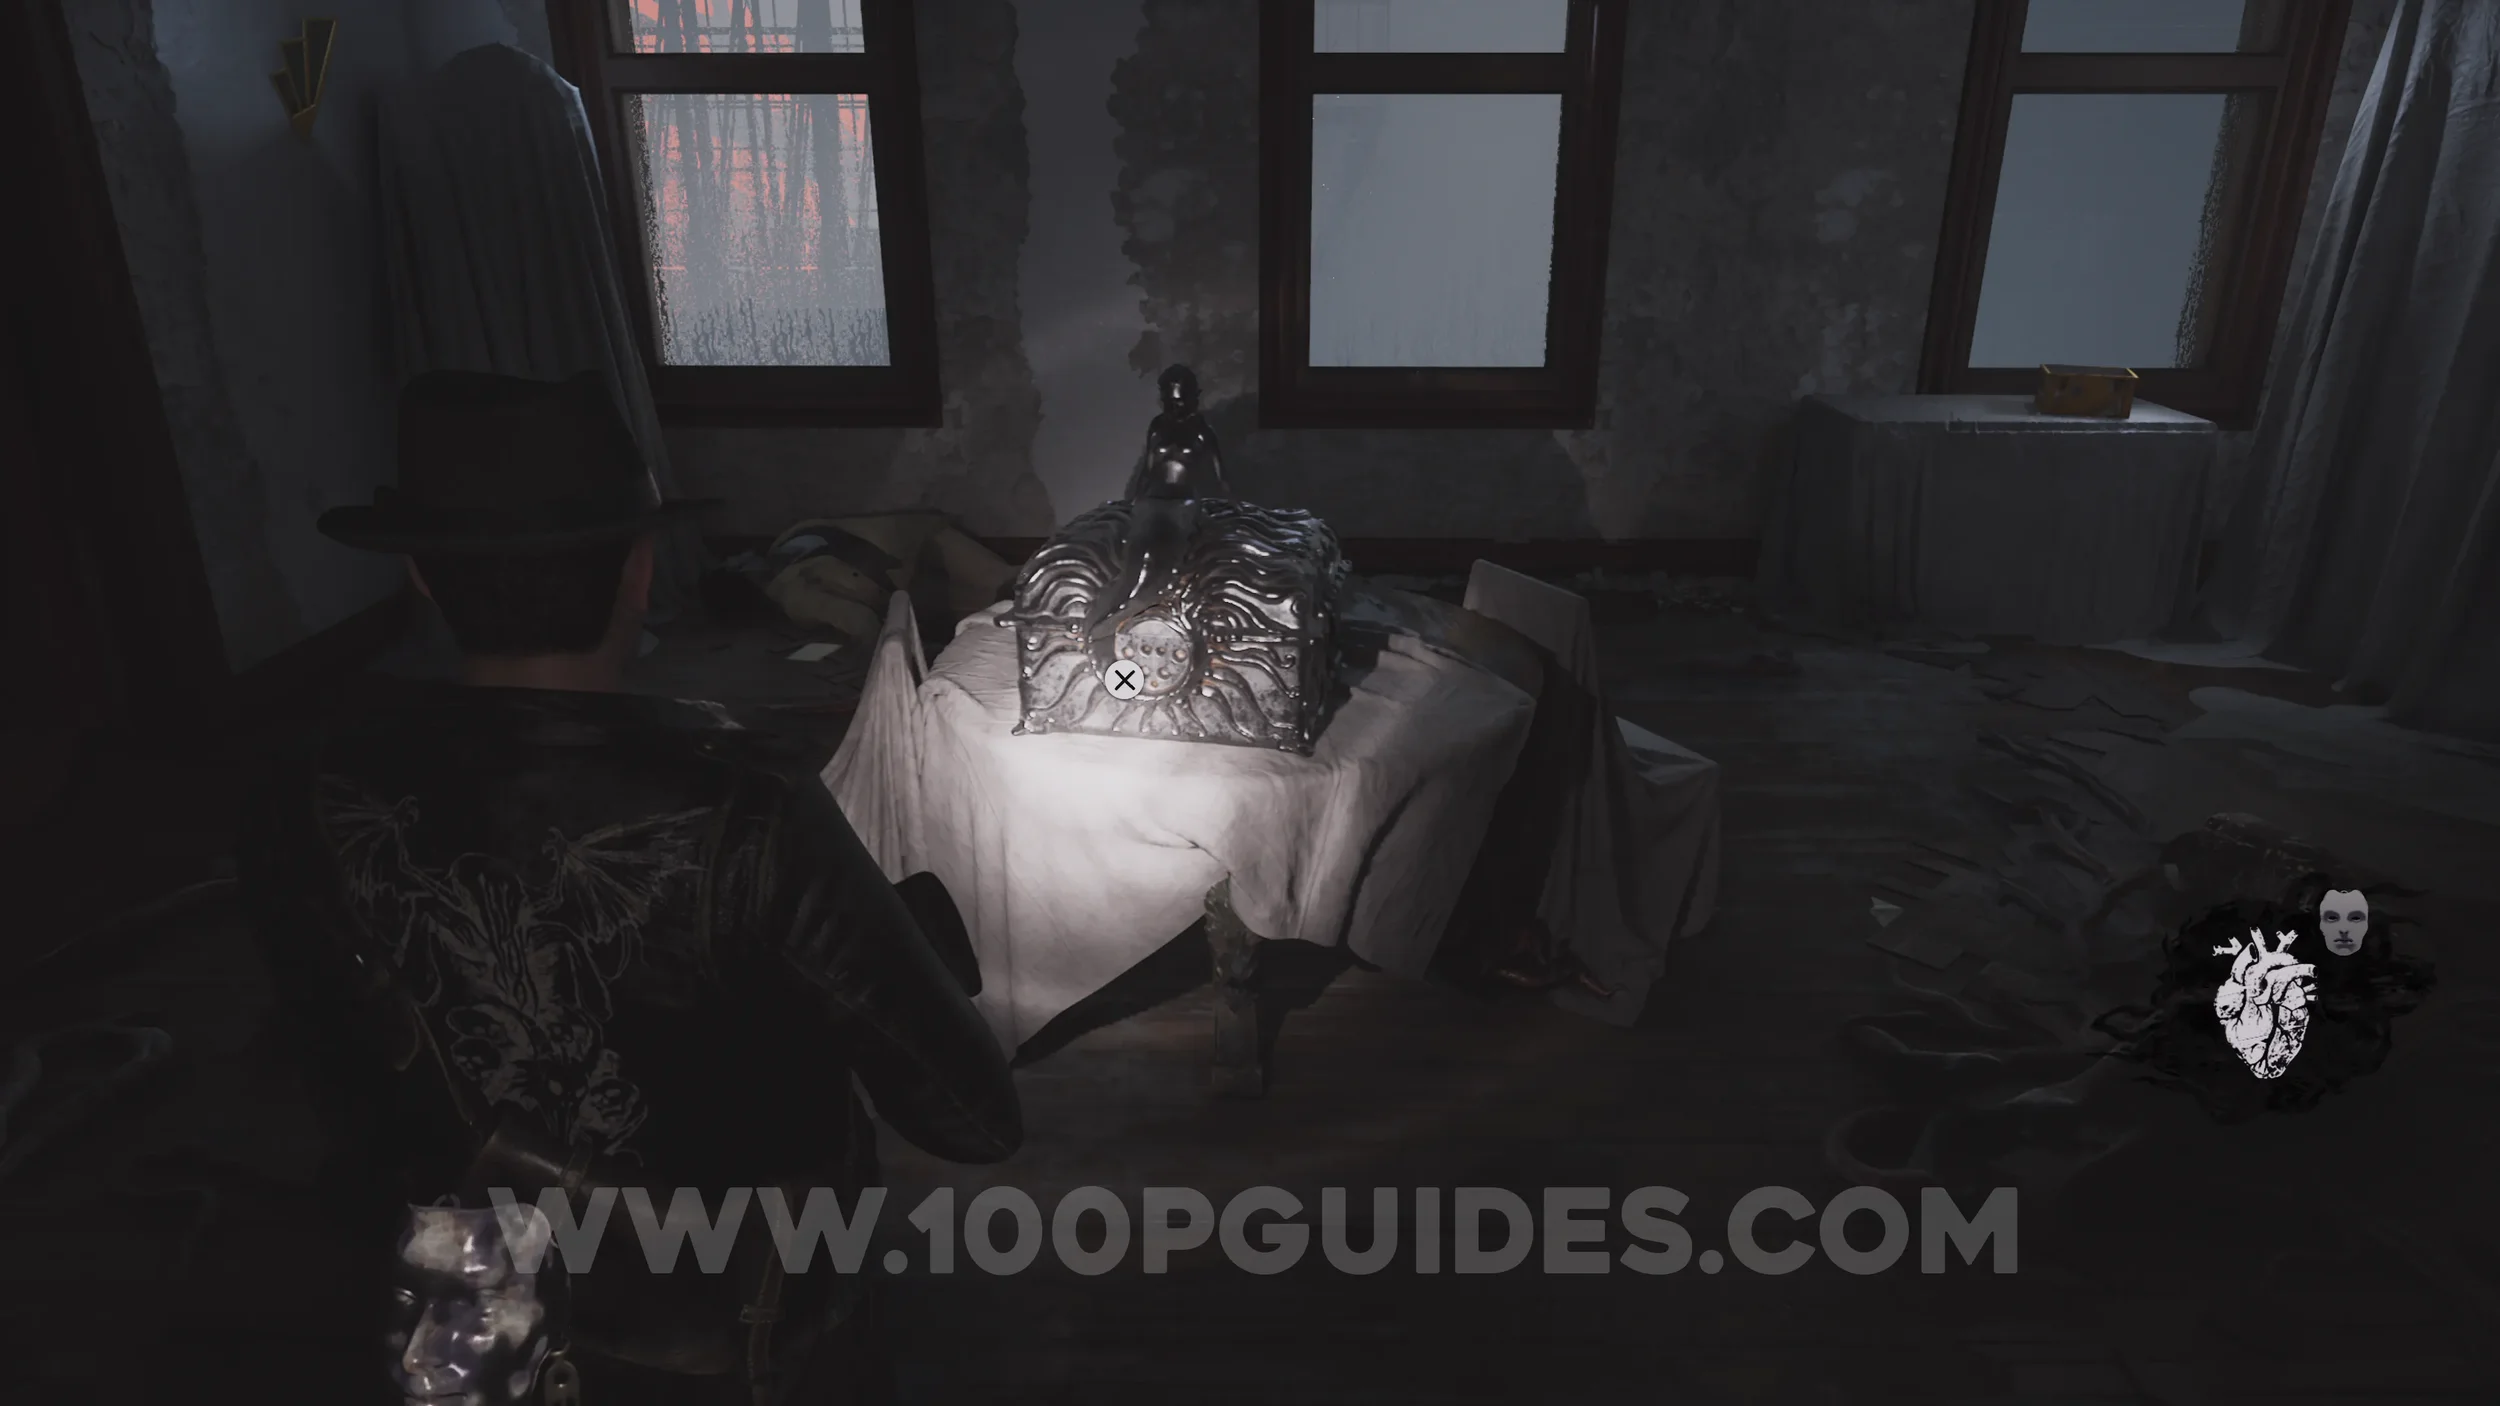
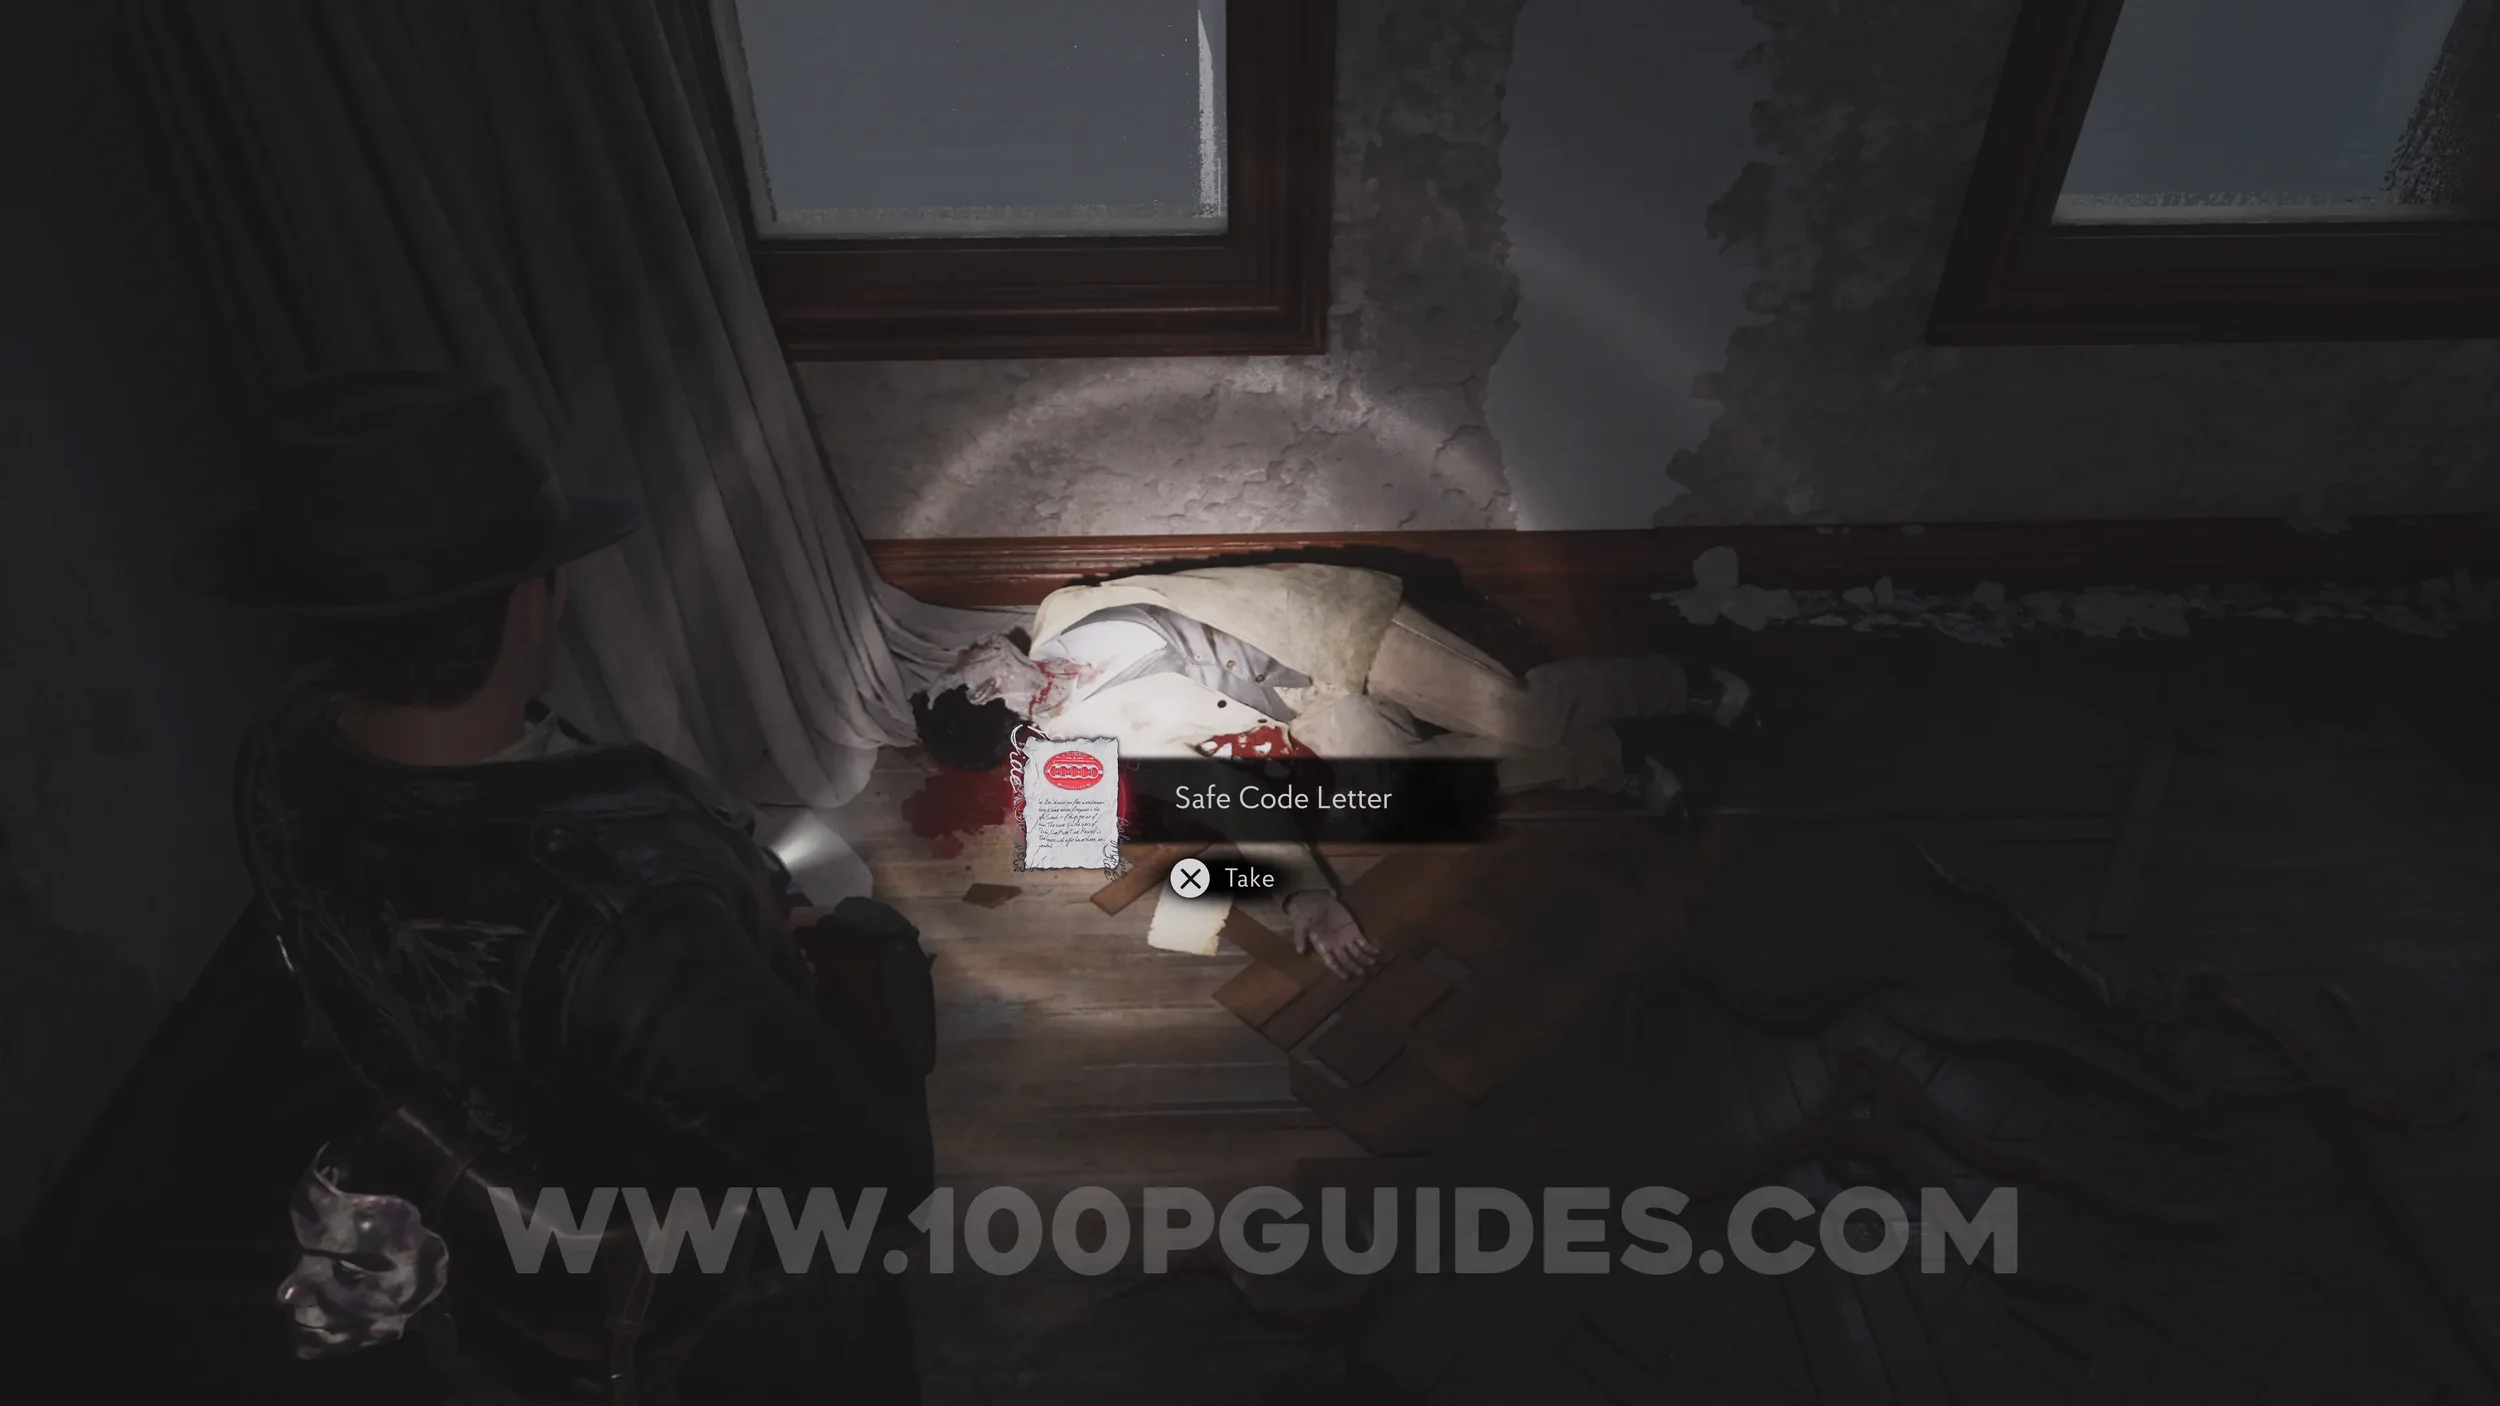
Evidence: Safe Code Letter. On the floor next to a corpse in room 303.
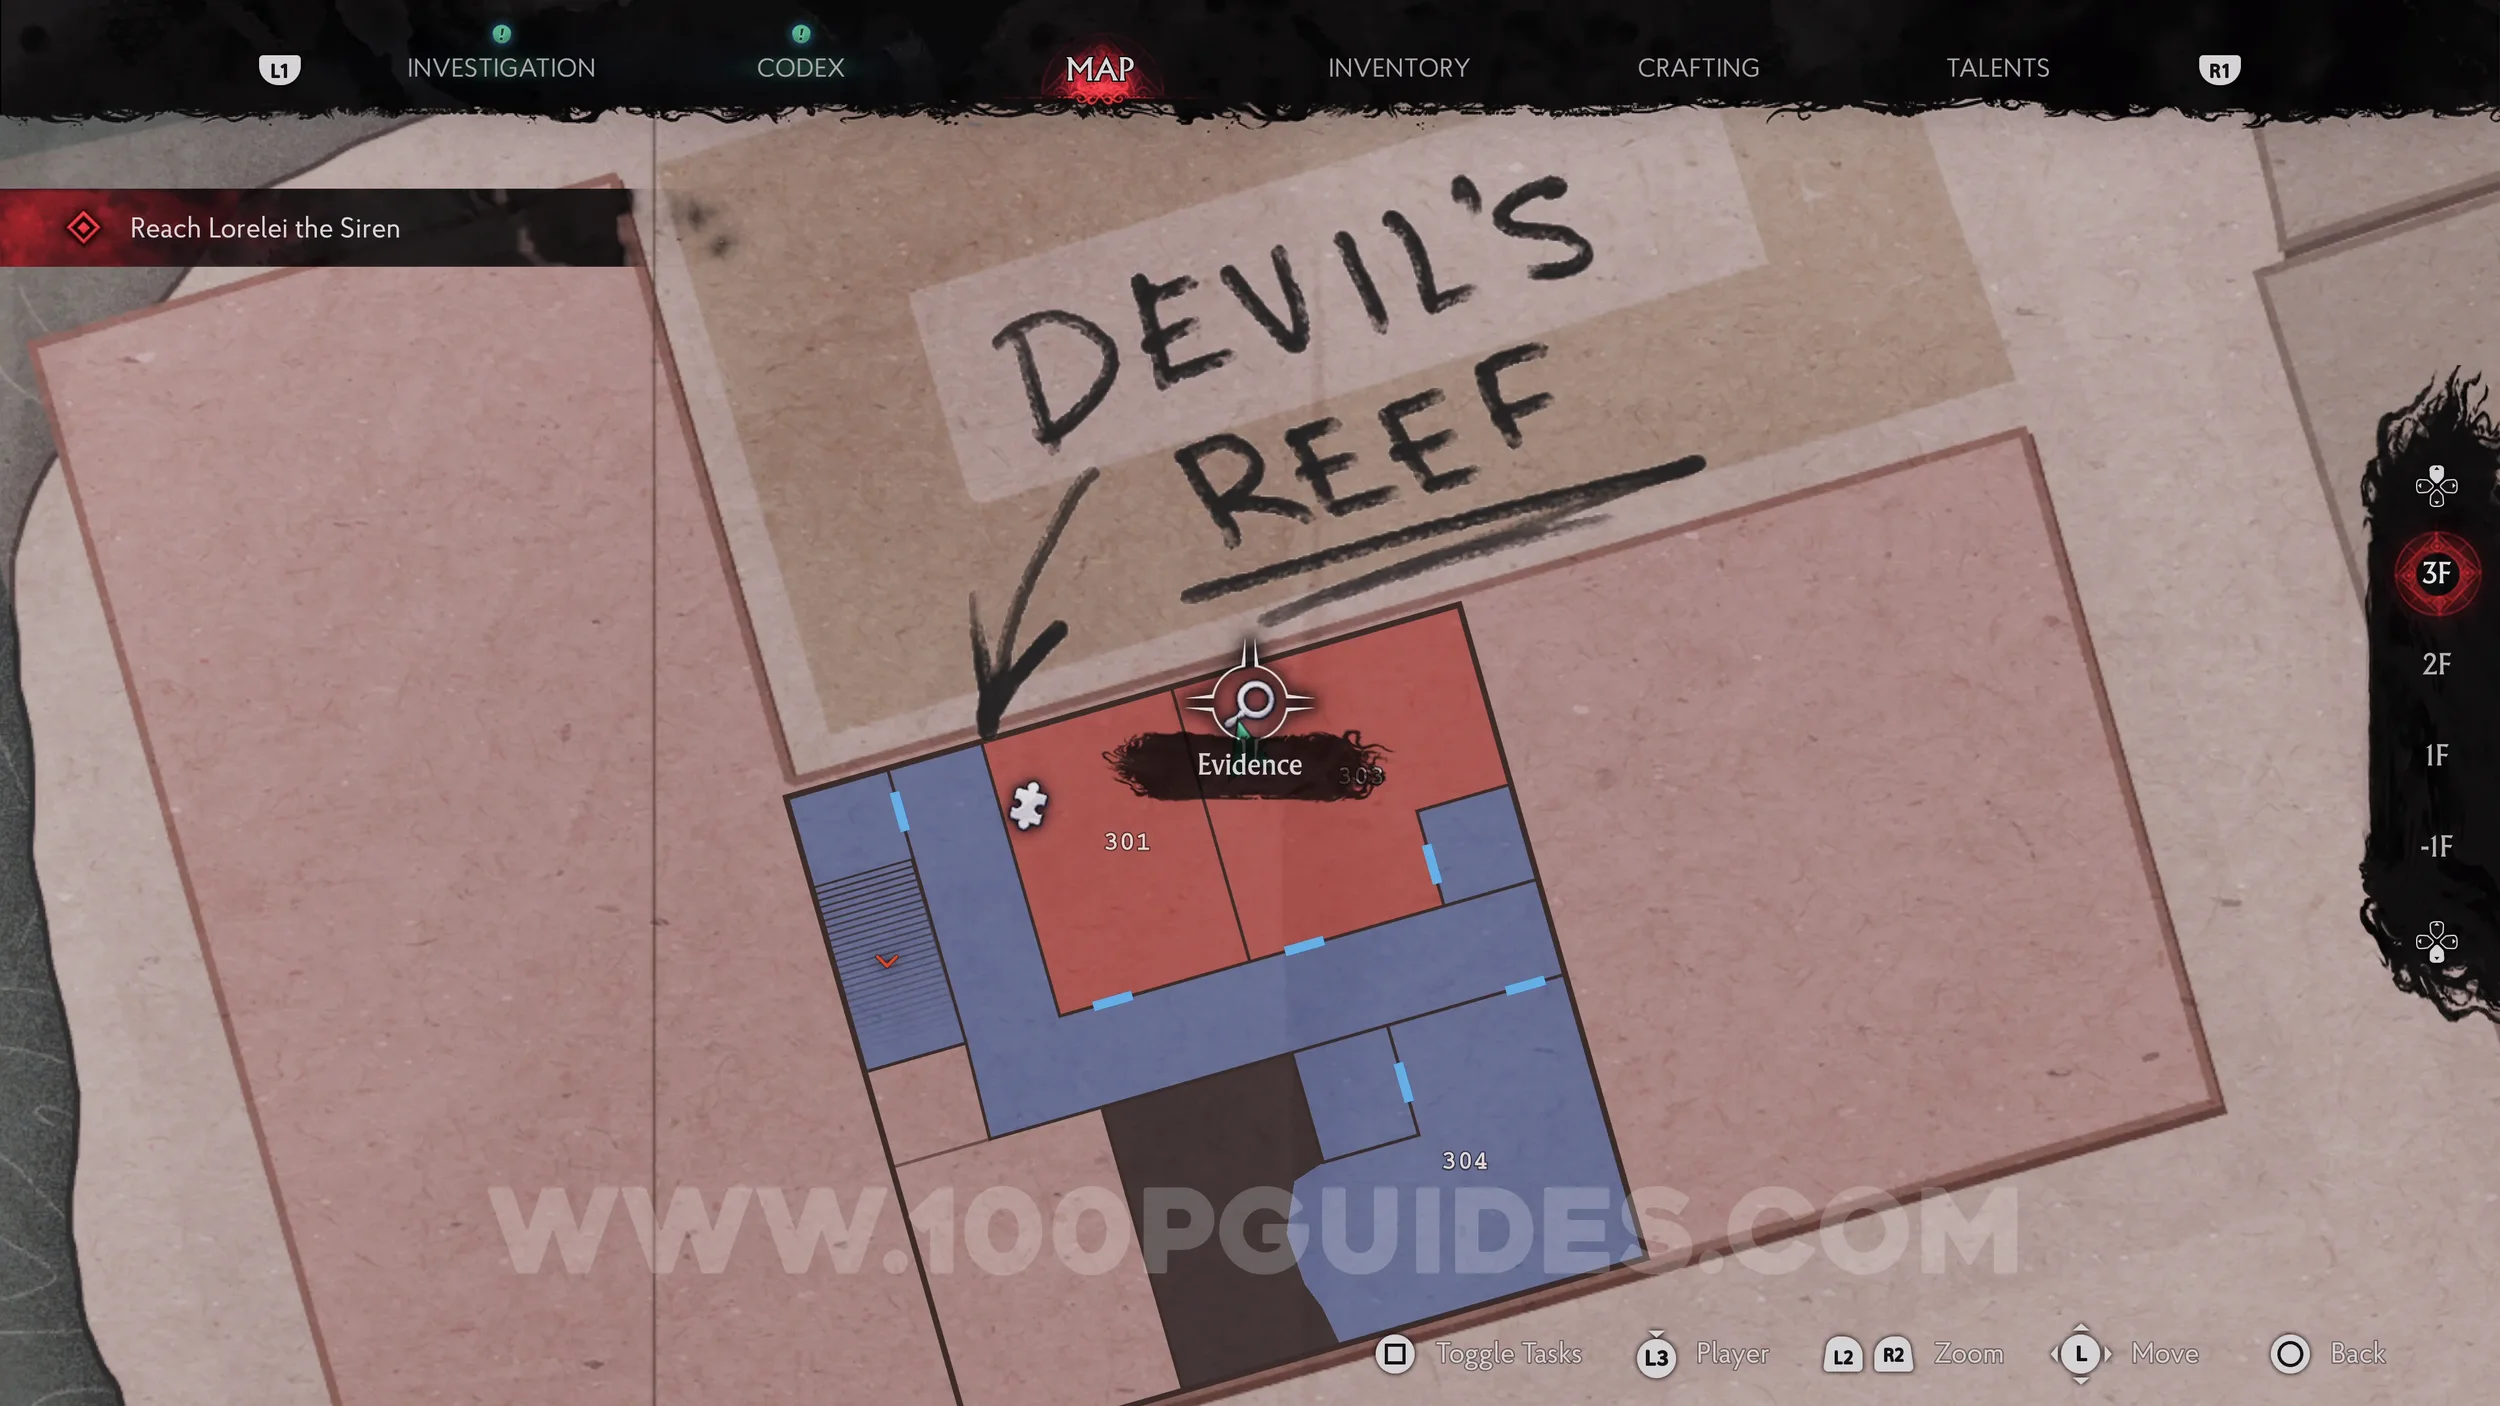
Key Item: Key for the Lorelei Lock. Go back down to 2F and make your way to Room 203 to find the second chest you can open with a token. After placing the token in this chest, you'll have to shoot the four cursed items that appear around the area. Three are in this very room, and the last is in the small bathroom in the corner. Remember to pick up the key from the chest afterwards.
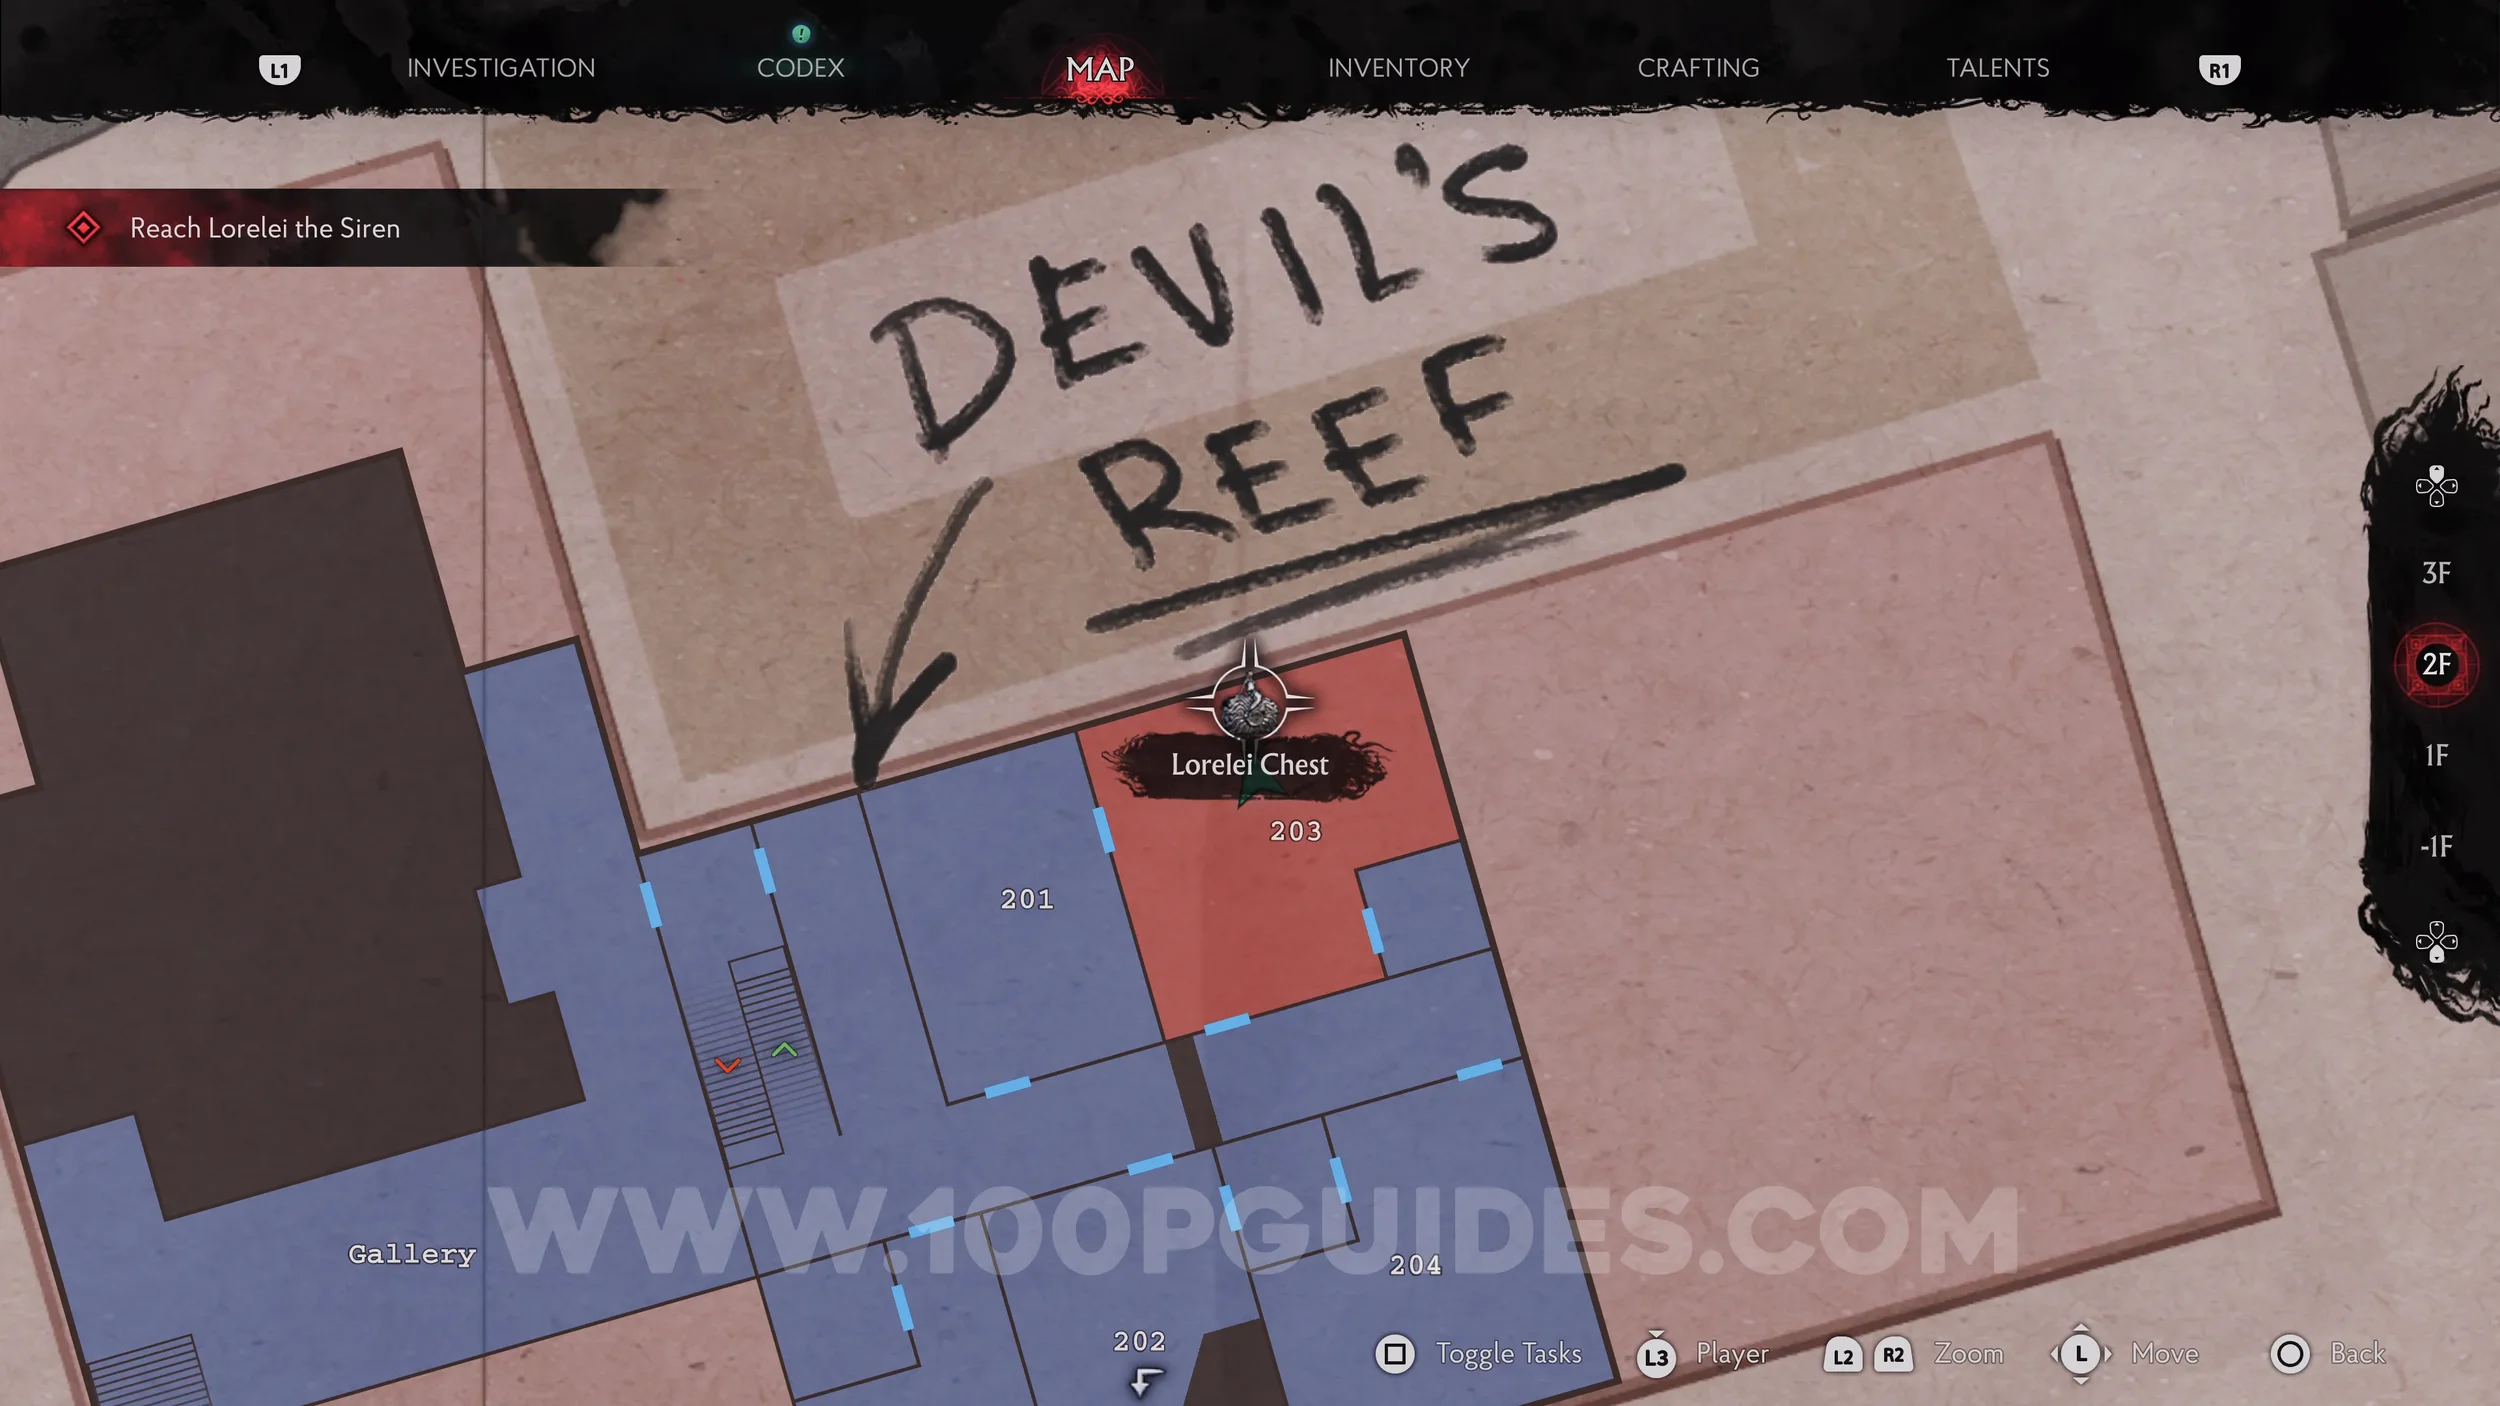
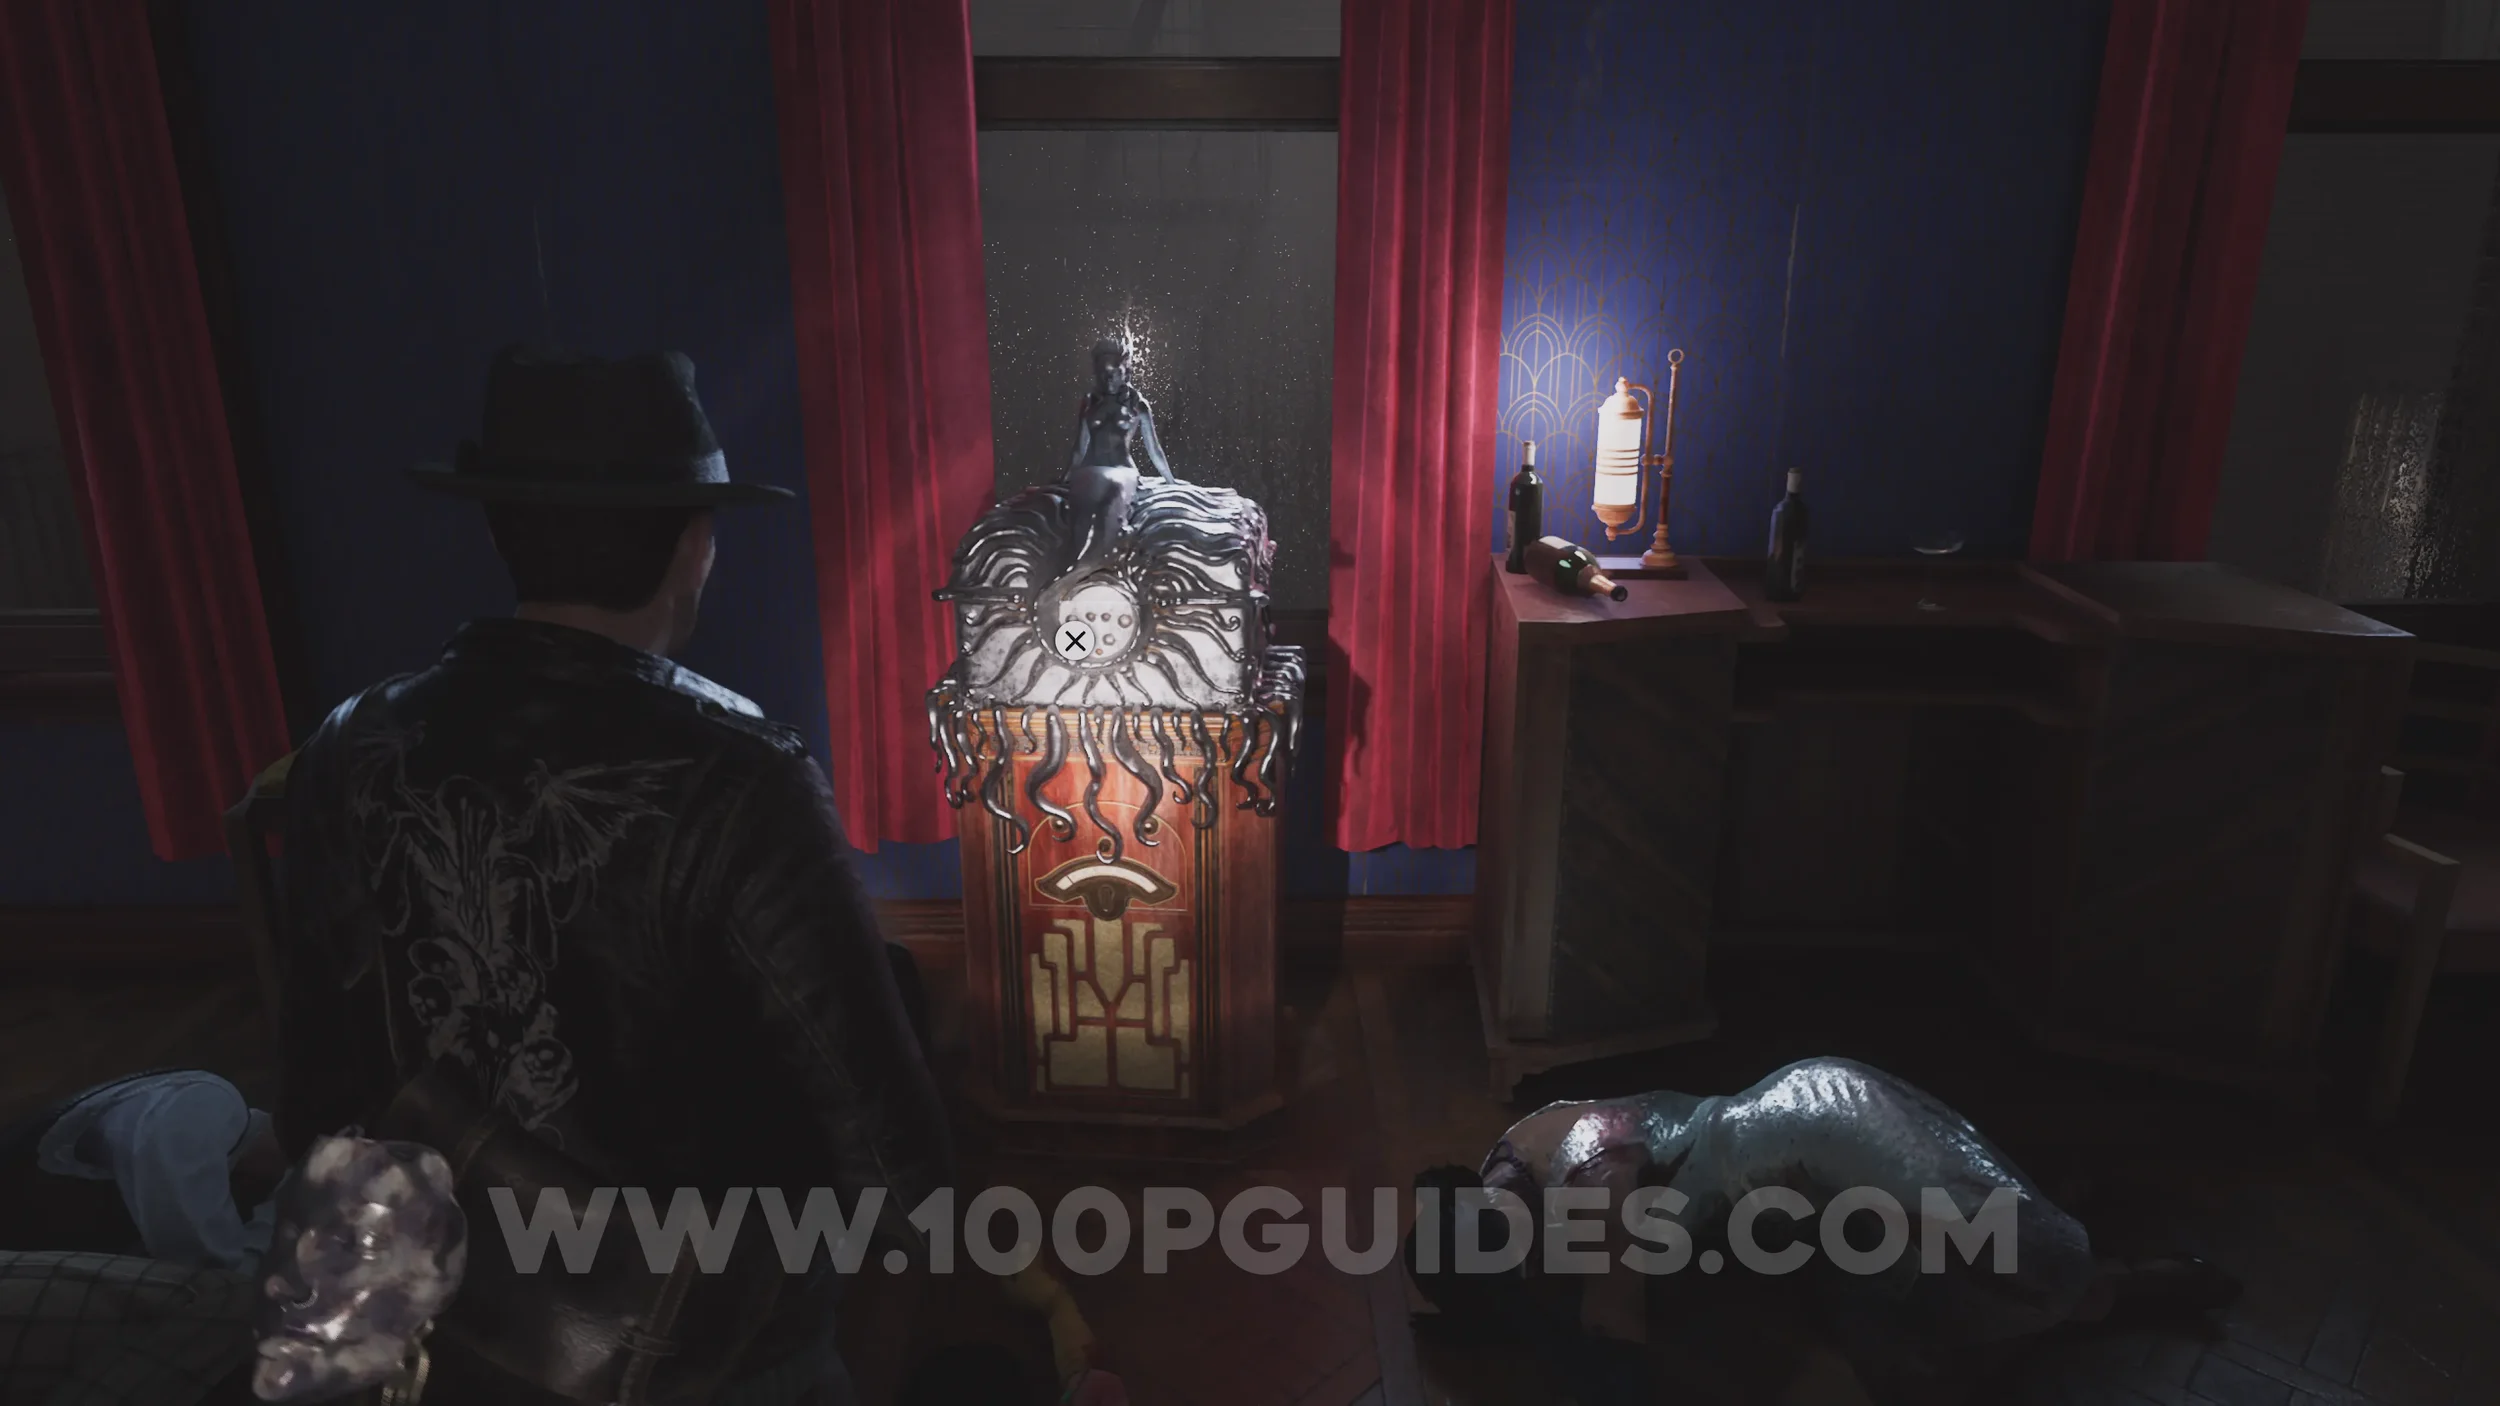
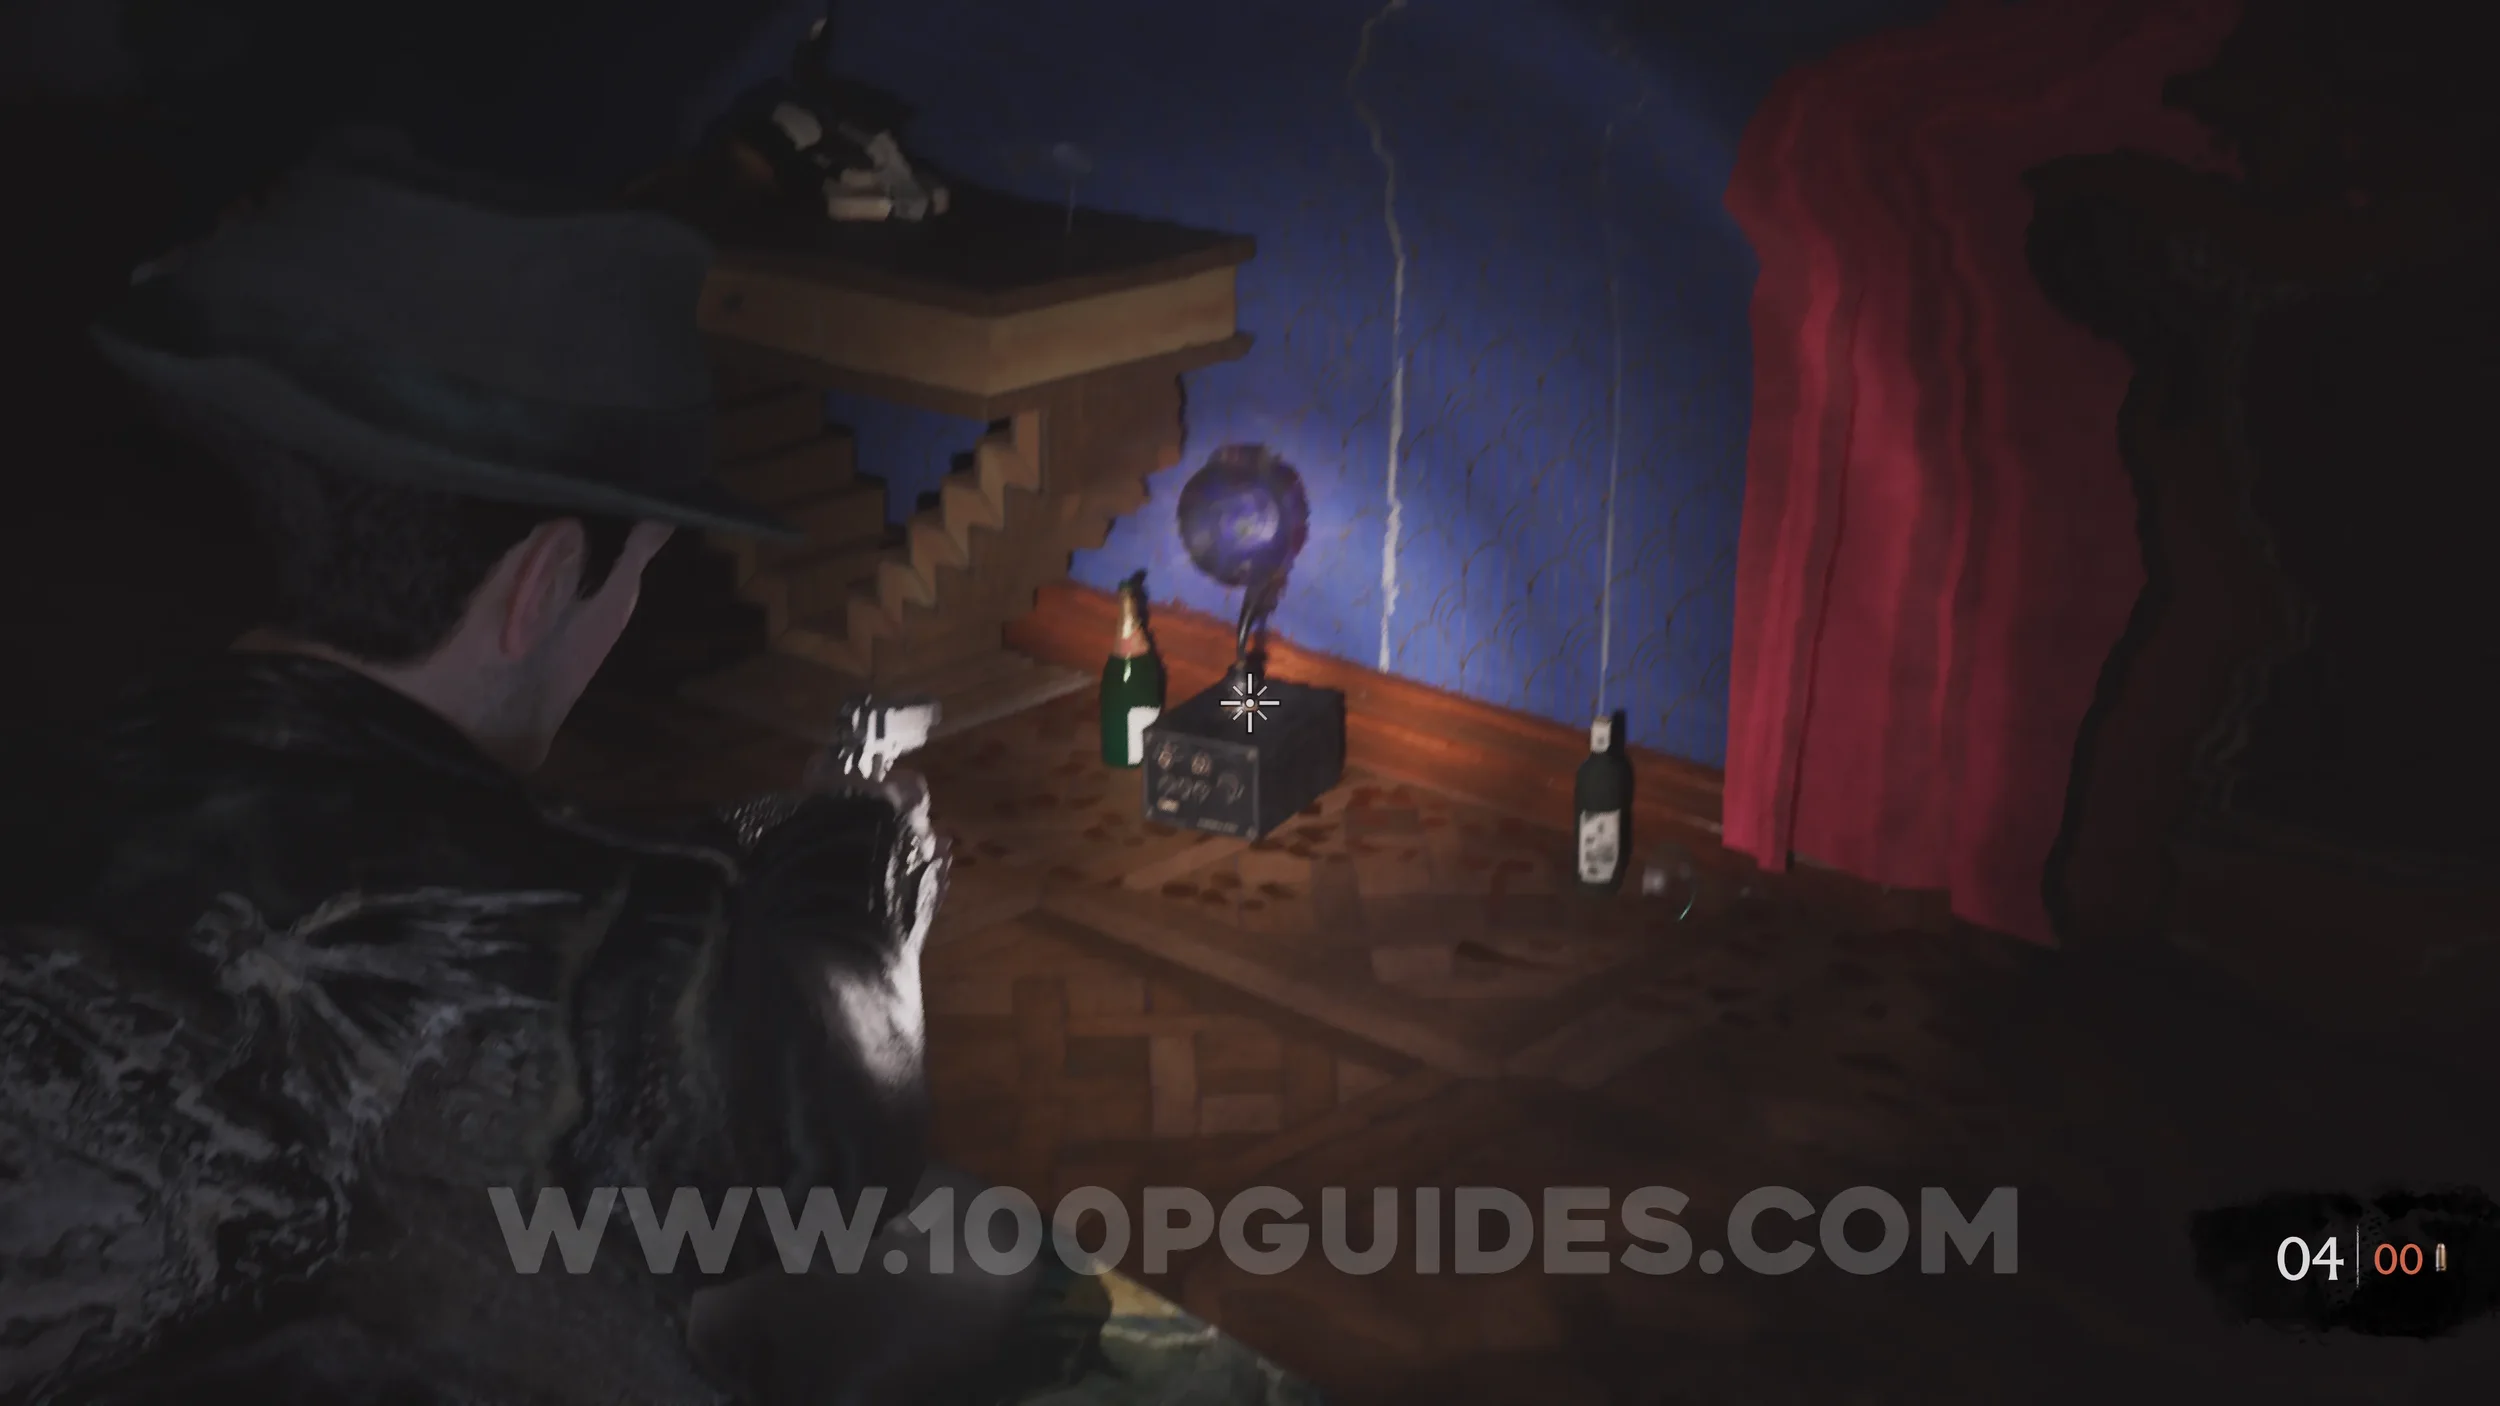
Key Item: Key for the Lorelei Lock. The final chest with a key inside is found in the Bar area, close to where you picked up the Staff Key.
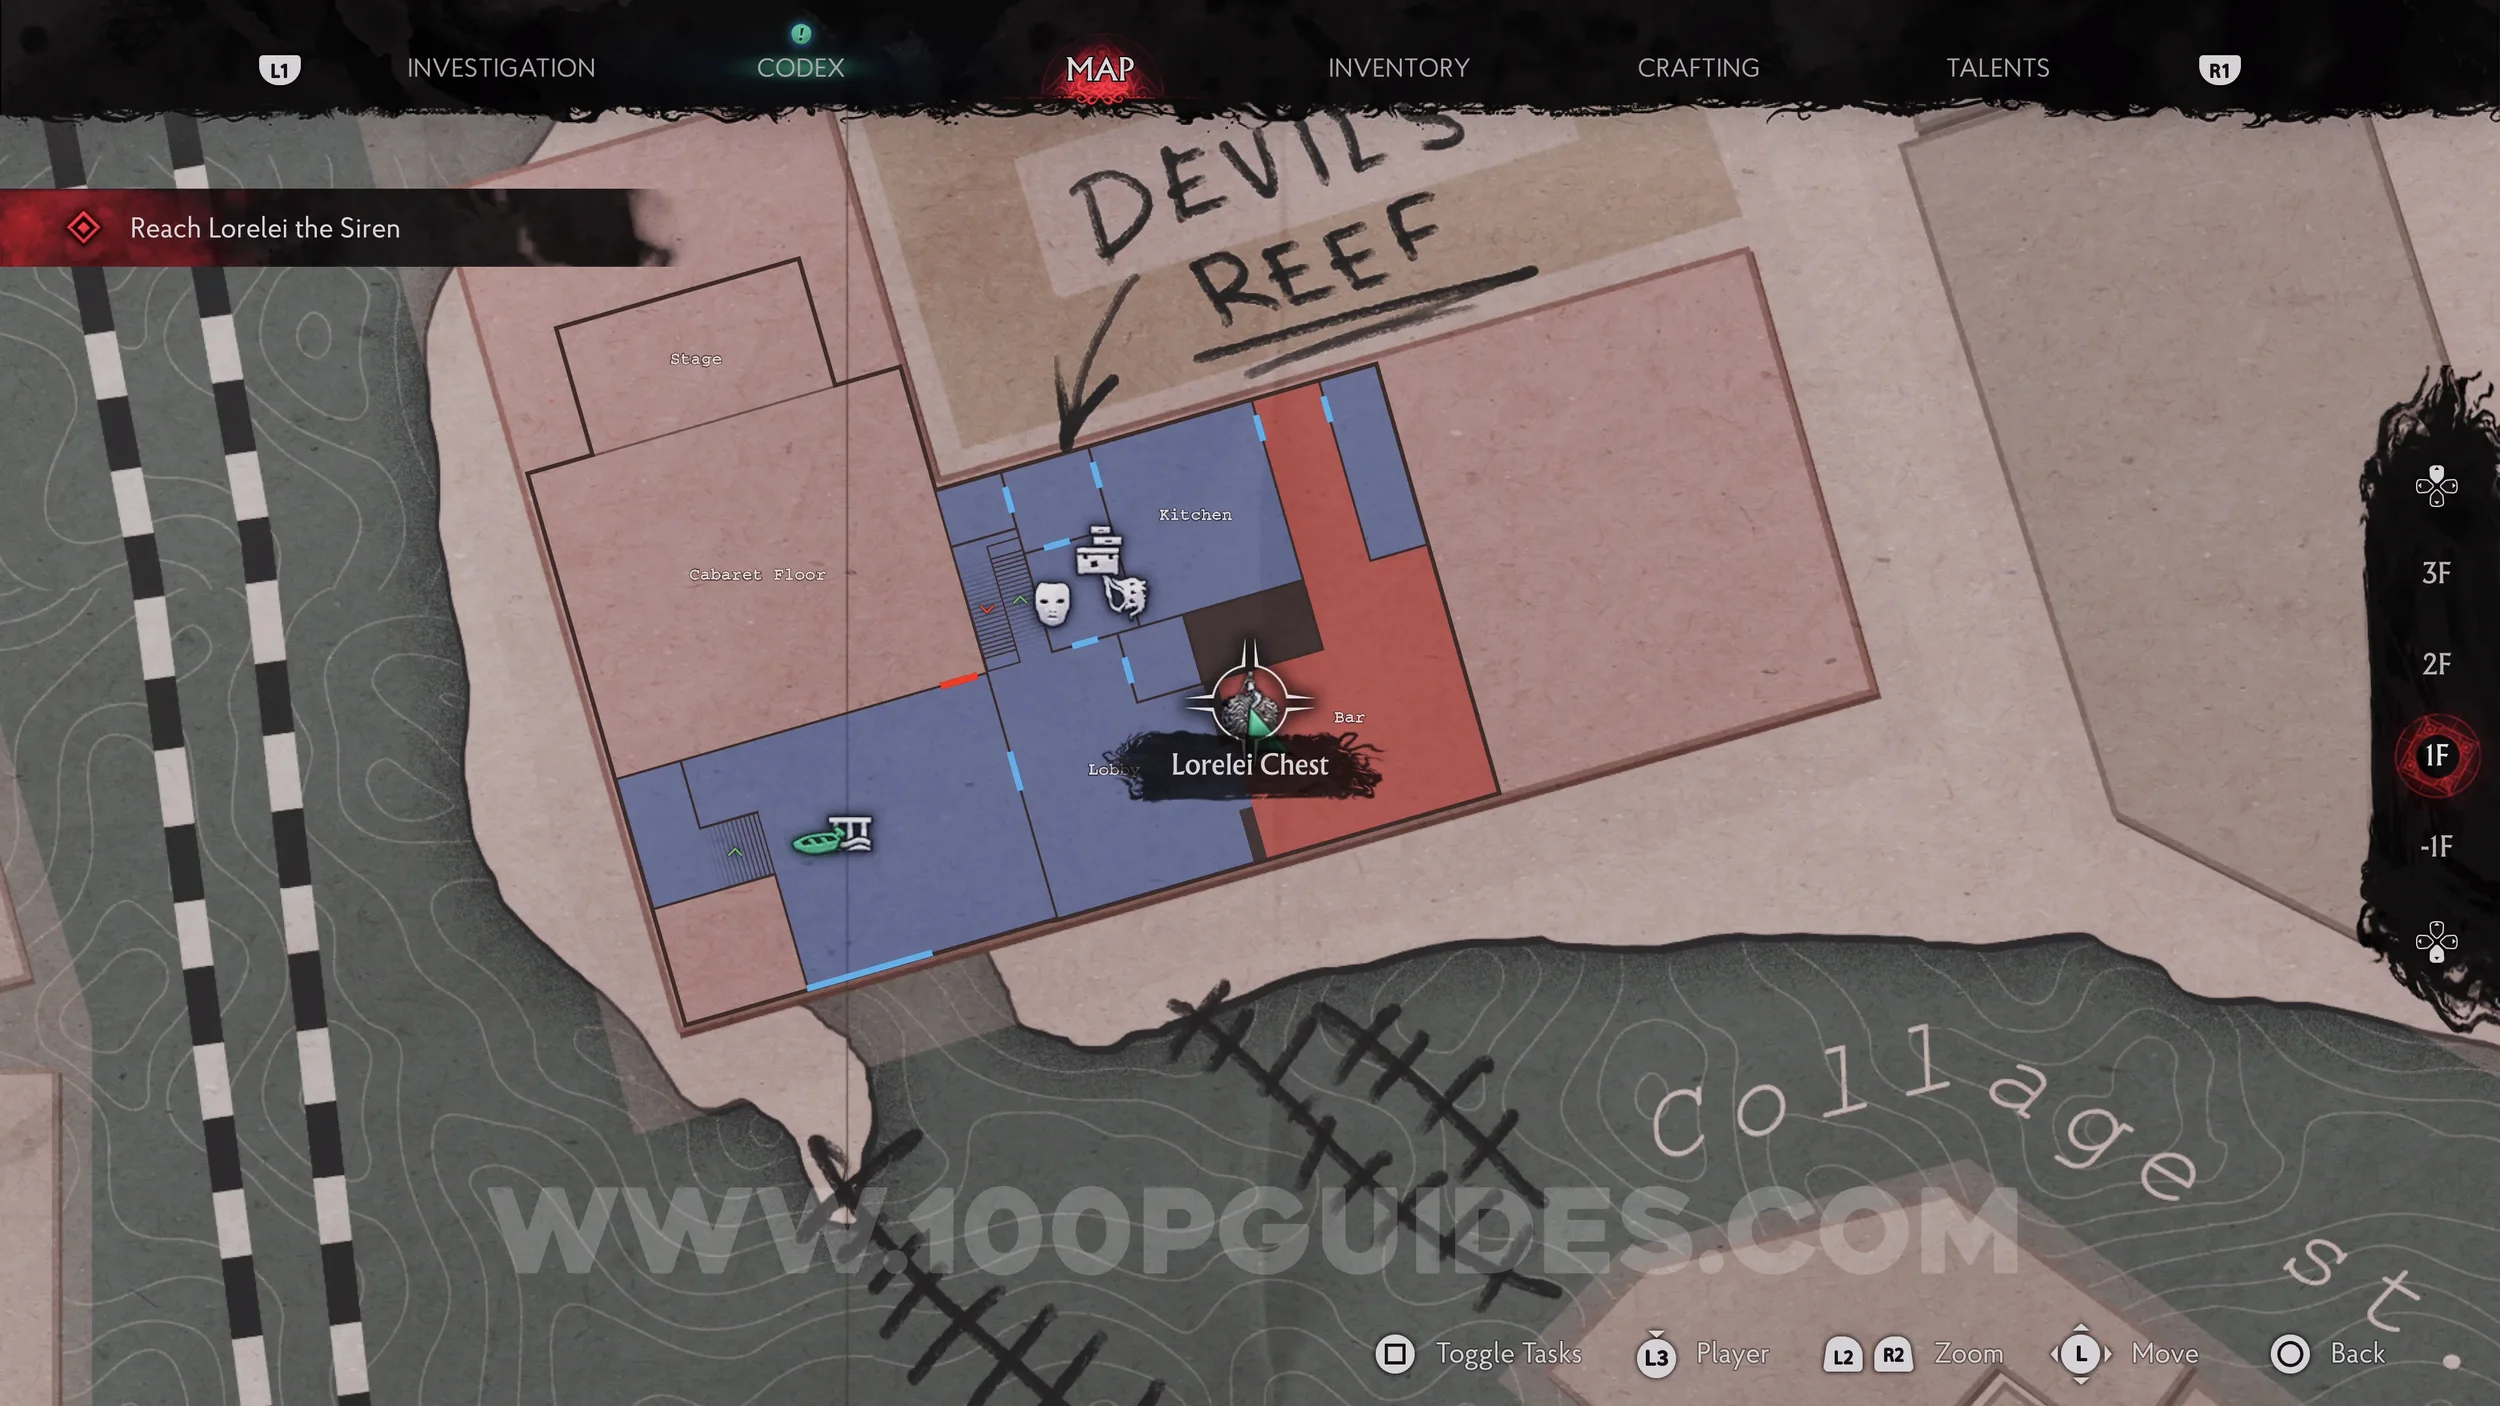
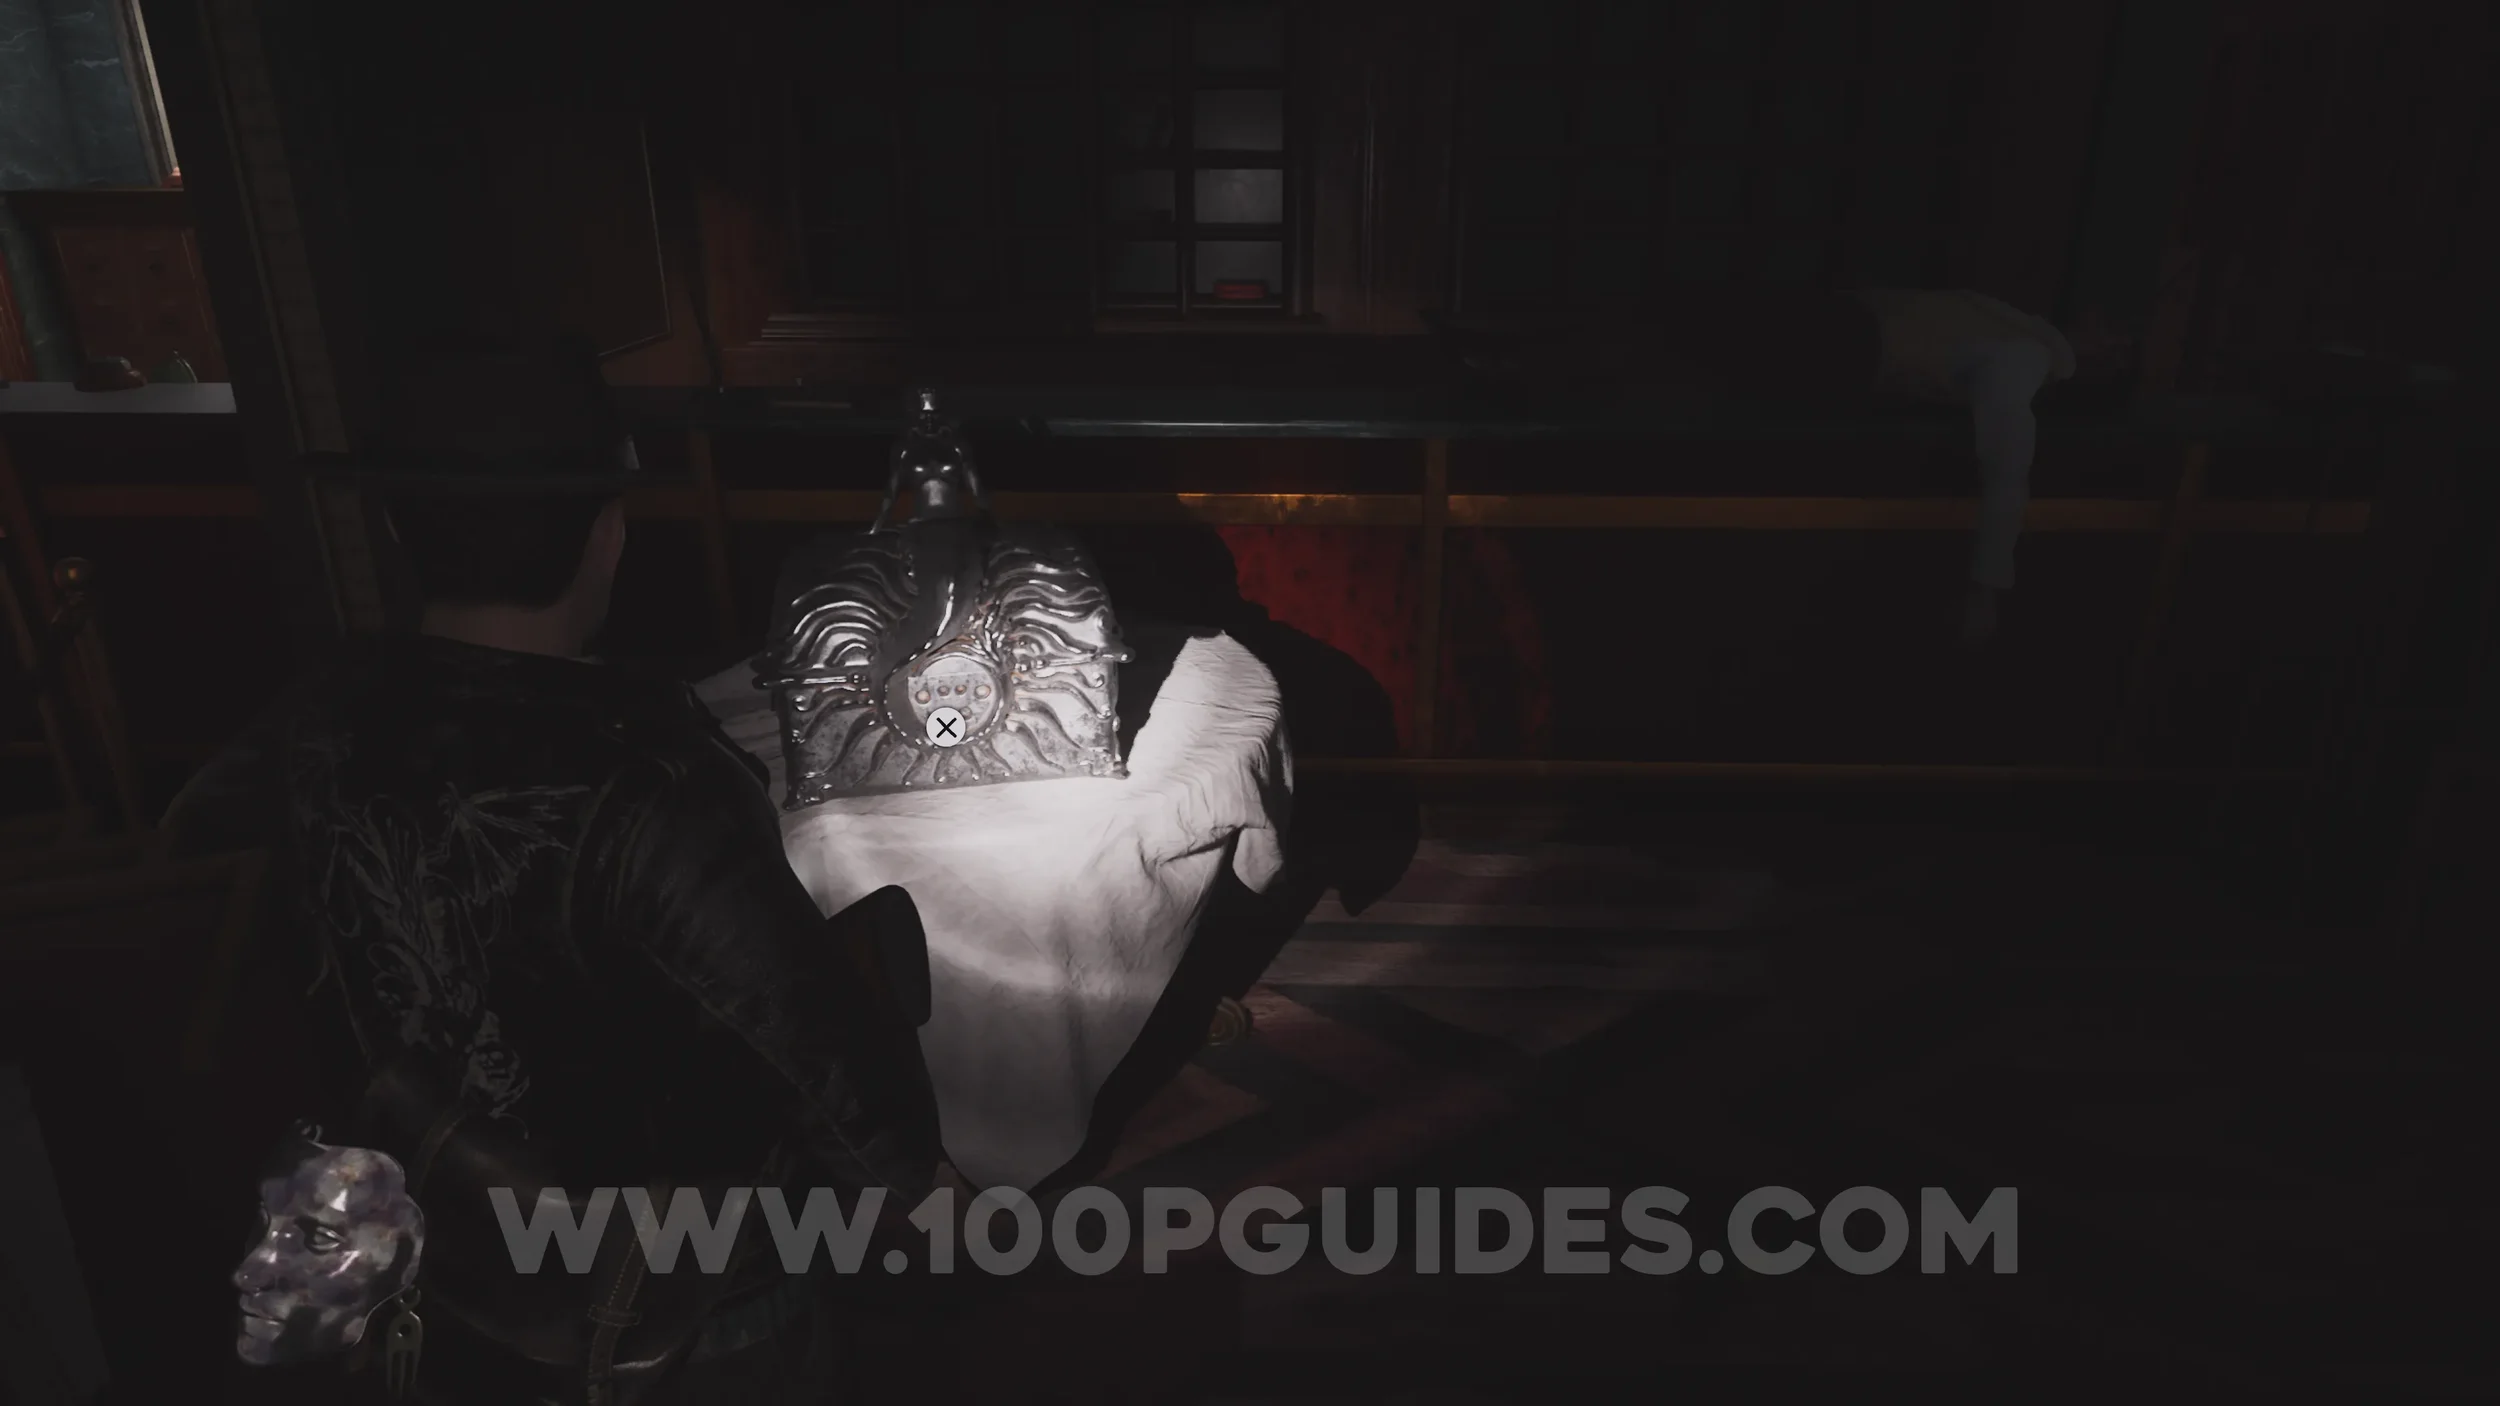
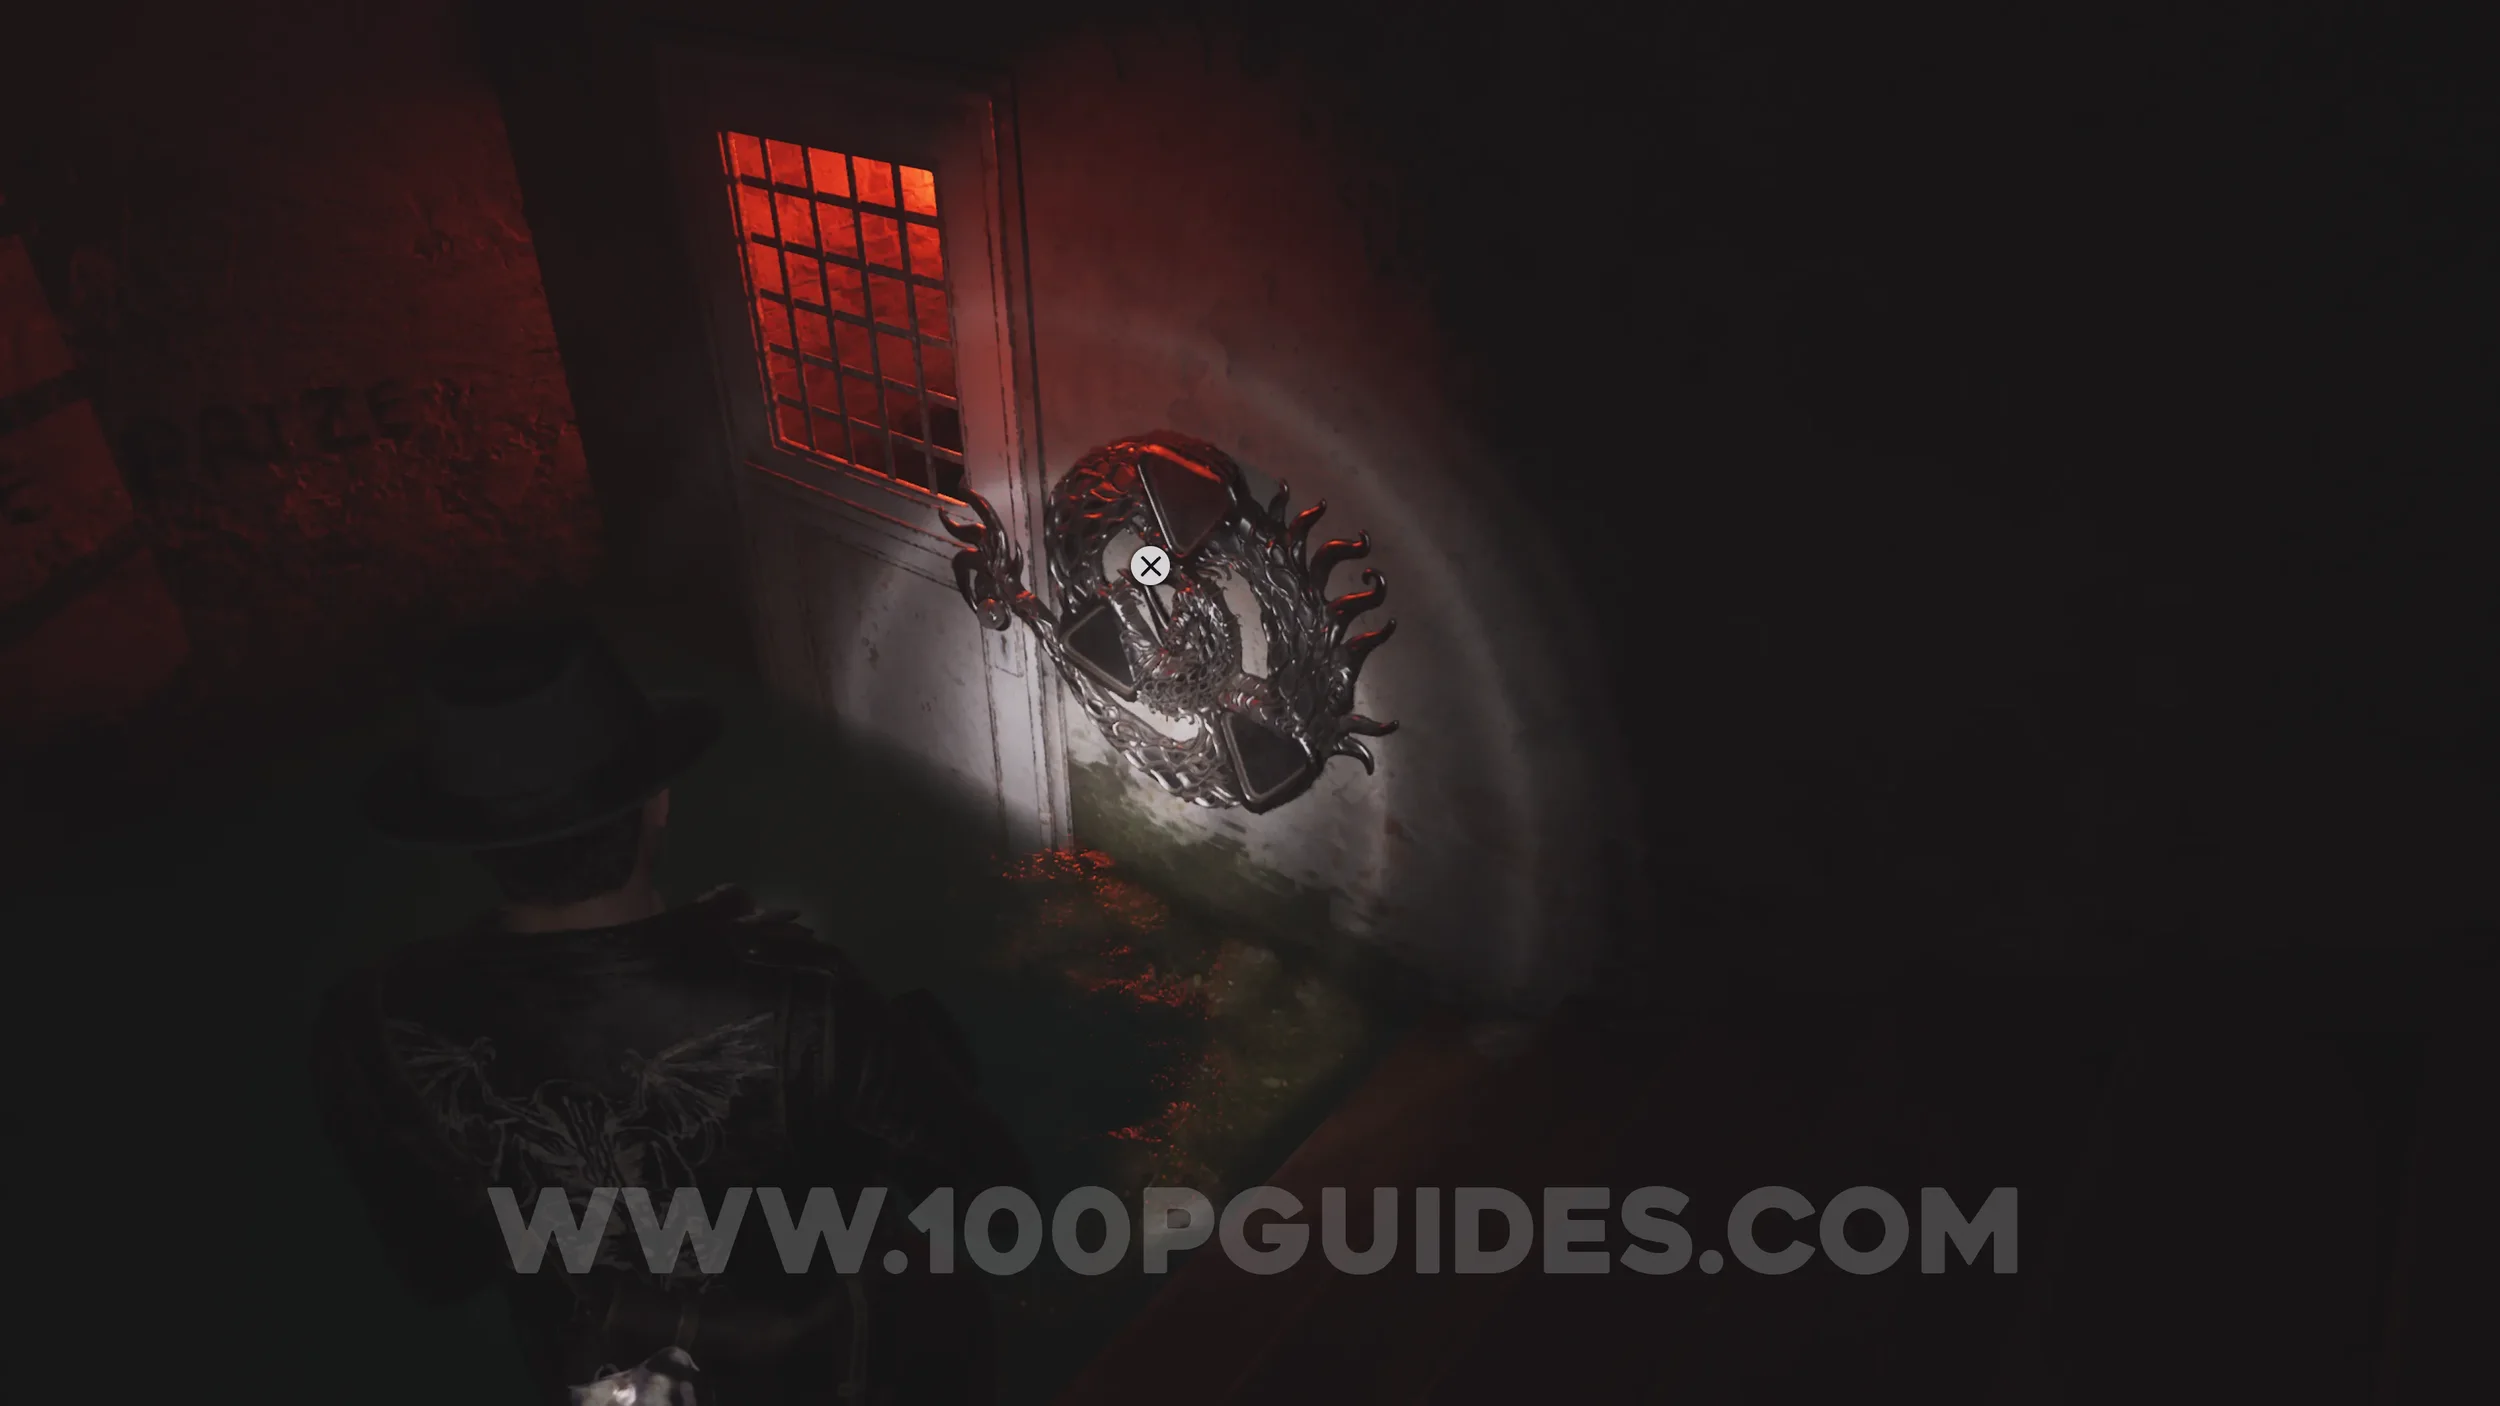
Evidence: The Lorelei Lock. Now that you have all three keys, head through the Safe Room and down the stairs on your left to reach -1F. Interact with the strange lock on the door at the bottom to get the evidence.
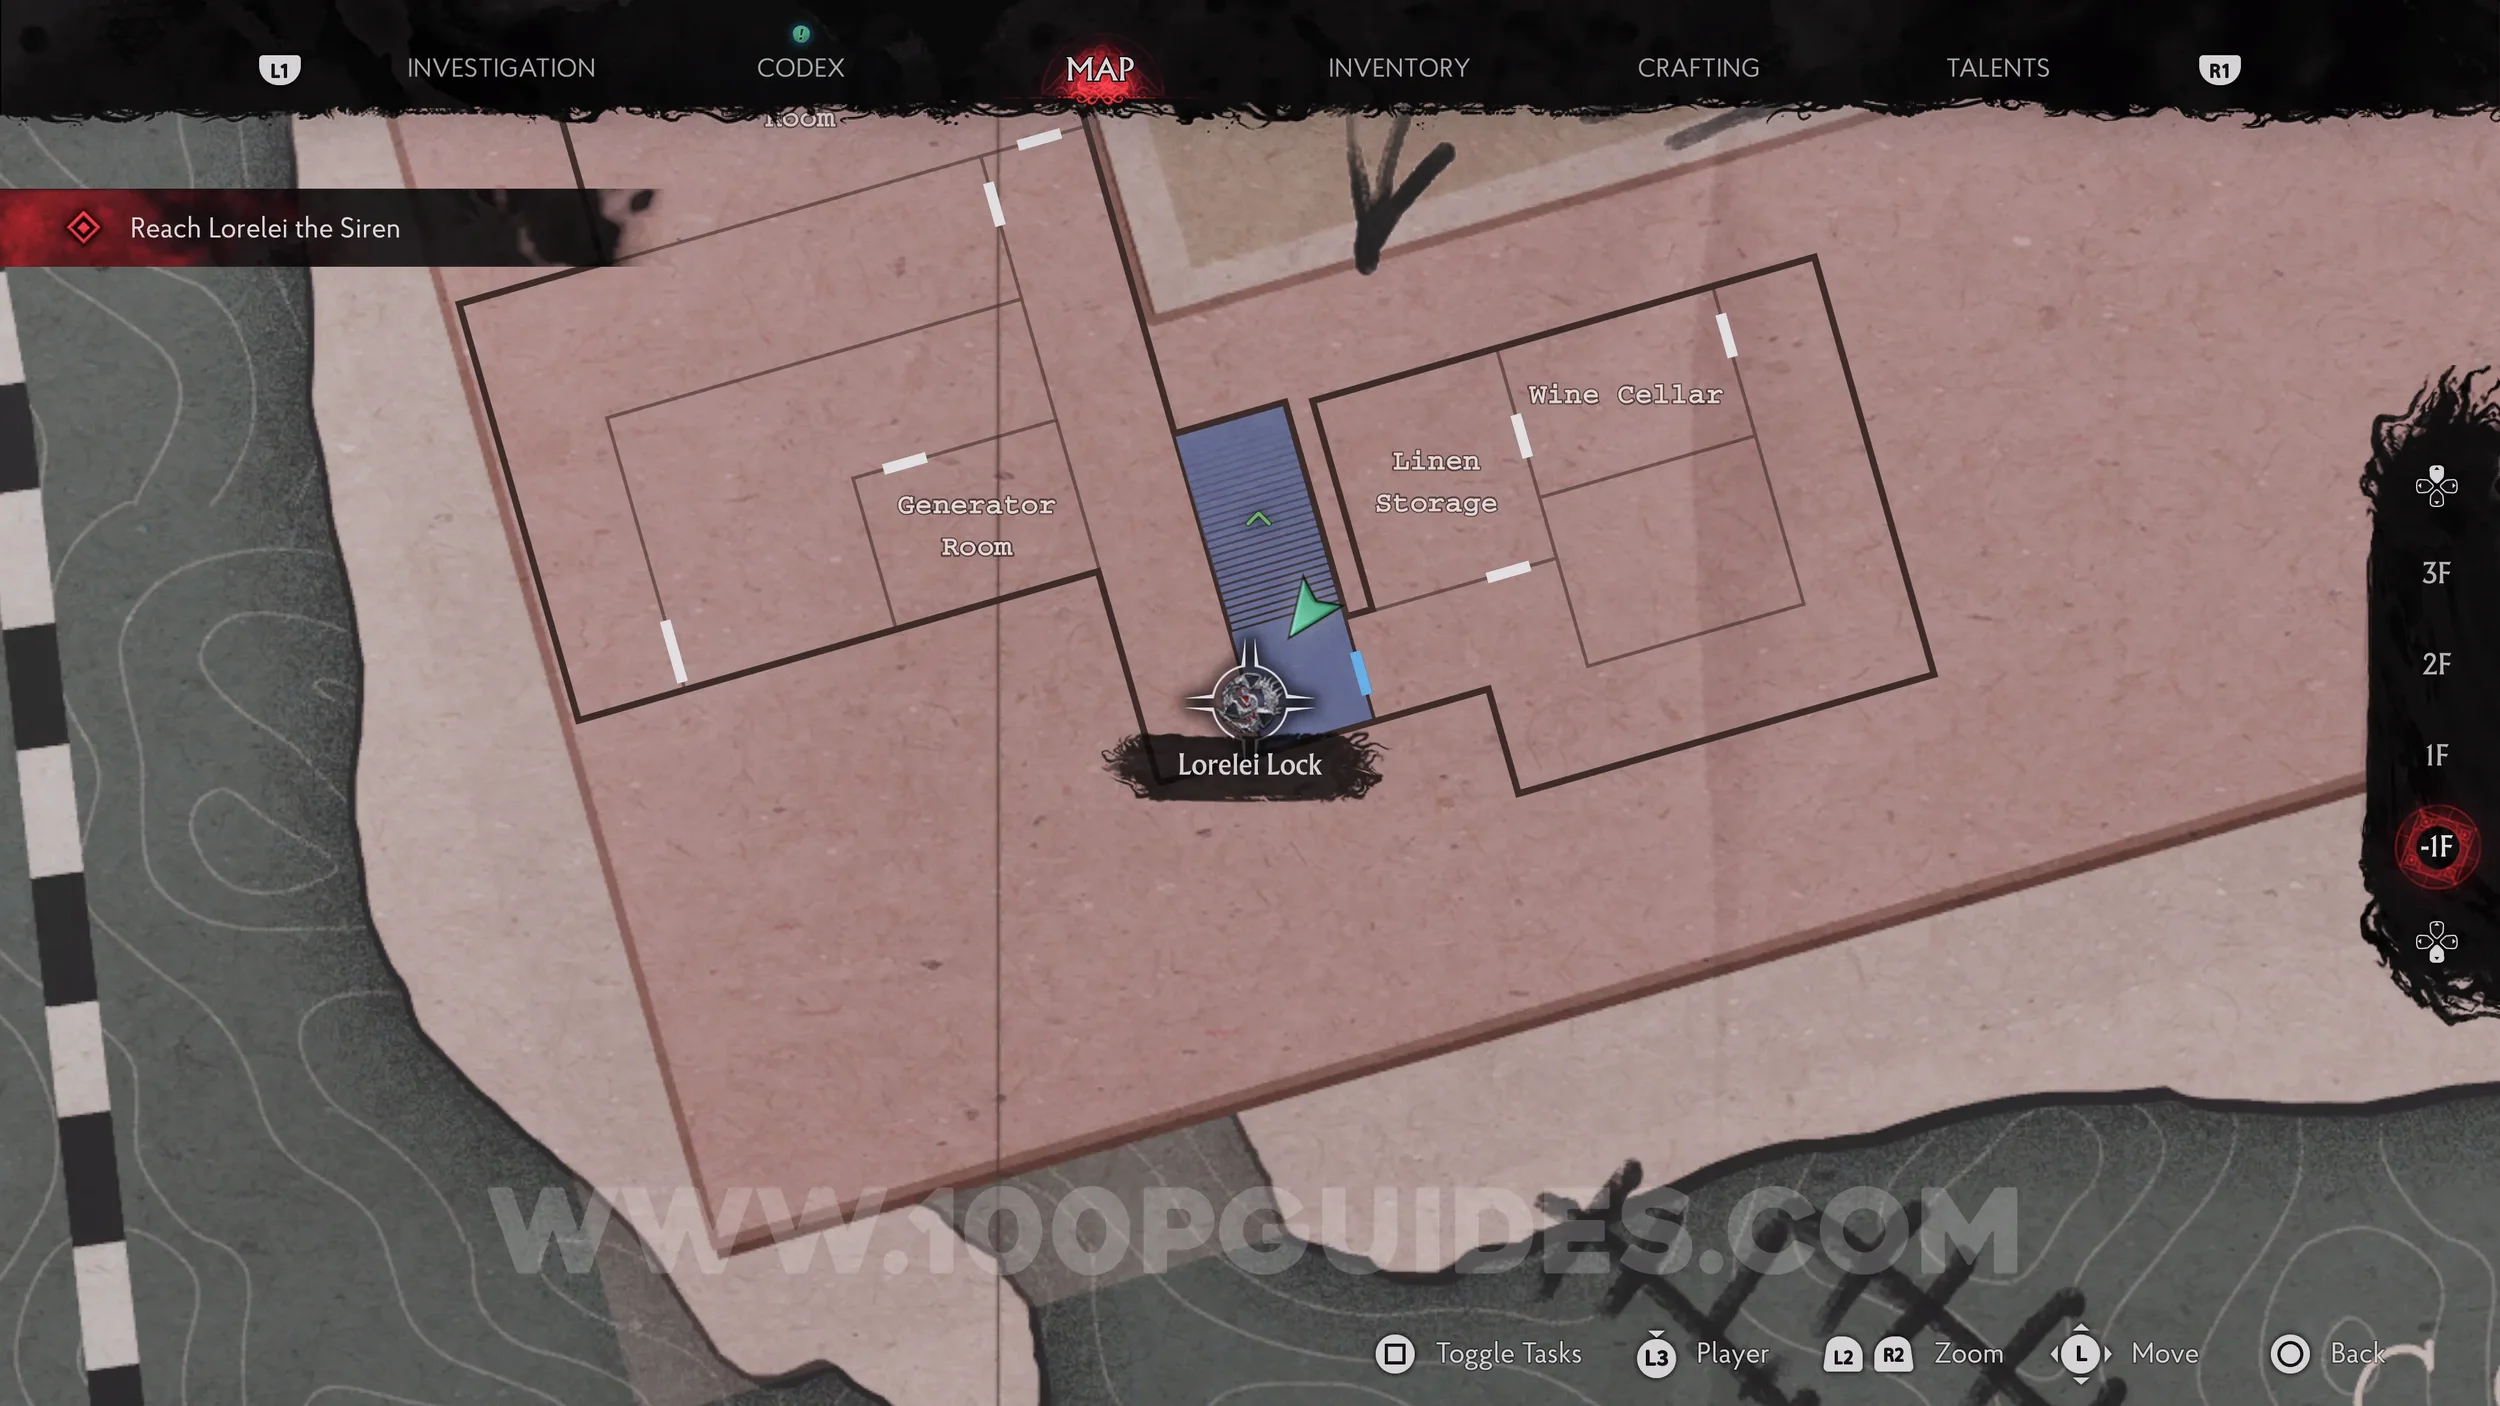
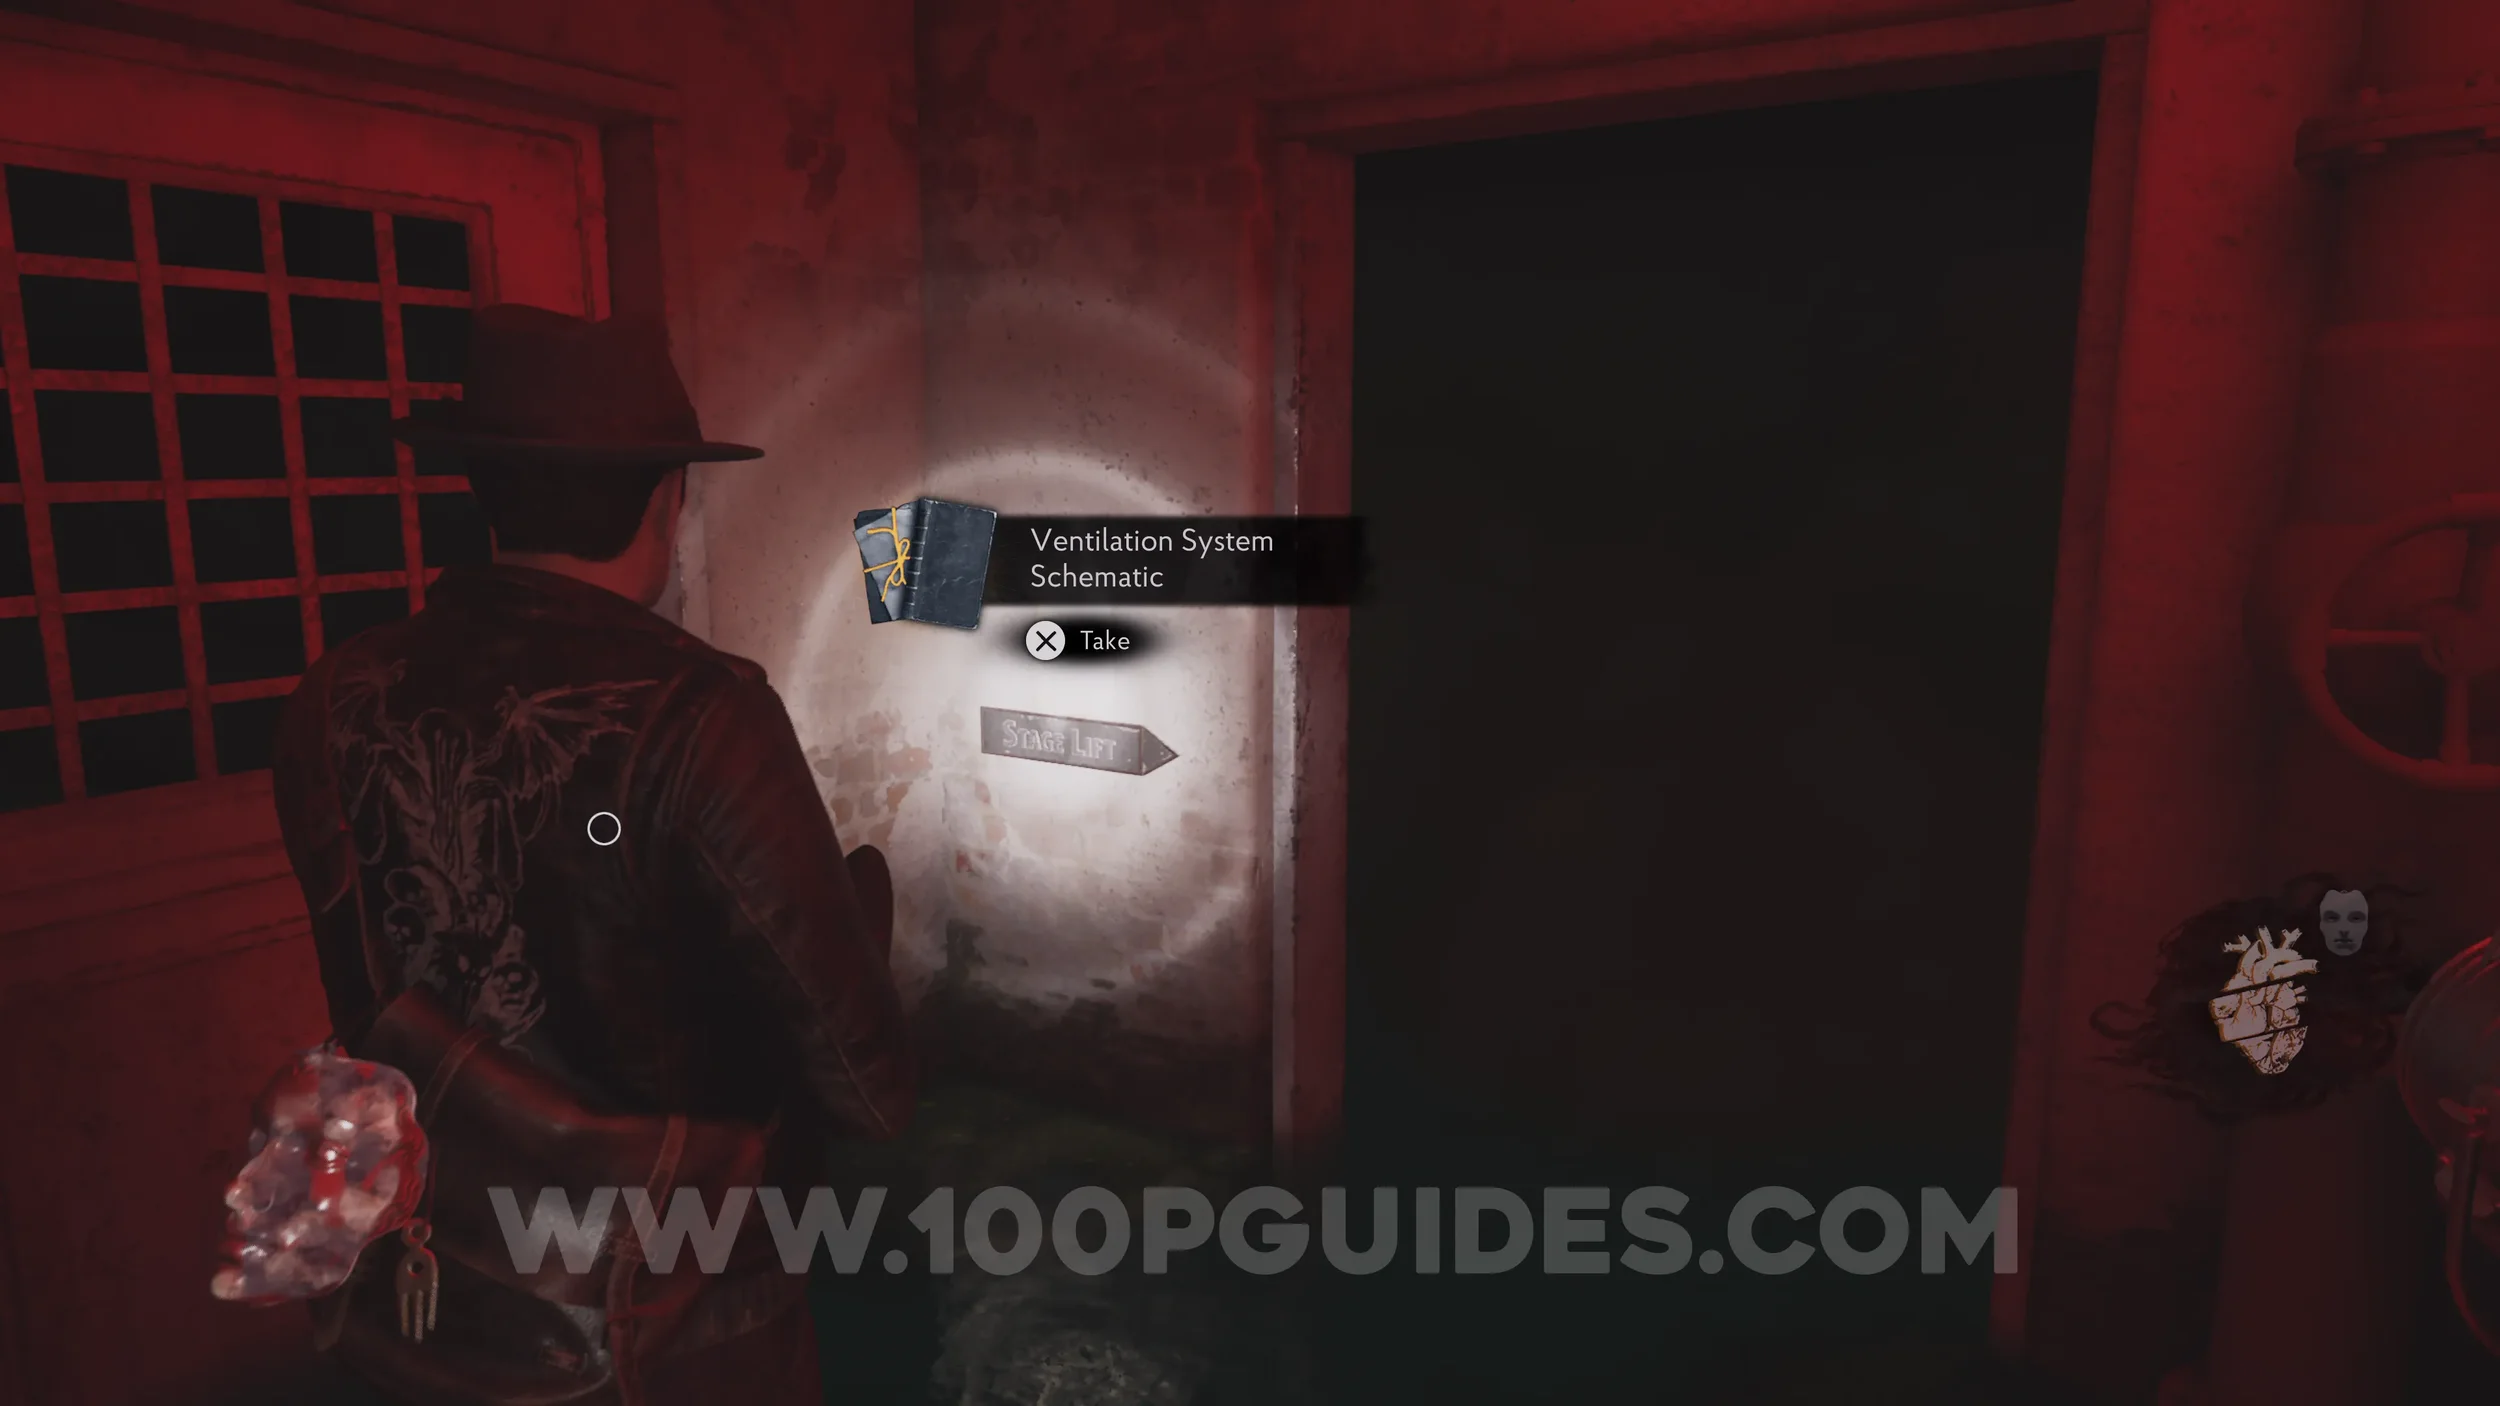
Lore Codex: Ventilation System Schematic. After opening the strange lock with the three keys, head down the corridor all the way to the end, where you'll find a doorway blocked with poison gas. The codex is on the wall to the left of the door.
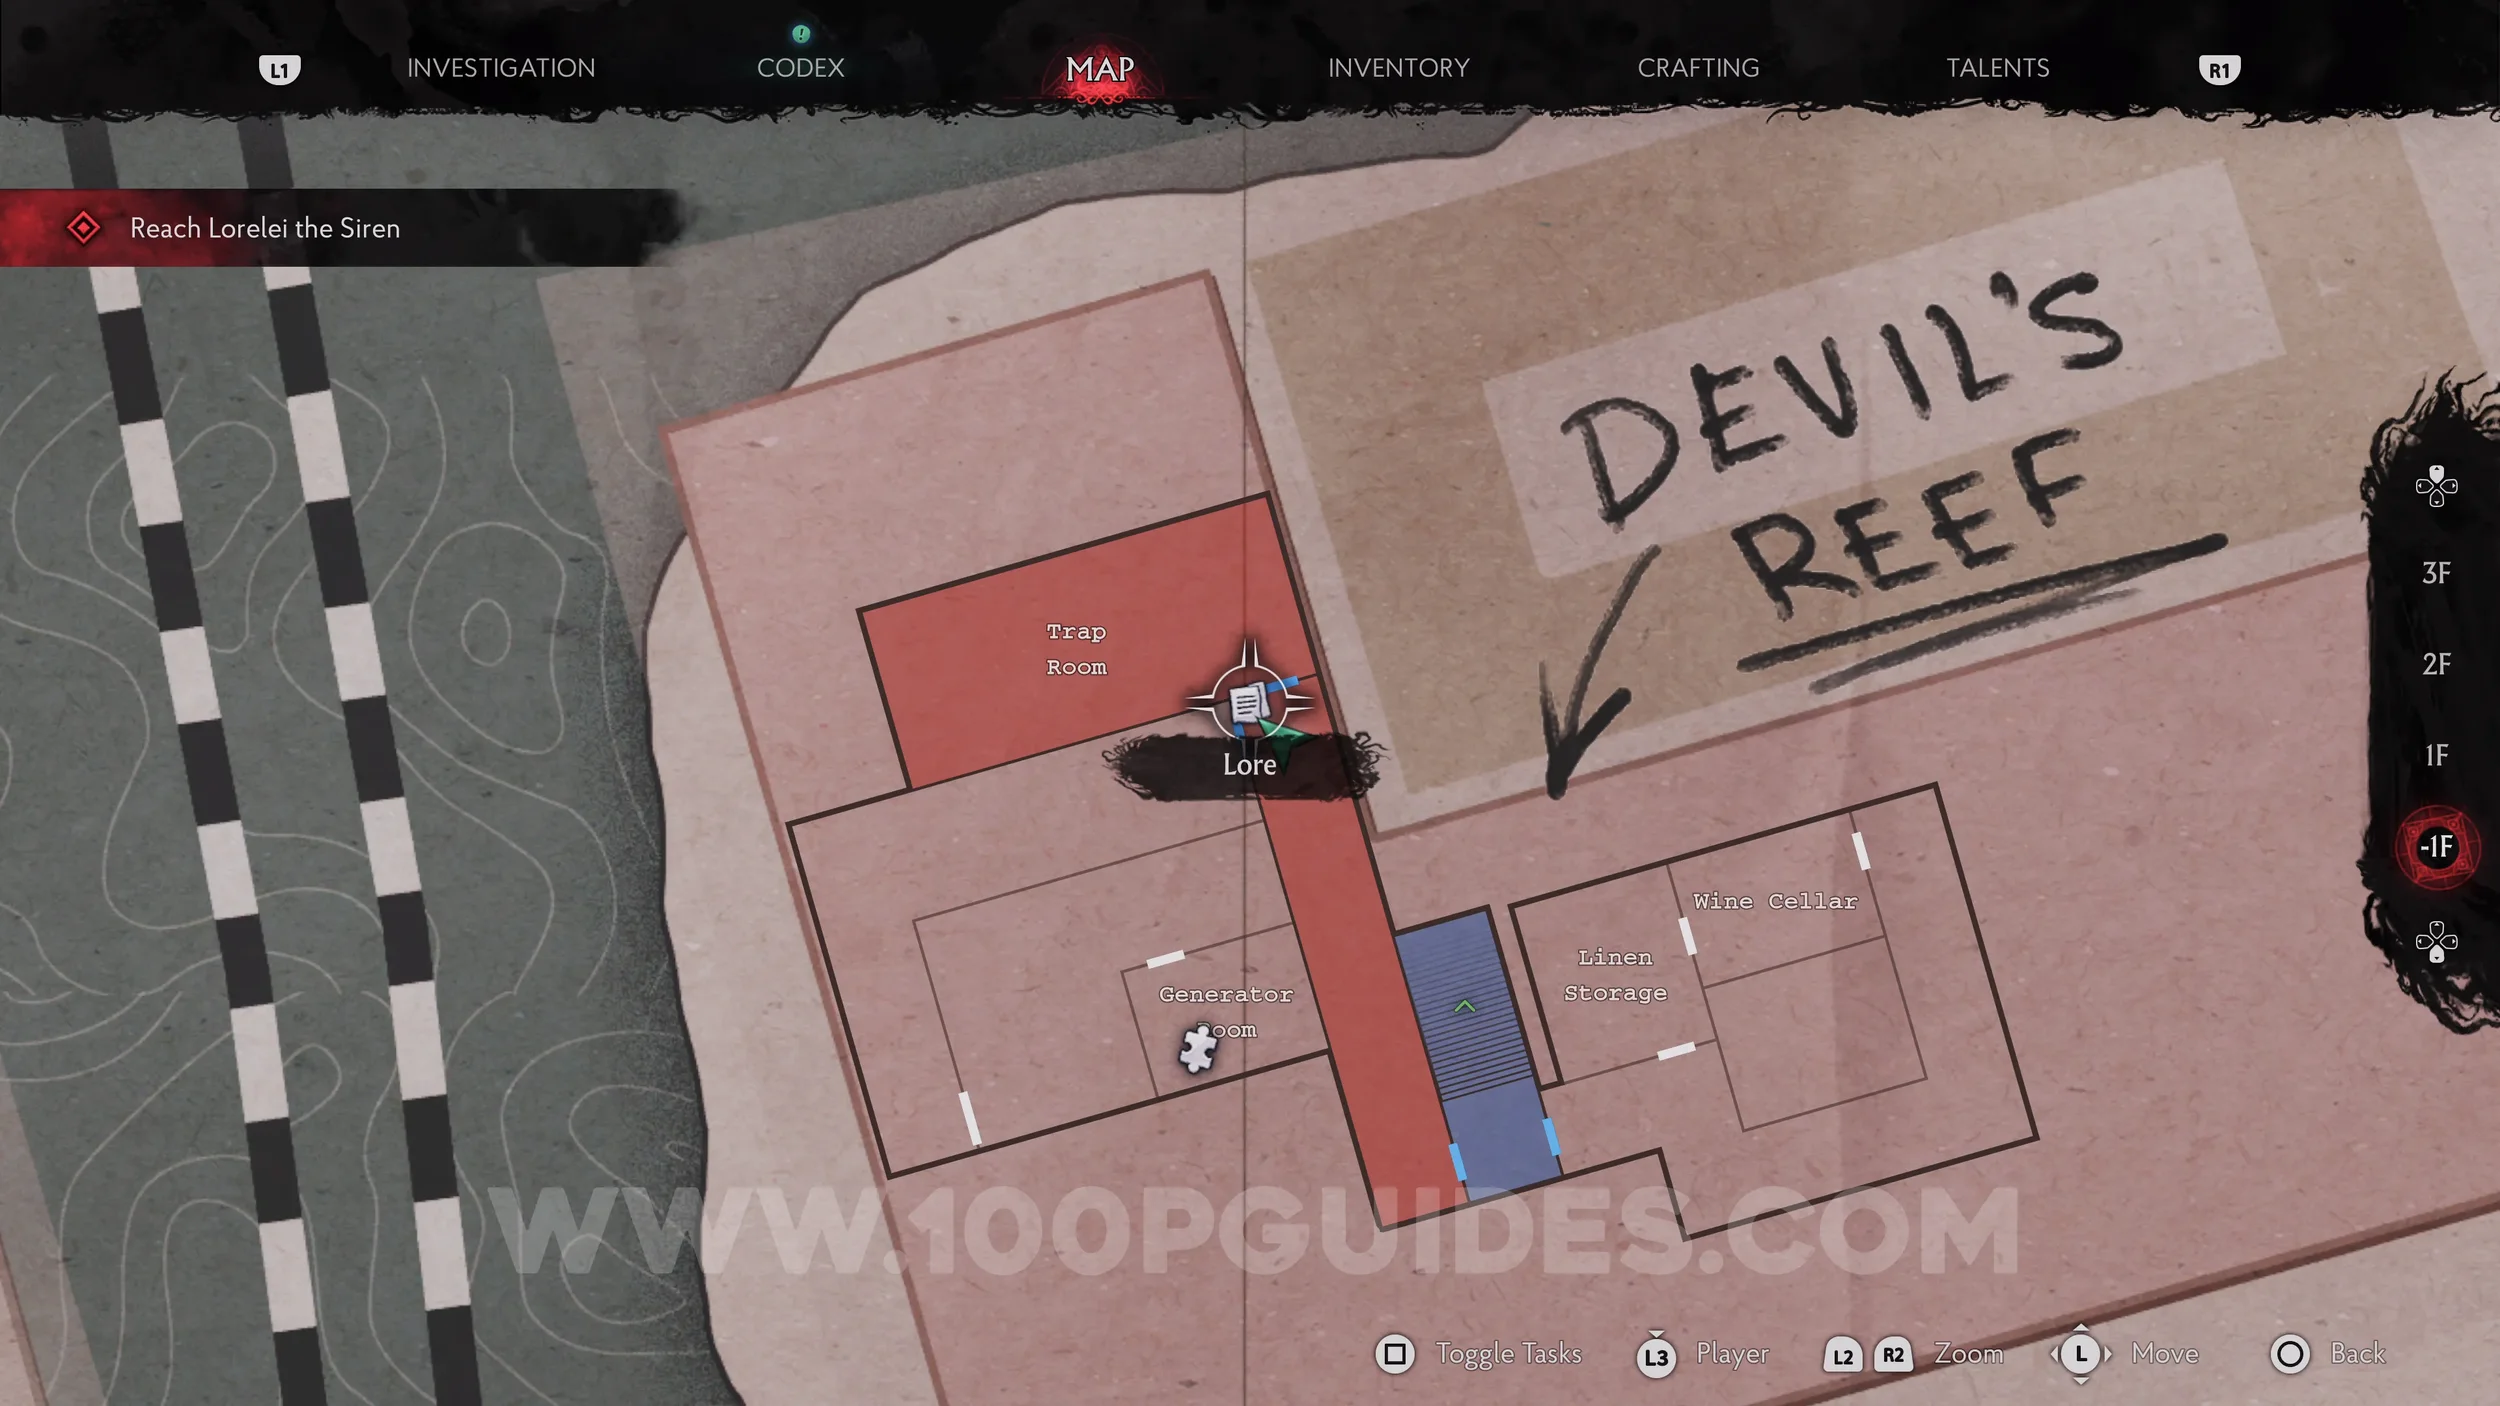
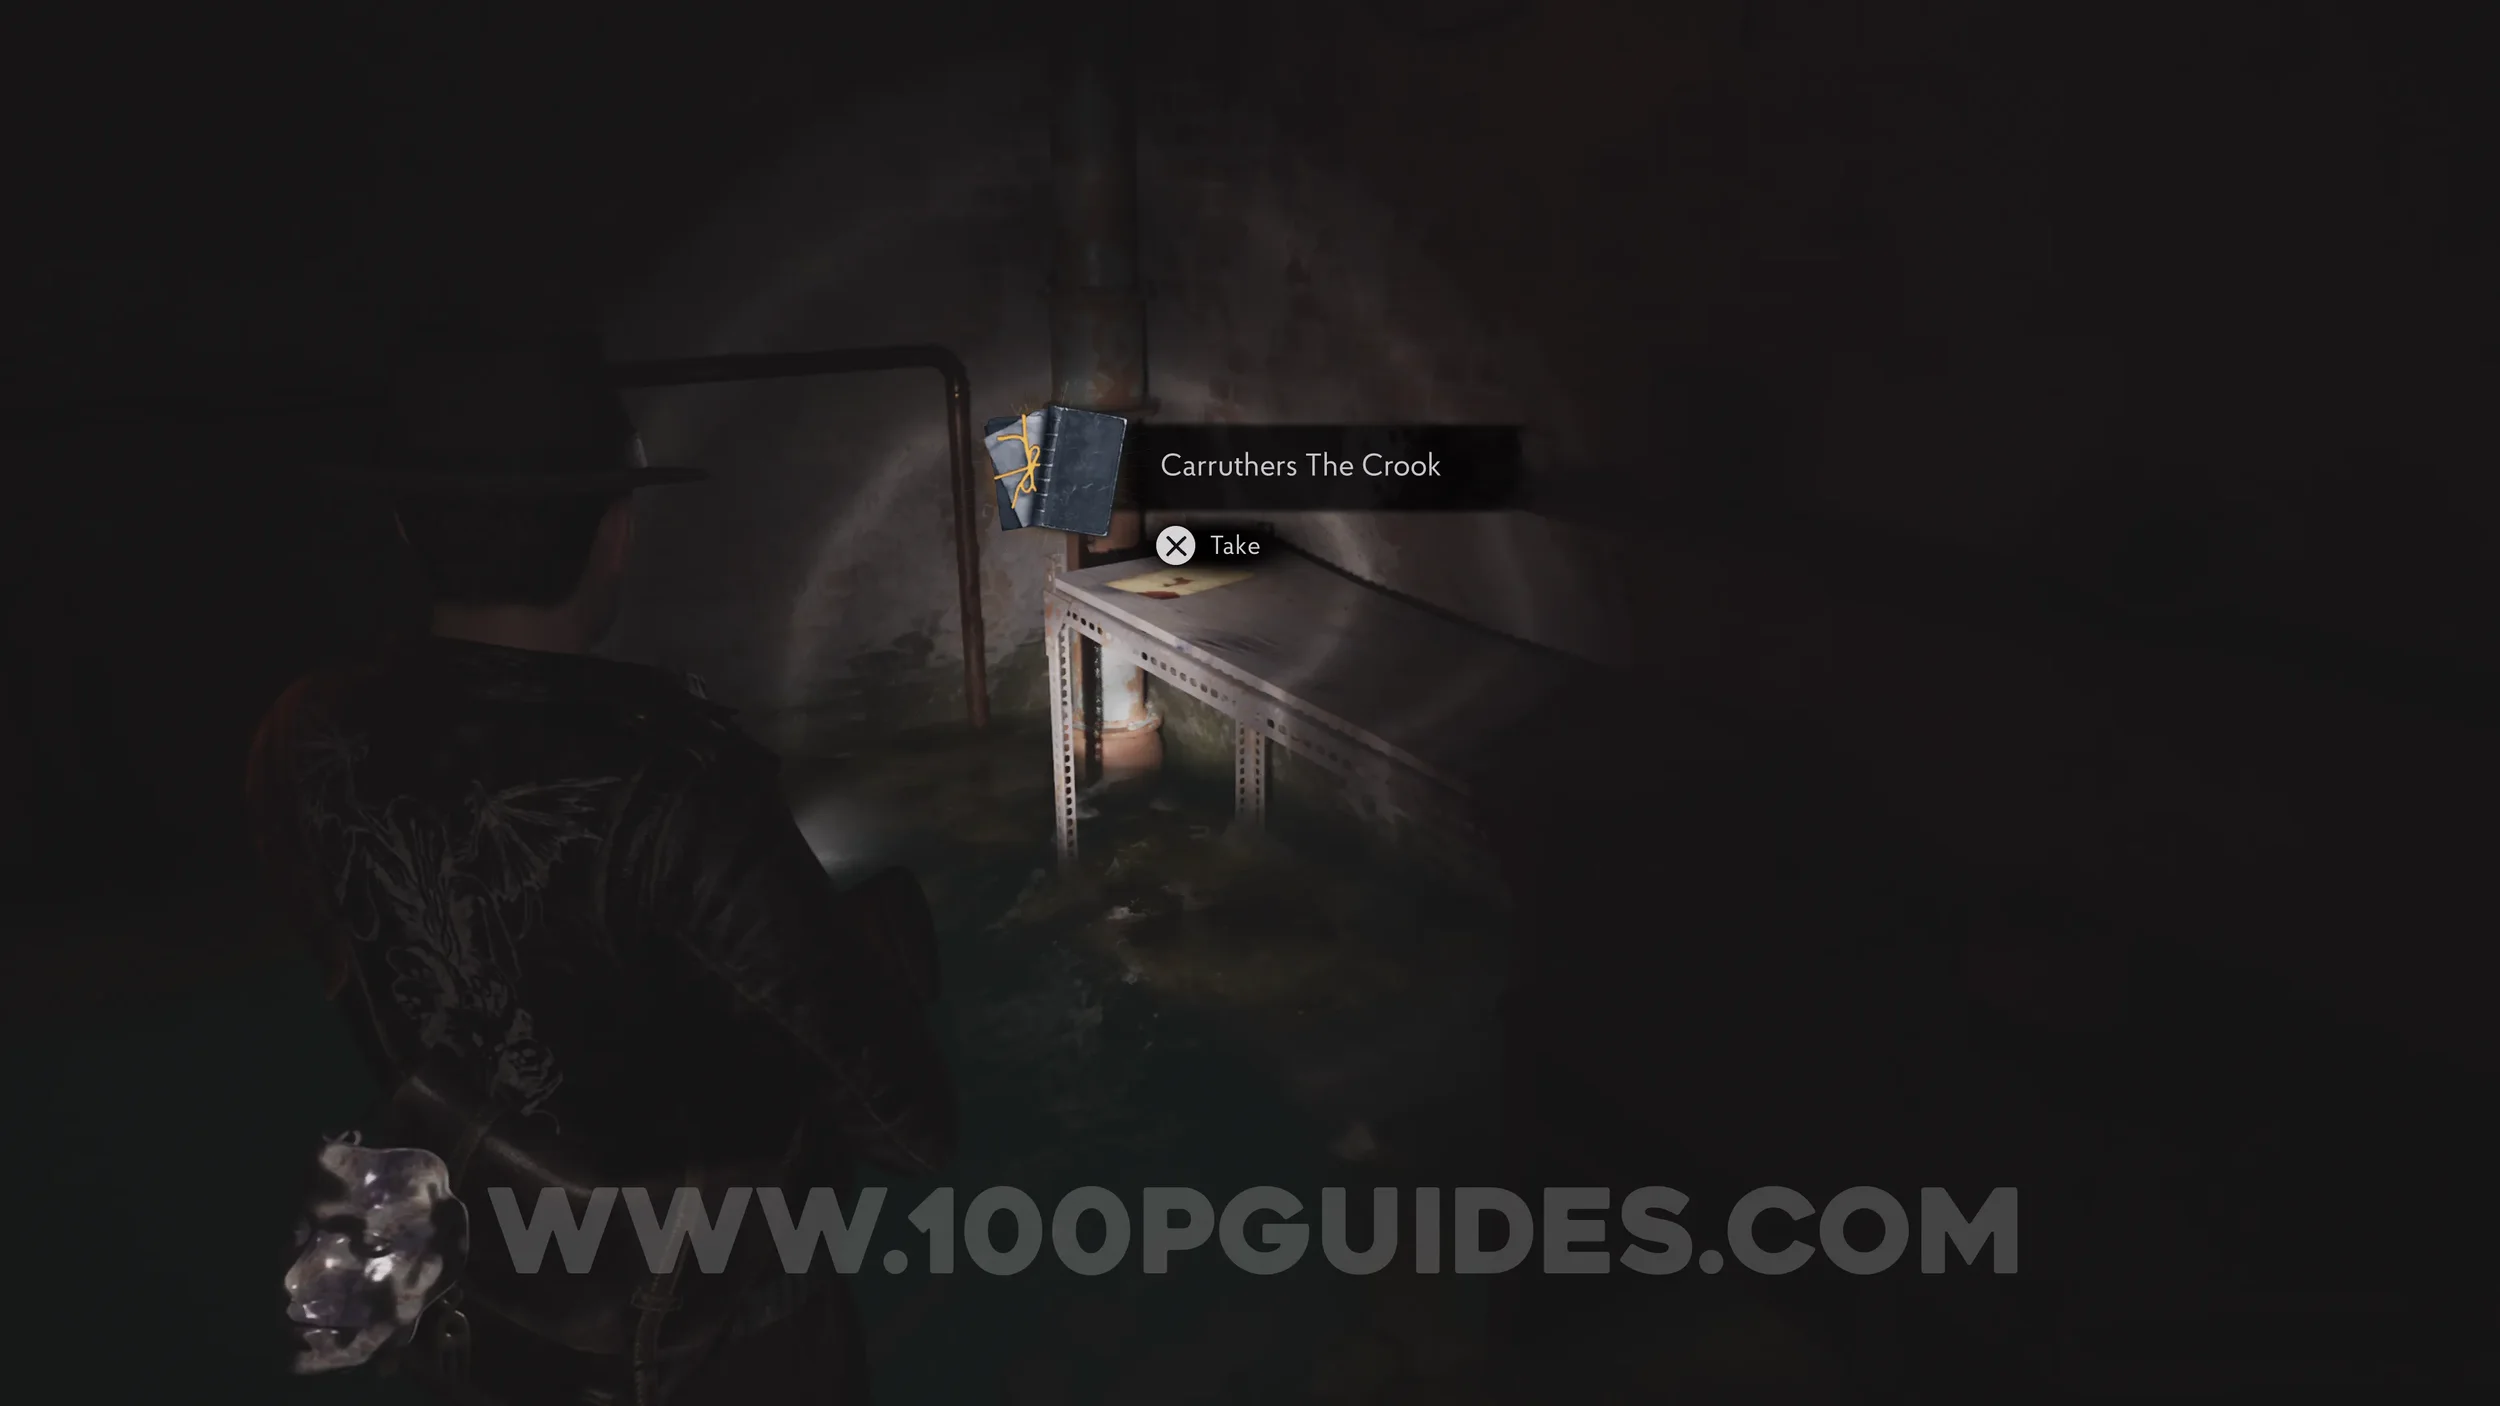
Lore Codex: Carruthers The Crook. Head through the door to the left of the previous codex and follow this path until you get attacked by an enemy. The codex is on a shelf to the right in this same area.
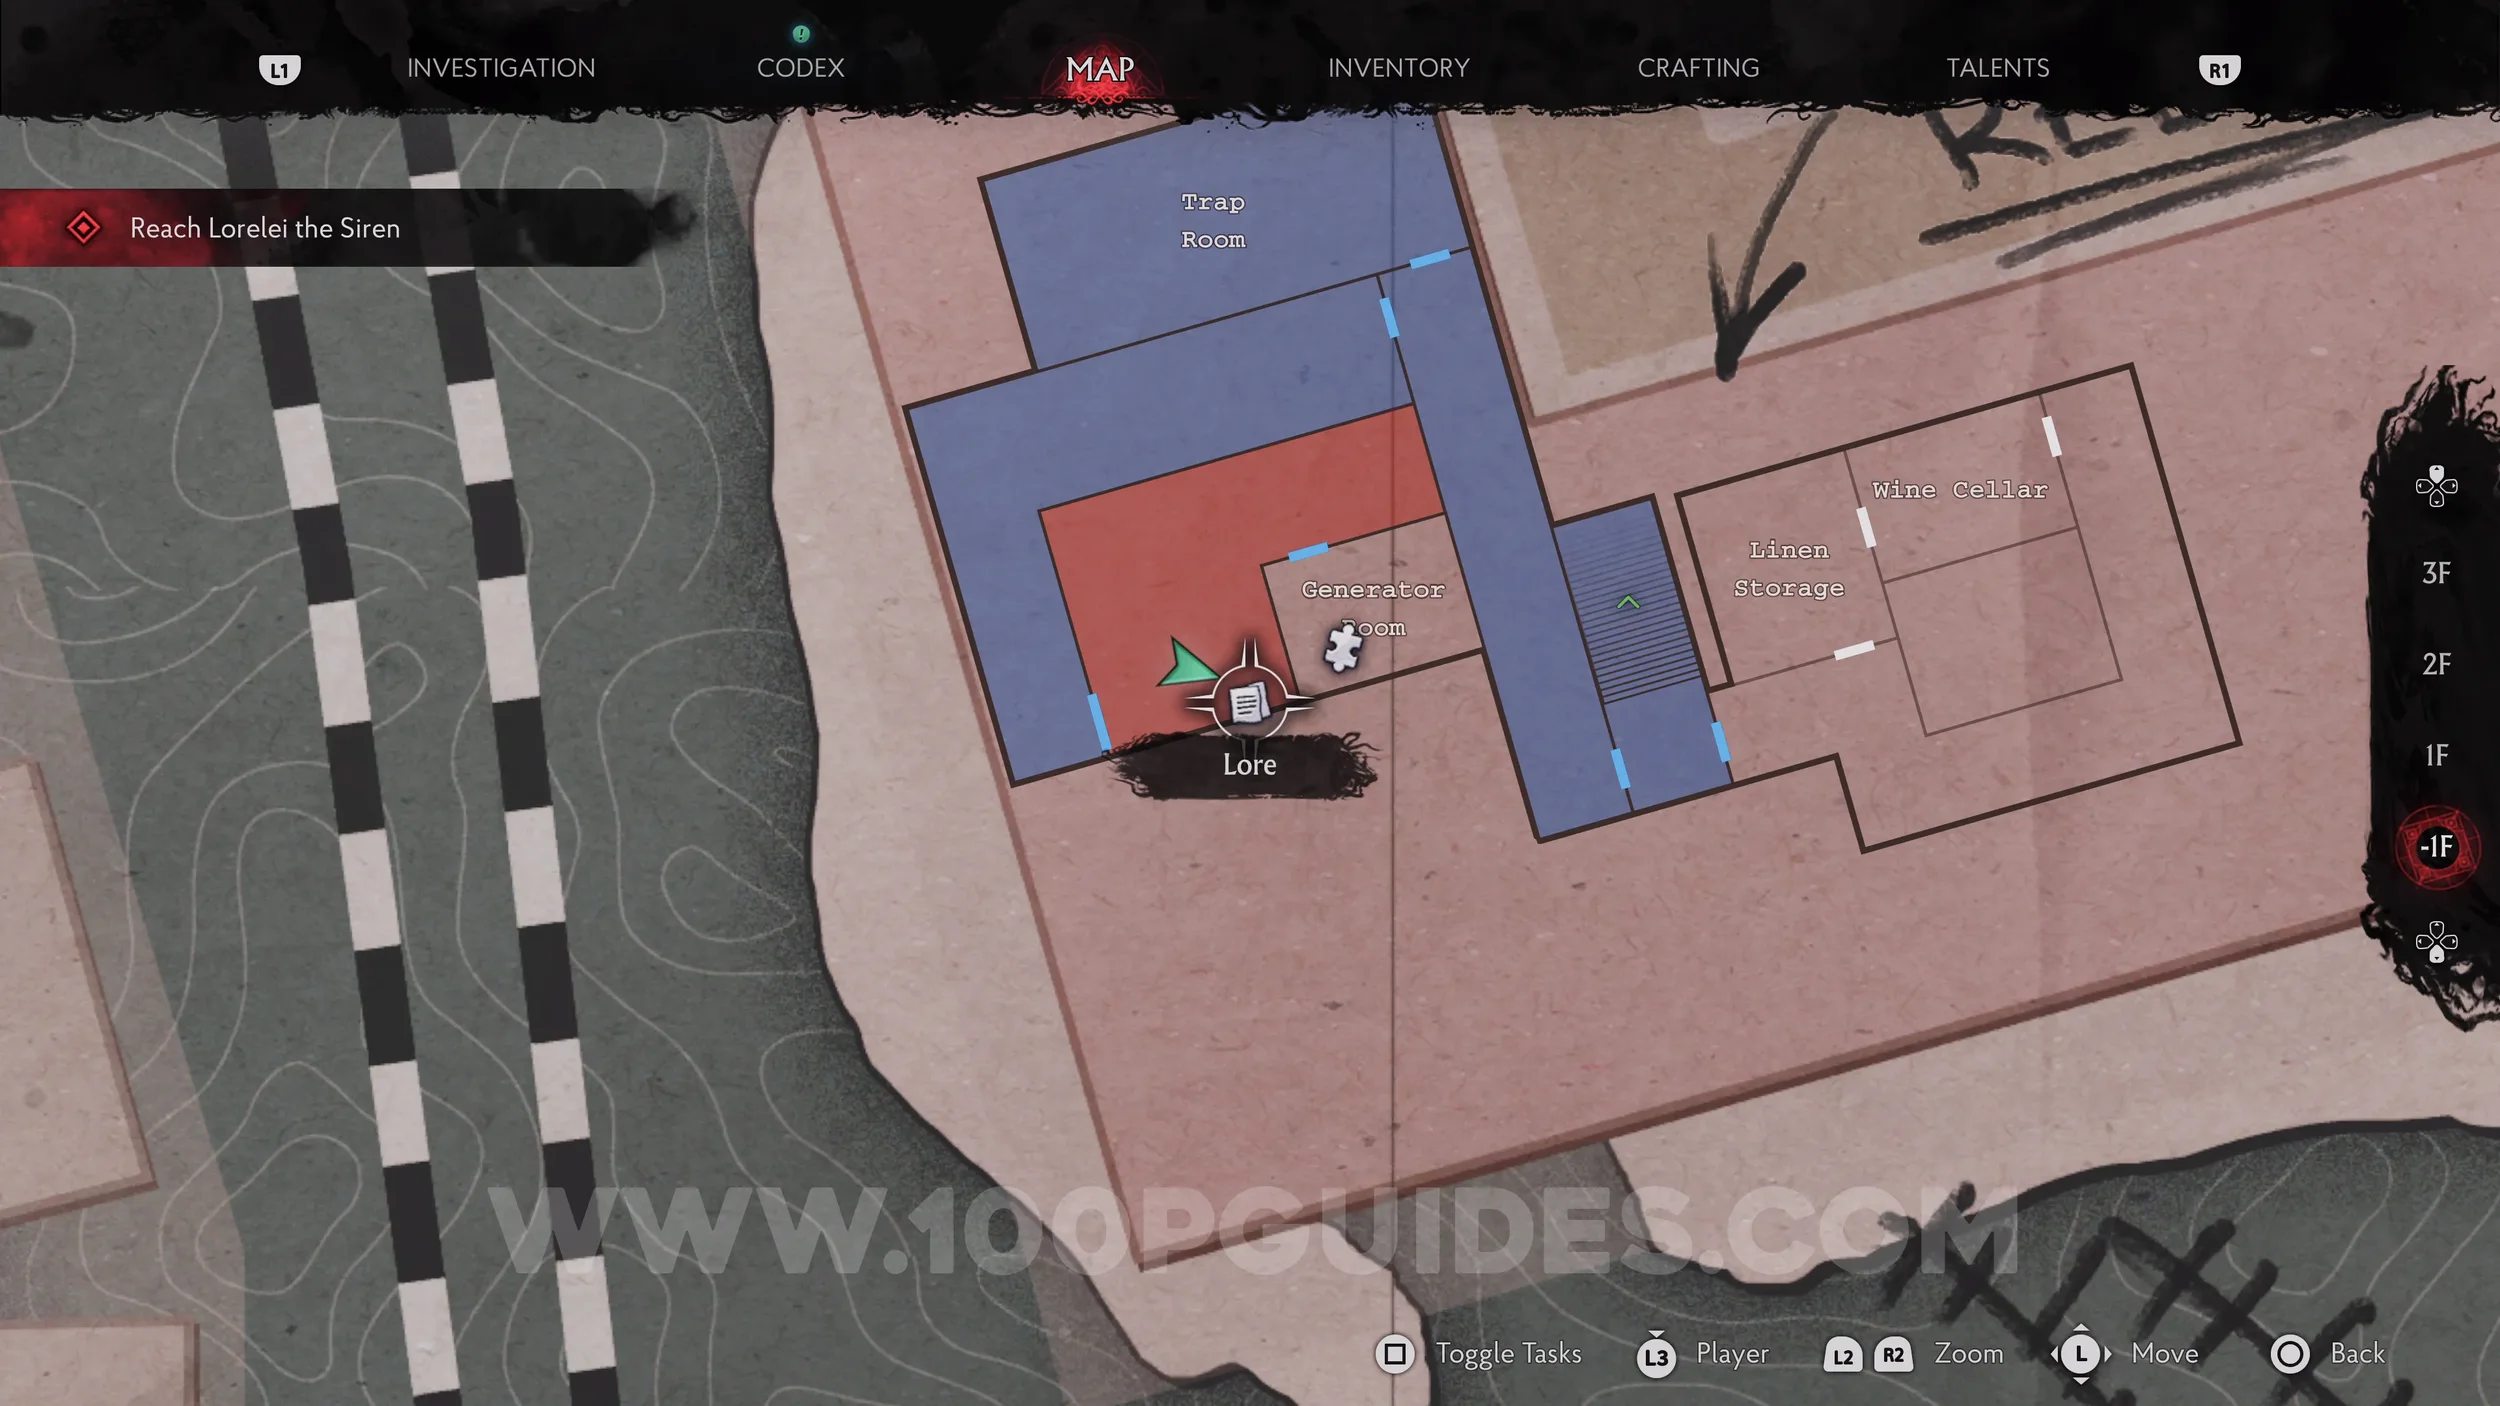
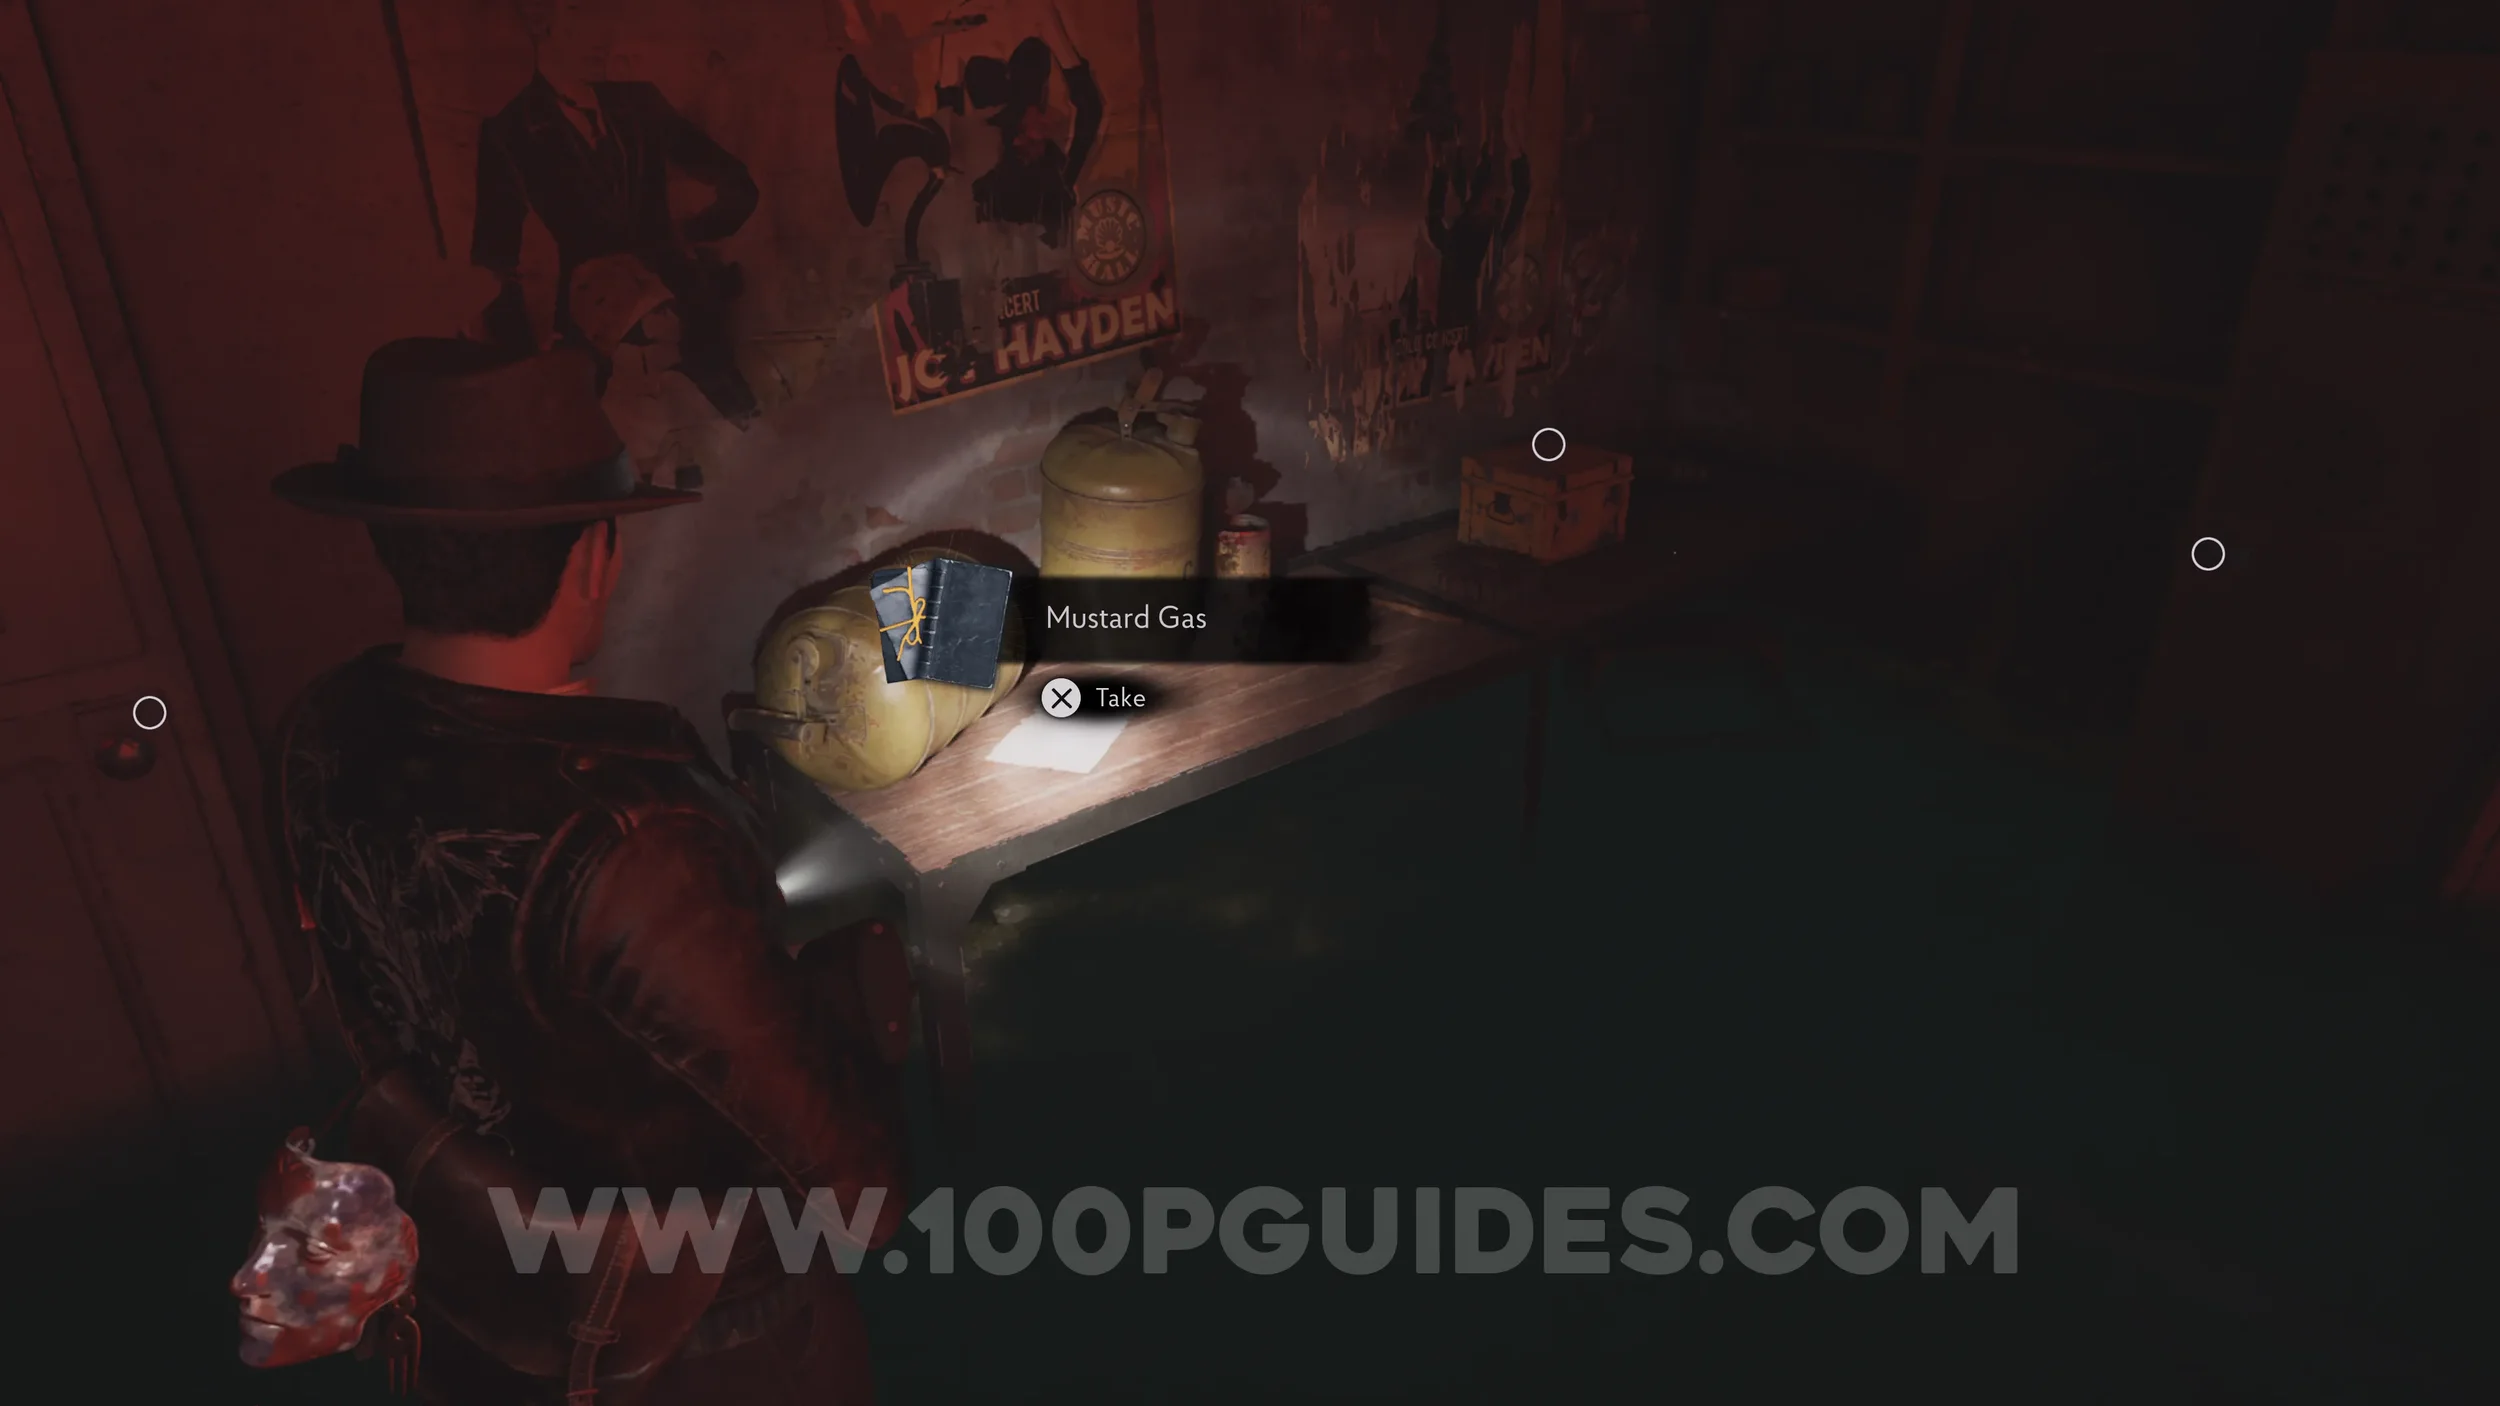
Lore Codex. Mustard Gas. On a bench in the Generator Room.
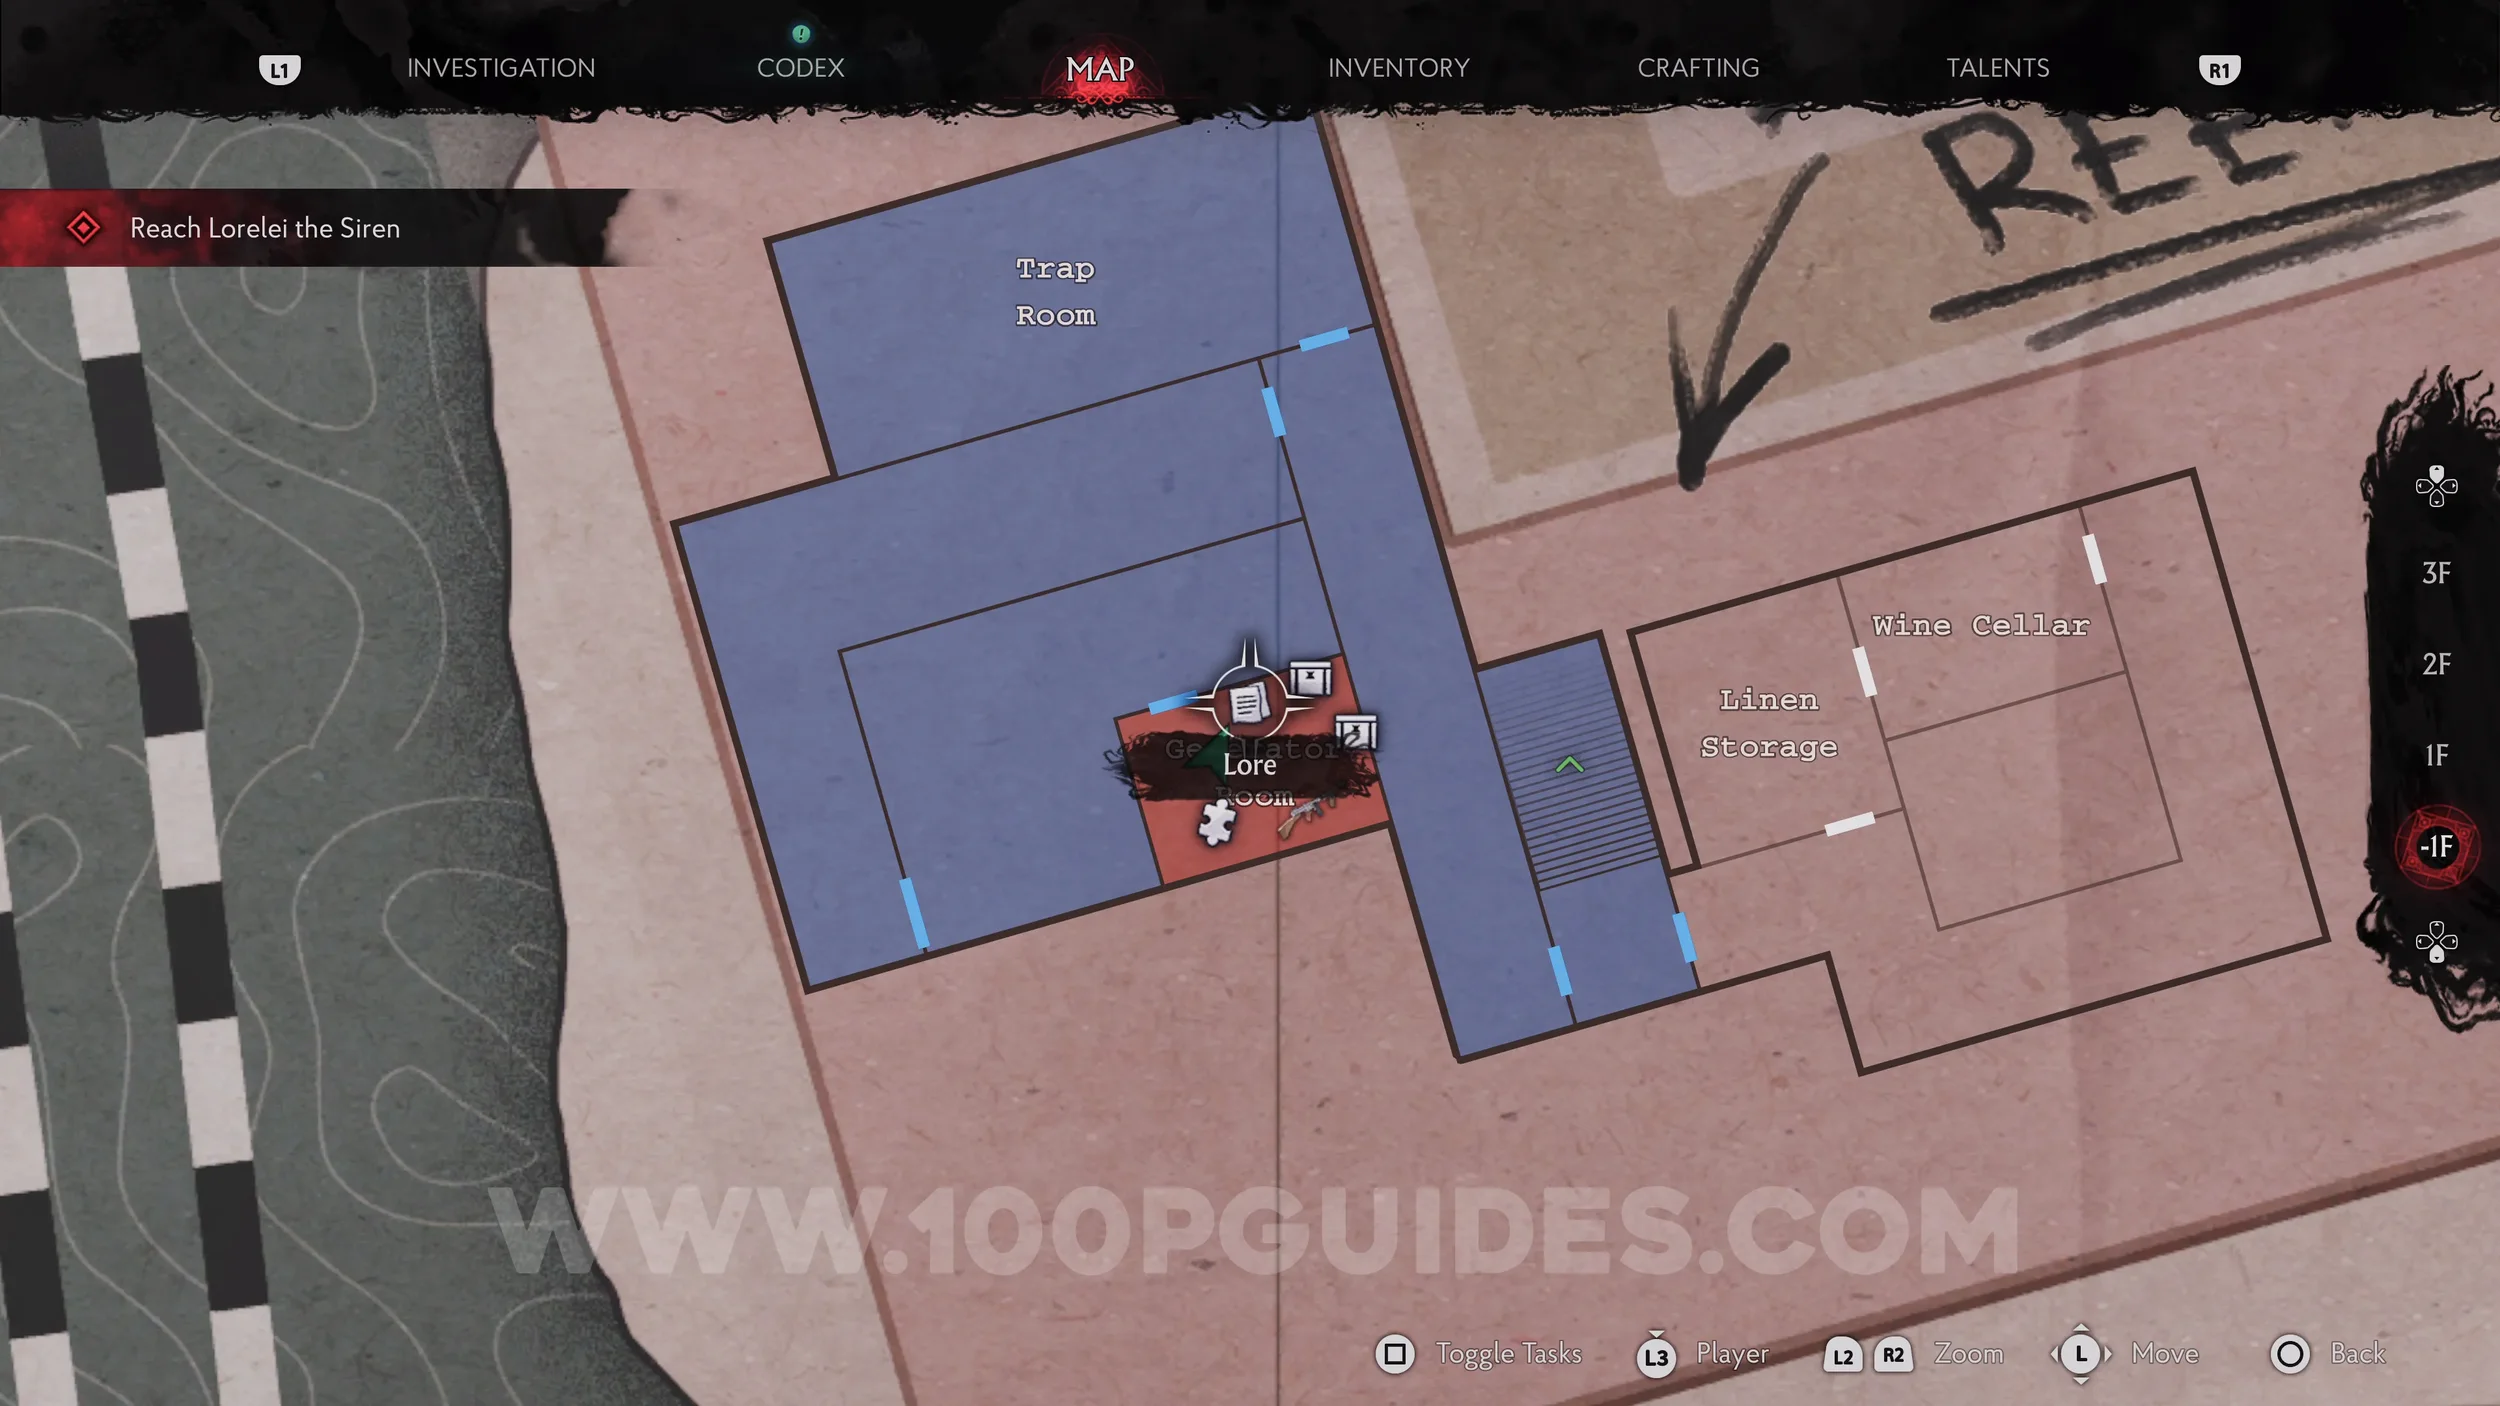
Weapon: The Minuteman (Tommy Gun). Also found in the Generator Room.
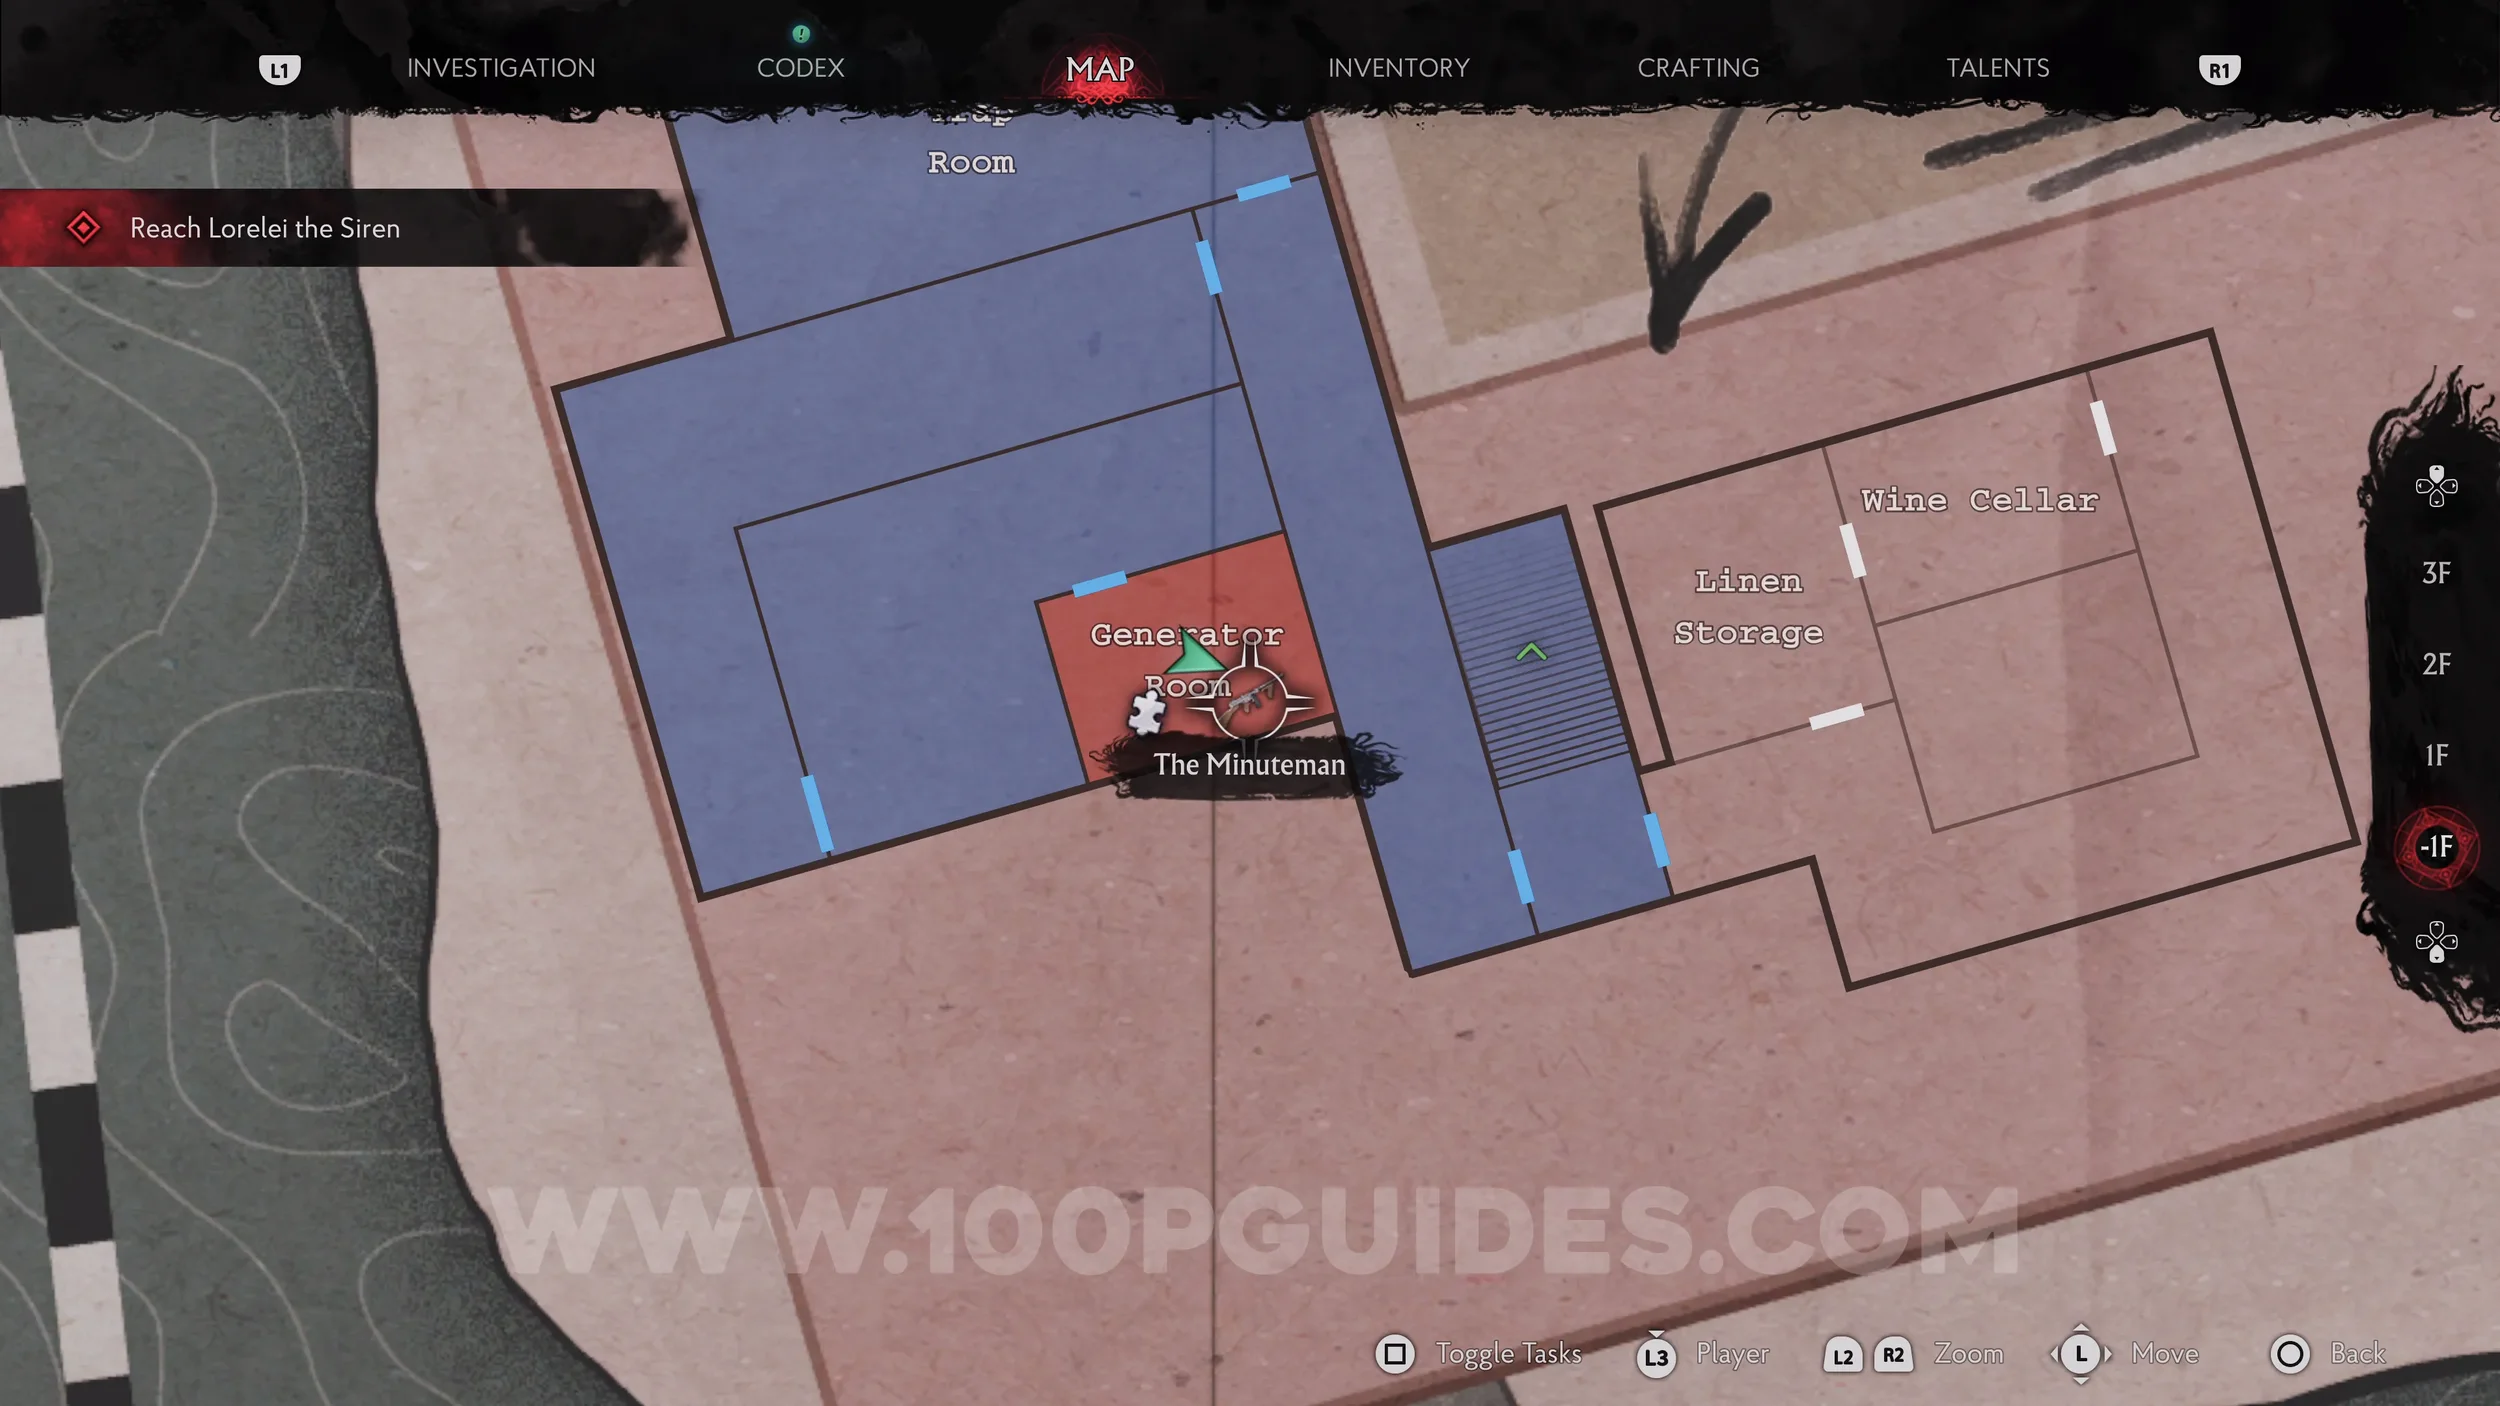
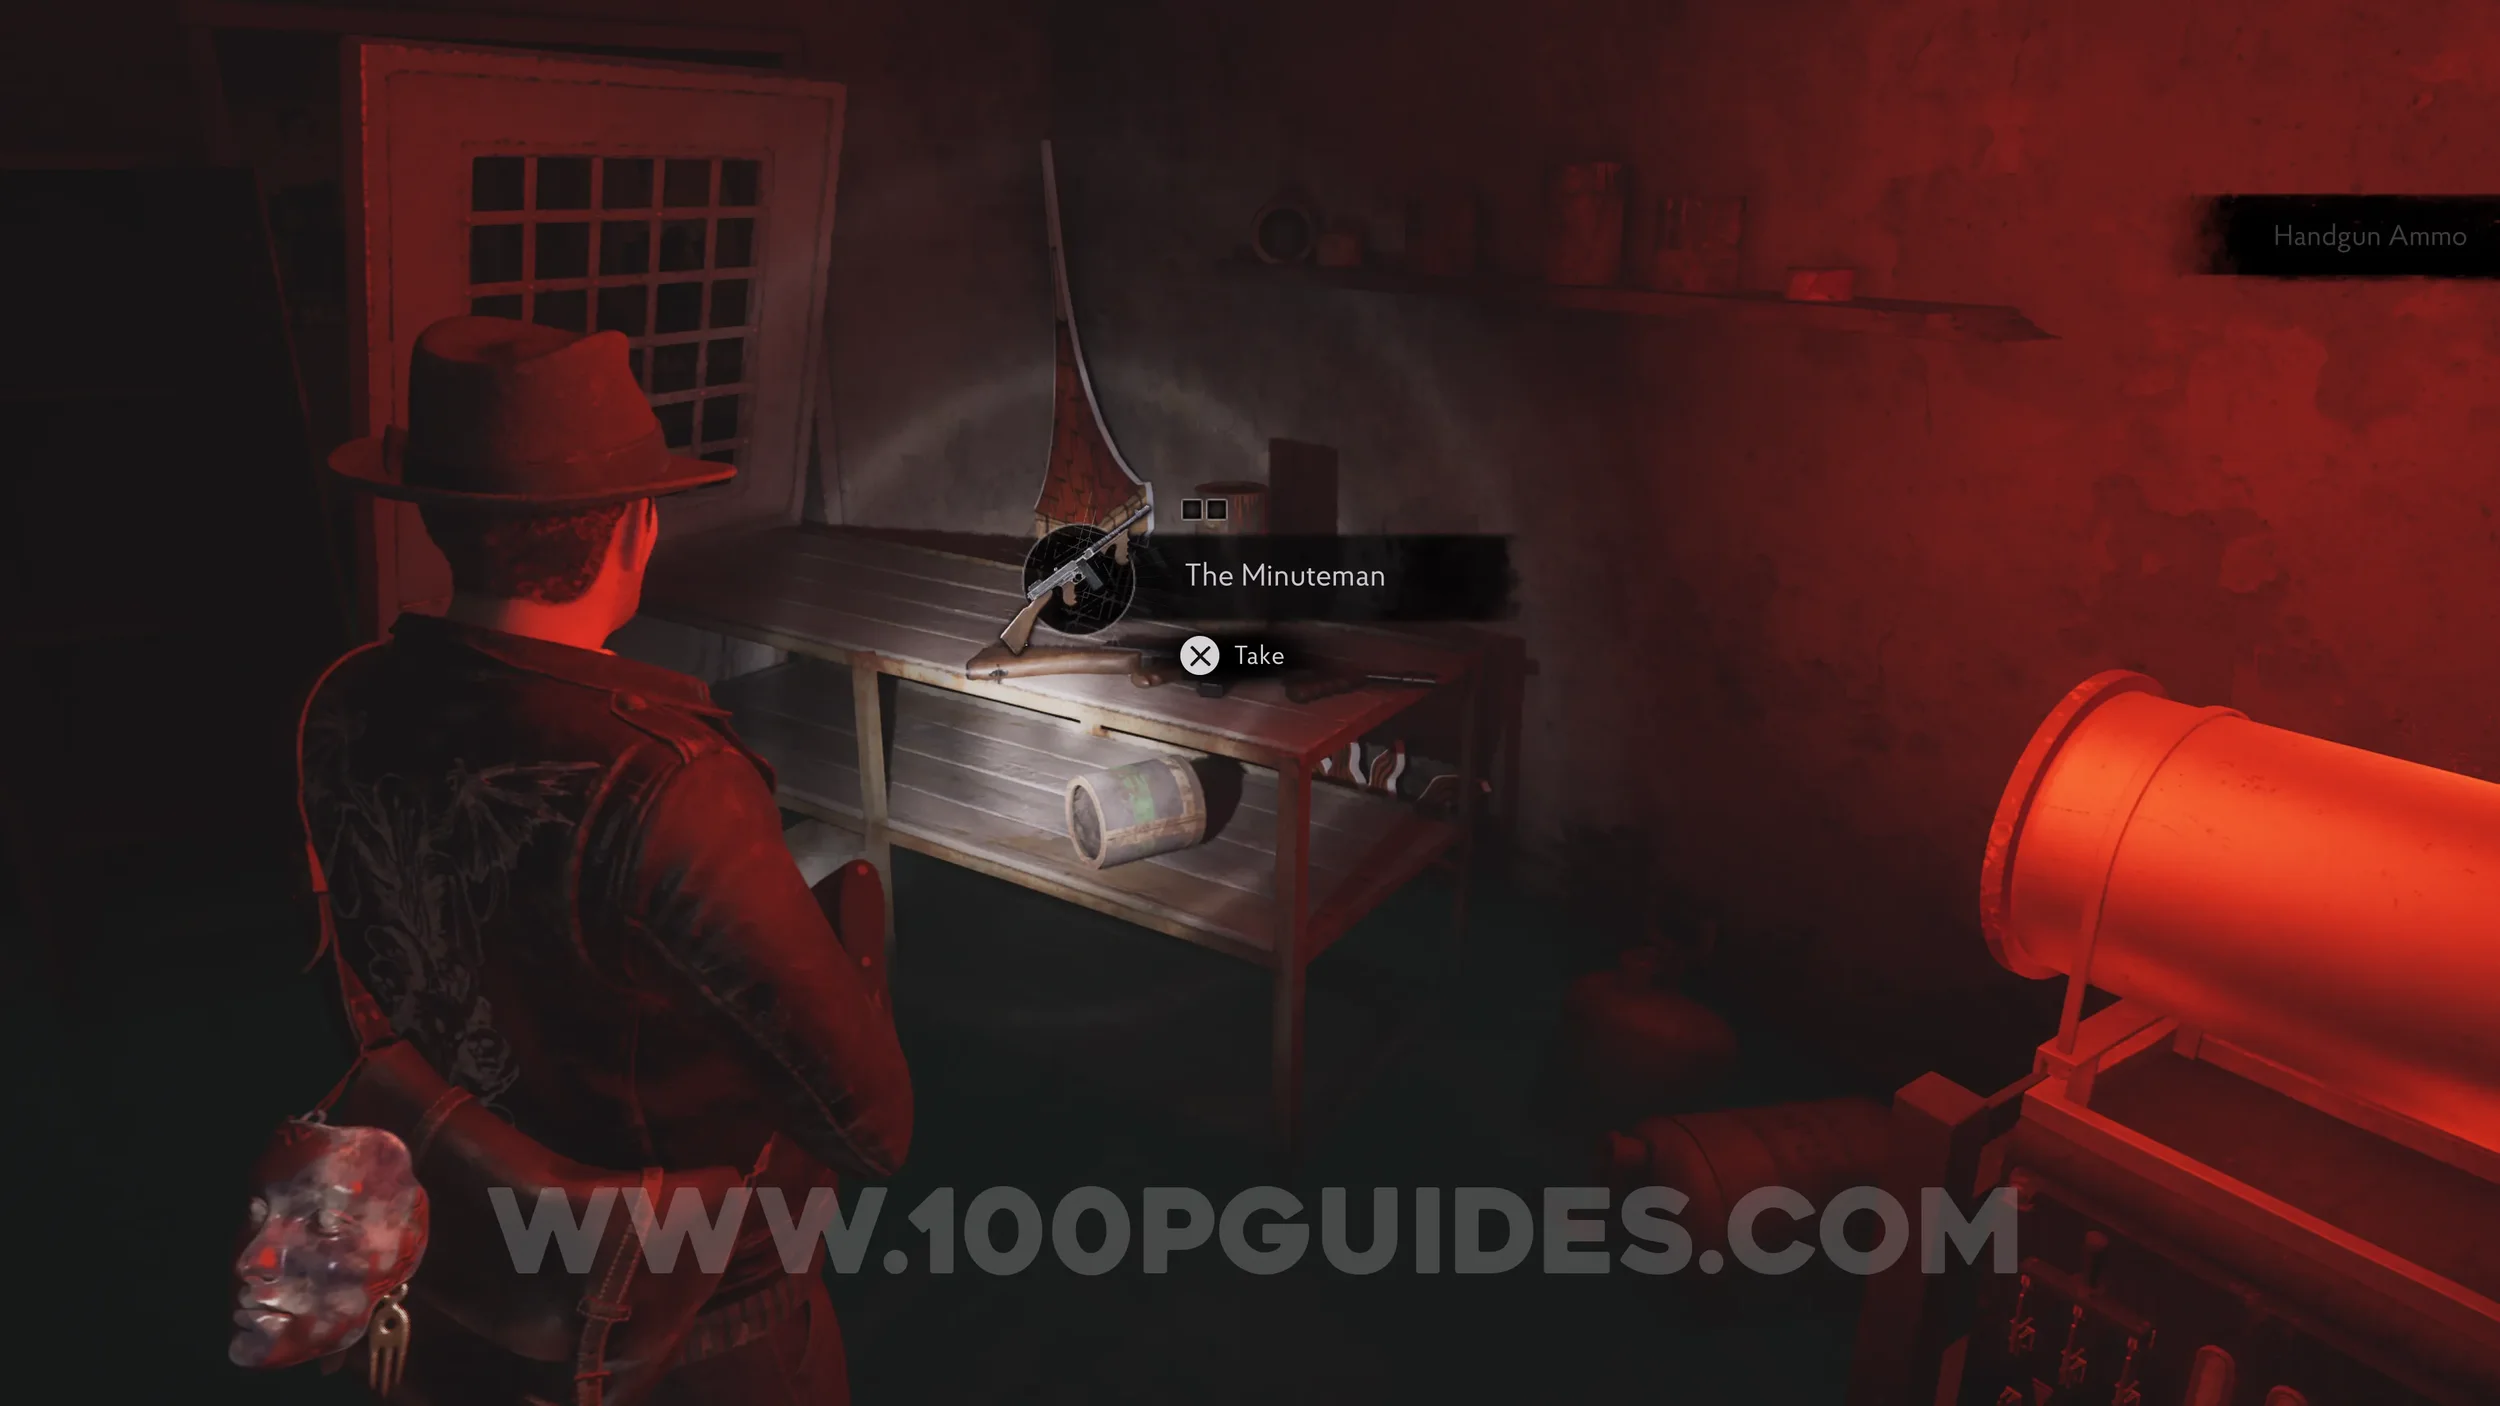
Ventilation System Puzzle
To solve the Ventilation System Puzzle in the Generator Room, press the buttons in this order: Button 1 > Button 1 > Button 2 > Button 2 > Button 2 > Button 2 > Button 3 > Button 3 > flip the switch to red > Button 1.


Finally, to finish the chapter, go through the doorway previously blocked with gas, take the elevator up, and press the switch to start moving Lorelei. Then keep pressing the red switches while surviving the enemies. Eventually you'll drop her onto your boat and take her back to Corentin.
Chapter 3 - A Sight For Sore Eyes
Lore Codex: Eye Technology. Pinned to a board on the wall in the Reception of the Hospital.
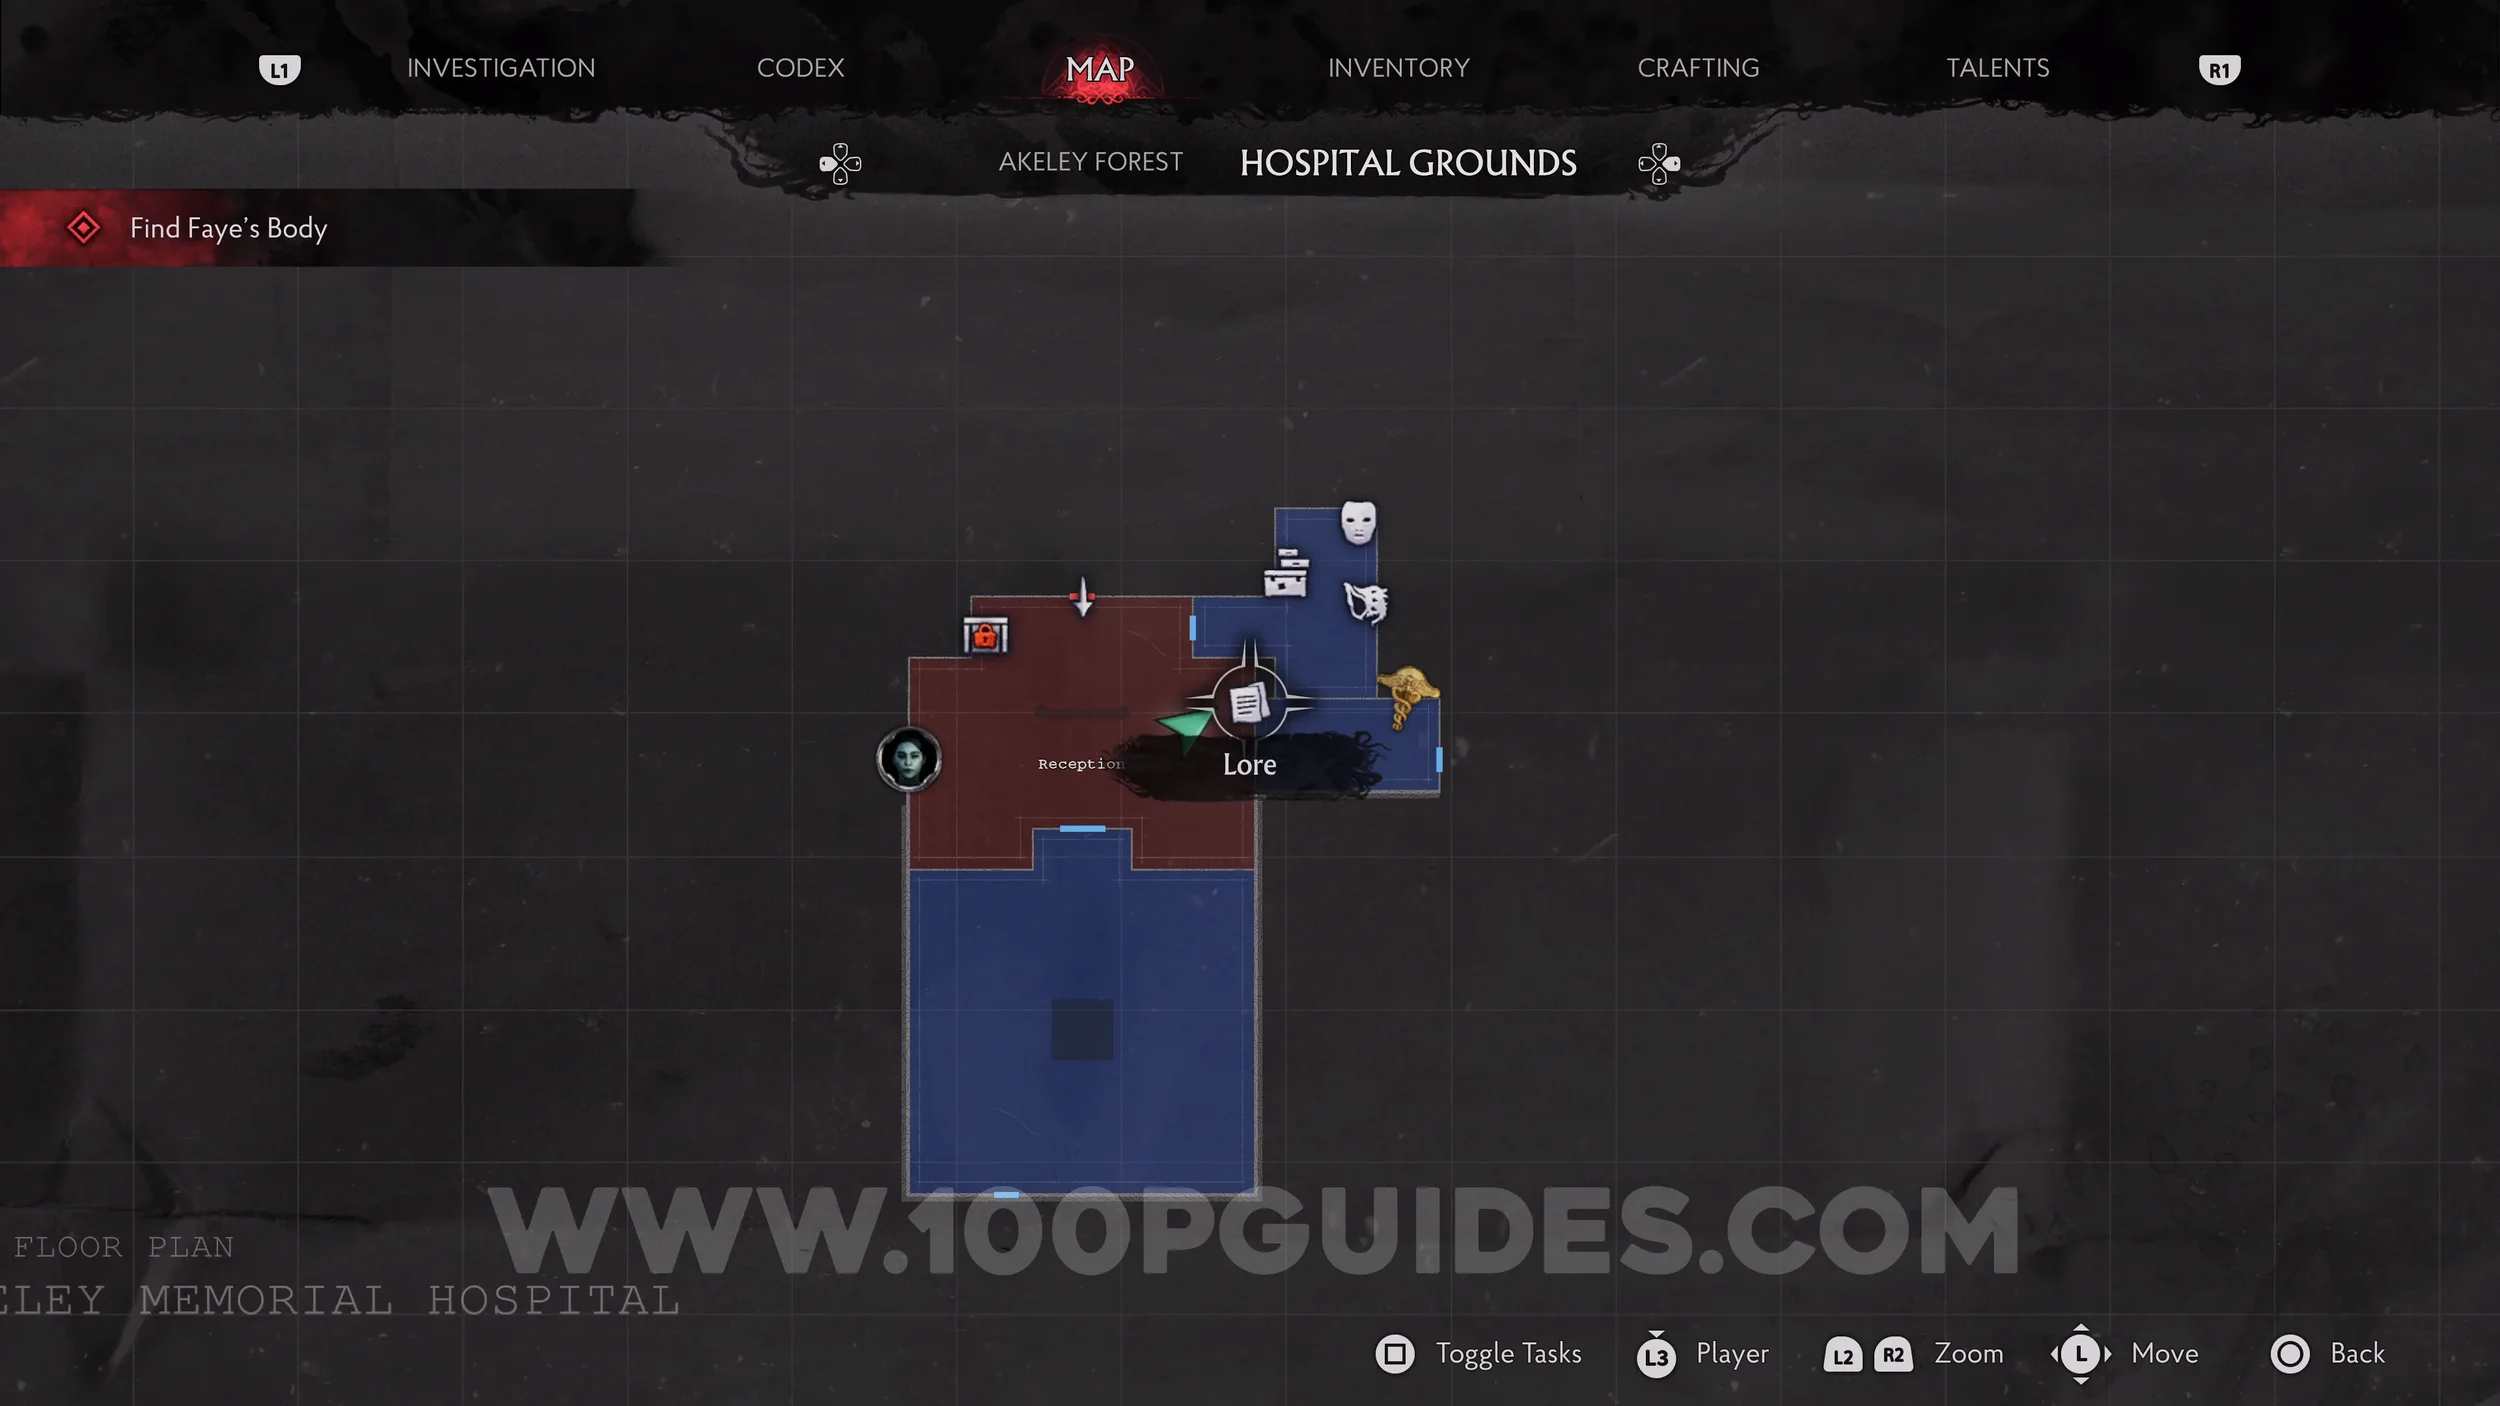
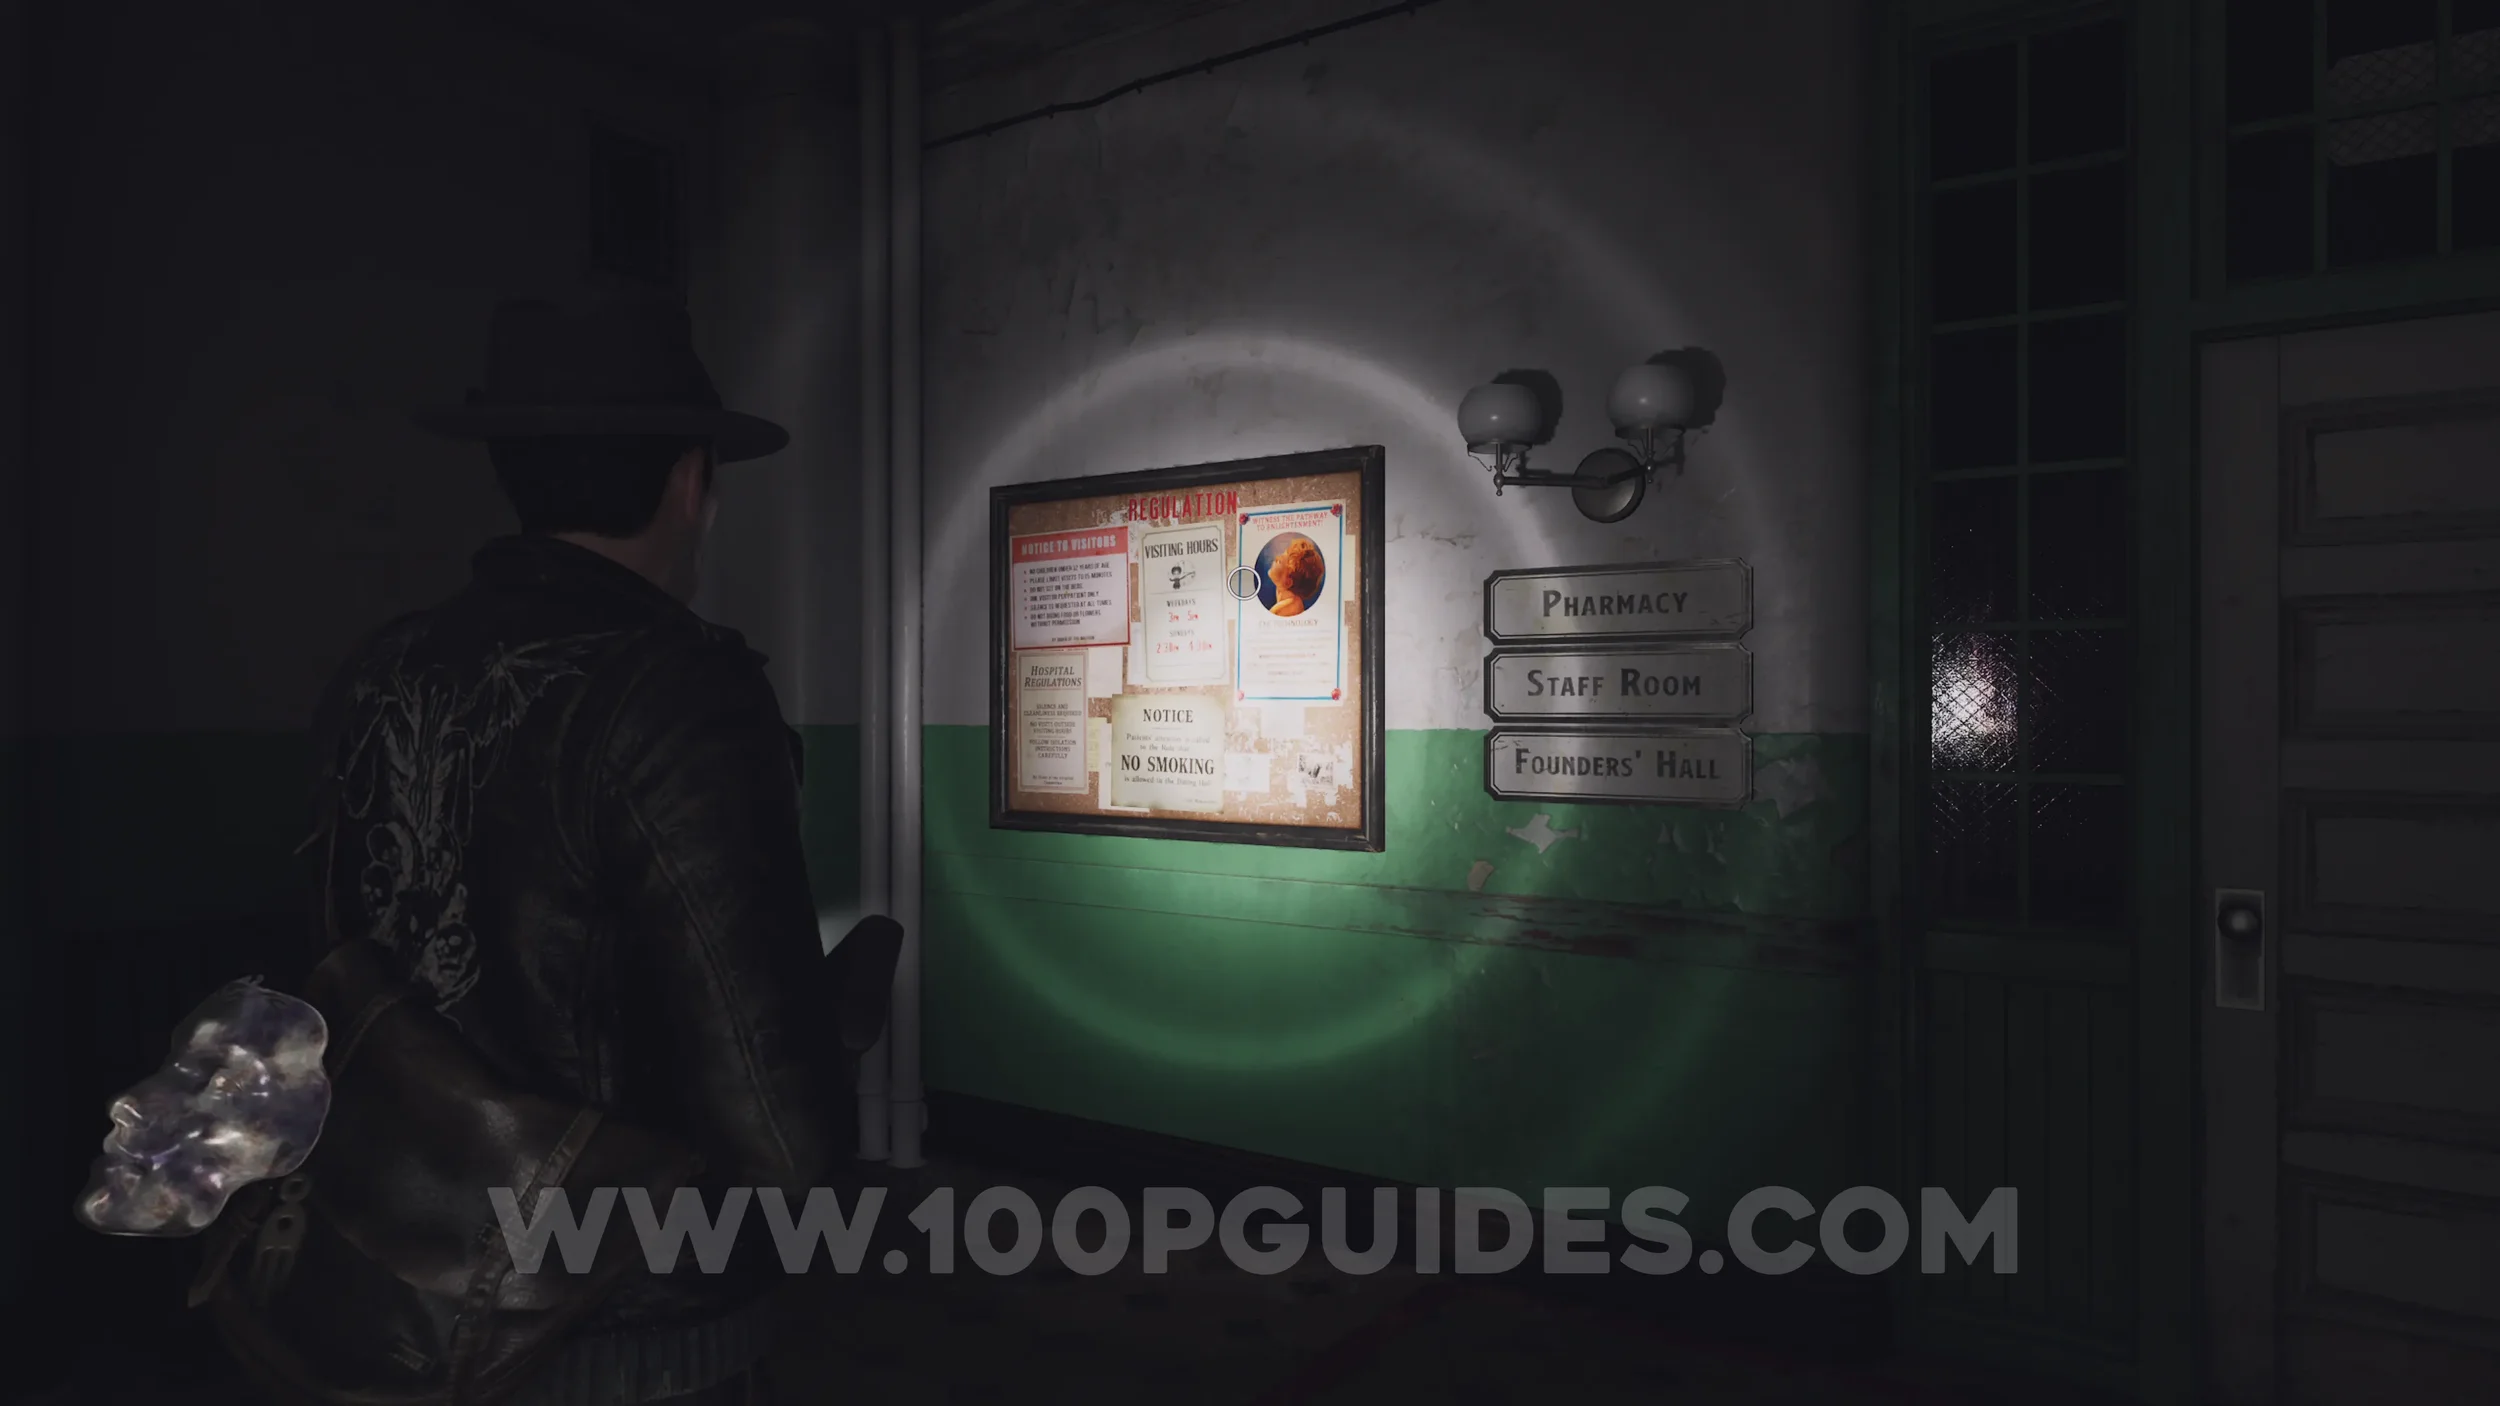
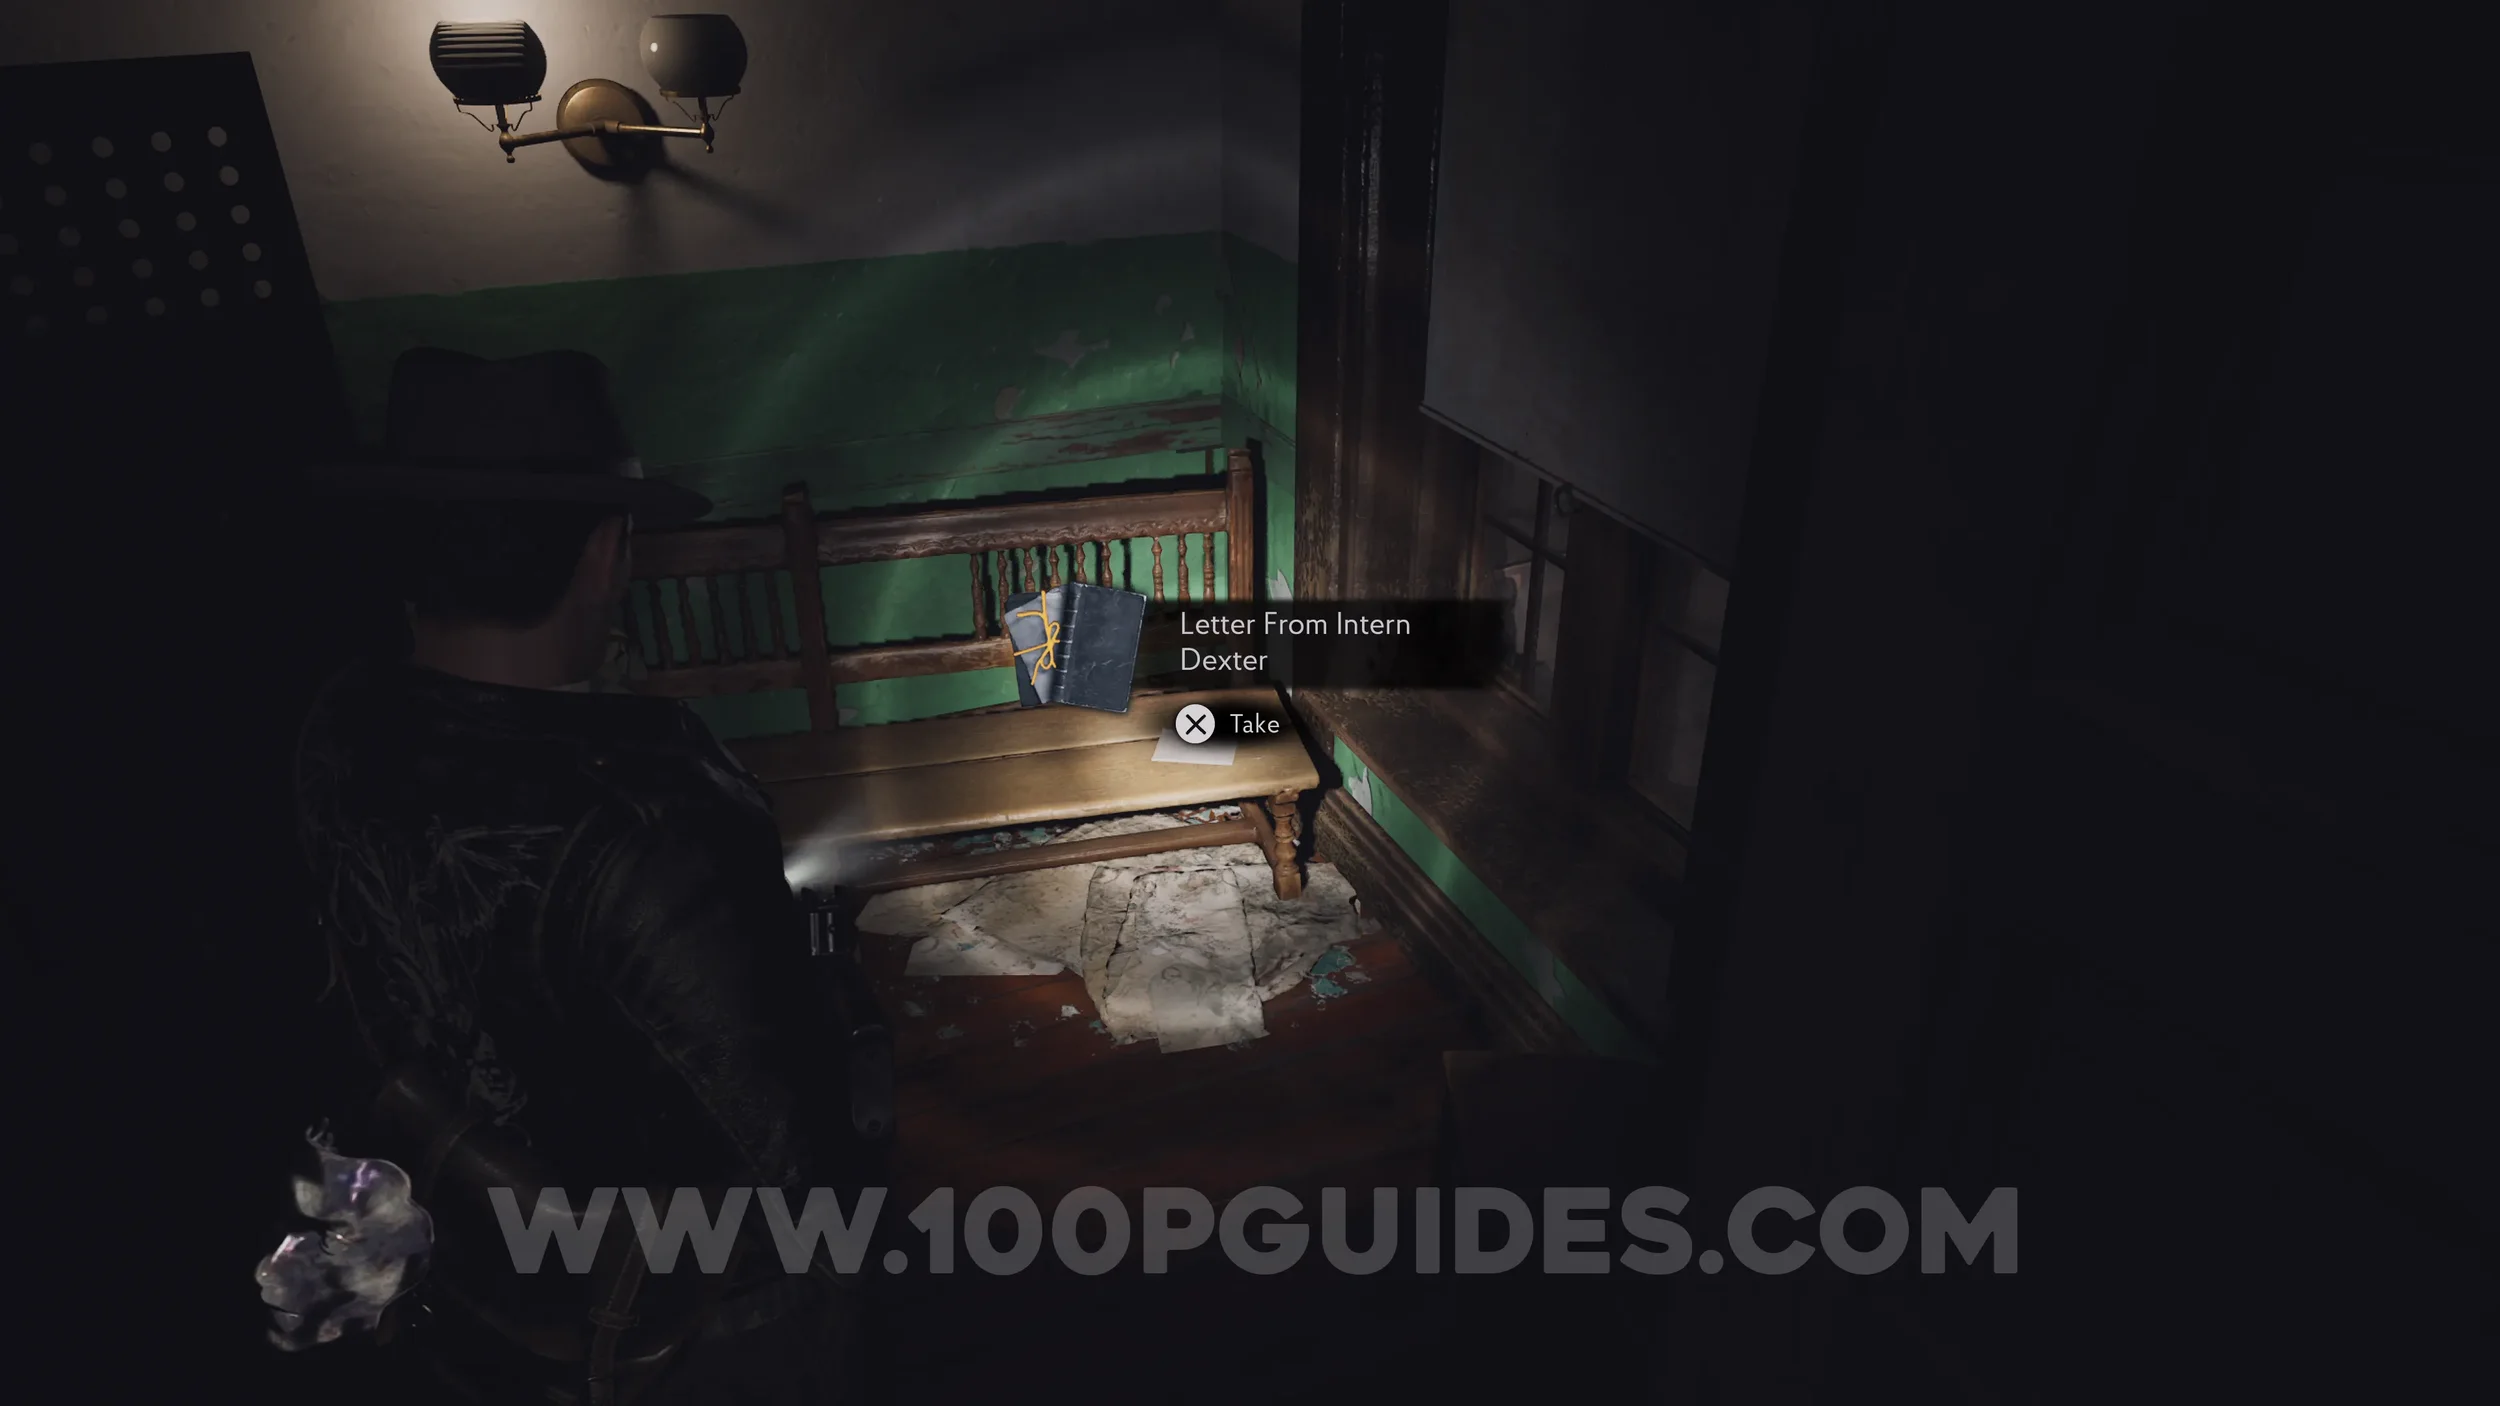
Lore Codex: Letter From Intern Dexter. After heading upstairs and watching the cutscene with Faye's body, head west and climb out onto the balcony. Then in the next room, head downstairs and enter the small Locker Room in the northwestern corner.
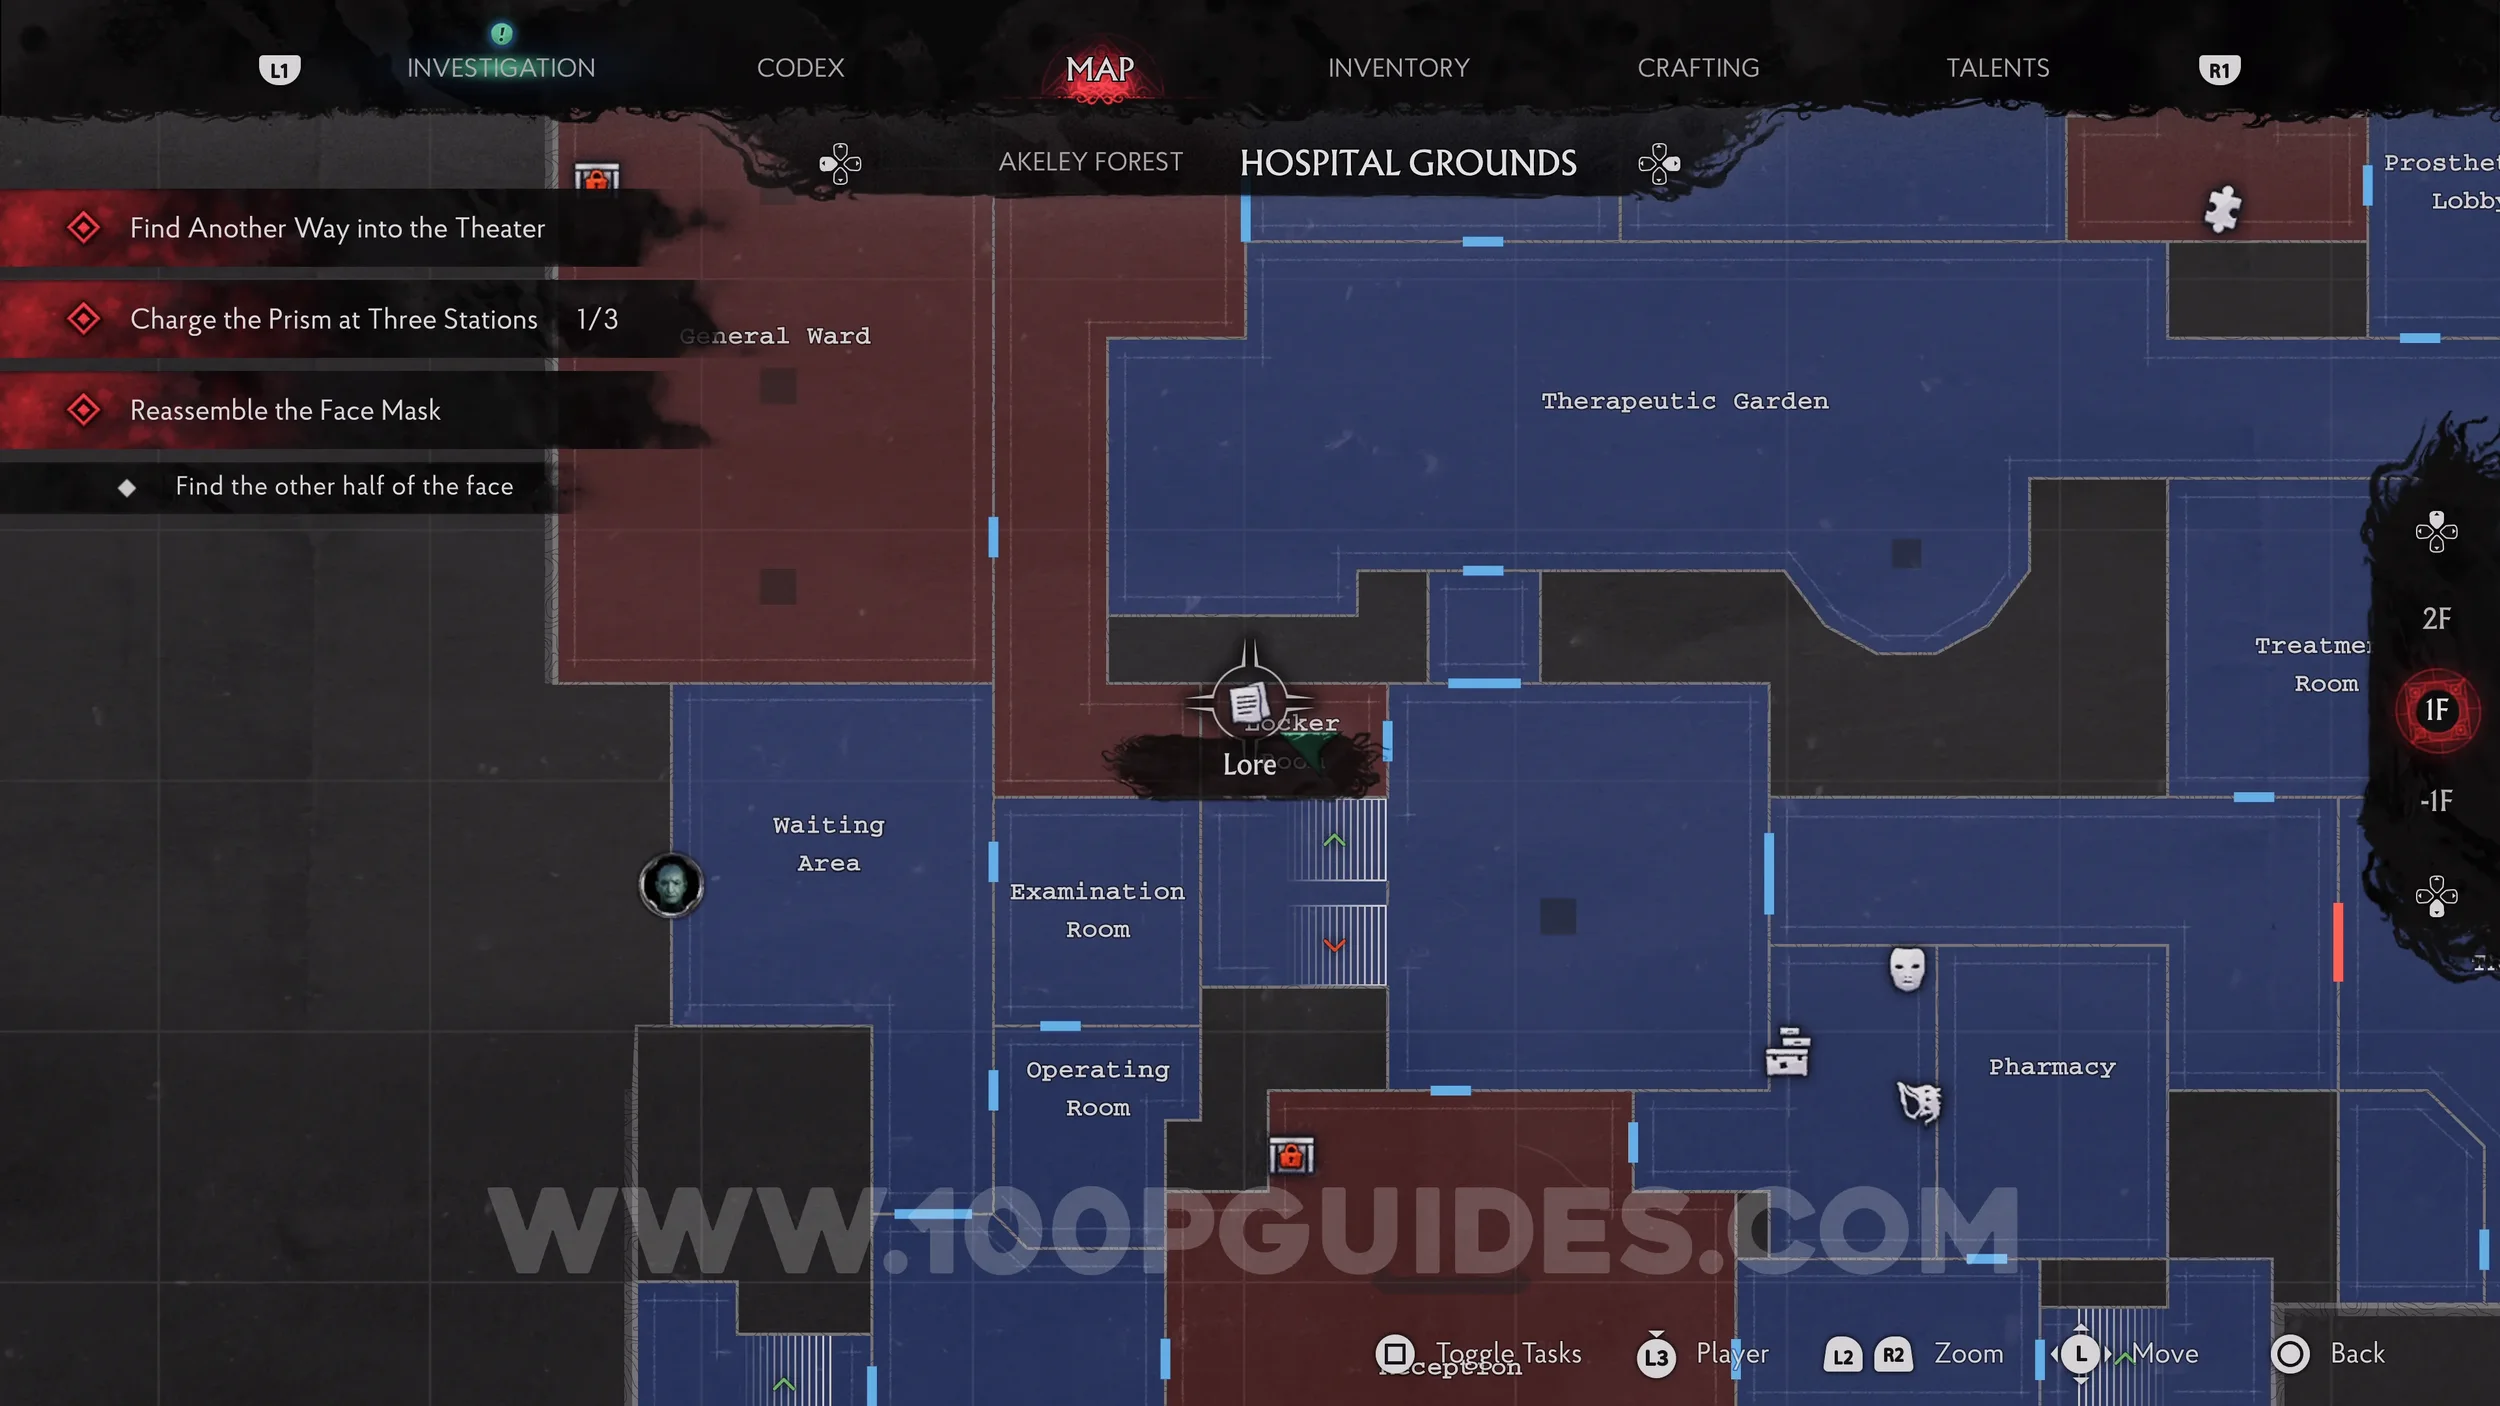
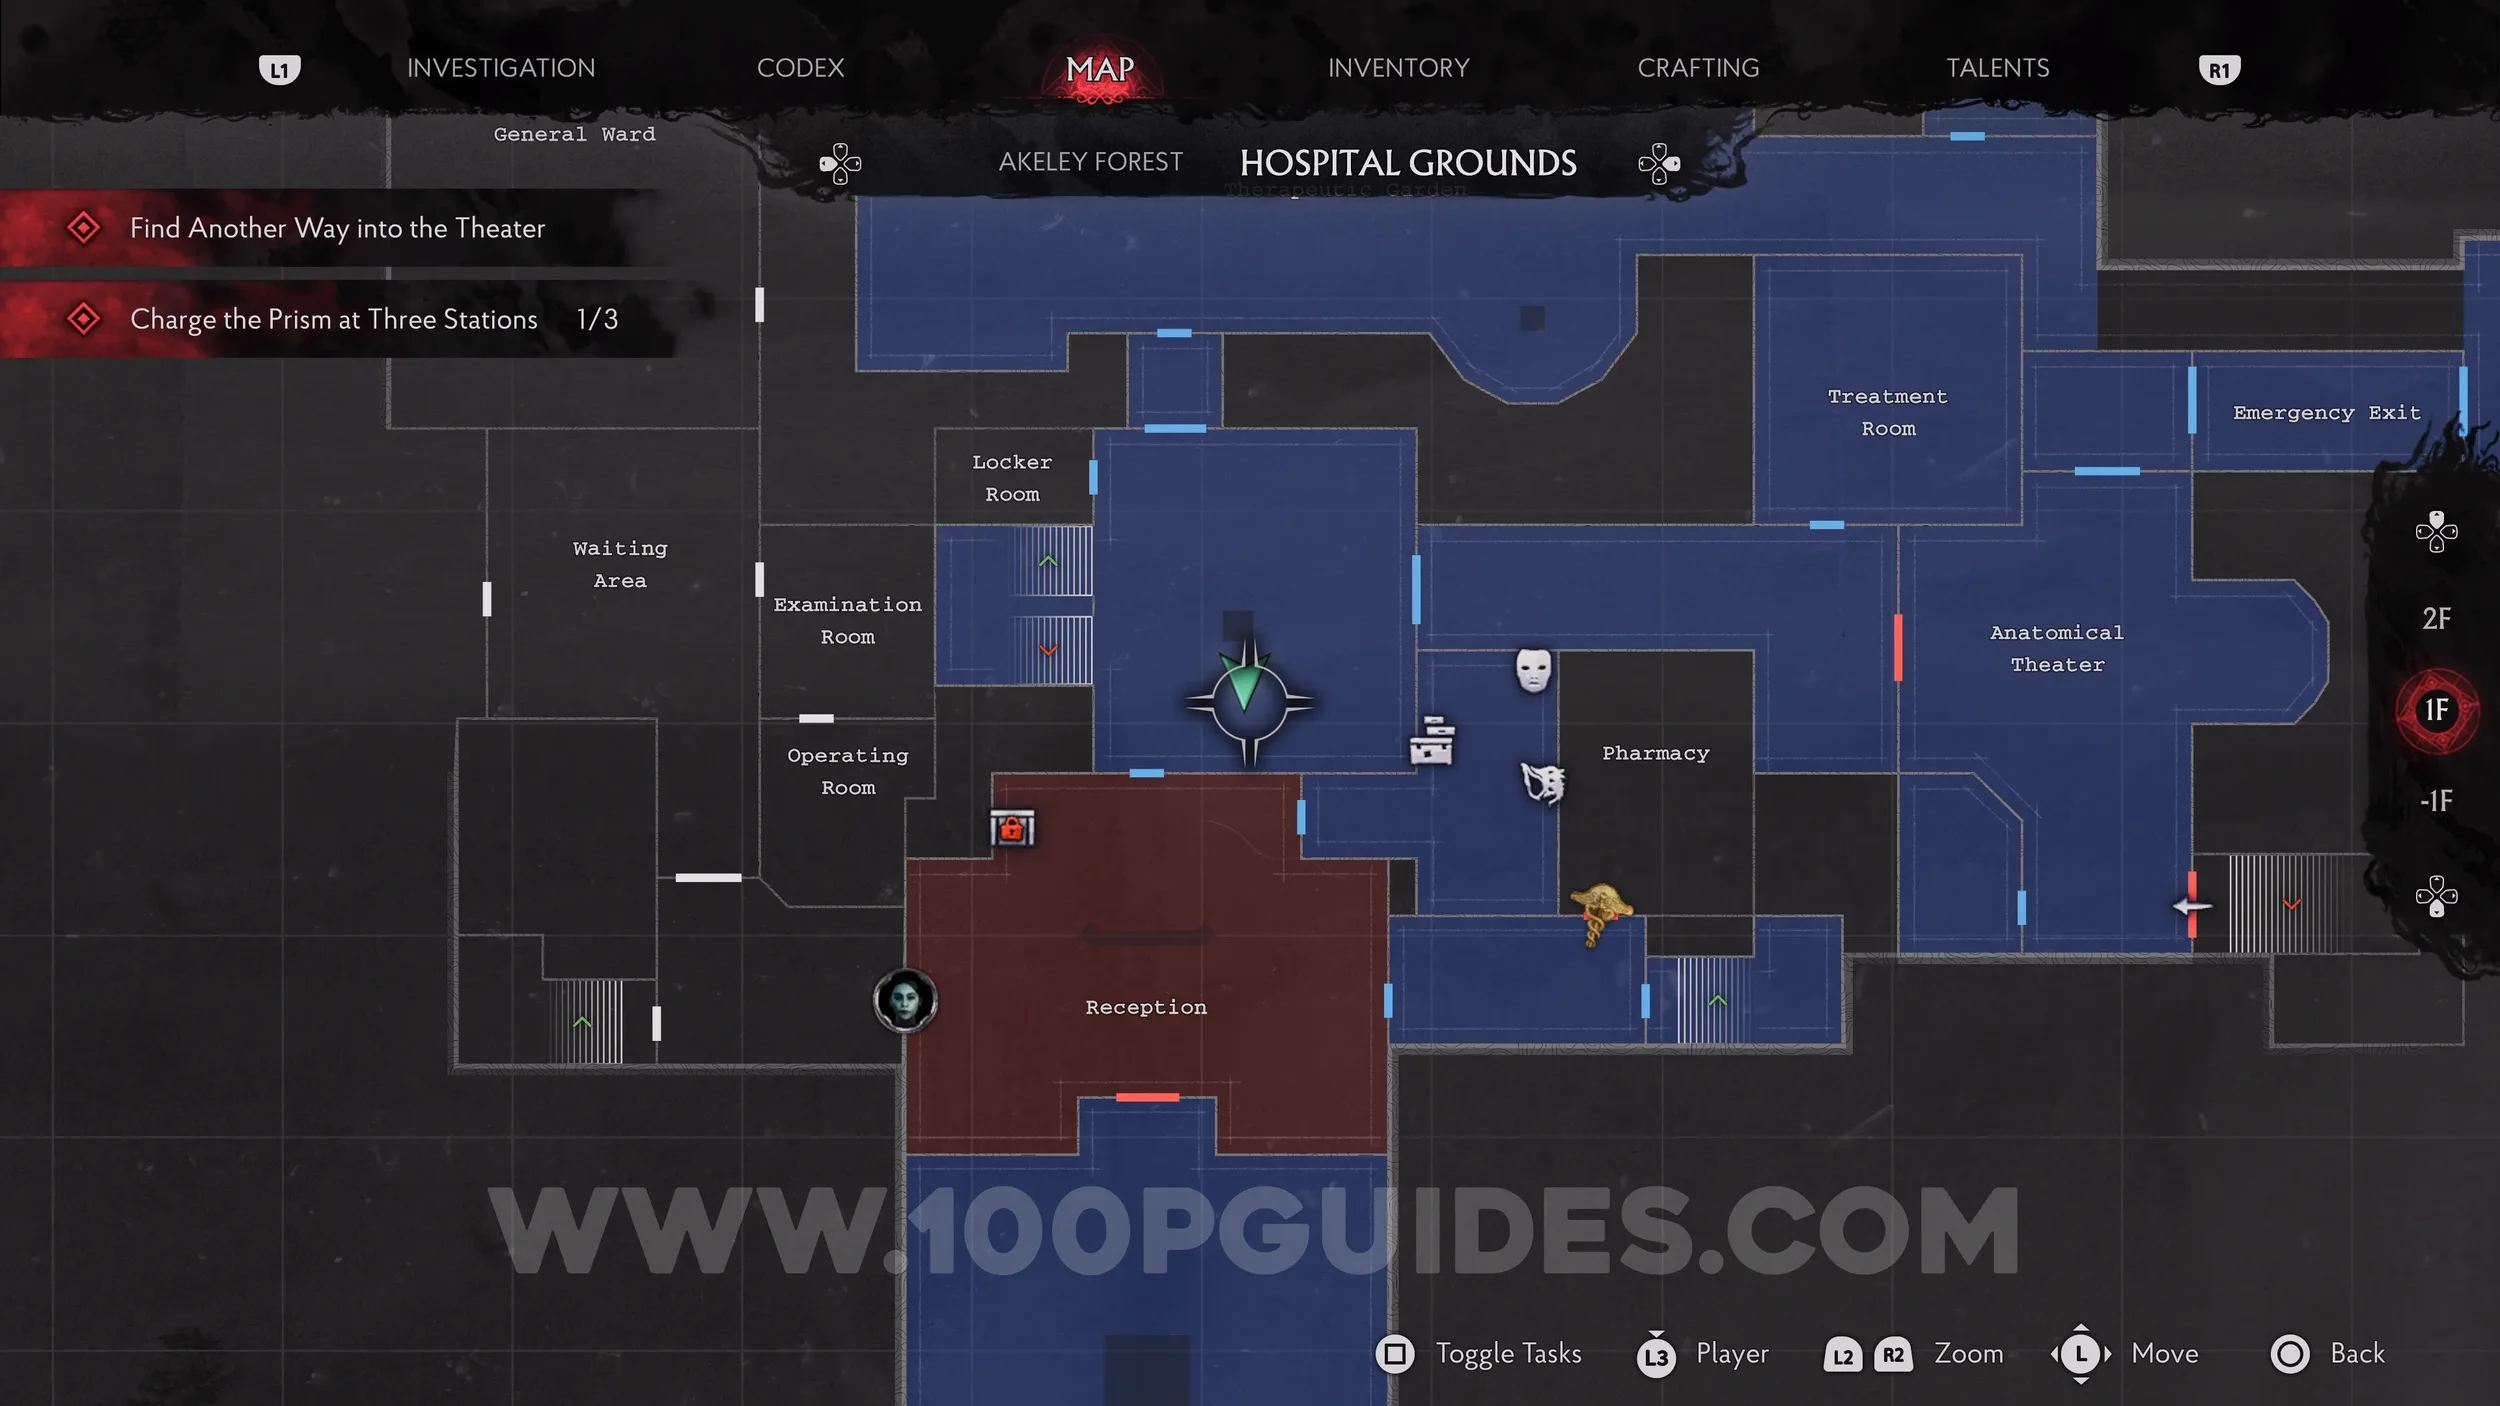
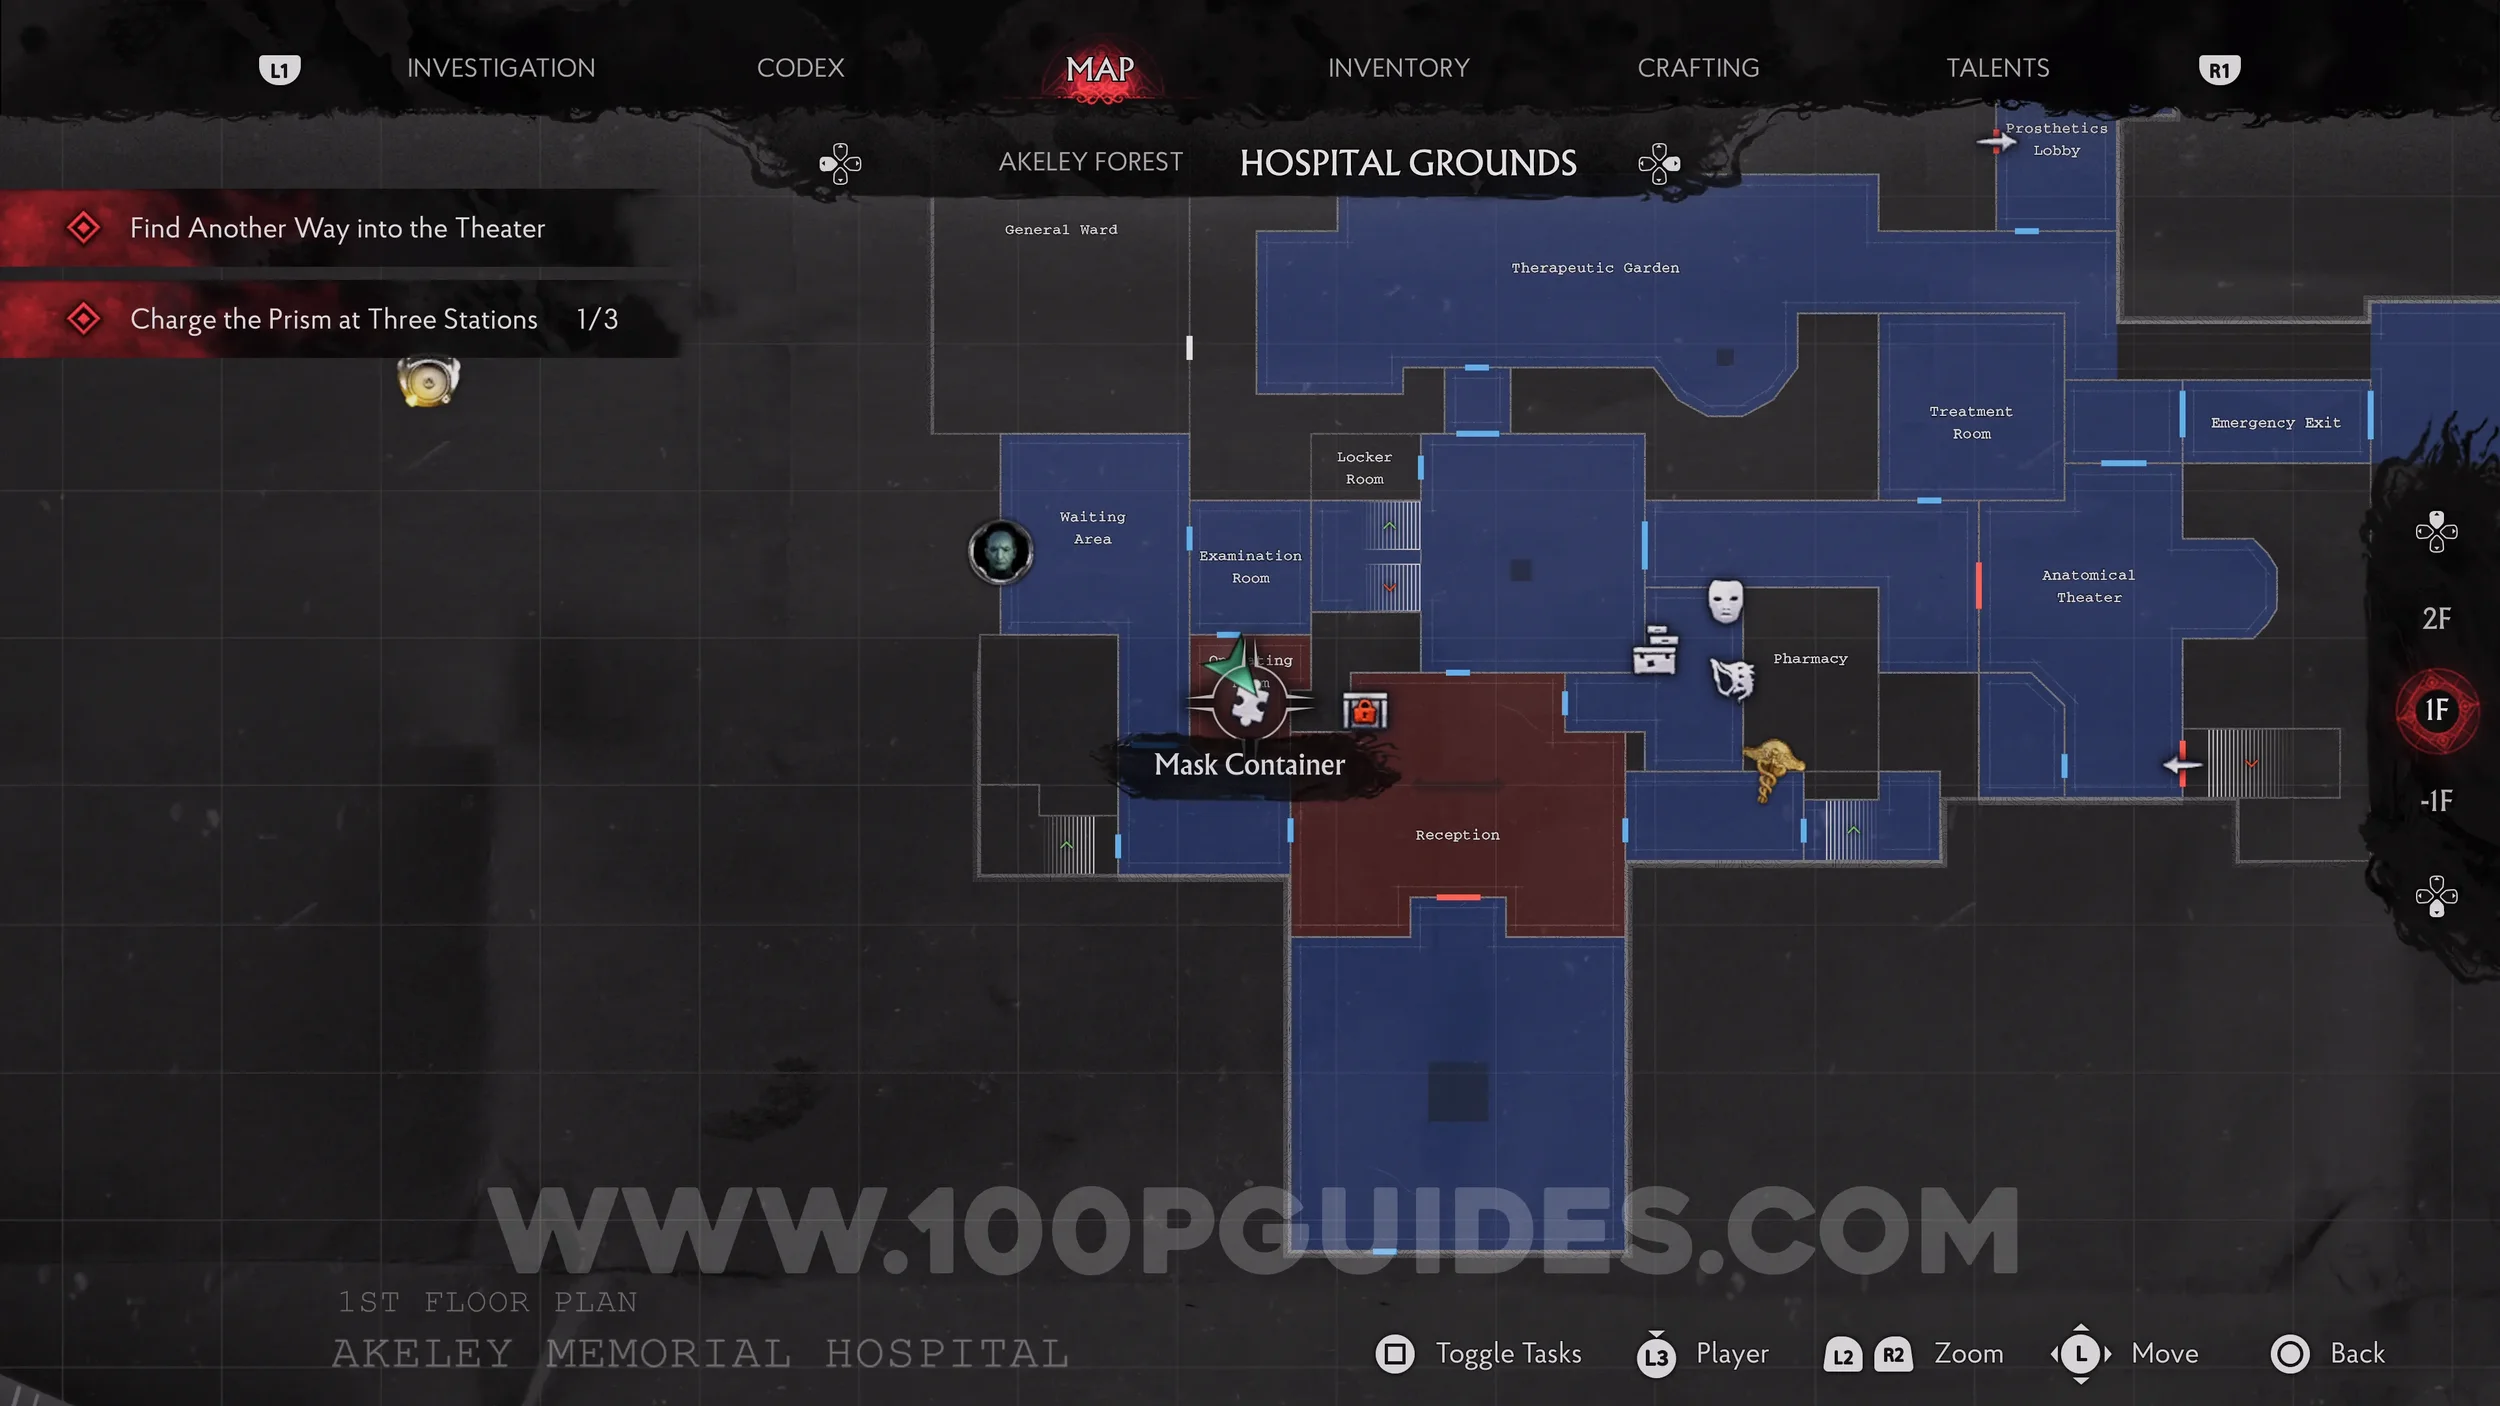
Map: First Floor. Exit the Locker Room back into the large room and you'll see the map on the wall next to the shortcut door back to the Reception.
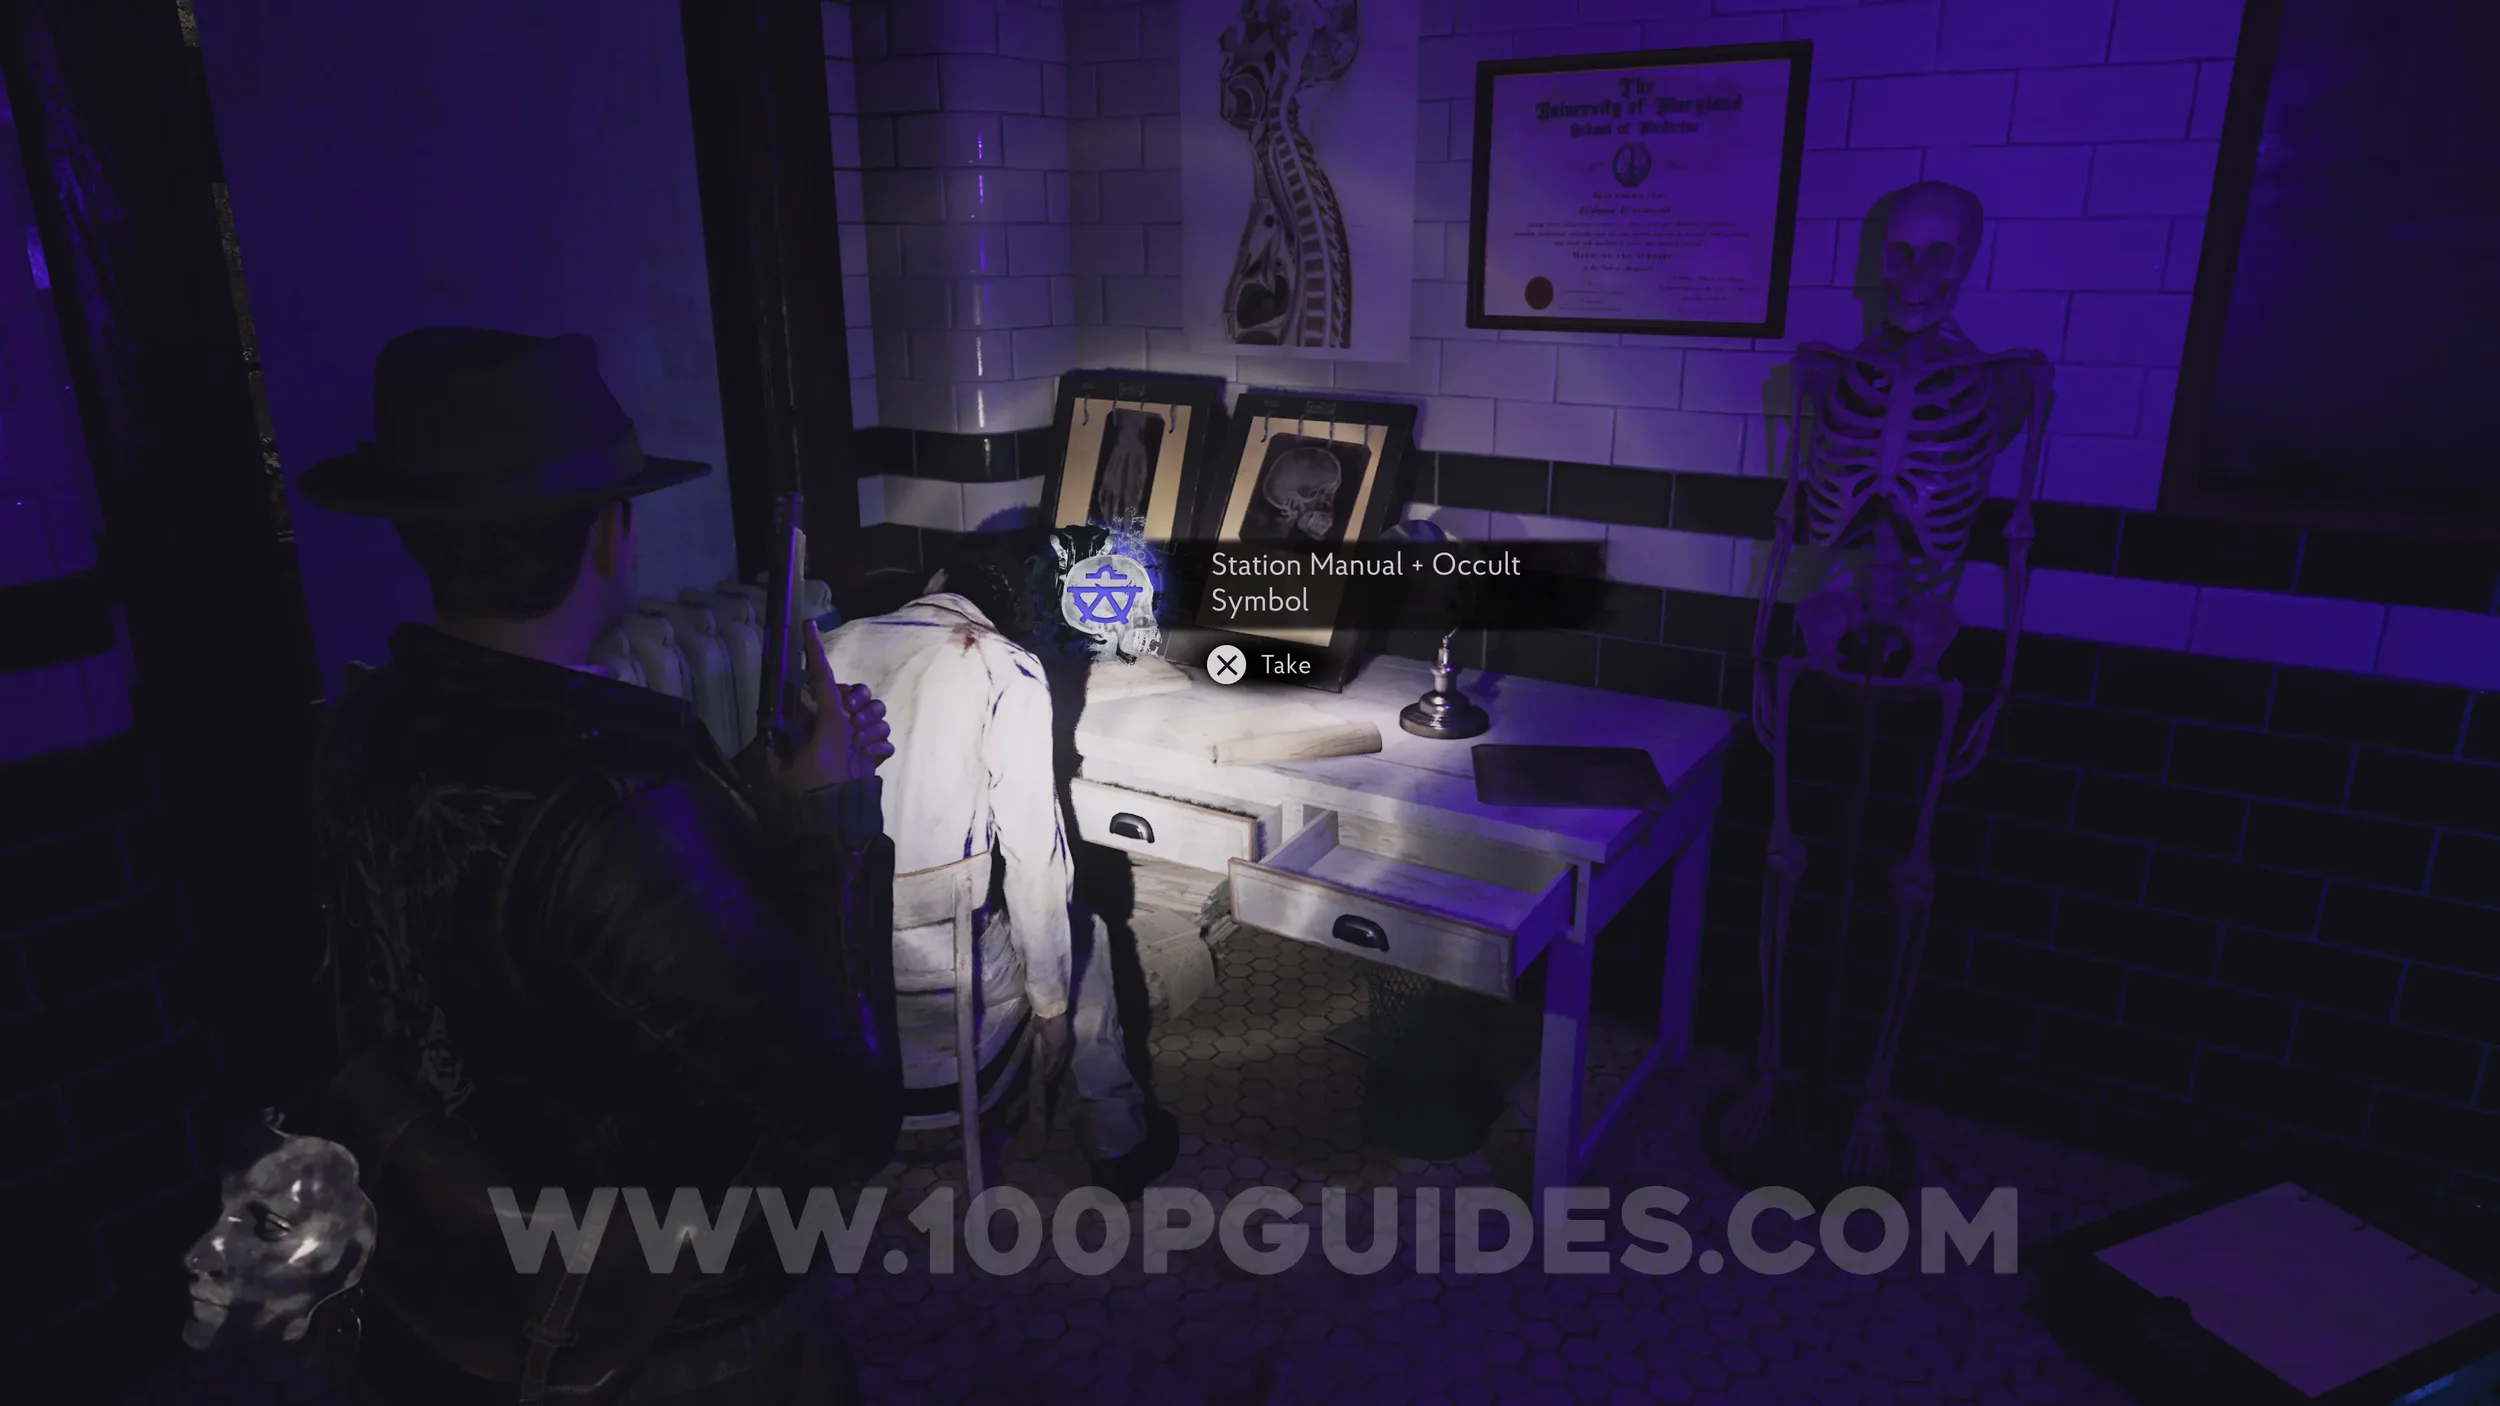
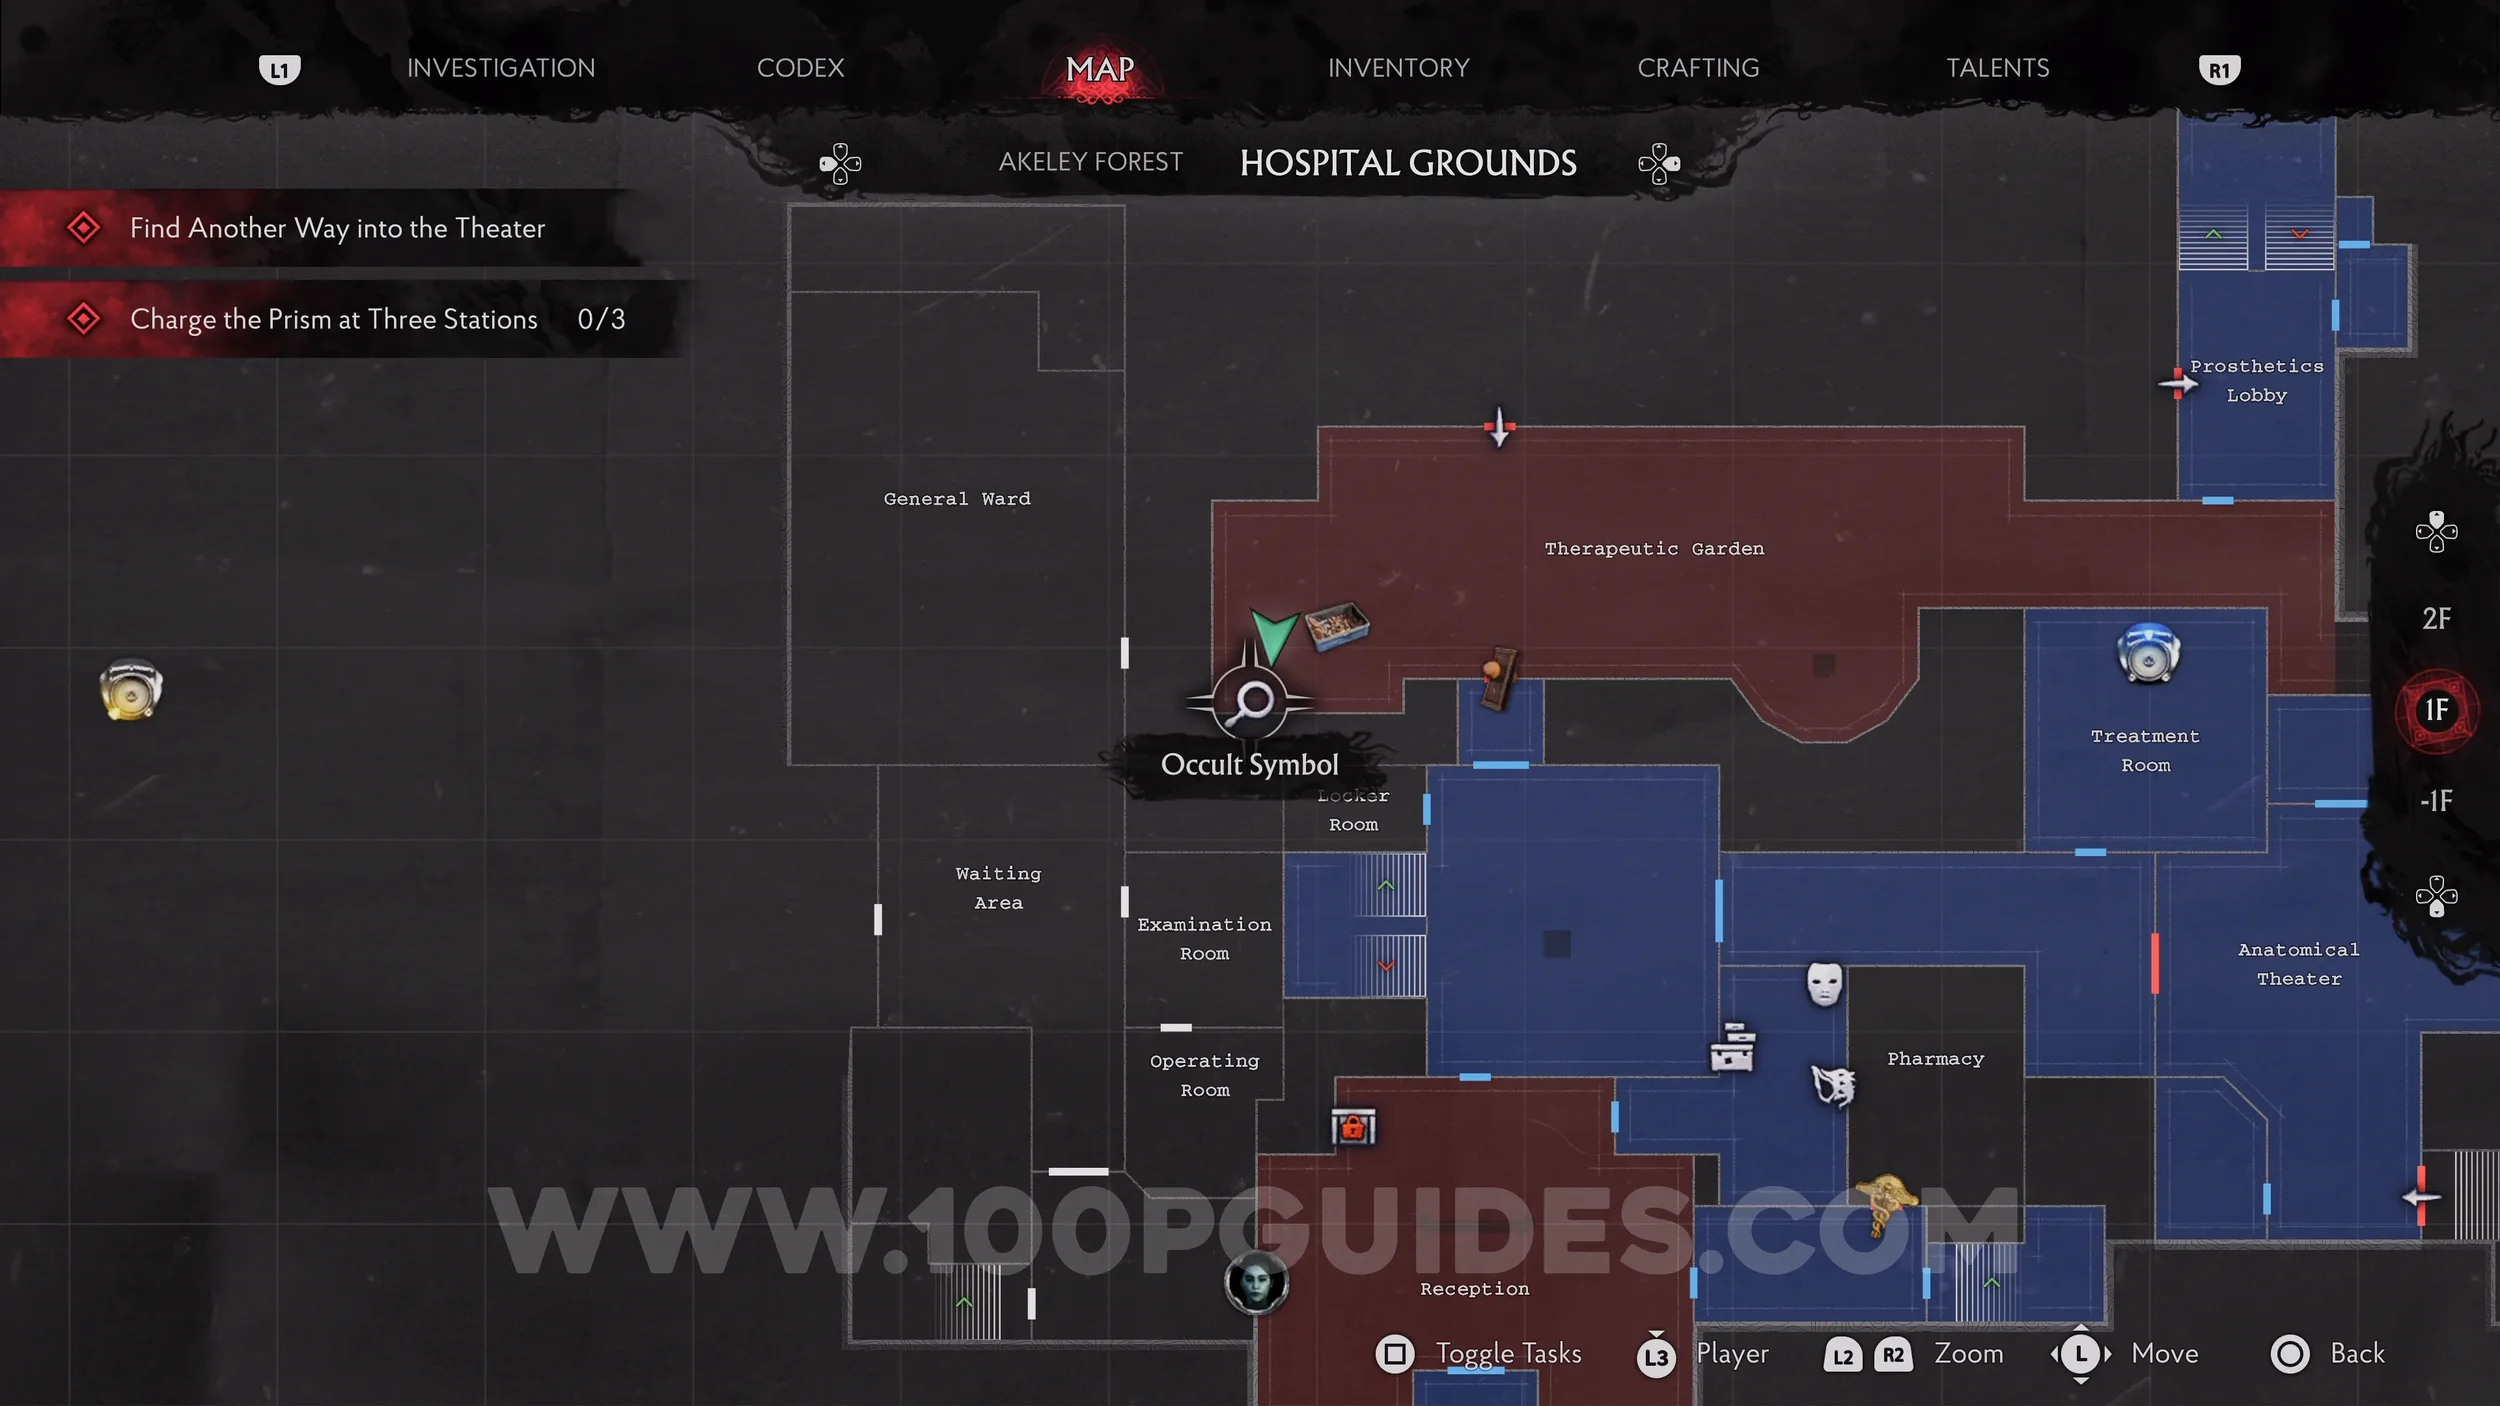
Evidence: Station Manual + Occult Symbol (Blue). From the previous collectible, head down the hall to the east and enter the Treatment Room. You'll find the evidence on the desk in the northwestern corner.
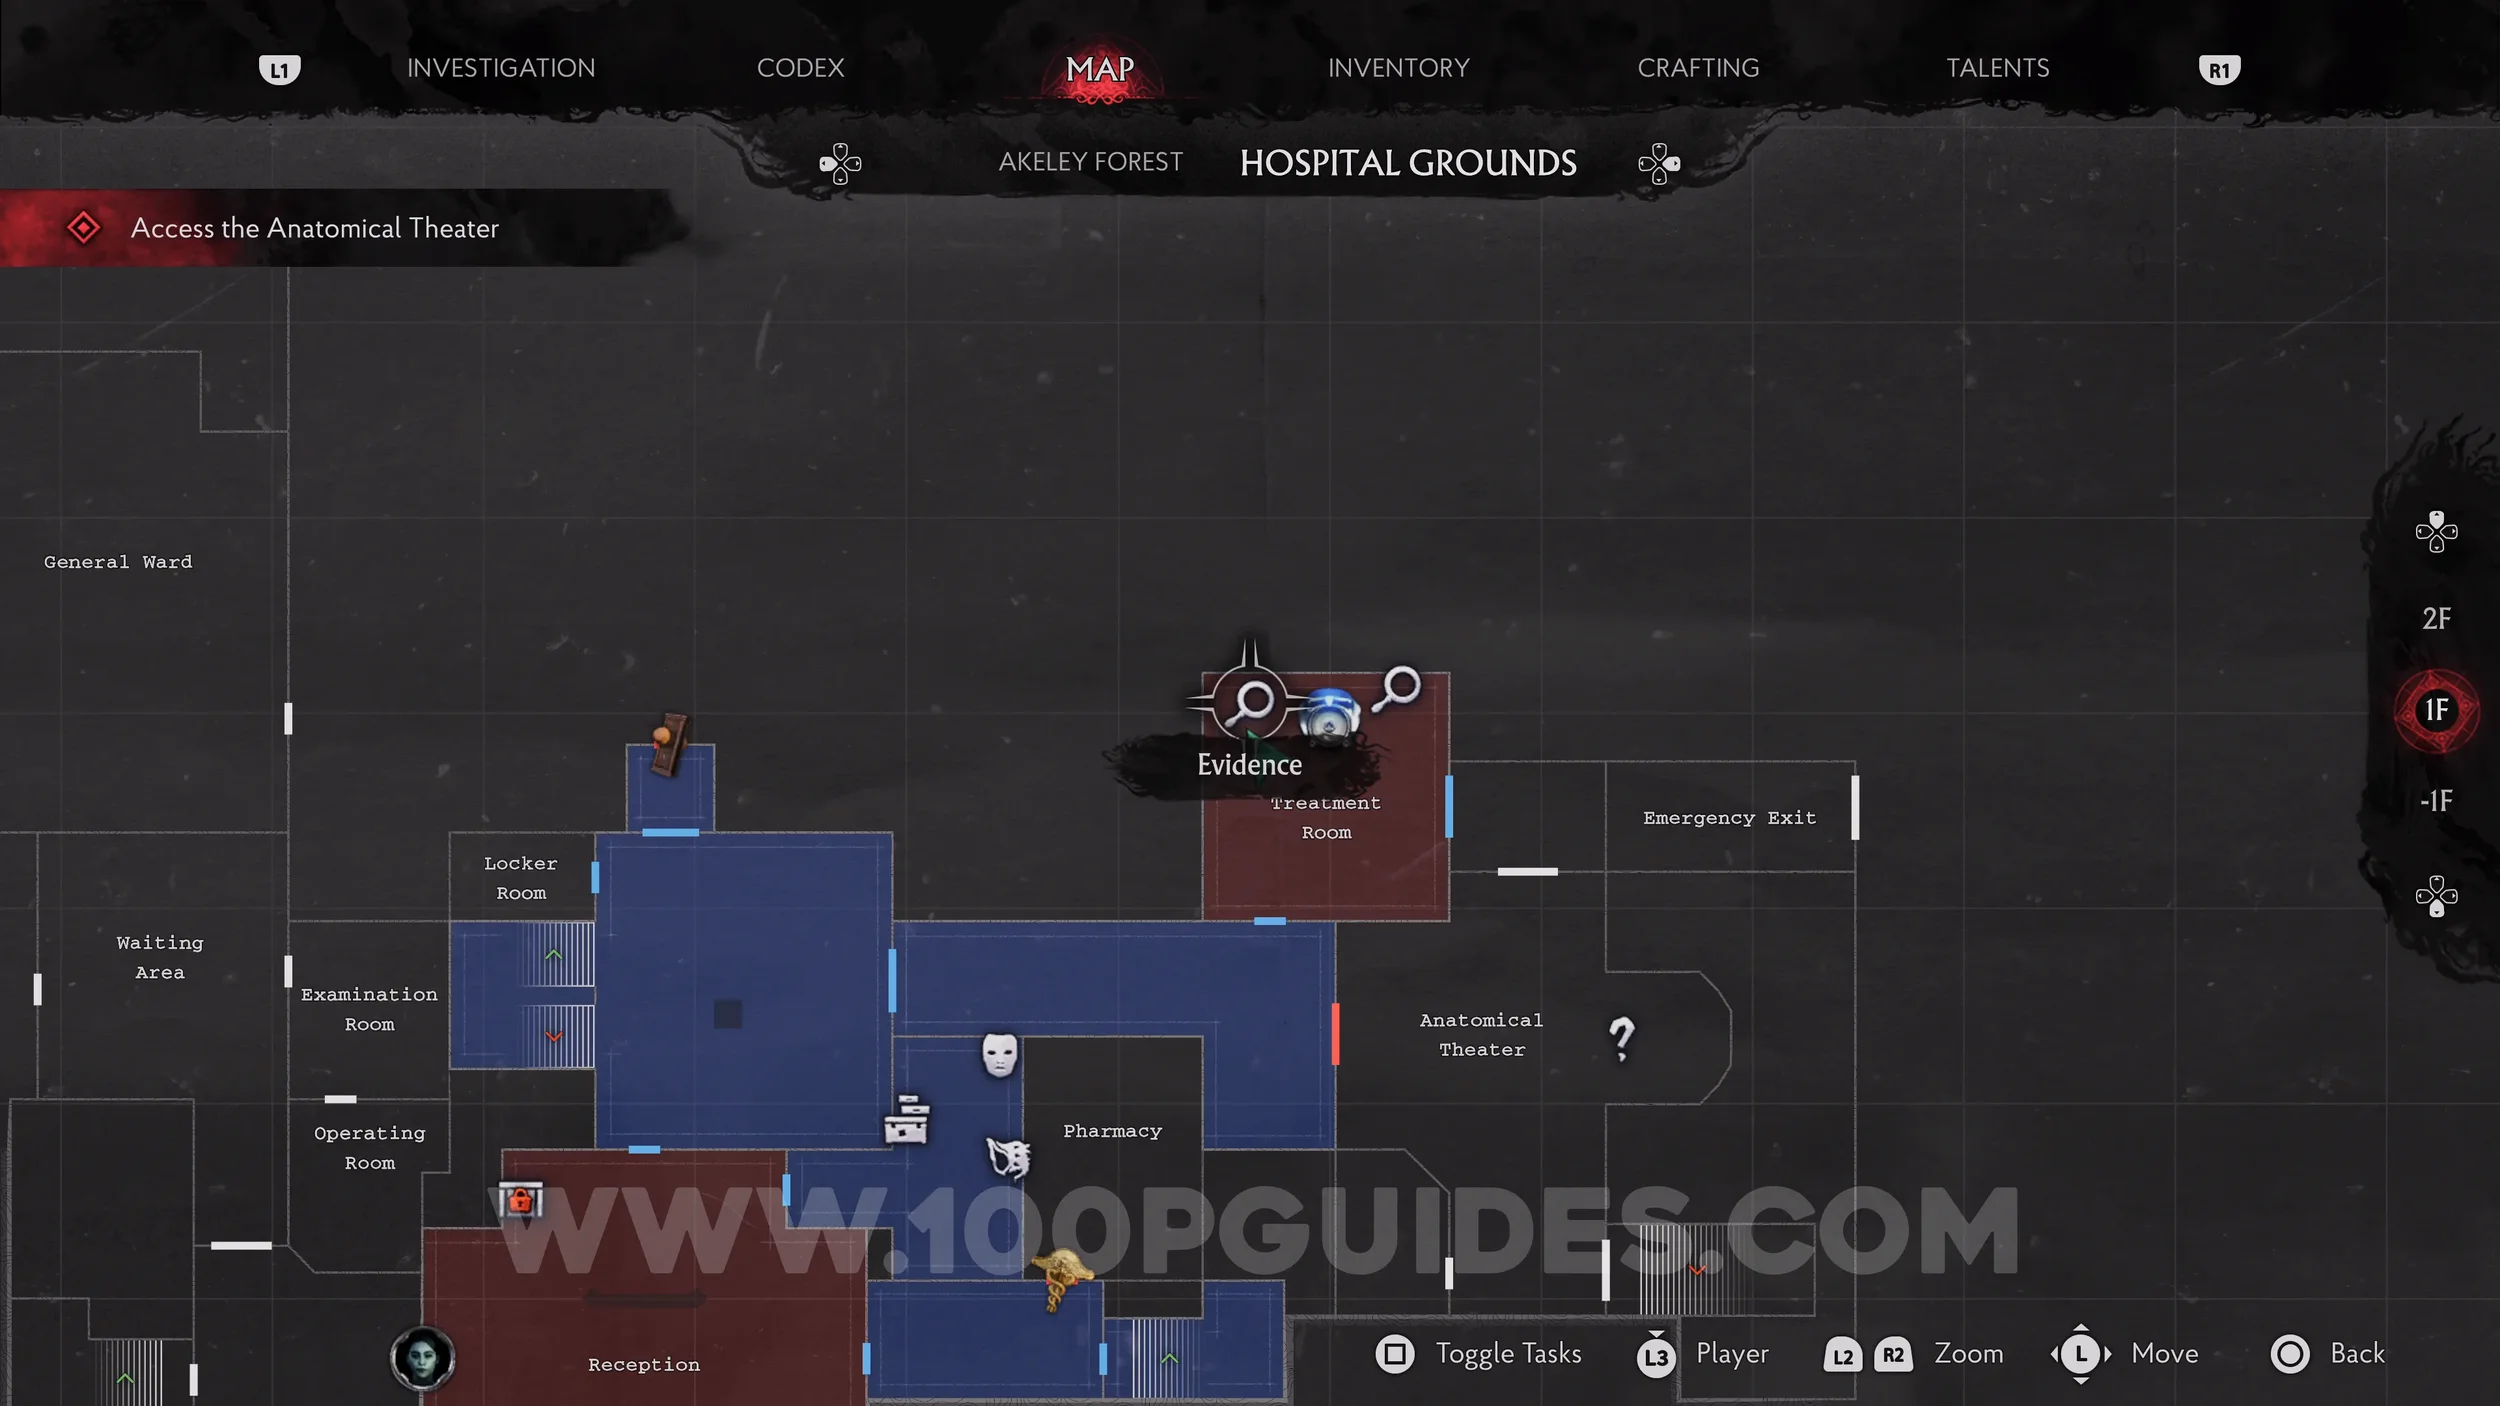
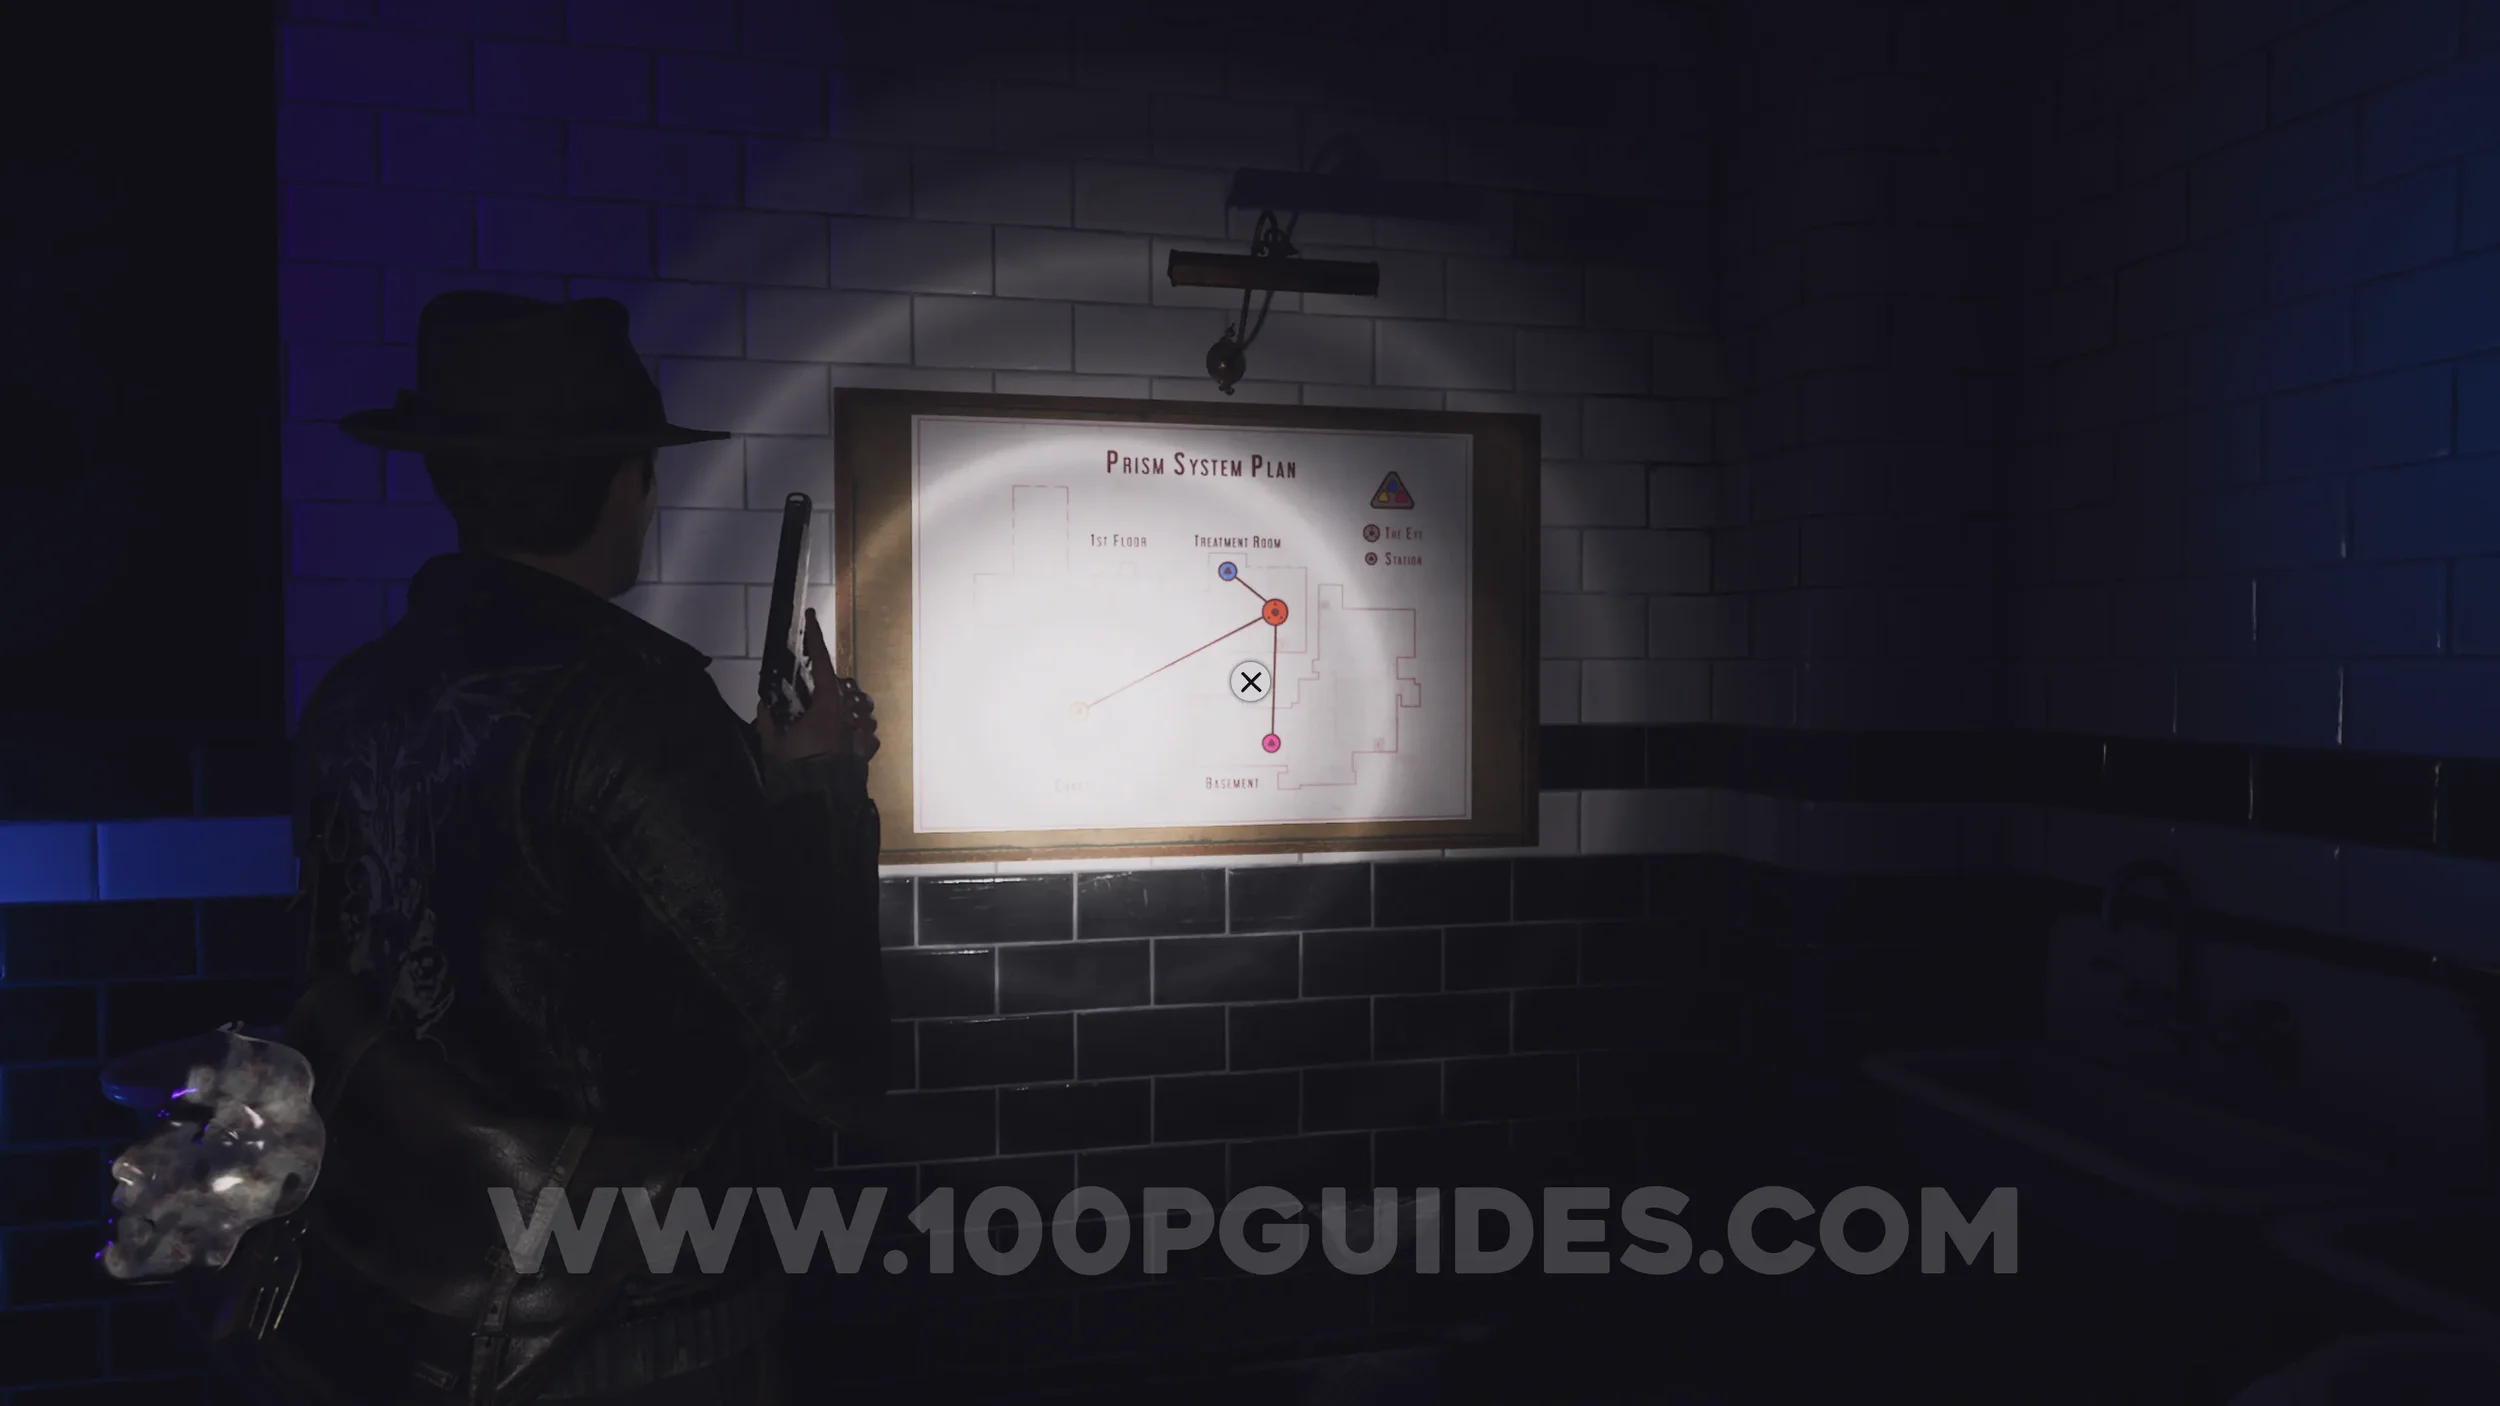
Evidence: Prism System Schematics. Also in the Treatment Room. On the wall to the right.
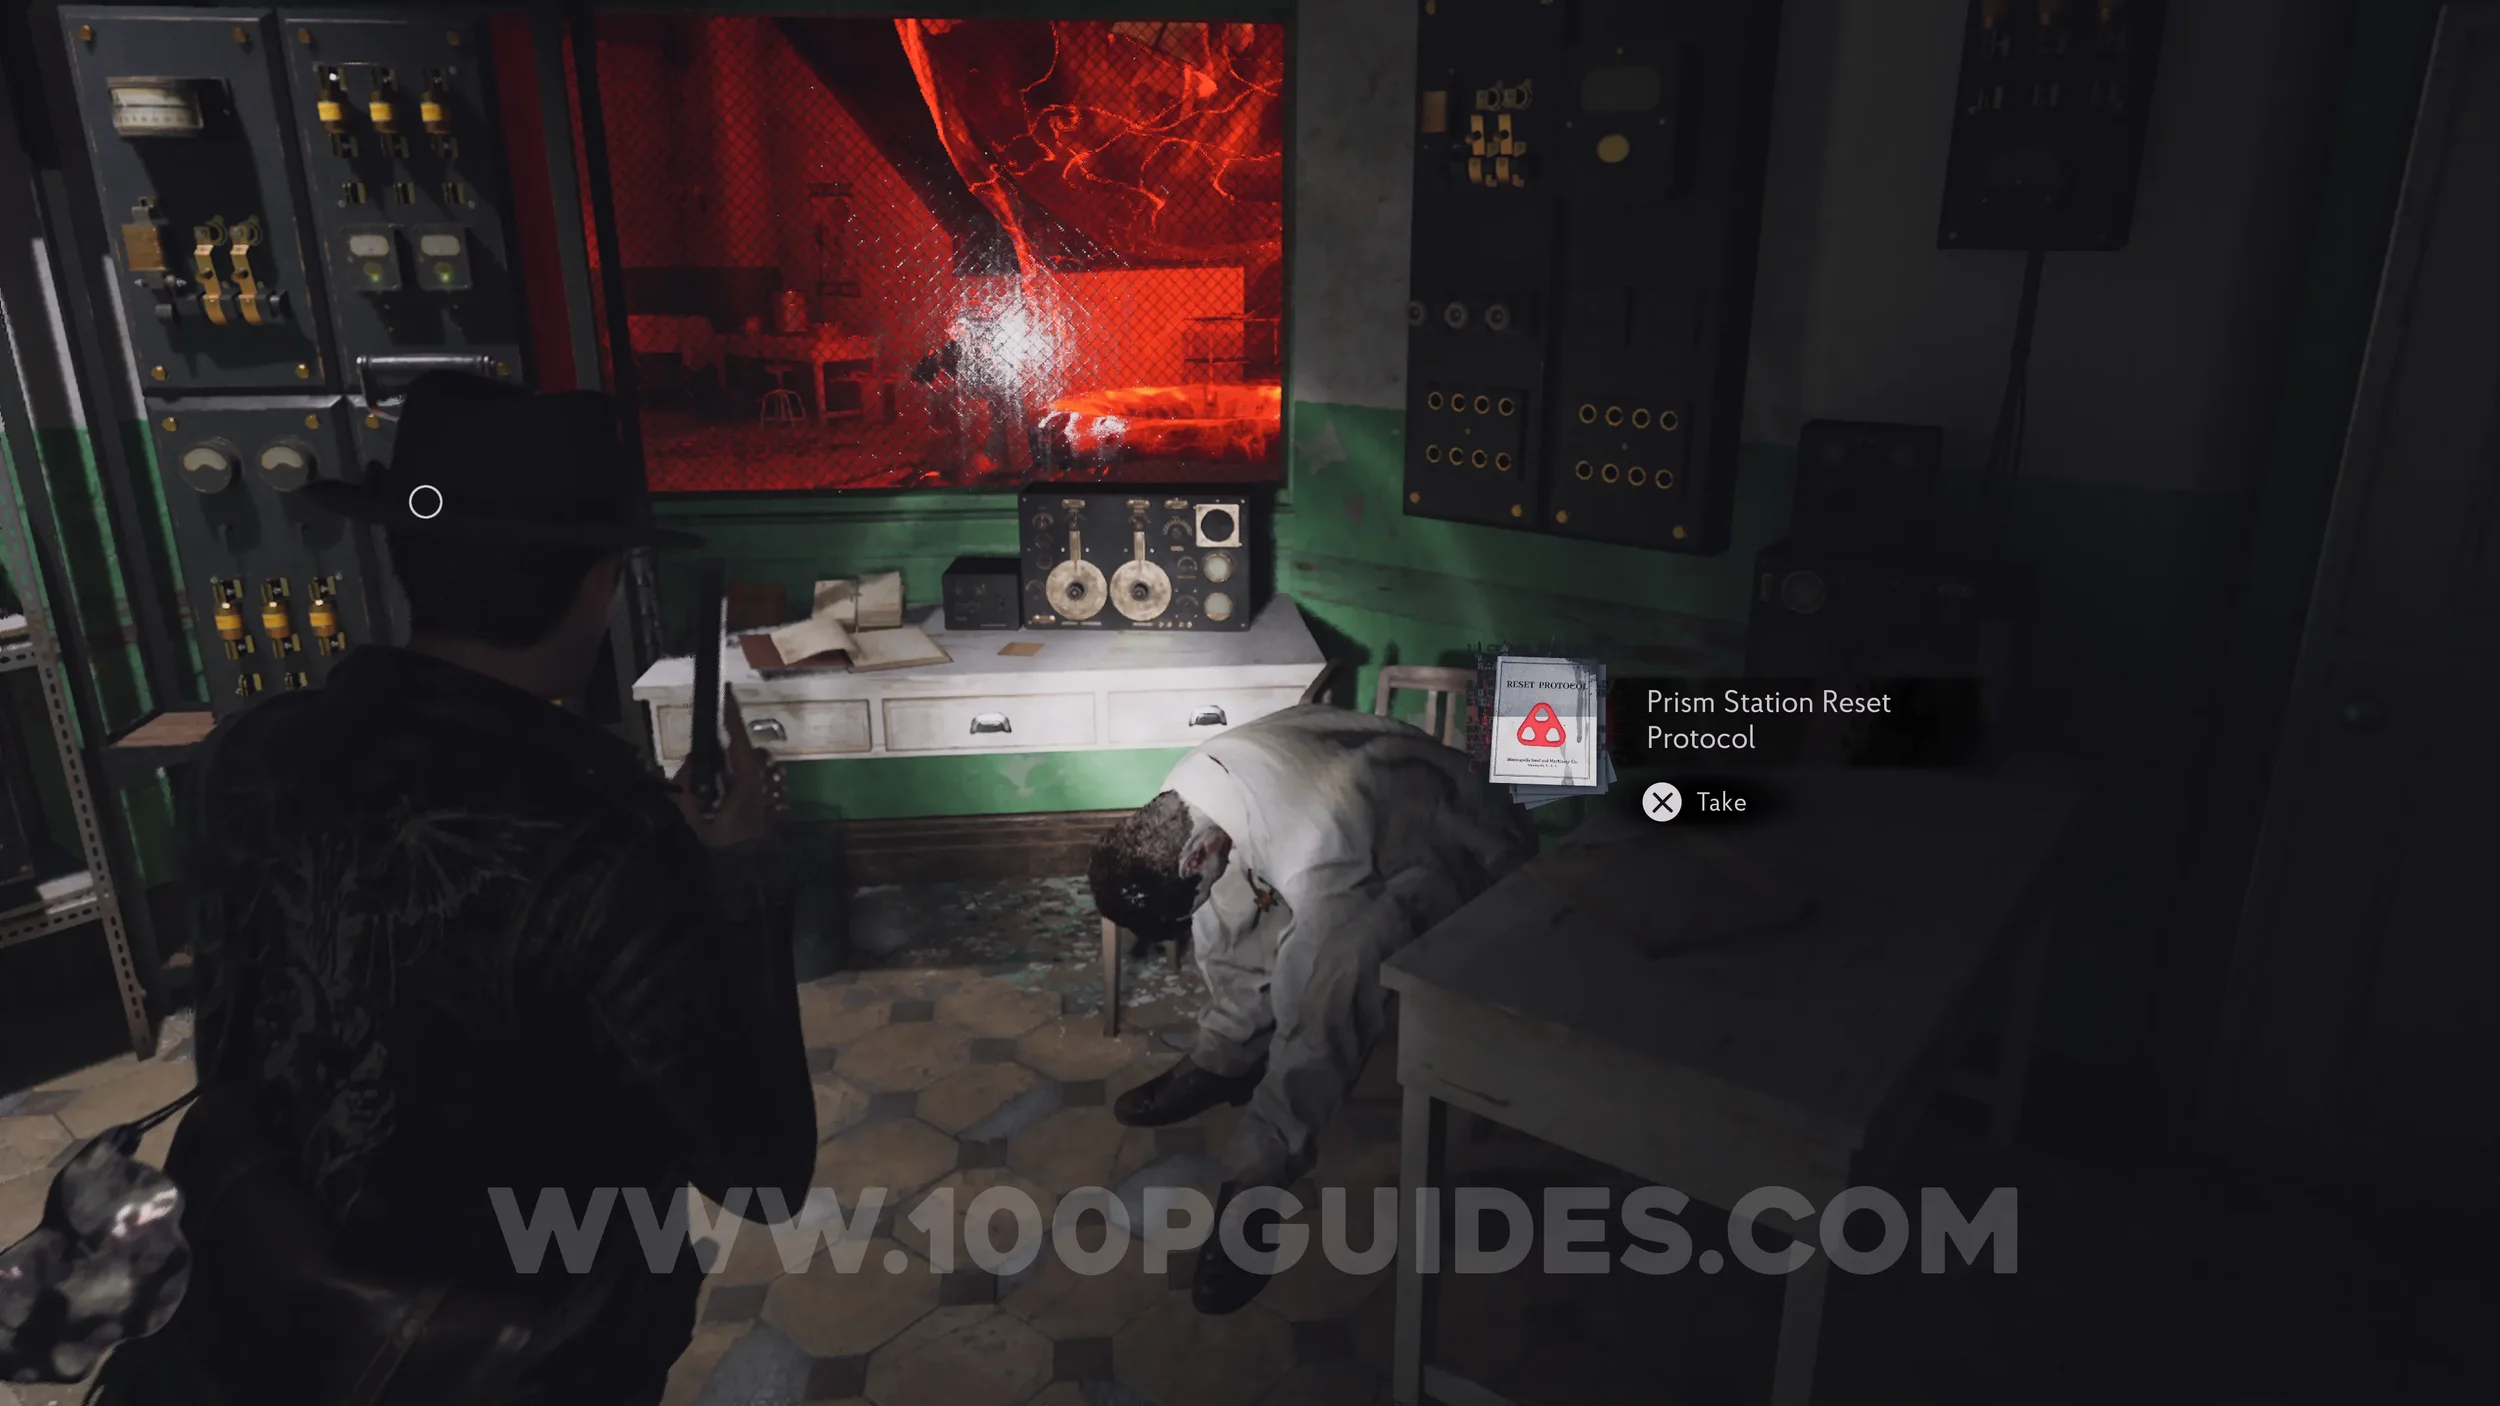
Evidence: Prism Station Reset Protocol. Head under the shutter to leave the Treatment Room and reach the room where Faye's body is. Here, enter the small room in the southwestern corner to find the evidence inside.
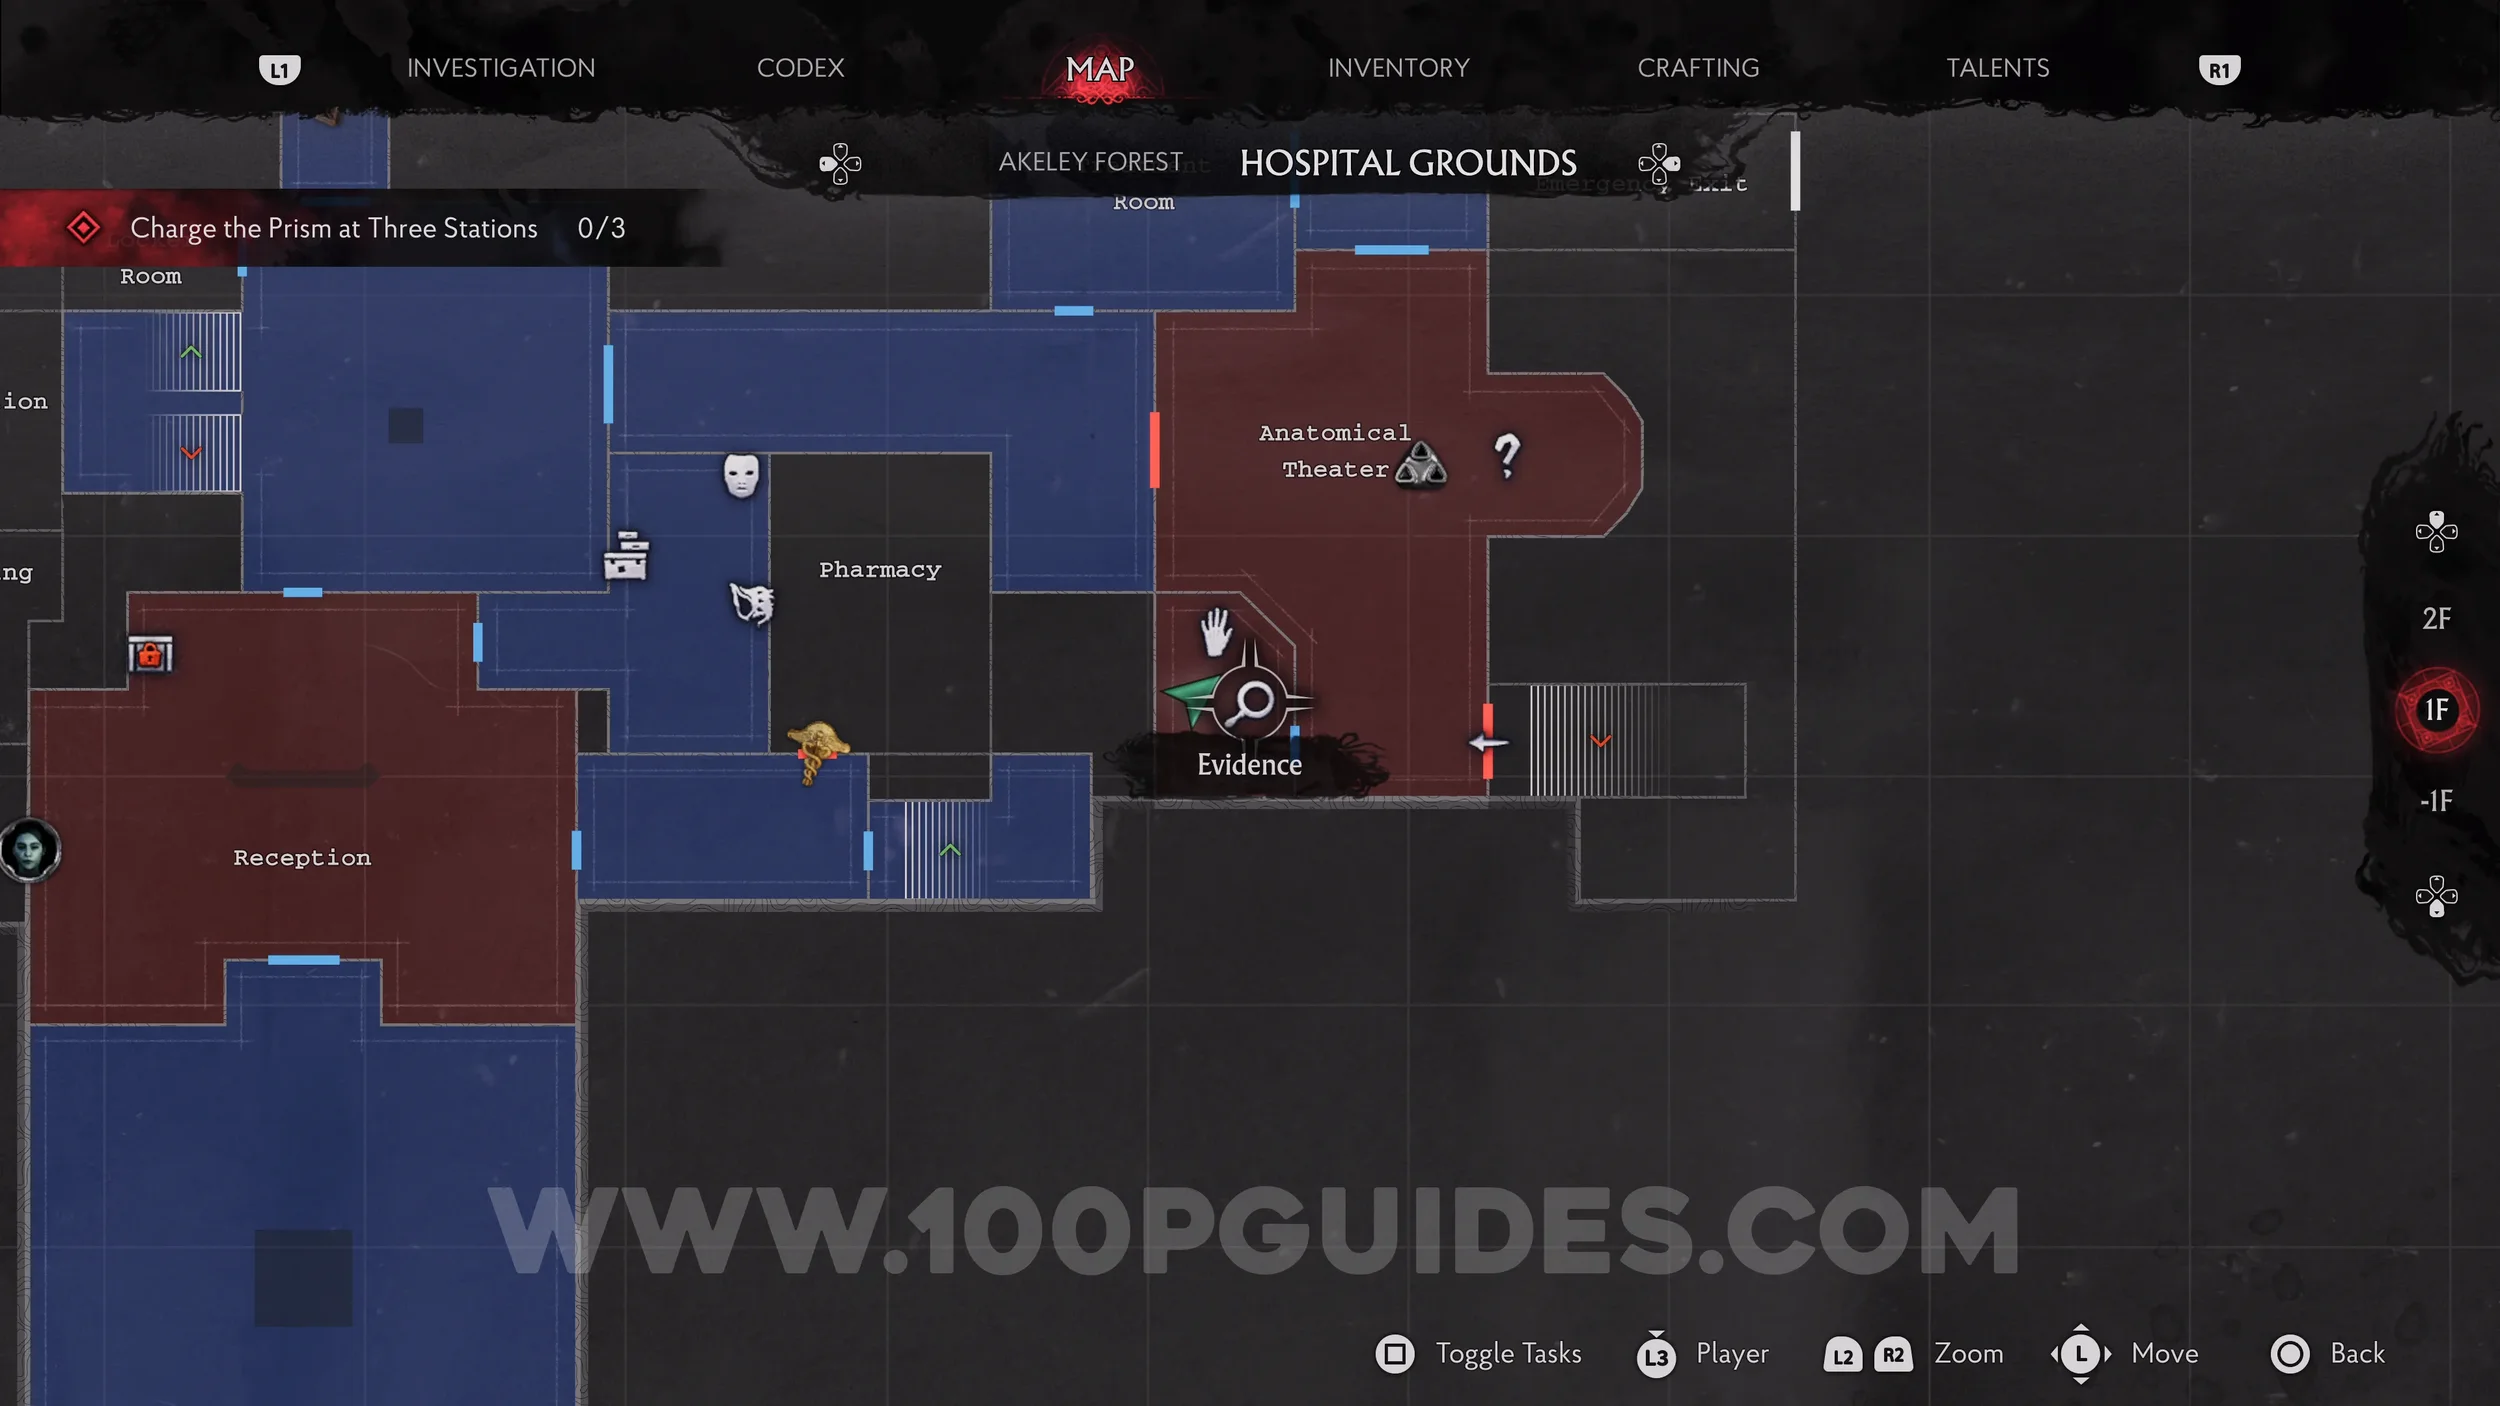
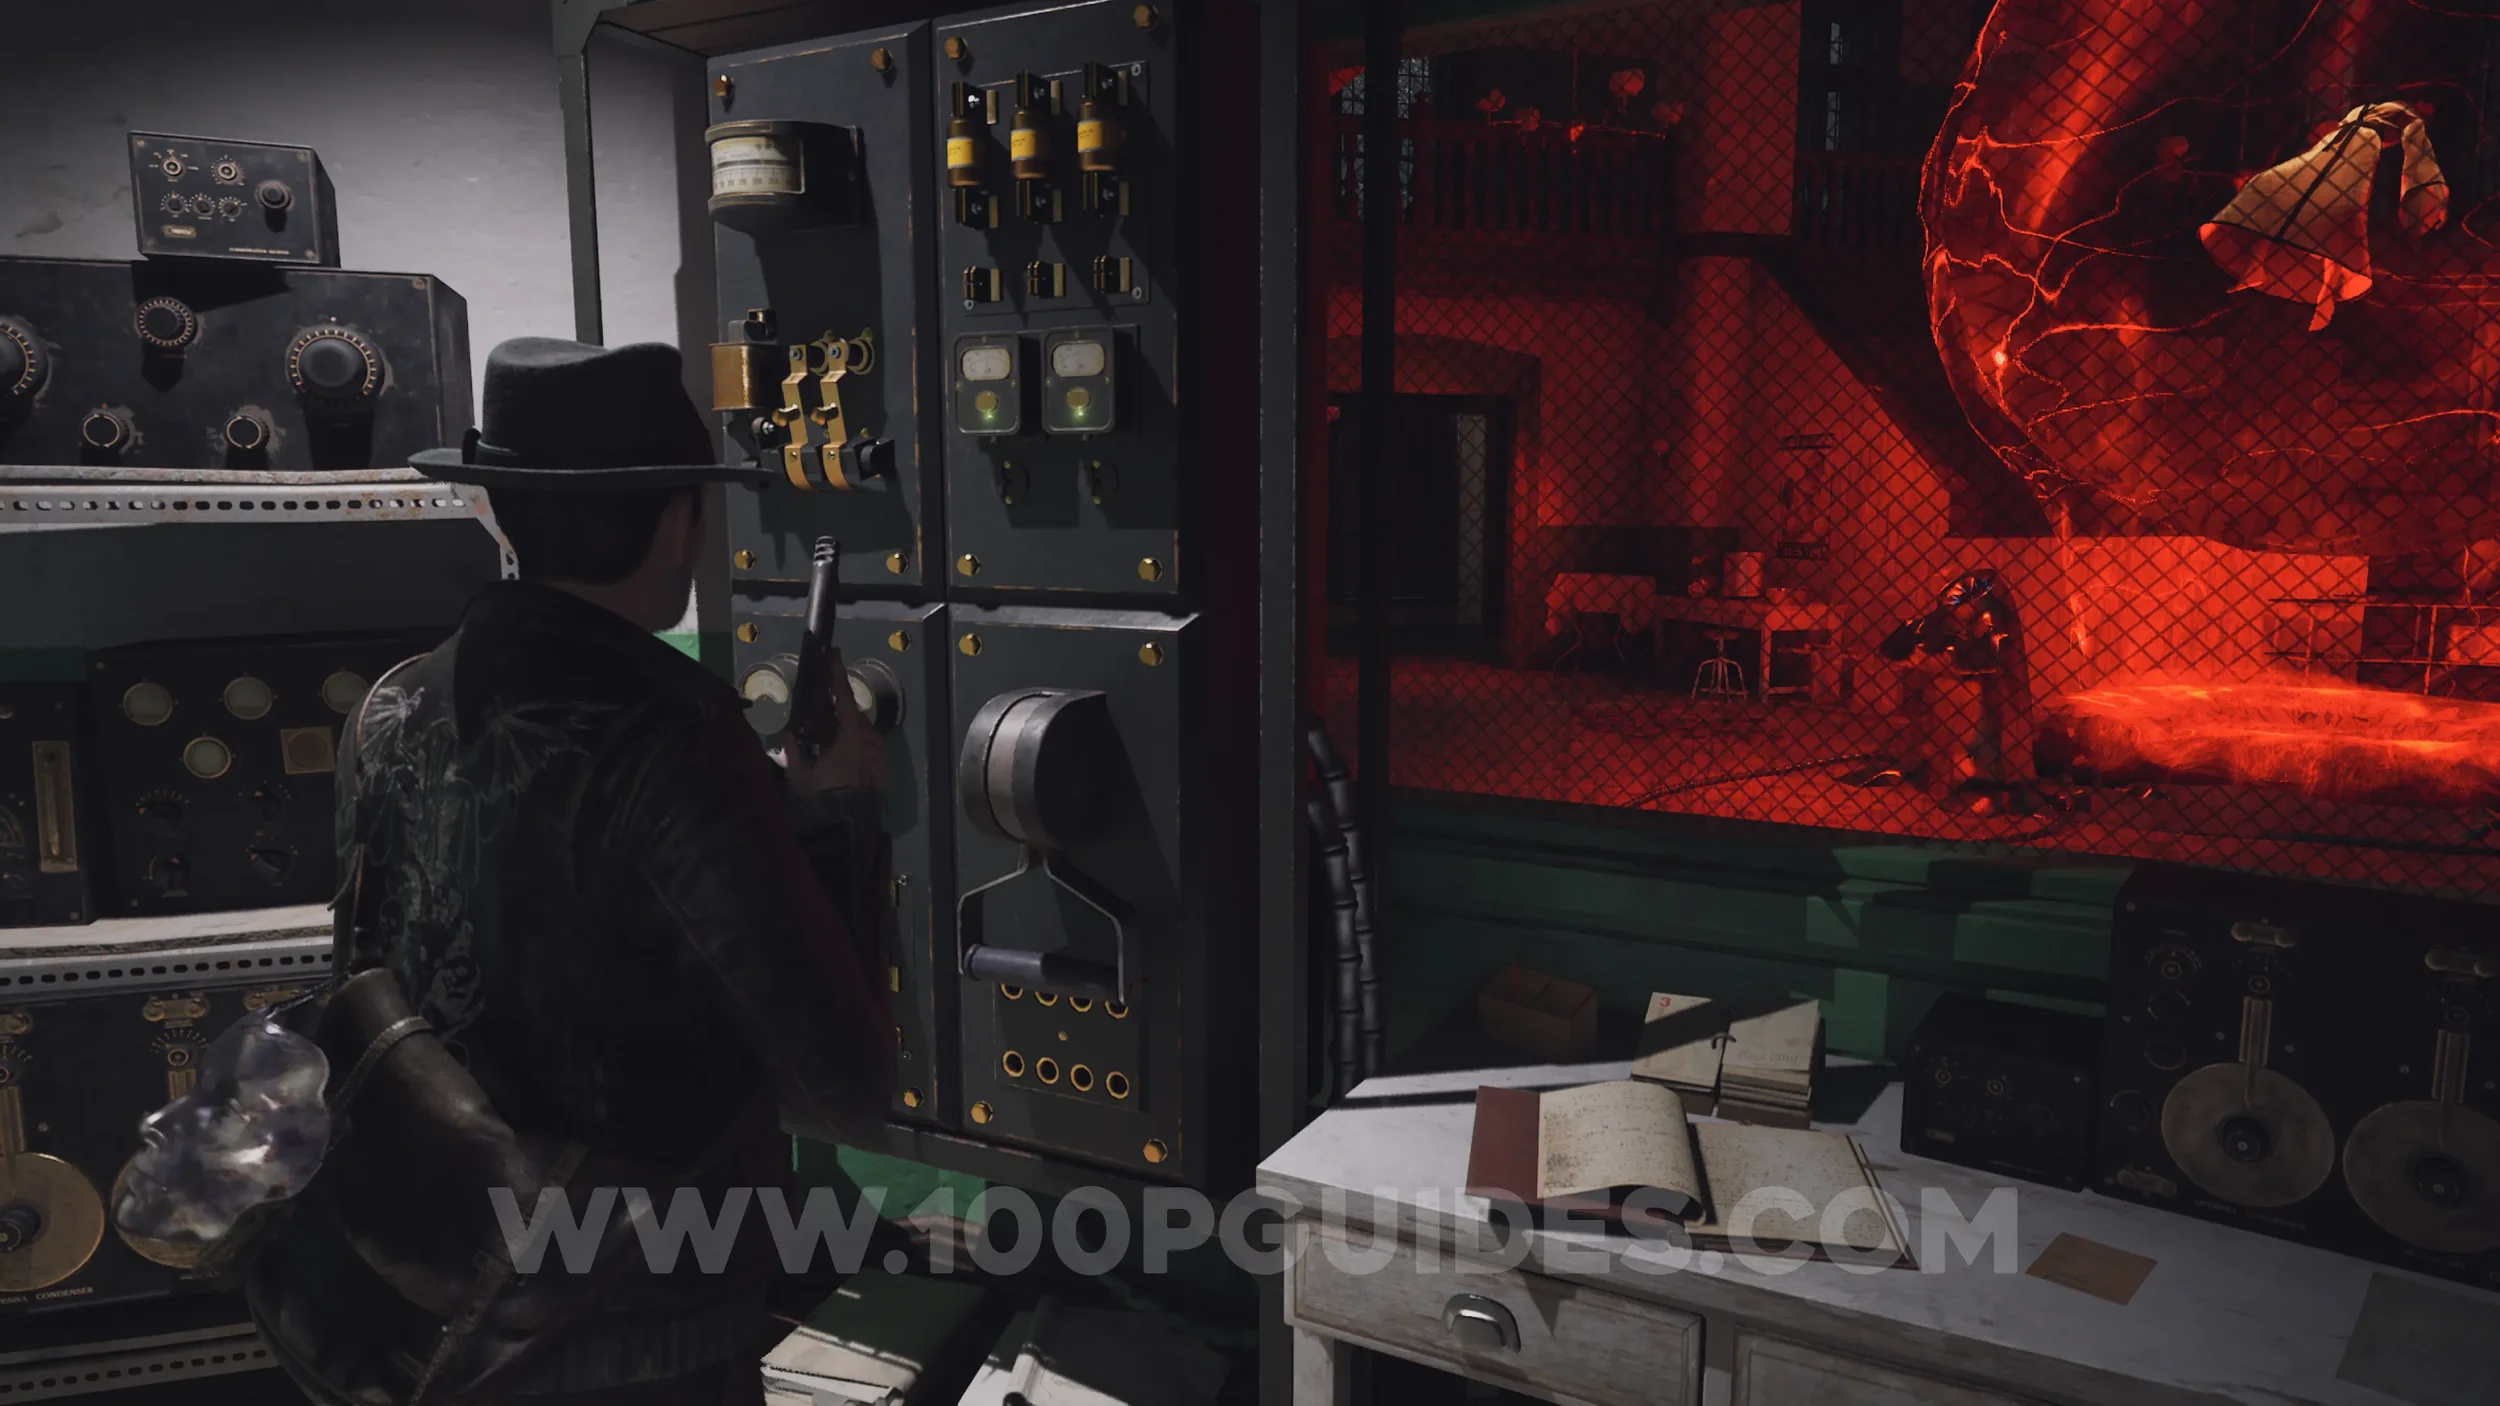
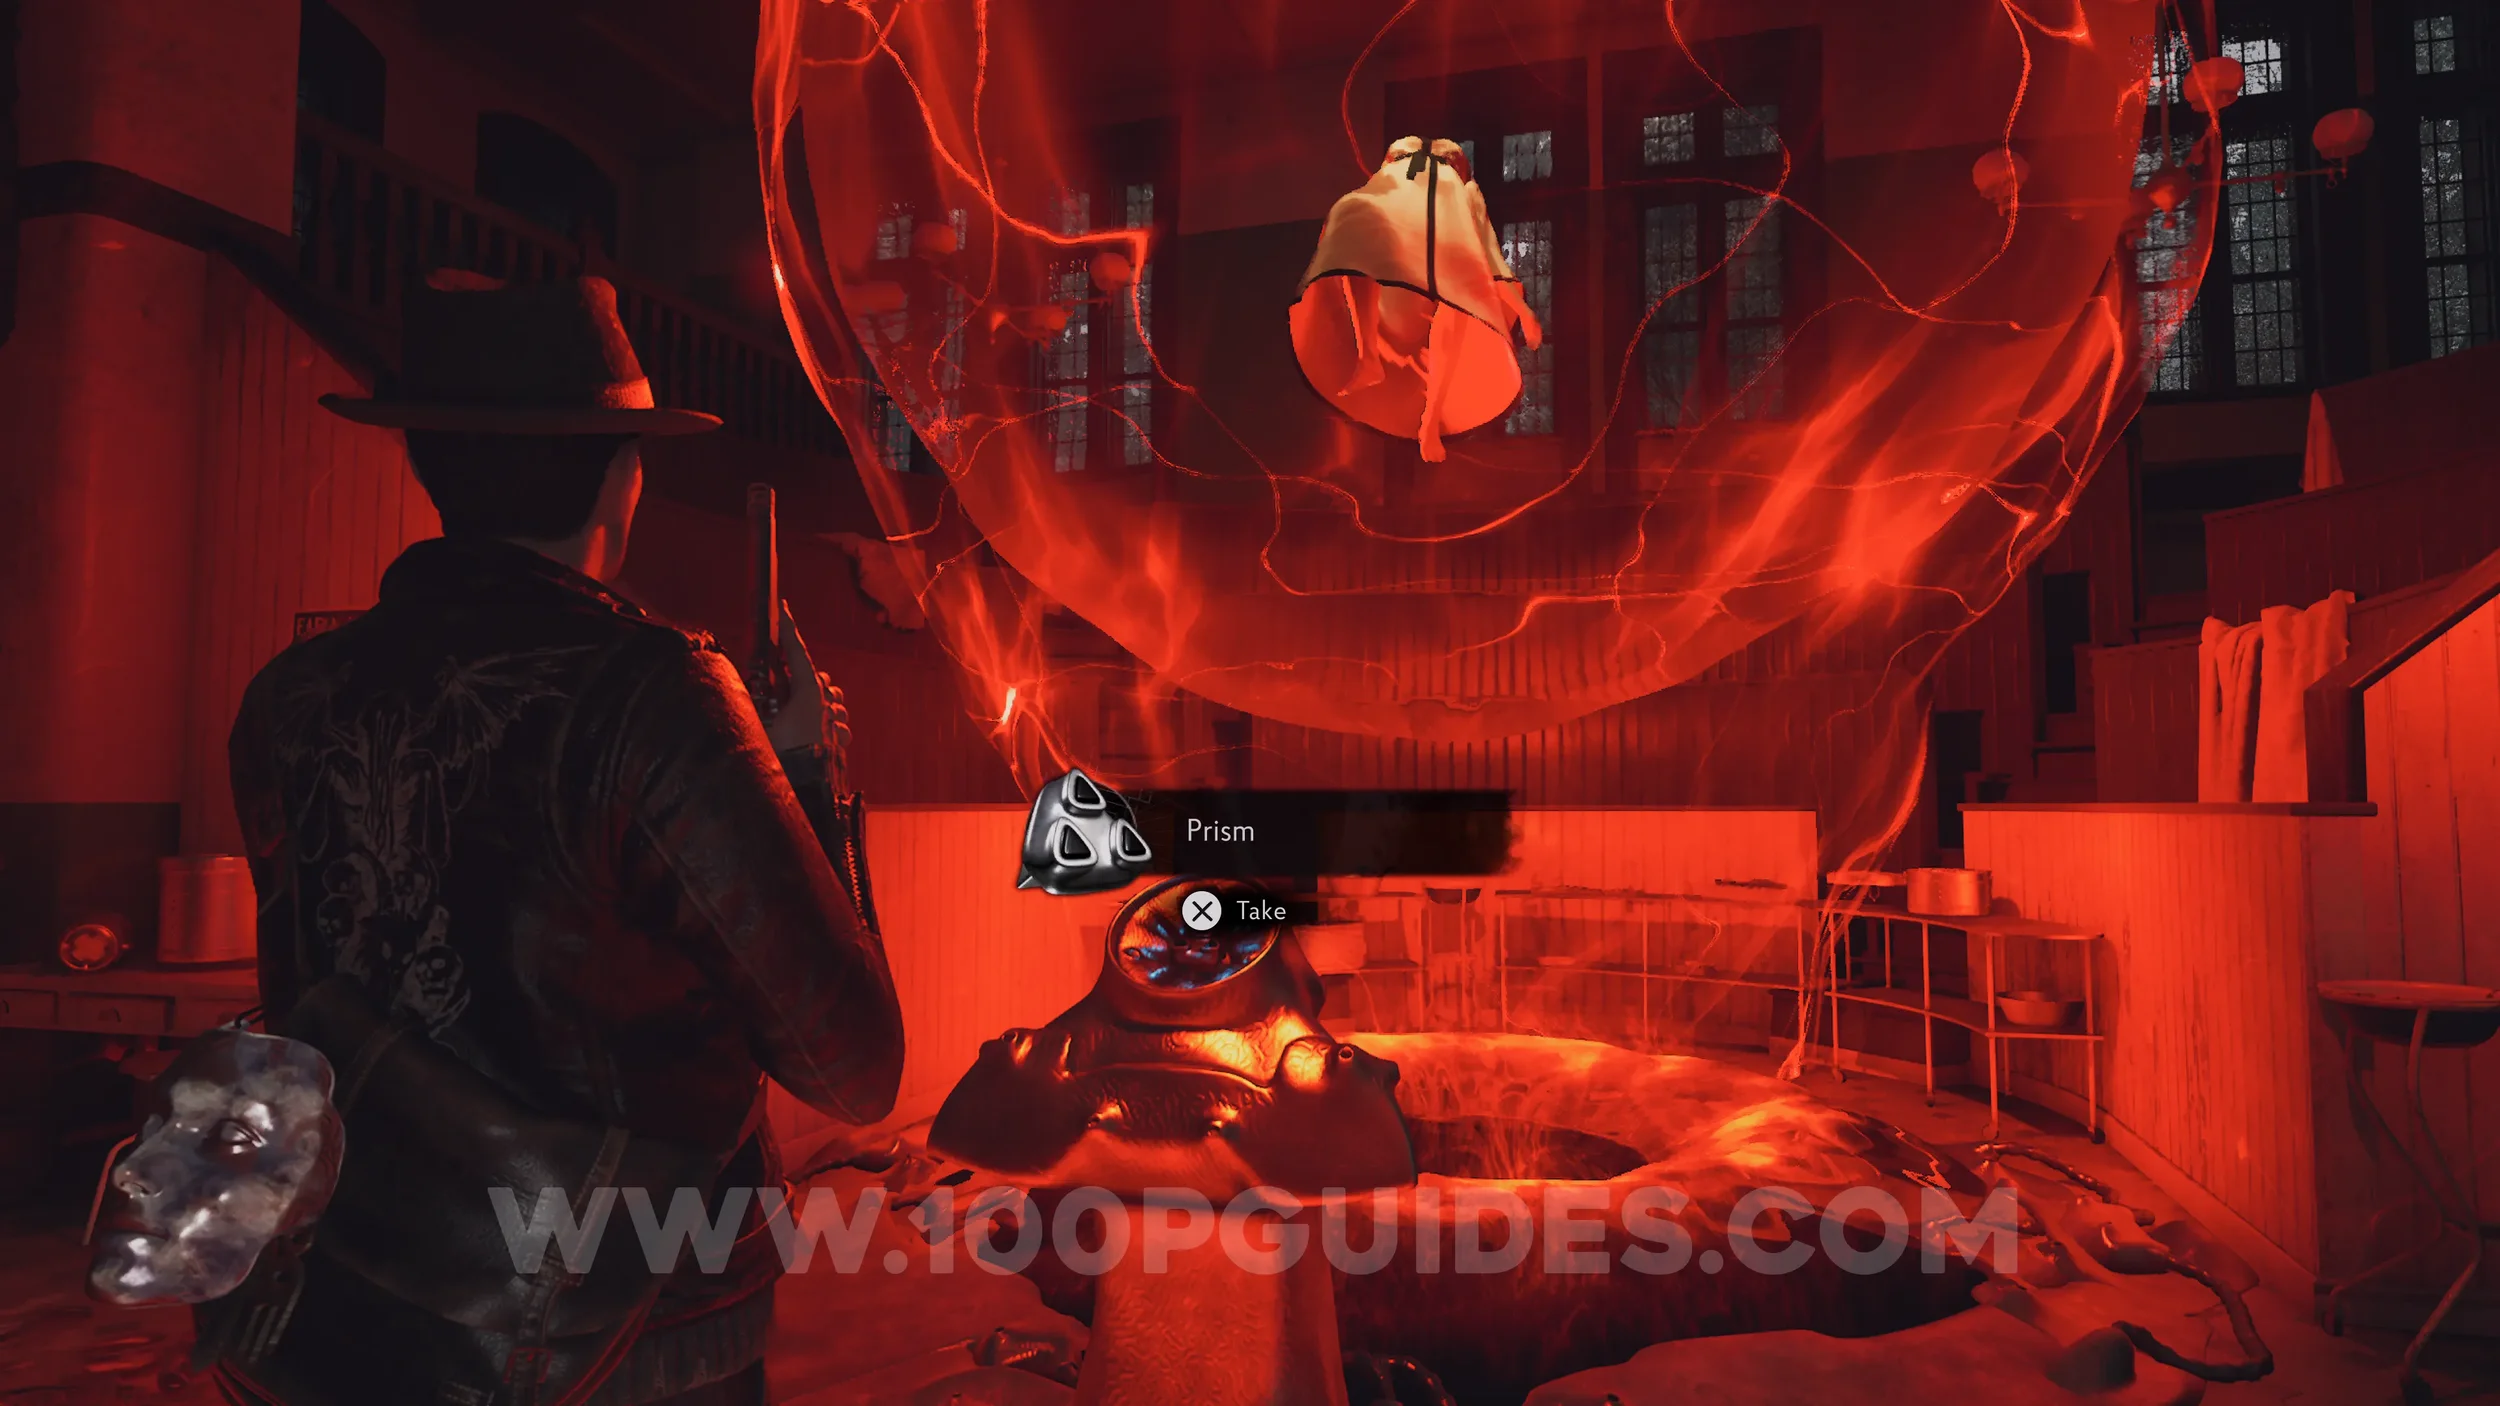
Key Item: Prism. Activate the switch in the small room where the previous evidence was, then grab the prism from the stand in front of Faye's body.
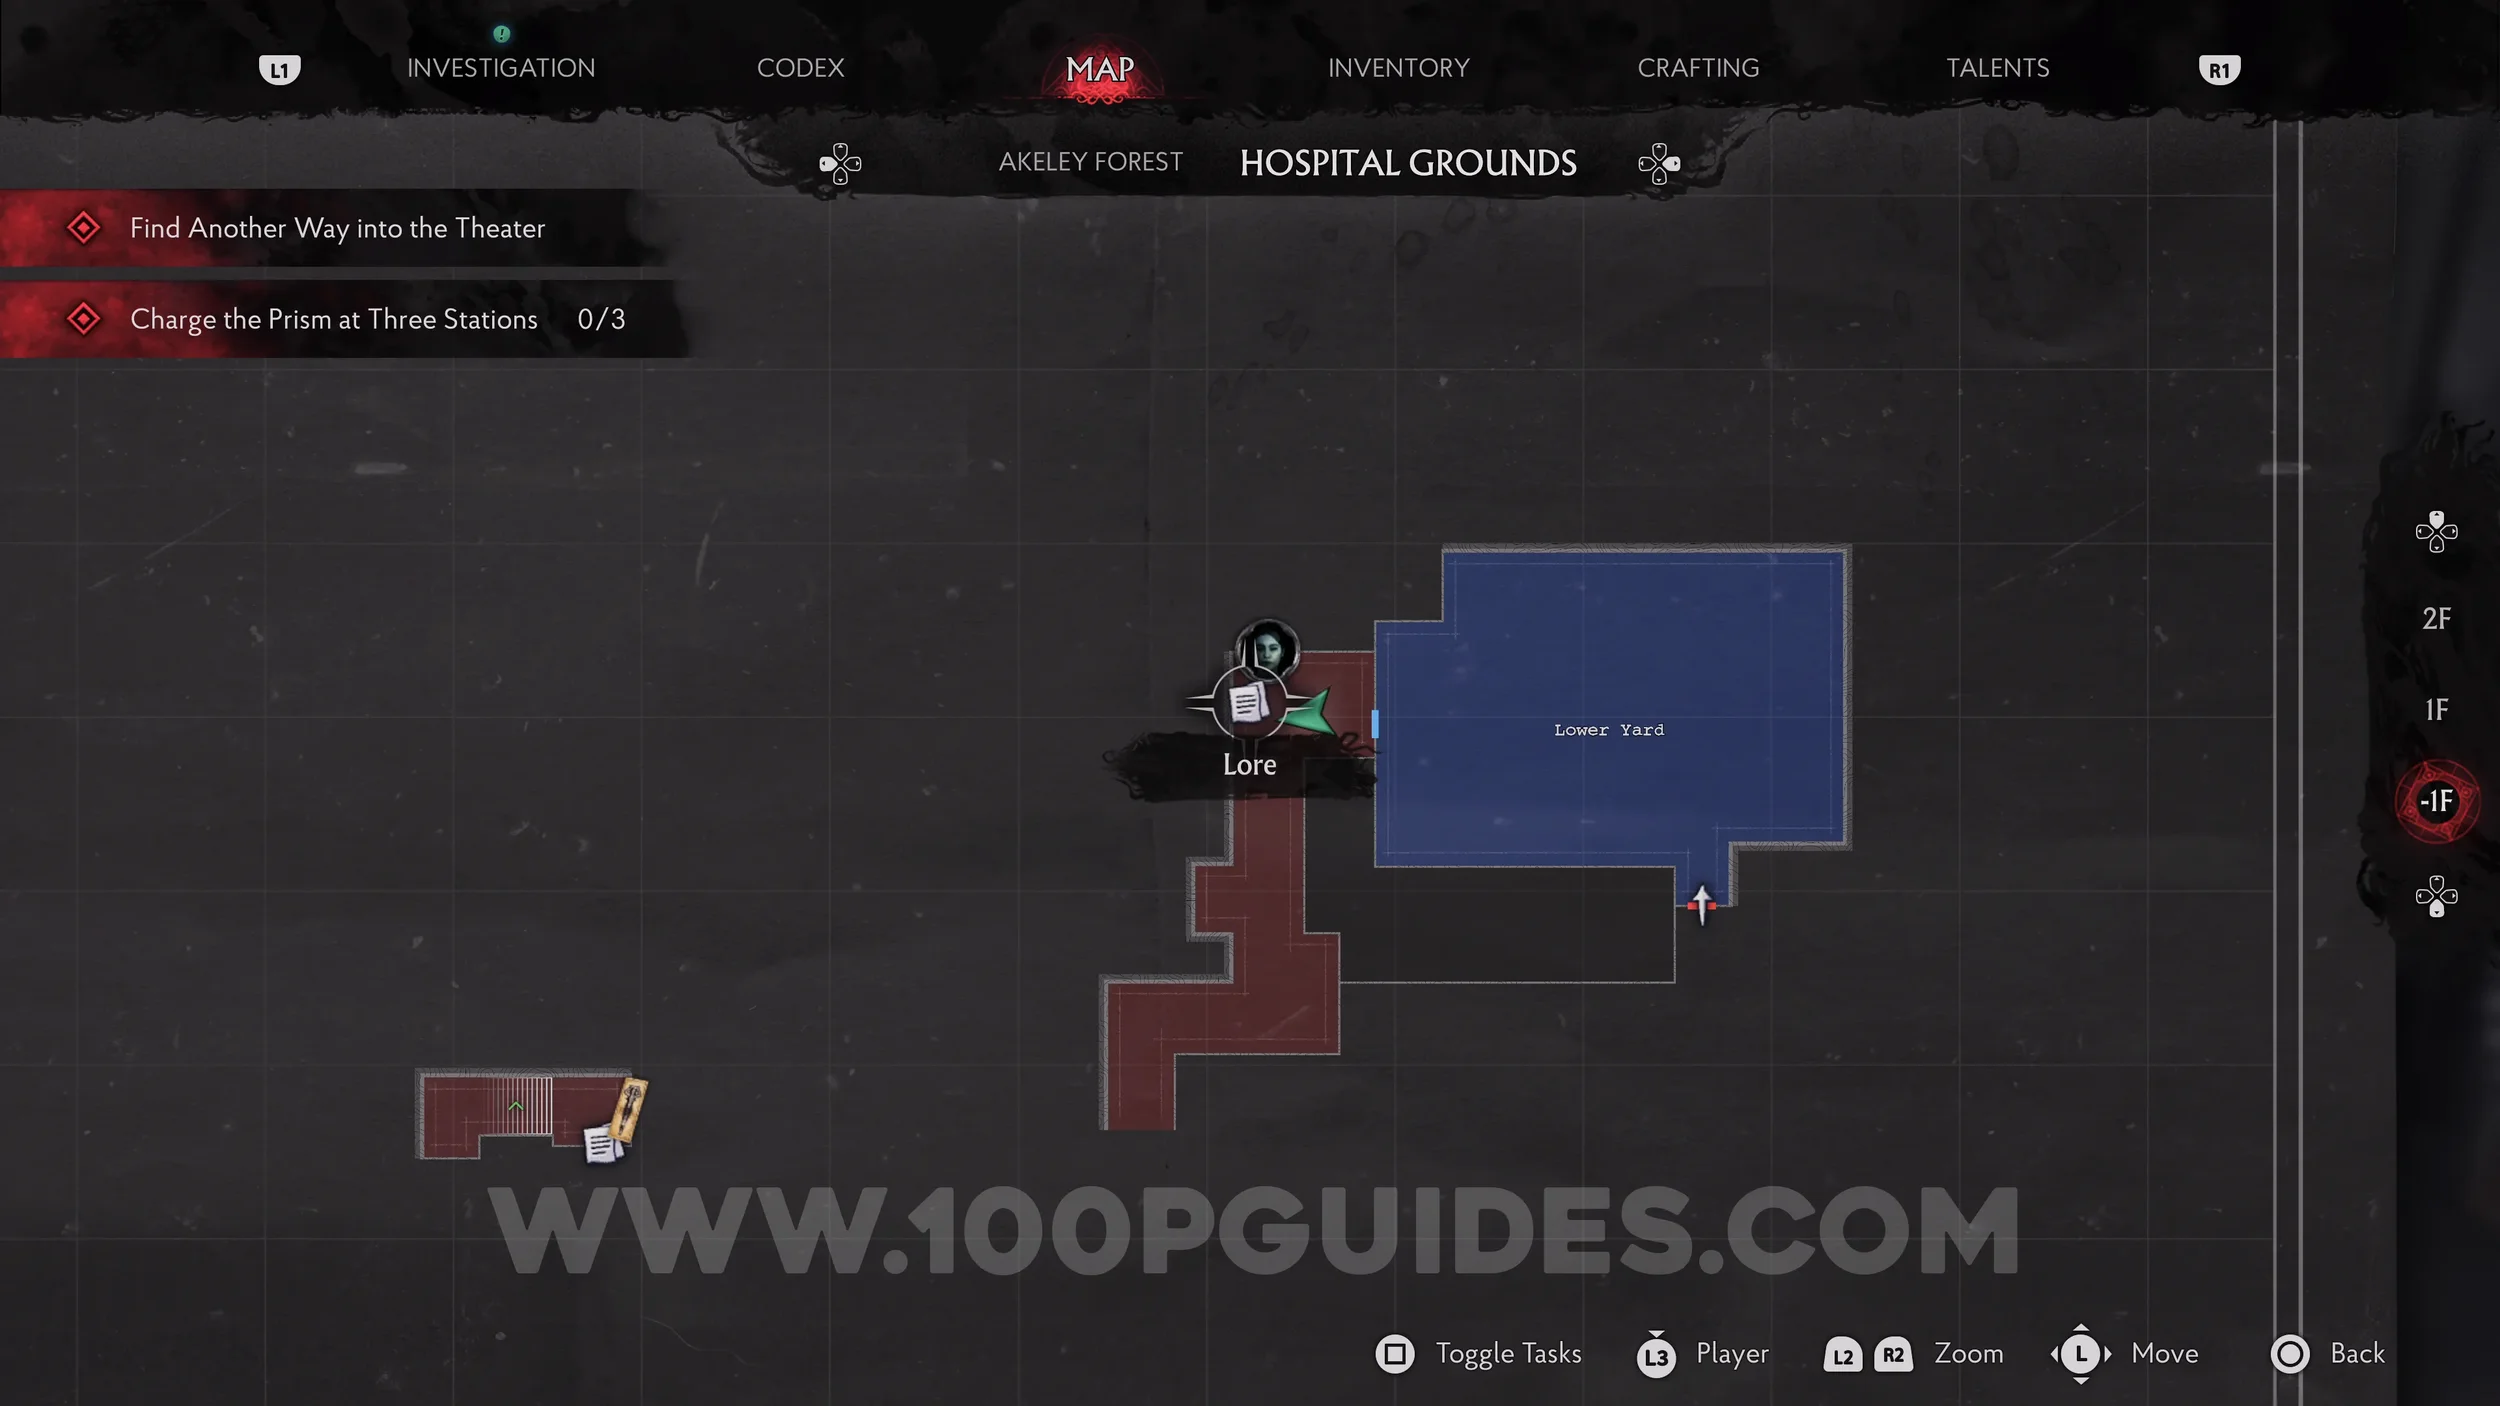
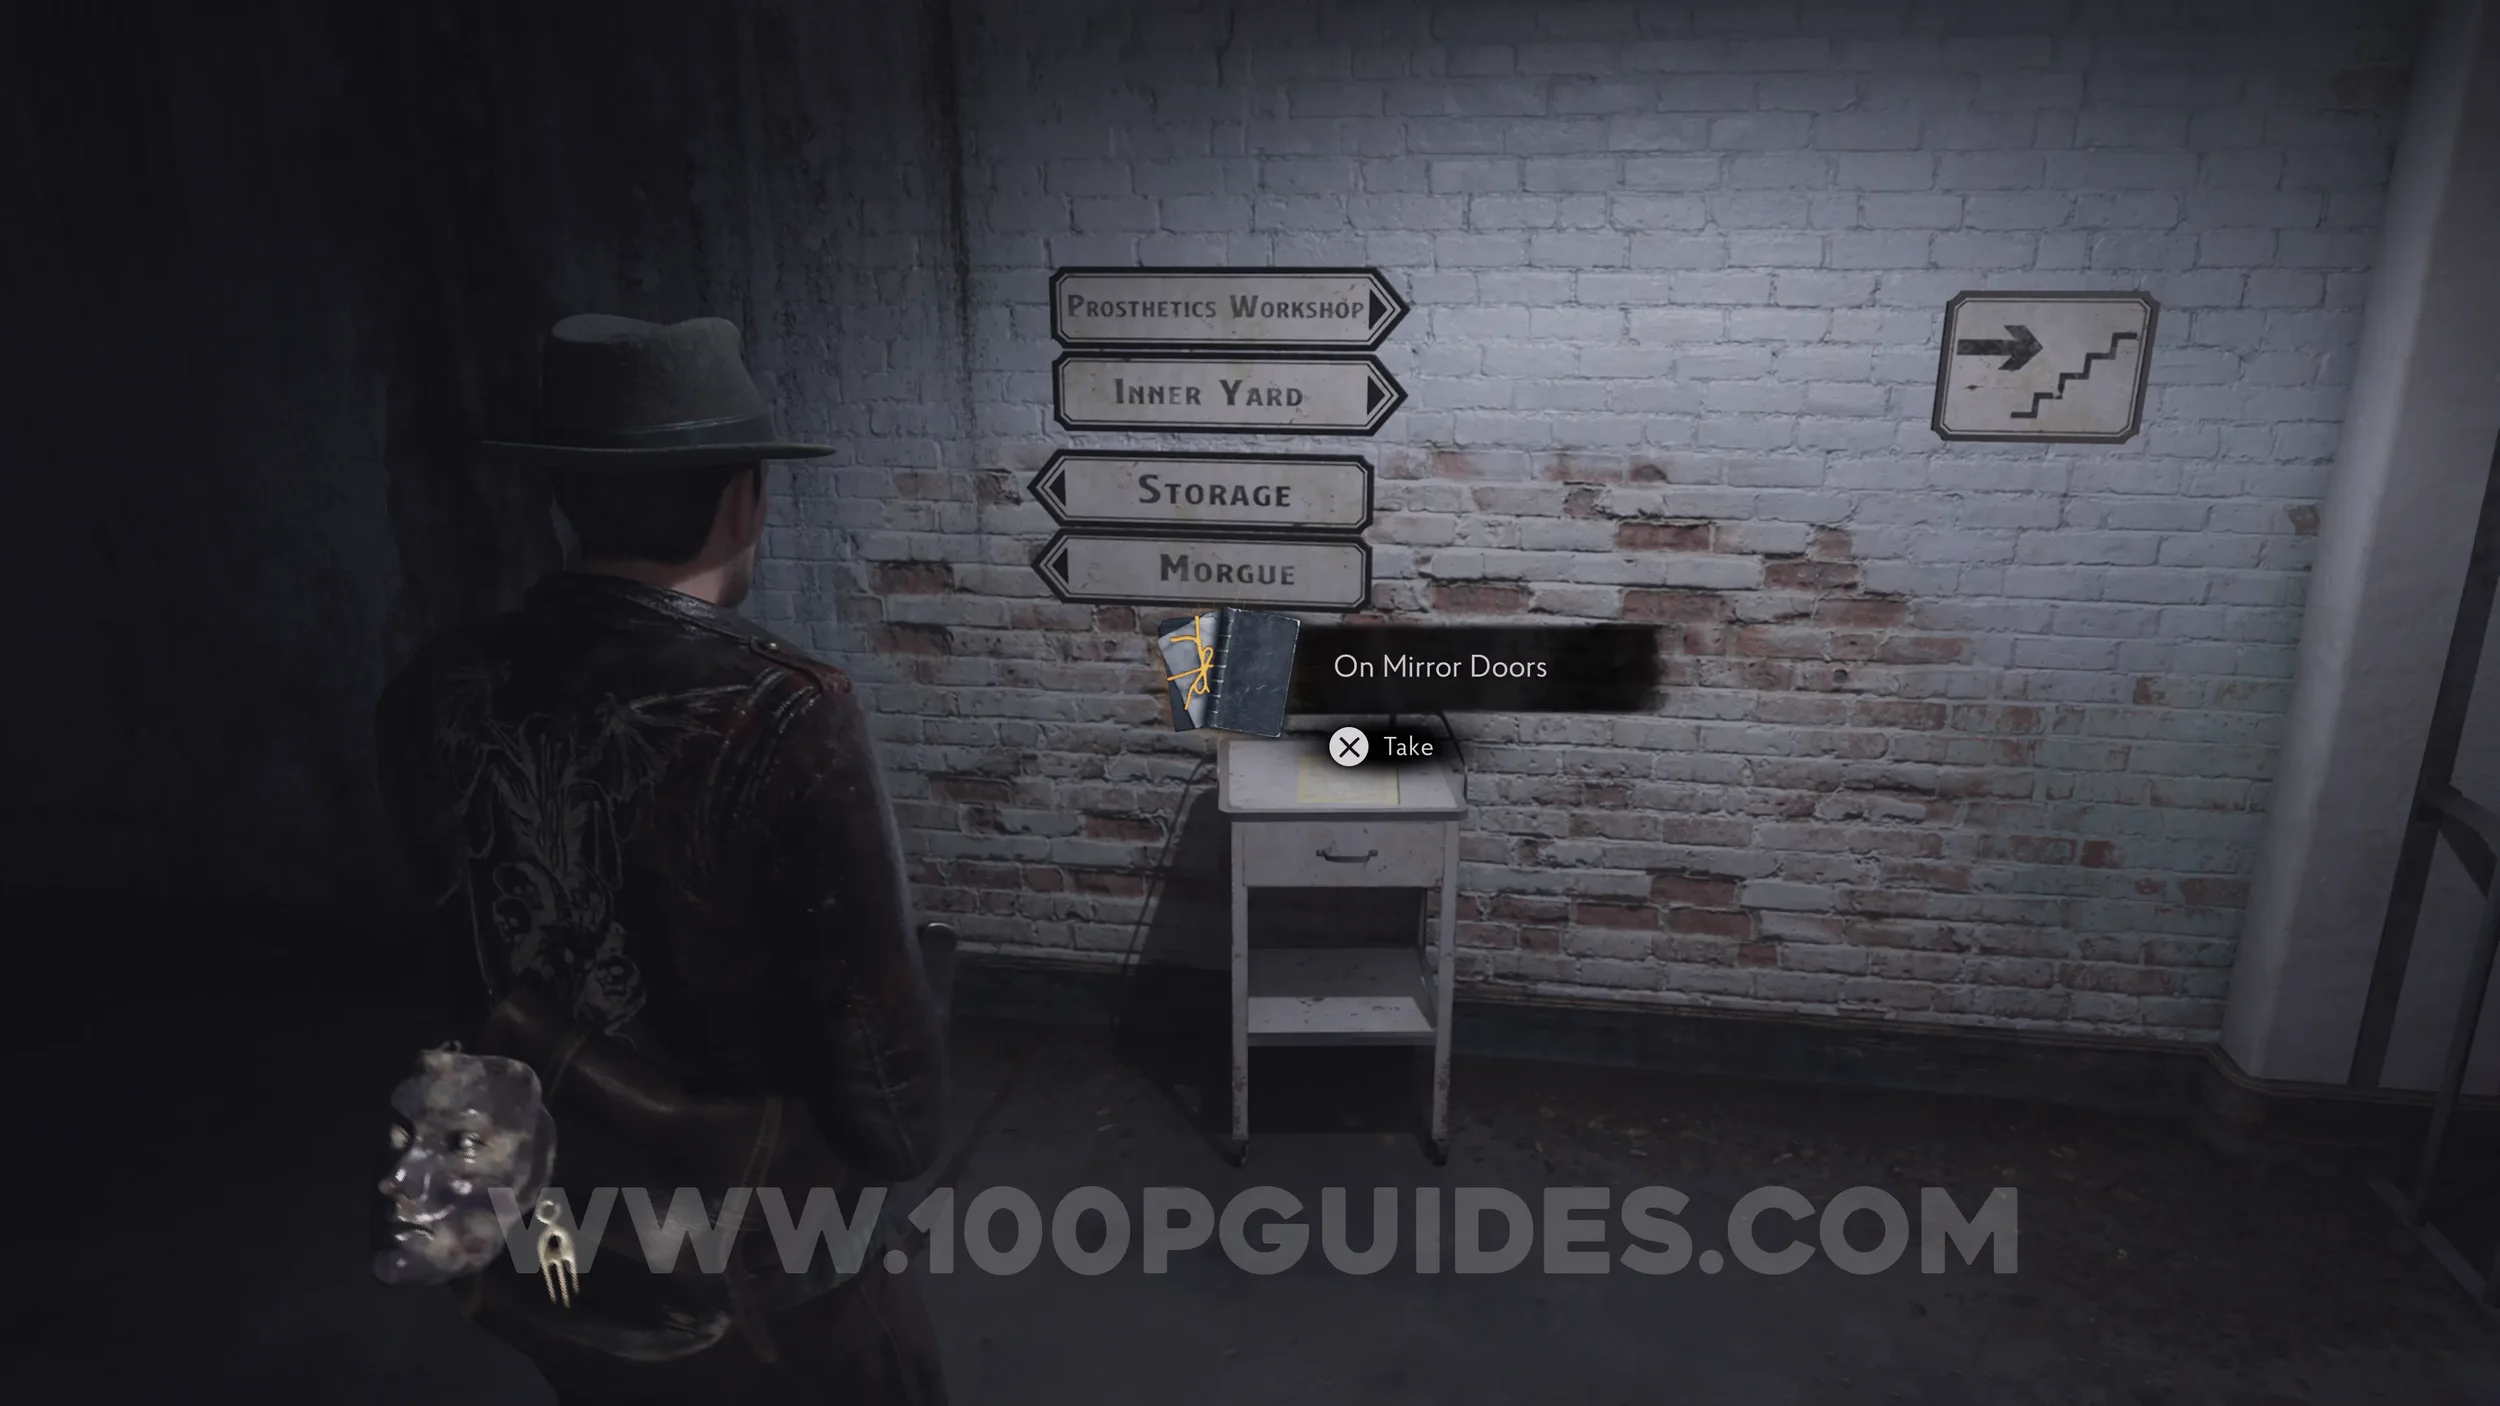
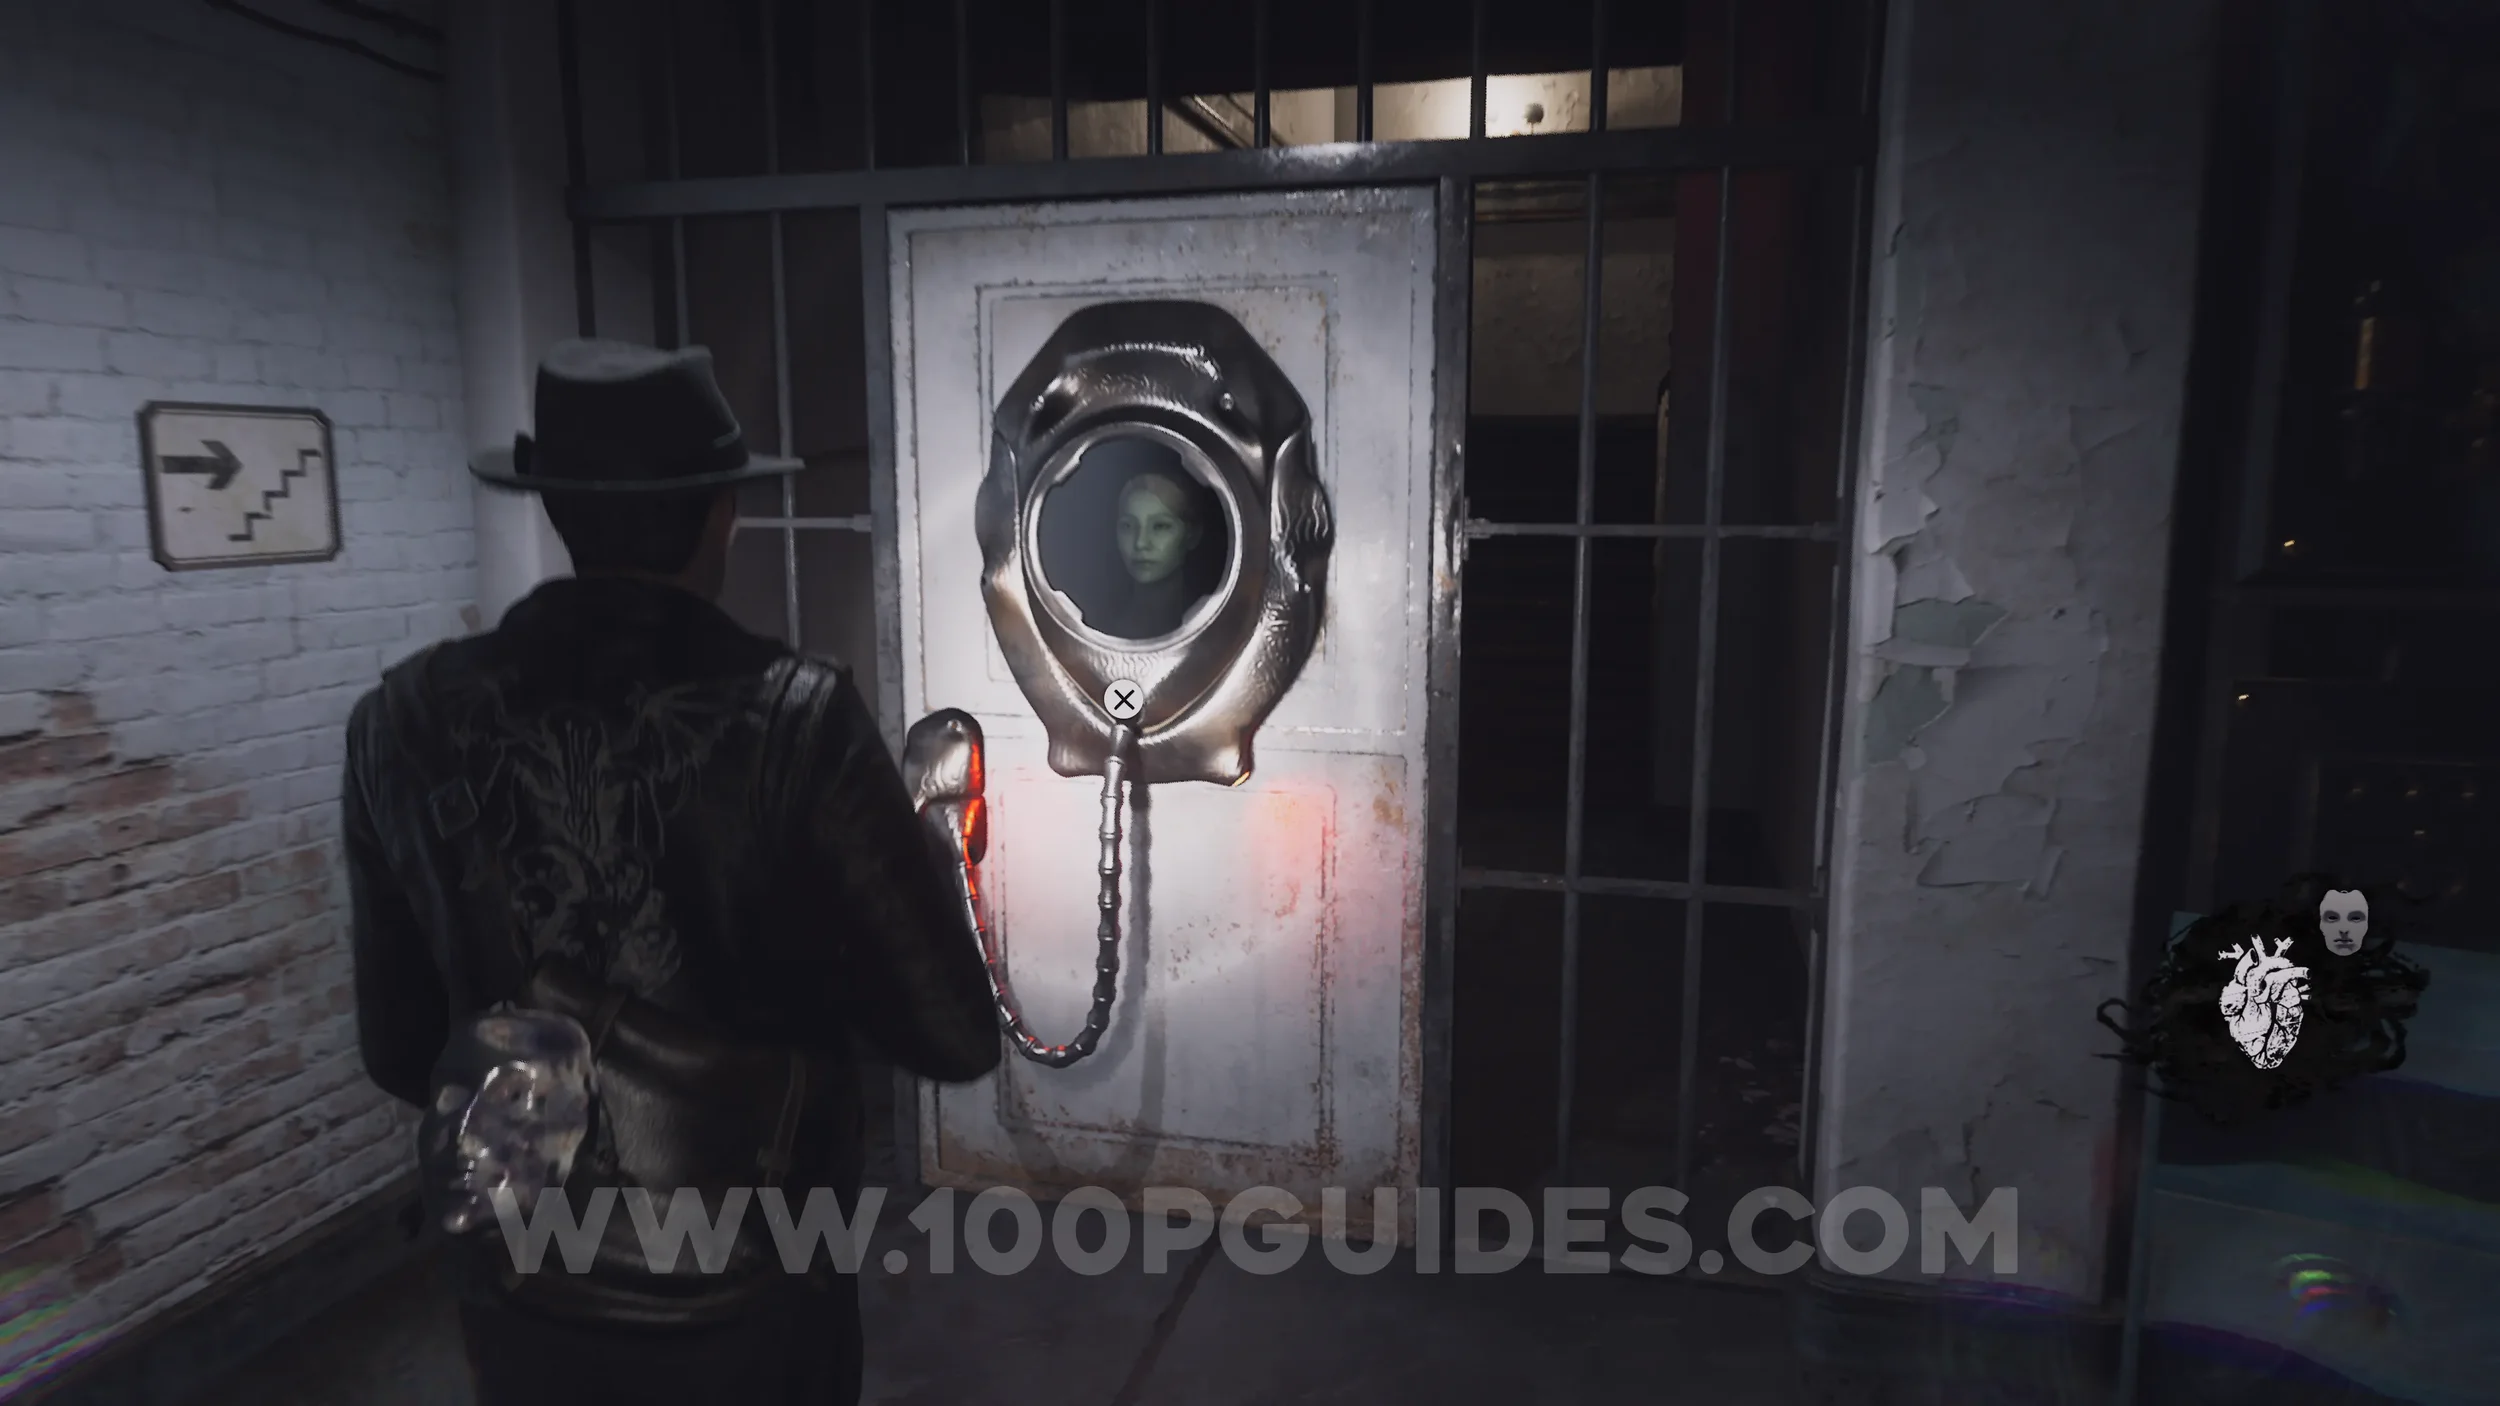
Lore Codex: On Mirror Doors. After going through the Emergency Exit to the northwest of Faye's body, follow the path and a short scene will play as an enemy pushes you down to the Lower Yard. From here, enter the door to find the codex on the table in front of you.
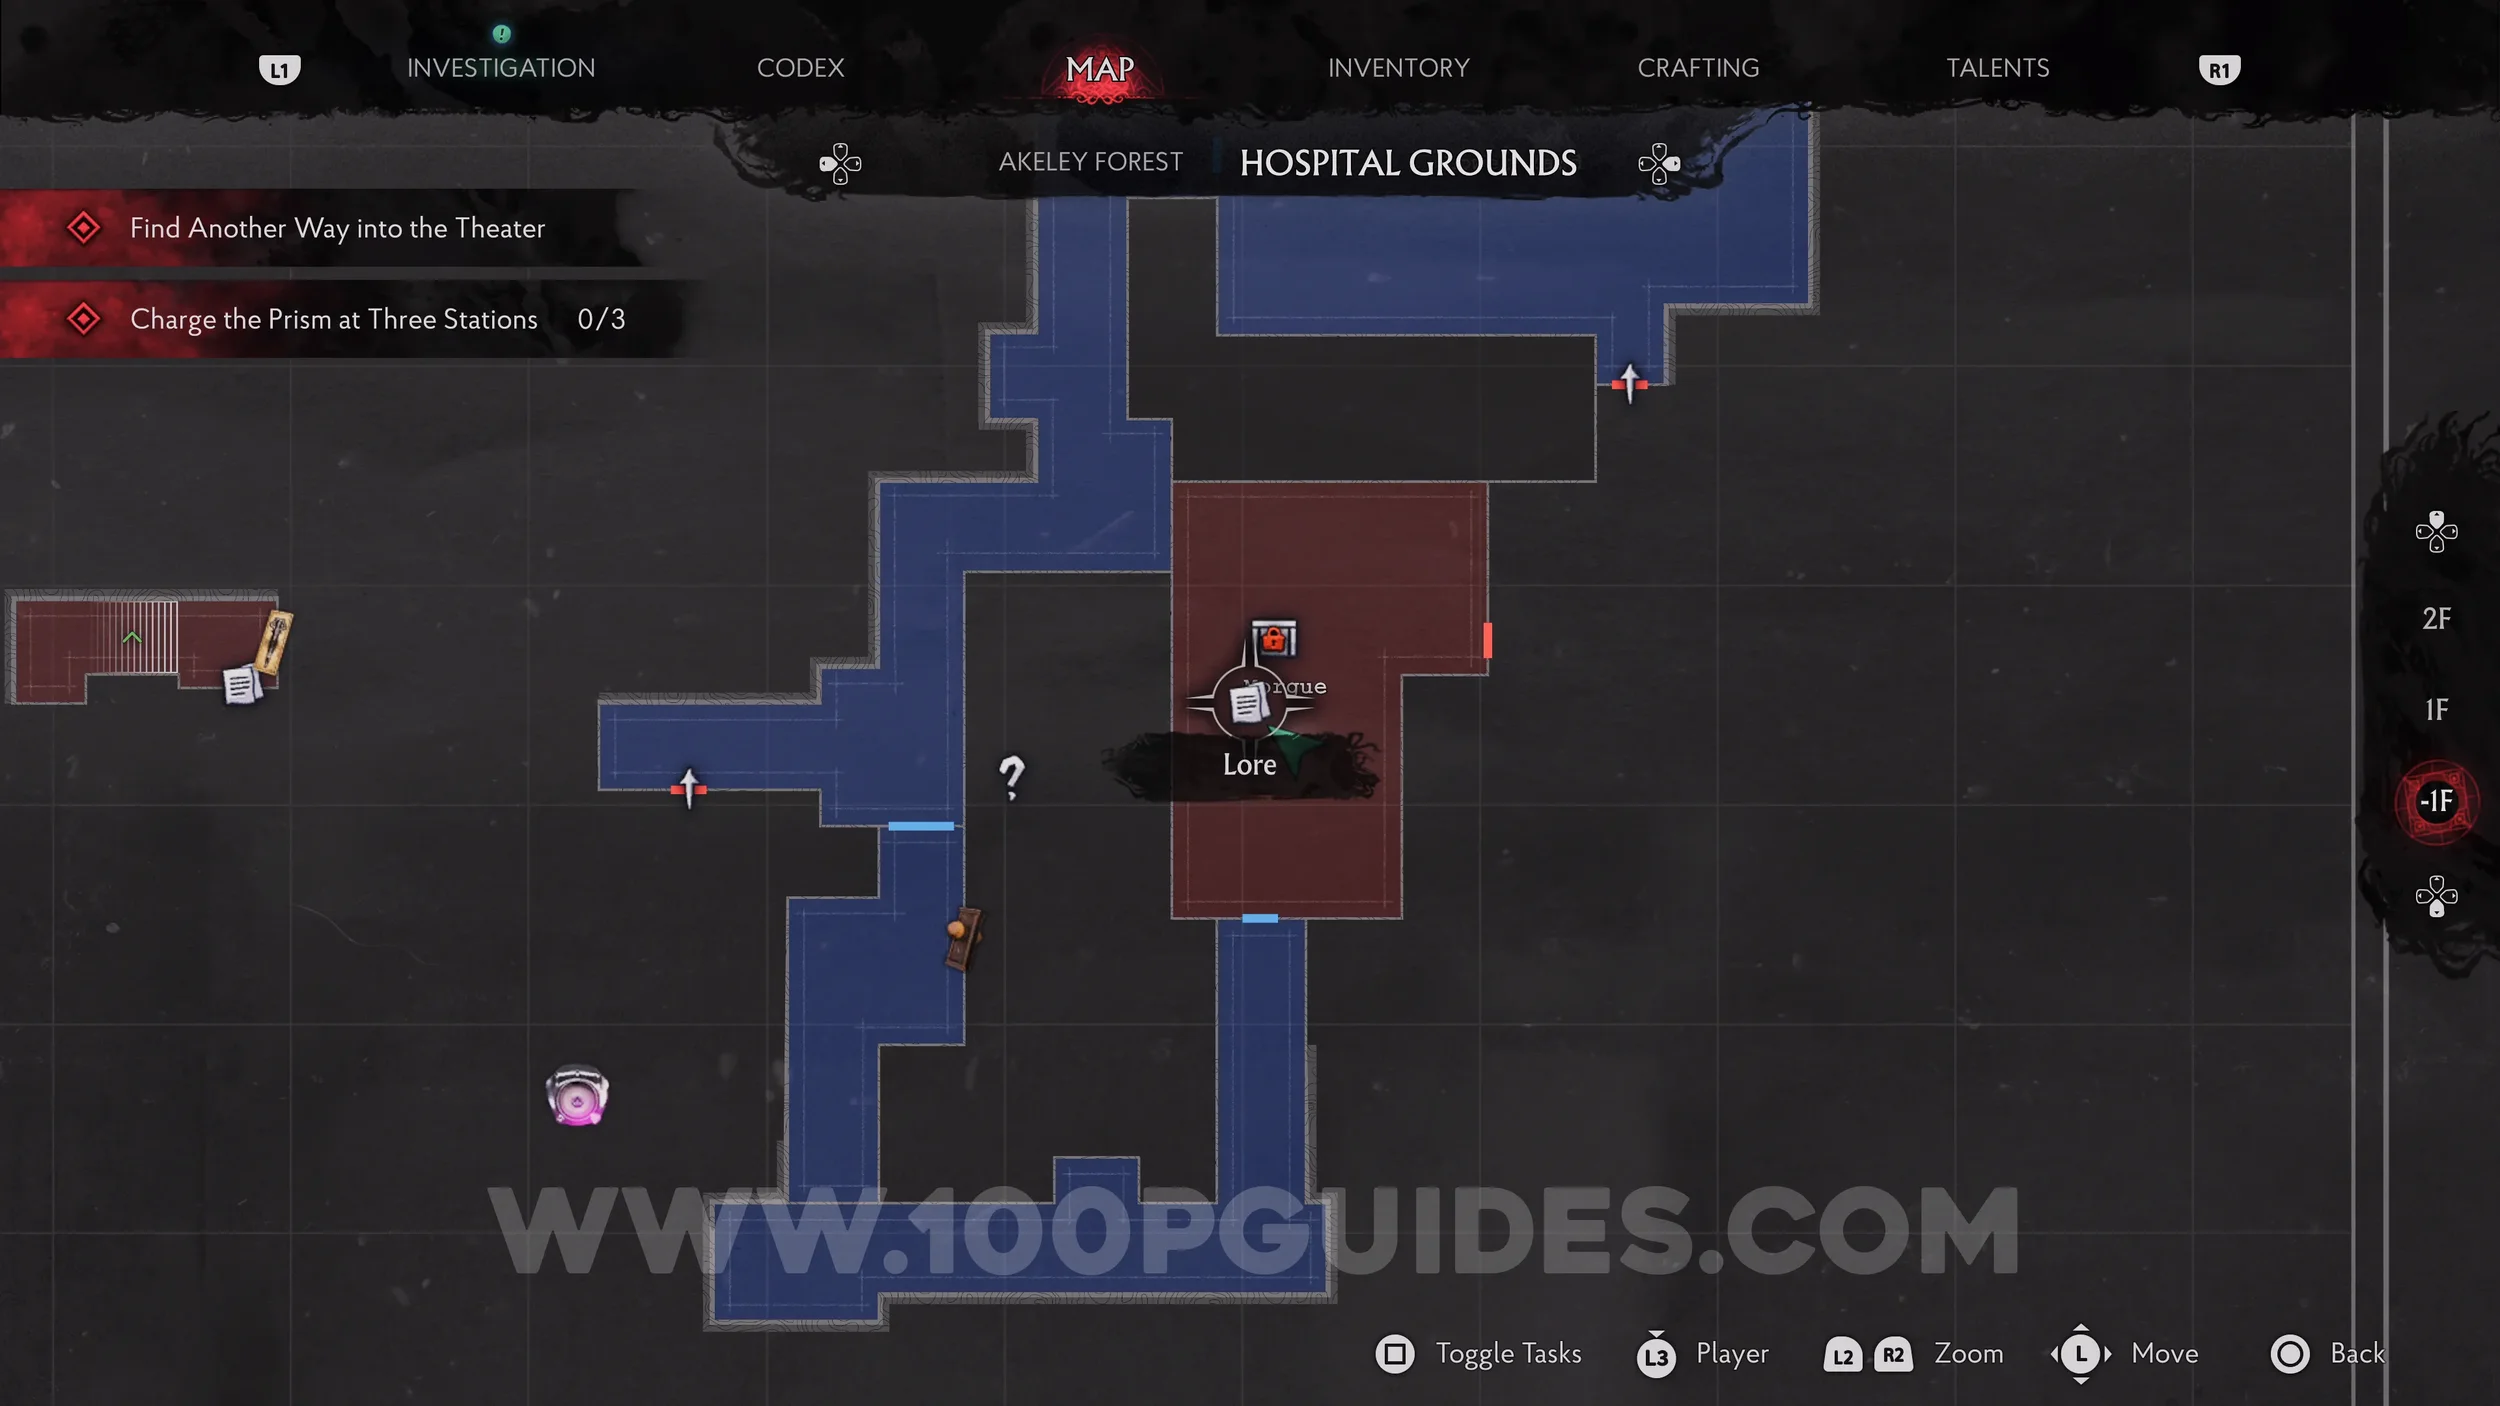
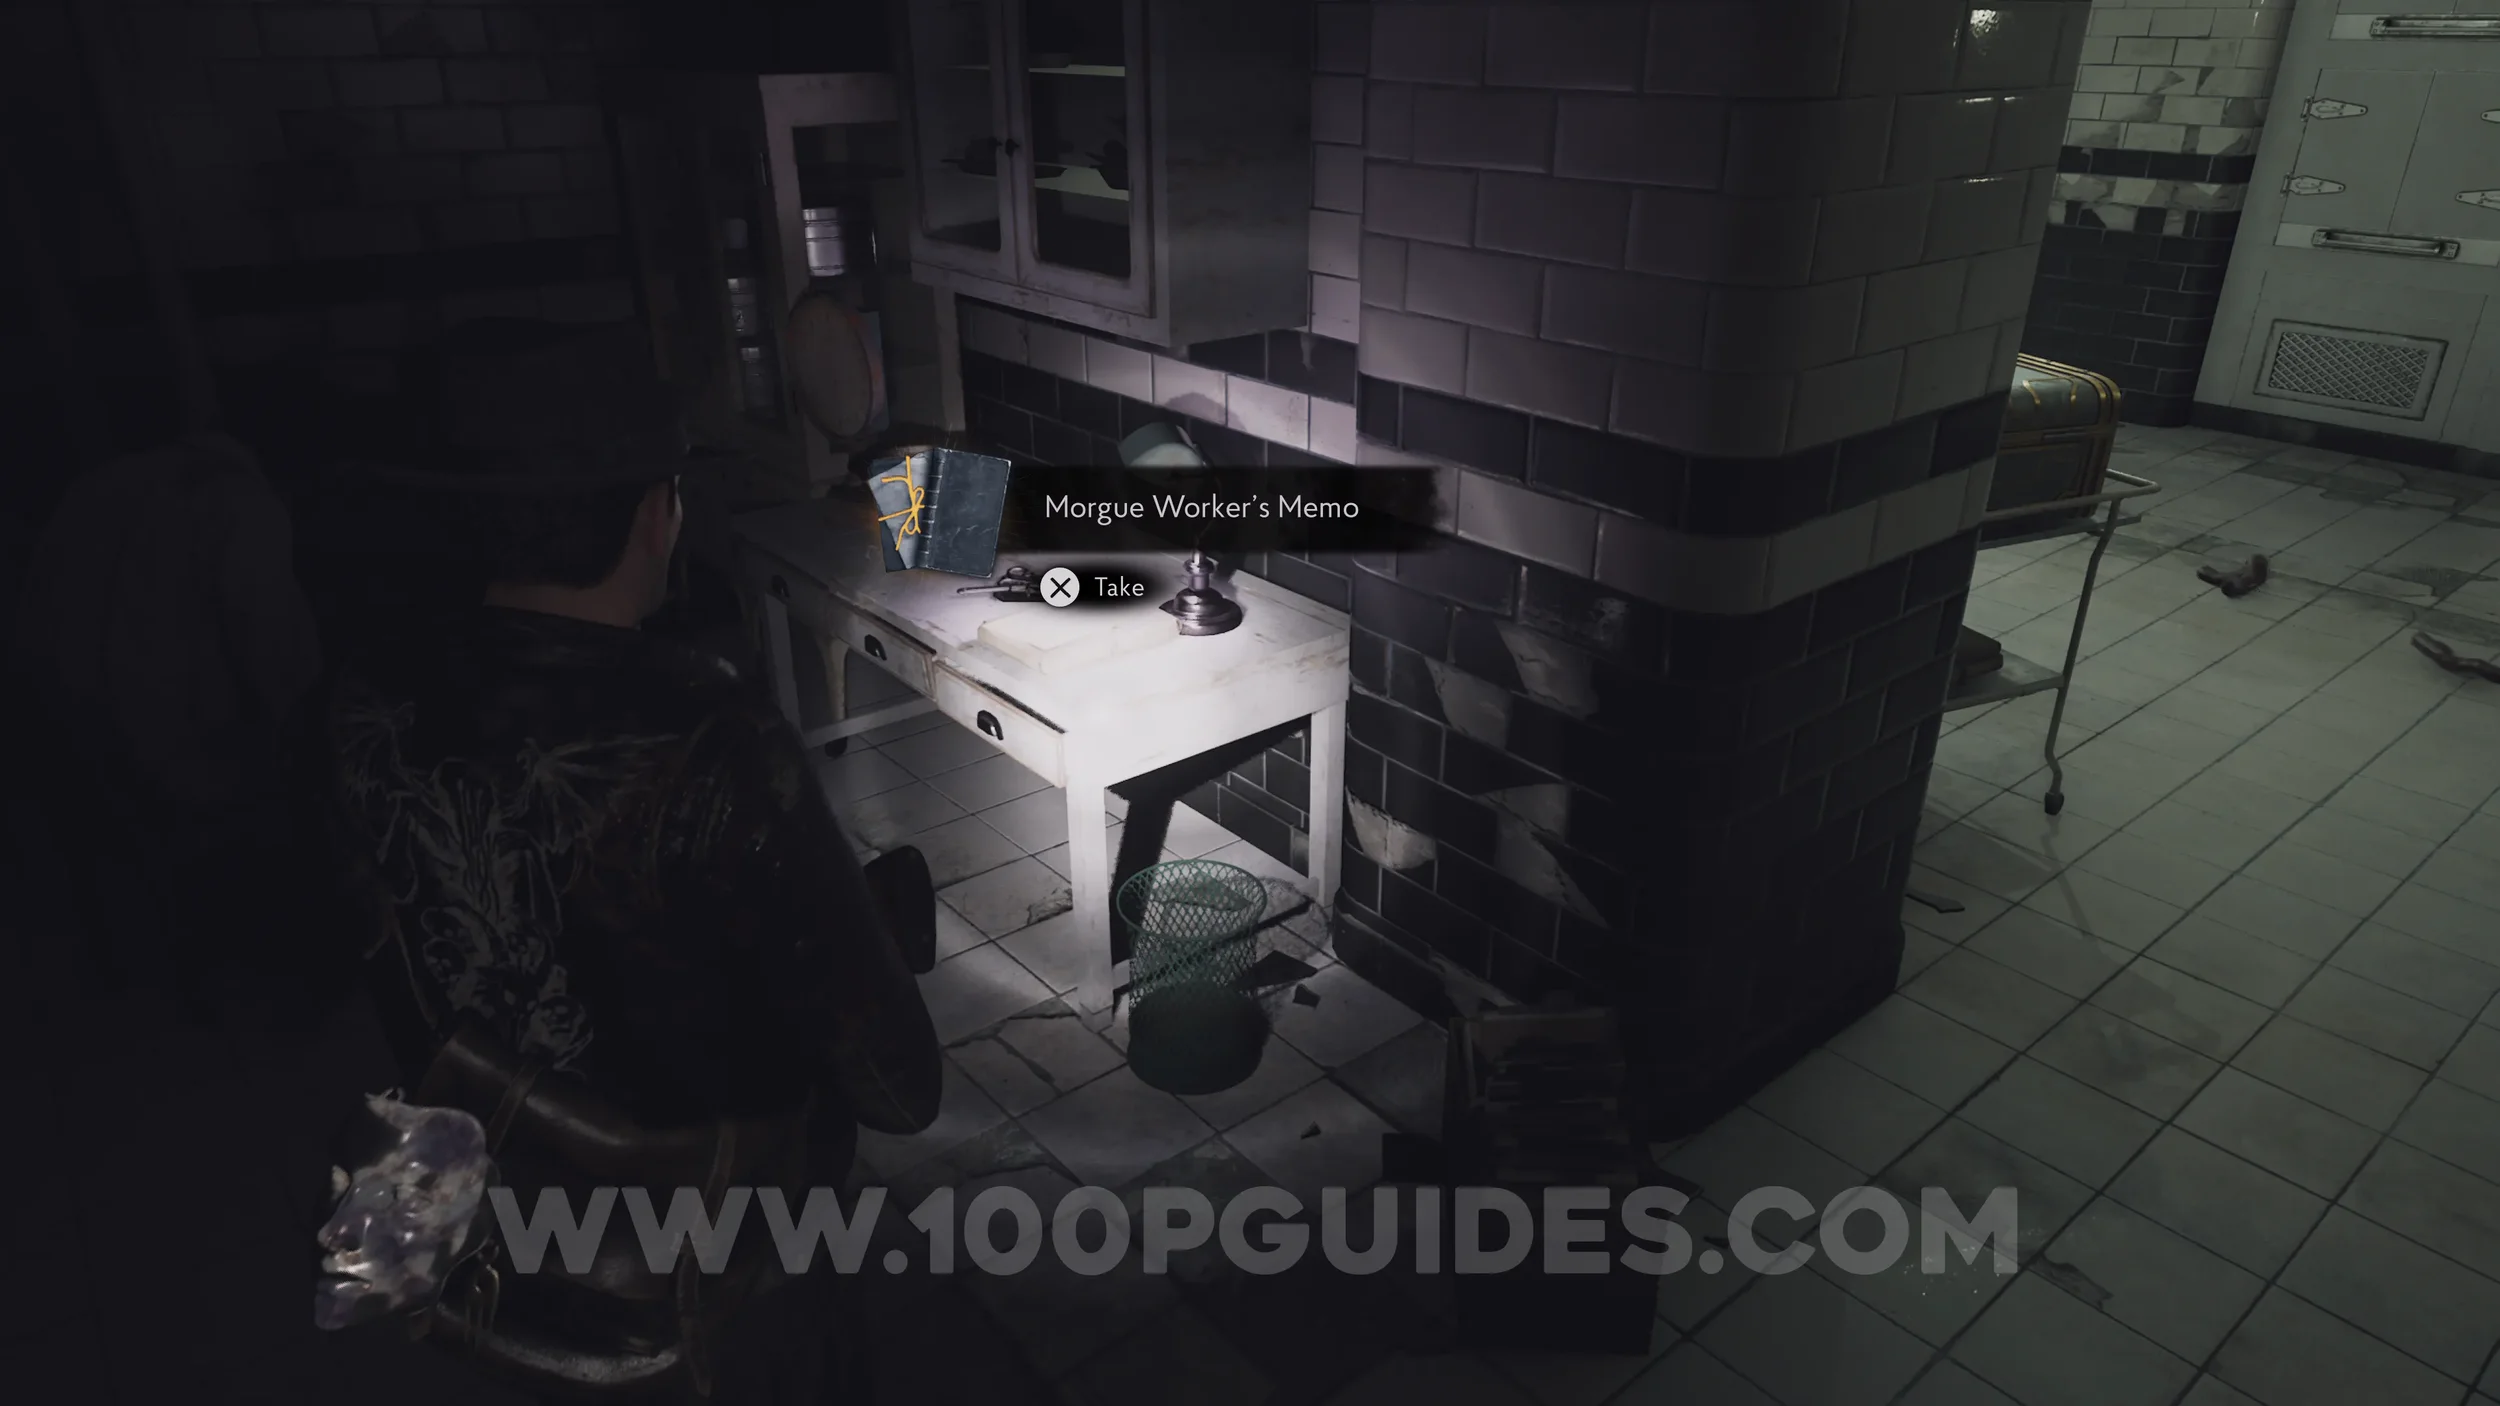
Lore Codex: Morgue Worker’s Memo. Follow the only available path until you reach the Morgue. The codex is on the desk.
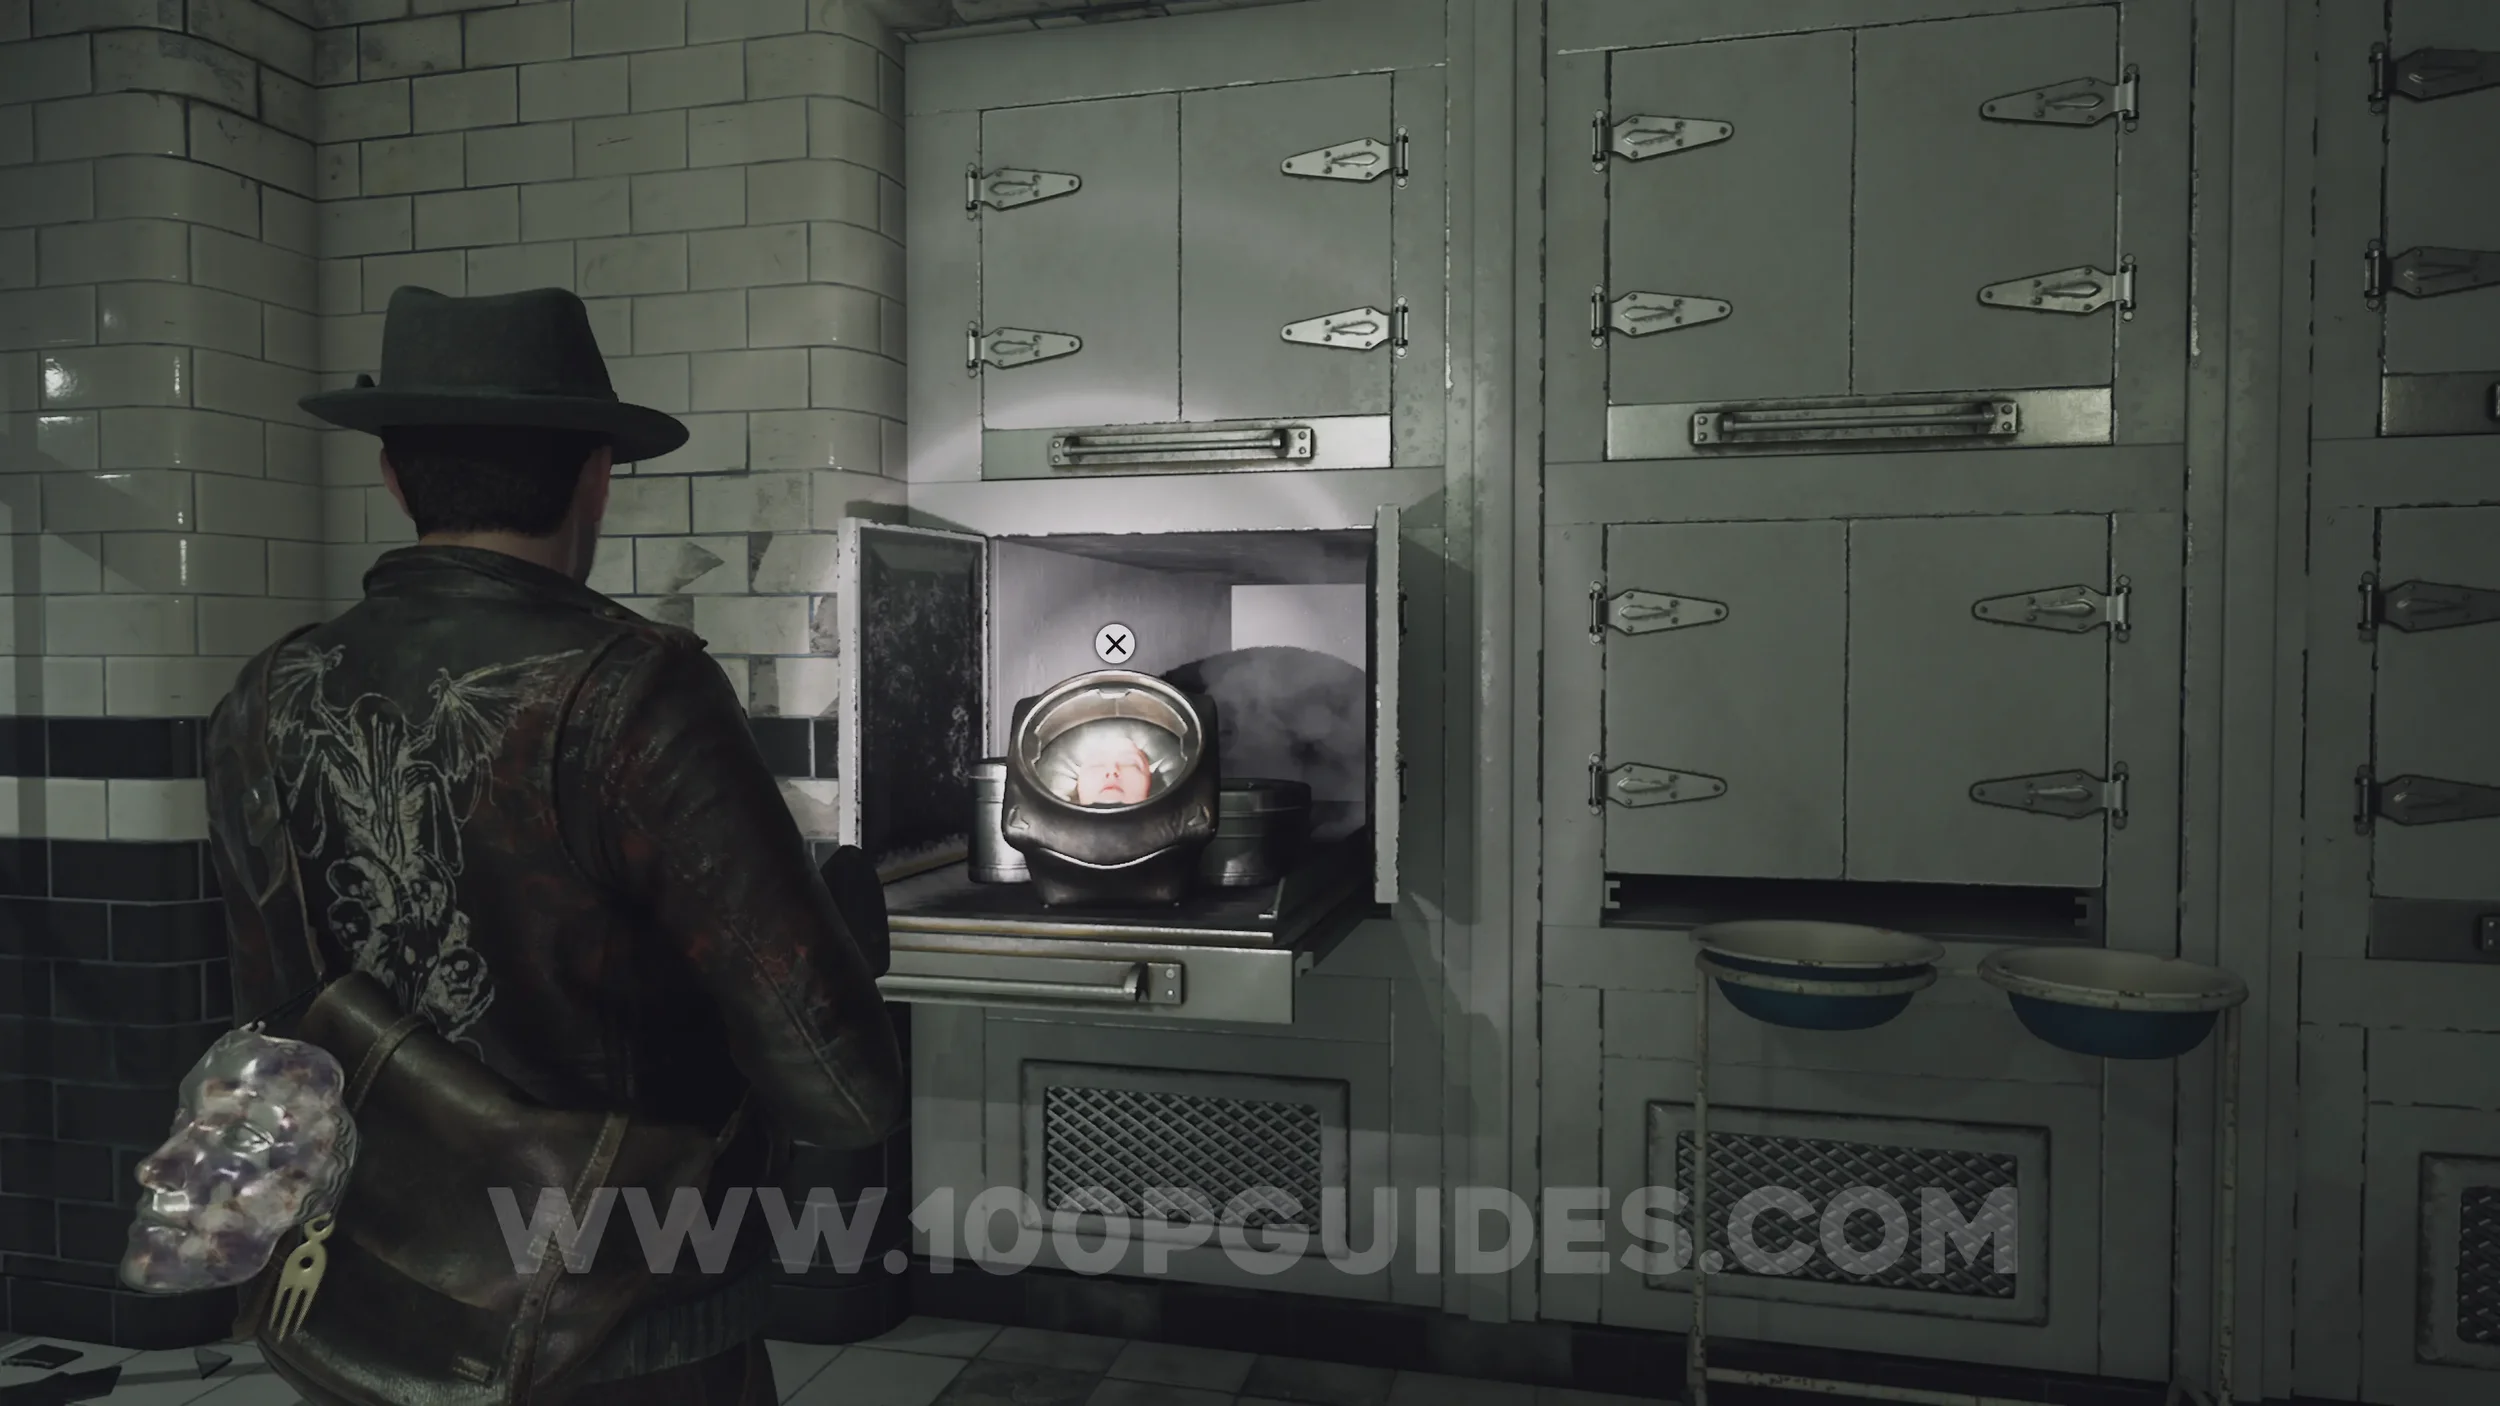
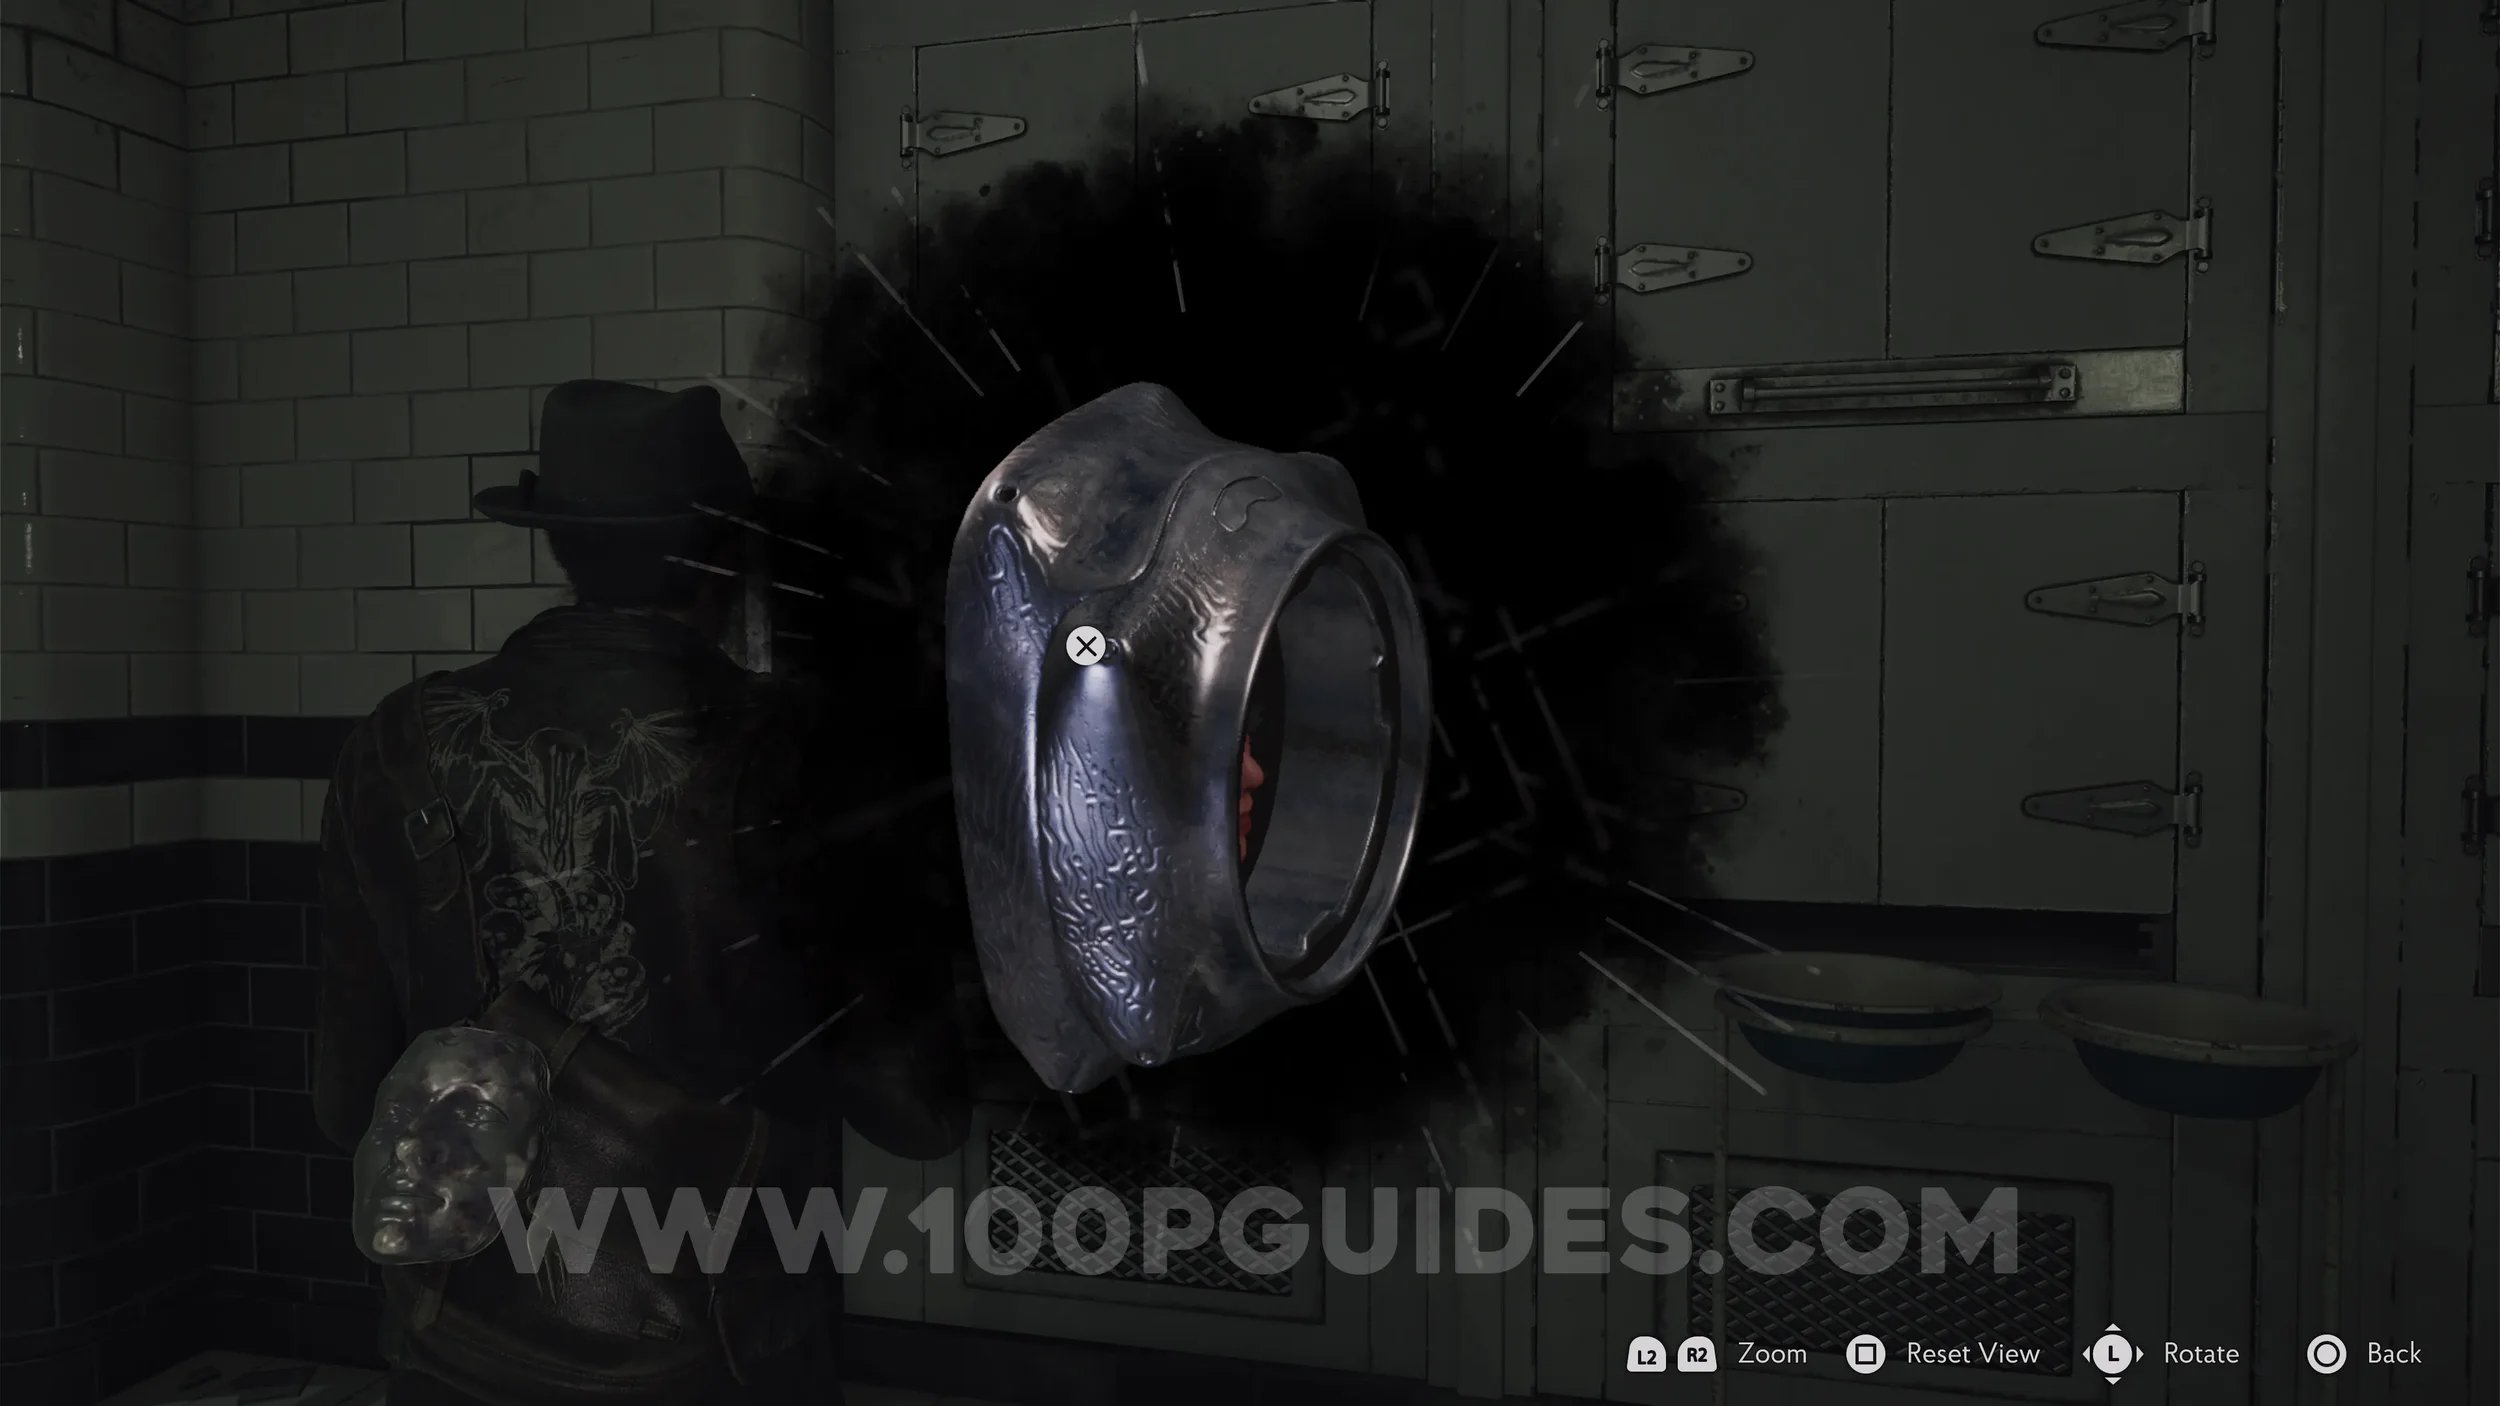
Key Item: Woman’s Face Mask. Interact with the leftmost mortuary cabinet on the northern wall of the Morgue to reveal a woman's face in a pod. First you'll need to open it by undoing the screws in the corners, then turn it around and interact with the multiple points on the back. Finally, press the buttons in the corners on the front. Then after the cutscne, pick it up.
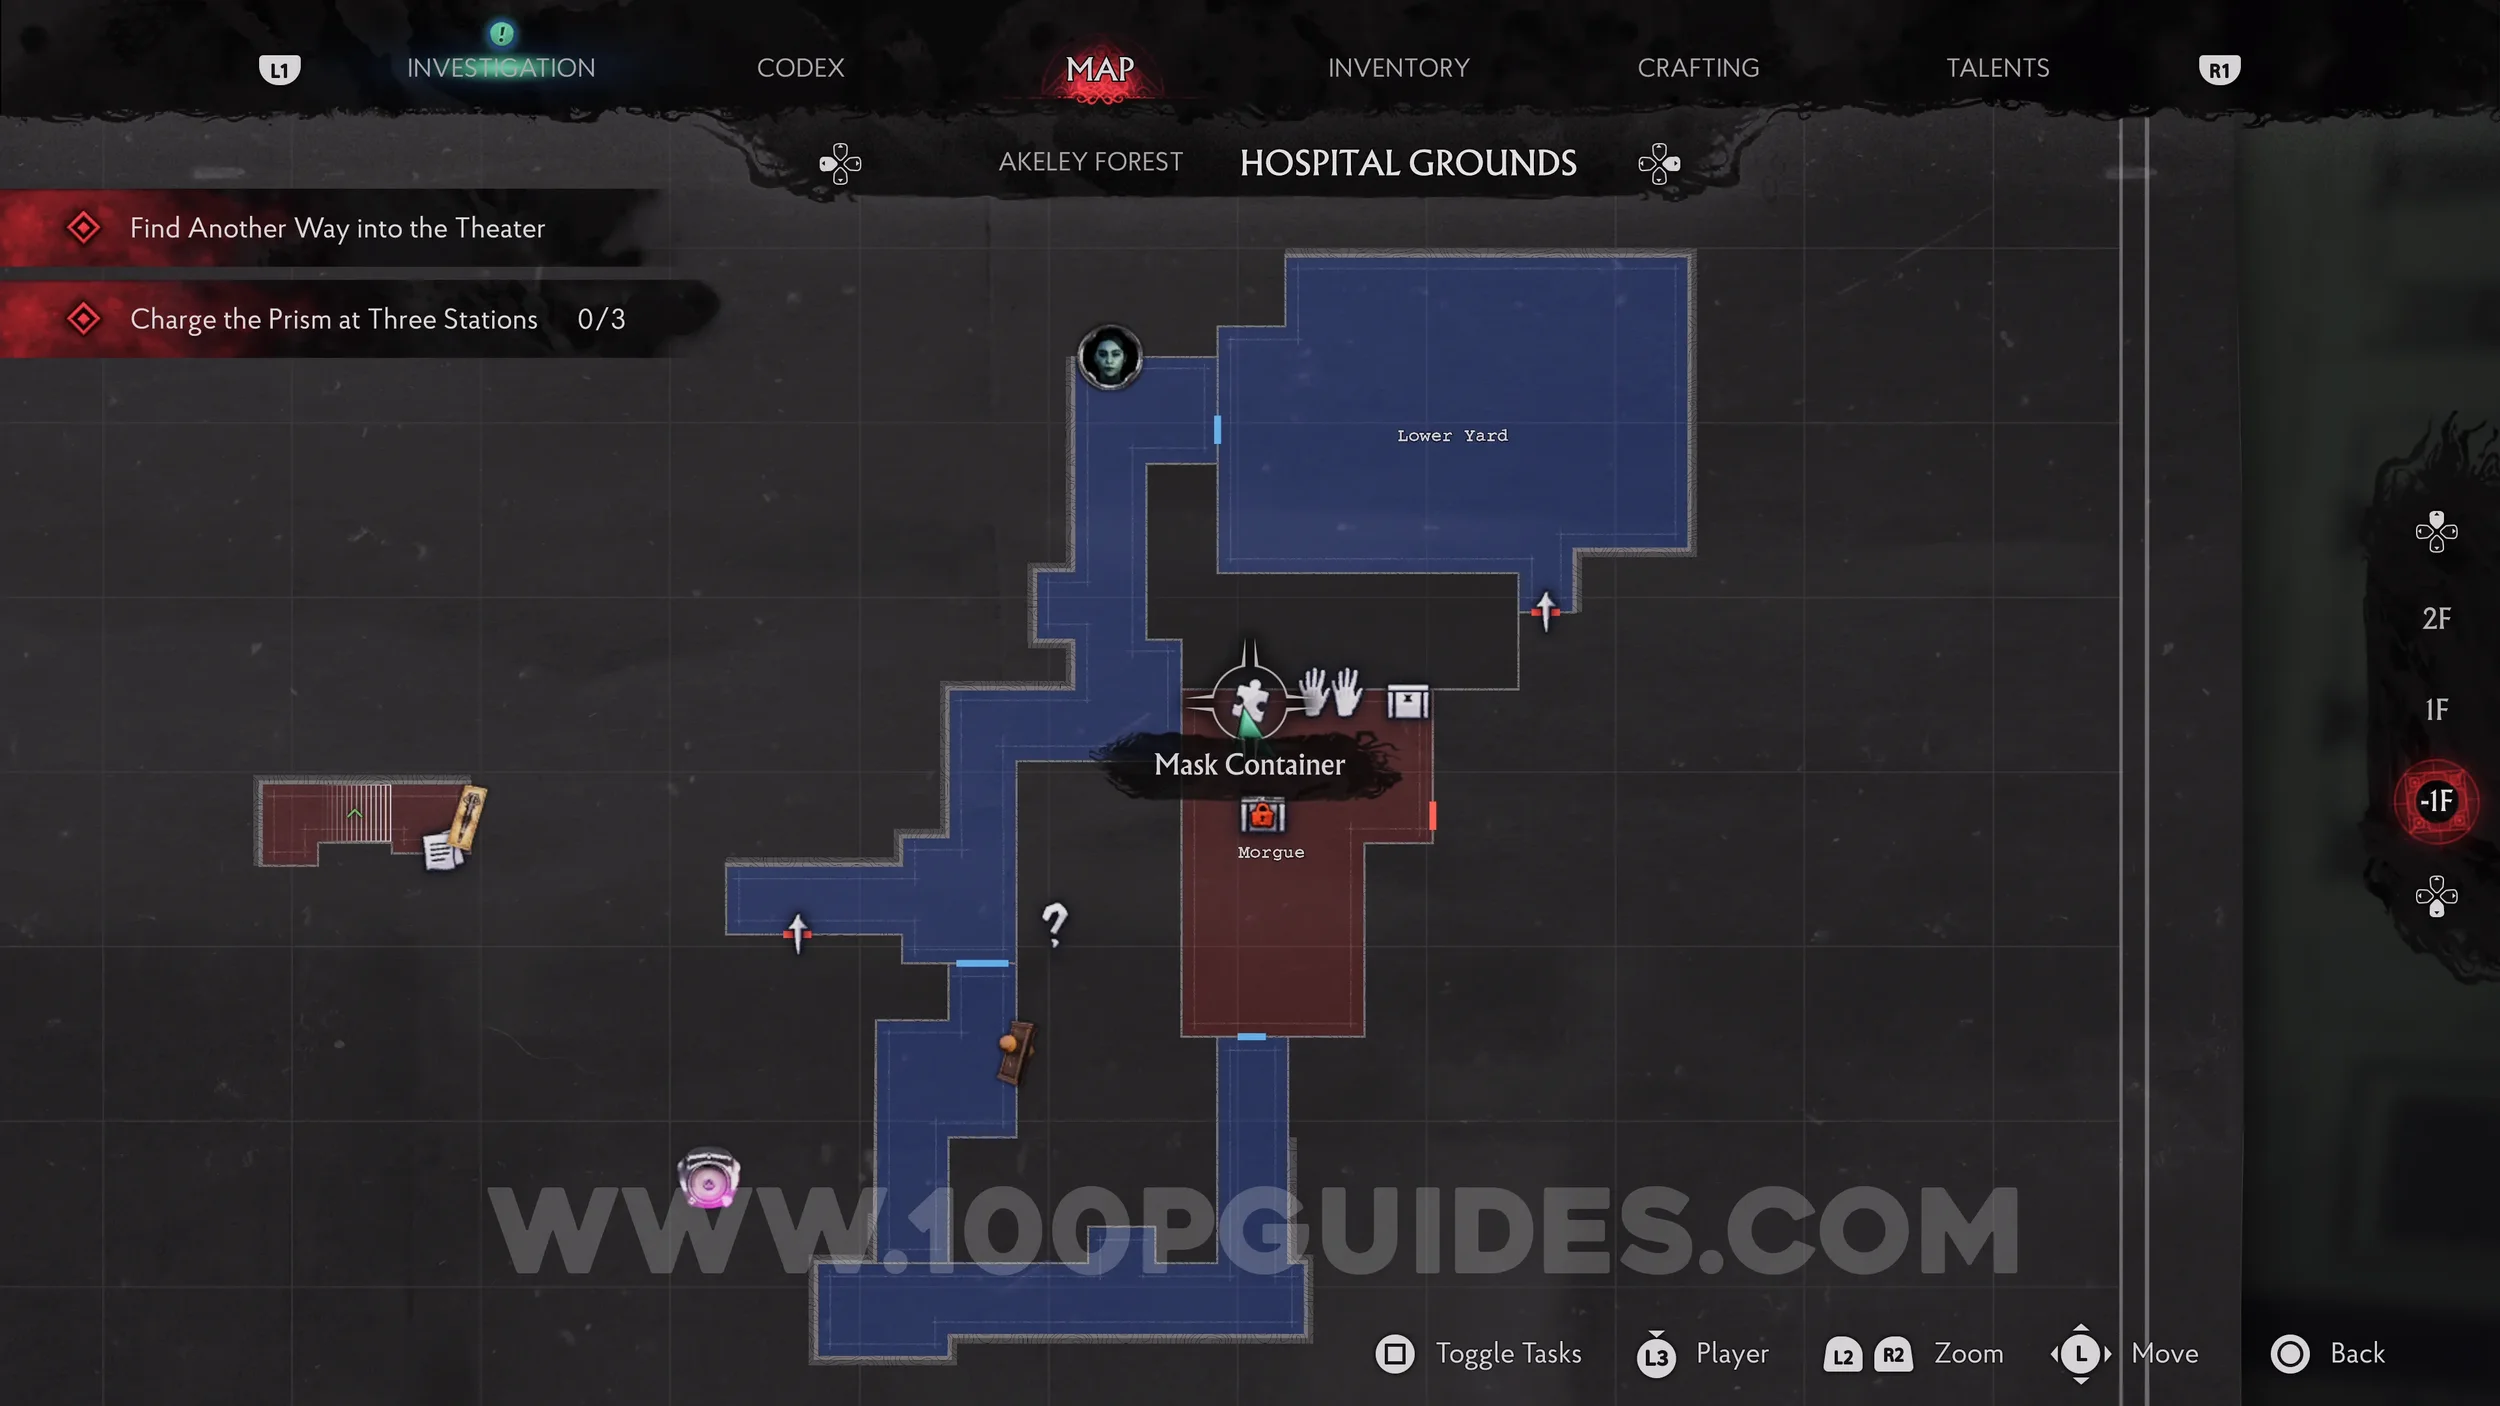
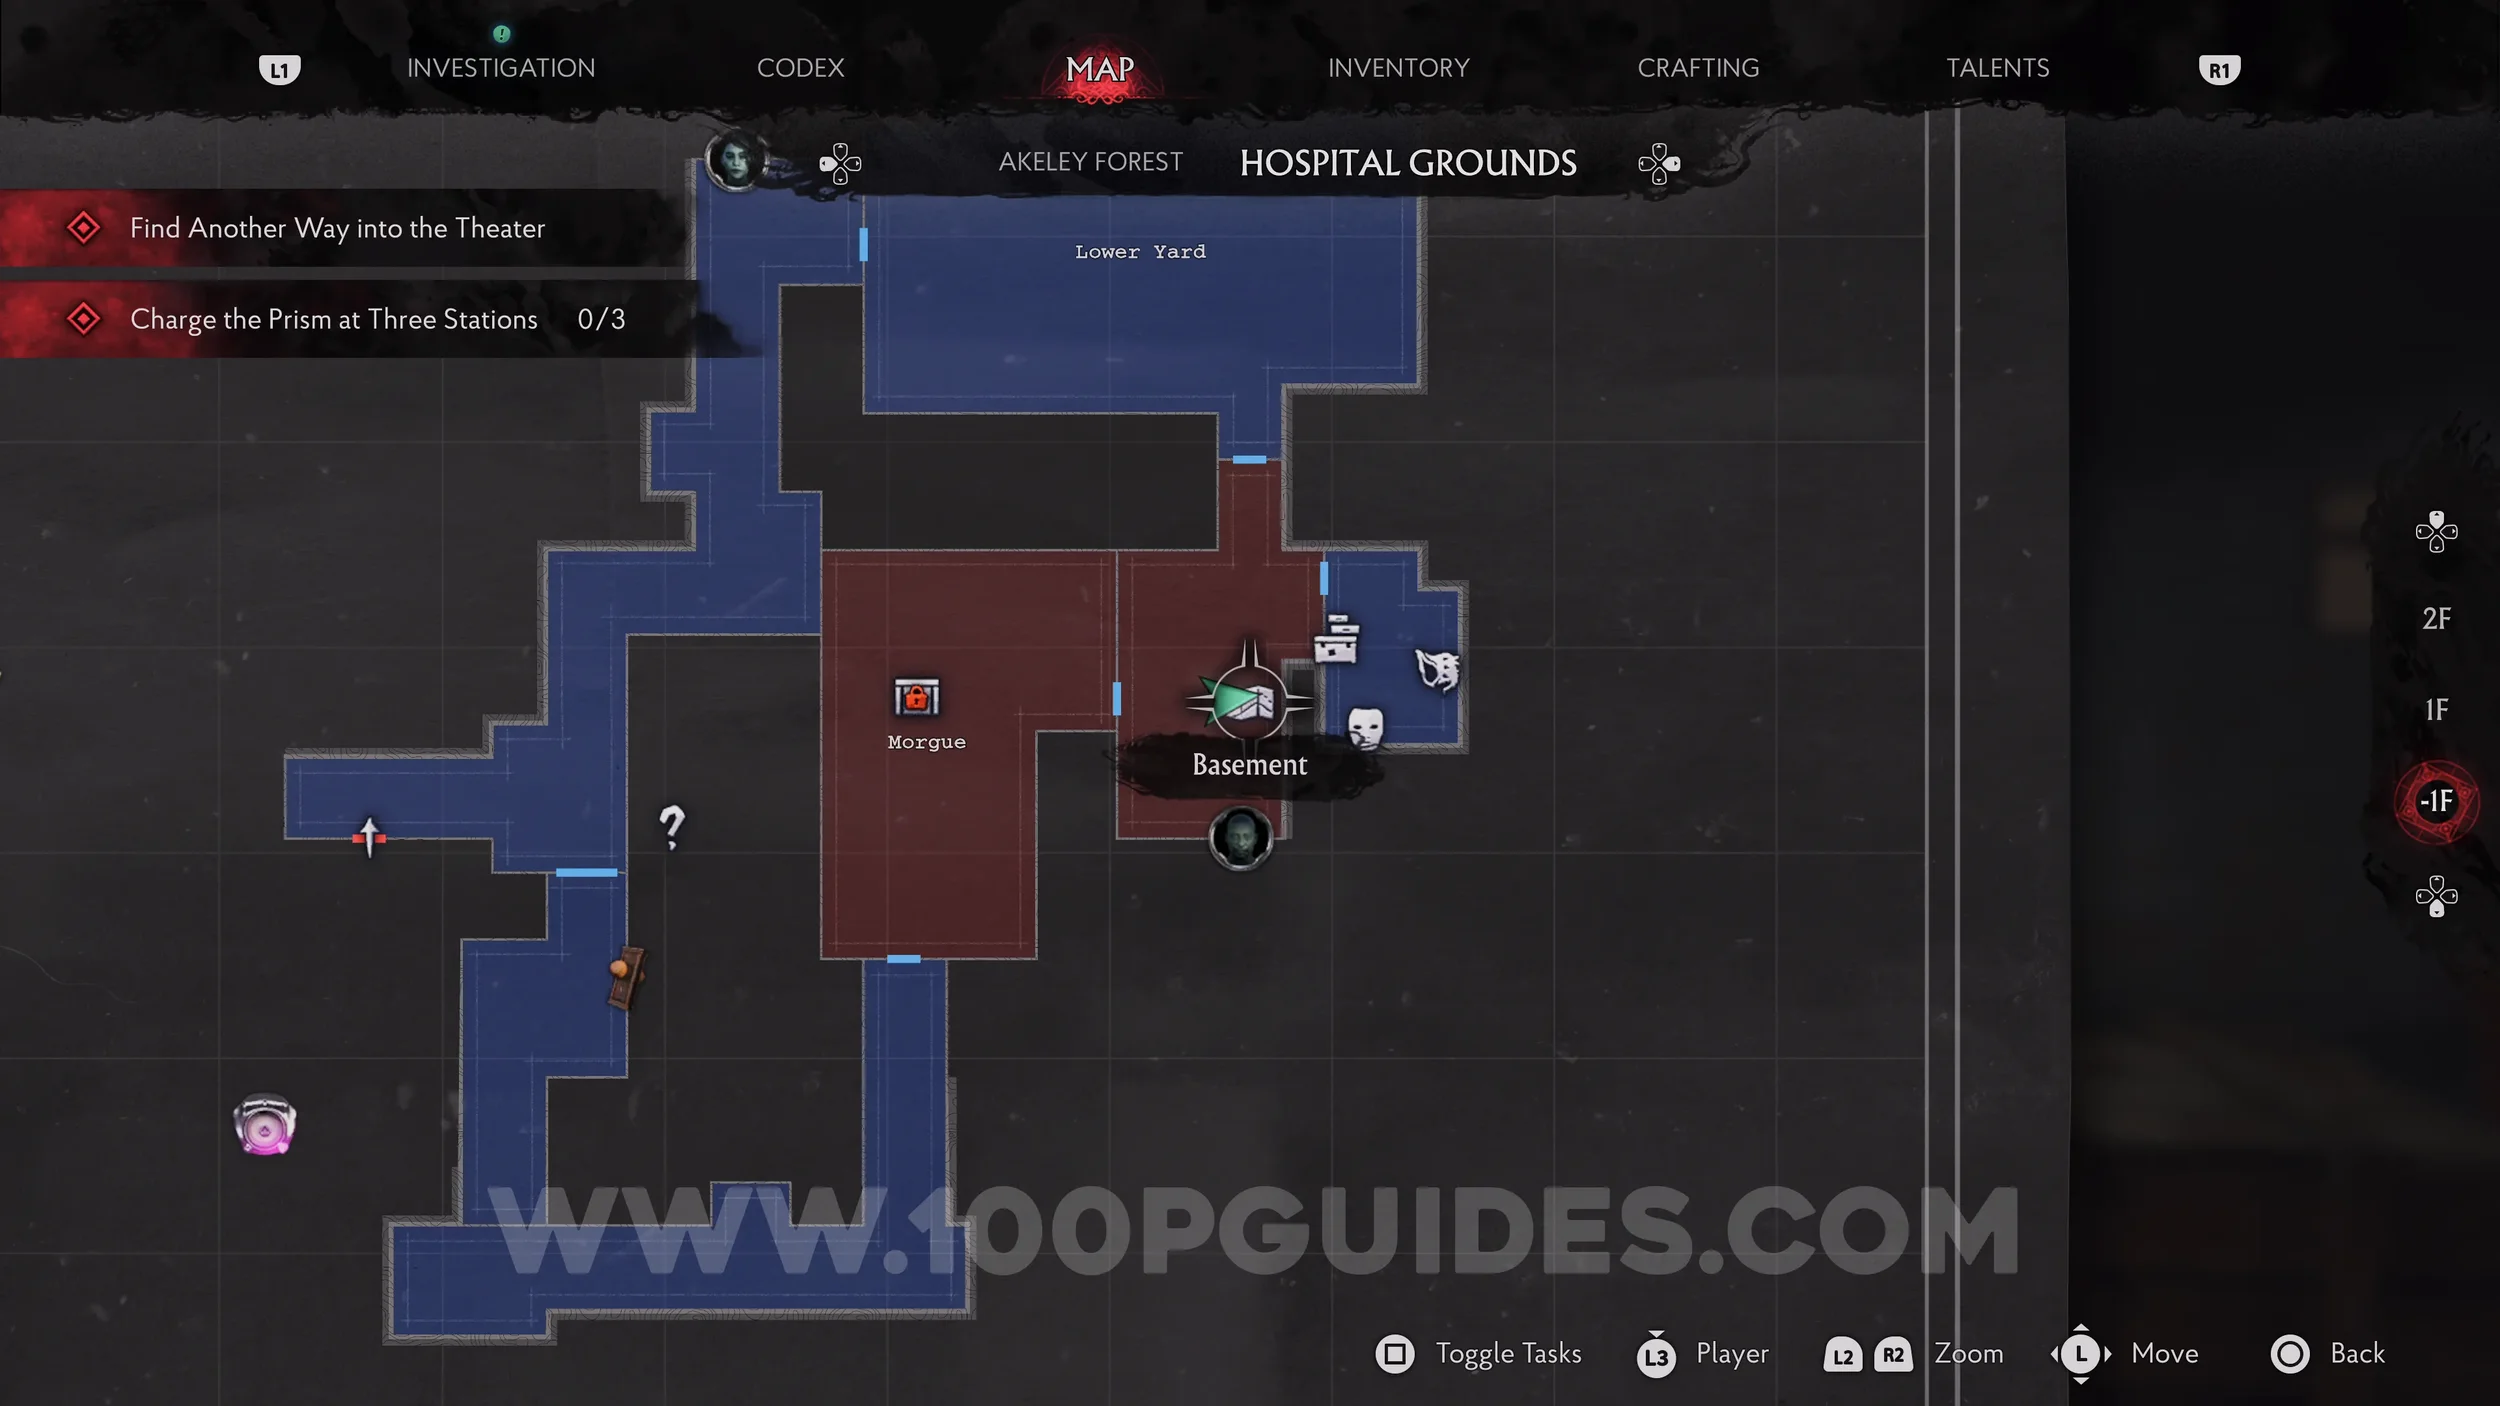
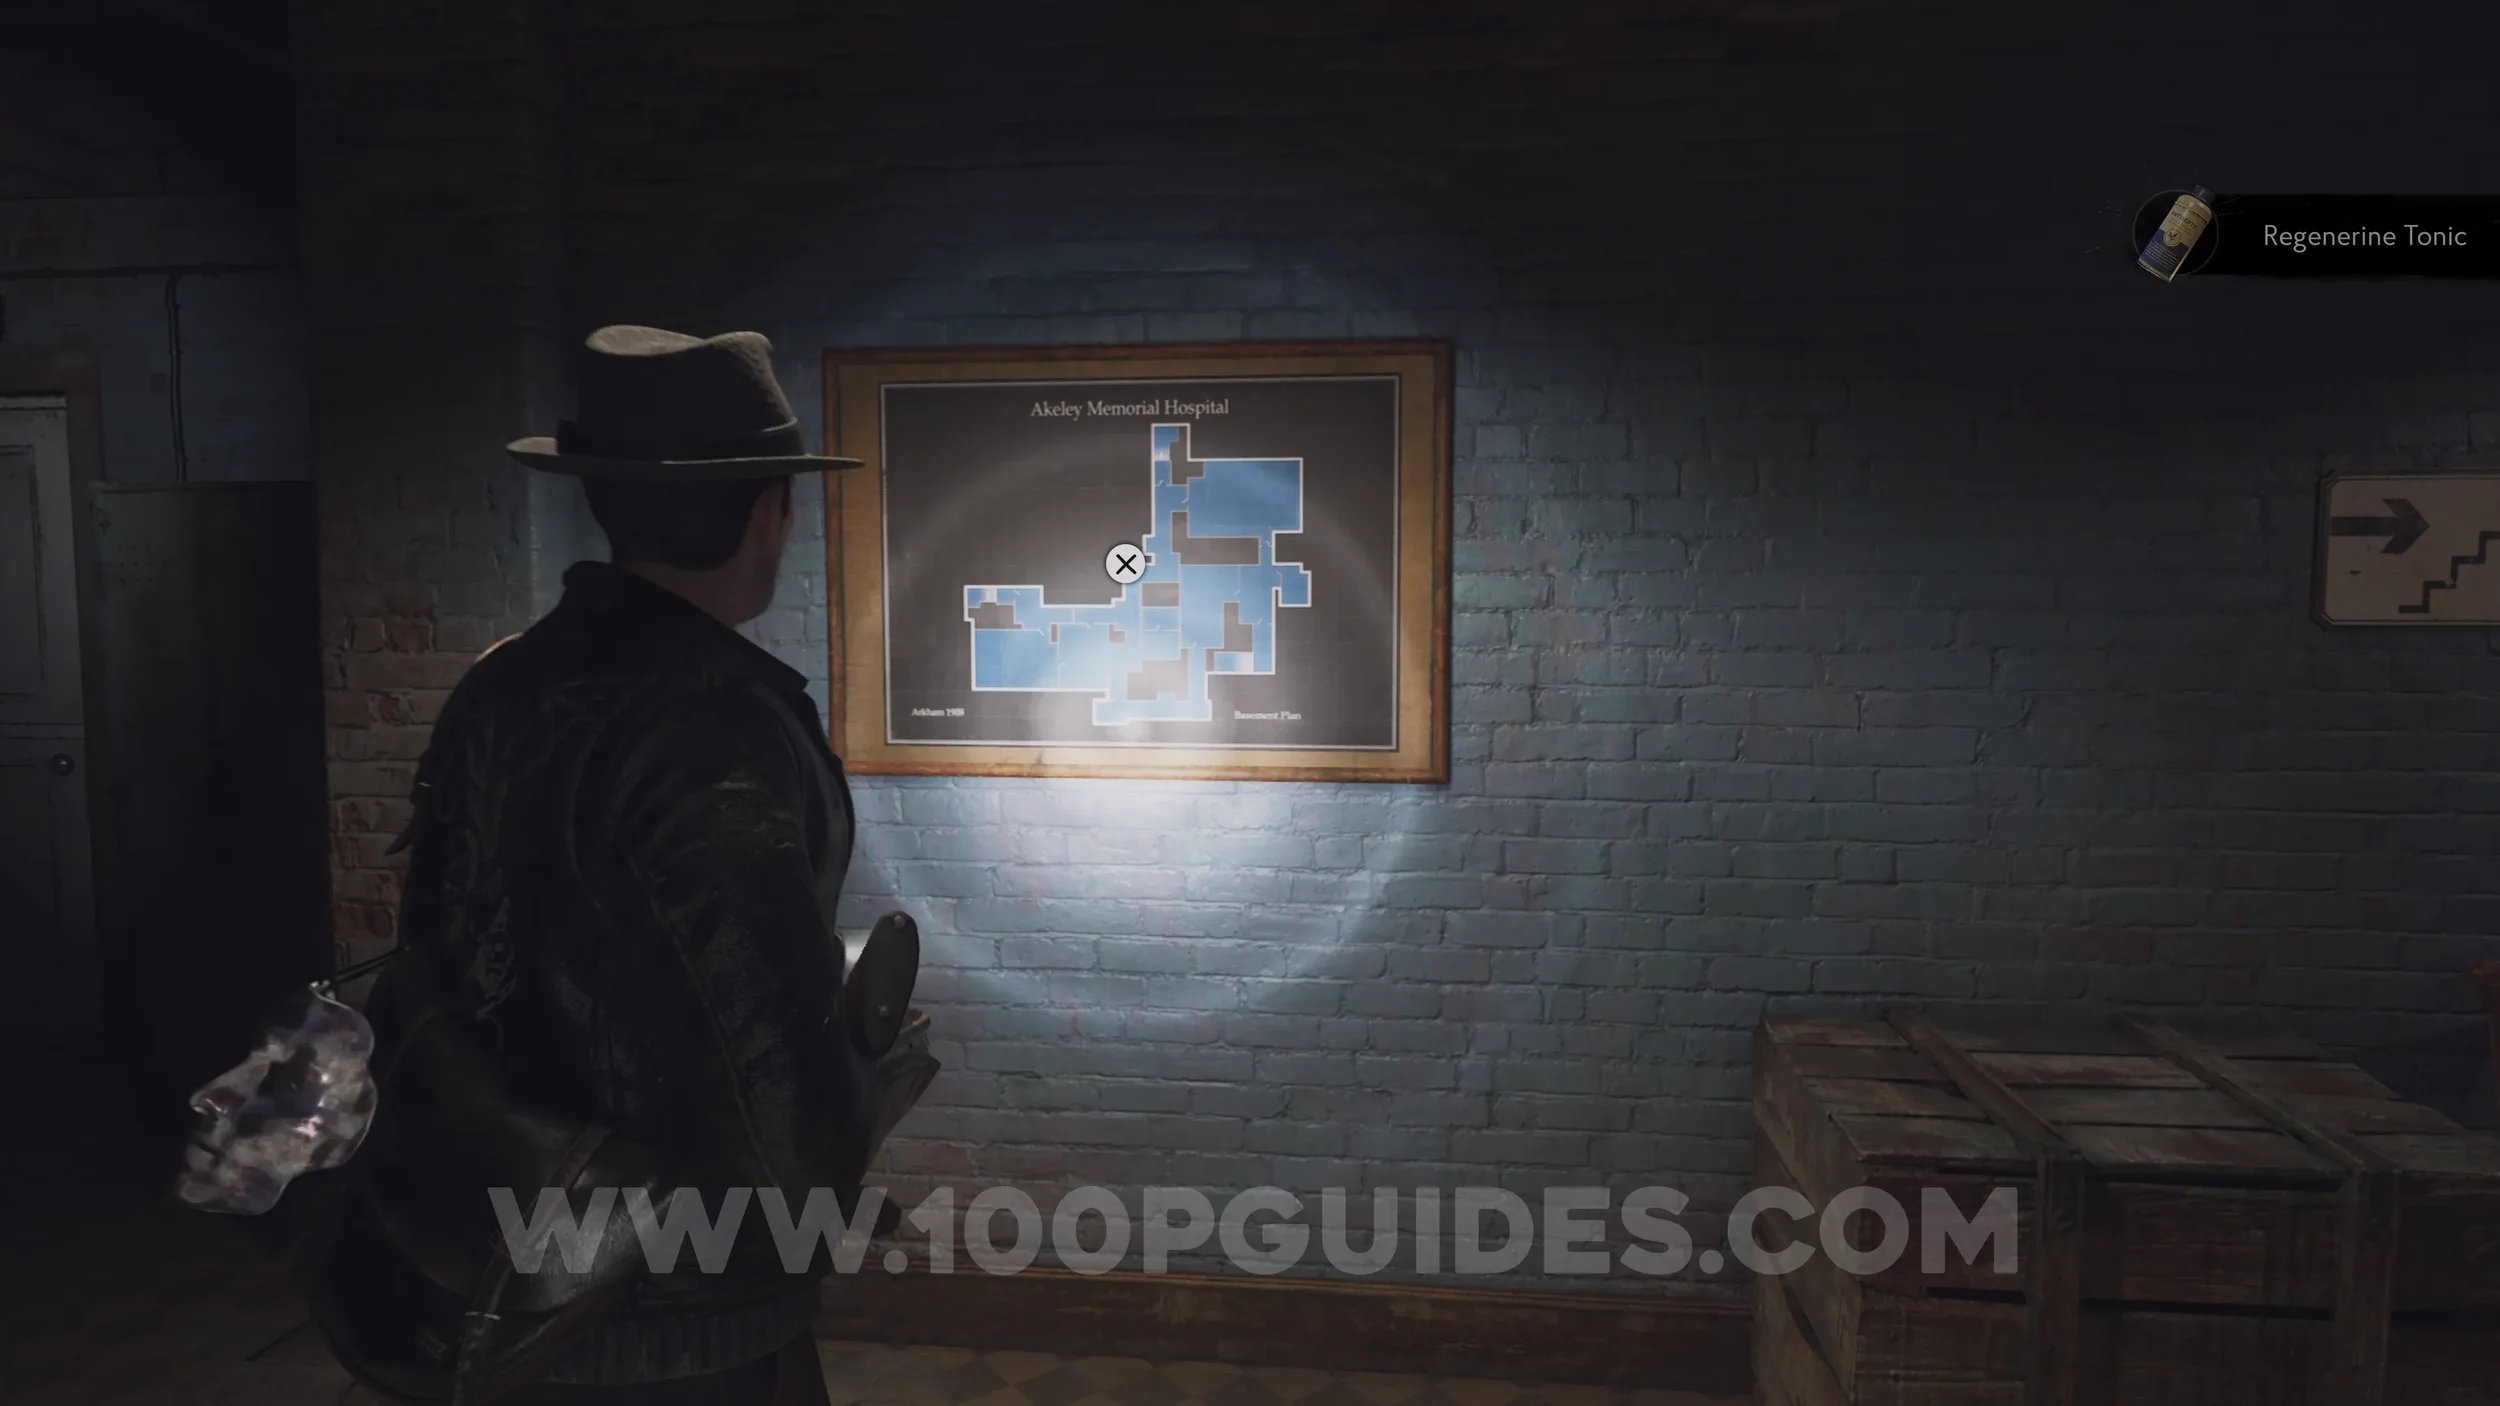
Map: Basement. Head through the door on the eastern side of the Morgue and you'll see the map on the wall in front of you.
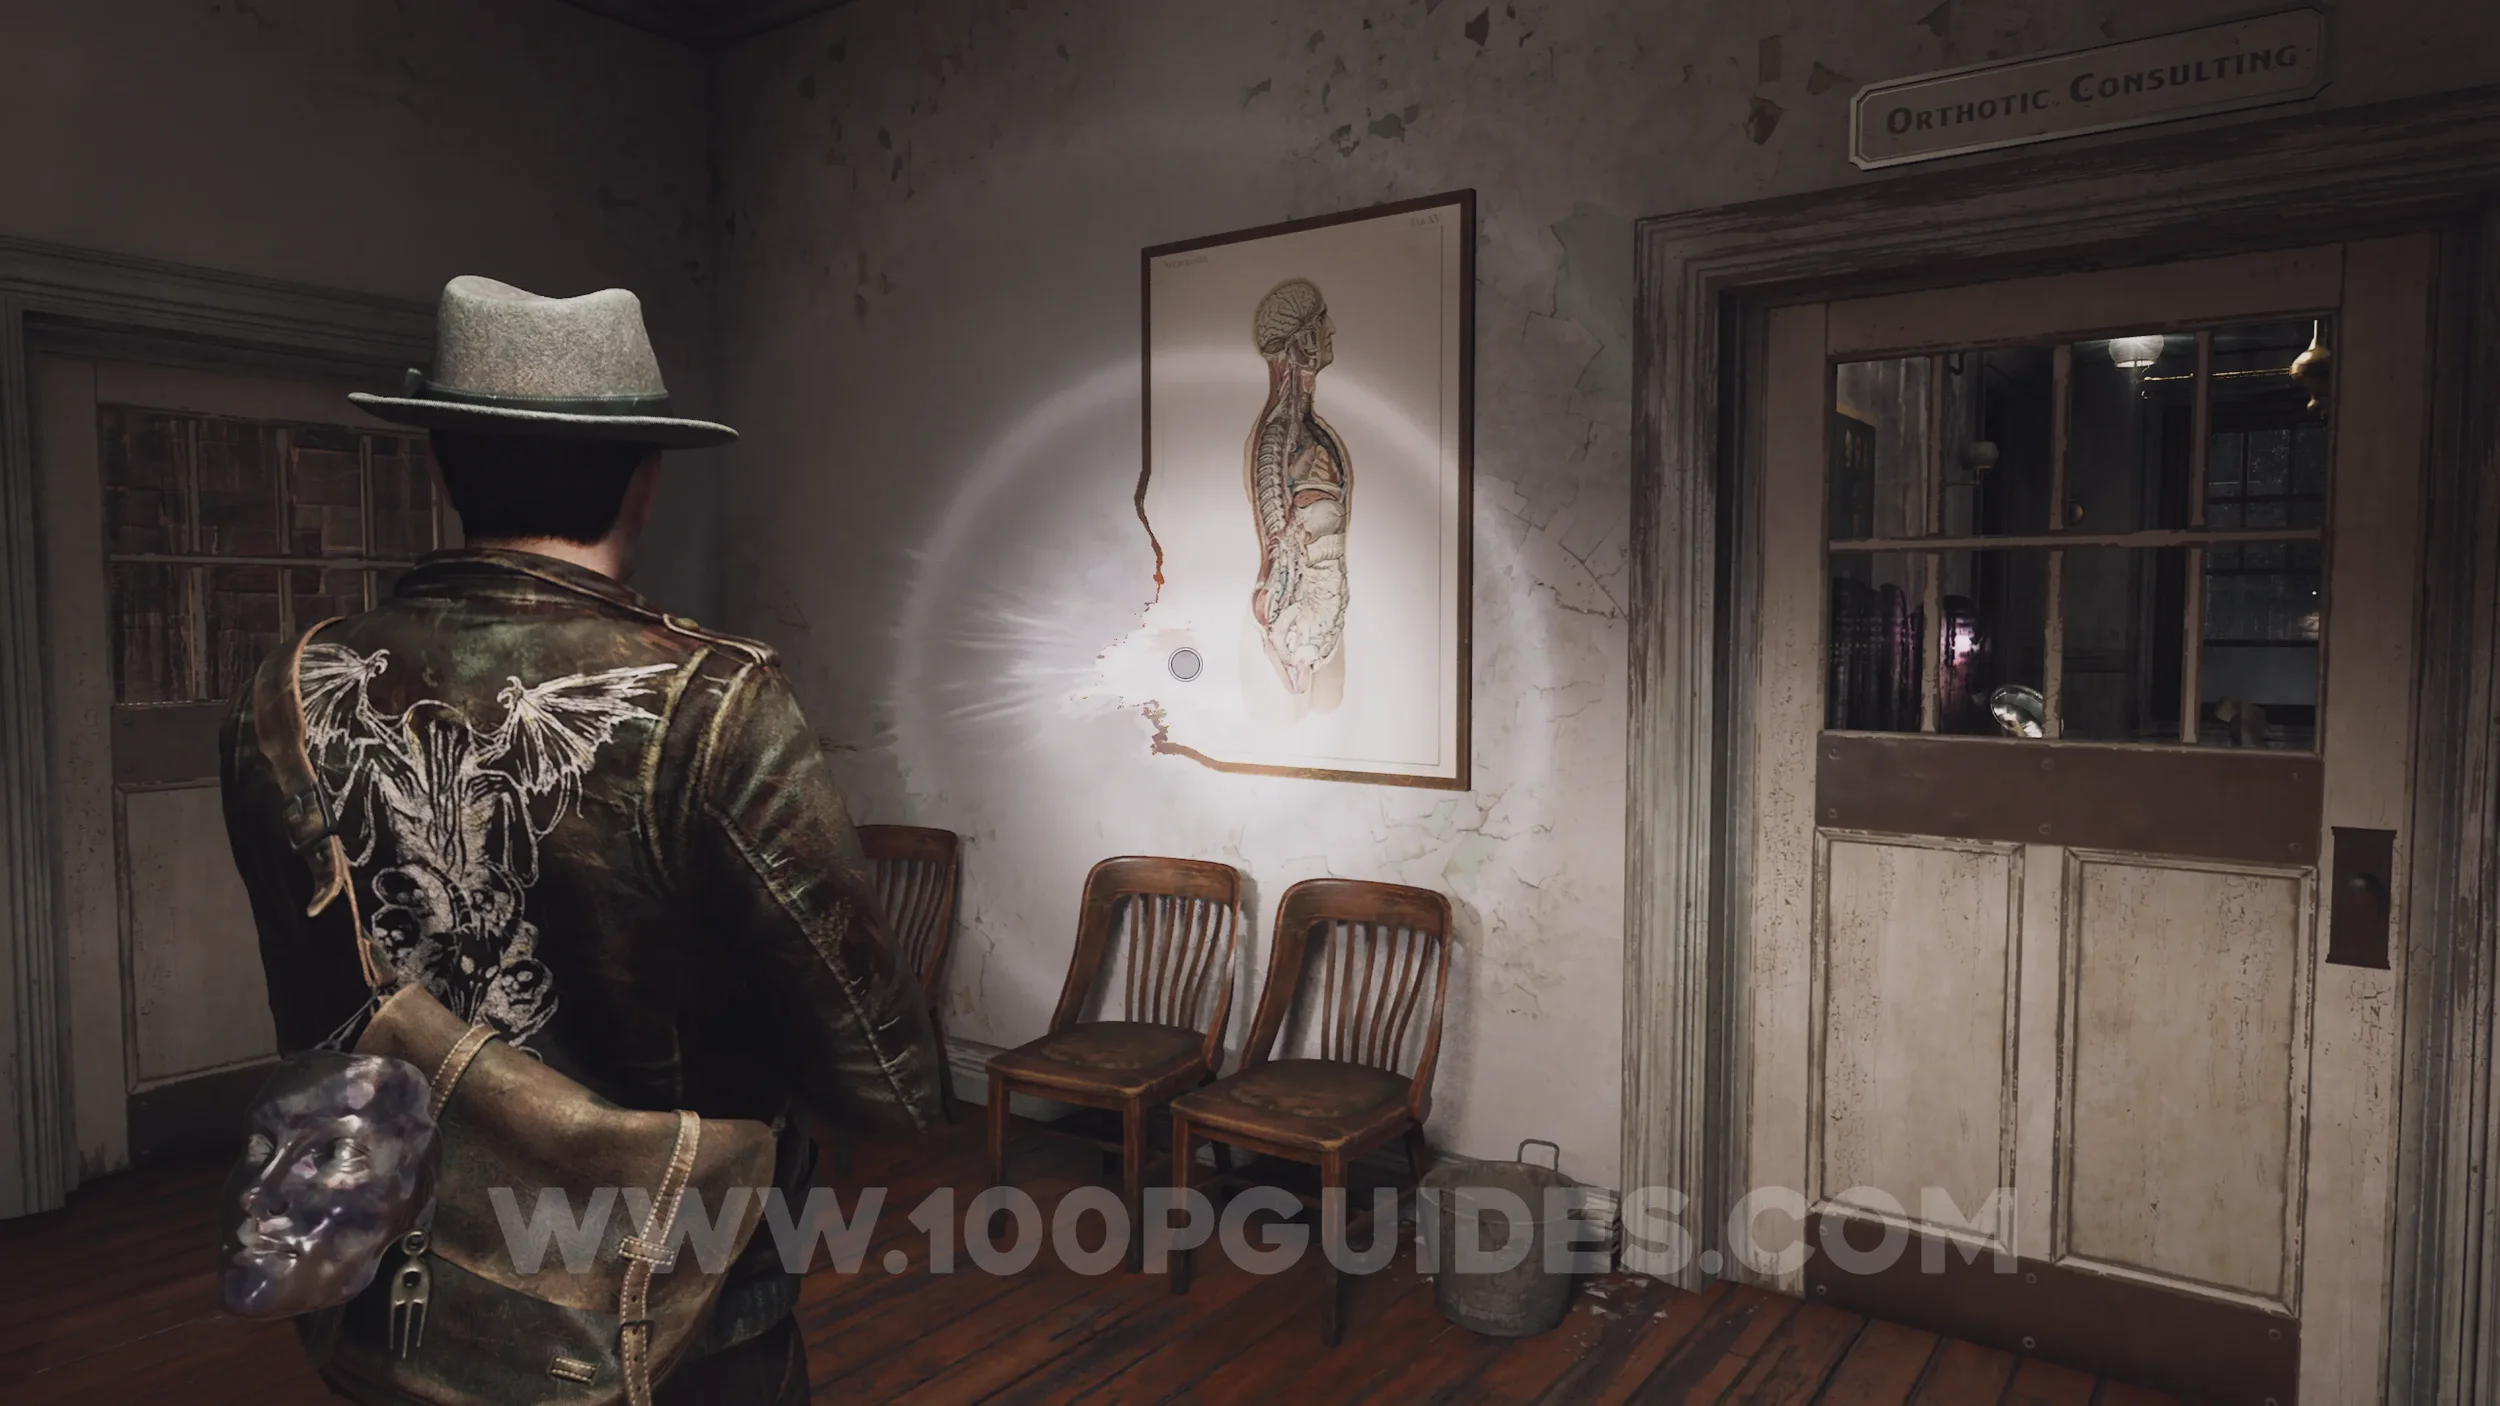
Evidence: Occult Symbol (Blue). After using the Woman's Face Mask to open the door to the west of the Lower Yard, go up the stairs and interact with the shimmer on the picture on the wall.
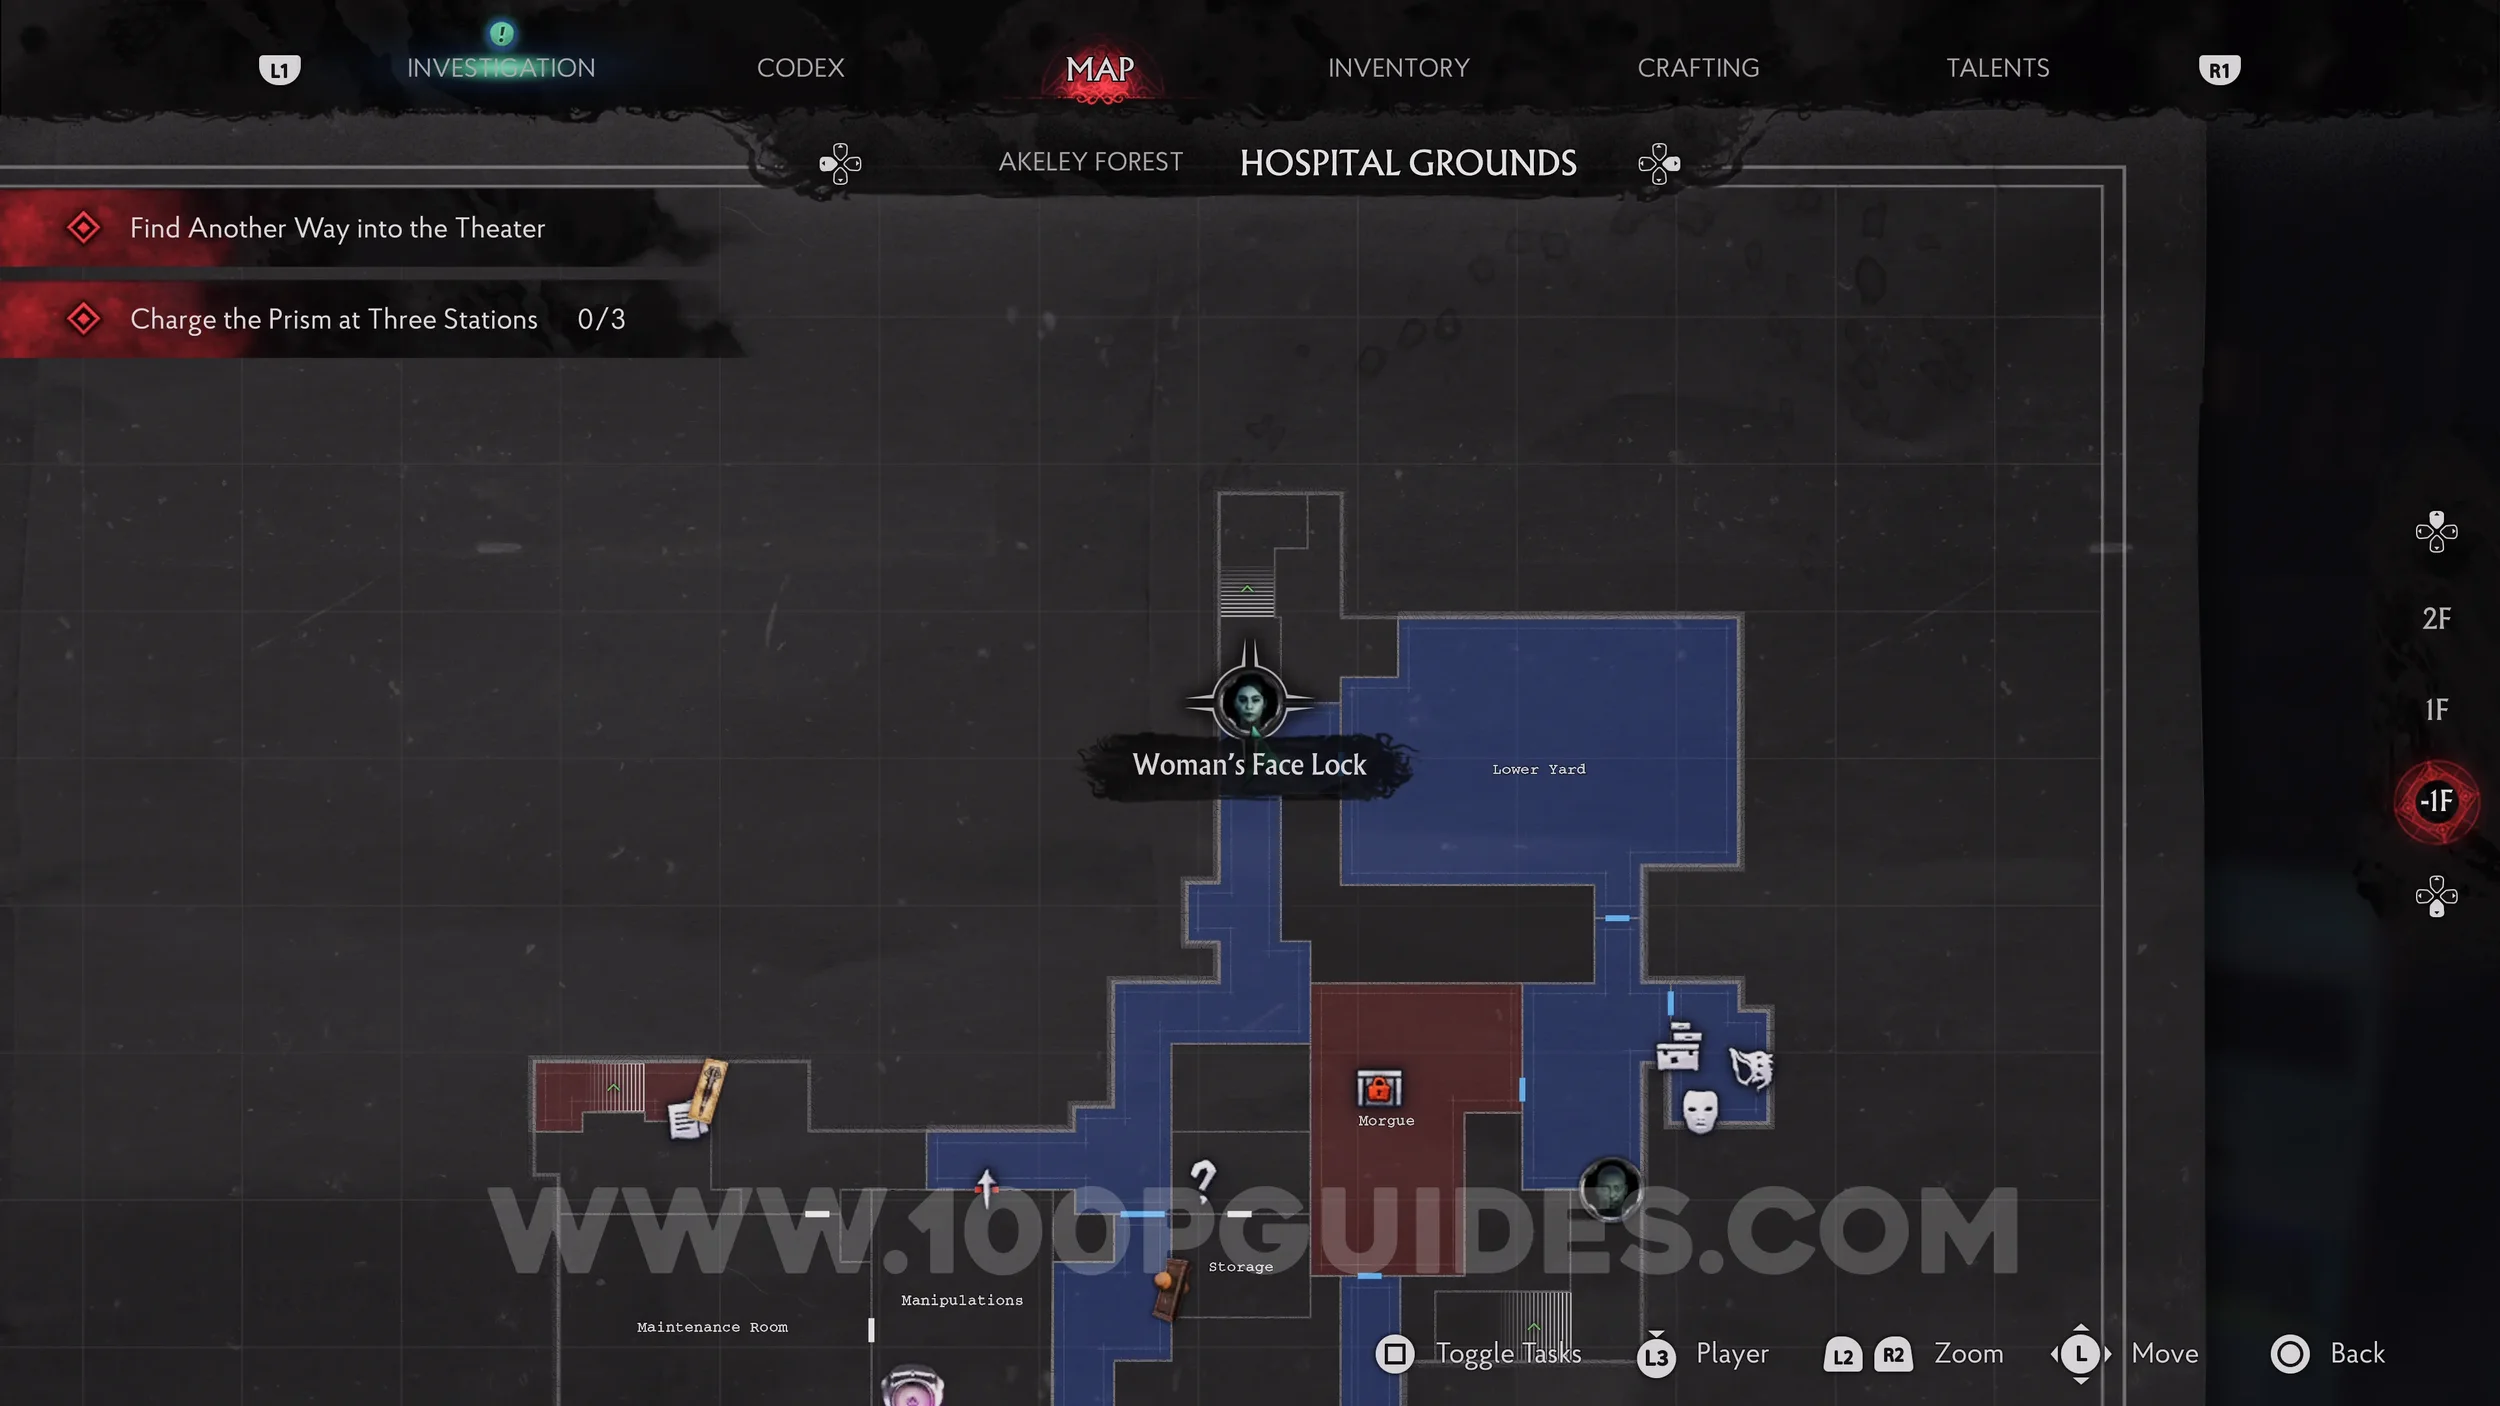
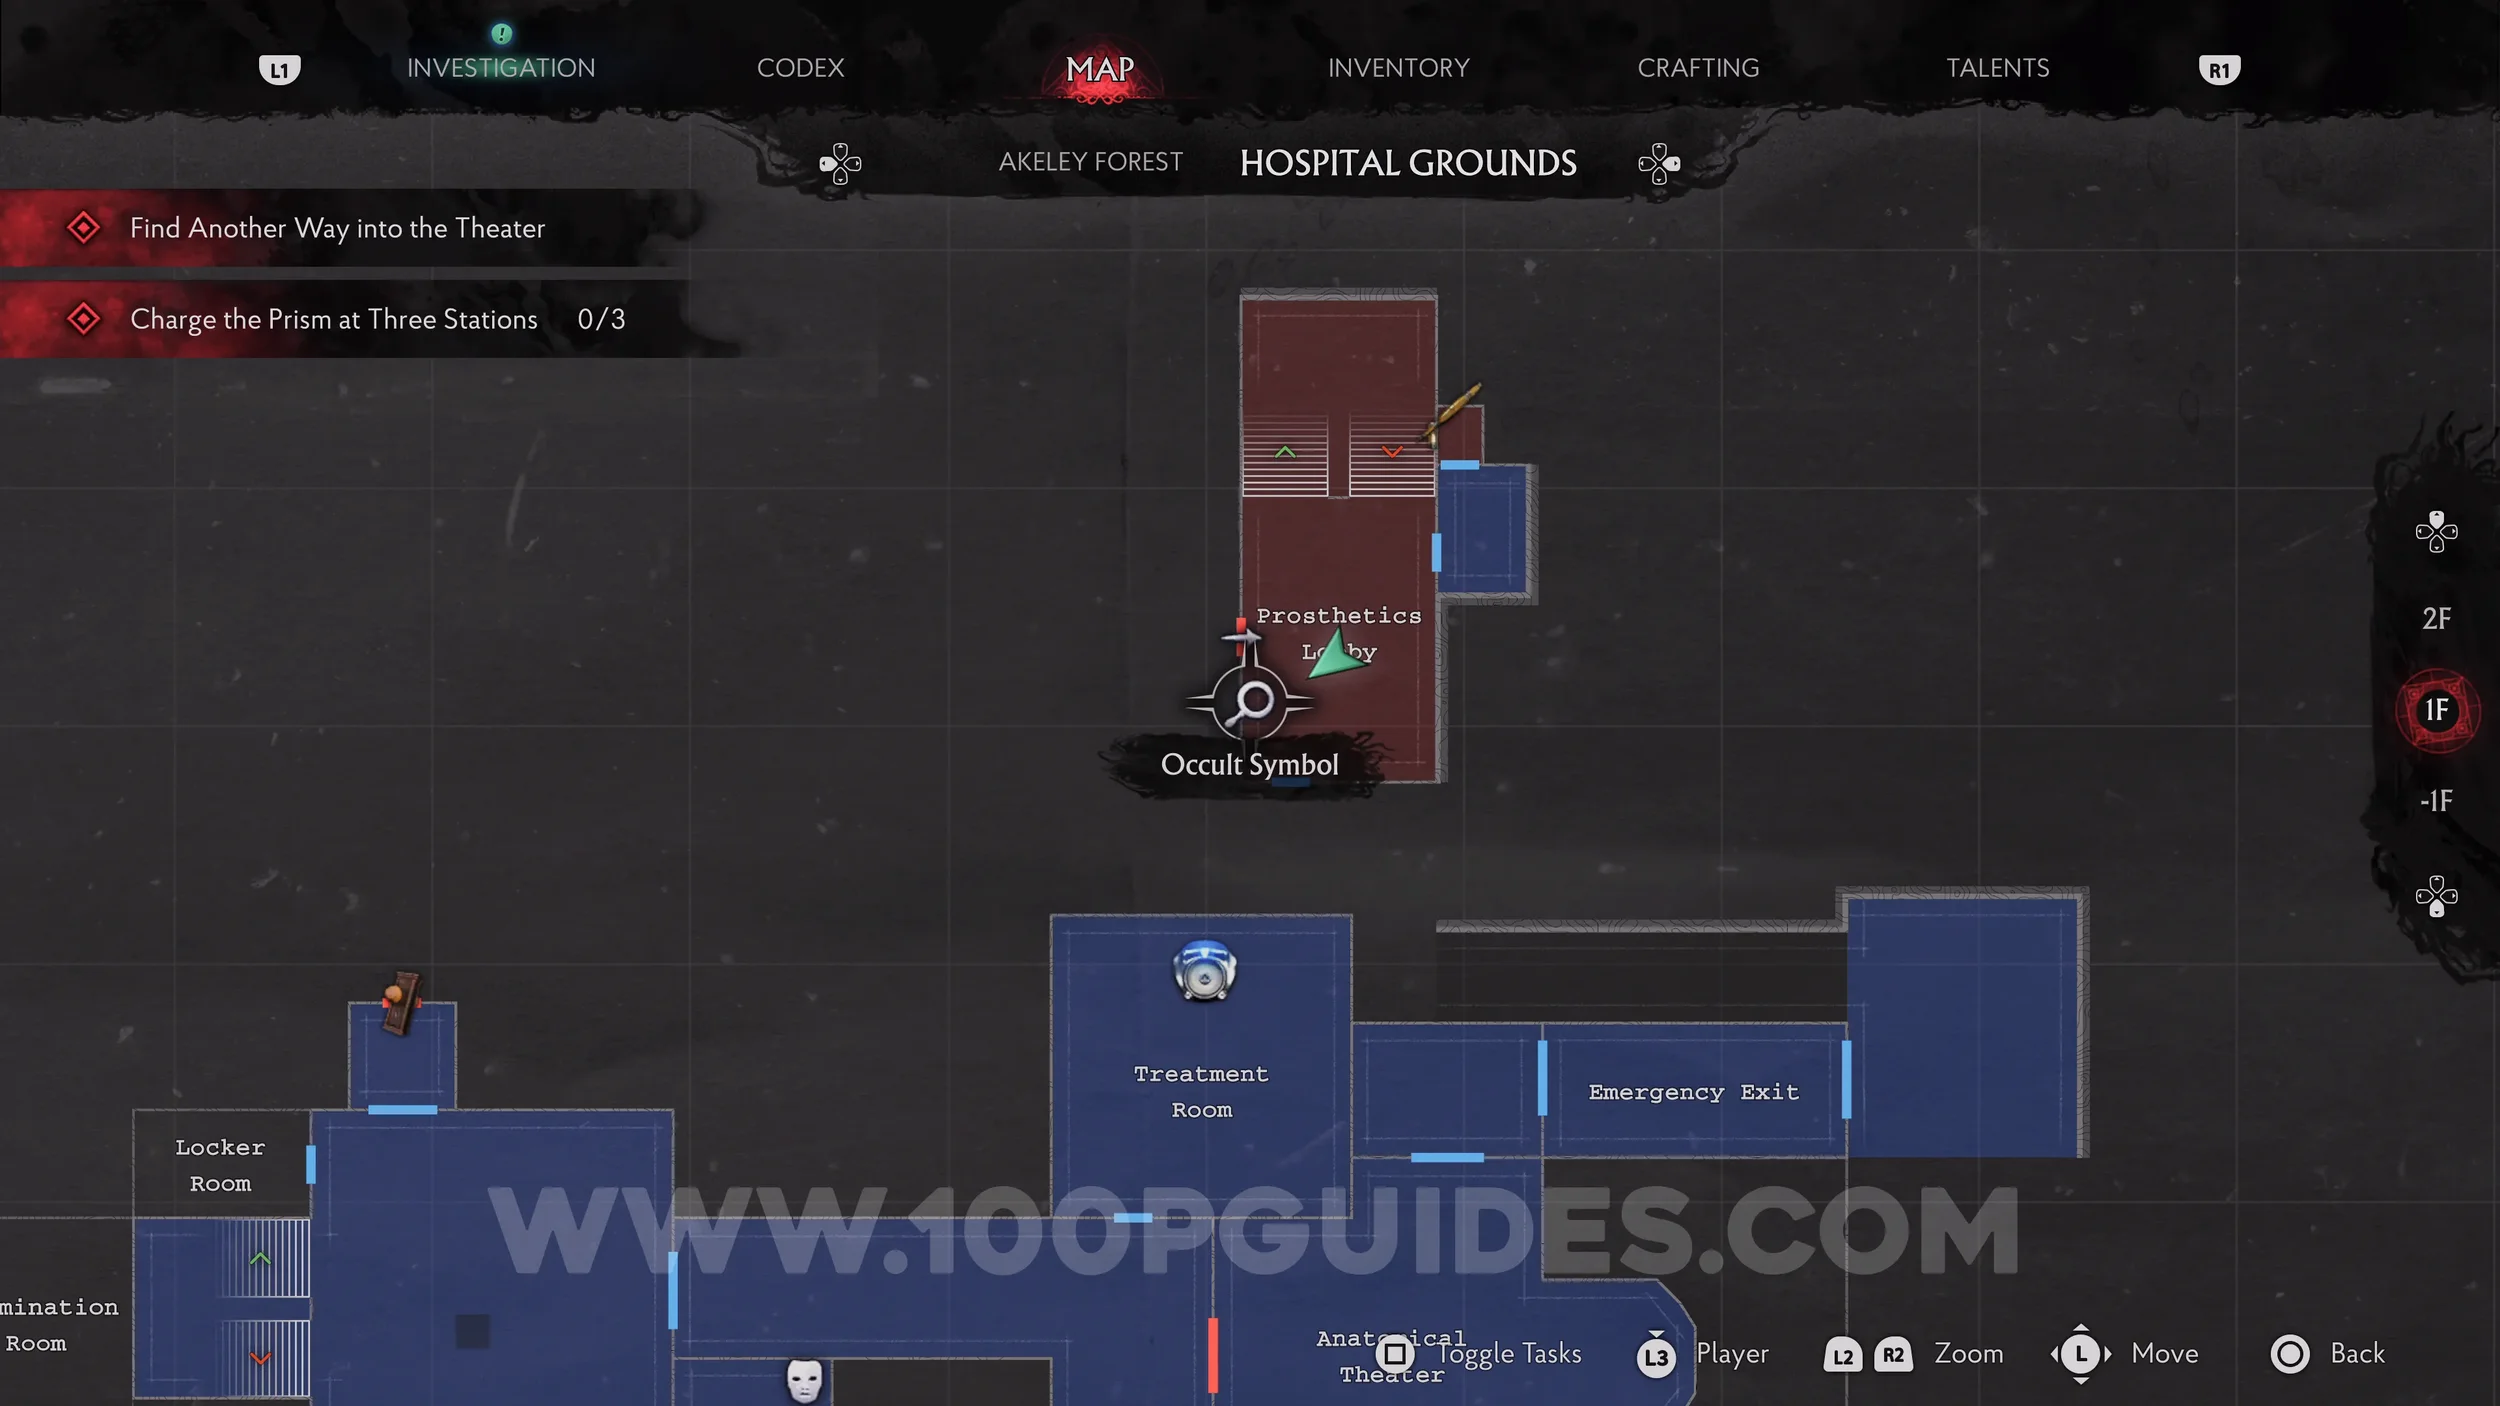
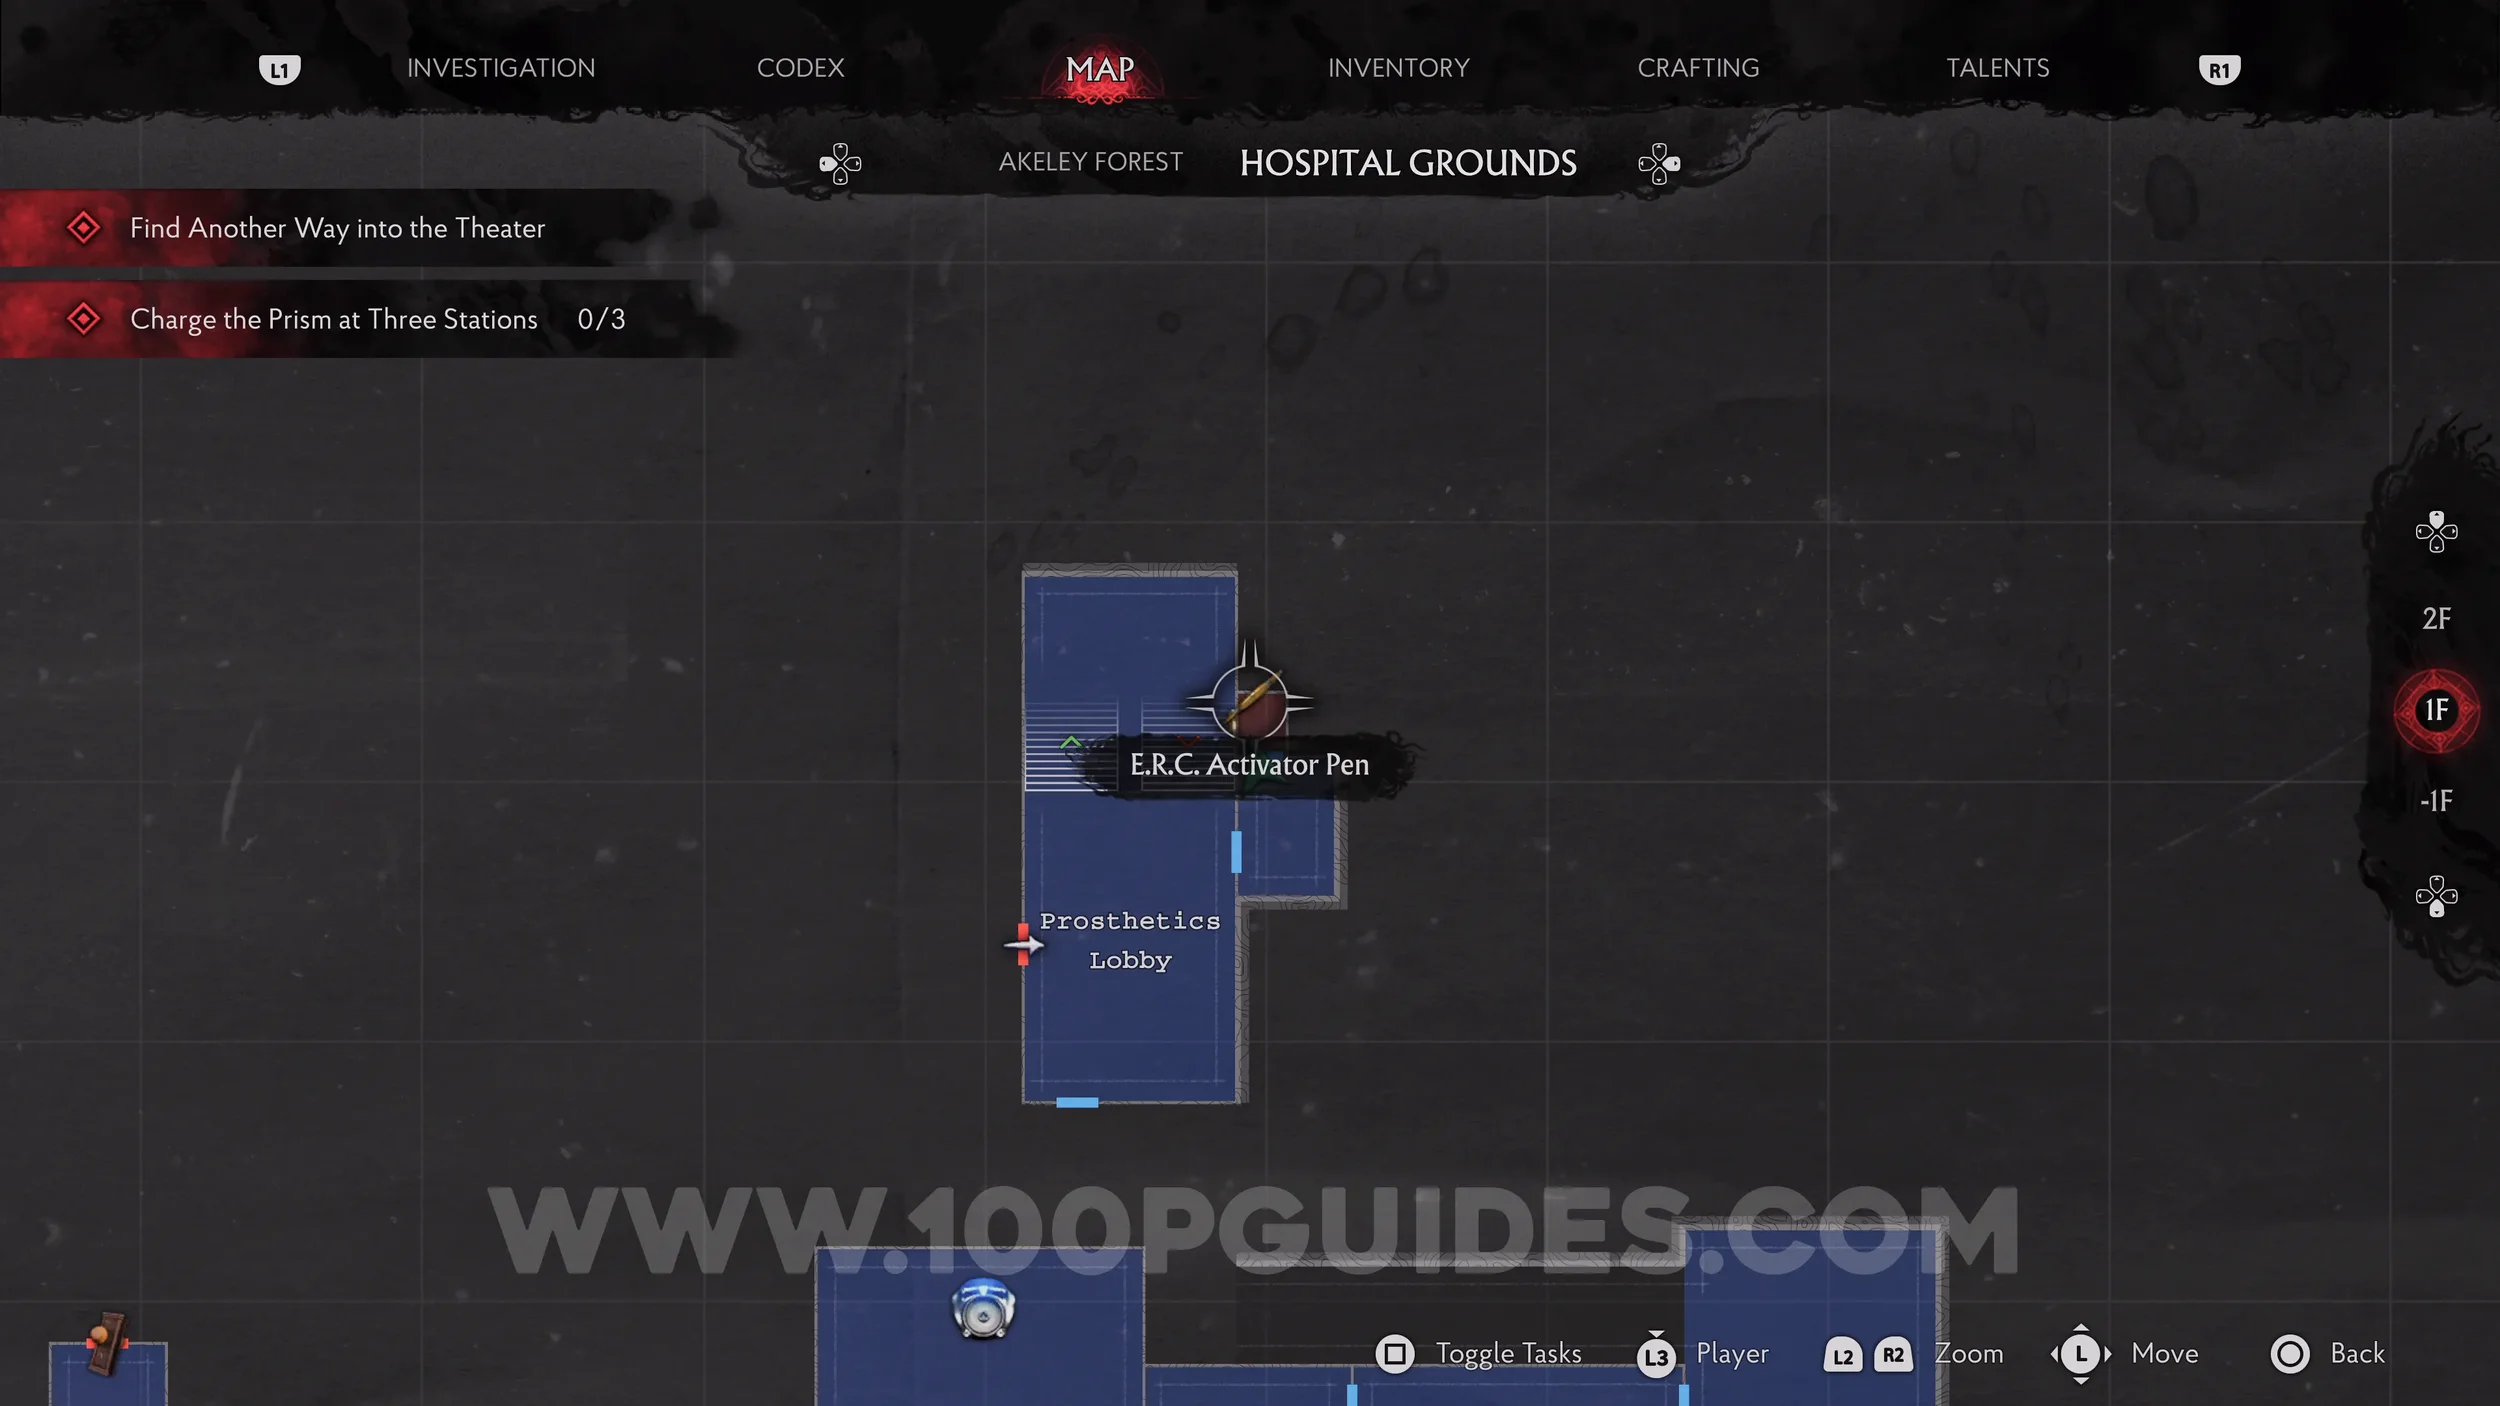
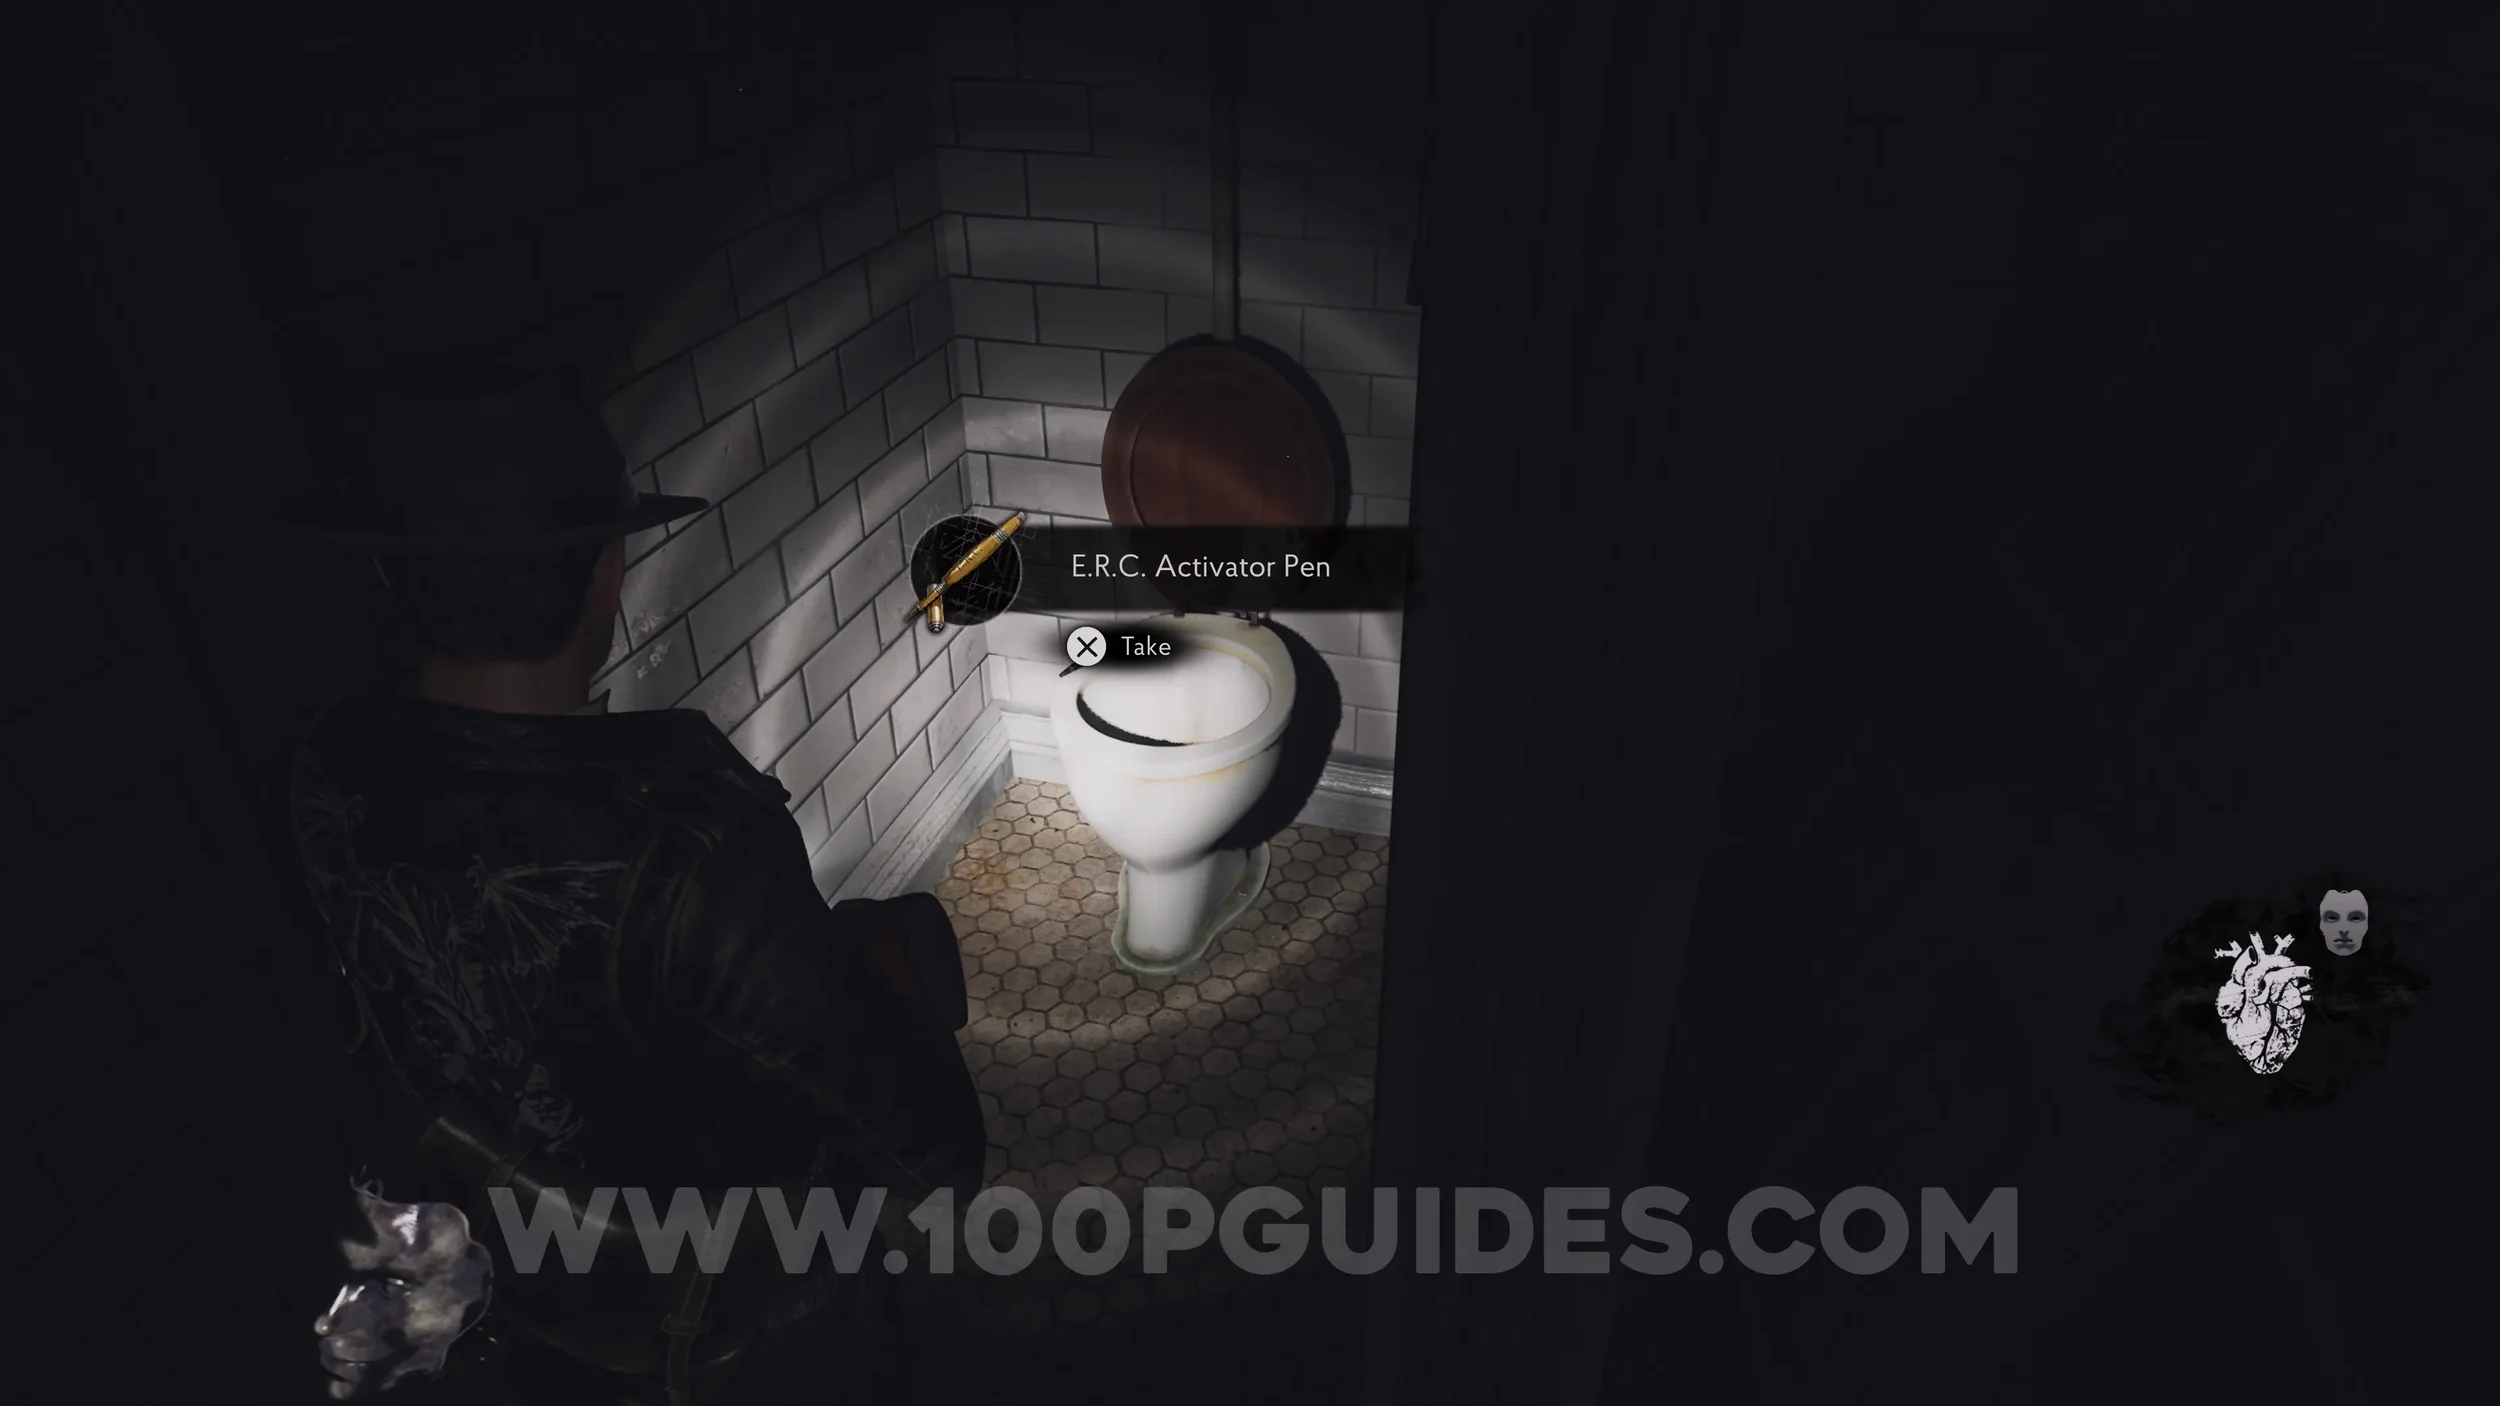
E.R.C. Activator Pen. On the toilet in the small room to the east of the Prosthetics Lobby.
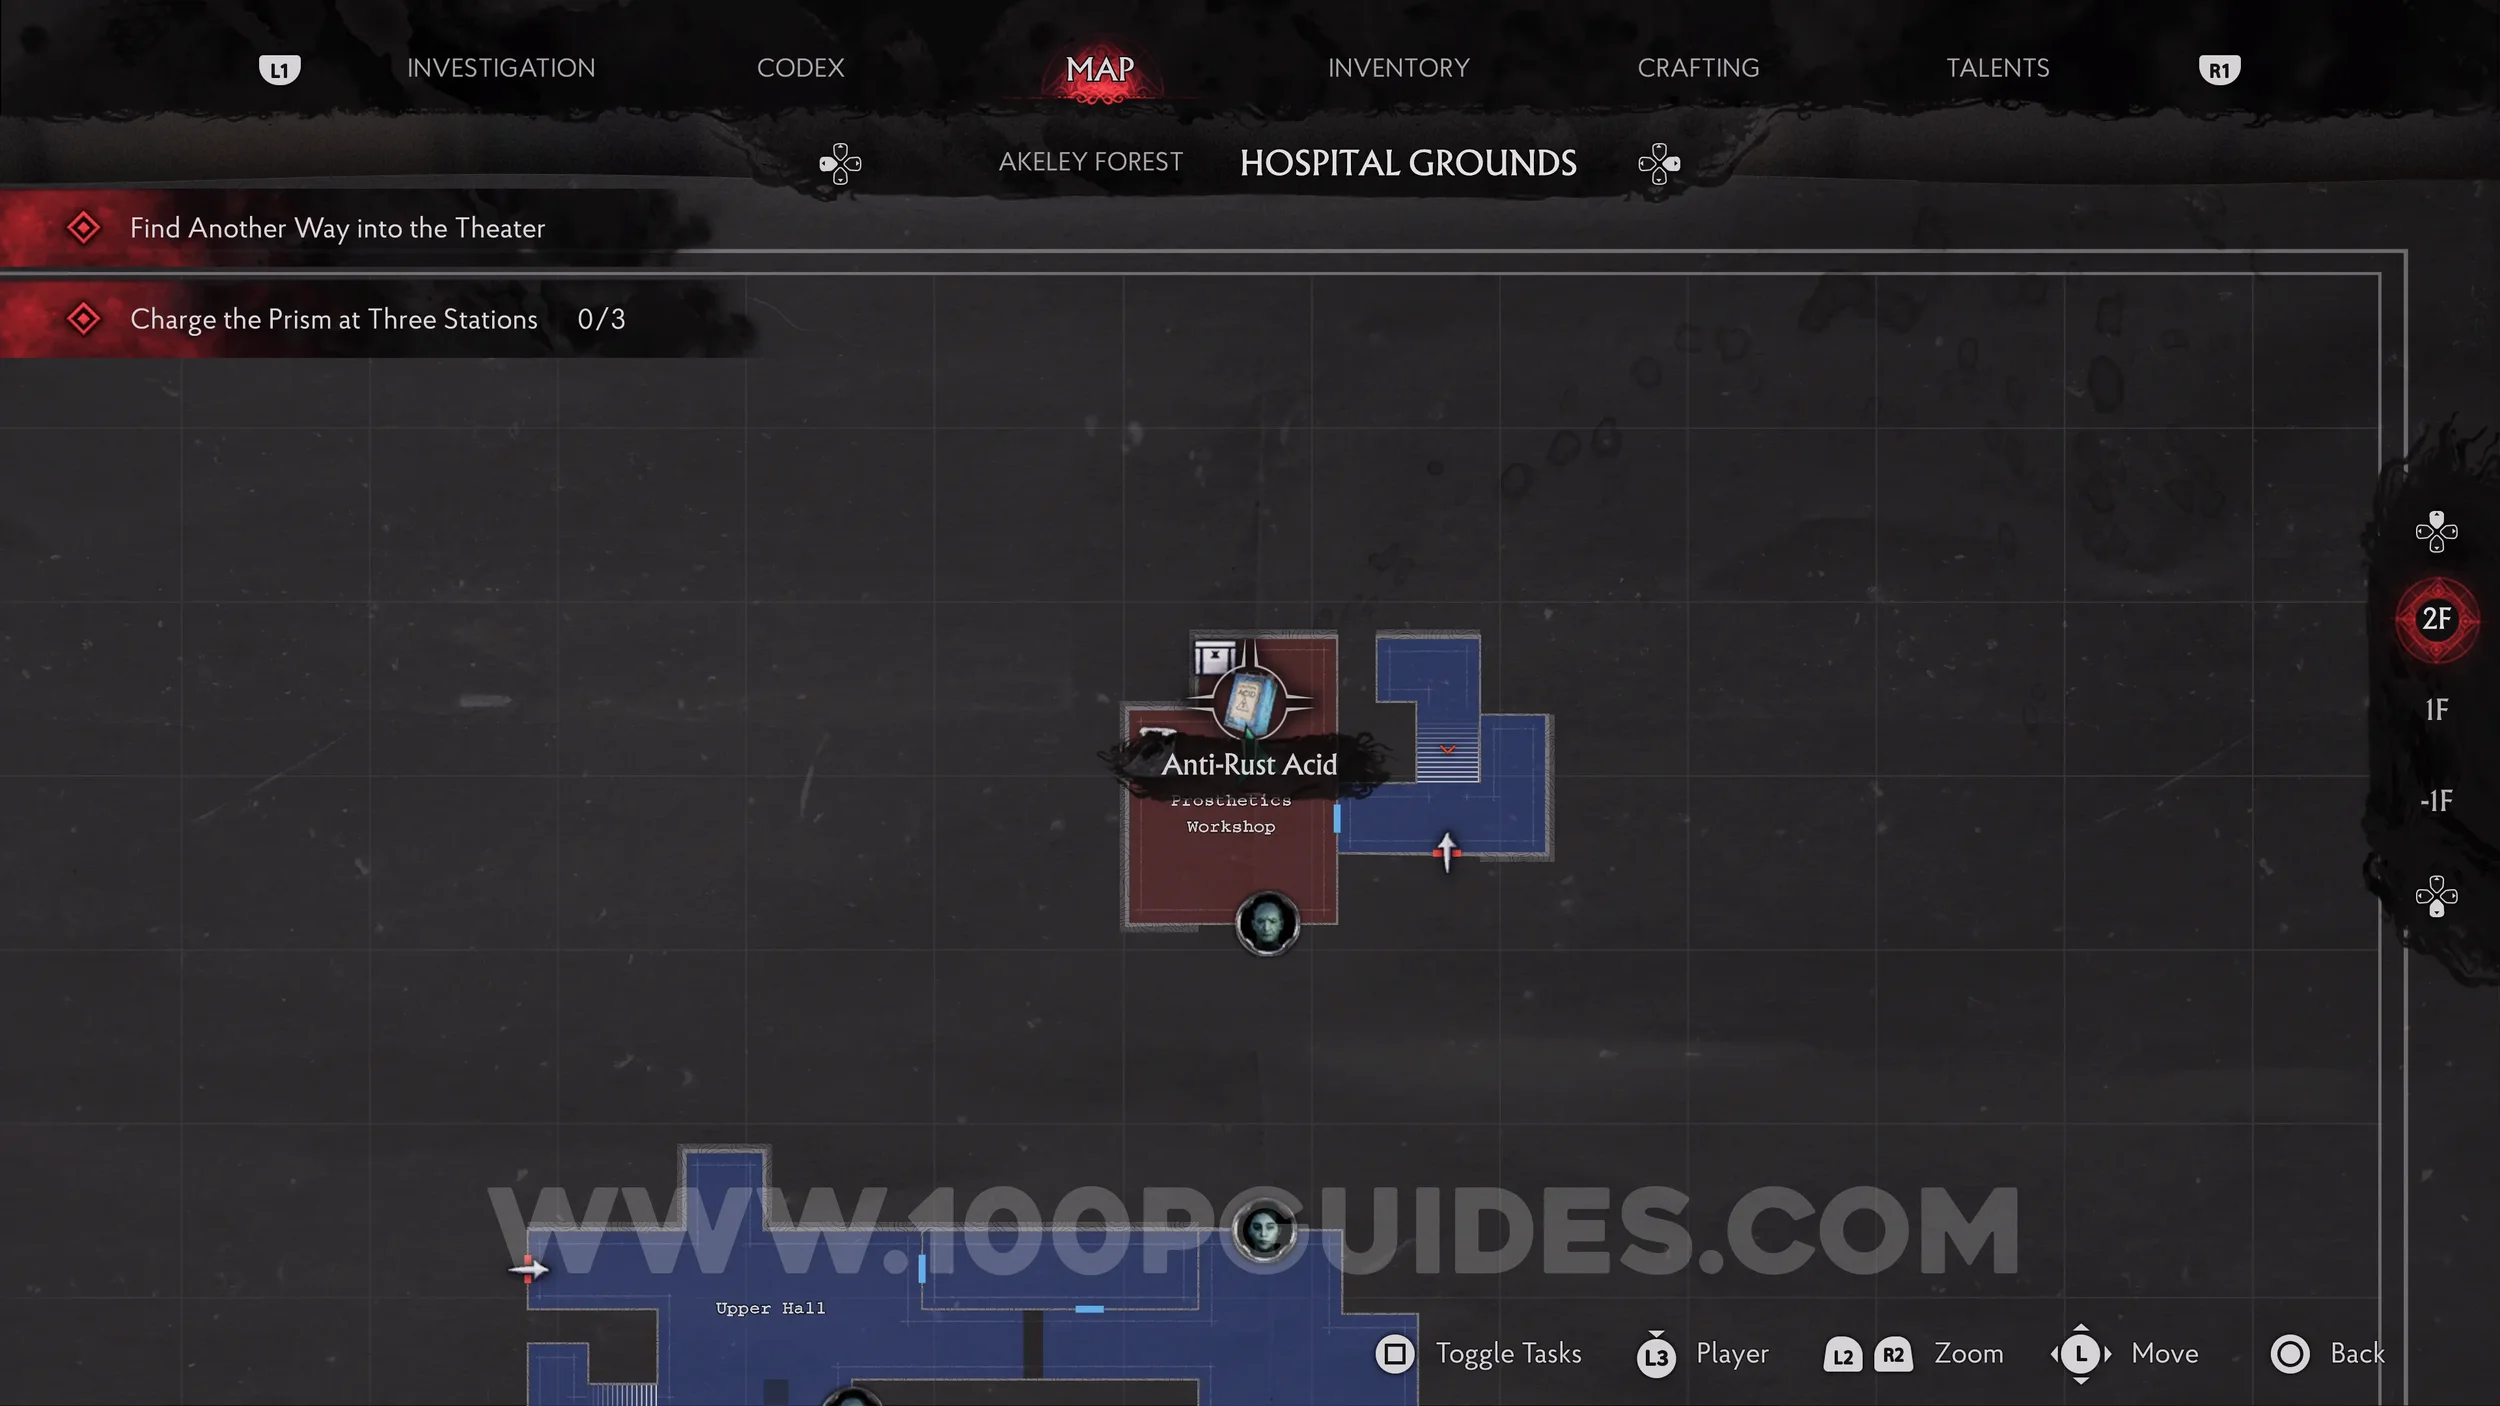
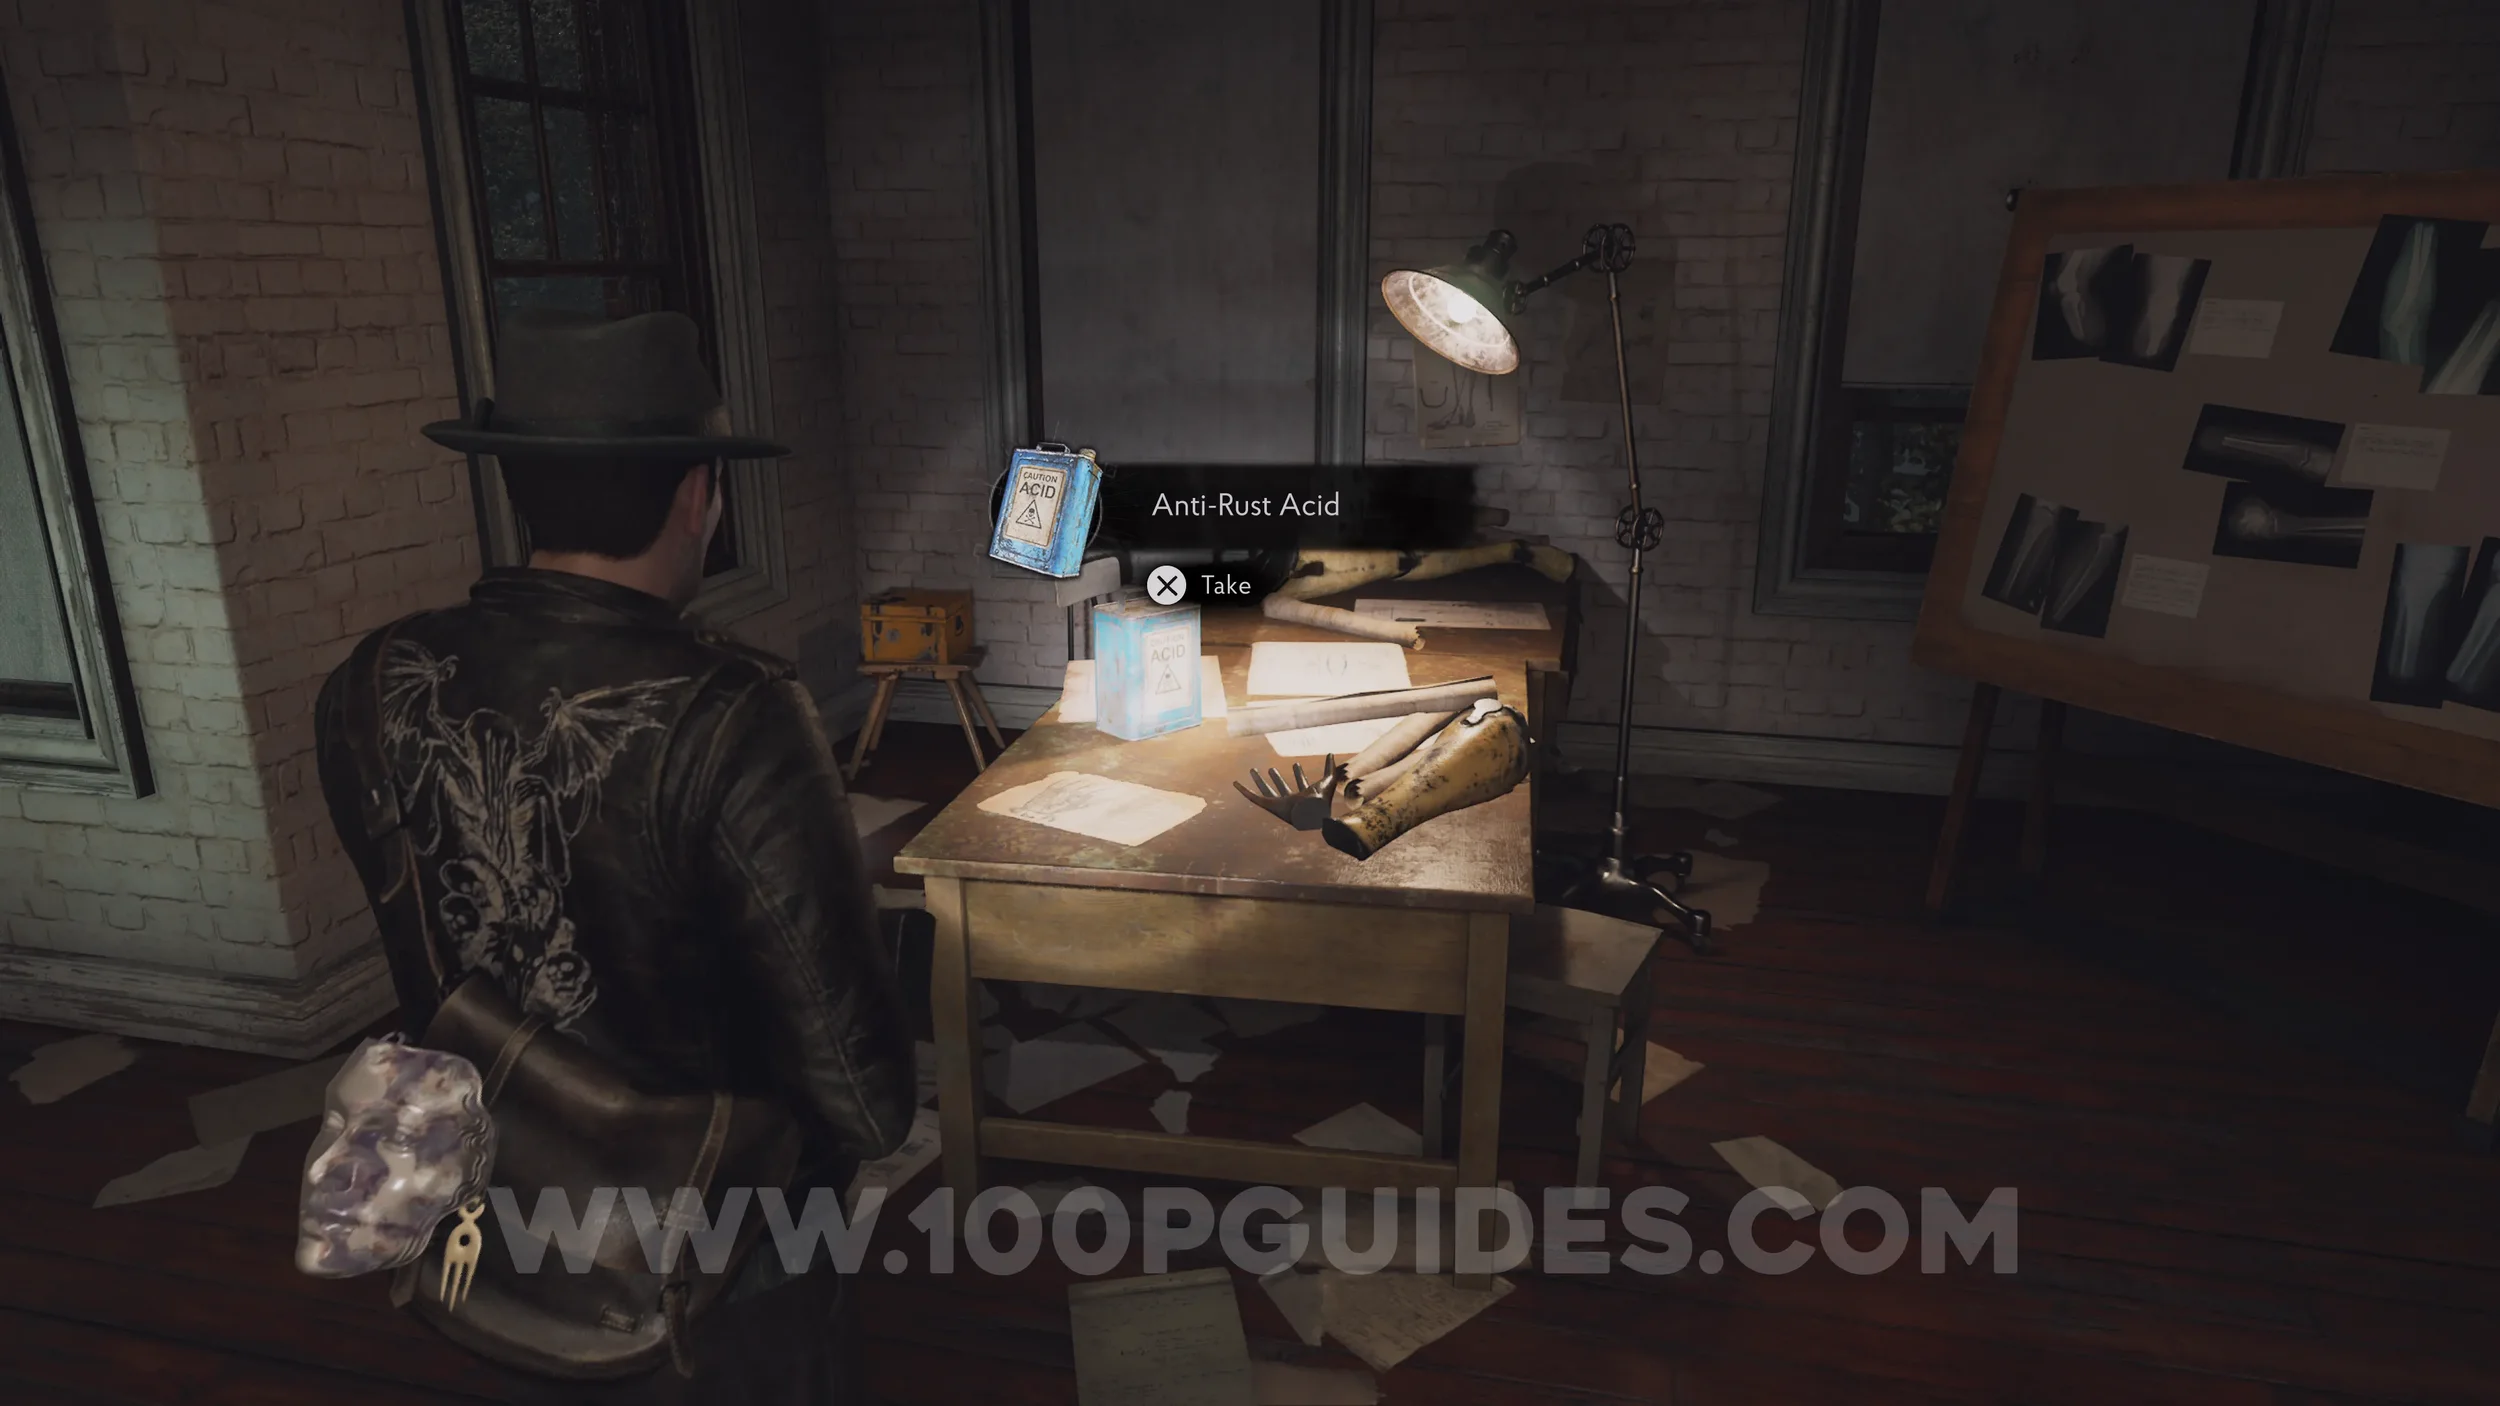
Key Item: Anti-Rust Acid. Continue upstairs to 2F. Here, enter the western door to the Prosthetics Workshop, where you'll find the acid on the table.
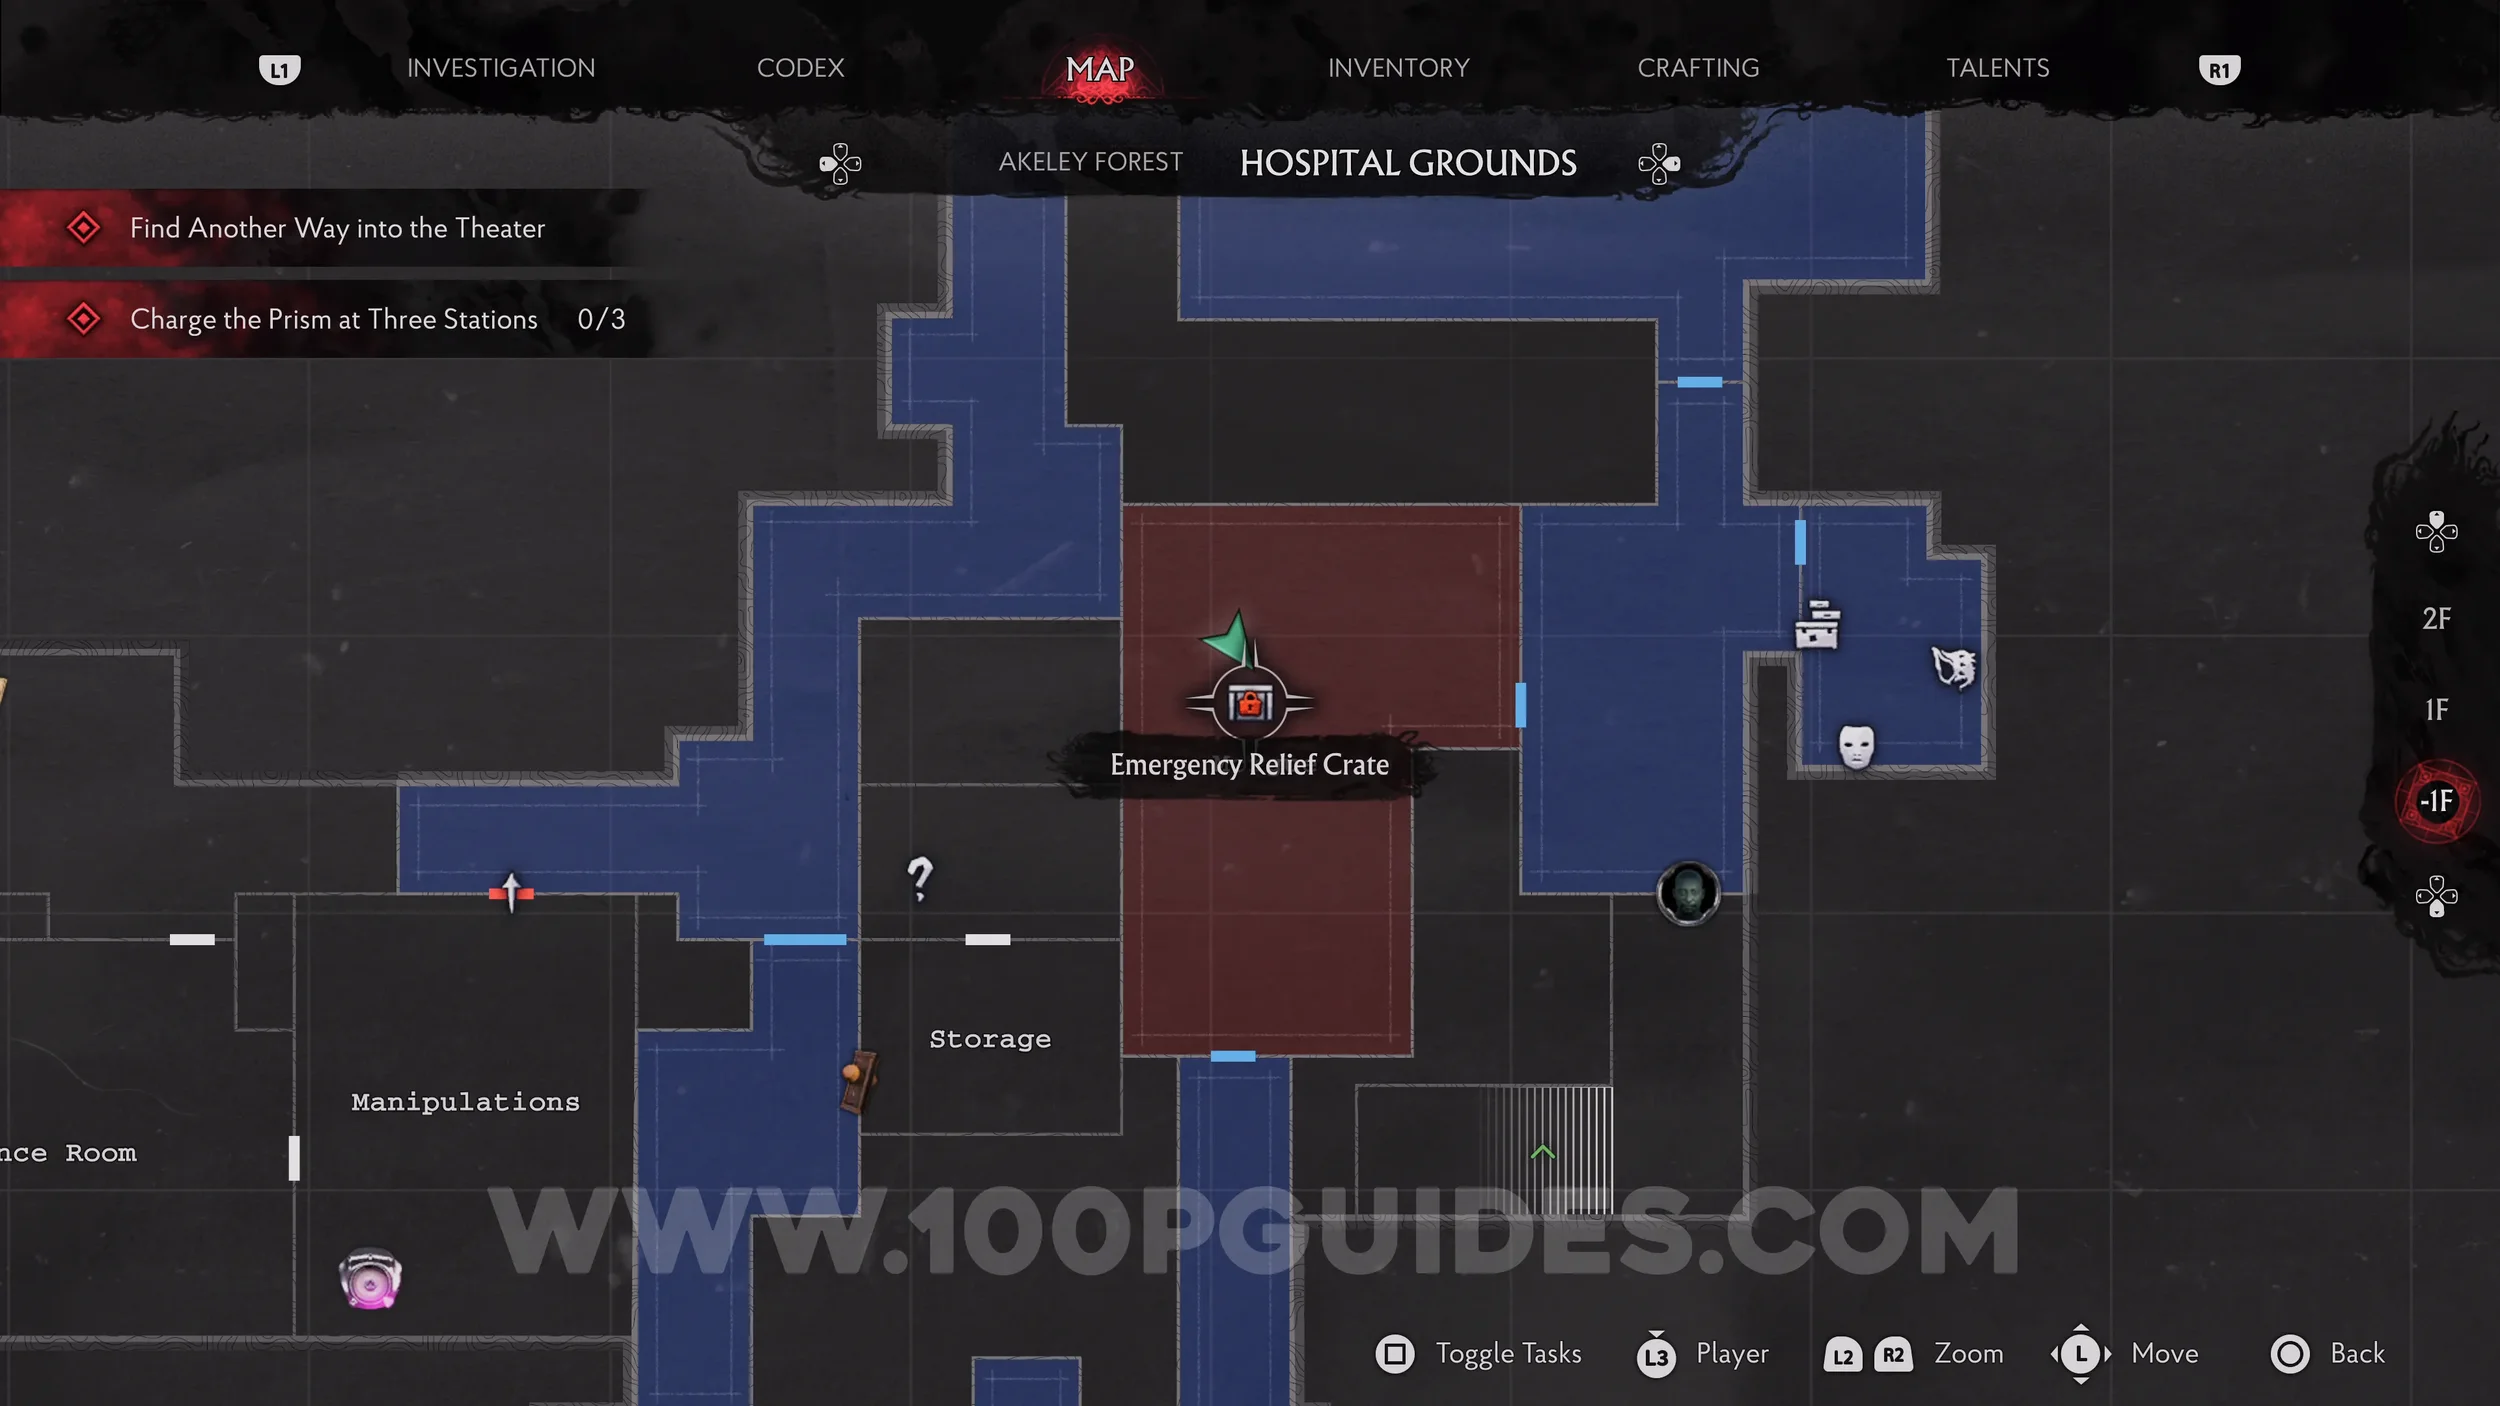
Emergency Relief Crate (E.R.C.) + Inventory Expansion. Head back downstairs and through the Lower Yard to return to the Morgue. Open the E.R.C. with the pen to get the Inventory Expansion.
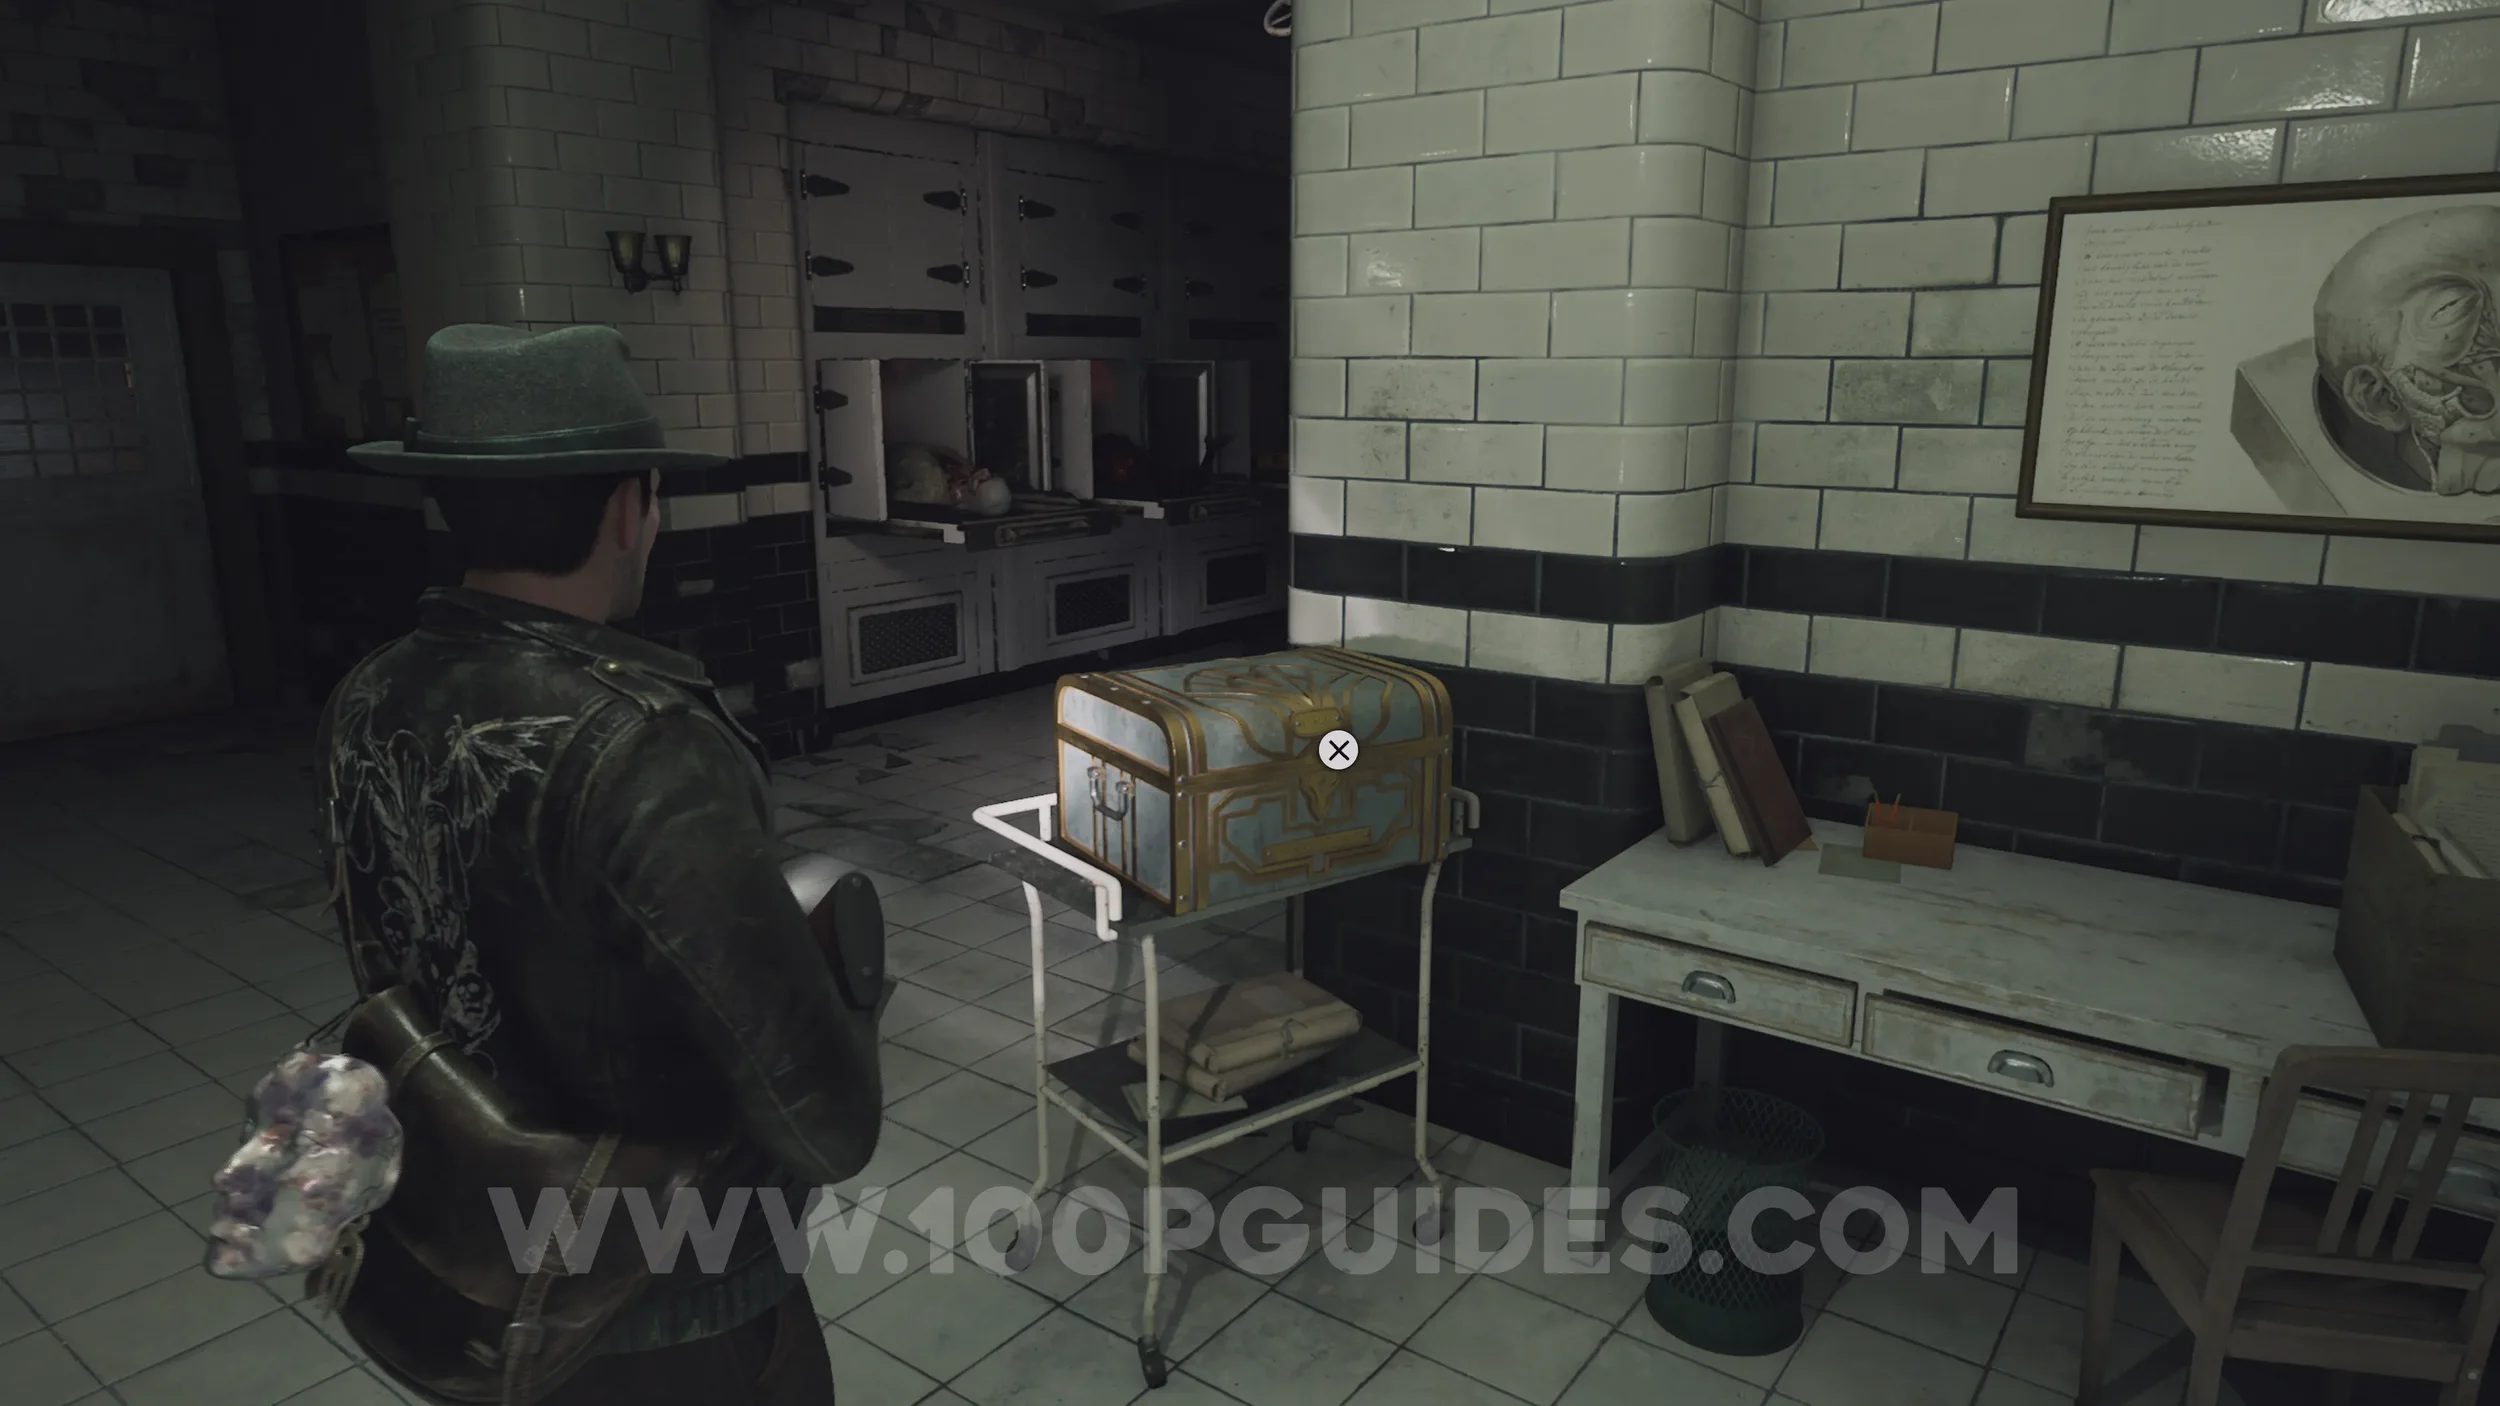
Locked Storage Room Combination Lock Code
Now that you have the Anti-Rust Acid and you're in the area, head around to the Storage Room on -1F and use it to open the door. Then, inside, use the code 1308 to open the gate. Technically you'd have to wait until you find a few pieces of evidence later in the Hospital to work it out, but if you already know the code you can enter it now and get it out of the way.


Trophy: The Vault. Obtained after opening the gate in the storage room.
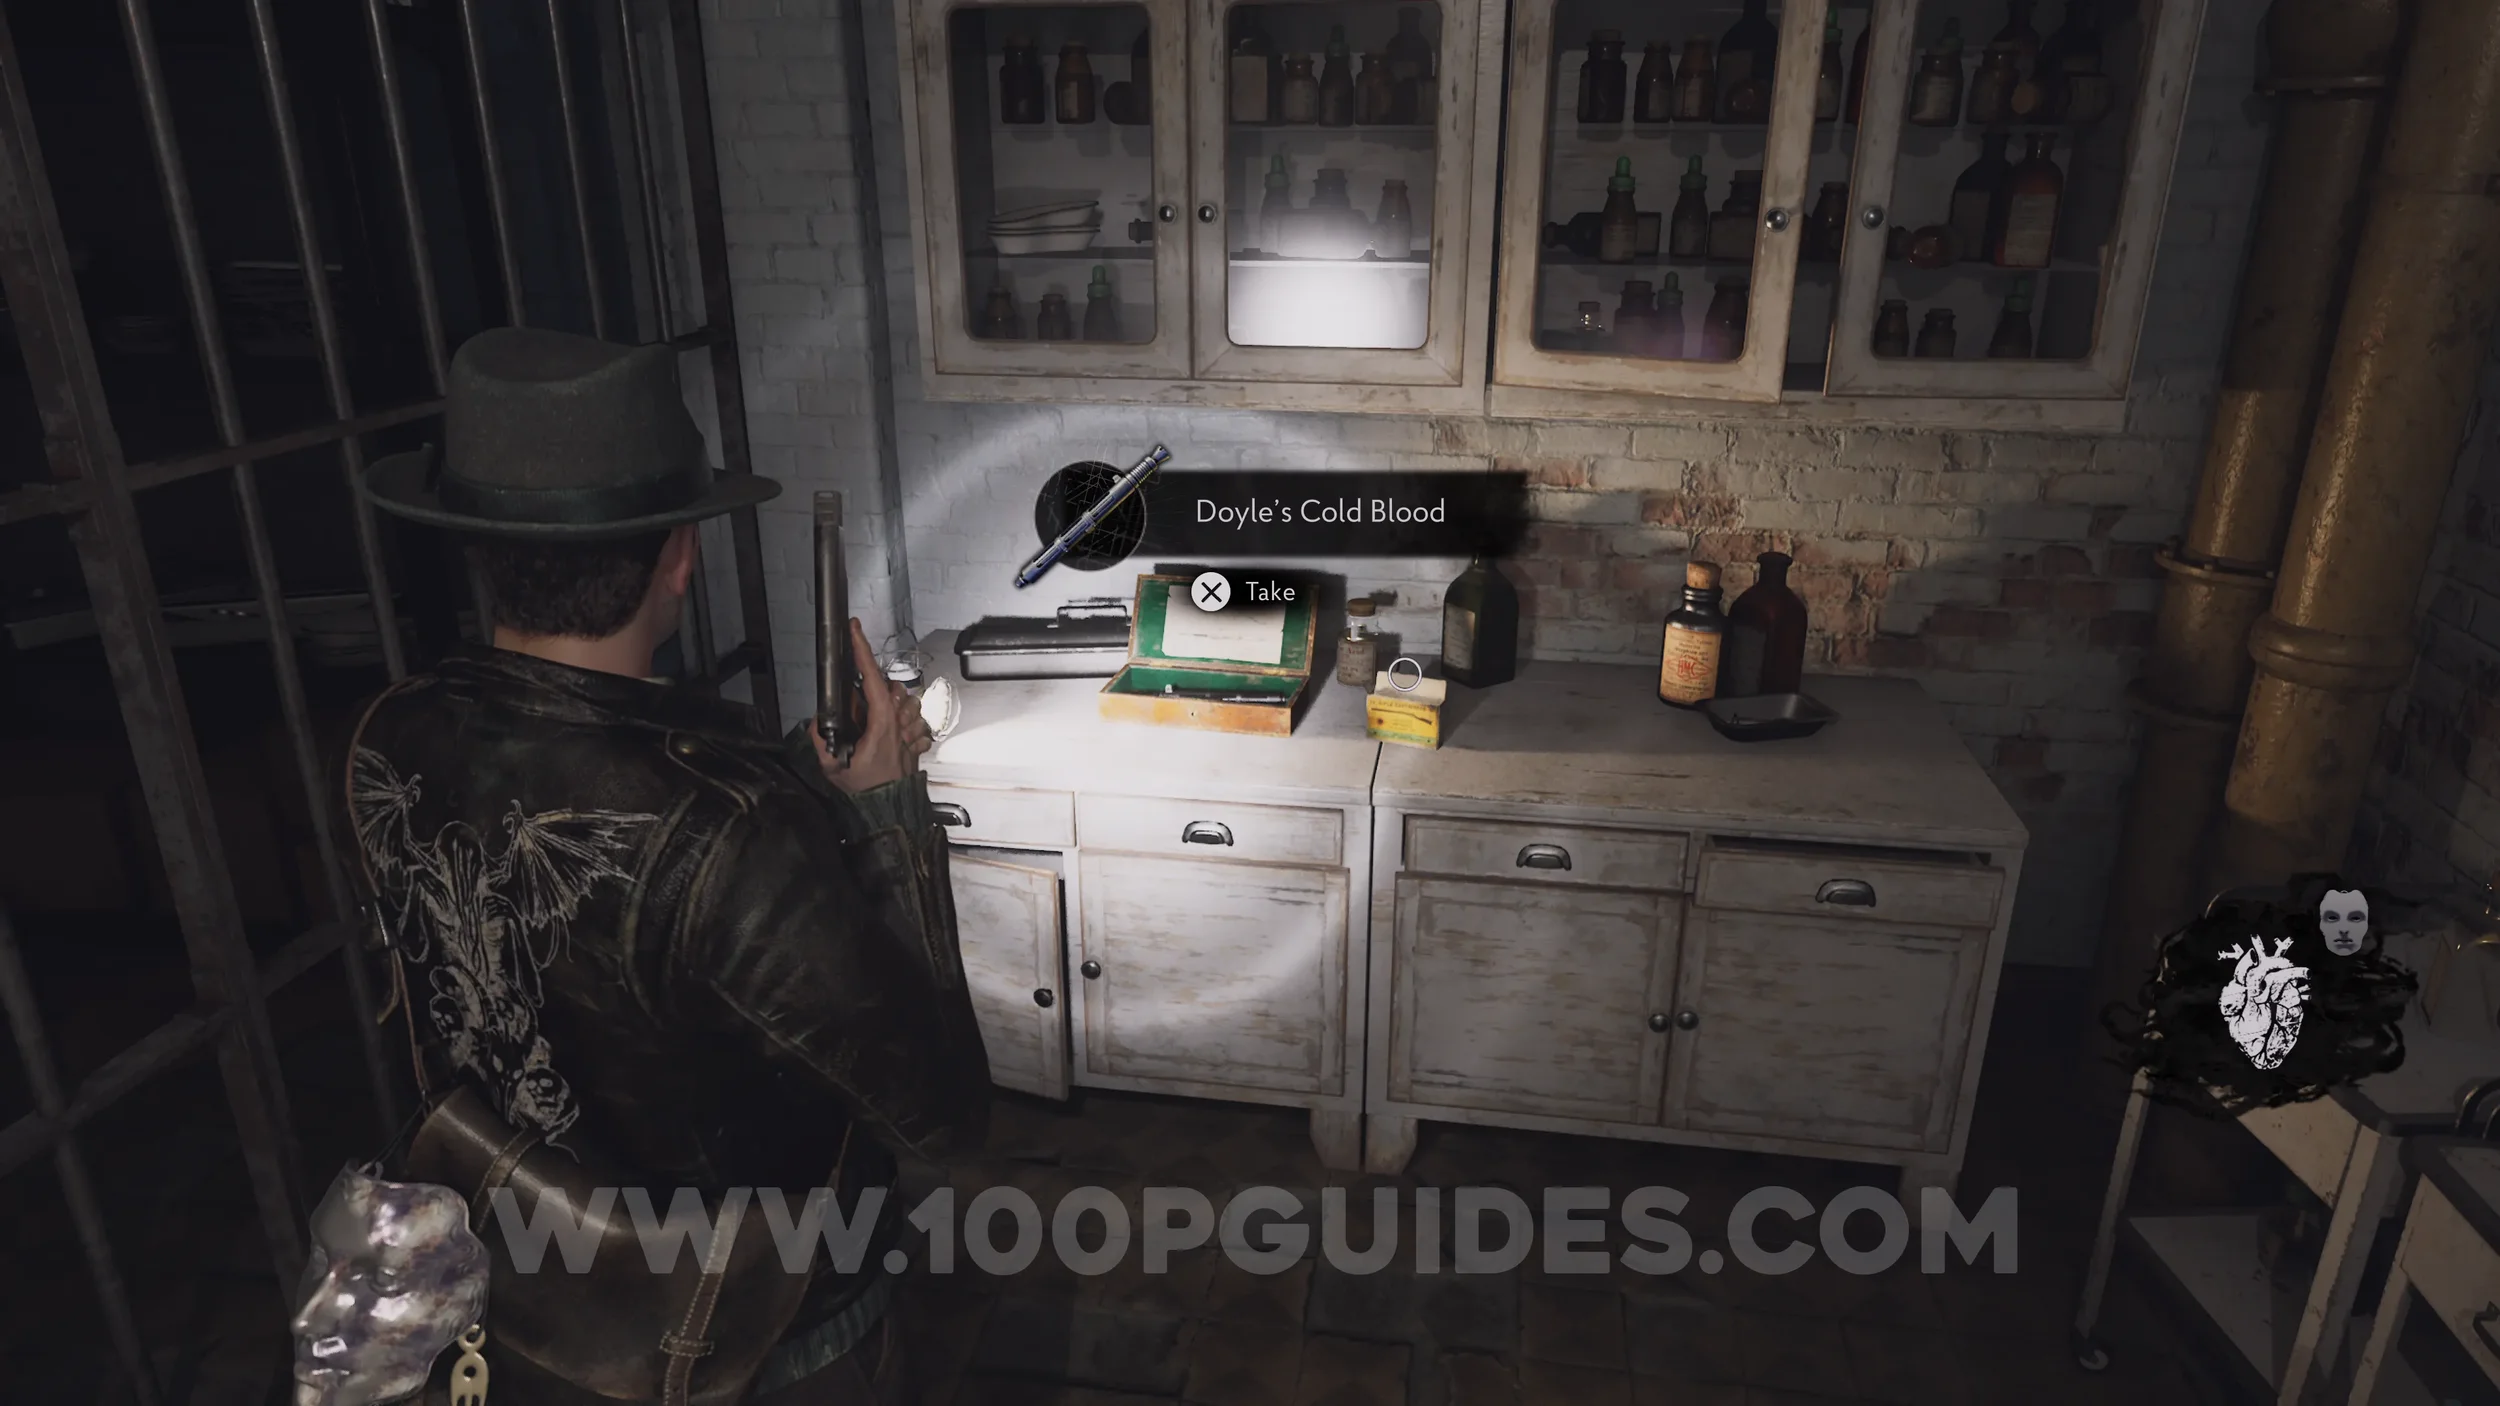
Weapon Accessory: Doyle’s Cold Blood. On the other side of the locked gate in the Storage Room.
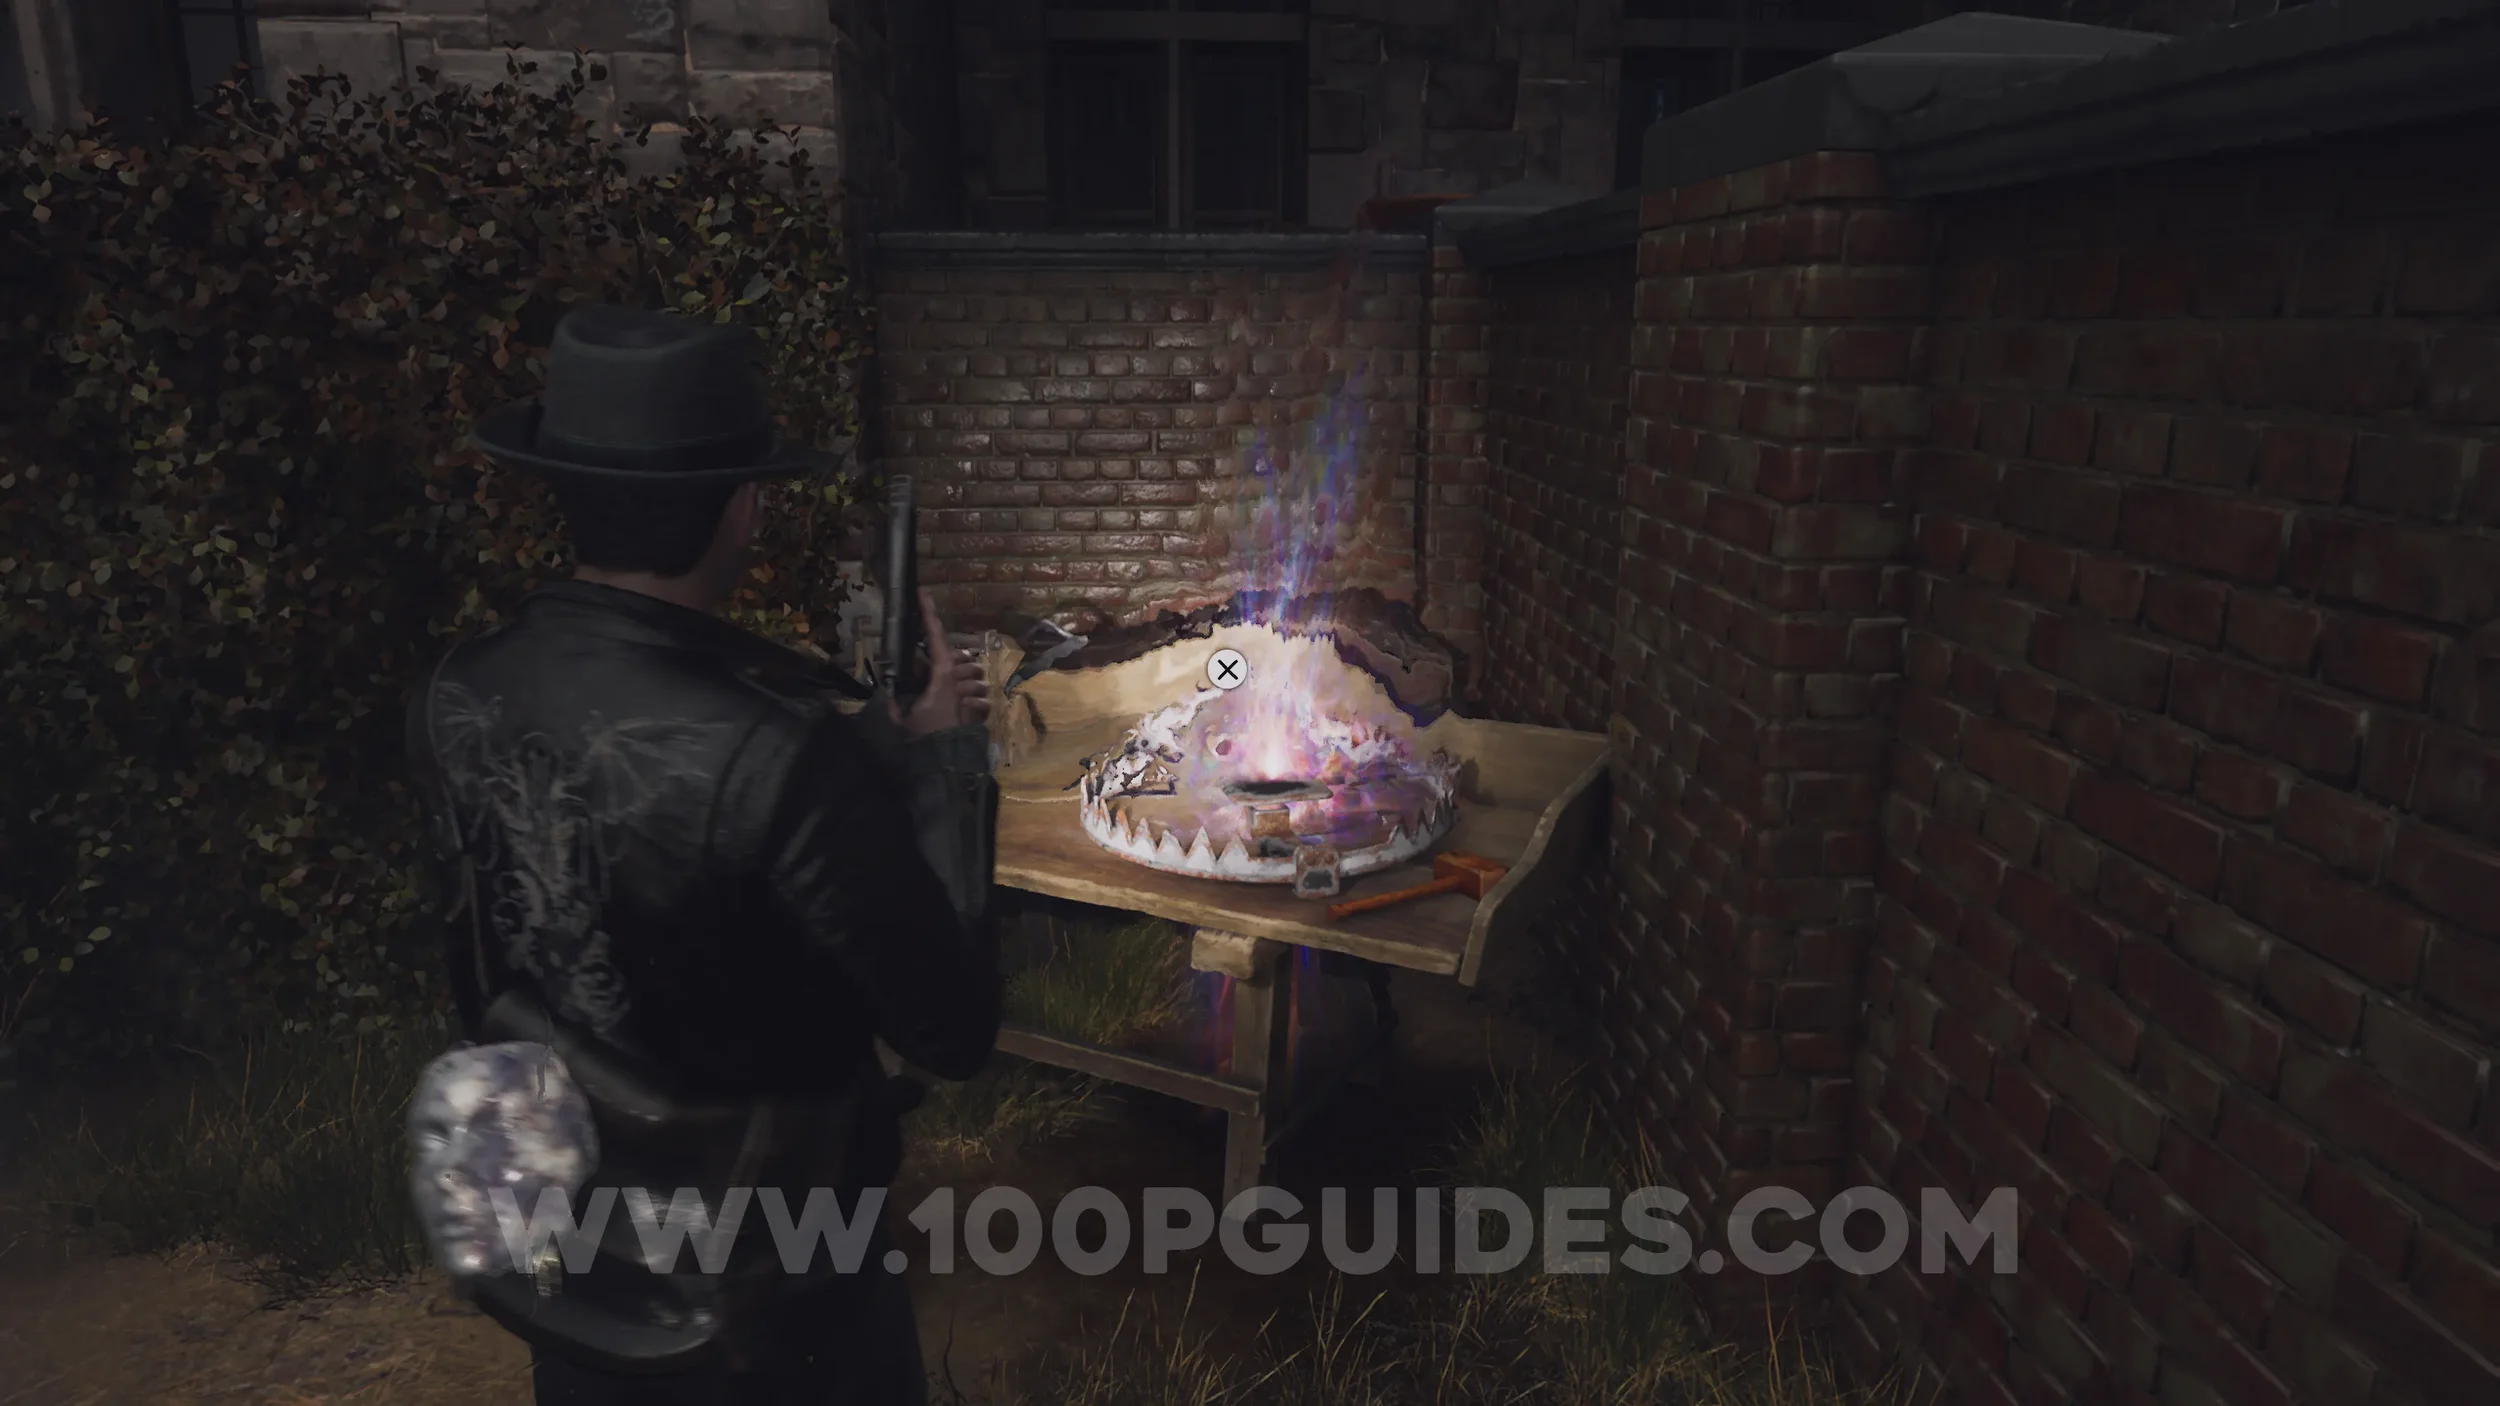
Evidence: Occult Symbol (Blue). Go upstairs and return to the Prosthetics Lobby on 1F, then exit through the southern door to reach the Gardens. Here, go all the way to the end to find the evidence in a bear trap.
Blue Prism Station Puzzle
Now that you have the three blue Occult Symbols, return to the Treatment Room and place the Prism in the station. Then rotate the three rings so they match the image below.


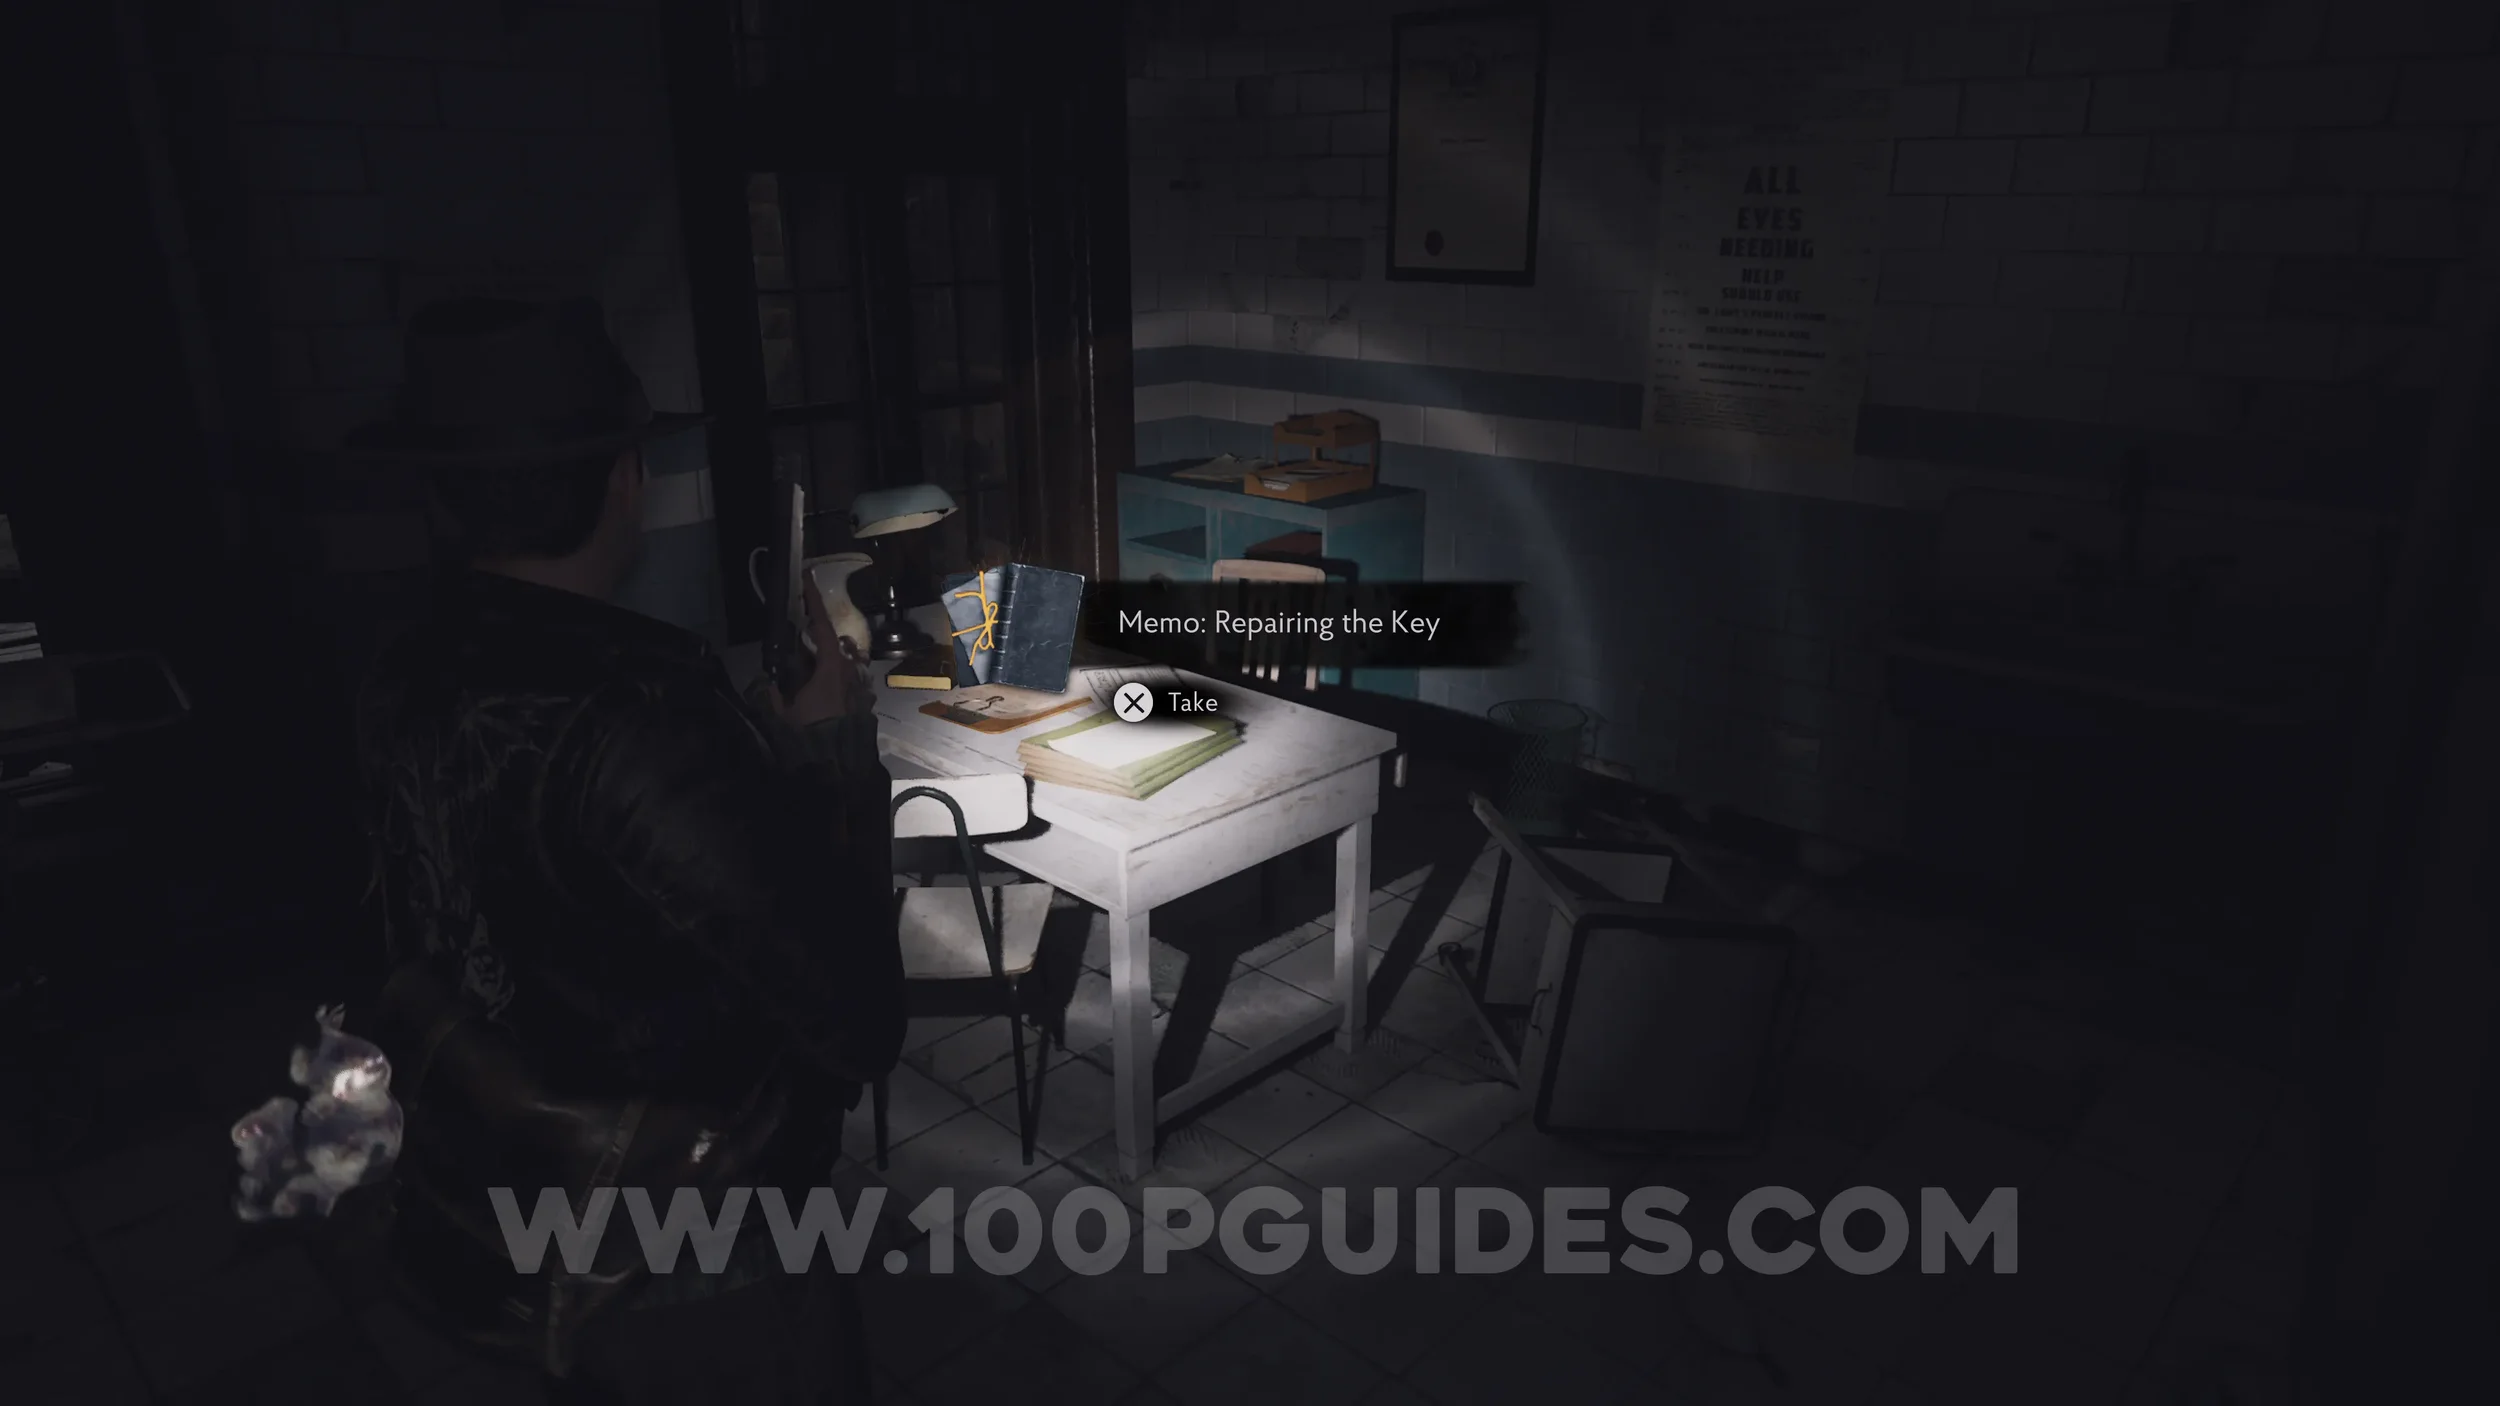
Lore Codex: Memo: Repairing the Key. Head back to the Reception and use the Woman's Face Mask to open the western door. Then head north into the Examination Room. The codex is on the table.
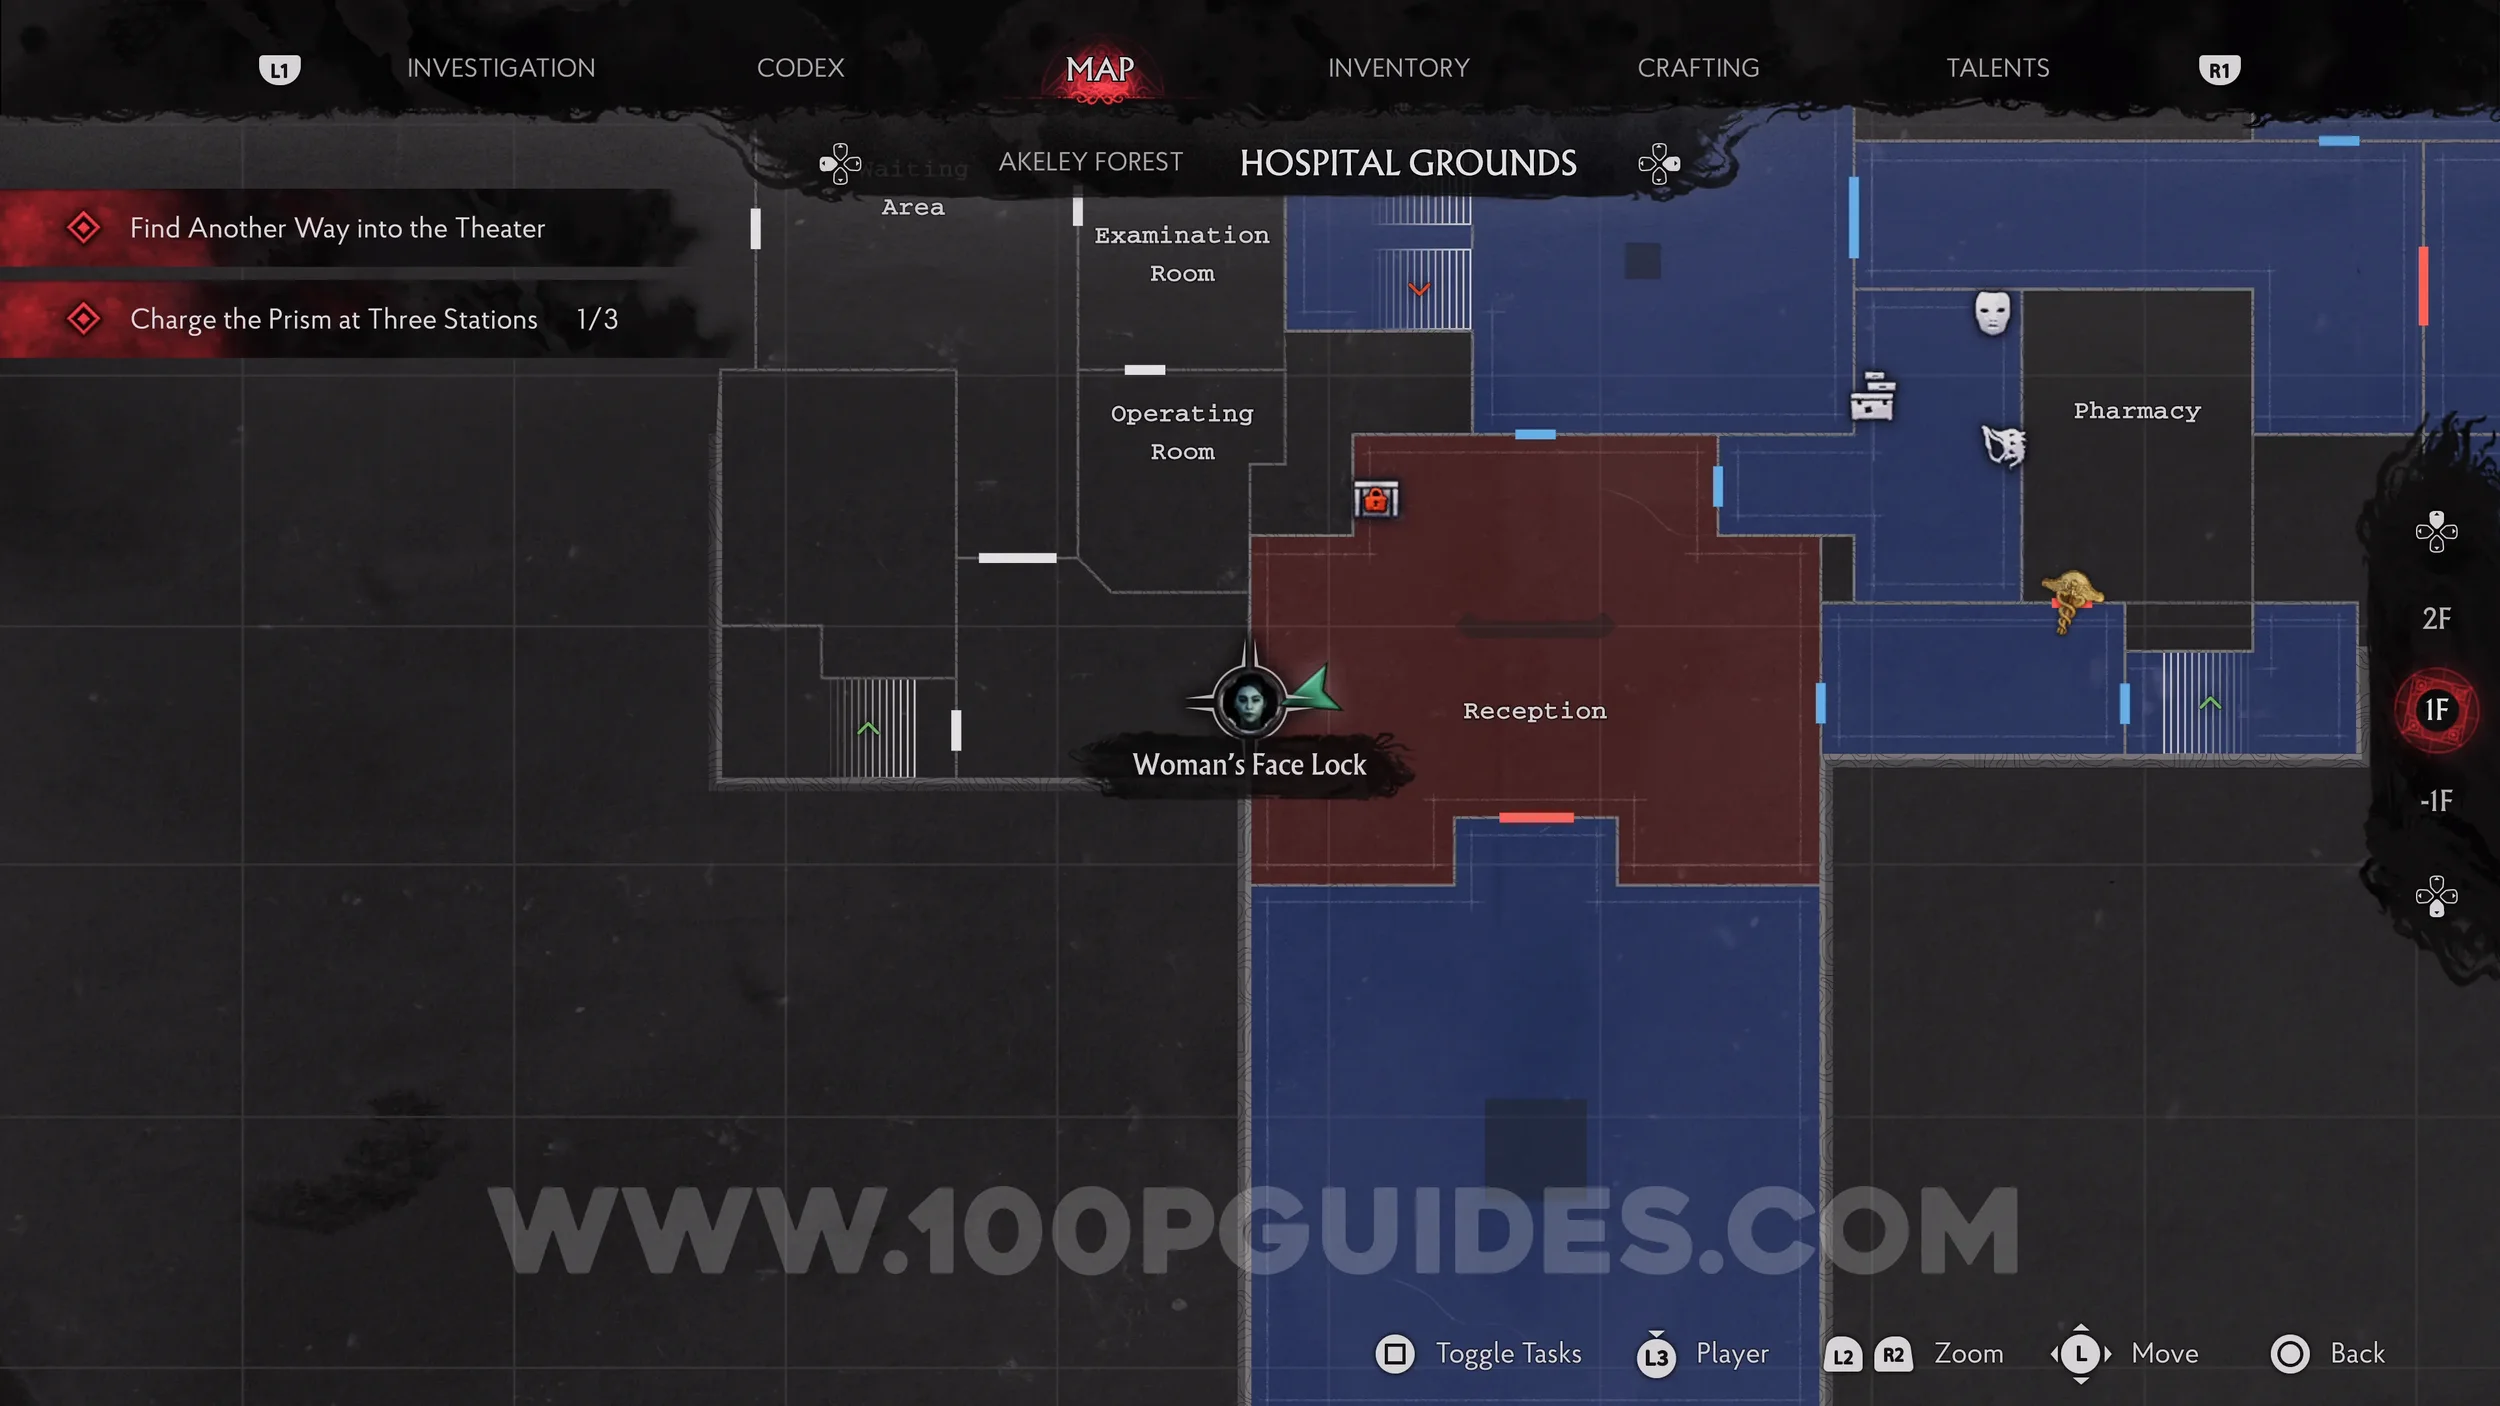
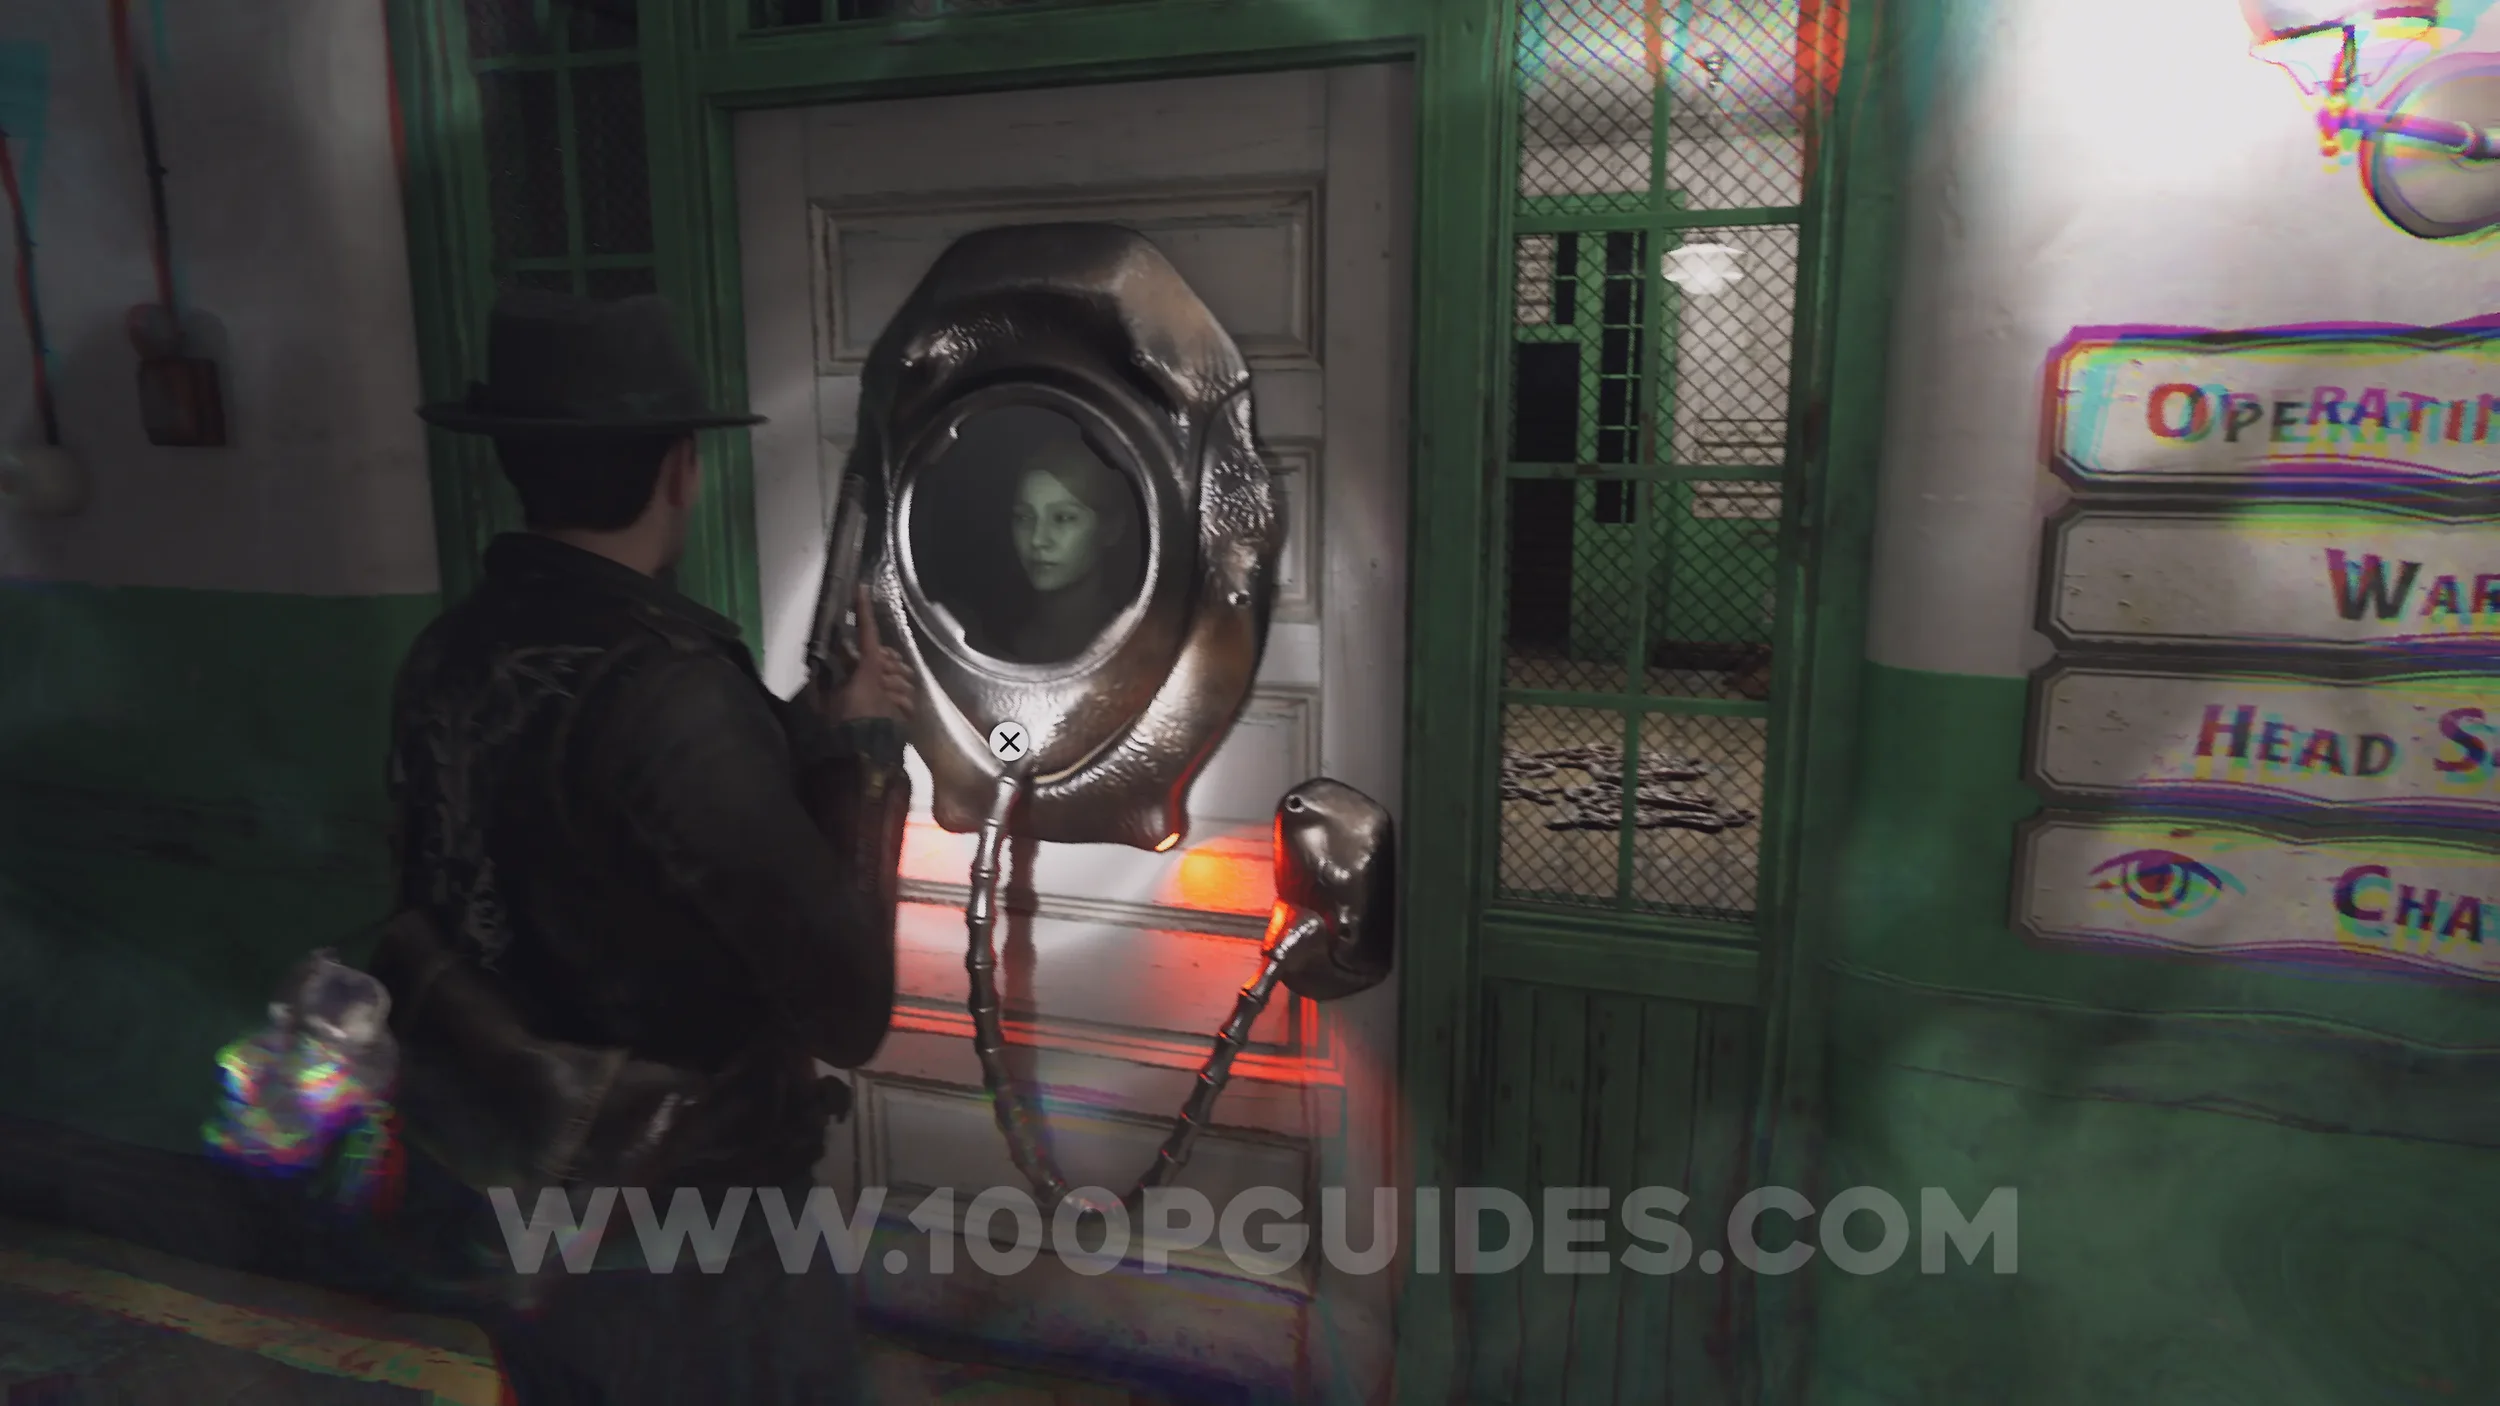
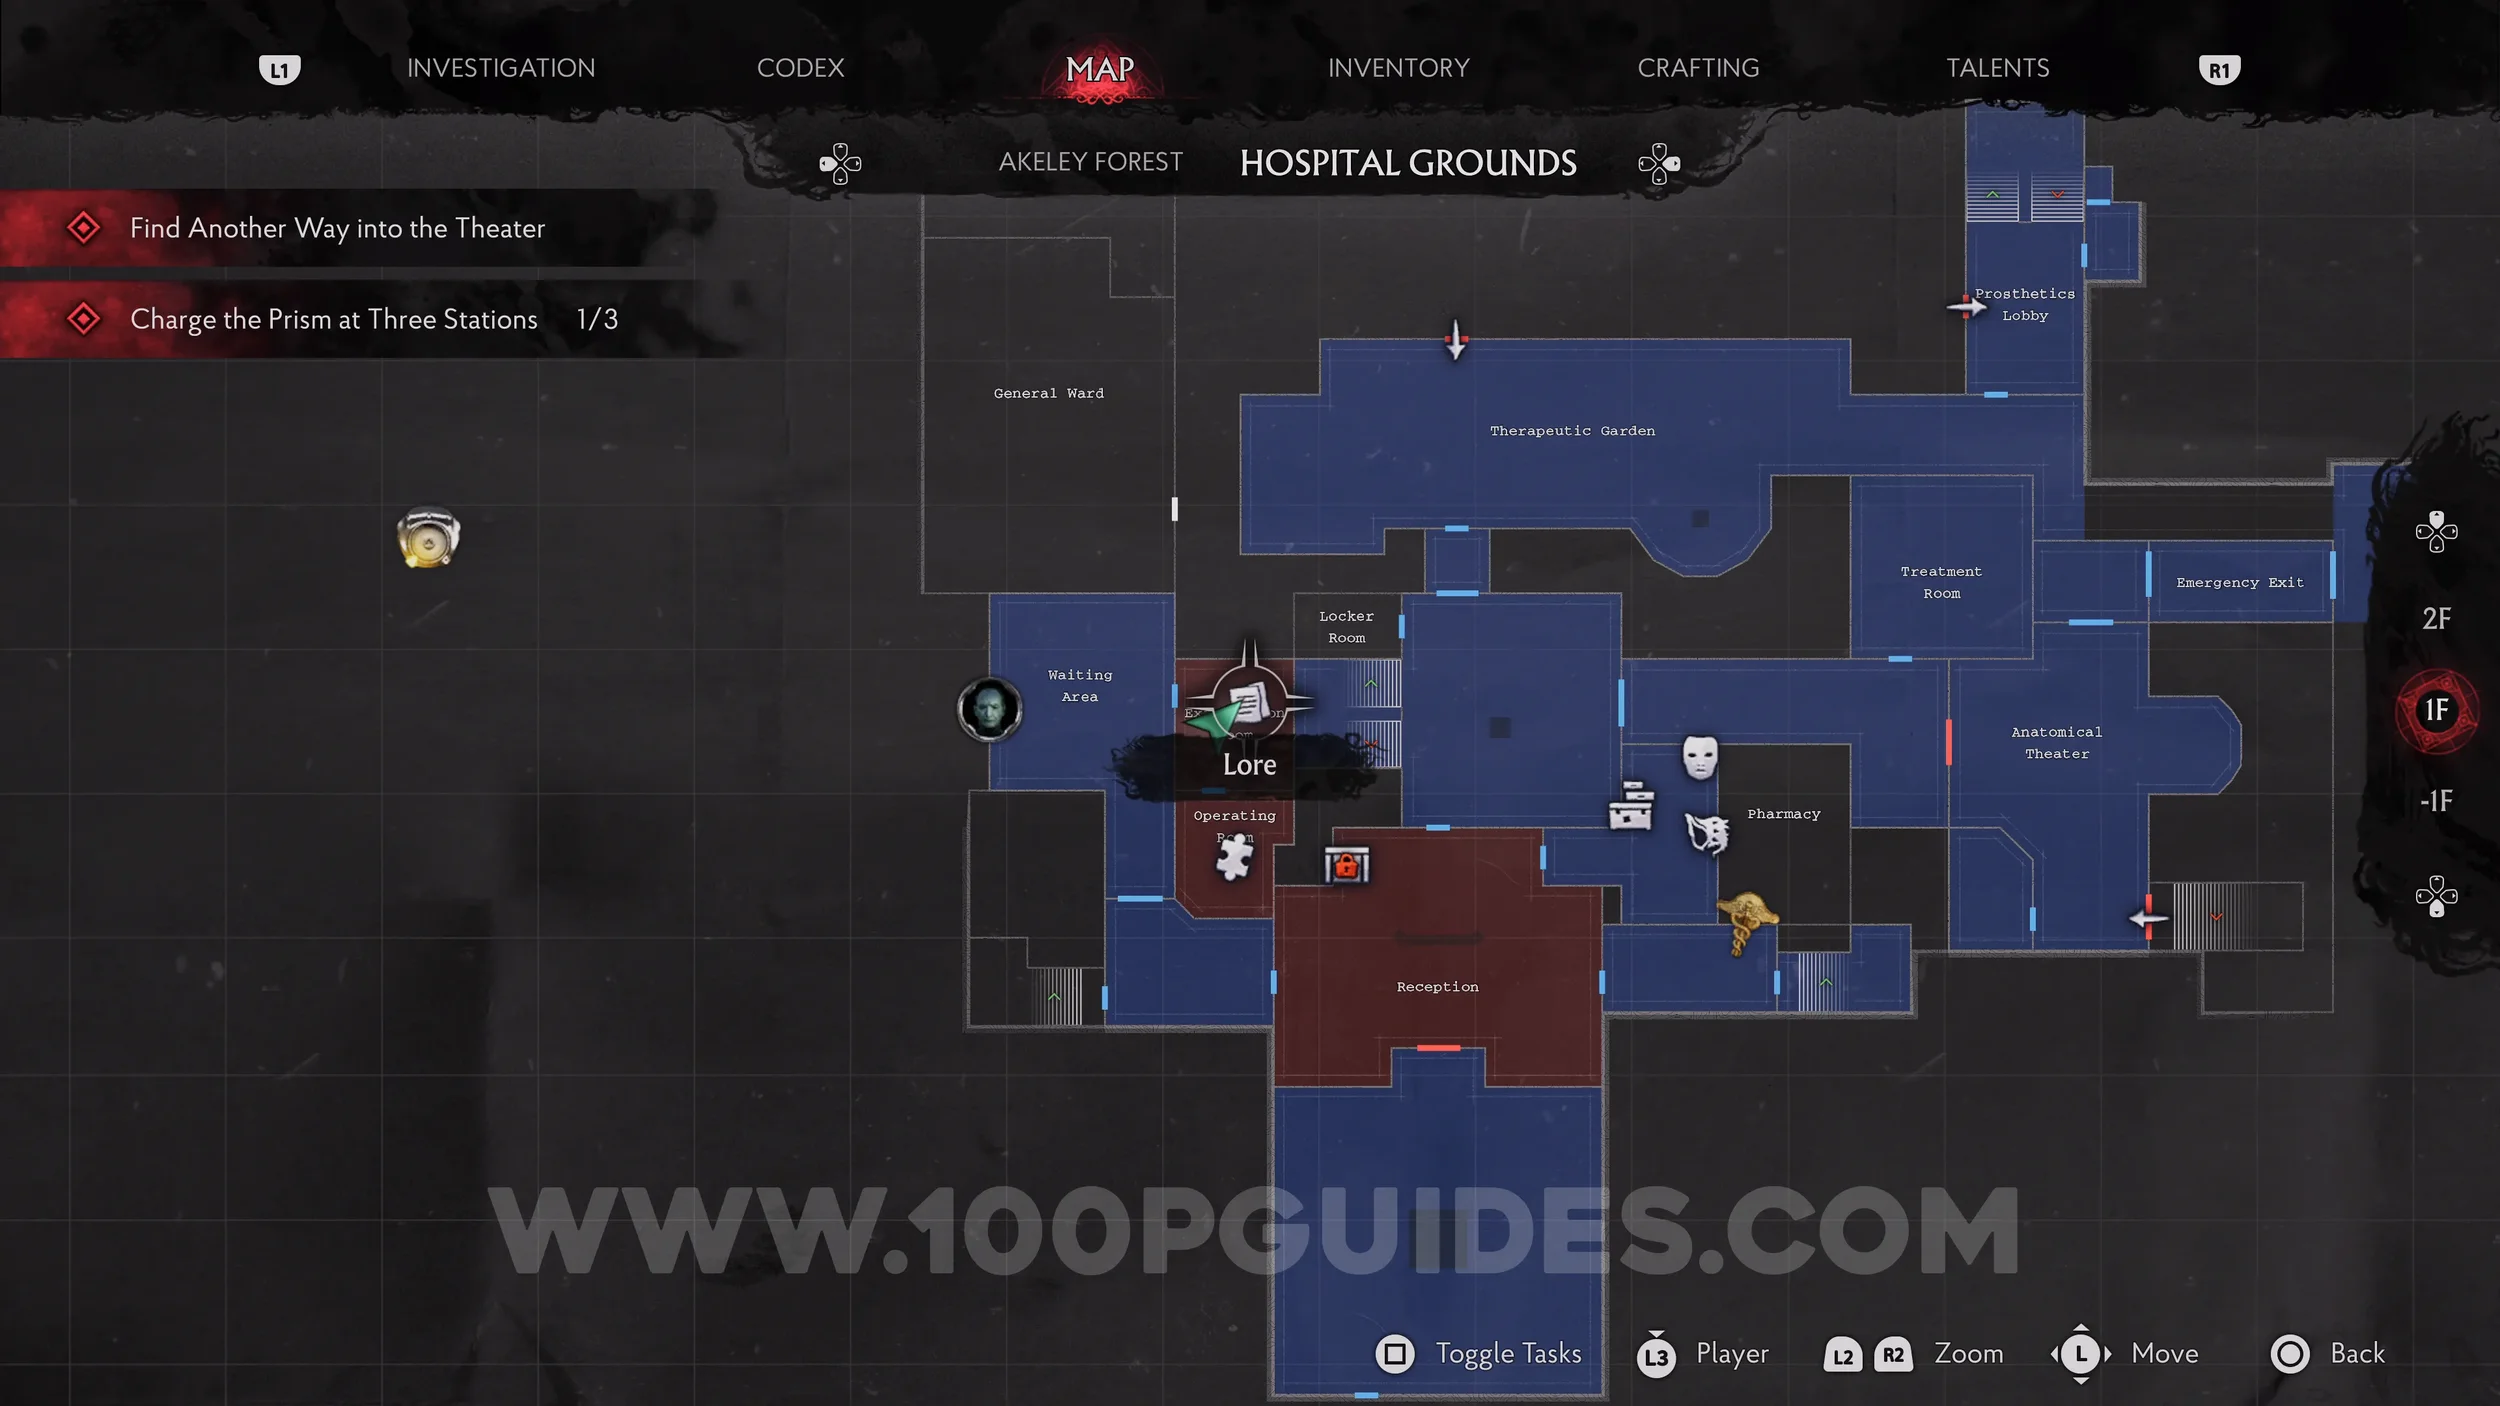
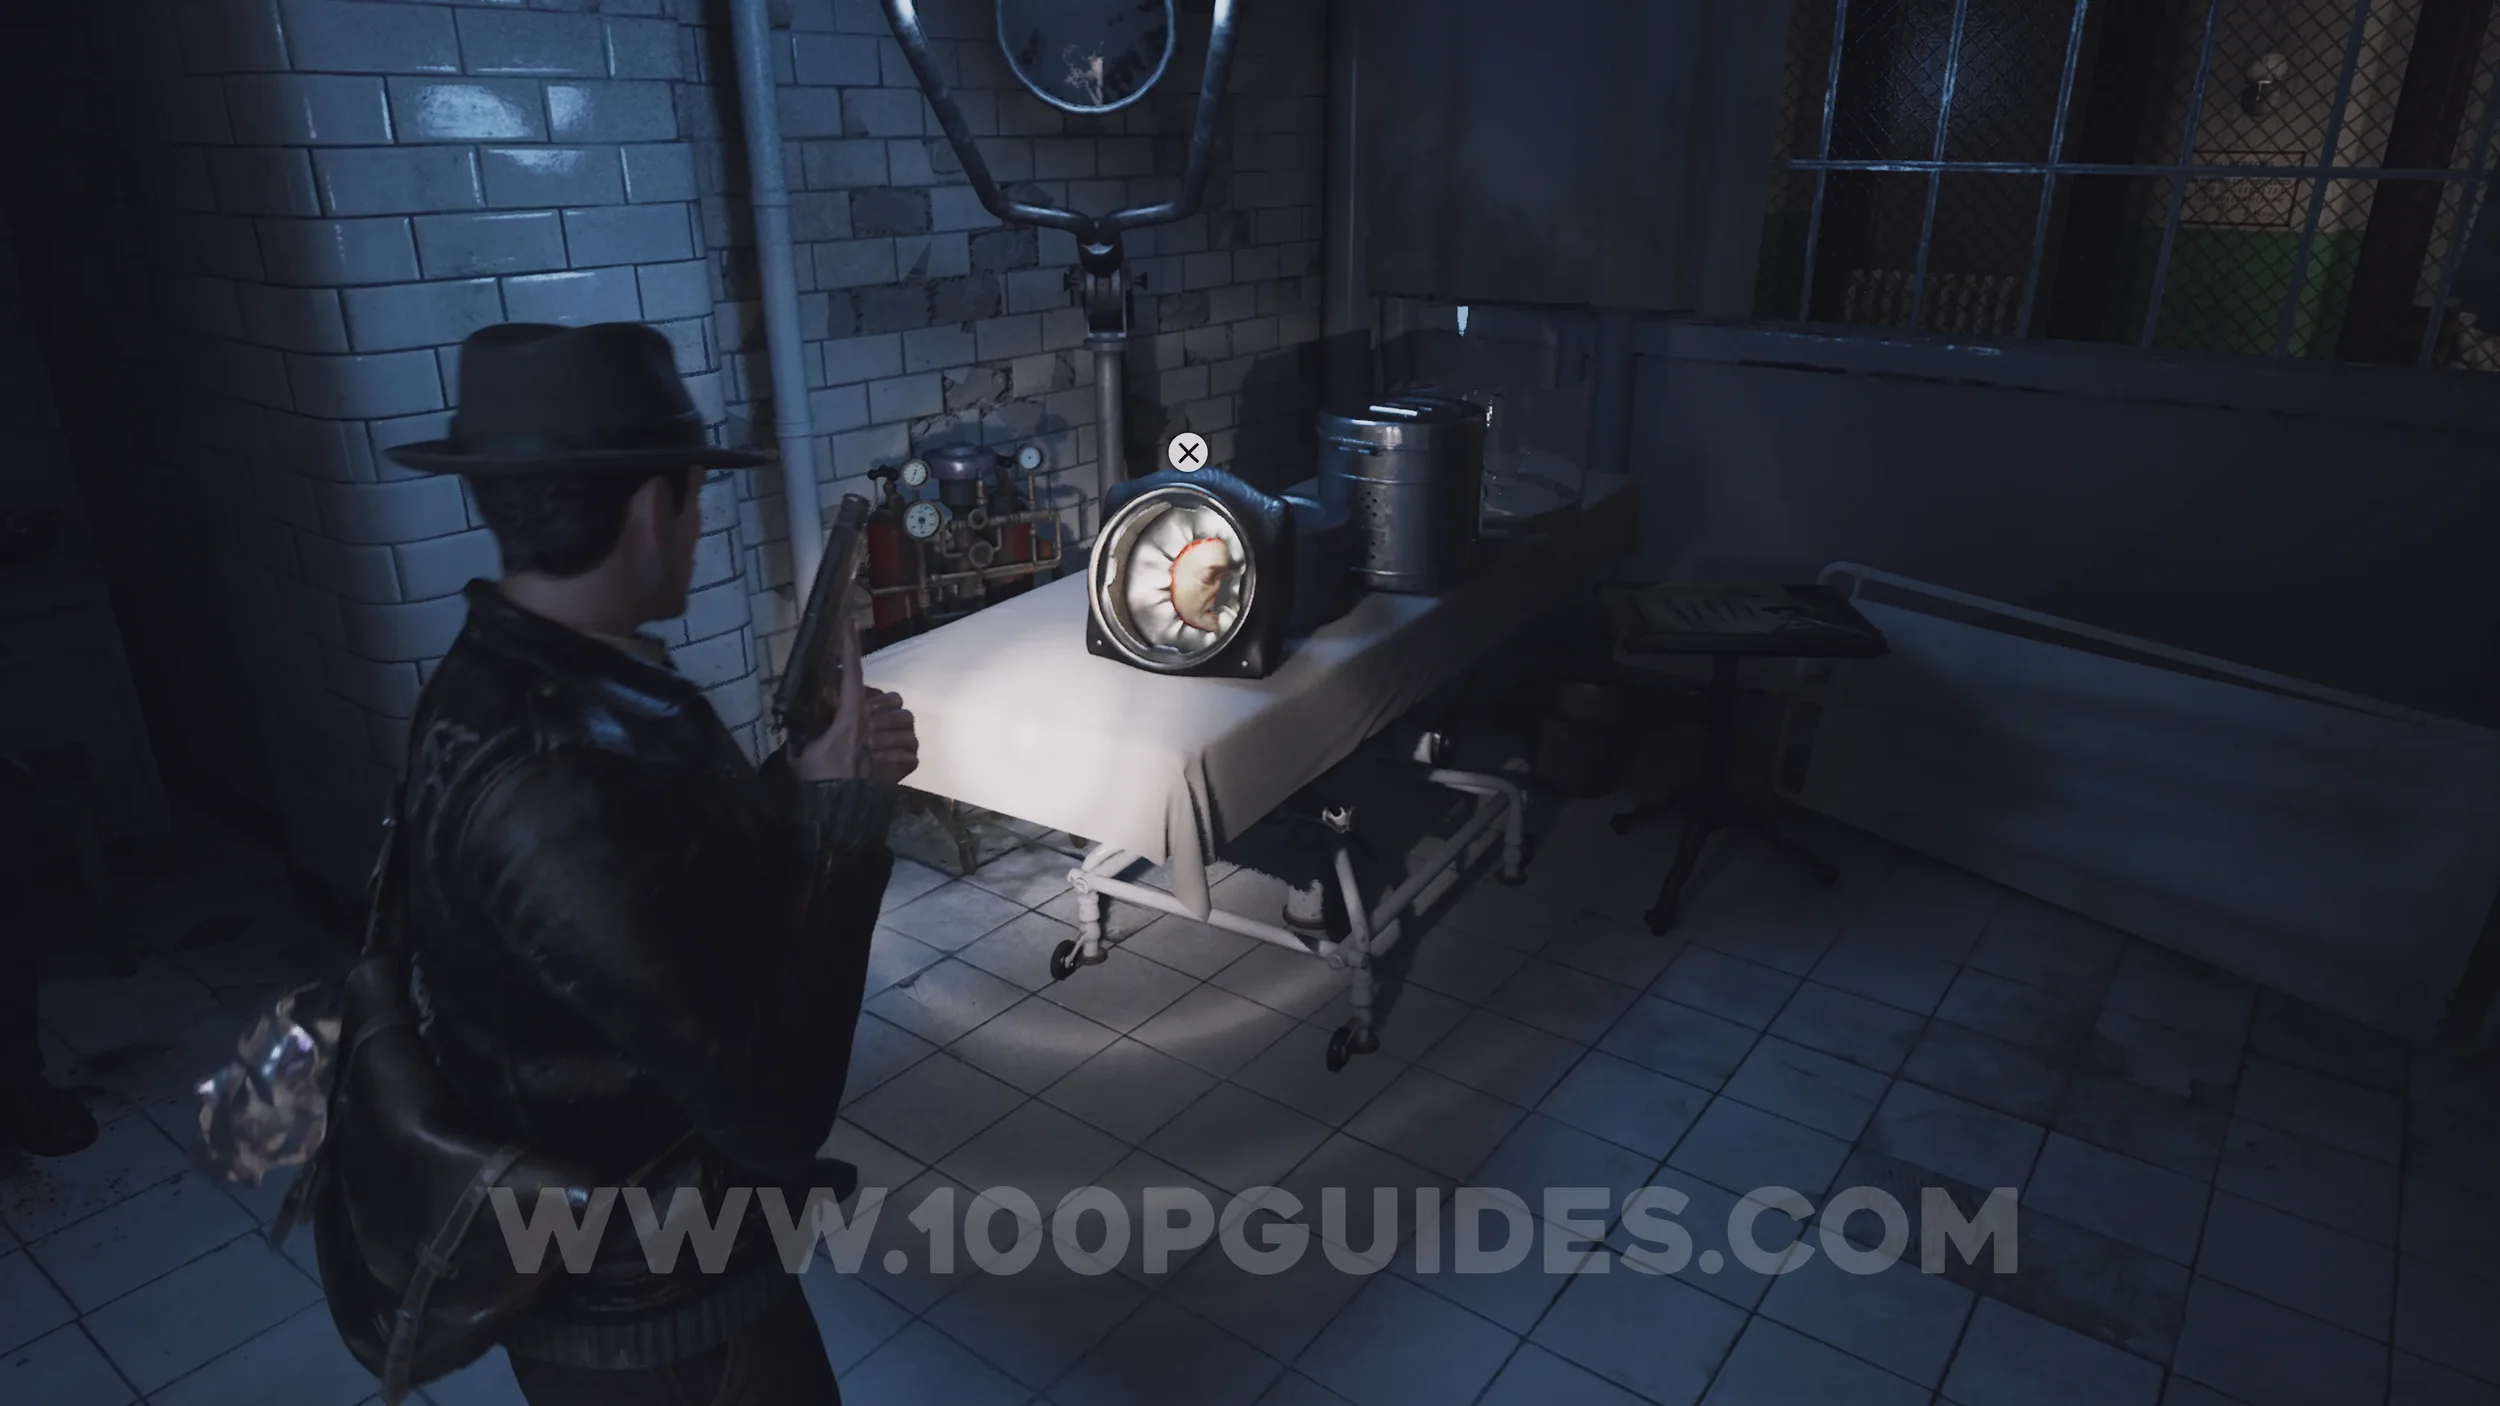
Key Item: Right Half Of A Face. Head into the room to the south of the previous collectible and open the pod containing the half of a face. First the three latches on the side of the back, then the stands, then the sliders under the stands. After that you can interact with the front.
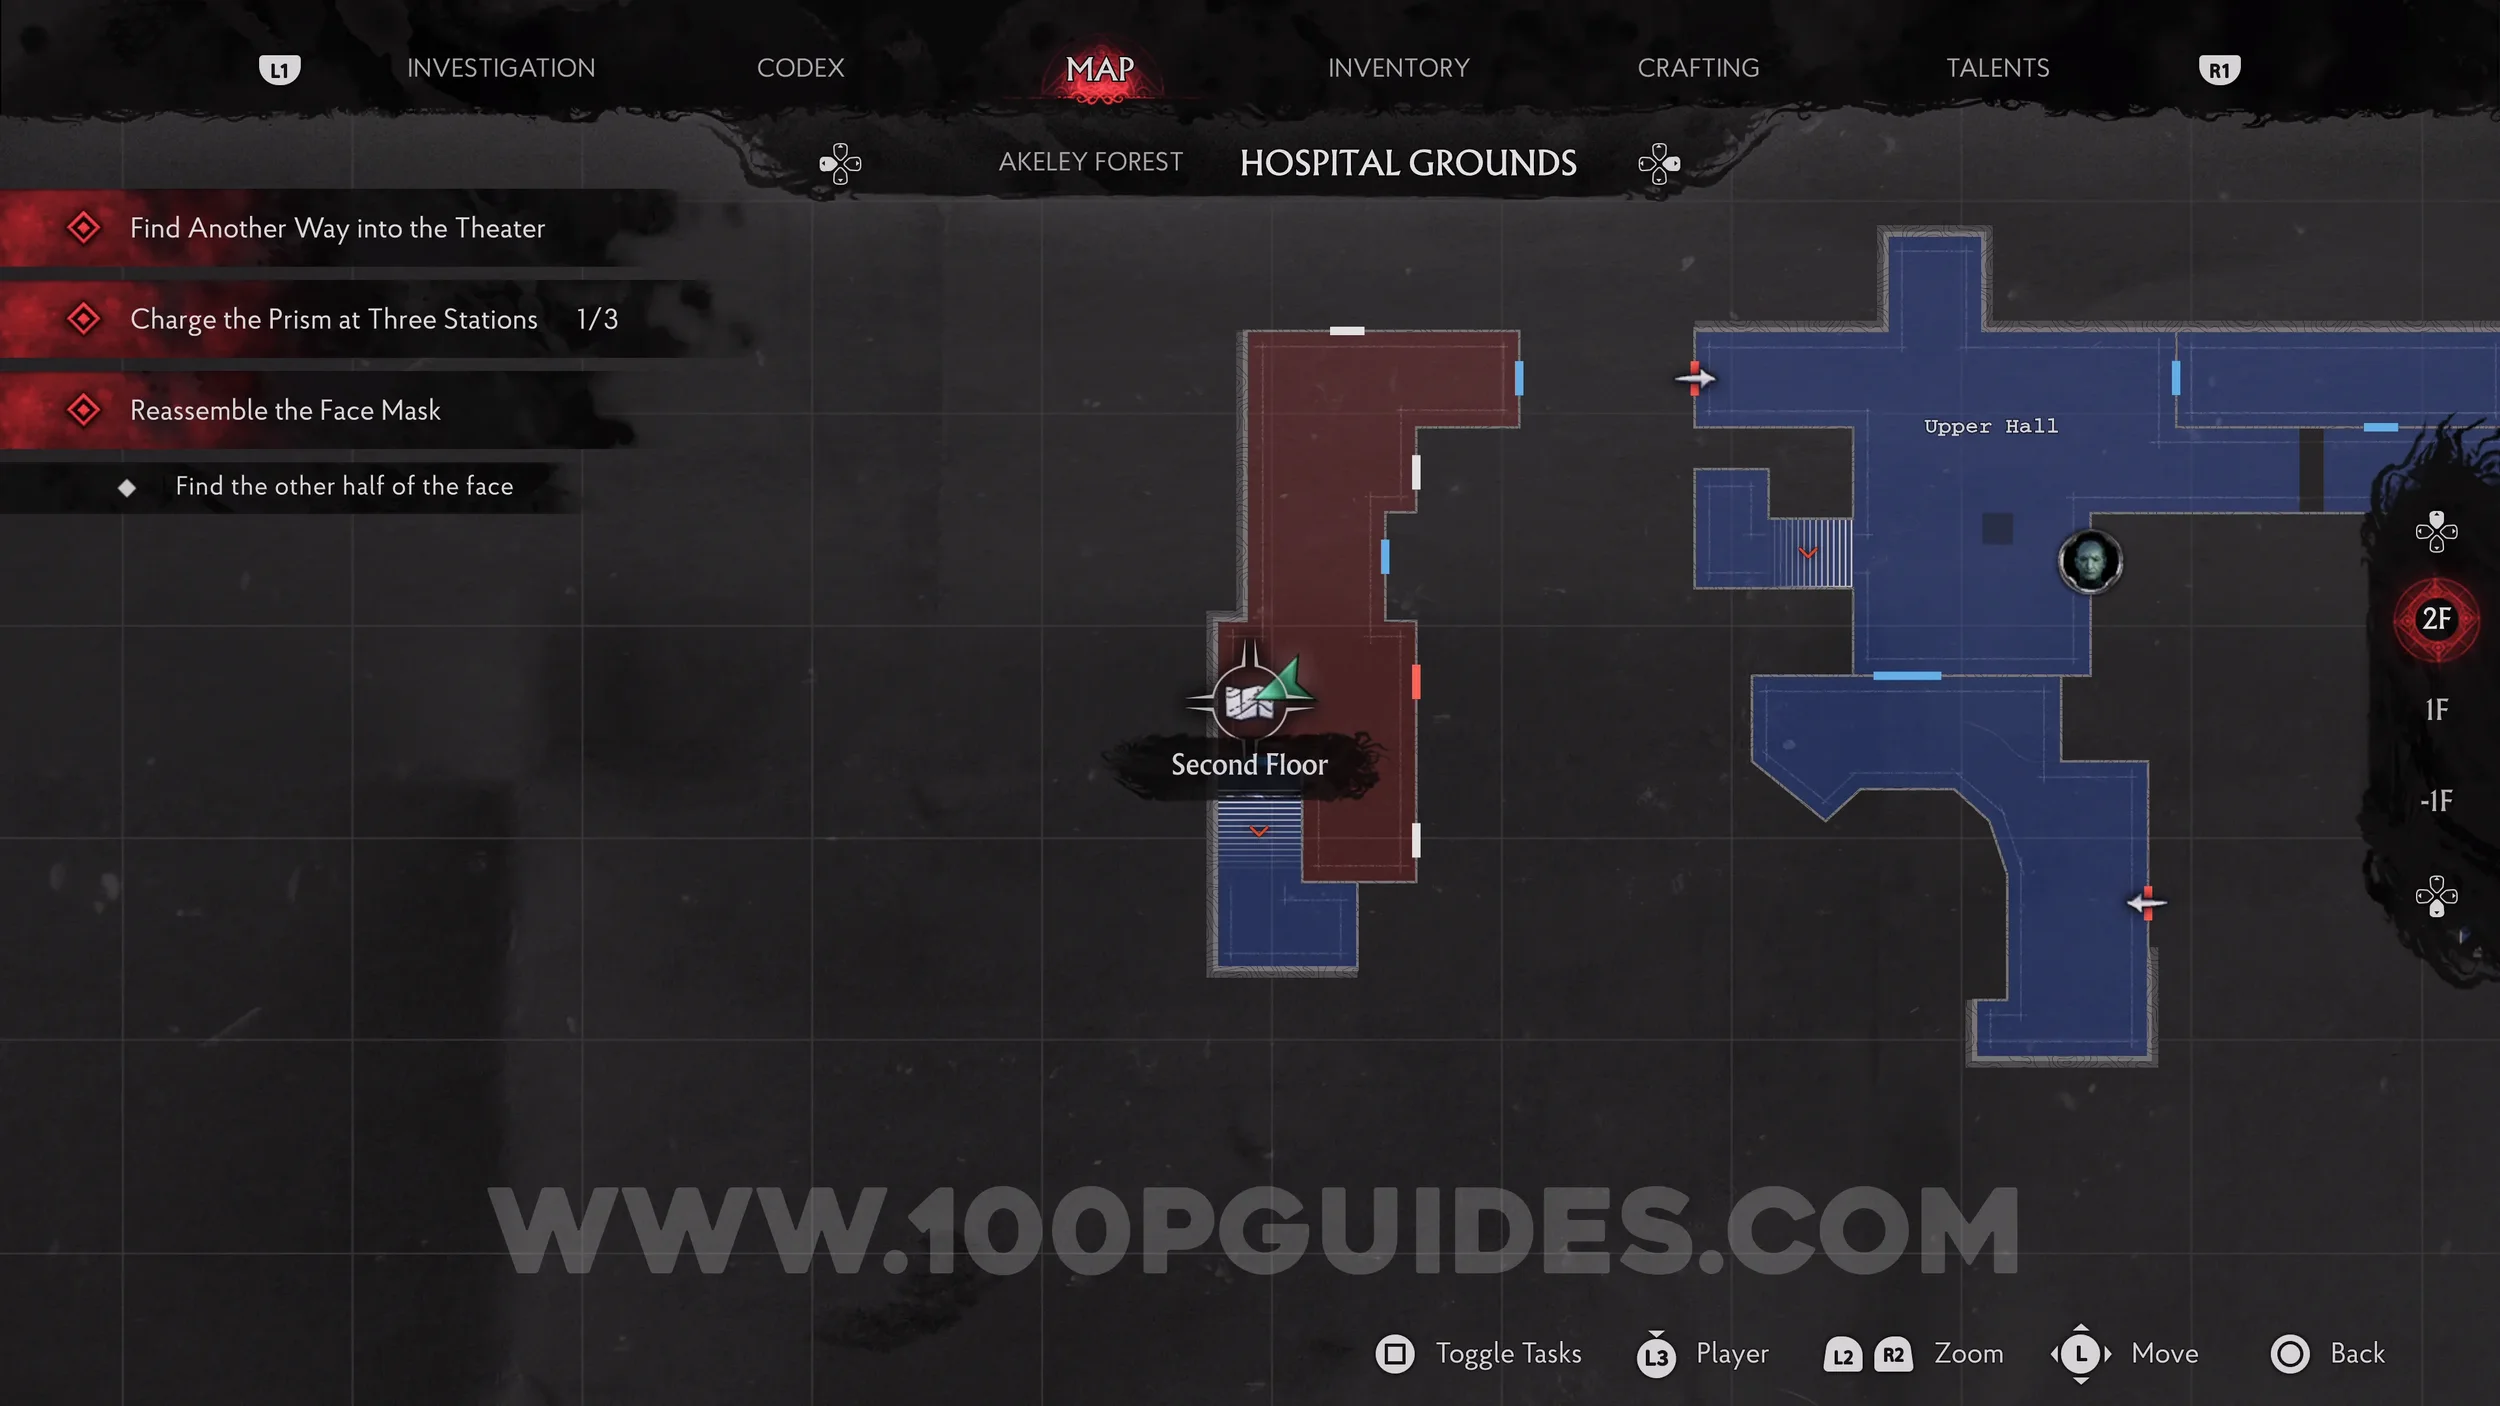
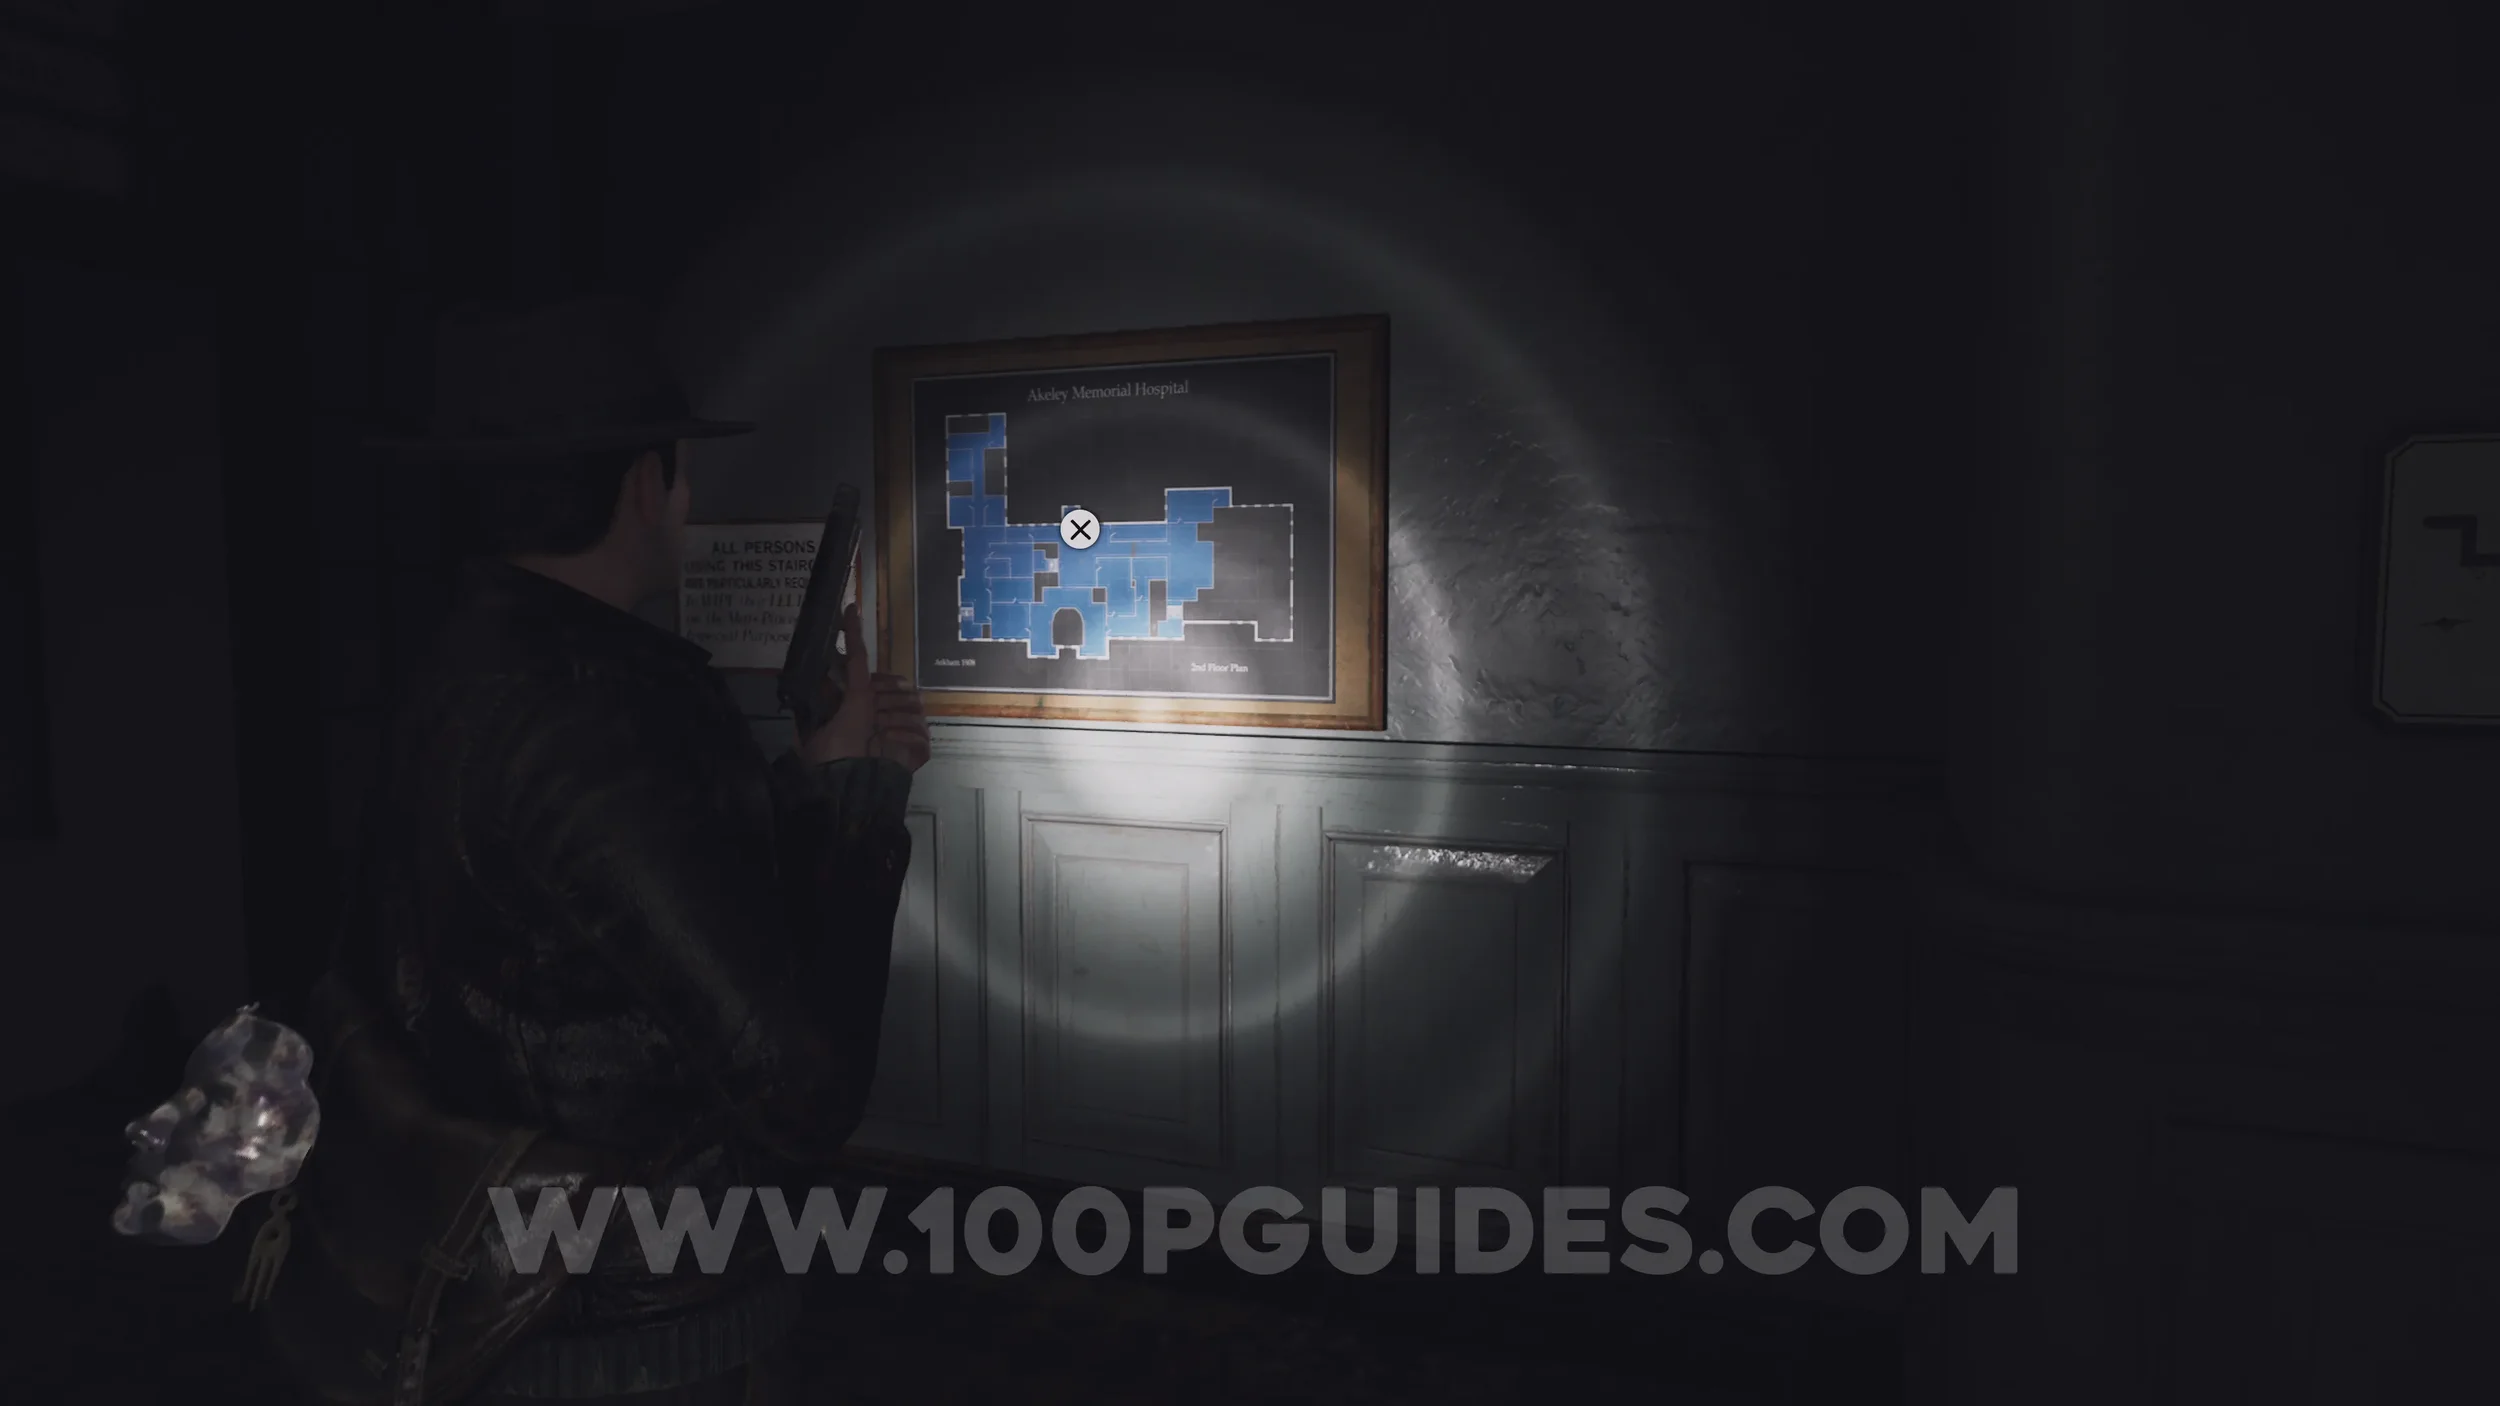
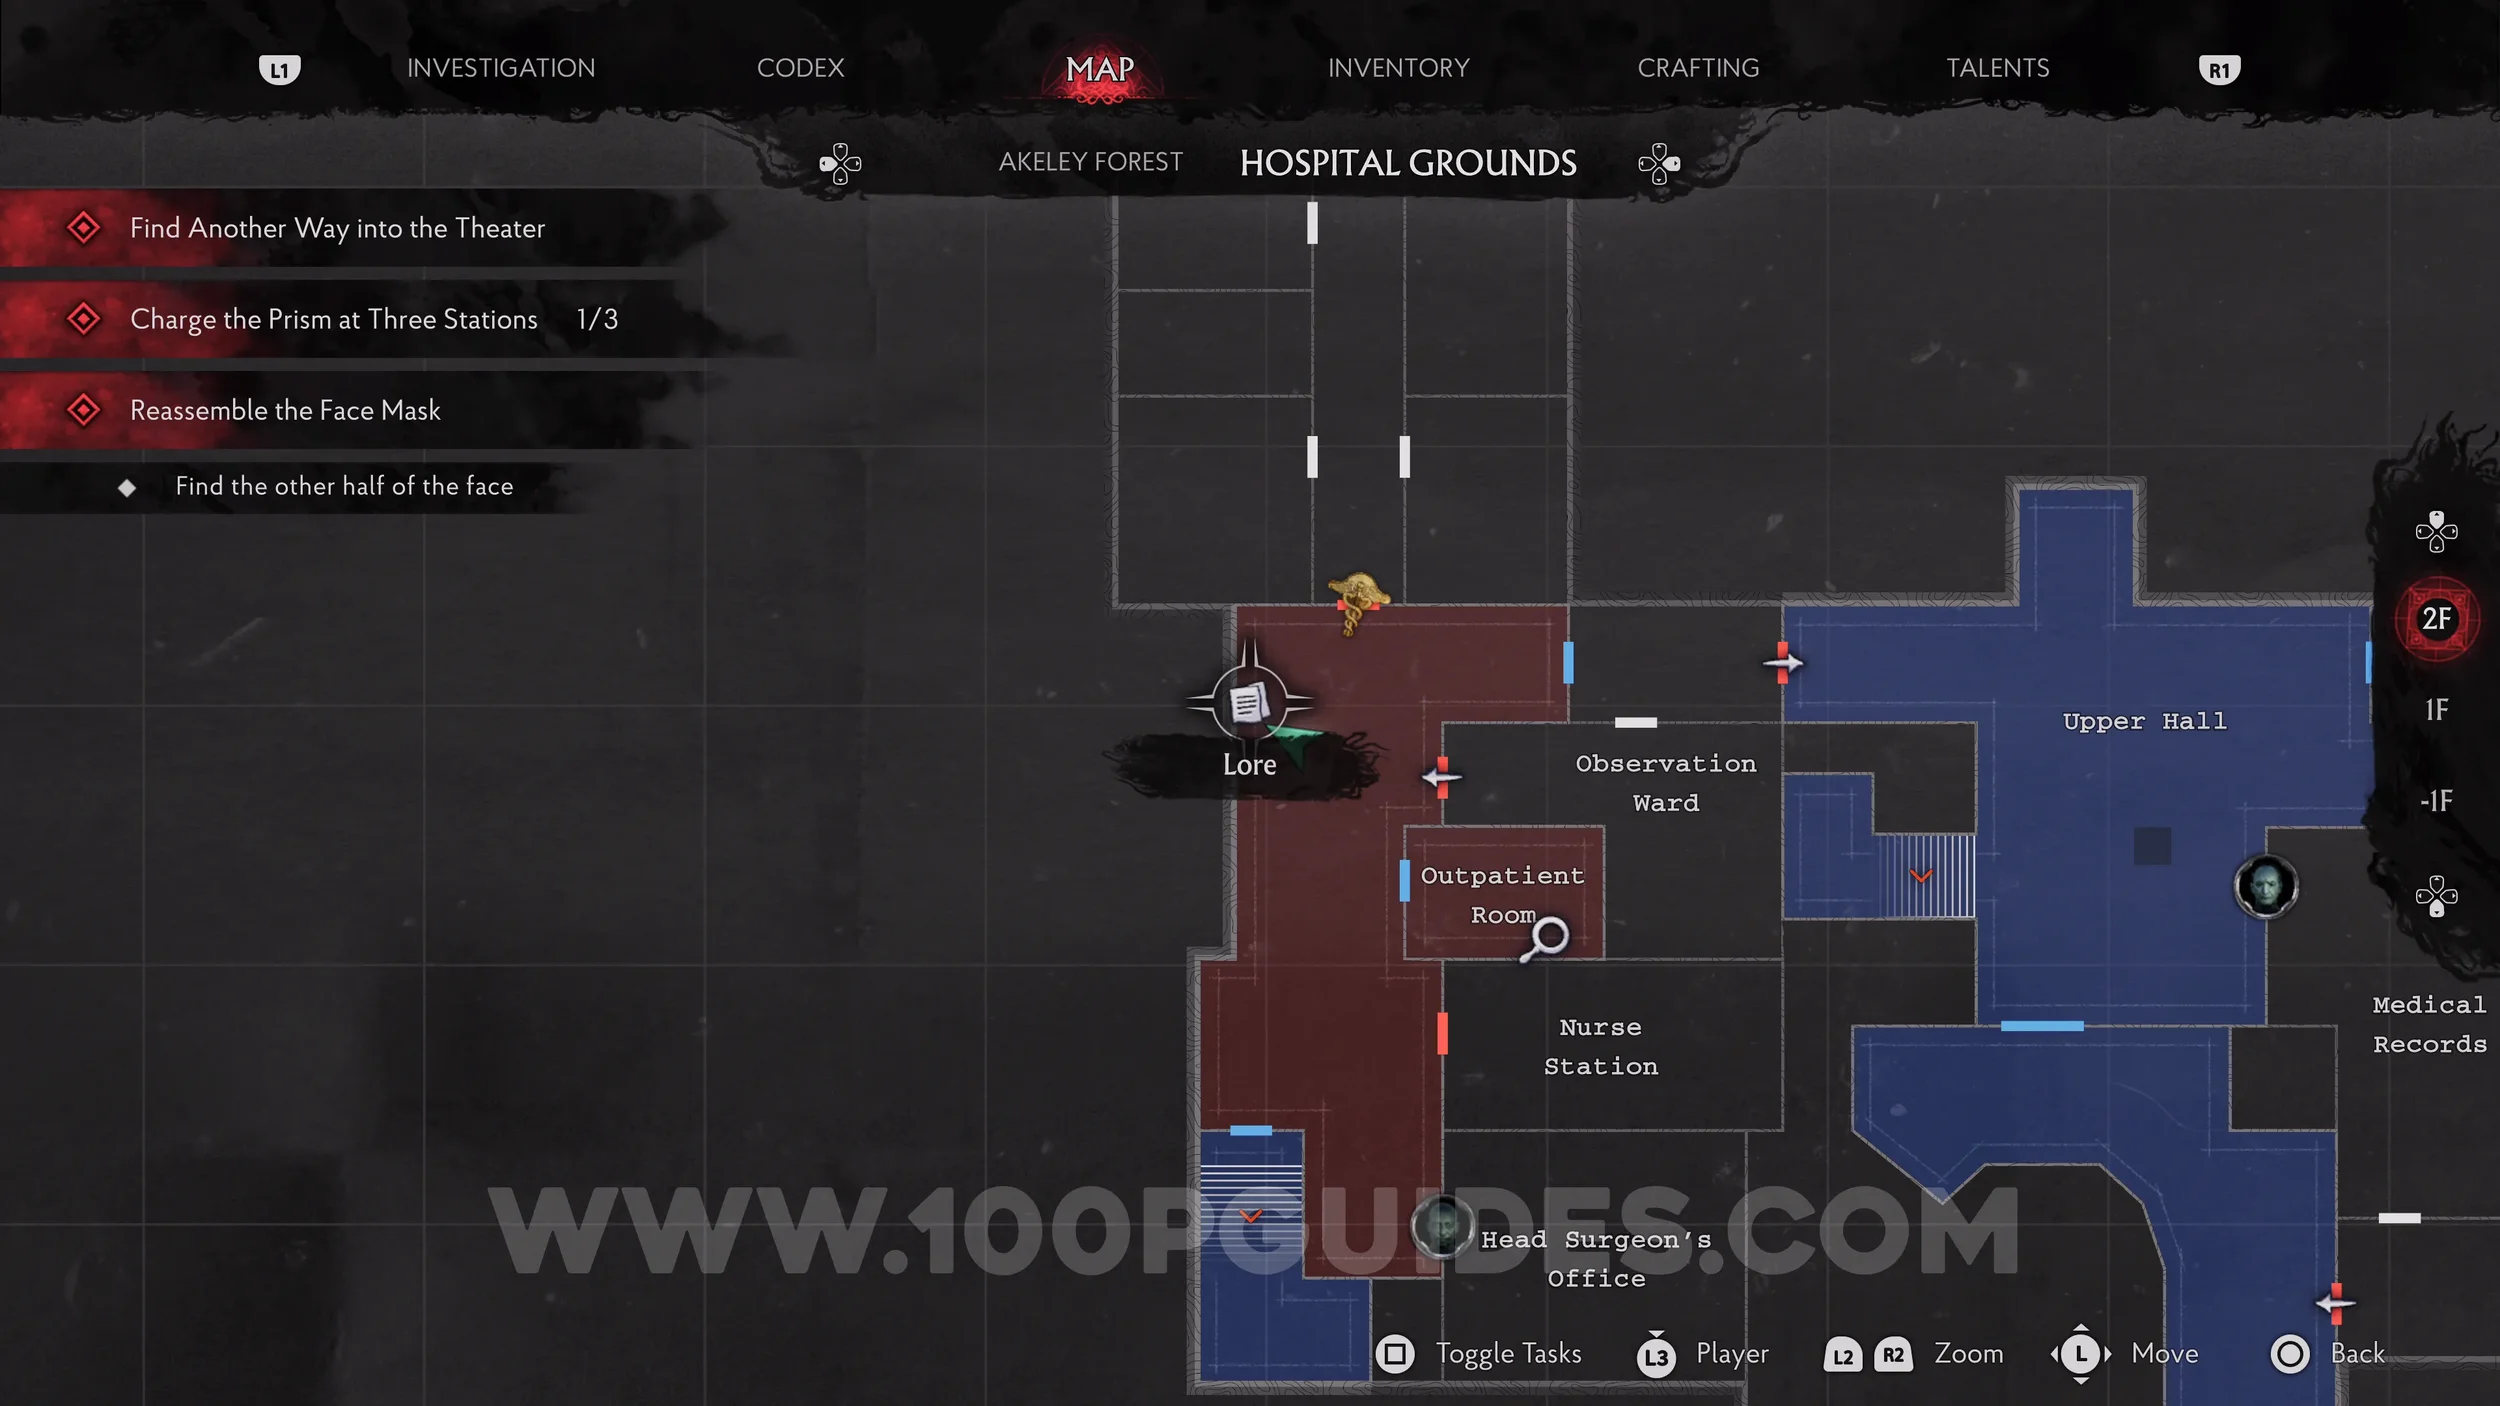
Map: Second Floor. Now head up the stairs in the southwestern corner. The map is on the wall at the top of them.
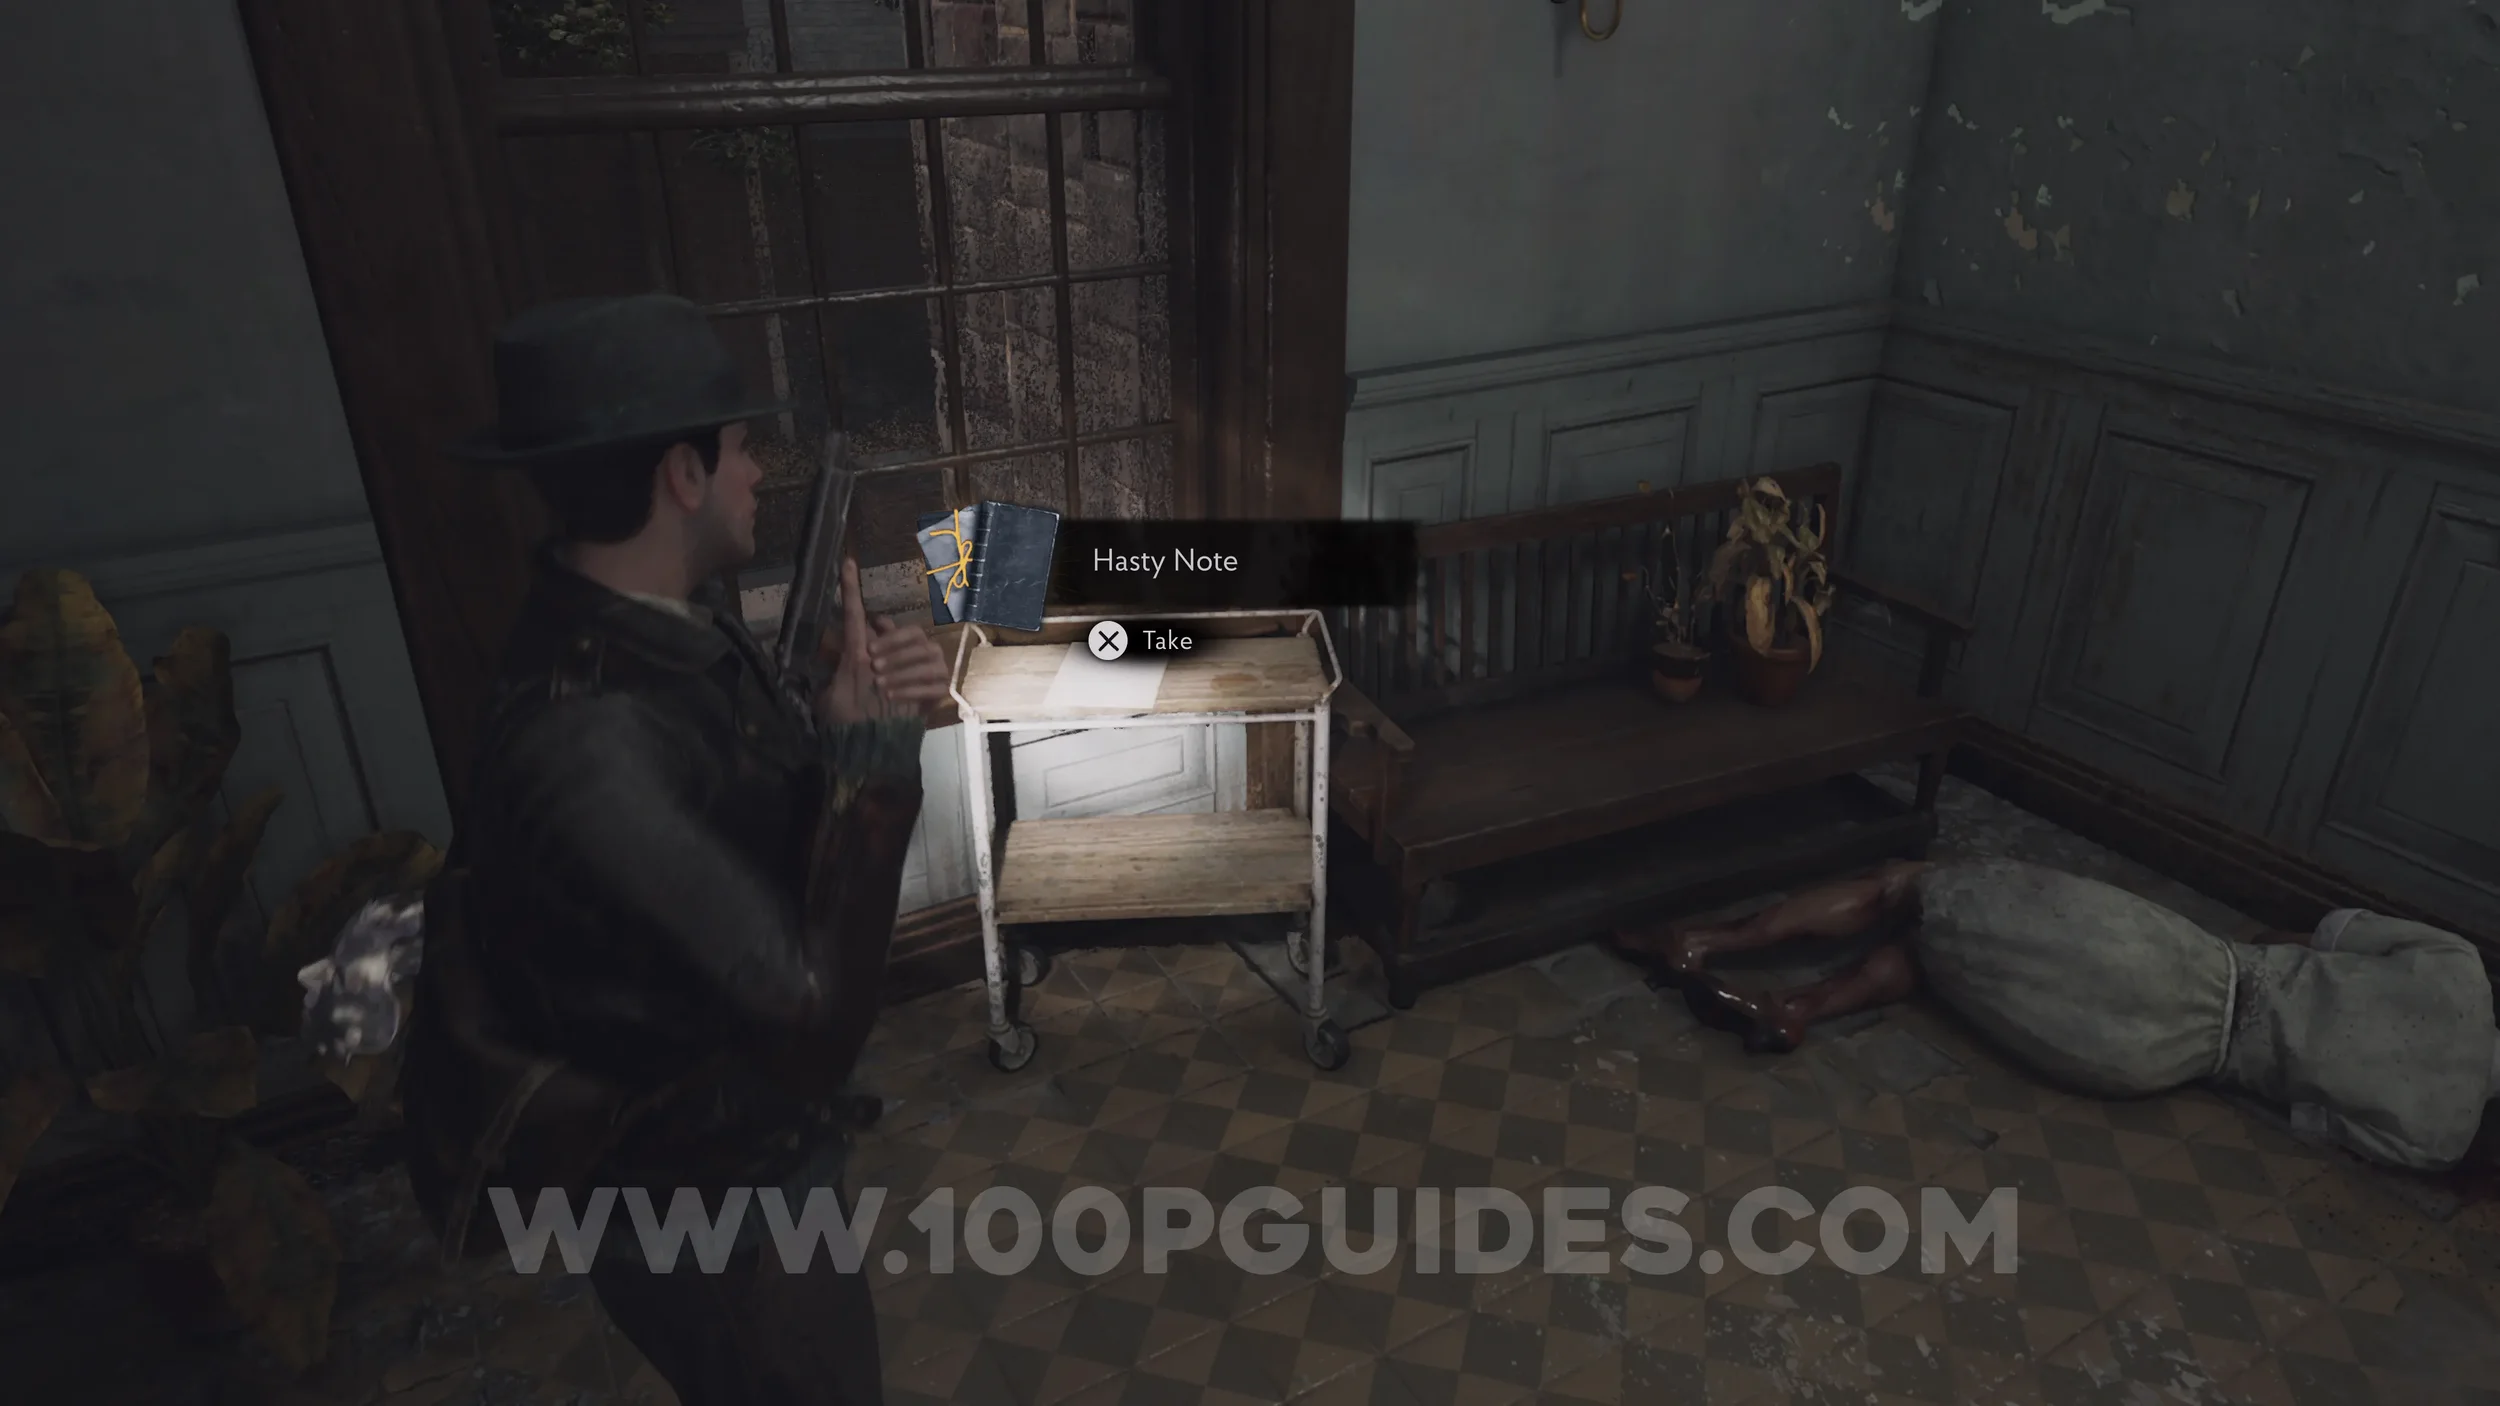
Lore Codex: Hasty Note. On a tray in the same area as the map.
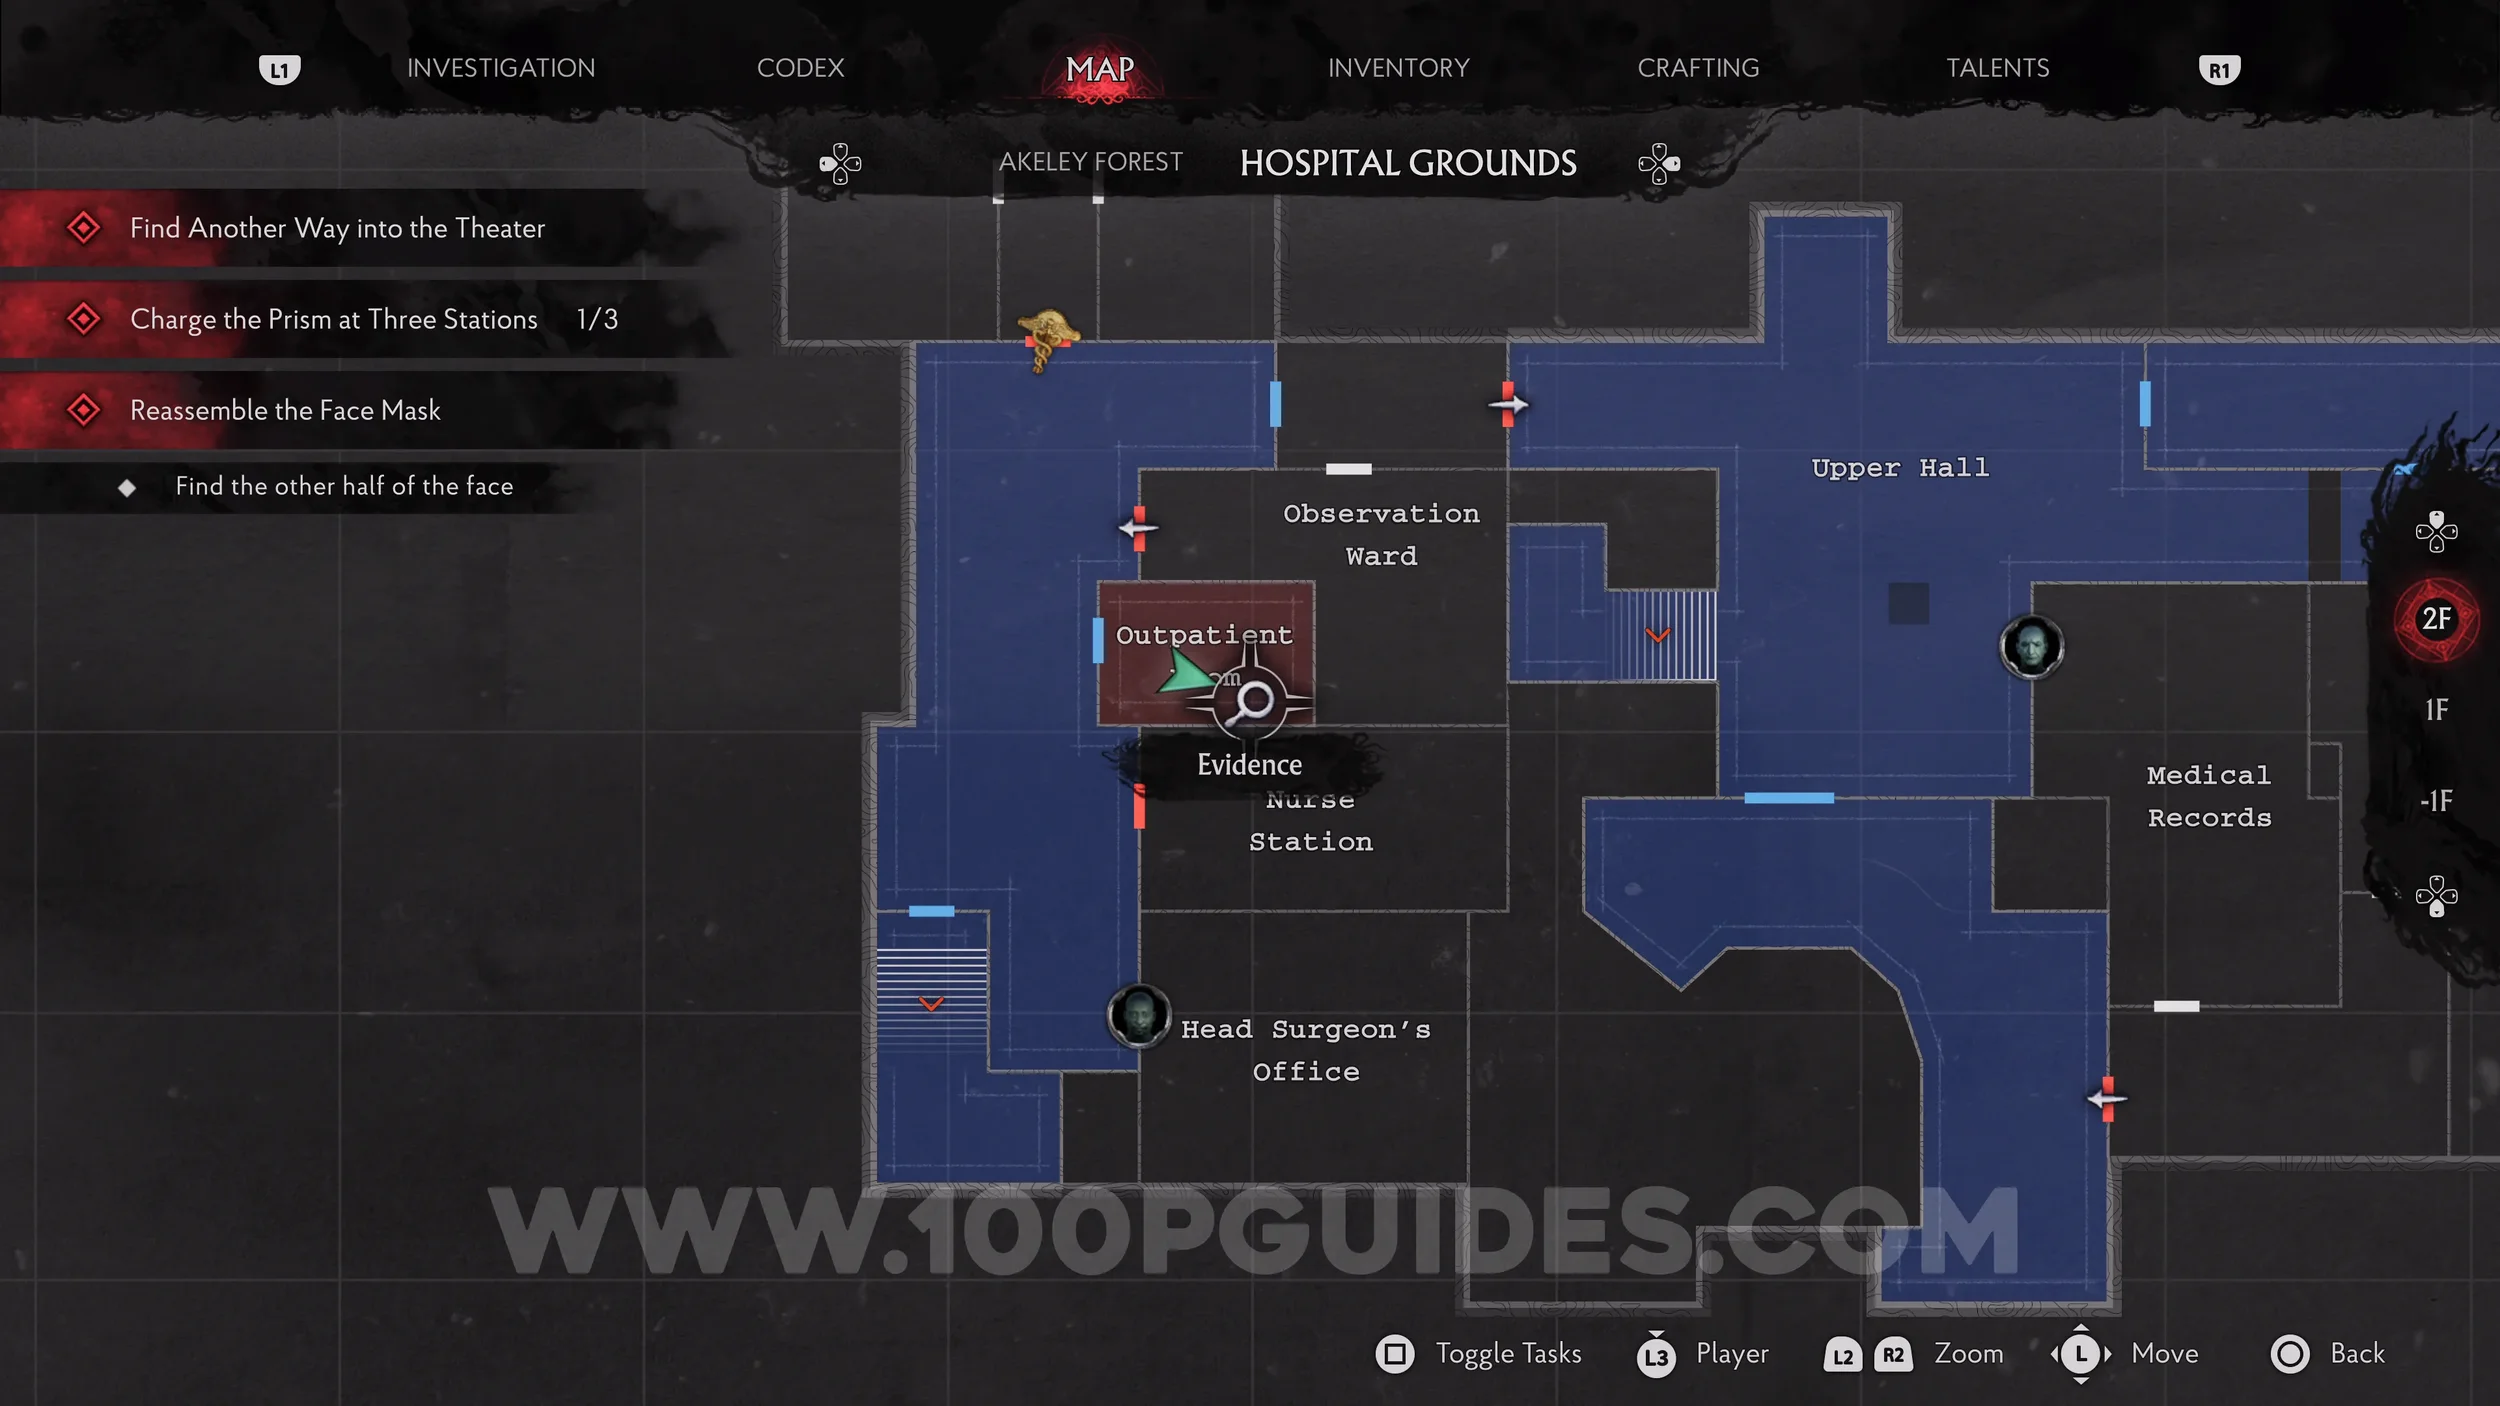
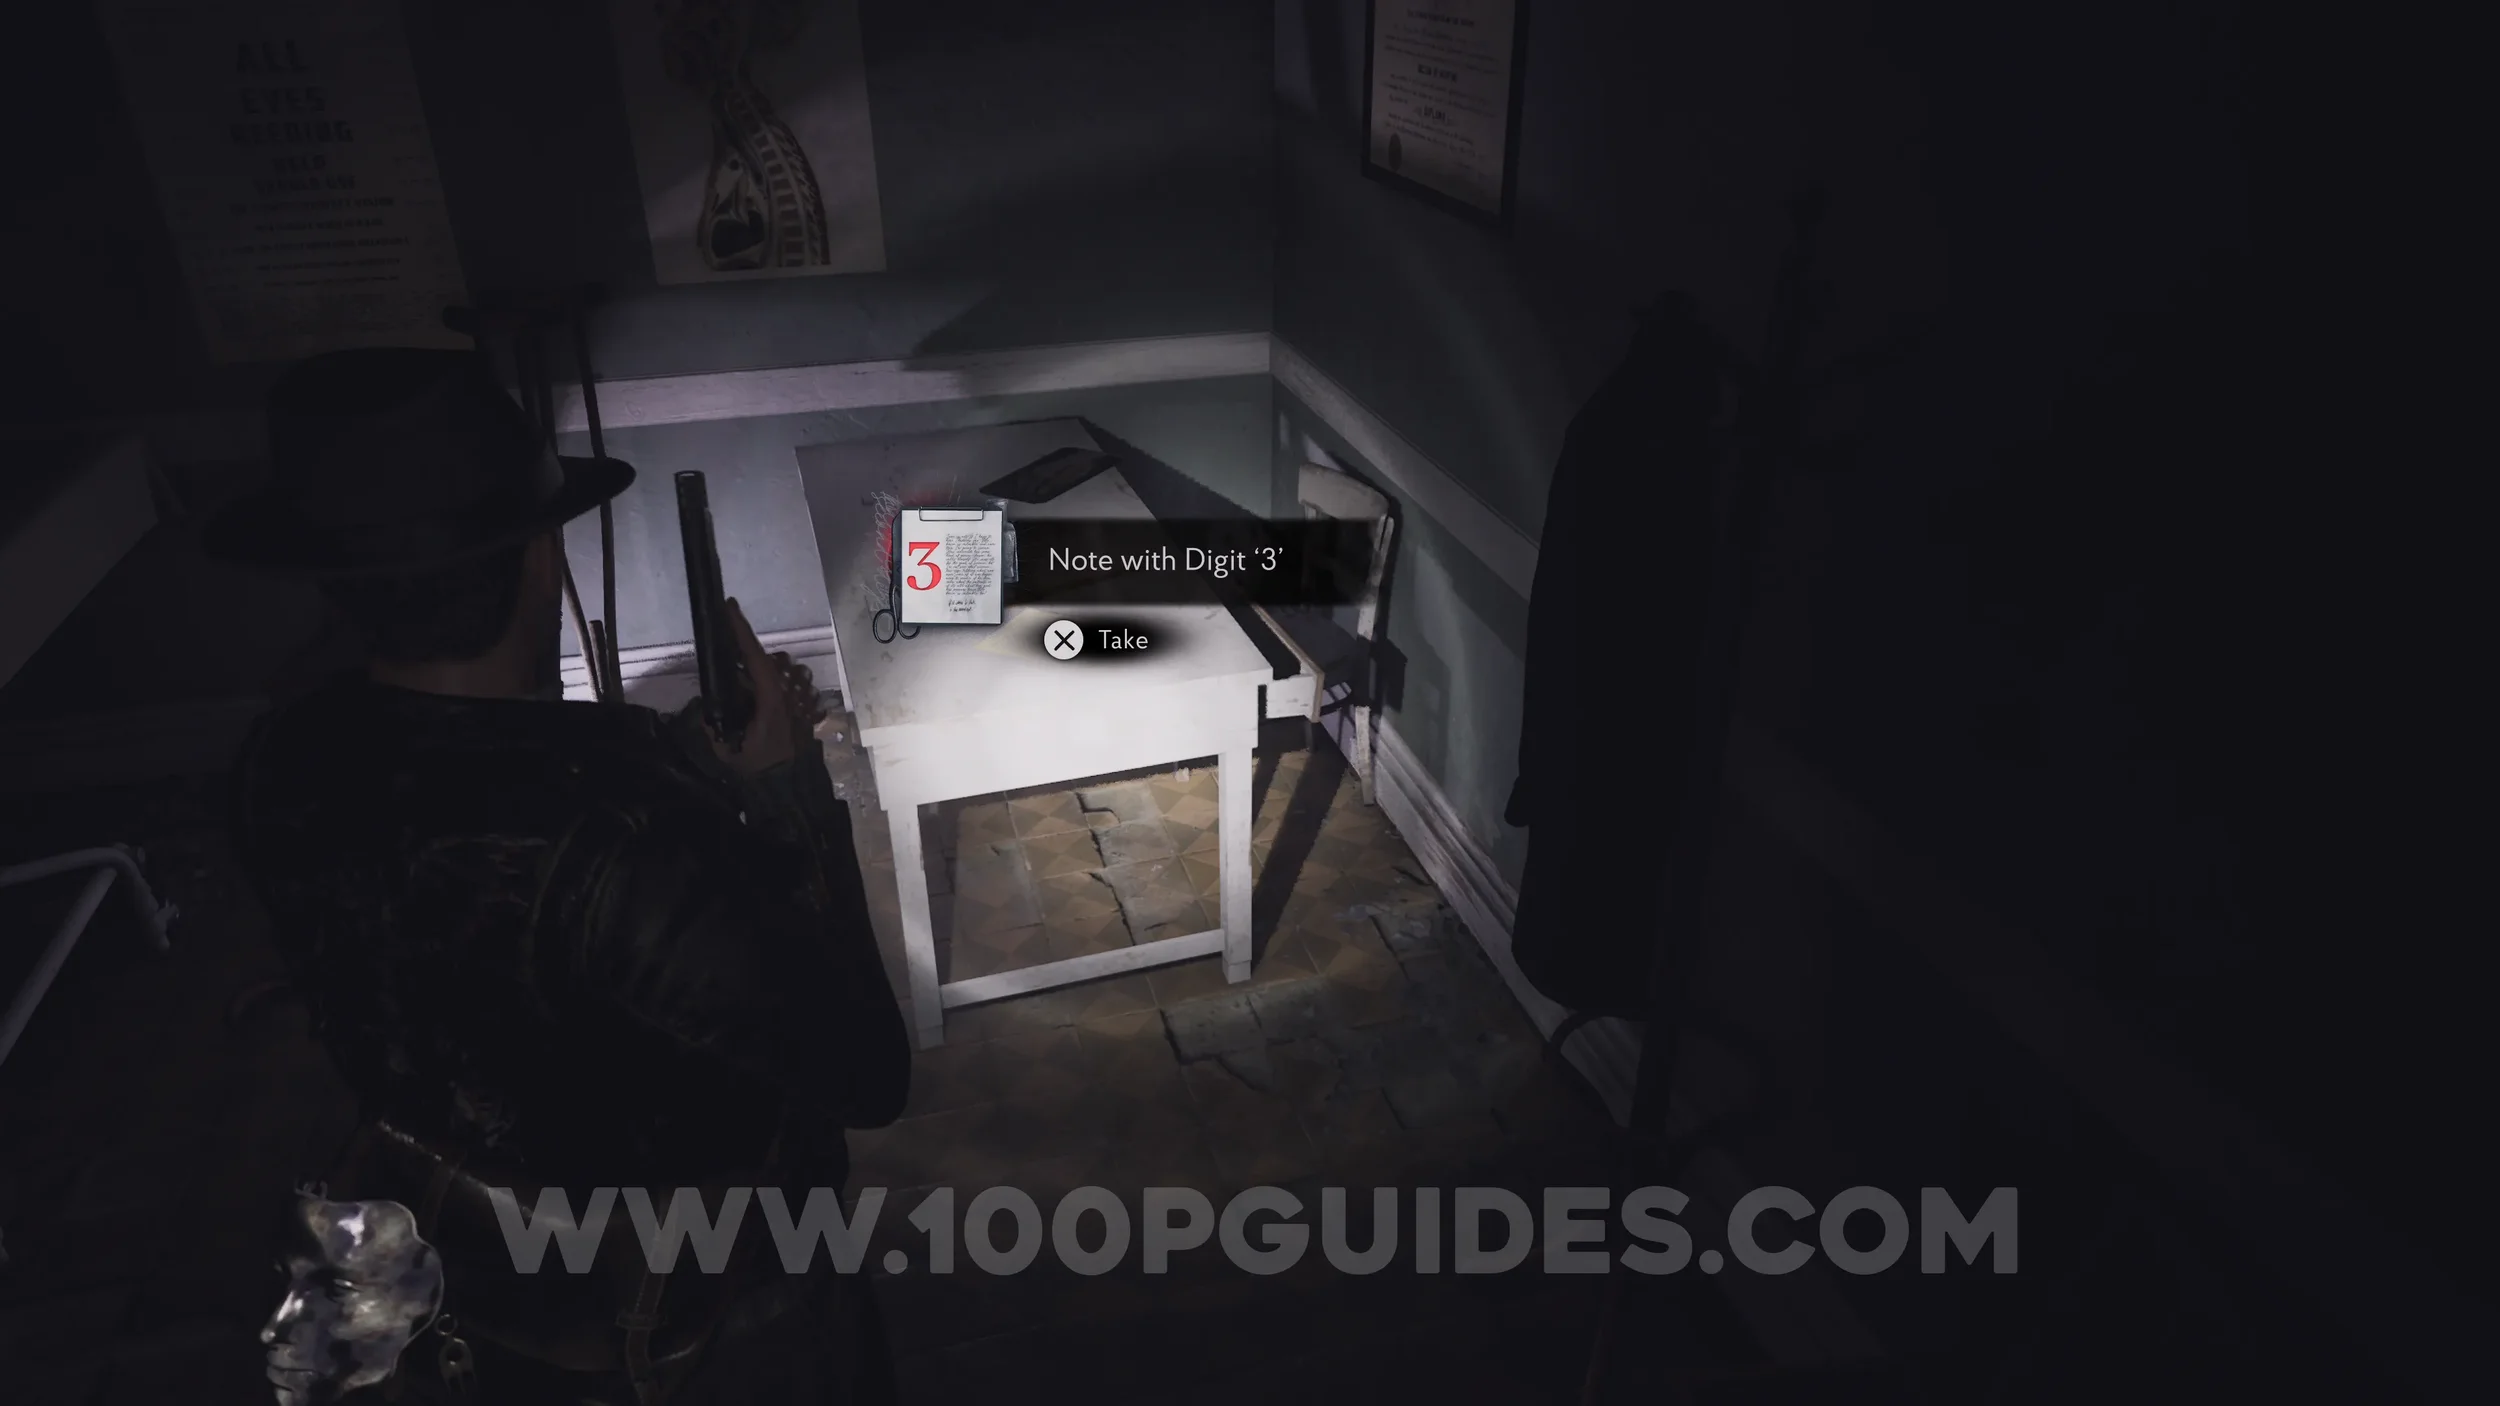
Evidence: Note with Digit ‘3’. On the desk in the Outpatient Room.
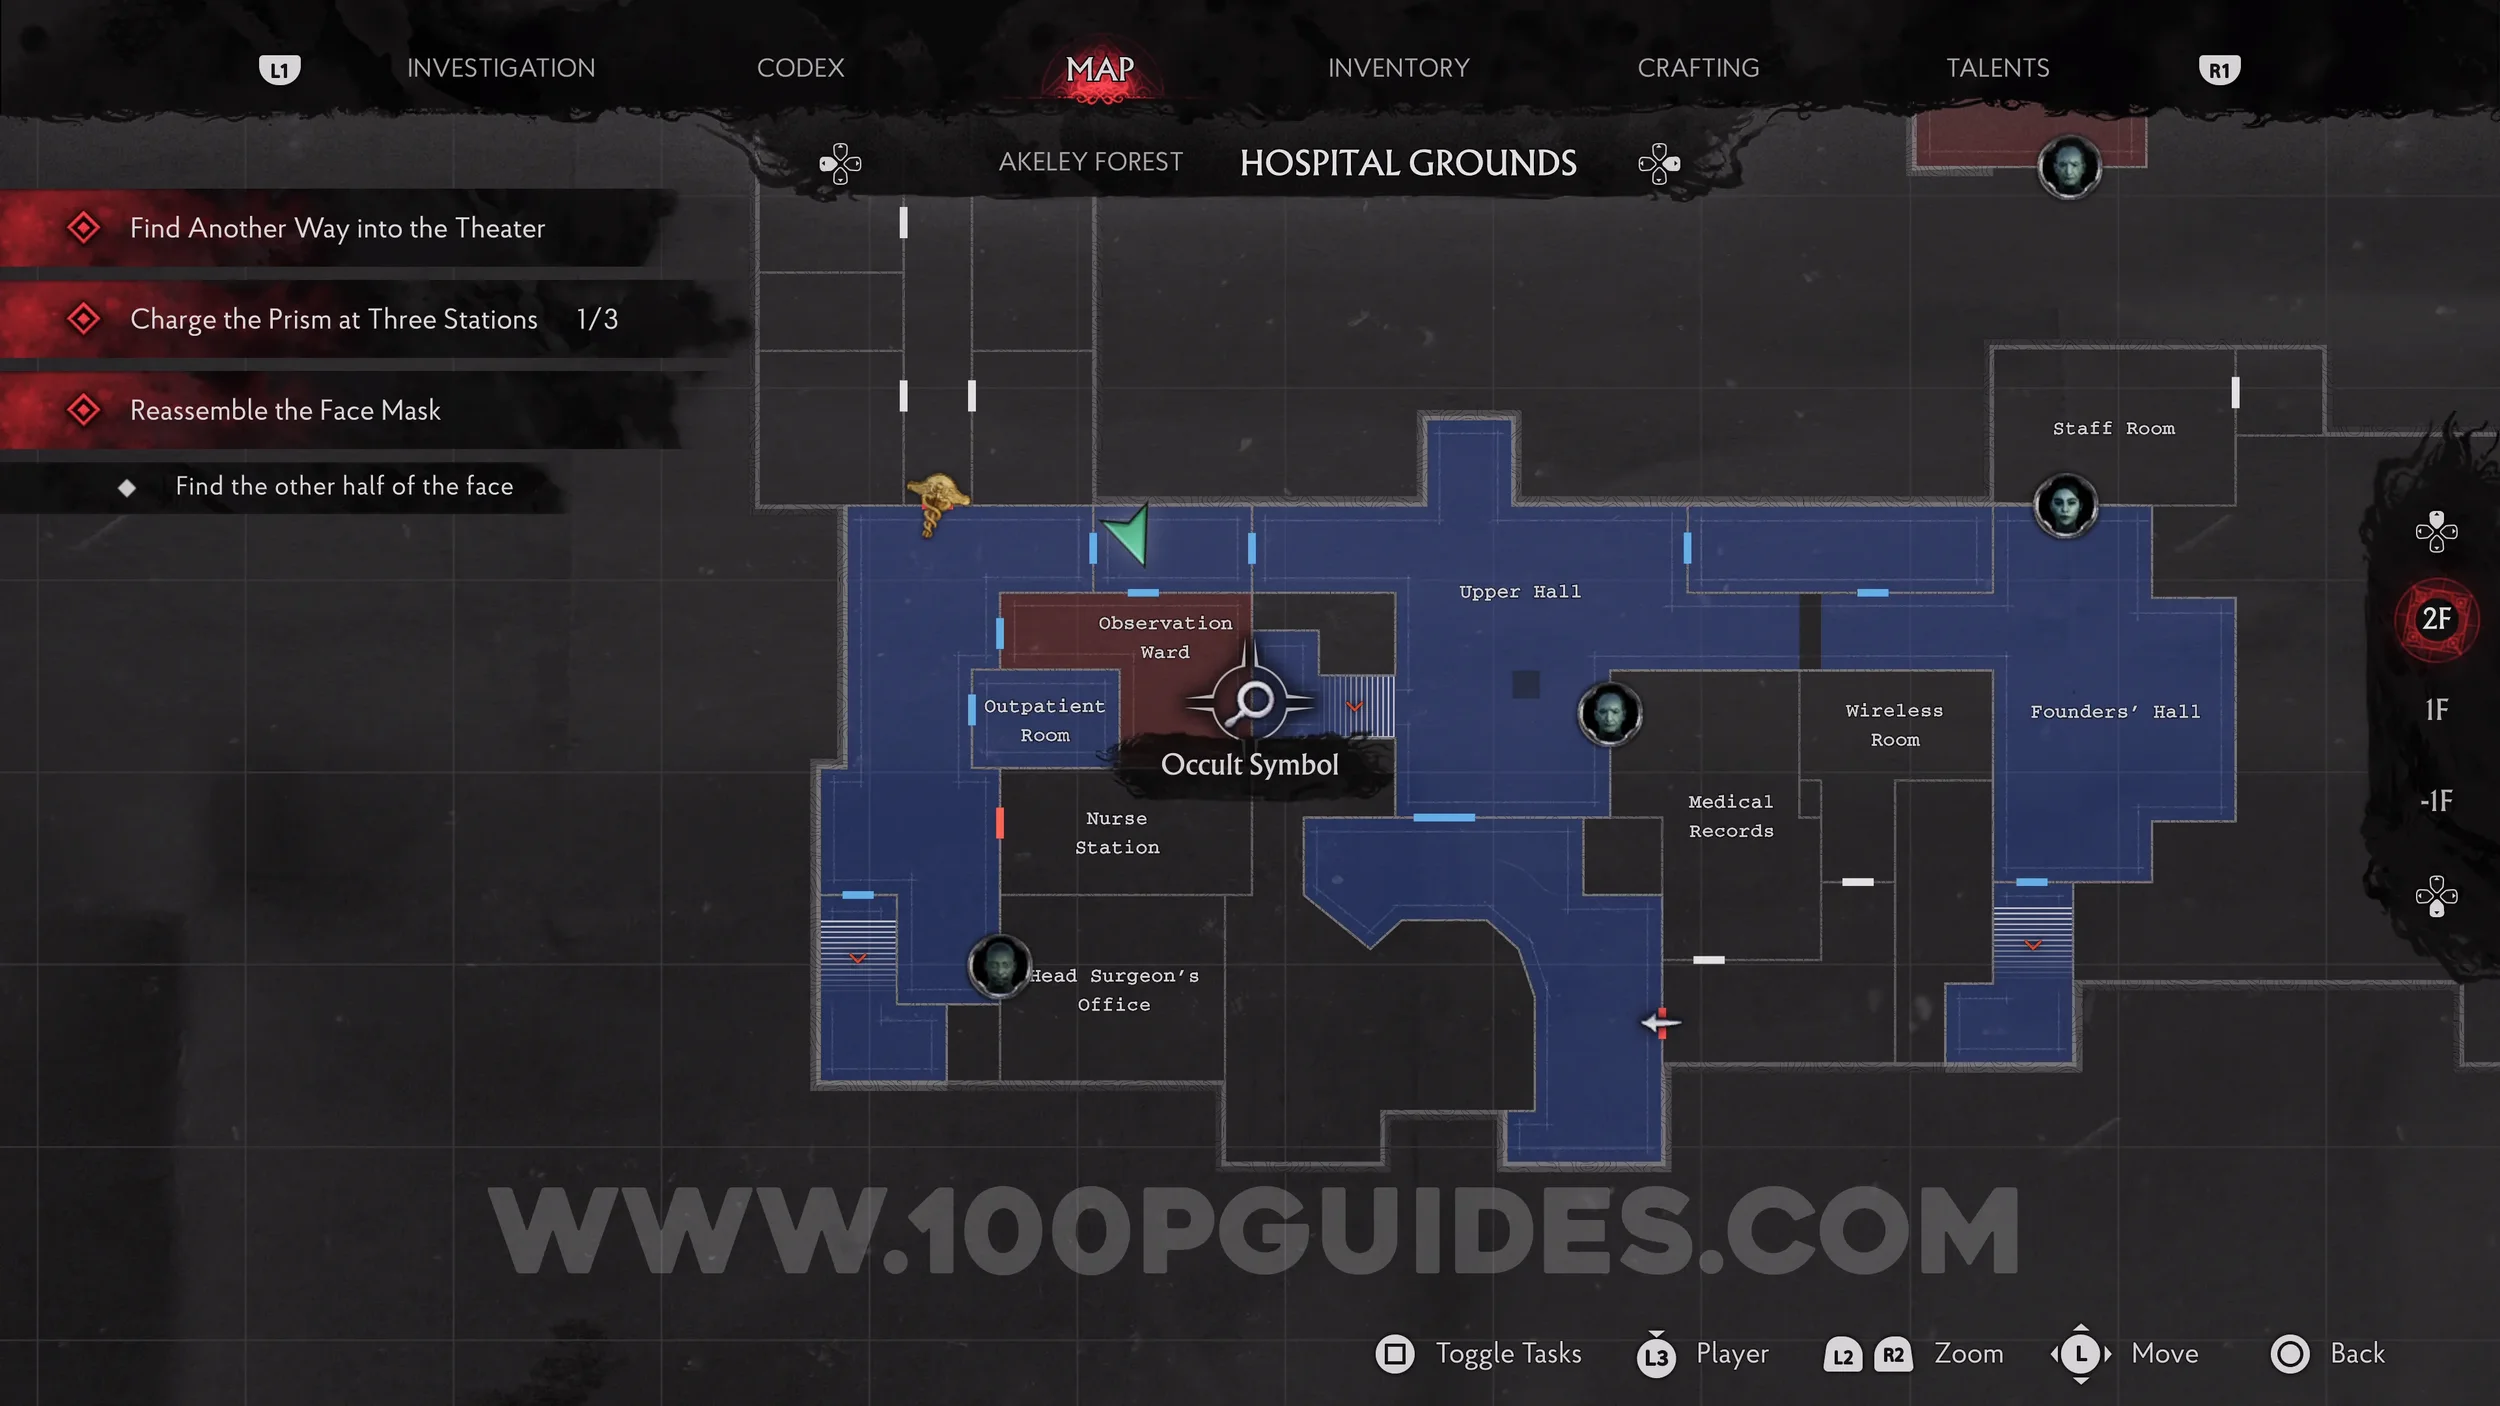
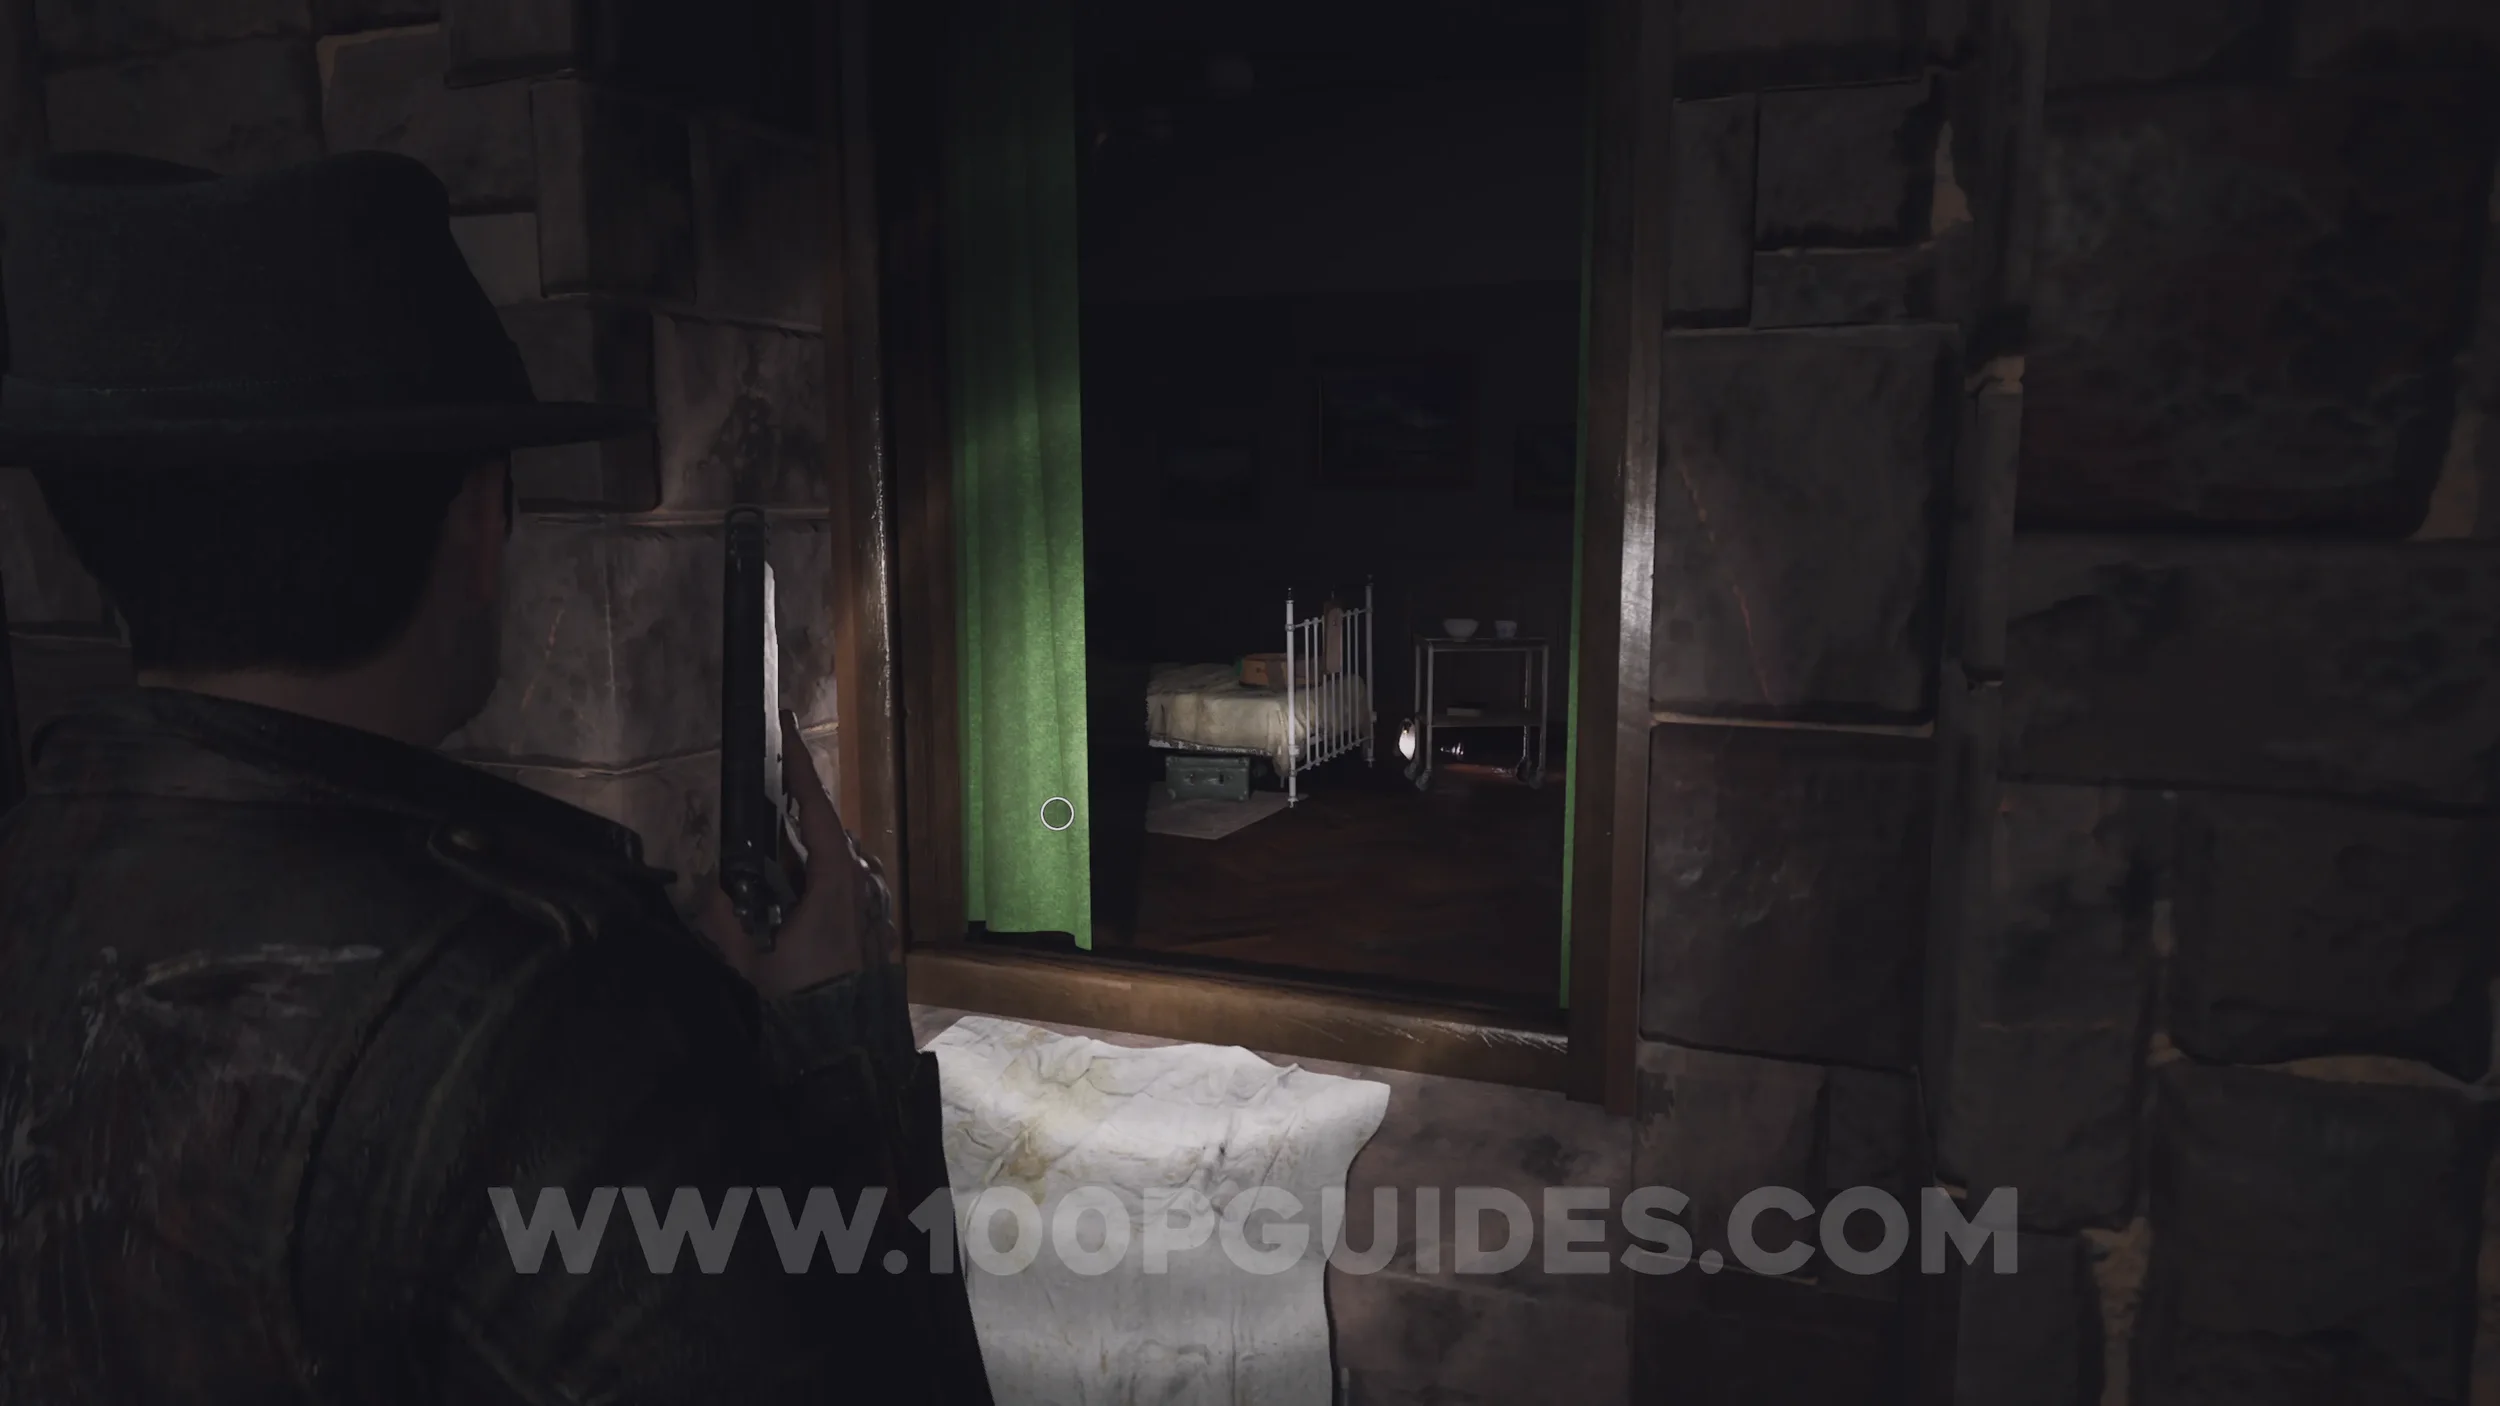
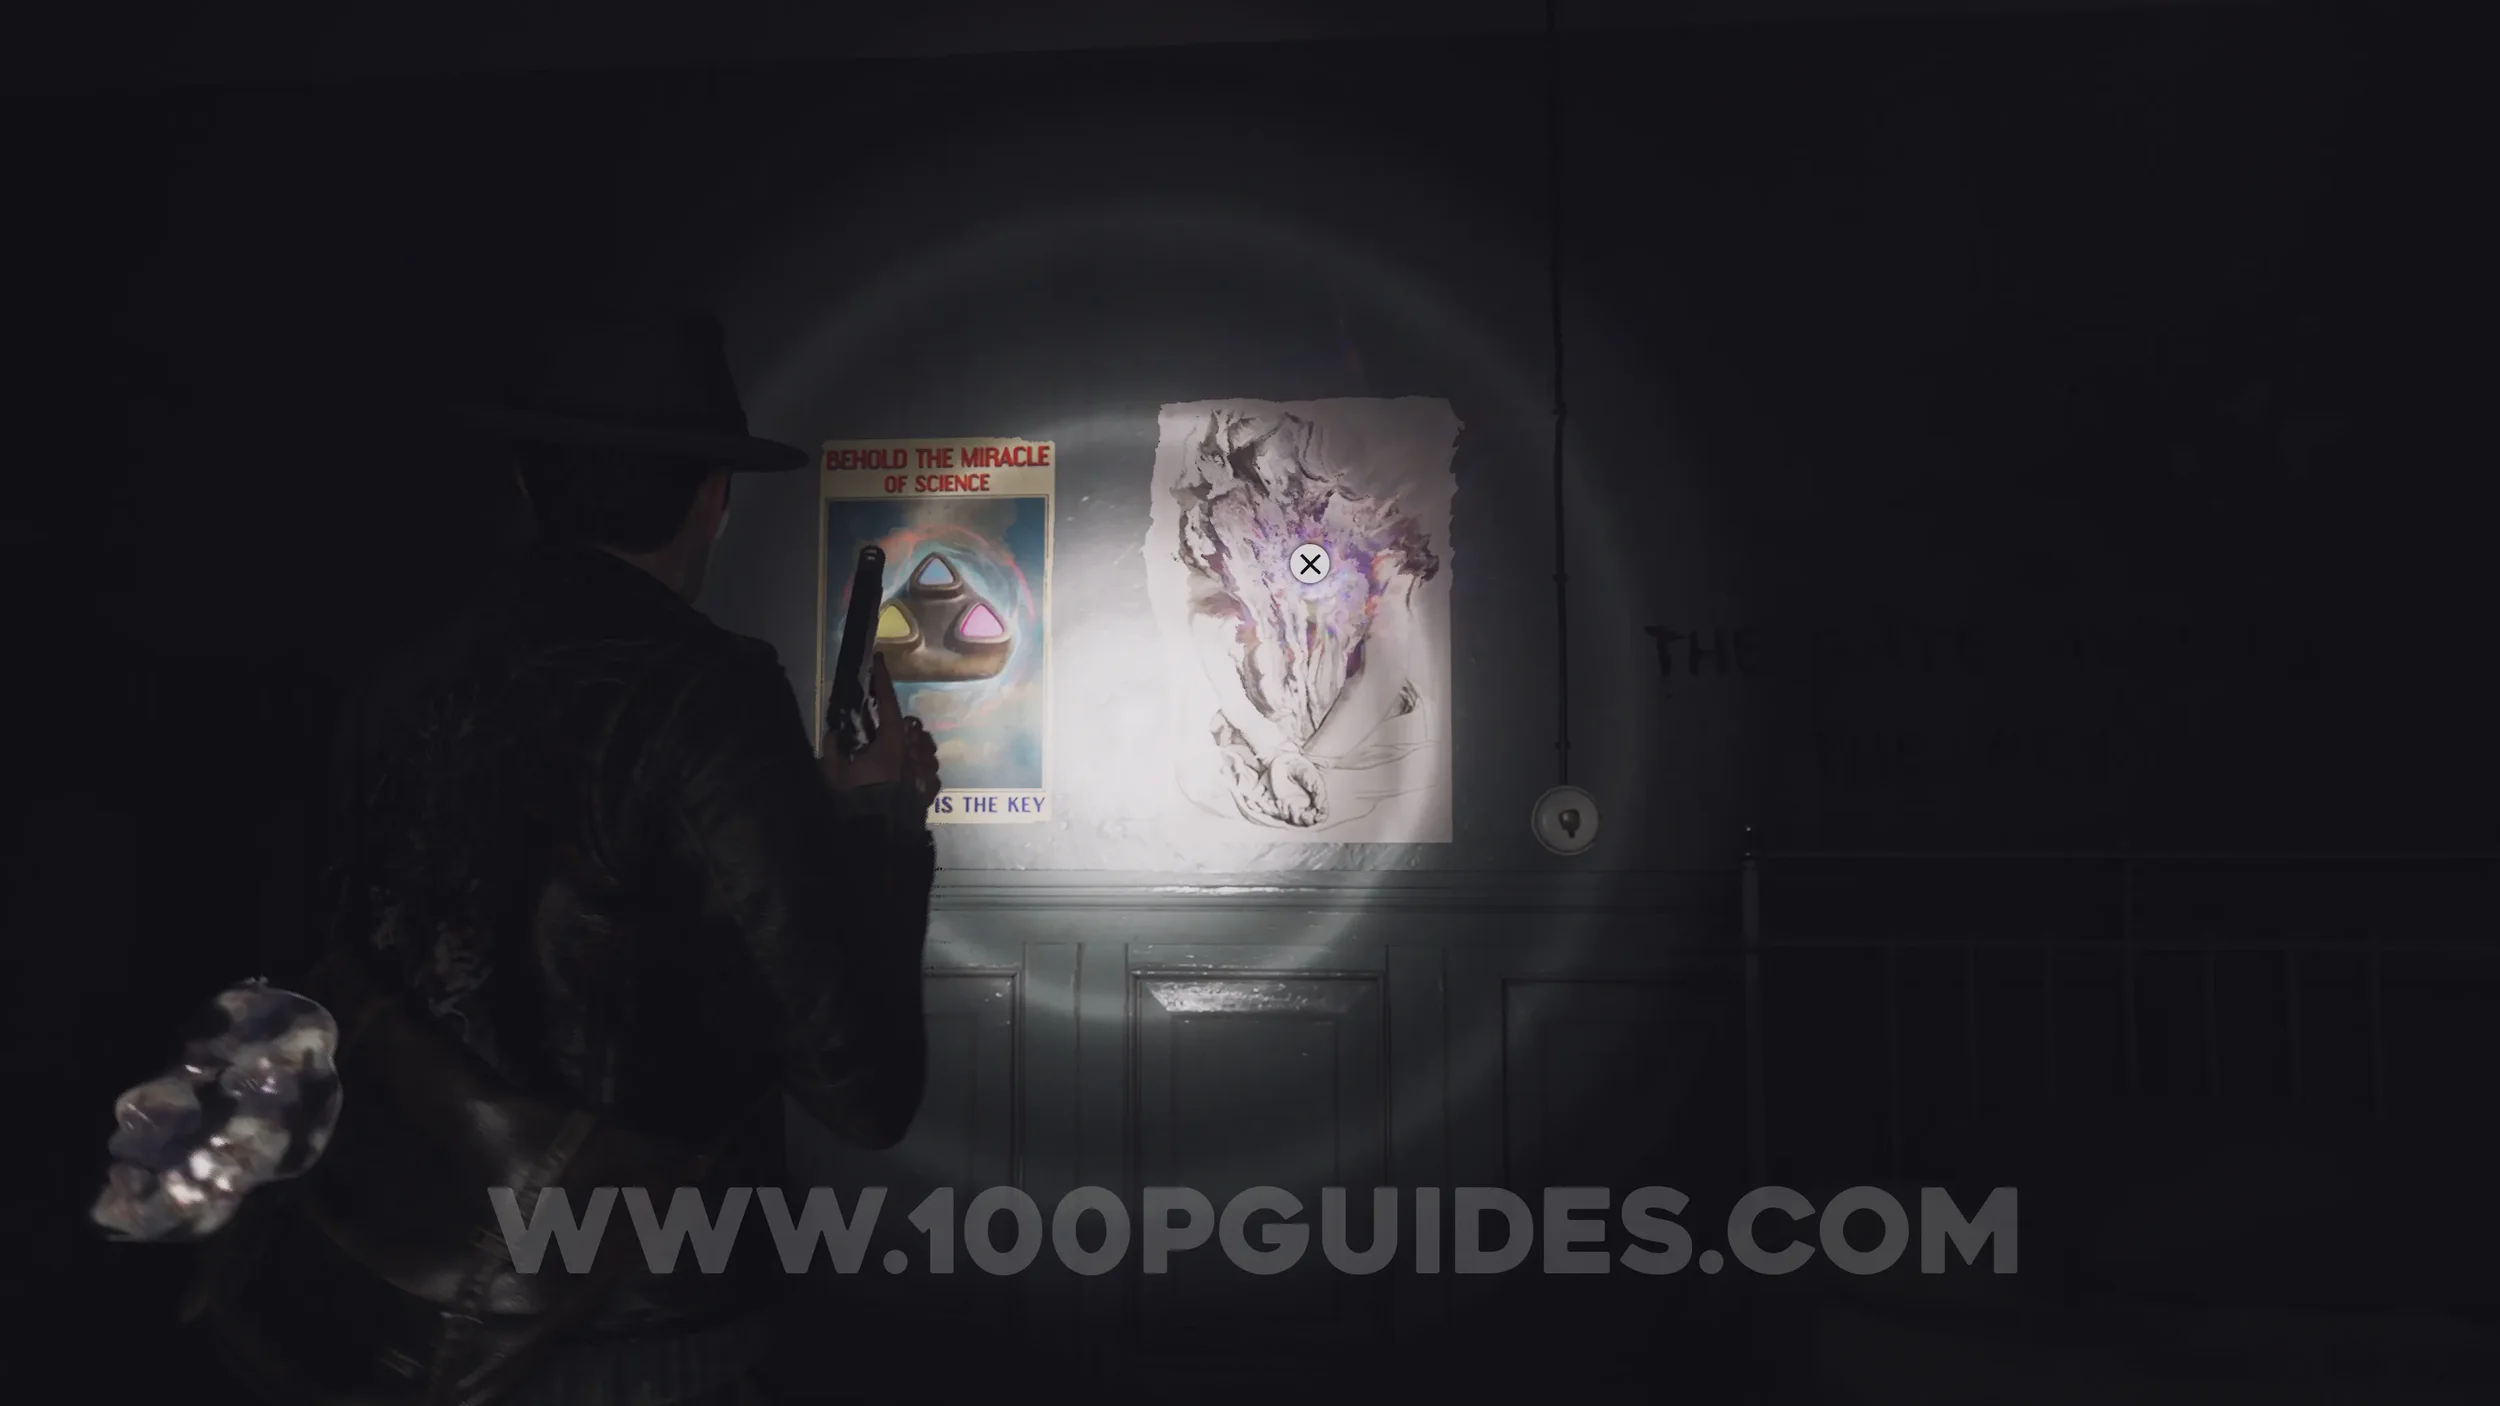
Evidence: Occult Symbol (Pink). Enter the Observation Ward via the northern window and examine the shimmer on the wall.
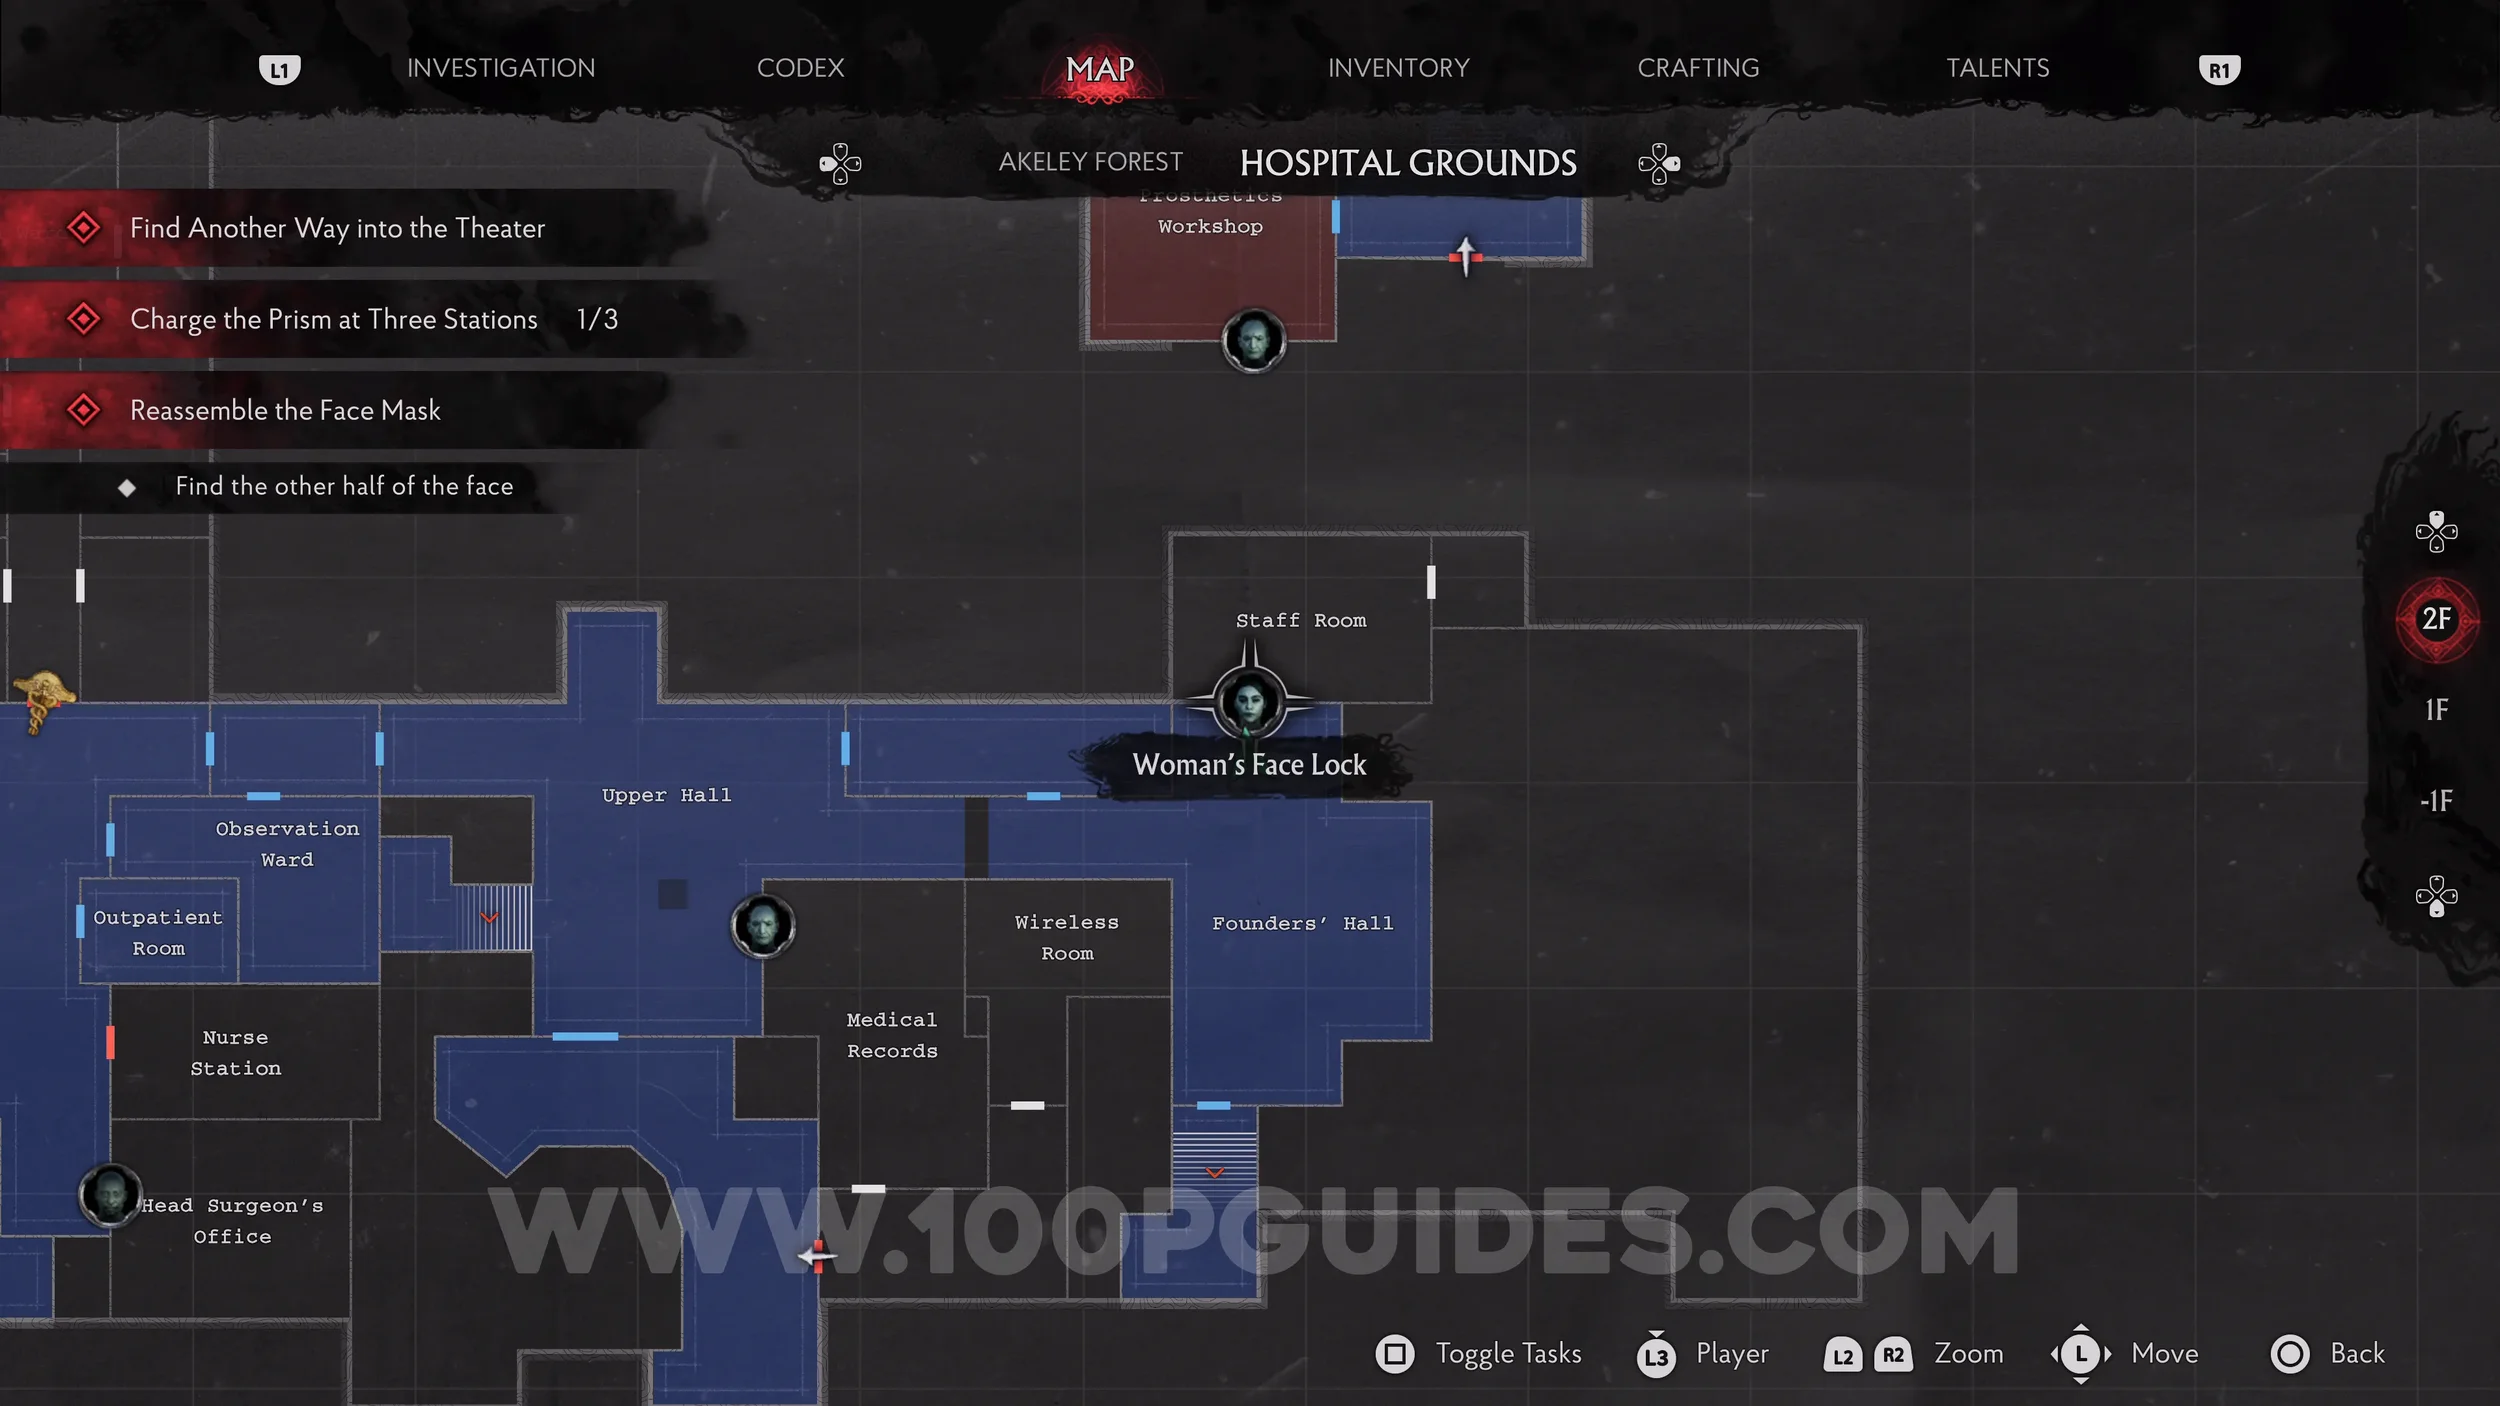
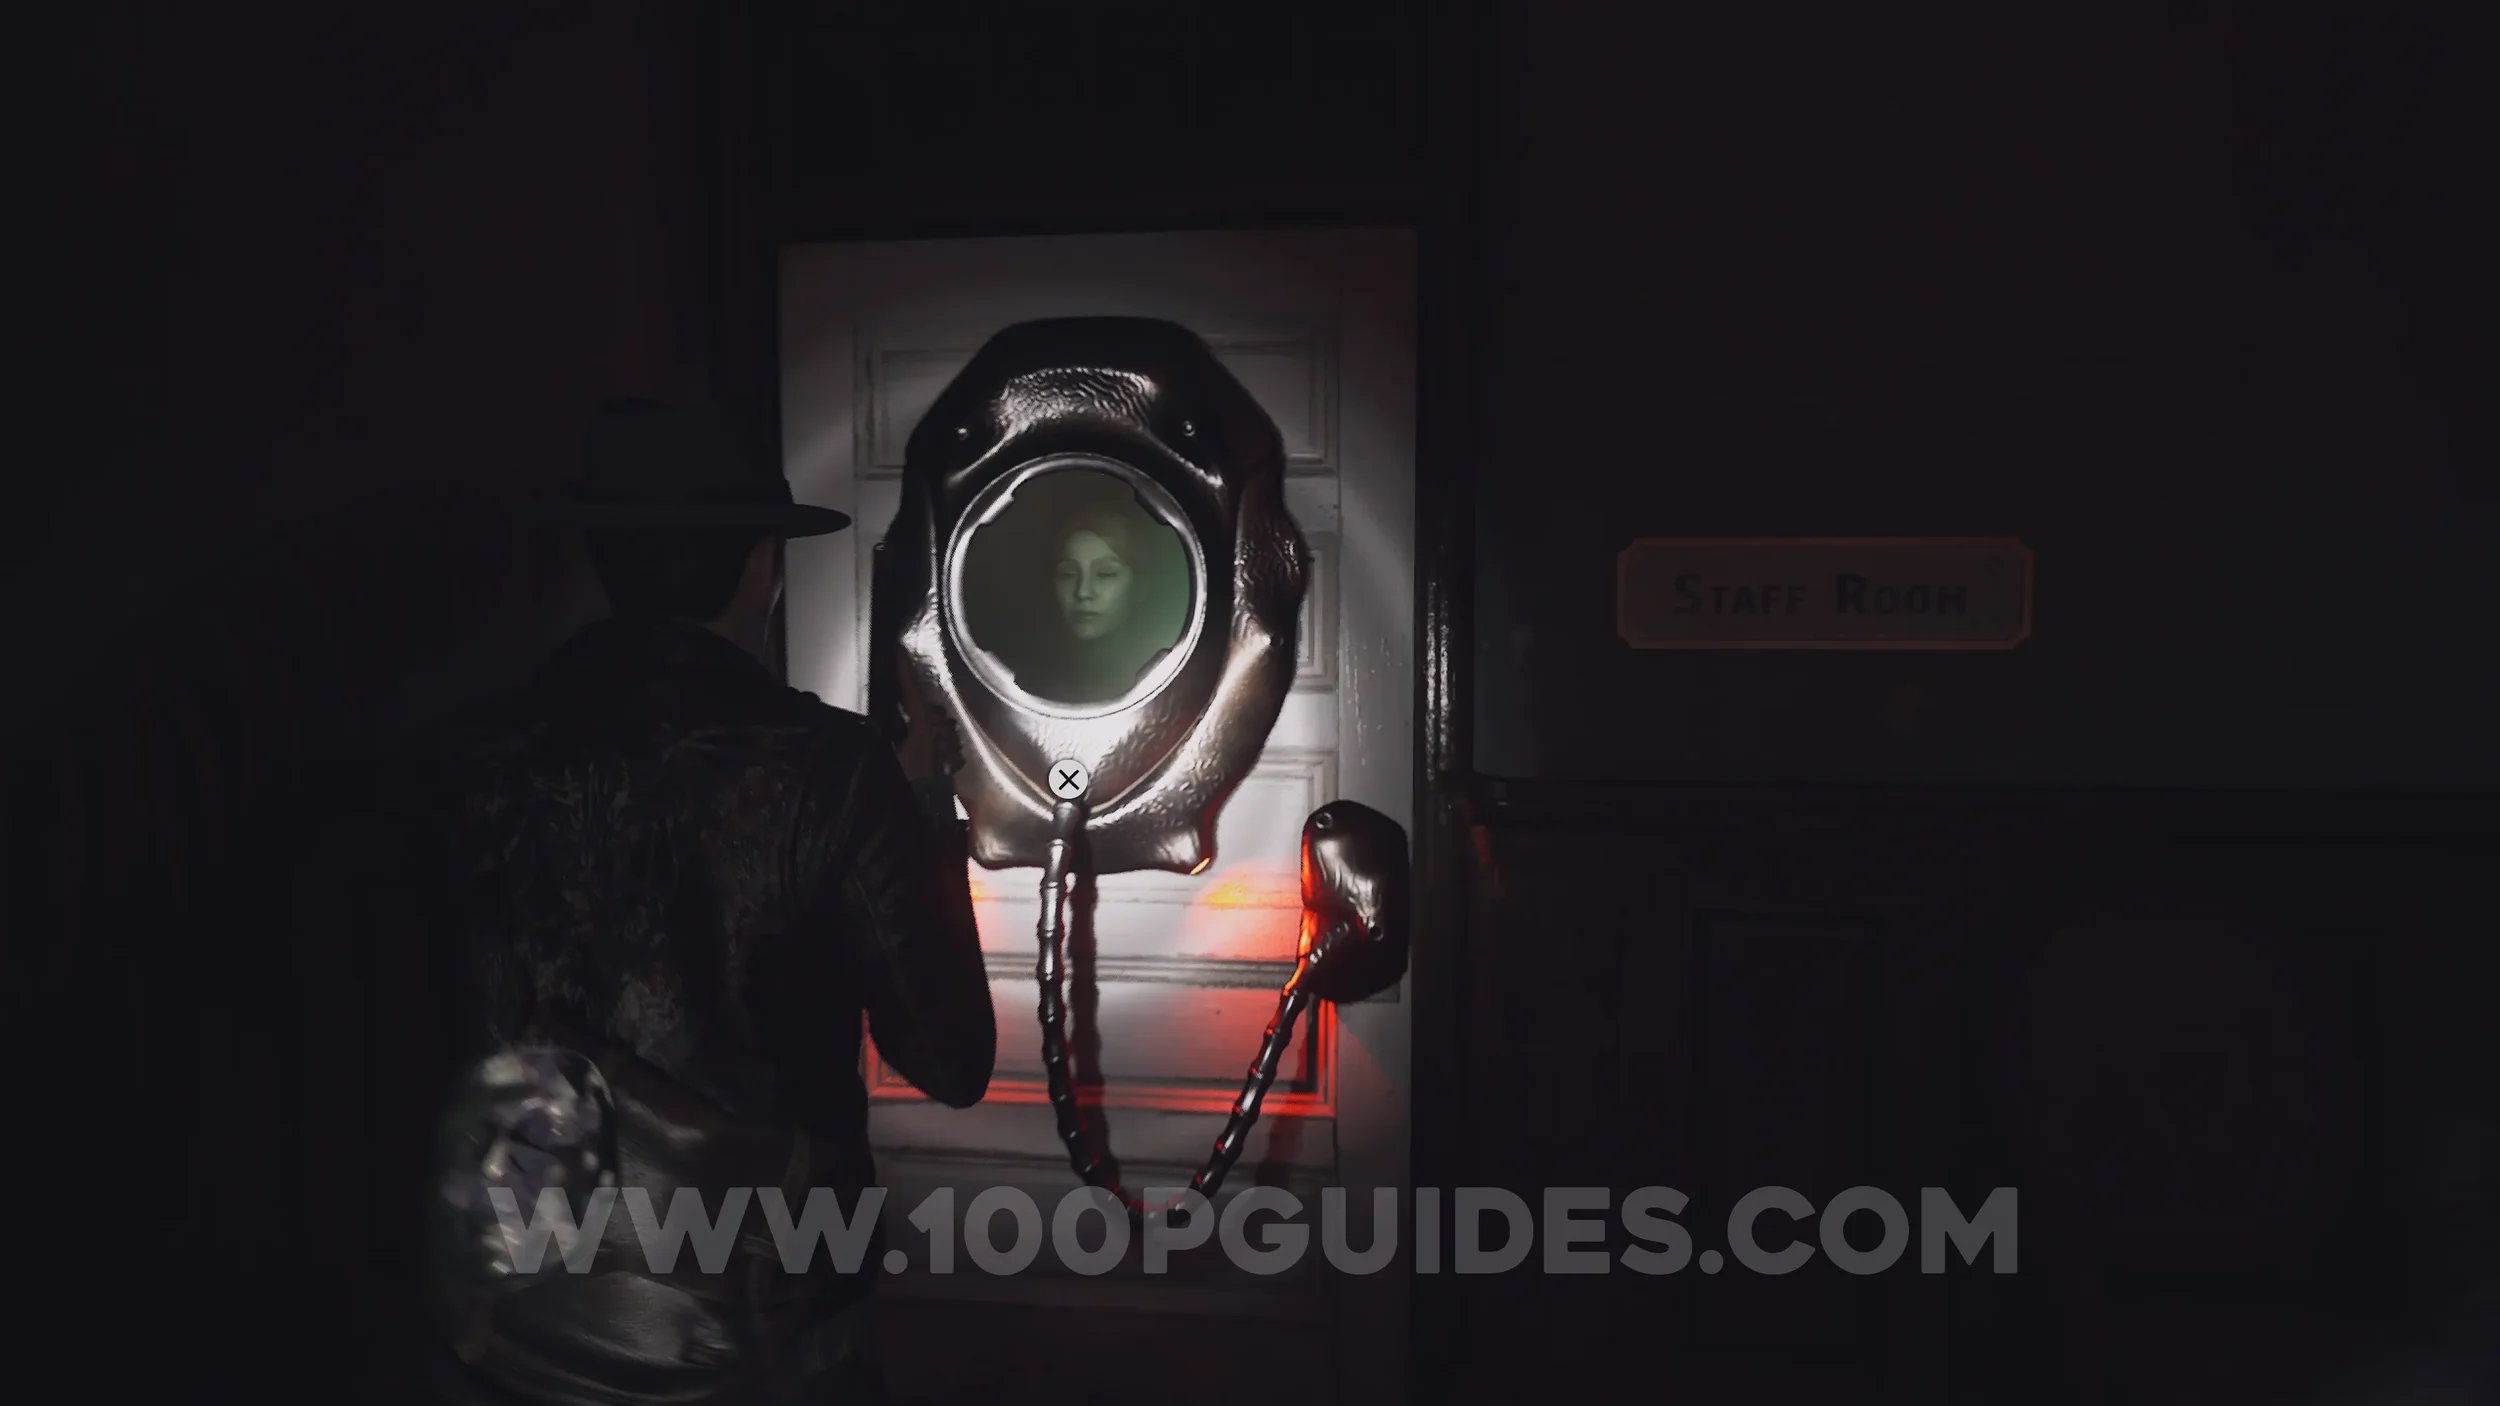
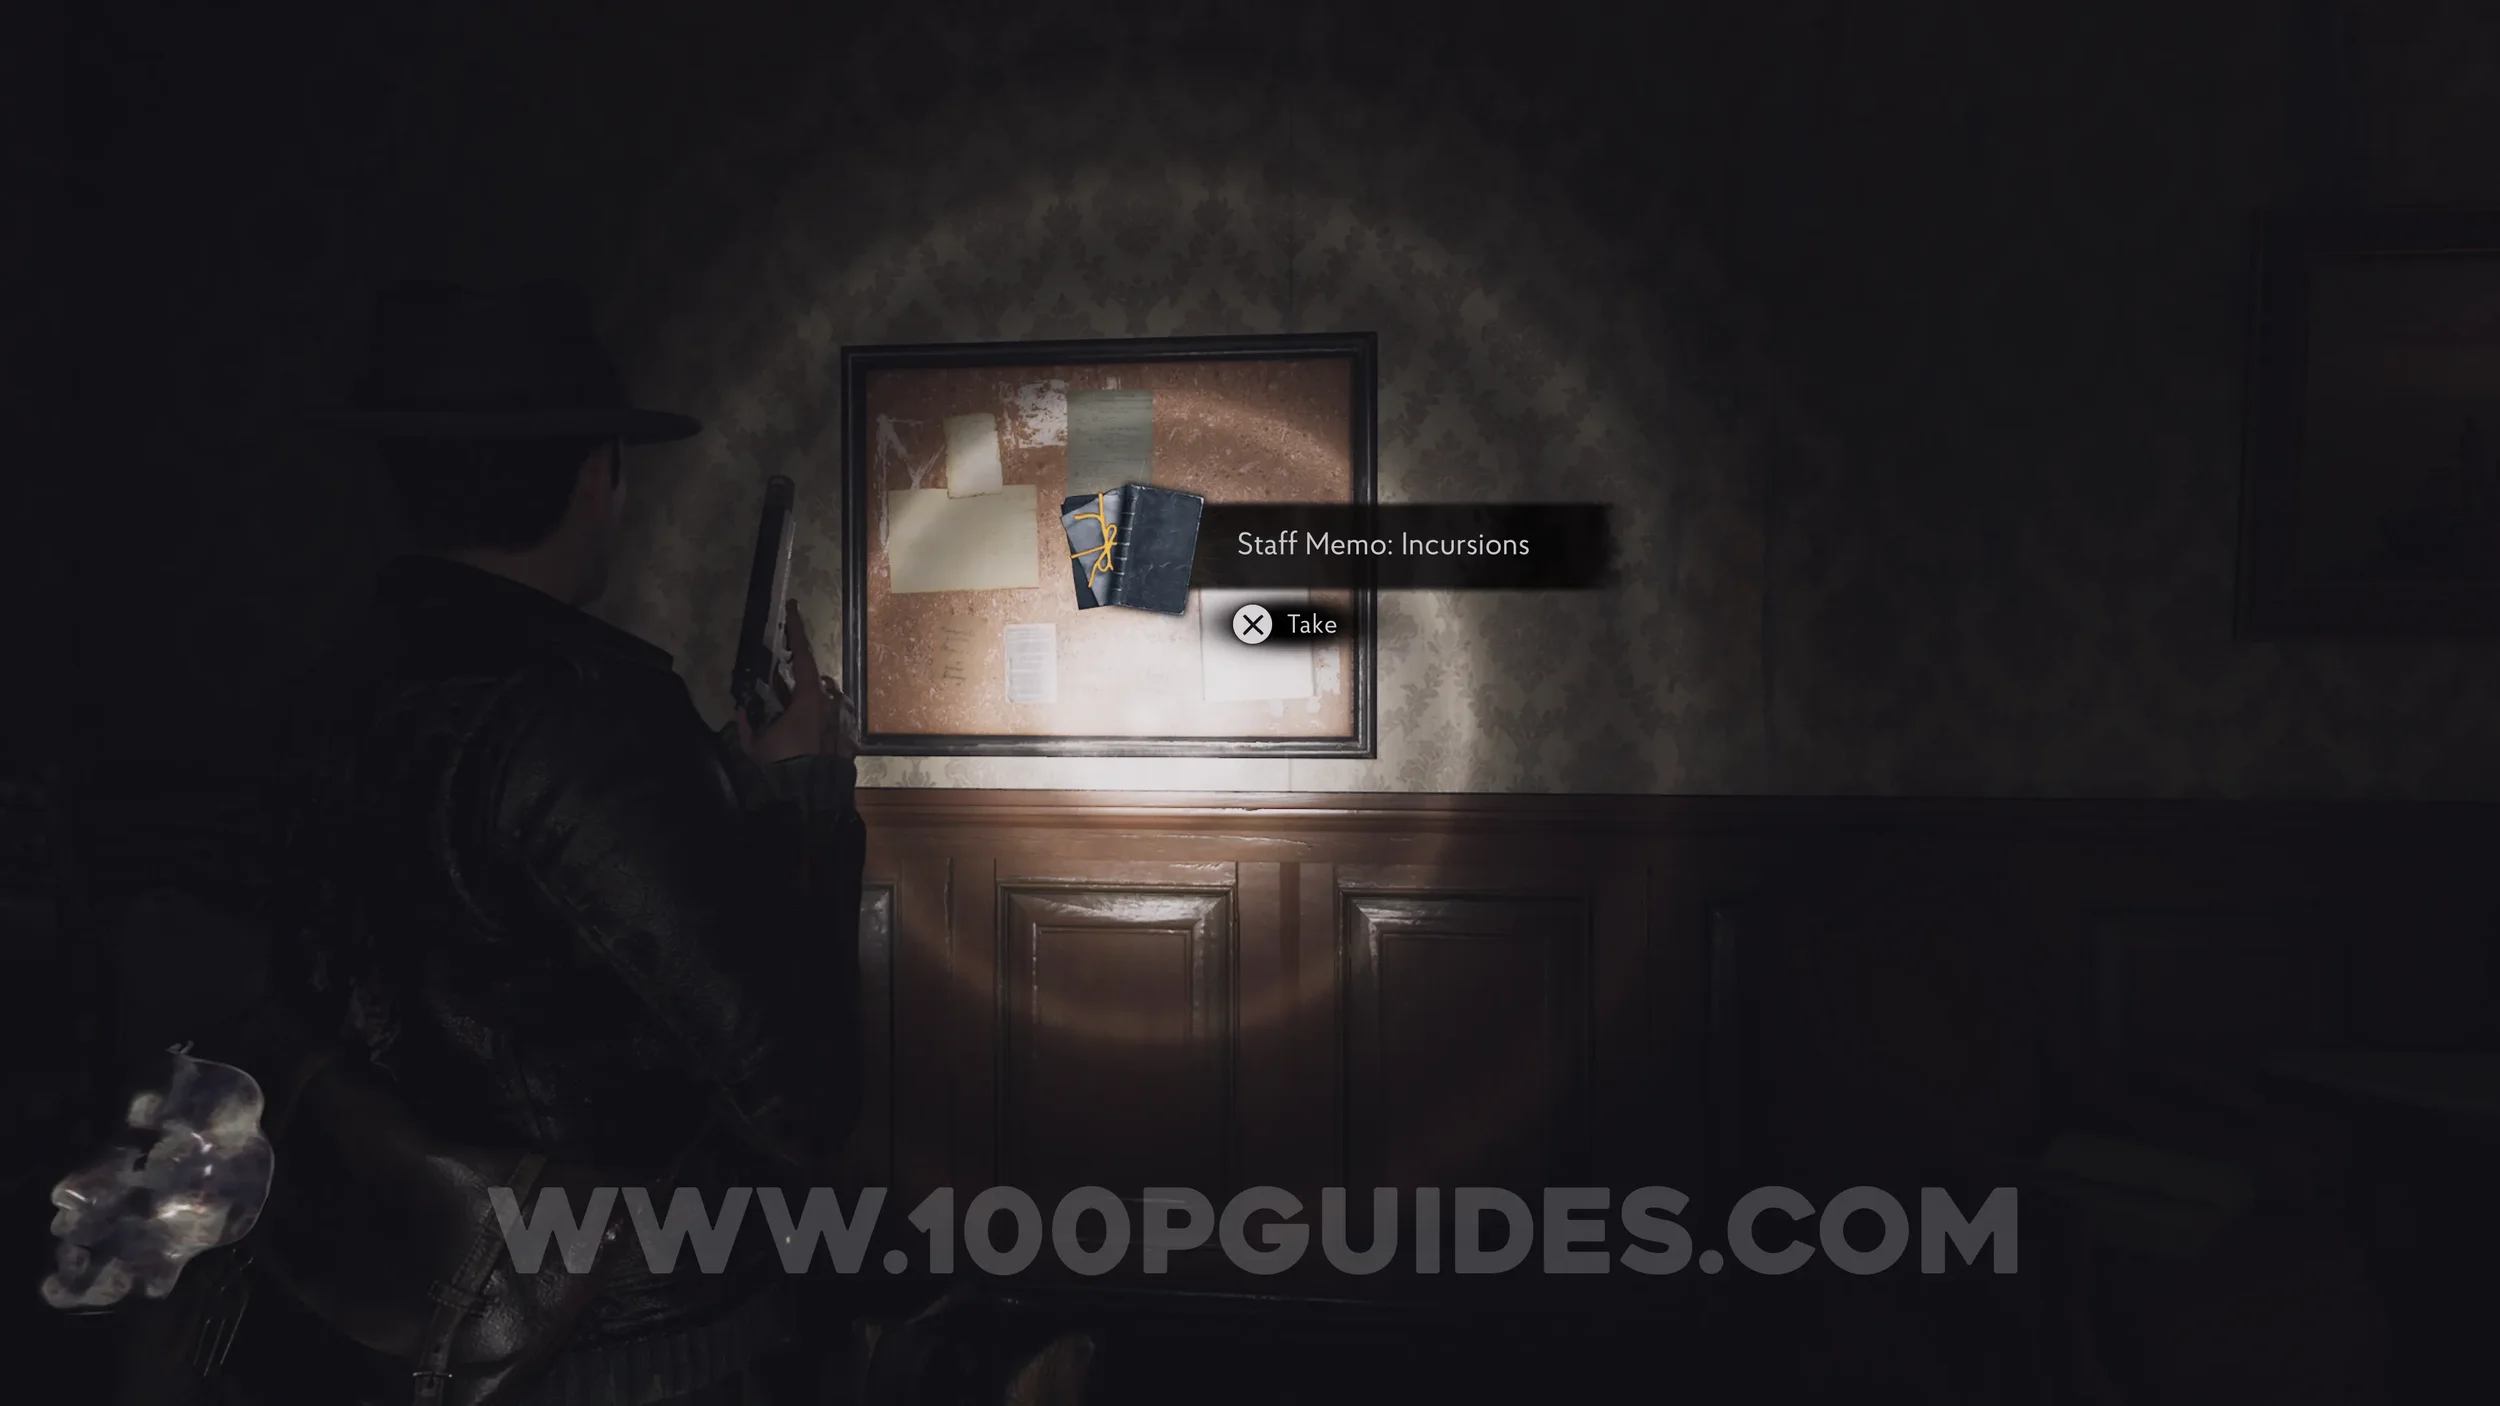
Lore Codex: Staff Memo: Incursions. Head east all the way to the Founders' Hall. Here, use the Woman's Face Mask to open the door to the Staff Room. You'll see the codex on the wall in front of you on the other side.
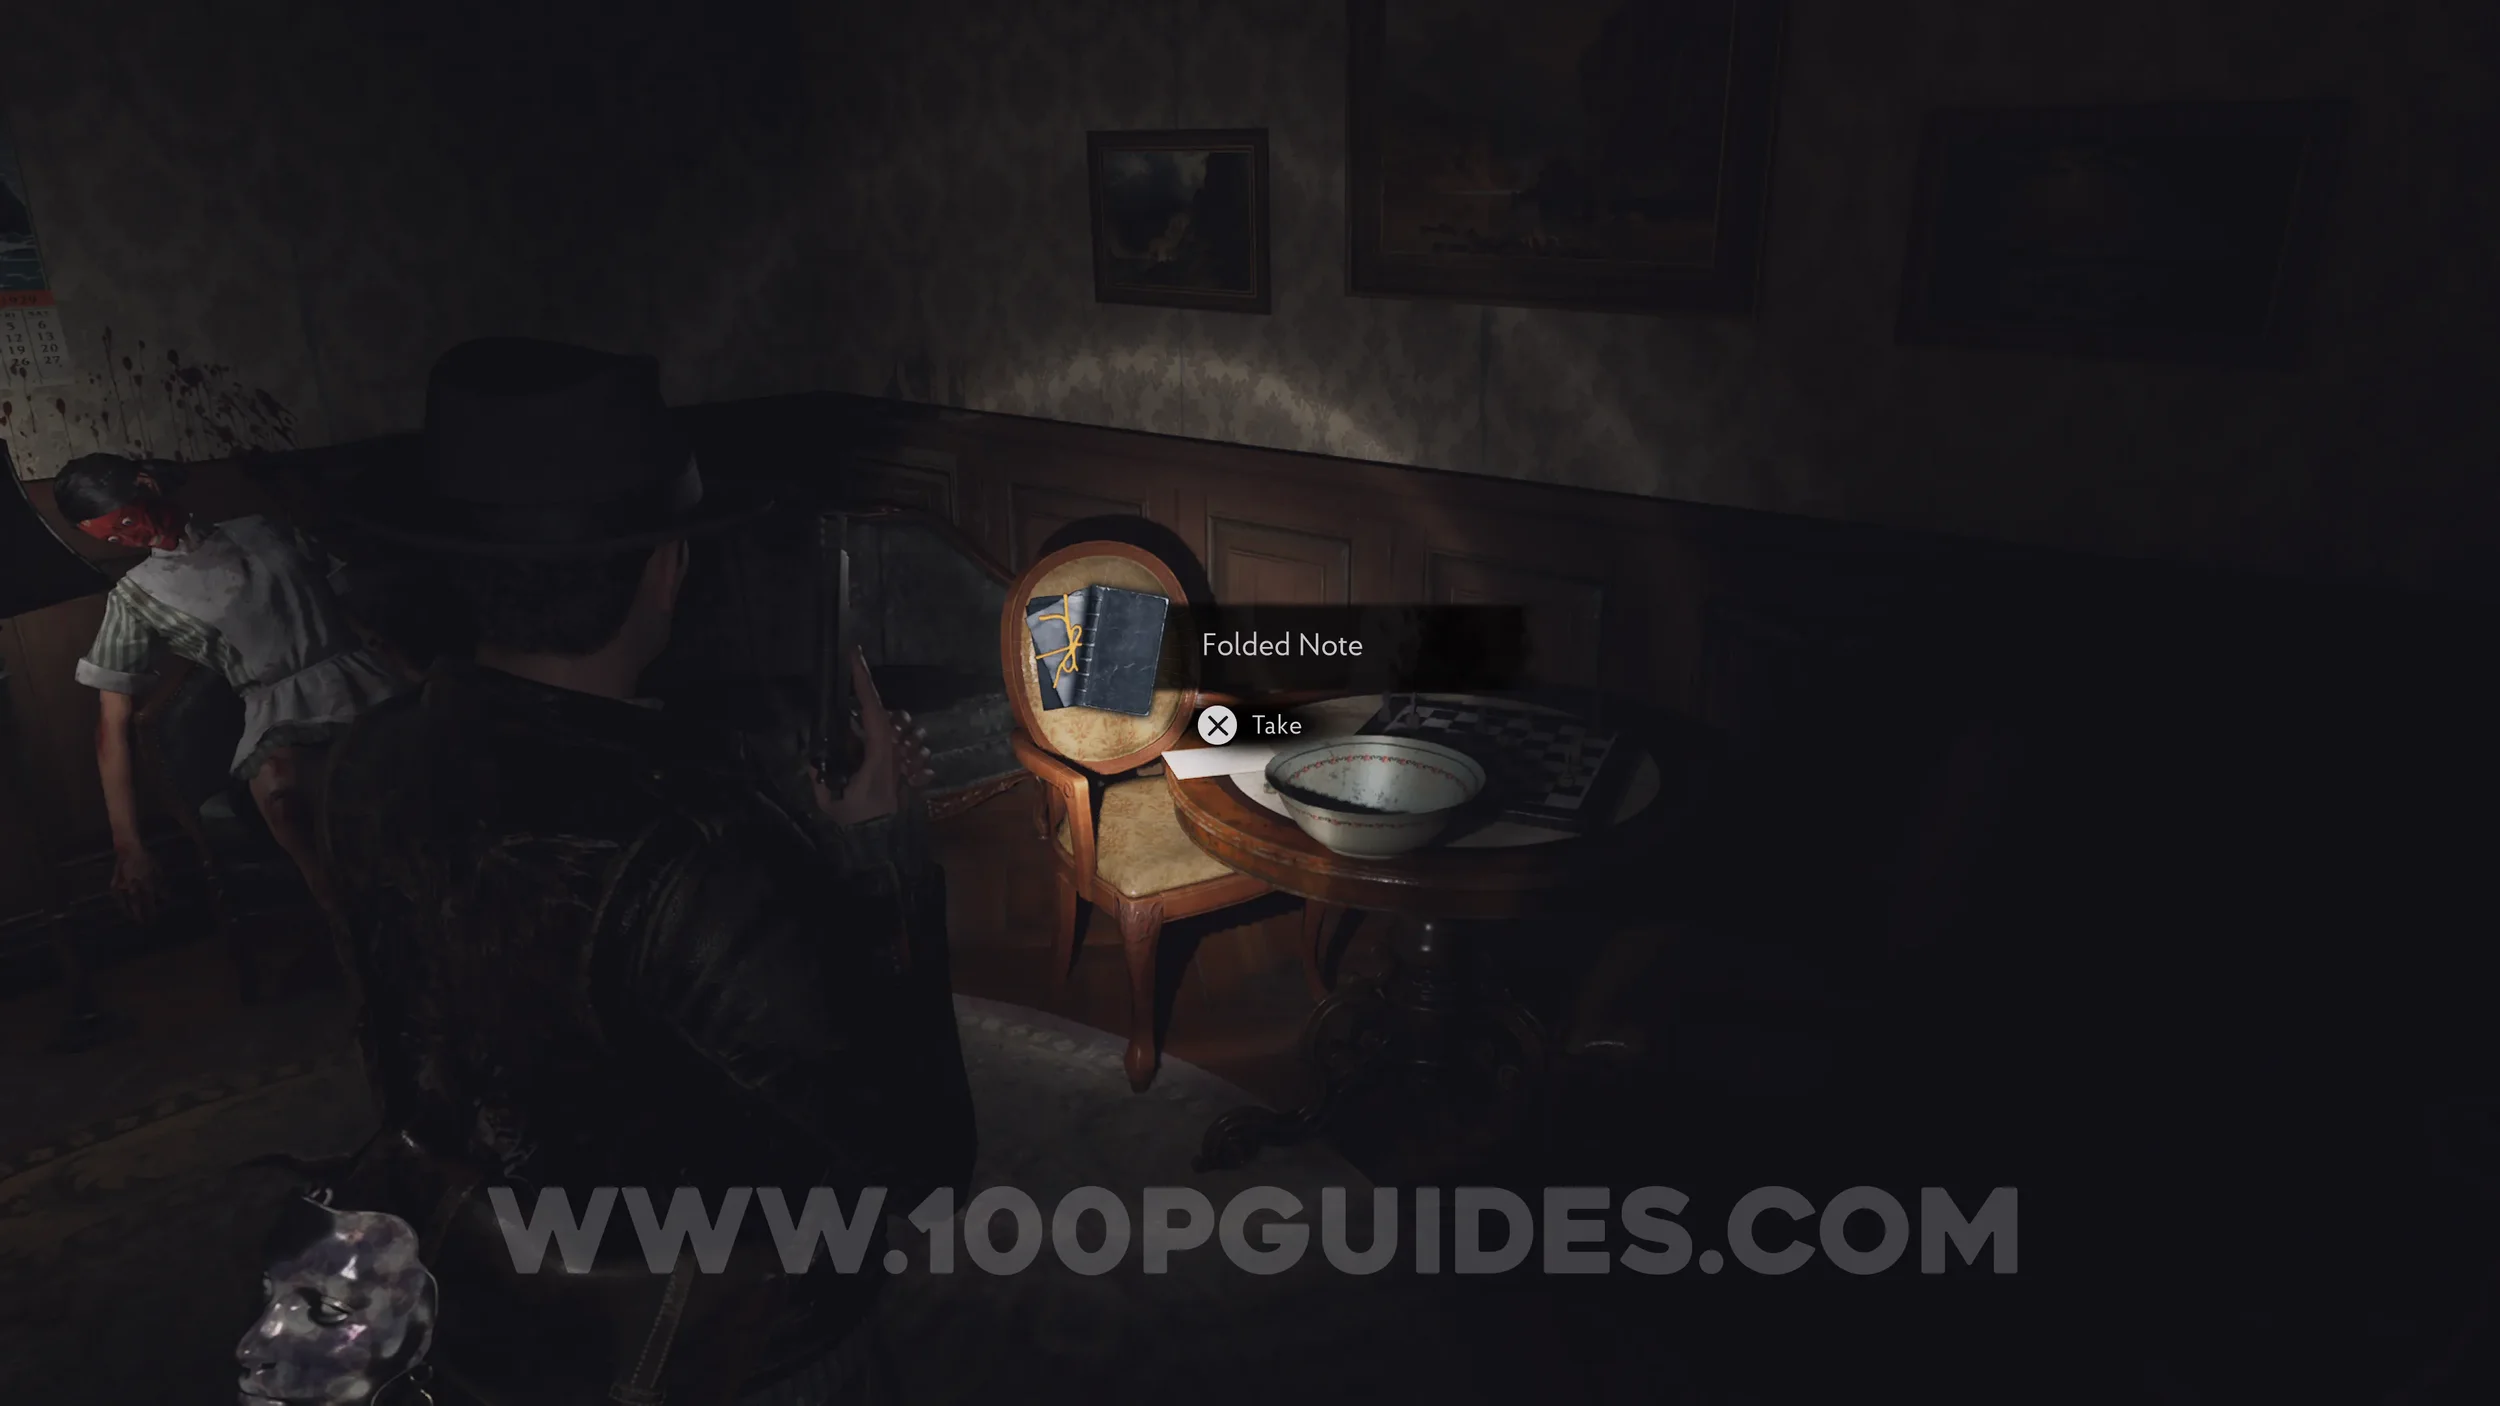
Lore Codex: Folded Note. On the table in the same room.
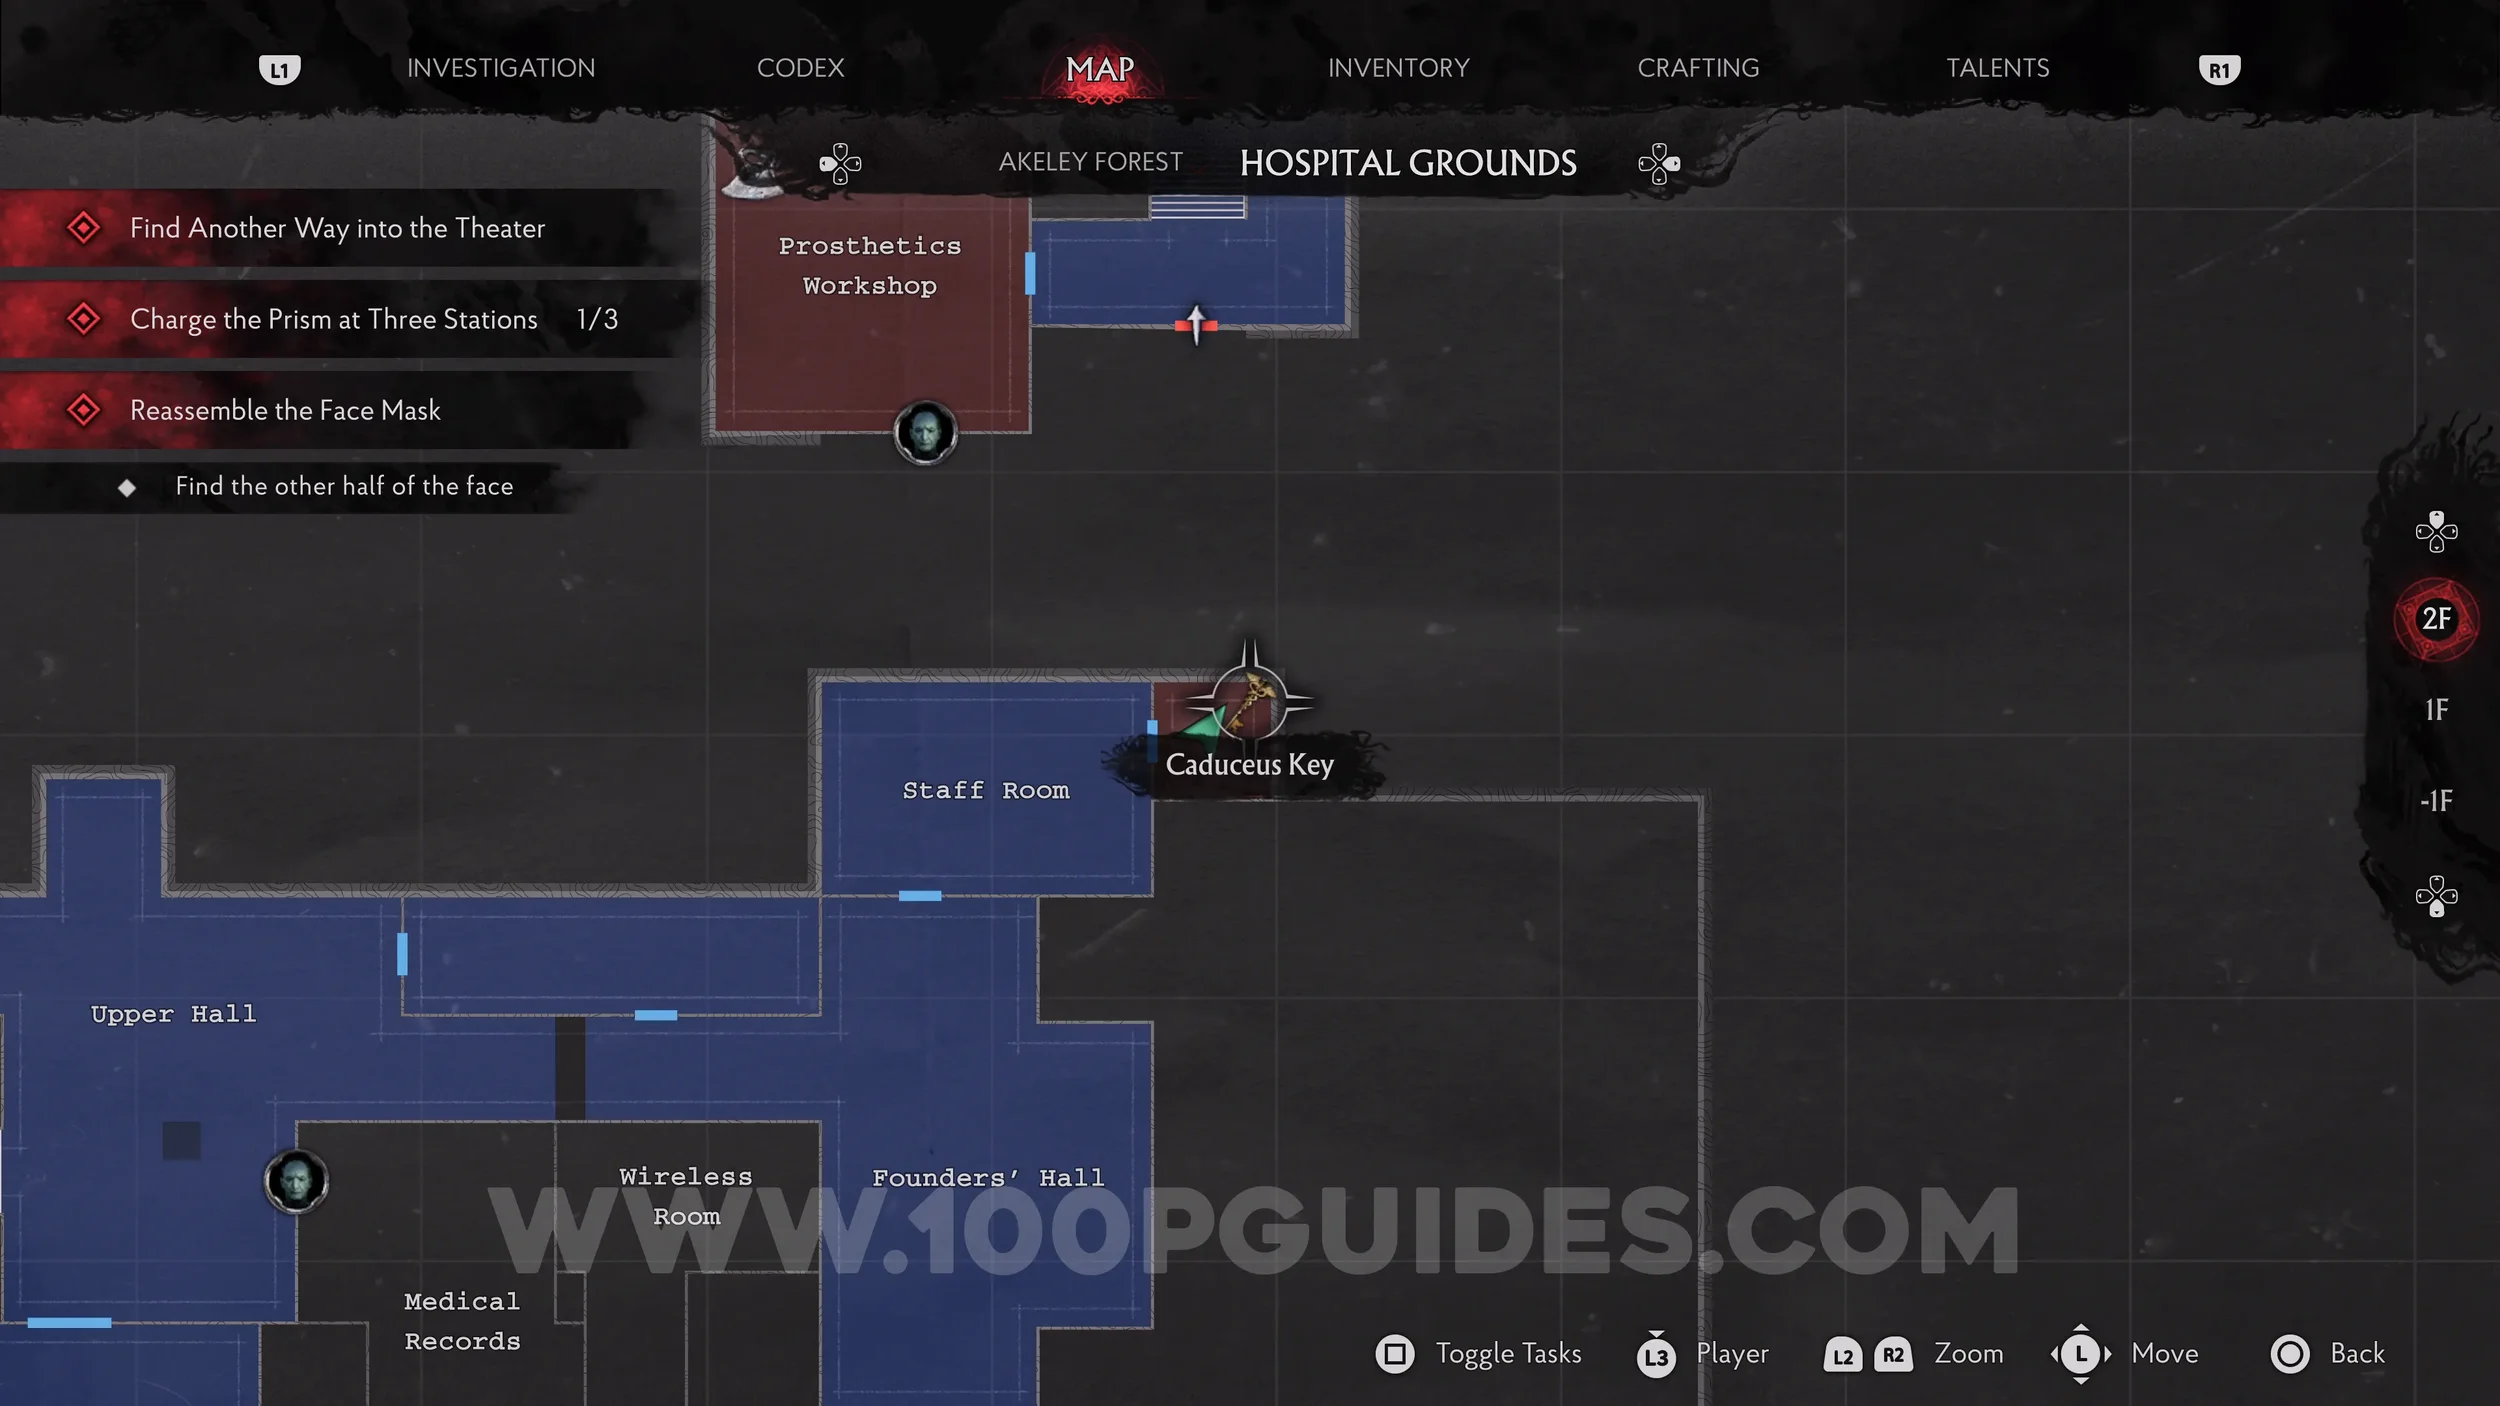
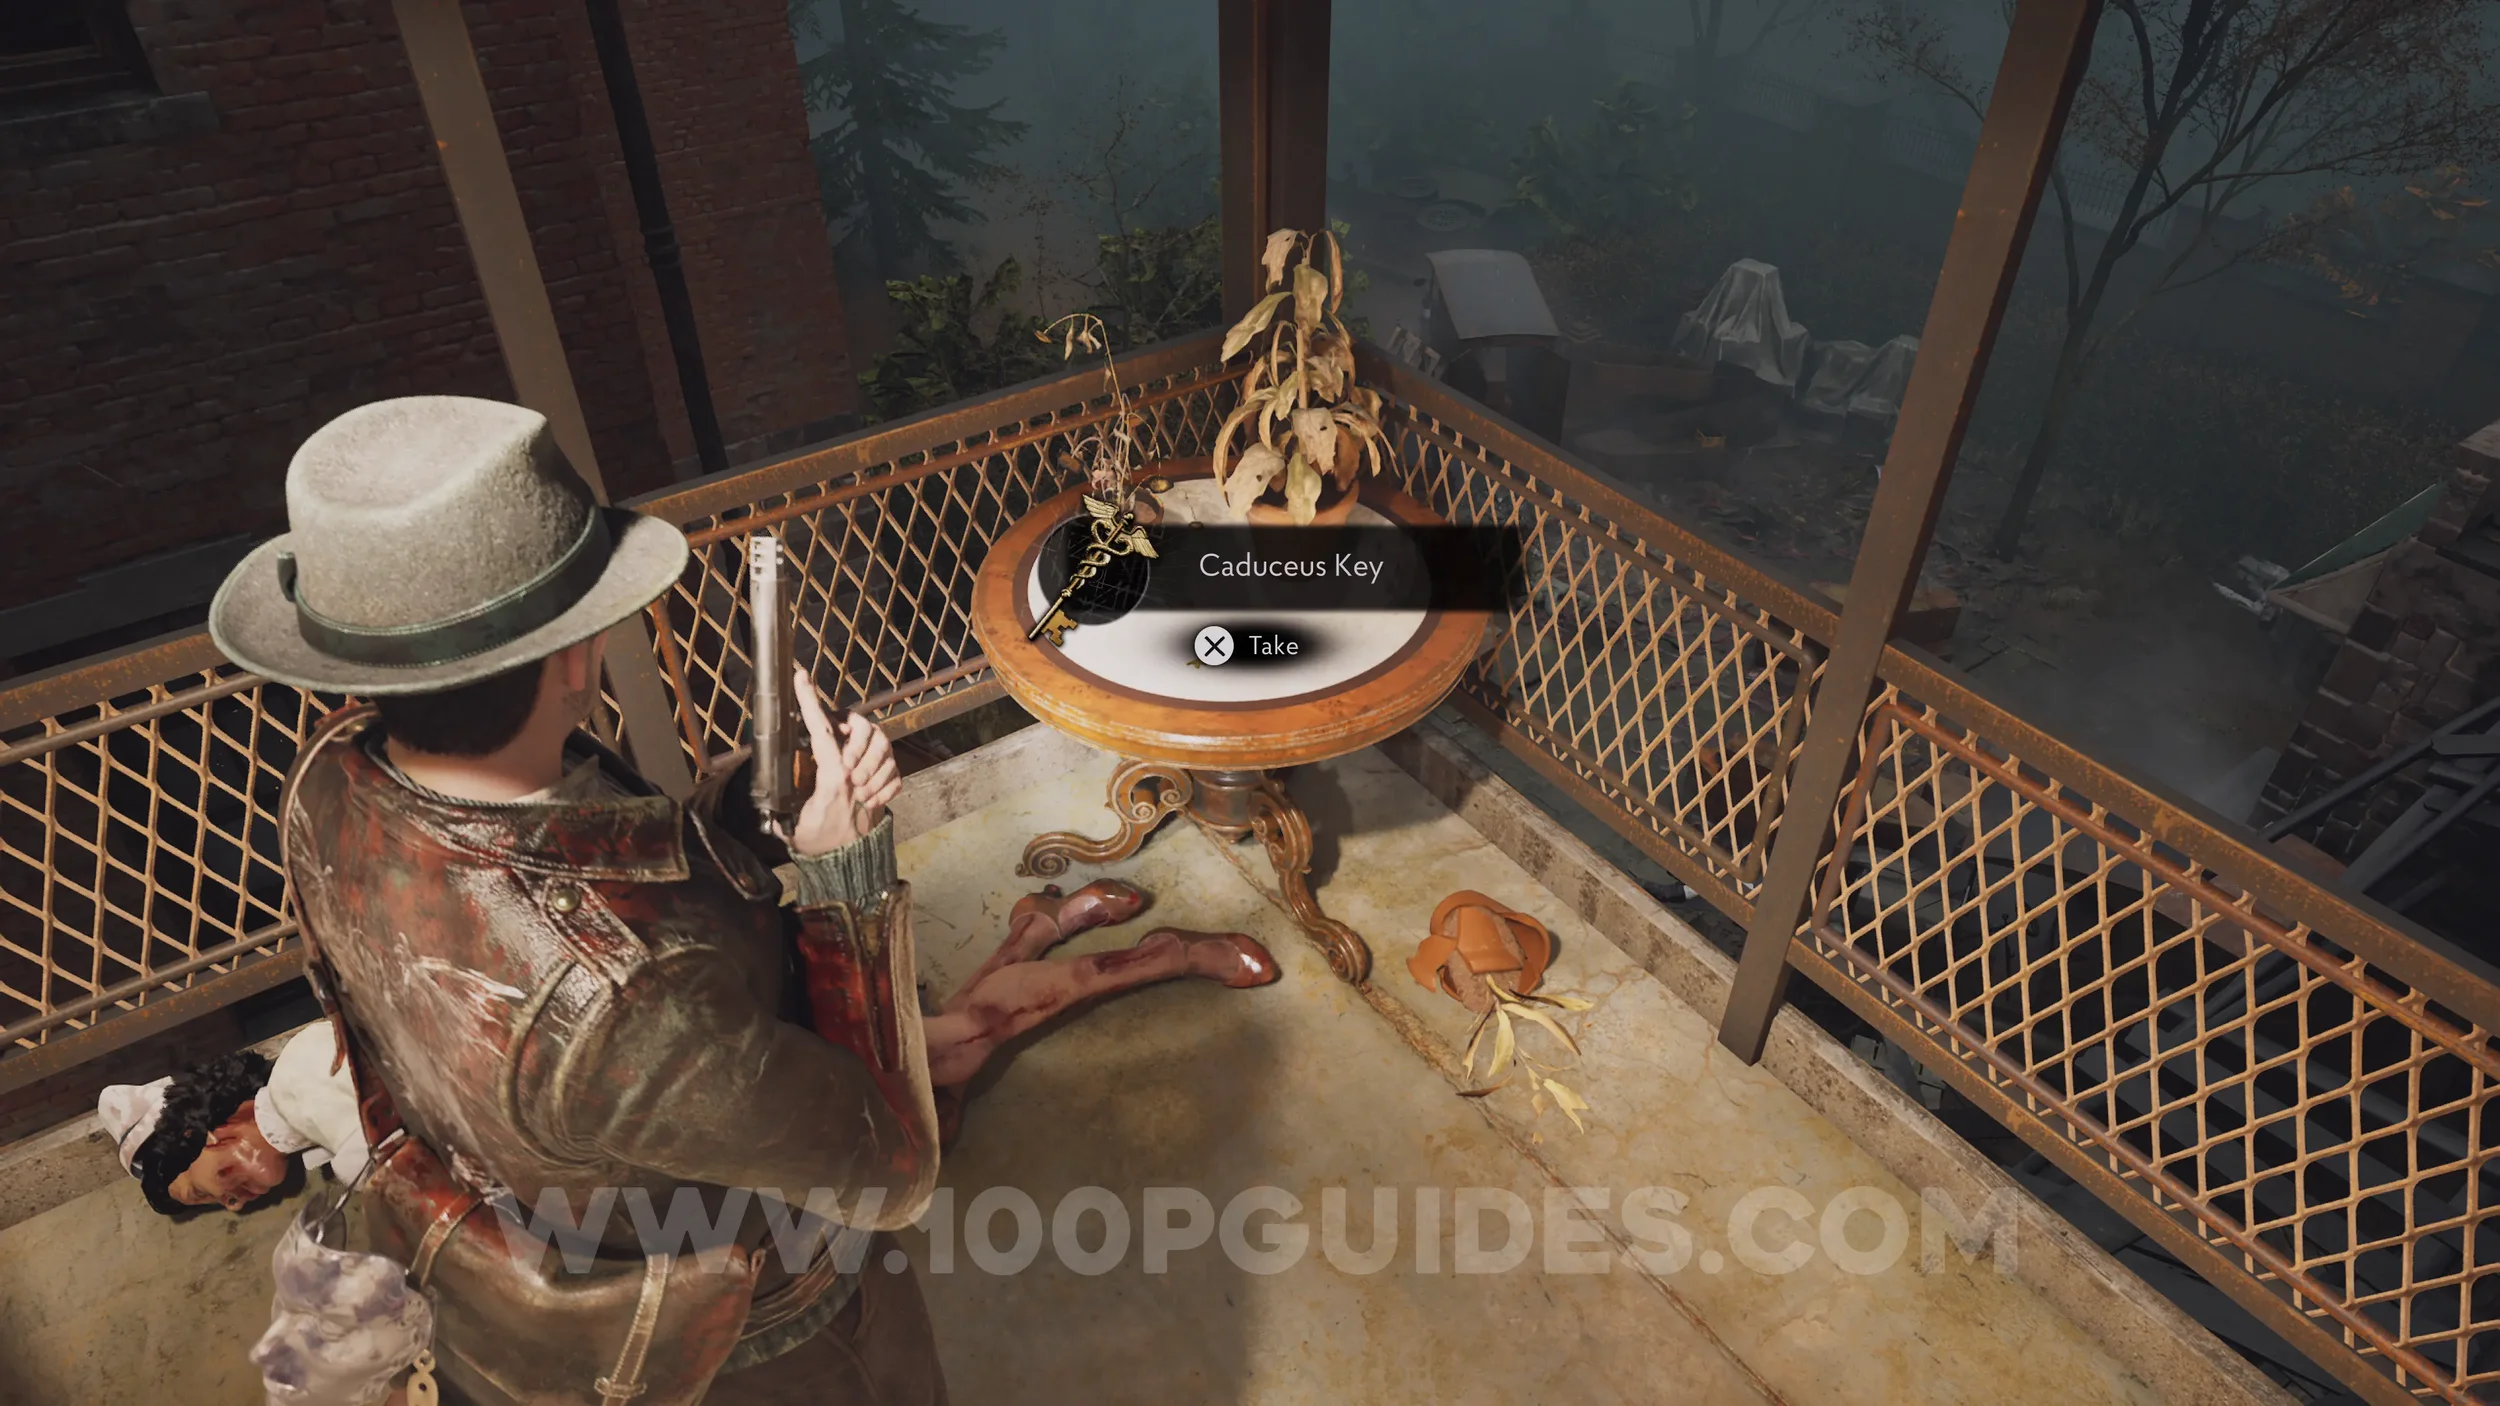
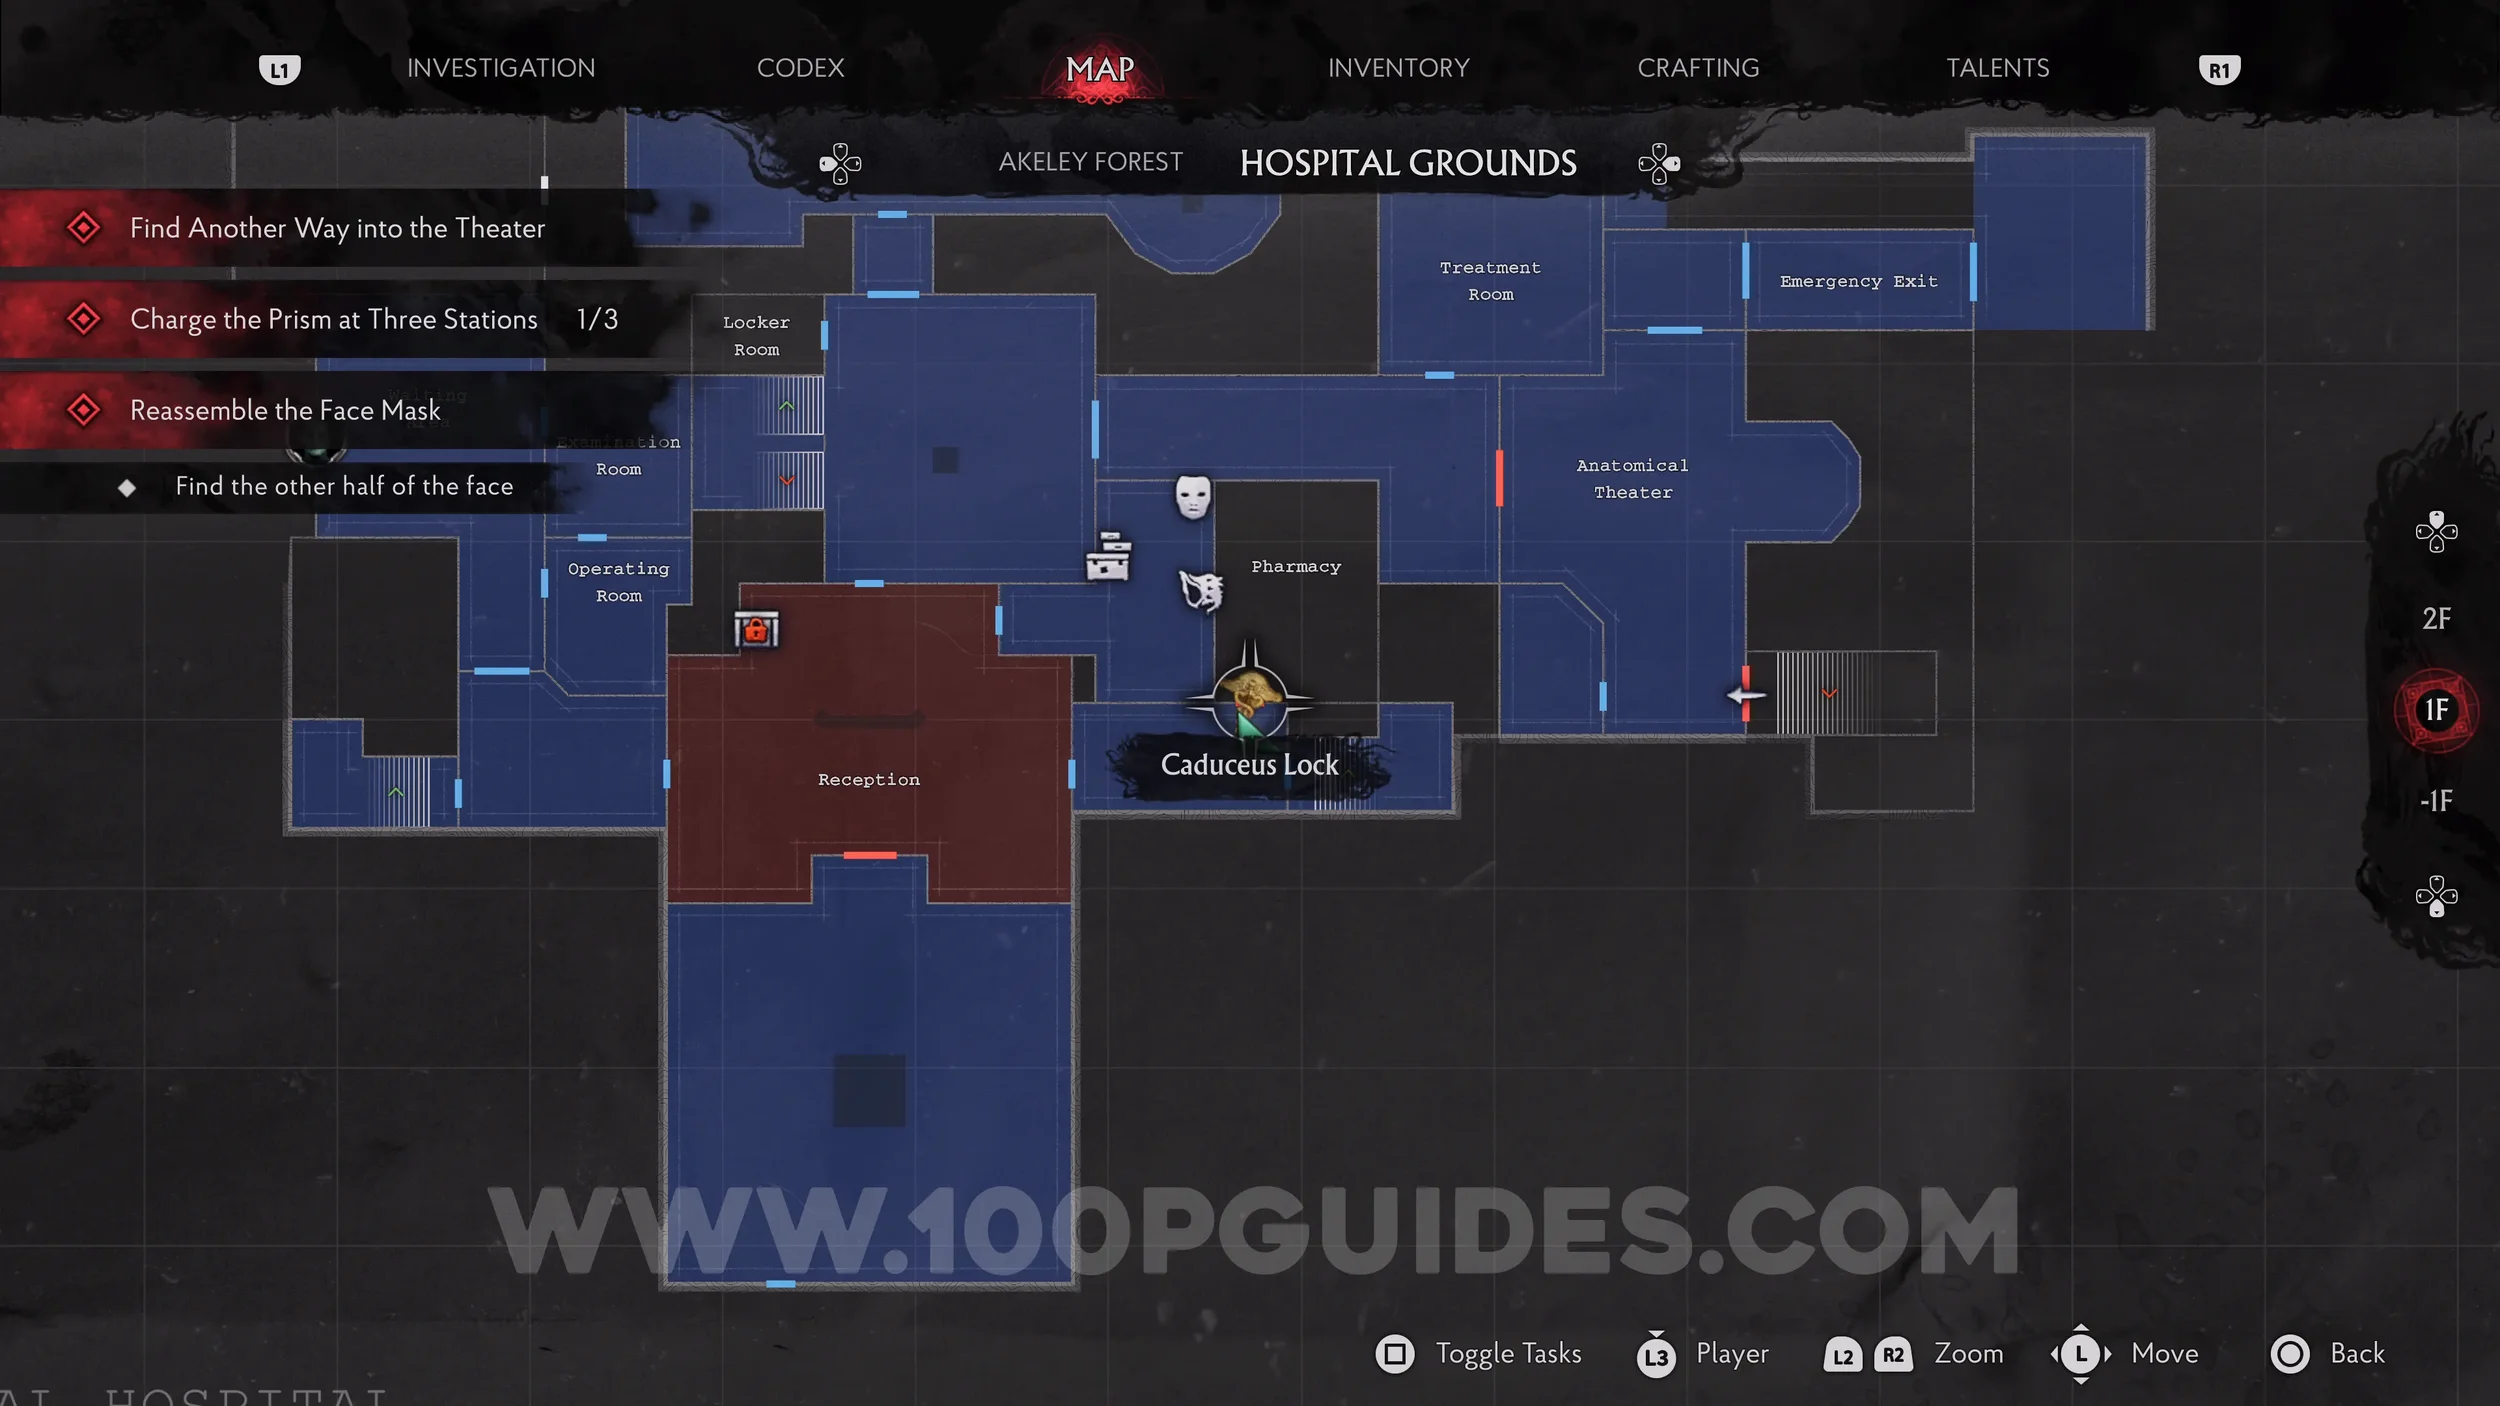
Key Item: Caduceus Key. On the small balcony to the east of the Staff Room.
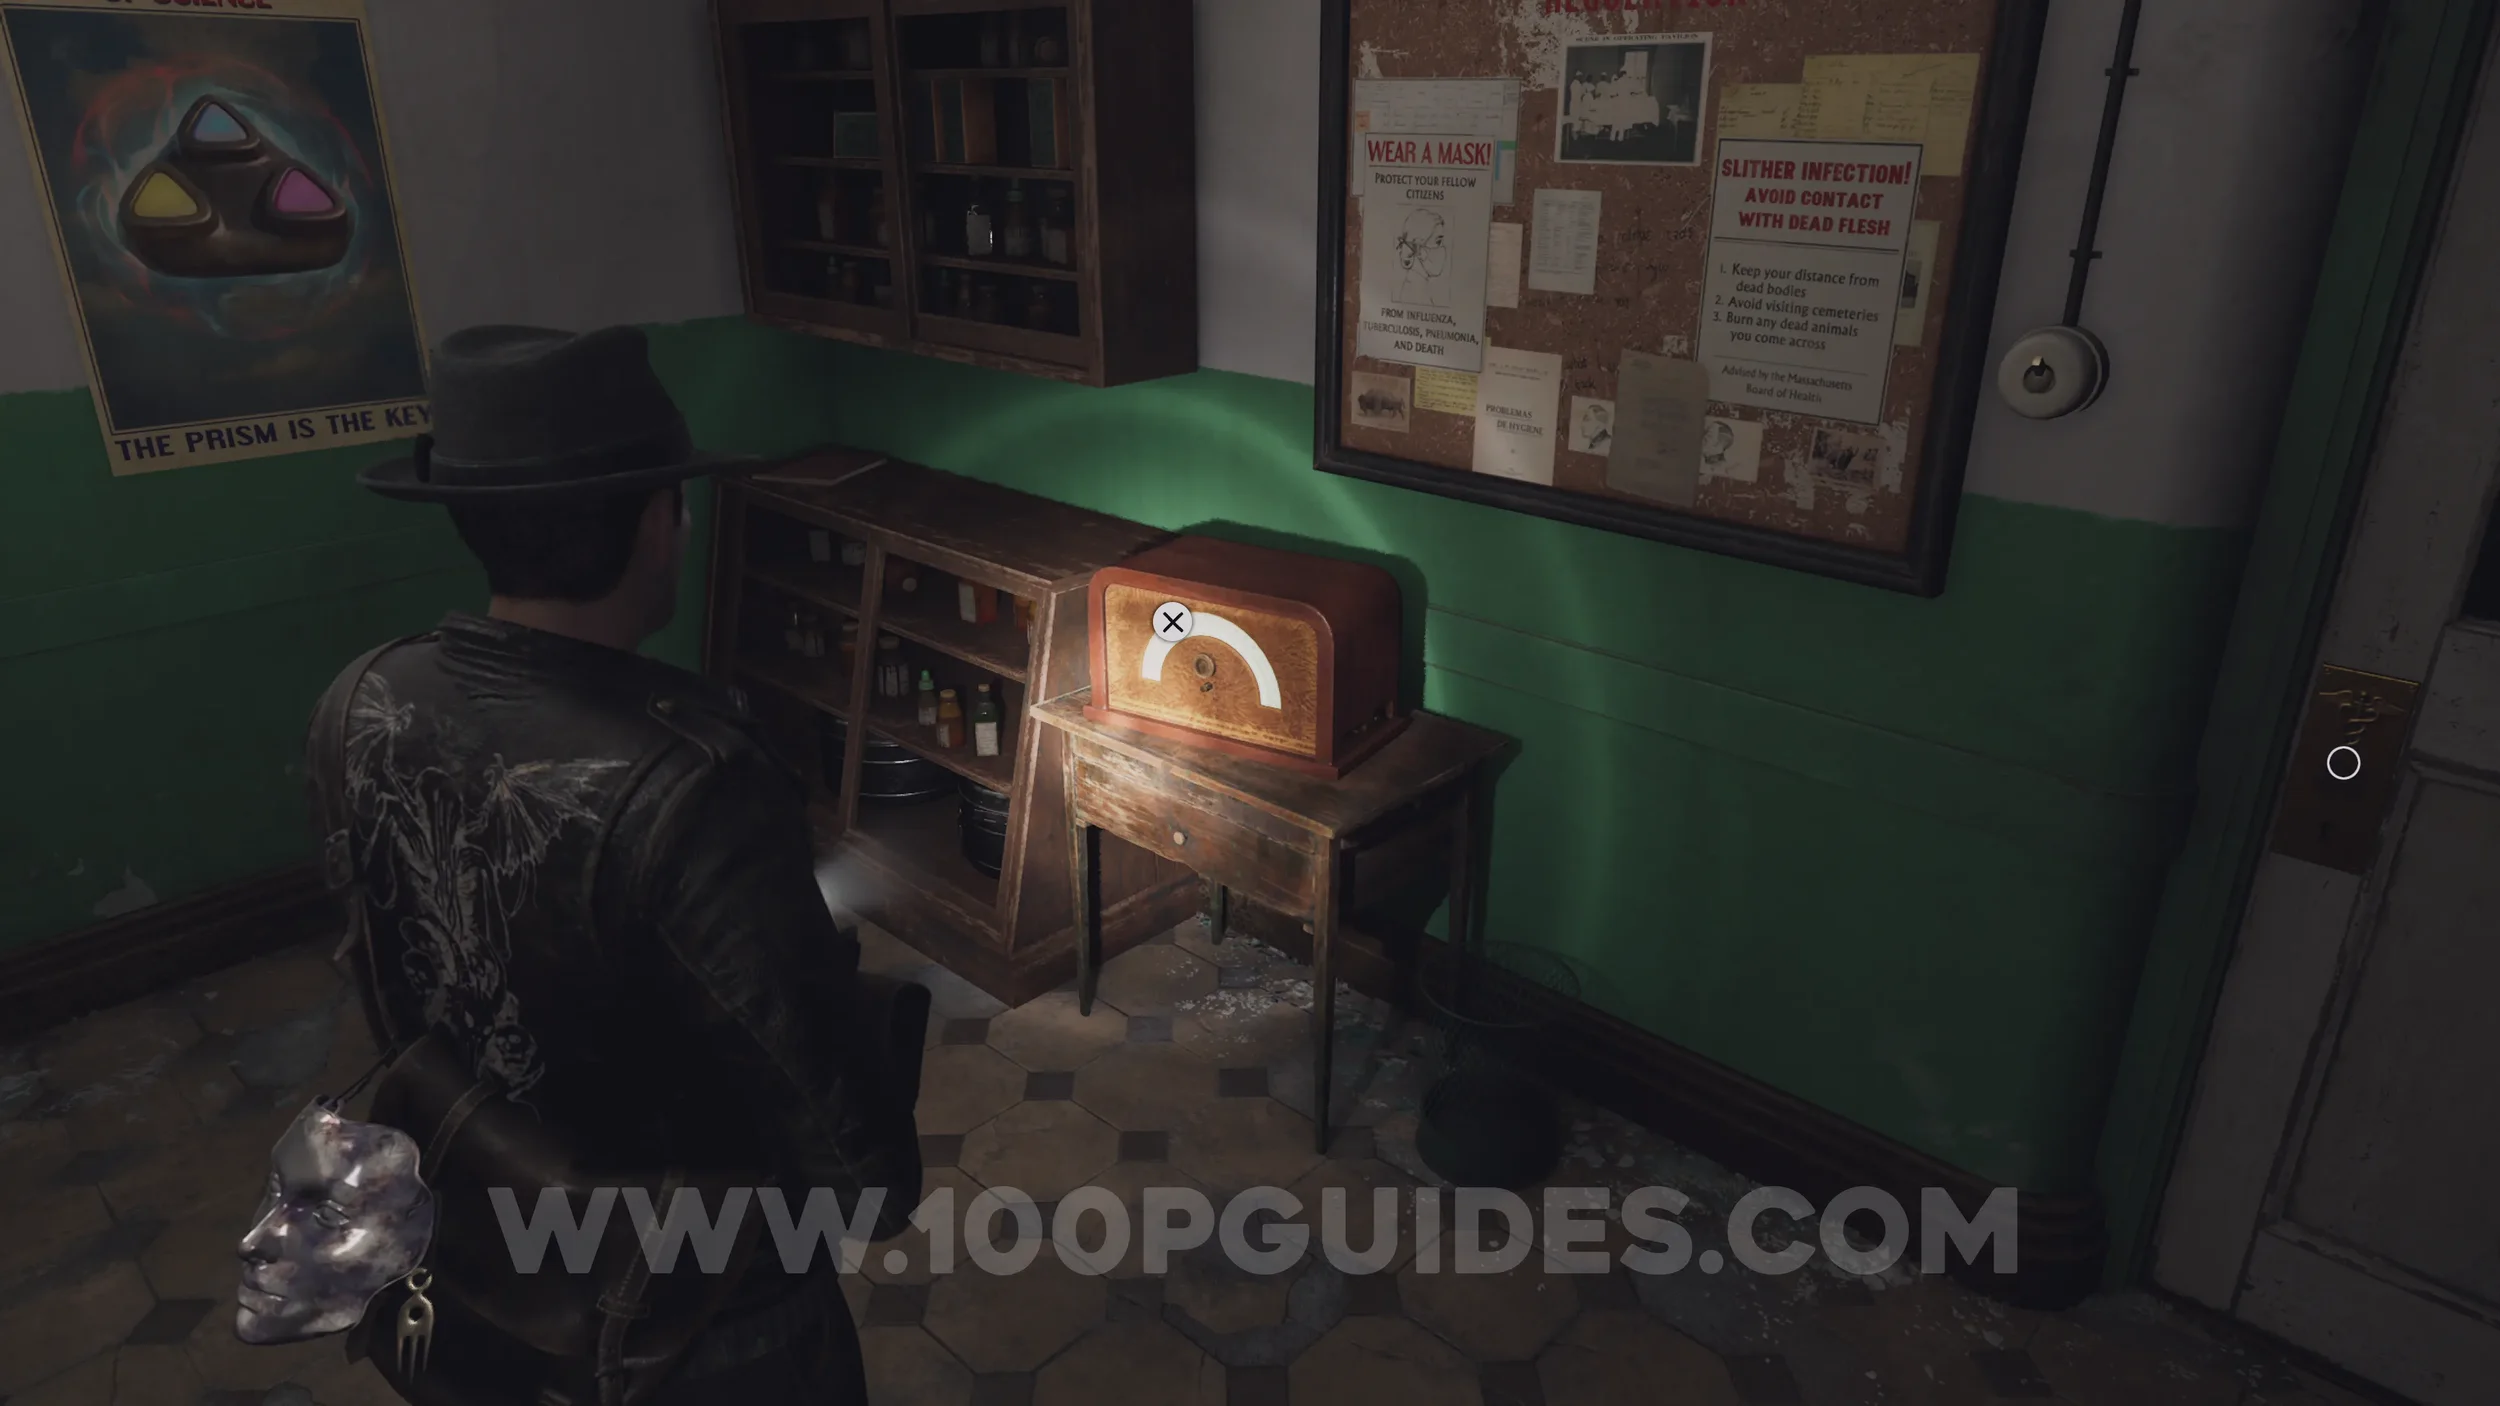
Radio: The Insatiable Beast. Head down the stairs to the south of the Founders' Hall and open the door to the Pharmacy with the Caduceus Key. The radio is inside.
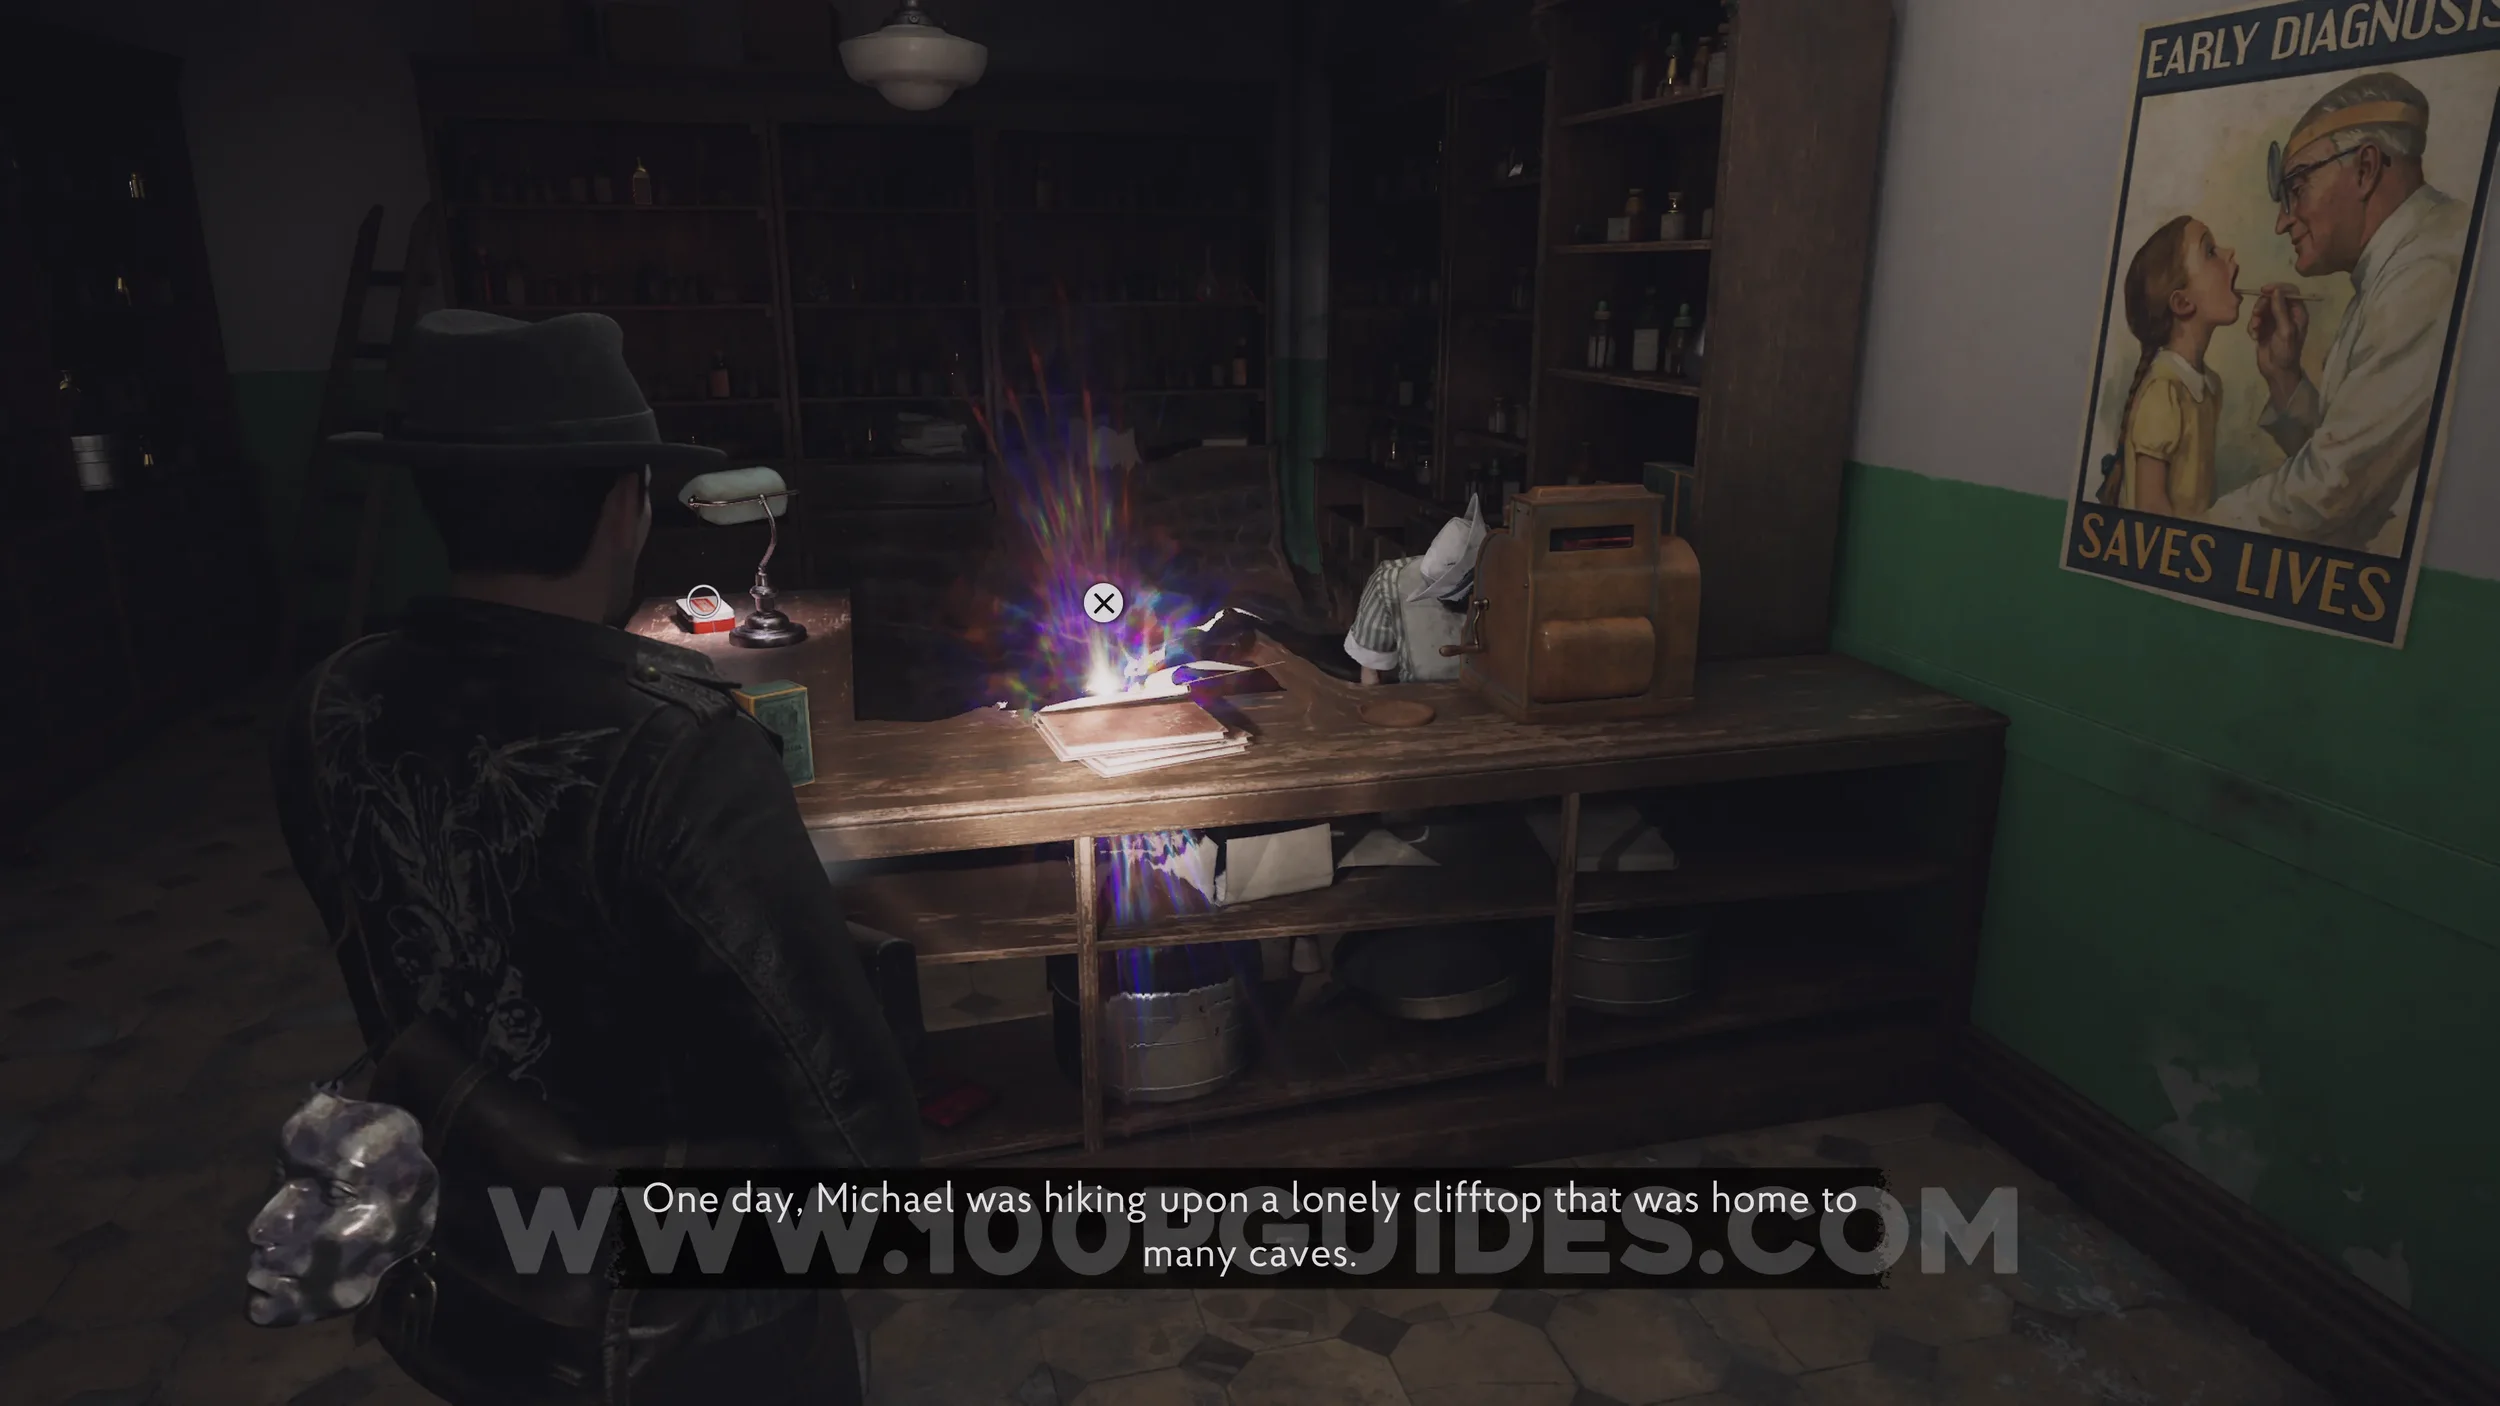
Evidence: Occult Symbol (Pink). Also in the Pharmacy.
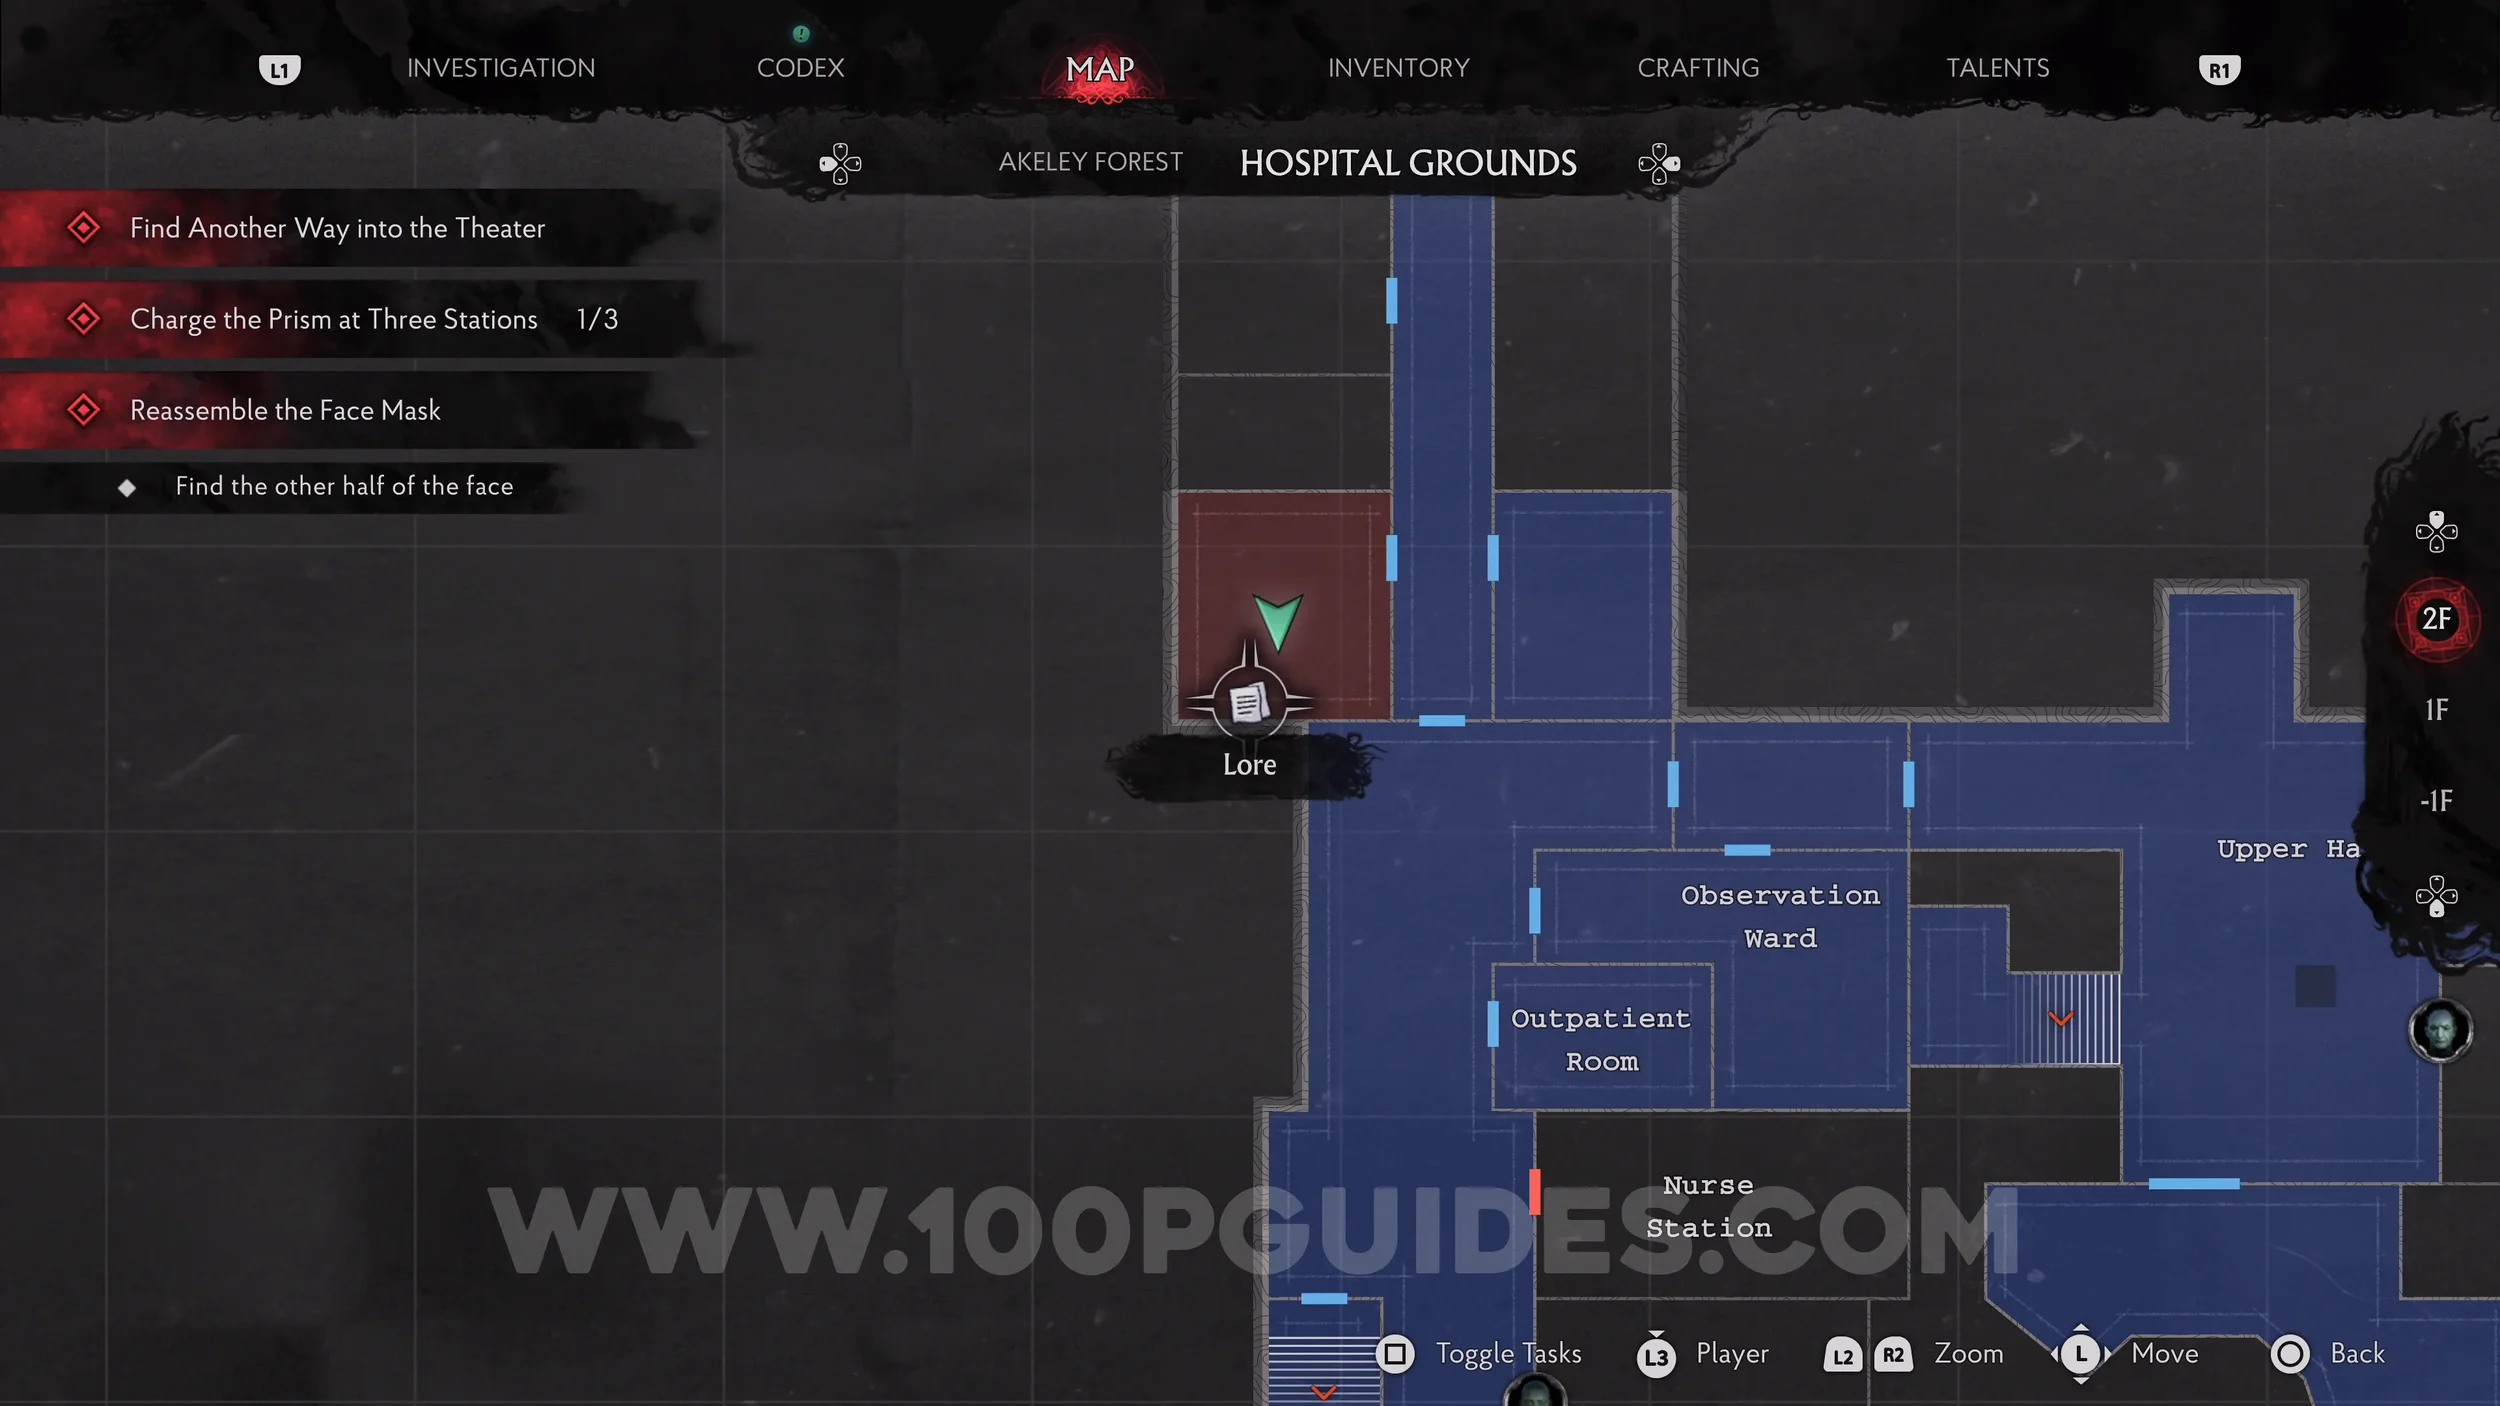
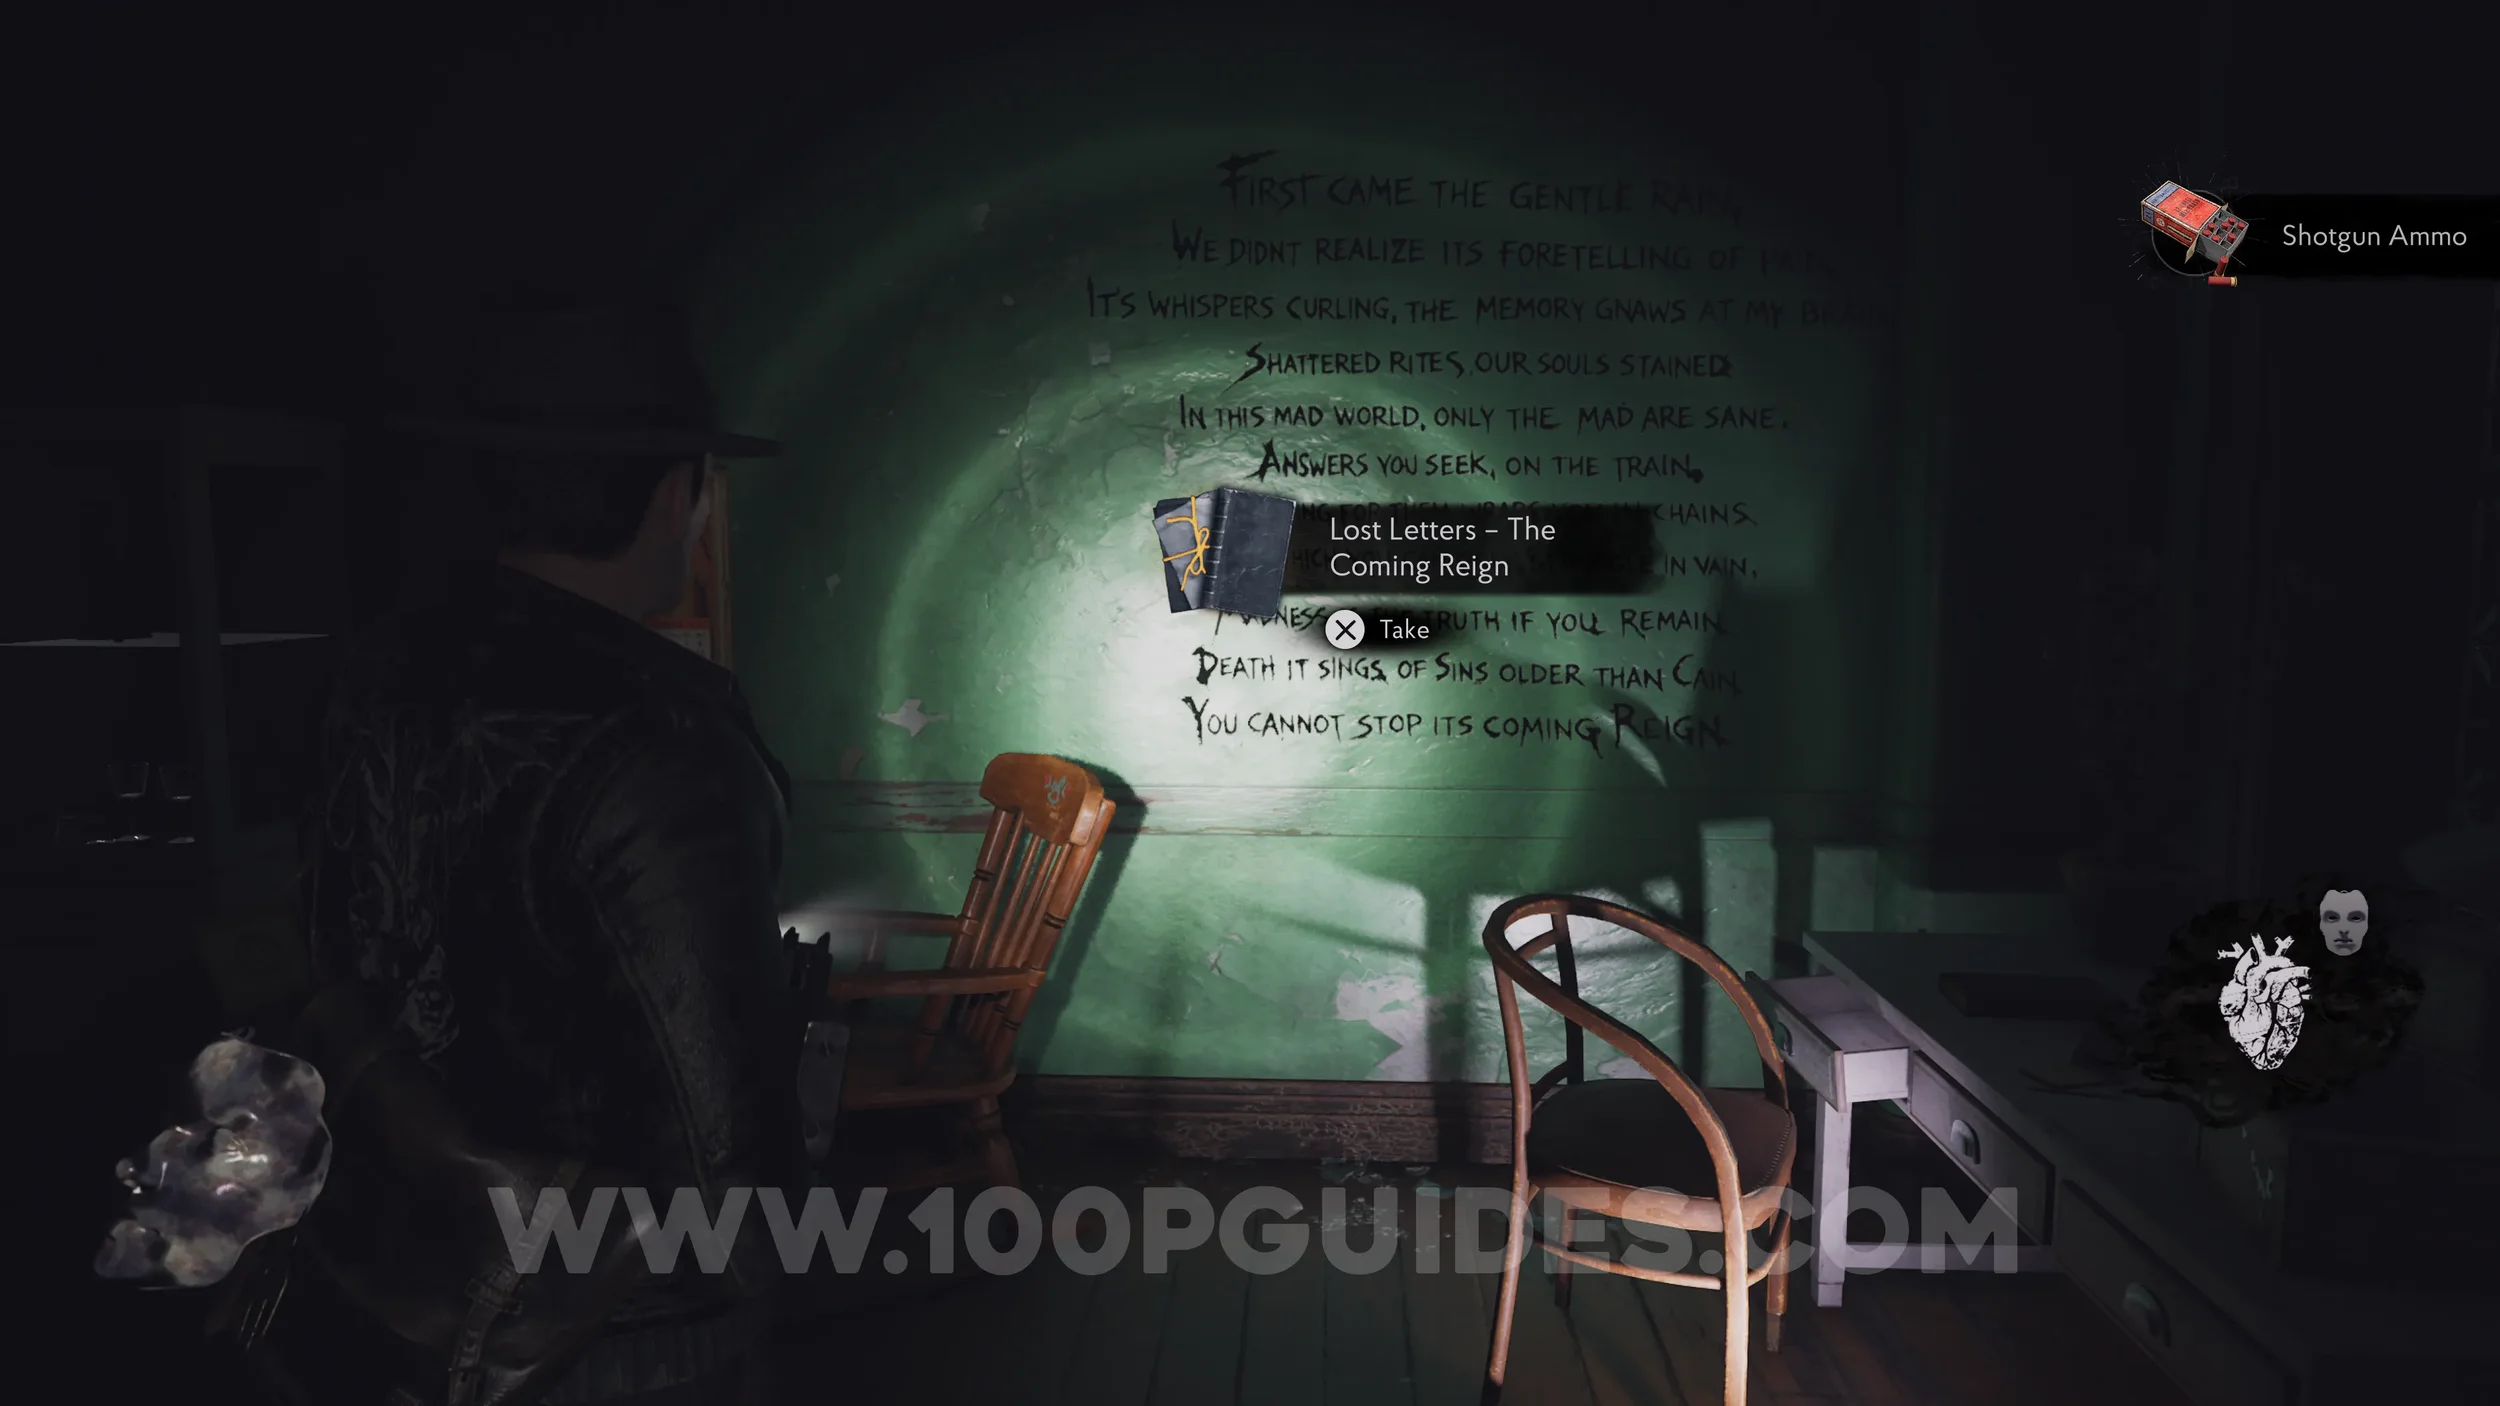
Lore Codex: Lost Letters - The Coming Reign. Head through the reception and up the southwestern stairs, then open the door to the north with the Caduceus Key. Take the first door on your left and examine the writing on the walls.
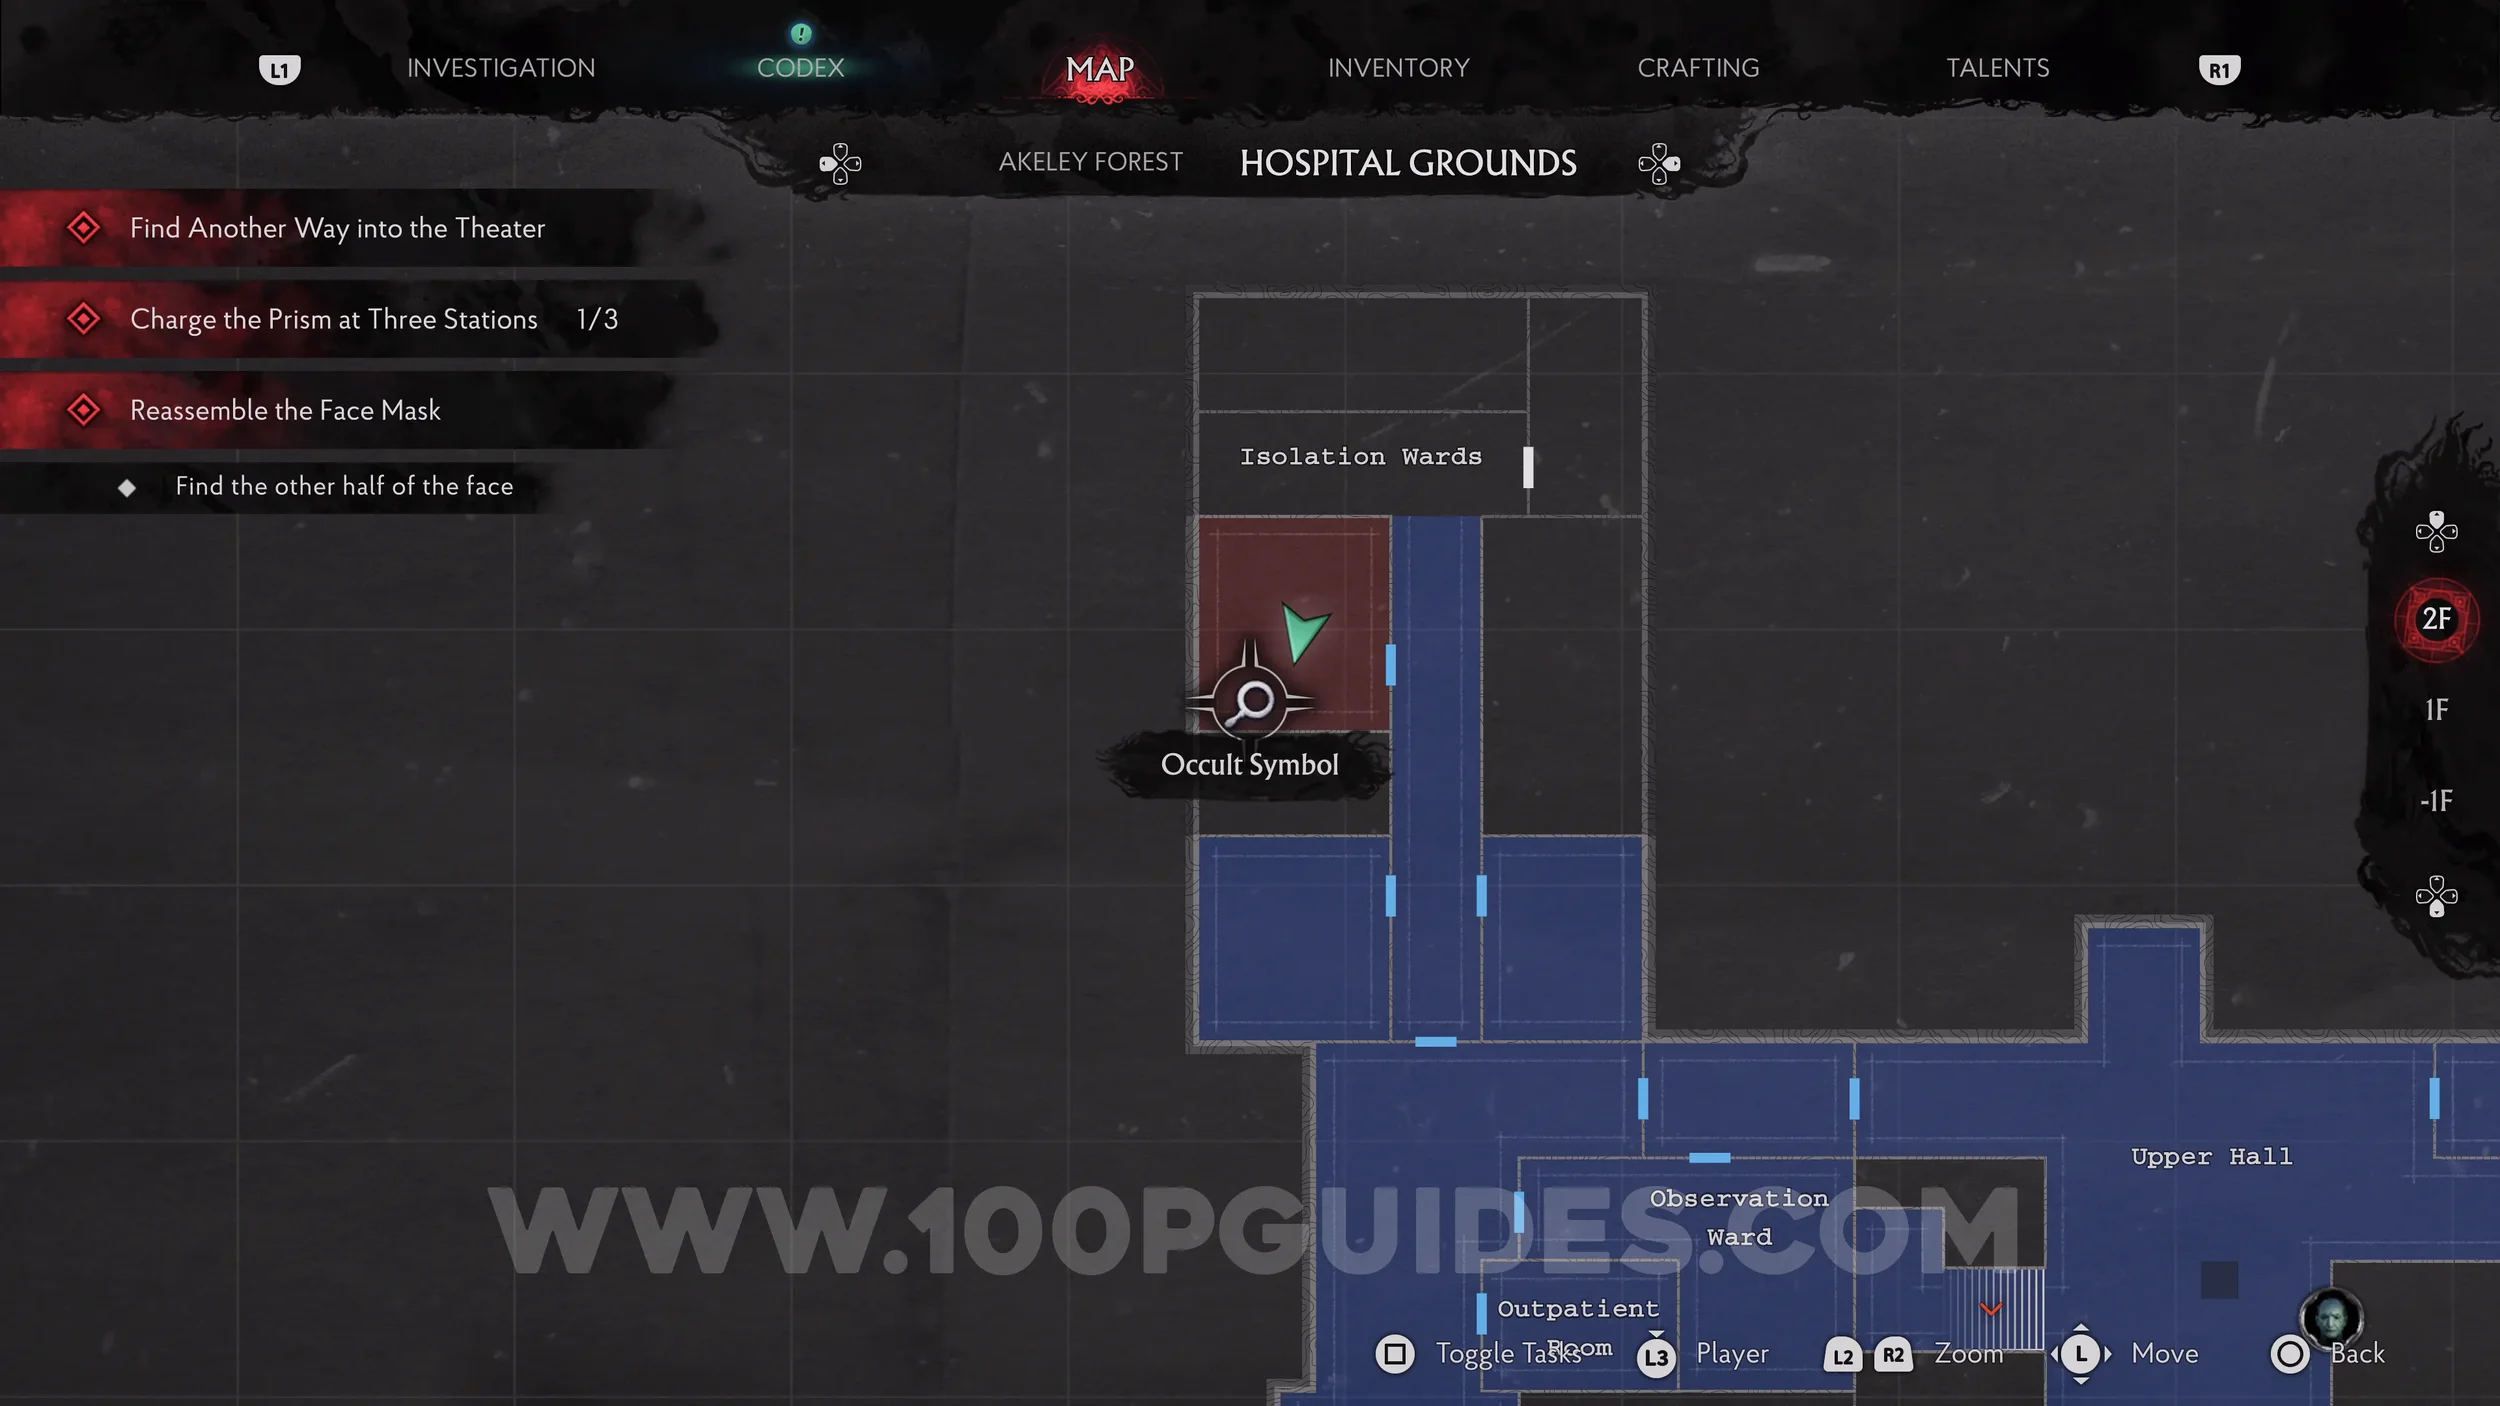
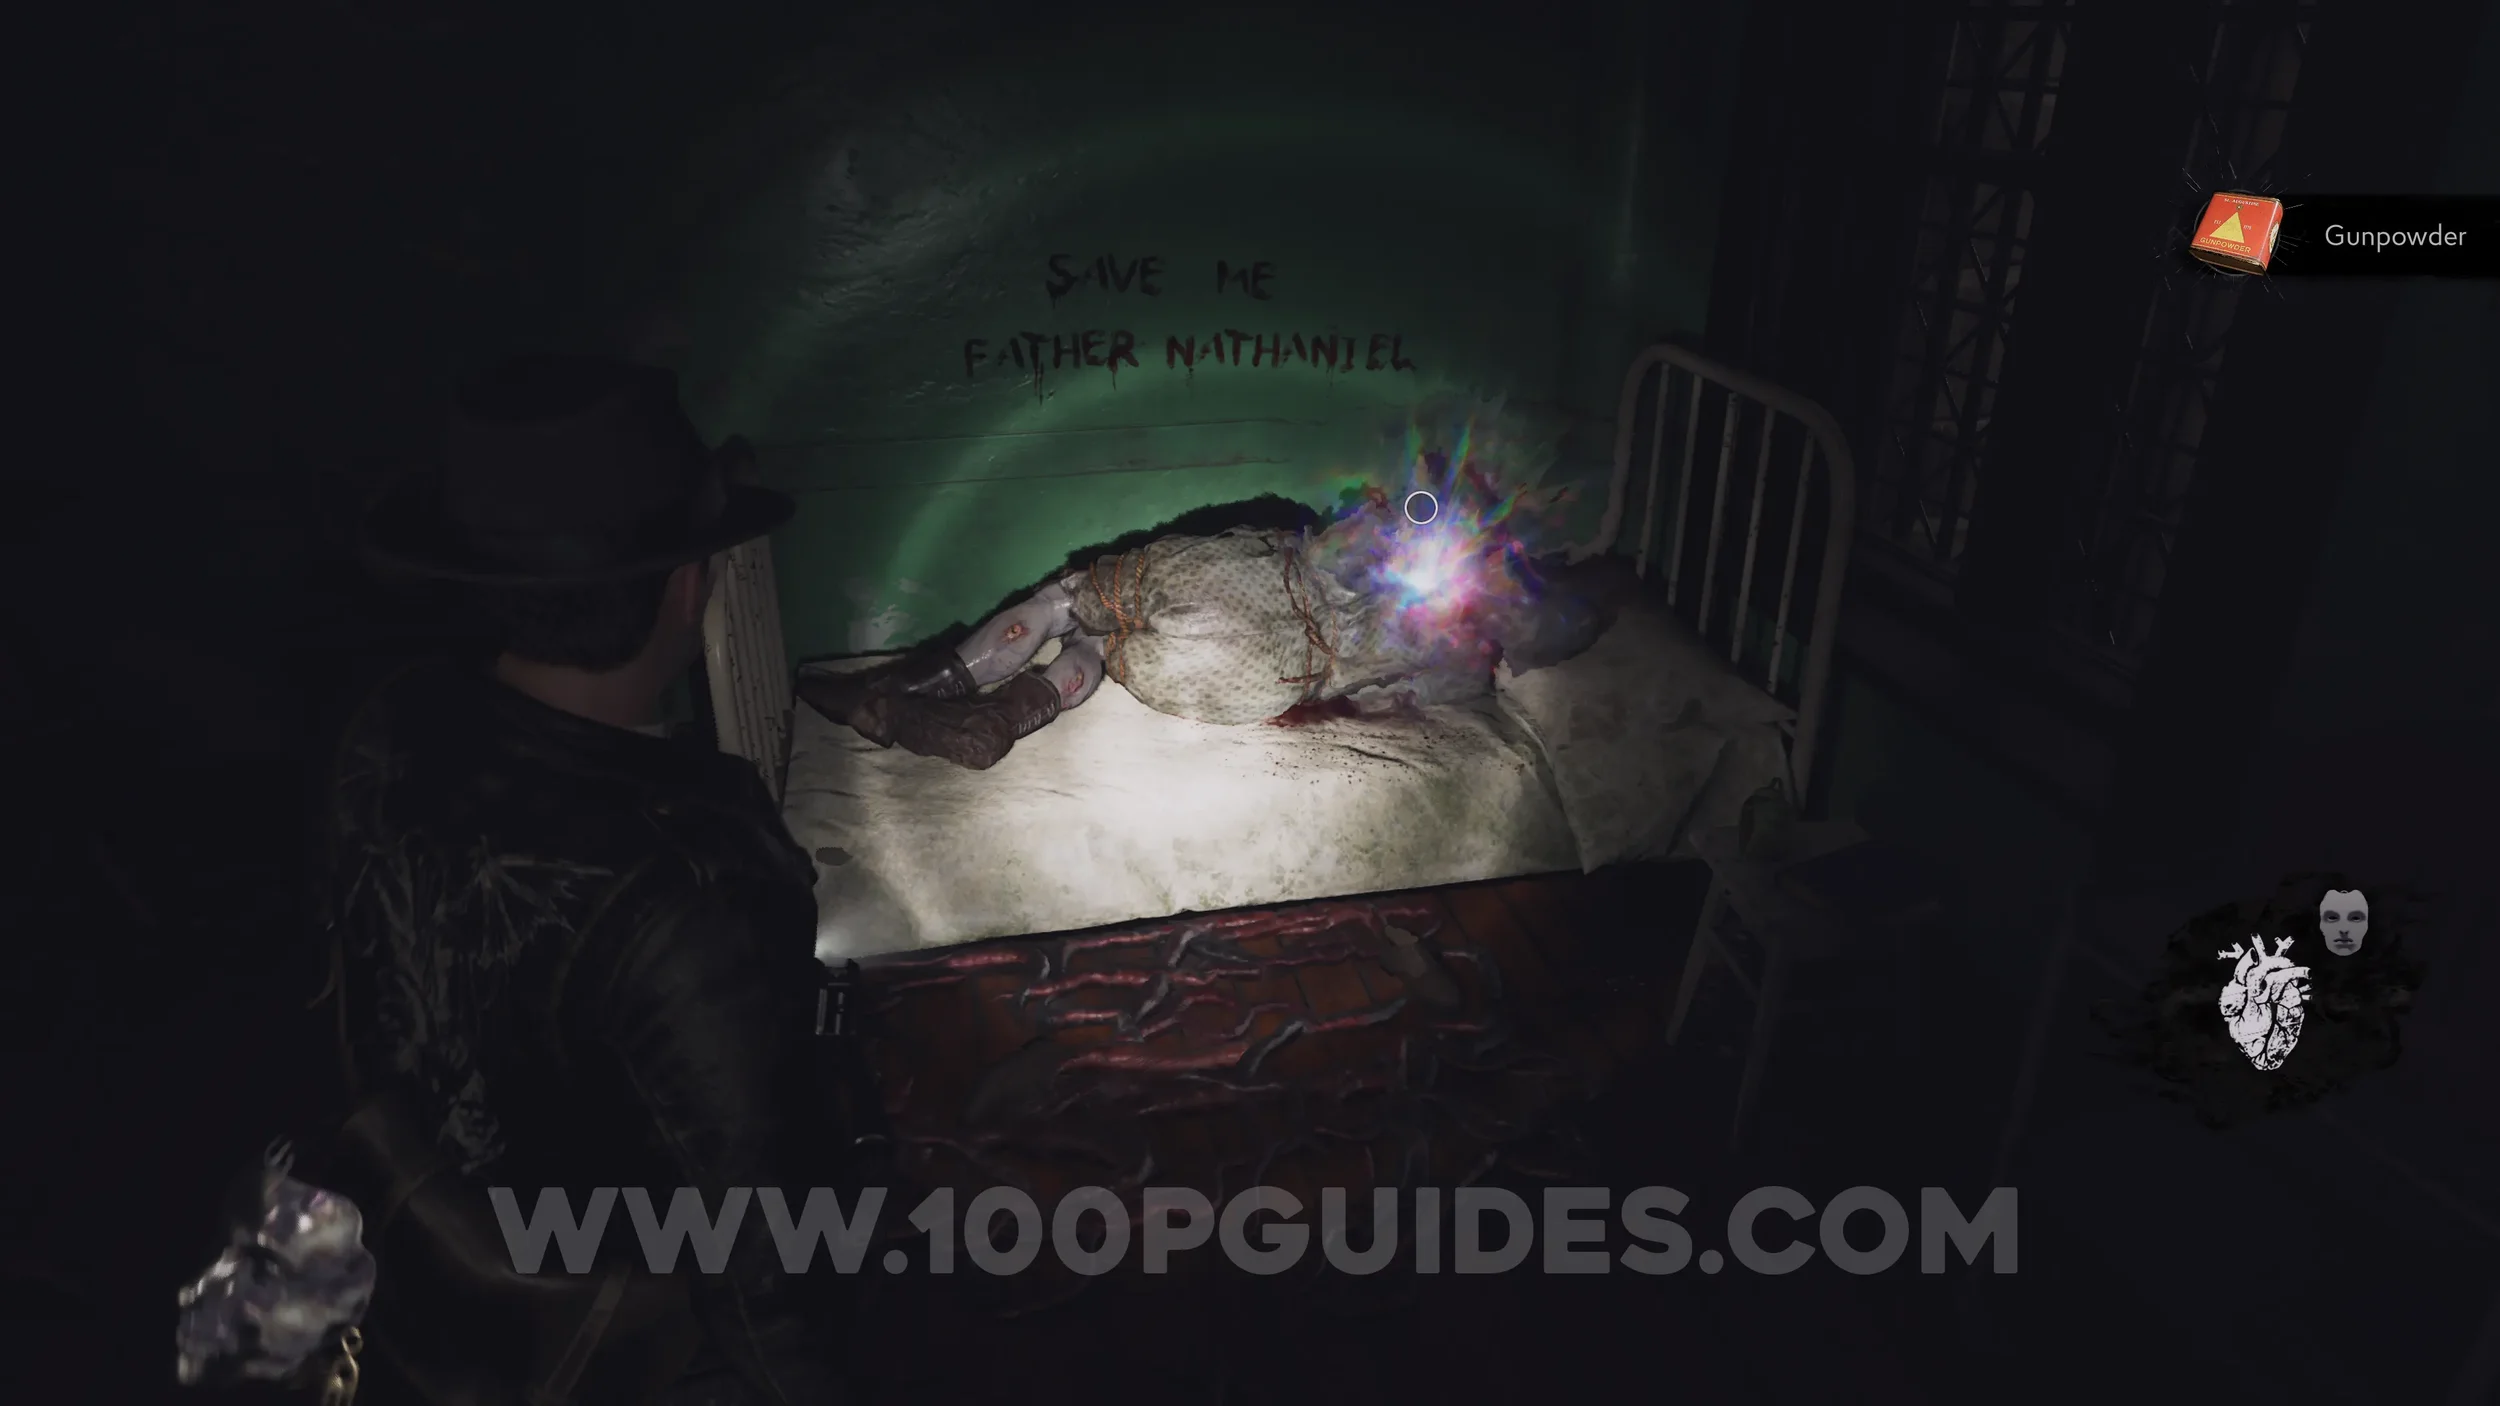
Evidence: Occult Symbol (Yellow). On the corpse on the bed behind the second door on the left.
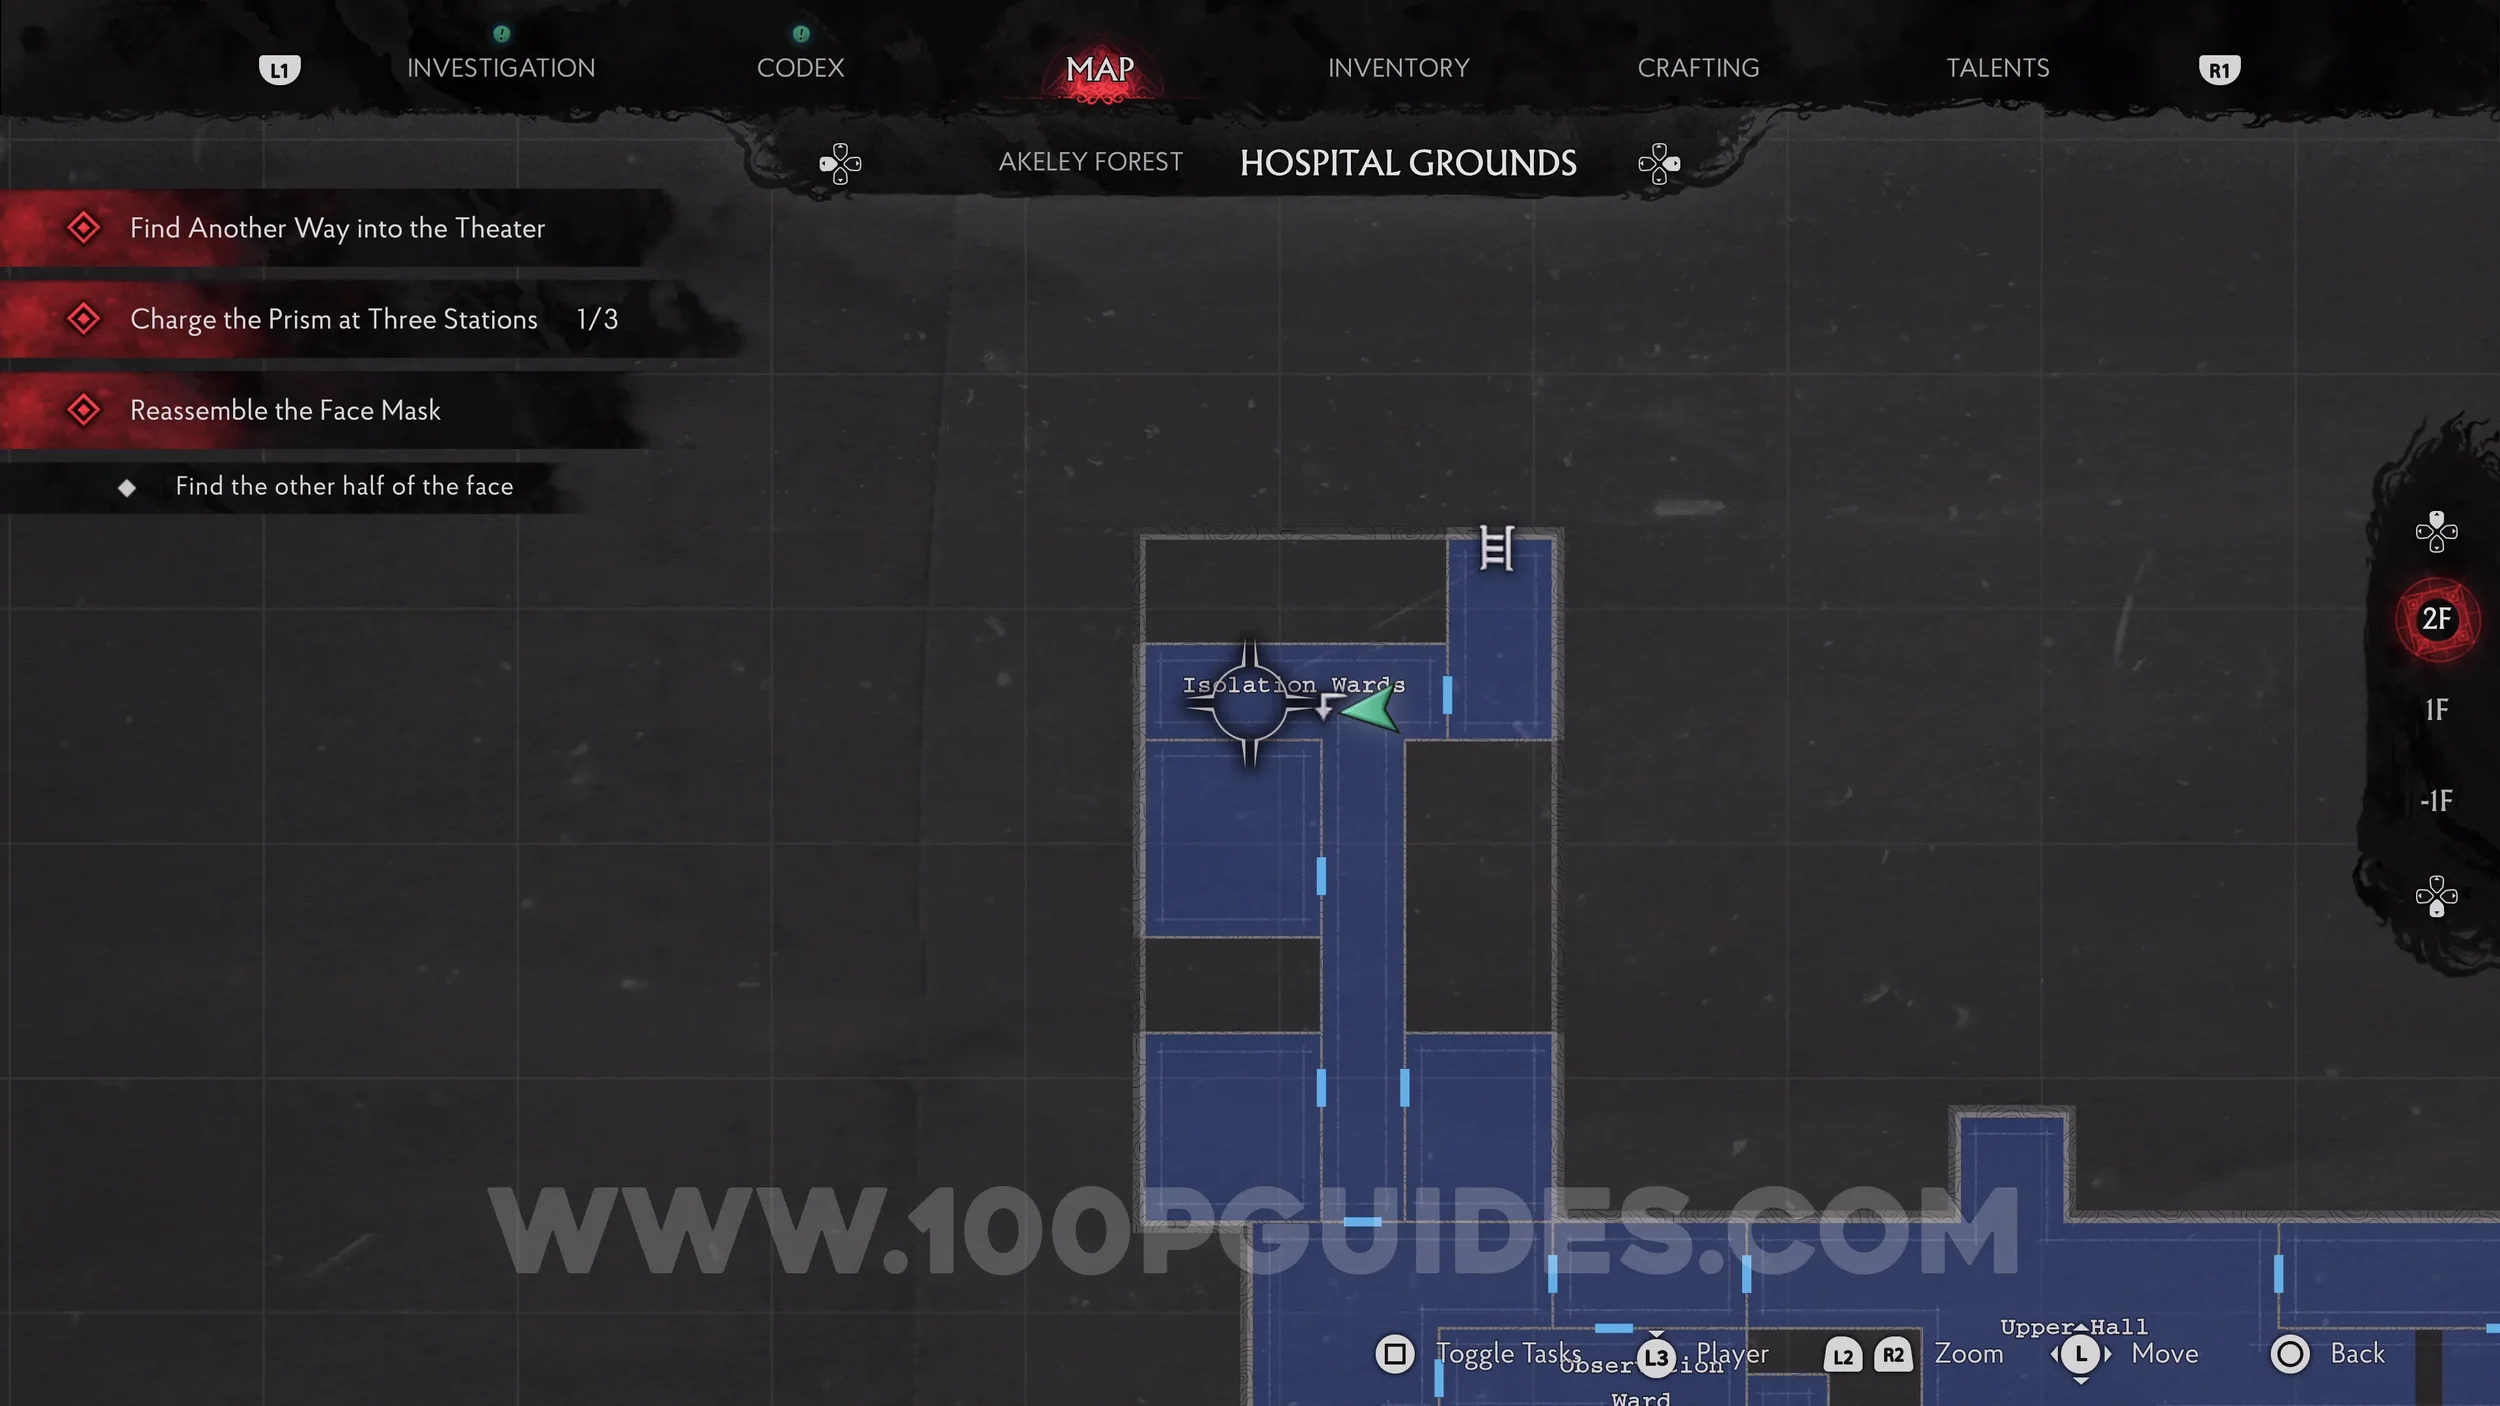
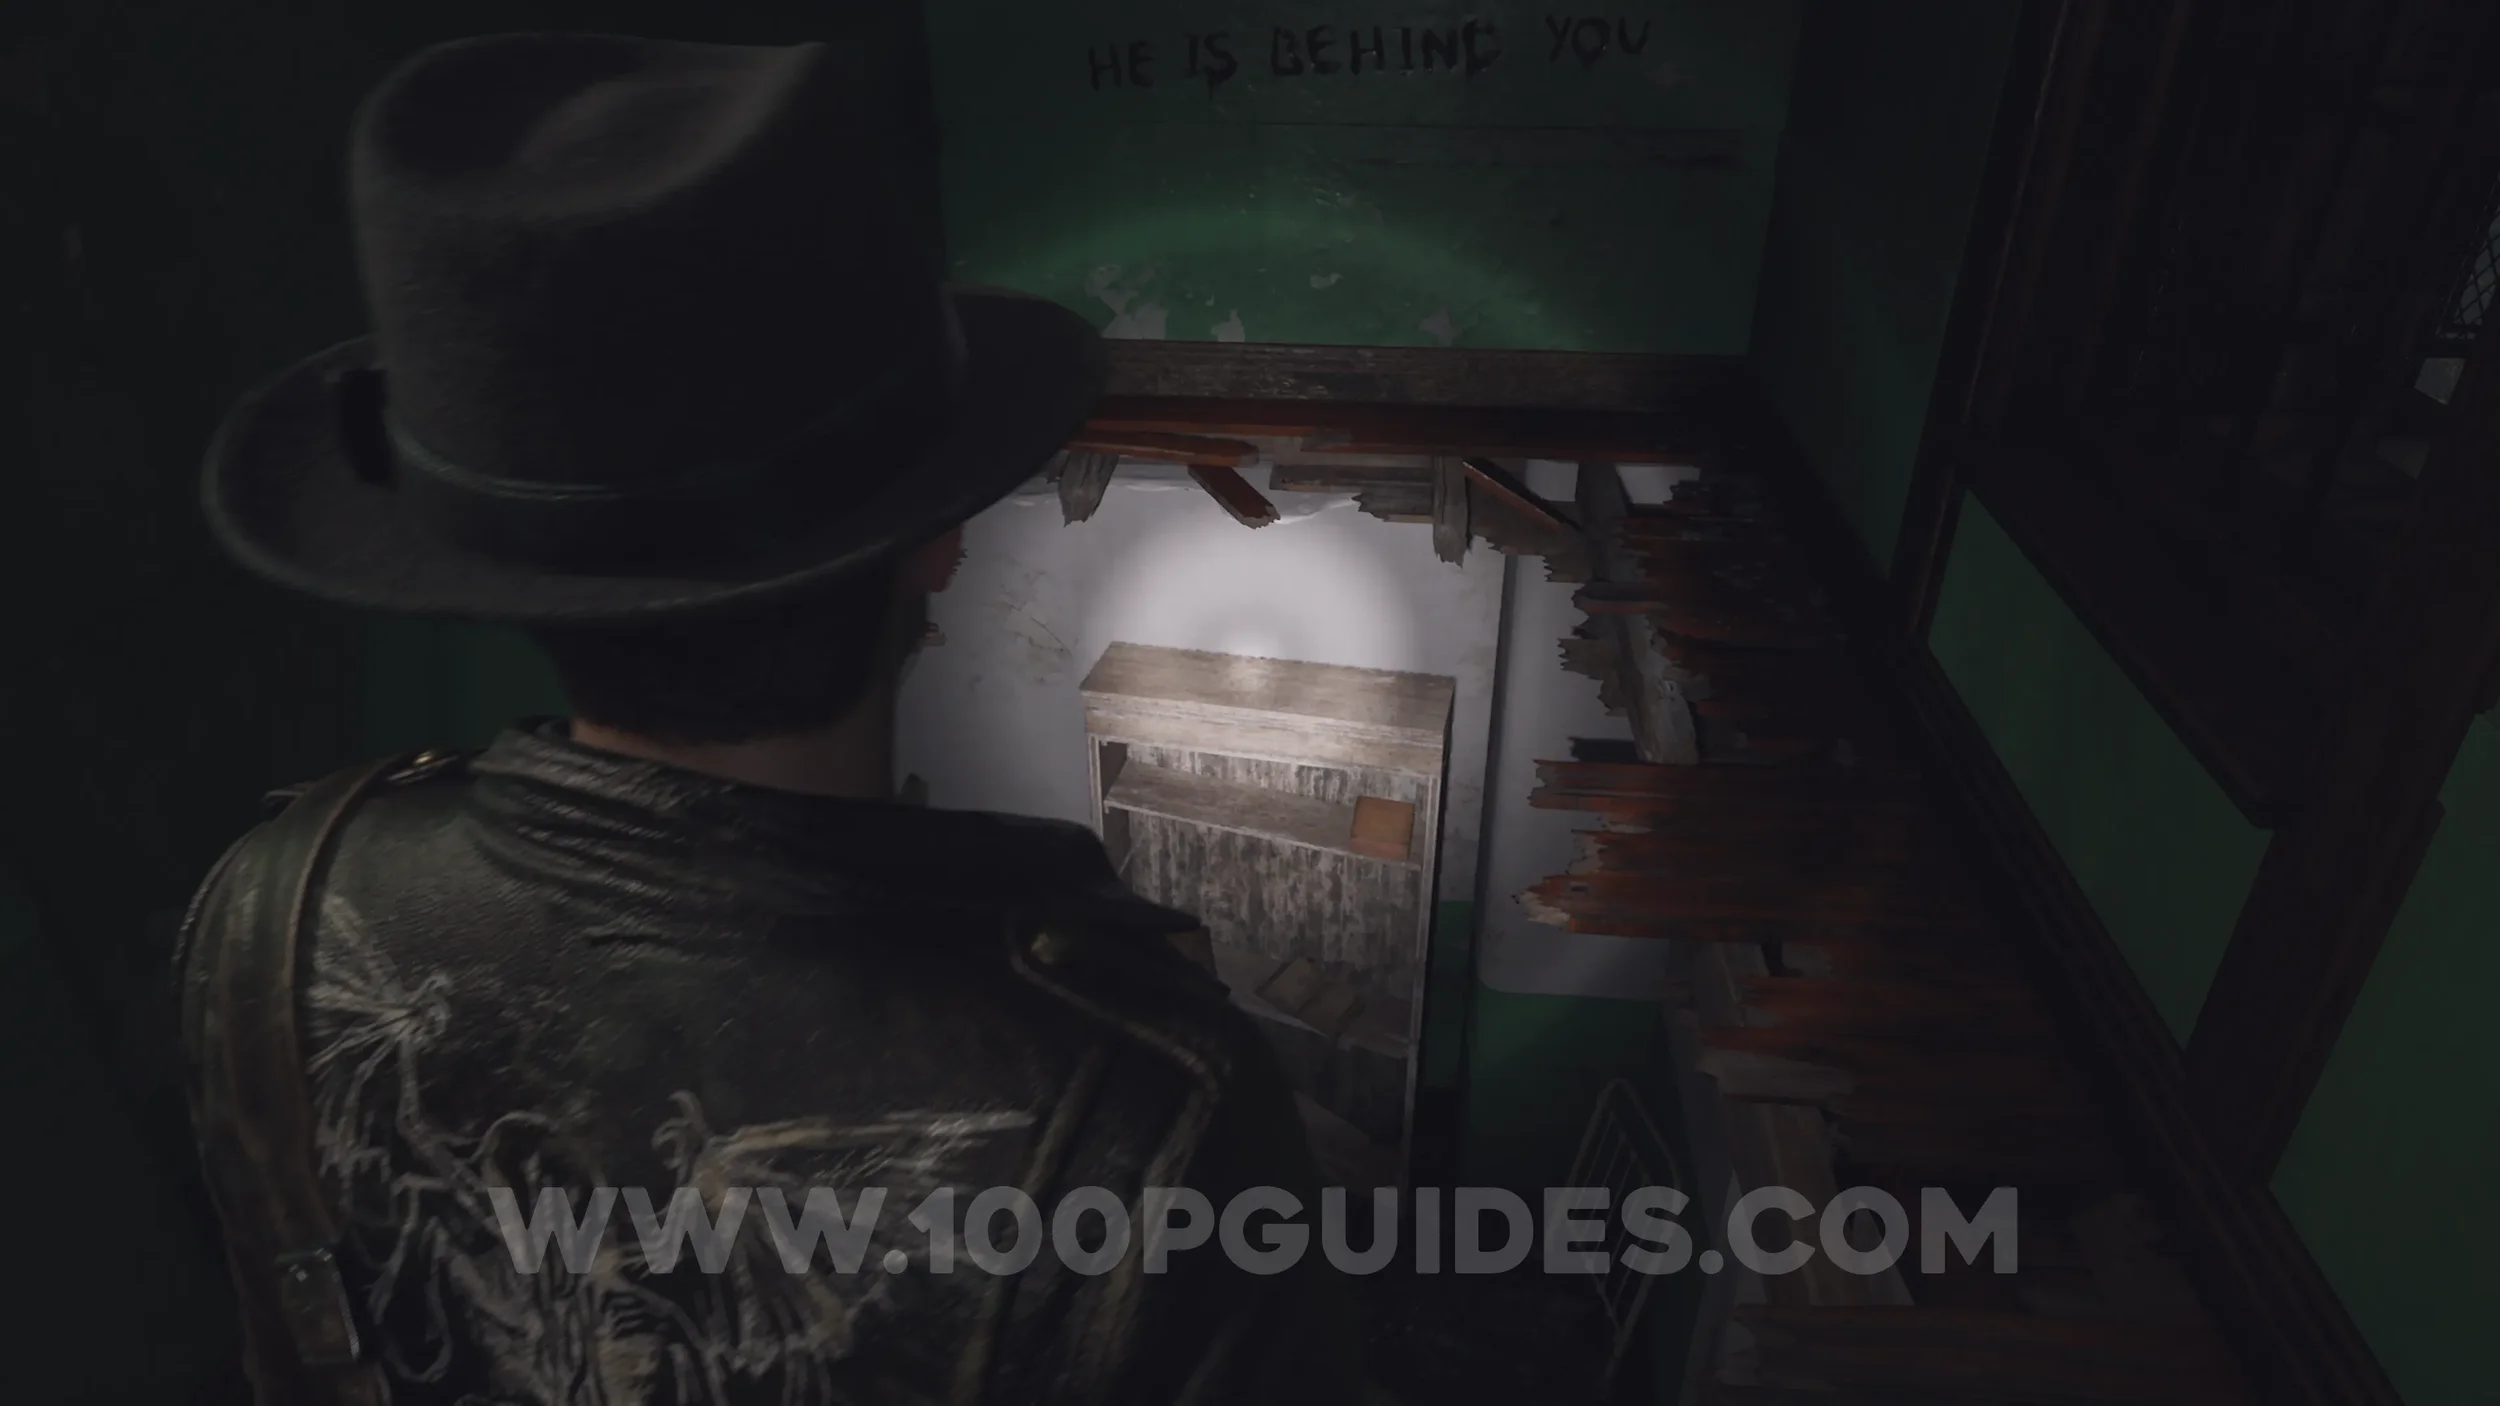
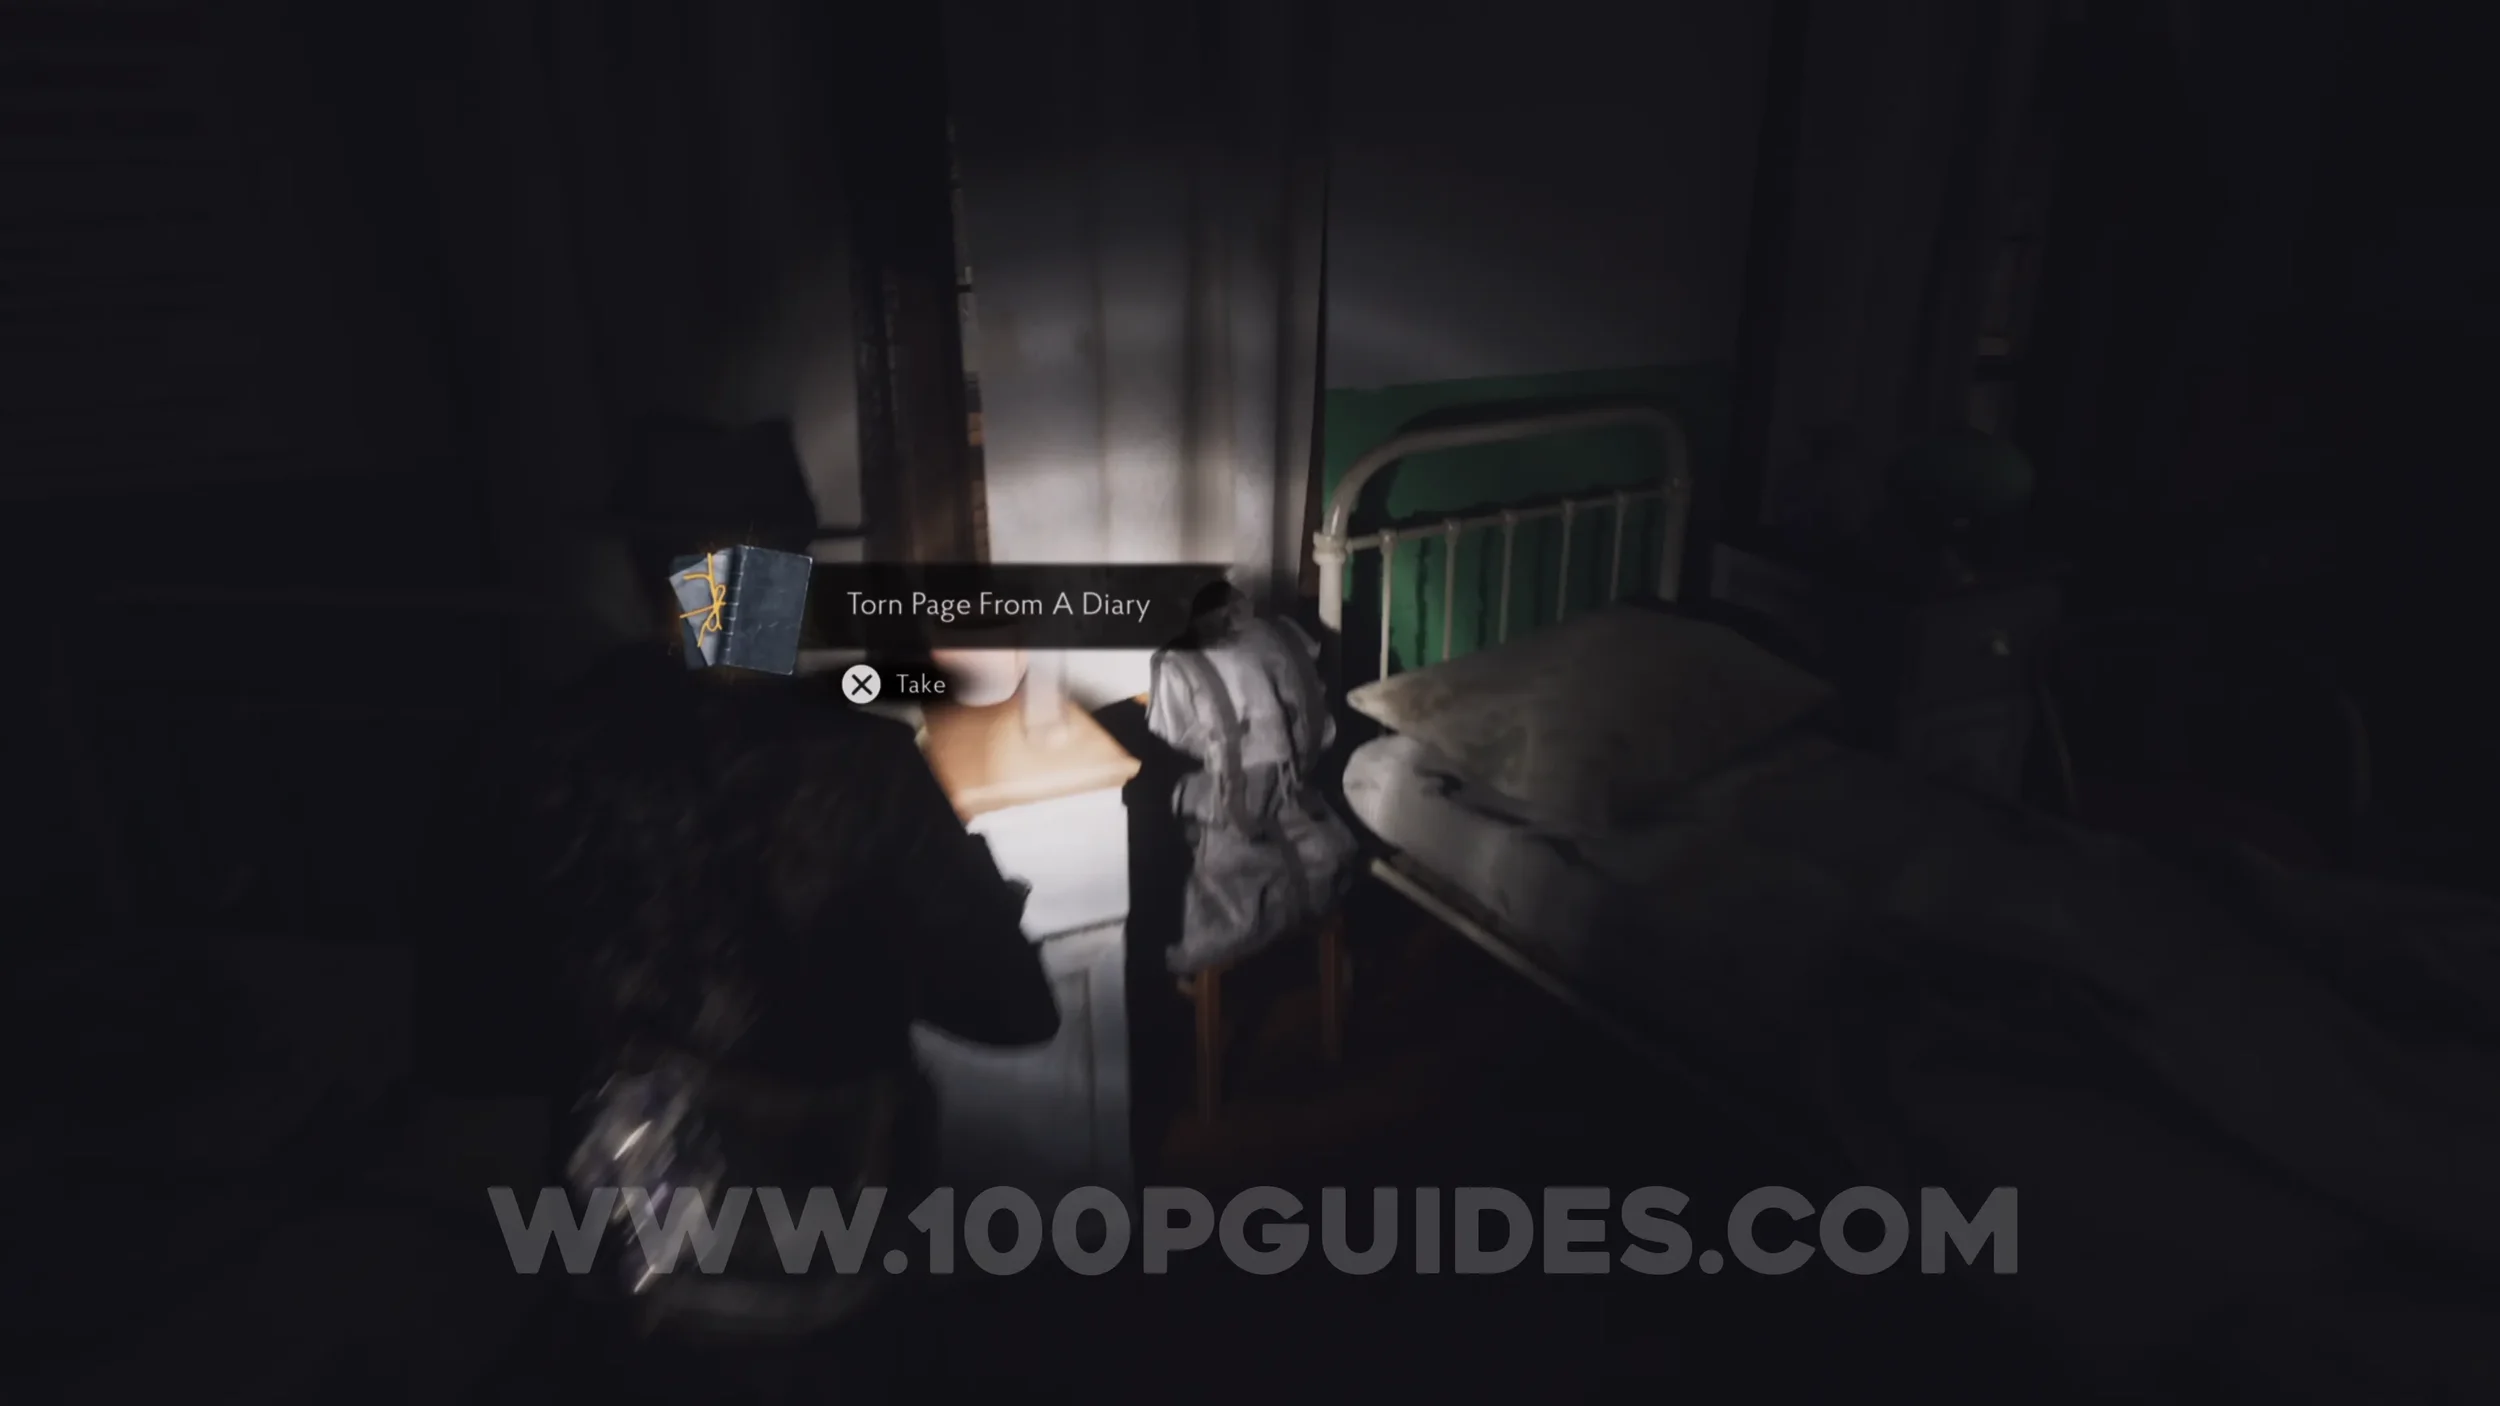
Lore Codex: Torn Page From a Diary. Jump down the hole in the northwestern corner of the Isolation Wards, then look for the codex on a small nightstand against the eastern wall.
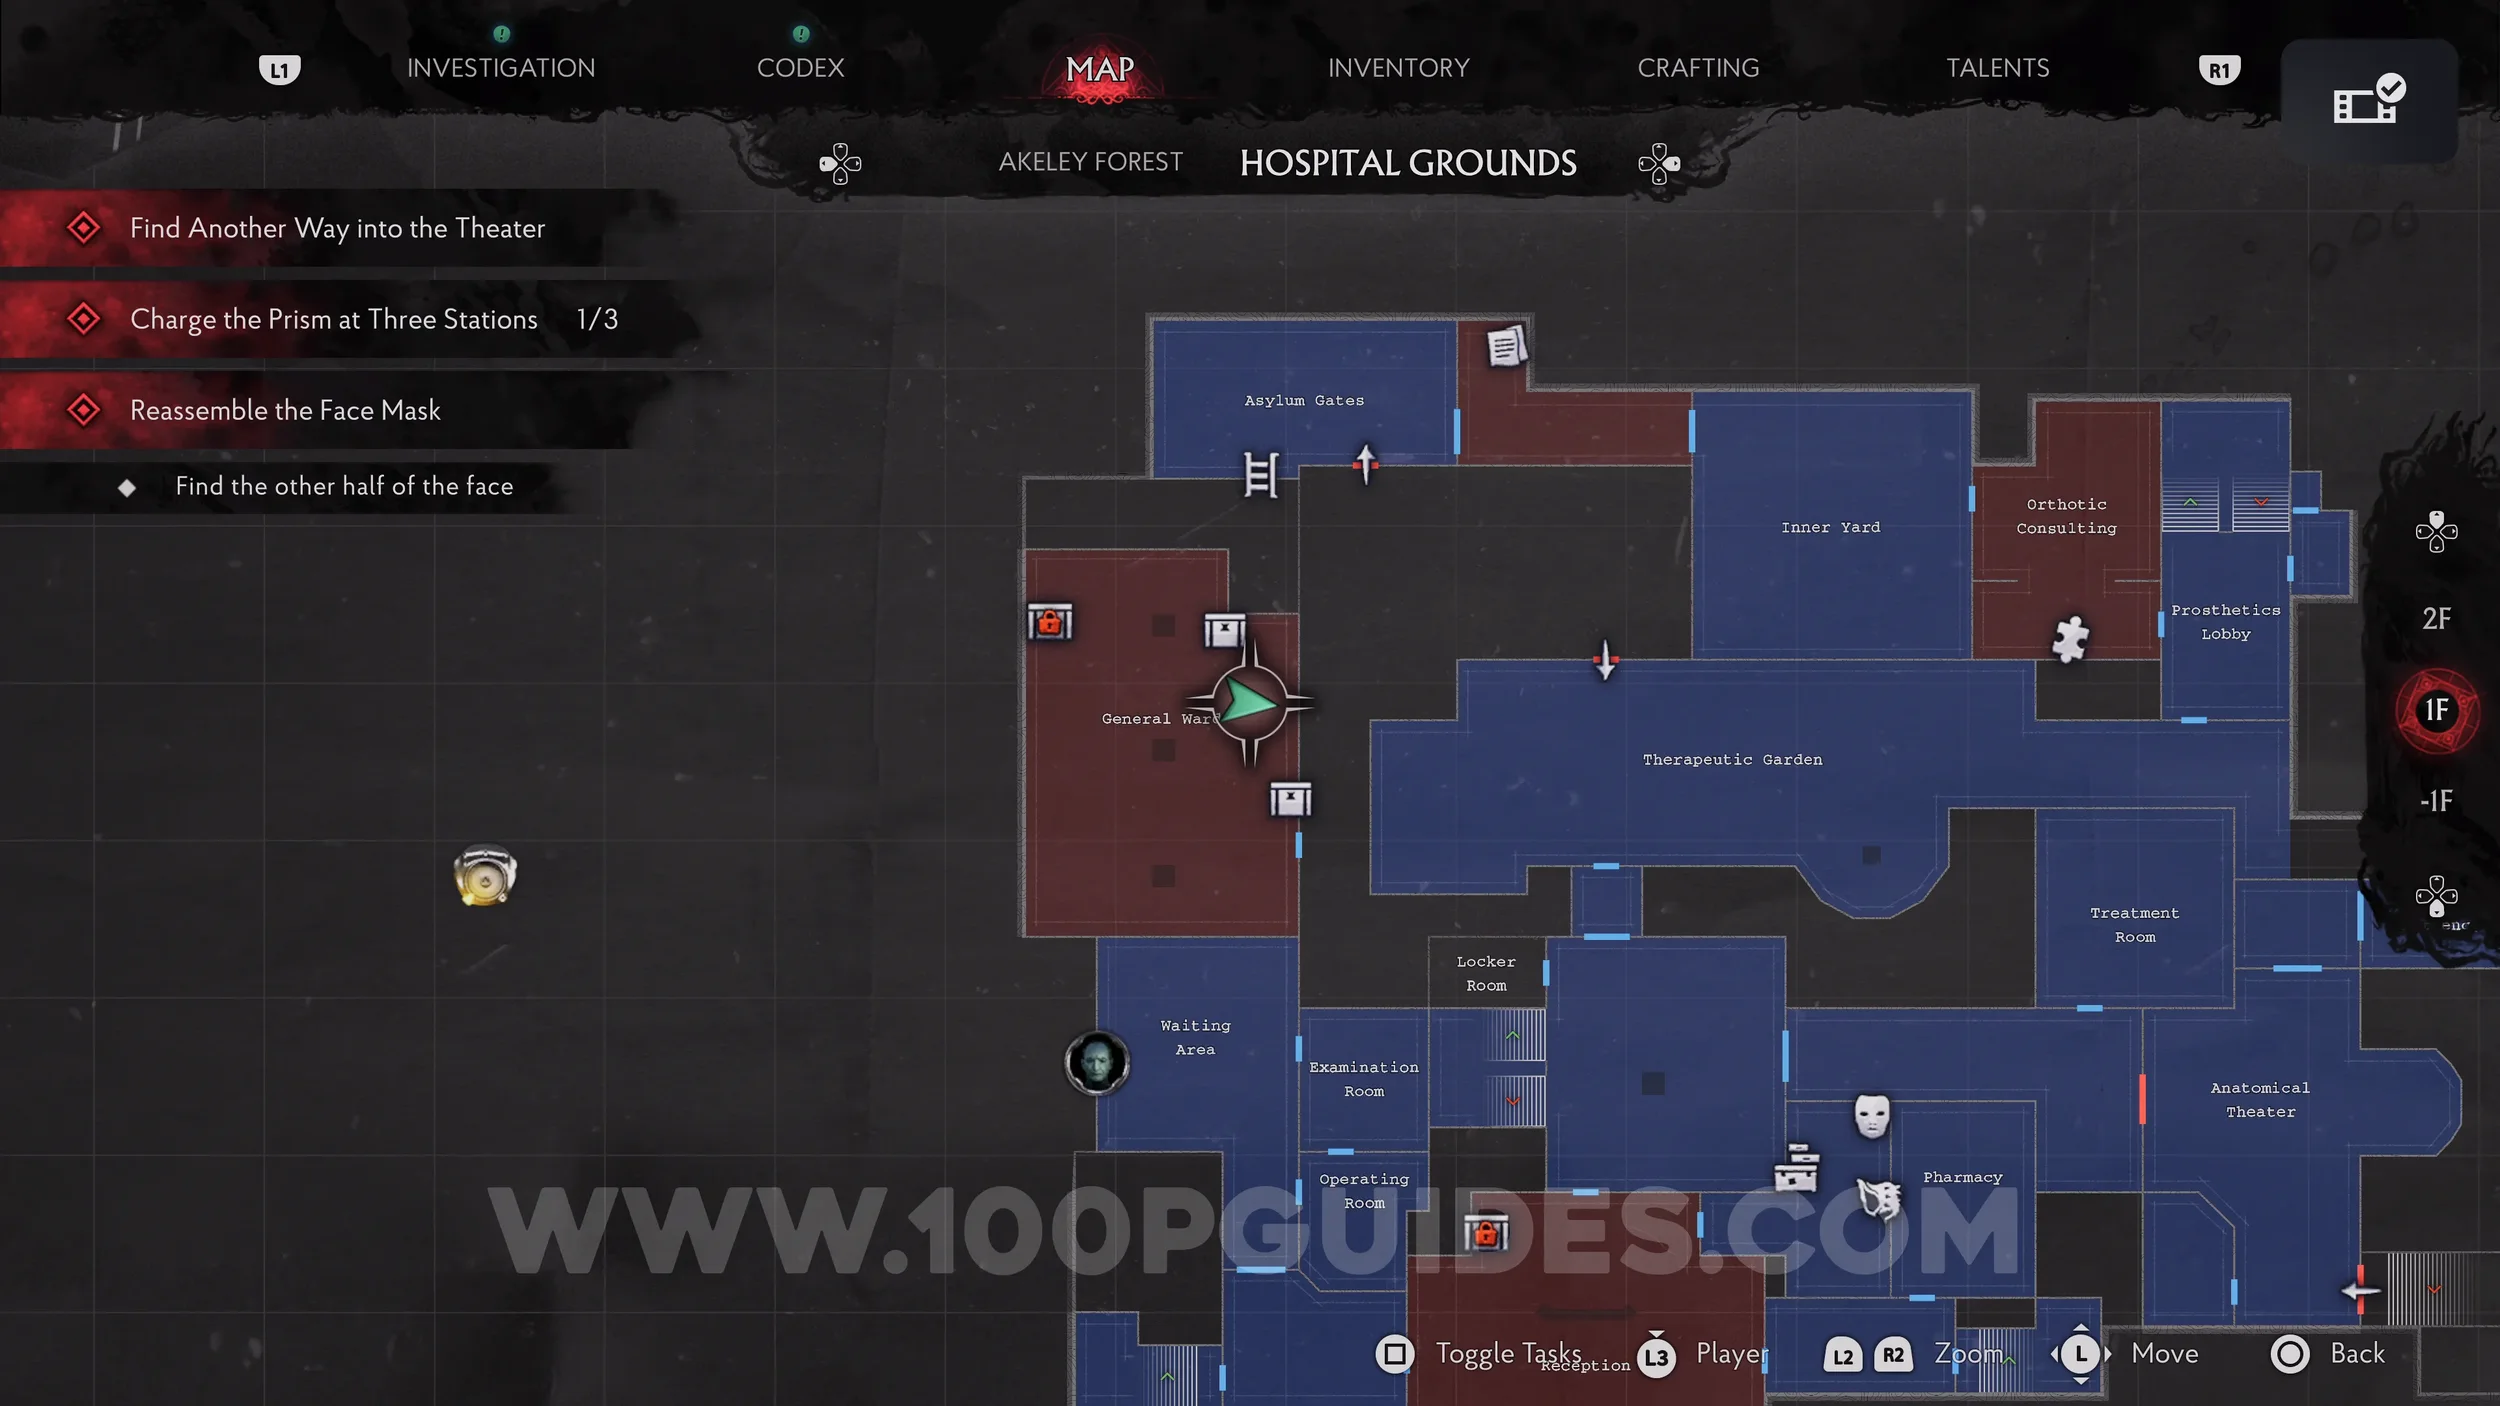
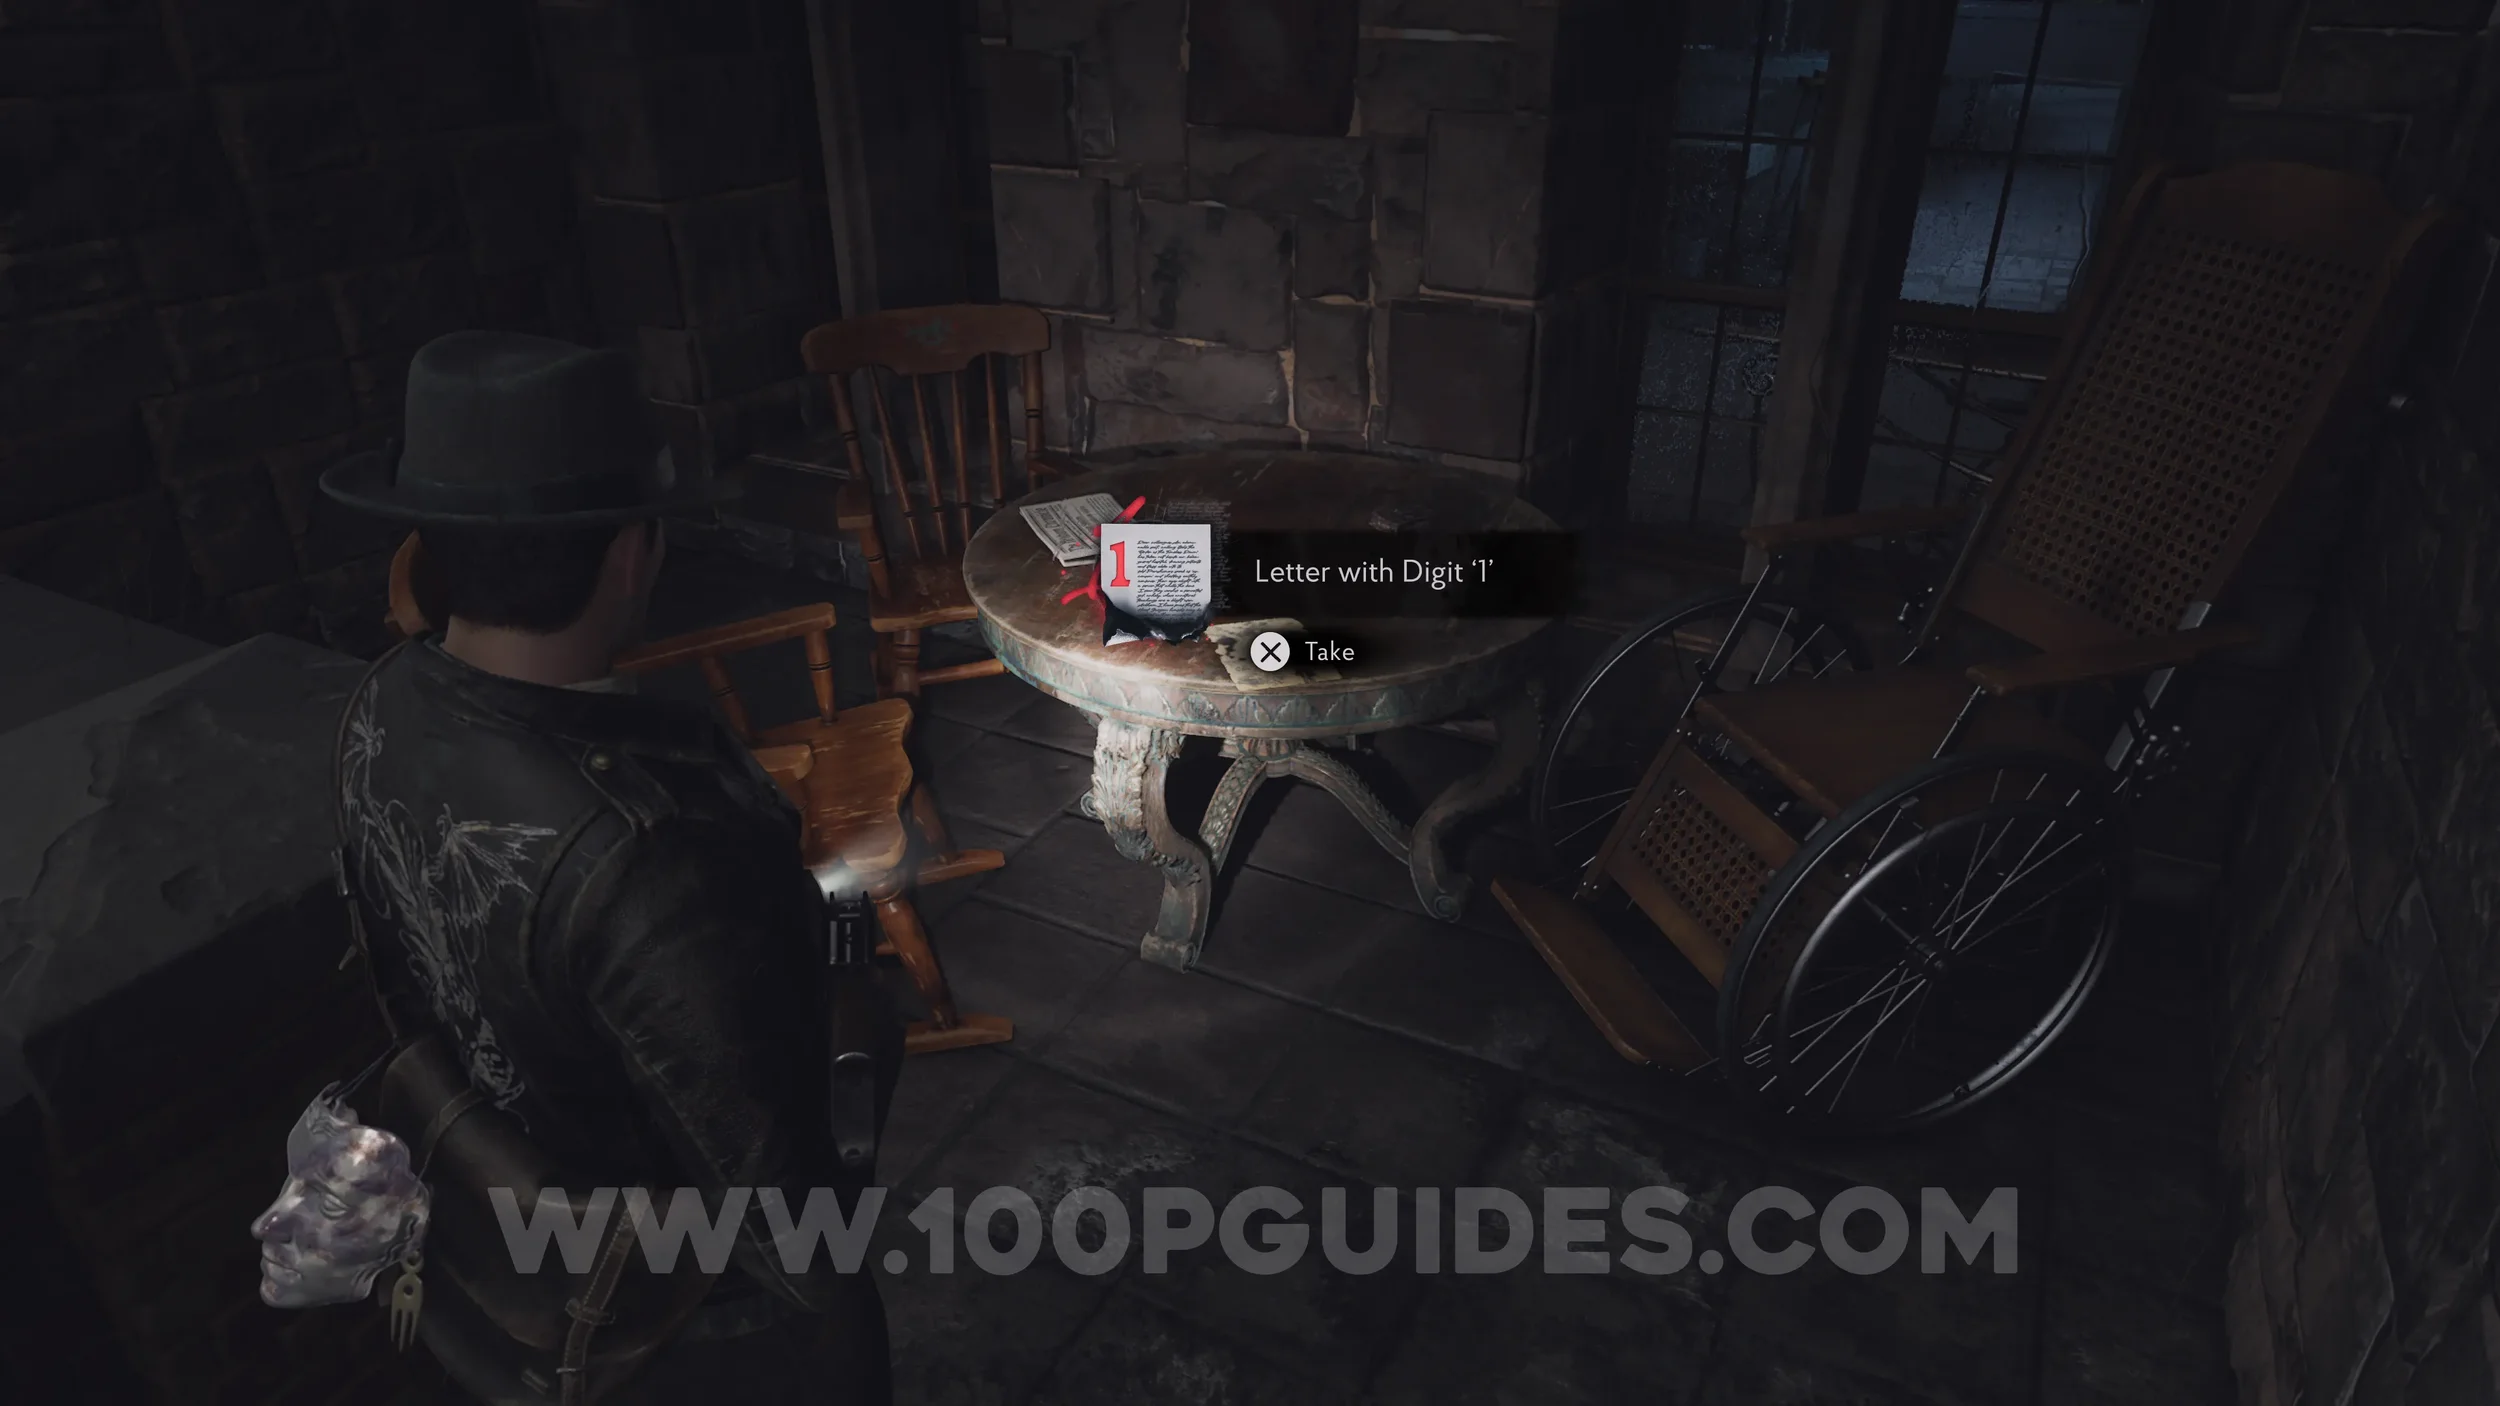
Evidence: Letter with Digit ‘1’. Exit the General Ward via the eastern door, then head south to find it on a table.
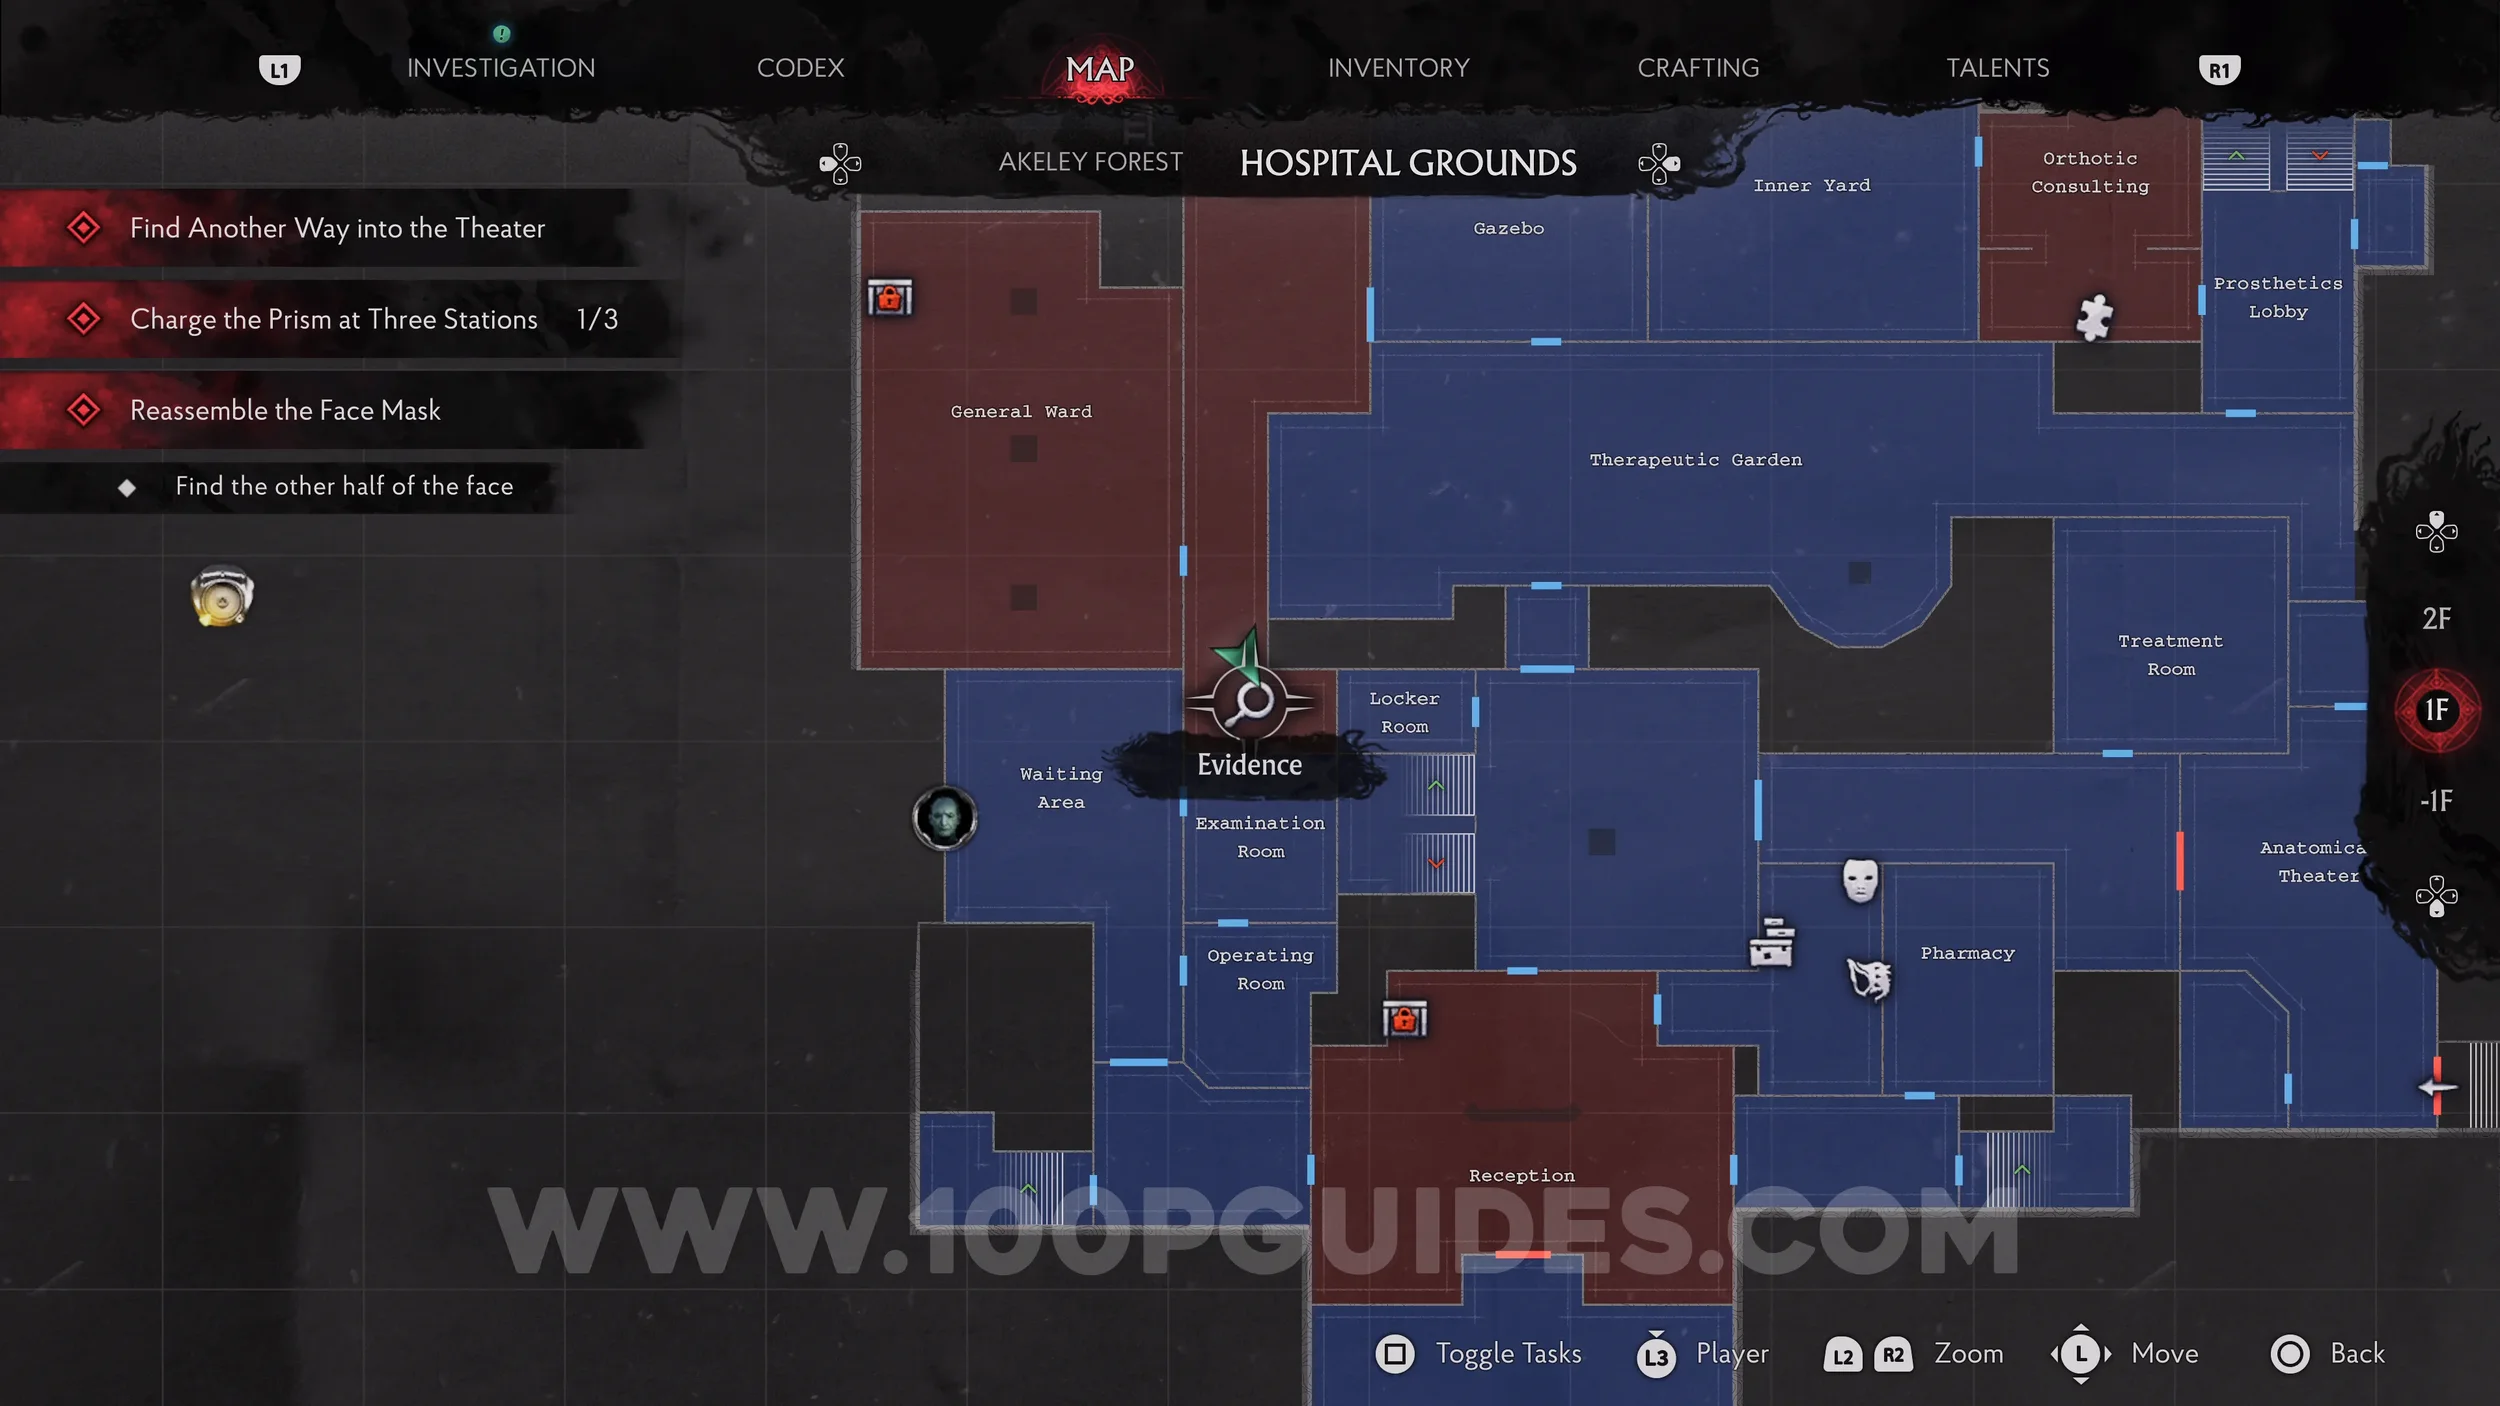
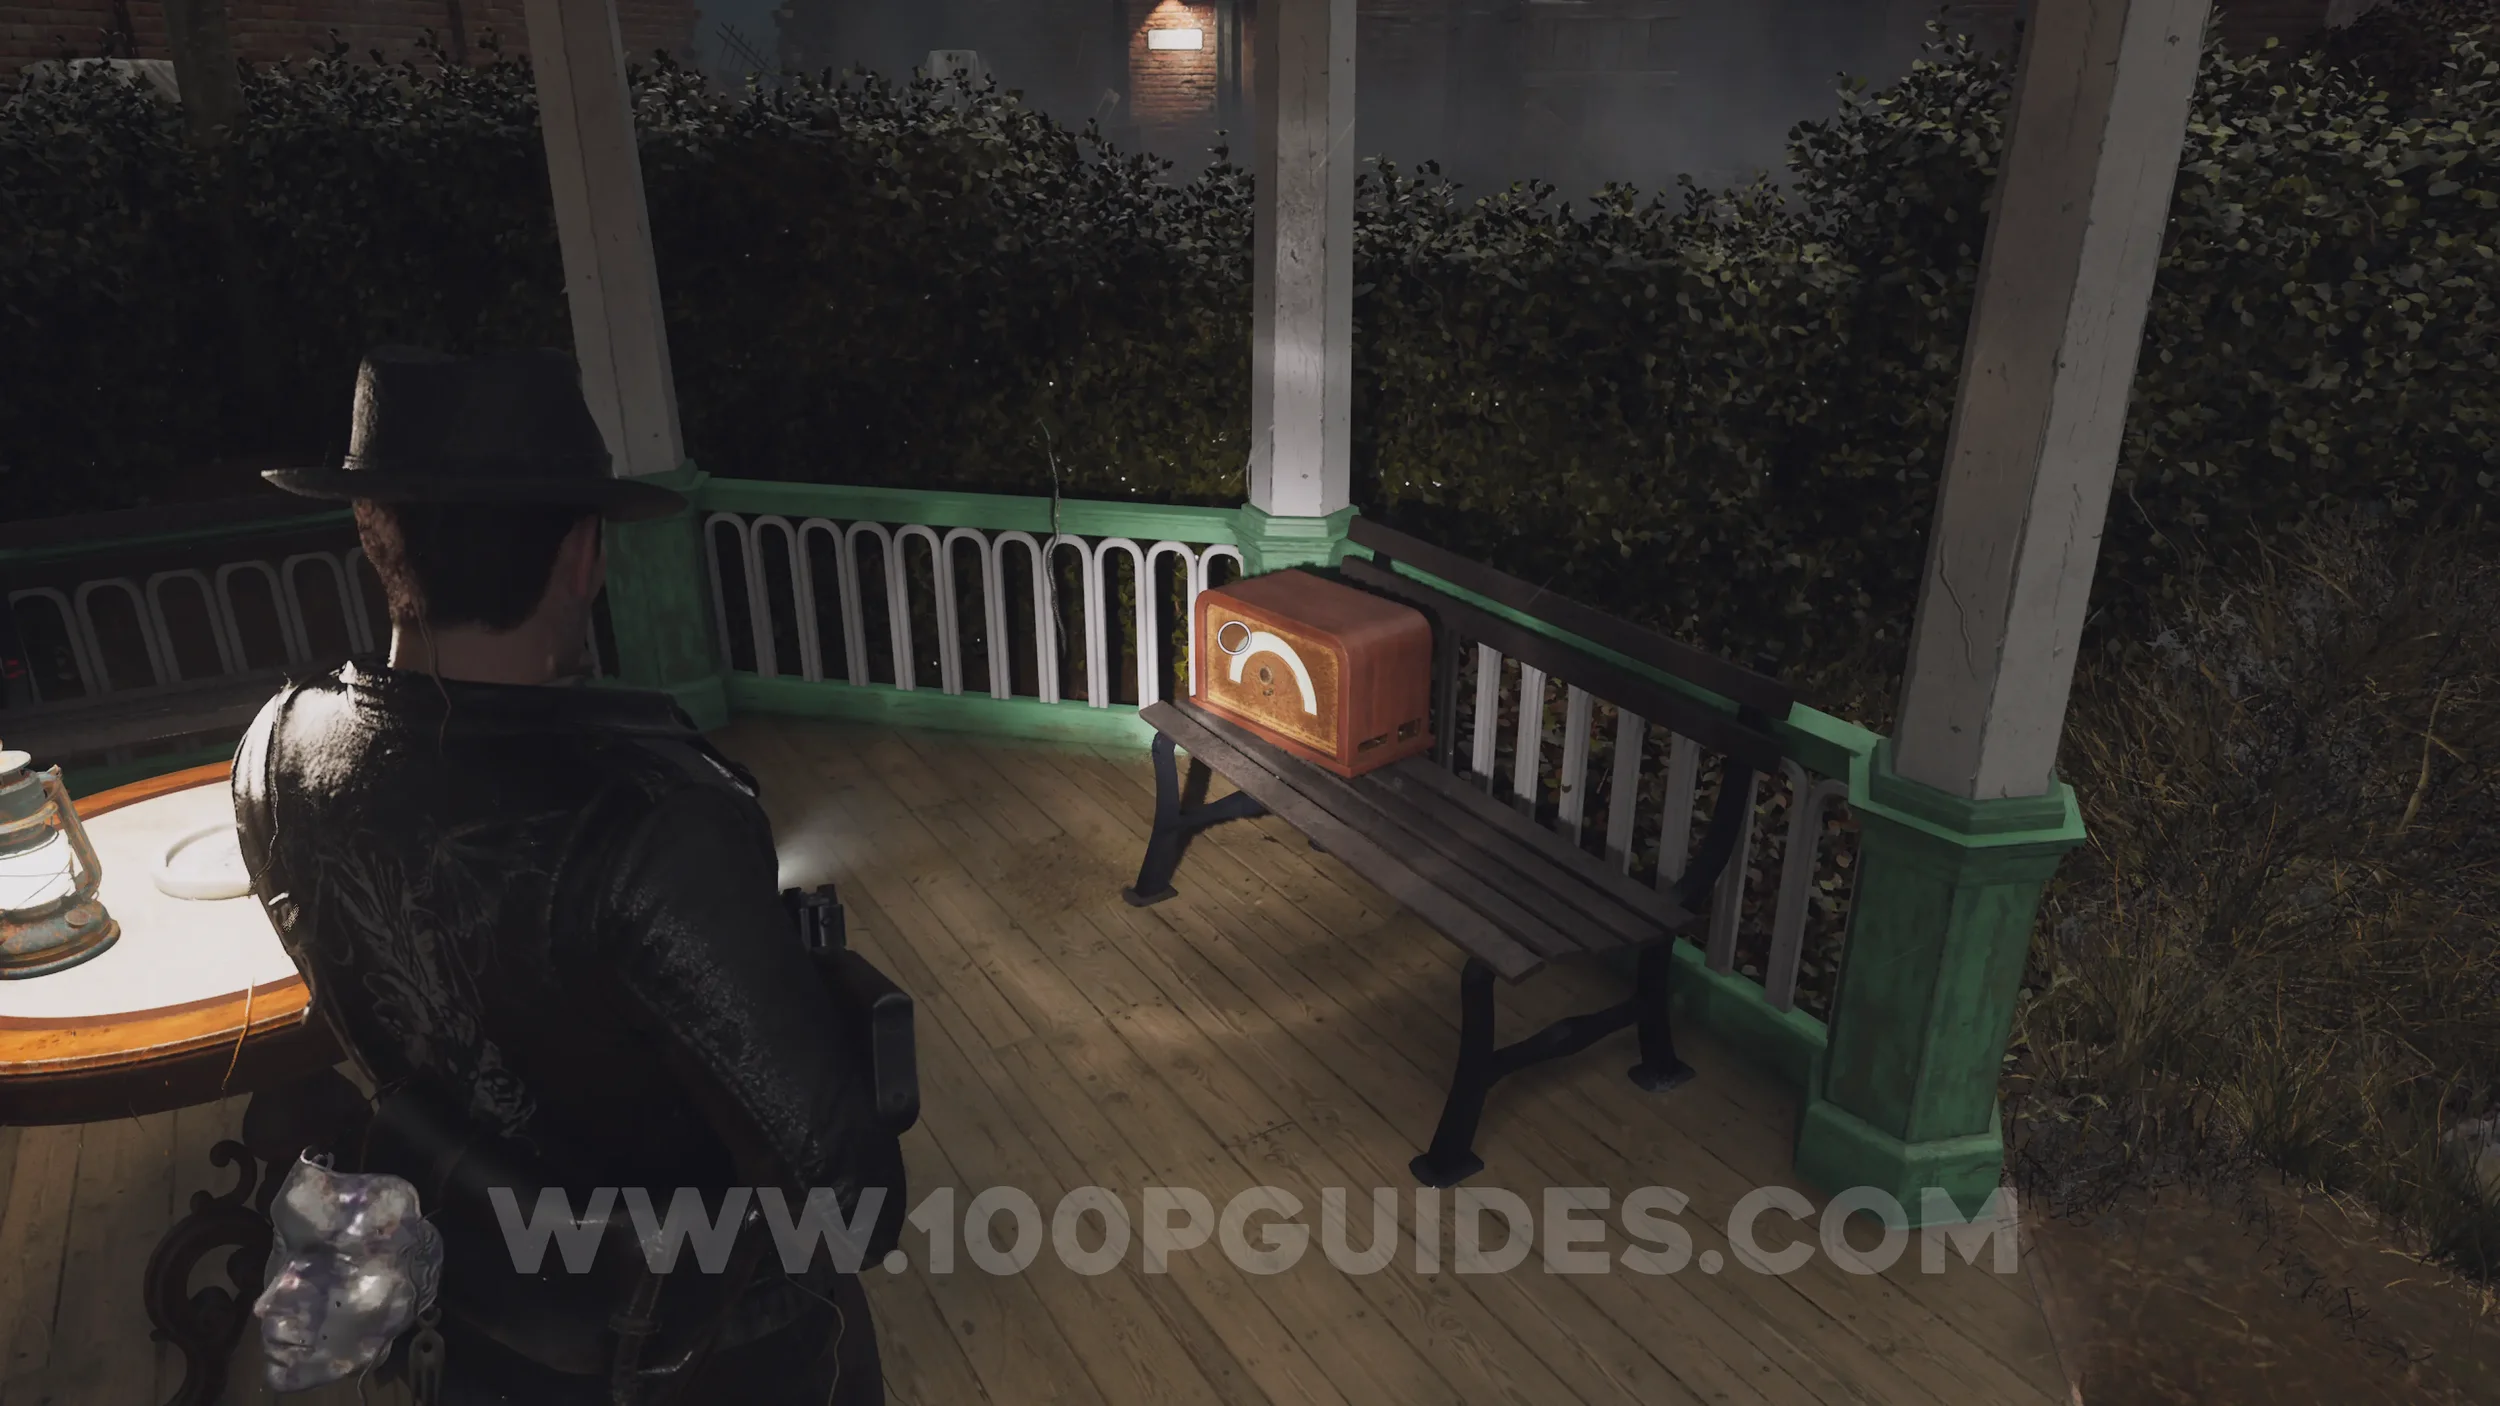
Inventory Expansion. Head north and enter the Gazebo on your right, where you'll find the Inventory Expansion.
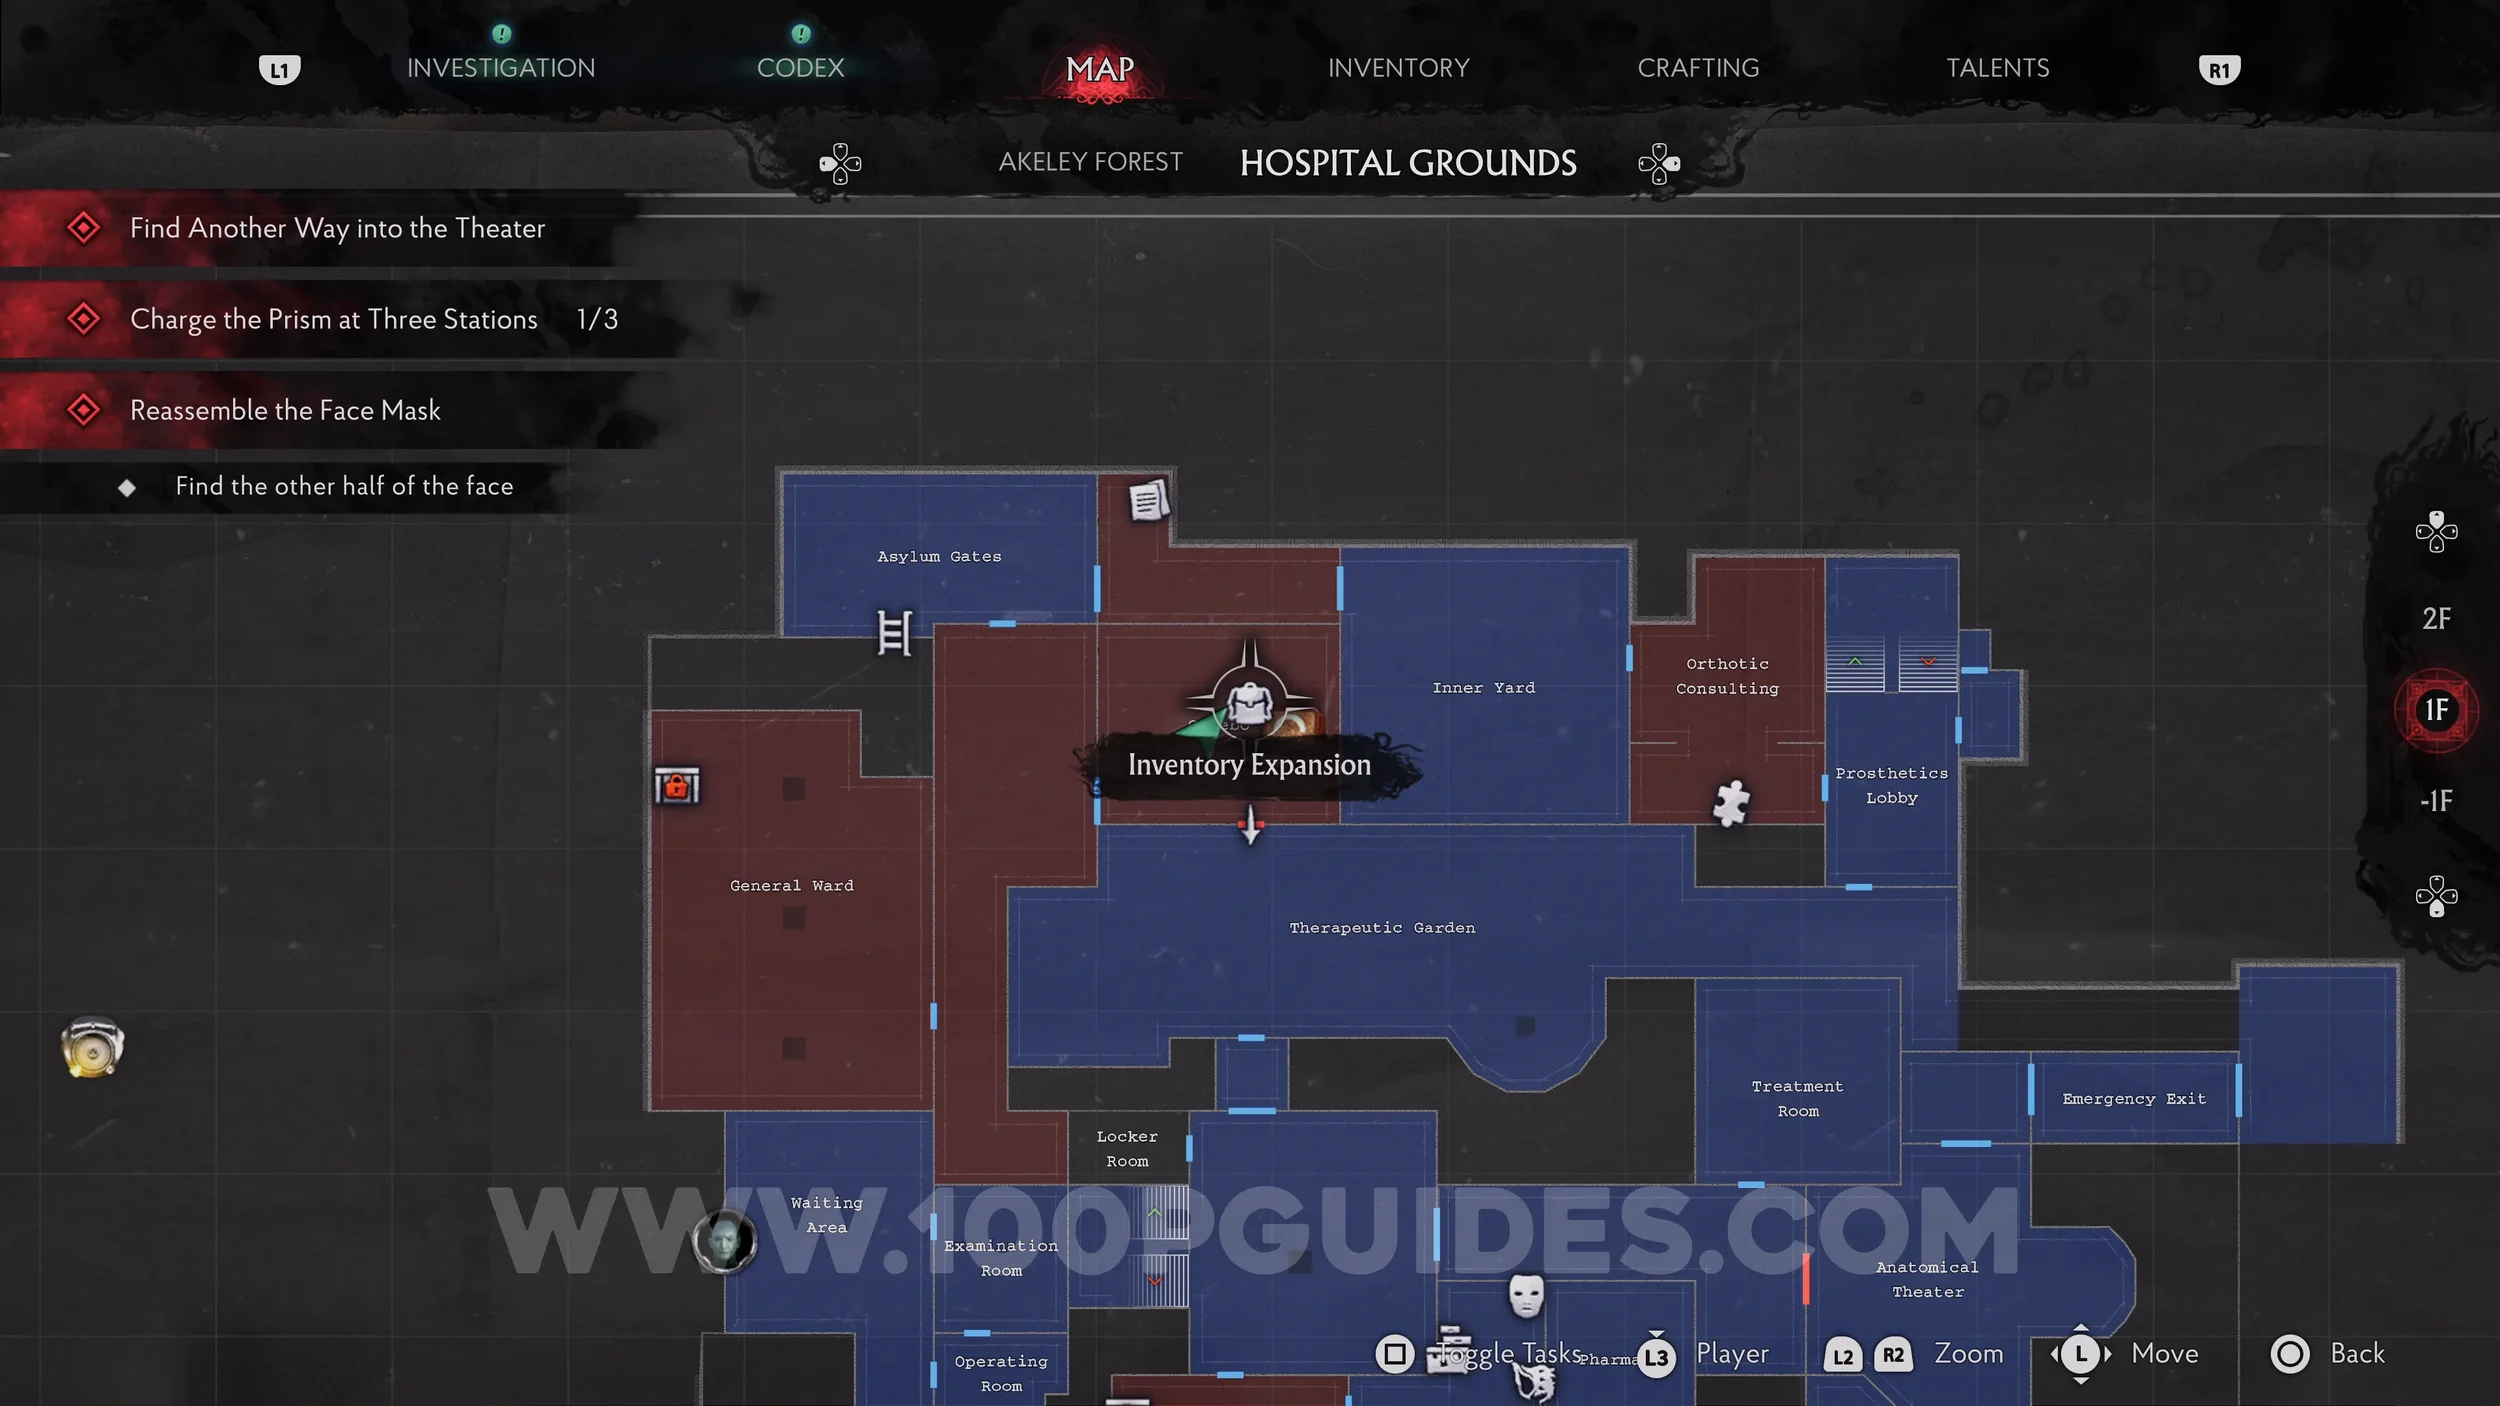
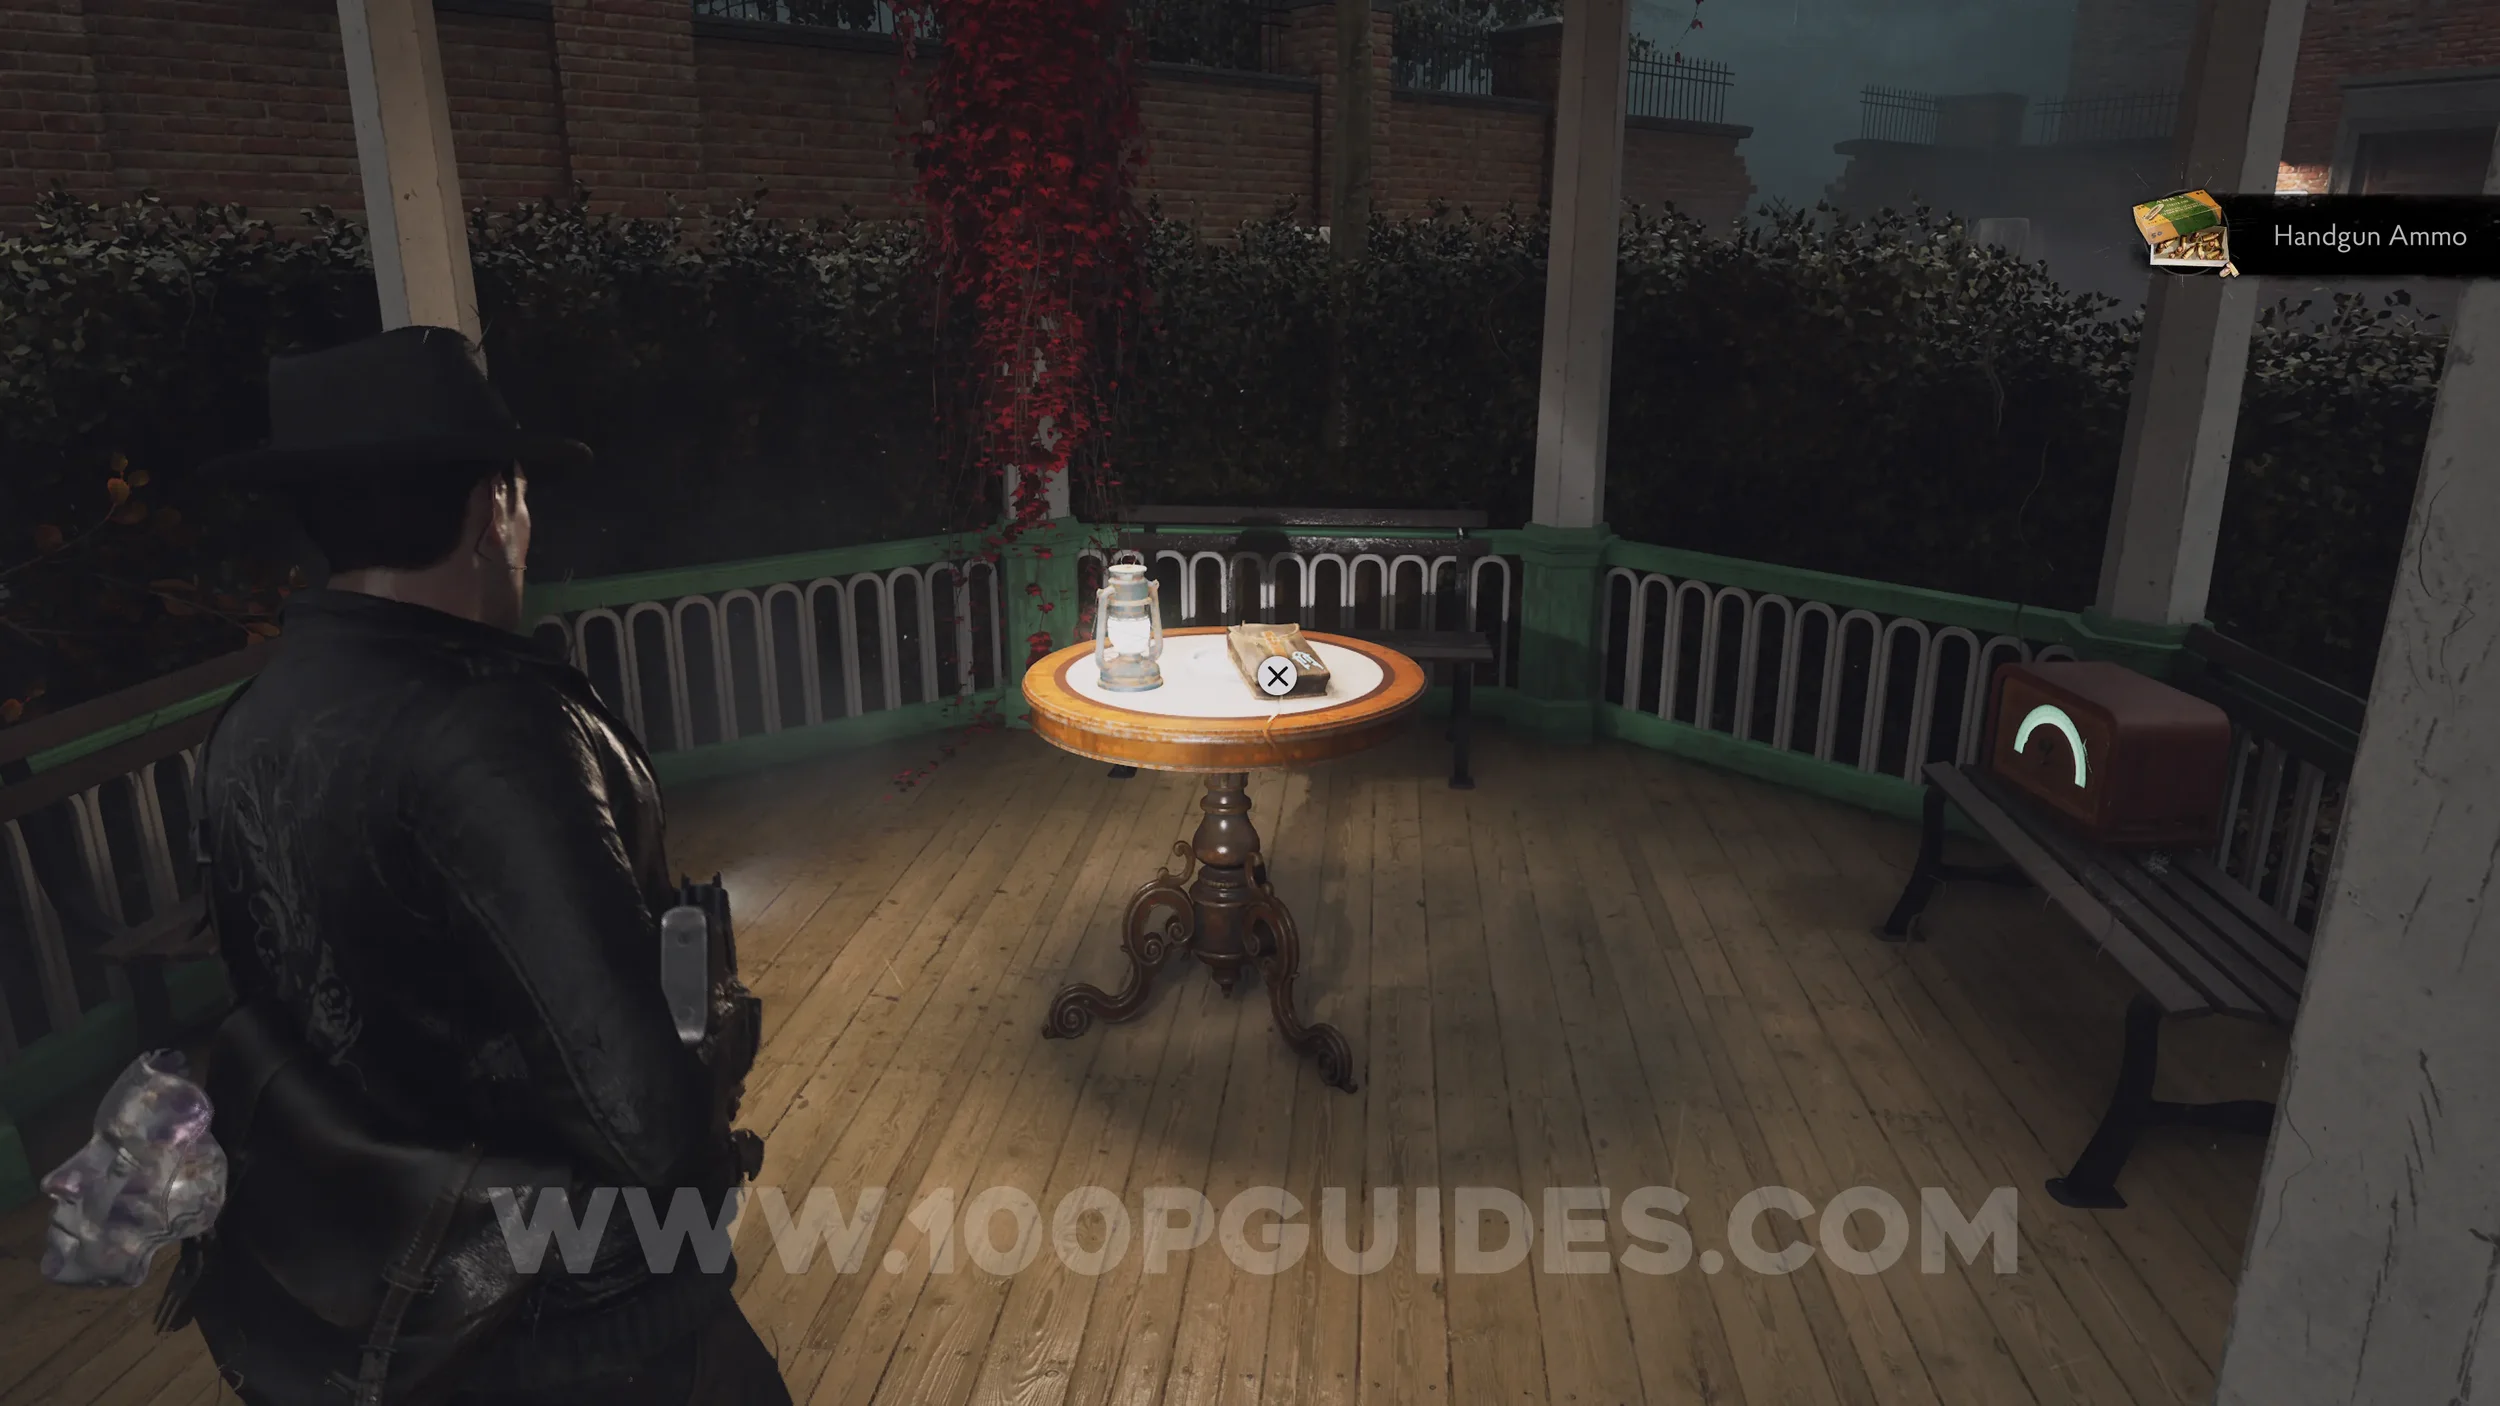
Radio: The Eyes Have It. Also under the Gazebo.
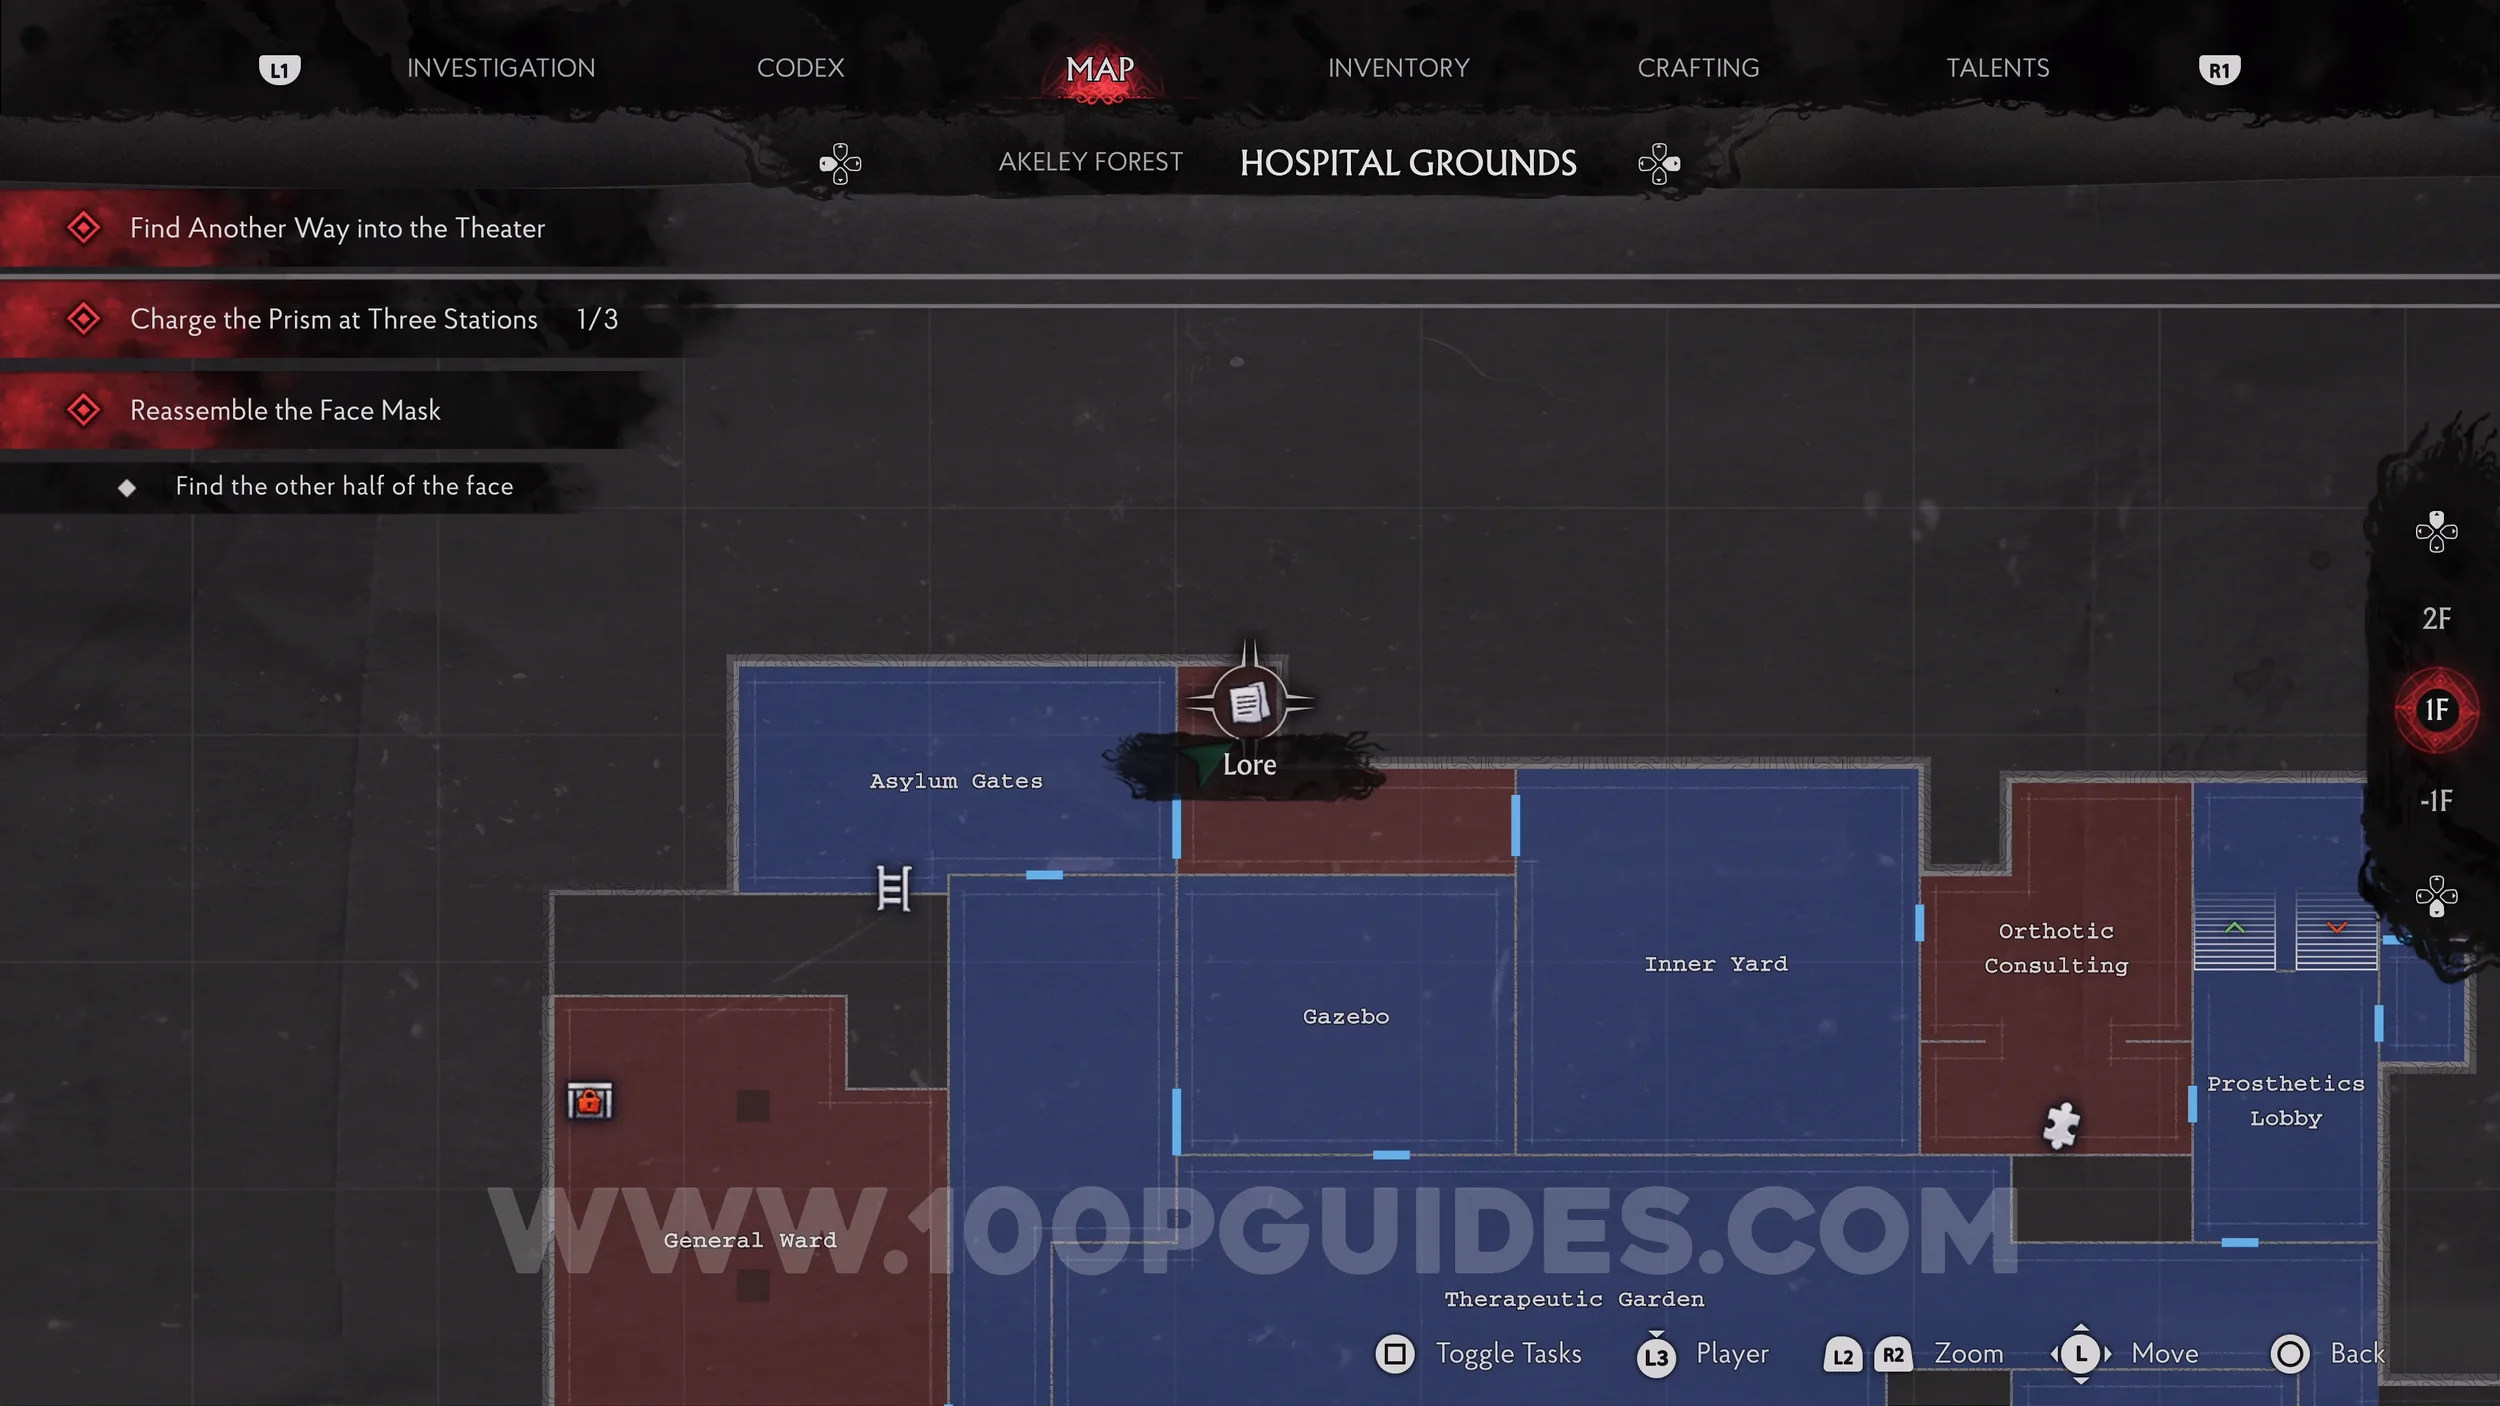
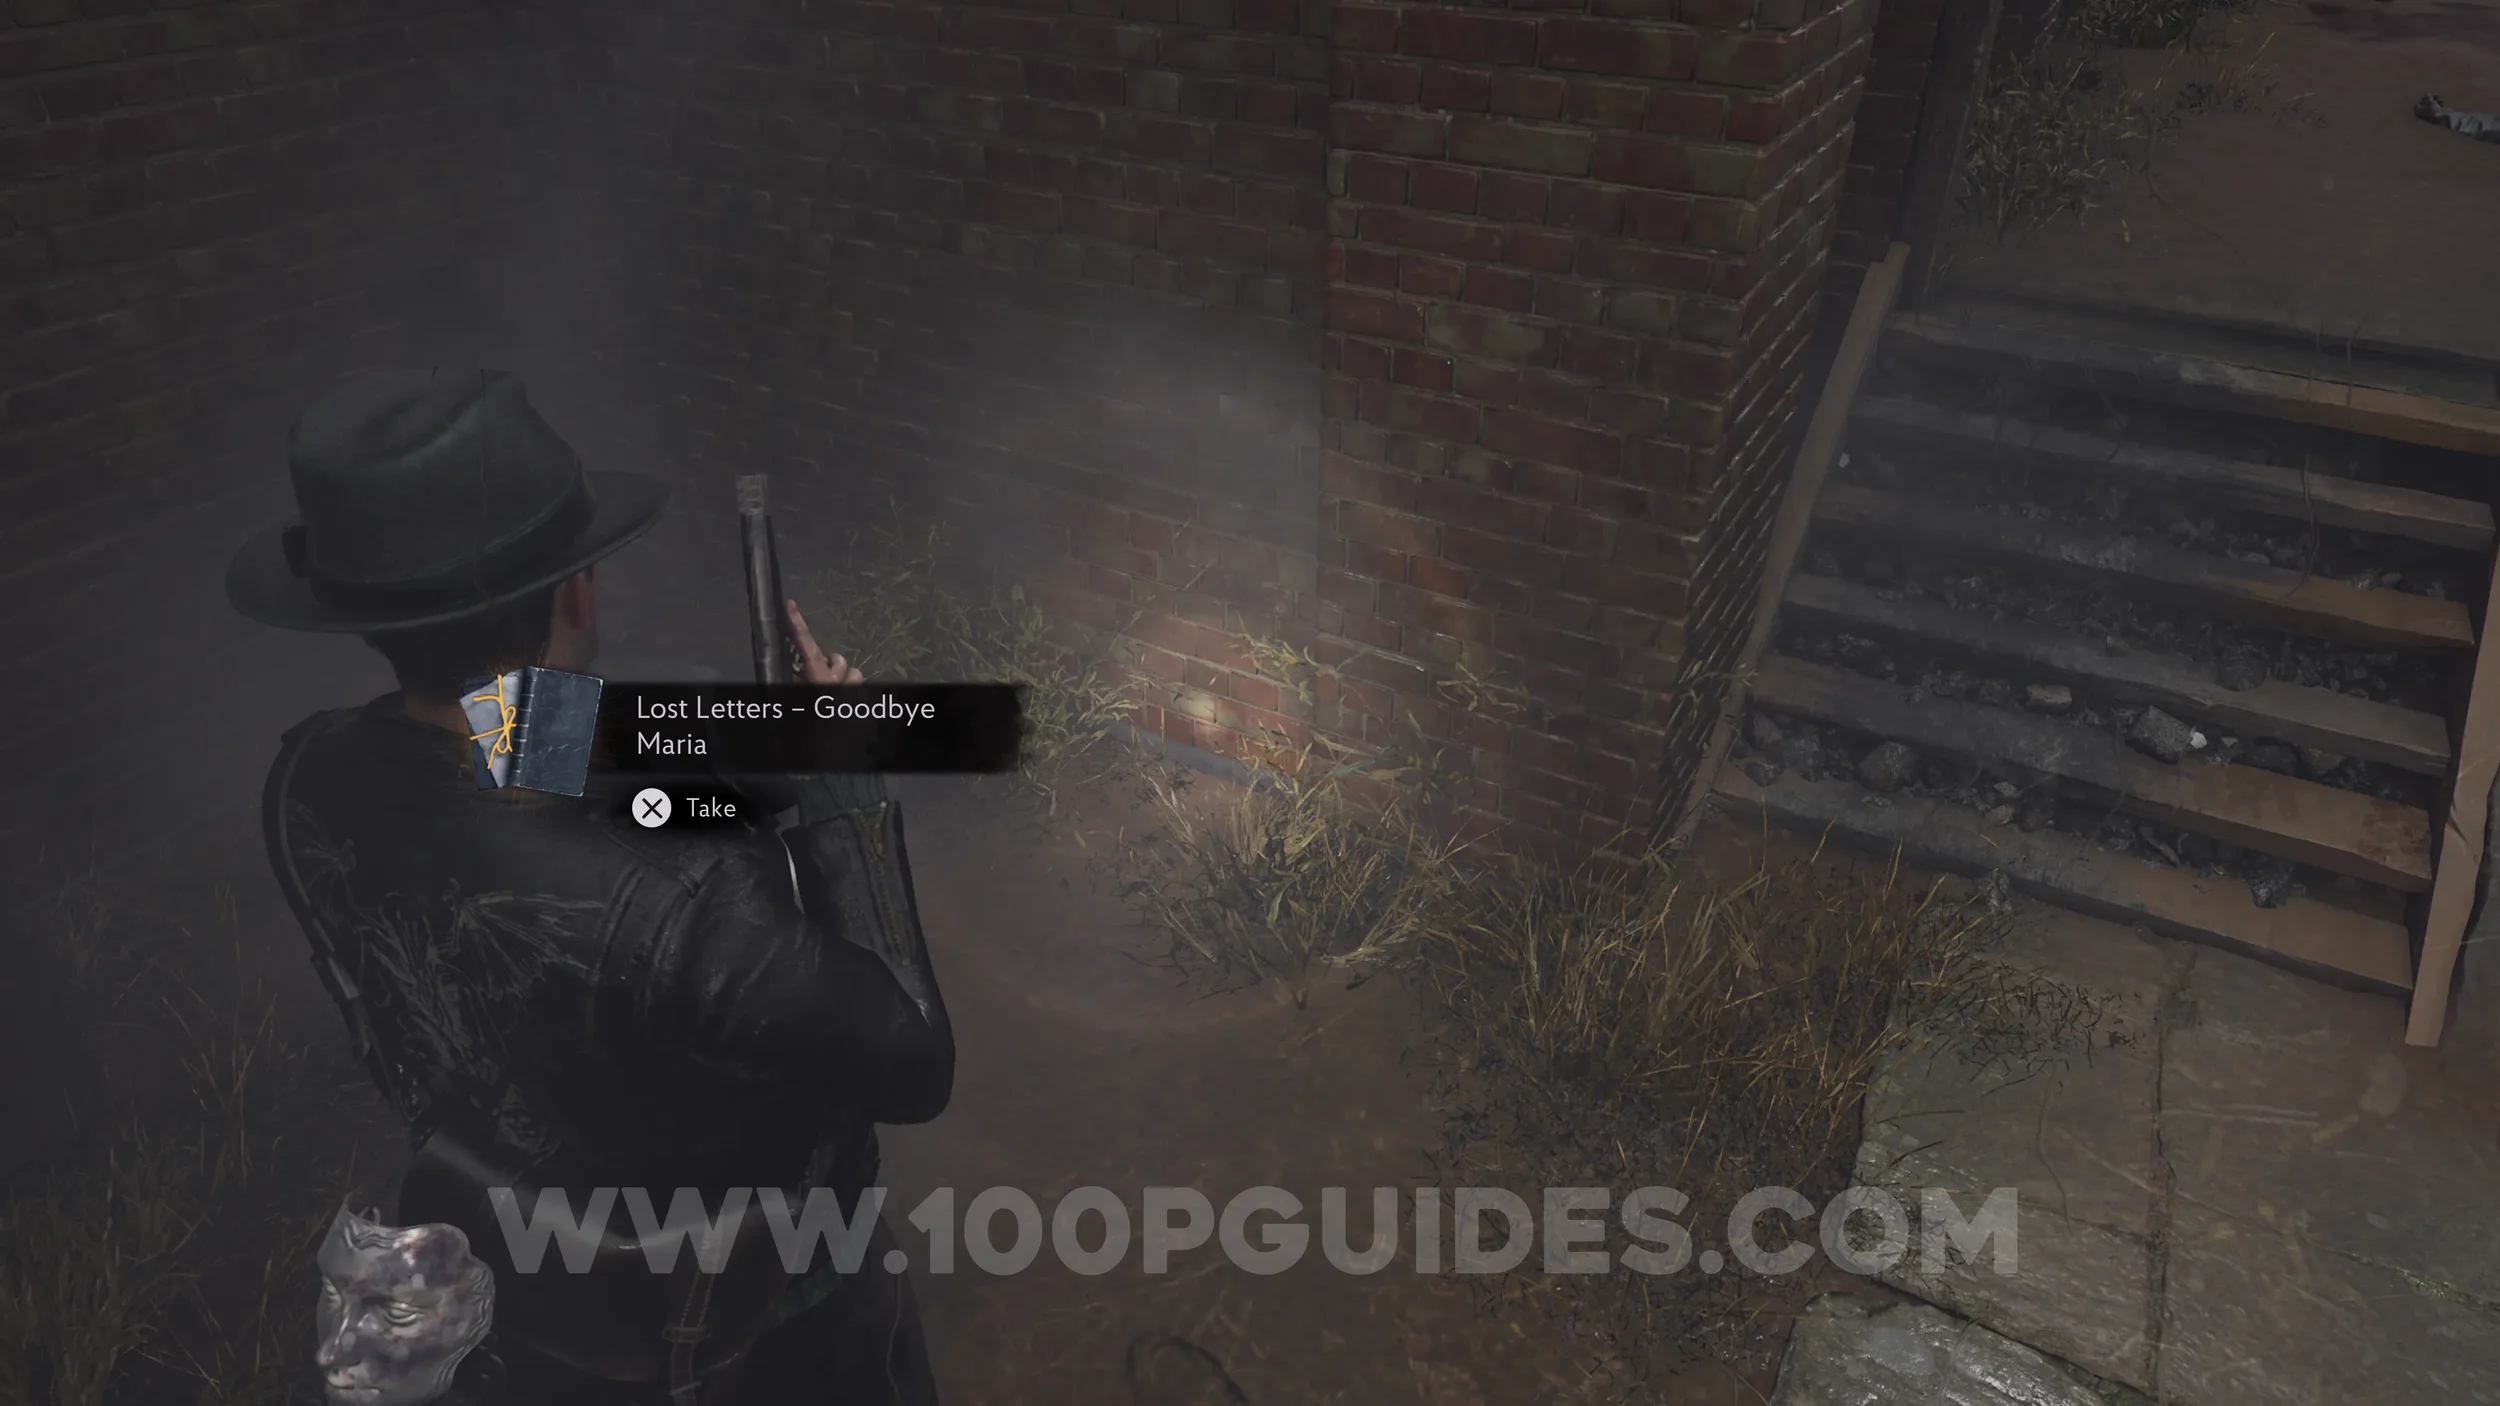
Lore Codex: Lost Letters - Goodbye Maria. Go through the gate to the northwest of the Gazebo, then look right to see some stairs. The codex is on the left just before you head up the stairs.
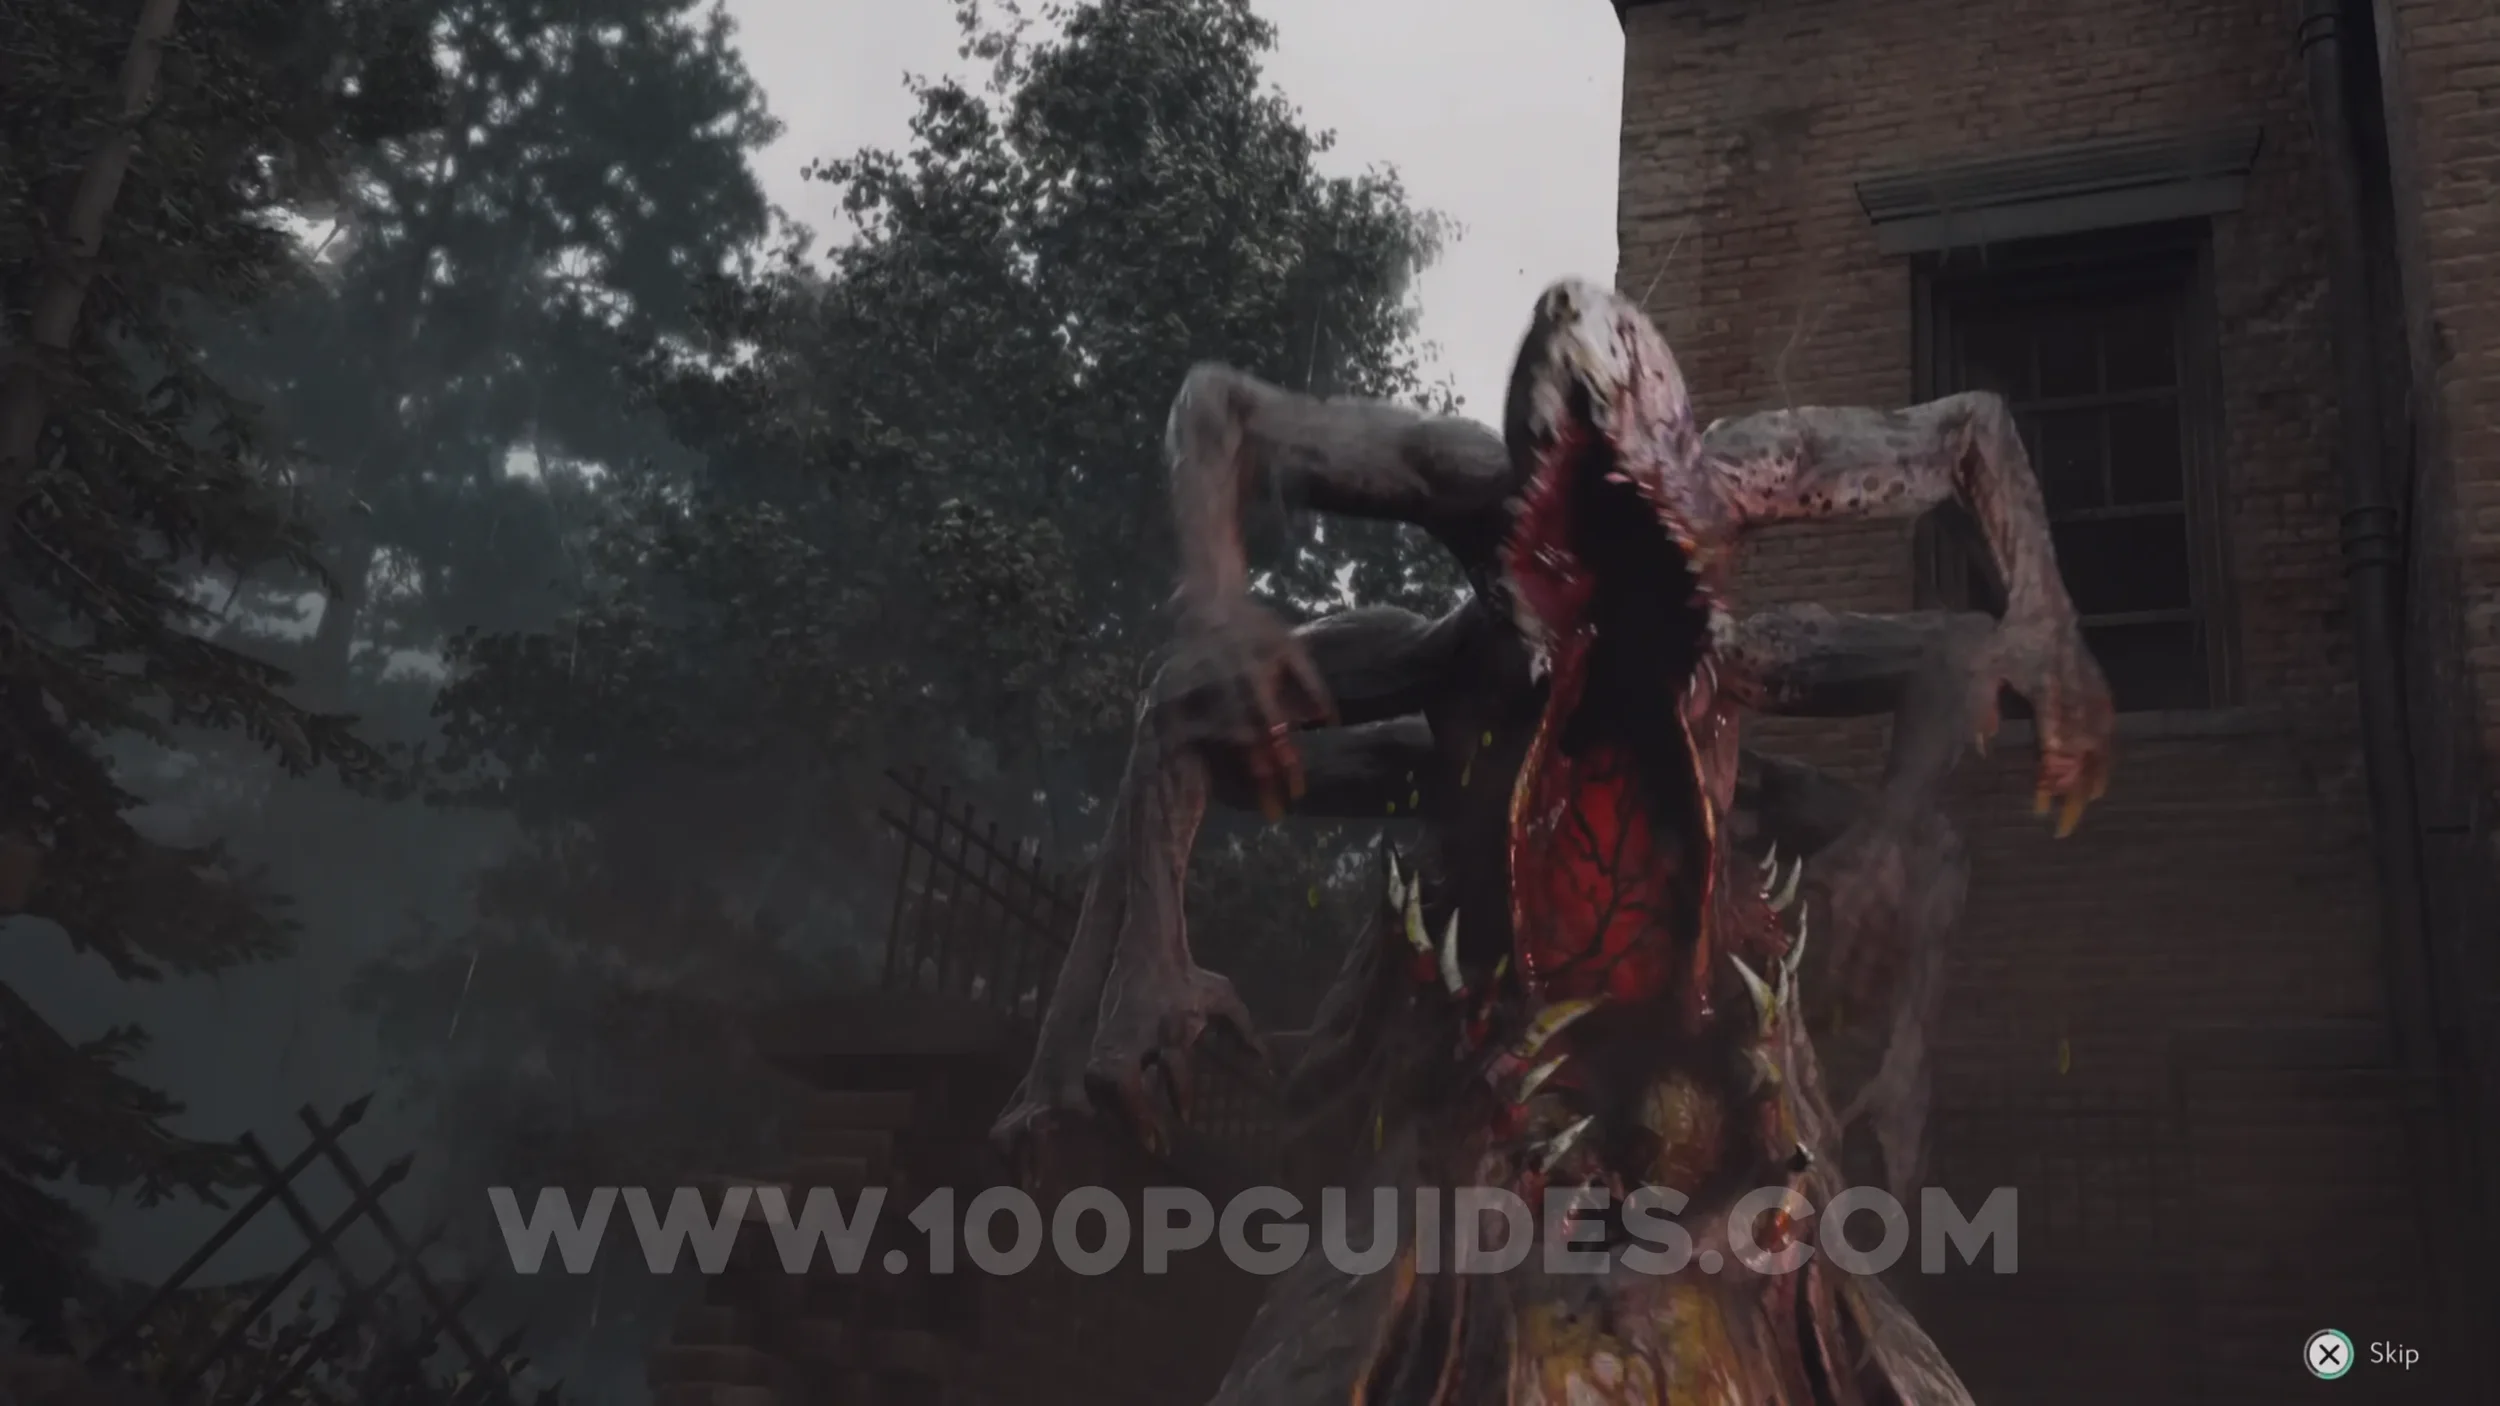
Nightmare (1/3). From the previous collectible, head east into the Inner Yard, where you'll get attacked by a large enemy. Make sure you defeat it, since you'll need to beat three of them for the "Sterilizer" trophy.
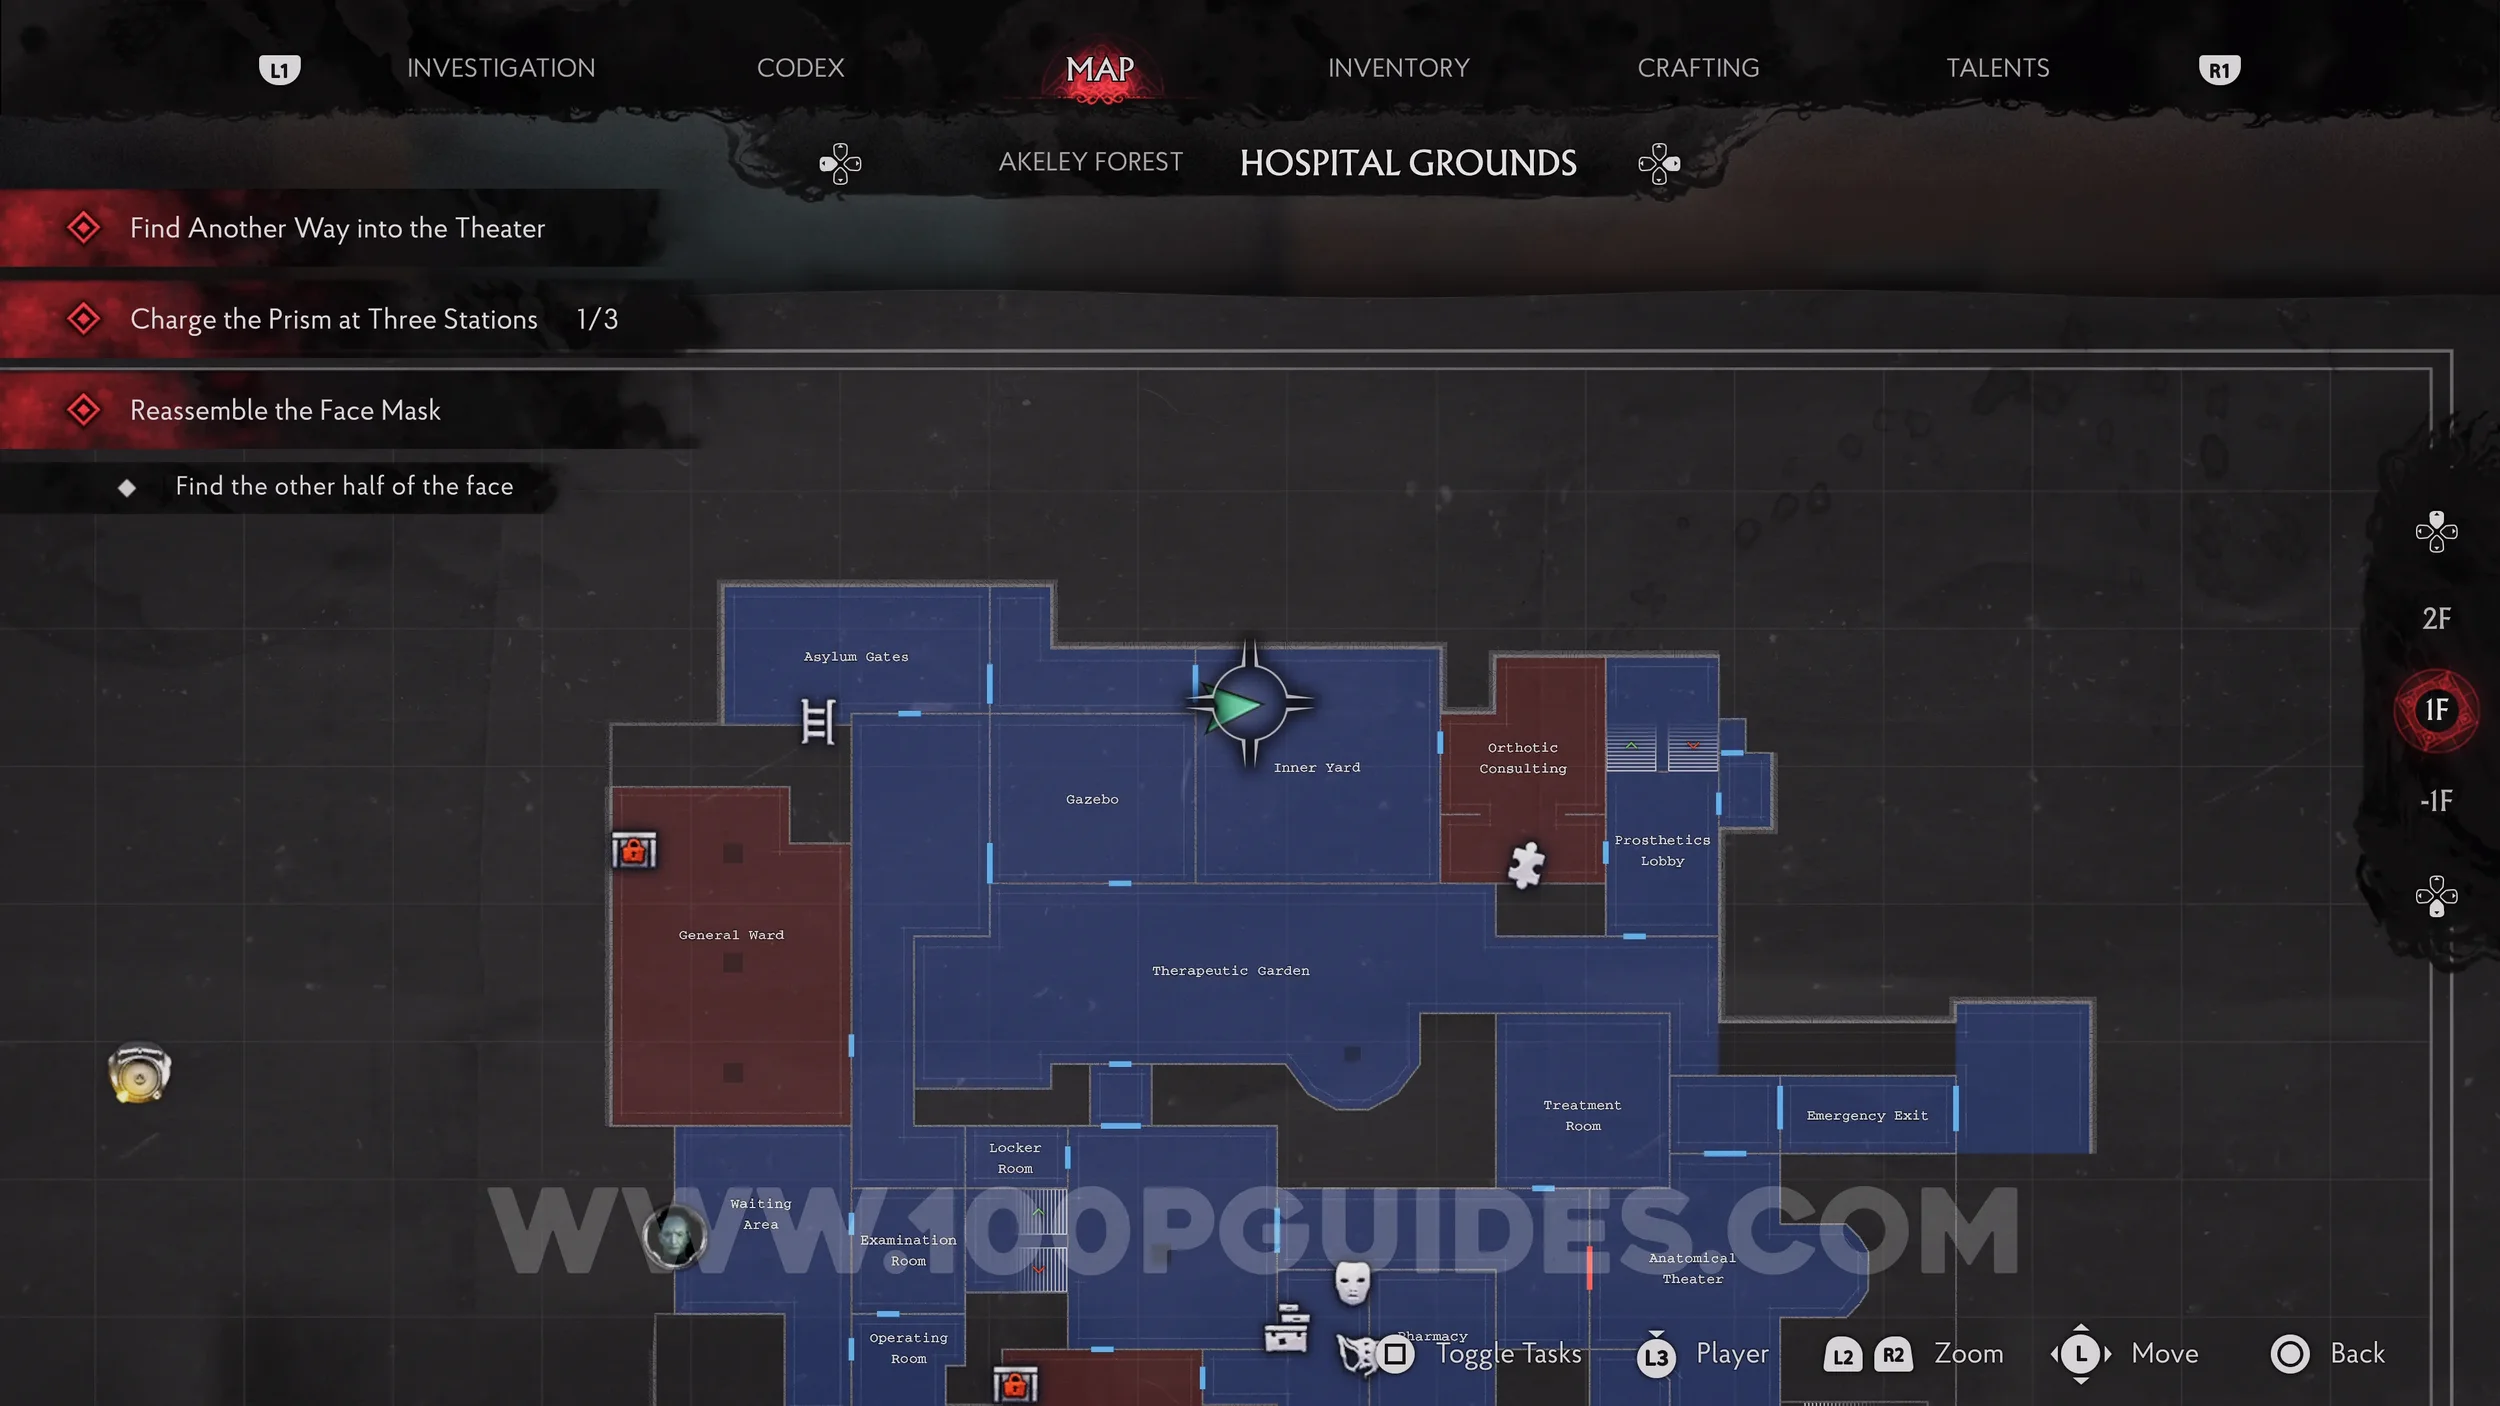
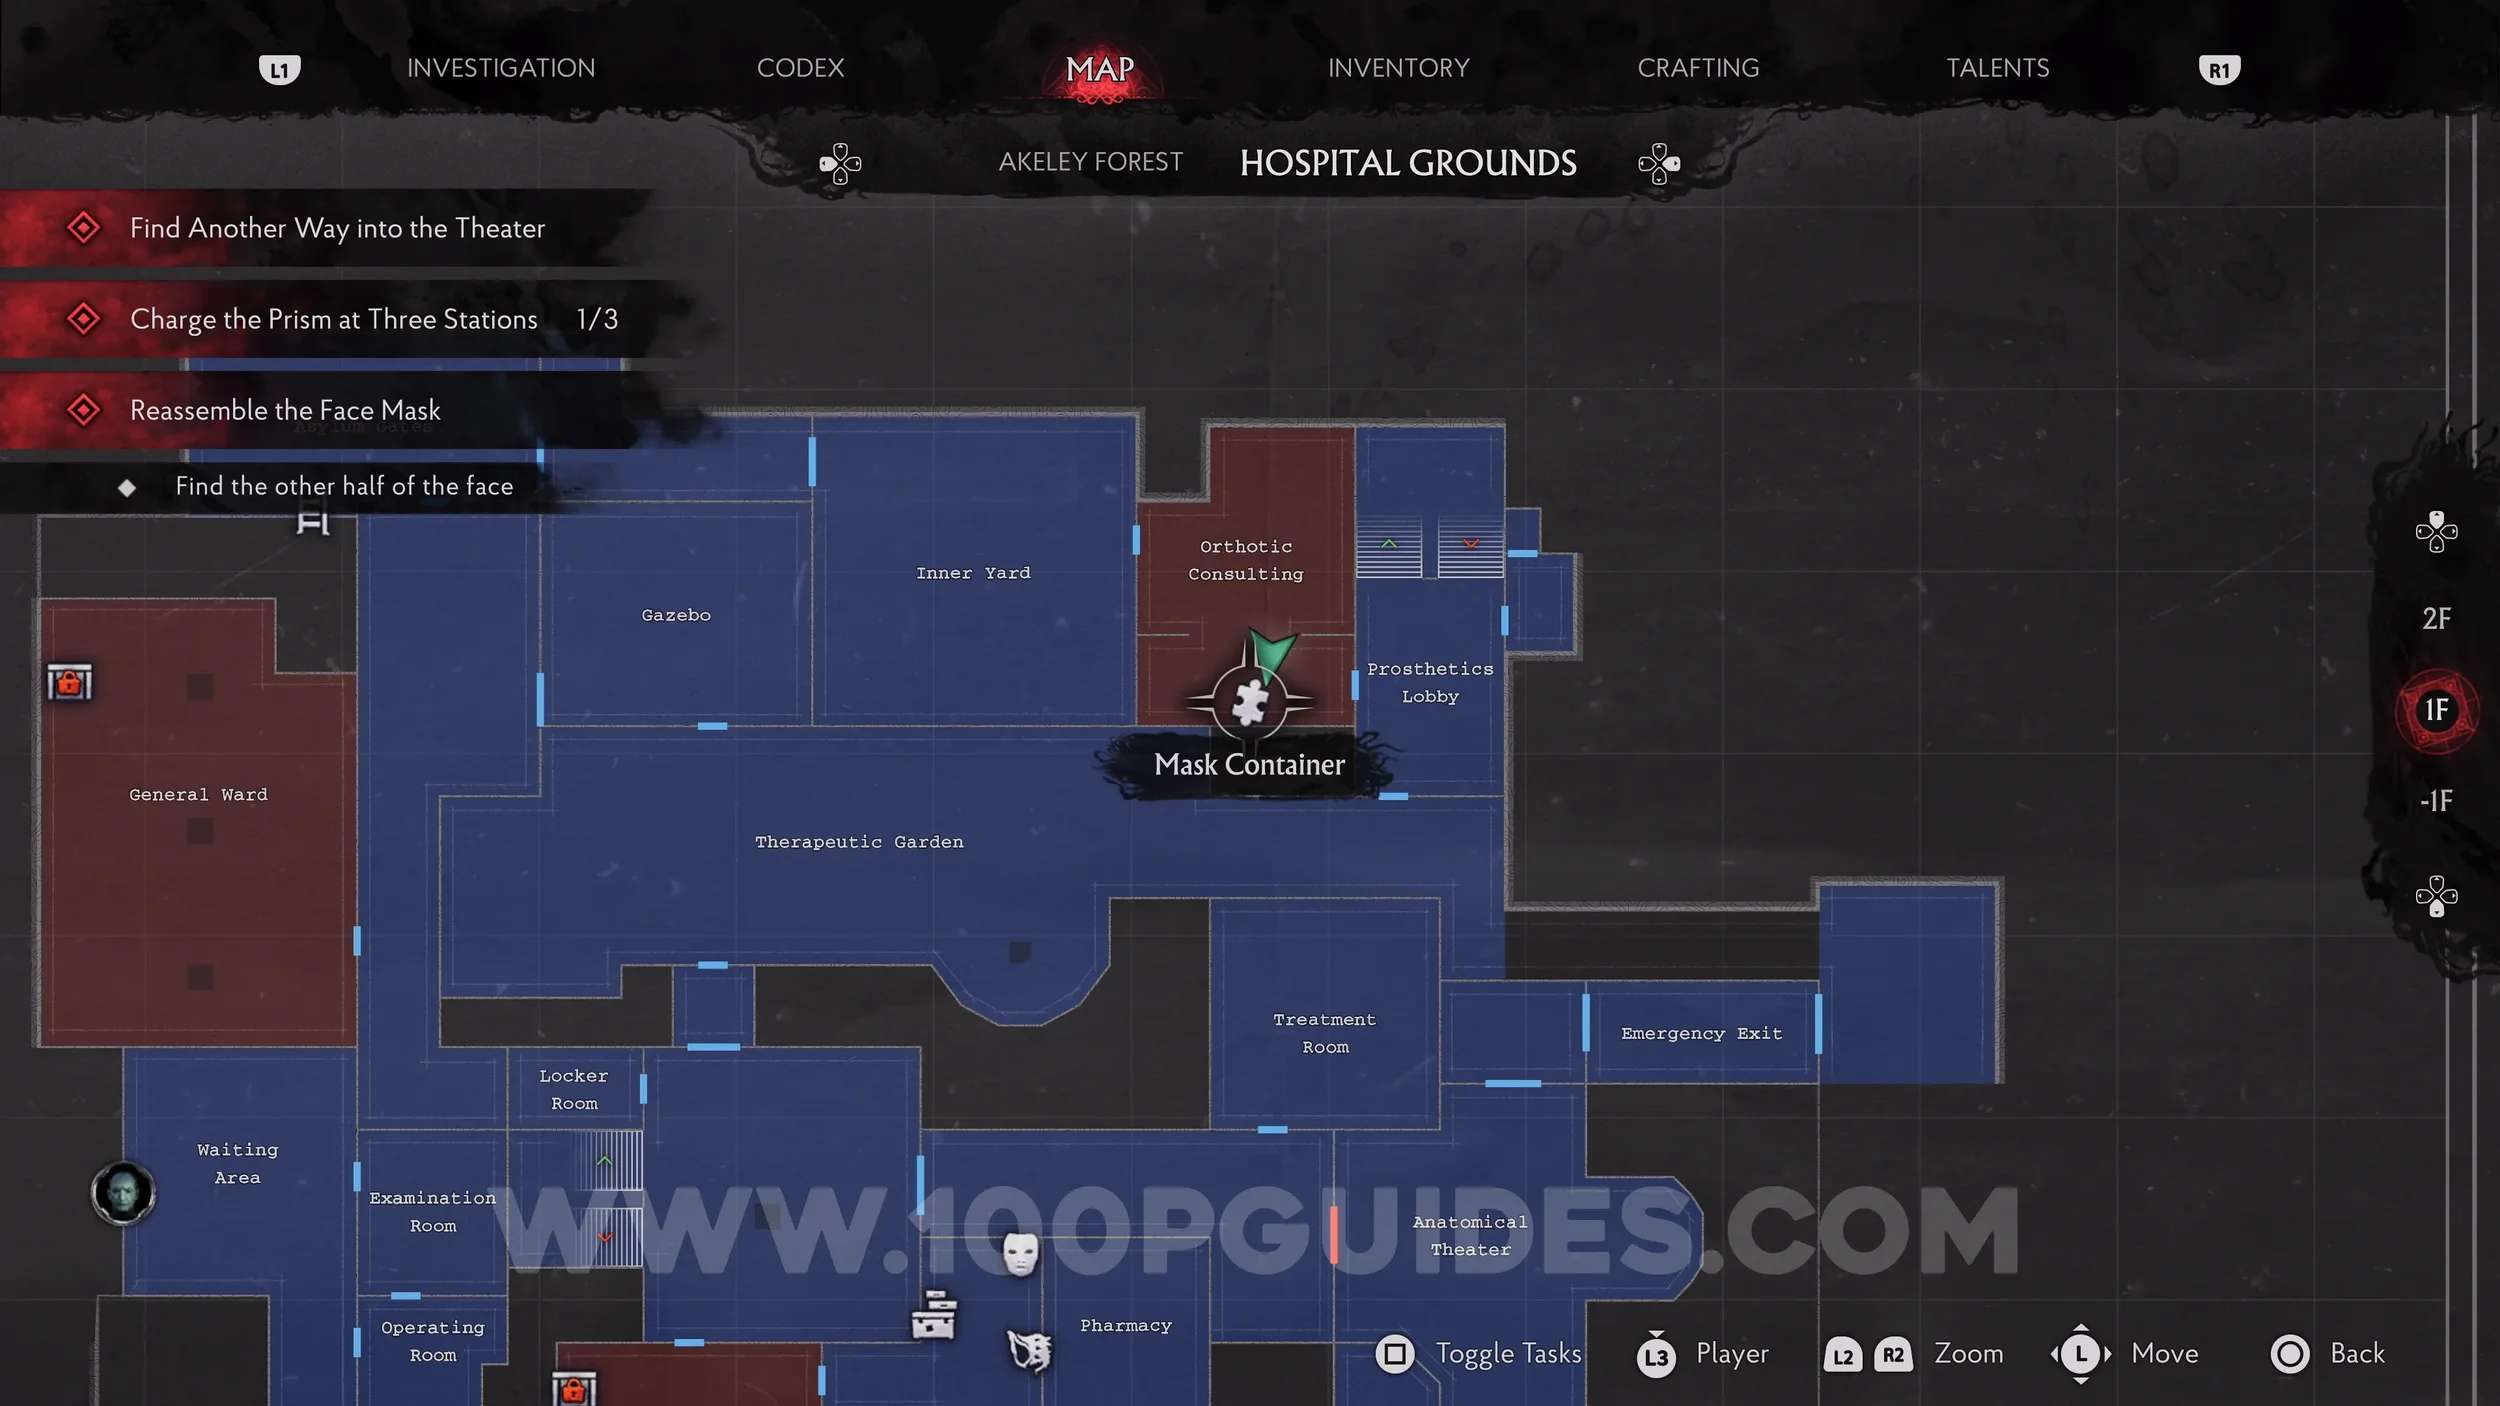
Key Item: Left Half of a Face. Head east into the Orthotic Consulting to find the pod with the half of a face in it on a bed. To open the pod, remove the four small corner panels on the front, then the four screws in the corners in the back, then spin the central back panel, then open from the front.
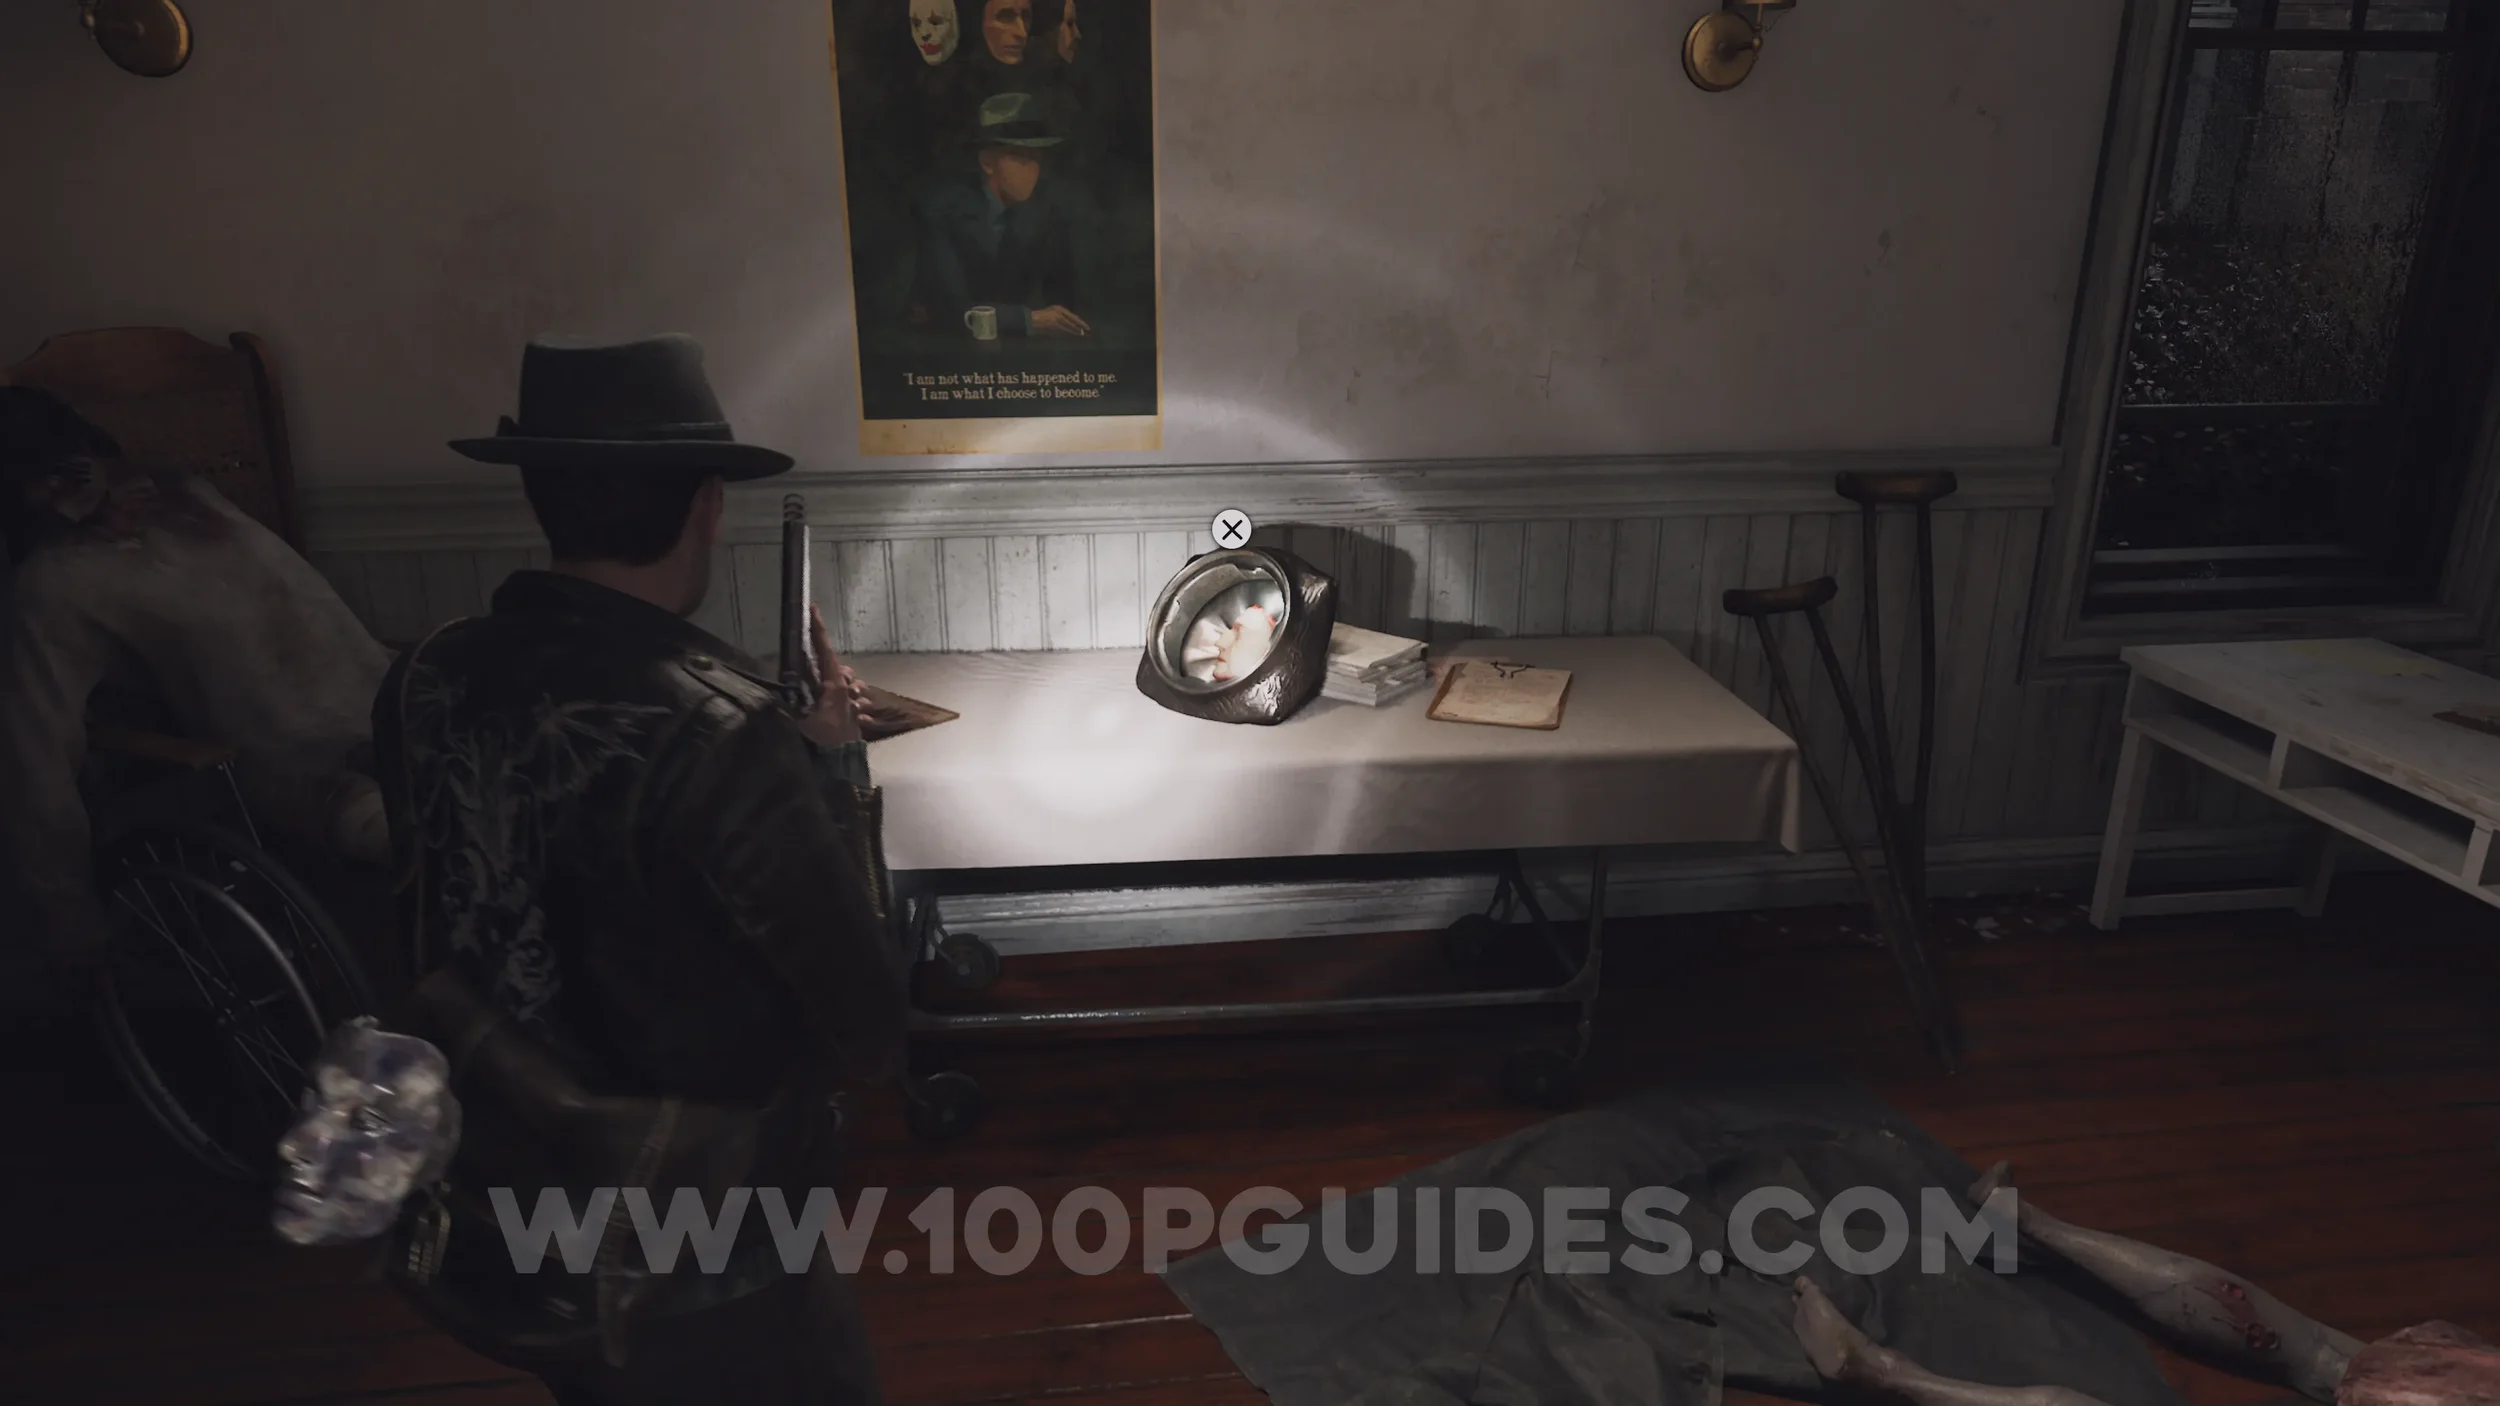
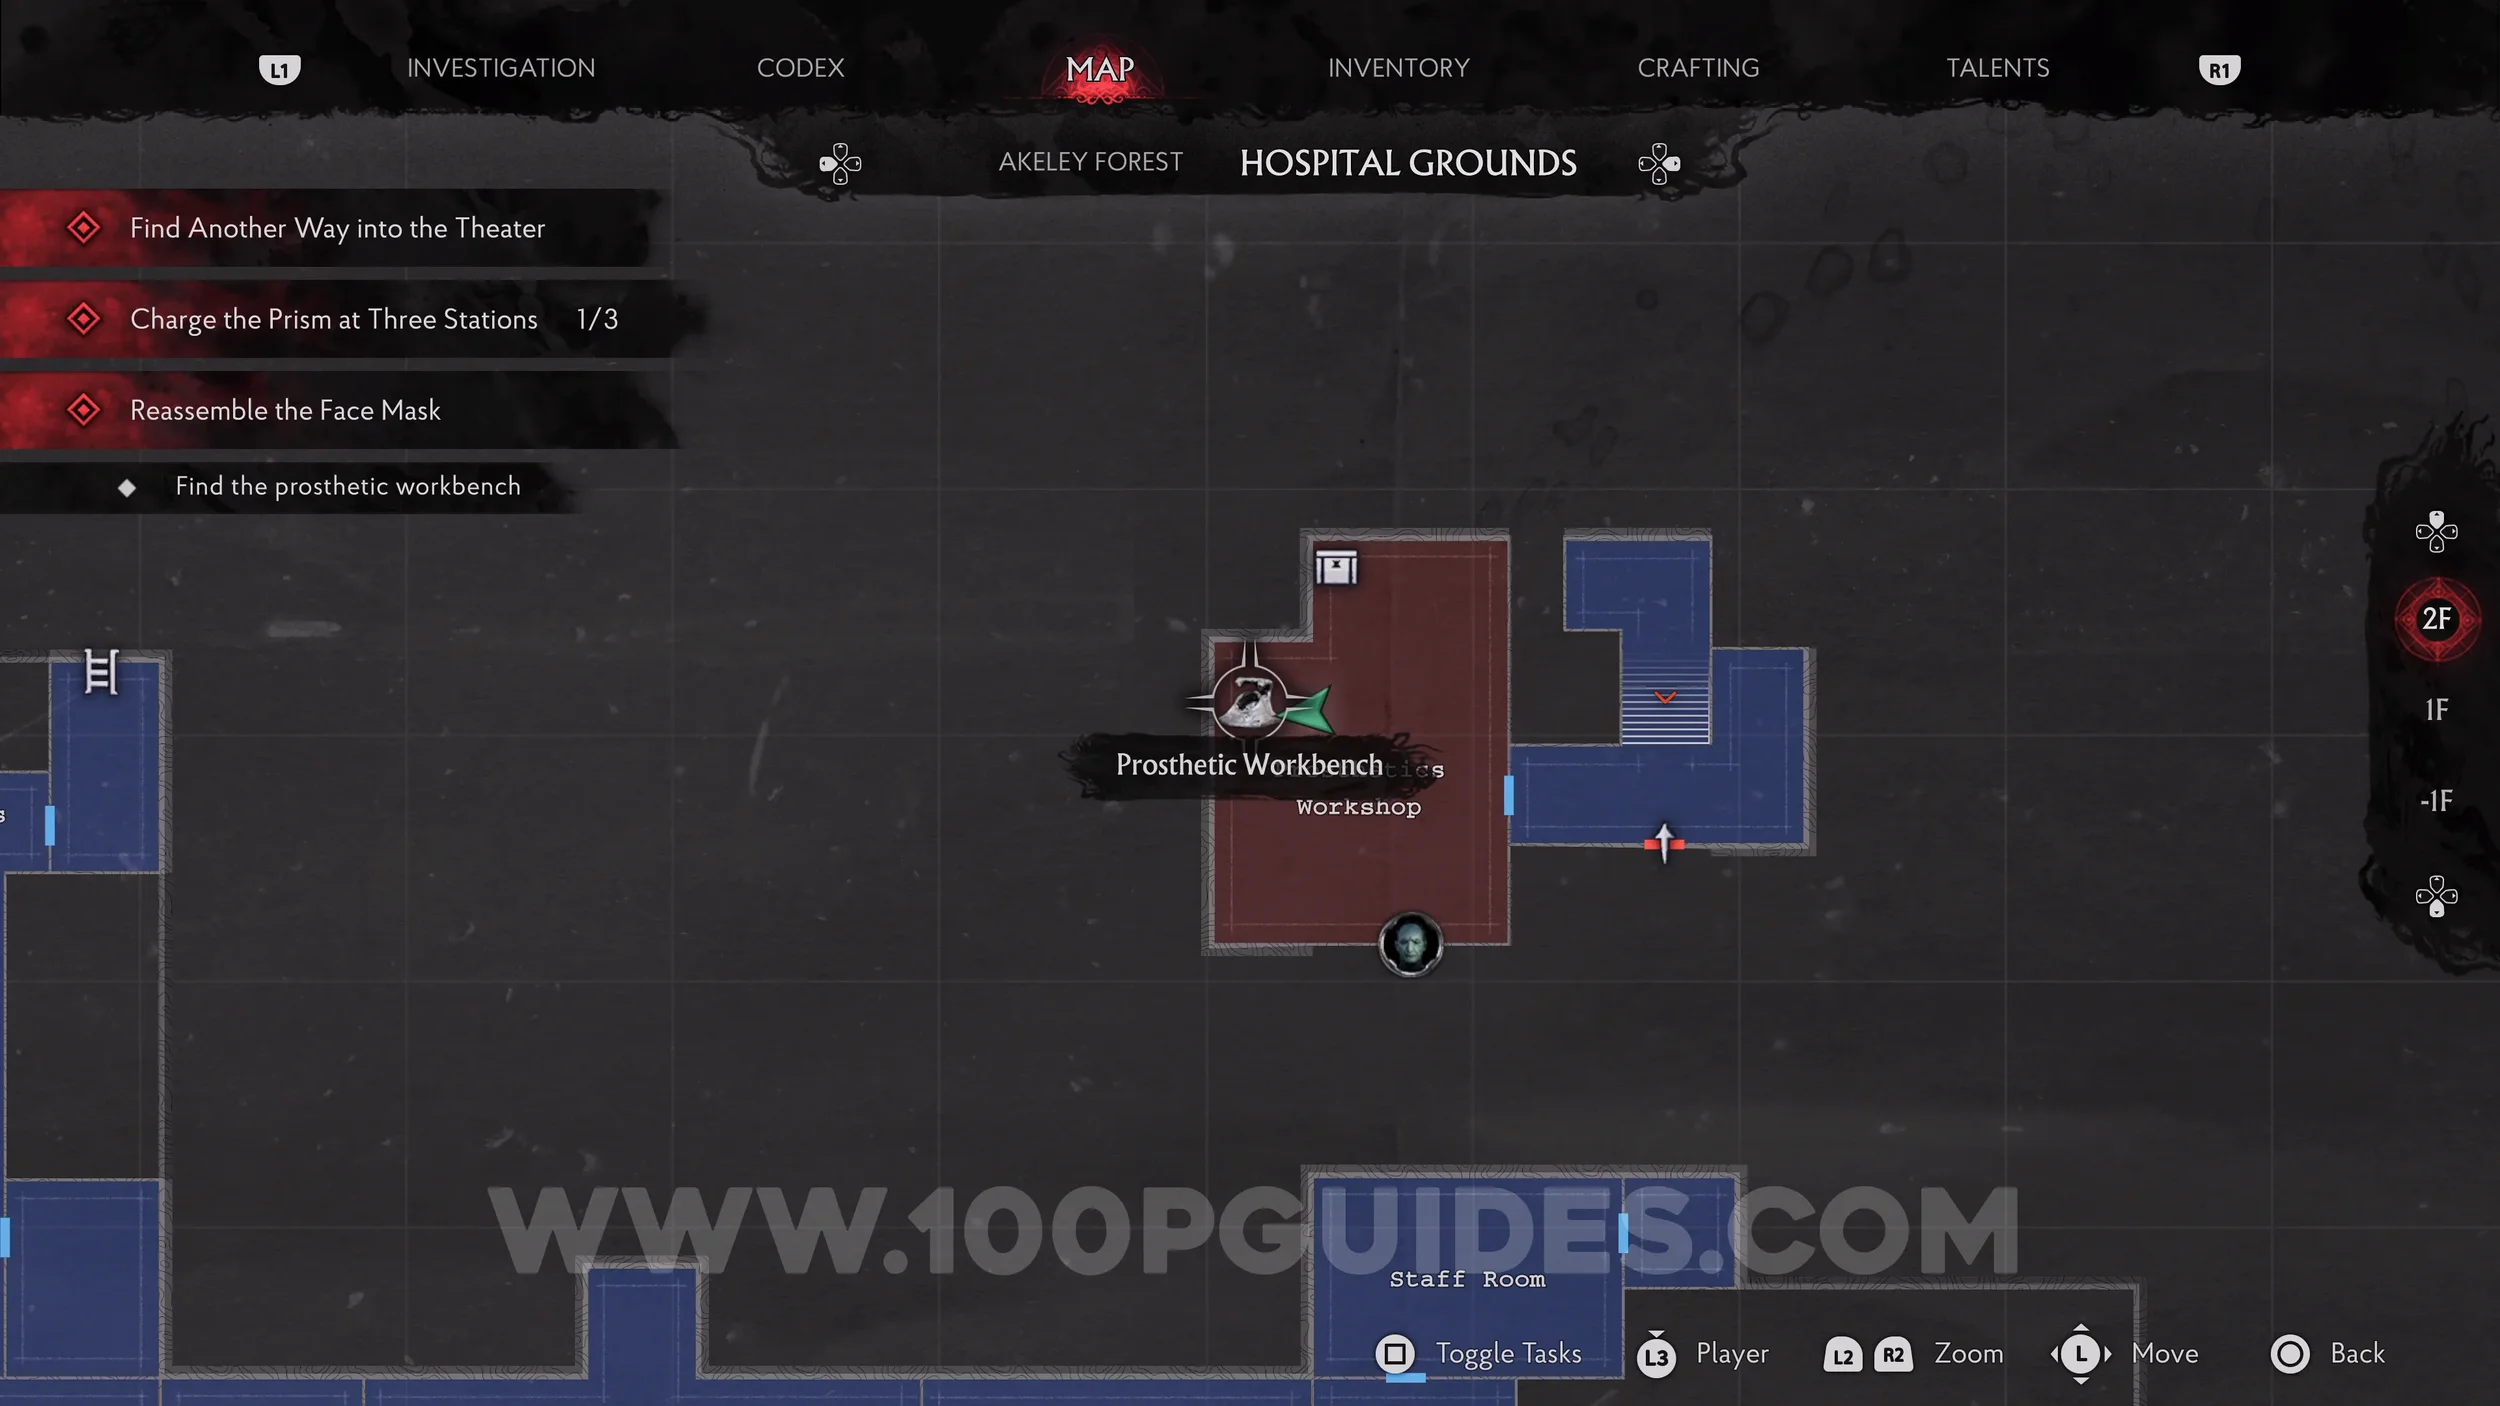
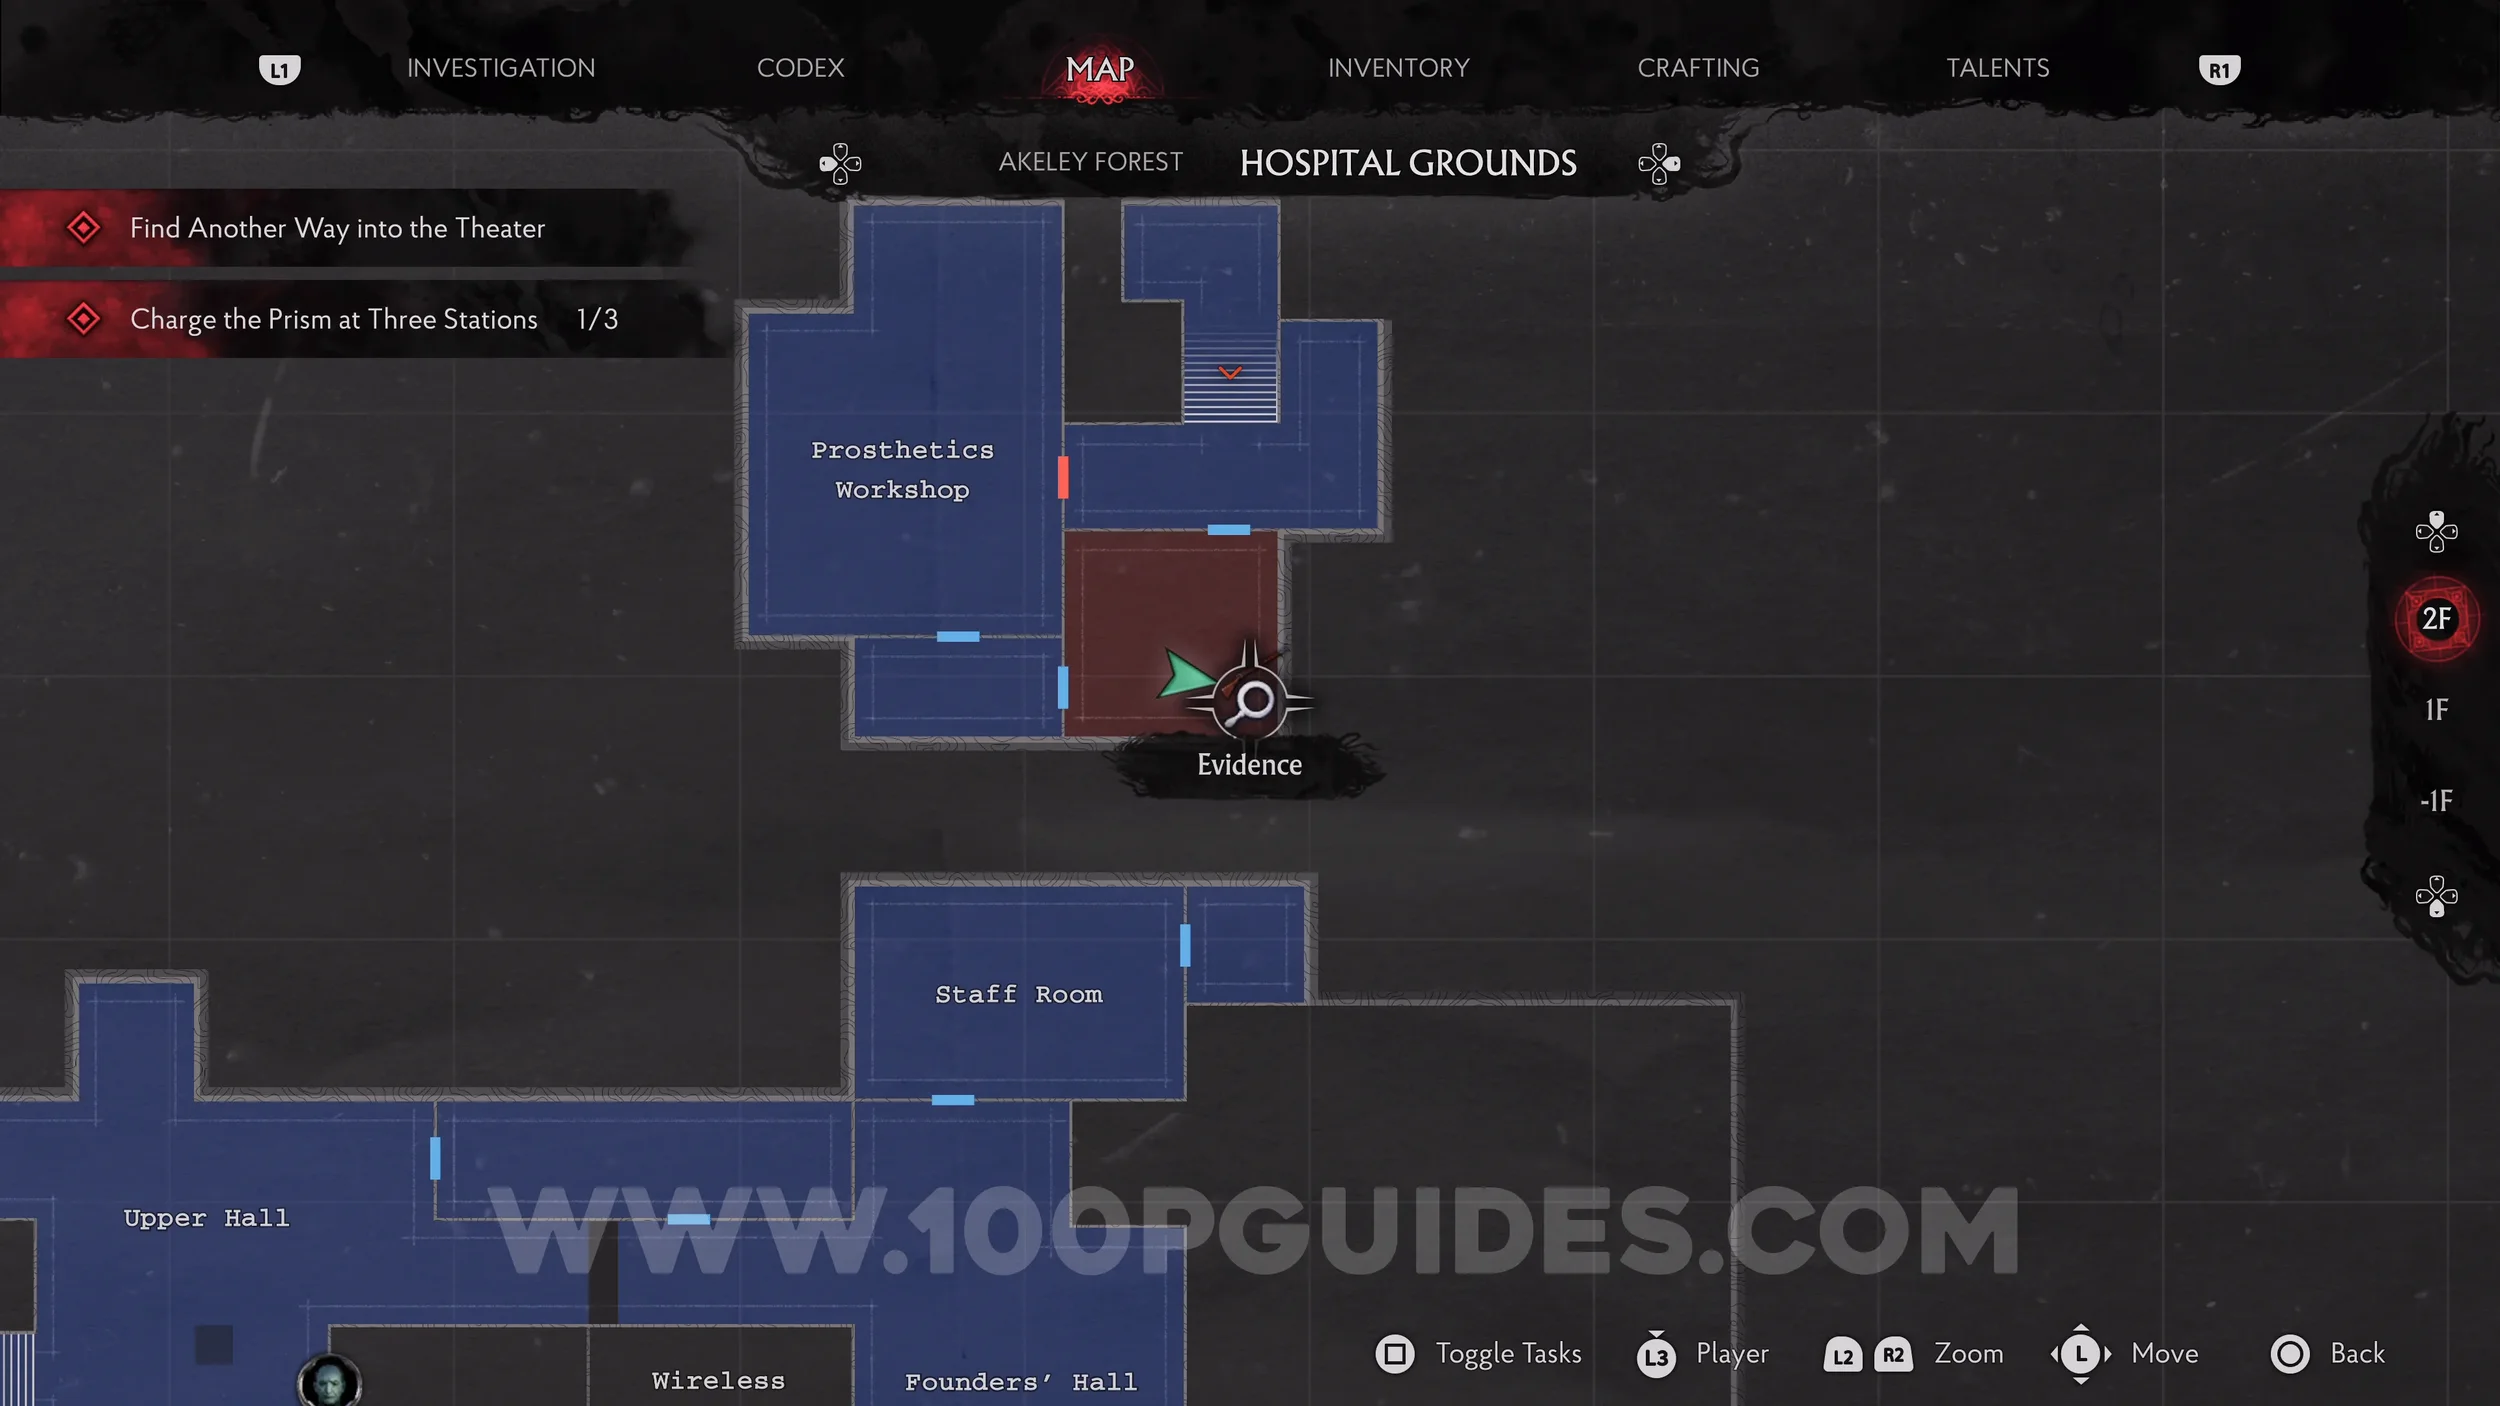
Key Item: Old Man’s Face Mask. Head out of the Orthotic Consulting via the eastern door, then head up the stairs to the Prosthetics Workshop. Use the Workbench to fuse the two face halves.
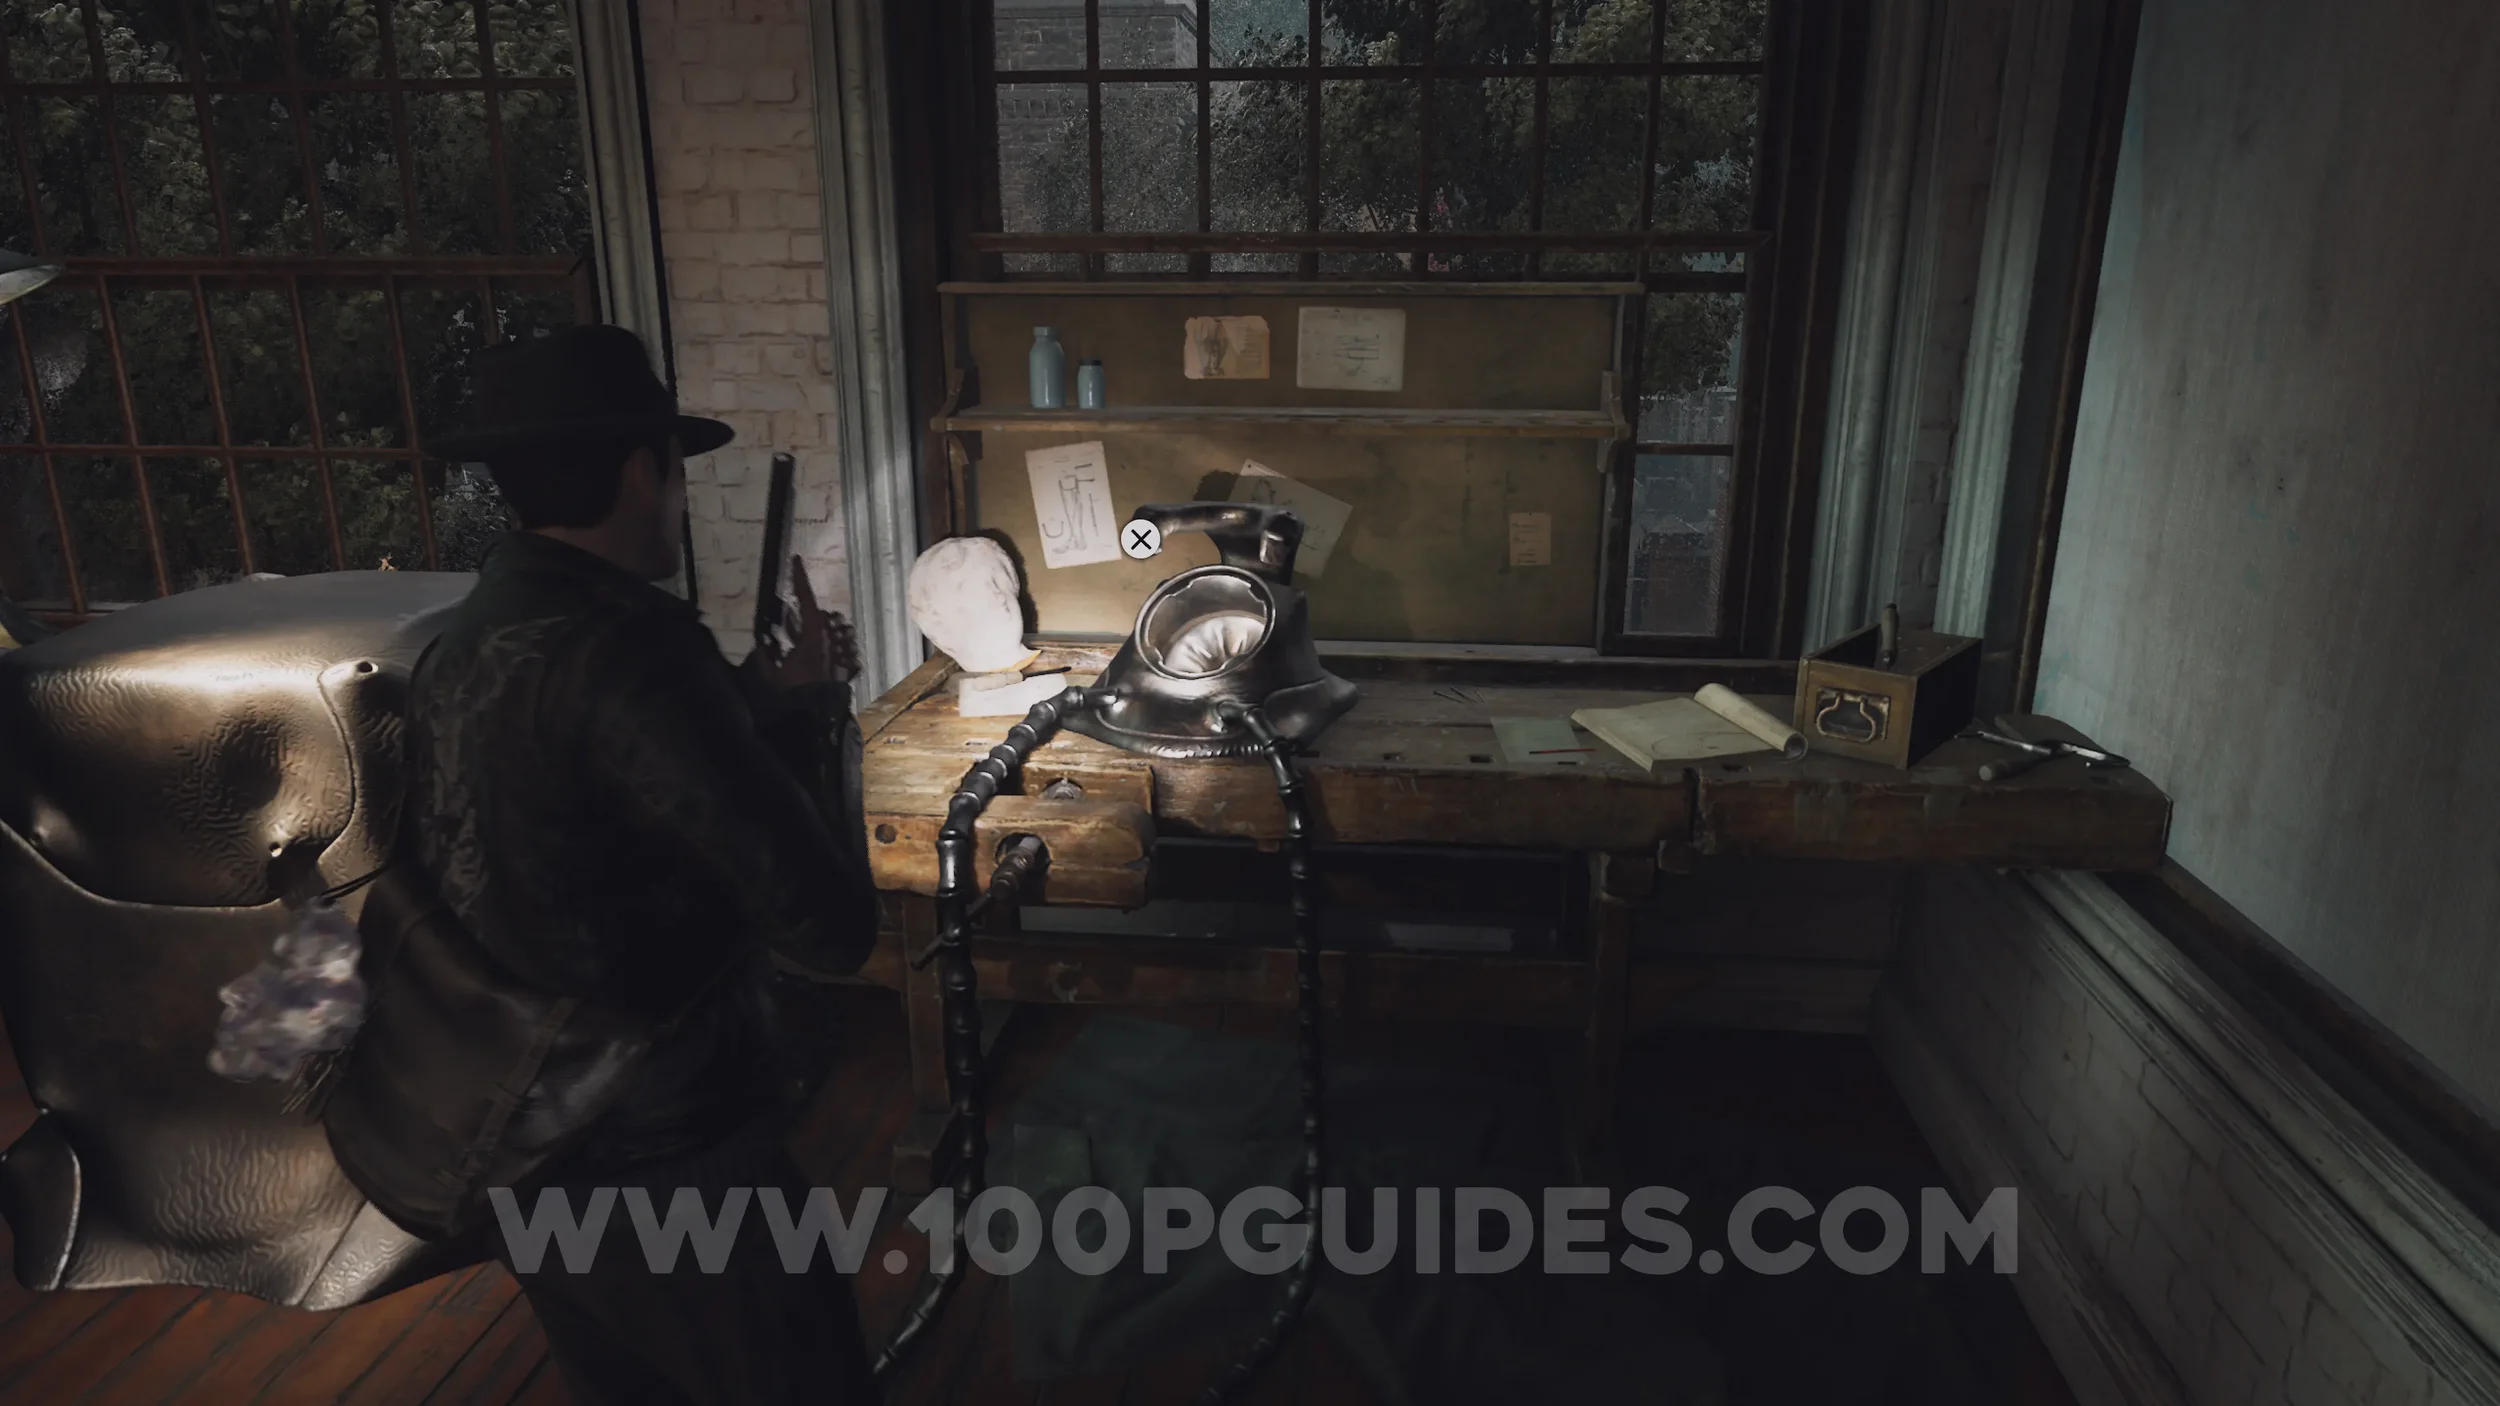
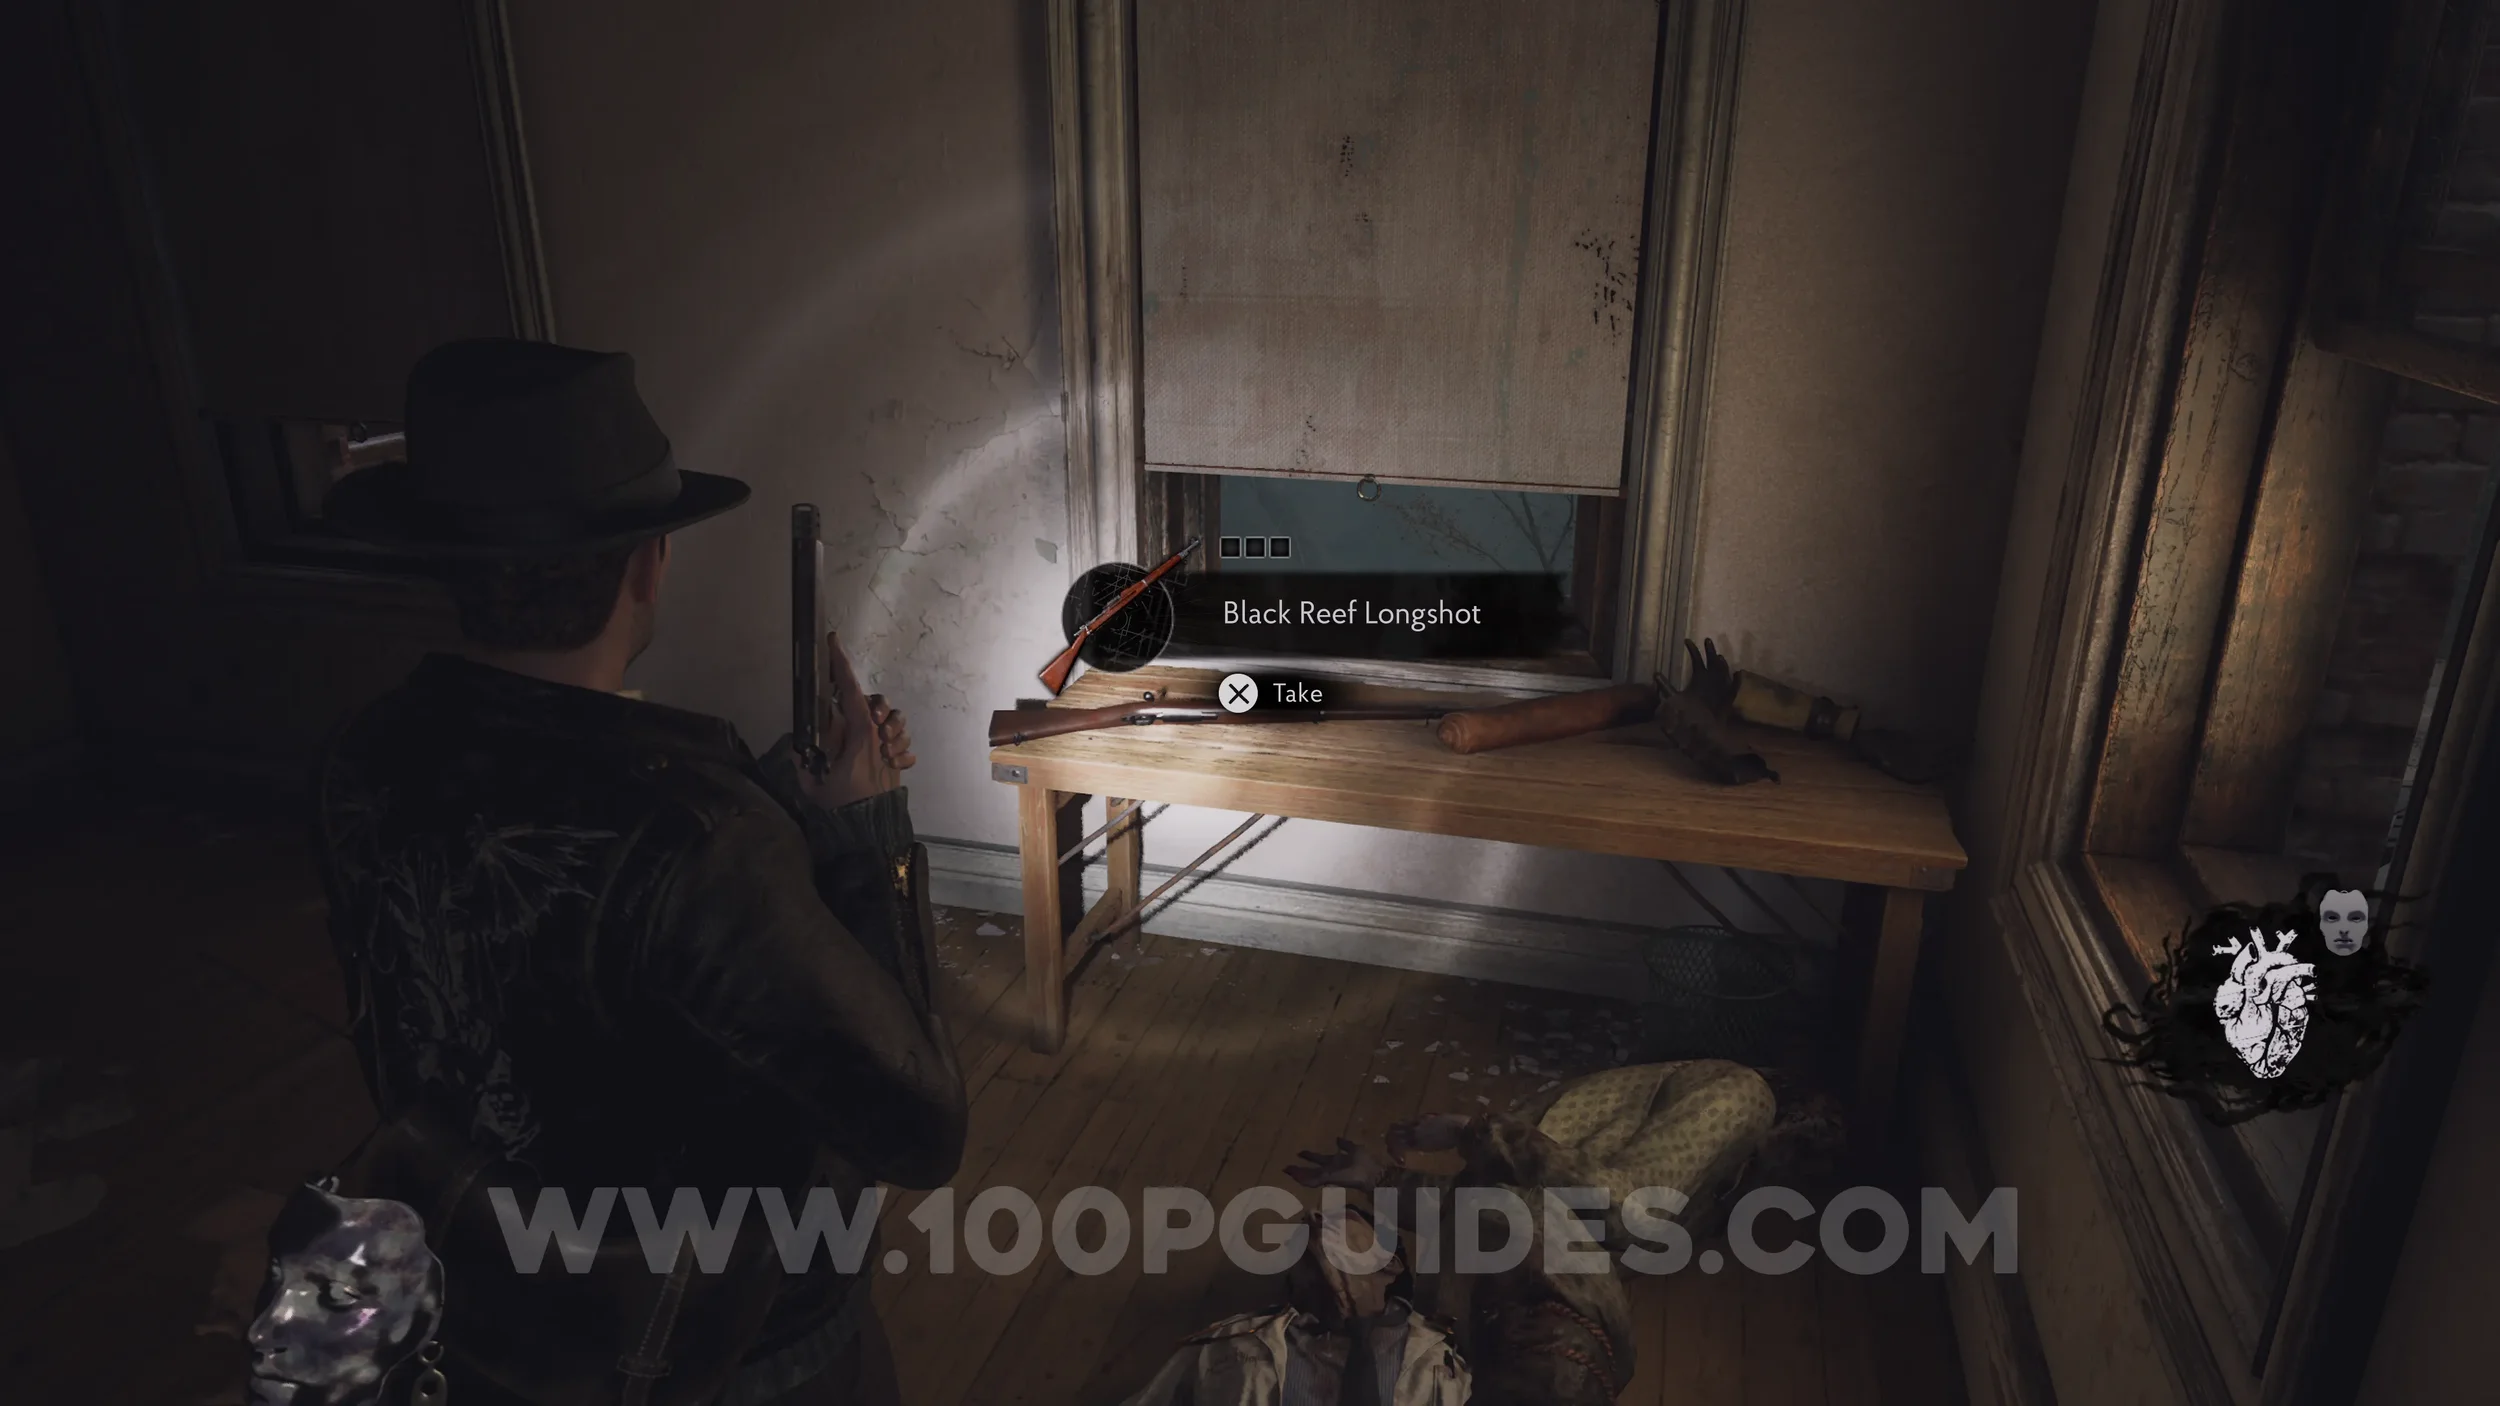
Evidence: Note with Digit ‘0’. Use the Old Man's Face Mask to open the southern door in the Prosthetics Workshop. You'll then see the evidence on the table in the next room.
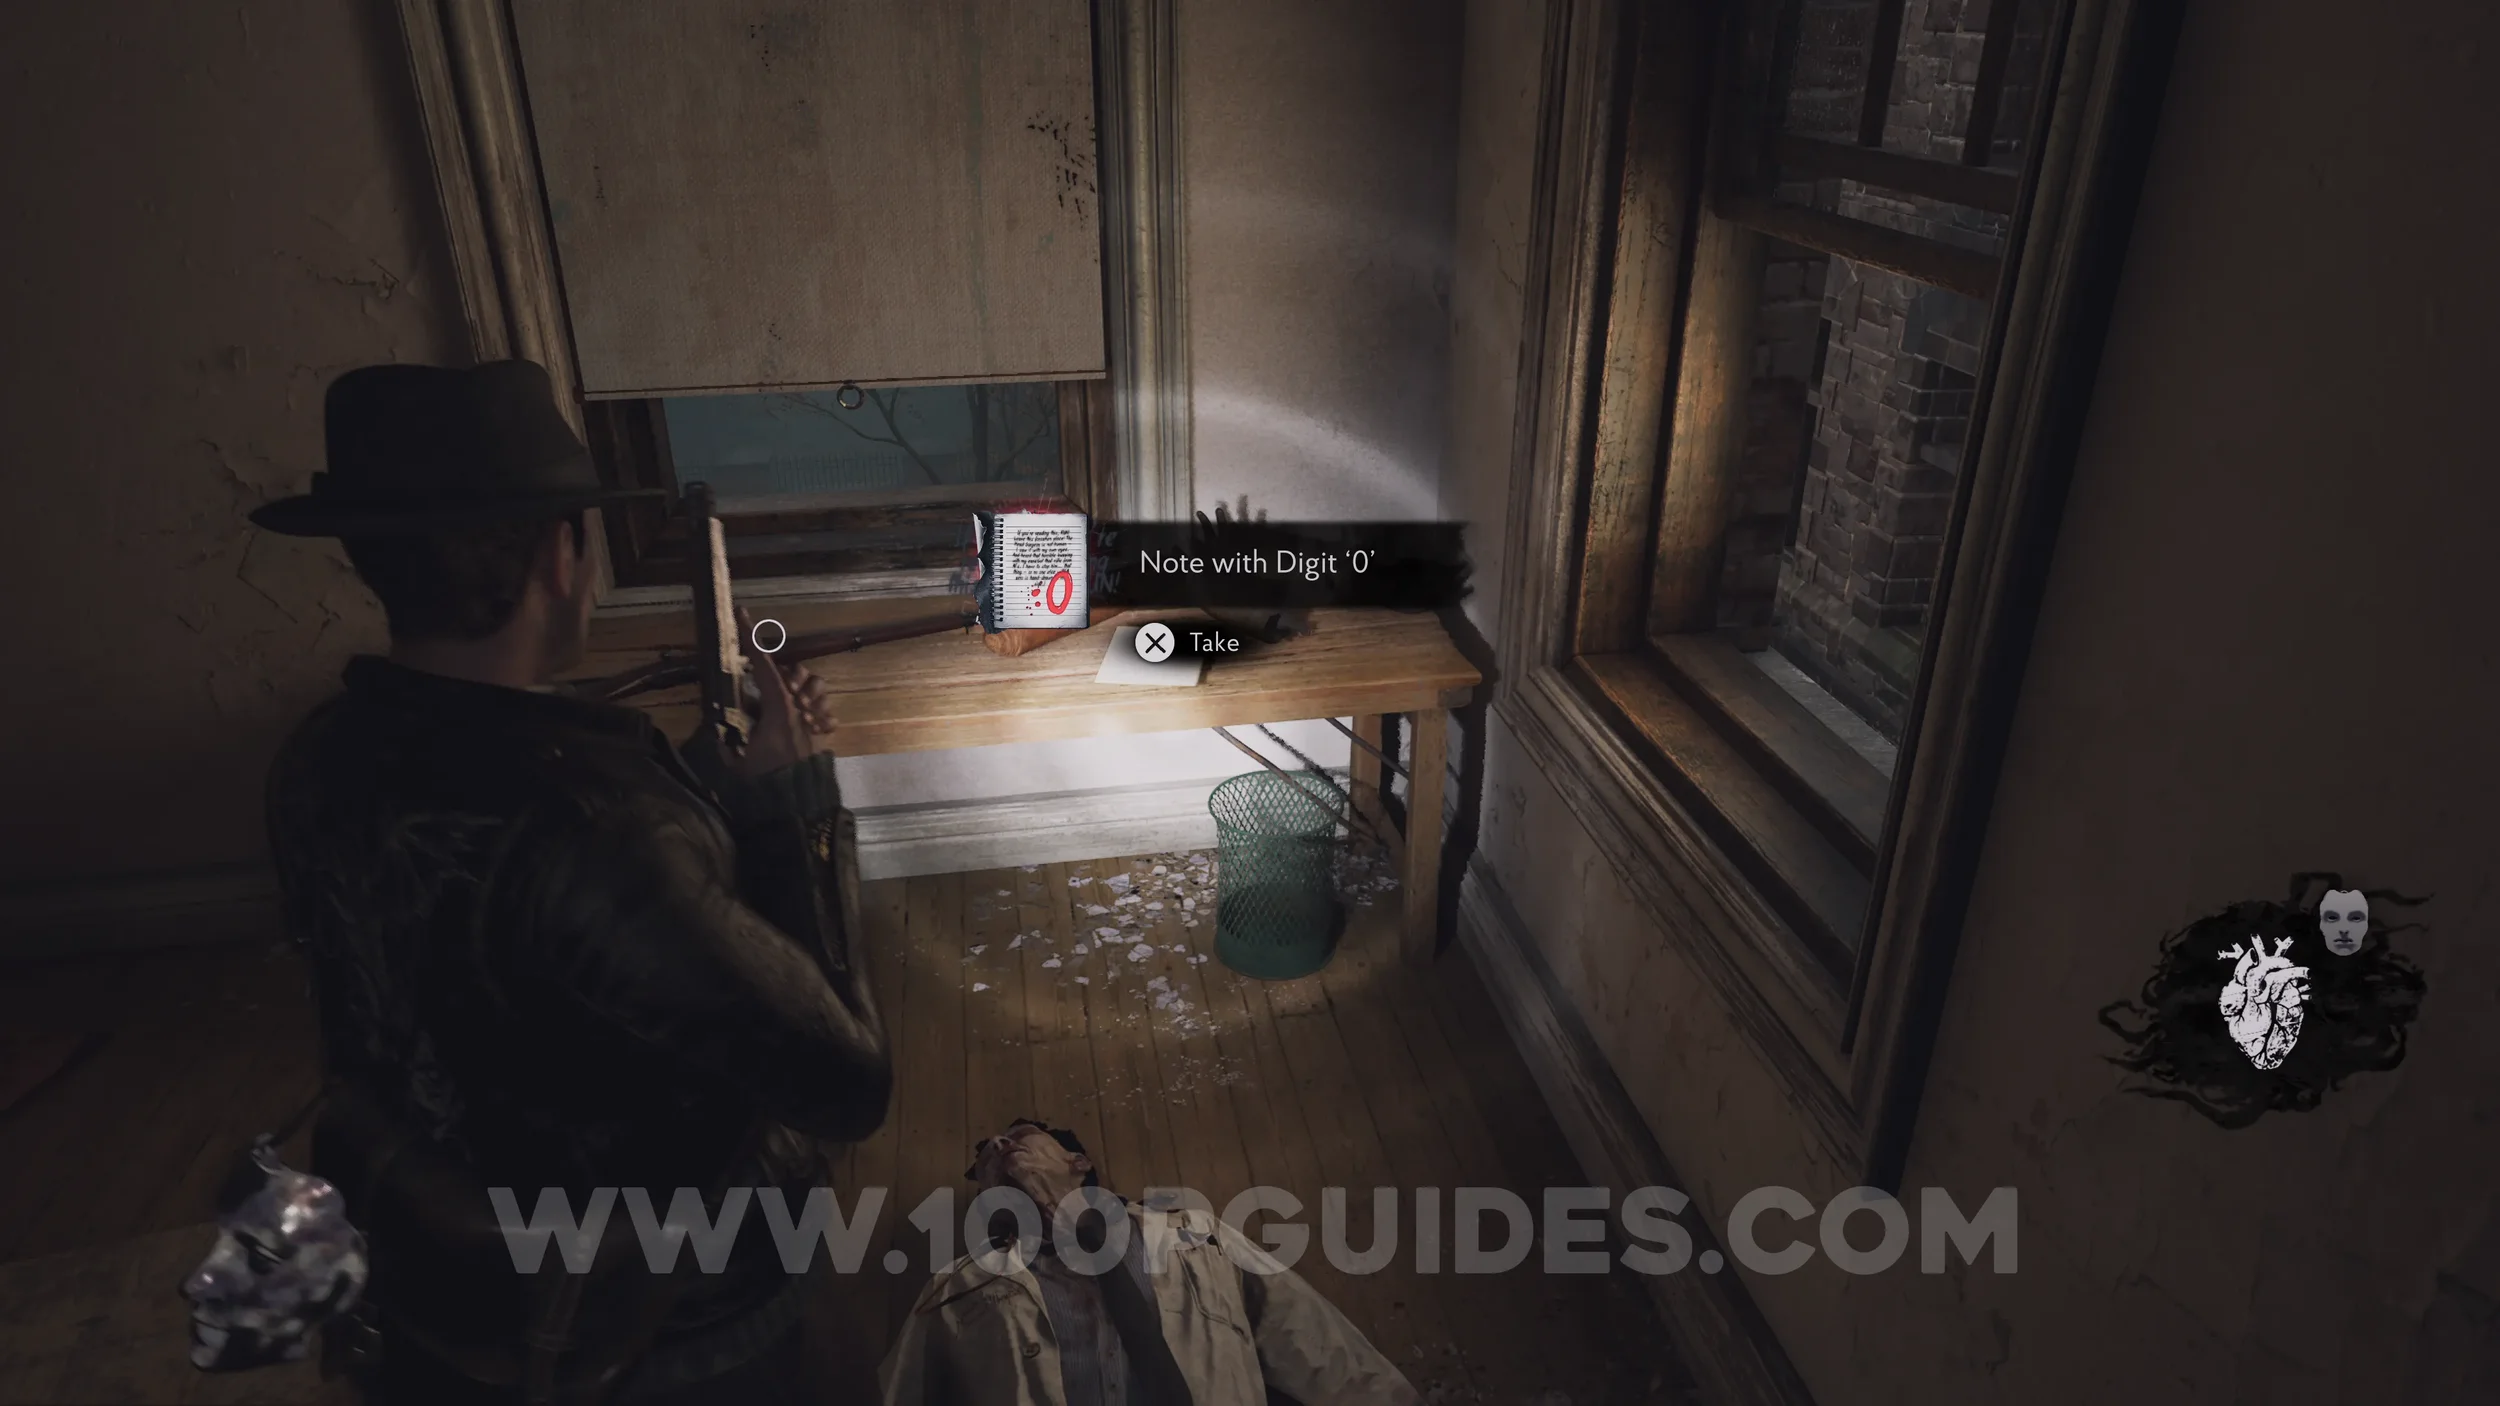
Weapon: Black Reef Longshot (Rifle). On the same table as the previous evidence.
Evidence: Note About Wireless Room. Head downstairs to 1F and south to exit onto the Therapeutic Garden. As you make your way through it, you'll hear someone talk over the speakers and you'll get the evidence.
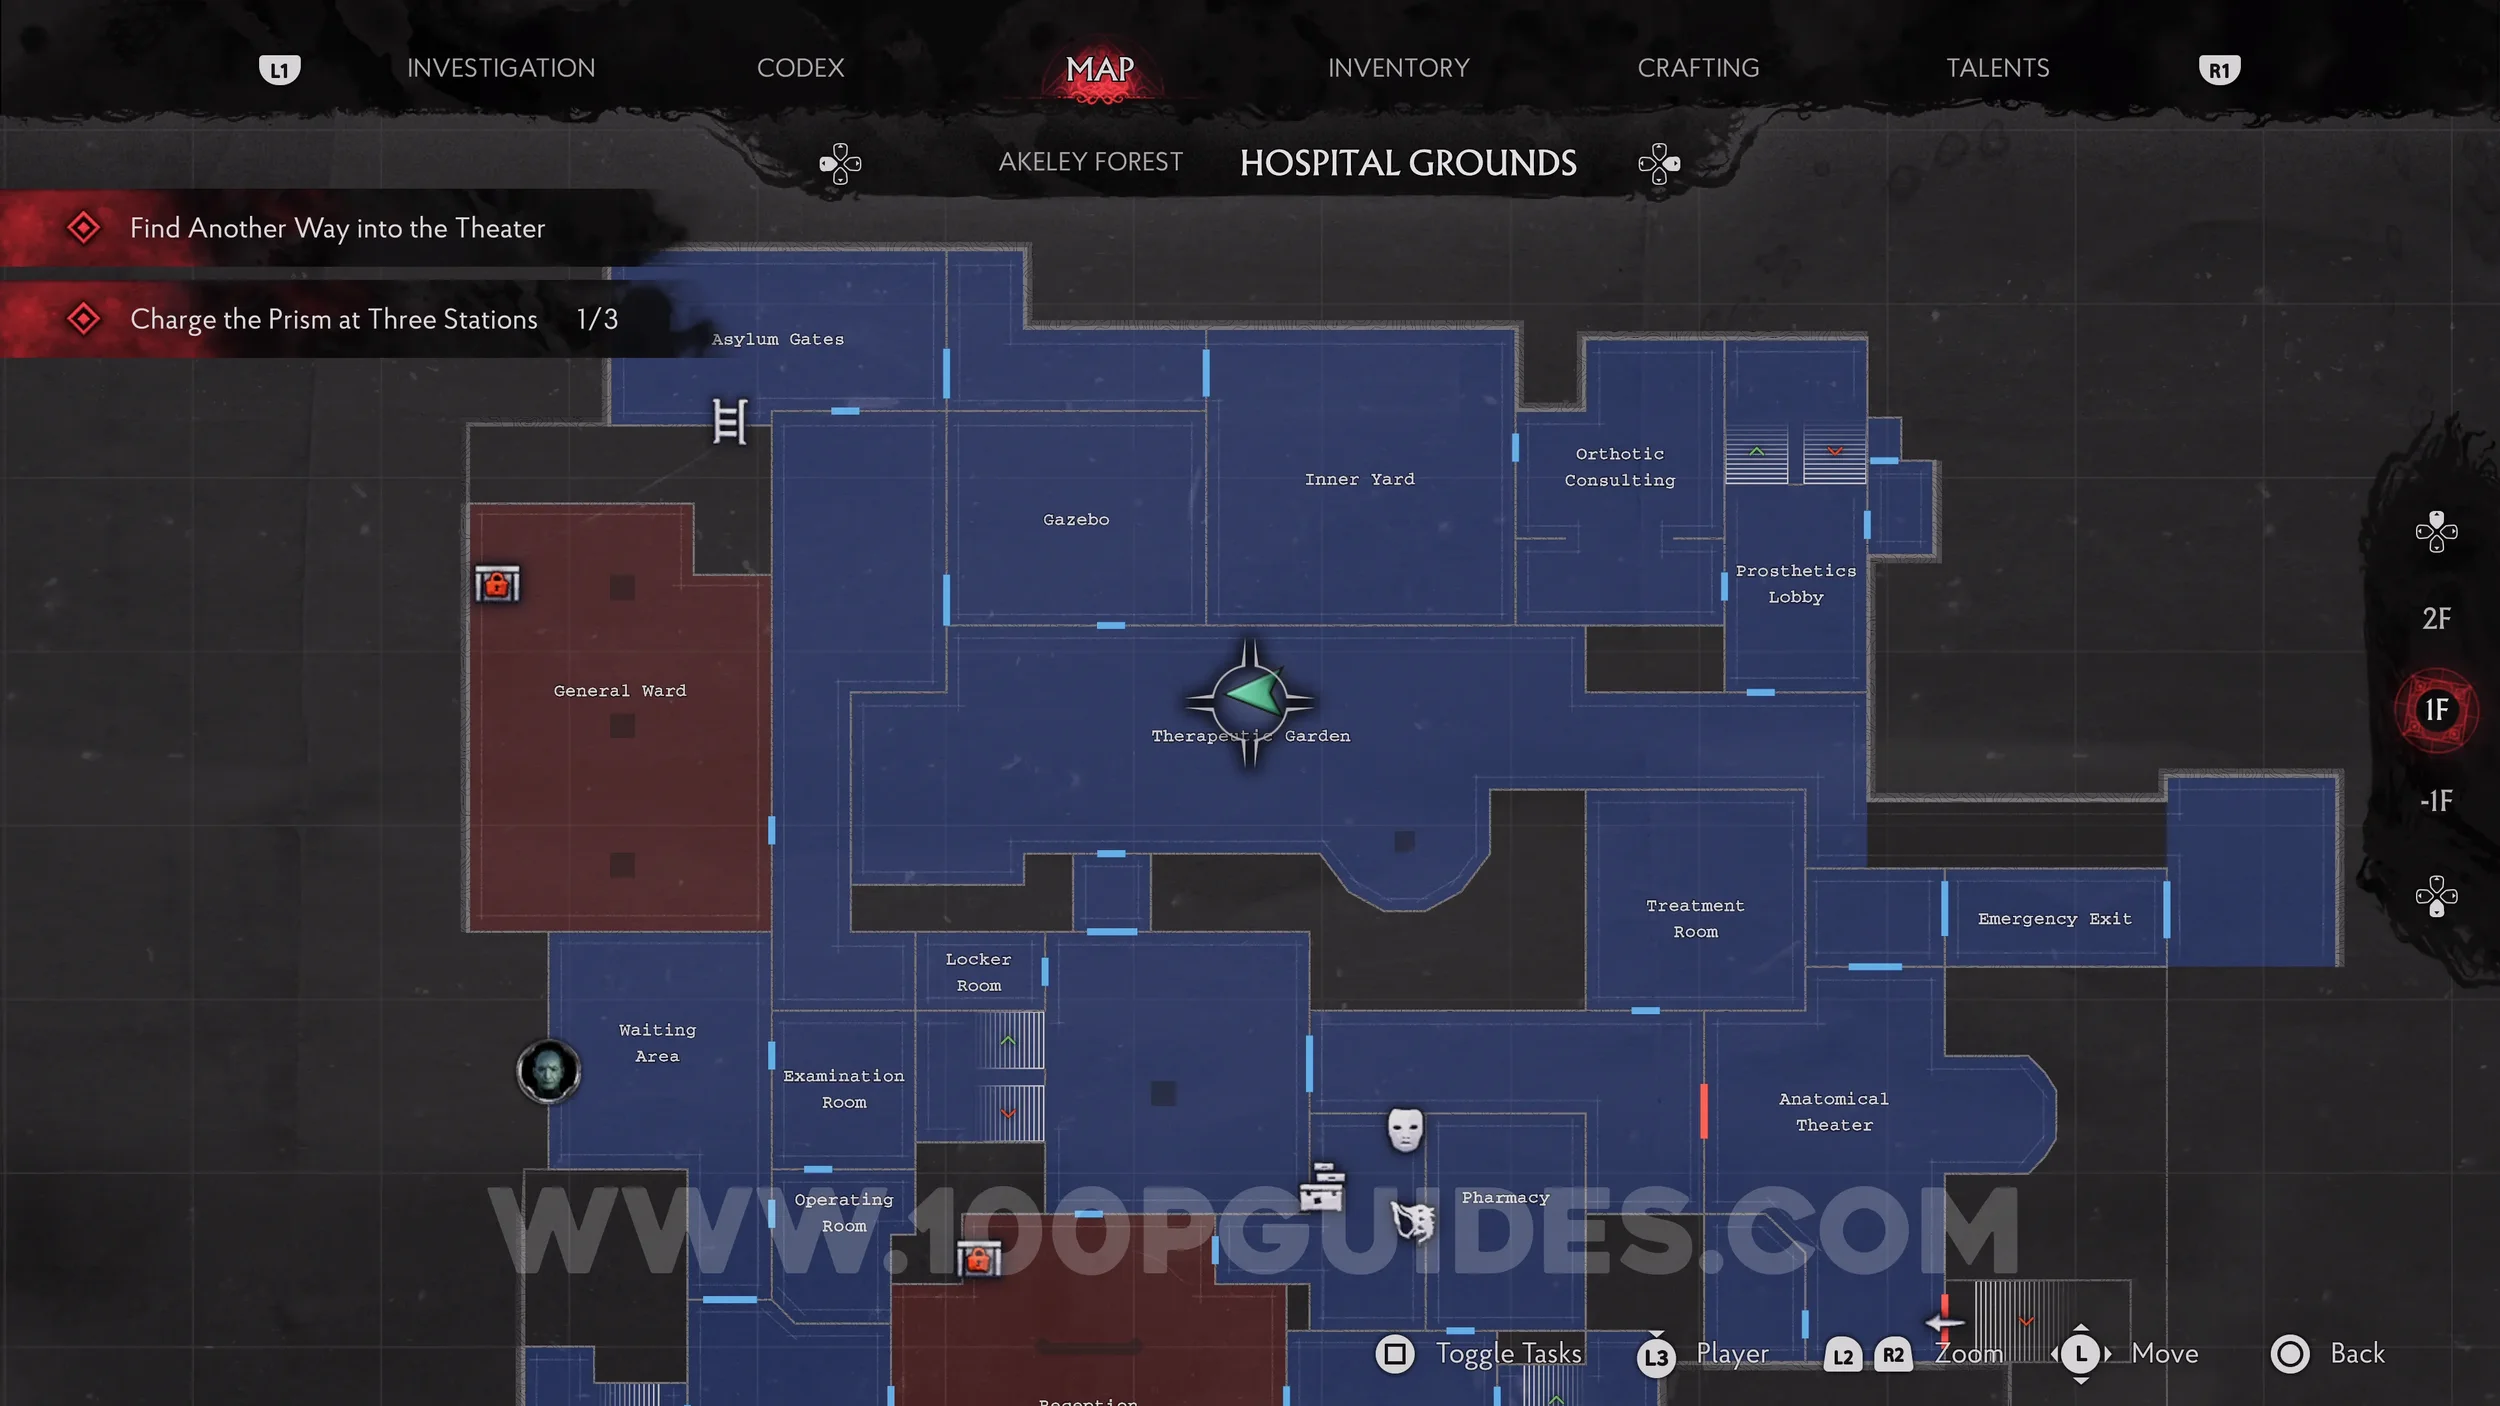
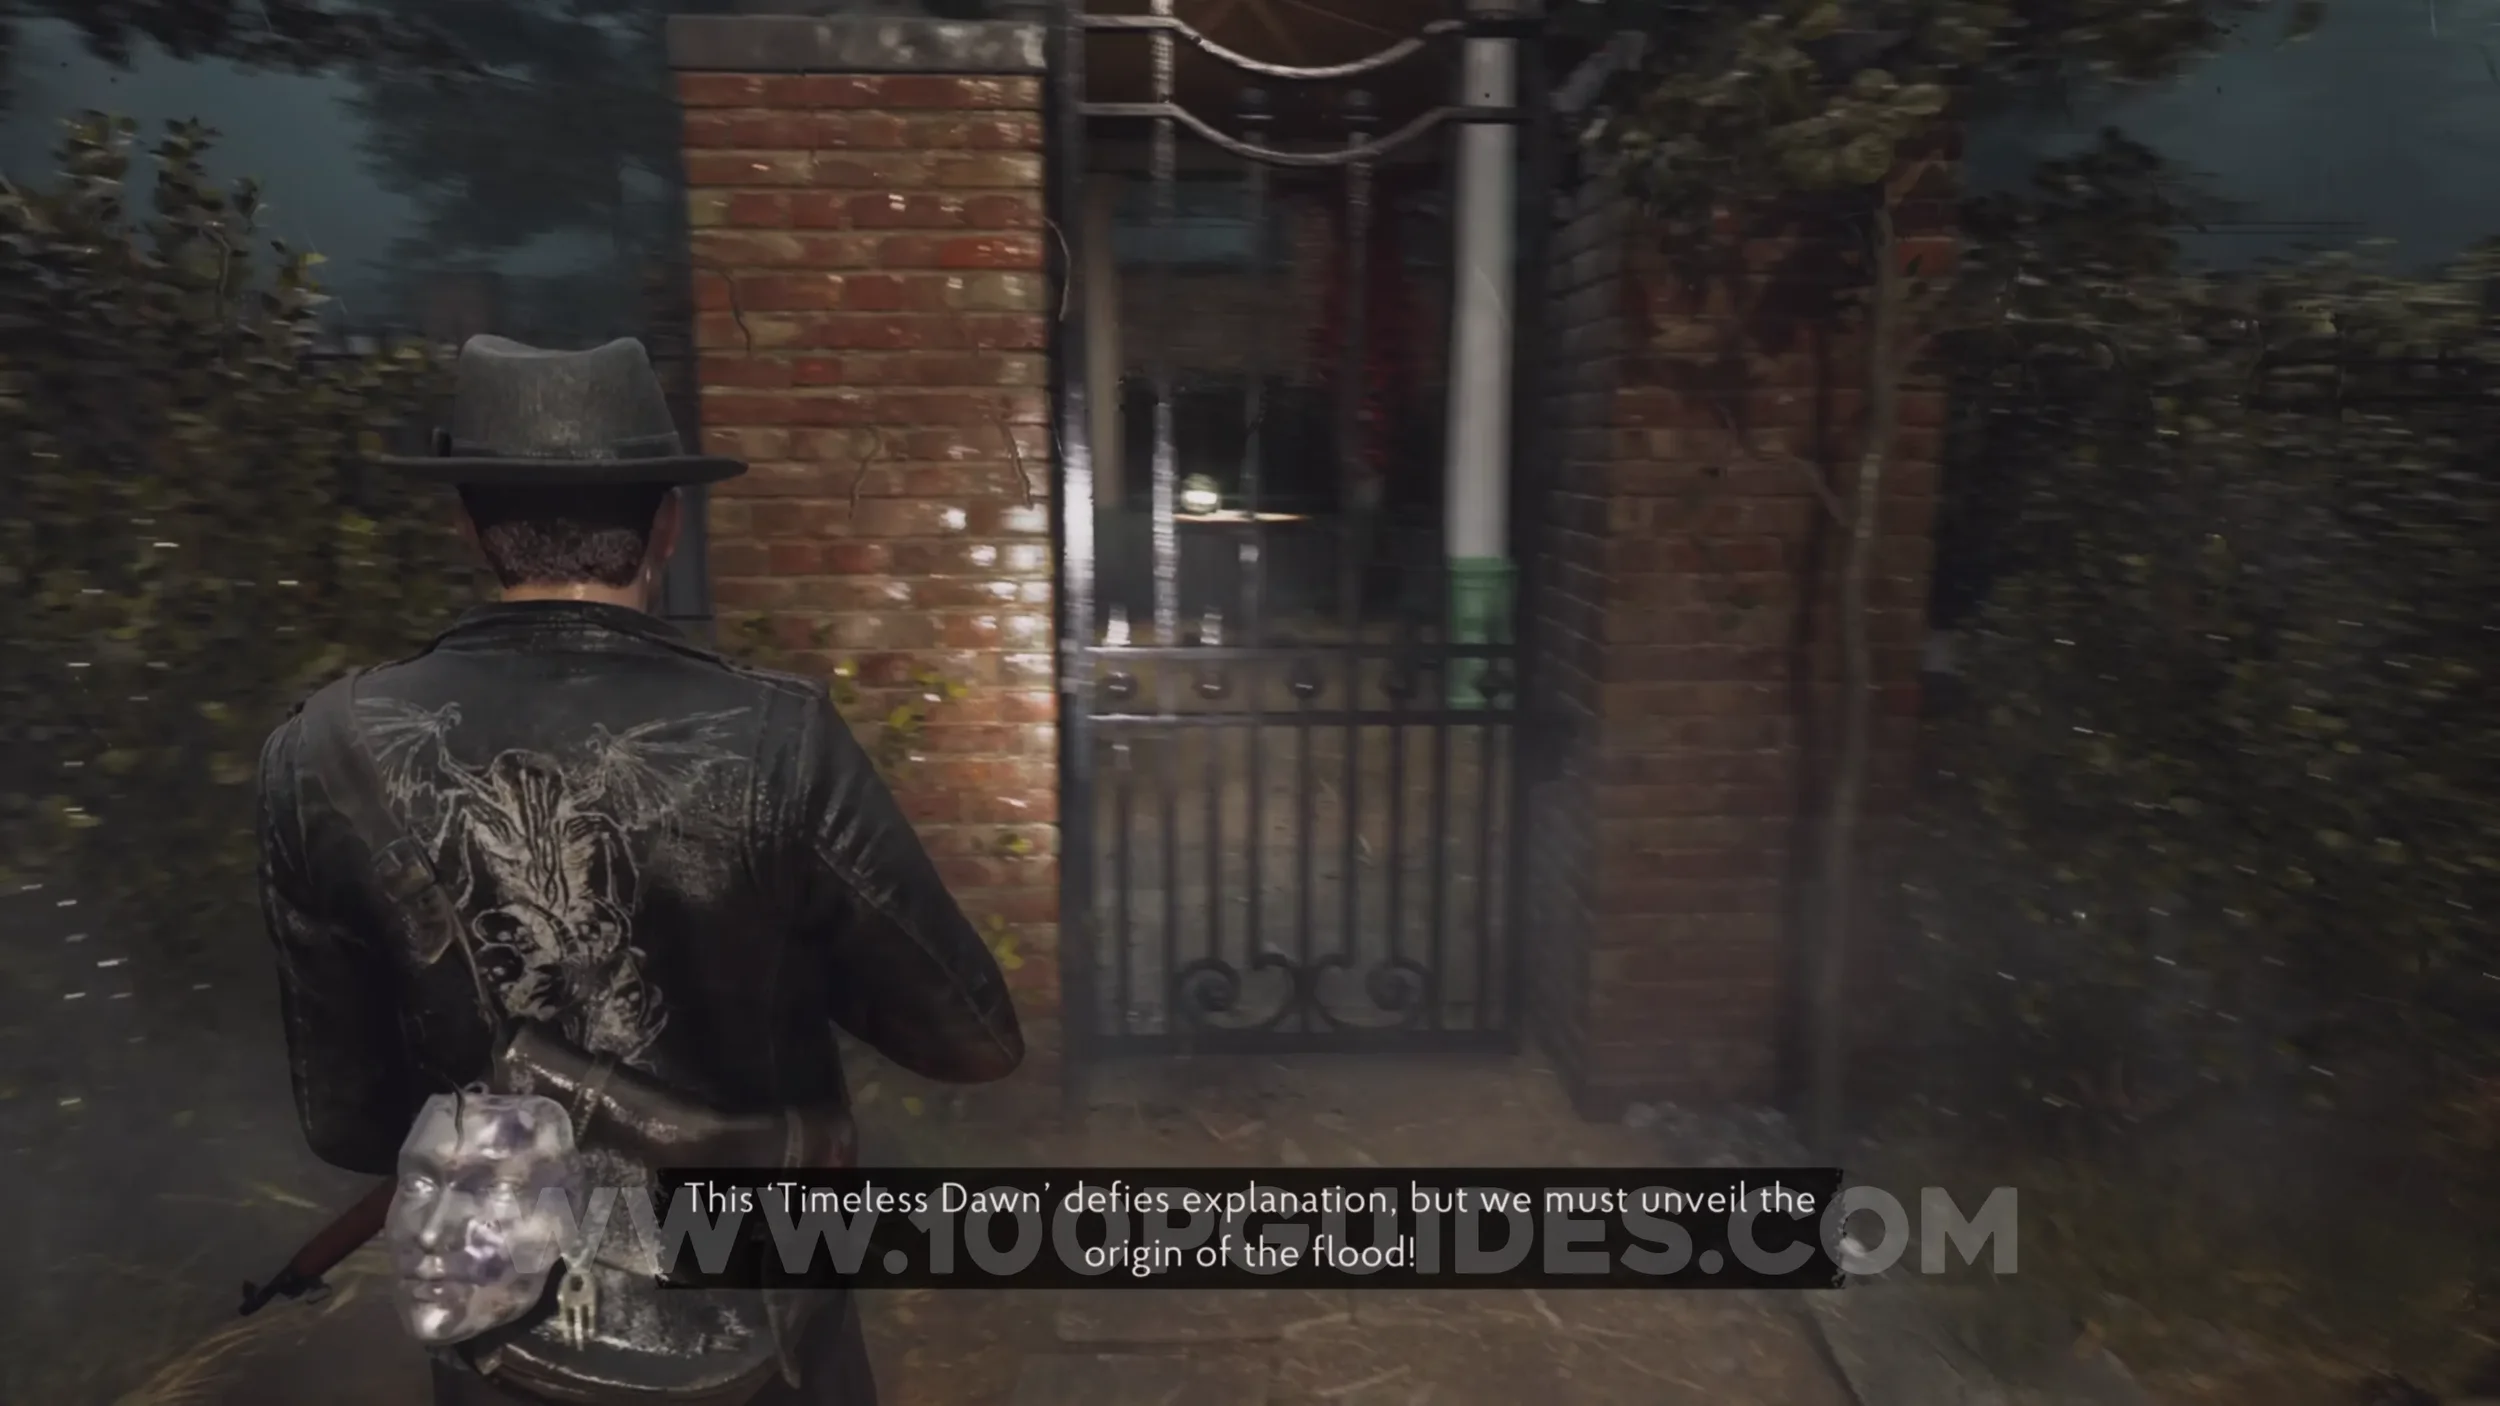
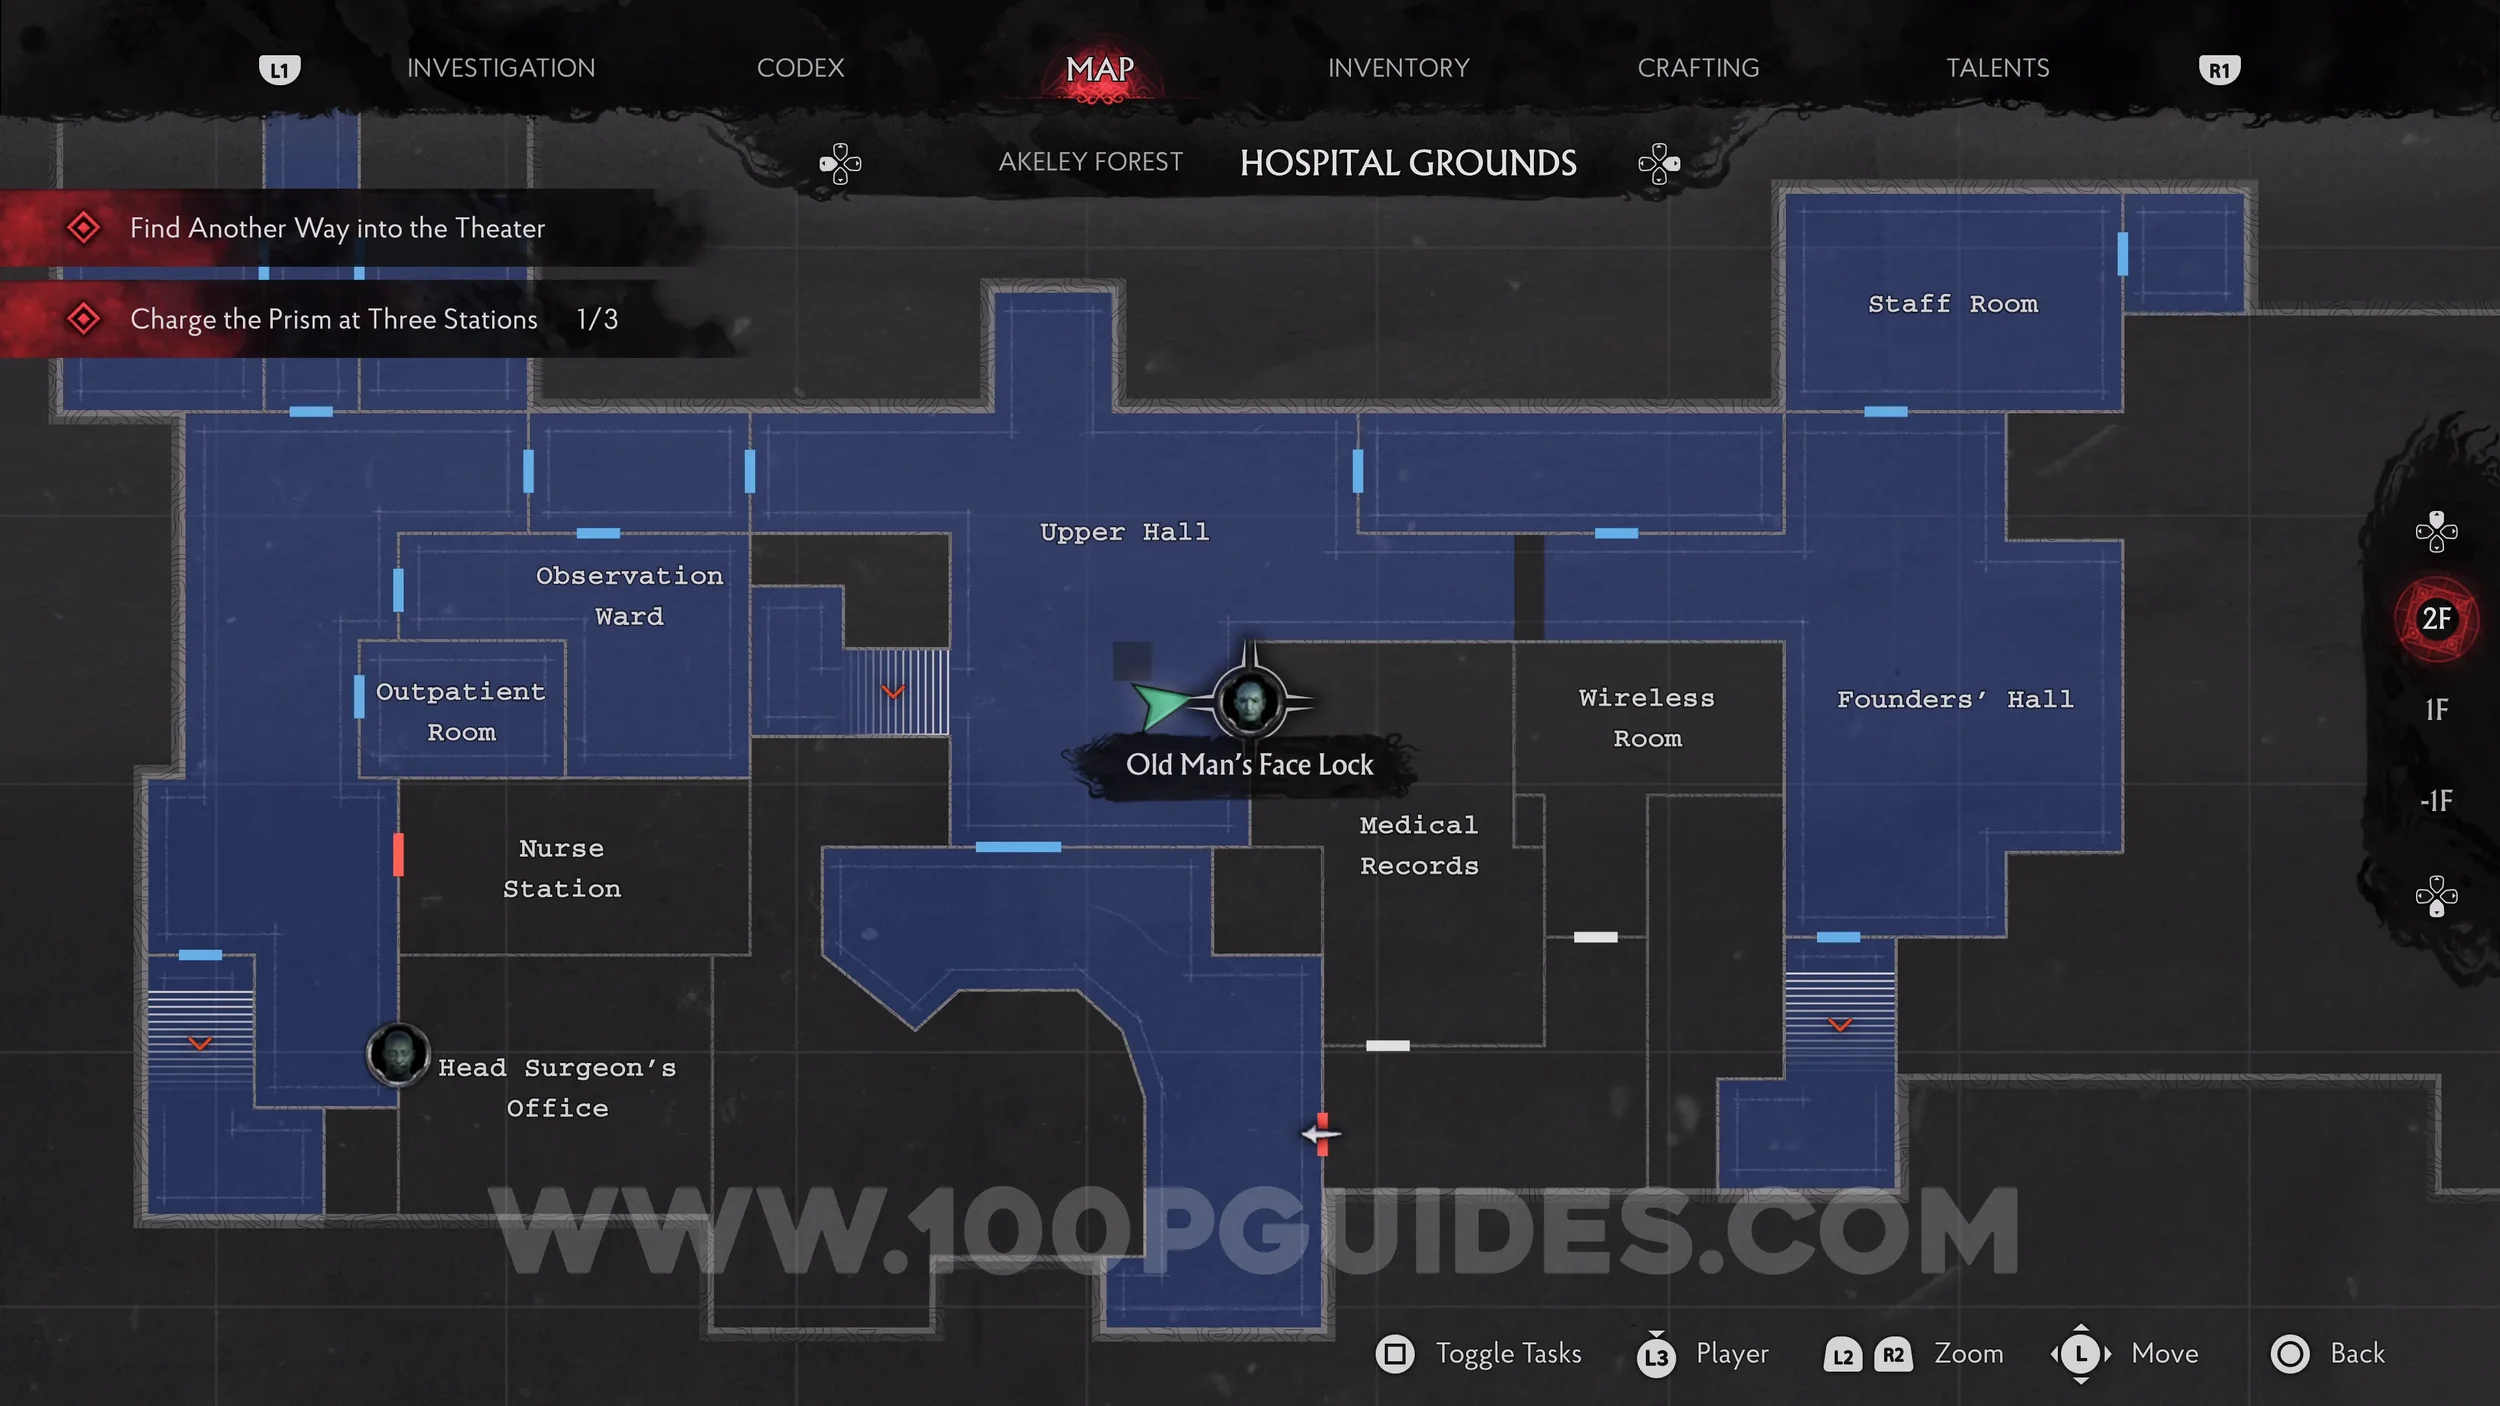
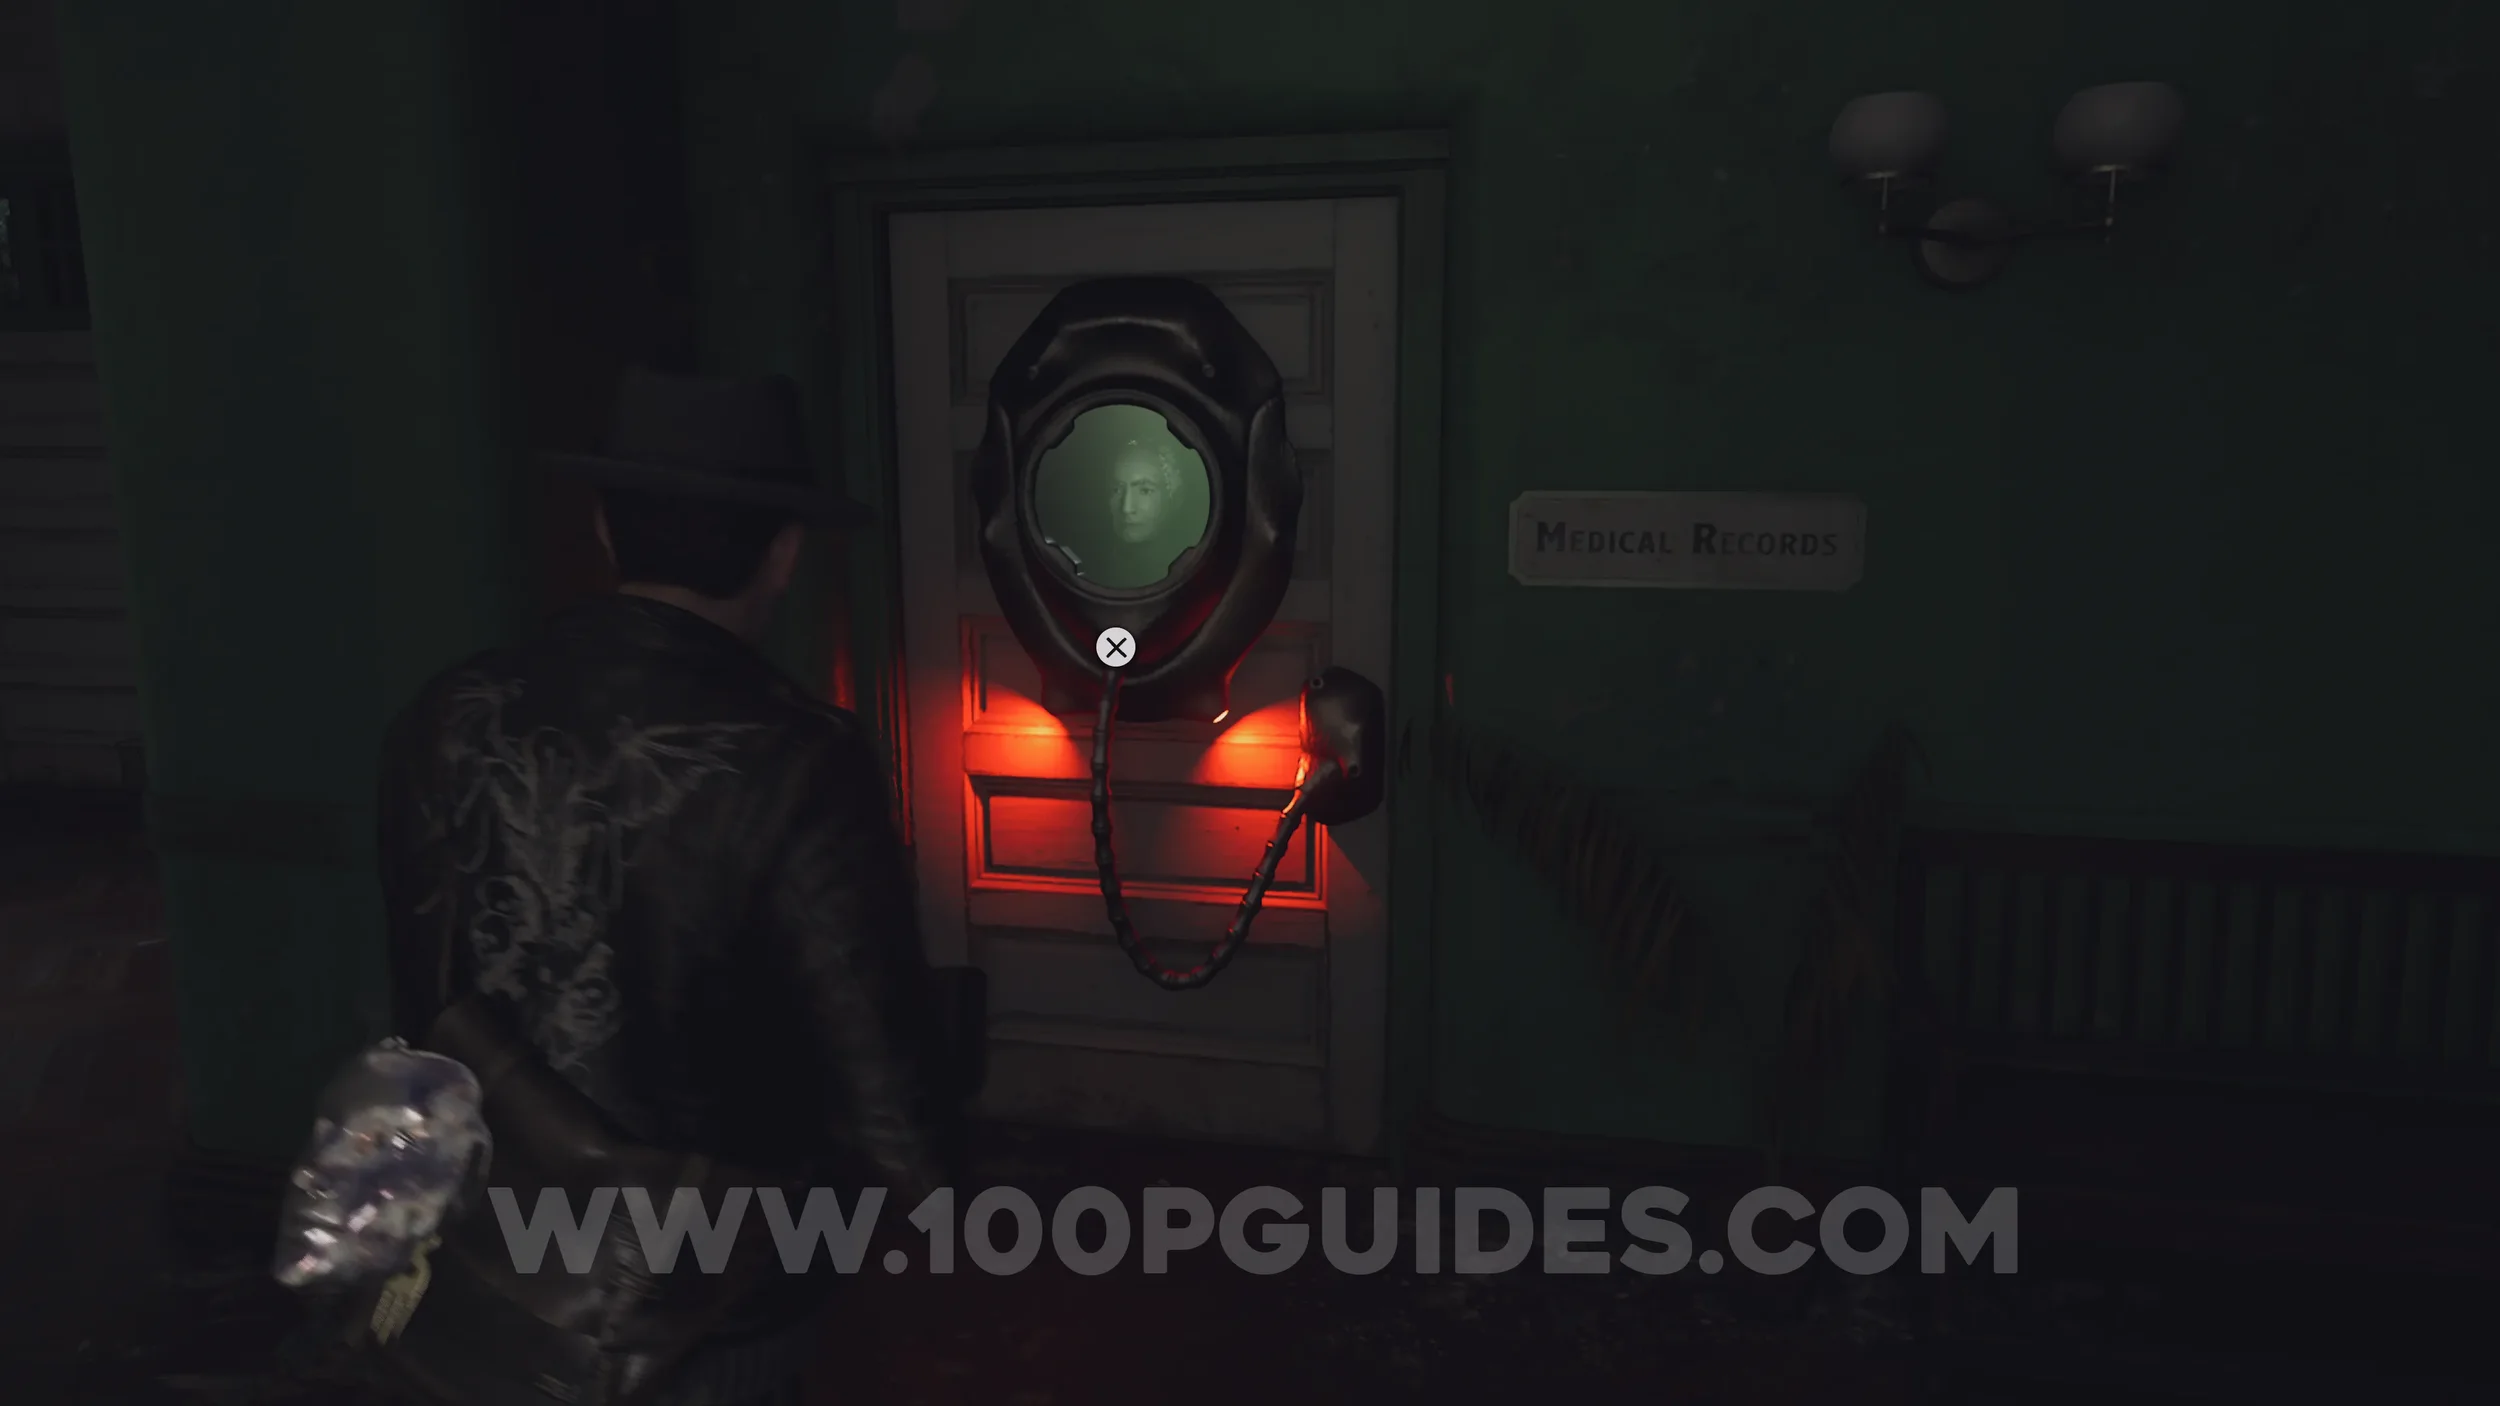
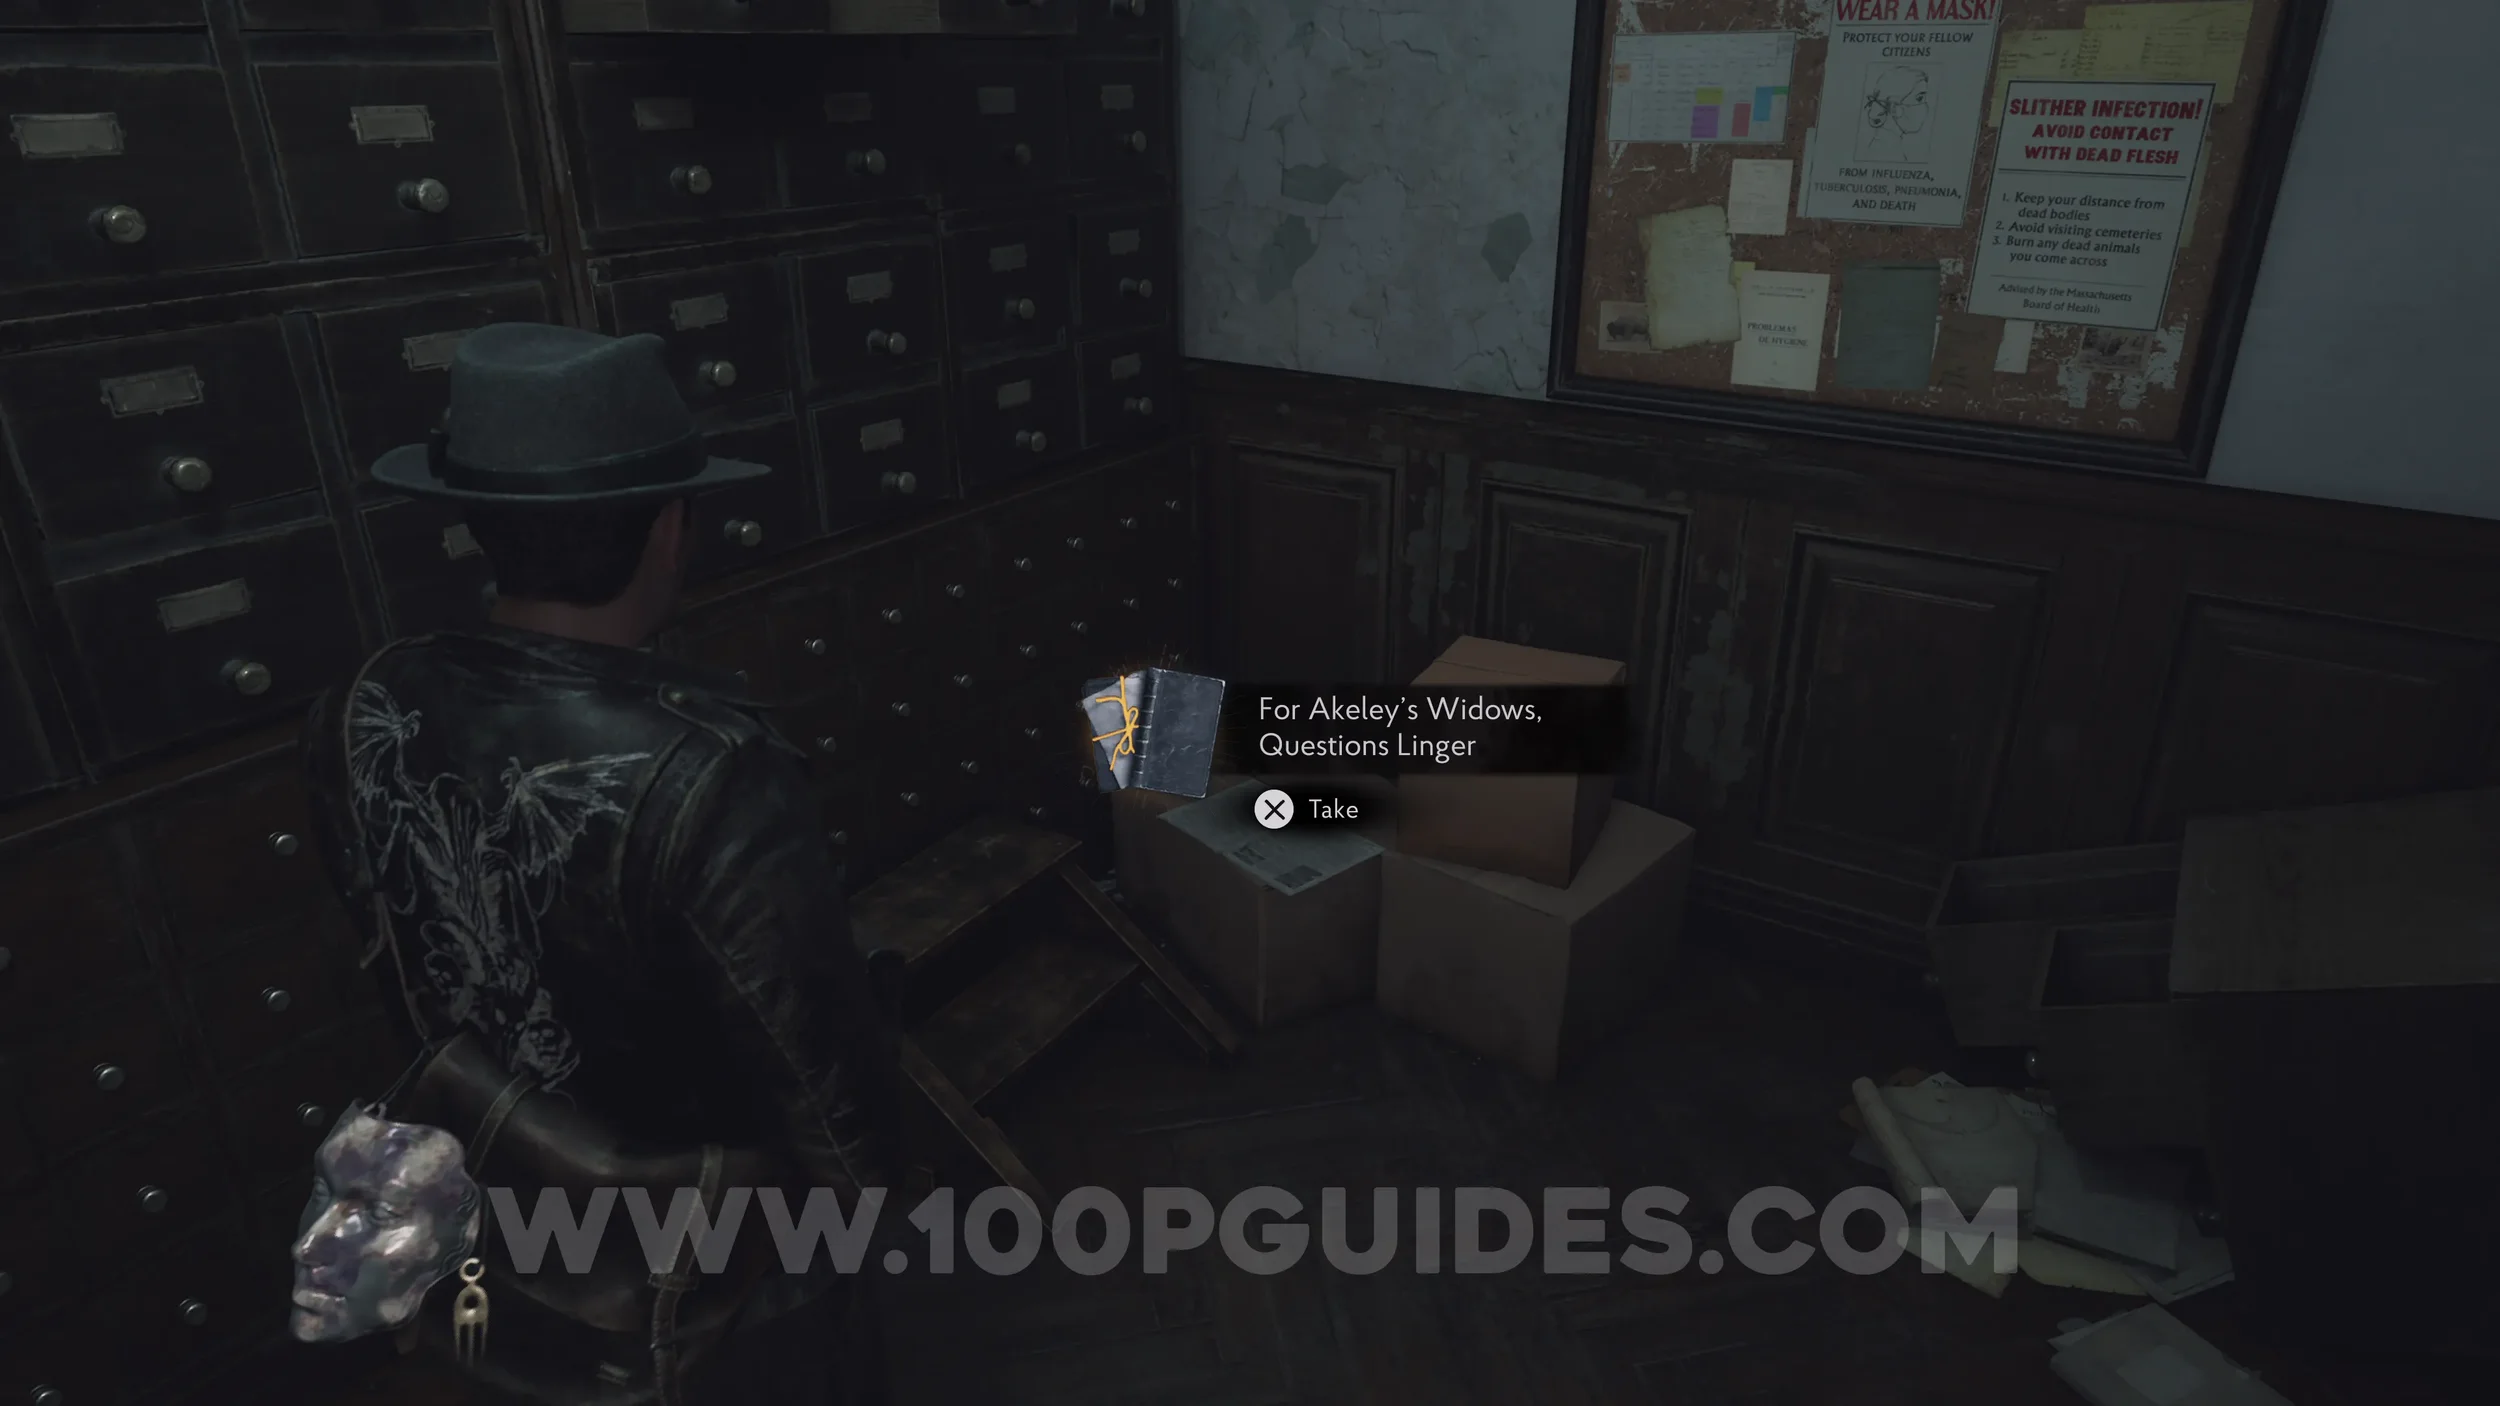
Lore Codex: For Akeley’s Widows, Questions Linger. Head up to the Upper Hall on 2F and open the door with the Old Man's Face Mask. You'll see the collectible in front of you on the other side.
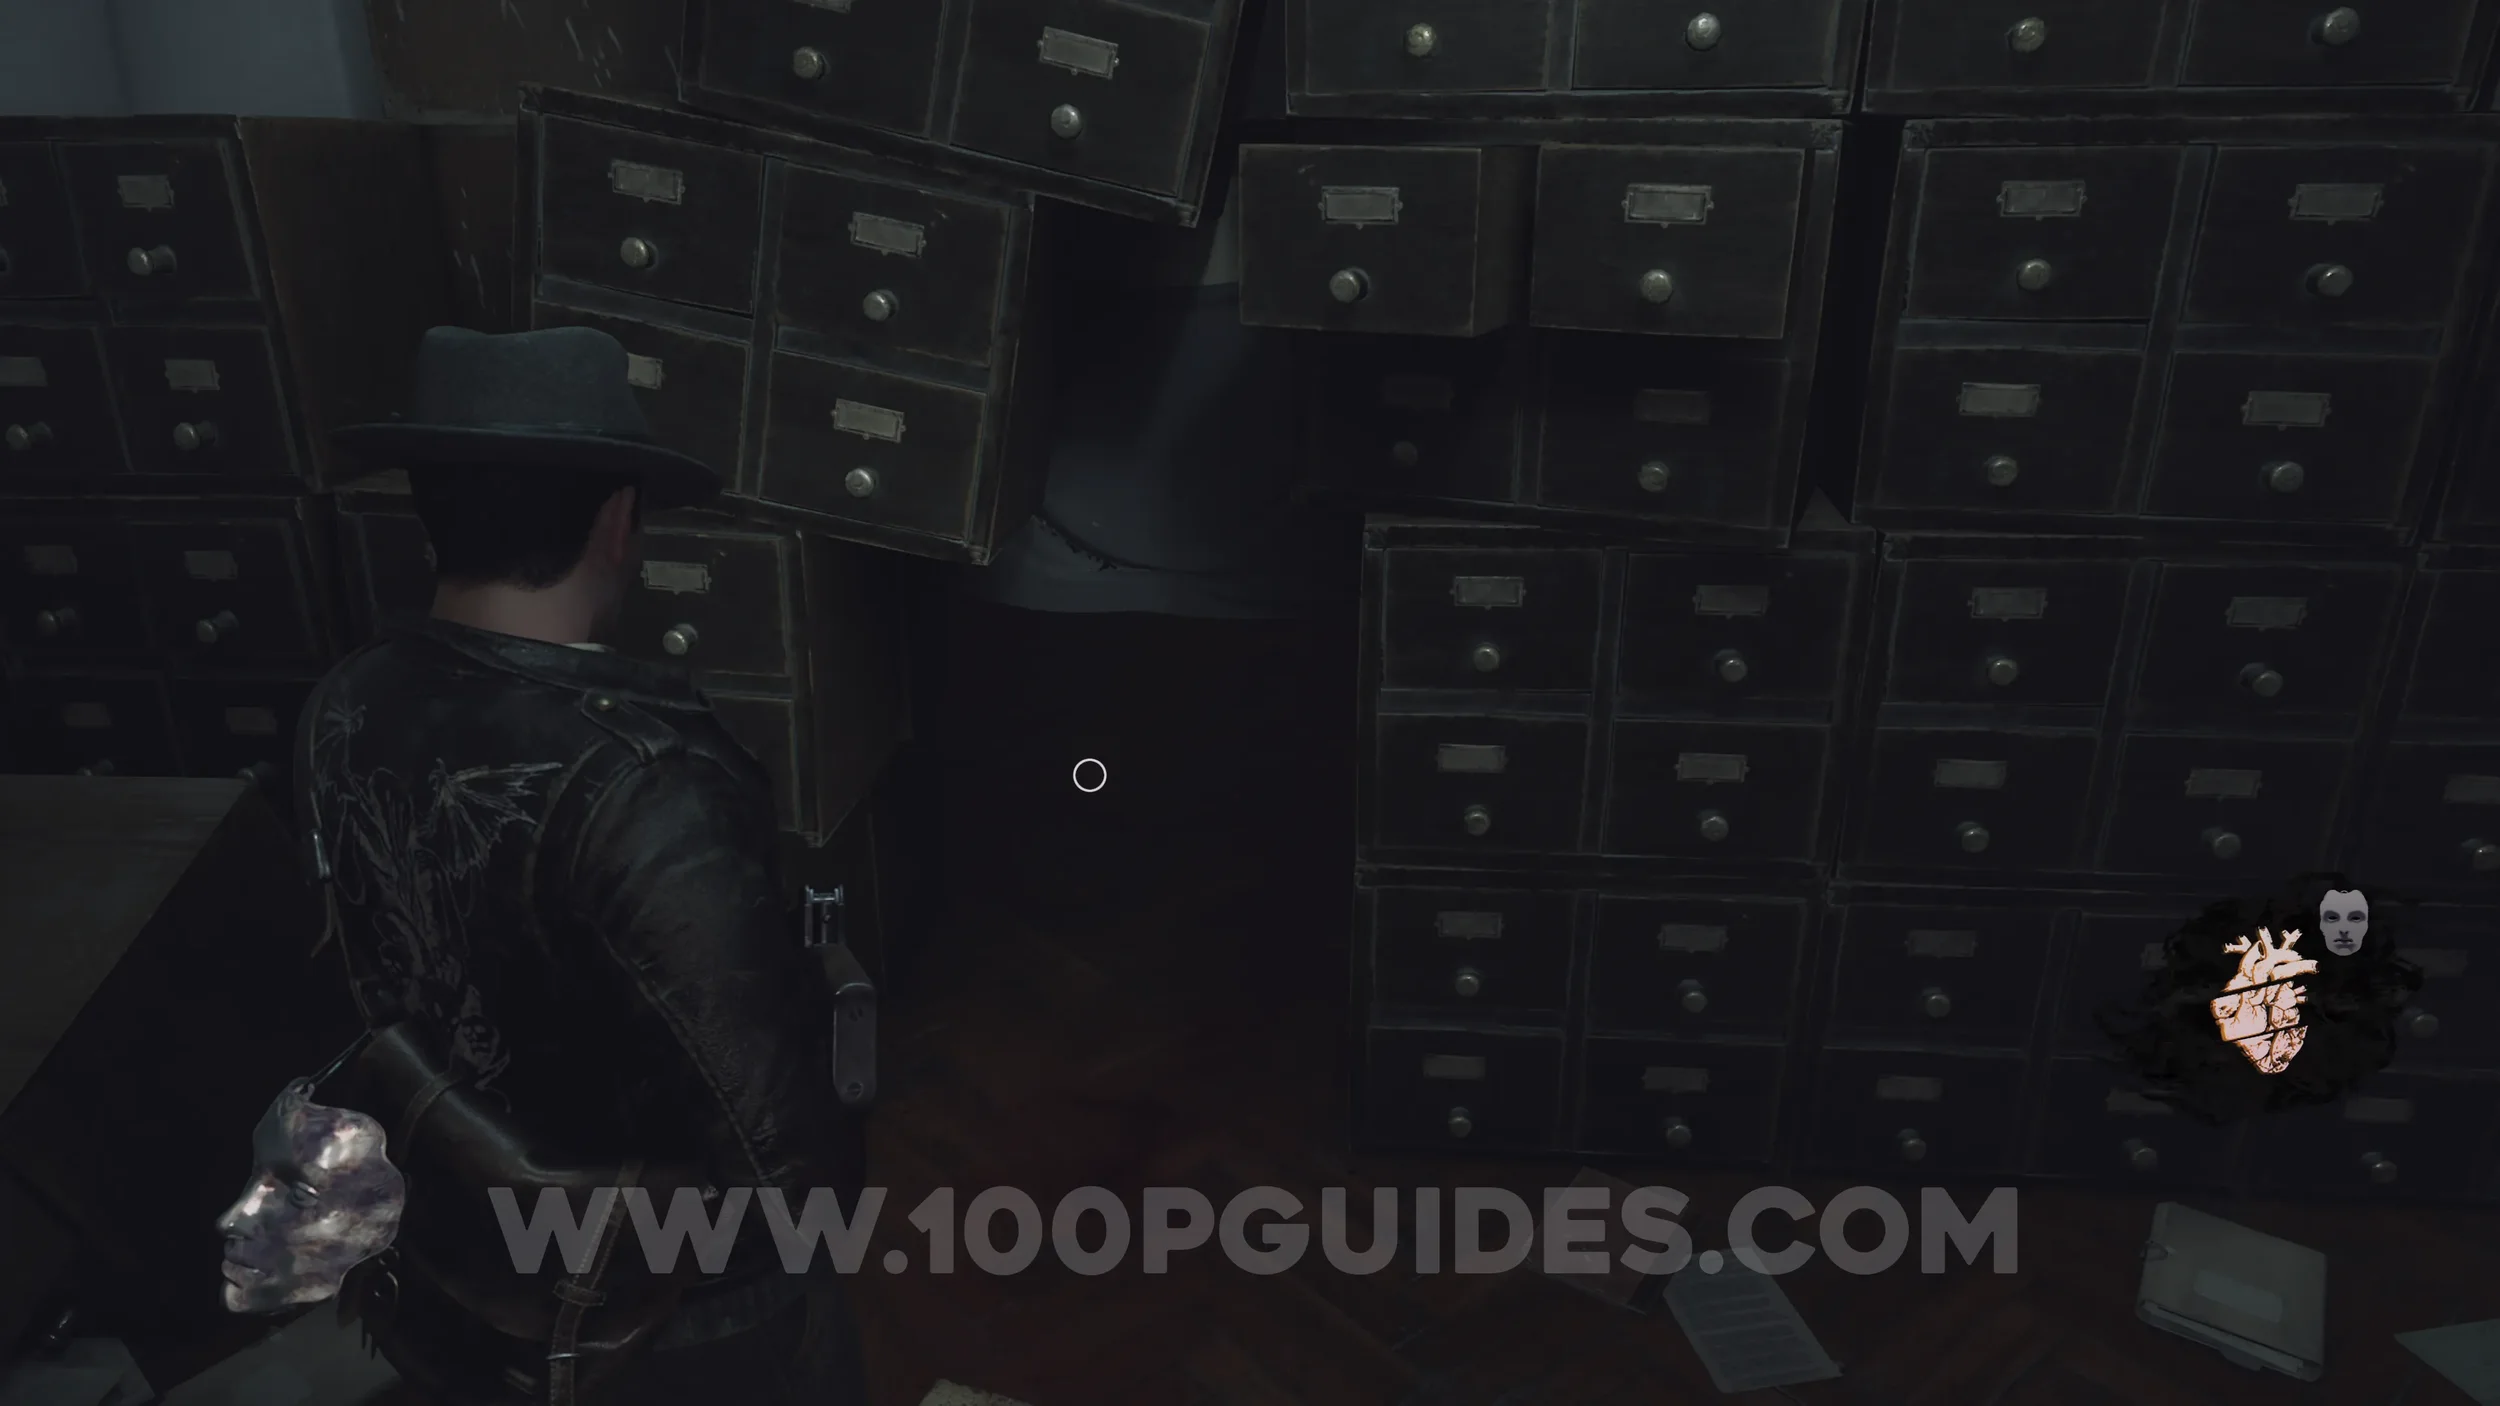
Evidence: Occult Symbol (Yellow). Go through the hole to the right of the previous collectible to find the evidence once you come out the other side.
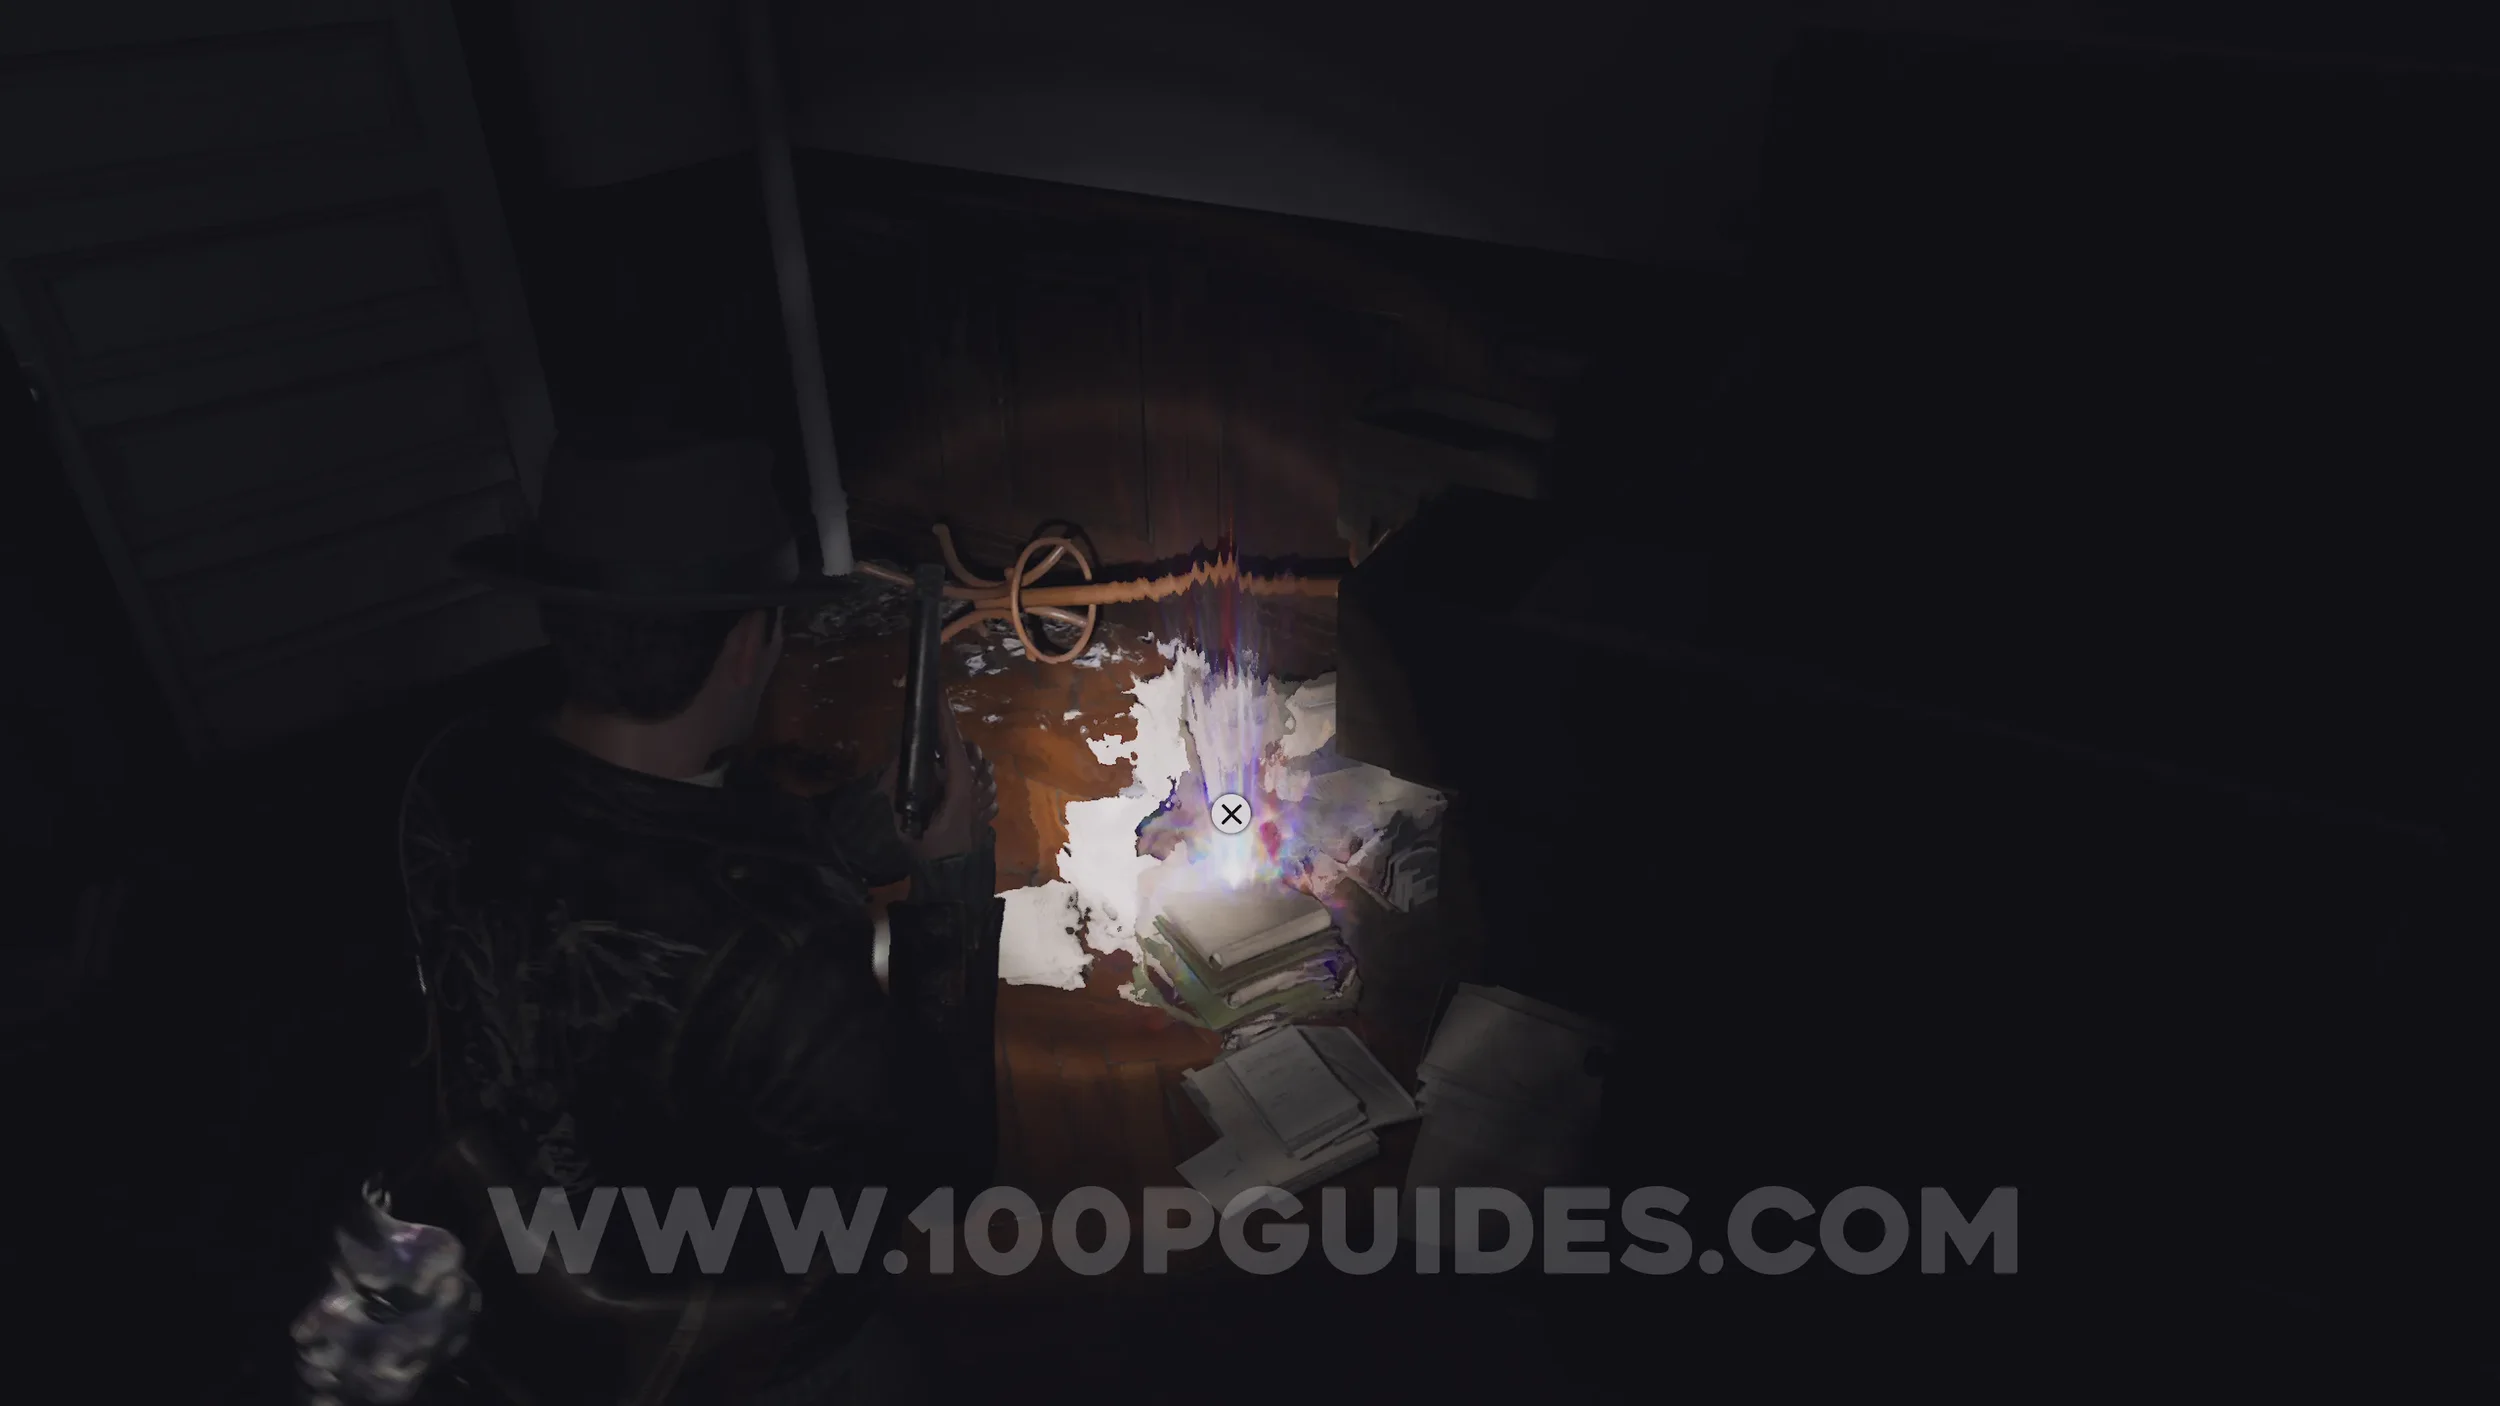
E.R.C. Activator Pen. Head out the door next to the previous evidence, then go left and north to the Wireless Room, where you'll find the pen.
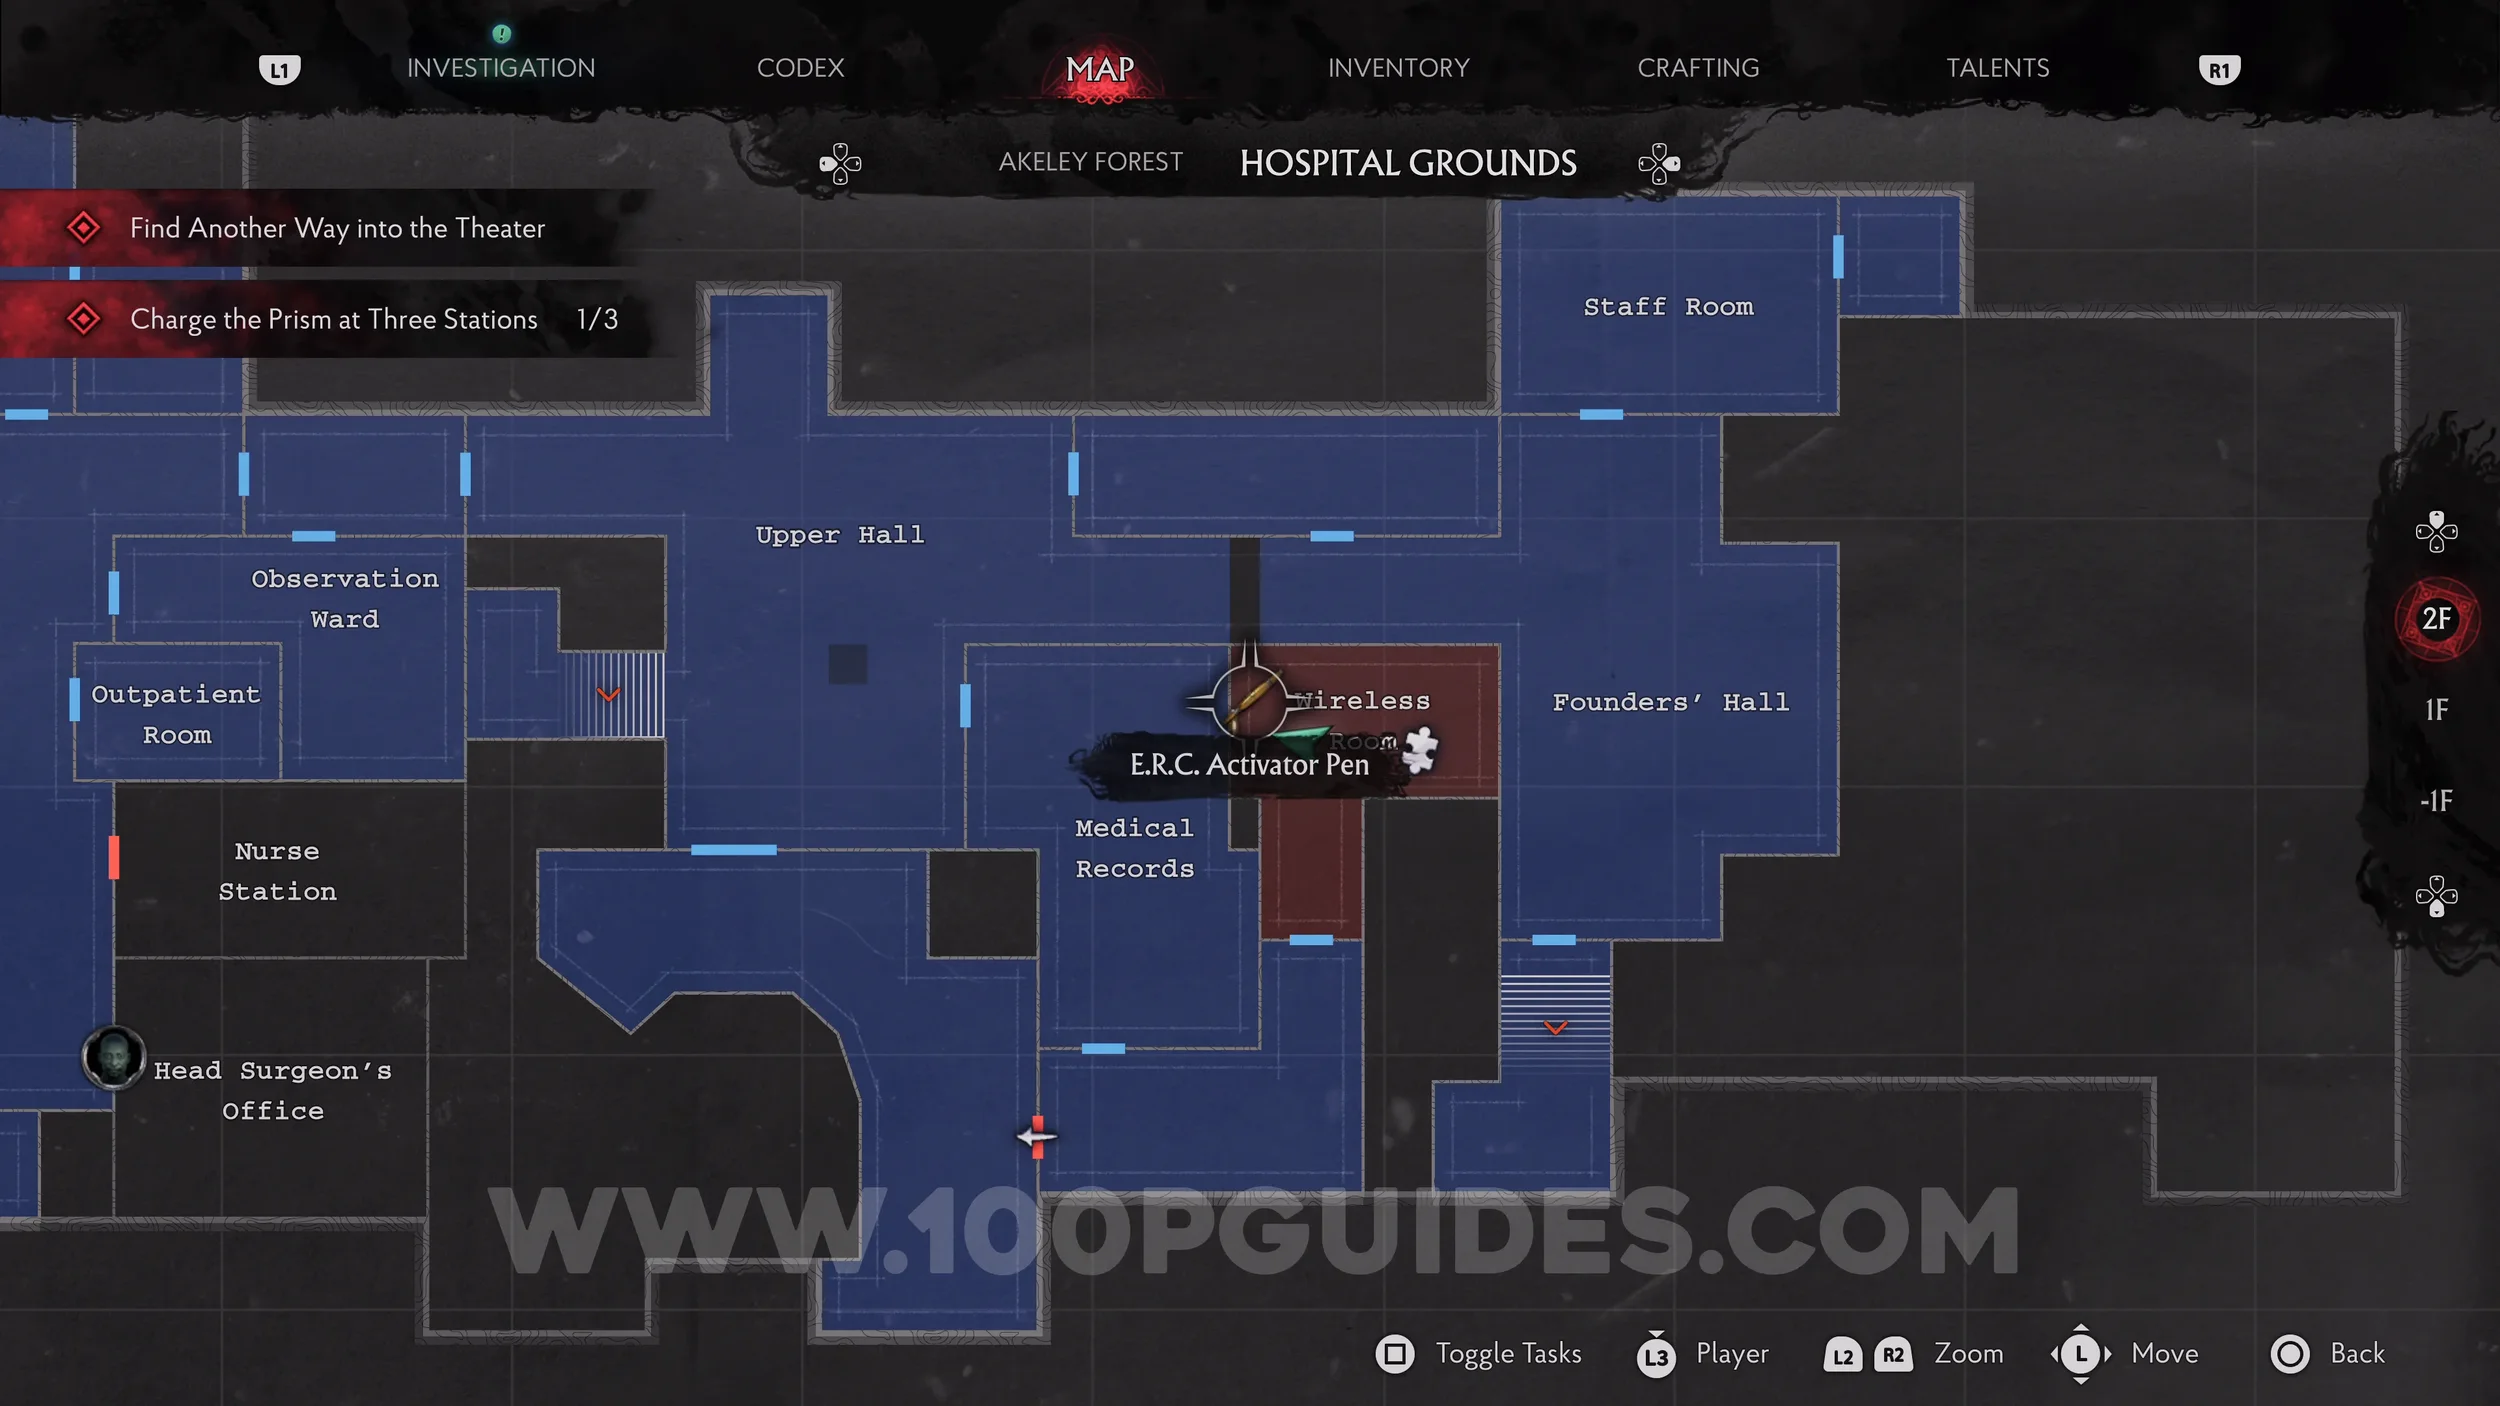
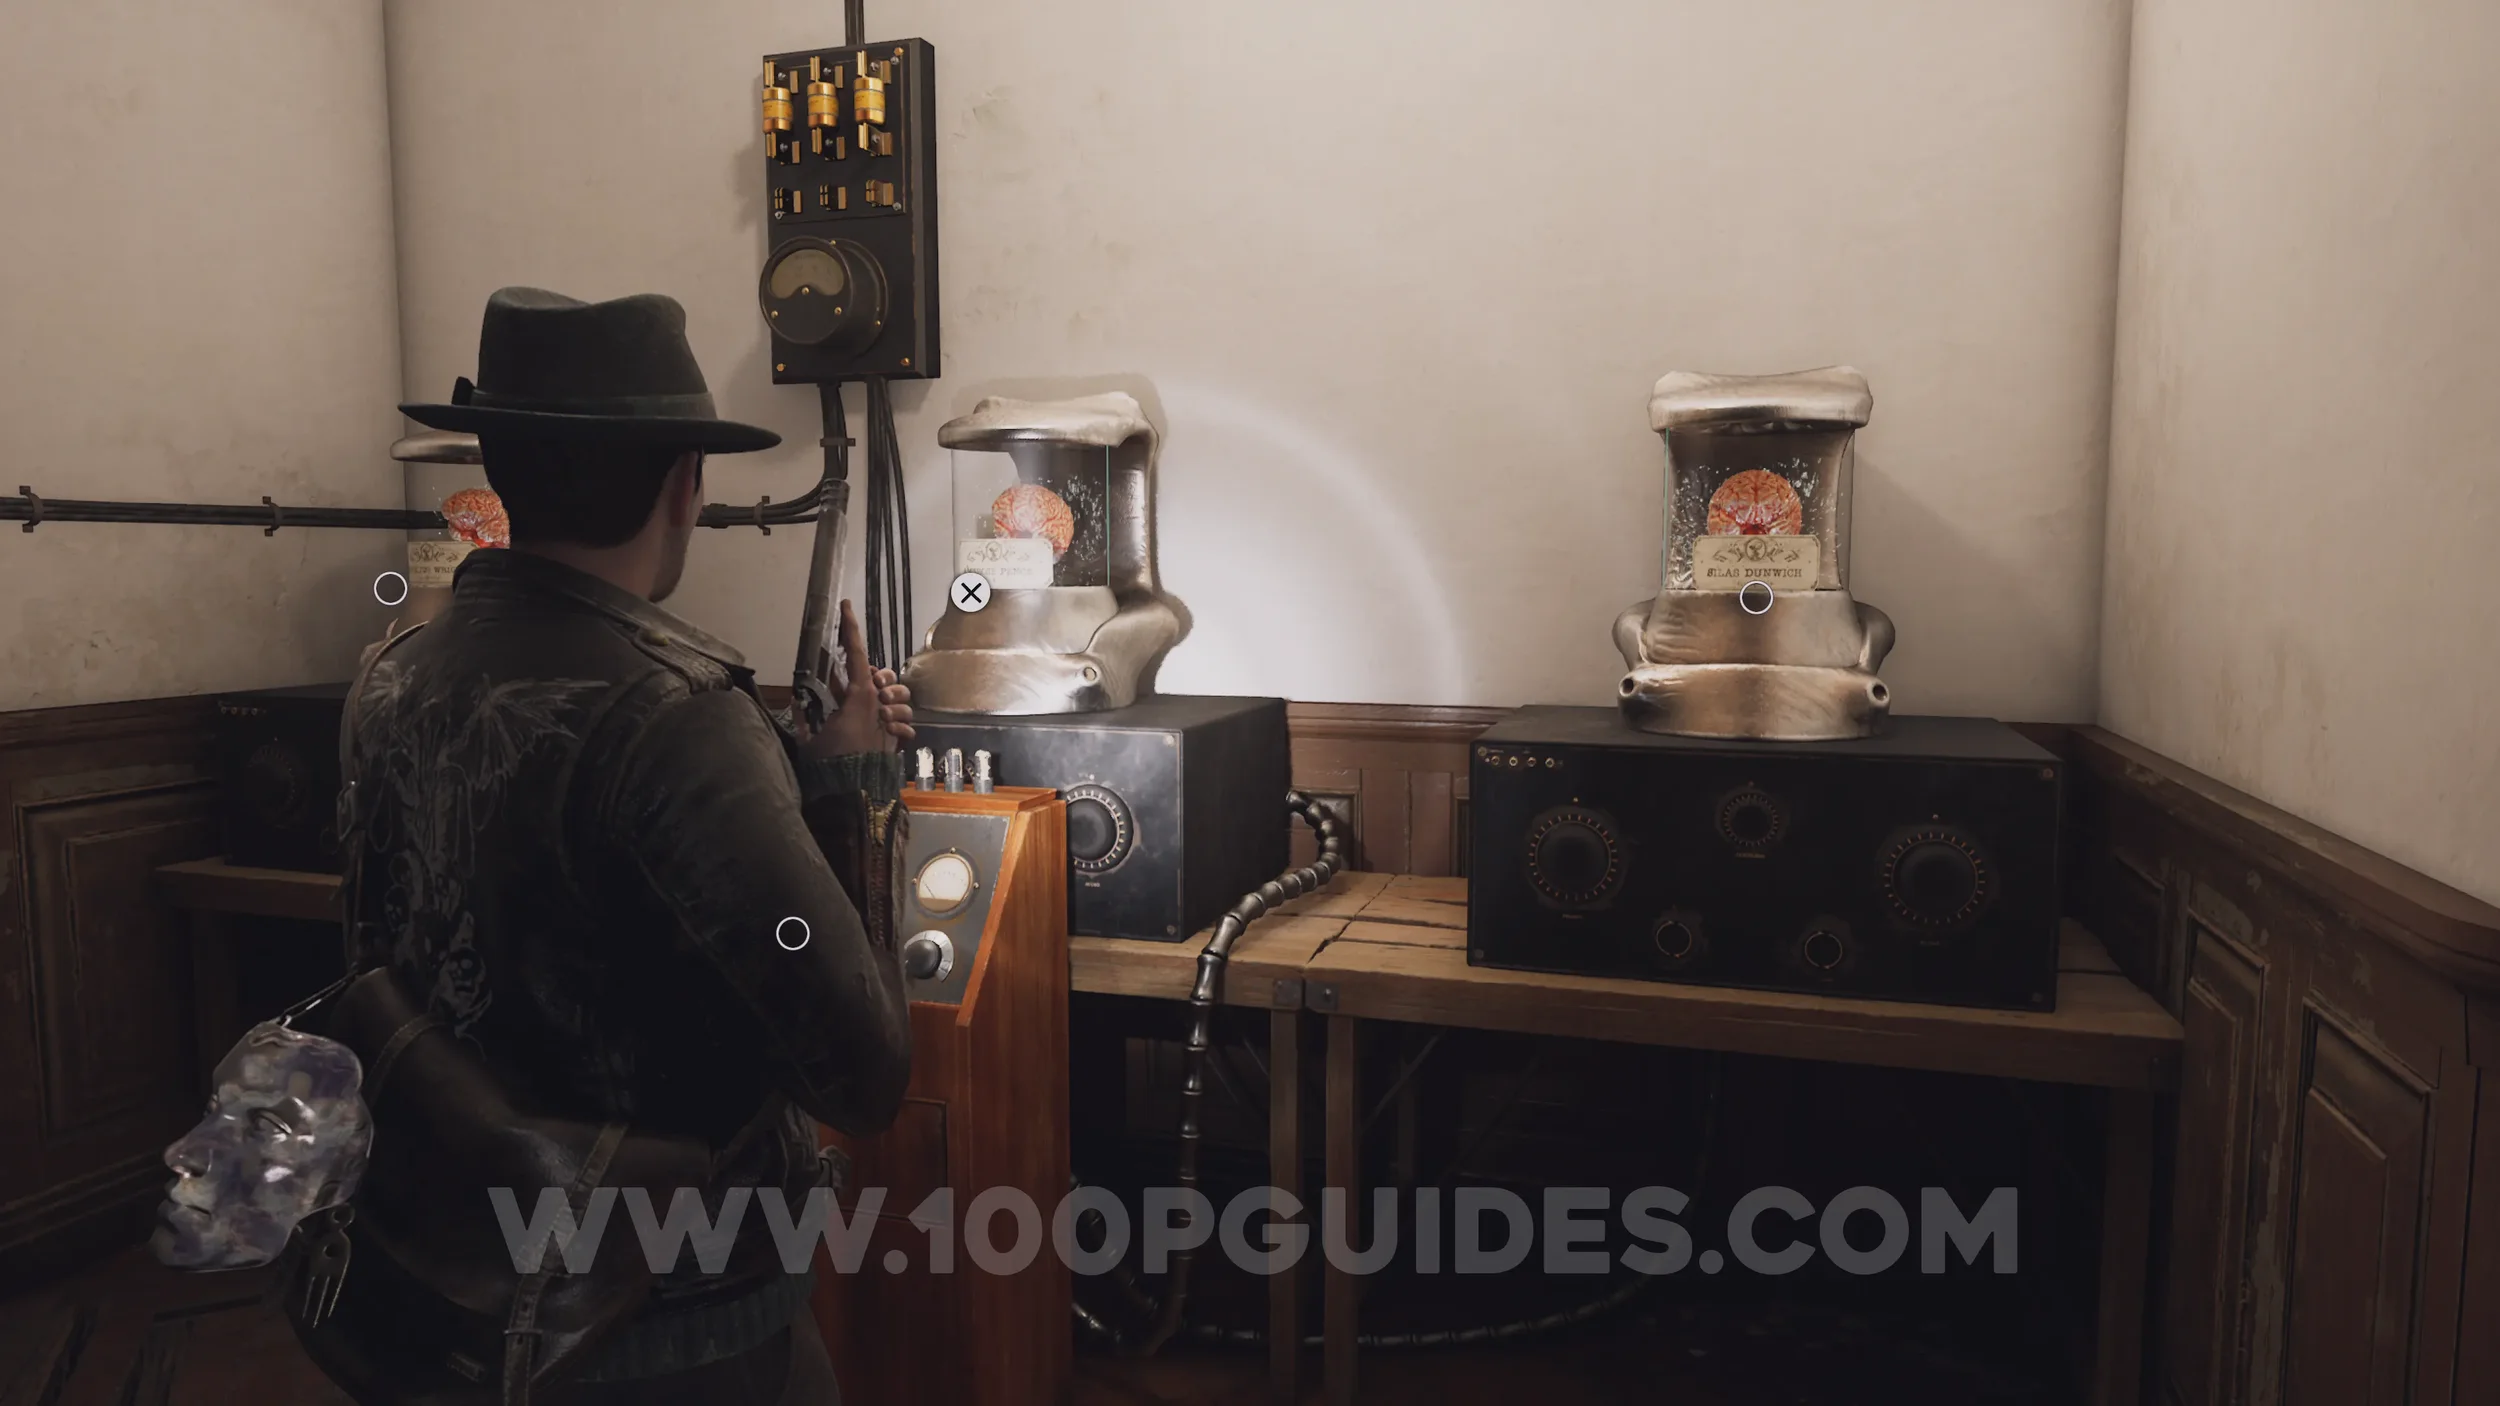
Evidence x3: Testimonies. Talk to the three Brains in the containers in the Wireless Room.
Wireless Room Brain Puzzle
Now that you have the clues from the three Brains in the Wireless Room, you should be able to work out the three frequencies. Interact with the machine under the three Brains and input the following numbers in order, holding after each one to confirm it: 13 > 05 > 36.


Trophy: The Whisperers. Obtained after solving the brains puzzle in the Wireless Room.
Dream Essence x3: They will appear in the machine under the Brains after solving the puzzle.
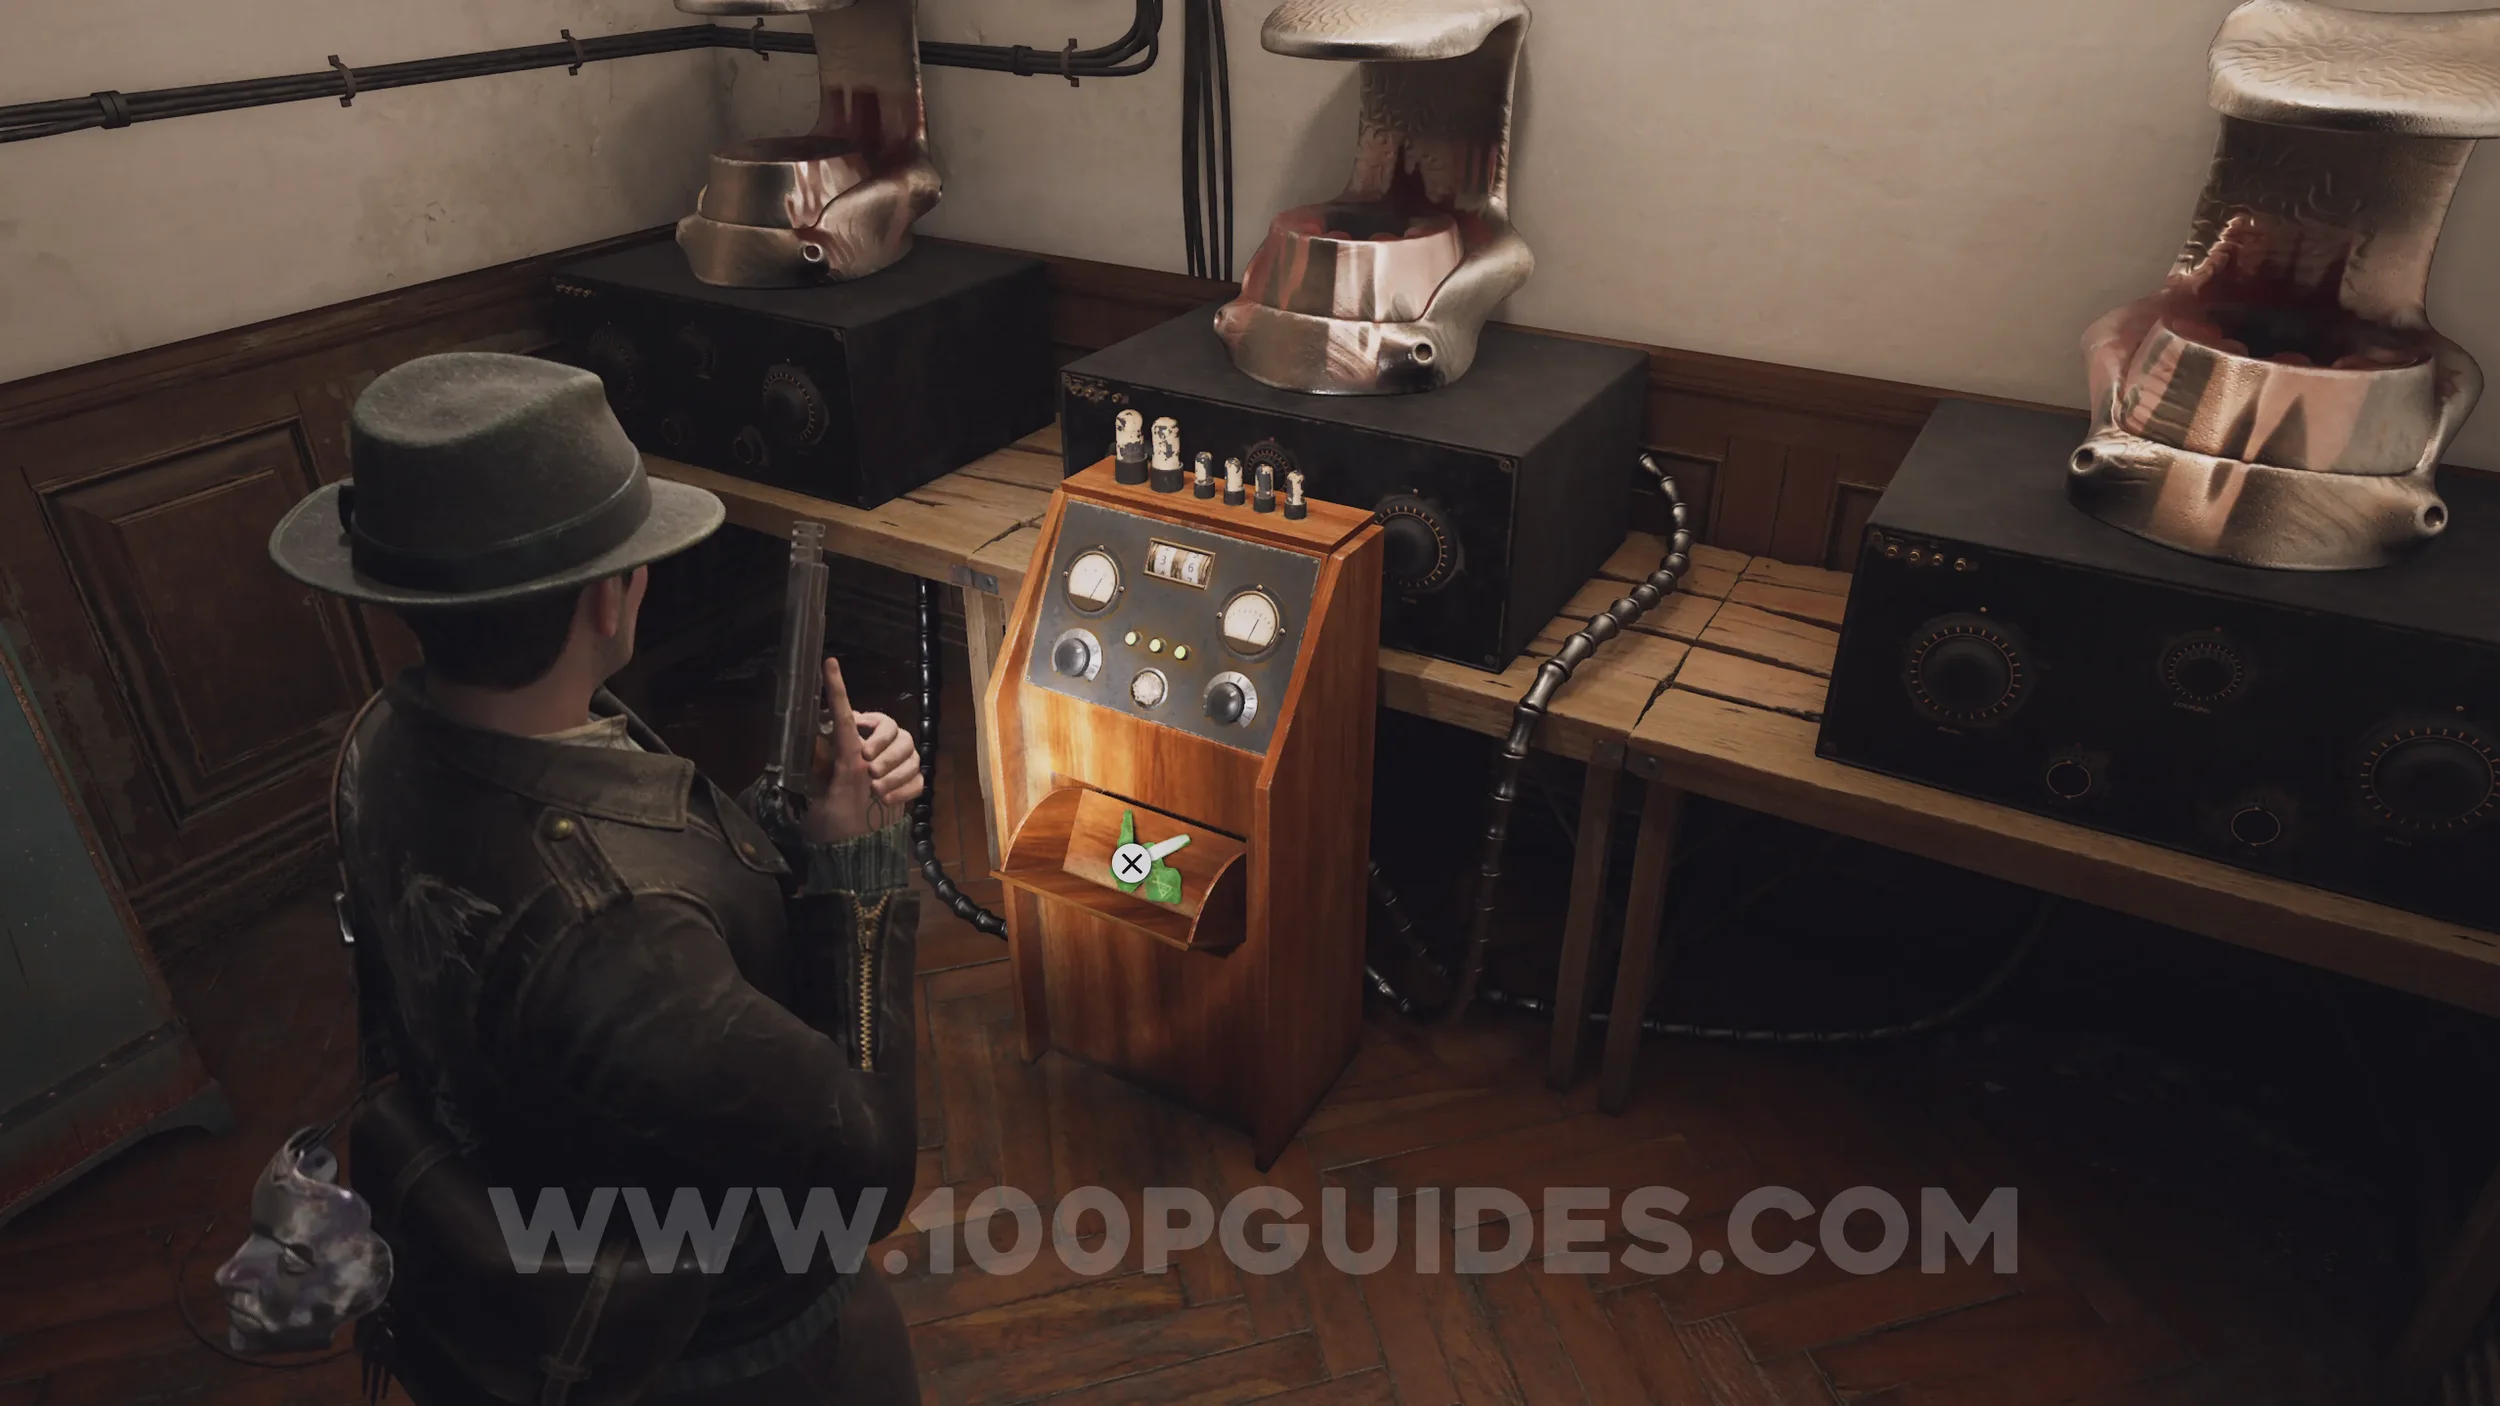
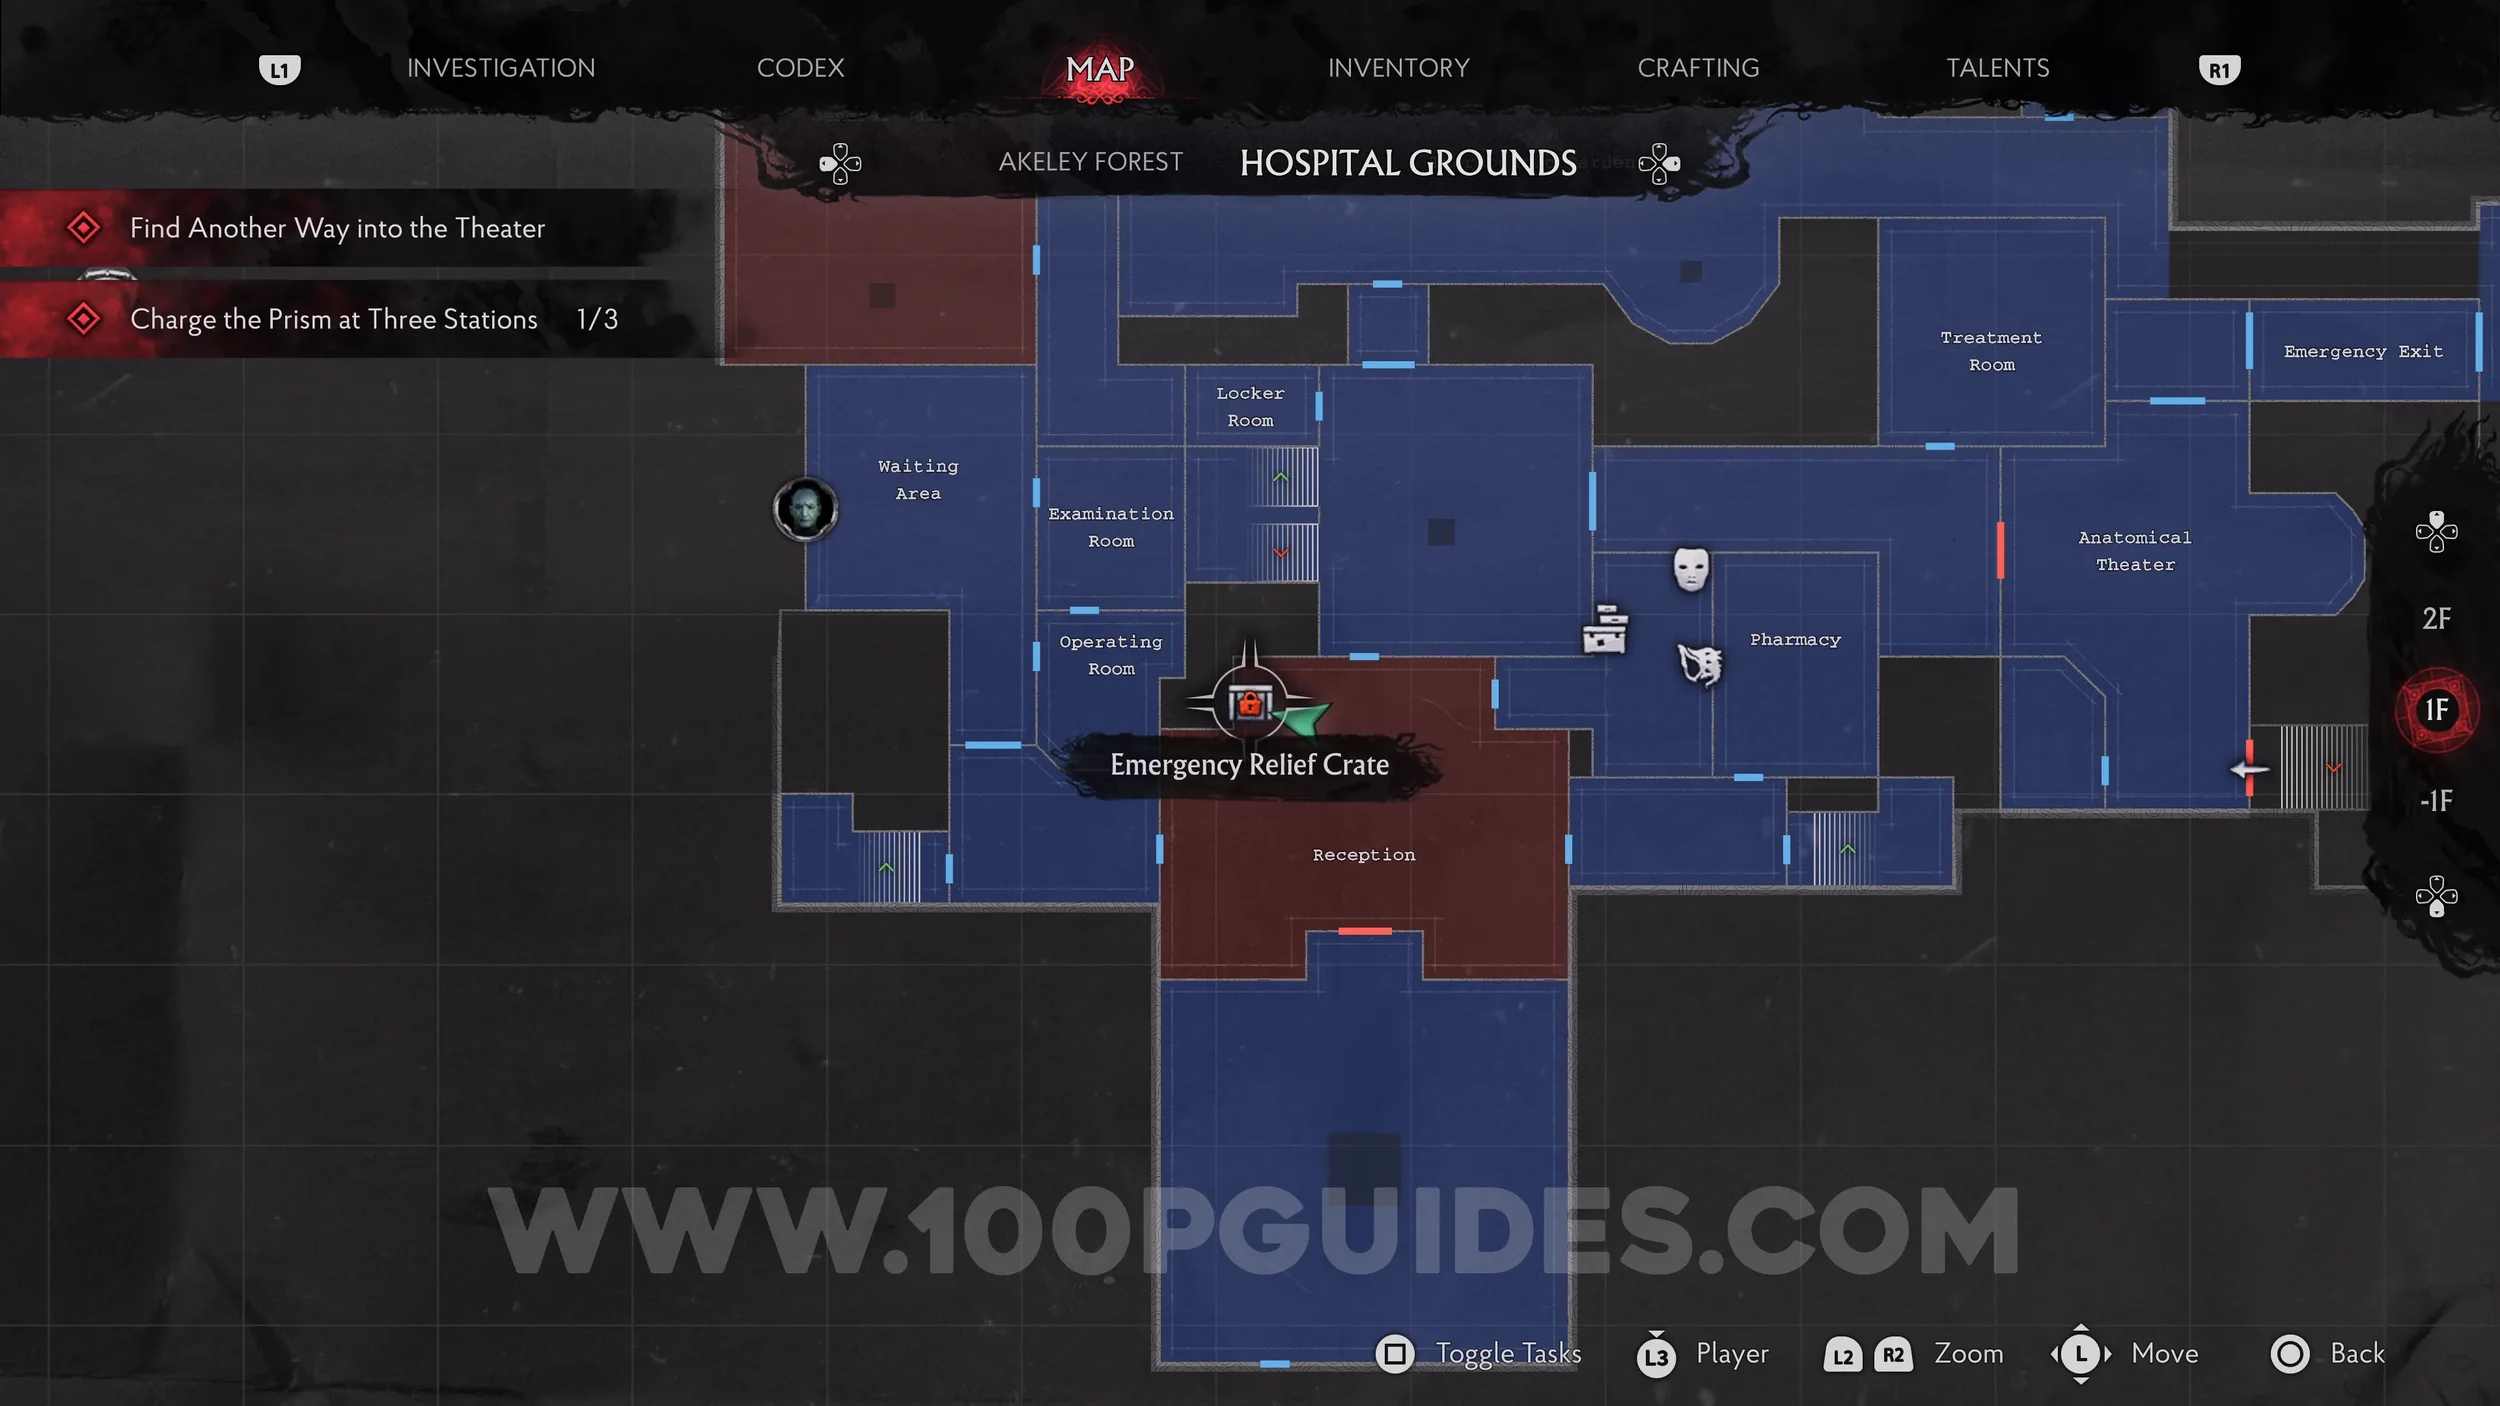
Emergency Relief Crate (E.R.C.) + Weapon Accessory: Cutter’s Tomahawk. Head back down to the Reception and use the pen to open the E.R.C. in the corner. The accessory is inside.
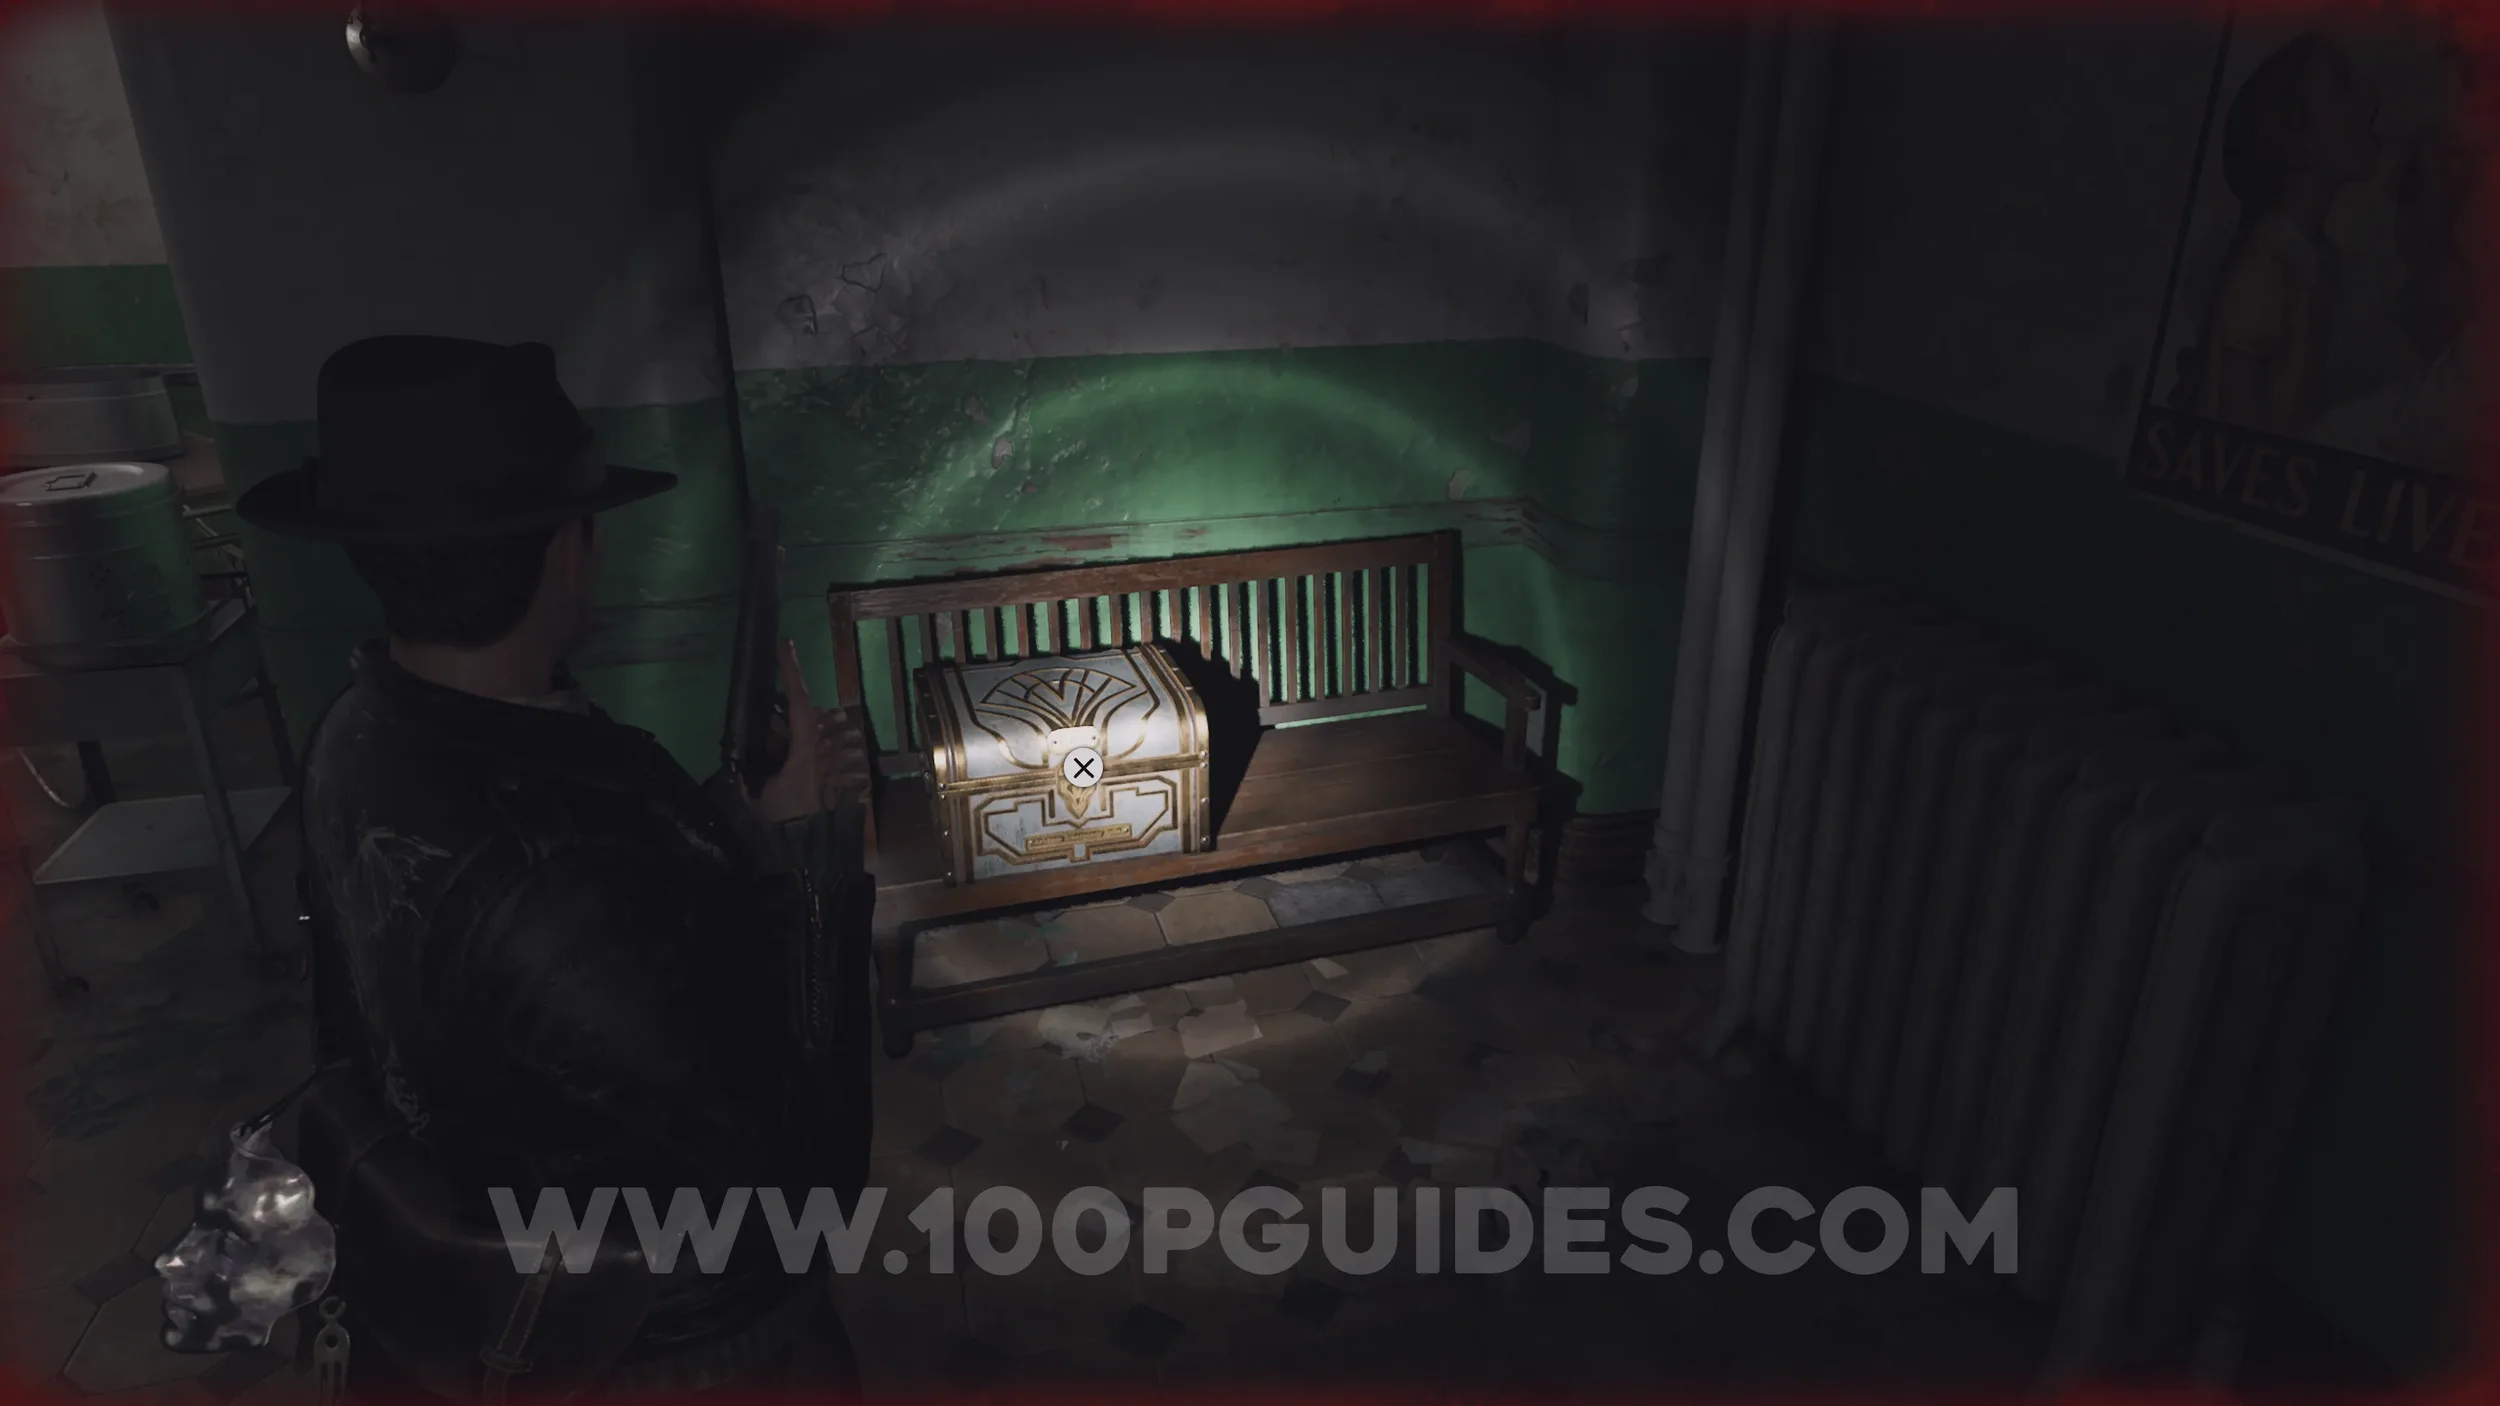
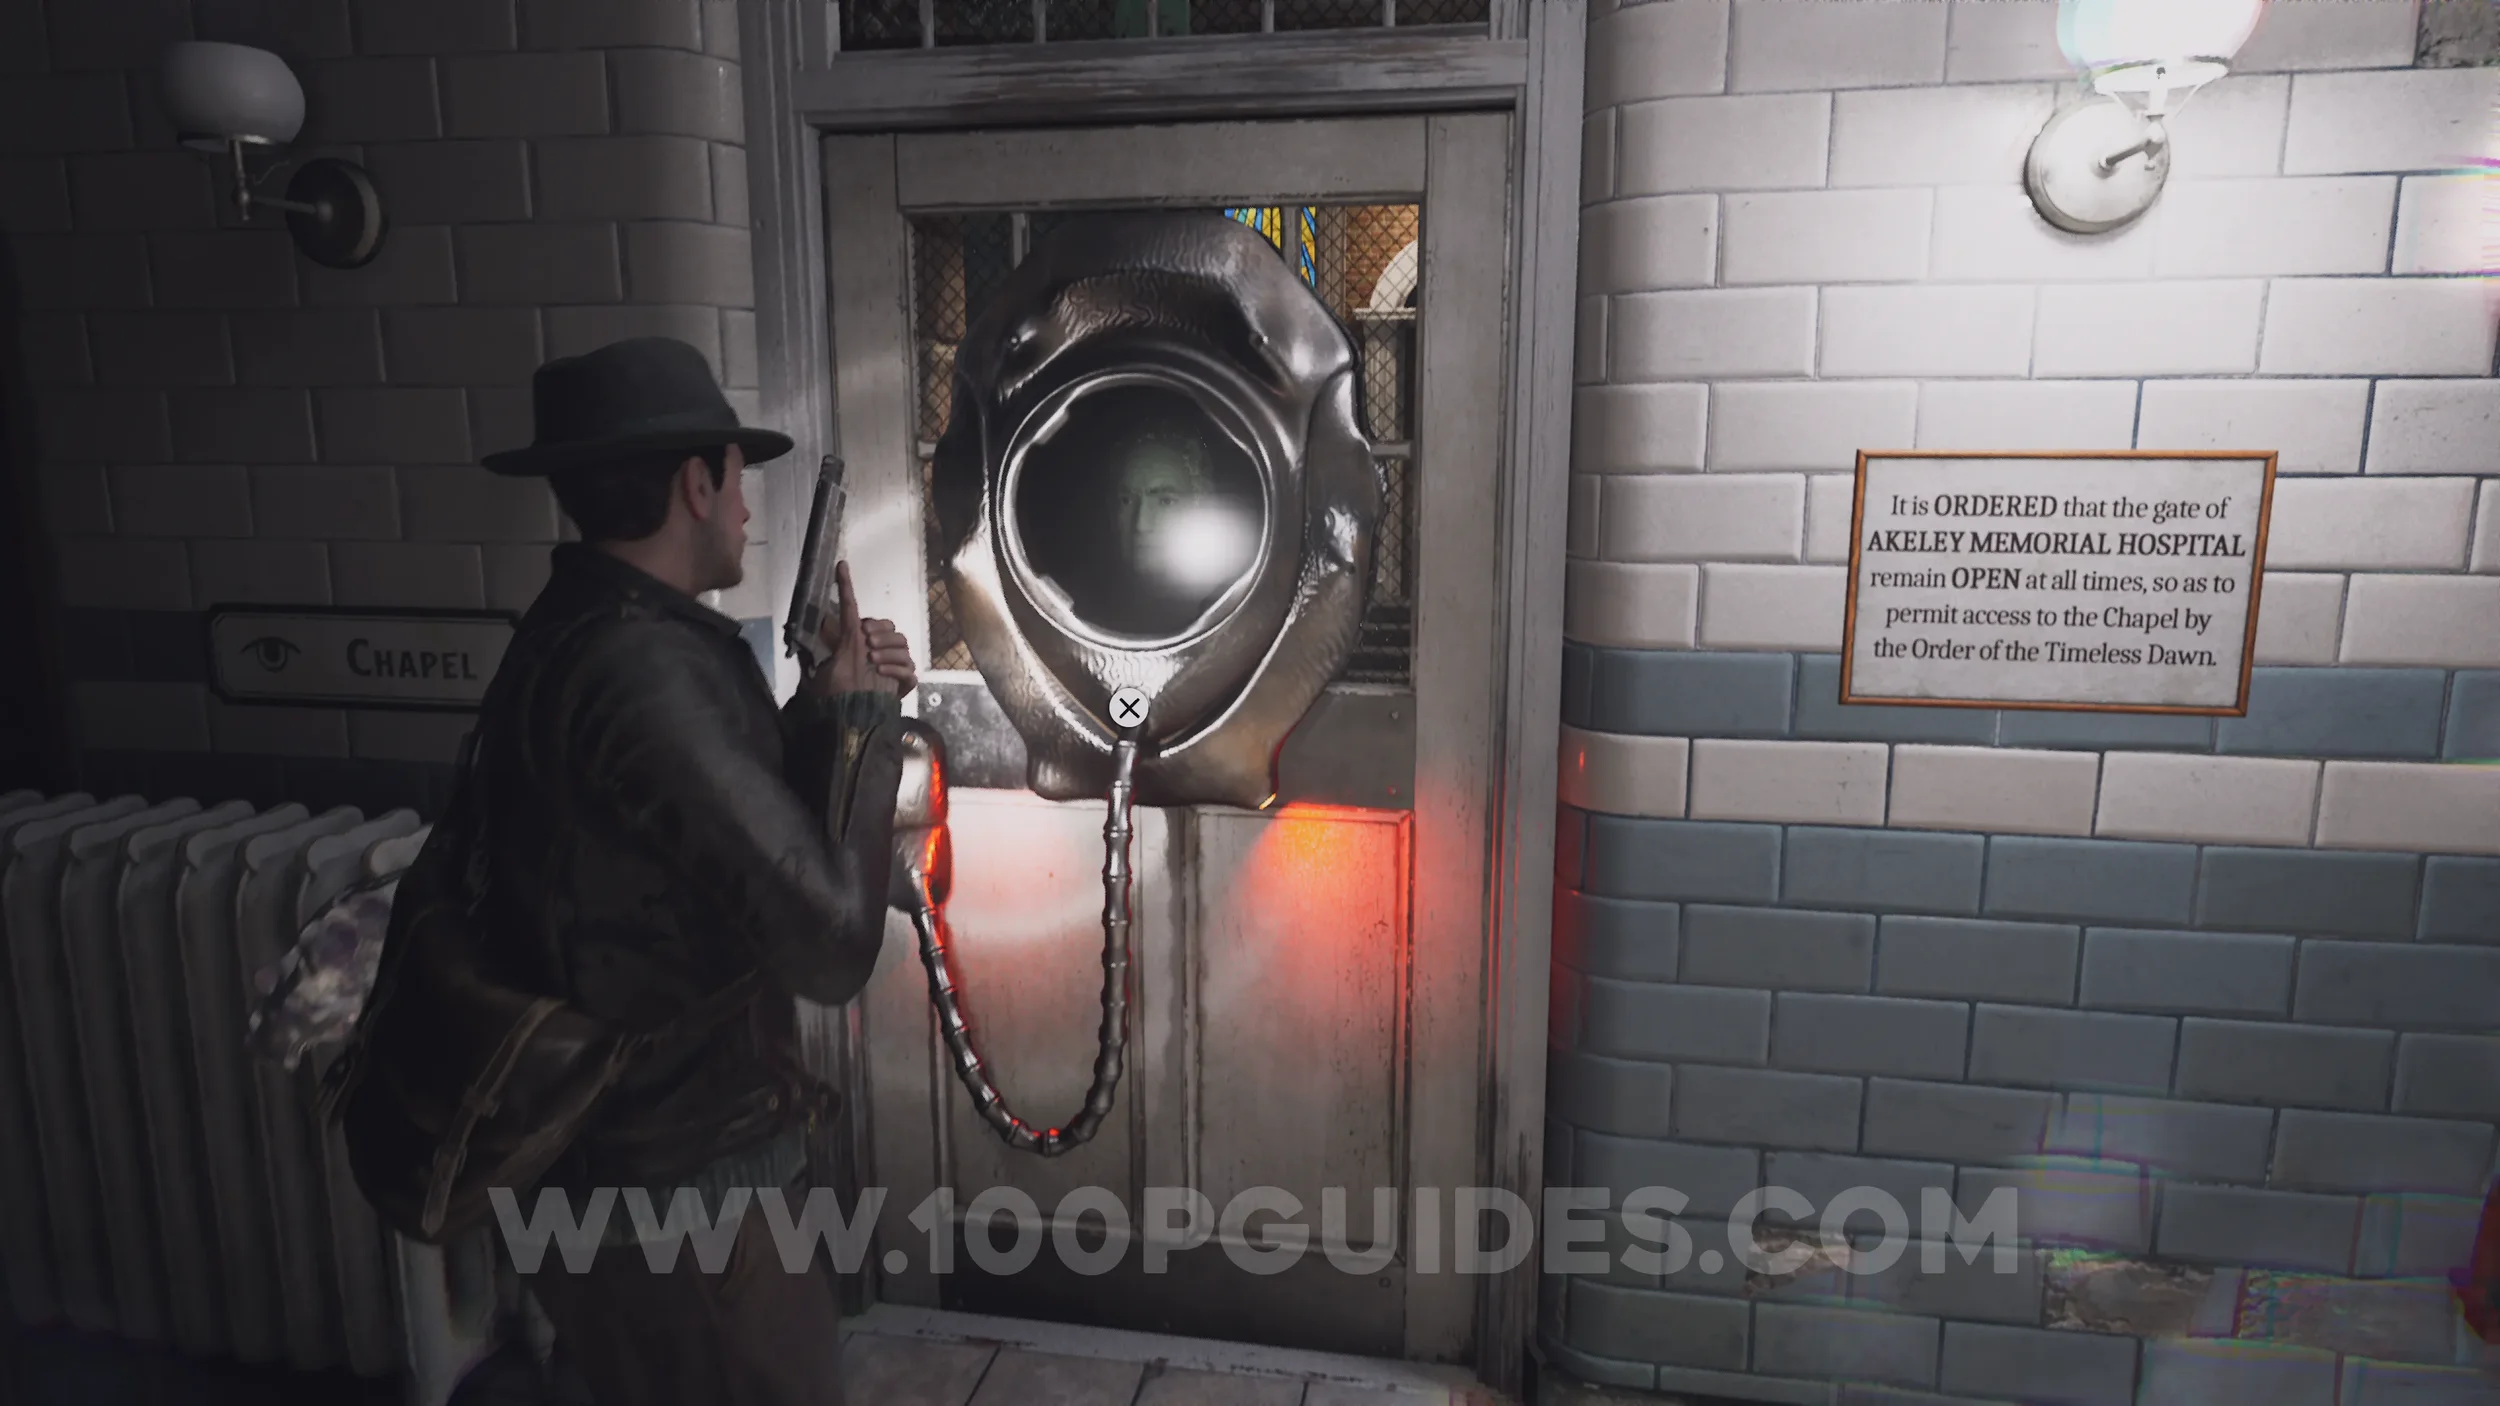
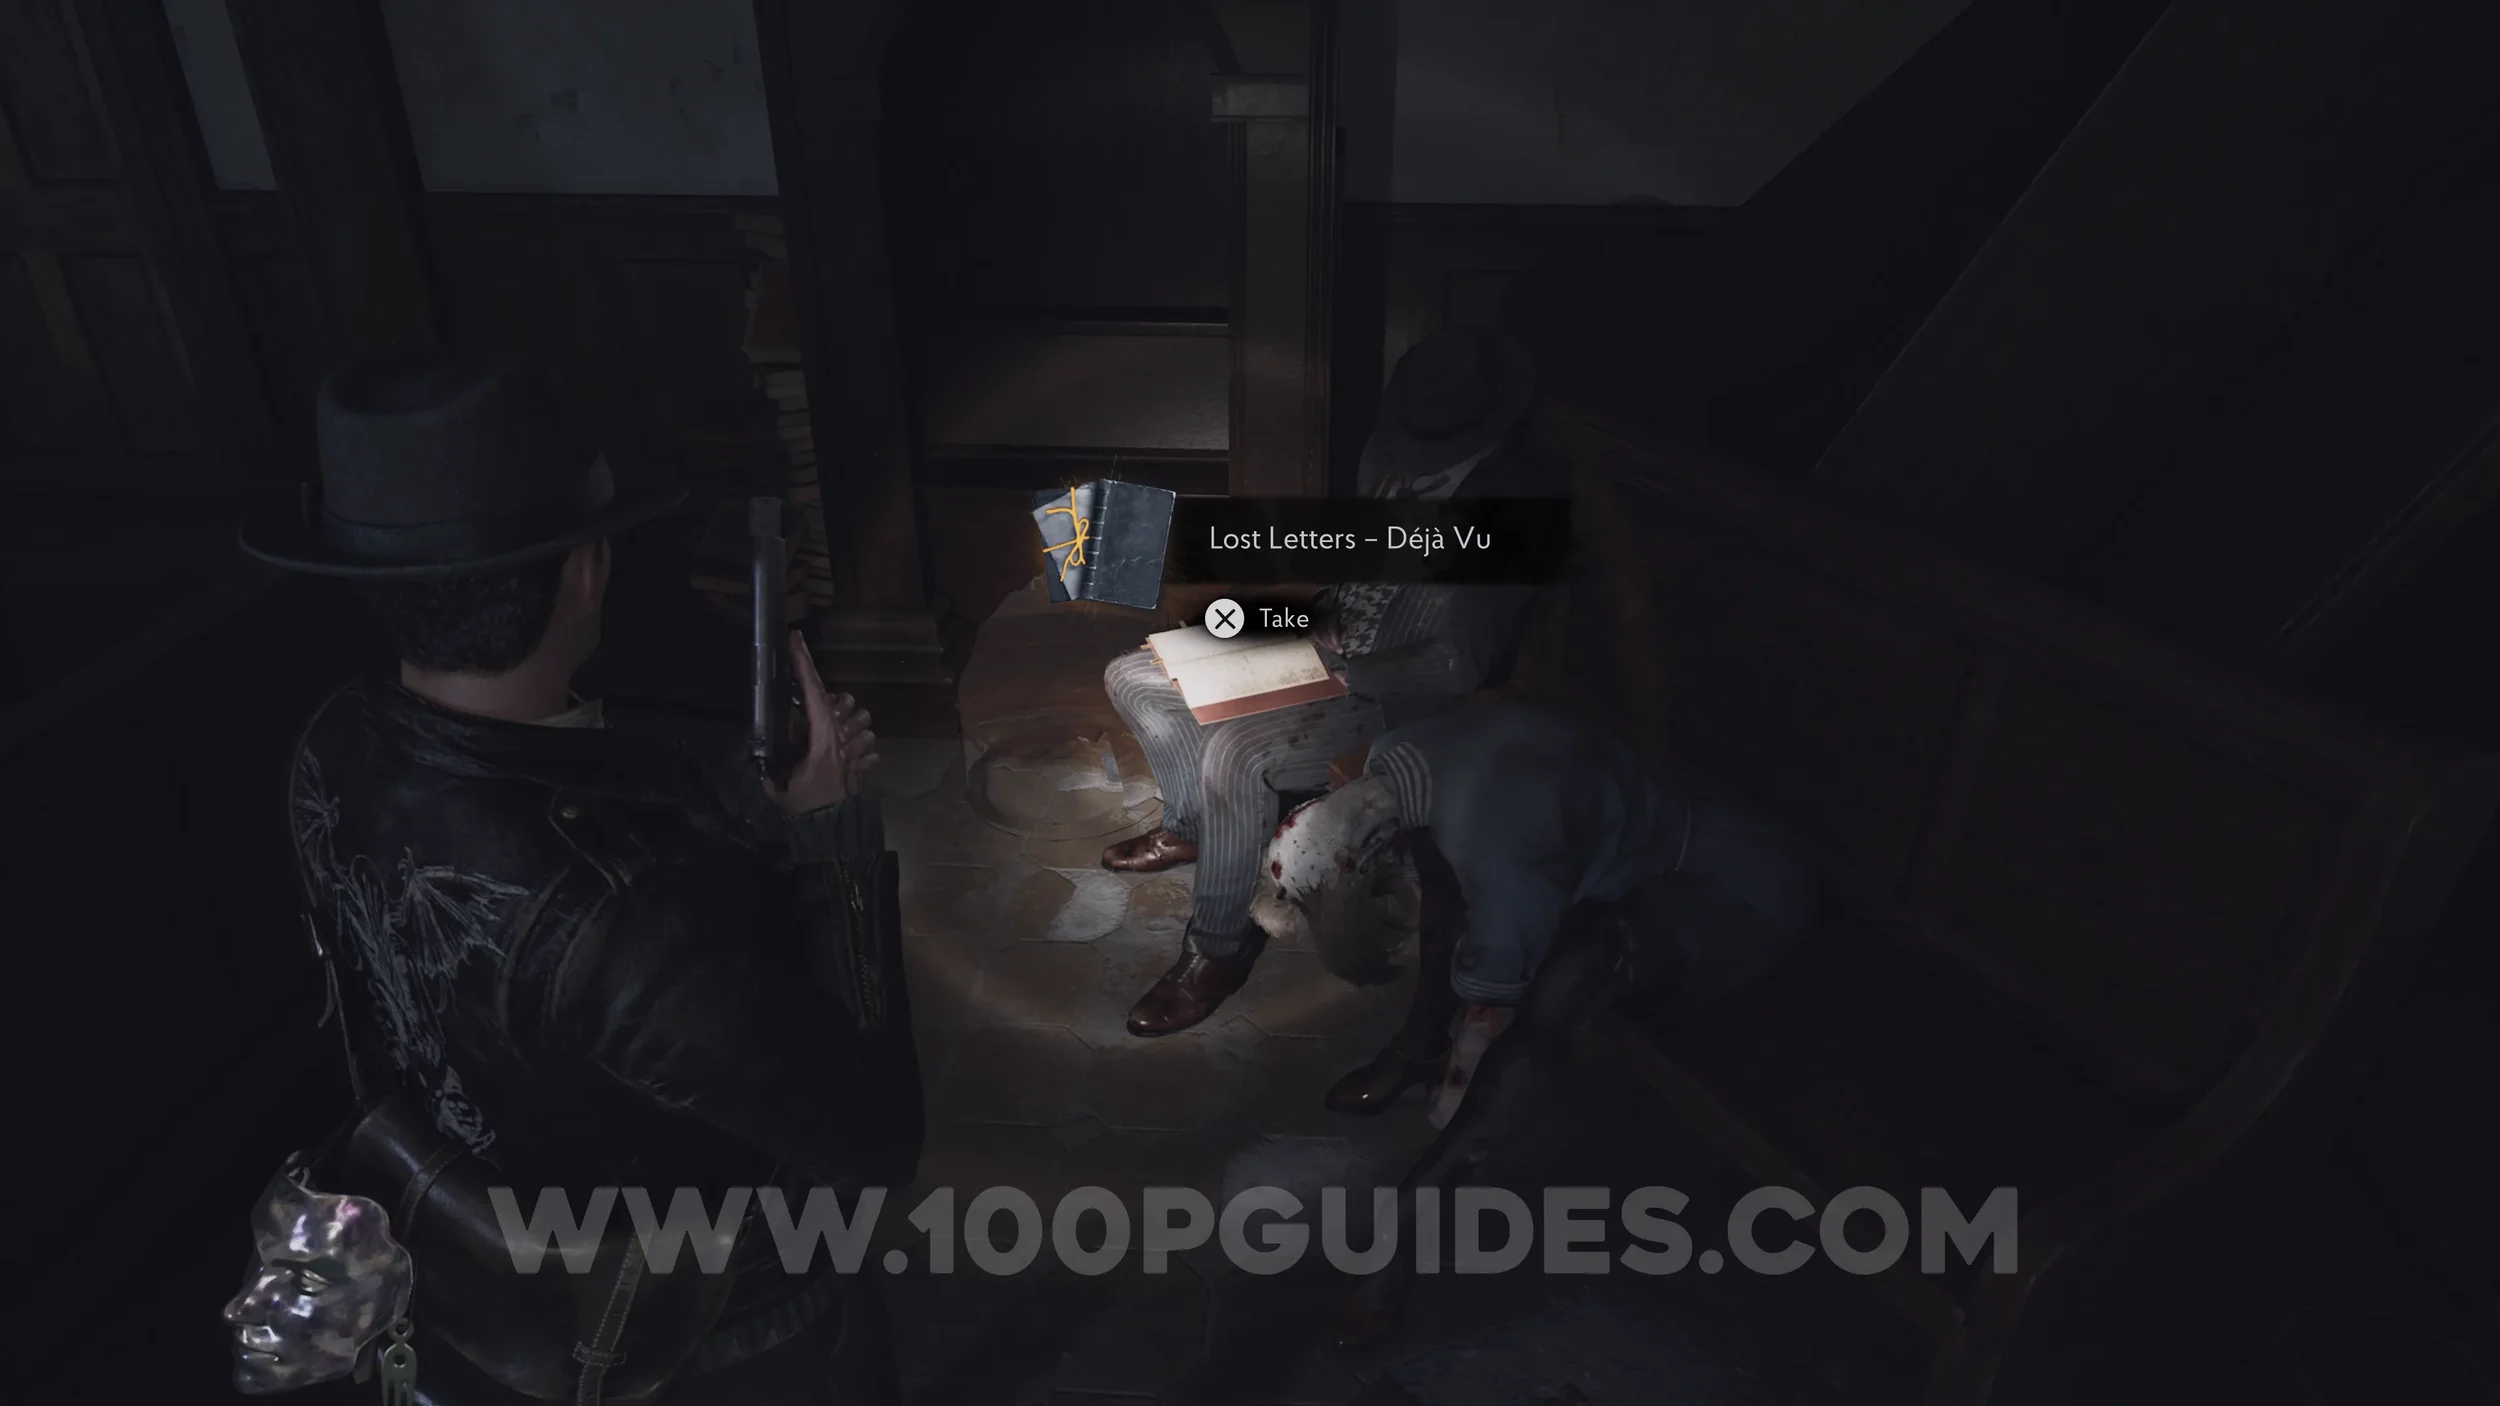
Lore Codex: Lost Letters - Deja Vu. Head to the west of the Reception and use the Old Man's Face Mask on the door in the Waiting Area to reach the Chapel. Inside the Chapel, look for the codex on a corpse sitting on one of the benches to the right.
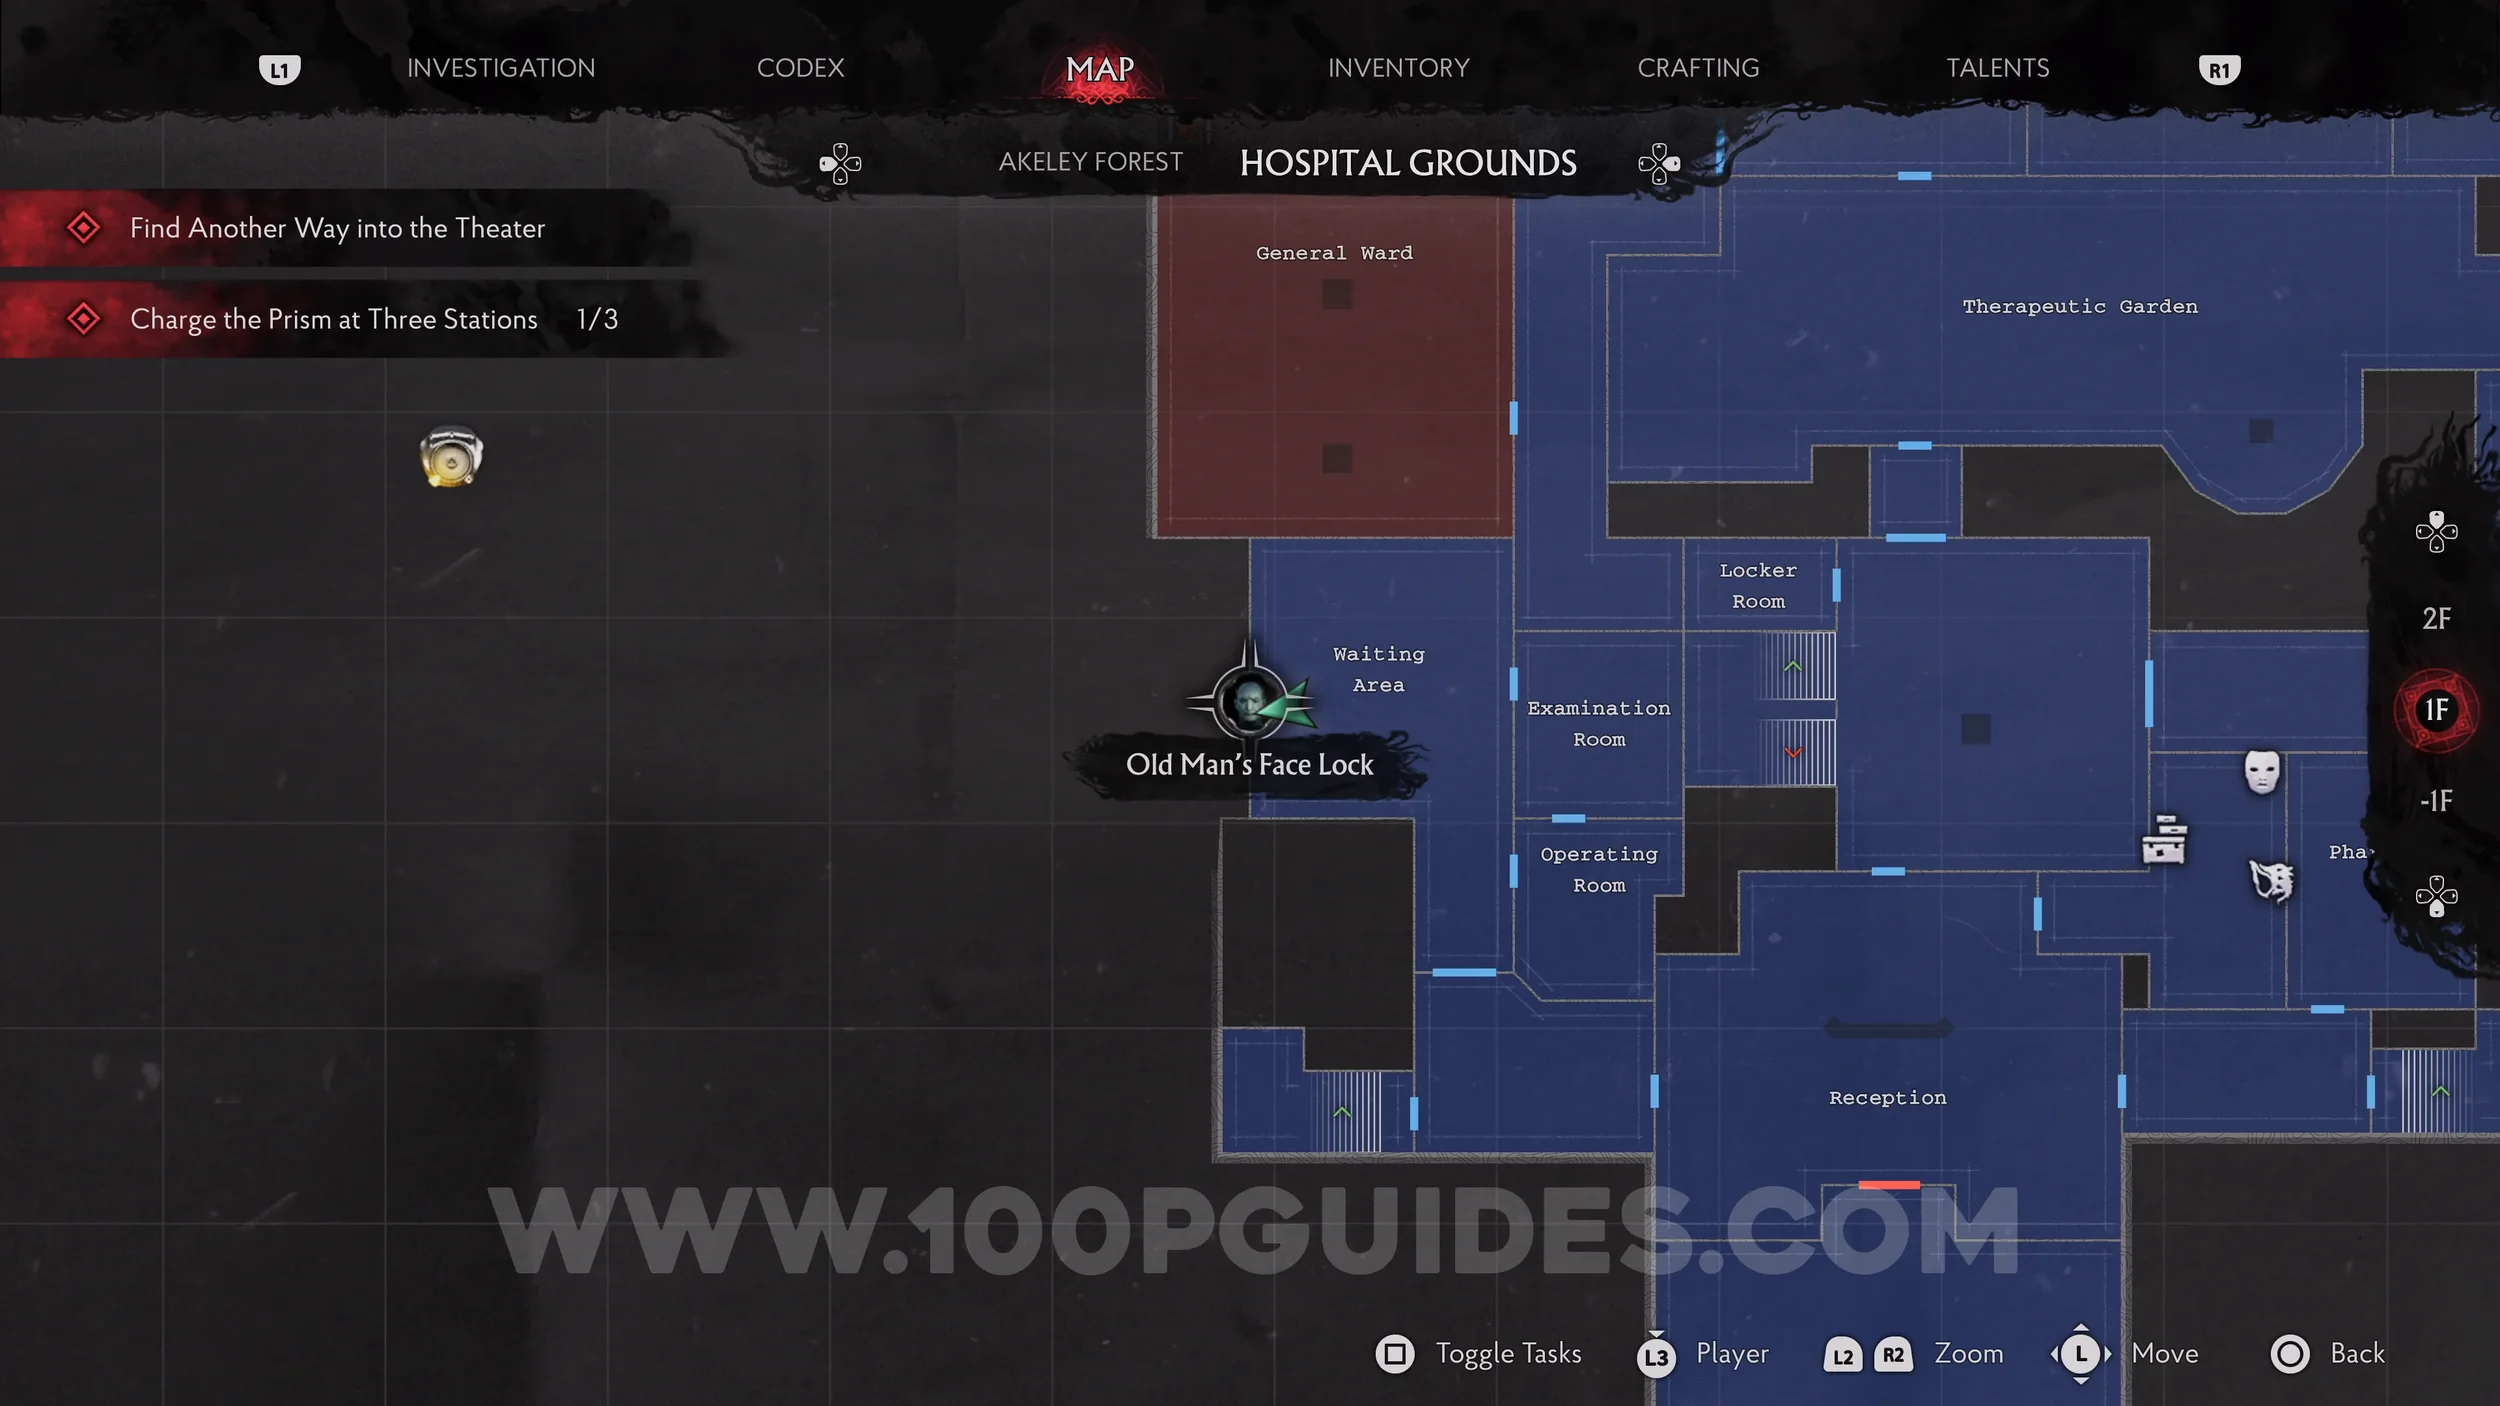
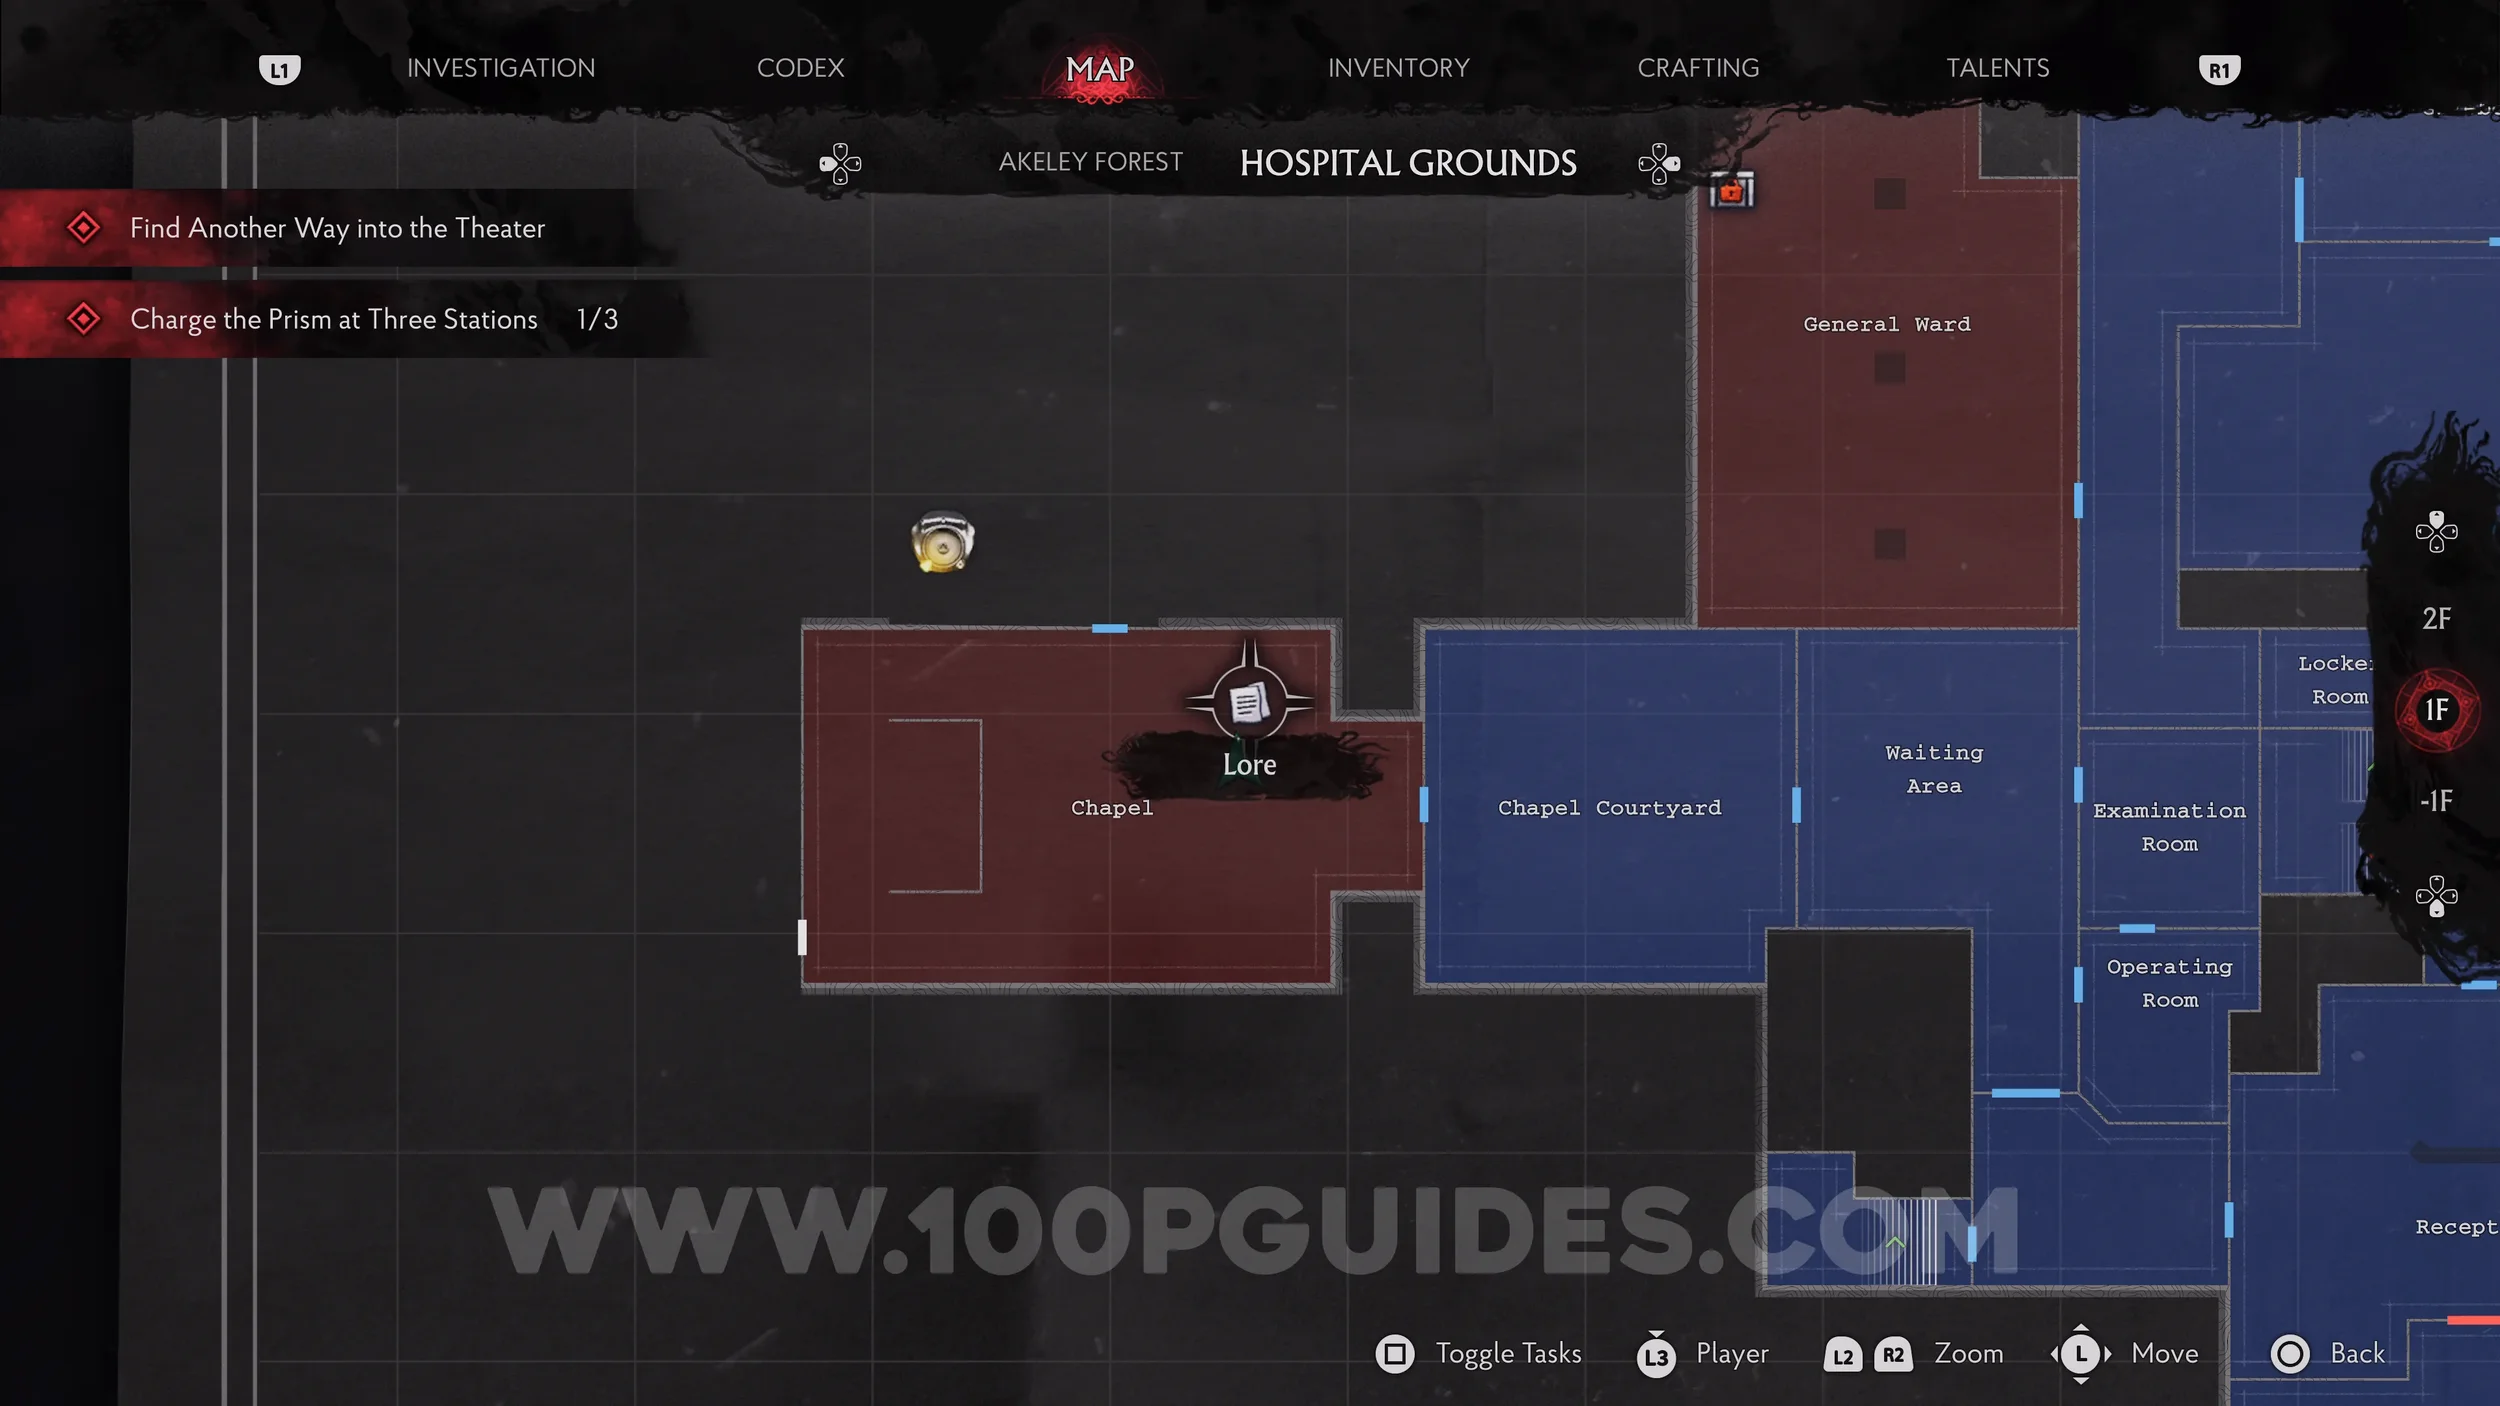
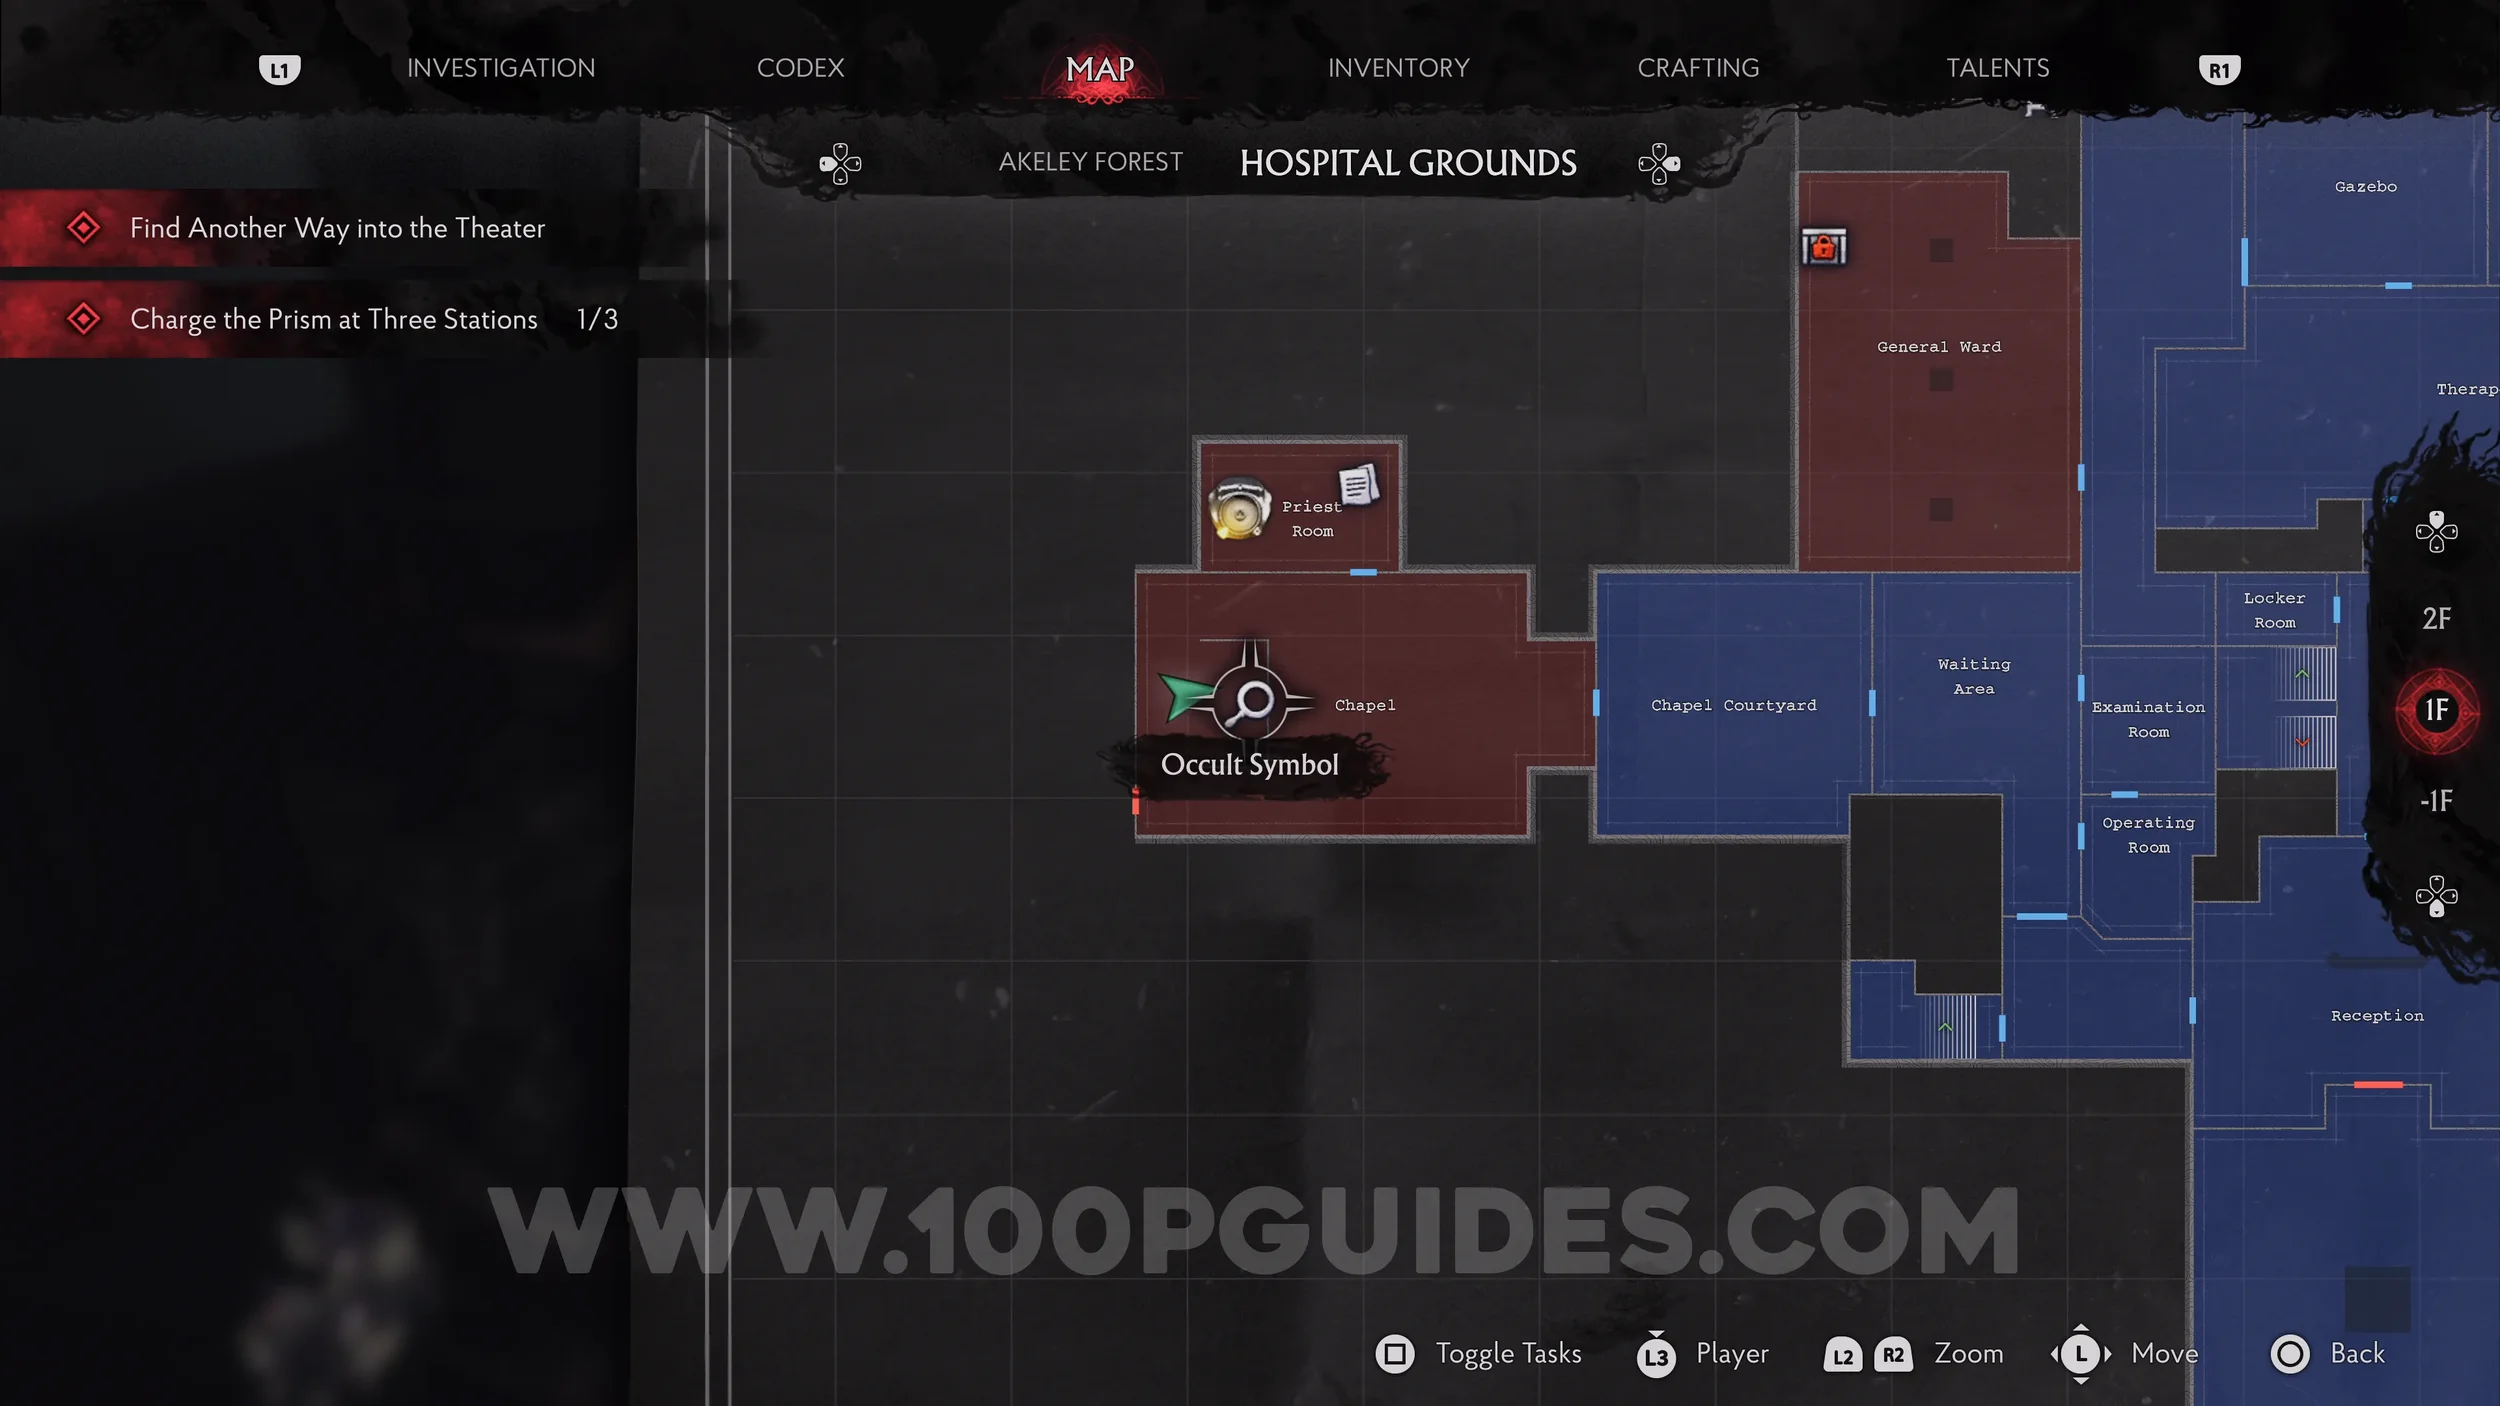
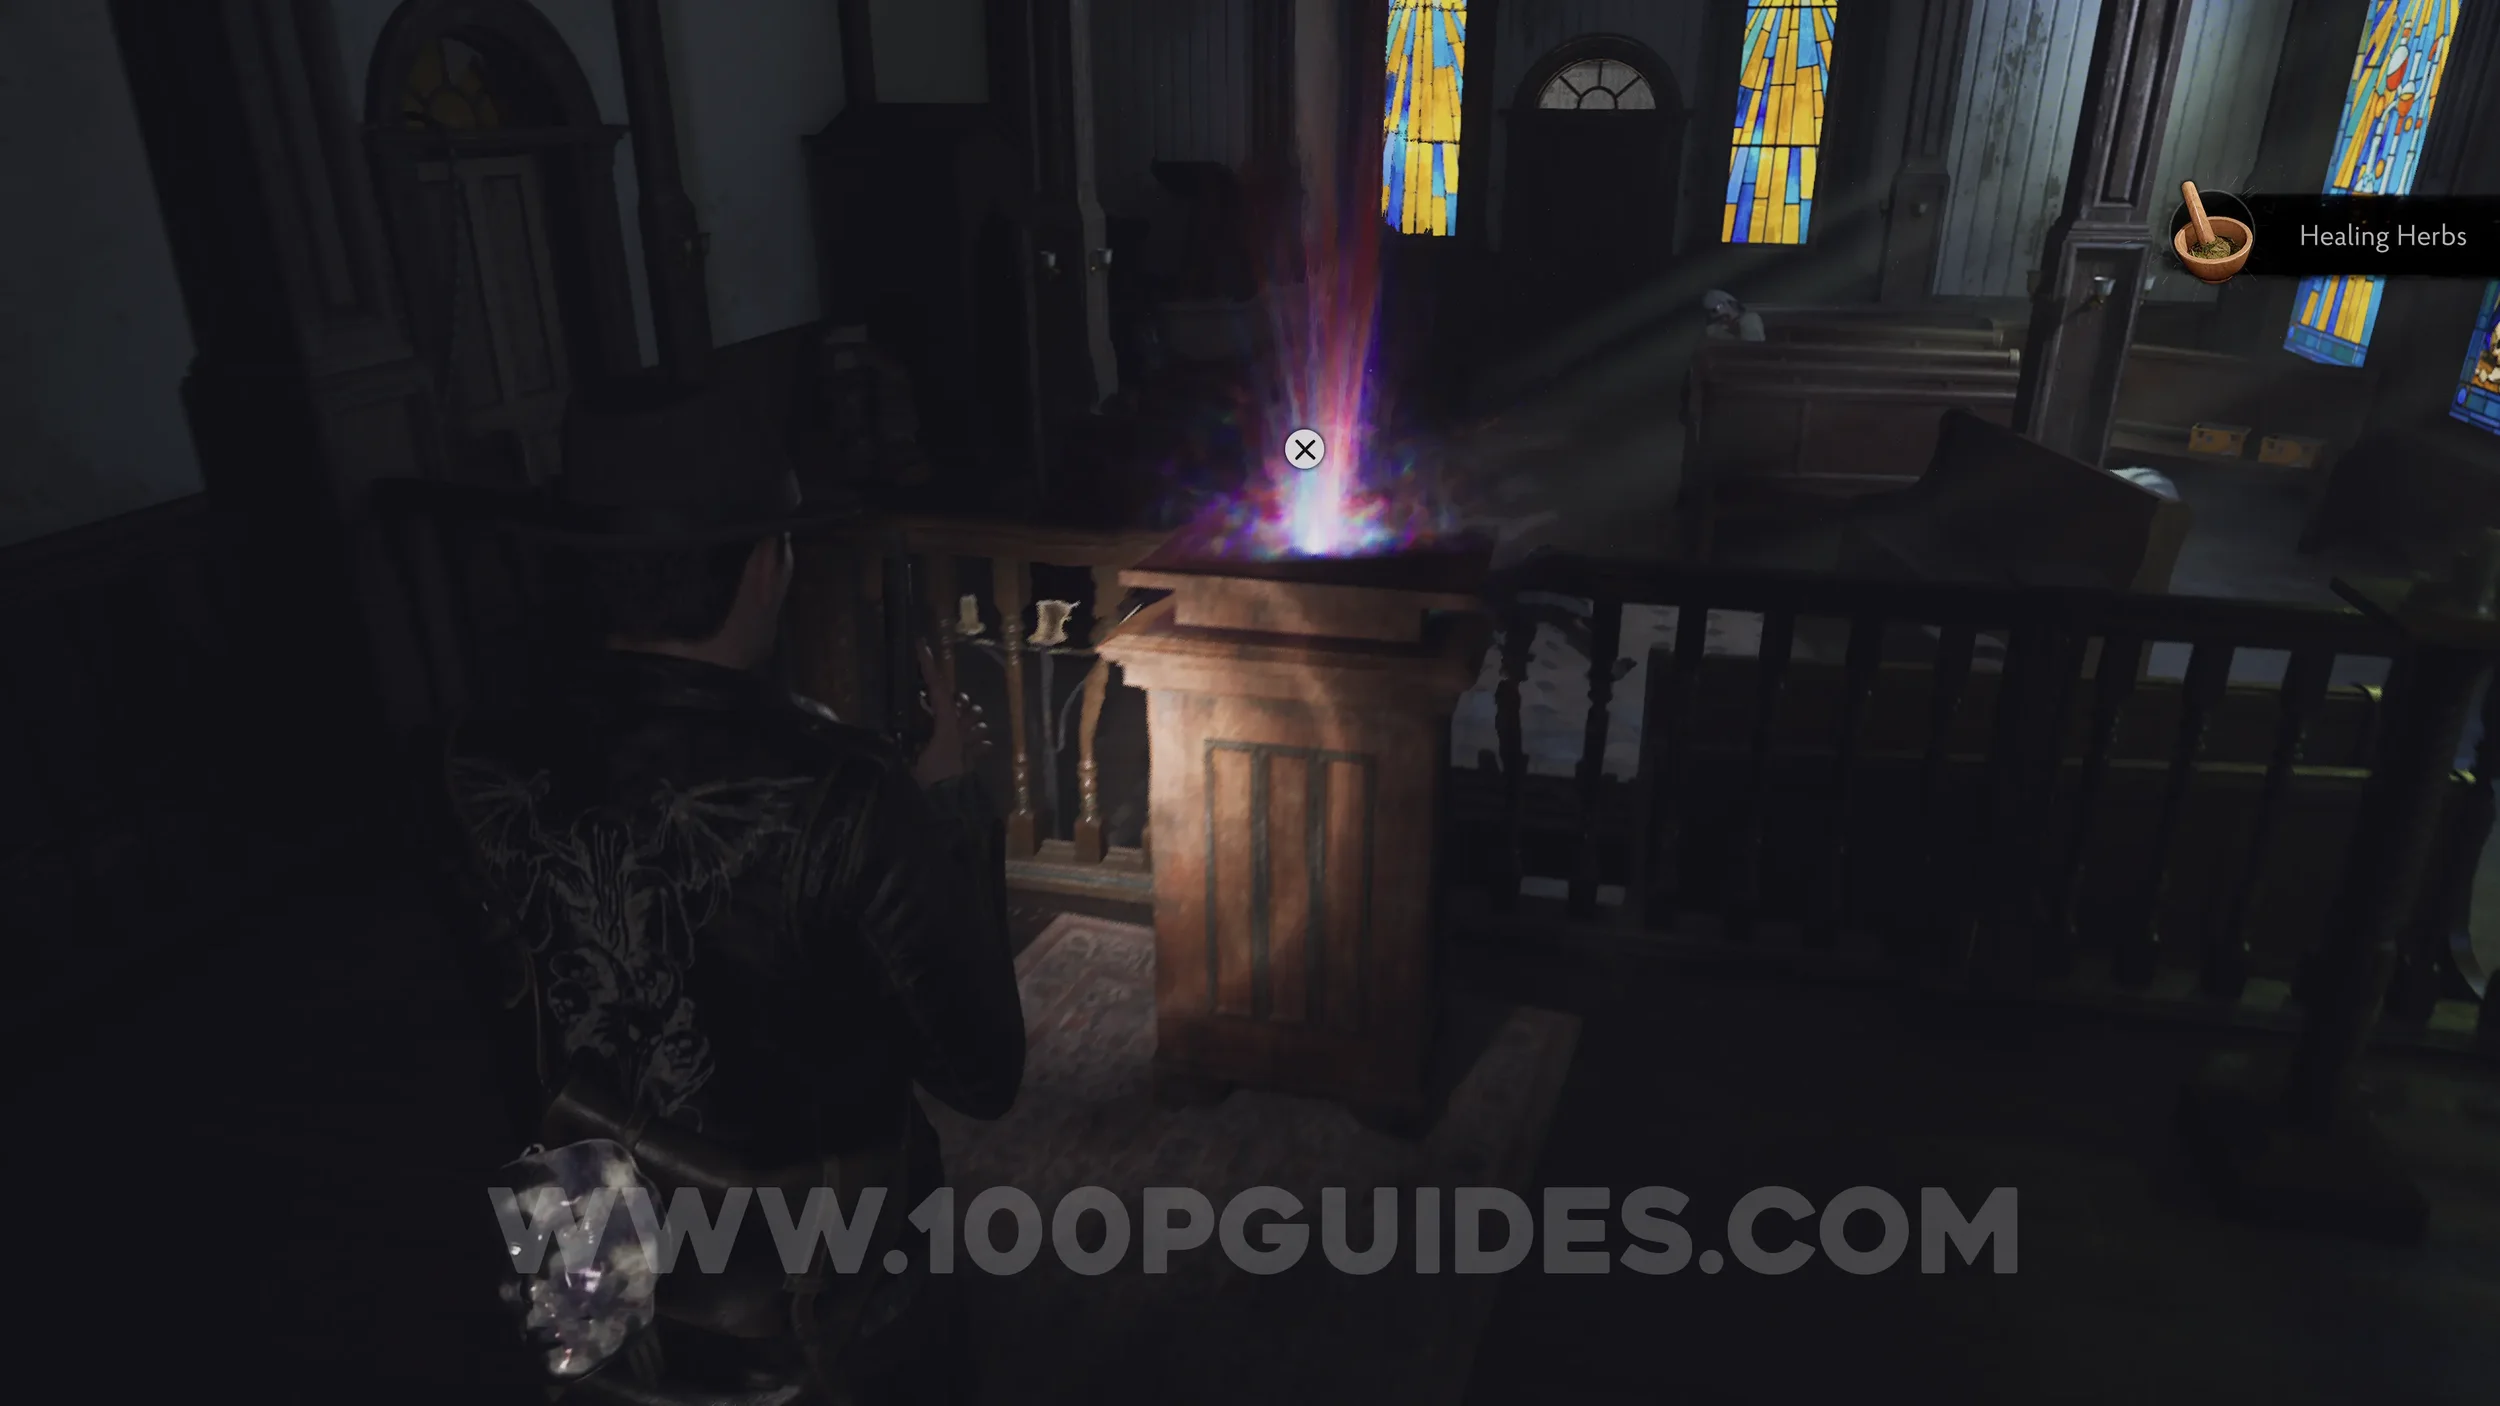
Evidence: Occult Symbol (Yellow). On the altar in the Chapel.
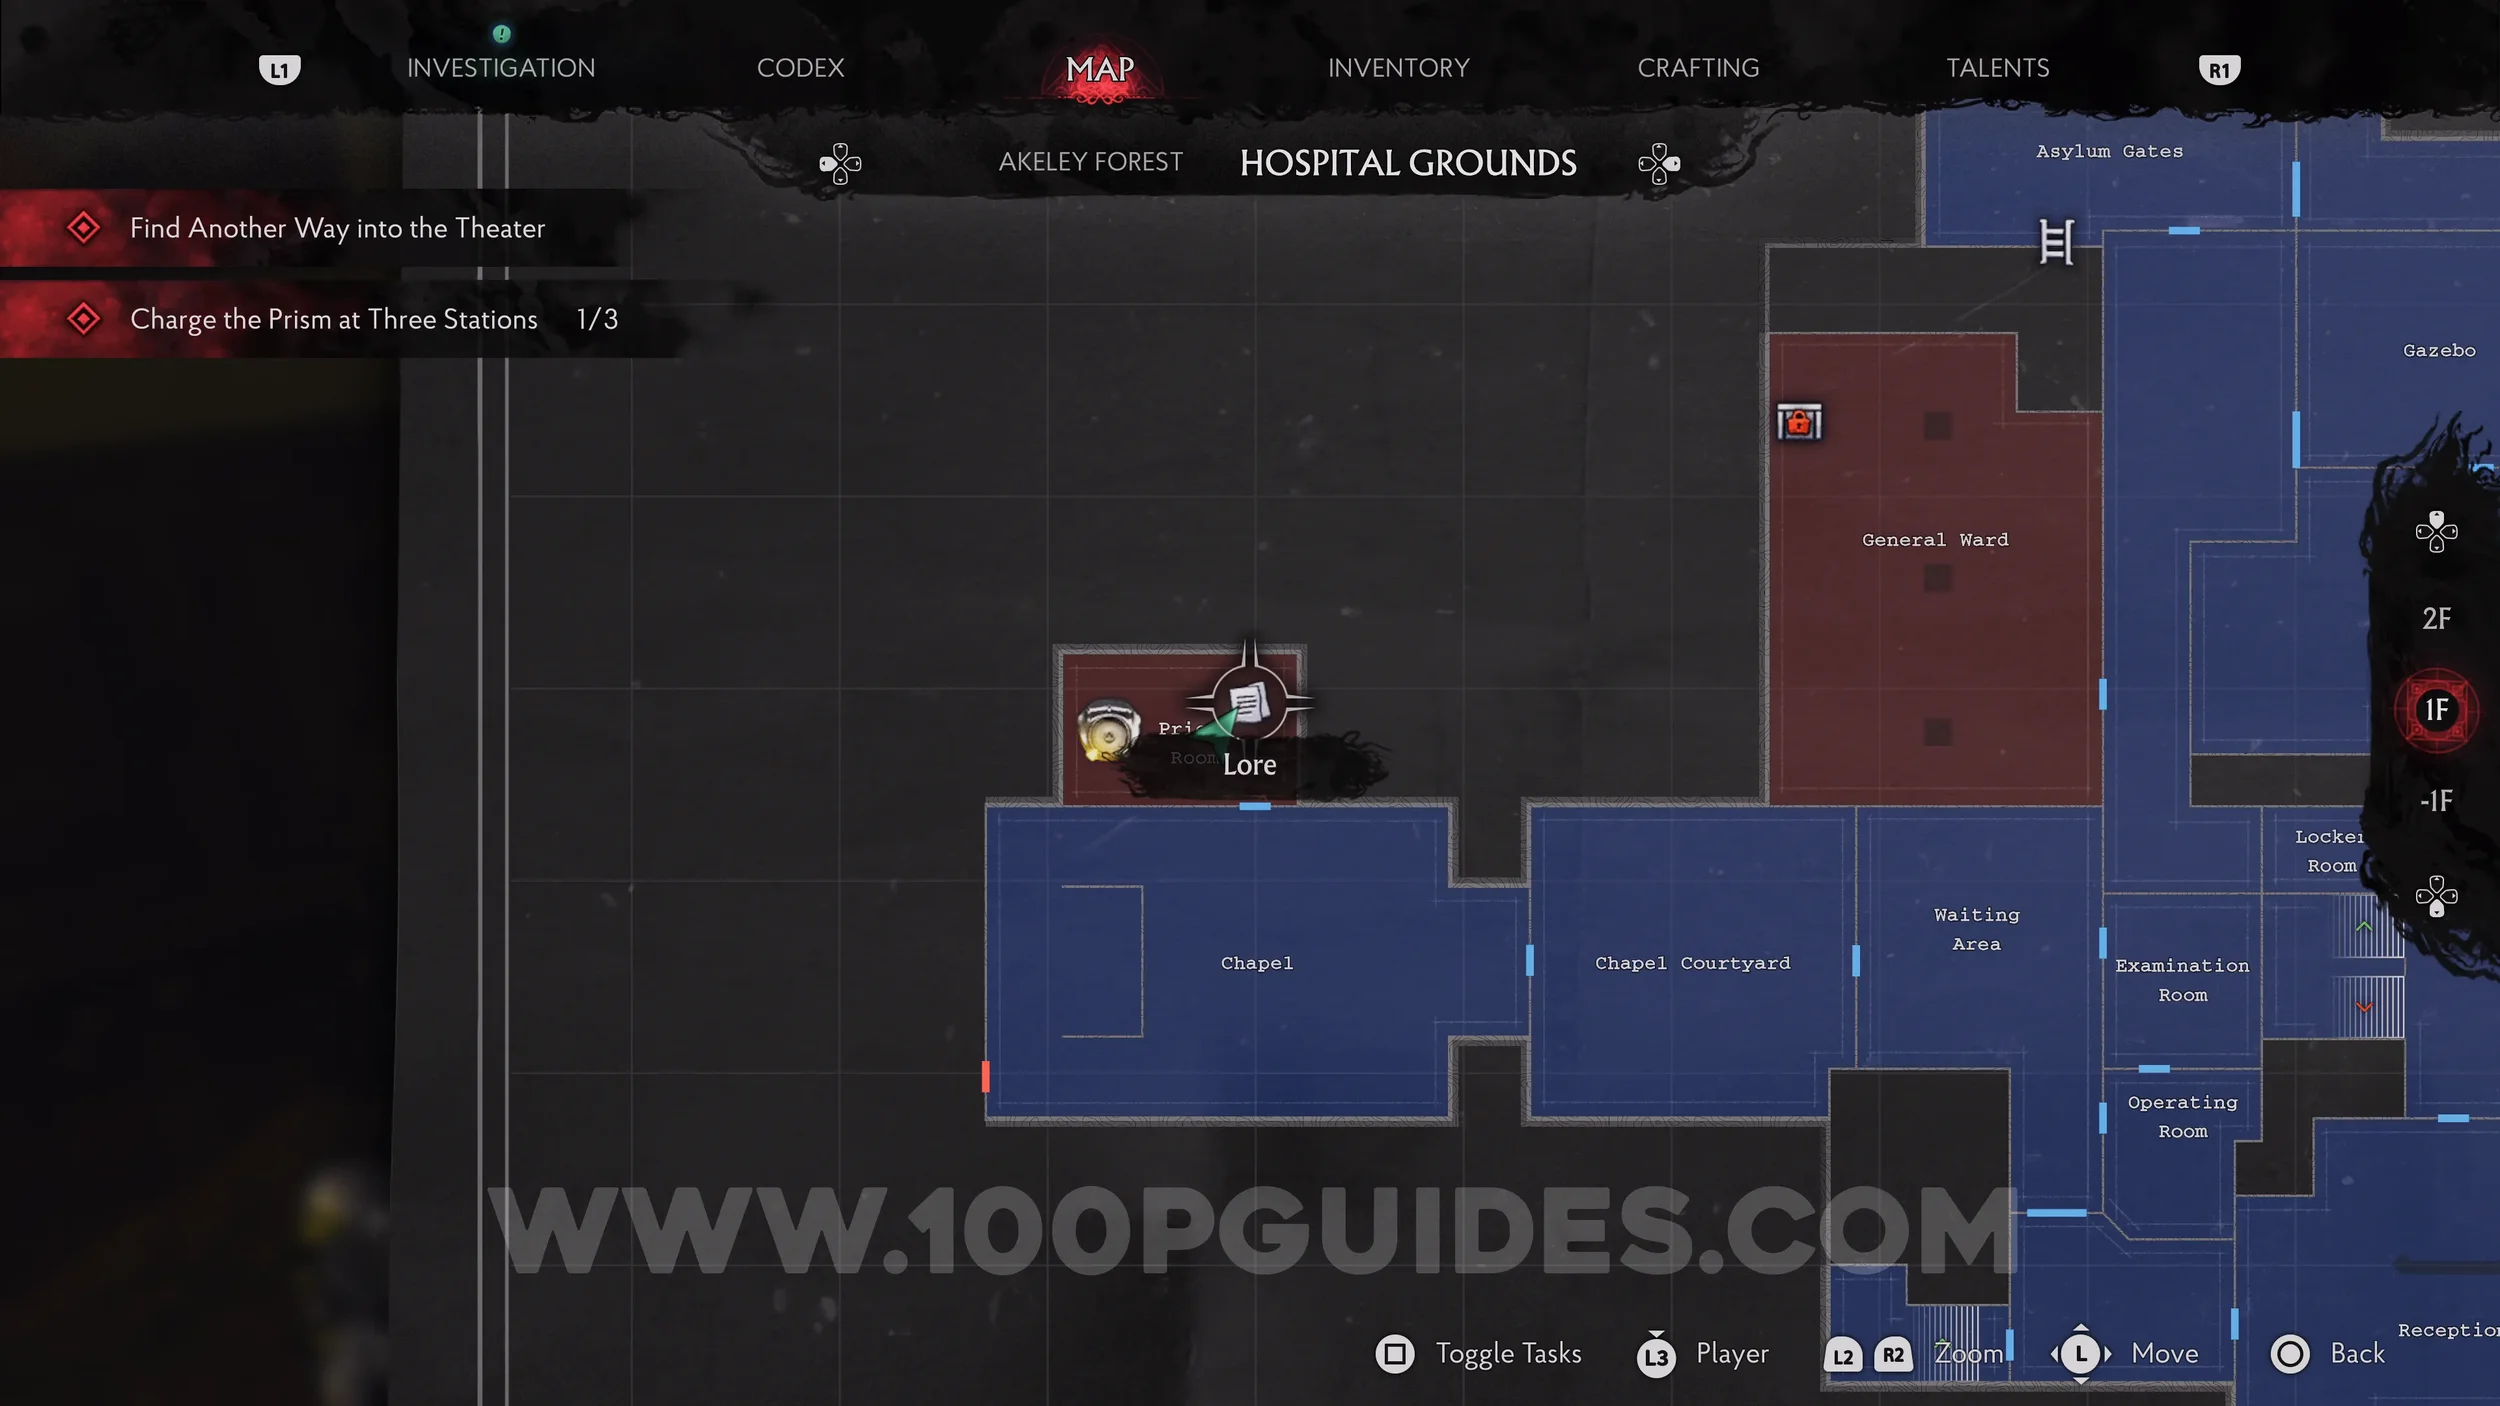
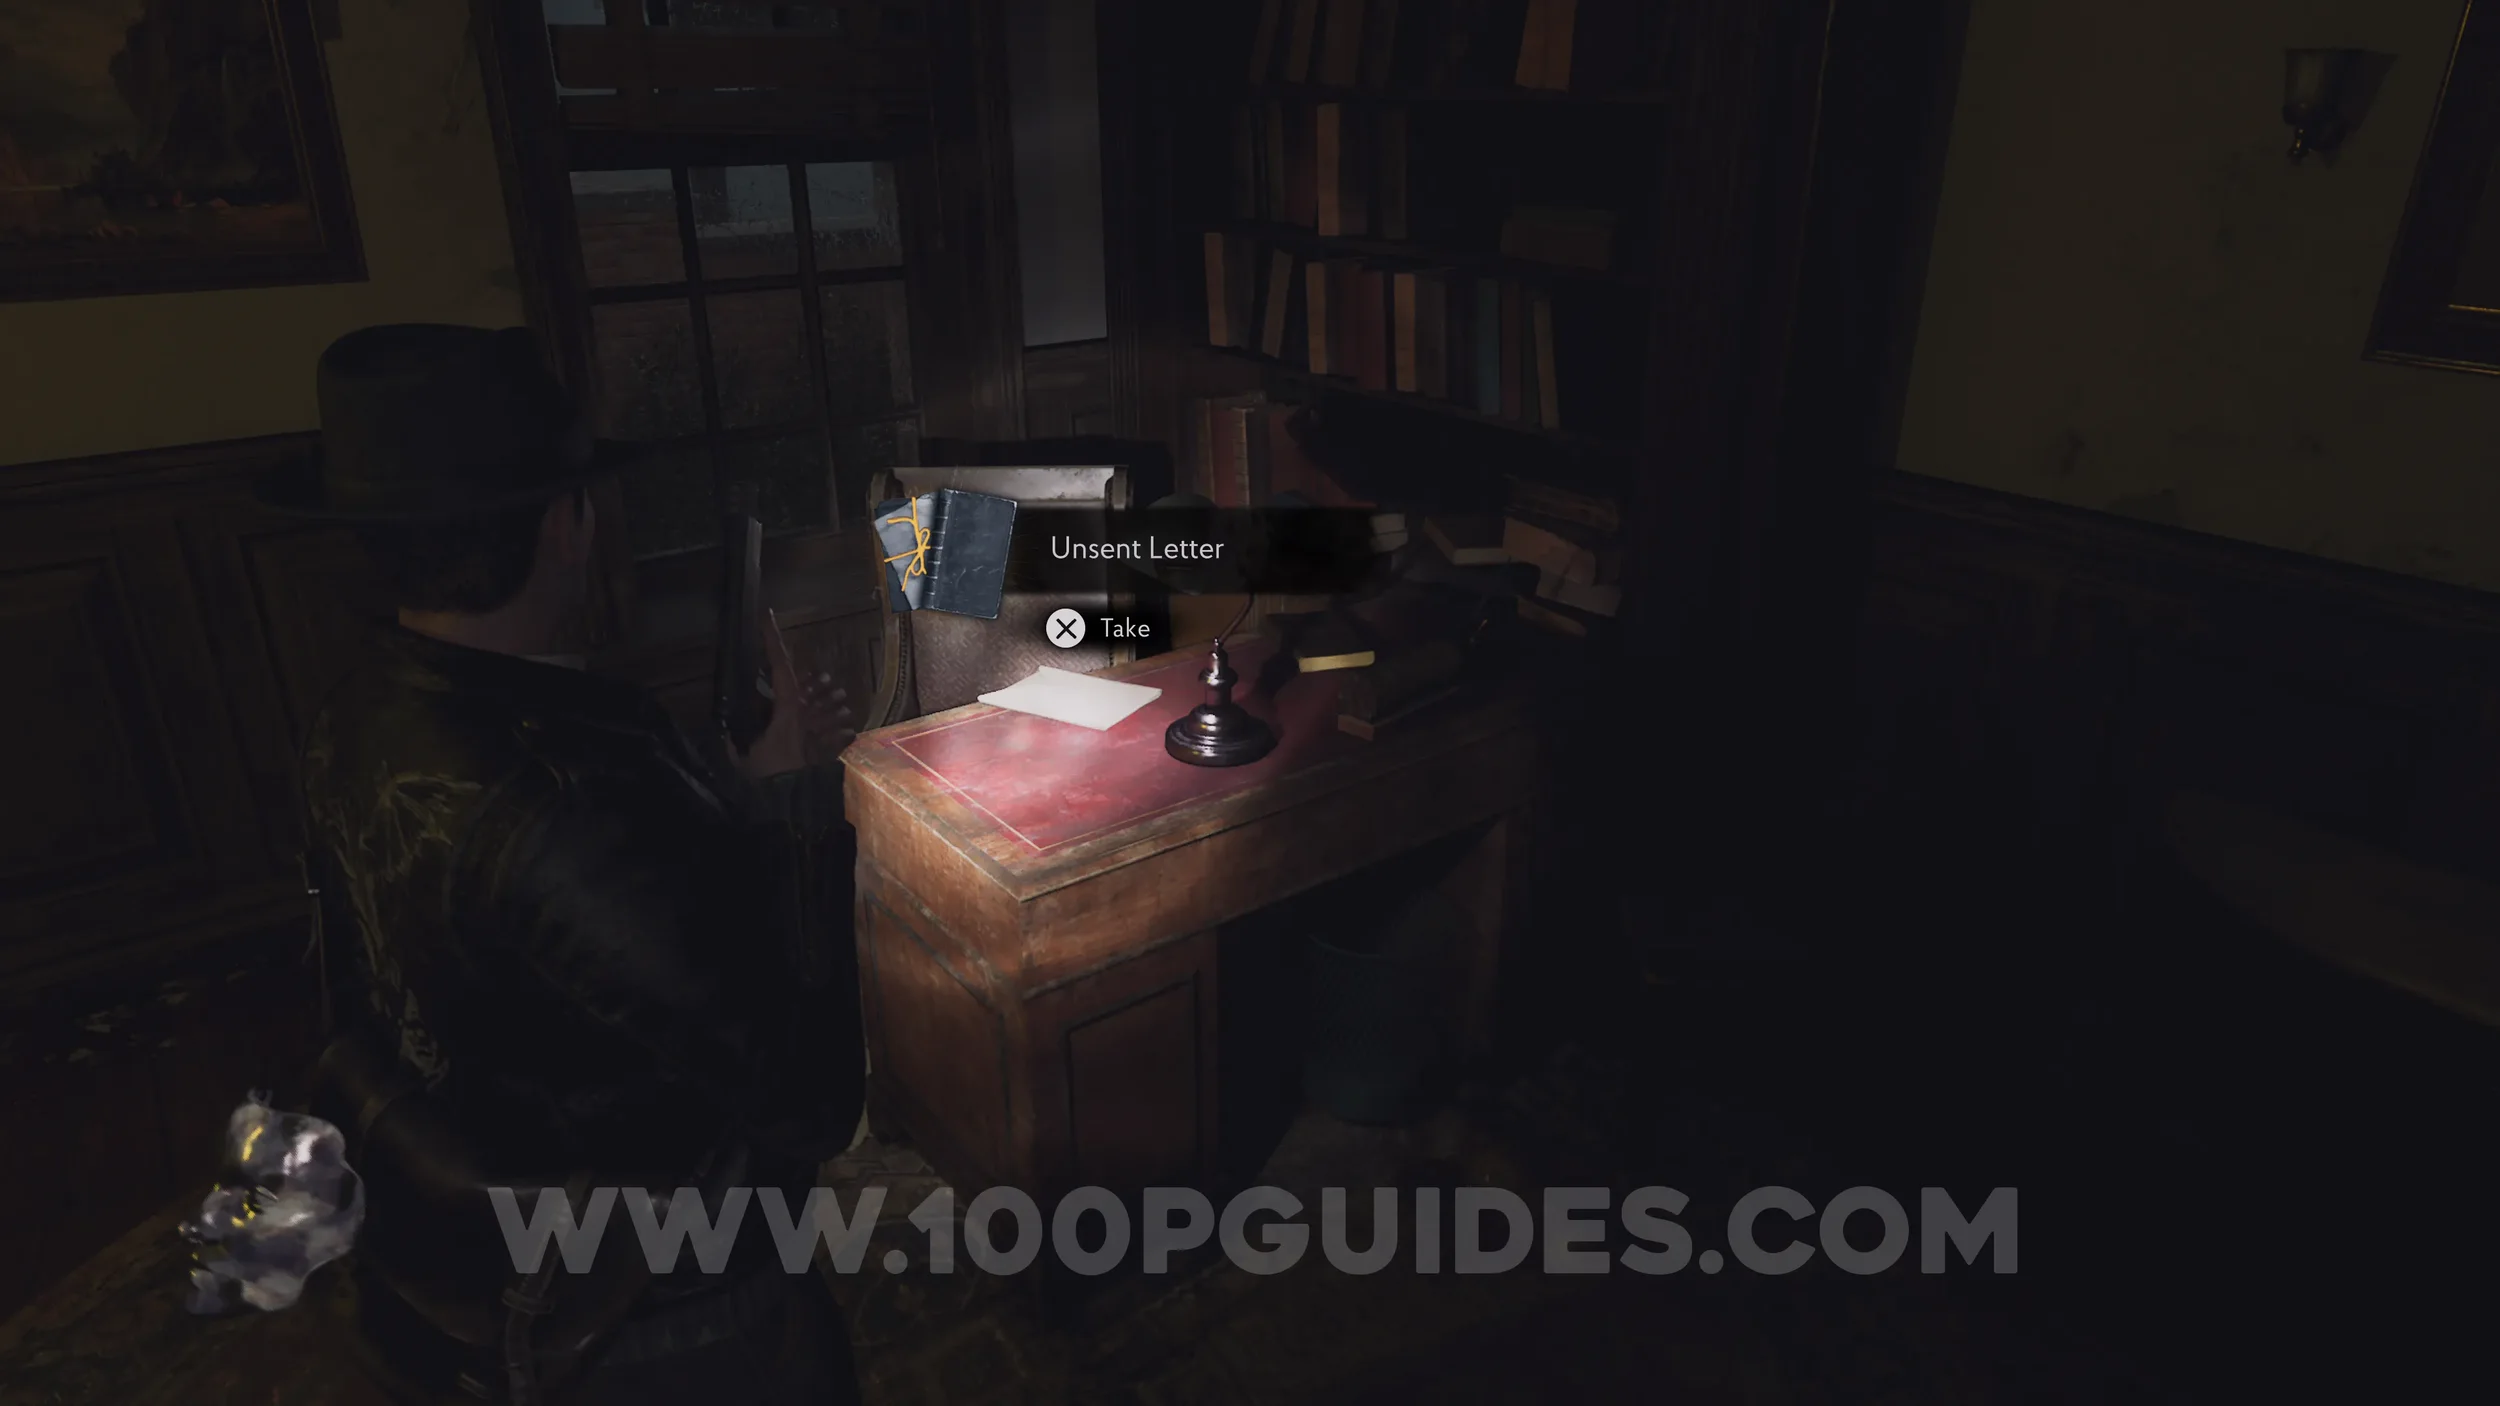
Lore Codex: Unsent Letter. In the small room attached to the Chapel.
Yellow Prism Station Puzzle
Now that you have all three Yellow Occult Symbols, place the Prism into the station in the Priest's Room, the small room attached to the Chapel, and spin the three rings so they match the image below. Then press to validate.


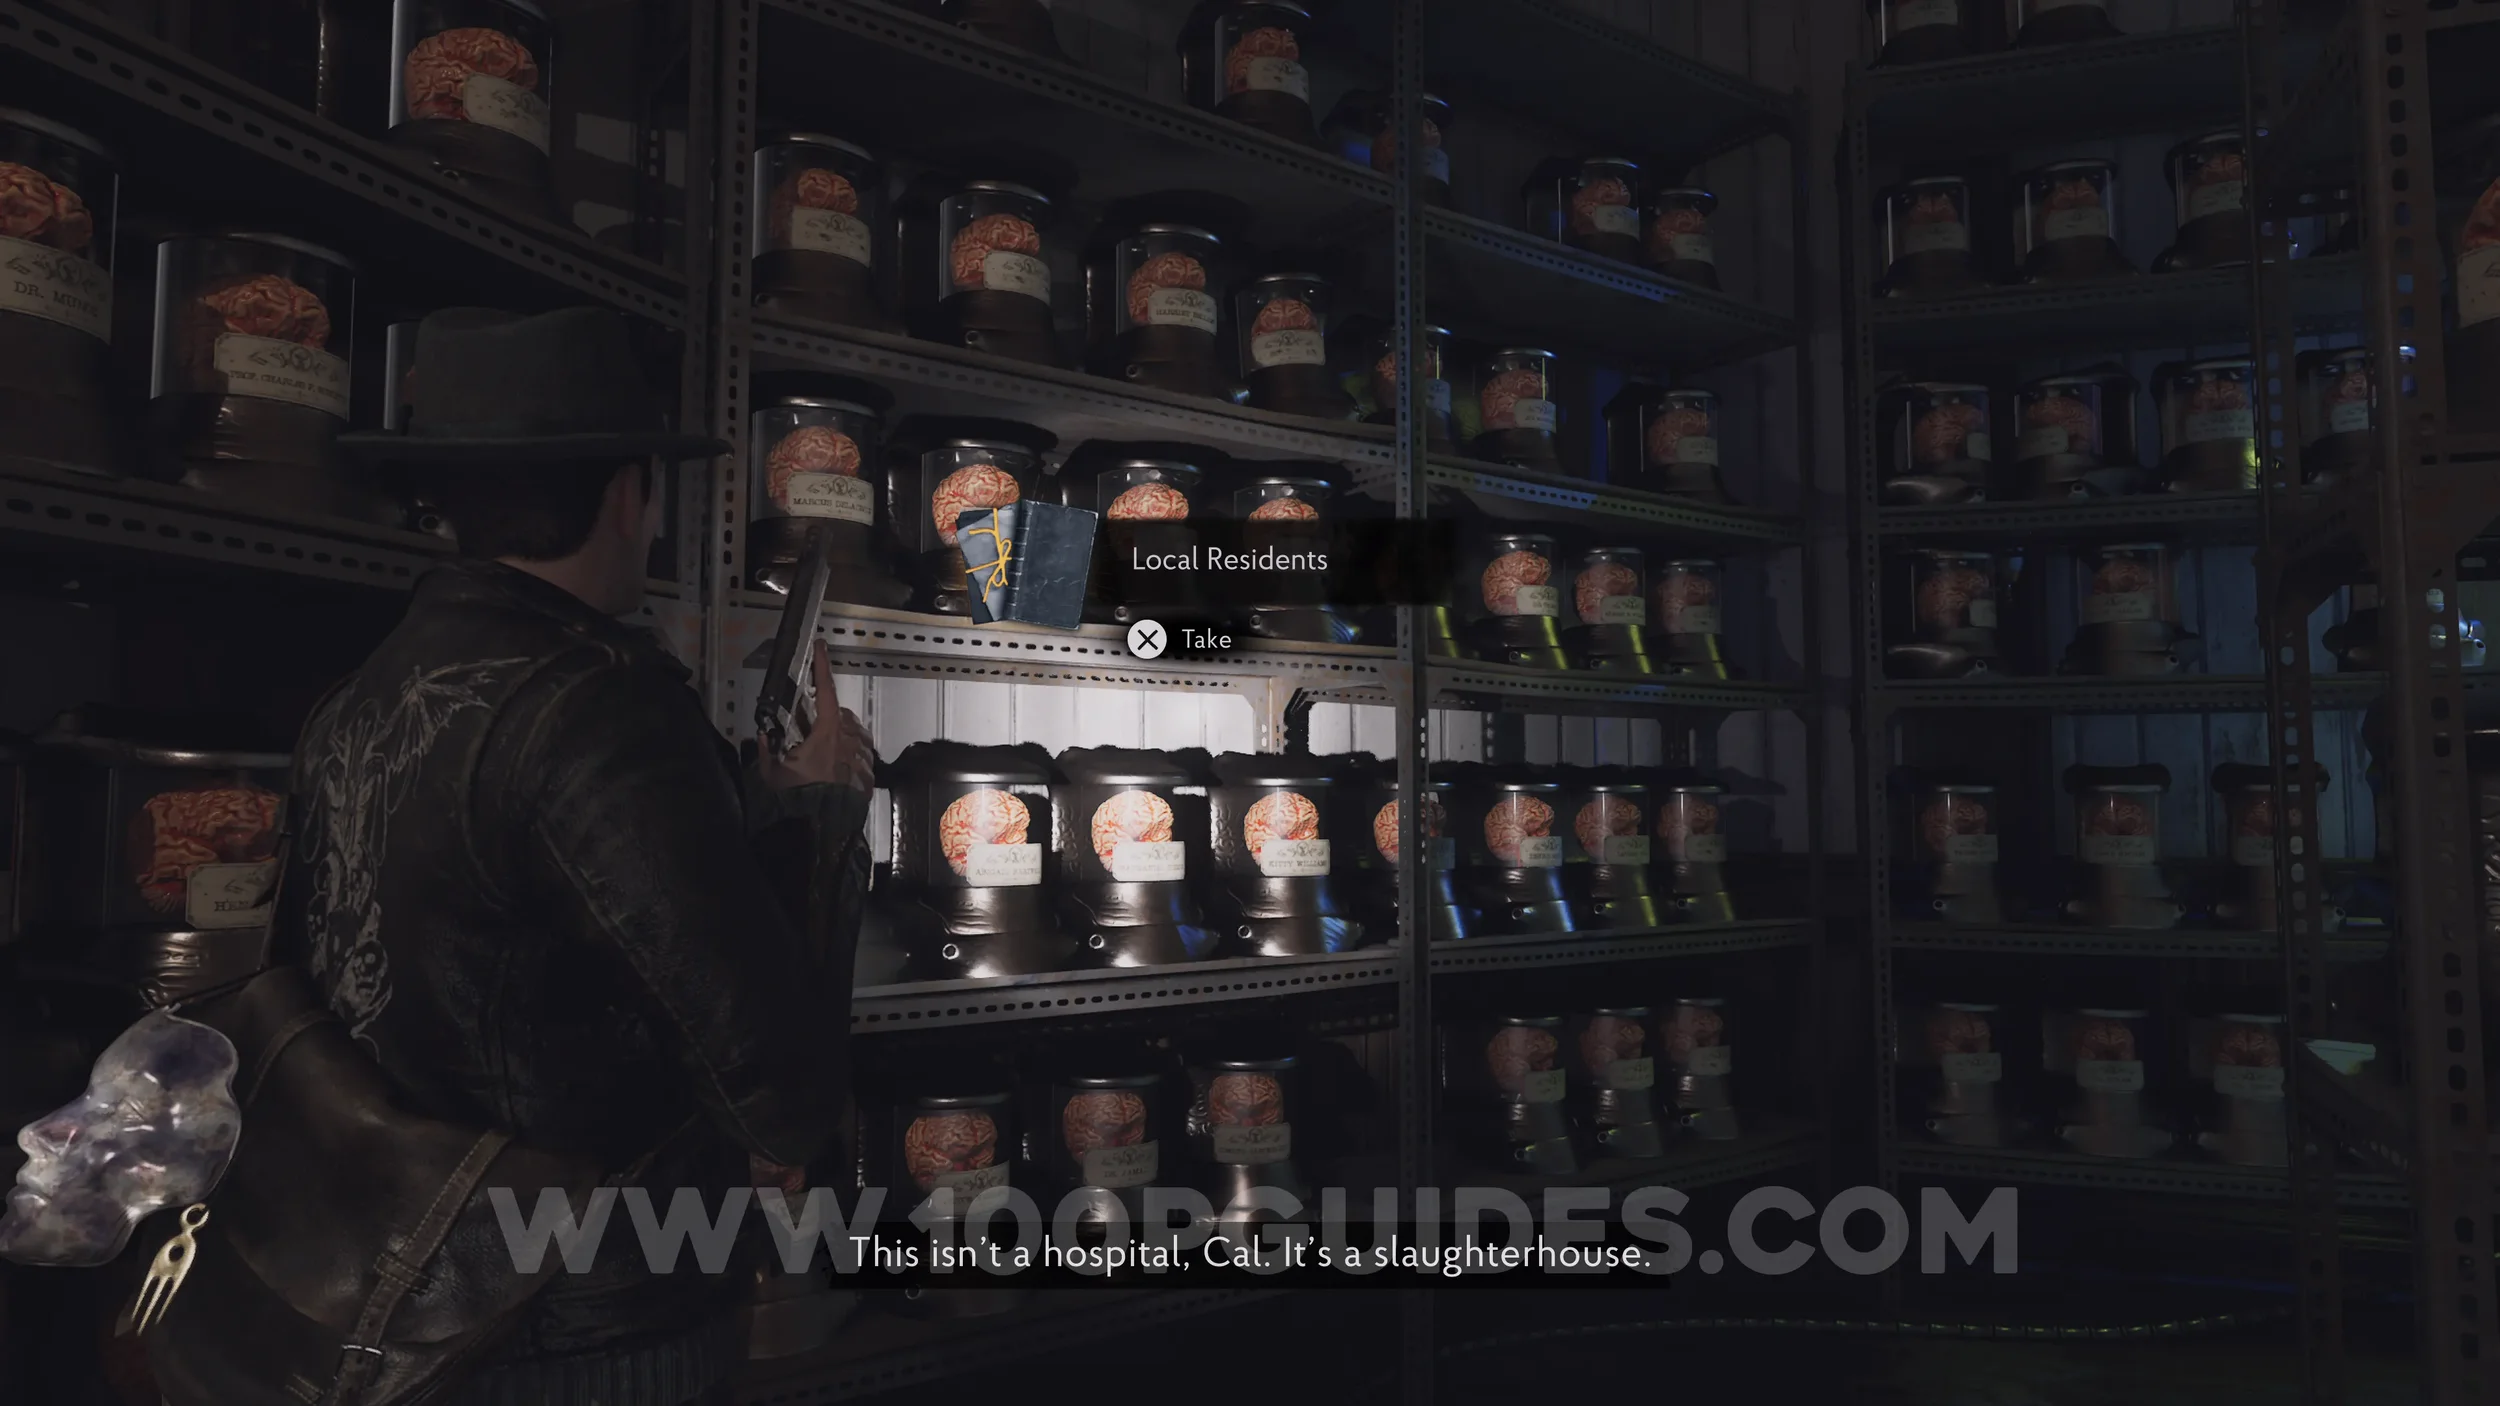
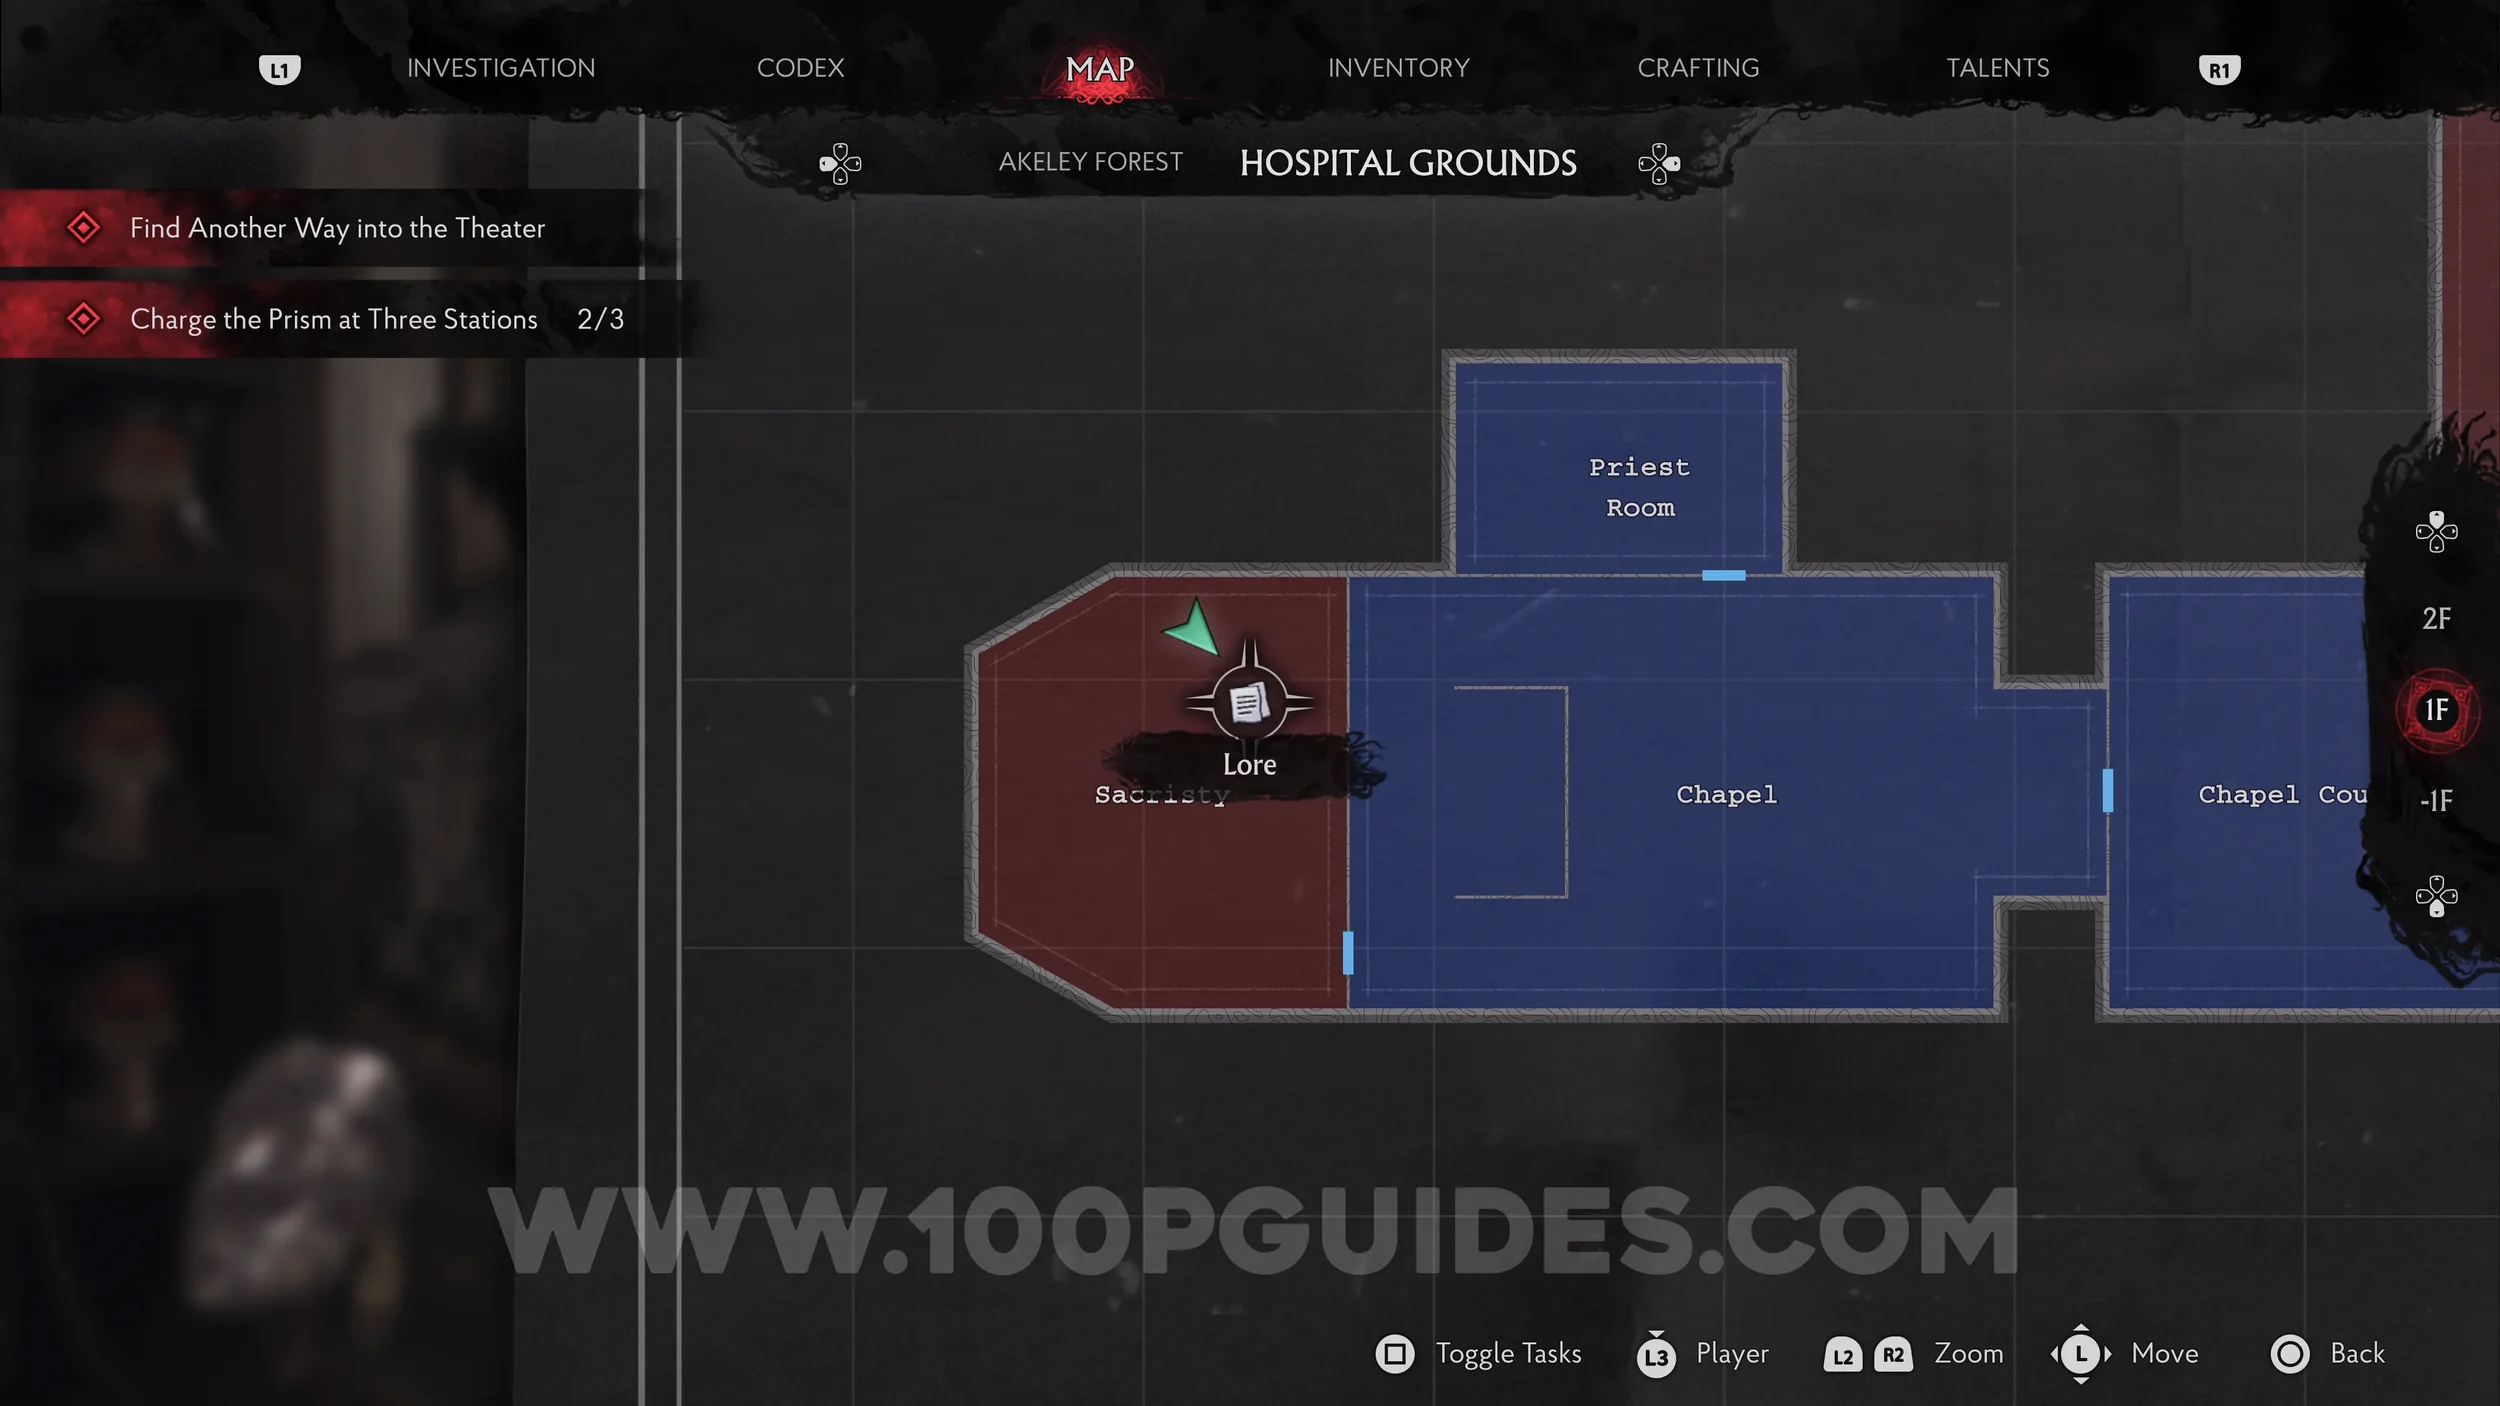
Lore Codex: Local Residents. After solving the Yellow Prism Station Puzzle, head through the door behind the altar in the Chapel. You'll then see the codex on the left wall of brains.
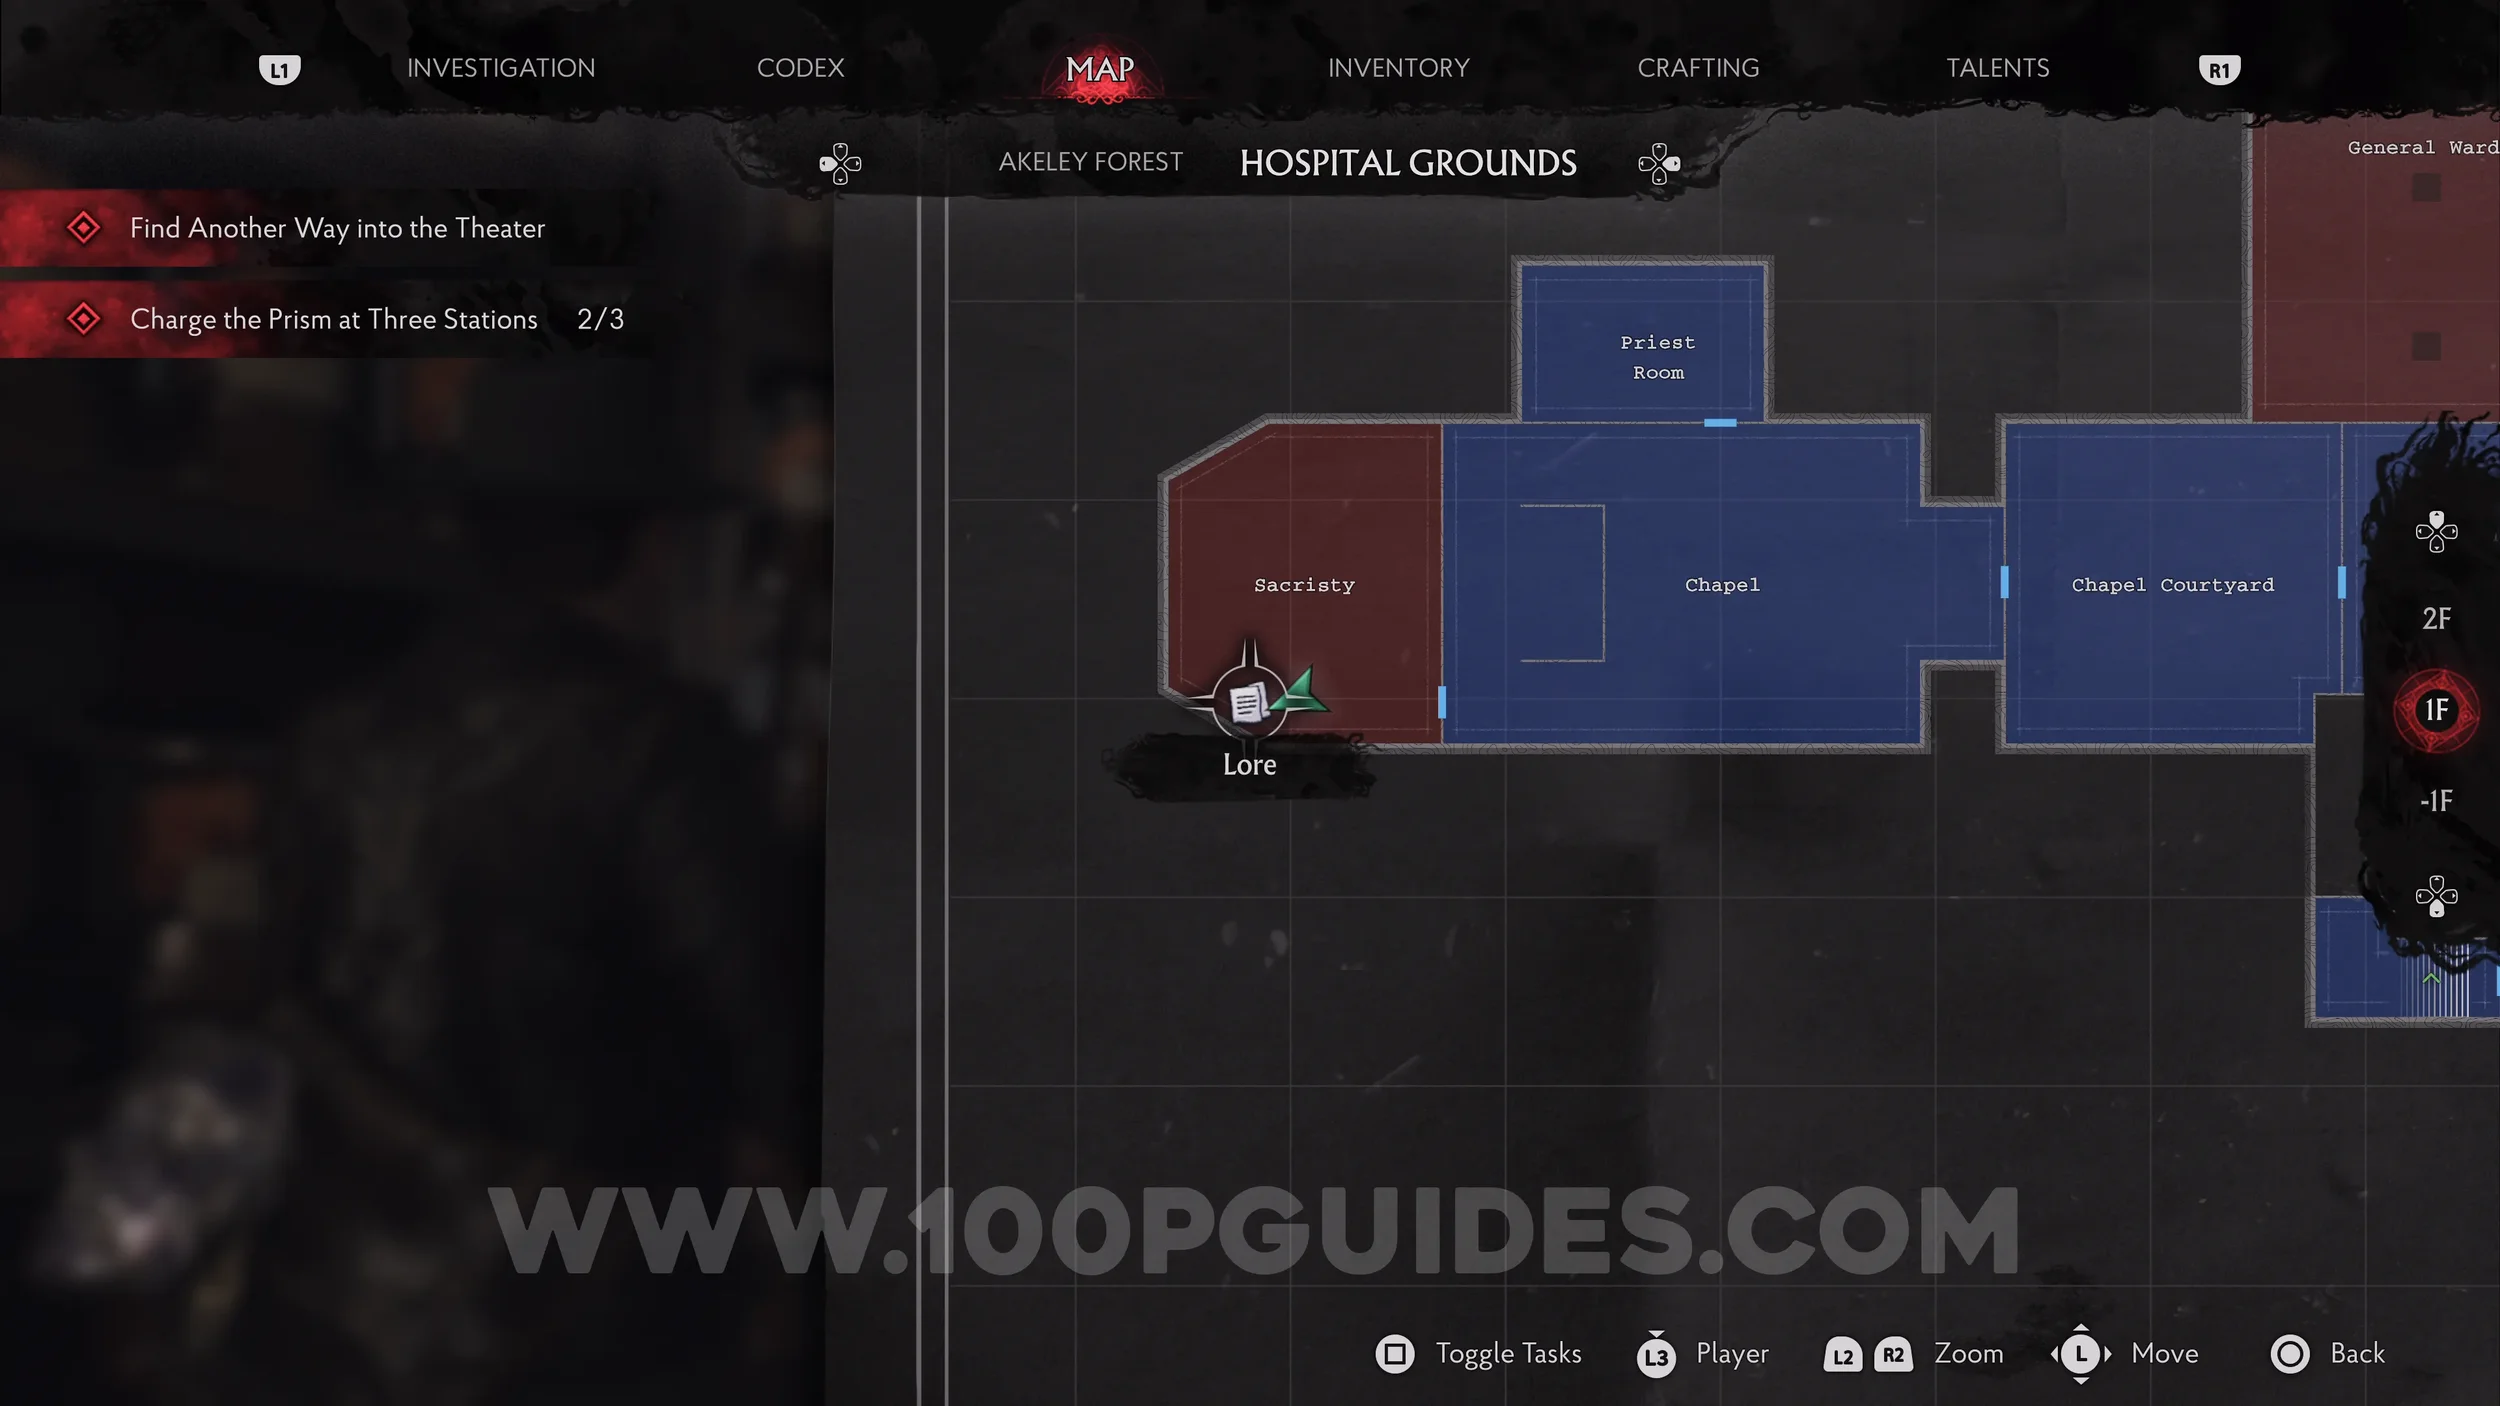
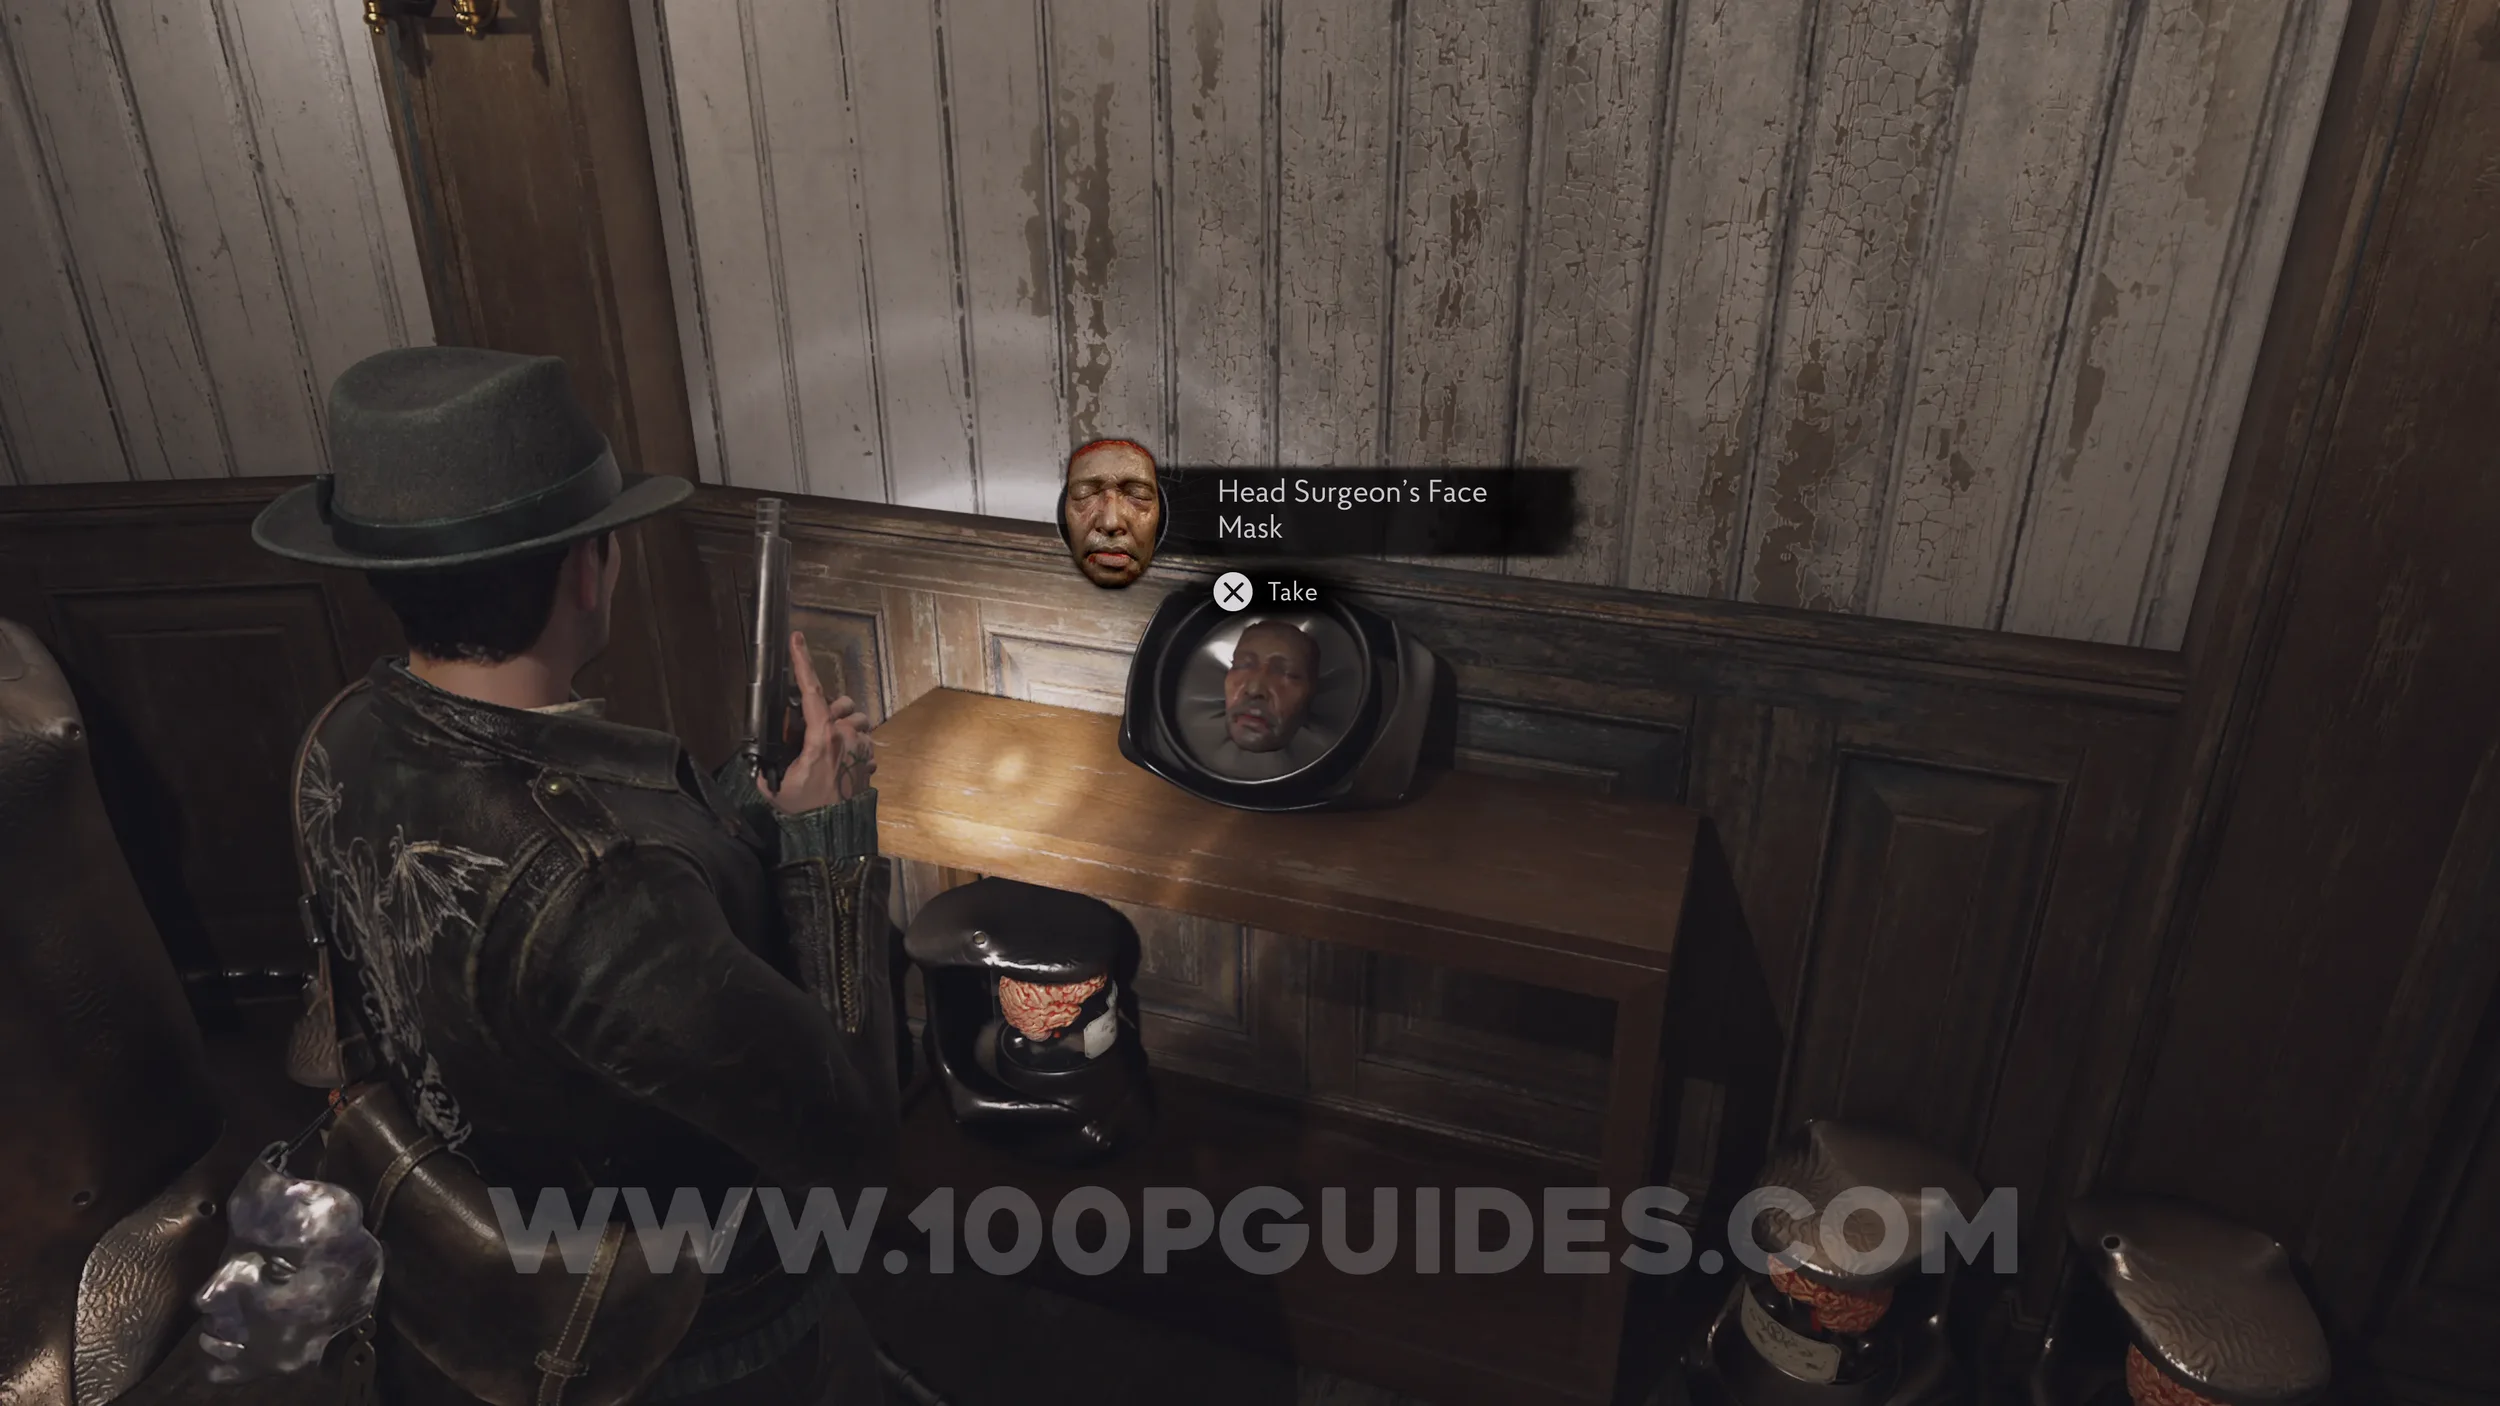
Key Item: Head Surgeon’s Face Mask. At the end of the Sacristy, the room with all the brains.
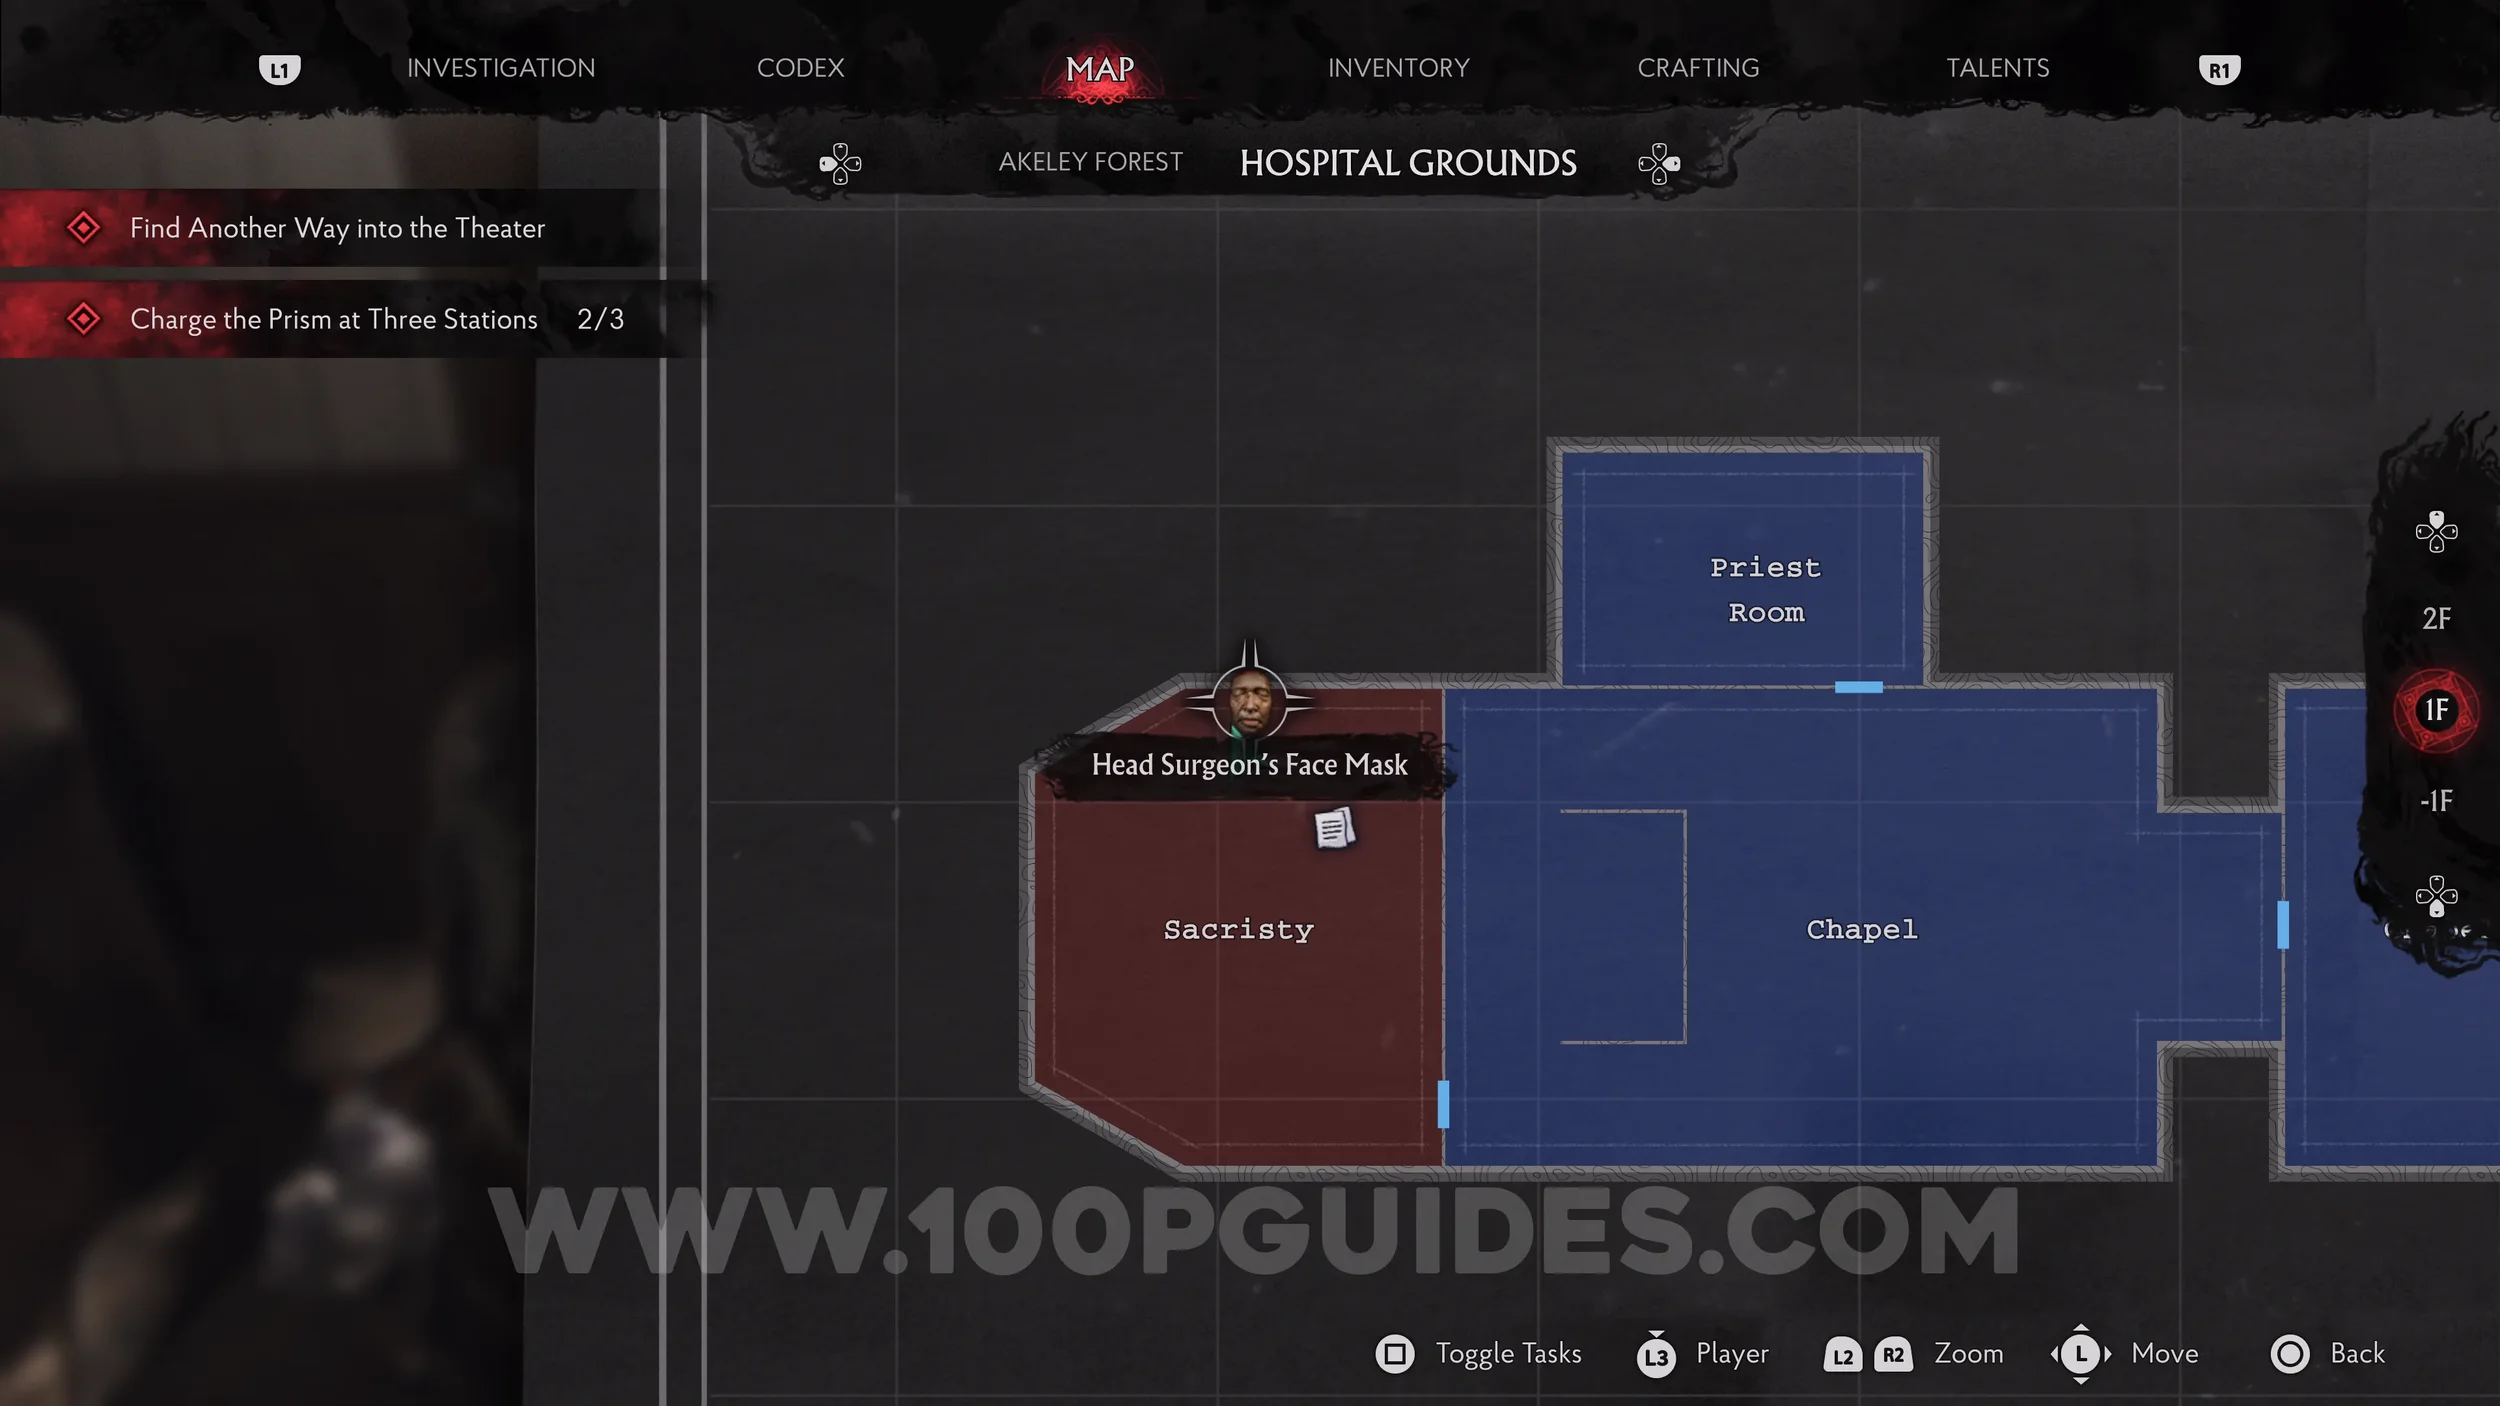
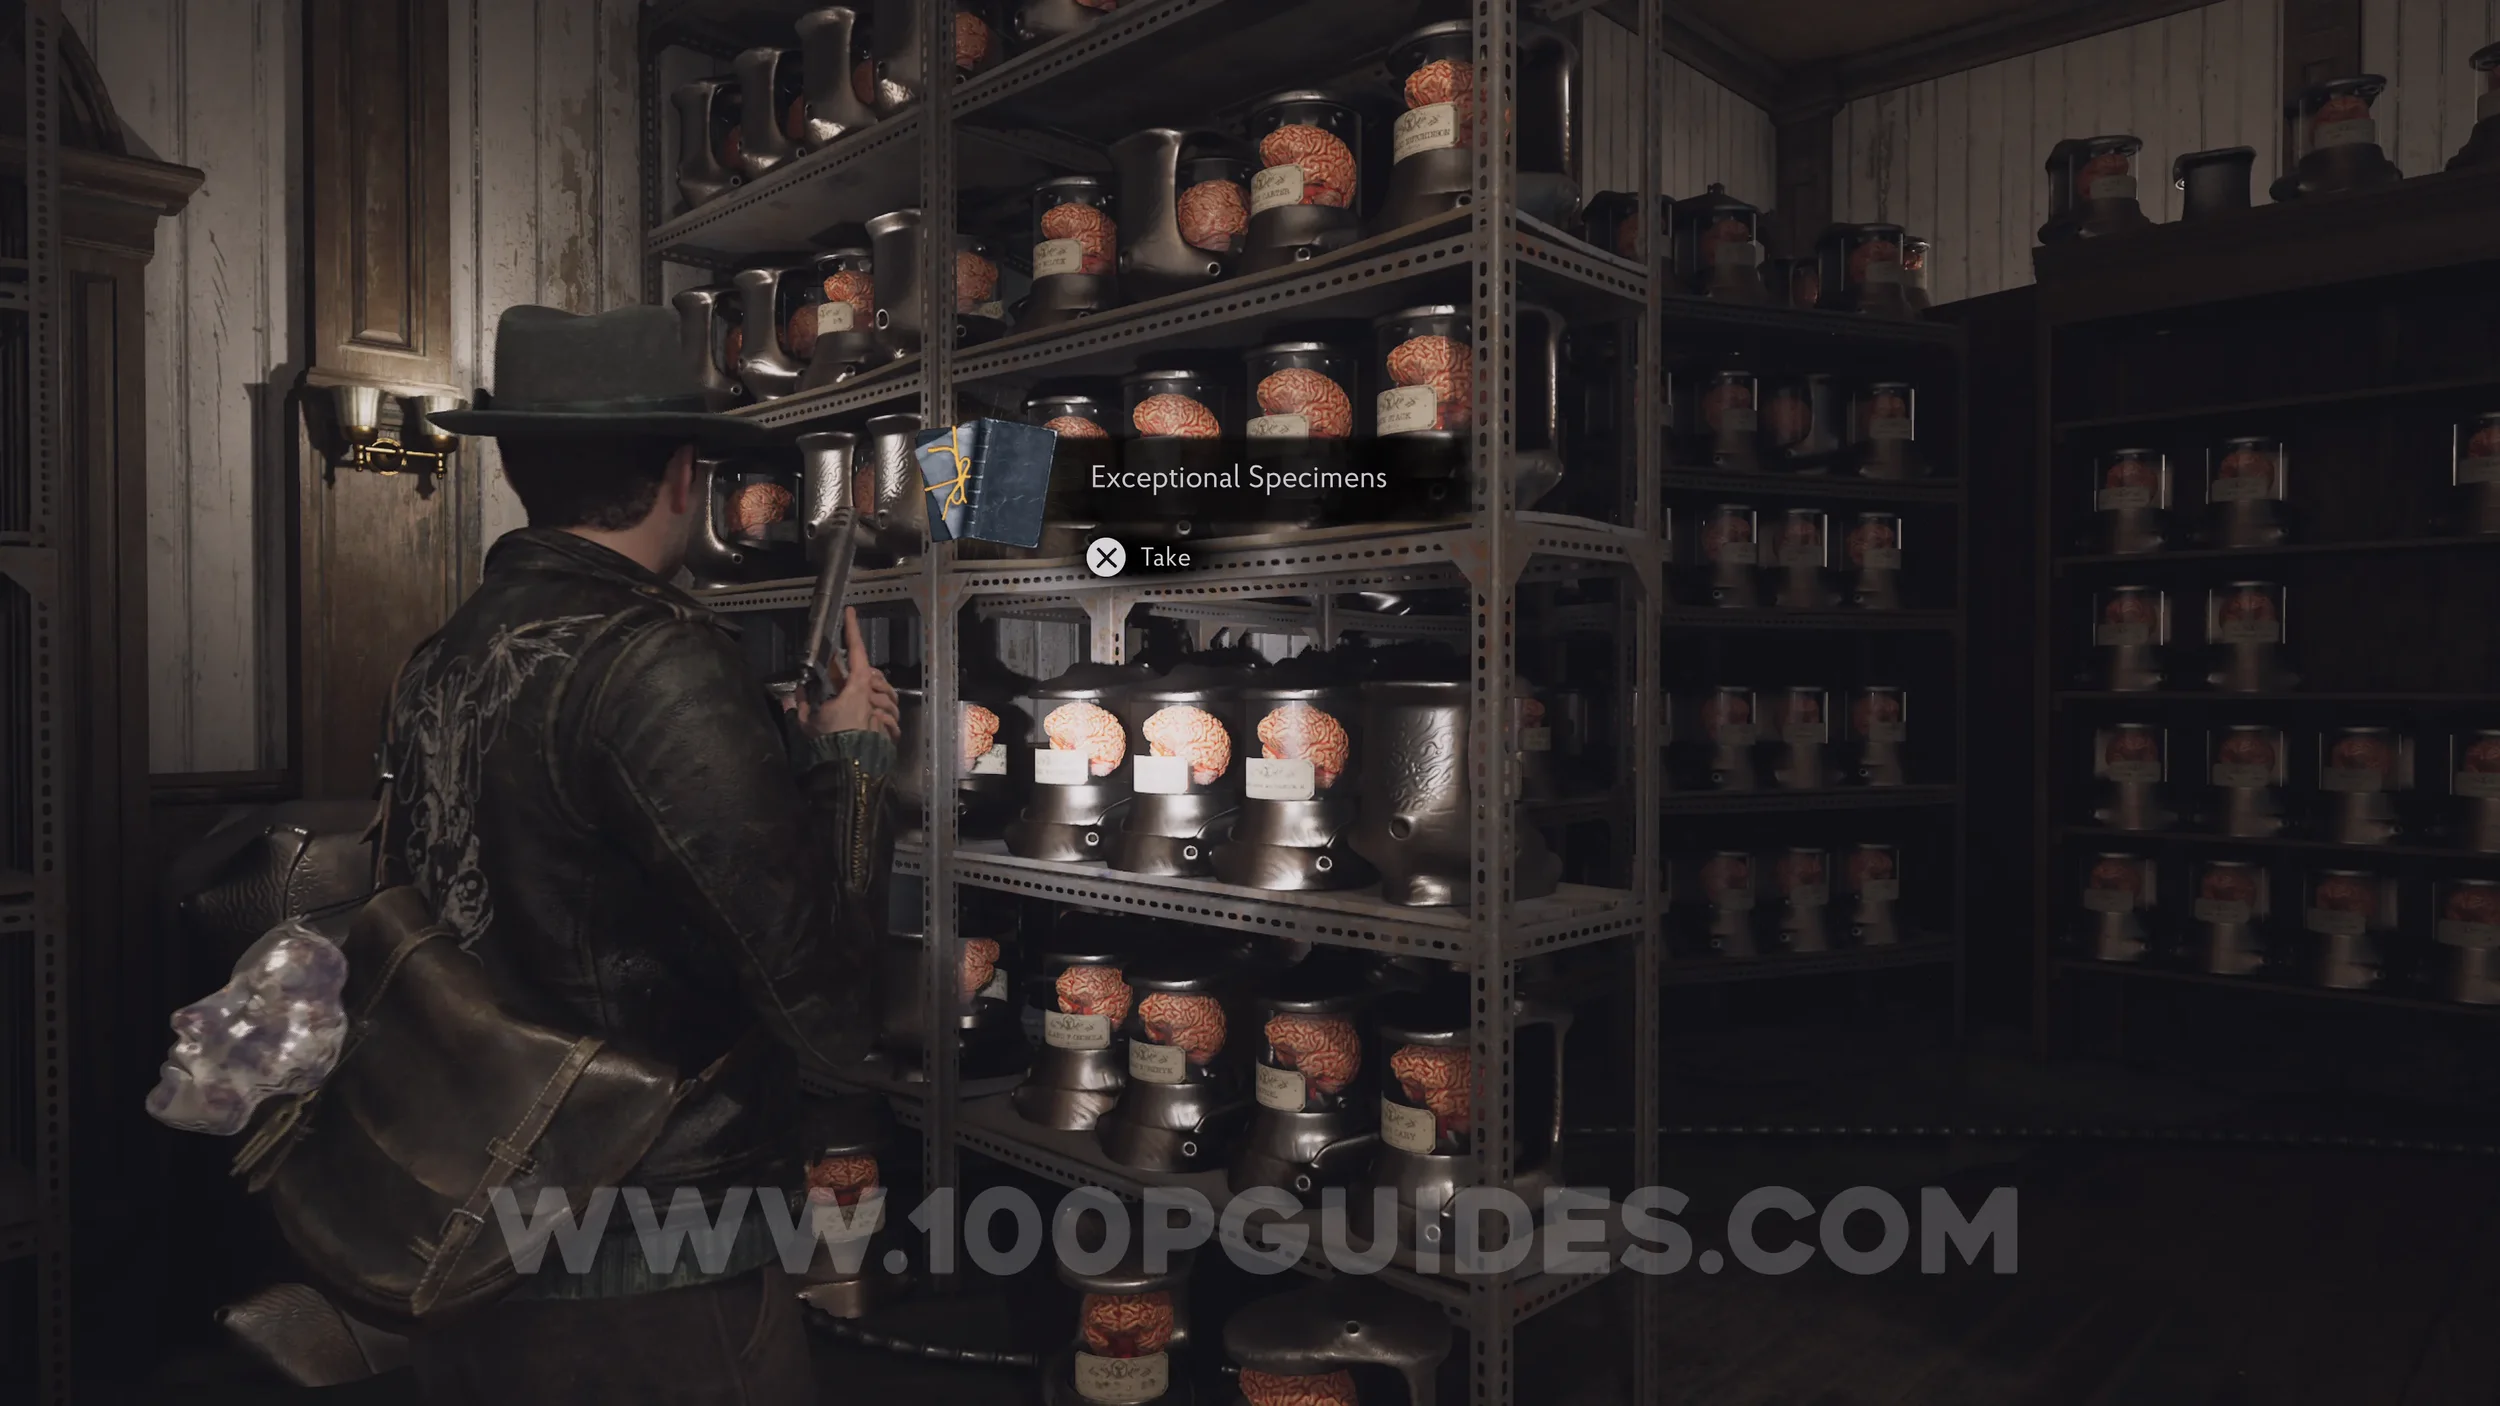
Lore Codex: Exceptional Specimens. From the Head Surgeon's Face Mask, turn around to find it on the shelf of brains to your left.
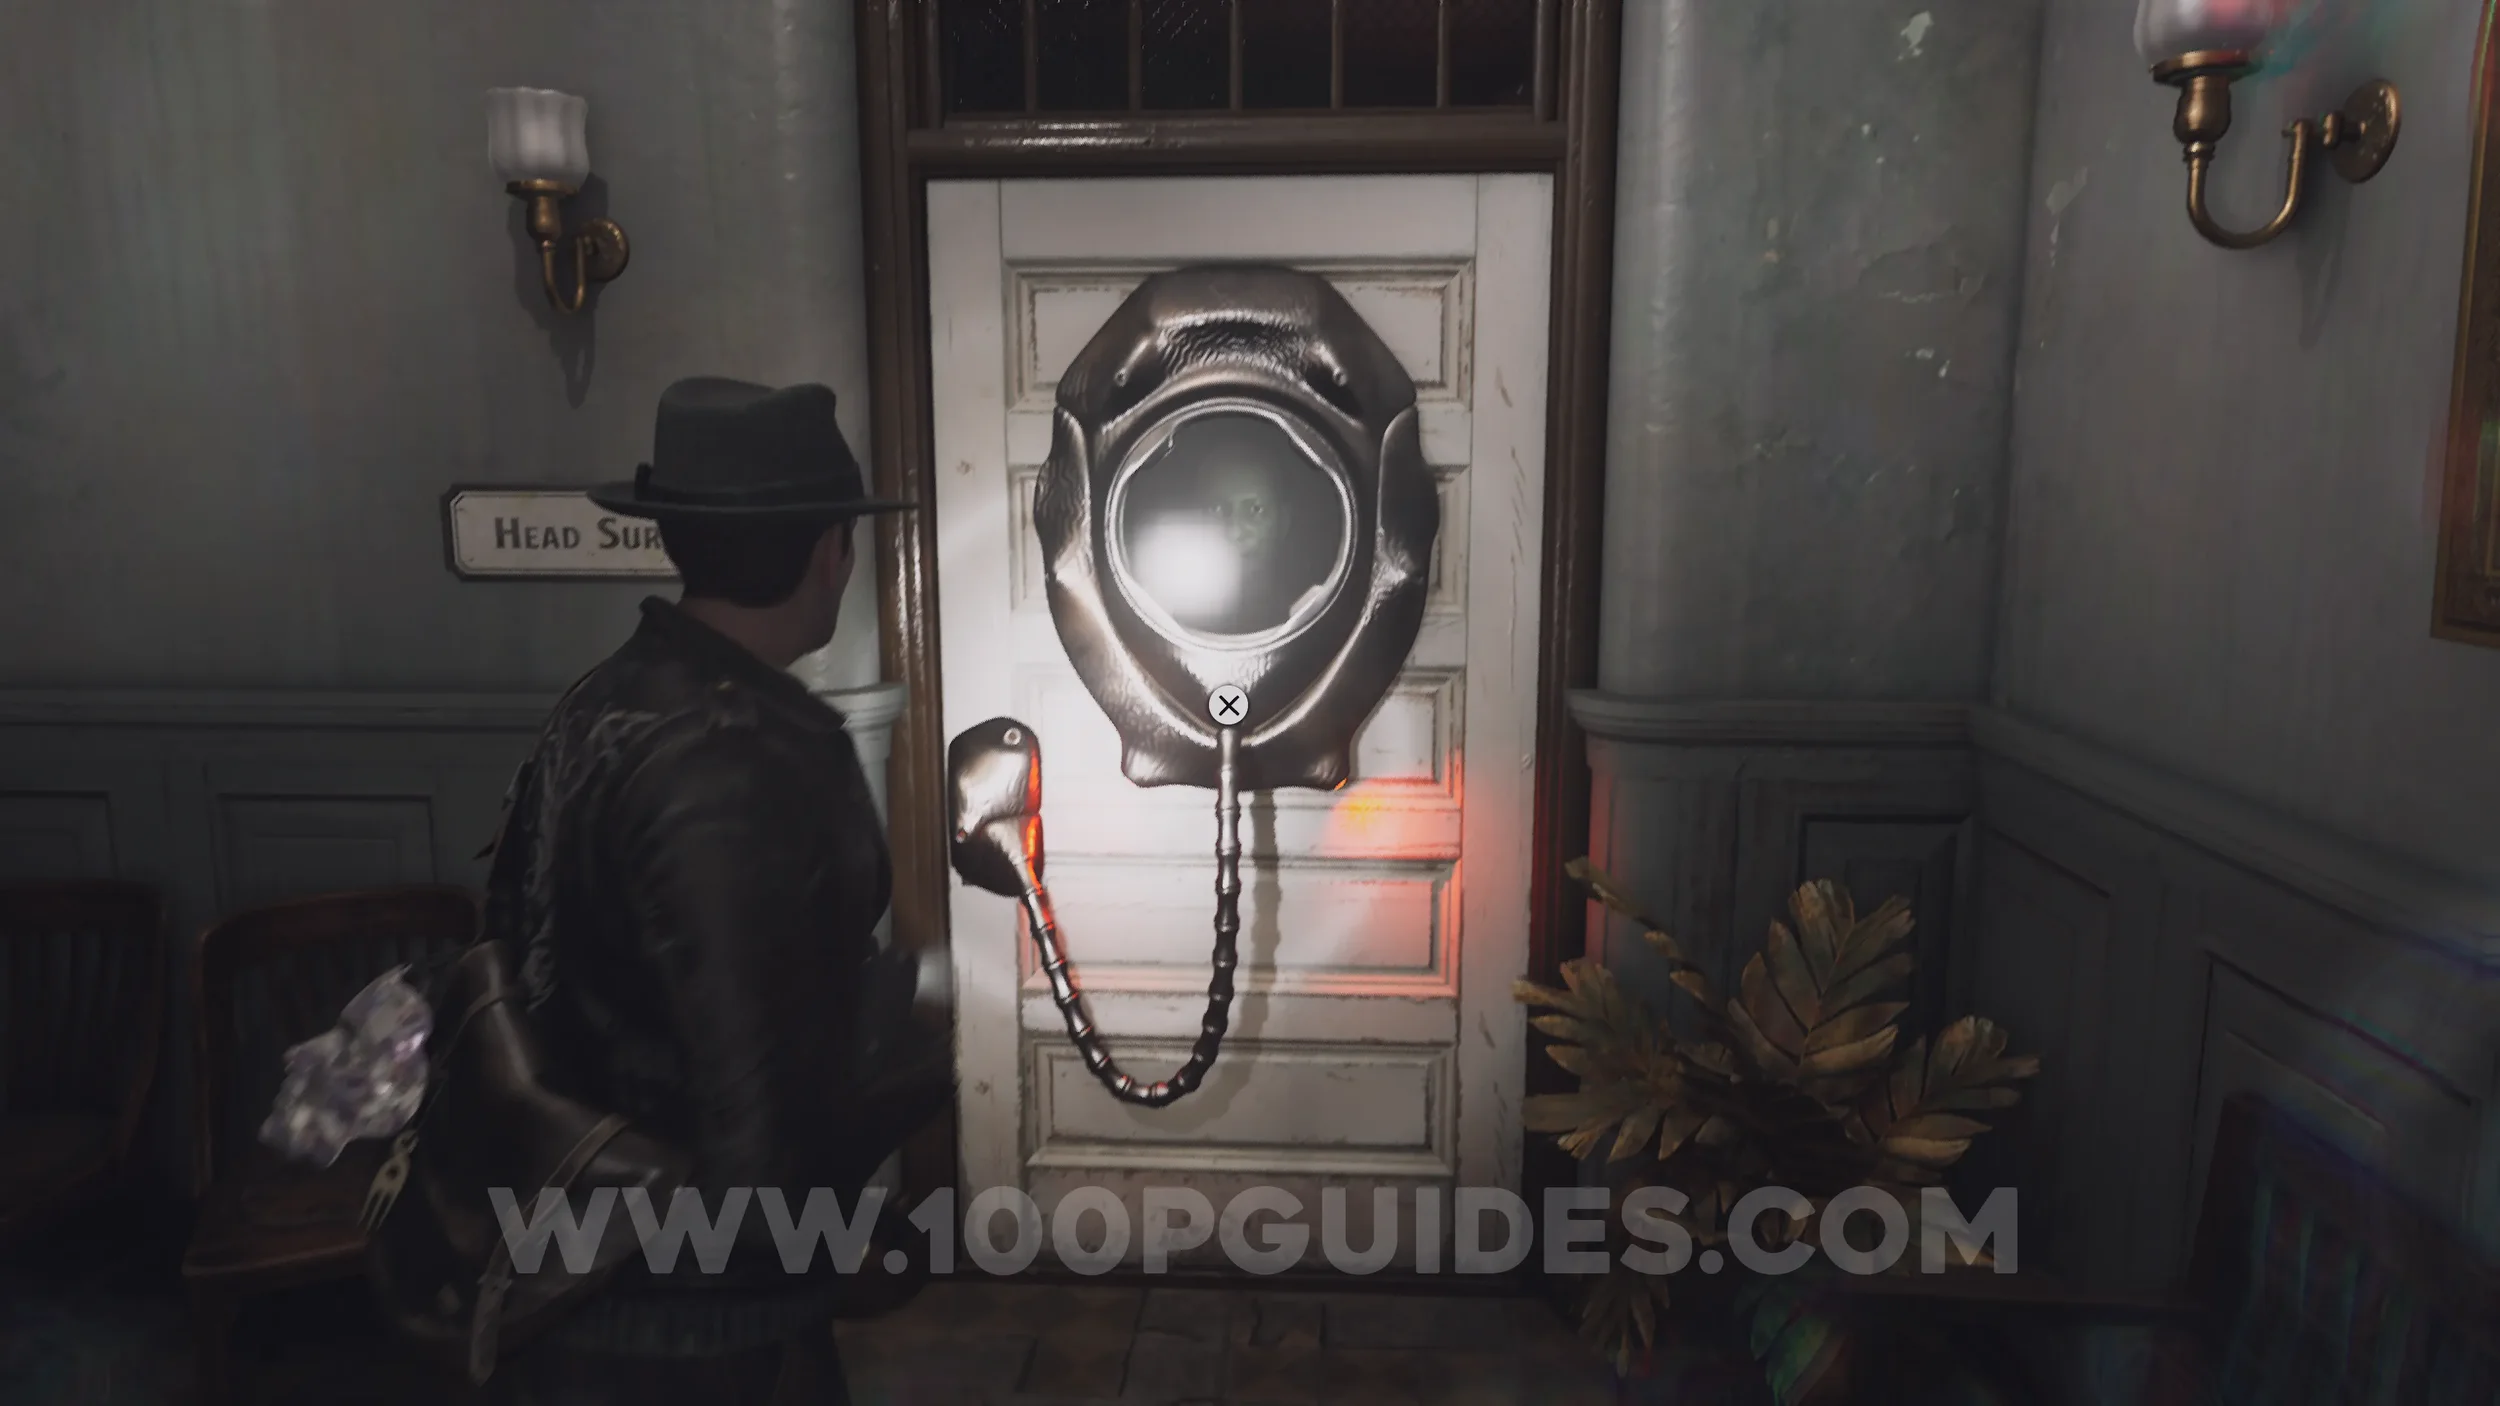
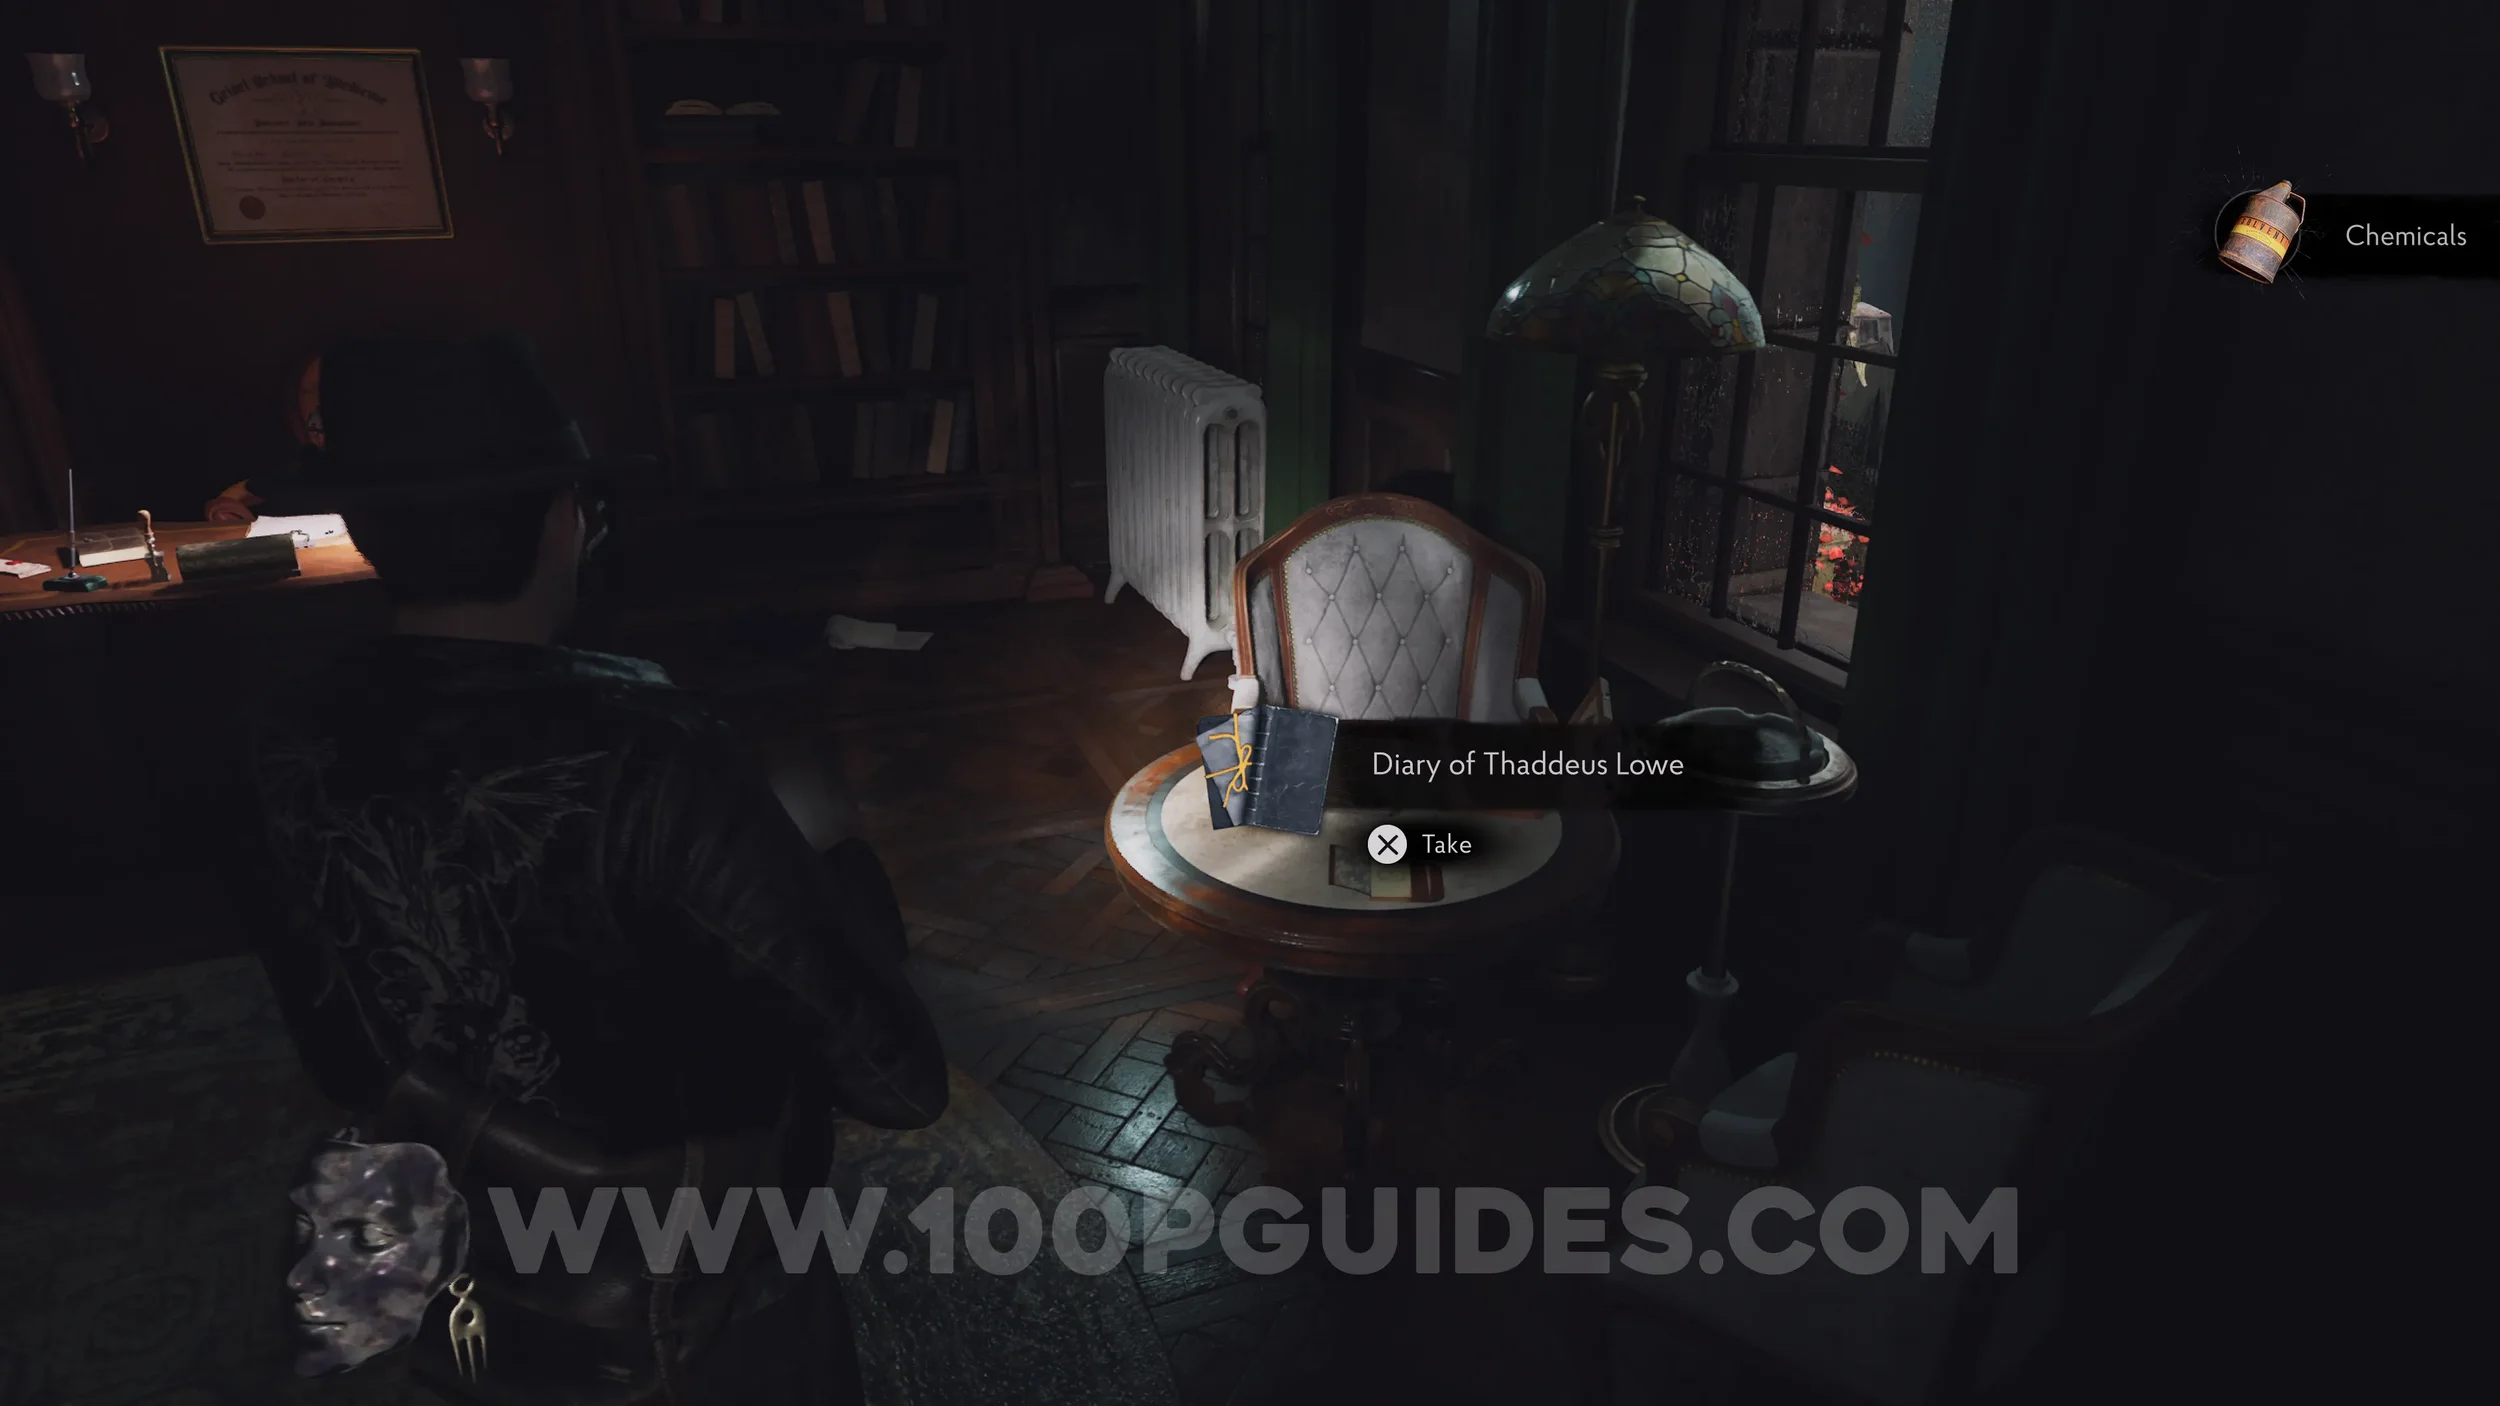
Lore Codex: Diary of Thaddeus Lowe. Head back to the main building and go up the stairs in the southwest corner. Then use the Head Surgeon's Face Mask to open the door on your right. The codex is on the table inside.
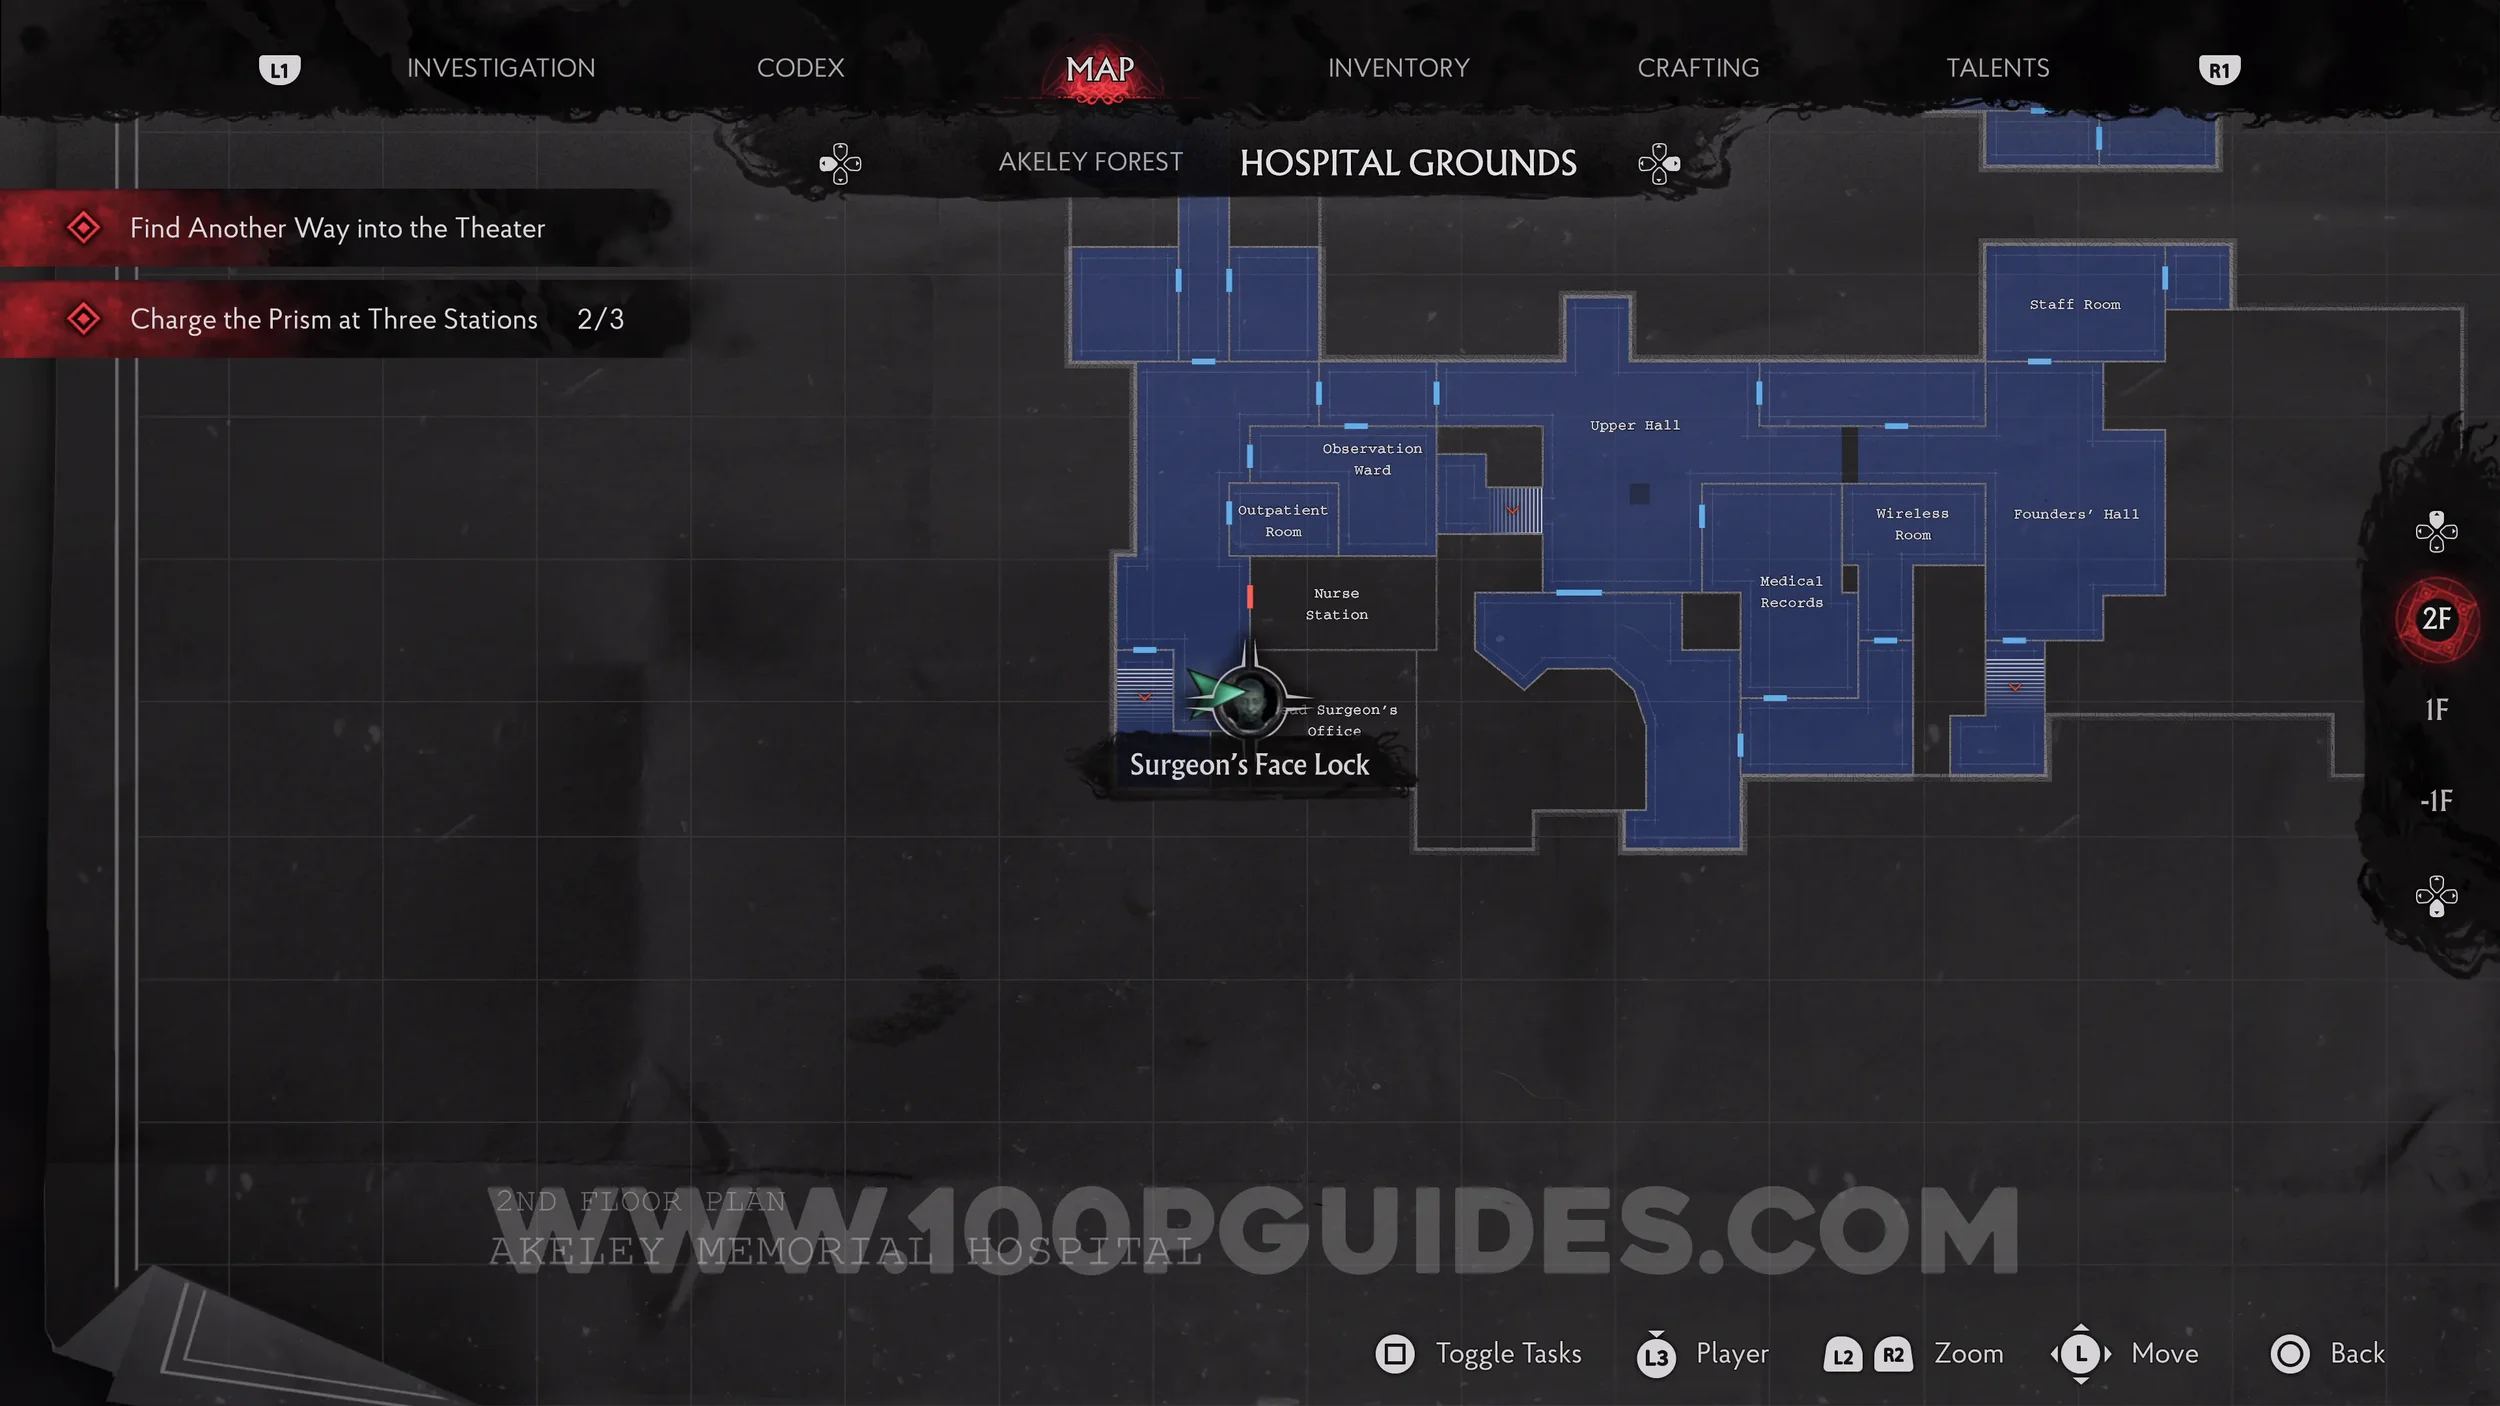
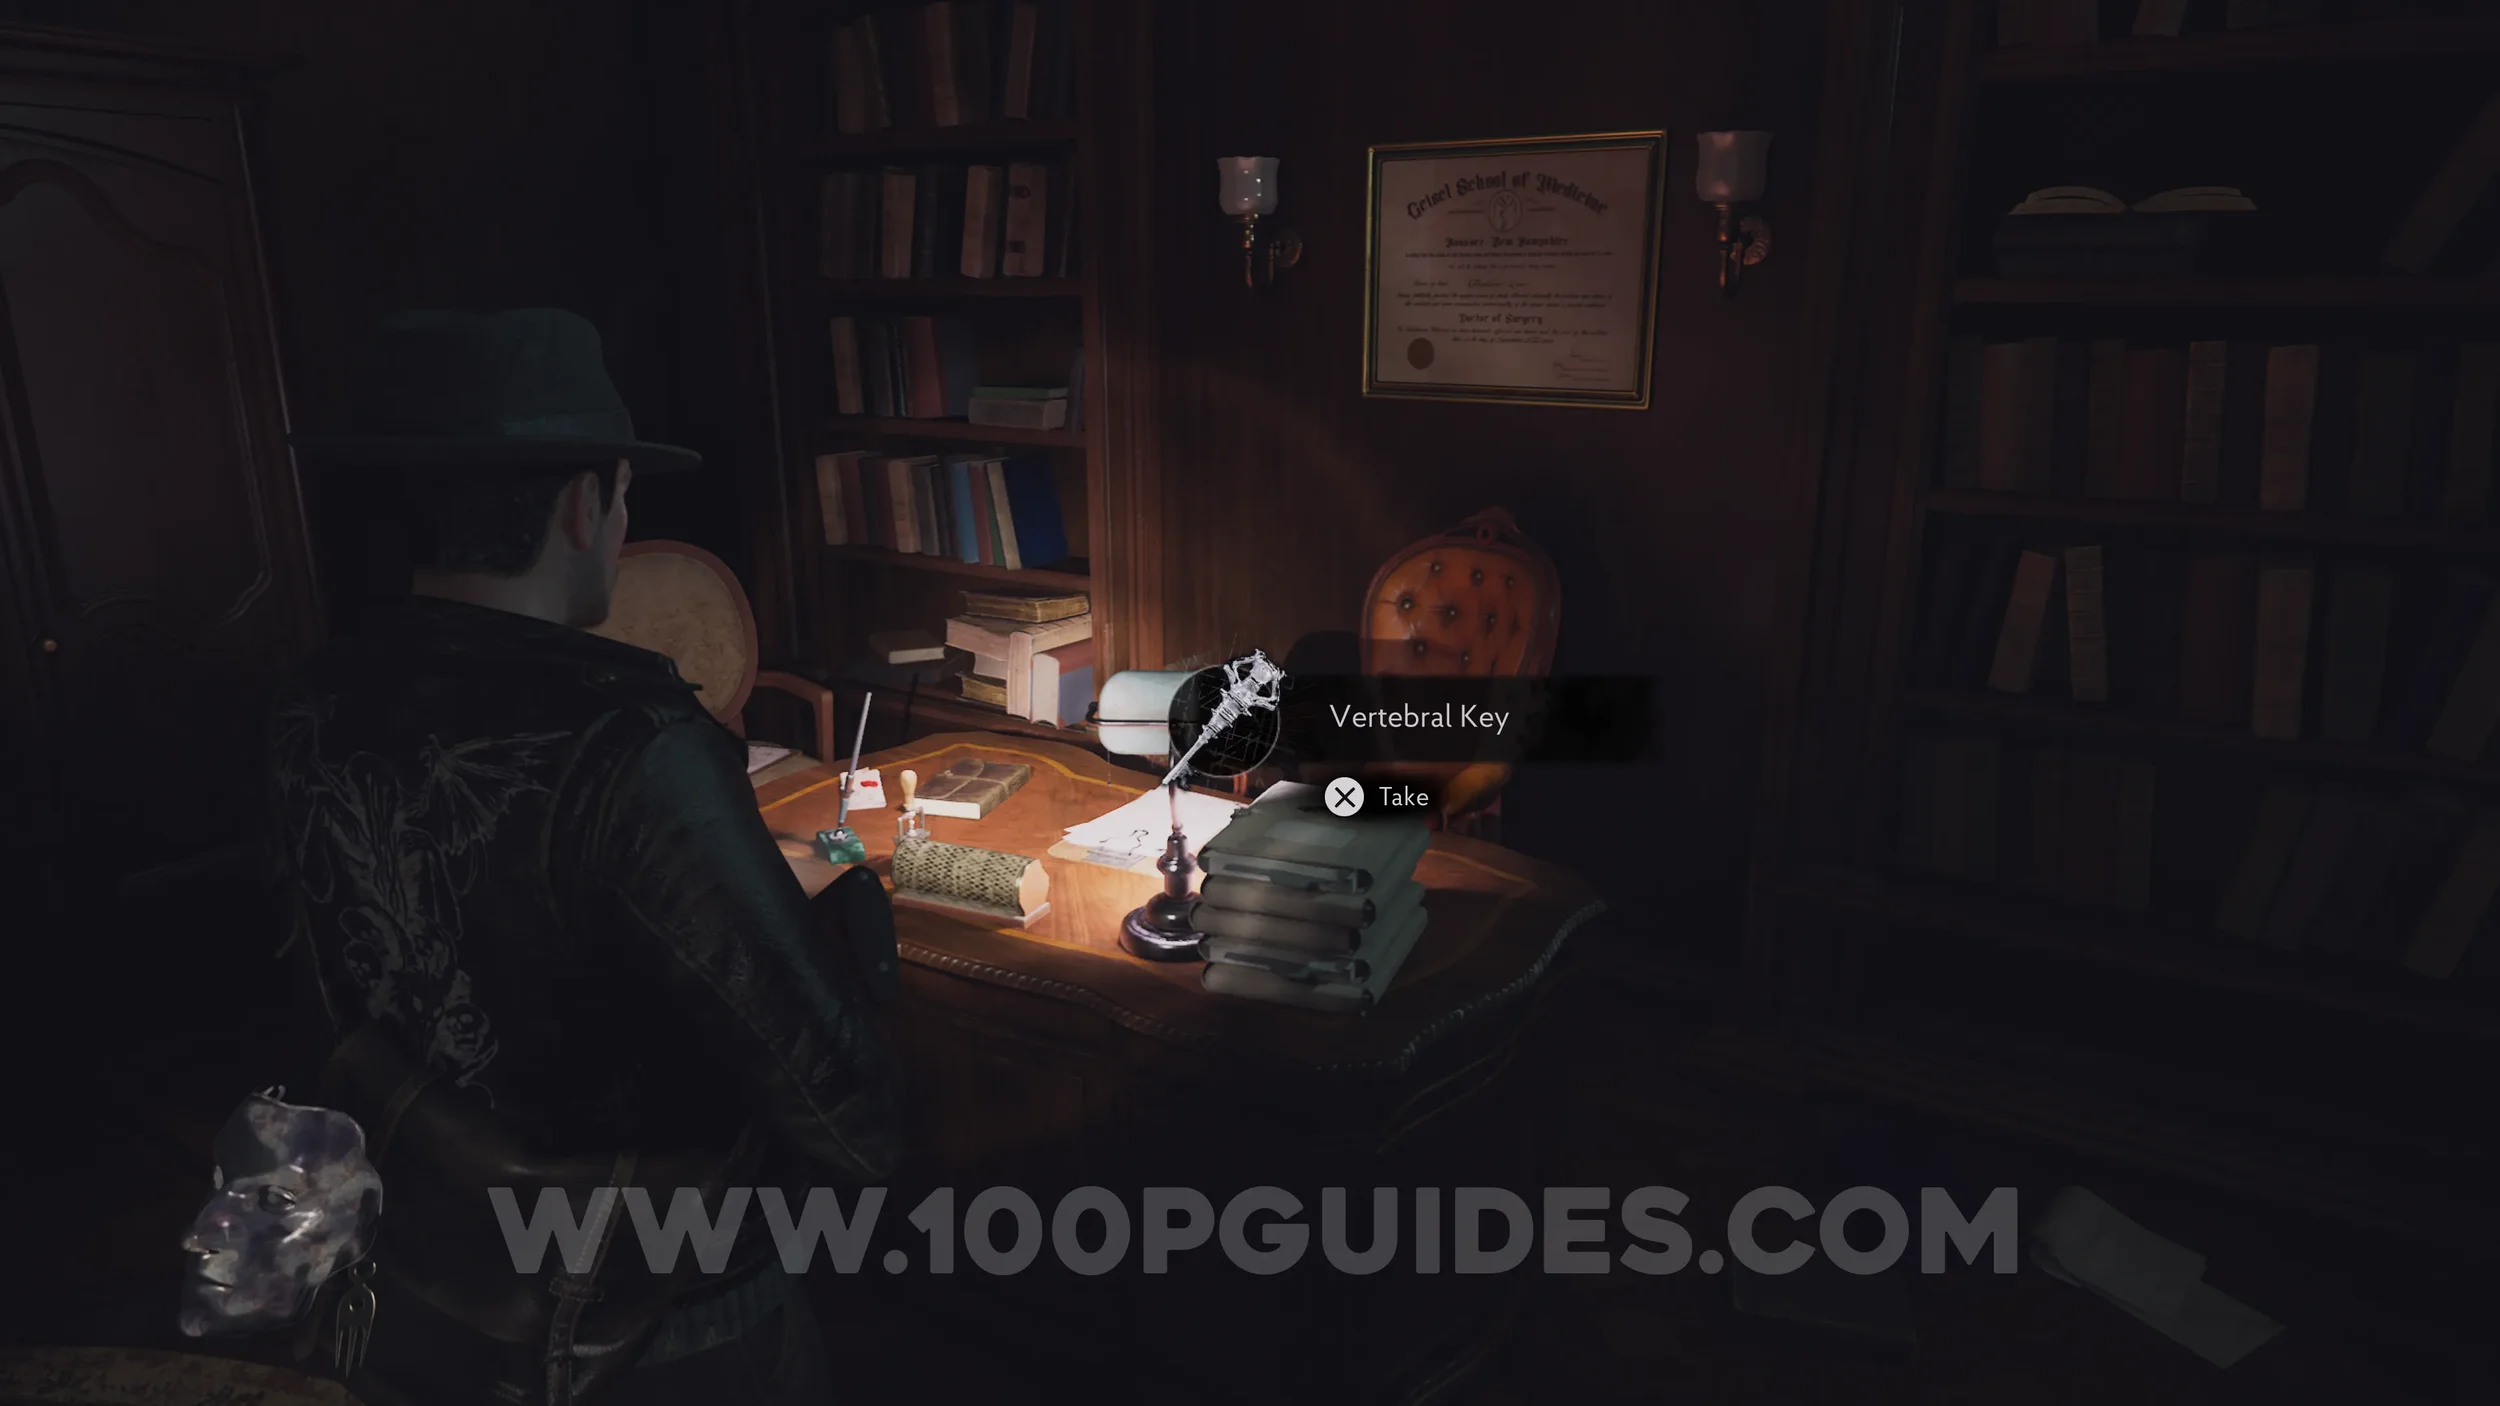
Key Item: Vertebral Key. In the same room as the previous collectible.
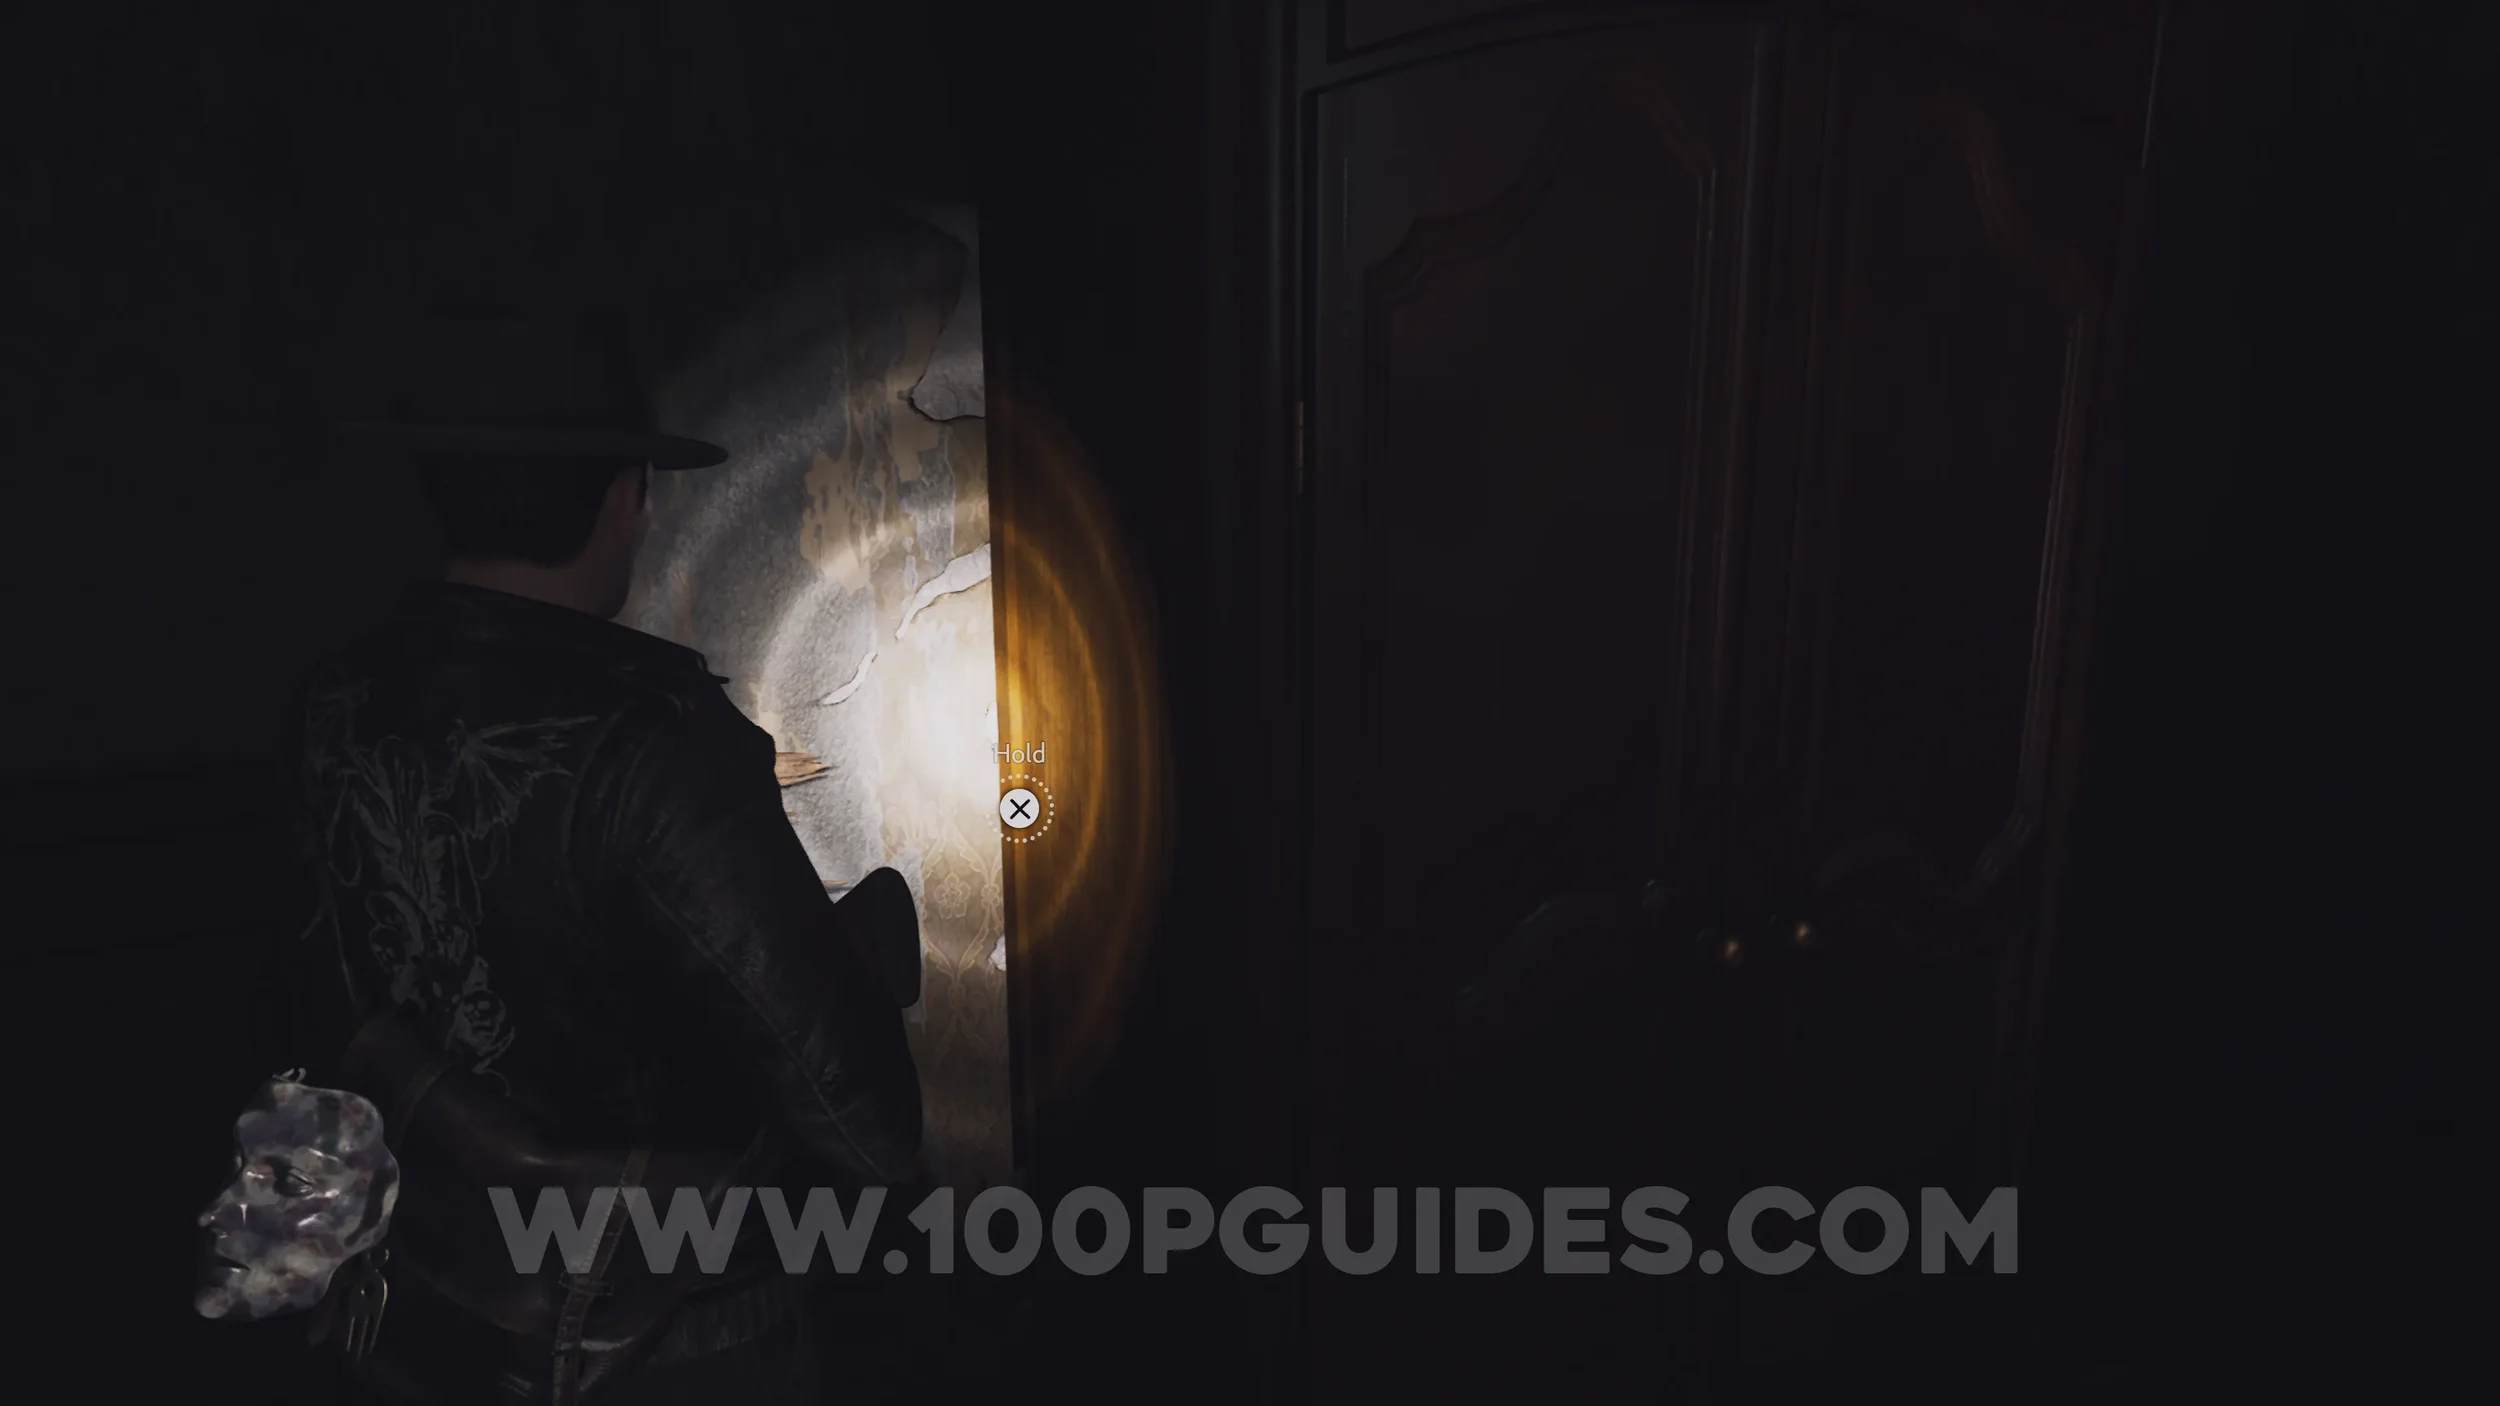
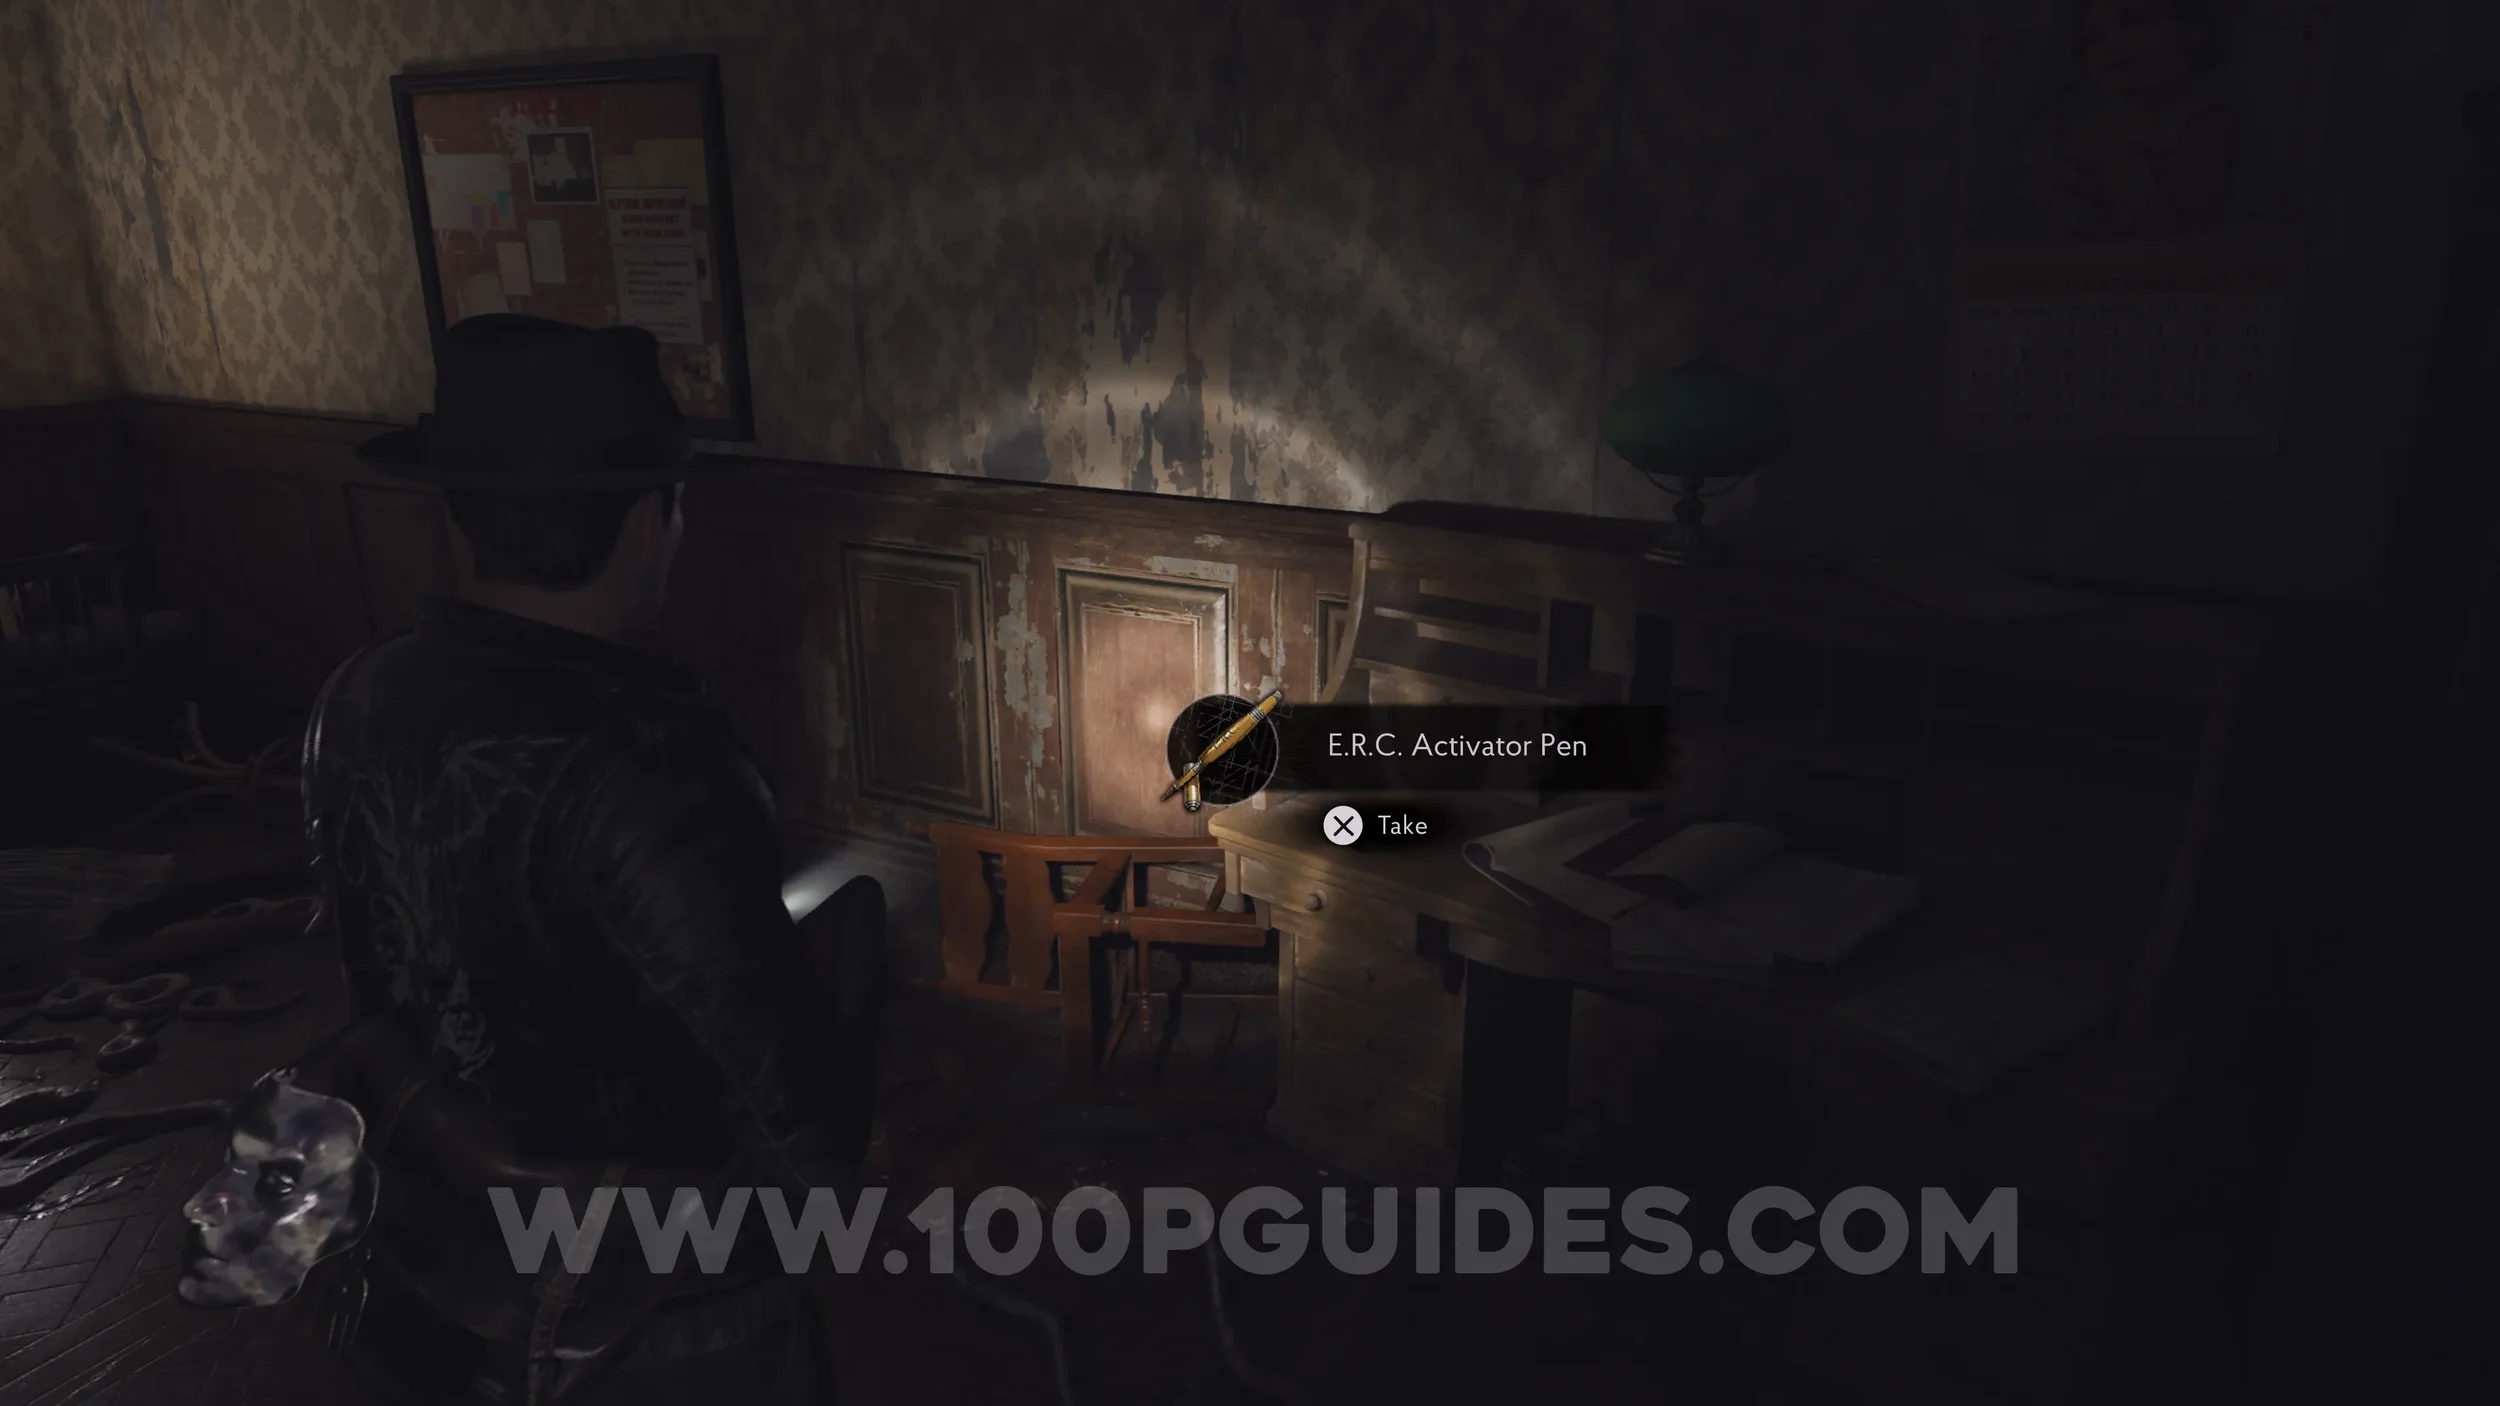
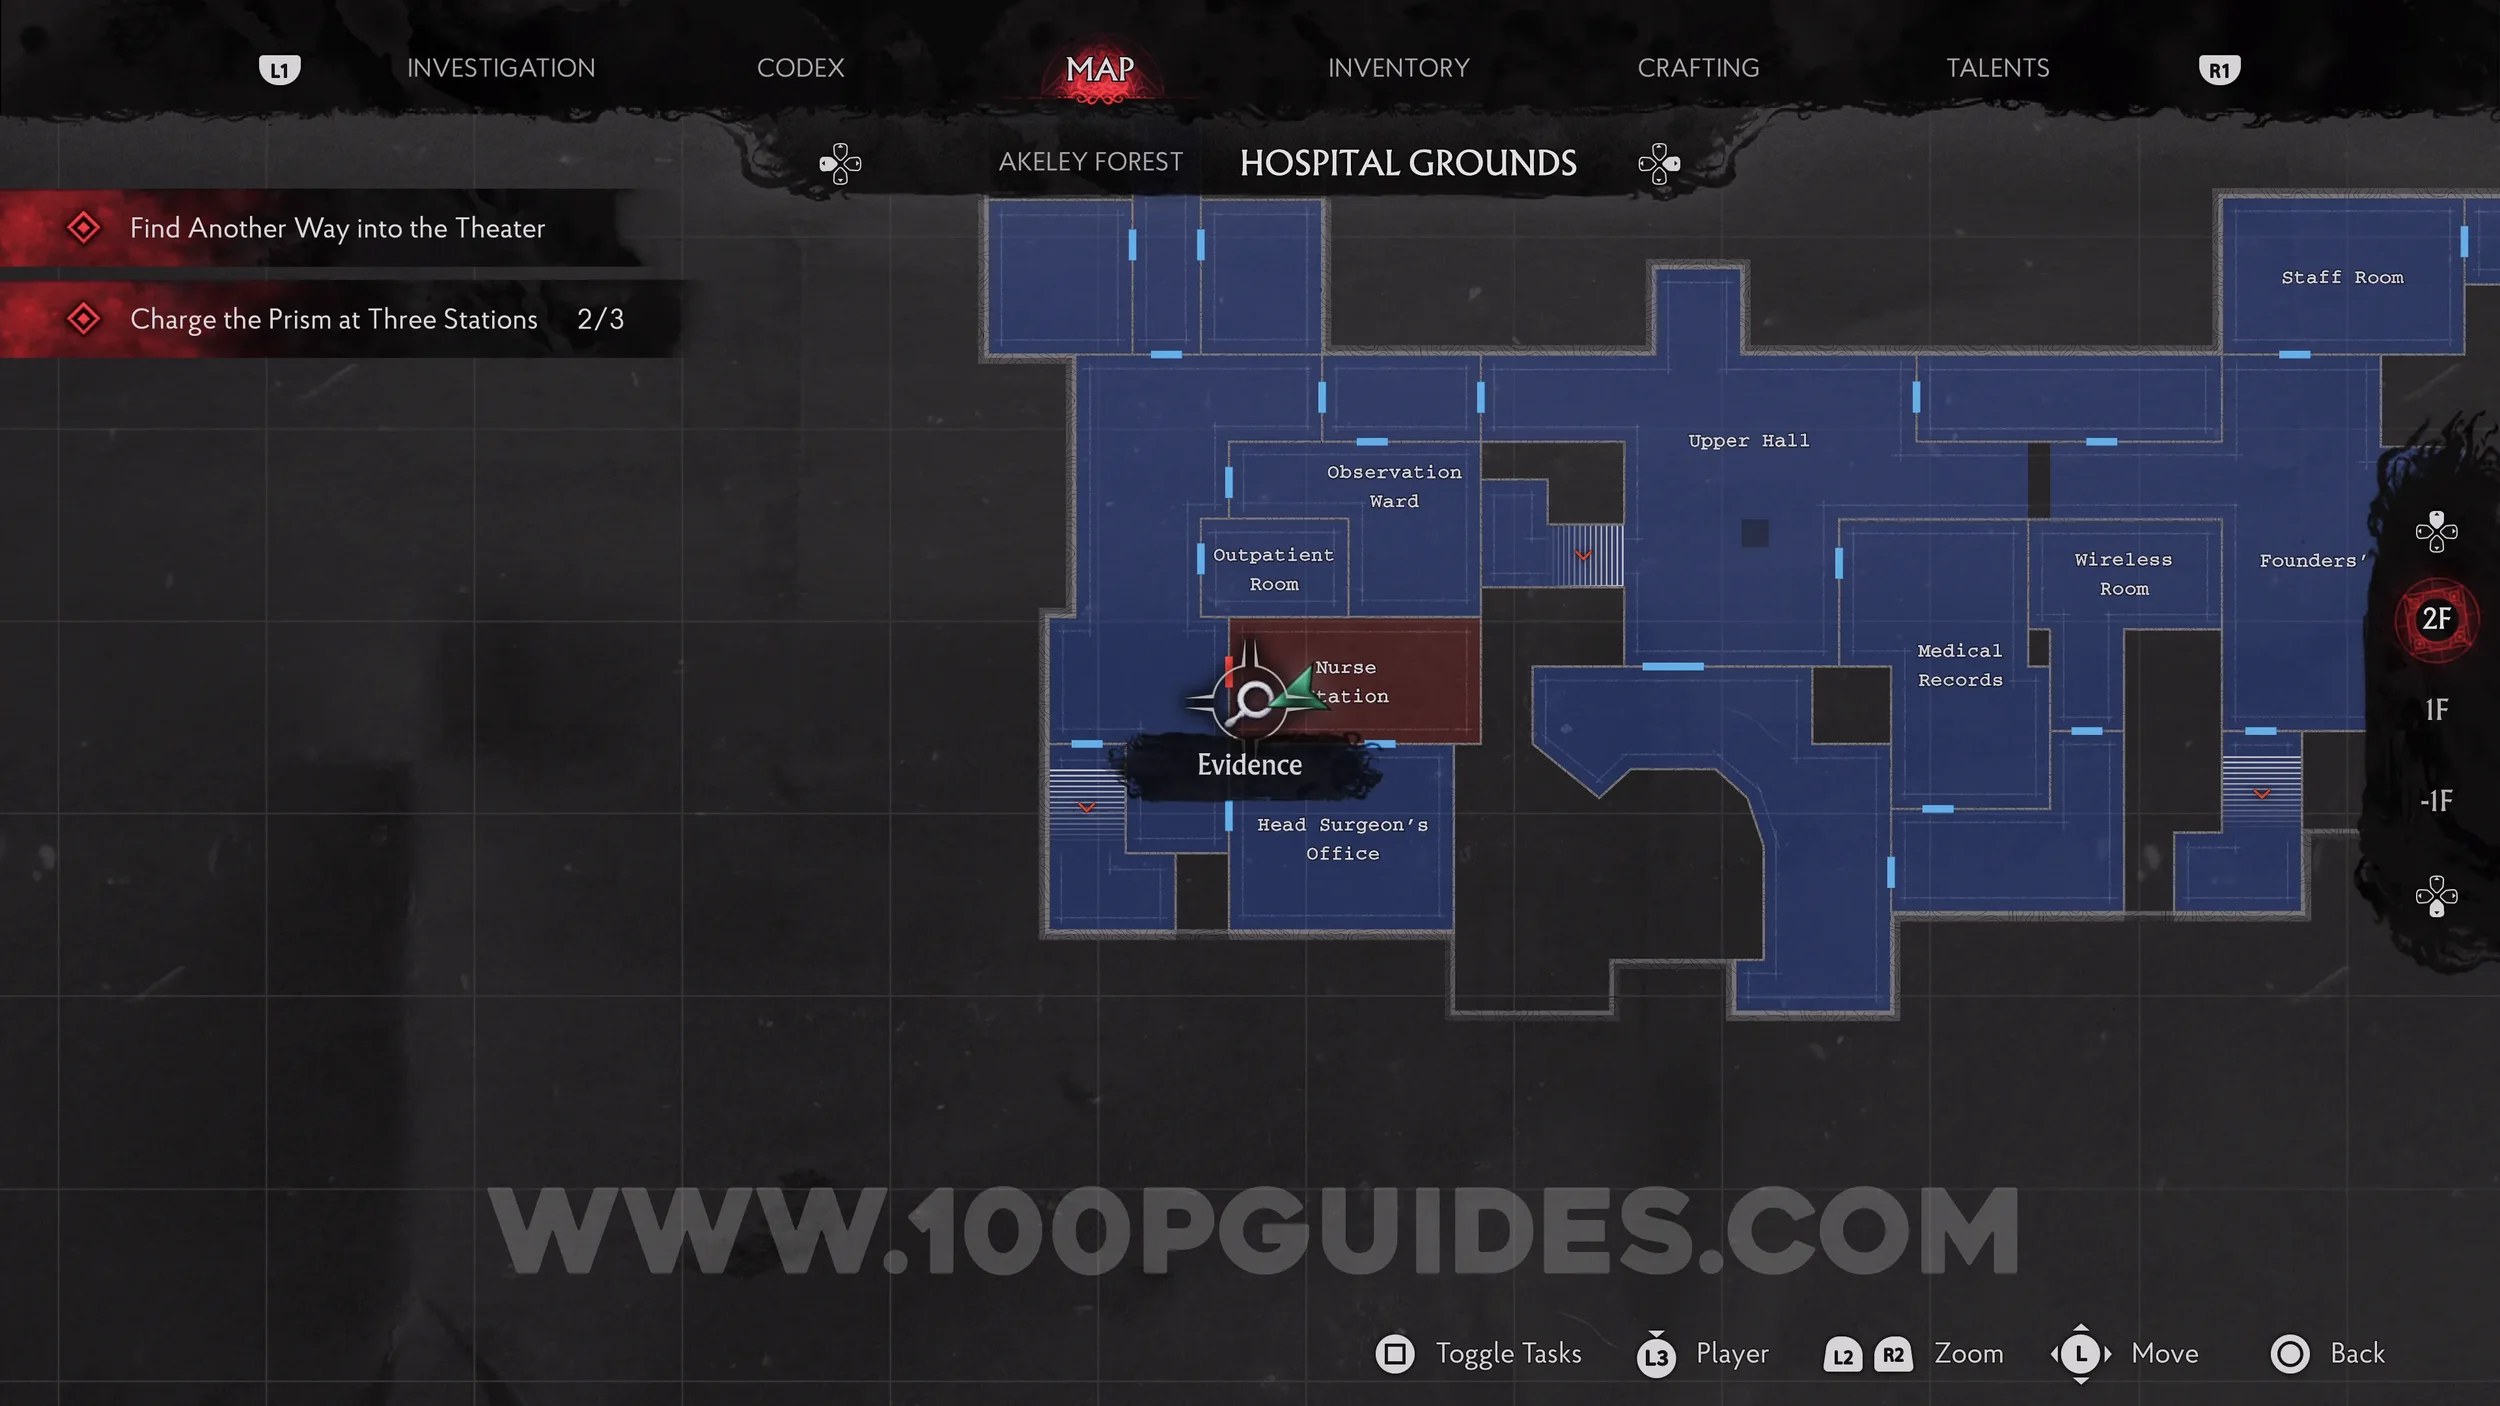
E.R.C. Activator Pen. Move the shelf up against the northern wall in the same room as the previous collectible to reveal a hole to the Nurse Station. Go through it to find the pen in front of you.
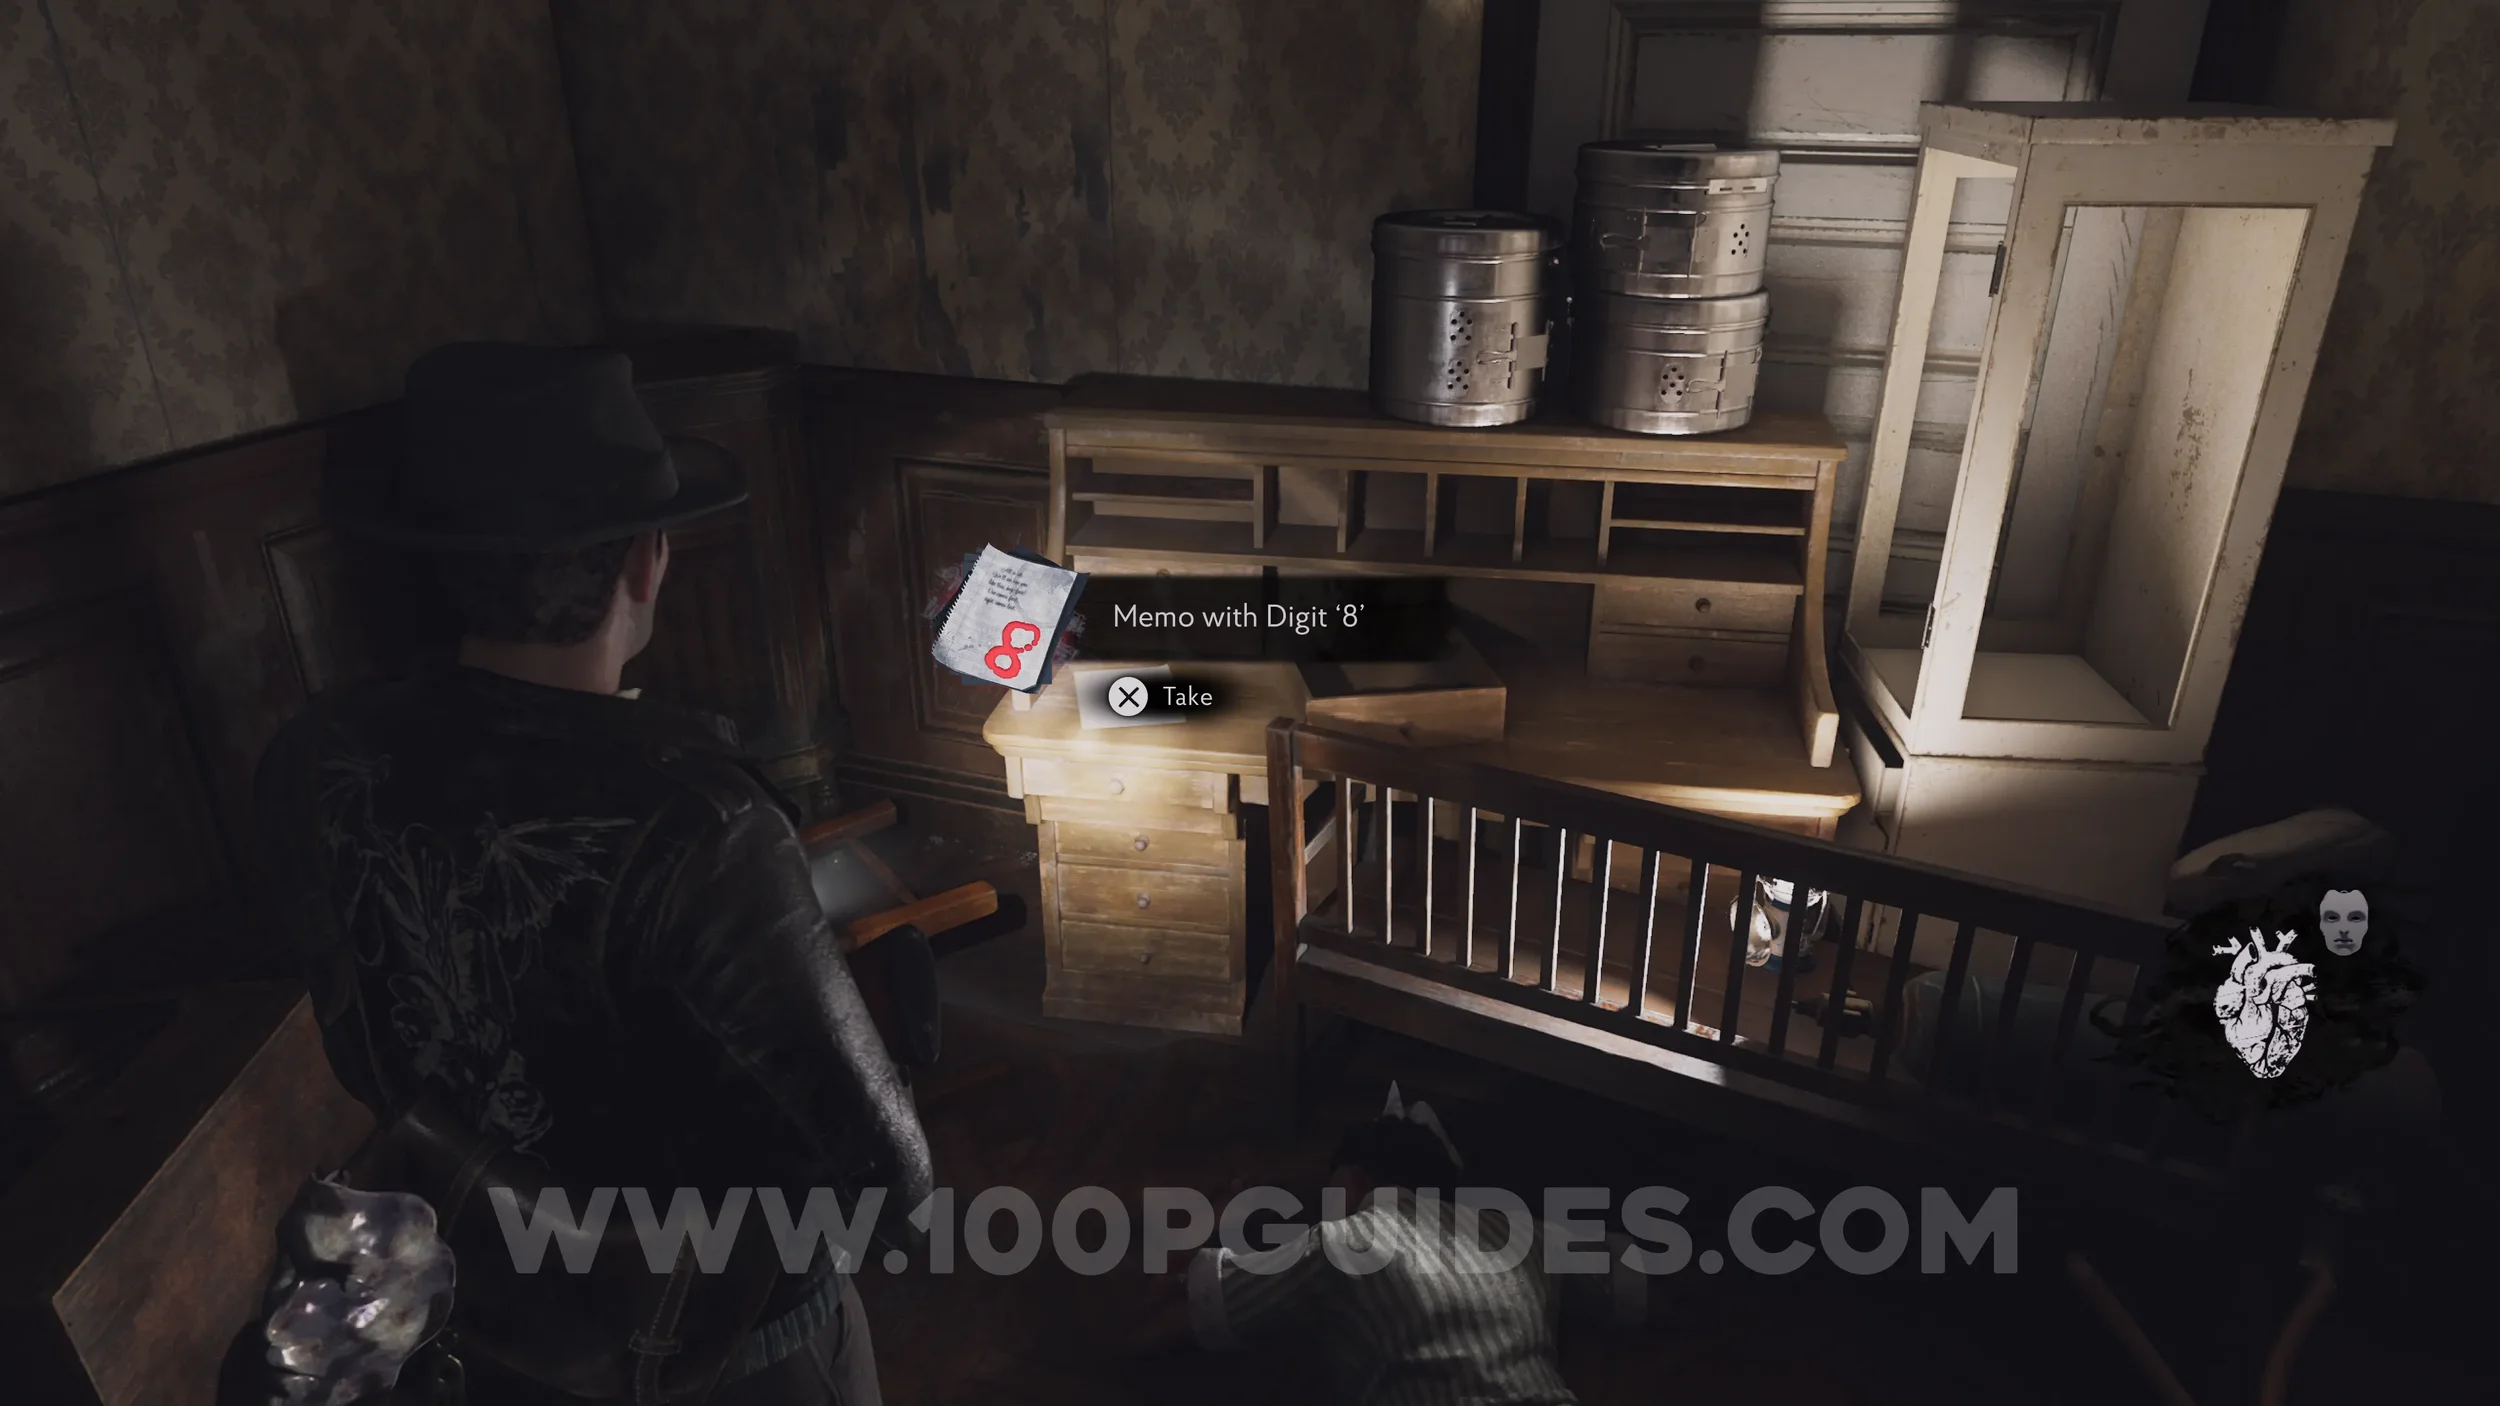
Evidence: Memo with Digit ‘8’. Also in the Nurse Station.
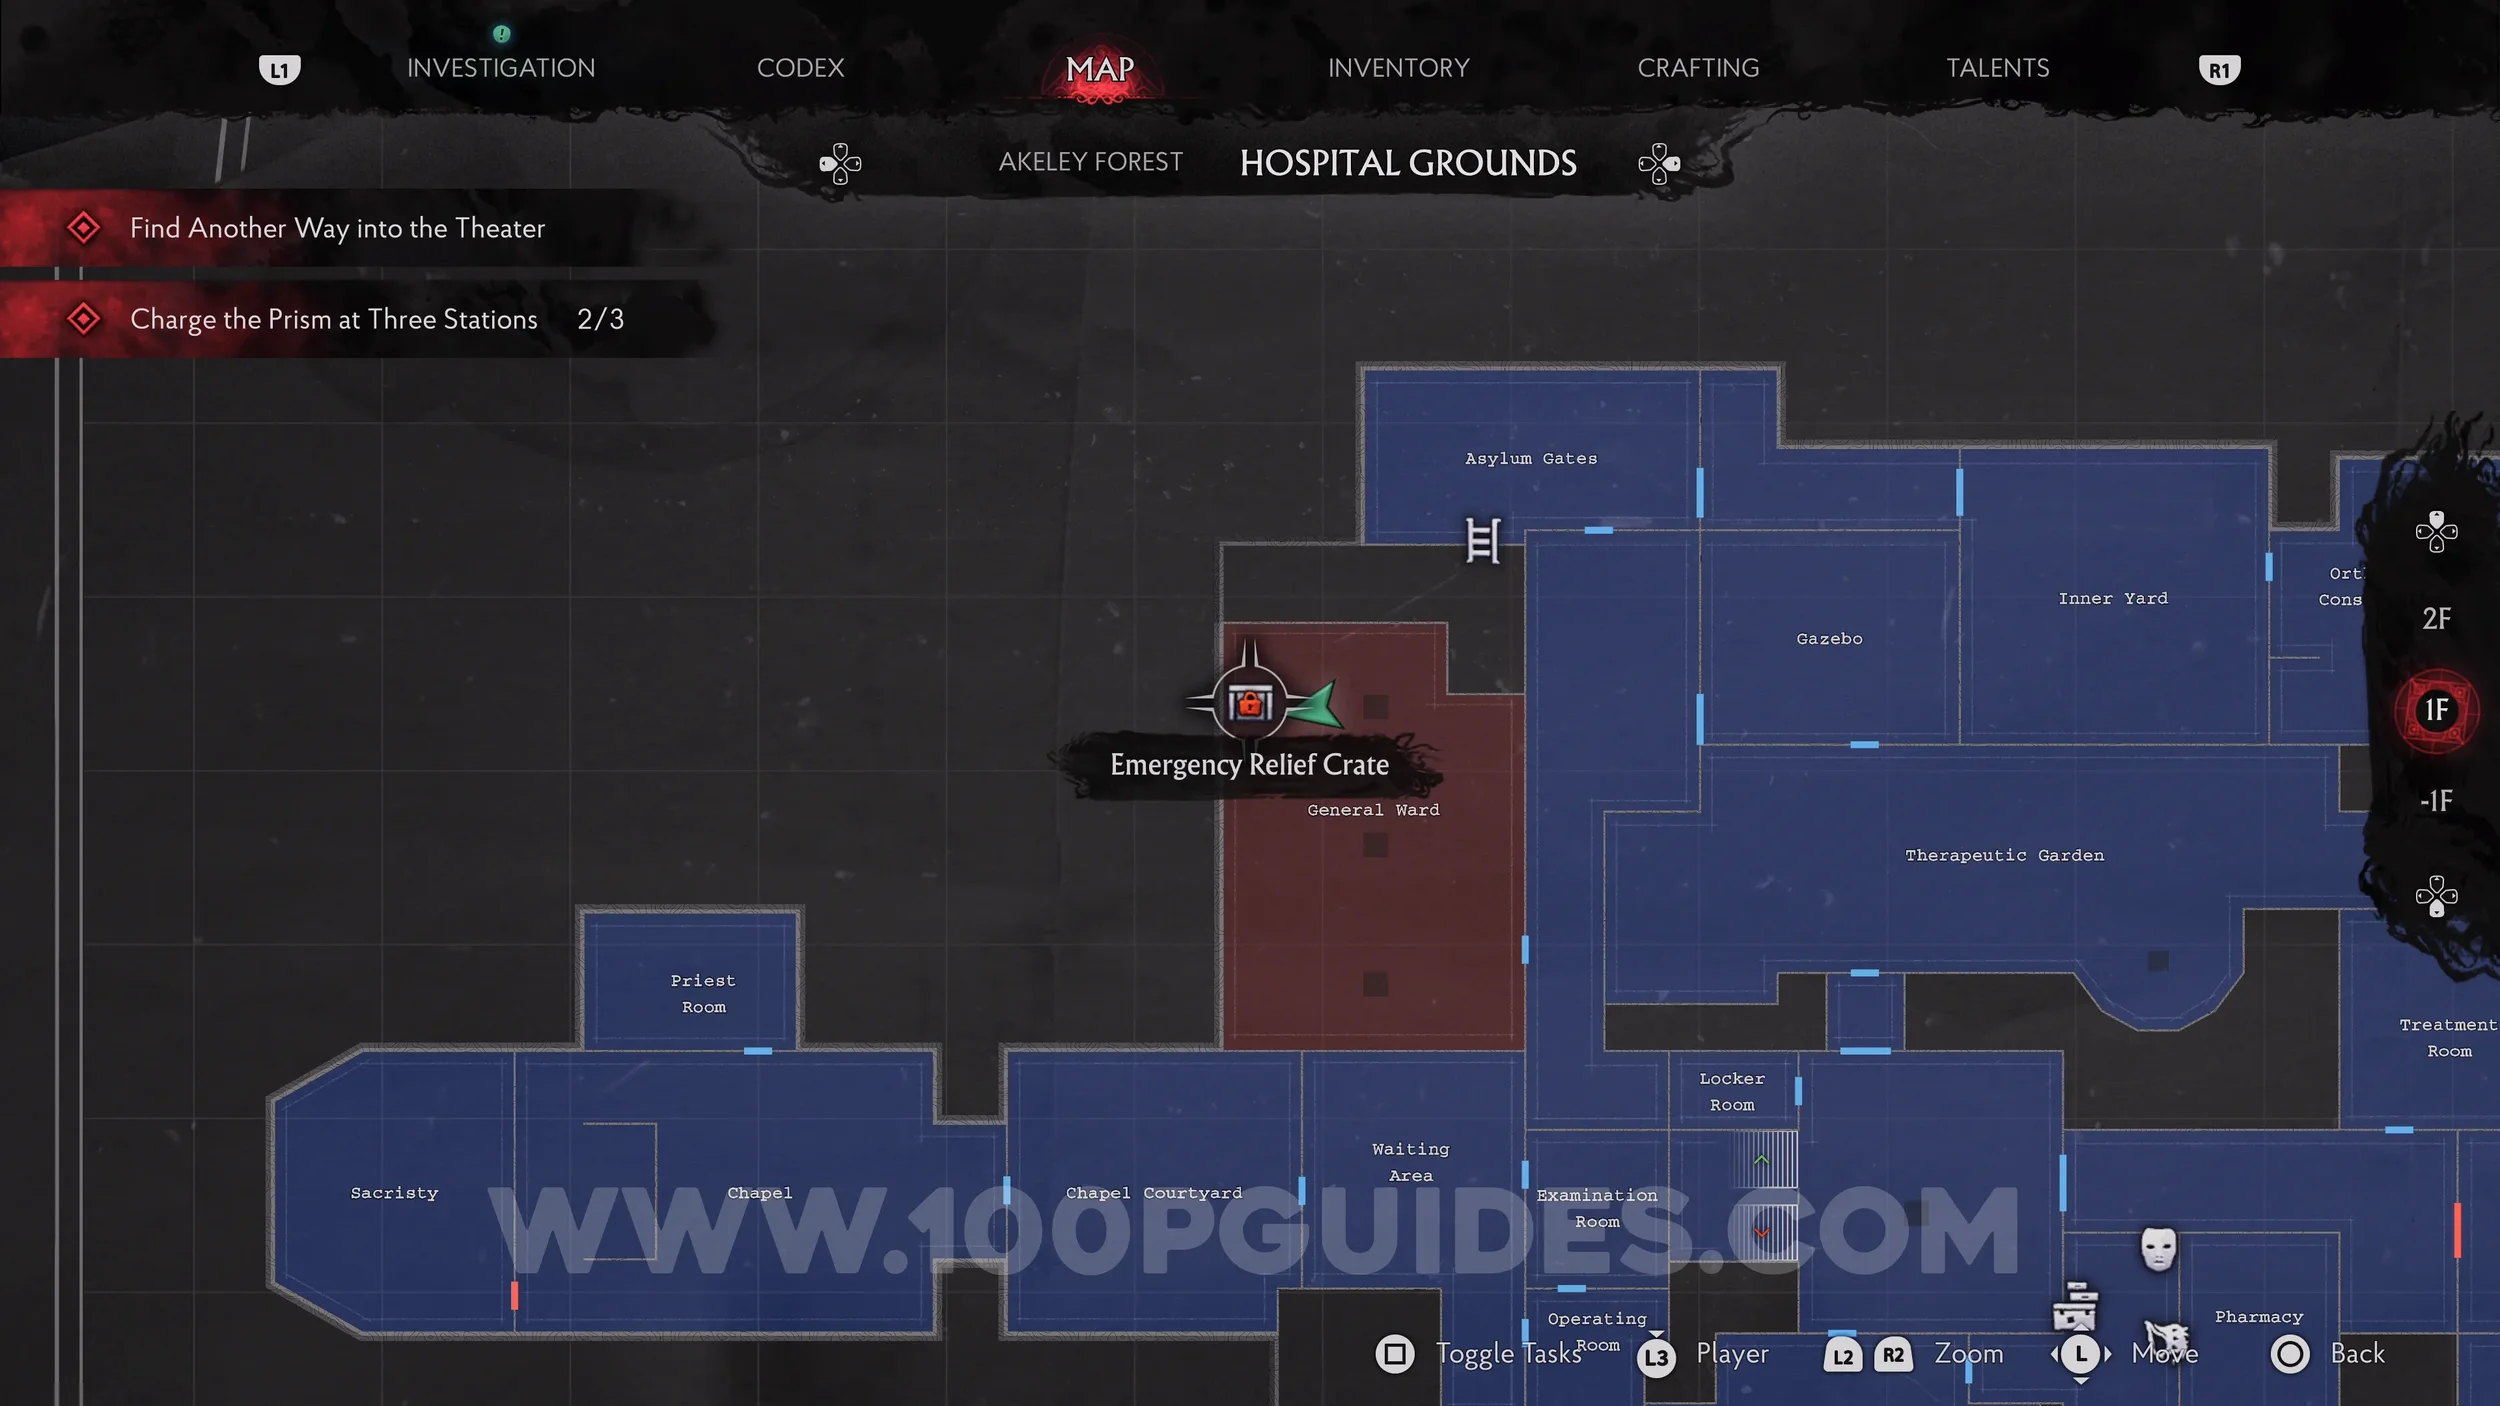
Emergency Relief Crate (E.R.C.) + Dream Essence x2. Exit the Head Surgeon's Office and head north through the Isolation Wards, then drop down the hole in the northern hall to find the E.R.C. in the General Ward. The Dream Essence is inside.
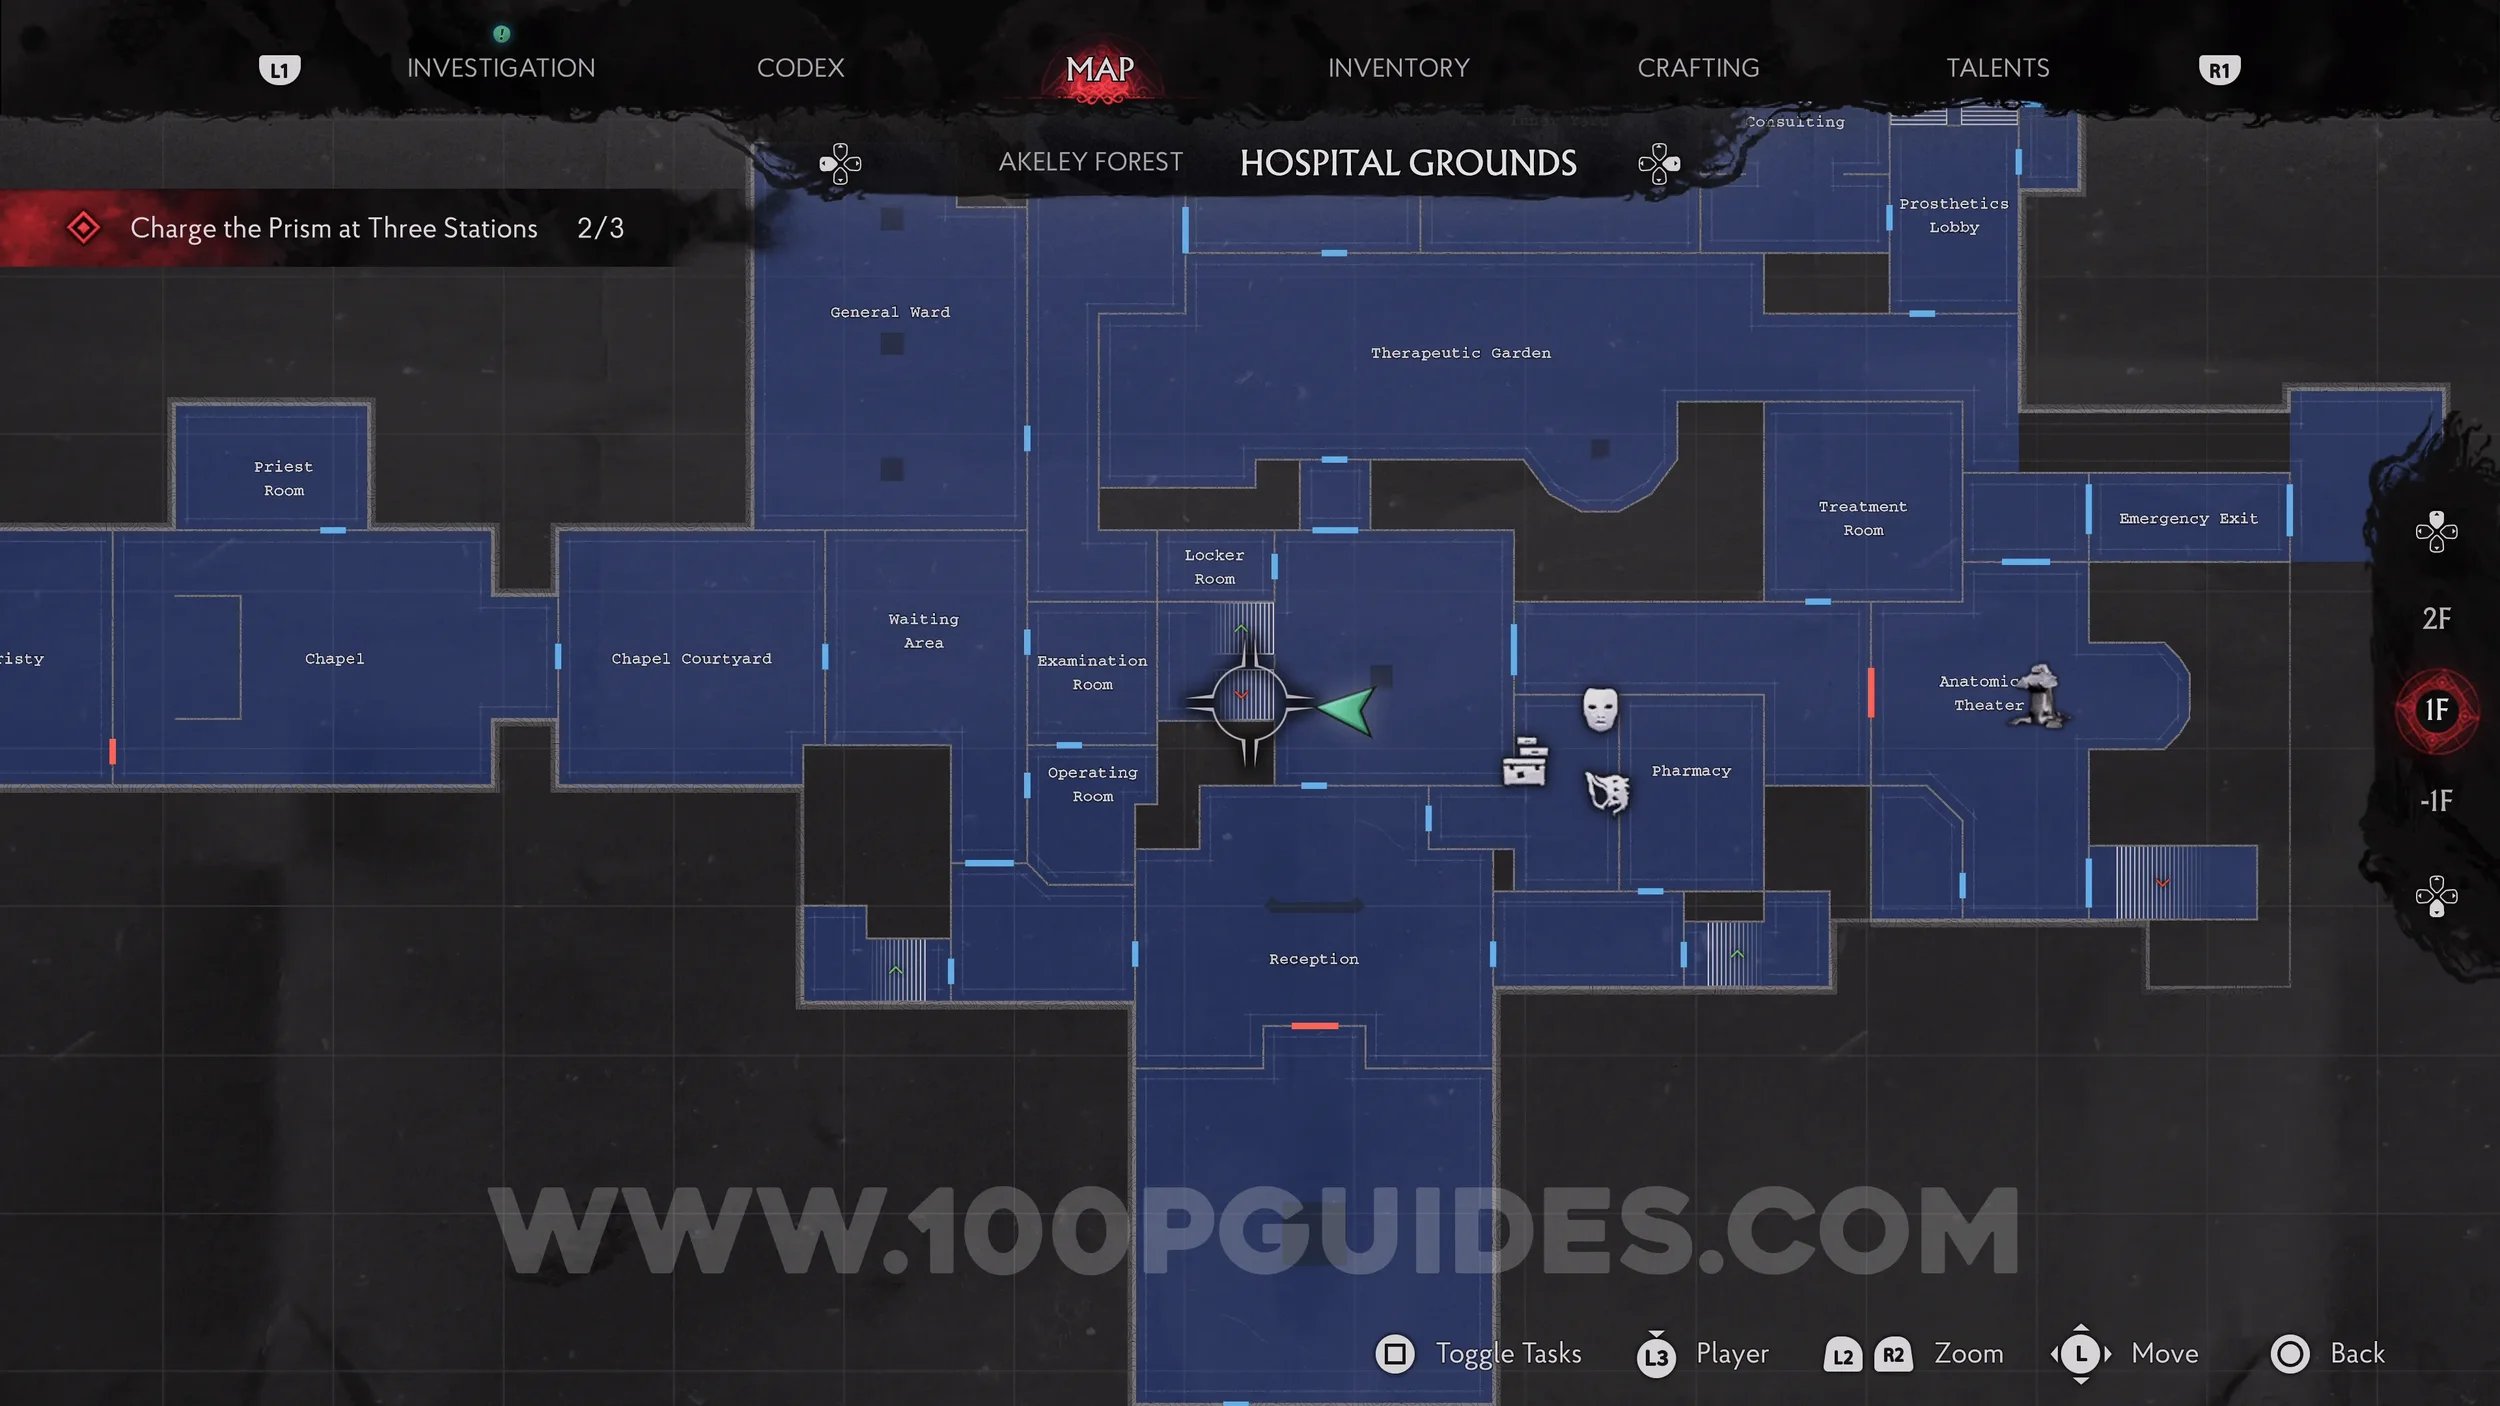
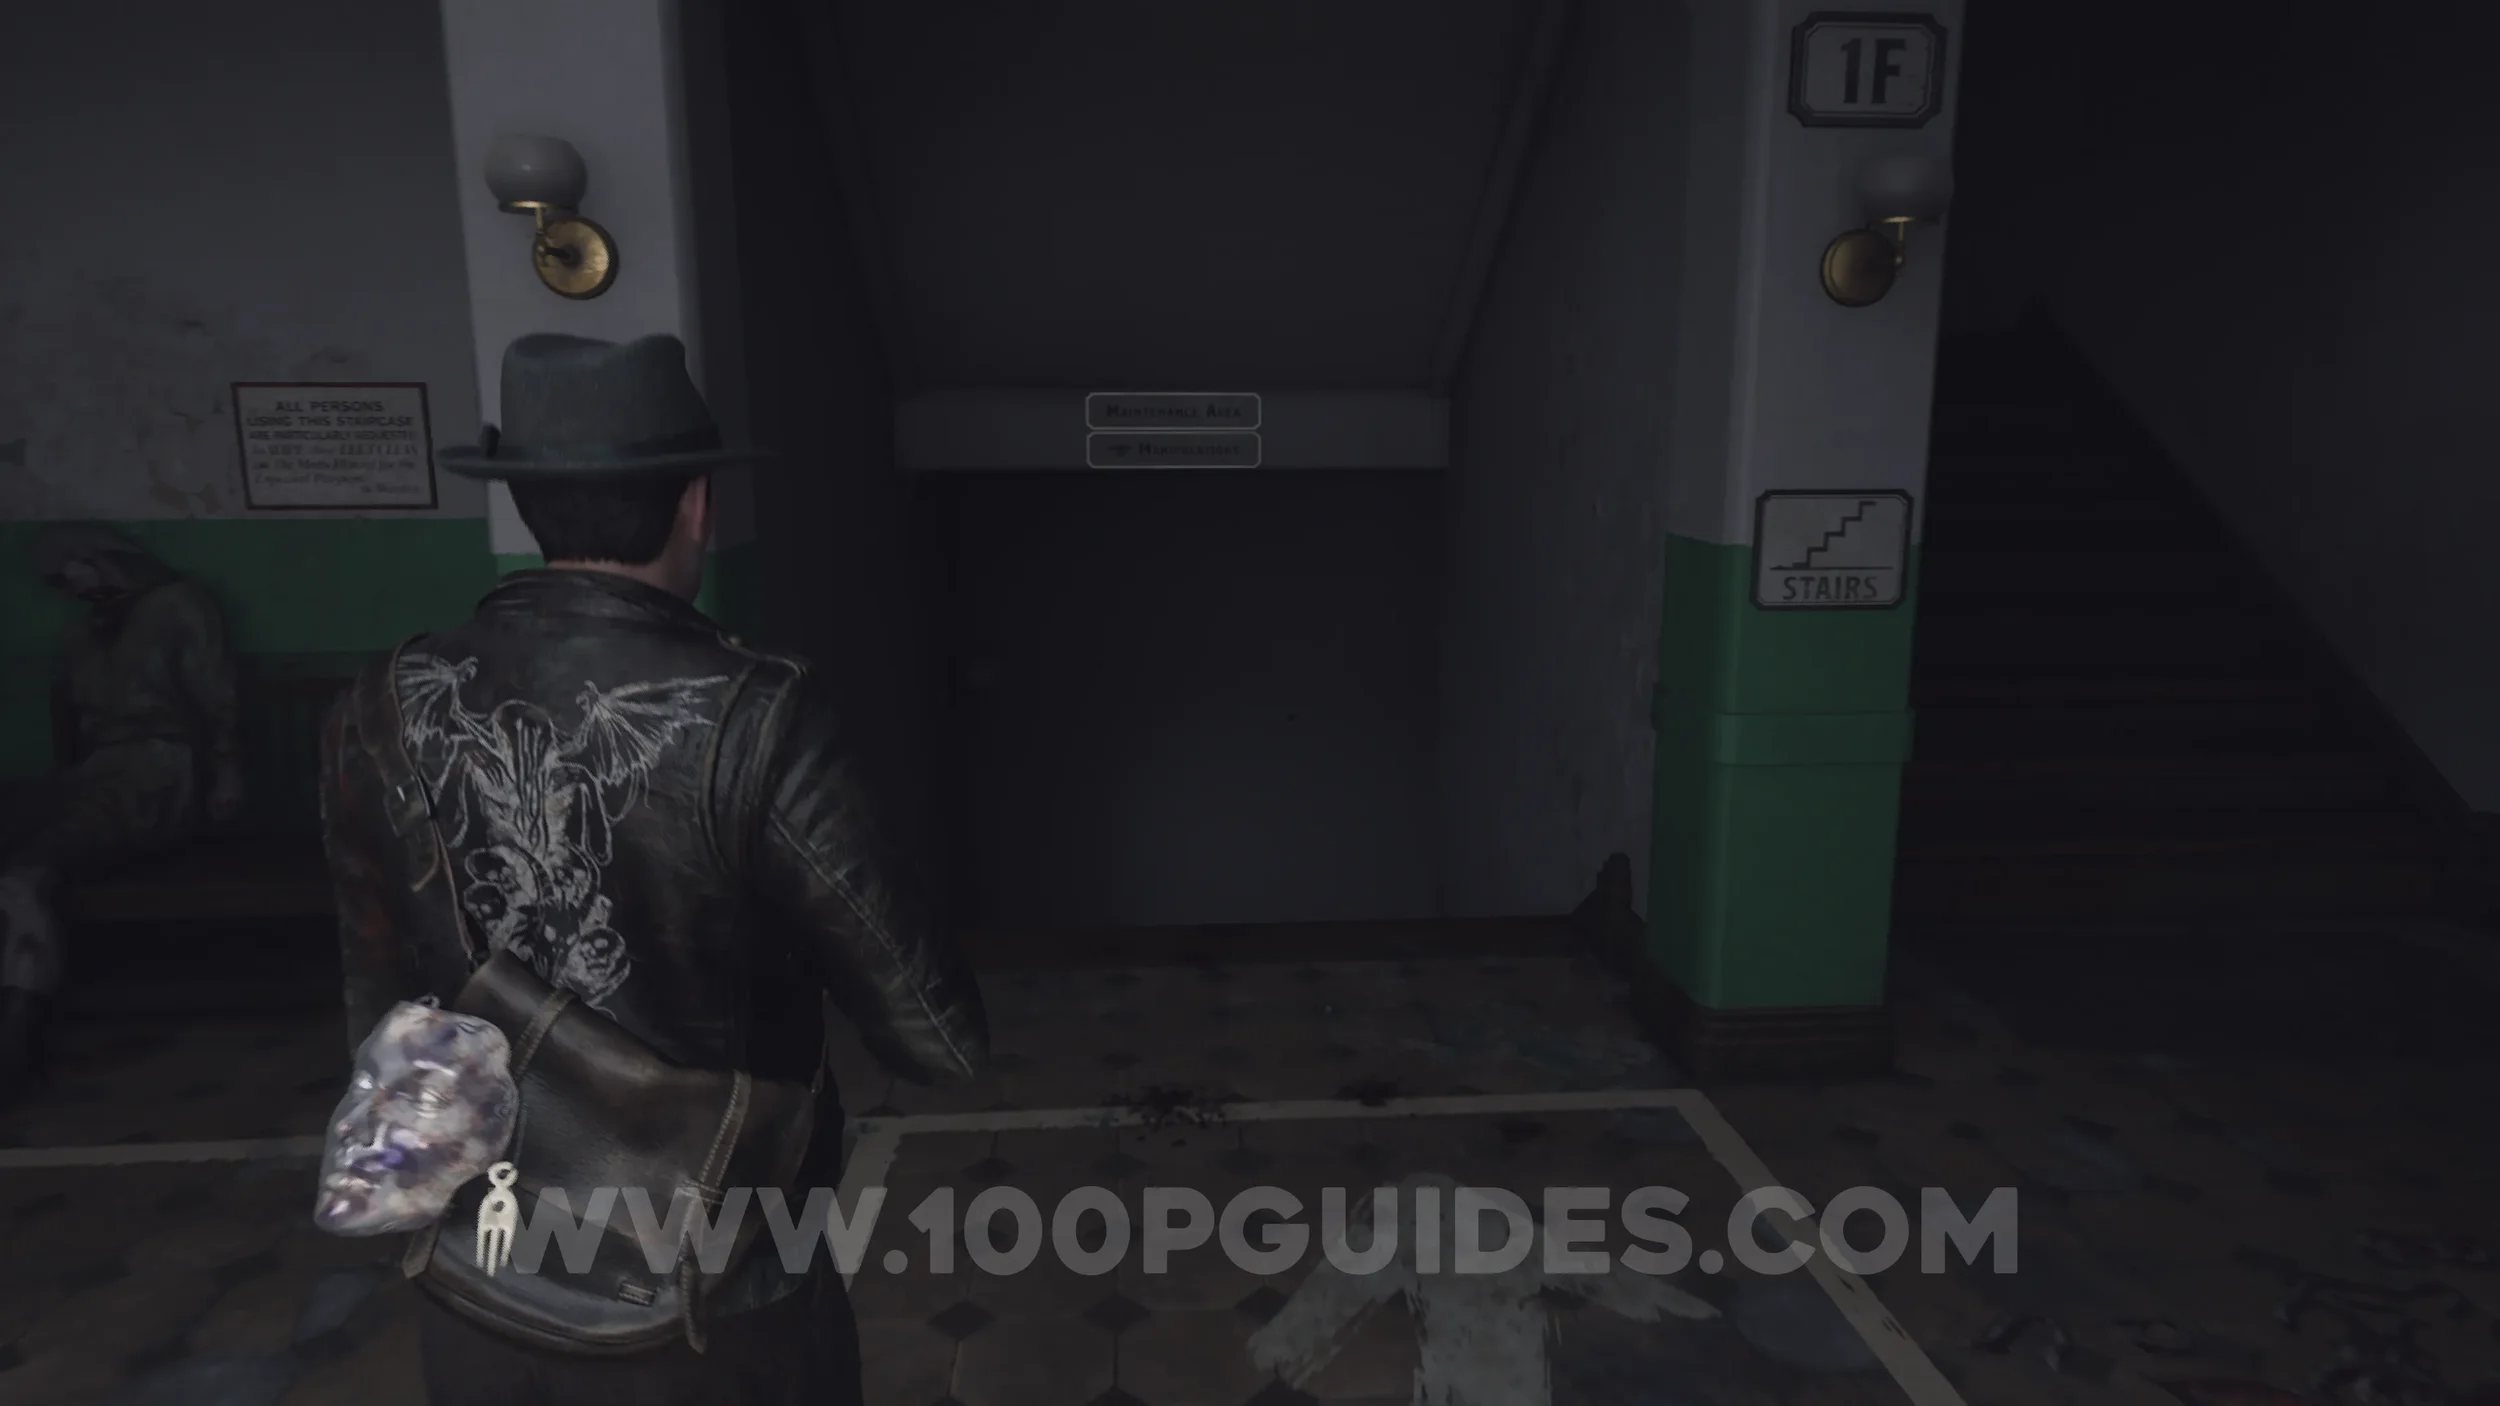
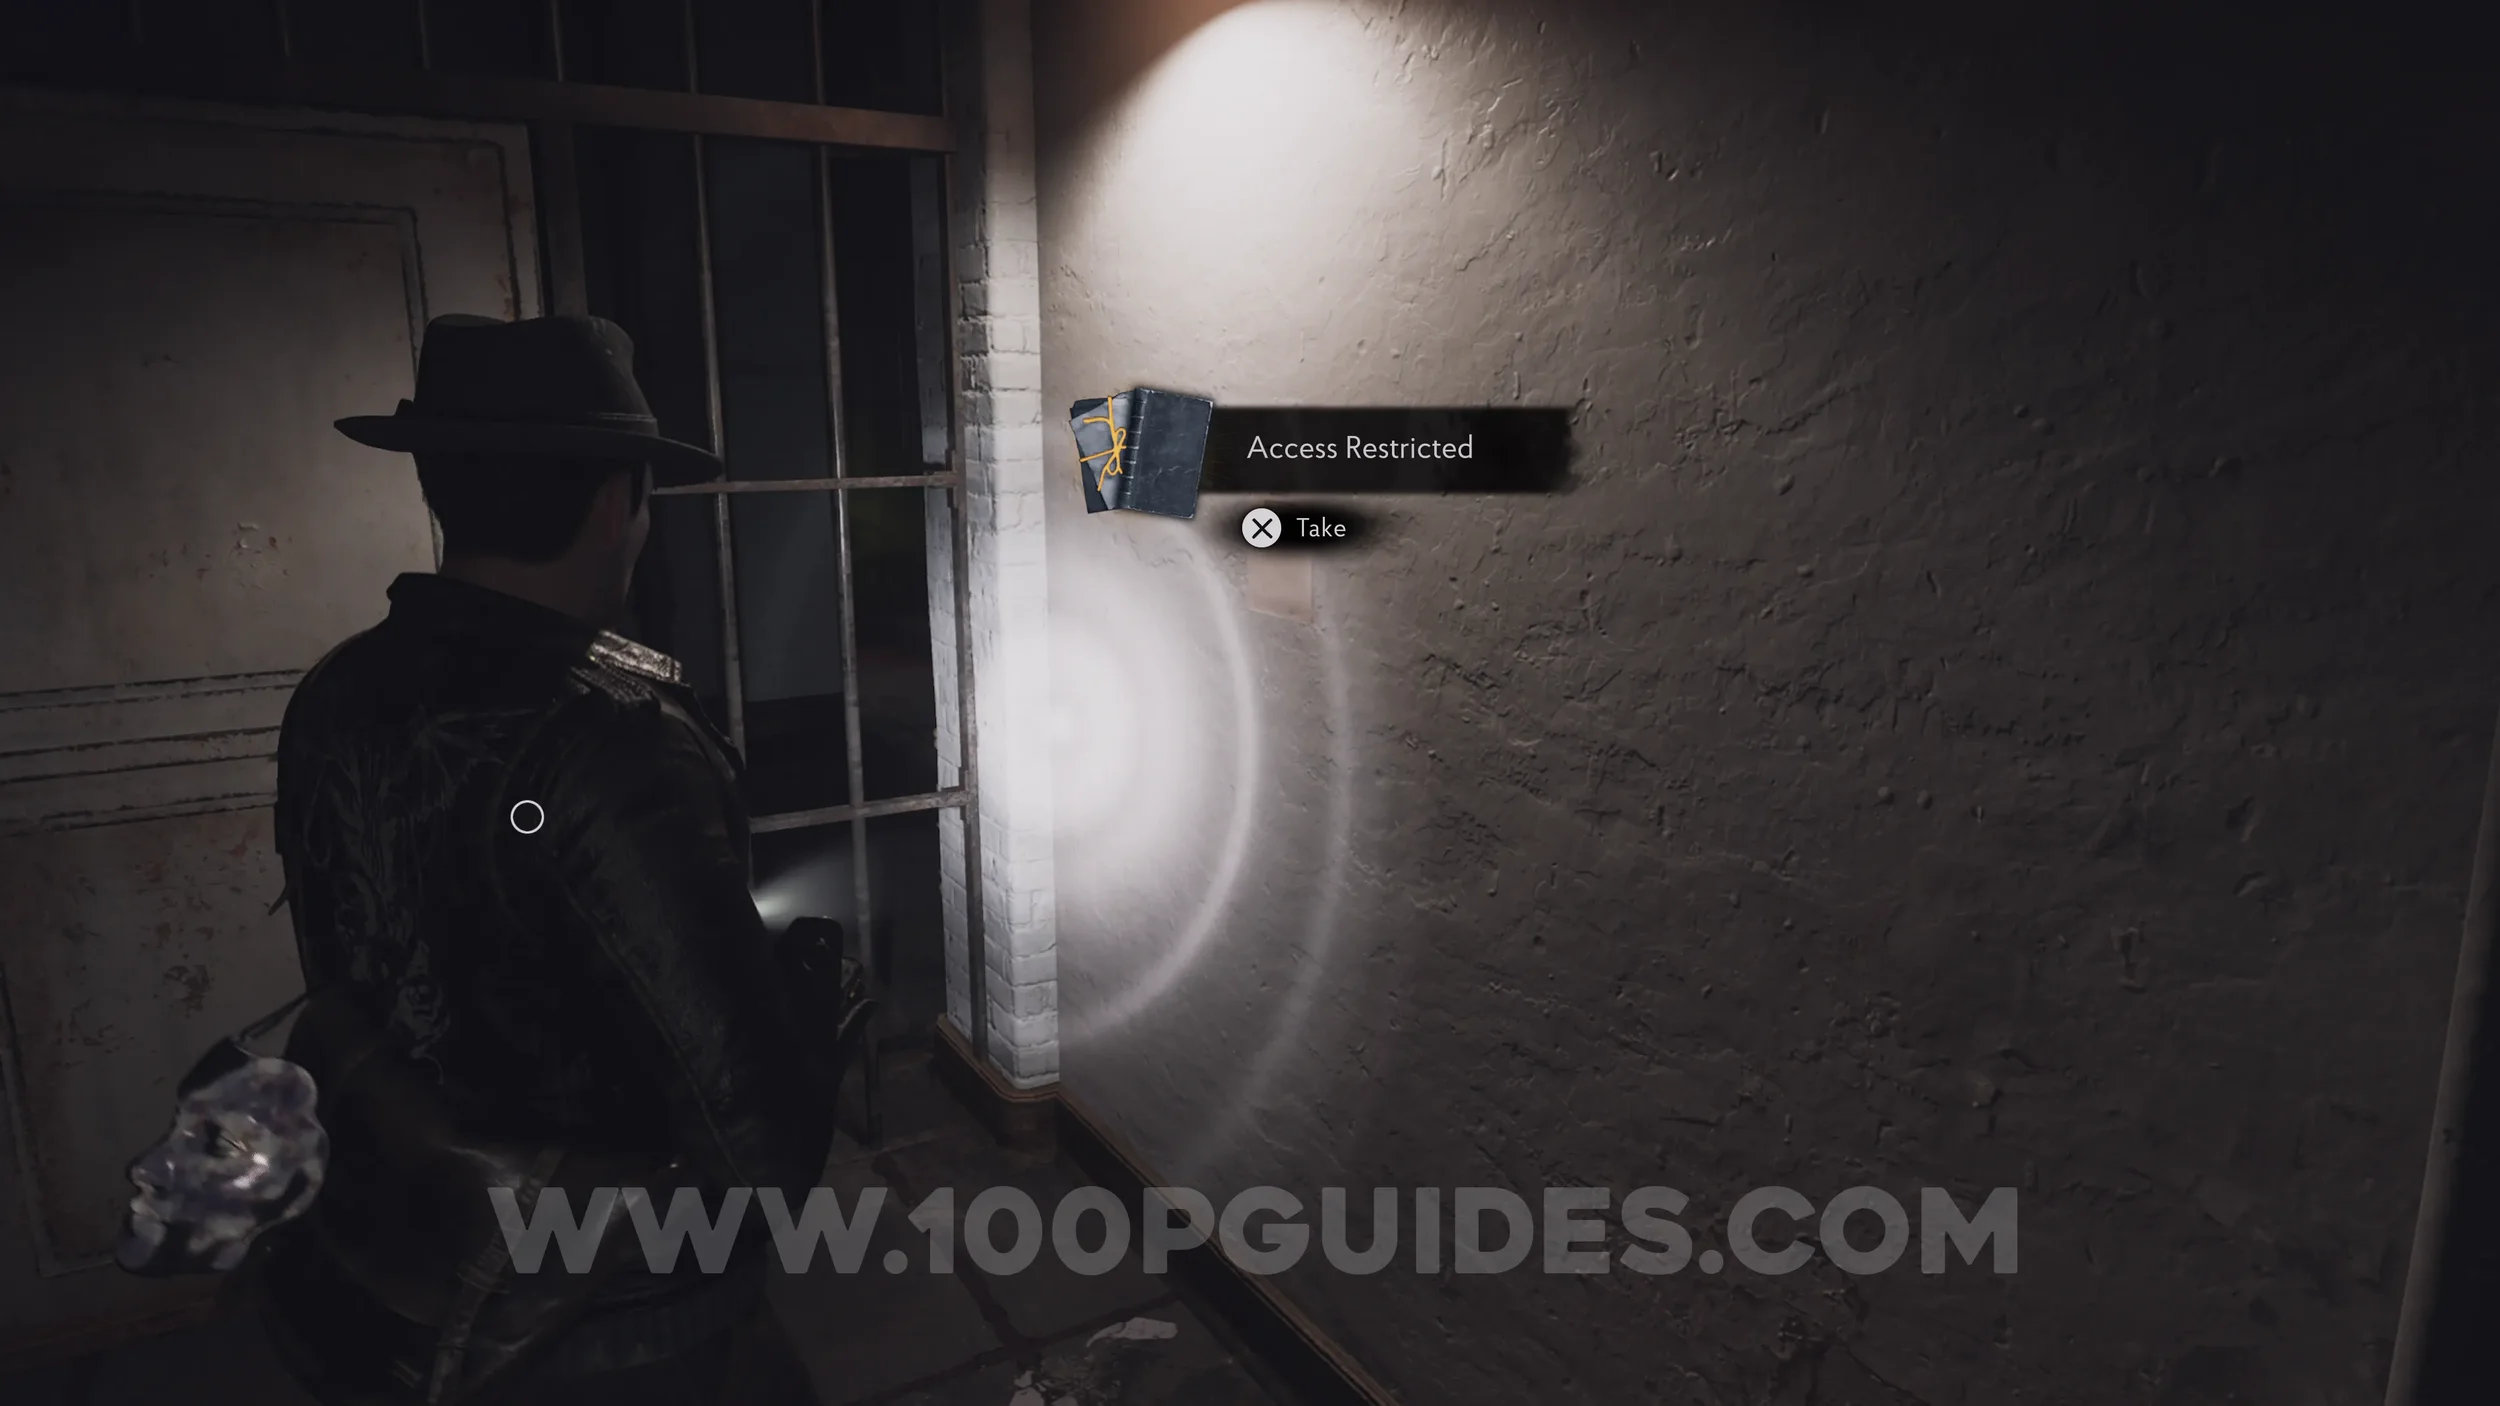
Lore Codex: Access Restricted. Head to the room to the north of the Reception on 1F and go down the stairs to the west. You'll see the codex on the wall just before the locked door you open with the Vertebral Key.
Evidence: Occult Symbol (Pink). On the pile of corpses on the other side of the door you open with the Vertebral Key.
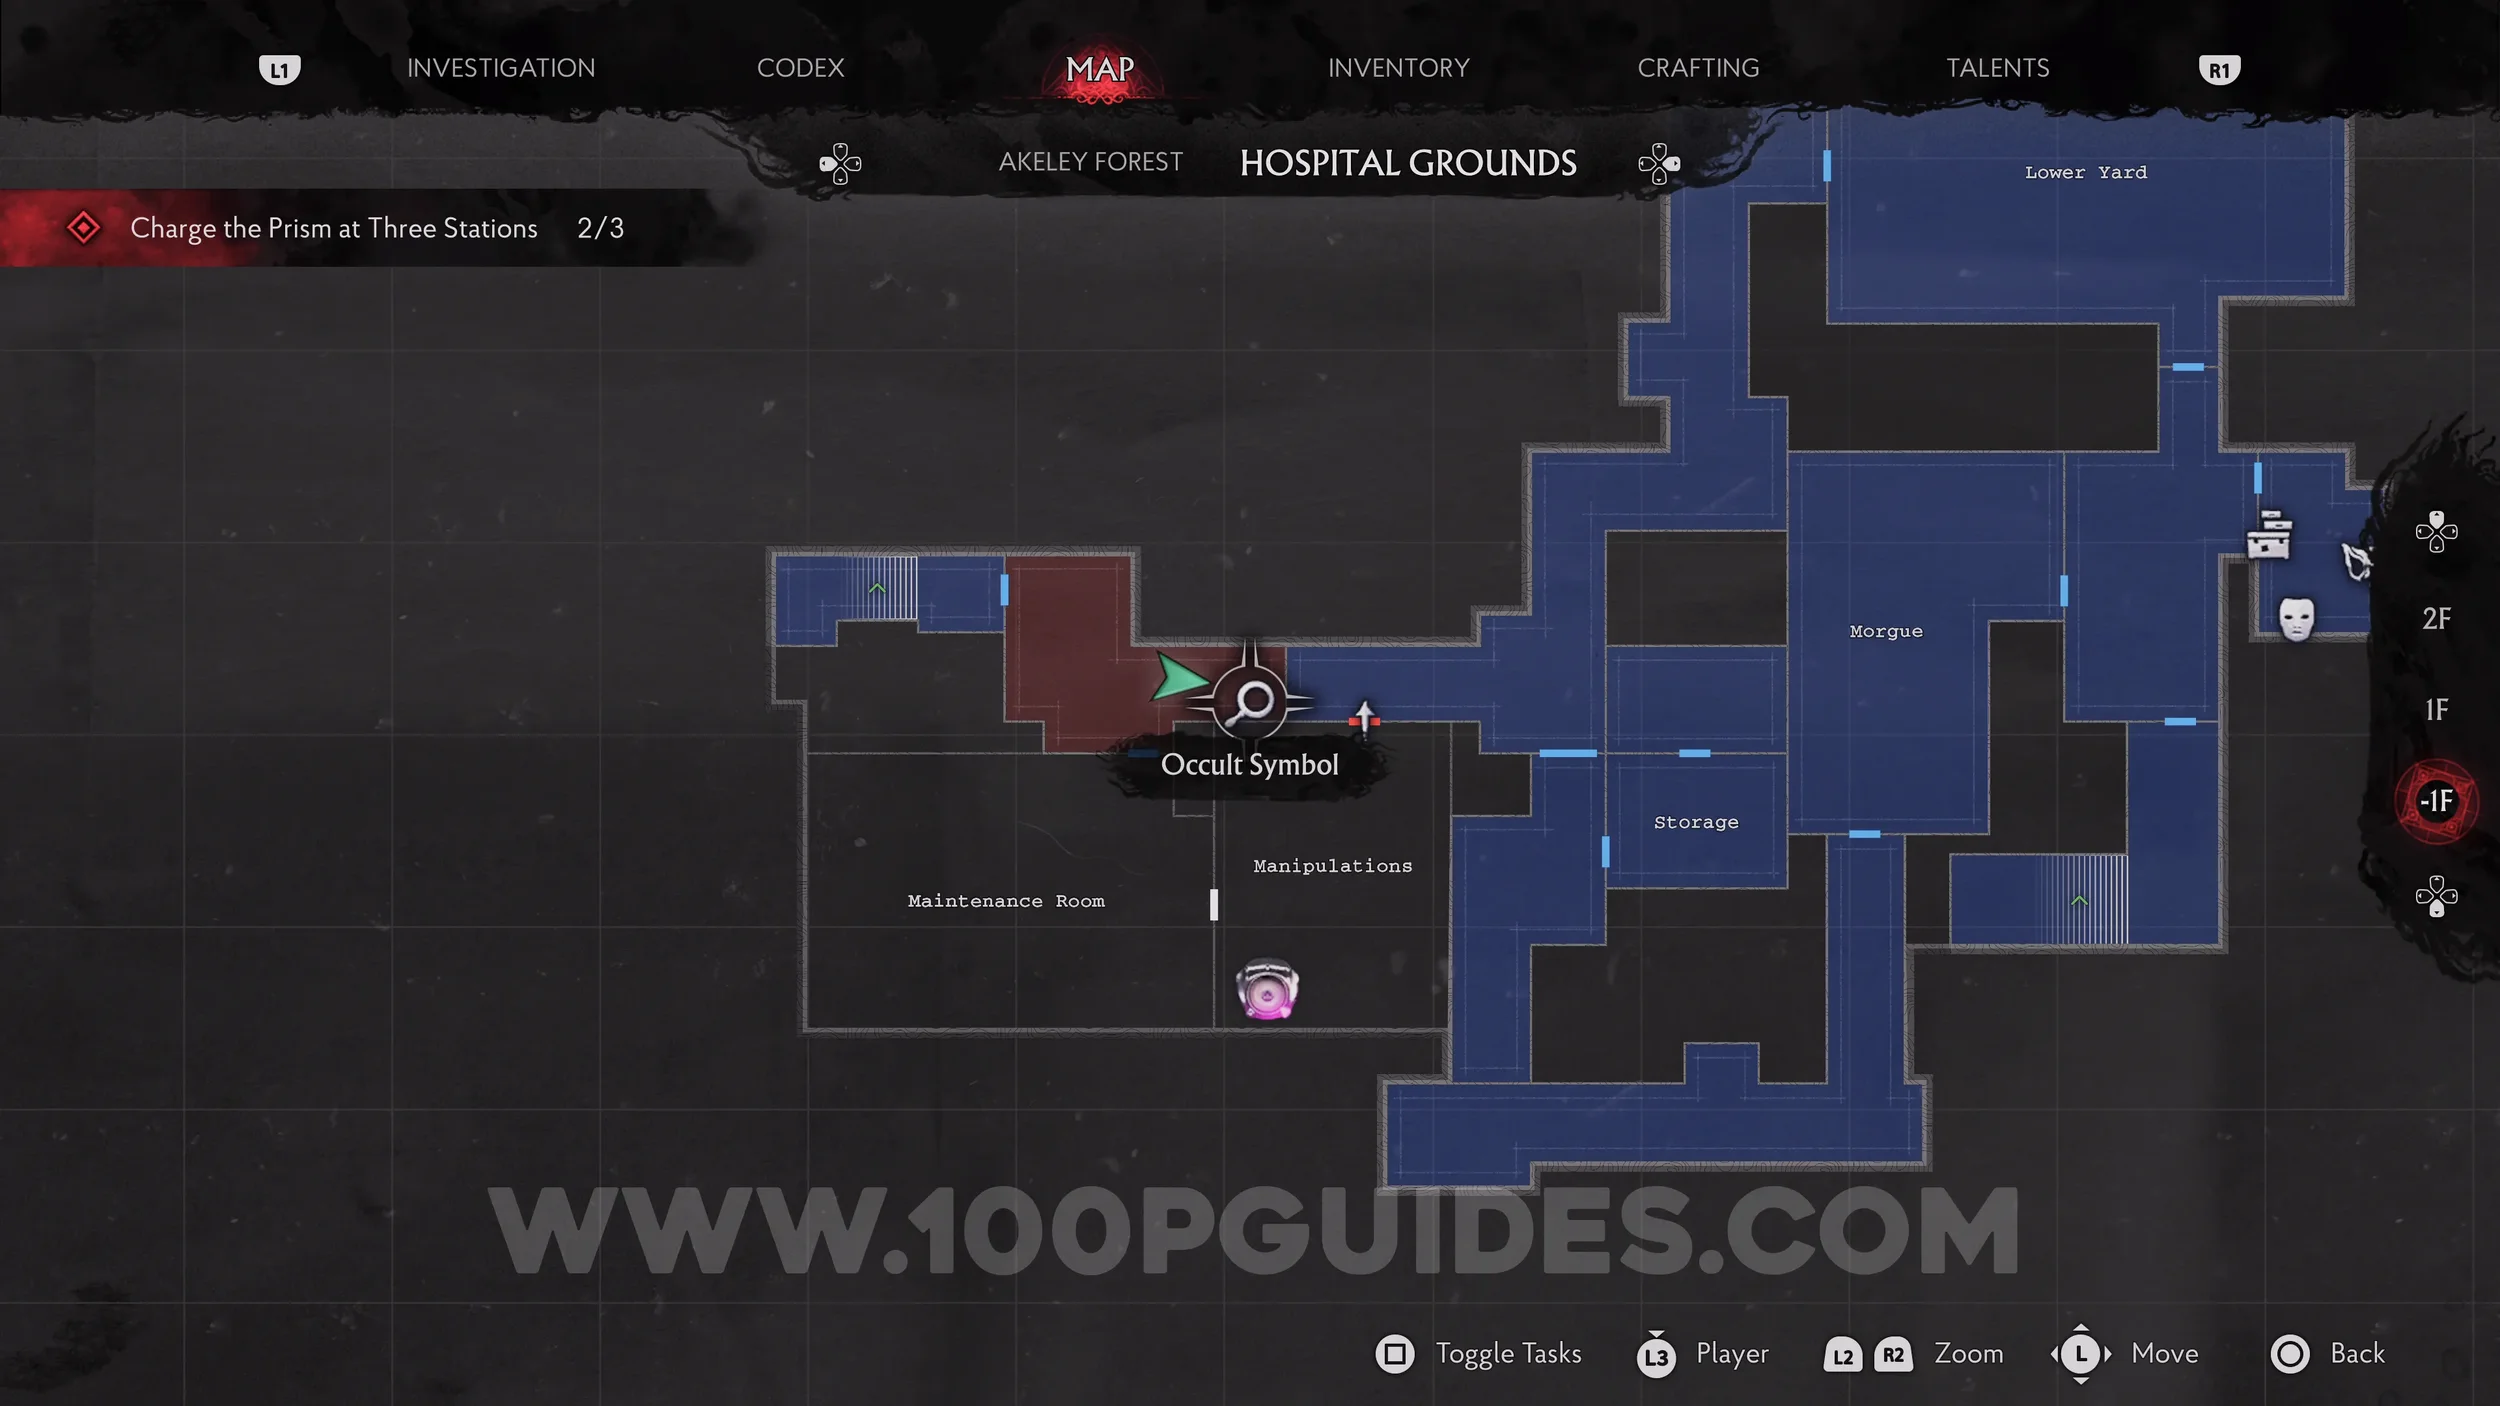
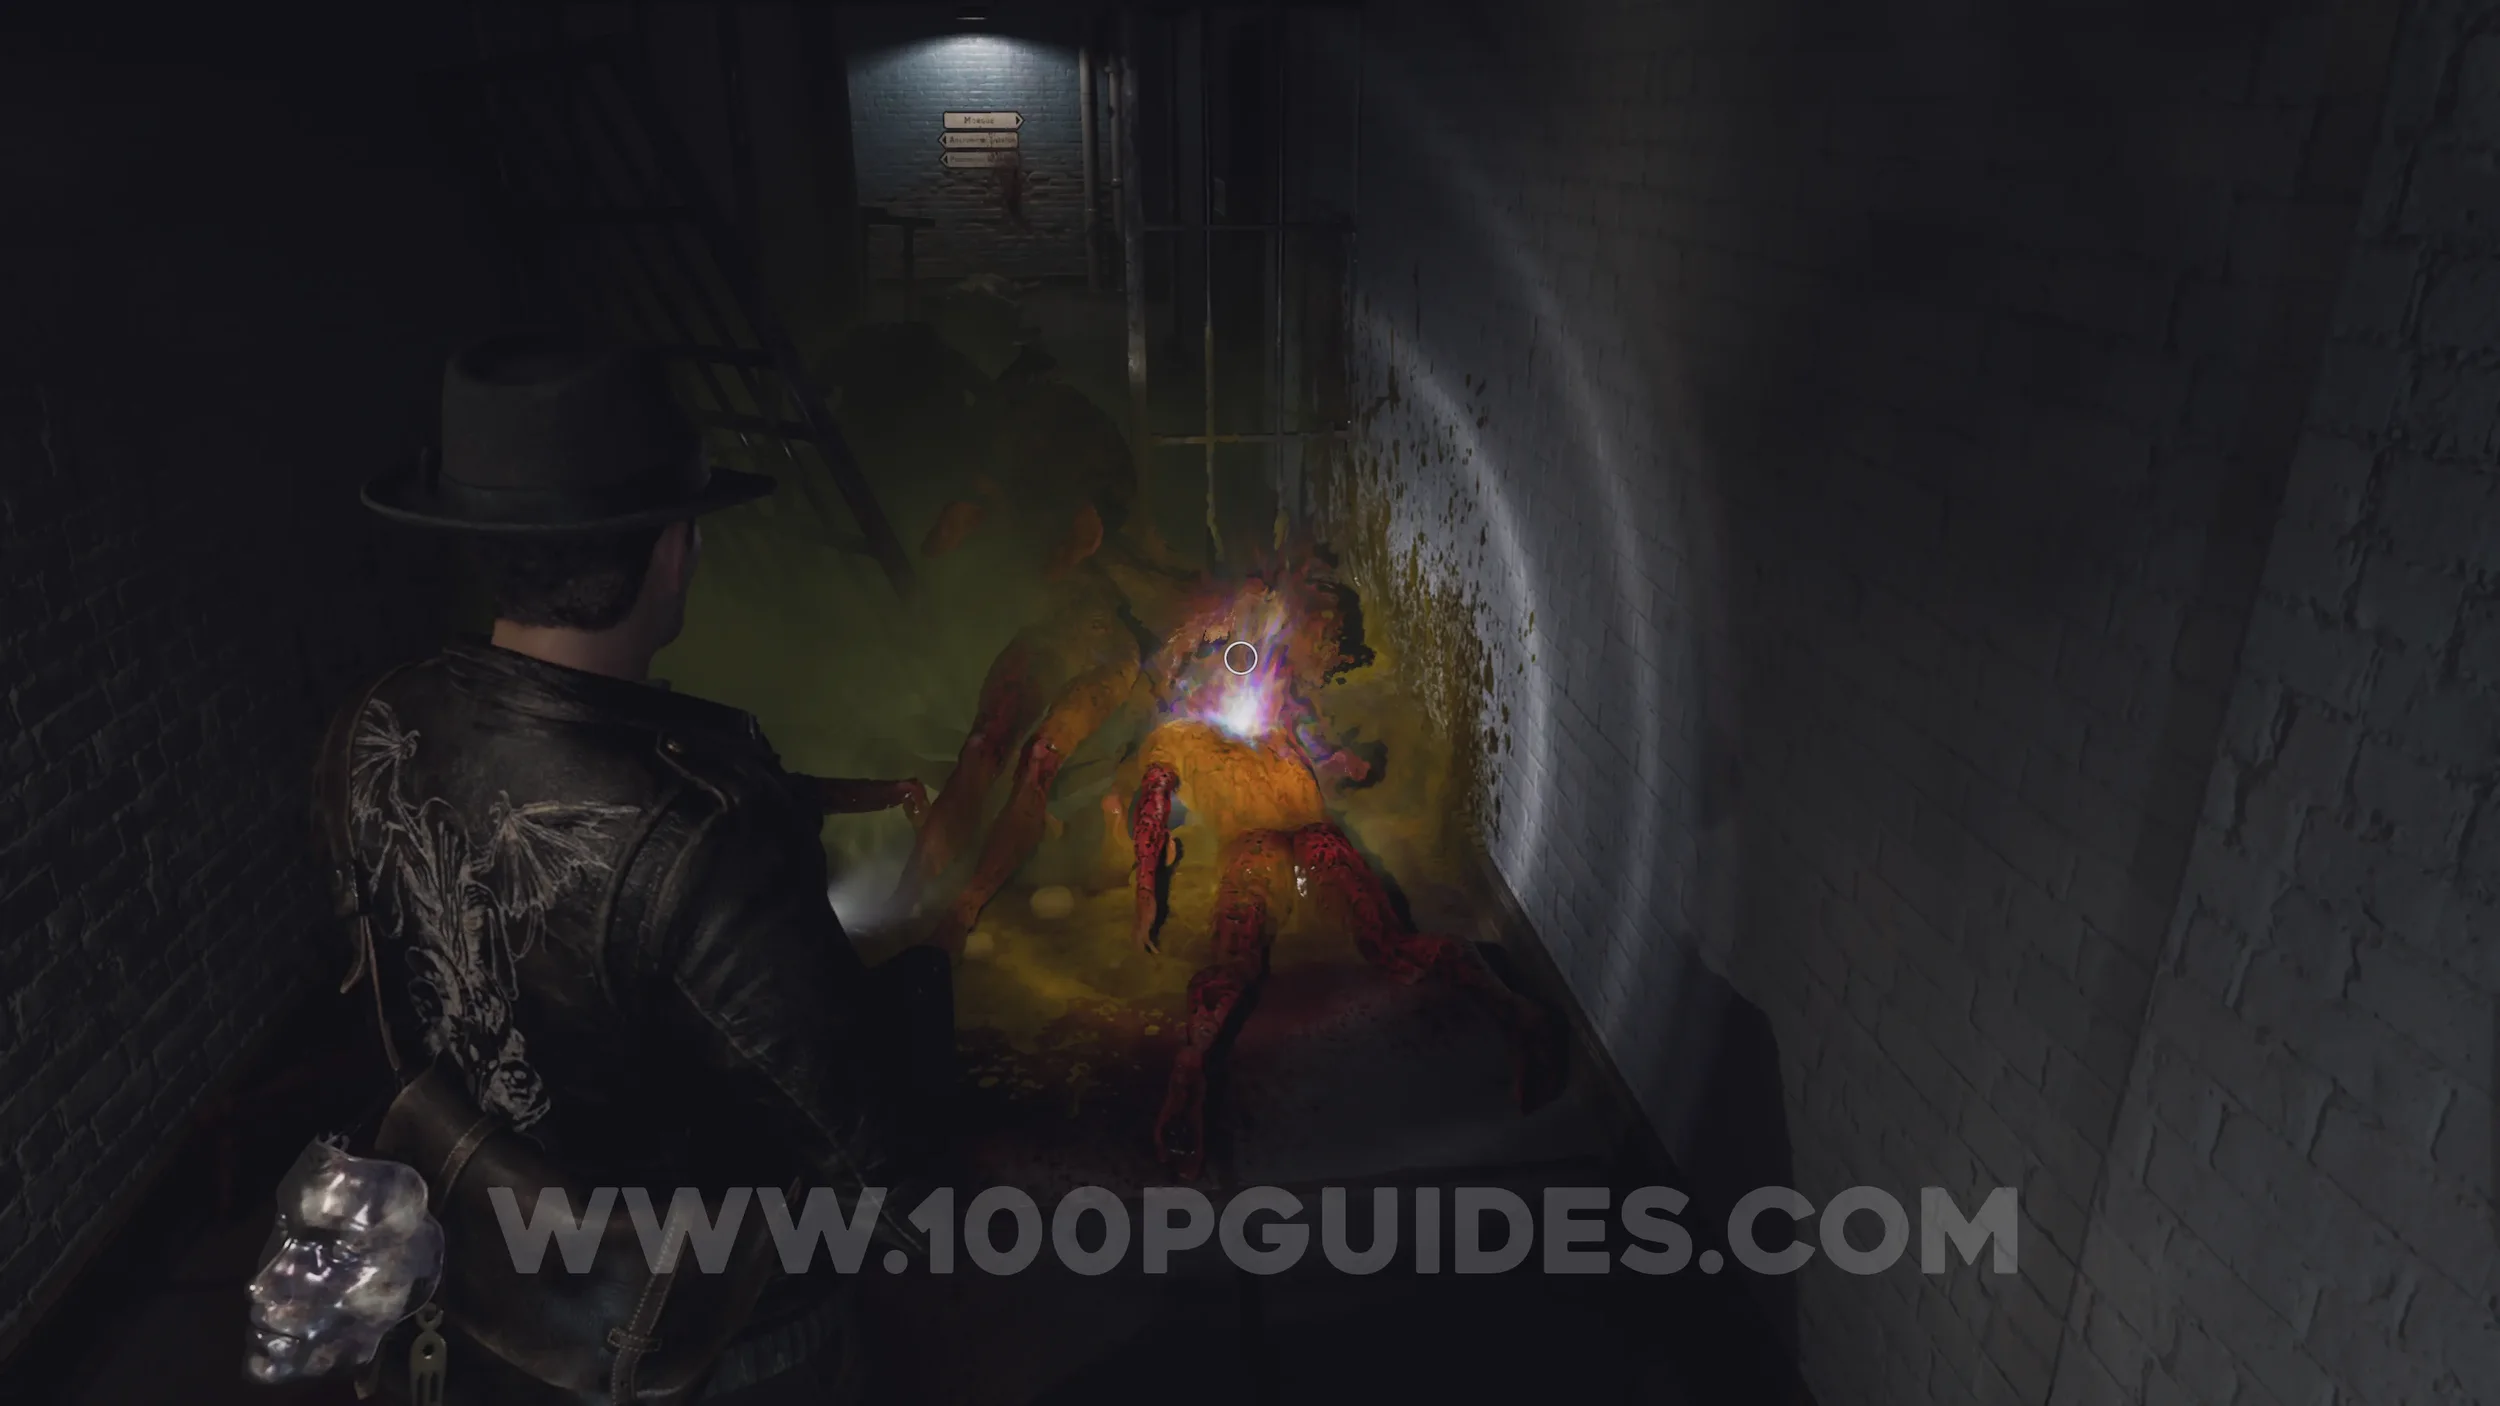
Nightmare (2/3). Go through the hole to the right of the previous evidence into the Maintenance Room. Here, the nightmare will attack you. Make sure you defeat it for the “Sterilizer” trophy.
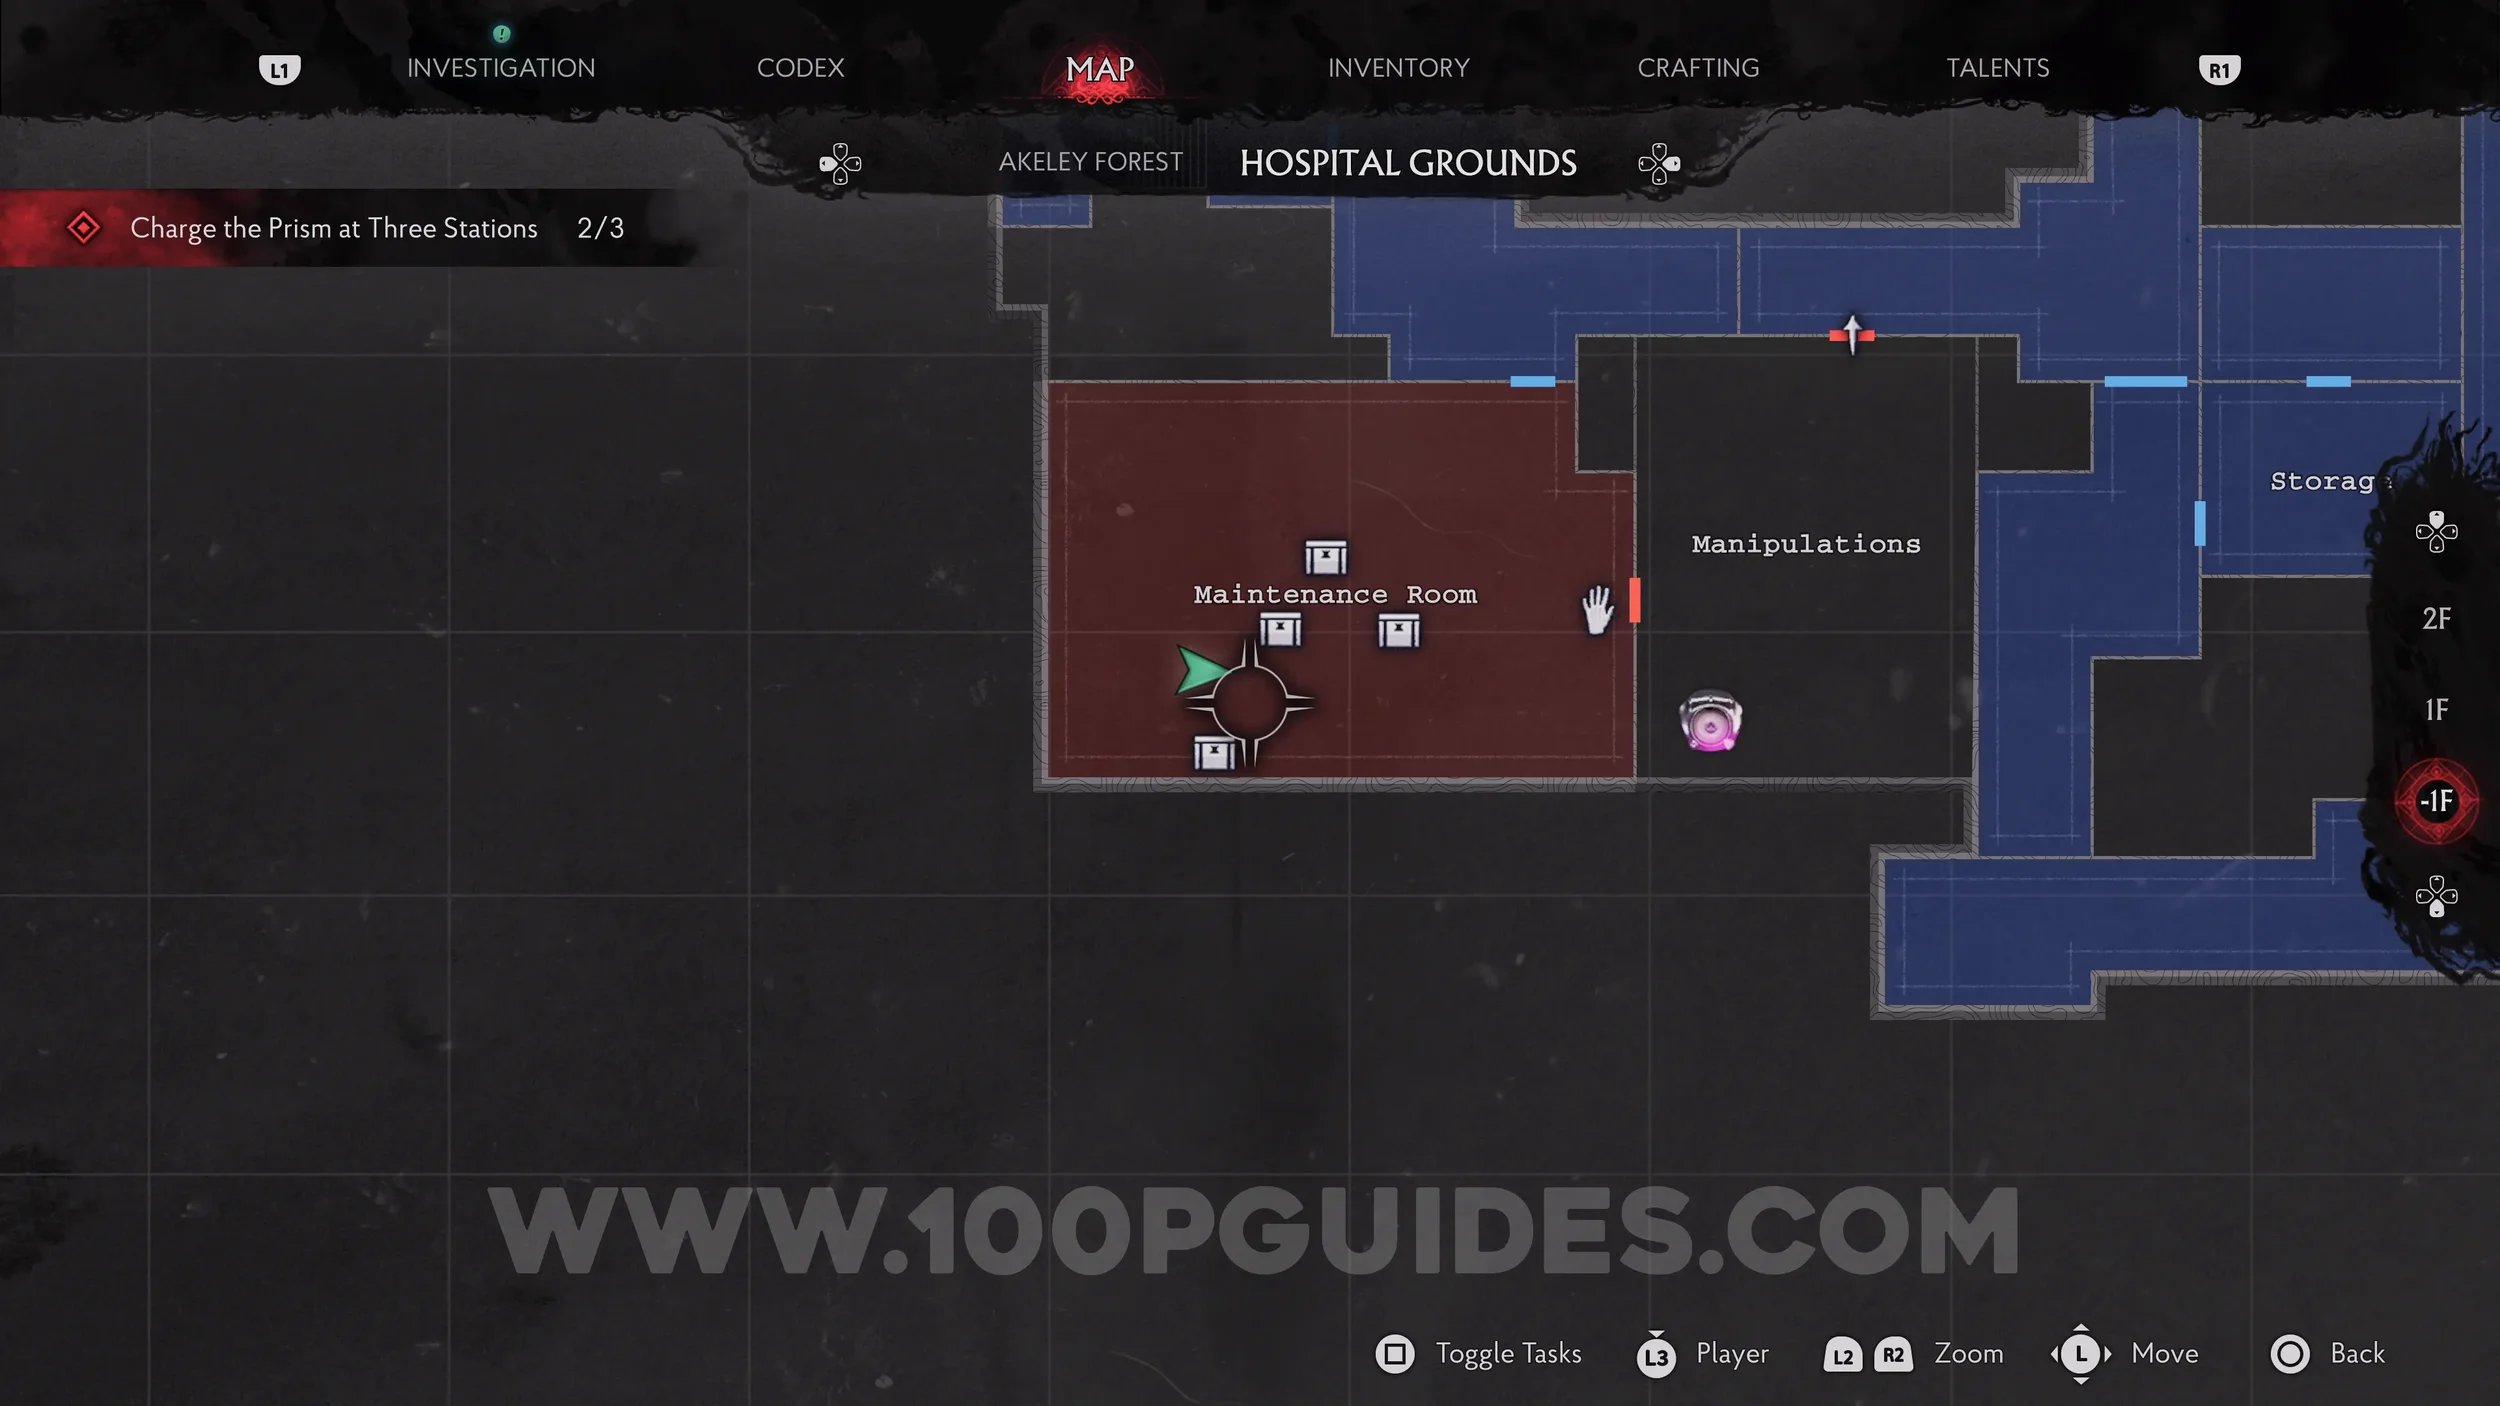
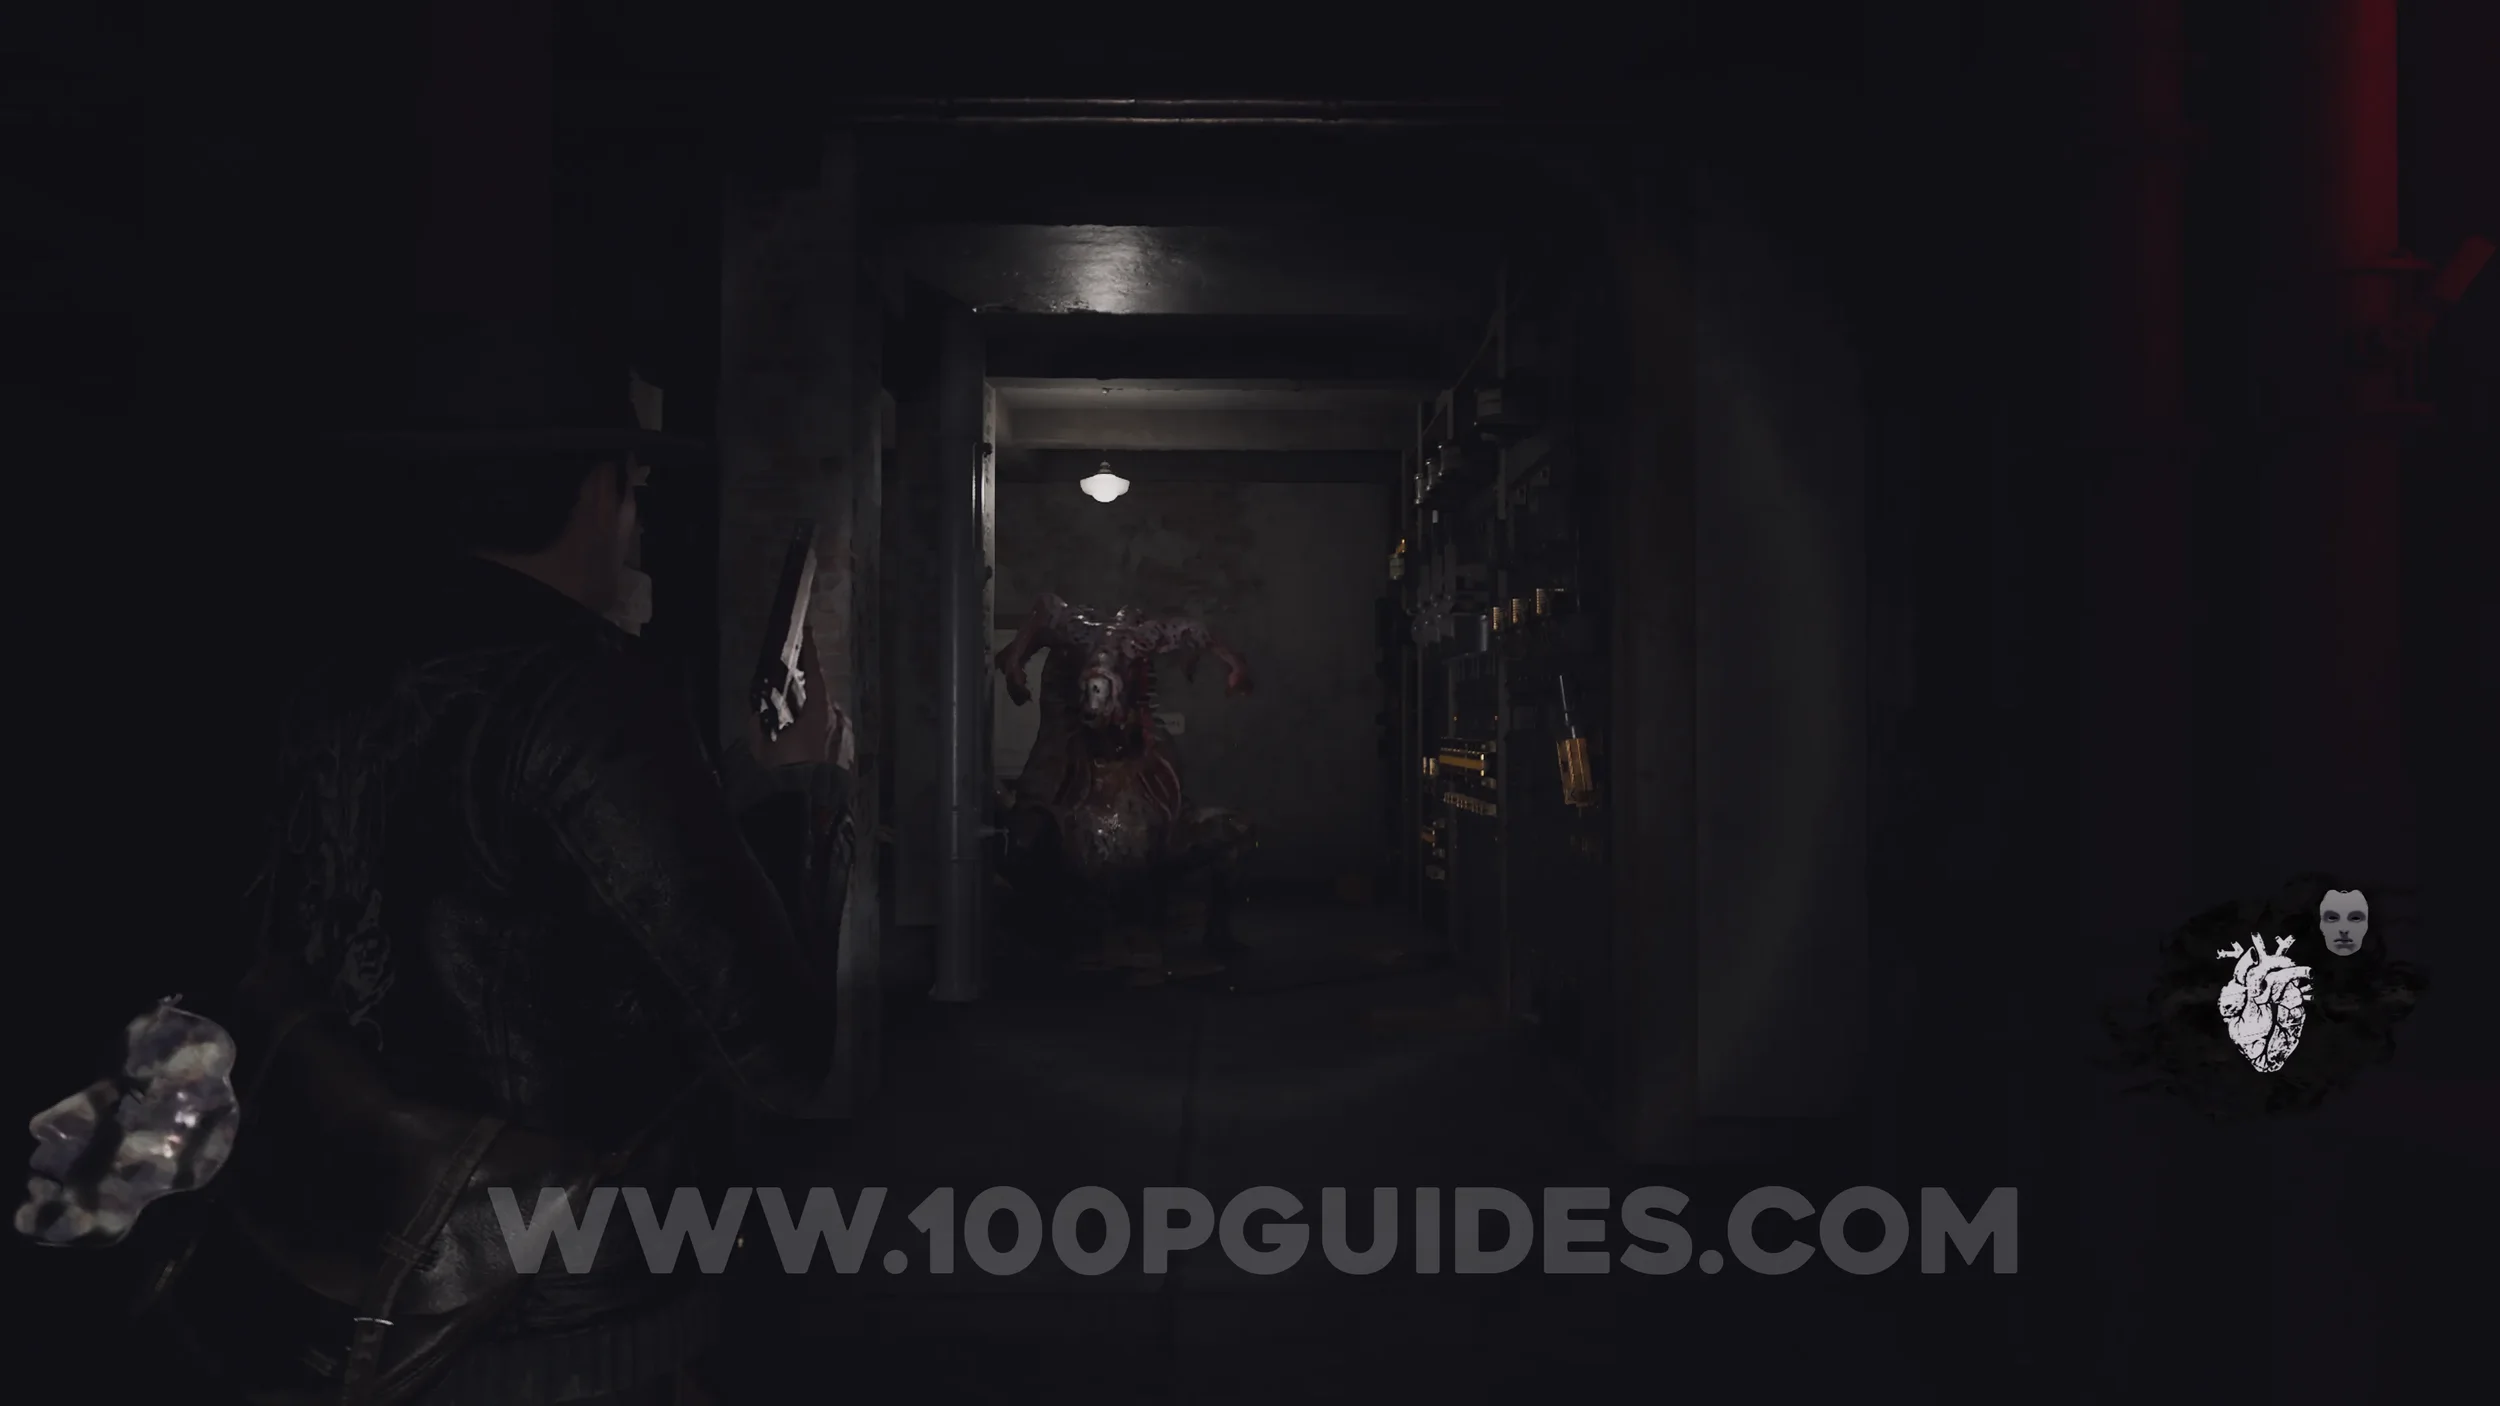
Pink Prism Station Puzzle
Head to the Manipulations Room, the room to the east of the Maintenance Room, and place the Prism into the station. Then spin the three rings so they match the image below and hold to validate.
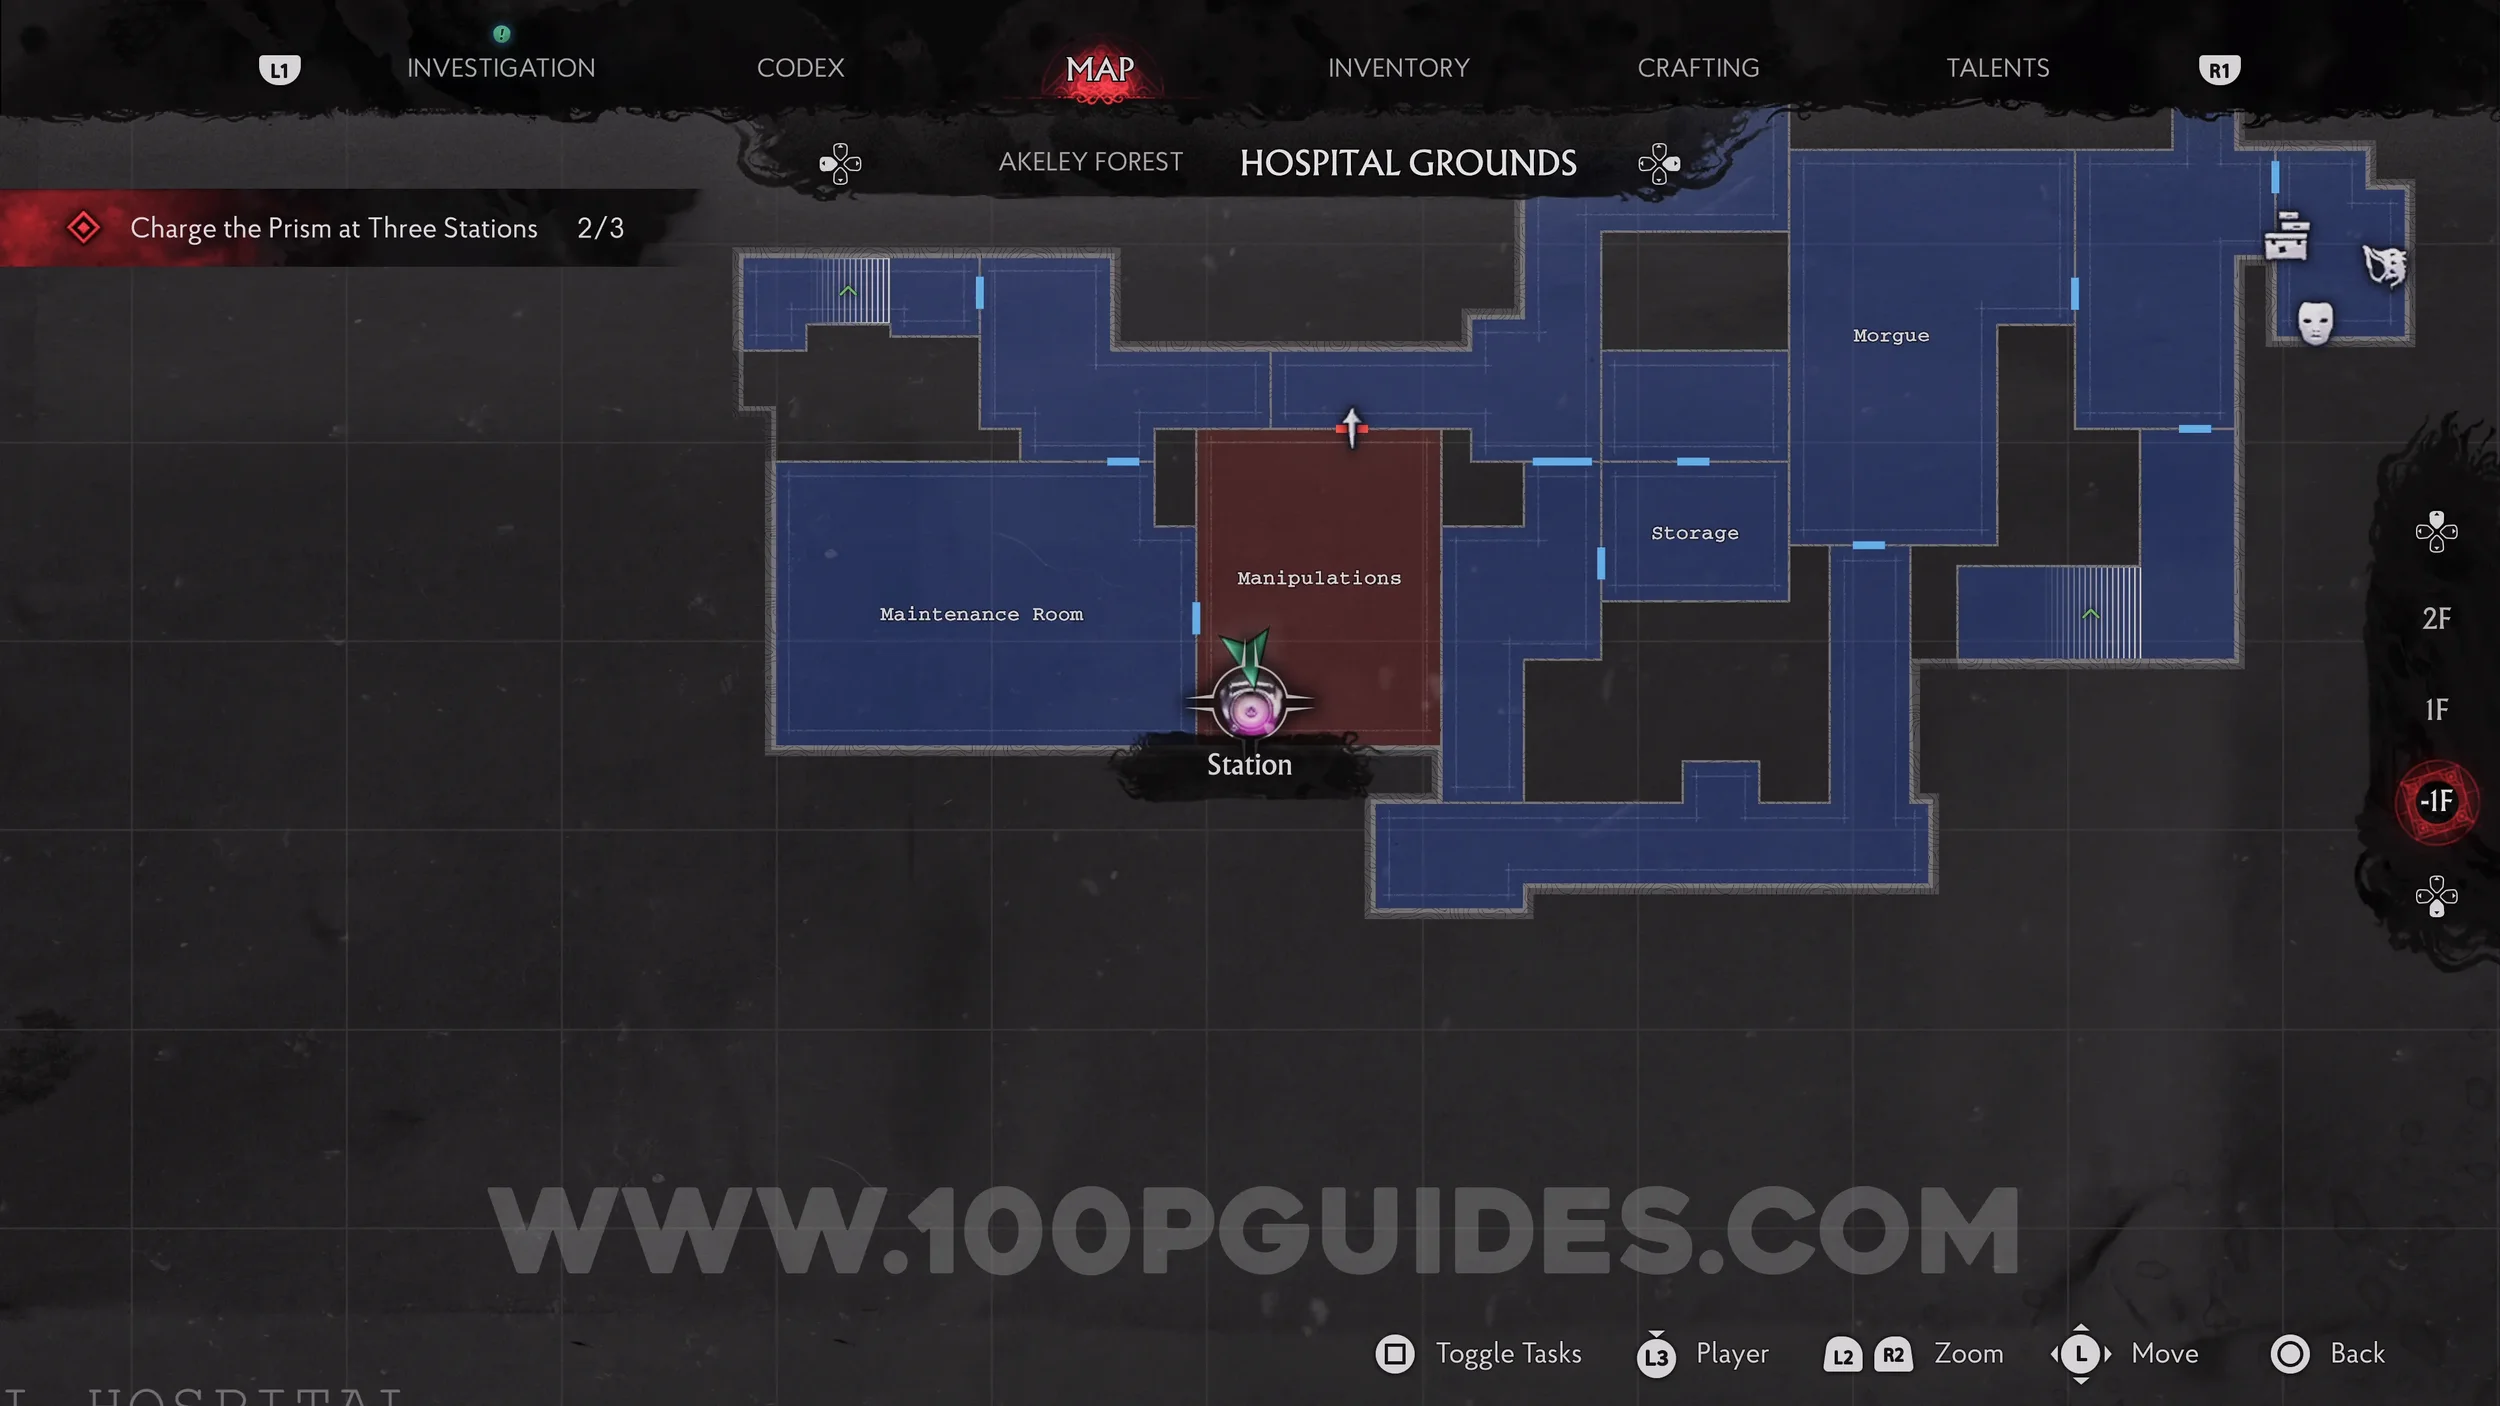

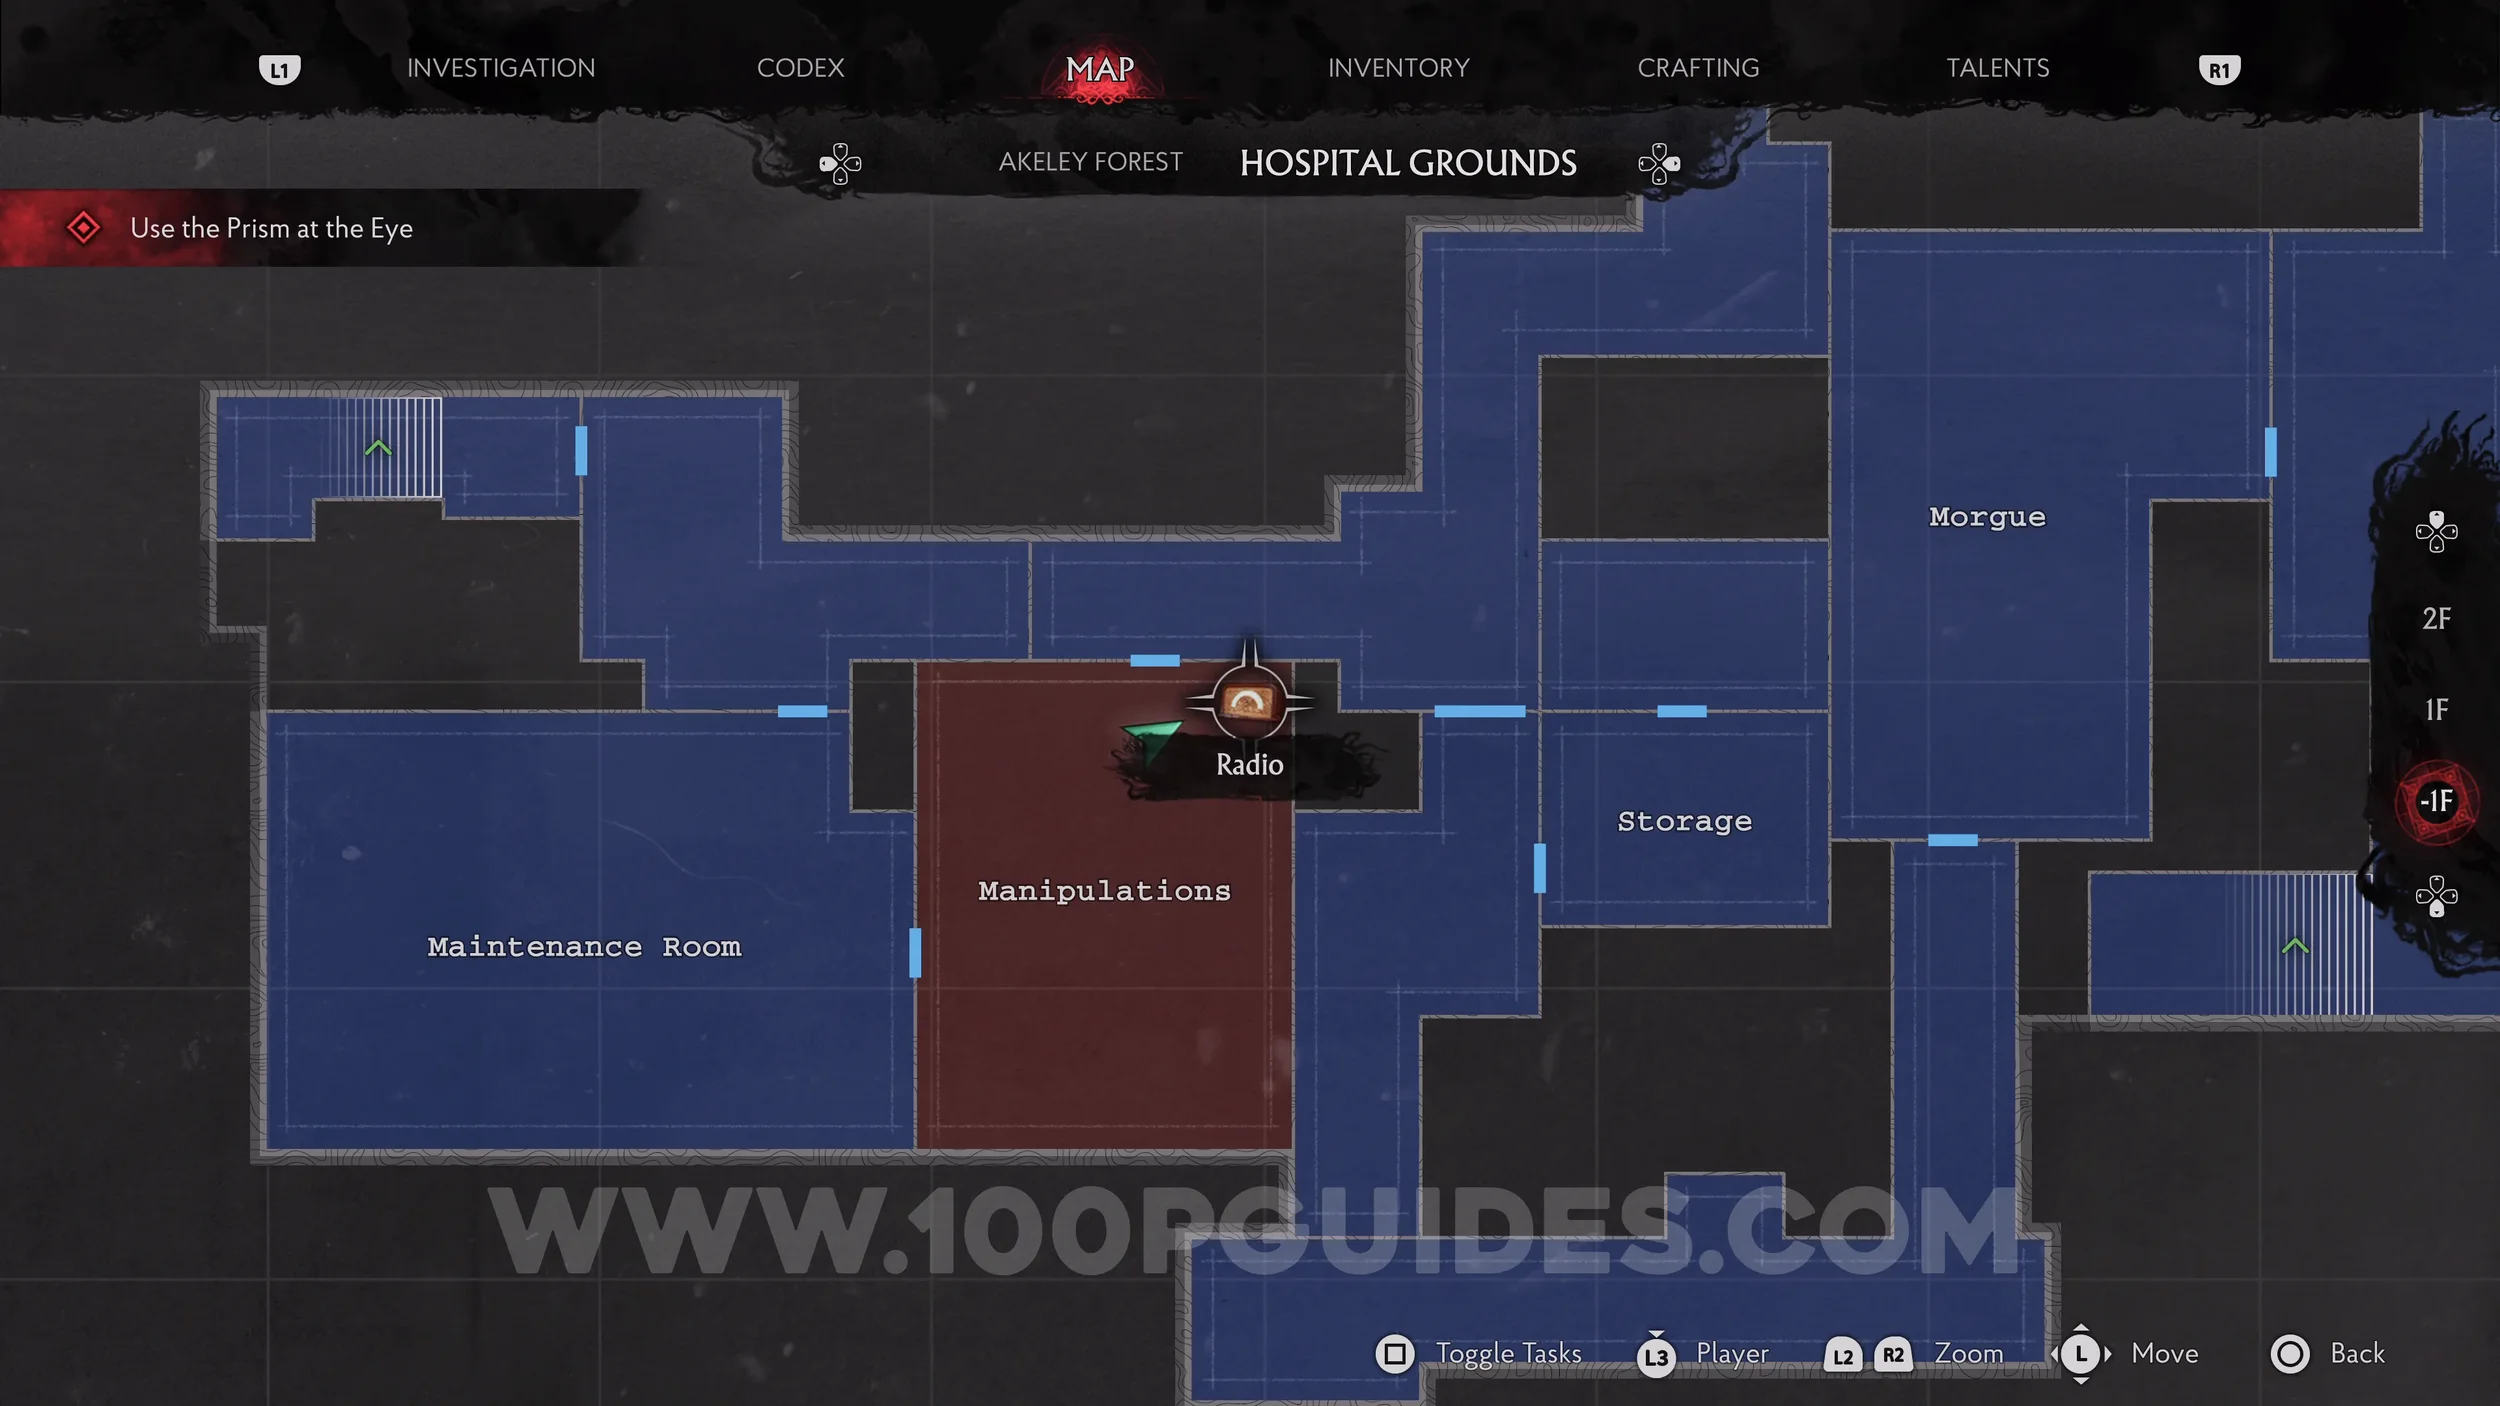
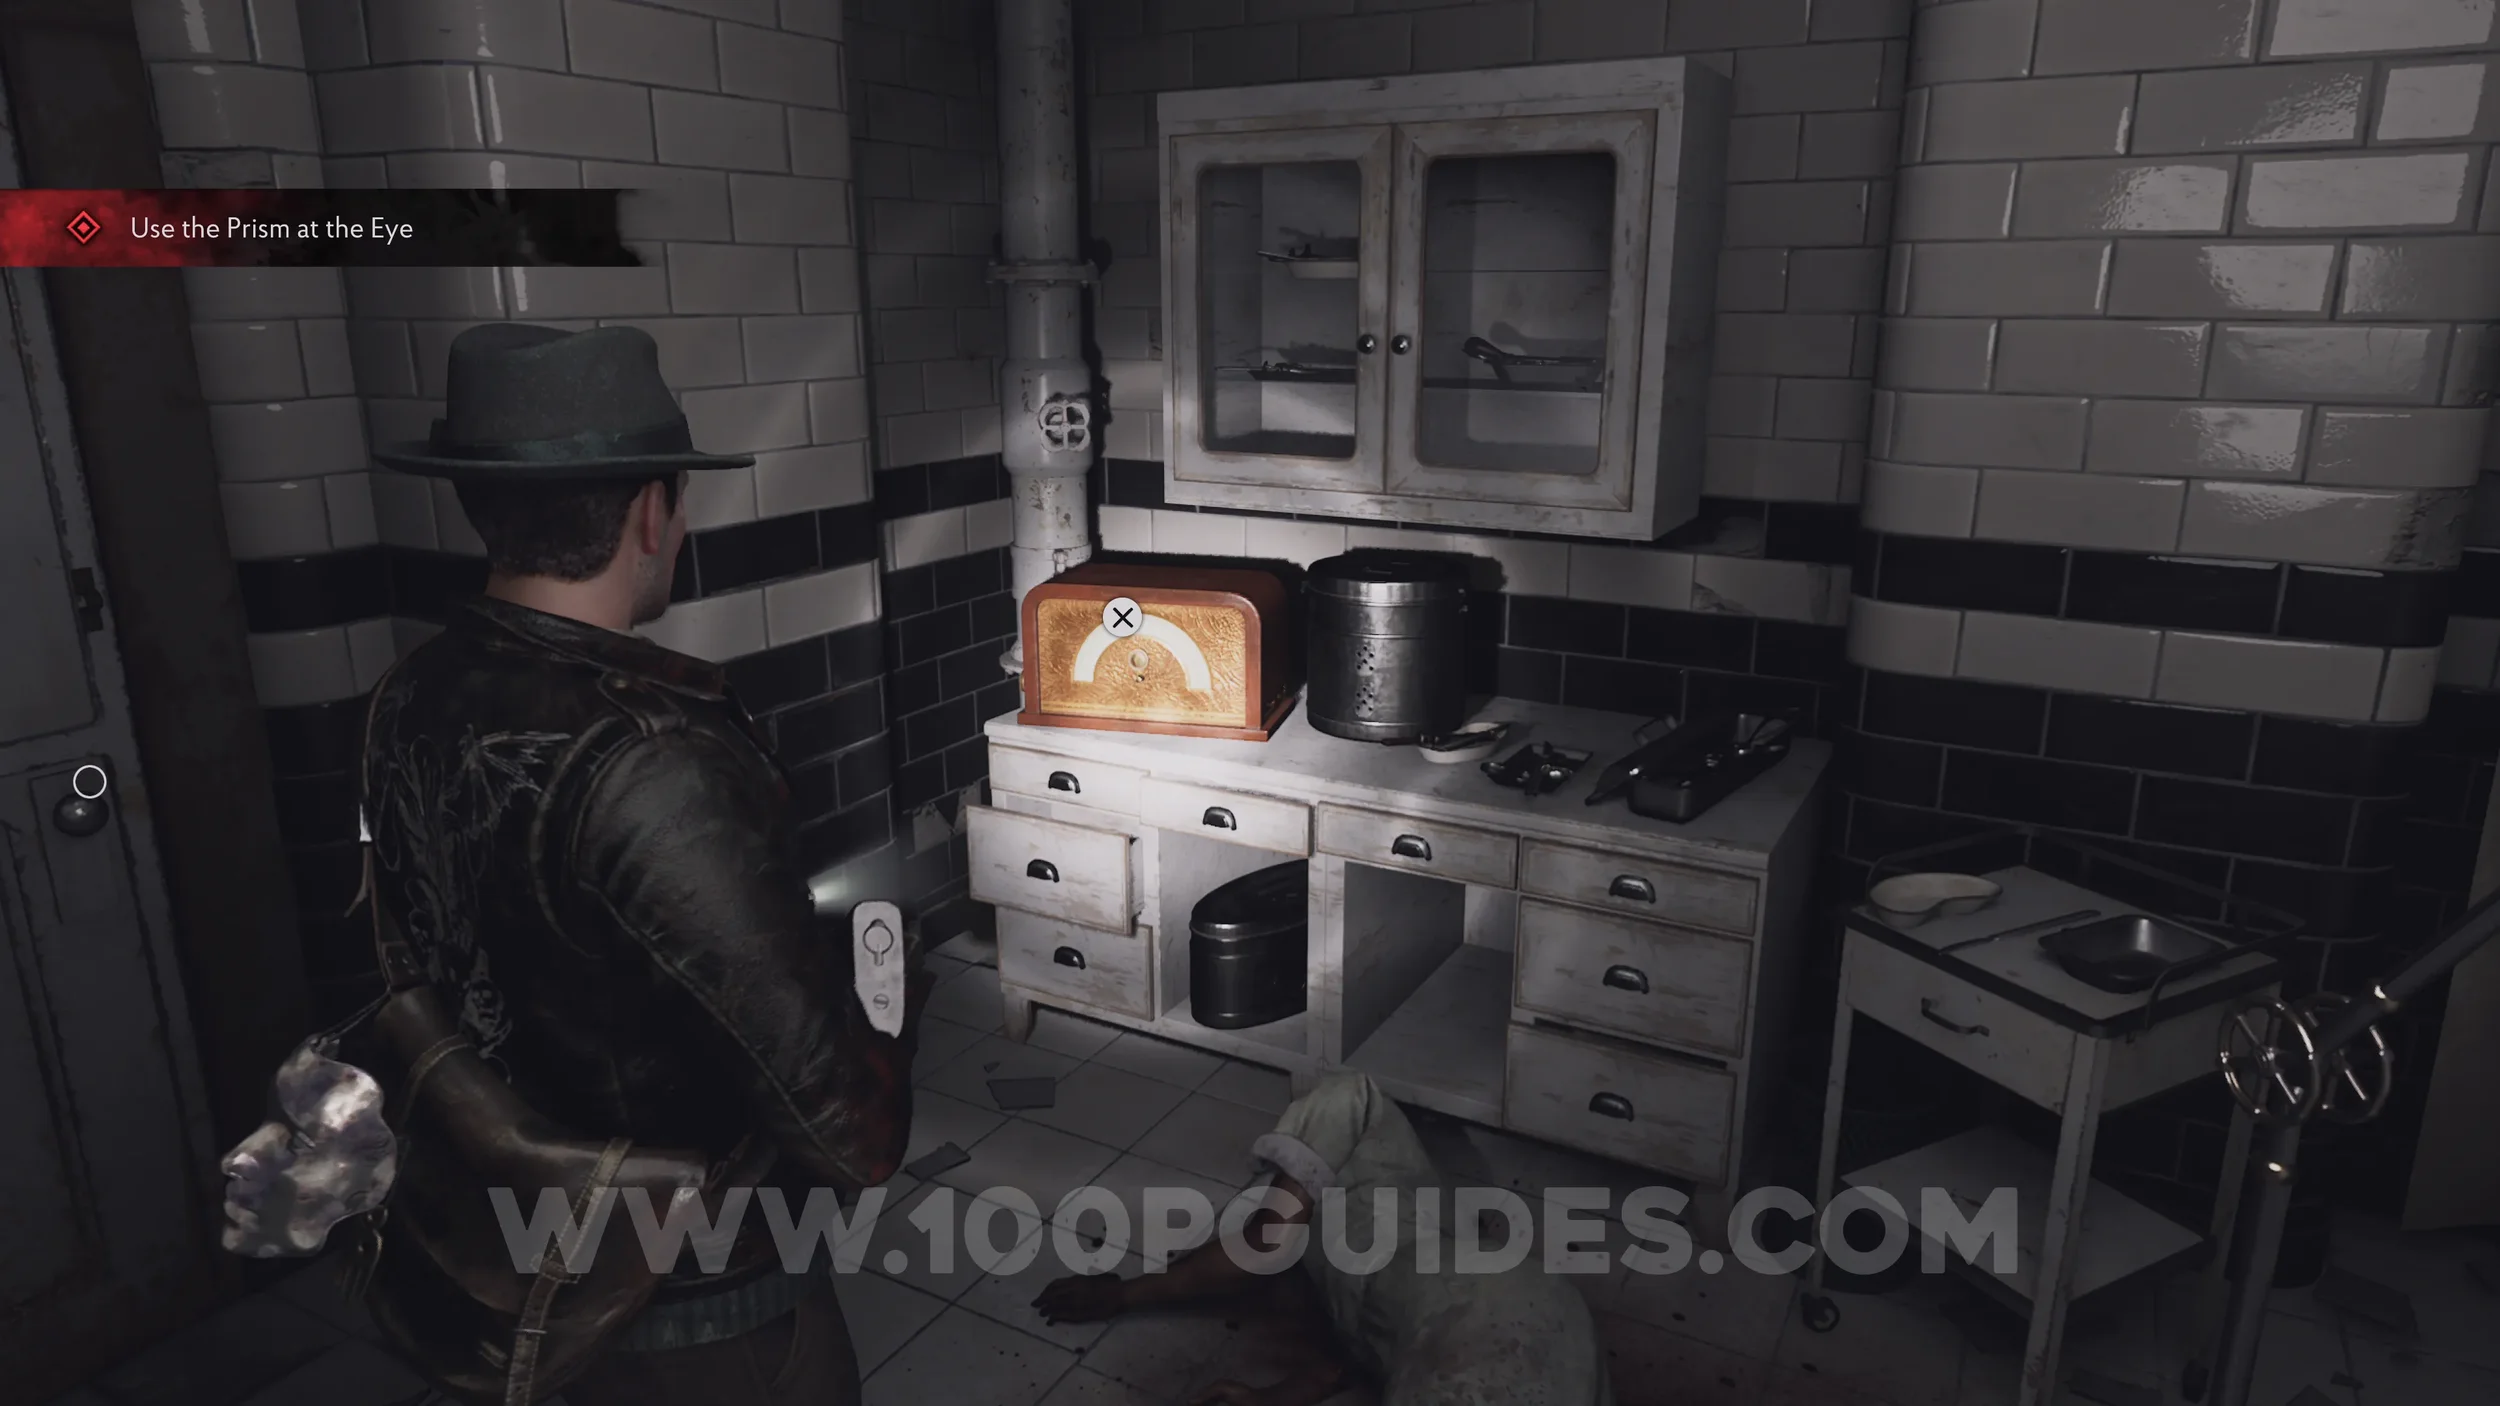
Radio: The Wickedness of West. Found in the corner of the Manipulations room.
Nightmare (3/3). Now that you have all three charges in the Prism, head back up to the Anatomical Theater by going through the door on -1F that needs the Head Surgeon's Face Mask, then place the Prism on the pedestal below Faye. After that, you'll leave the Hospital and have to get back to the boat. On the way there, you'll have to defend Faye as she tries to get rid of a barrier made of slithers. During this section, one of the enemies that attacks you will be the final Nightmare needed for the "Sterilizer" trophy.
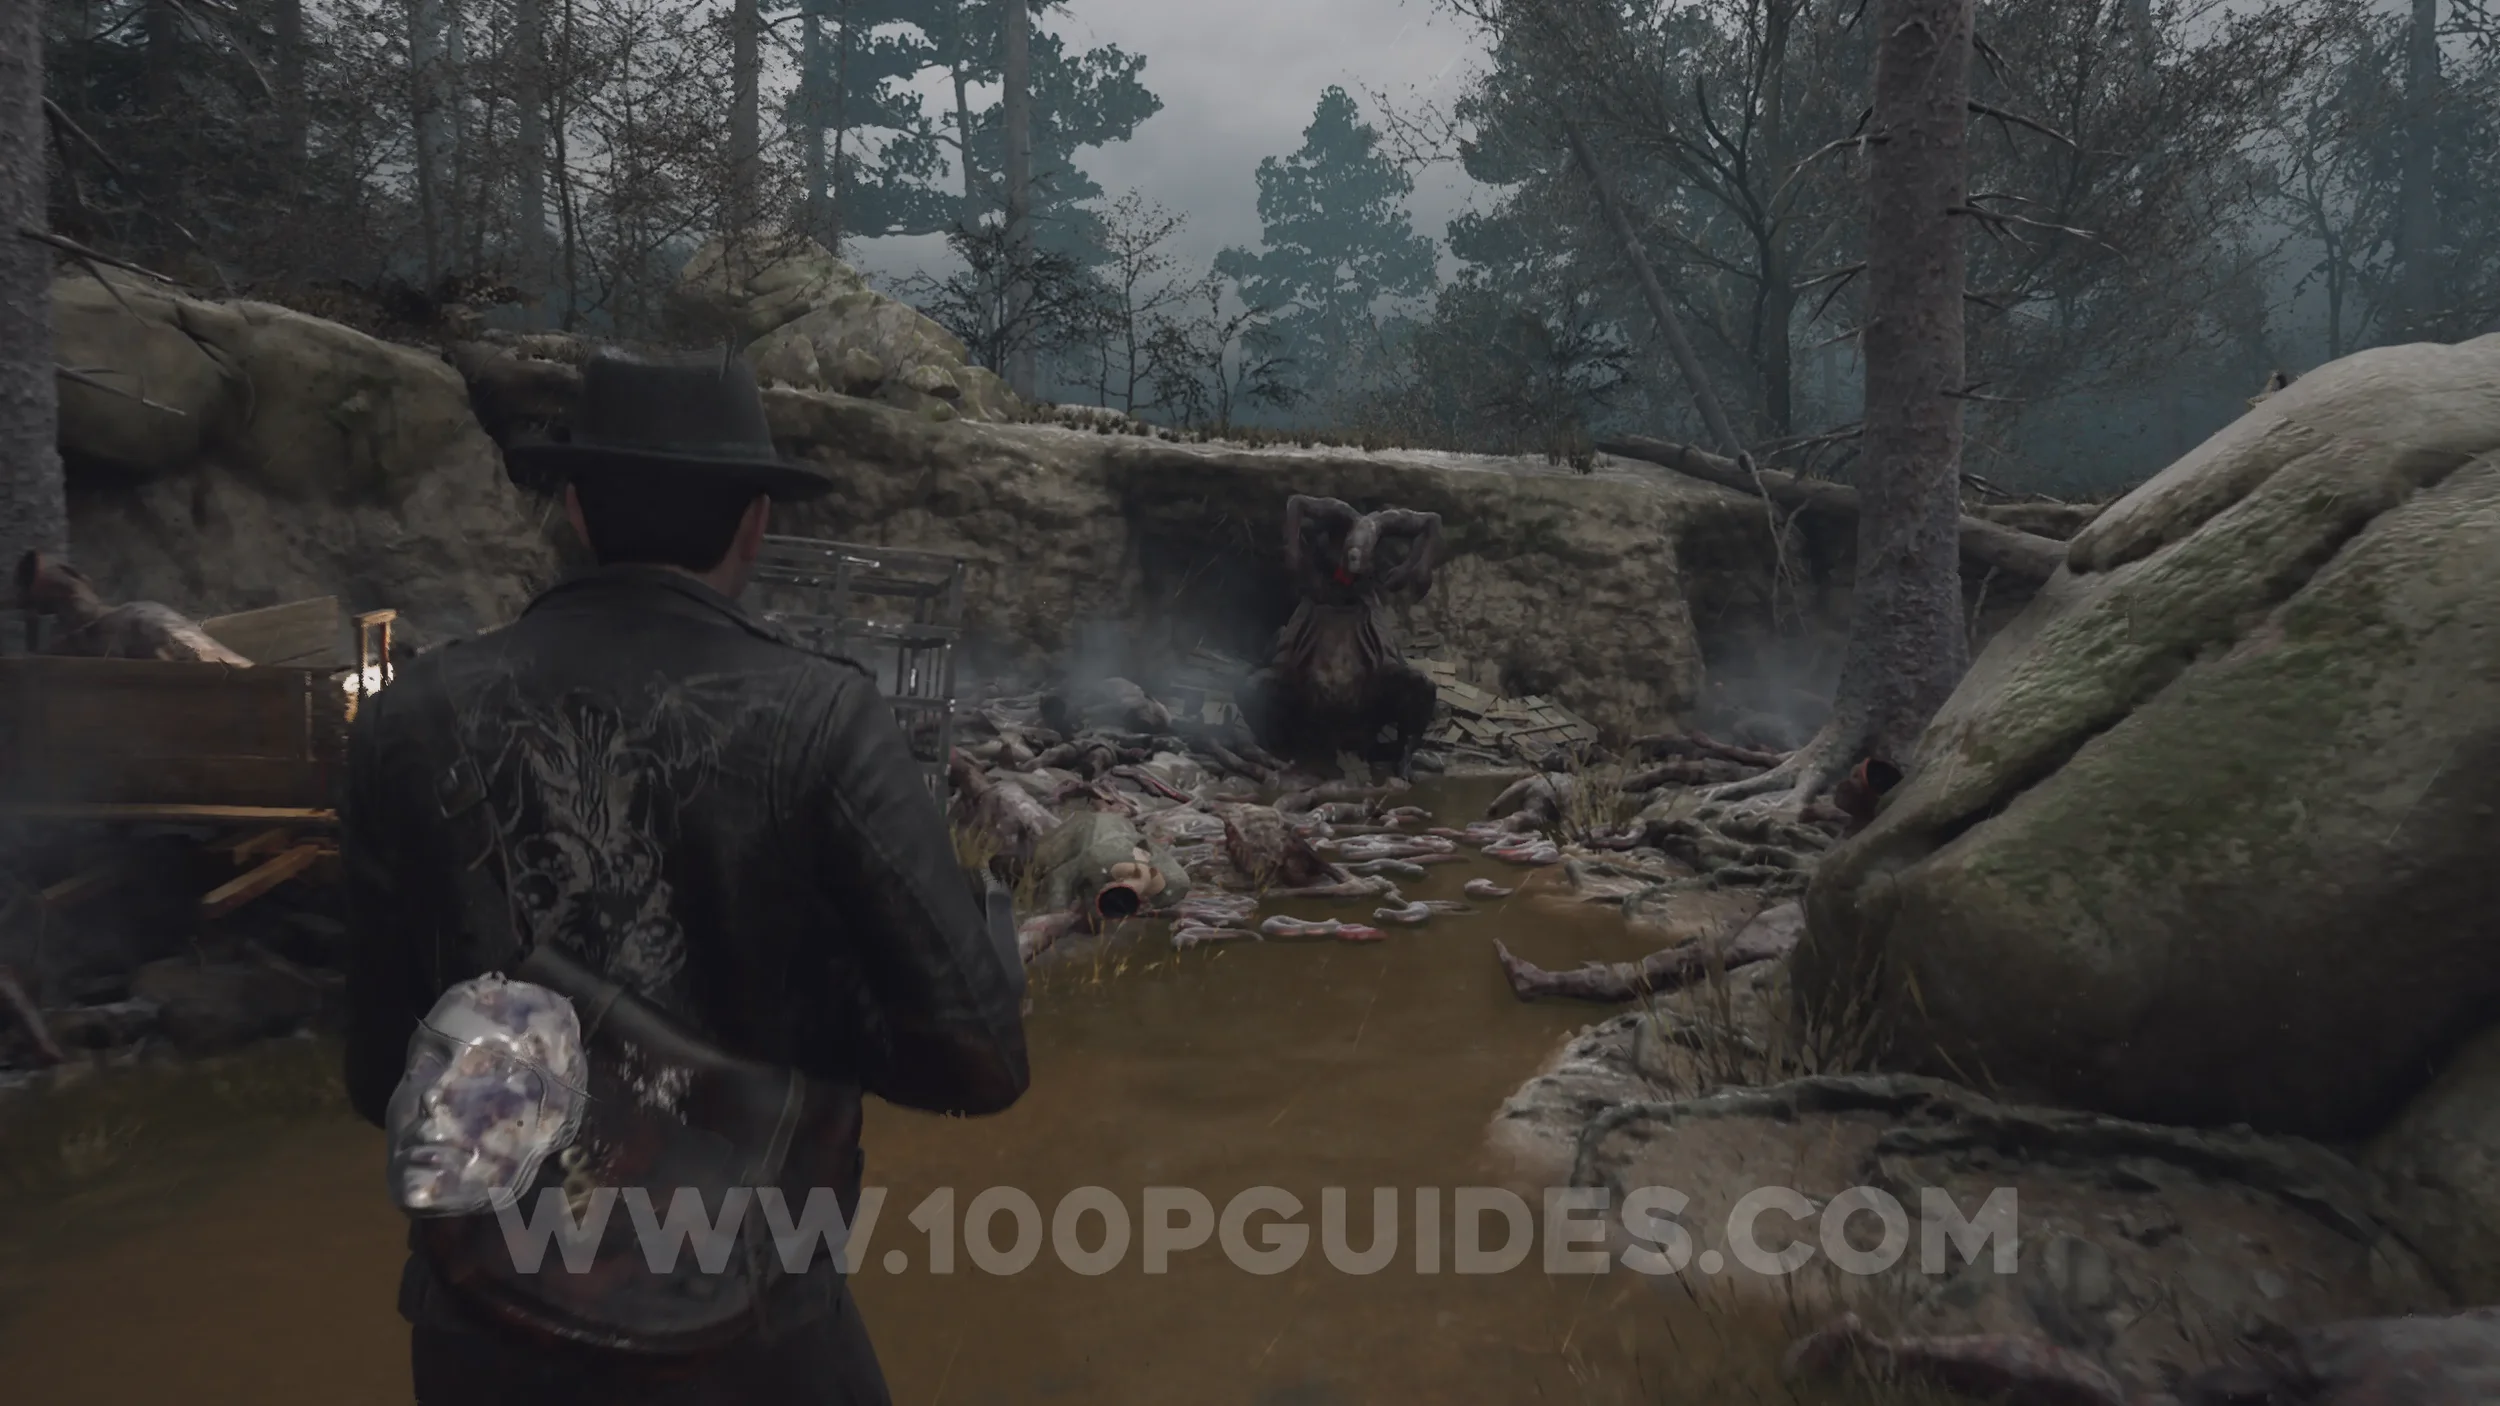
After going through the barrier and watching a cutscene, head to the boat to finish the chapter.
Chapter 4 - Time And Tide
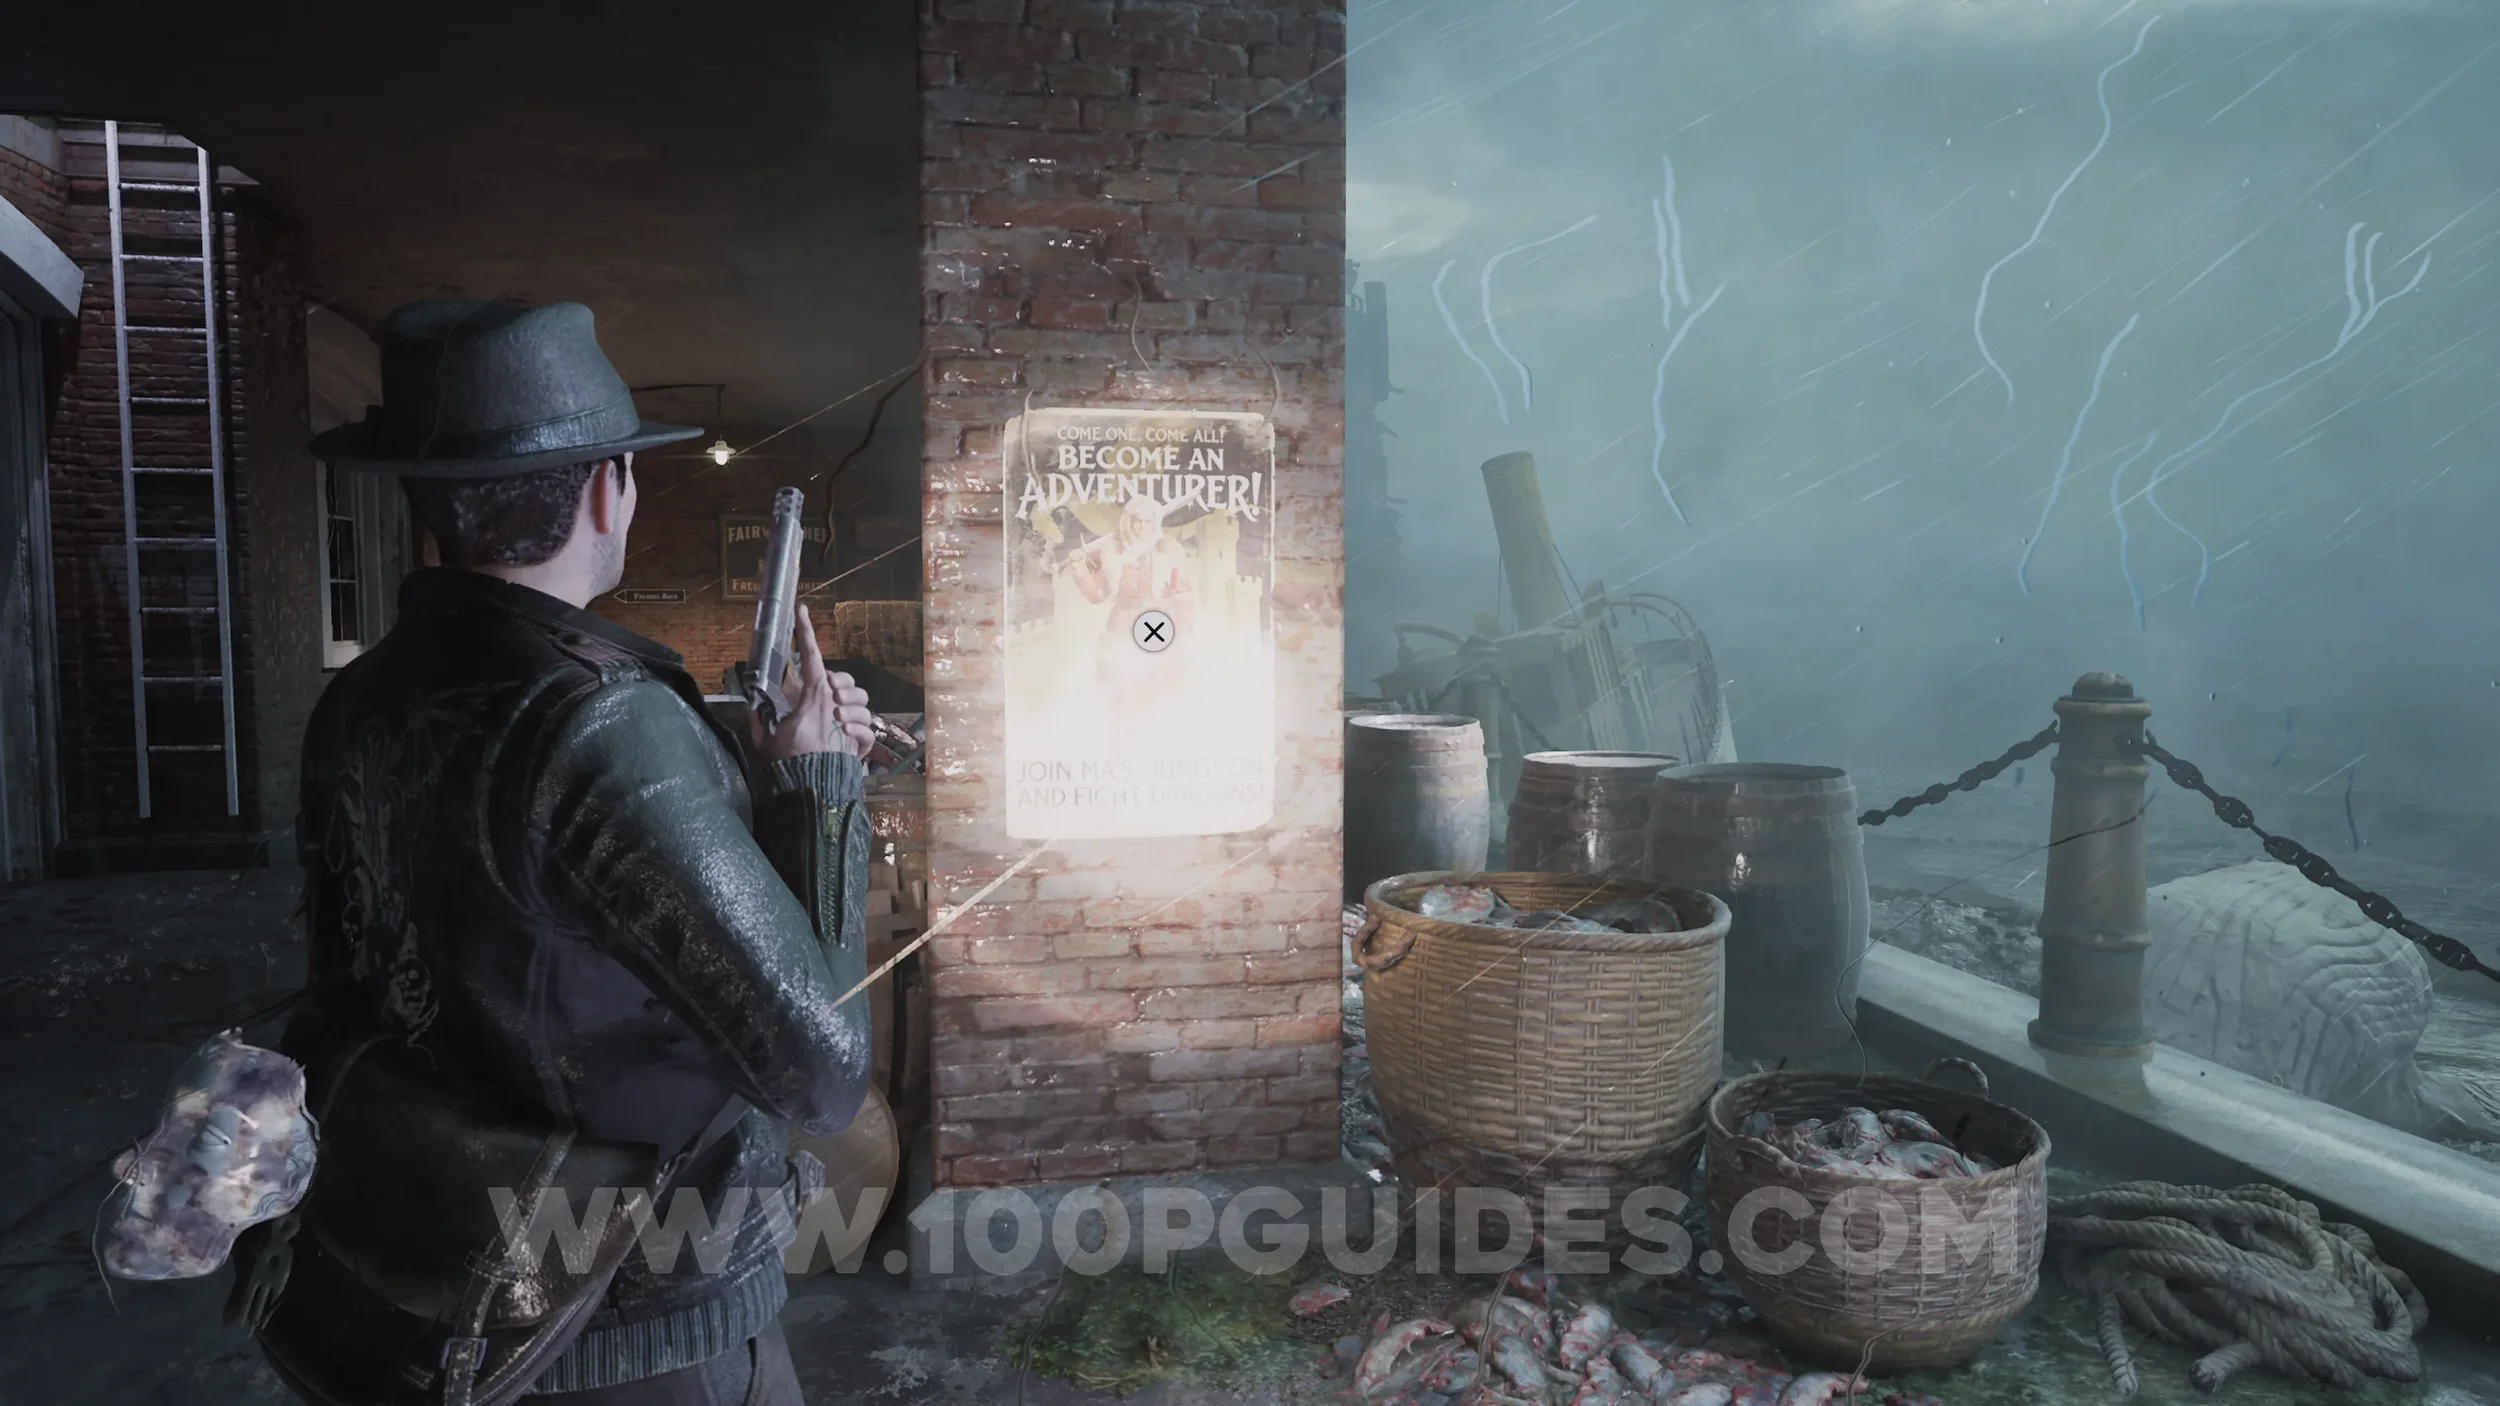
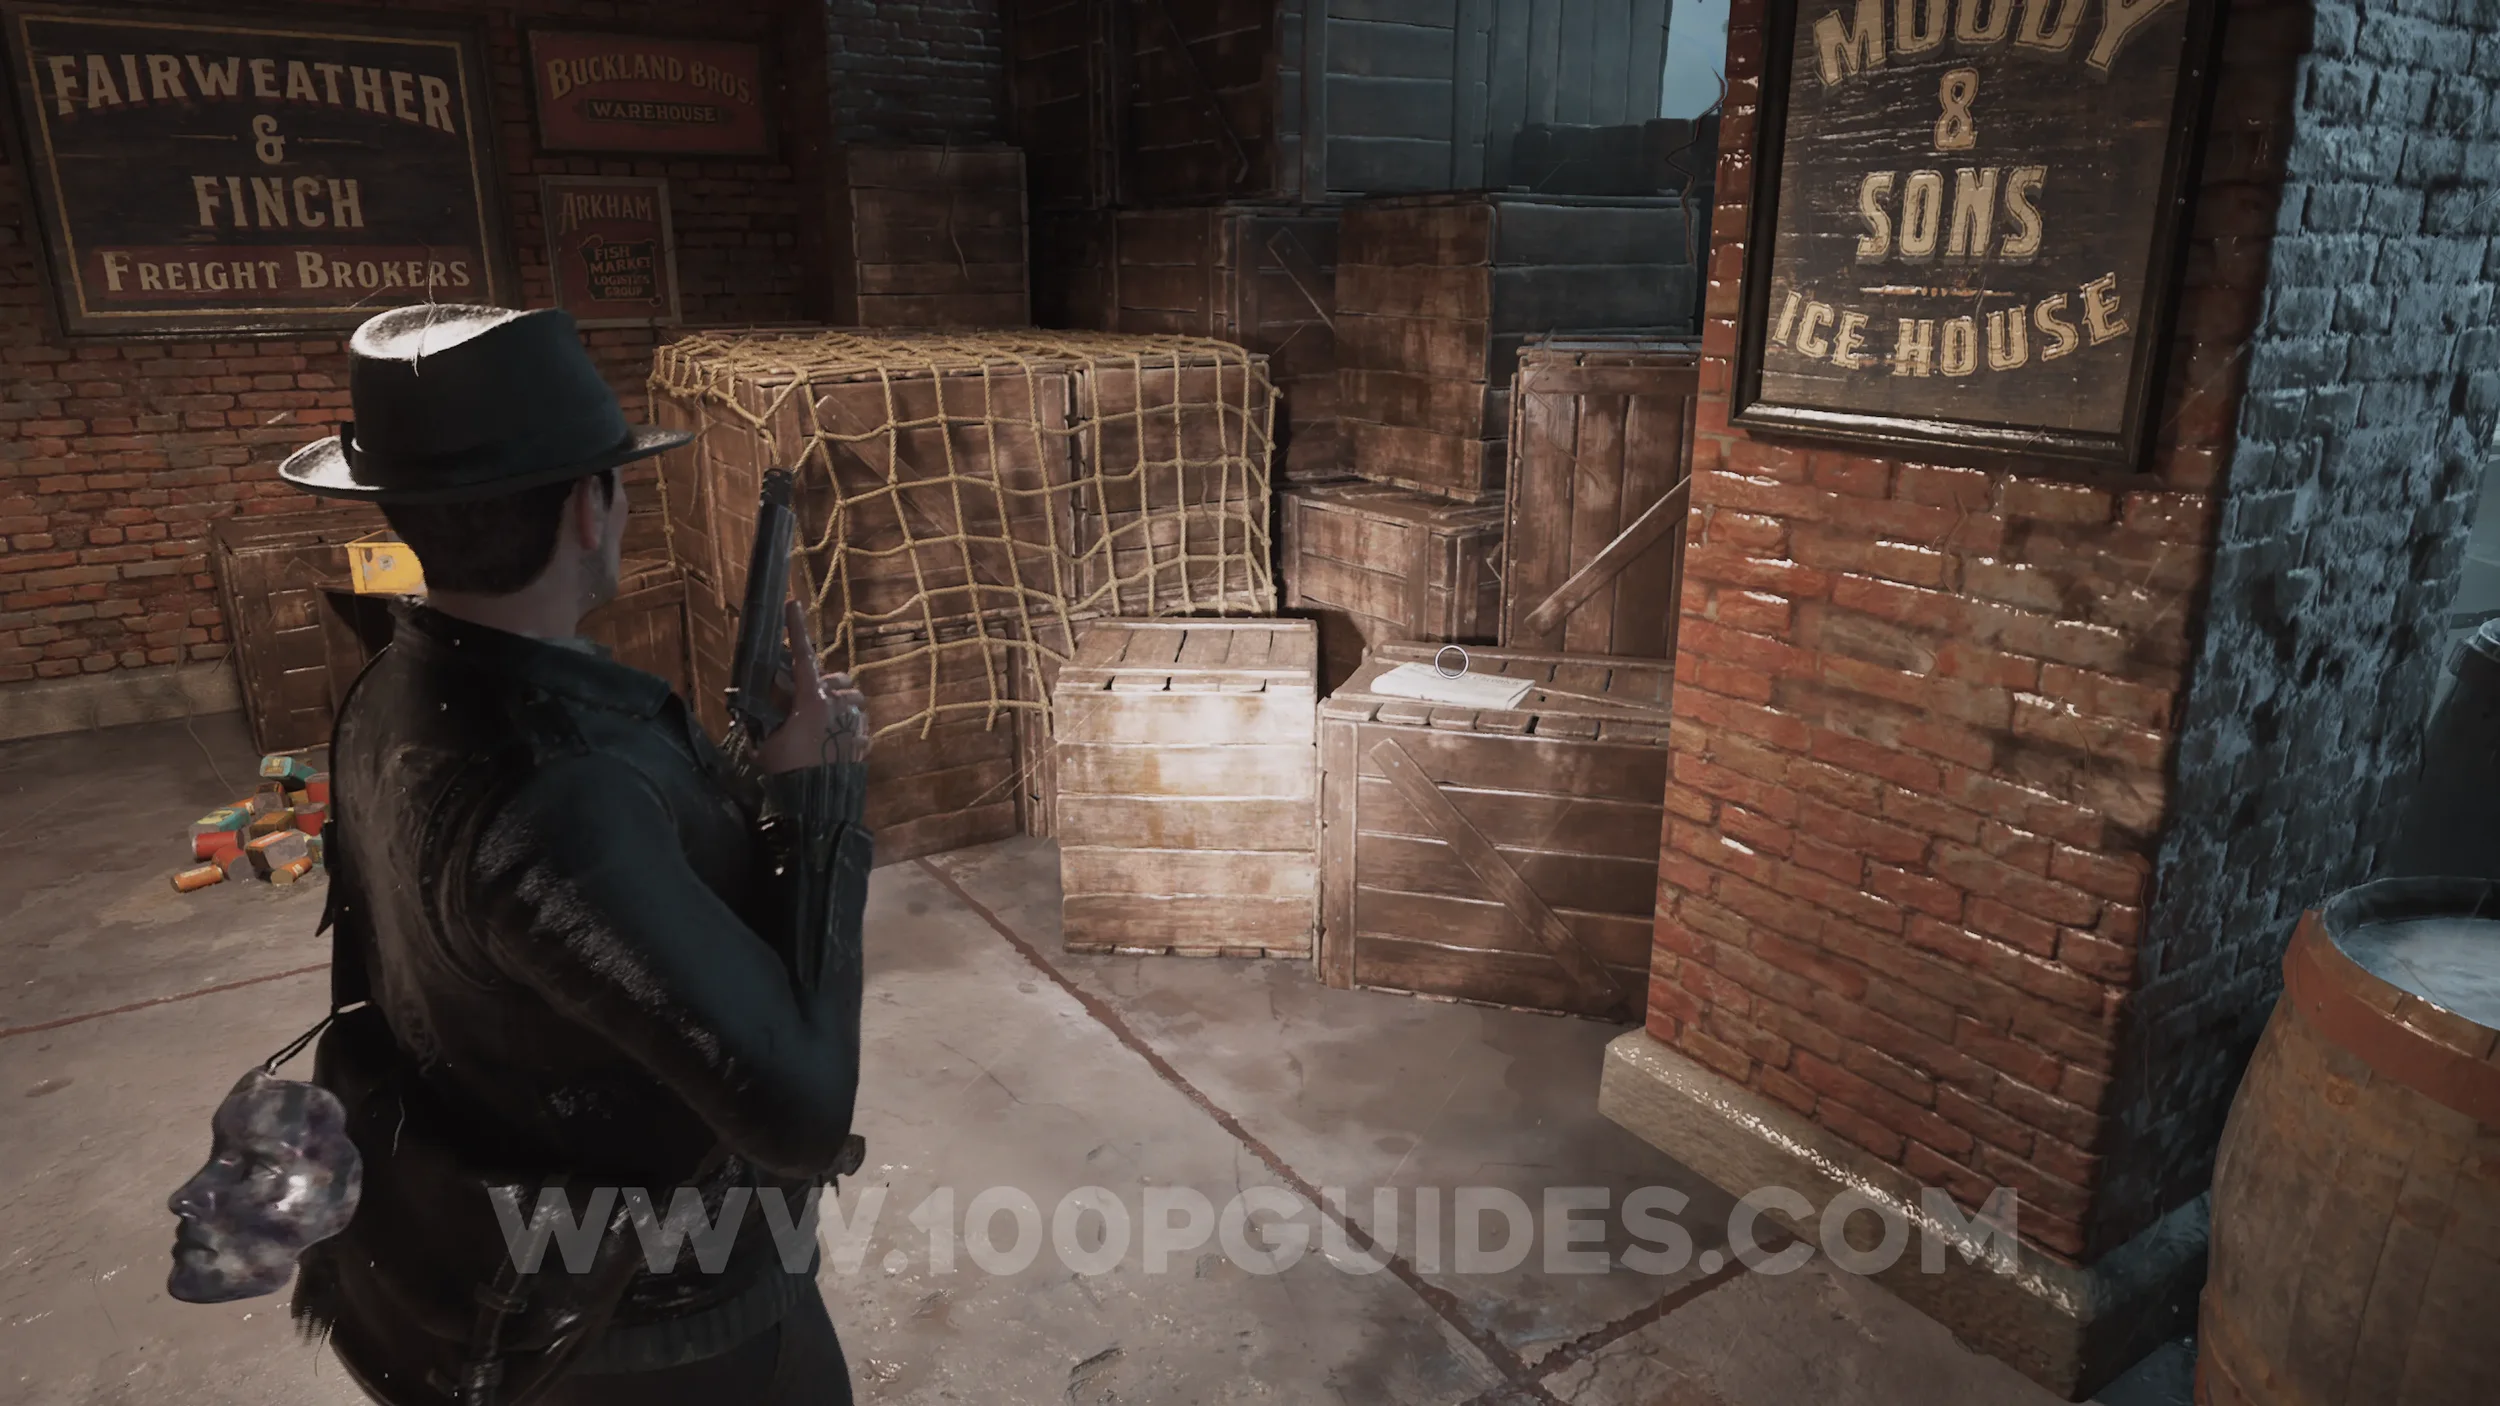
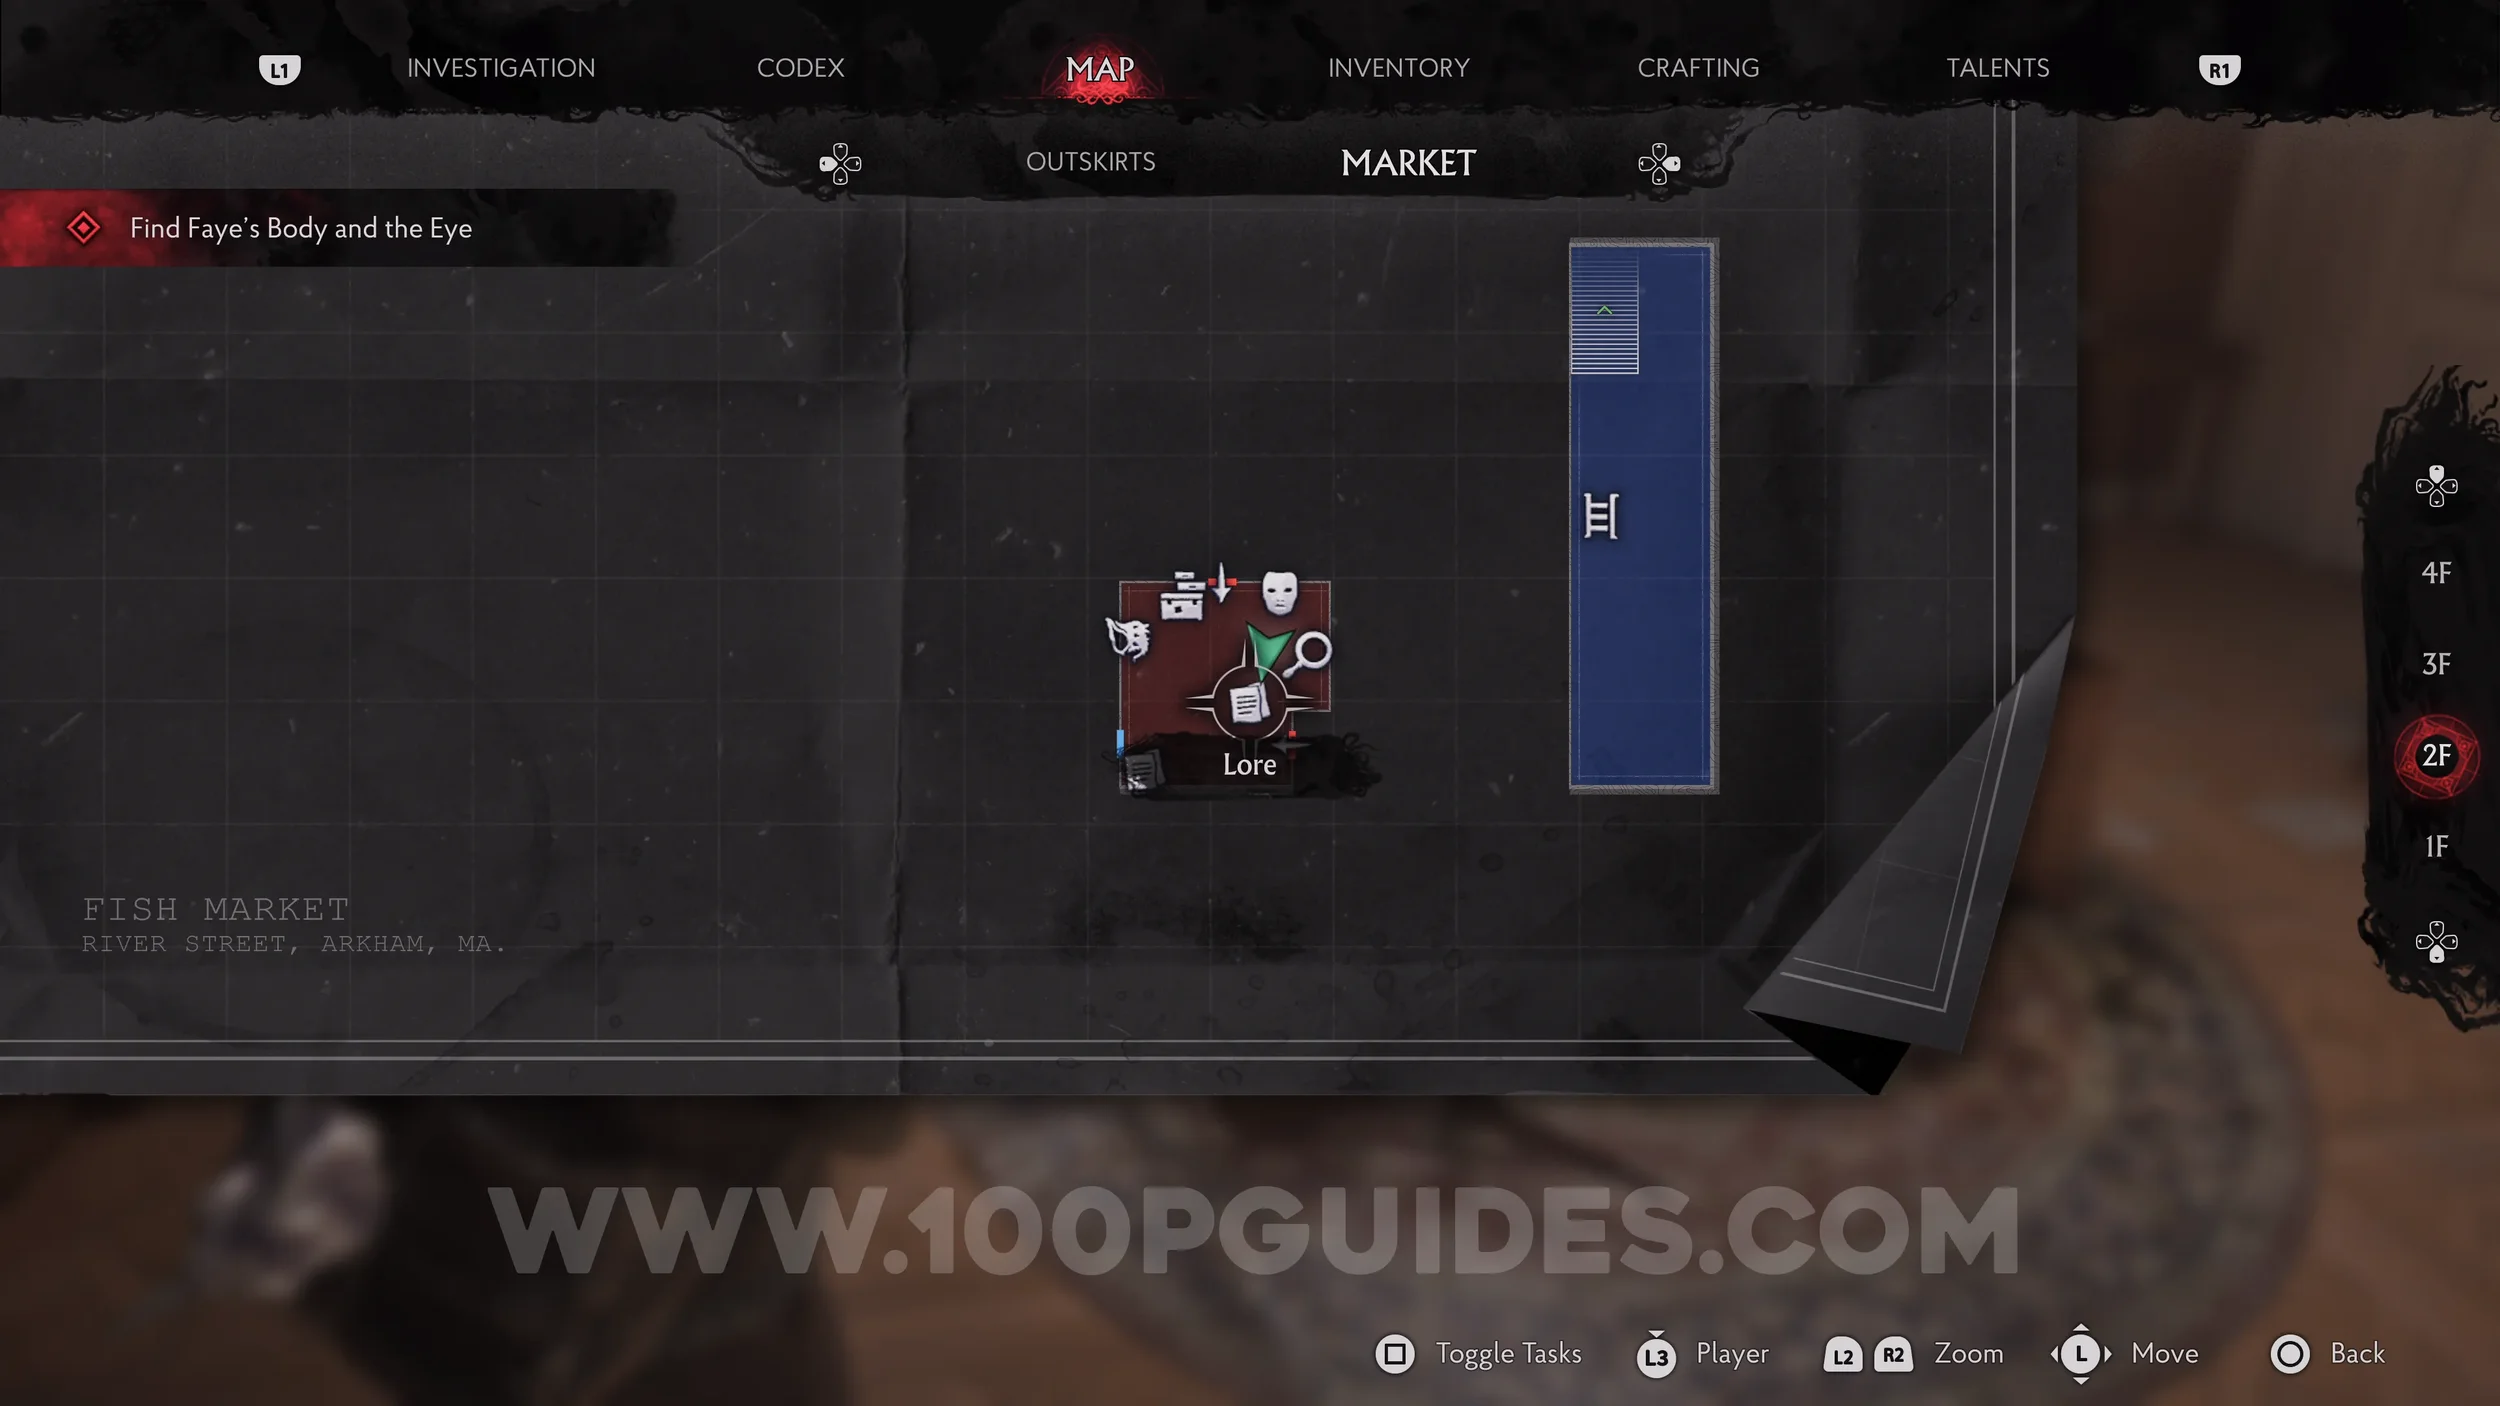
Lore Codex: Become An Adventurer!. On a column as soon as you go around the right side of the market at the start of the chapter.
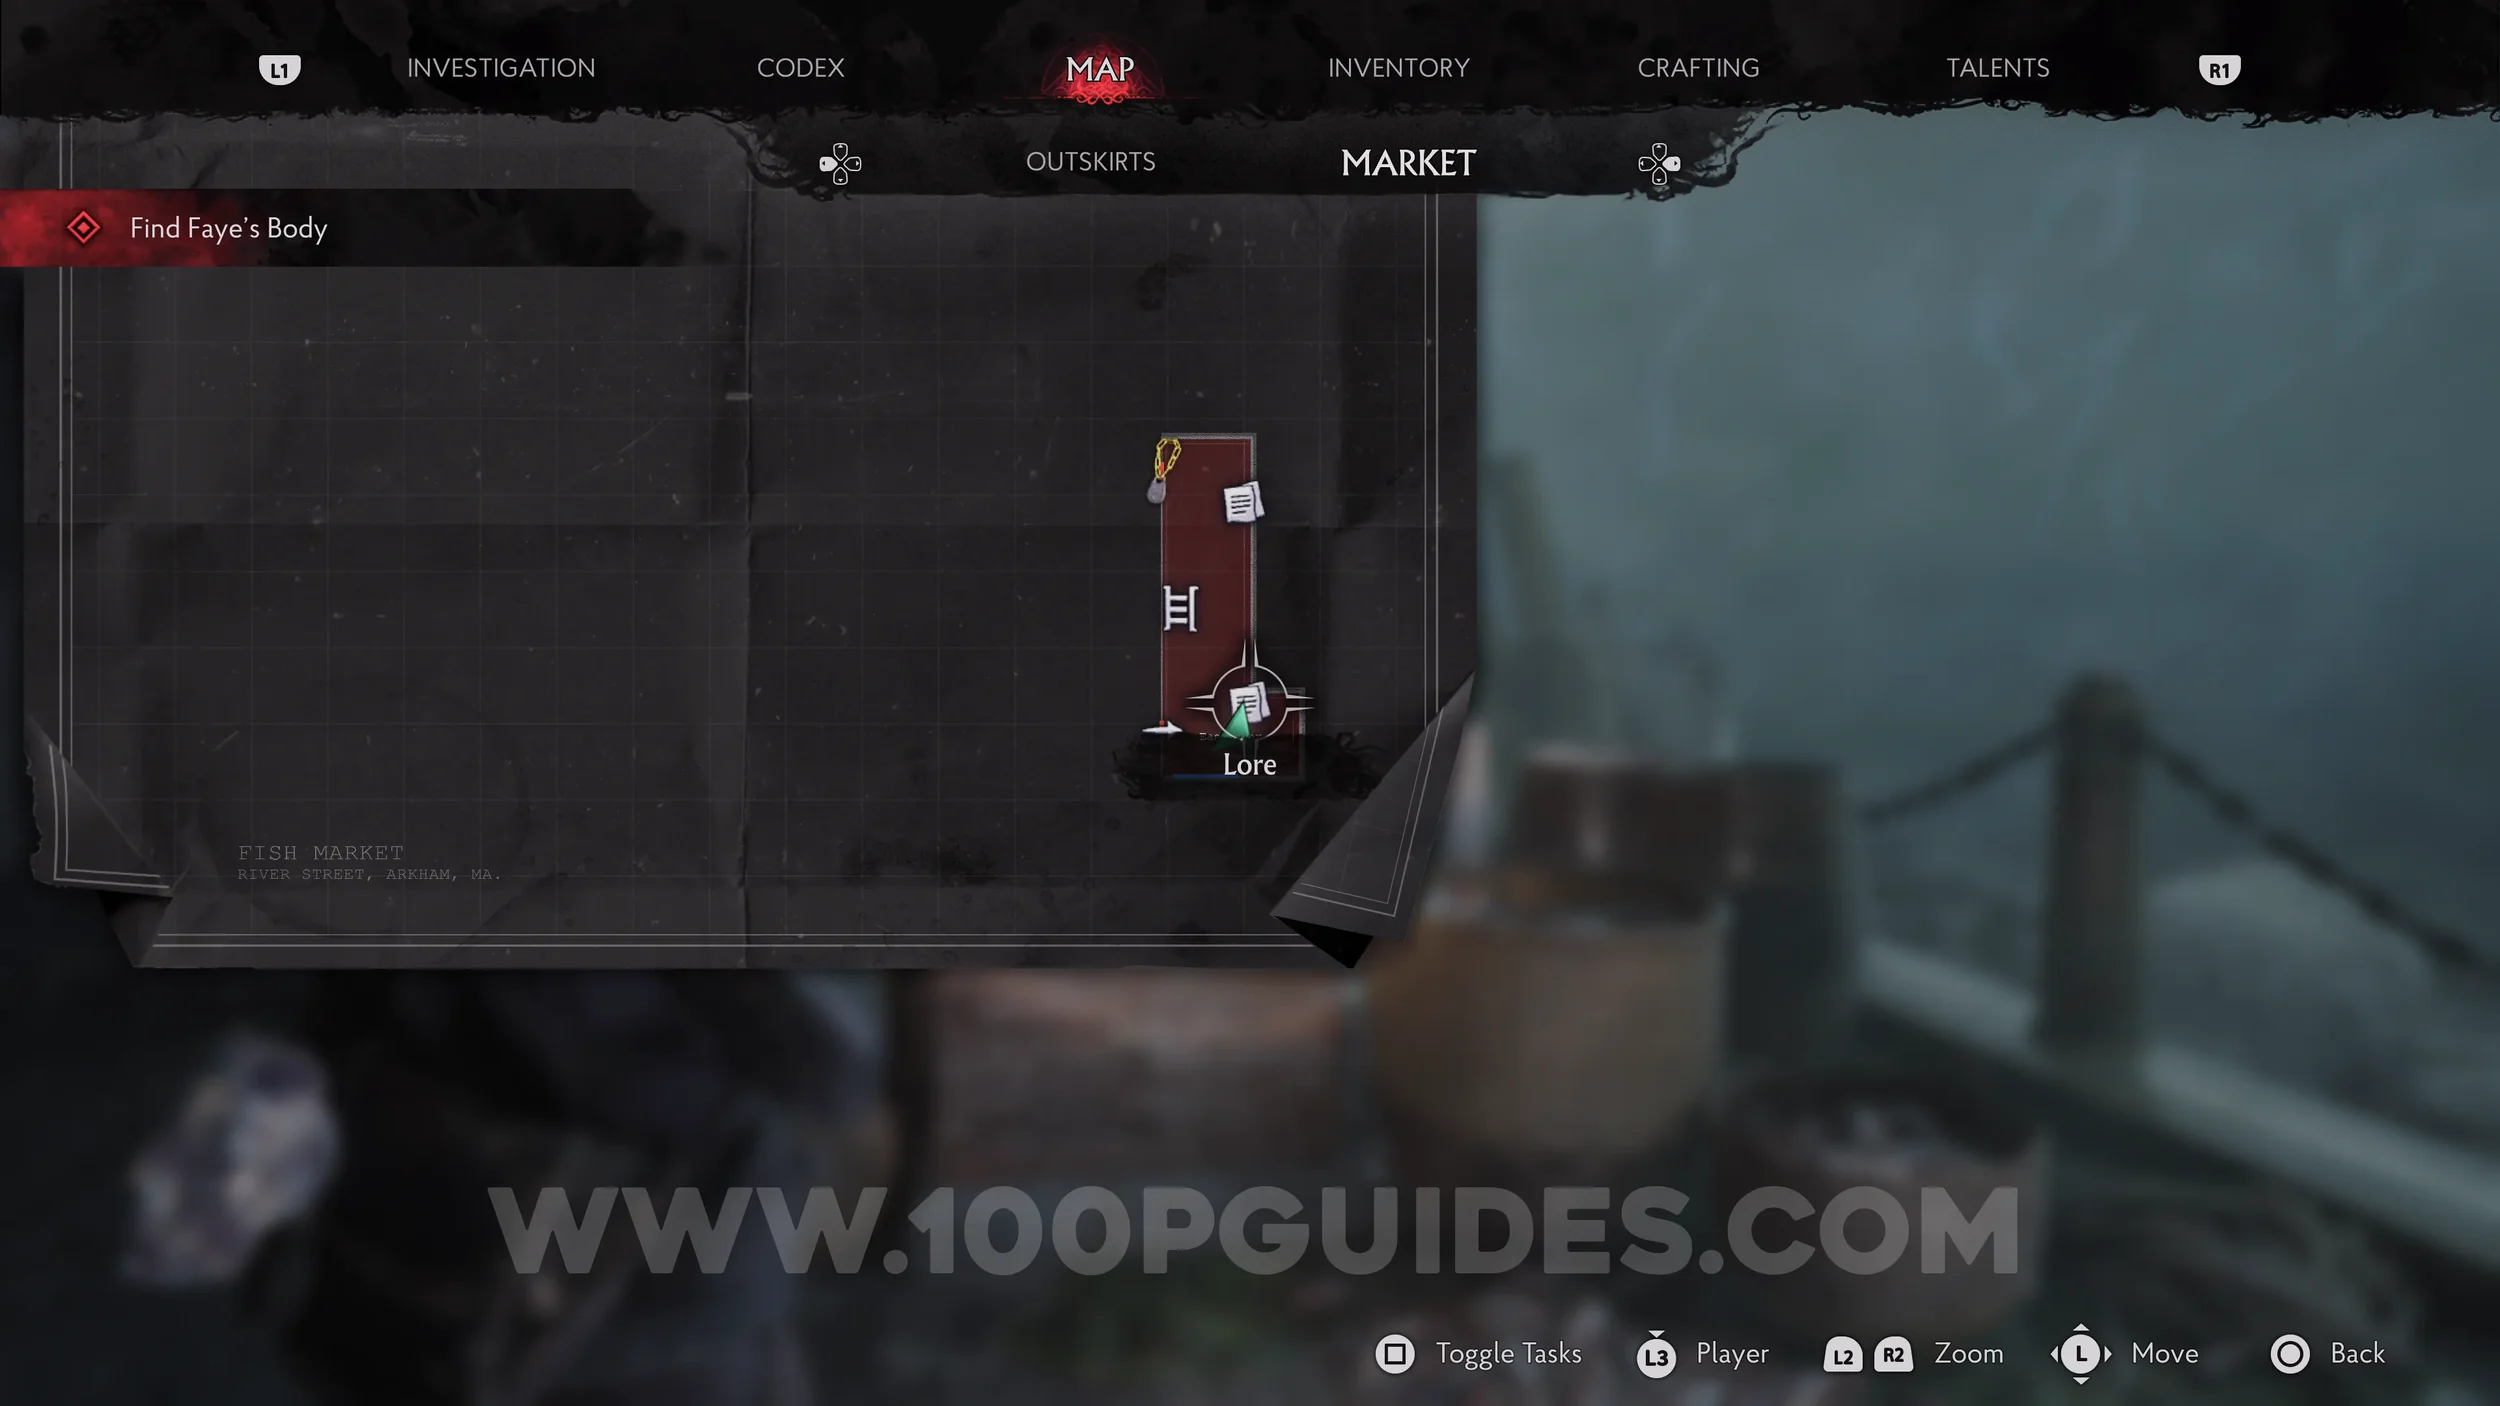
Lore Codex: Non-Existence of Arkham. Just past the previous collectible, on a box down the same alley.
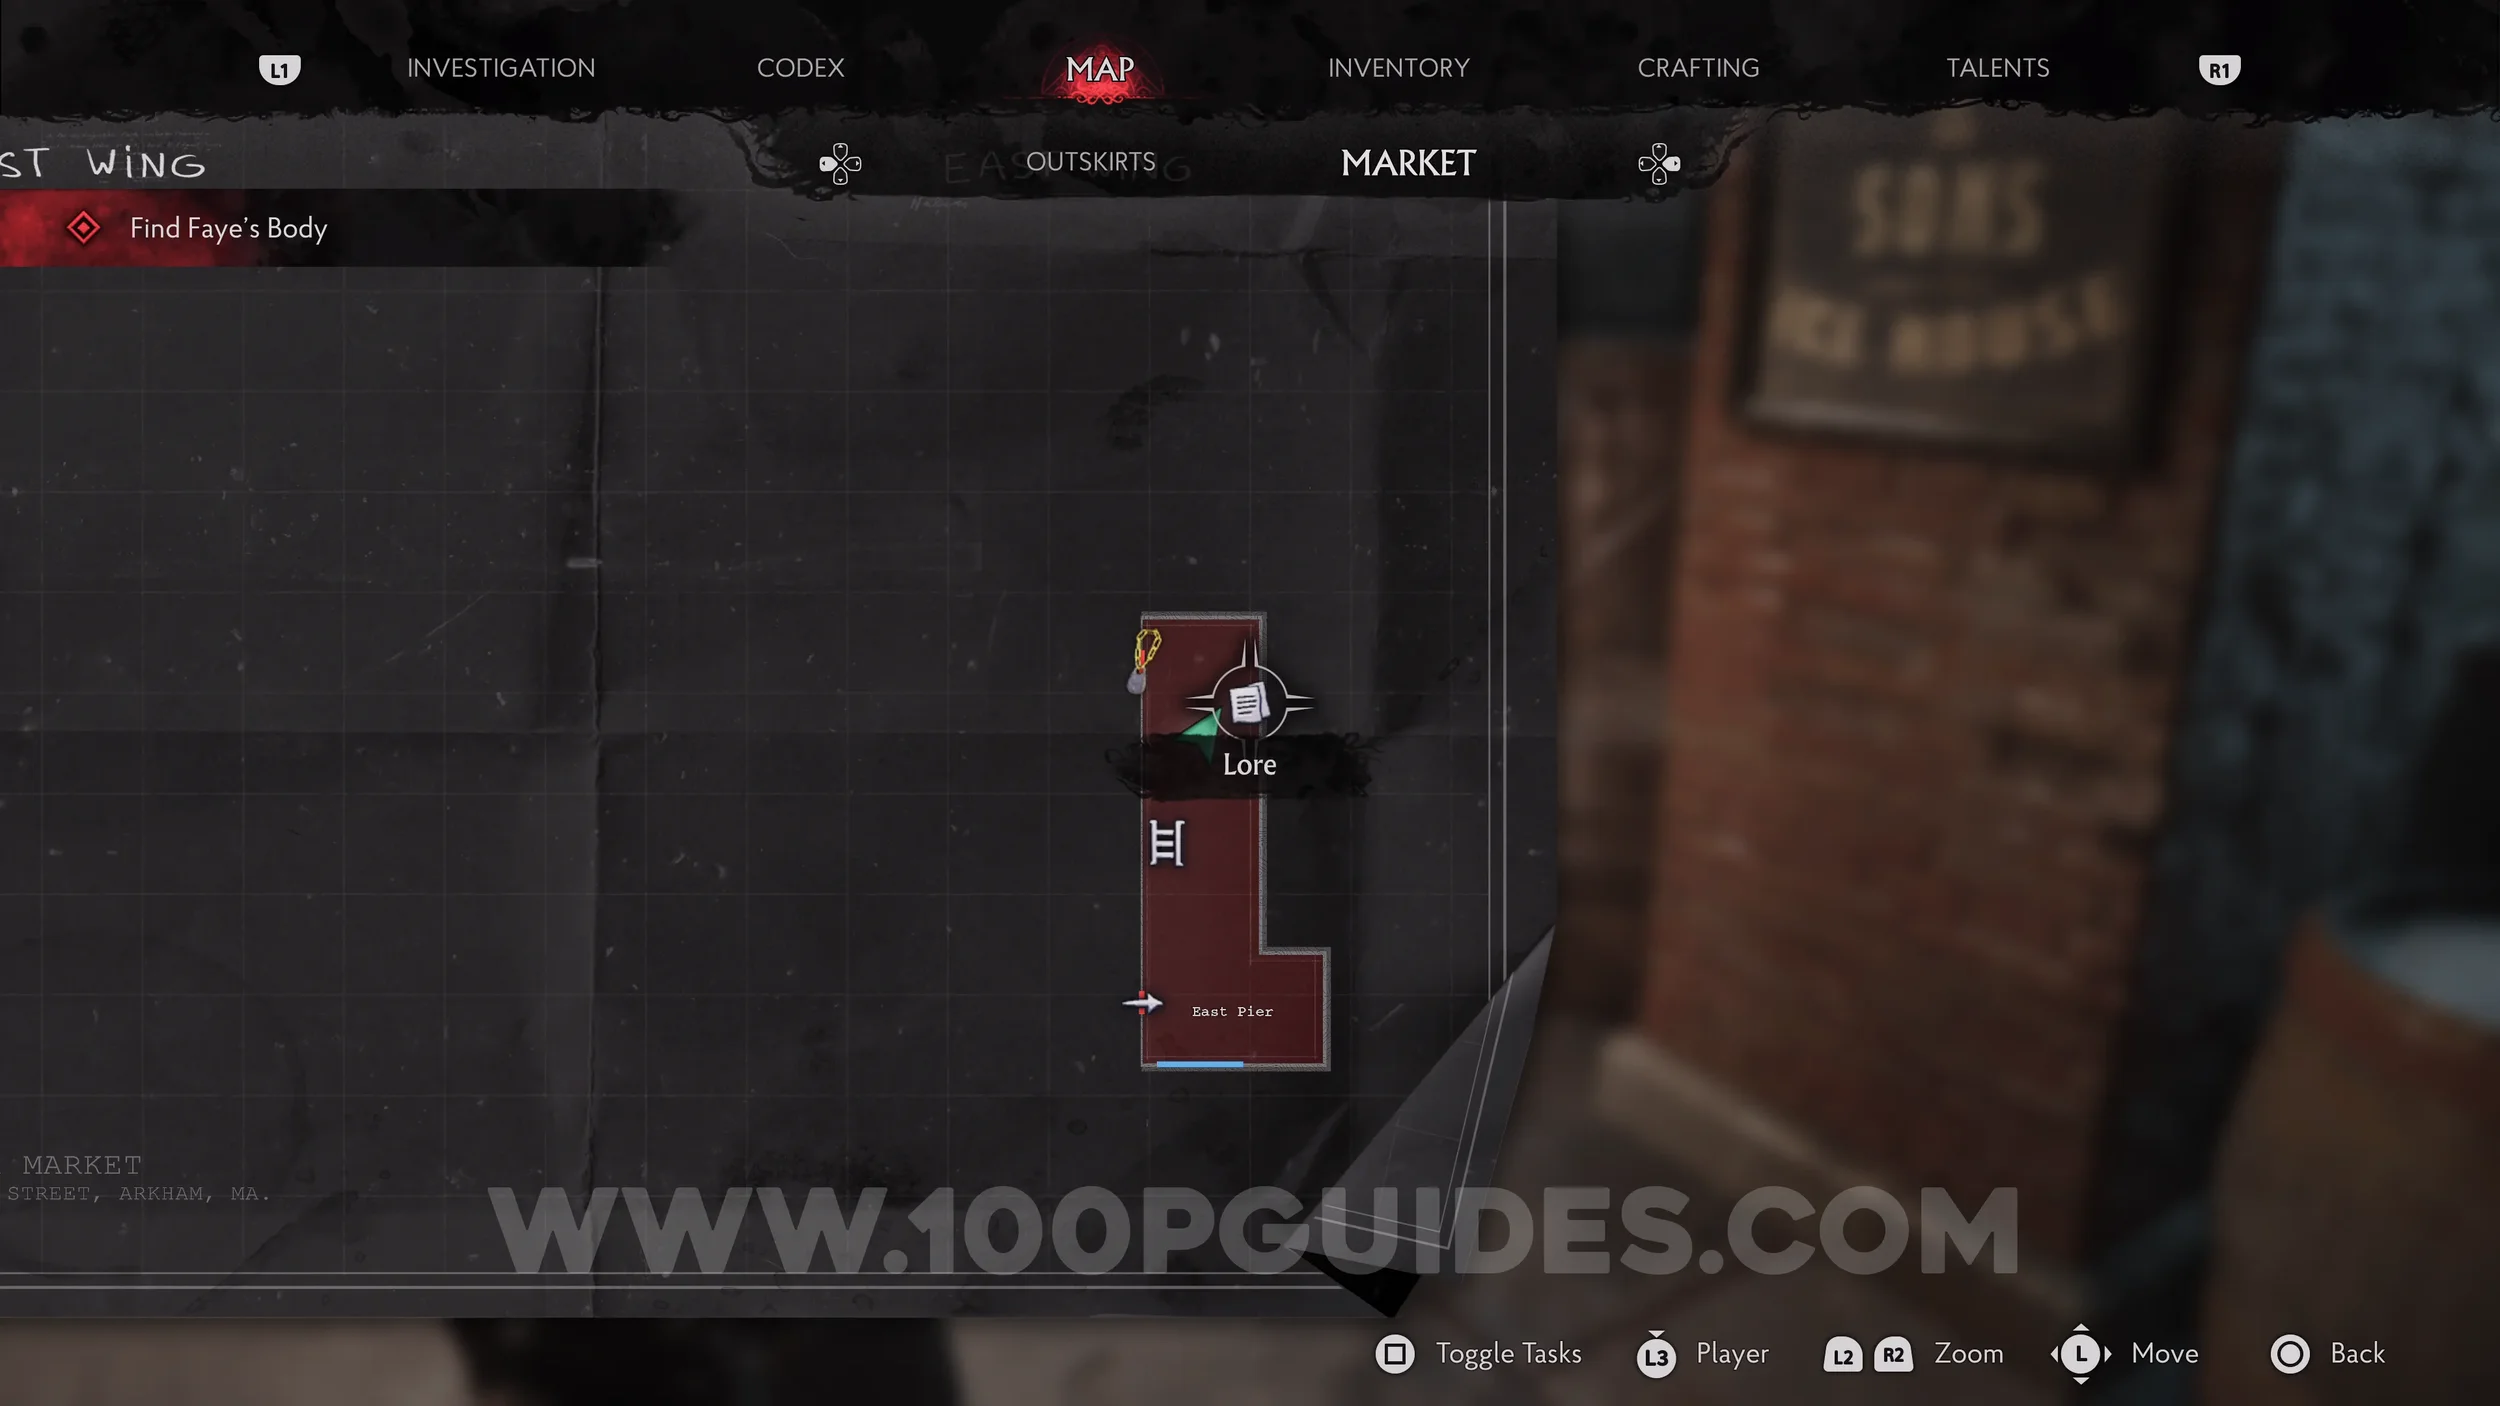
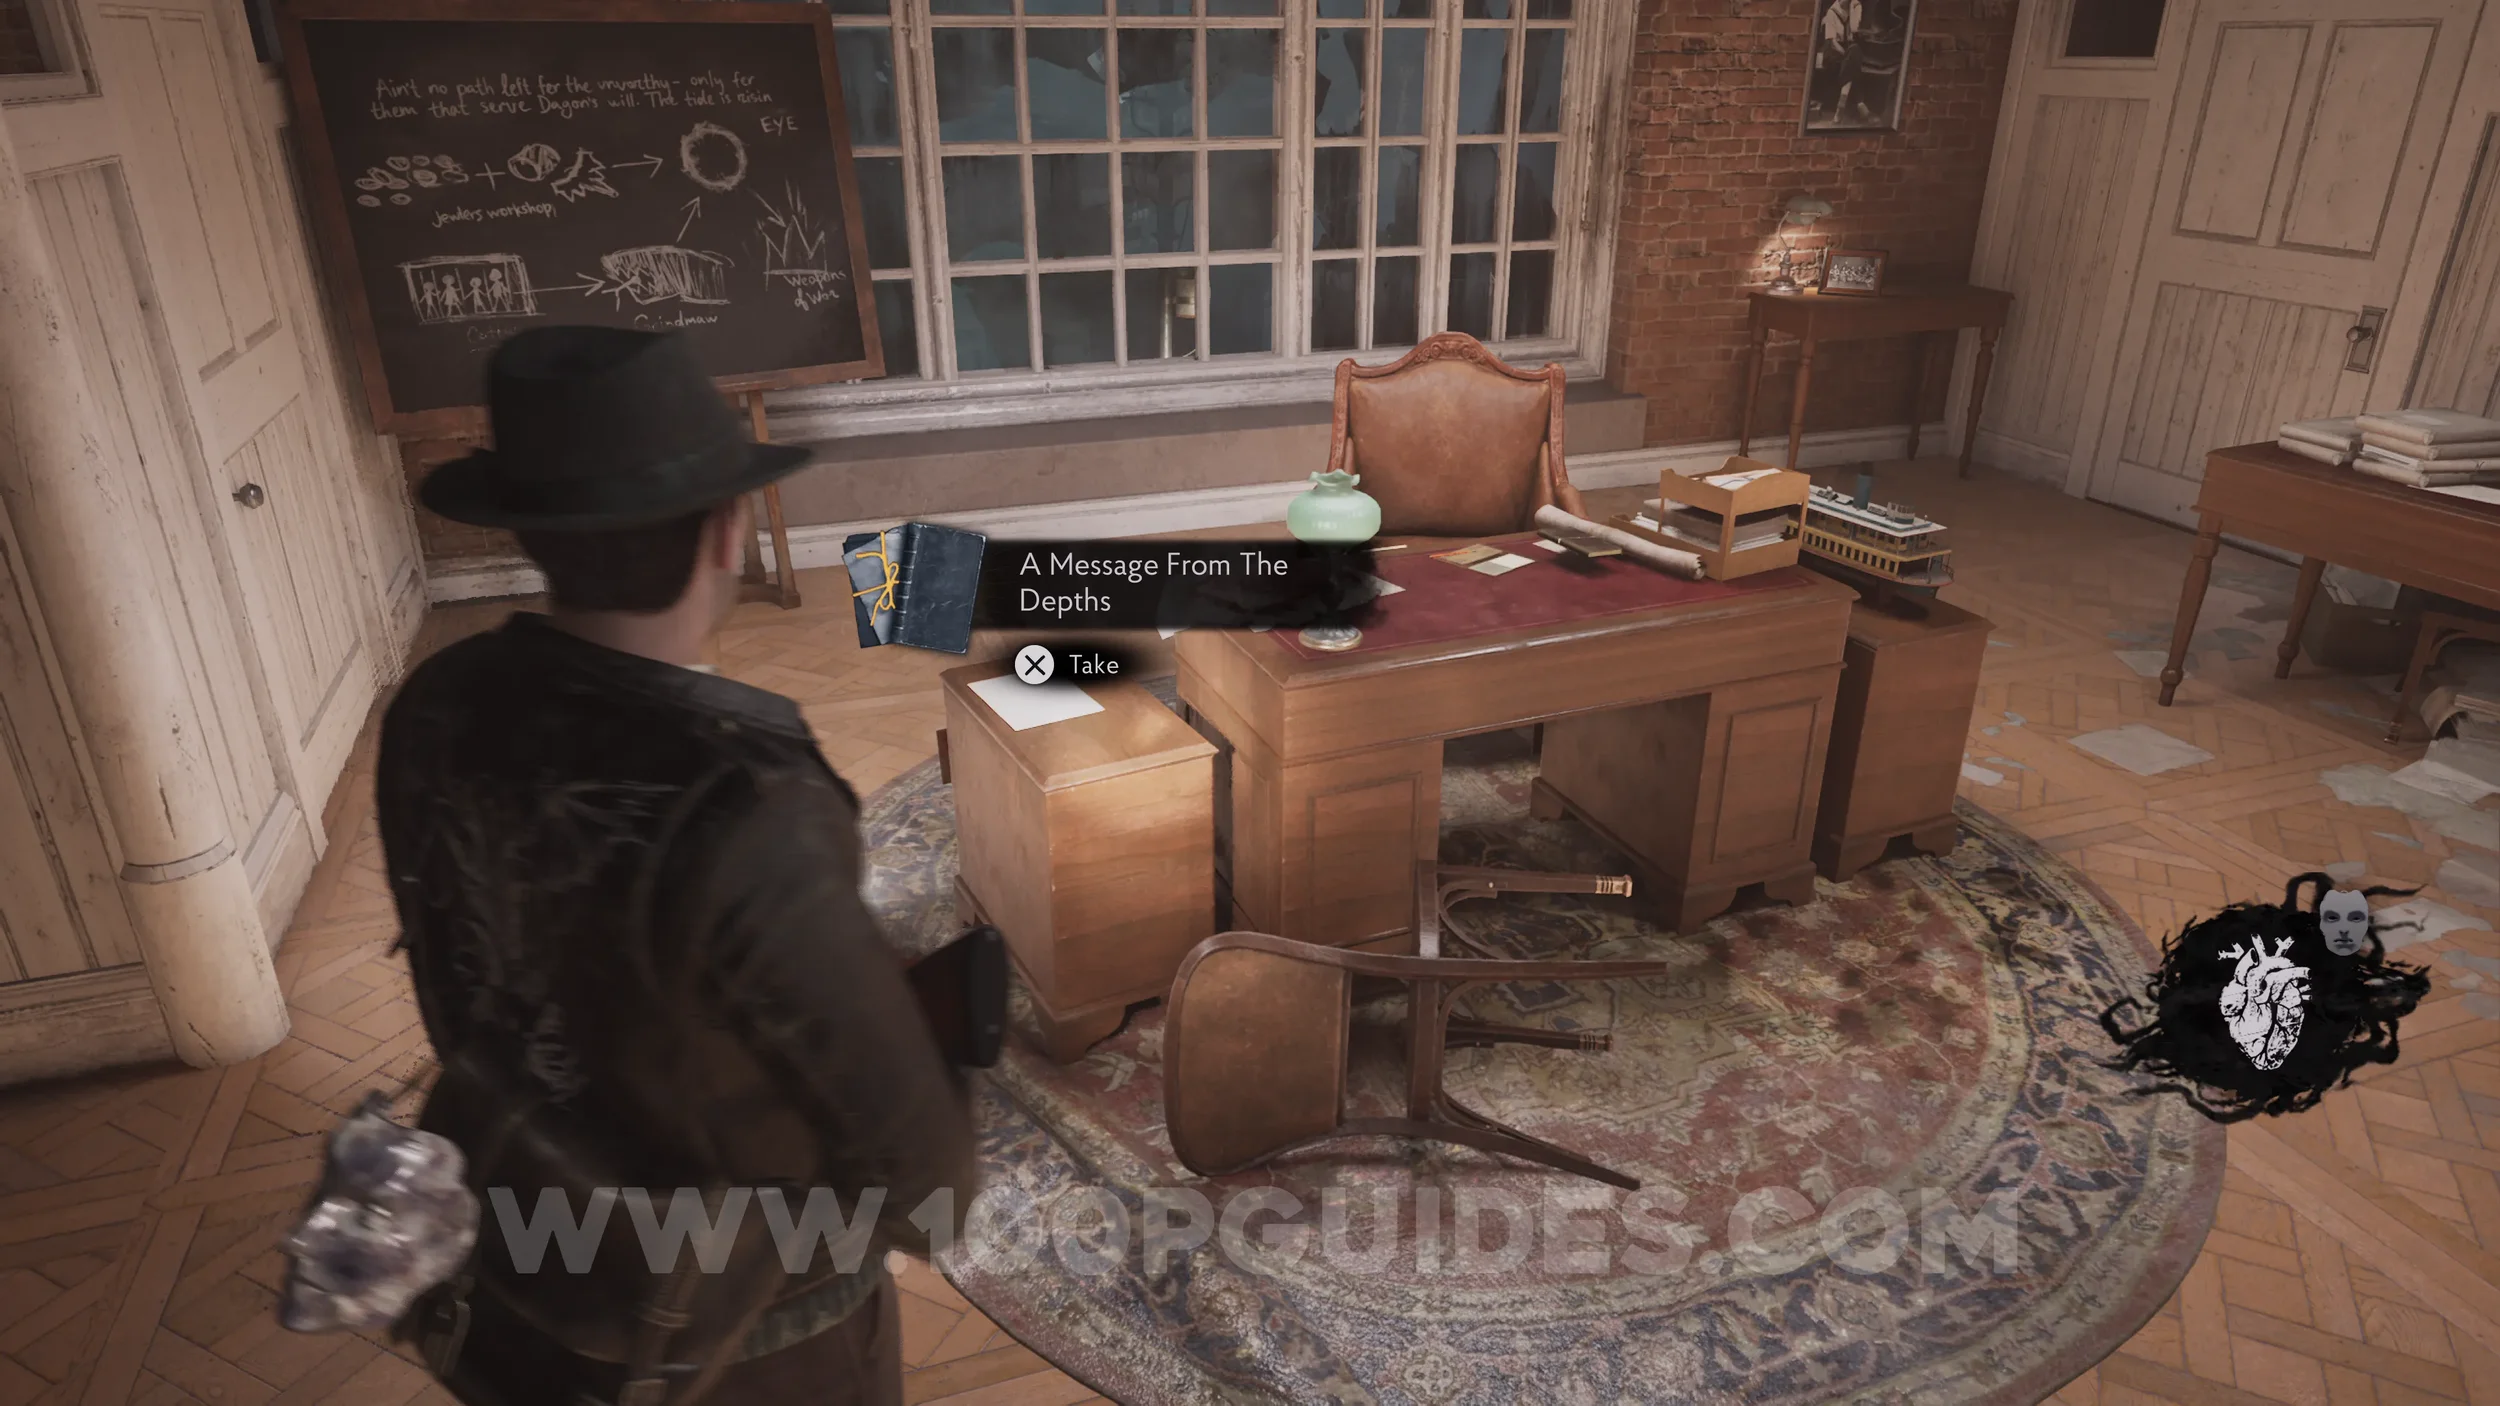
Lore Codex: A Message From The Depths. Found in the Safe Room you climb down into after the cutscene on the rooftops.
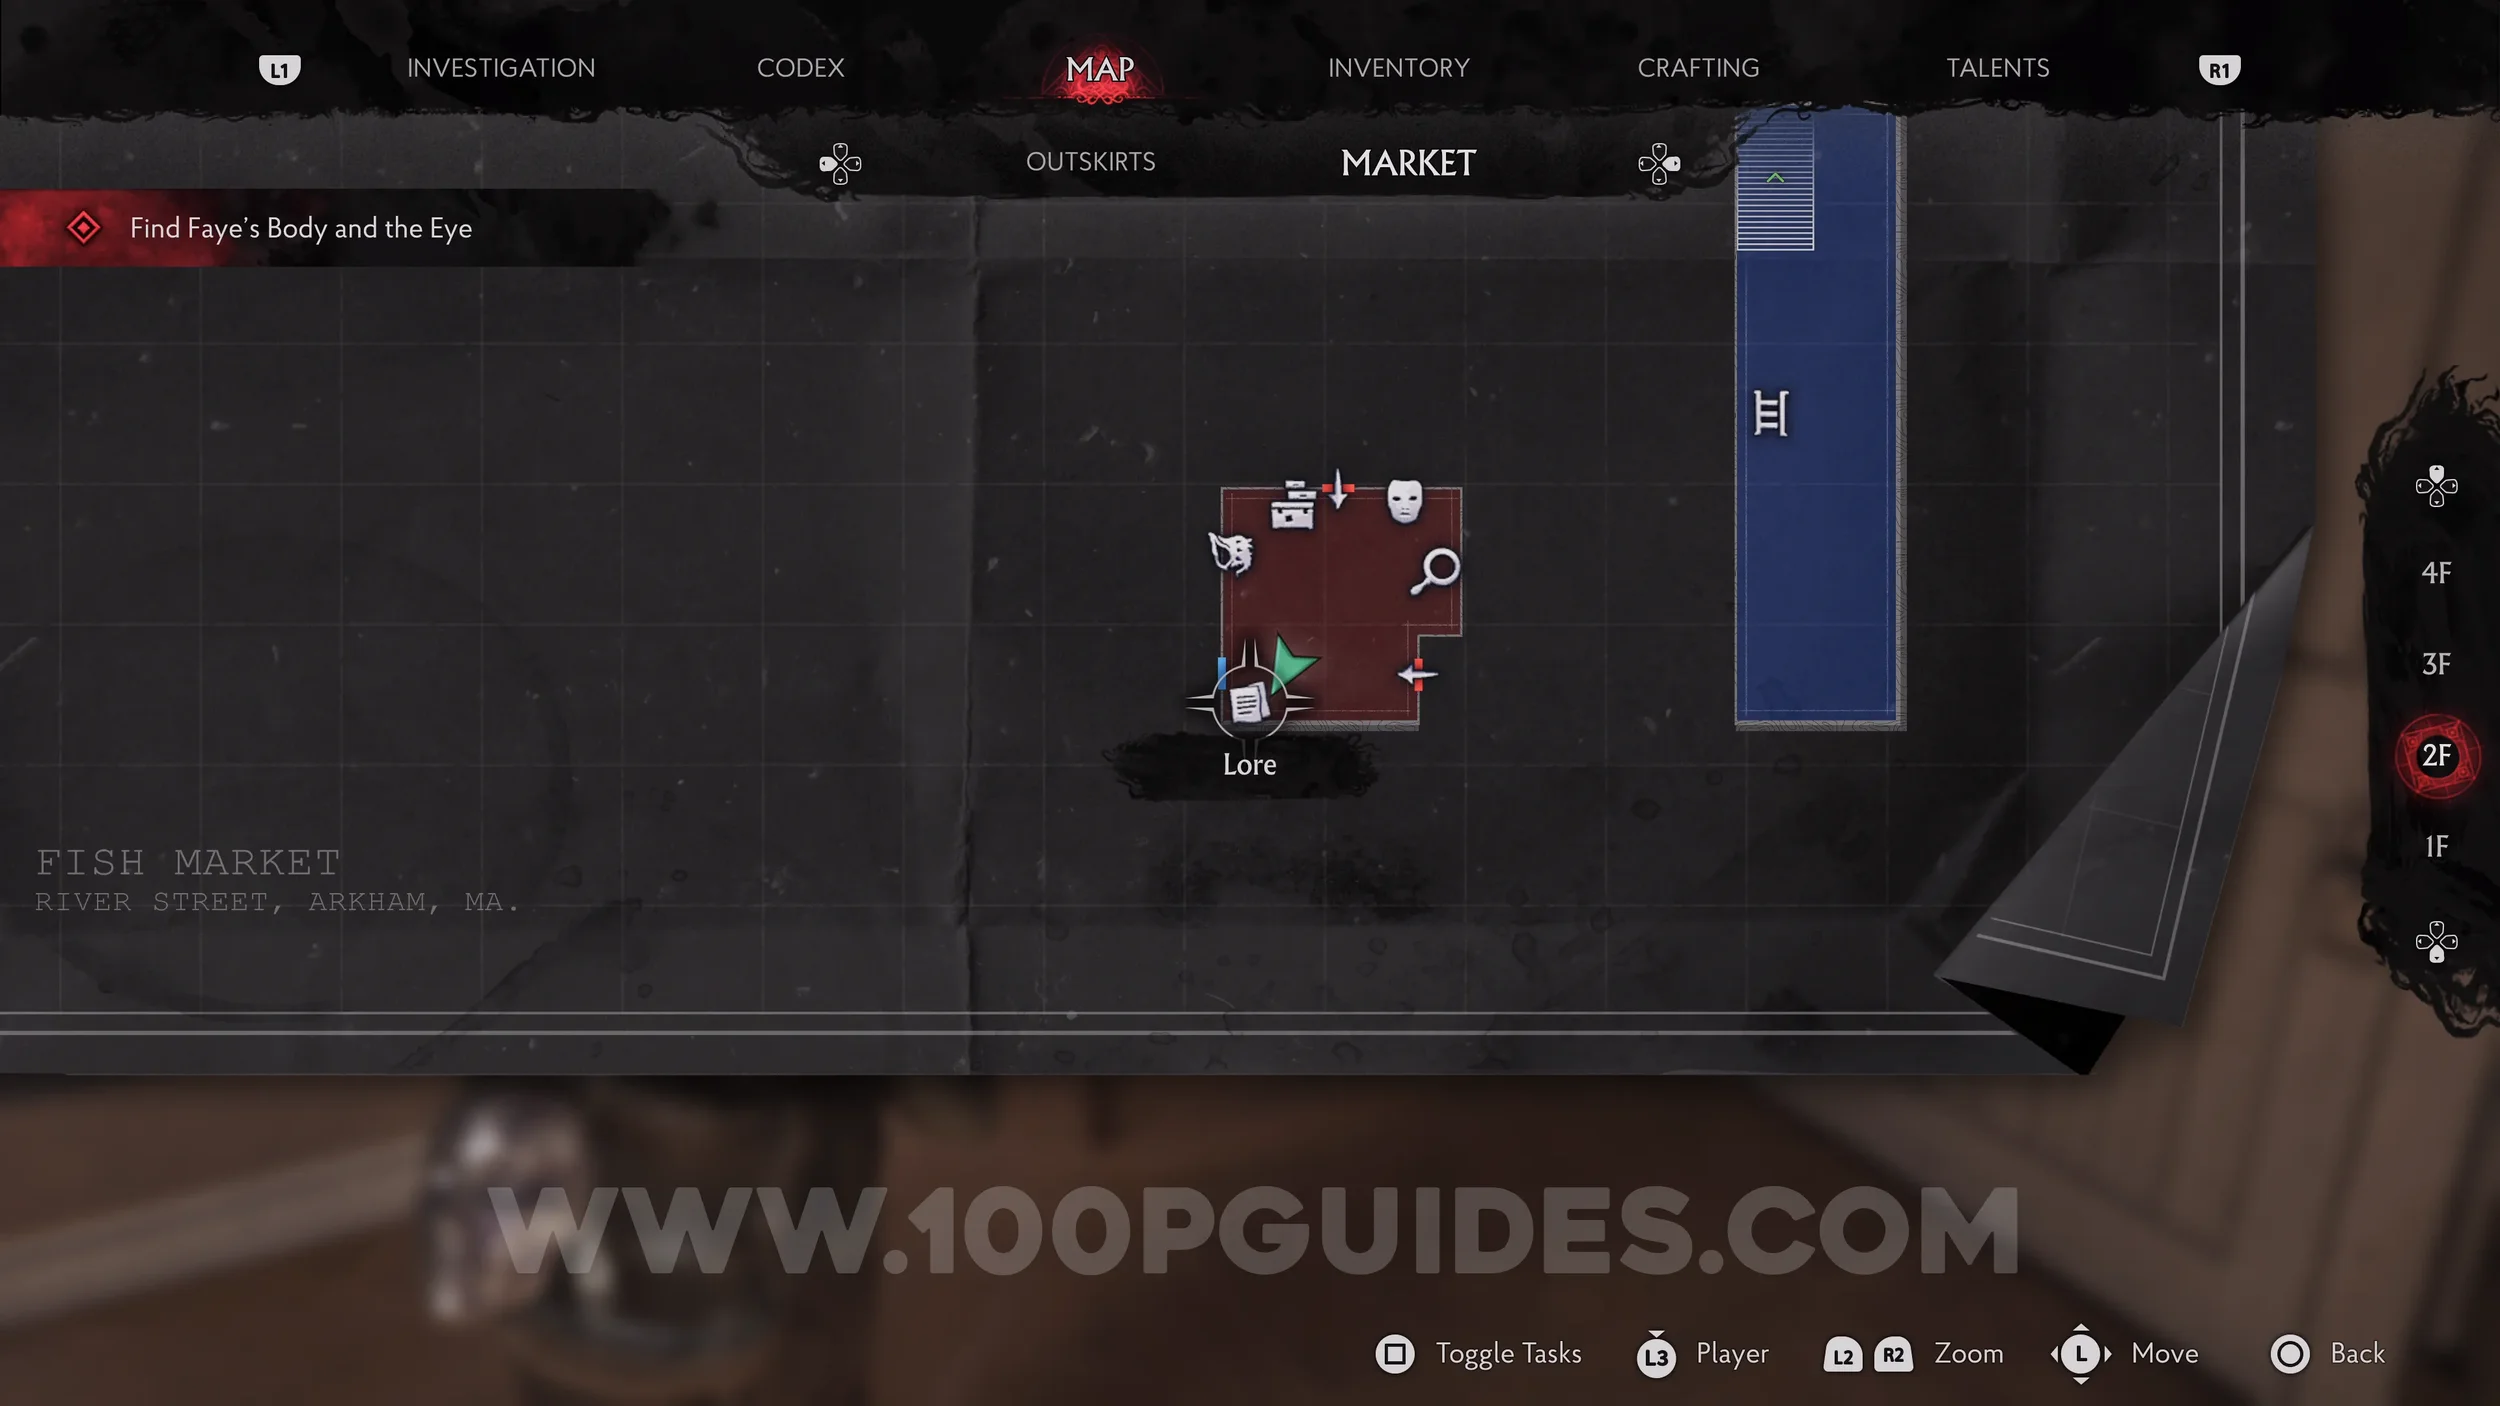
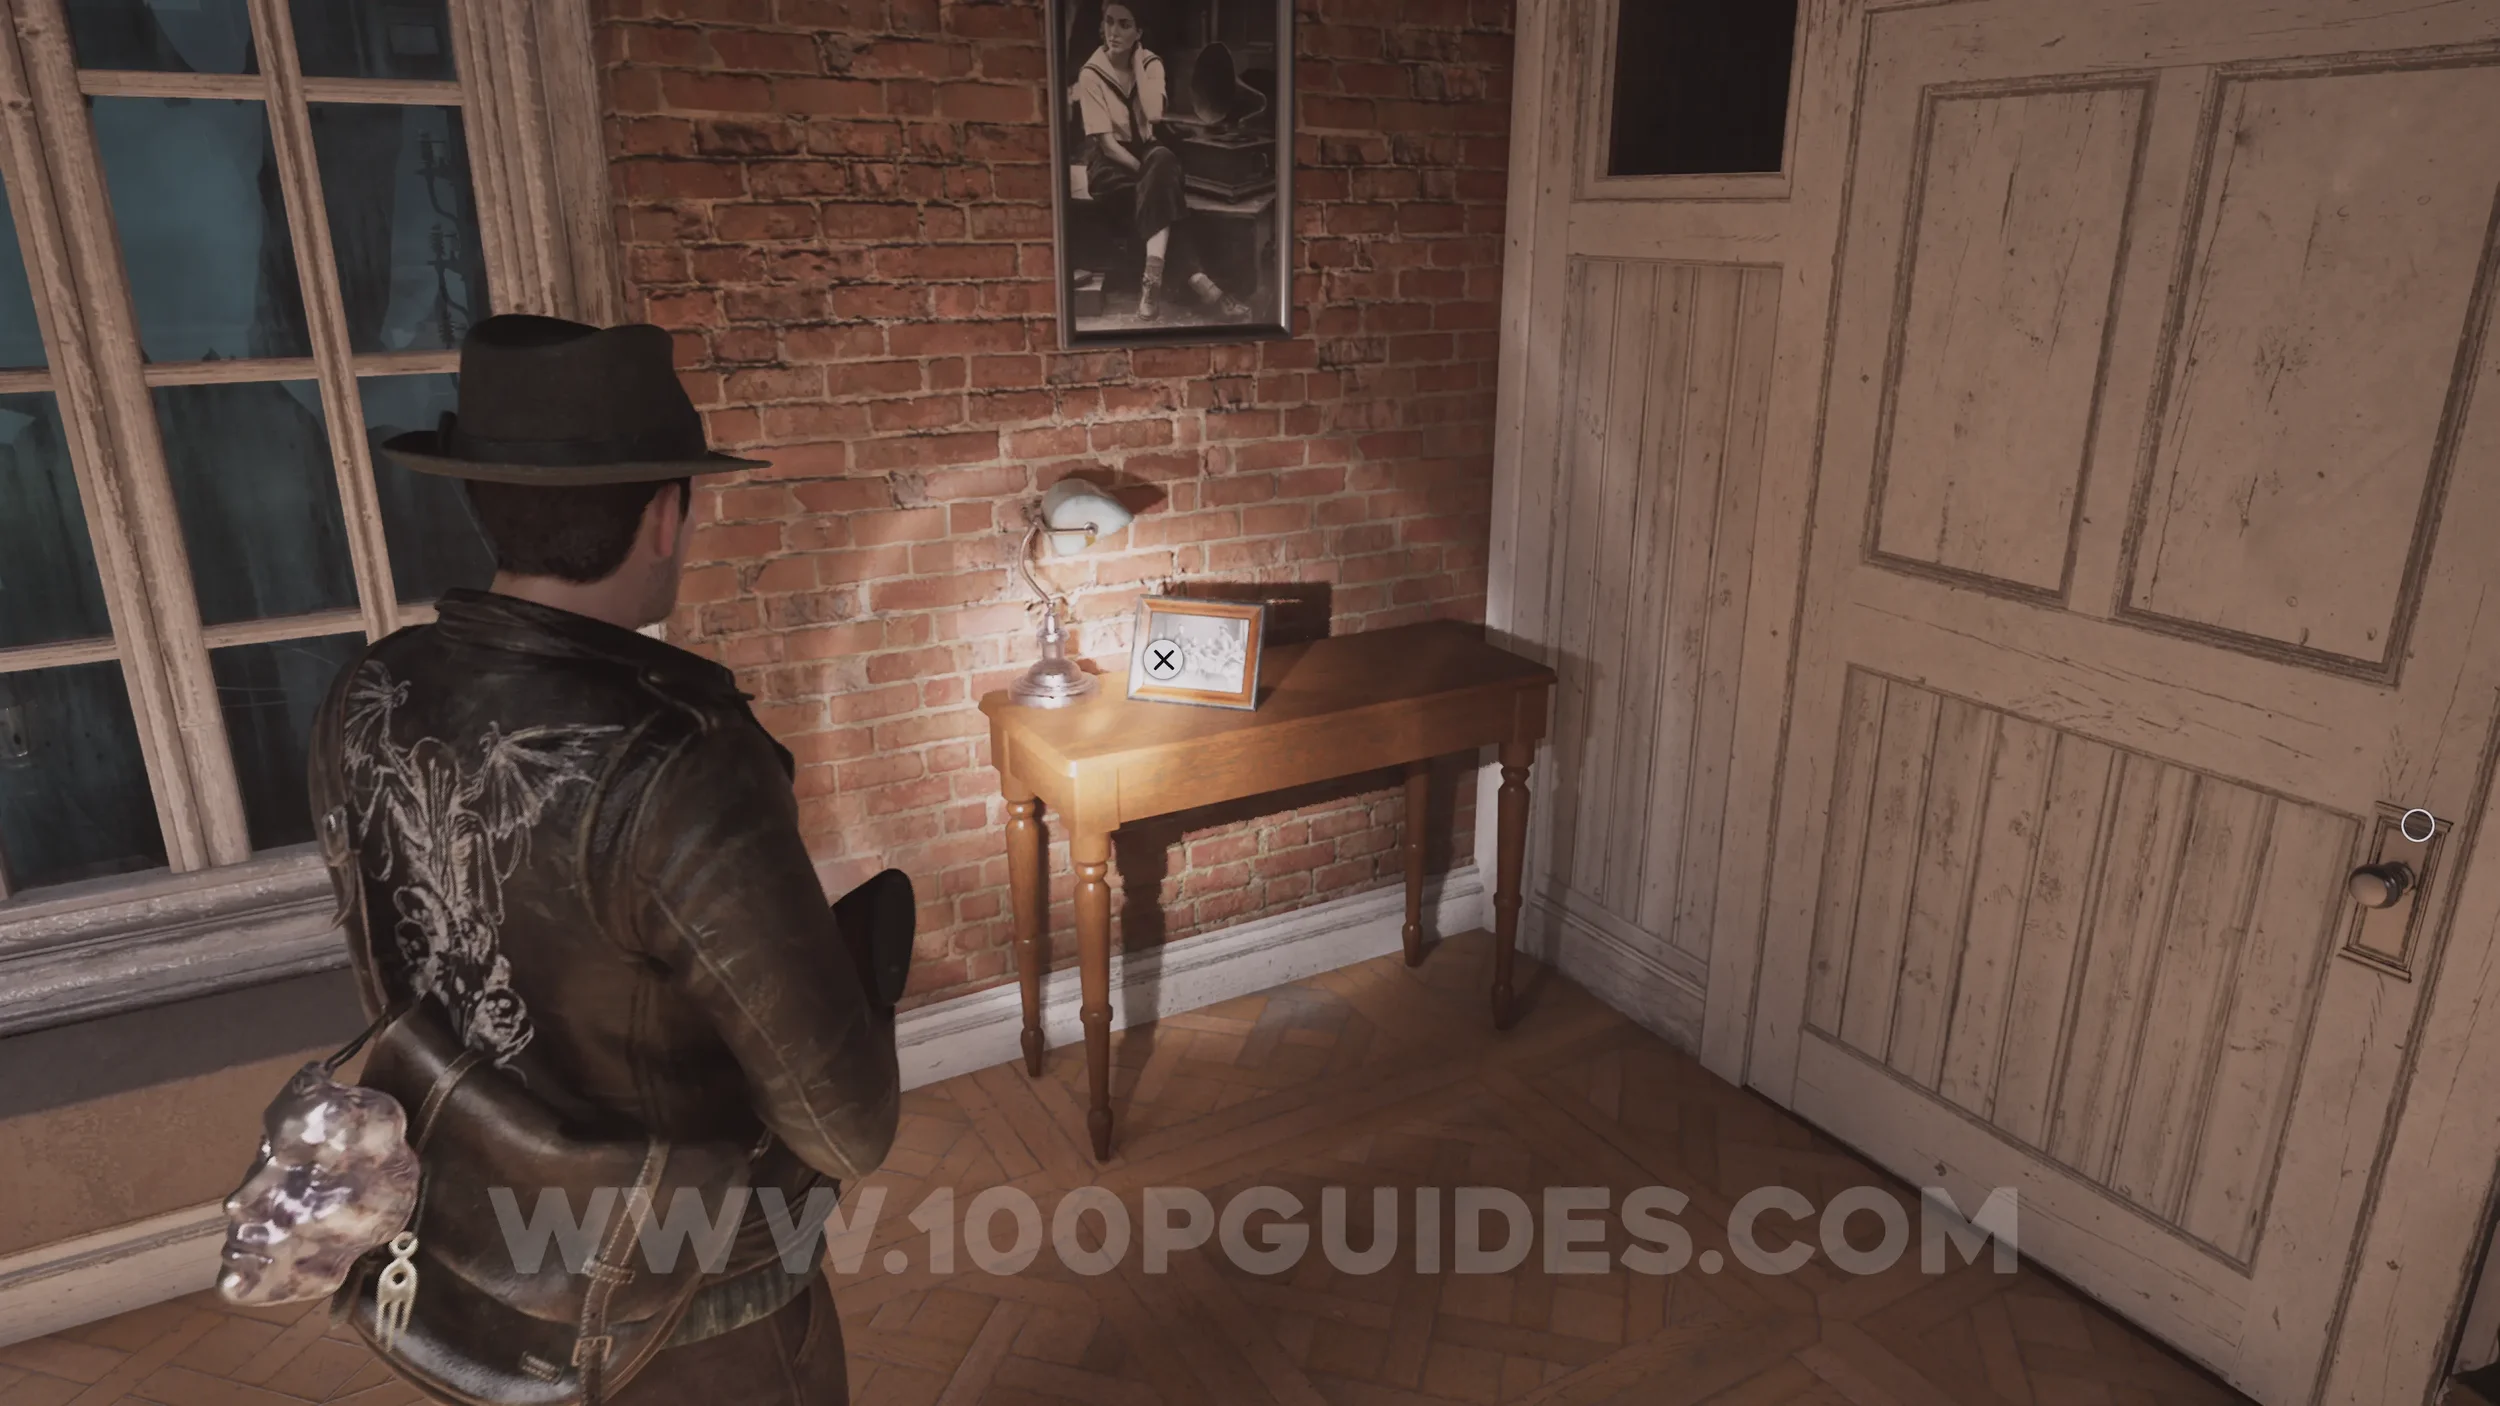
Lore Codex: The Filleter Crew. Examine the small photo in the corner of the Safe Room.
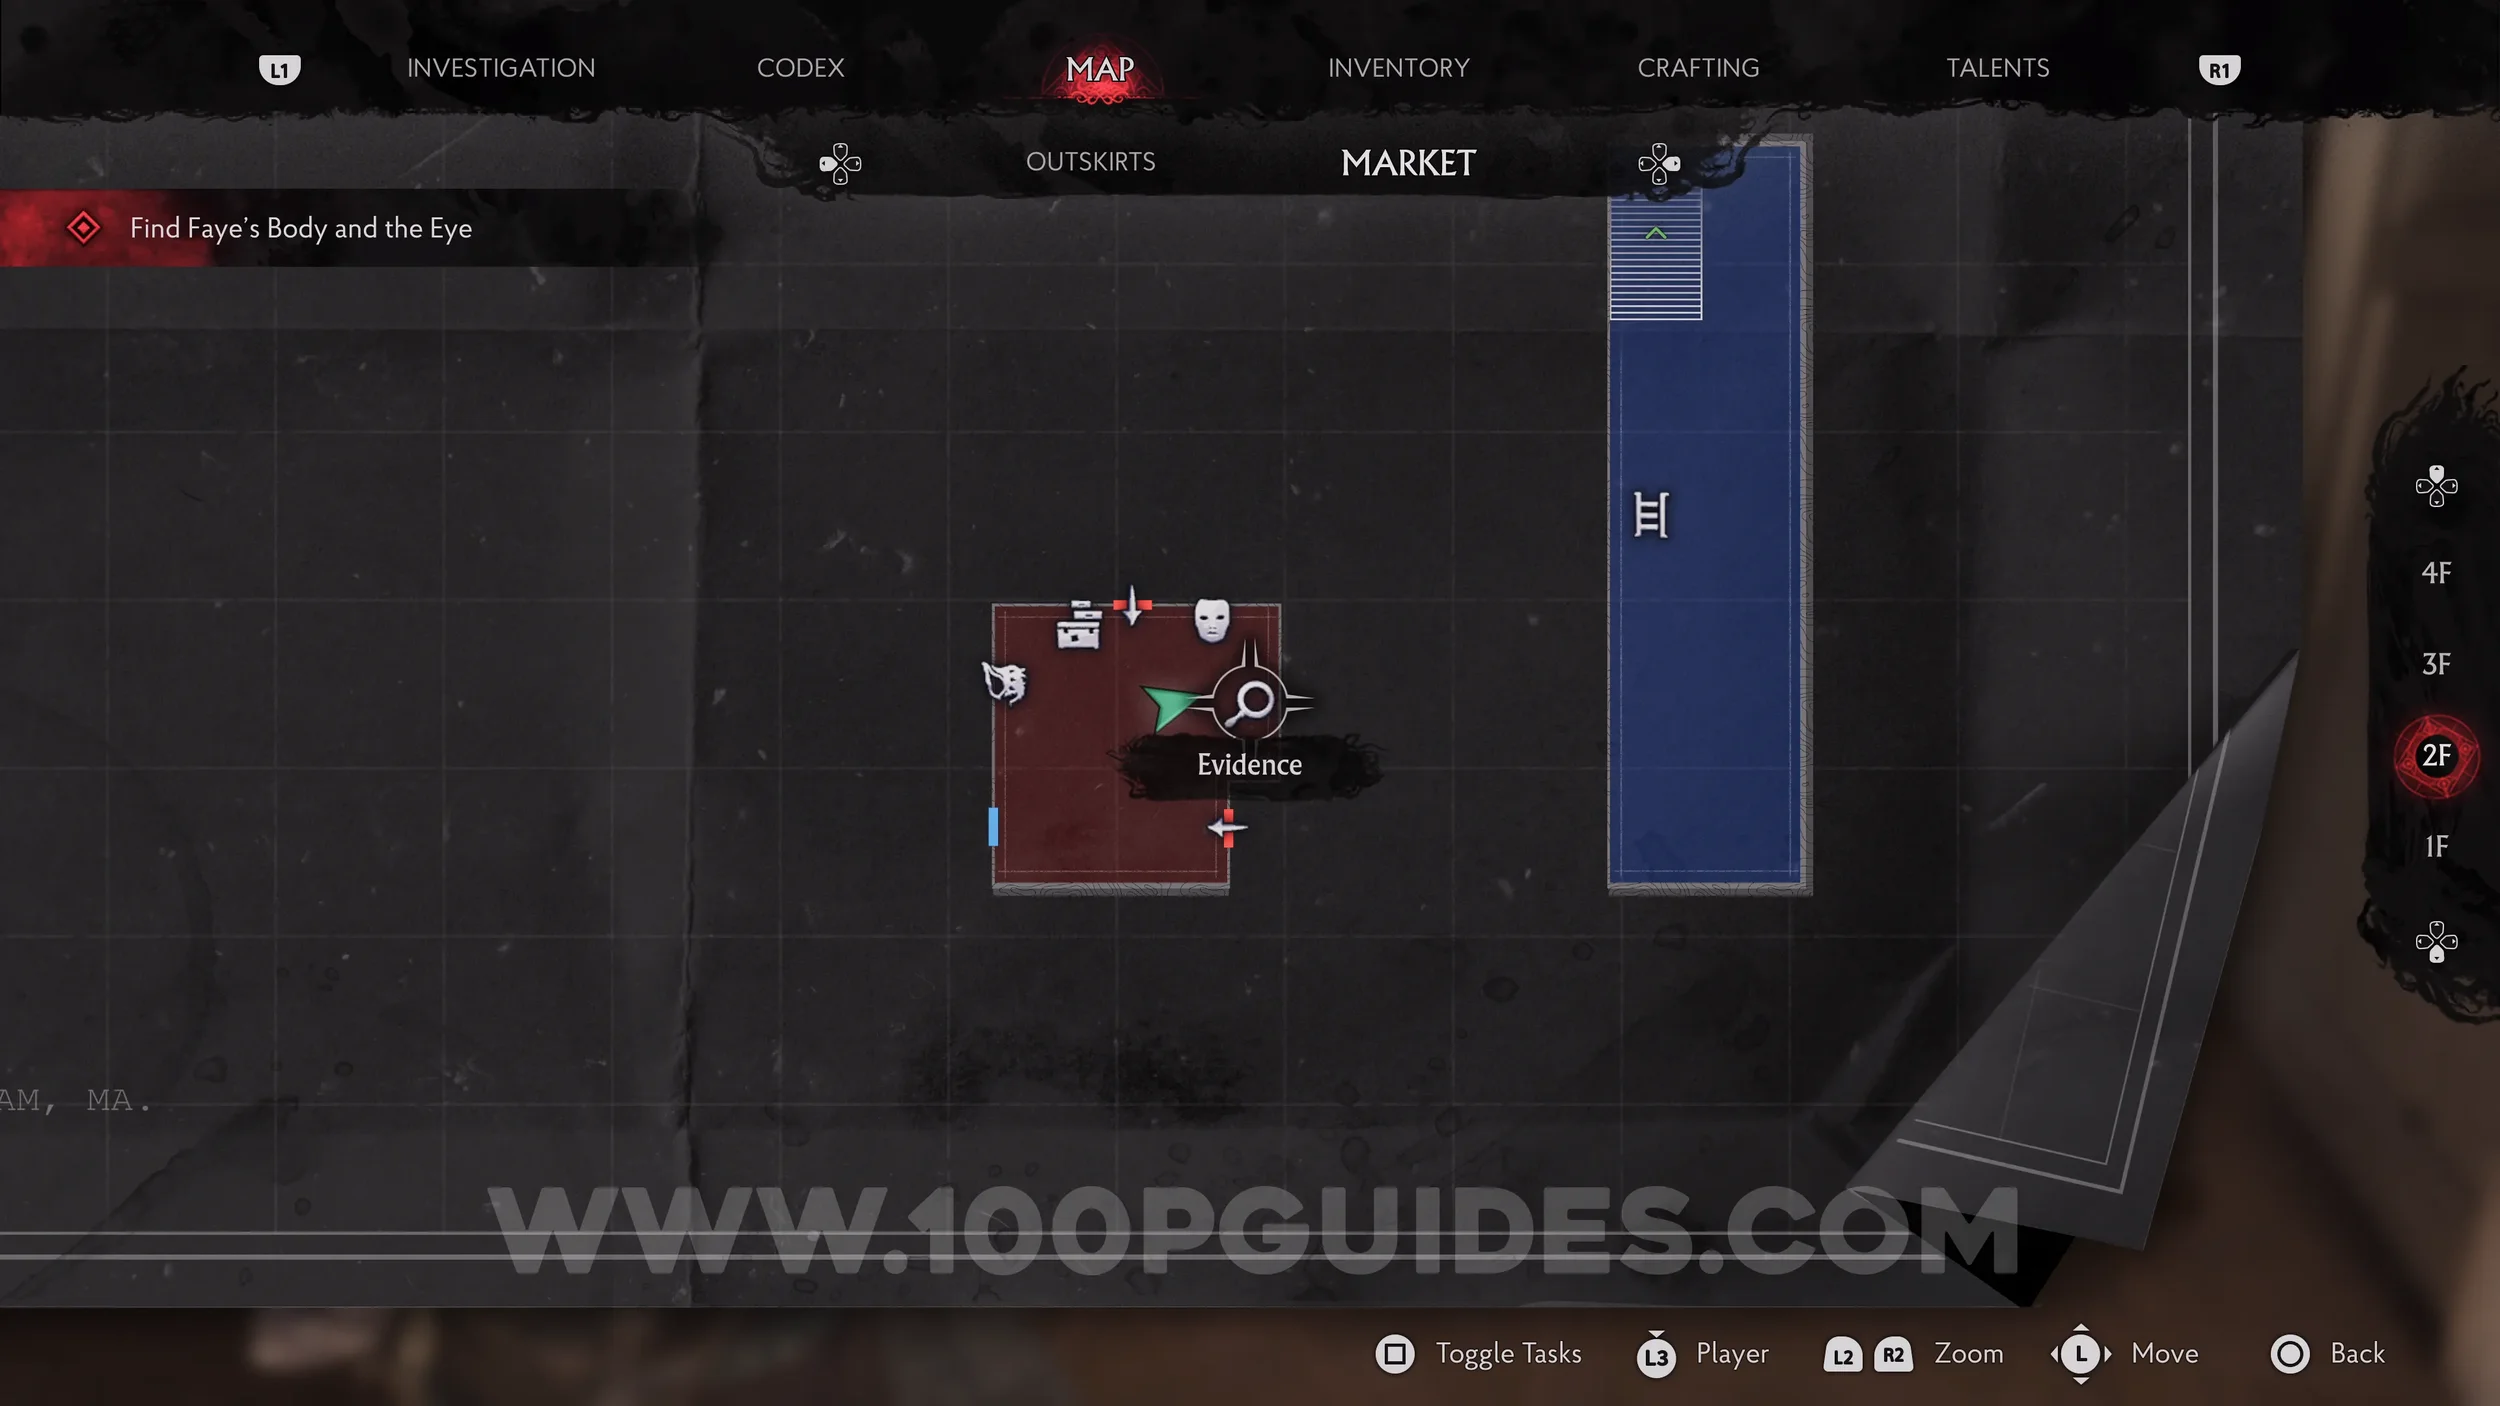
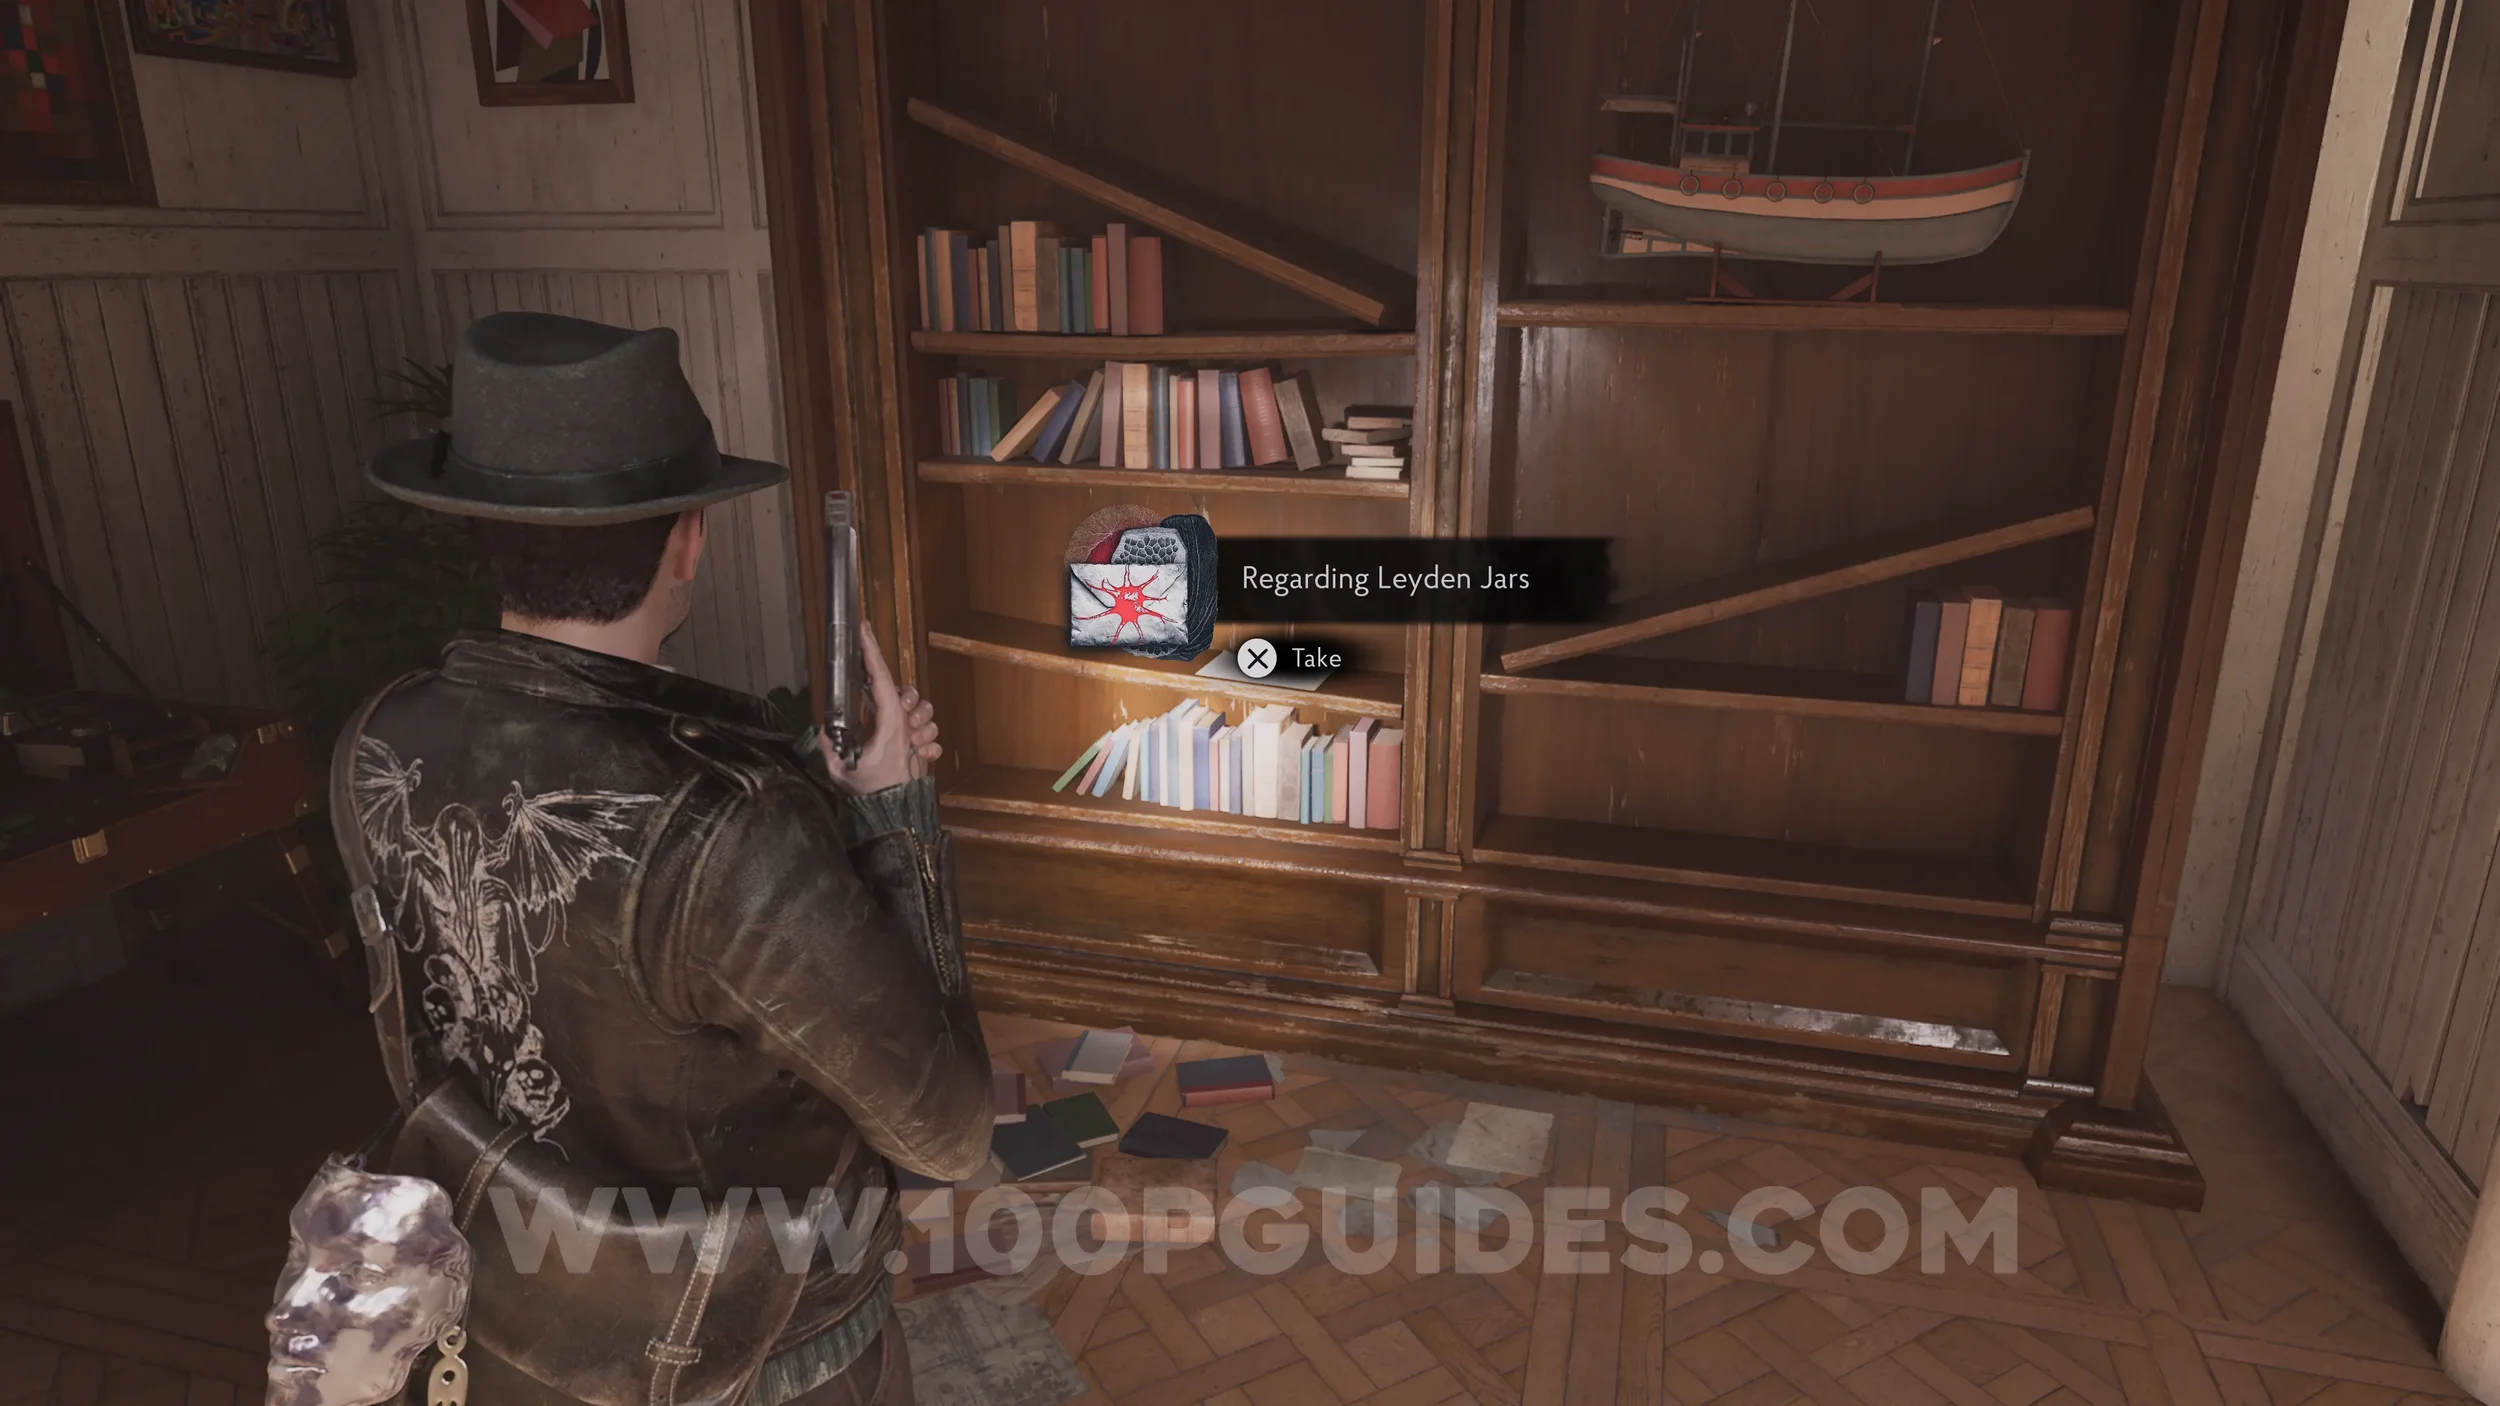
Evidence: Regarding Leyden Jars. On a bookshelf in the Safe Room.
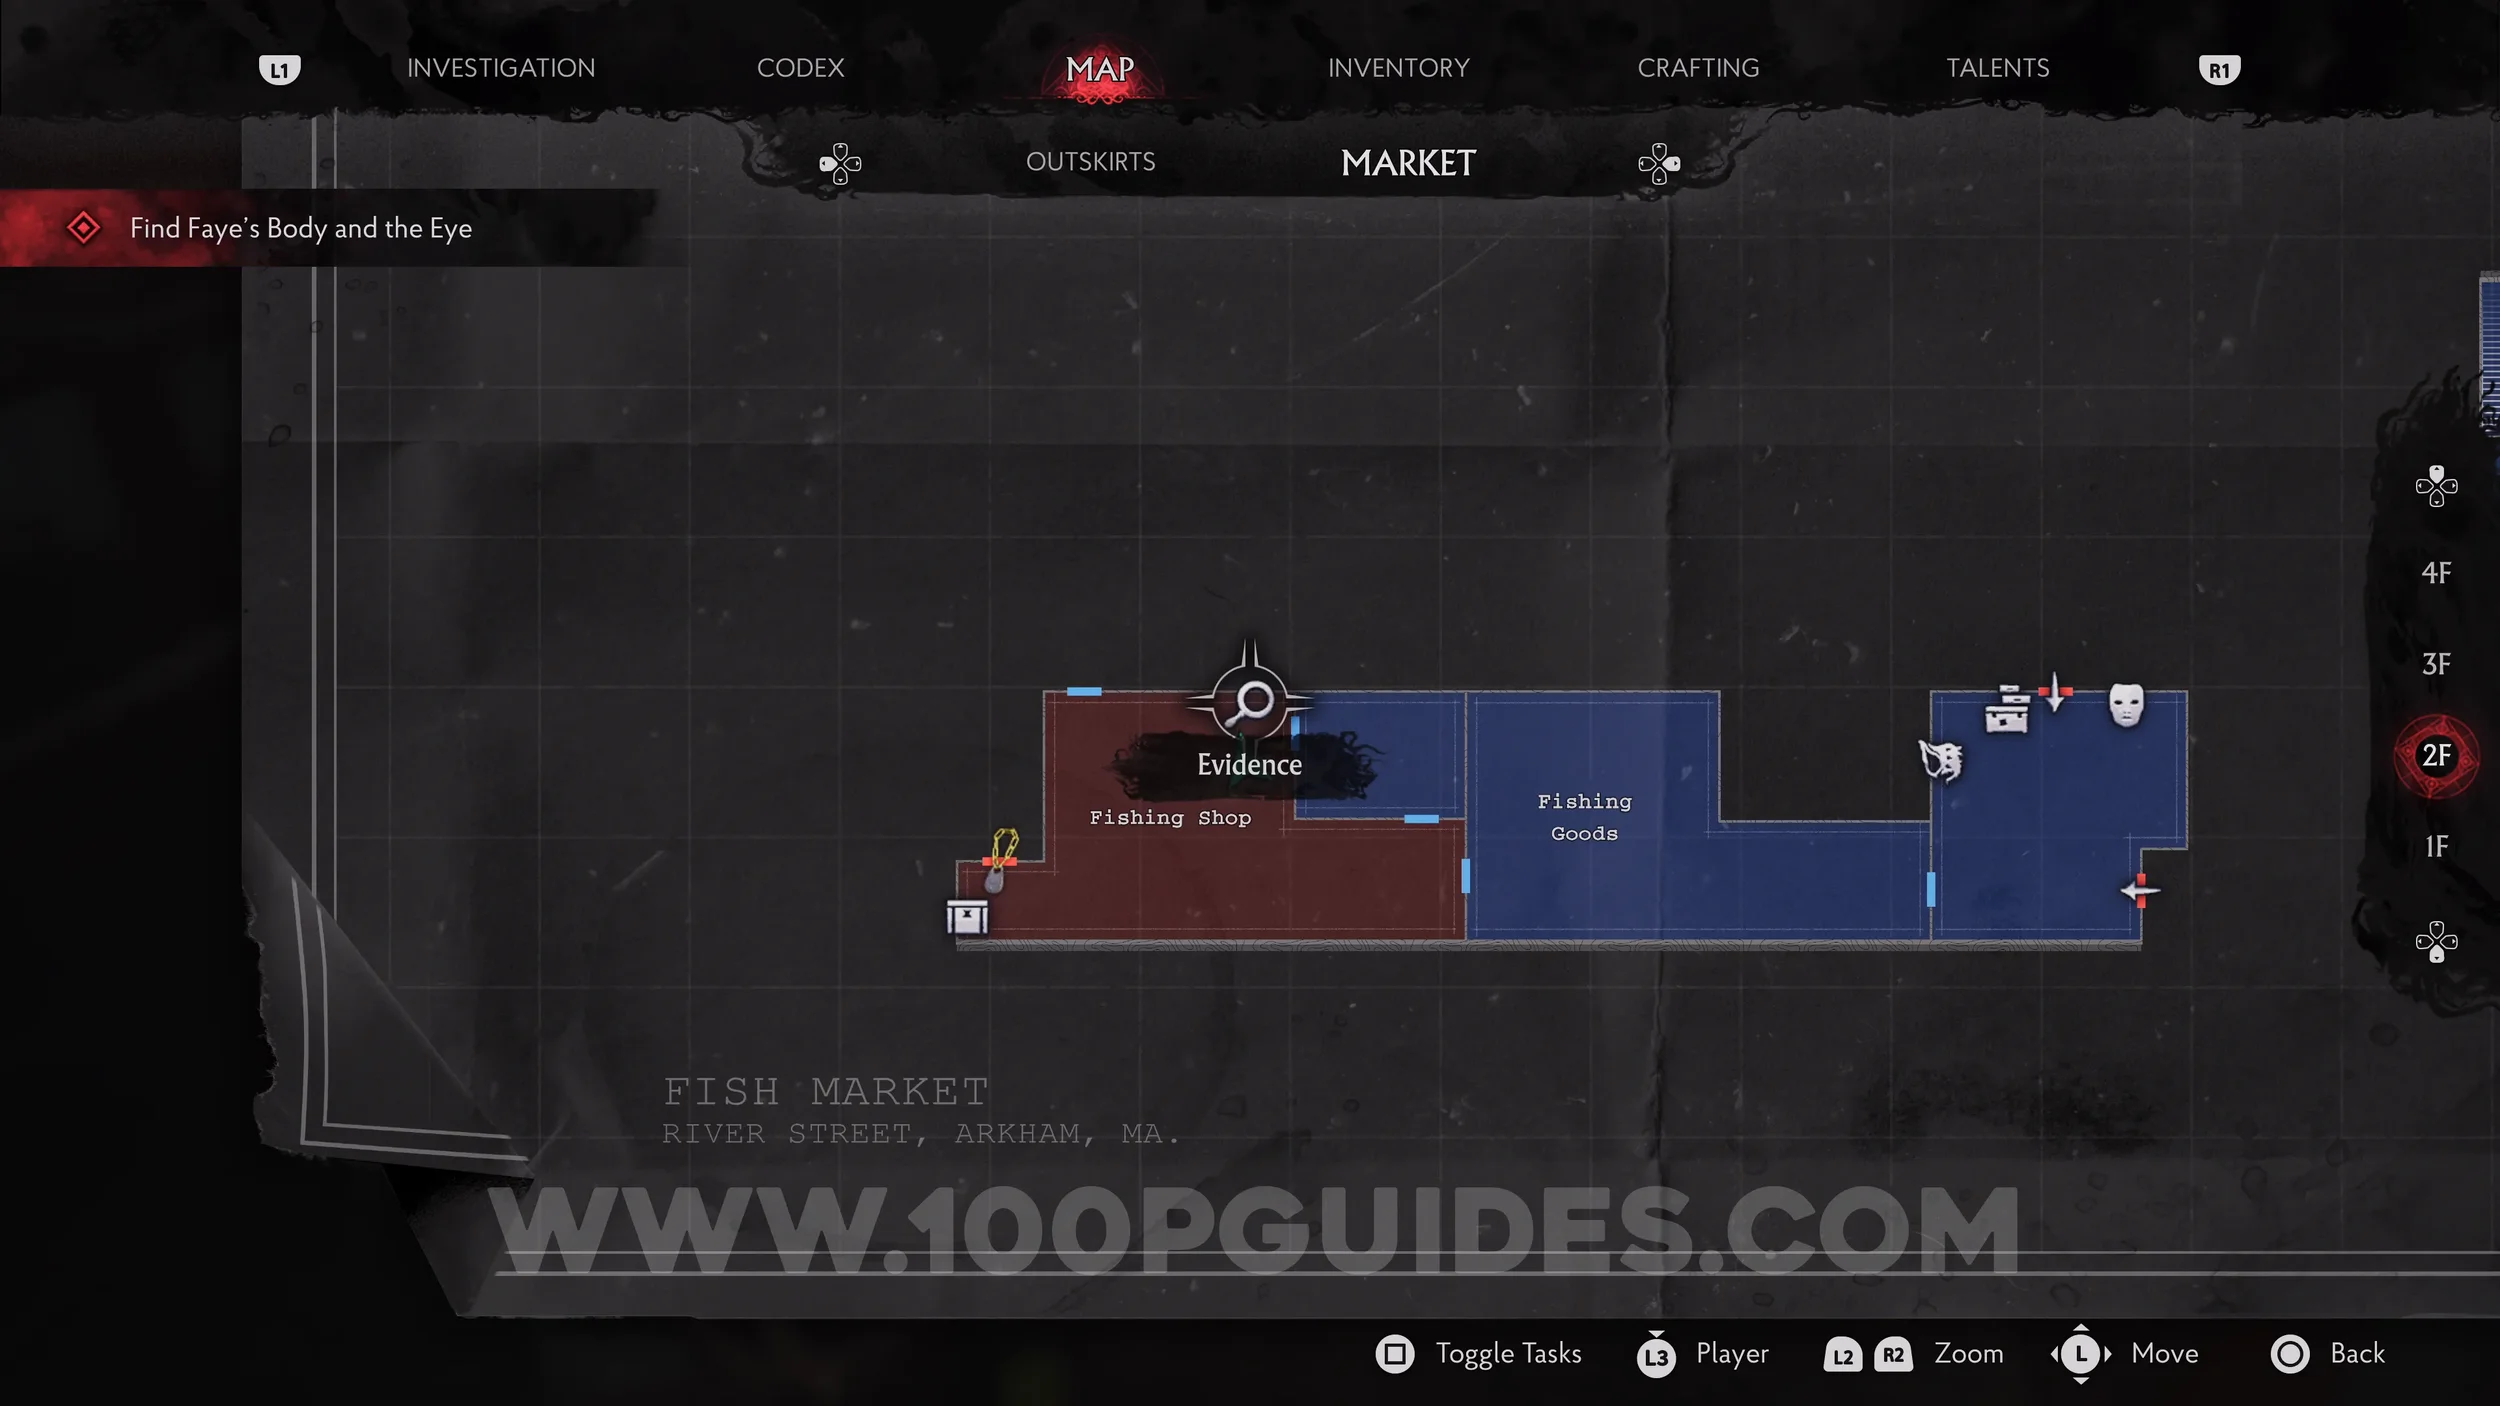
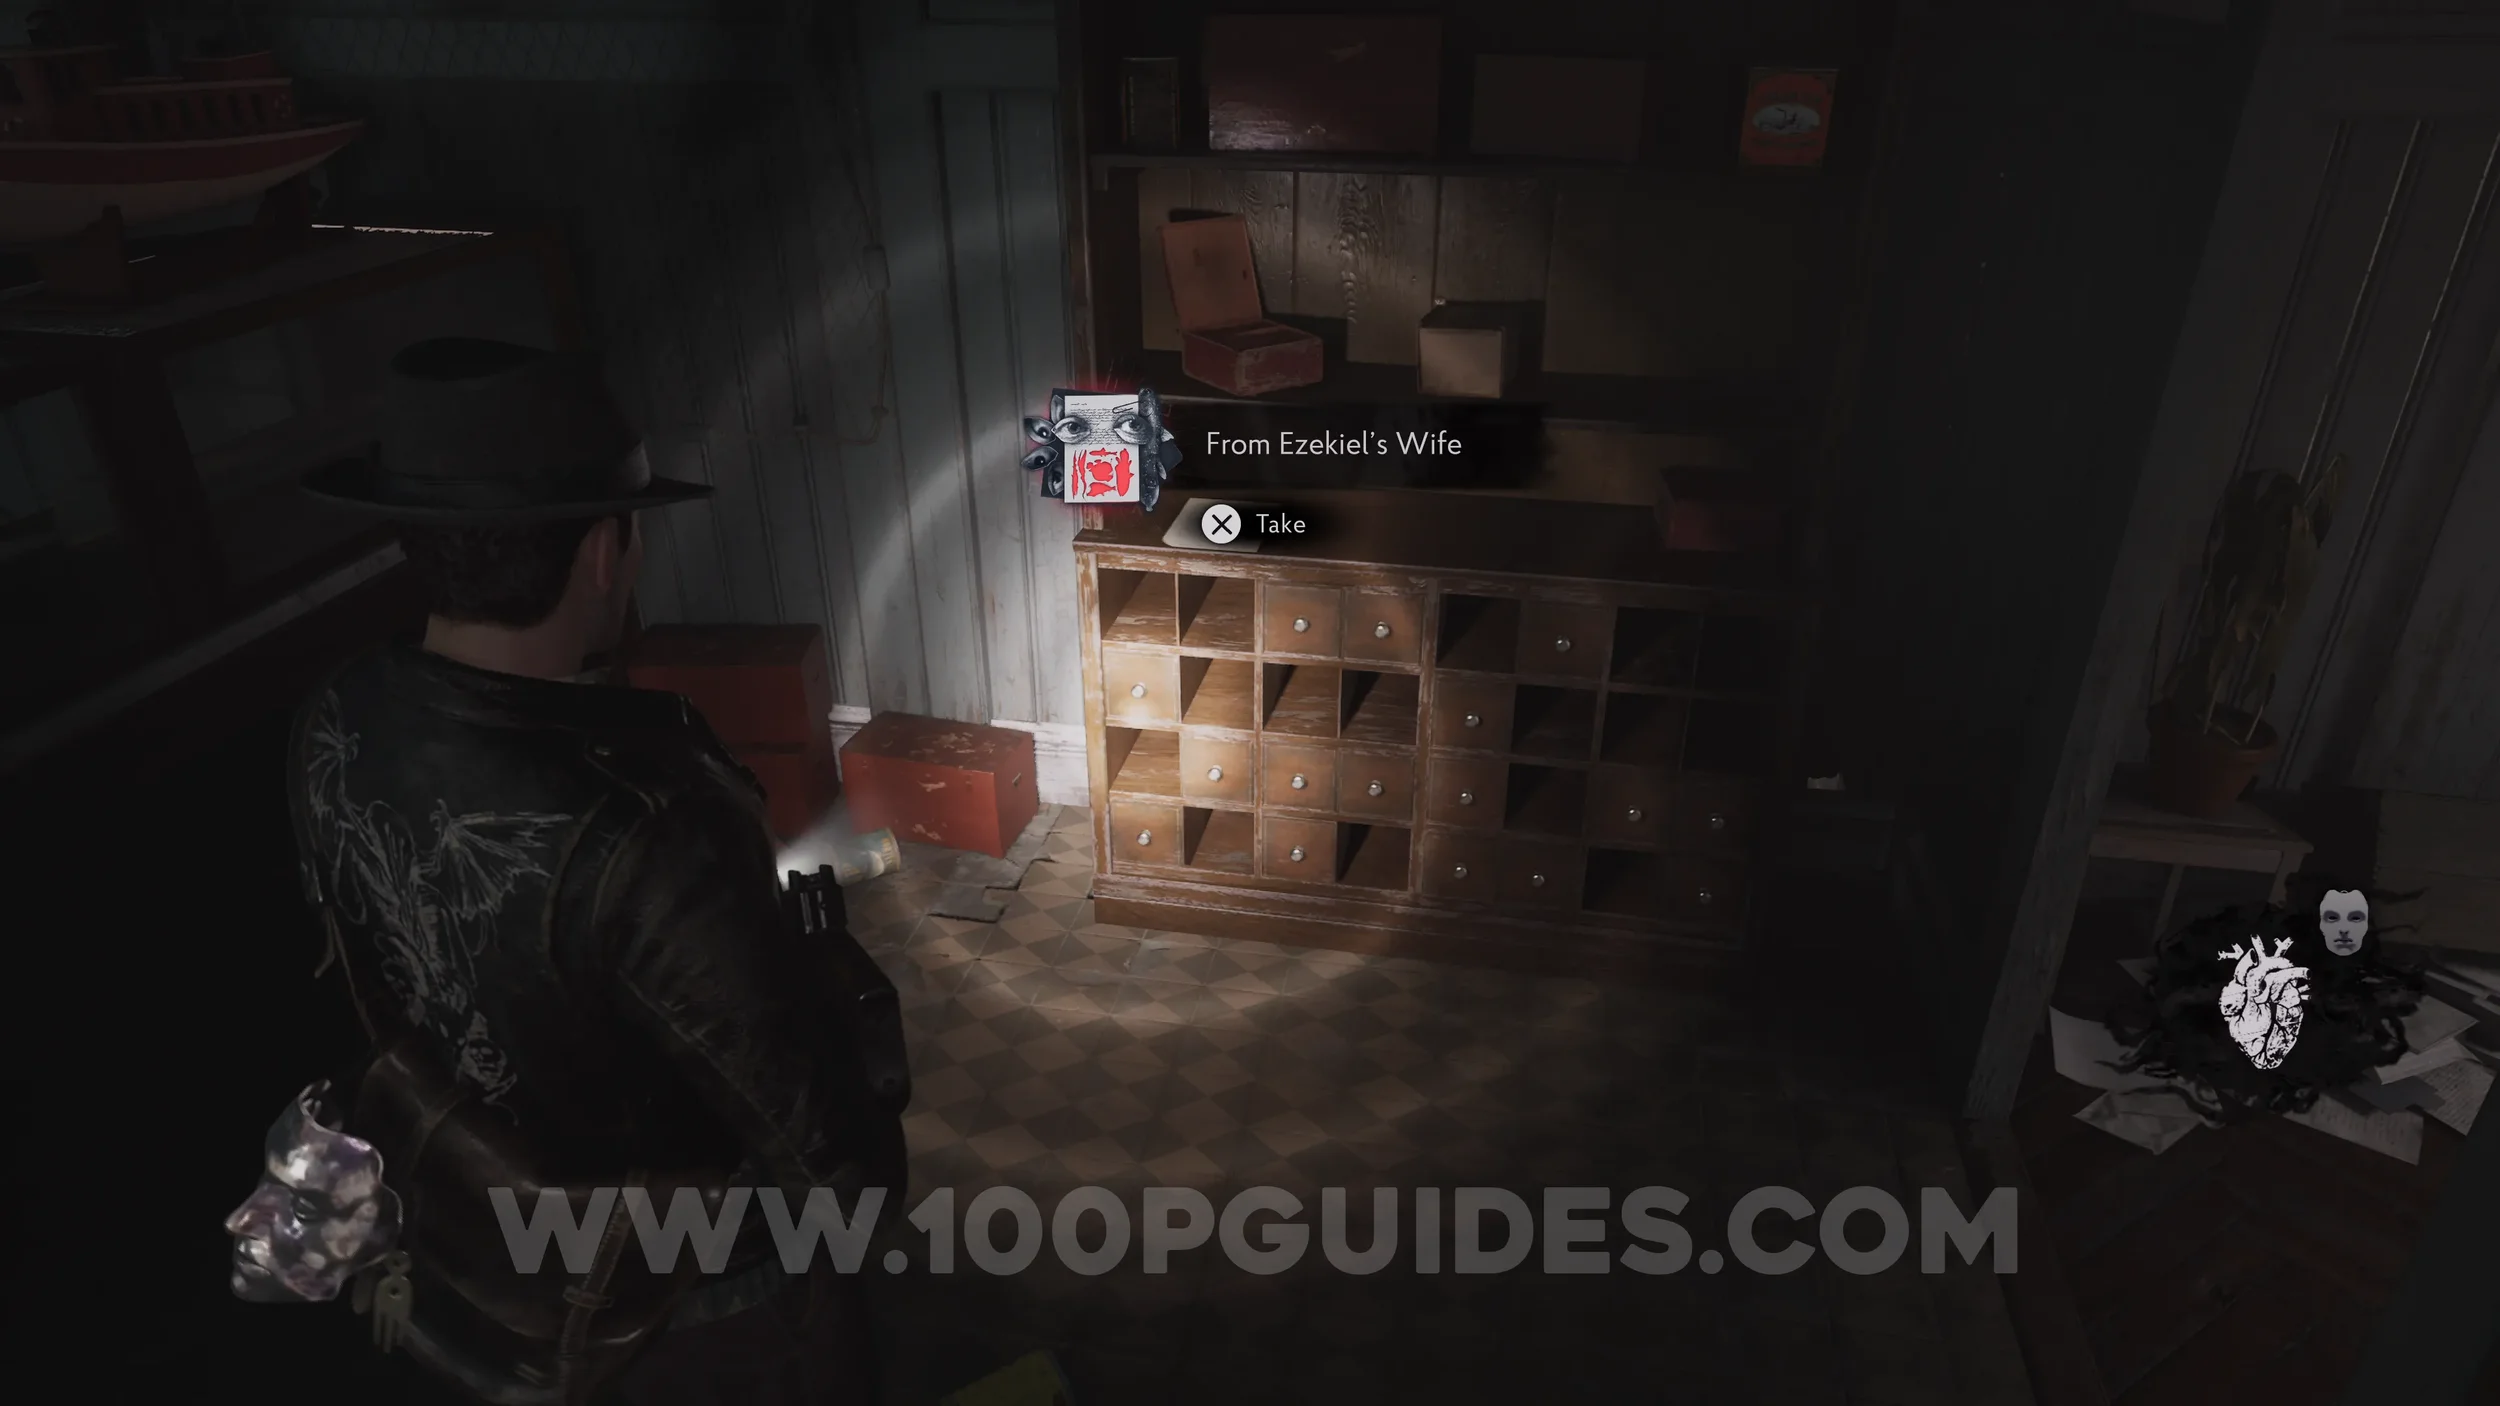
Evidence: From Ezekiel’s Wife. Make your way west from the Safe Room and go through the Fishing Goods section to reach the Fishing Shop, where you'll find the Evidence.
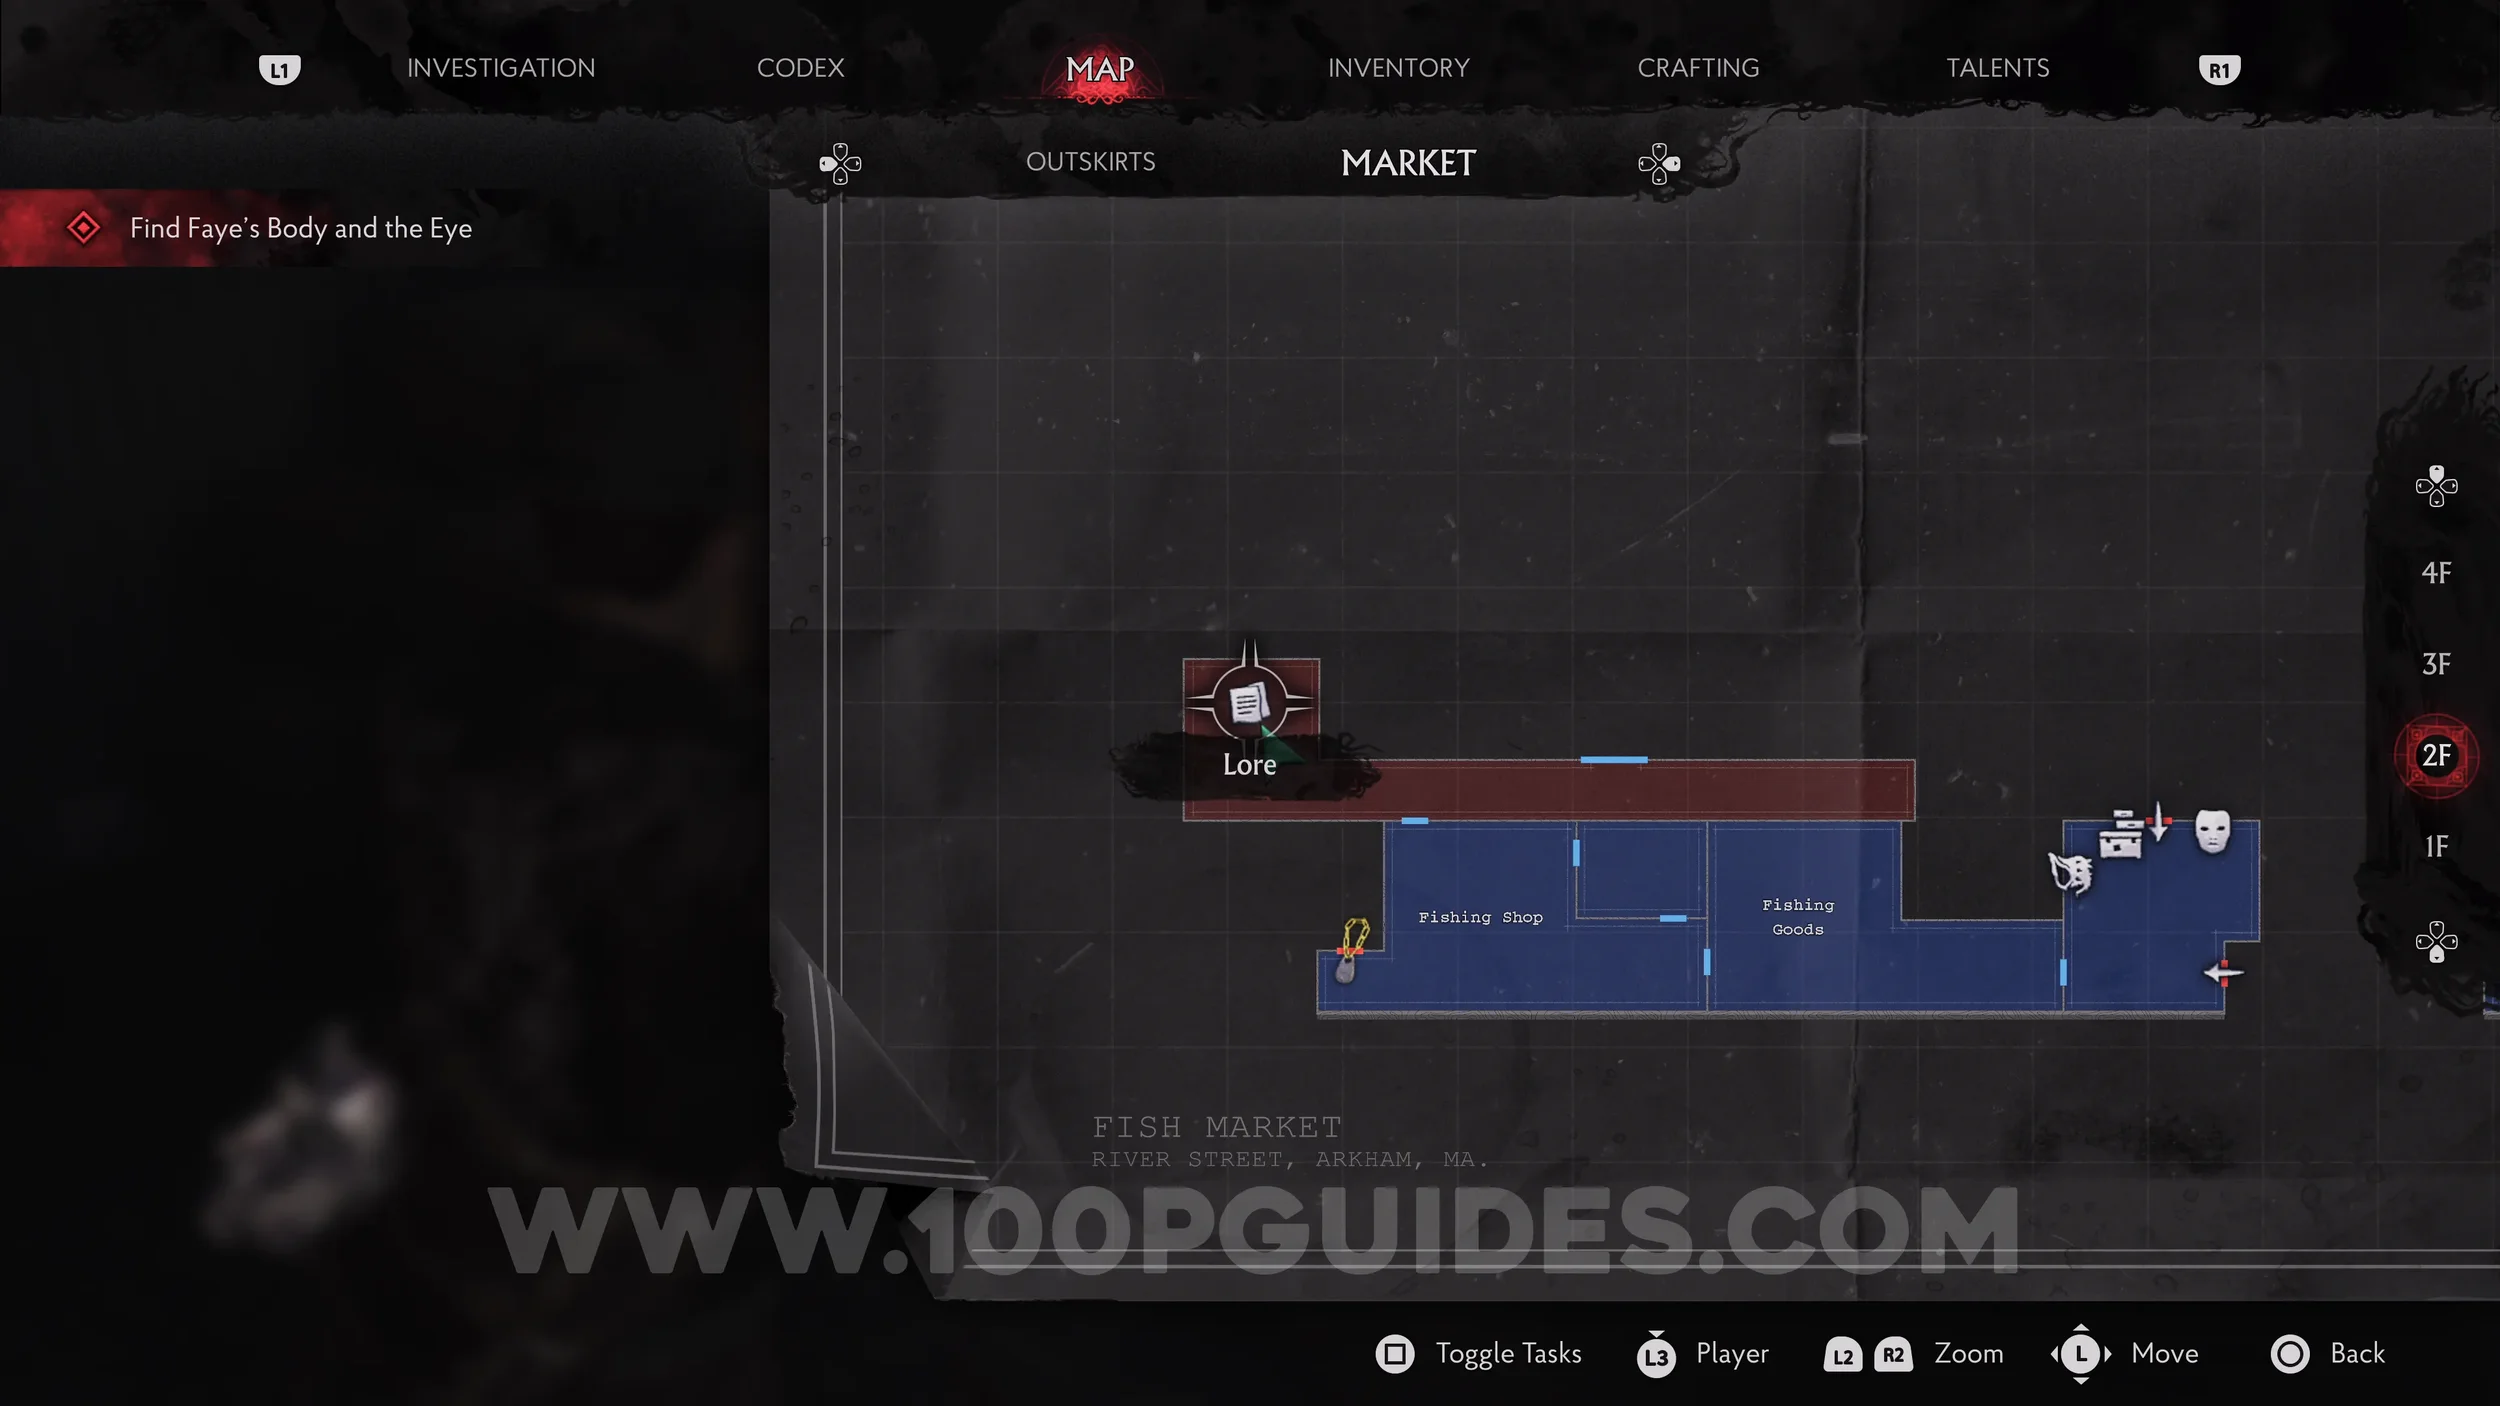
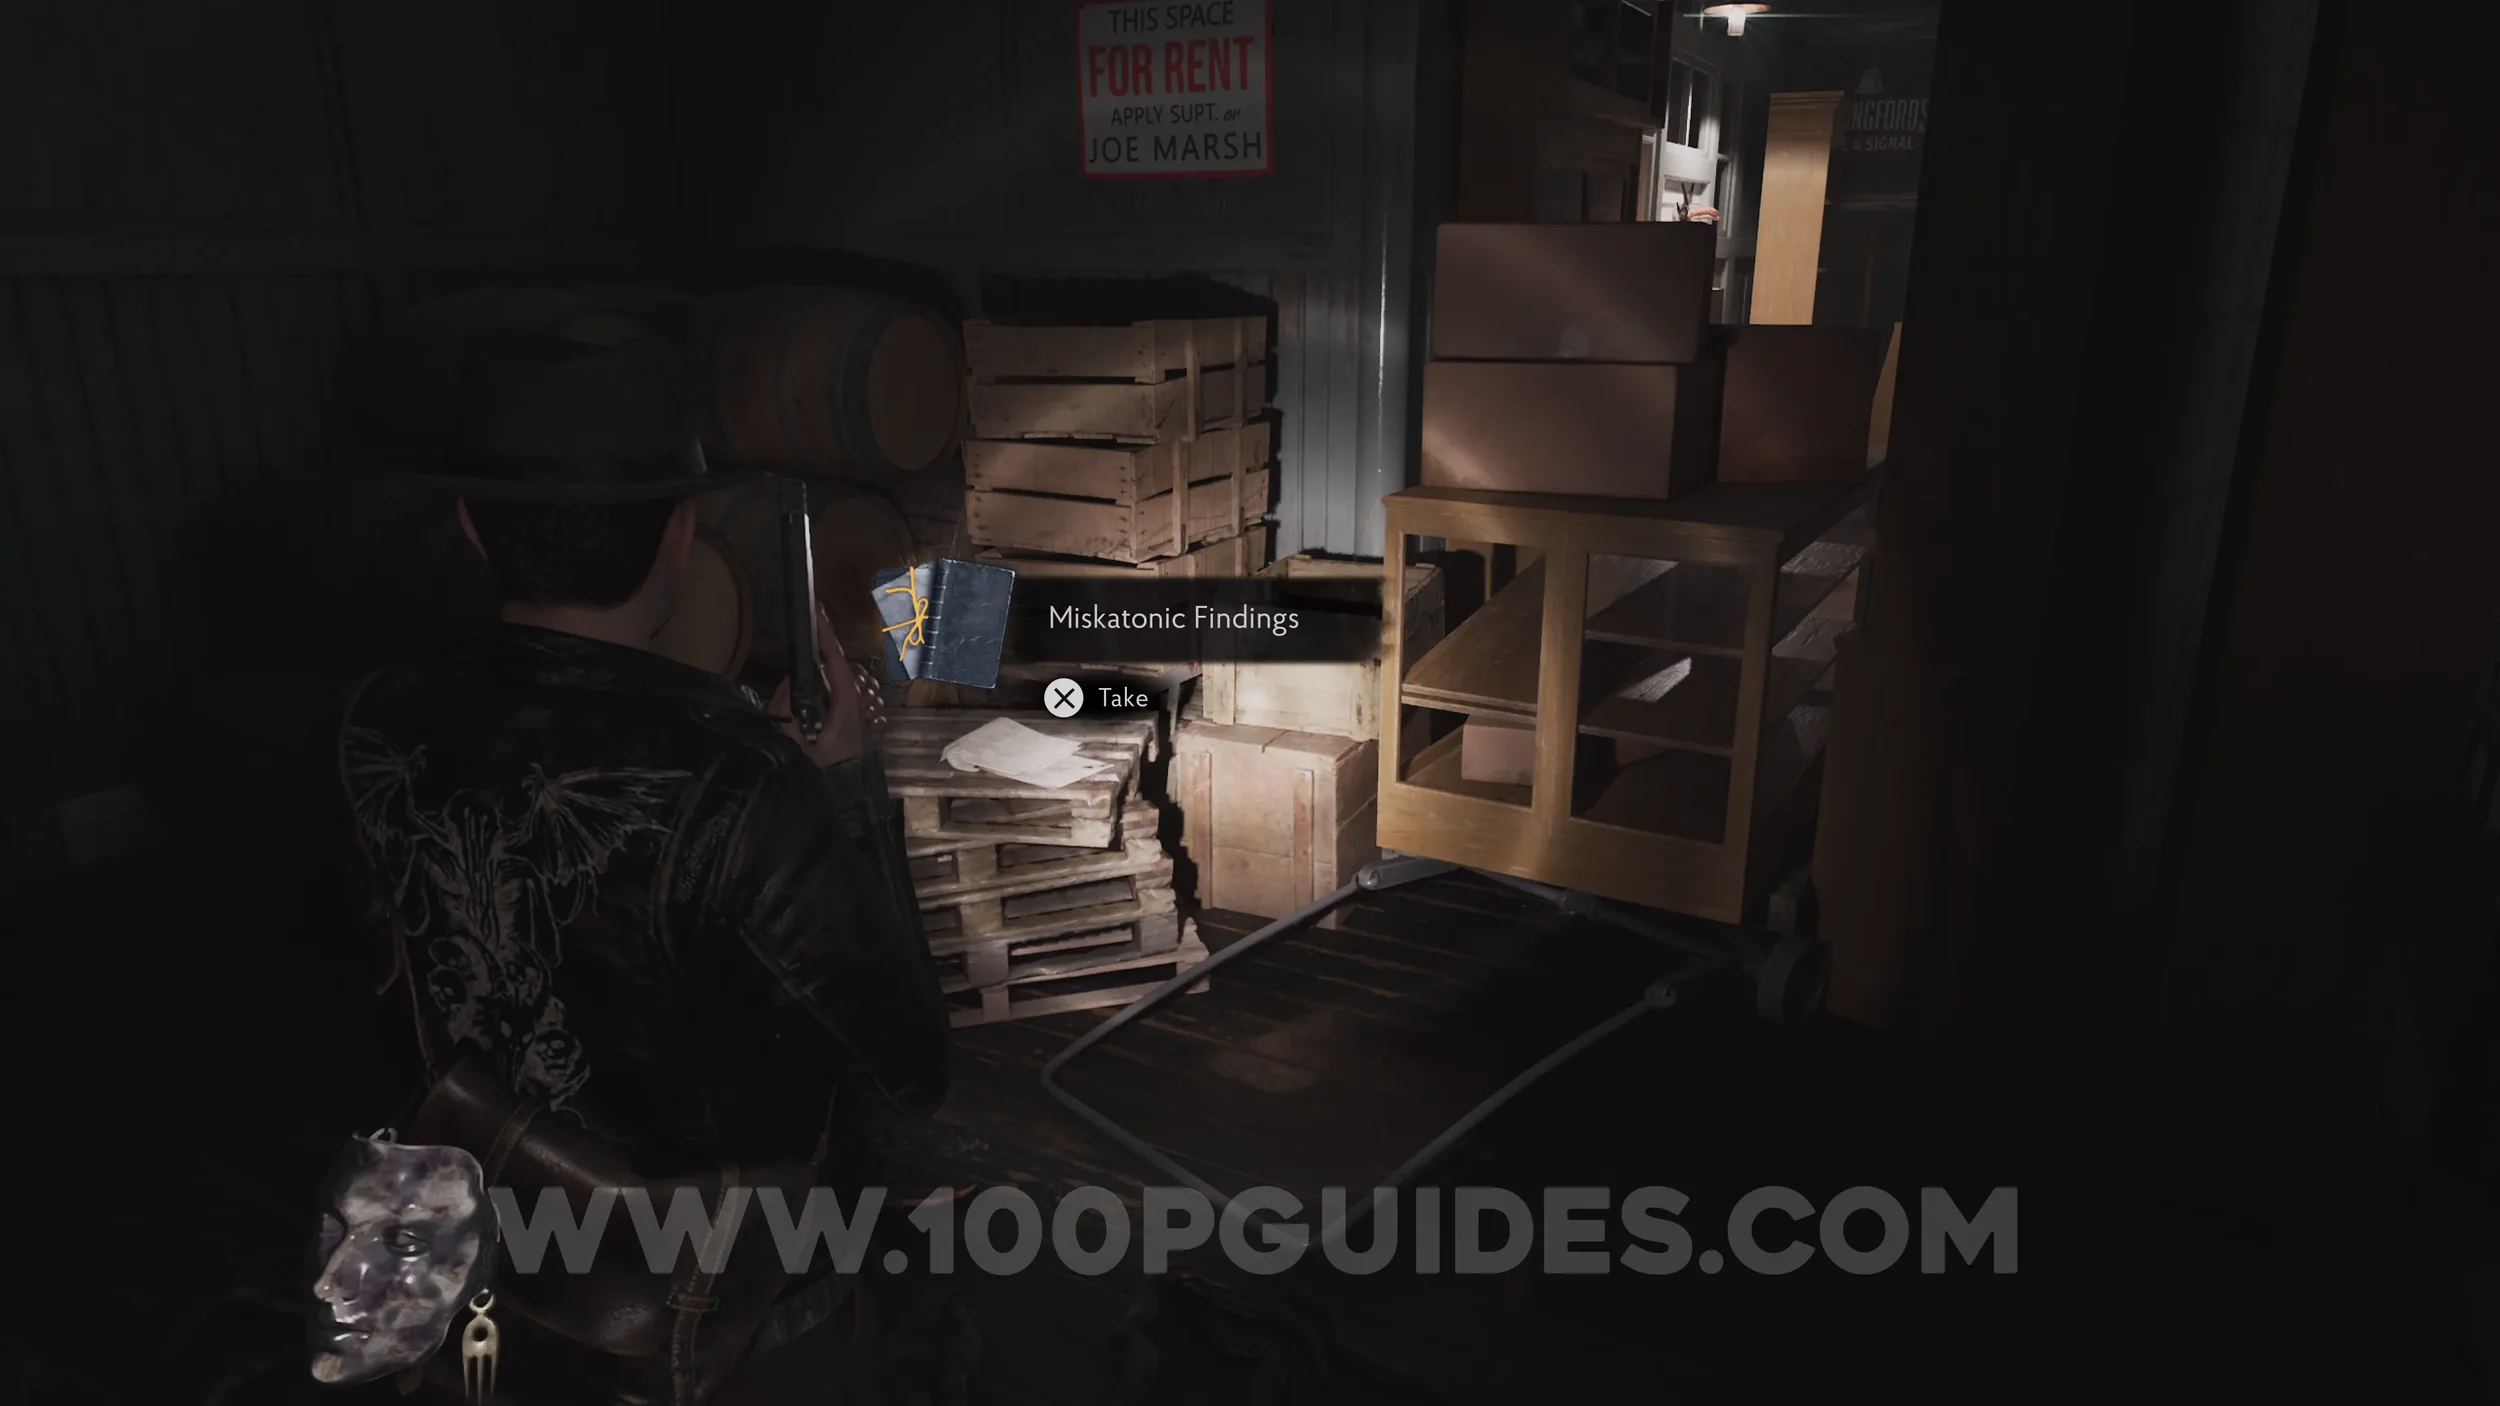
Lore Codex: Miskatonic Findings. Exit the Fishing Shop through the northern door and head left to the end to find the codex.
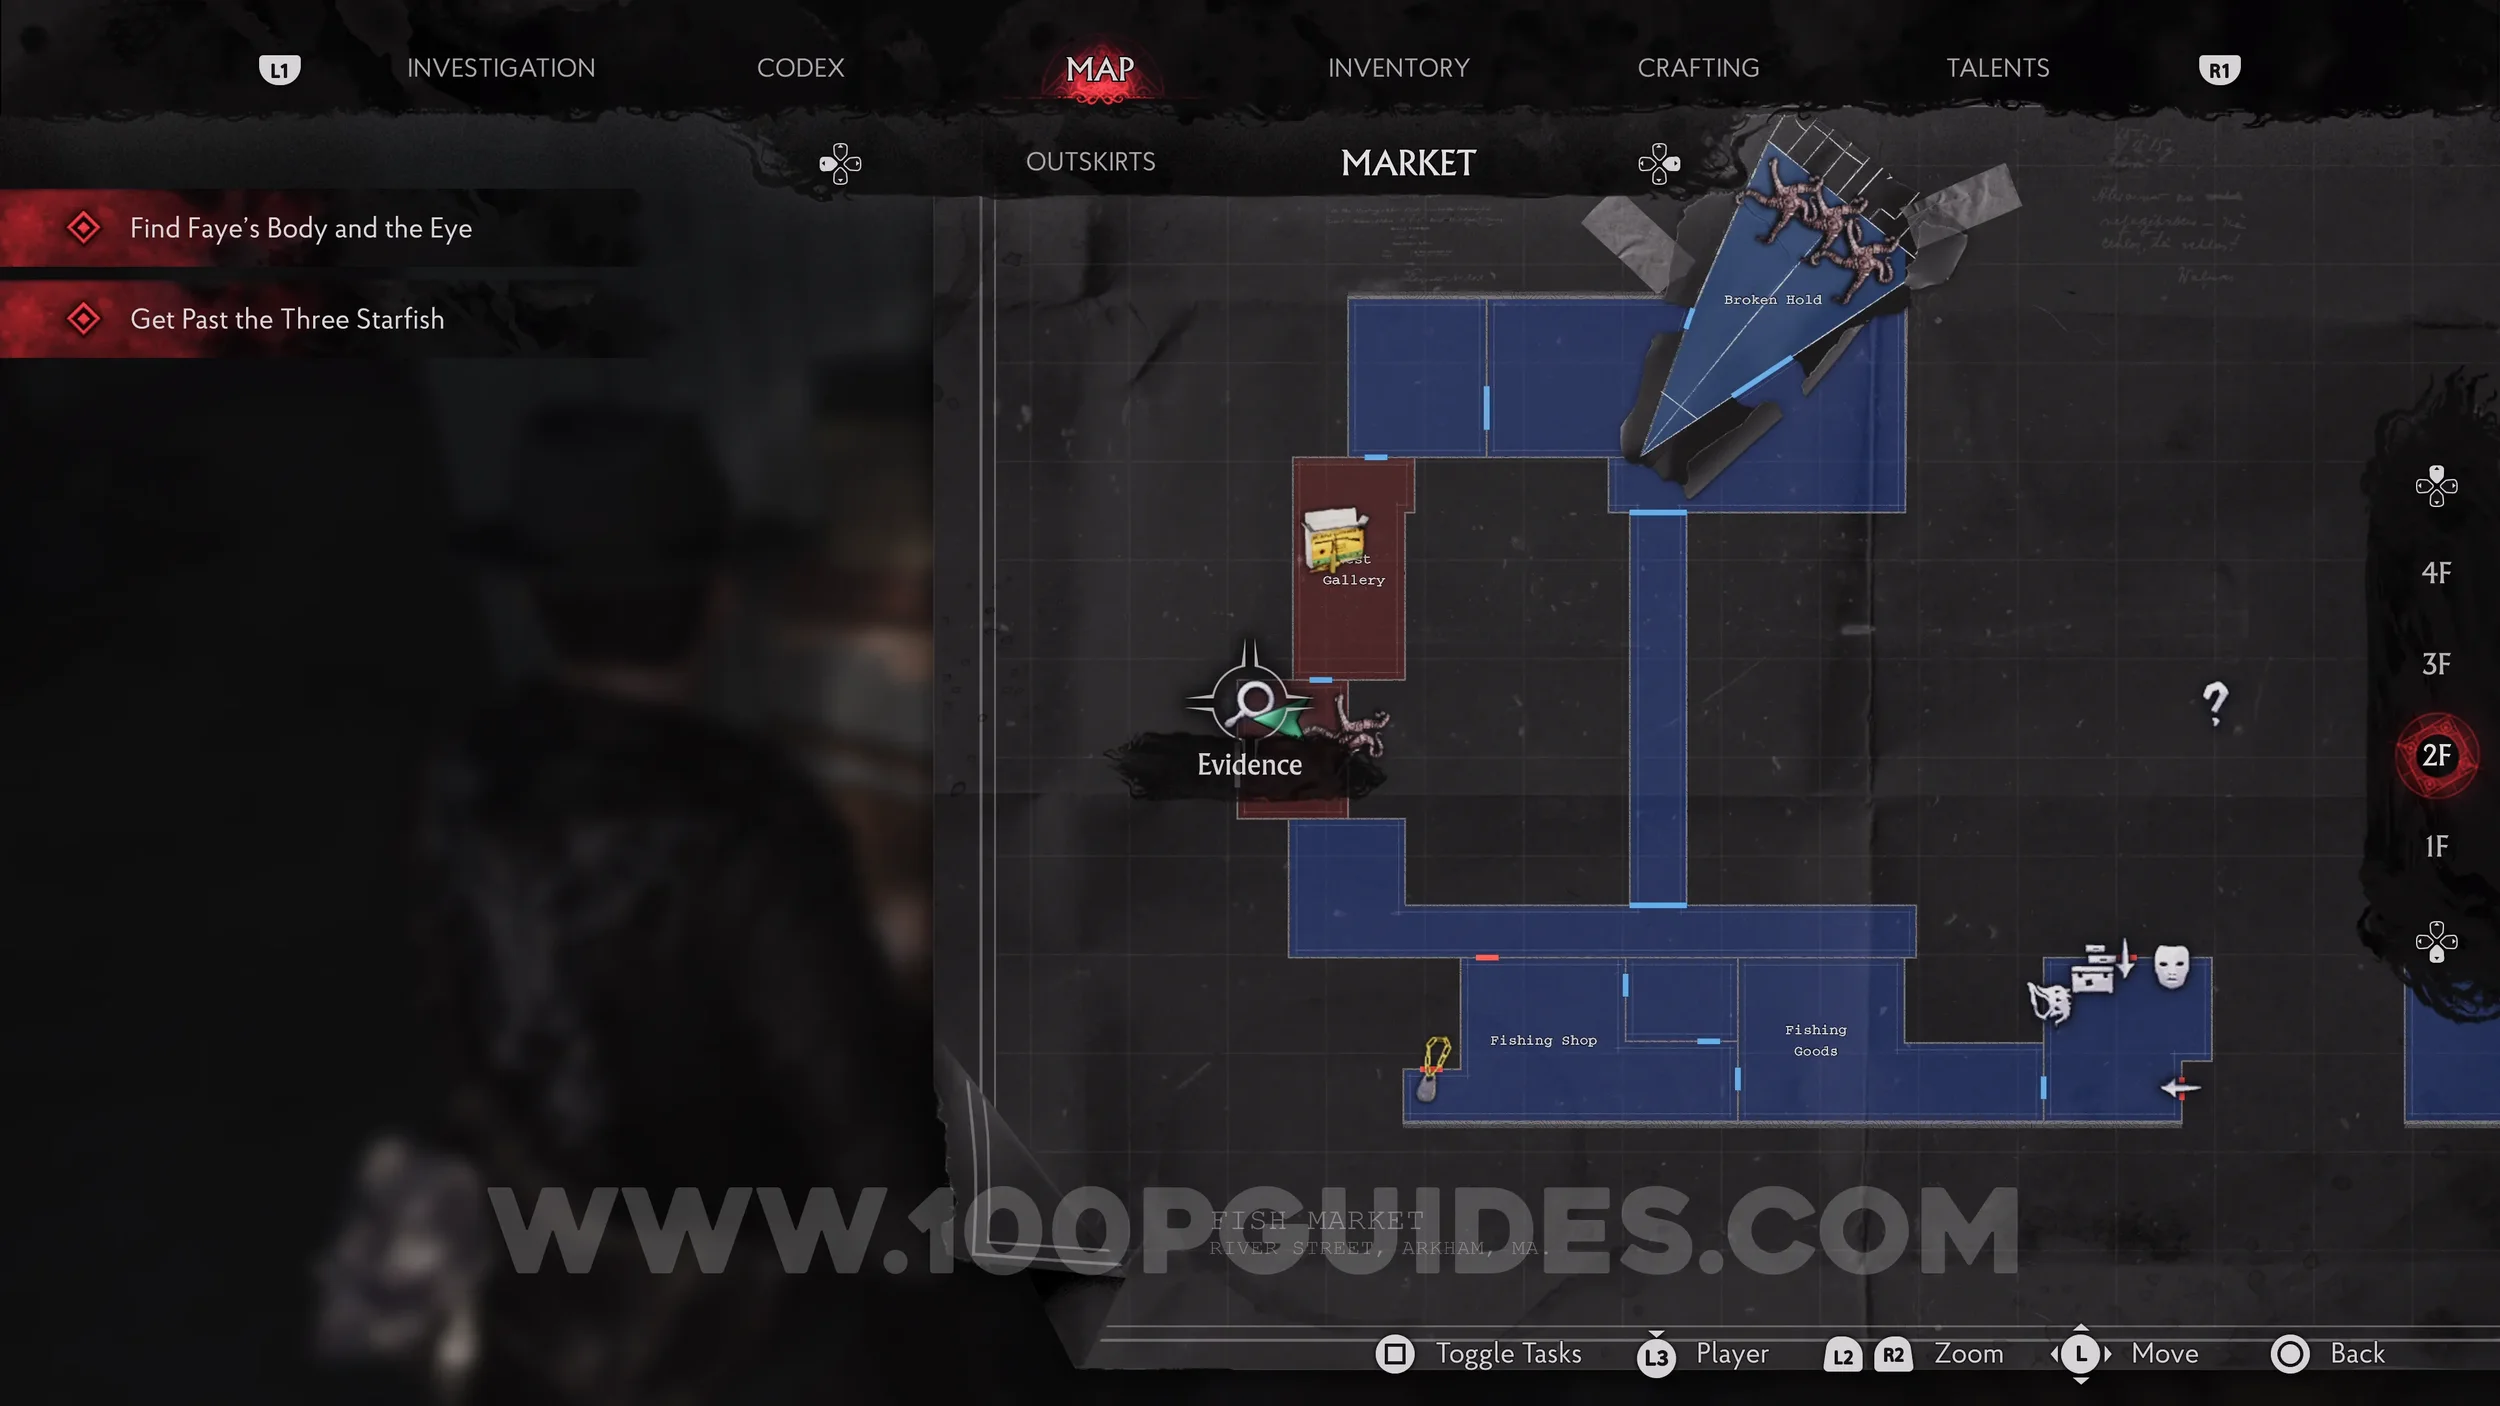
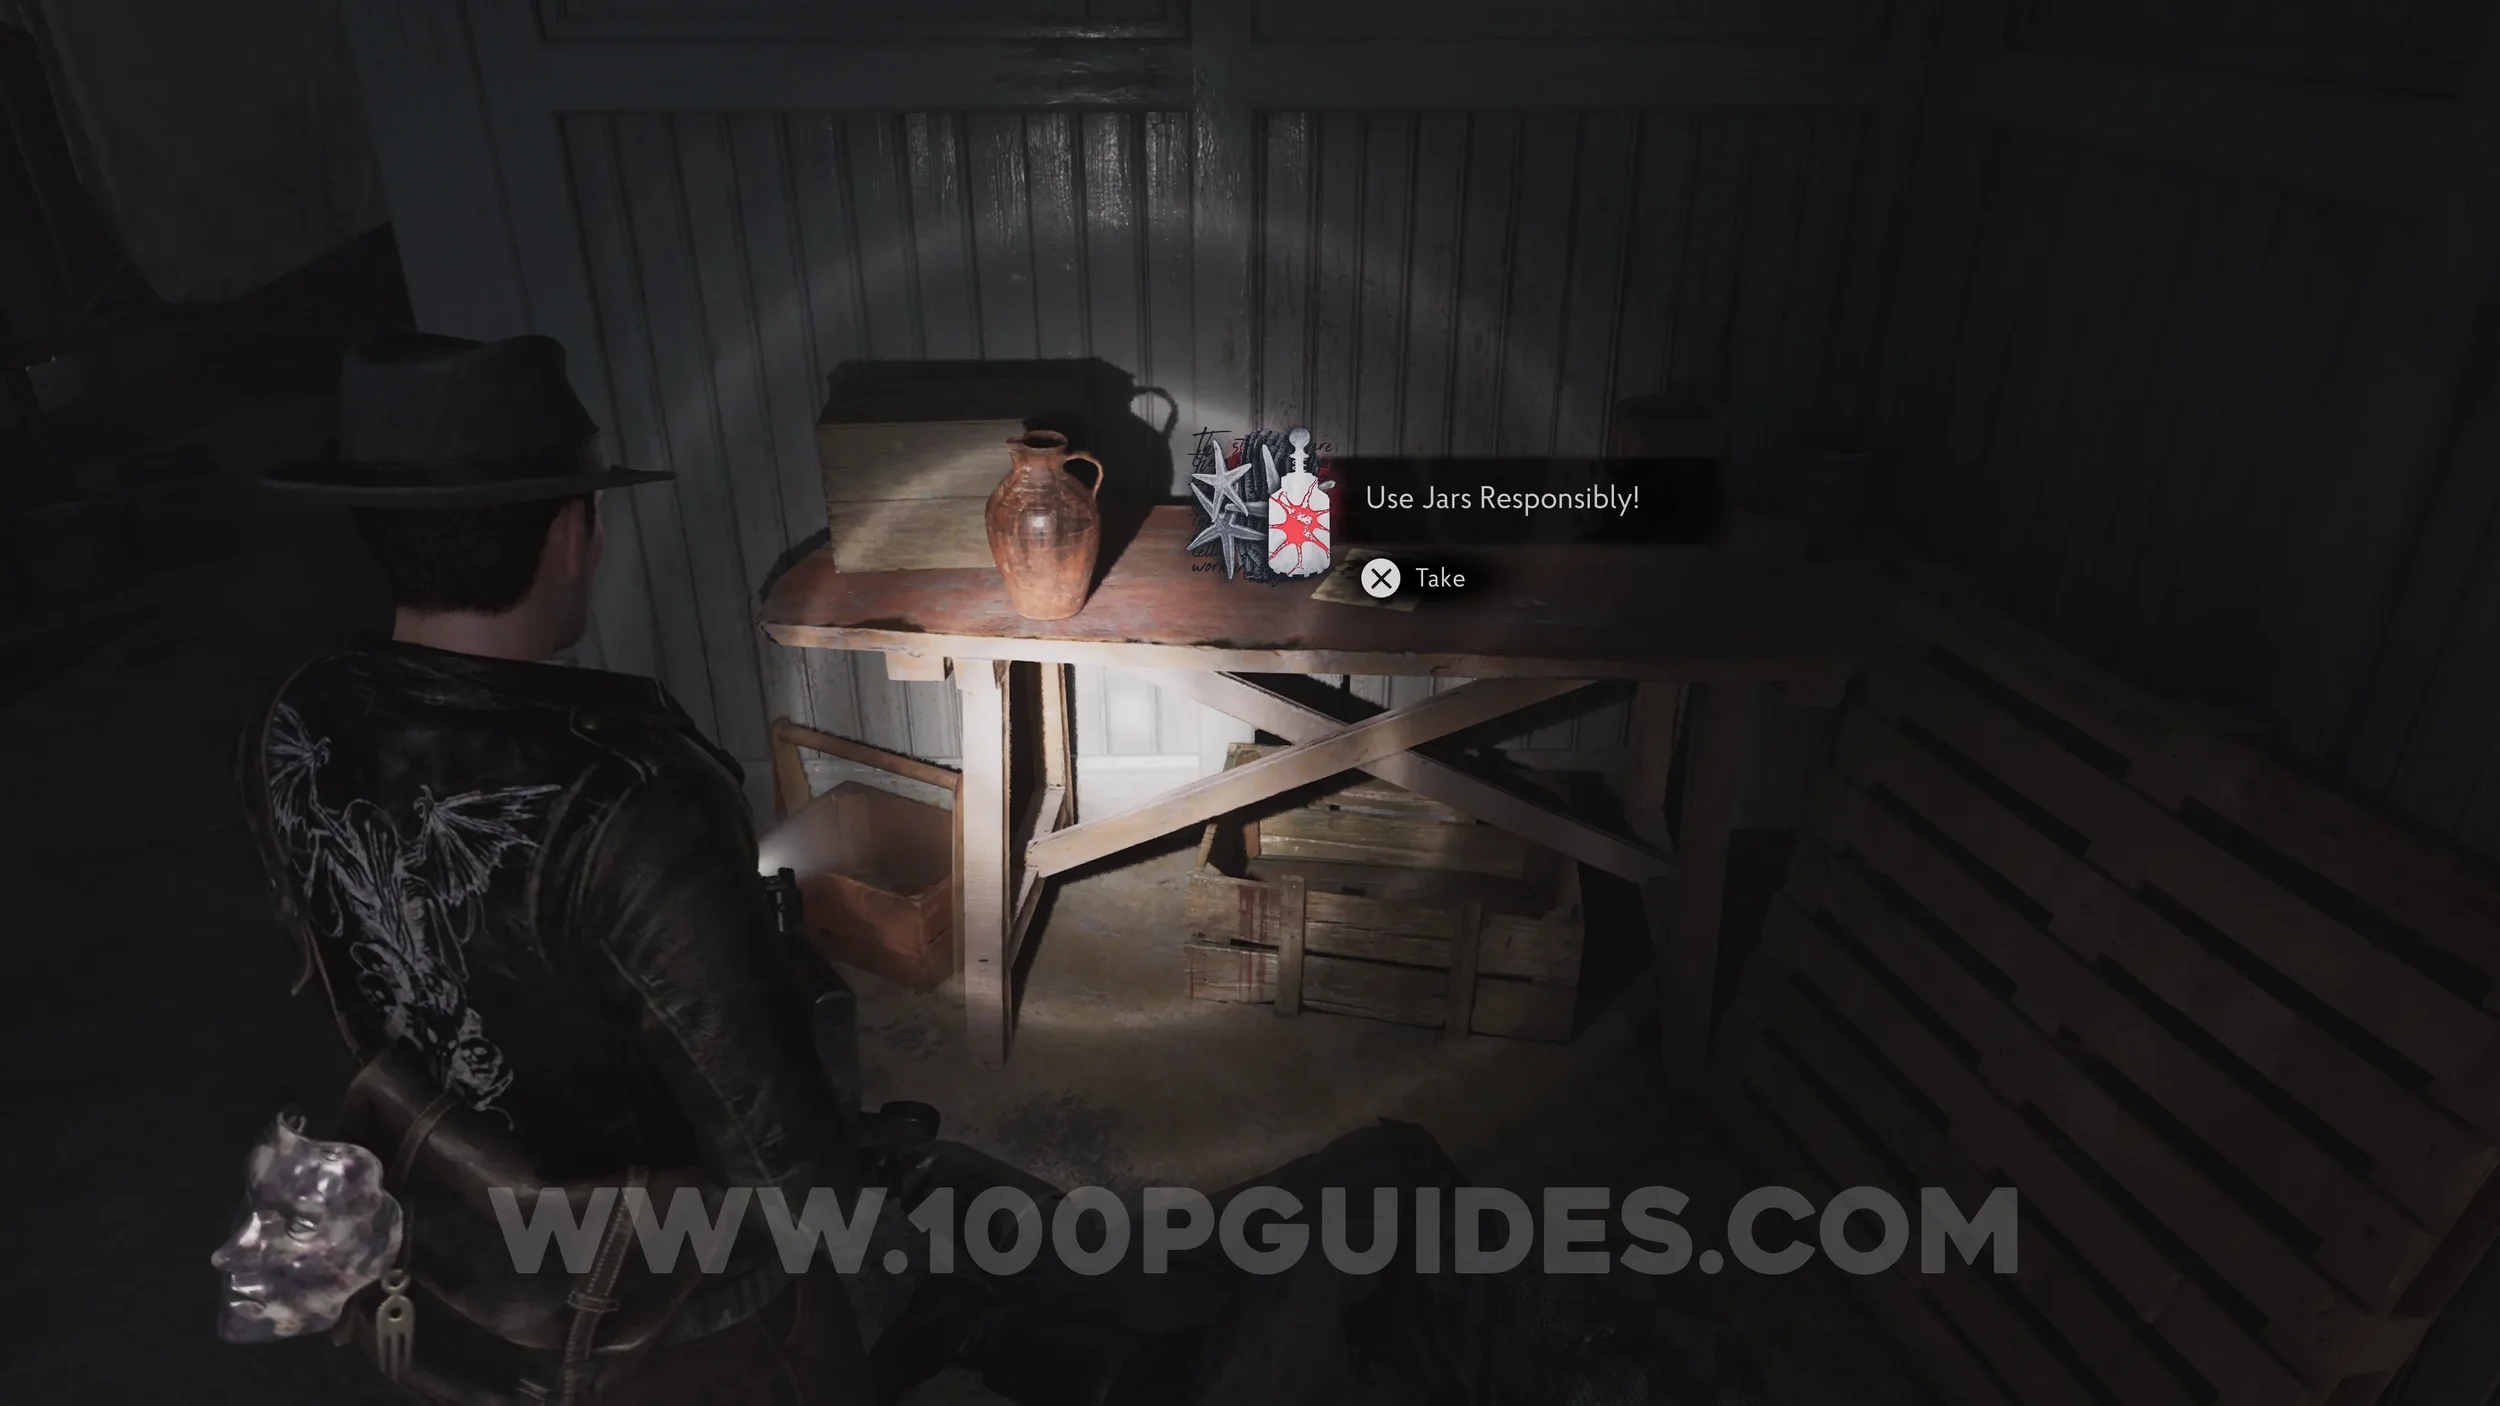
Evidence: Use Jars Responsibly!. After going through the front section of the massive ship and the West Gallery, you'll find the evidence on the table in the small room just south of it.
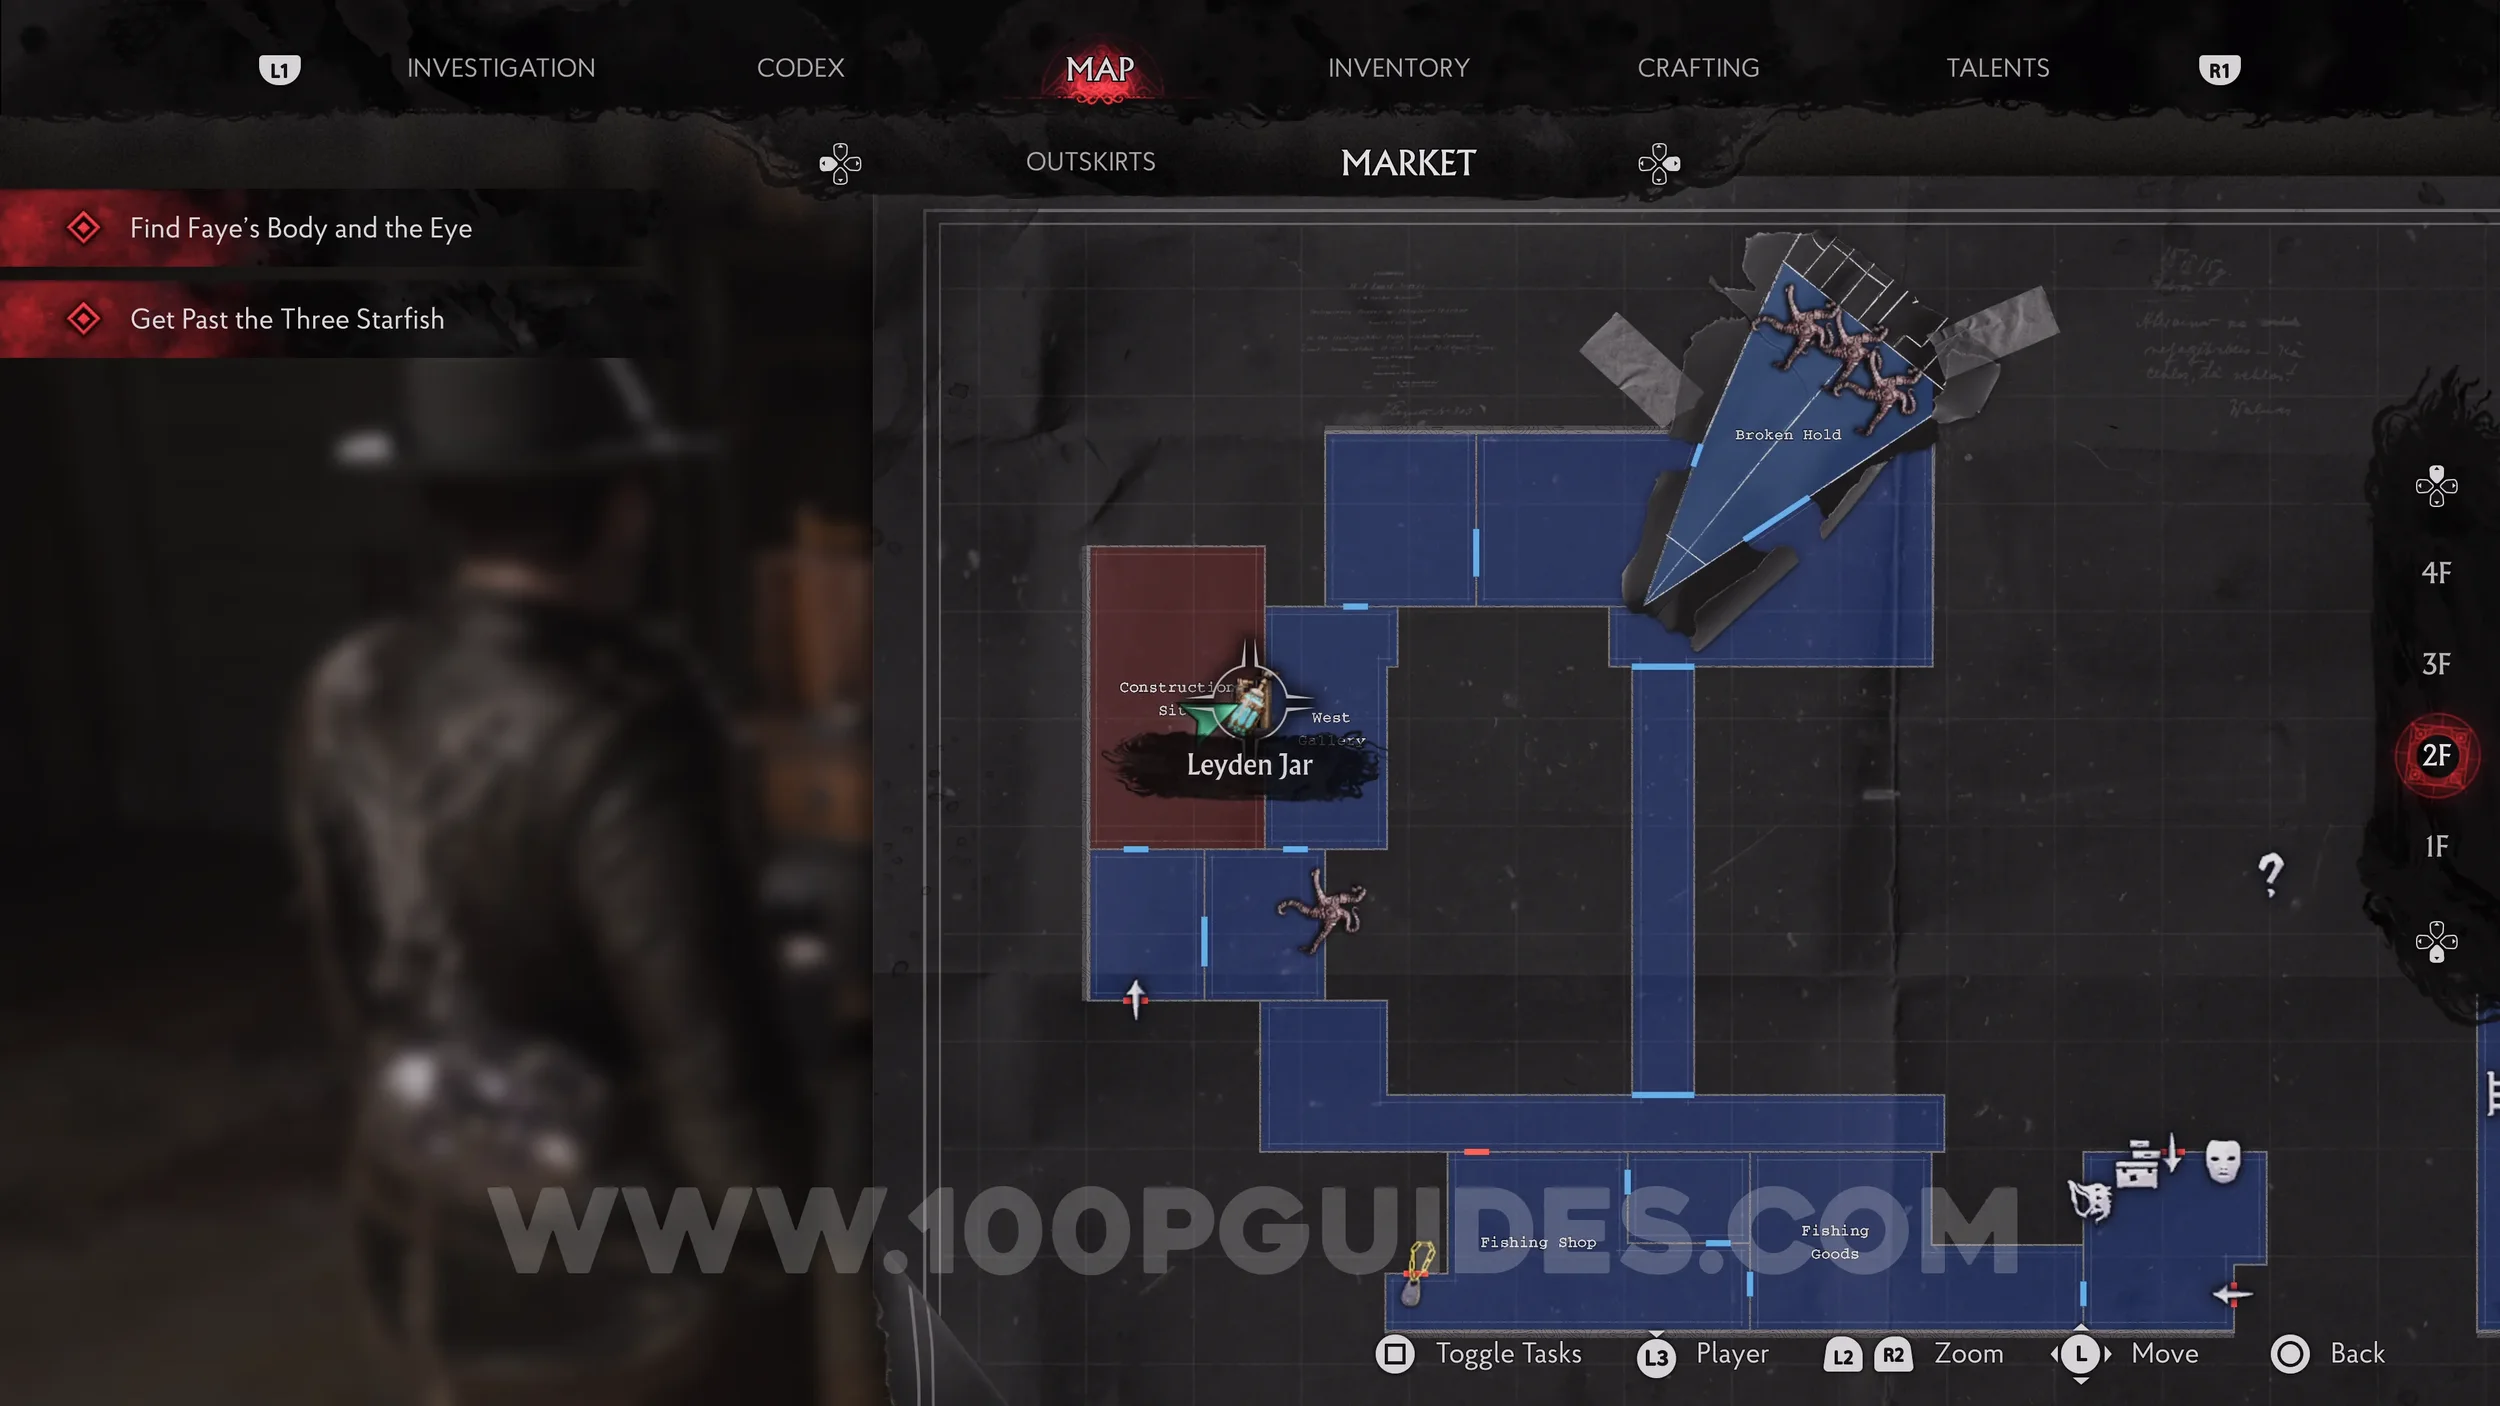
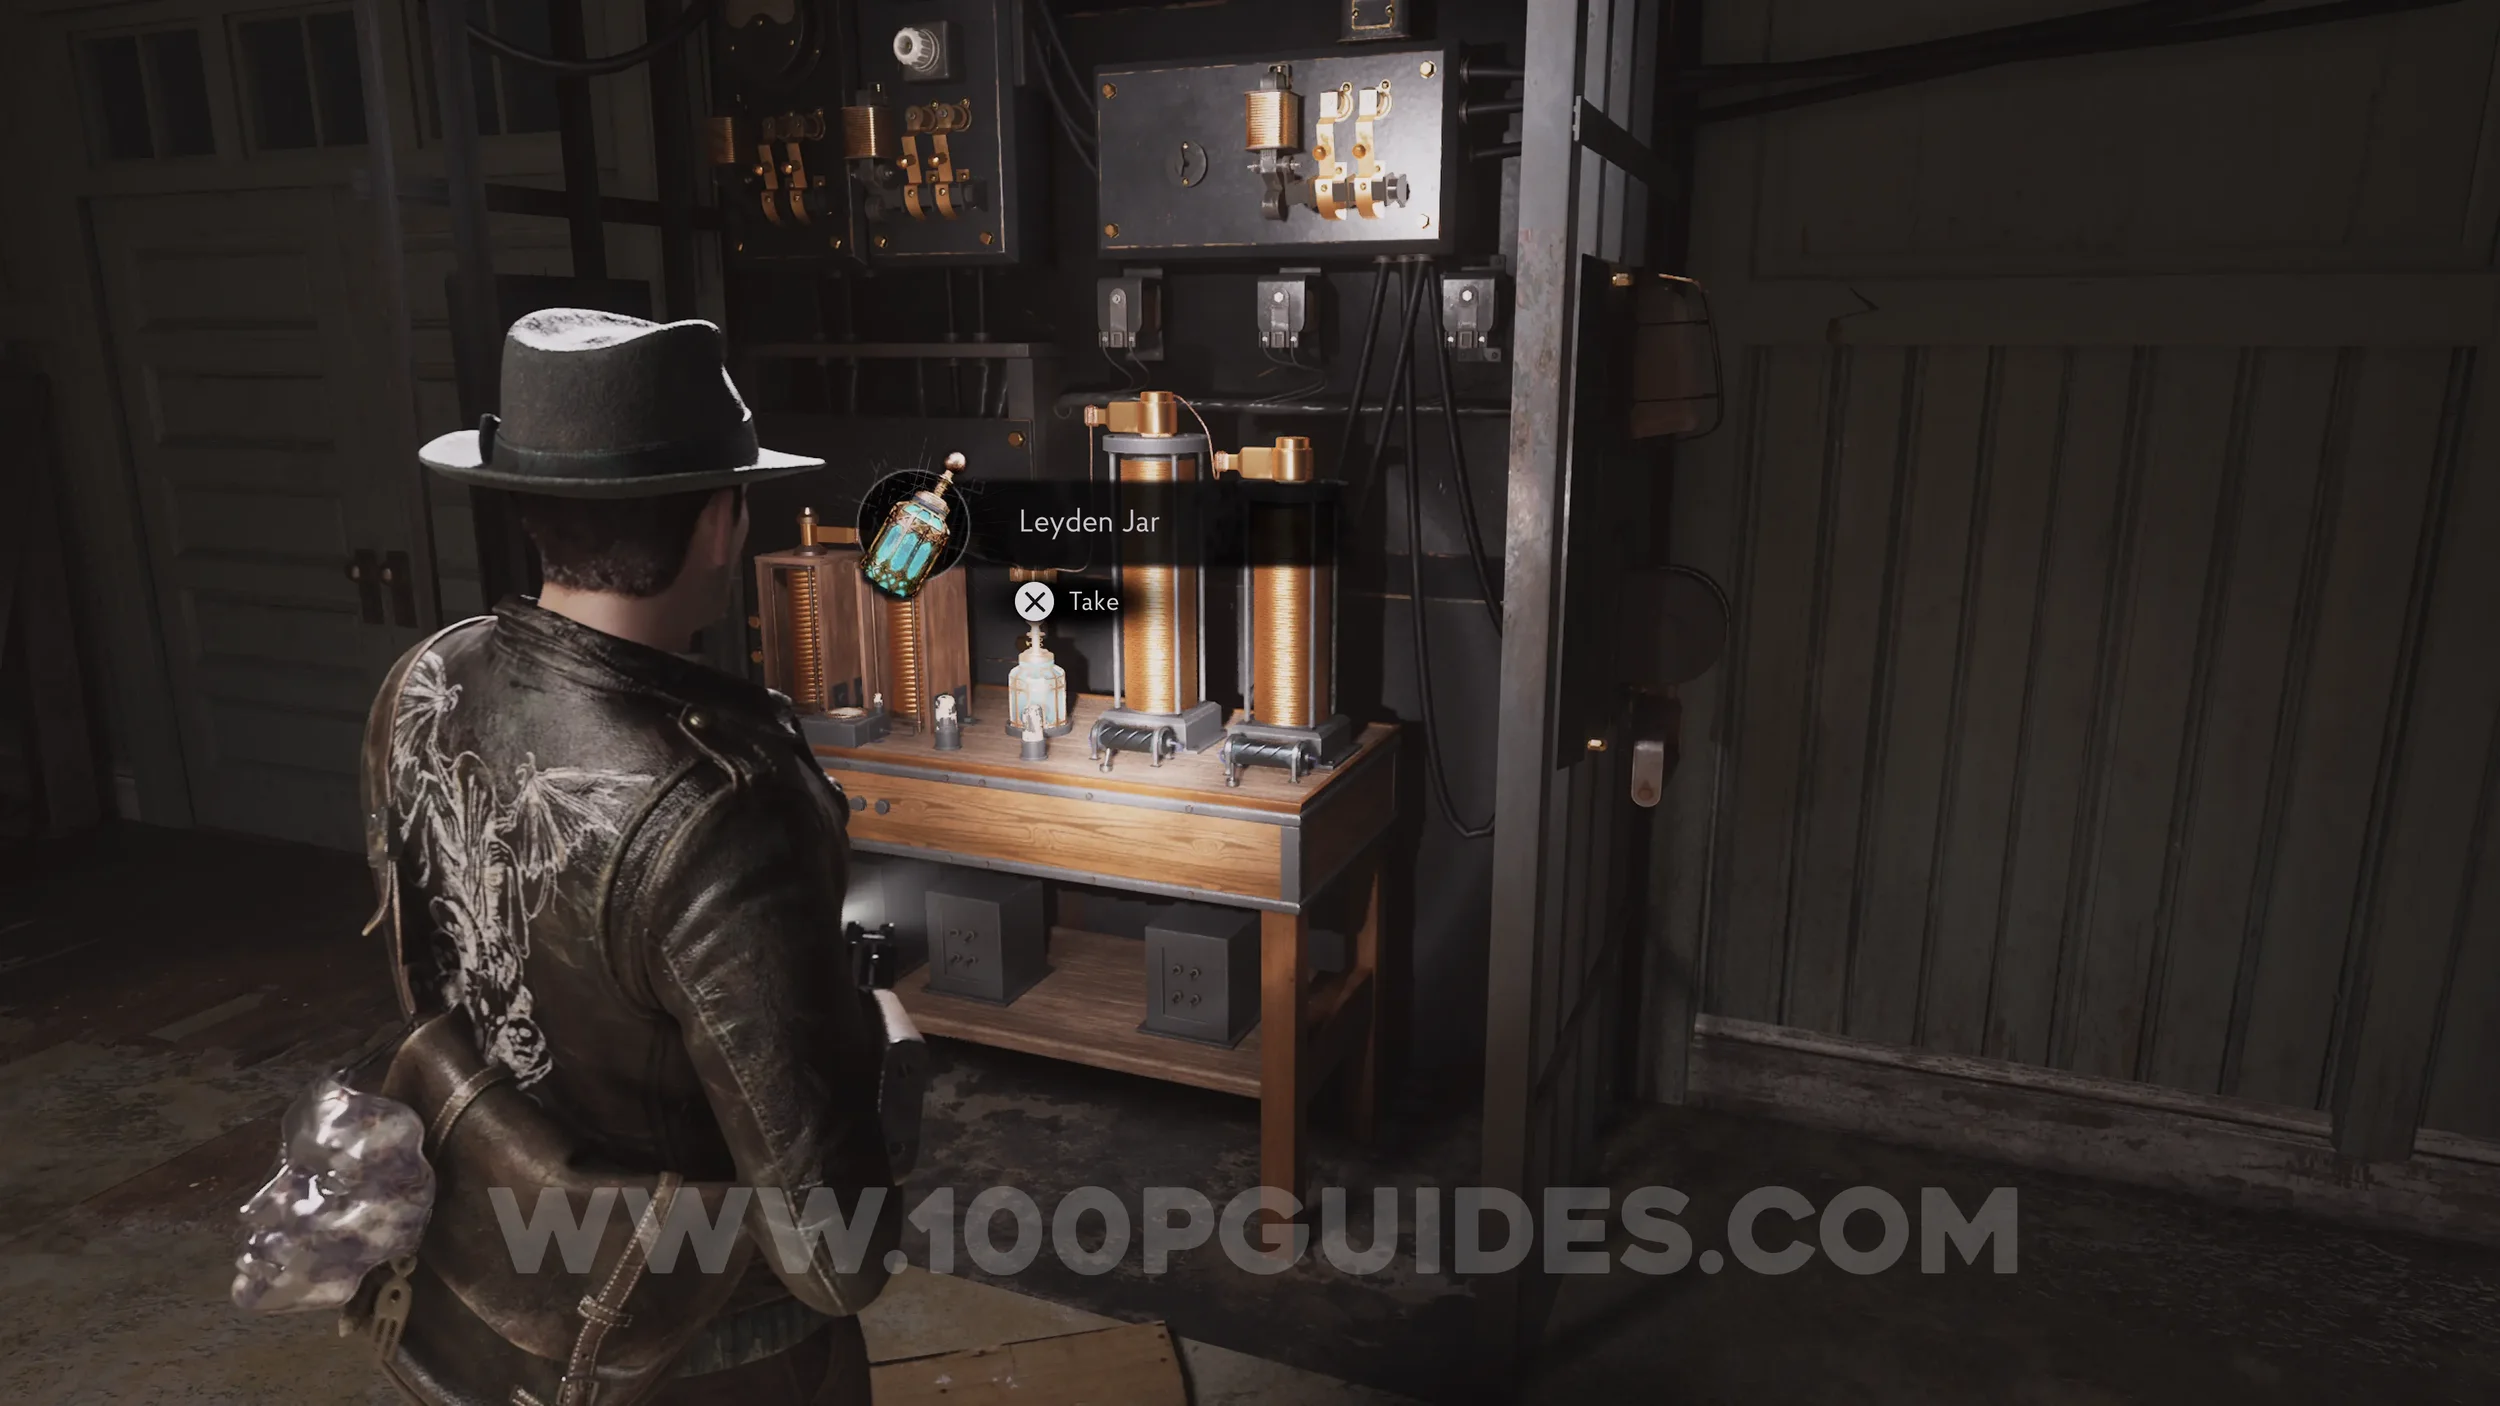
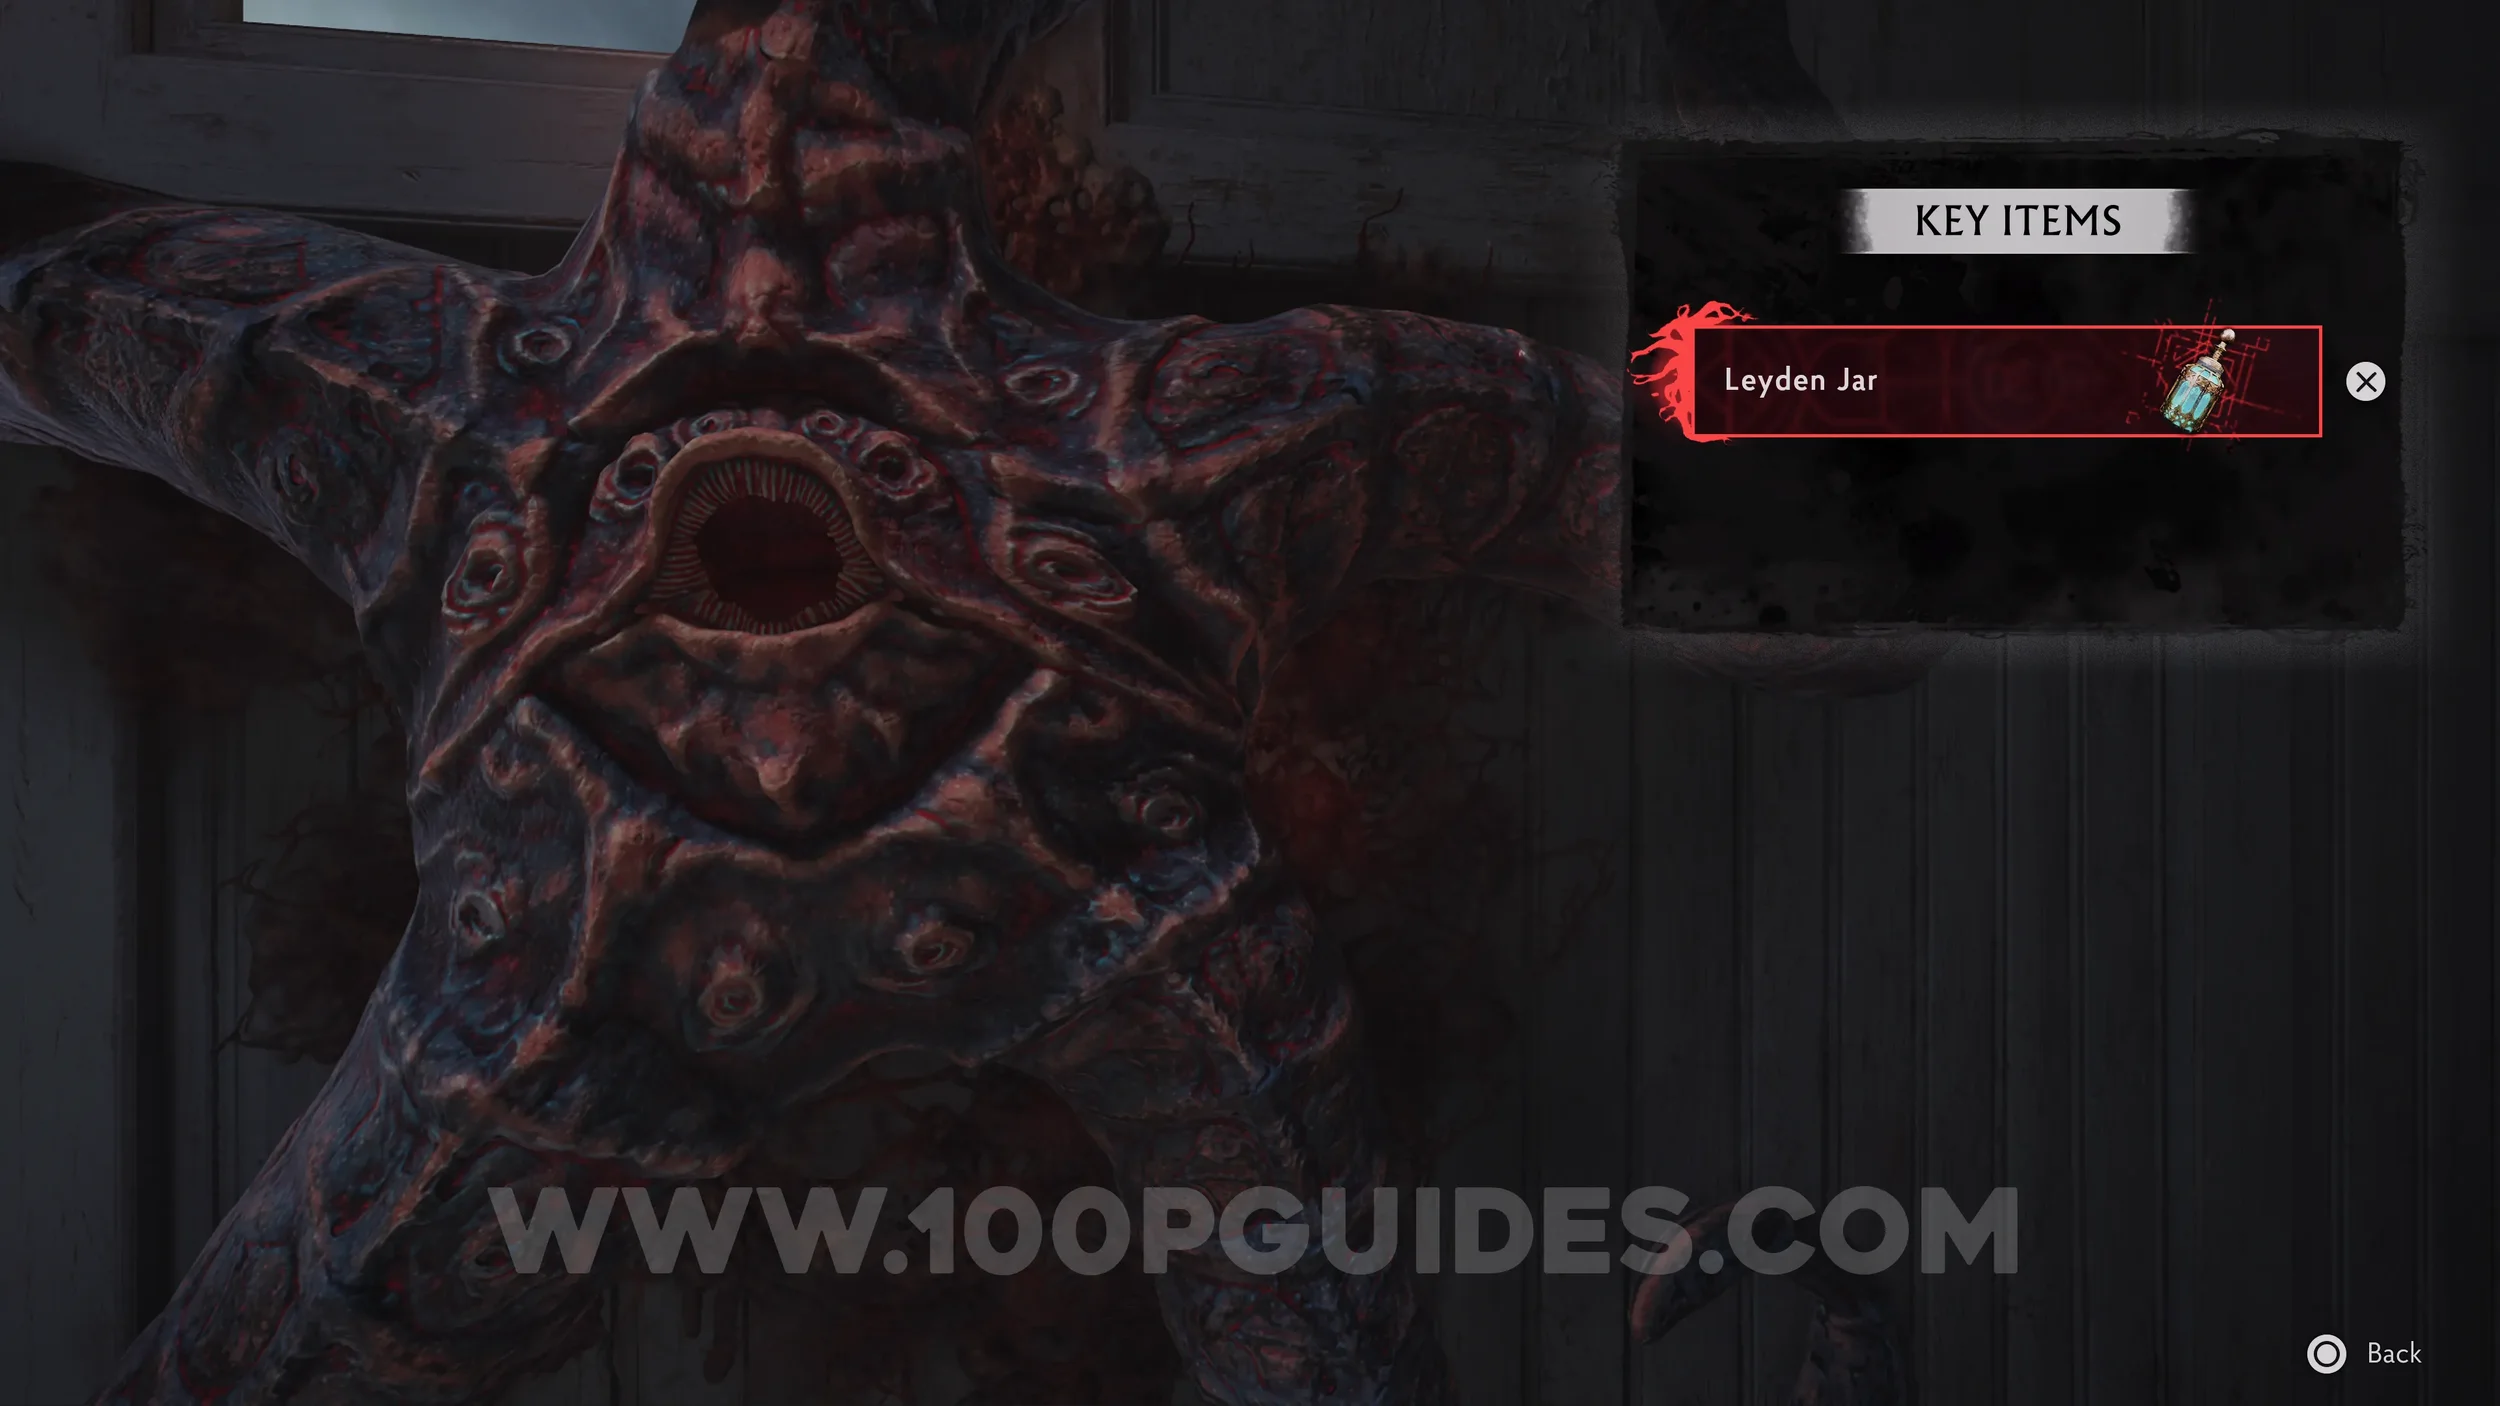
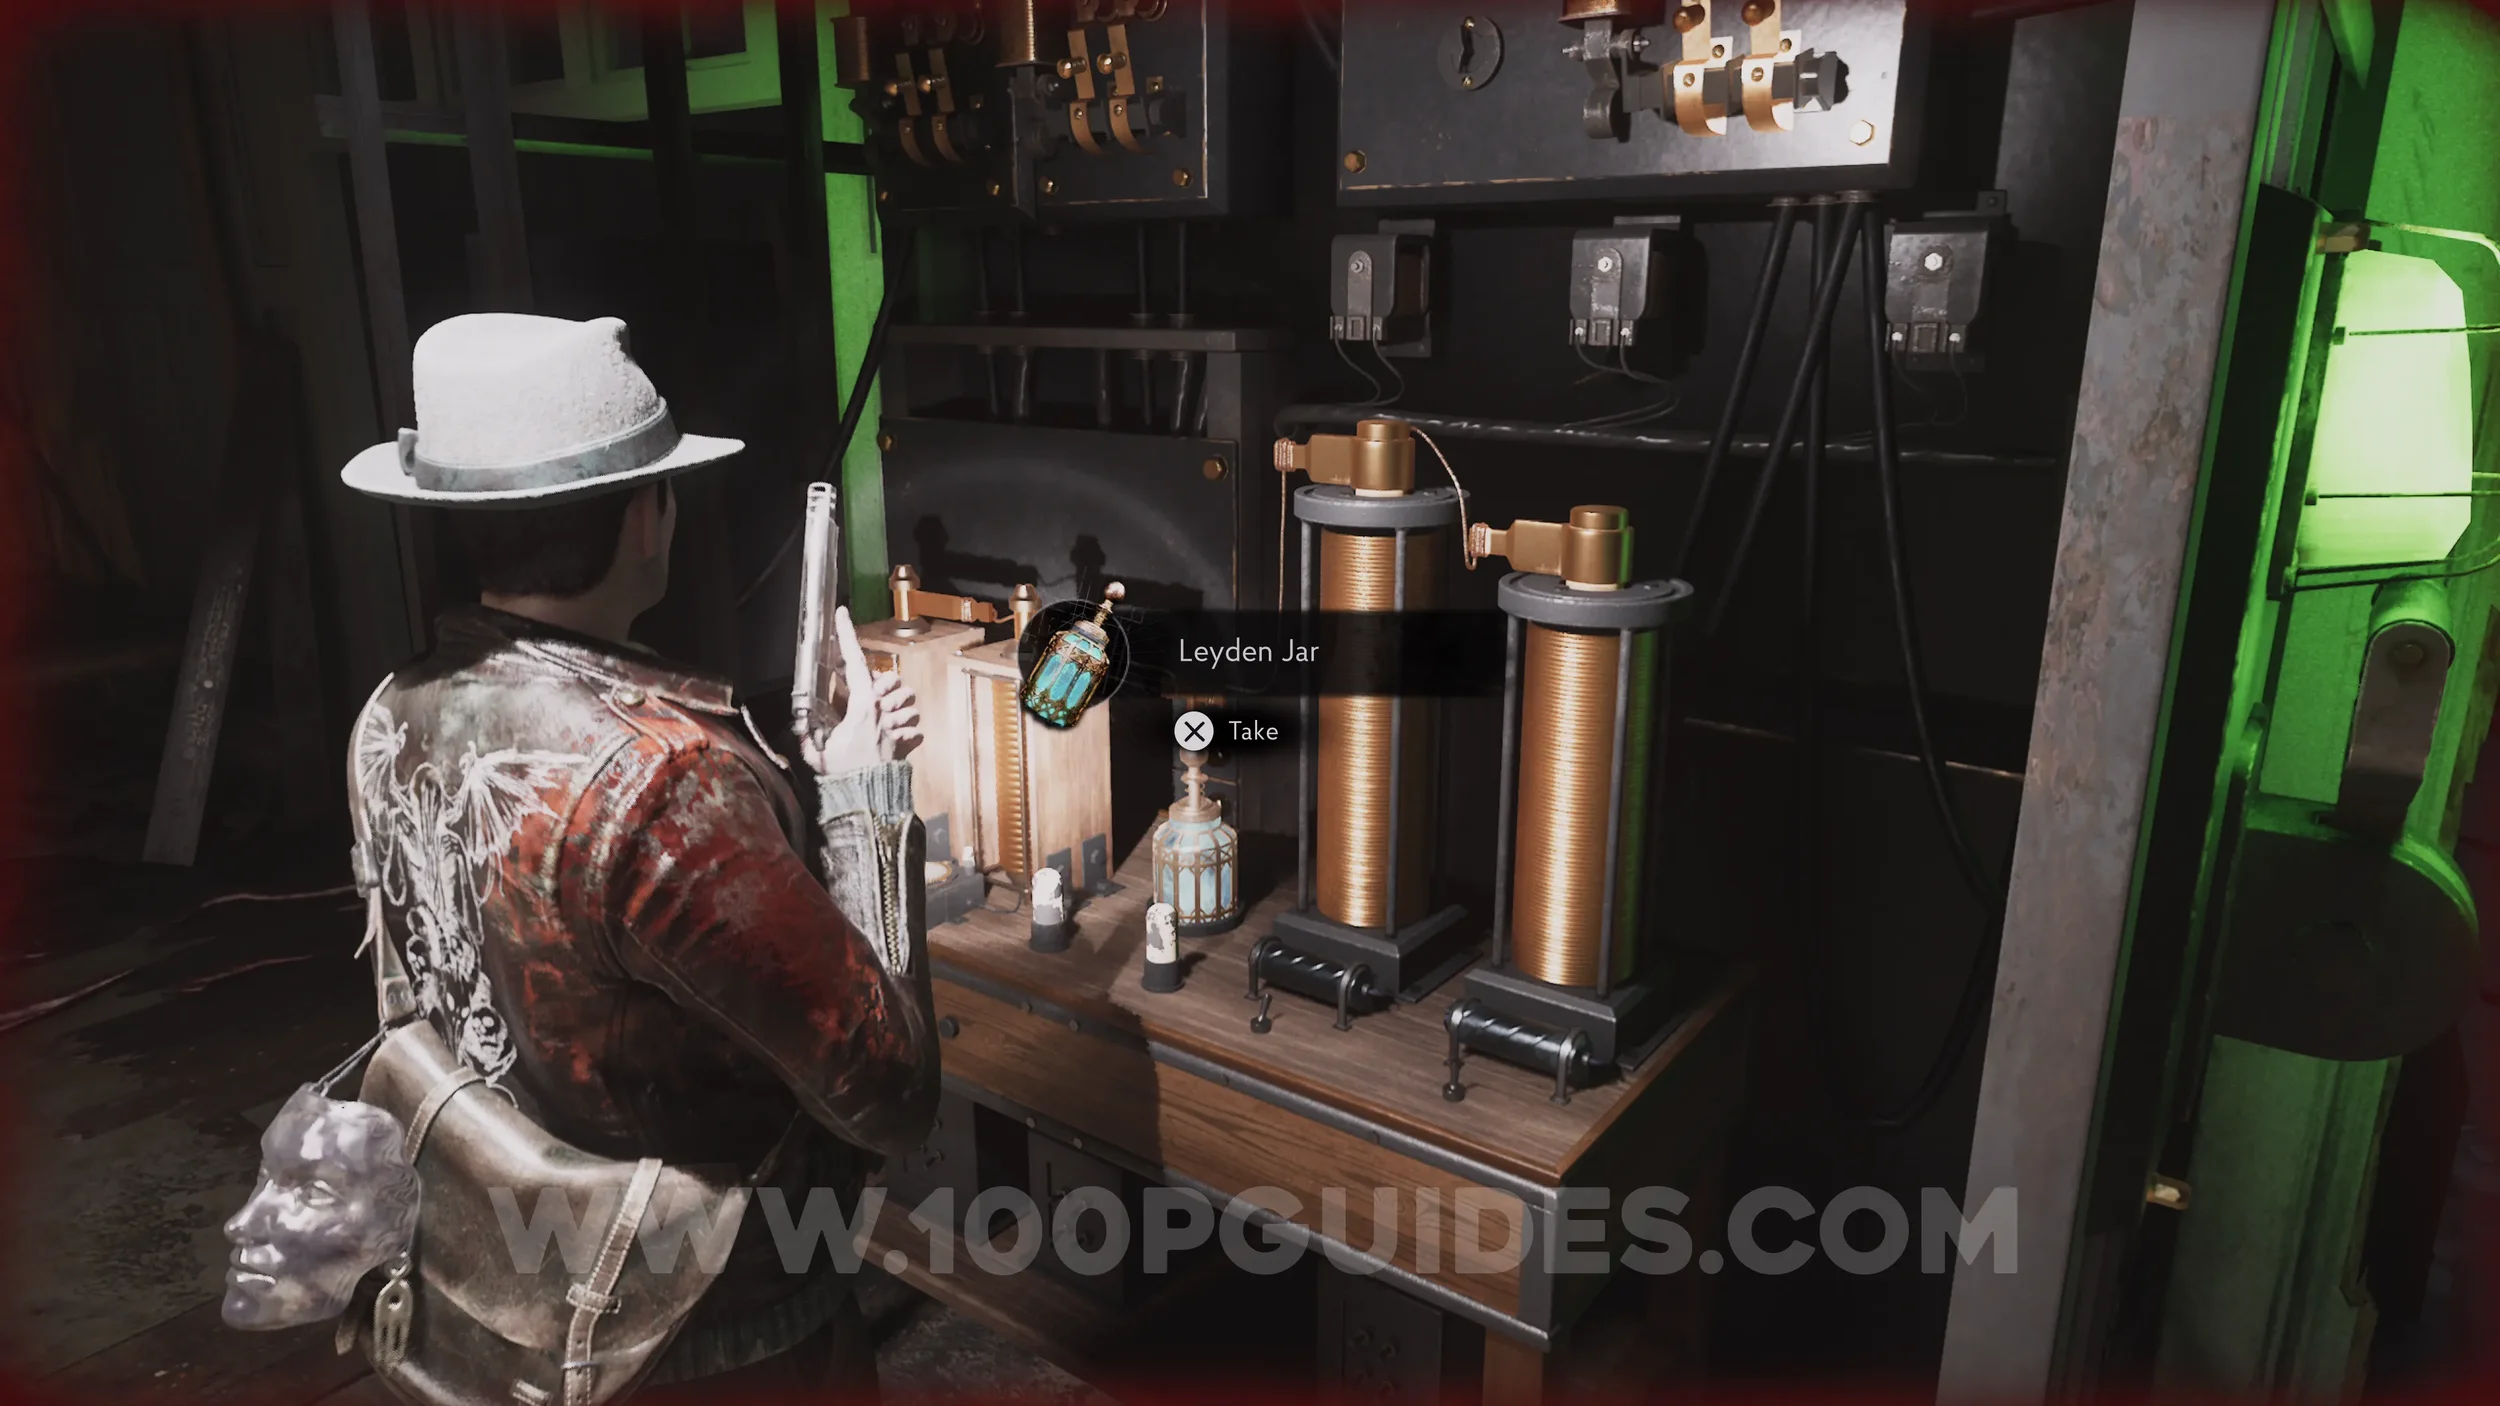
Key Item: Leyden Jar. Found in the Construction Site.
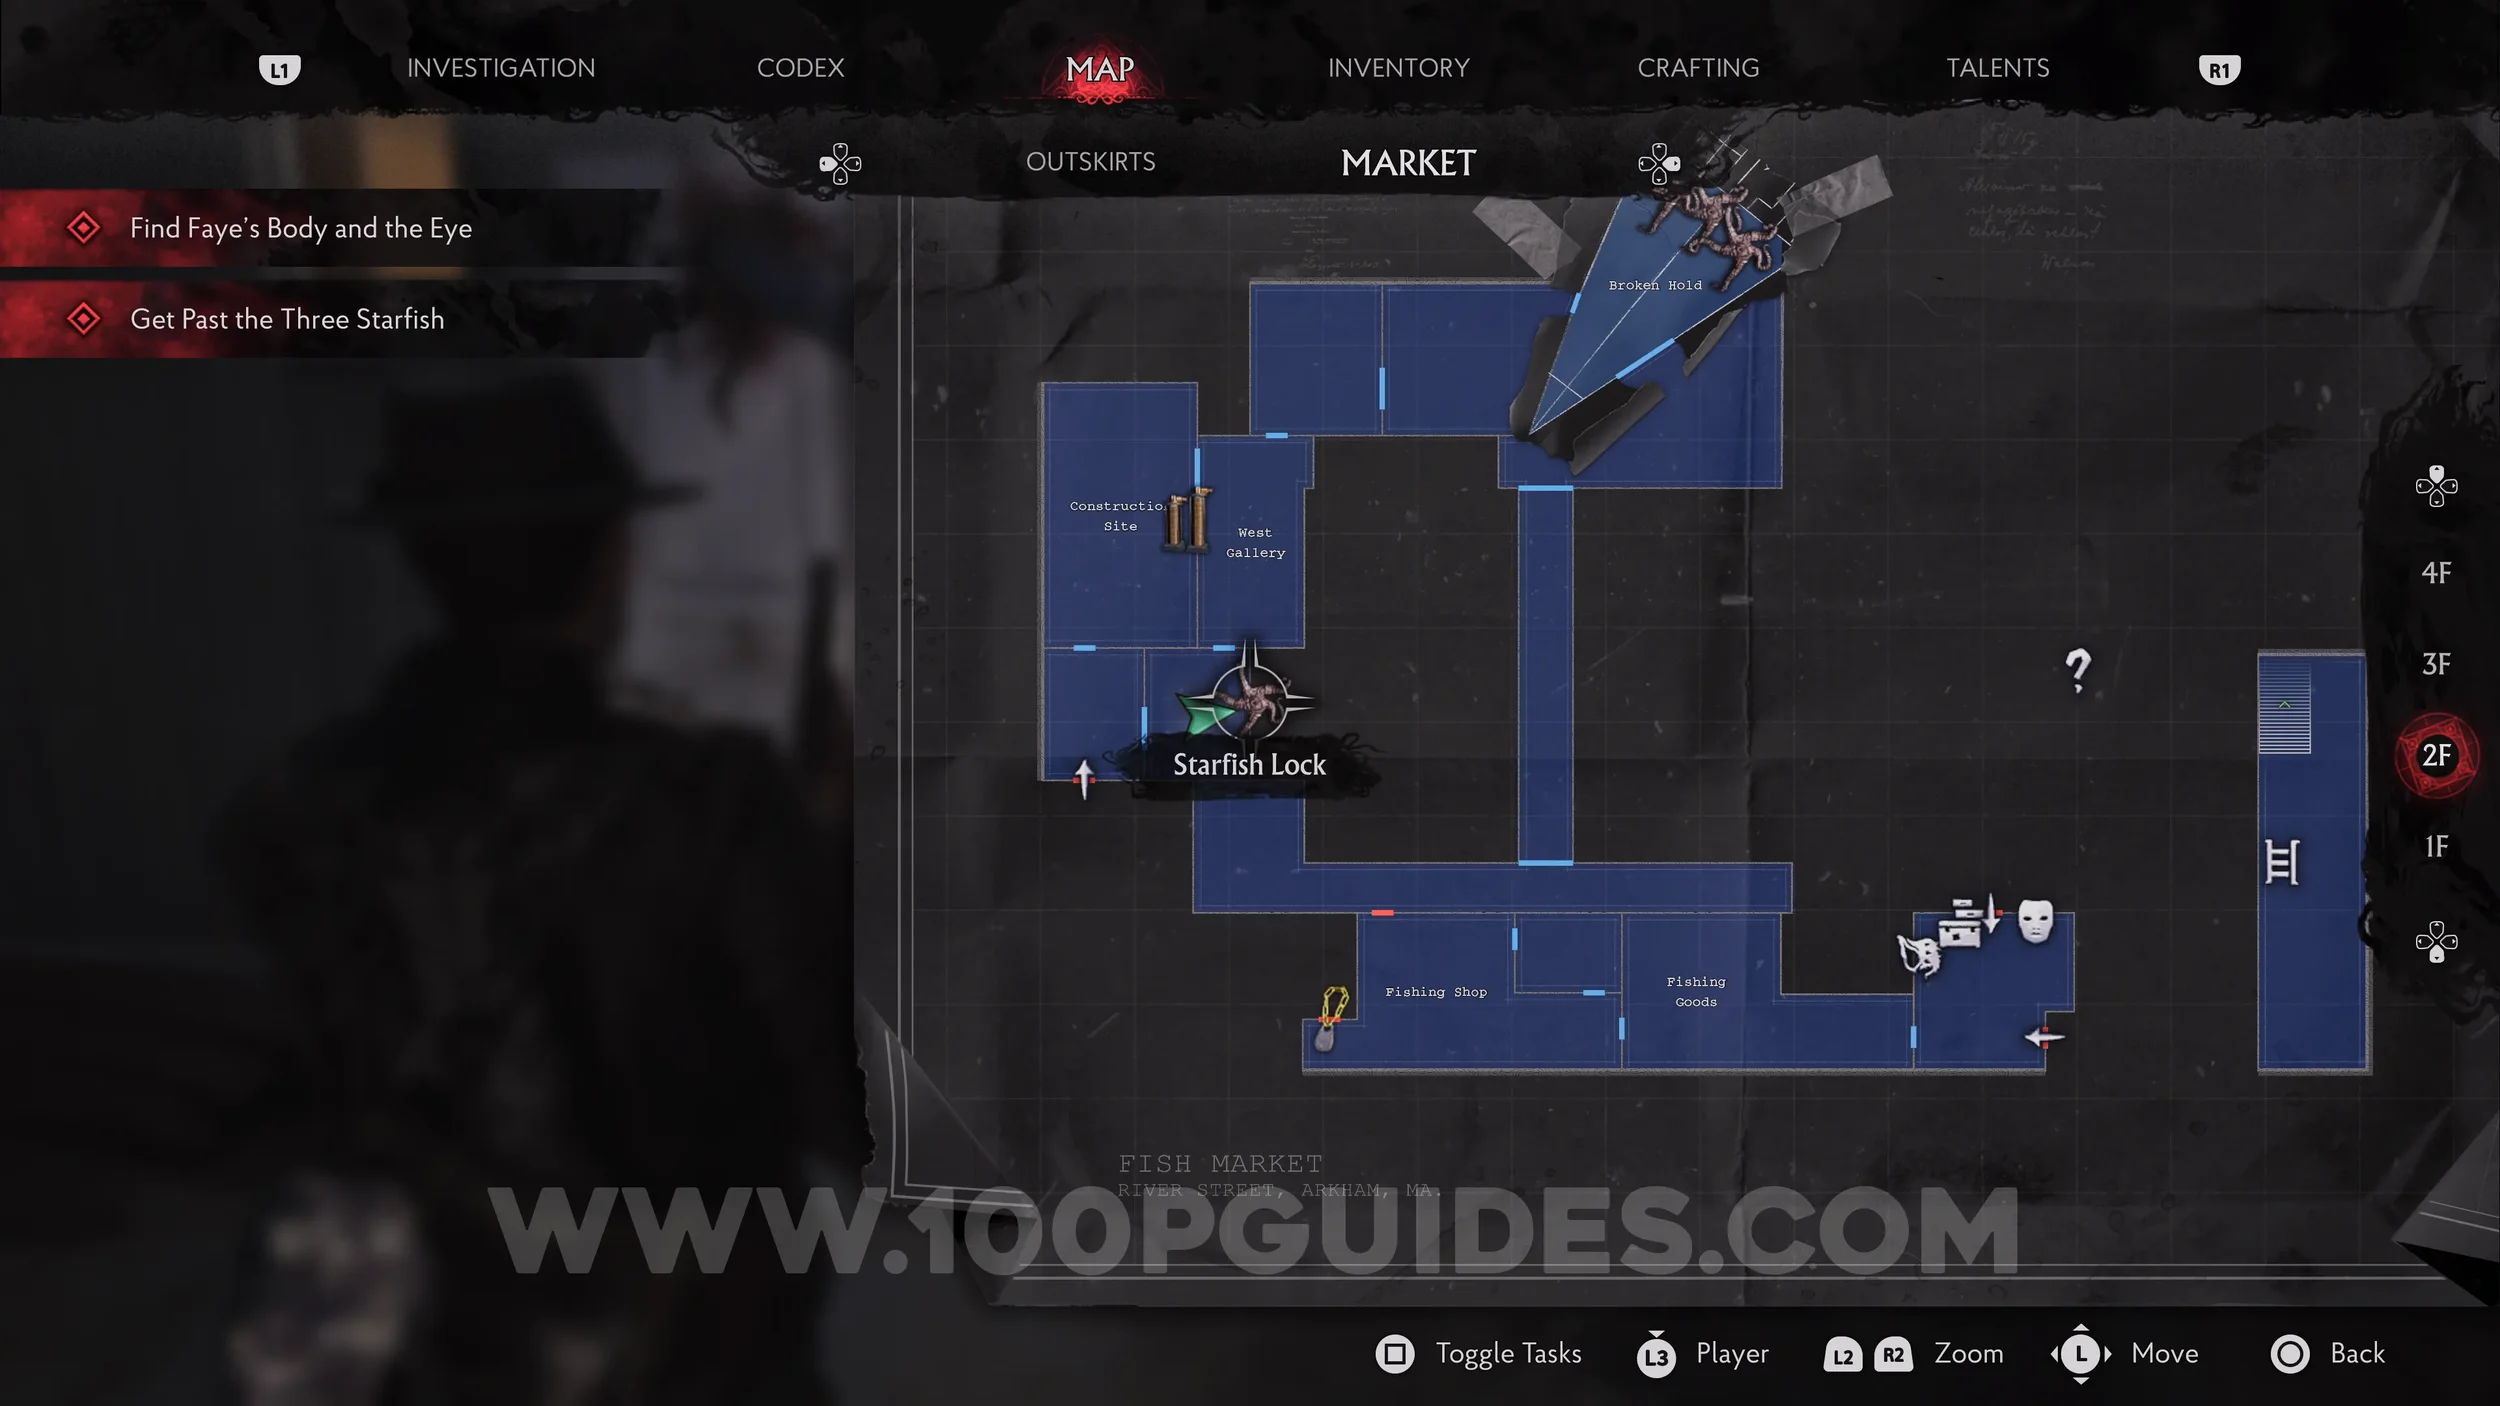
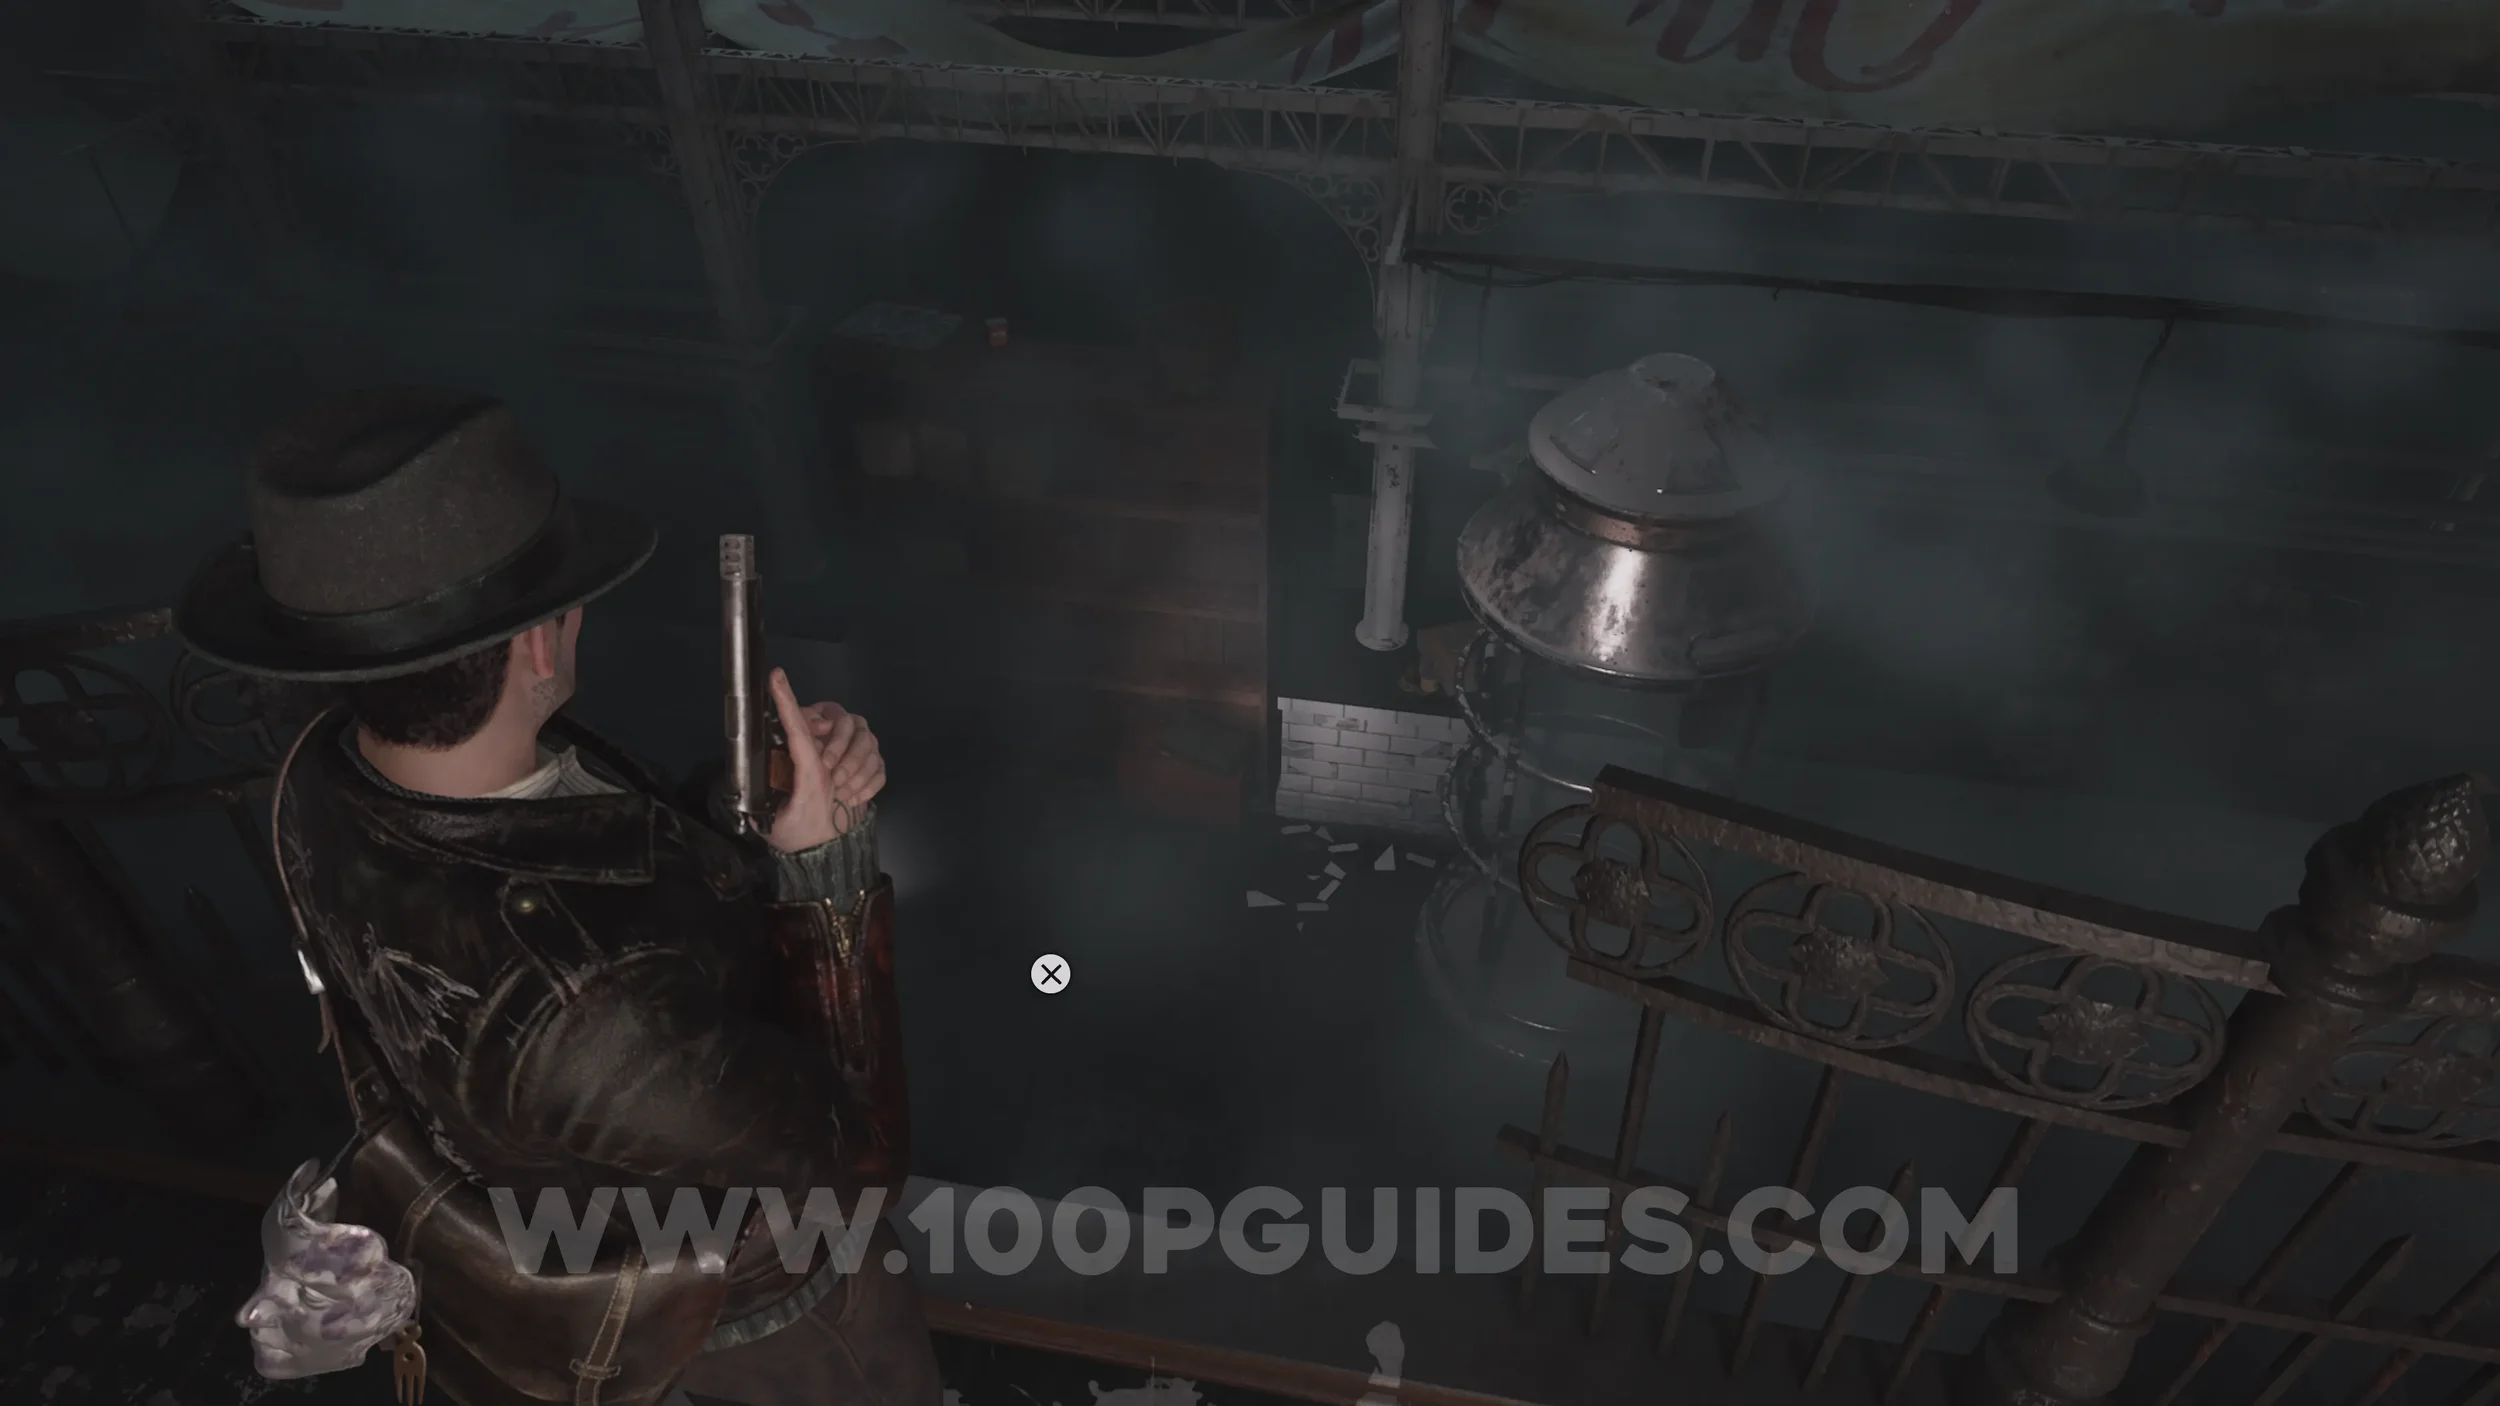
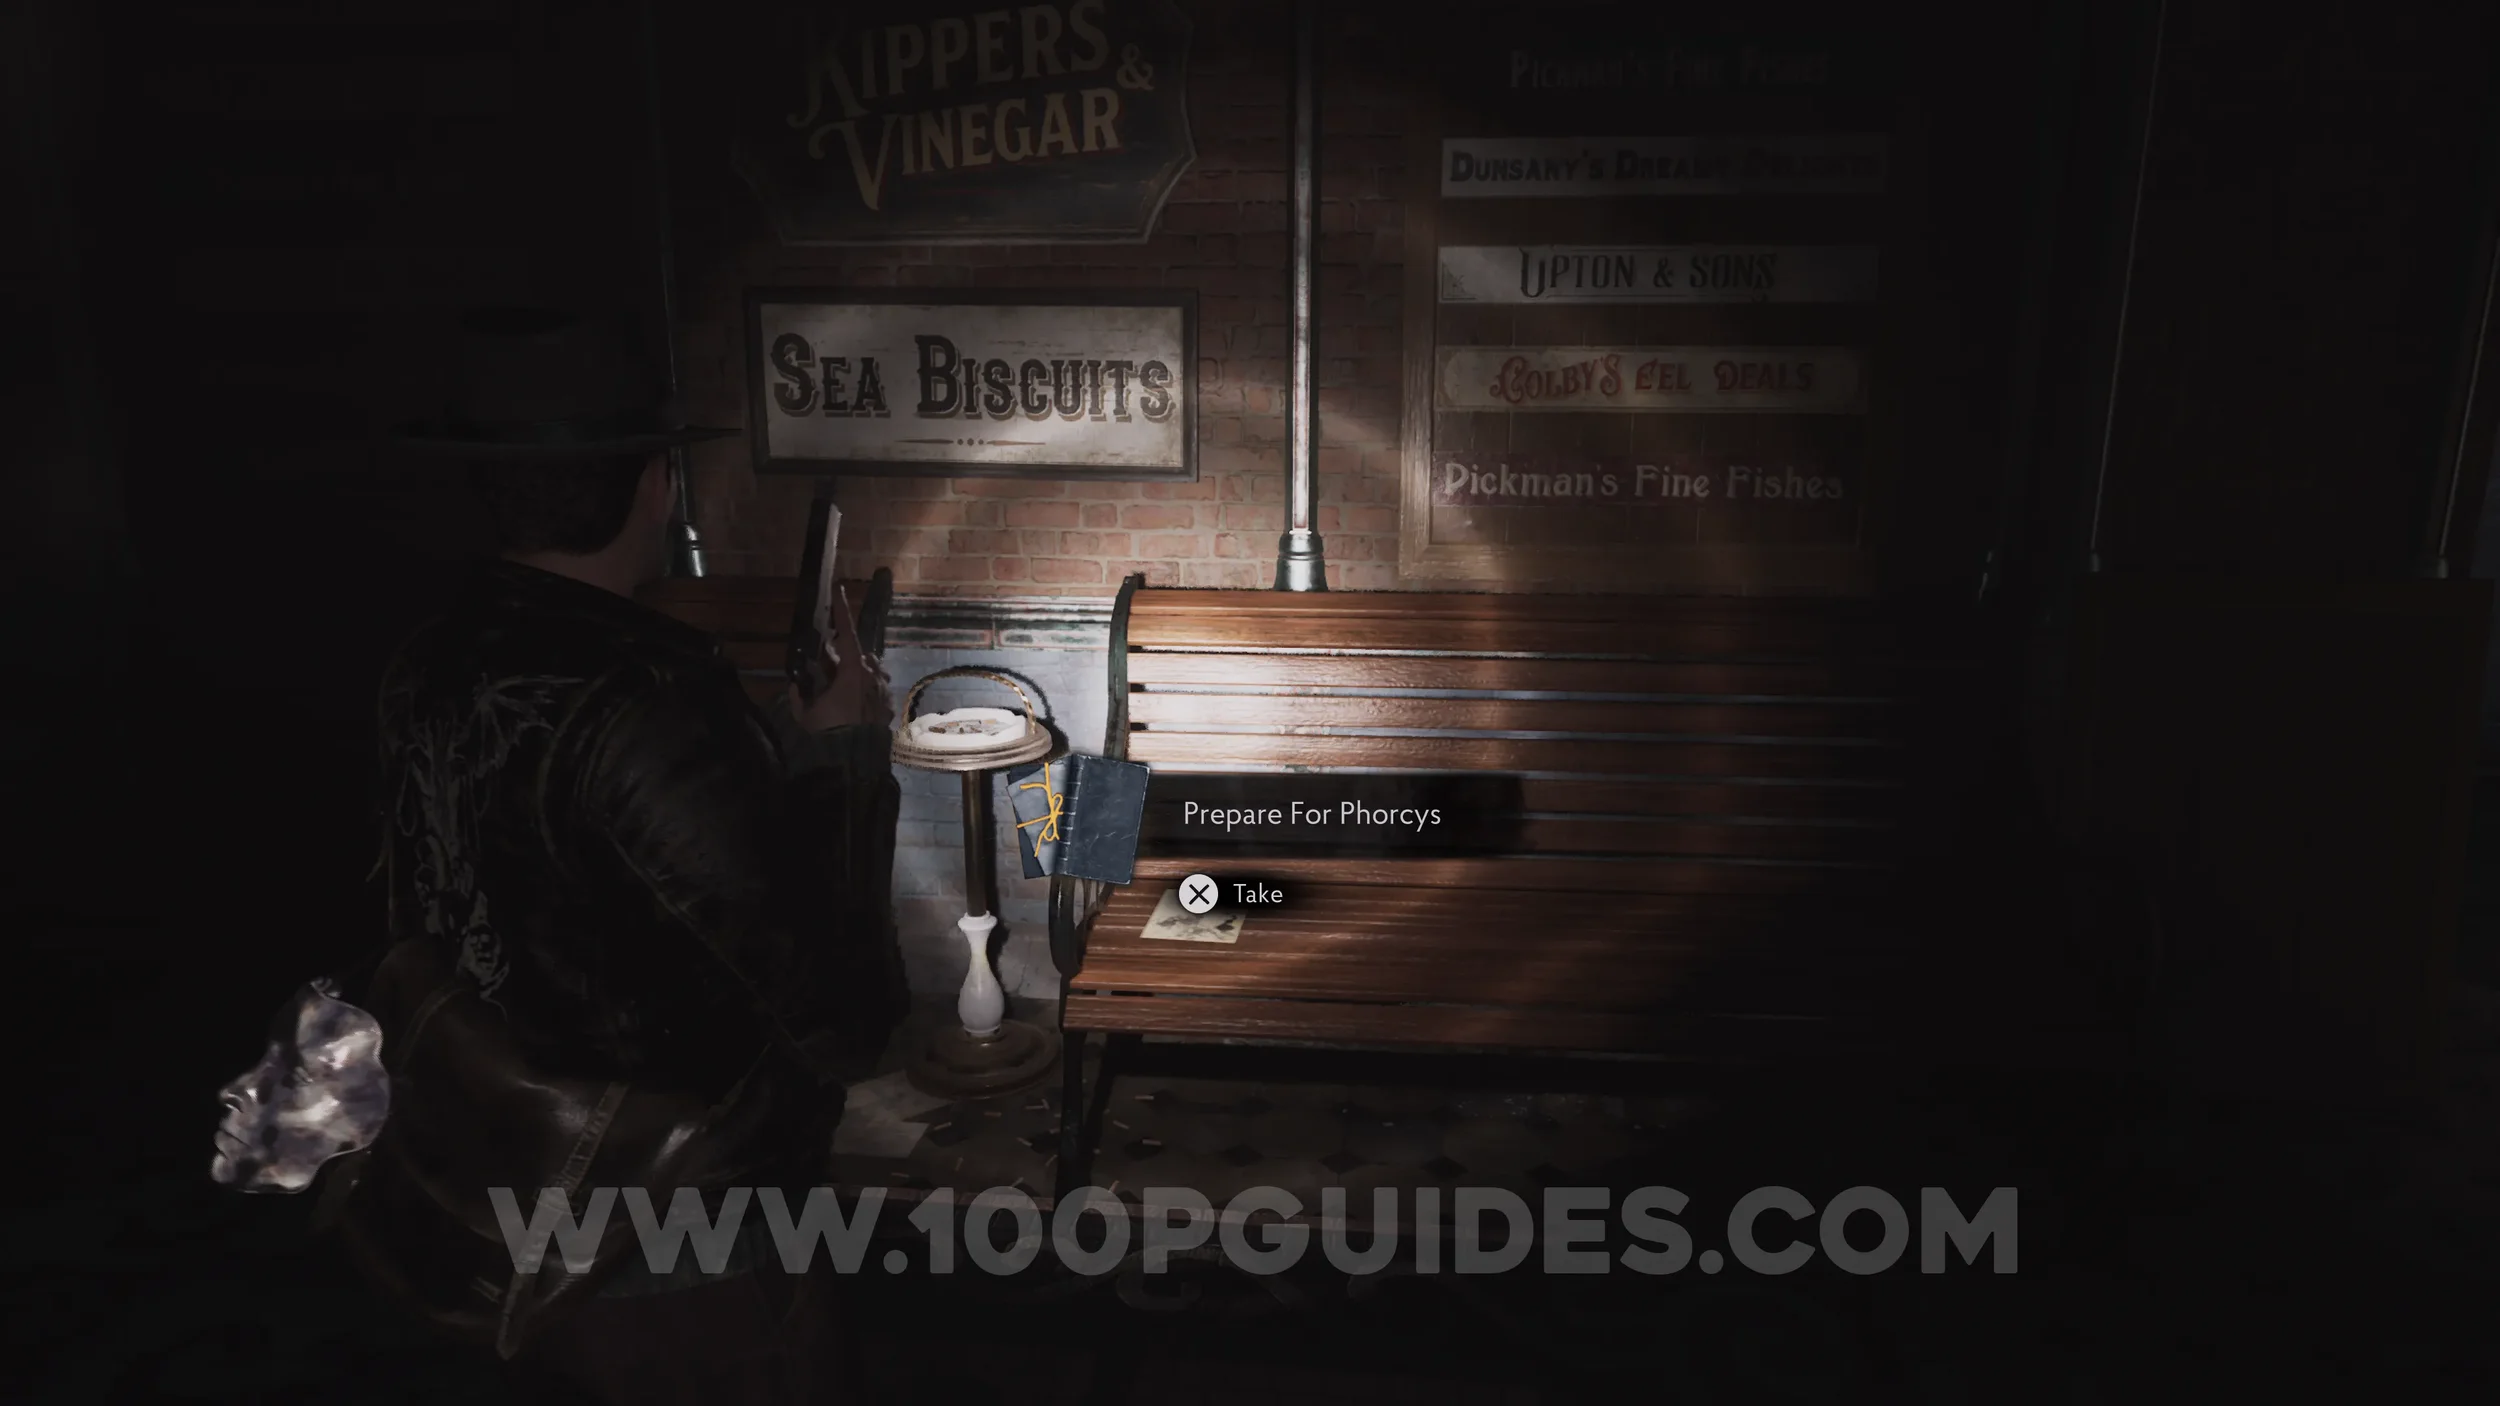
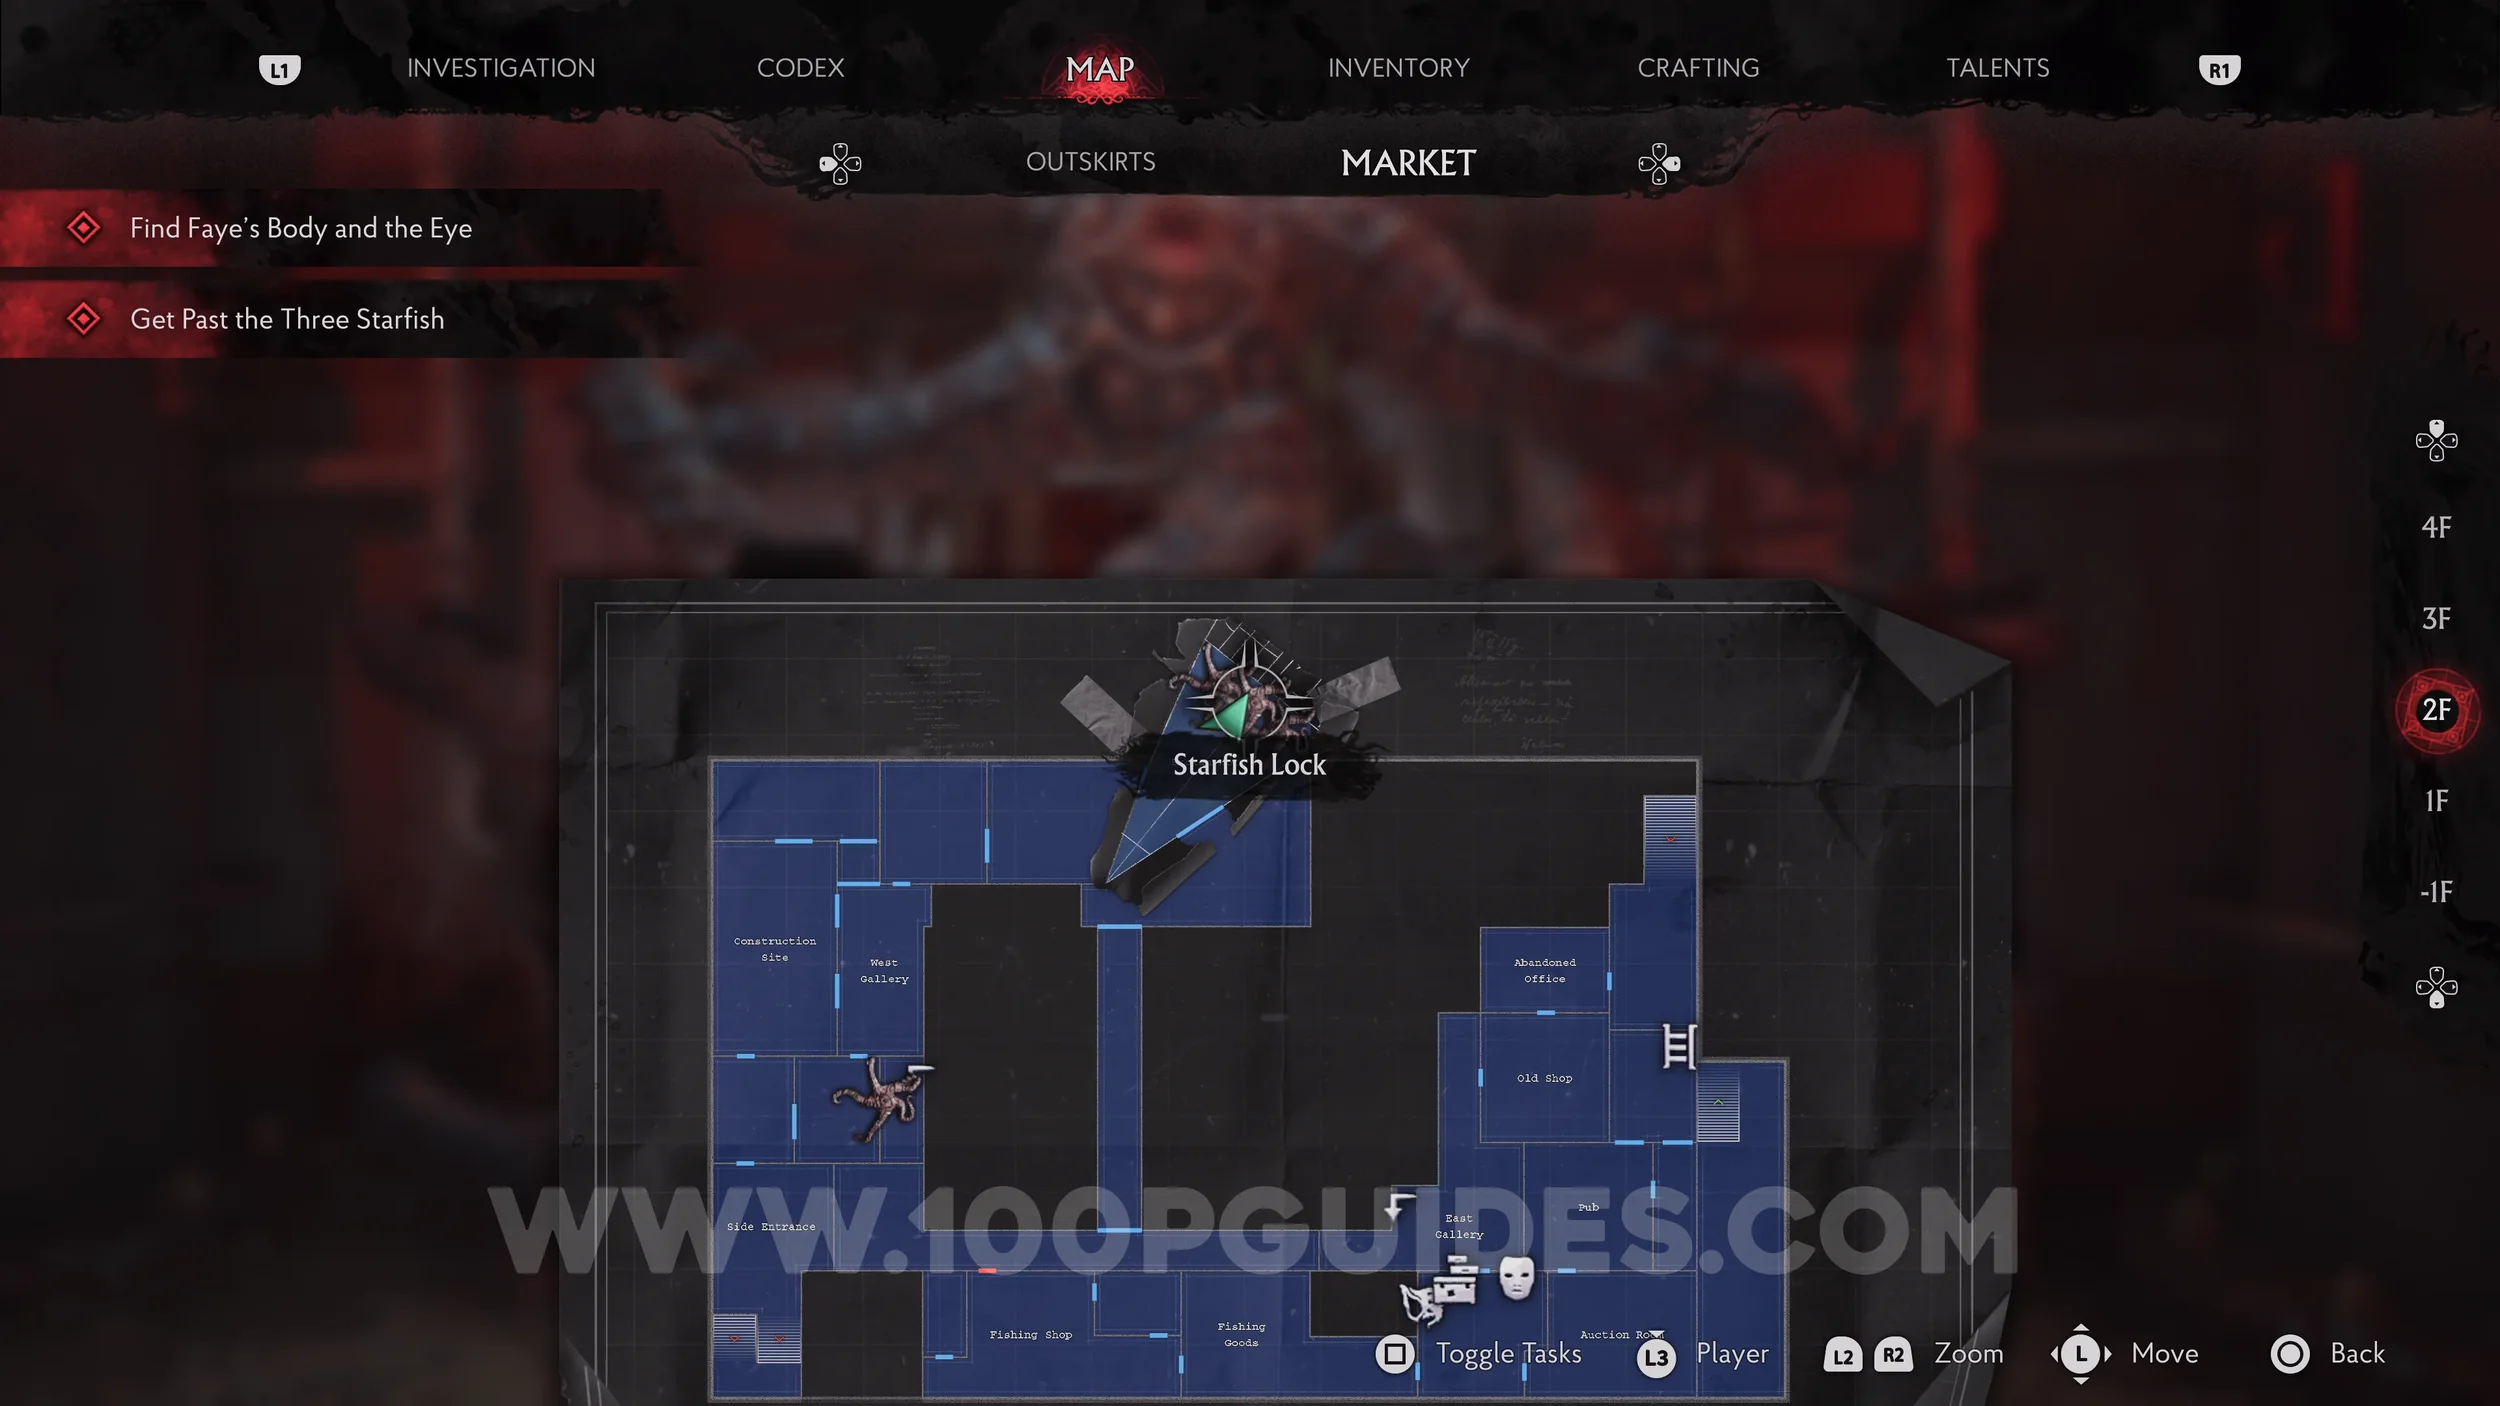
Lore Codex: Prepare For Phorcys. Now that you have the Leyden Jar, use it on the starfish in the small room to the south of the West Galley. This will let you go through and jump down to 1F. Here, head down to the Entrance Hall, where you'll find the collectible on a bench.
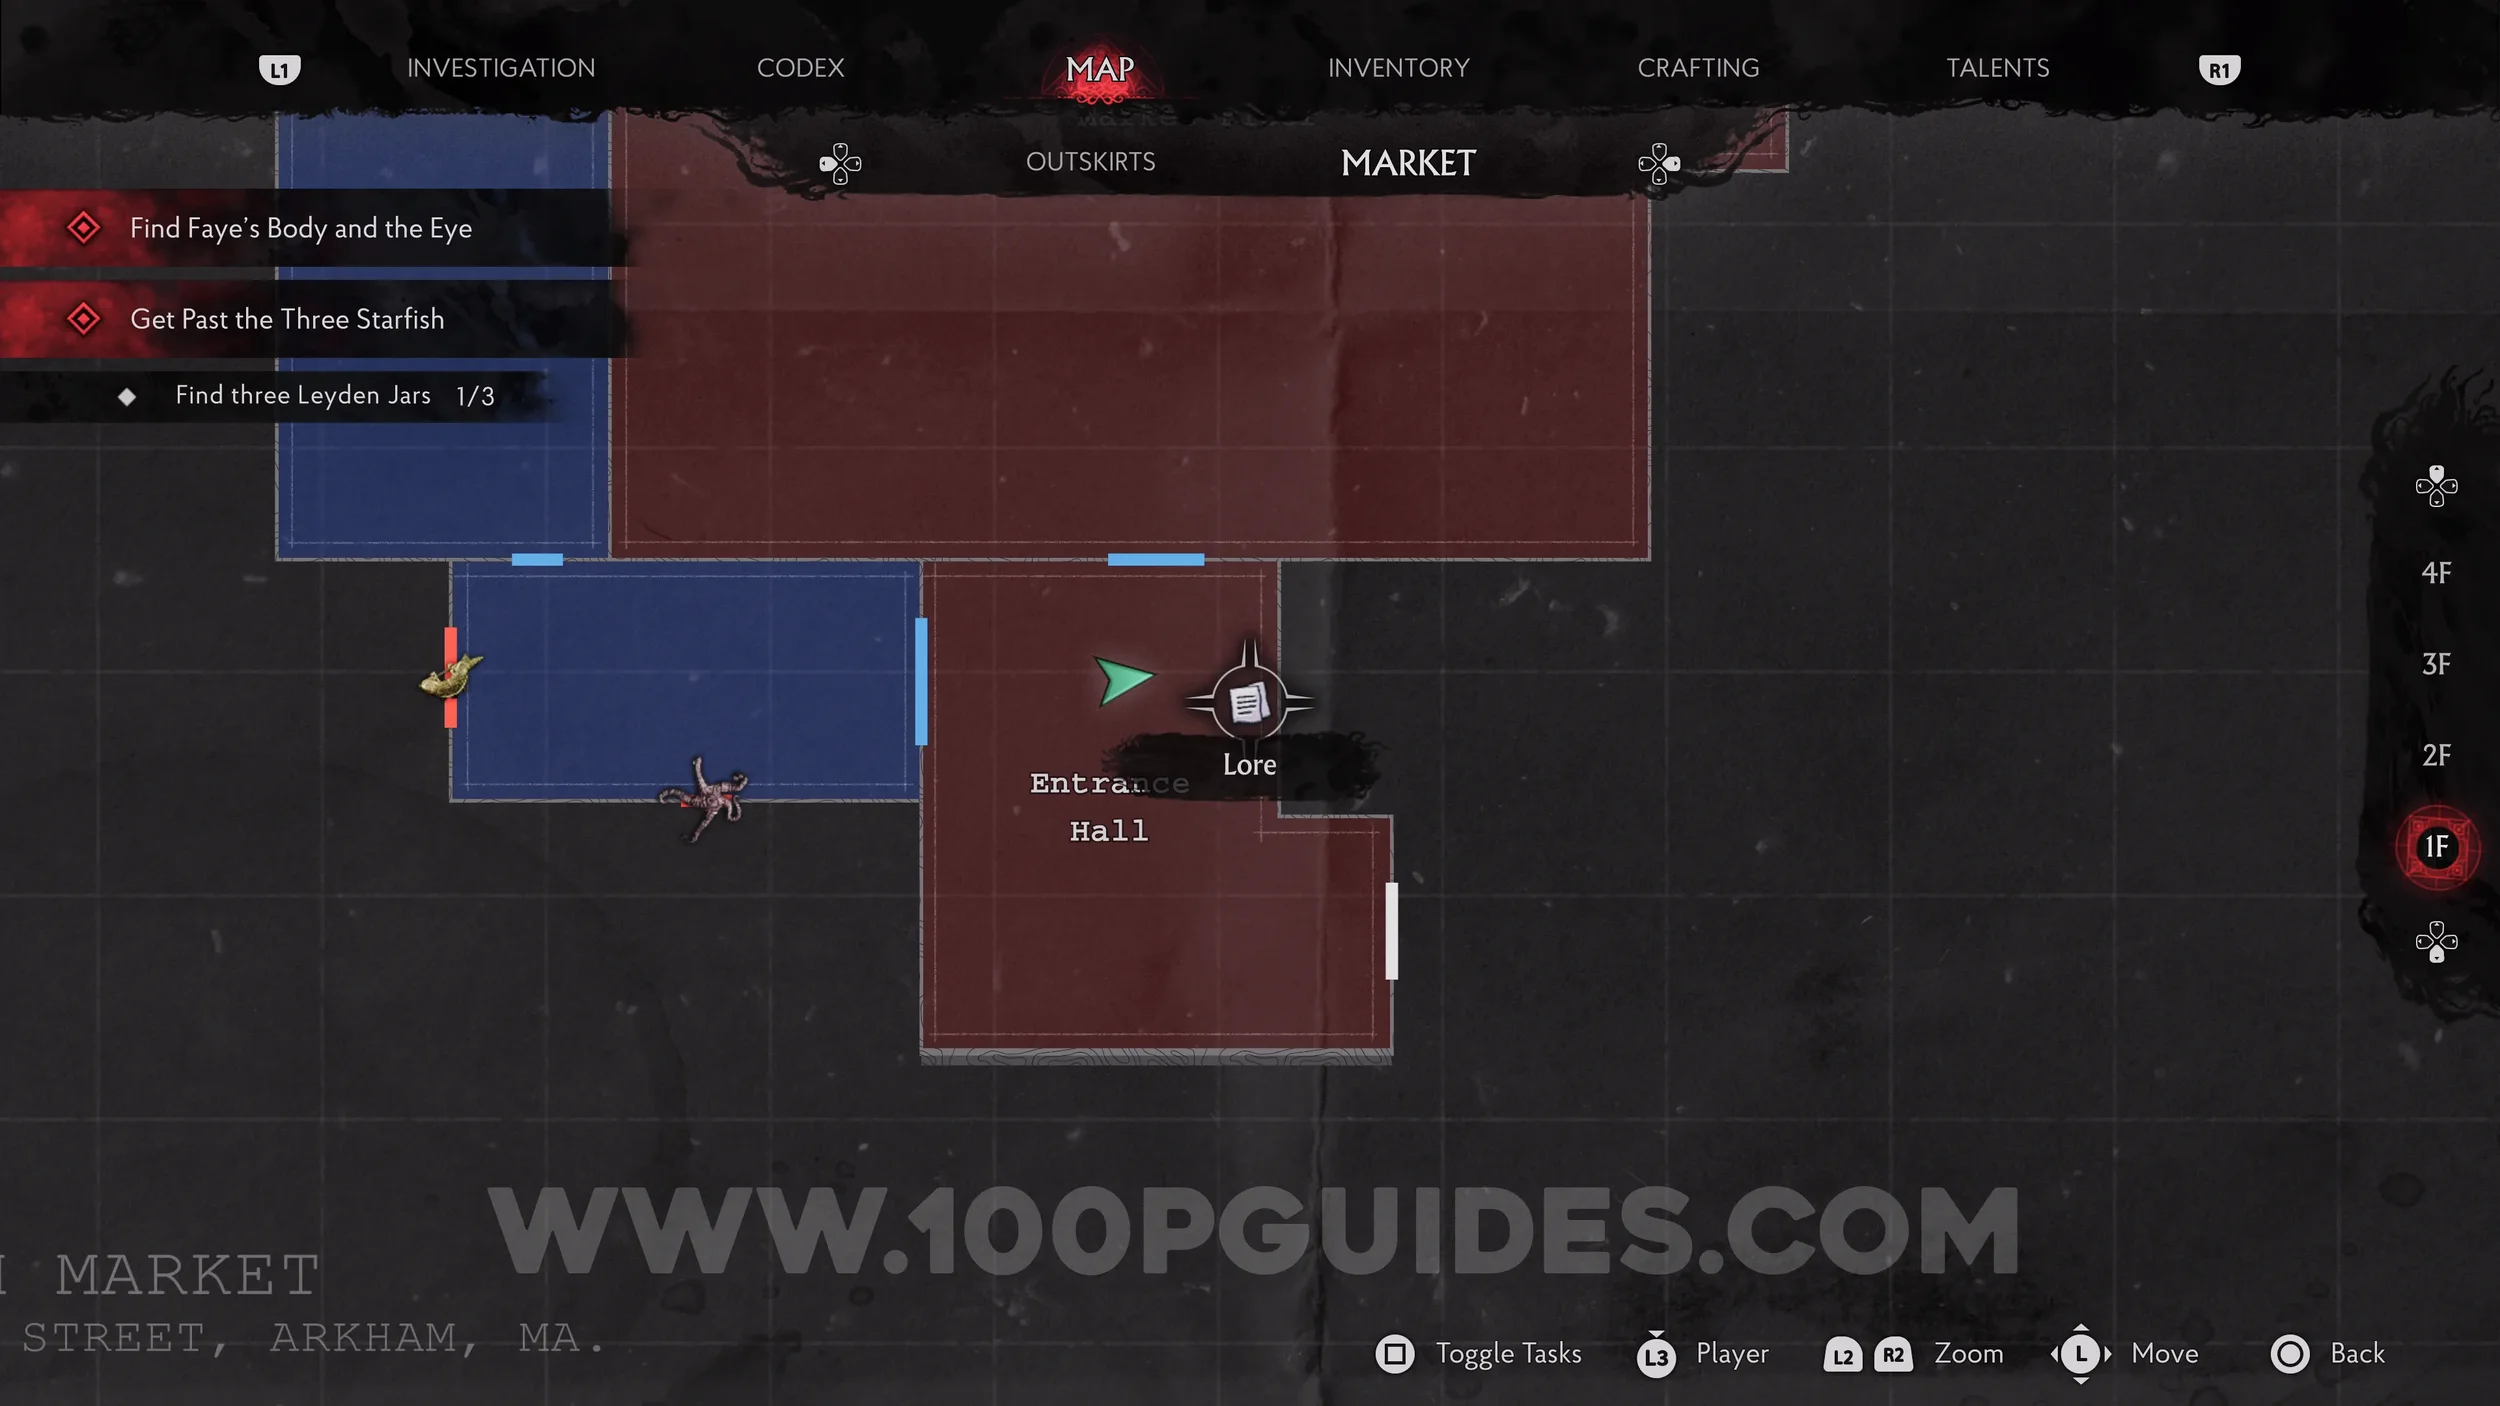
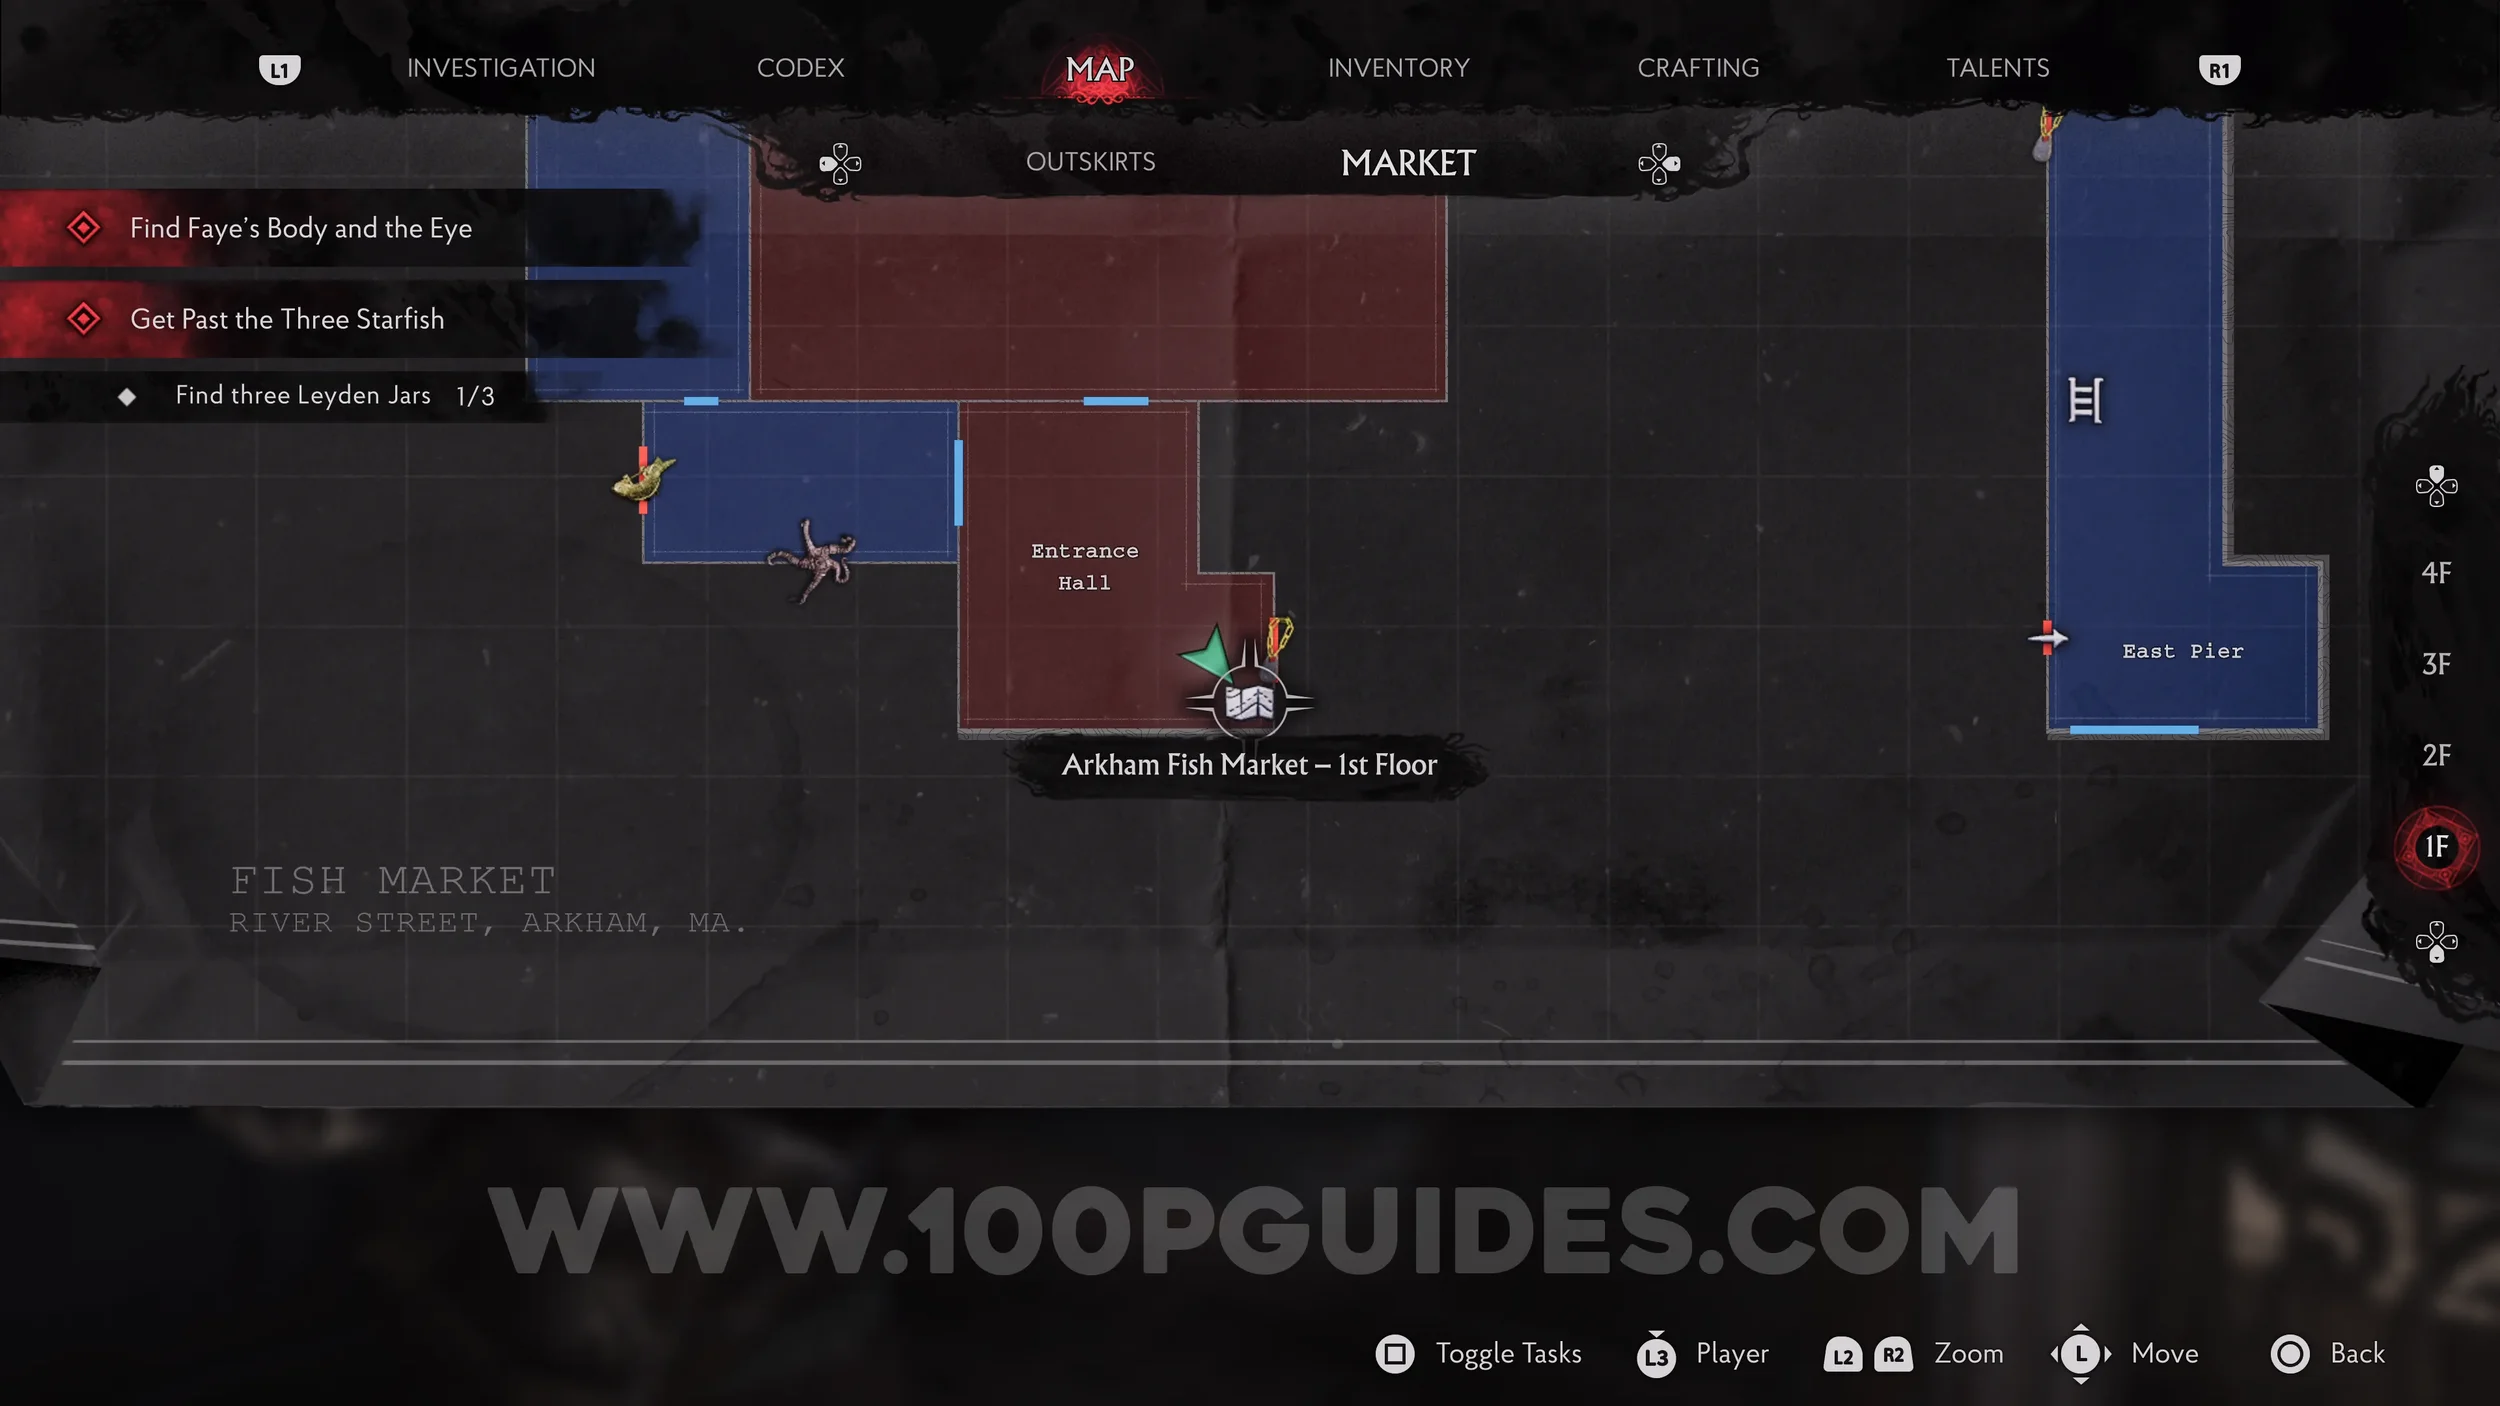
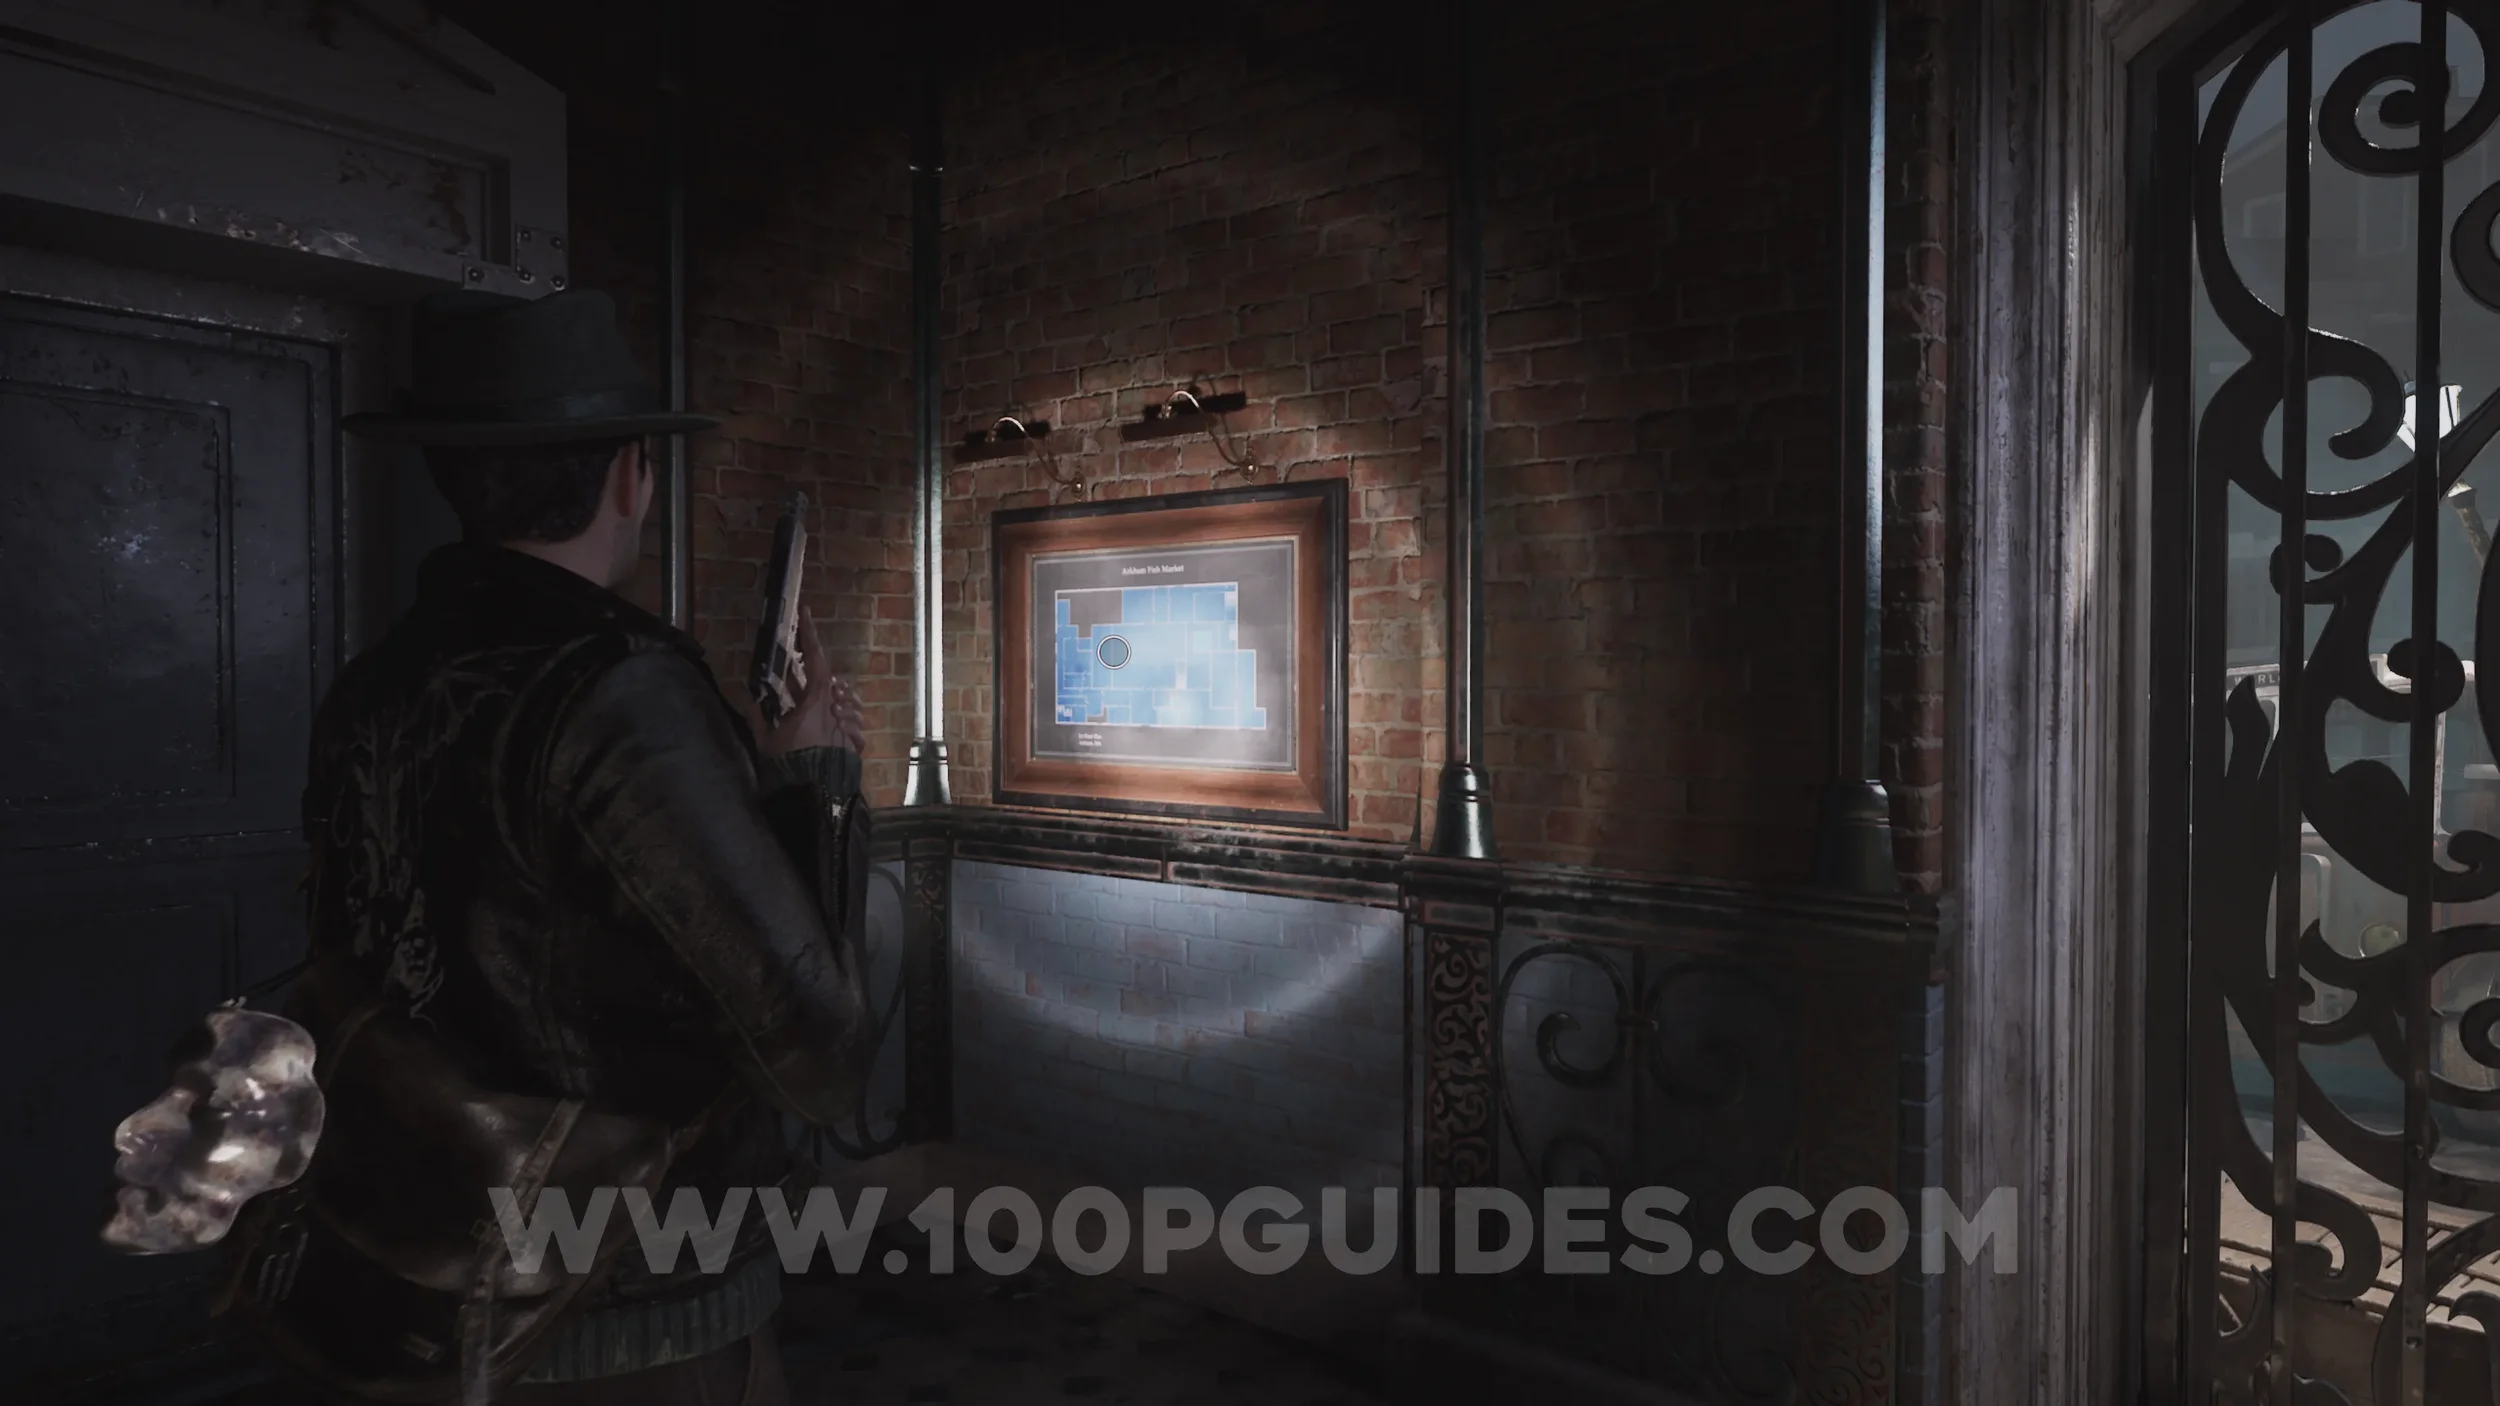
Map: Arkham Fish Market - 1st Floor. On the wall in the Entrance Hall.
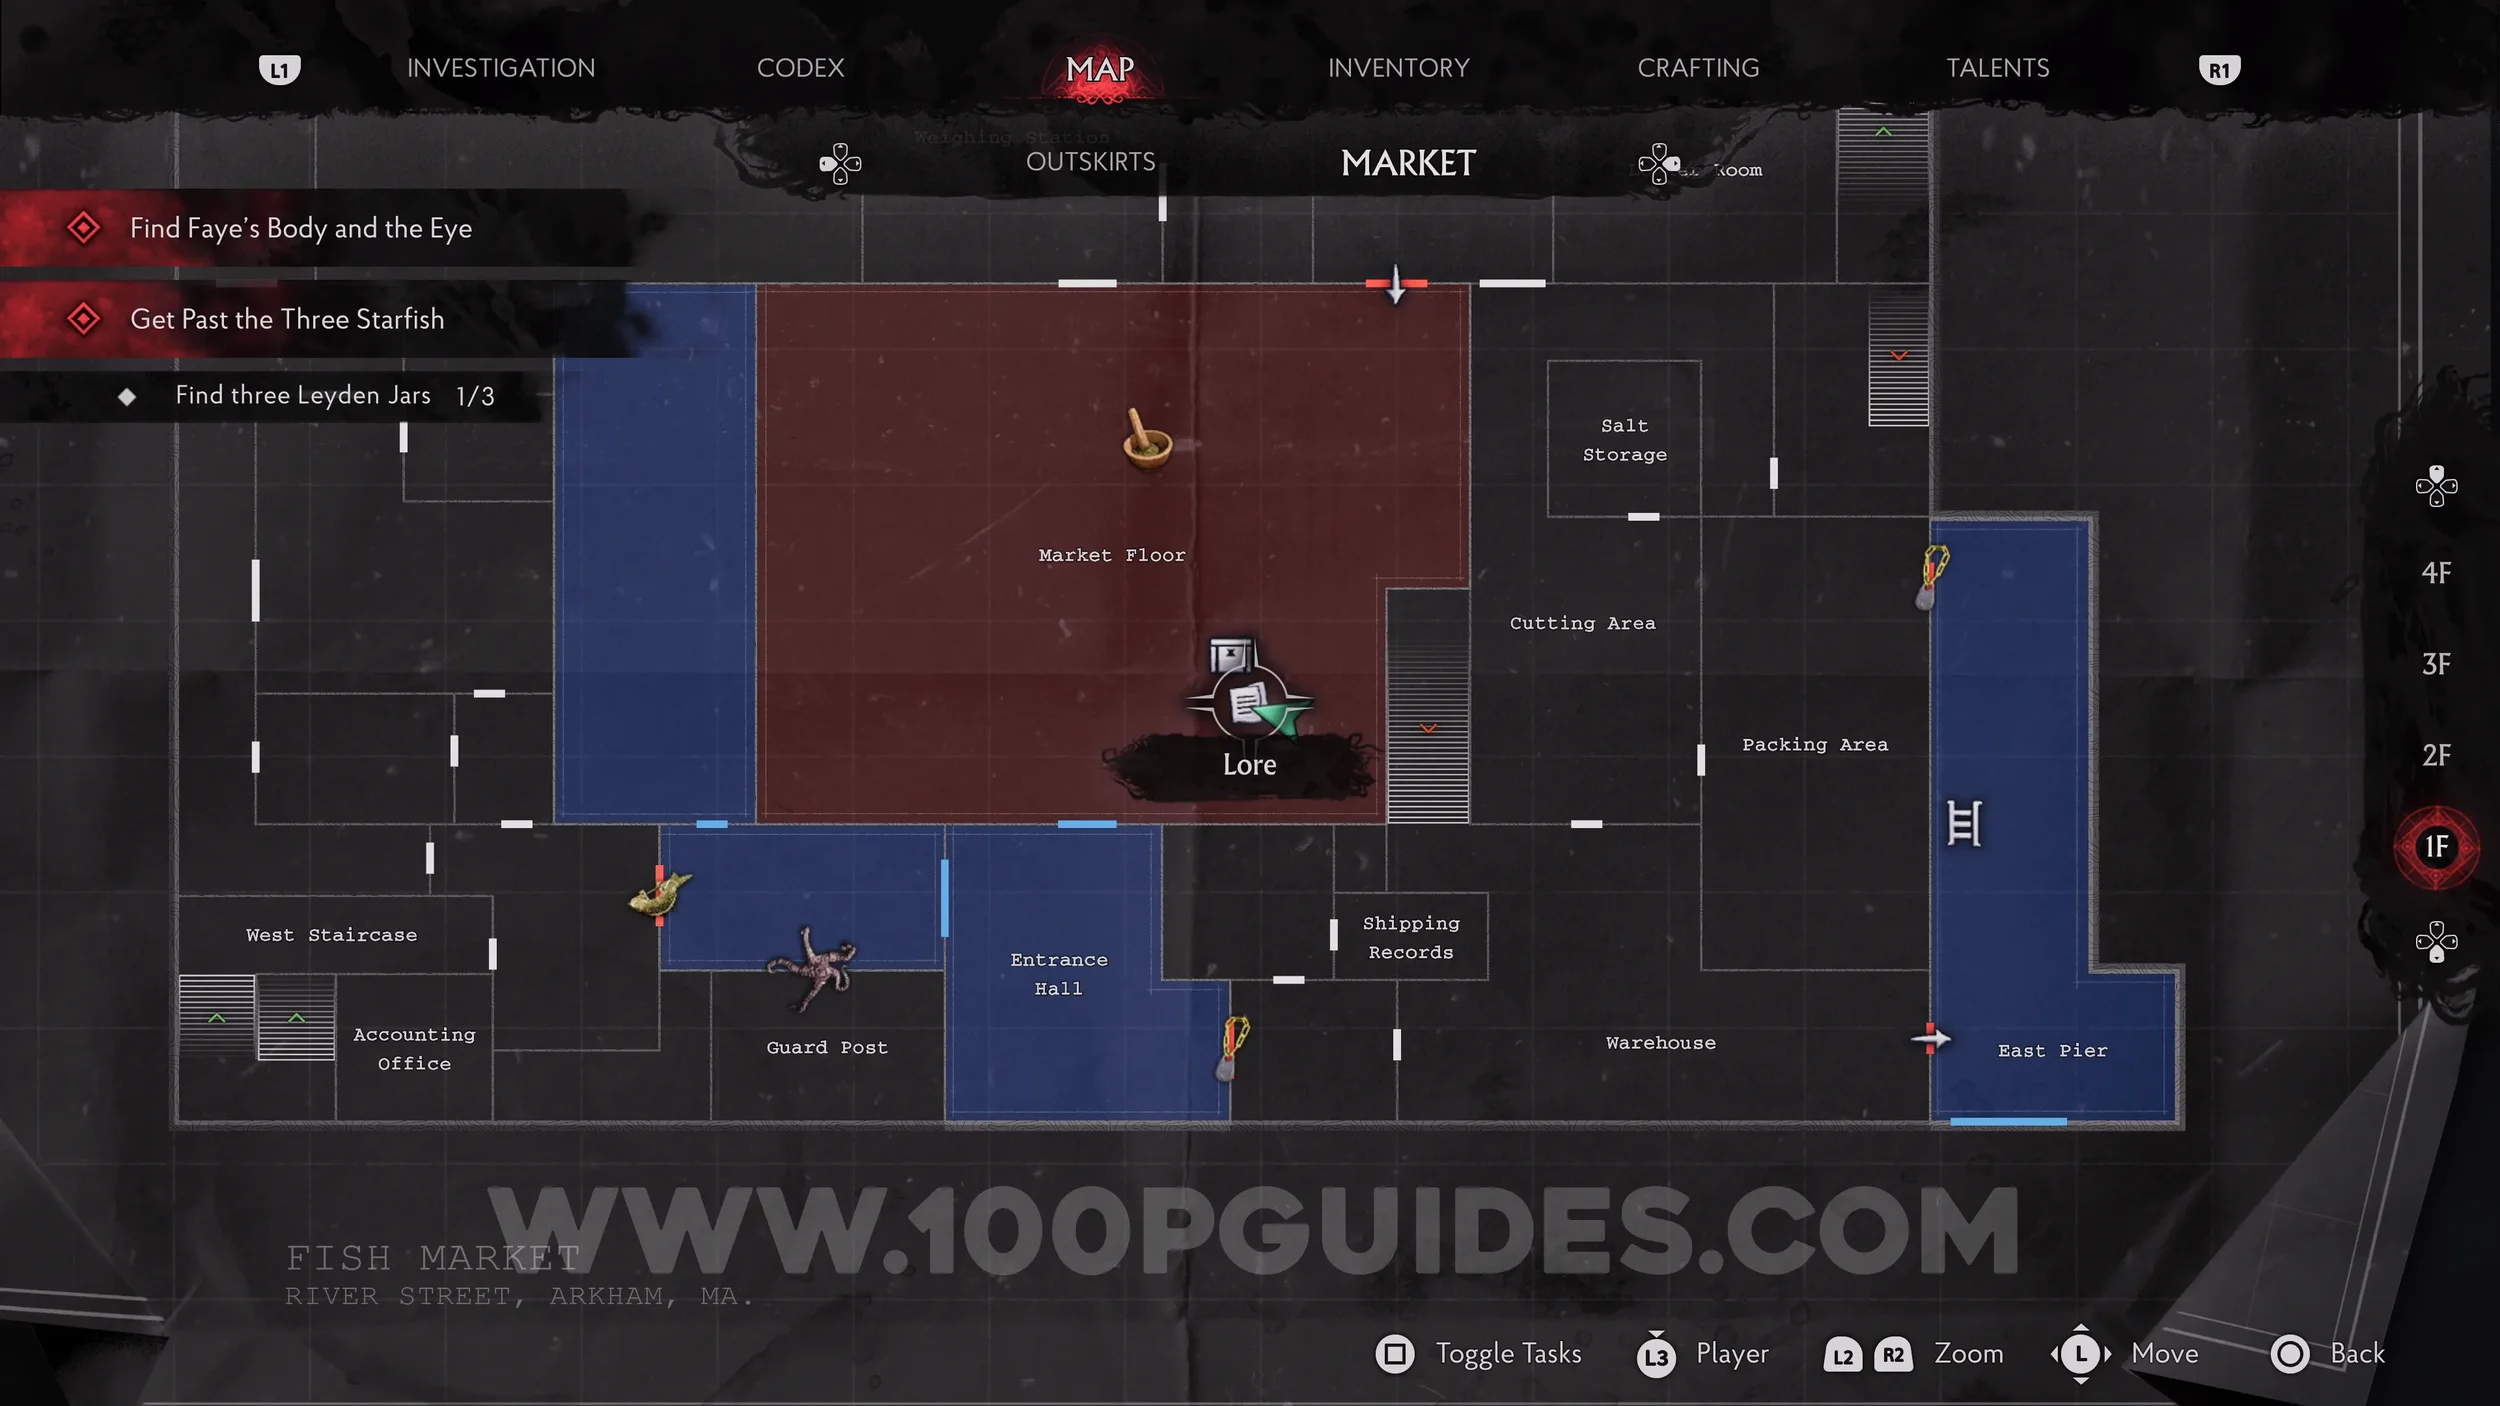
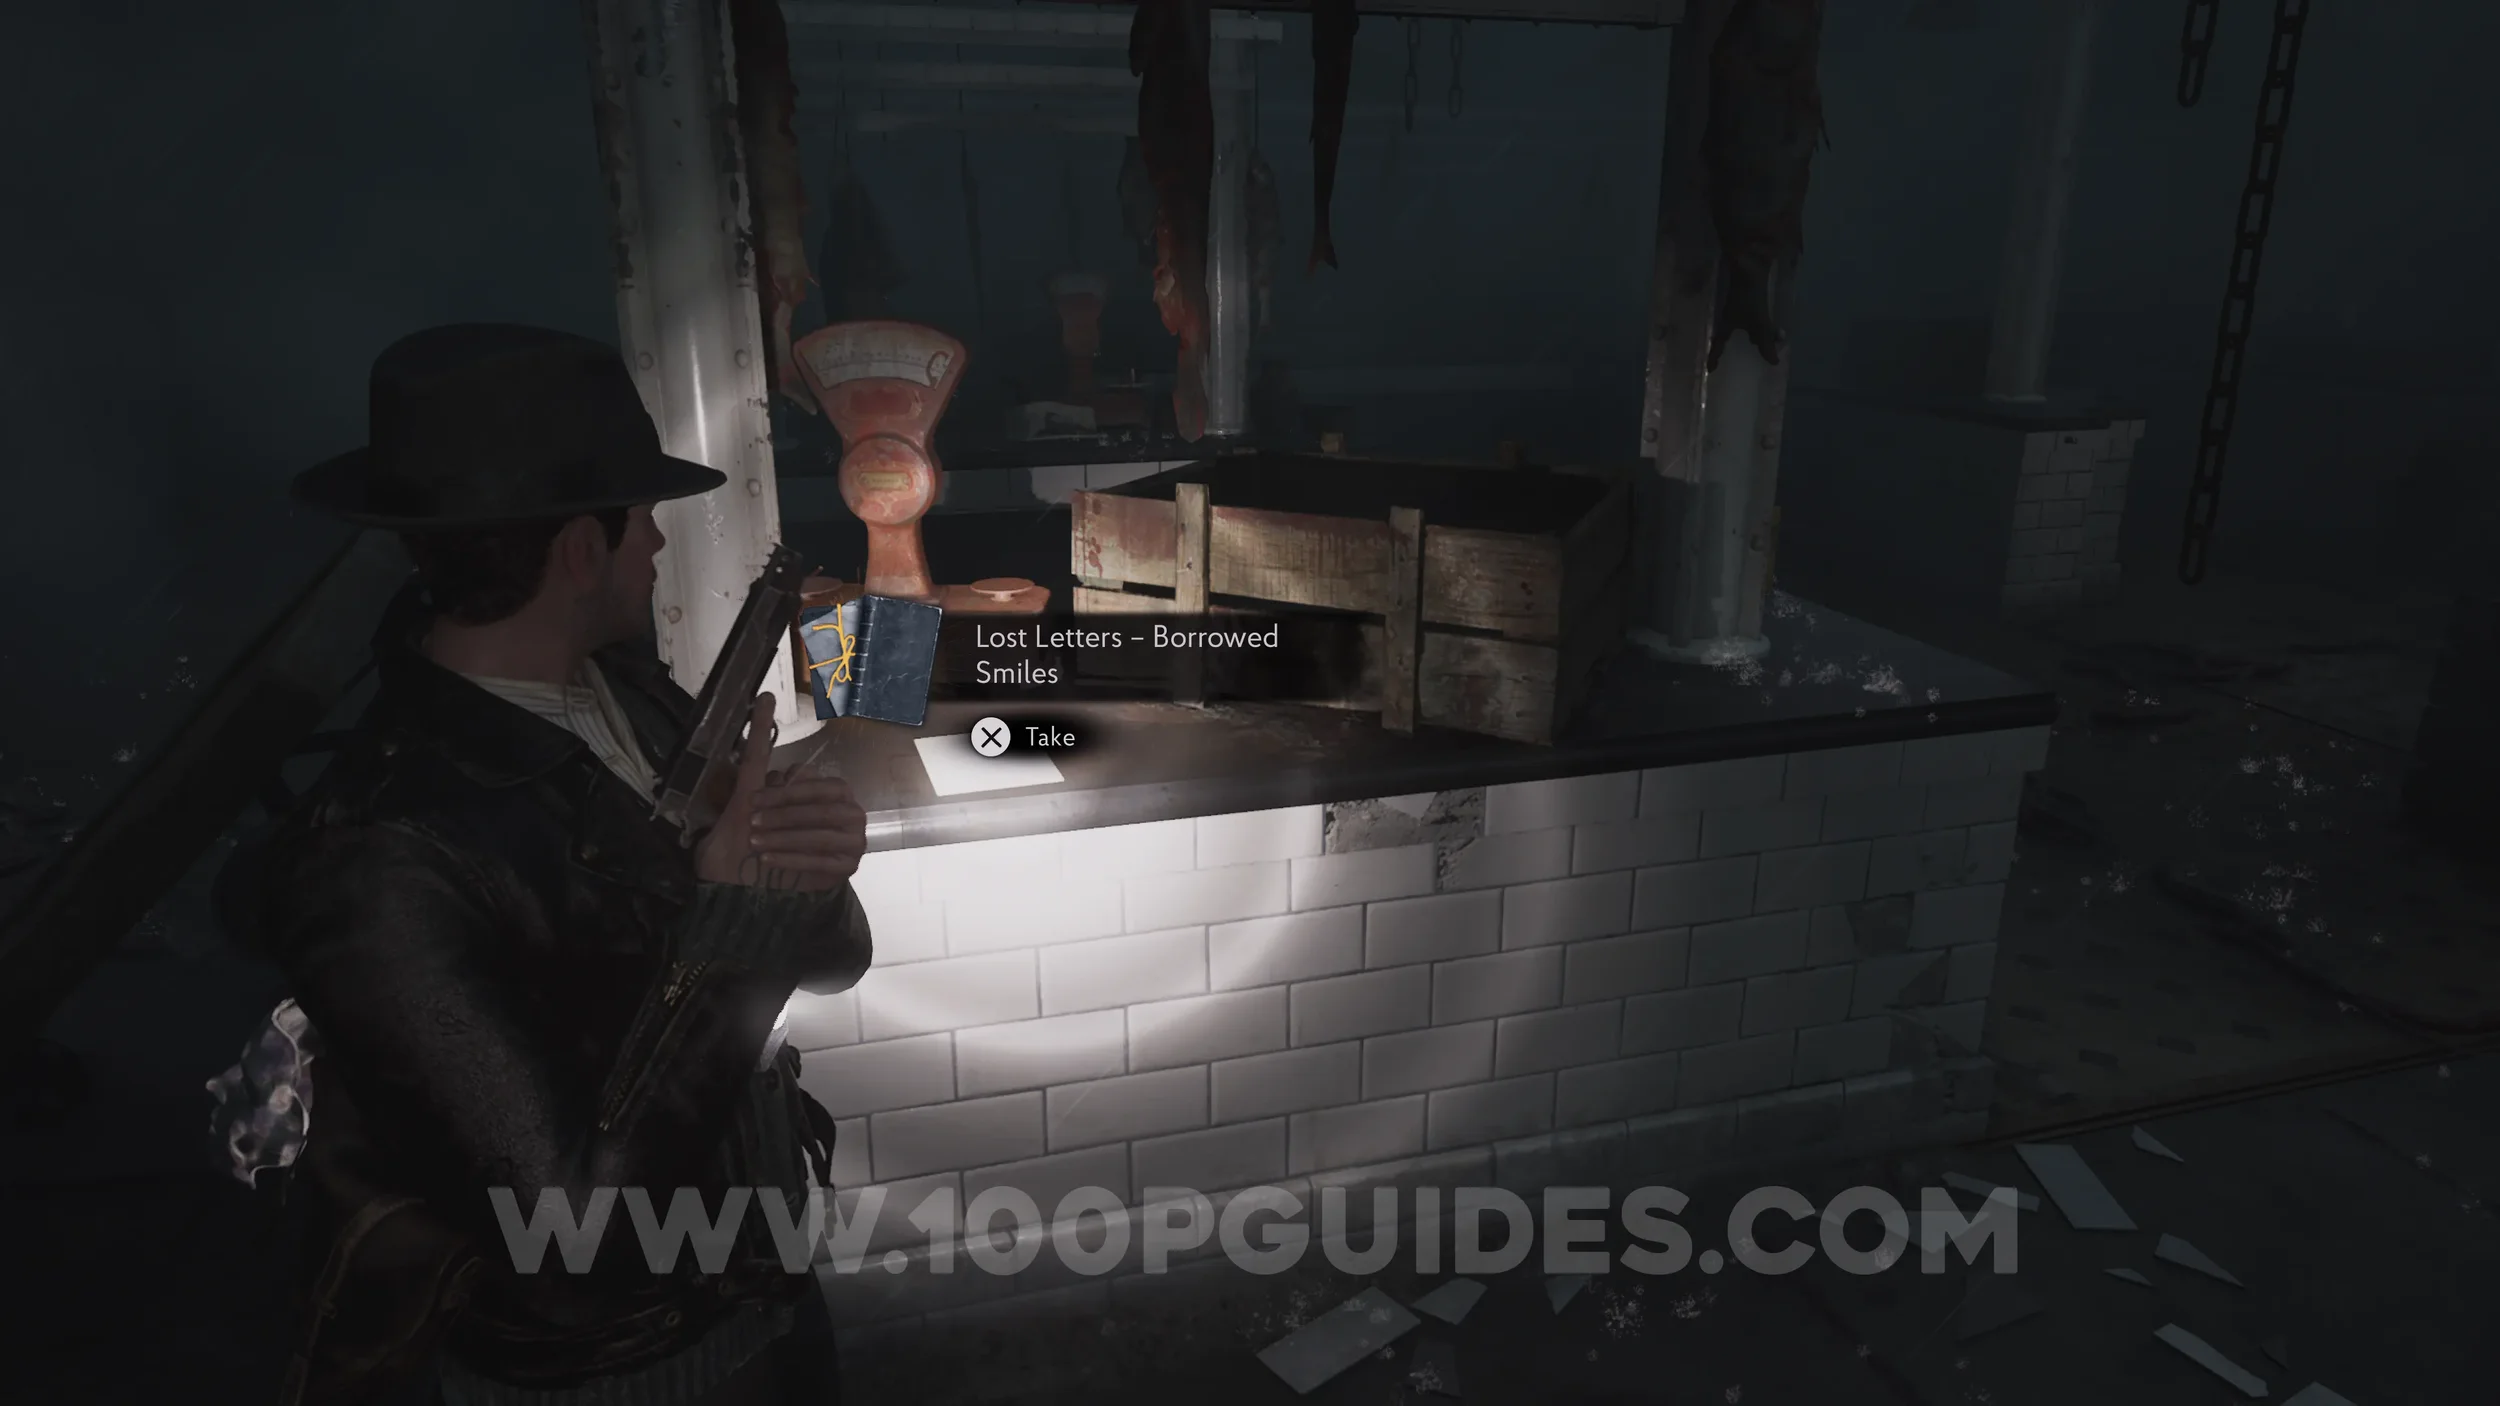
Lore Codex: Lost Letter - Borrowed Smiles. In the southeastern corner of the Market Floor.
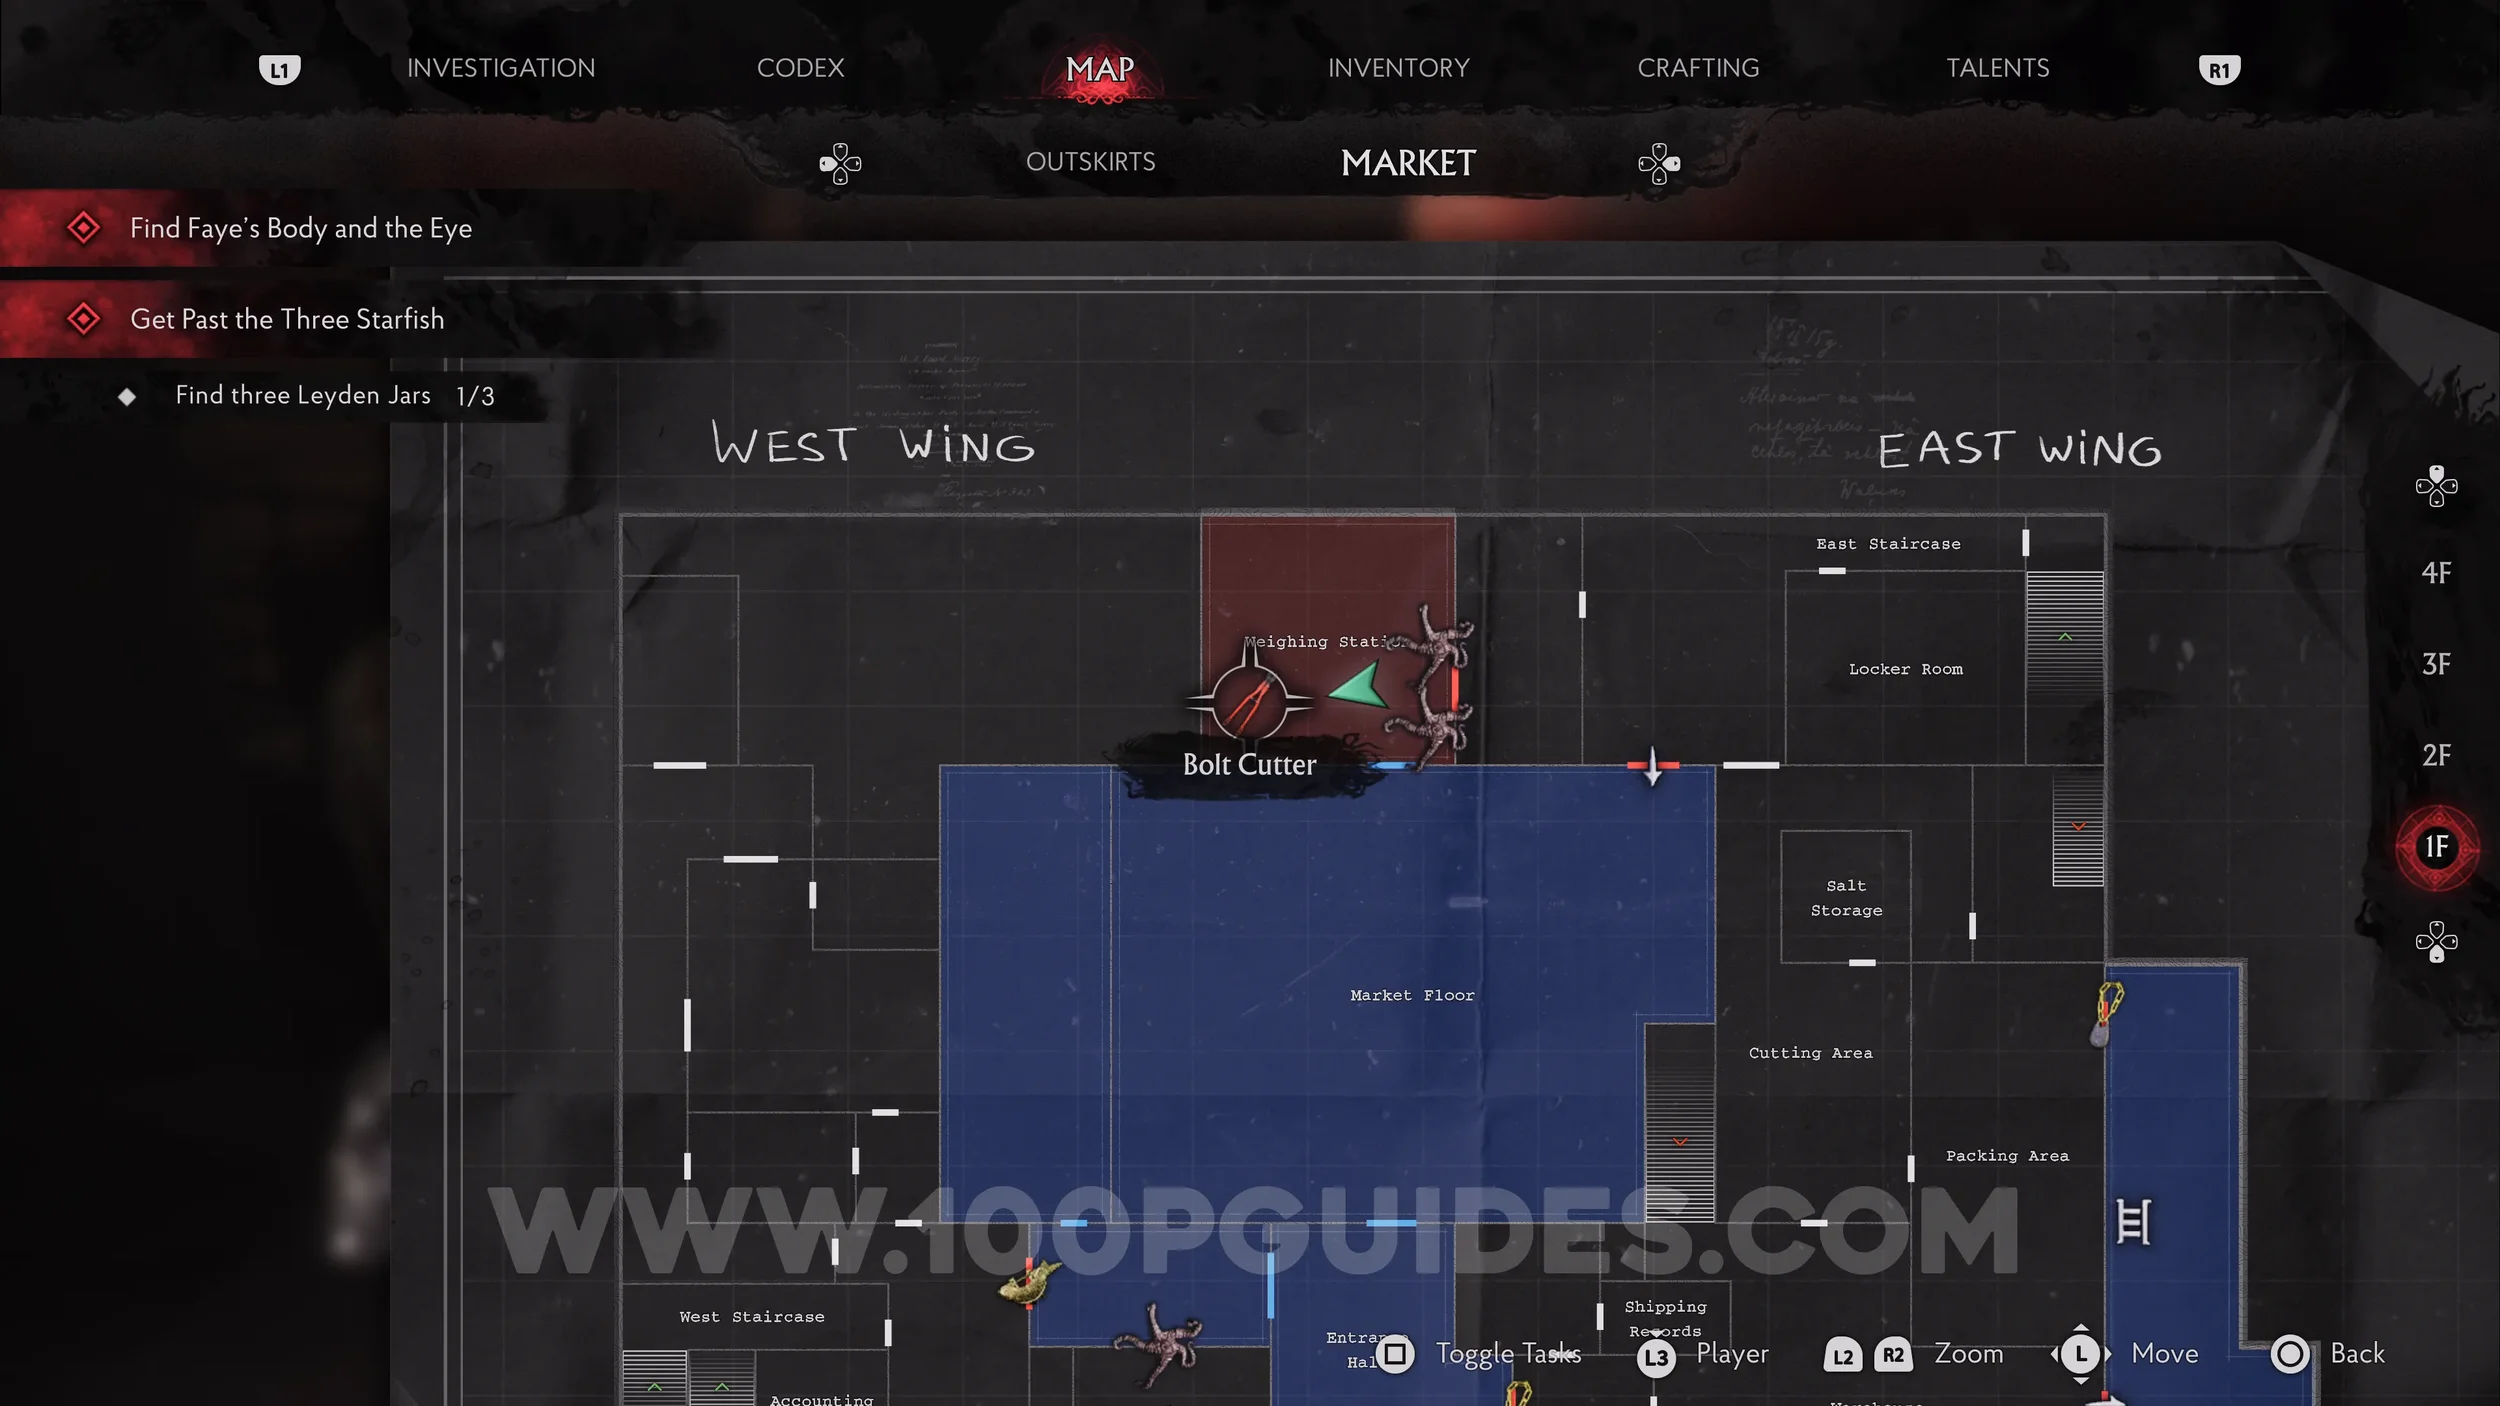
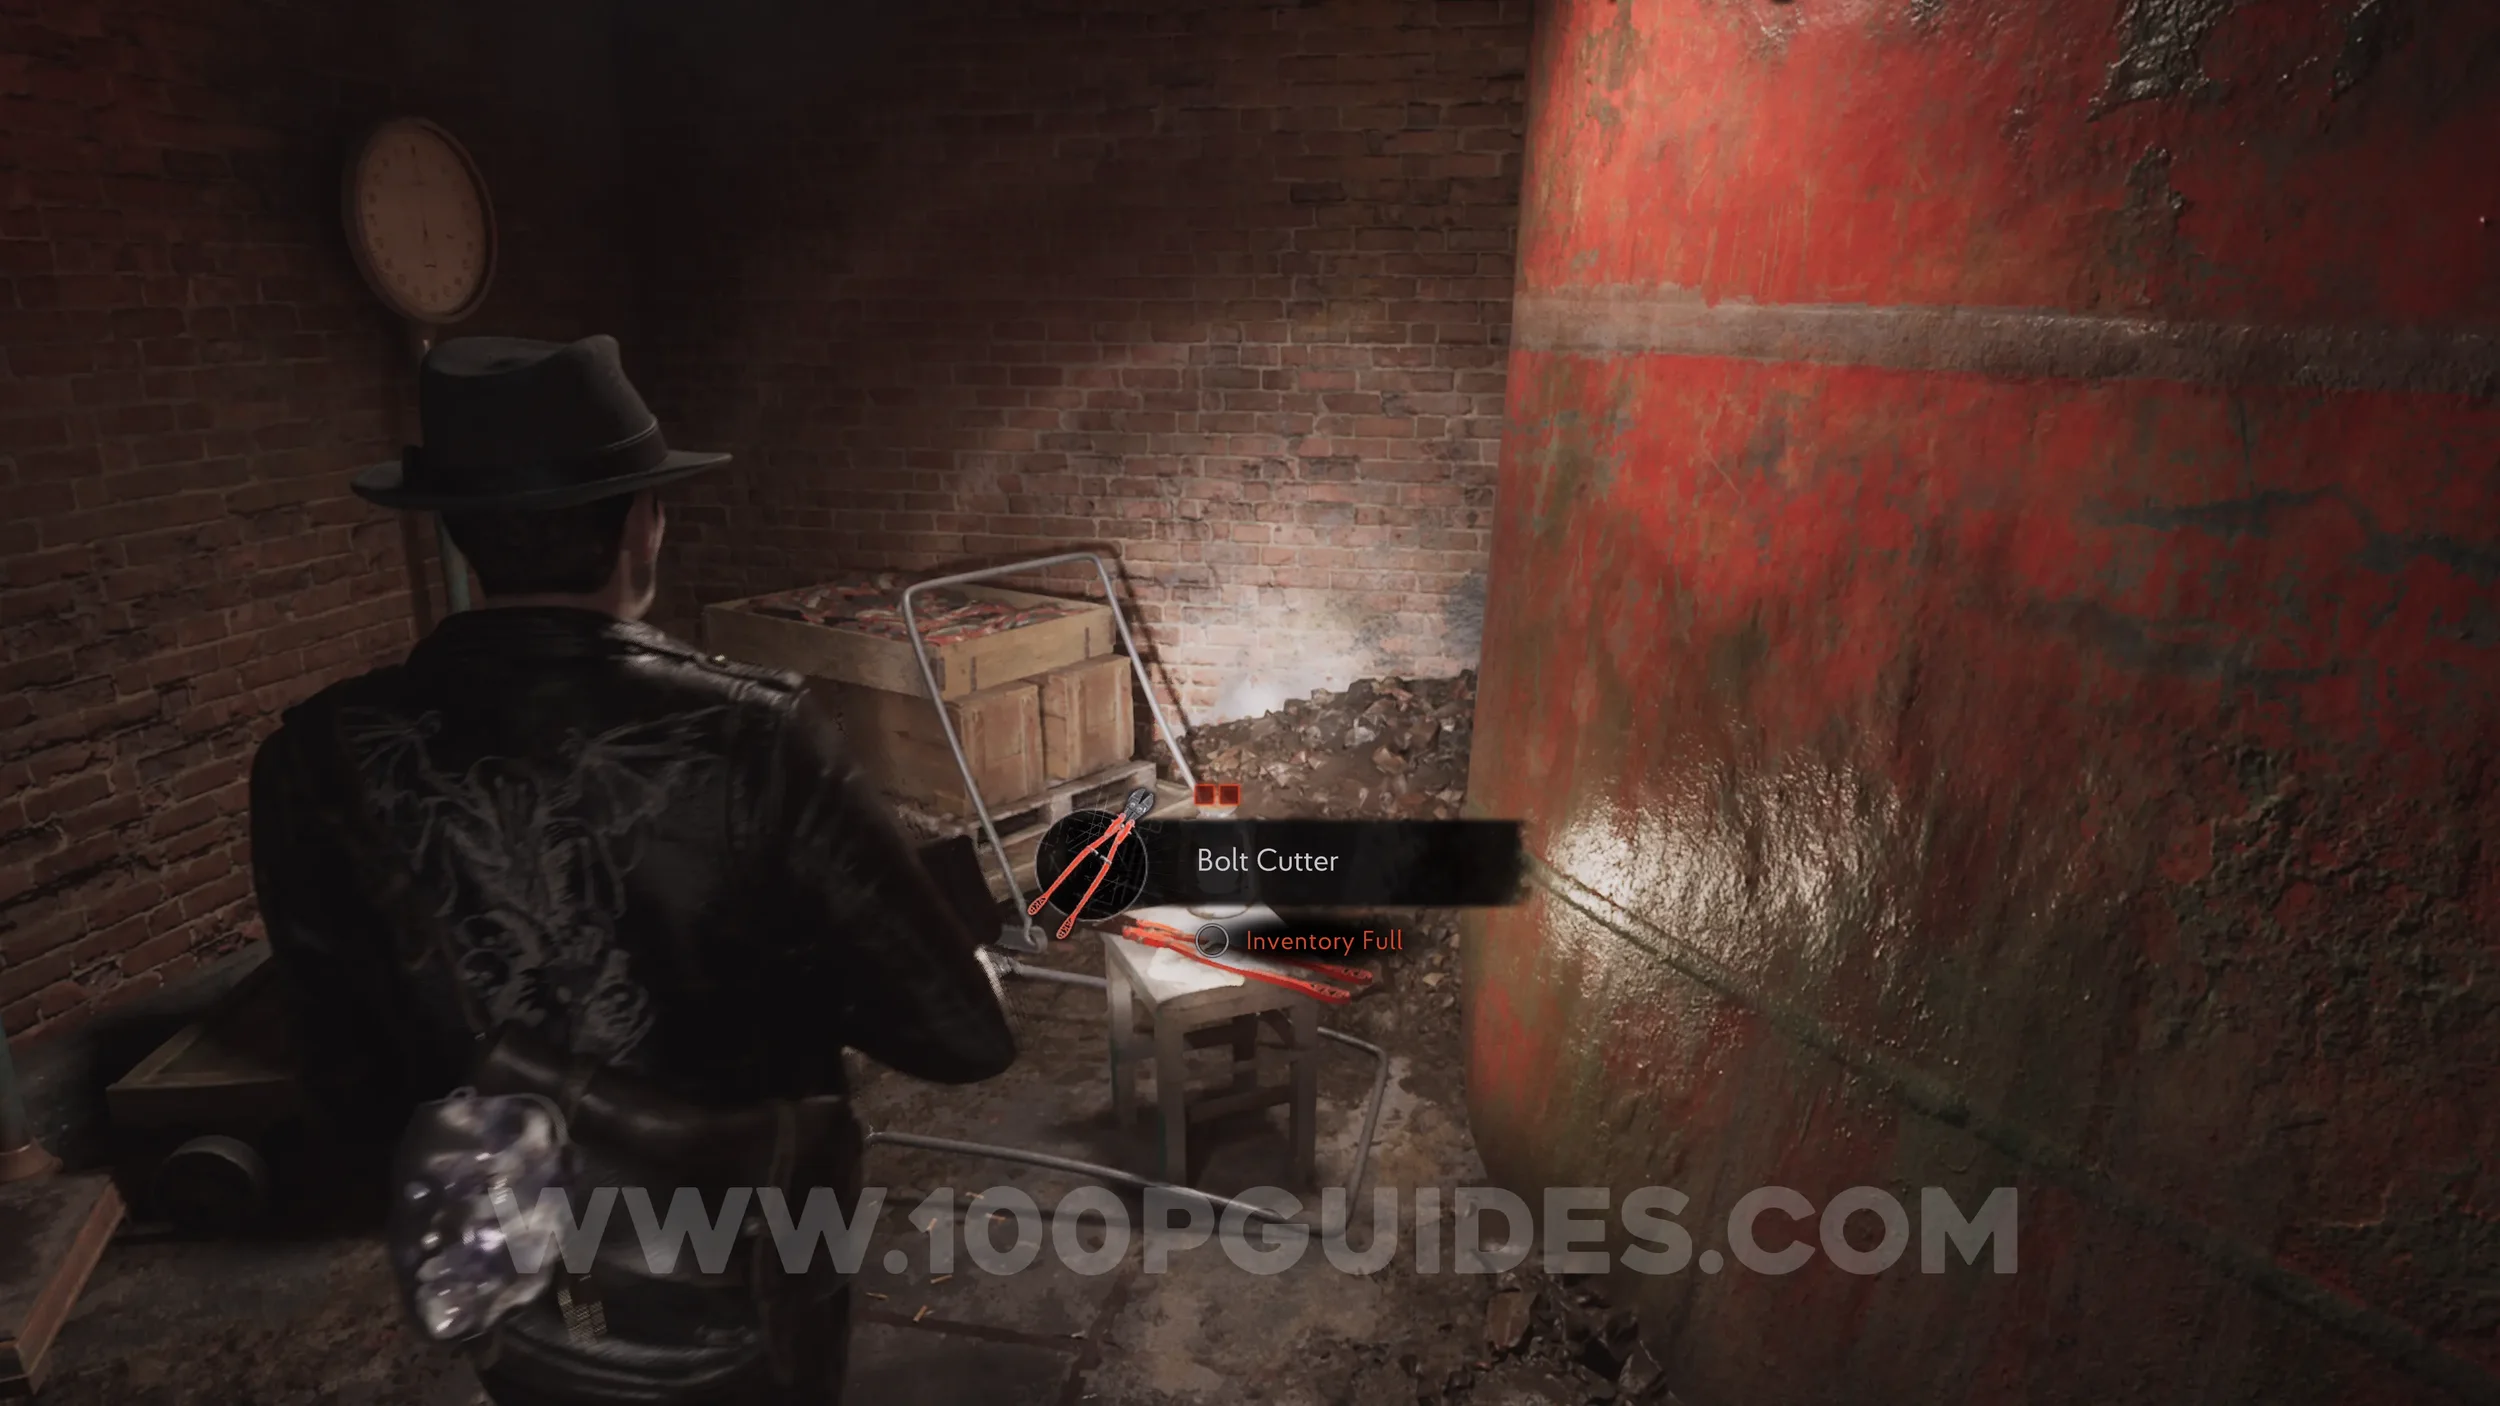
Key Item: Bolt Cutter + Evidence: Find More Jars!. Found in the Weighing Station to the north of the Market Floor.
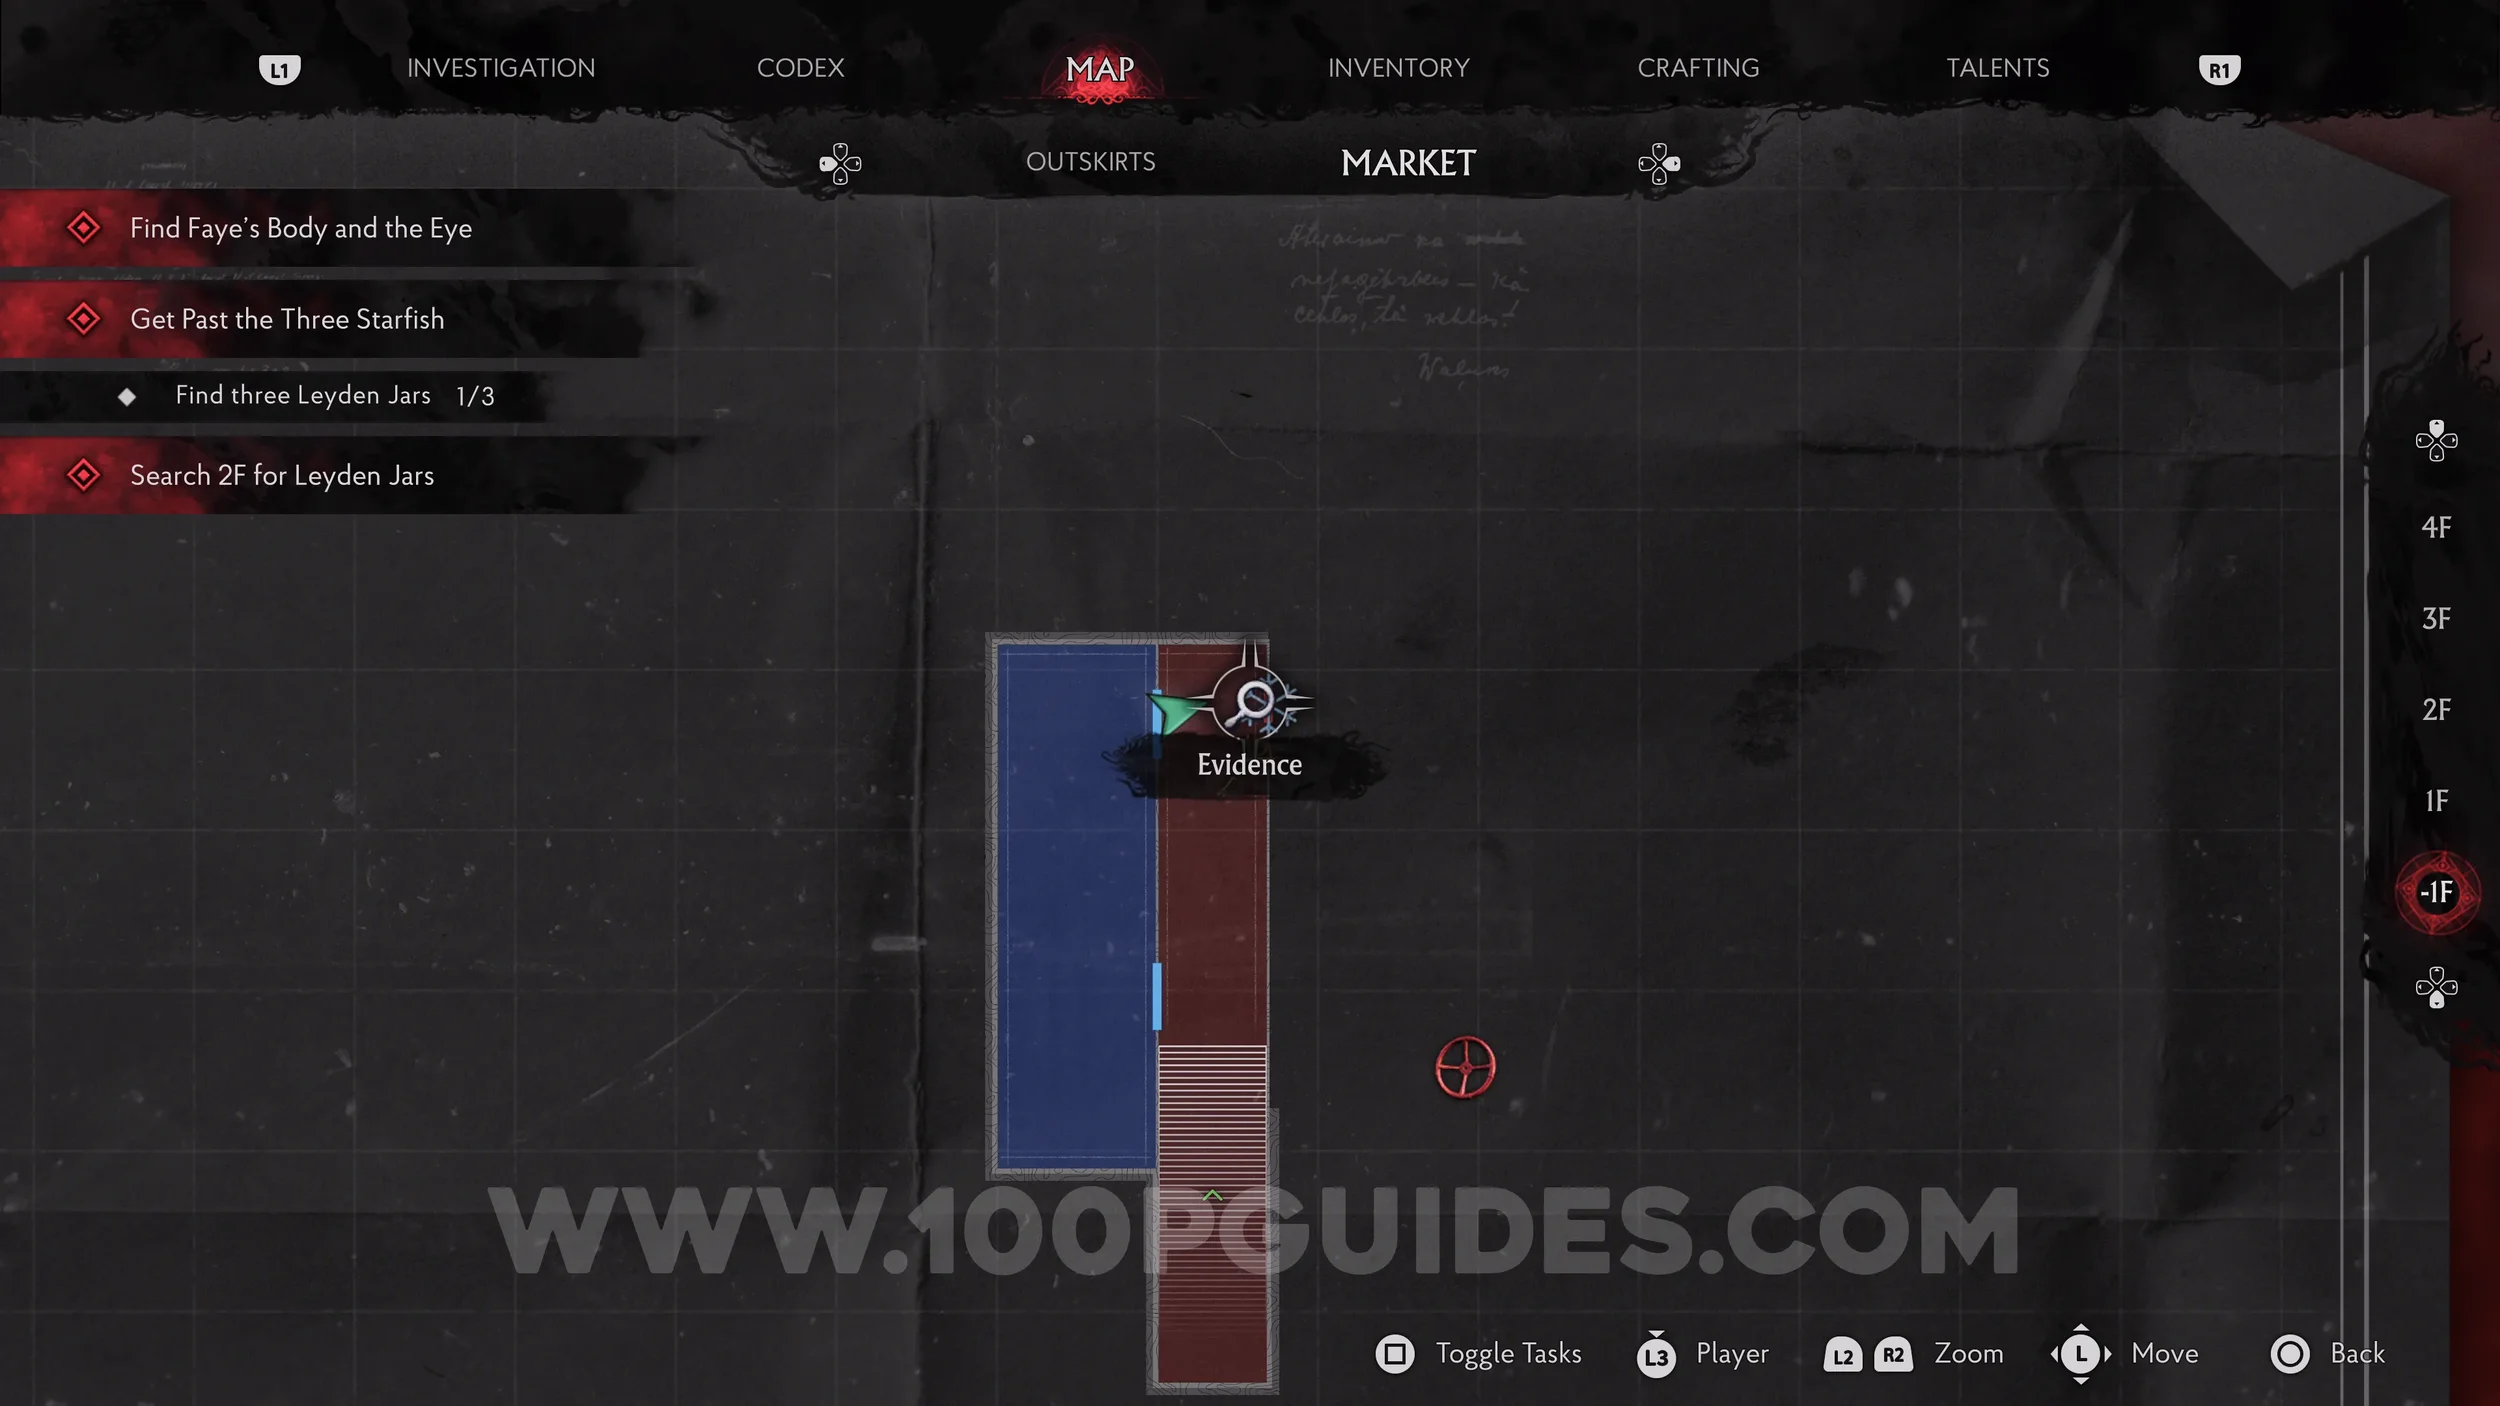
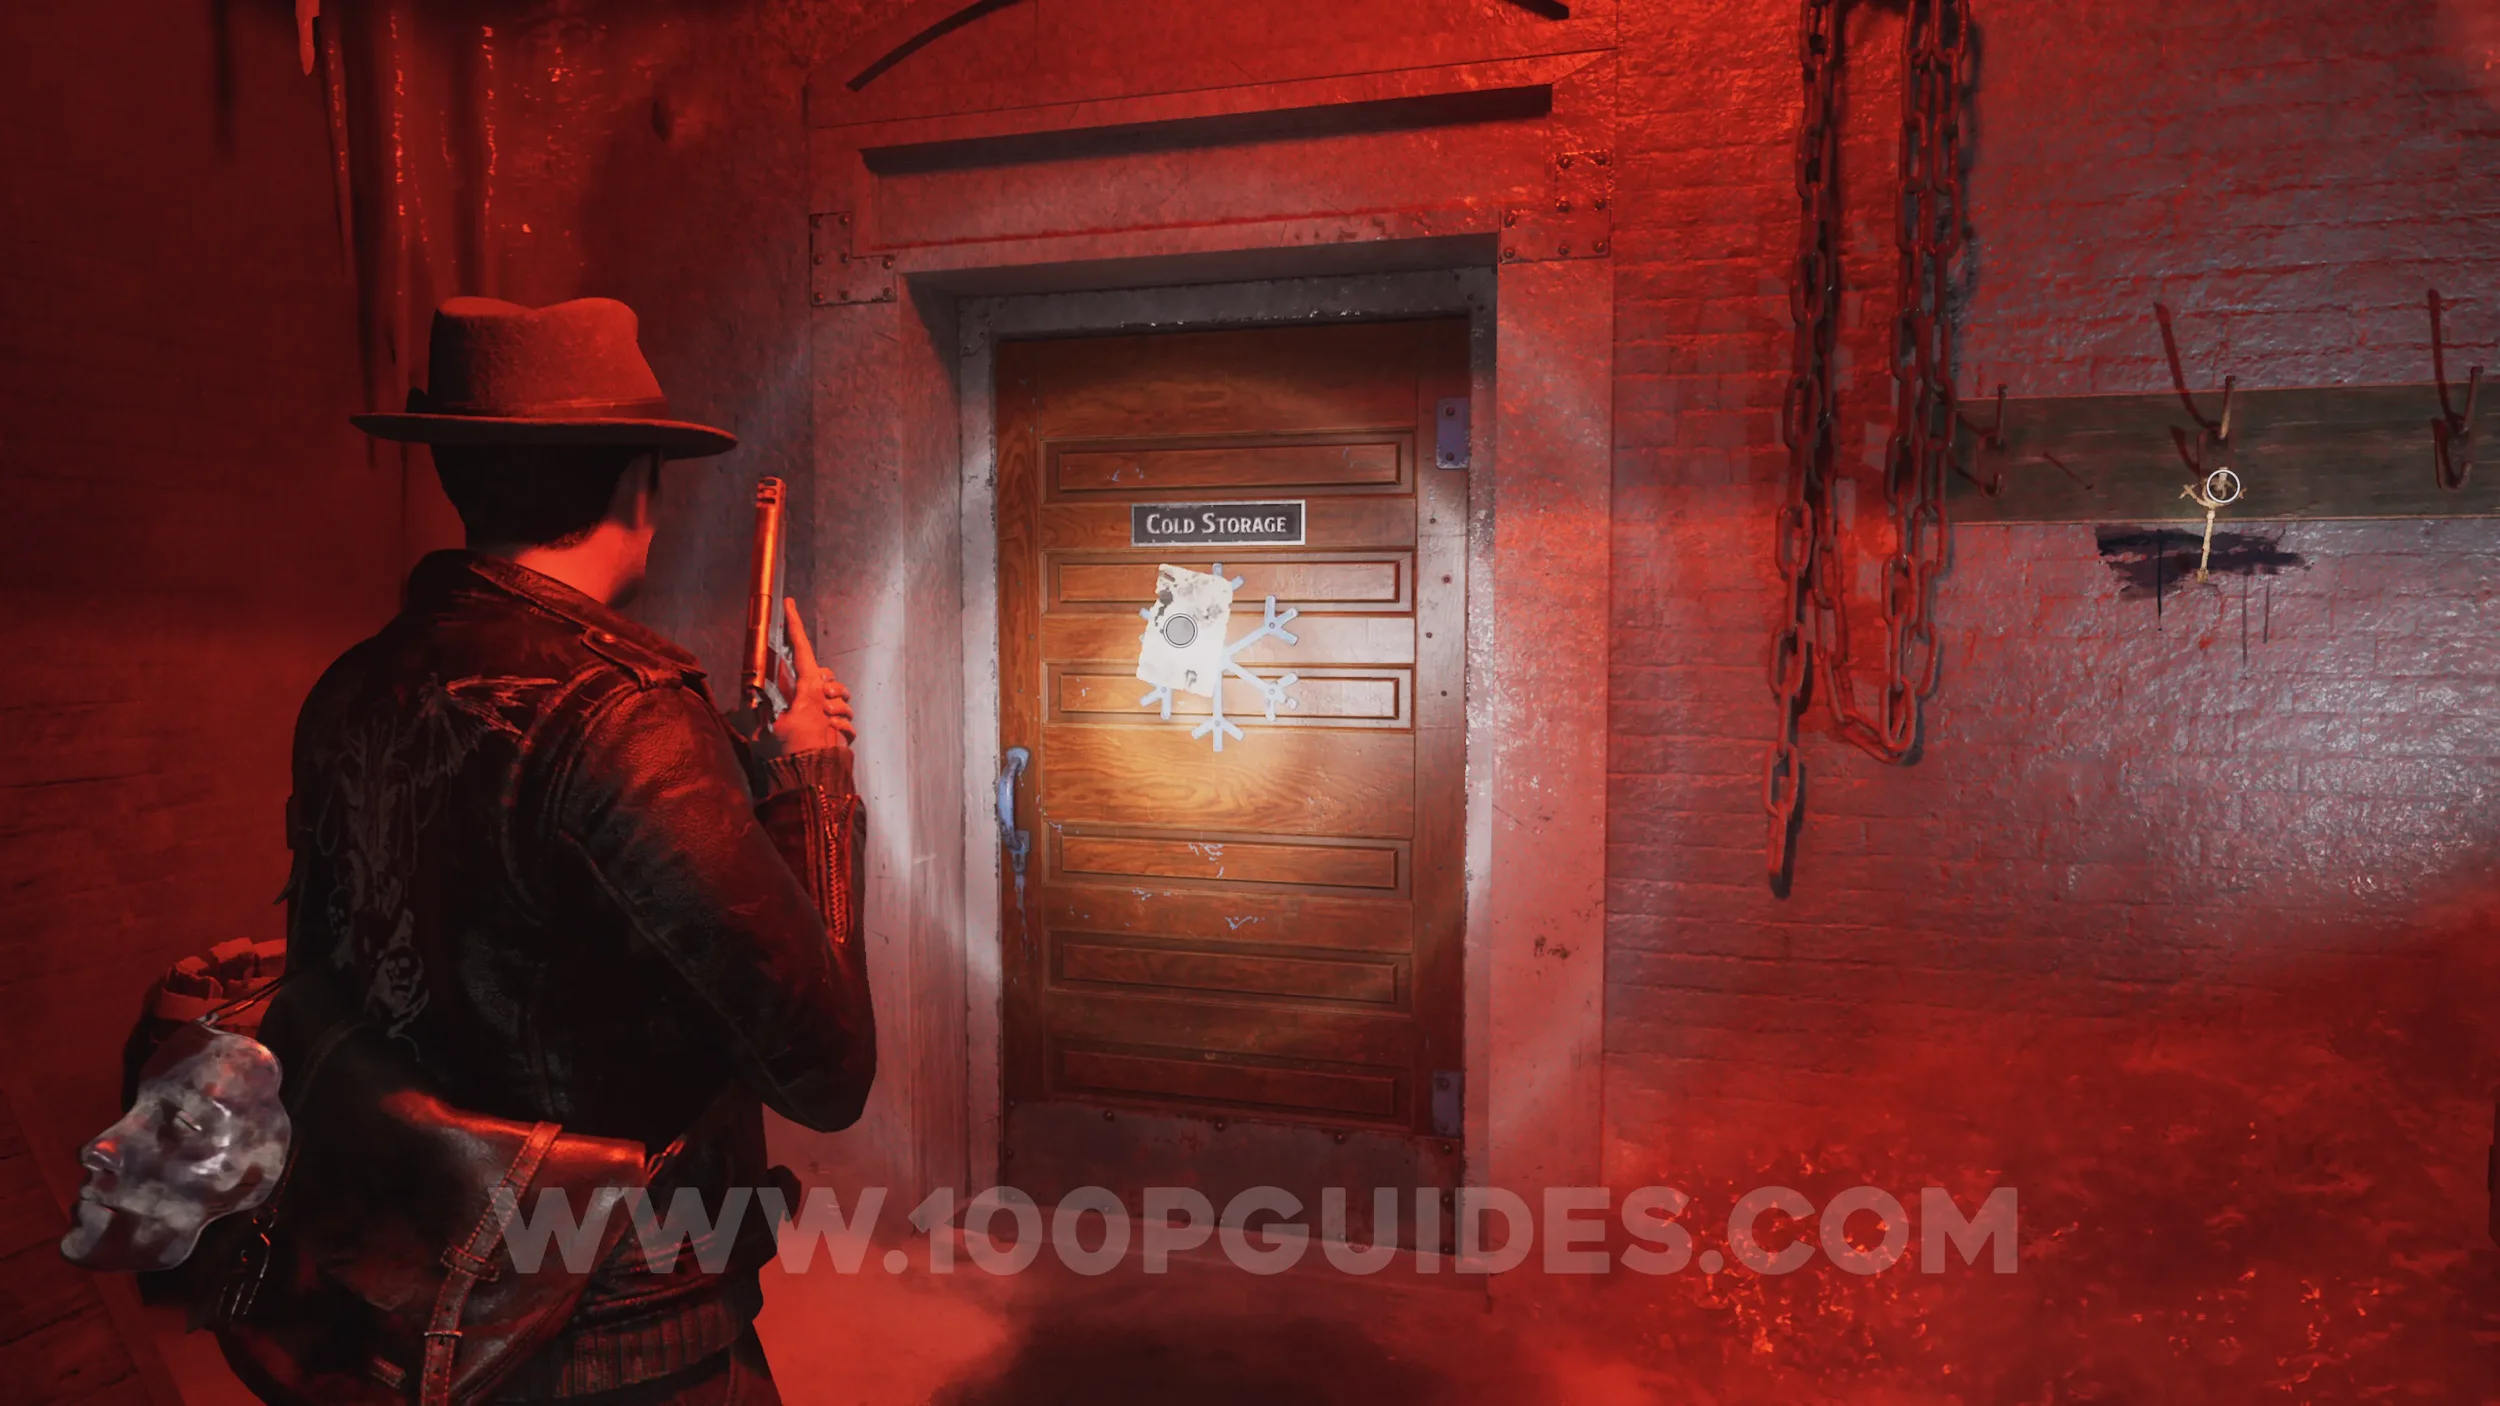
Evidence: Key for the Cold Room. Use the Bolt Cutter to open the door in the Entrance Hall, then head down the stairs to the north. Soon after you will find the evidence on the door with the Cold Storage Lock.
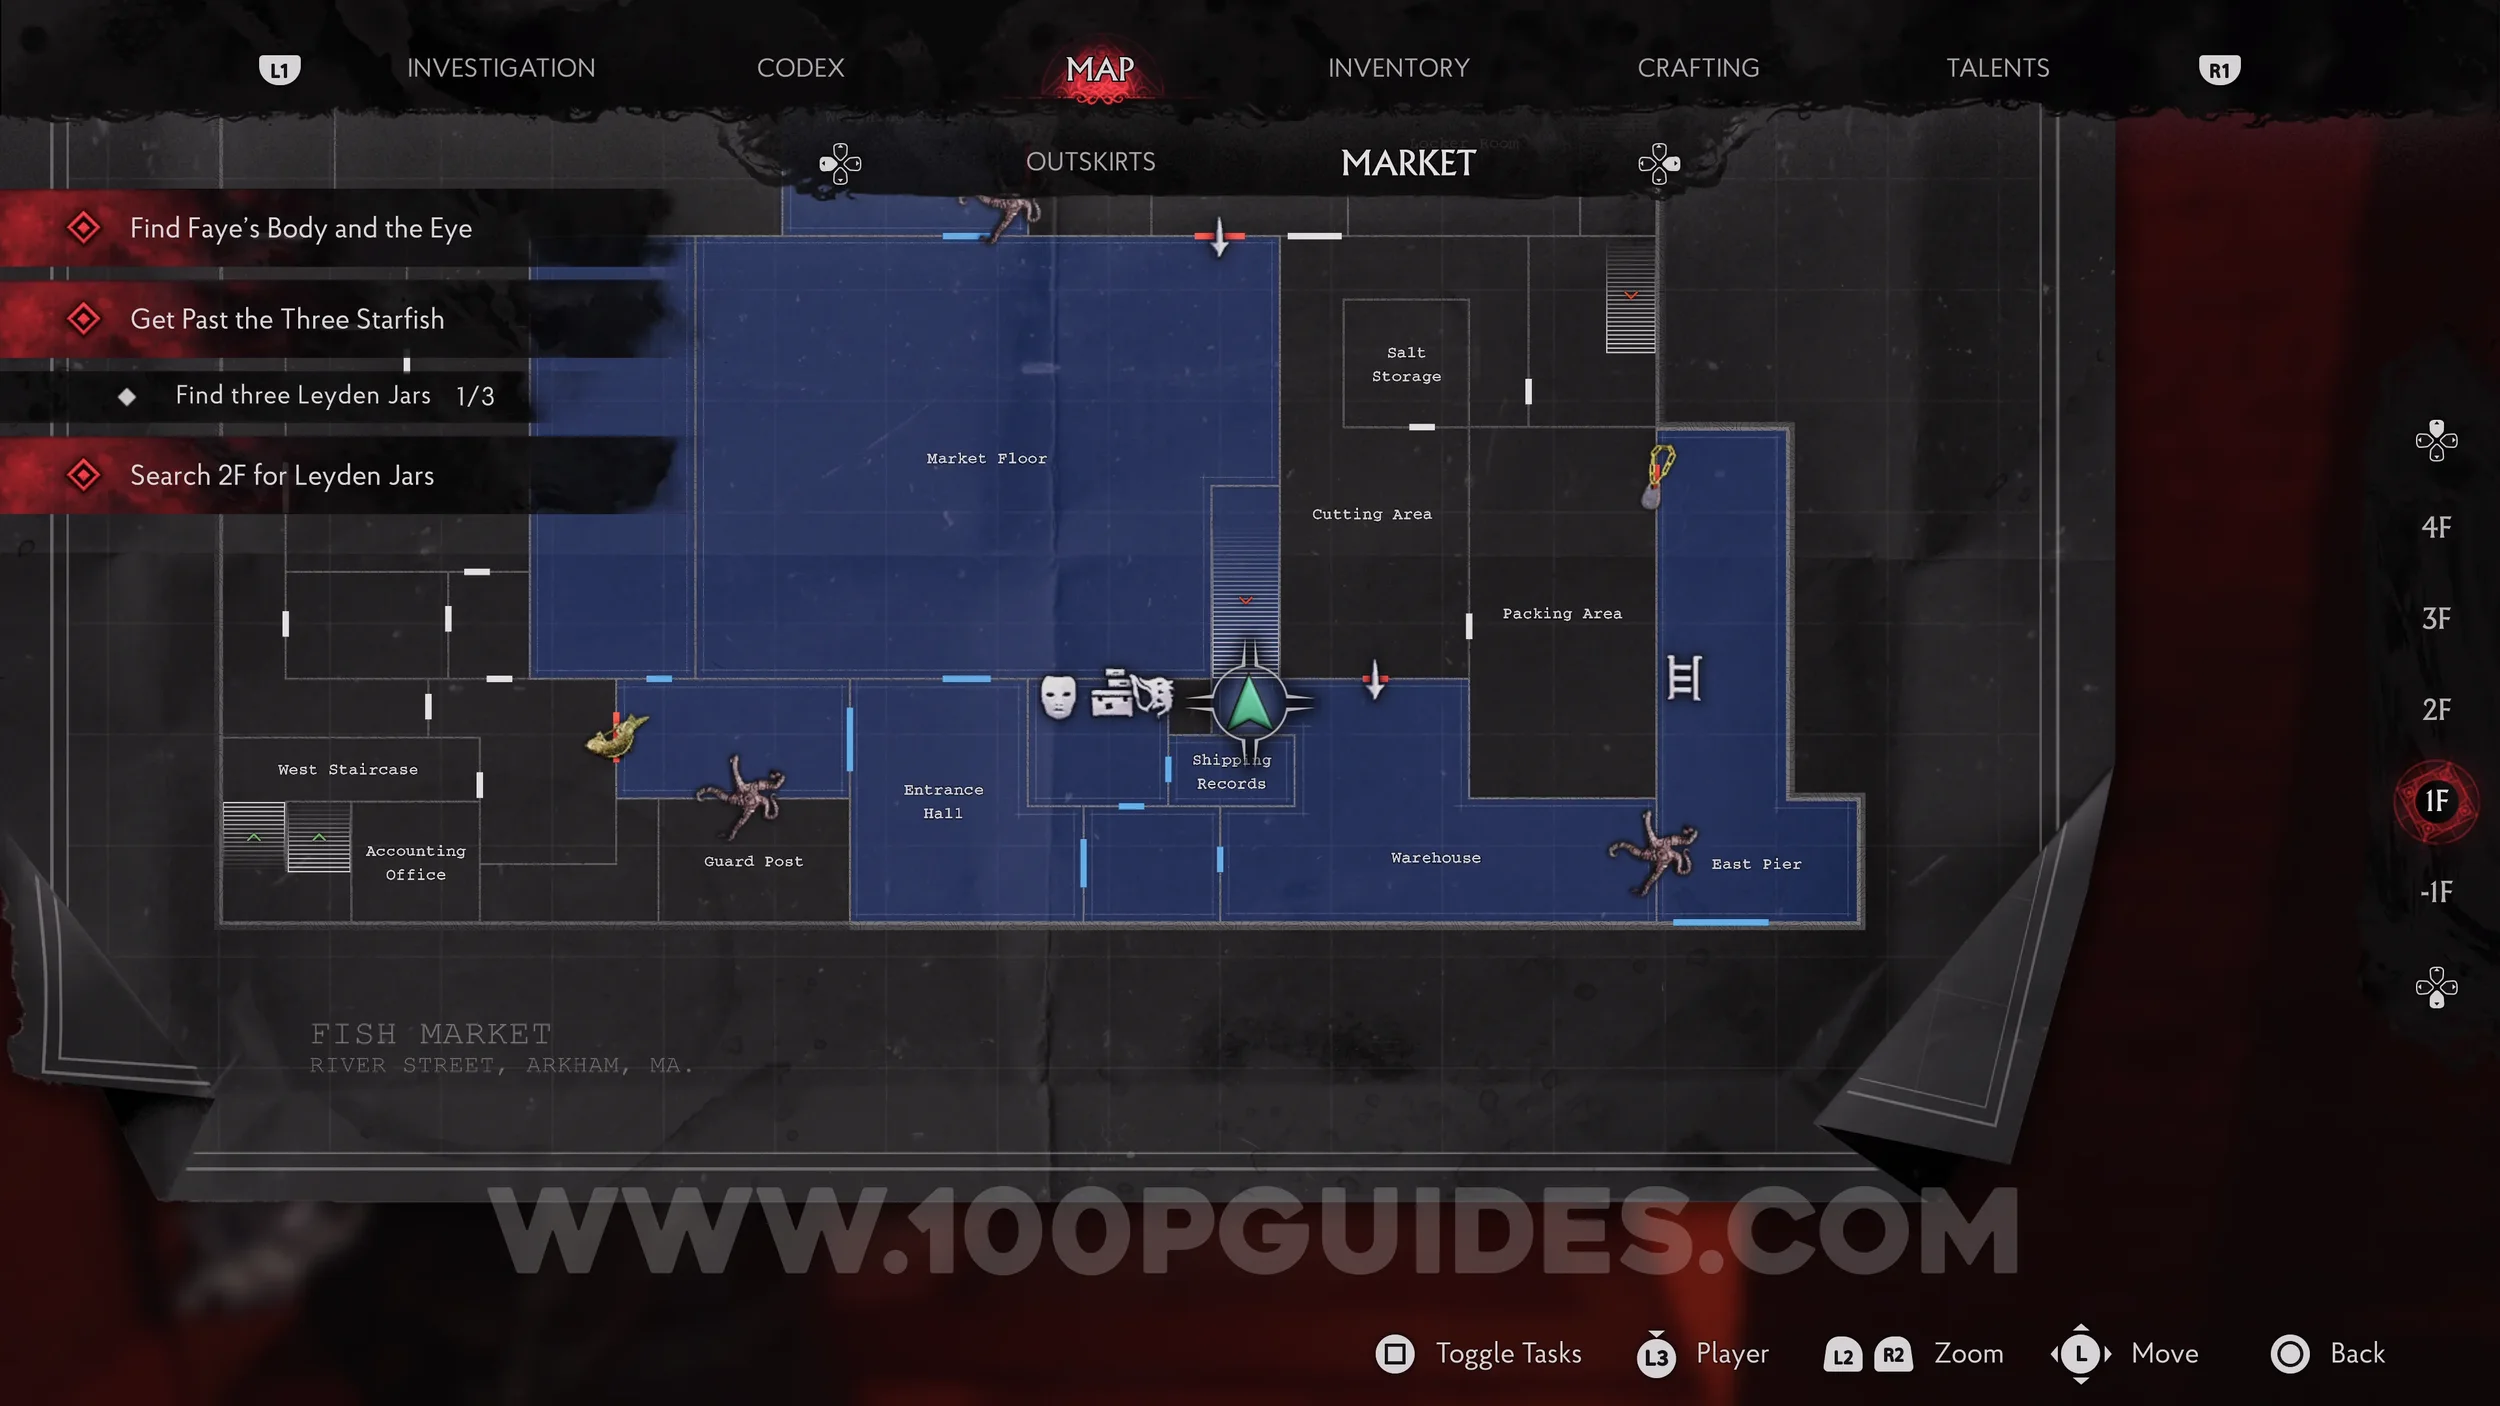
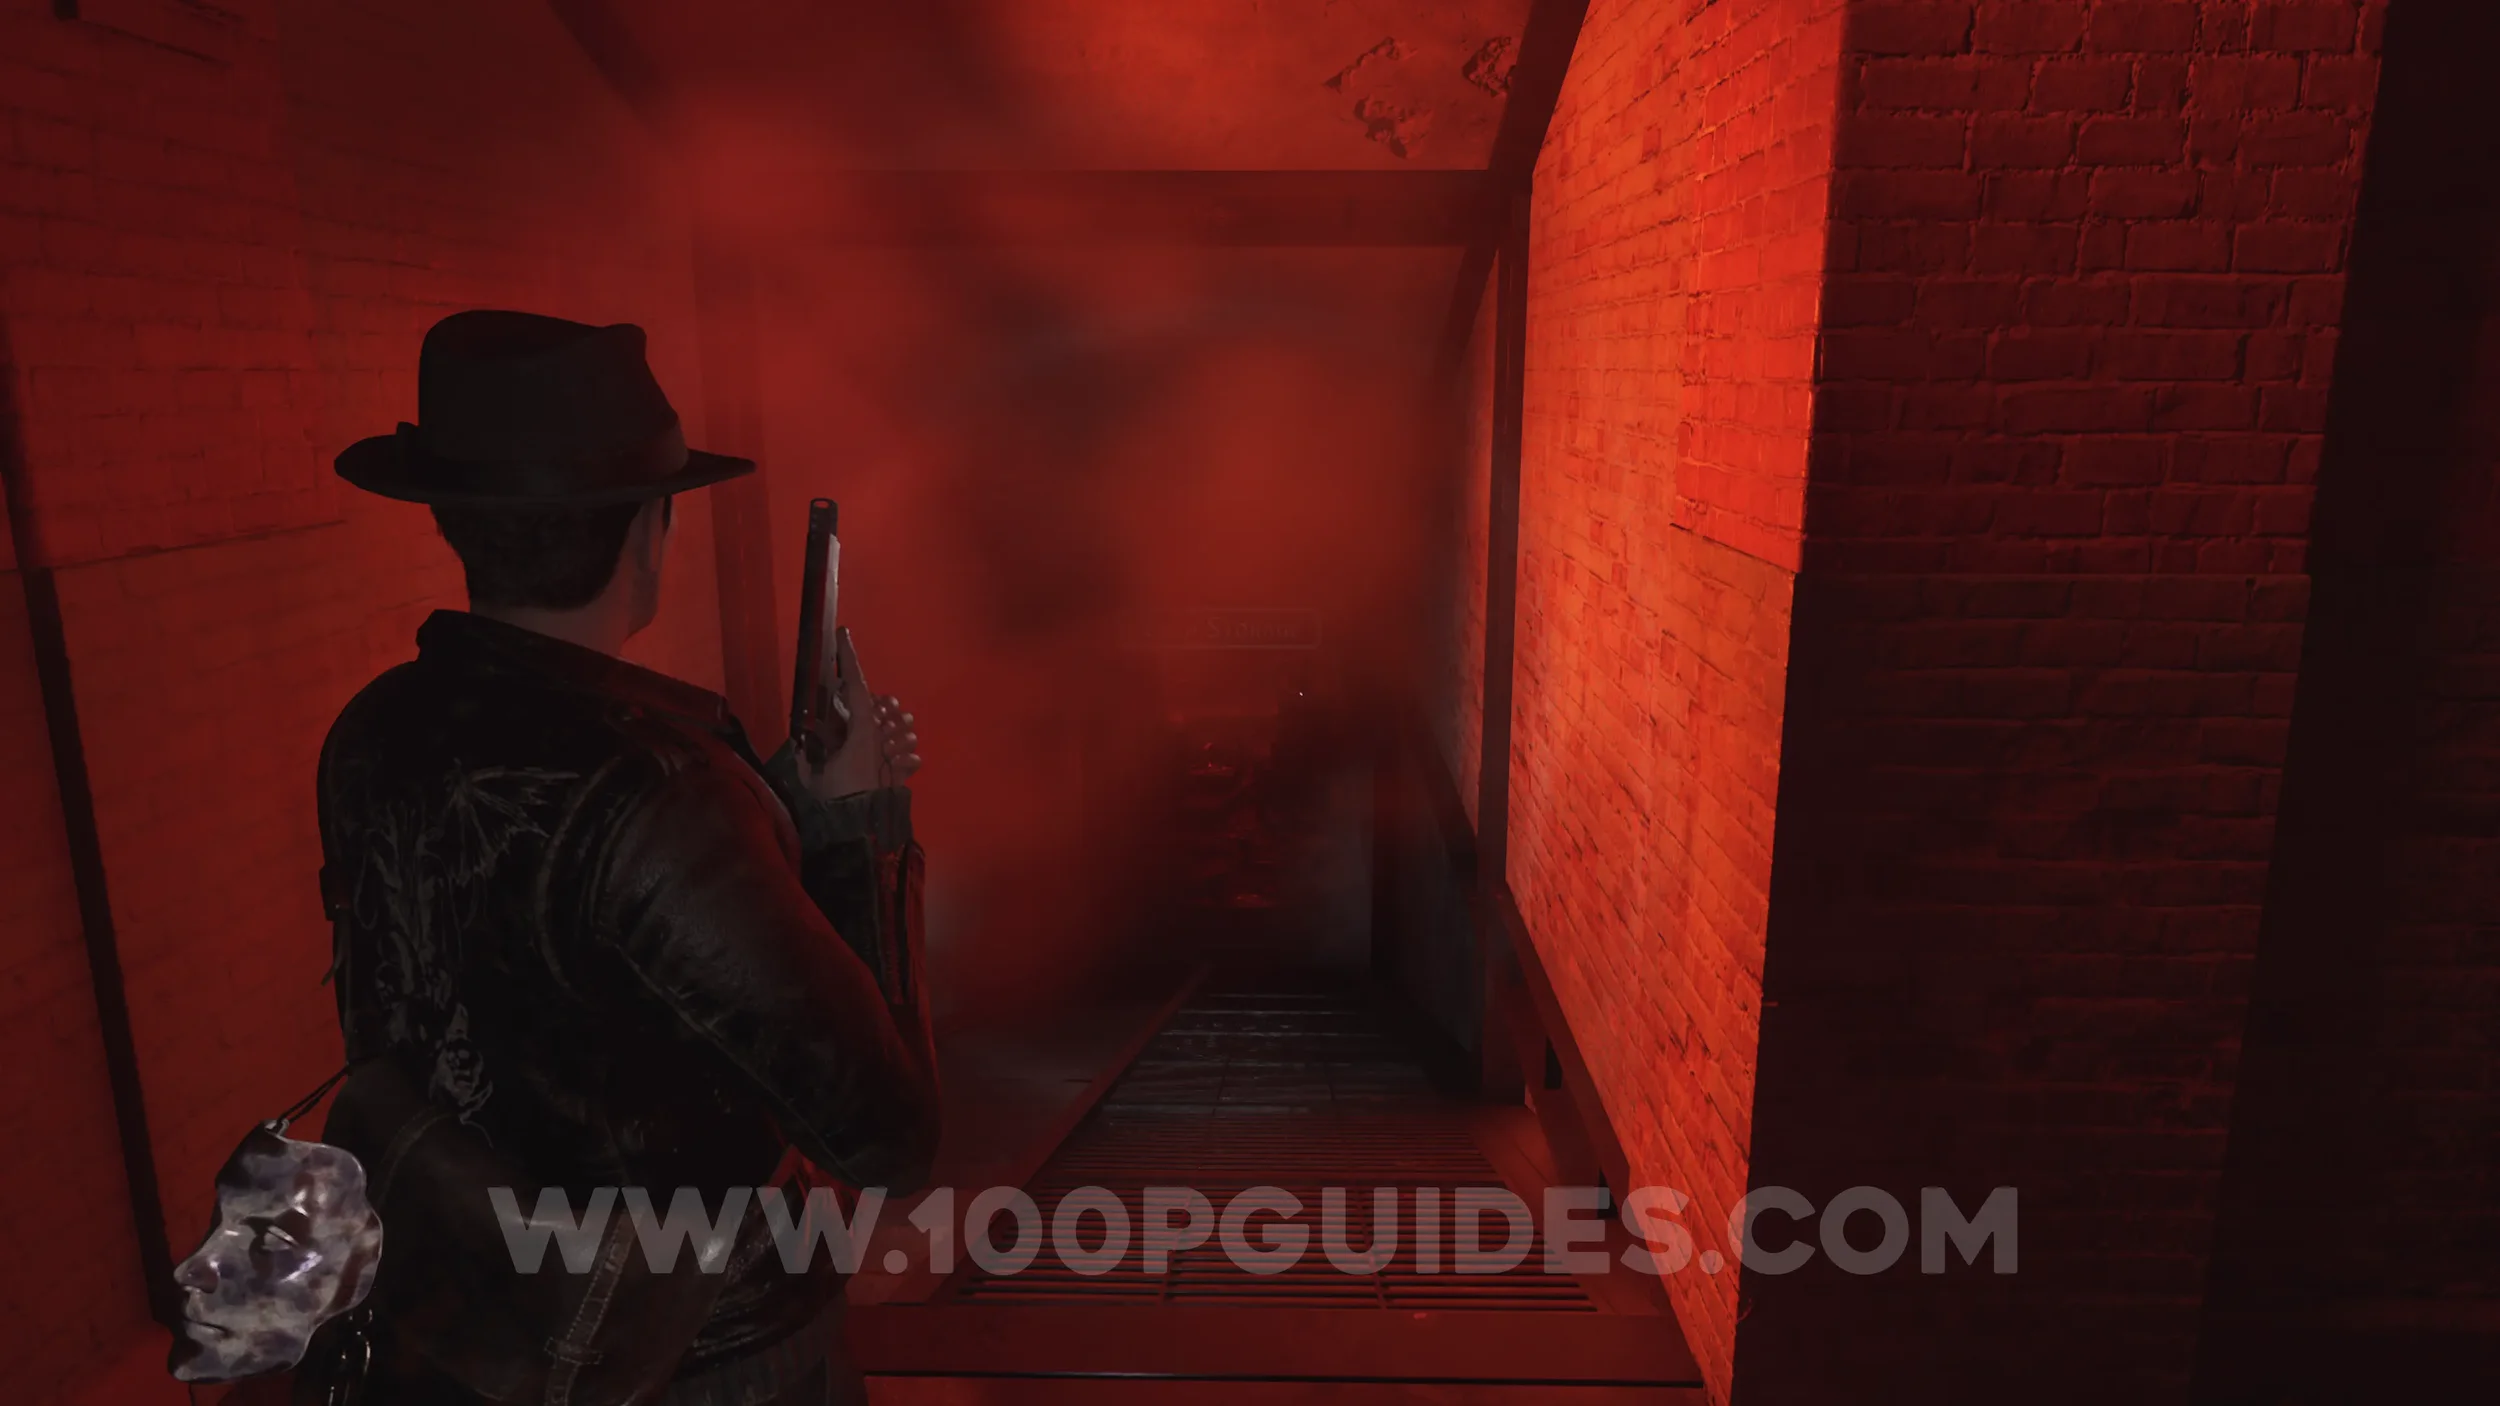
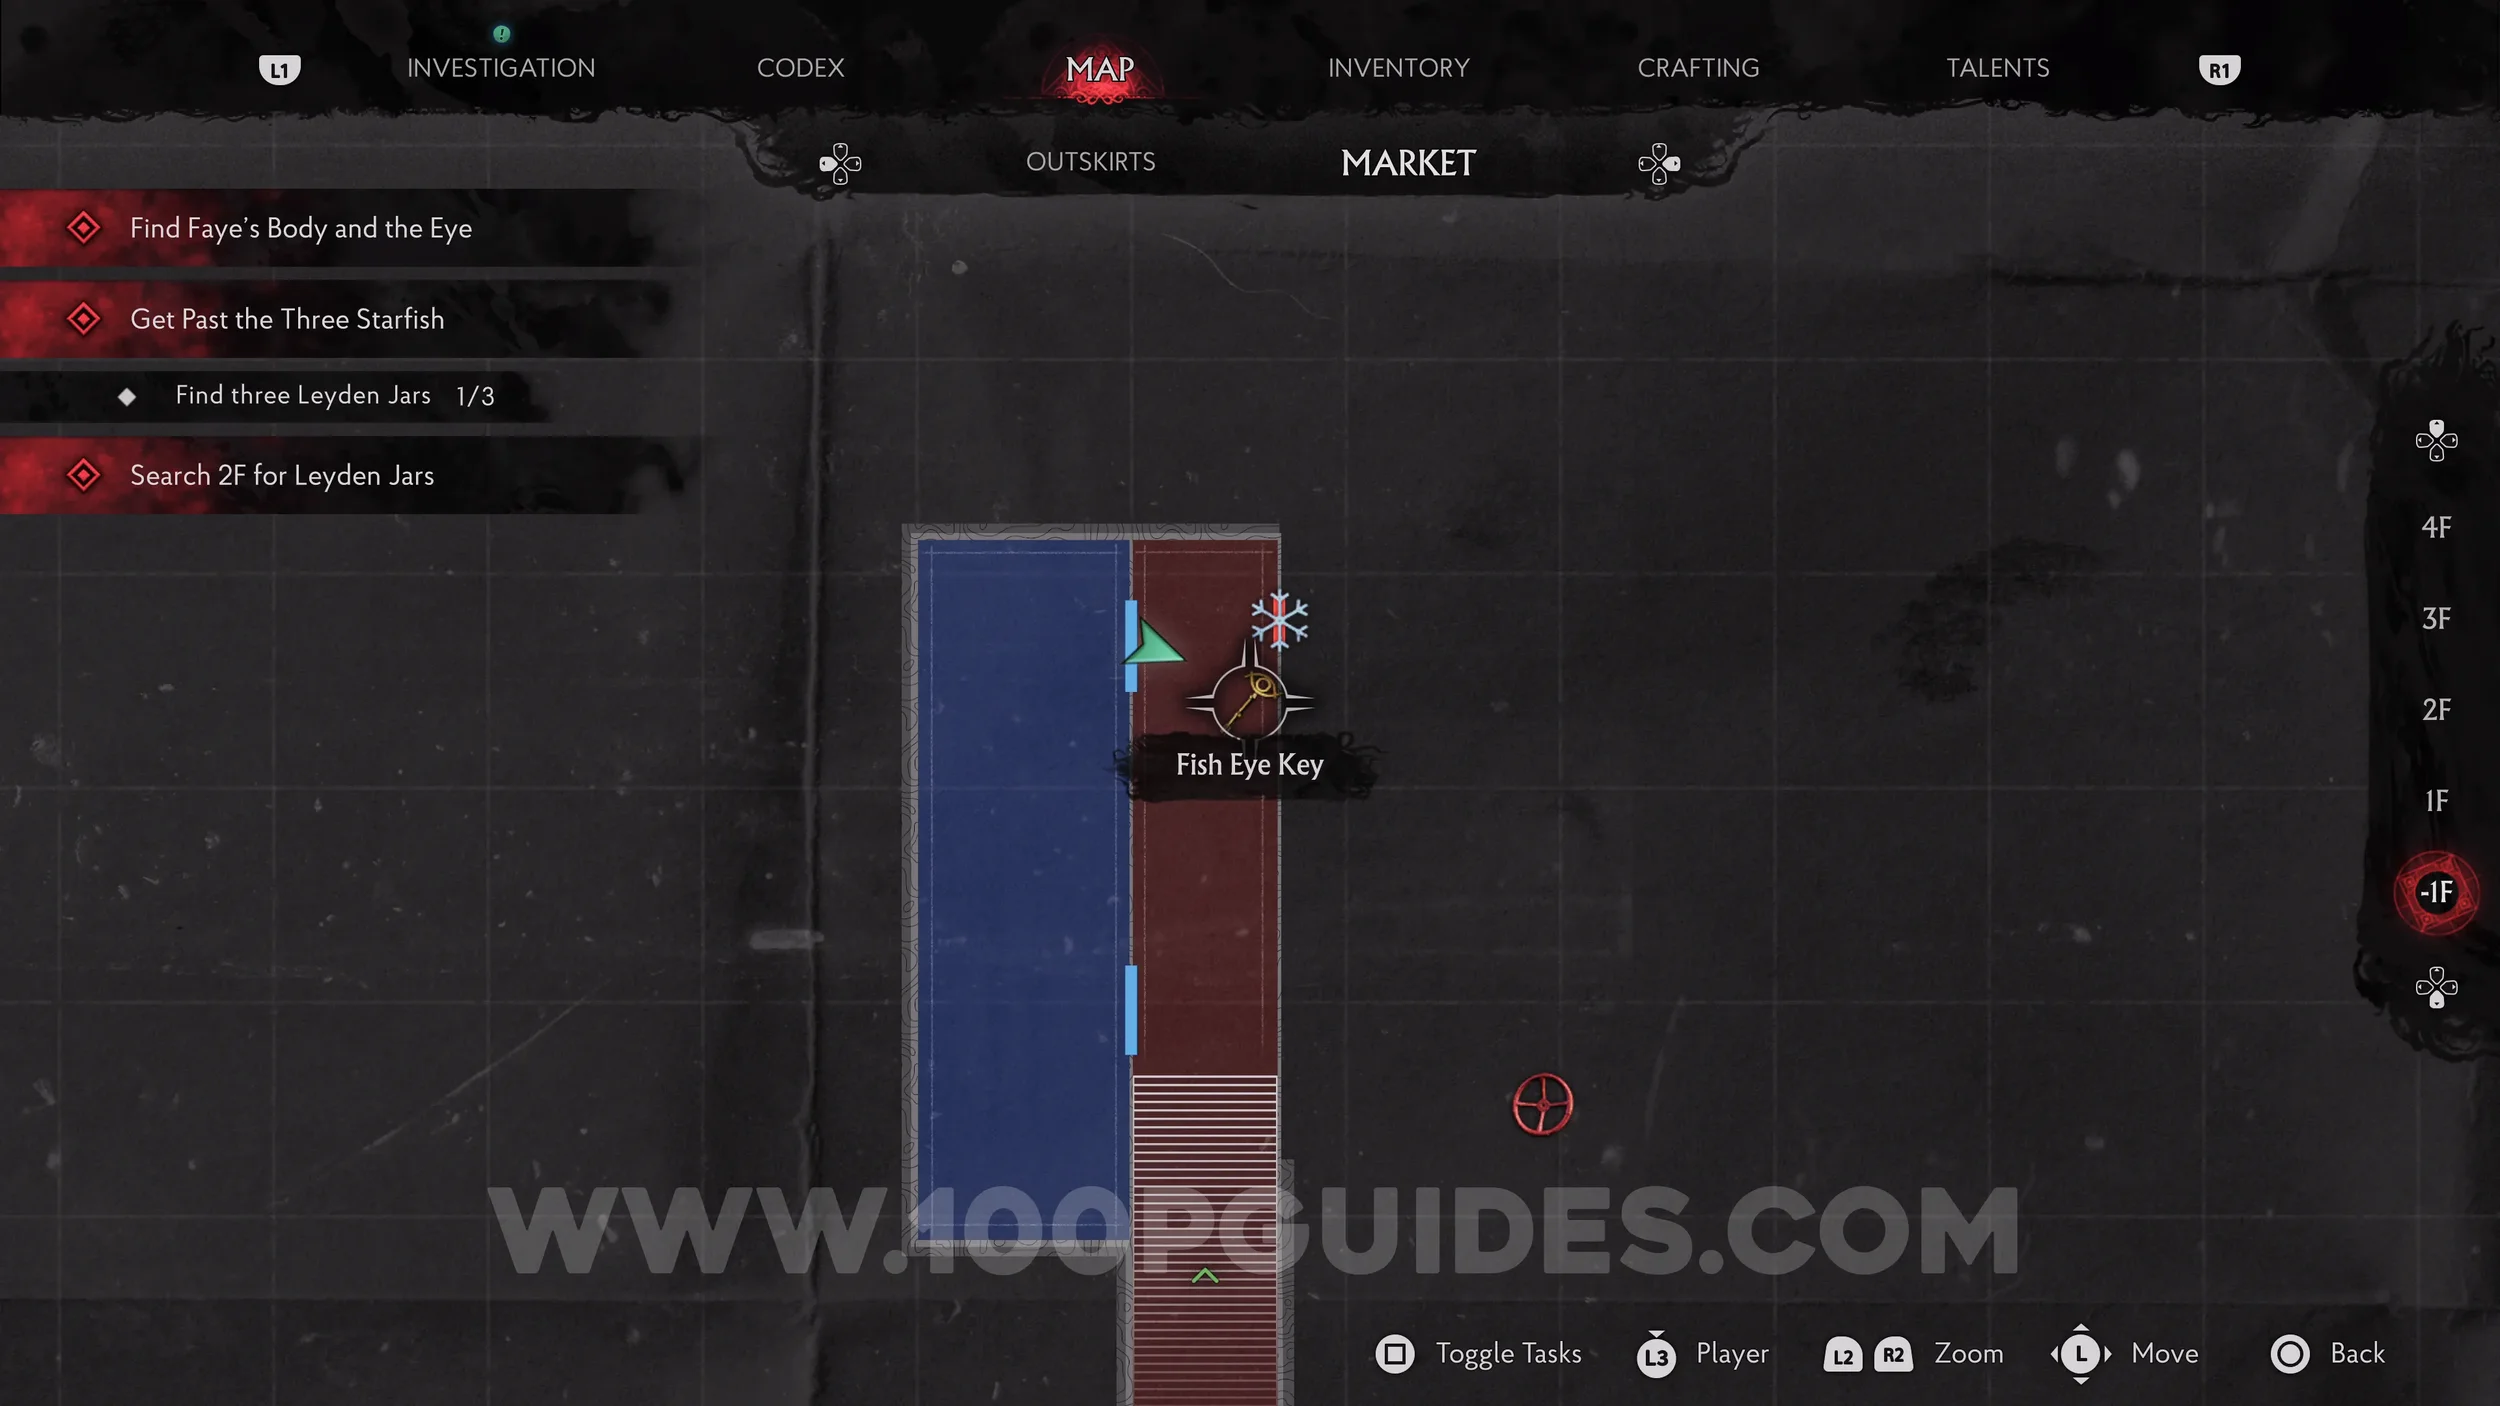
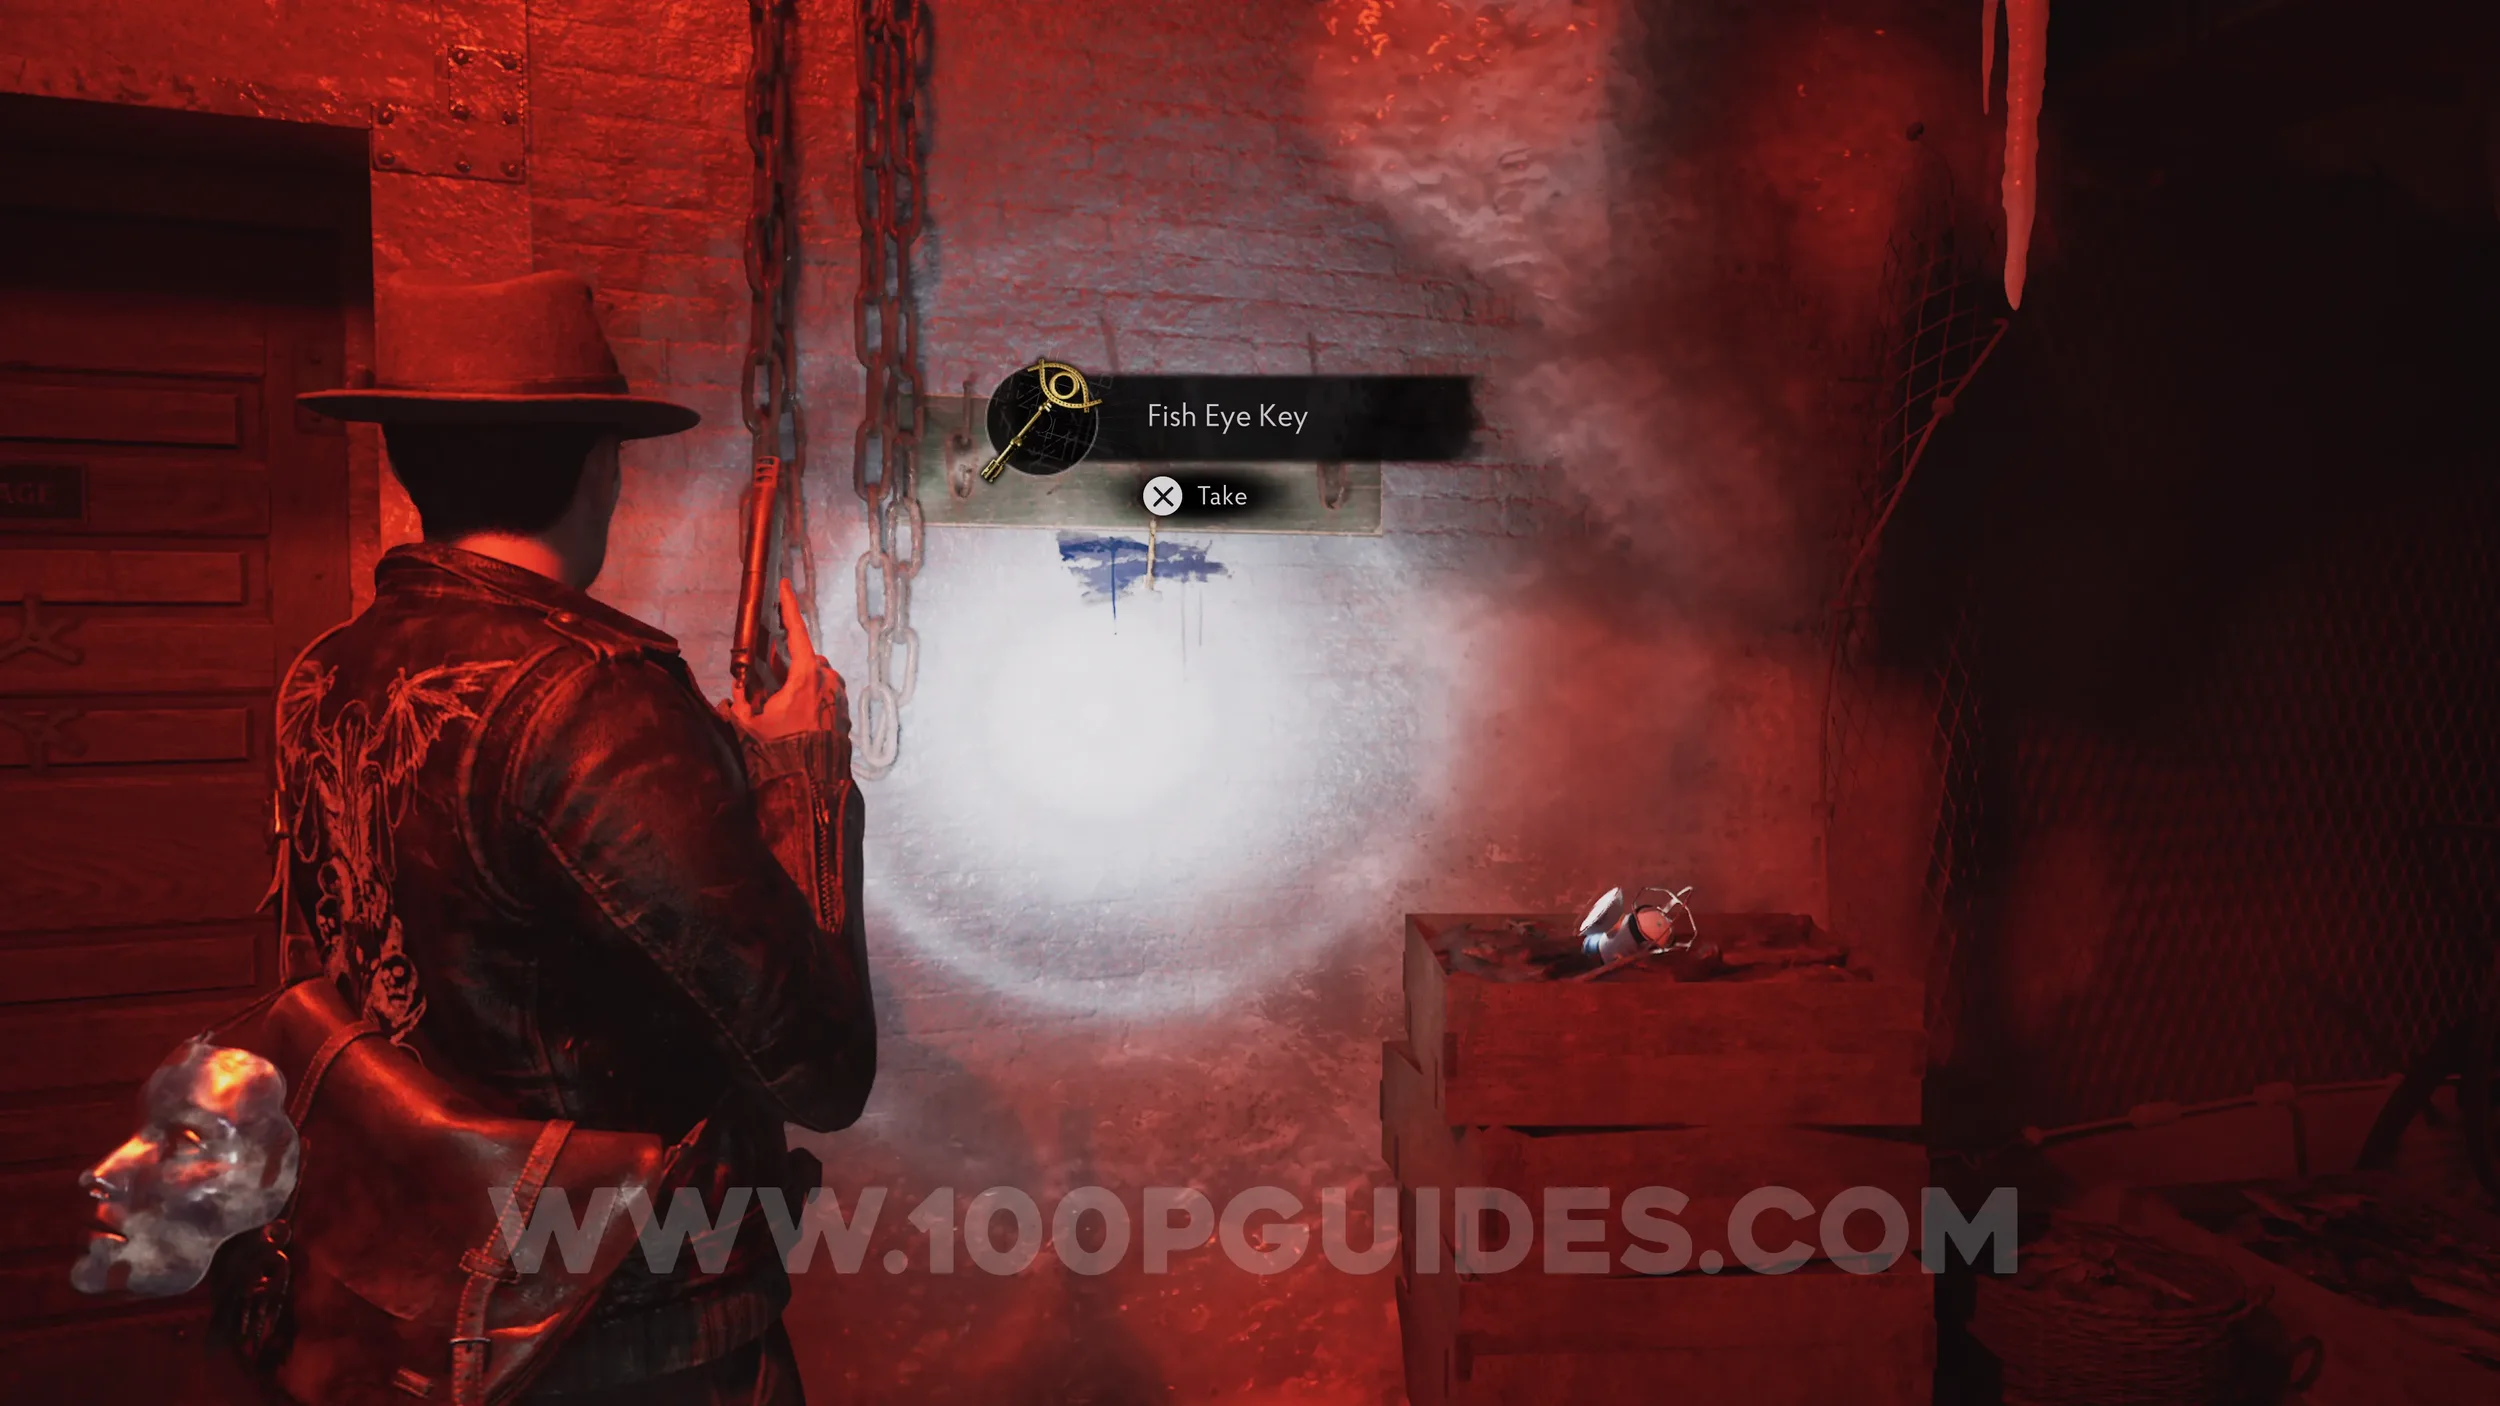
Key Item: Fish Eye Key. On the wall to the right of the previous evidence.
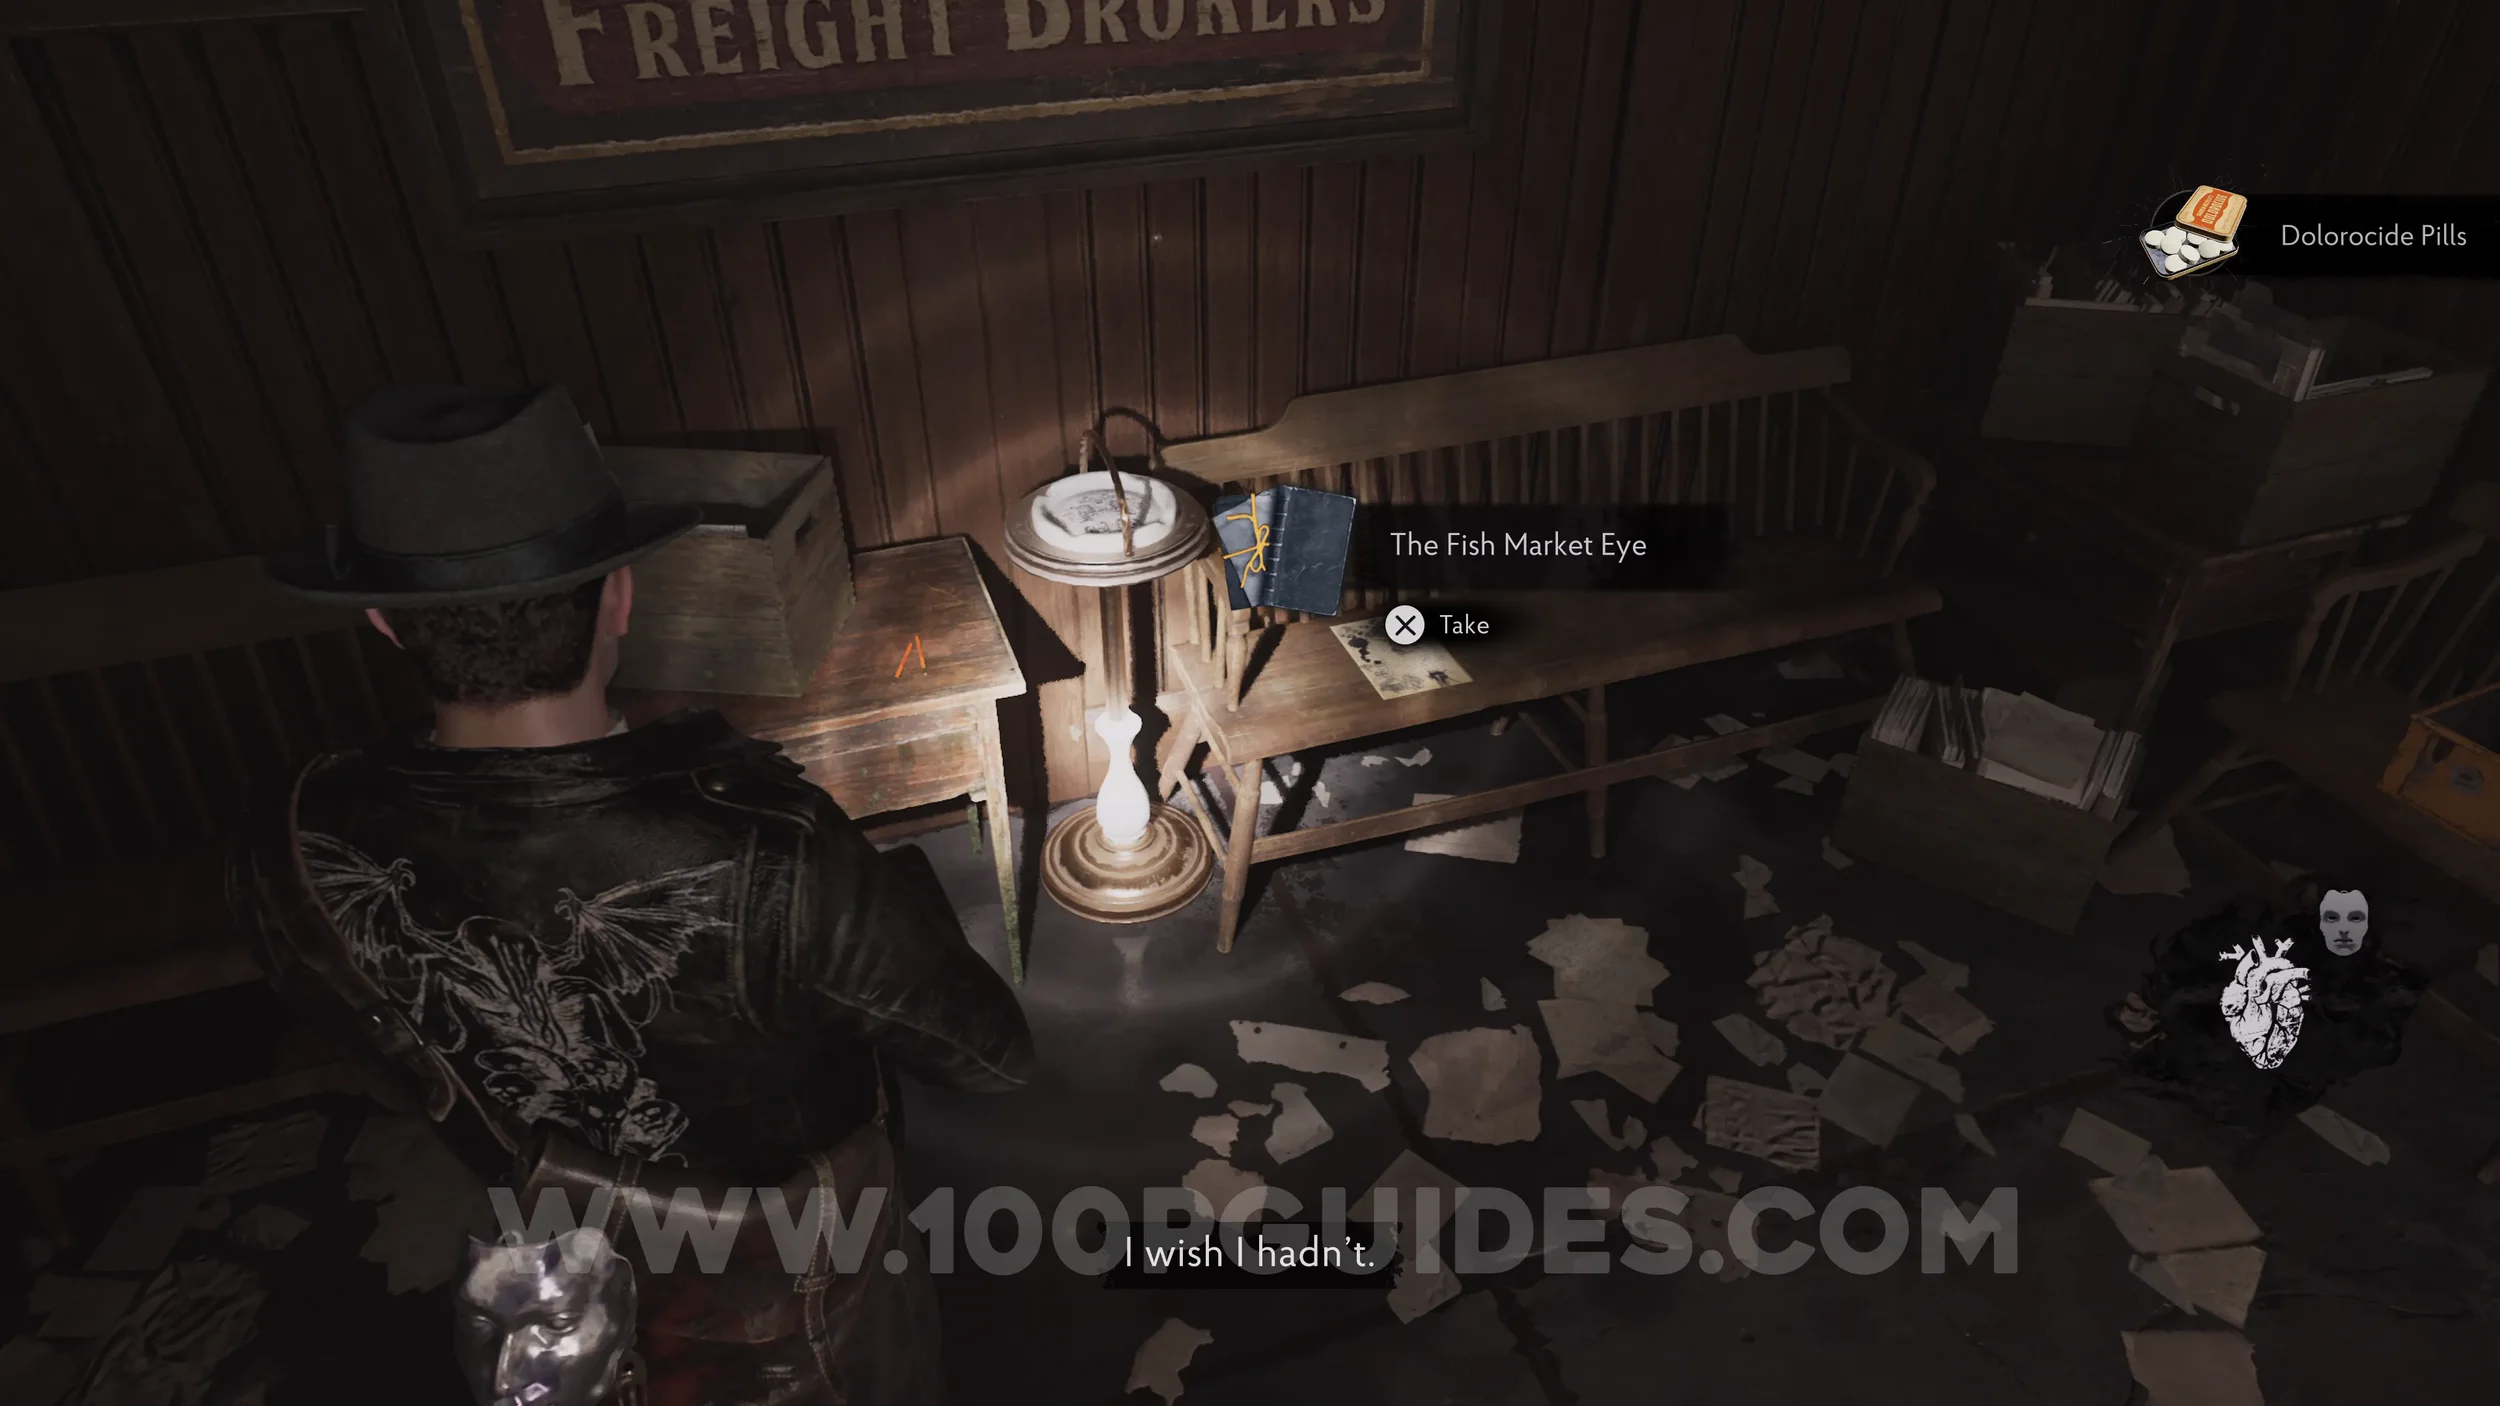
Lore Codex: The Fish Market Eye. Go back upstairs and use the Fish Eye Key to open the door to the west of the Entrance Hall. Go through it and you'll find the collectible on the bench to your left.
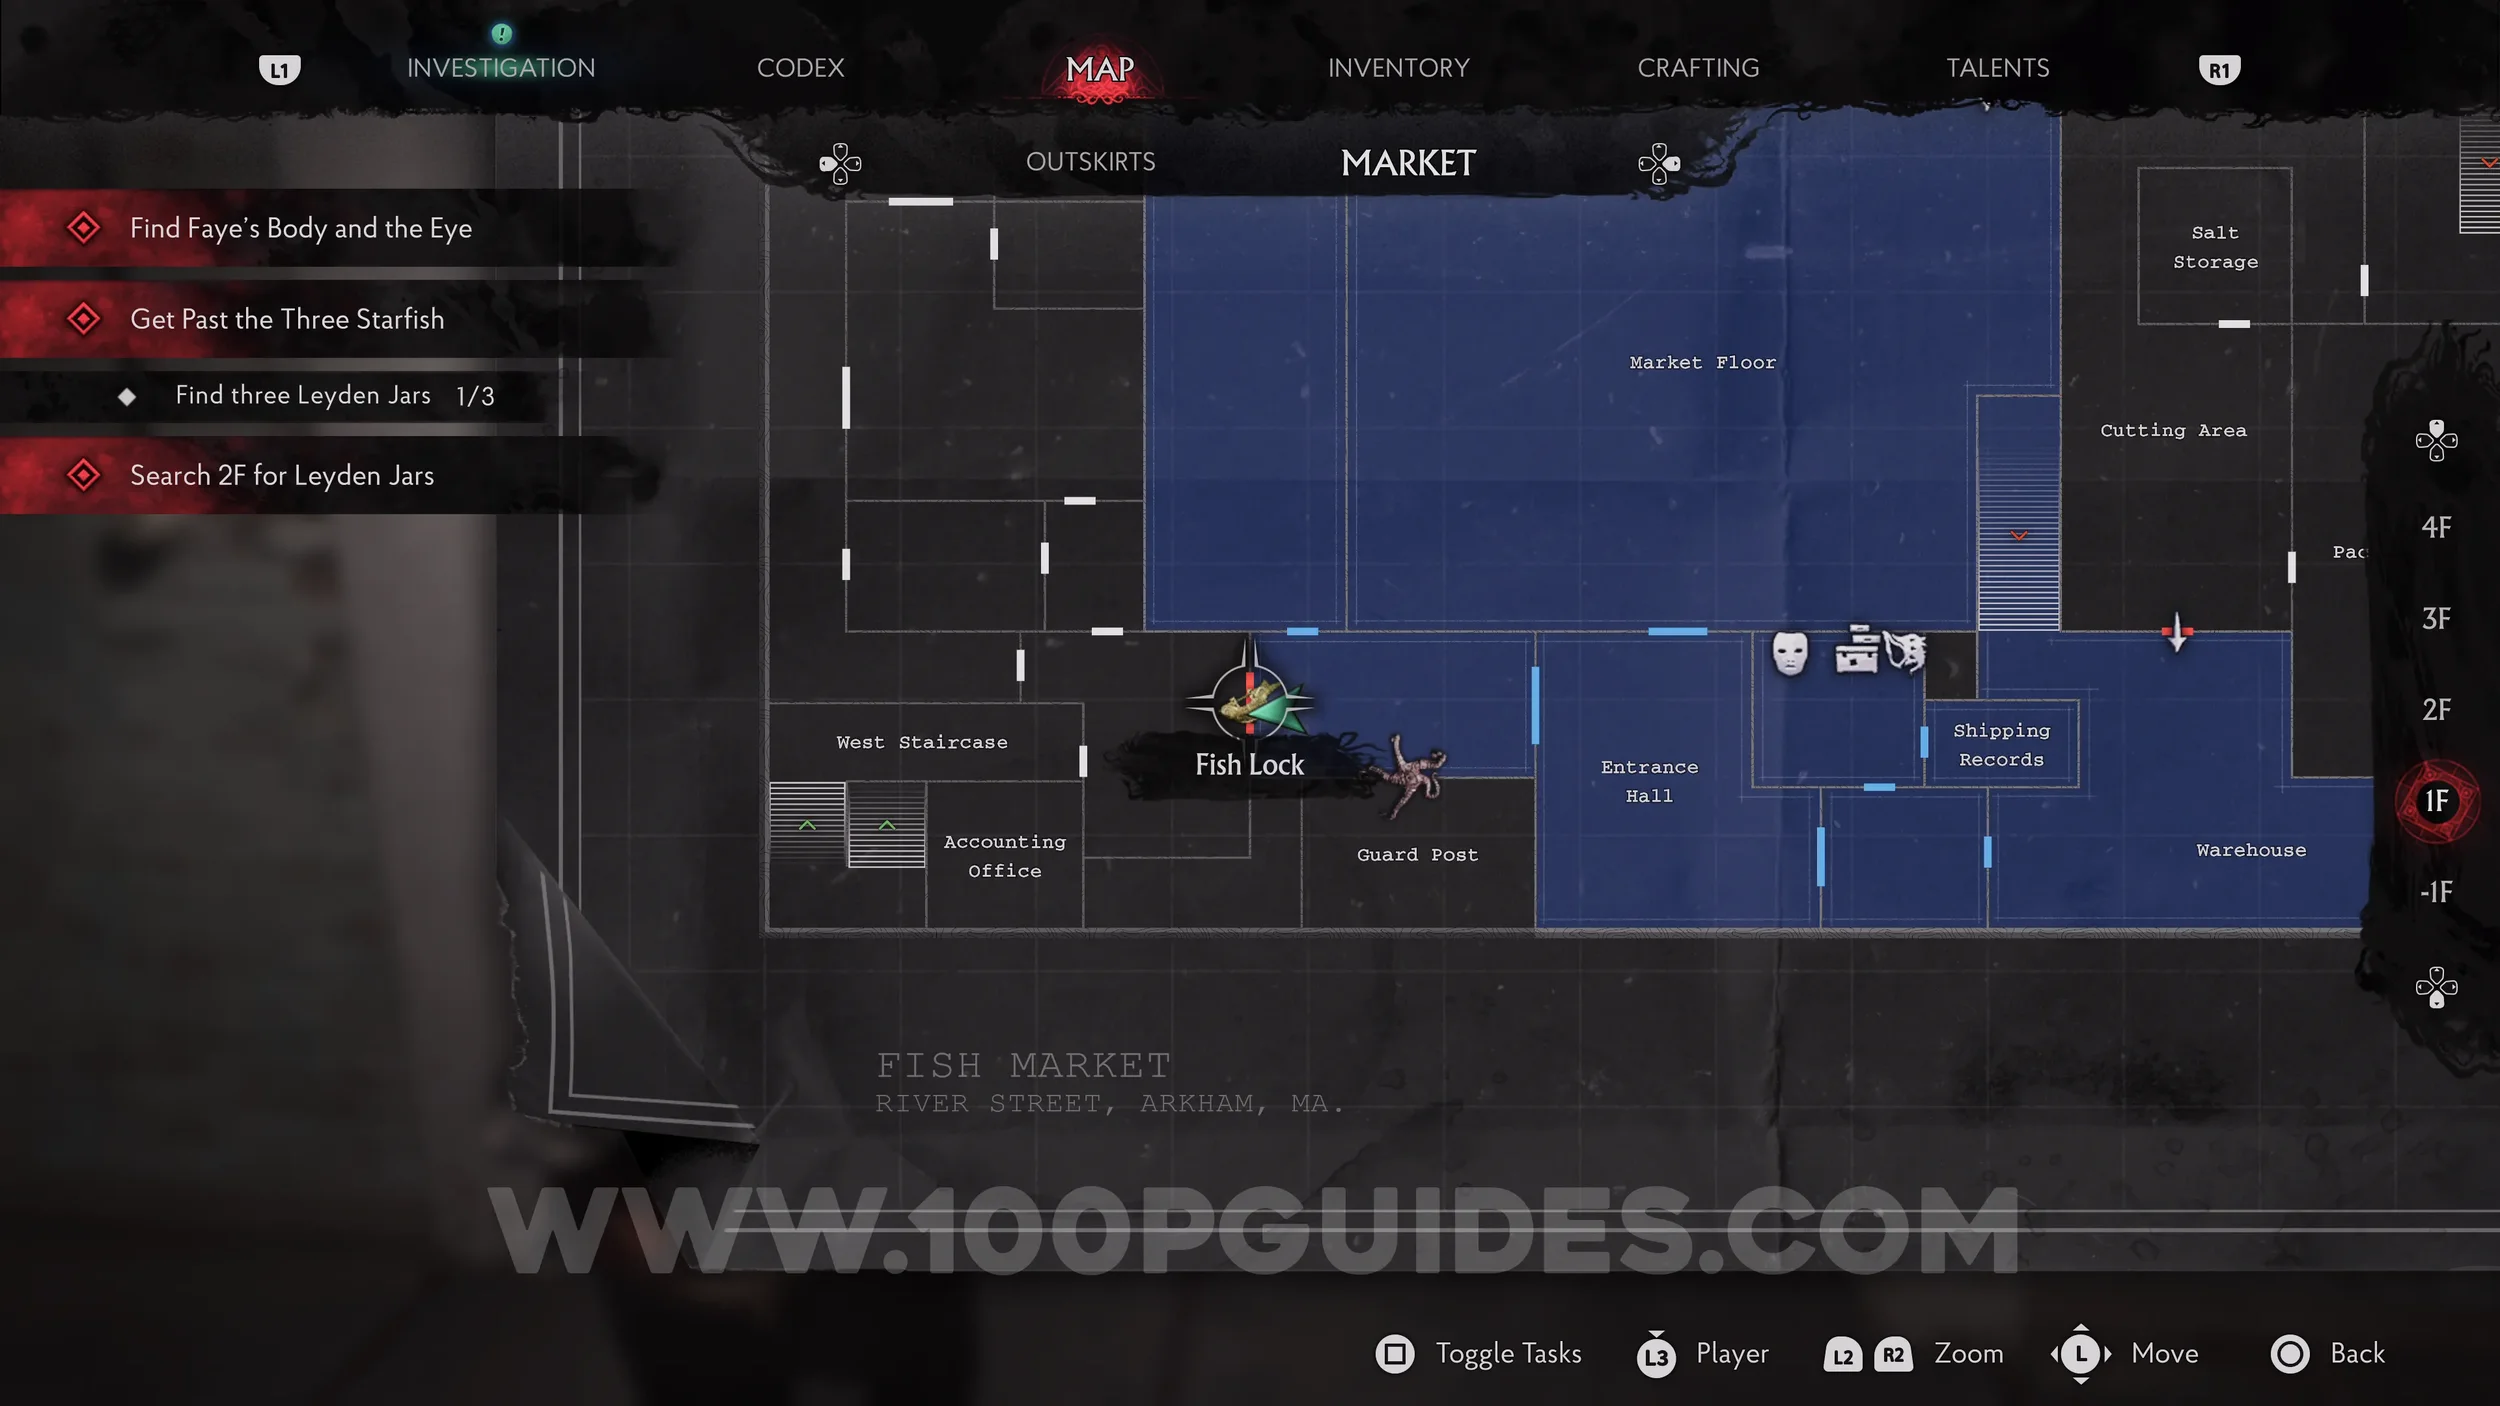
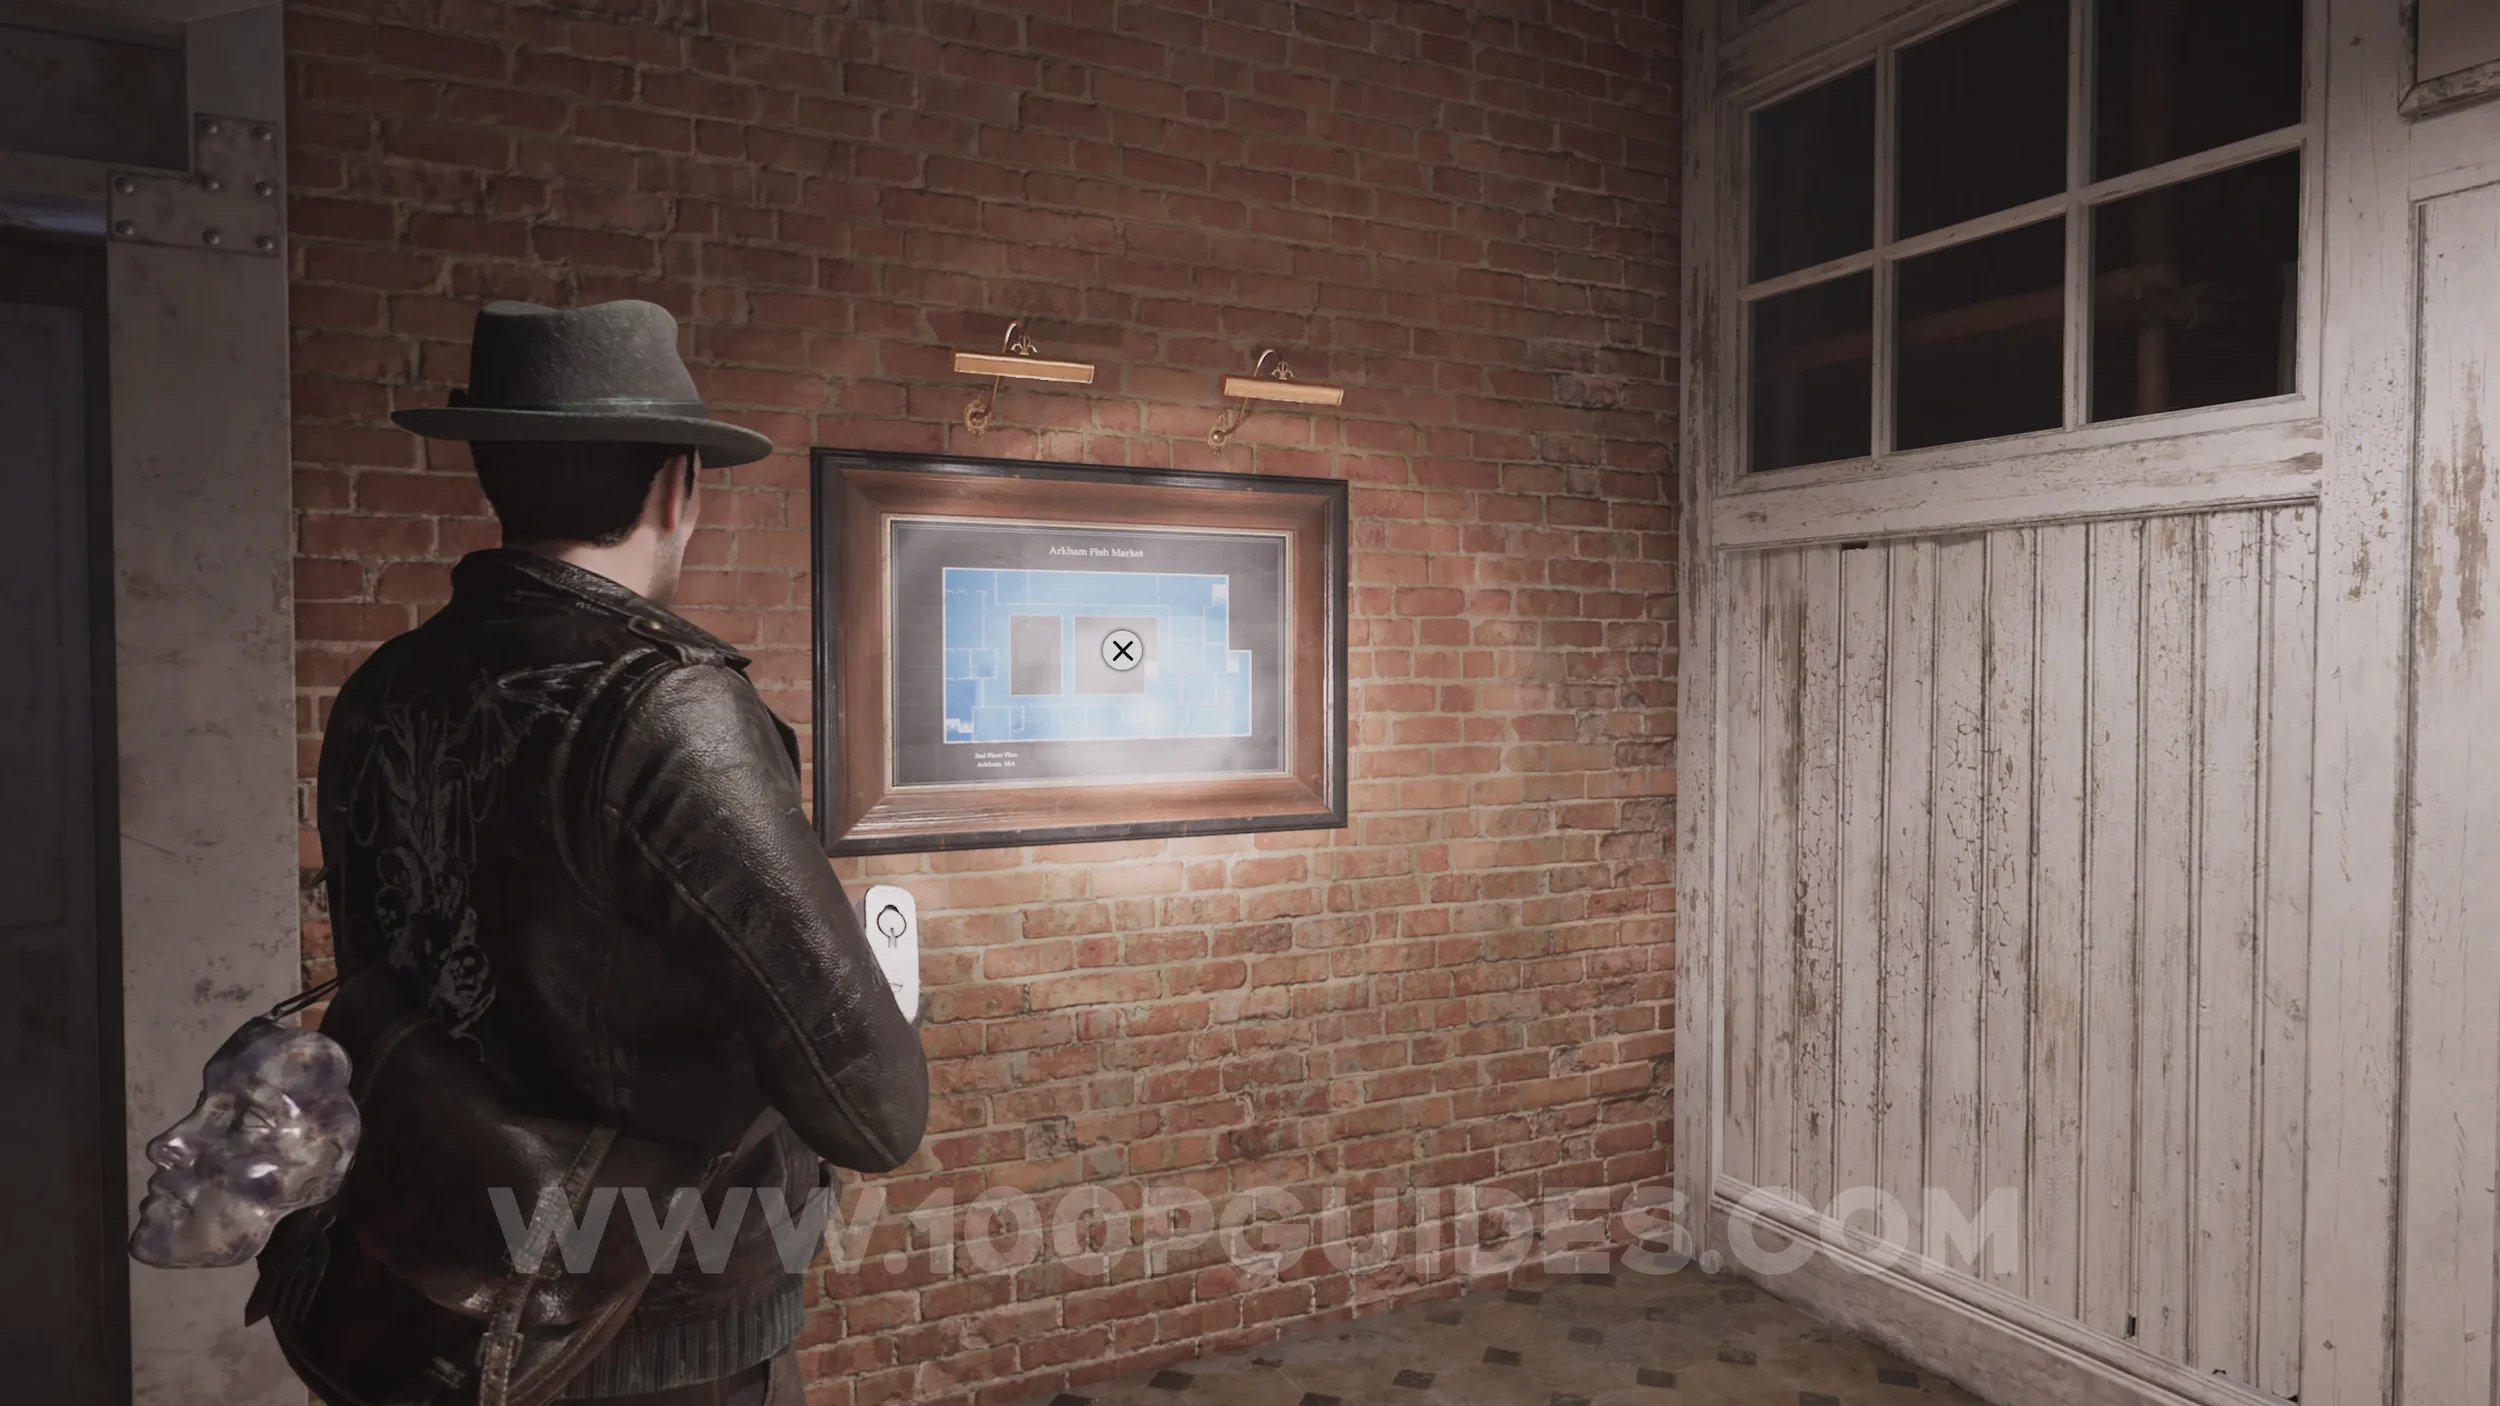
Map: Arkham Fish Market: 2nd Floor. Head up the West Staircase and you'll find the map on the wall on the left at the top.
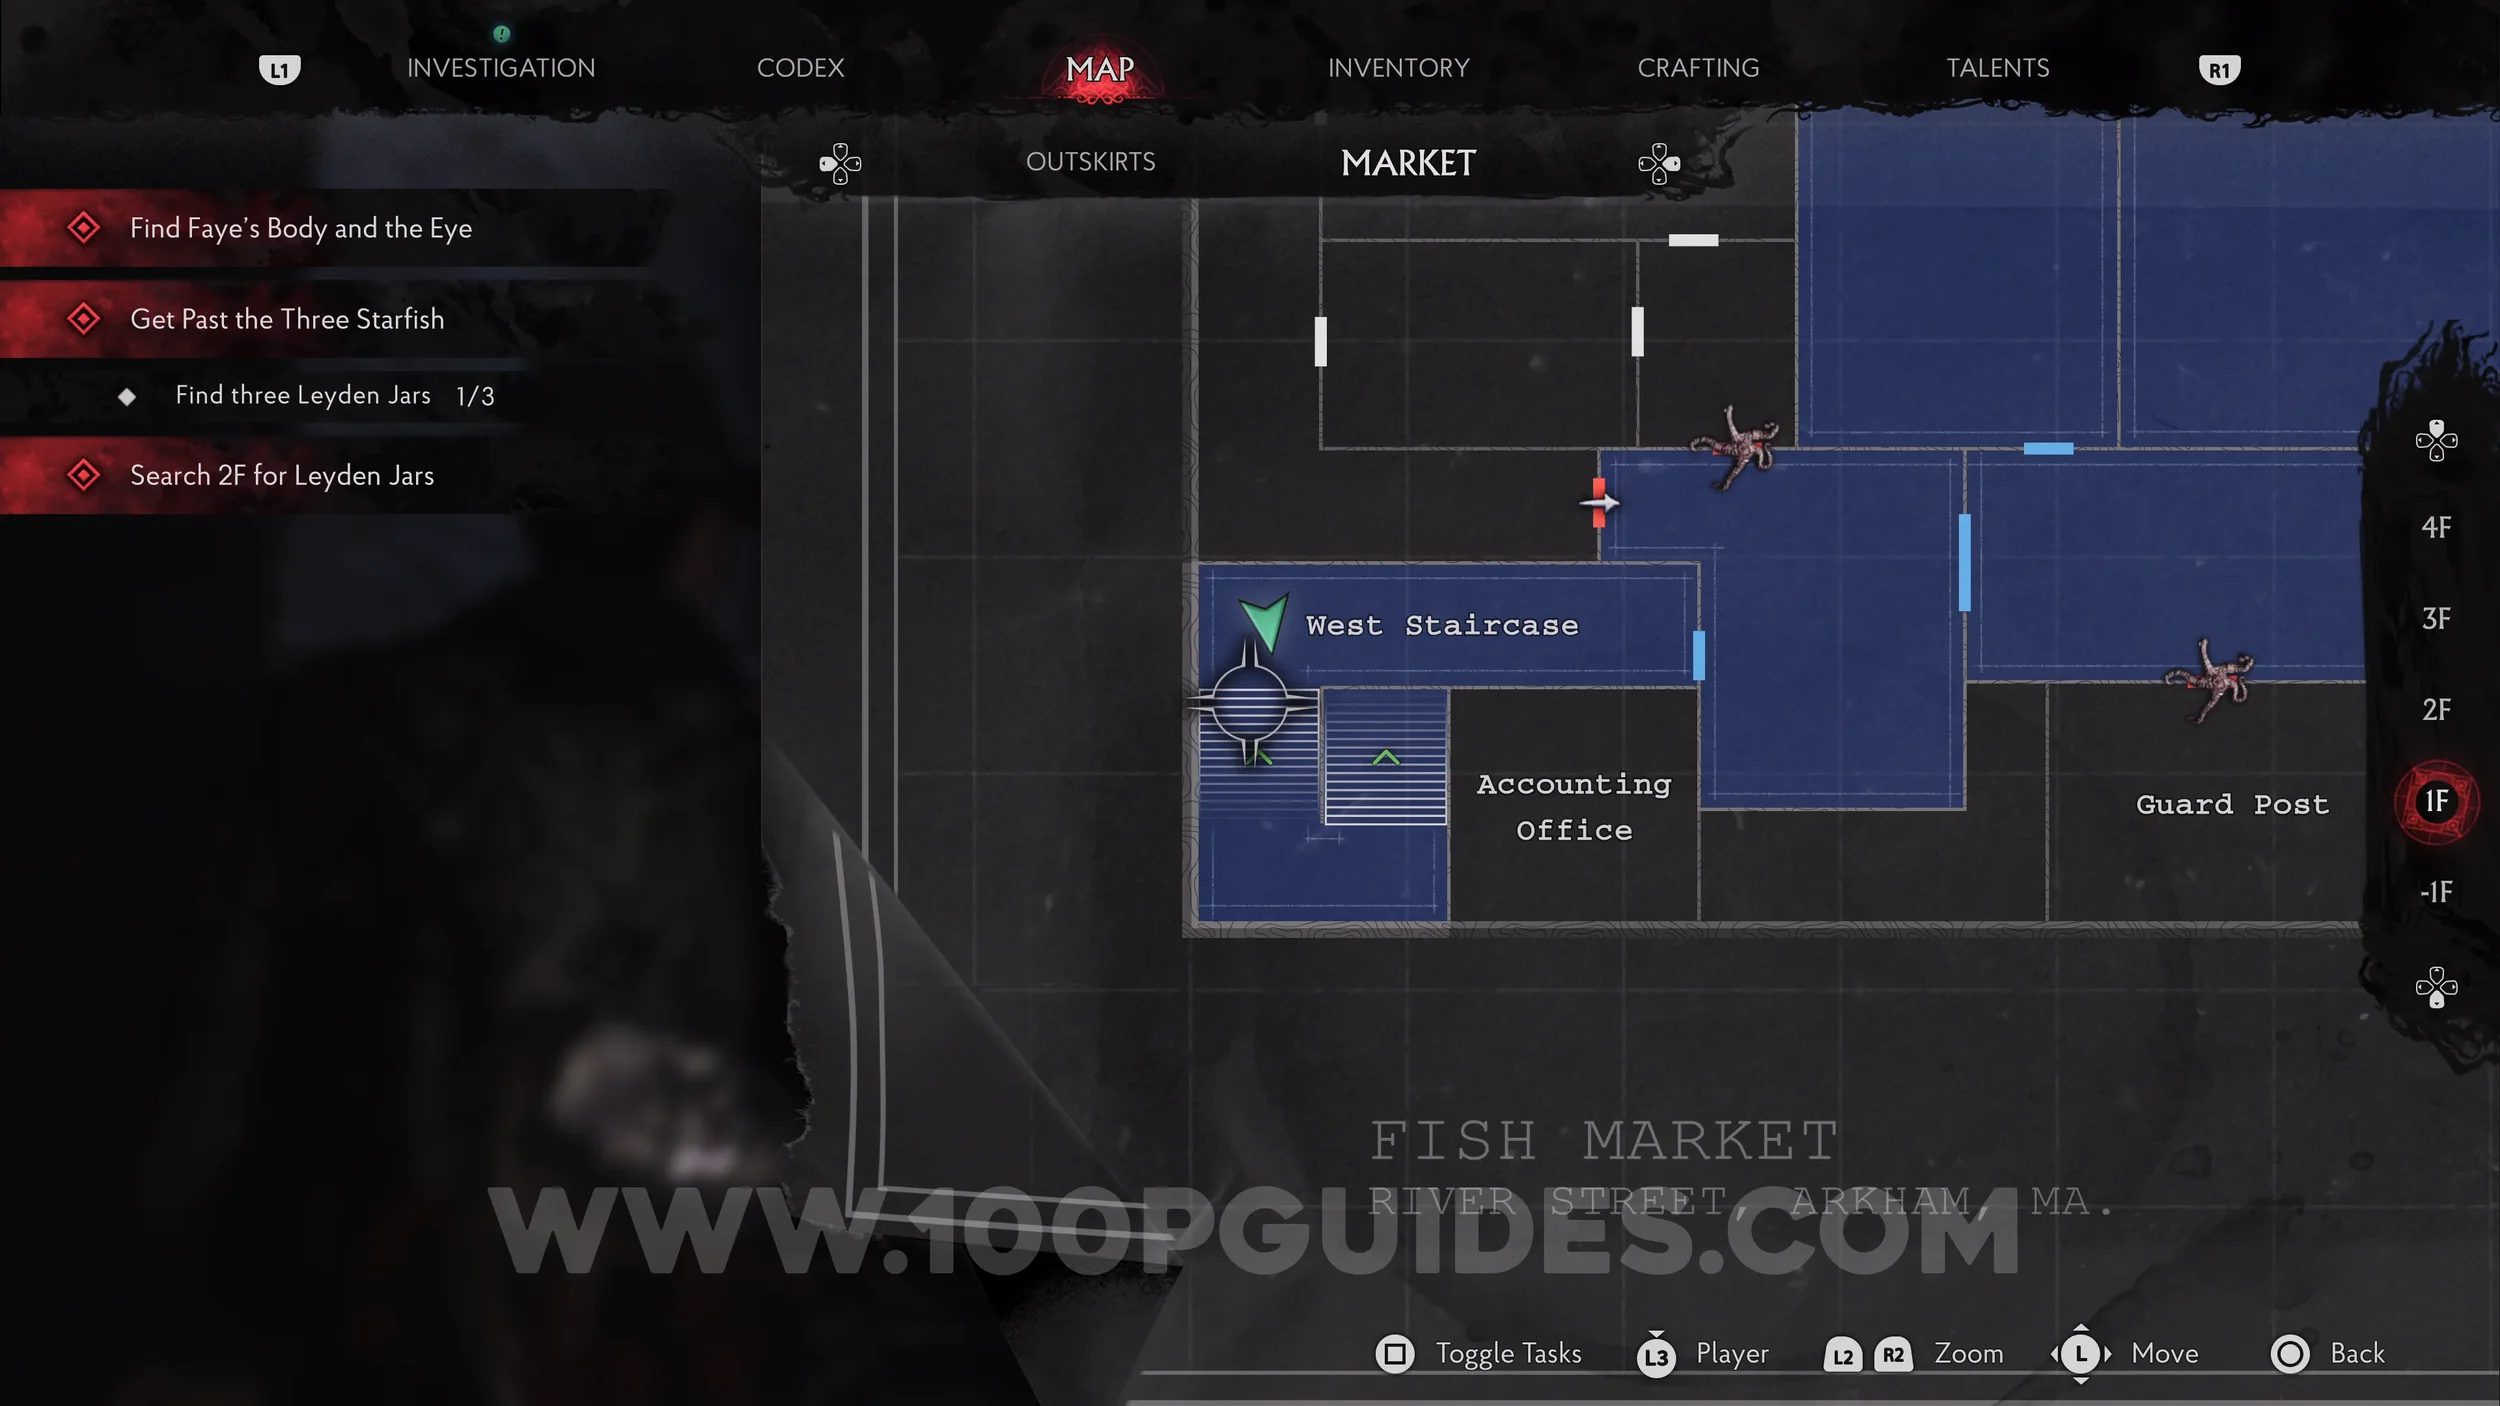
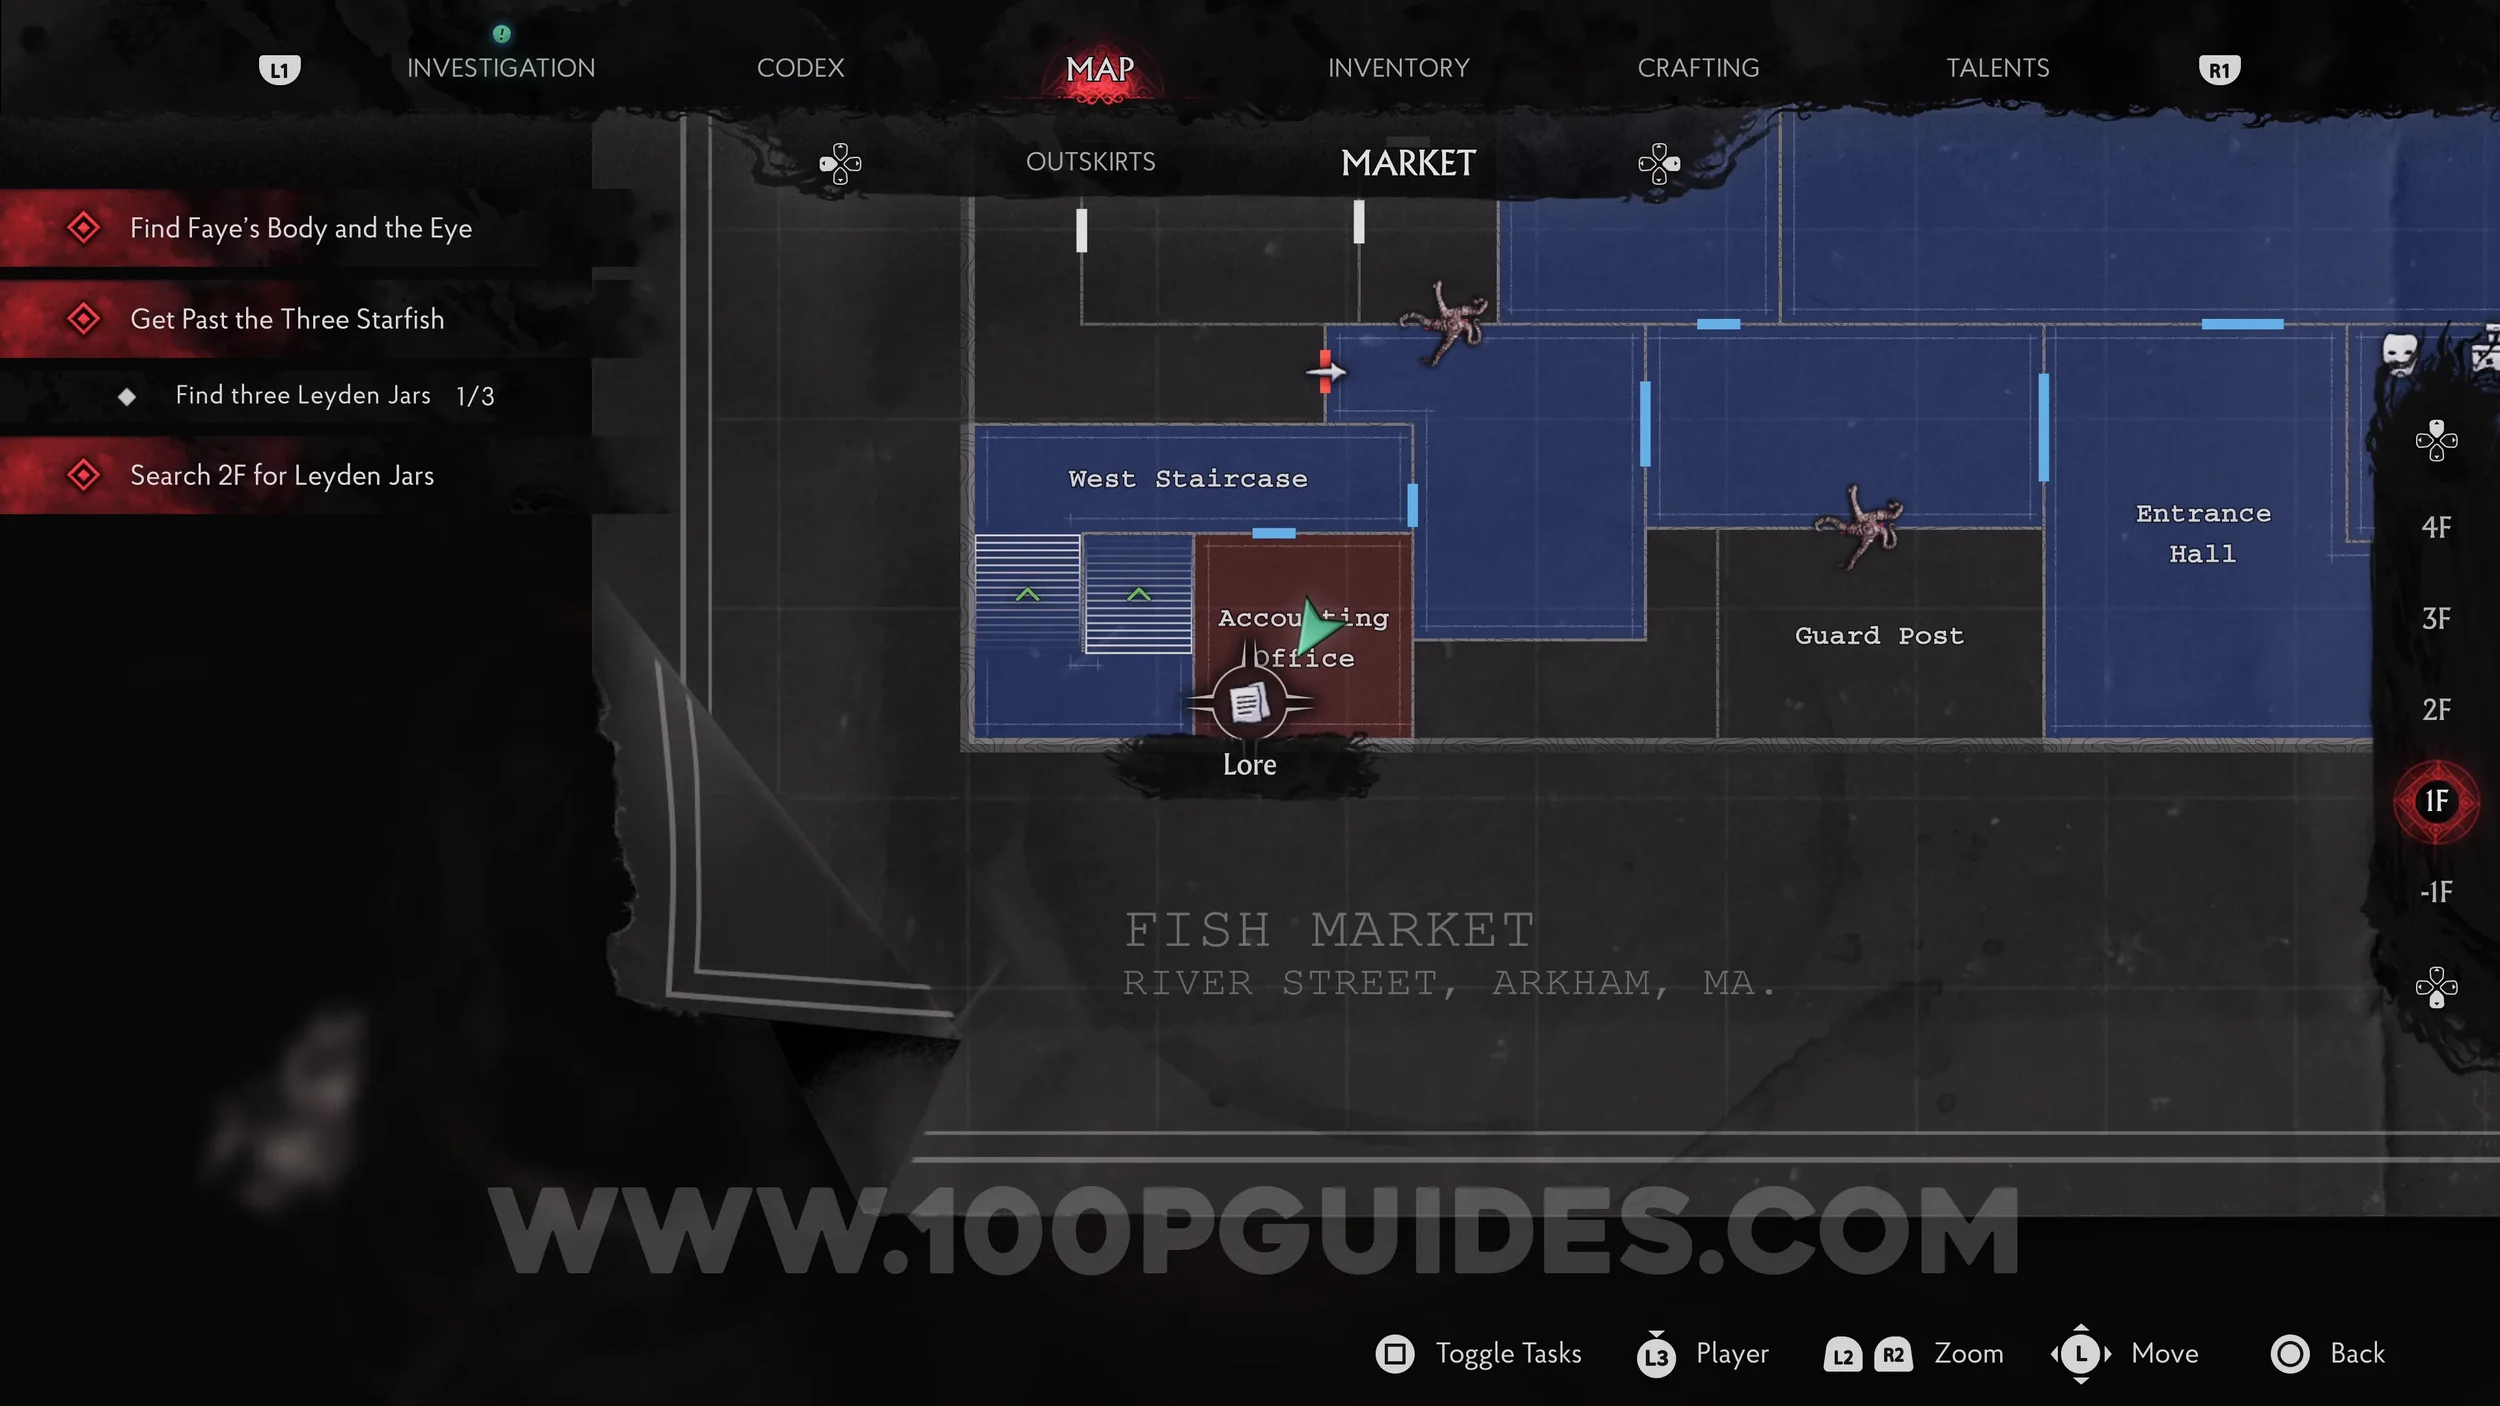
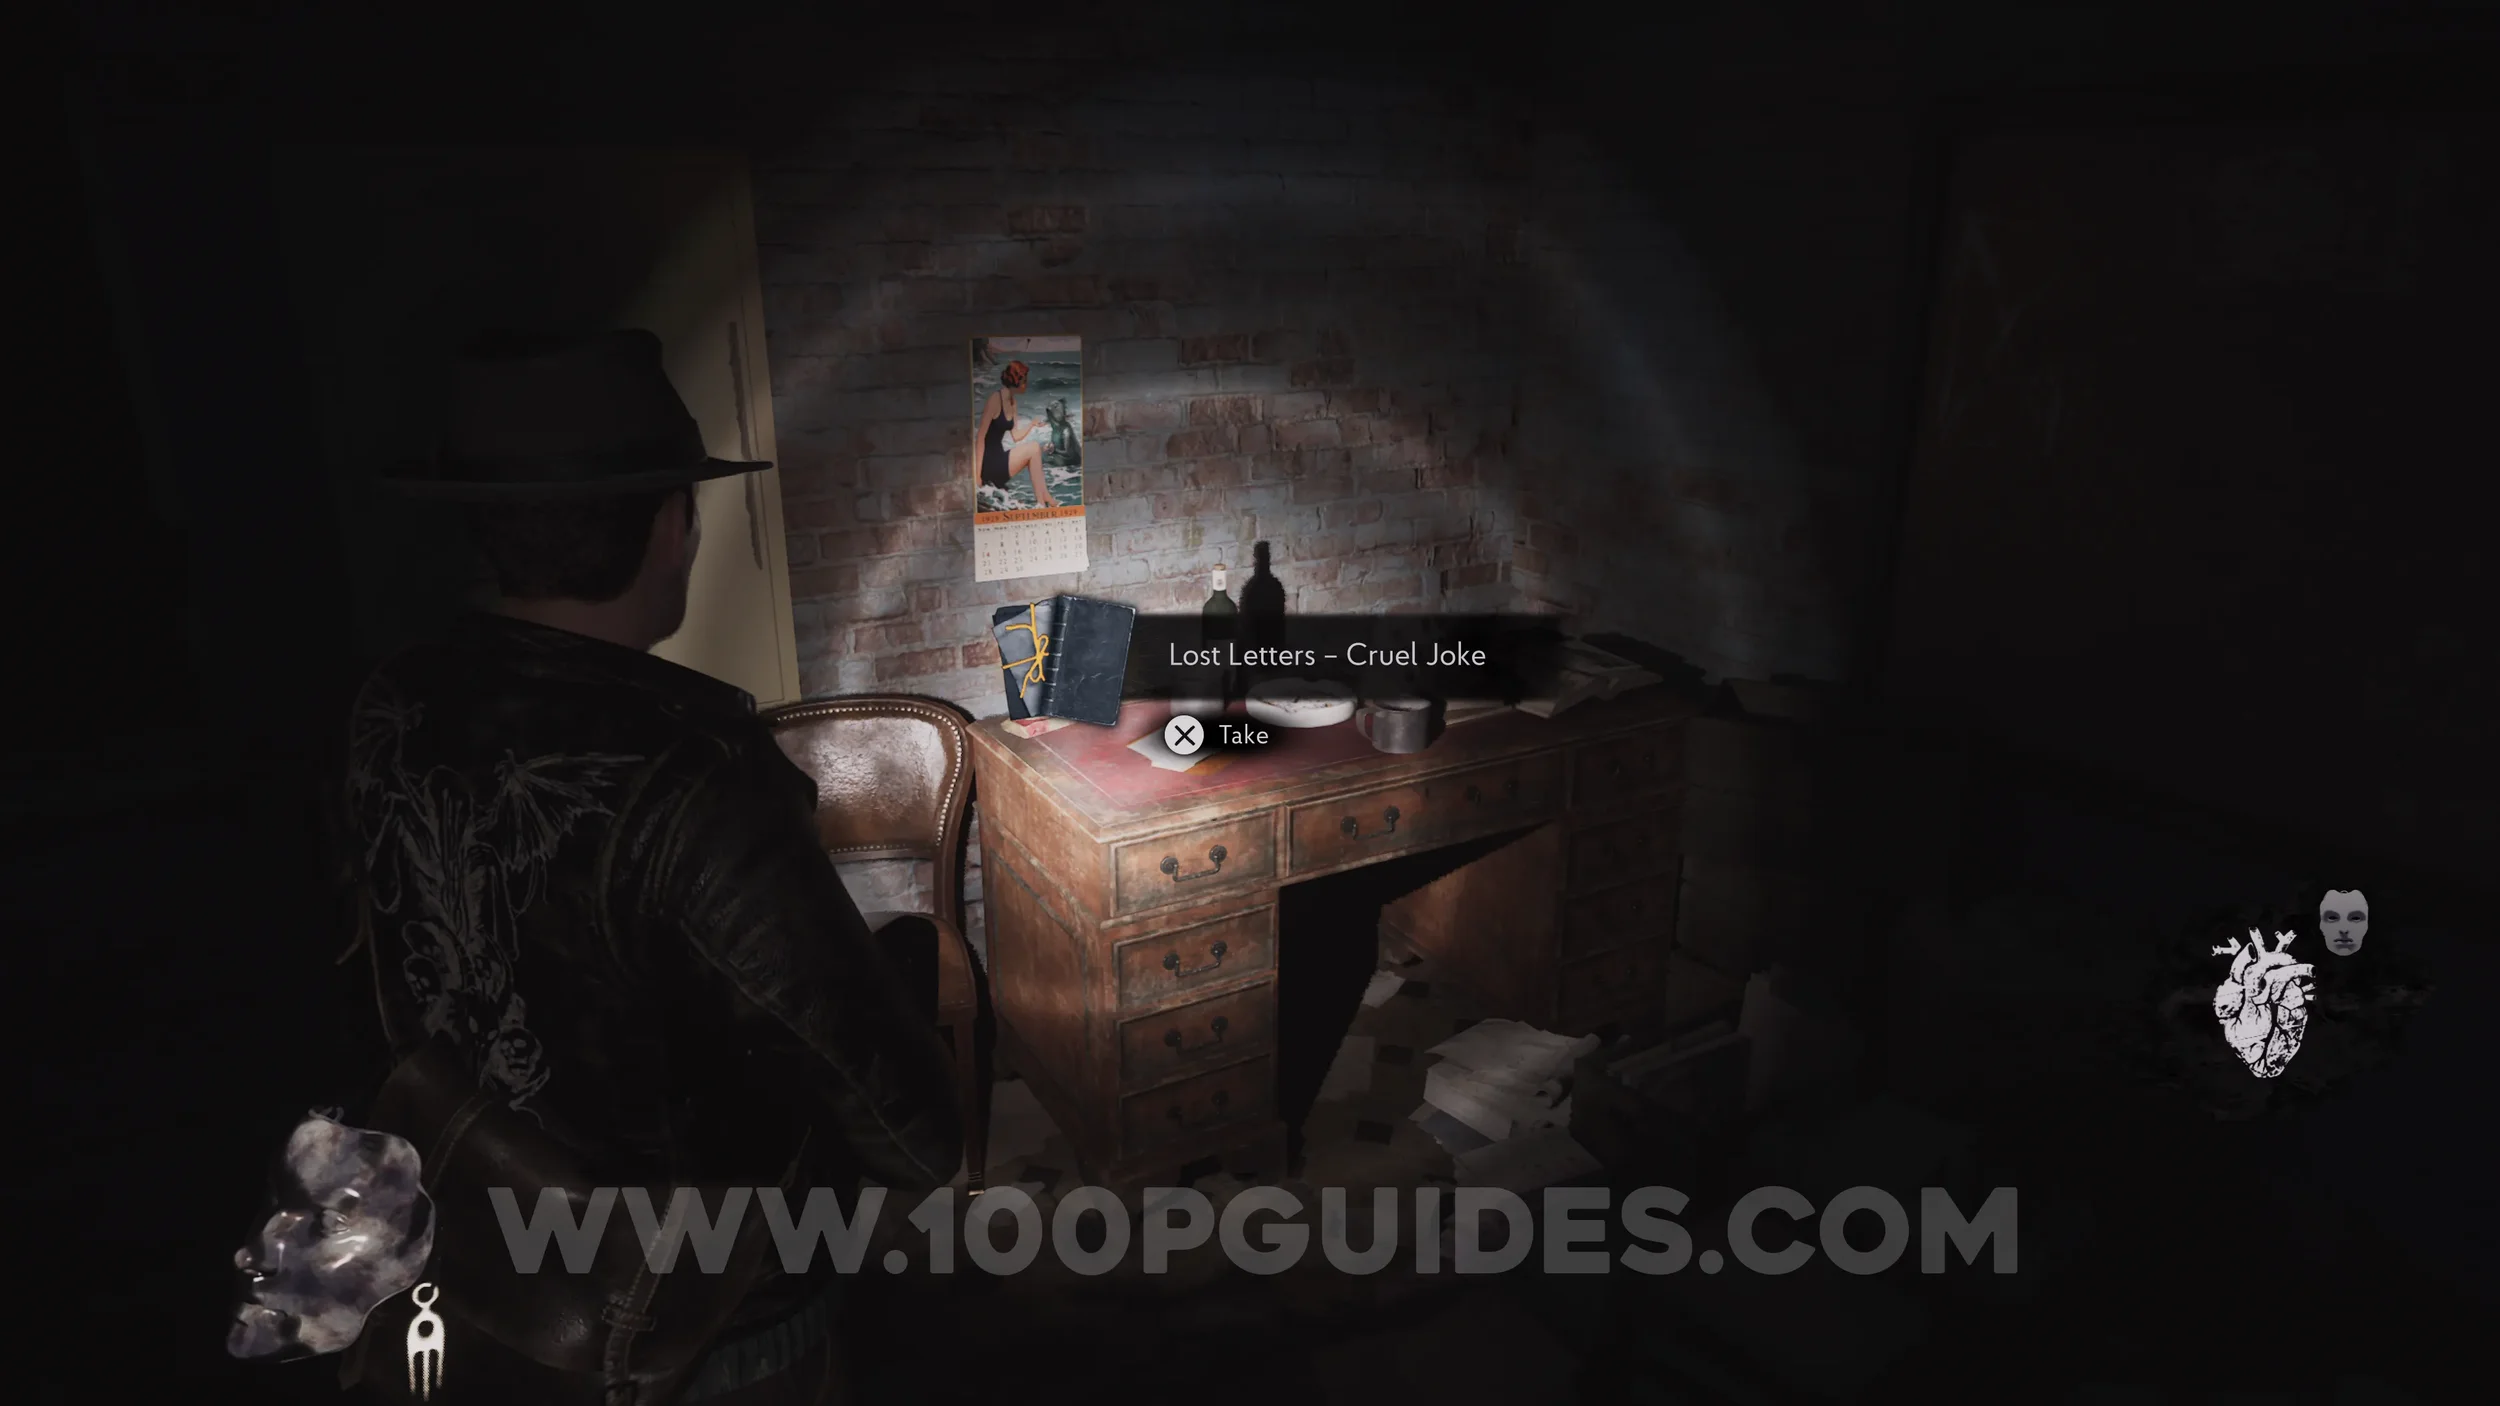
Lore Codex: Lost Letters - Cruel Joke. From the previous collectible, head north and grab the Leyden Jar from the starfish you inserted it into earlier, then use the Western Staircase to go back downstairs. Here, an enemy will burst out from the room on your right, destroying the door and letting you enter. The codex is inside.
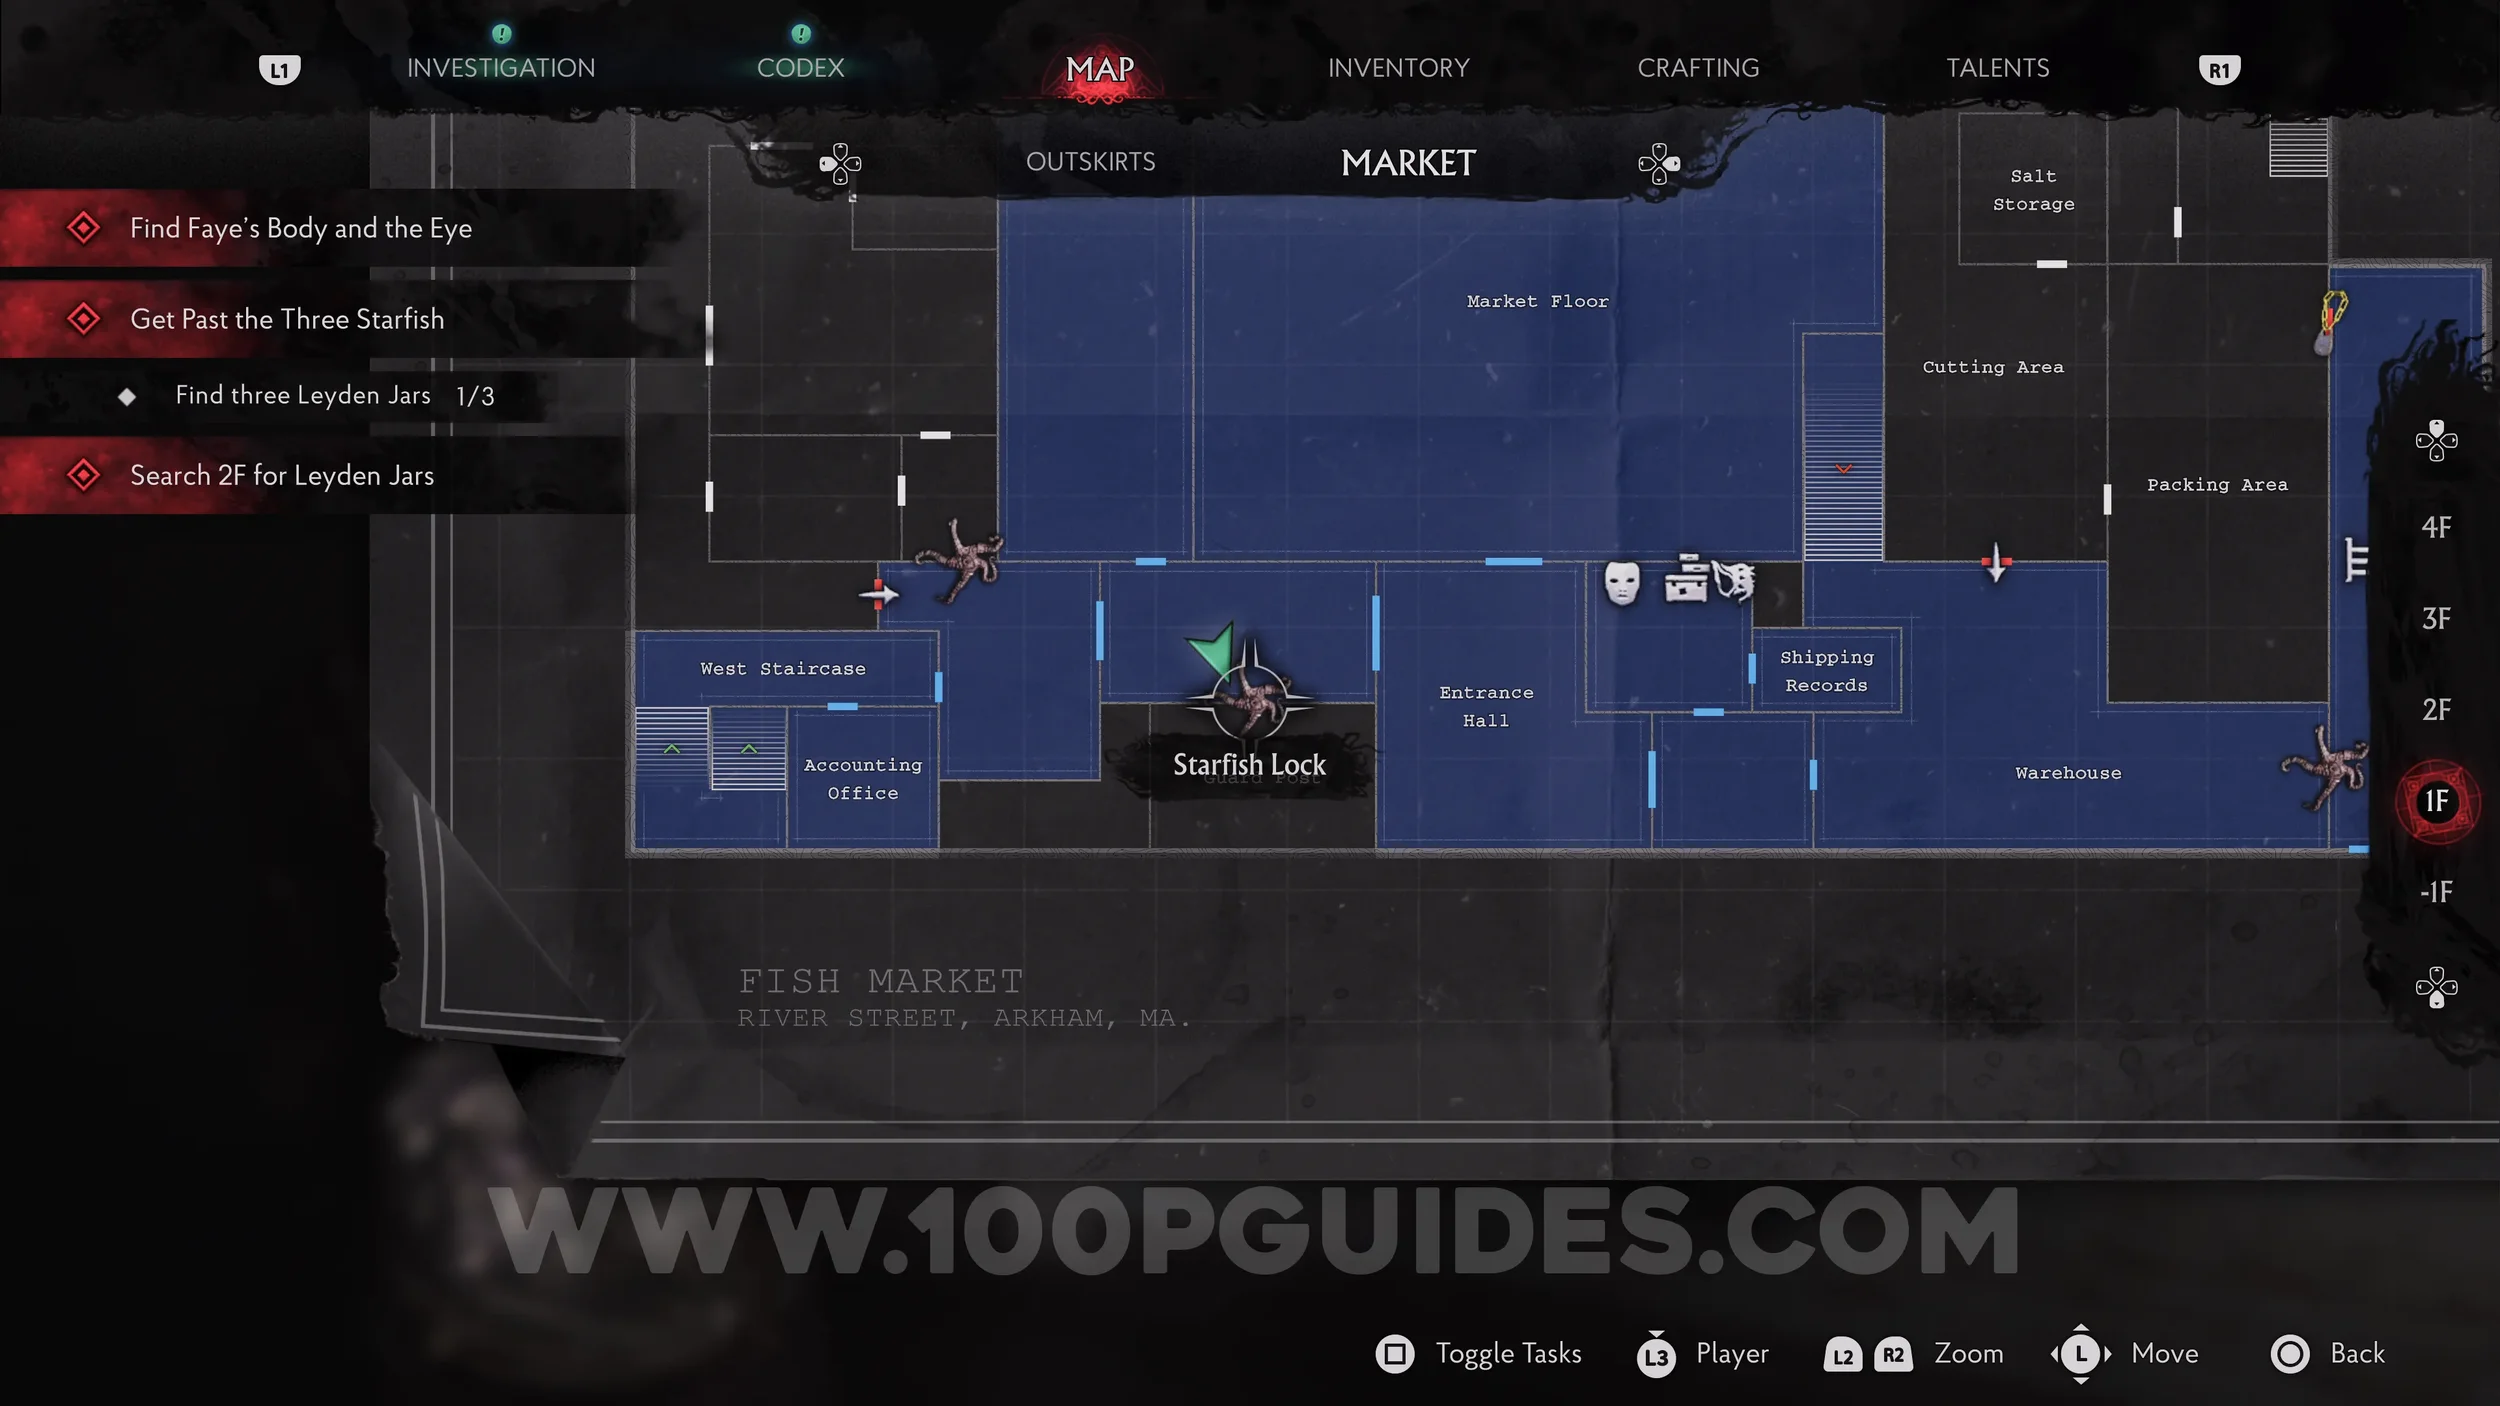
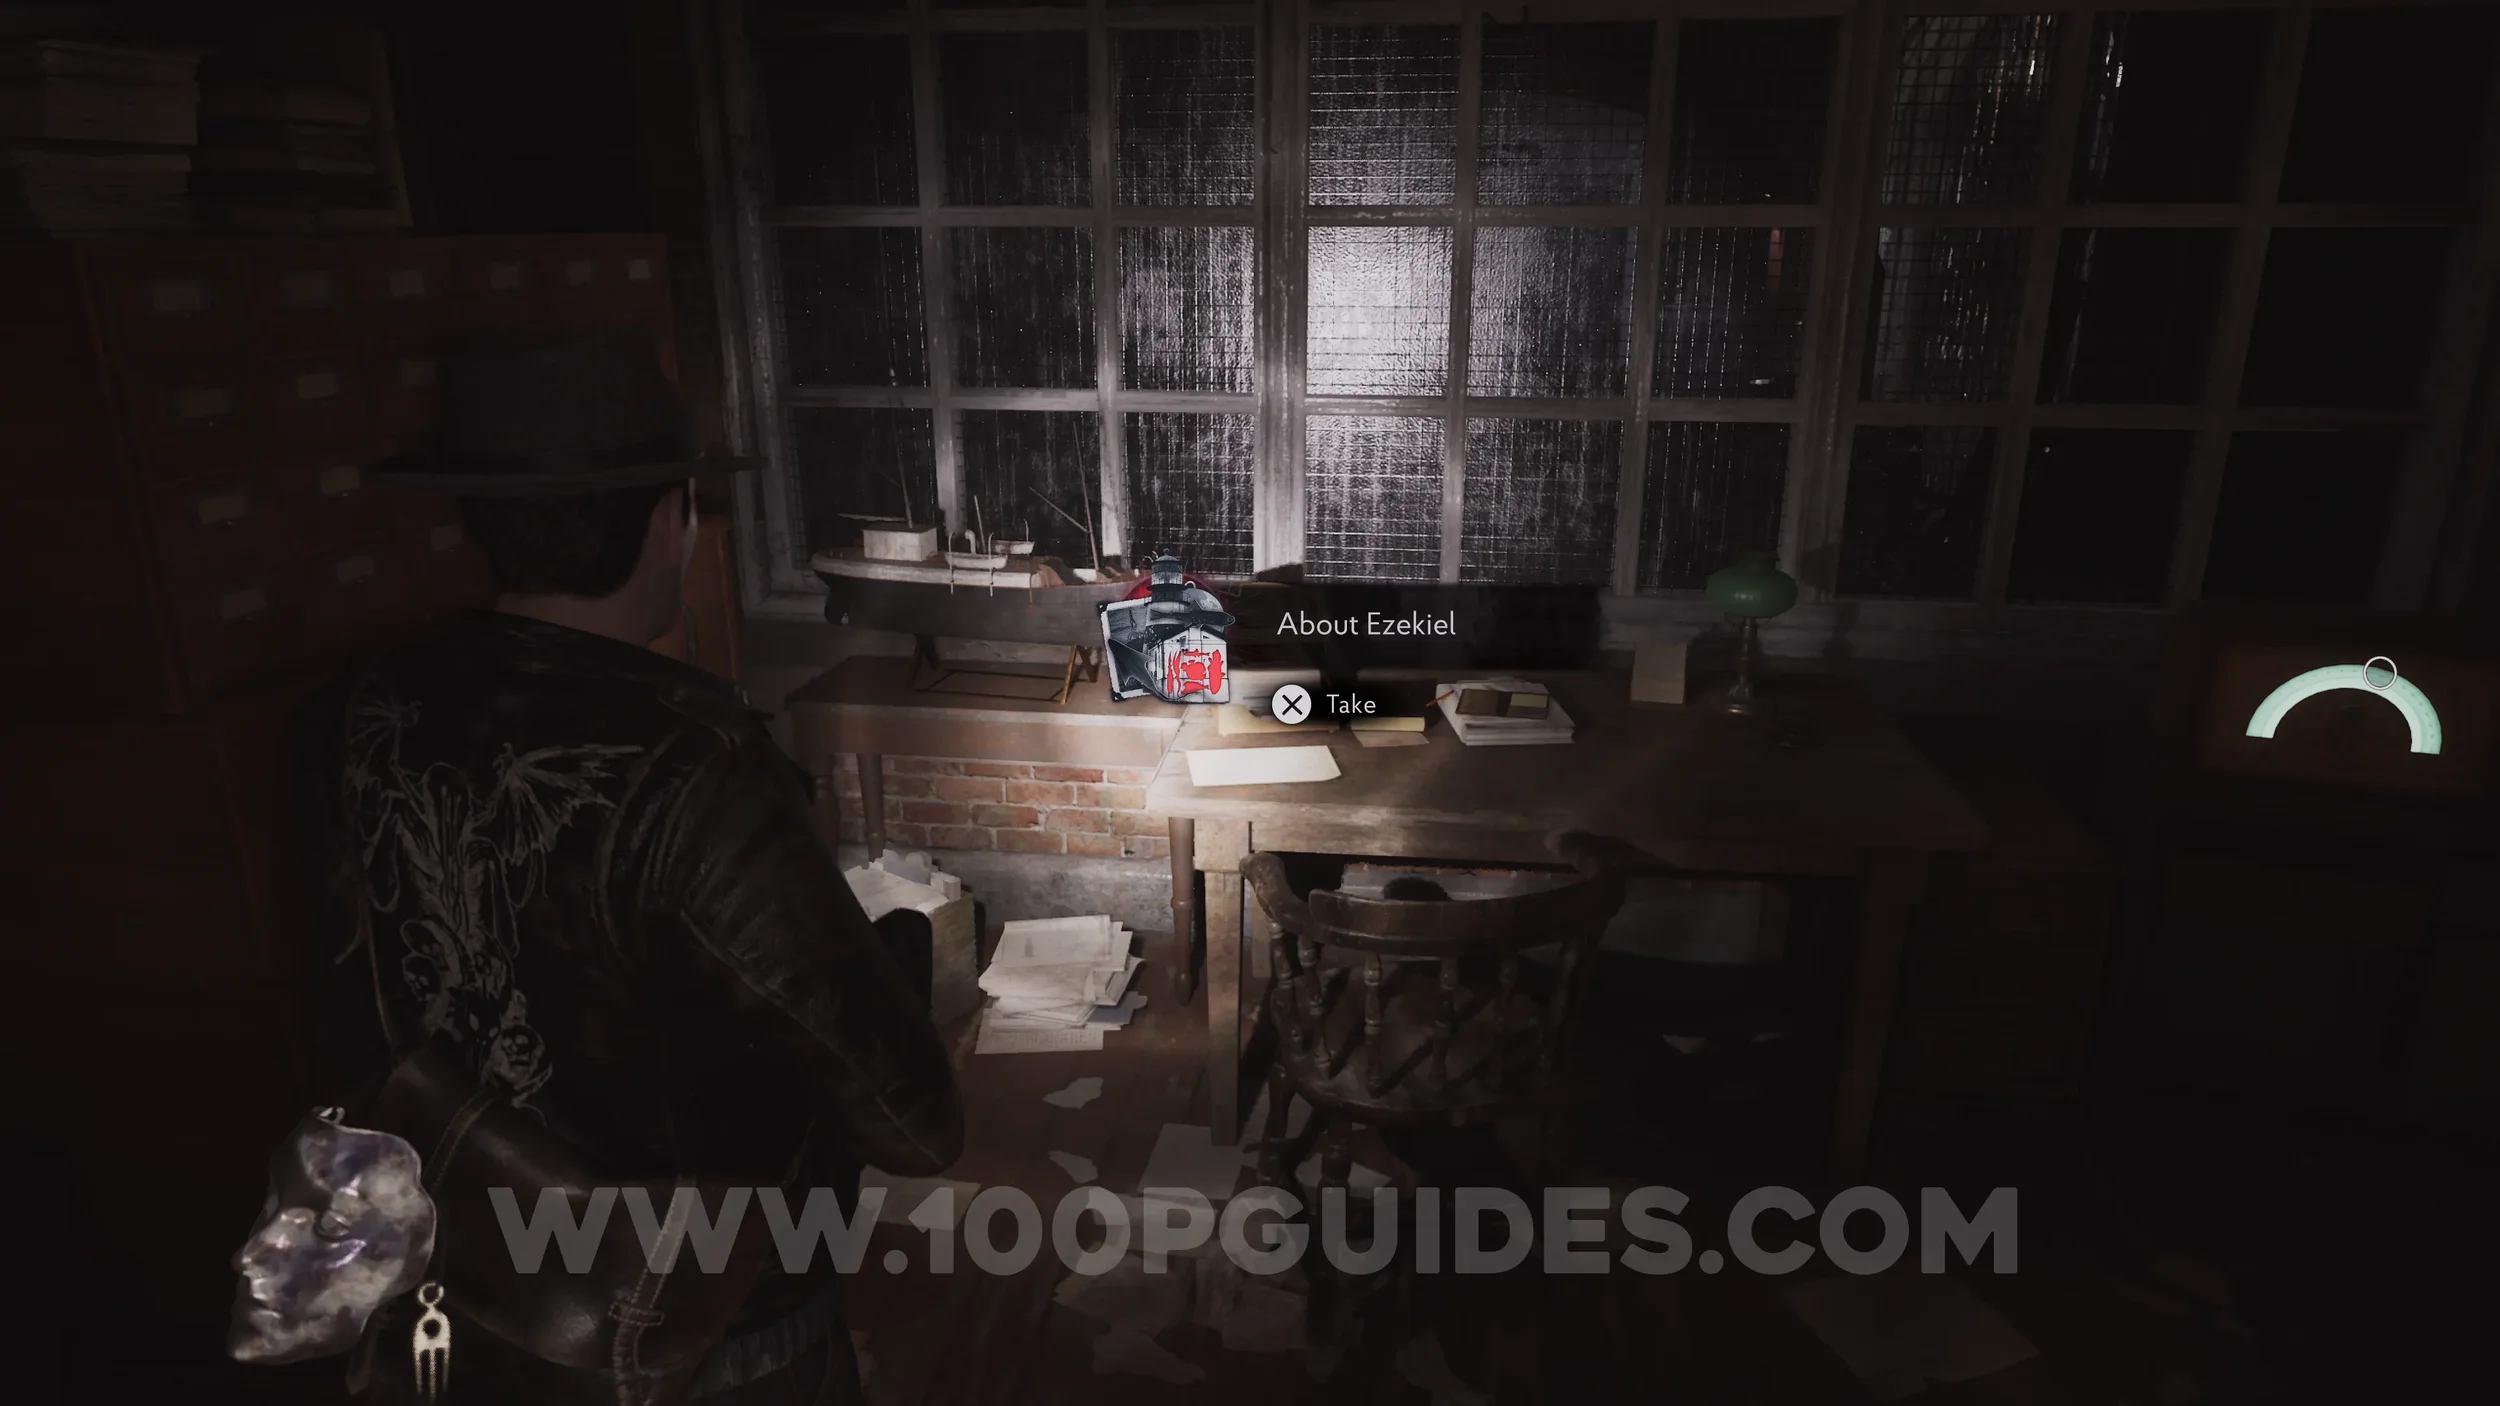
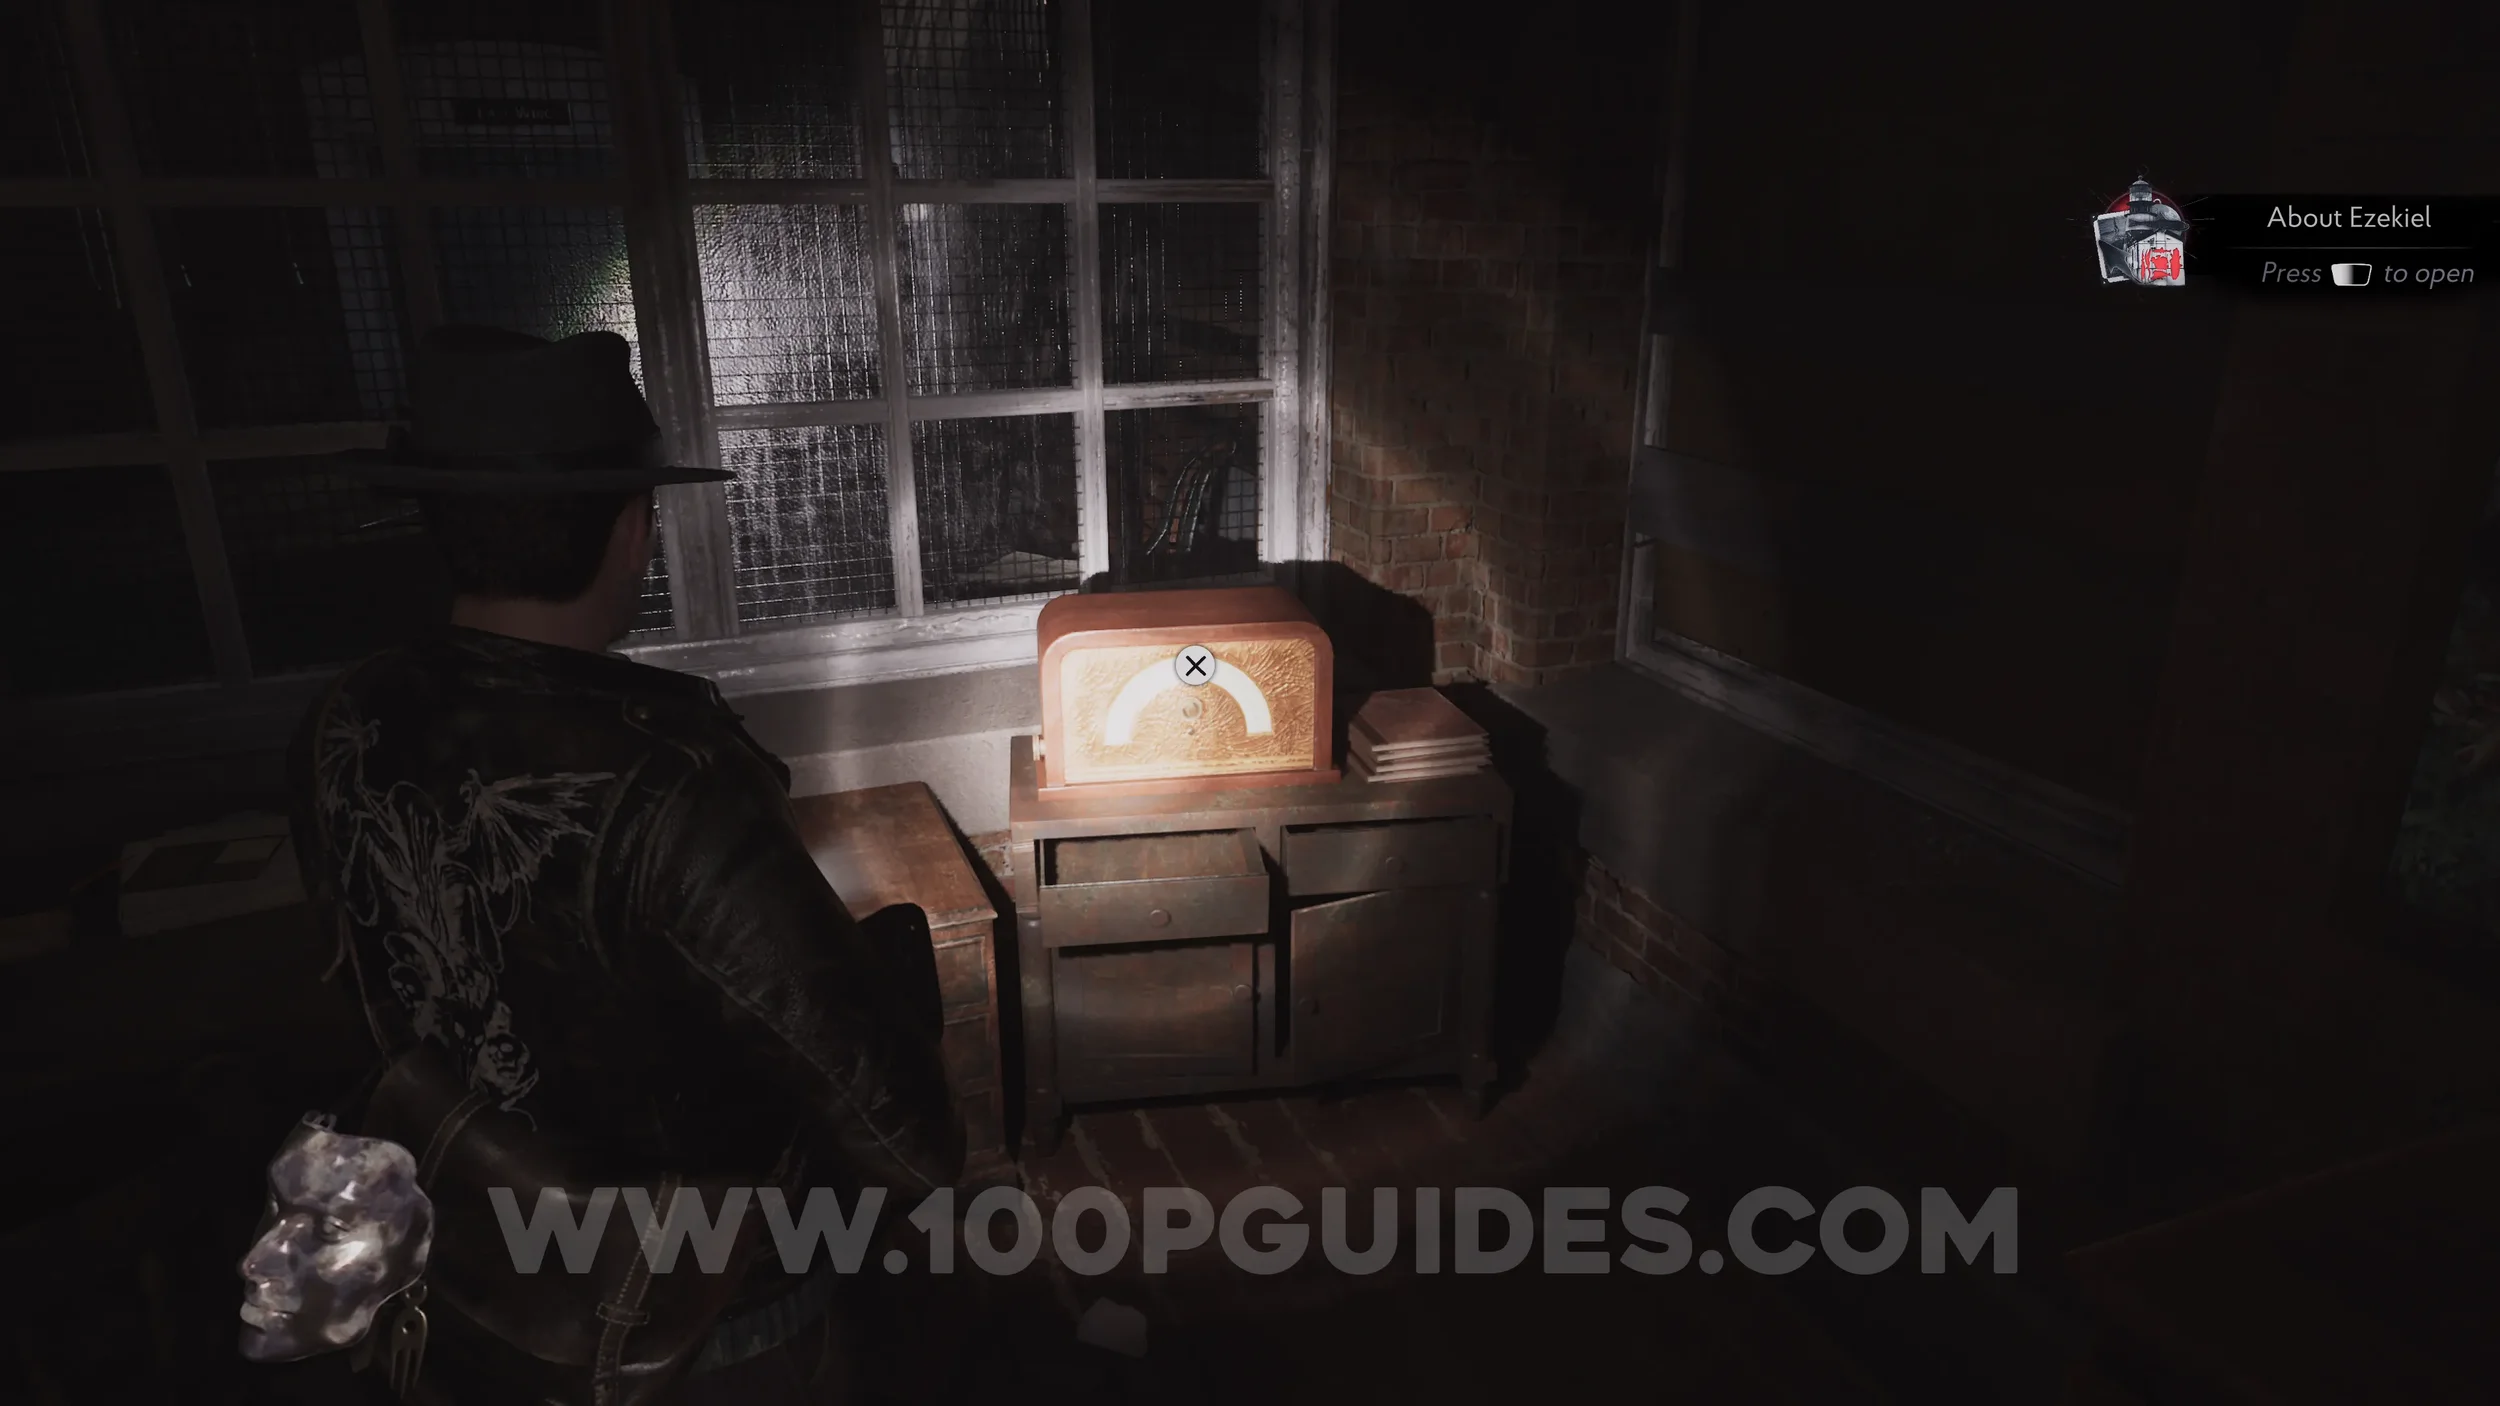
Evidence: About Ezekiel. Head slightly east and use the Jar to open the Starfish door to the Guard Post. The evidence is on a table inside.
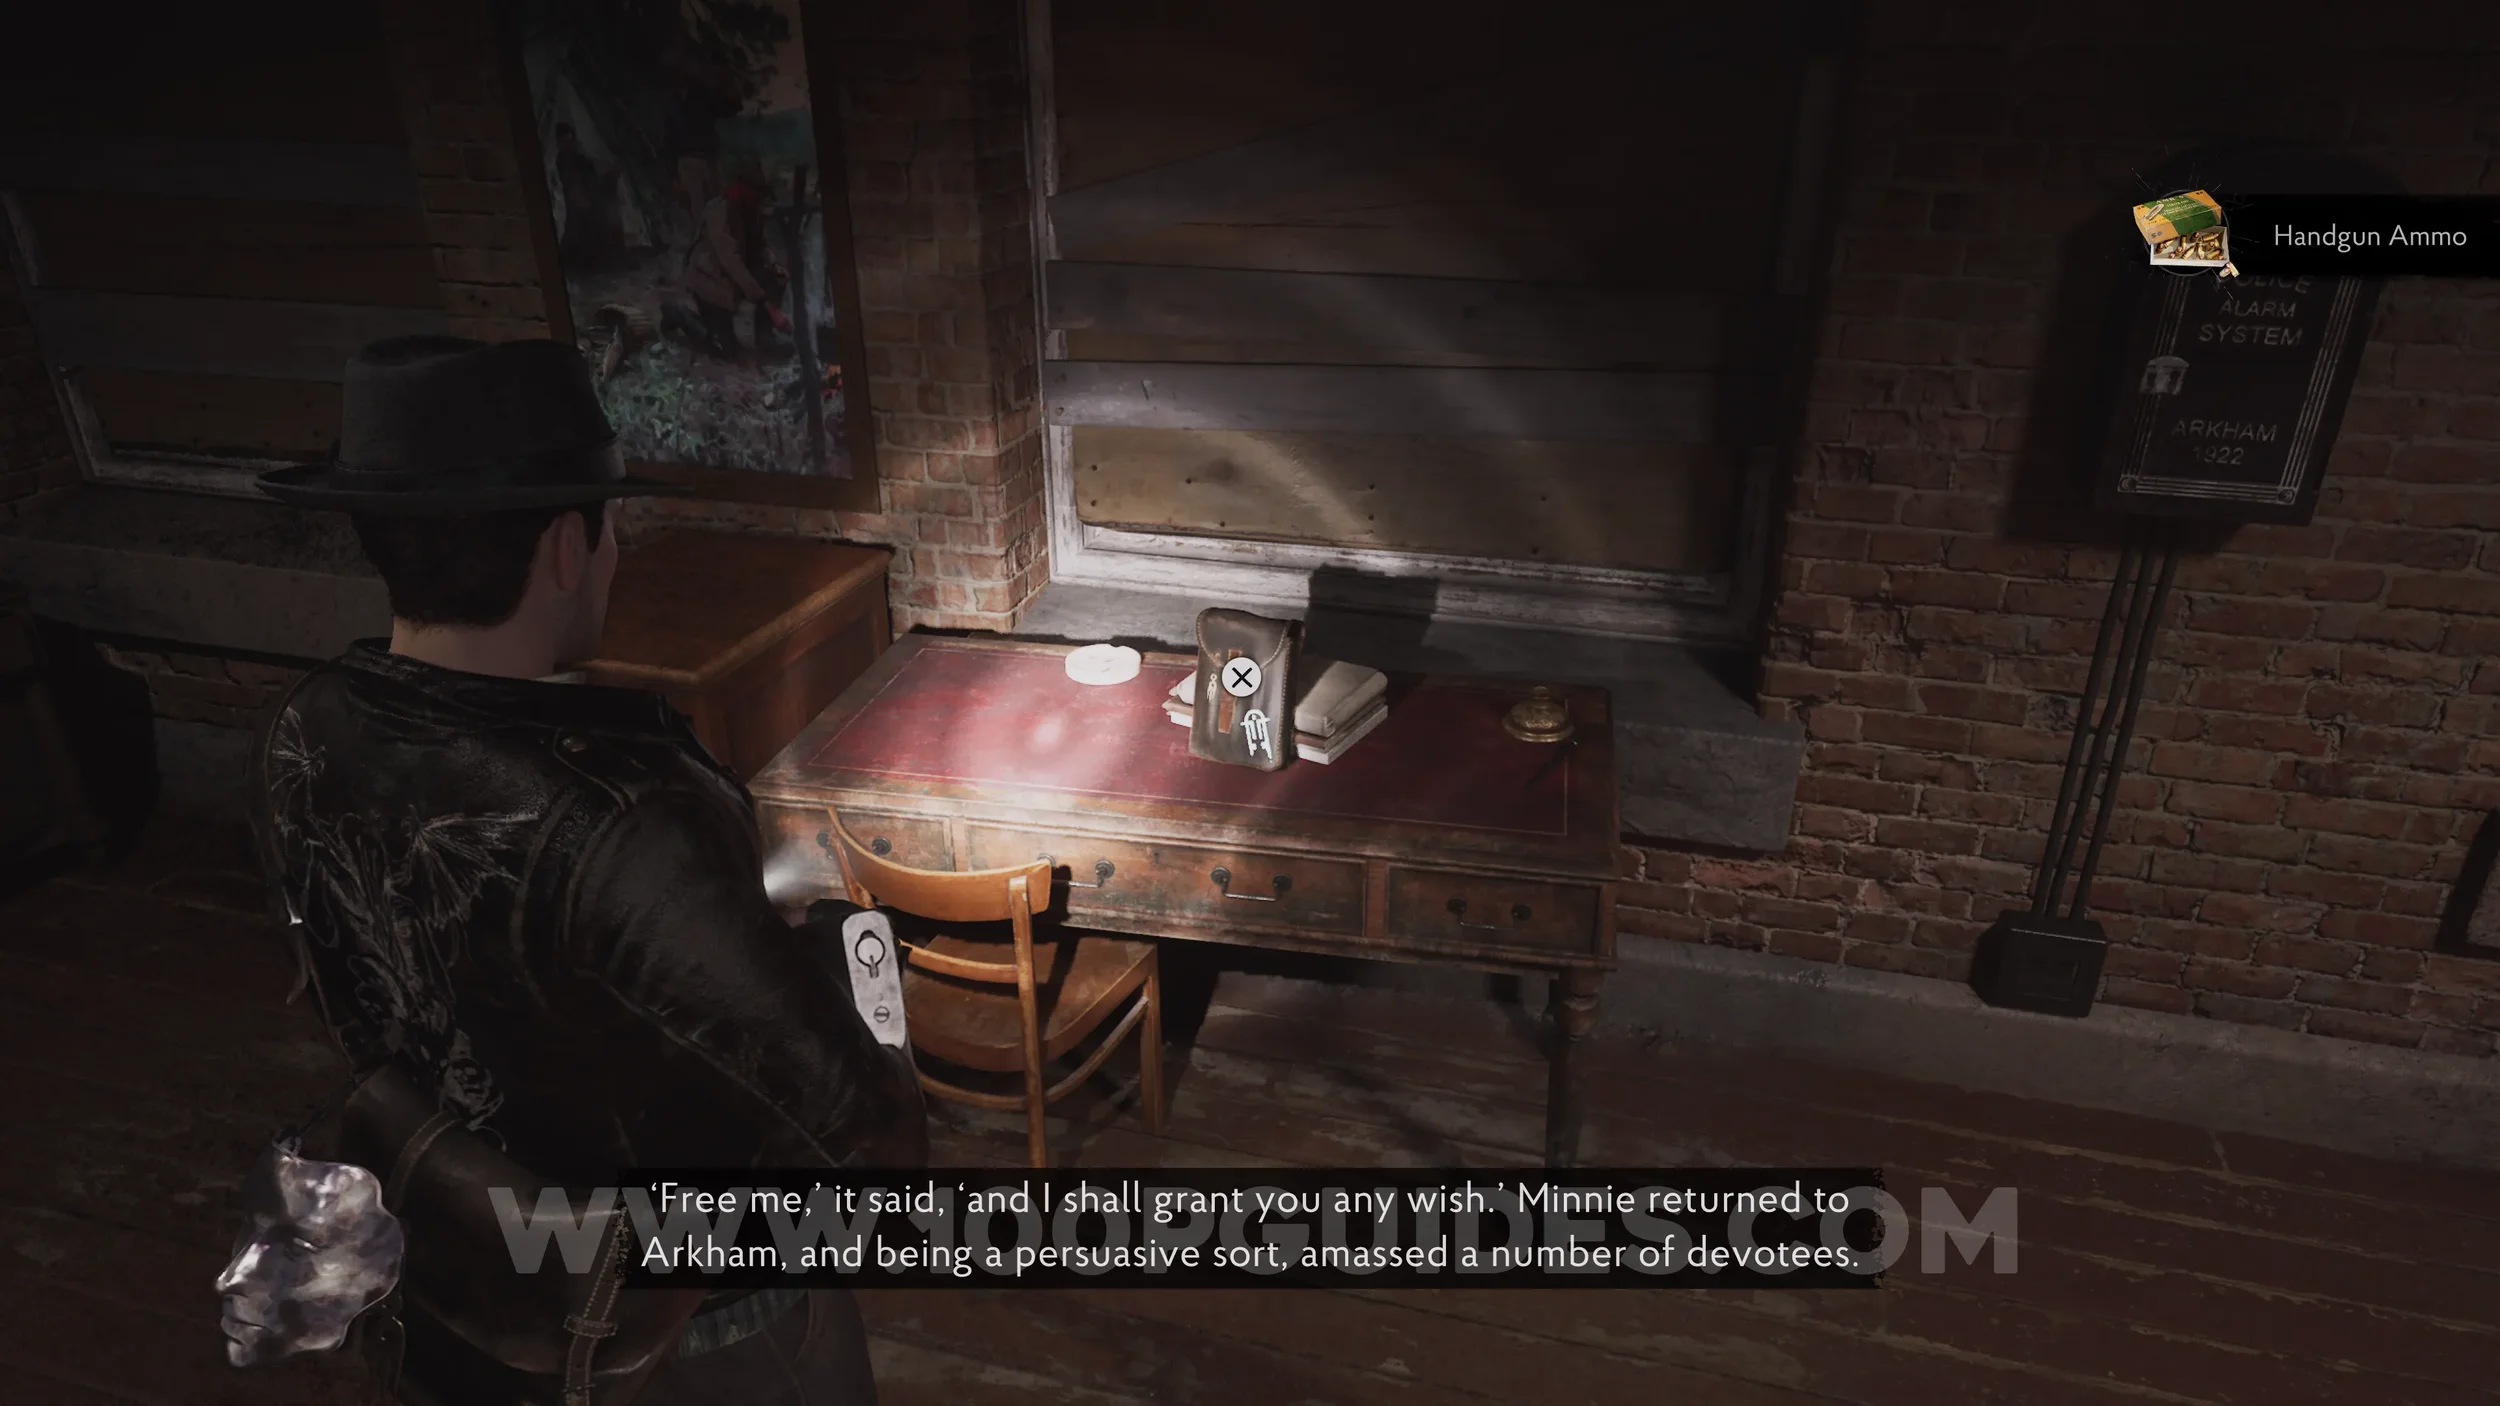
Radio: The Word on the Wind. Also in the Guard Post.
Inventory Expansion. Also in the Guard Post.
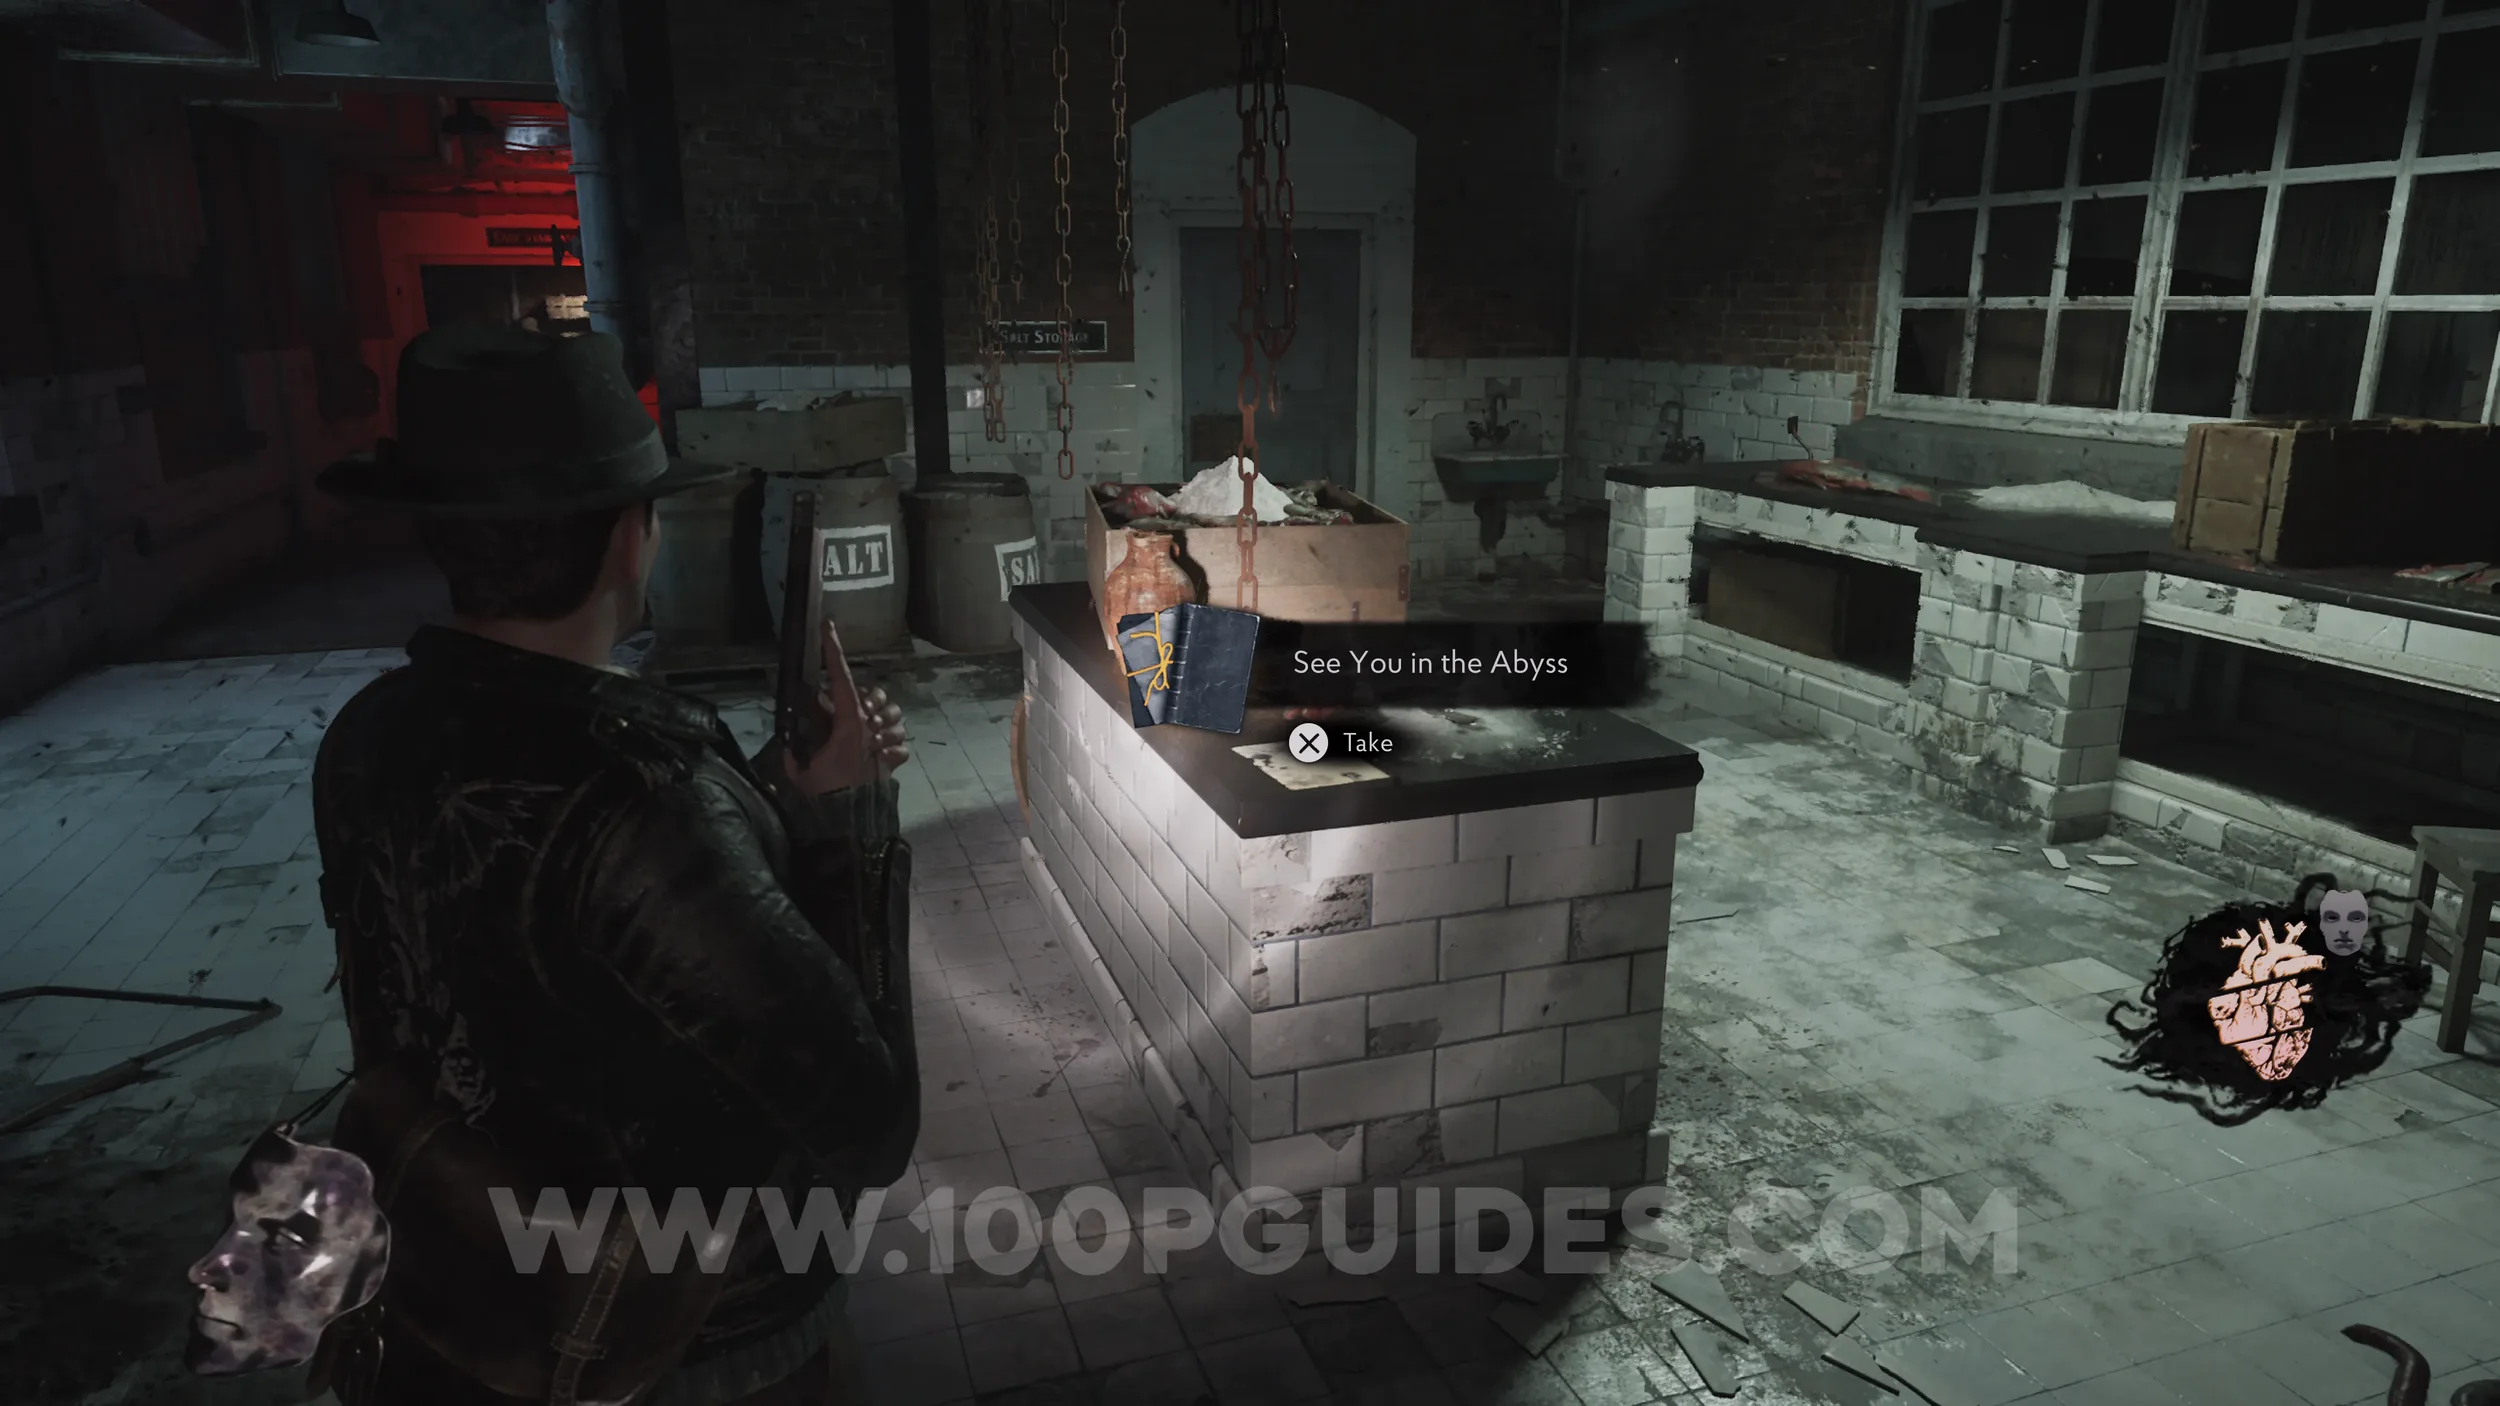
Lore Codex: See You in the Abyss. Continue east and open the starfish door at the end to return to the outside section near the start of the chapter. You'll also get attacked by a mini boss on the way. Here, use the Bolt Cutter to open the door to the north, then head to the Cutting area to find the codex in the center.
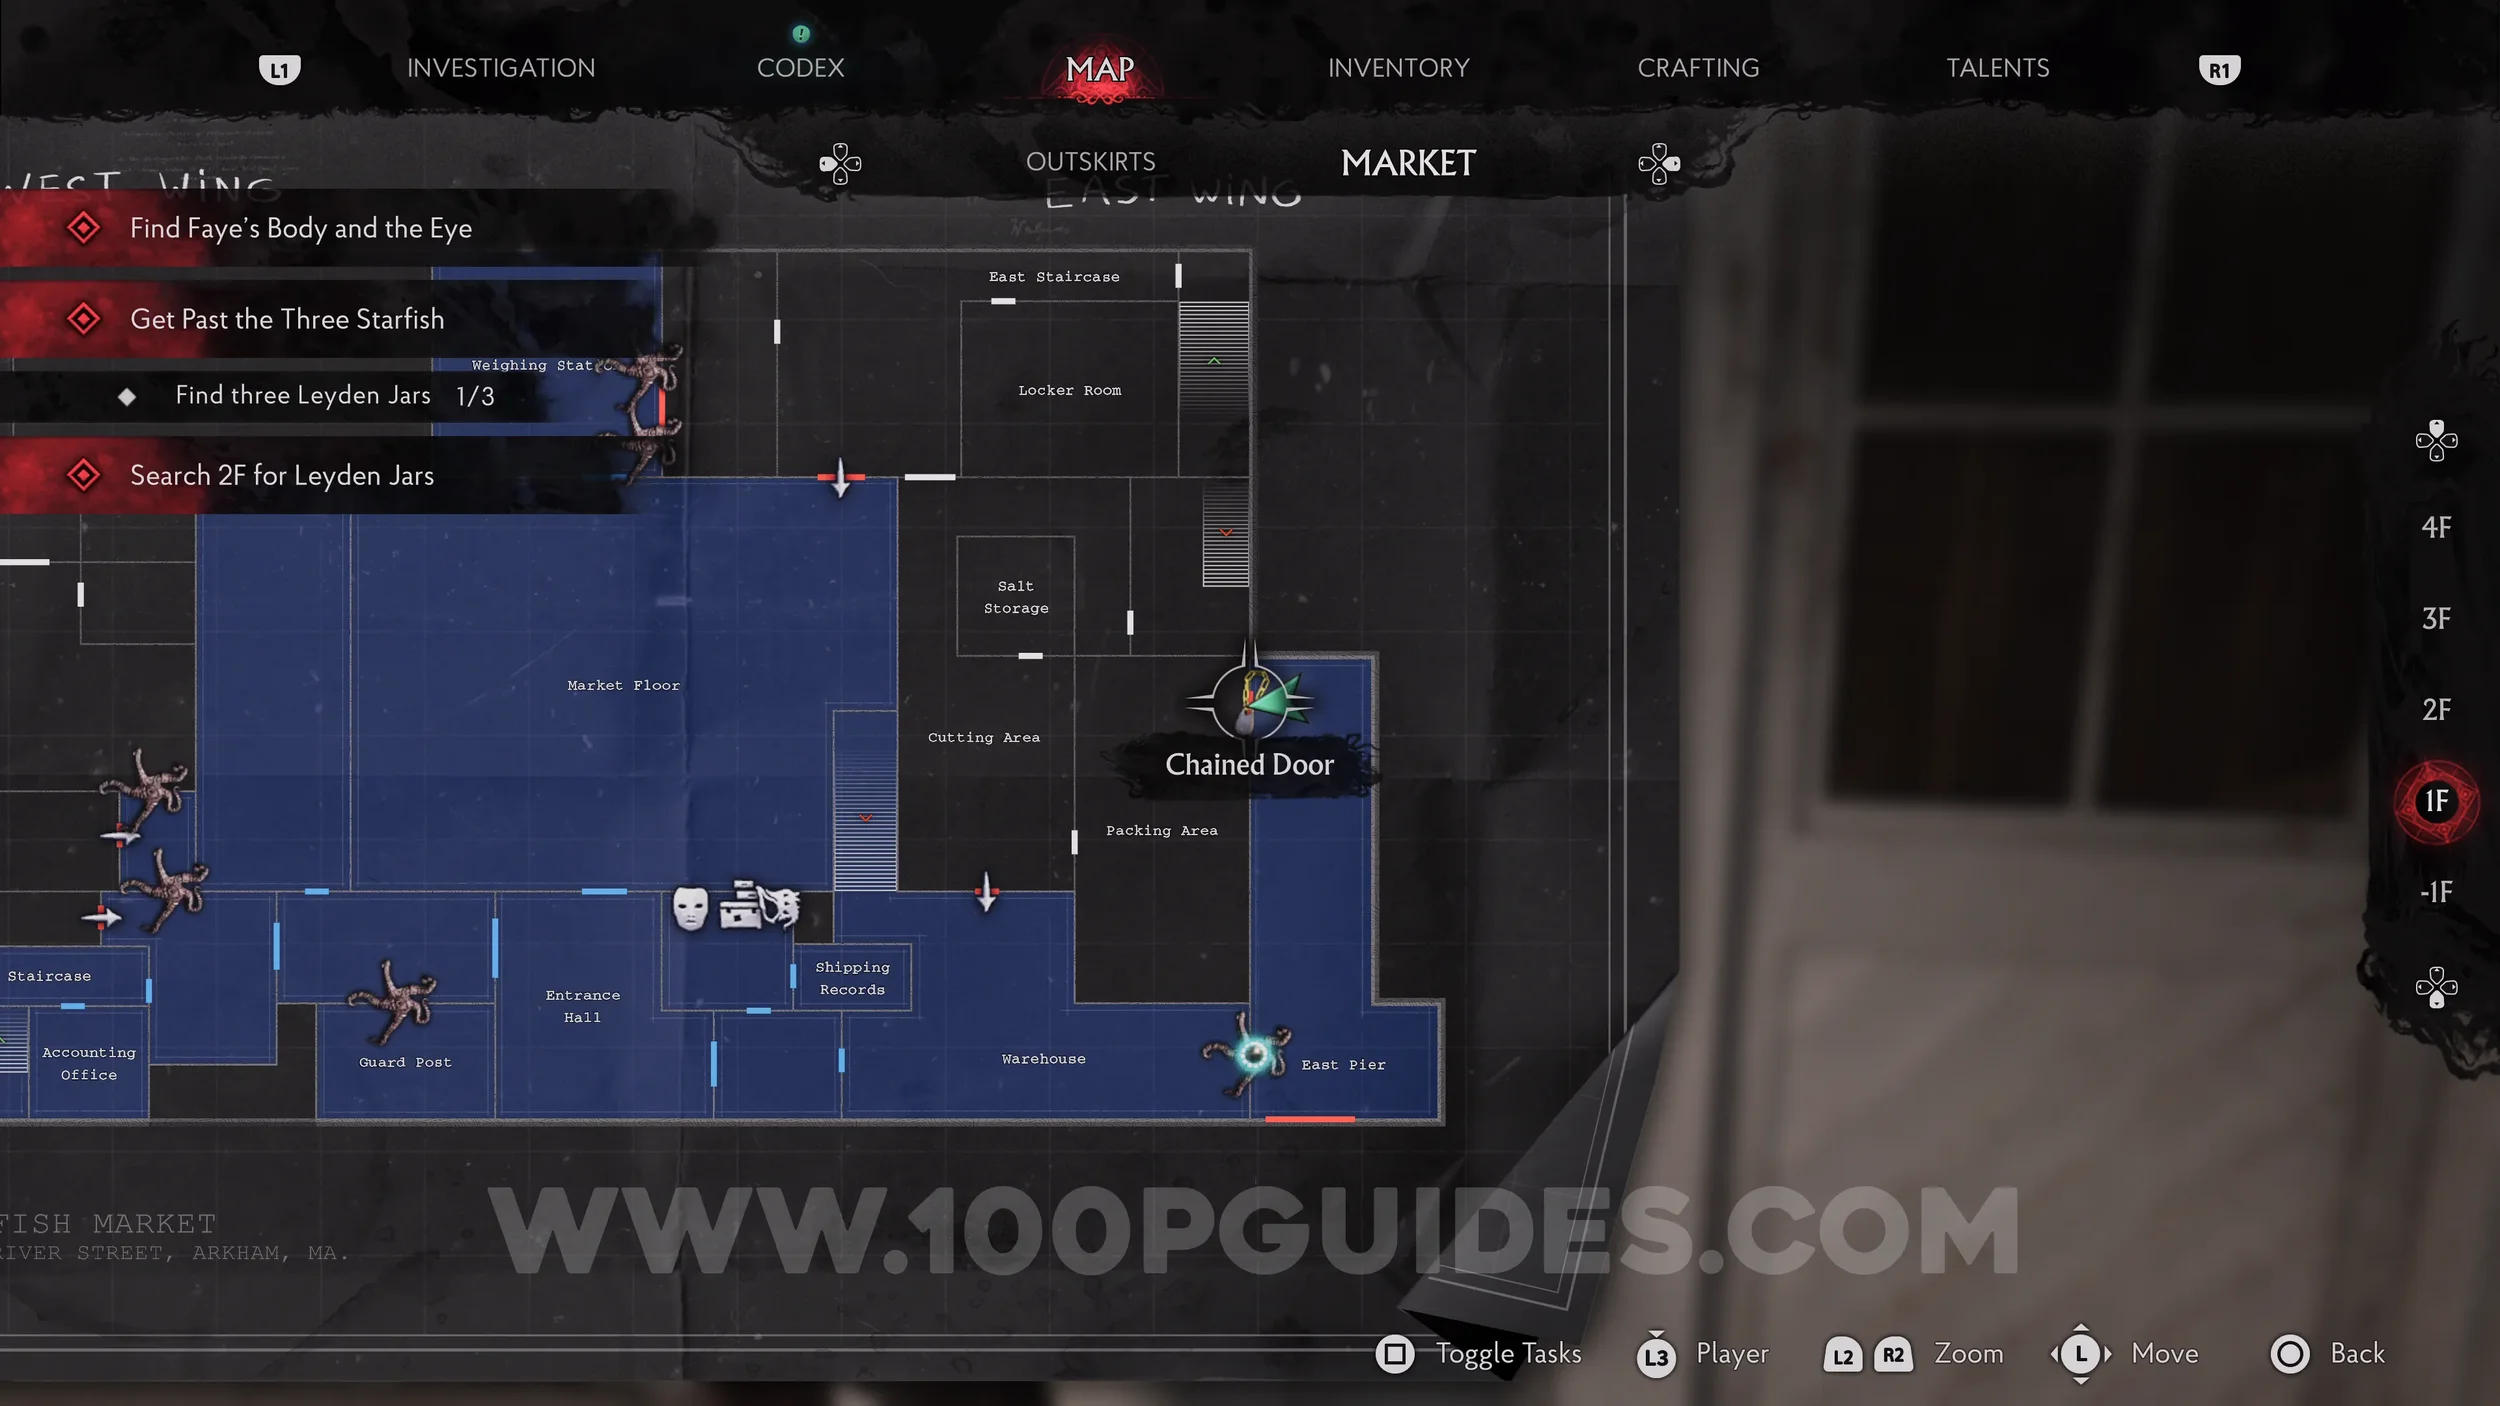
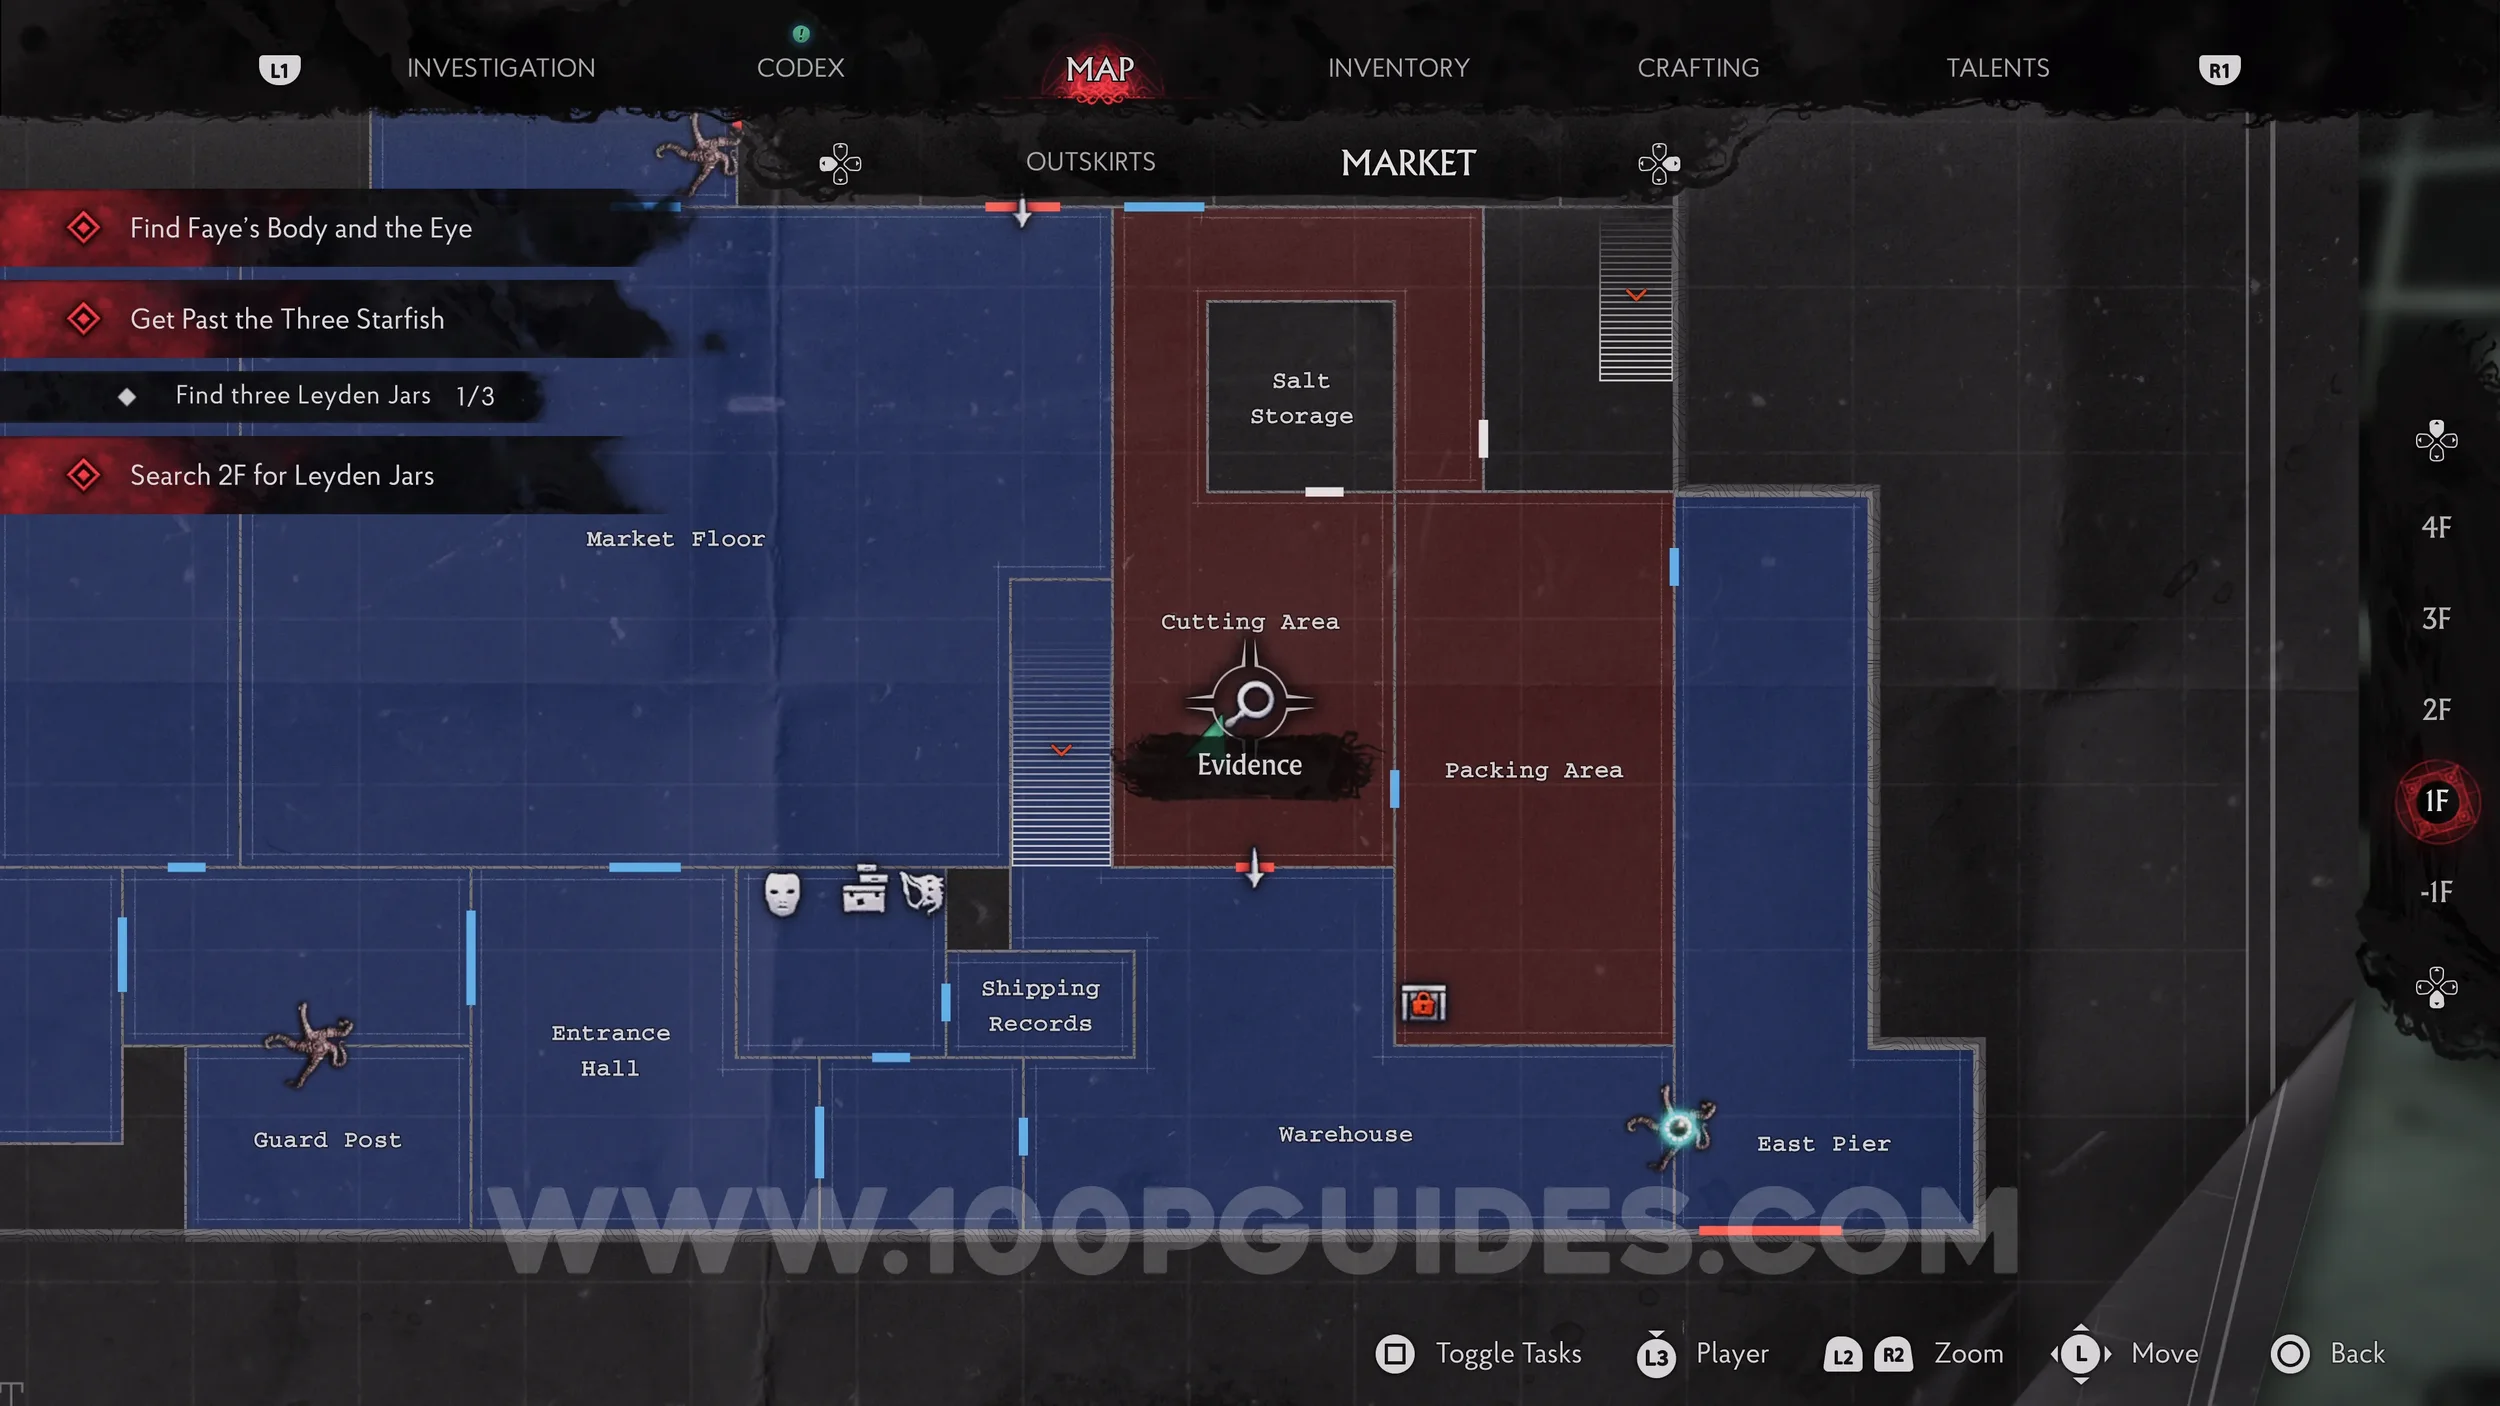
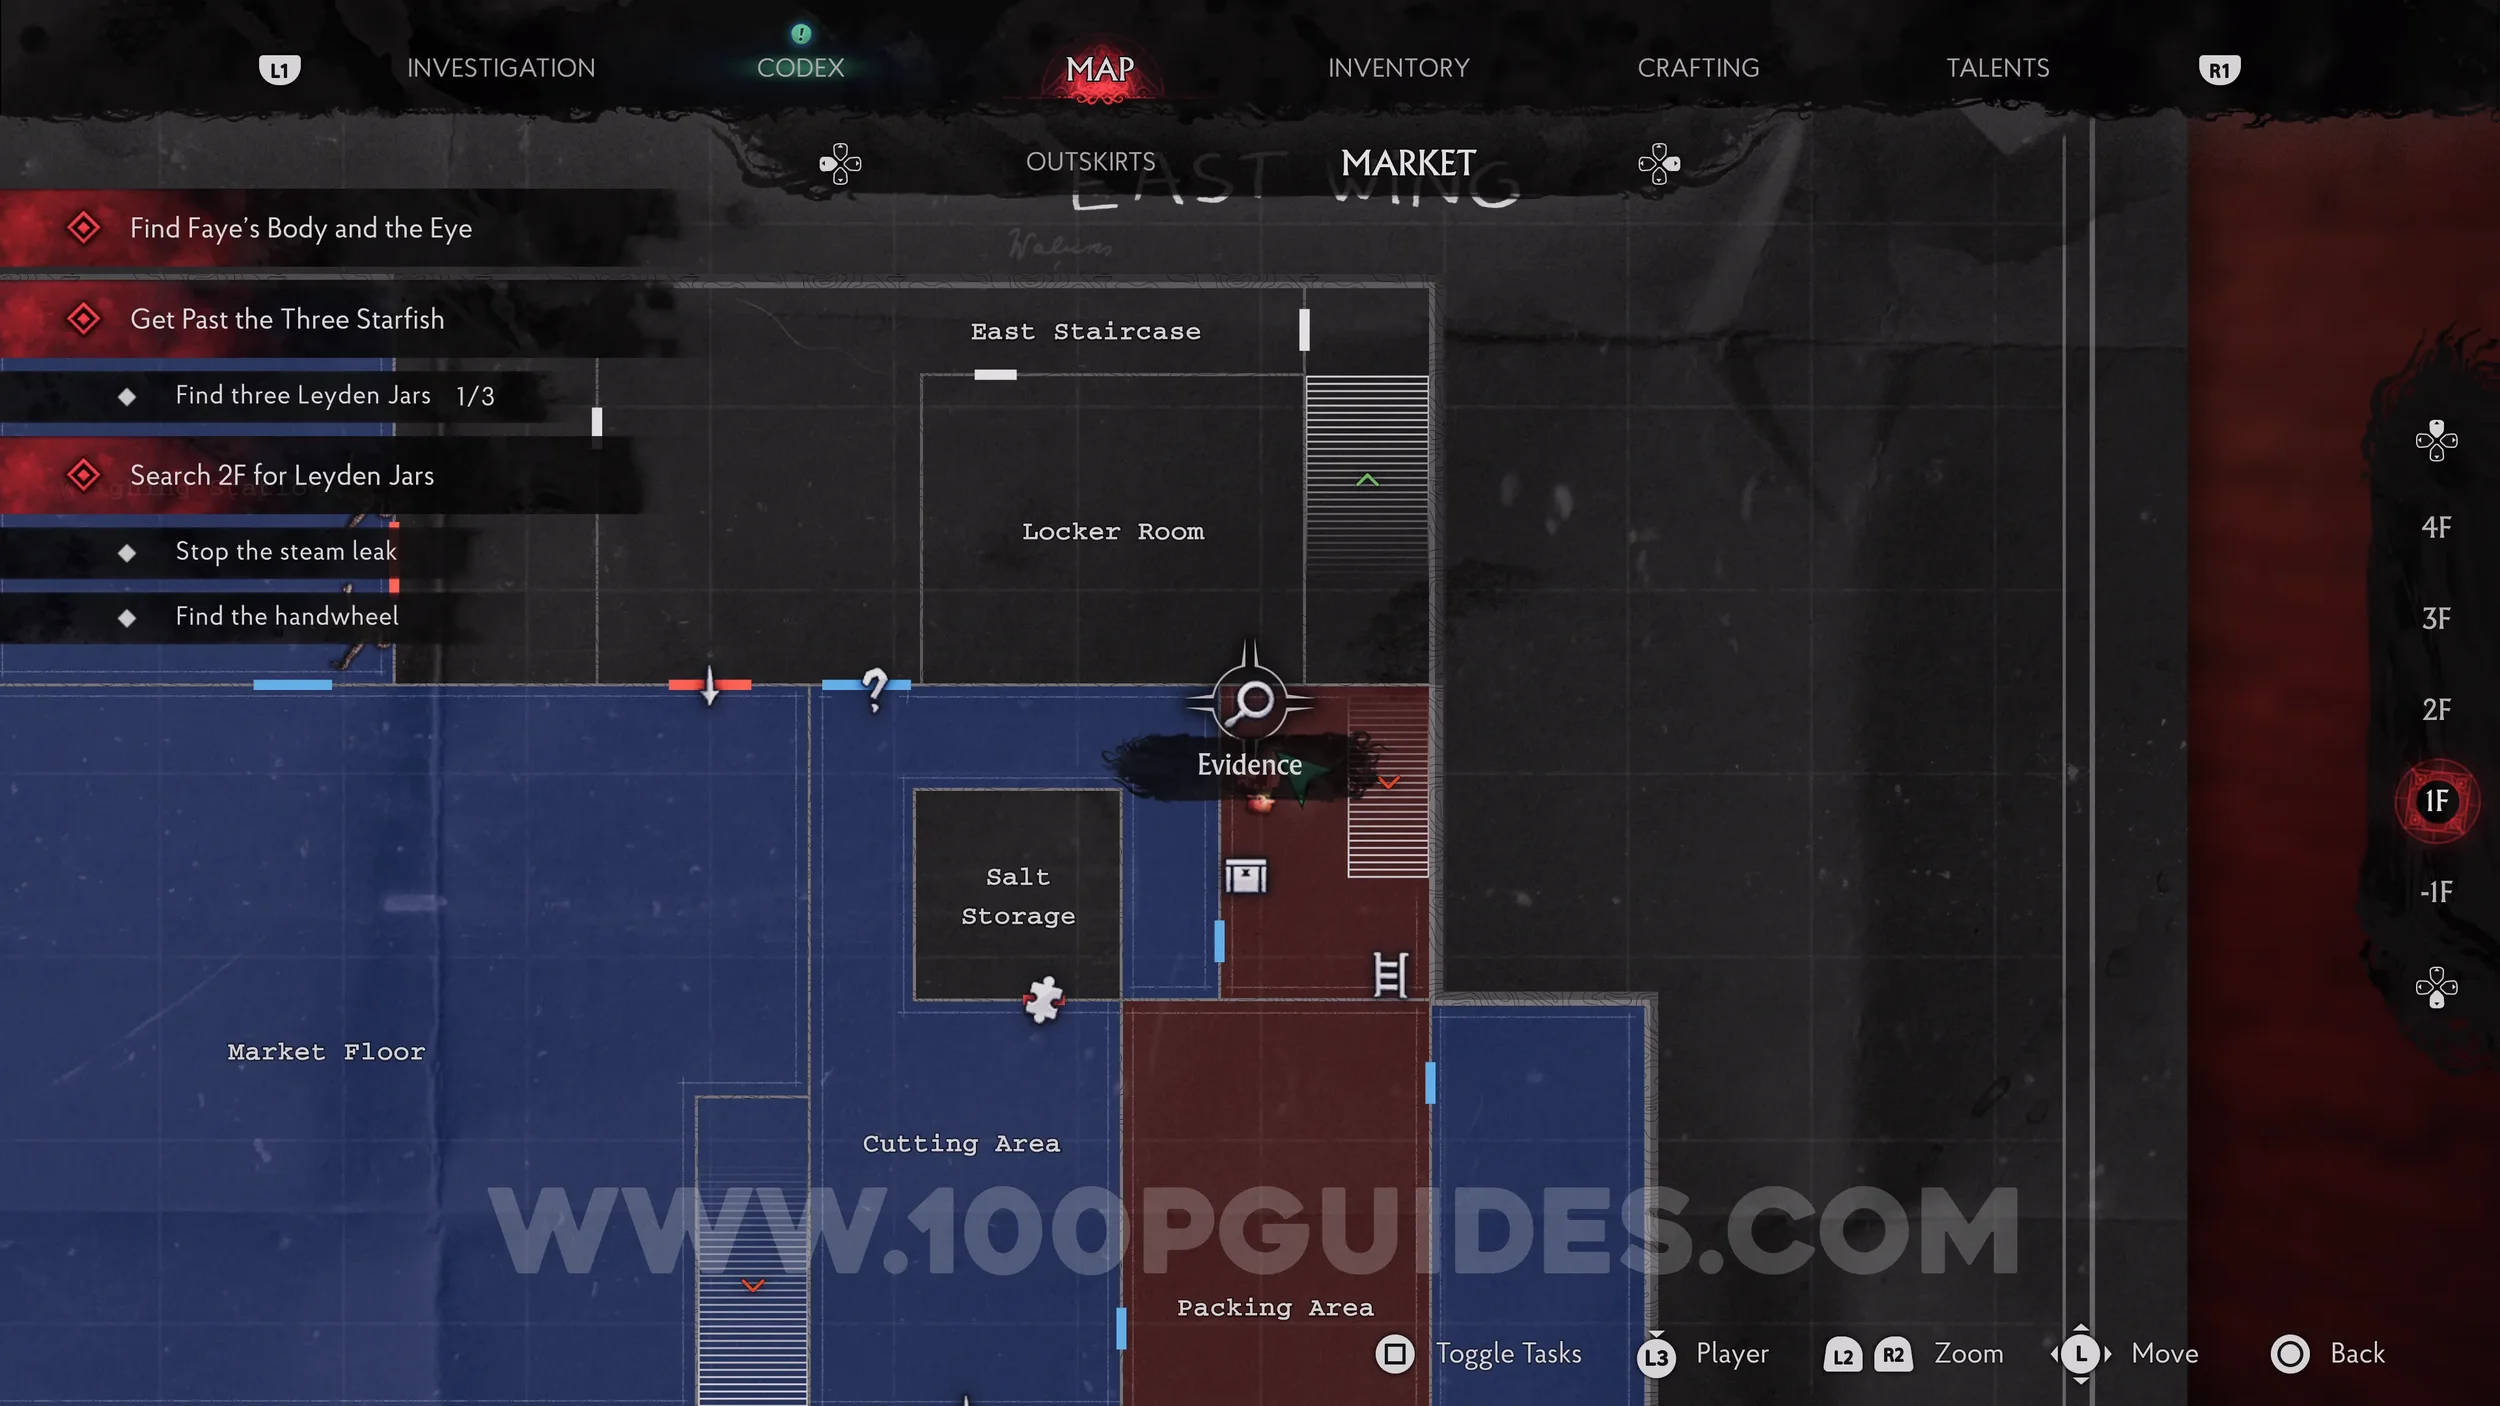
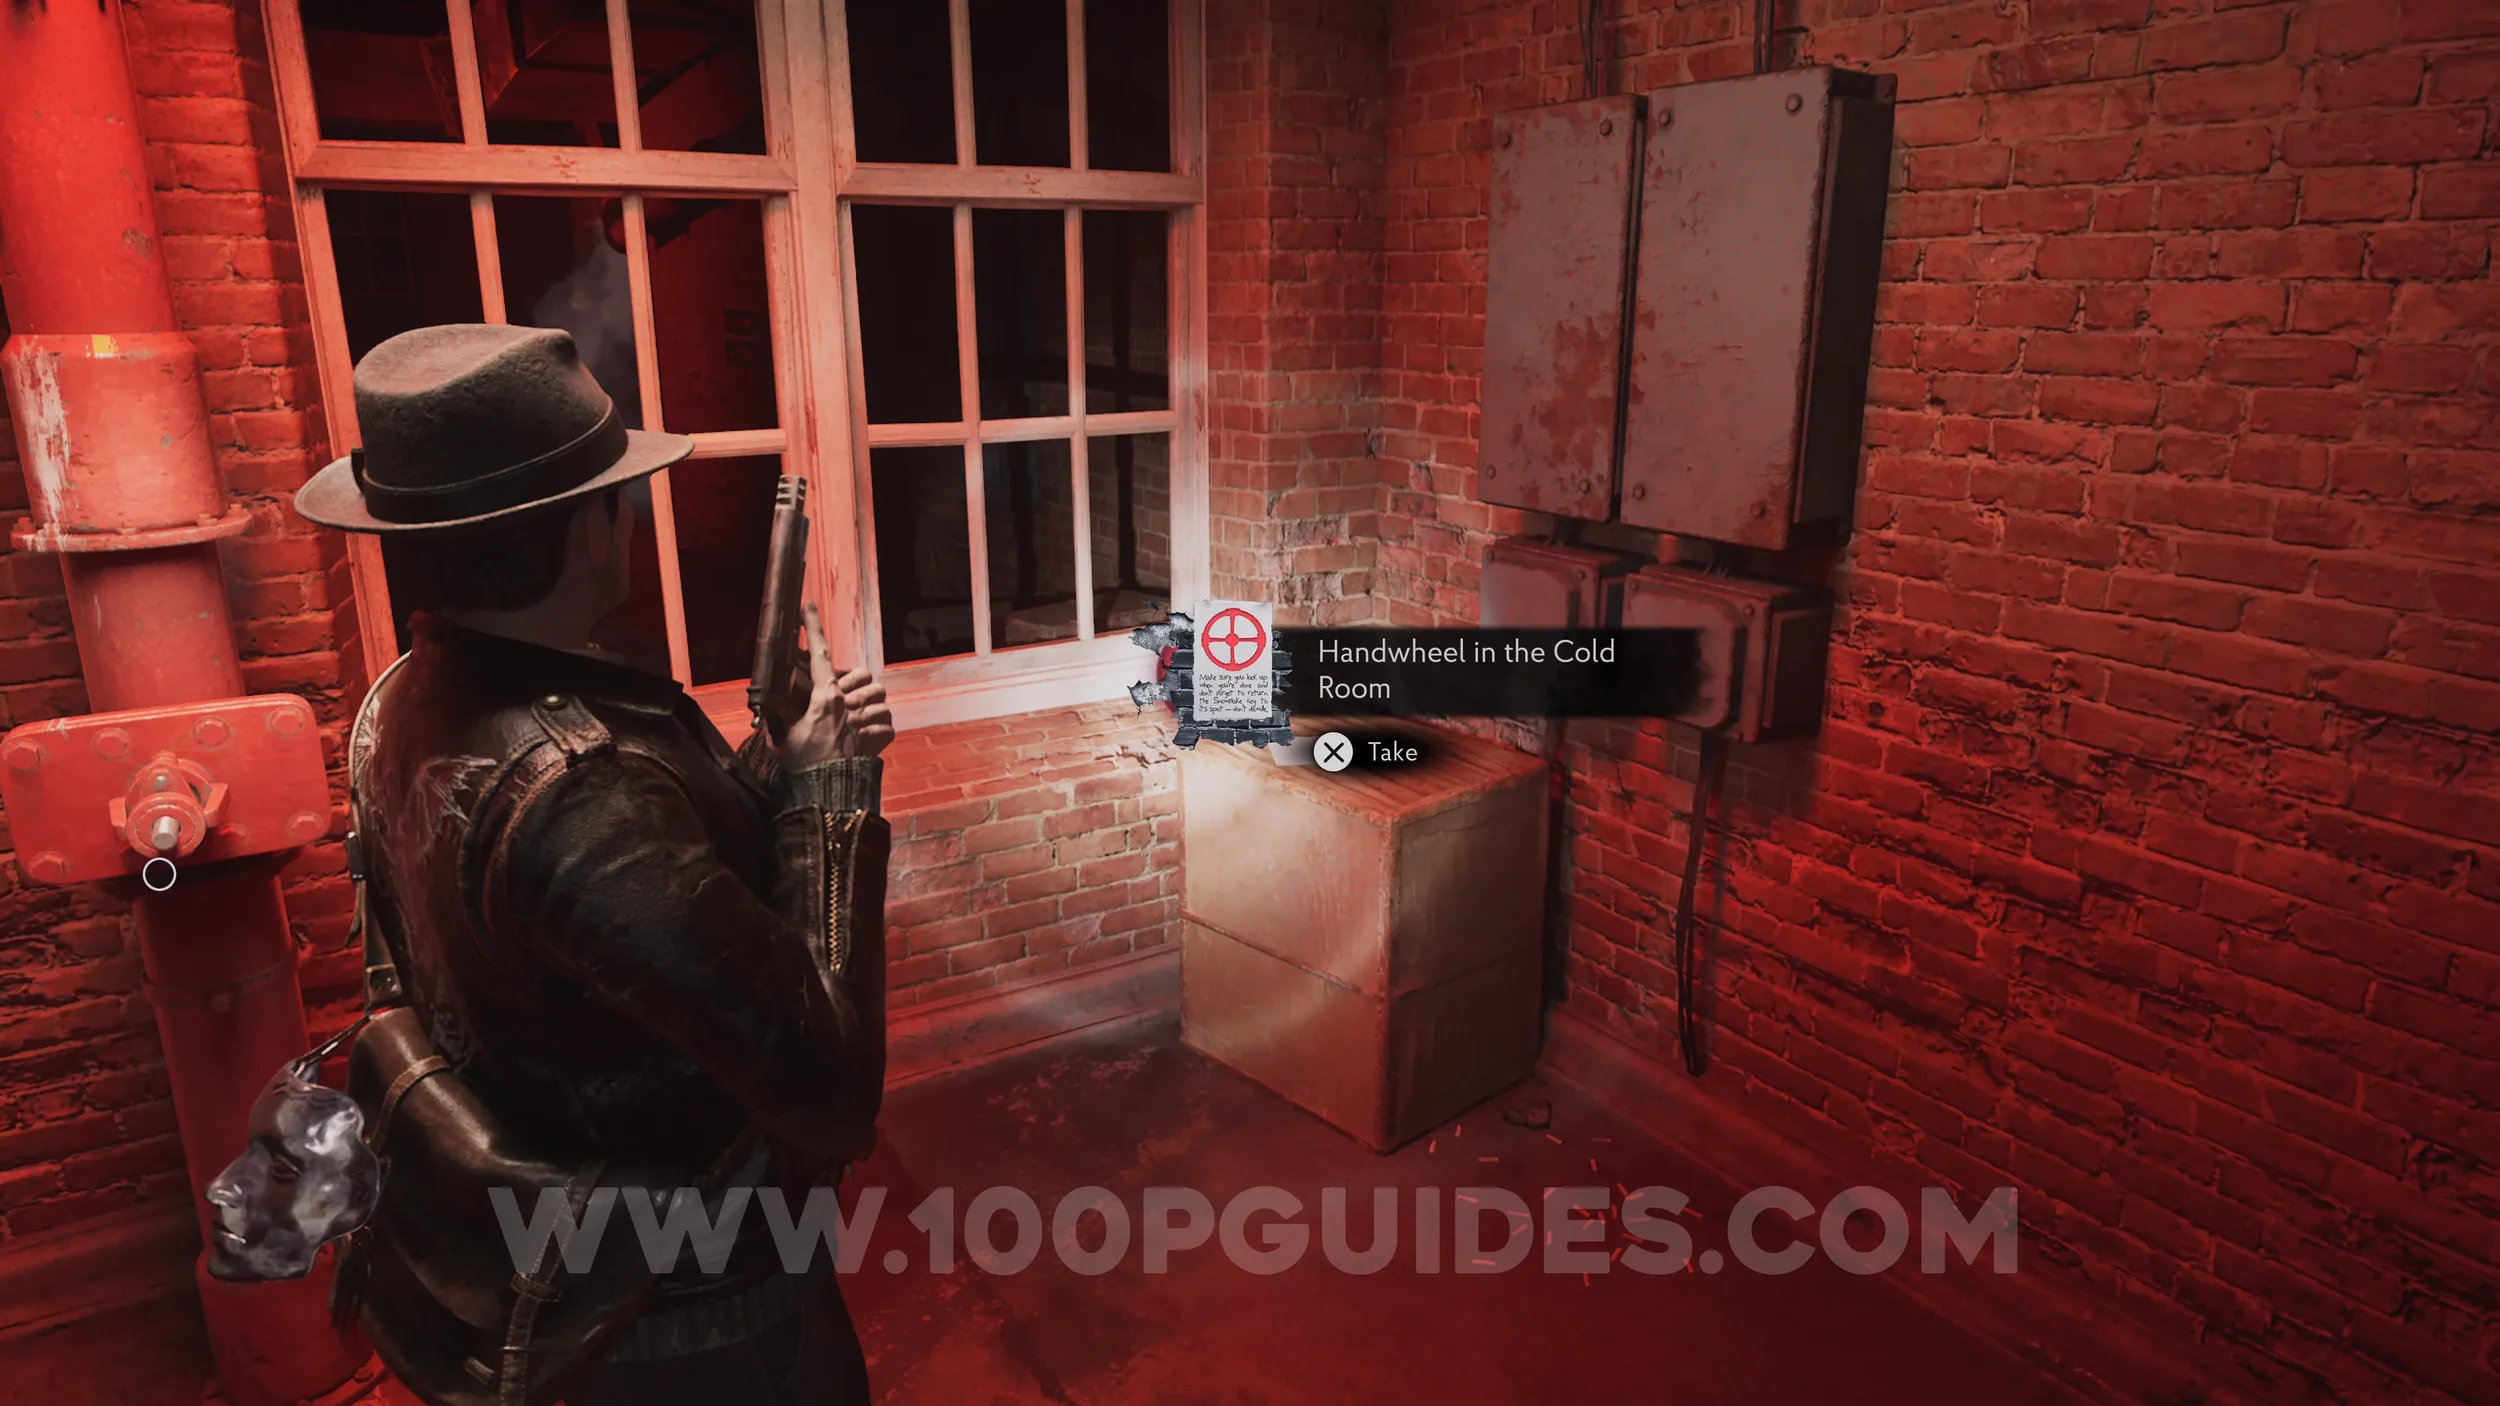
Evidence: Handwheel in the Cold Room. After the previous collectible, continue forward on the only available path until you see a ladder on your right and some stairs going down to your left. Here you'll find the evidence next to the pipe where you'll later place the valve.
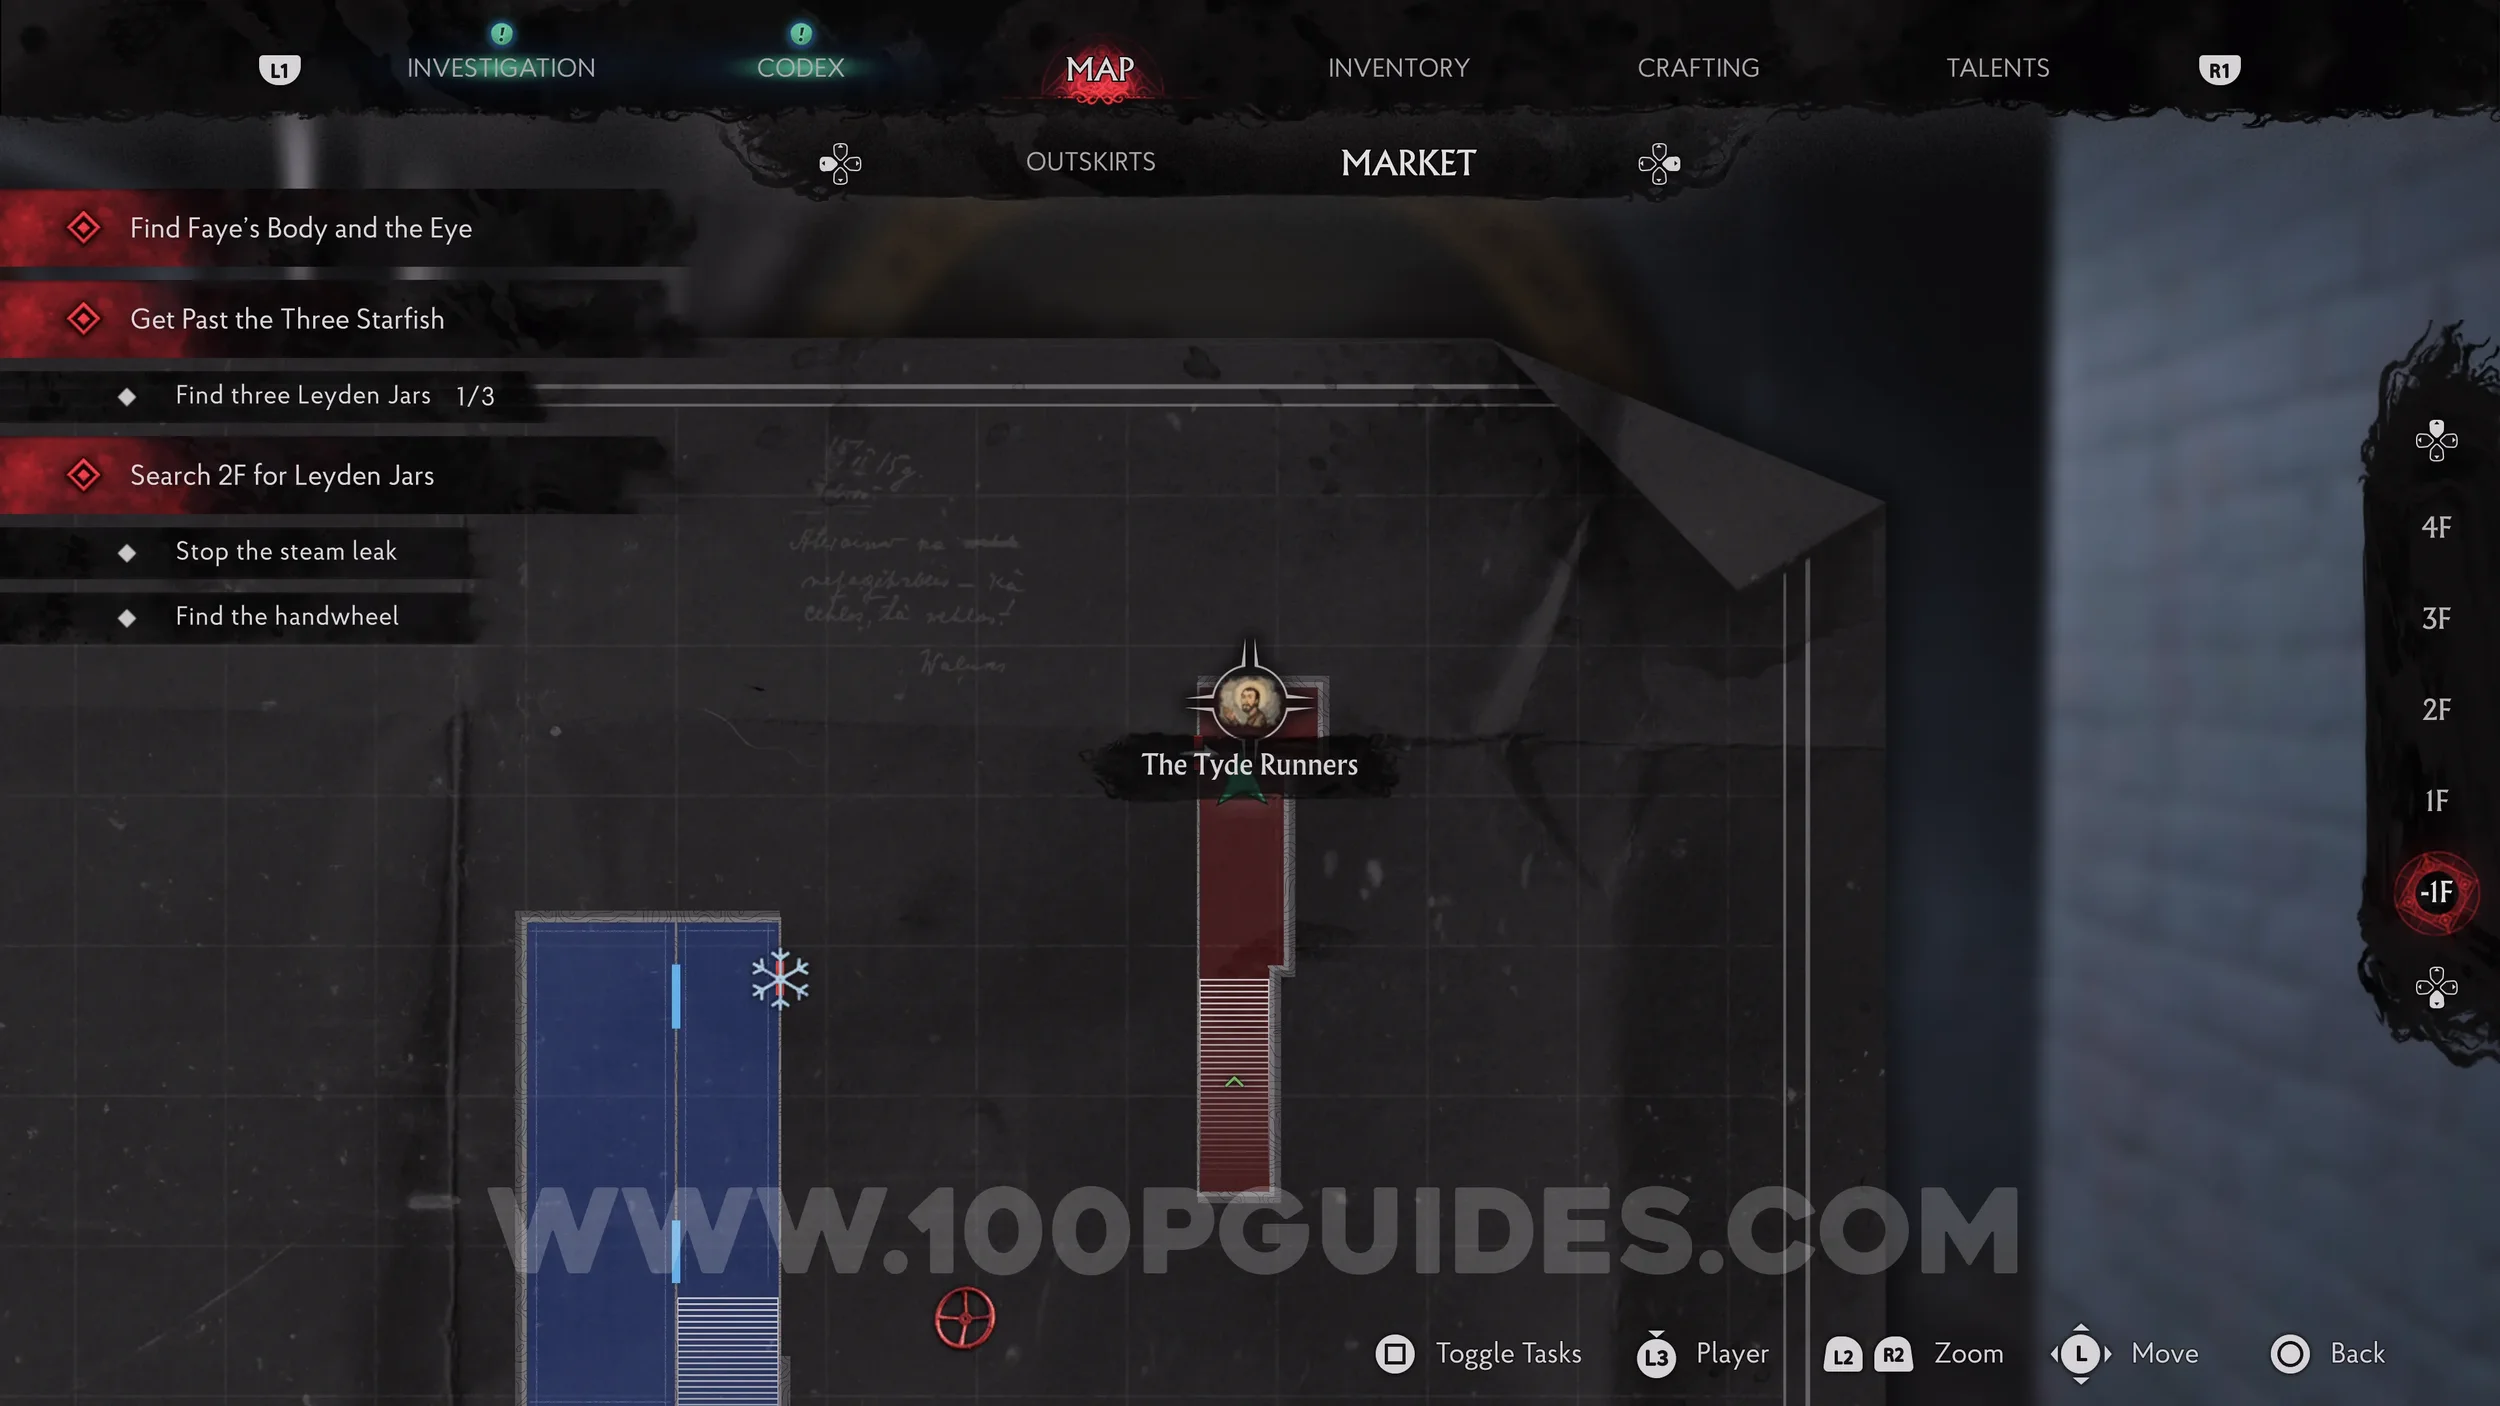
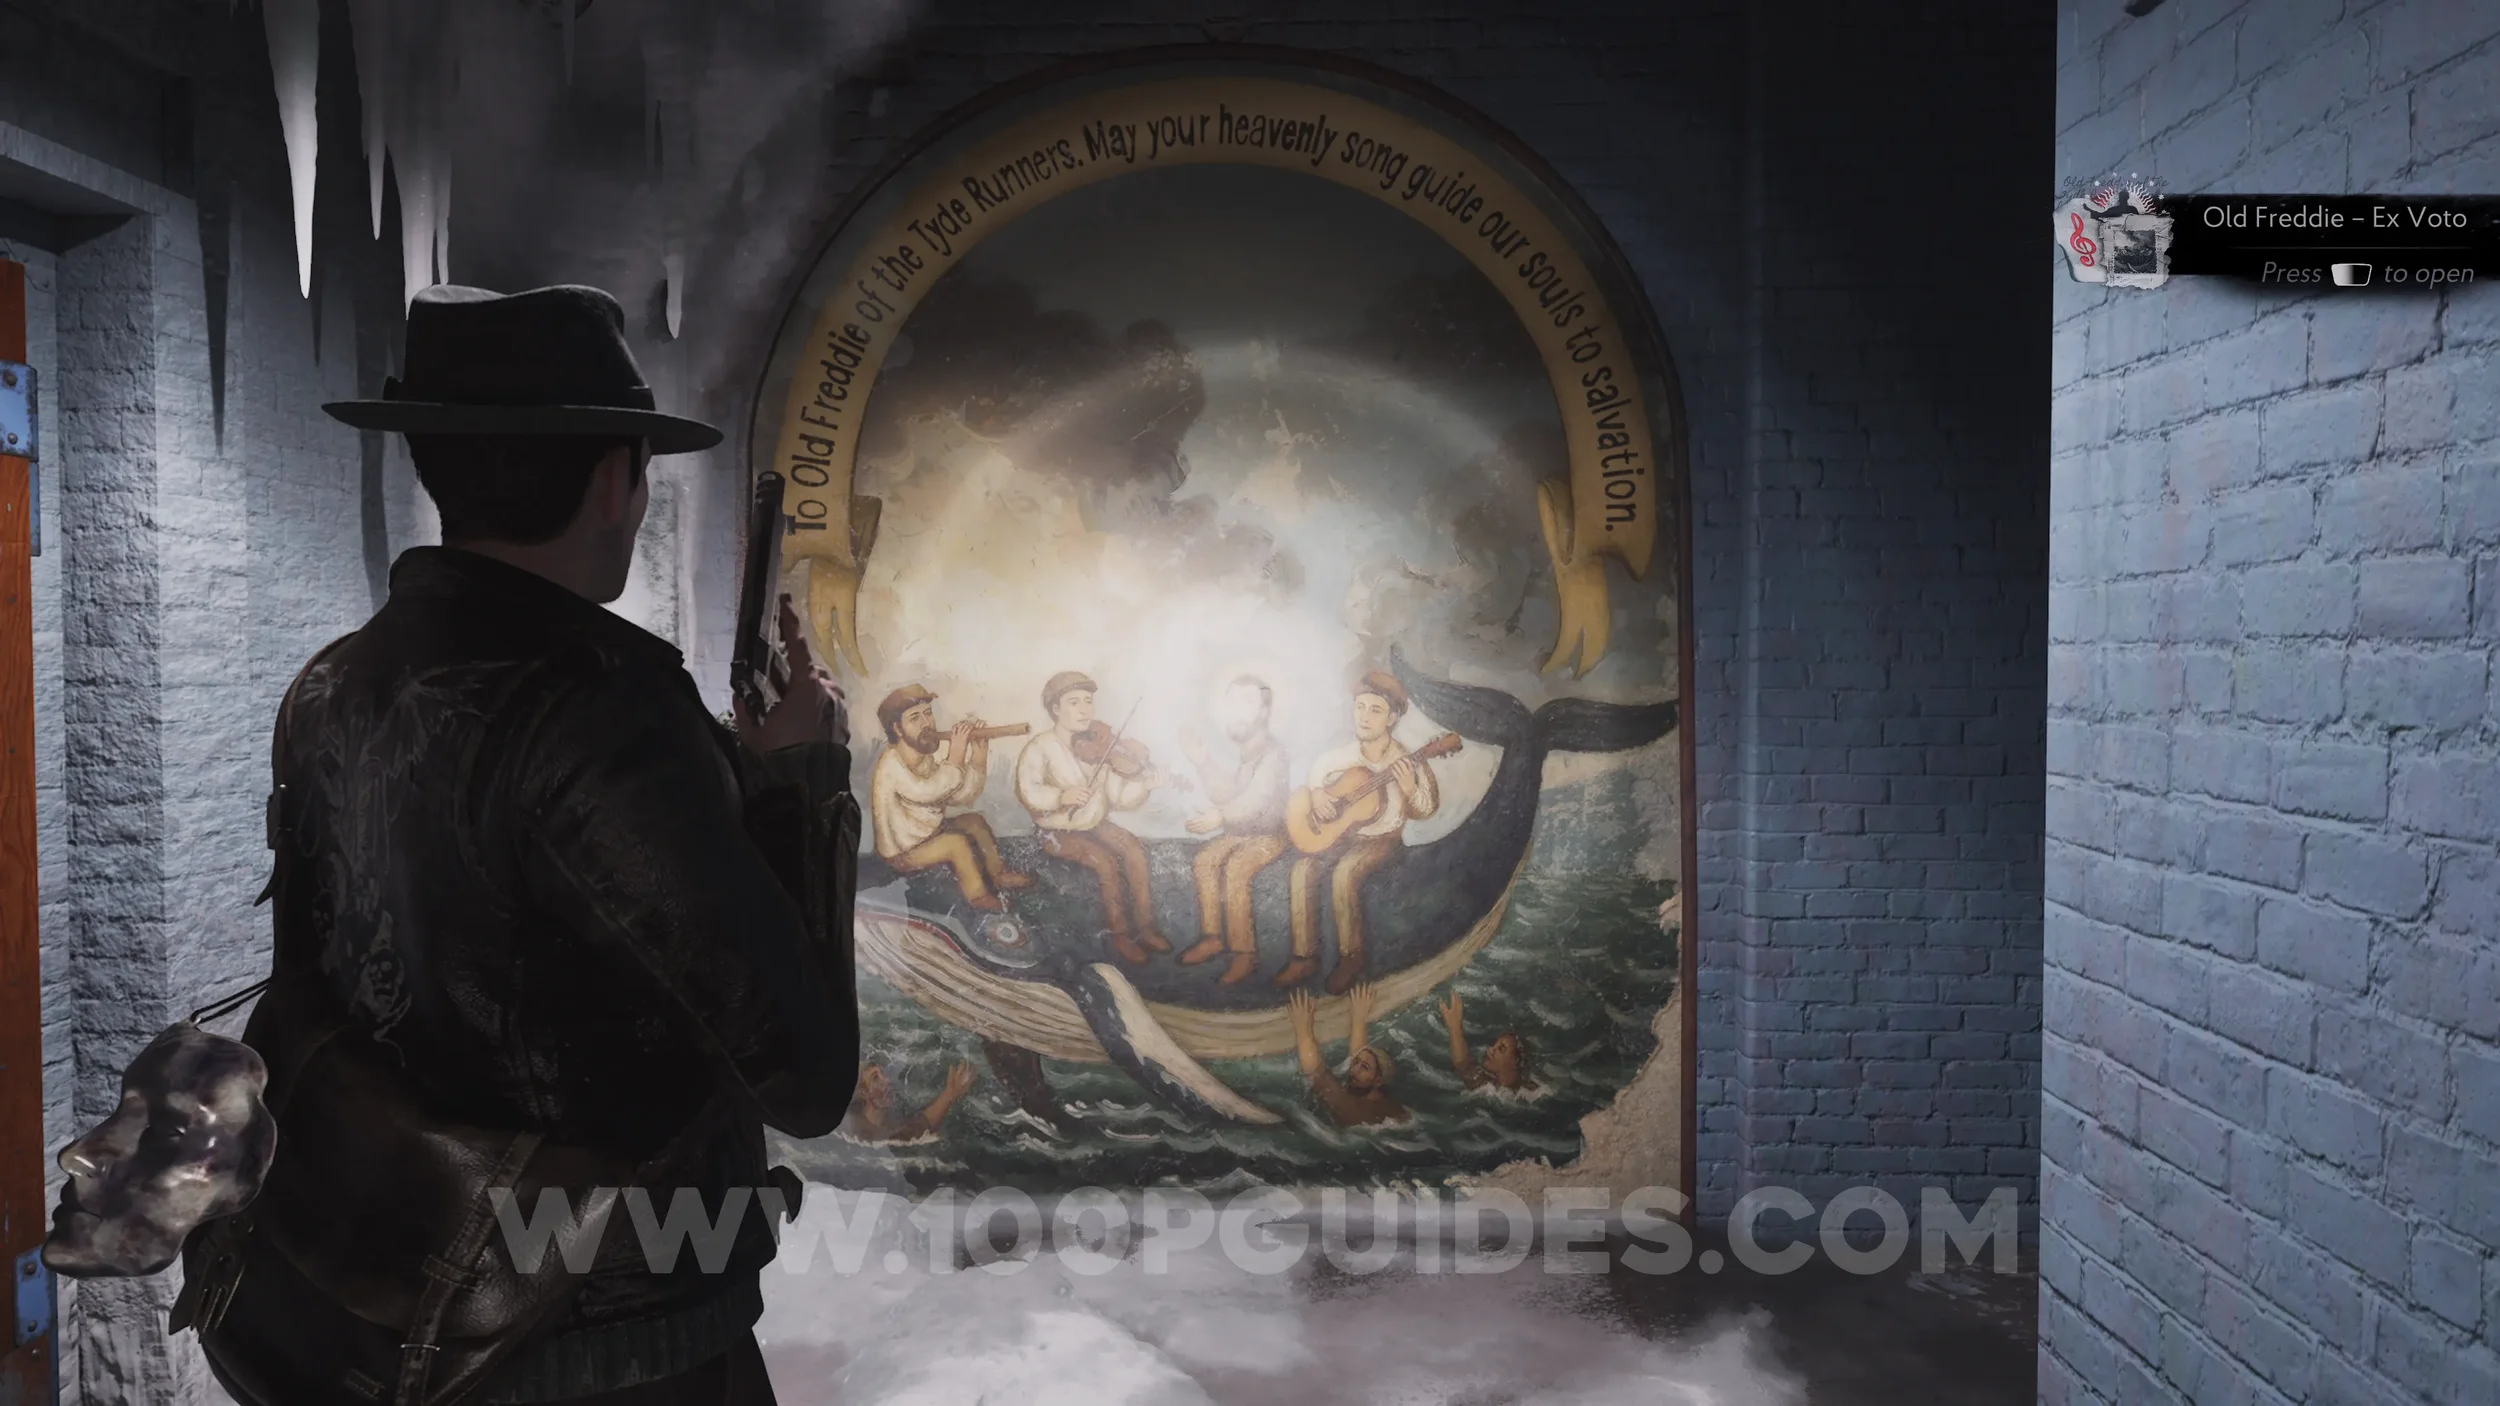
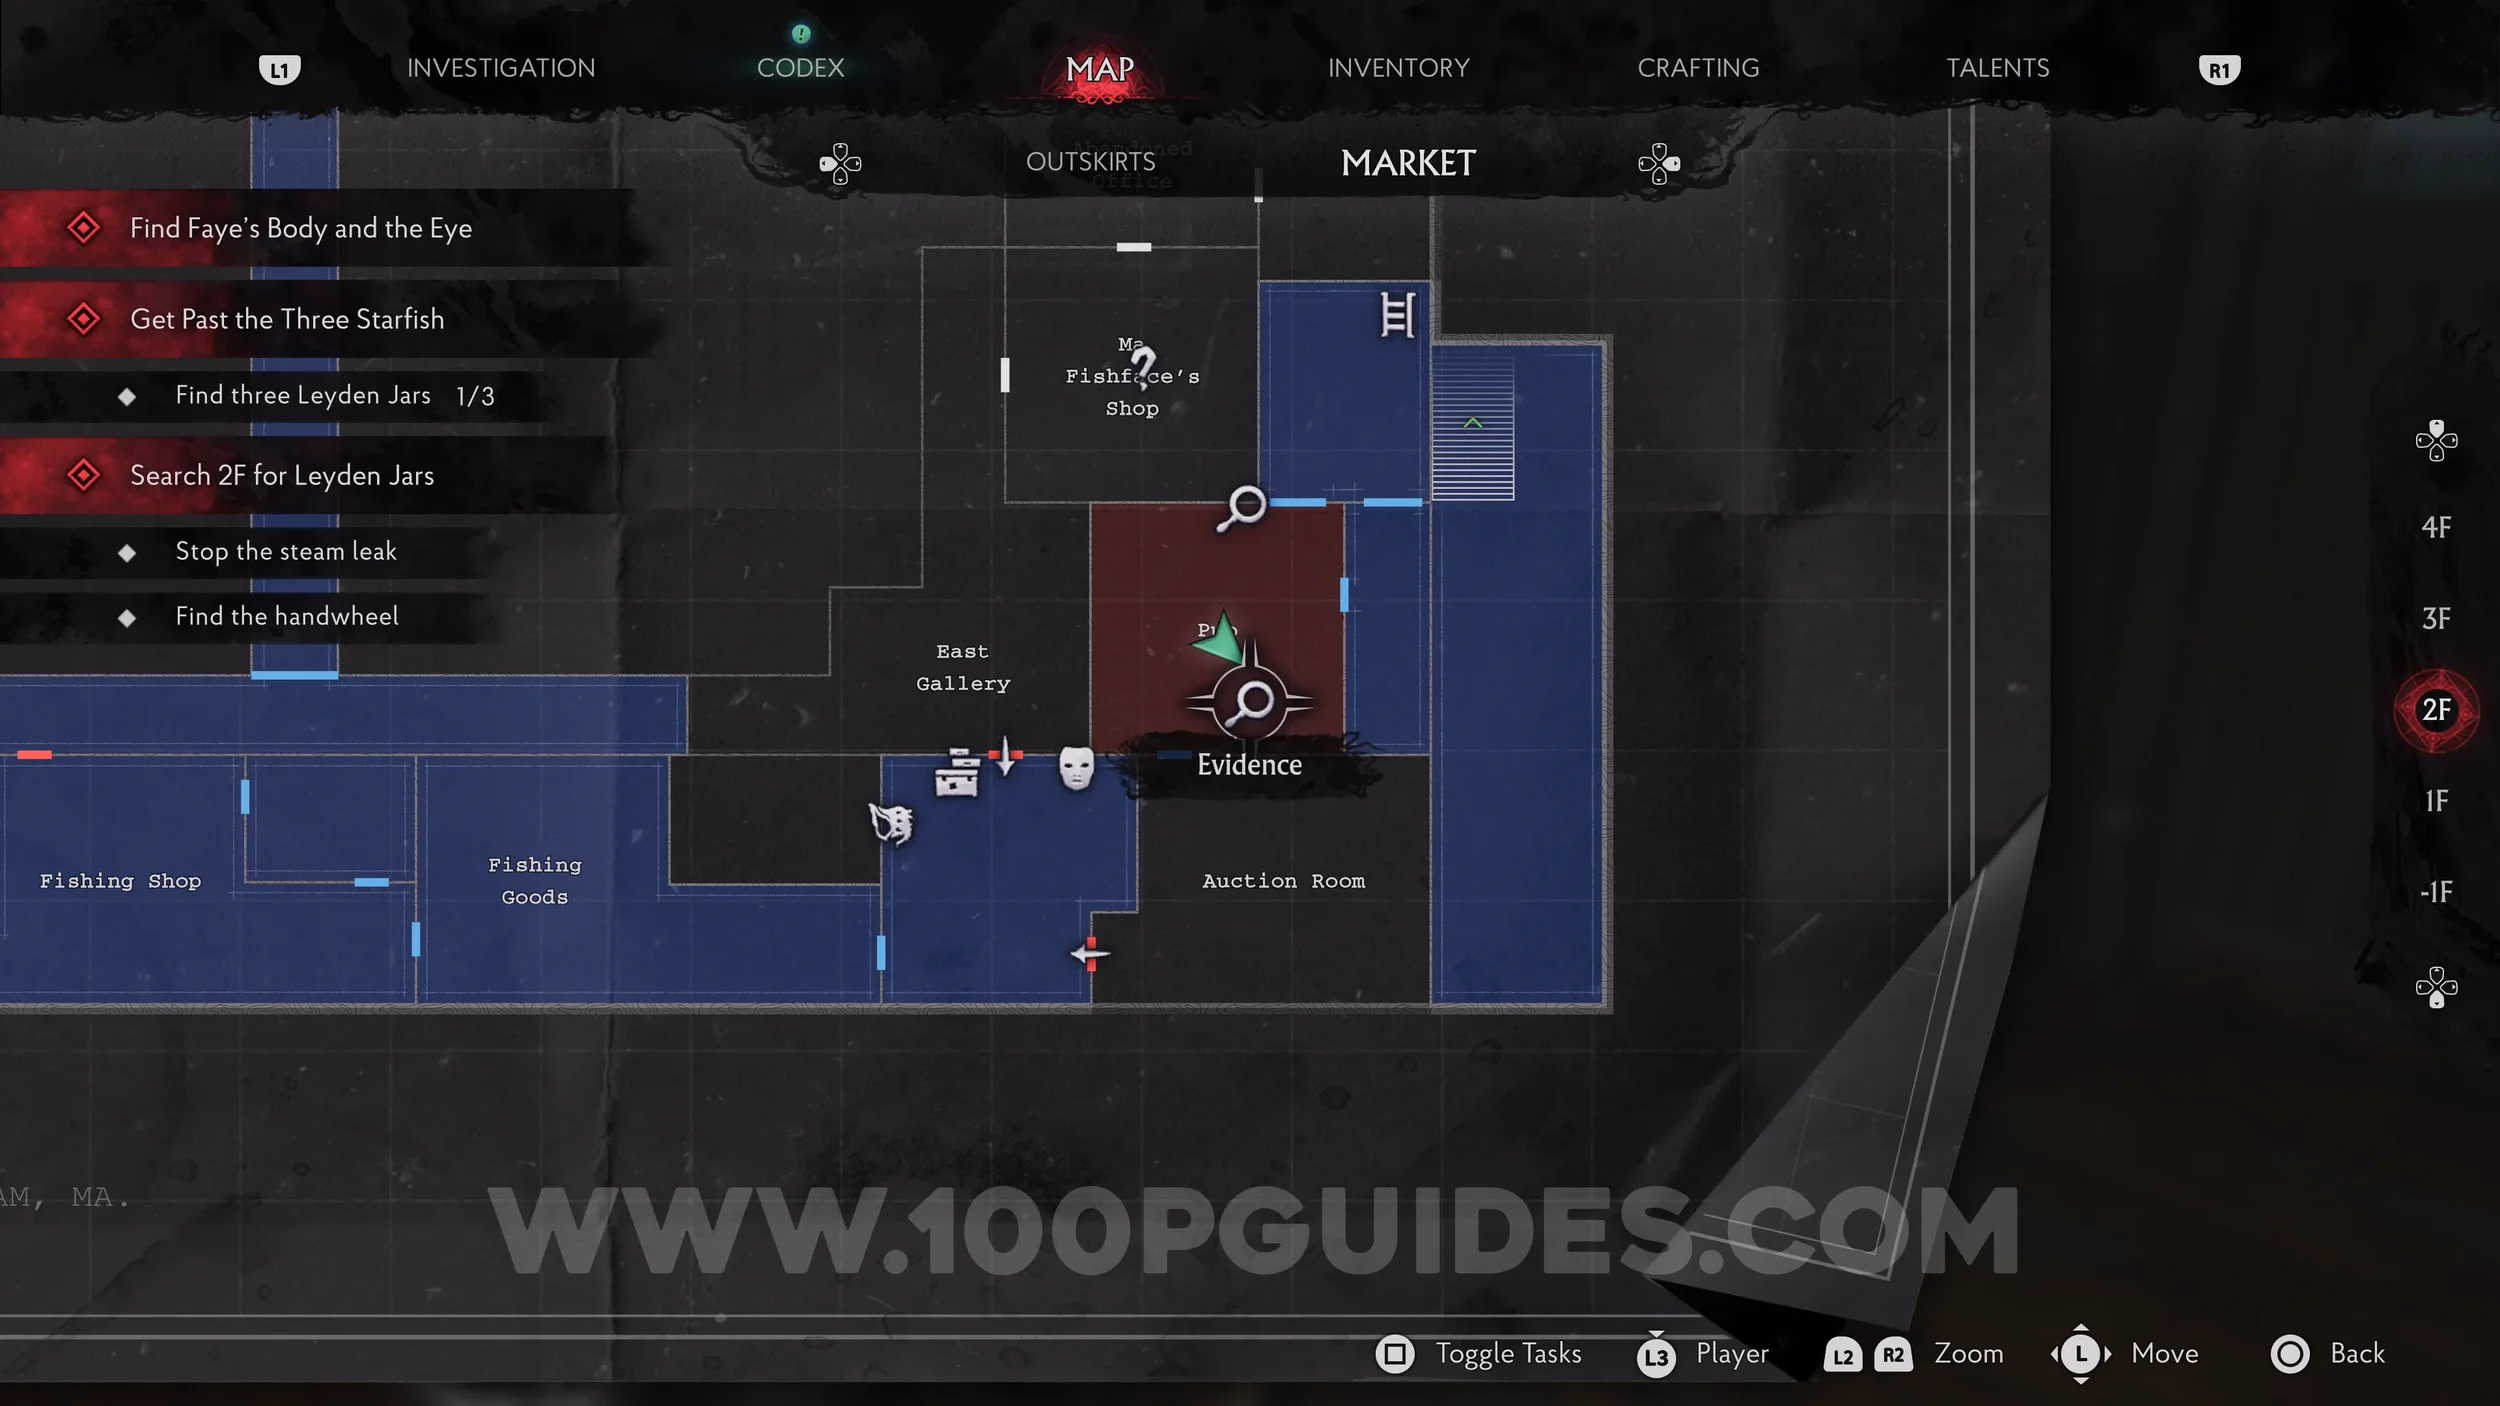
Evidence: Old Freddie - Ex Voto. Head downstairs and examine the fresco on the wall at the bottom.
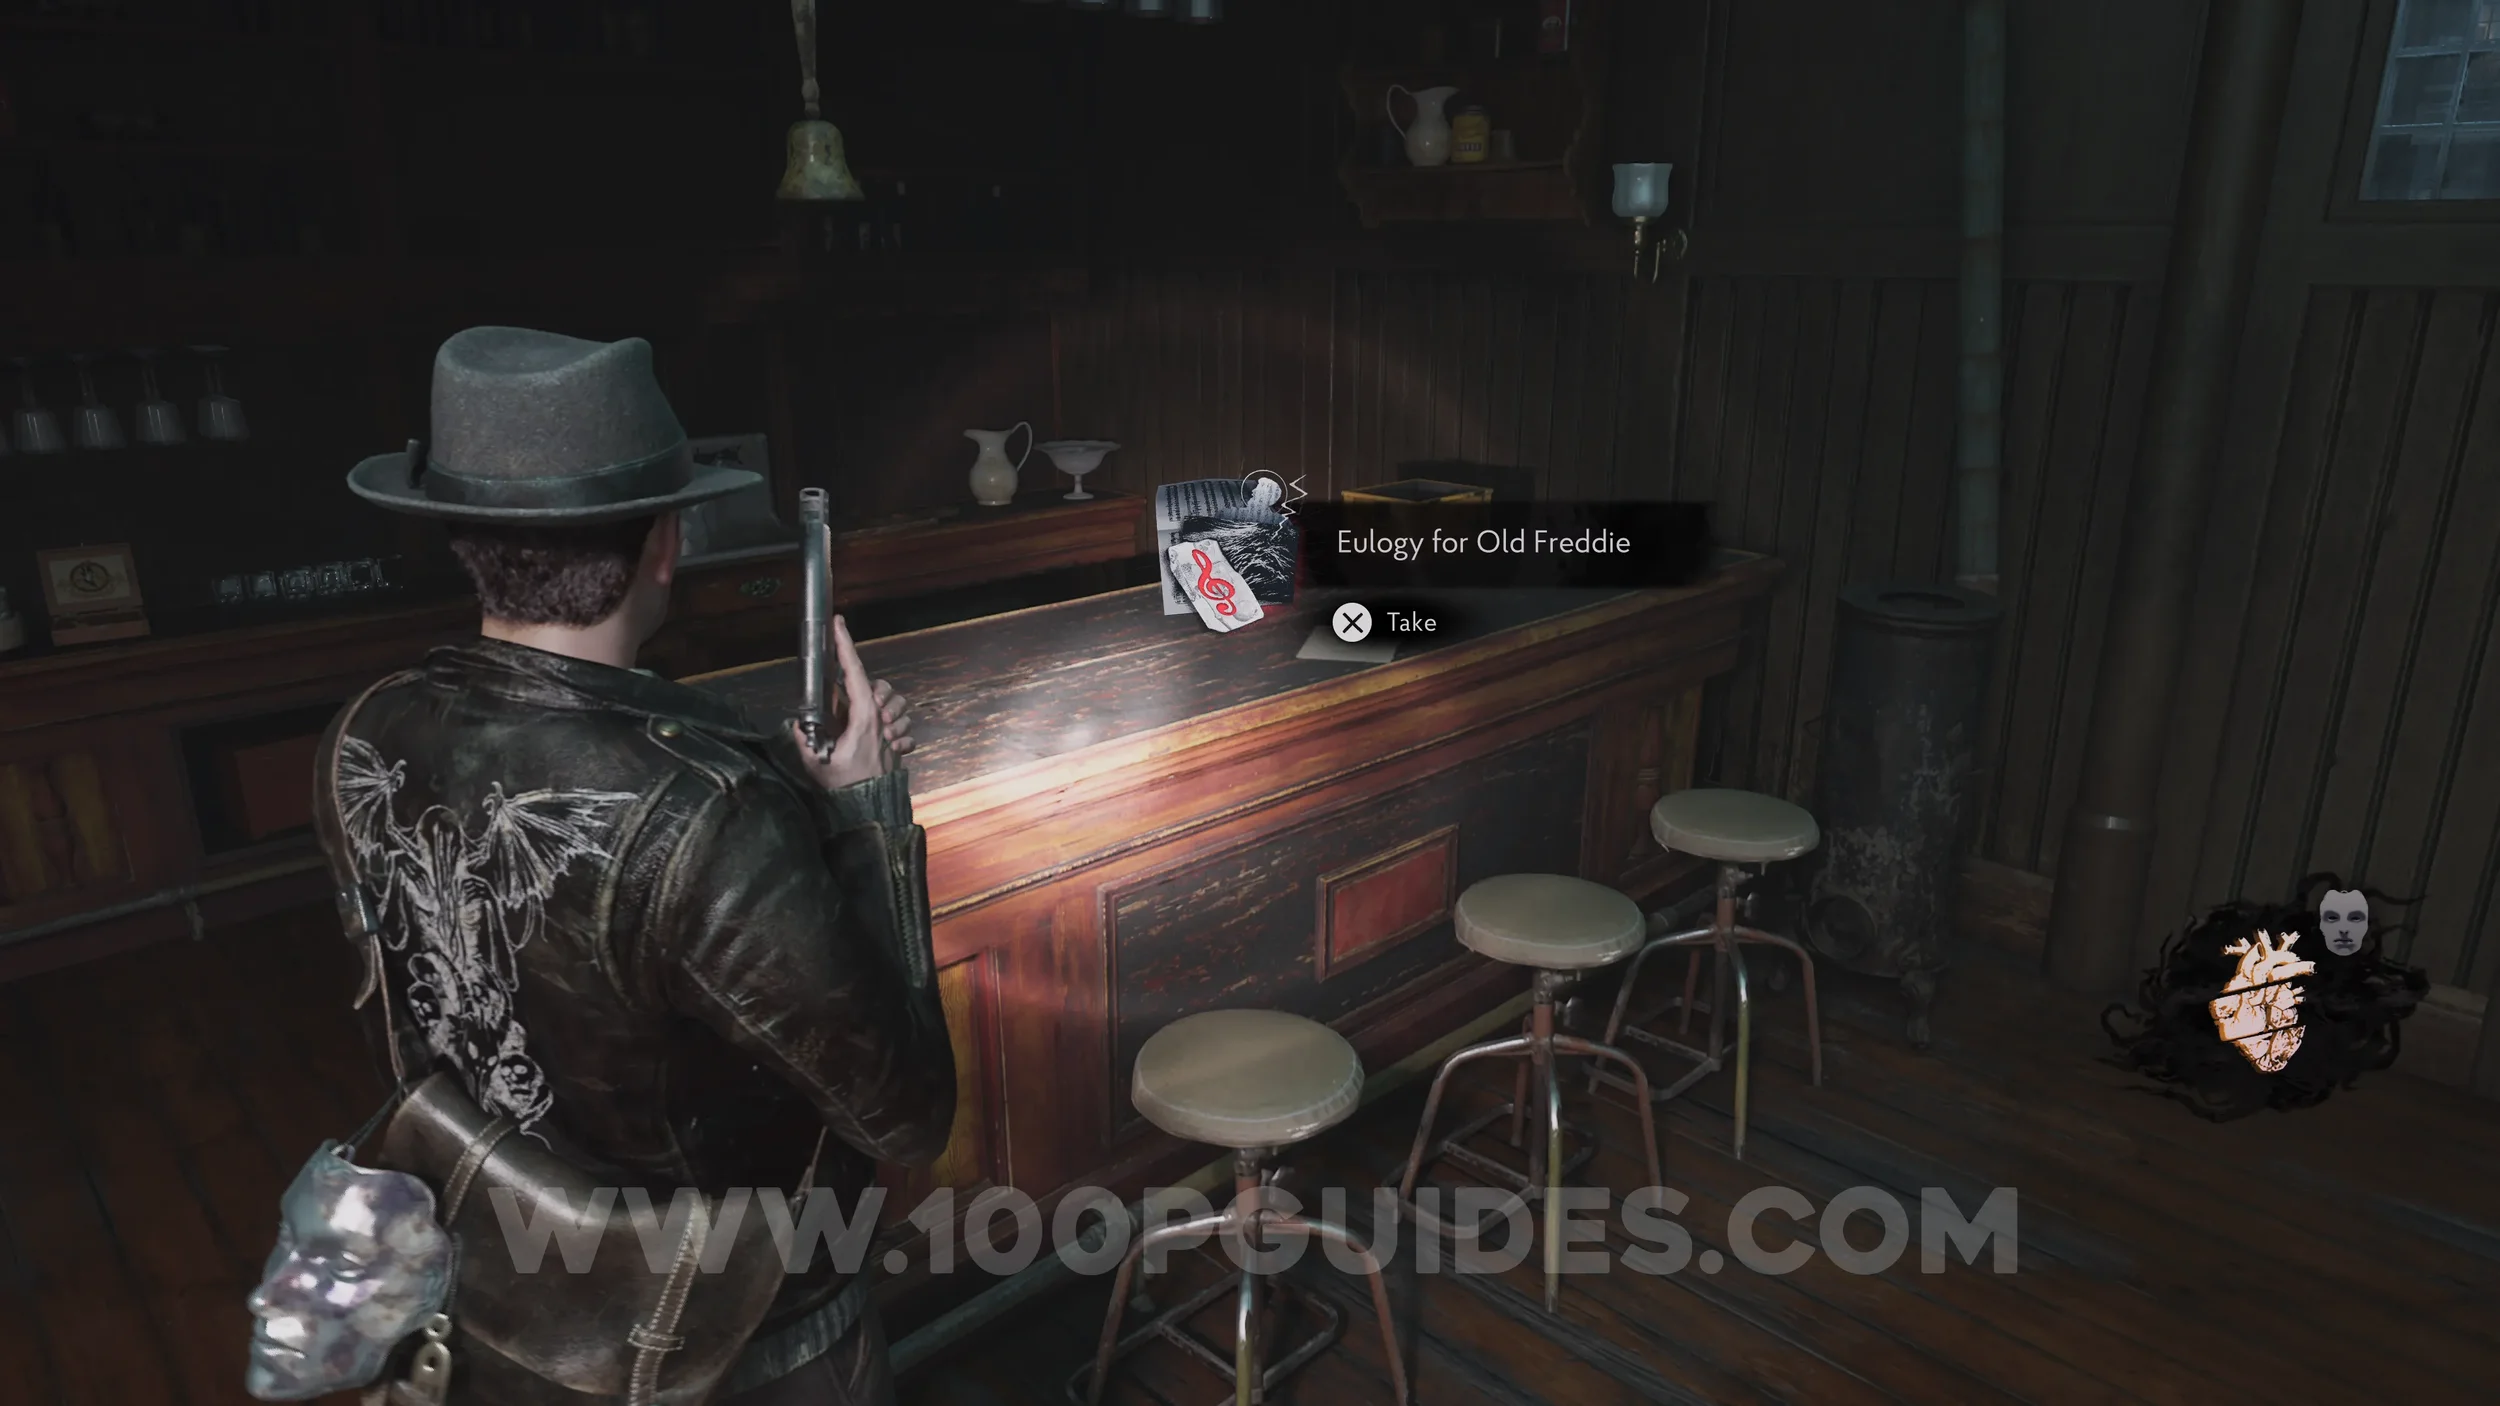
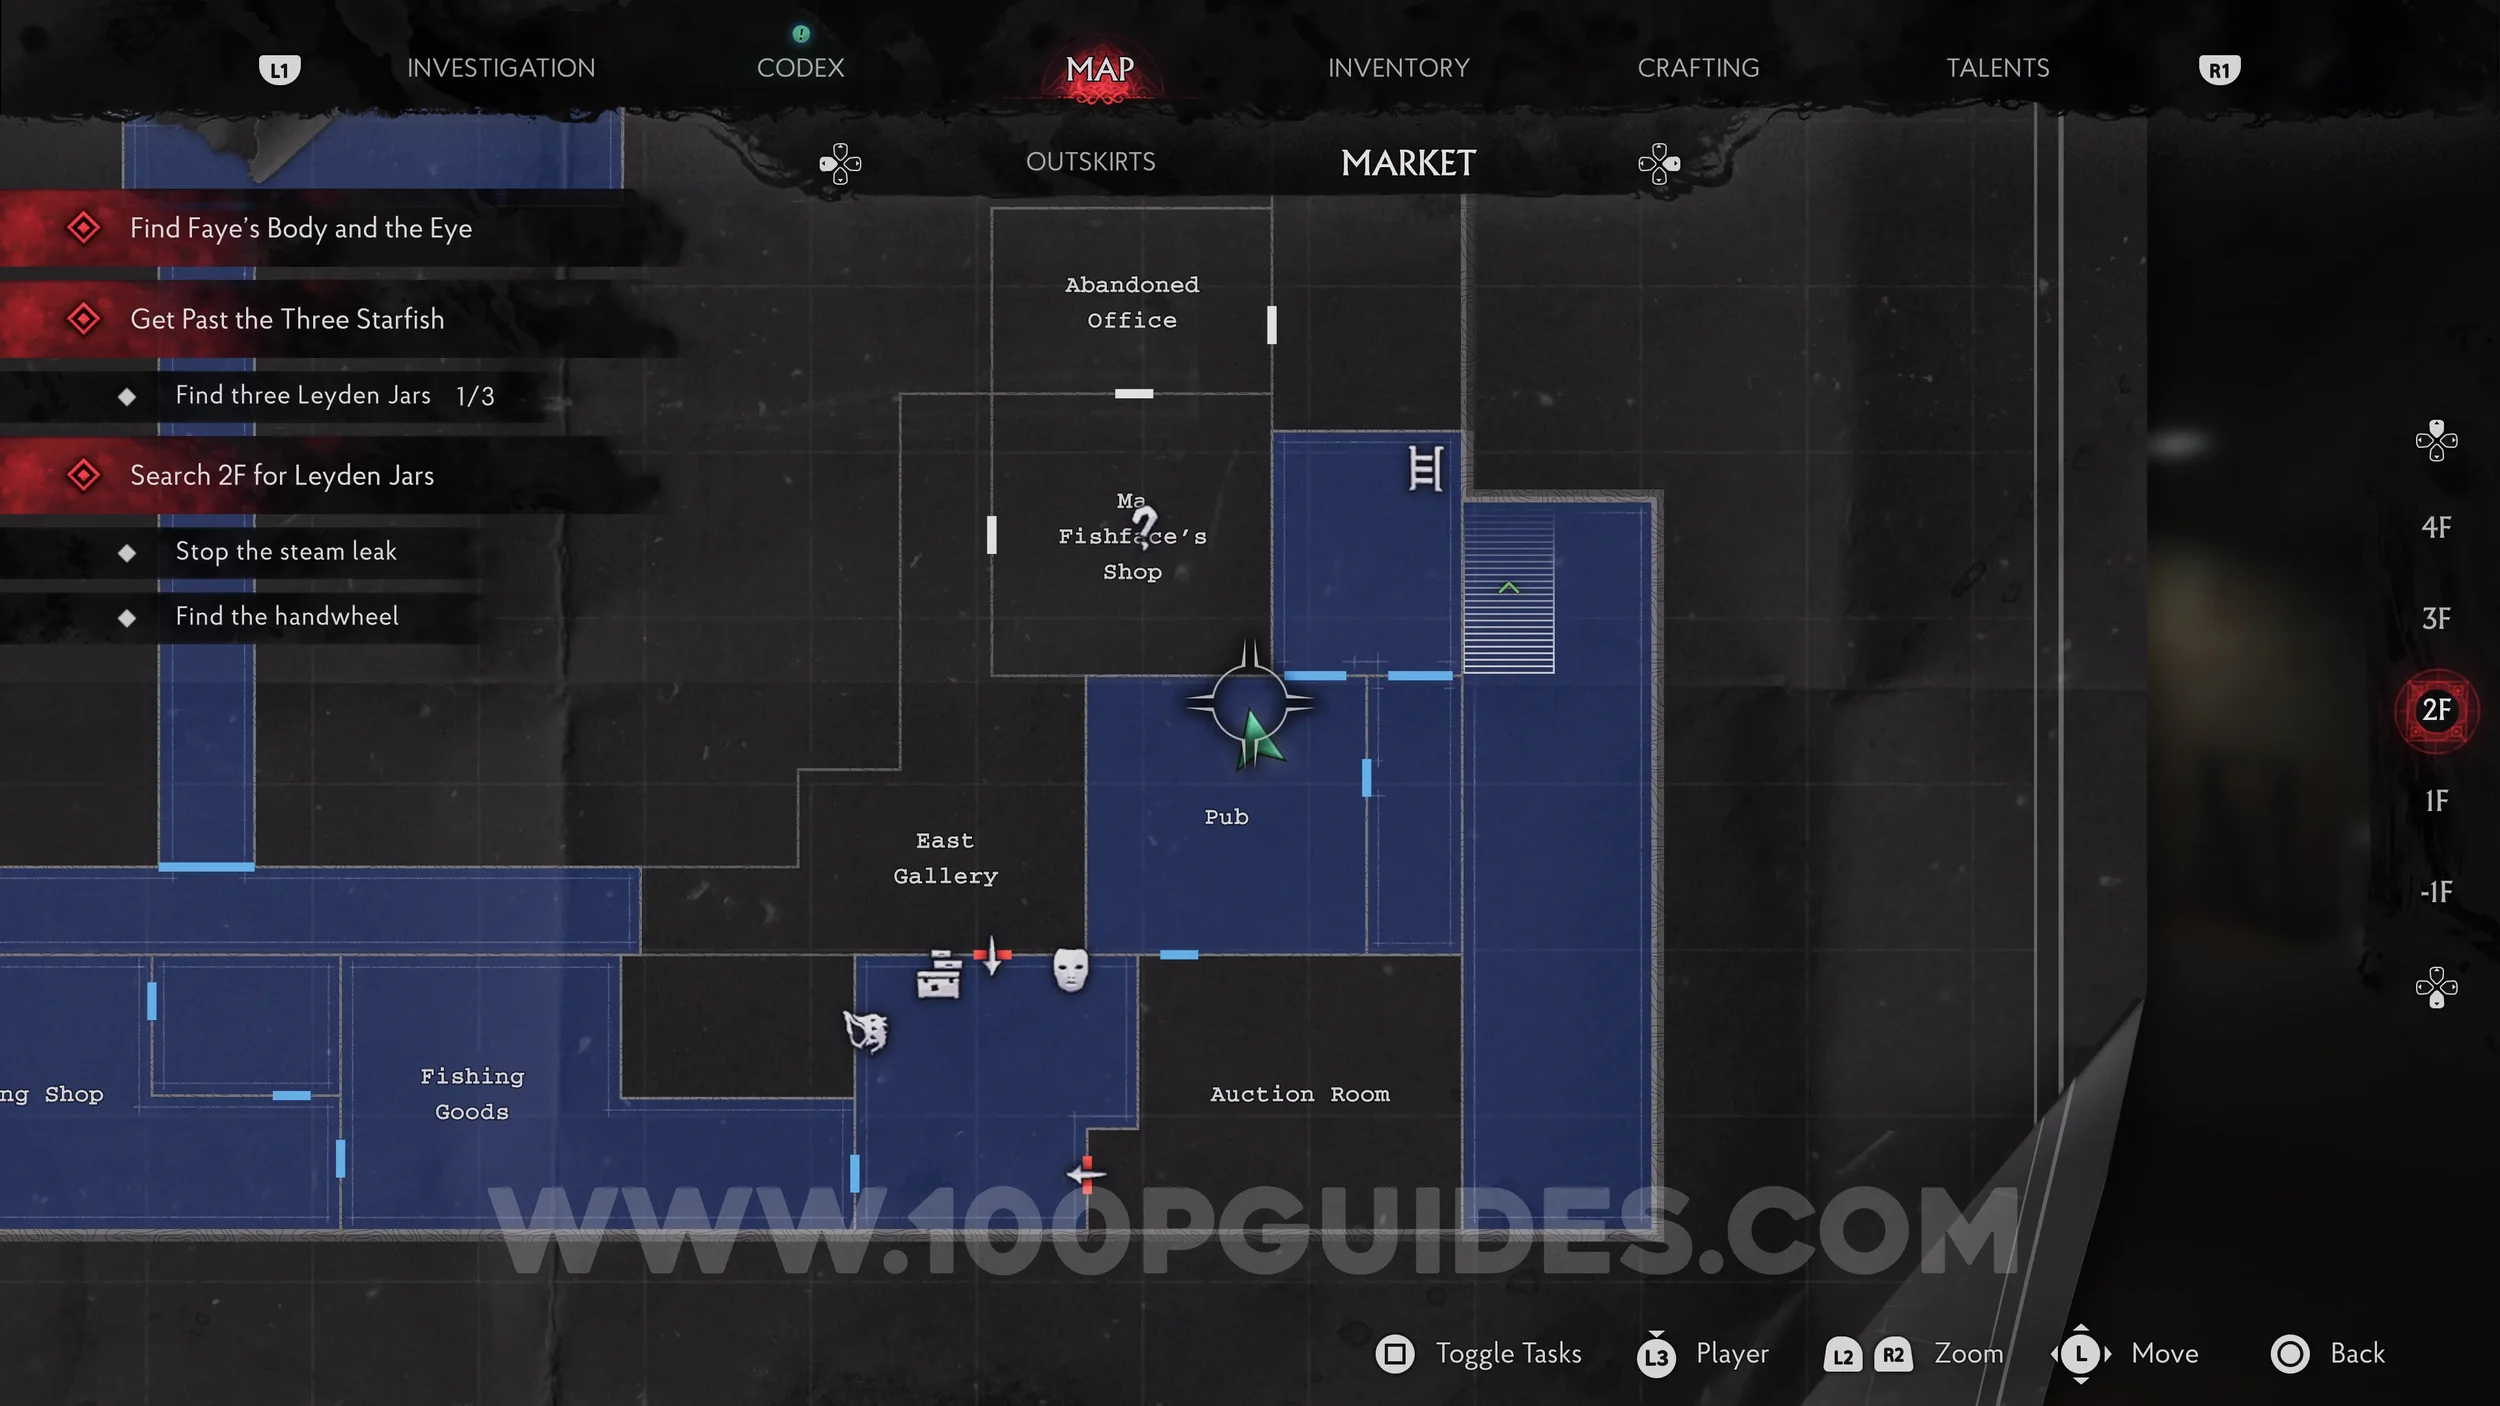
Evidence: Eulogy for Old Freddie. Now head back upstairs, then climb the ladder to get to the Pub. The evidence is on the table.
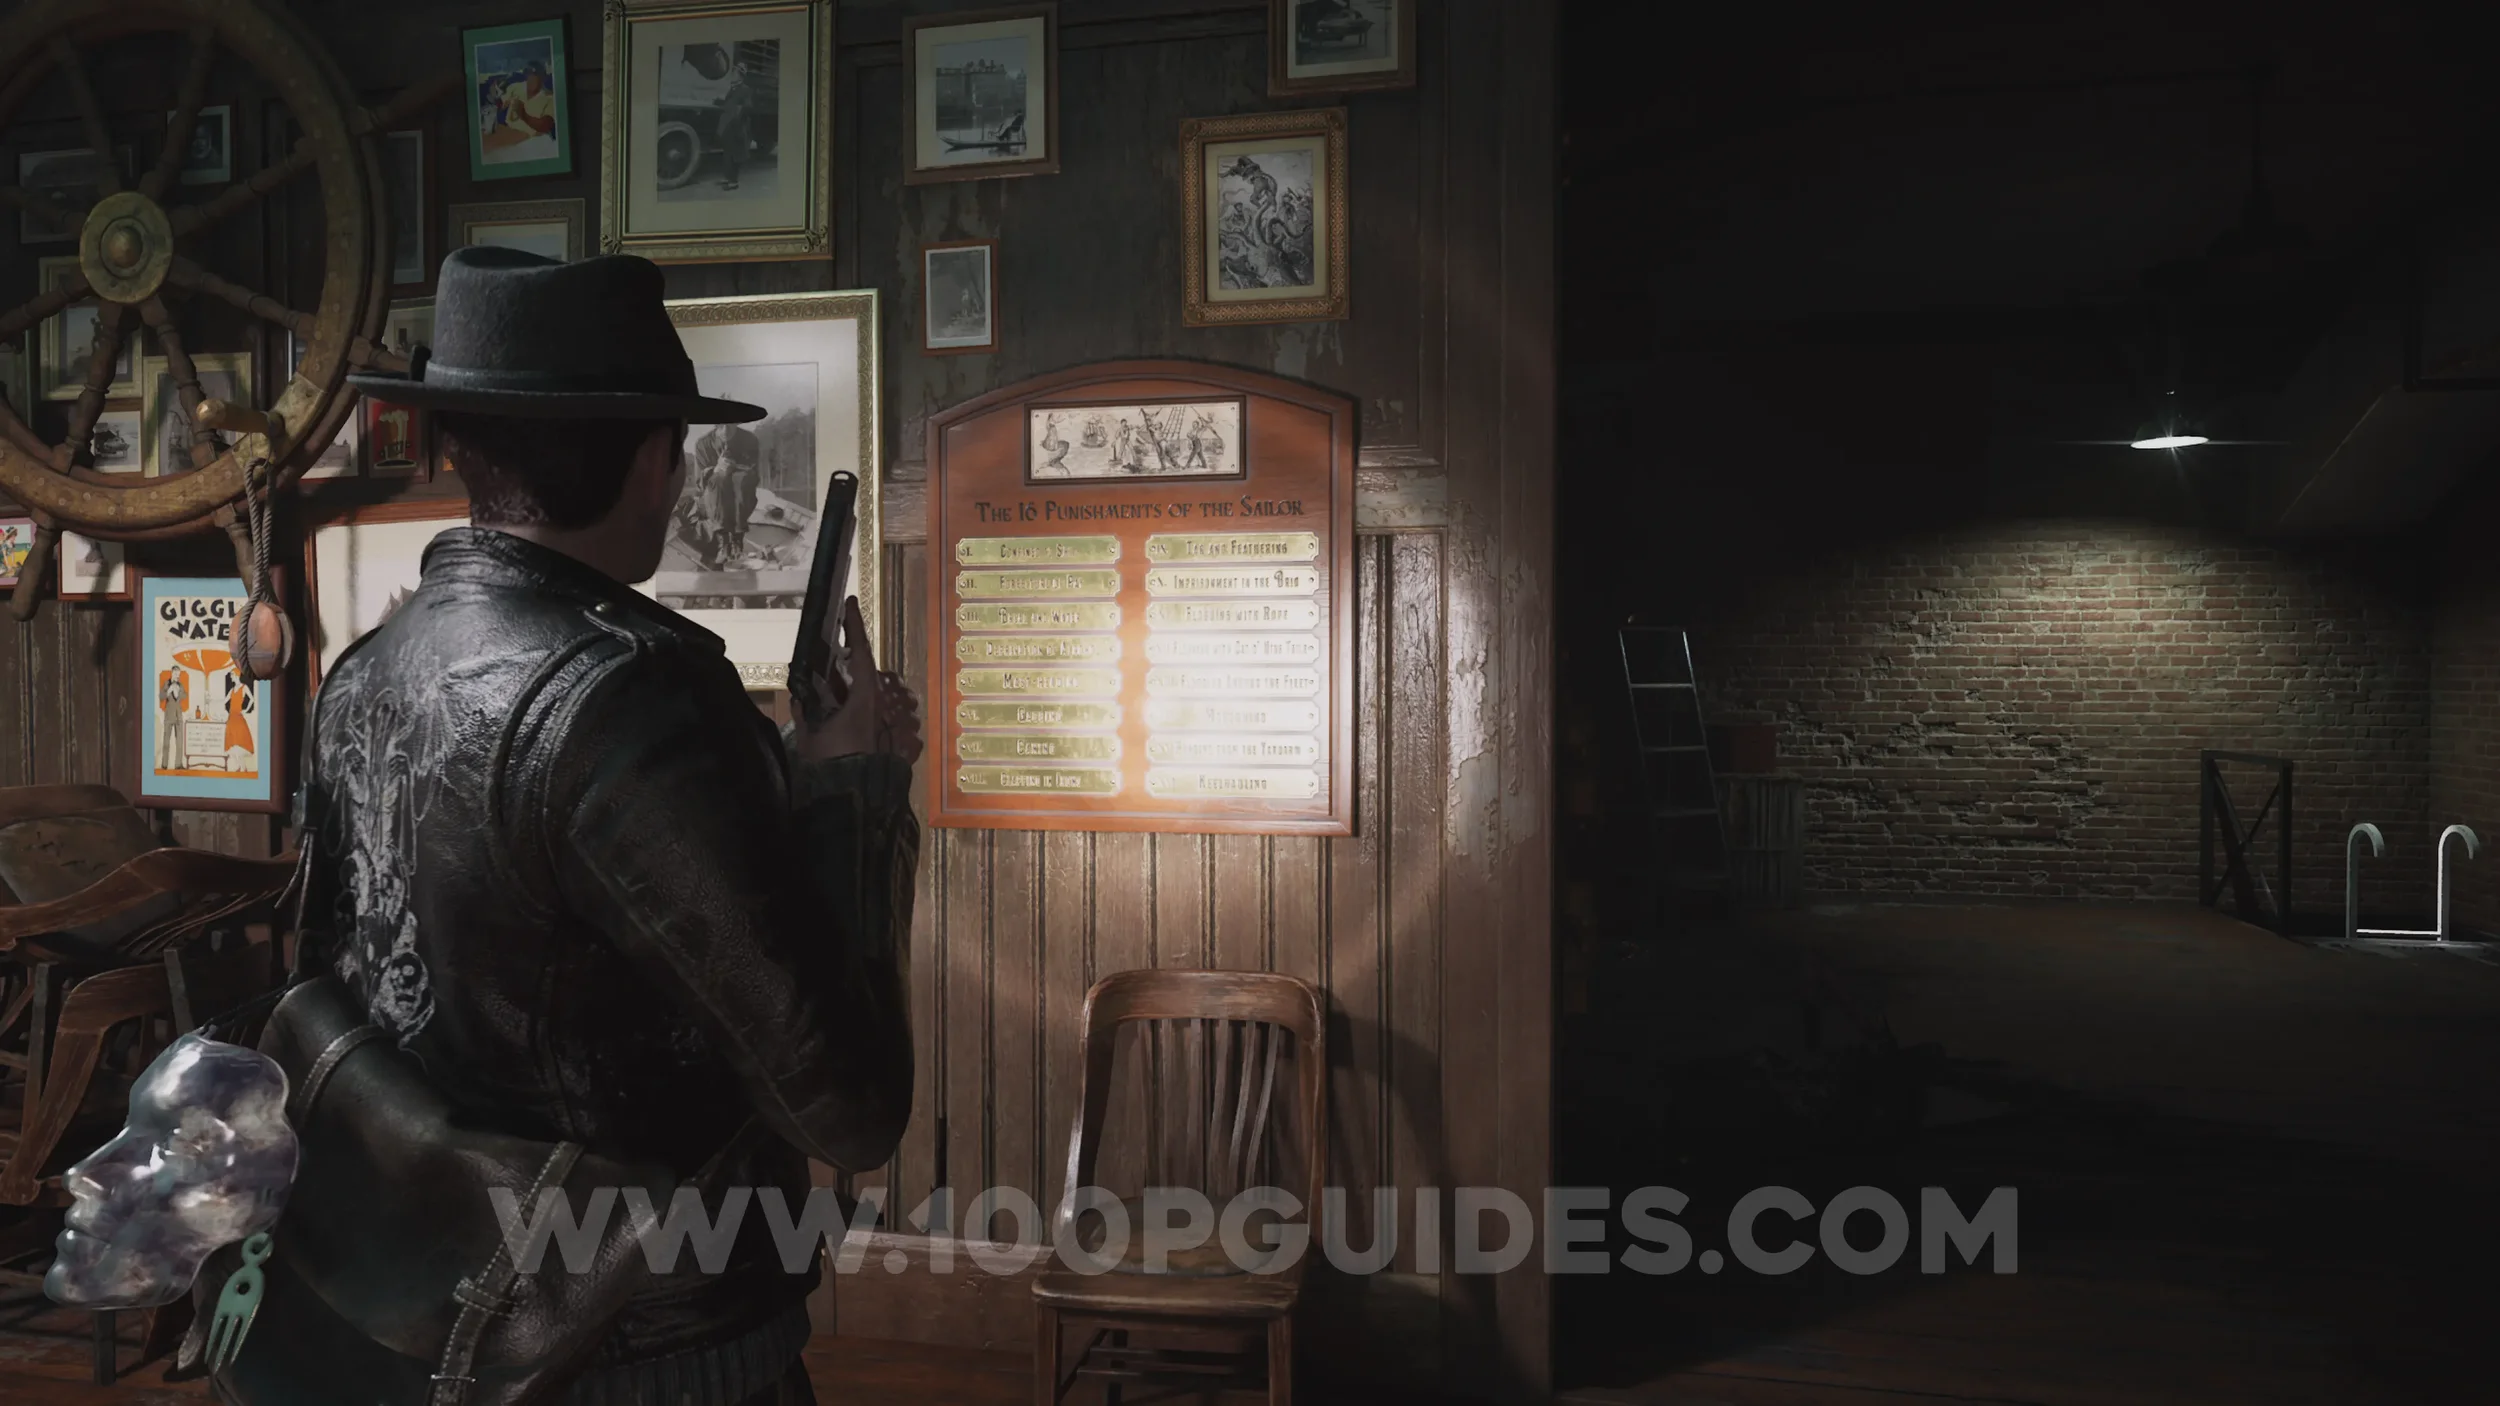
Evidence: The 16 Punishments of the Sailors. Examine the plaque on the wall in the Pub.
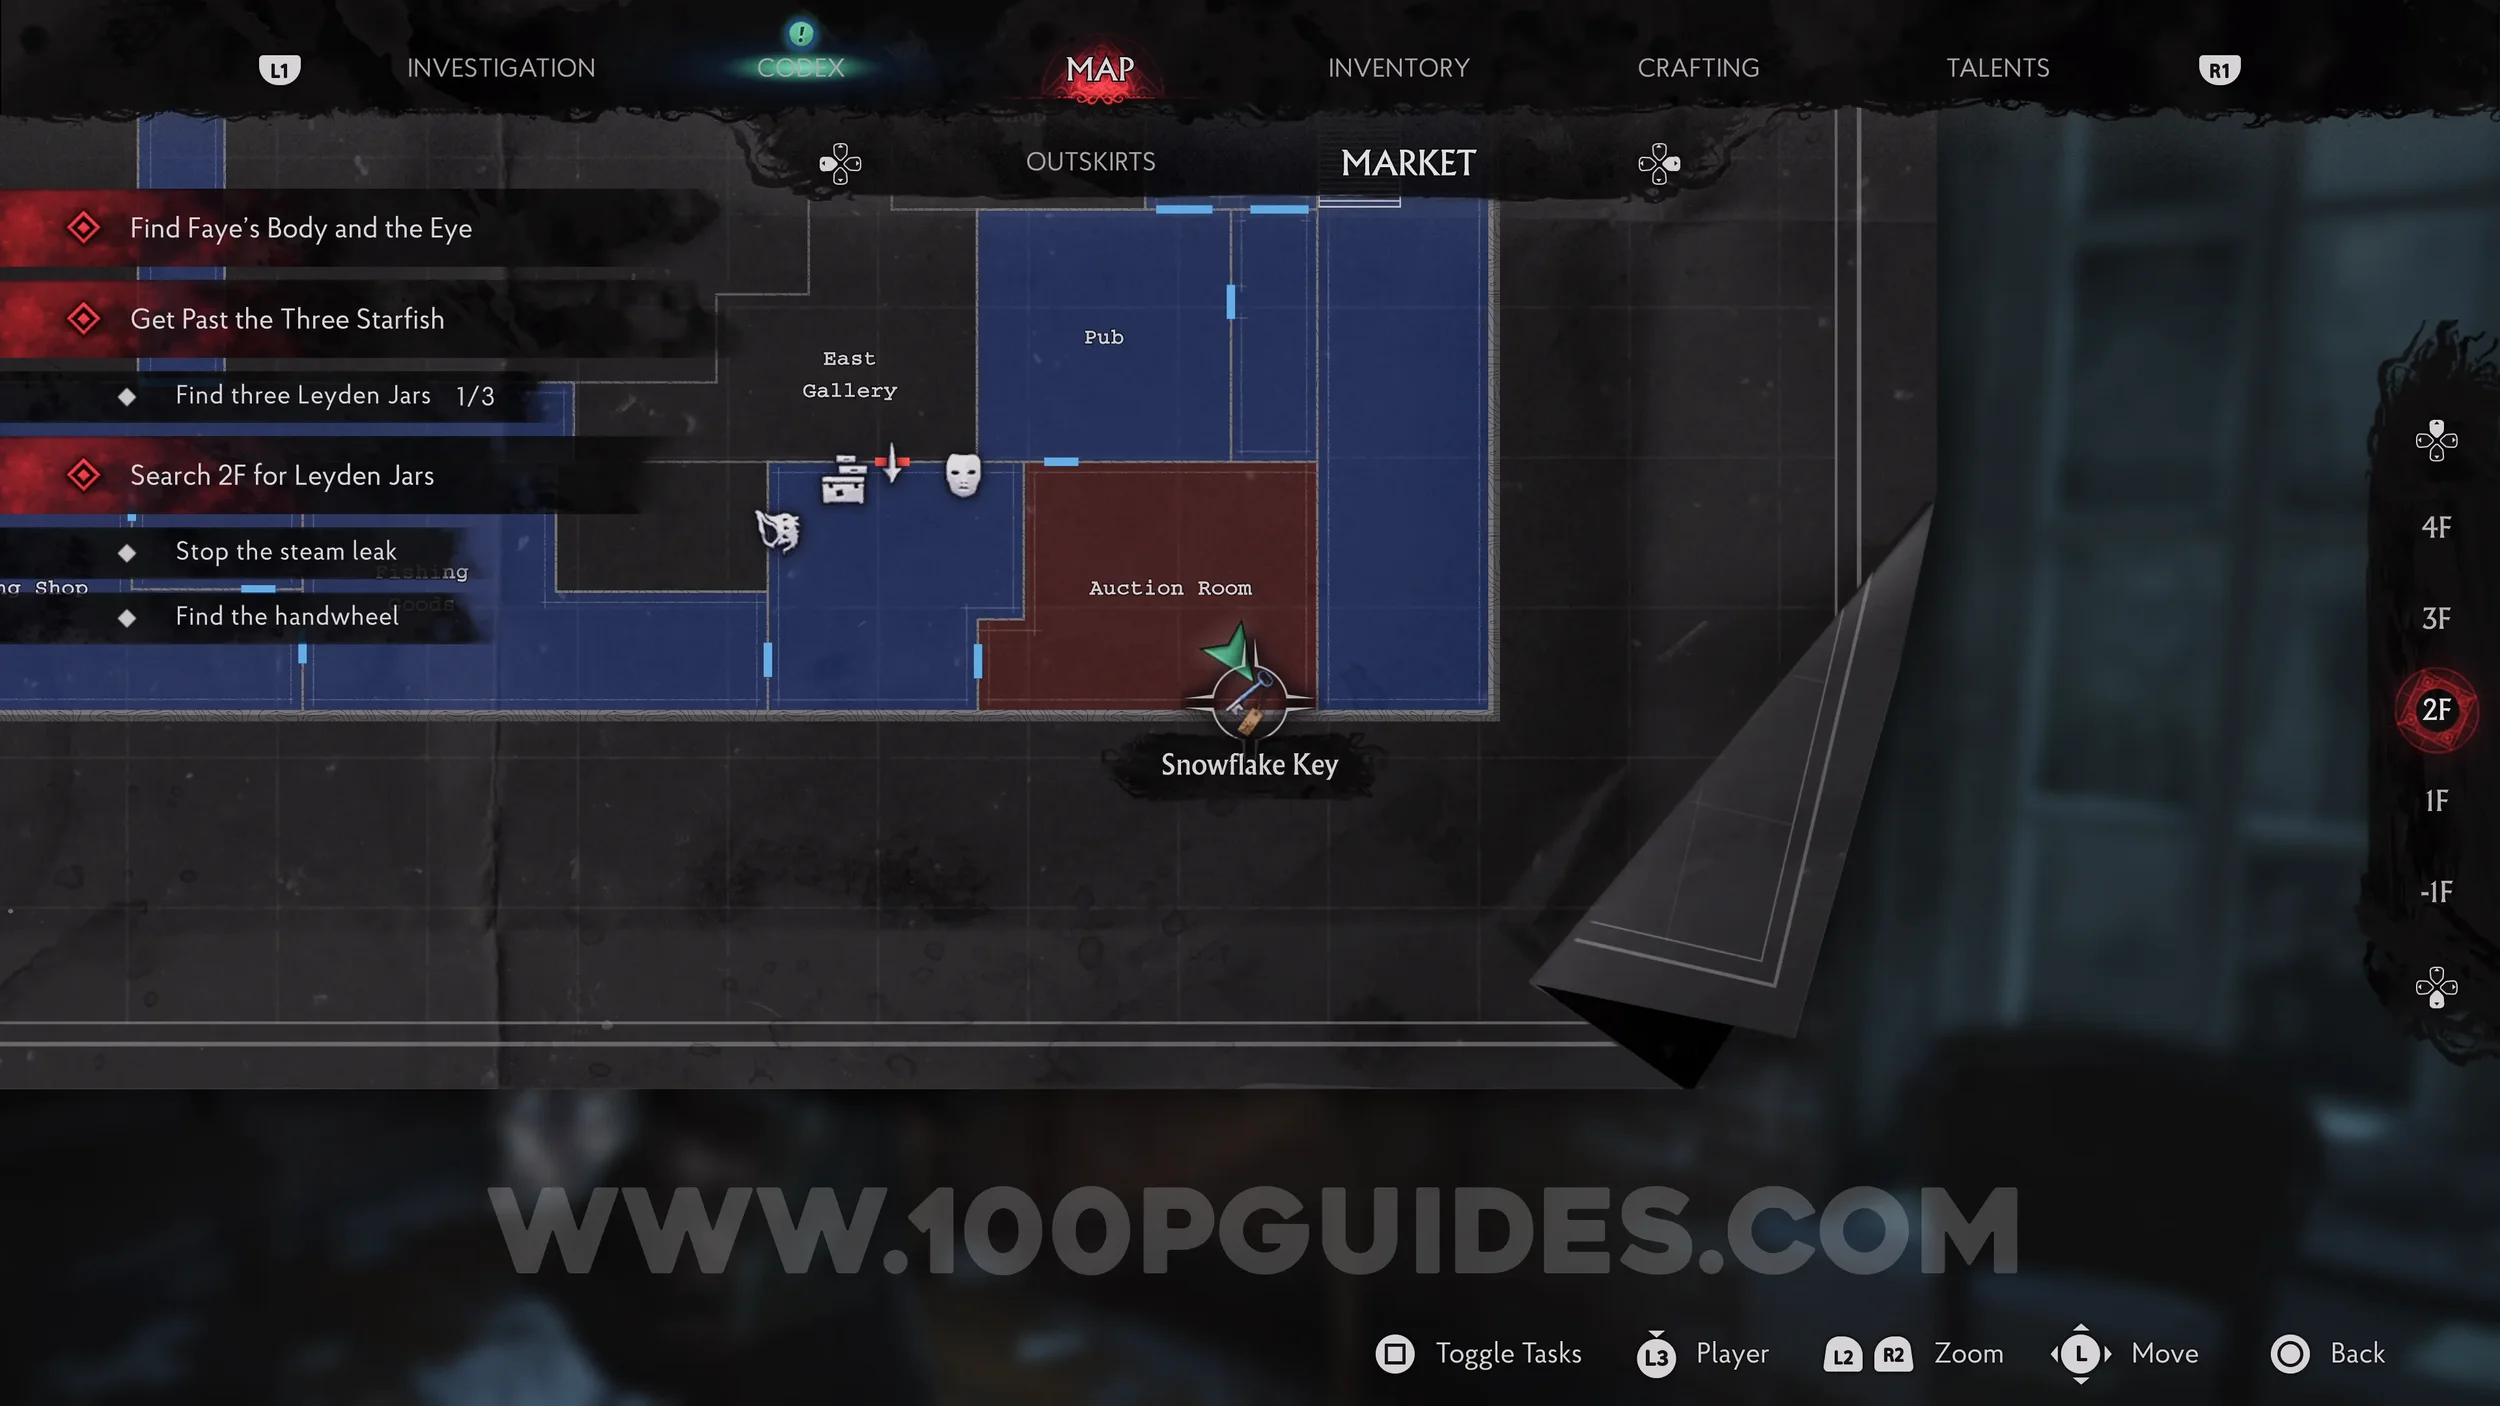
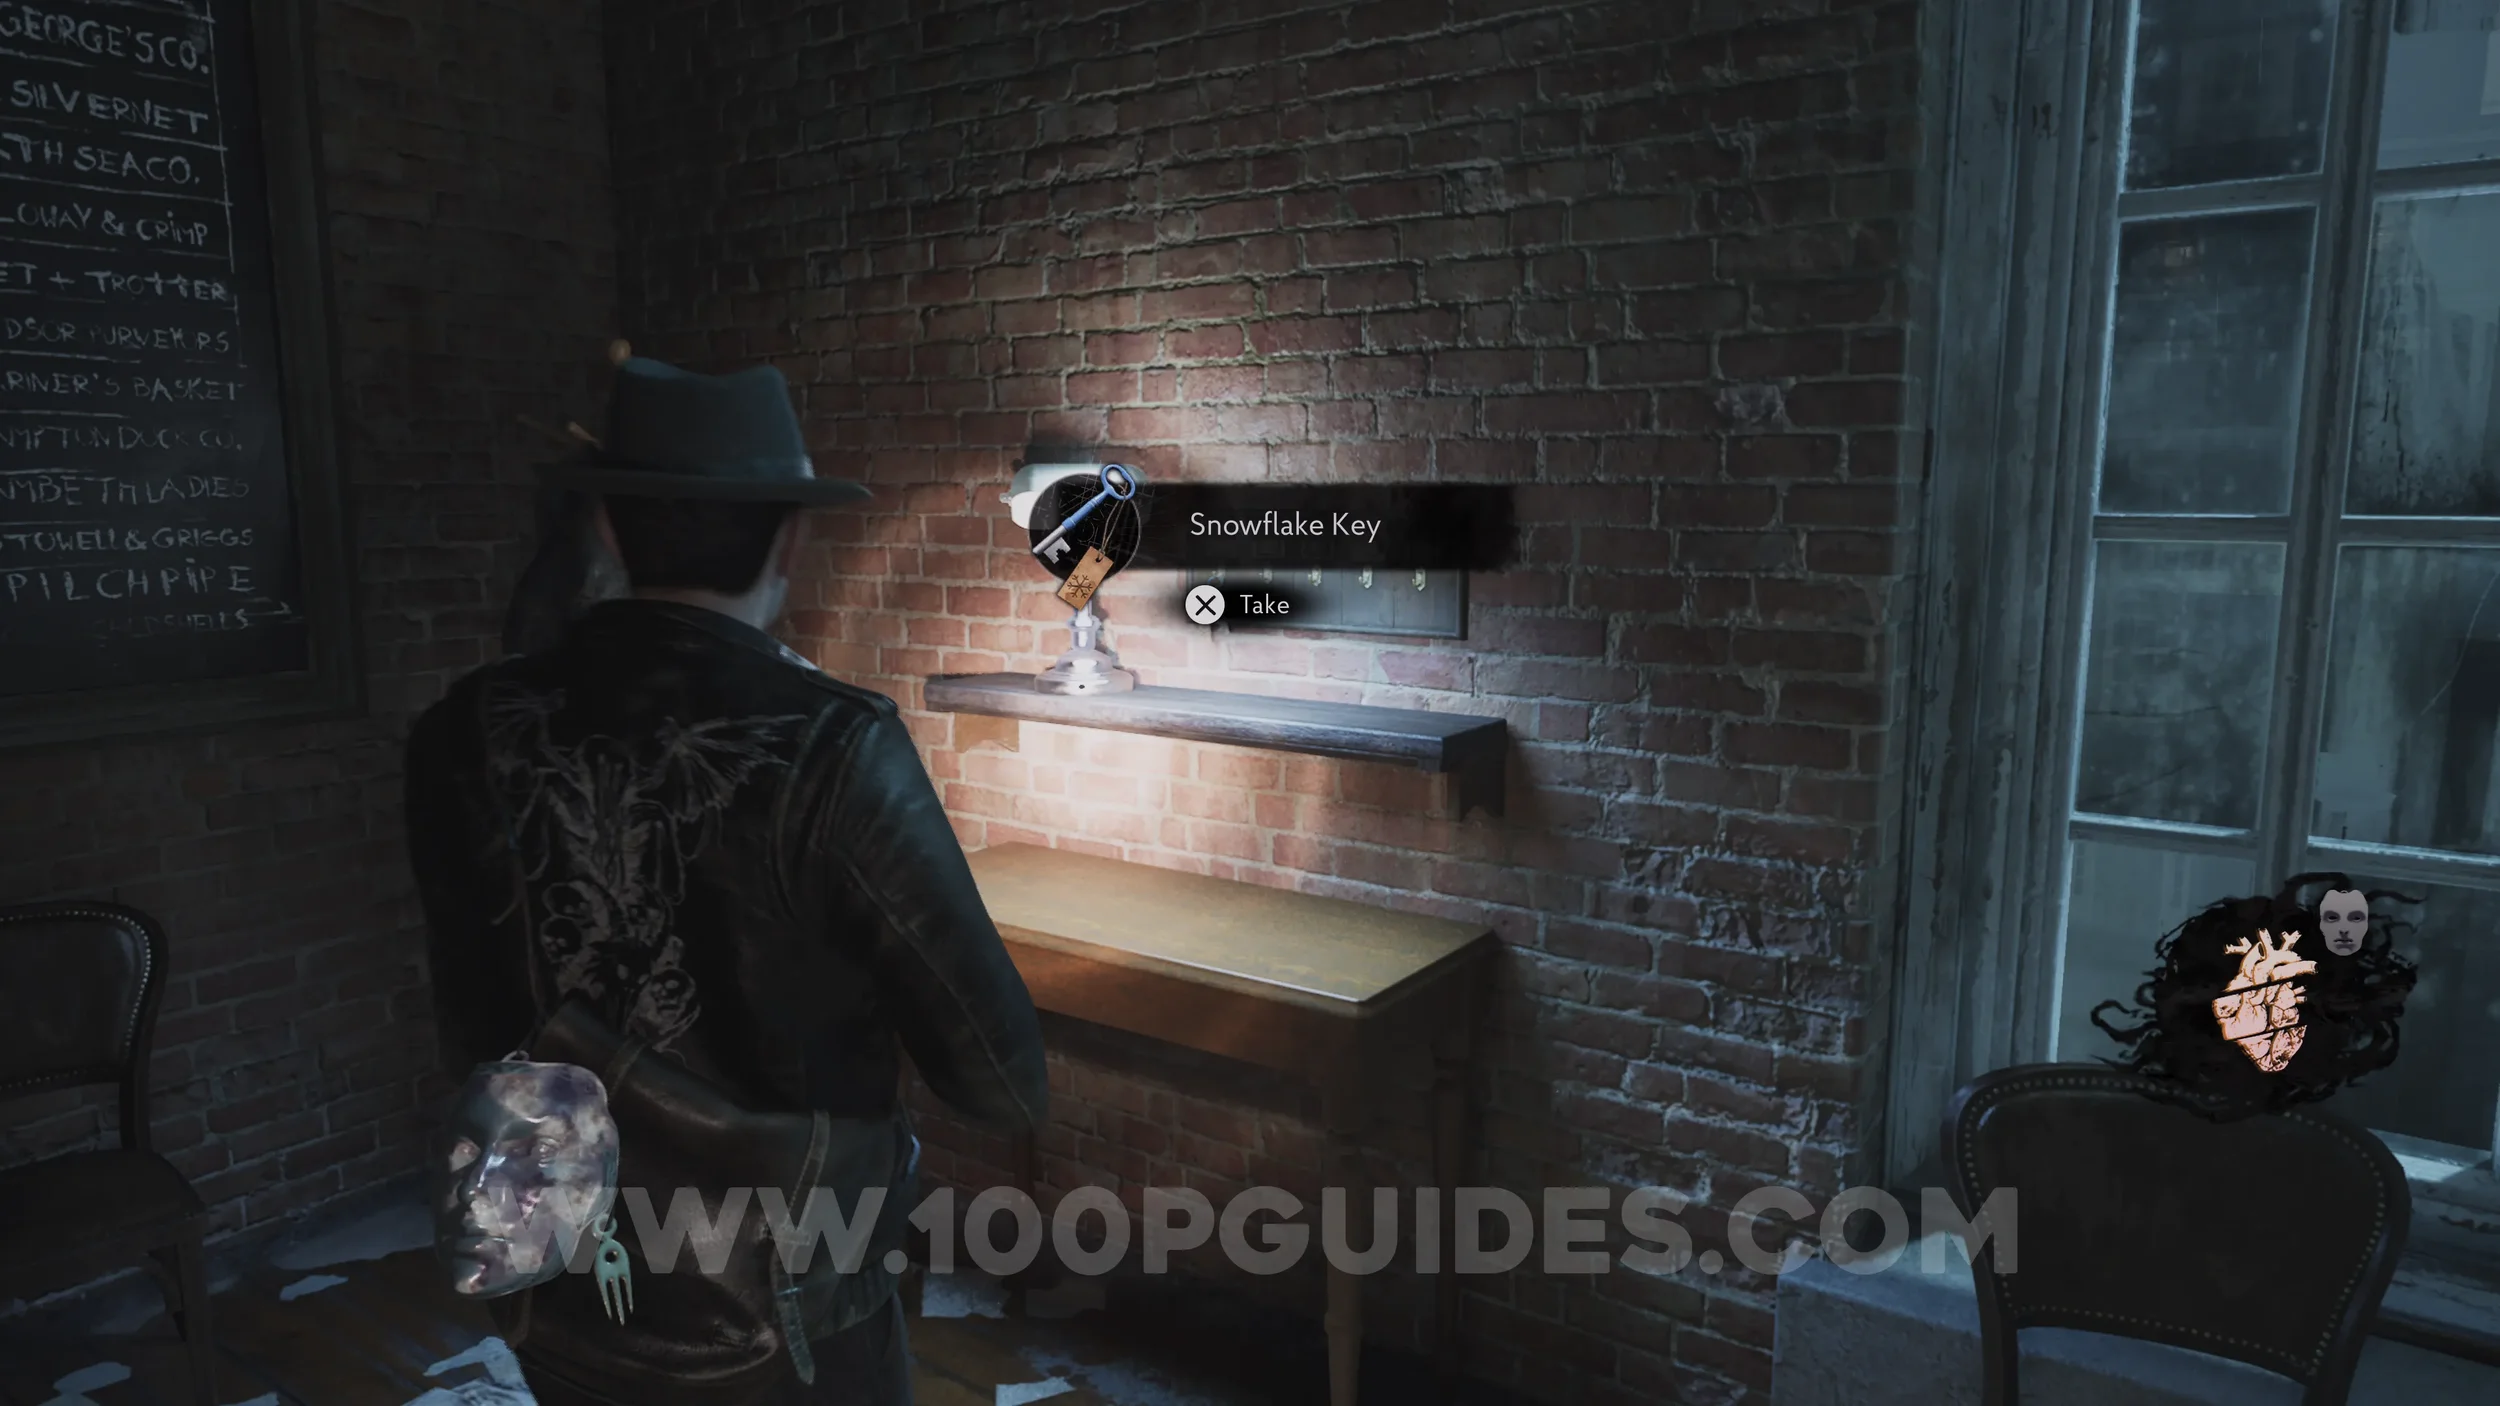
Key Item: Snowflake Key. Head south to the Auction Room to find the key hanging on the southern wall.
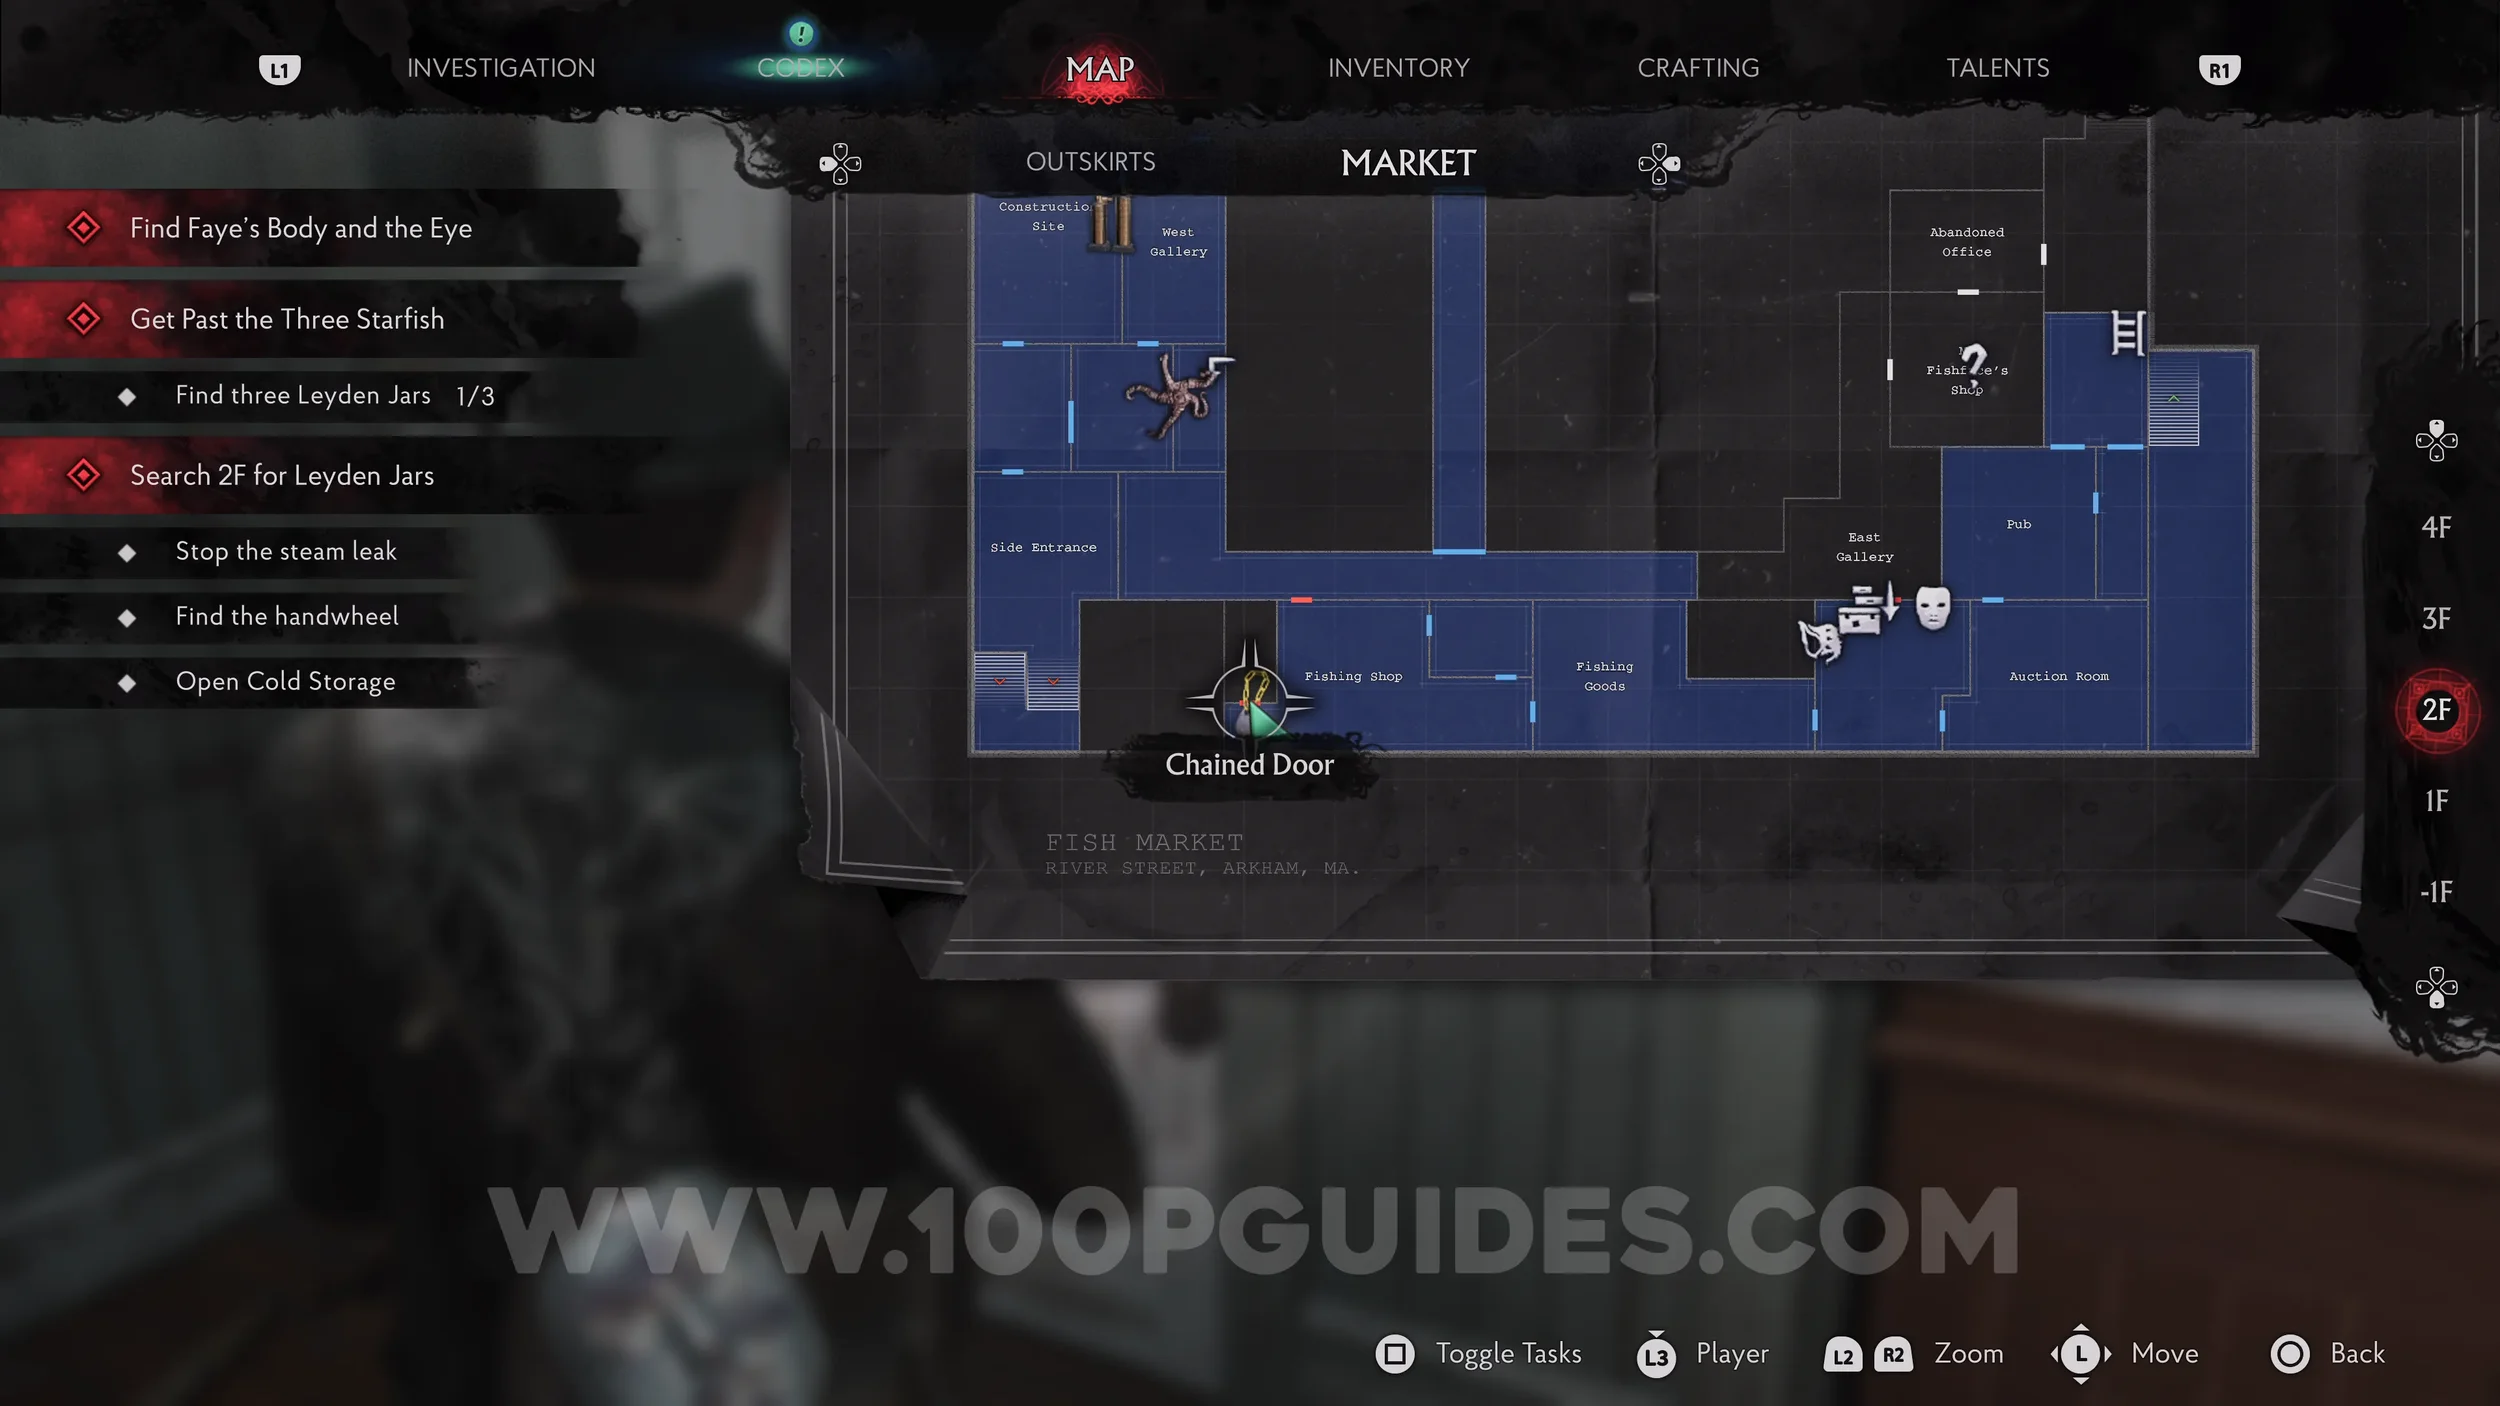
E.R.C. Activator Pen. From the Auction Room, head west and open the chained door with the Bolt Cutter. The Pen is on the table inside.
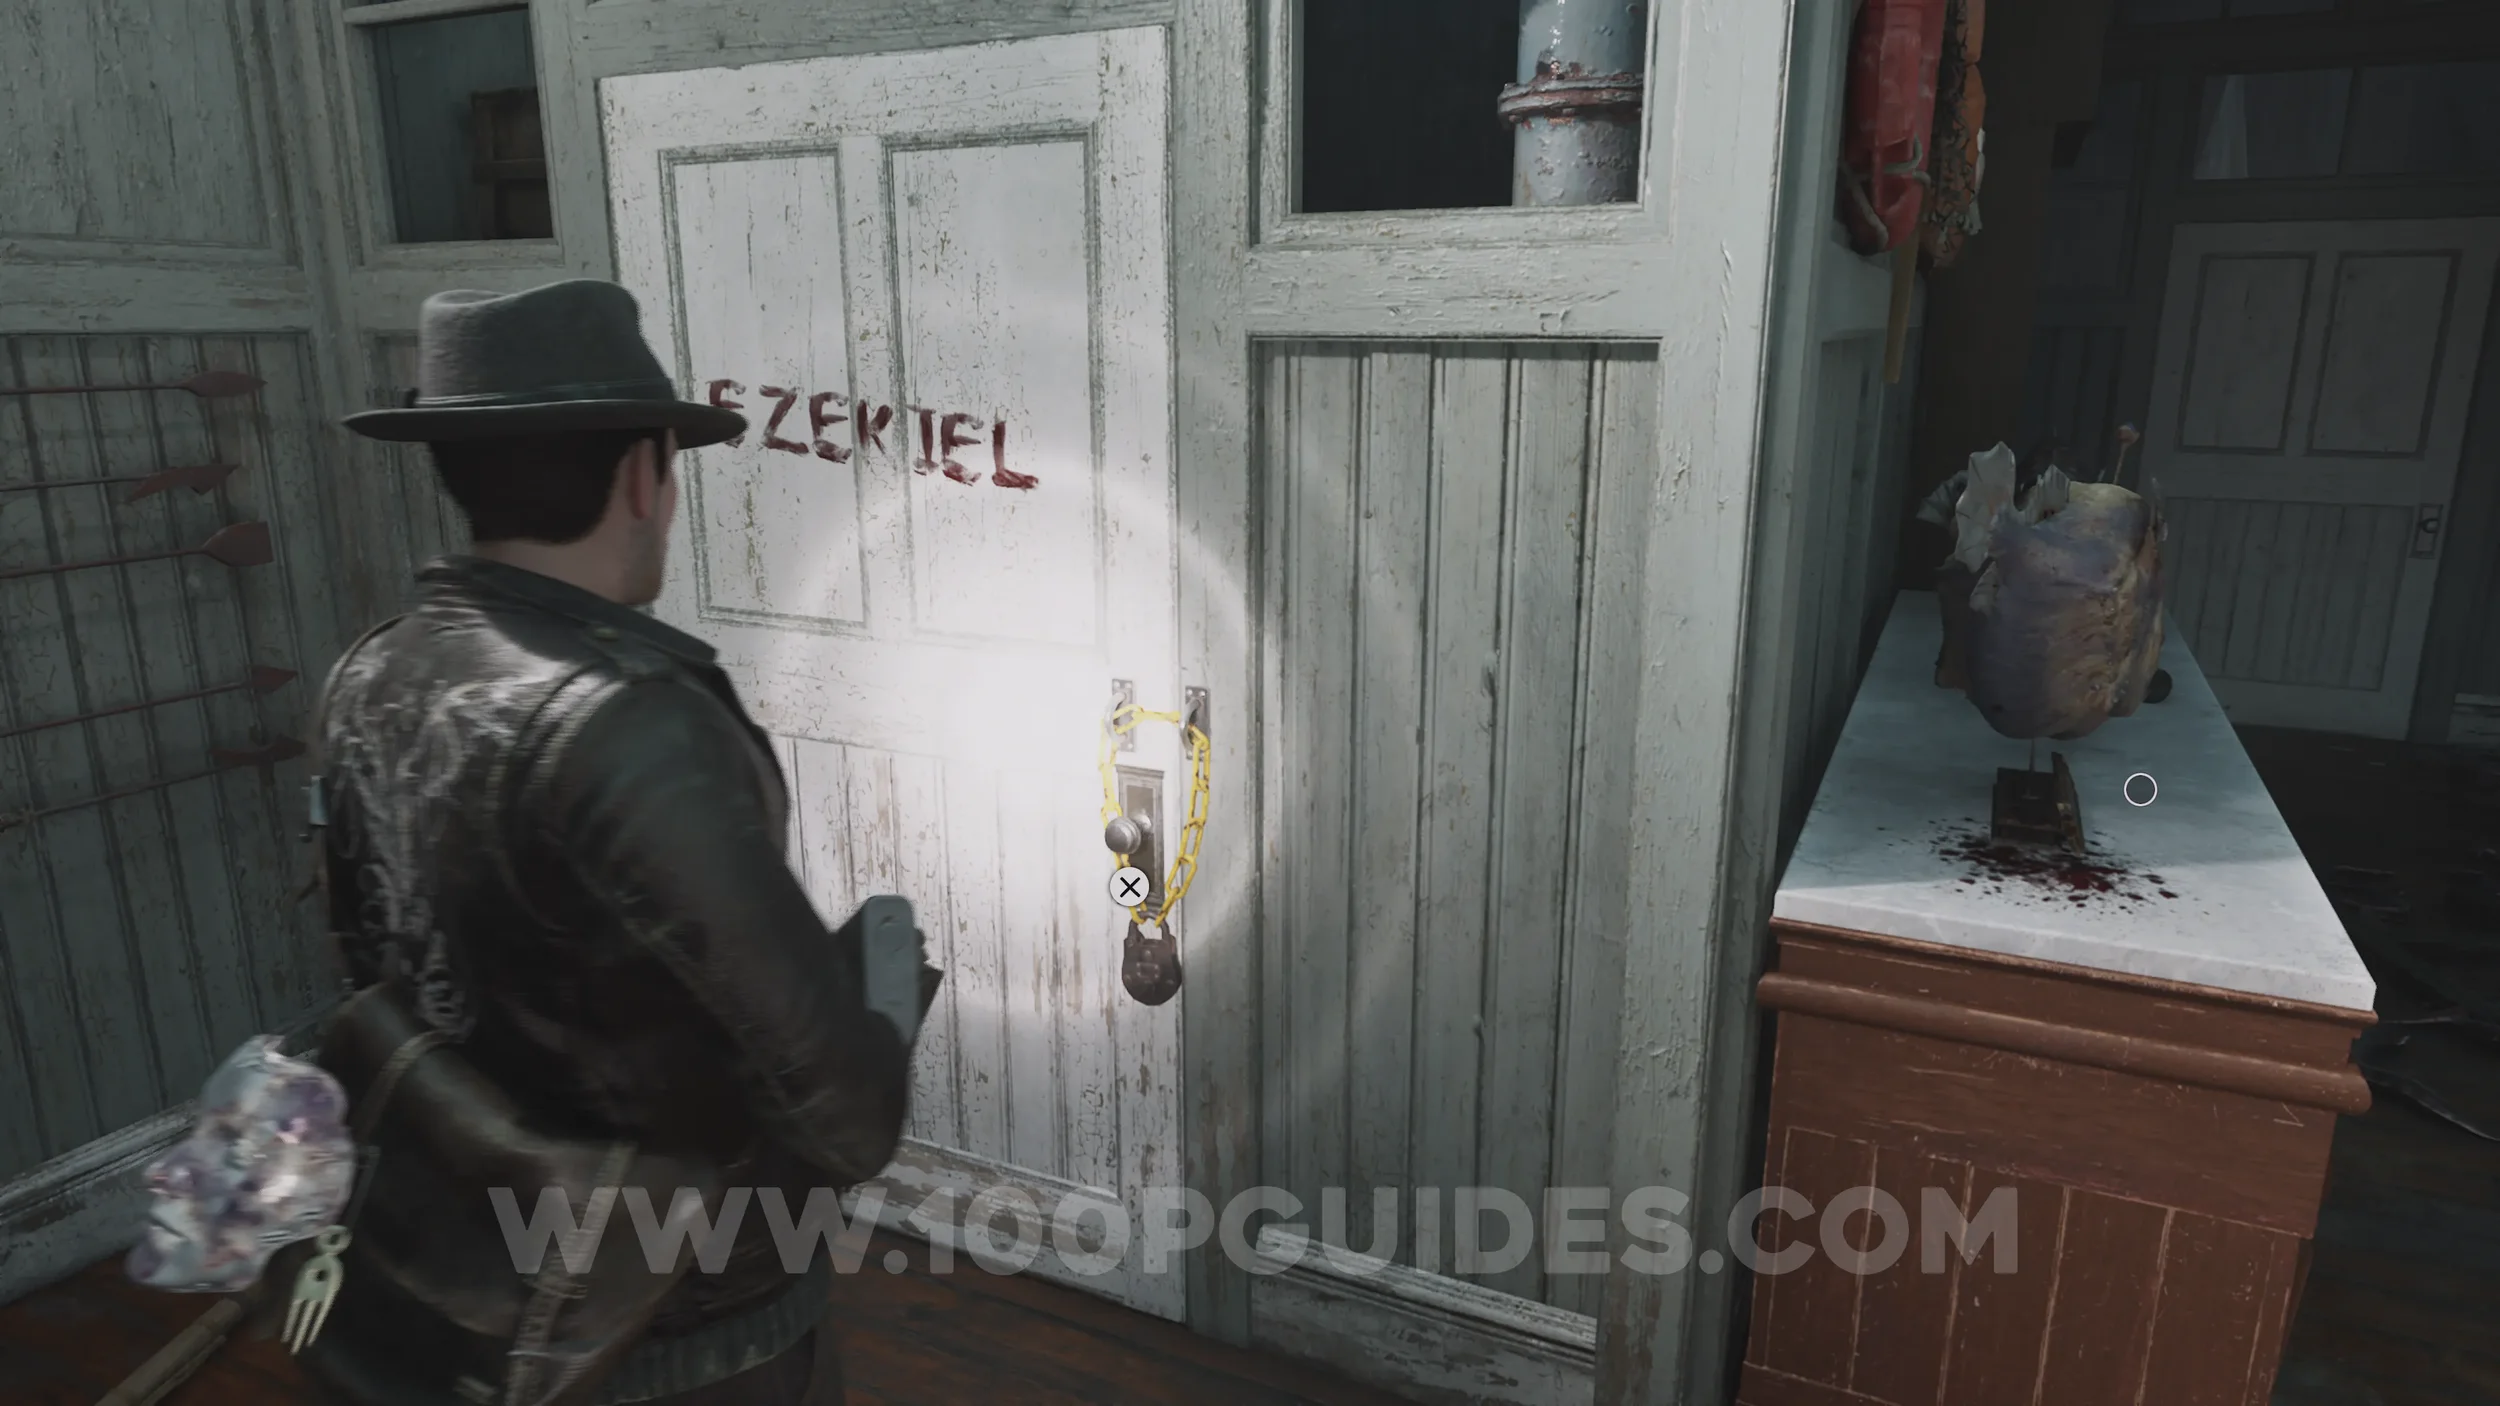
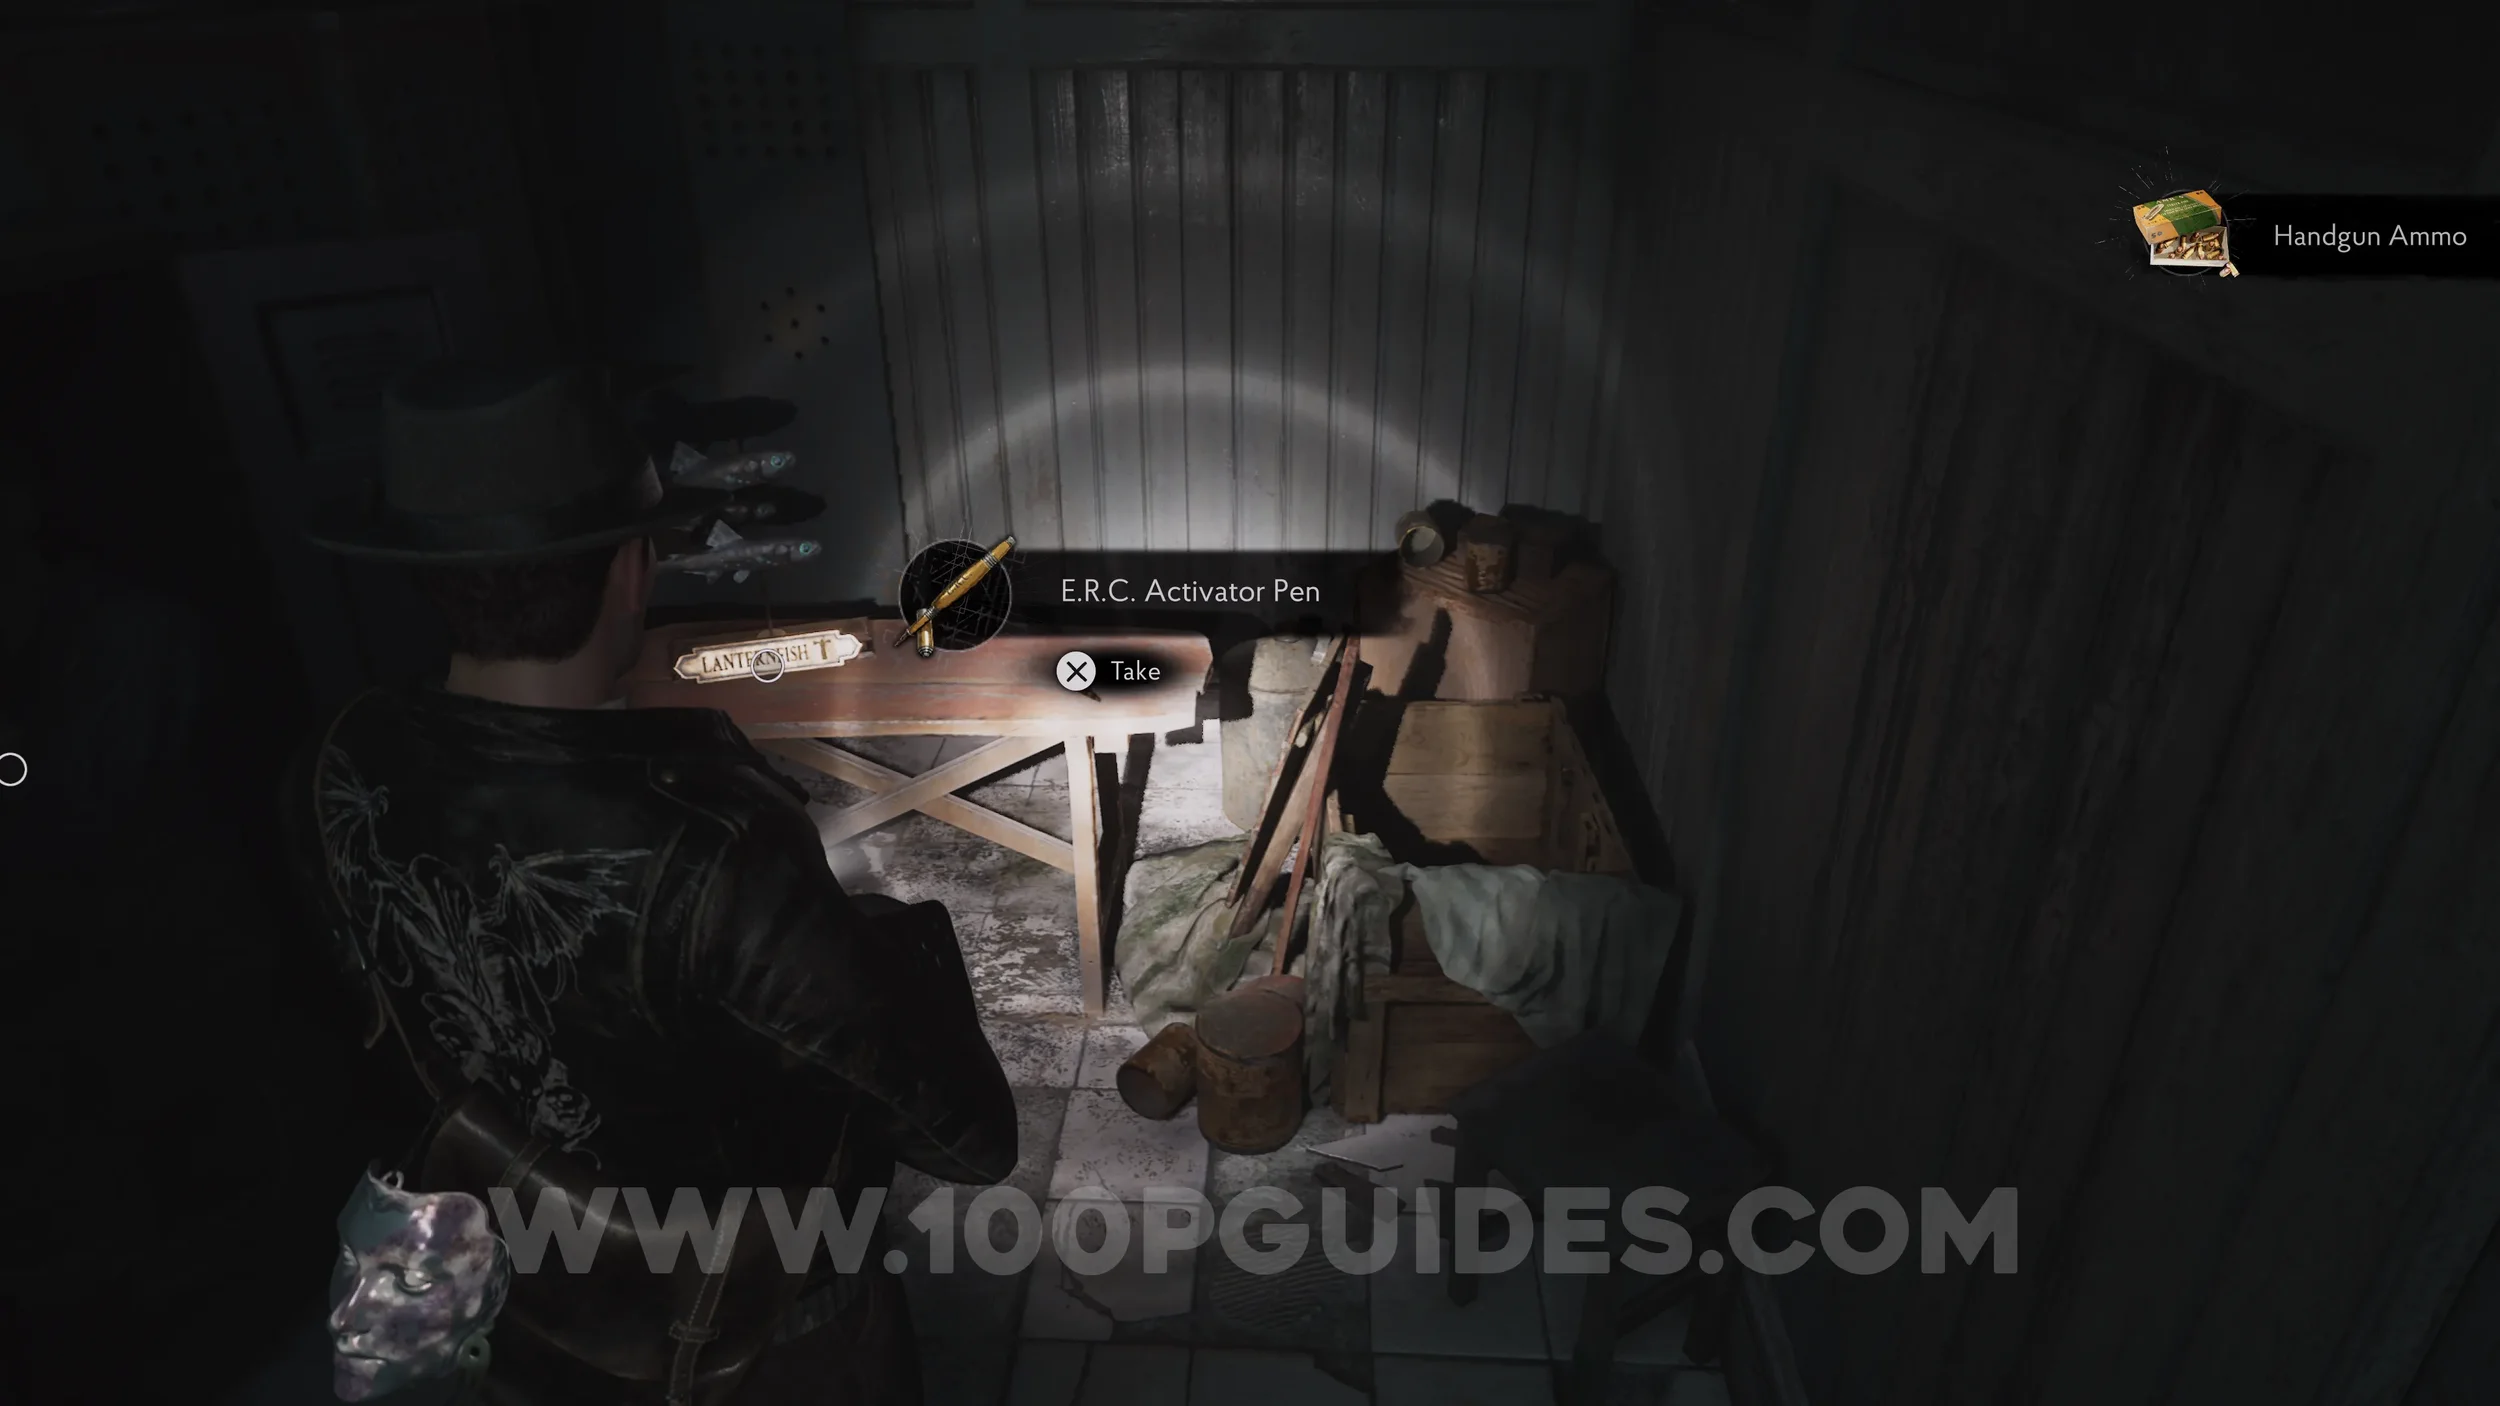
Buoy Combination Code Puzzle/Mysterious Locker
Open the locker in the same room as the previous pen to find a corpse holding a locked Buoy. You can work out the correct code using the following evidence: "About Ezekiel" and "From Ezekiel's Wife". The correct combination is: Lighthouse > Ropes > Starfish > Octopus.

Trophy: The Drowned. Obtained after solving the Buoy Combination Lock Puzzle.
Weapon Accessory: Doyle’s Hot Streak. Inside the Buoy after opening it.
Emergency Relief Crate (E.R.C.) + Dream Essence x2. Backtrack down to the Packing Area and open the E.R.C. with the pen in the southwest corner. The Dream Essence is found inside.
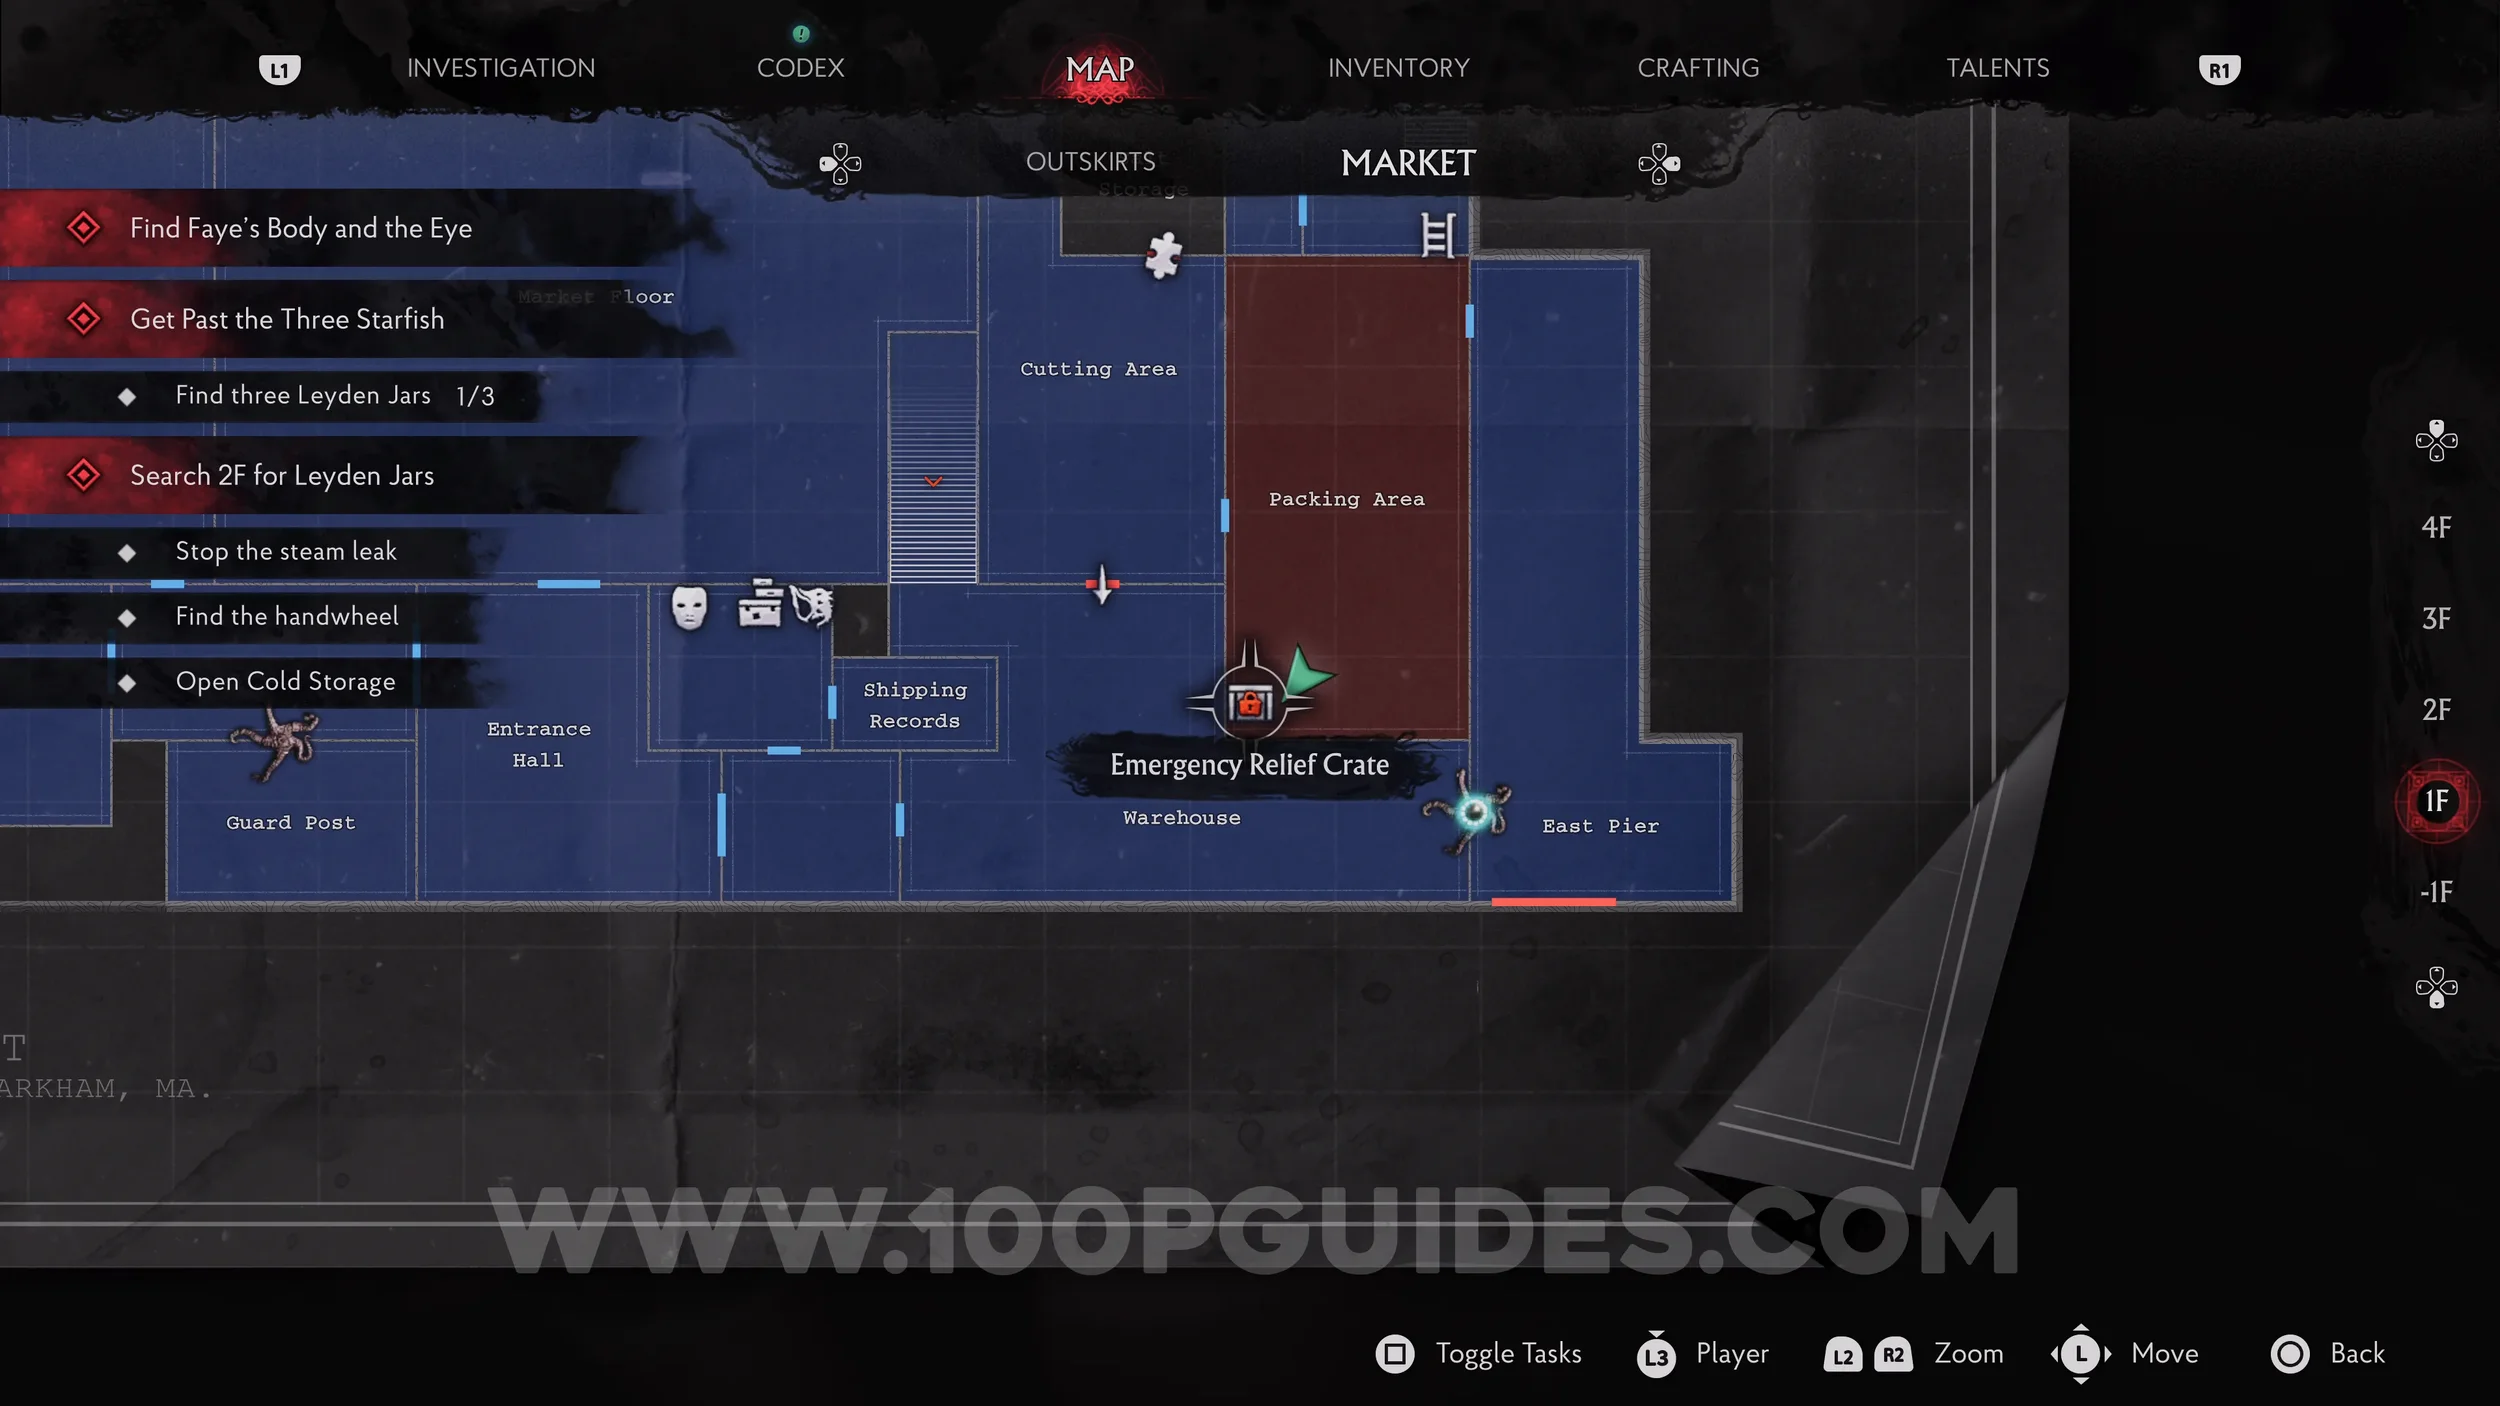
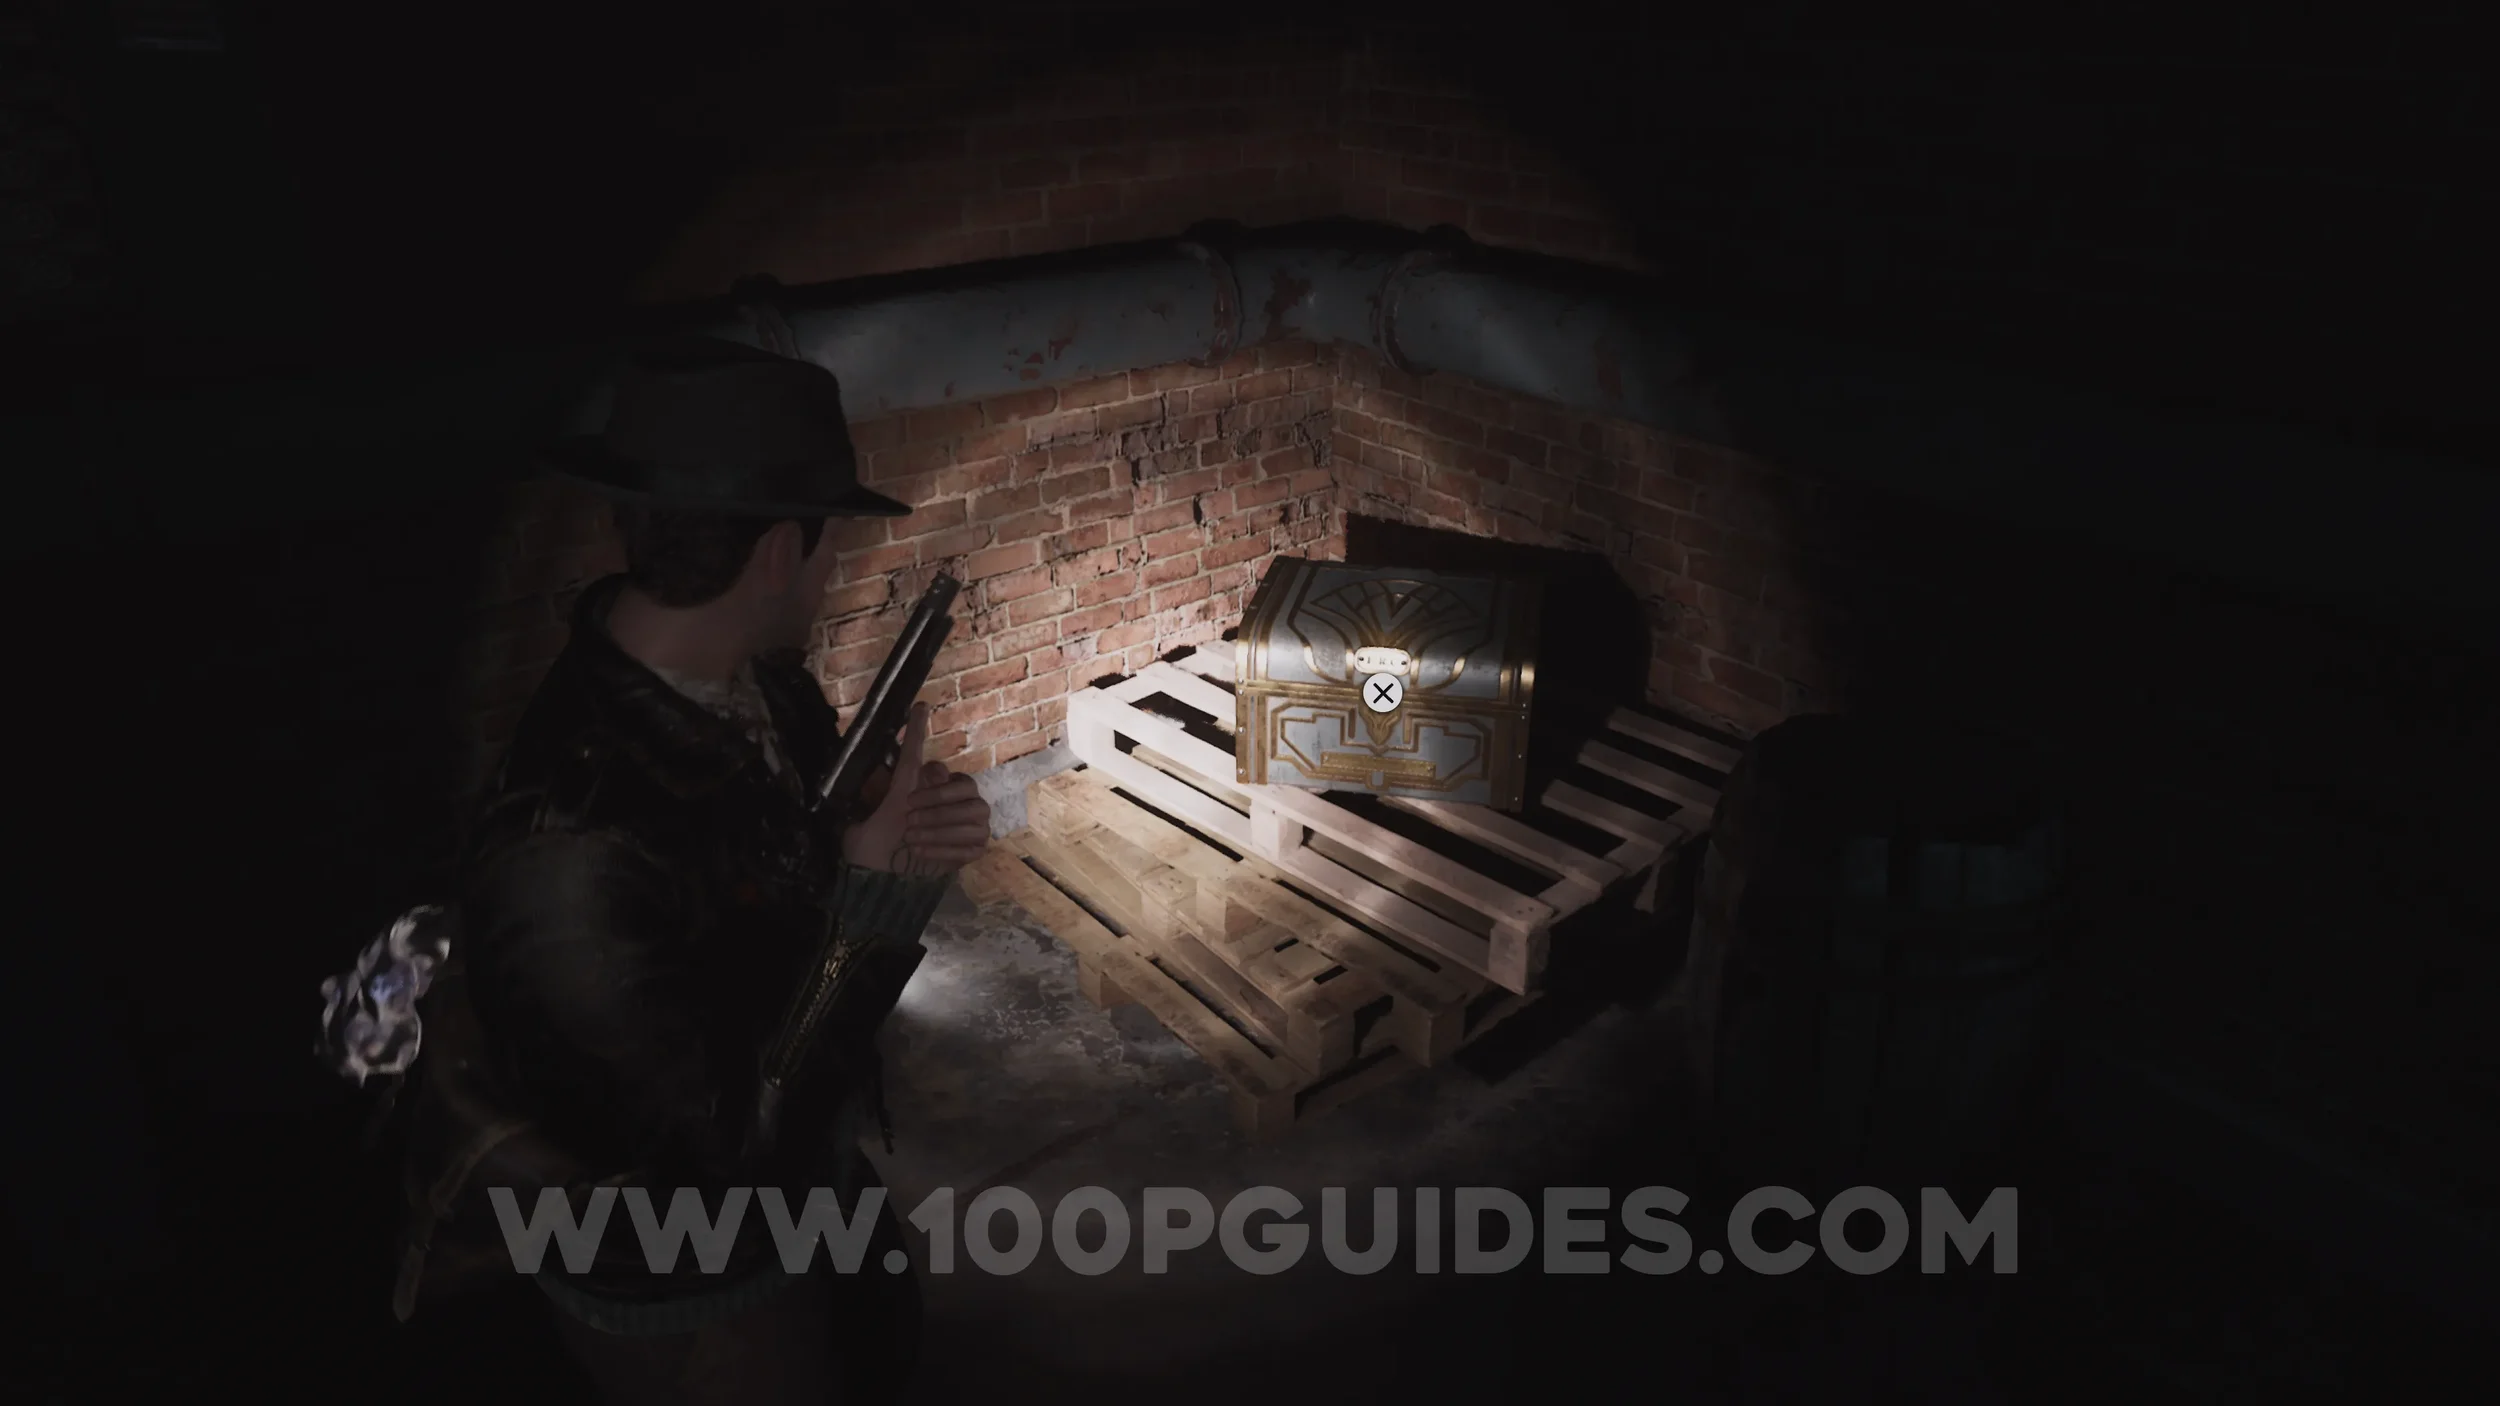
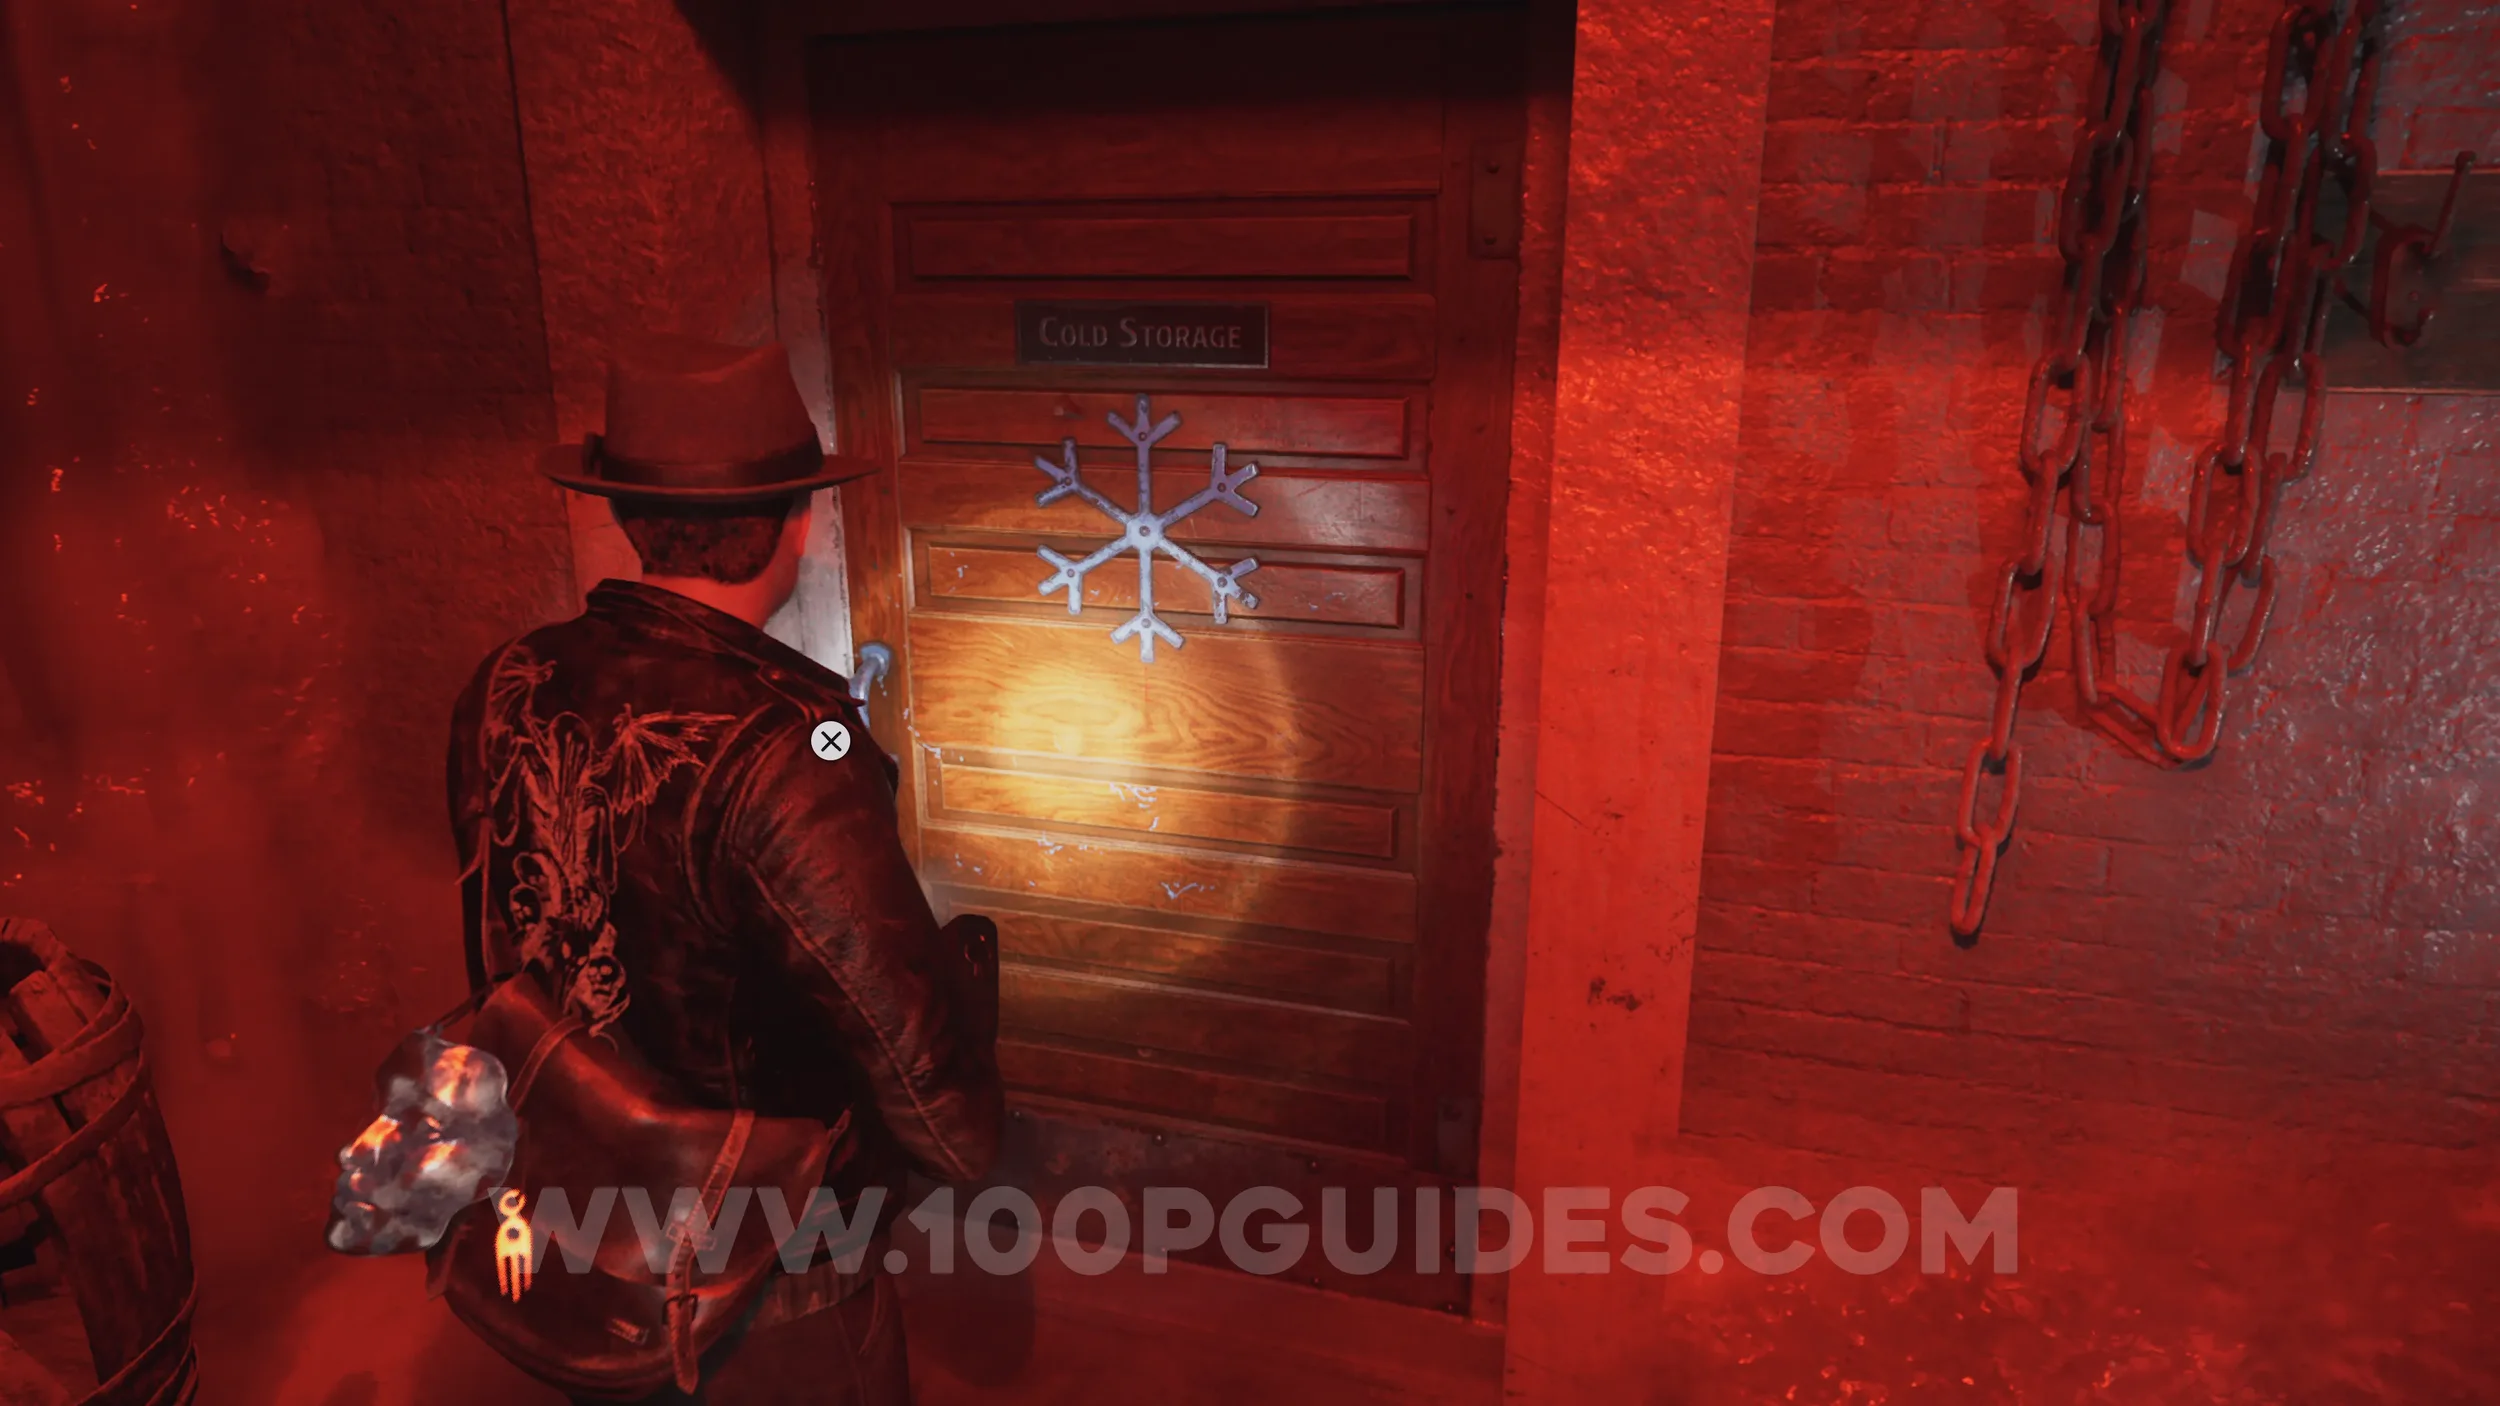
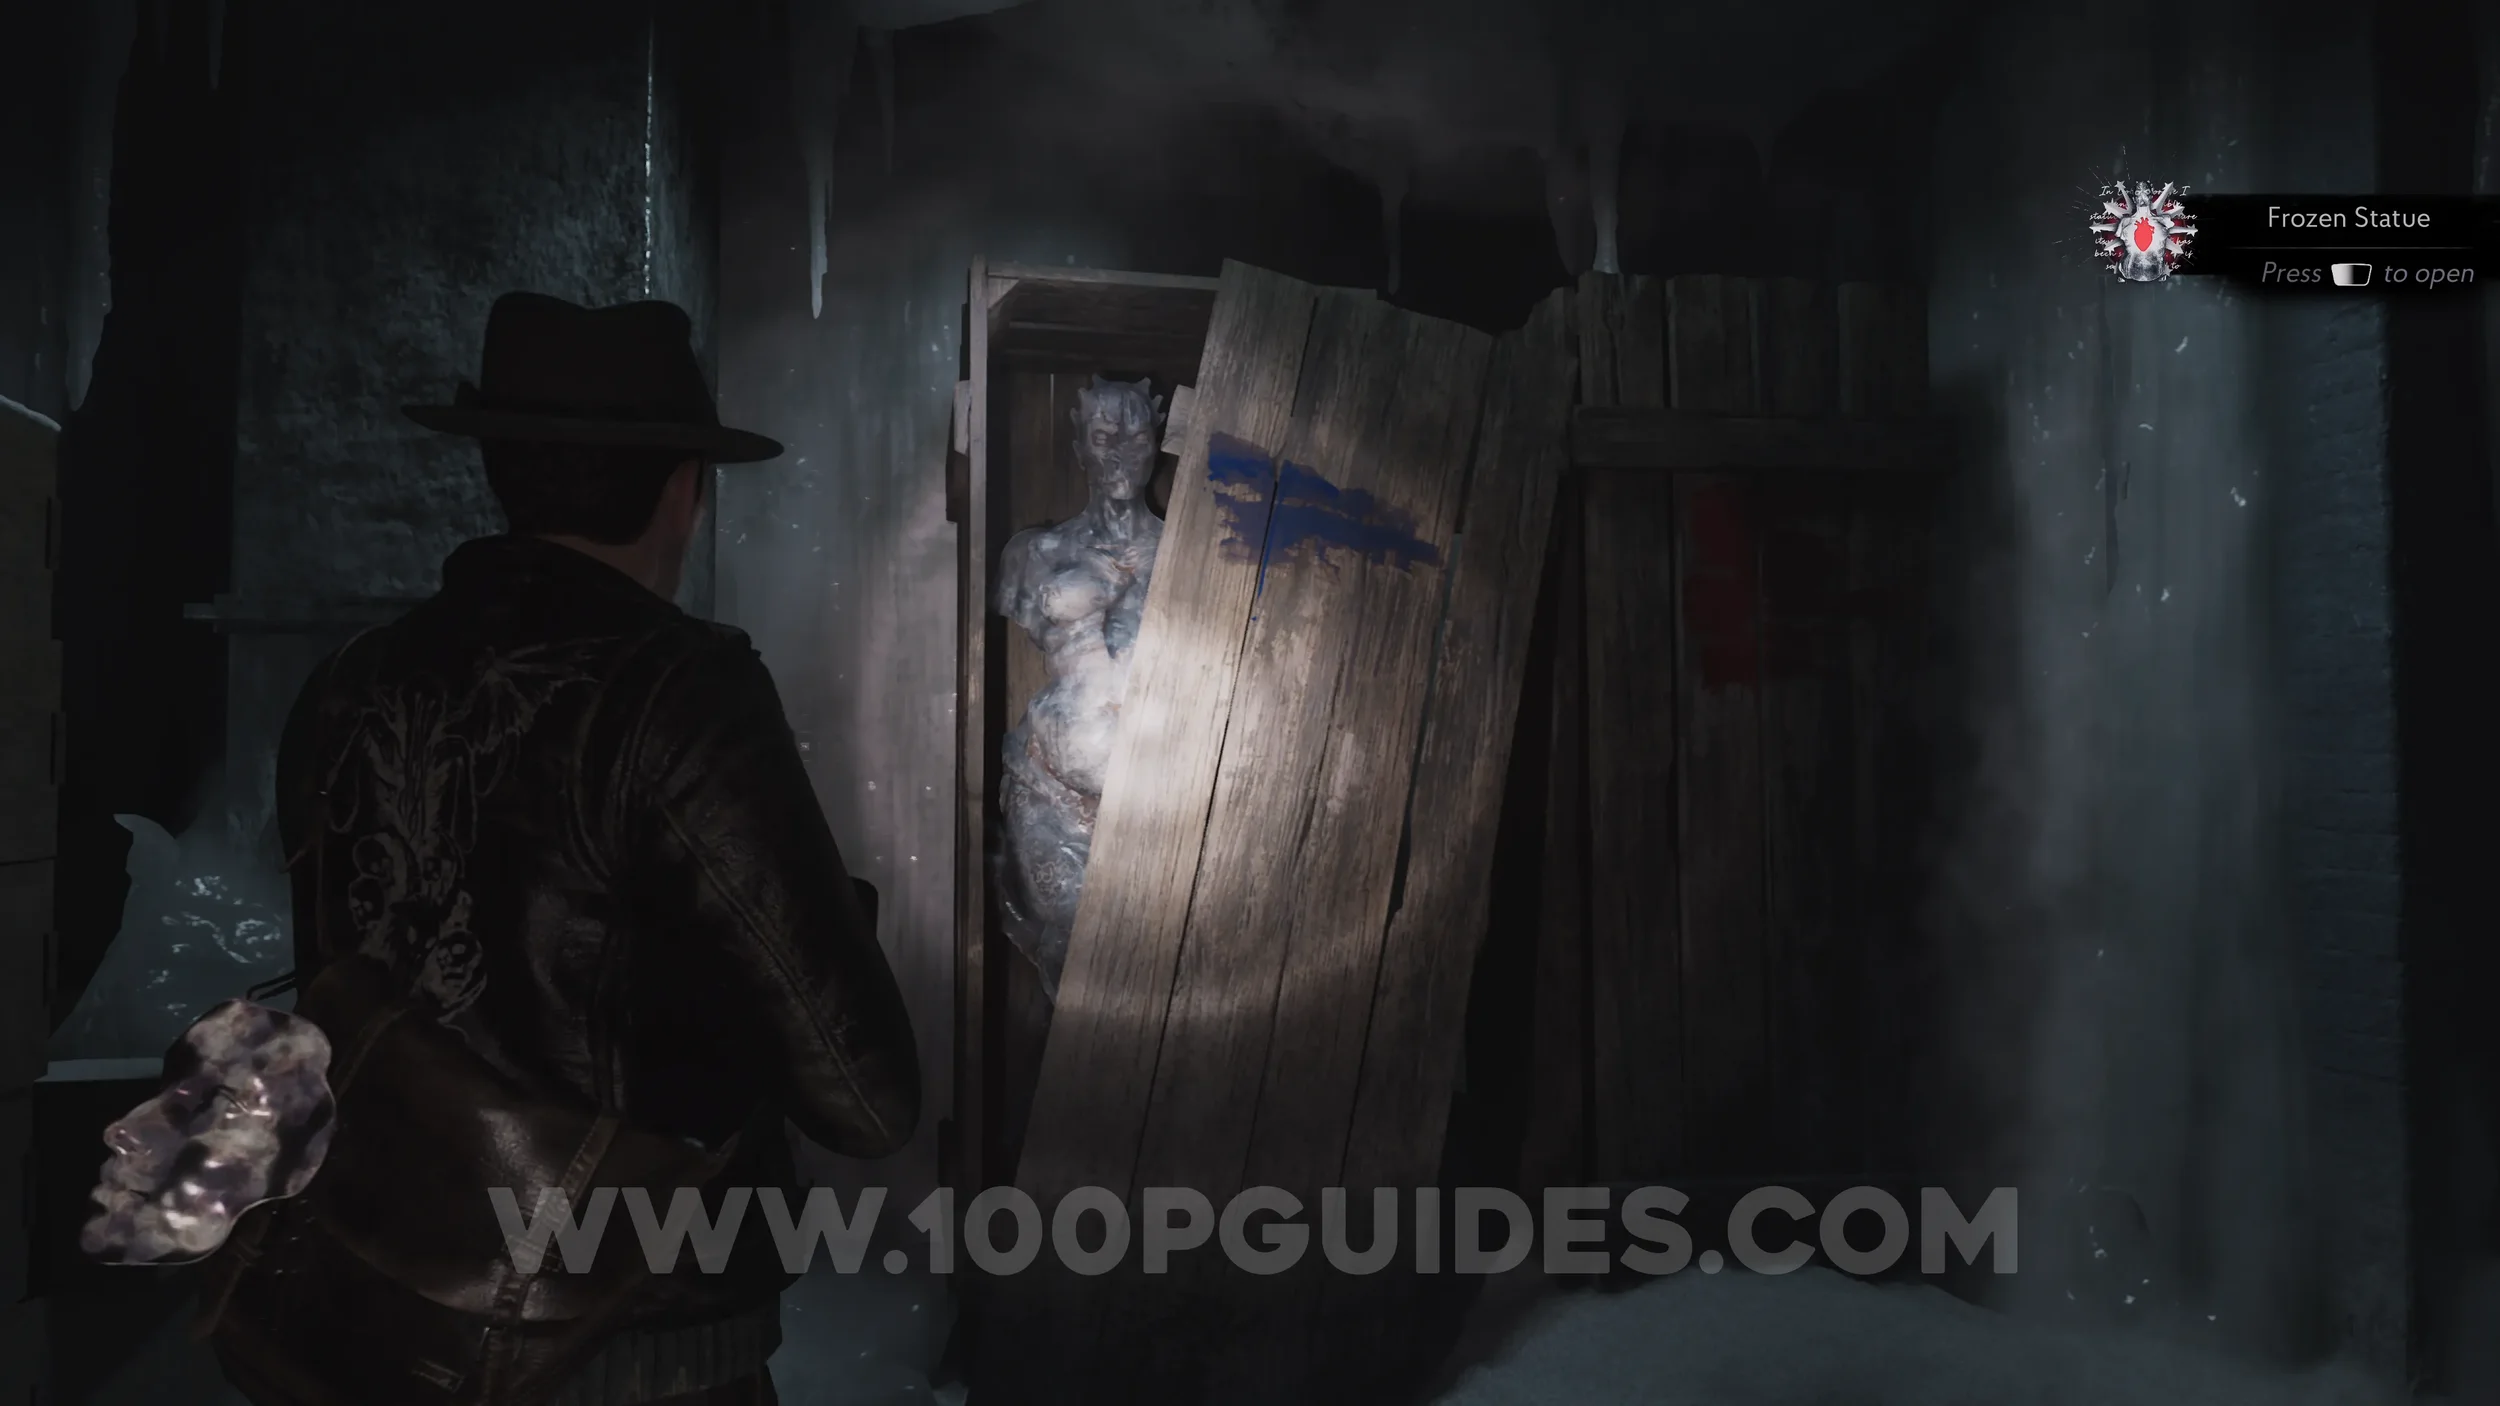
Evidence: Frozen Statue. Head down the central stairs on 1F and open the door at the bottom with the Snowflake Key. Then head inside, head south, and examine the frozen statue in the crate.
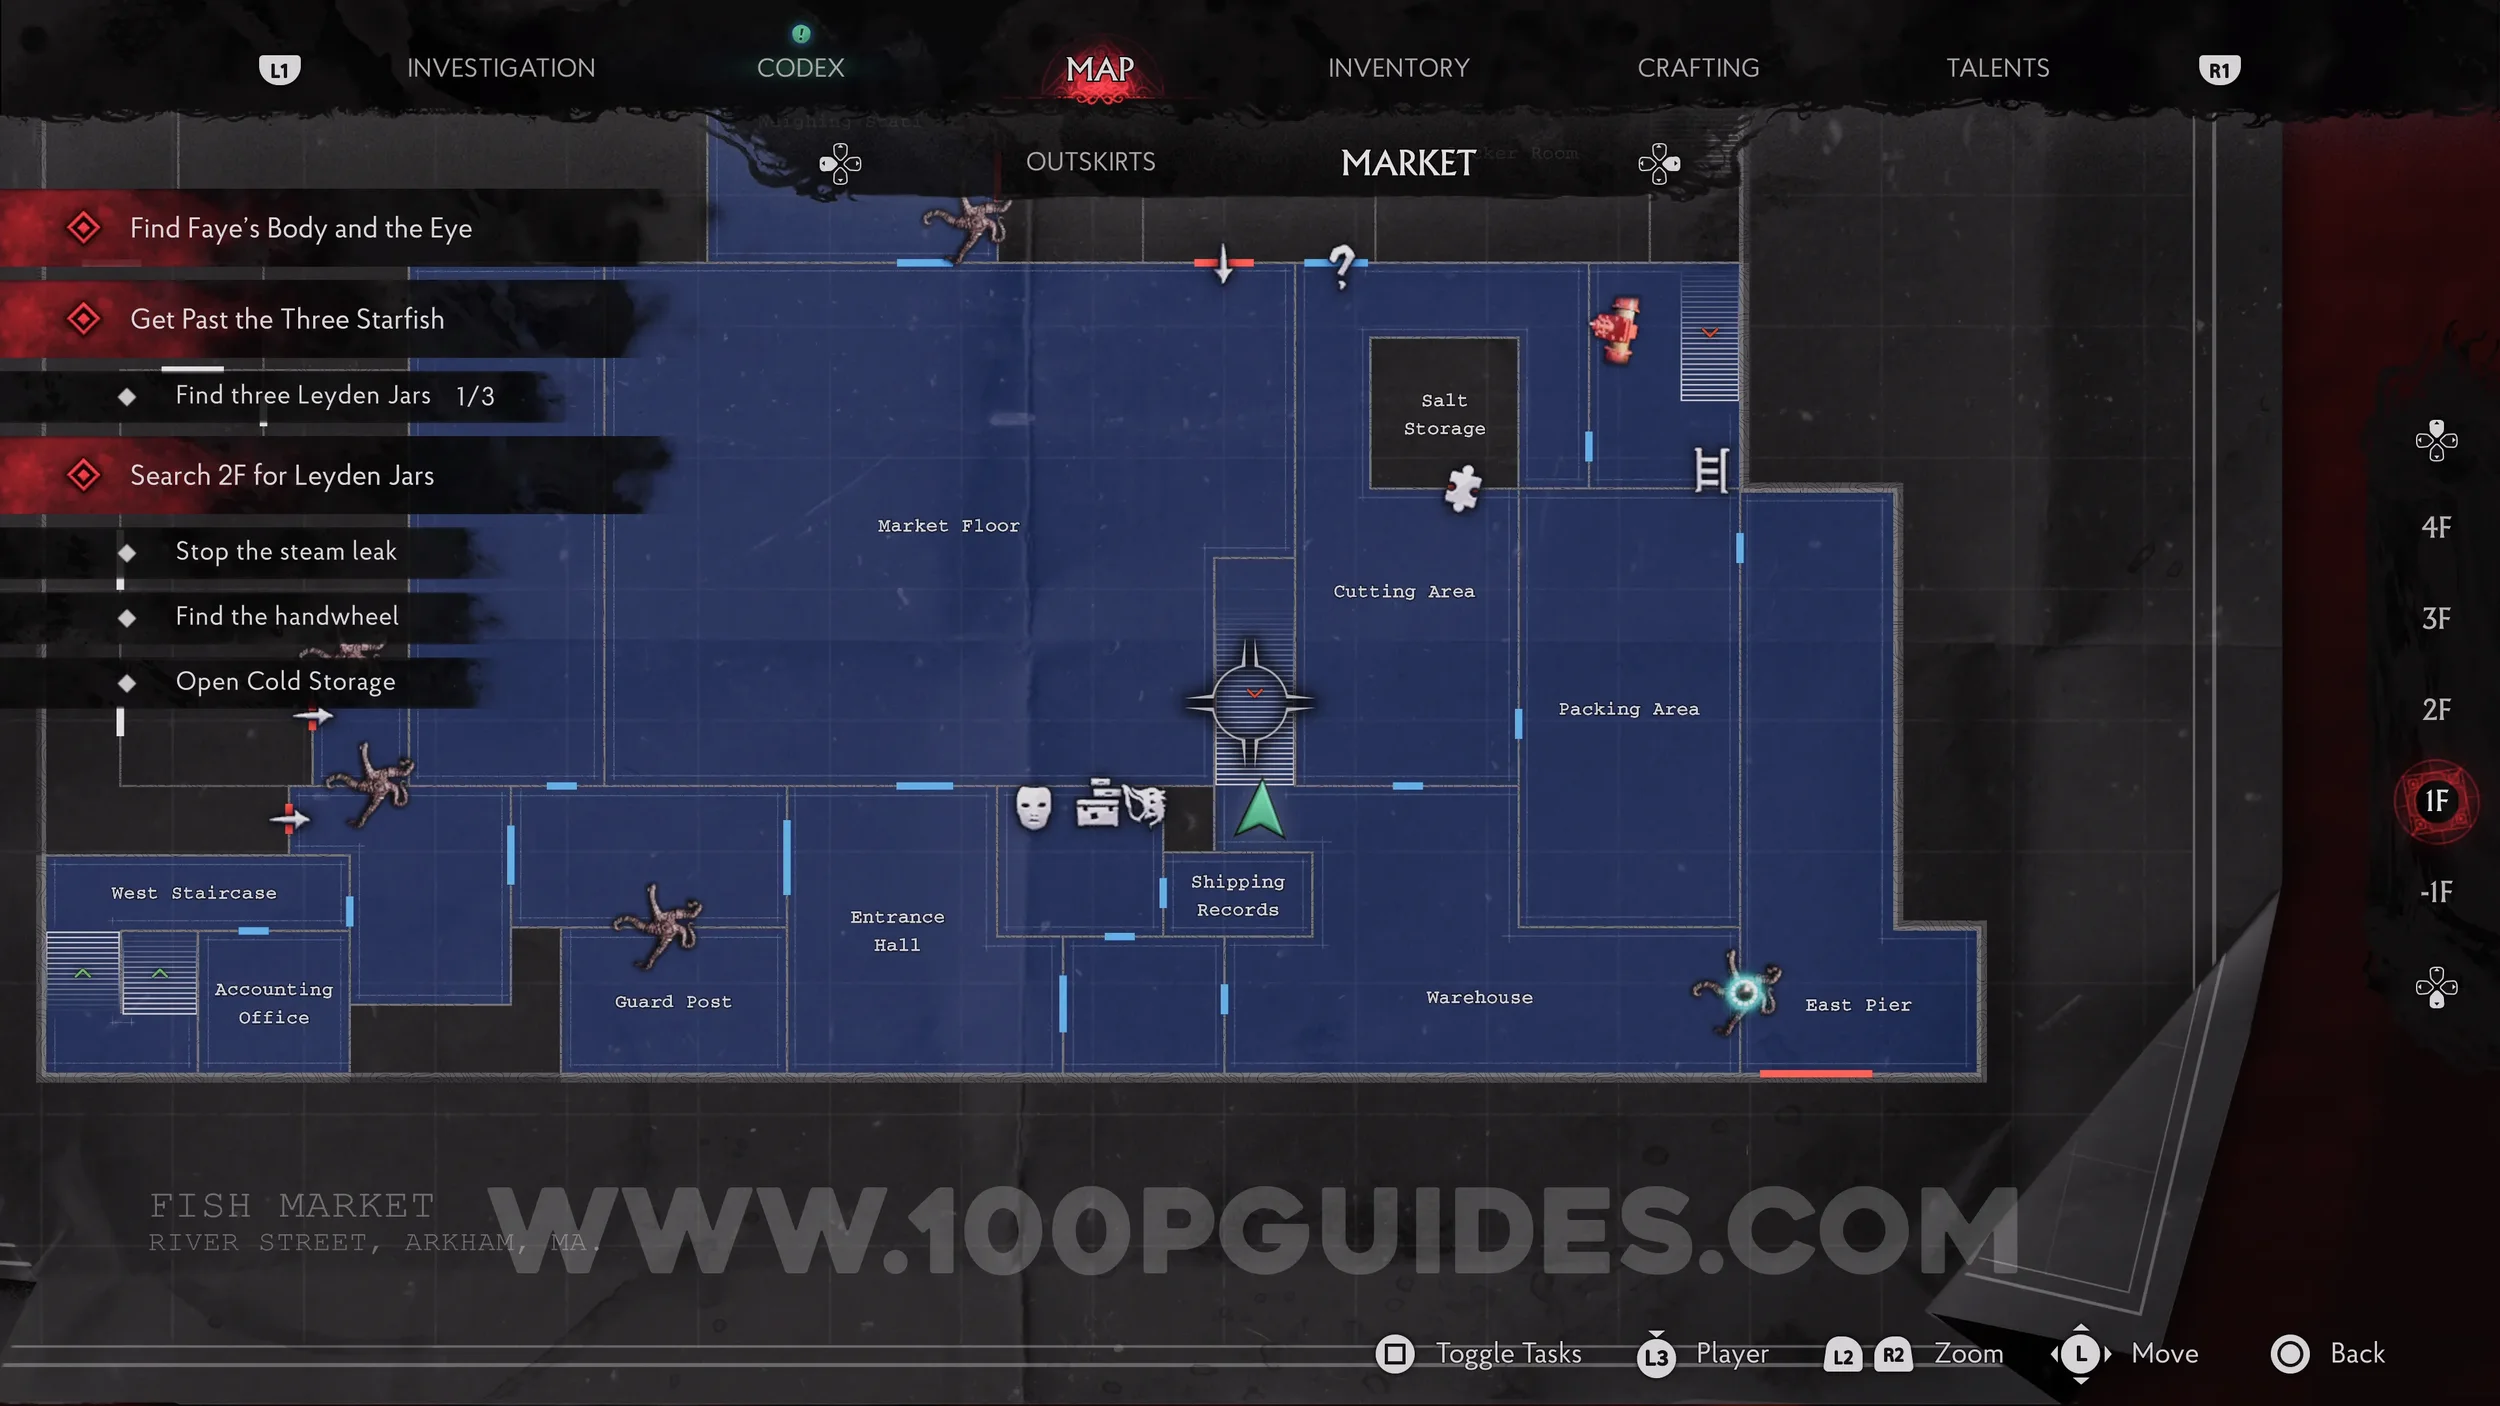
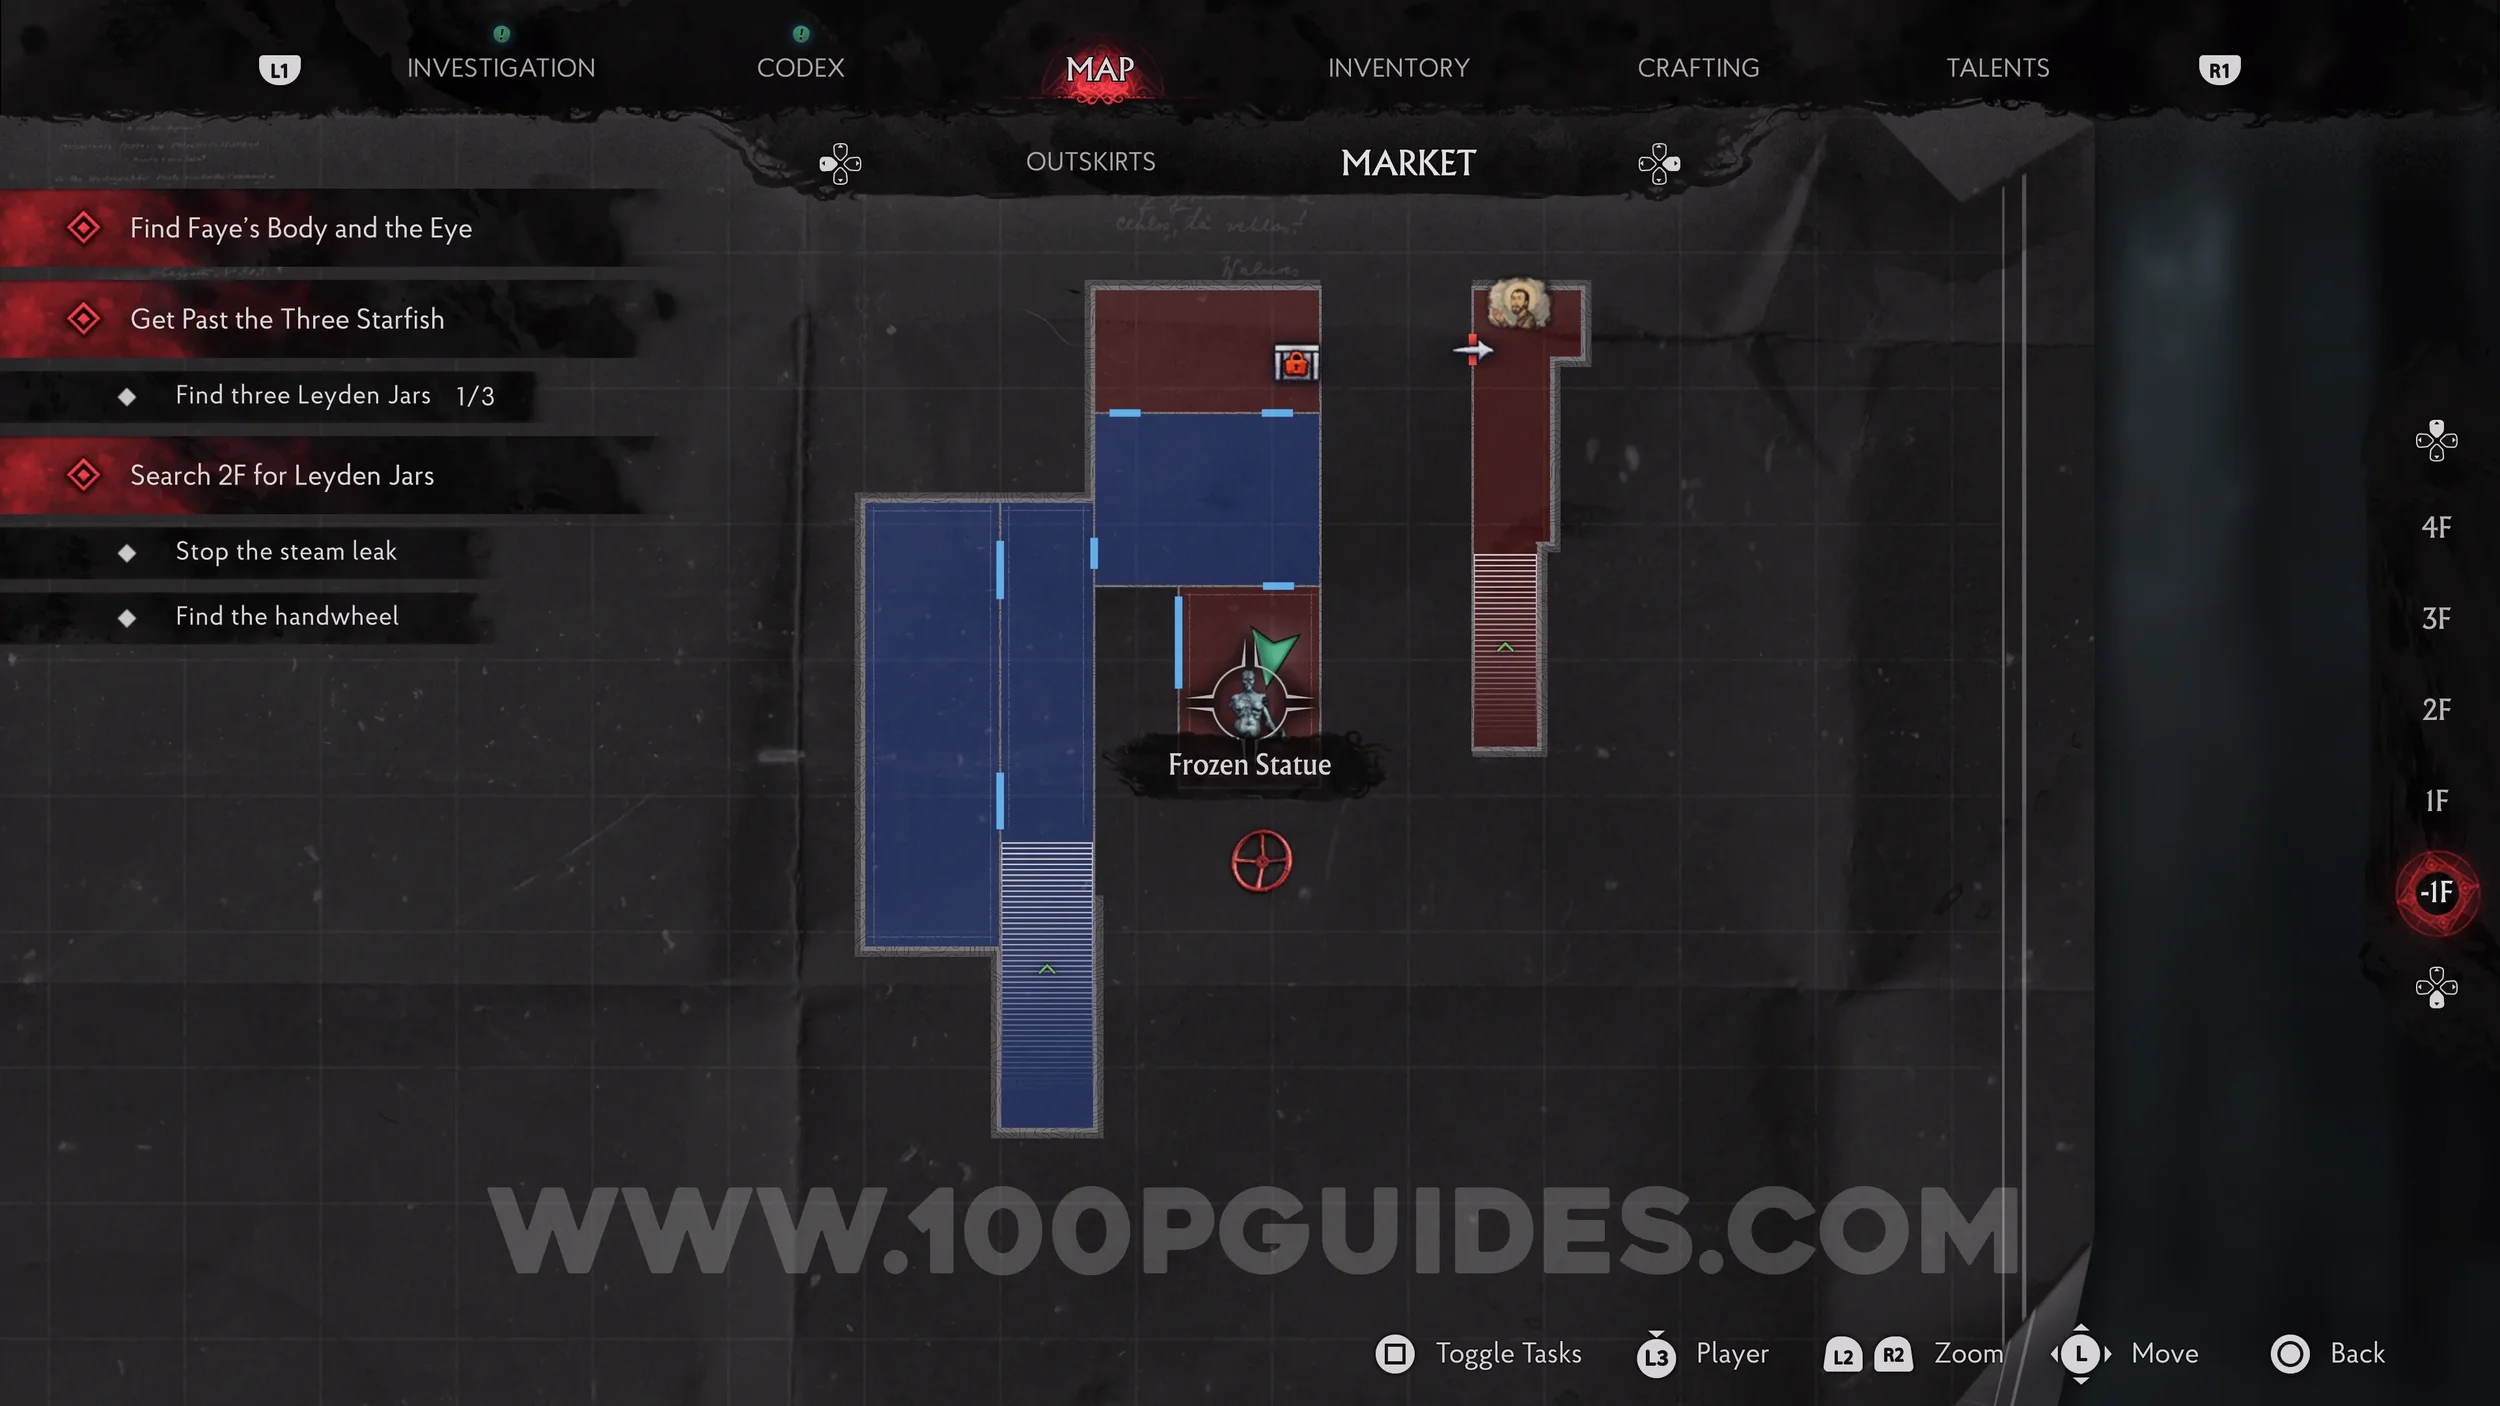
Key Item: Handwheel. In the room to the south of the previous evidence.
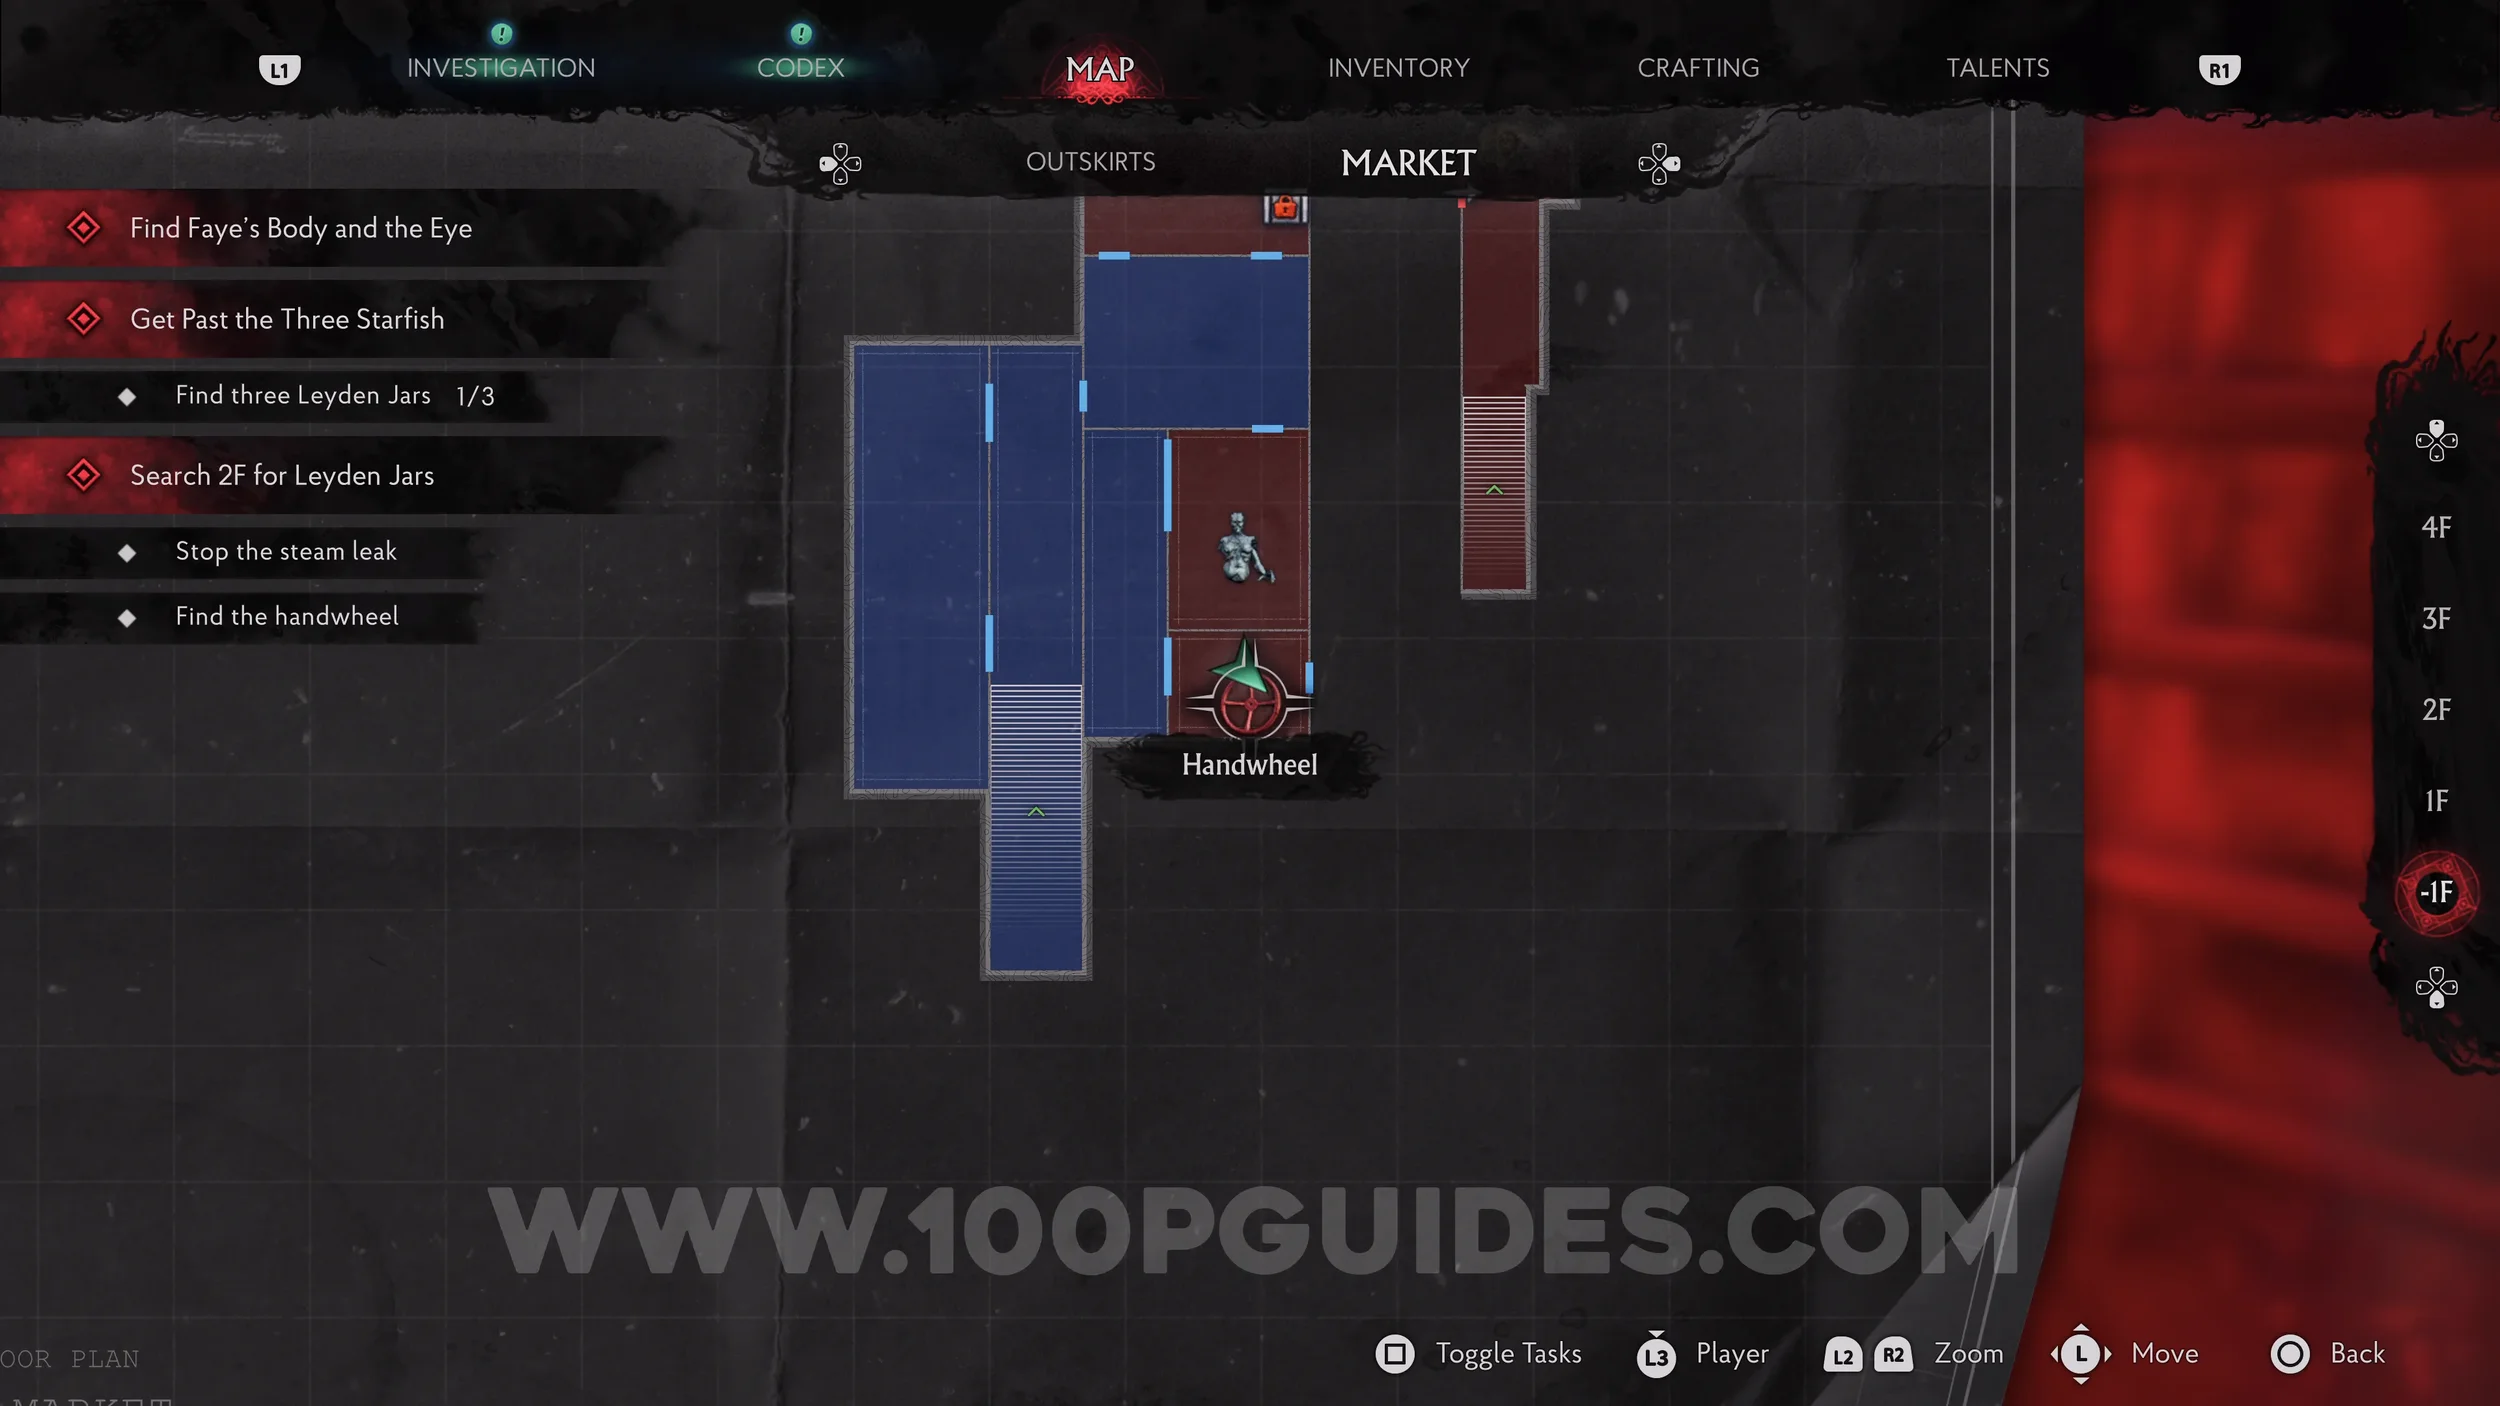
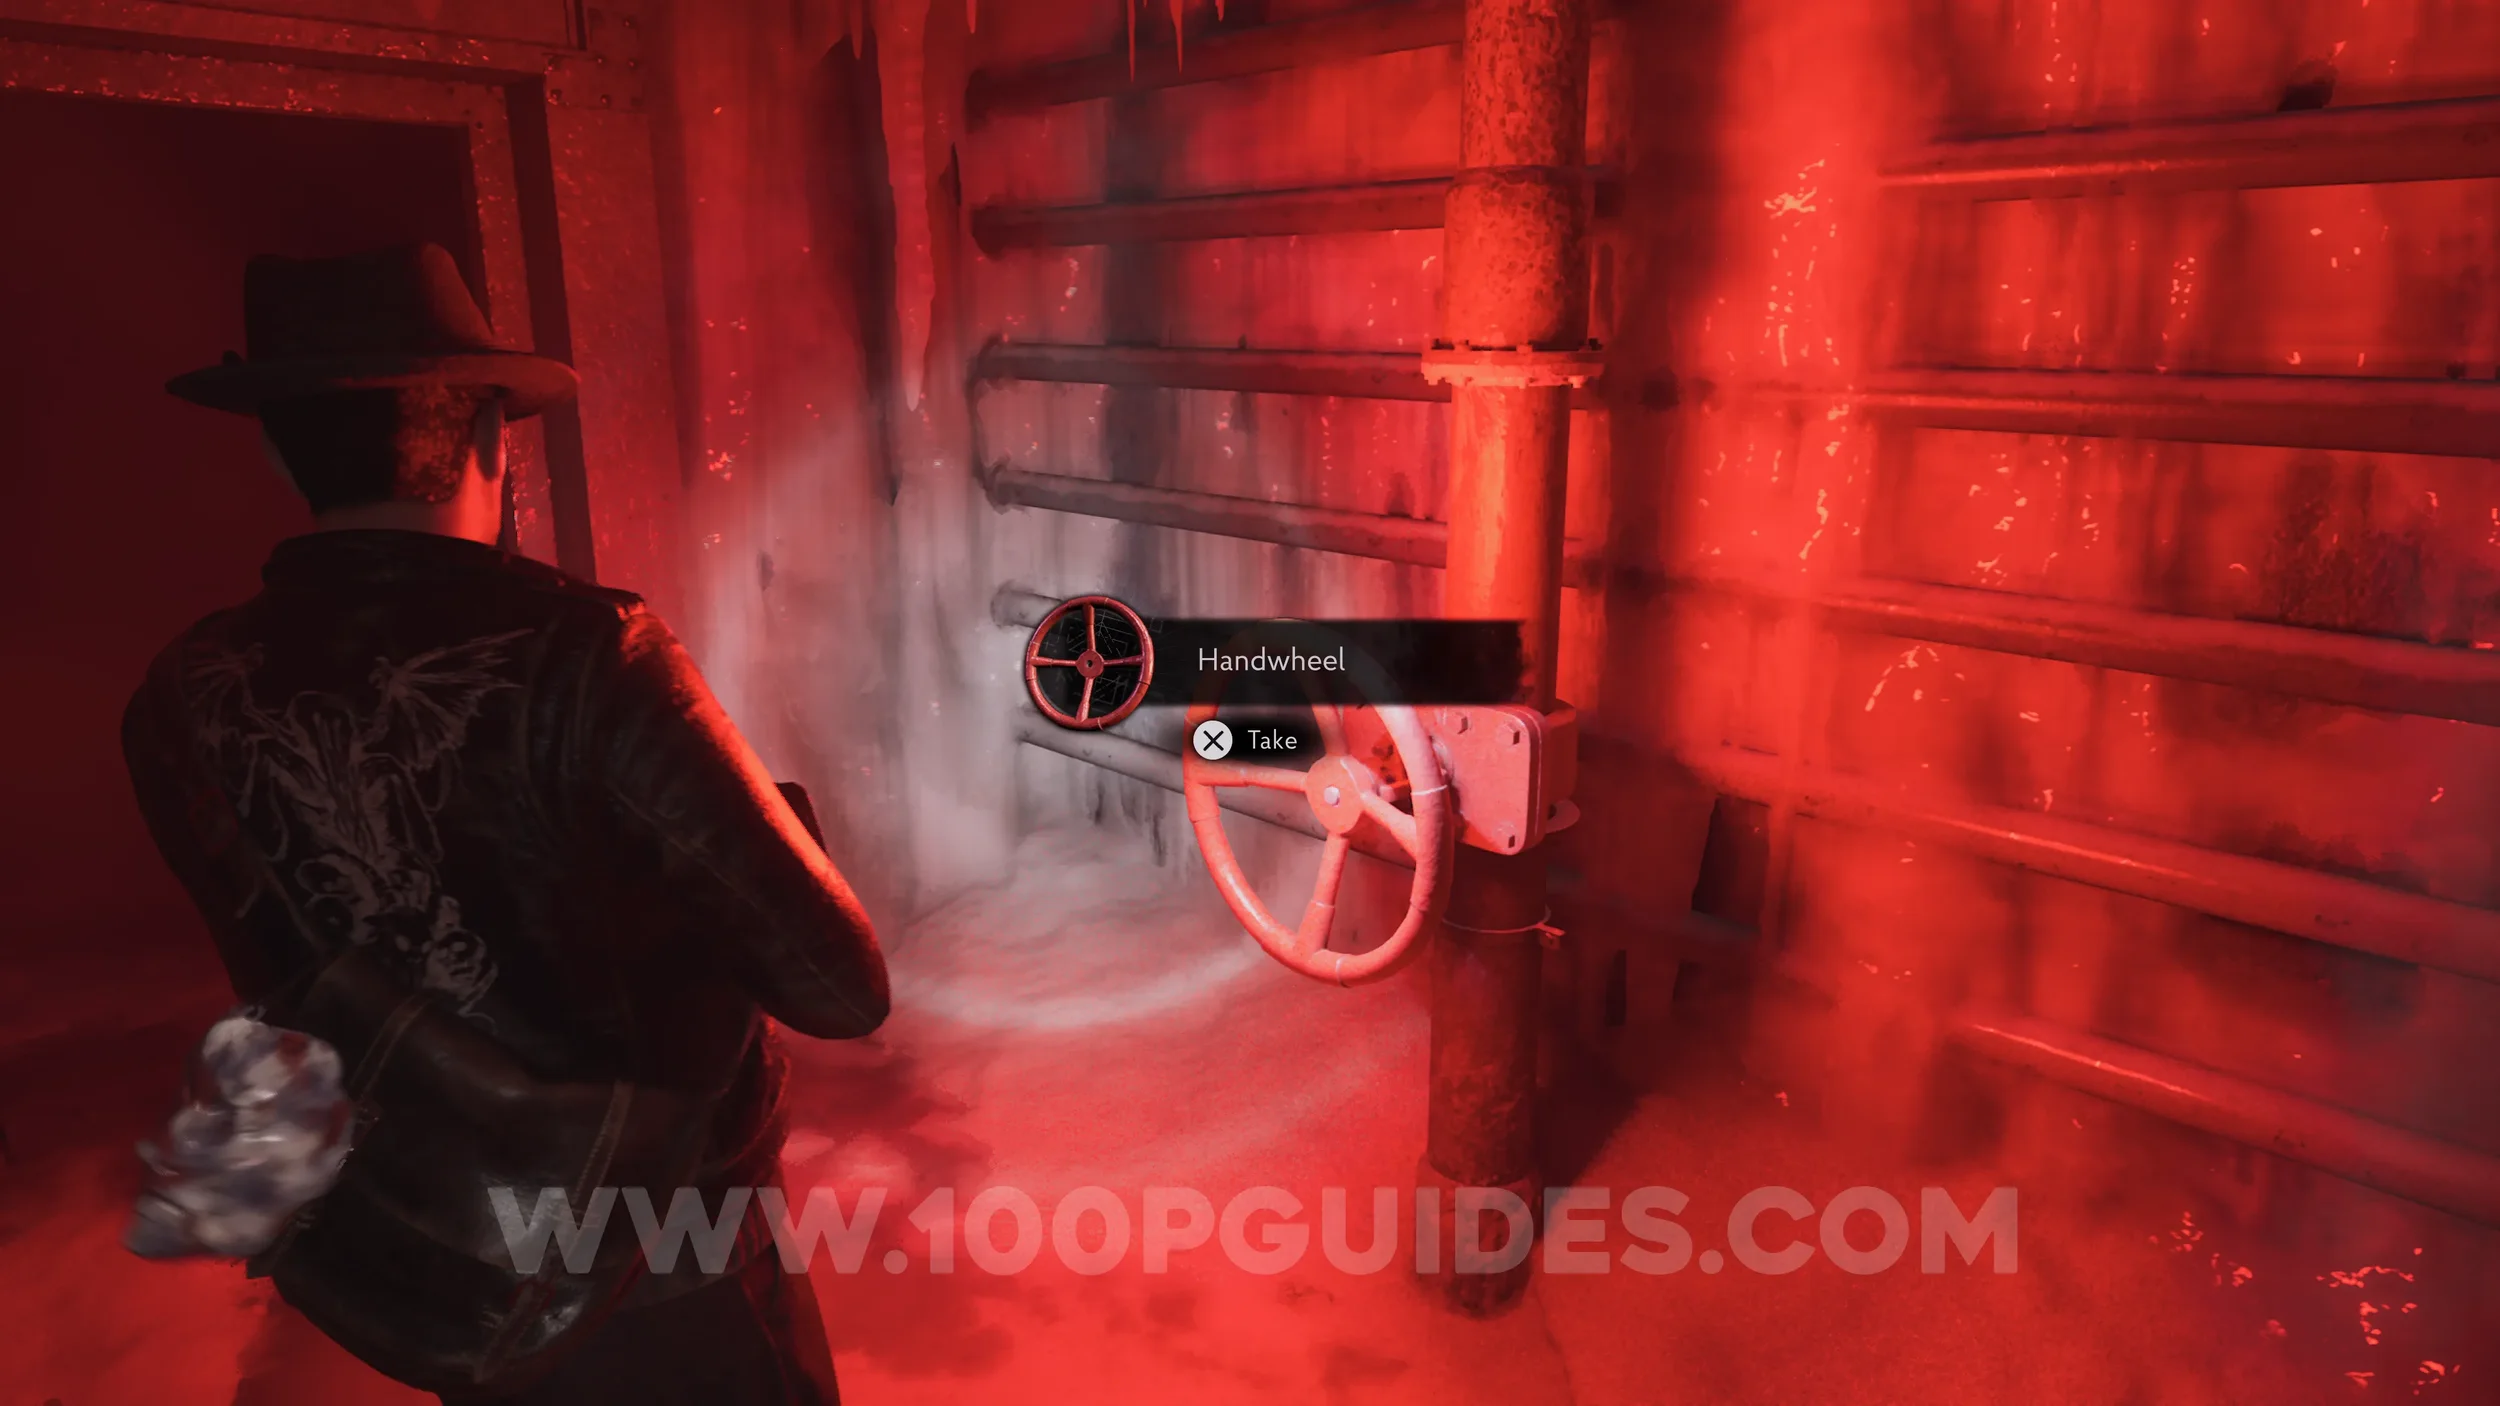
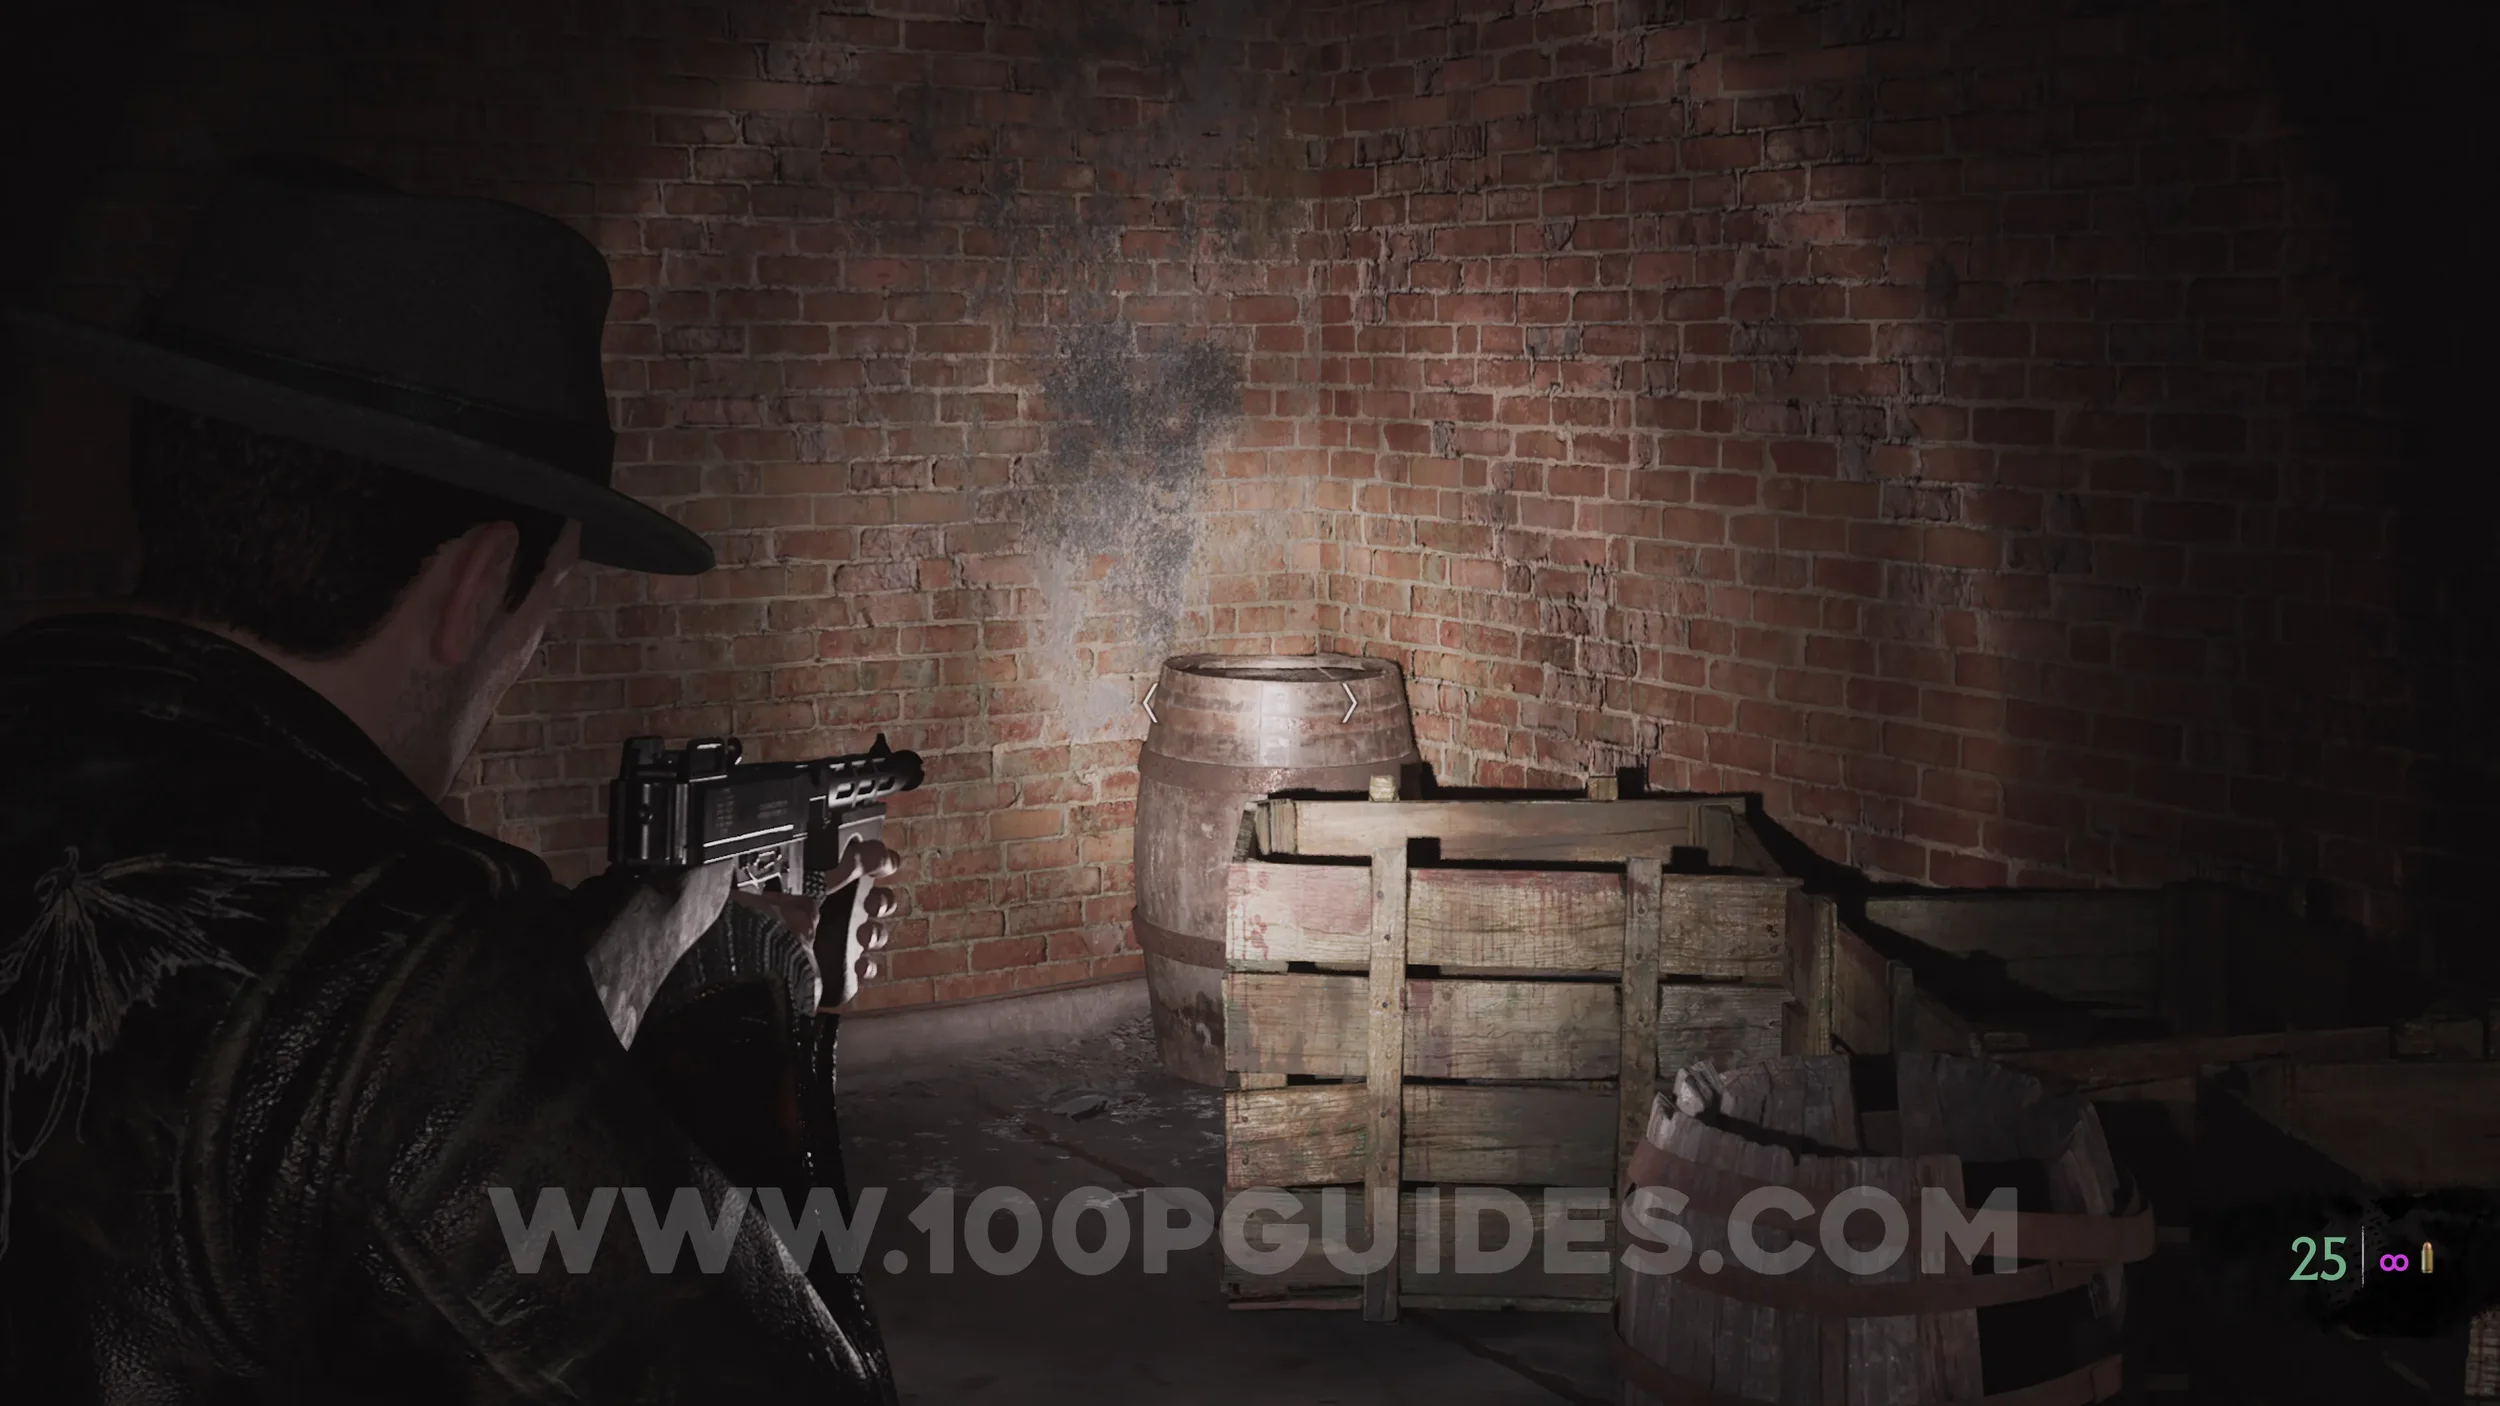
Lore Codex: Lost Letters - Sisters Of Fate. After using the Handwheel to turn off the steam blocking the northern exit of the Cutting Area, take that exit to reach the East Staircase. Then, pick up the codex from the barrel in the northwest corner.
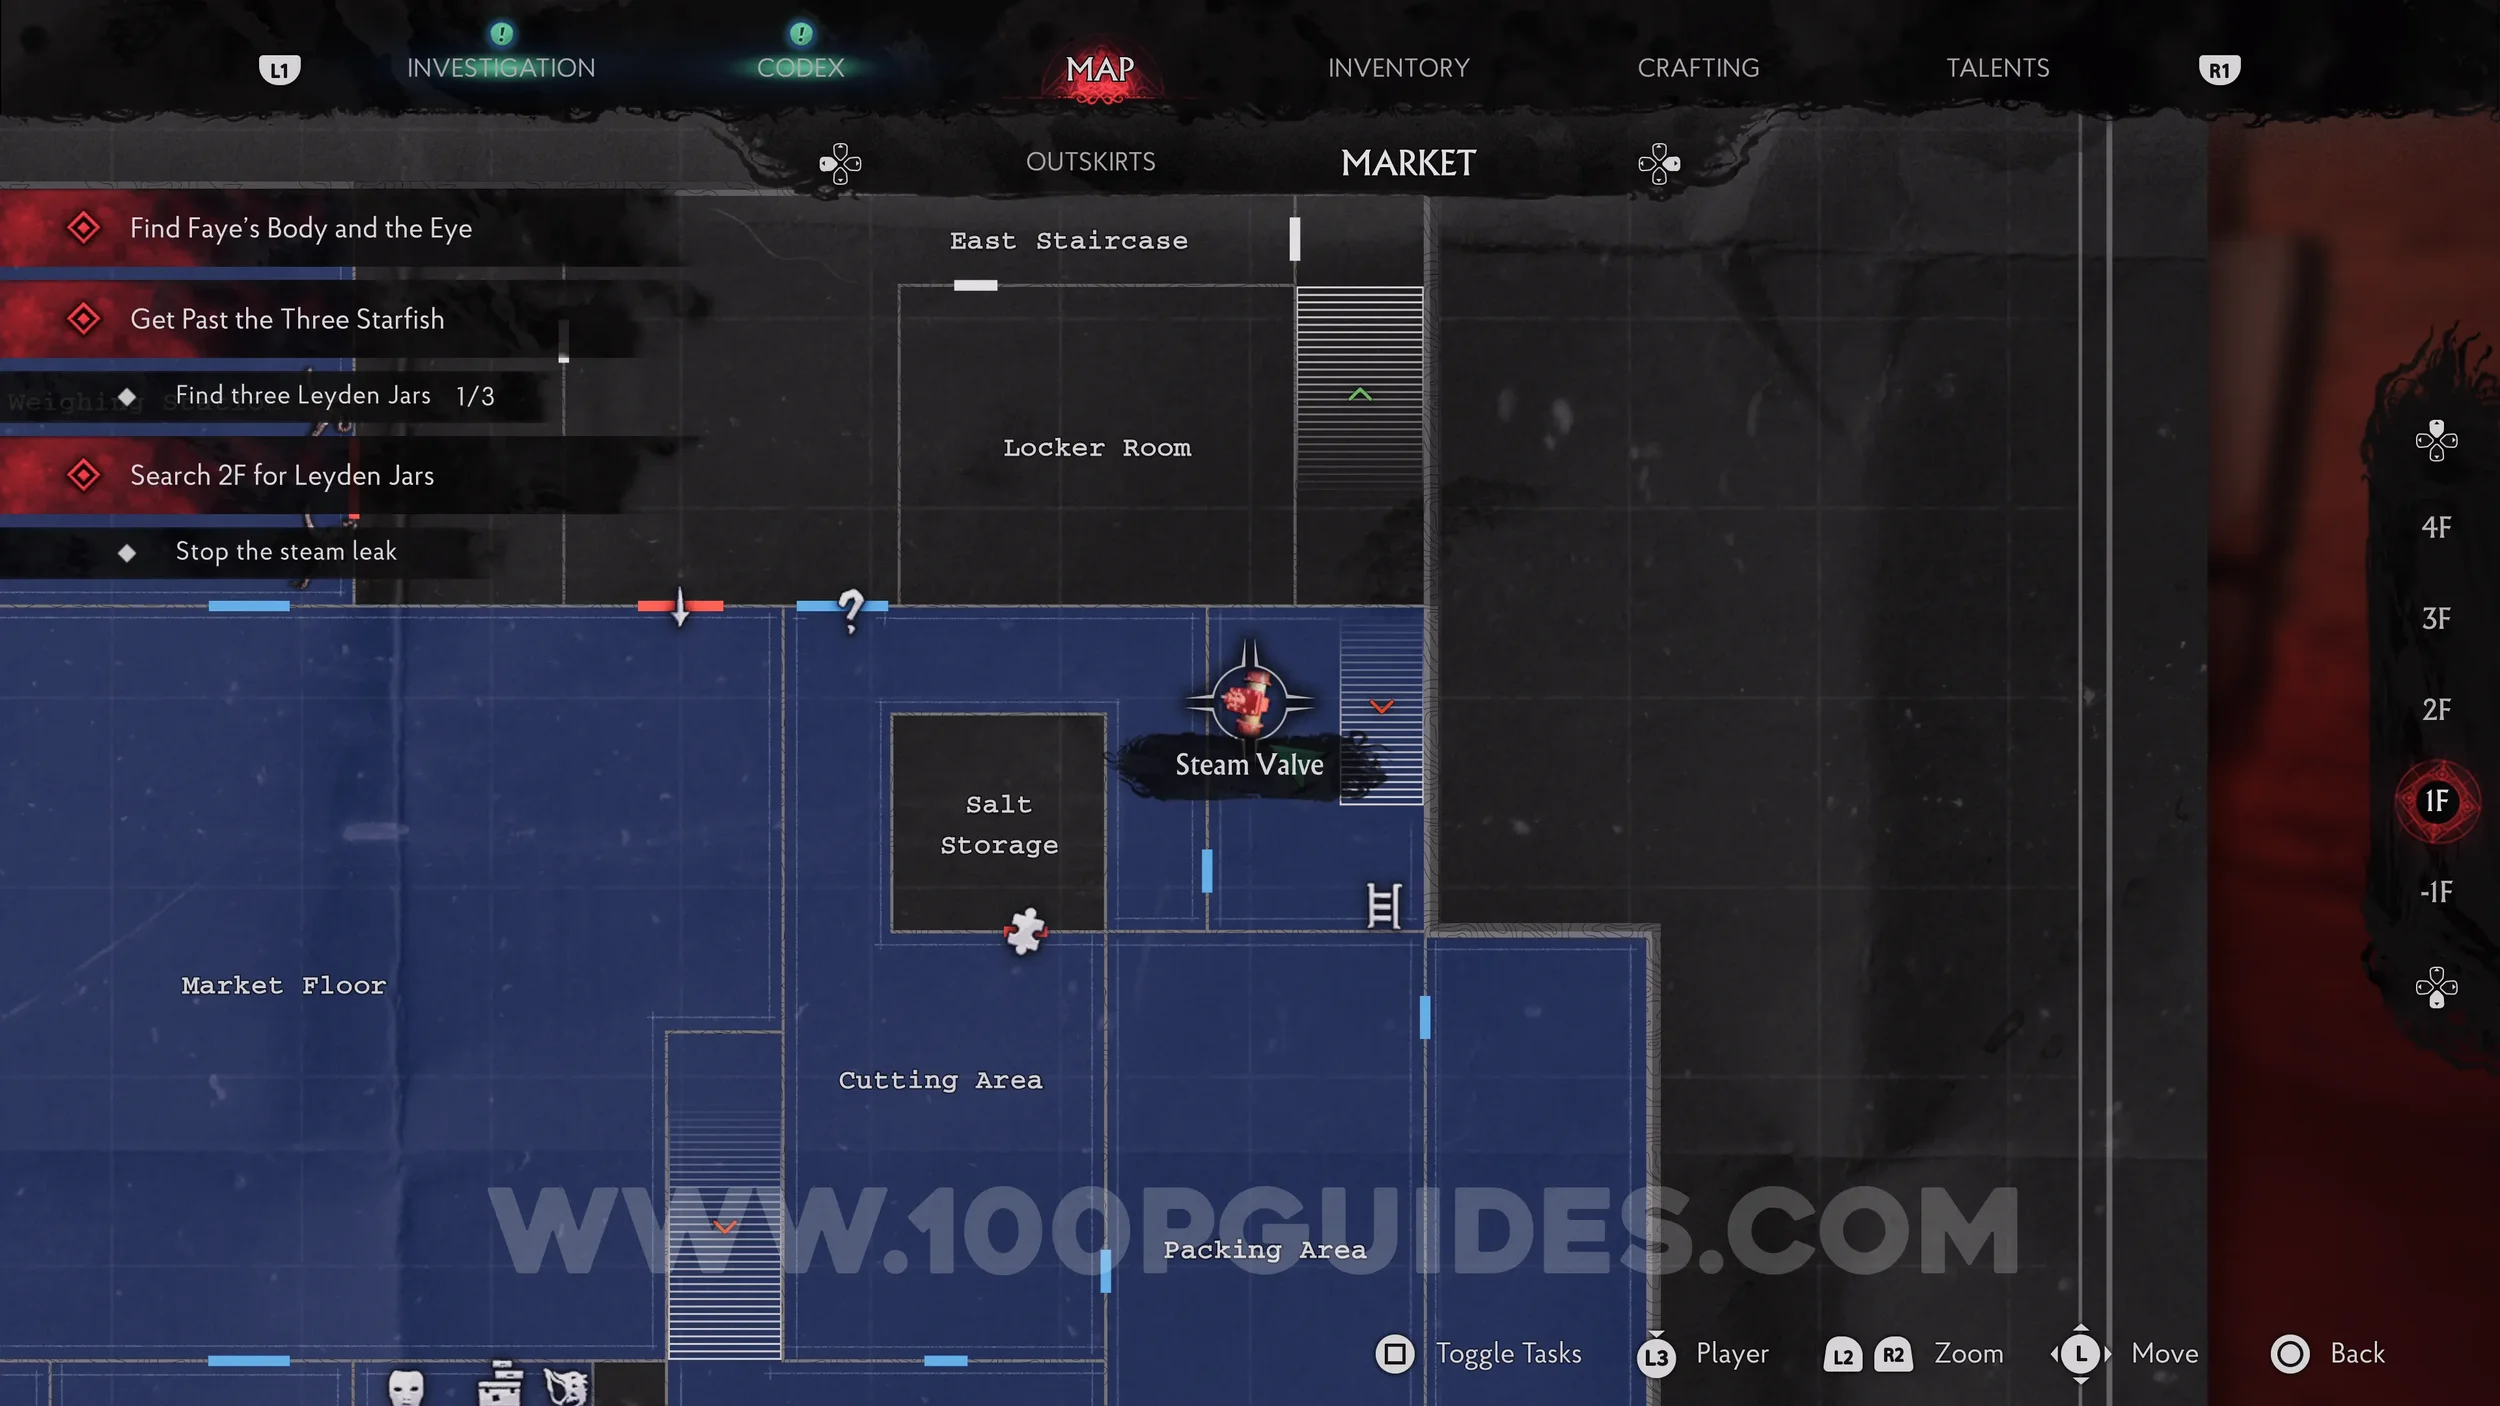
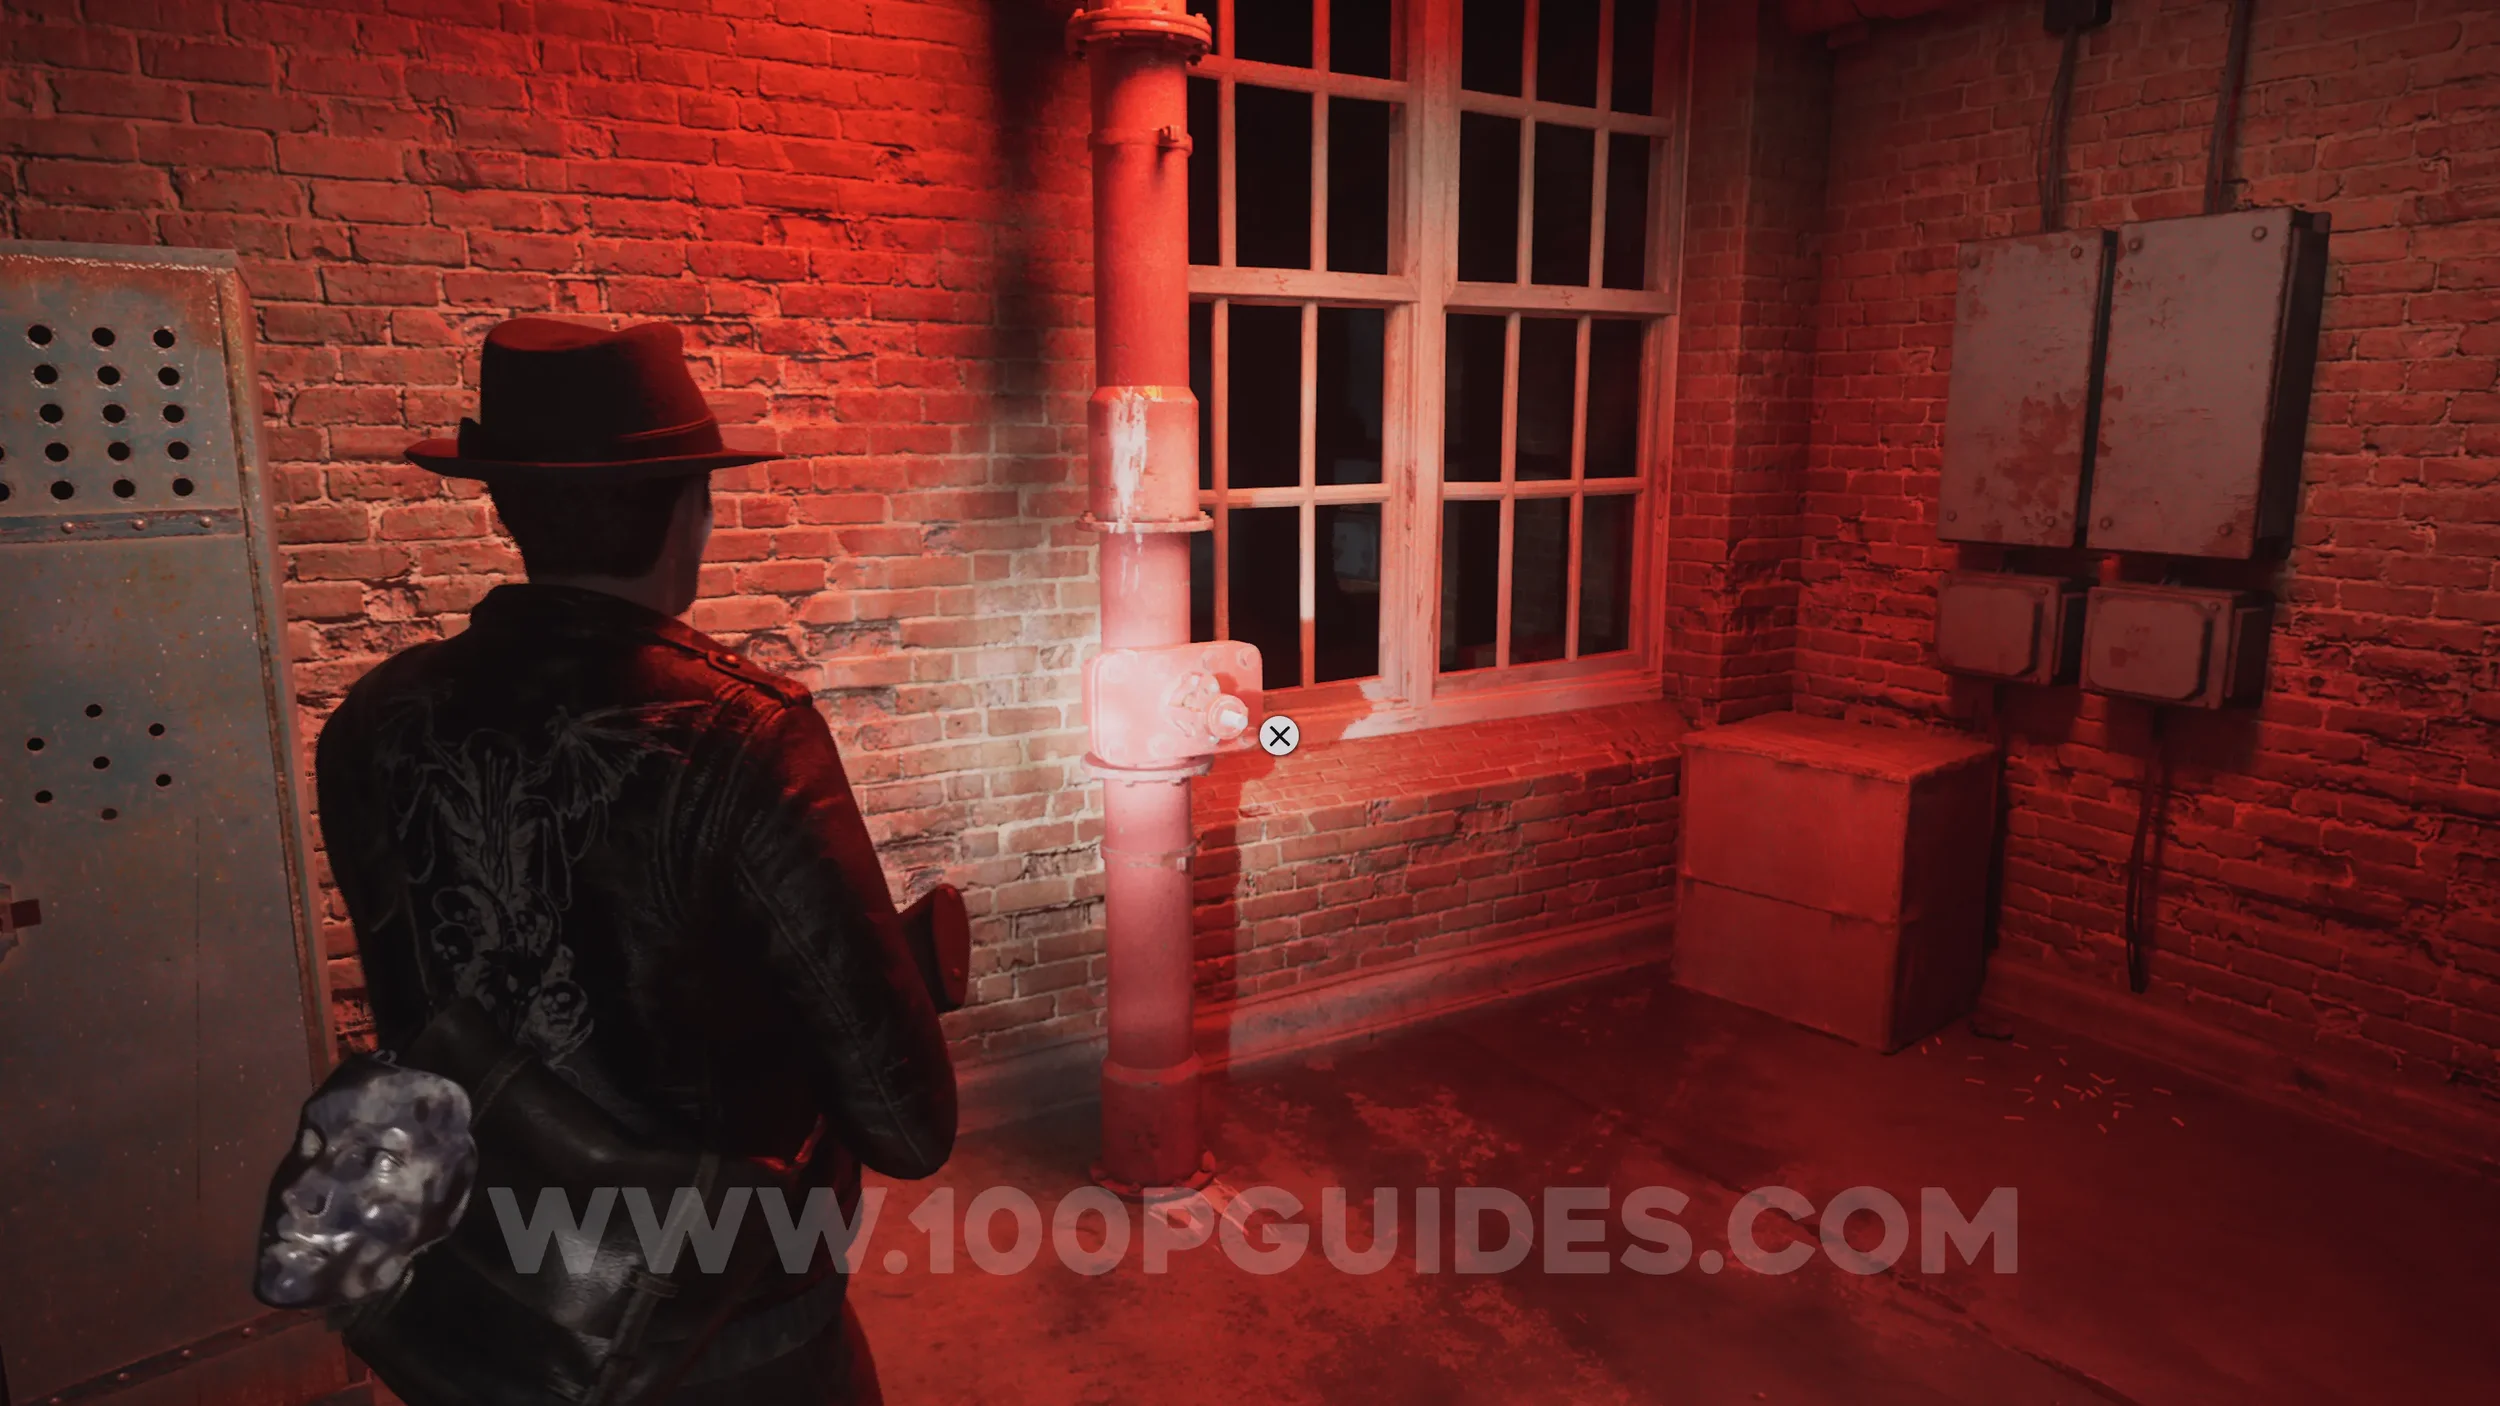
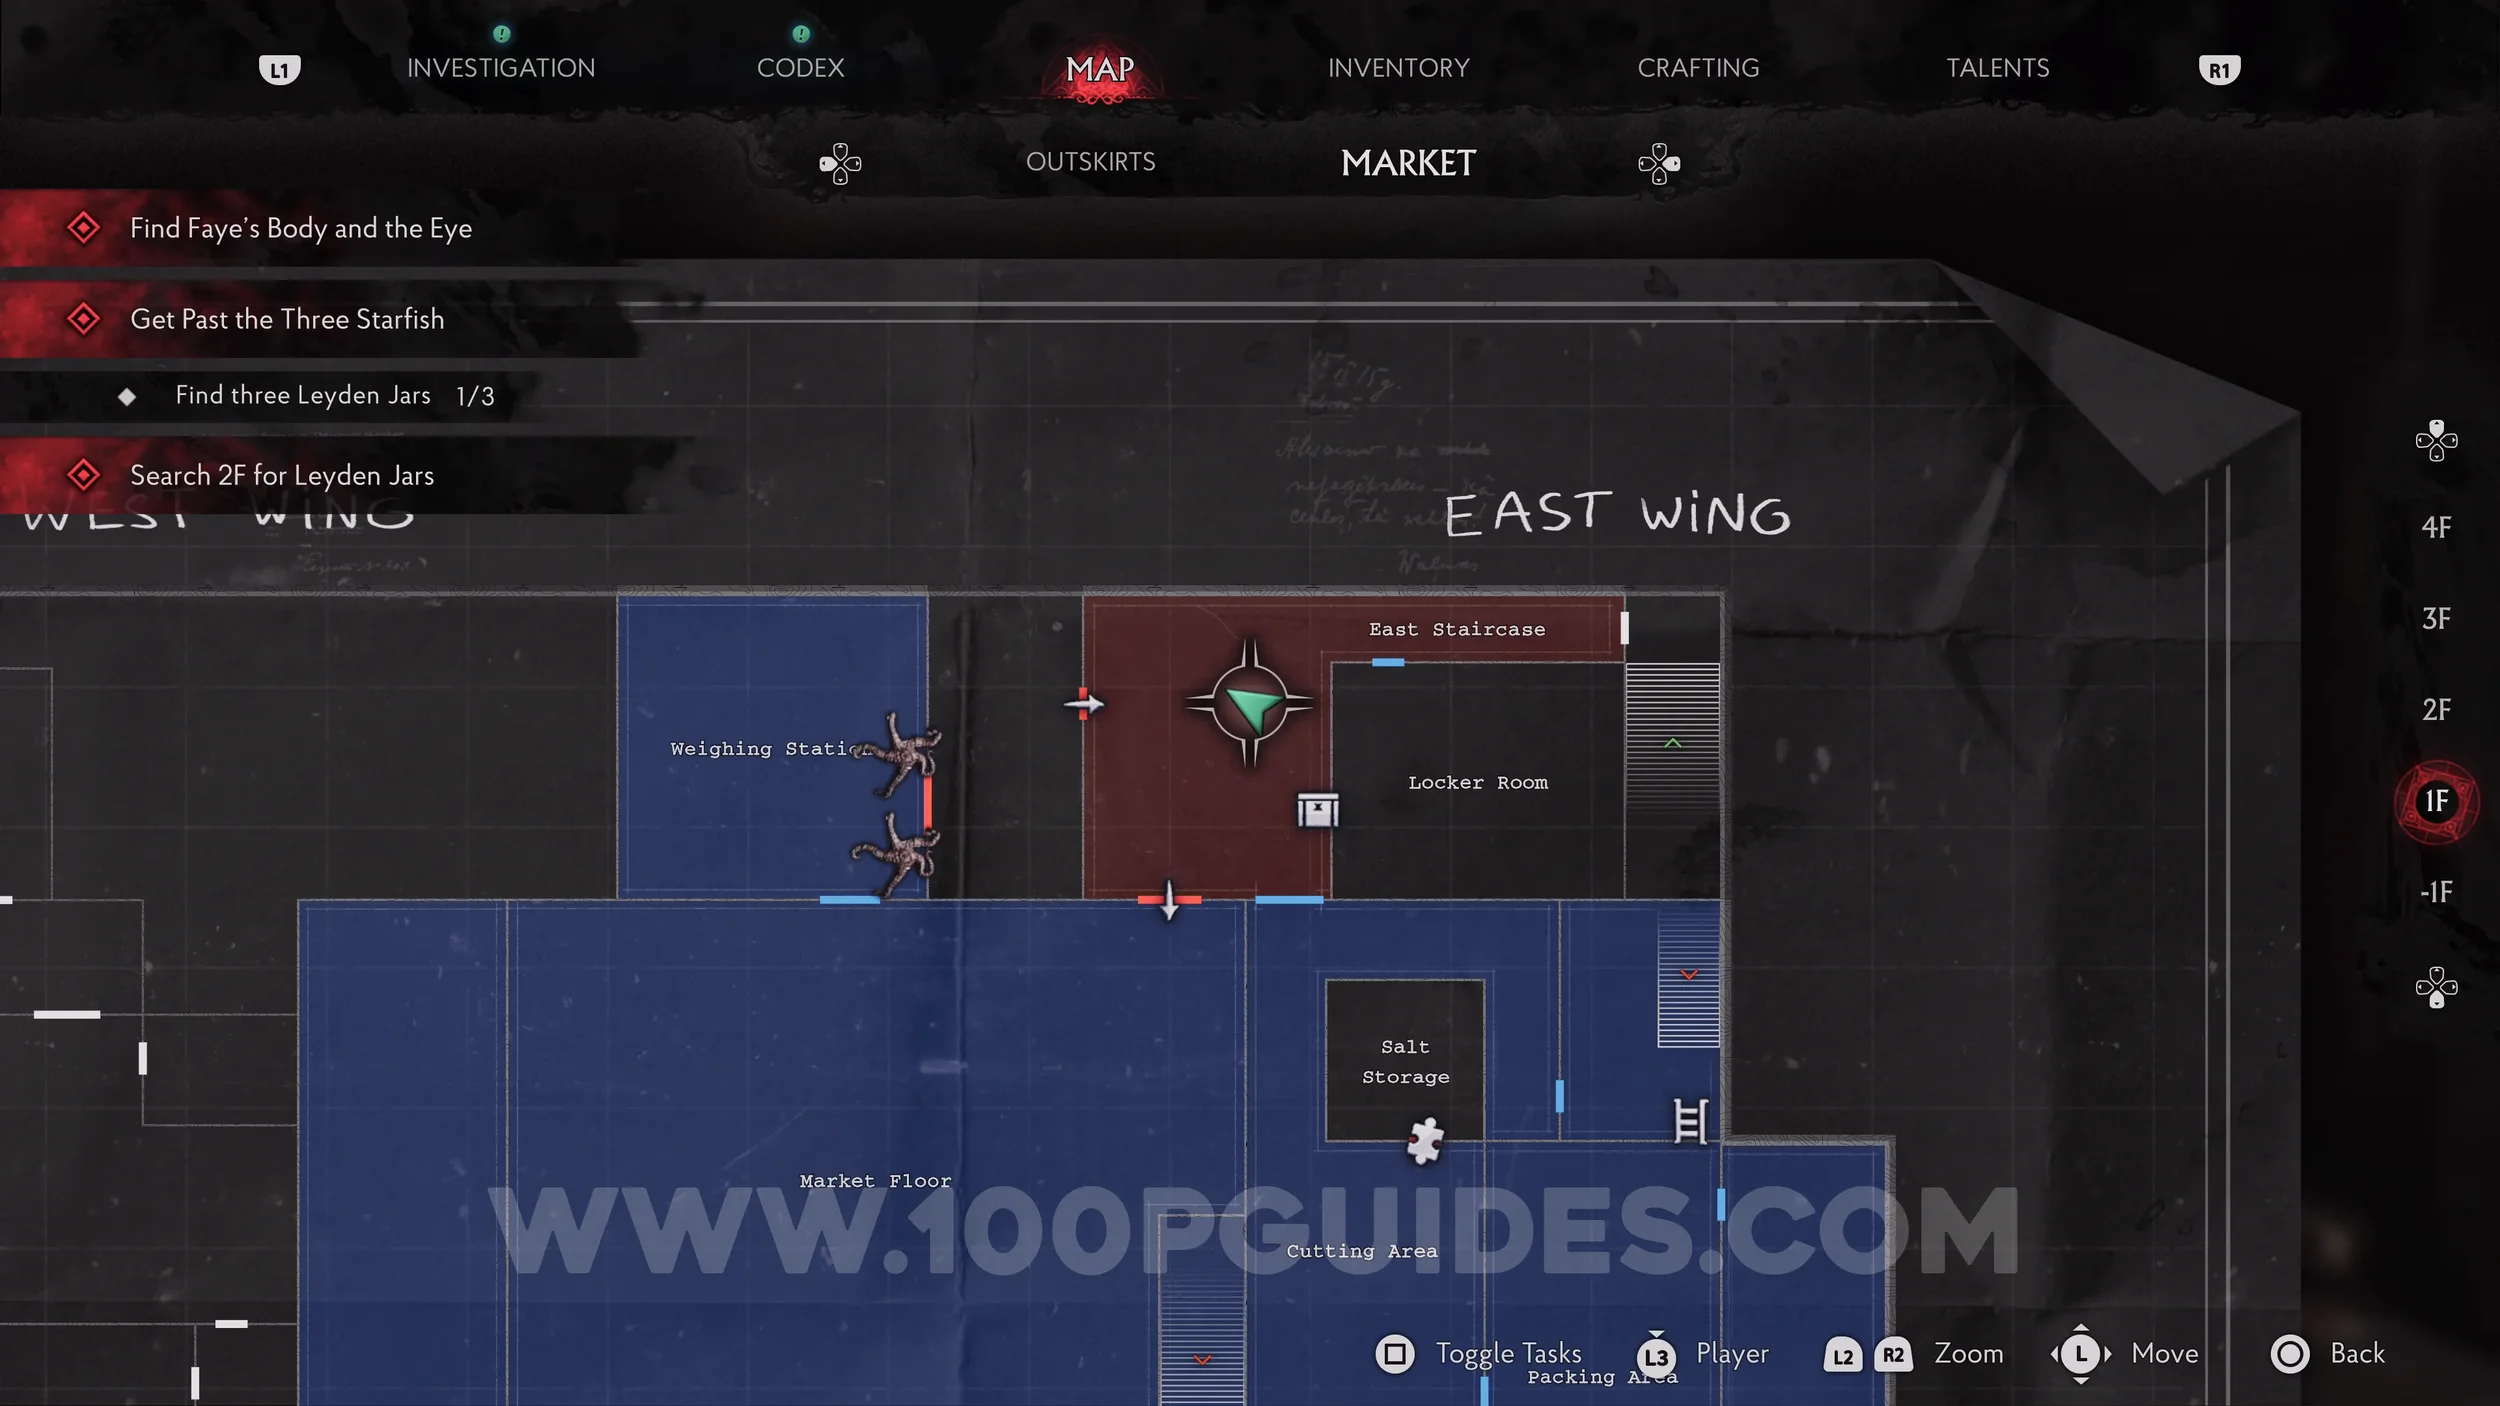
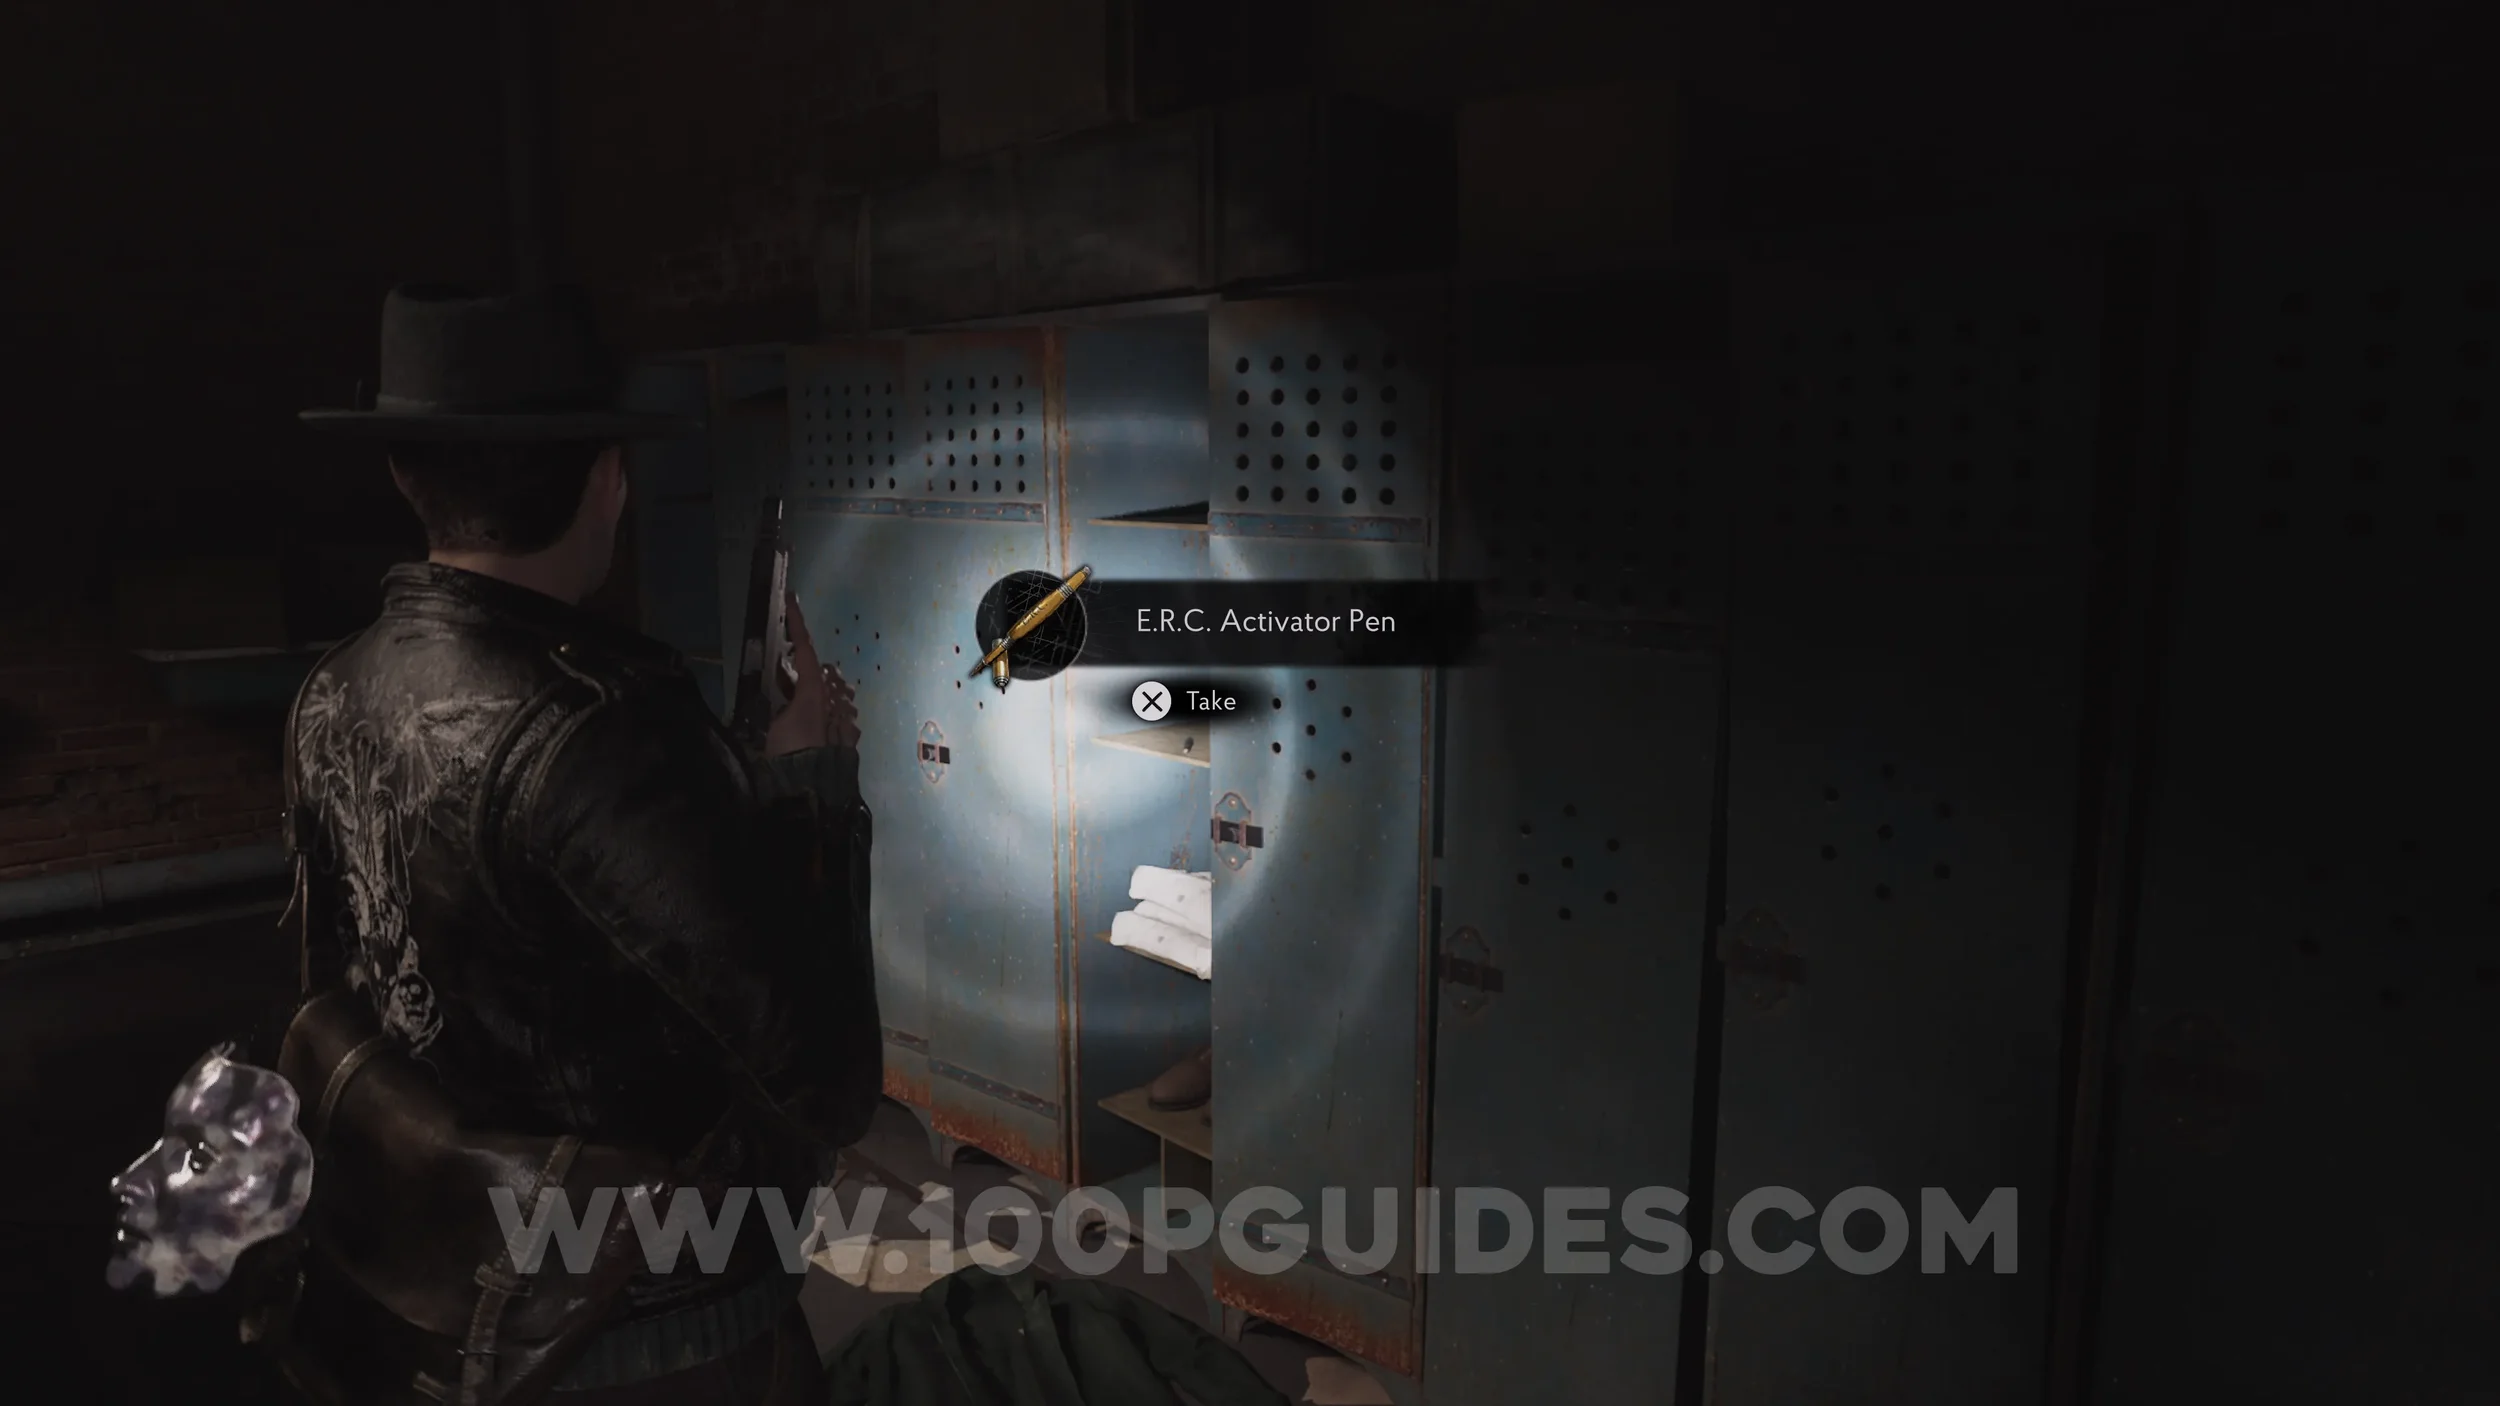
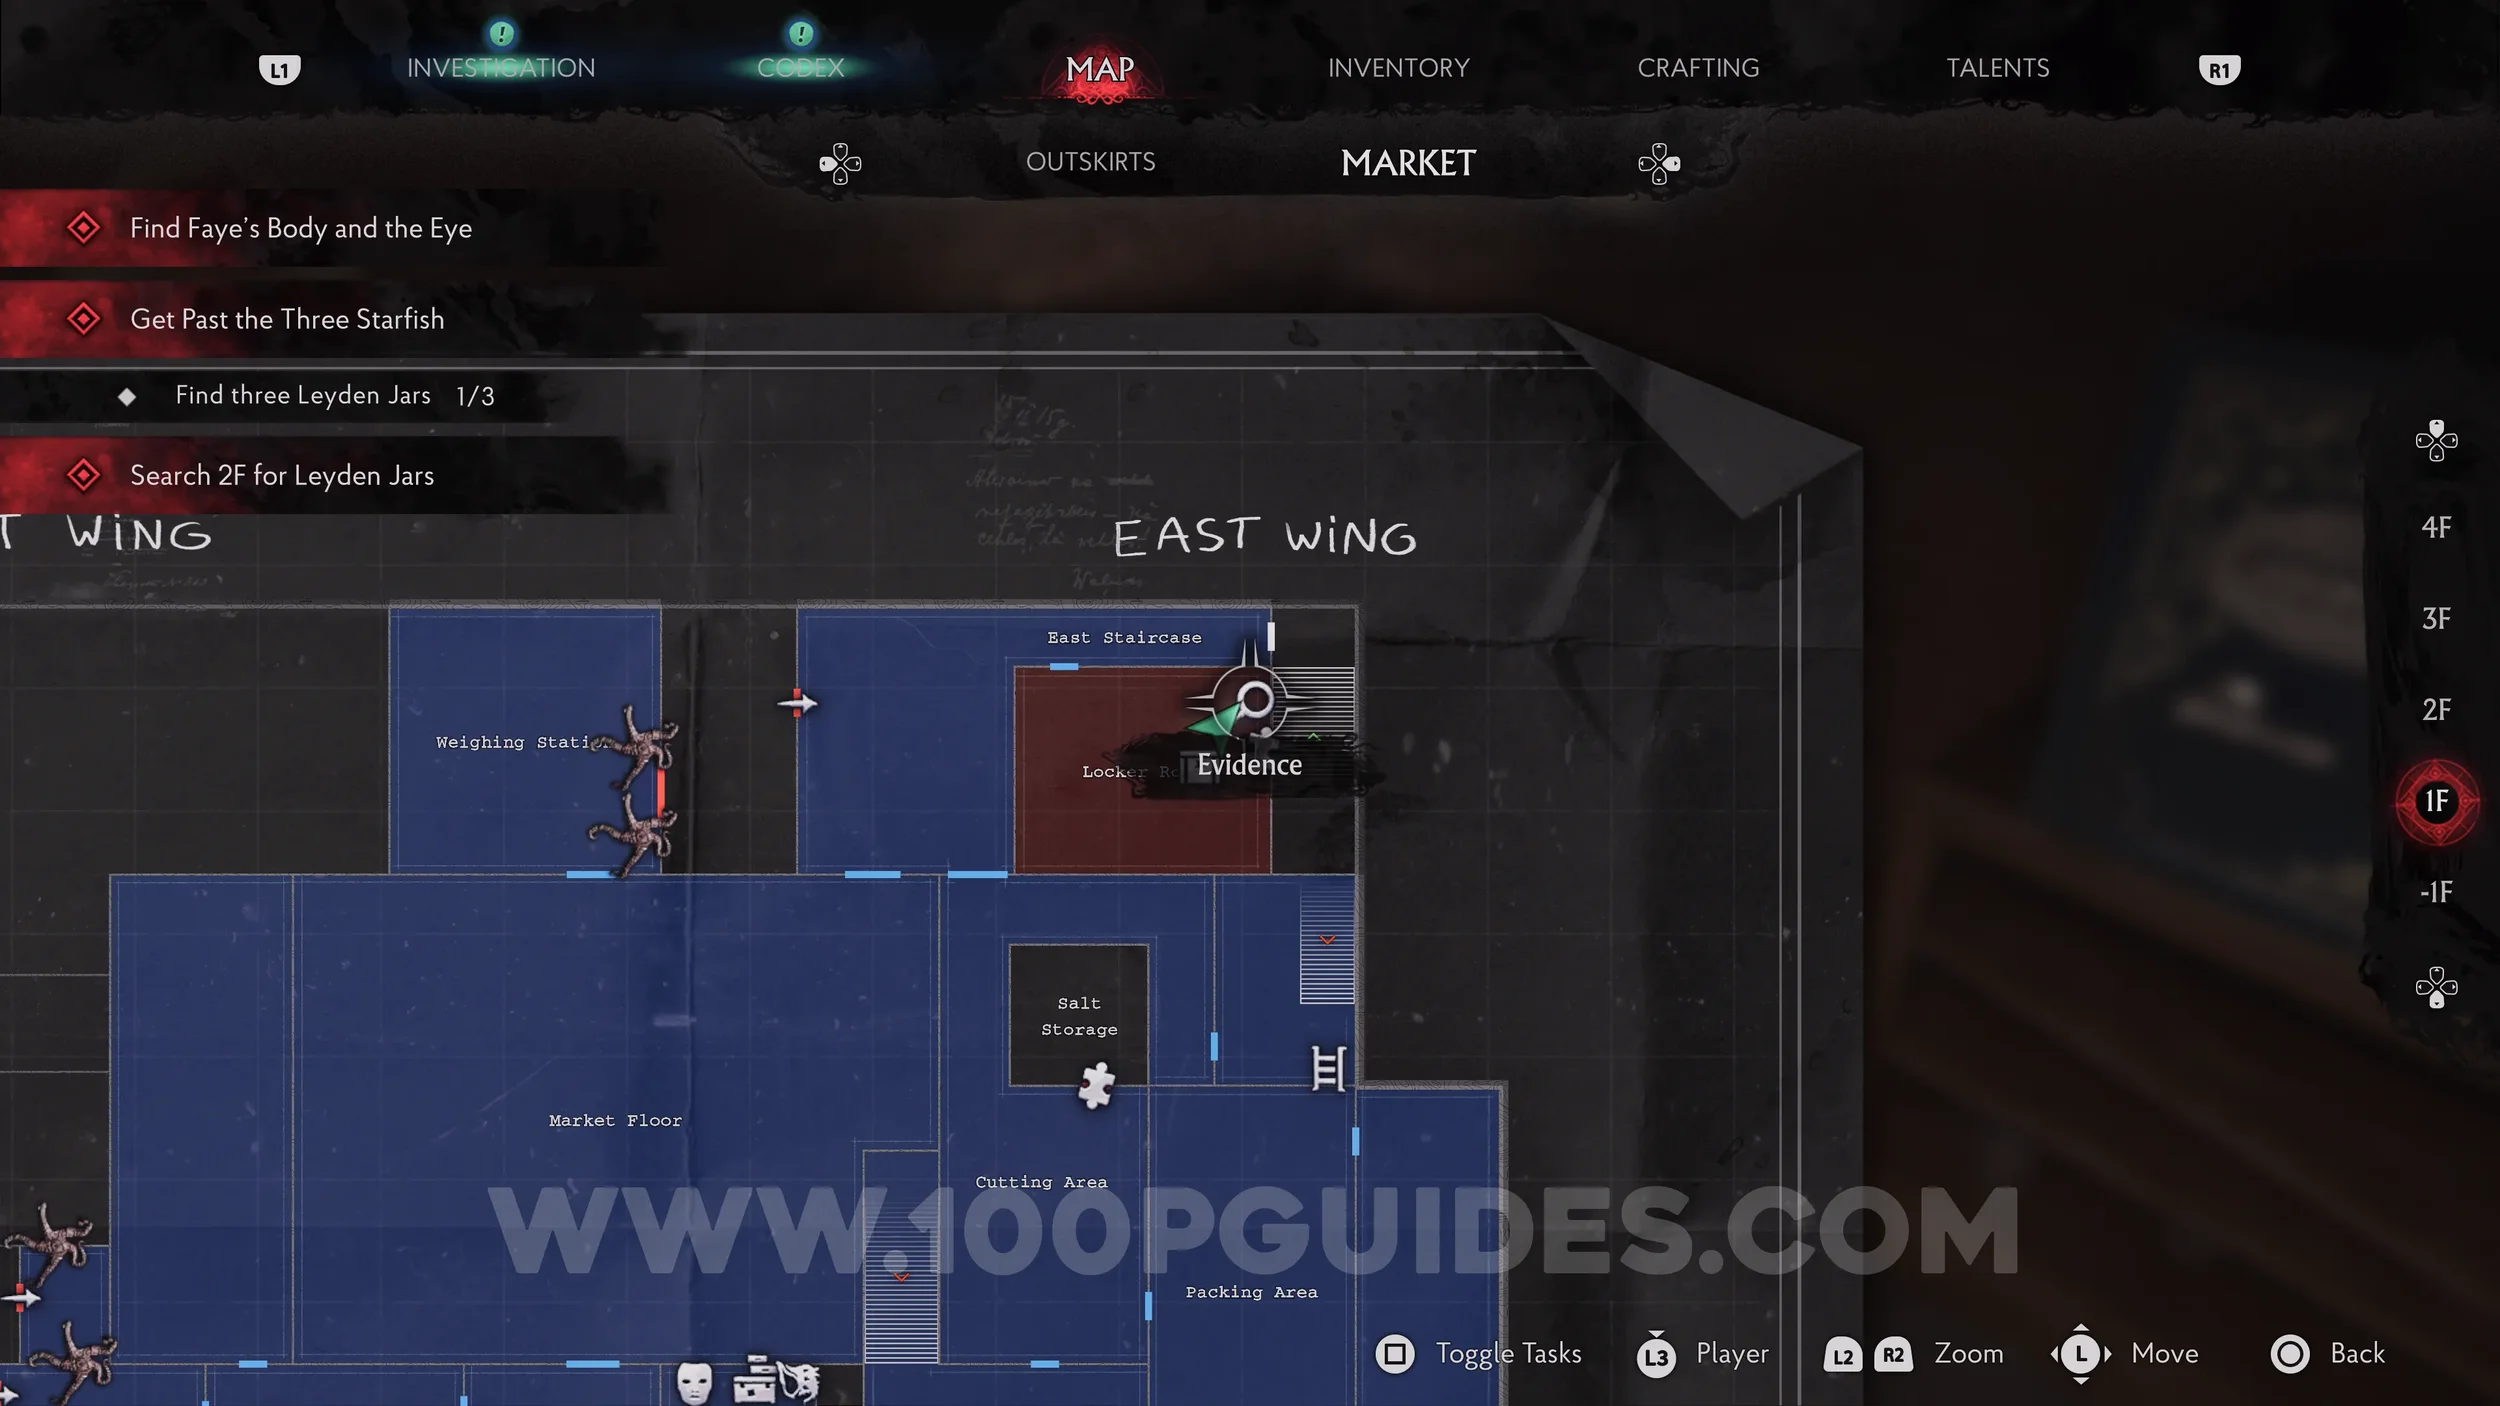
E.R.C. Activator Pen. Before heading up the stairs, head into the Locker Room to find the pen in one of the lockers.
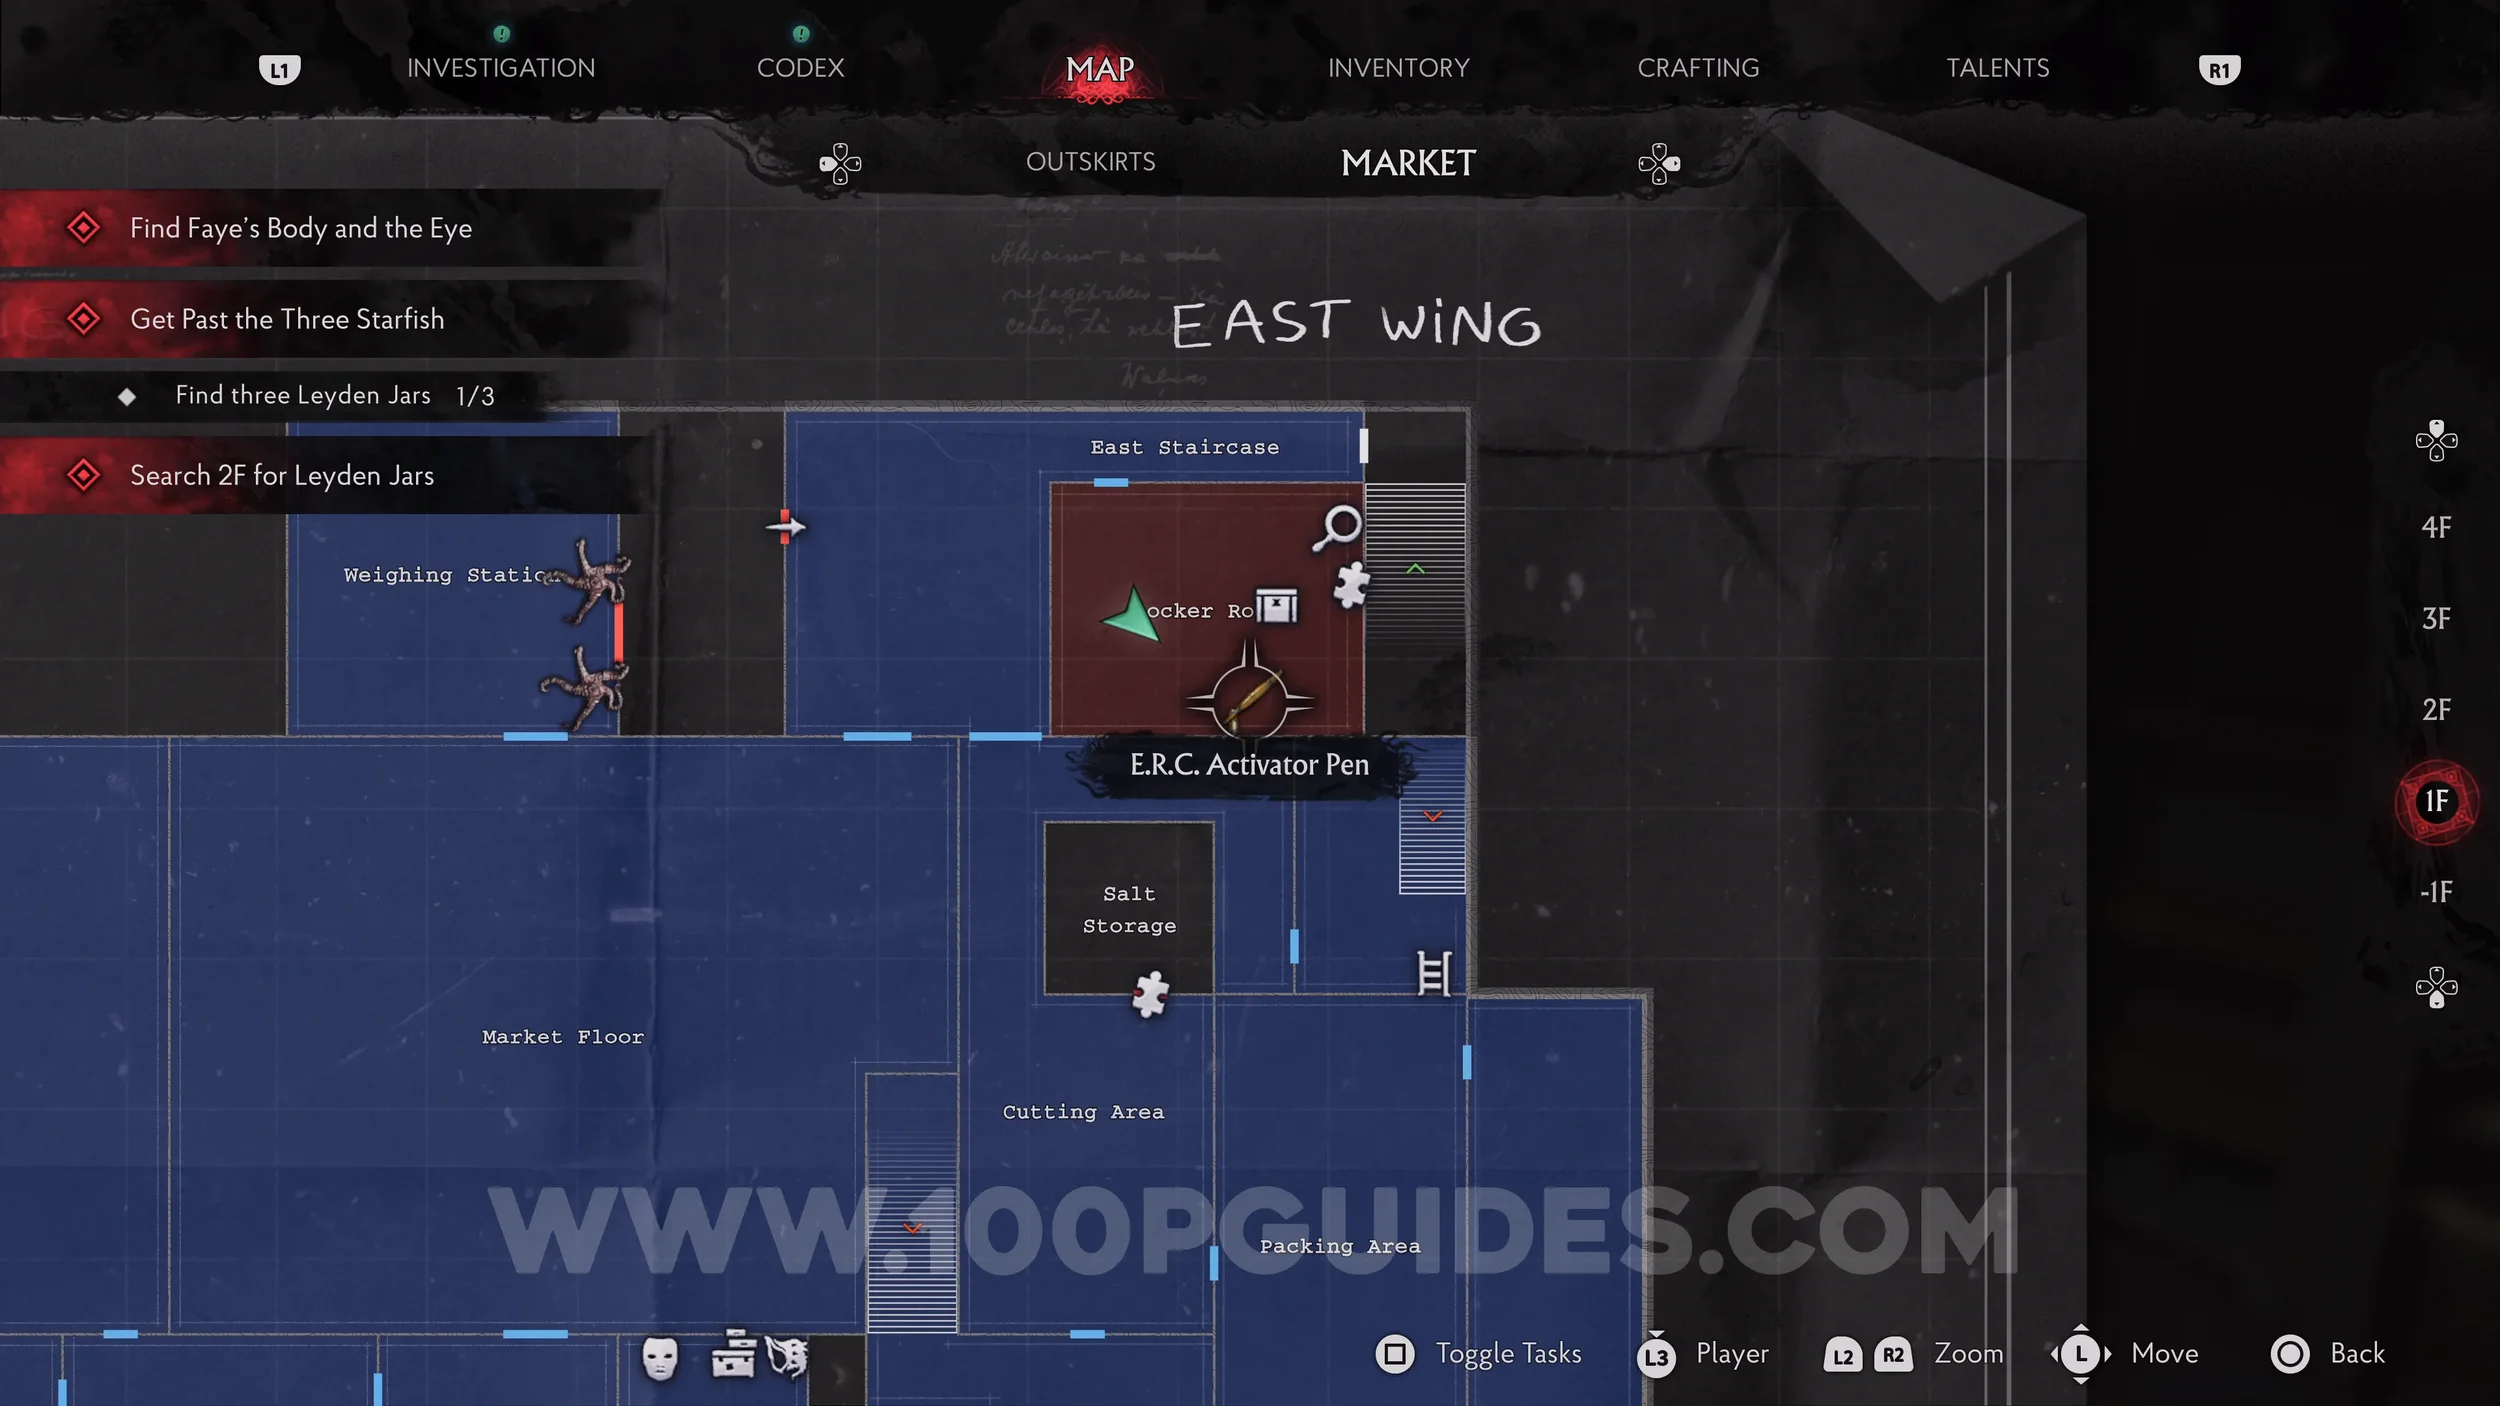
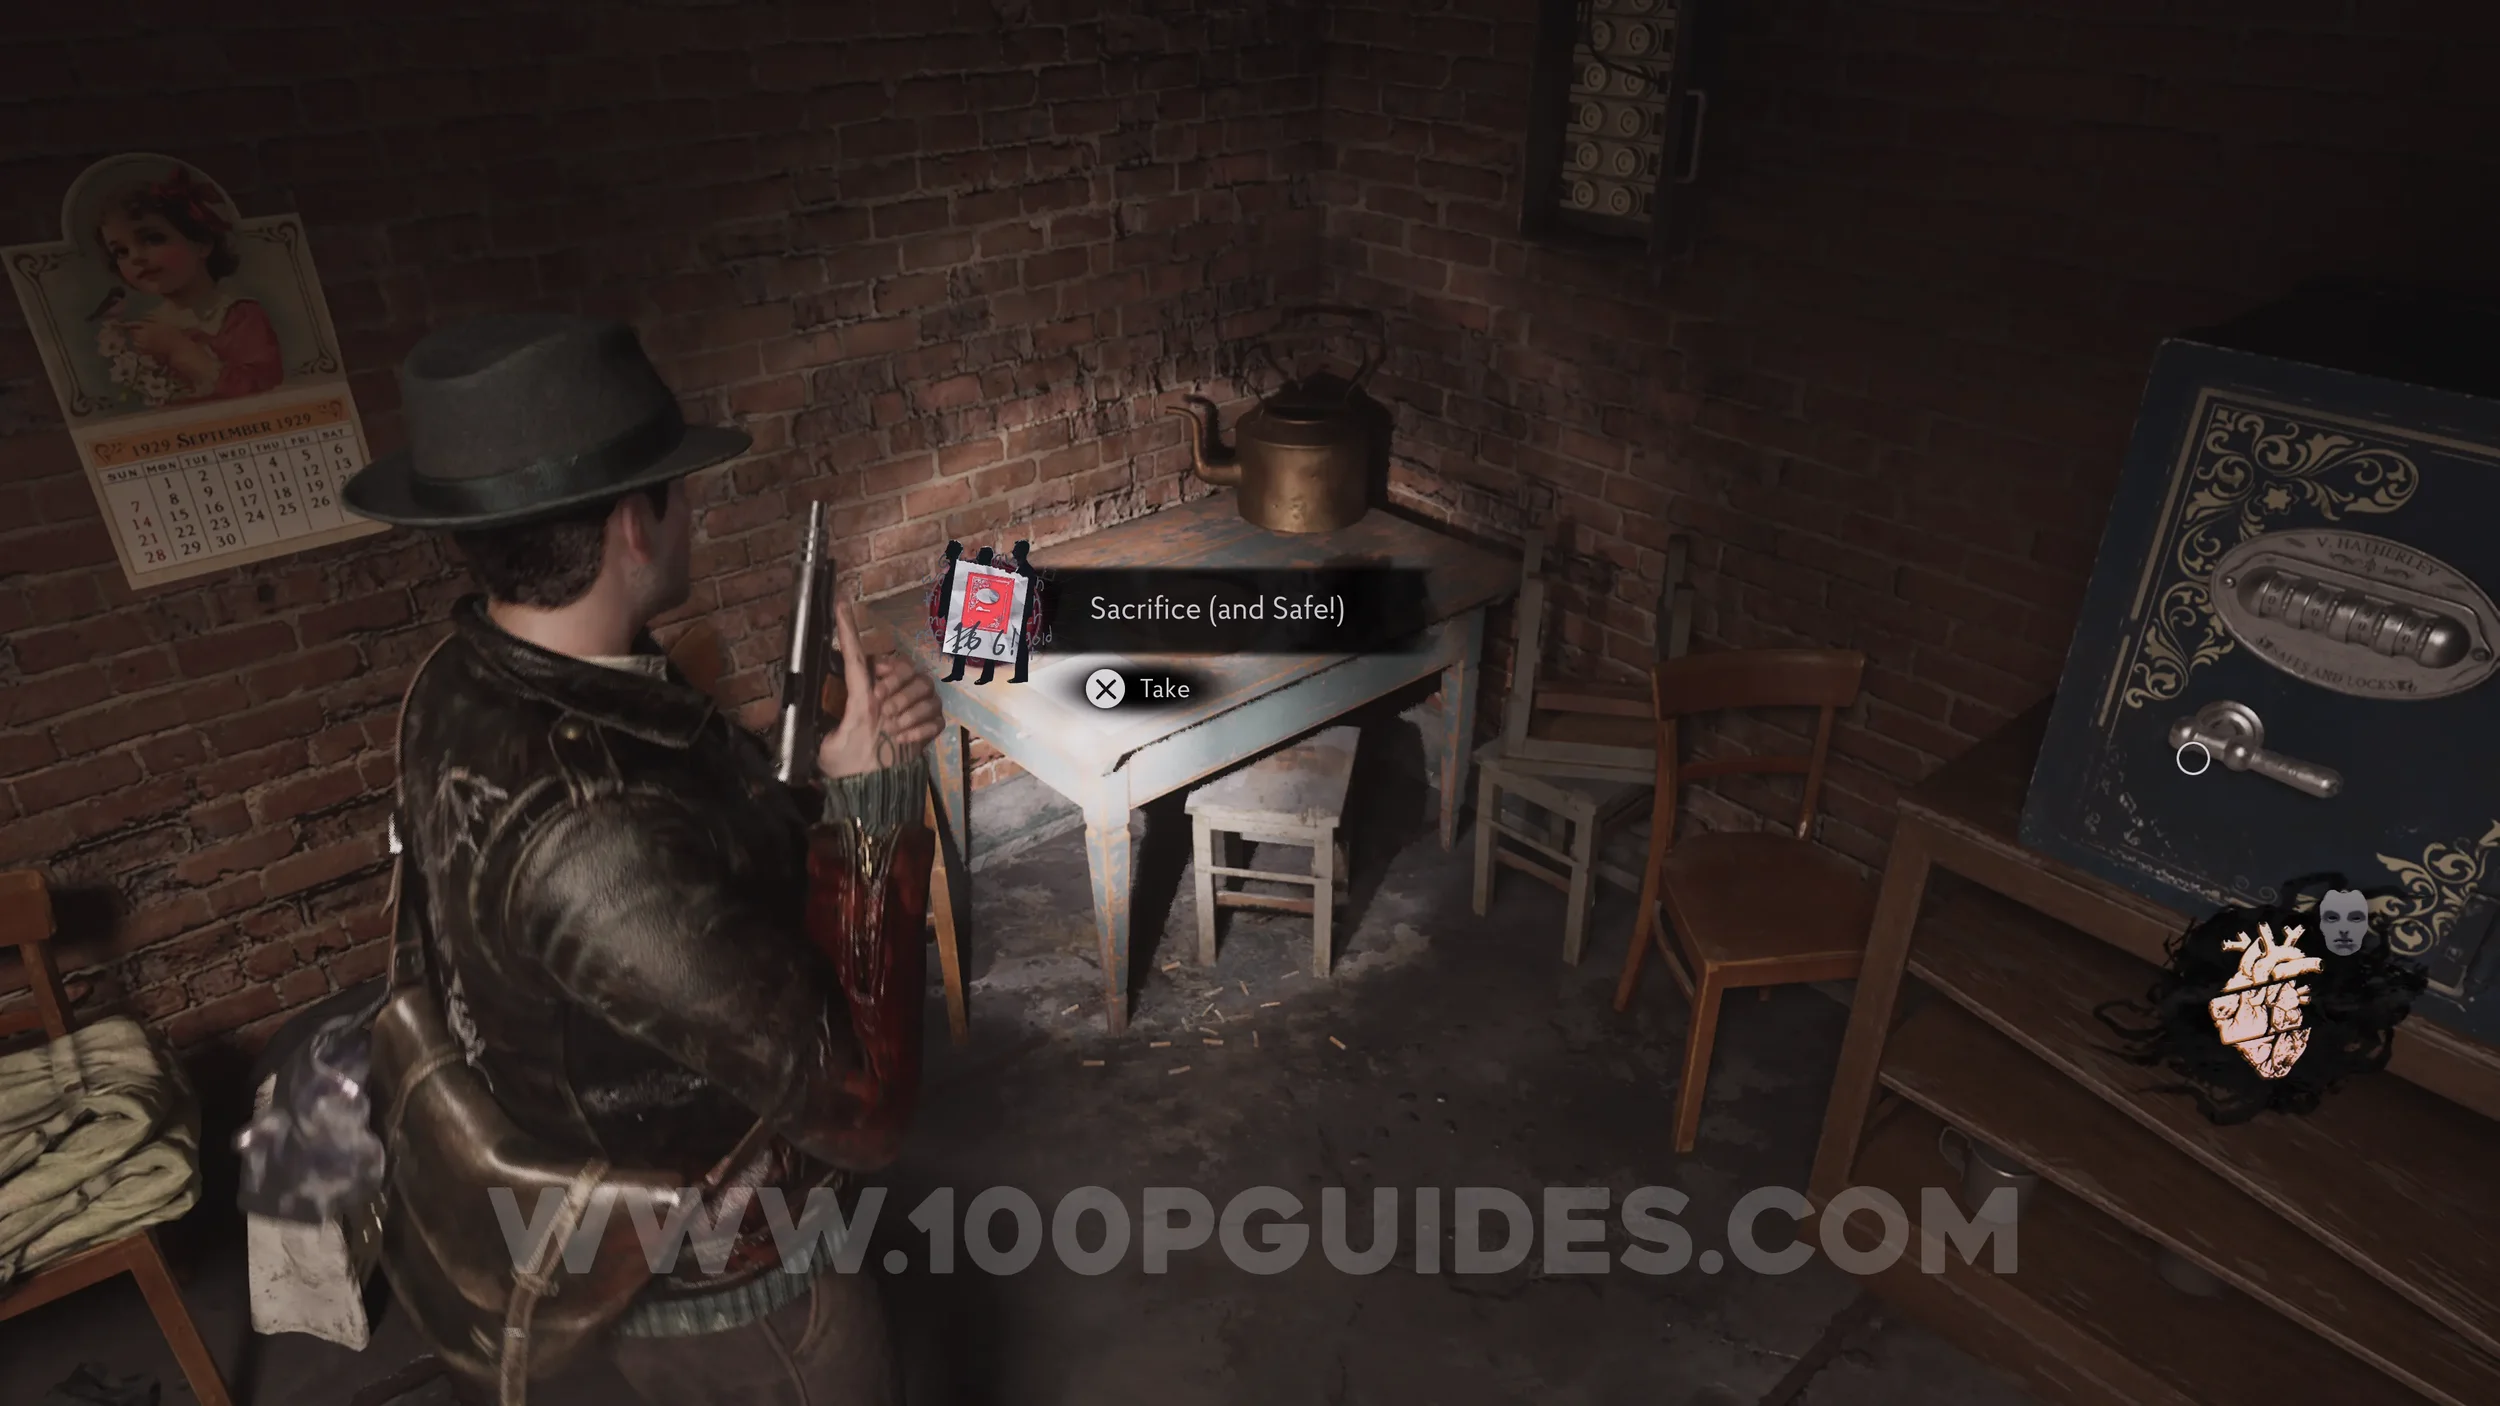
Evidence: Sacrifice (and Safe!). Also in the Locker Room next to the safe.
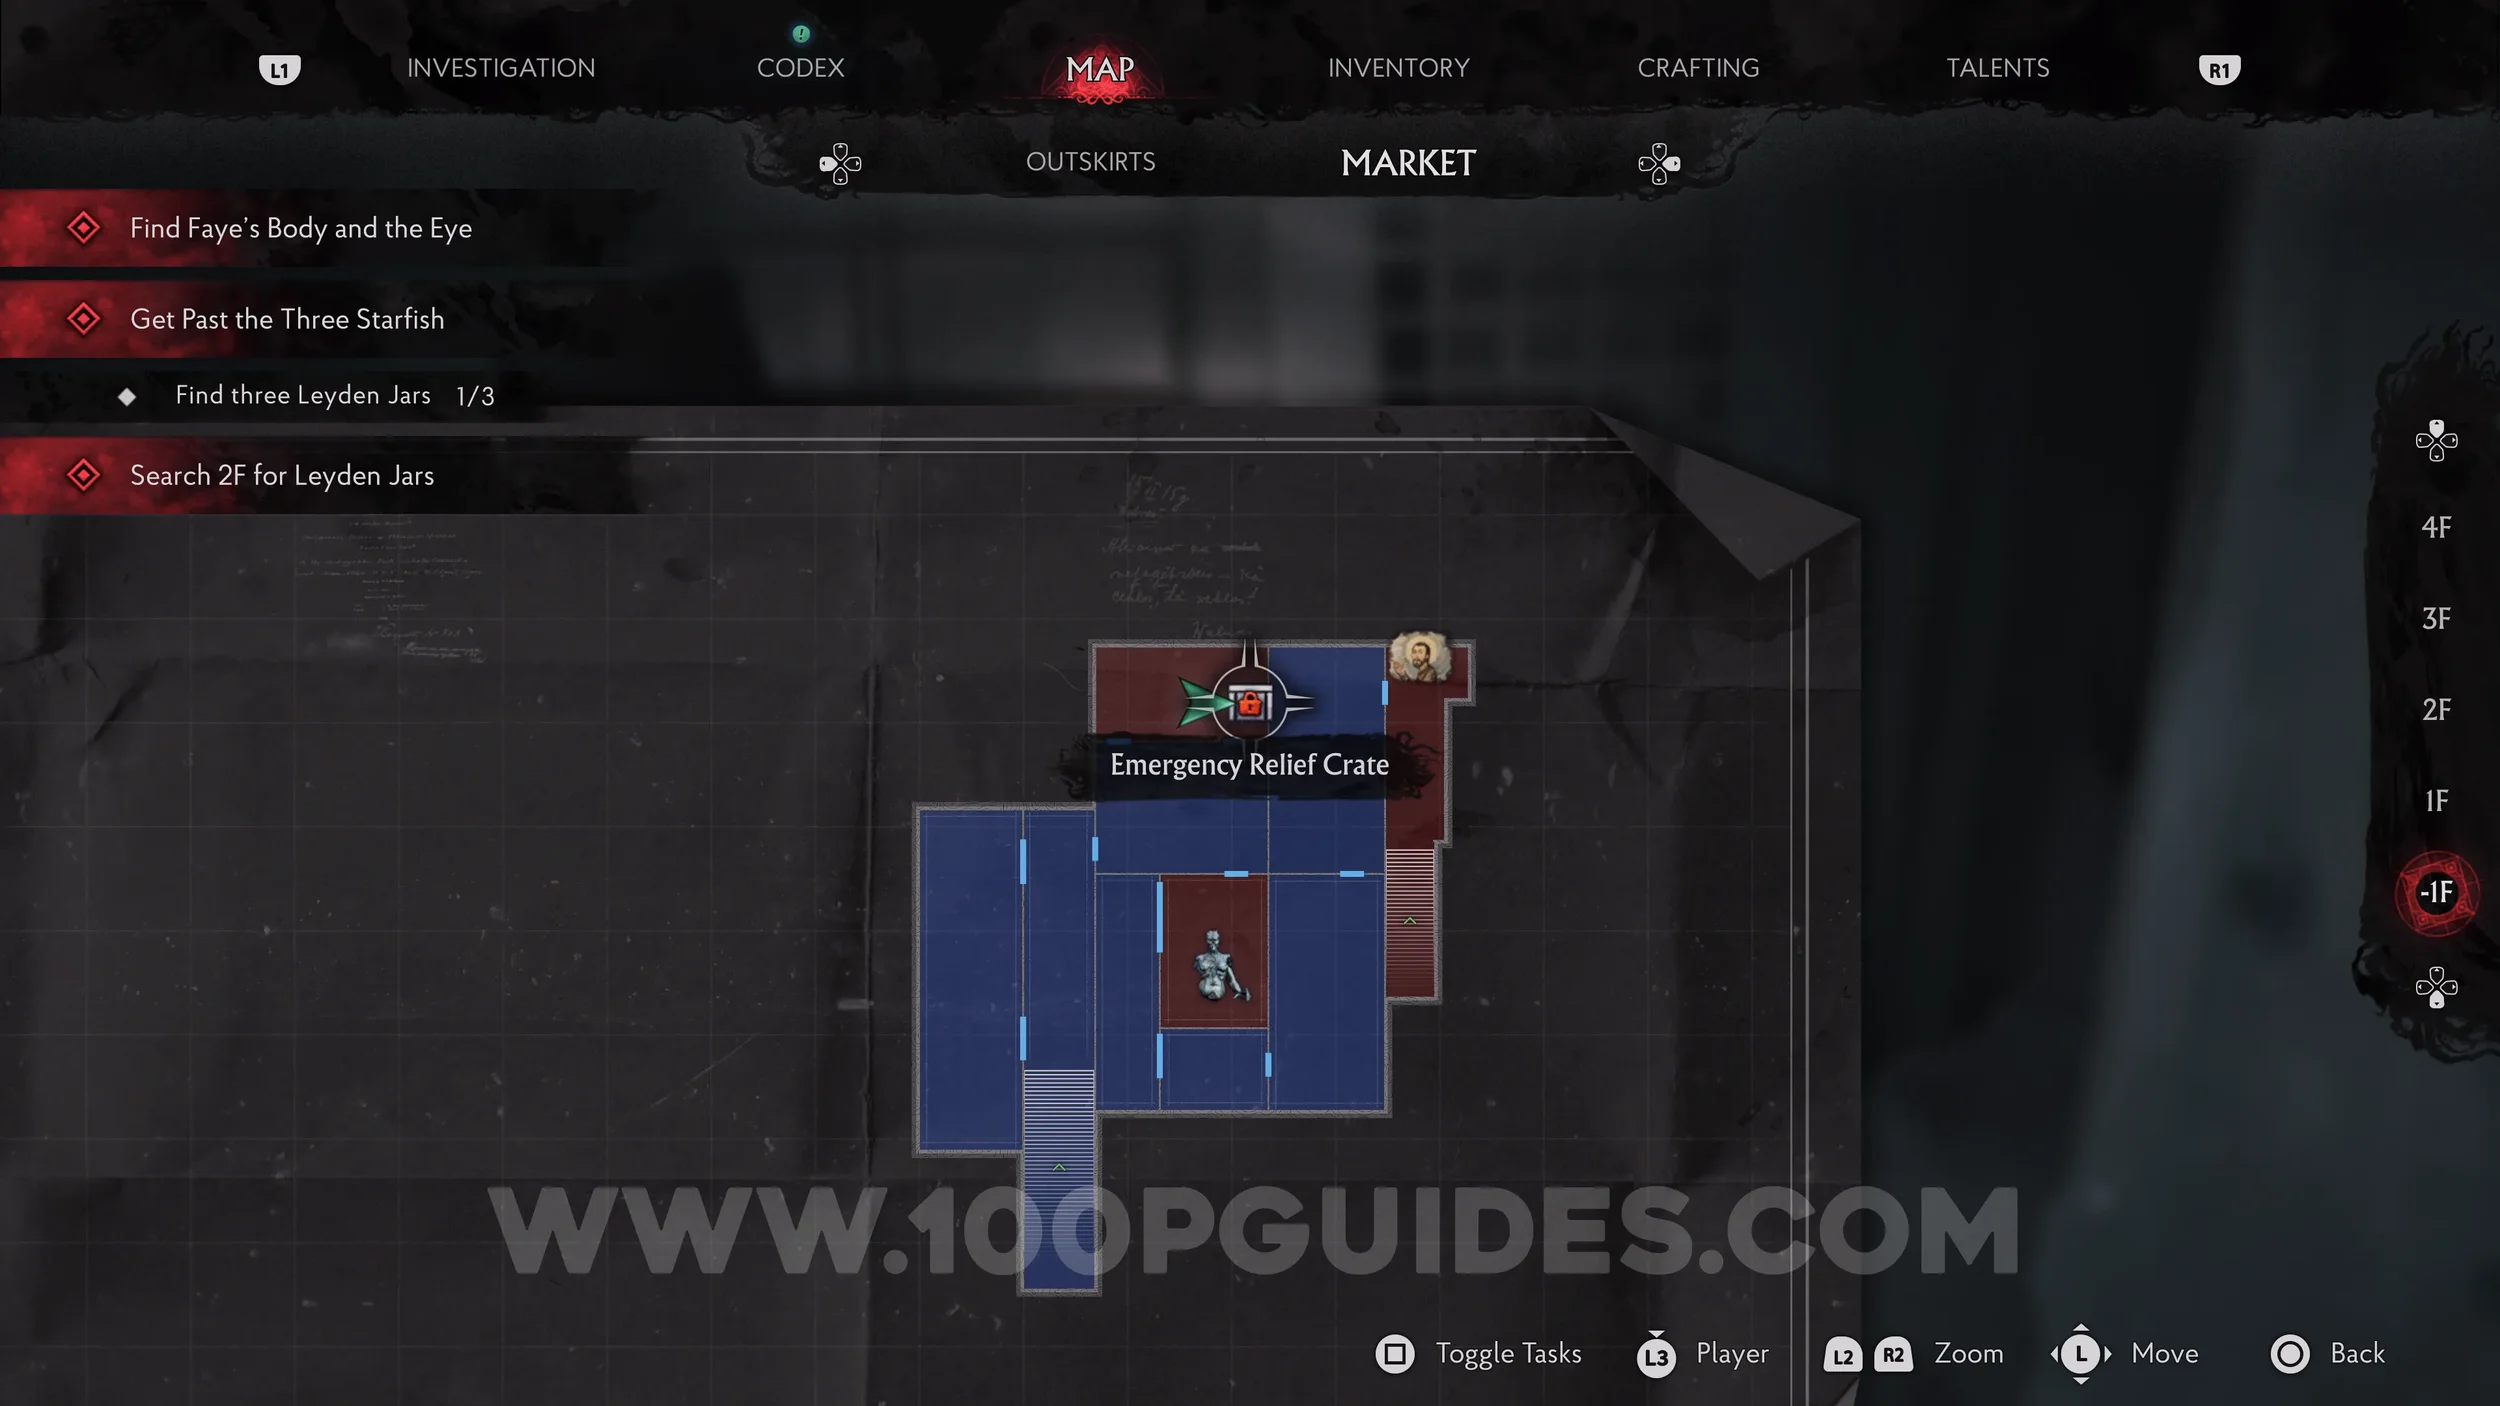
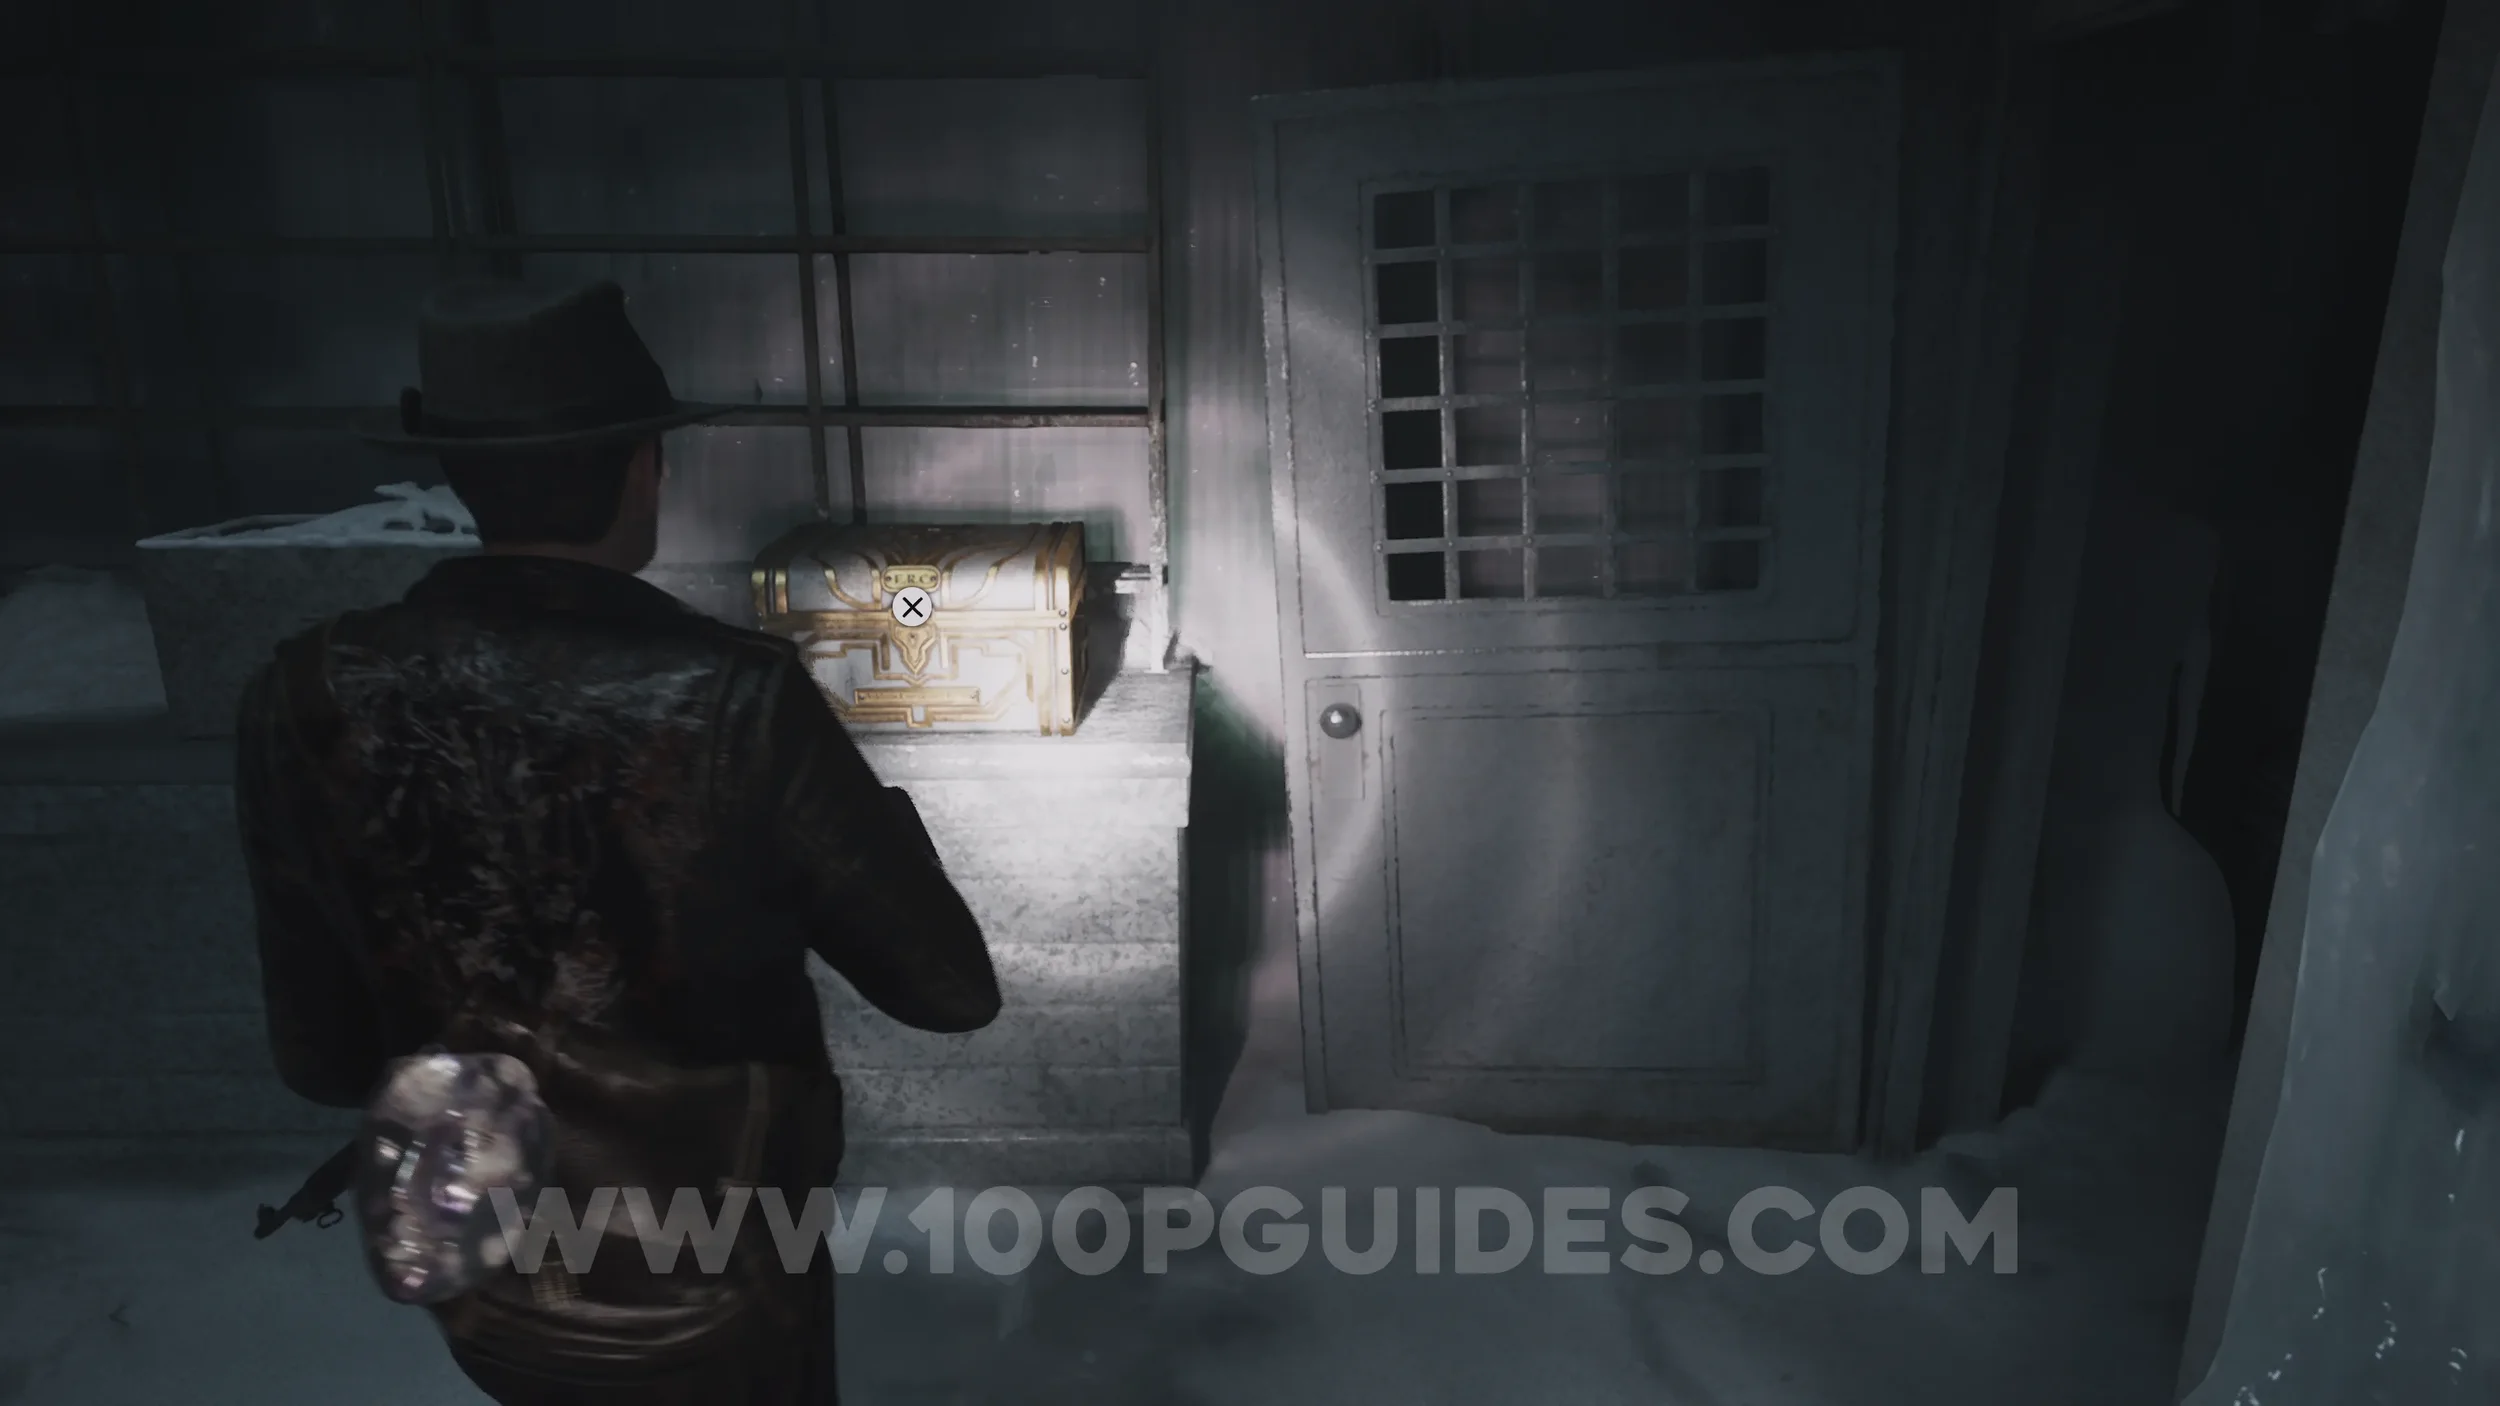
Emergency Relief Crate (E.R.C.) + Dream Essence x2. Head back down to Cold Storage and use the pen to open the E.R.C. in the northern room. The Essence is inside, along with some grenades.
Evidence: Instructions To Sybil. Now head up the East Staircase and pick up the evidence at the top.
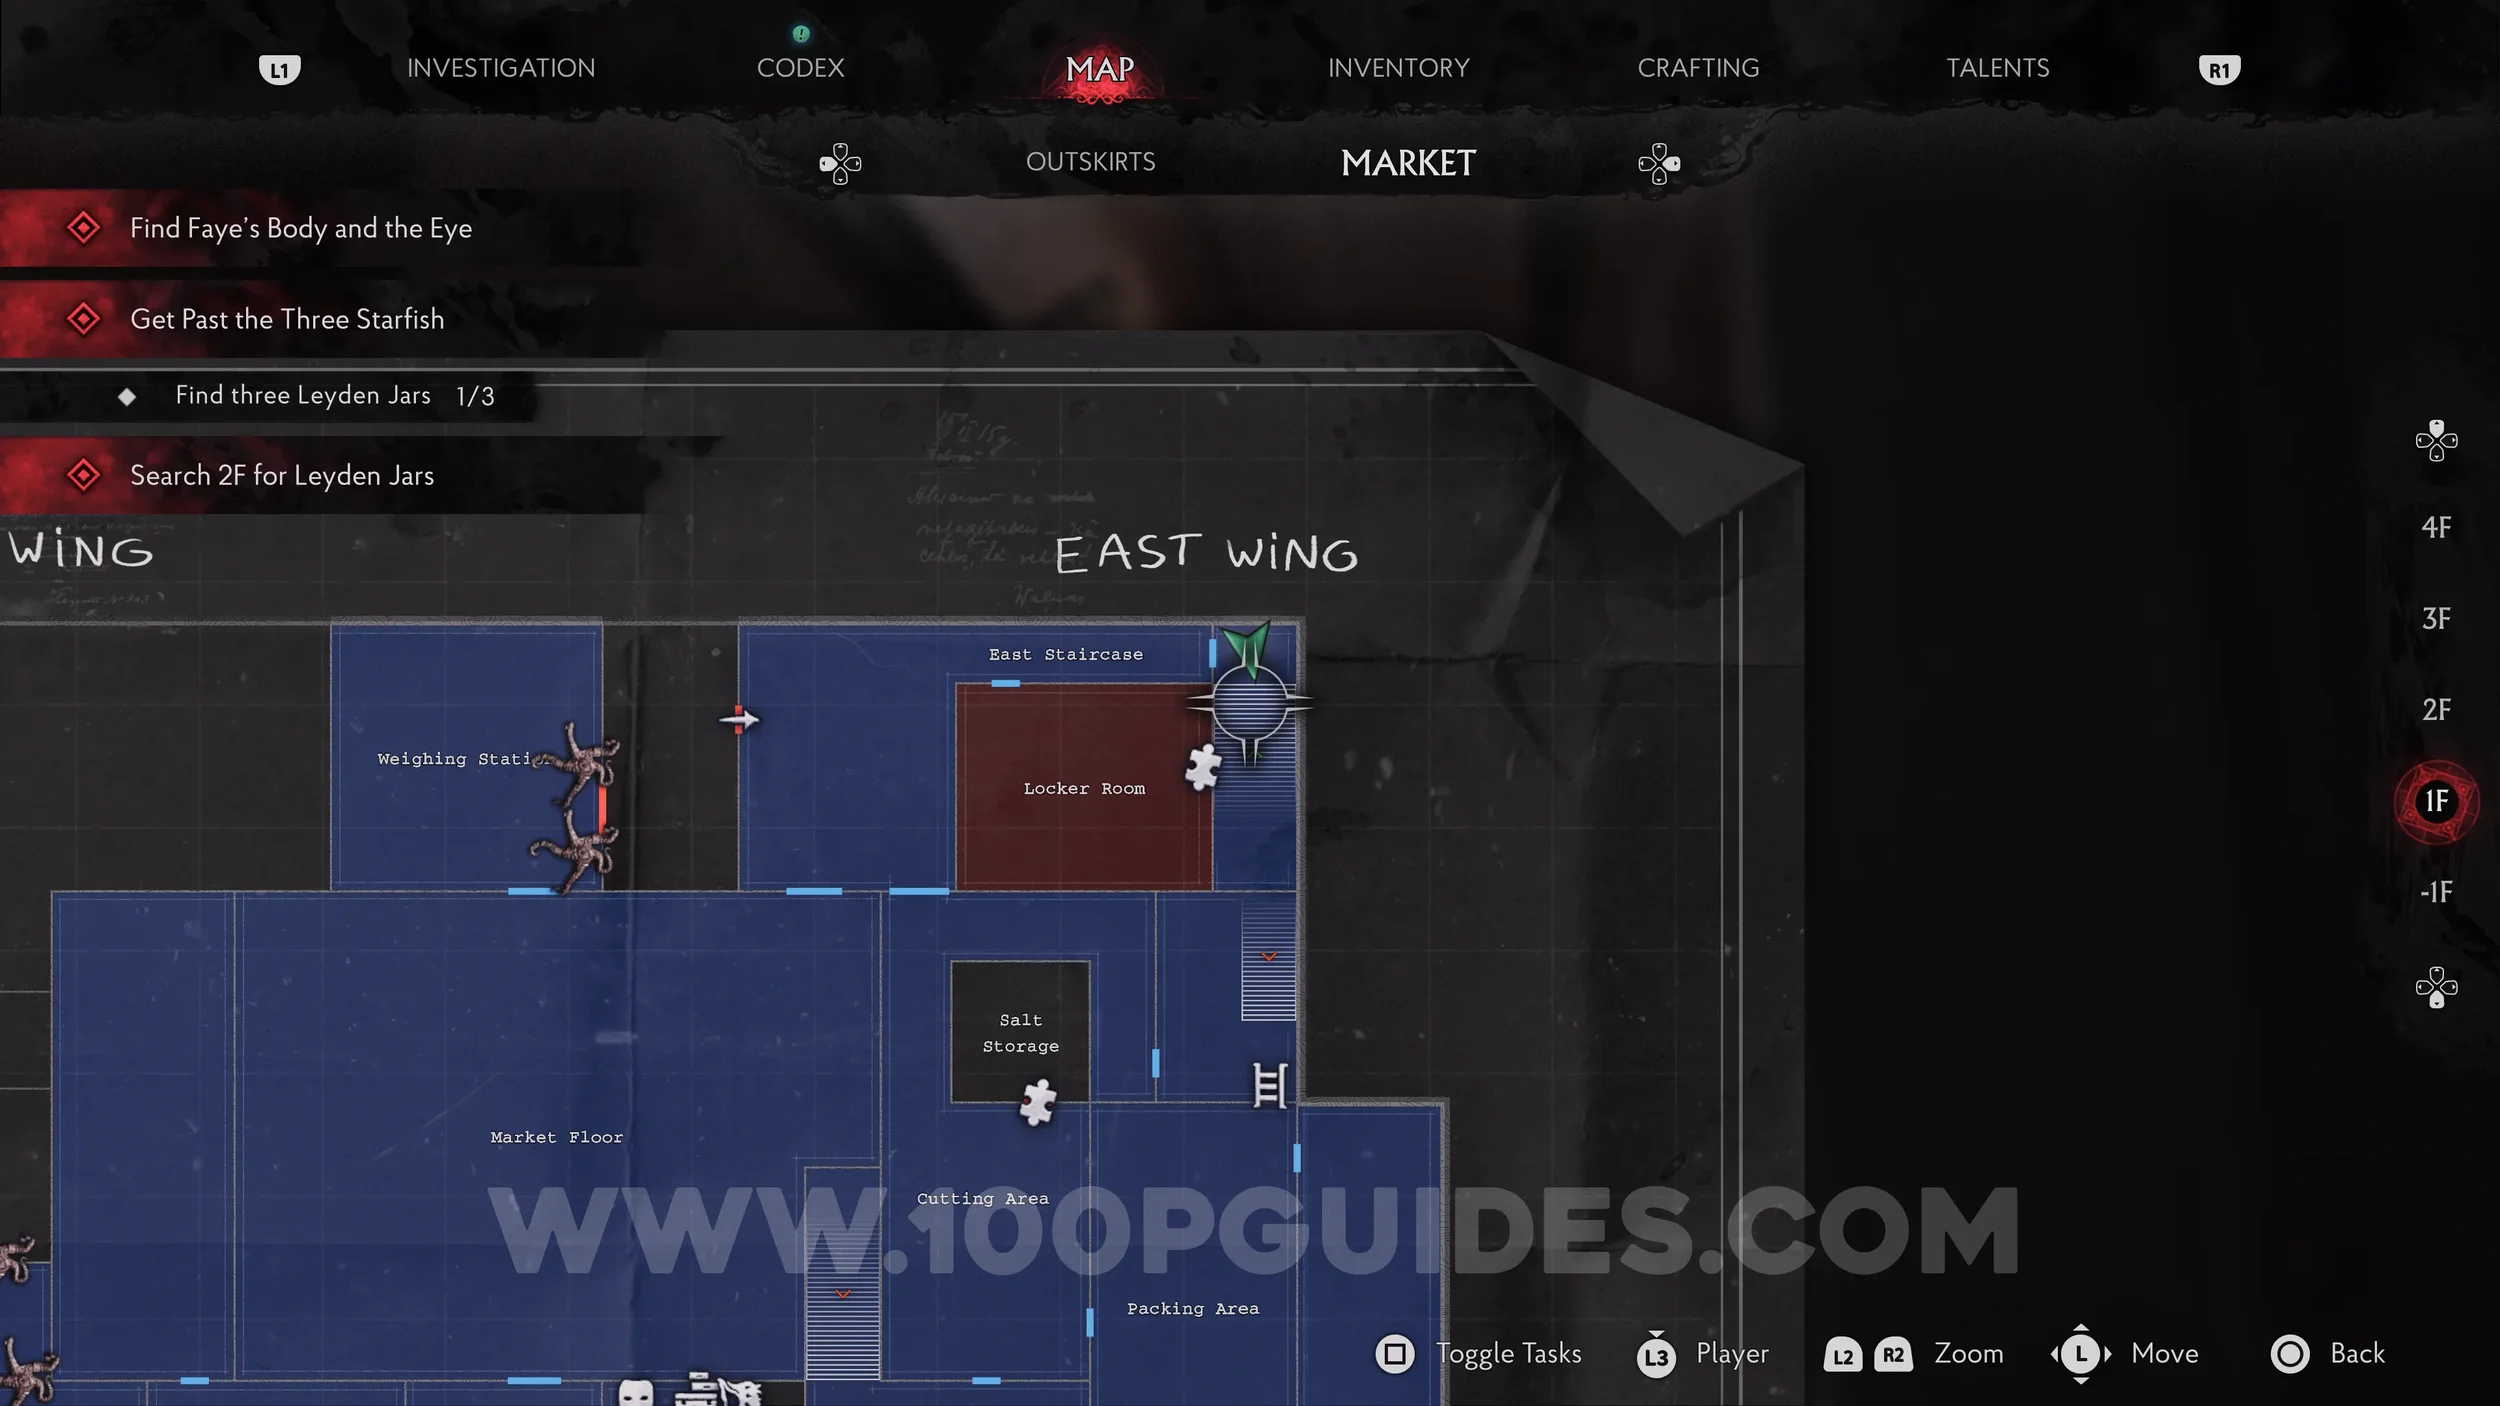
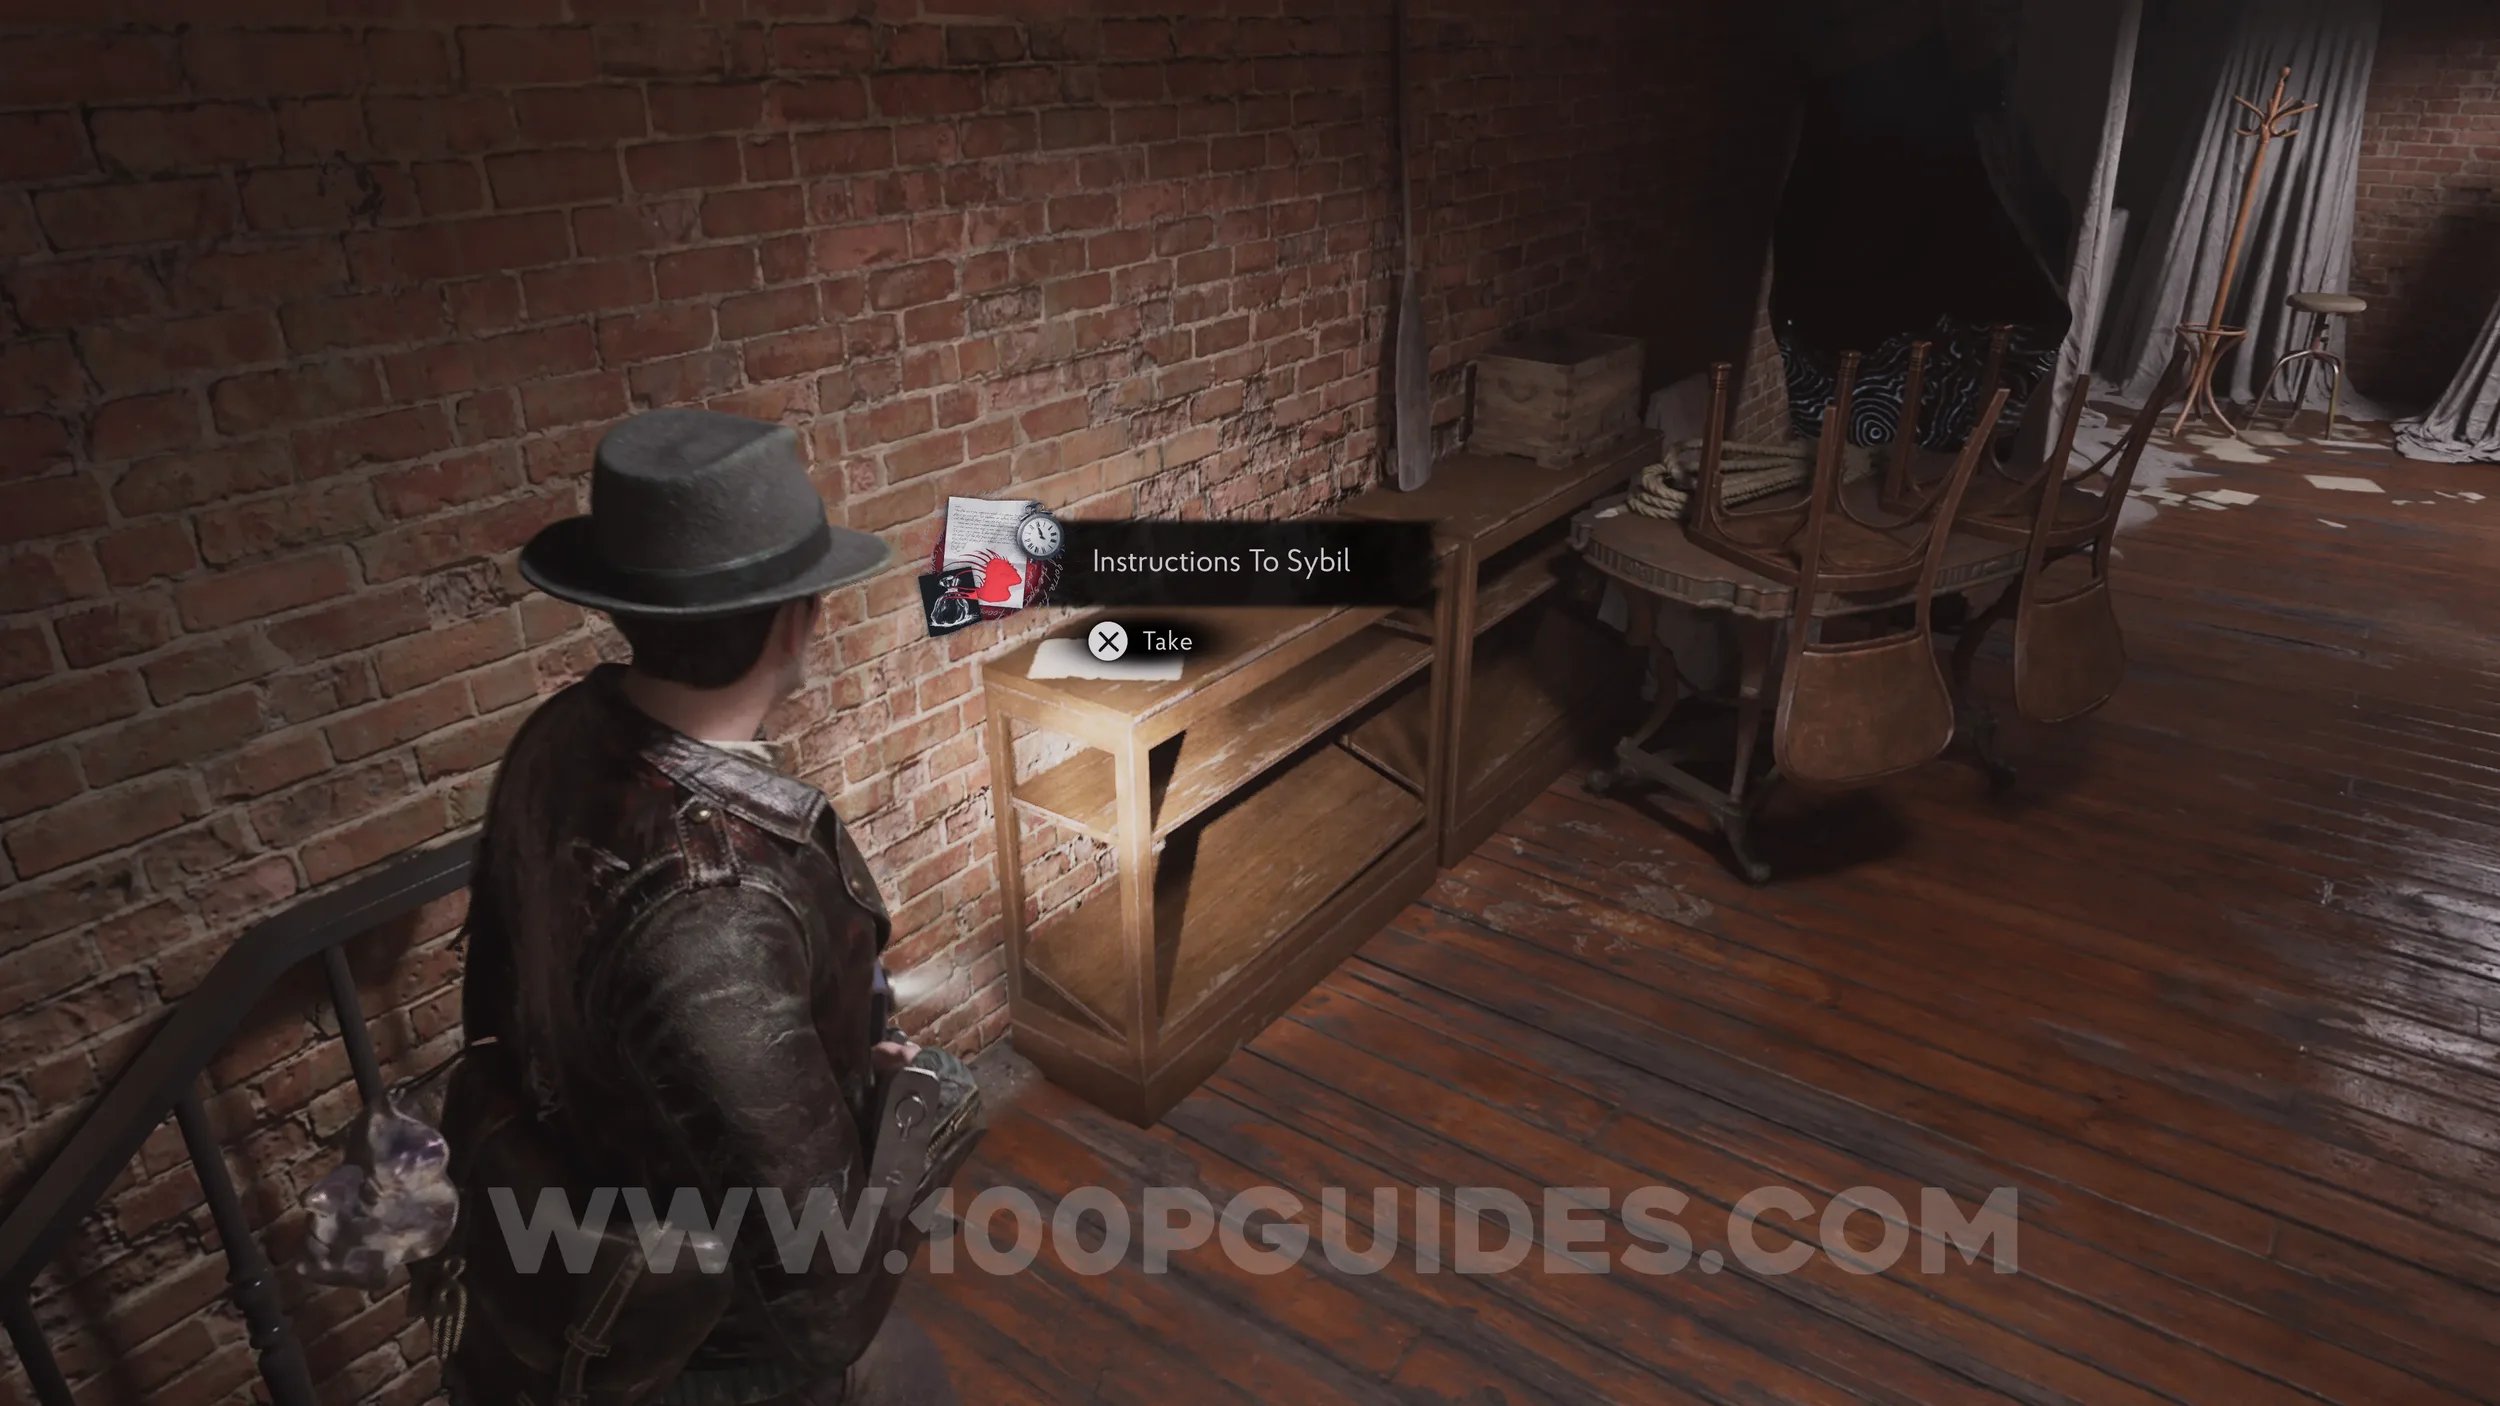
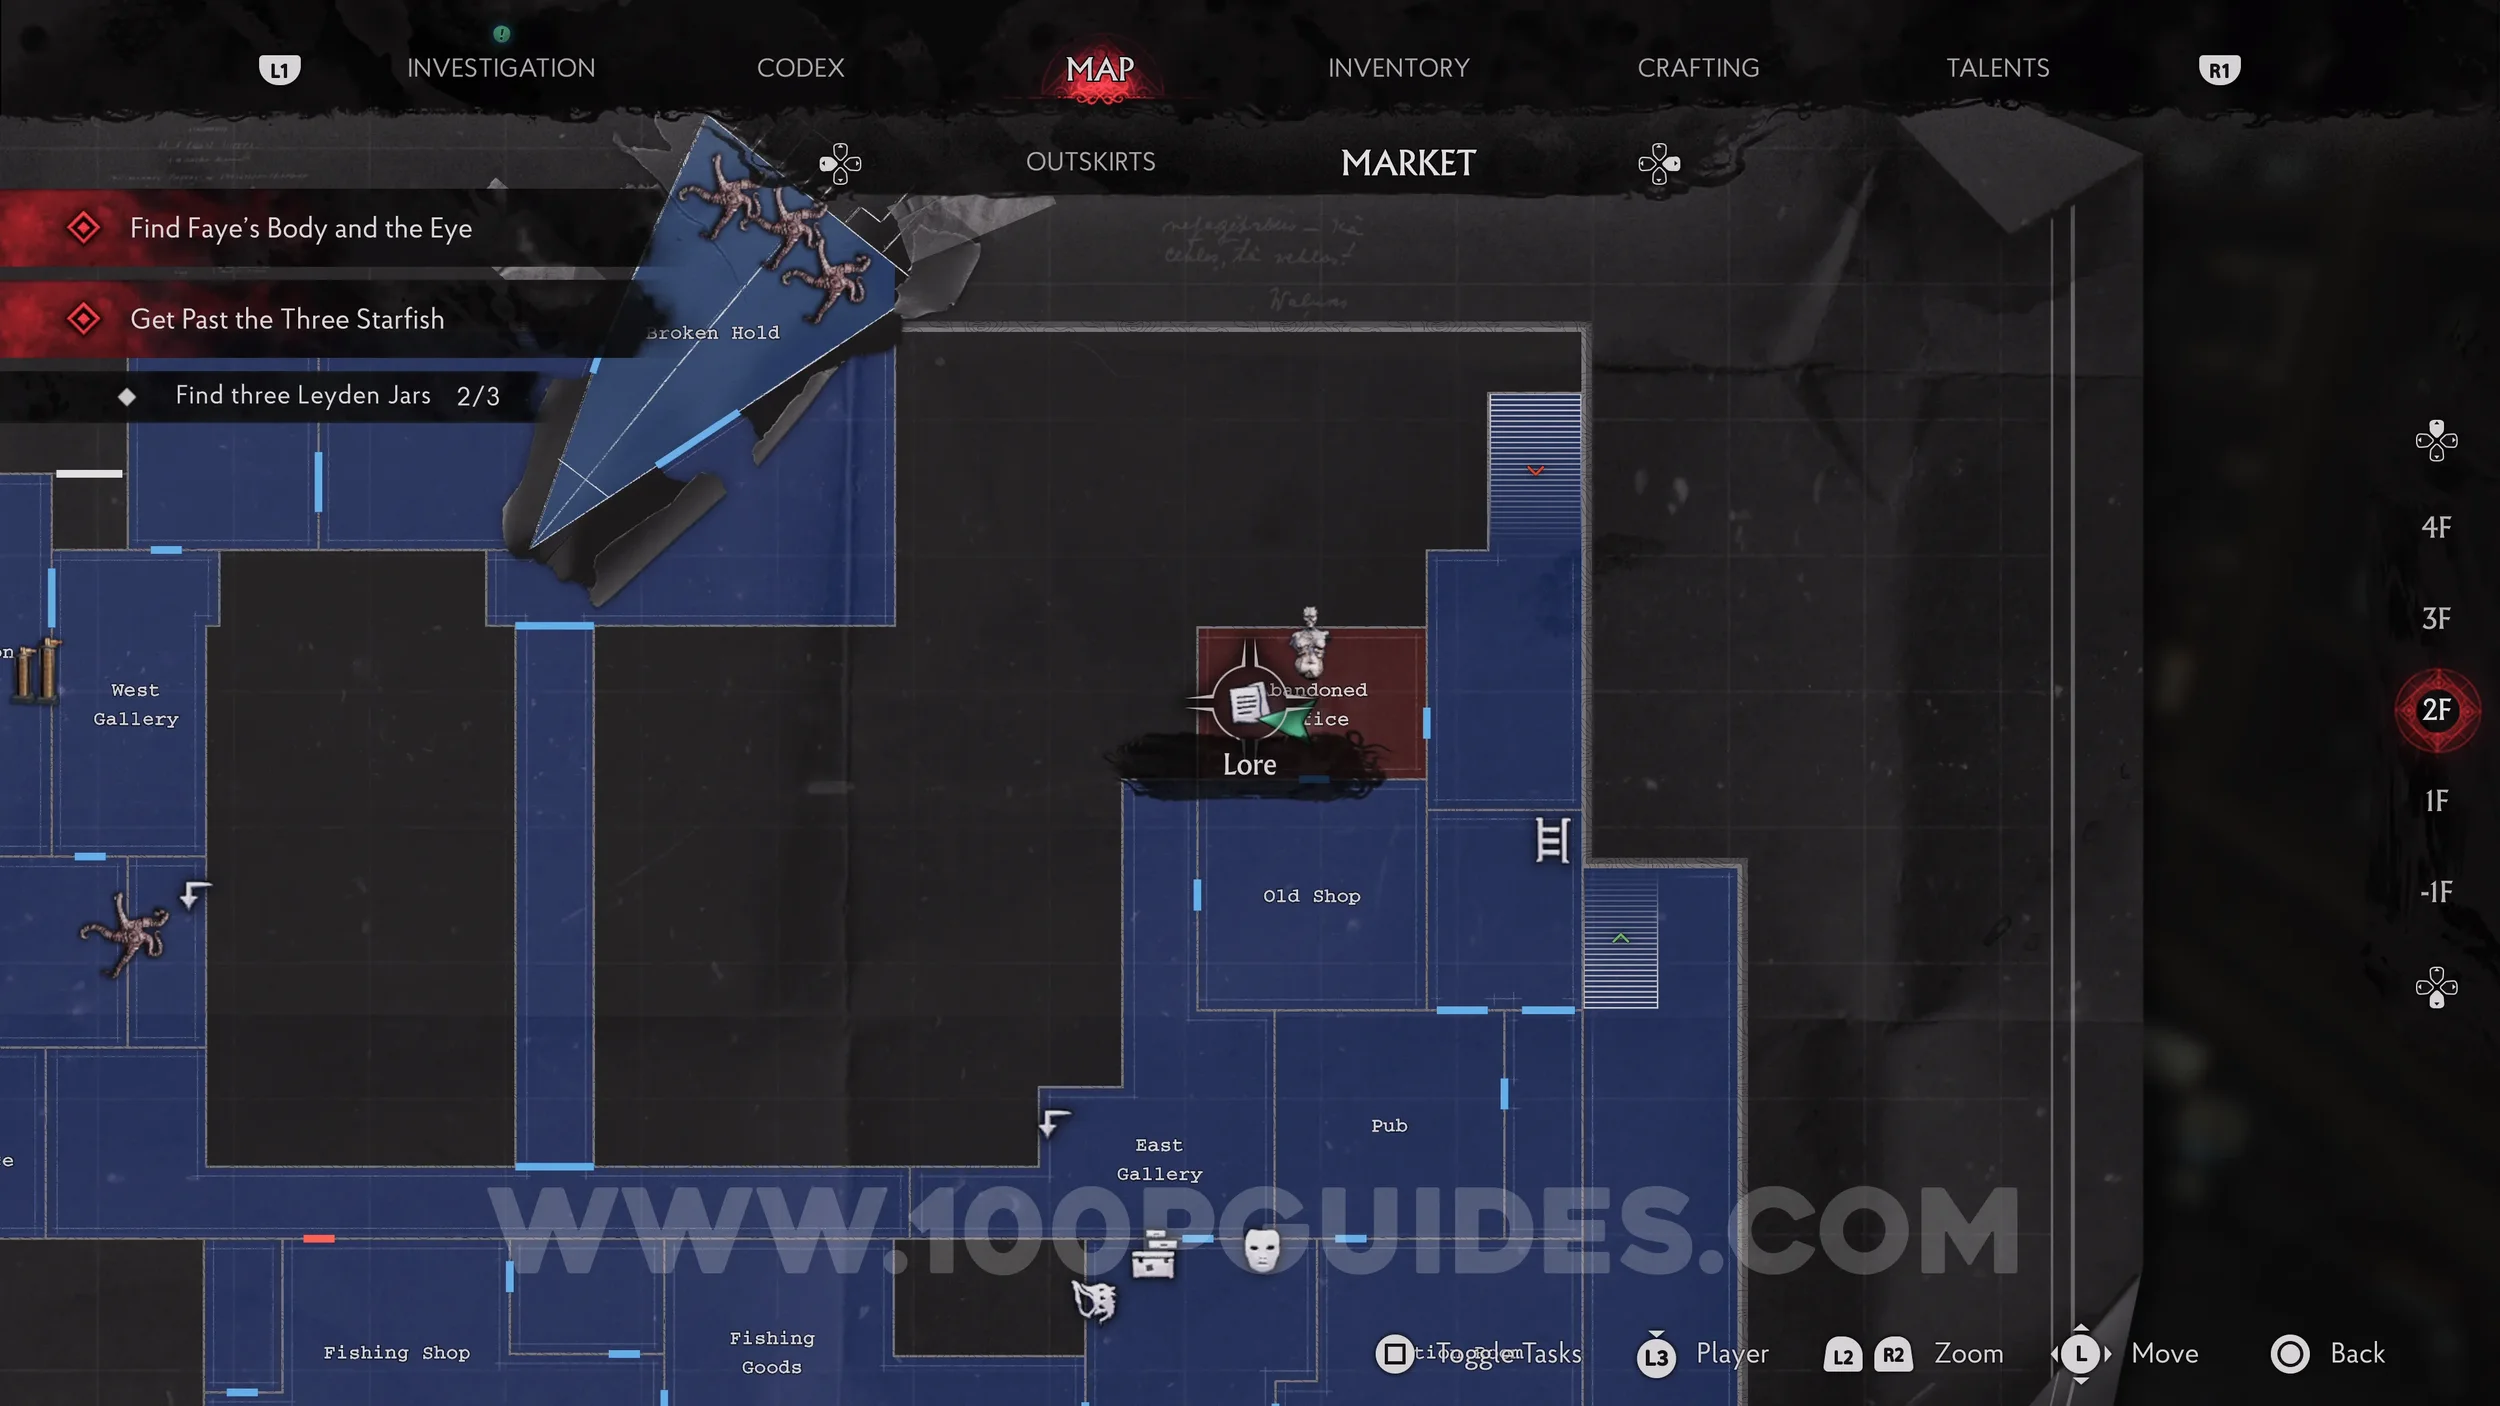
Evidence: Old Shop Ward. Obtained automatically once you approach the Magic Ward in the Abandoned Office on 2F.
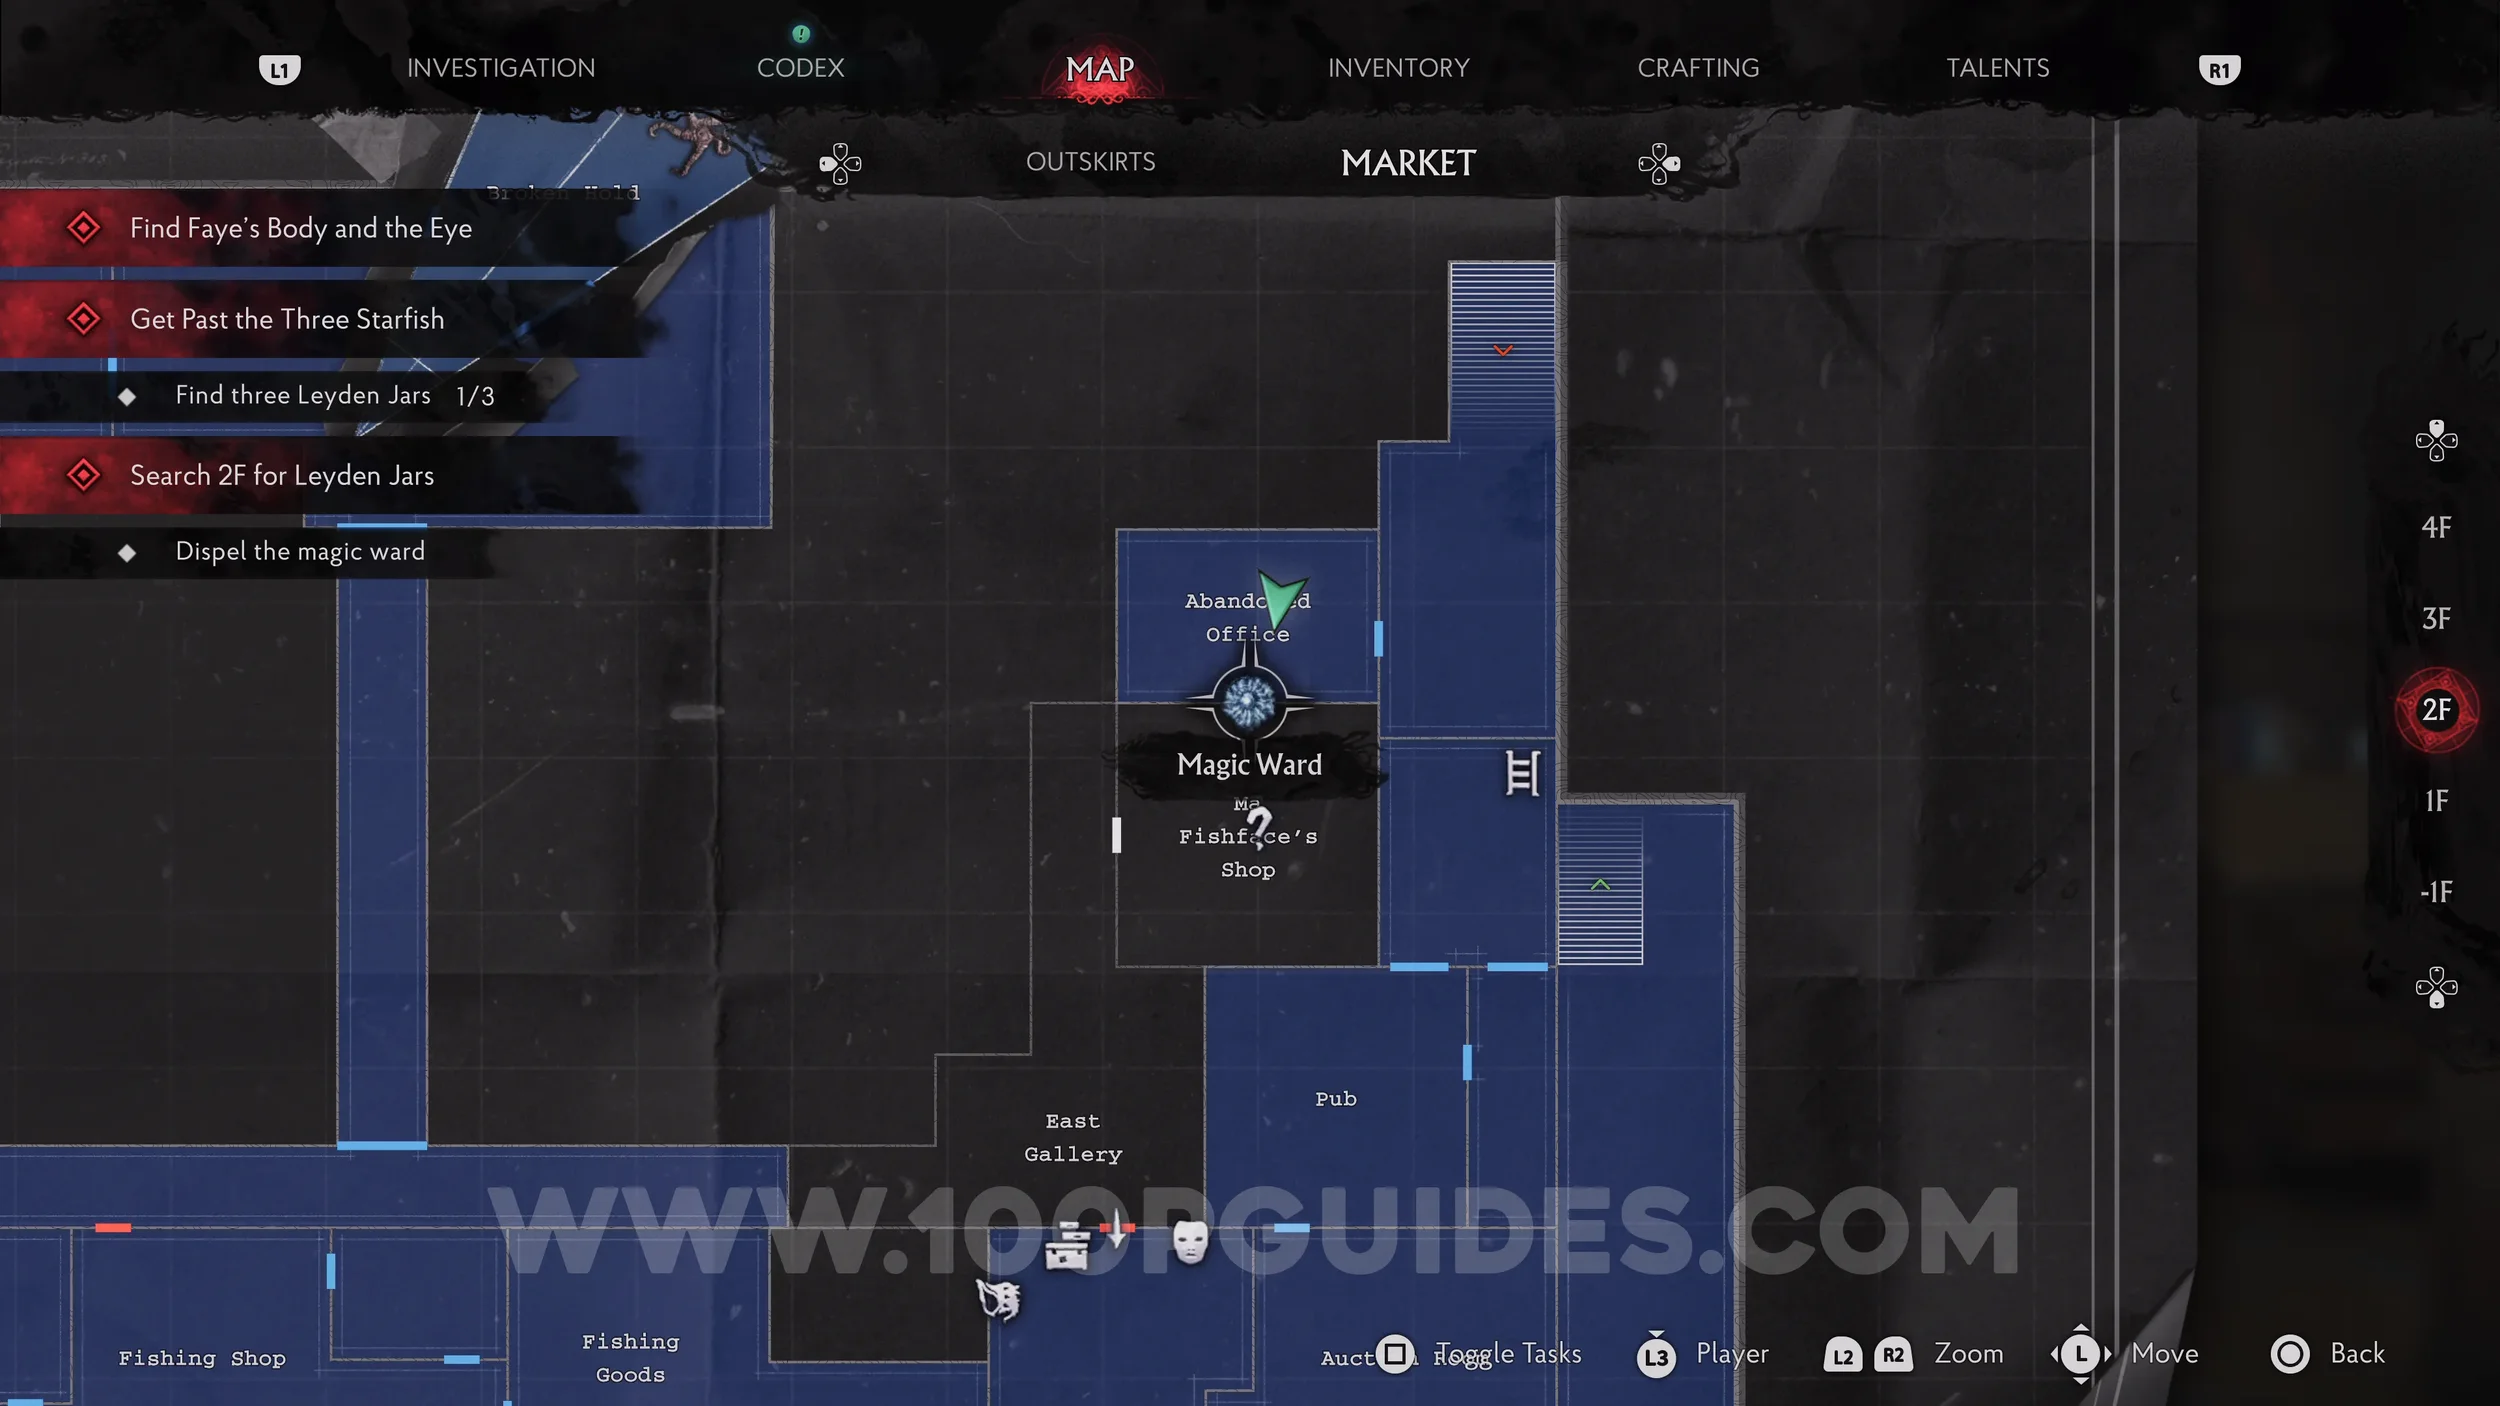
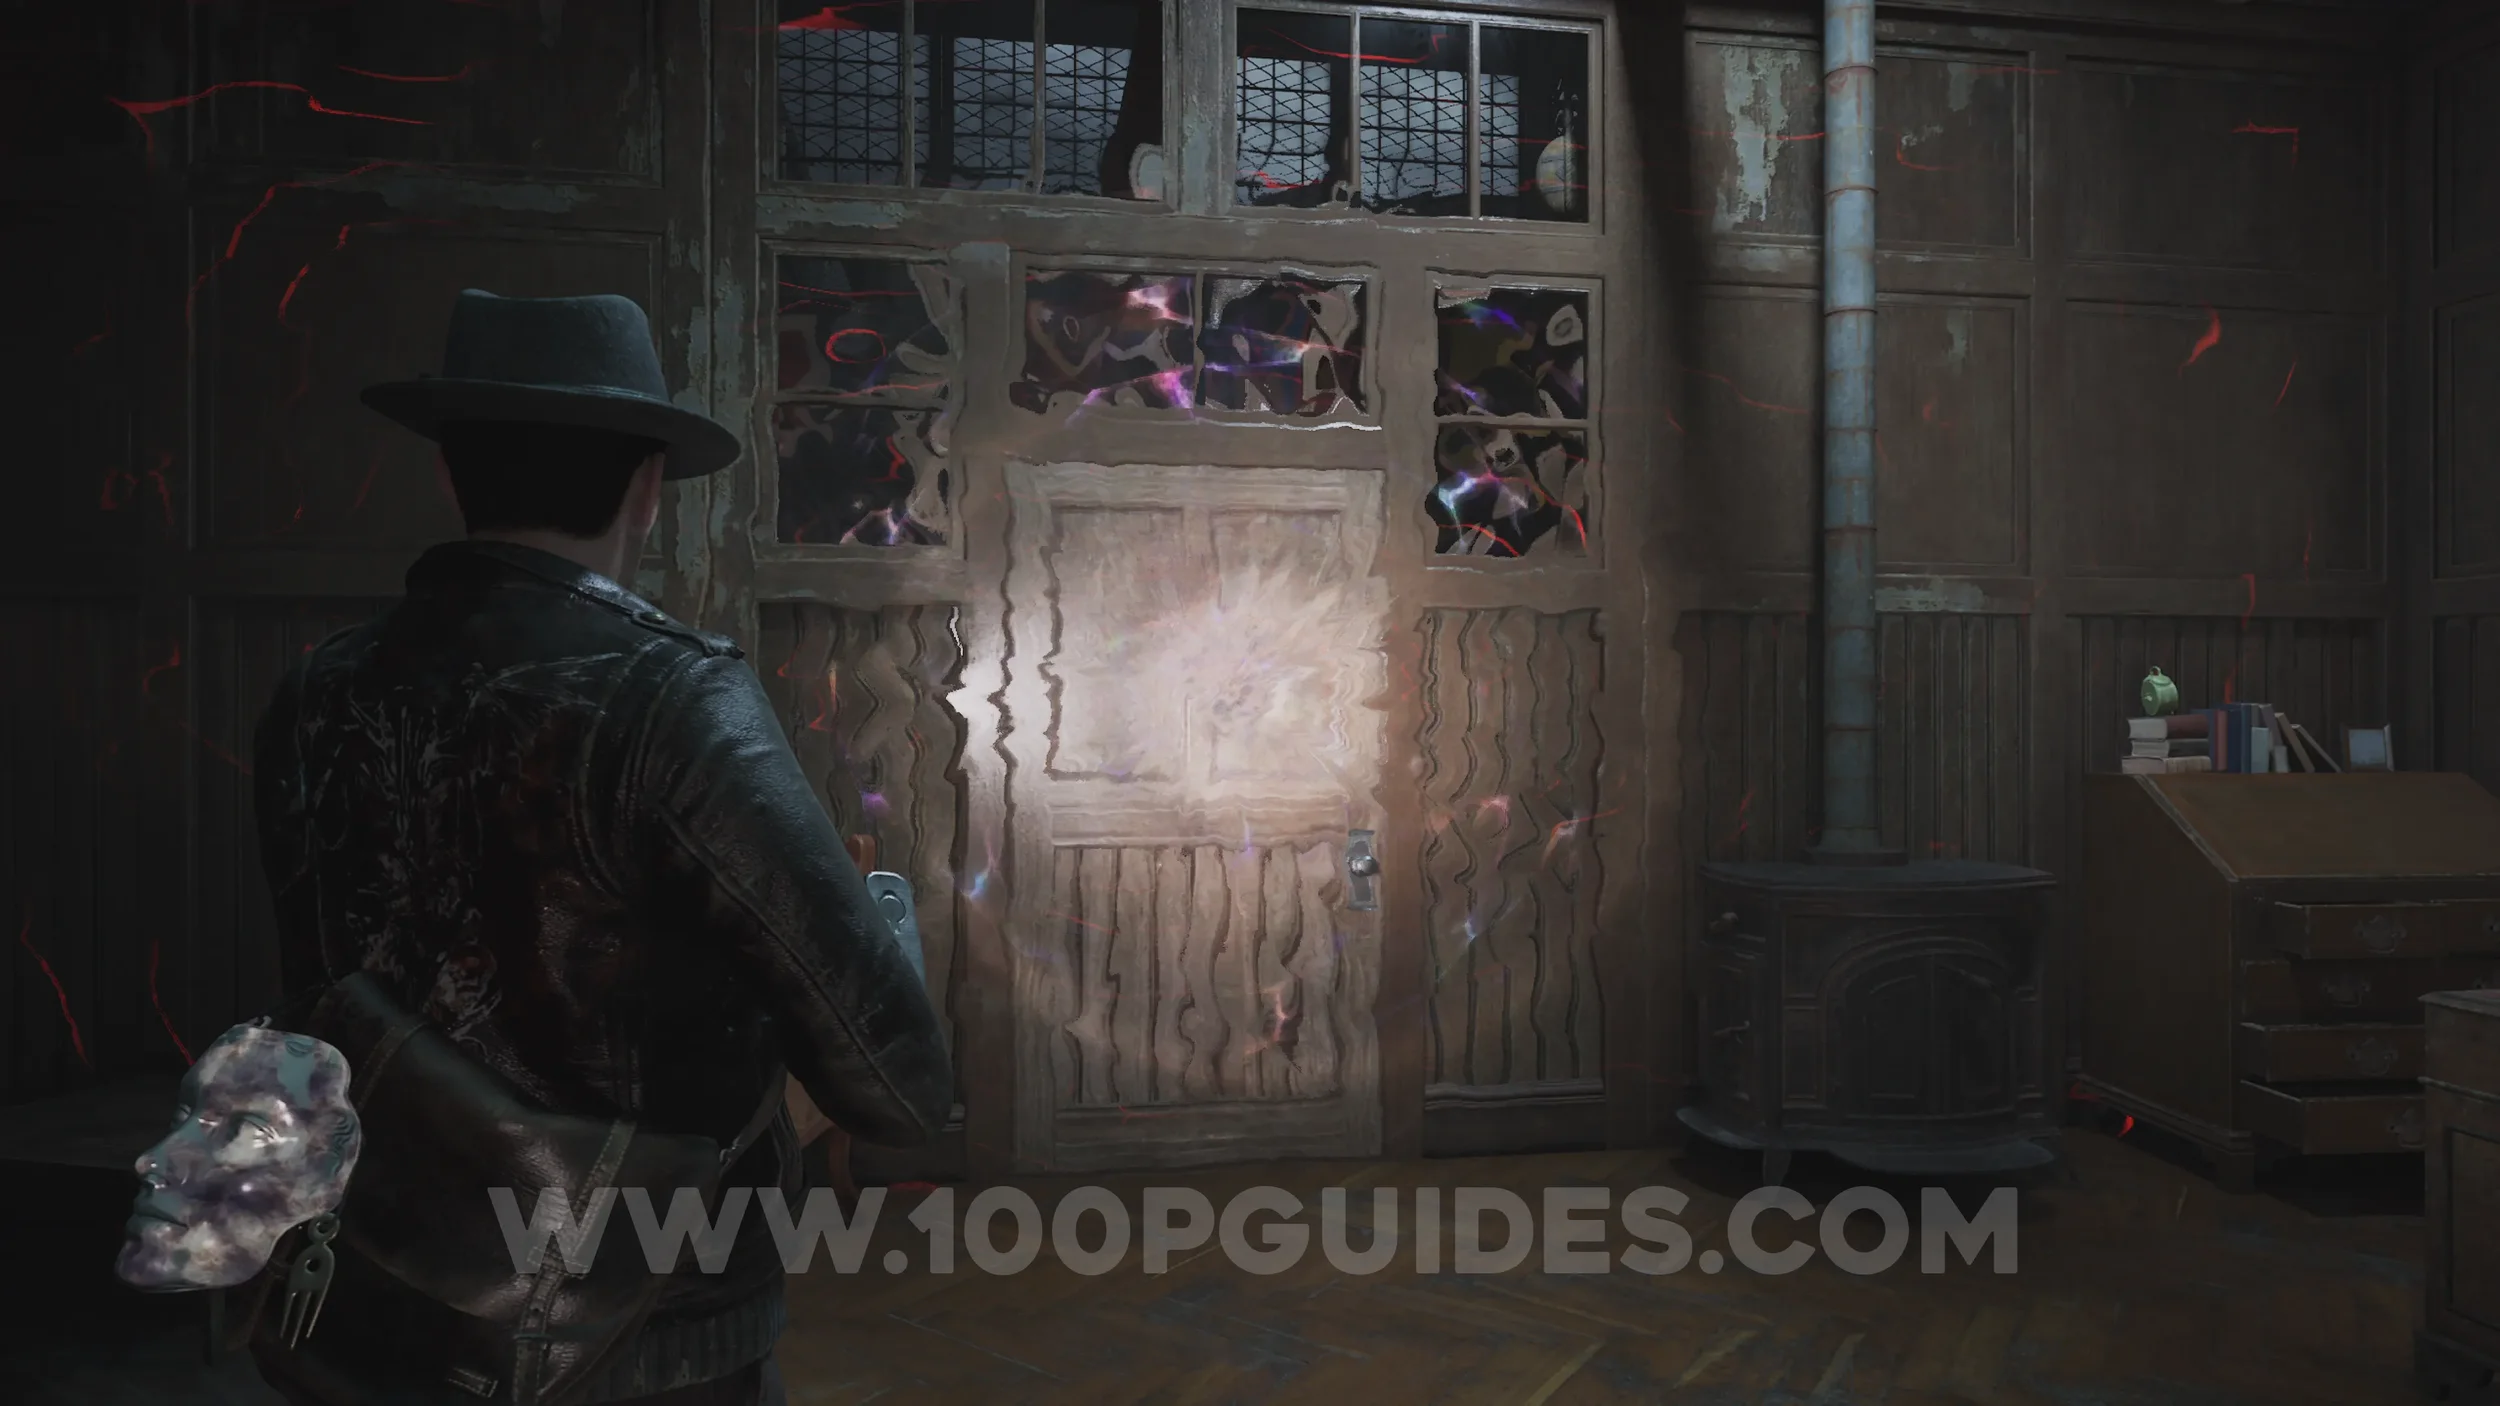
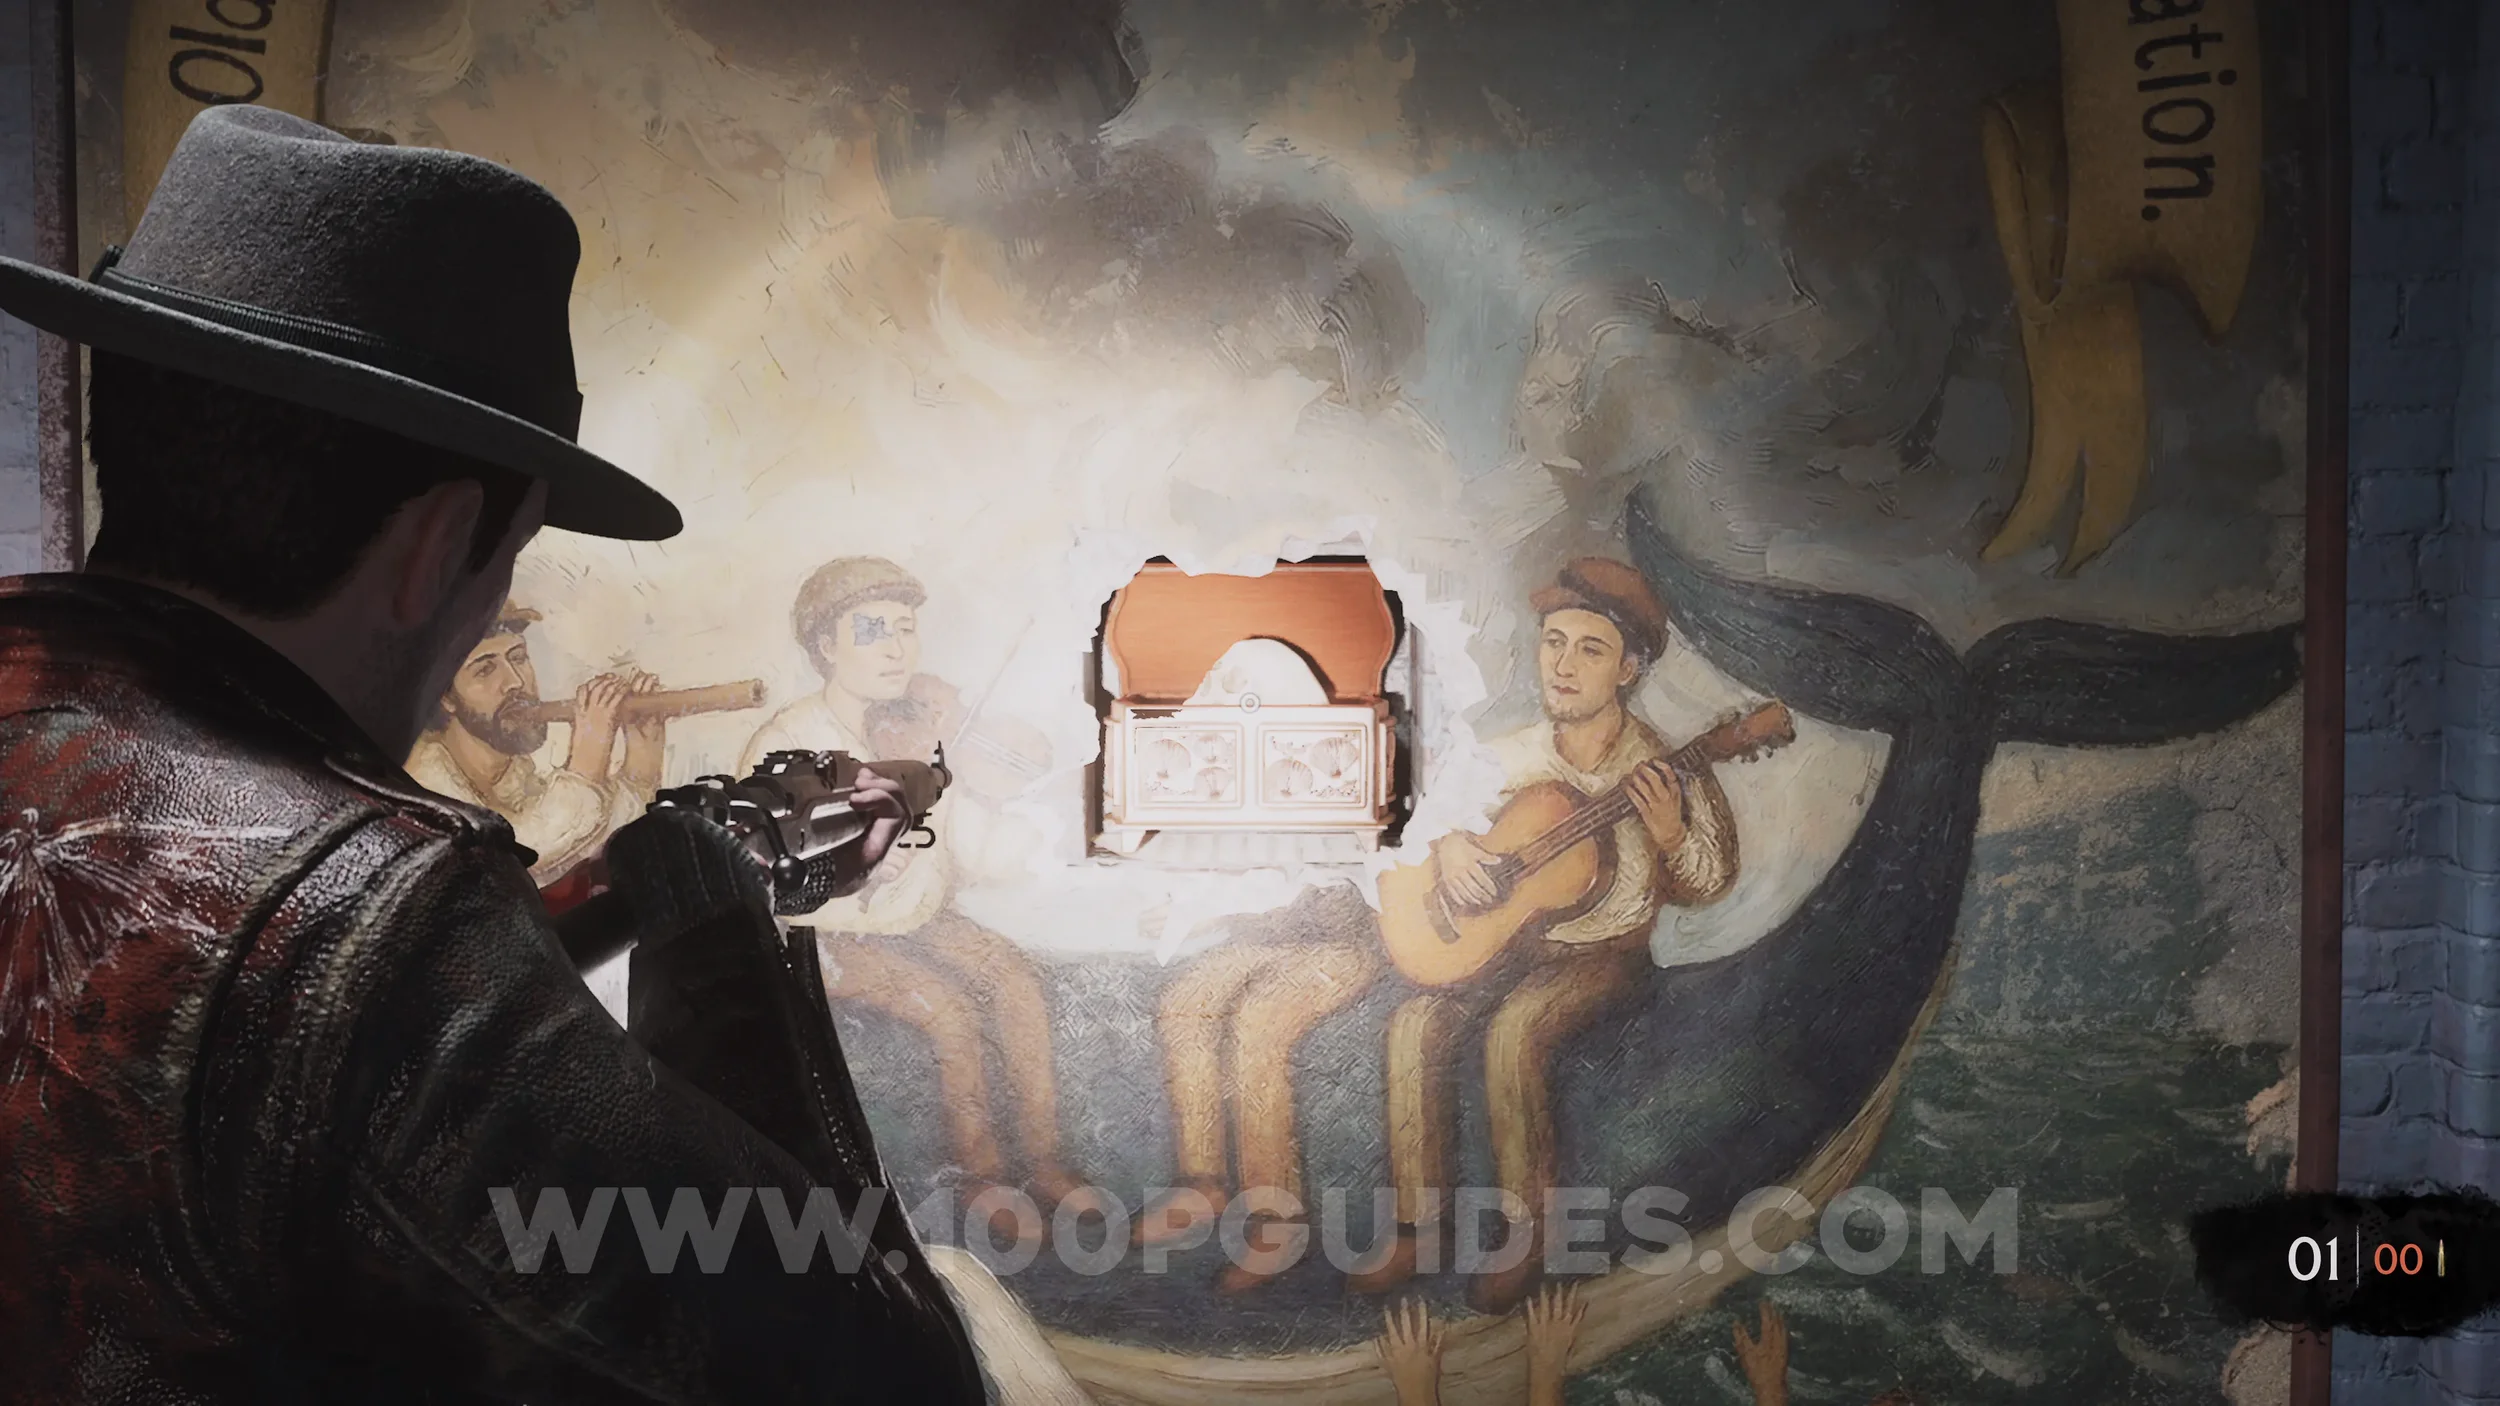
Key Item: Freddie’s Urn + Lore Codex: Old Freddie’s Shanty. Head back down to -1F where the fresco is and shoot the haloed person in the head to reveal the urn. You will get the codex once you pick it up.
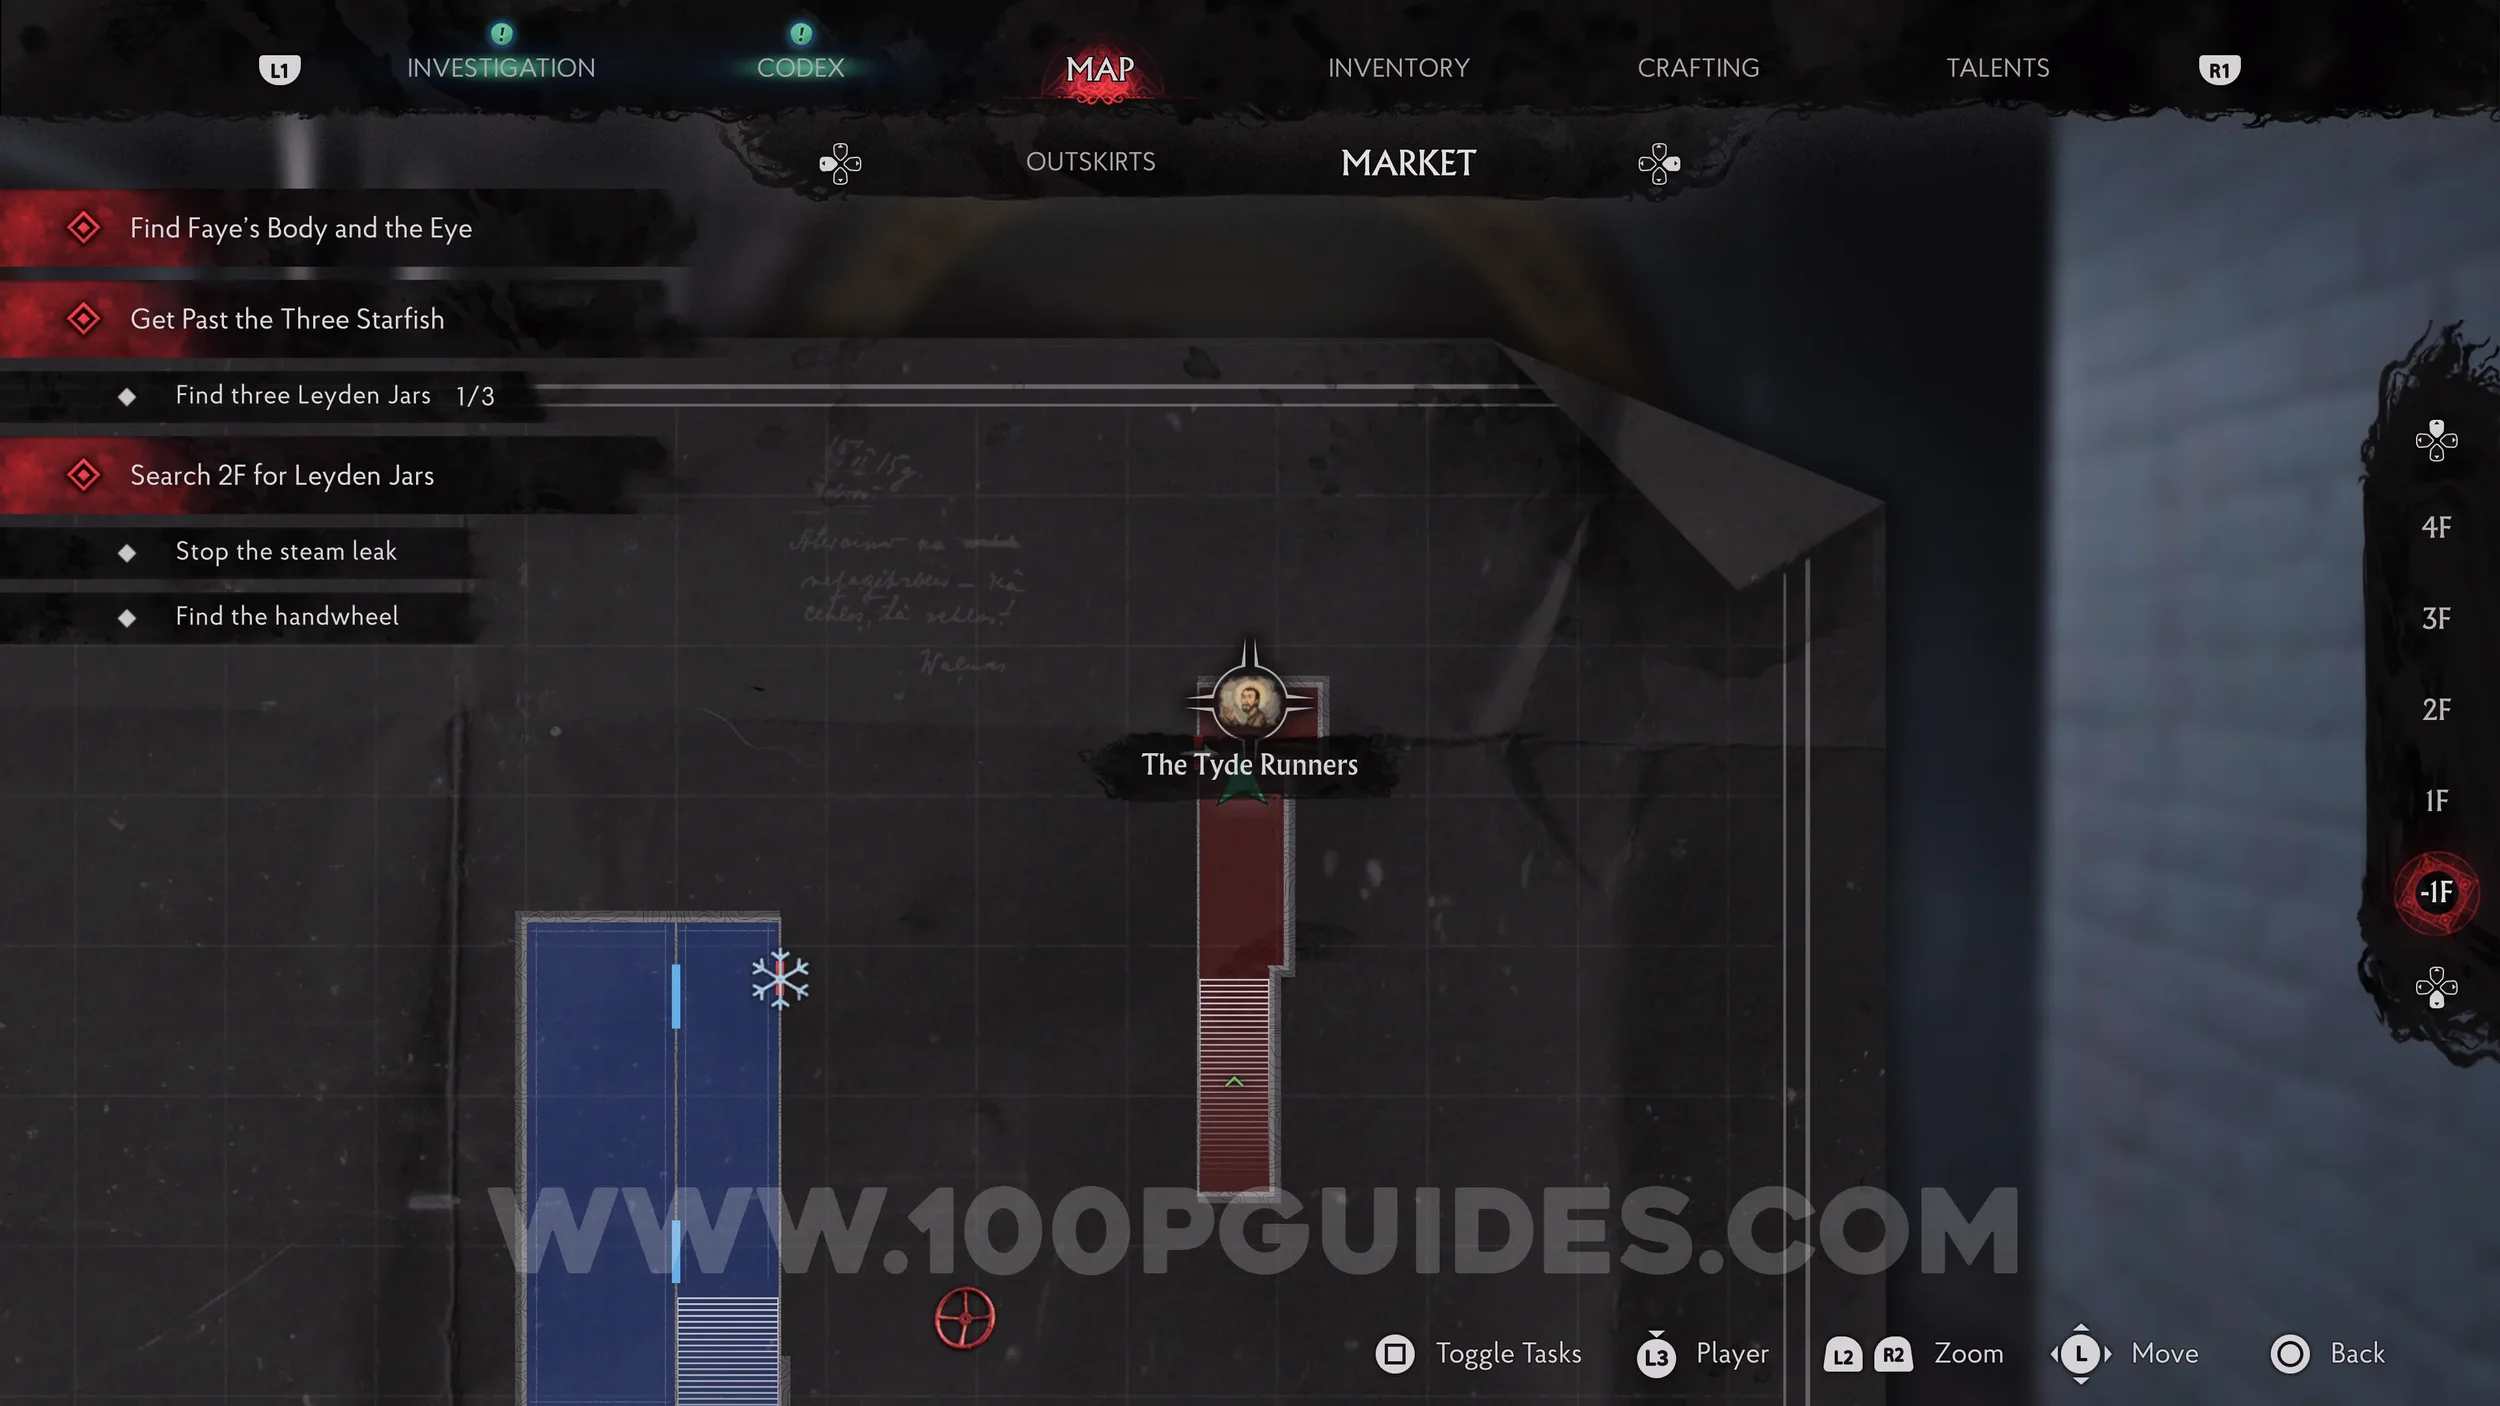
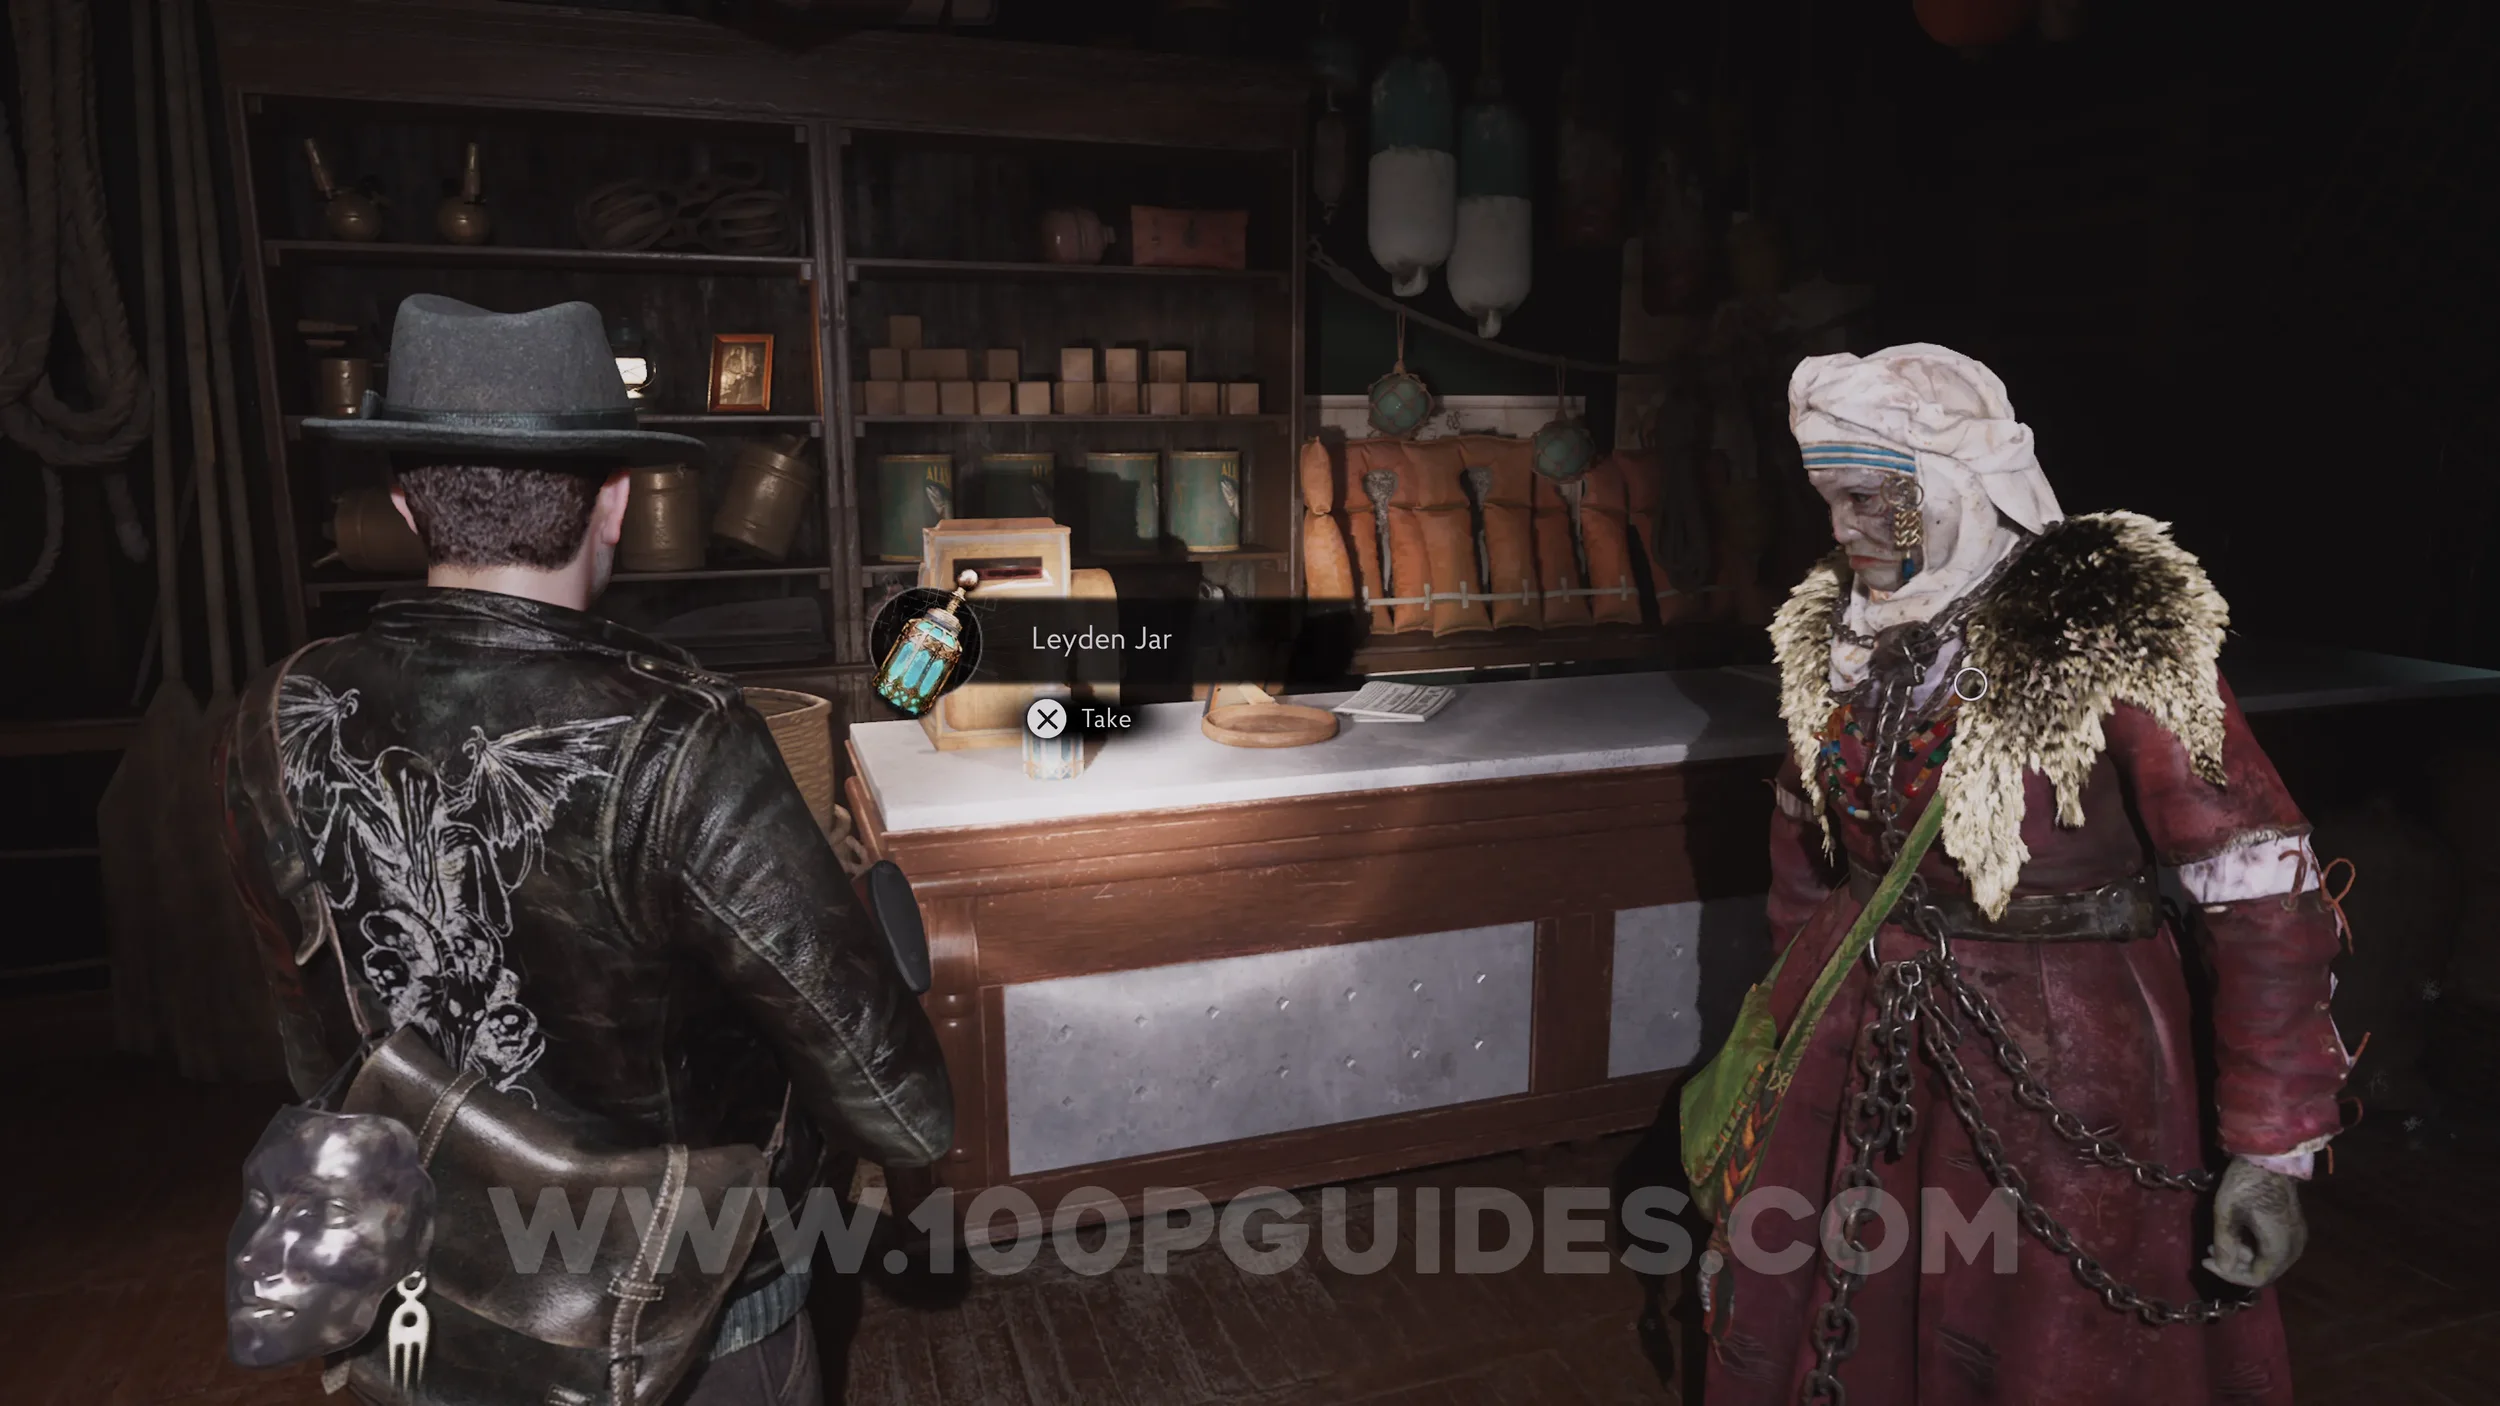
Key Item: Leyden Jar. Given to you by Ma after you open the Magic Ward in the Abandoned Office using Freddie's Urn.
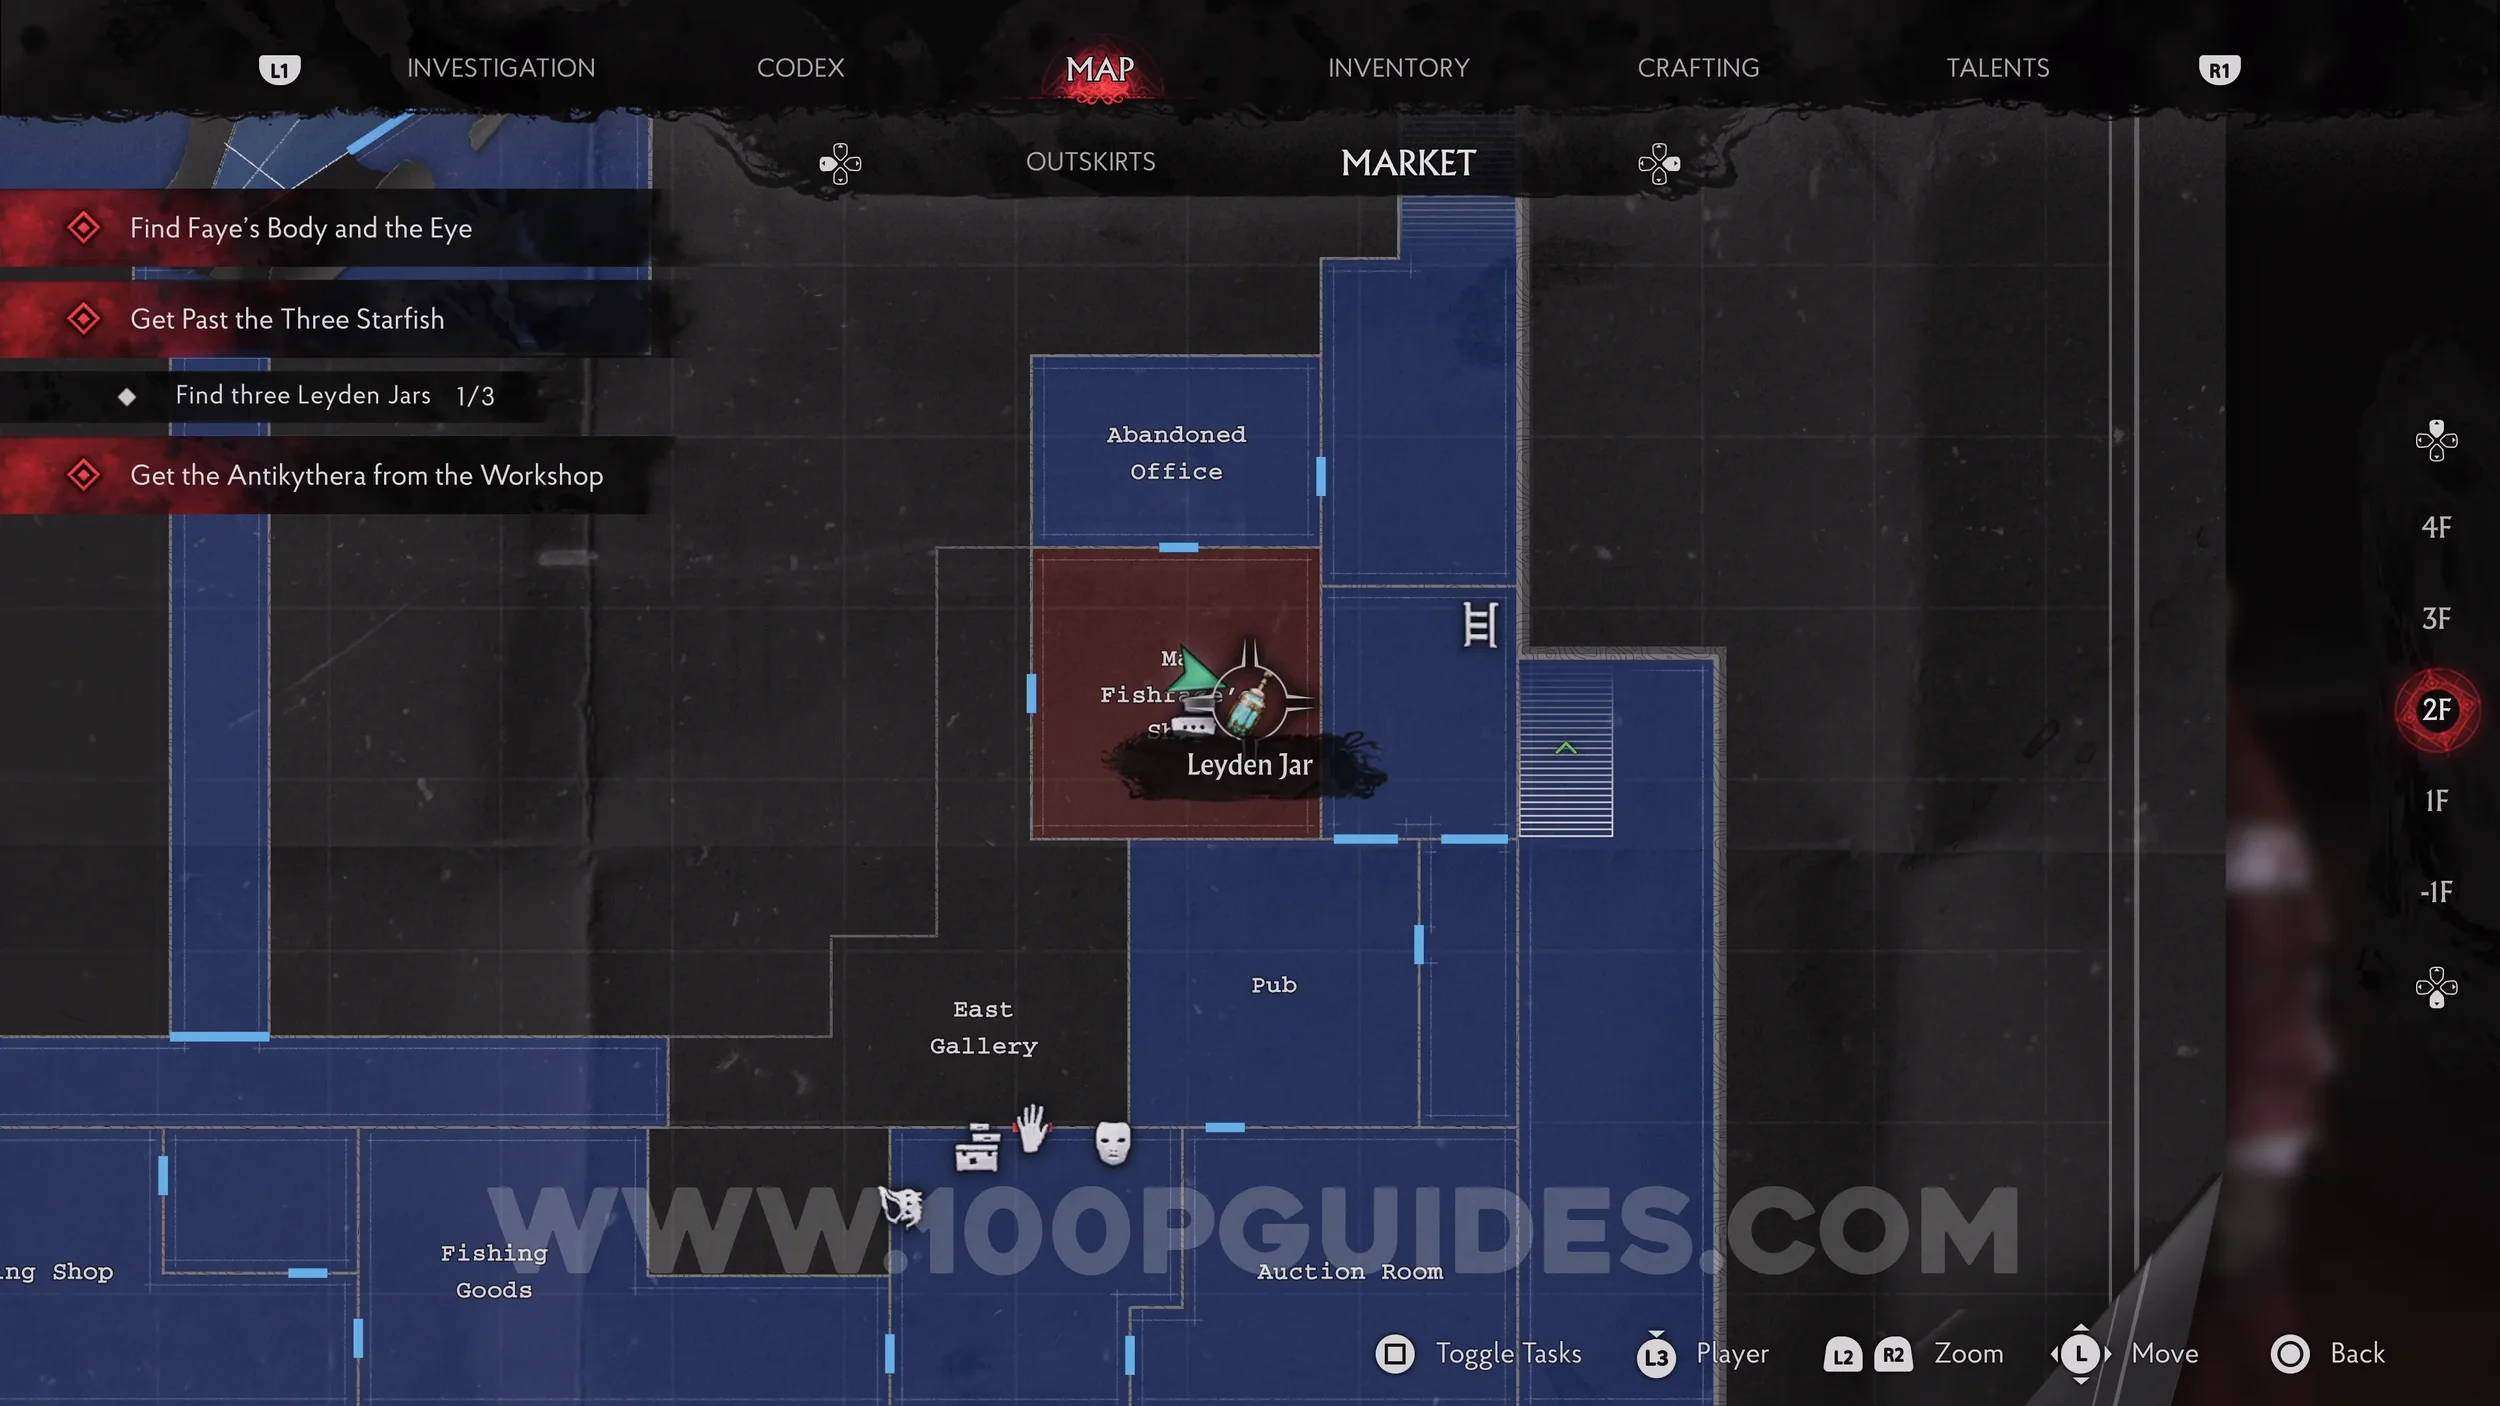
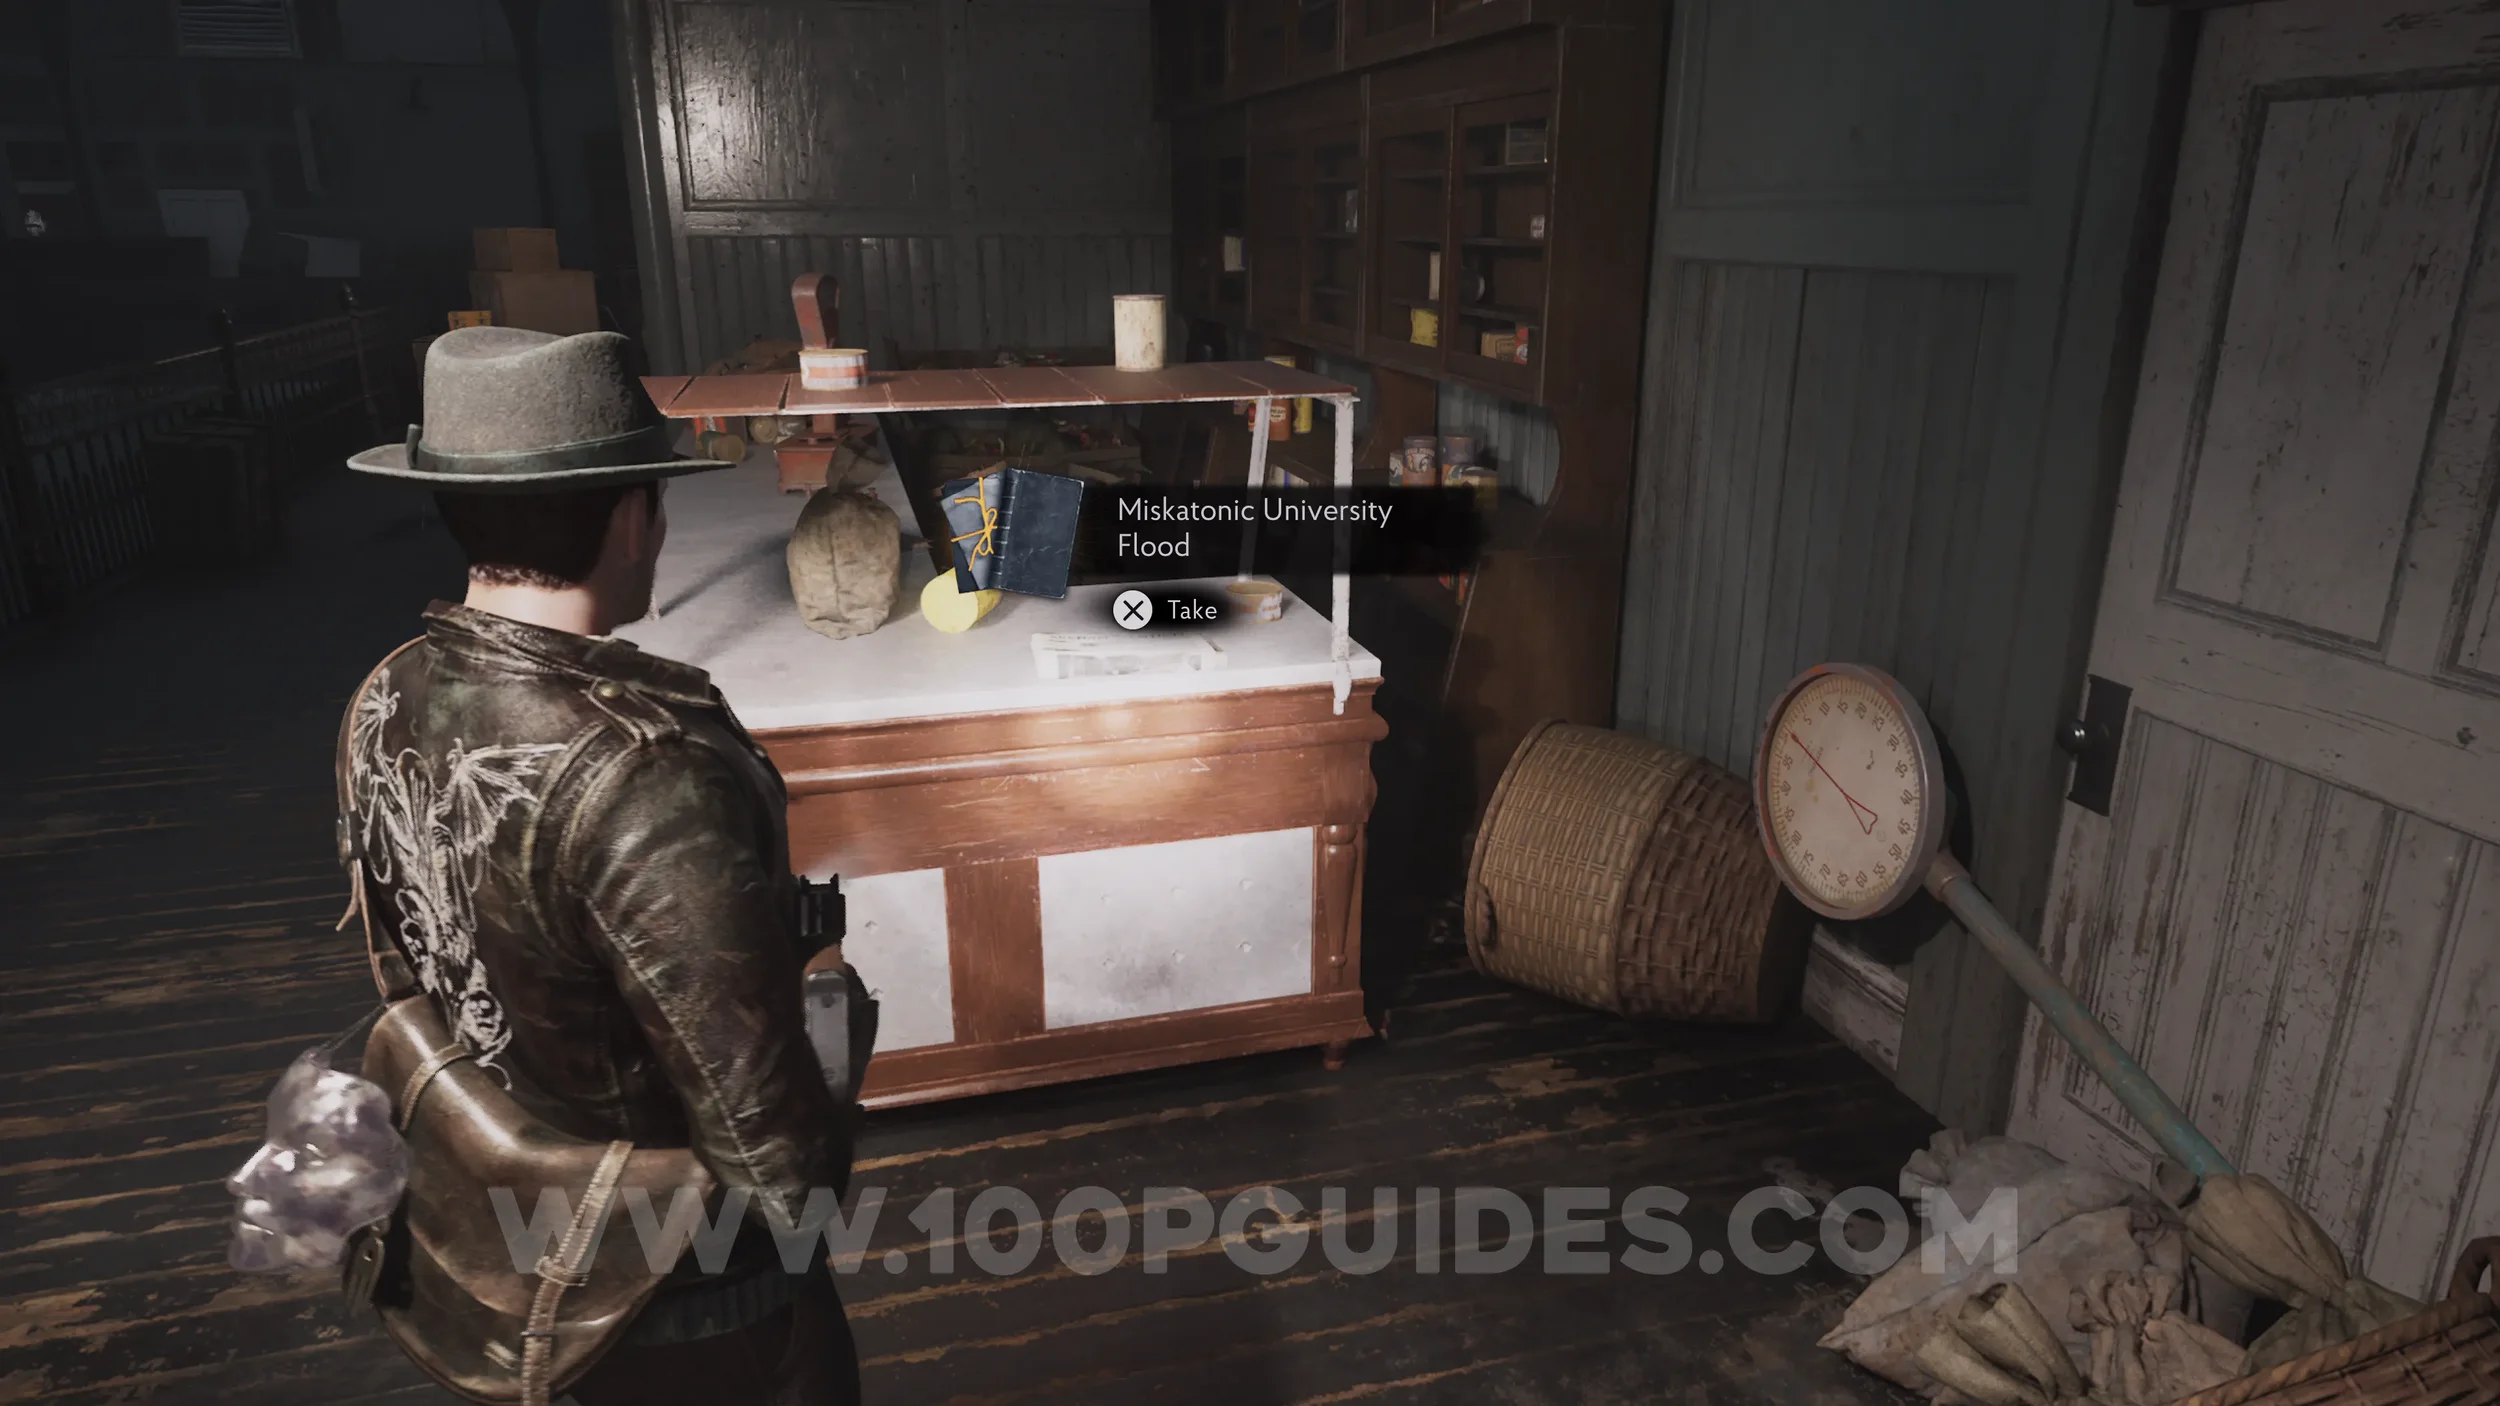
Lore Codex: Miskatonic University Flood. Leave Ma's Fishing Shop through the western door into the East Gallery. Here you'll find the codex on the counter to the south.
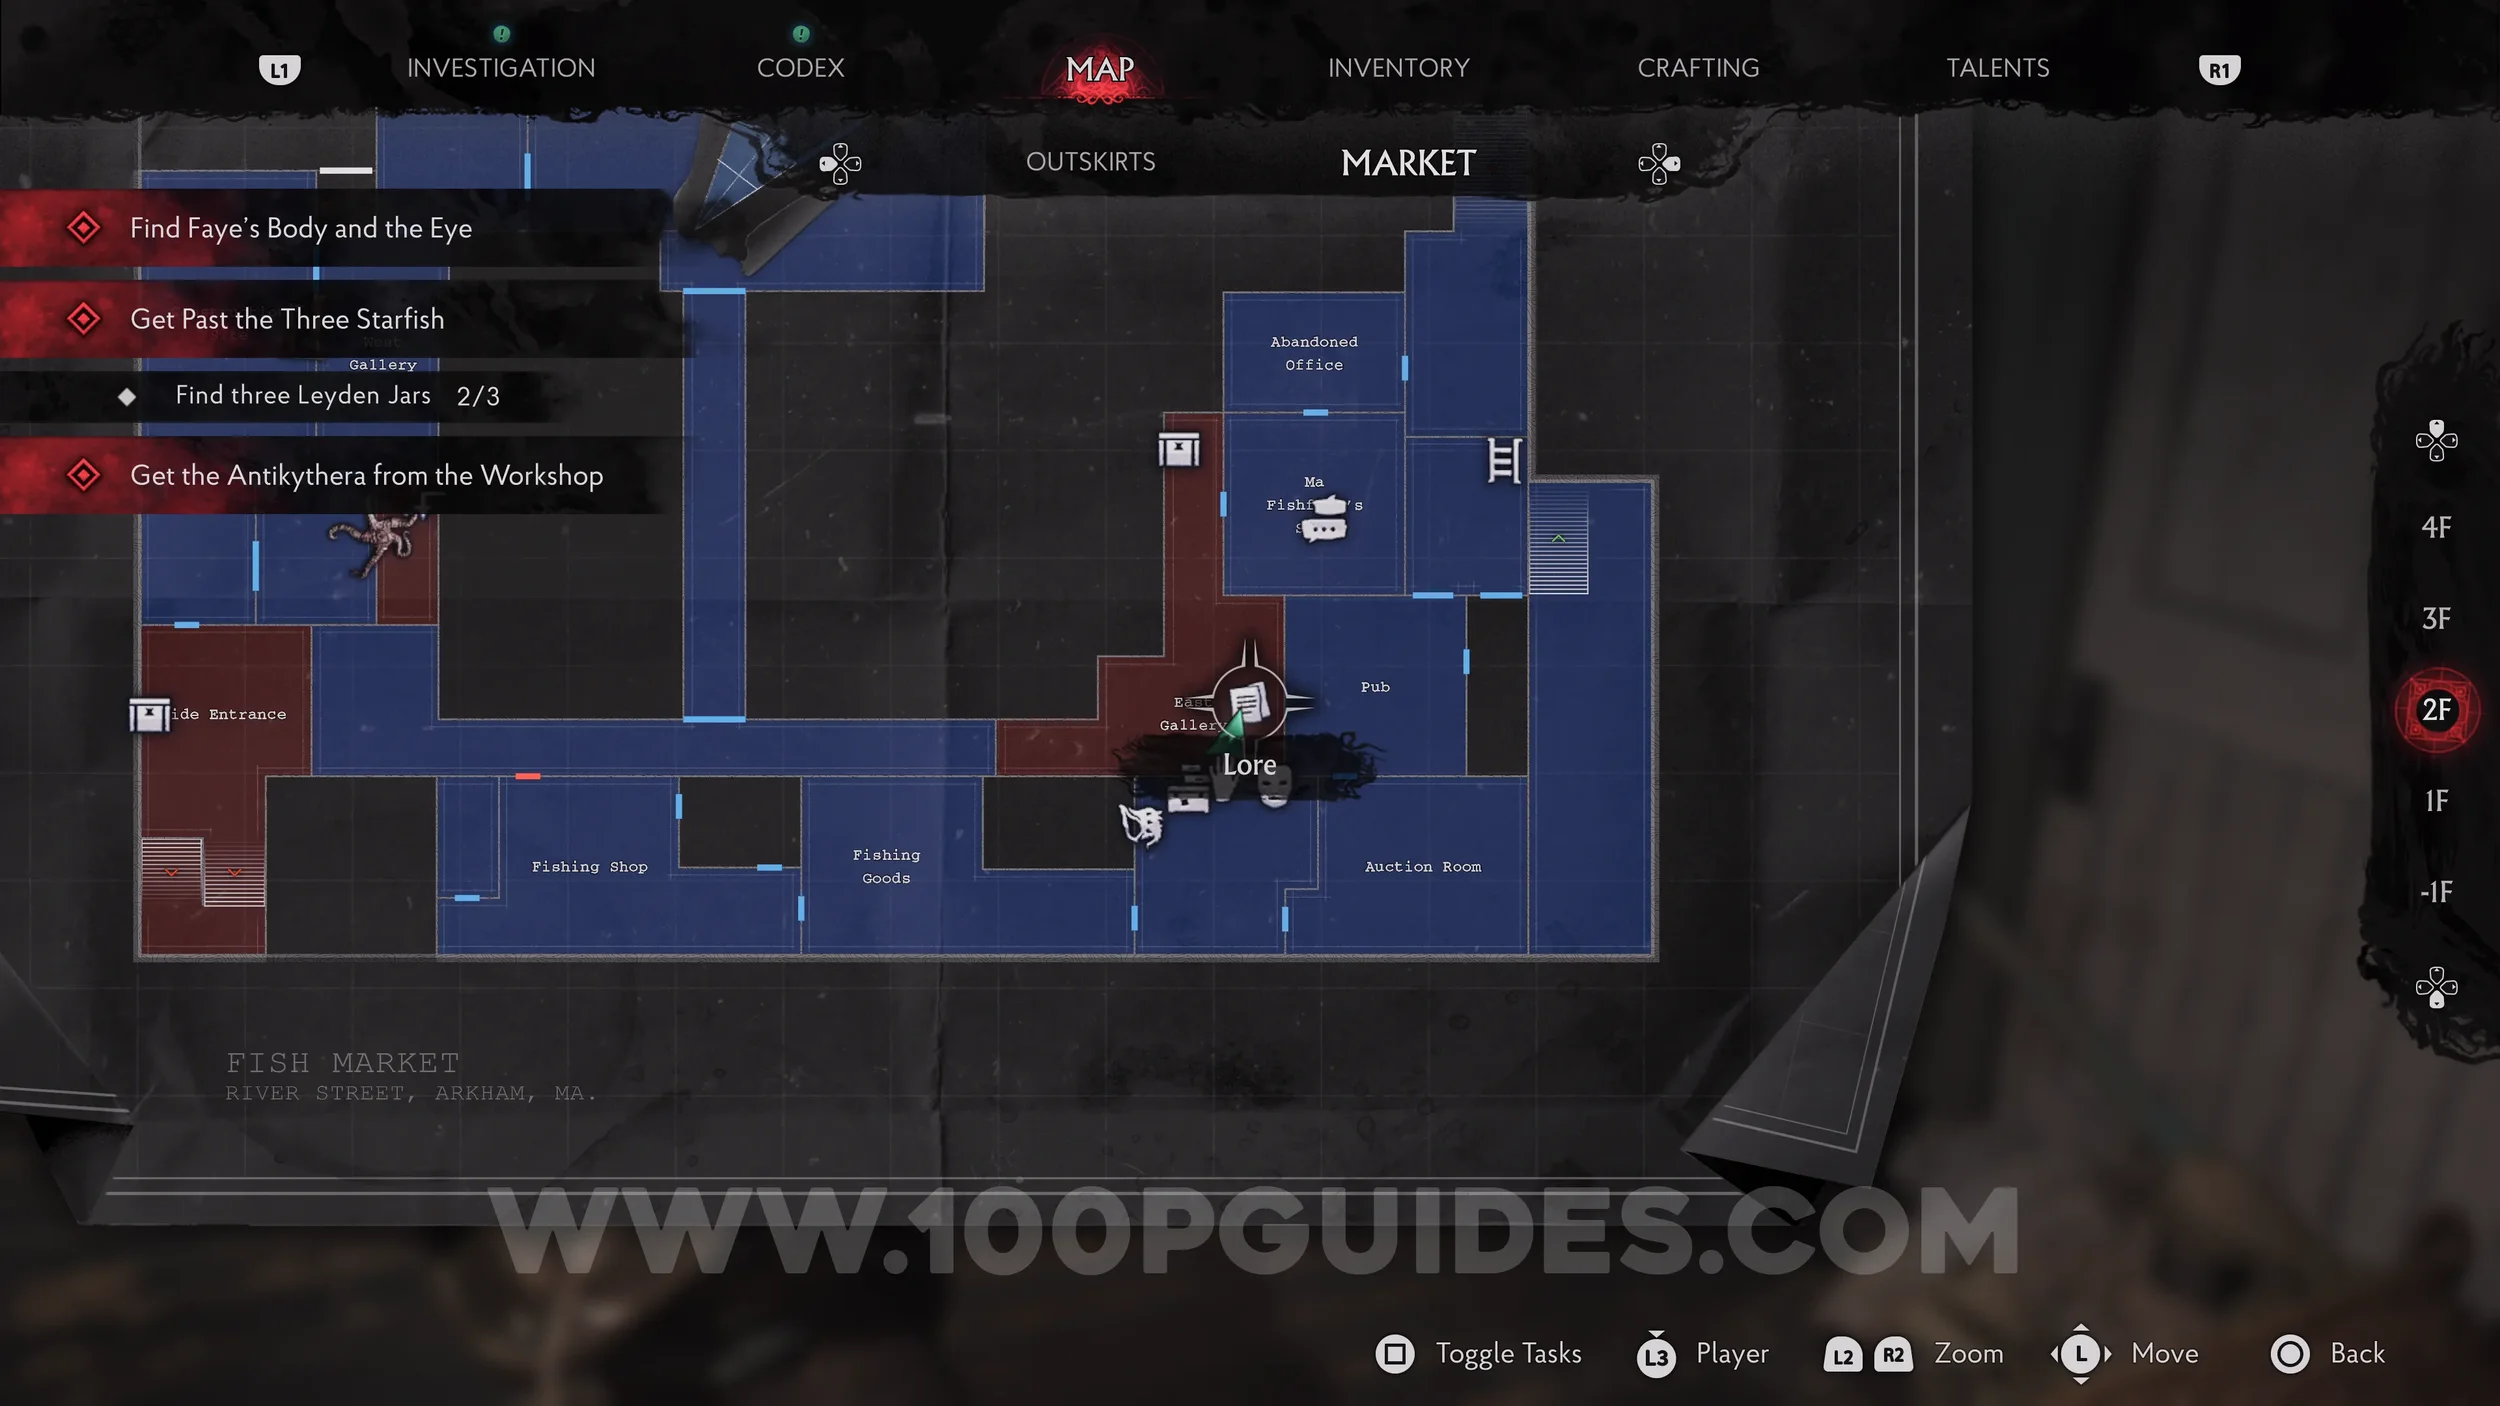
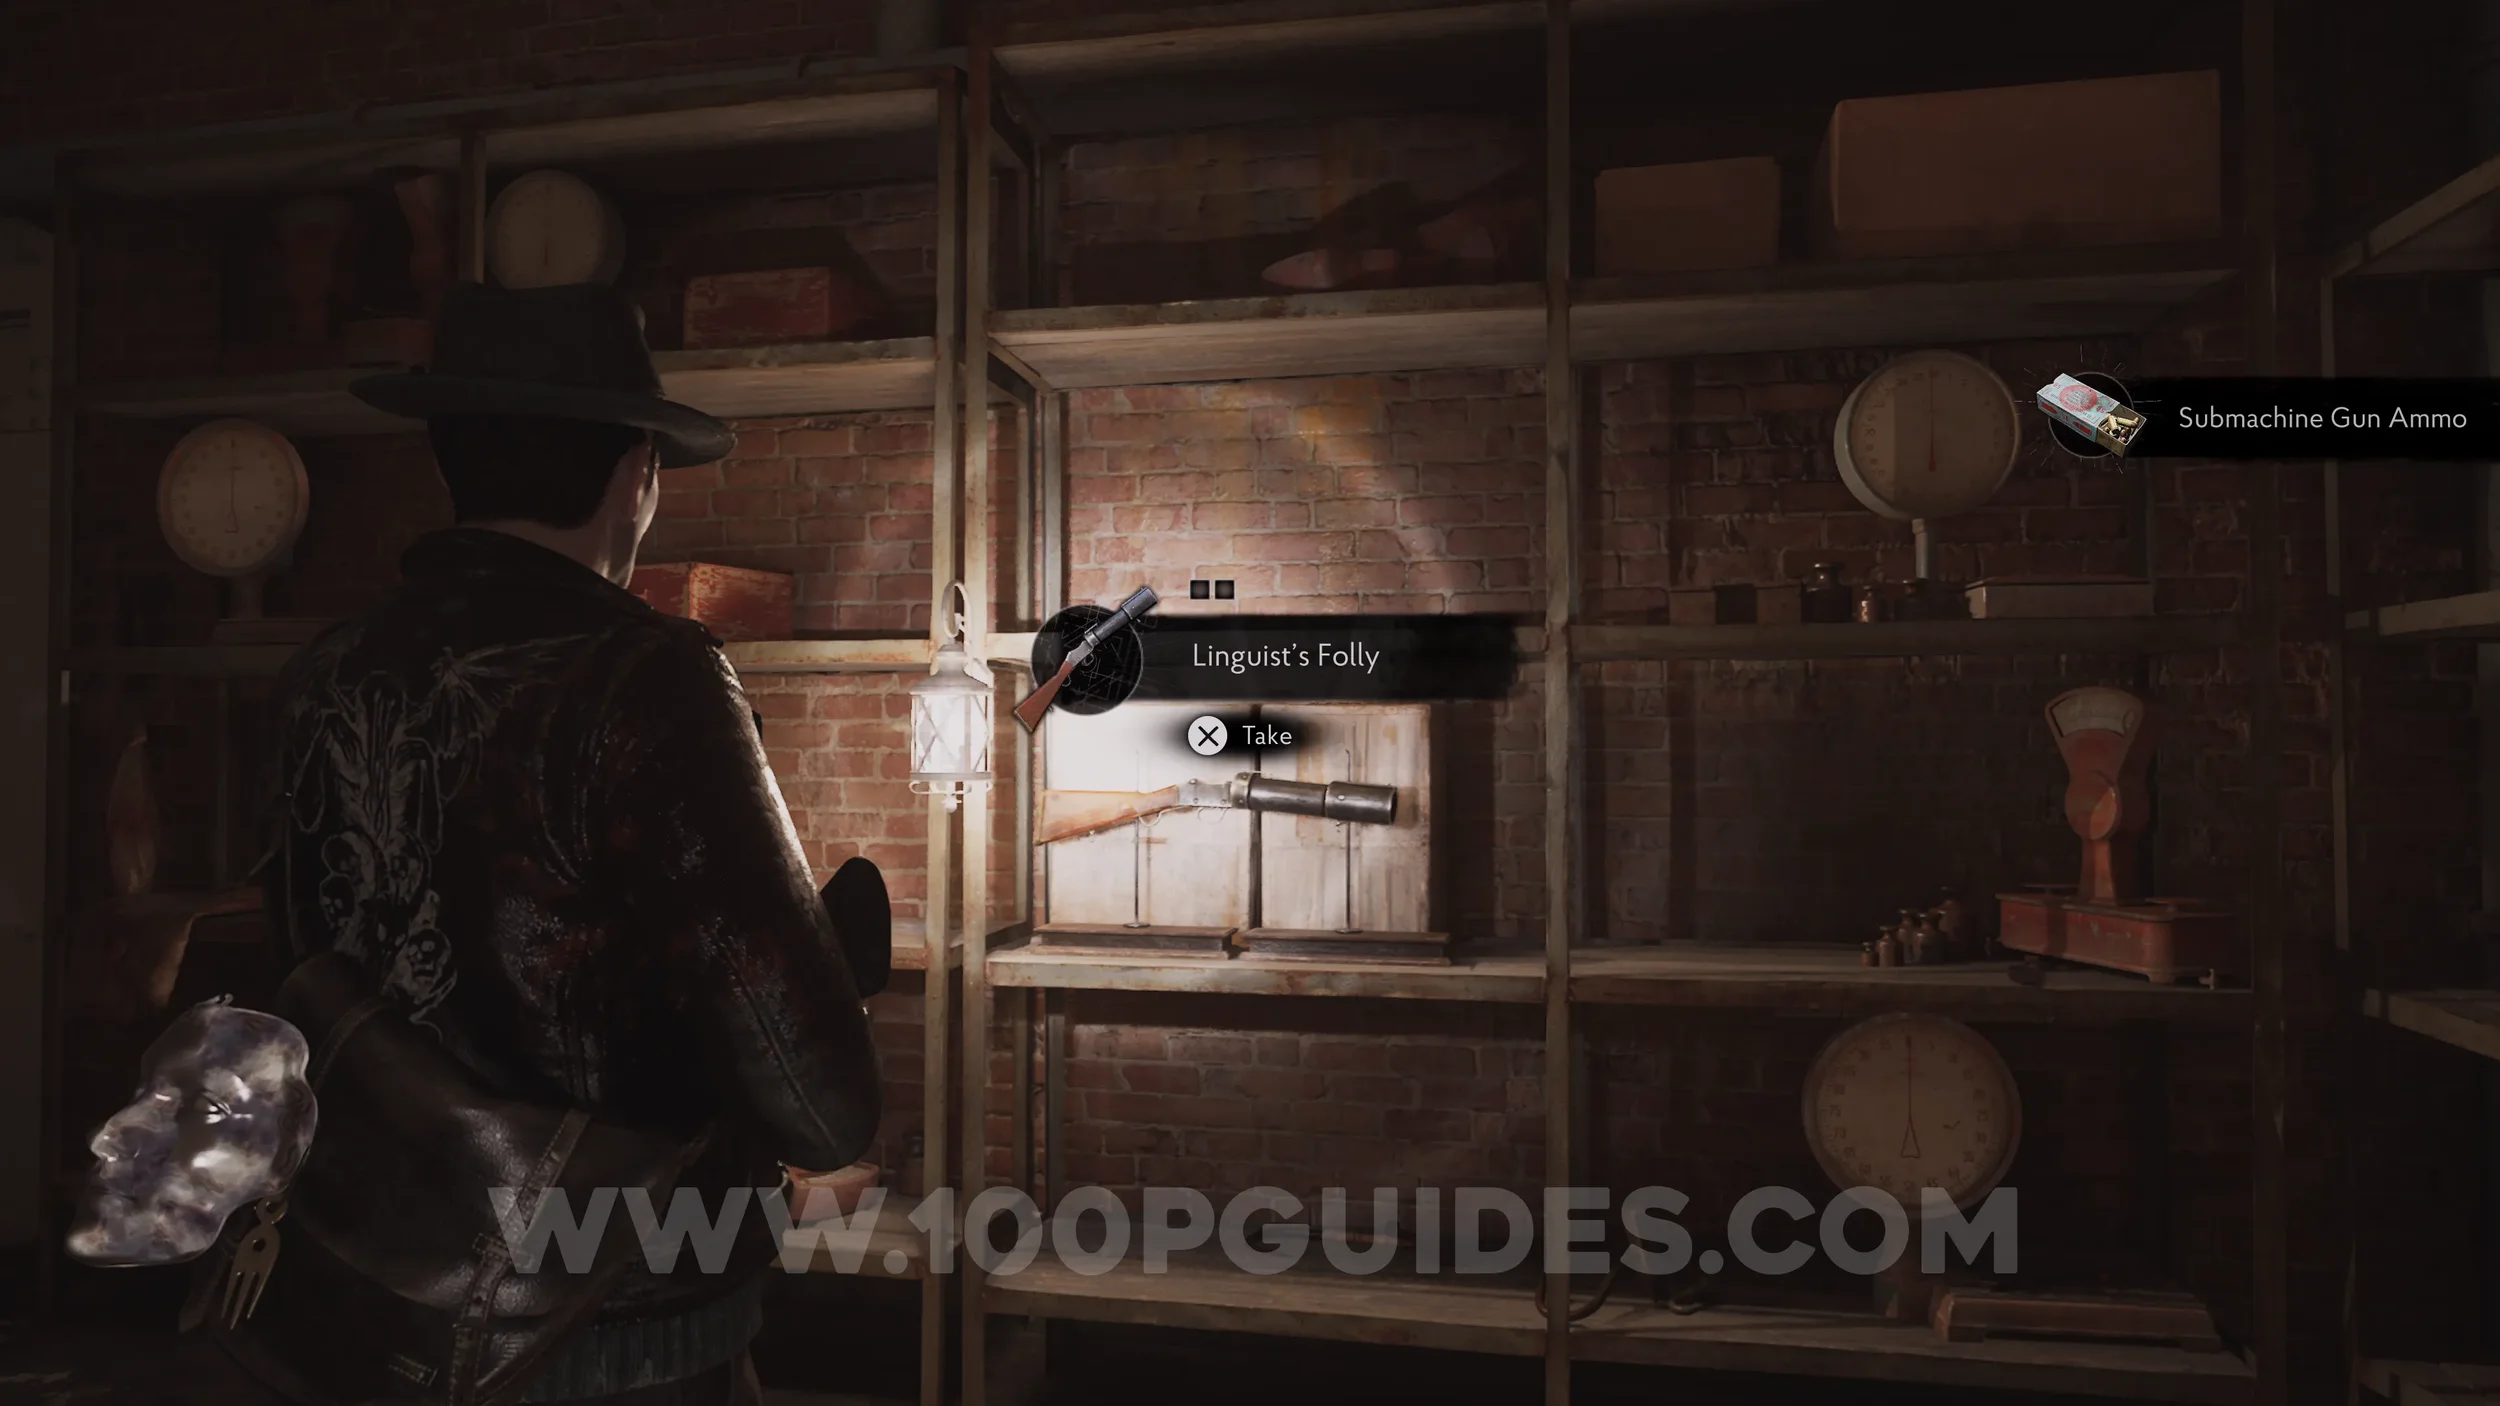
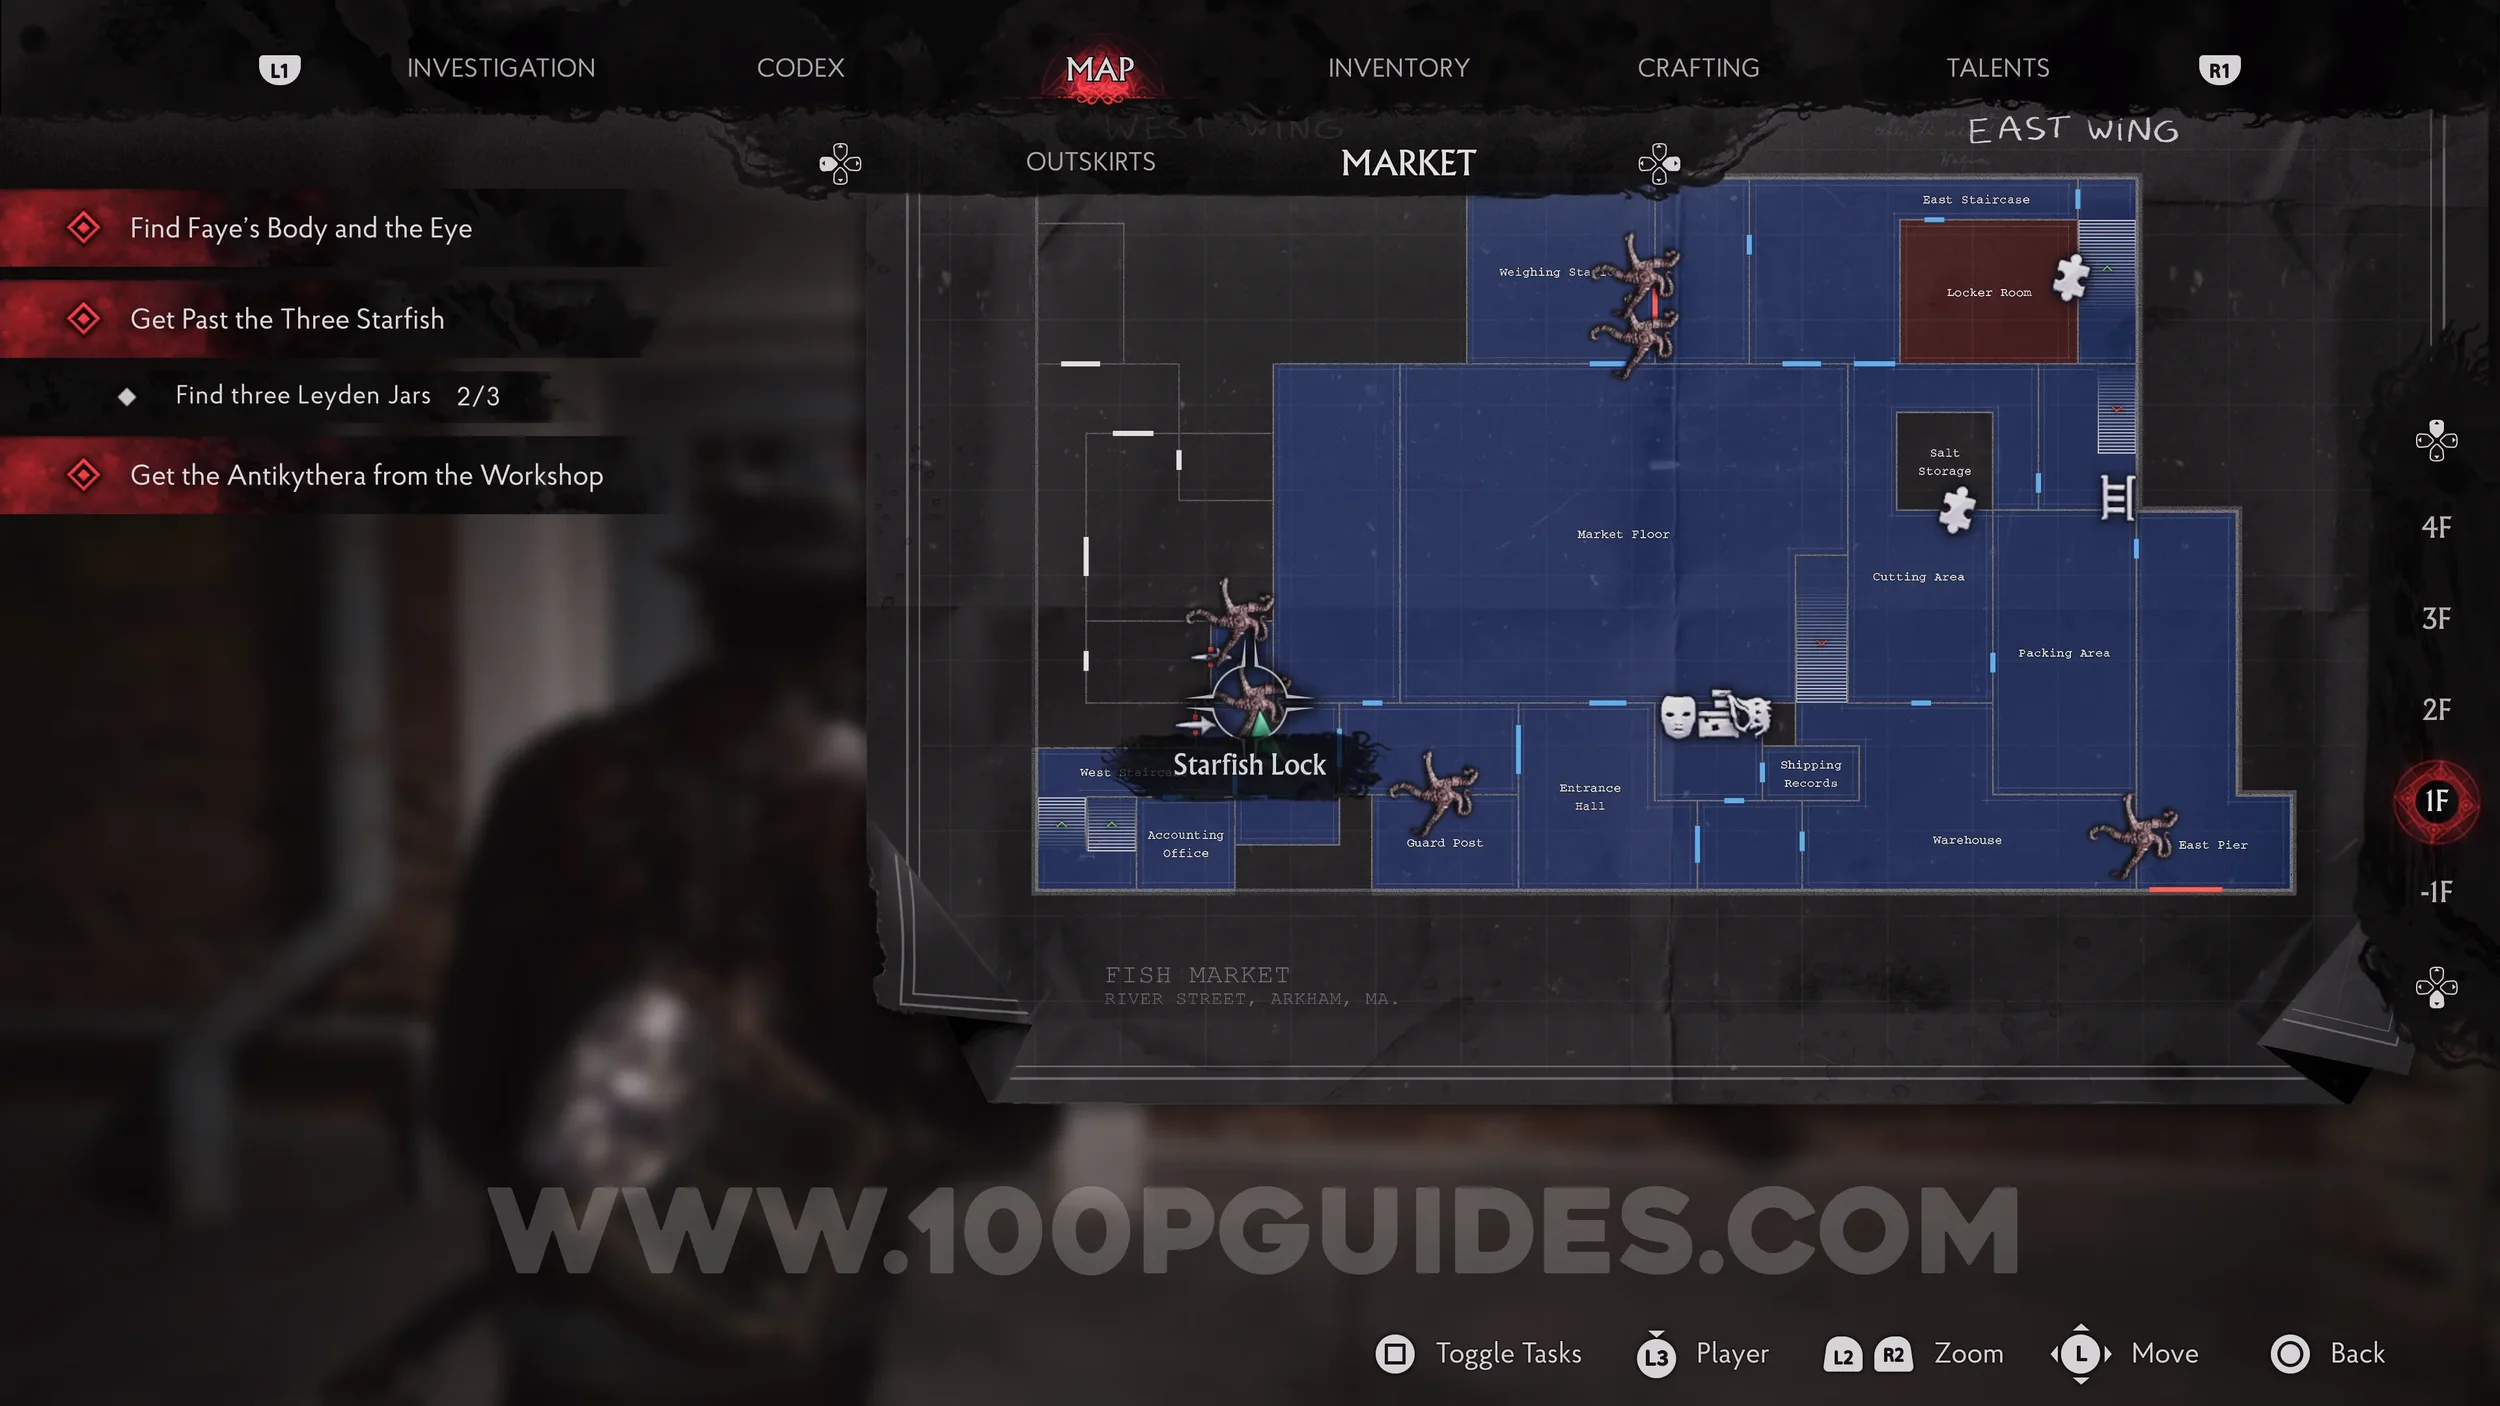
Weapon: Linguist’s Folly (Grenade Launcher). Retrieve your first Leyden Jar from the starfish door in the southeastern corner of 1F, then head to the Weighing Station to the north of the Market Floor. Now that you have two Leyden Jars, you can place them in the two starfish and open the door. The weapon is in the next room.
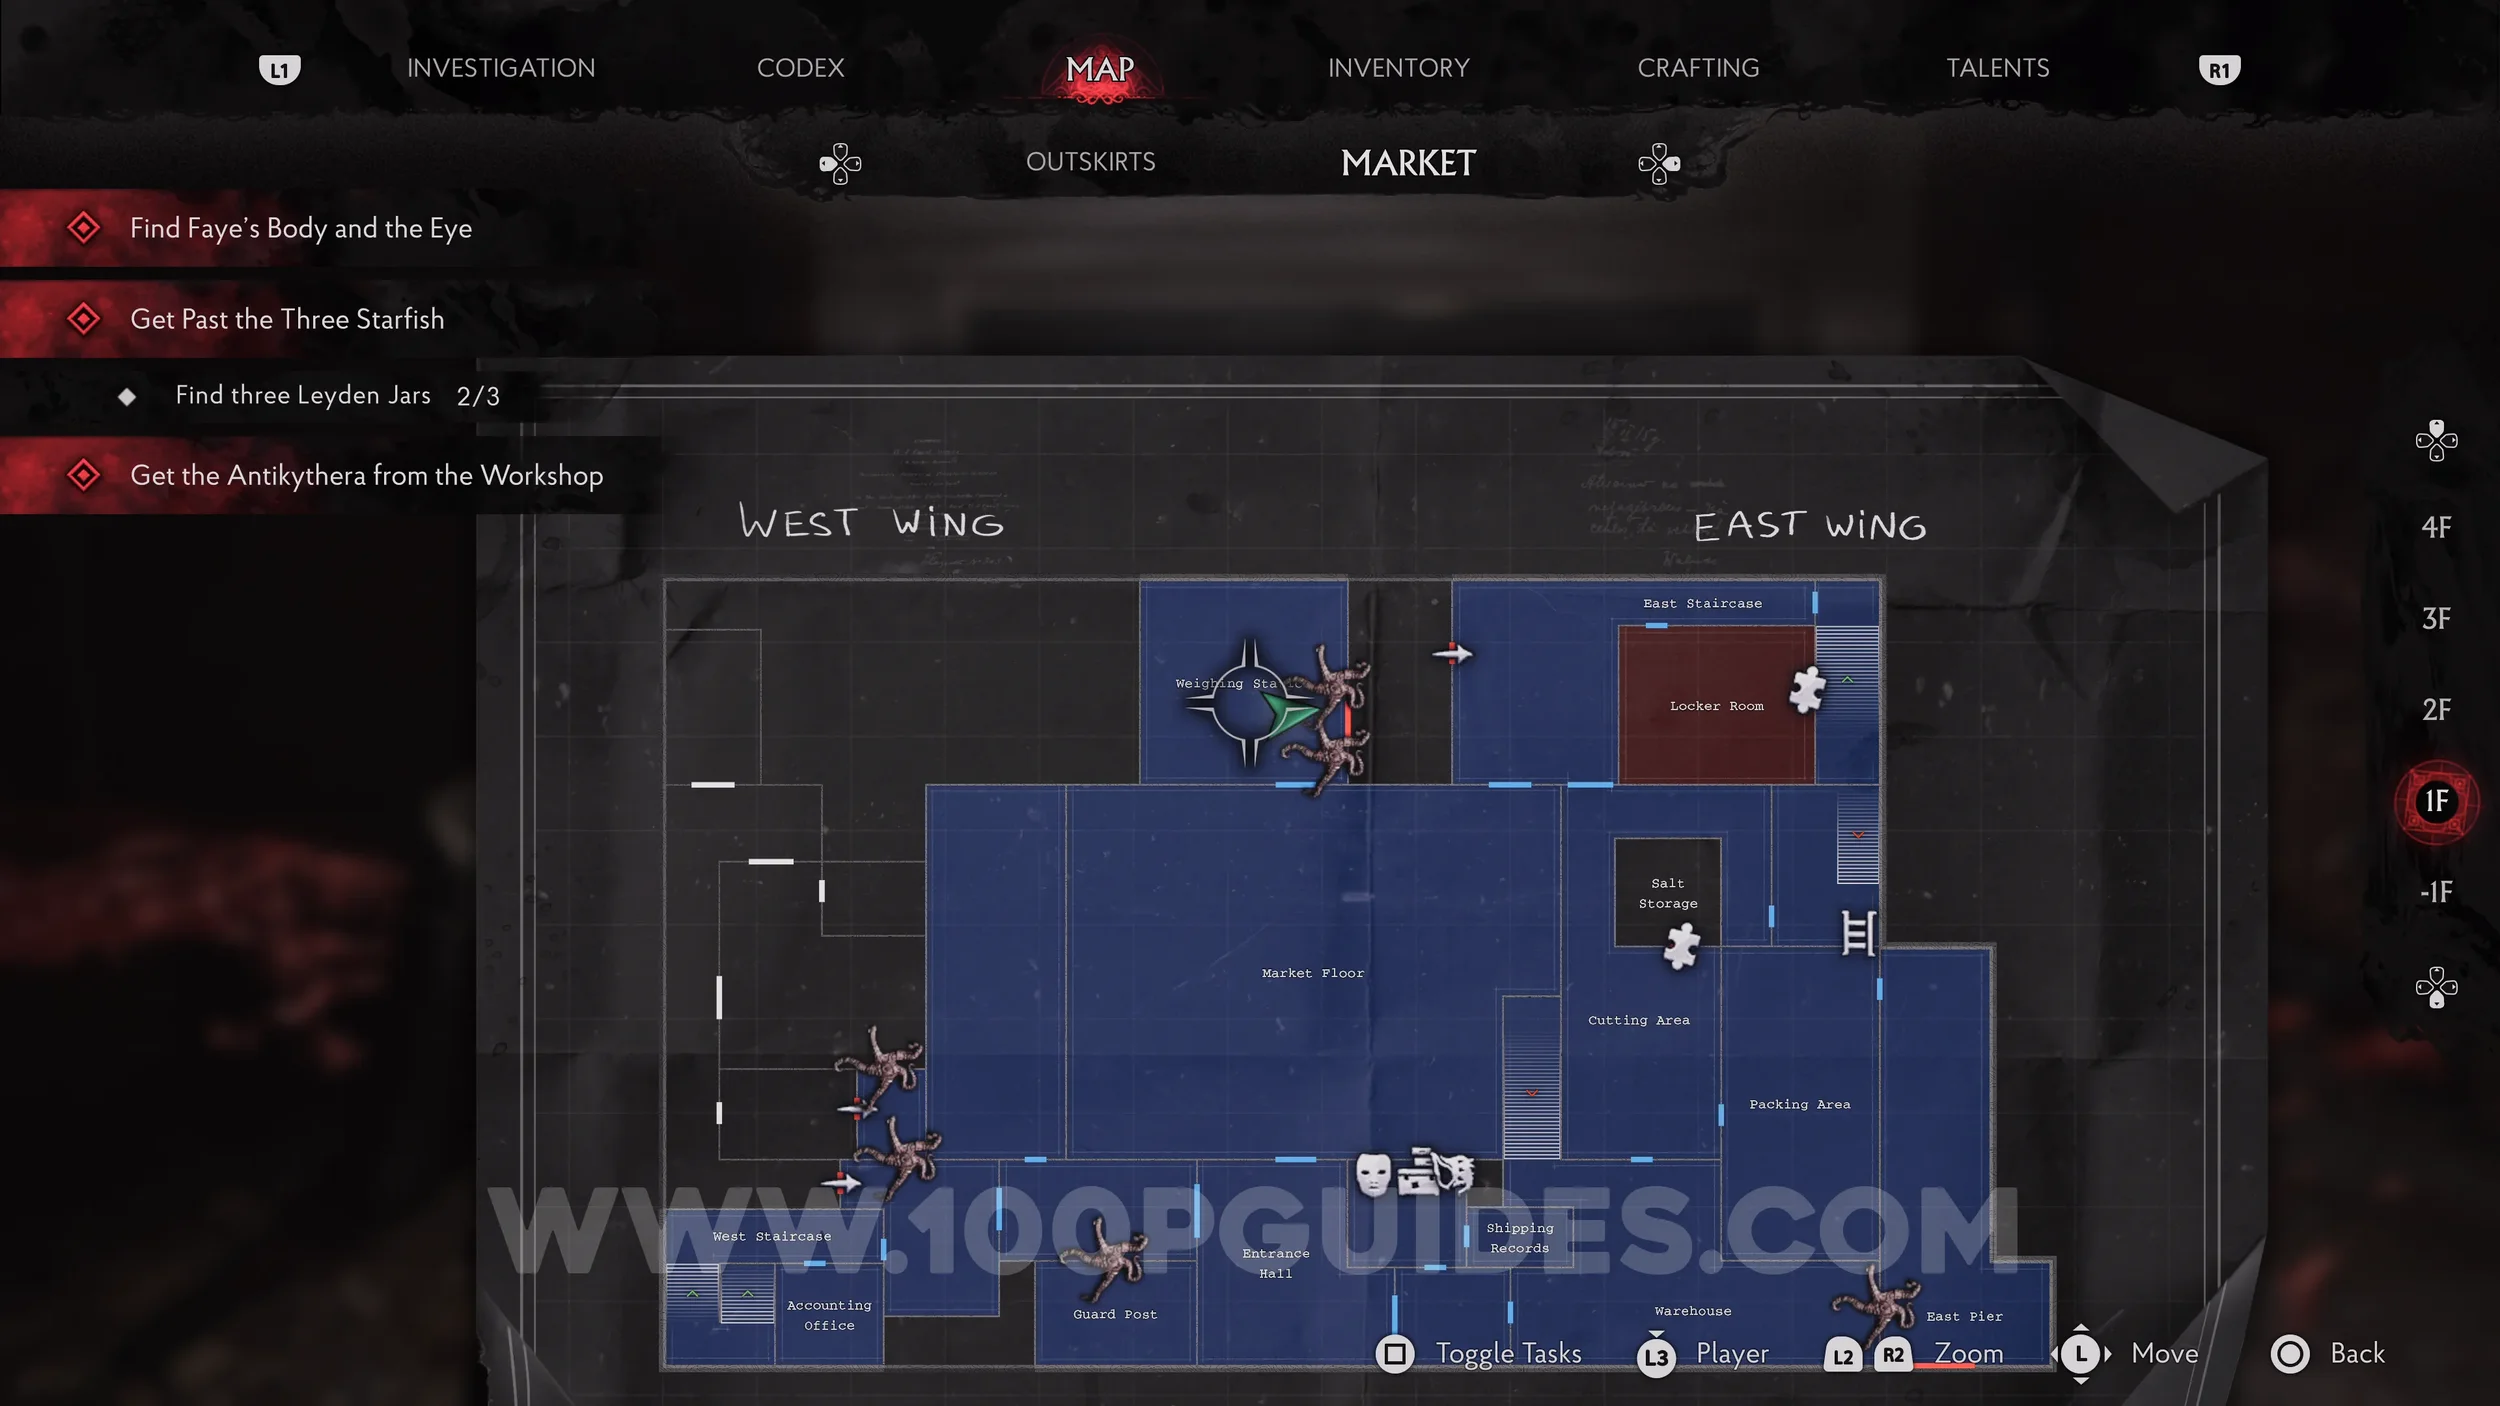
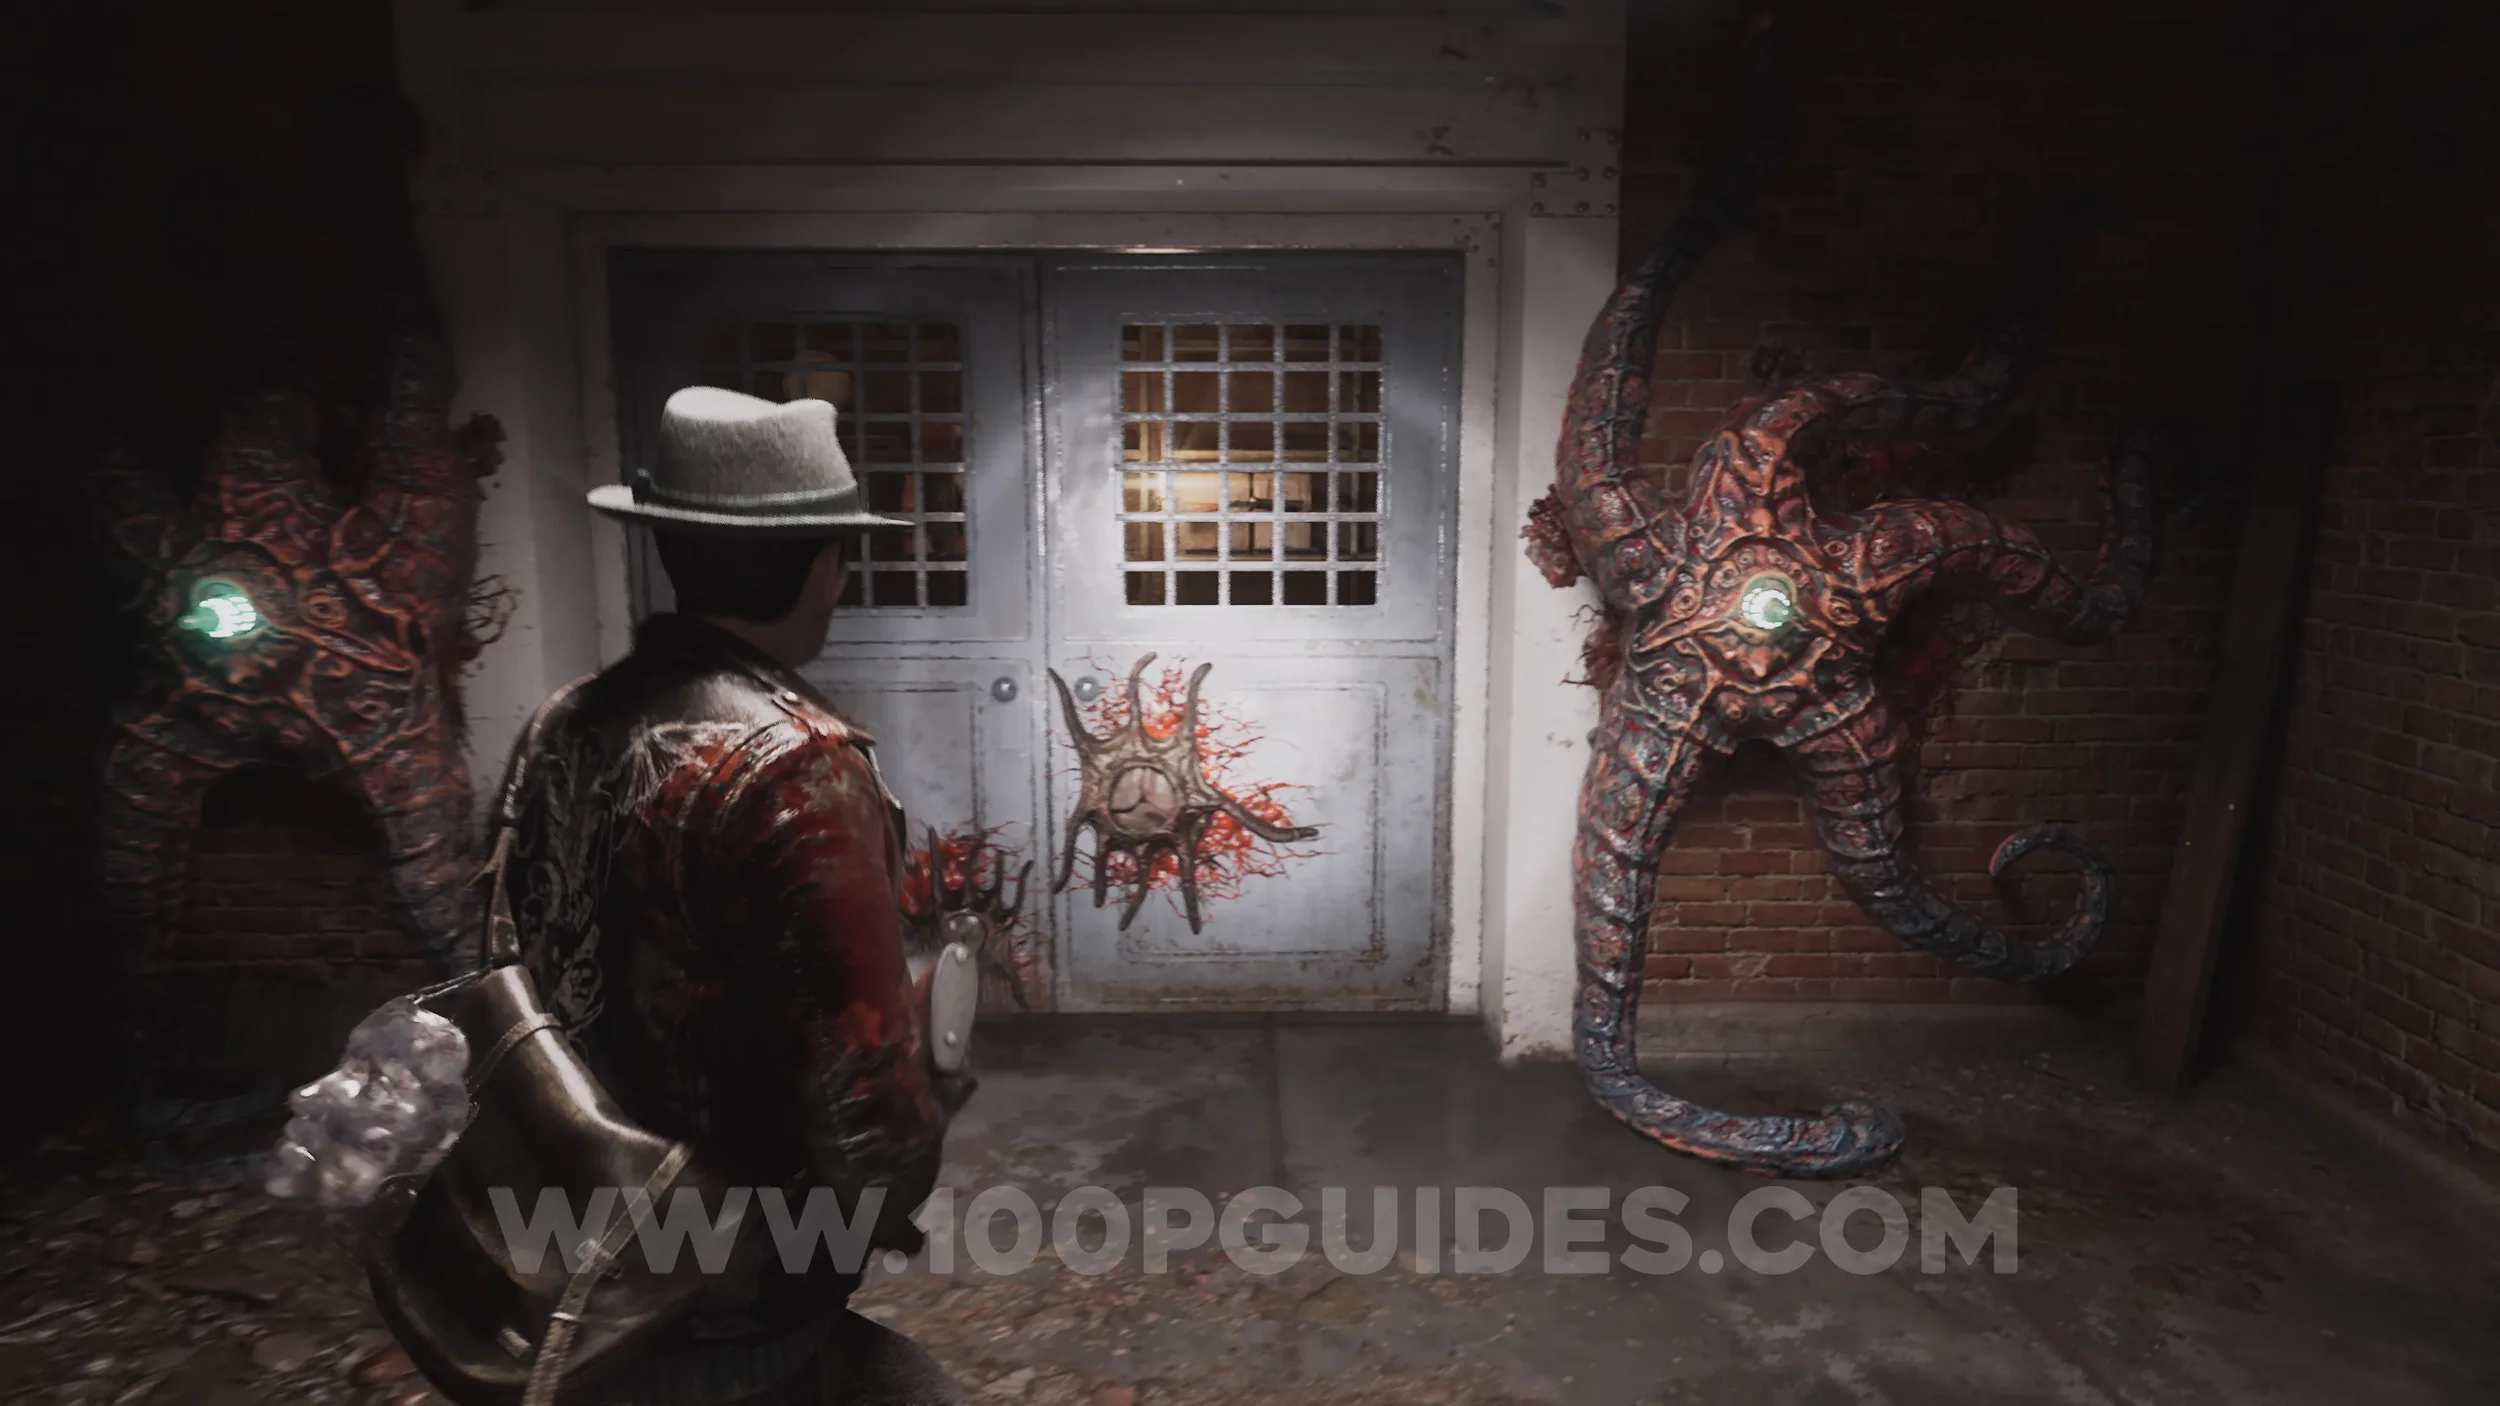
Lore Codex: Jewelers Be Warned!. Retrieve the two Leyden Jars and head to the starfish door close to the West Staircase on 1F. Now that you have two Jars, you can go through both doors and reach the Jewelry Workshop, where you'll find the codex on the table.
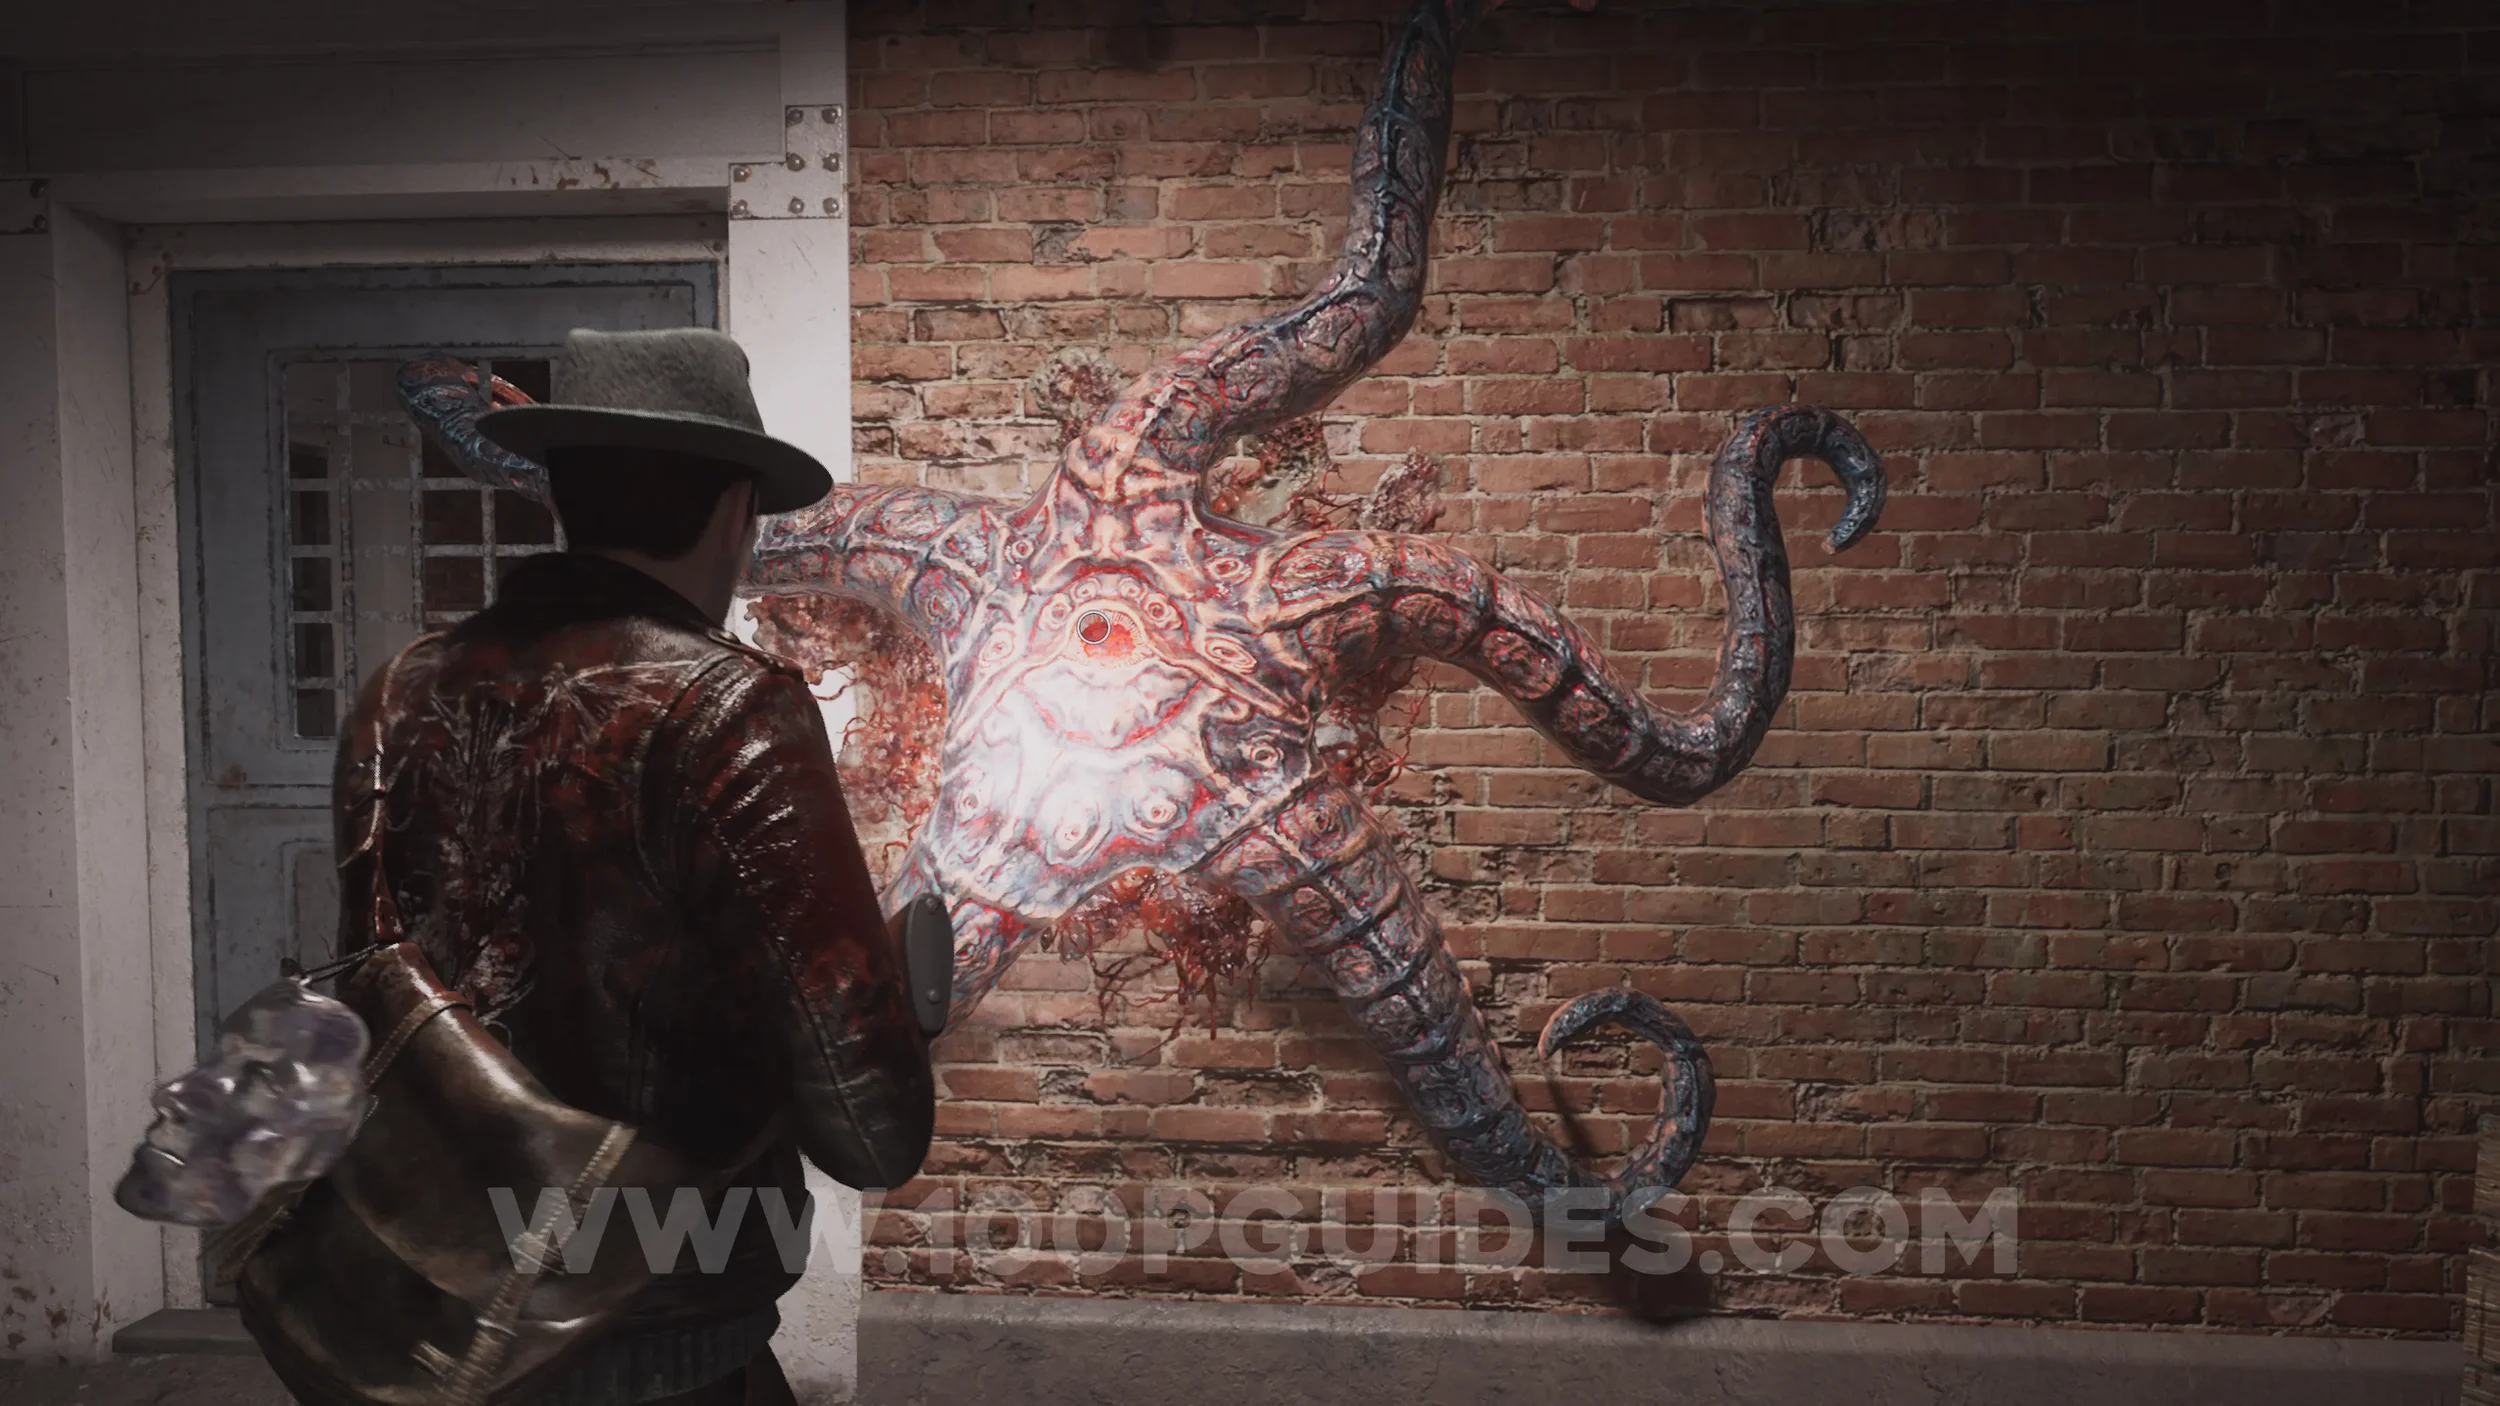
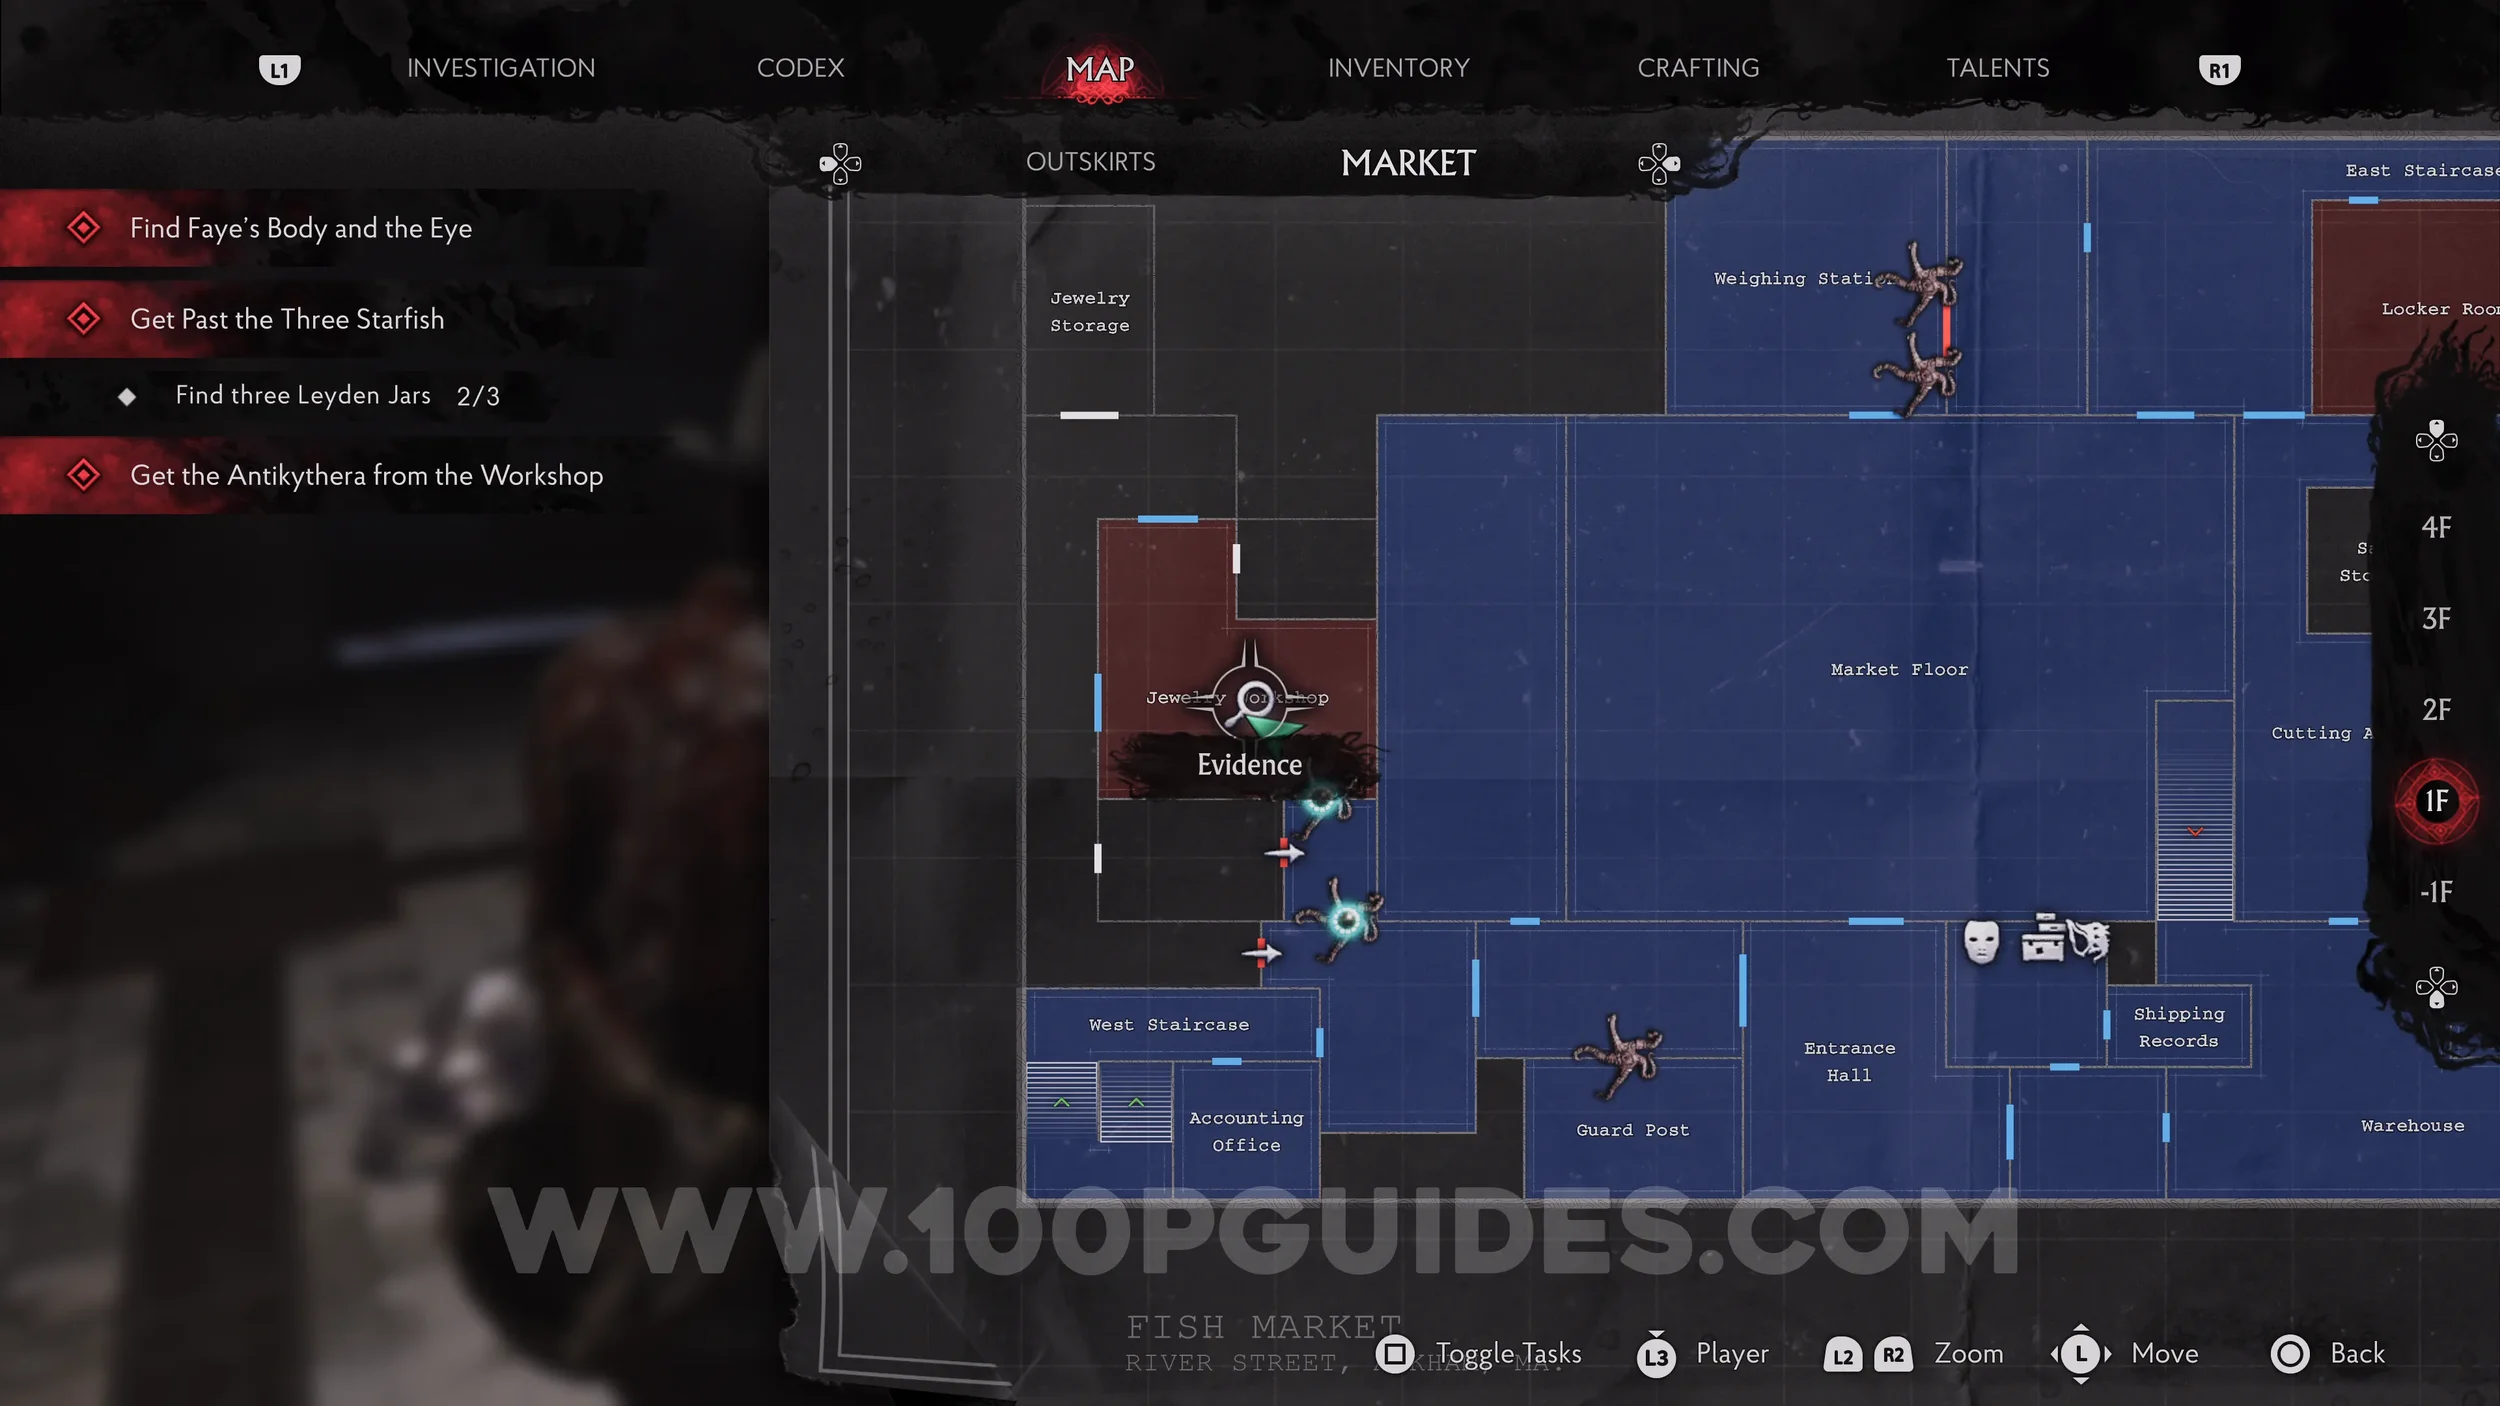
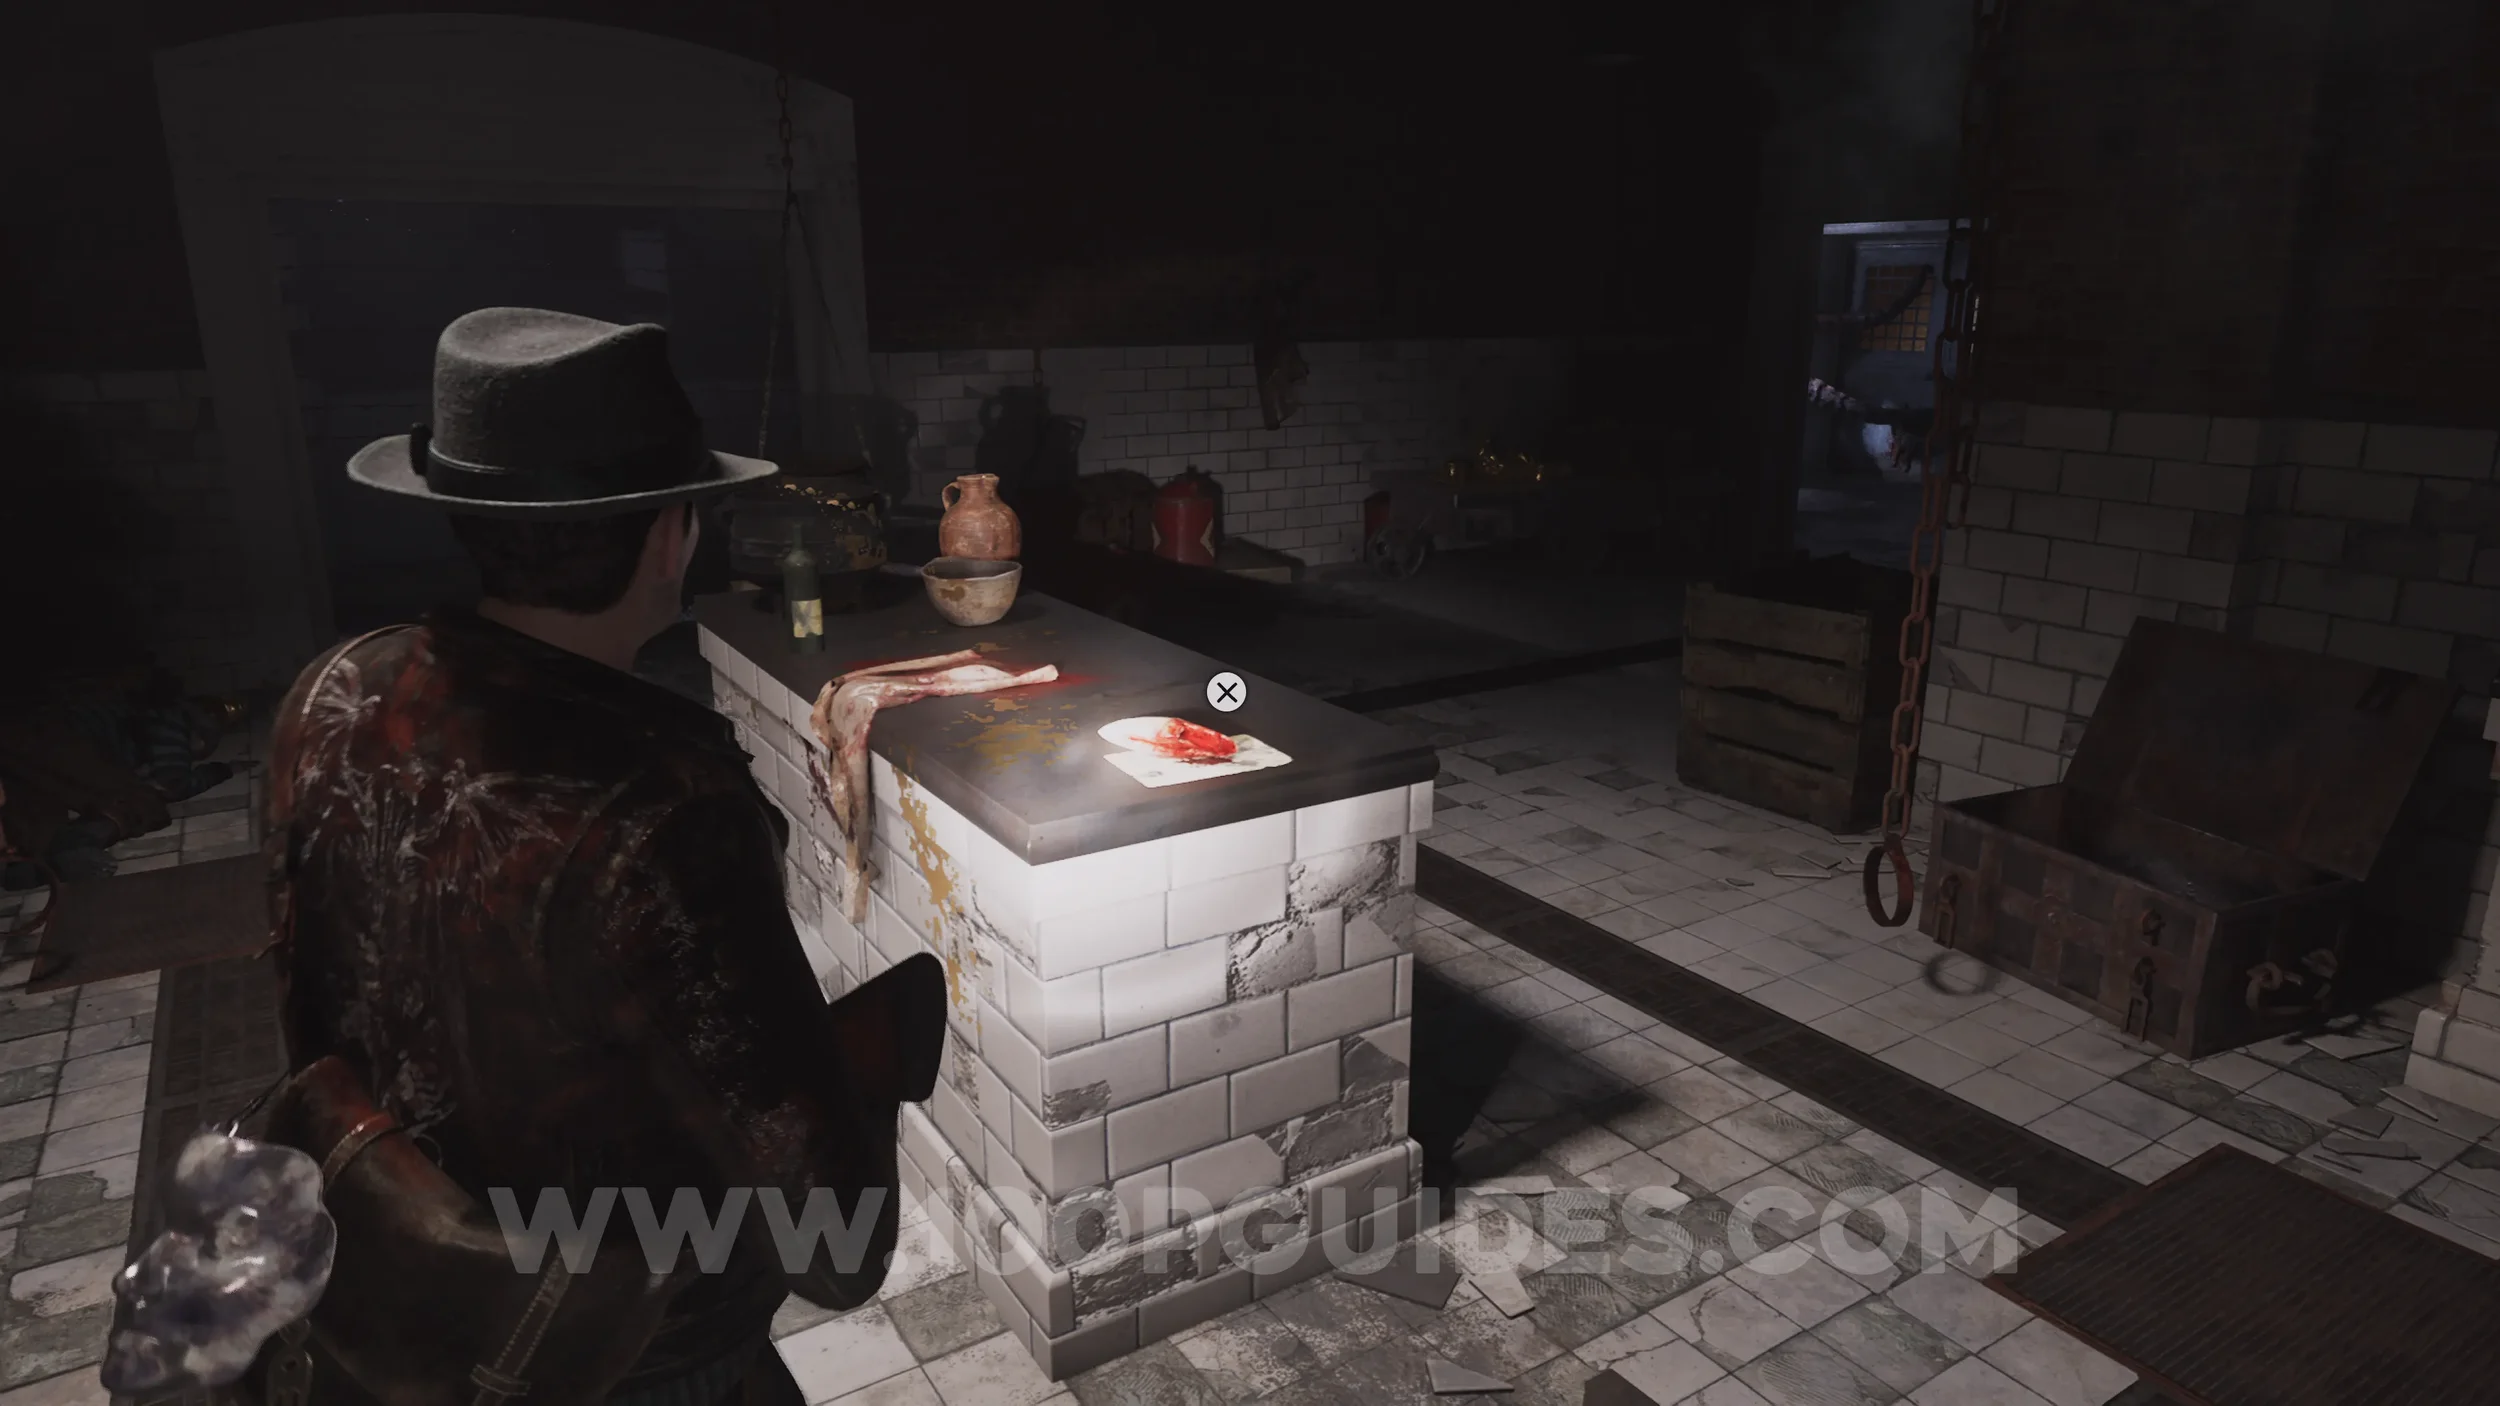
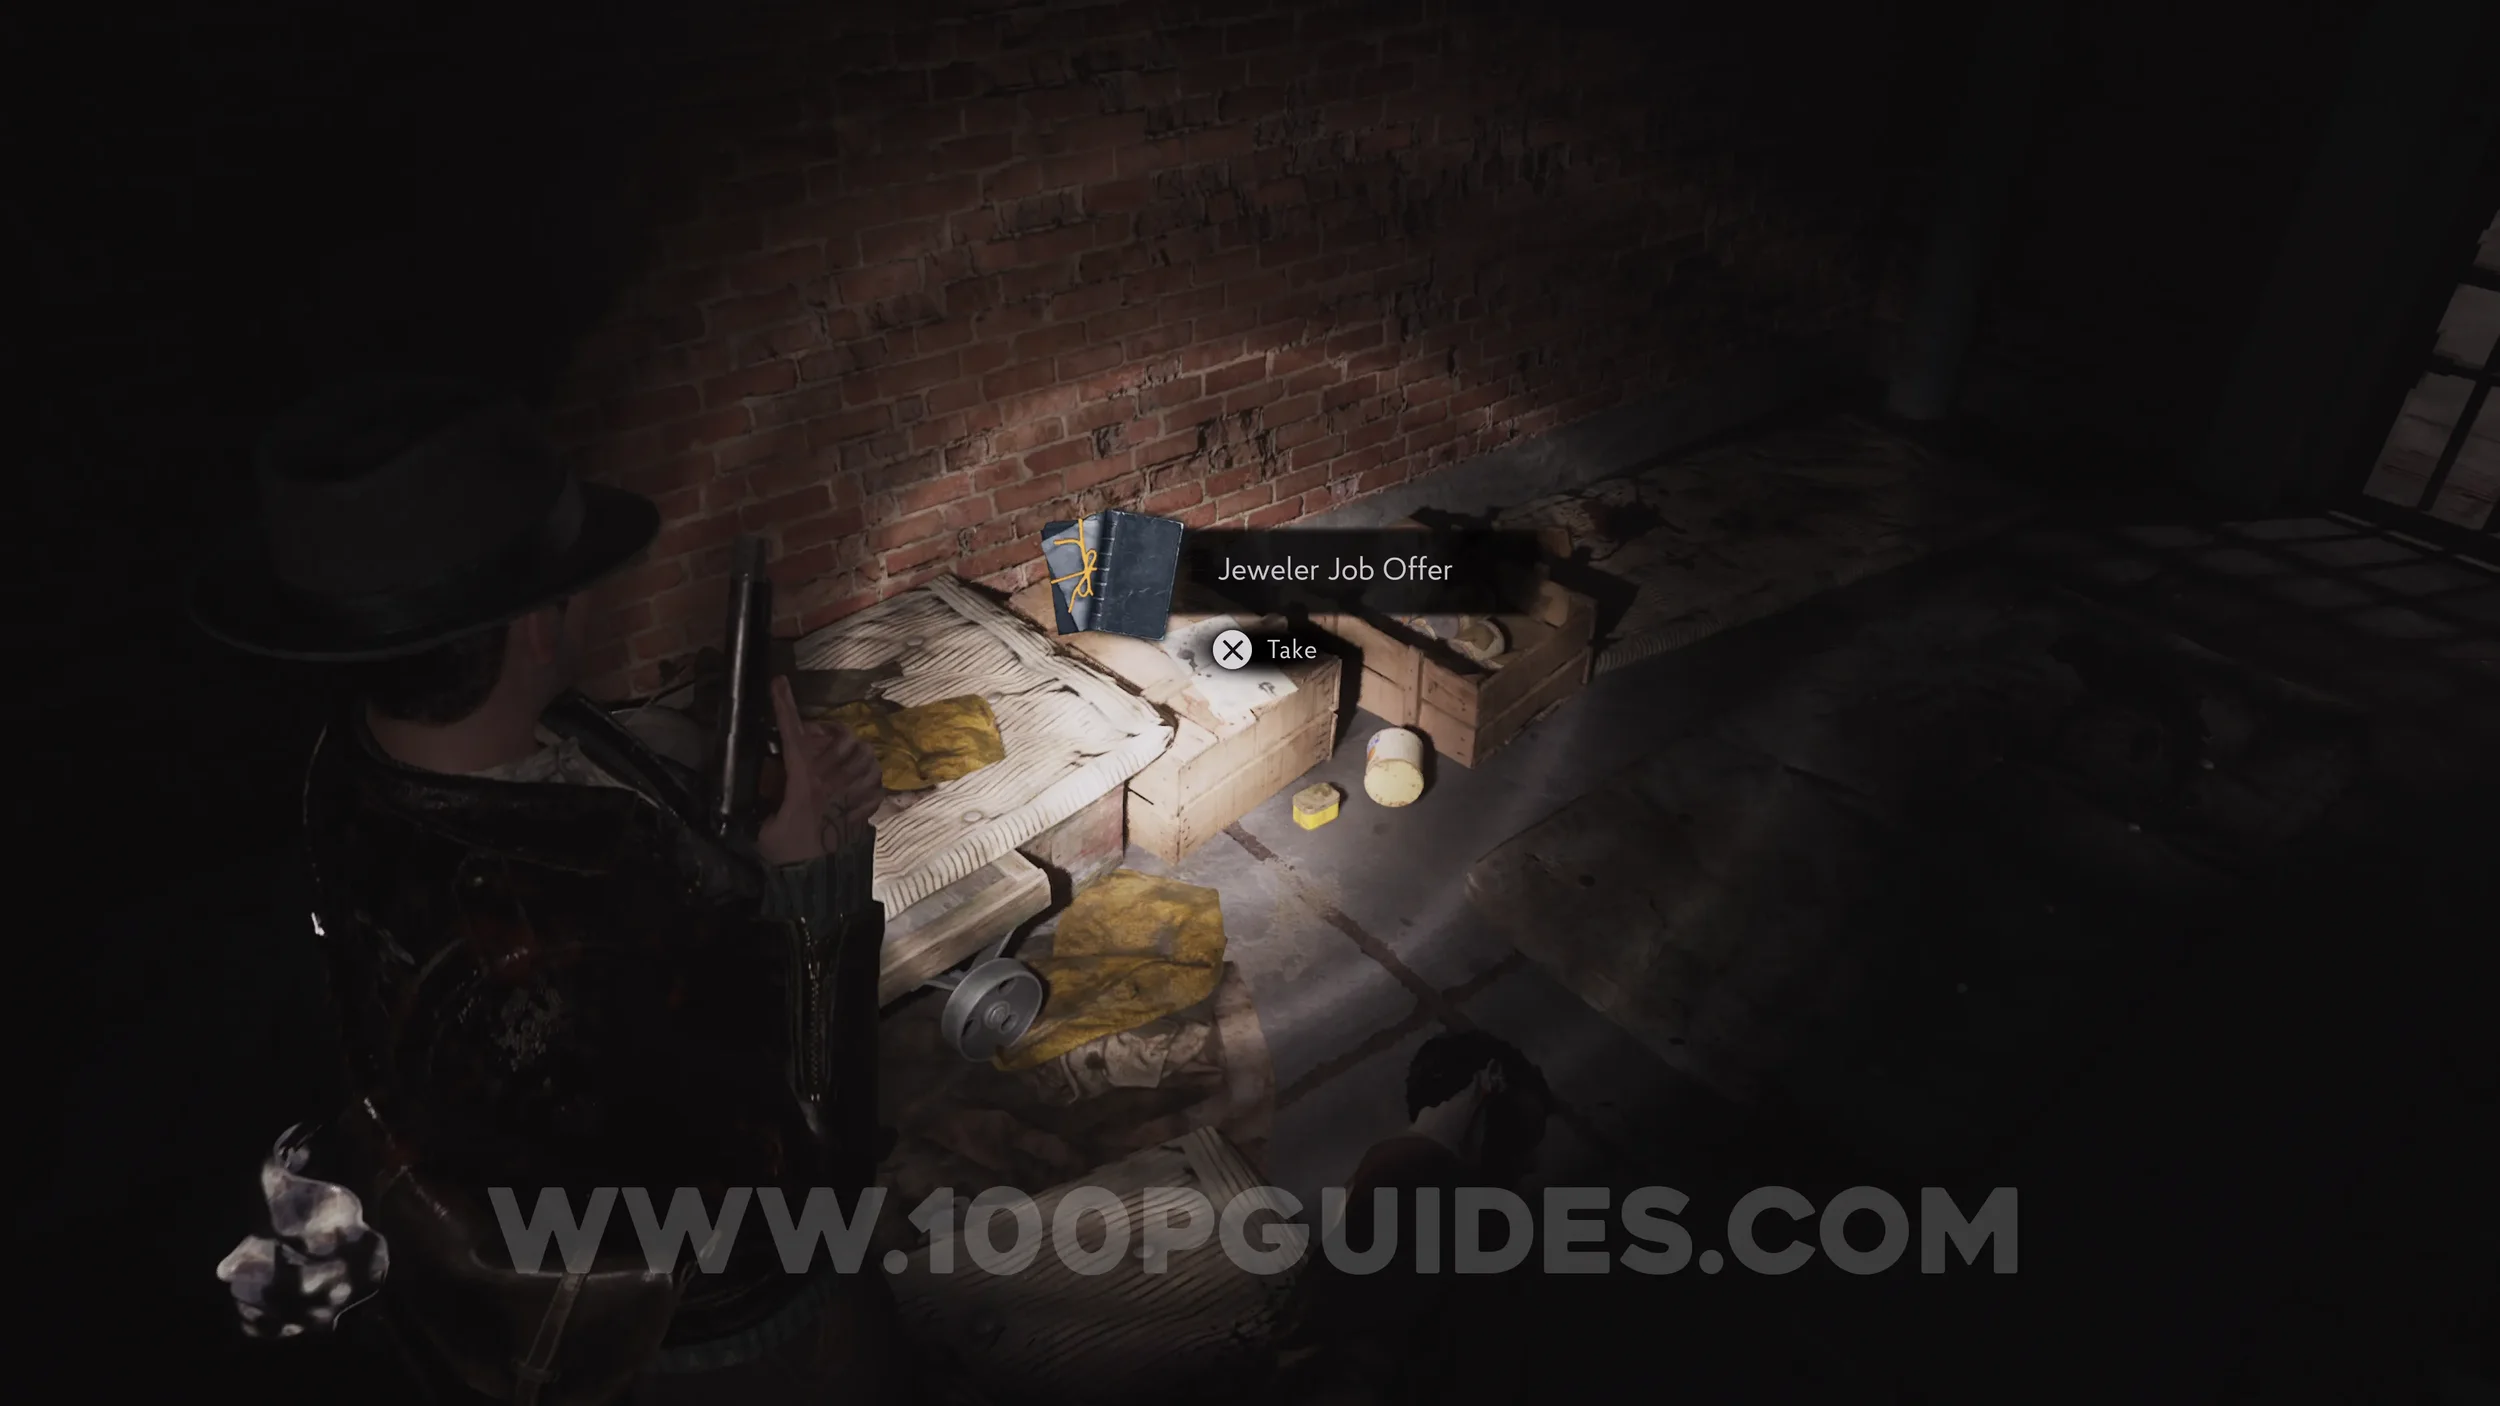
Lore Codex: Jeweler Job Offer. Head south down the hall to the west of the Jewelry Workshop and open the shortcut back to the two starfish doors where you currently have the Jars placed. Retrieve them both, then head back through the shortcut and place a Jar into the starfish in the hall. The codex is on the floor in the cell.
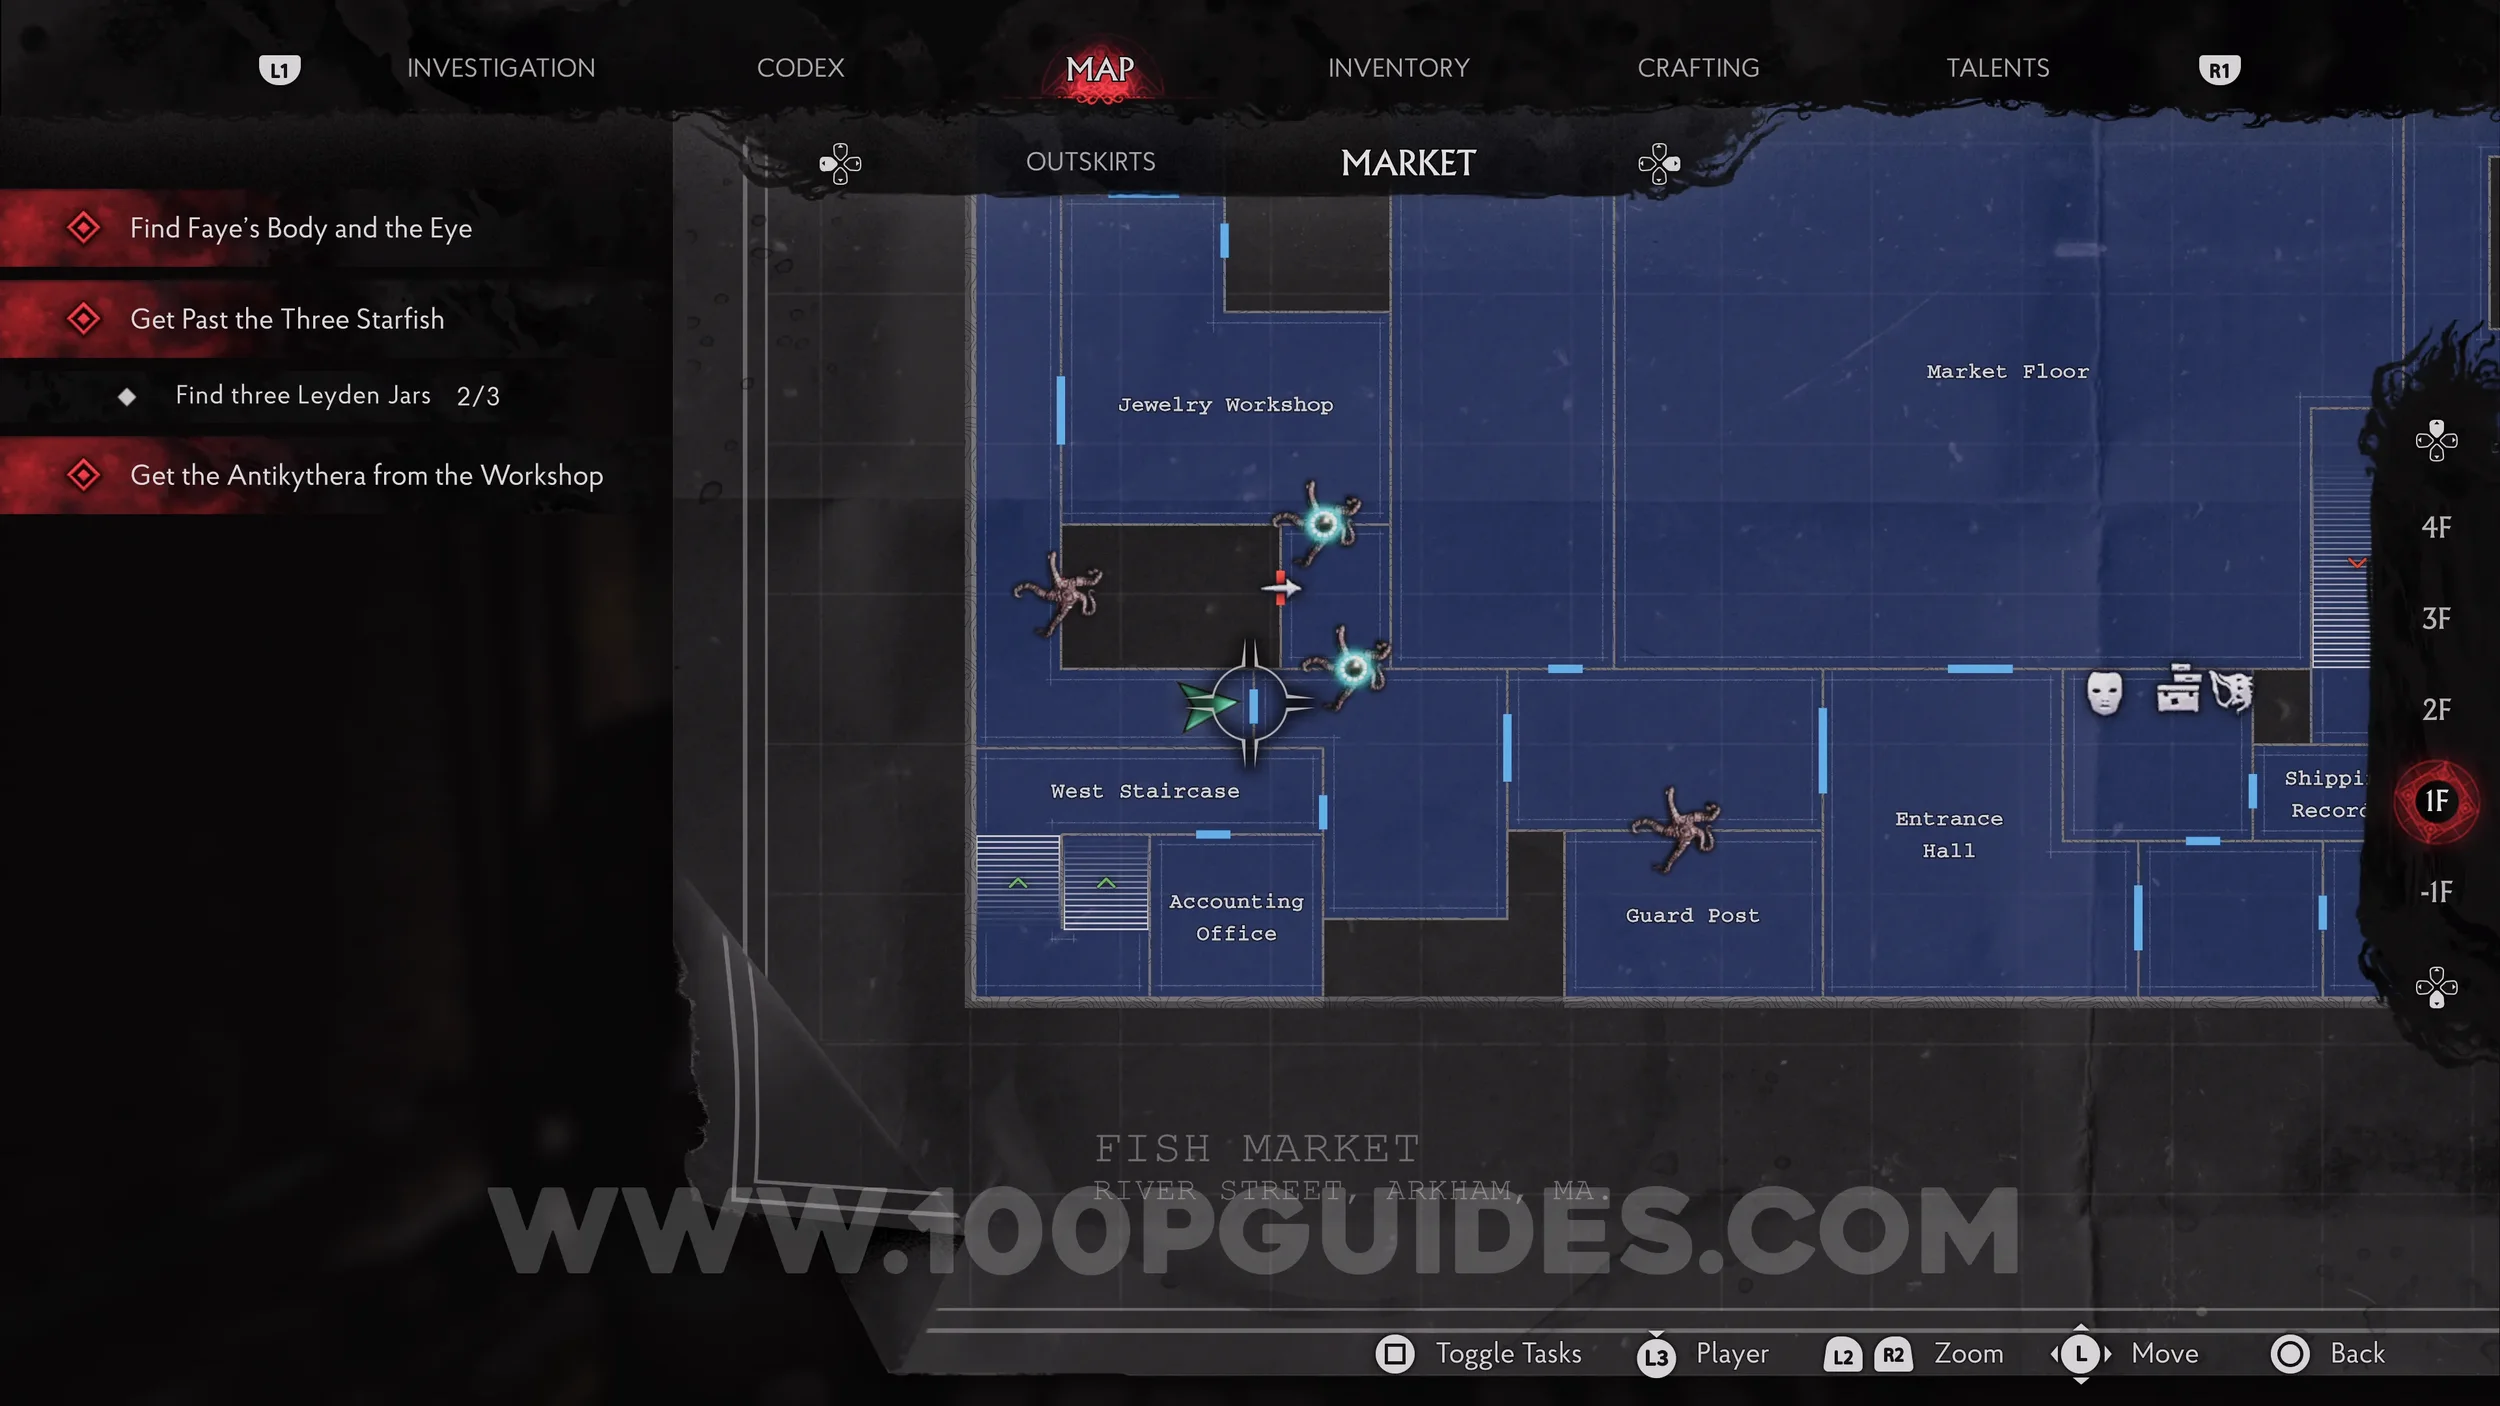
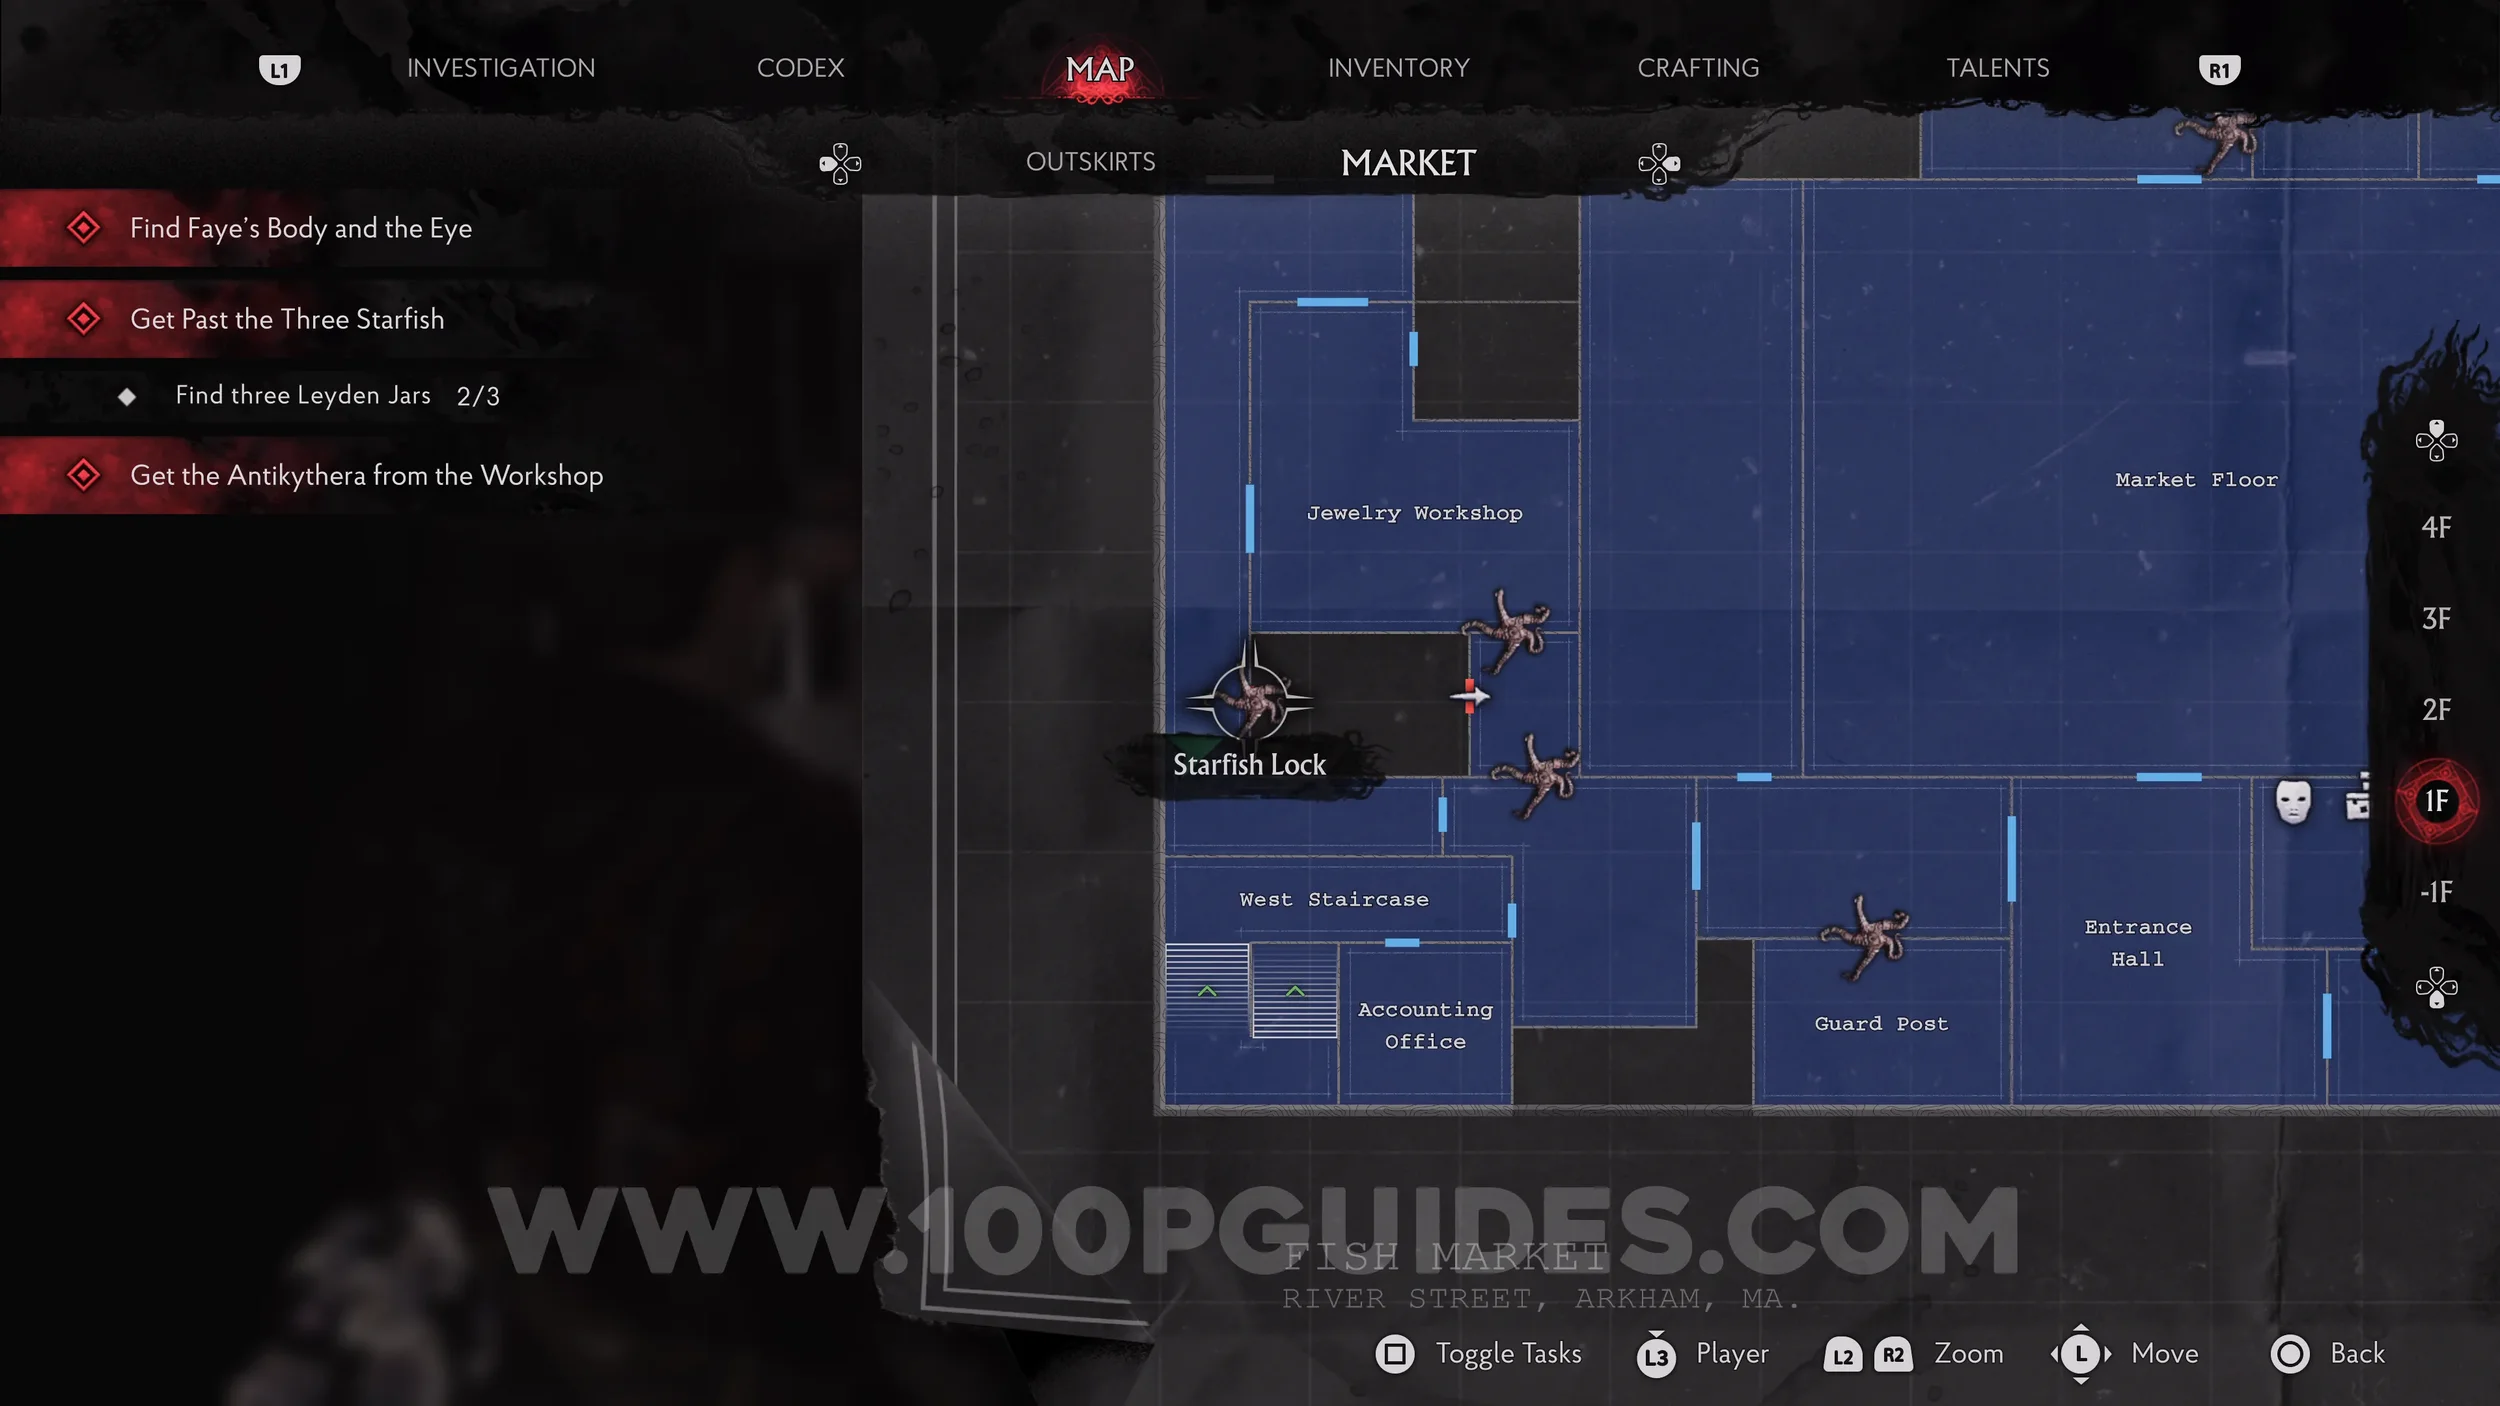
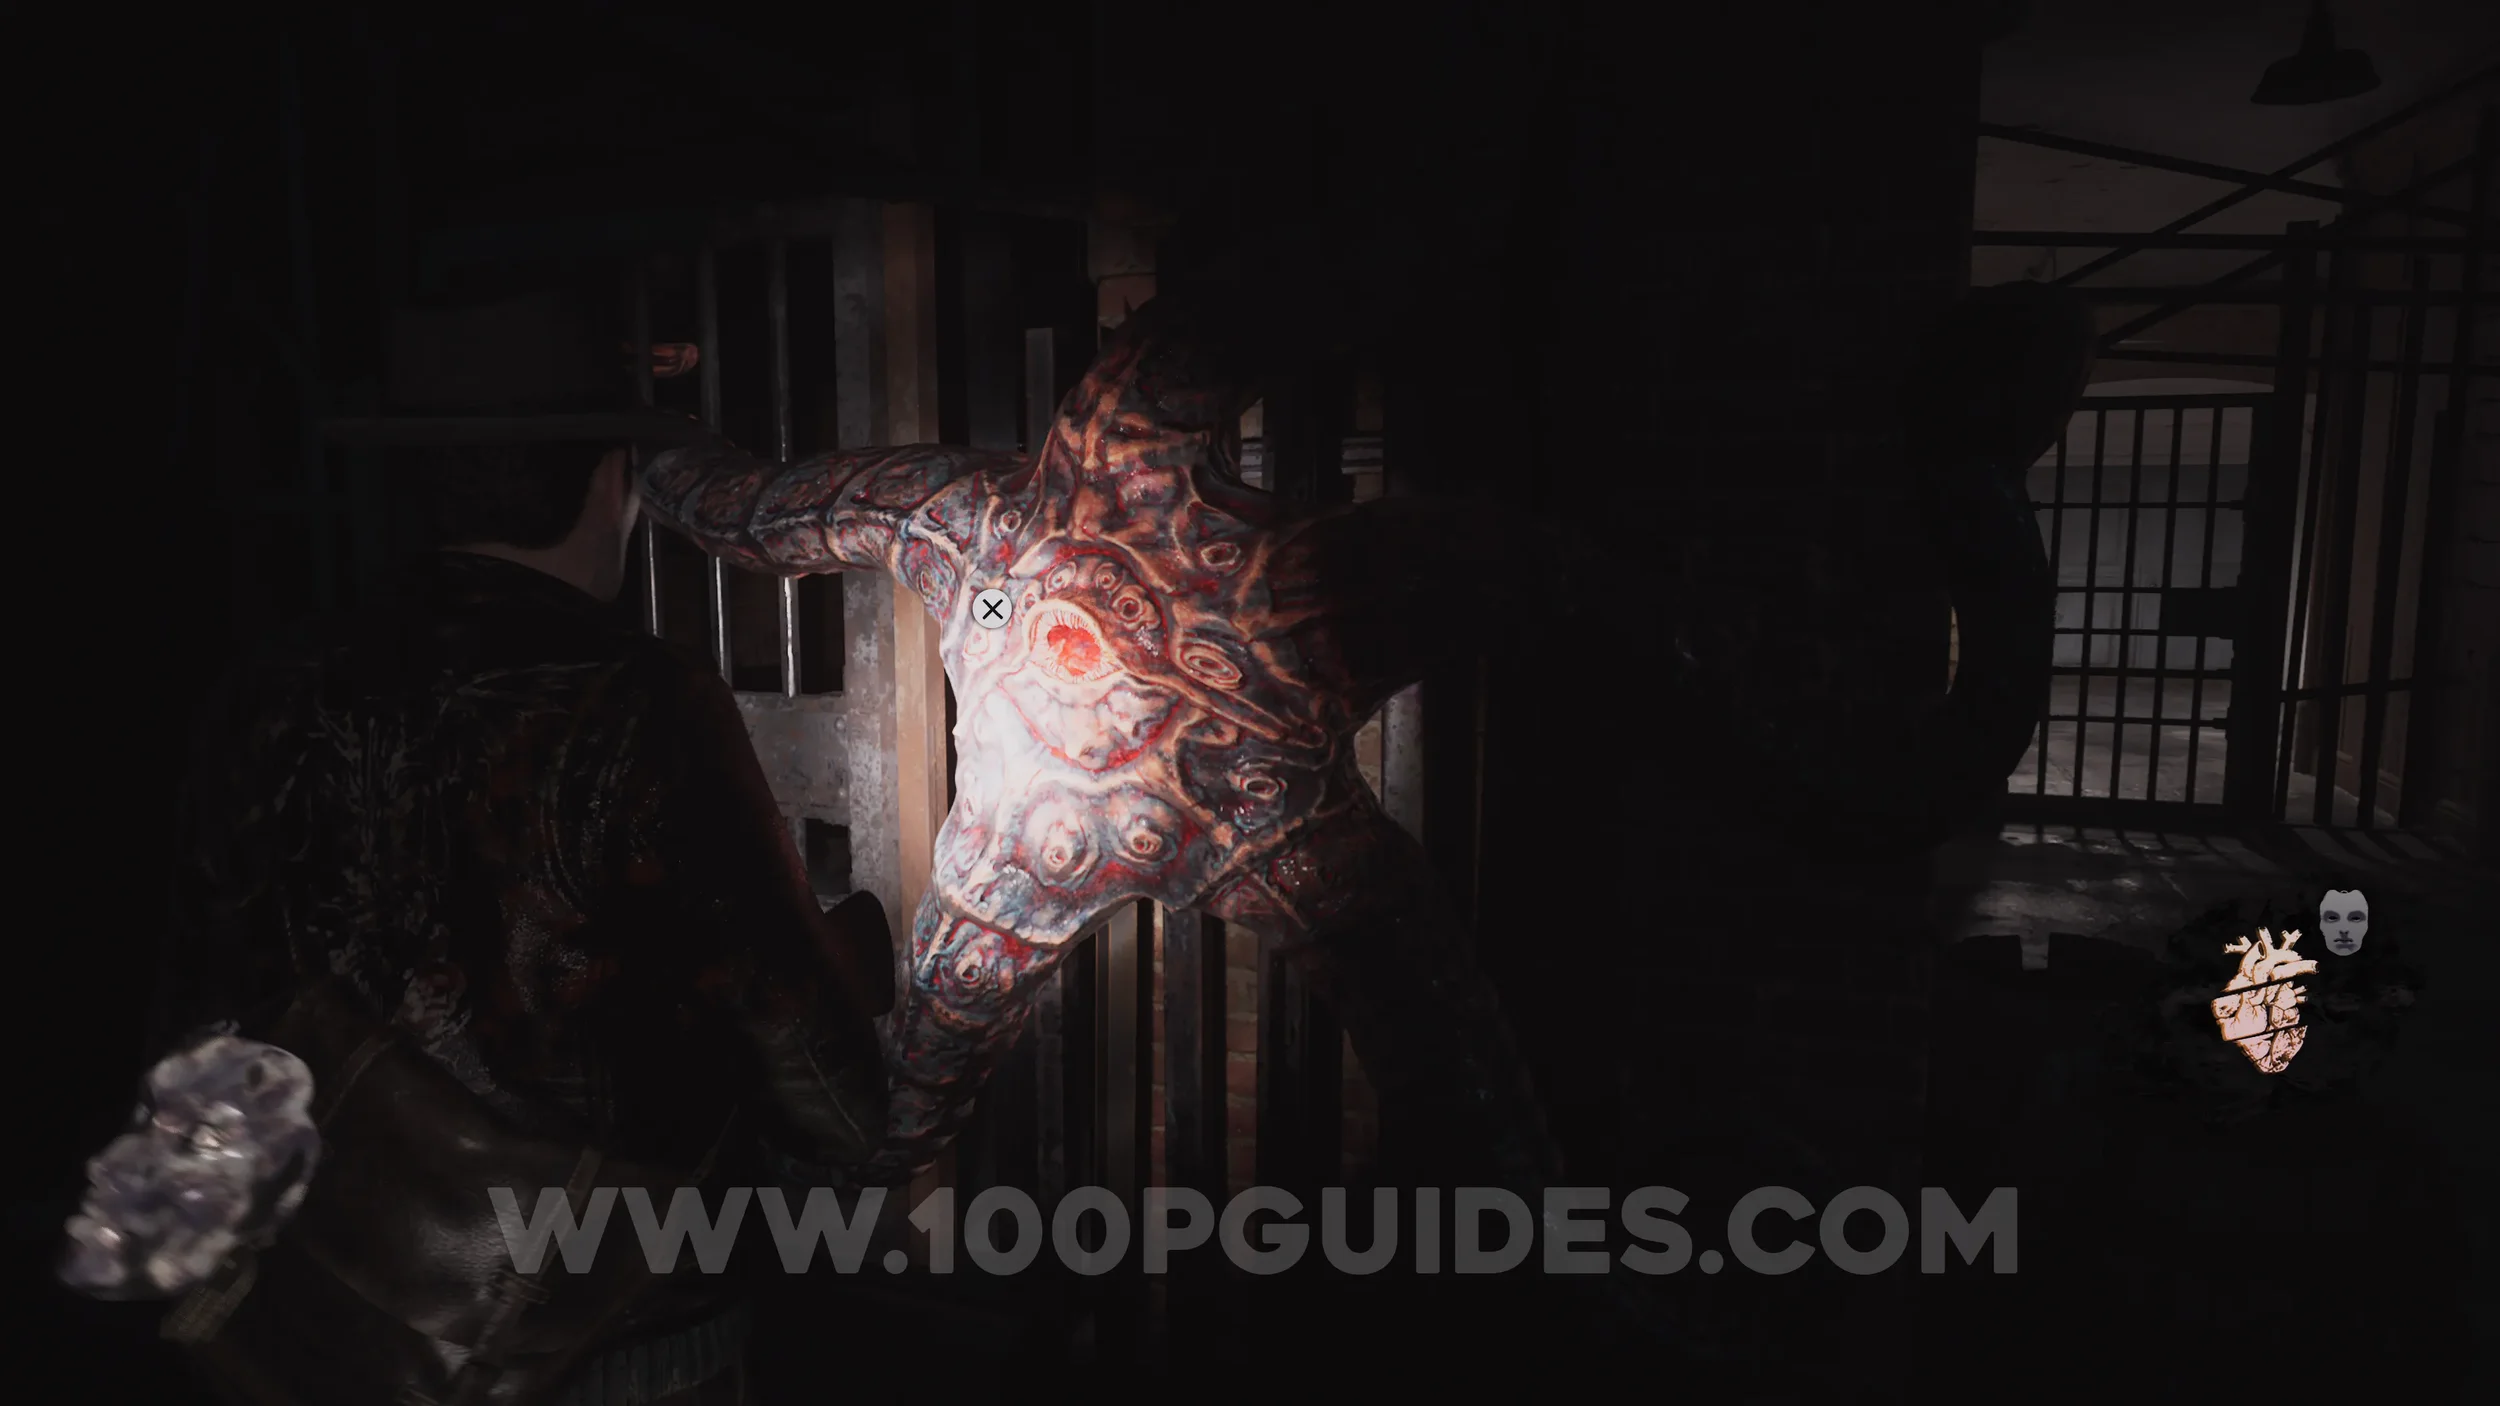
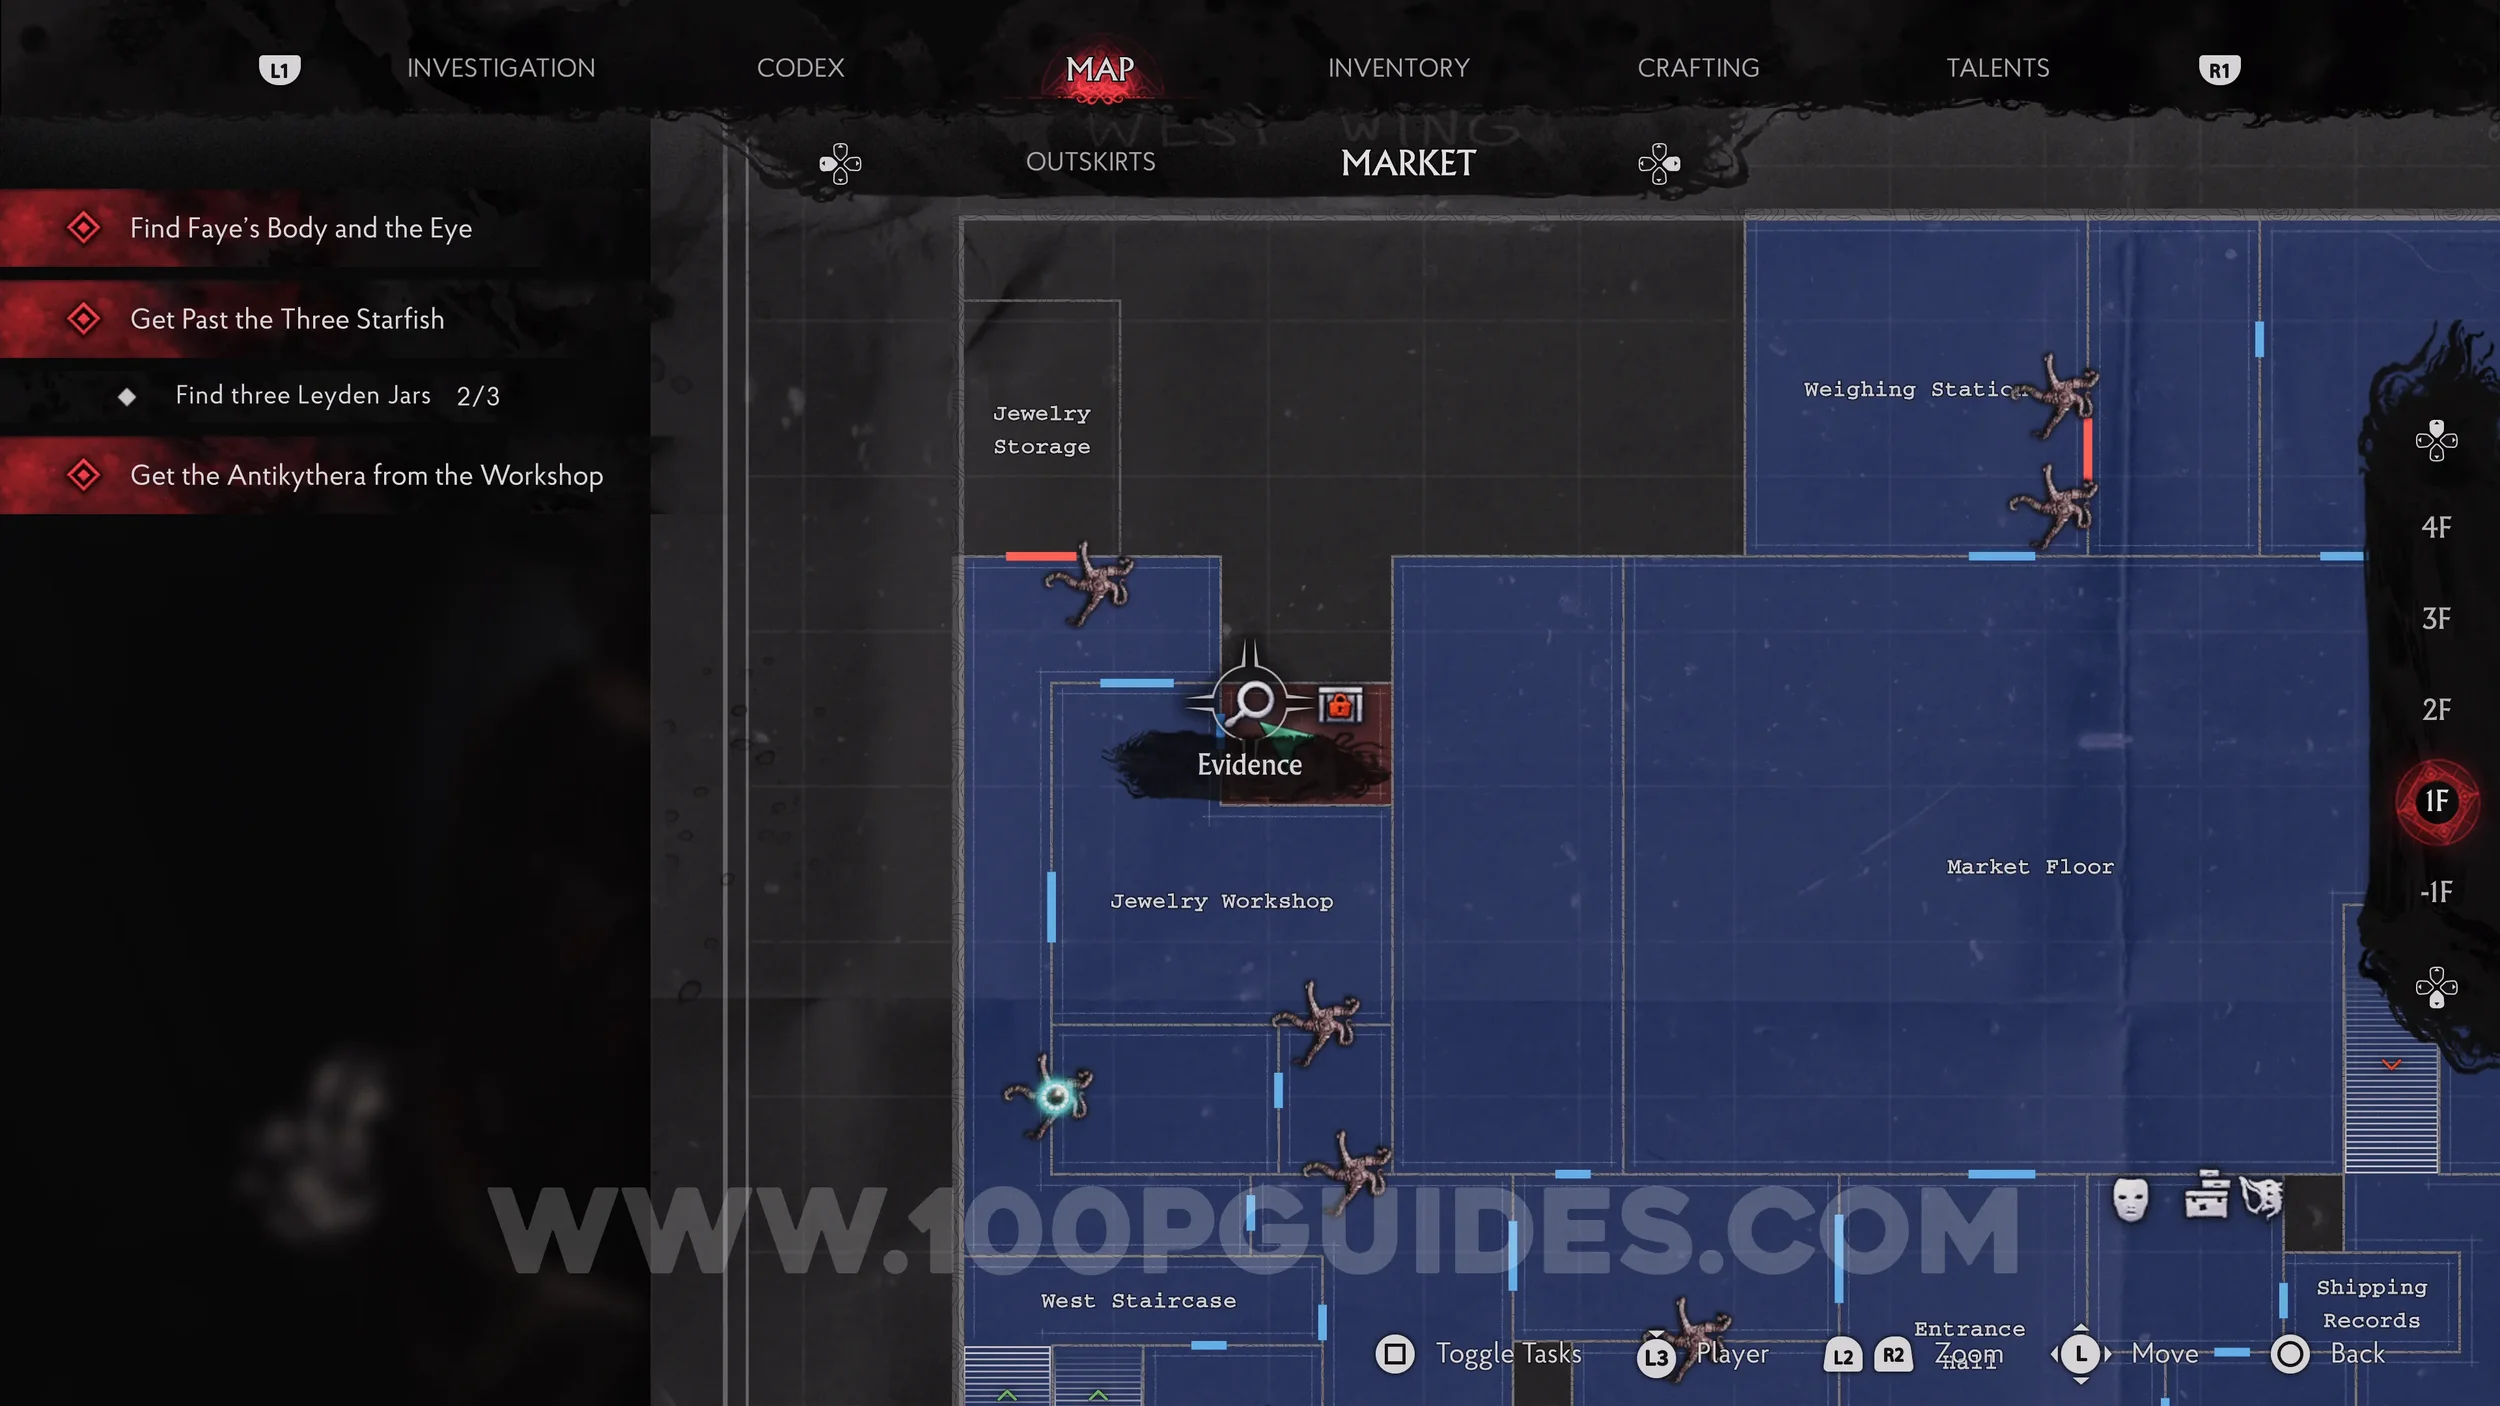
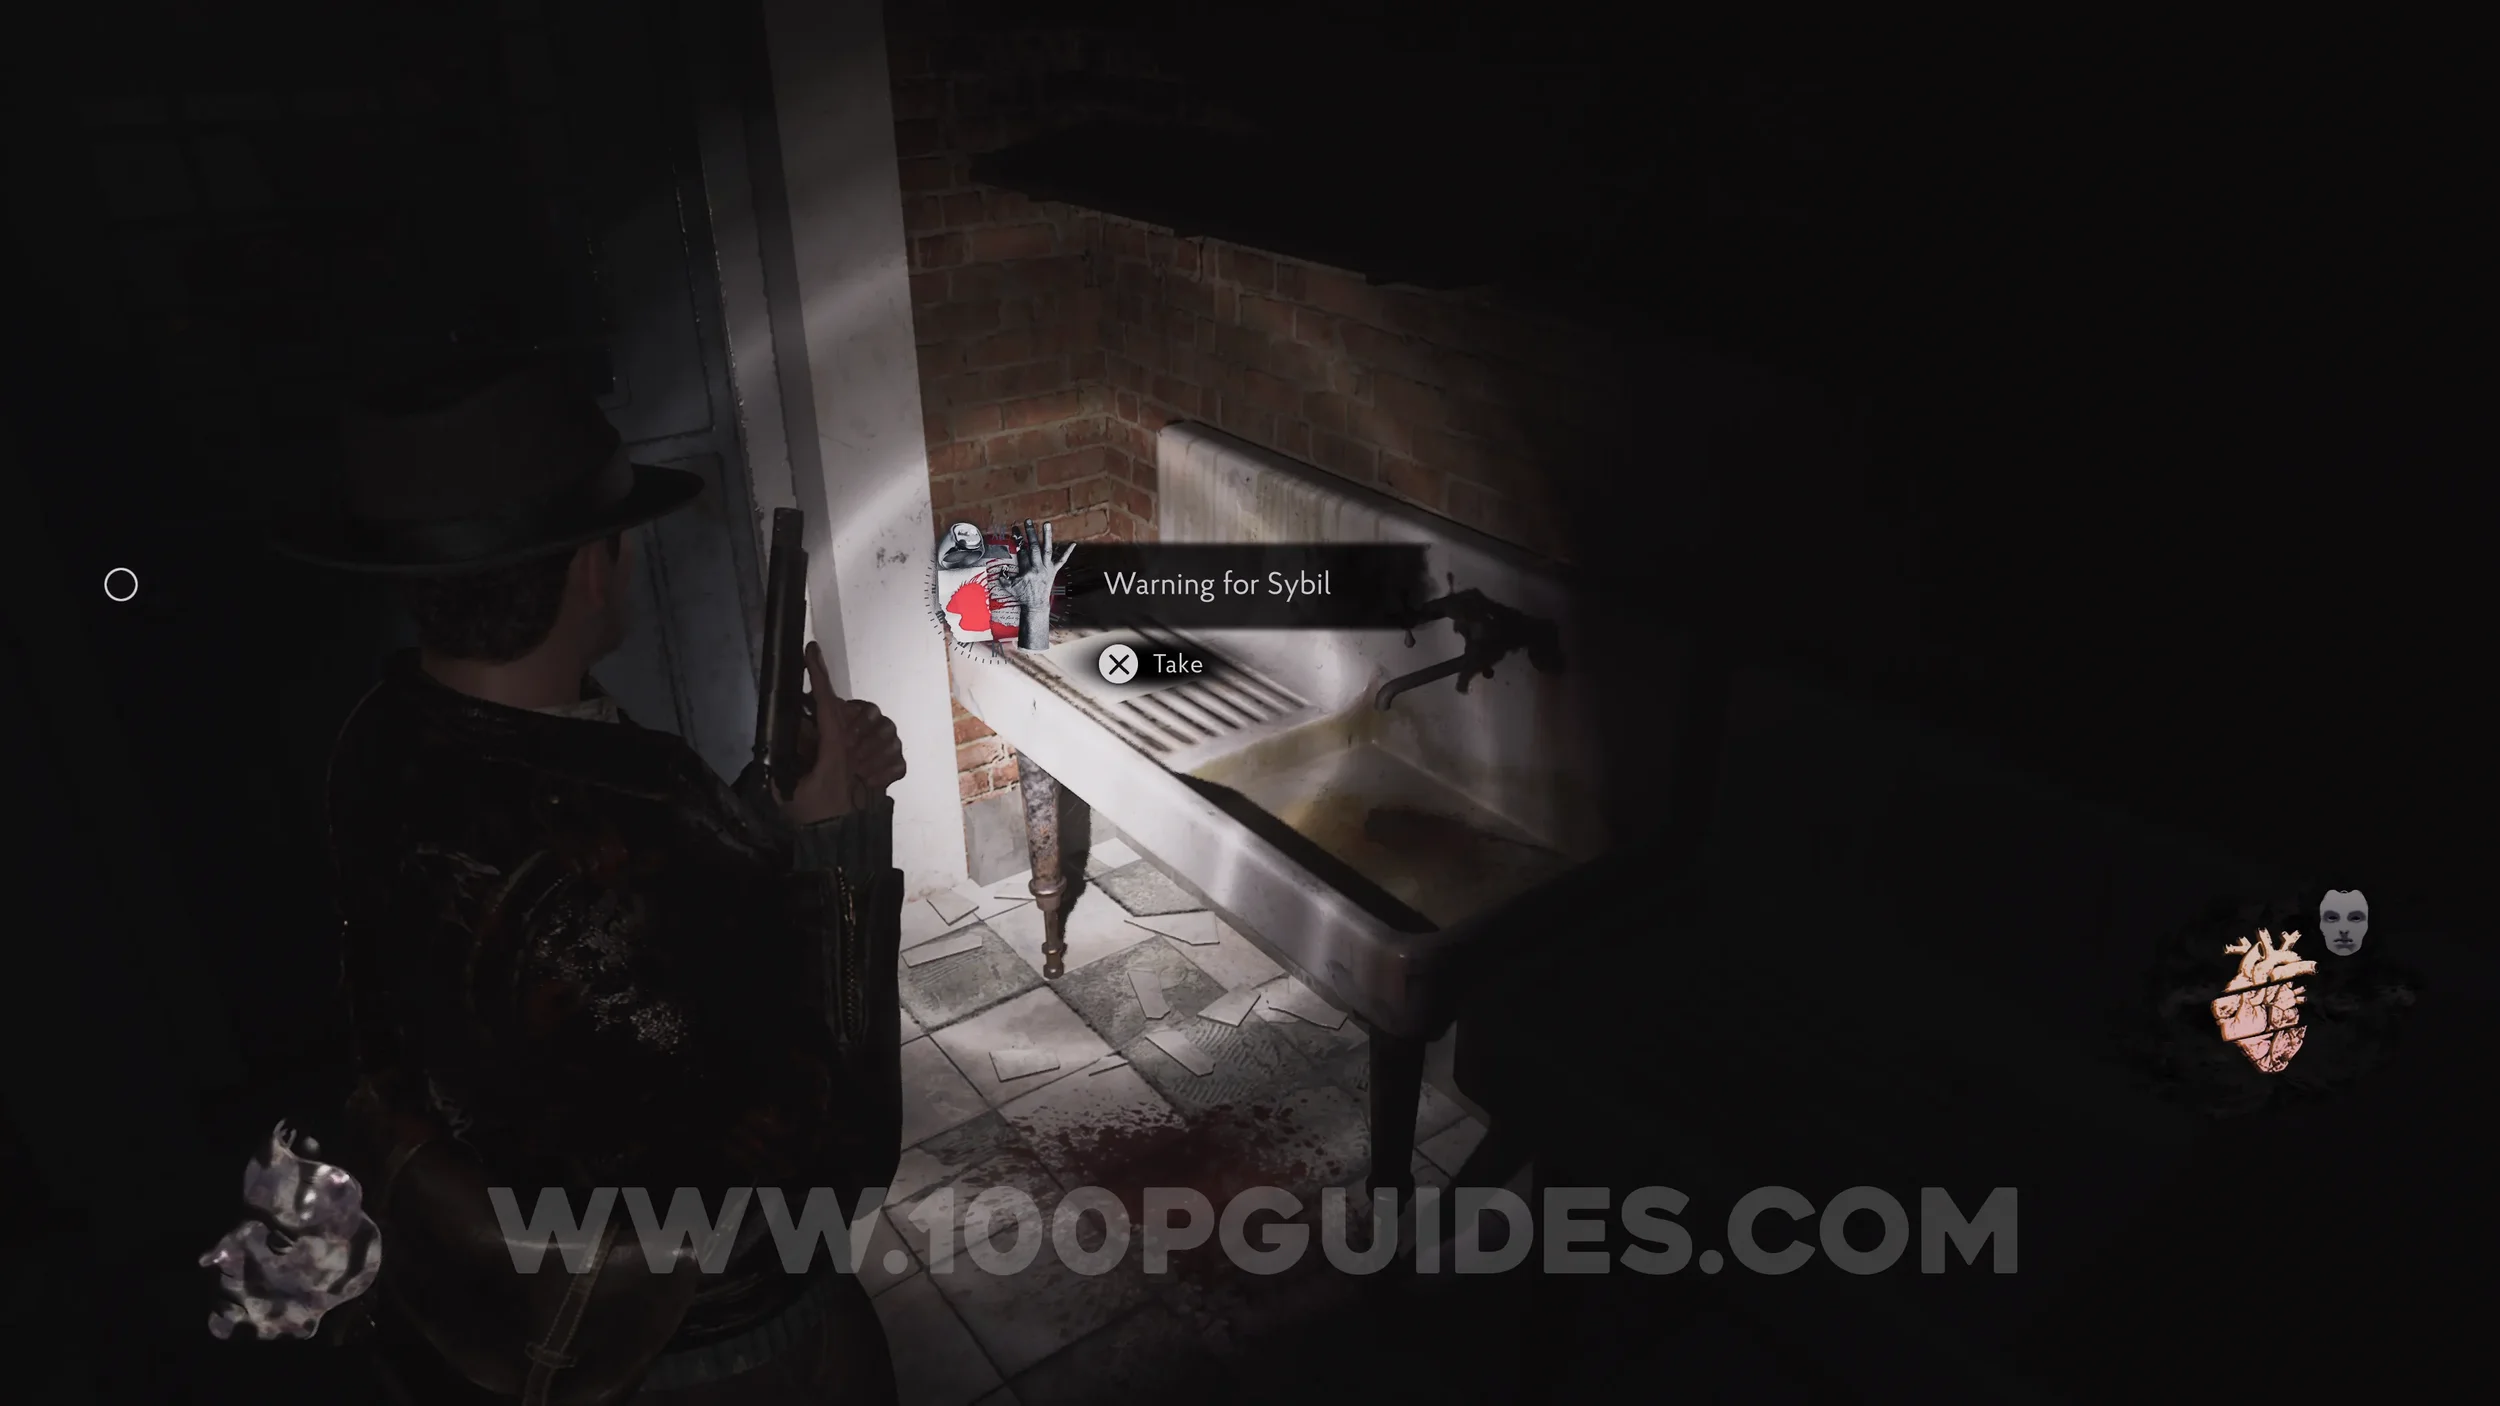
Evidence: Warning for Sybil. In the small room to the northeast of the Jewelry Workshop.
Lore Codex: Literature Review - Antikythera. In the Jewelry Storage room to the north of the Jewelry Workshop.
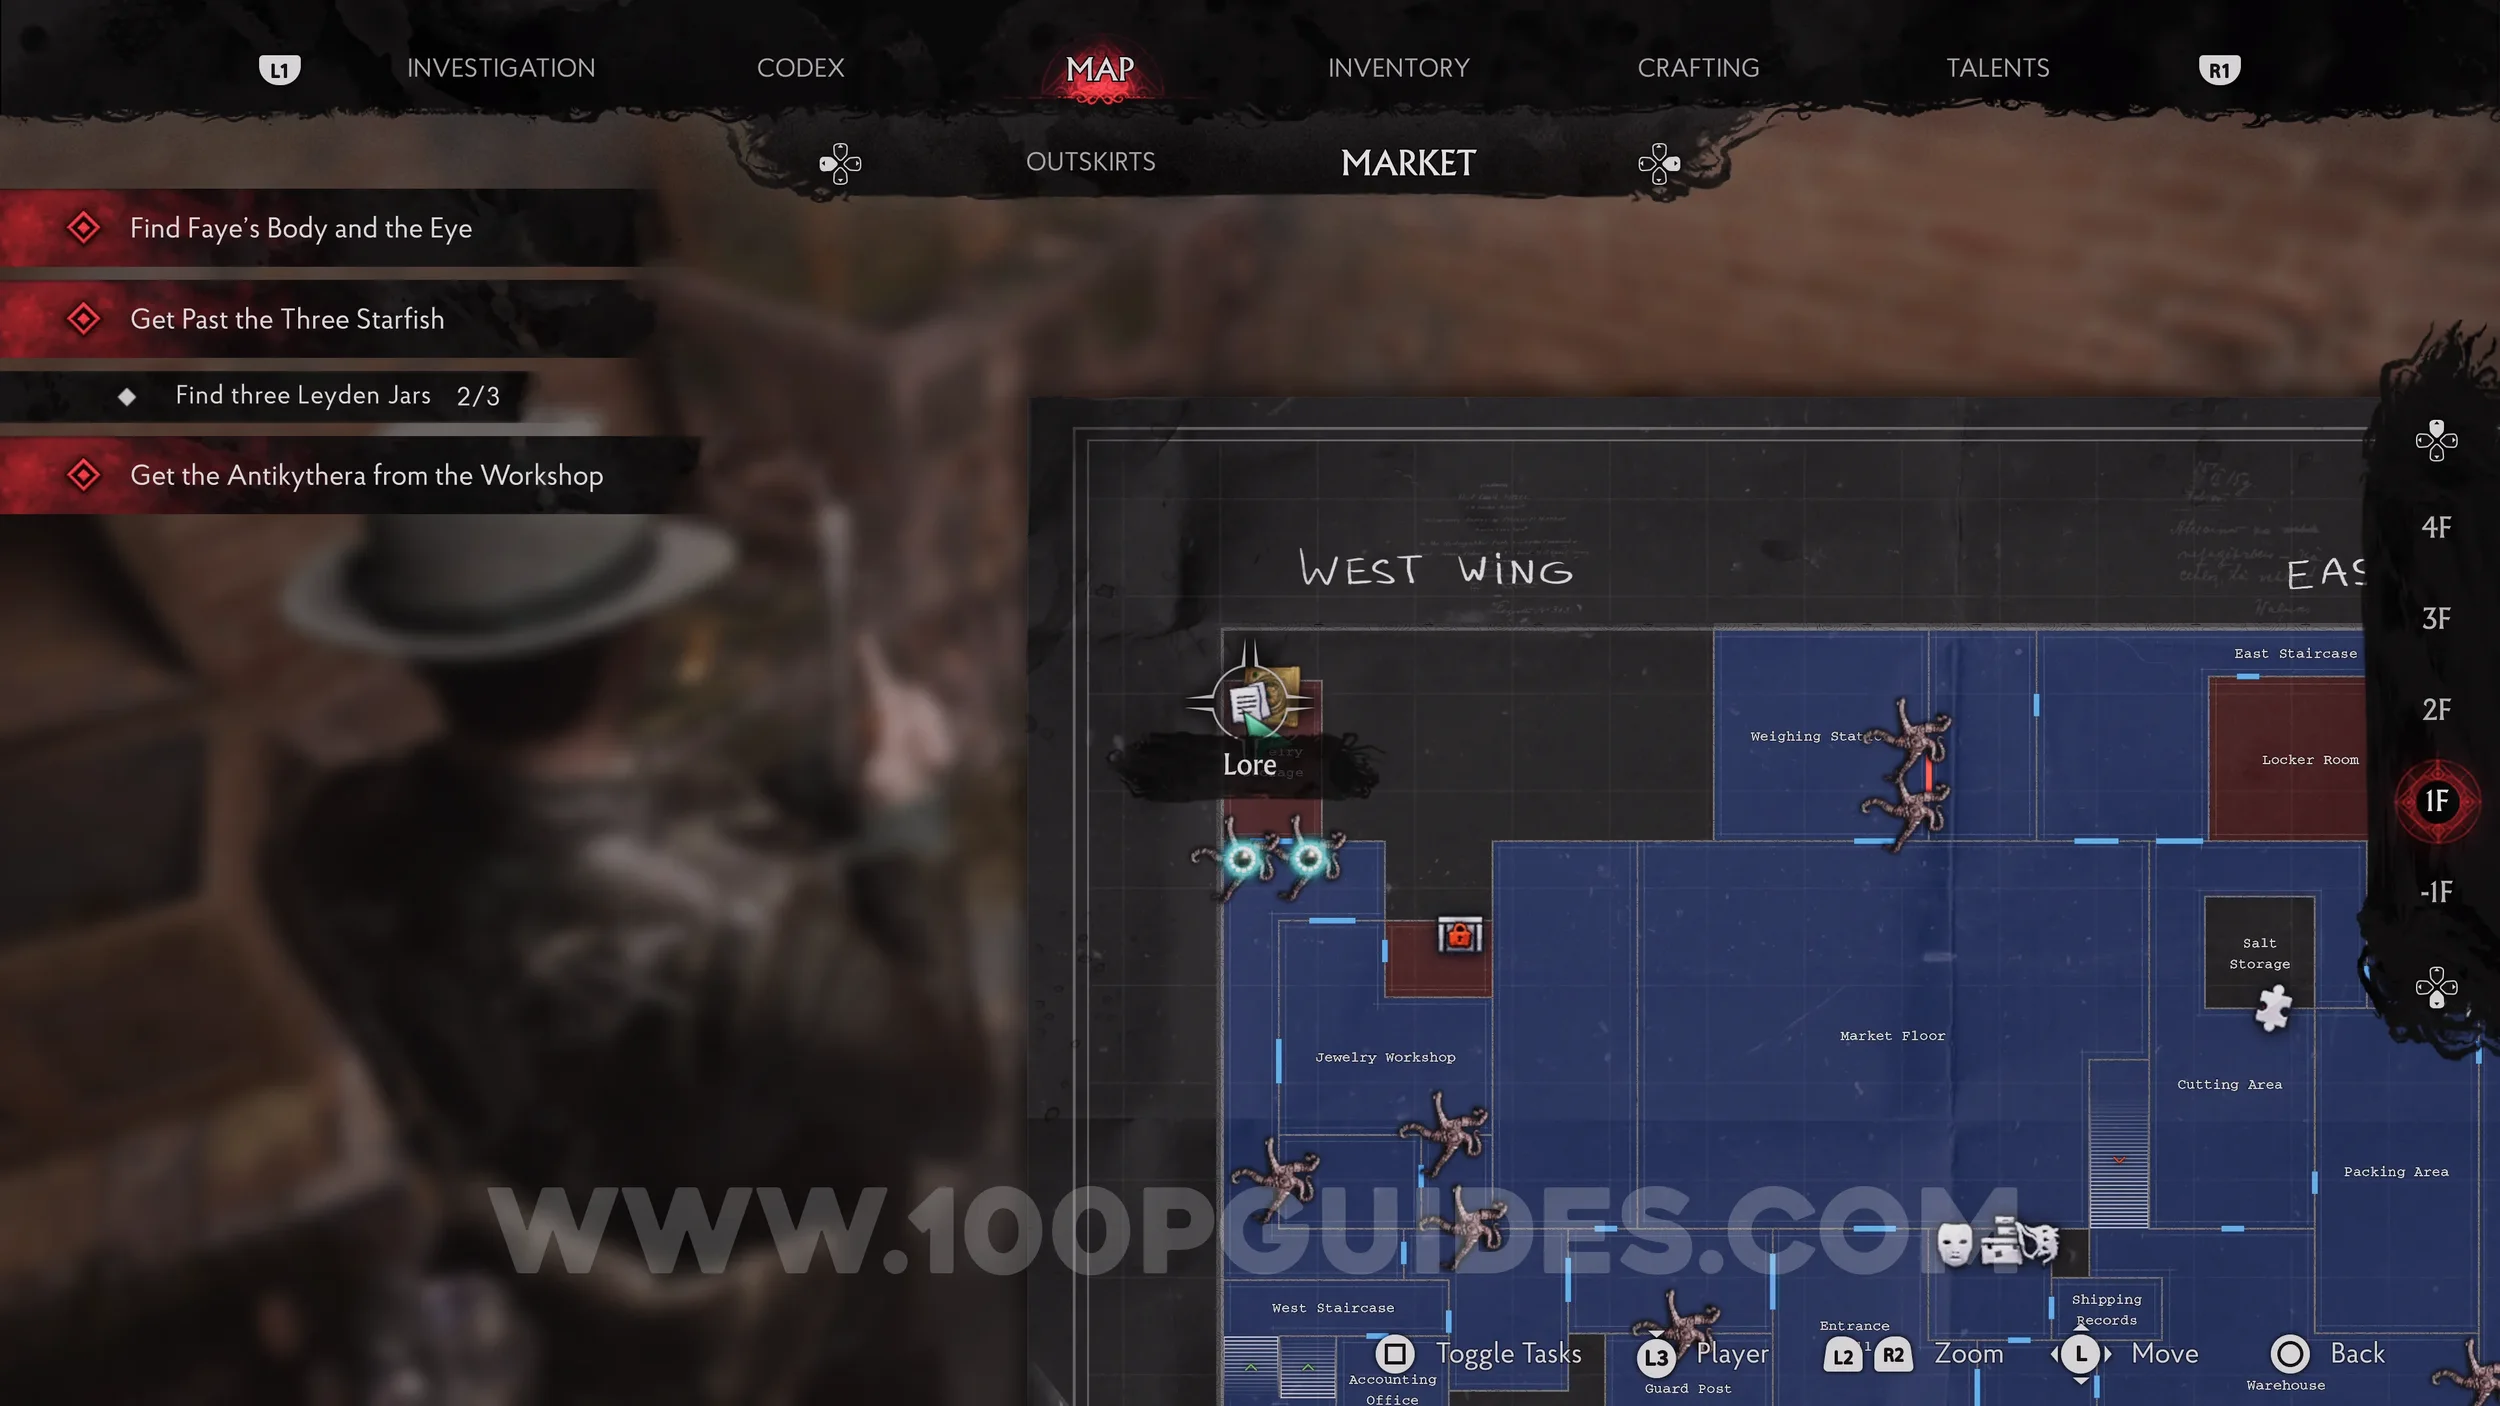
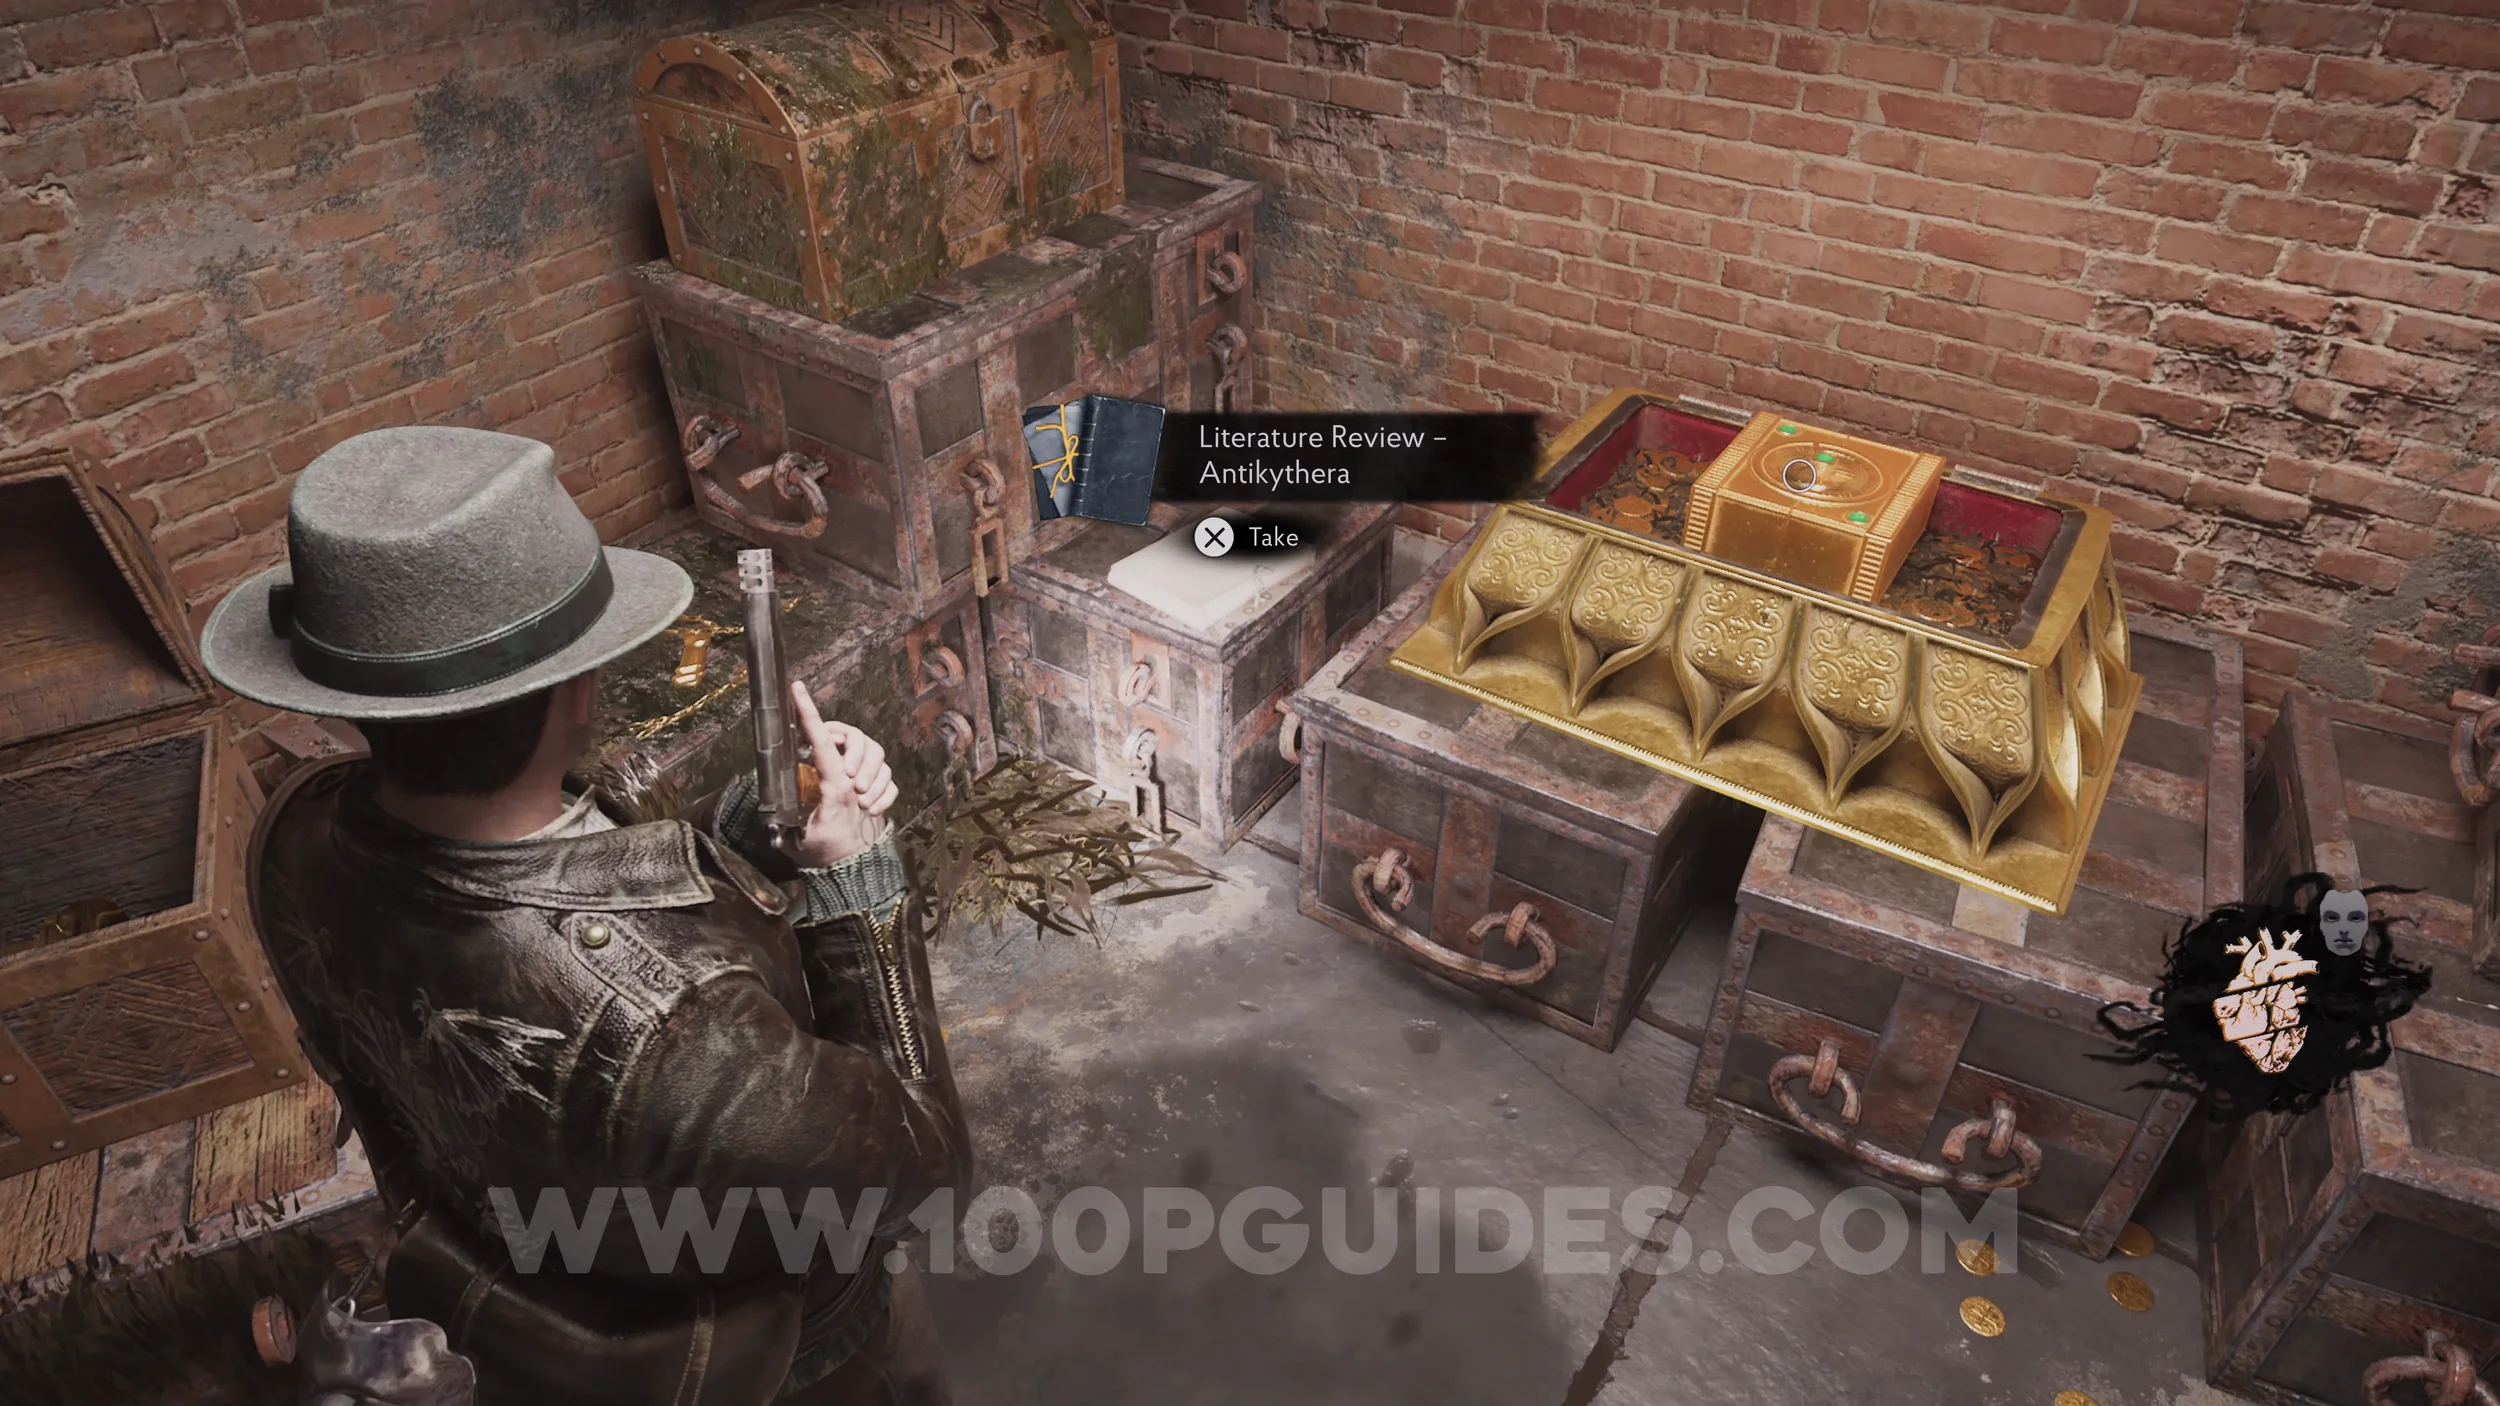
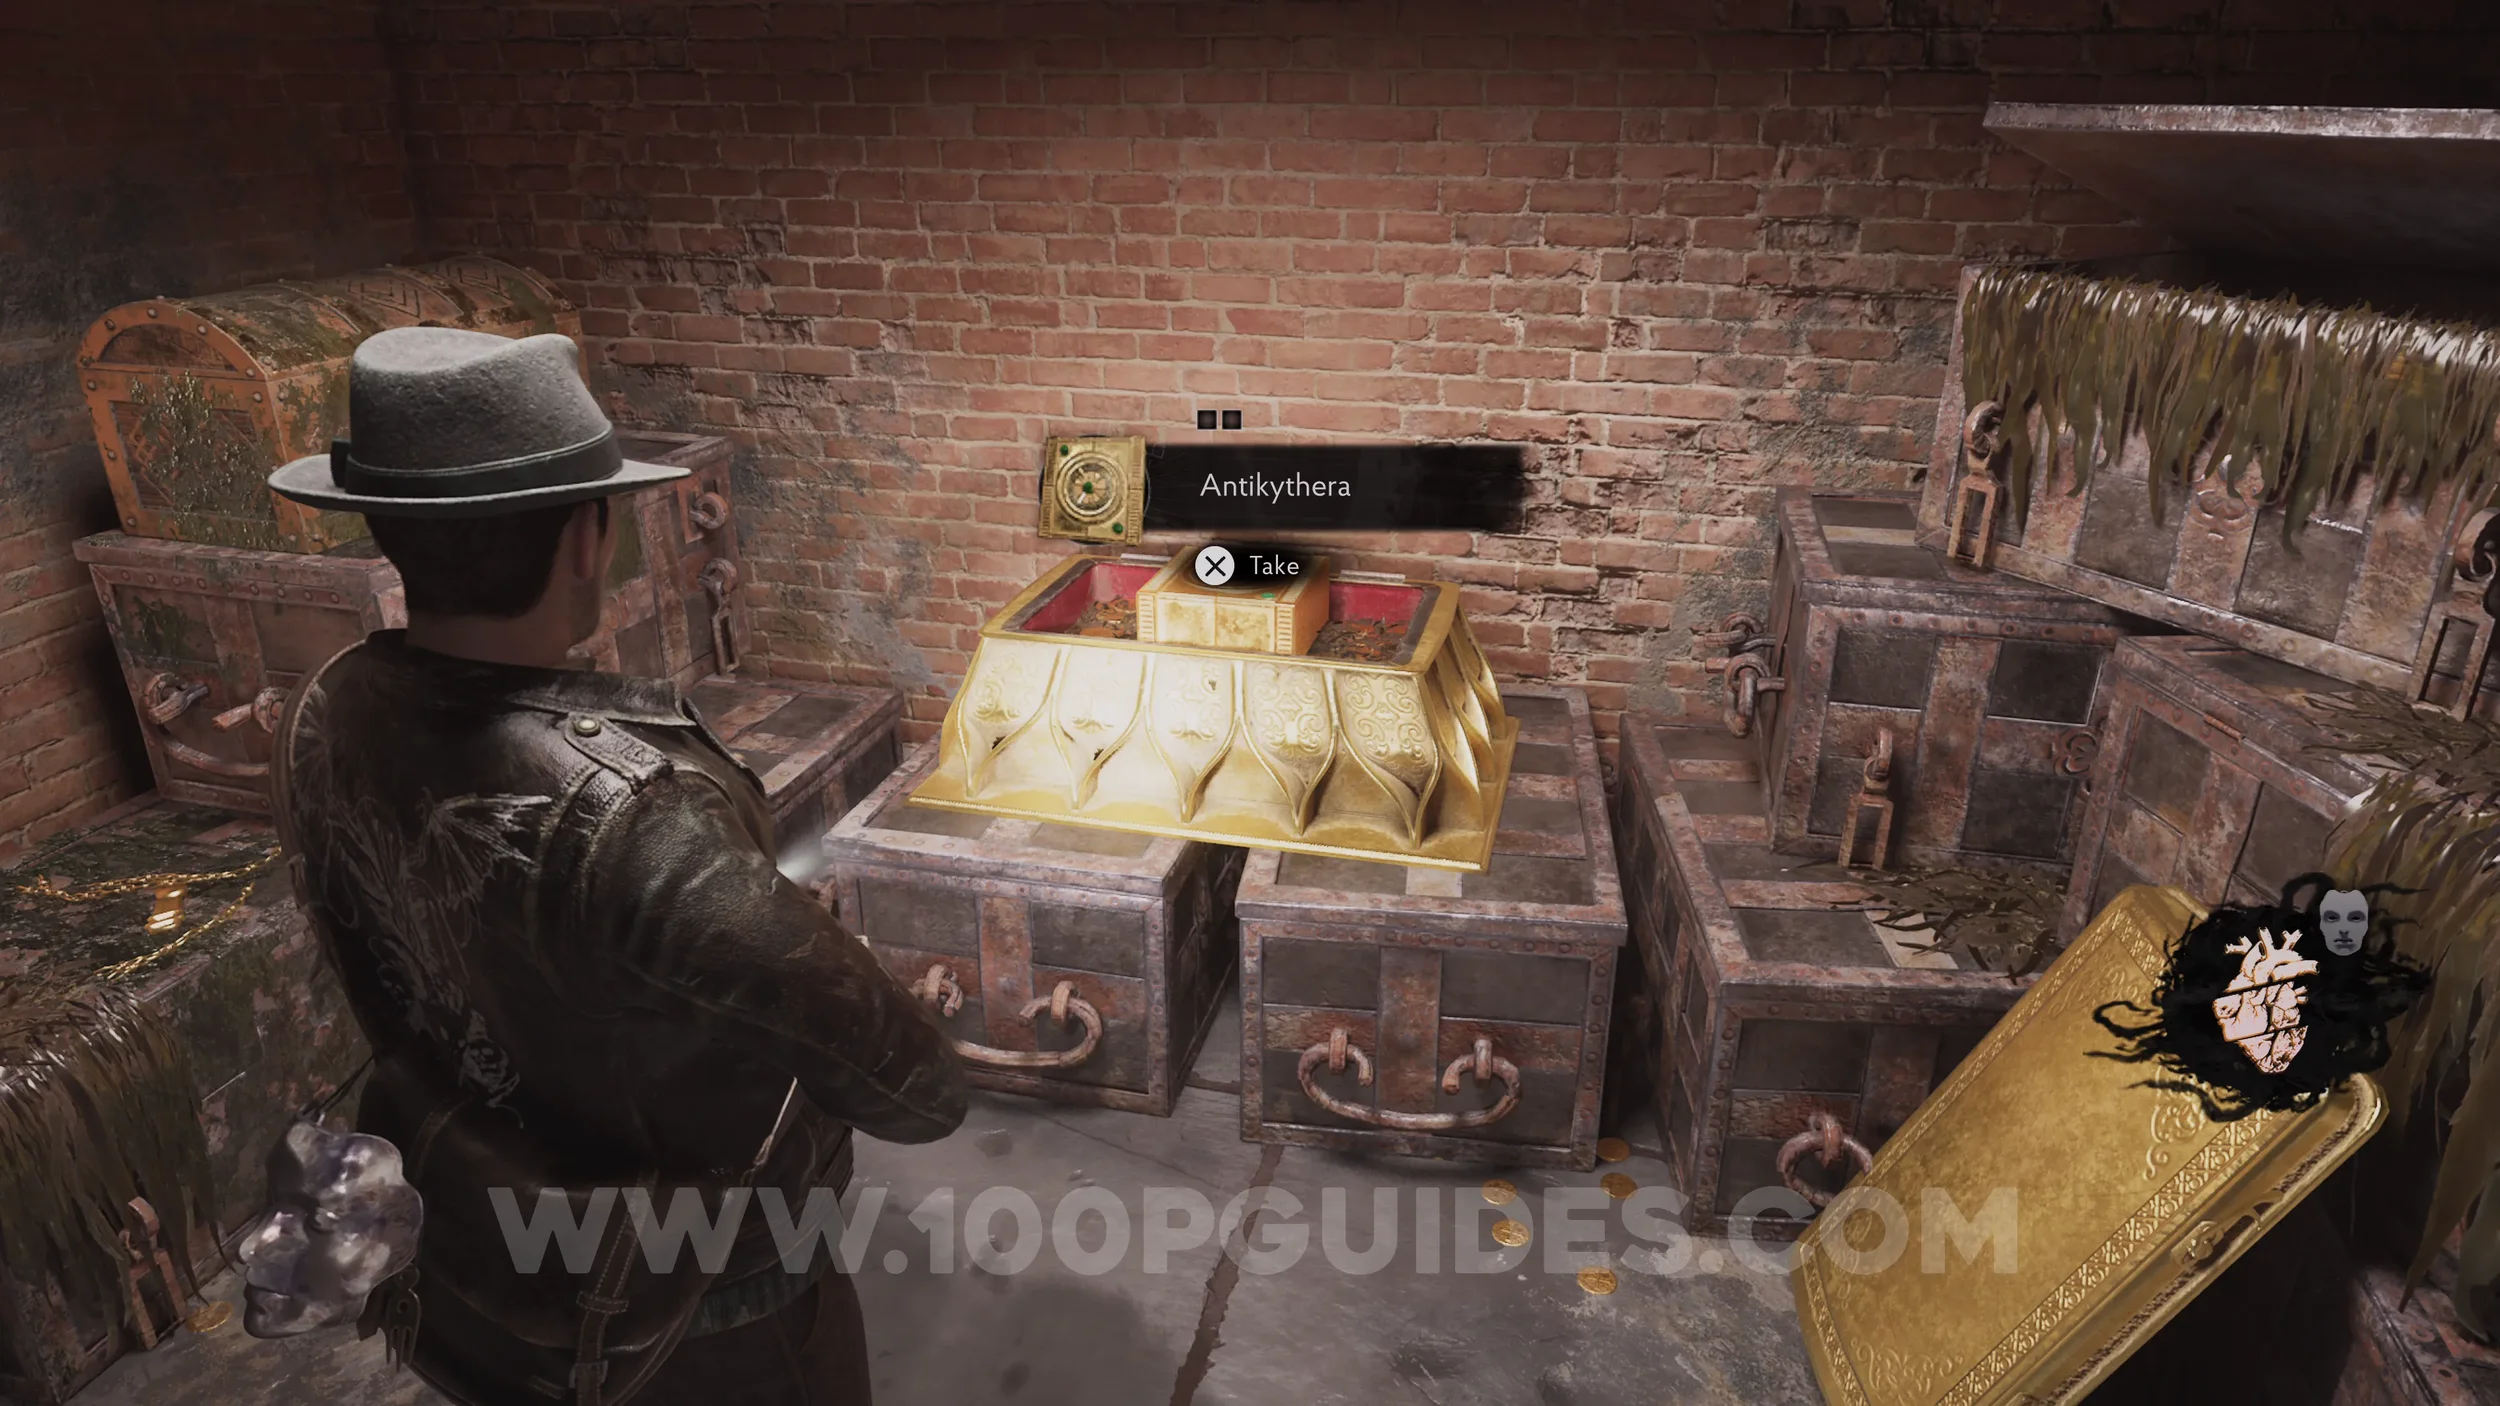
Key Item: Antikythera. In the same room as the previous codex.
Memory Safe Code
Once you bring the Antikythera back to Ma, you'll change the timeline. Then interact with the Memory Relic on the counter to enter a memory. In this memory, you'll have to open a safe. You can find the code by interacting with and listening to the phantoms. The correct code is: 6294.


Key Item: Heart of Stone. Once you open the safe and try to grab the jar, you'll return from the memory, and the jar will be replaced with the heart.
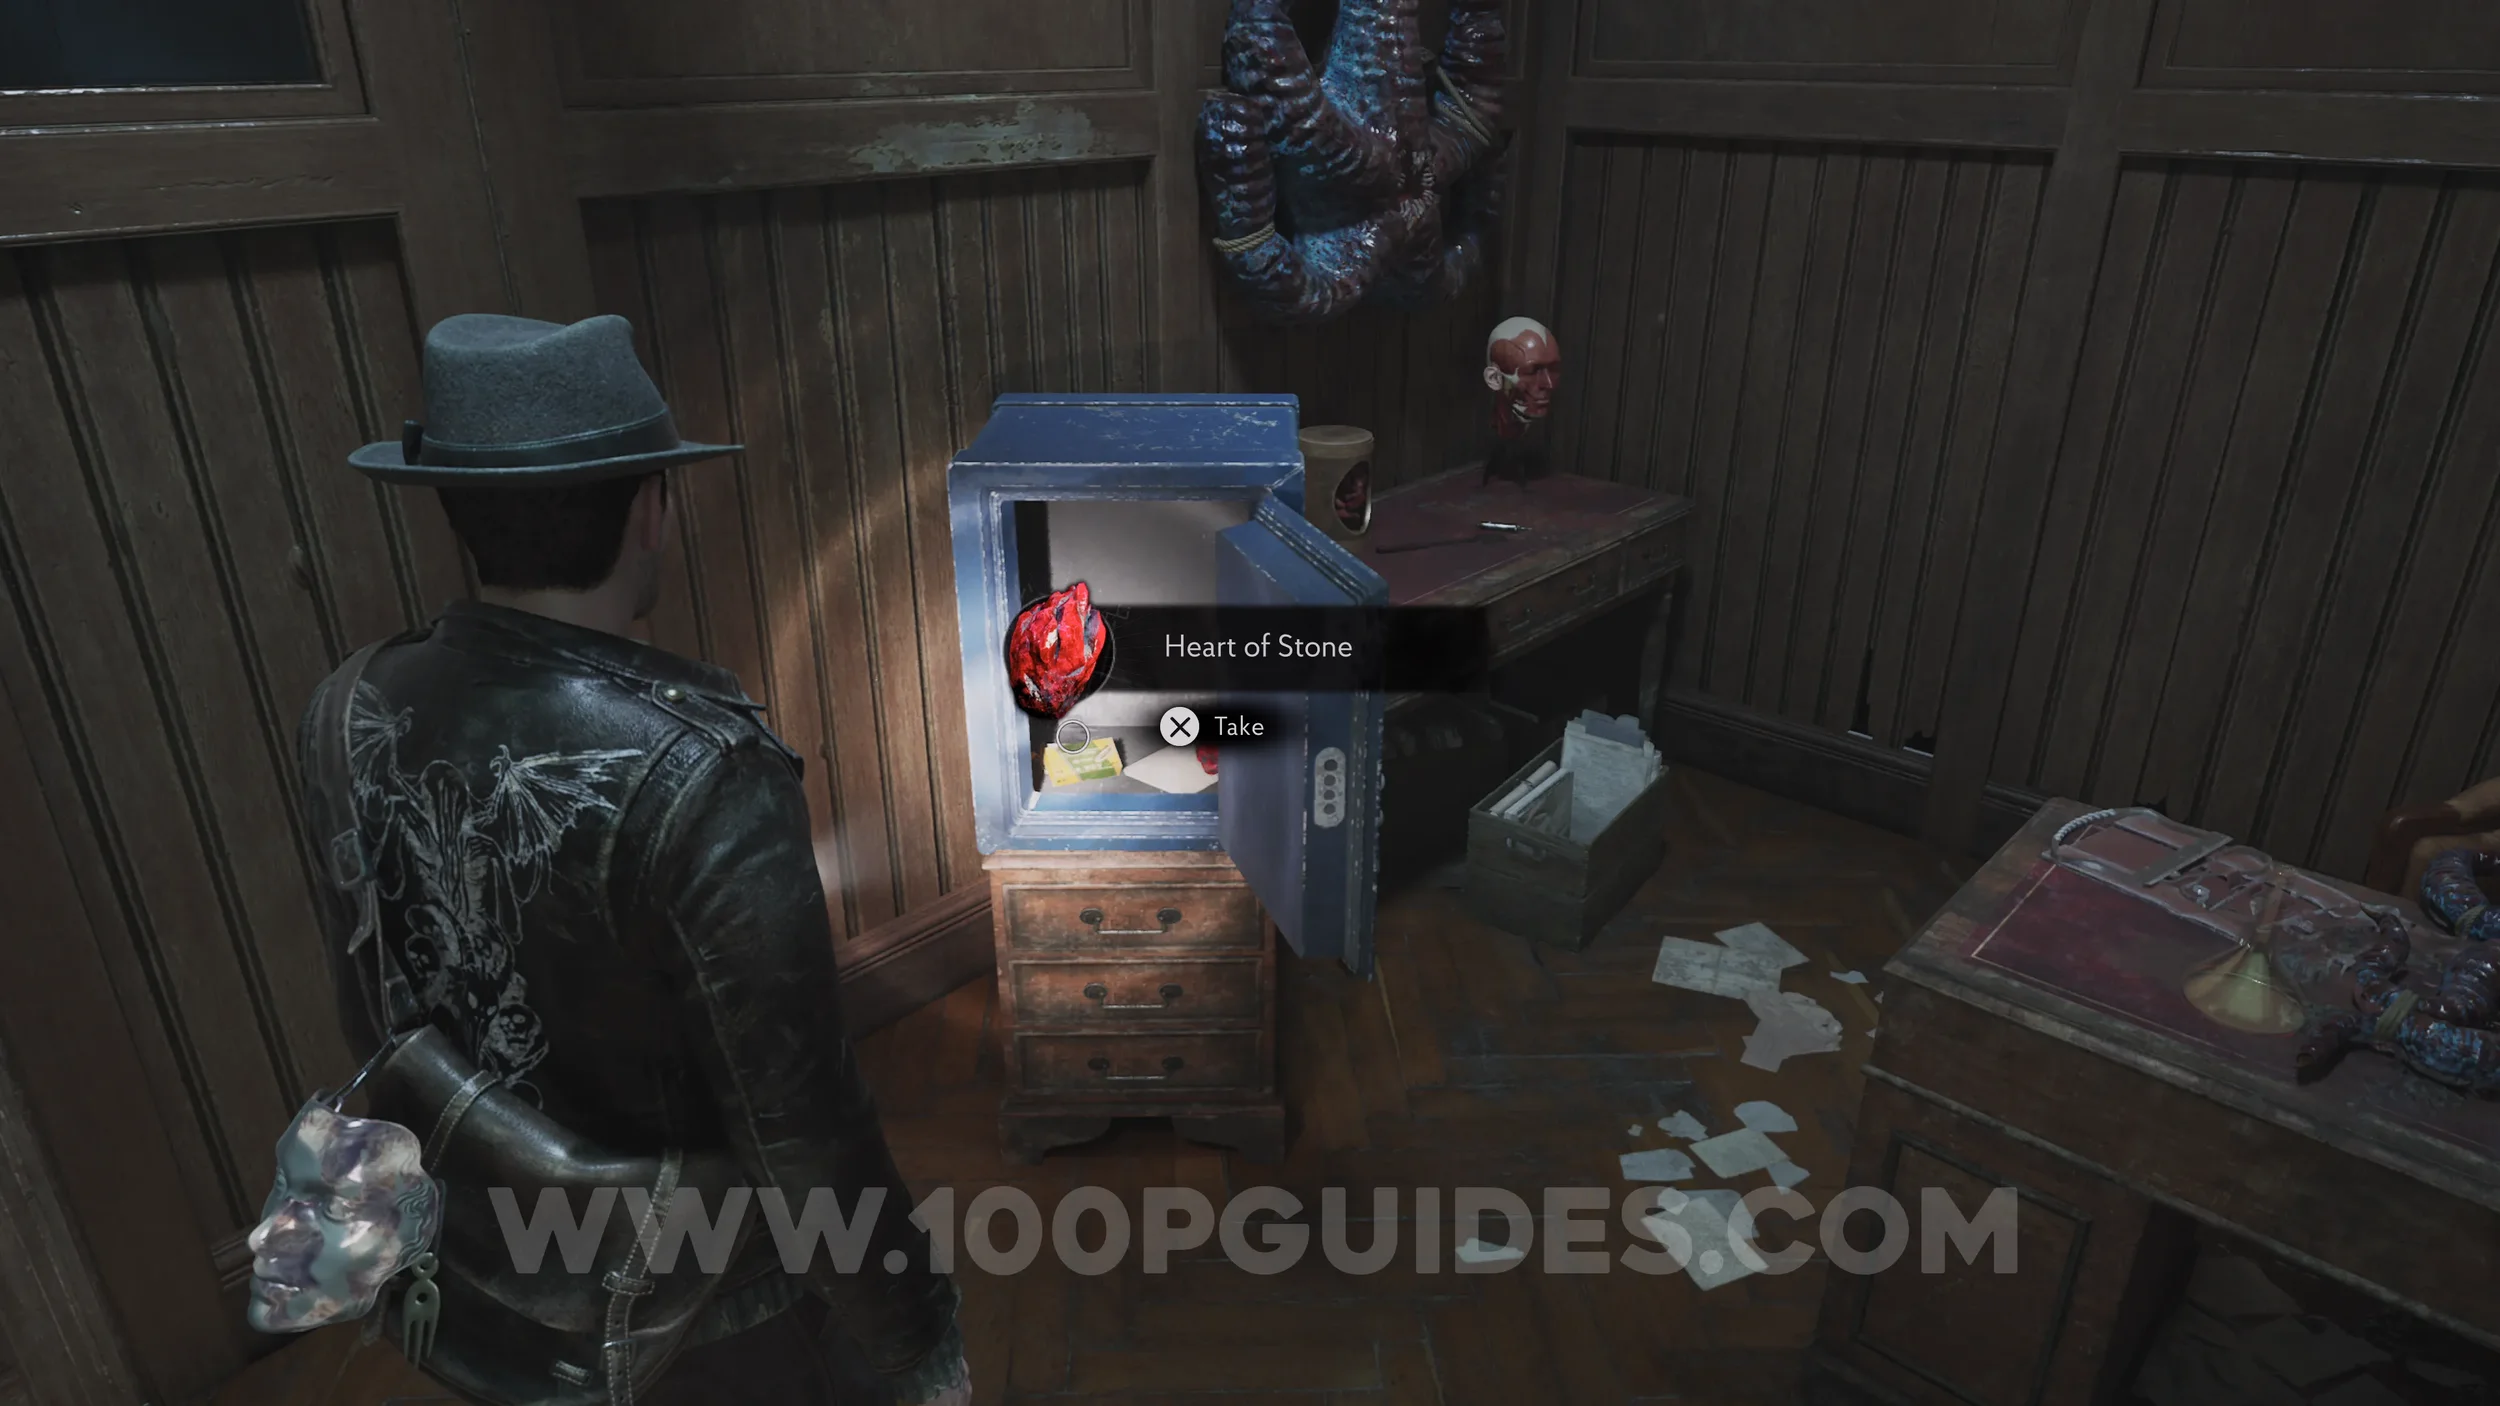
Evidence: Cryptic Riddle. Also found in the safe.
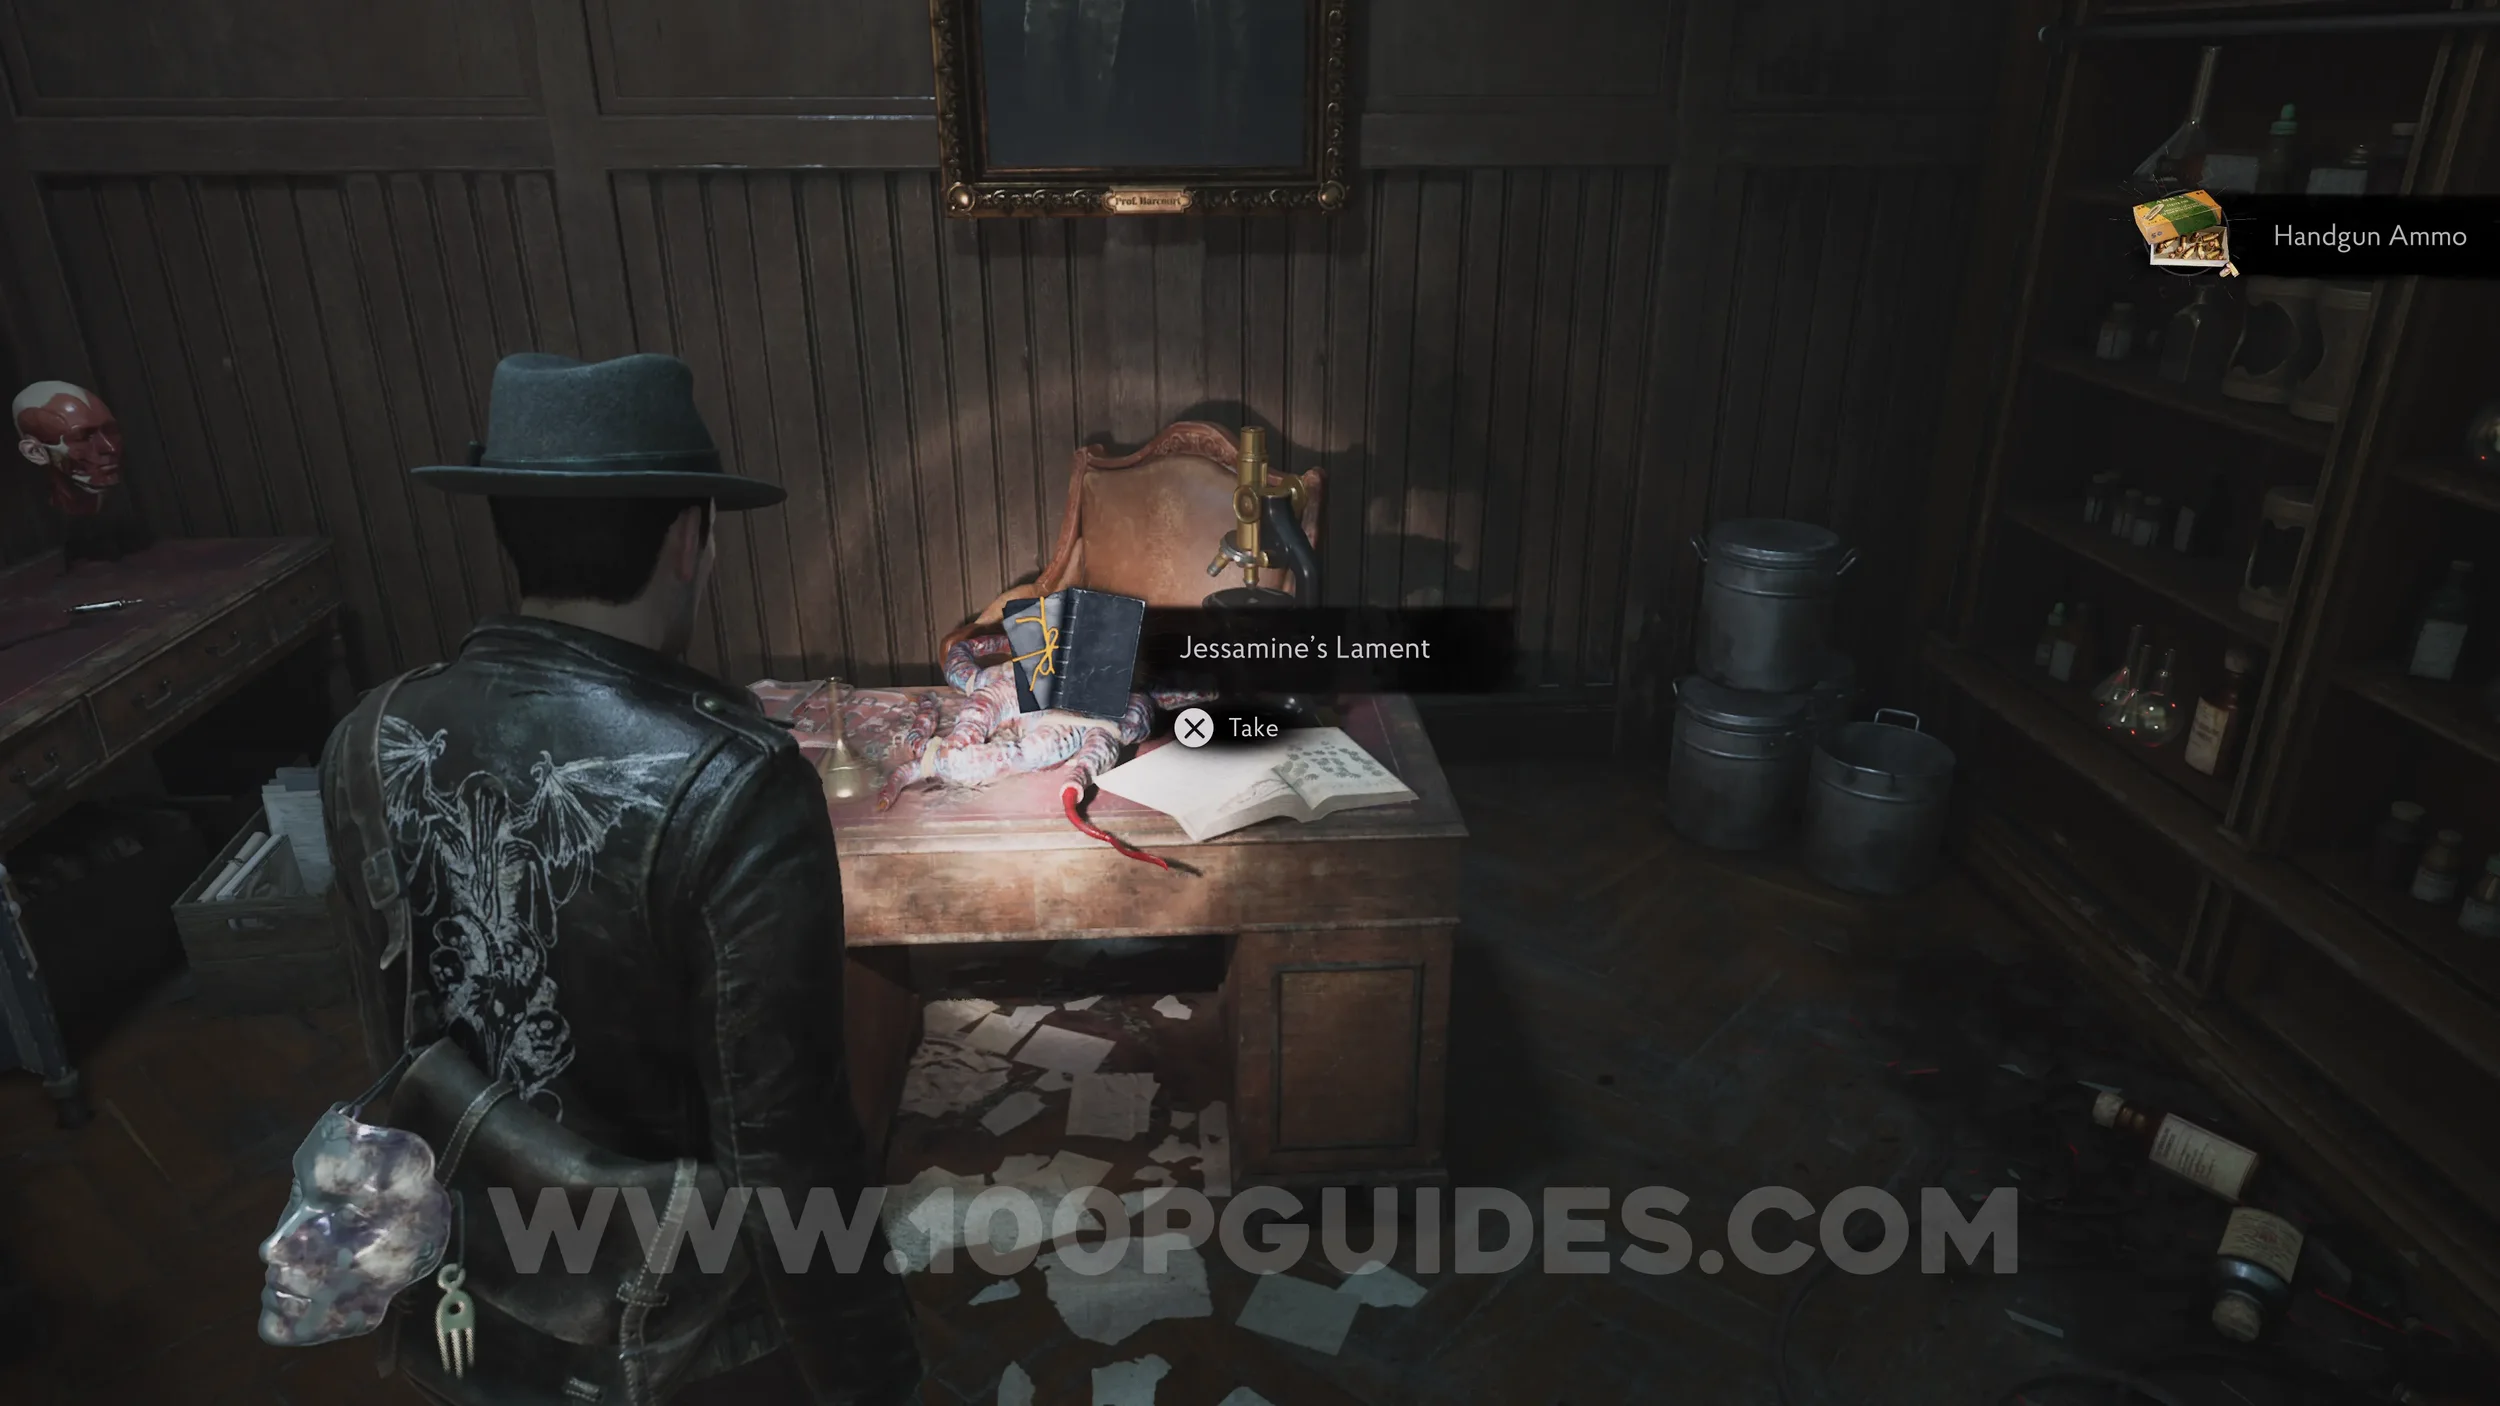
Lore Codex: Jessamine’s Lament. On the desk in the same office as the safe.
Strange Statue Puzzle Solution
Place the Heart of Stone into the Strange Statue in the Abandoned Office, the same room where you just opened the safe. You'll then have to shoot five limbs in the correct order. The order is: Kneeling Woman > Octopus > Sea Creature > Time > Jar.


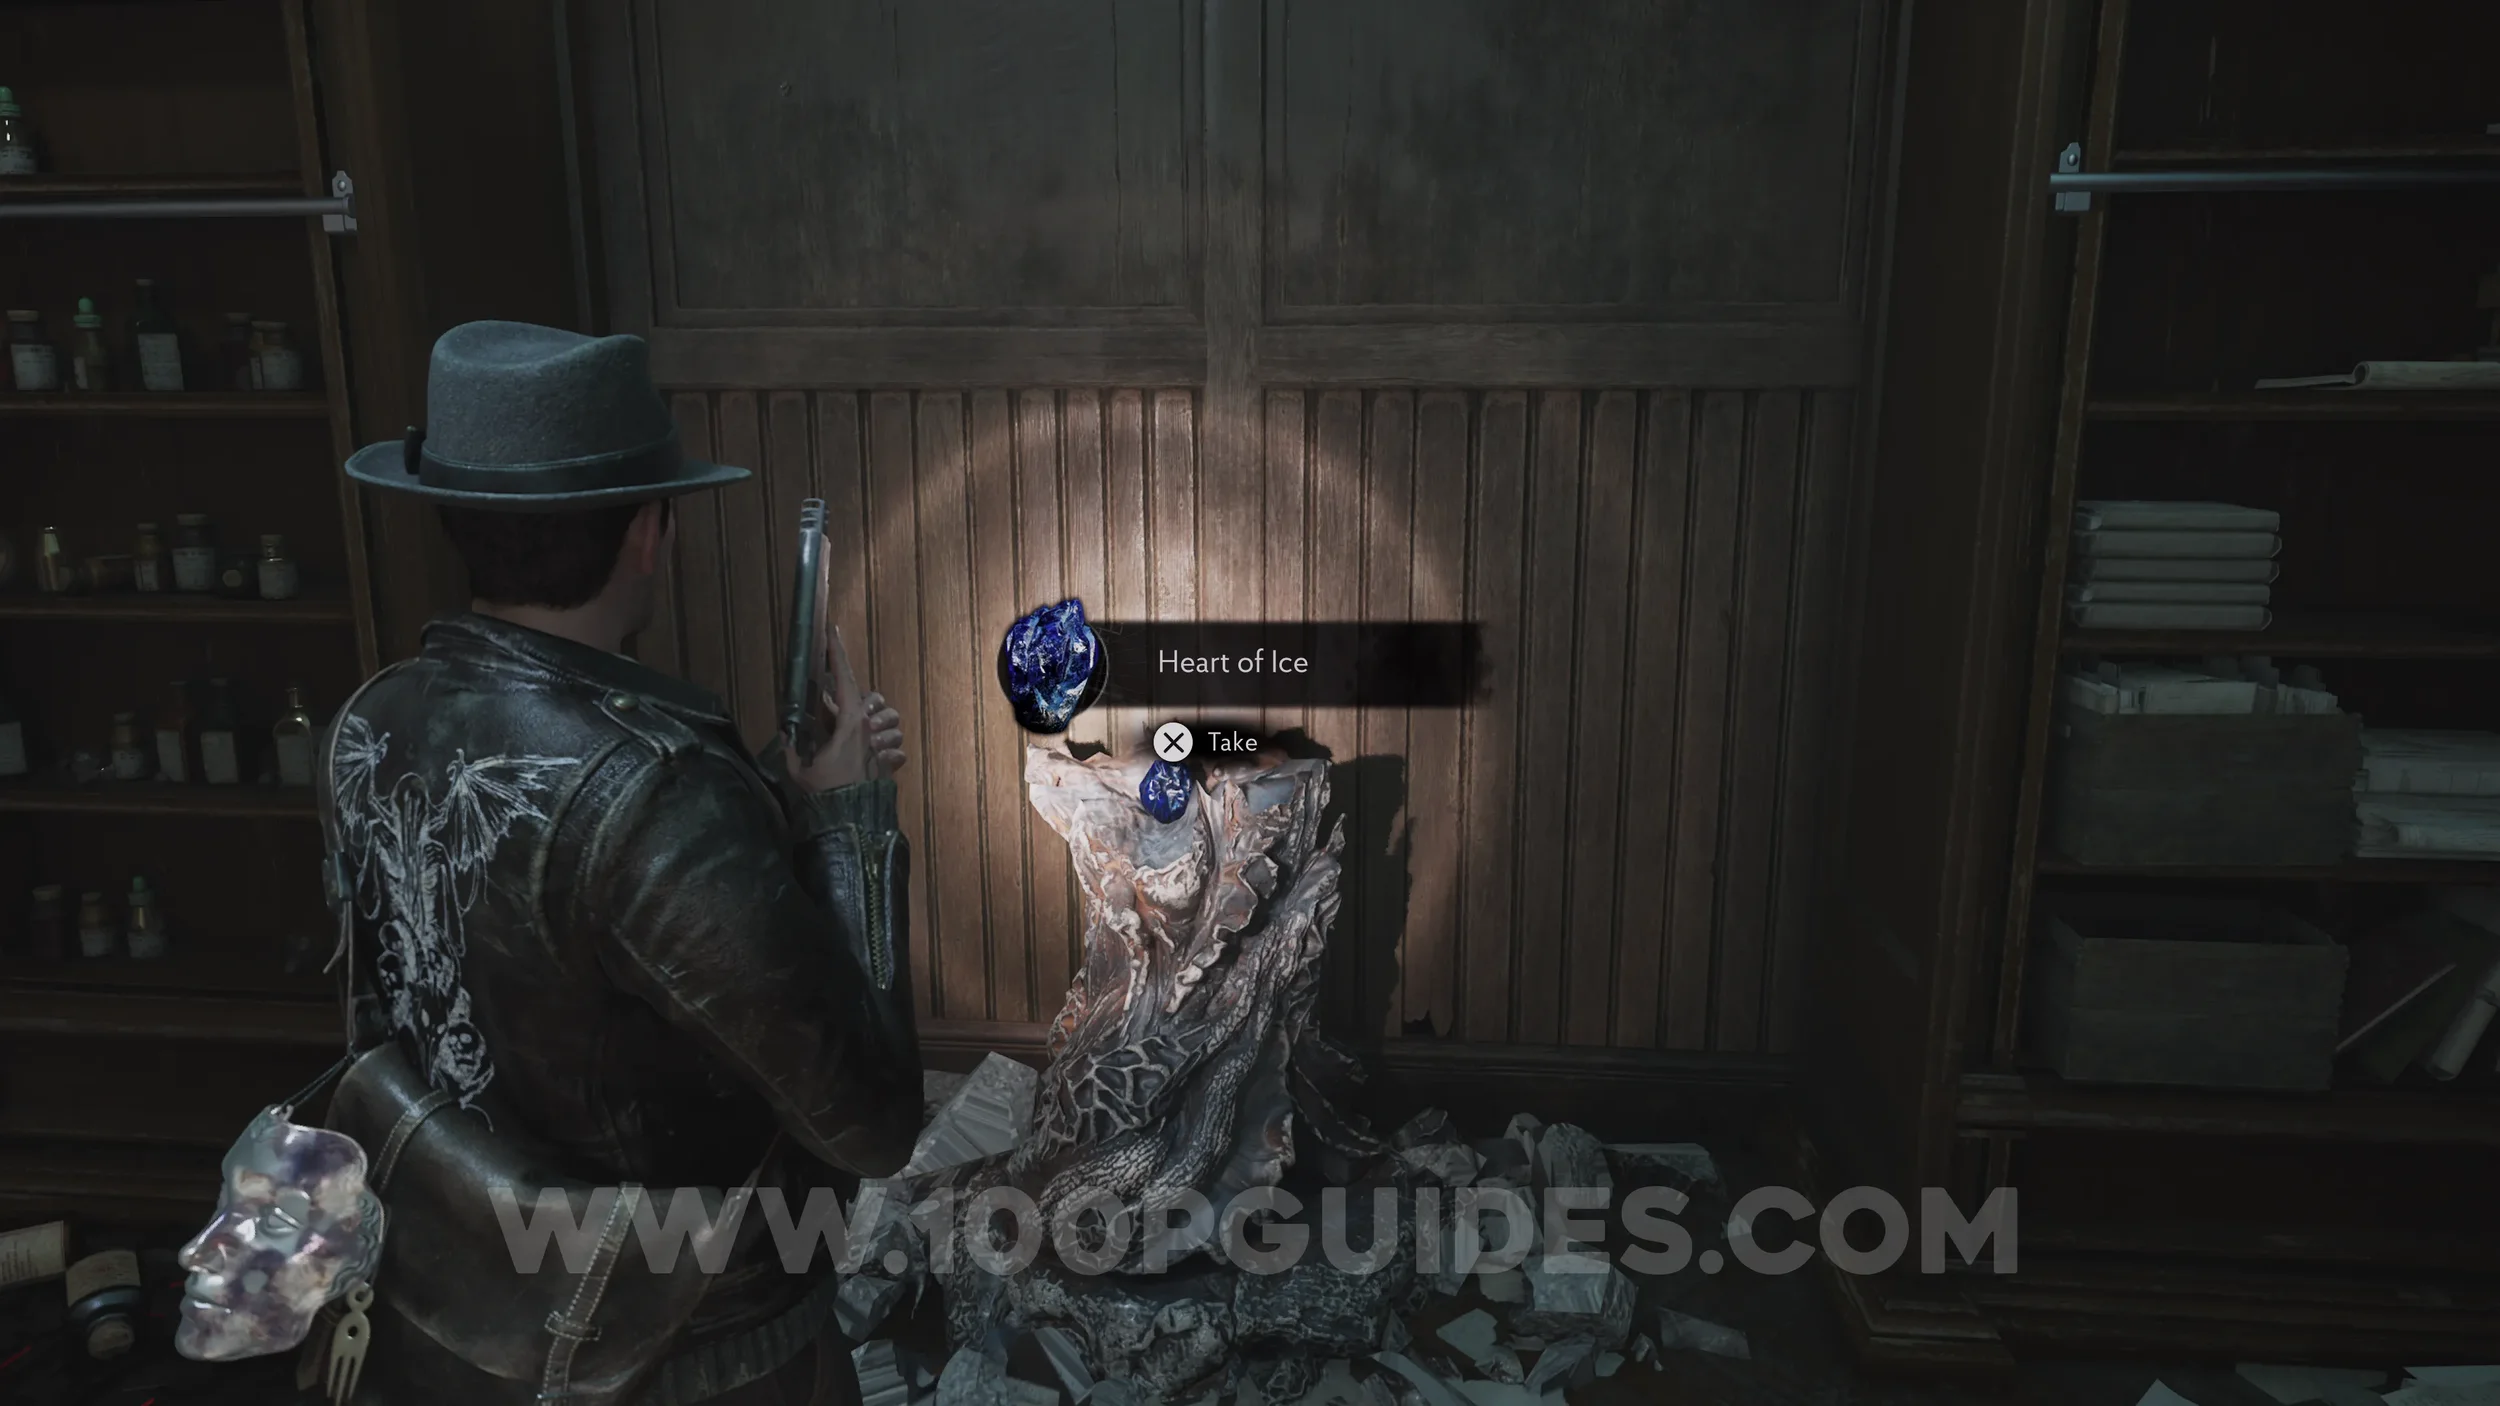
Key Item: Heart of Ice + Lore Codex: An Icy Heart. Found on the destroyed statue after solving the puzzle.
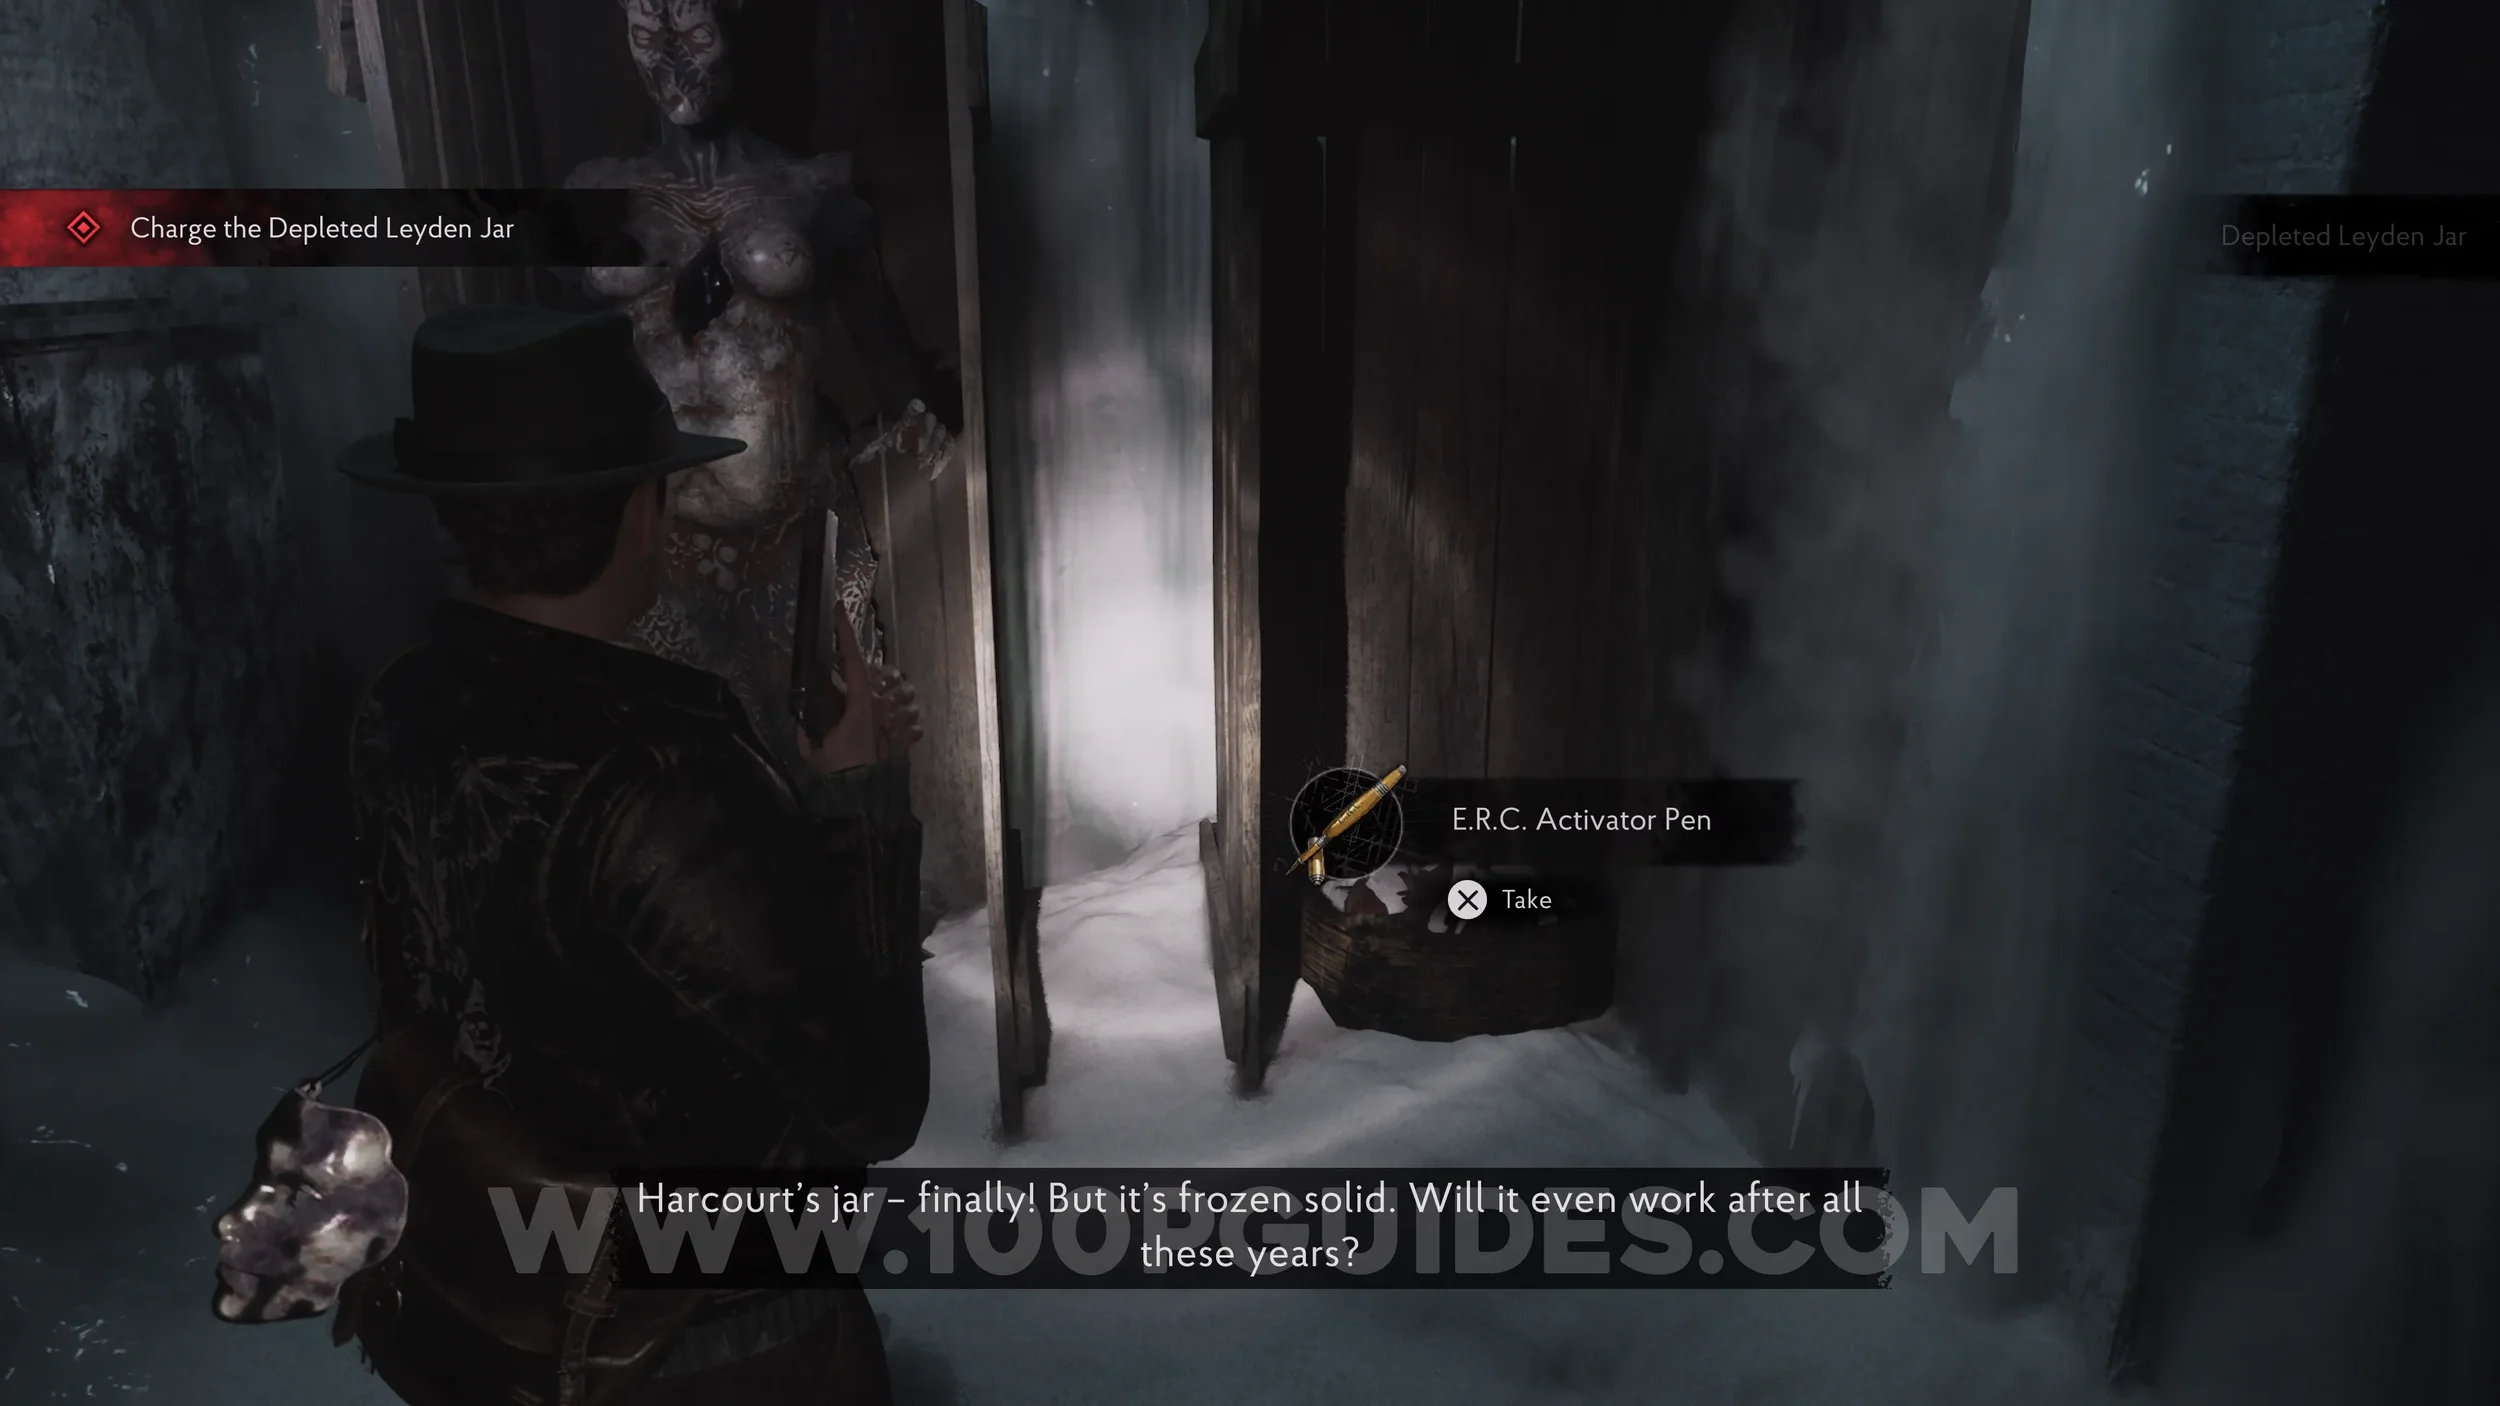
Key Item: Depleted Leyden Jar. Go down to Cold Storage and place the Heart of Ice into the Frozen Statue.
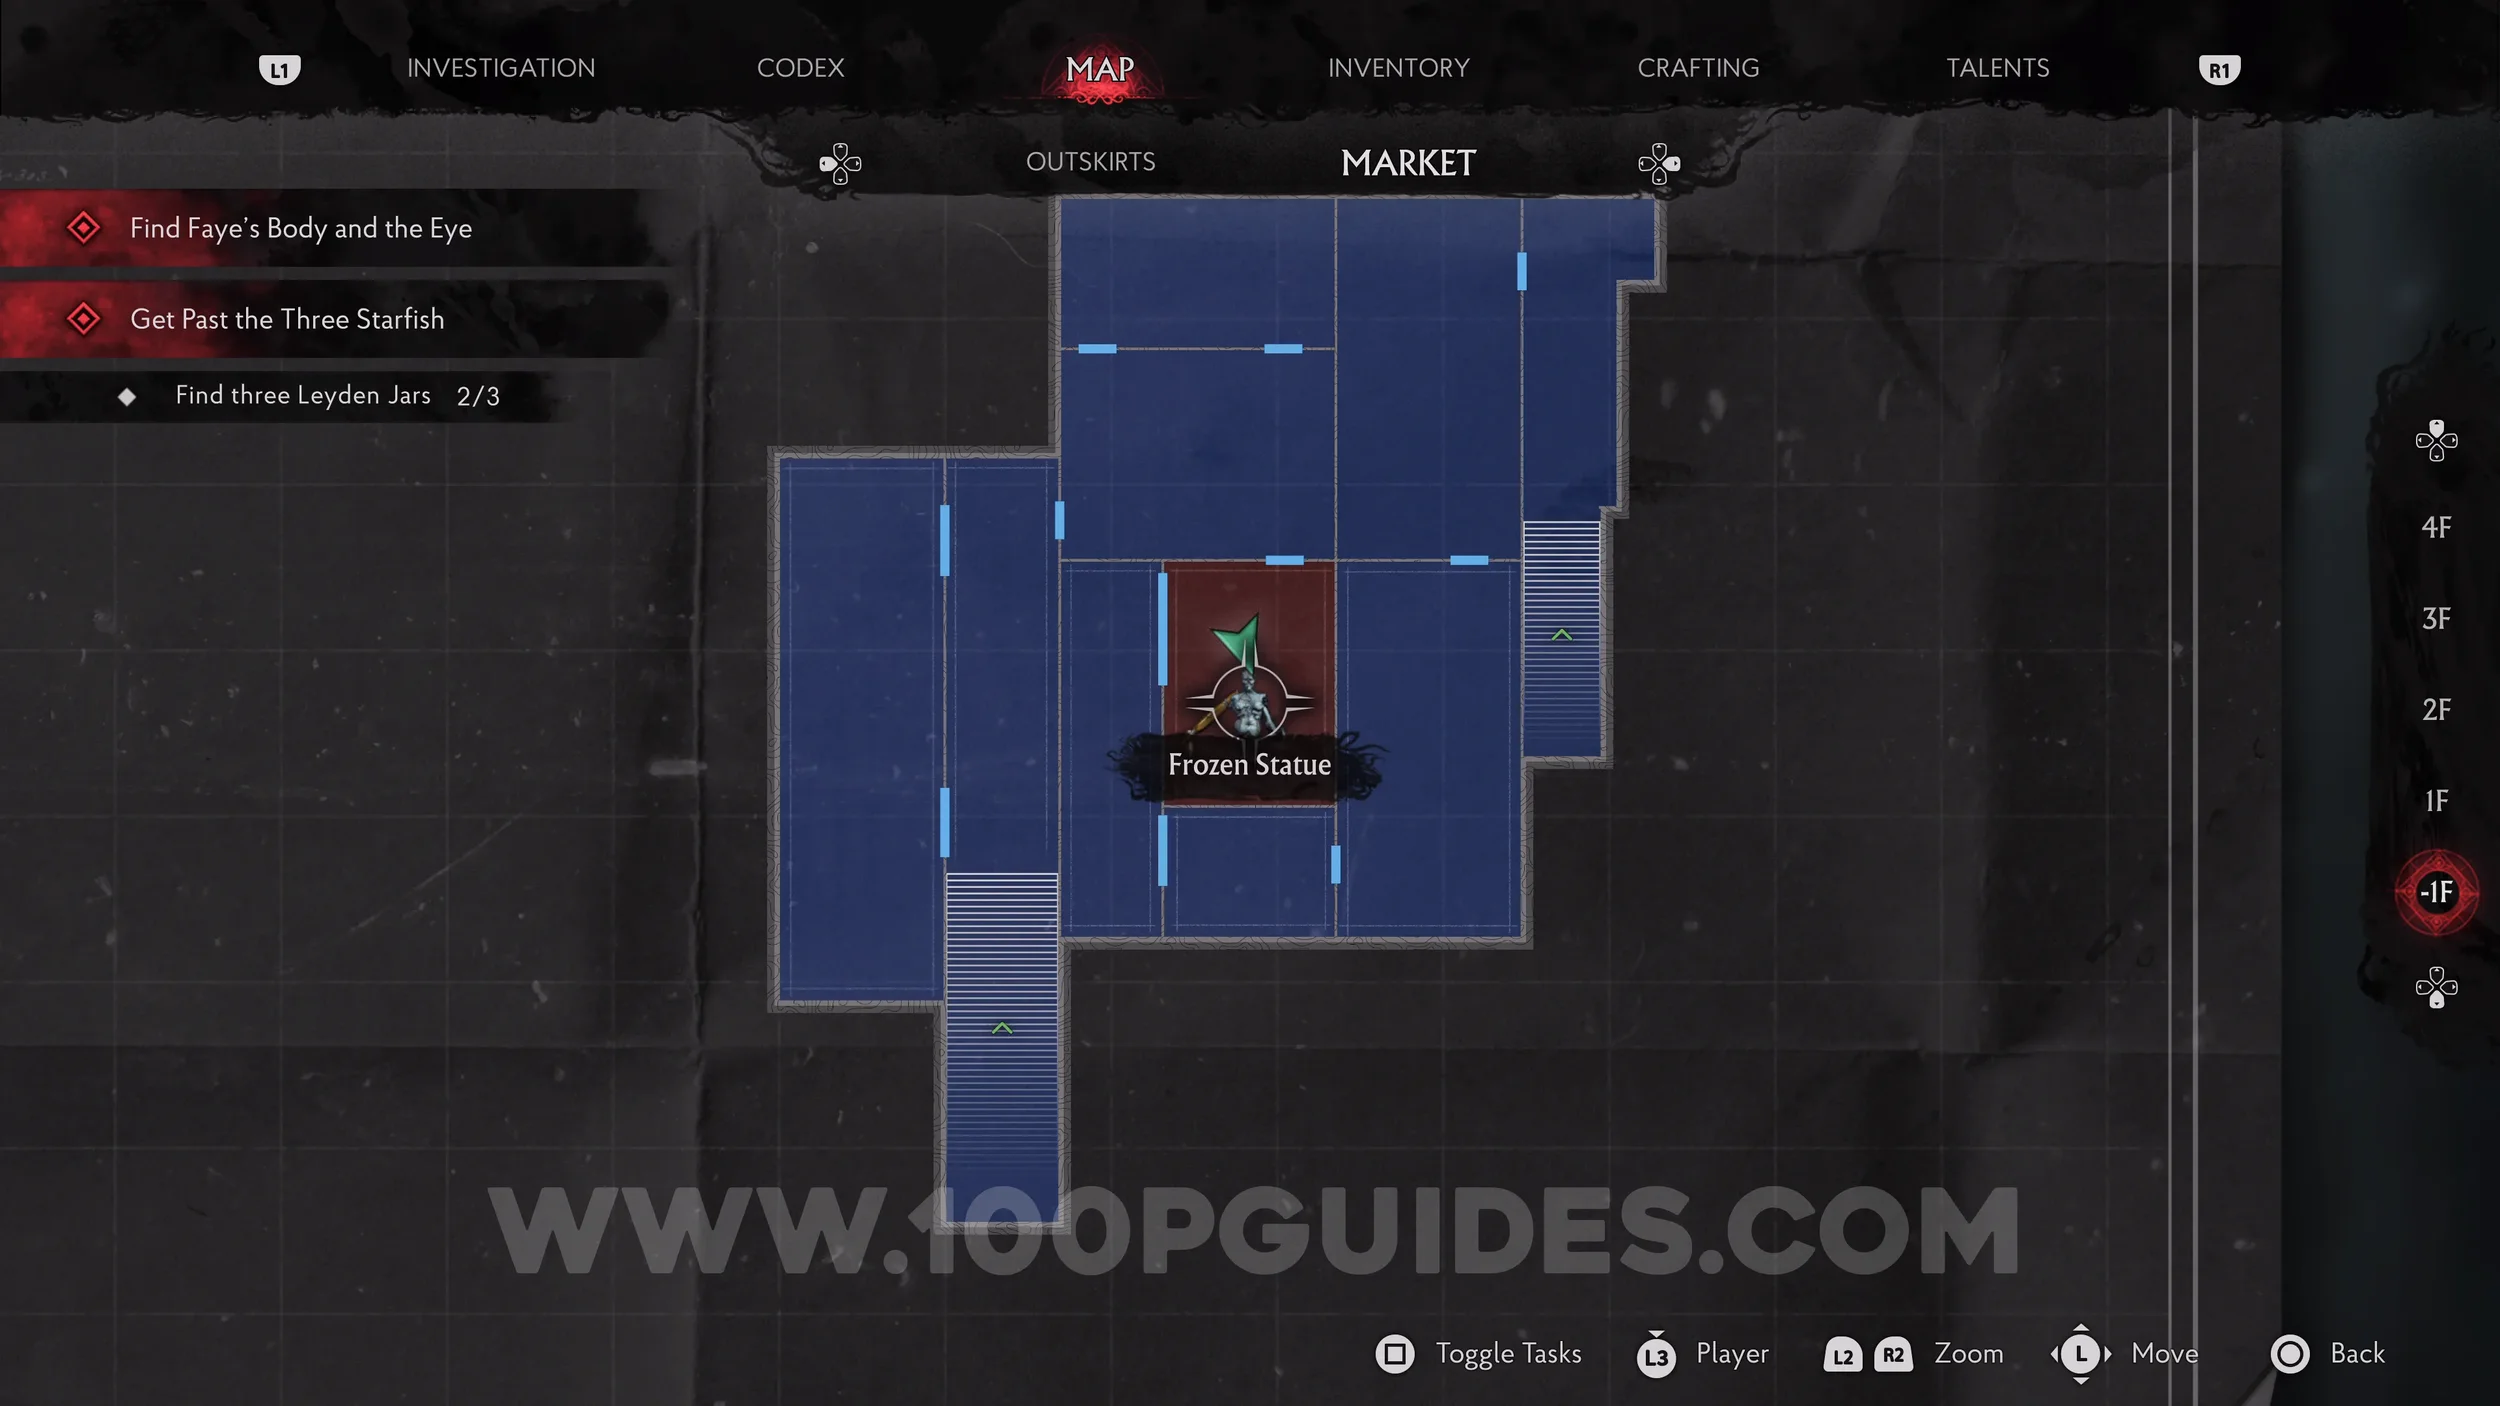
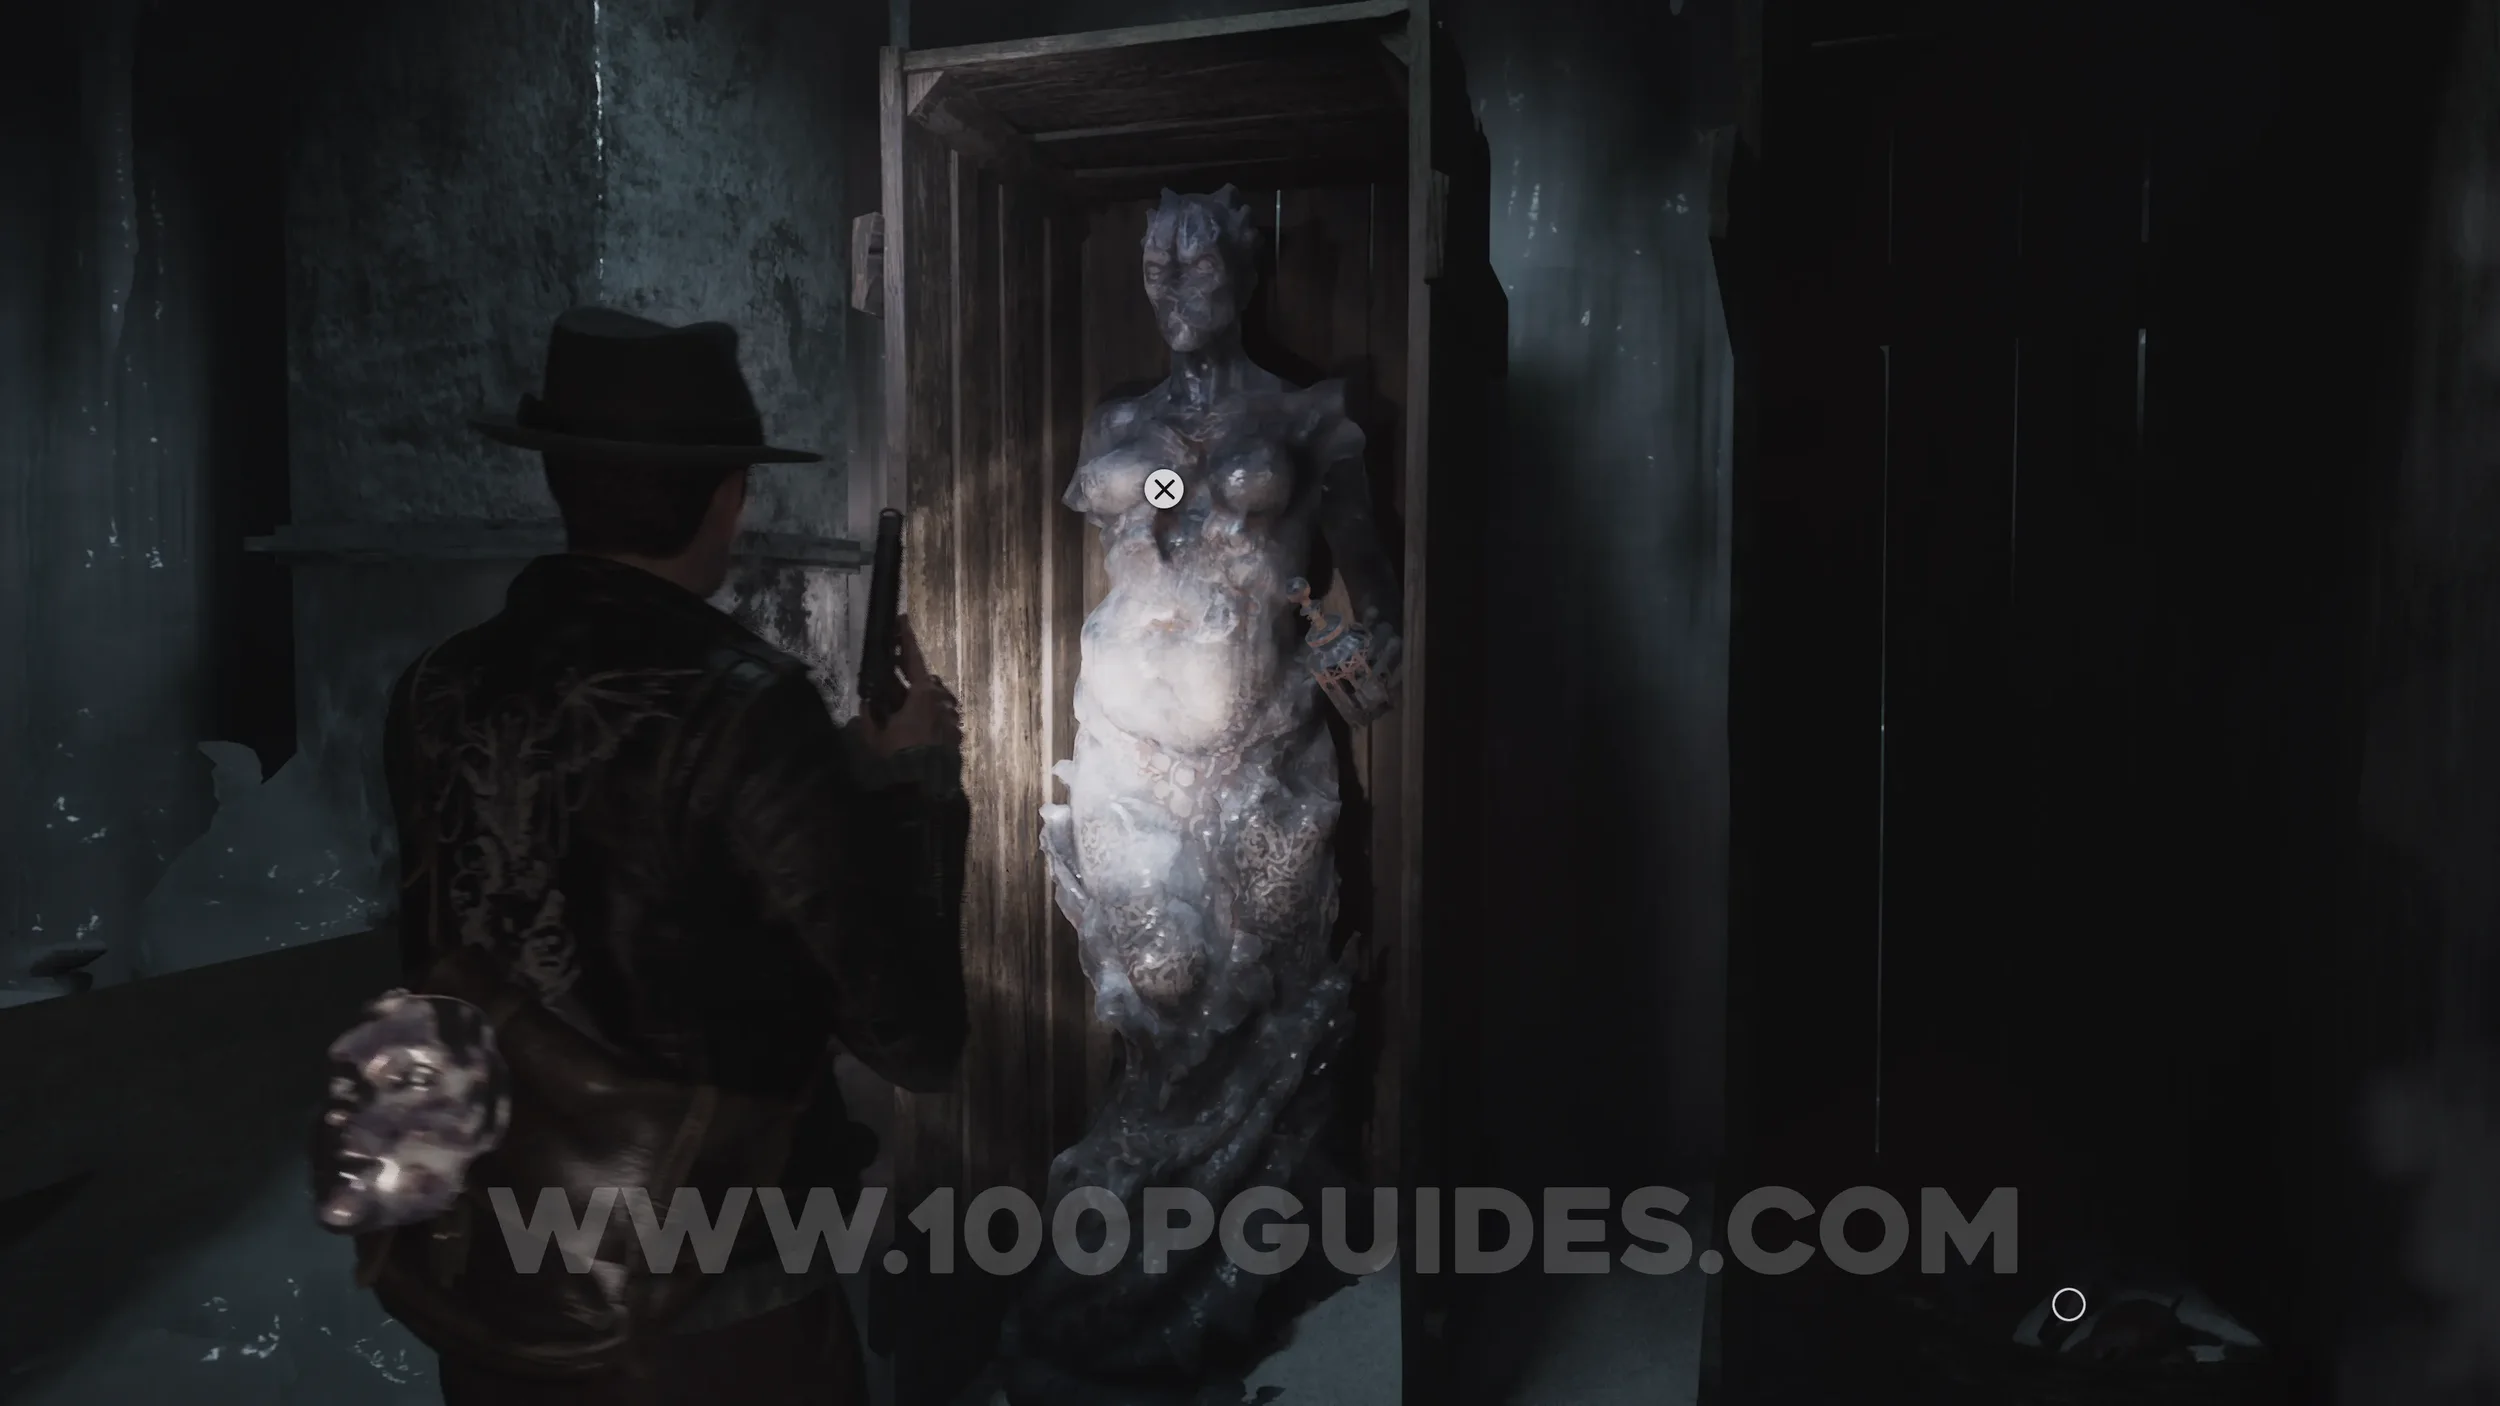
E.R.C. Activator Pen. Beside the Frozen Statue in Cold Storage.
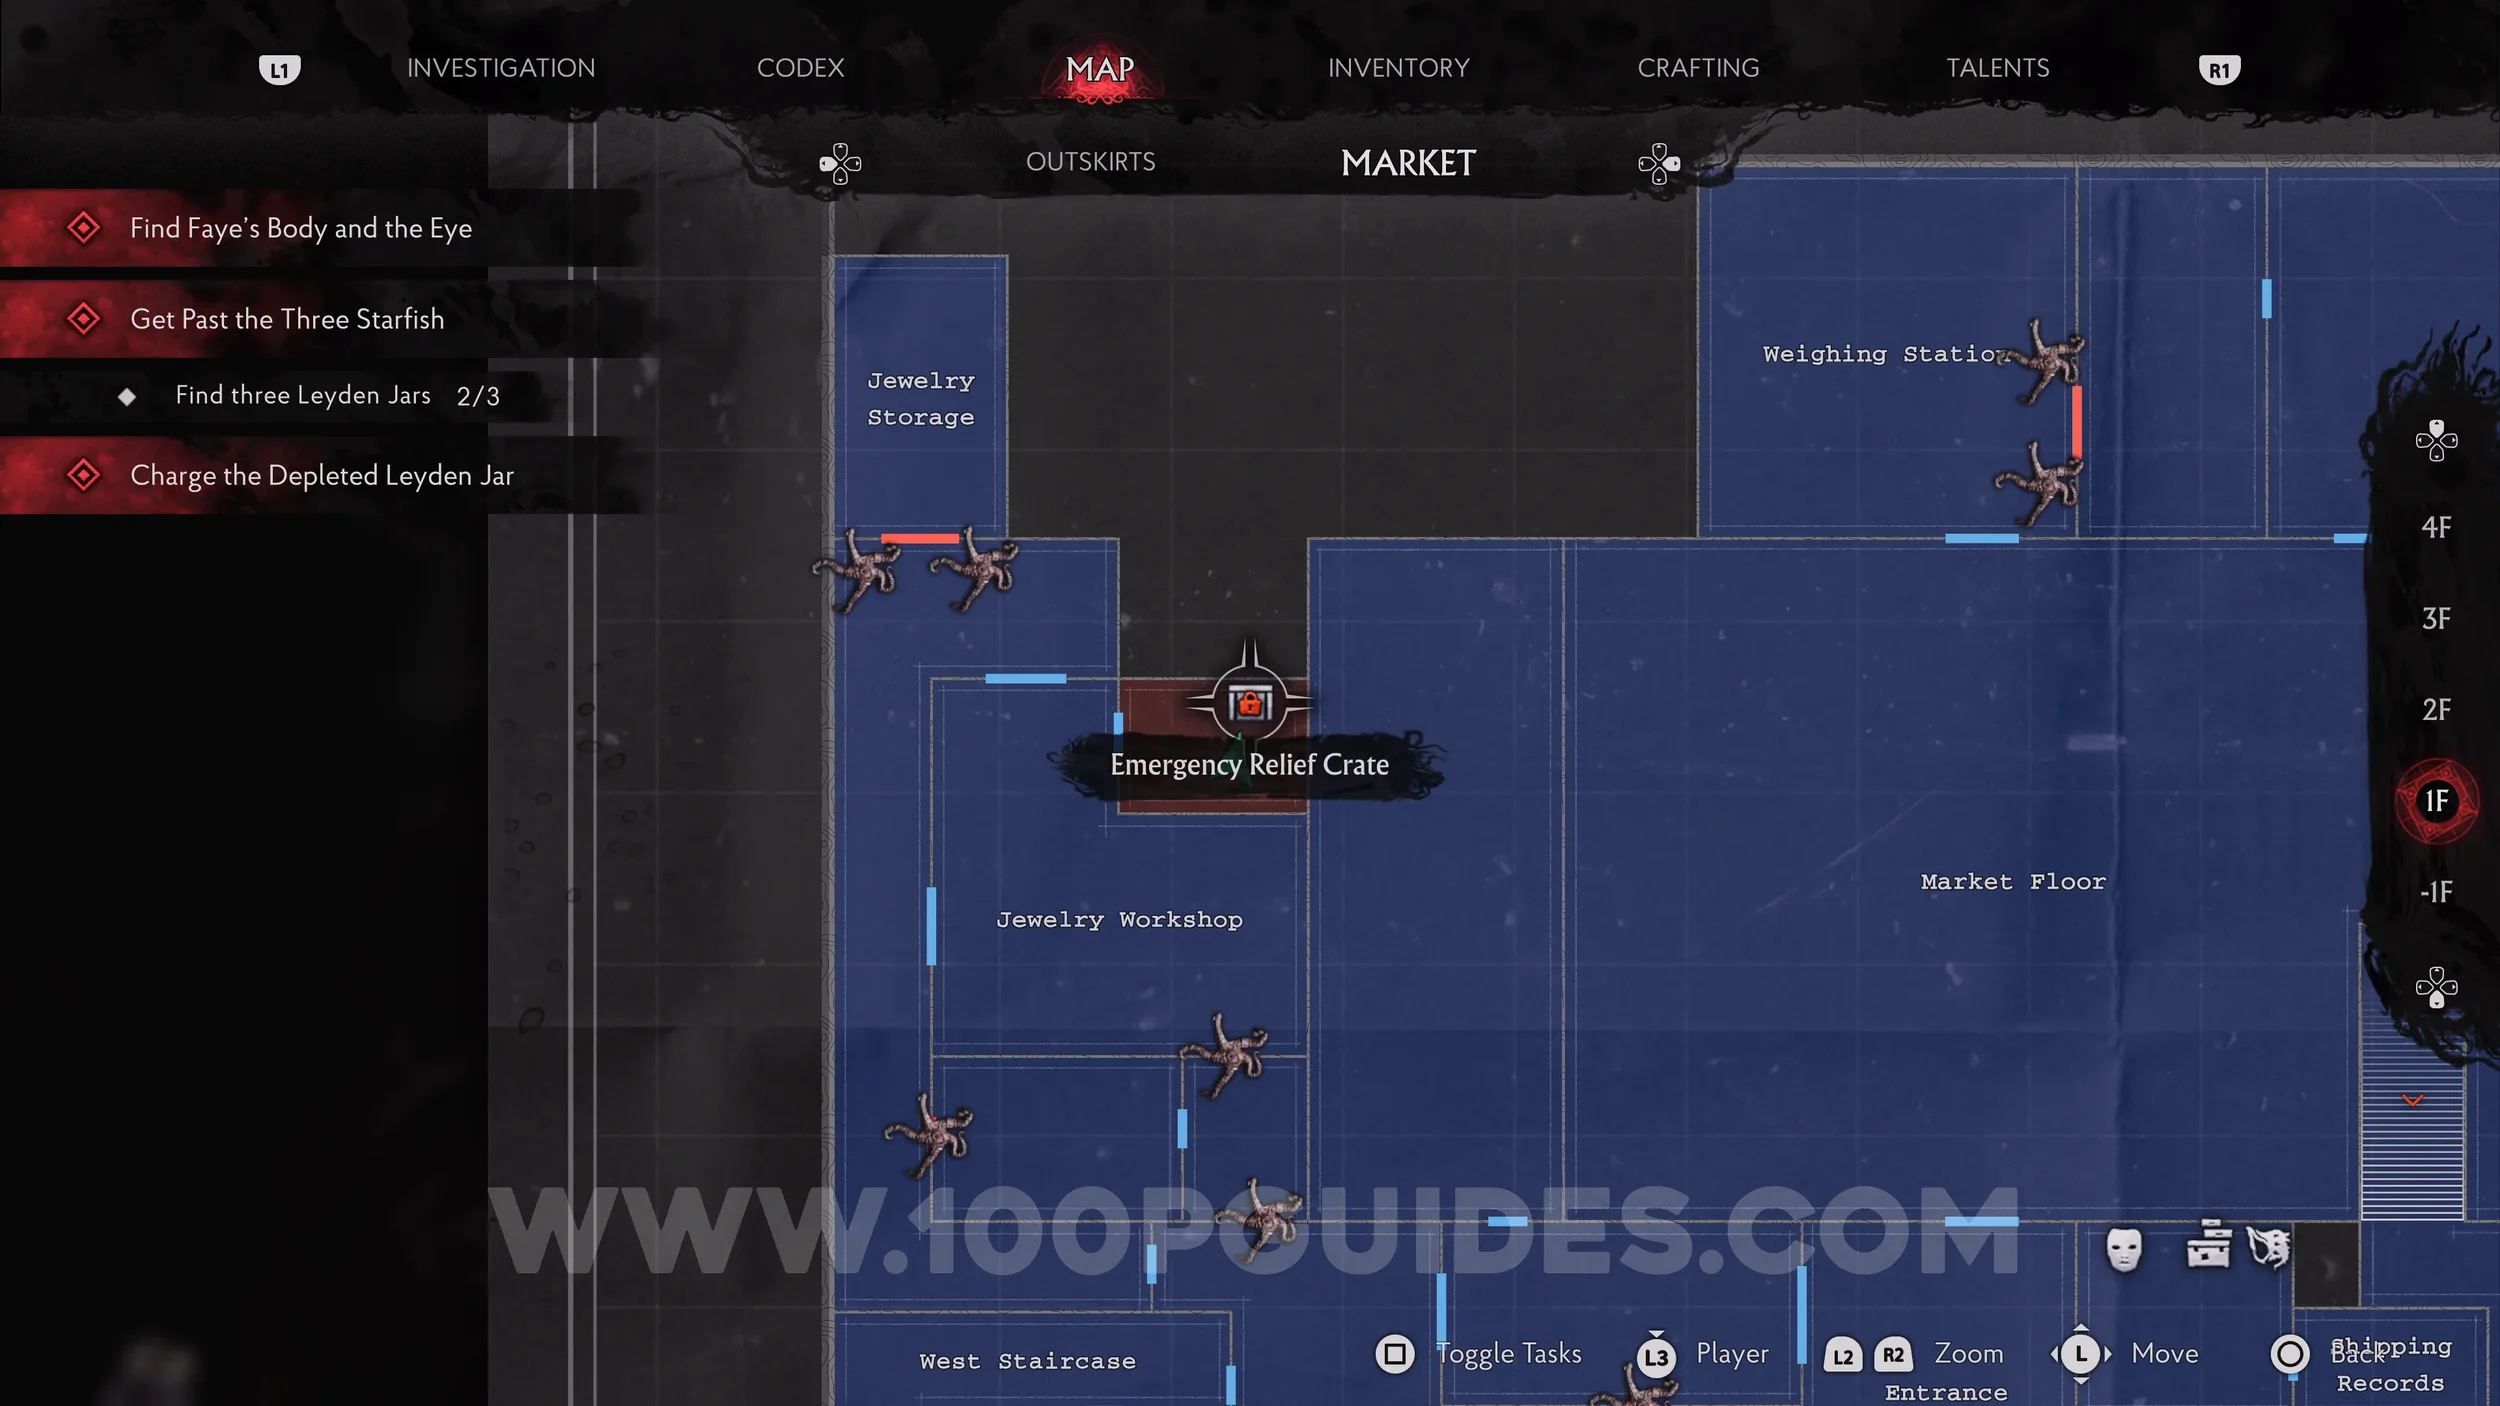
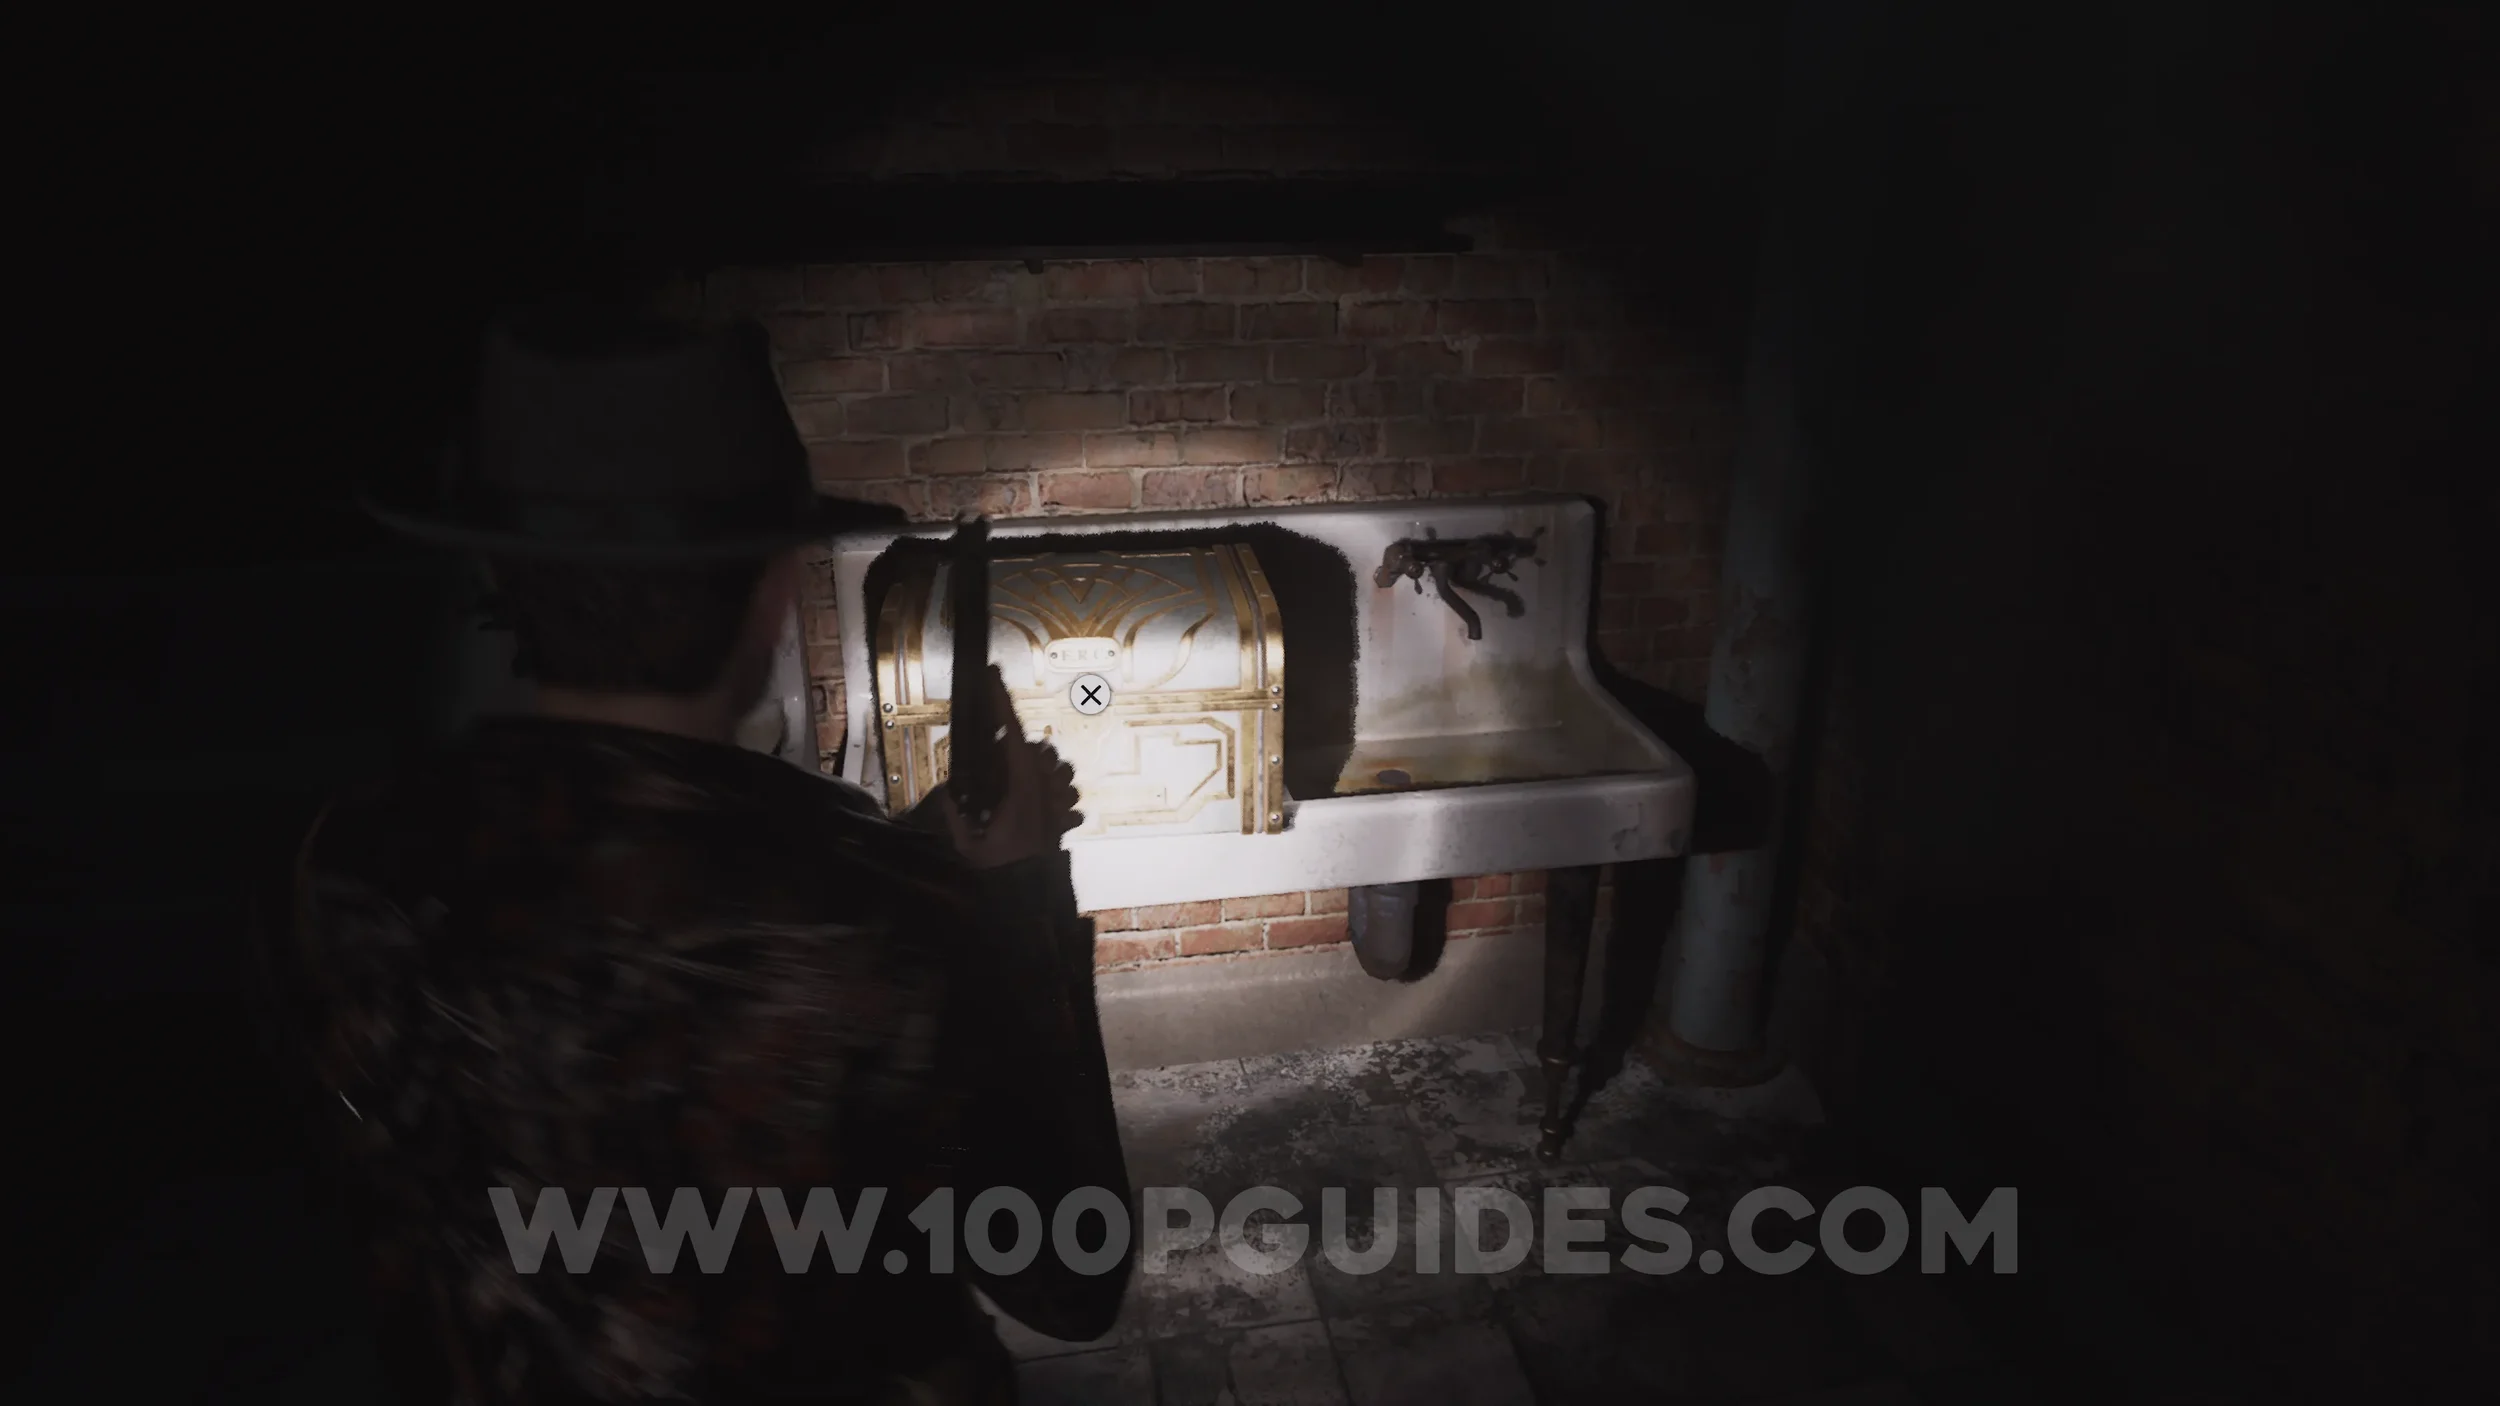
Emergency Relief Crate (E.R.C.) + Inventory Expansion. Use the pen to open the crate in the small room to the northeast of the Jewelry Workshop. The Expansion is inside.
Sixteen Punishments Puzzle/Cutting Area Door Puzzle
Before moving on to the last part of the chapter, head to the Cutting Area on 1F and interact with the door with the sixteen buttons on it. To open it, press the four correct buttons in any order, then hold . The buttons you need to press are I, IV, IX and XVI.


Evidence: Surprise in the Safe?. On the other side of the puzzle door.
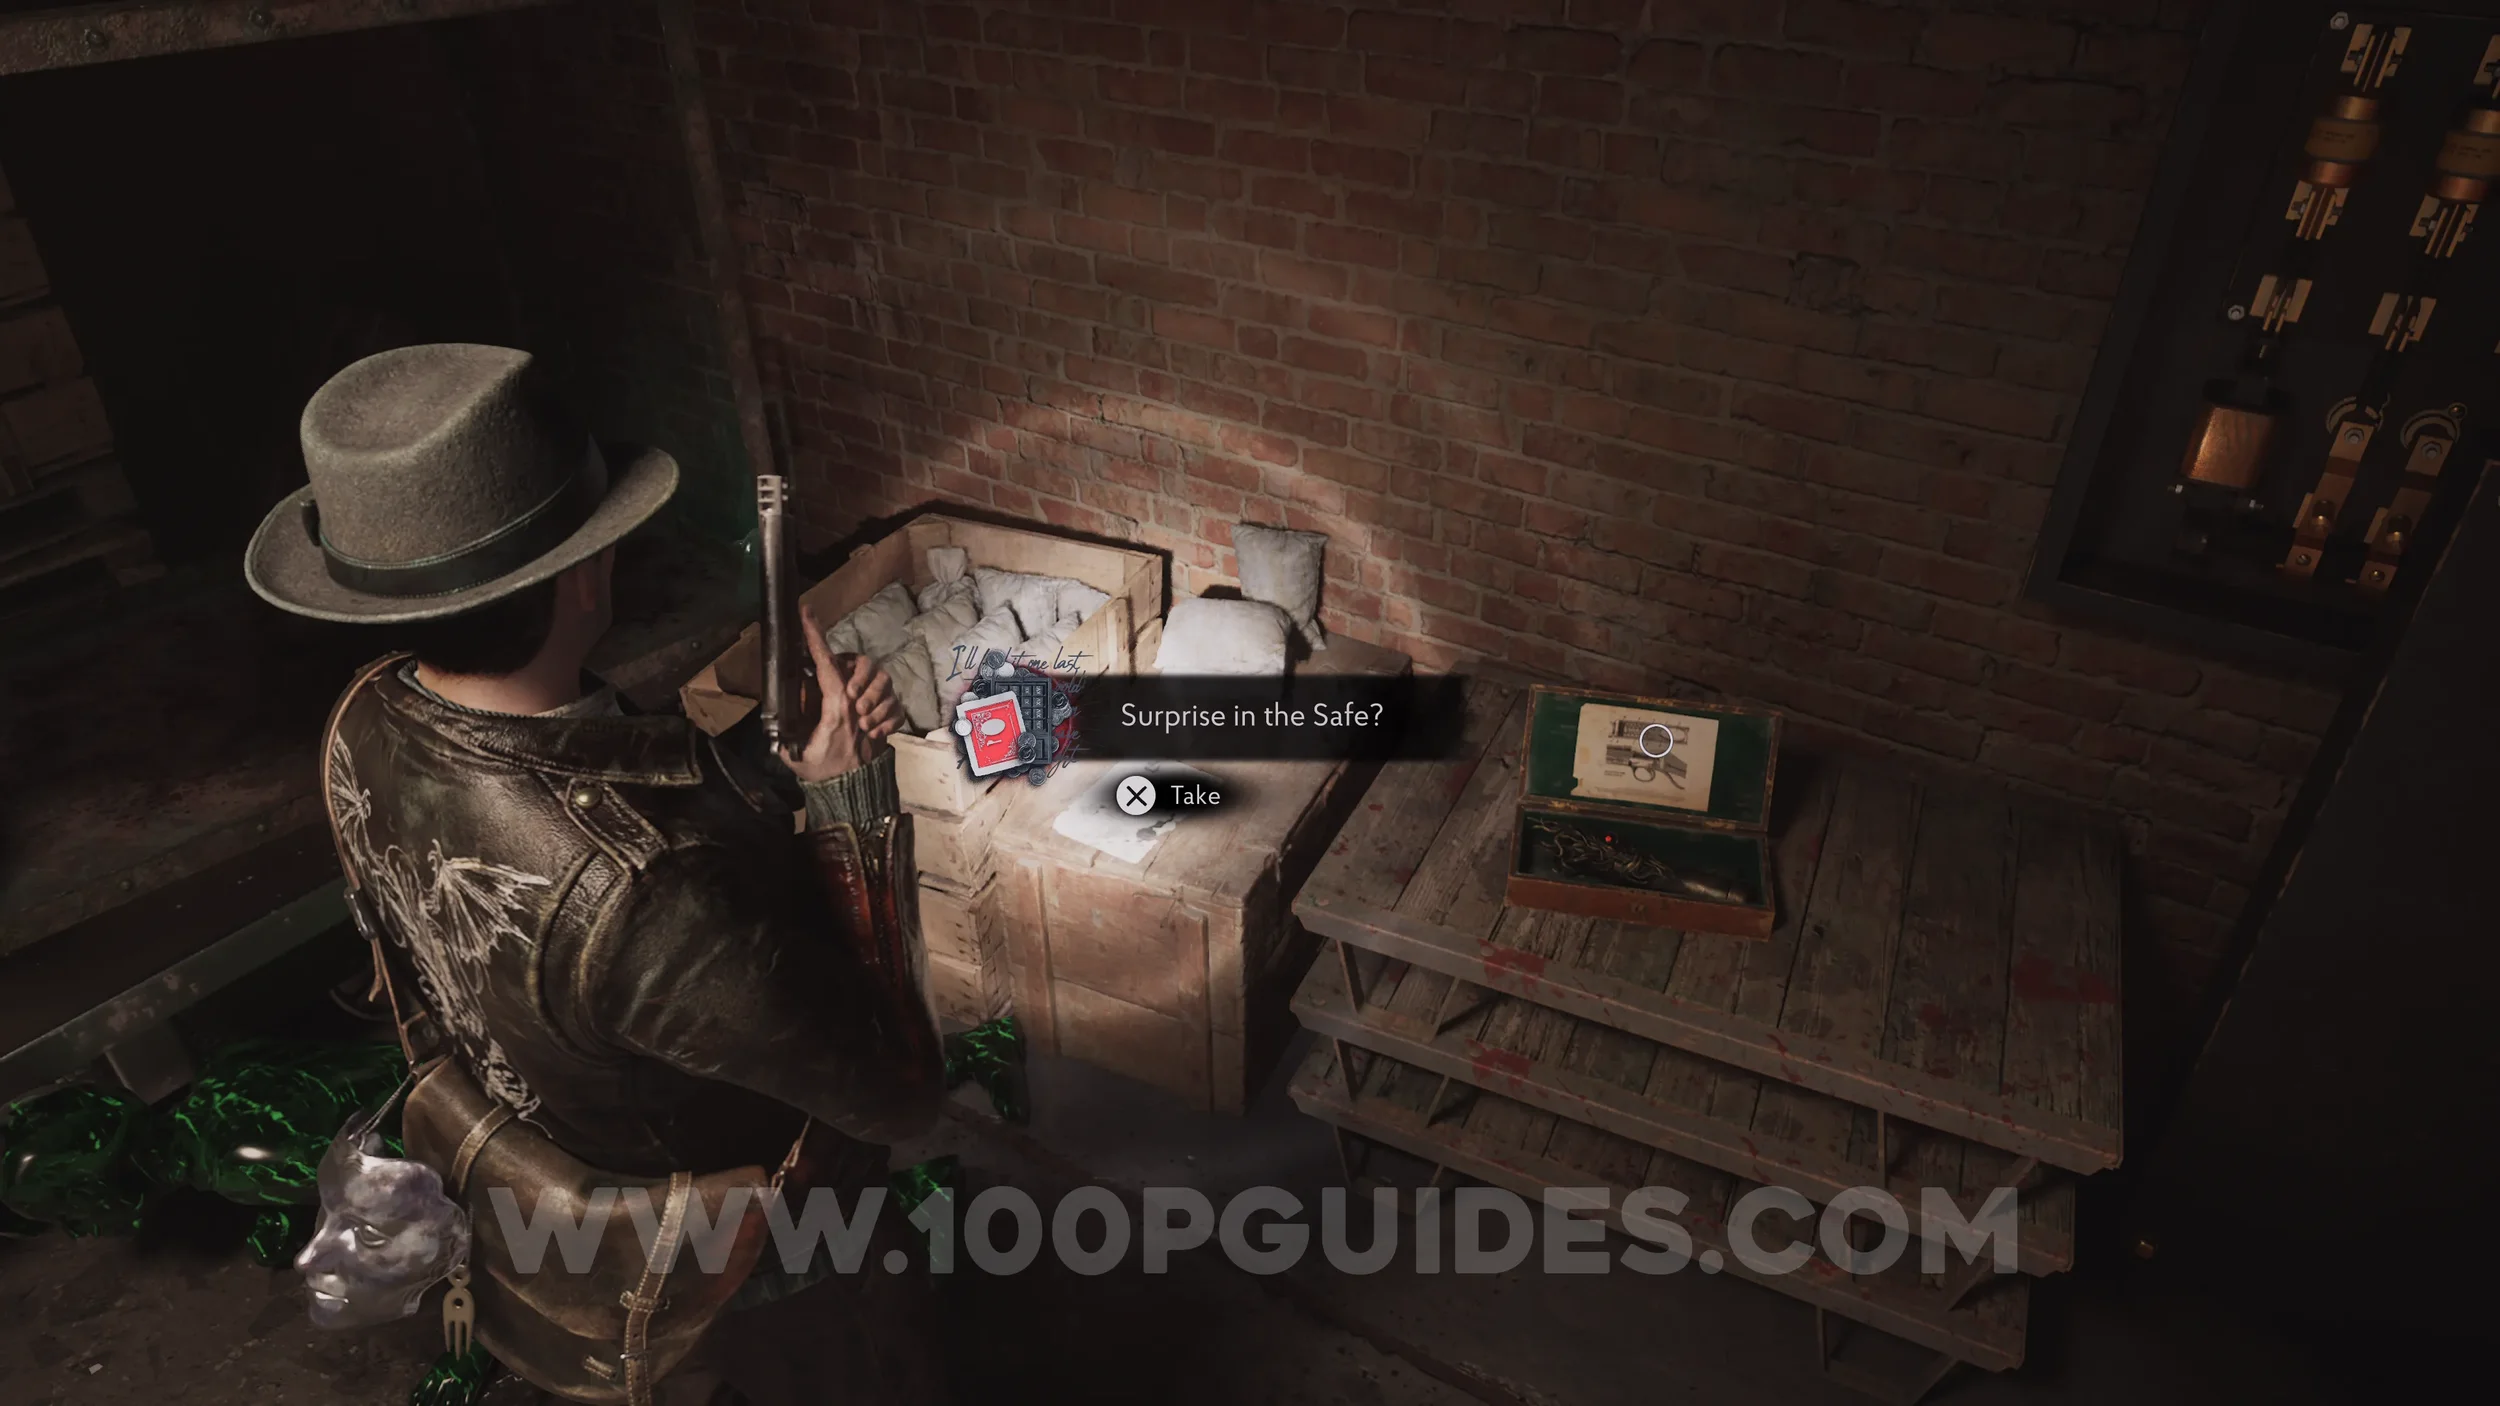
Weapon Accessory: Pyre’s Squid Barrel. In the same room.
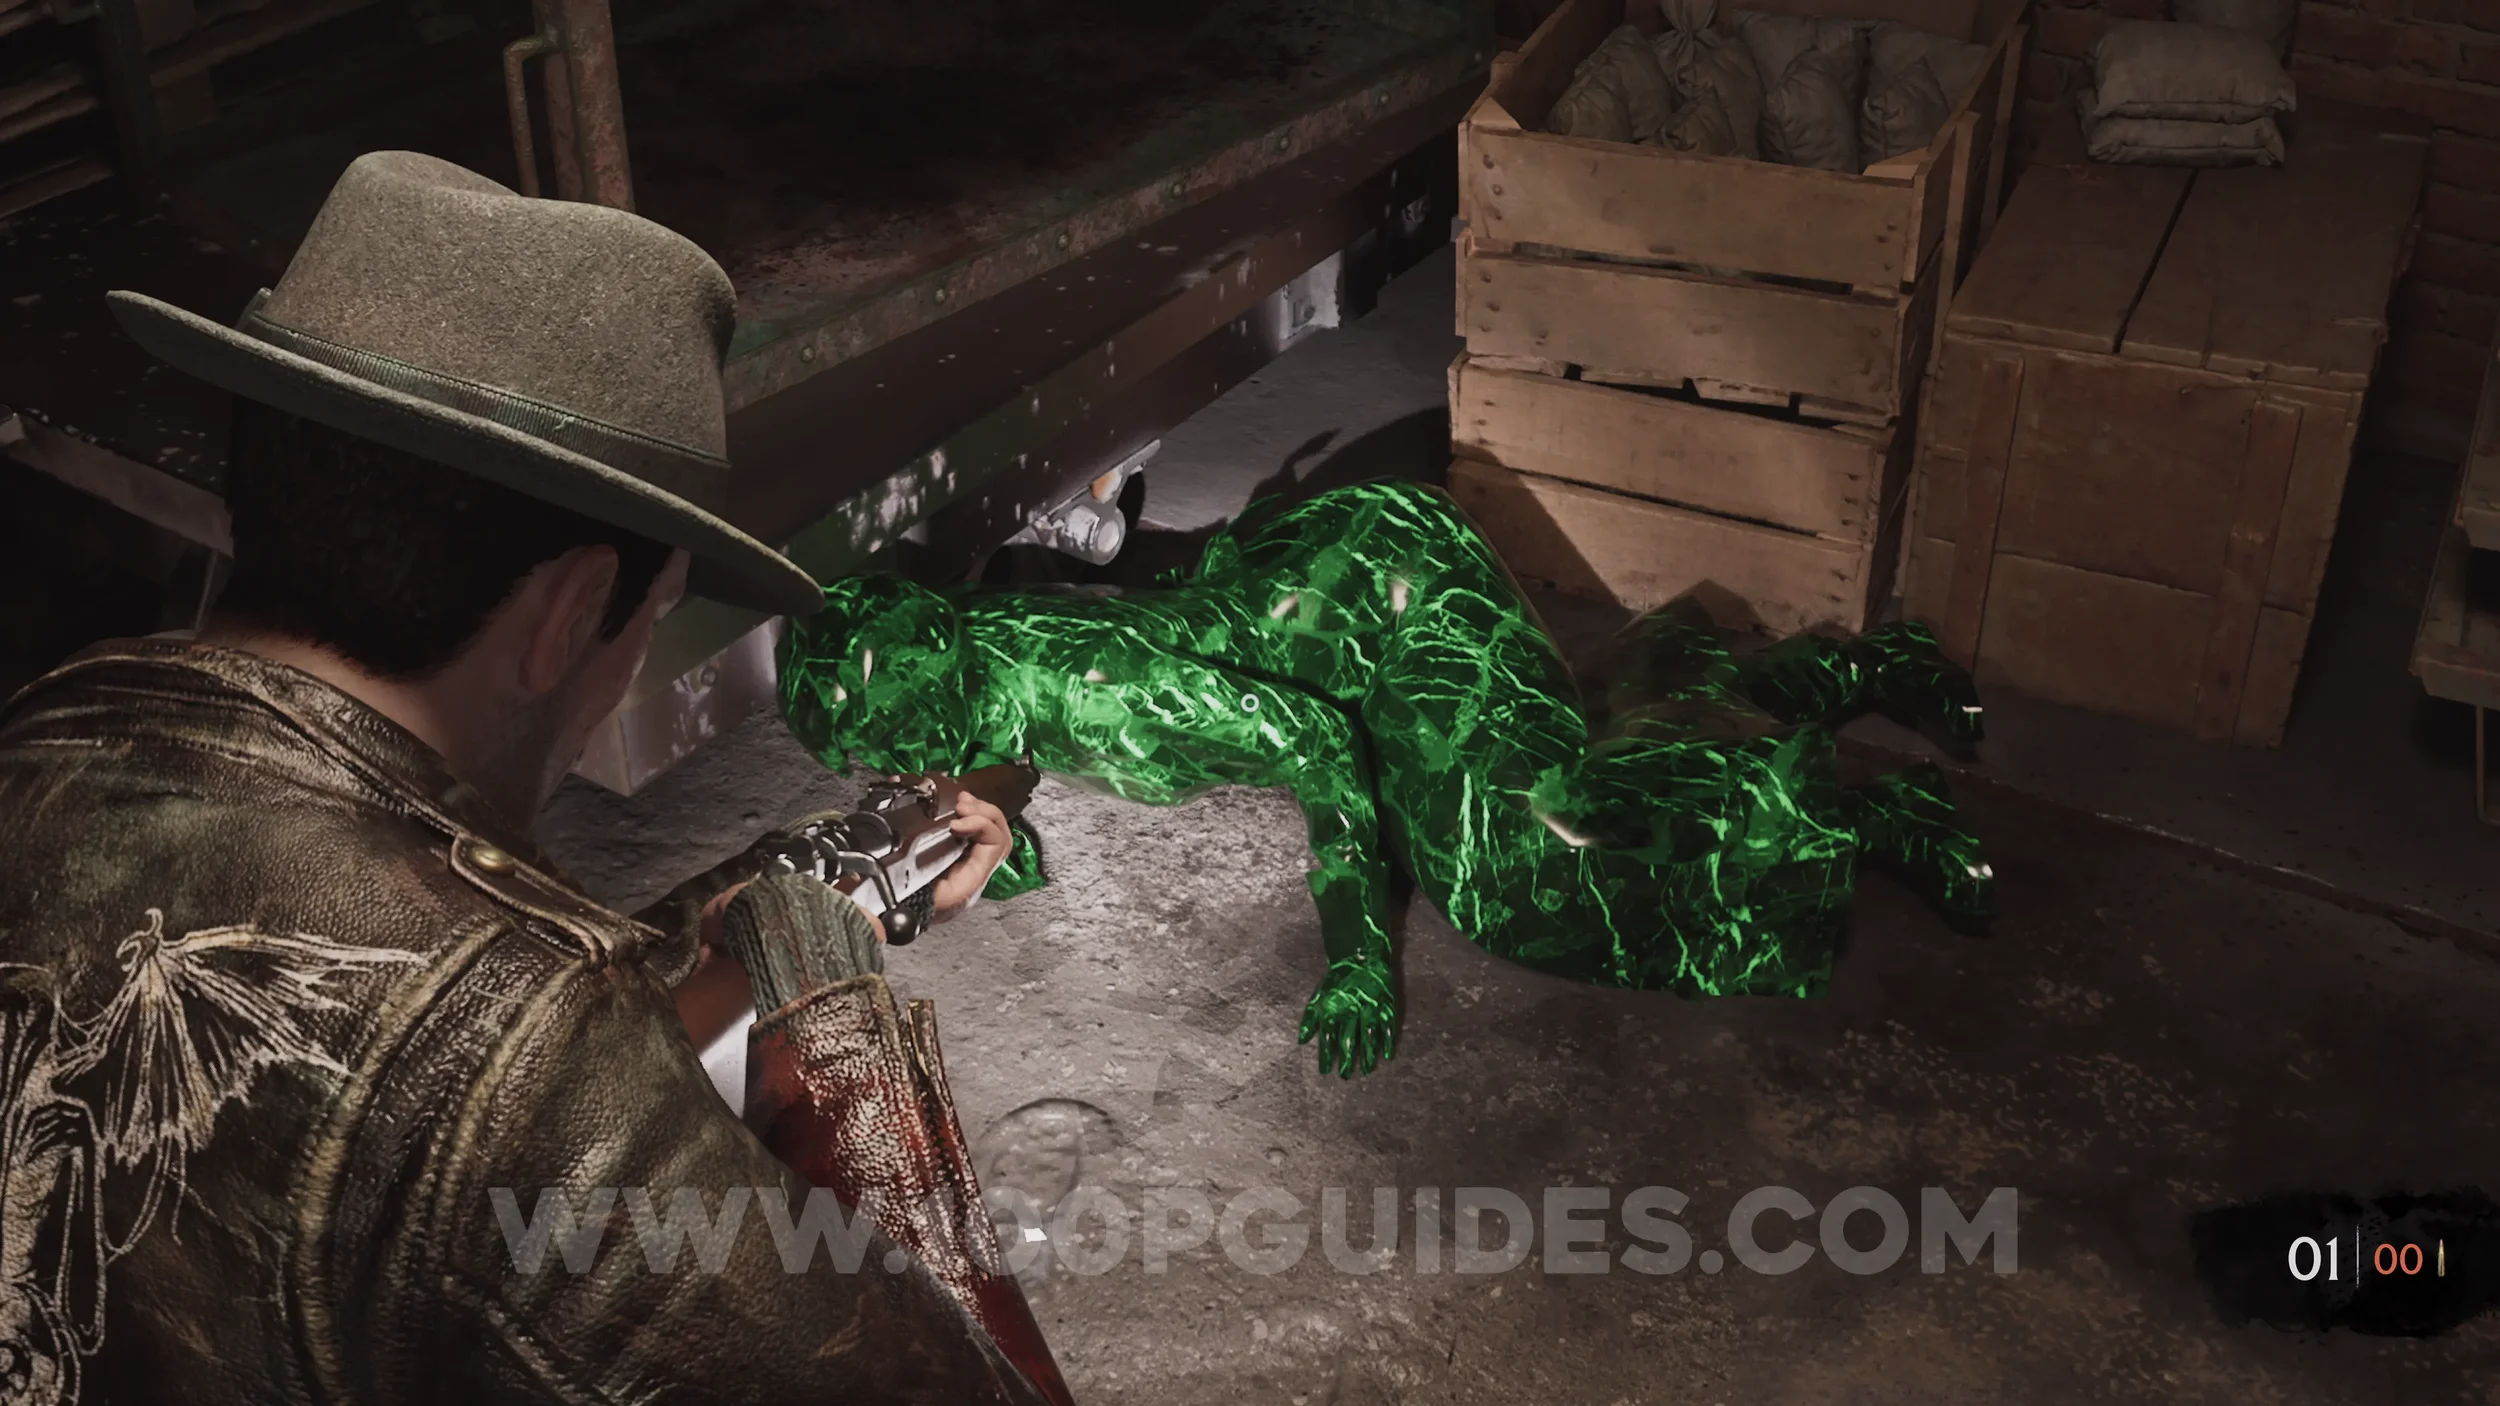
Trophy: The Damned + Dream Essence x2. Shoot the crystalized body on the floor in the room behind the puzzle door.
Locker Room Safe Code
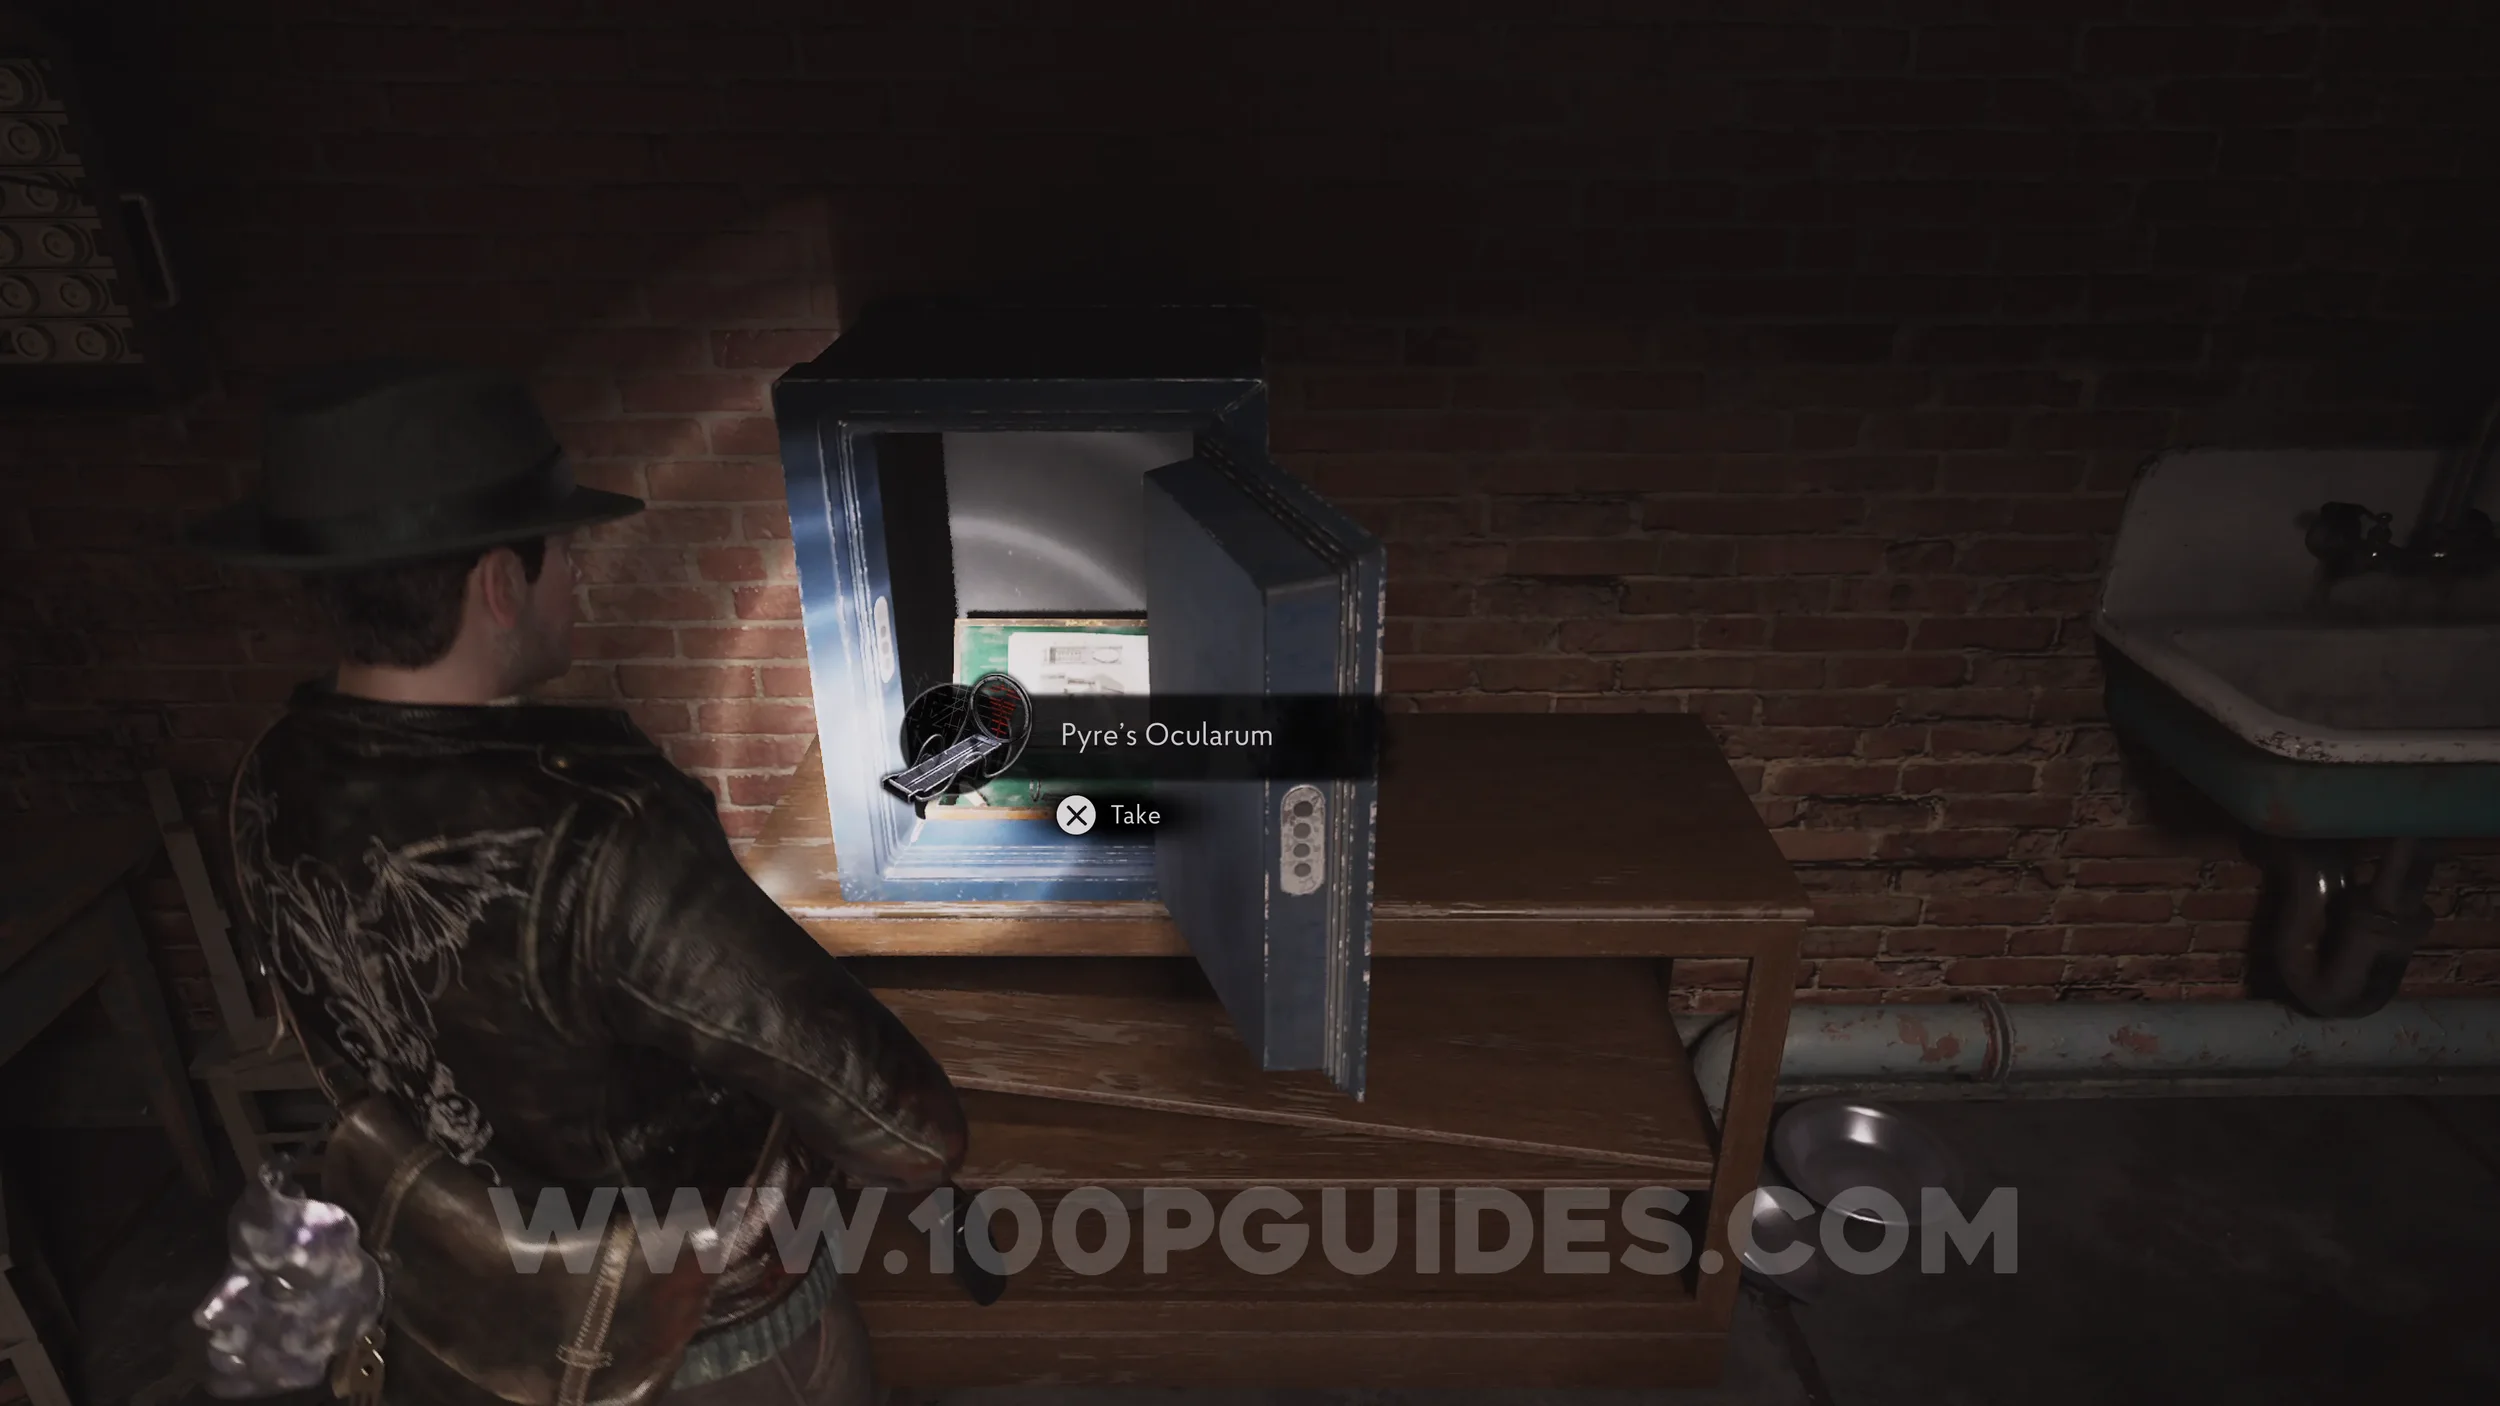
Head to the Locker Room just north of the Cutting Area to find a safe you'll now be able to open thanks to the latest evidence you picked up. The code is exactly the same as the Cutting Area door puzzle, but with a 6 at the end instead of 16. So the code is 1496.


Weapon Accessory: Pyre’s Ocularum. Inside the safe.
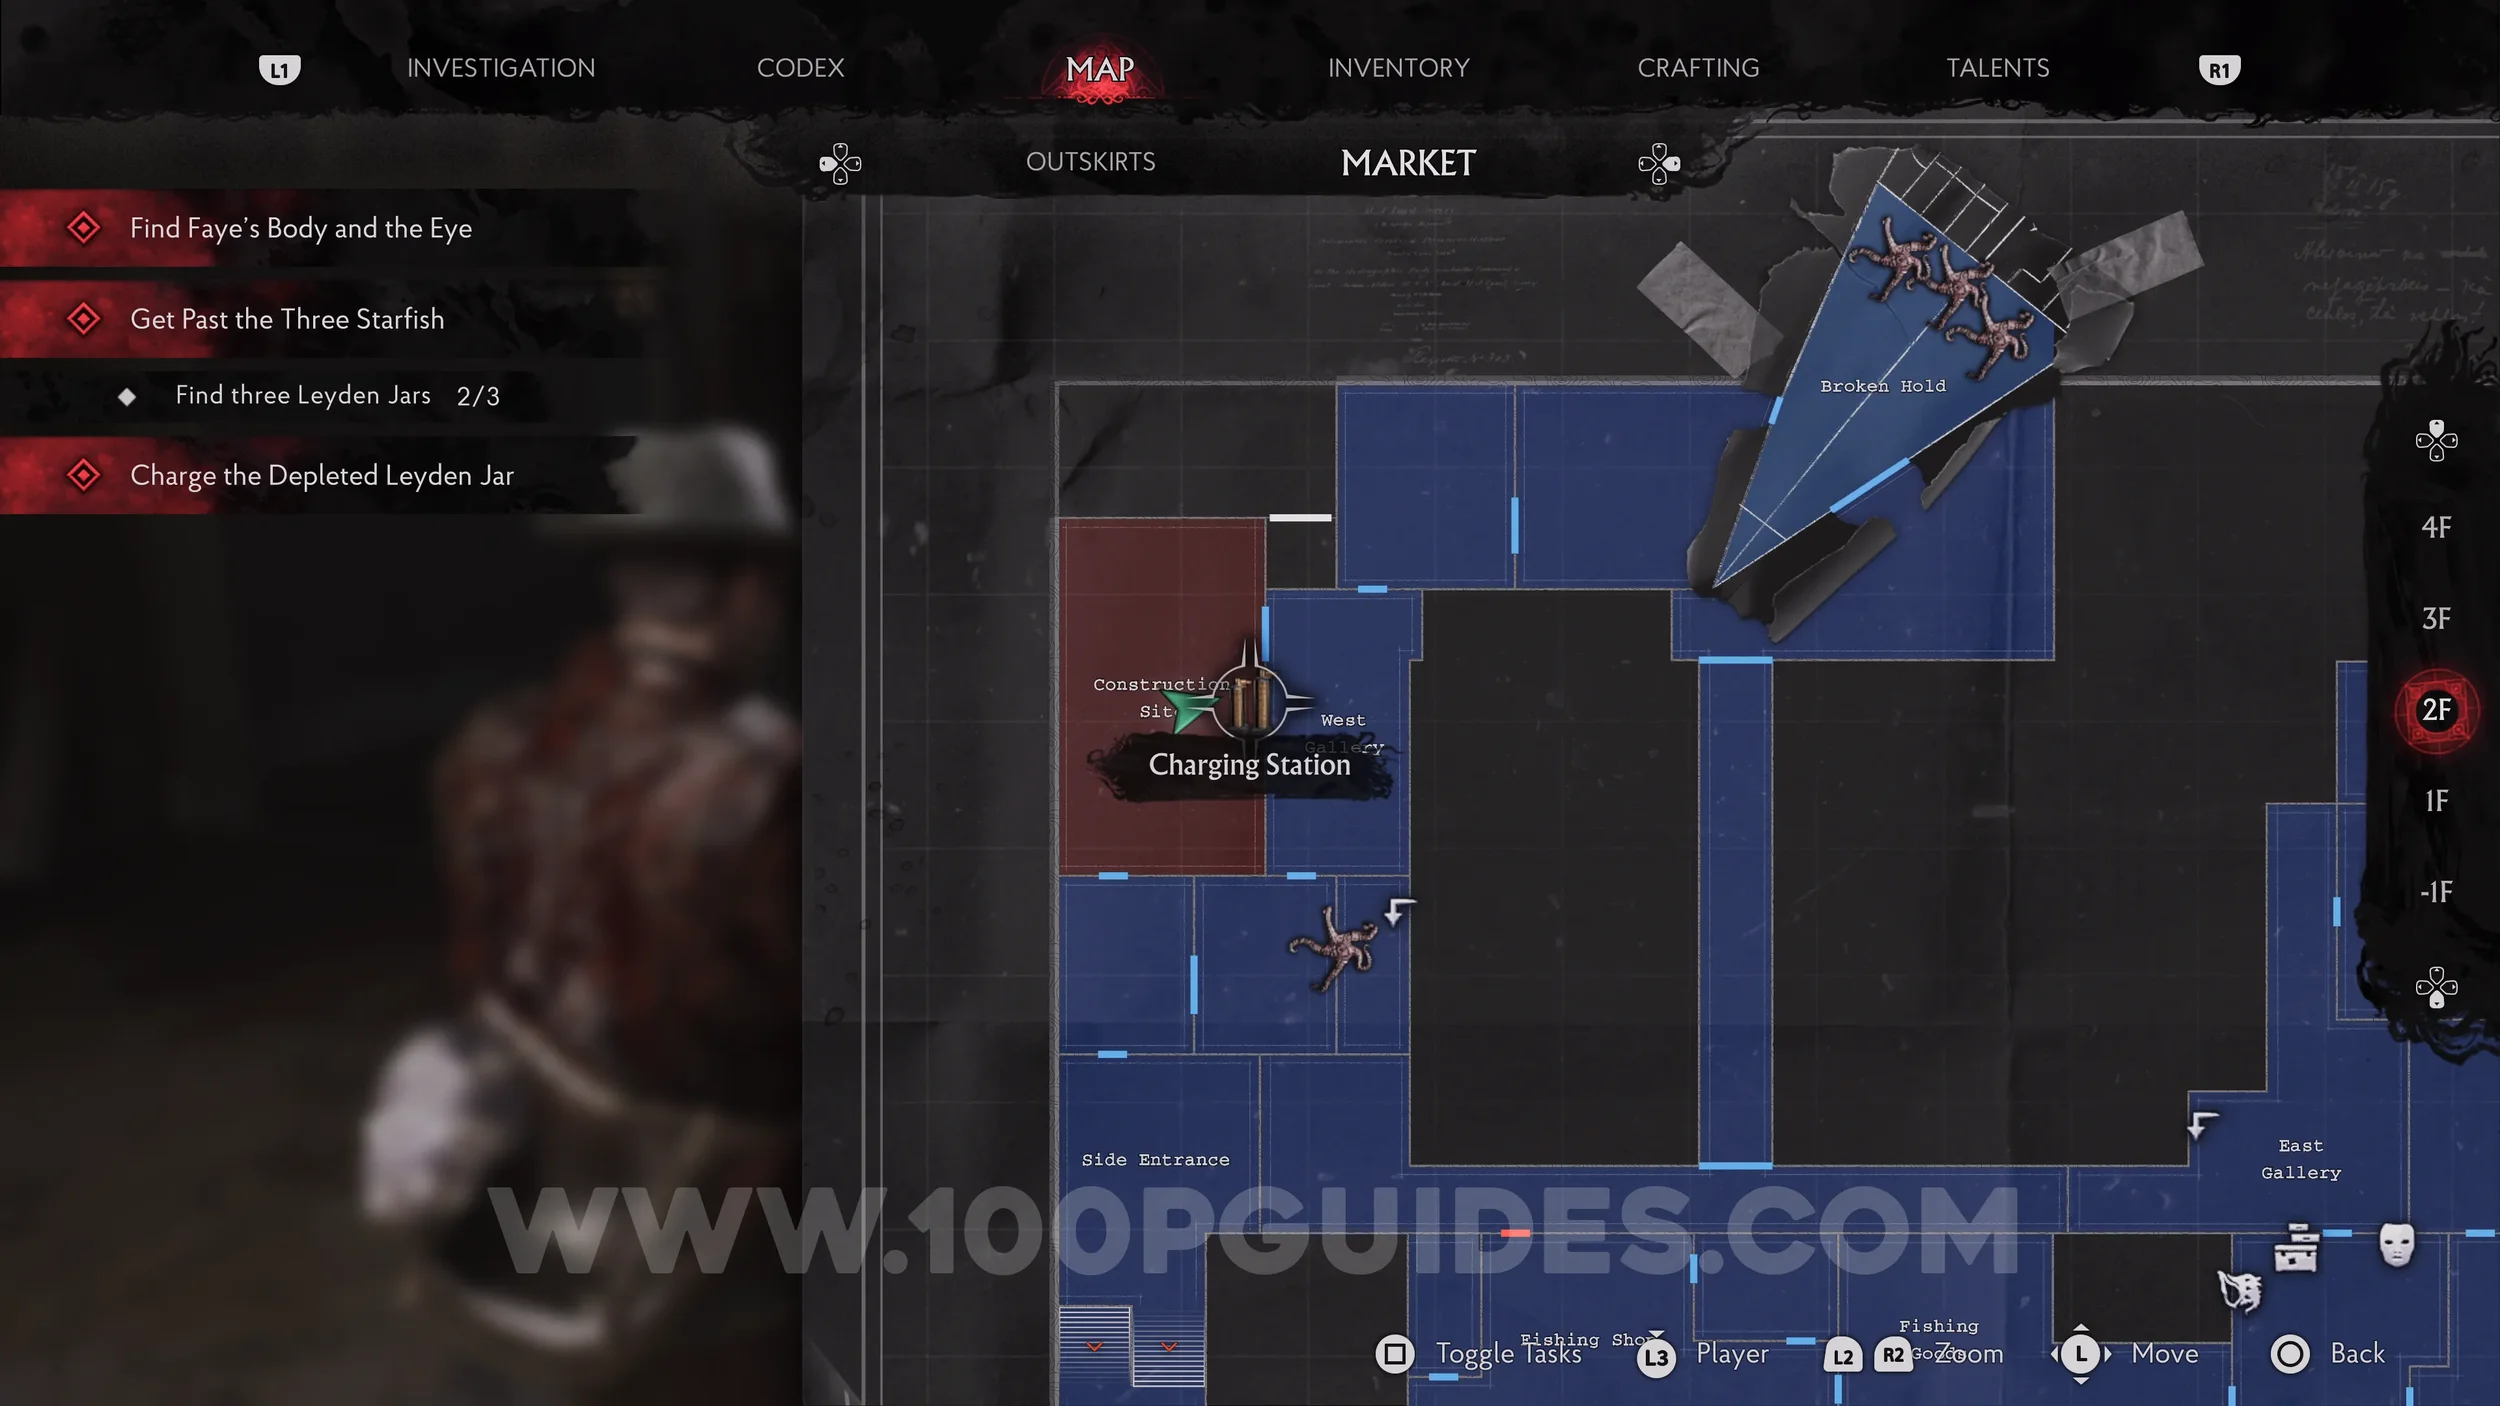
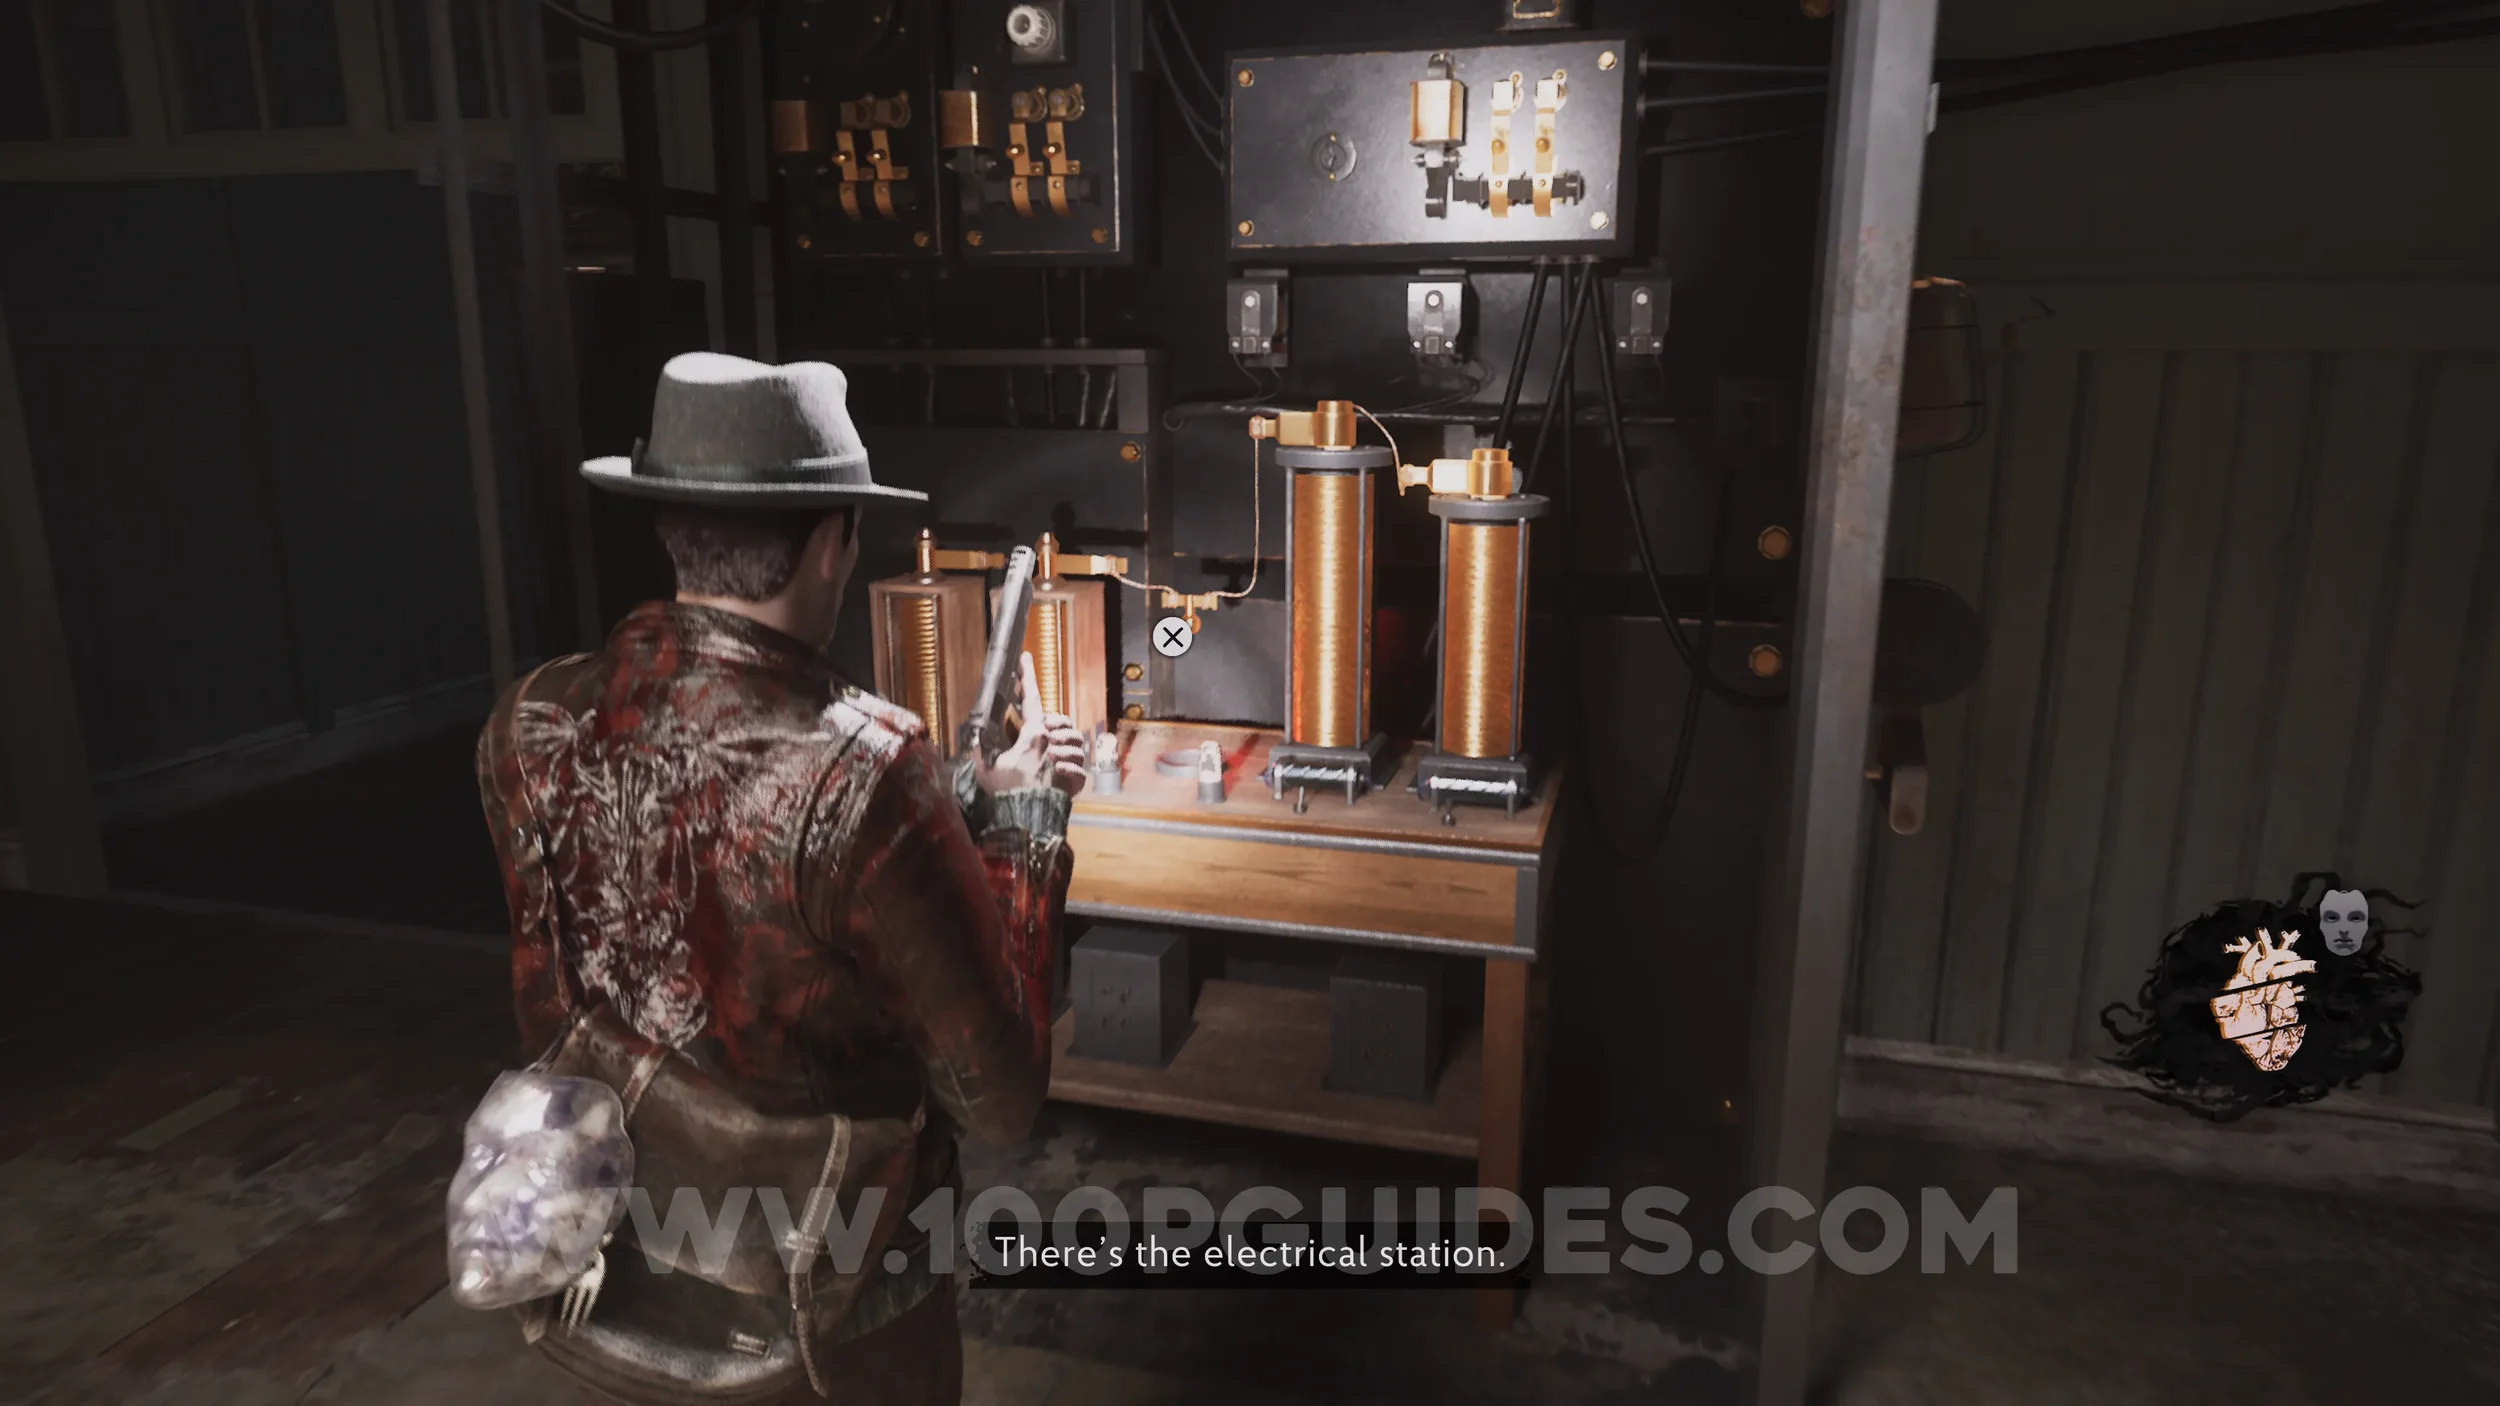
Key Item: Leyden Jar. Take the empty jar up to the Charging Station in the Construction Site on 2F. You'll then have to protect it from hordes of enemies and turn any switches back on if they turn red. After that, you can pick up the charged jar.
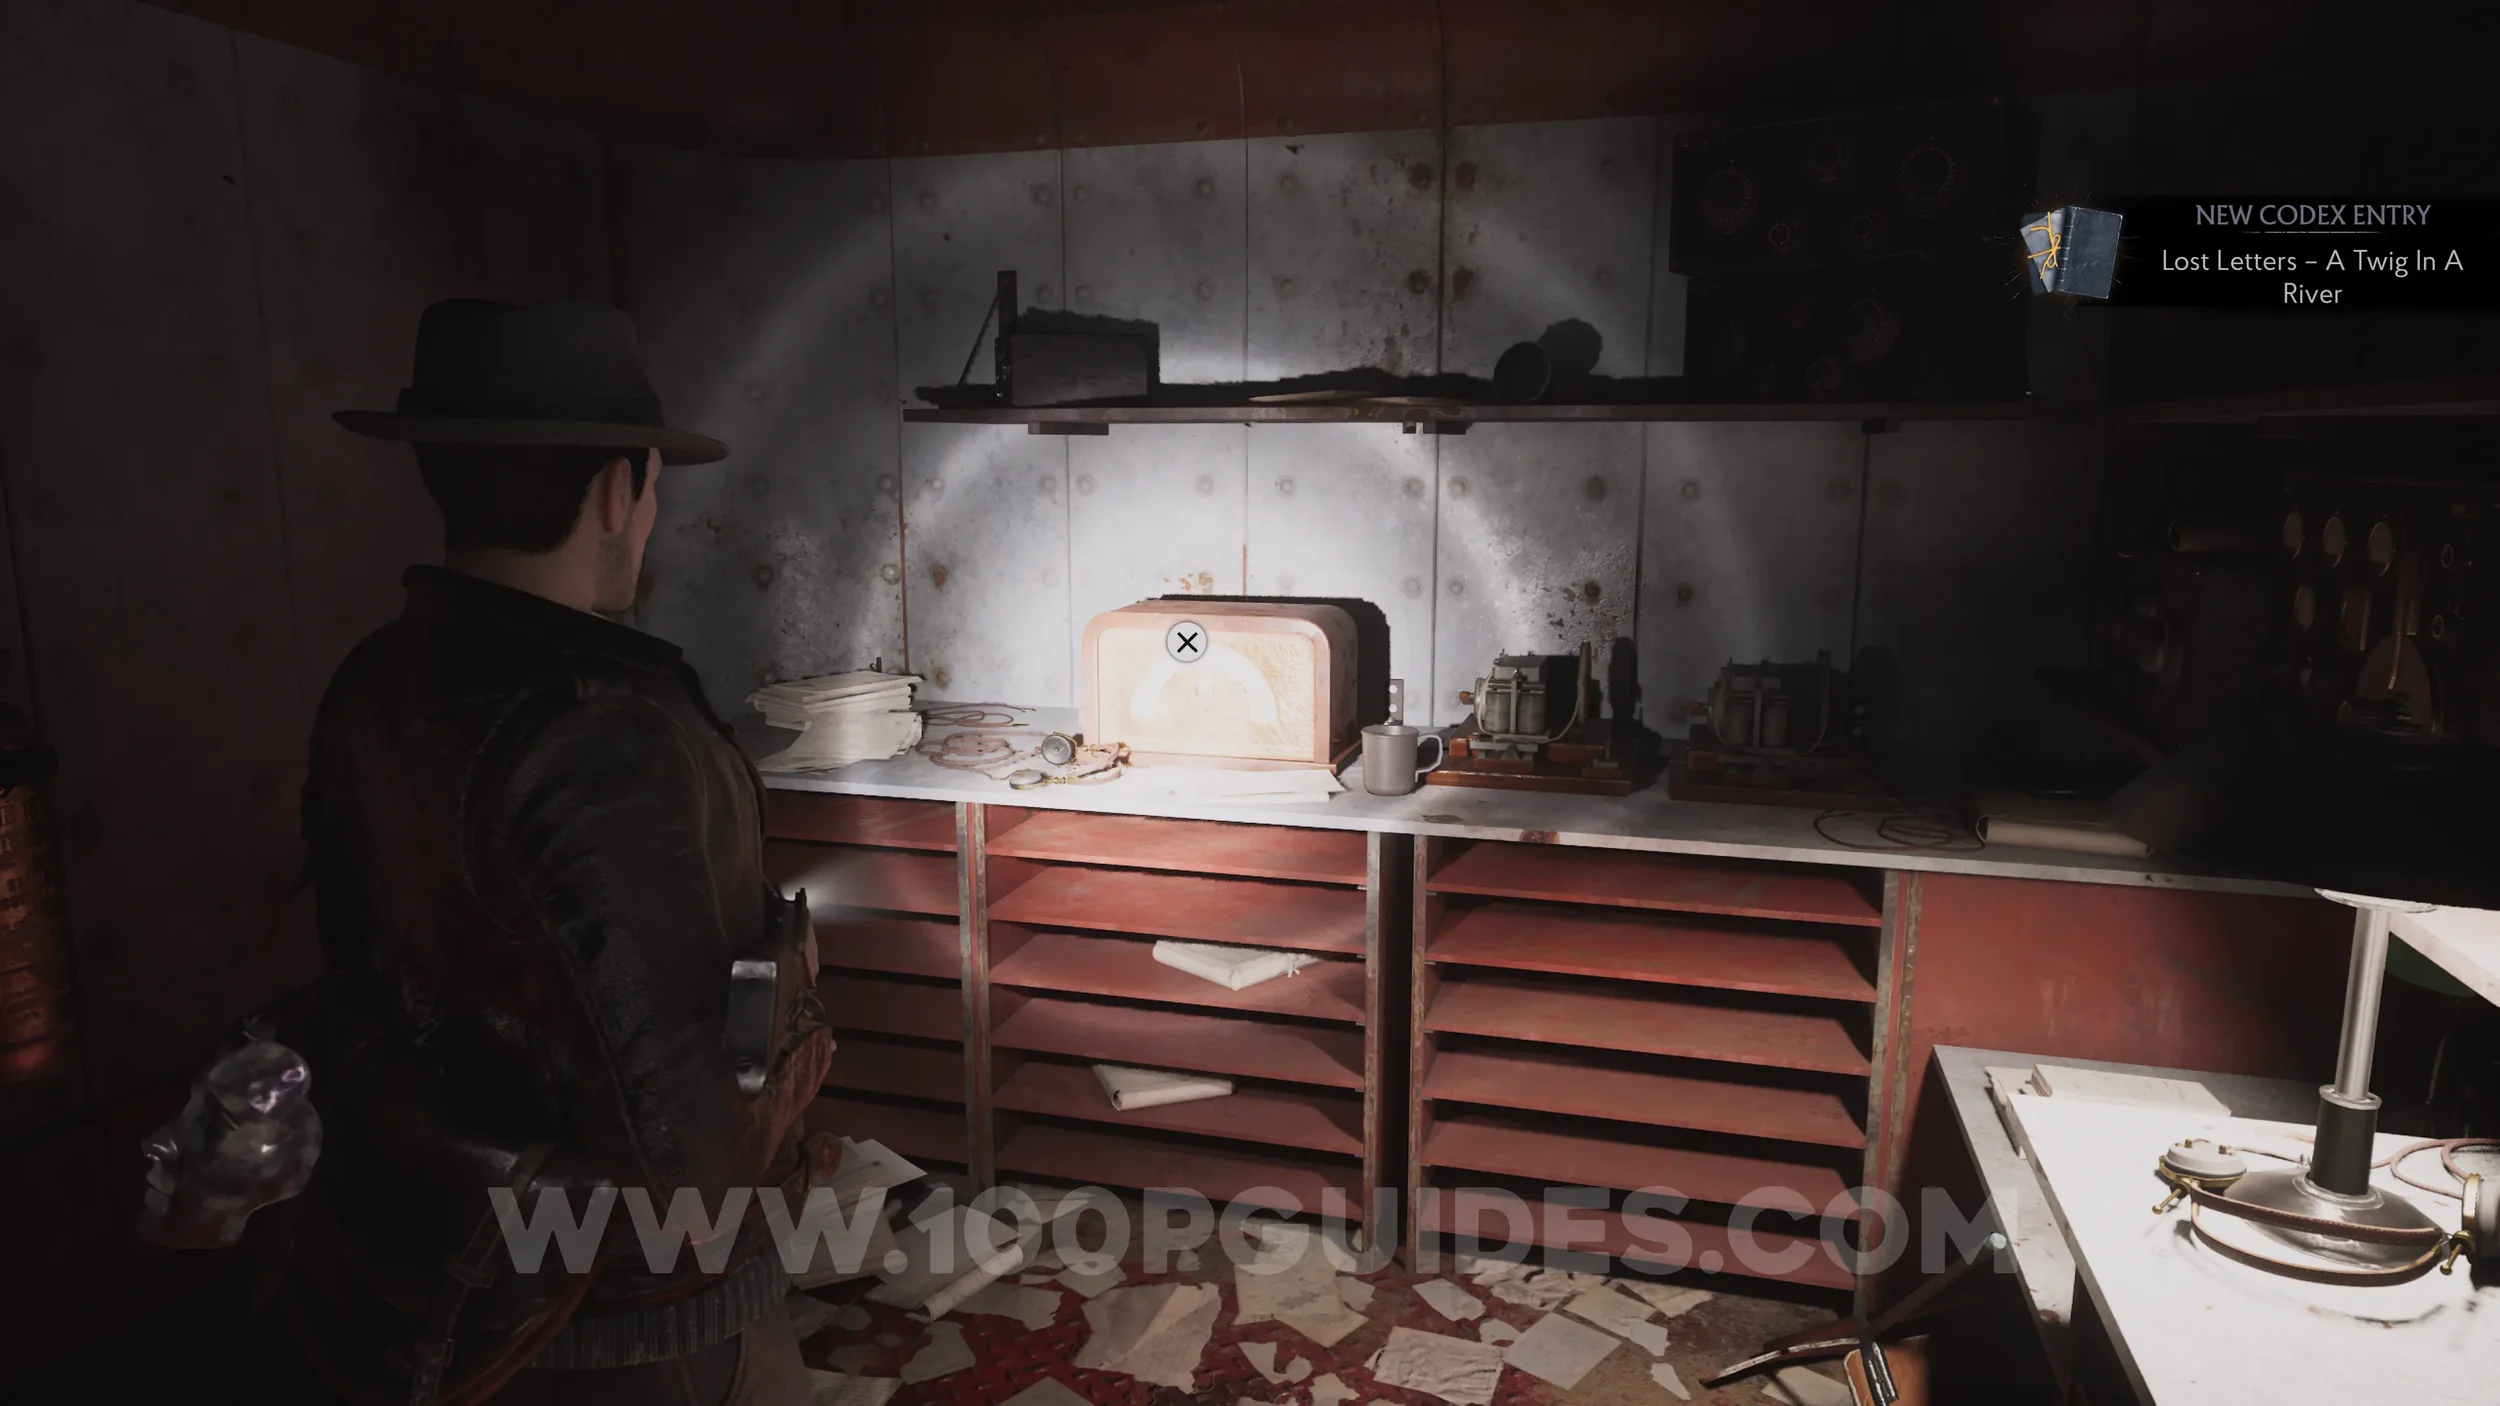
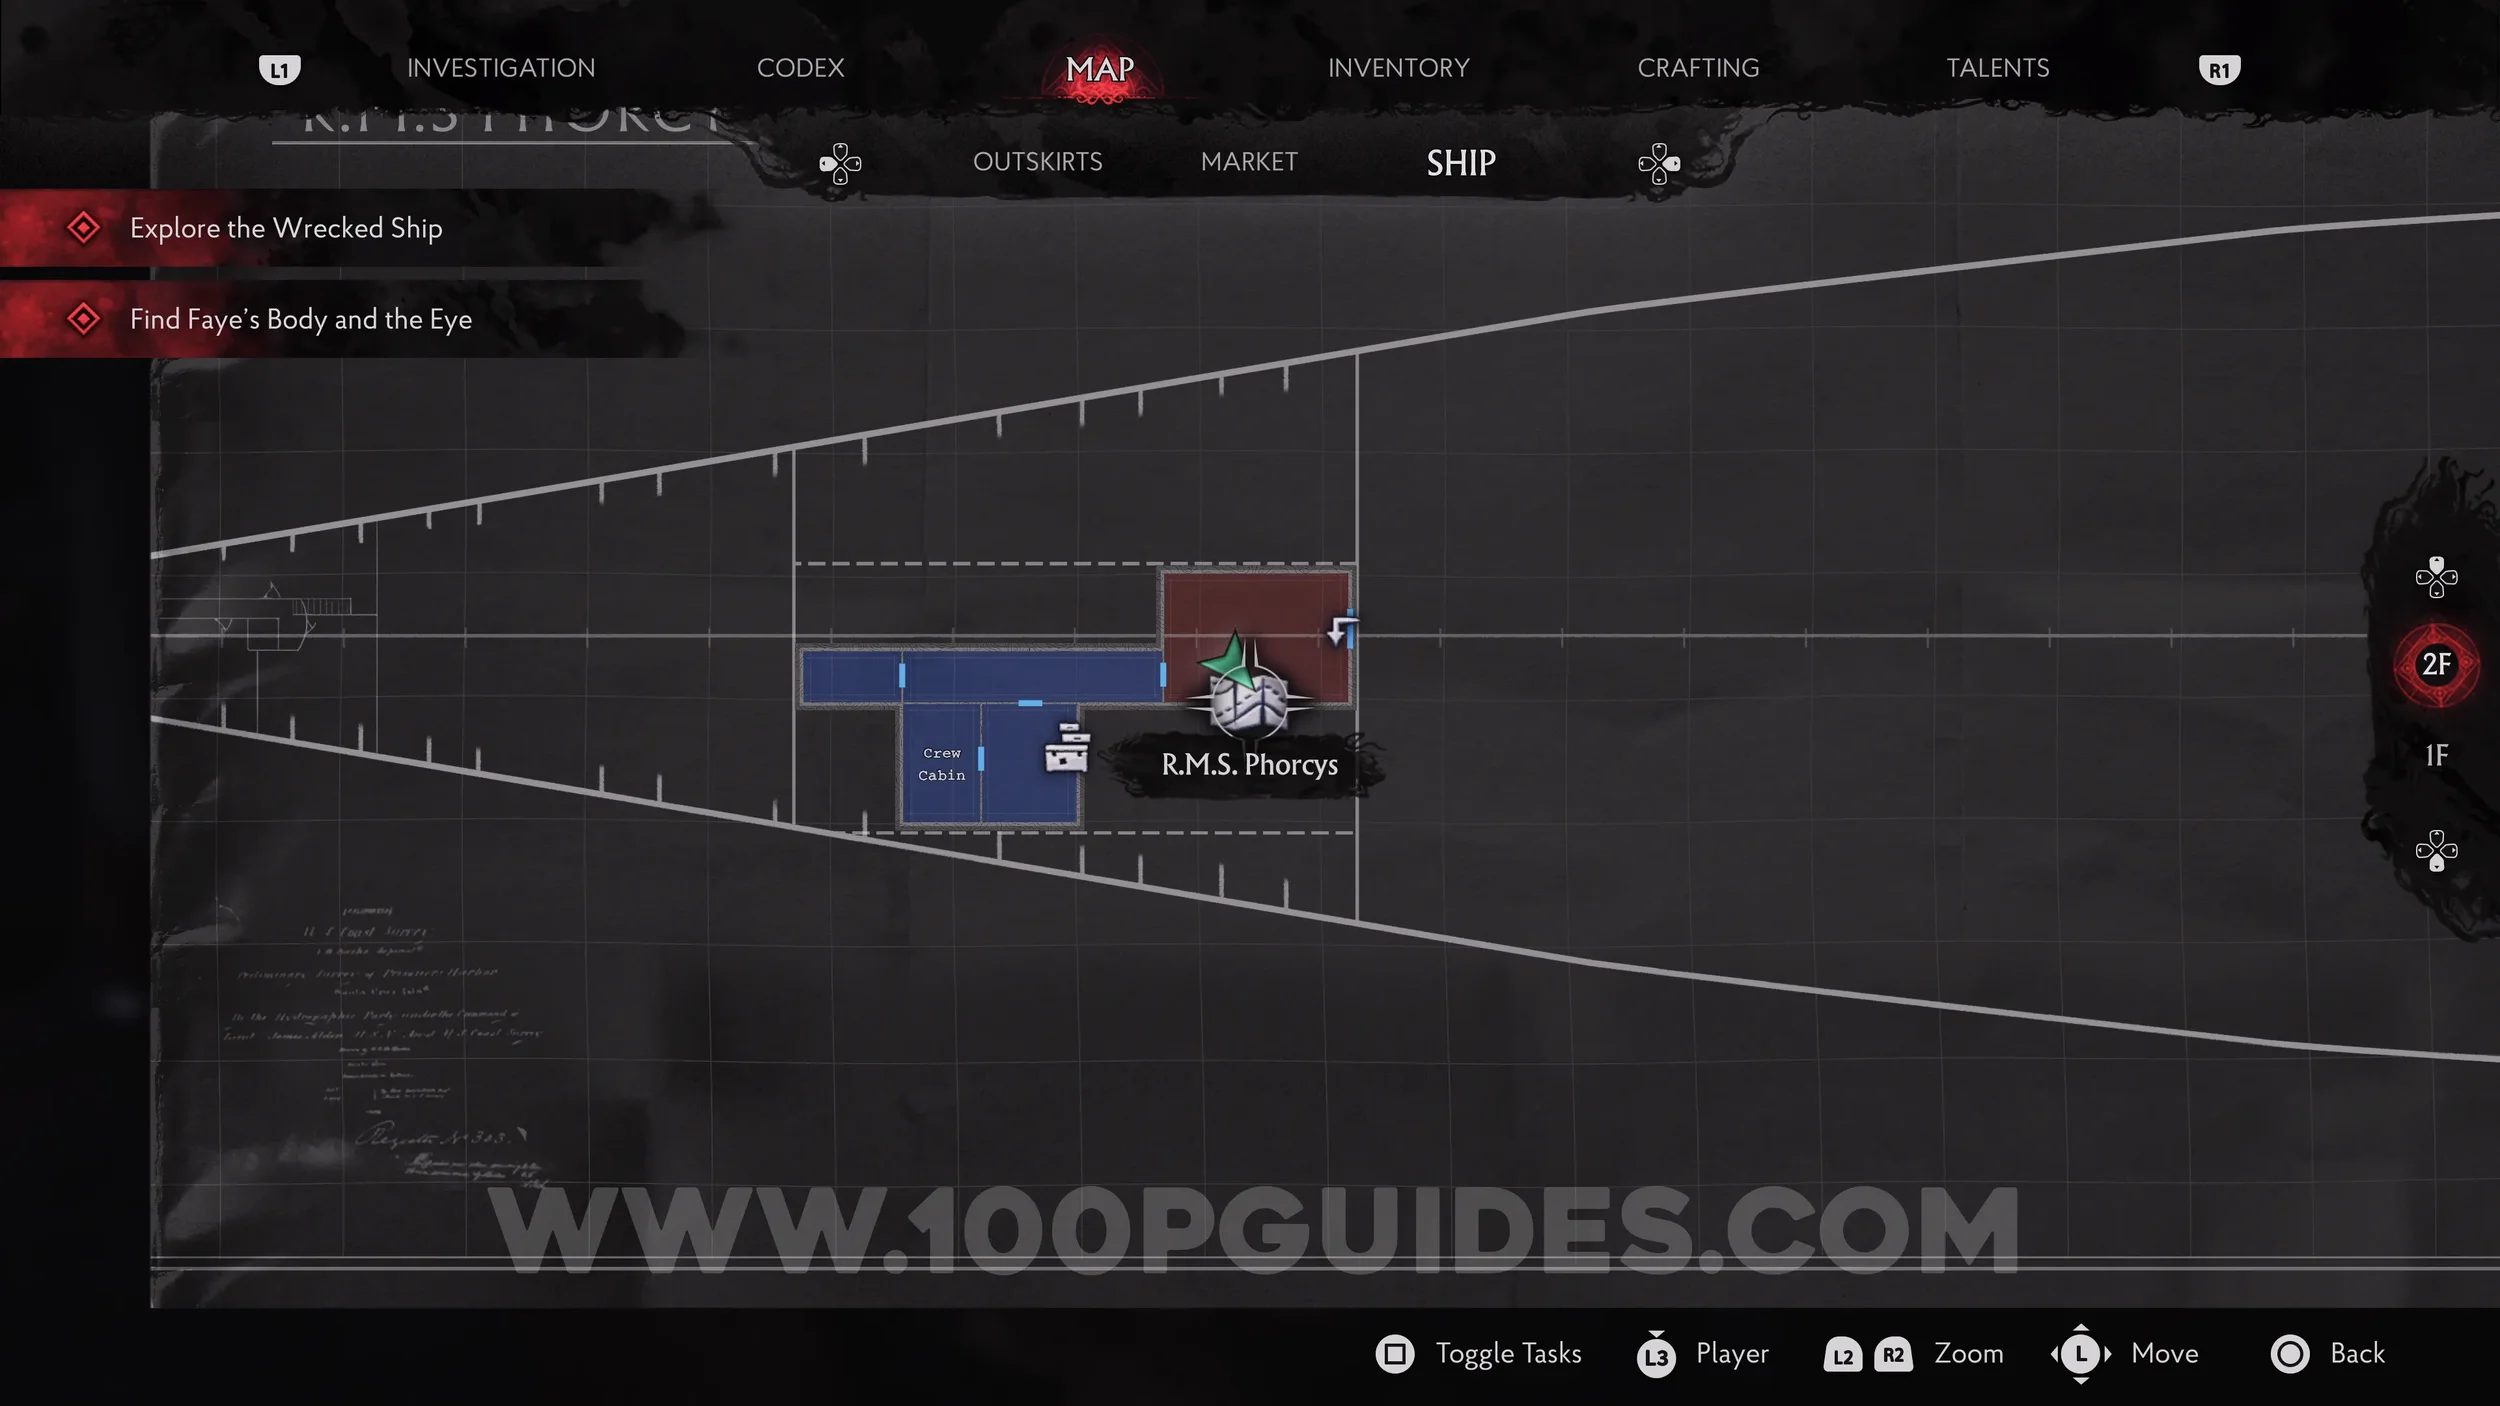
Lore Codex: Lost Letters - A Twig In A River. After using the three Jars to enter the ship, head up the stairs and enter the first door on the right. Then go through to the Crew Cabin to find the collectible.
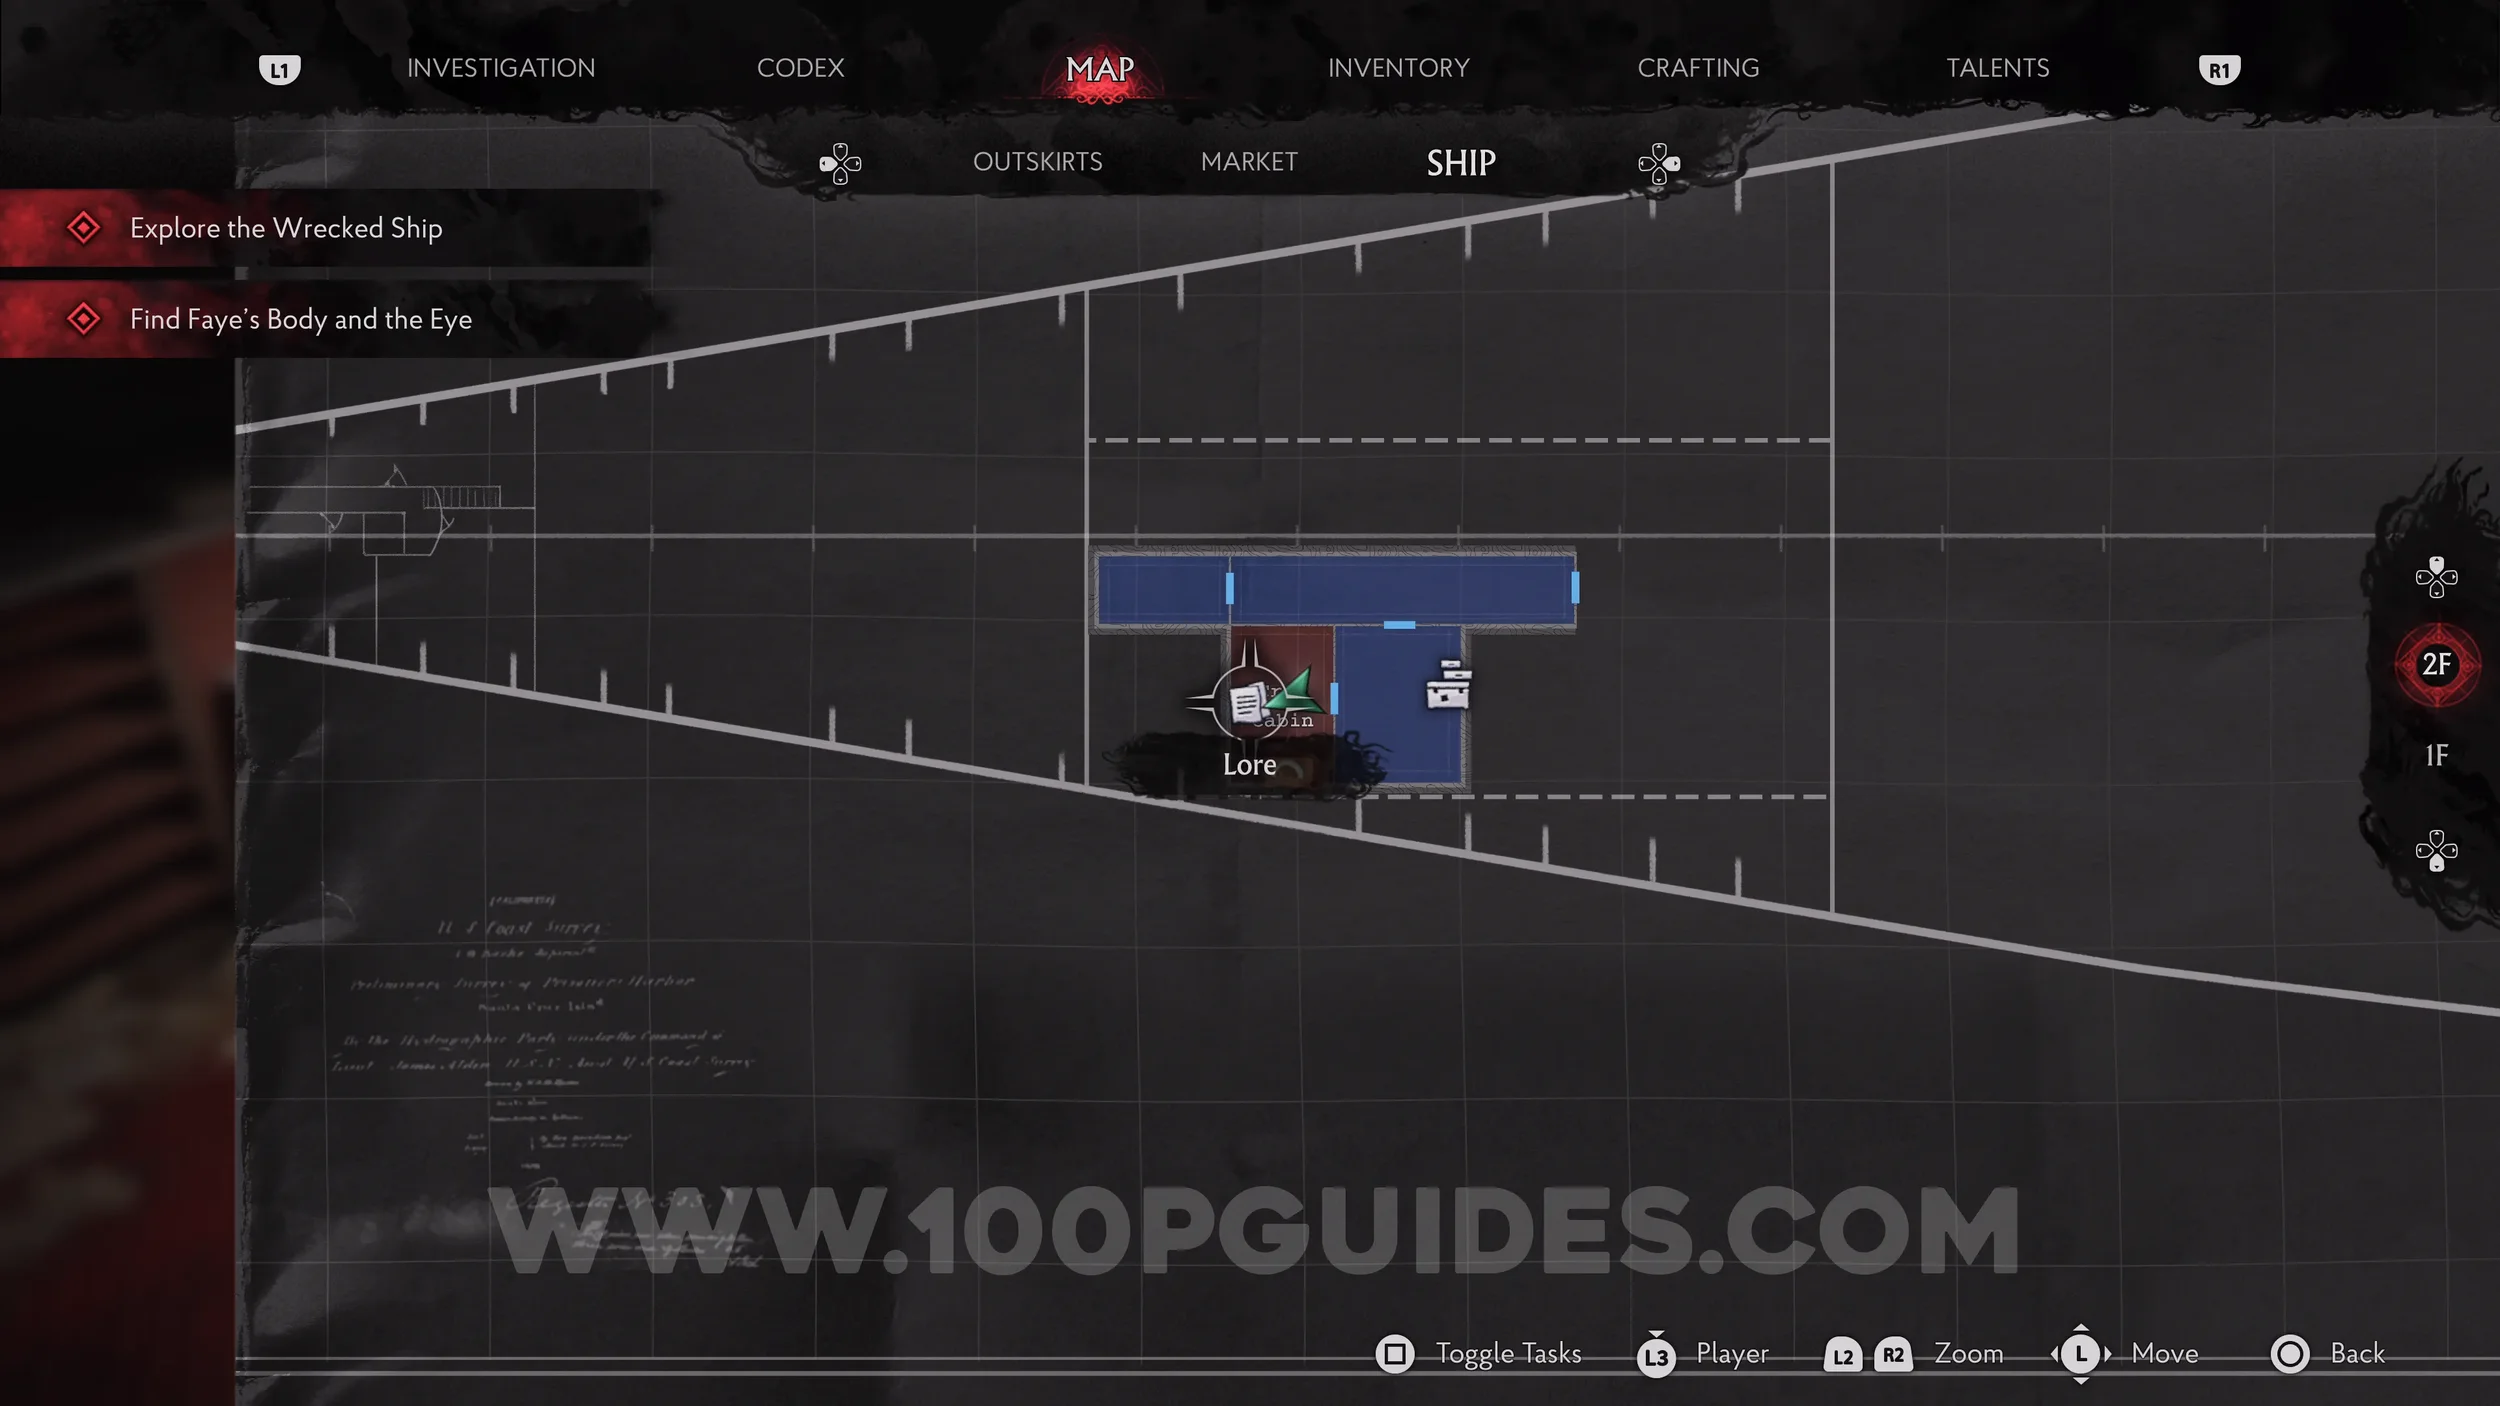
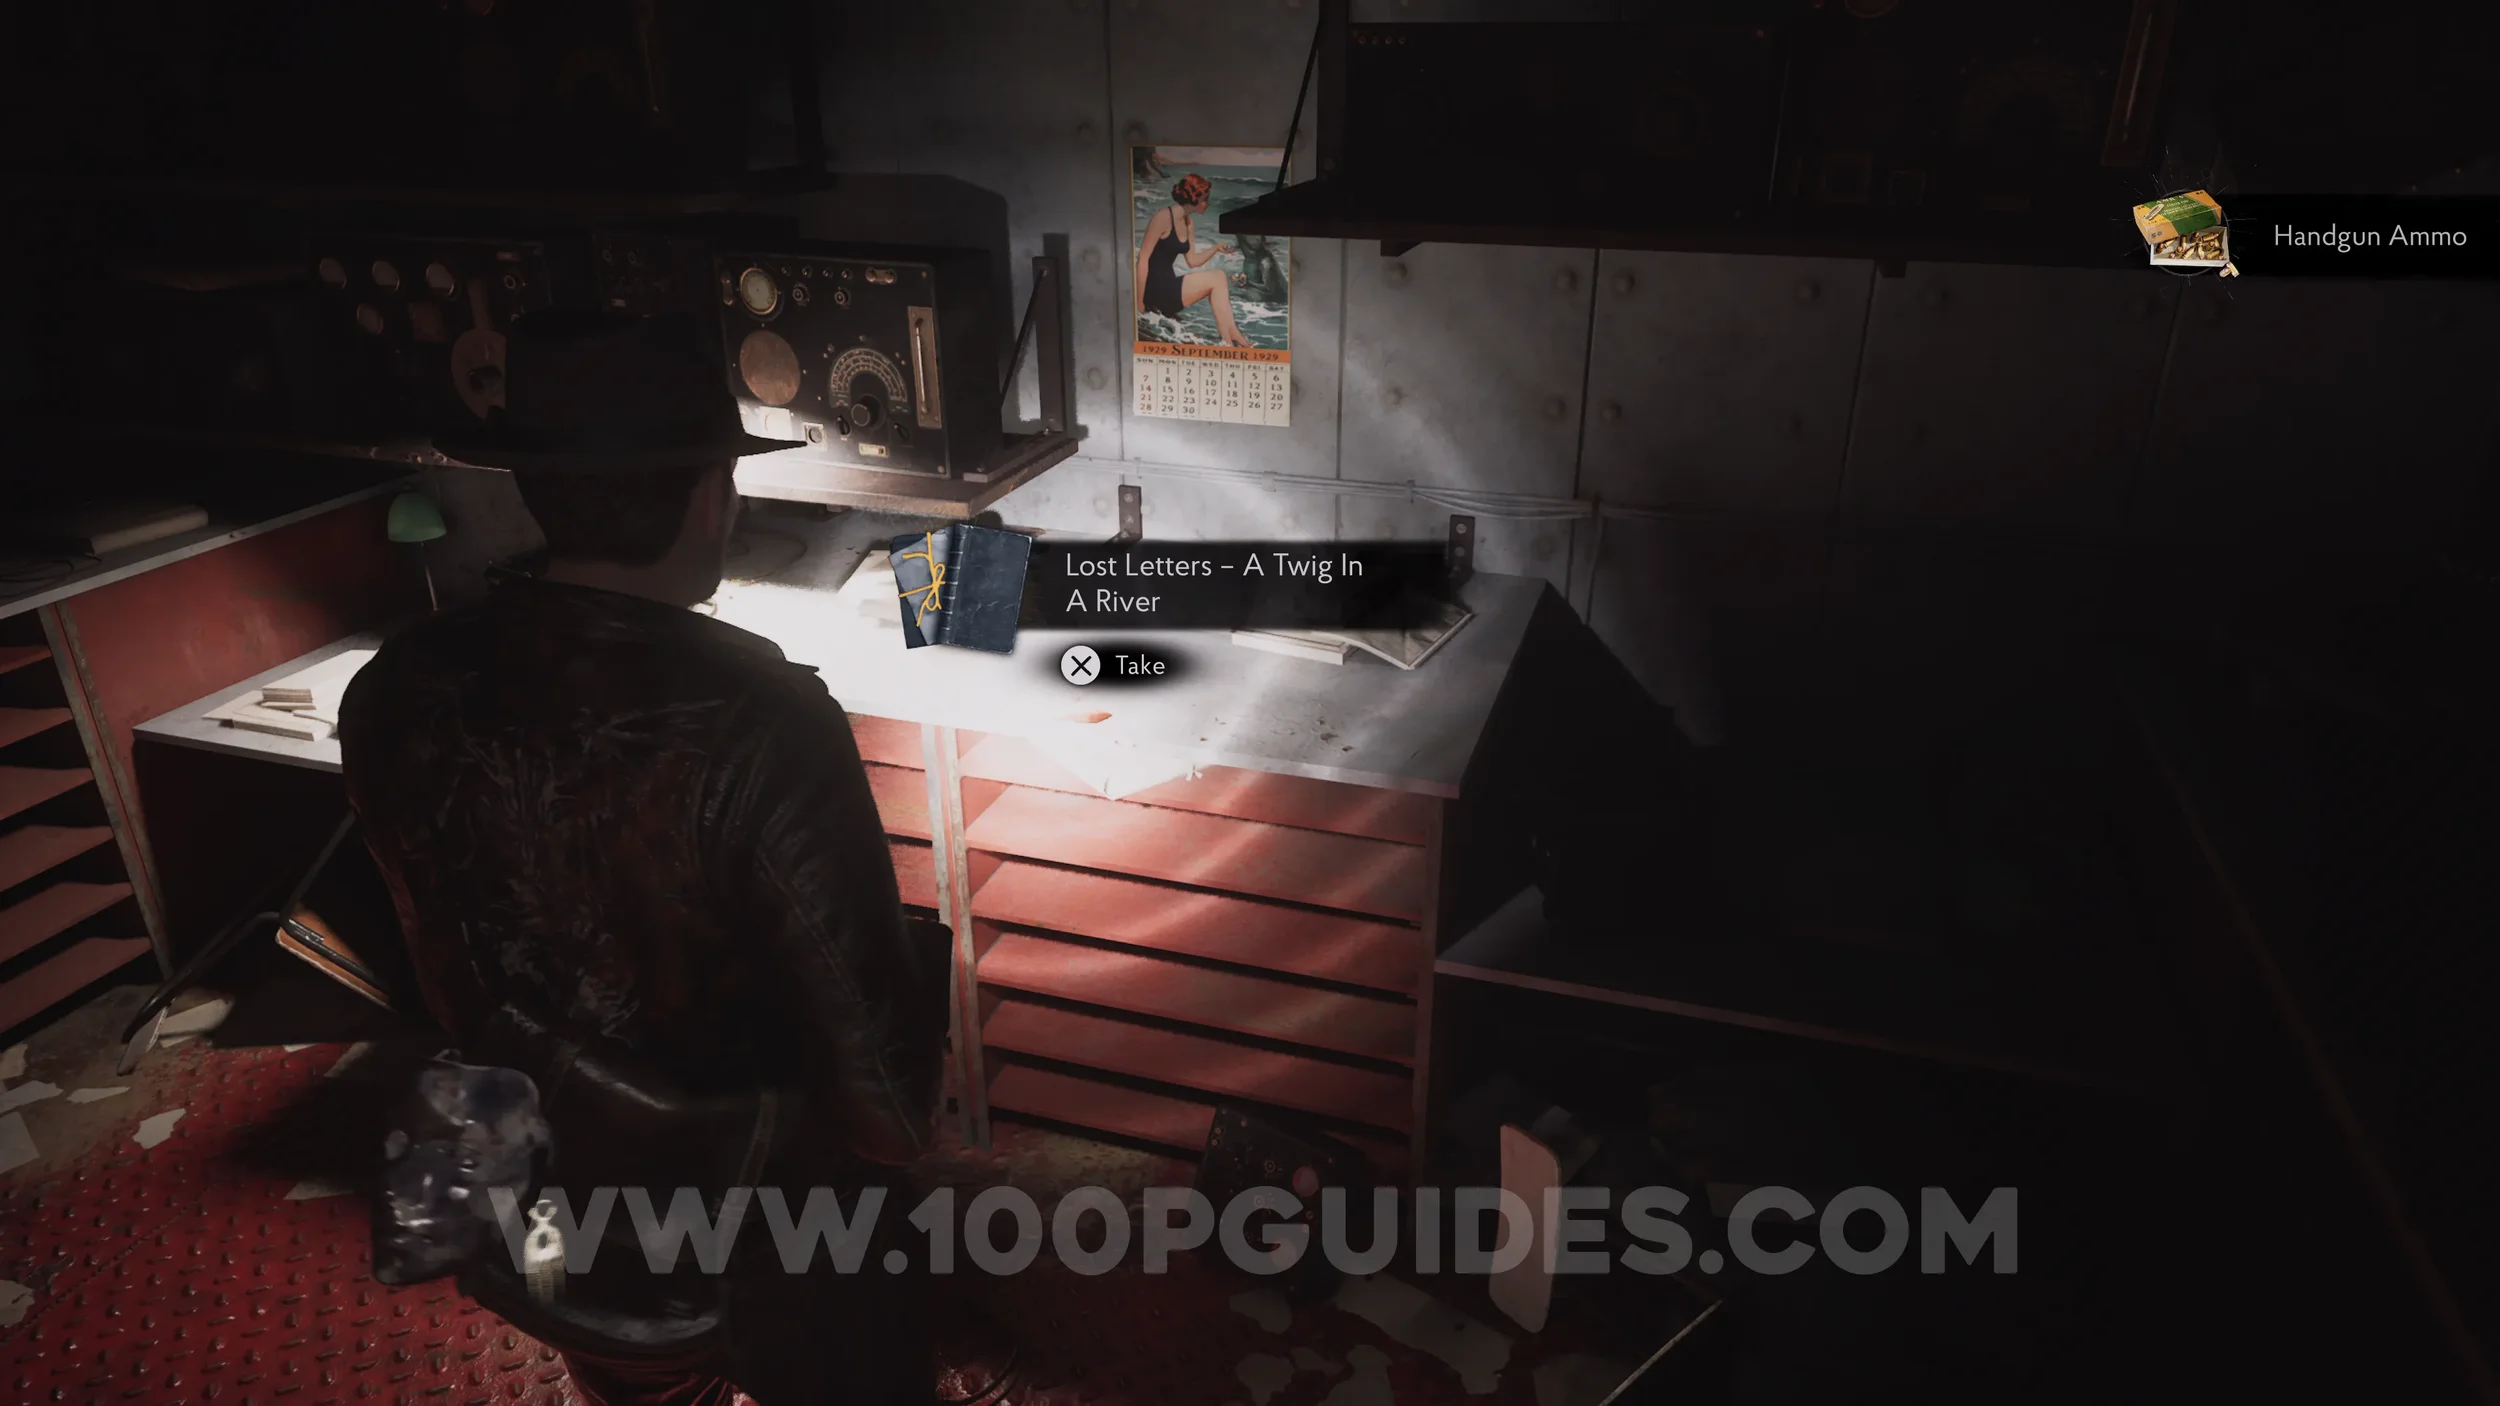
Radio: The Passage of Time. In the same room.
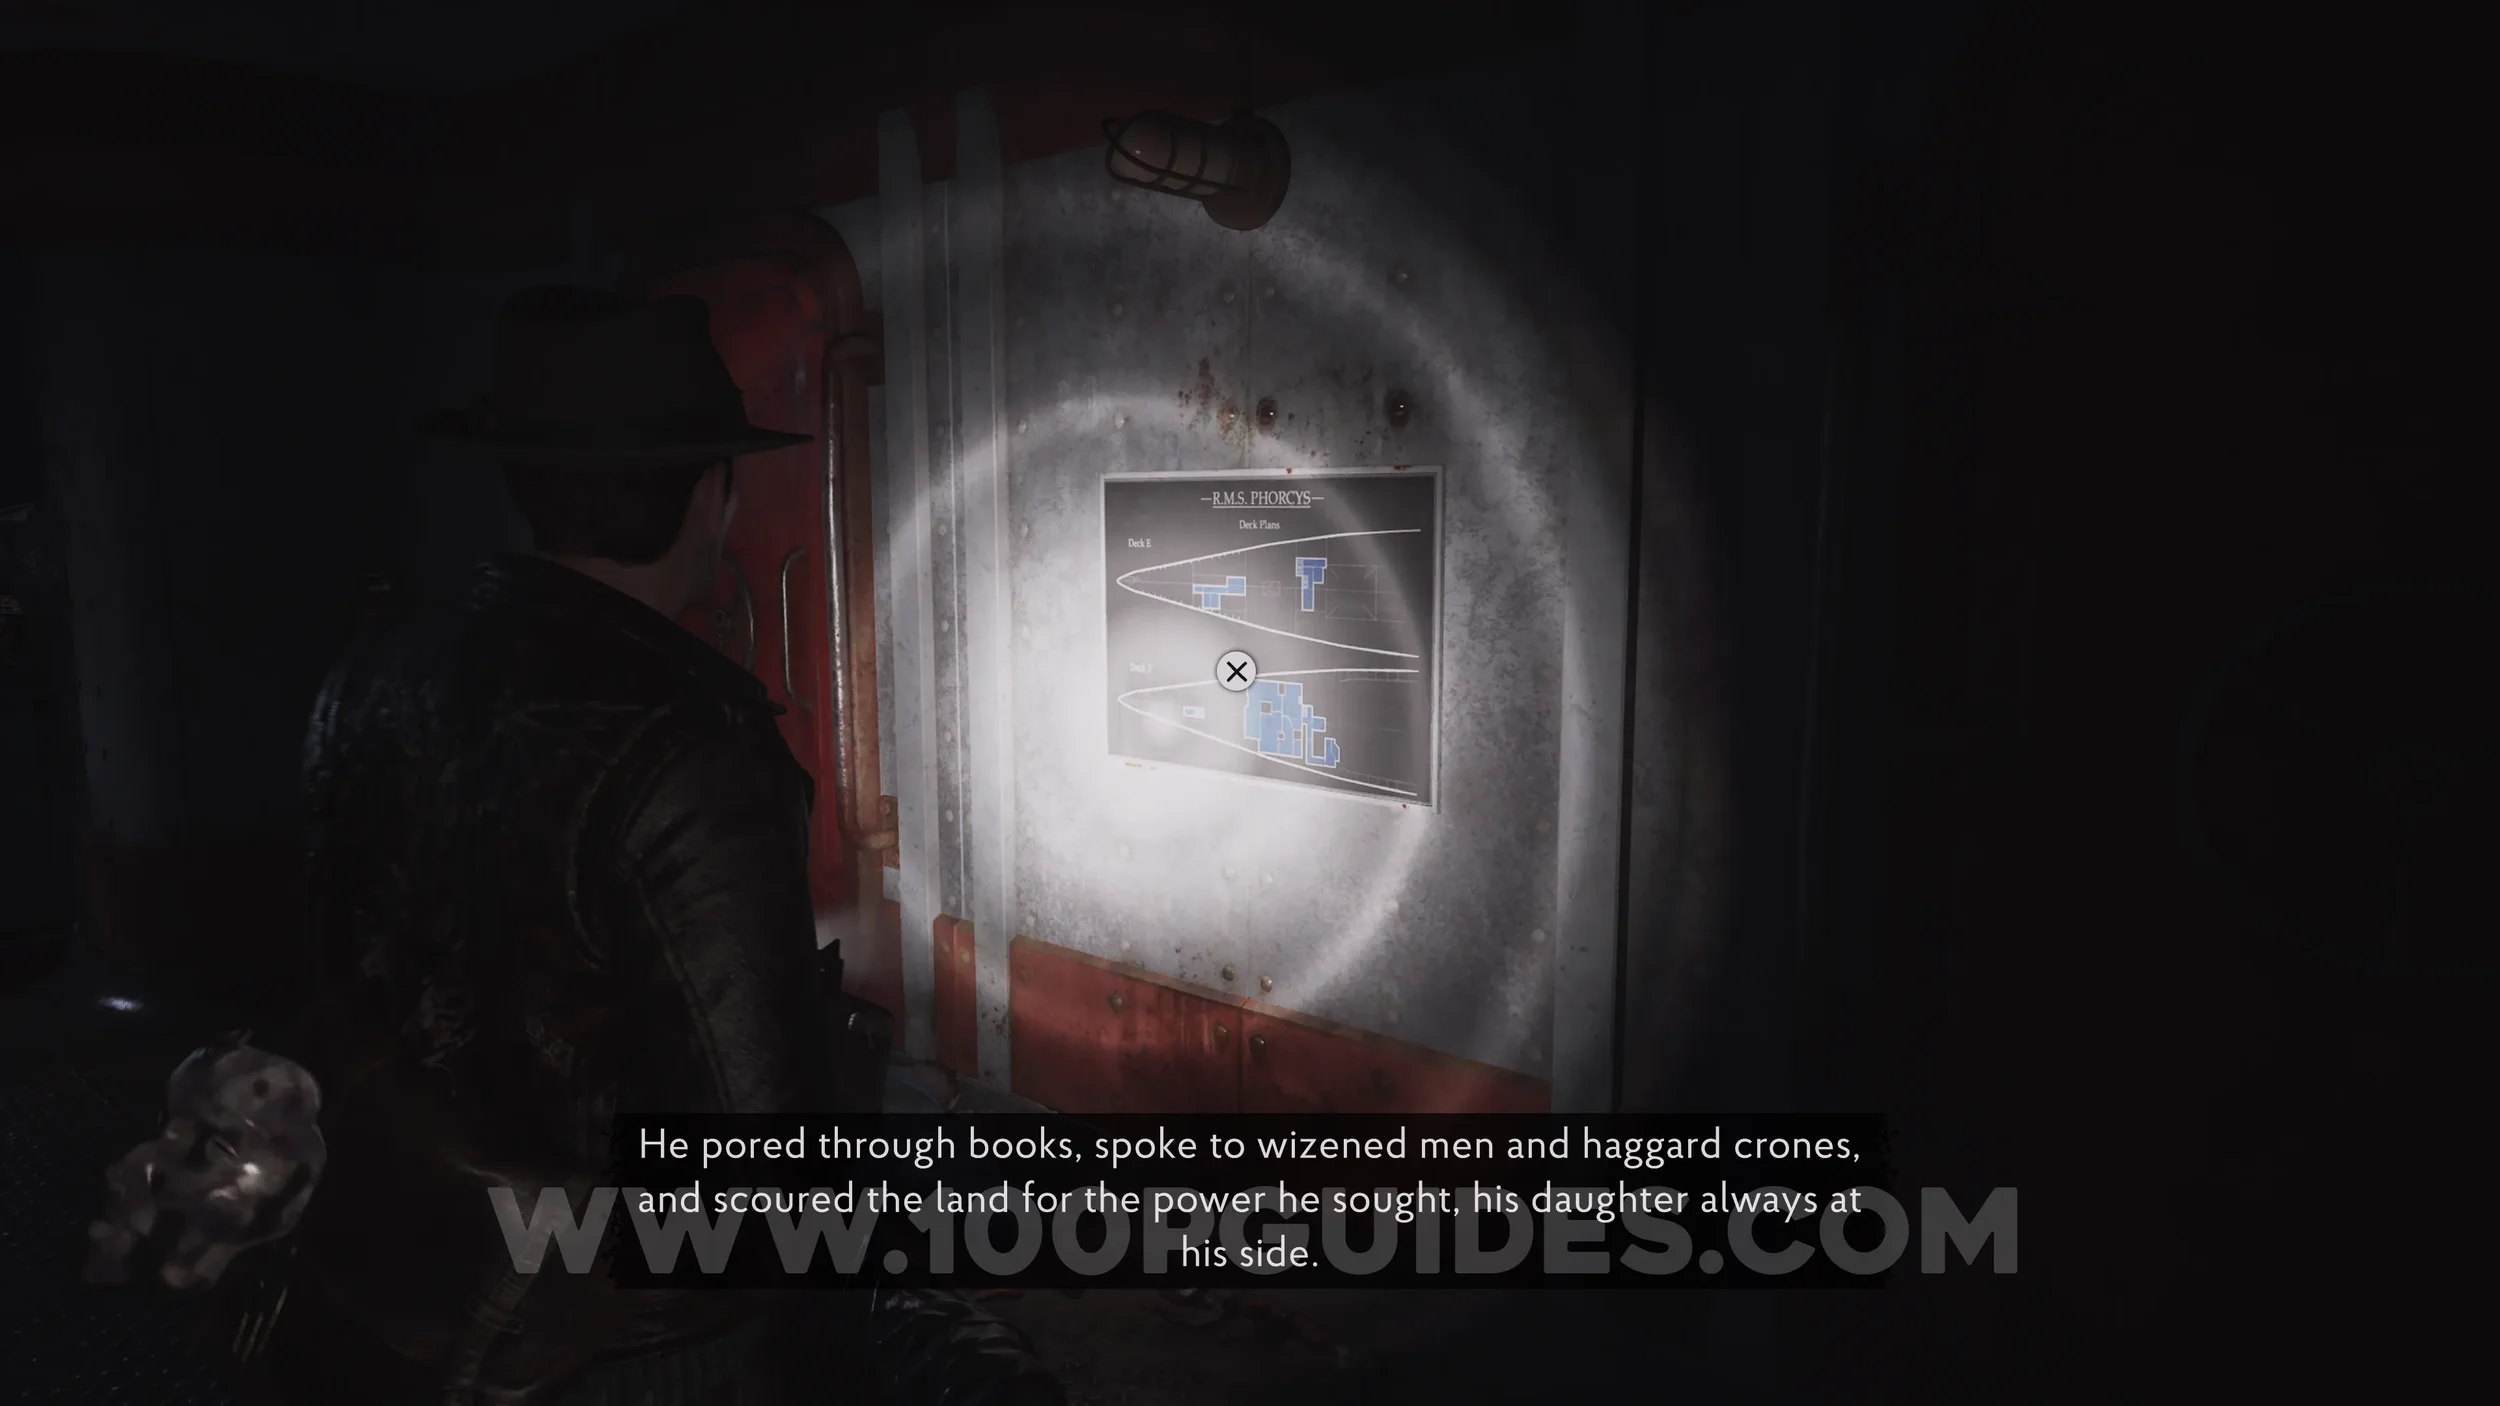
Map: R.M.S. Phorcys. Head back to the hall, then go east to find it on the wall in the next room.
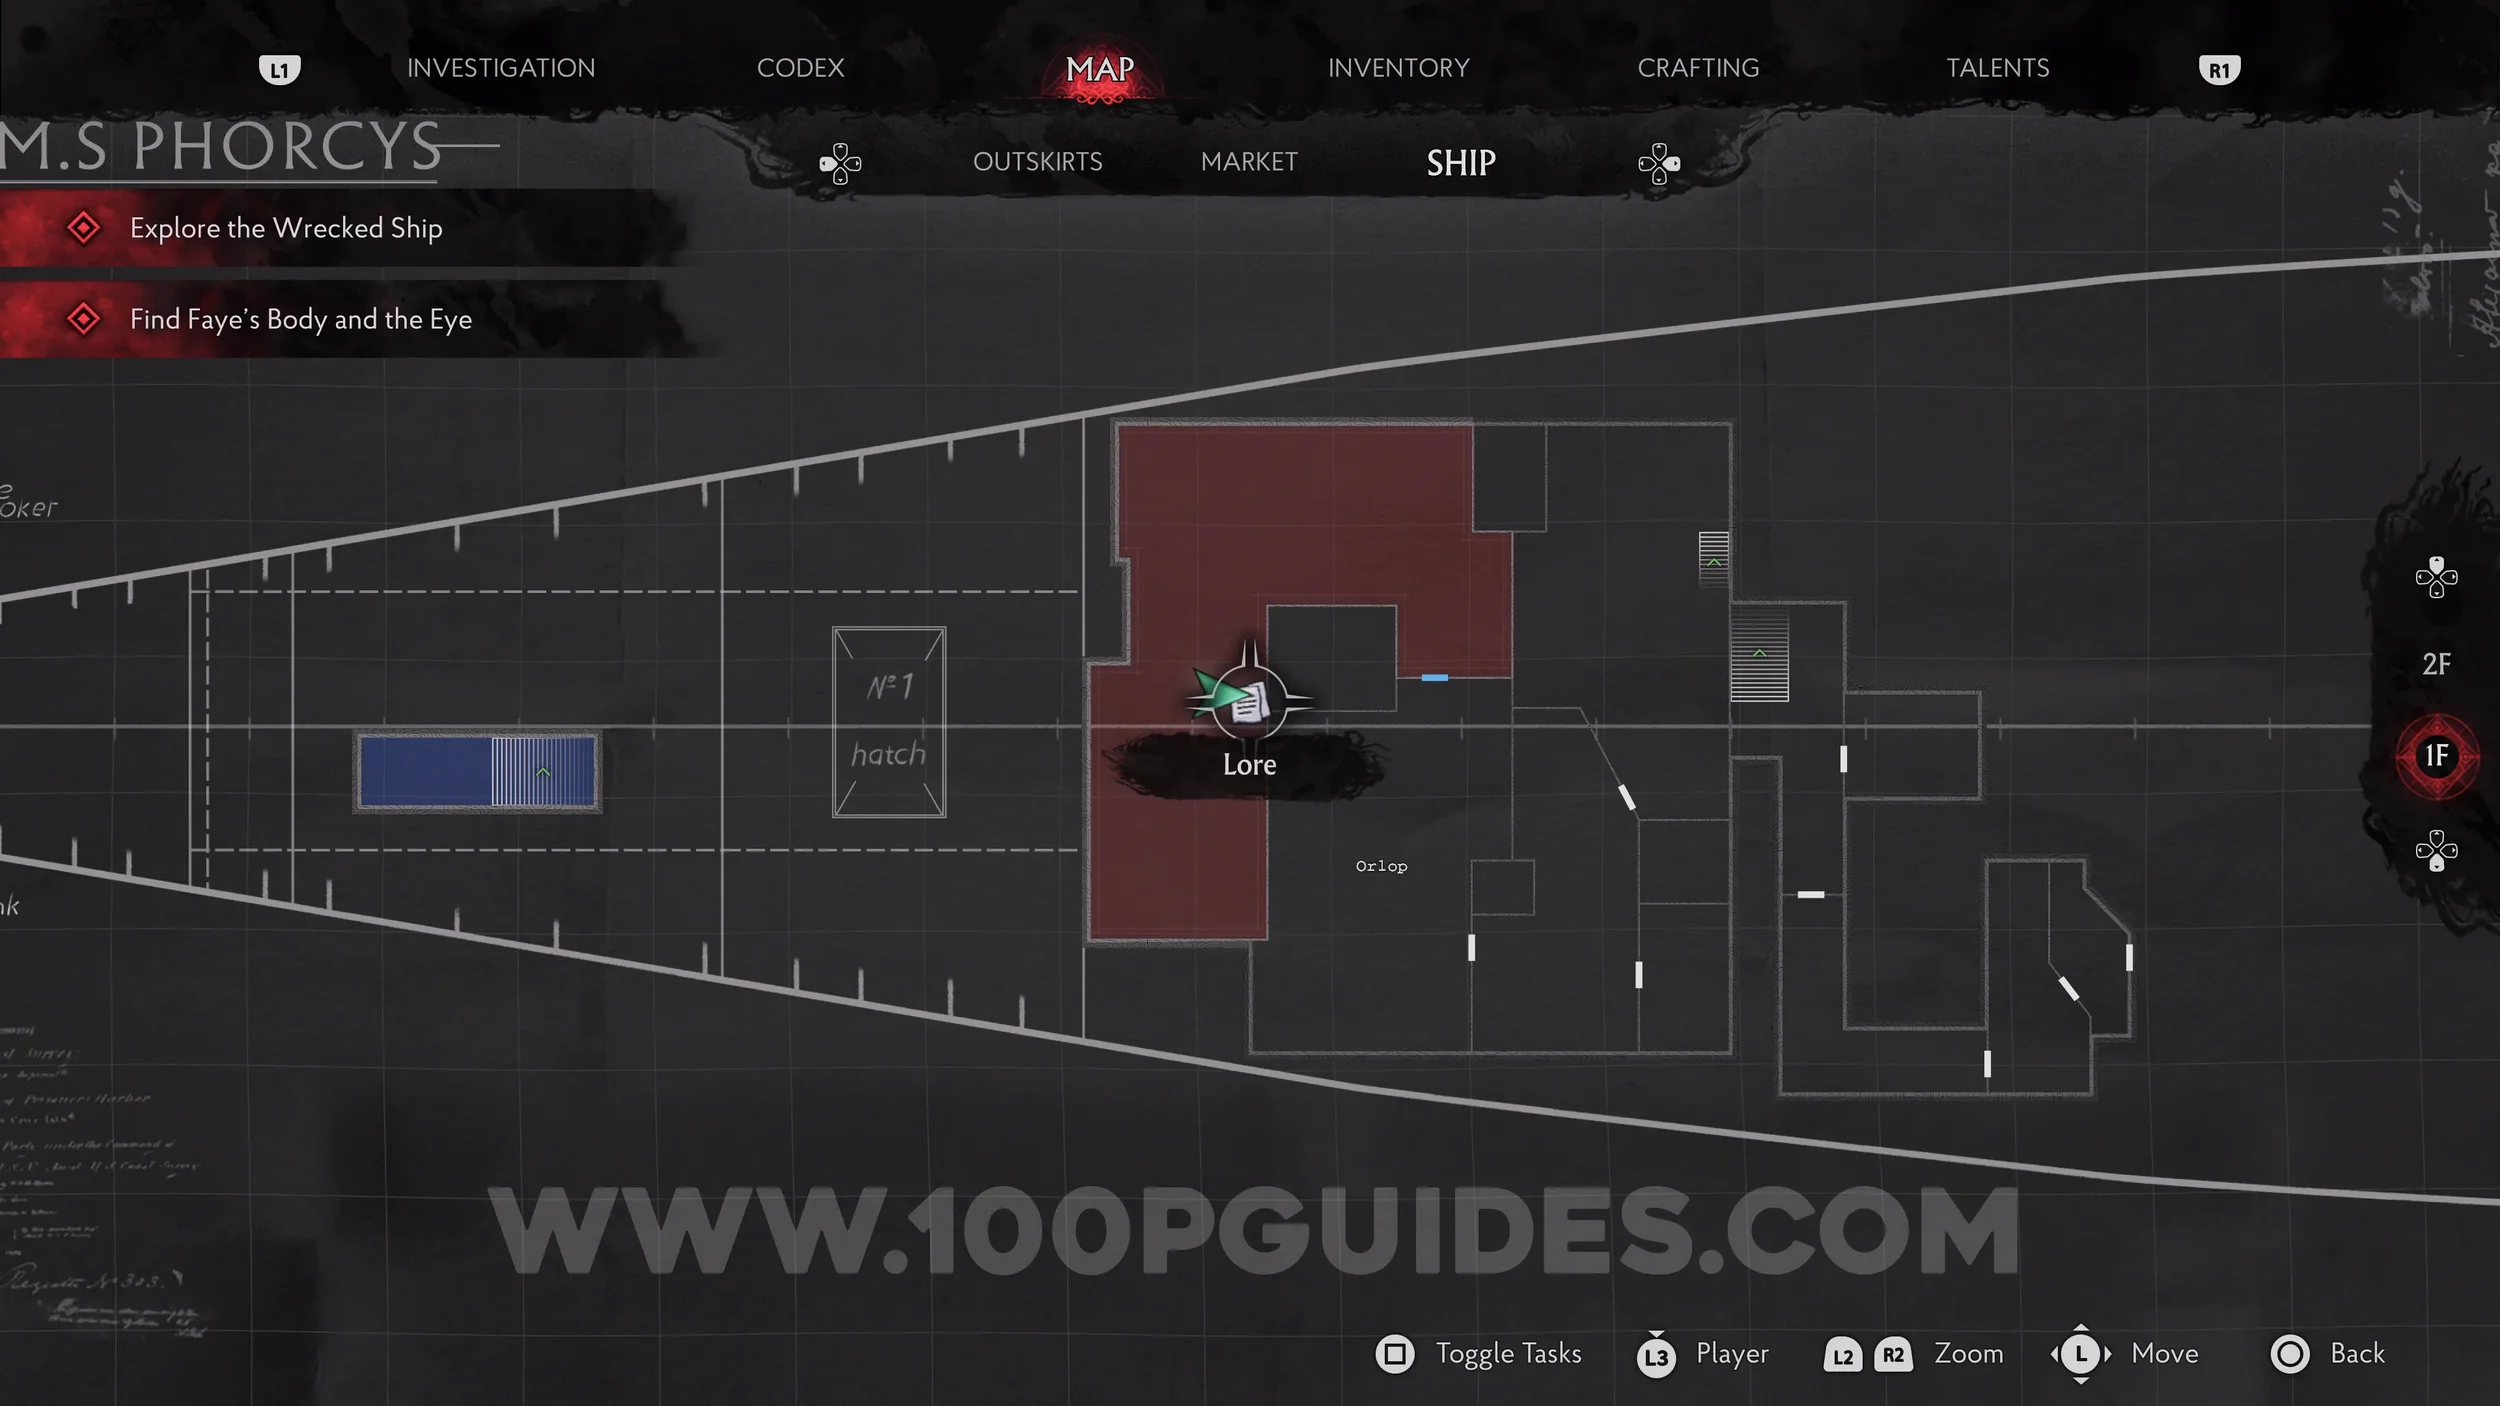
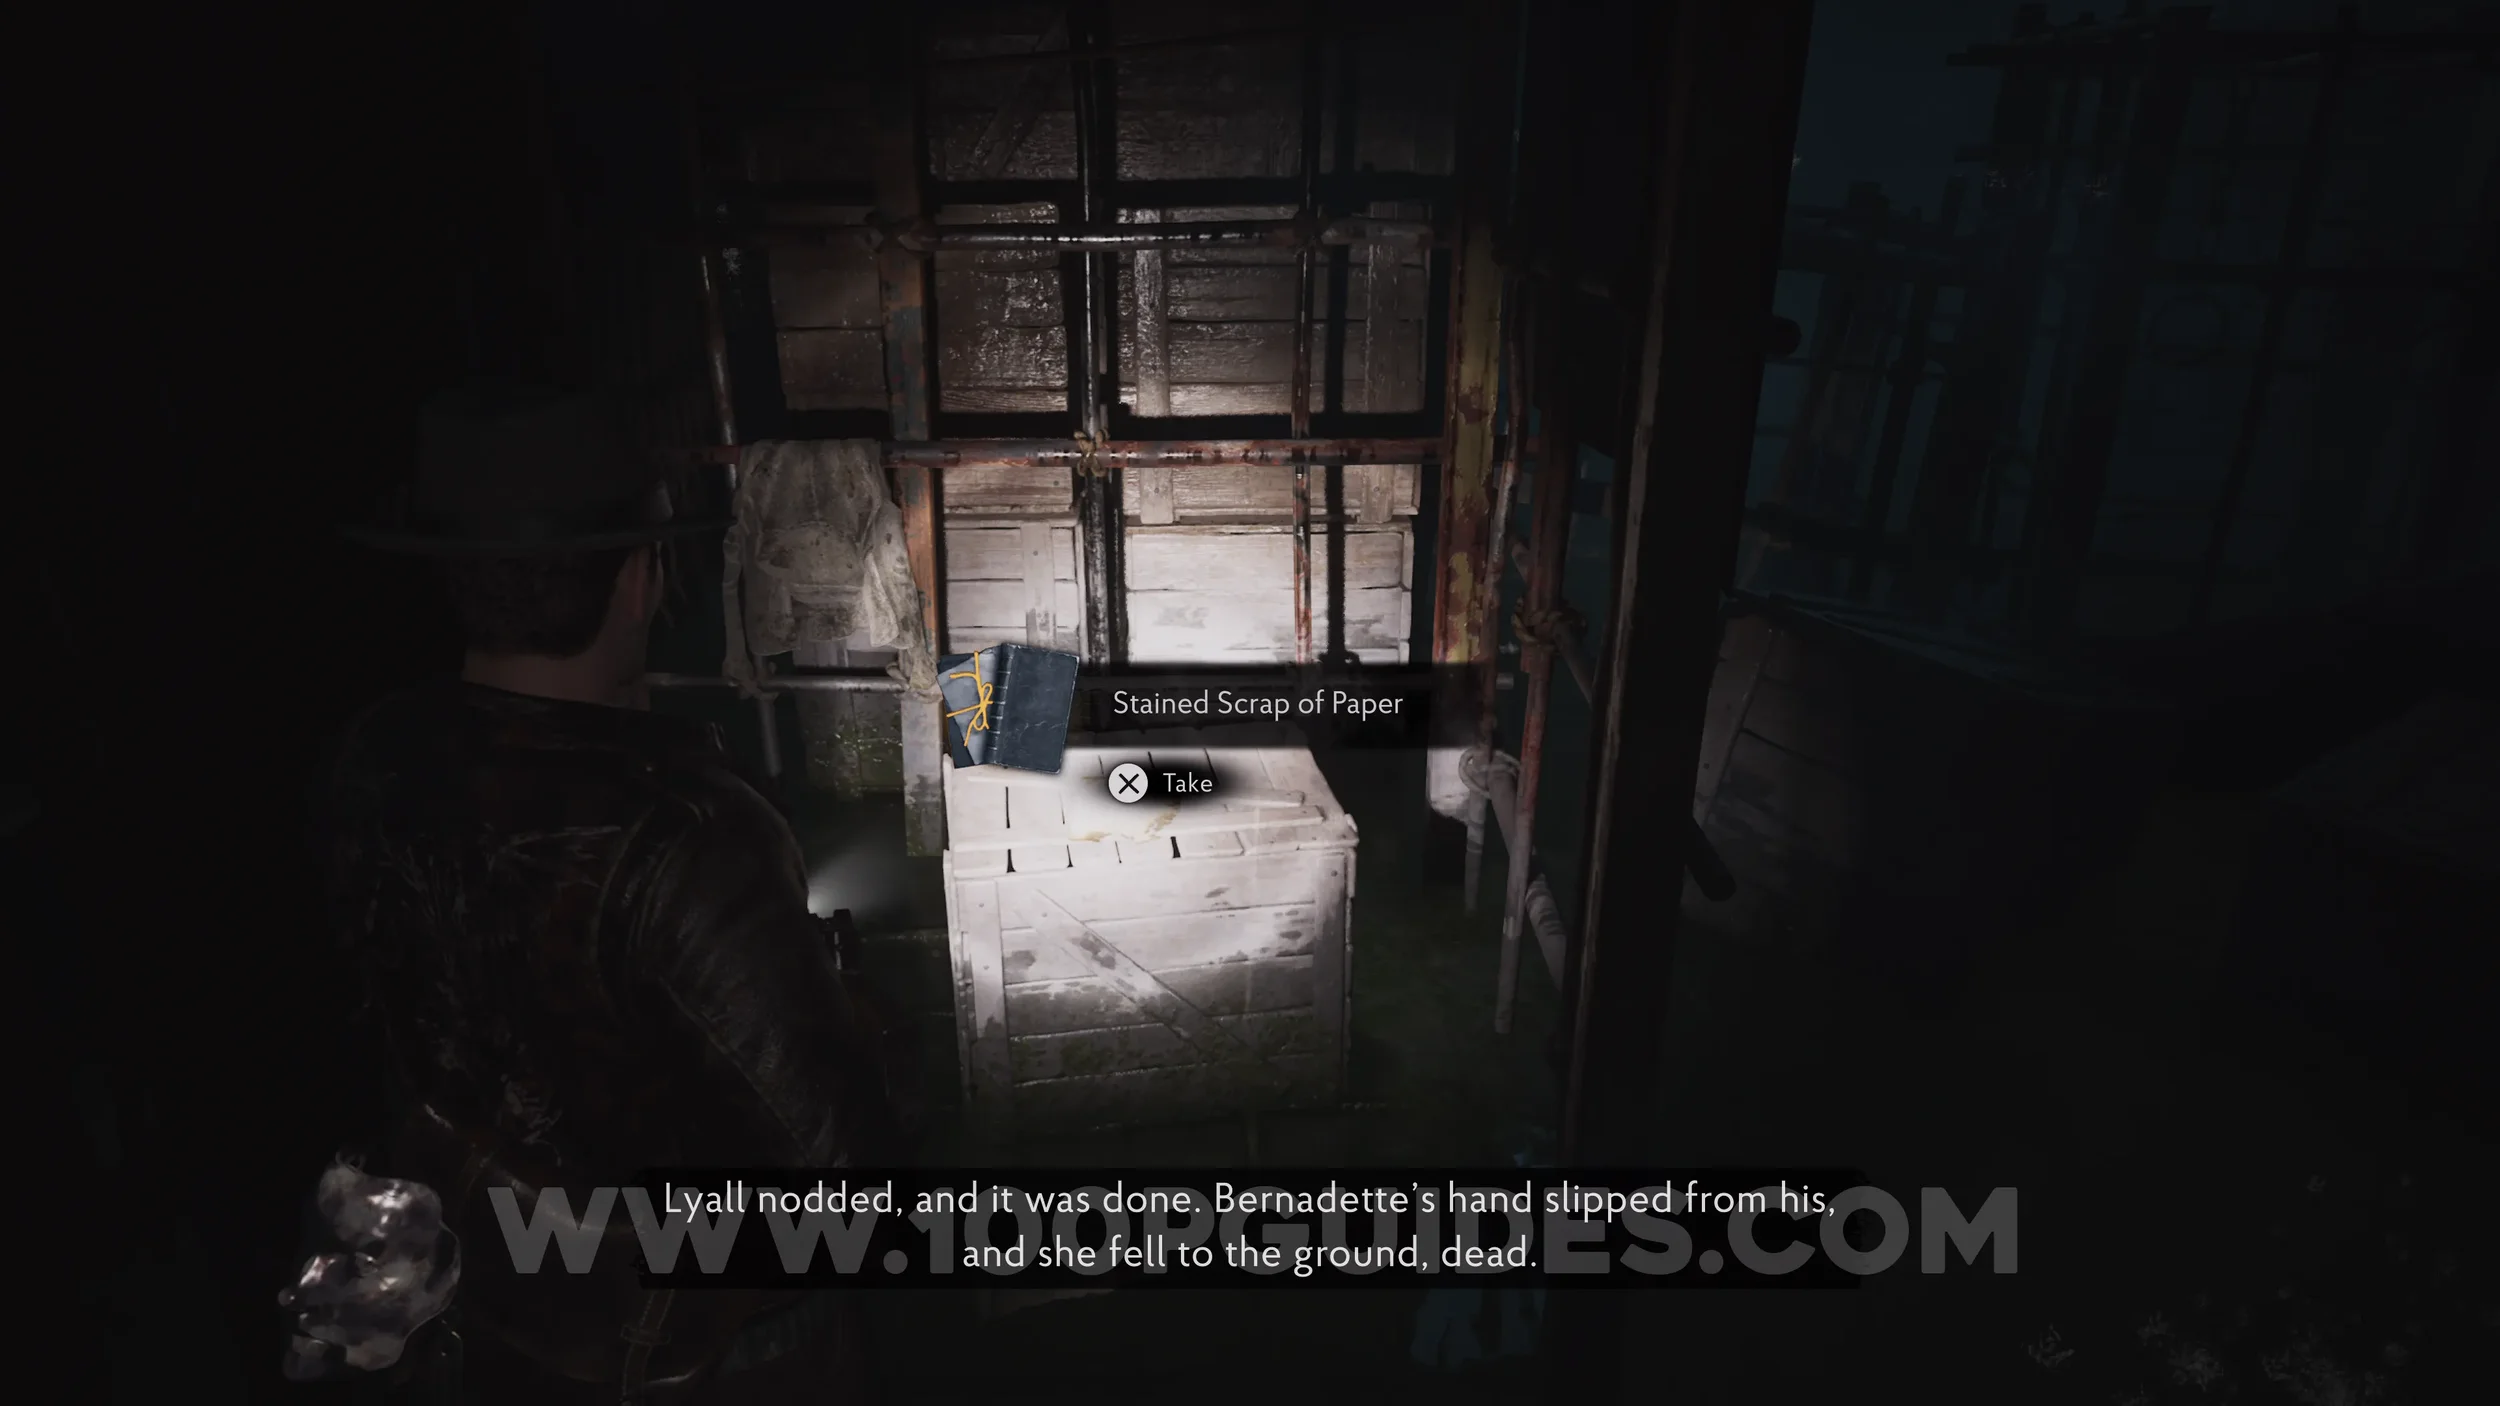
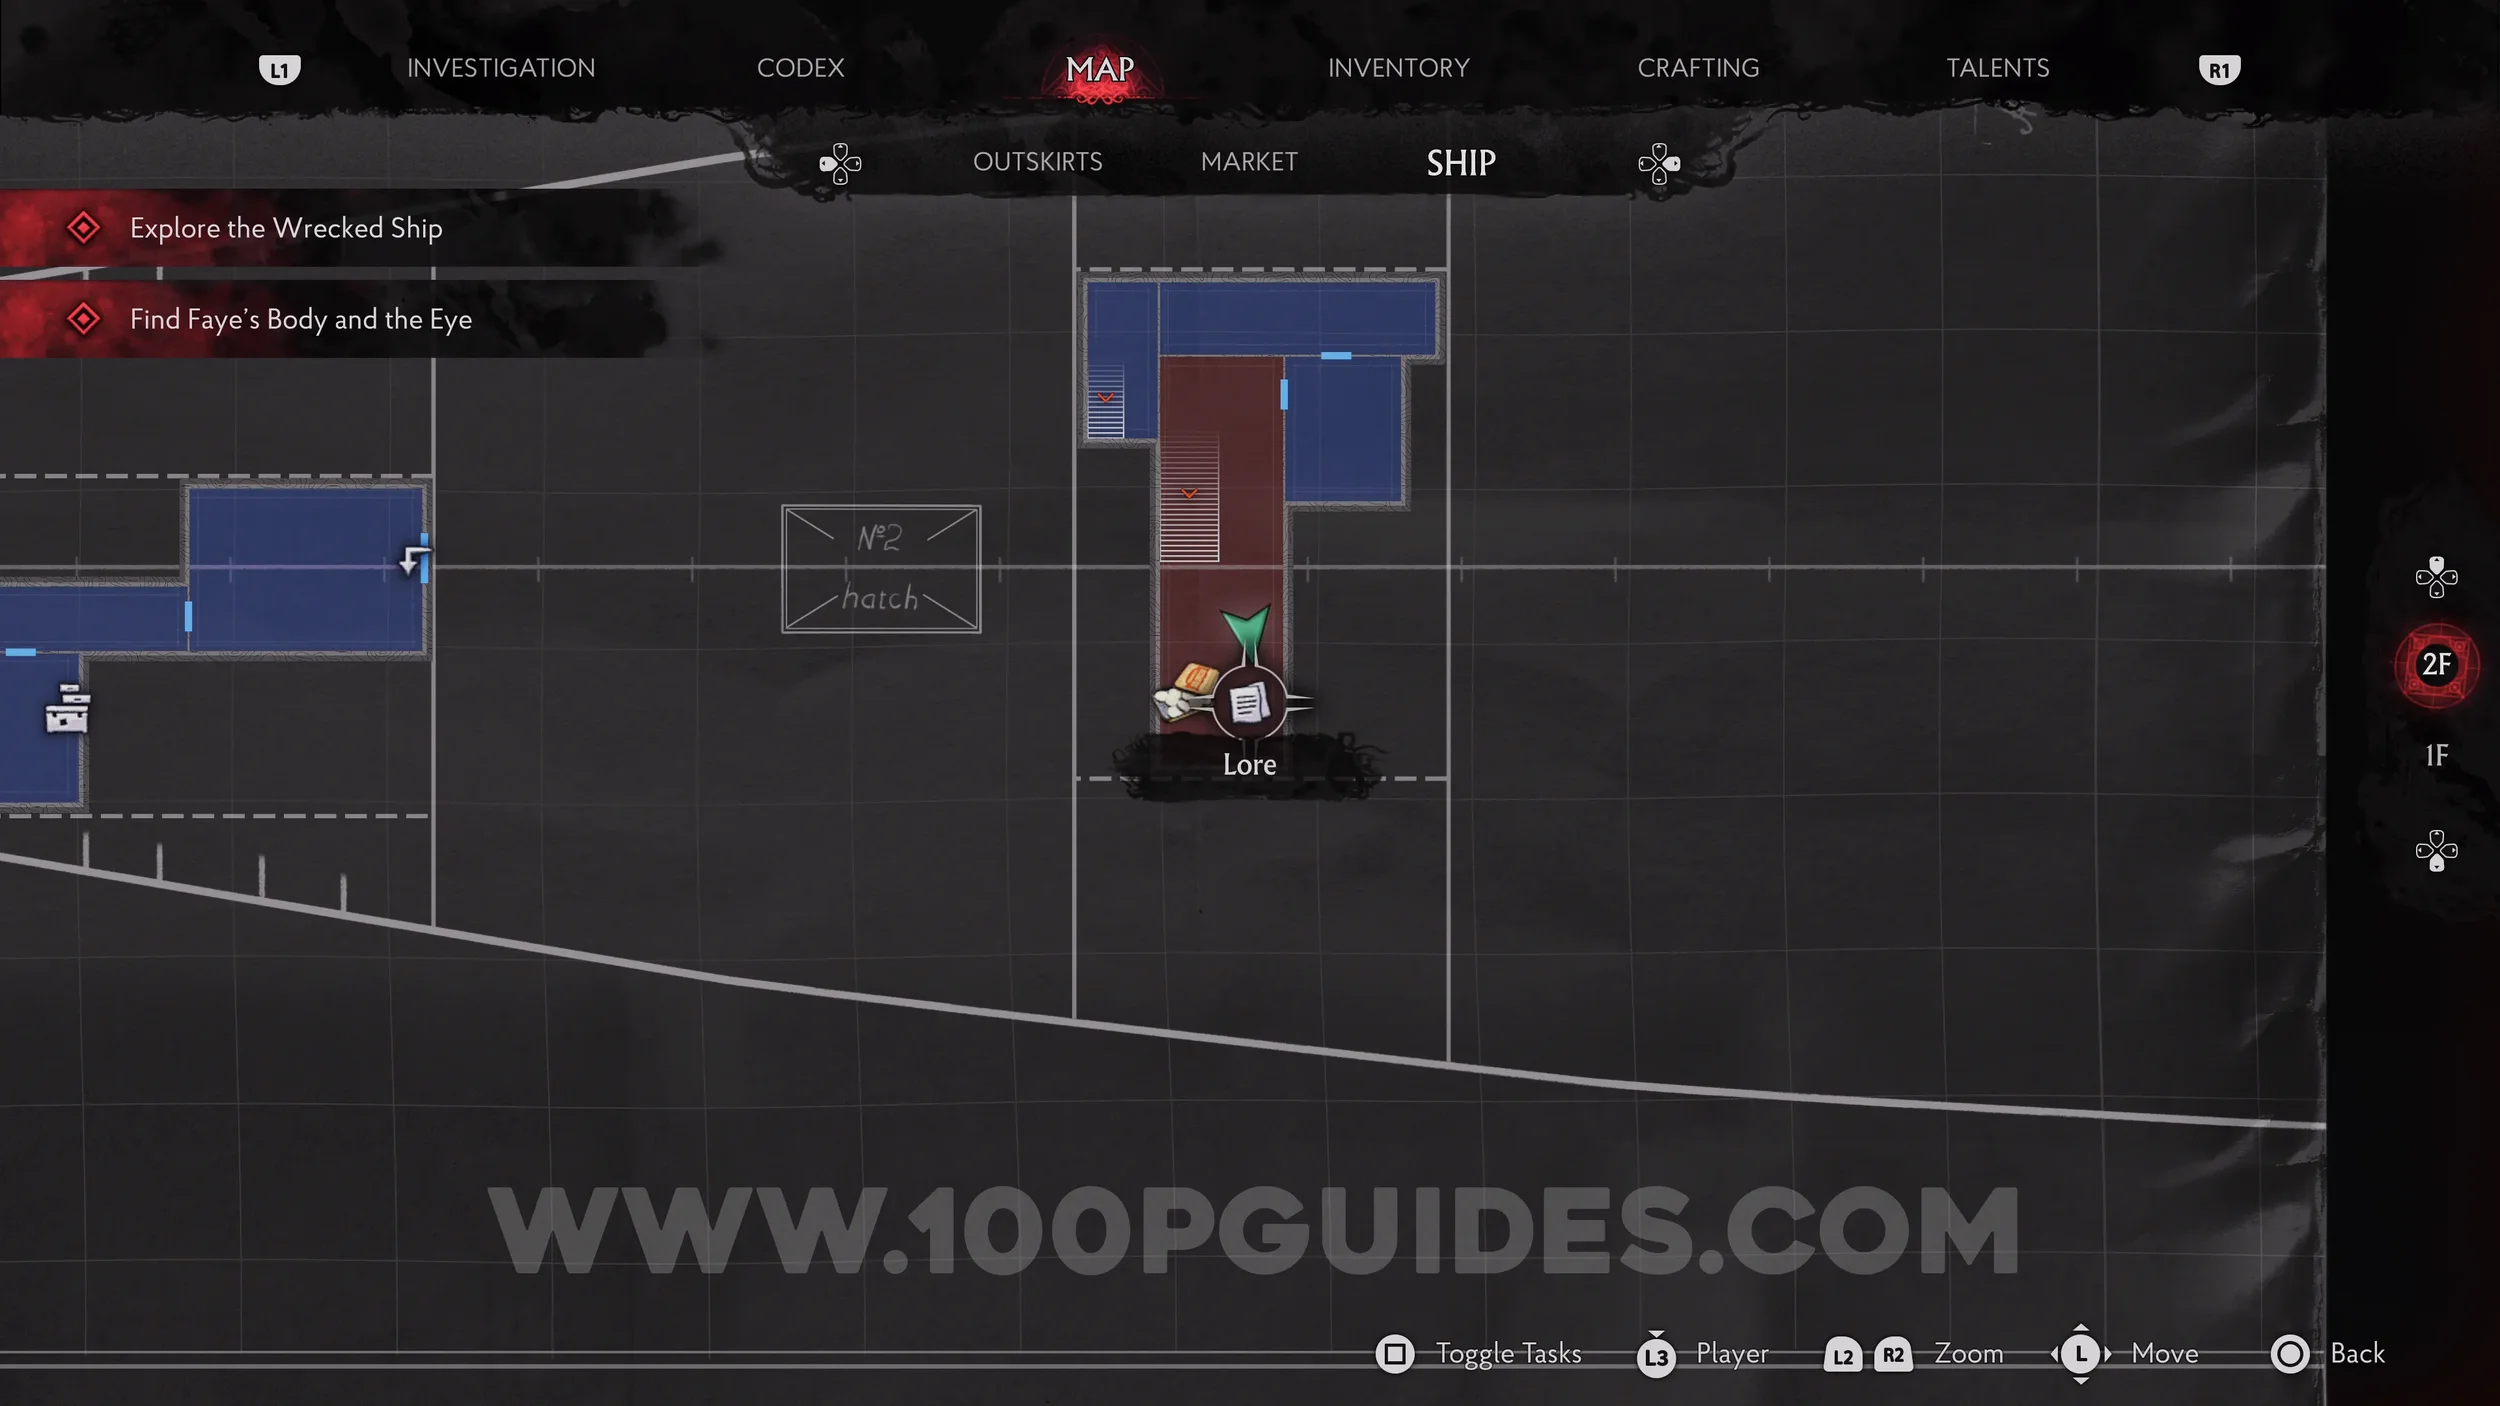
Lore Codex: Stained Scrap of Paper. From the map, drop down to the area below and the codex will be on a box in front of you.
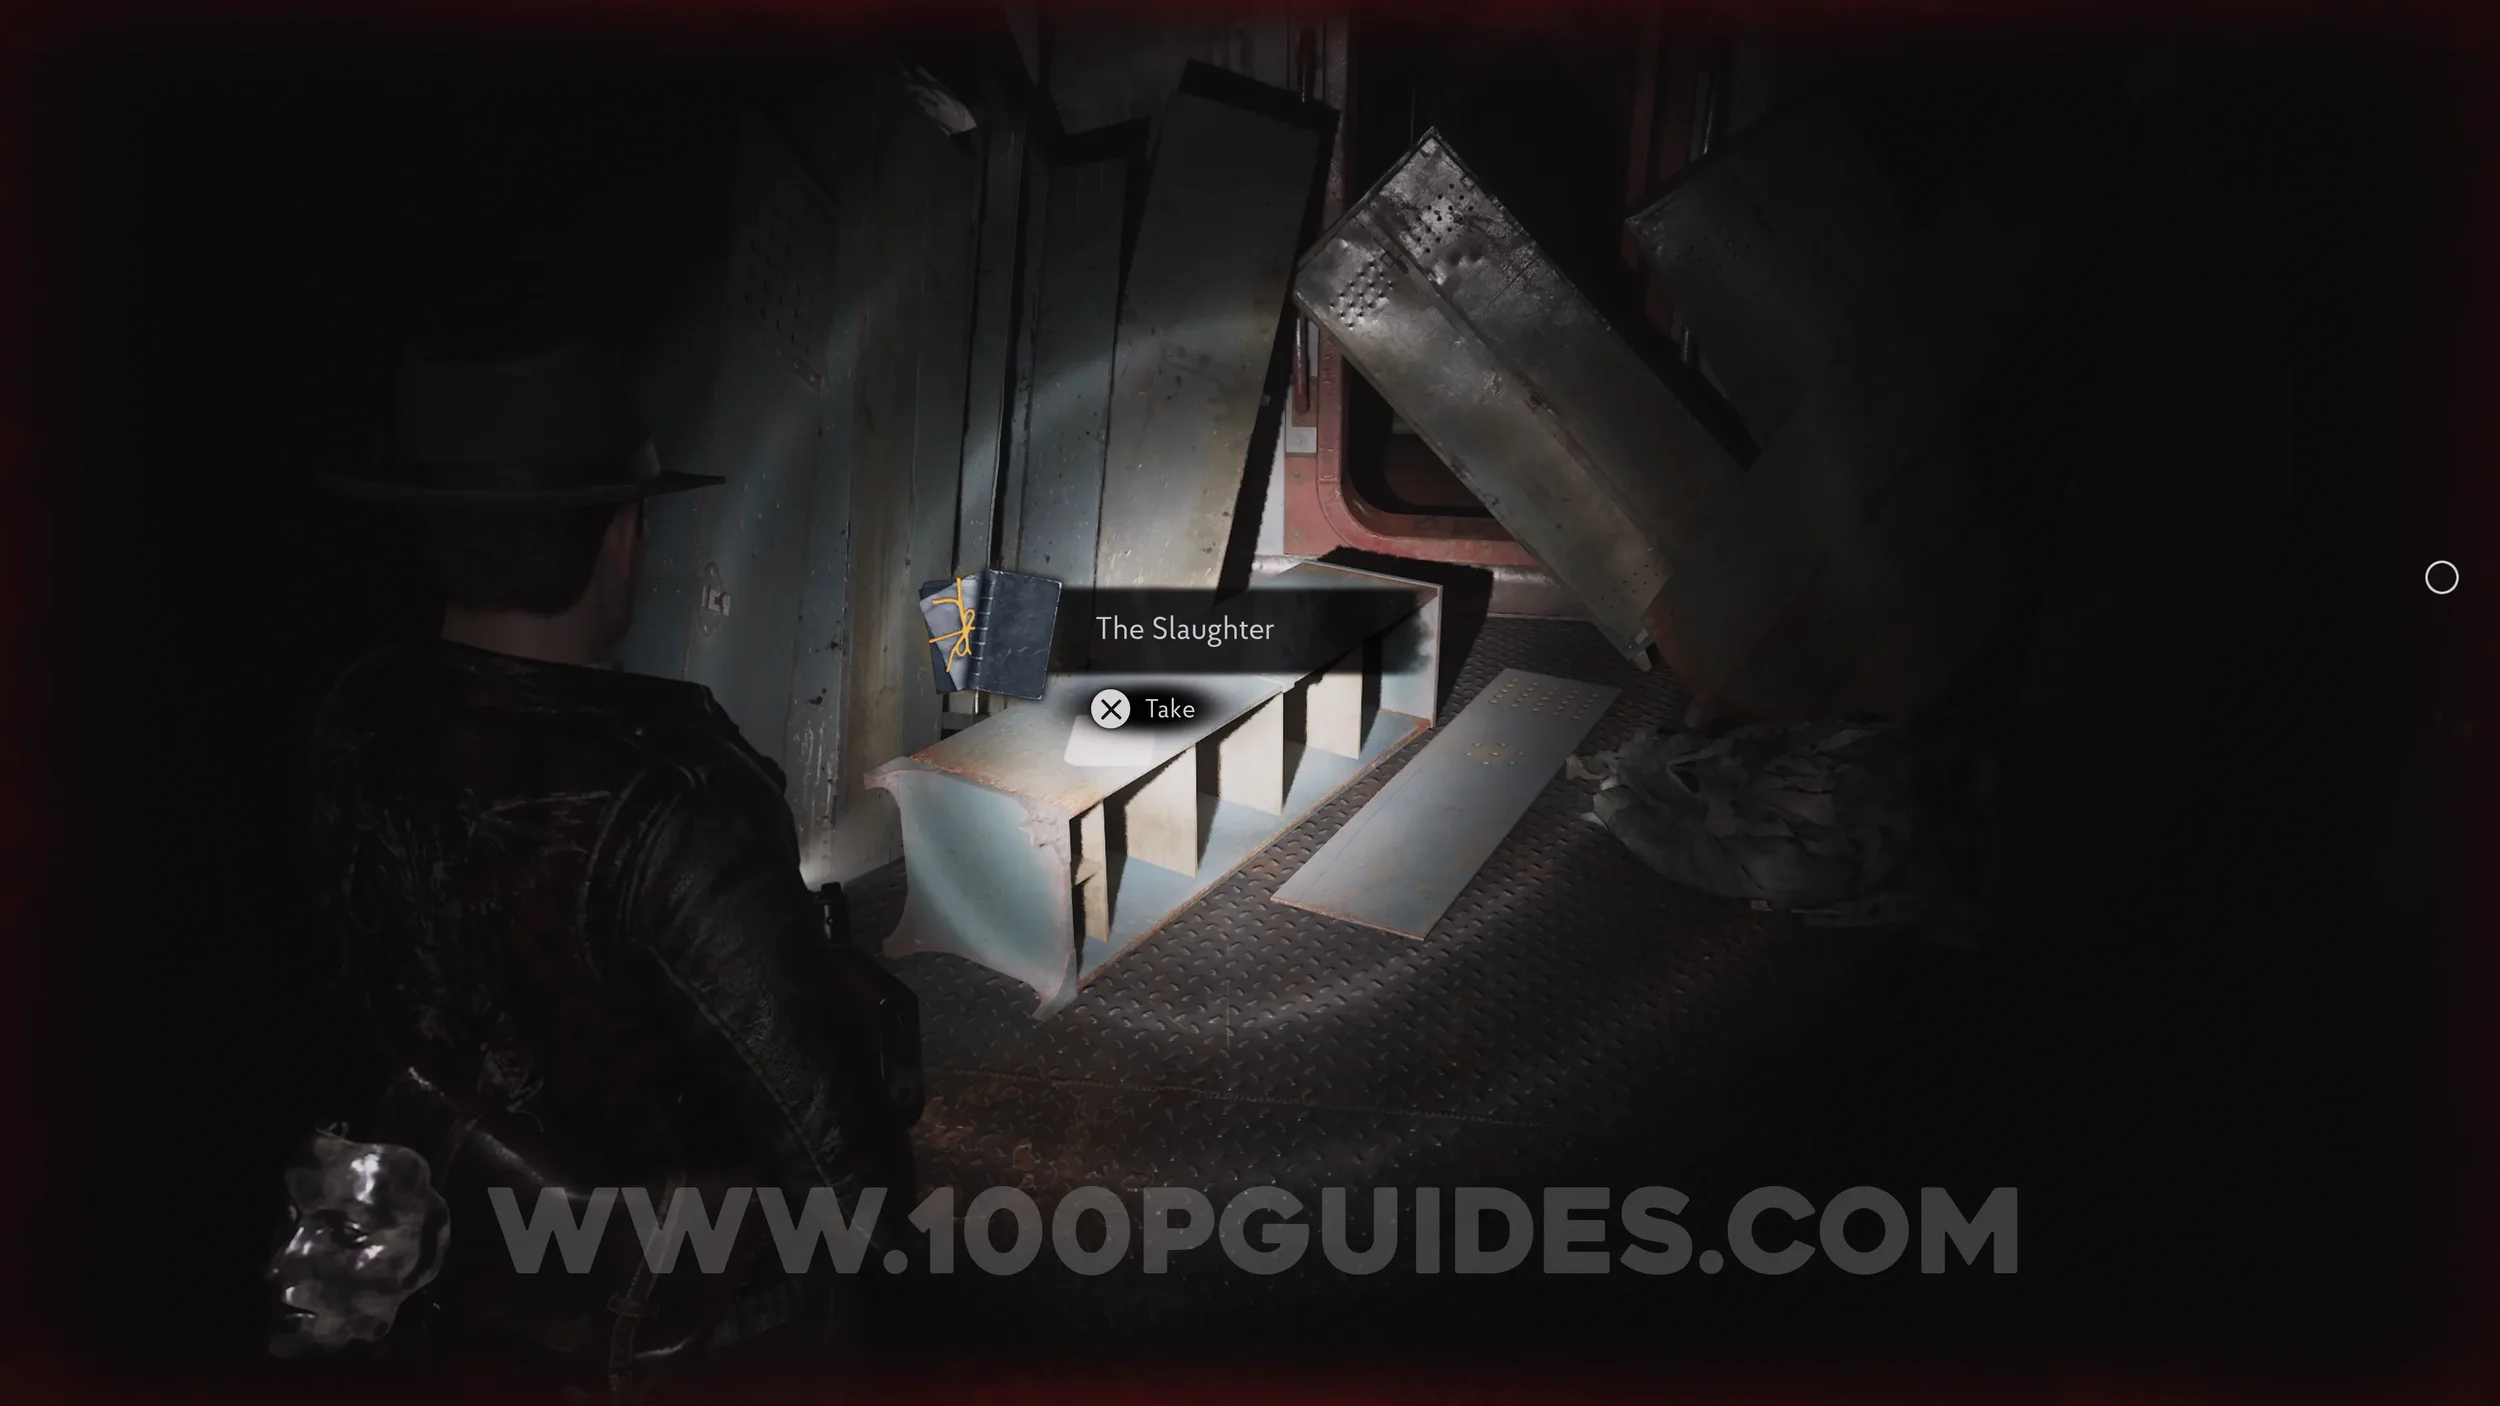
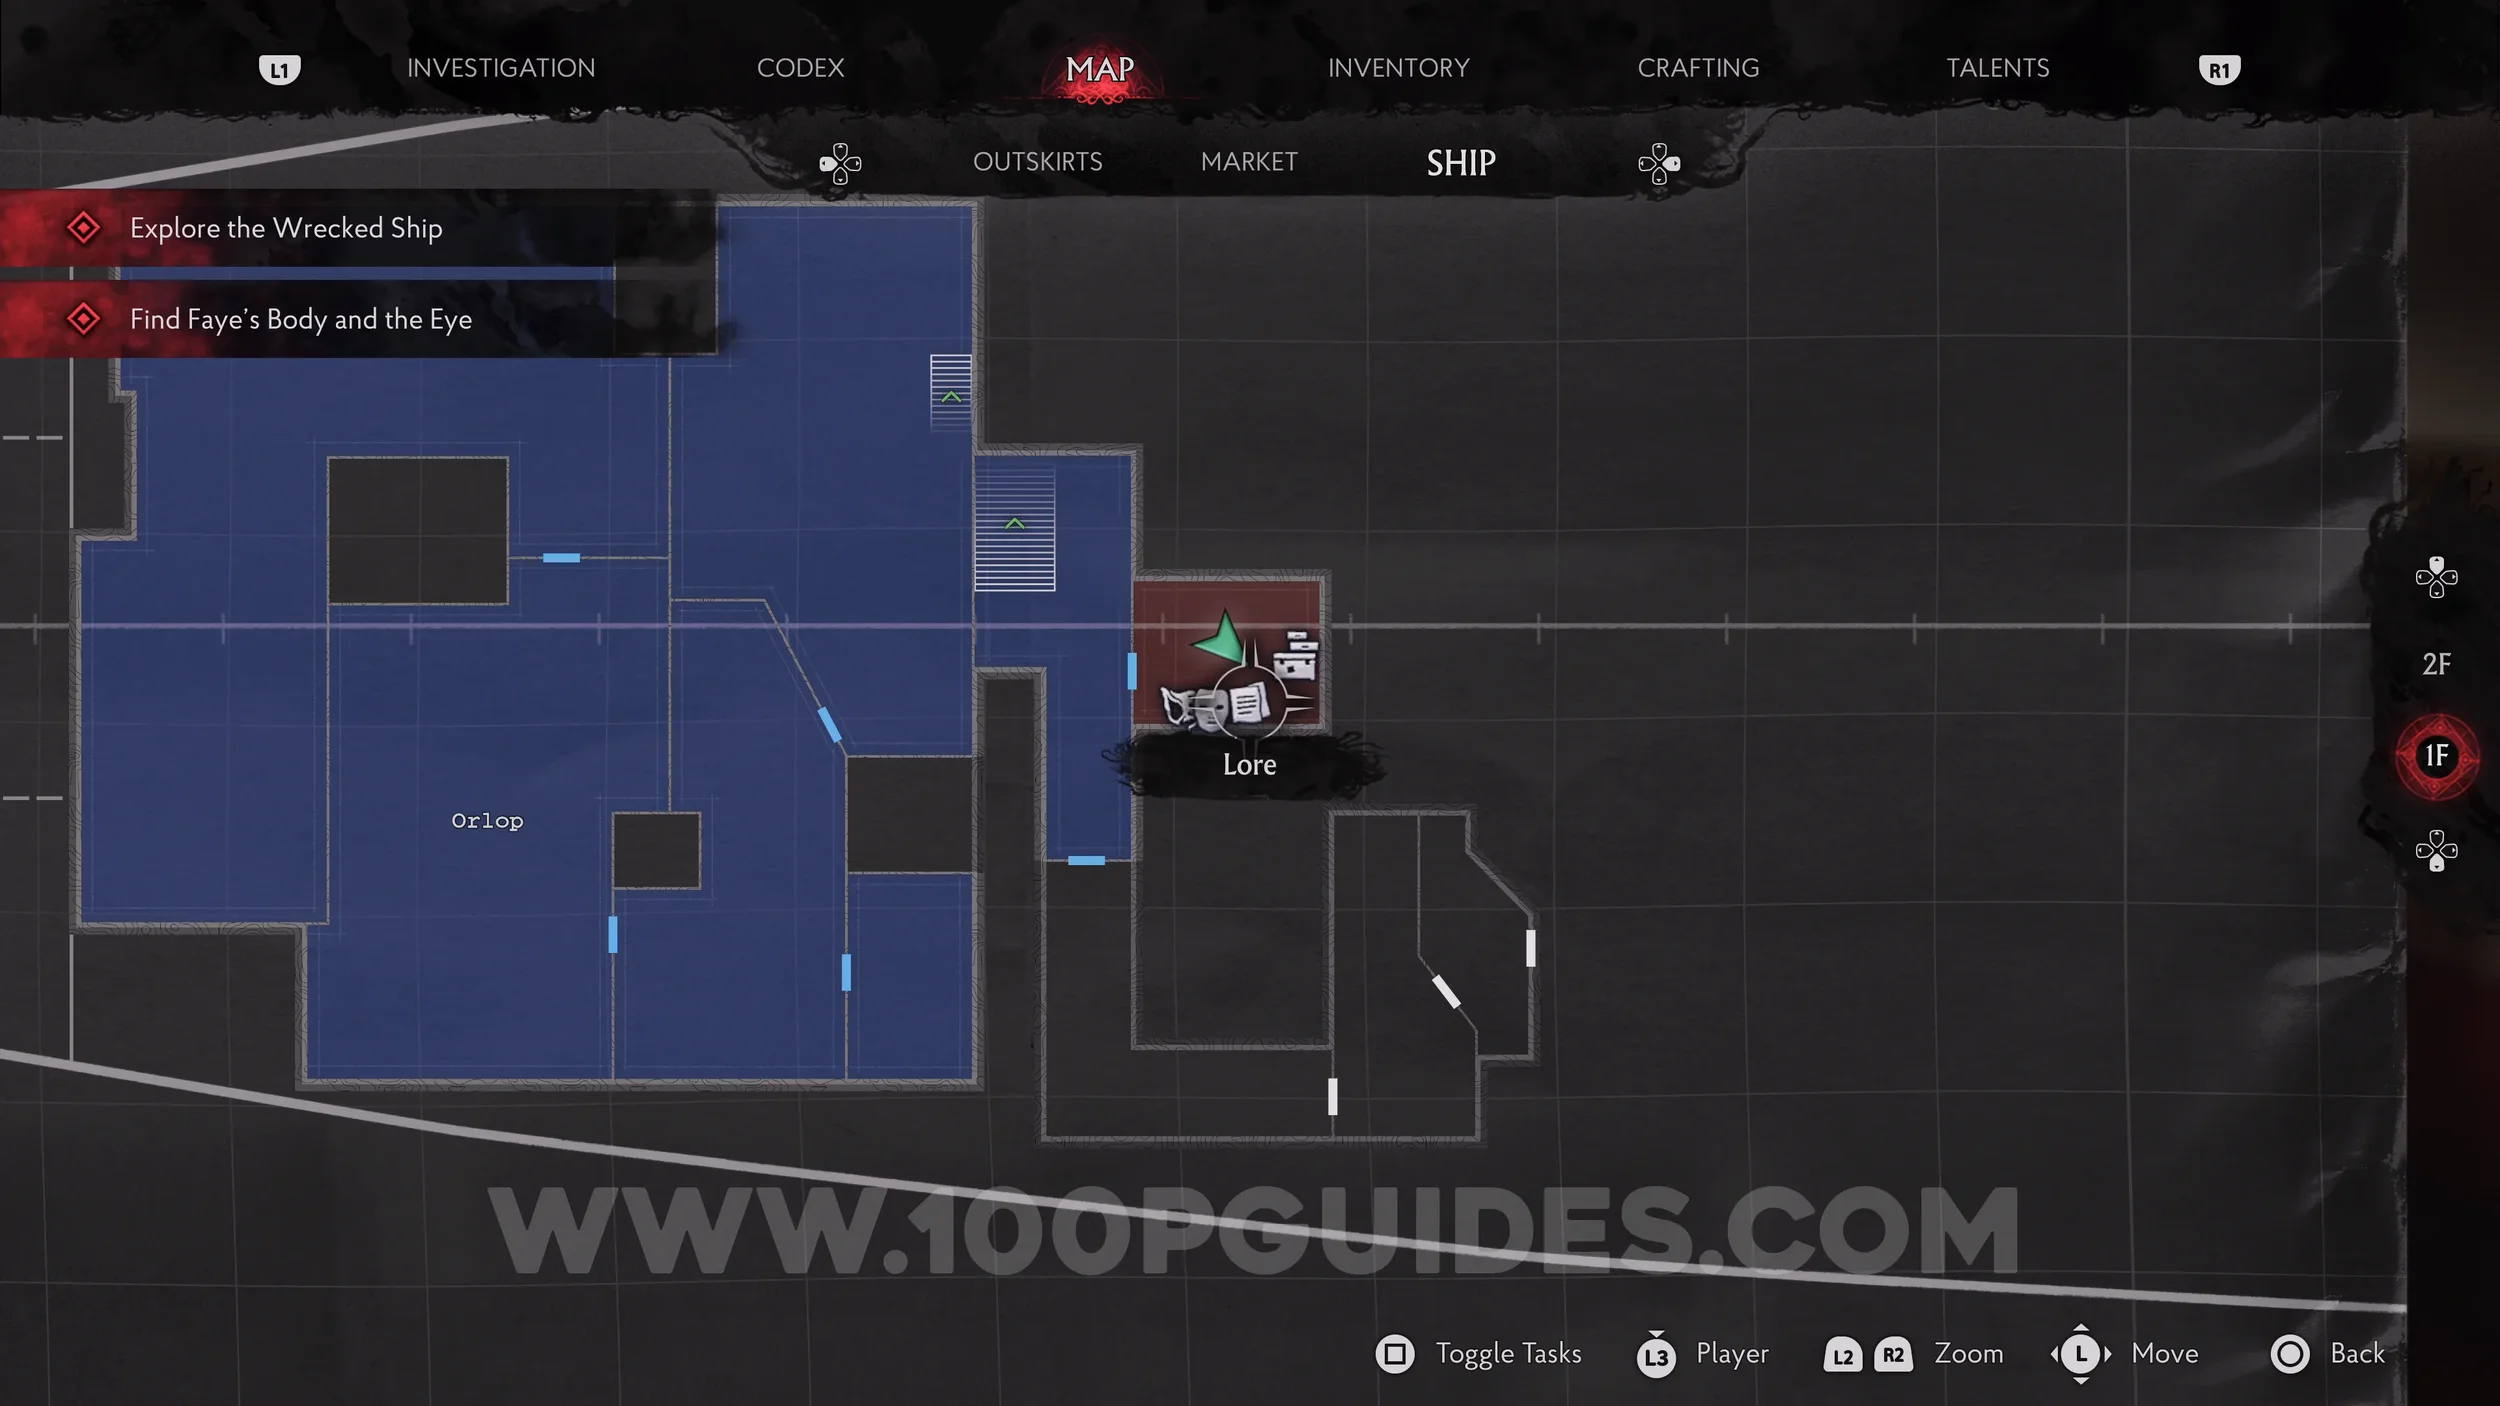
Lore Codex: The Slaughter. Continue east until you head up some stairs to 2F, then pass through a hall and another small room to reach some stairs heading down. Before heading down, go to the end of the room to find the codex.
Lore Codex: Departure. In the Safe Room on your left after going down the stairs.
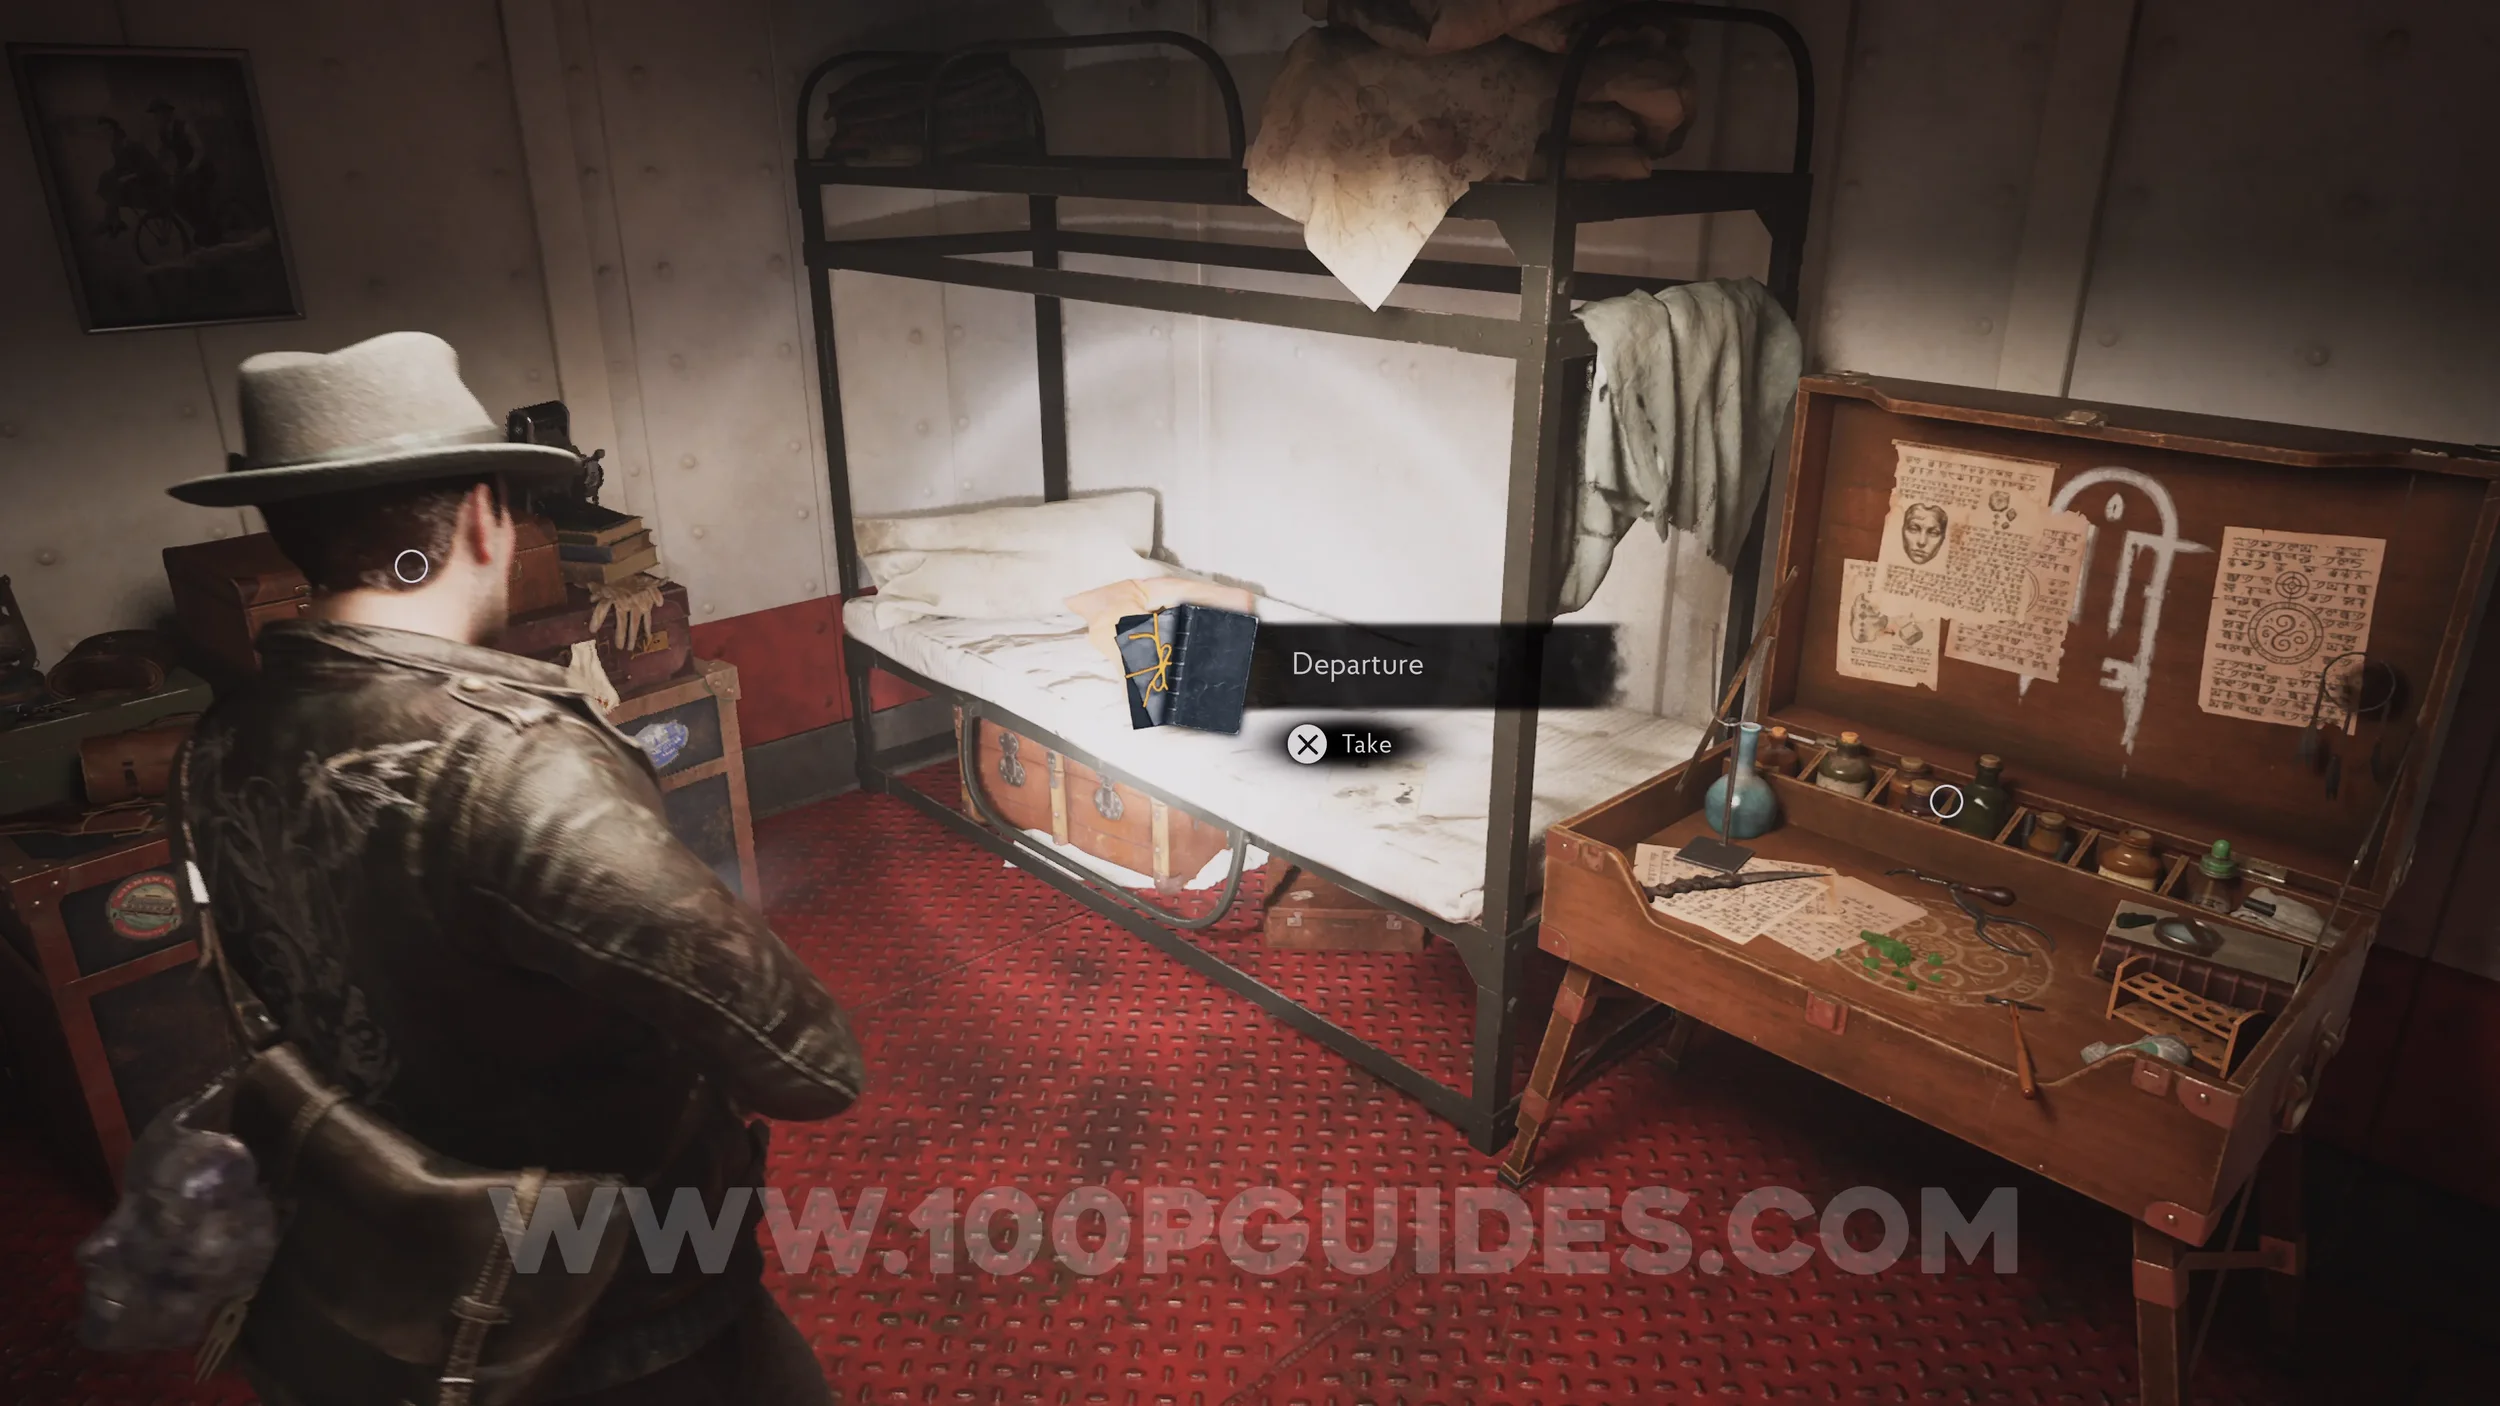
You can finish the chapter by following the path to the south and defeating the boss.
Chapter 5 - Cold Comfort
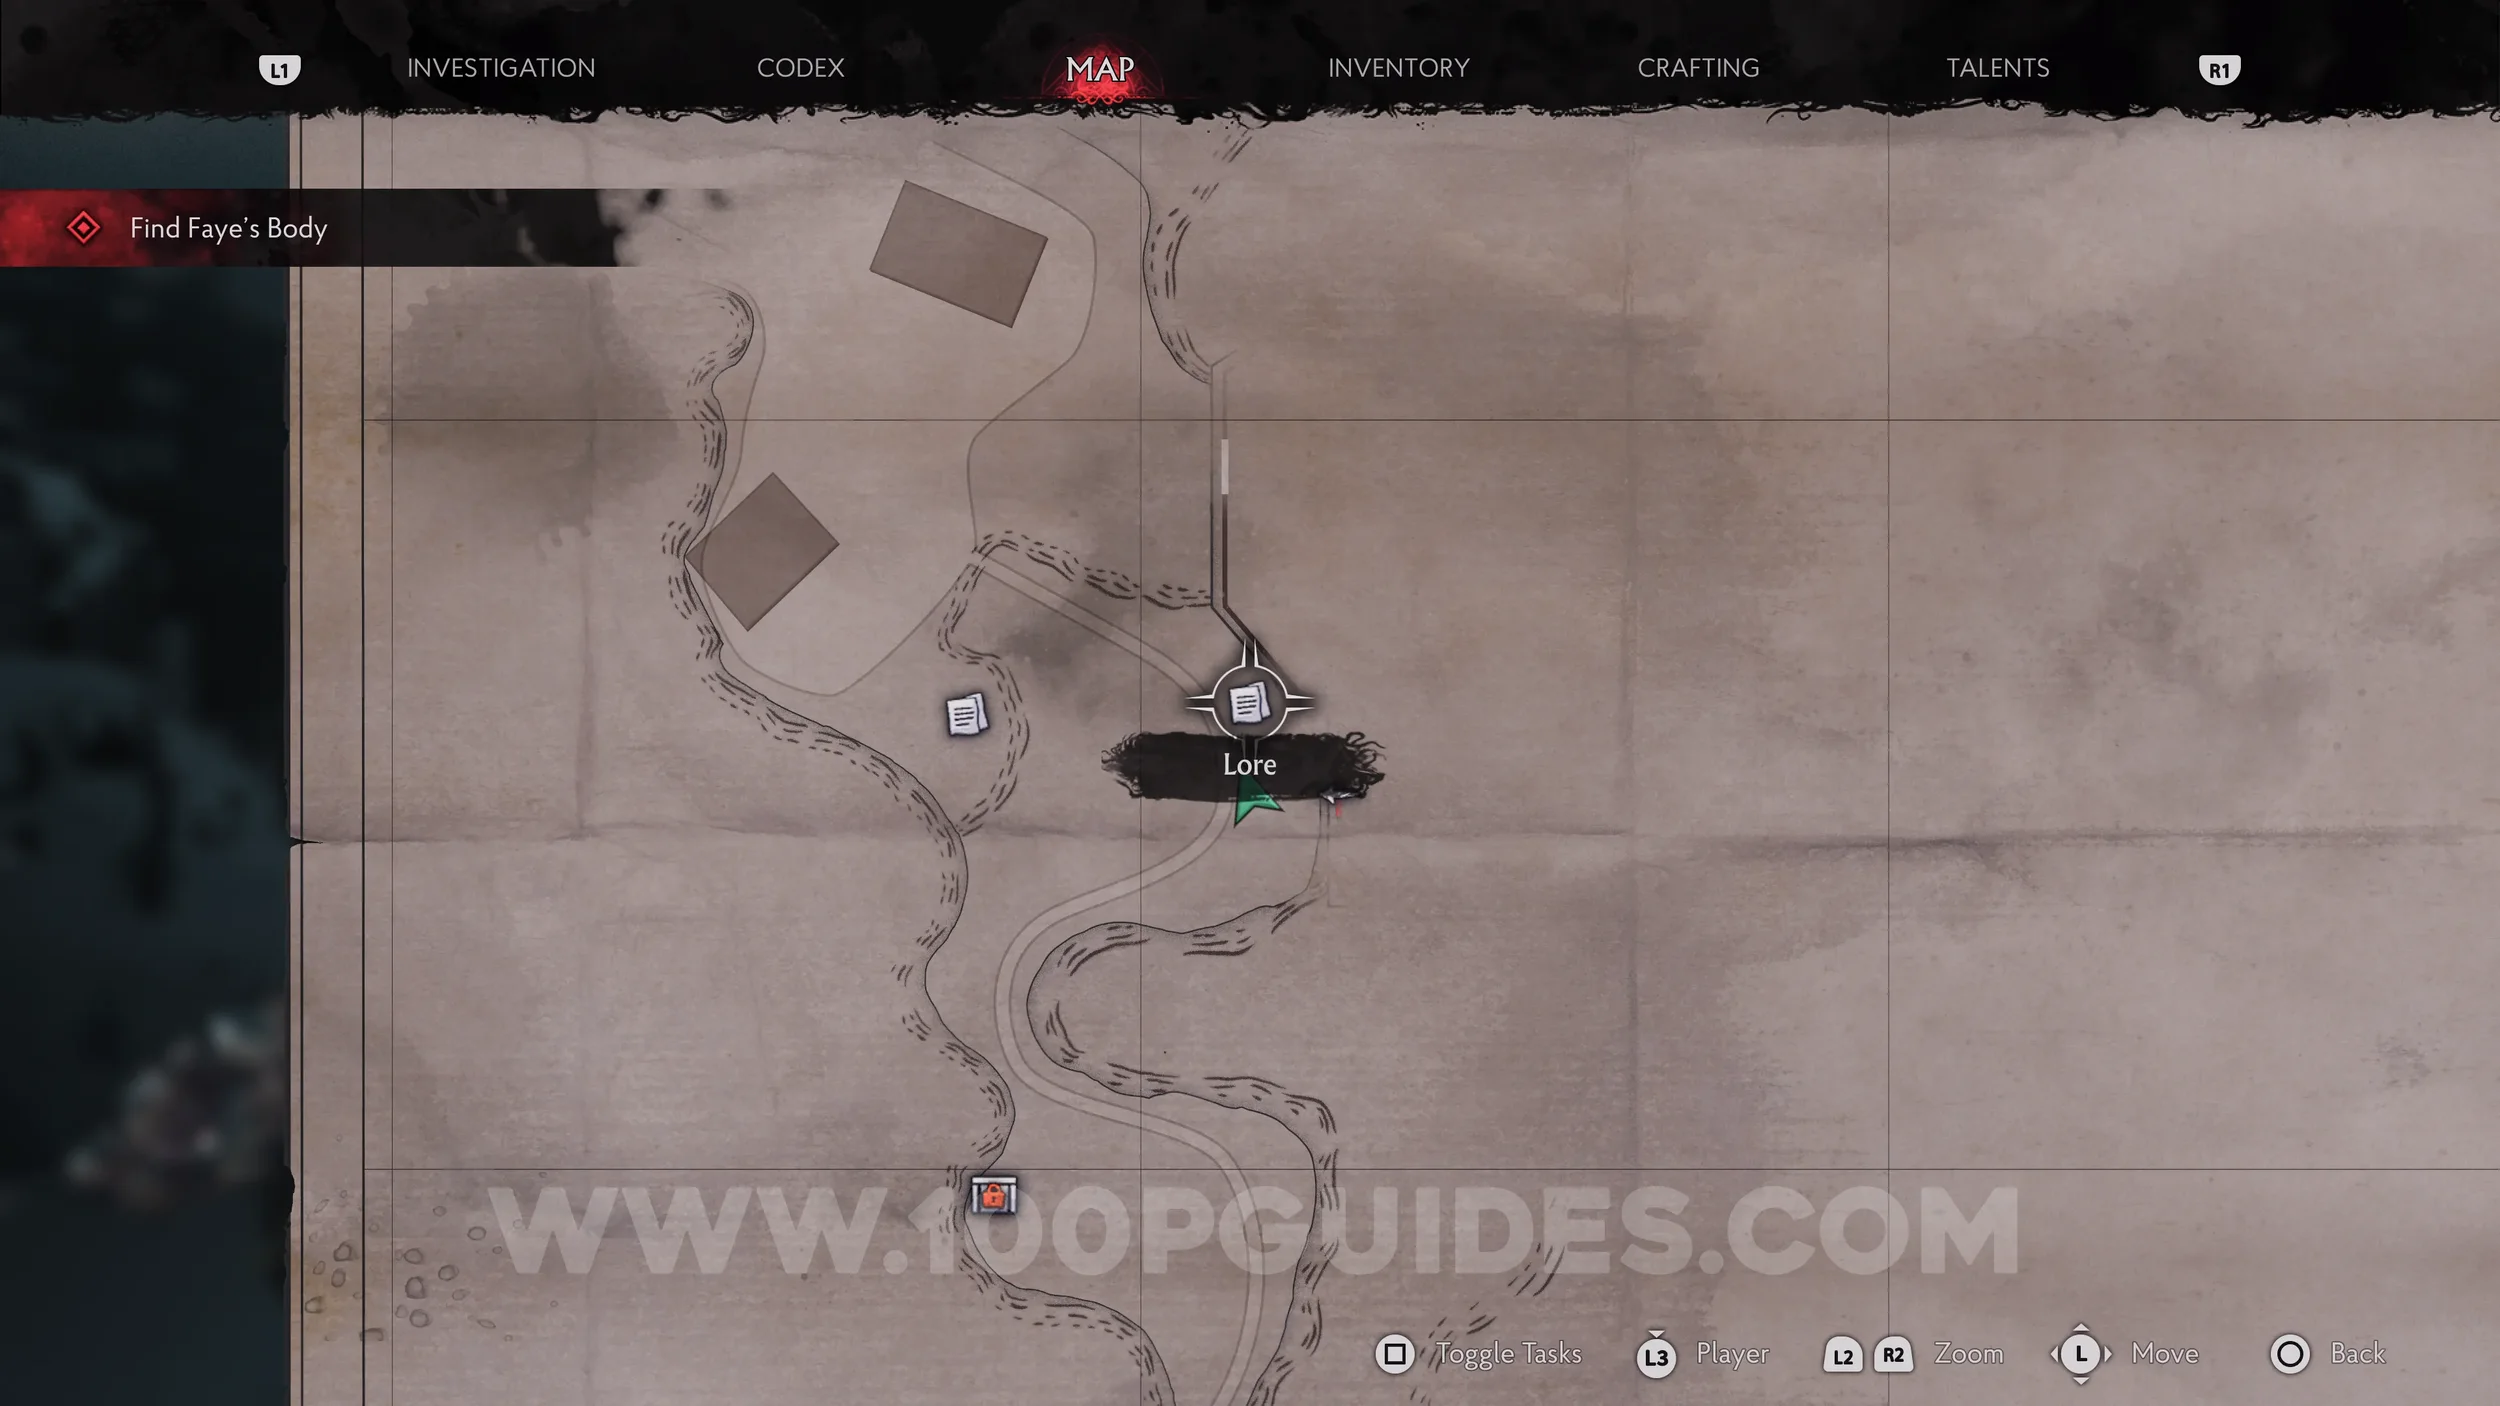
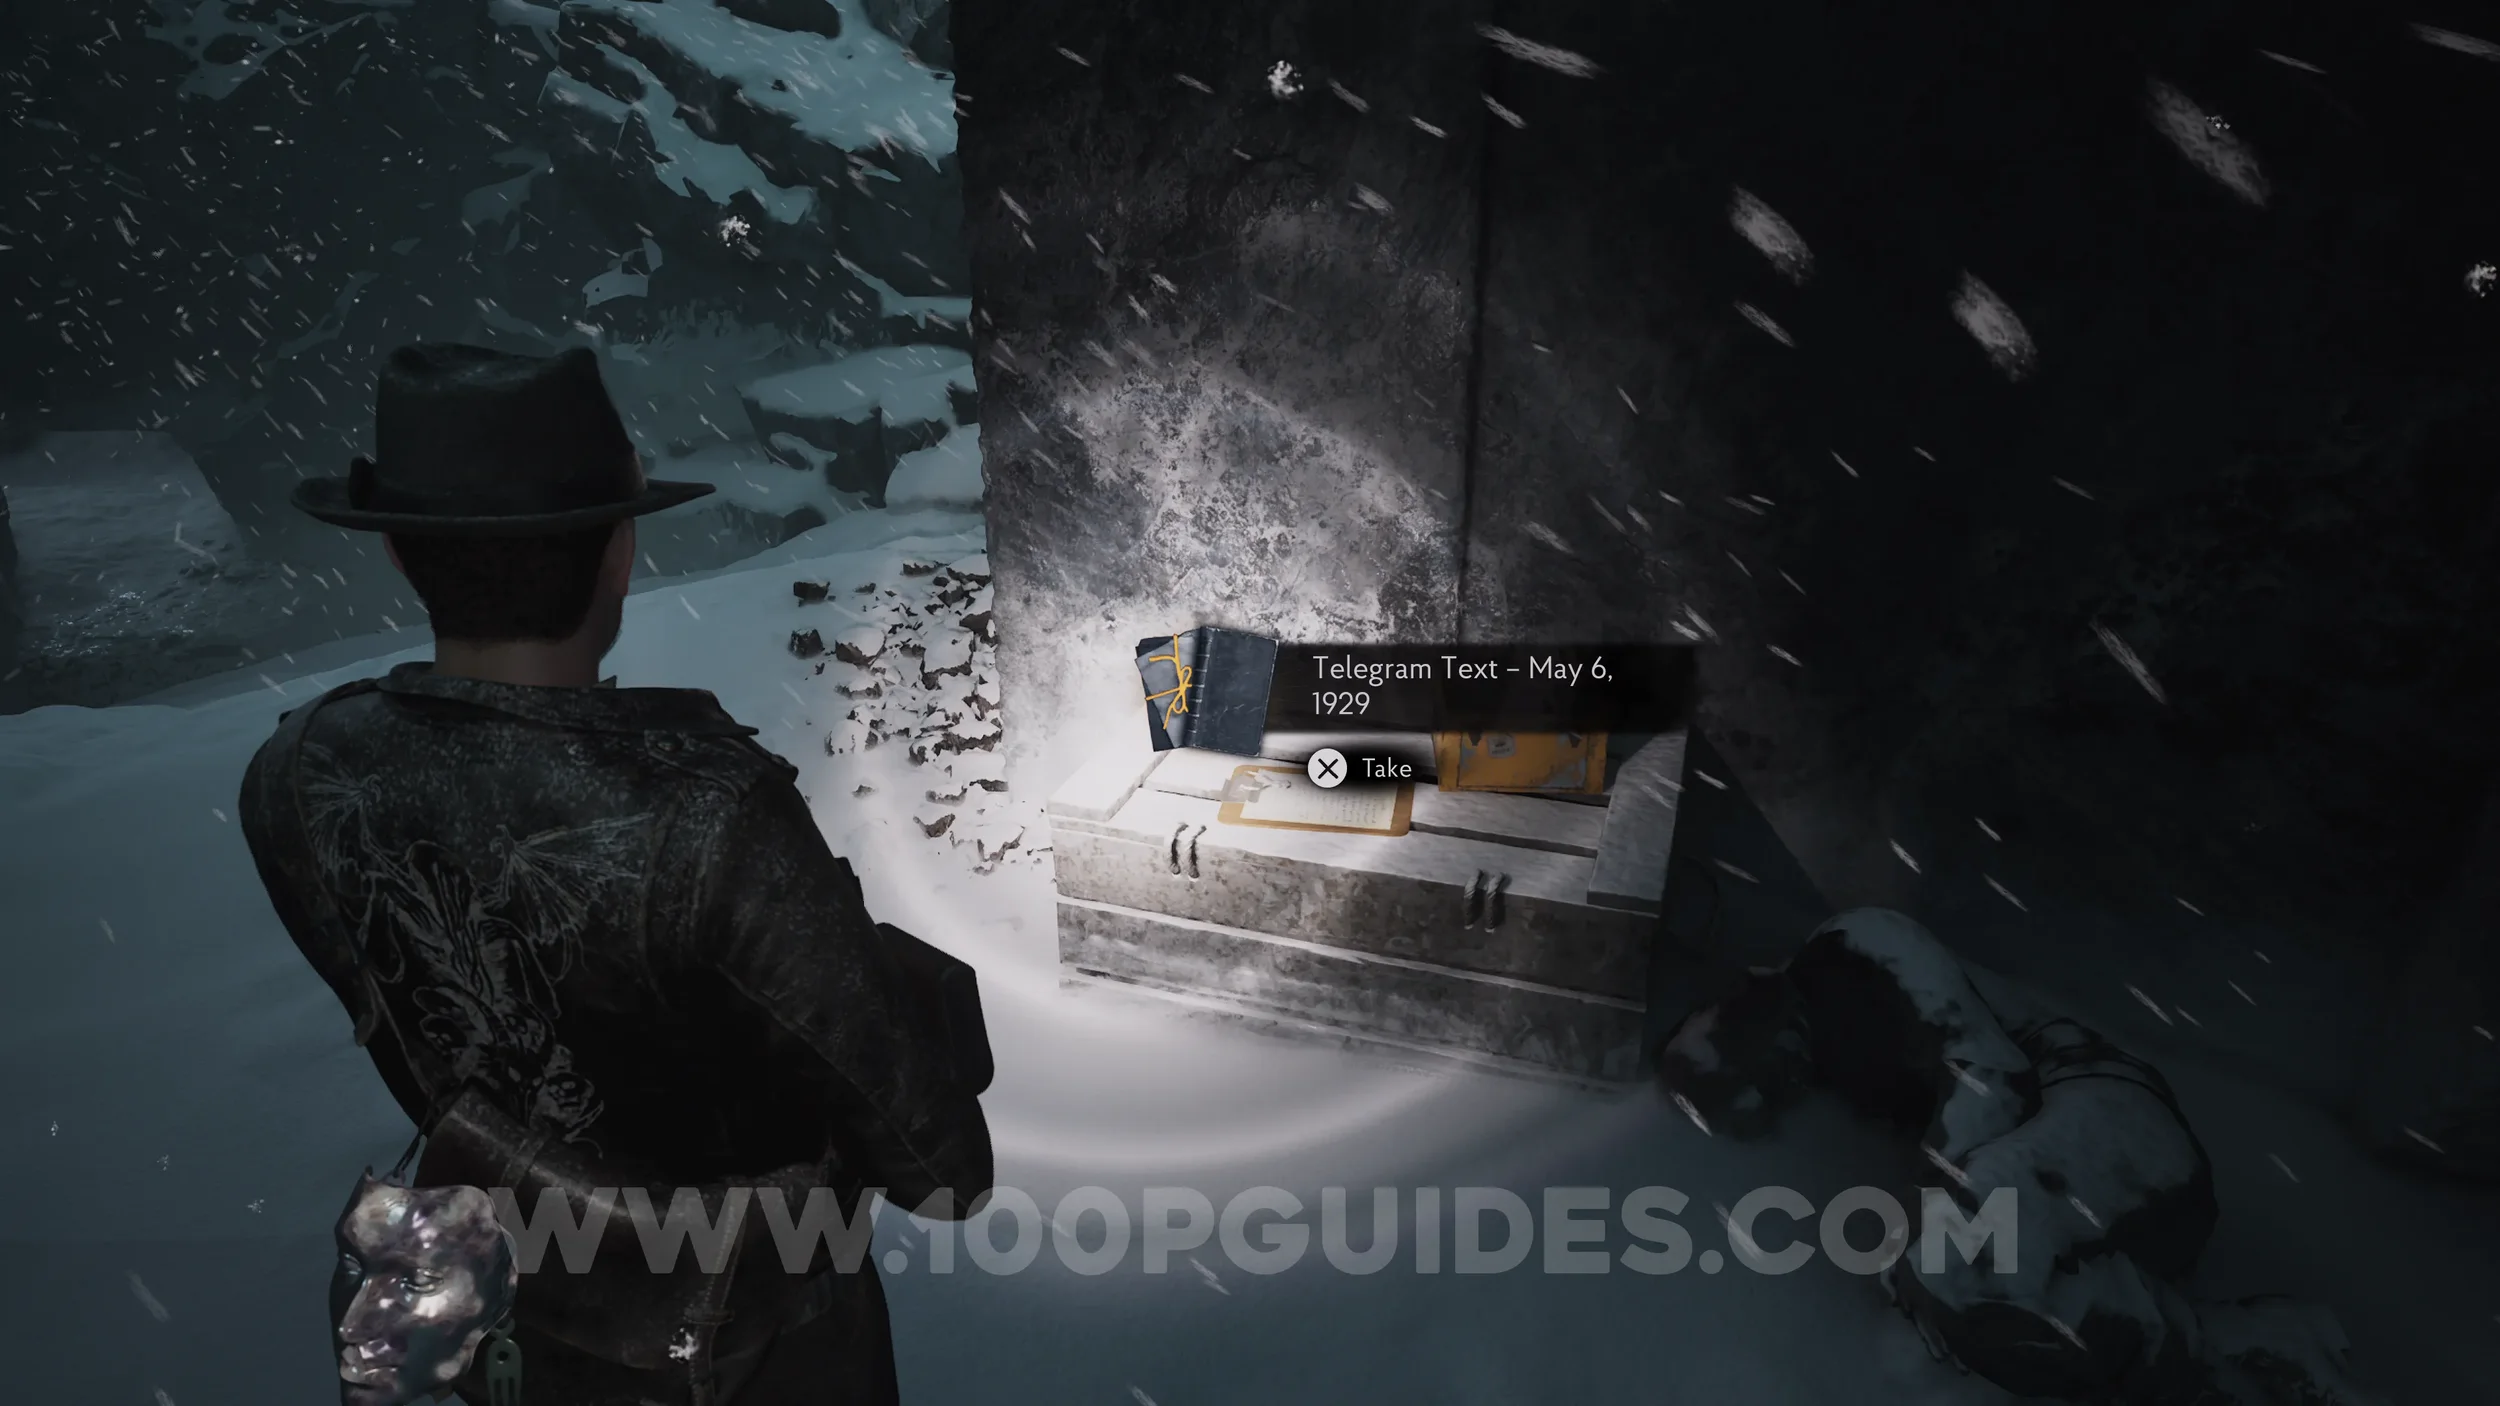
Lore Codex: Telegram Text - May 6, 1929. Found on the right of the main path as it snakes through the cave towards the area with tents.
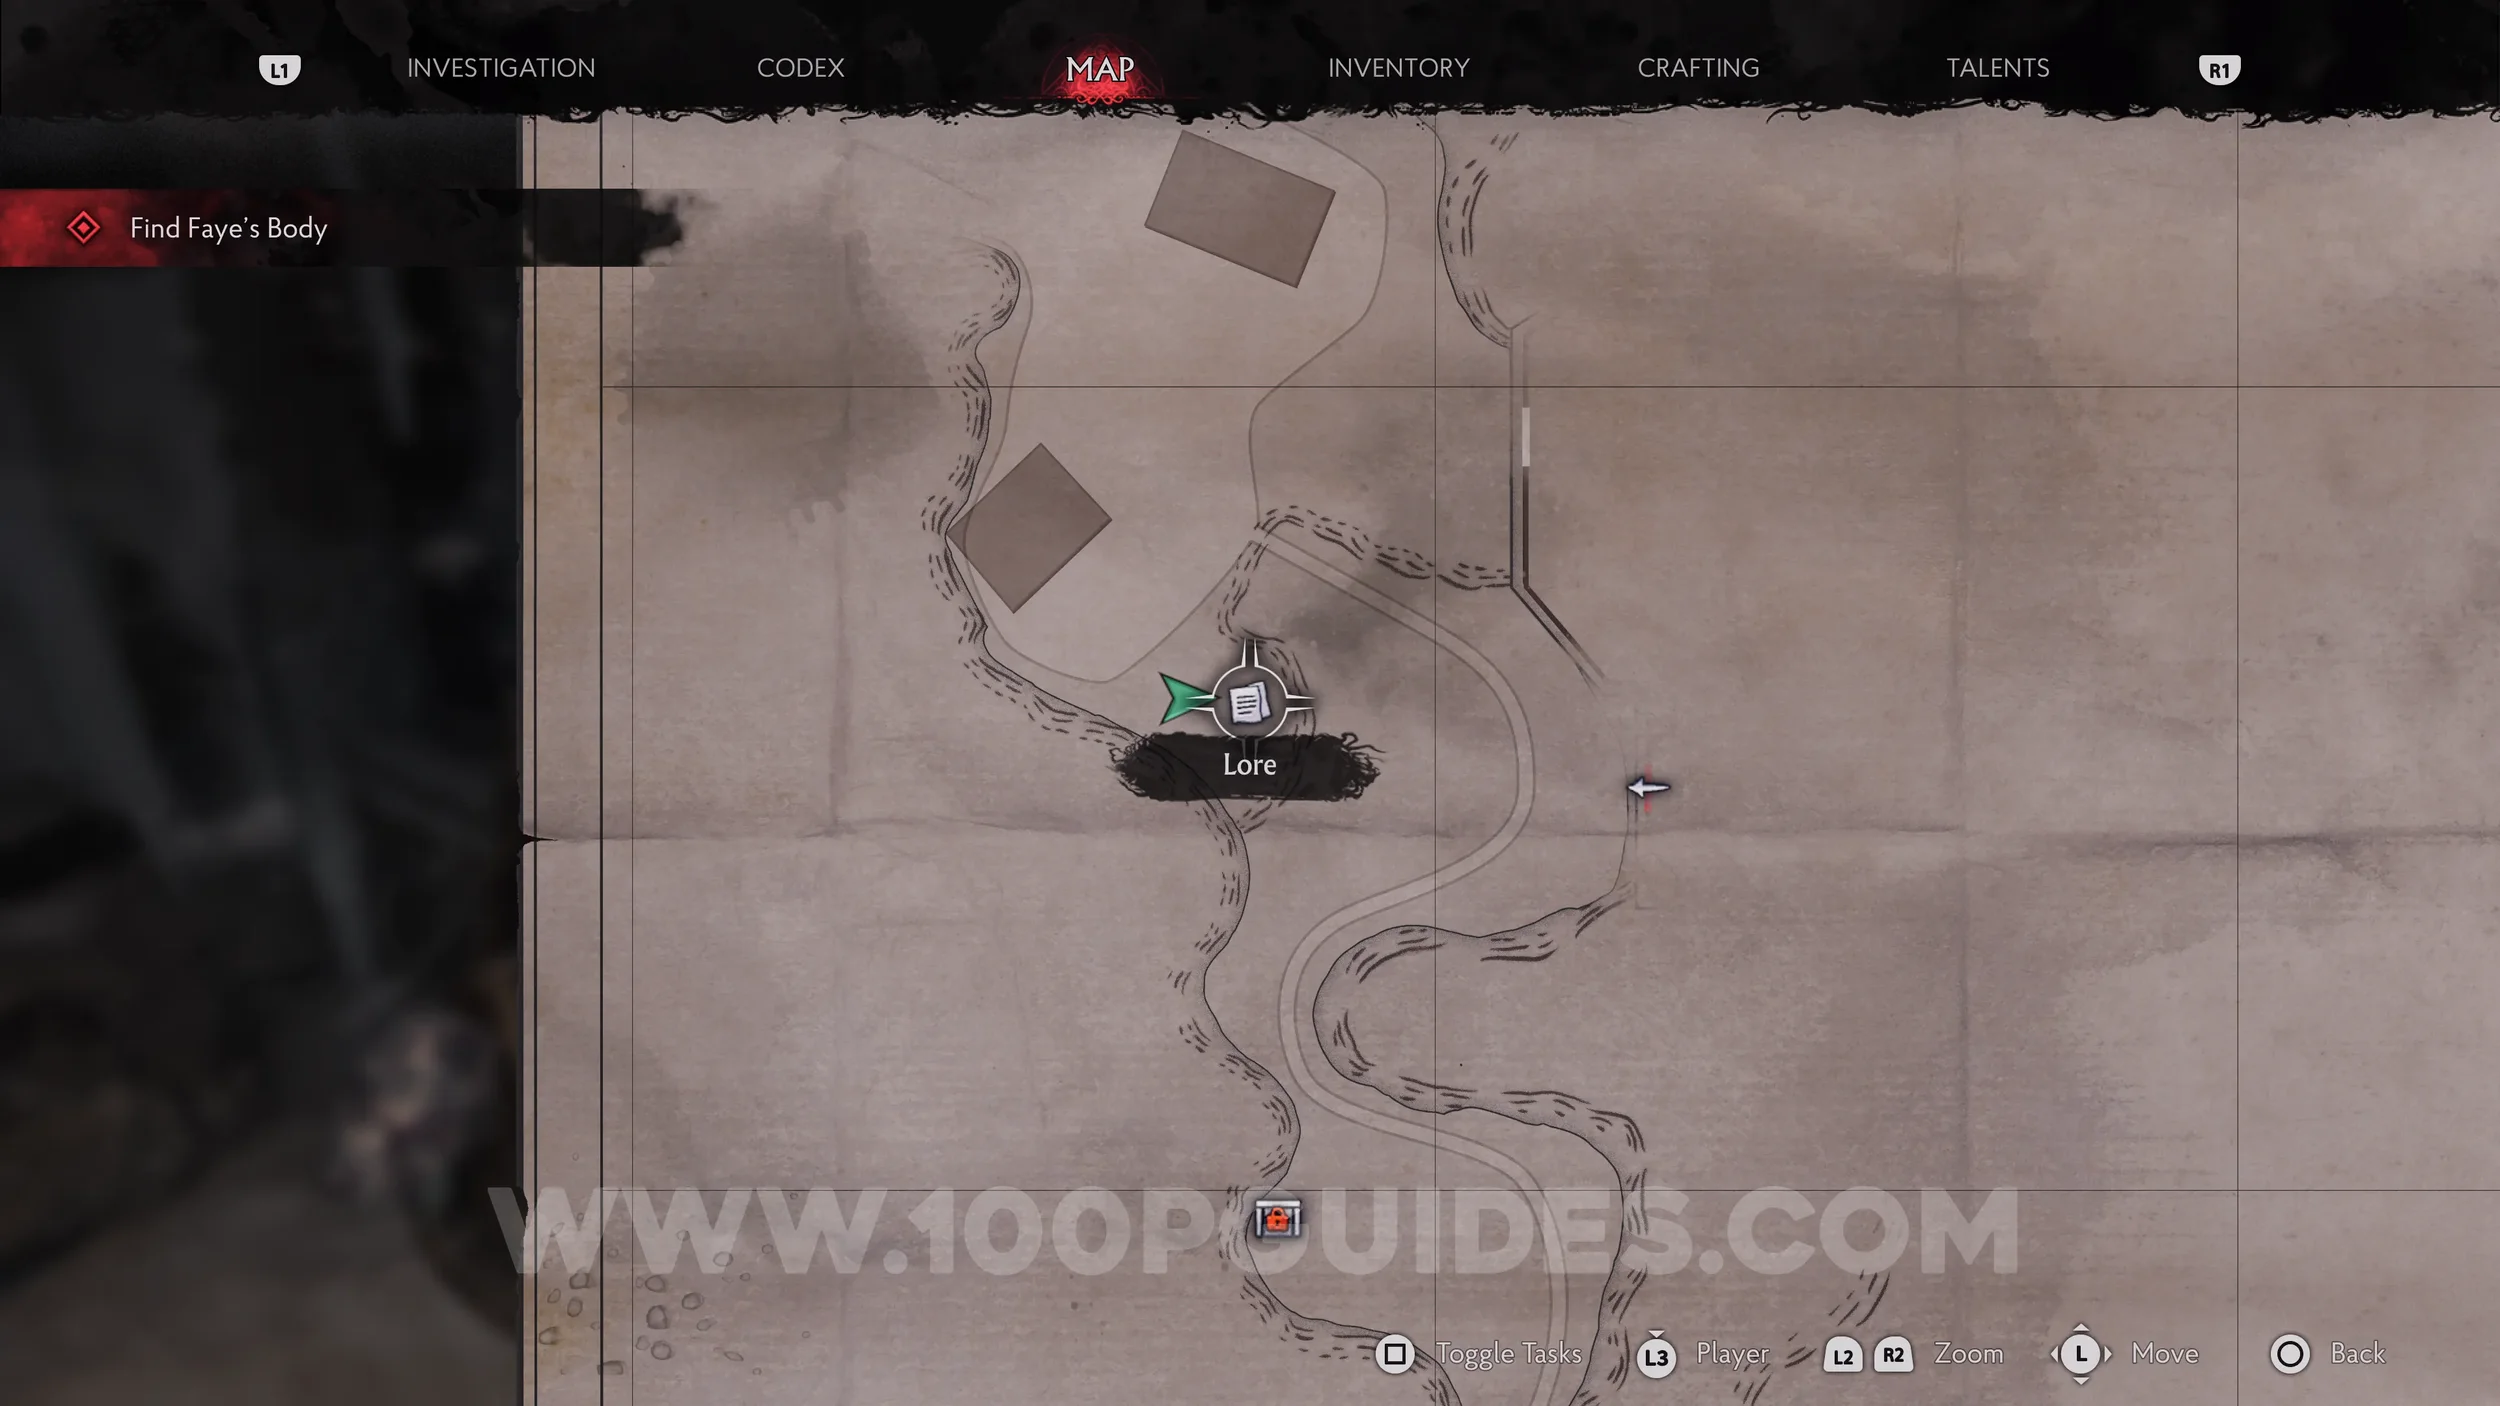
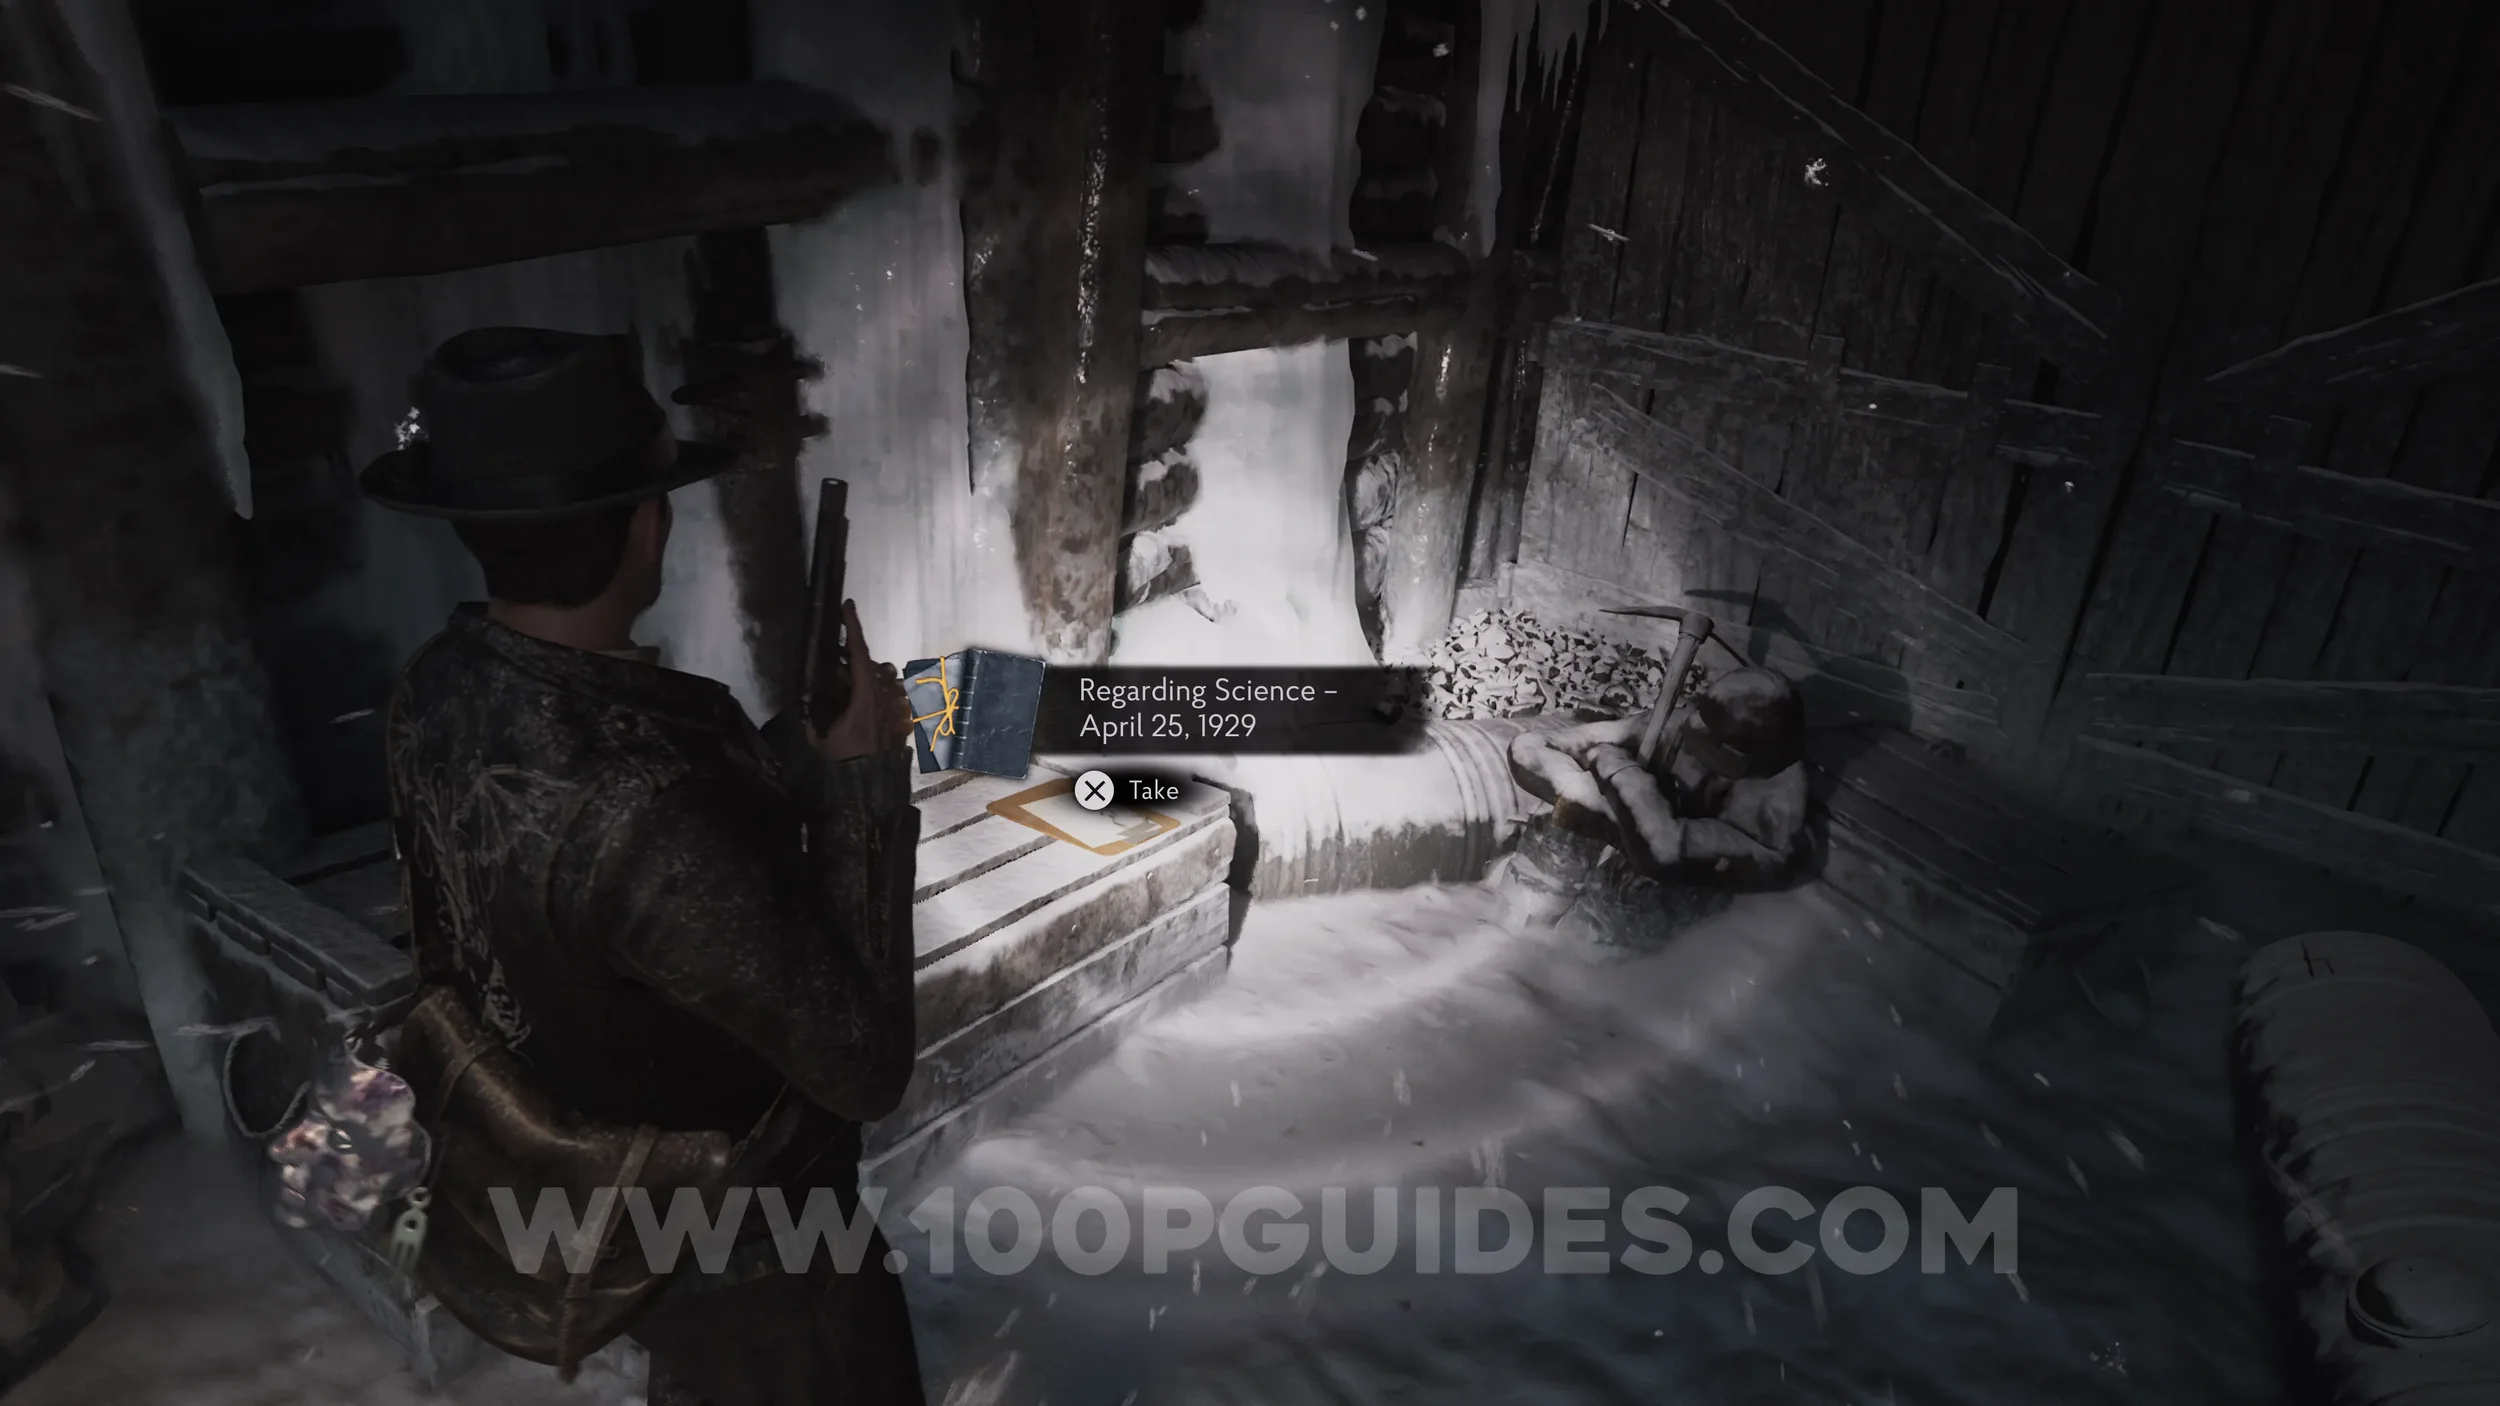
Lore Codex: Regarding Science - April 25, 1929. Just after the previous collectible, you'll reach an area with tents. At the first tent, turn left and make a U-turn to find the codex at the mine's entrance.
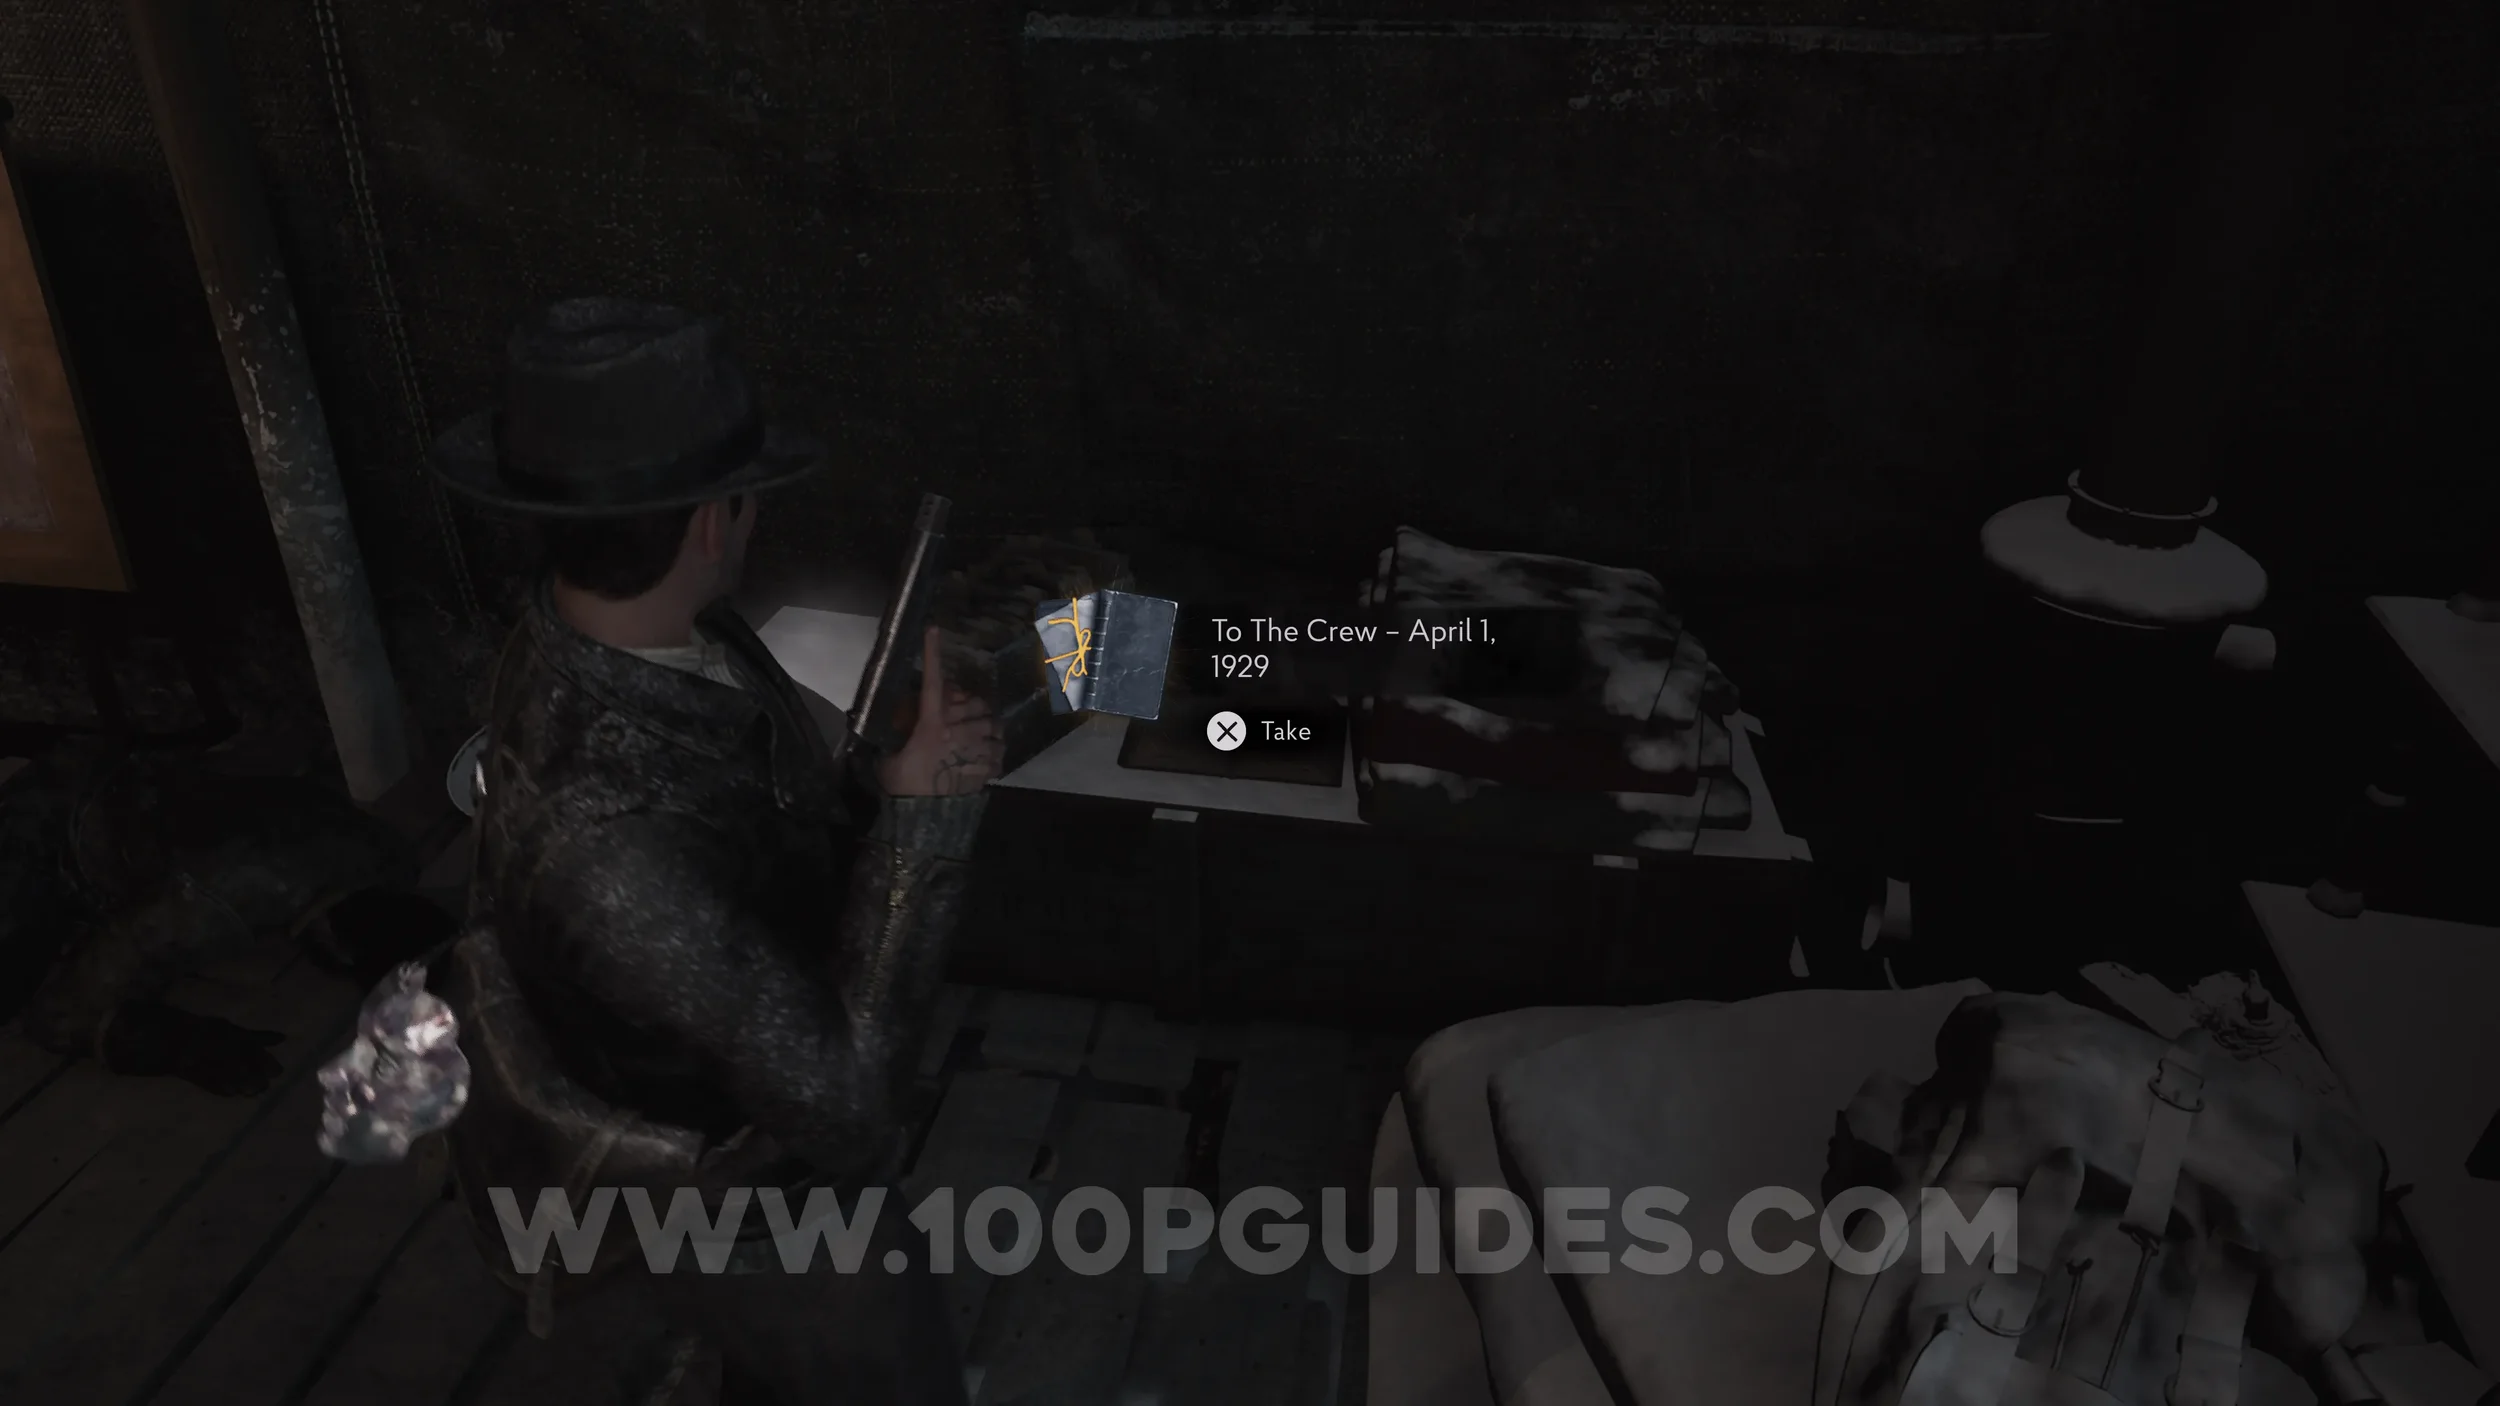
Lore Codex: To The Crew - April 1, 1929. In the large tent at the back of the camp where the cutscence plays.
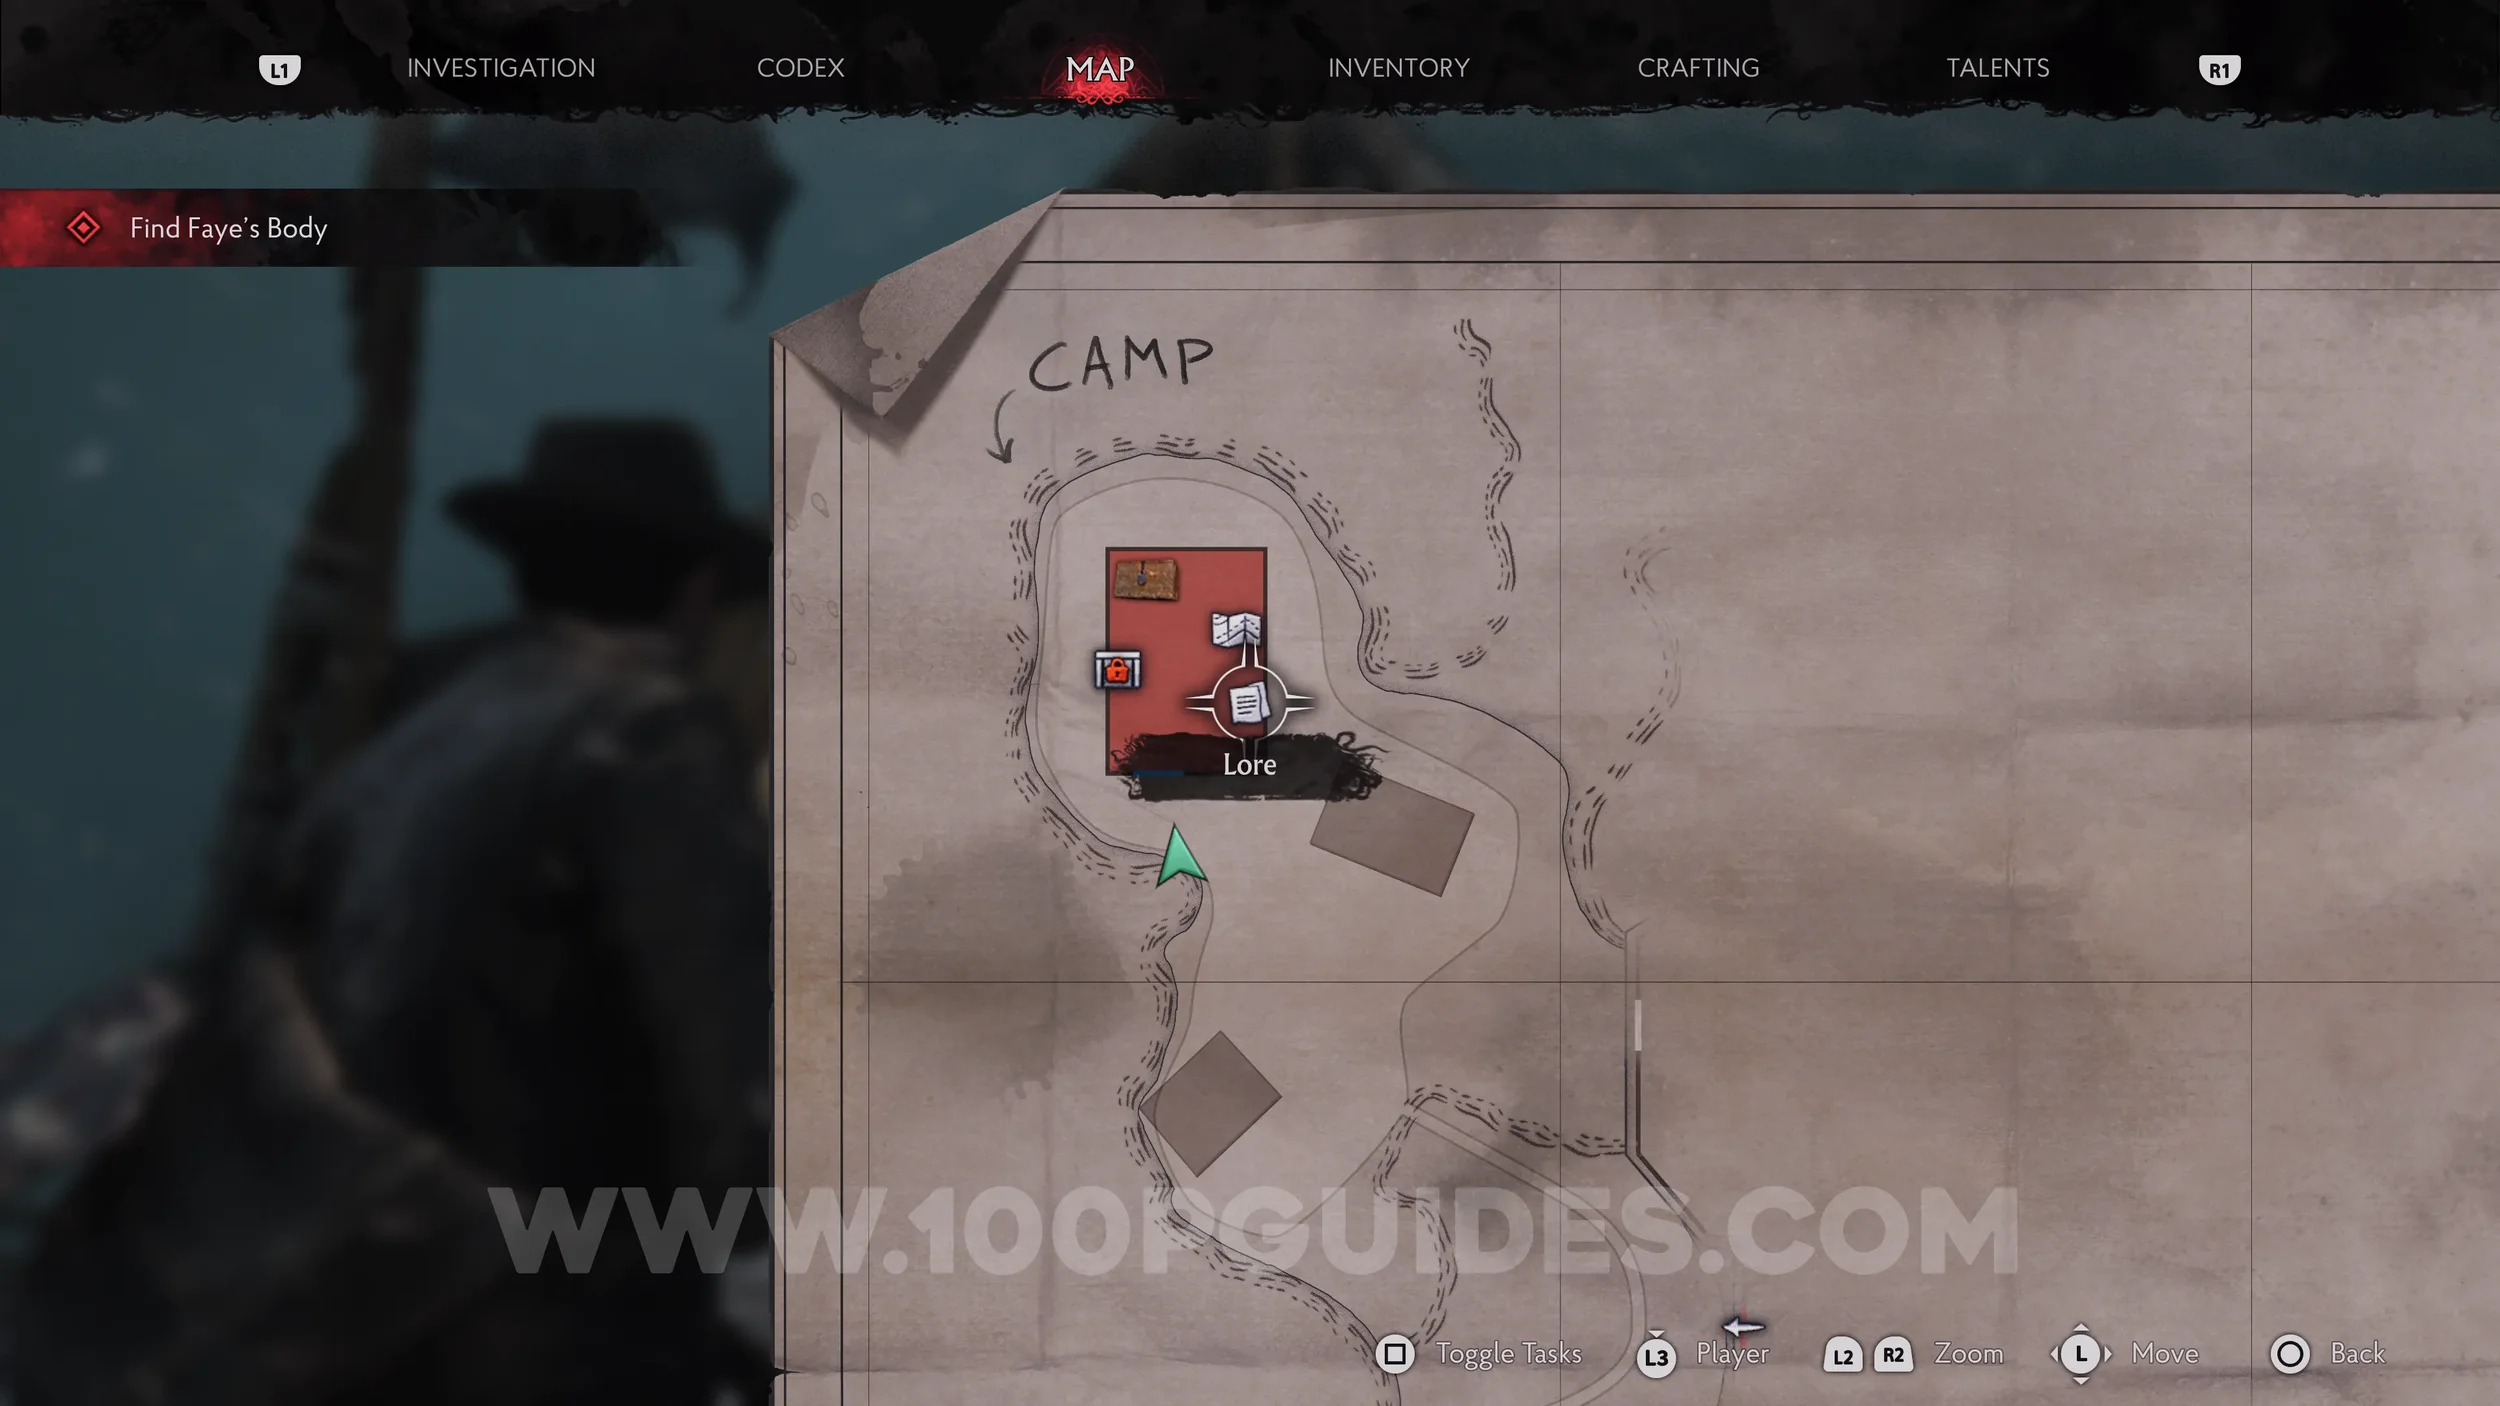
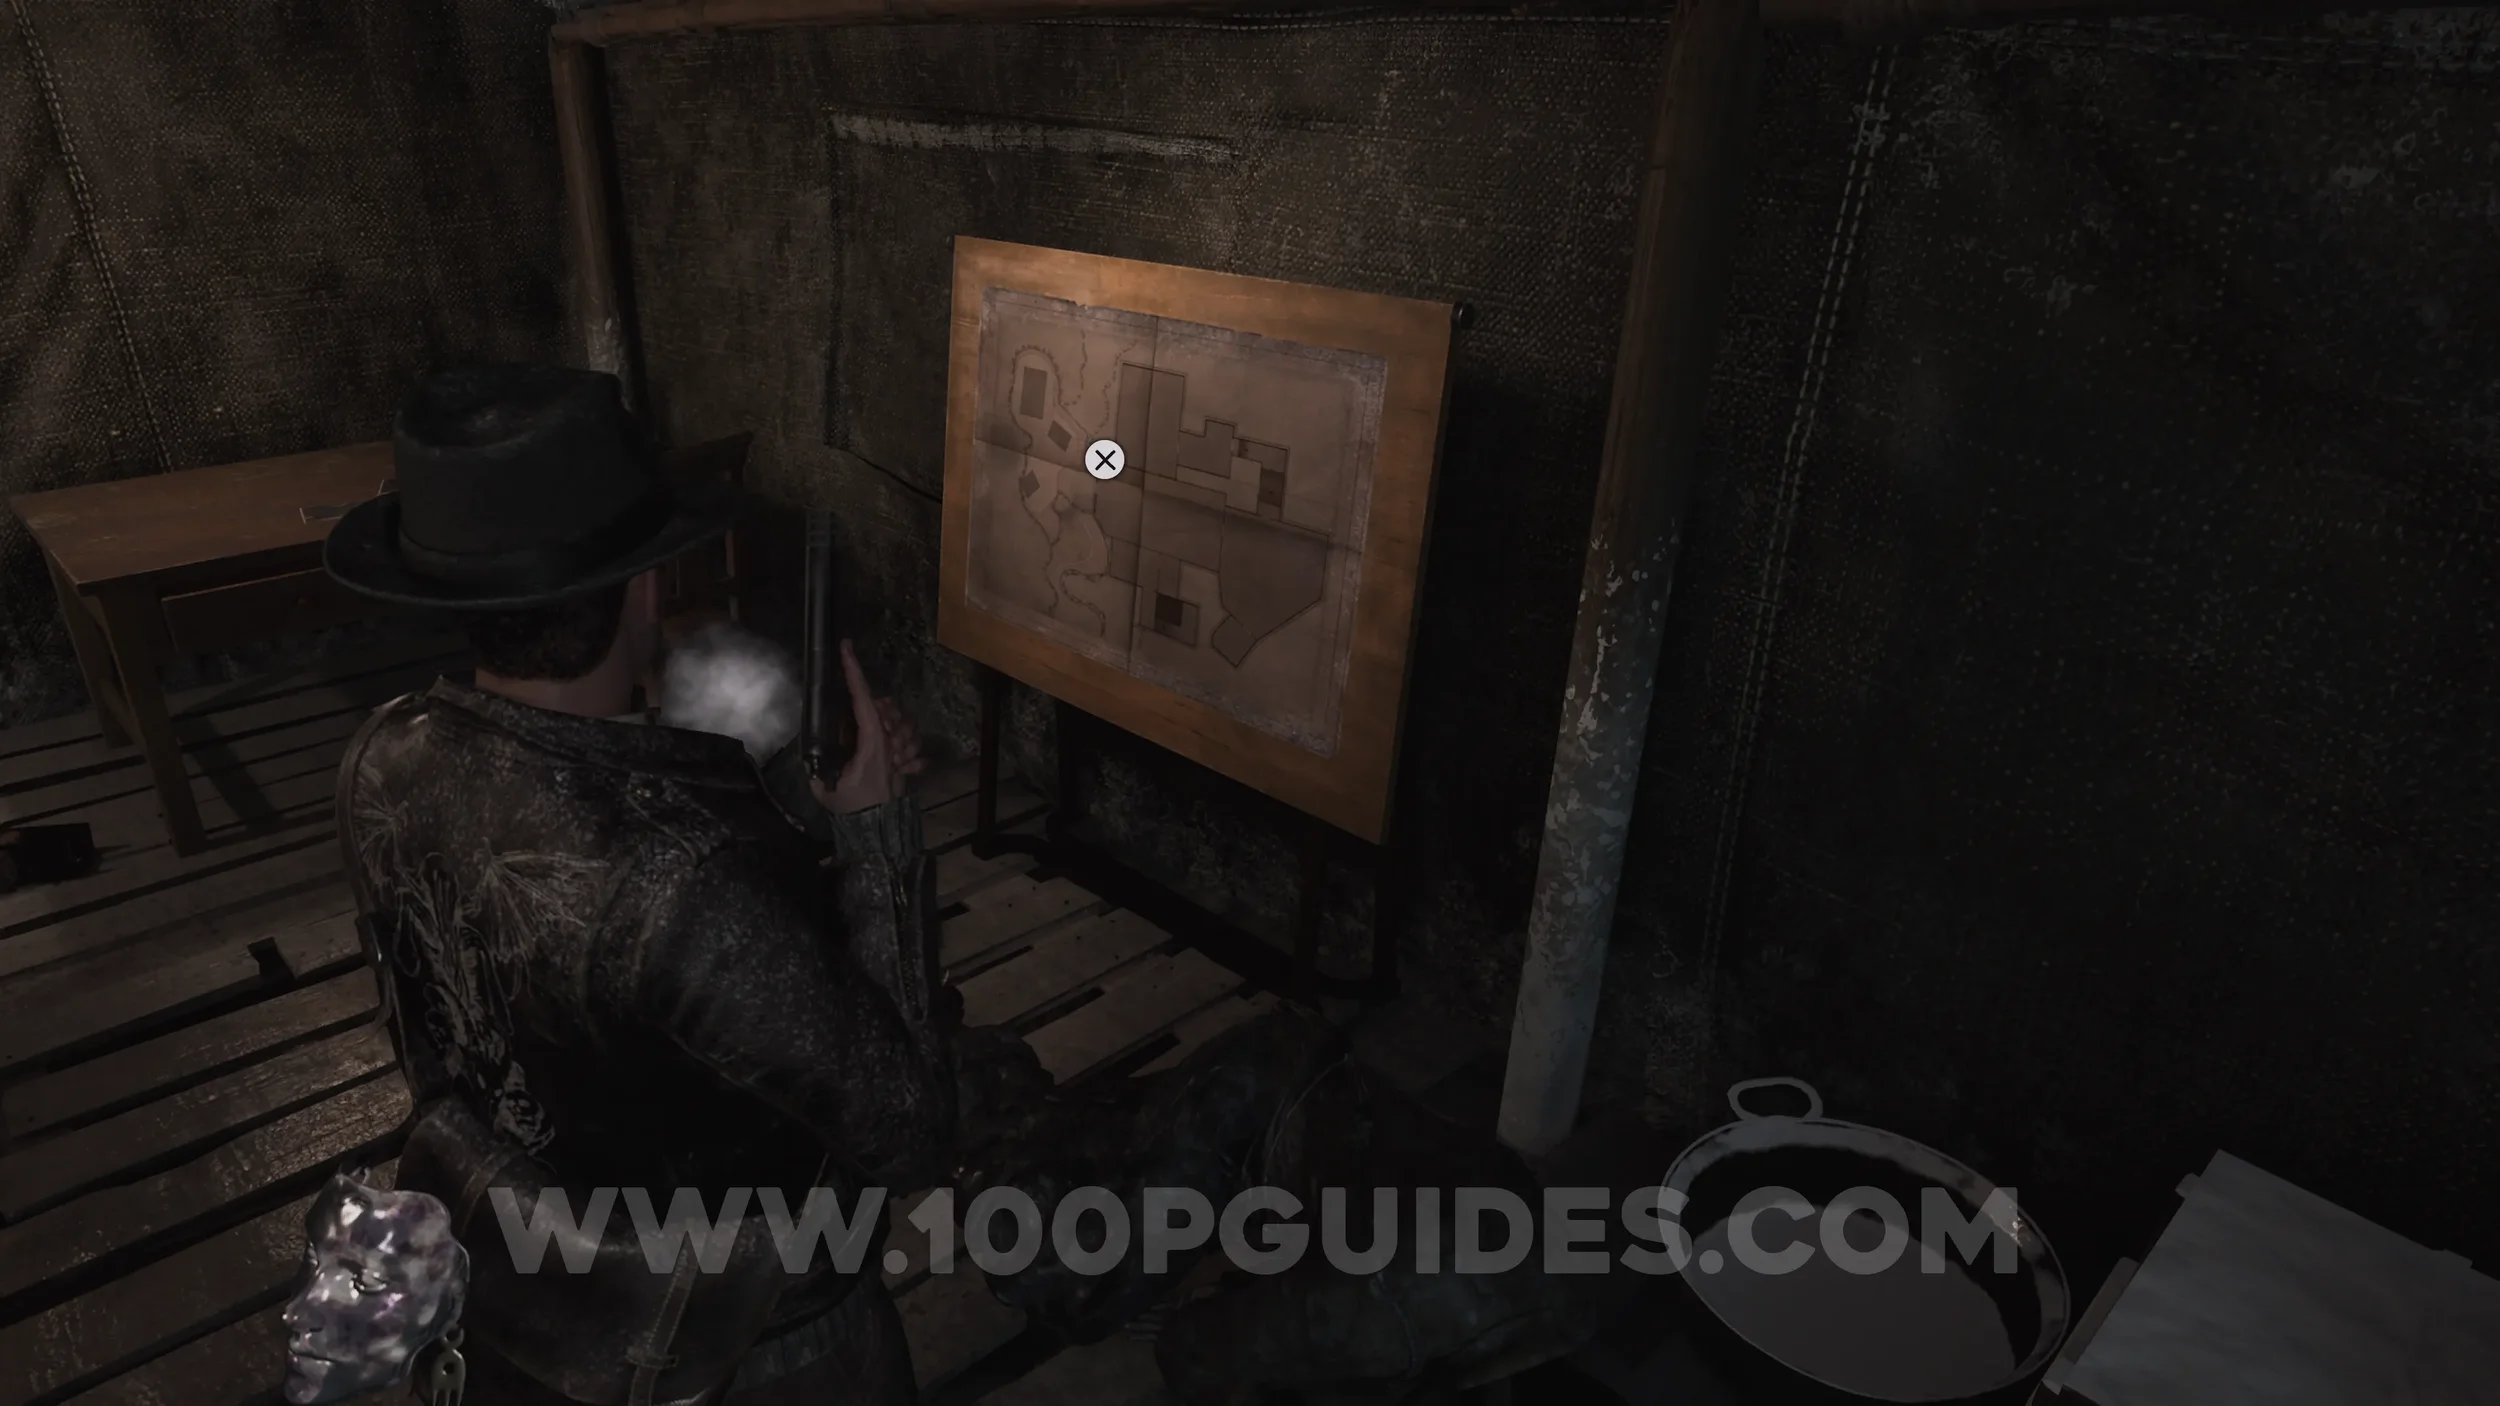
Map: Expedition Map. Also in the tent.
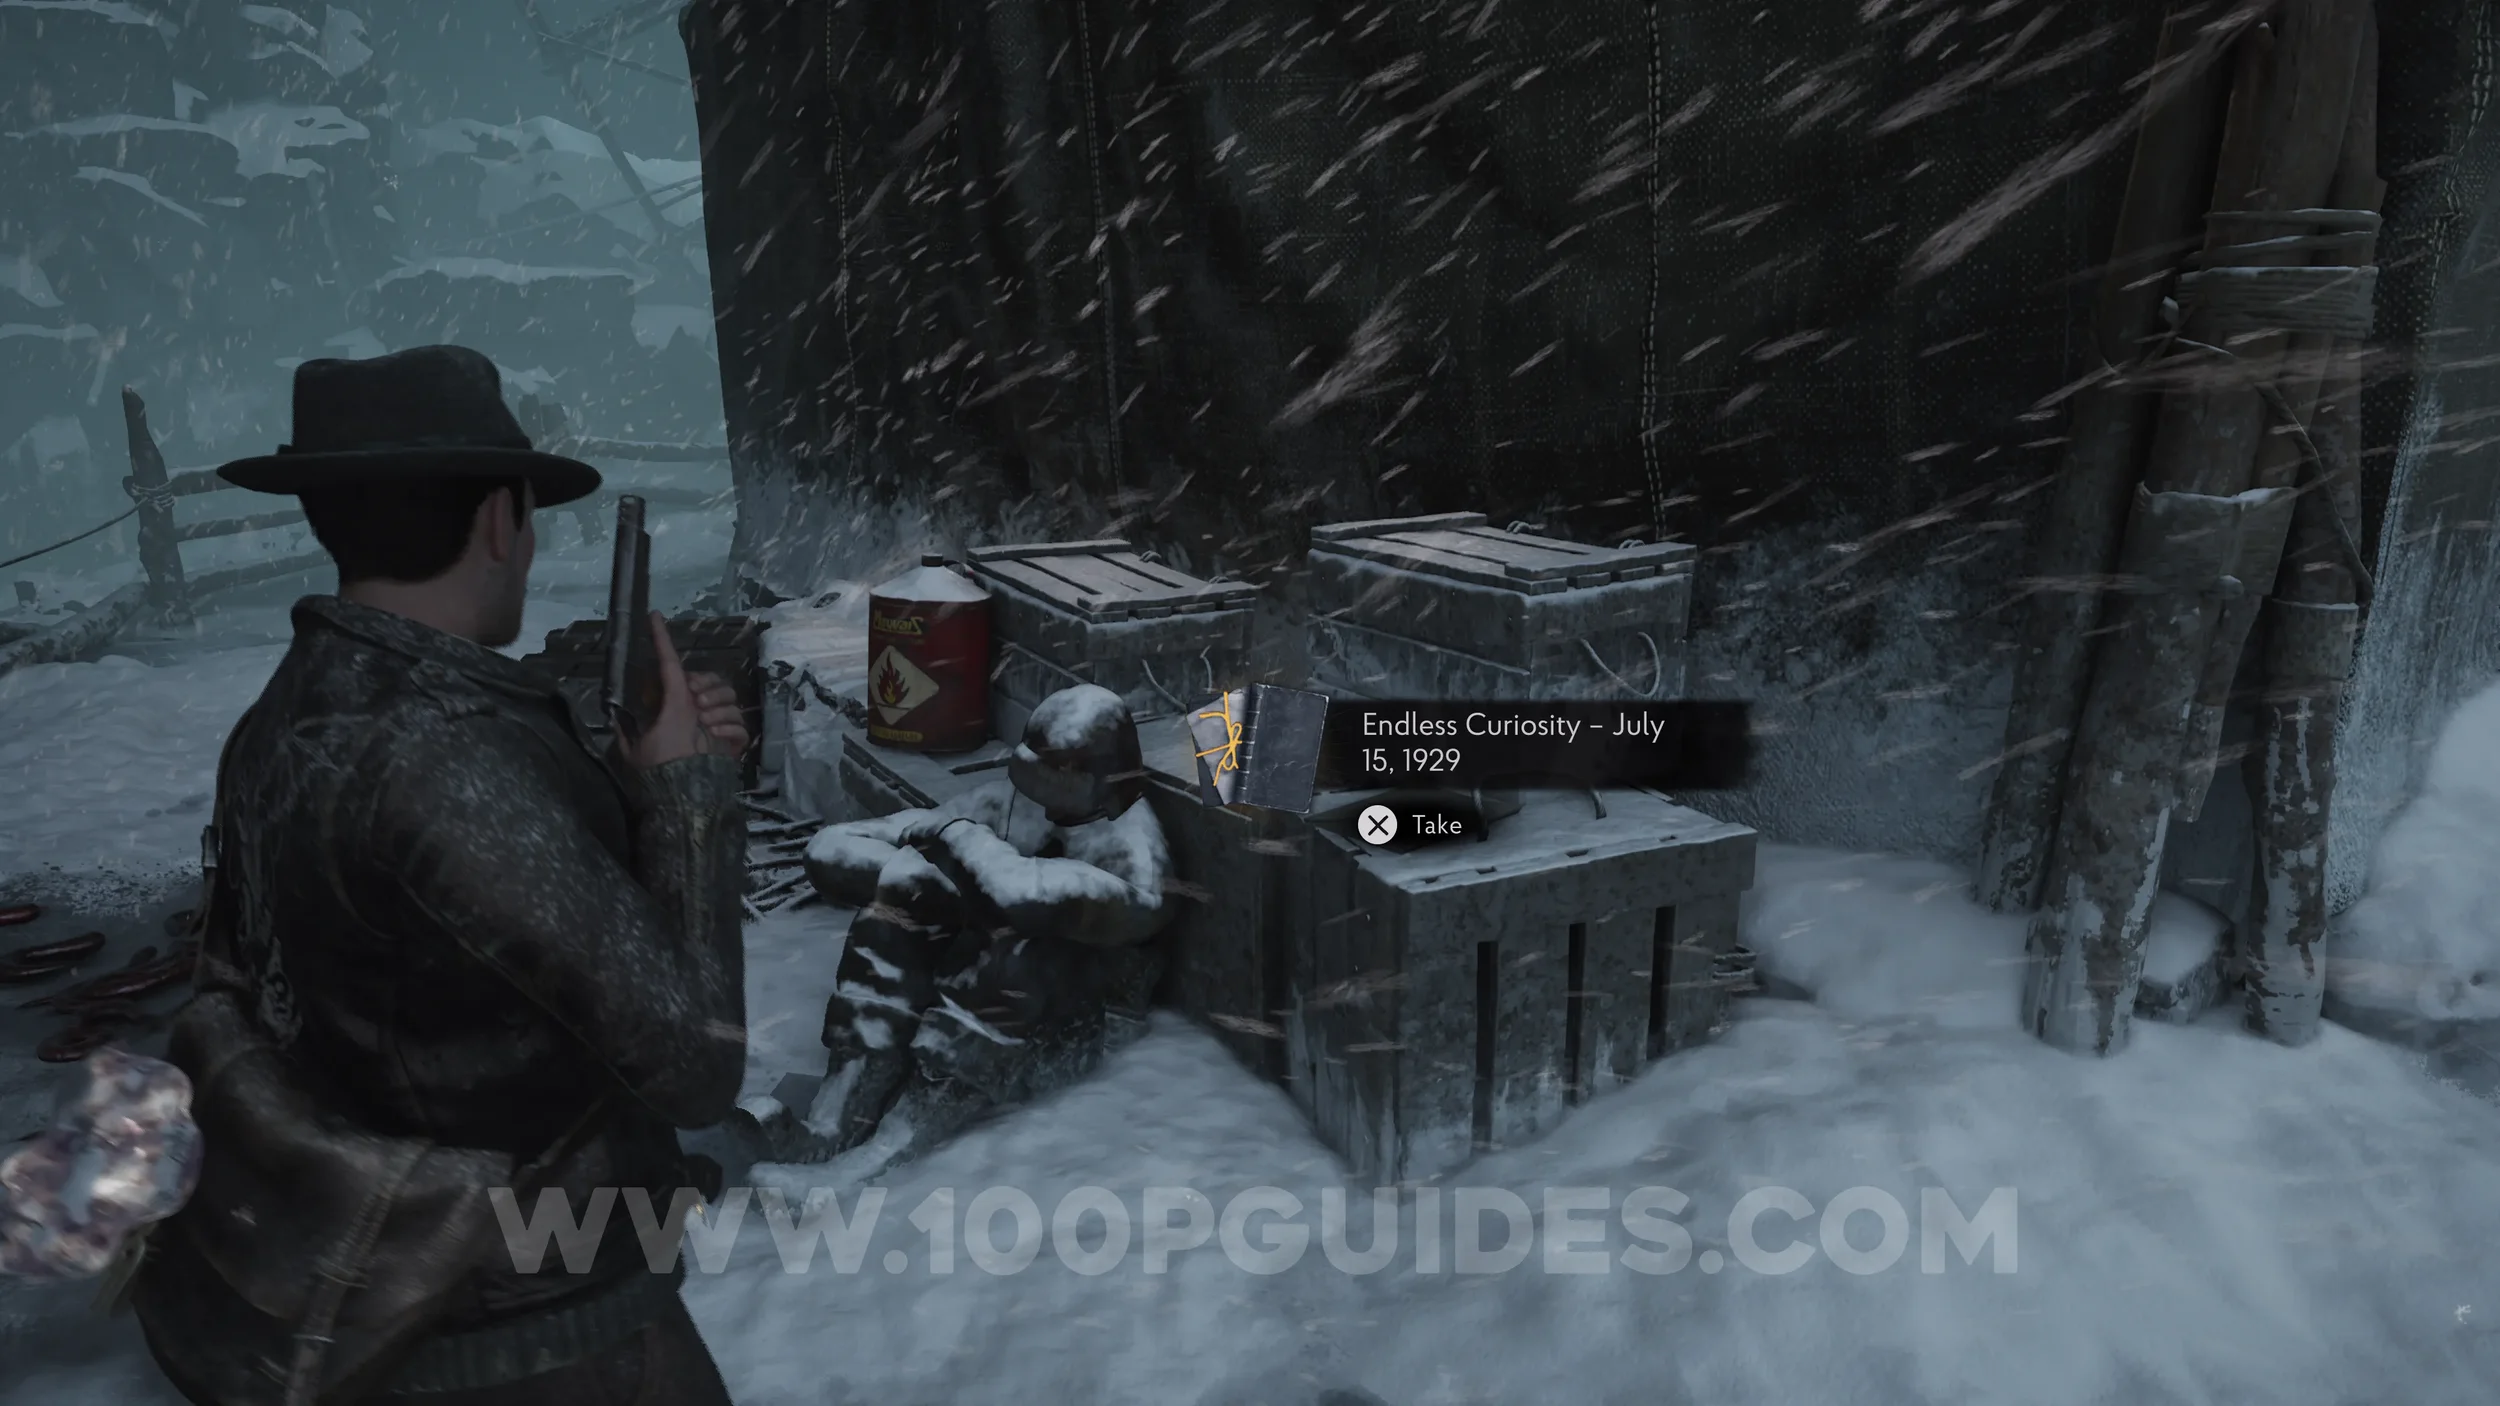
Lore Codex: Endless Curiosity - July 15, 1929. On some boxes behind the large tent.
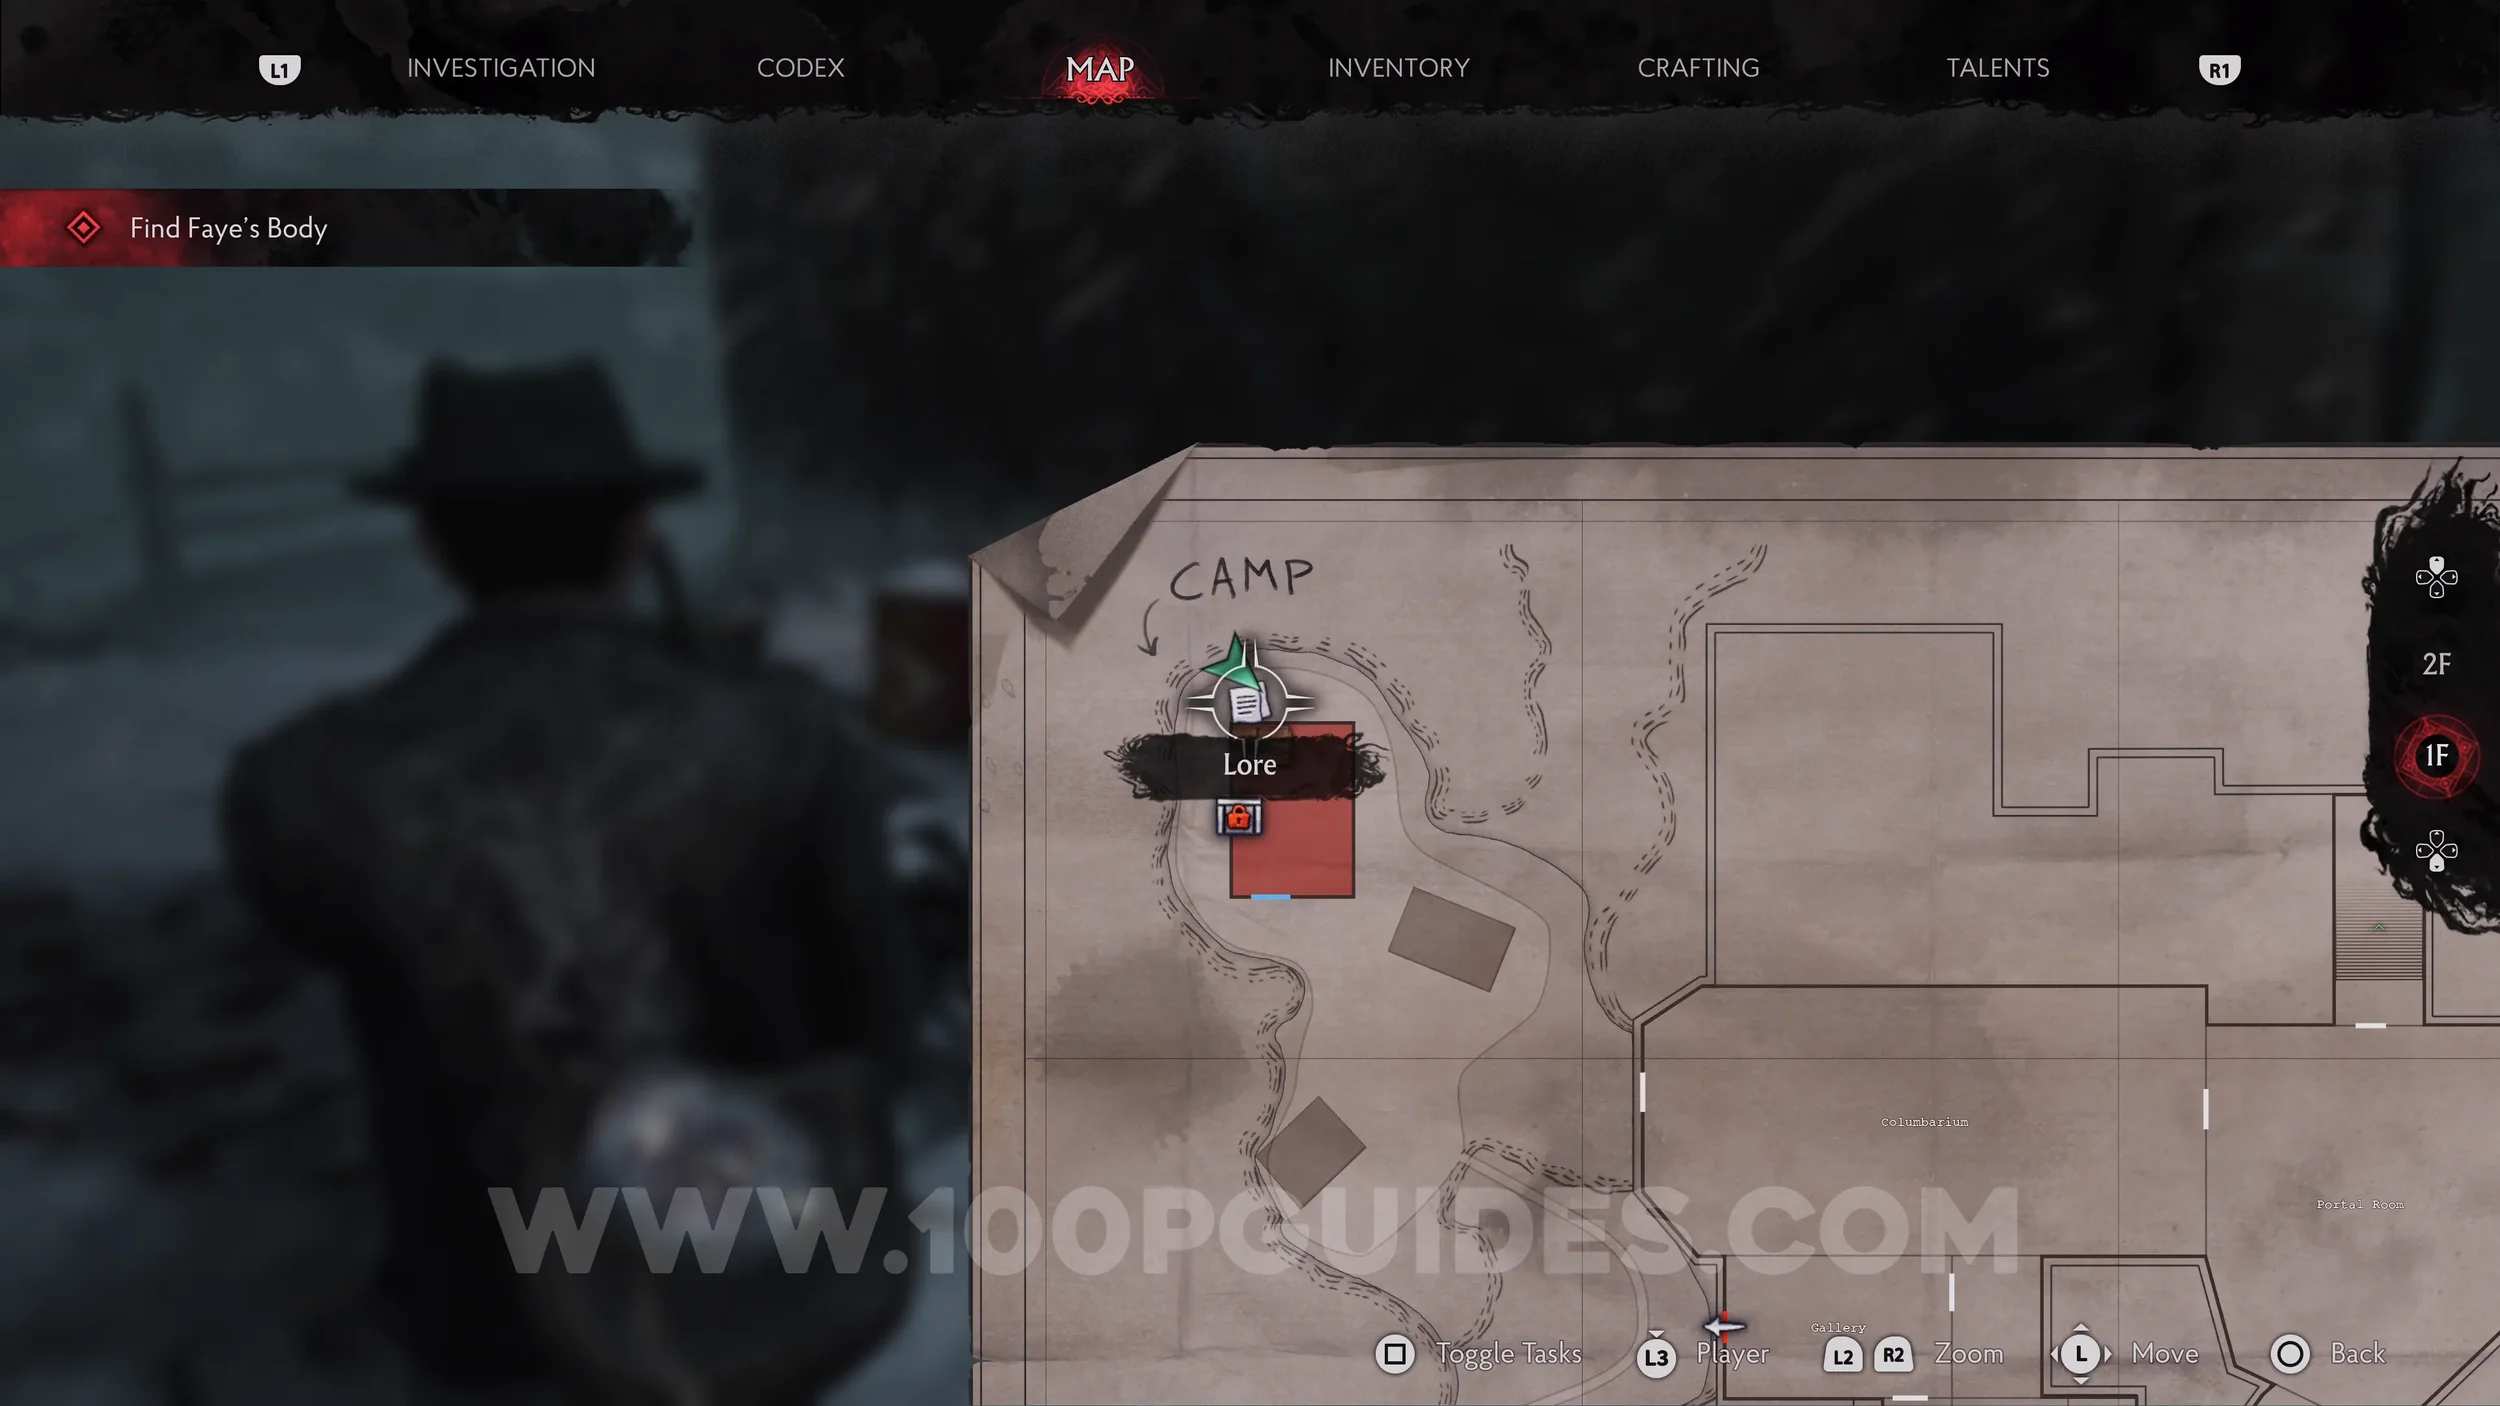
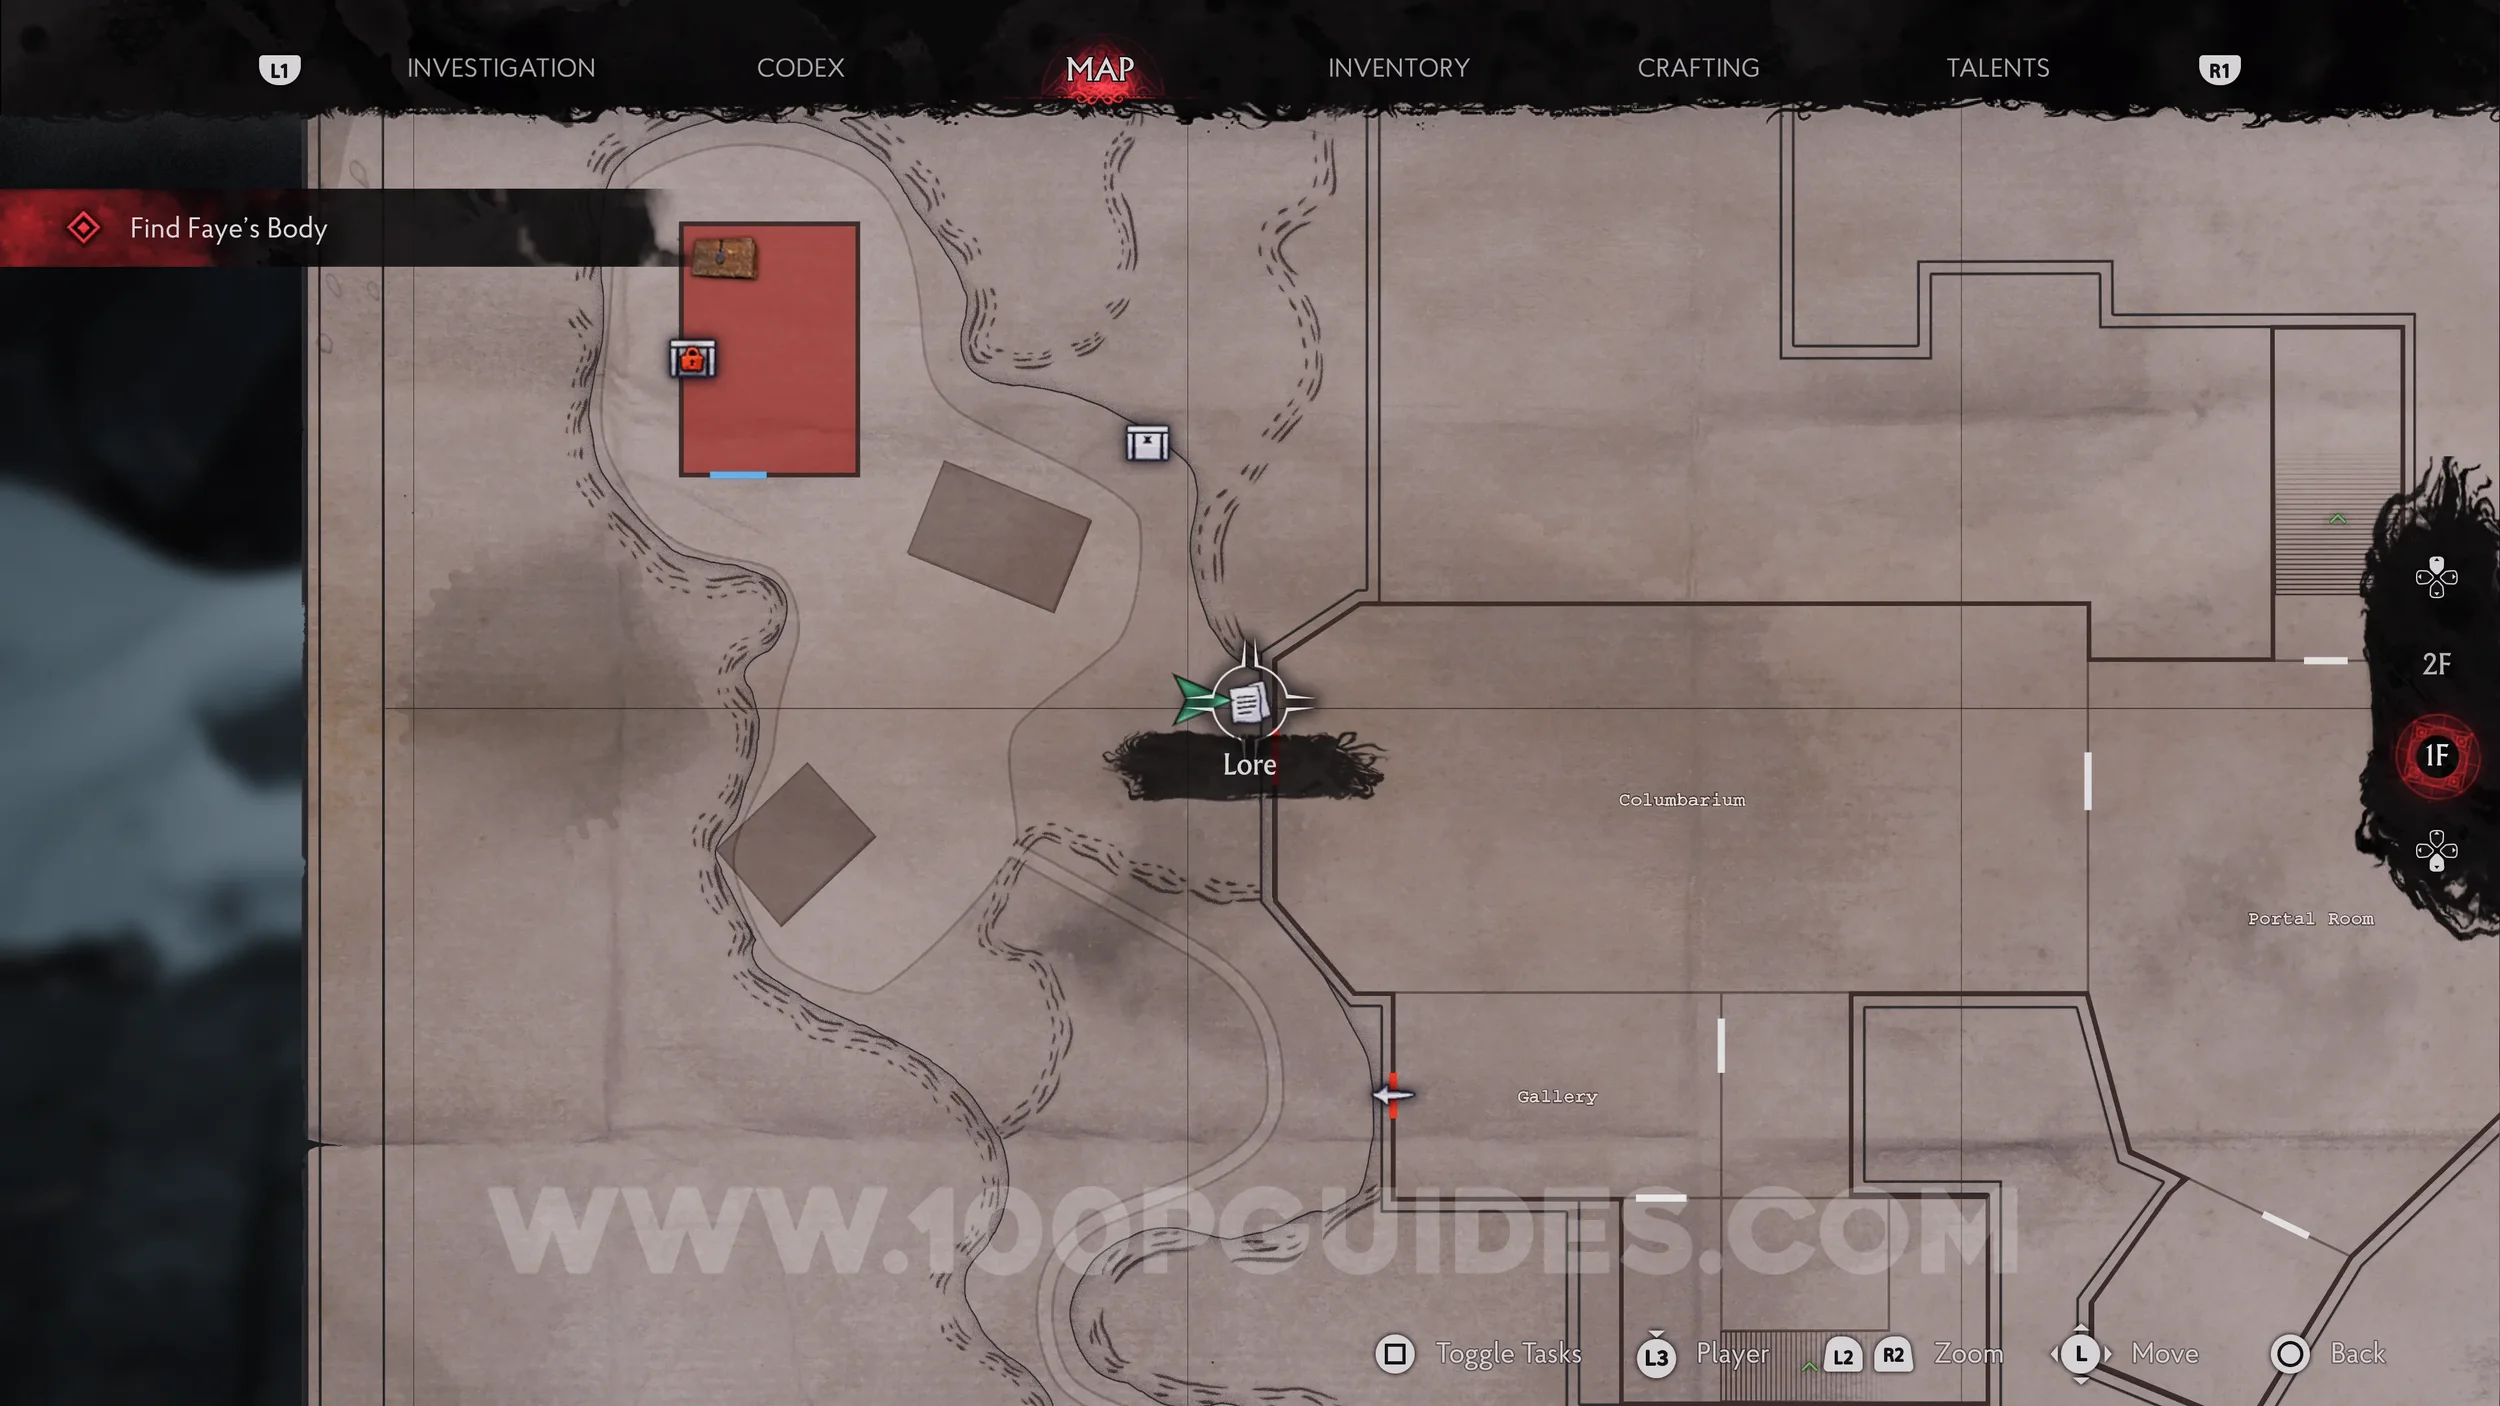
Lore Codex: Journal - August 1929. Next to the strange door to the southeast of the camp.
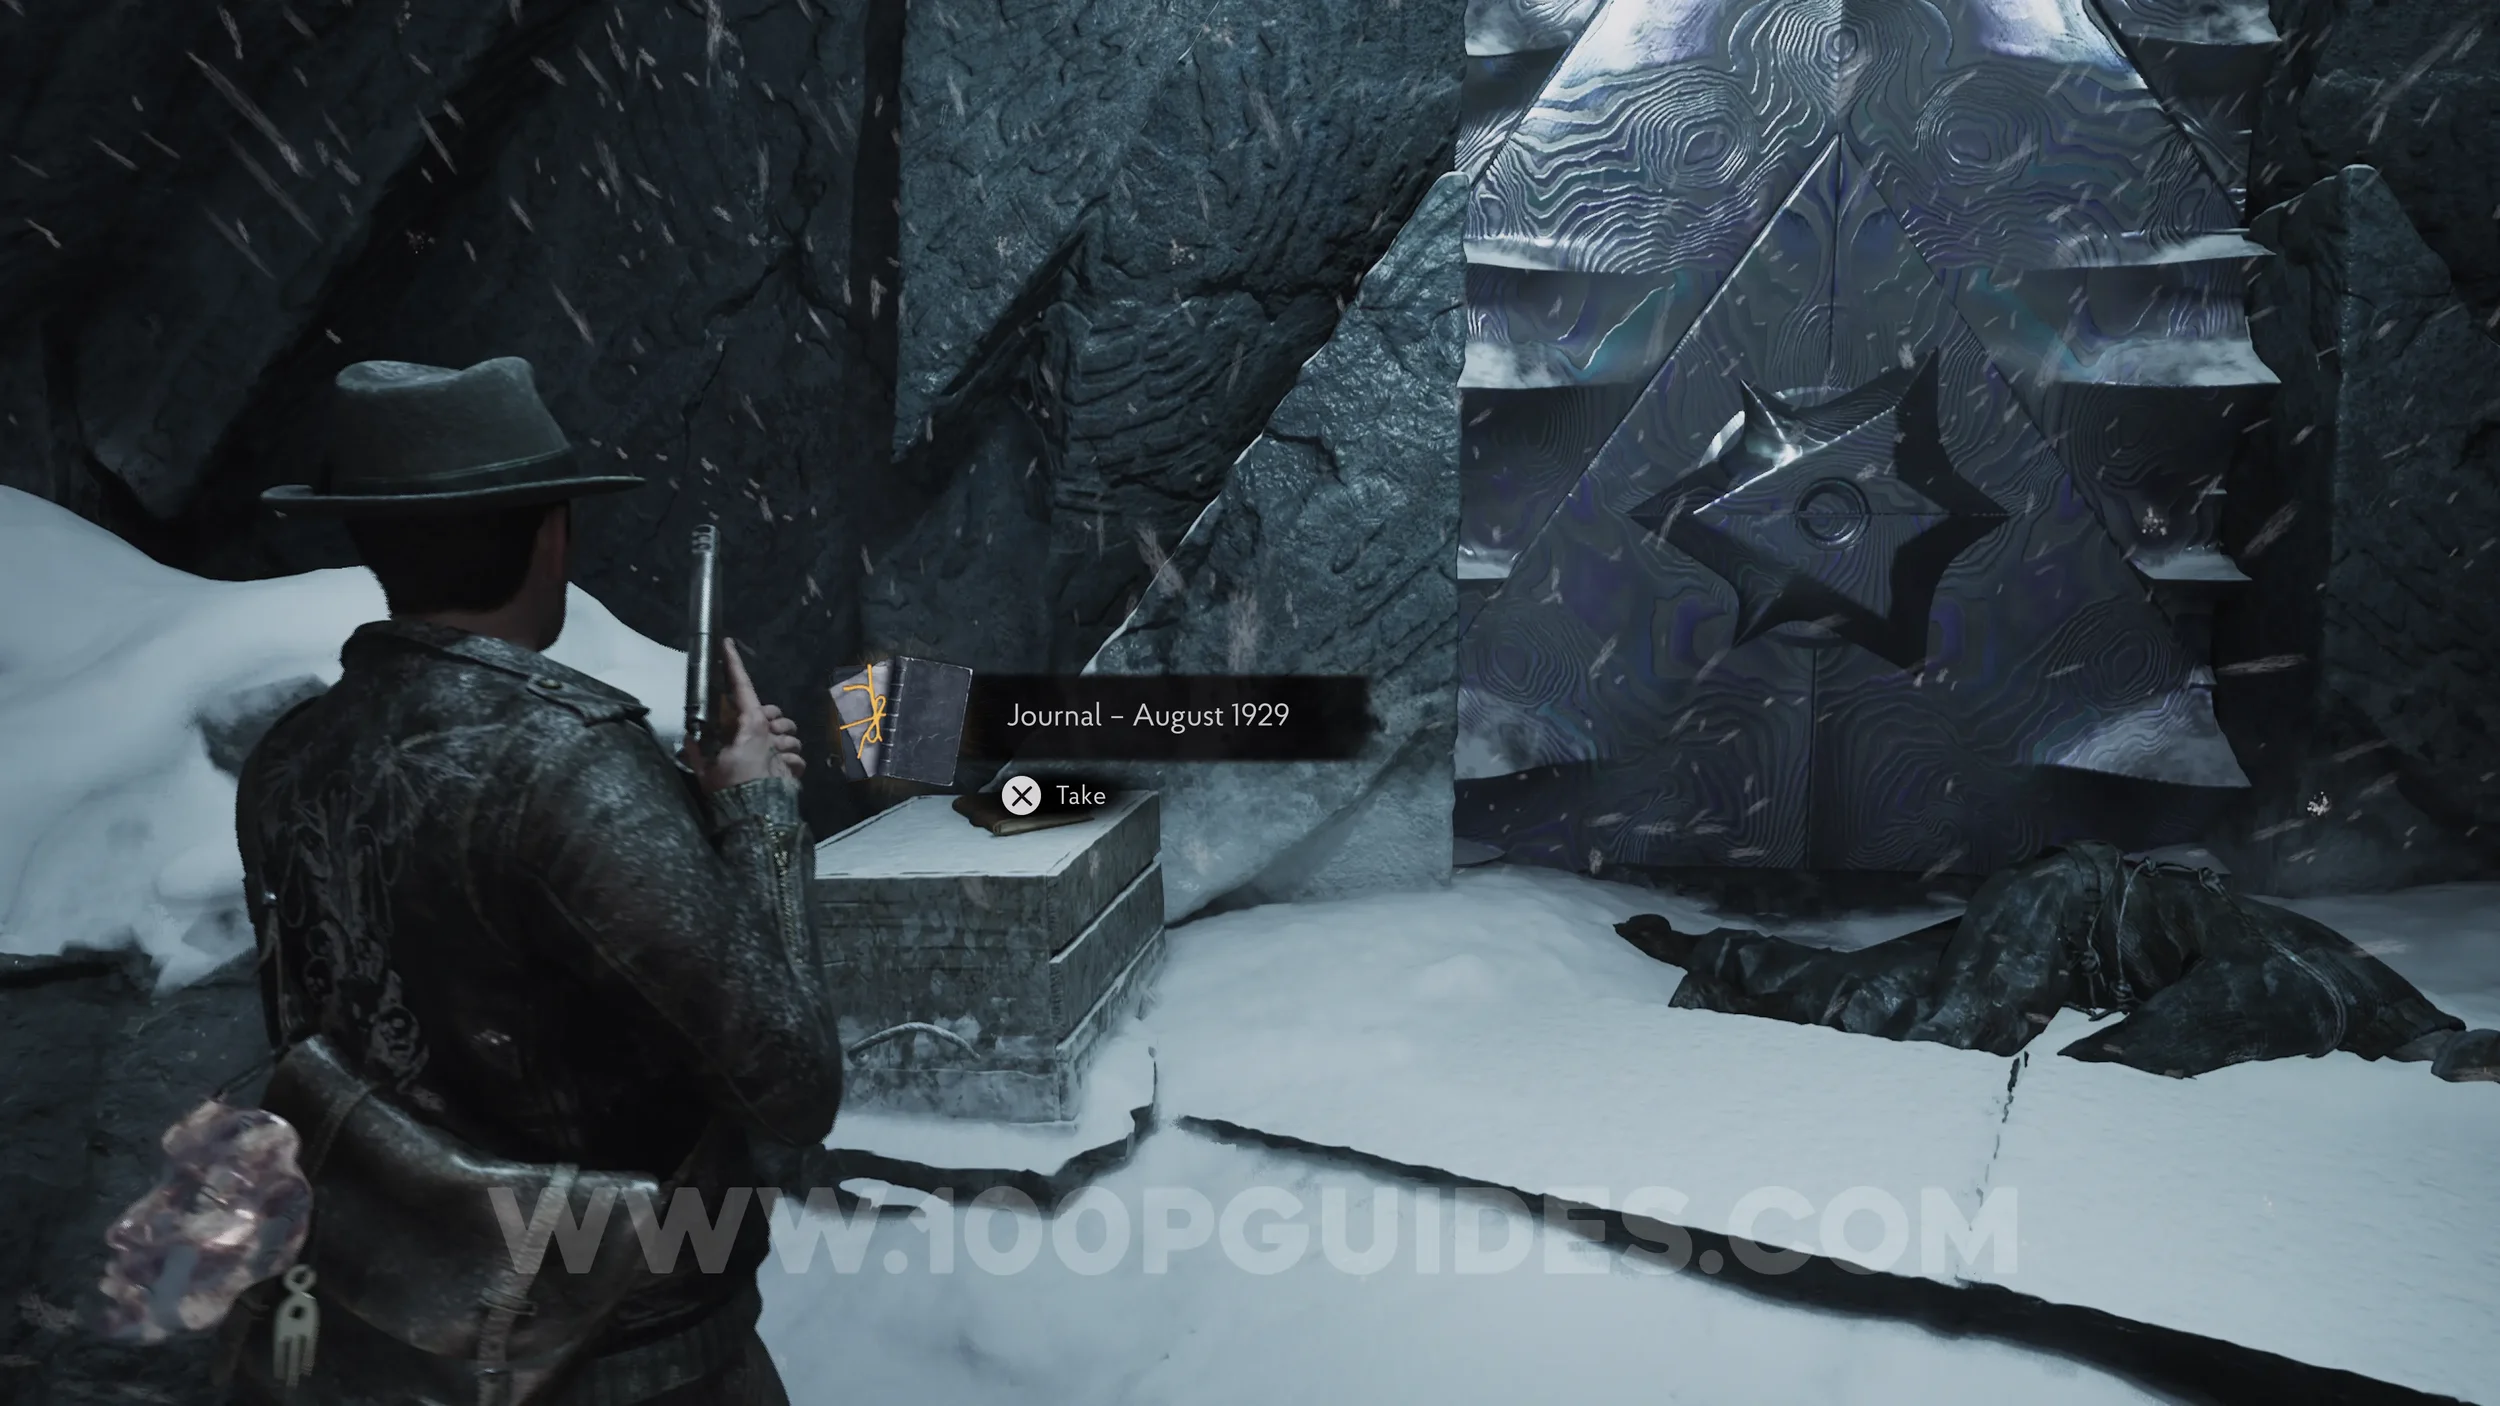
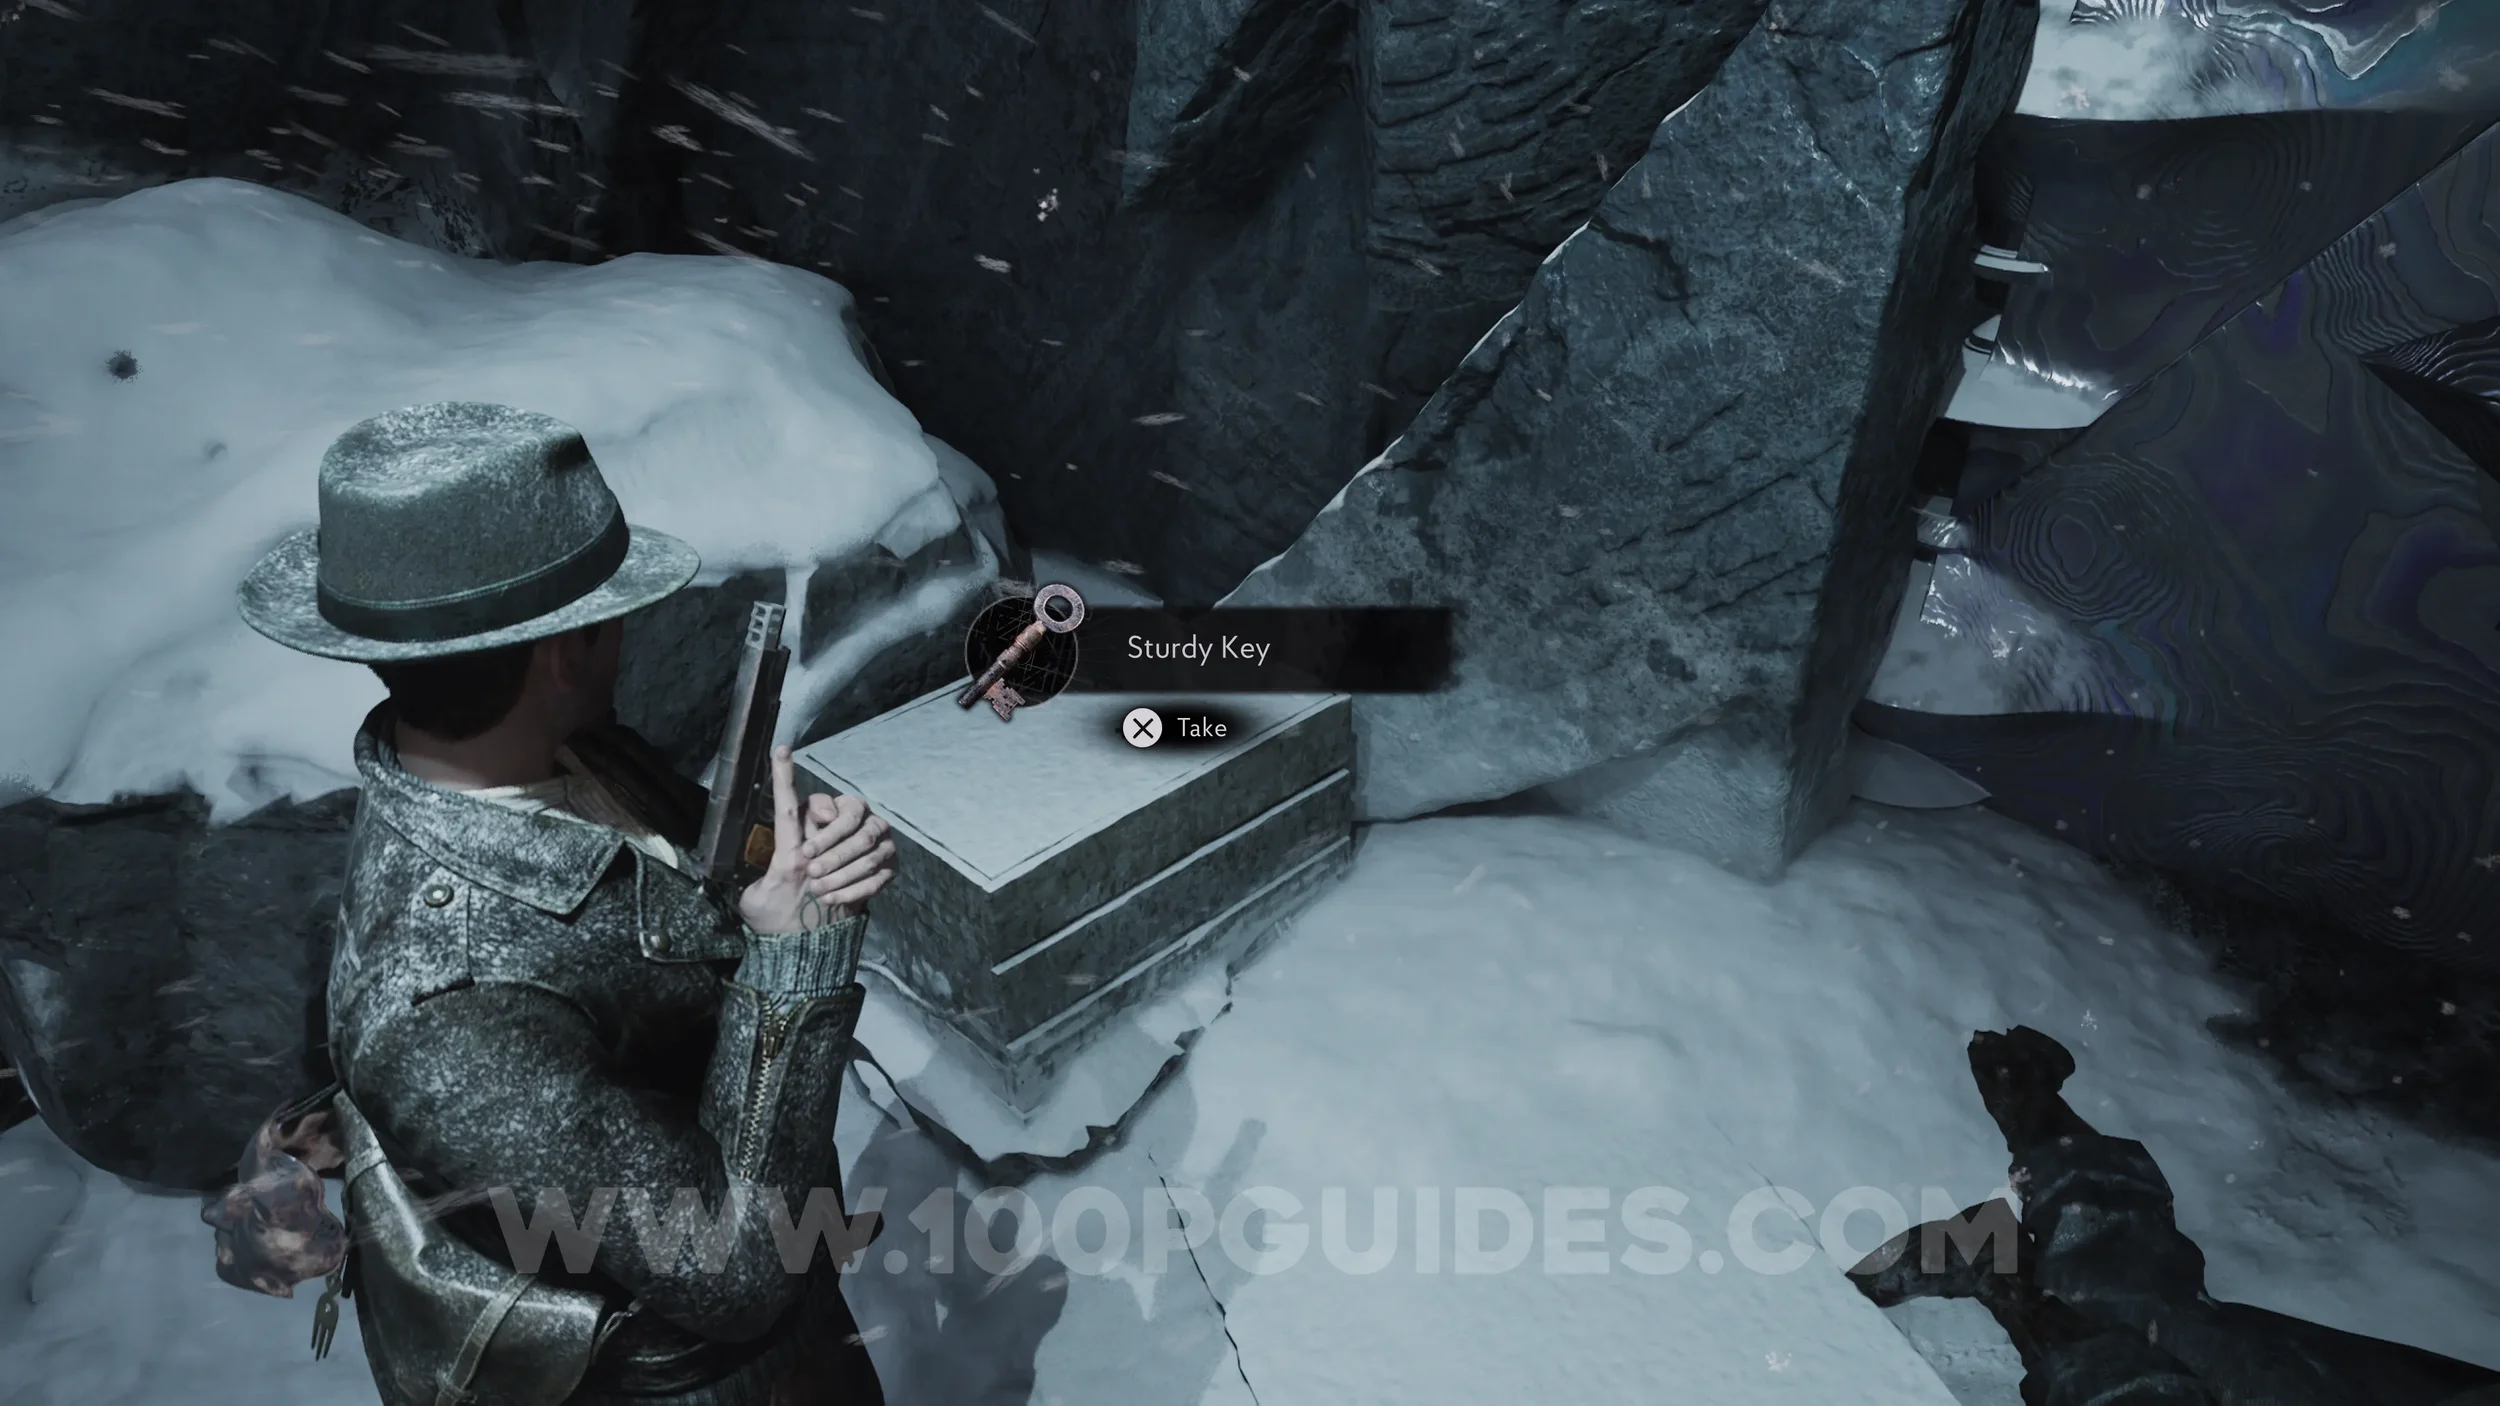
Key Item: Sturdy Key. In the same location as the previous collectible.
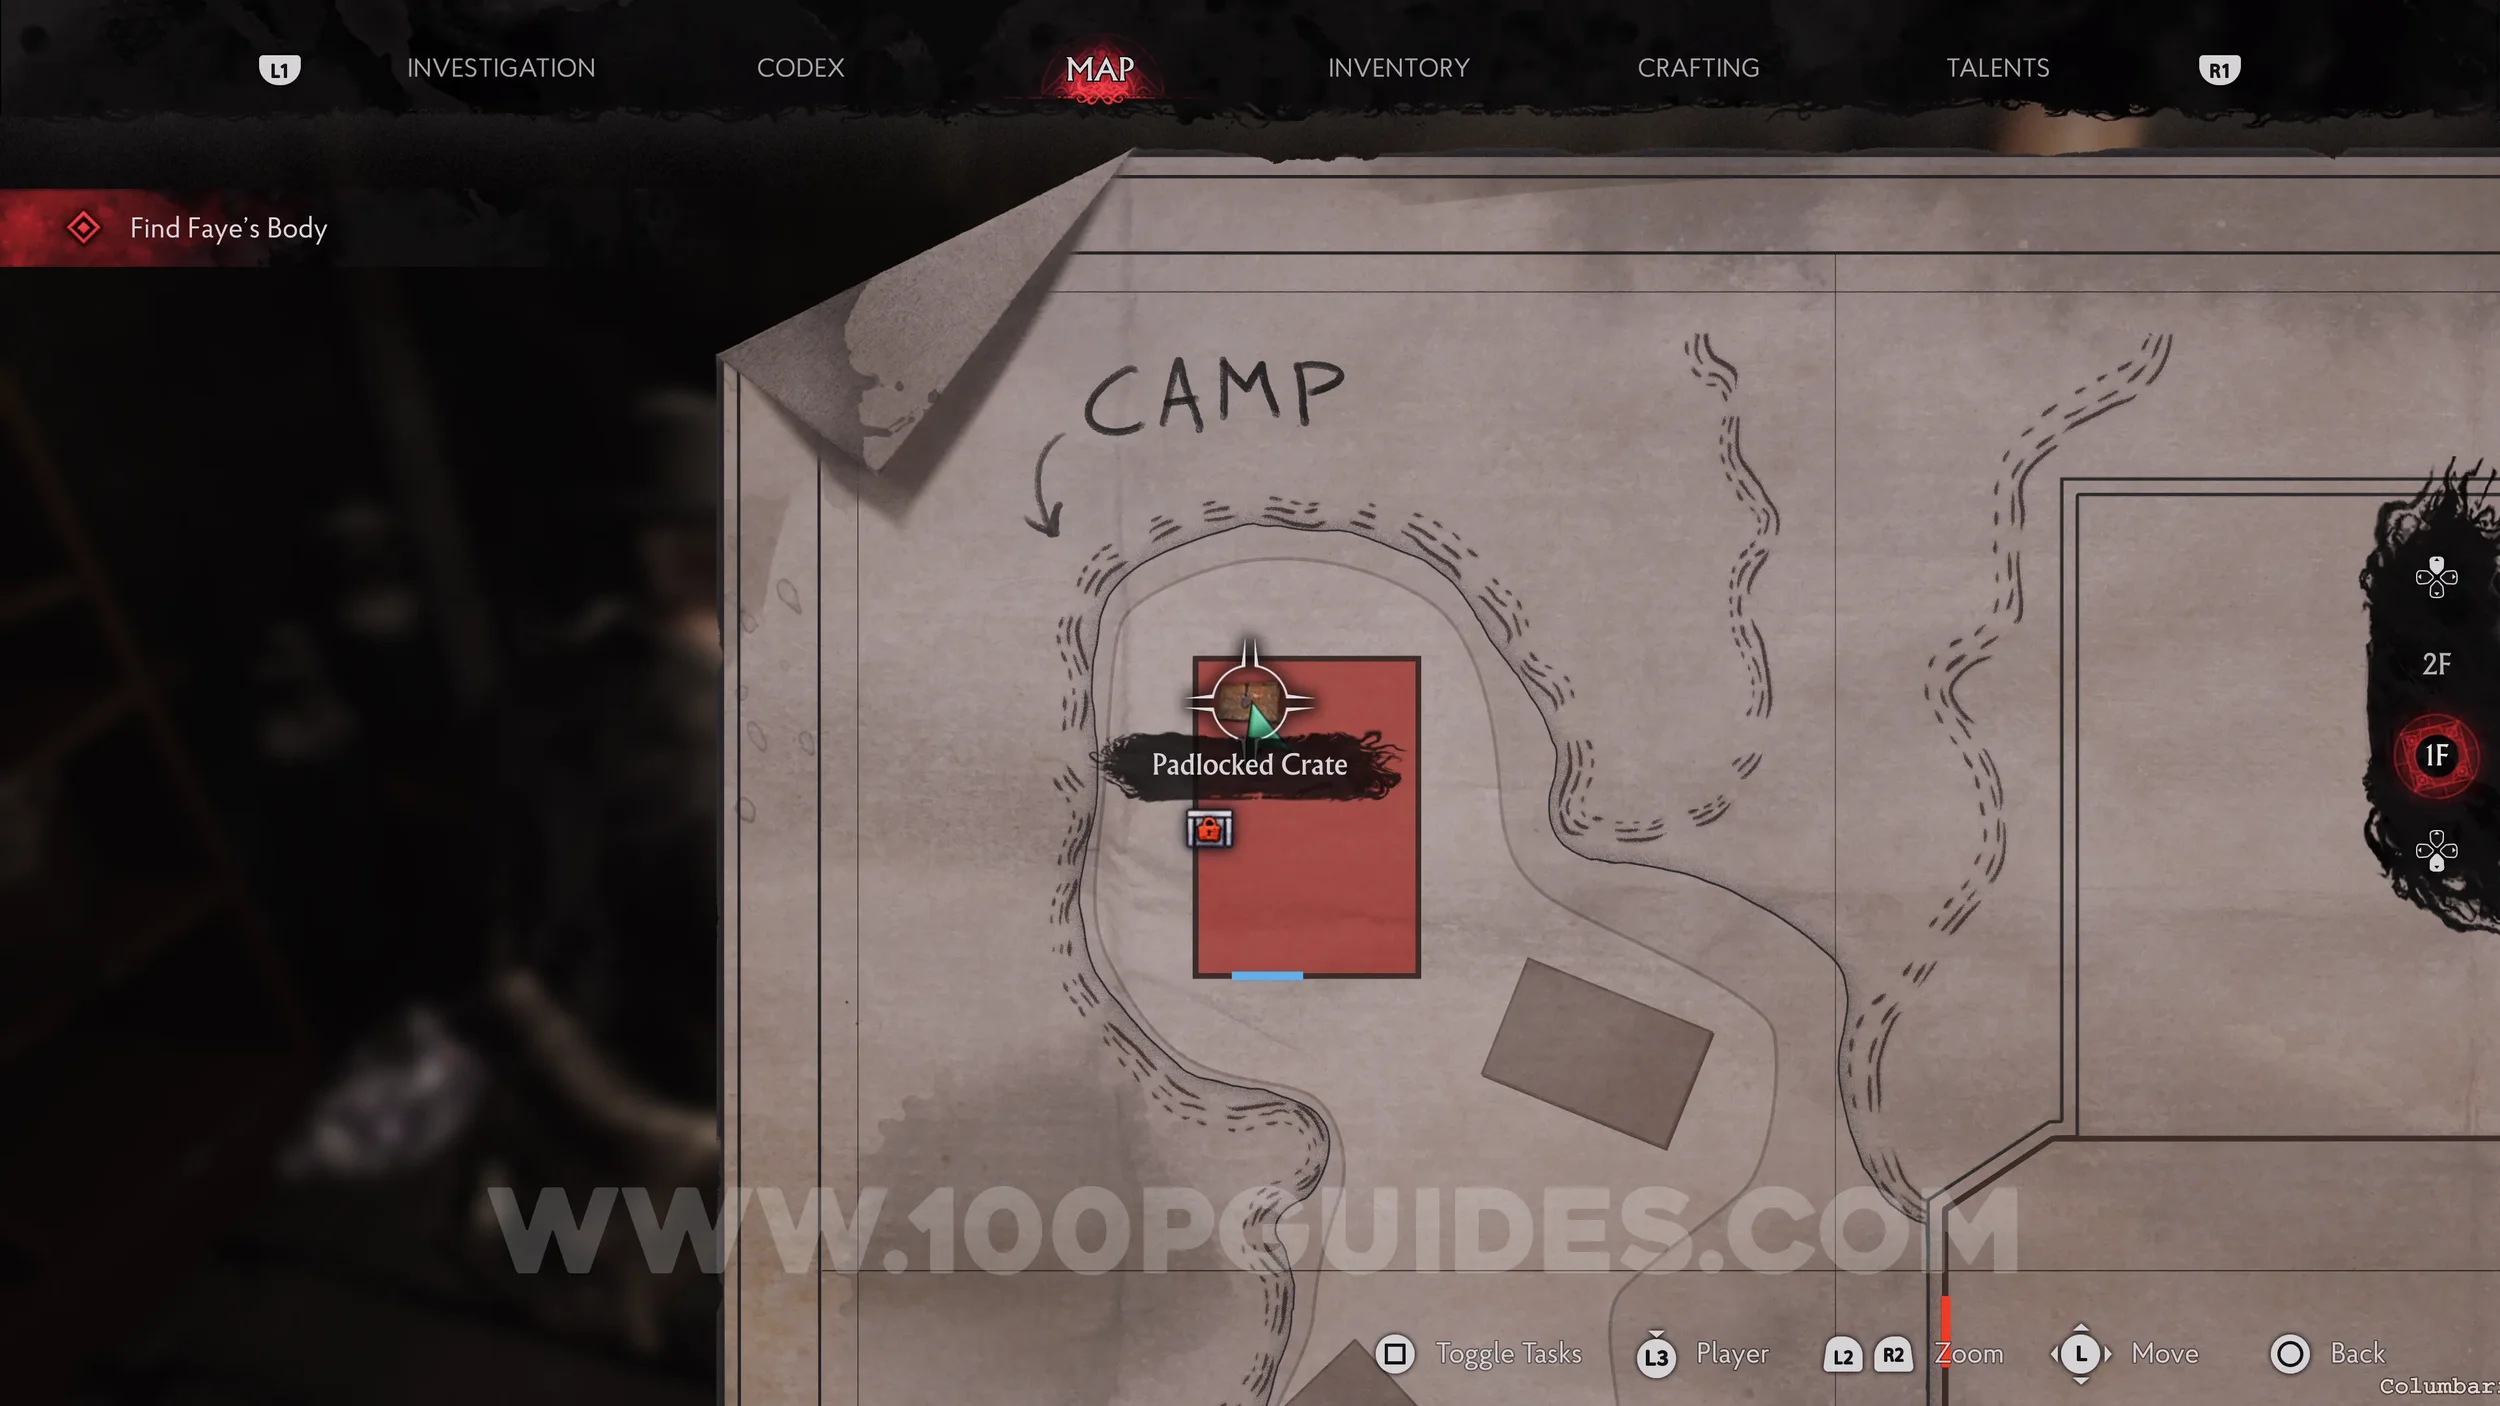
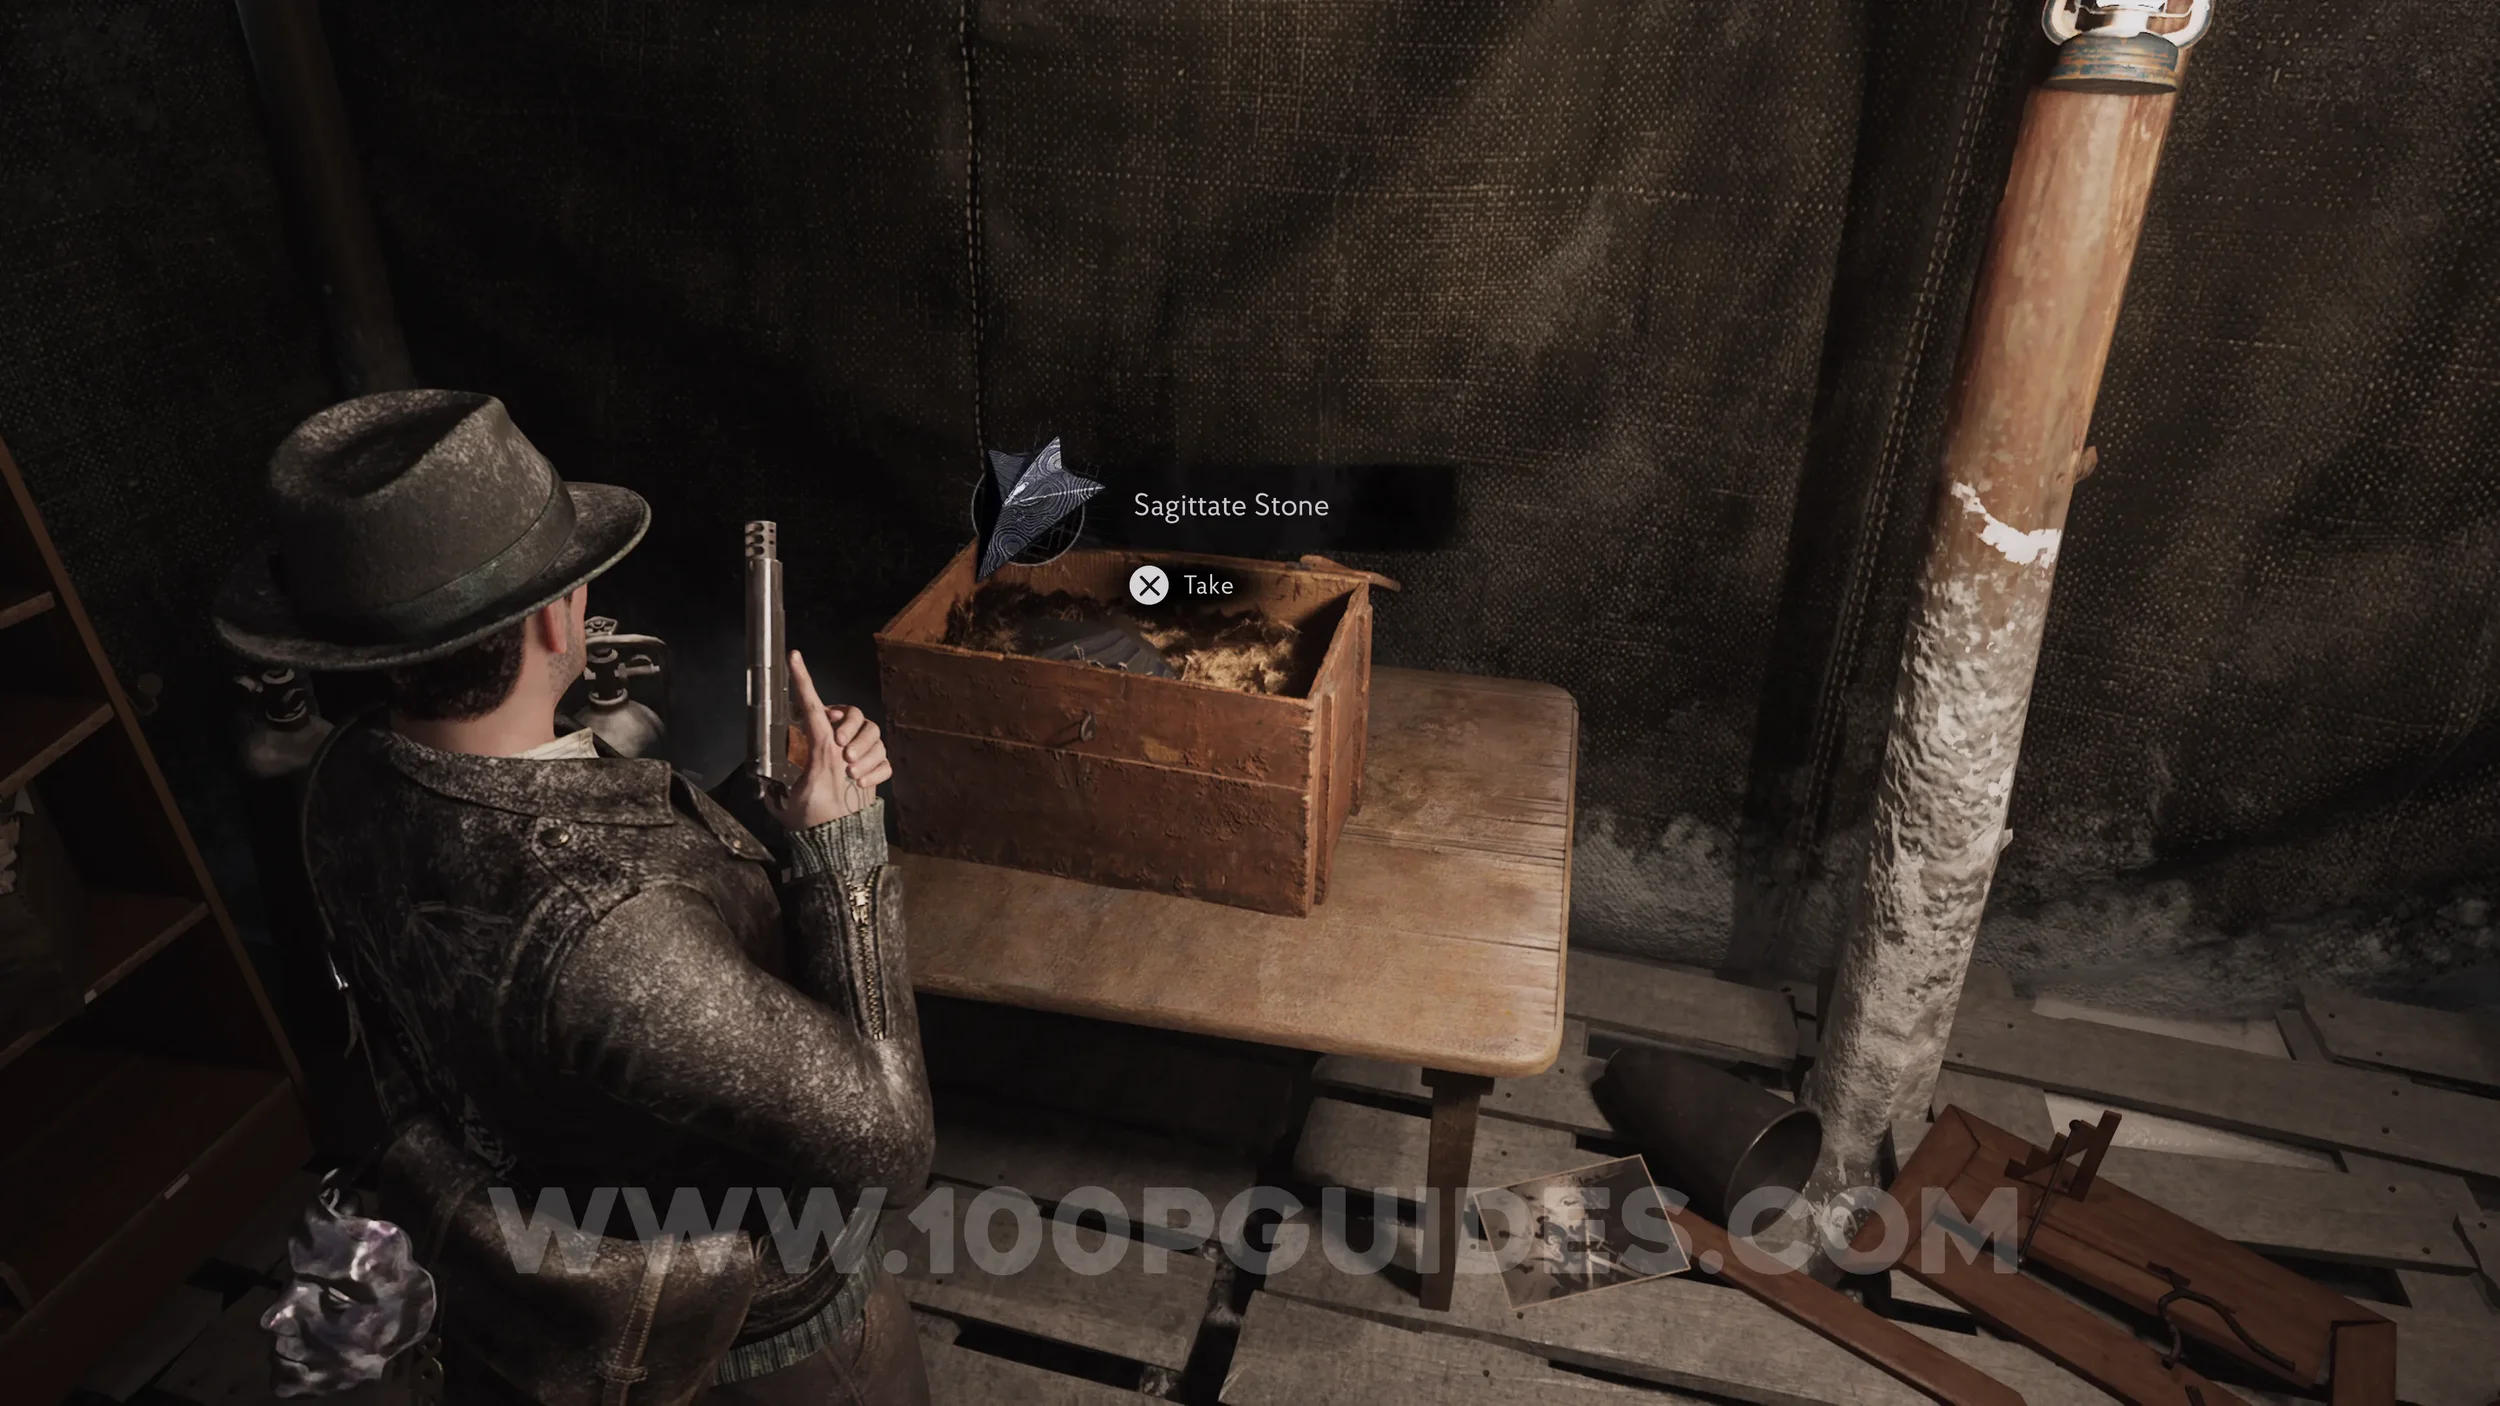
Key Item: Sagittate Stone. Use the Sturdy Key to unlock the chest in the large tent.
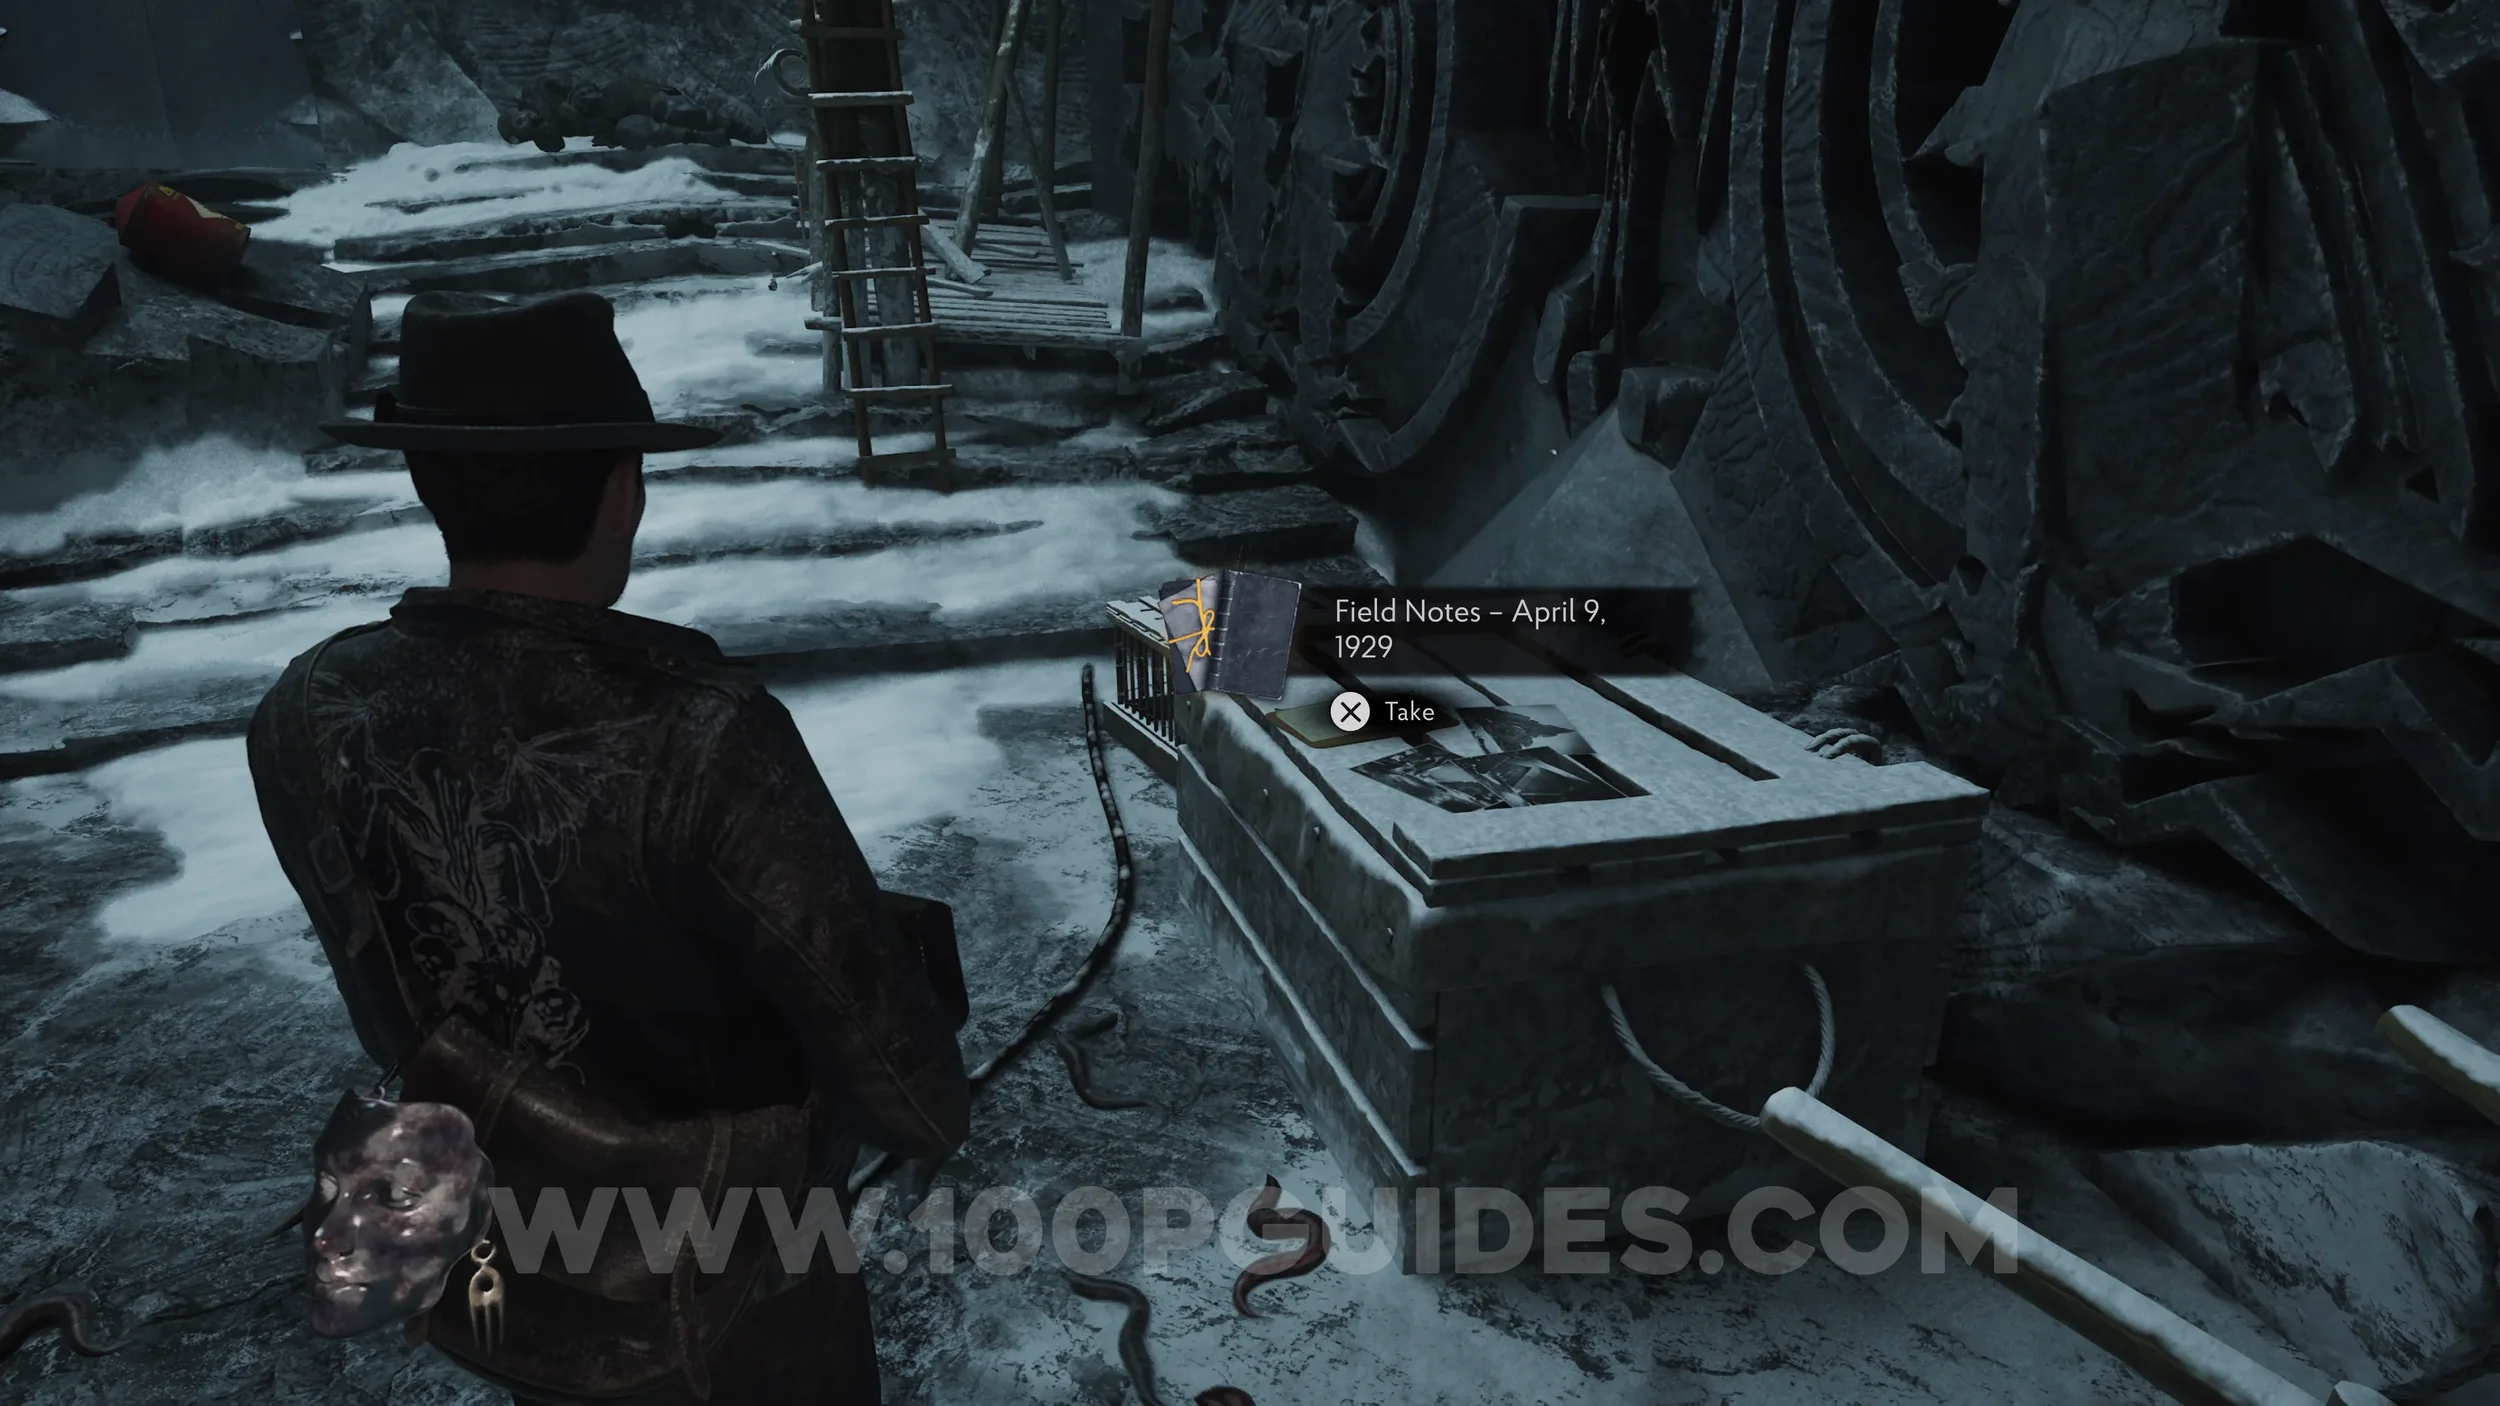
Lore Codex: Field Notes - April 9, 1929. Use the Sagittate Stone to open the strange door to the southeast of the camp, then head inside to find the codex on a box to the left.
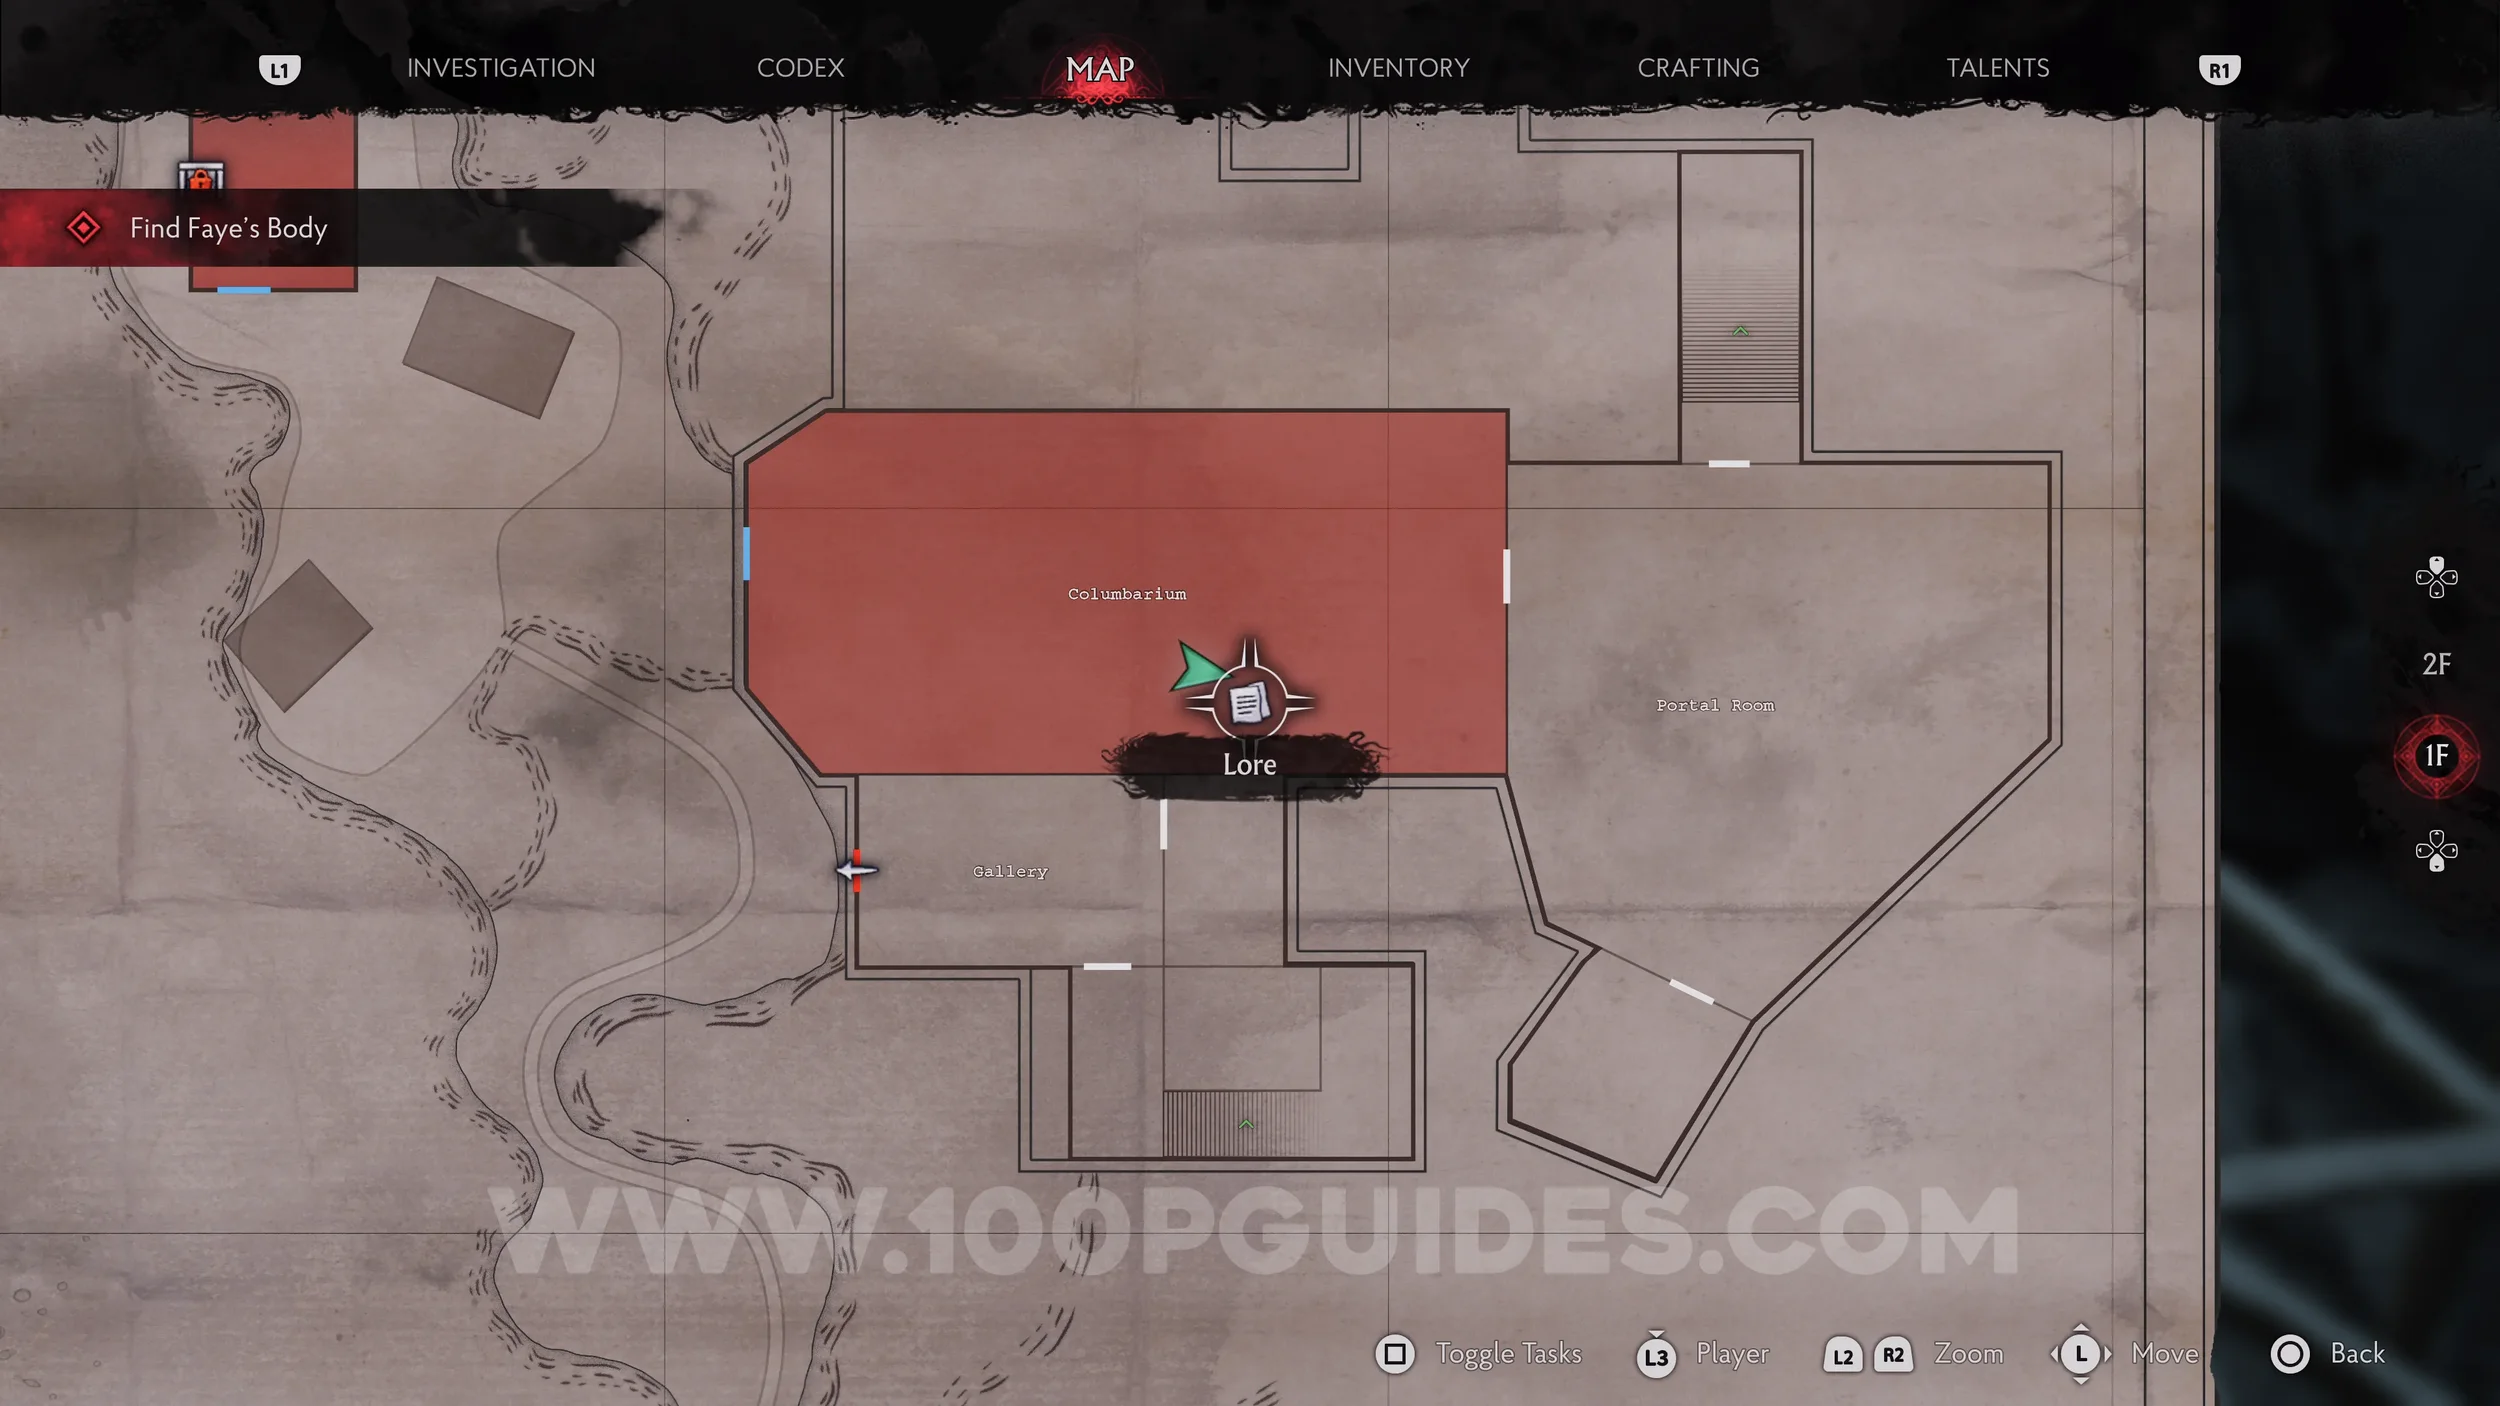
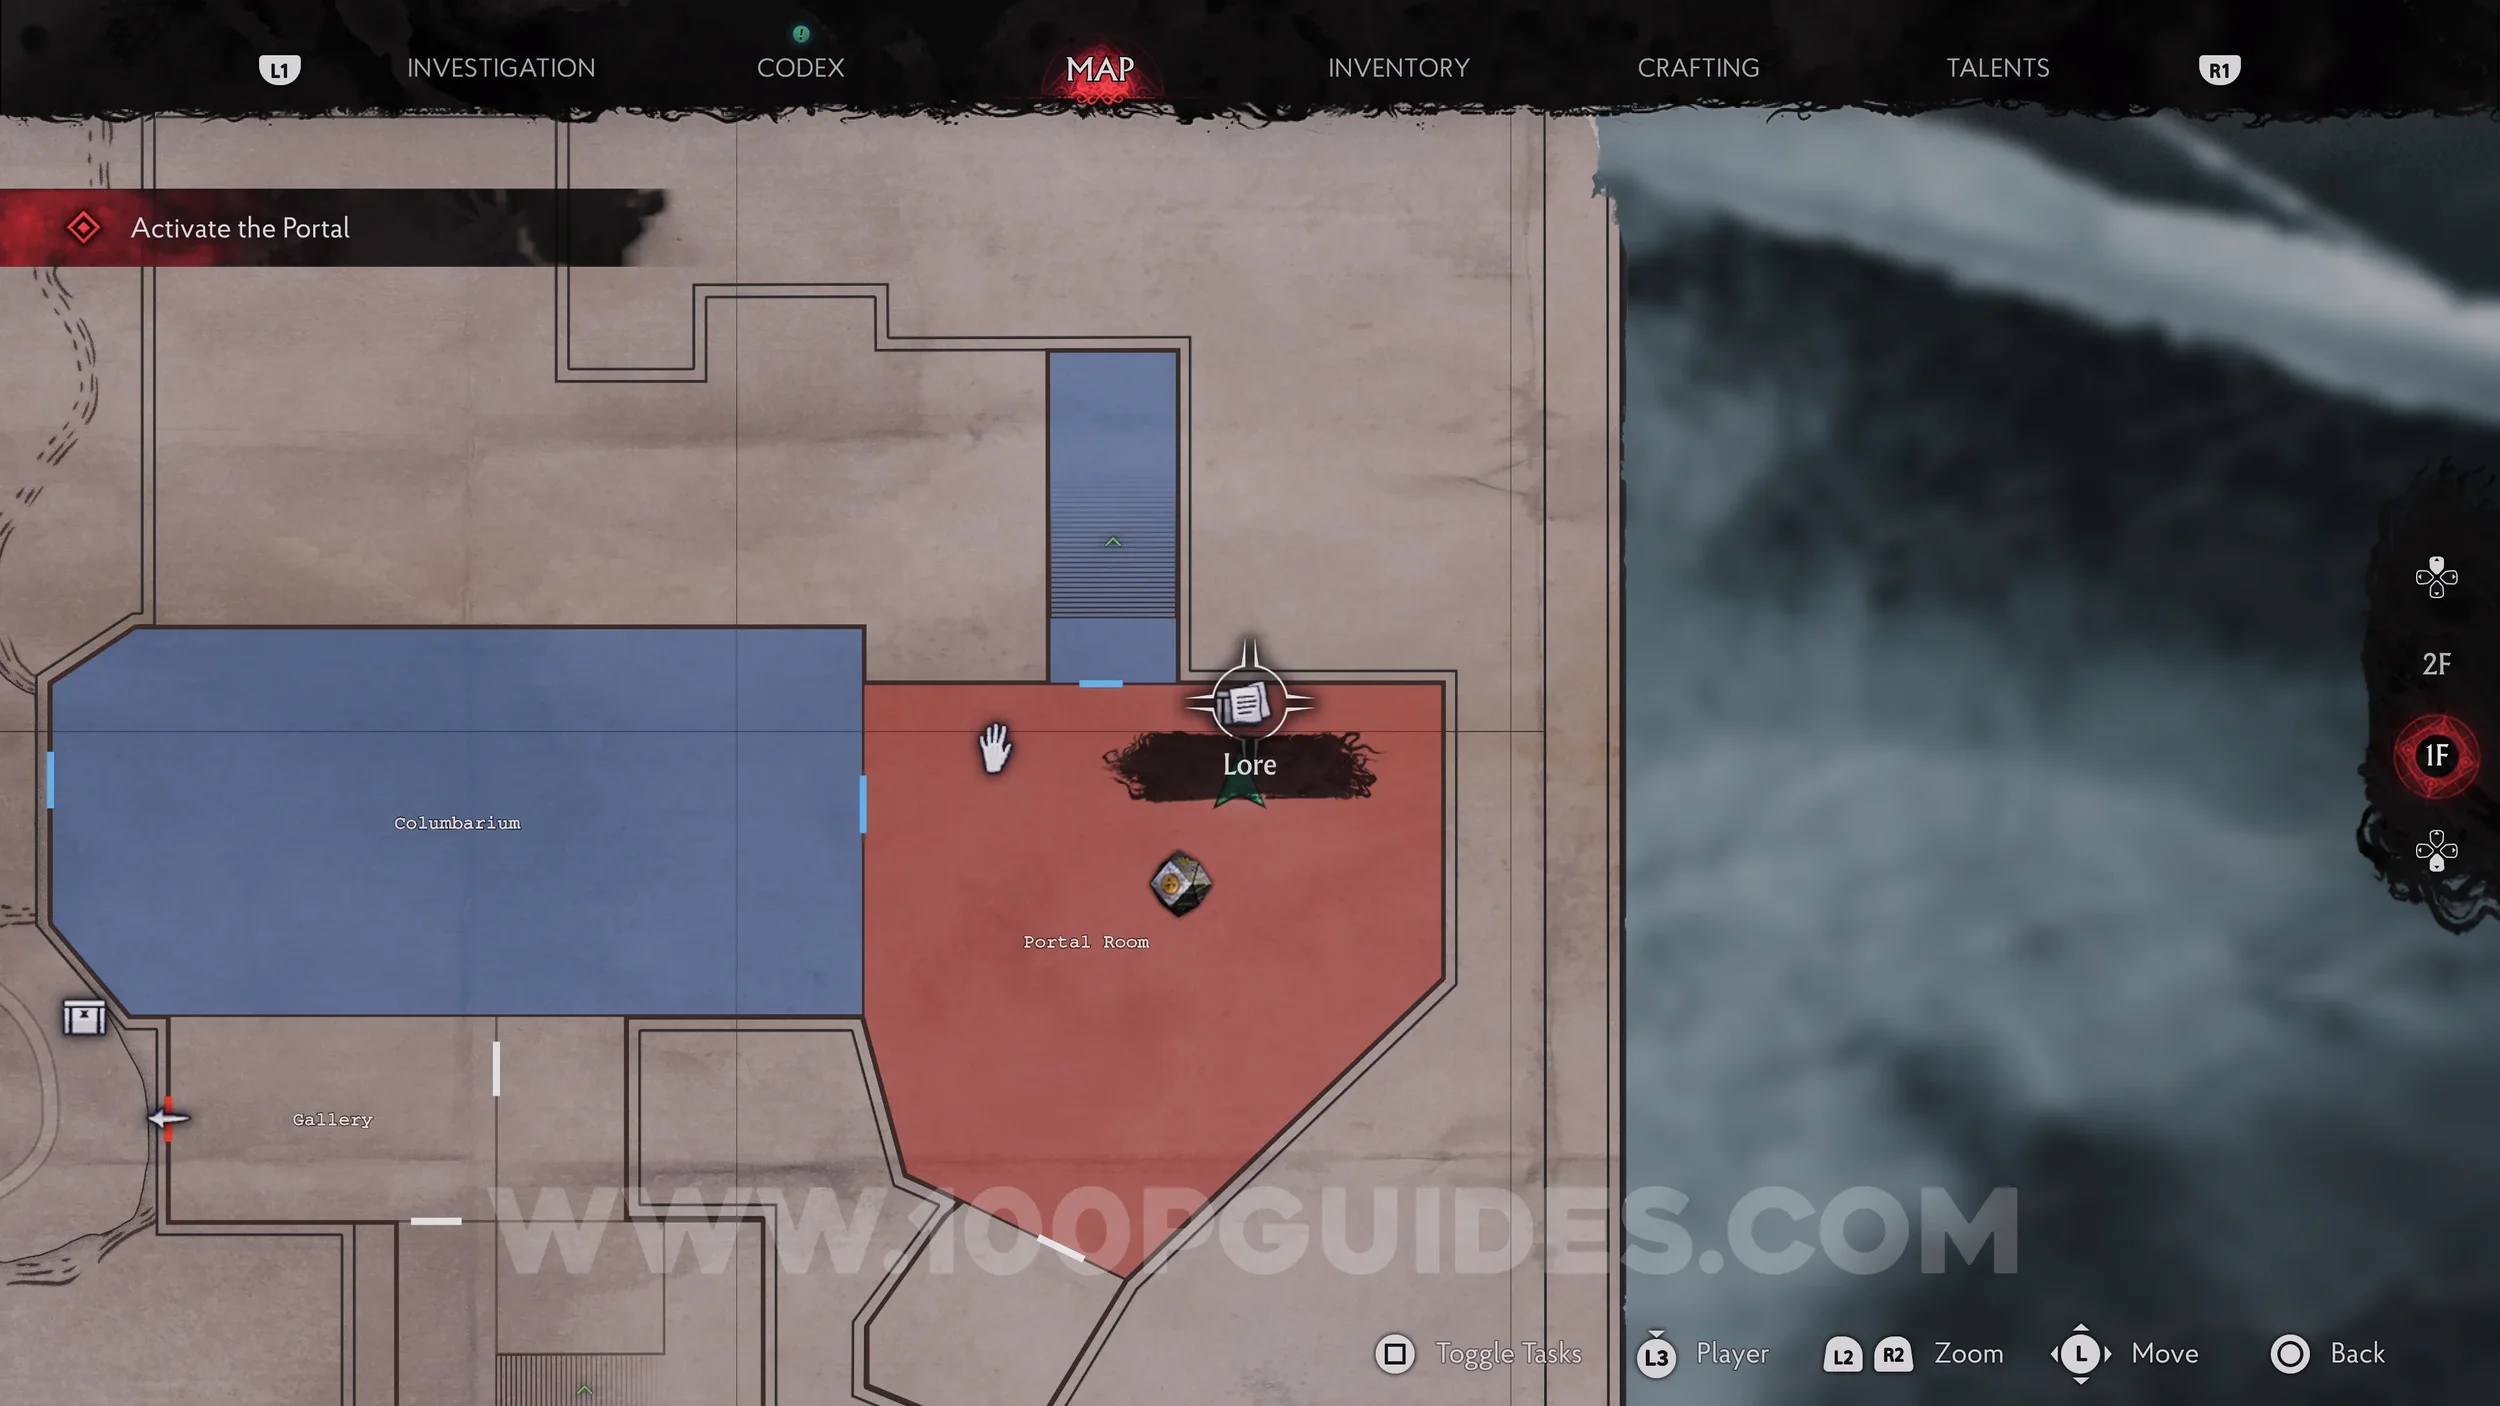
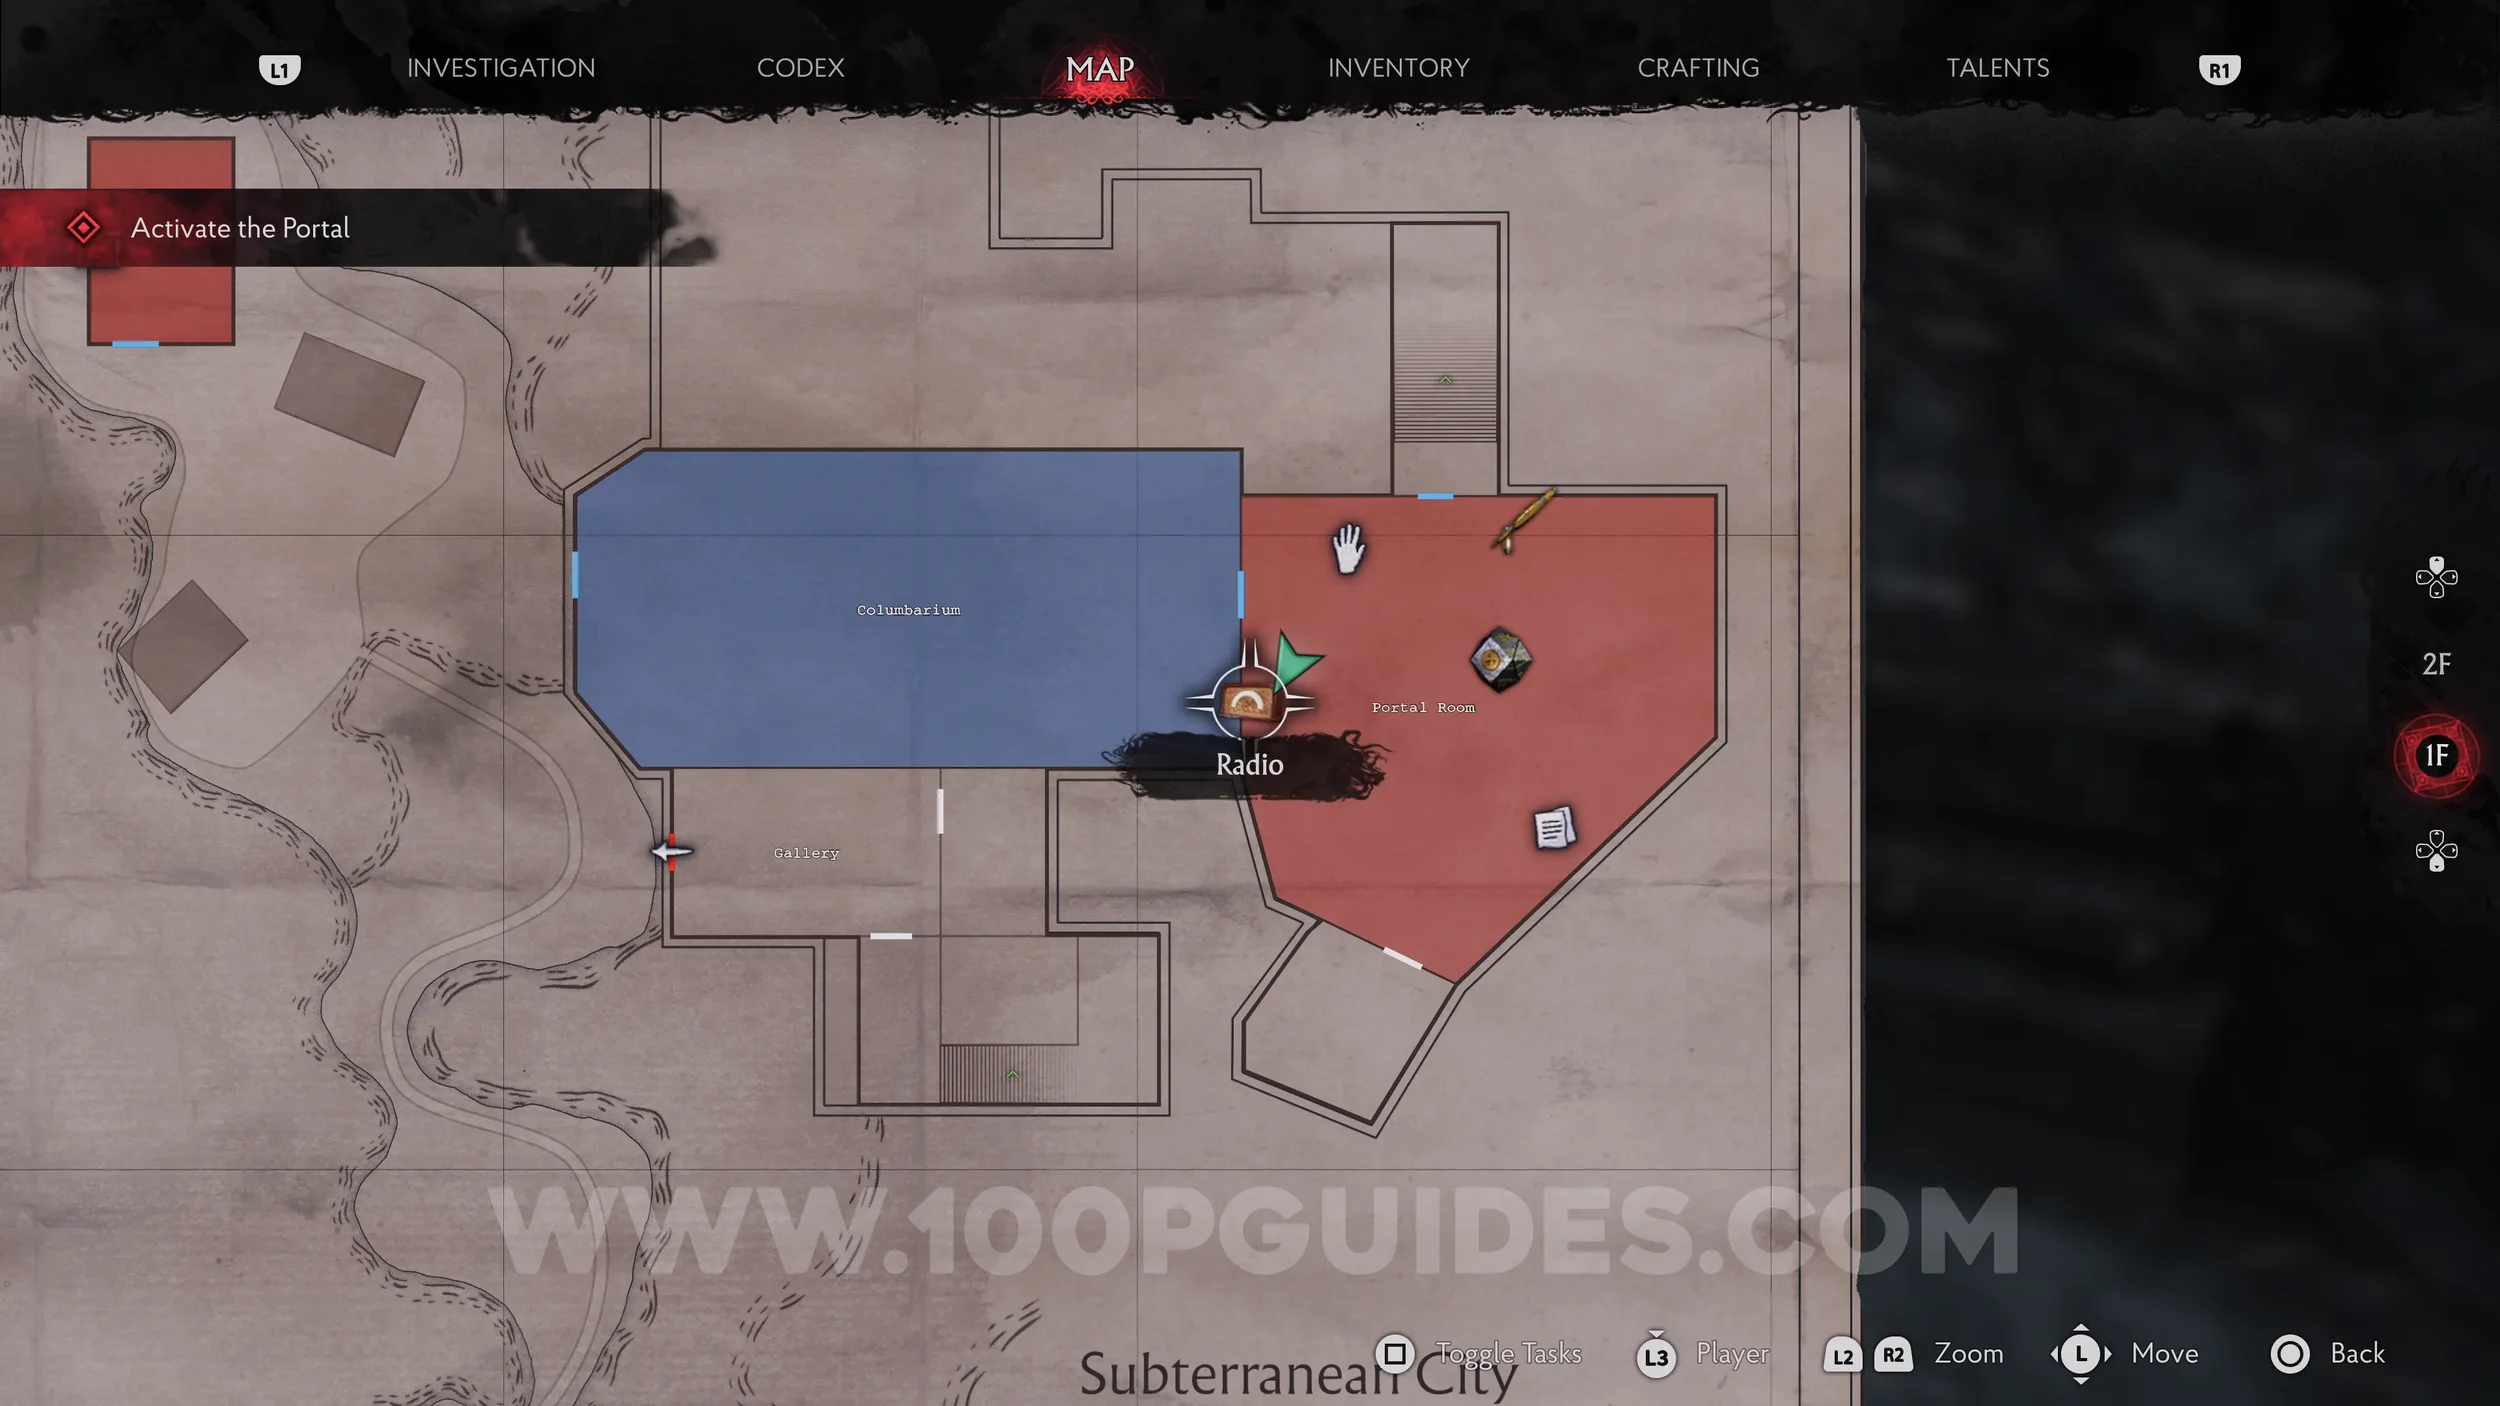
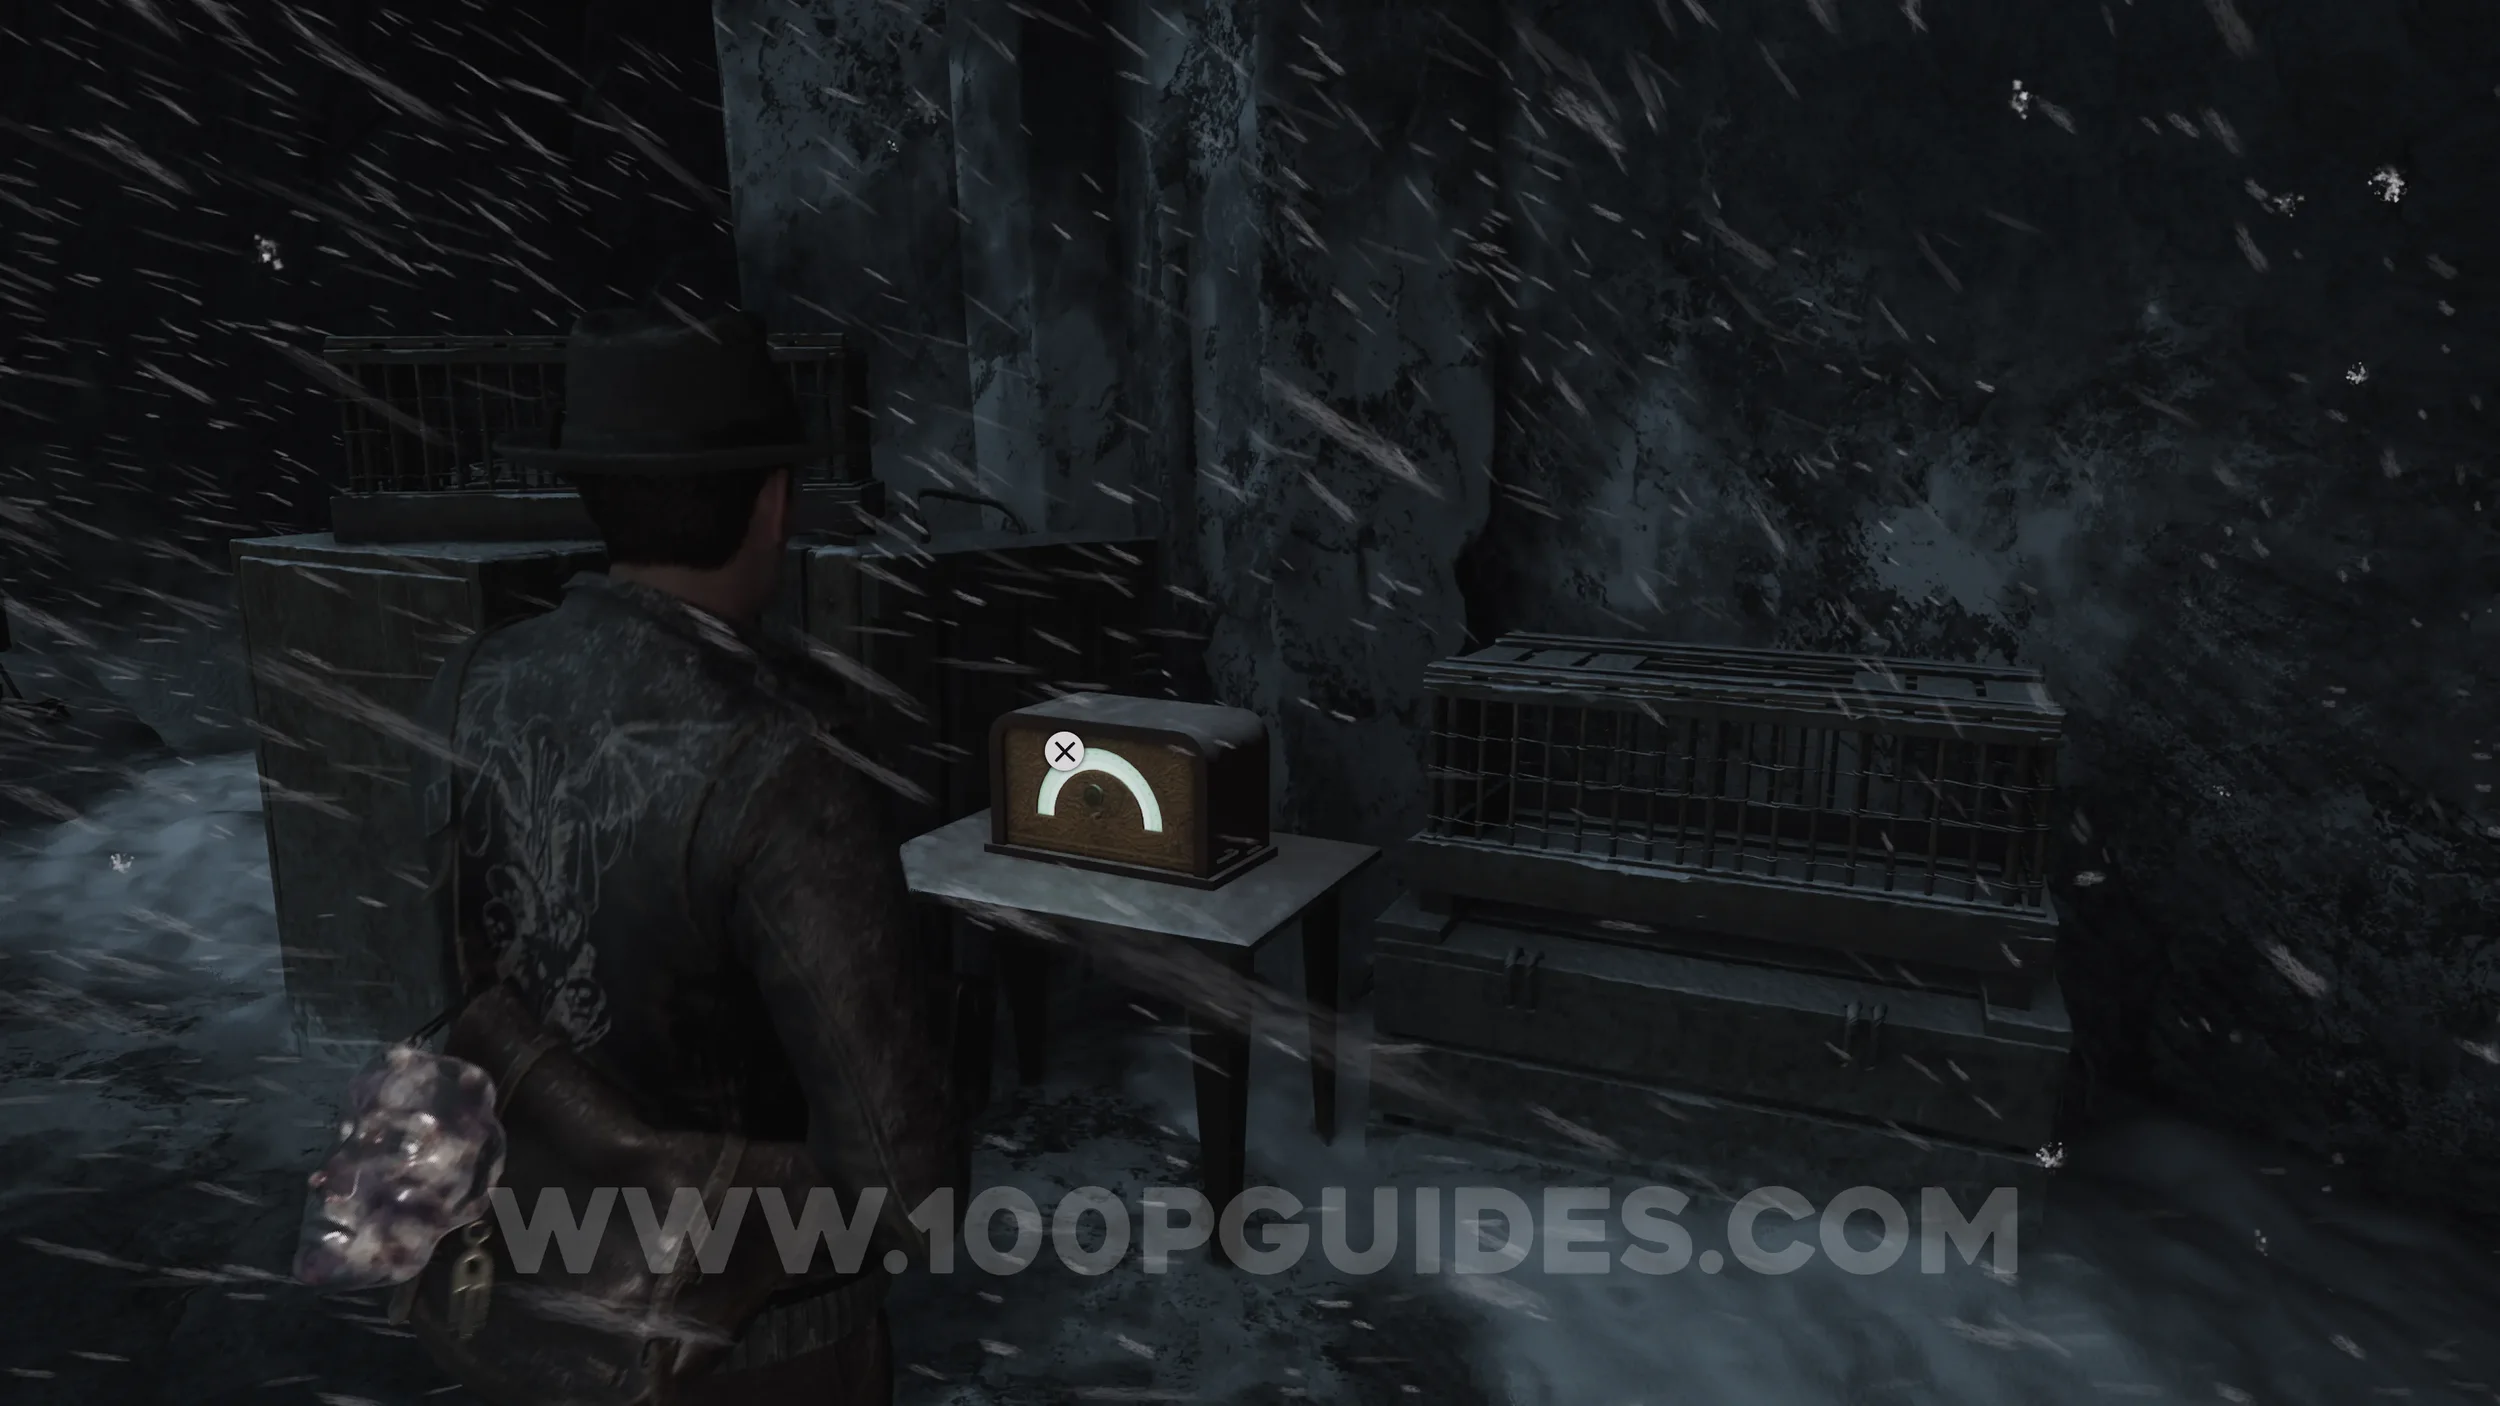
Radio: The Path. Go through to the Portal Room to the east, then look right to see the final Radio.
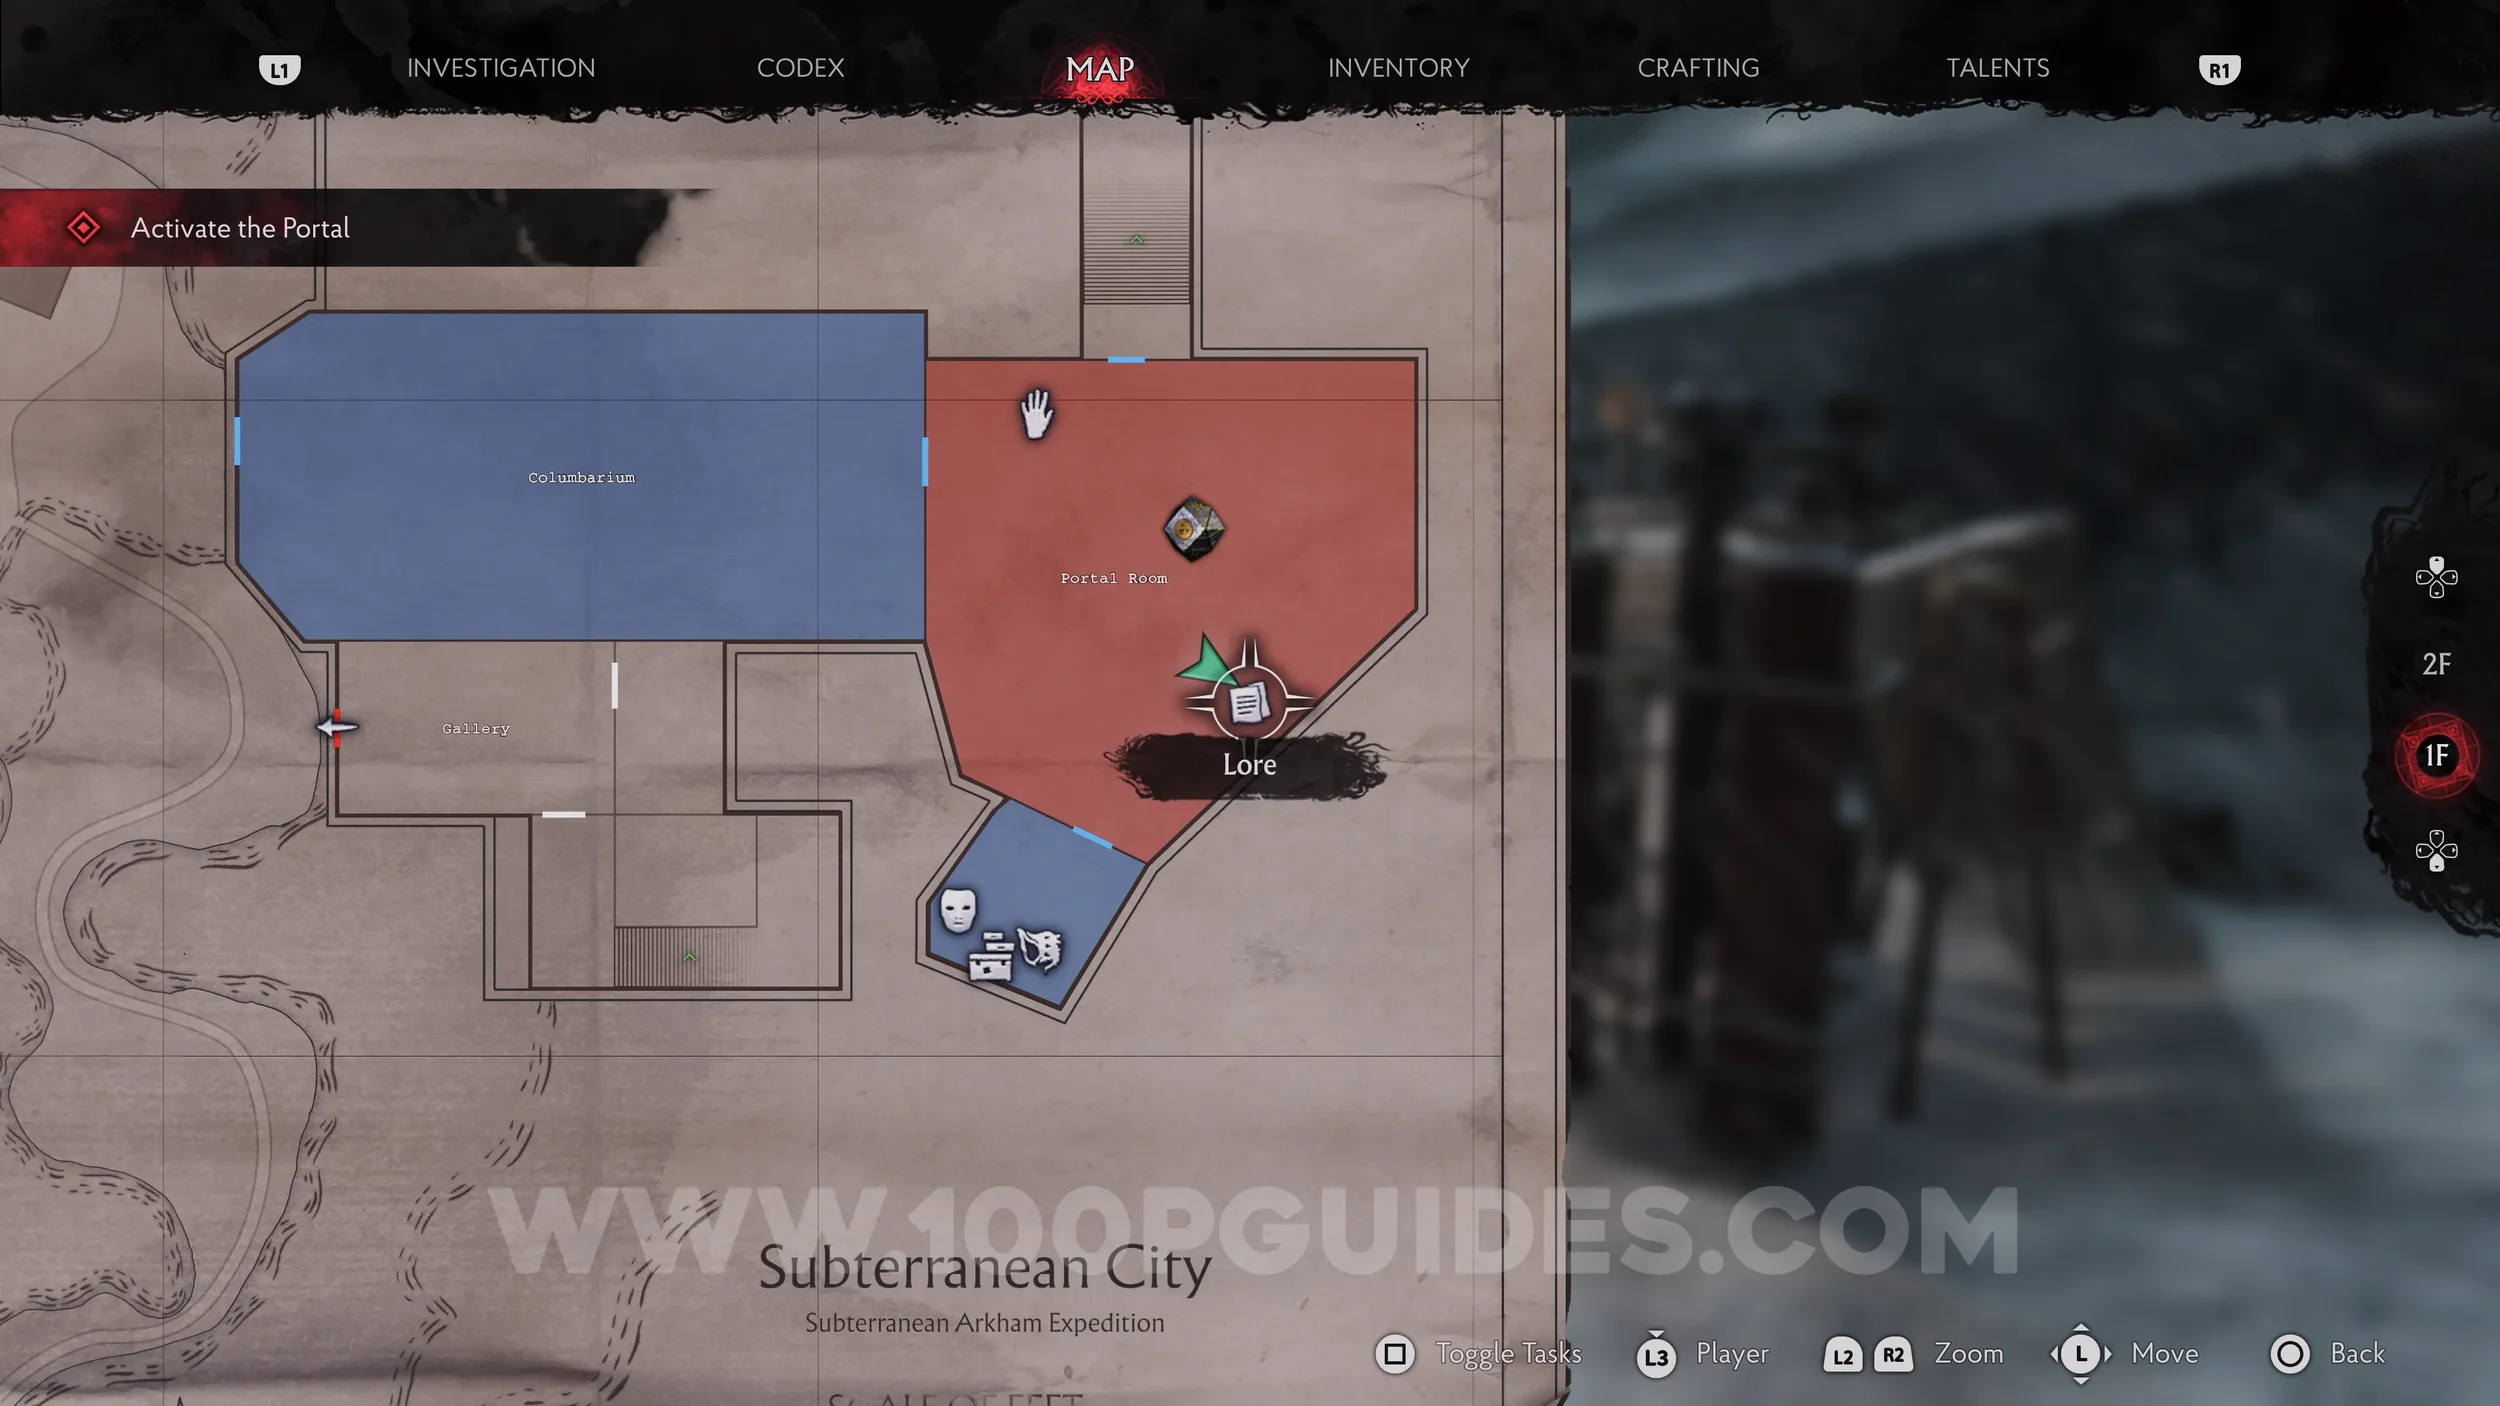
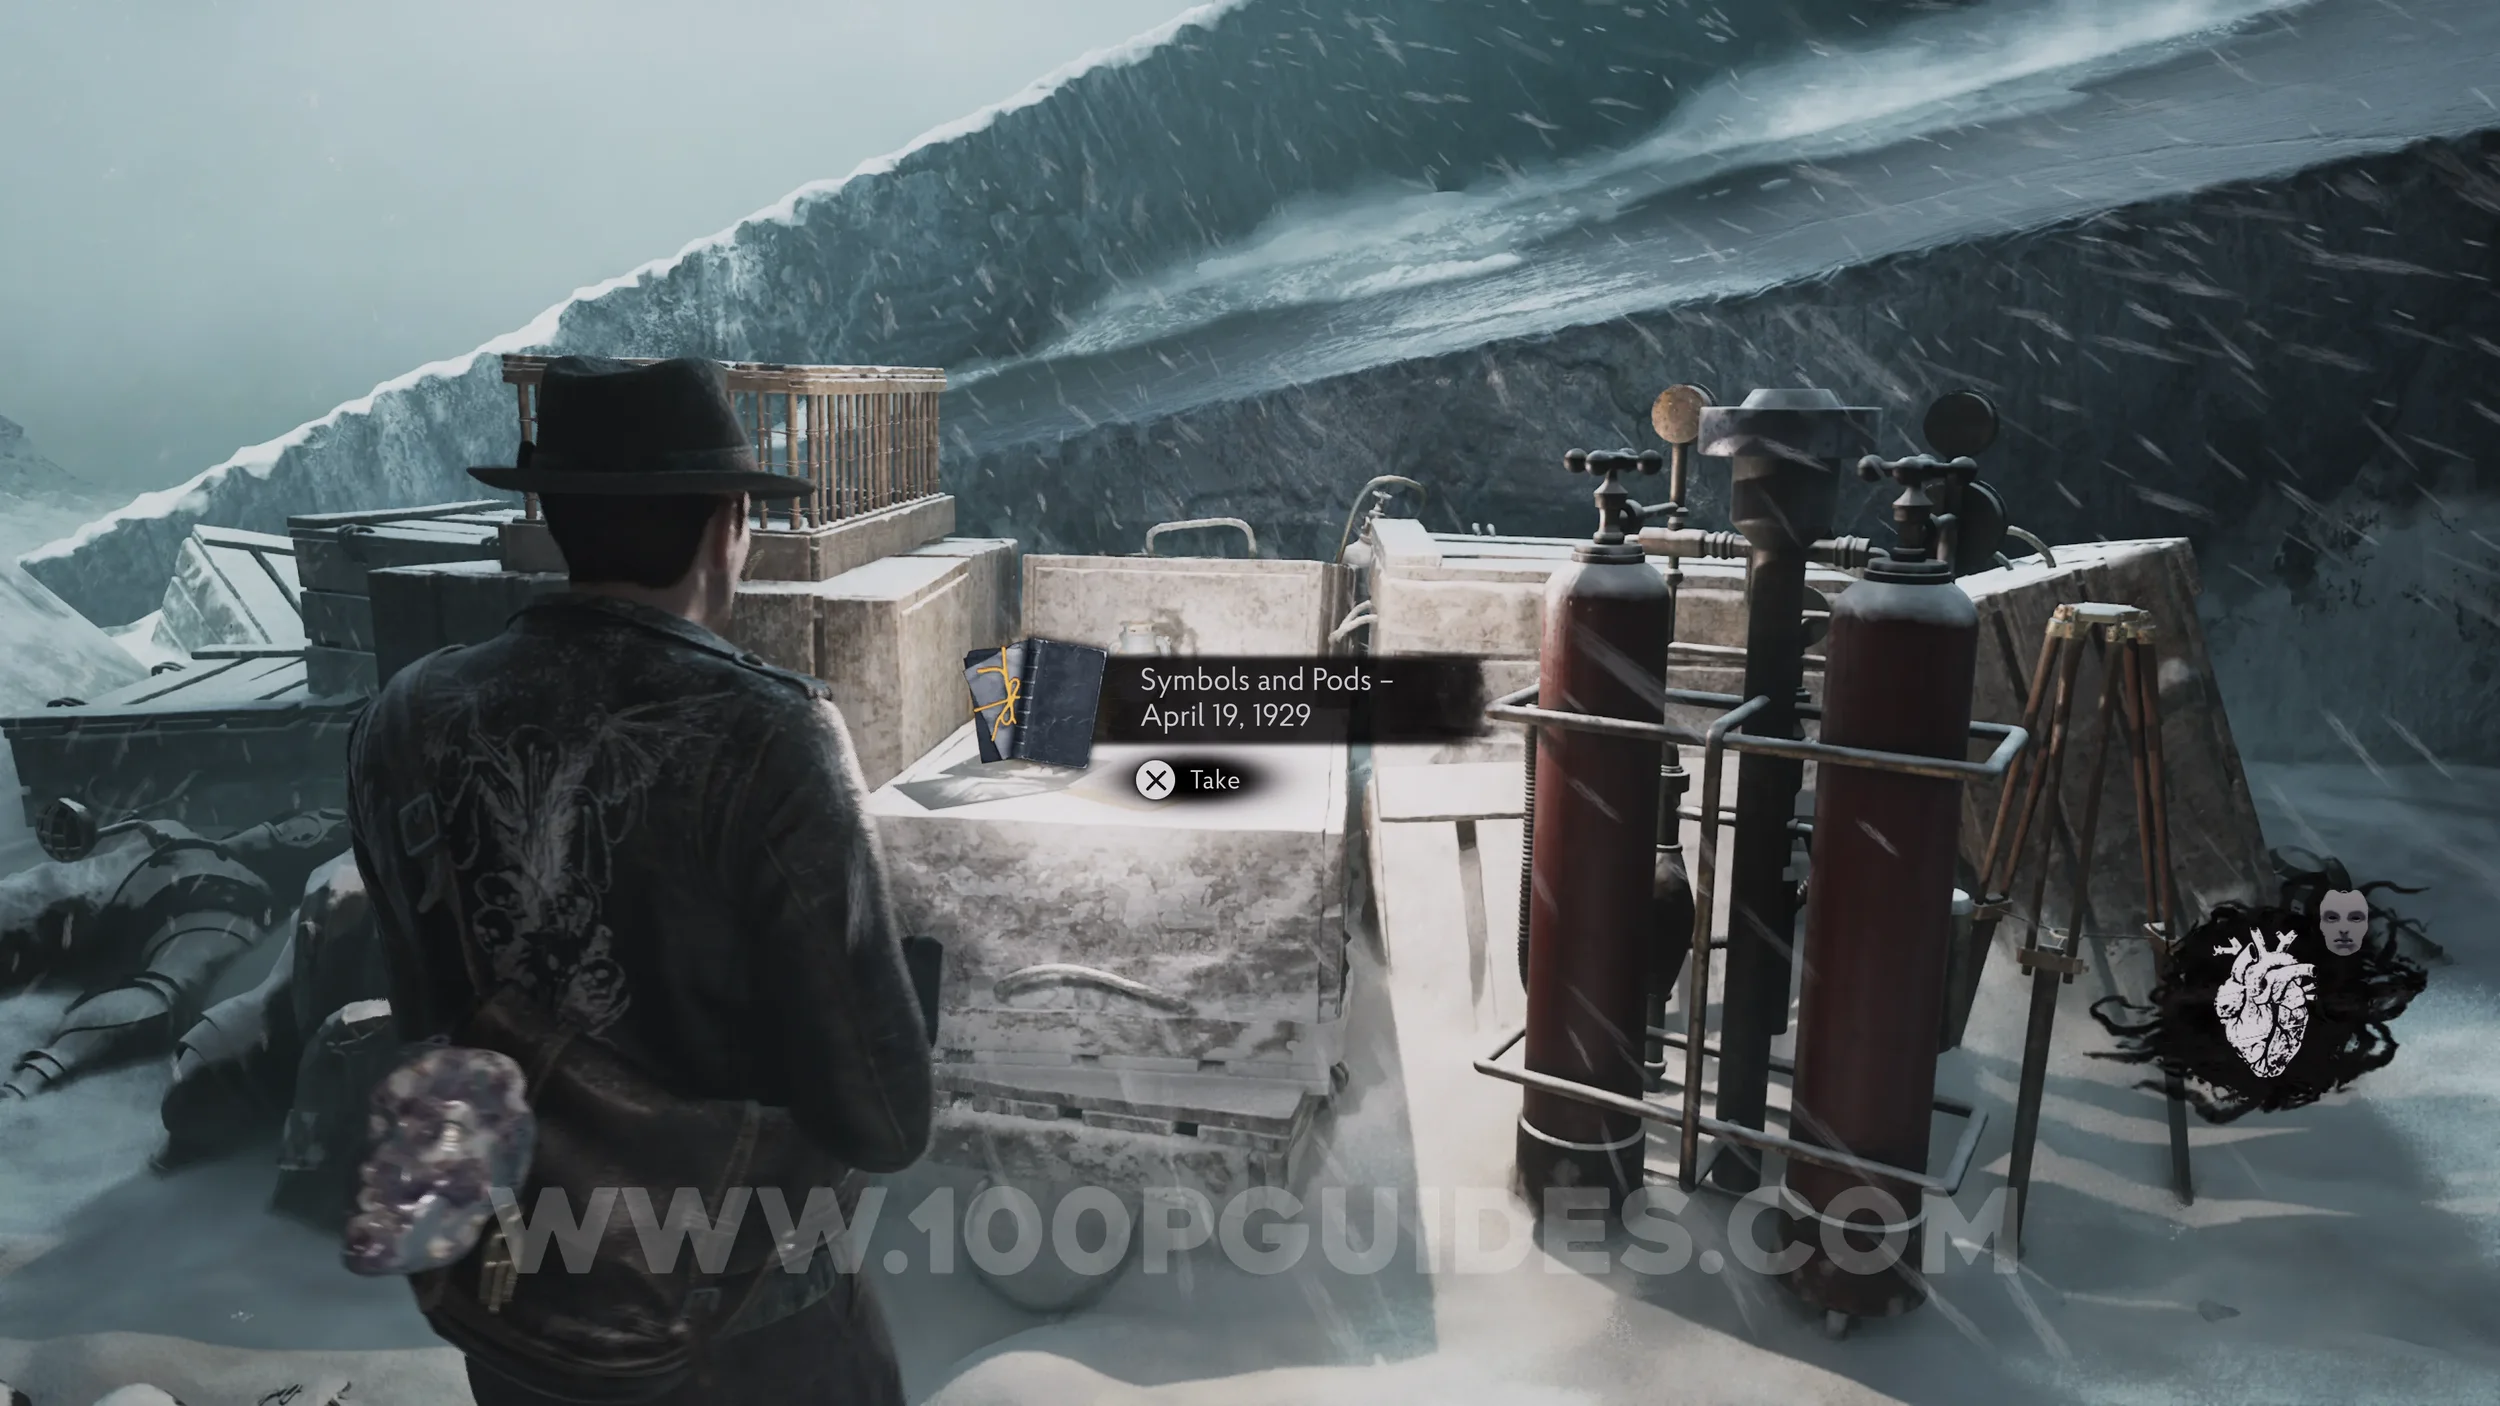
Lore Codex: Symbols and Pods - April 19, 1929. Also in the Portal Room. On a box to the southeast.
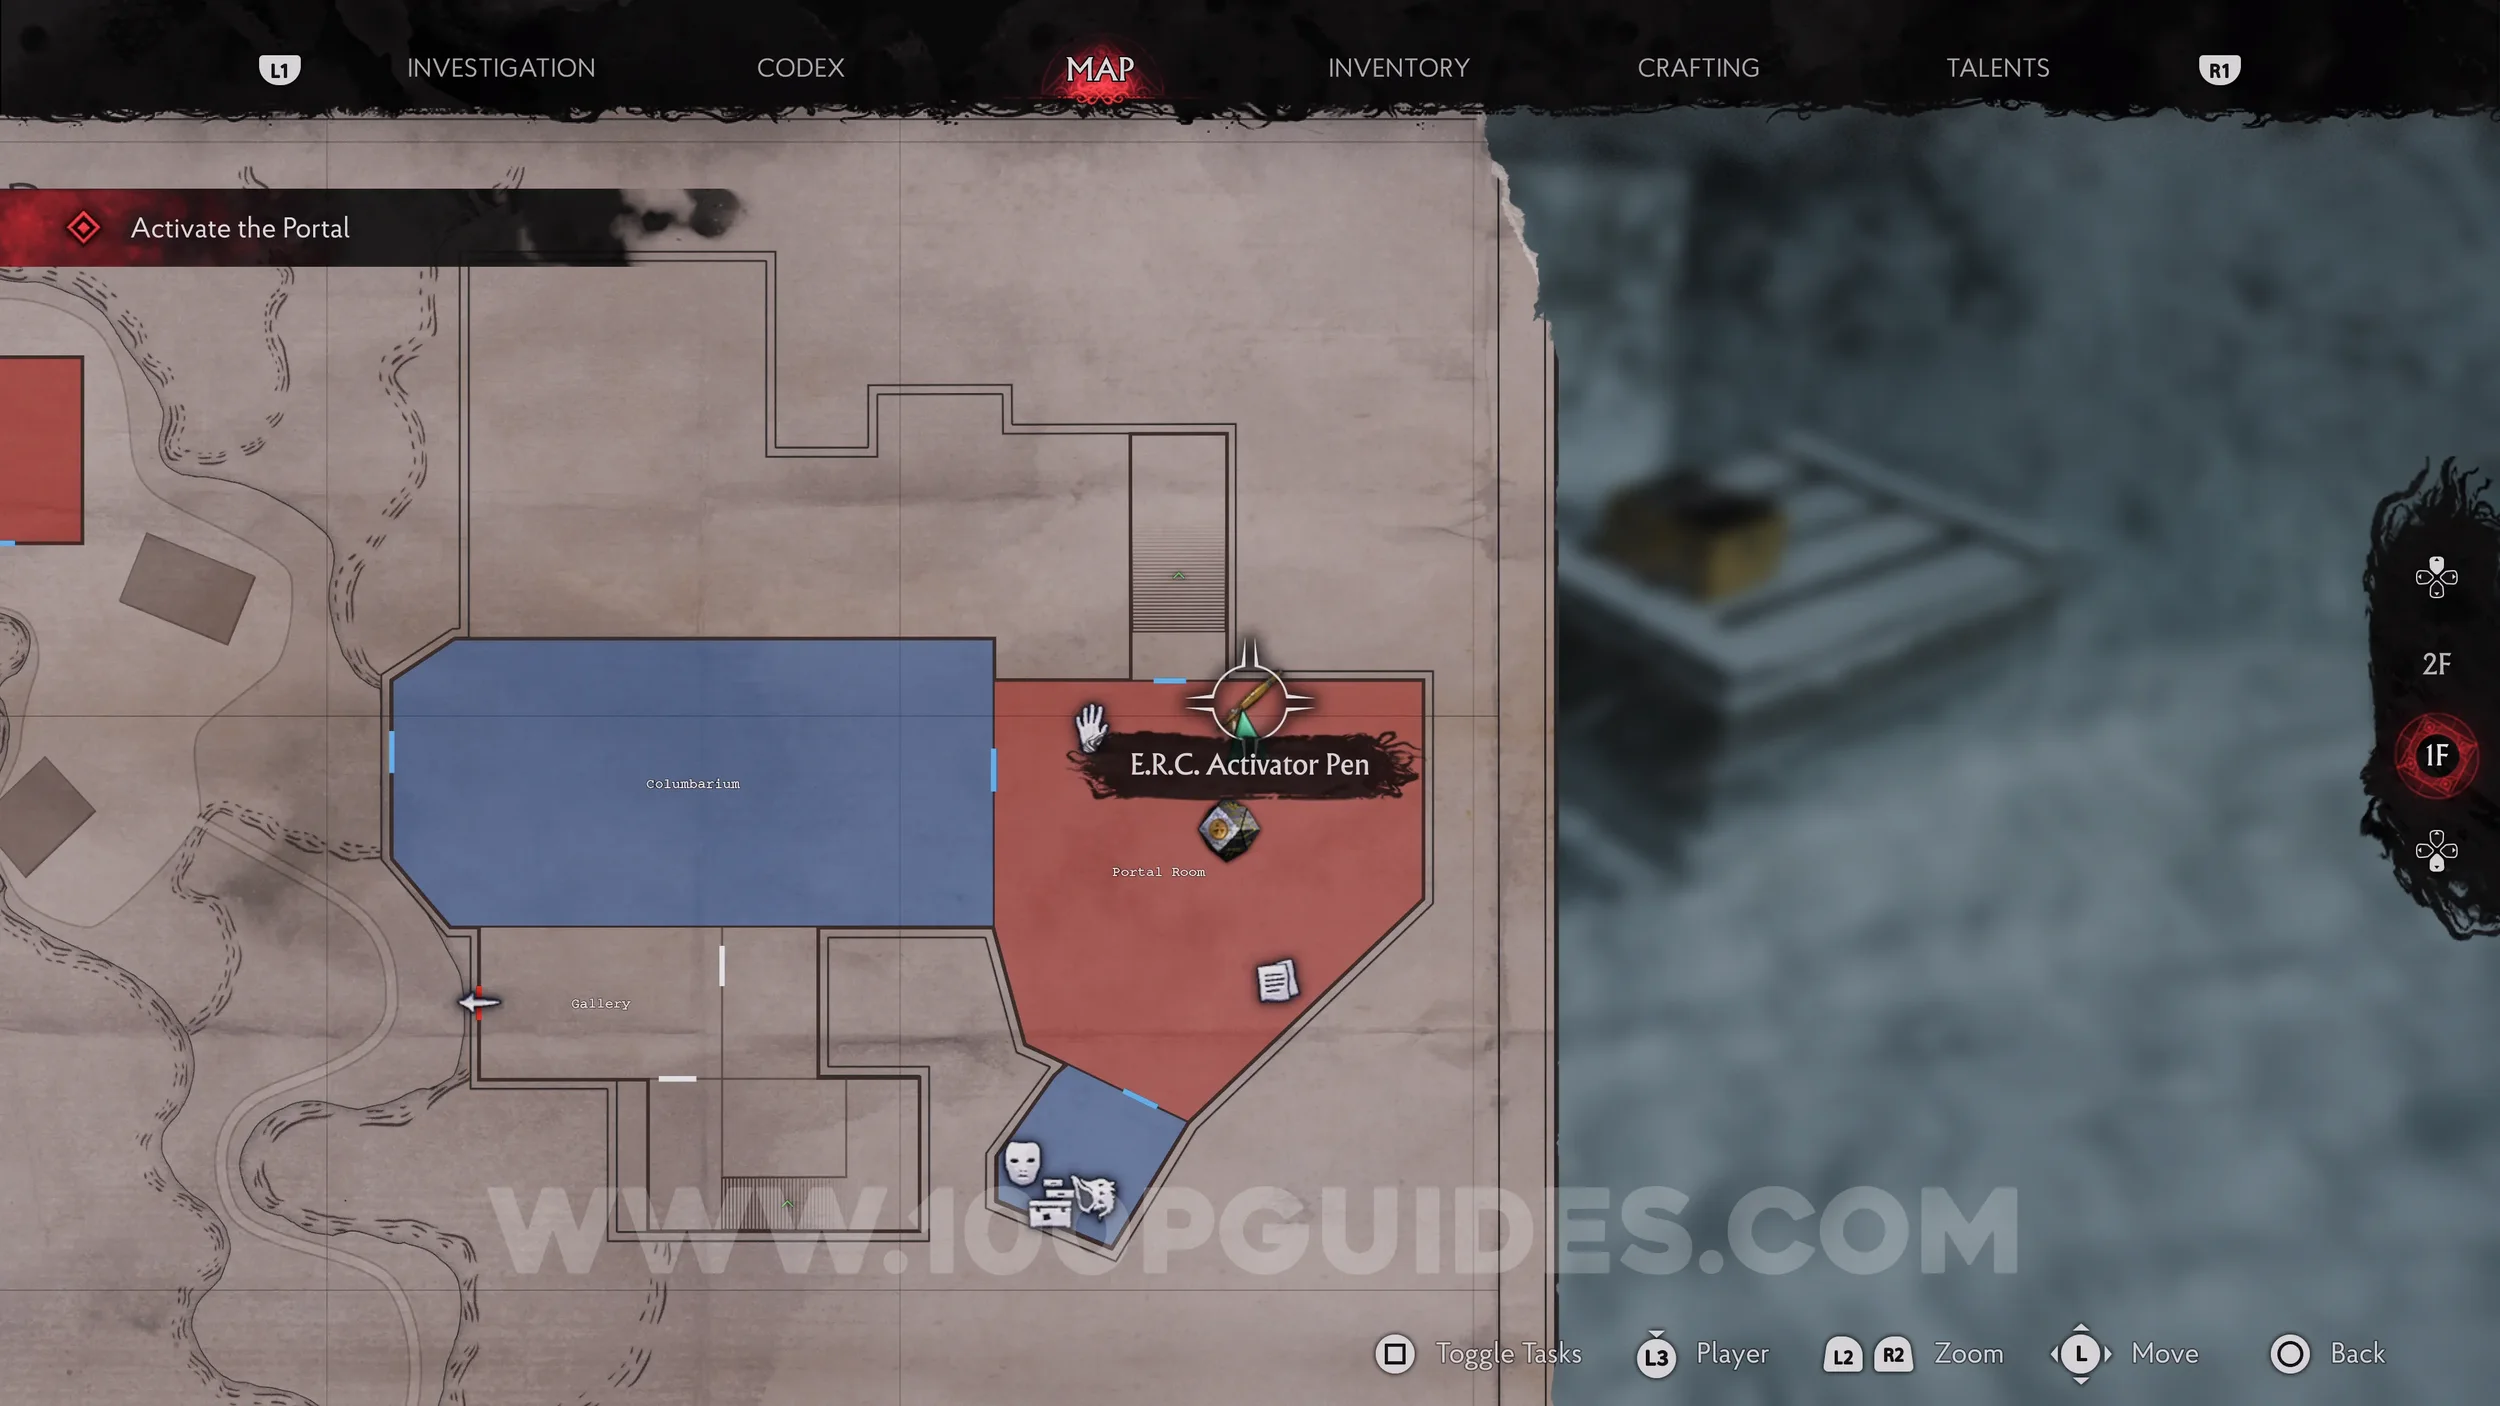
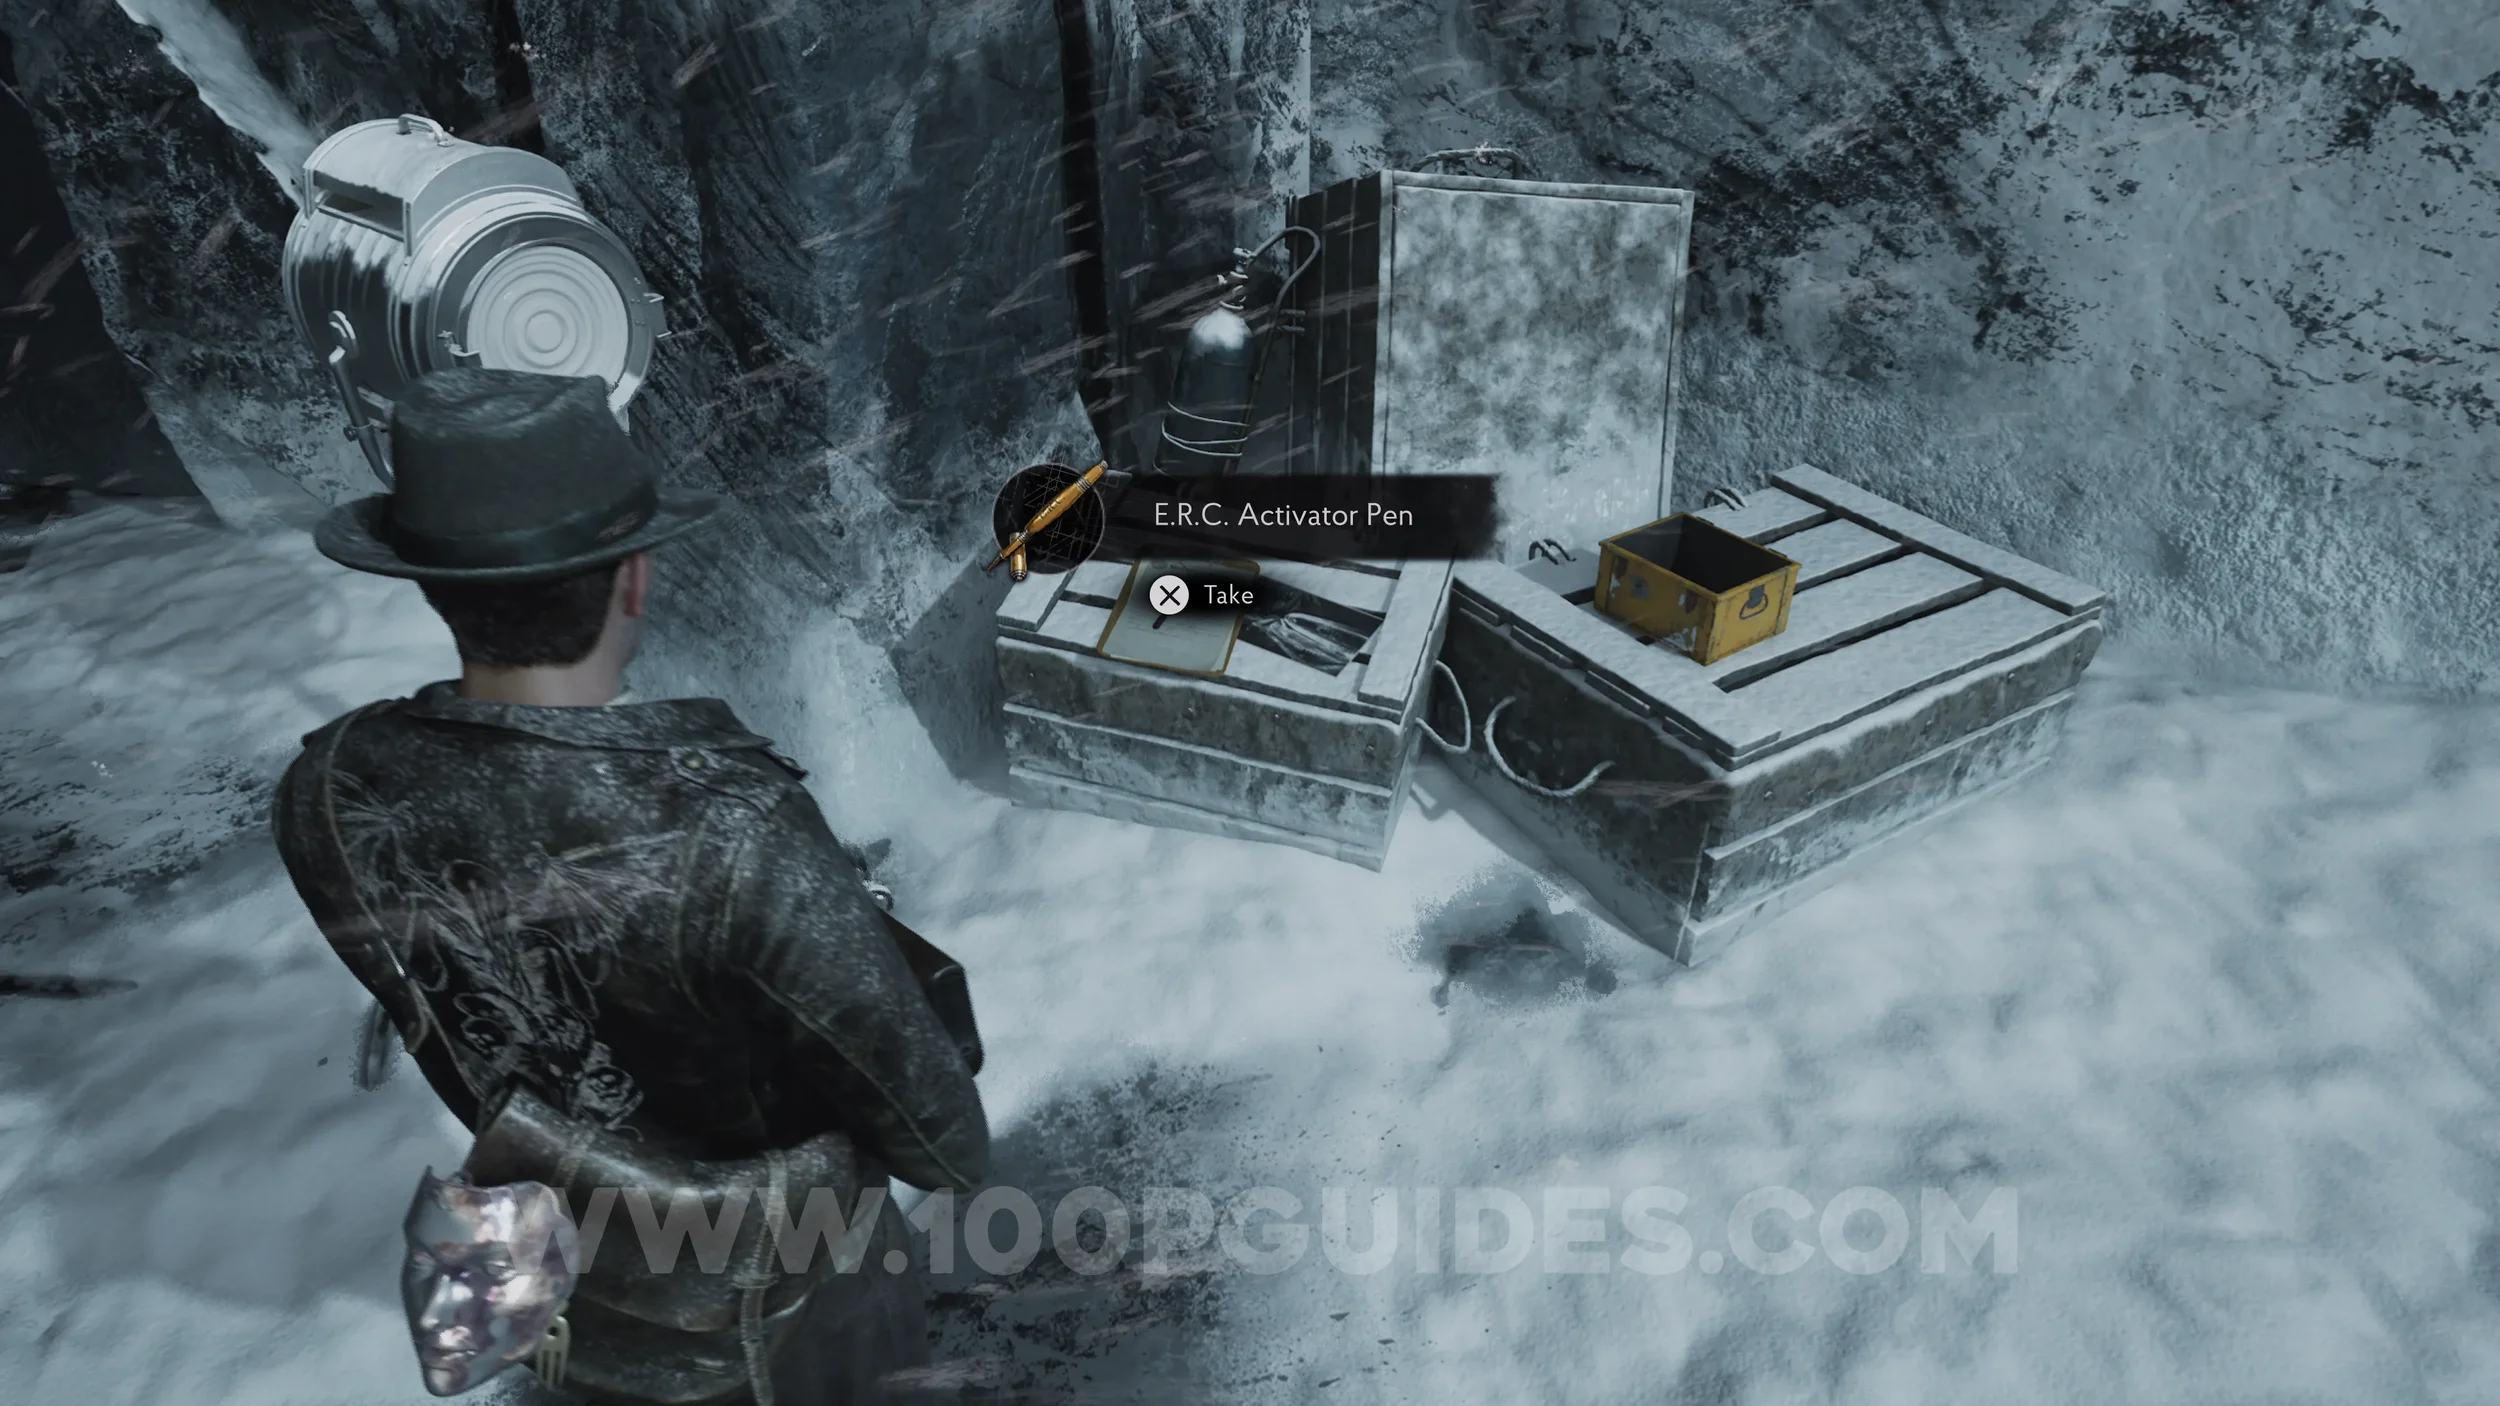
E.R.C. Activator Pen. On a box in the northeastern corner of the Portal Room.
Lore Codex: Stock Boy’s Letter. In the Portal Room, head through the door to the north. In the next room, you'll see the codex on your left.
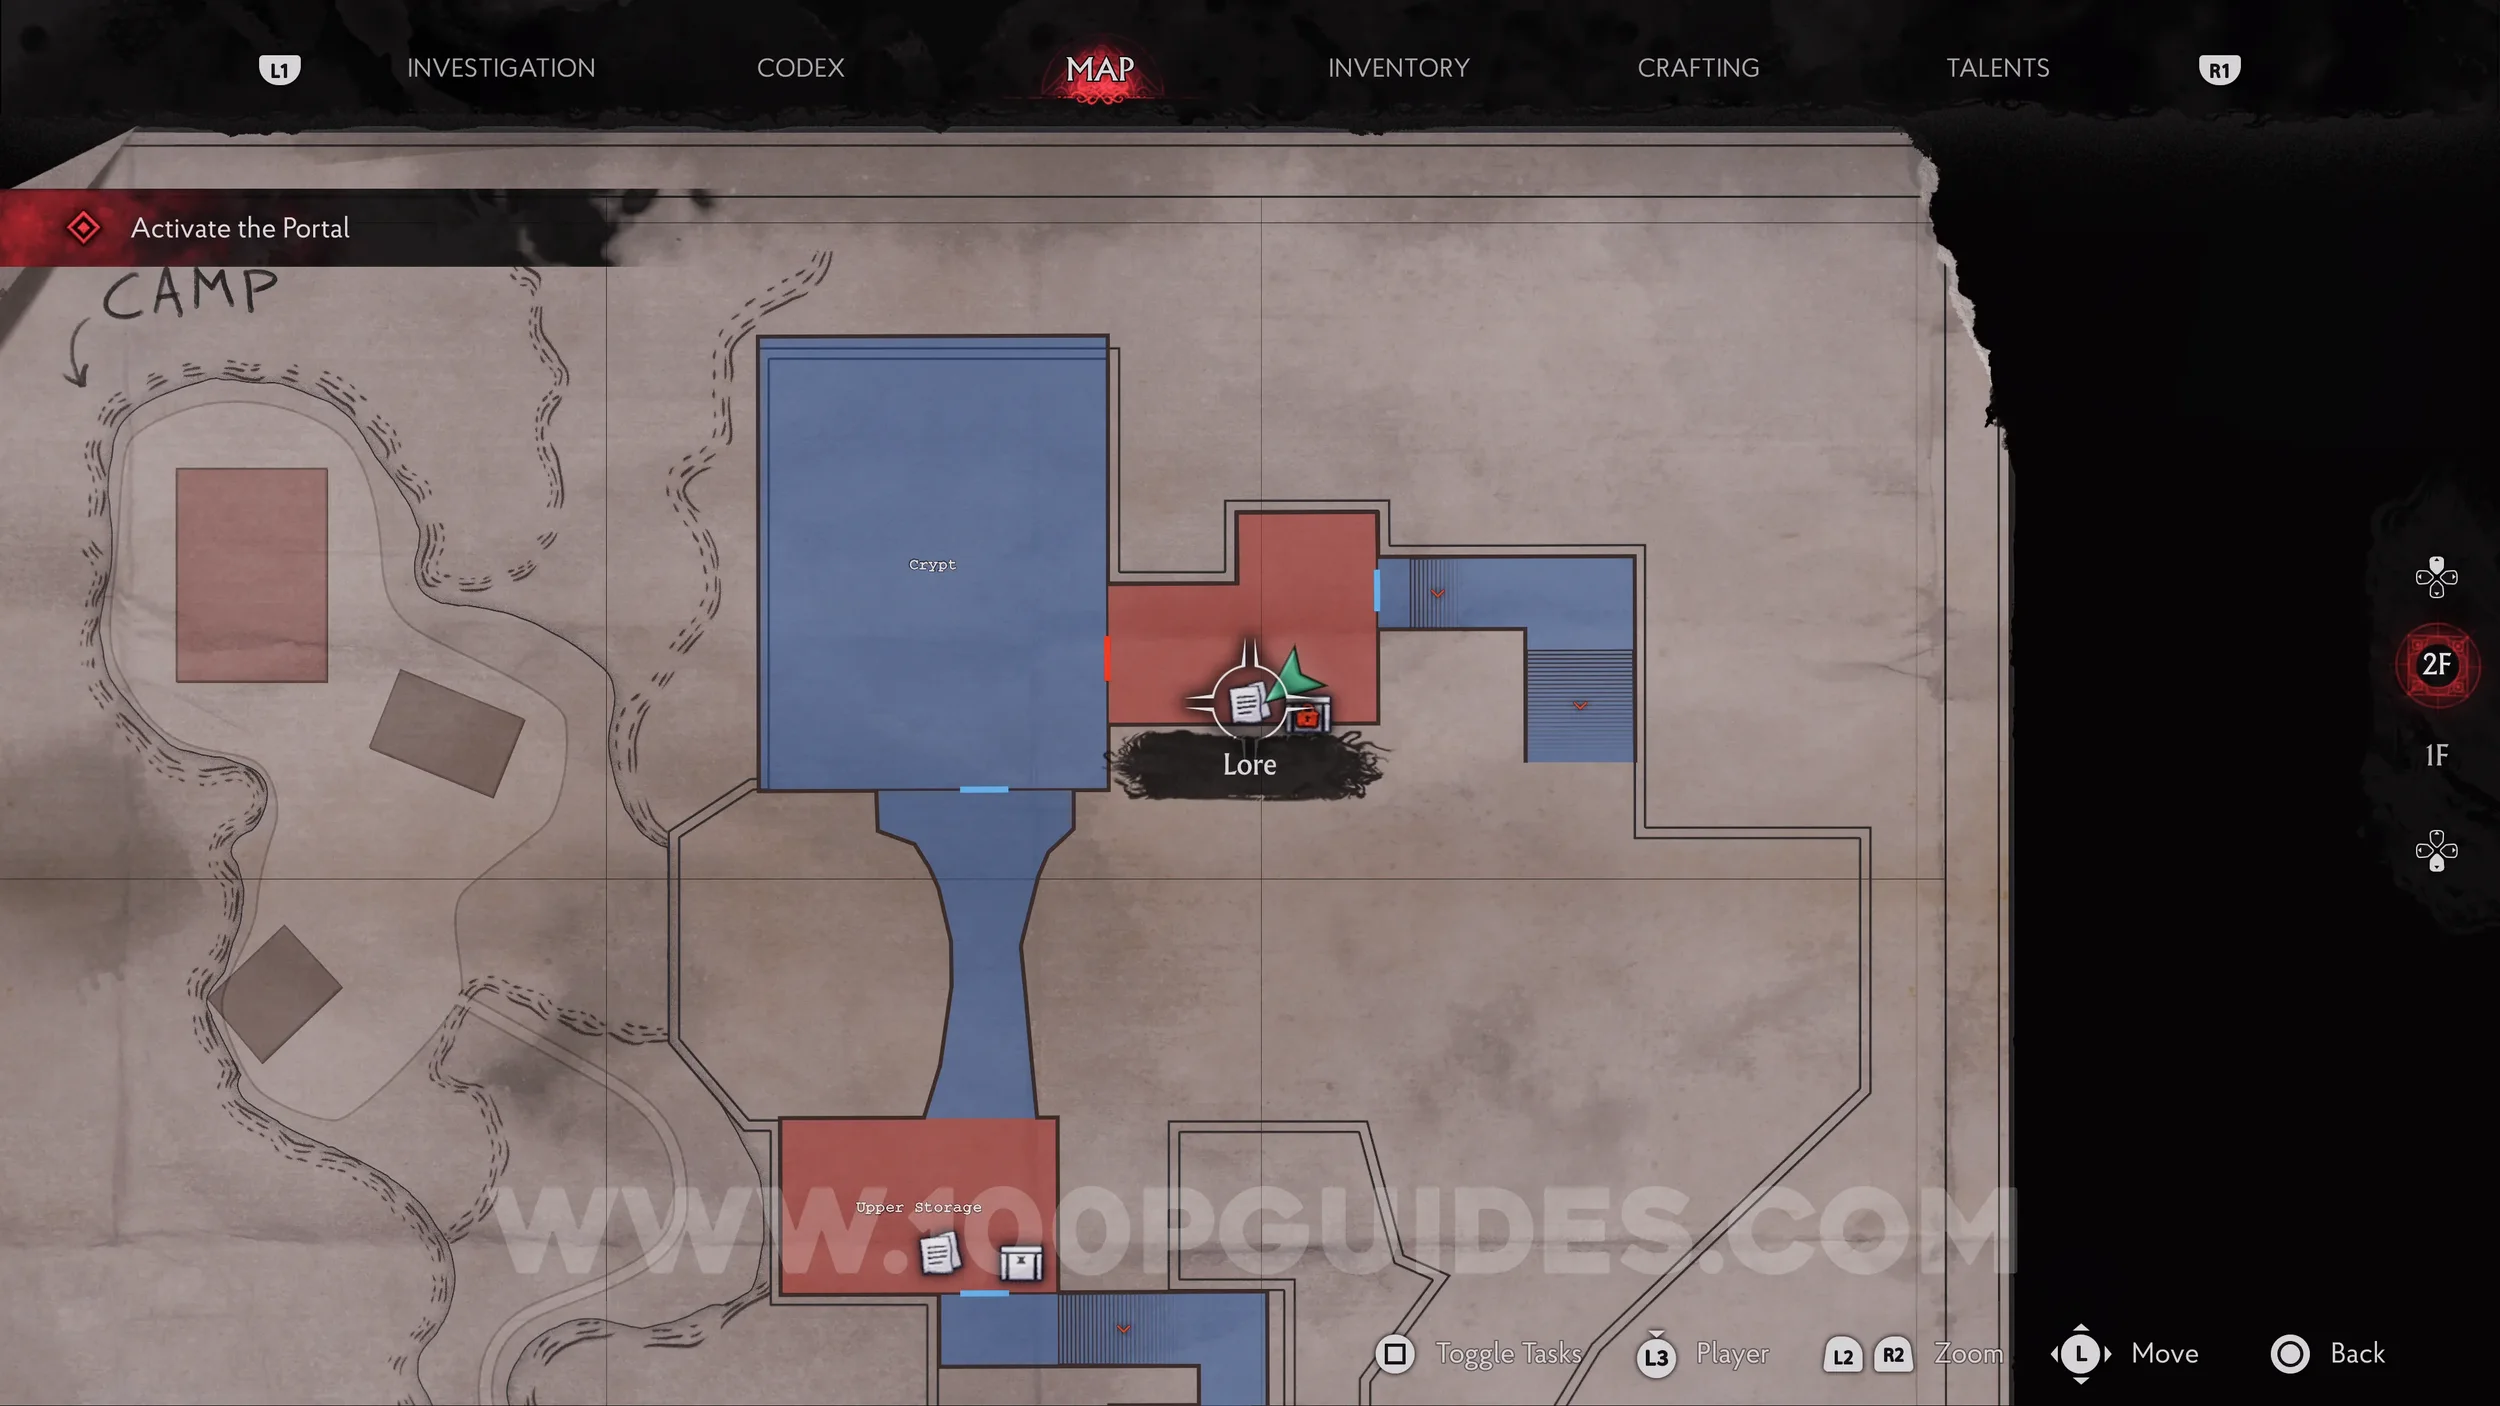
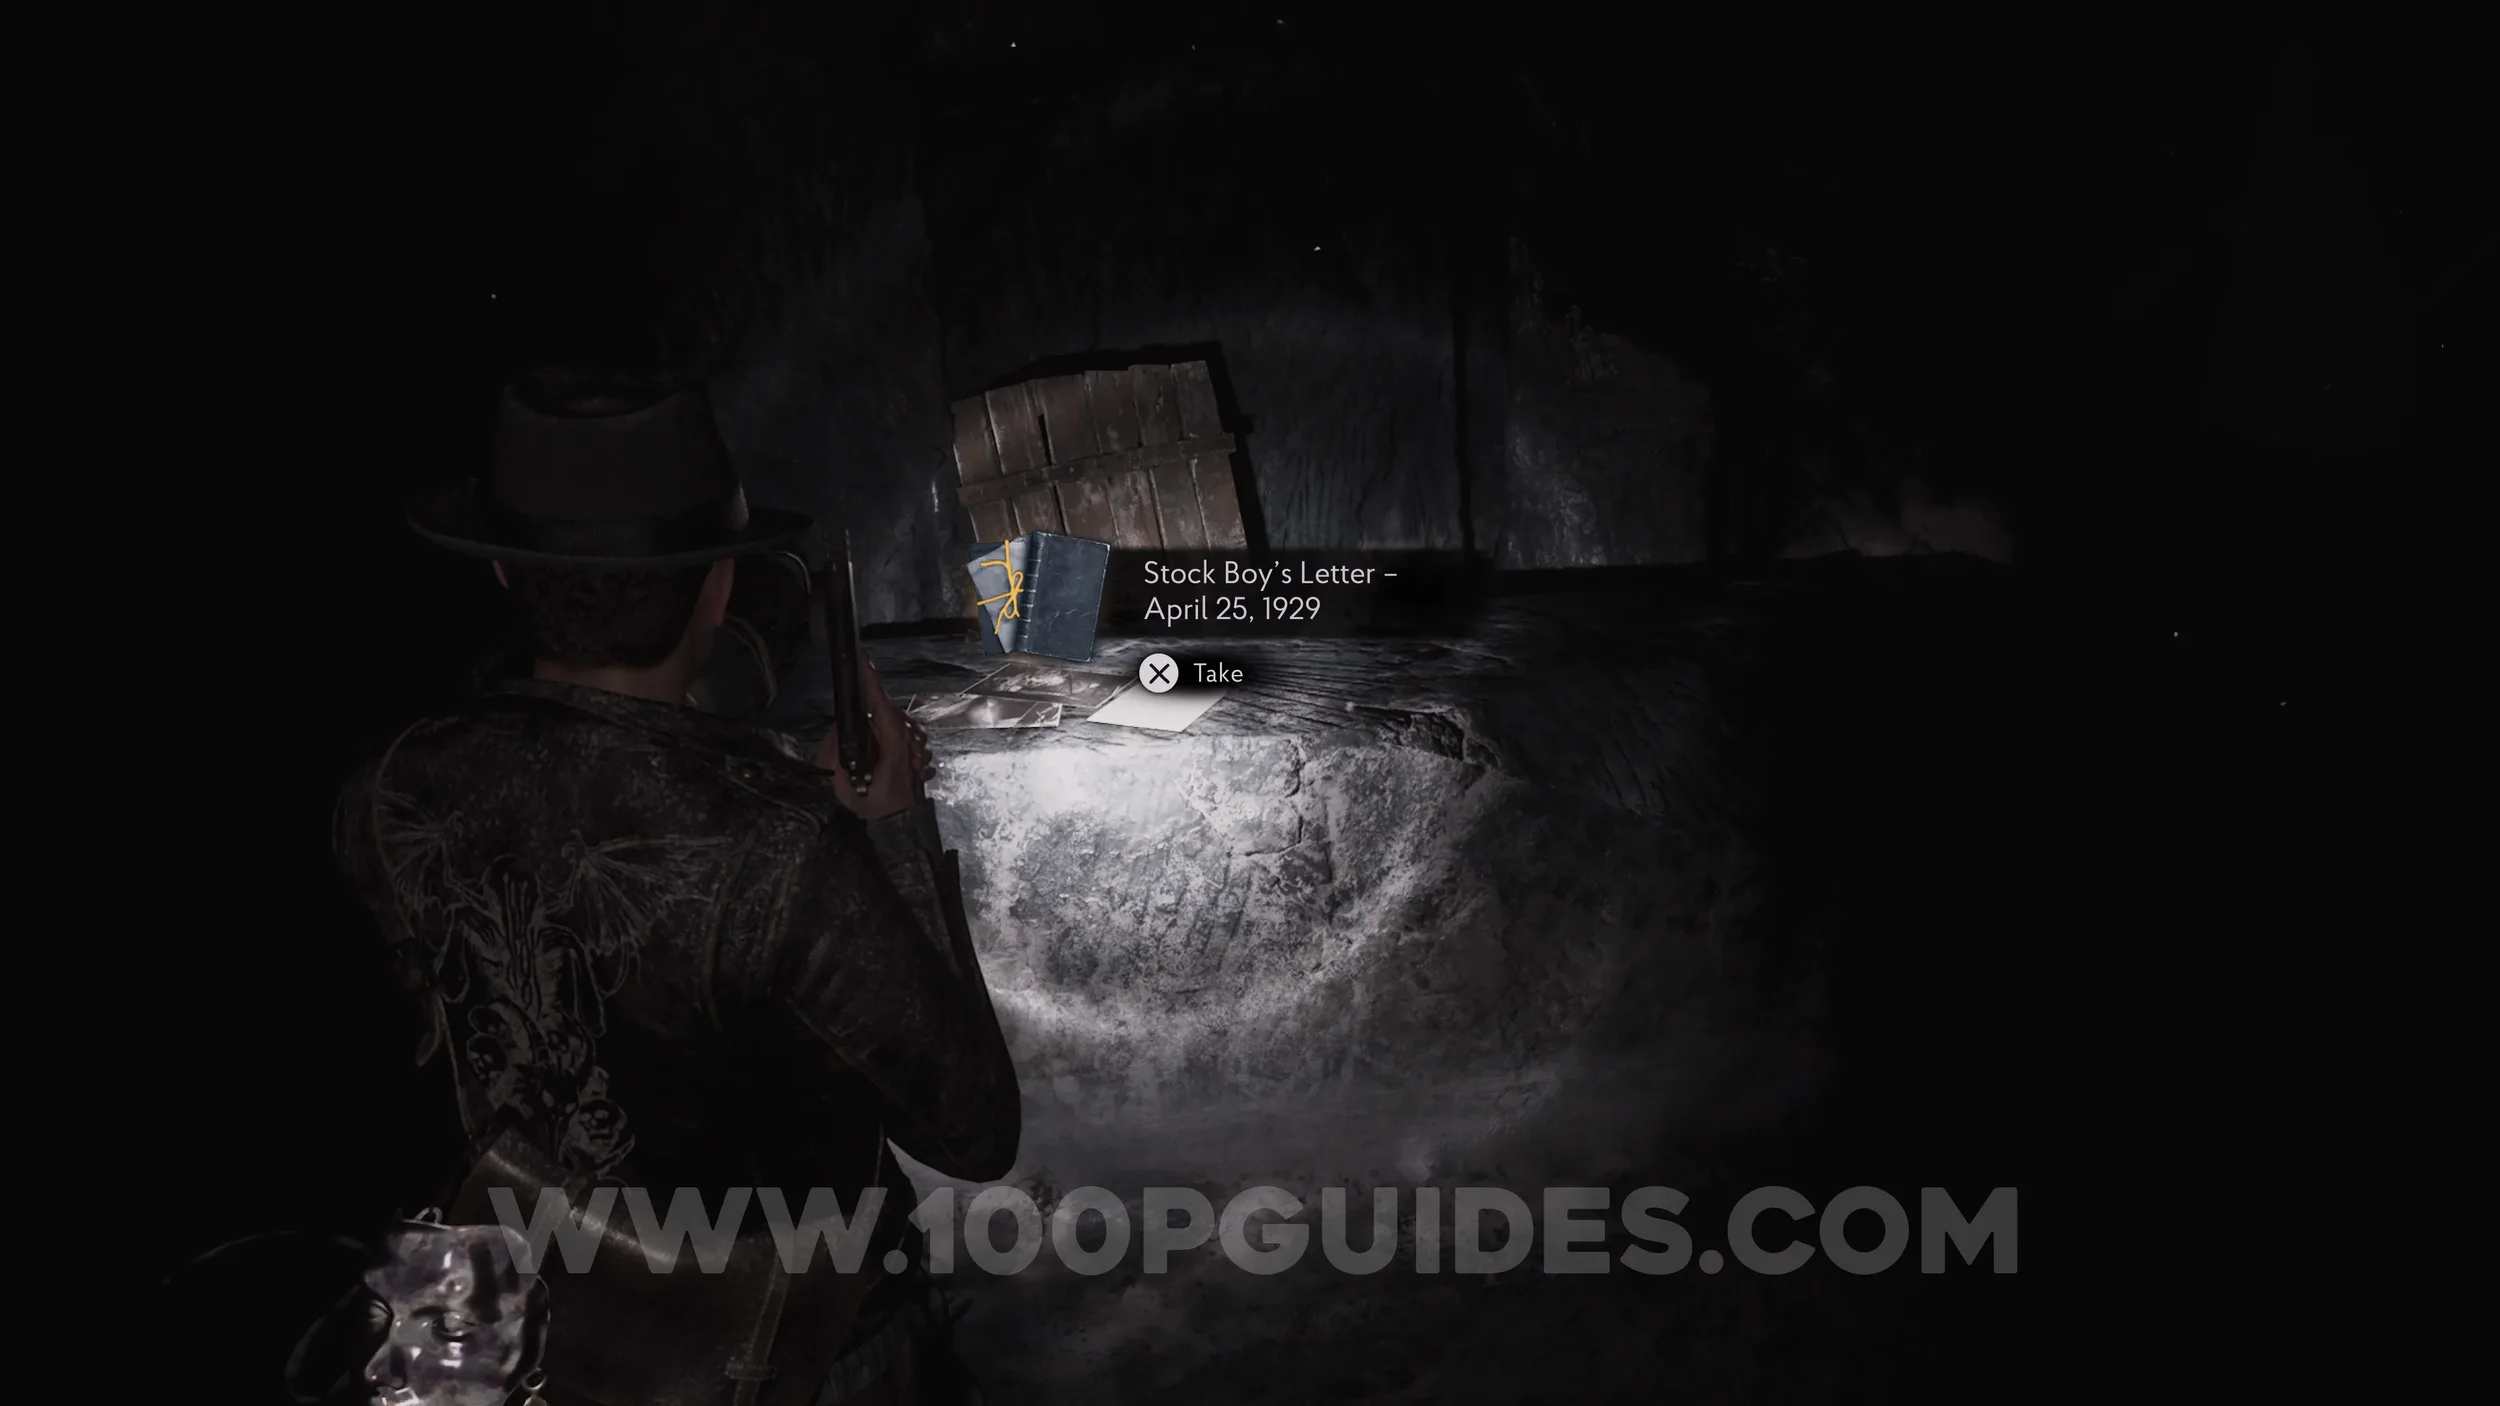
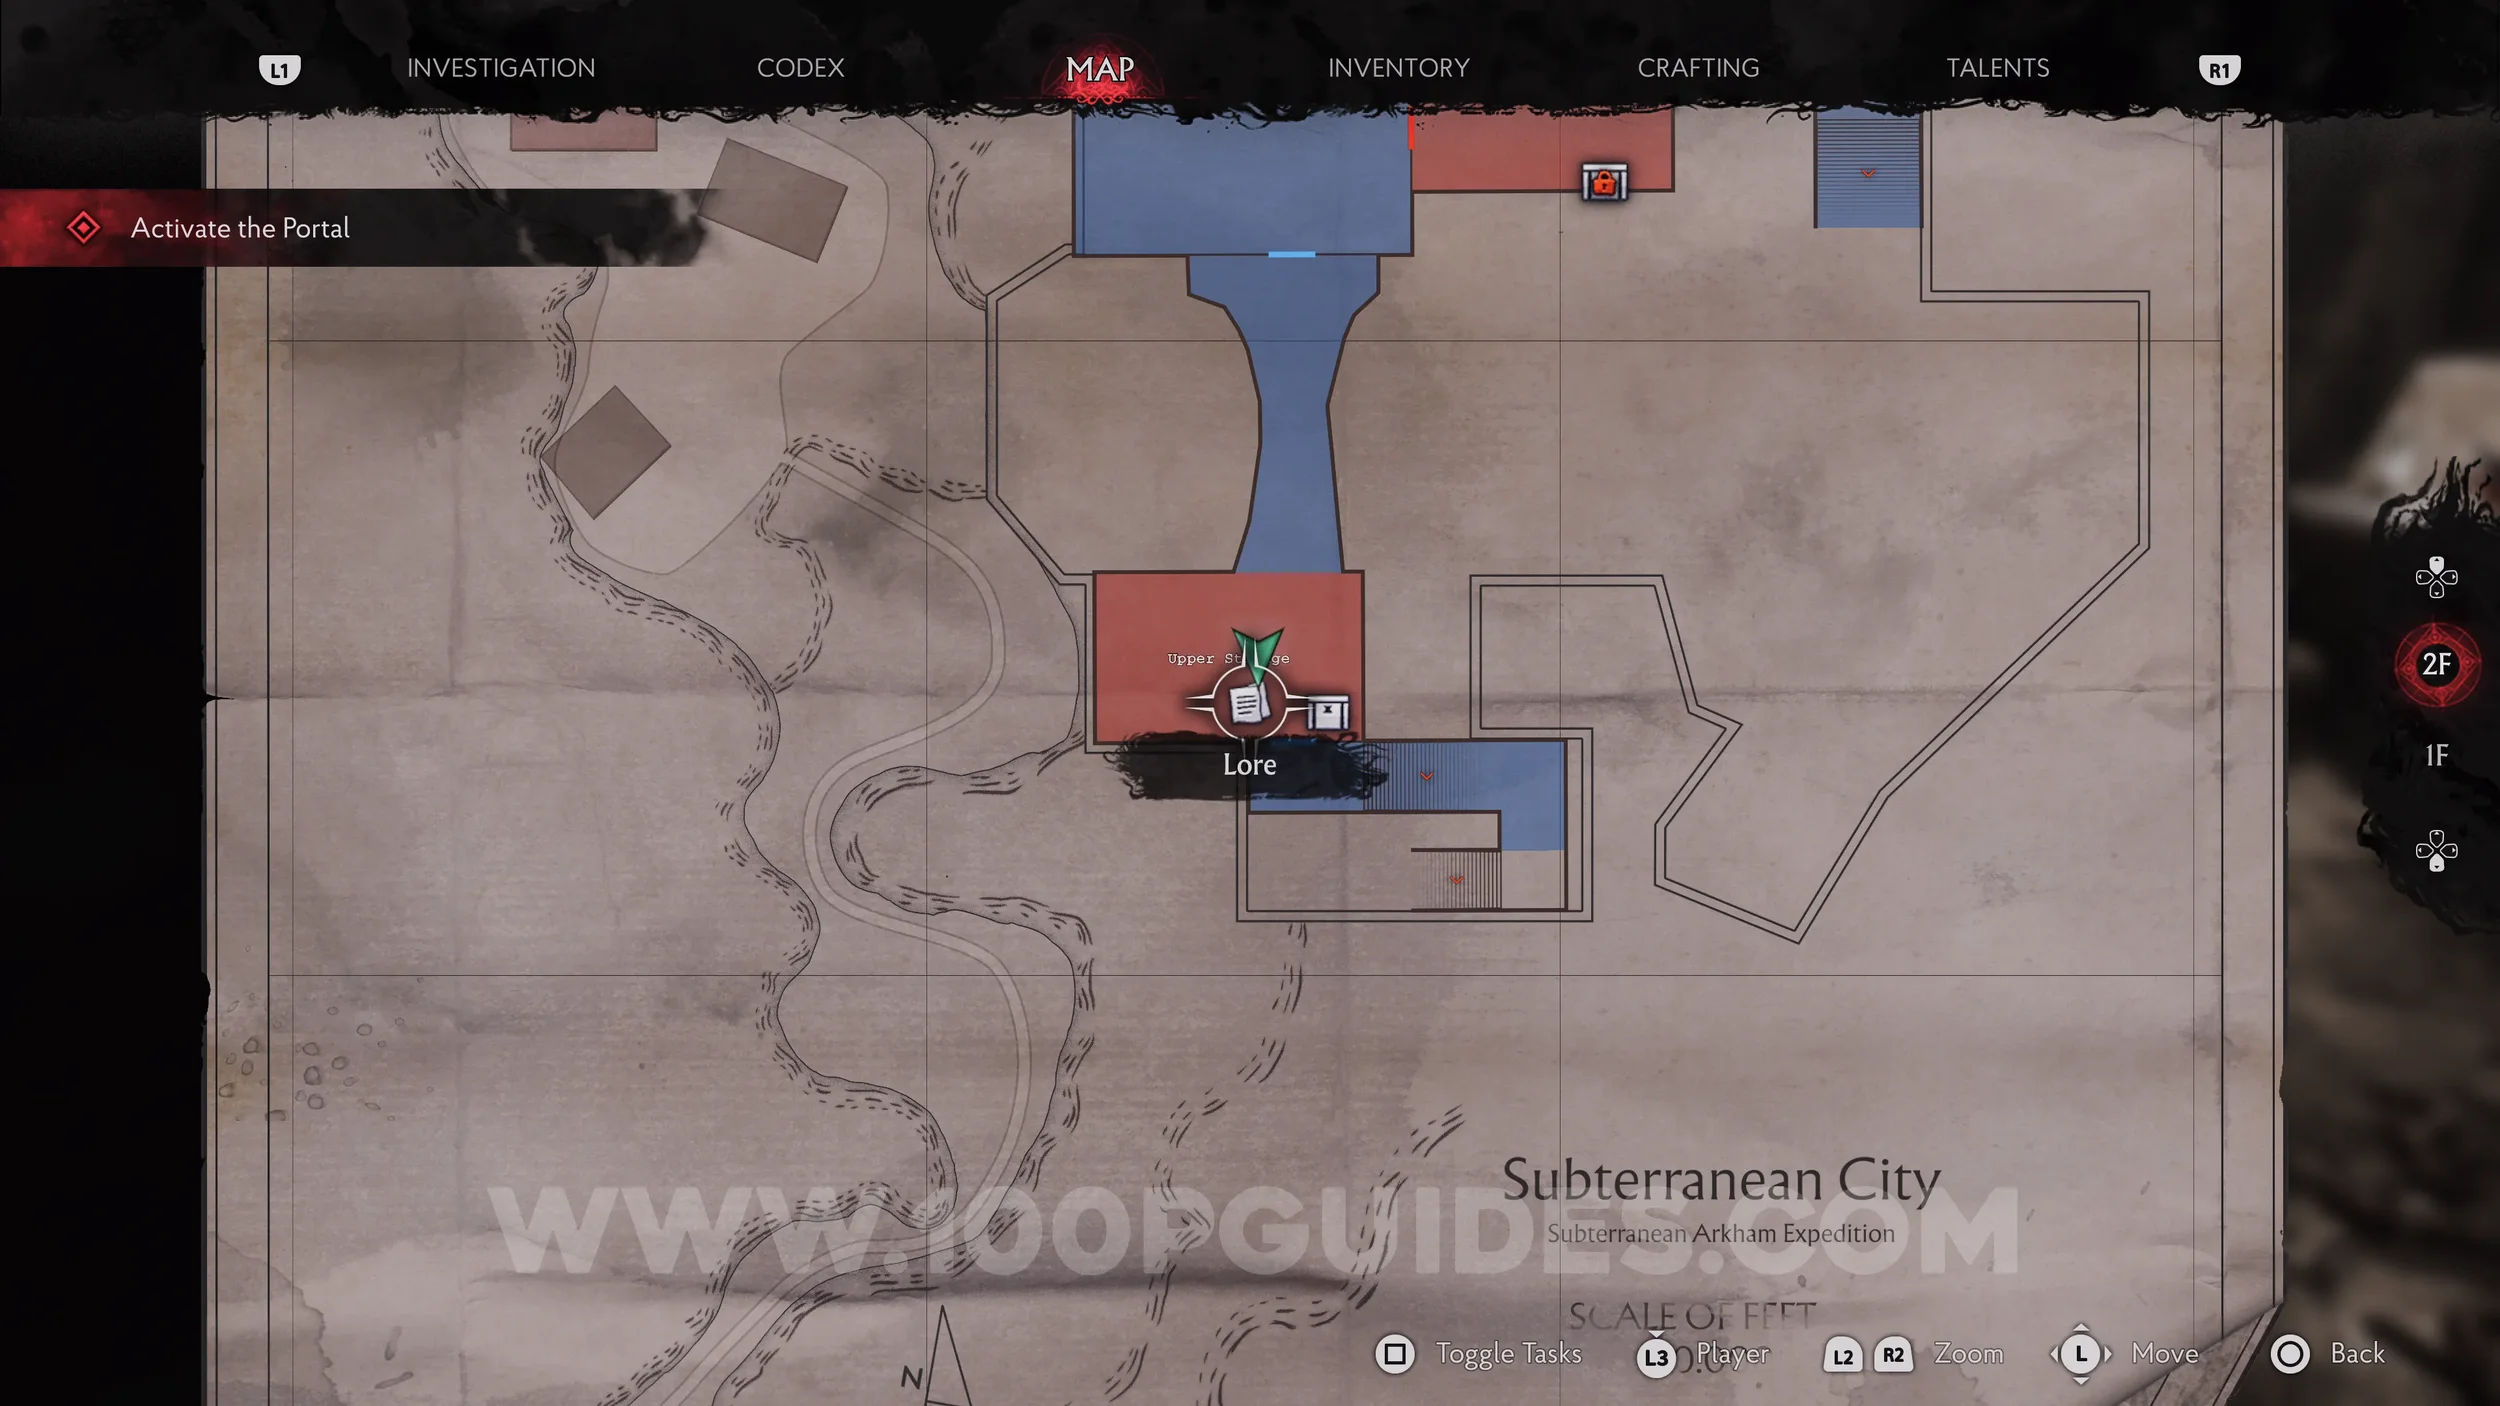
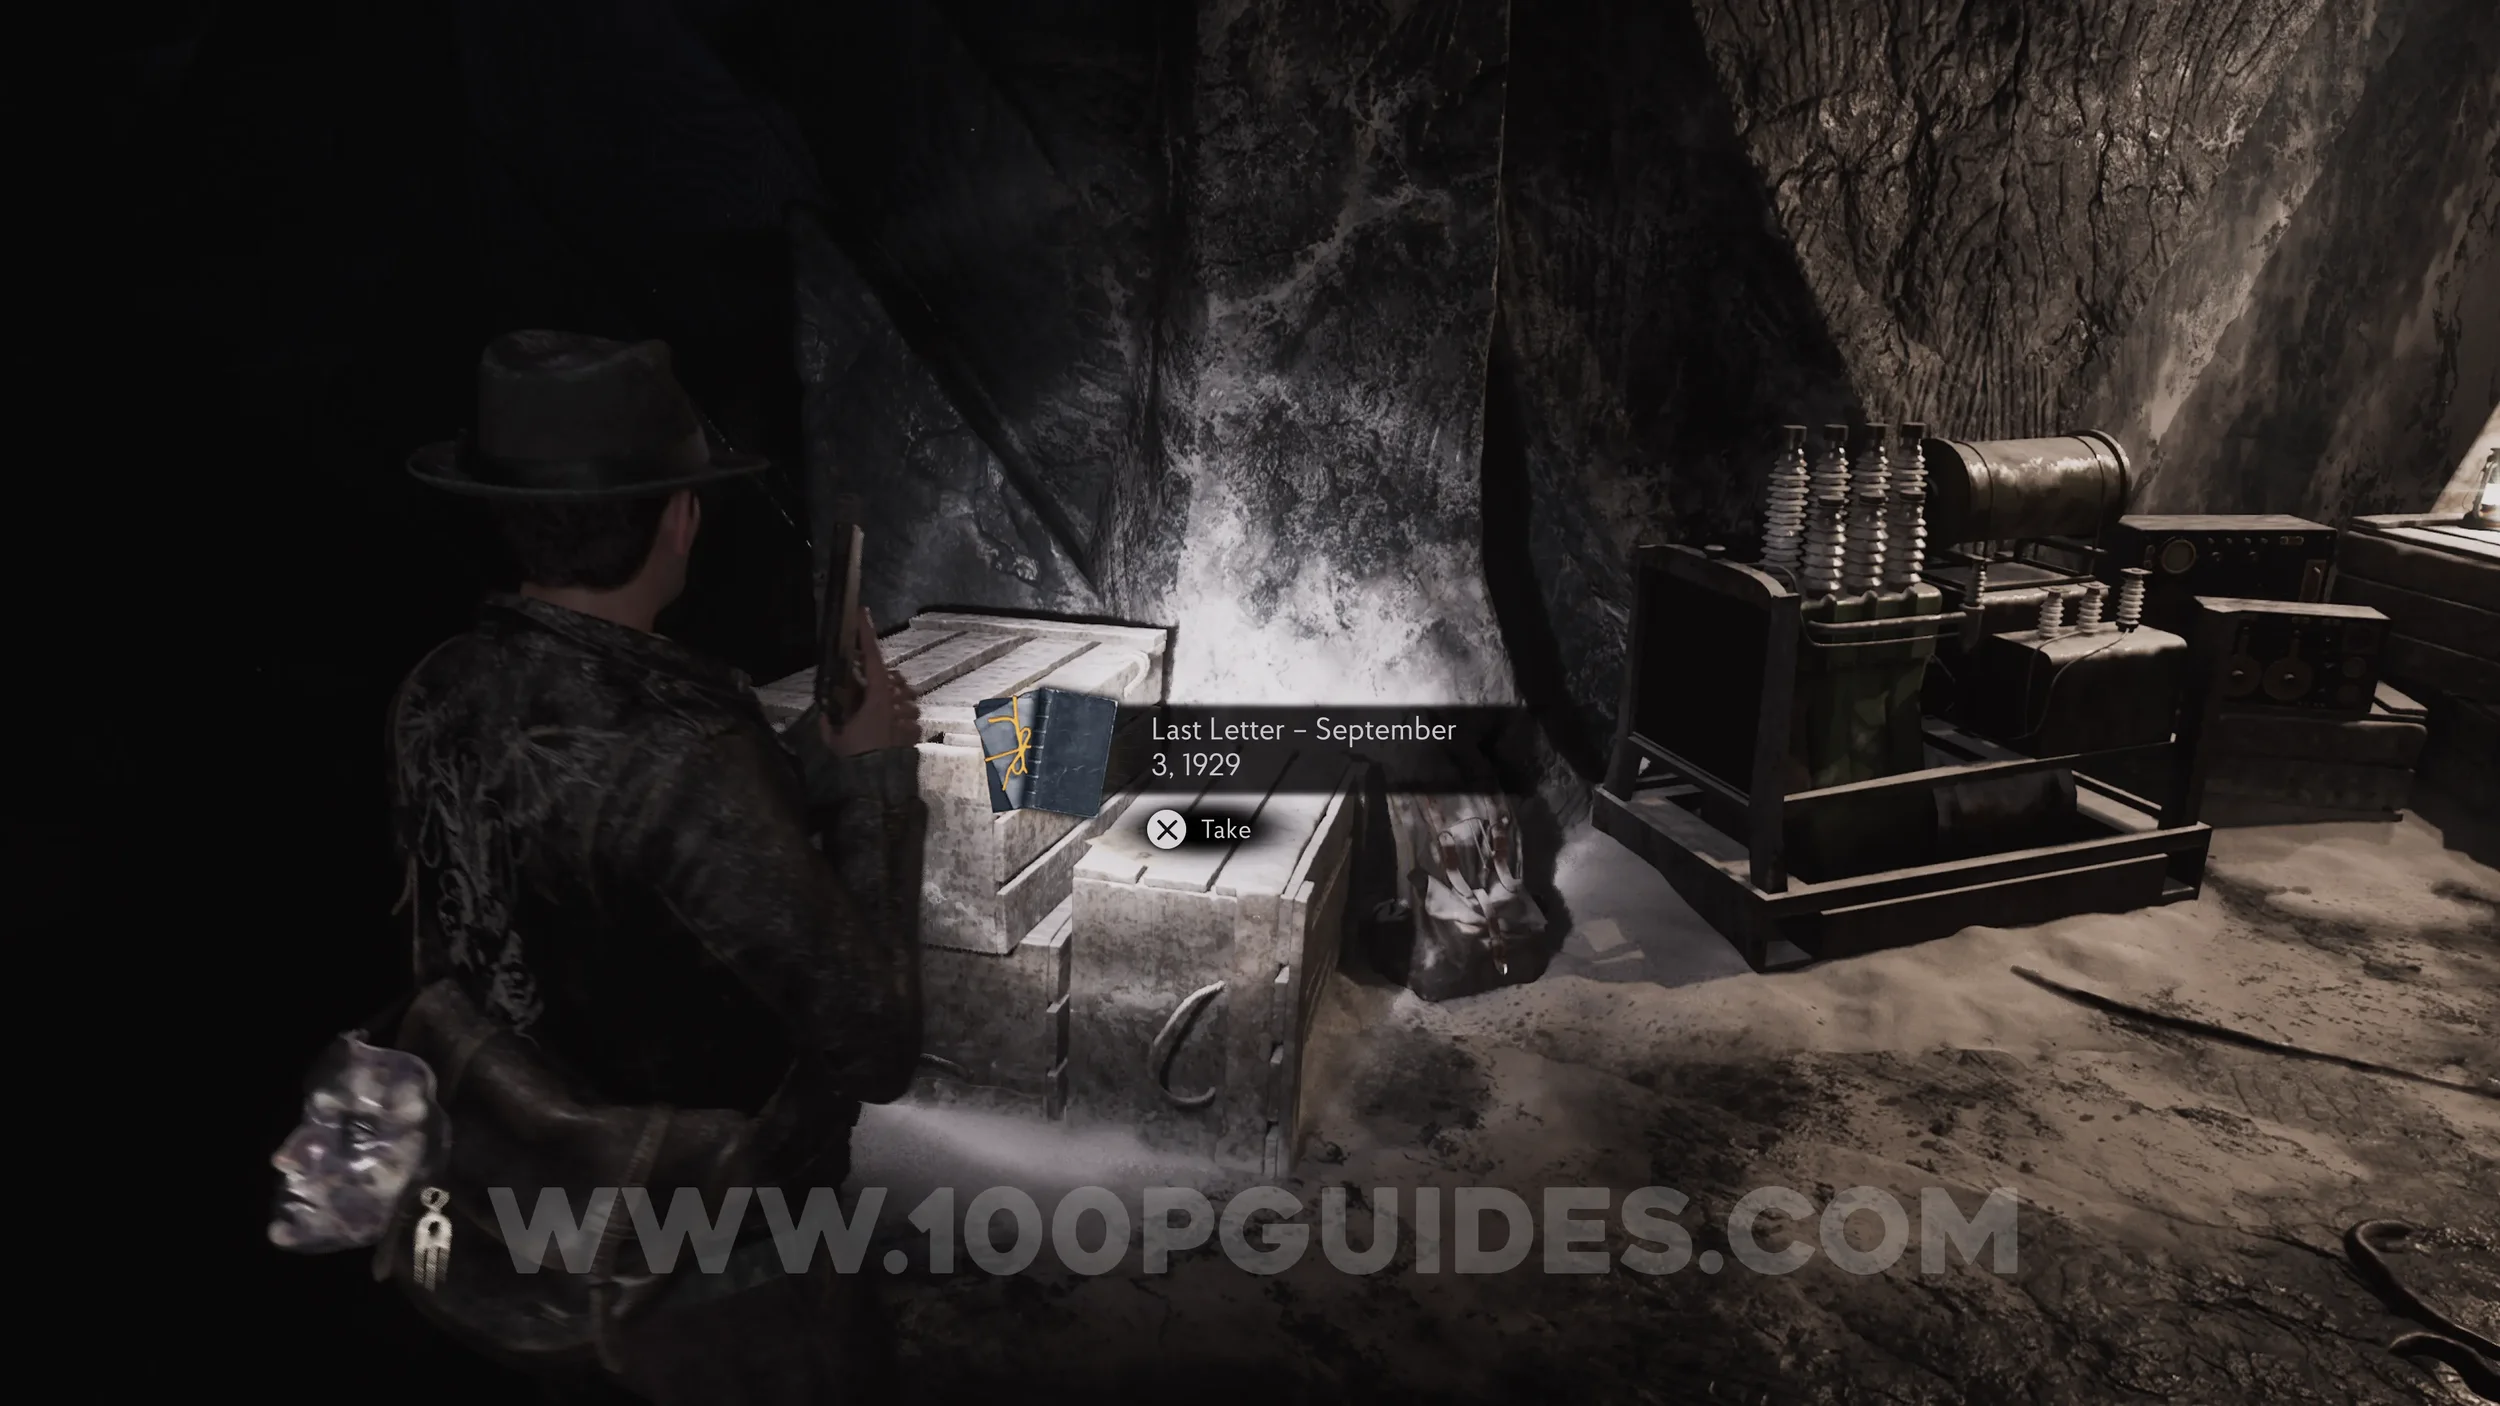
Lore Codex: Last Letter - September. After the previous collectible, continue forward and you'll have to survive a room filled with enemies. After that, you'll cross a bridge and reach the Upper Storage area, where you can find the codex on some boxes.
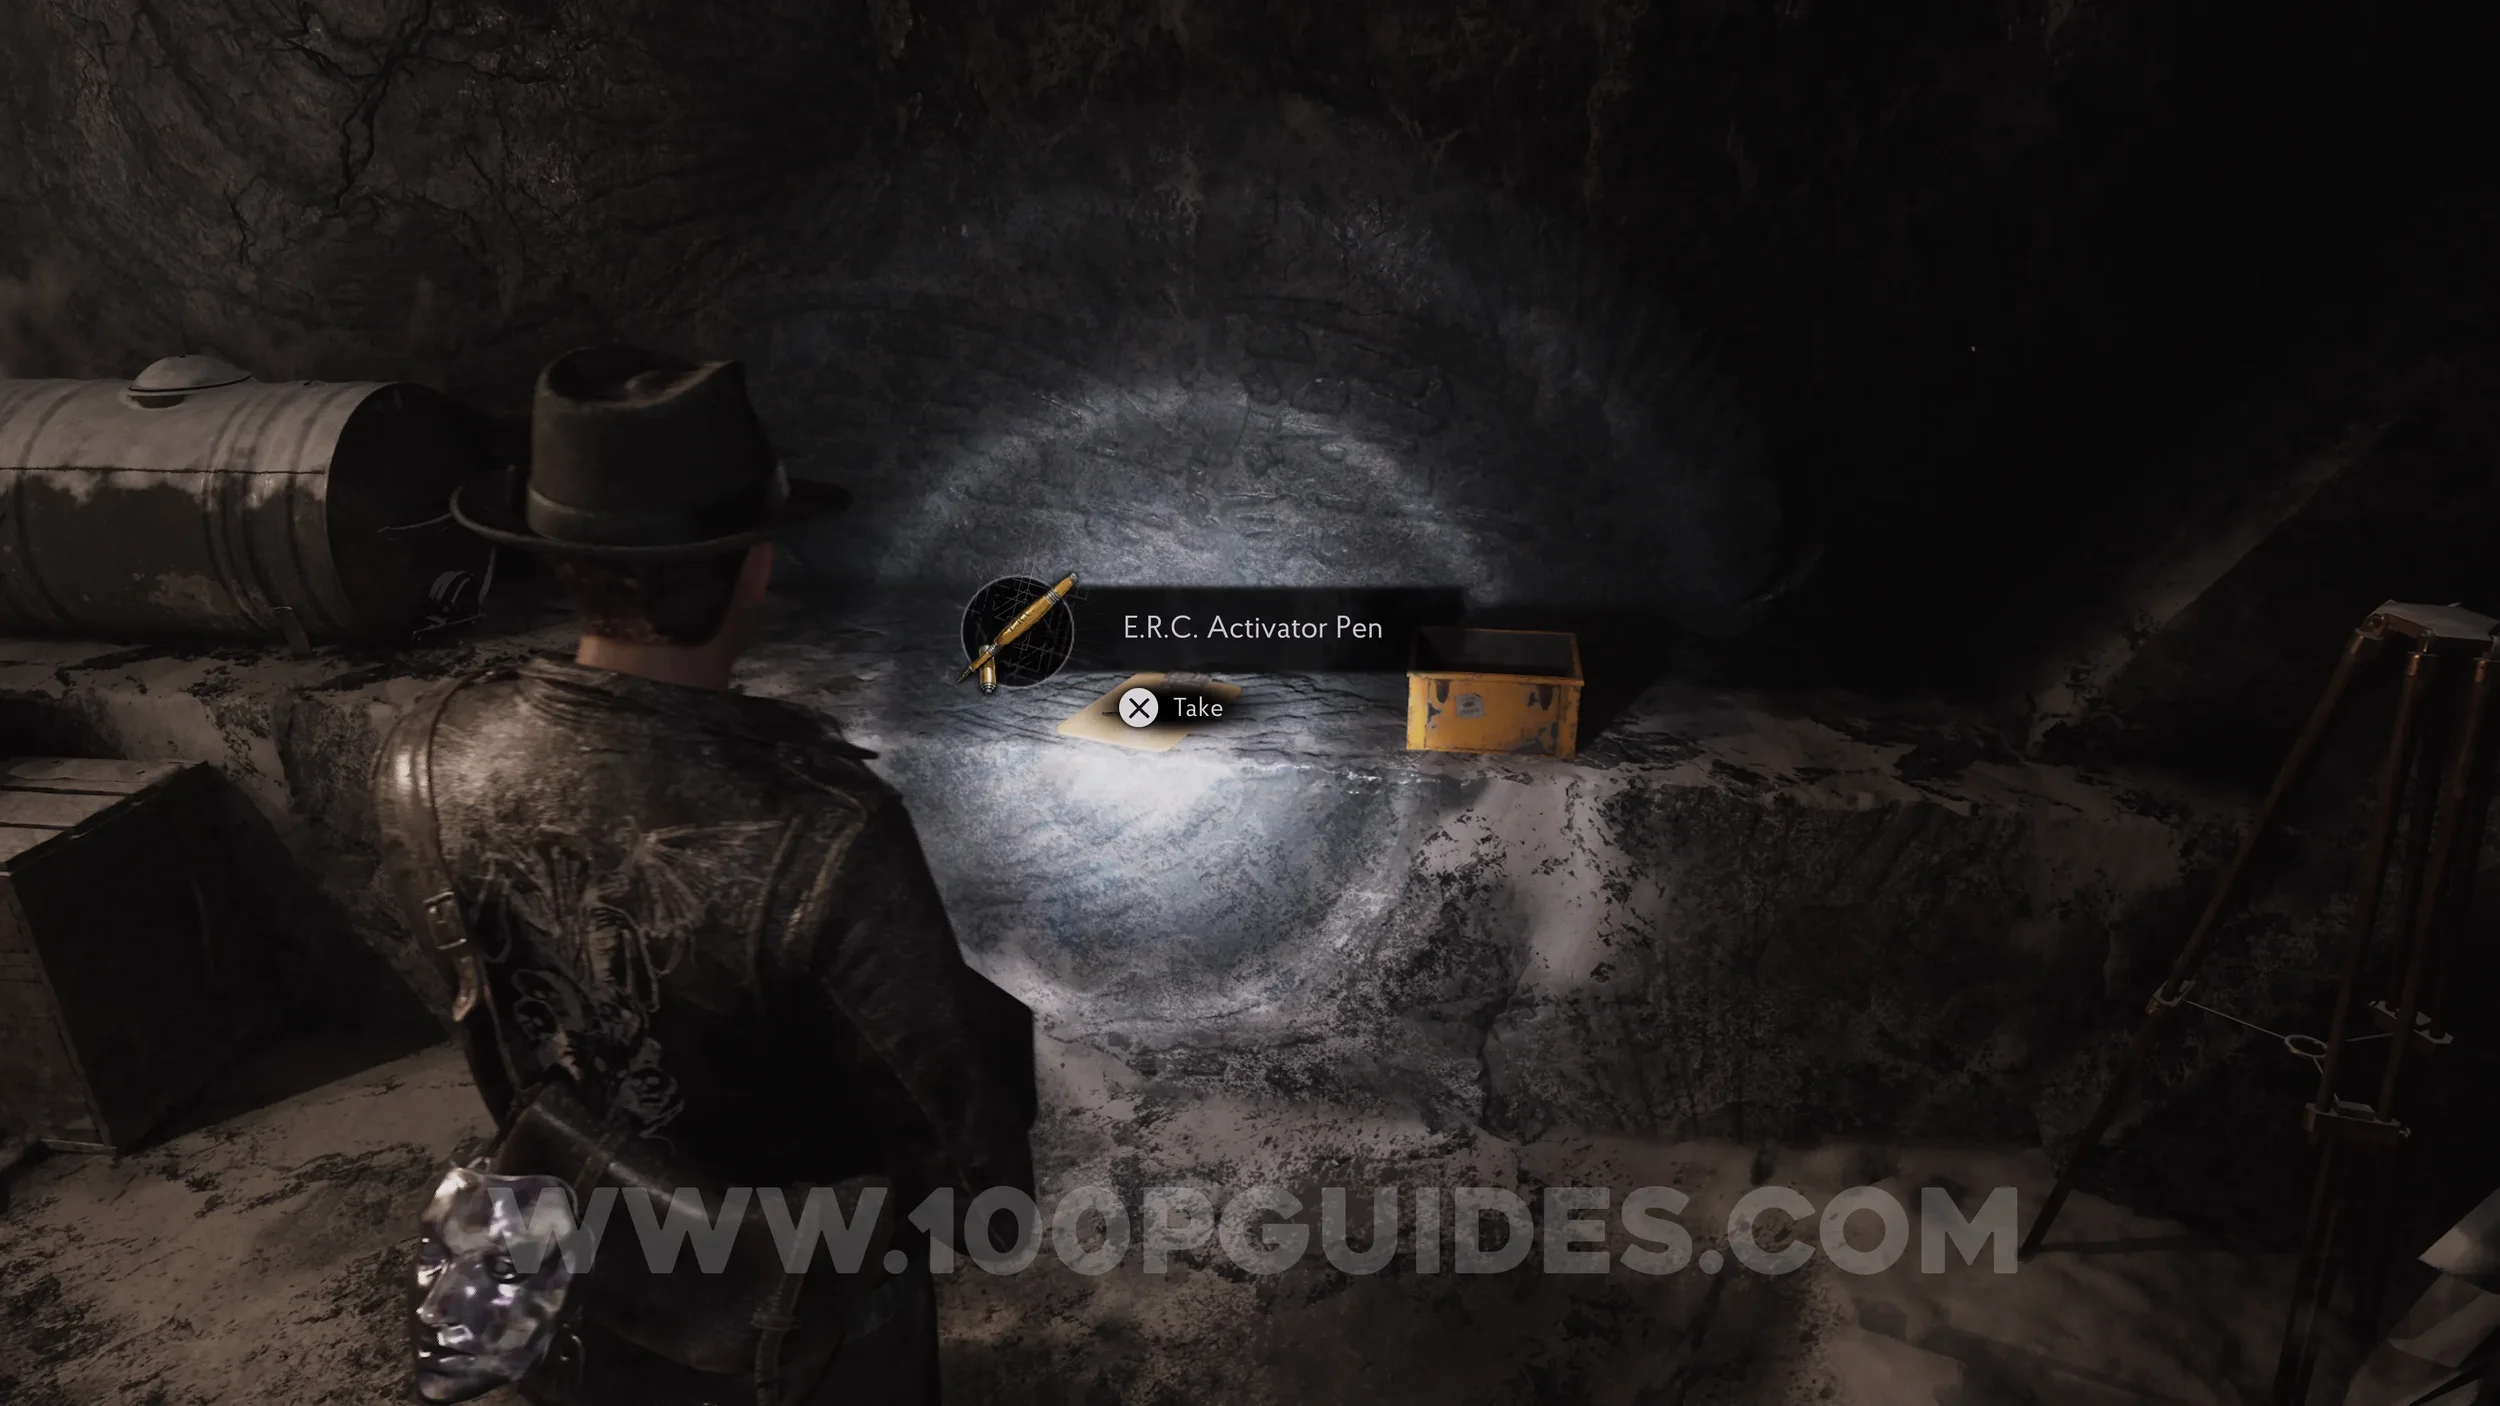
E.R.C. Activator Pen. In the same area as the previous codex.
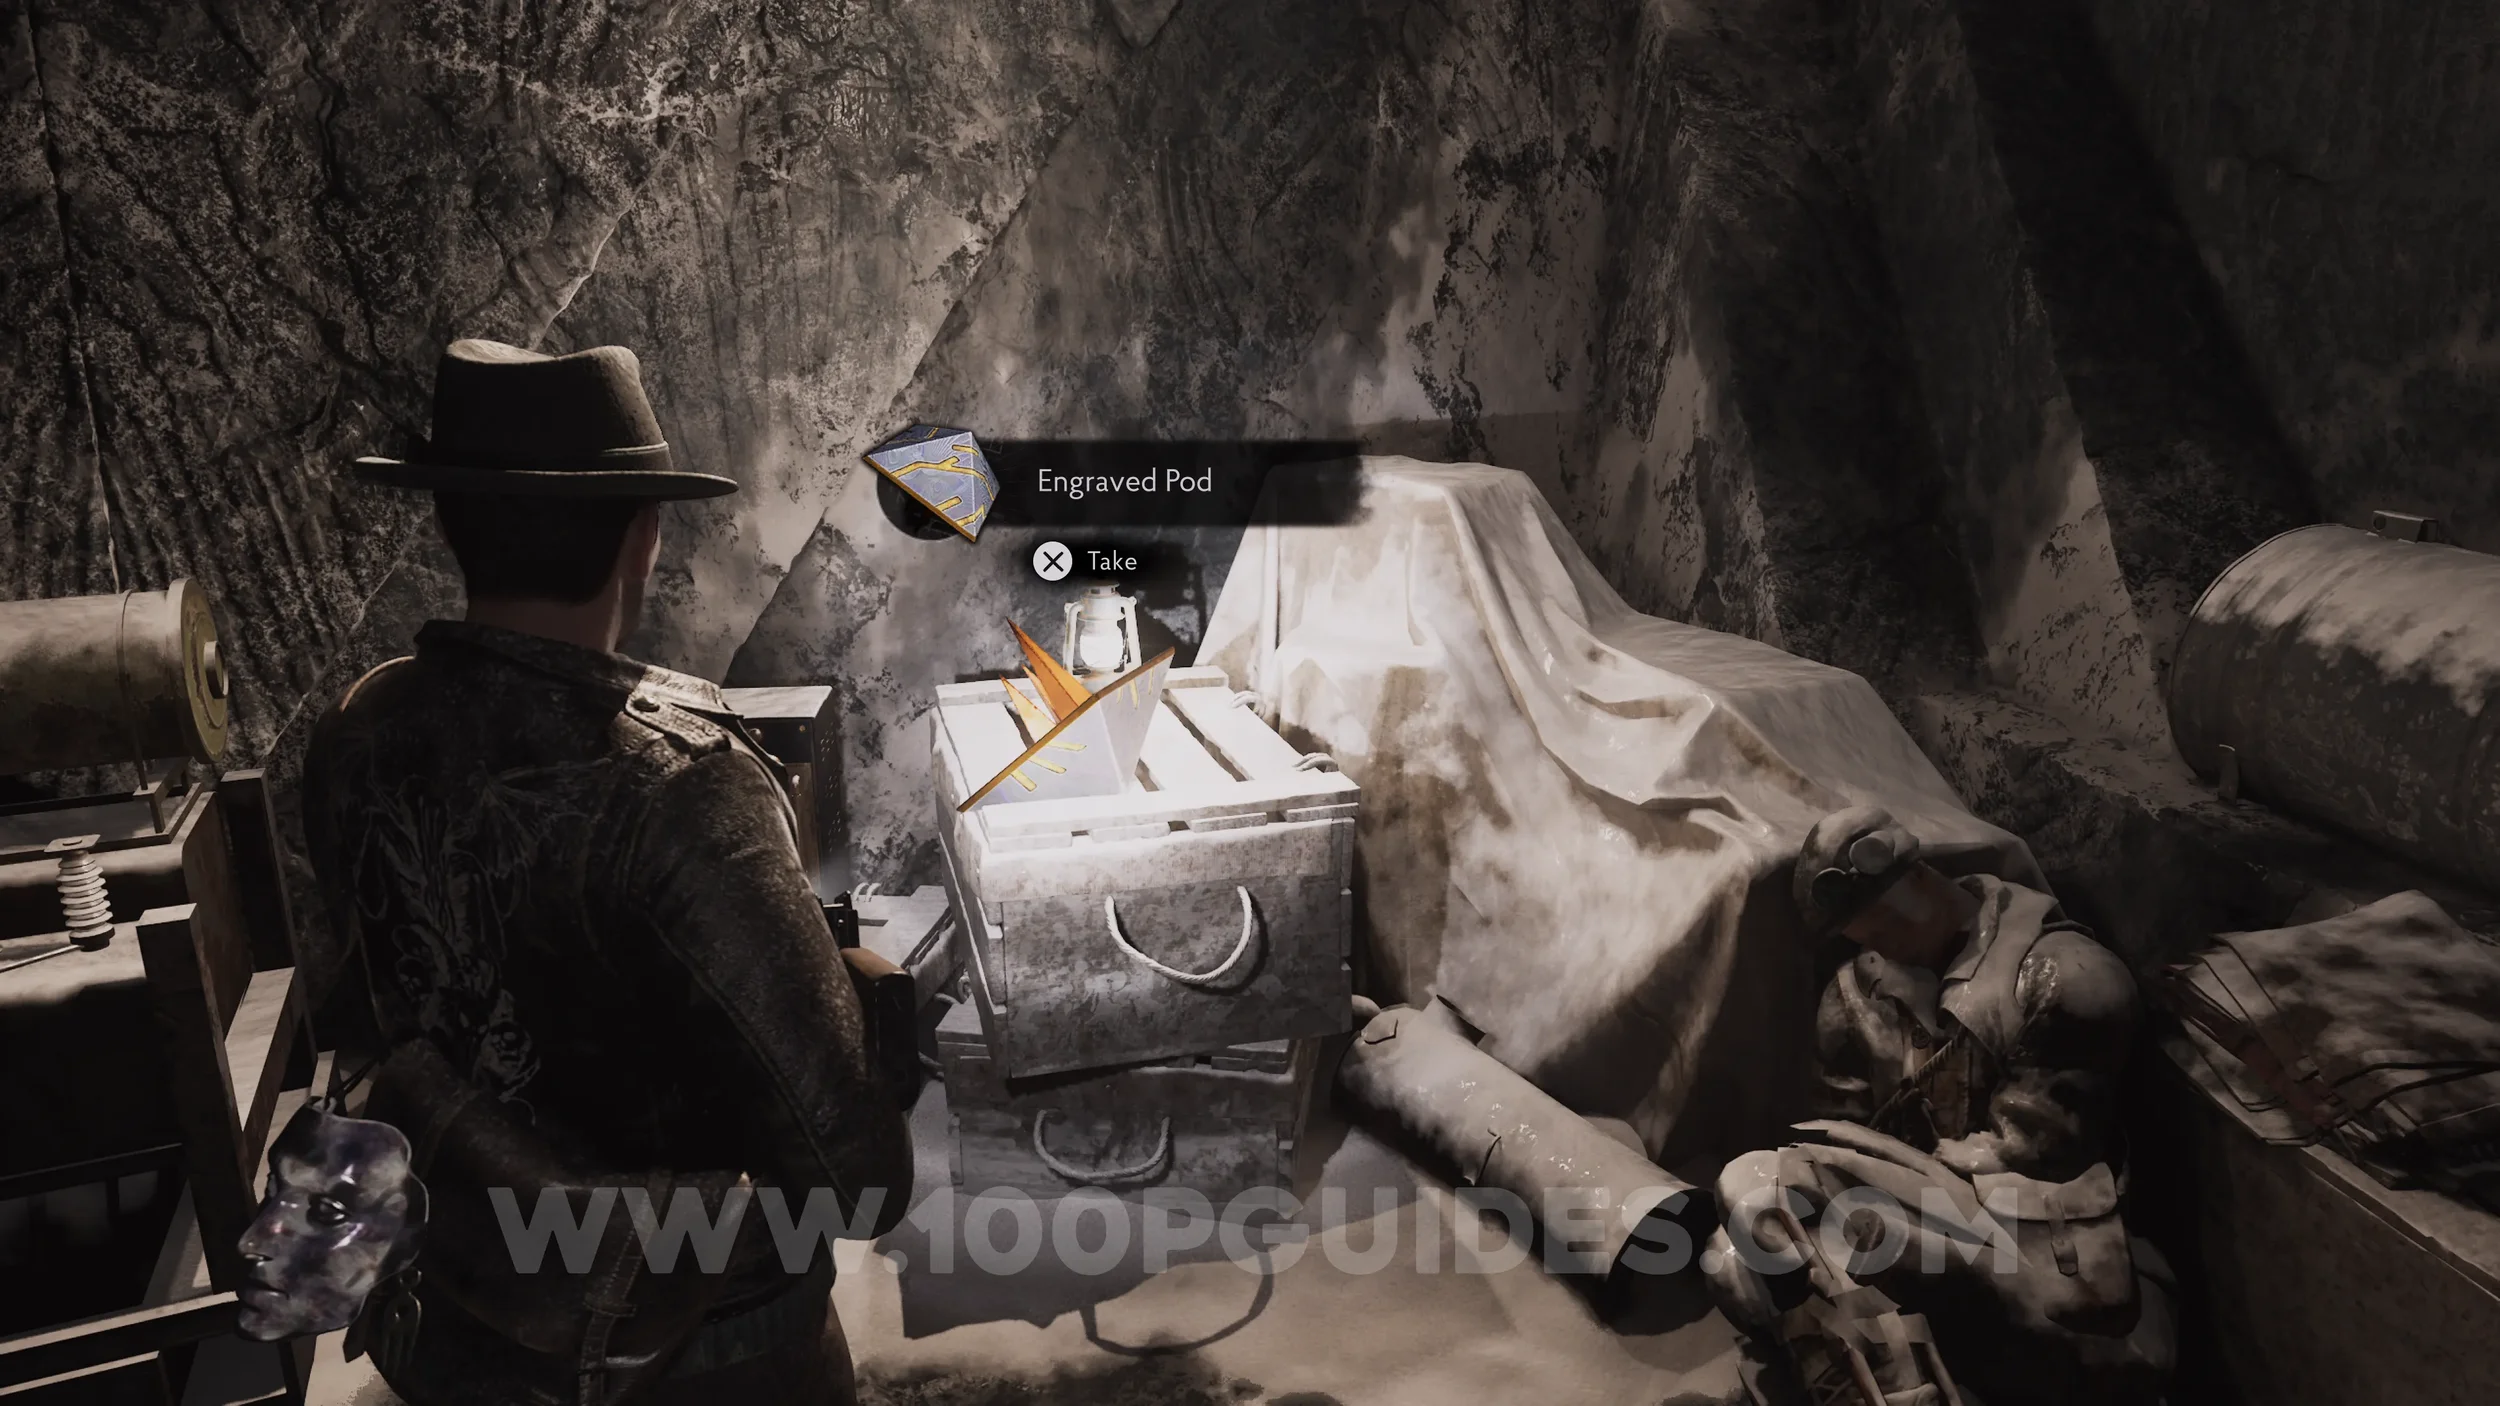
Key Item: Engraved Pod. Also in the same area.
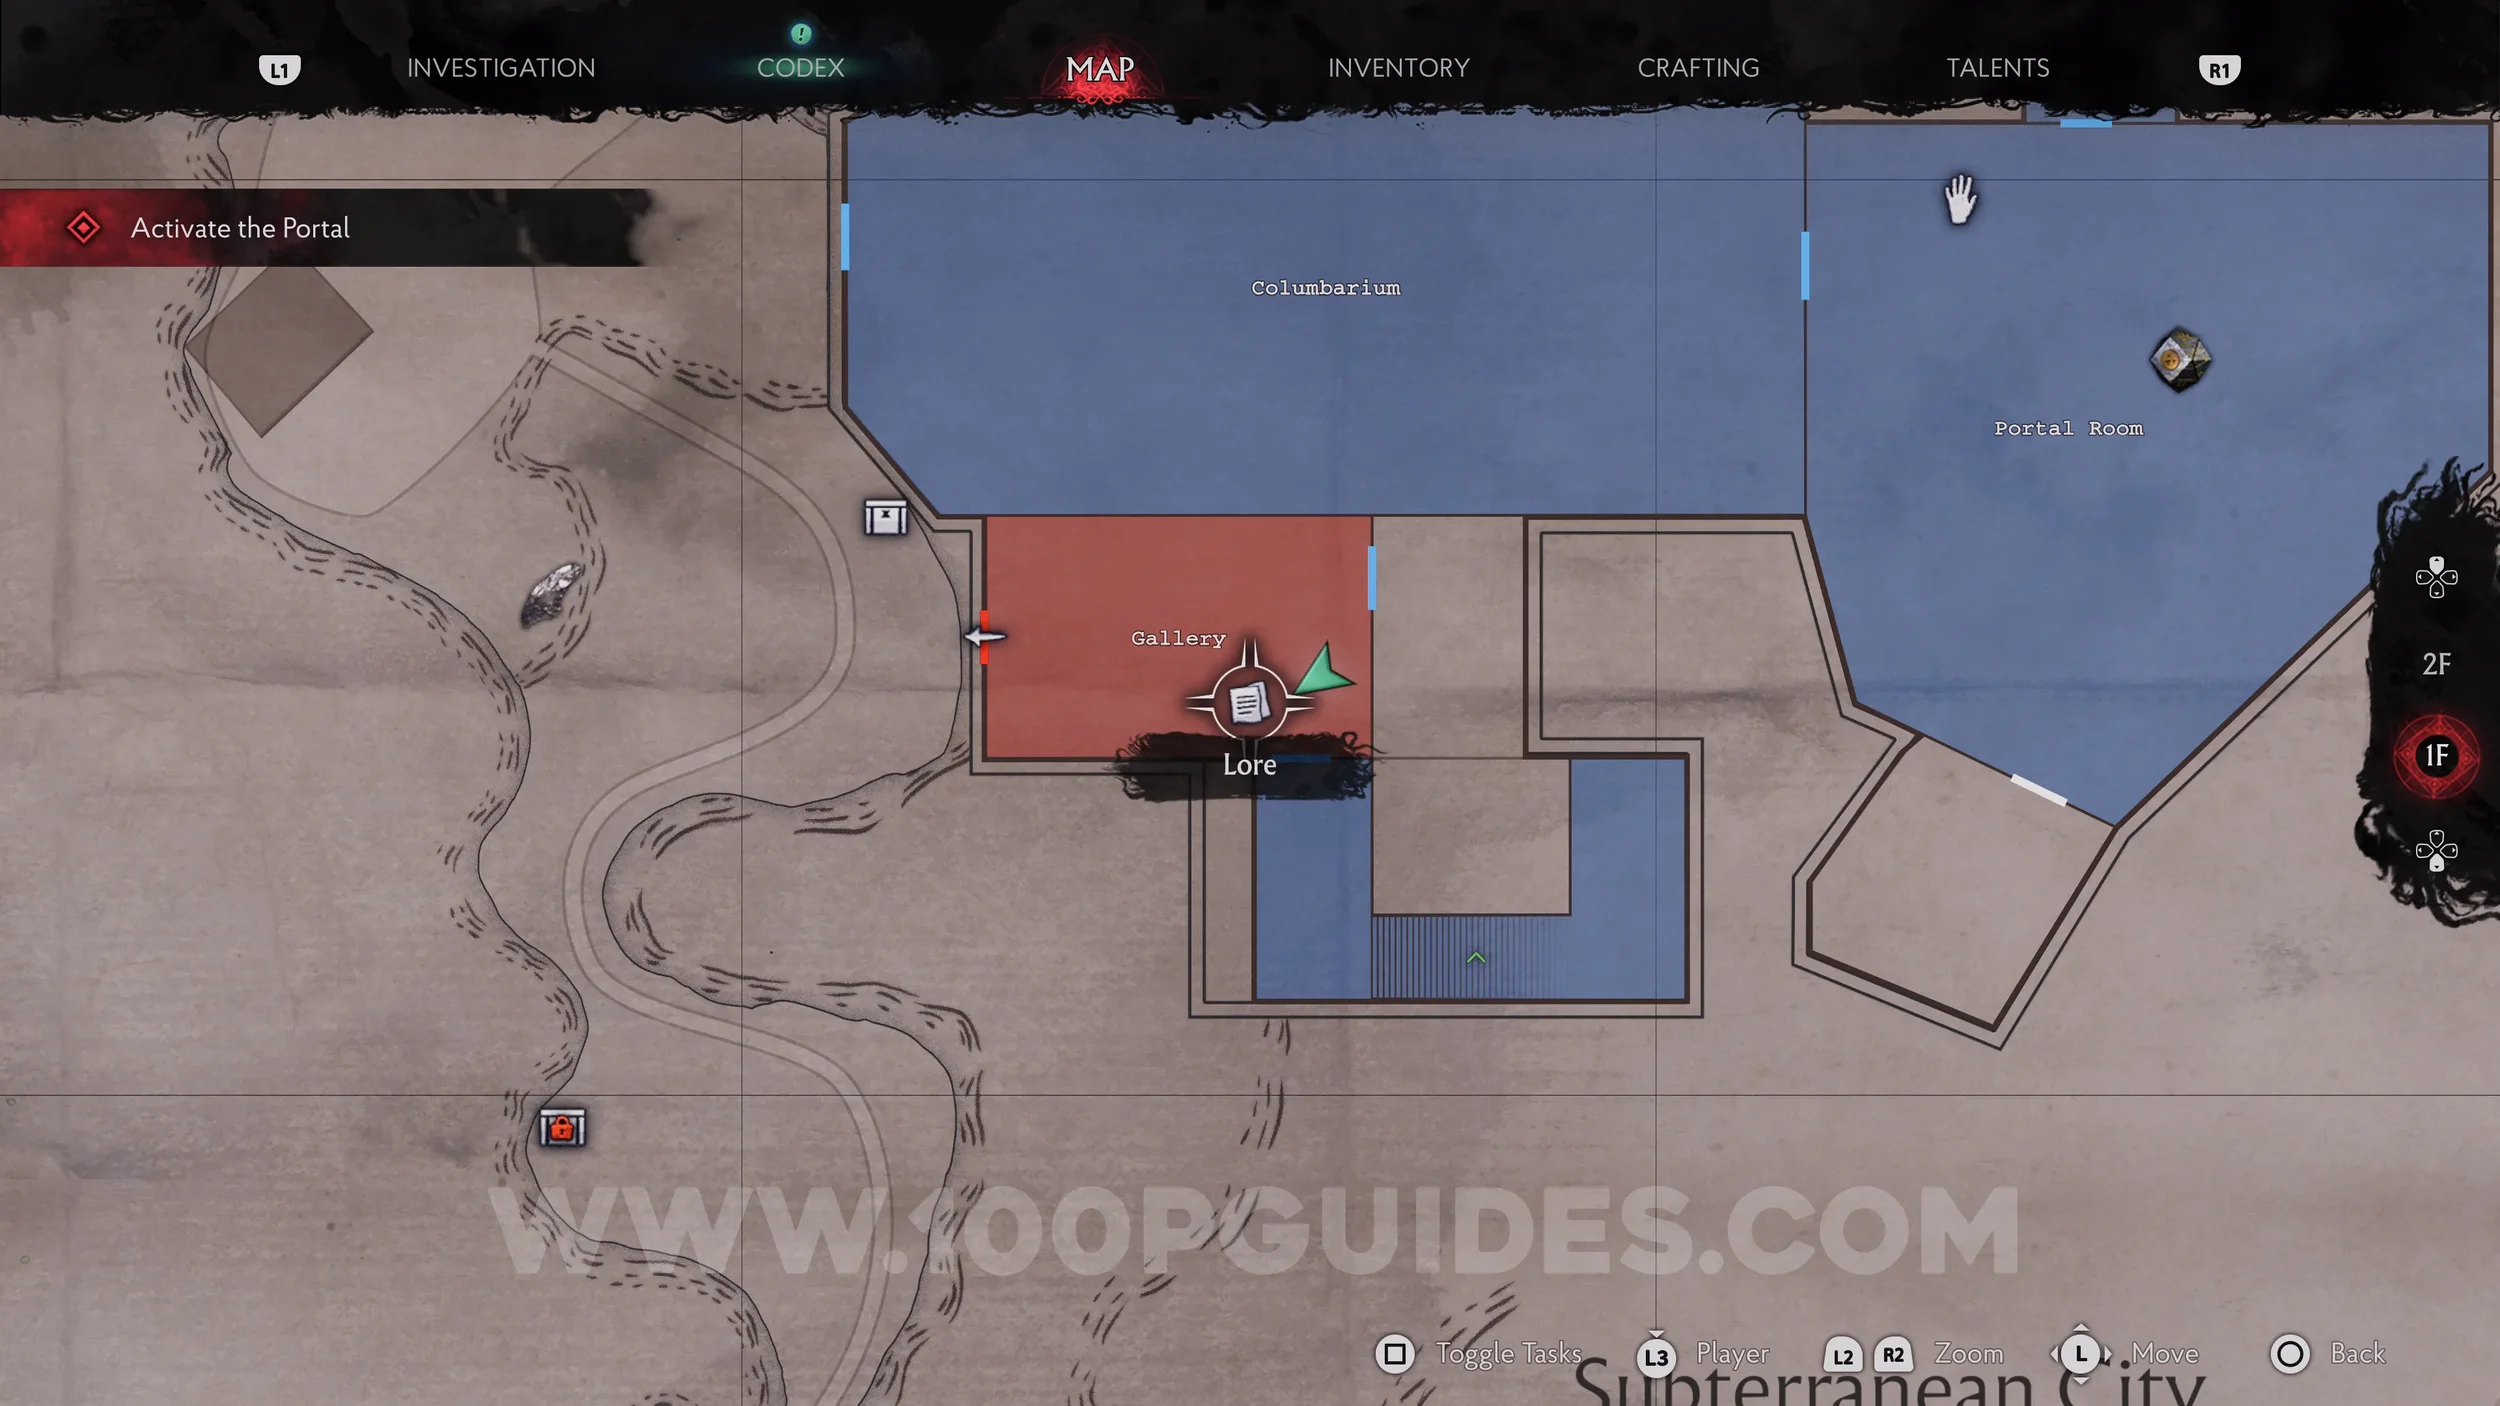
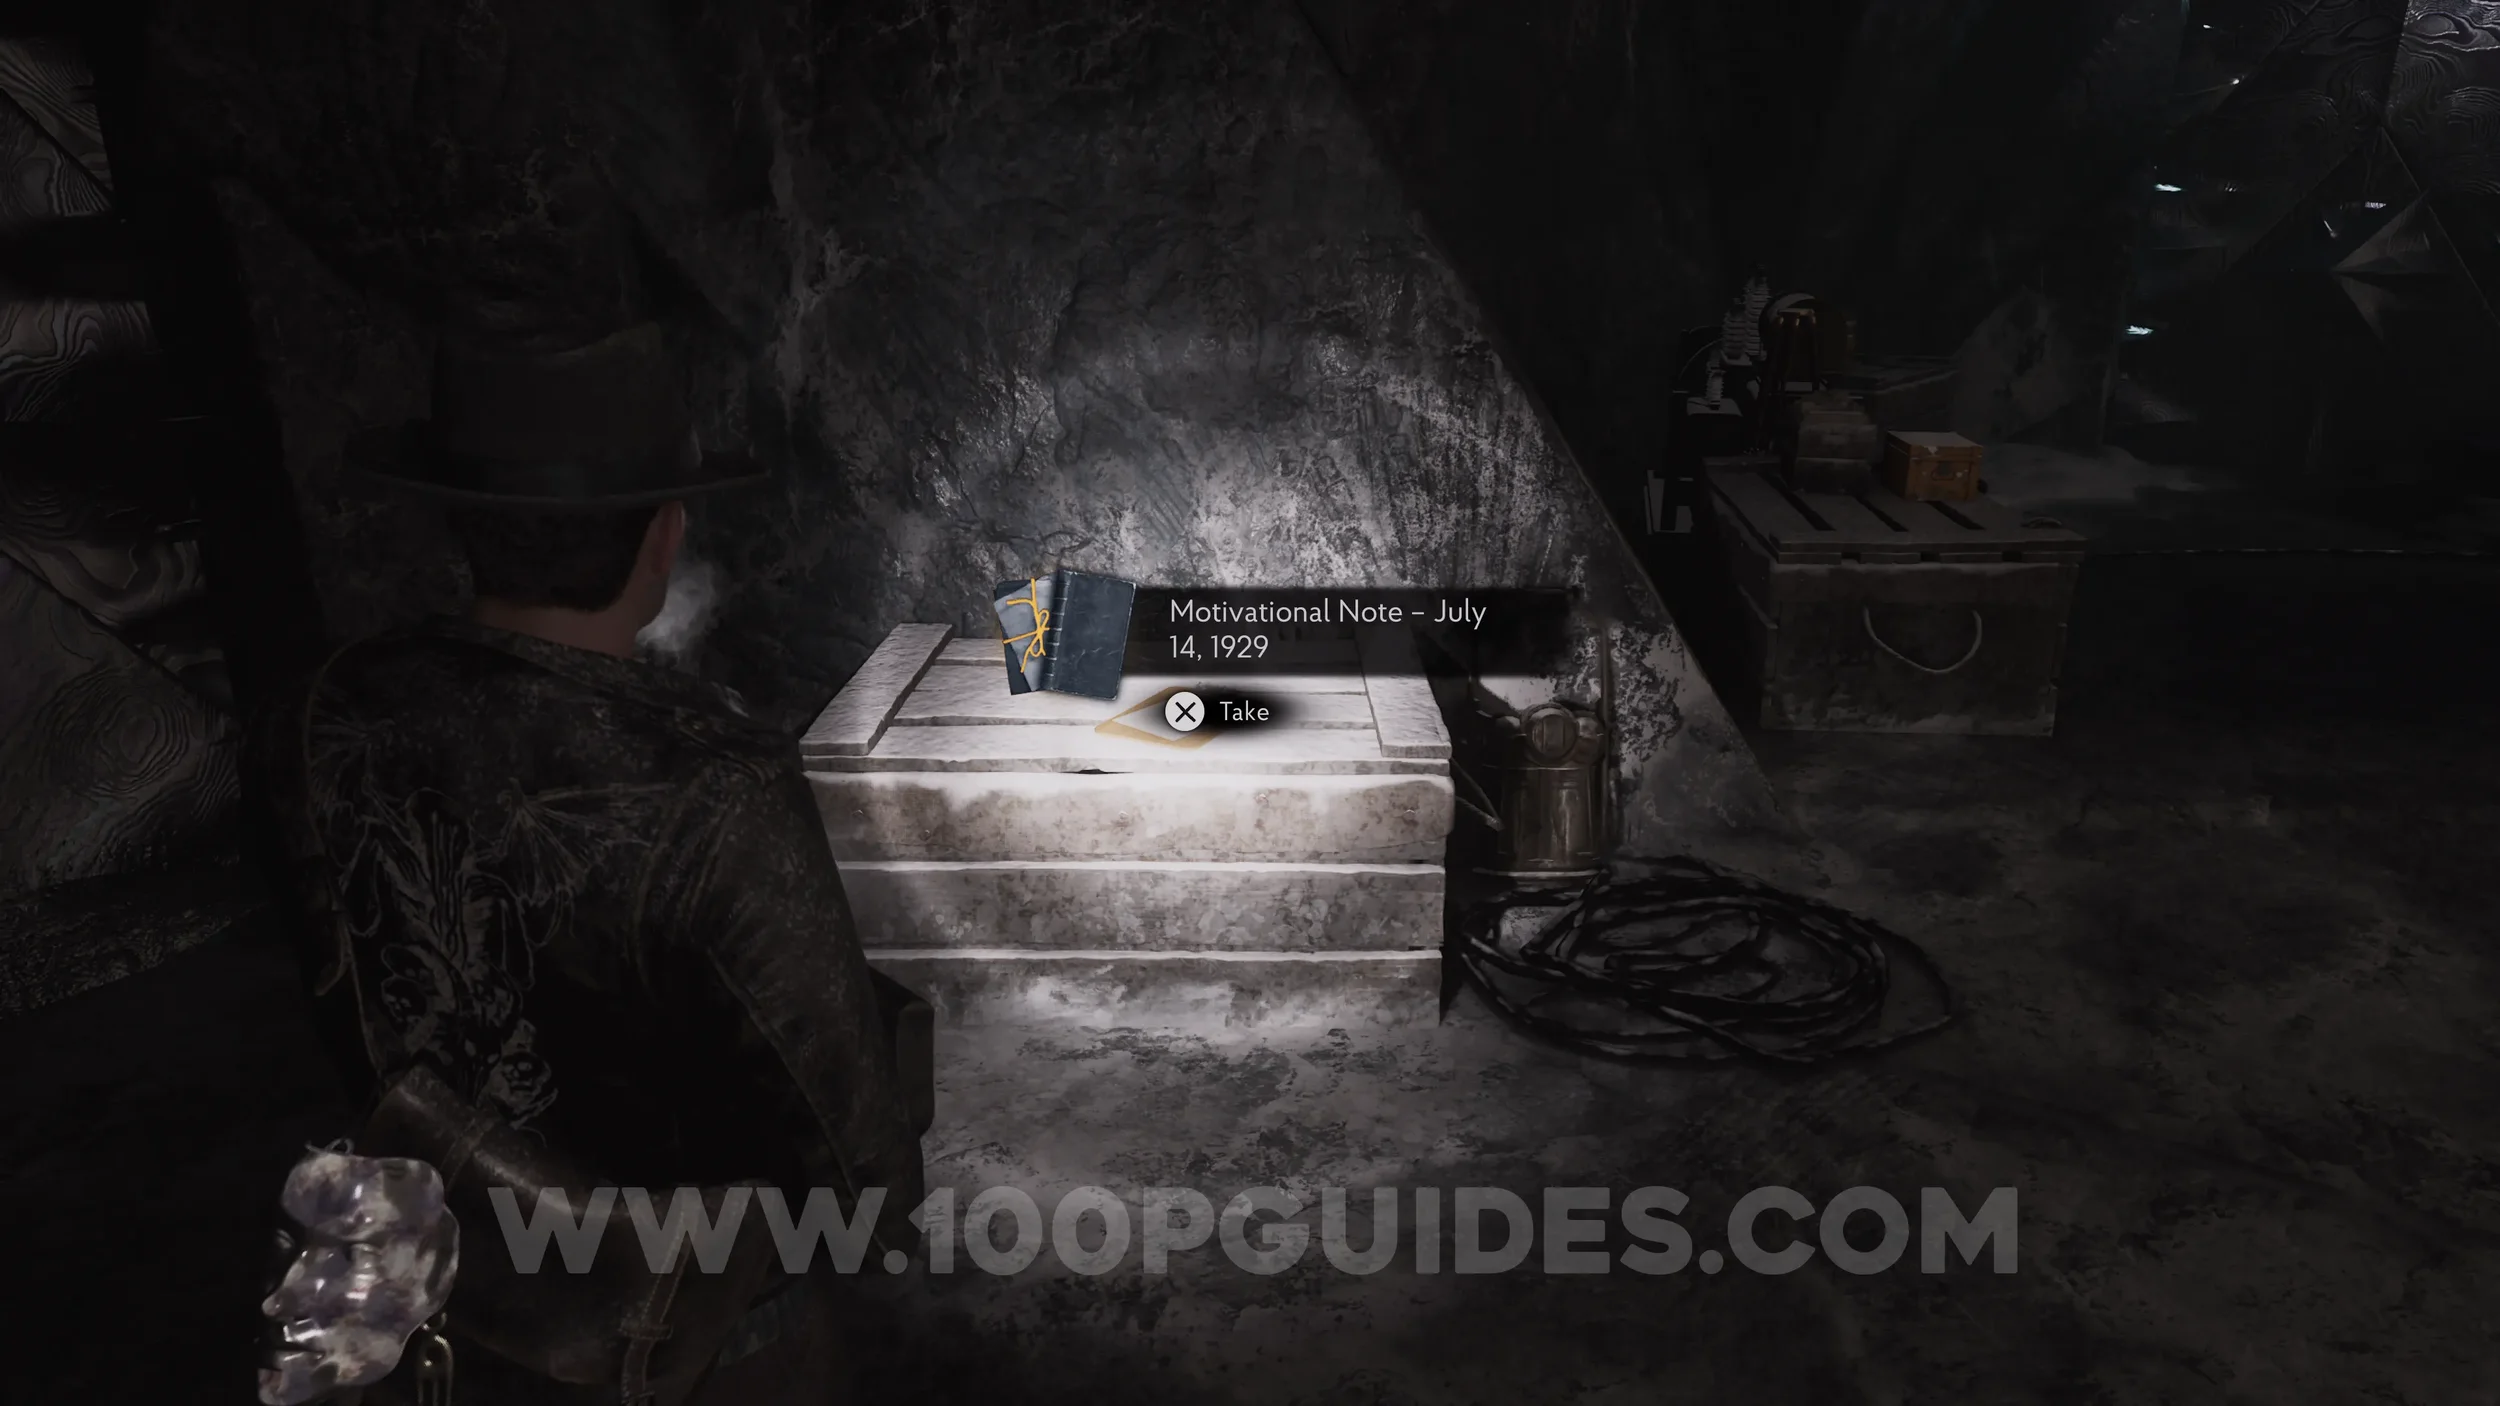
Lore Codex: Motivational Note - July 14, 1929. After the previous collectibles, continue down the stairs to reach the Gallery. The codex is on a box on your left as soon as you get there.
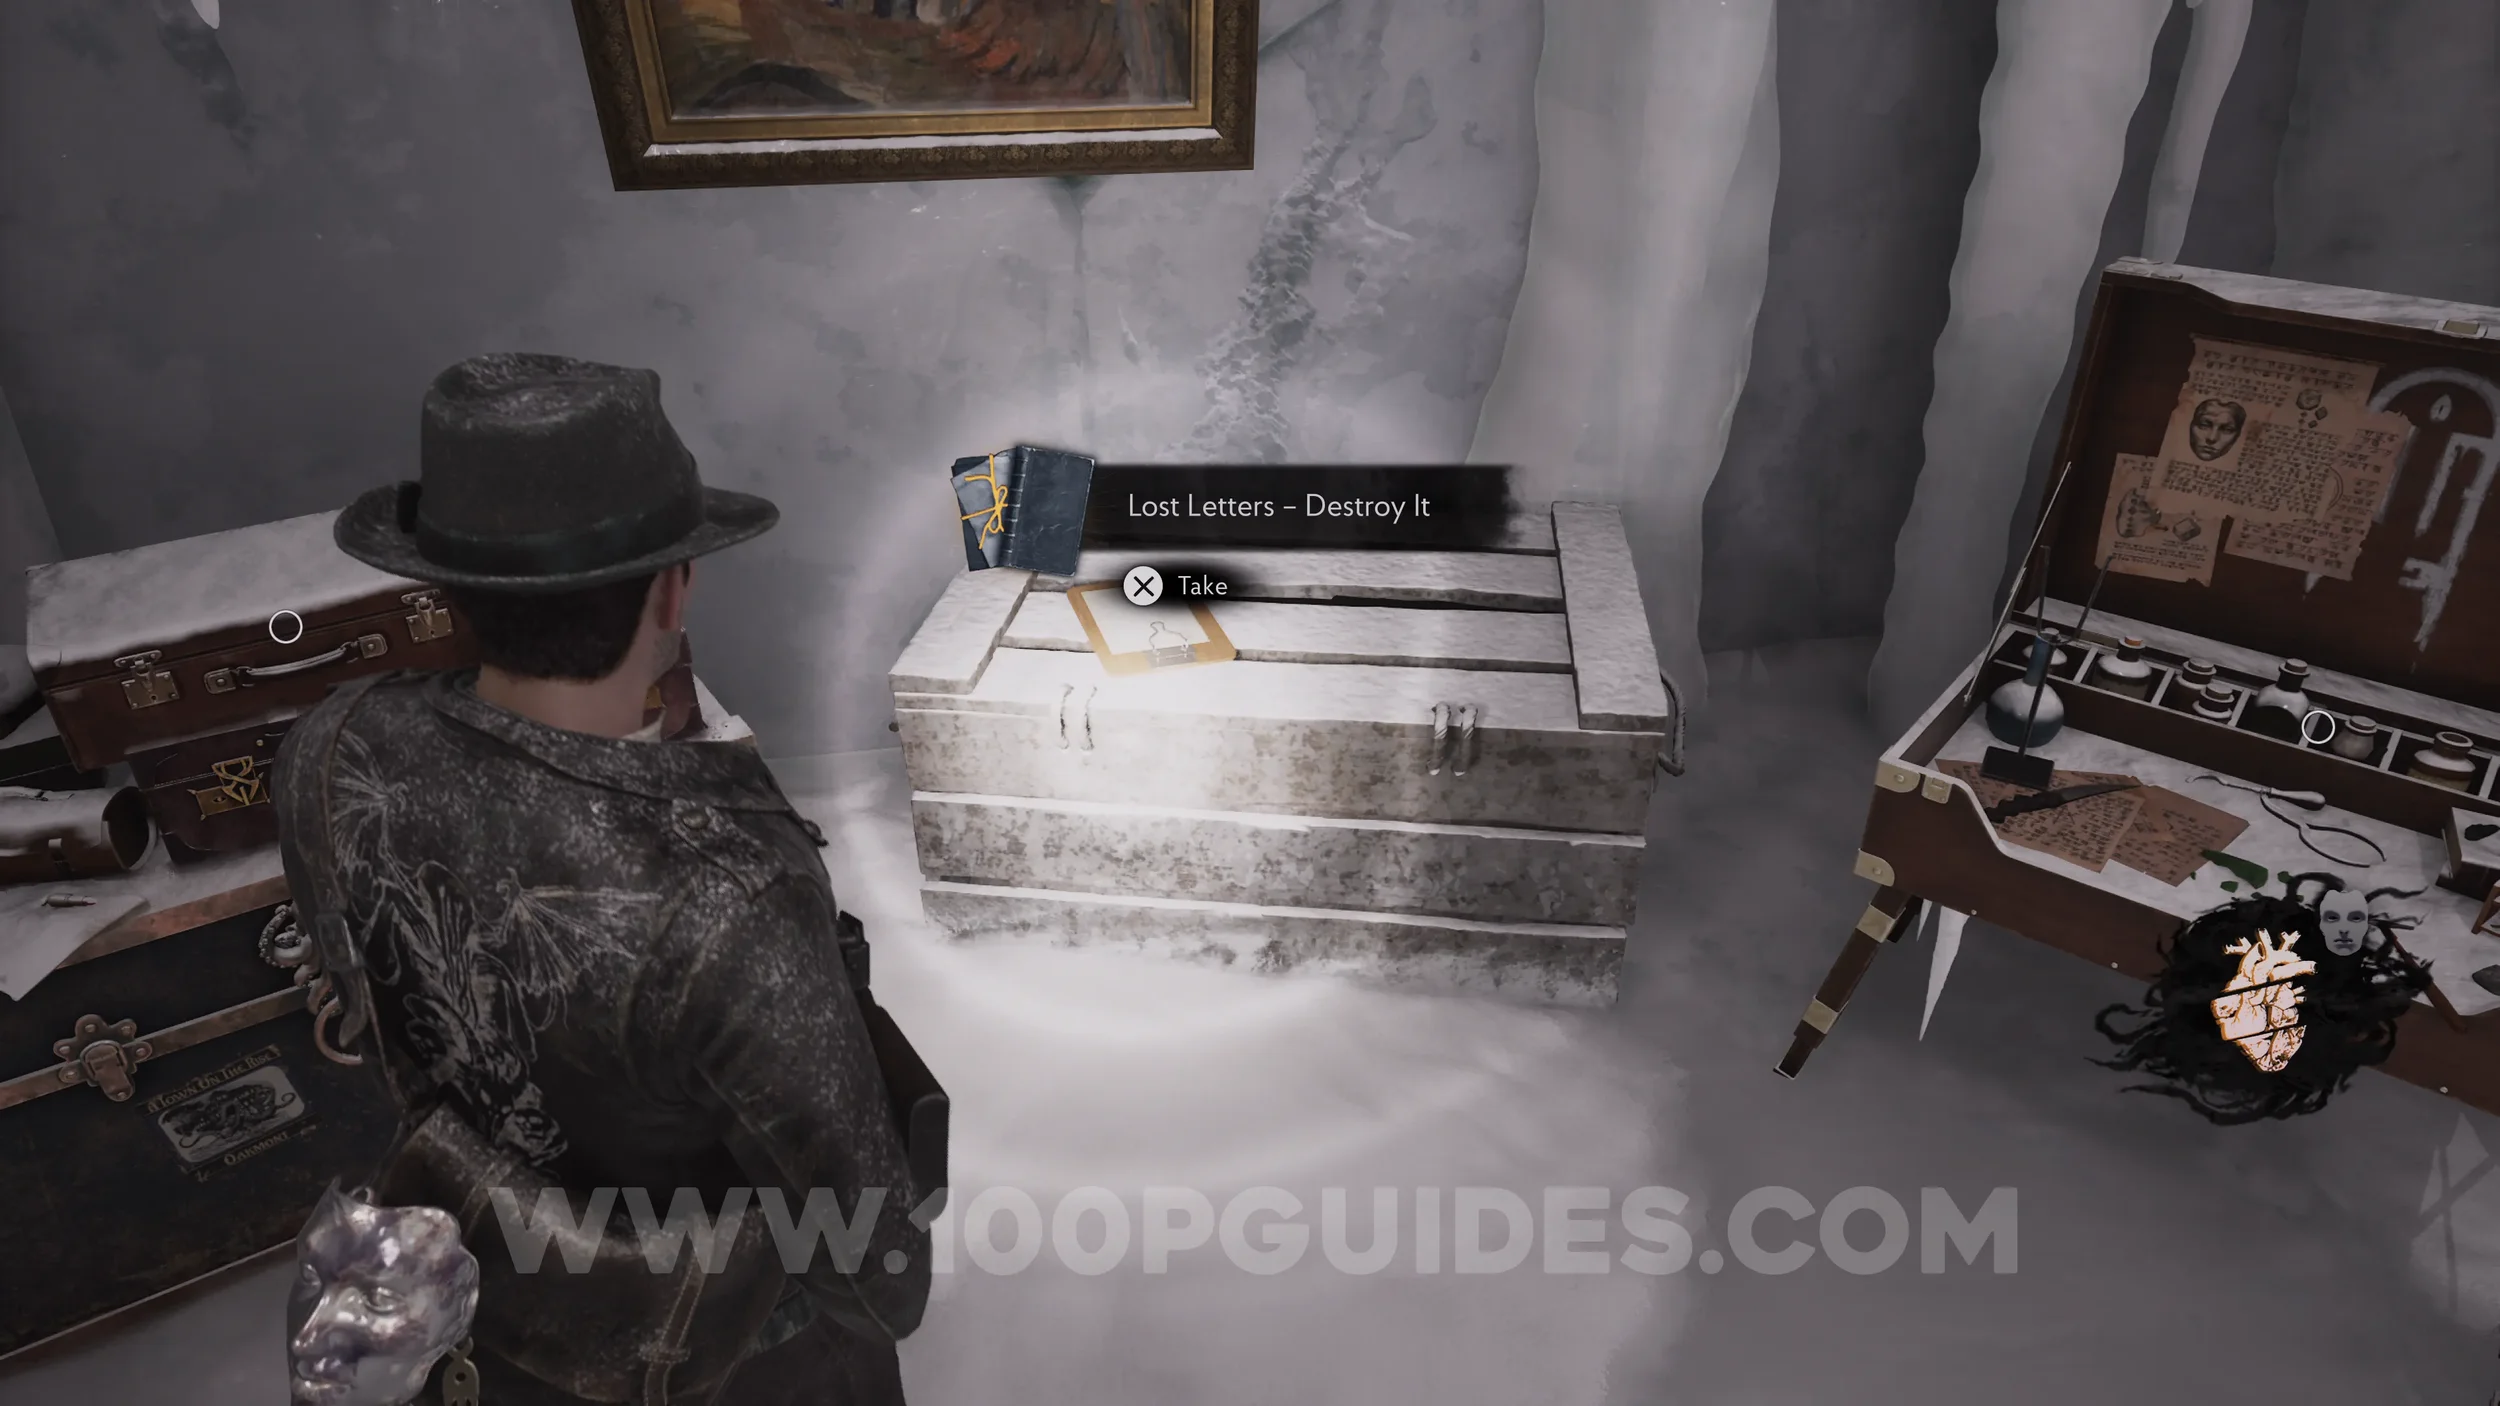
Lore Codex: Lost Letters - Destroy It. On a box in the Safe Room to the east of the Gallery.
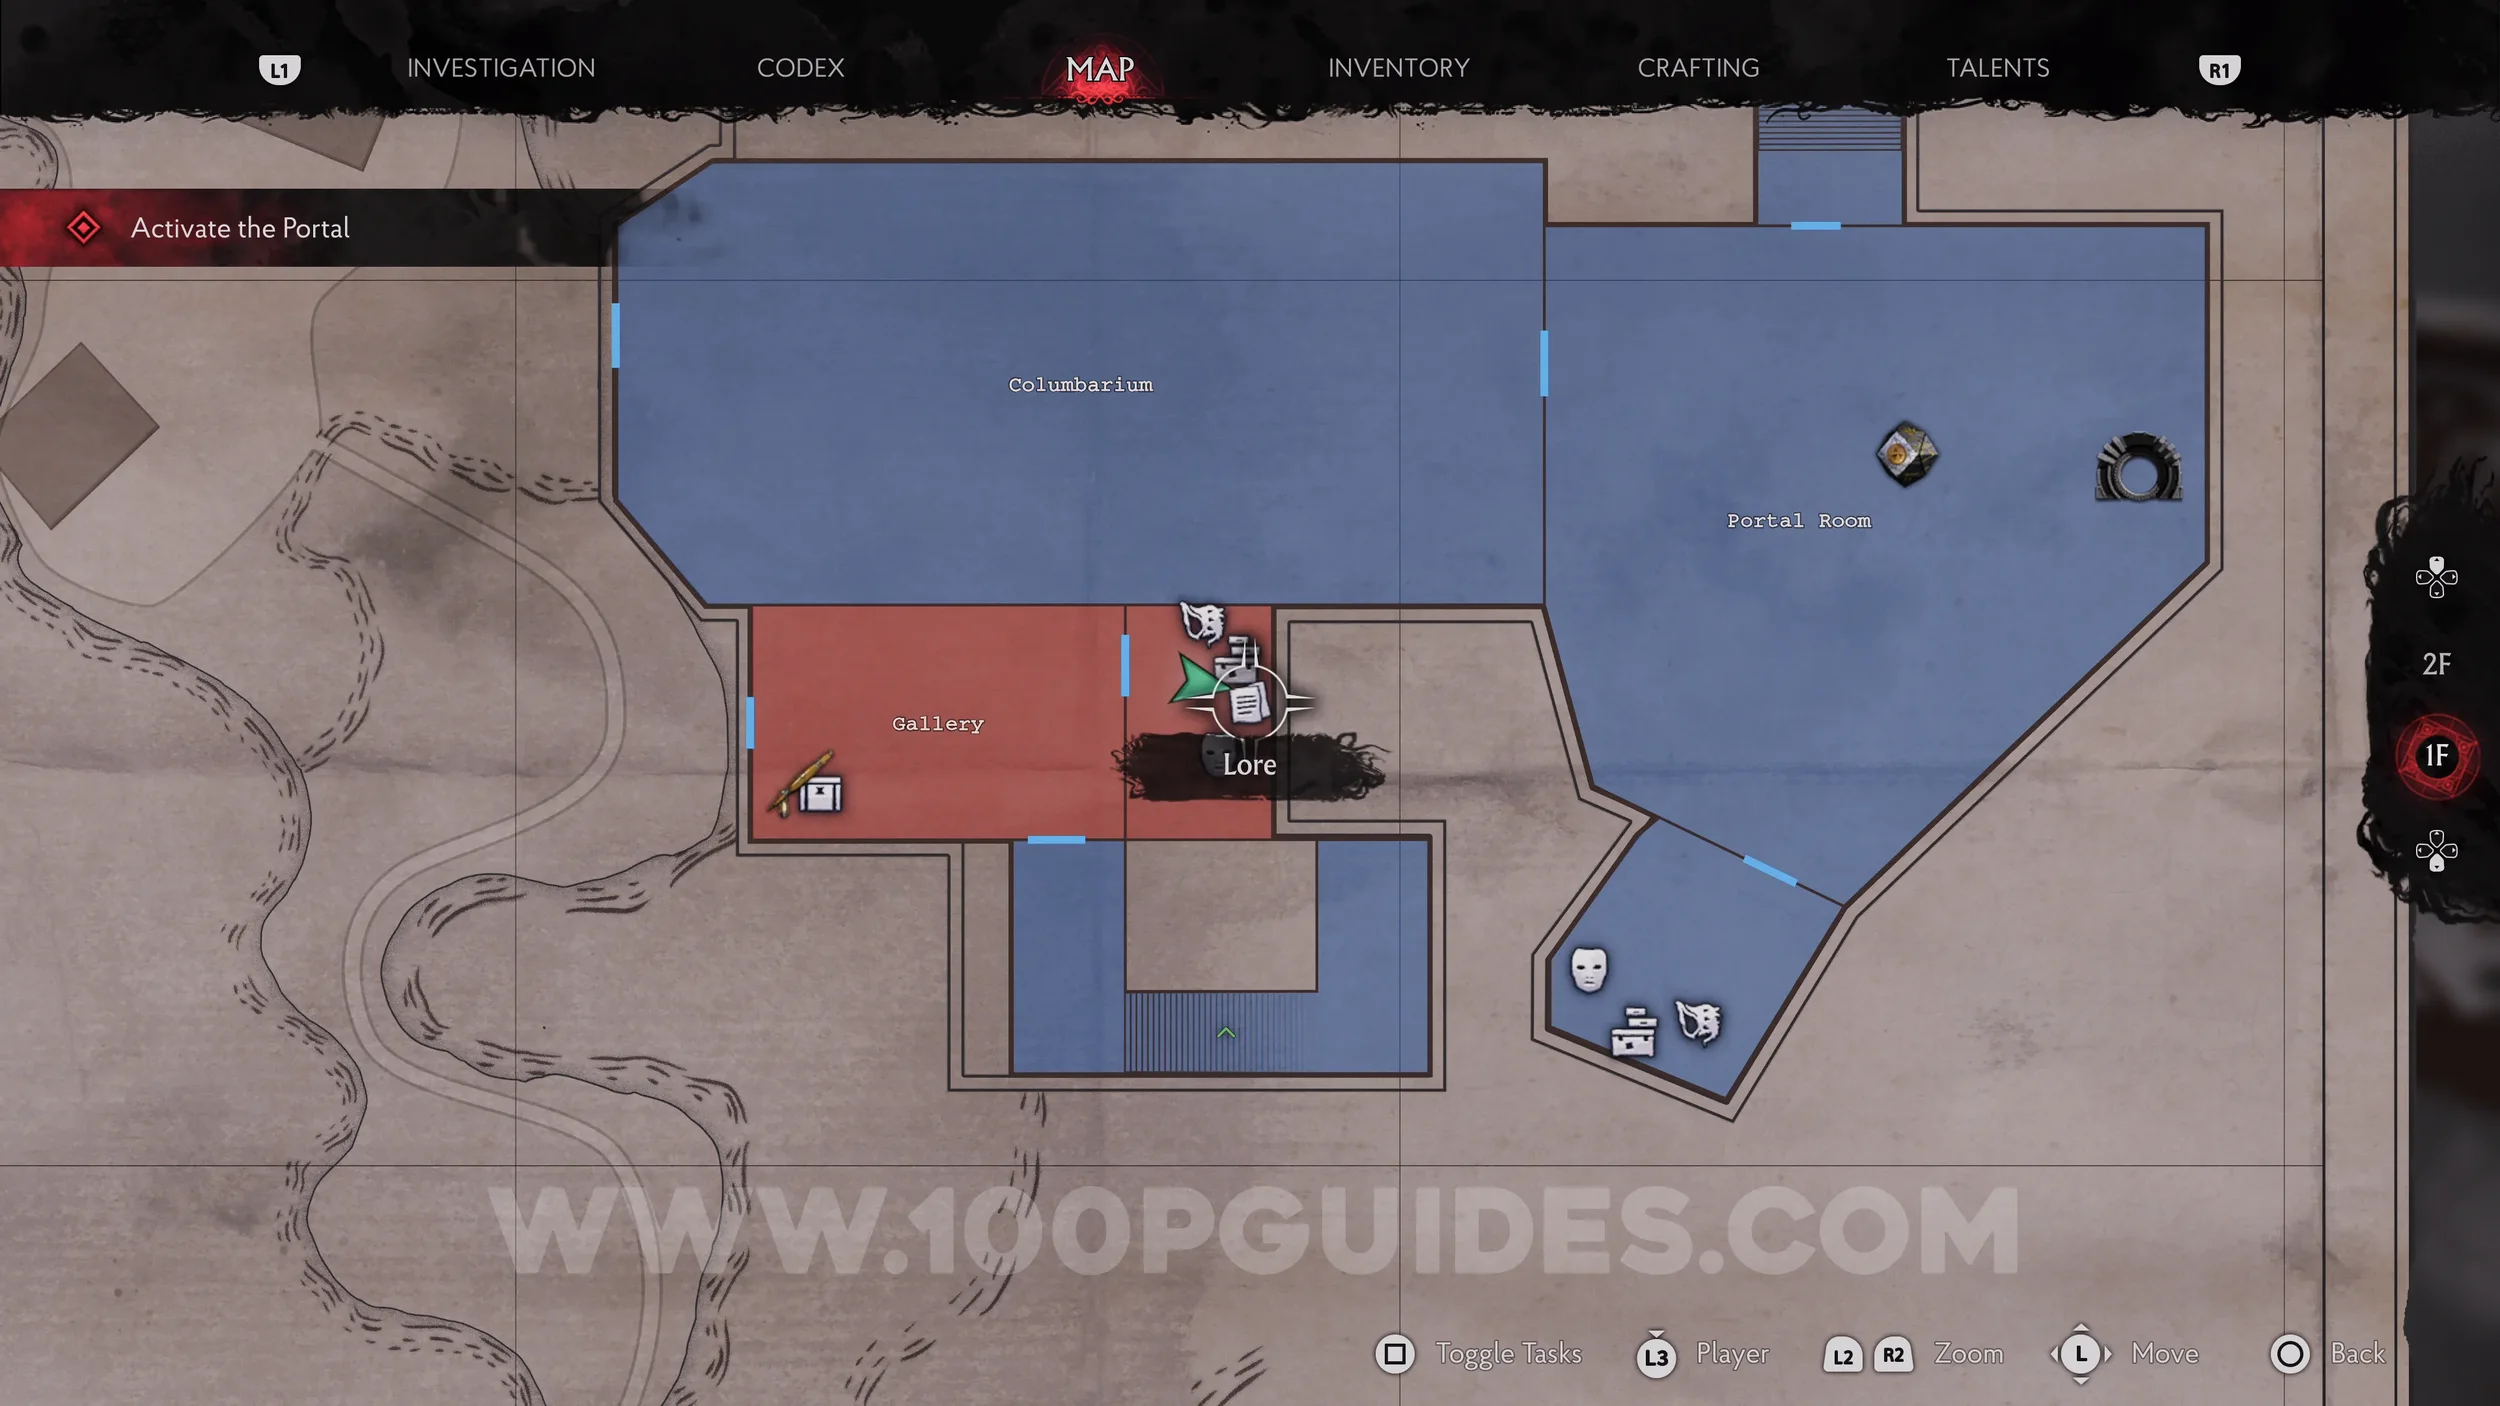
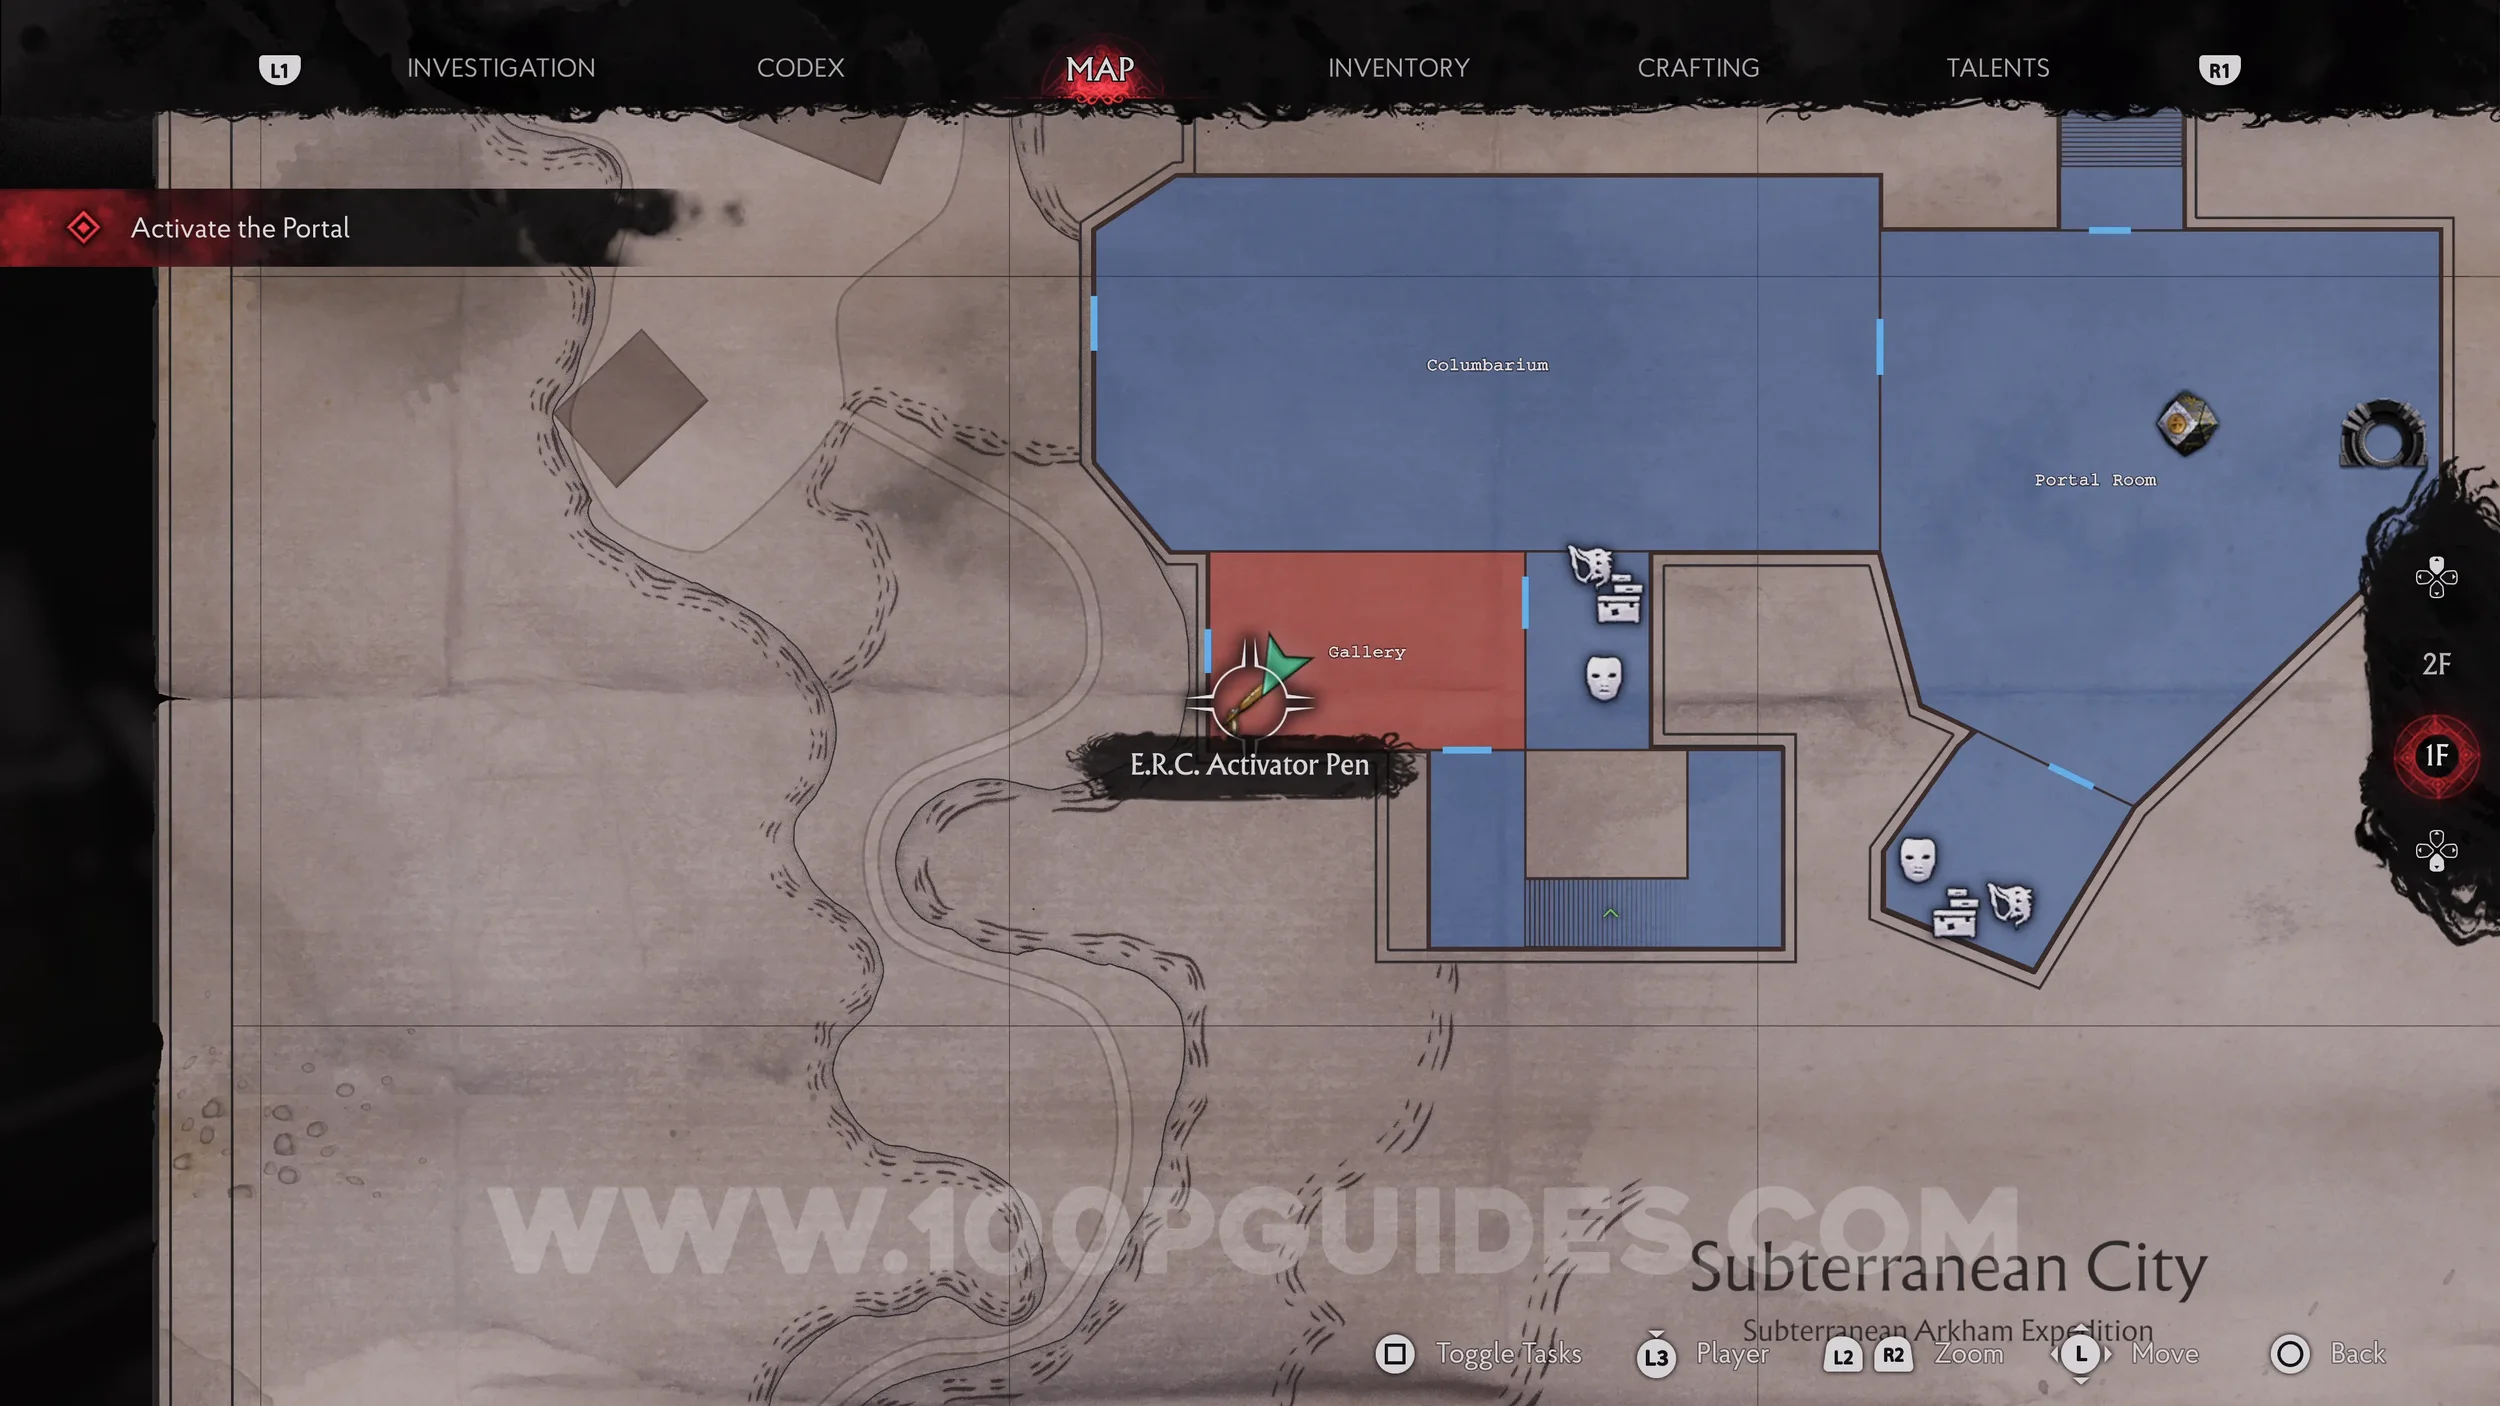
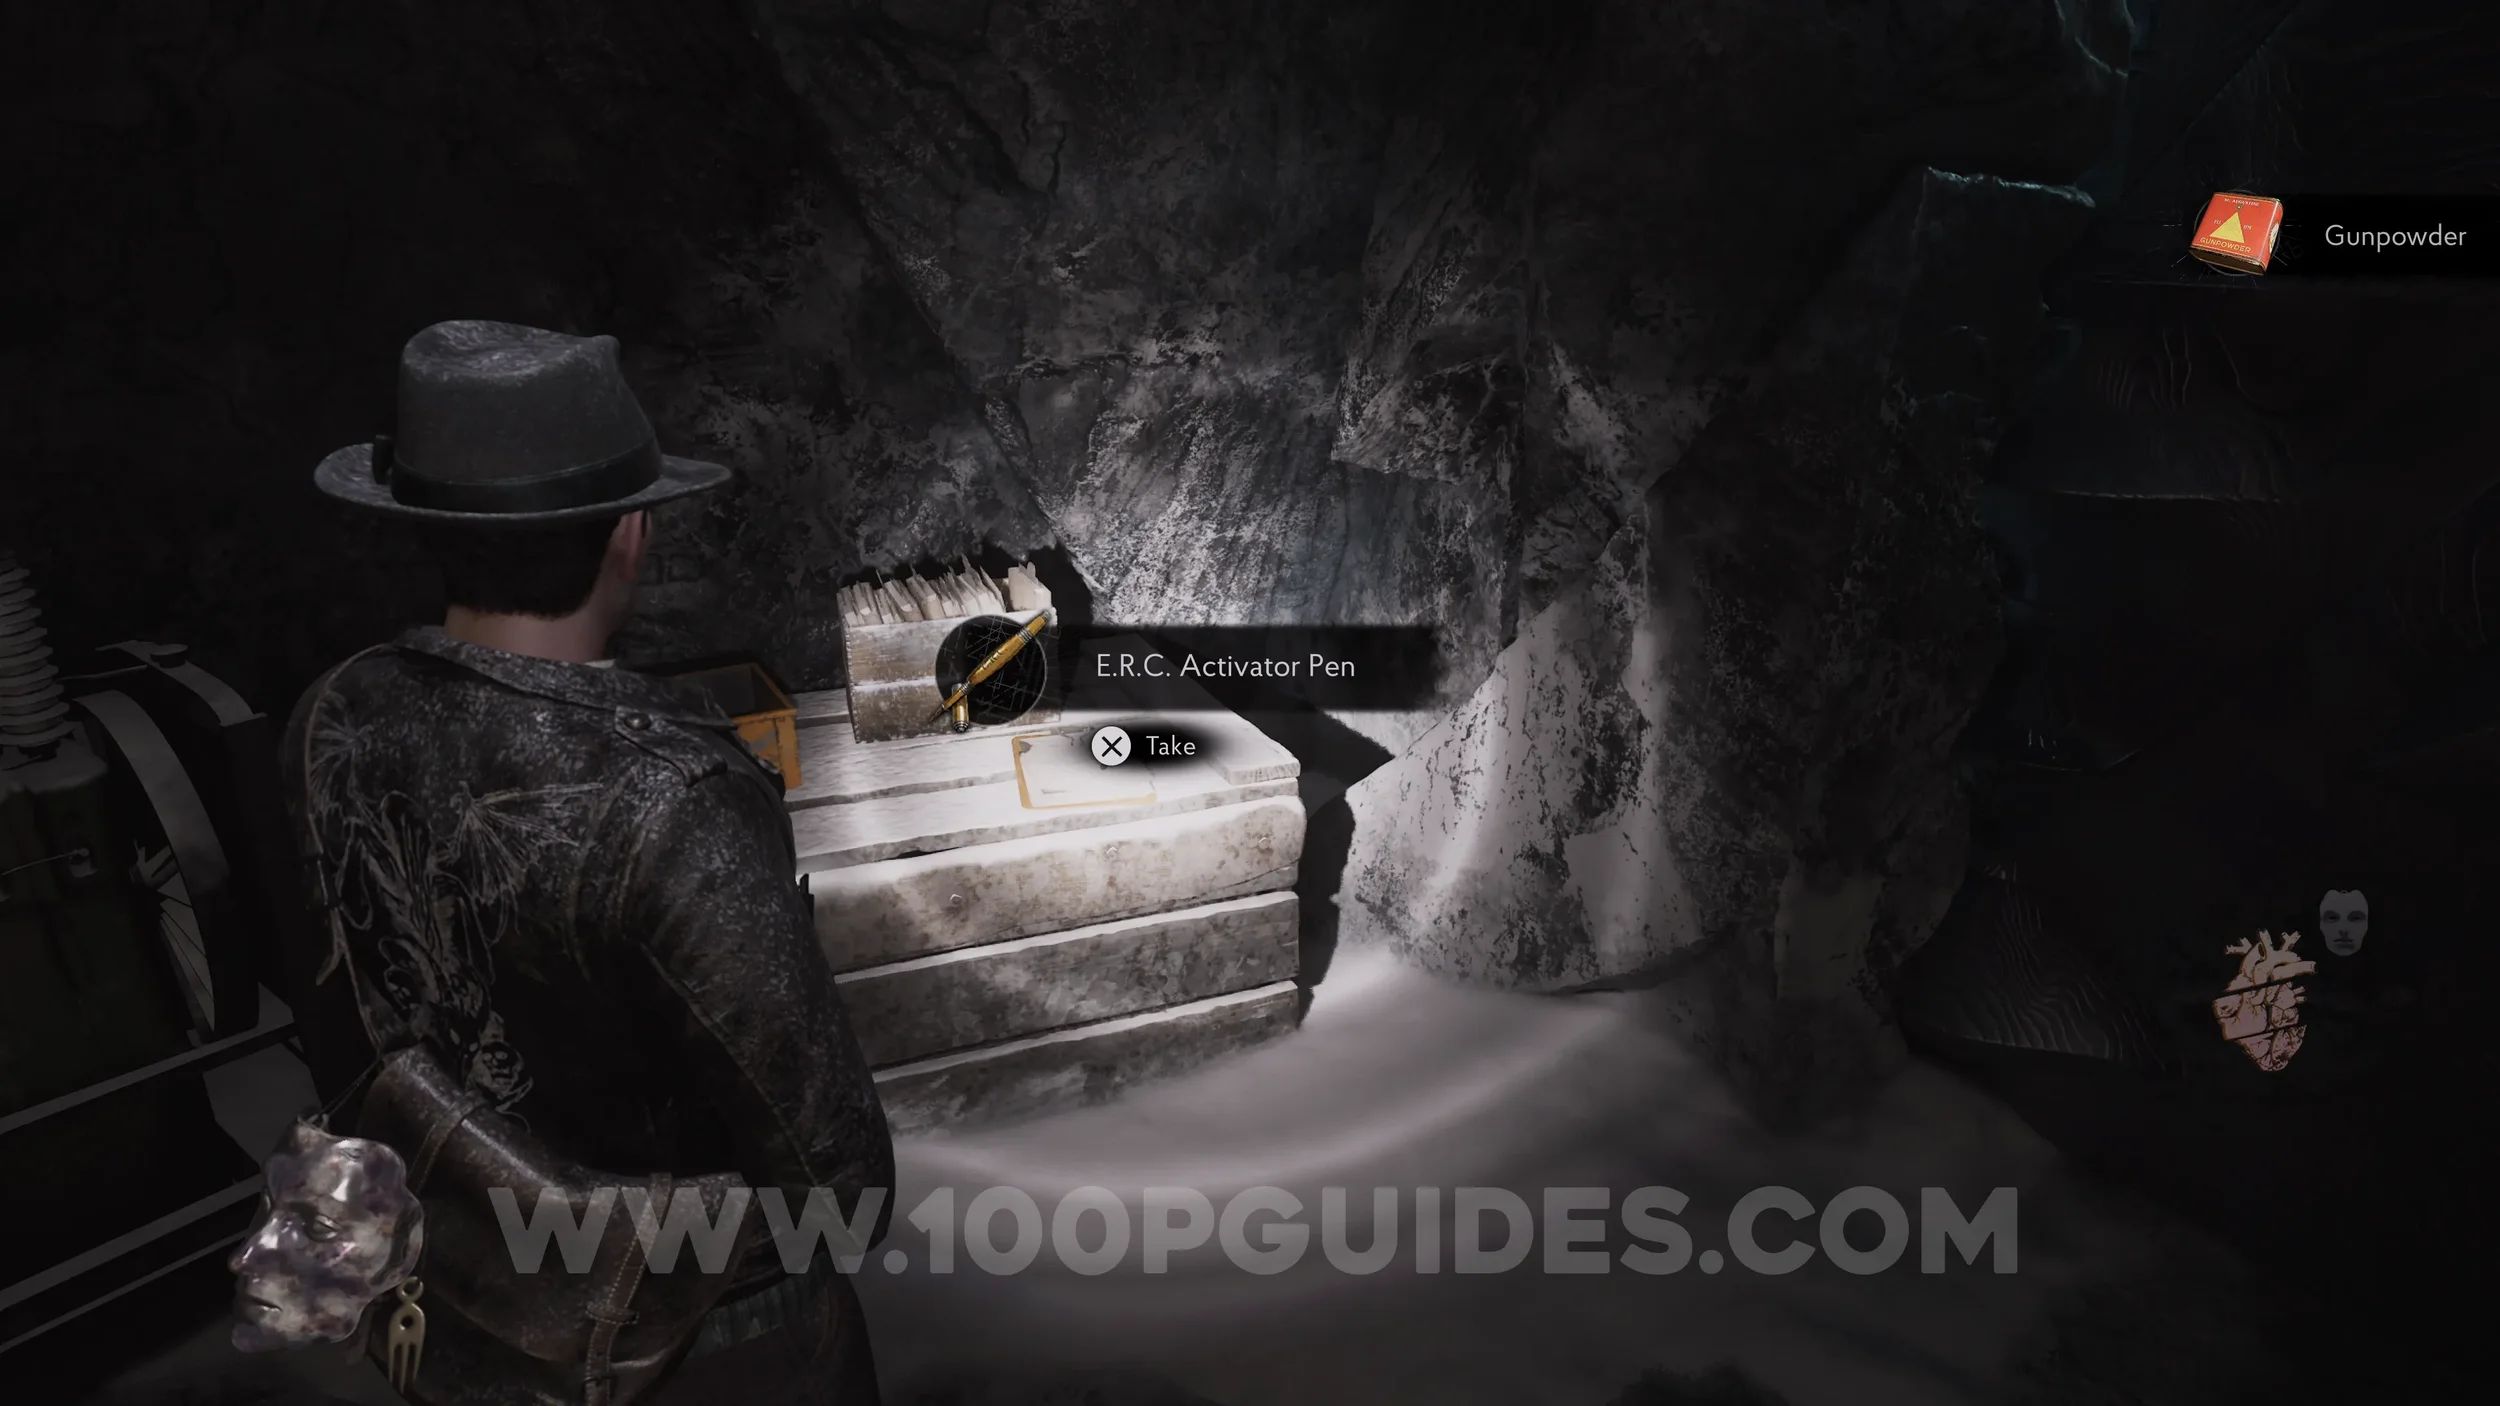
E.R.C. Activator Pen. On a box in the corner of the Gallery.
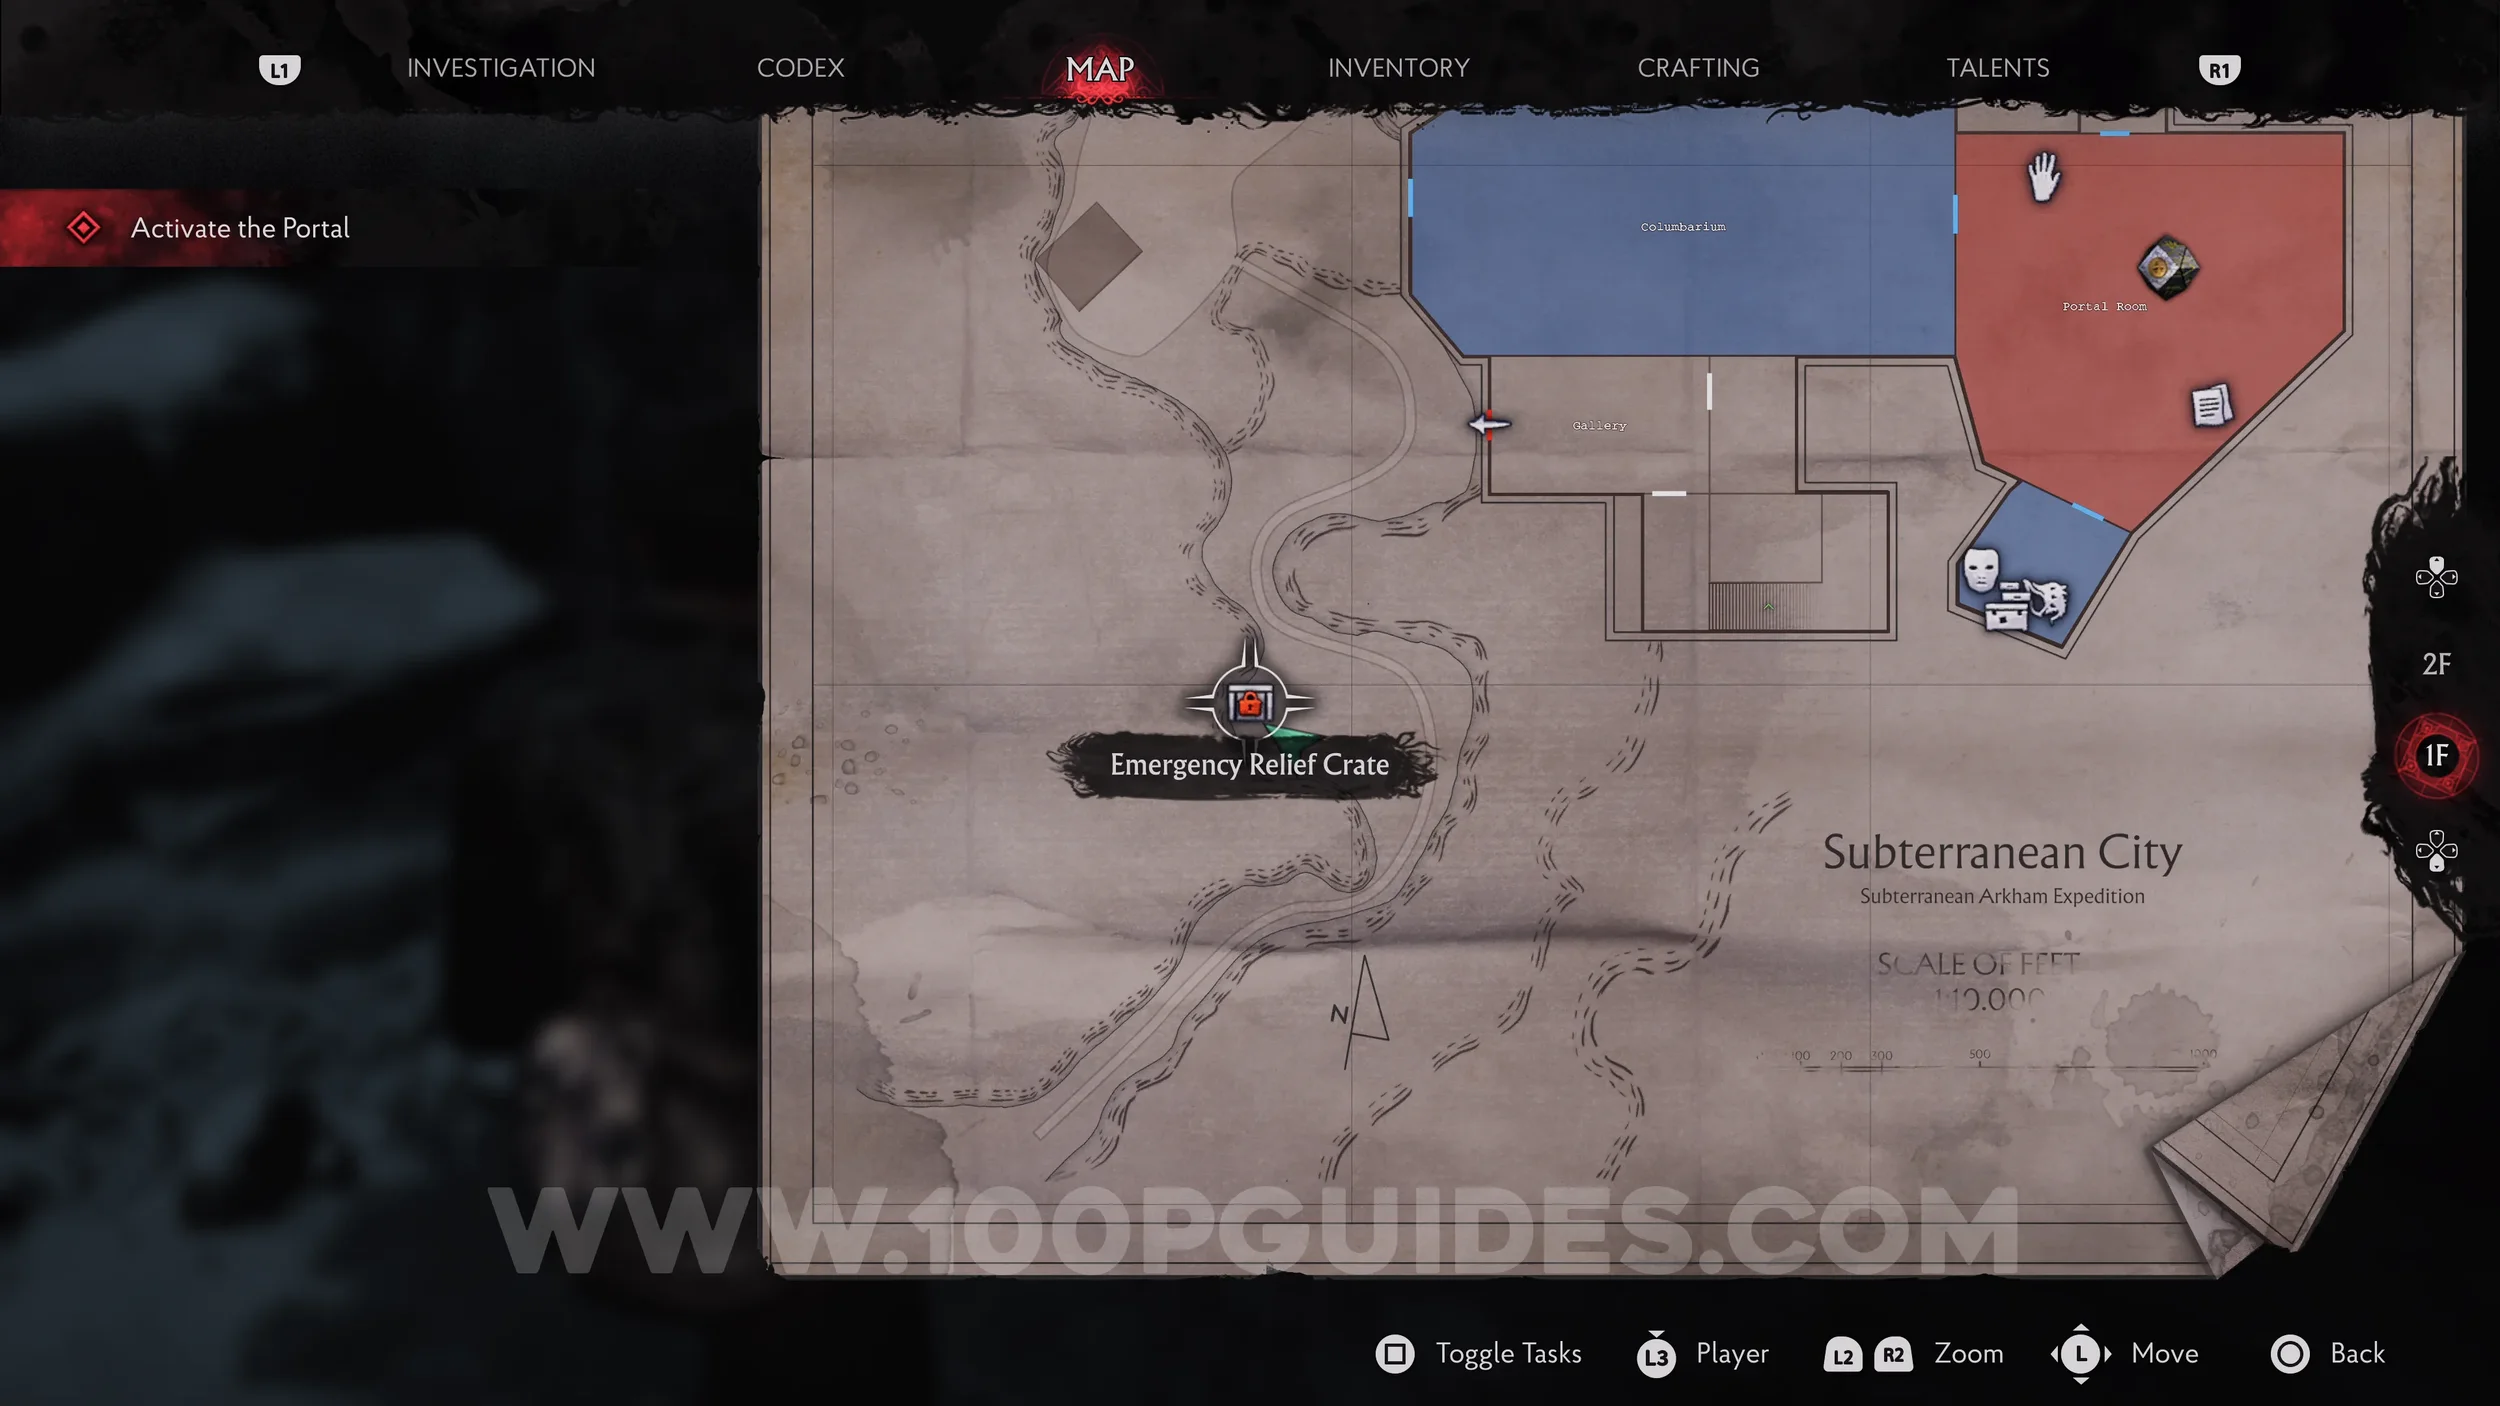
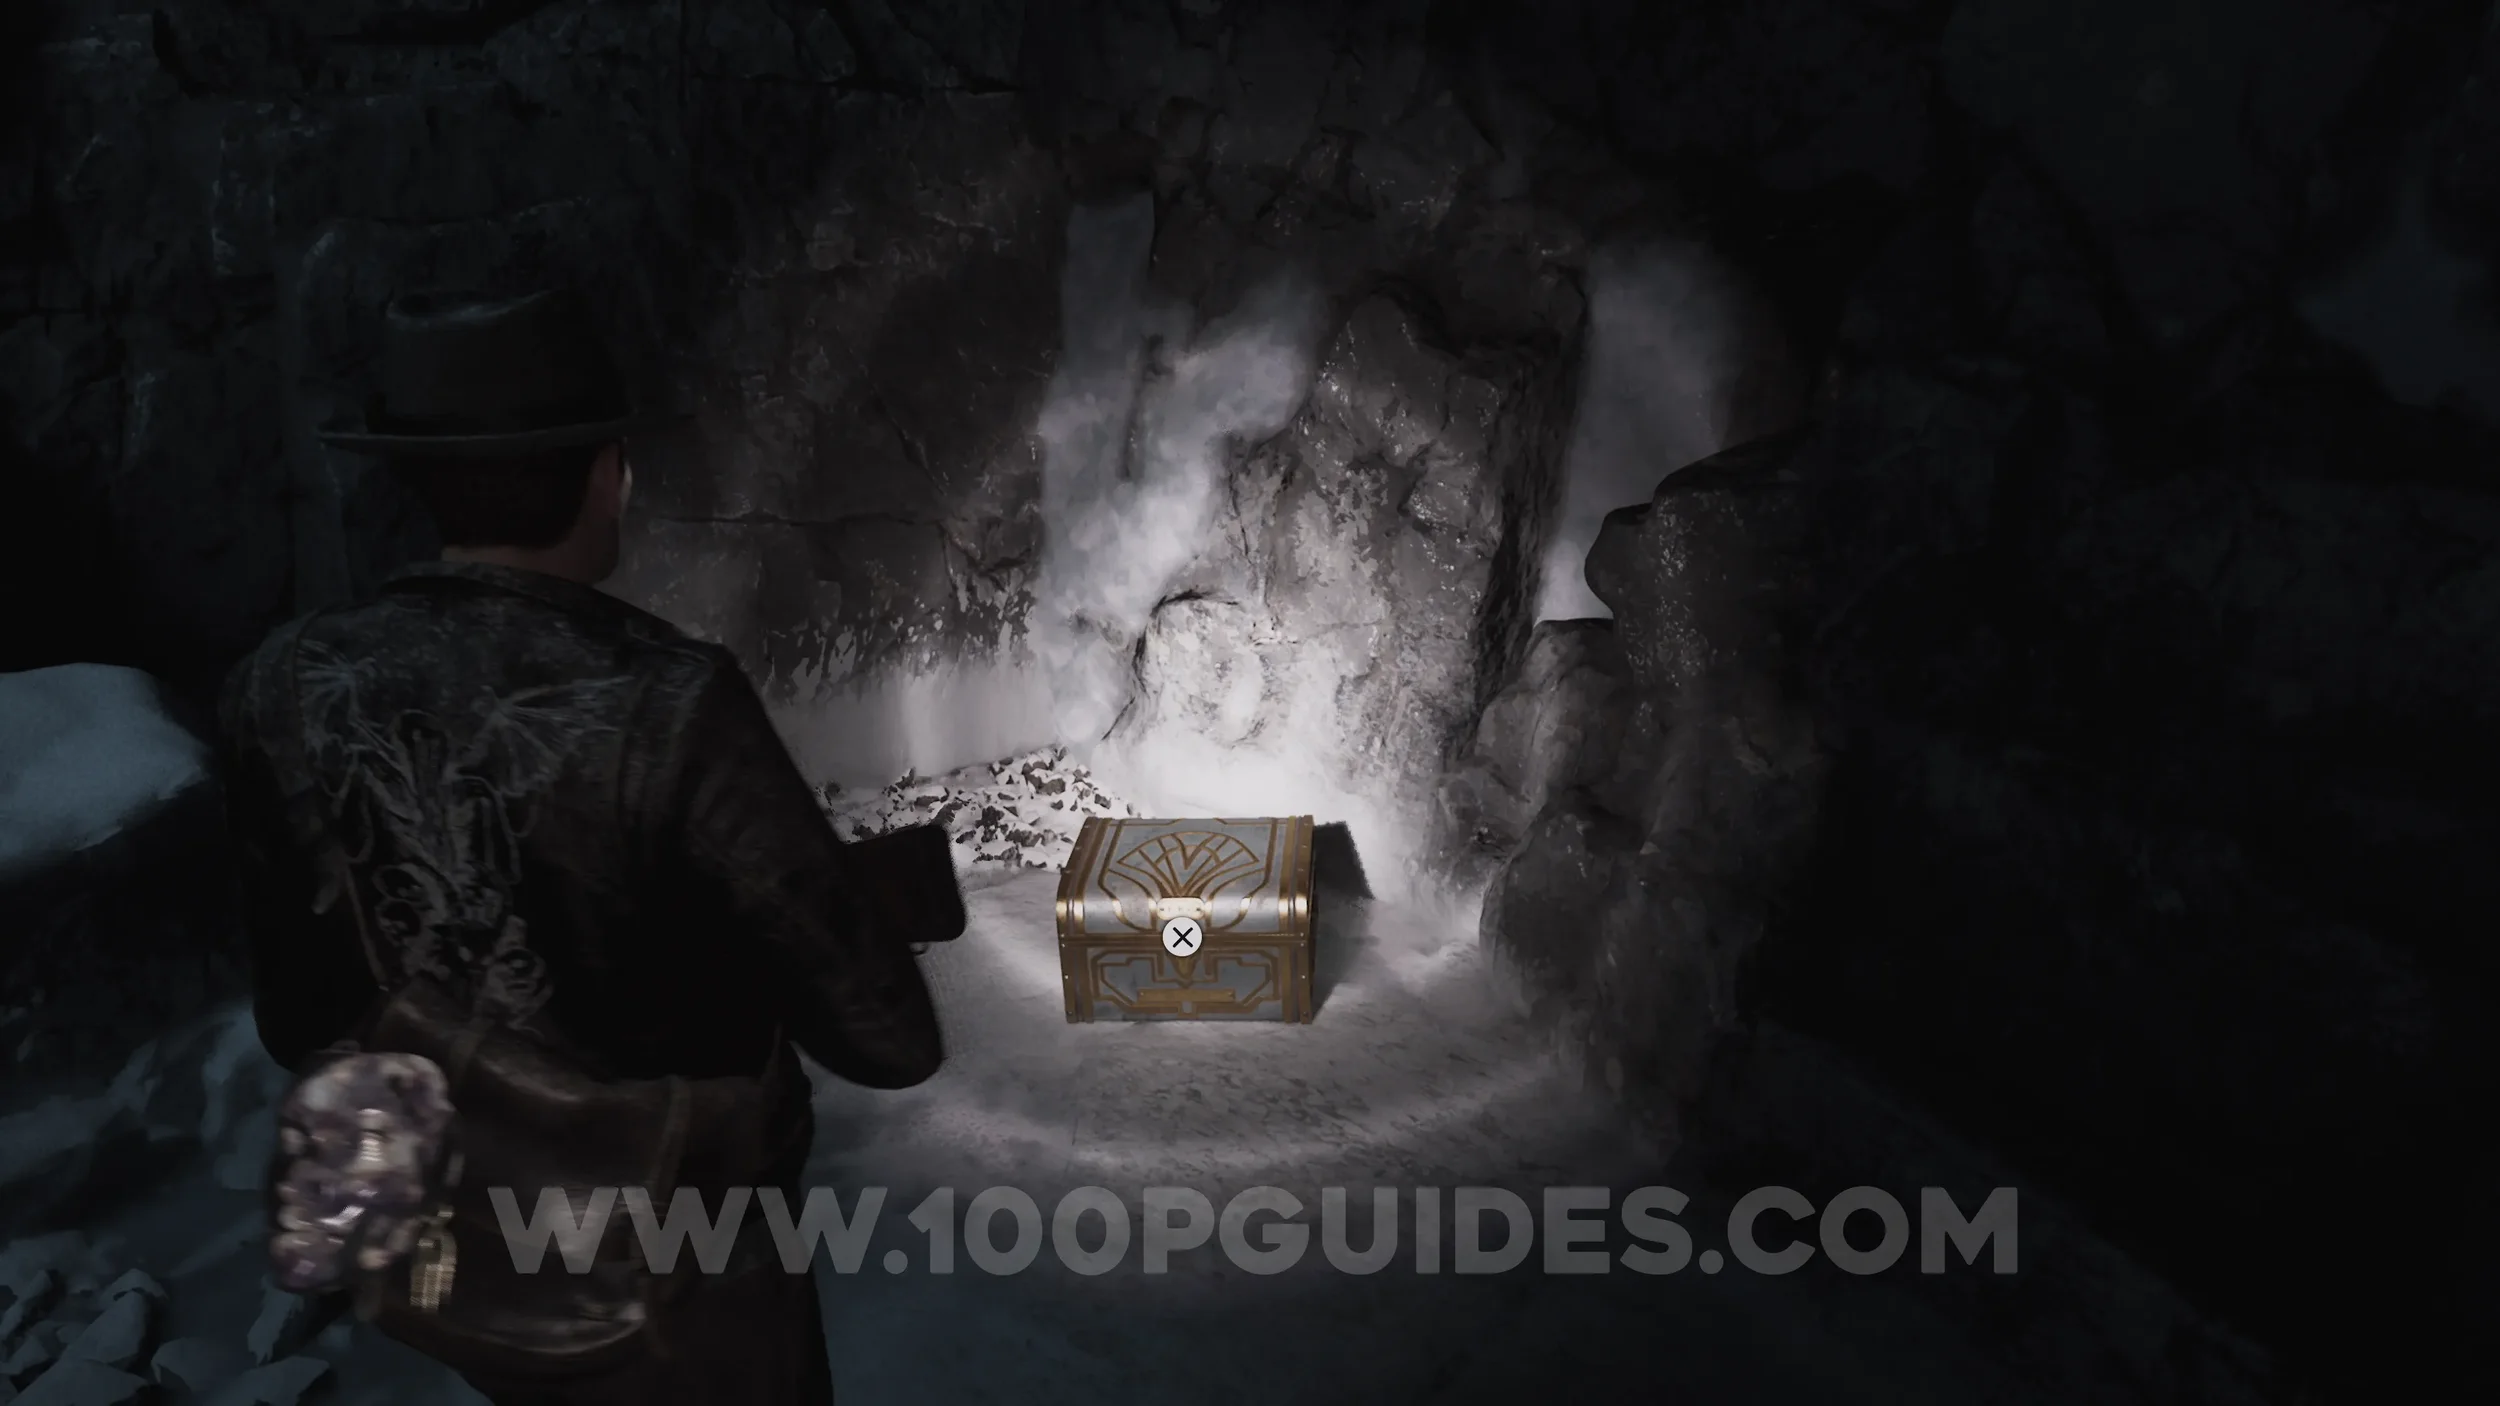
Emergency Relief Crate (E.R.C.) + Dream Essence x2. After leaving the Gallery, you'll emerge back into the cave close to where you started. Here, follow the path south until you see the crate on your right. The Dream Essence is inside.
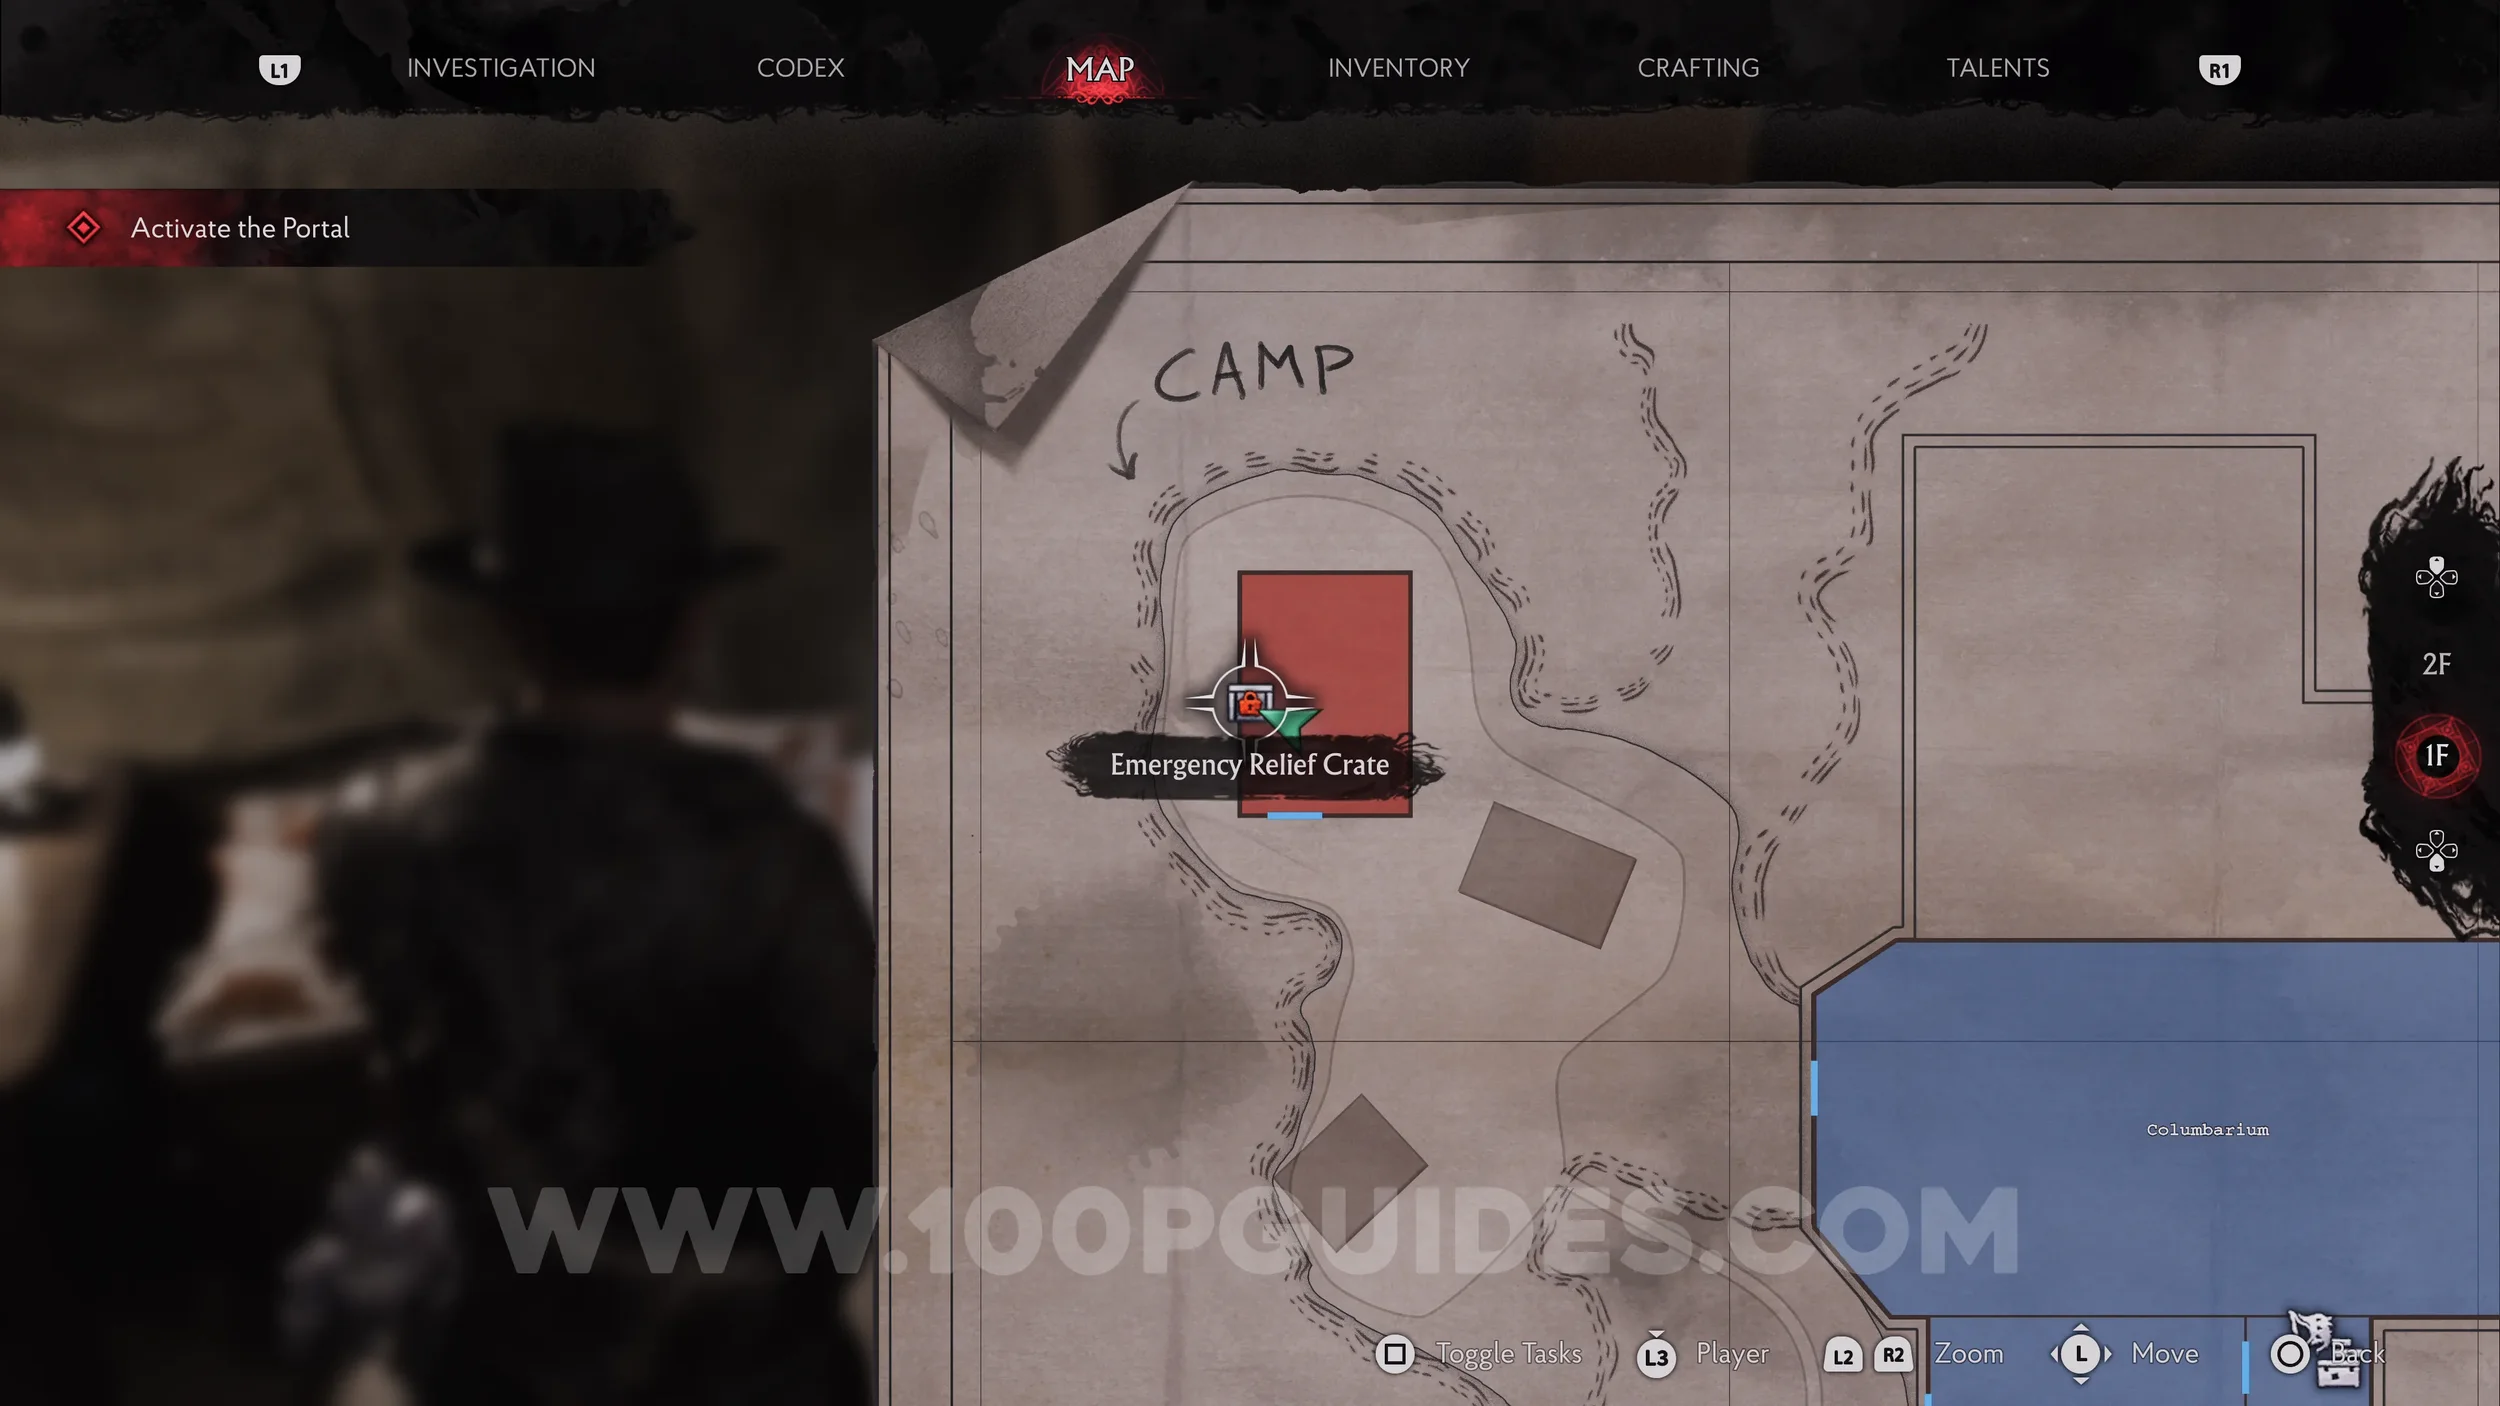
Emergency Relief Crate (E.R.C.) + Weapon Accessory: Keene’s Timeglass. Returning to the camp and use one of the pens to open the E.R.C. in the main tent. The accessory is inside.
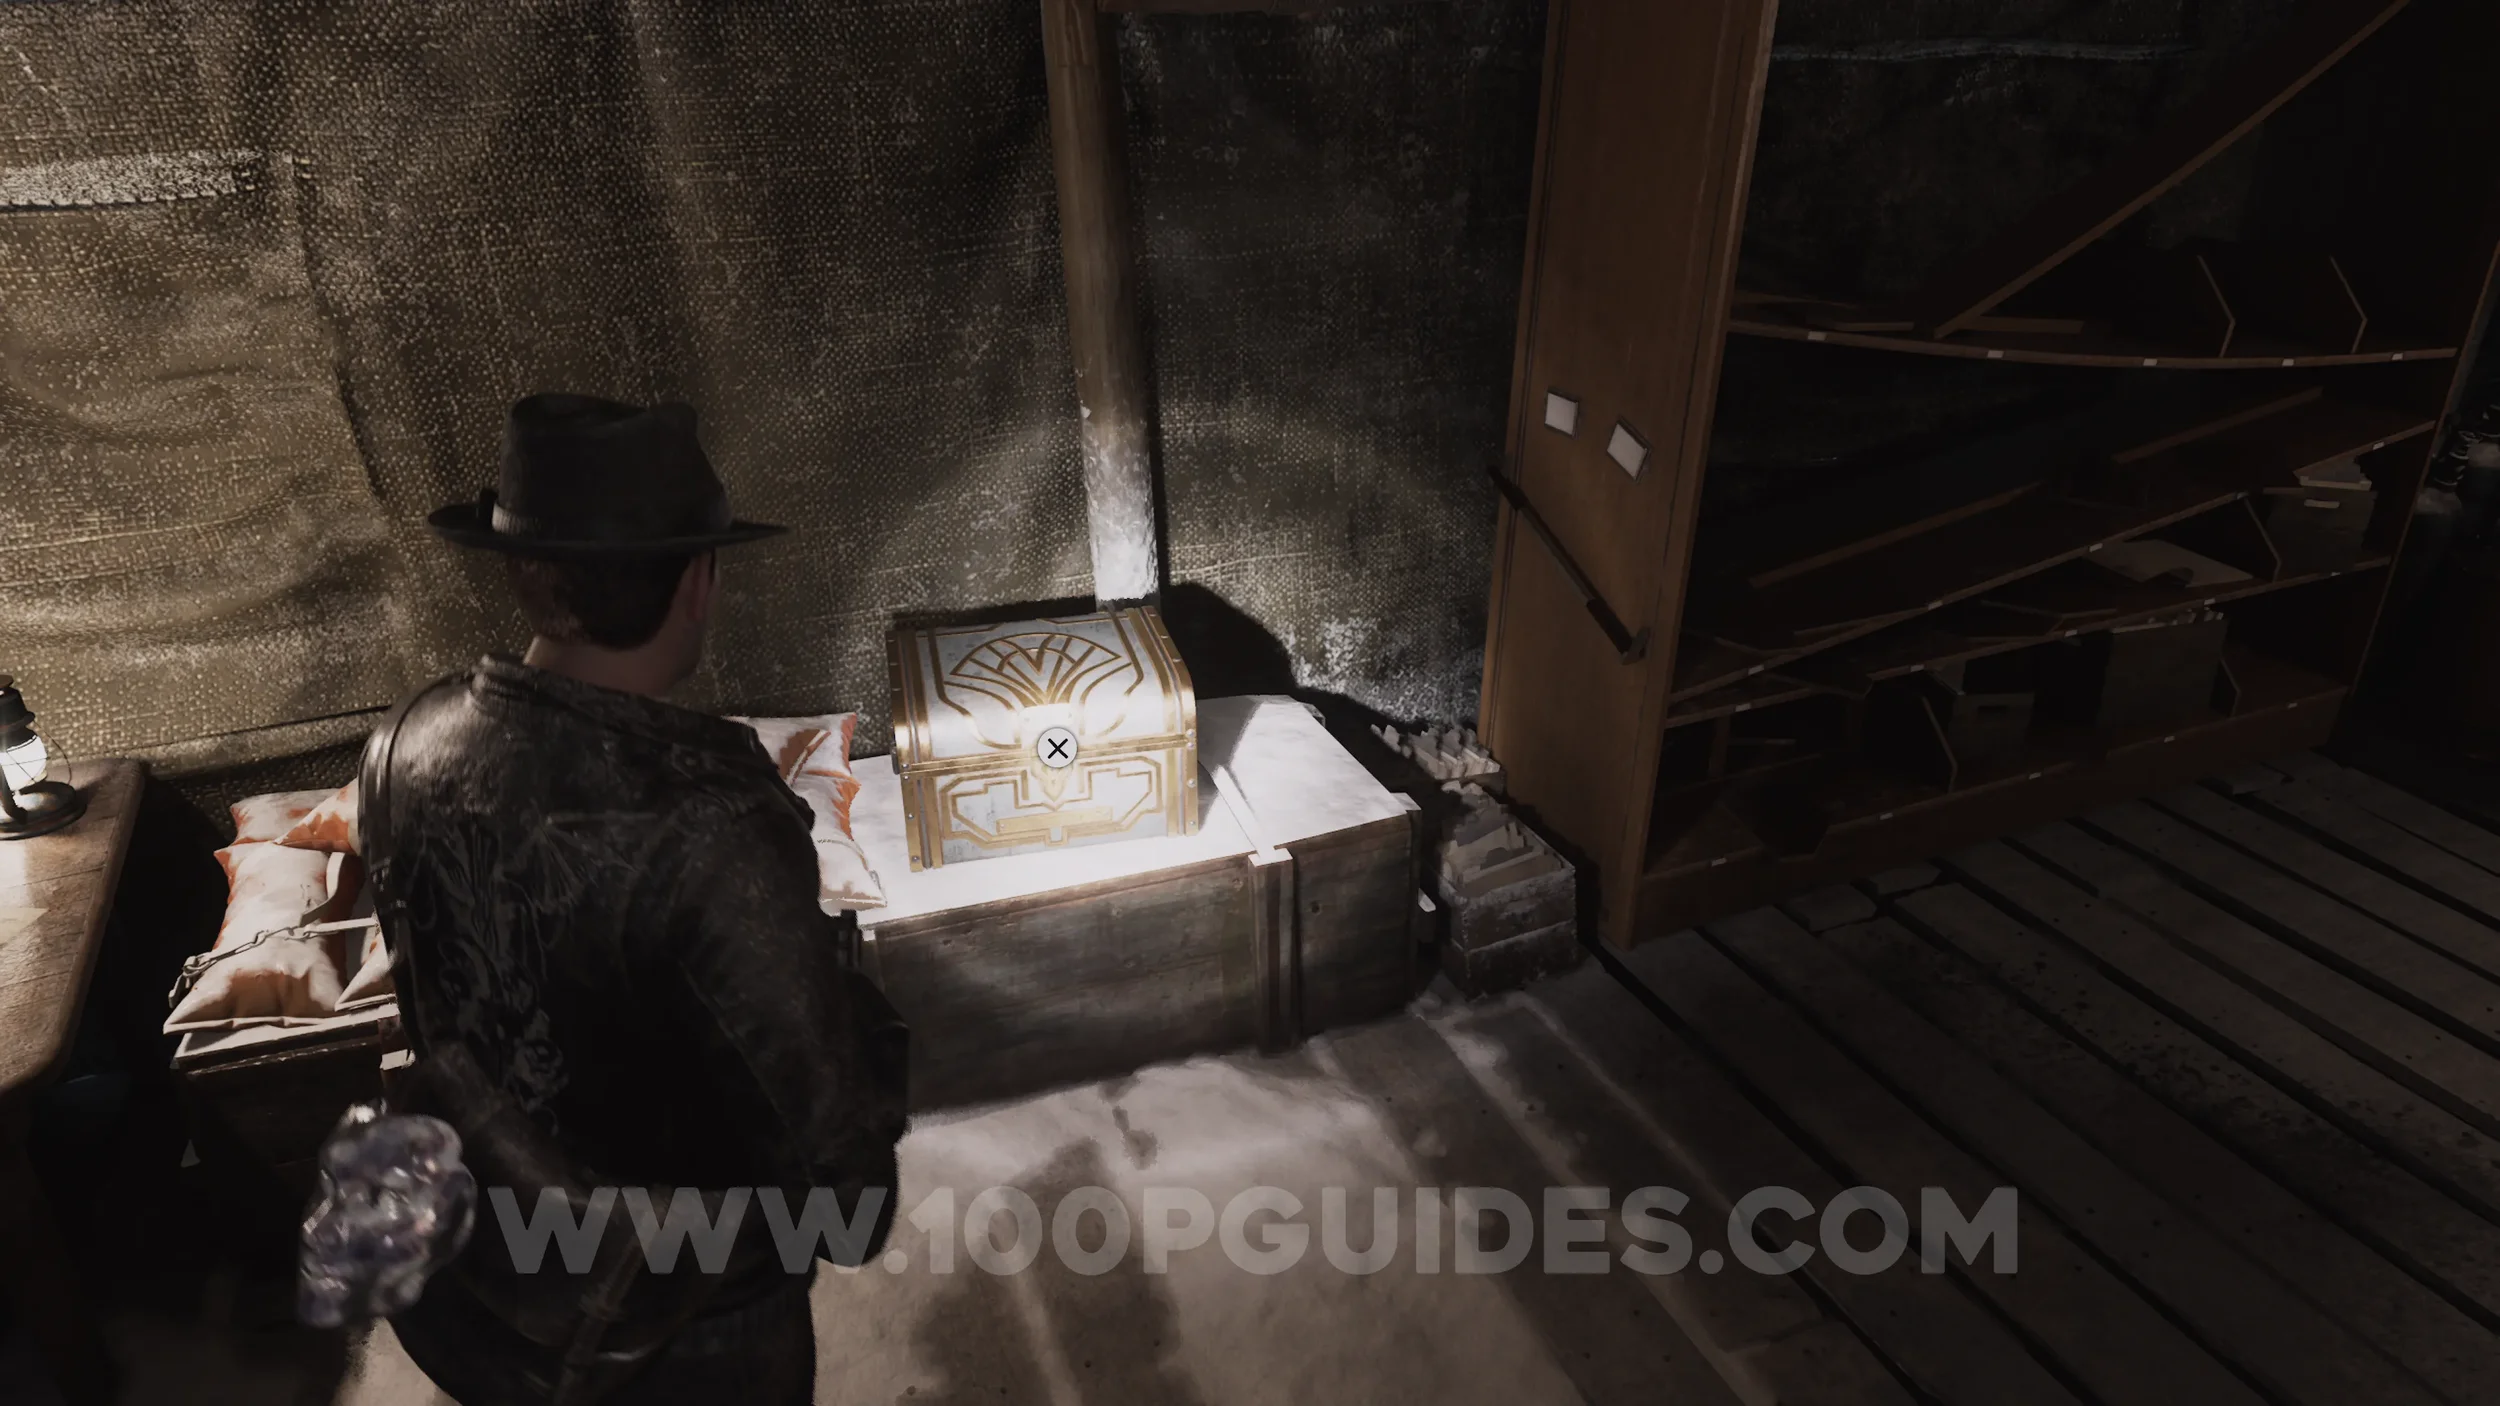
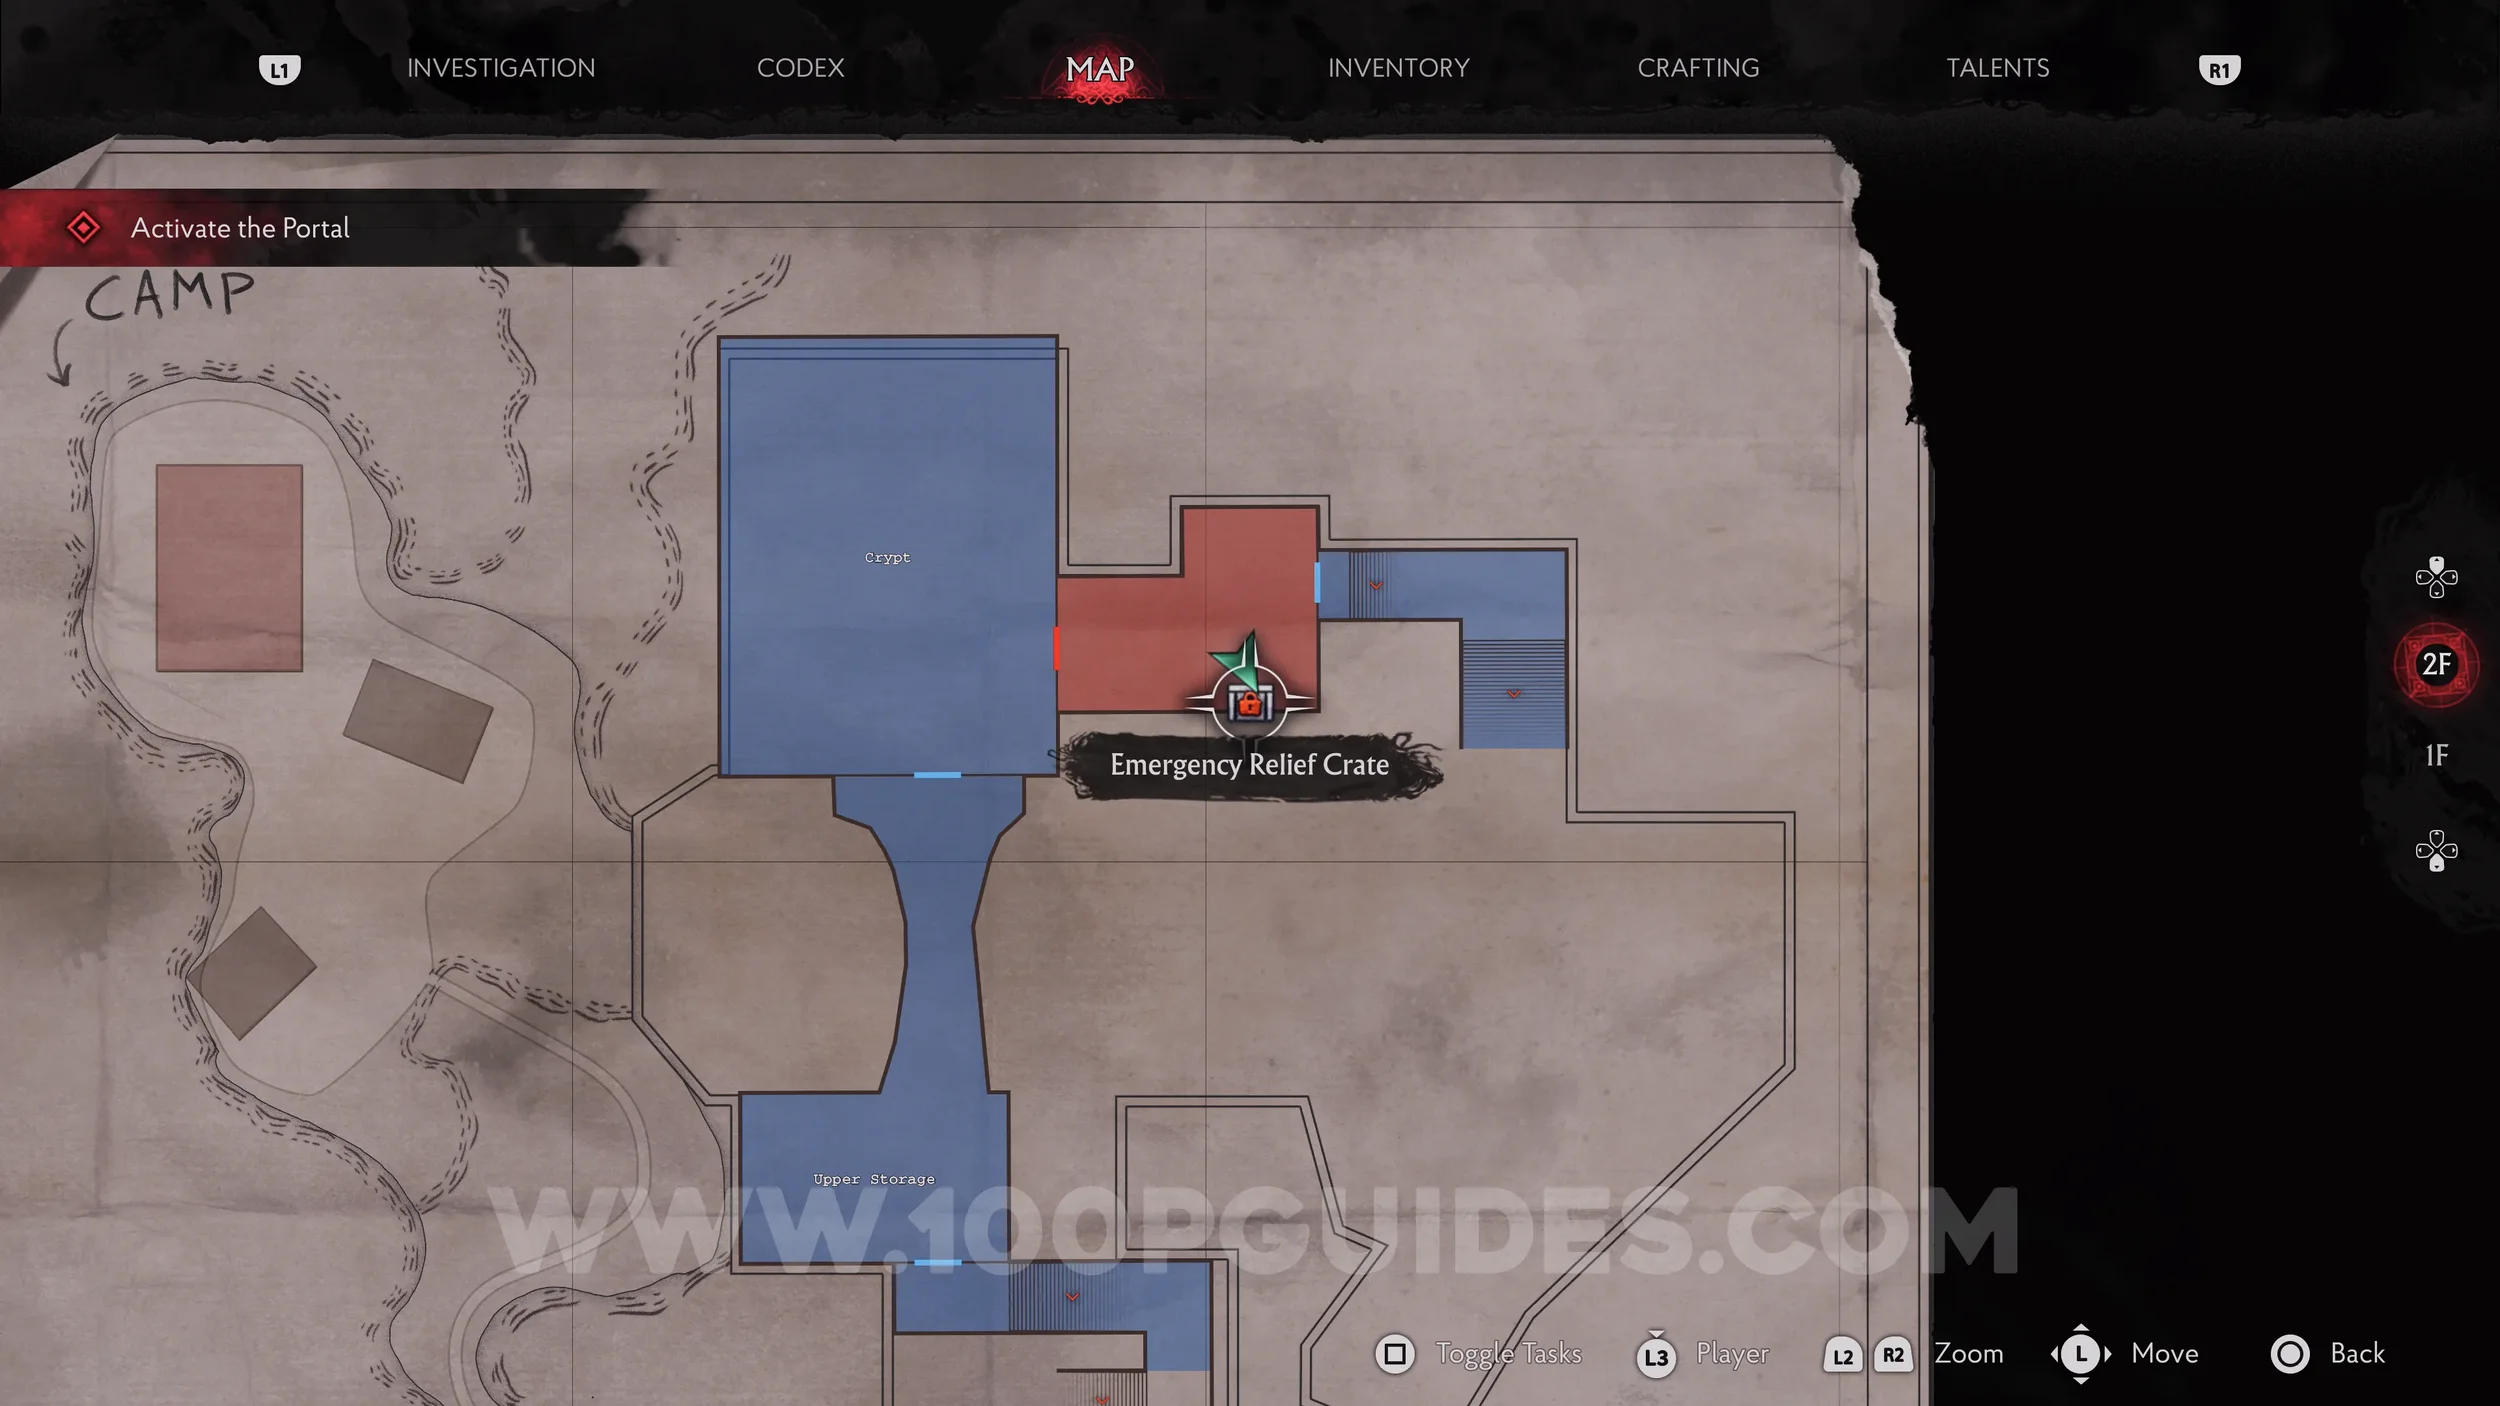
Emergency Relief Crate (E.R.C.) + Weapon Accessory: Keene’s Widowmaker. Return to the Portal Room, once again go through the door to the north, and open the final E.R.C. in the next room. The accessory is inside.
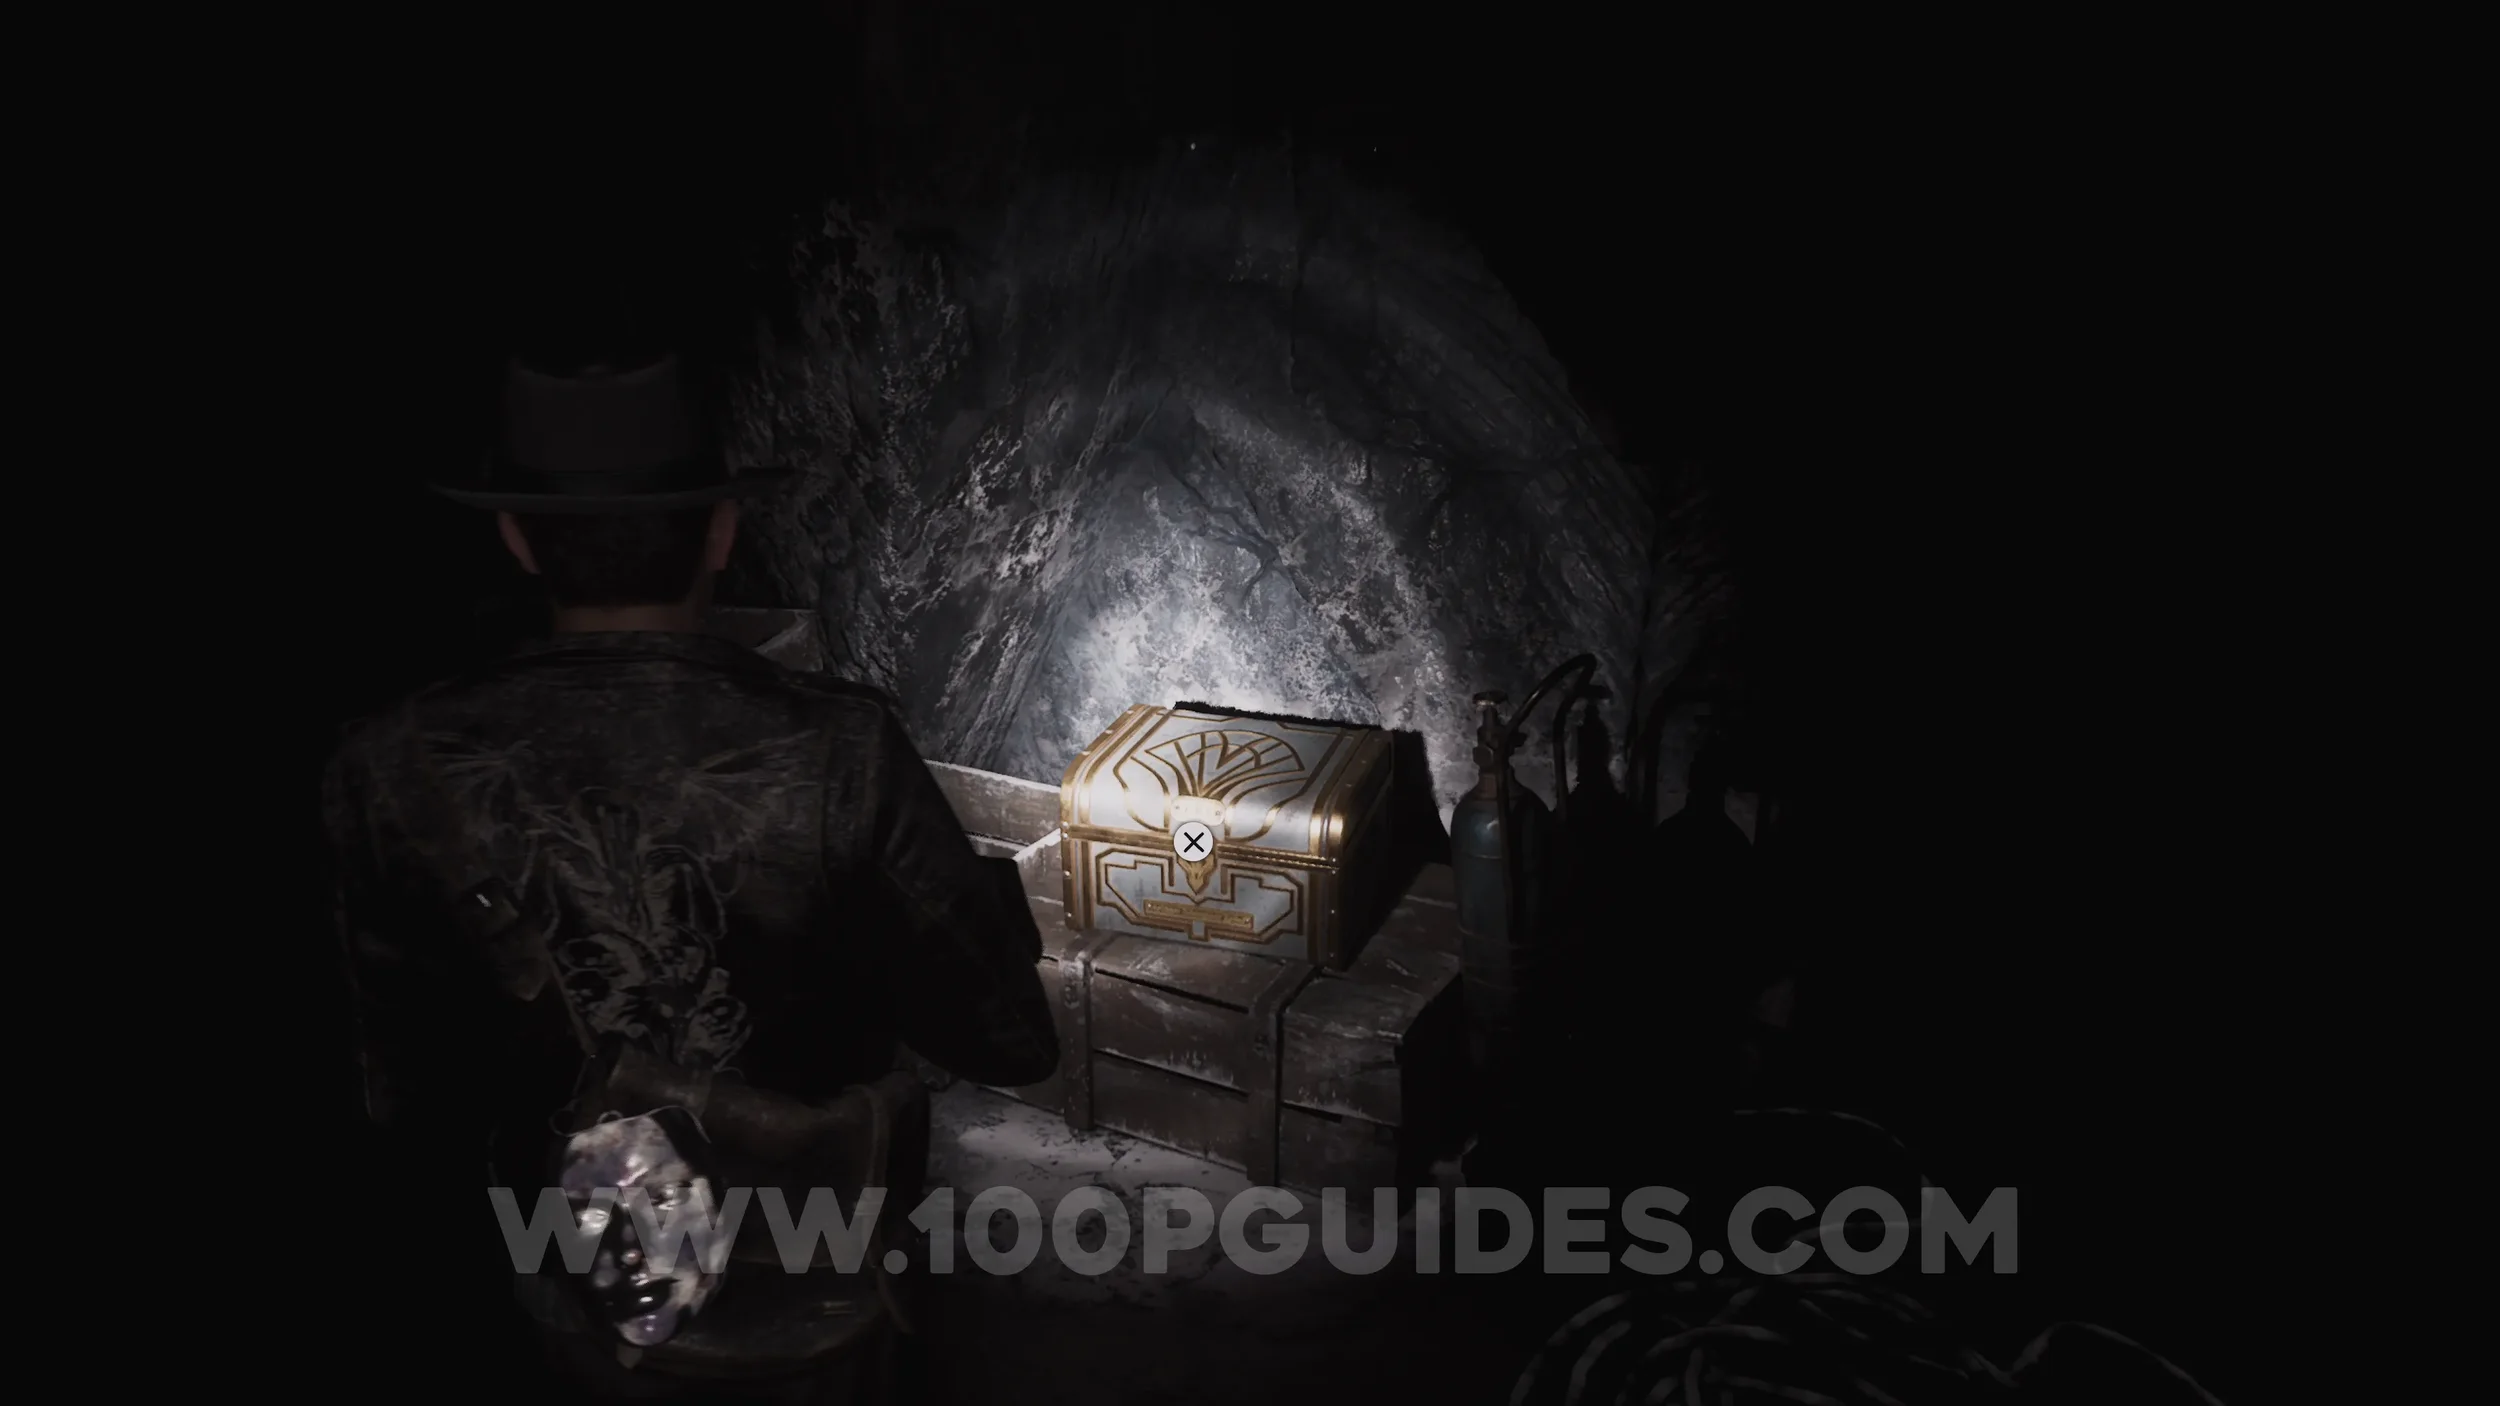
Portal Room Puzzle
Interact with the device in the middle of the Portal Room and place the Engraved Pod on it. Then spin the sides, top and bottom until the patterns match the images below.


After that, go through the portal and enjoy the final section of the game and the Final Boss!
Ex Oblivione (New Game+)
After finishing the main story you will unlock Ex Oblivione Mode (NG+). You can start it through the main menu and then select which clear save you would like to take into NG+. The only thing that carries over is your Talent points.
During this playthrough, you will want to do two things:
Pick up the 8 new Codex that only appear in NG+ for the "From Oblivion" trophy.
Pick up all 25 Dream Essence again and spend them on unlocking Talents to work towards the "What Dreams Are Made Of" trophy (you will still need to at least partially play through NG+2 to have enough to learn all Talents).
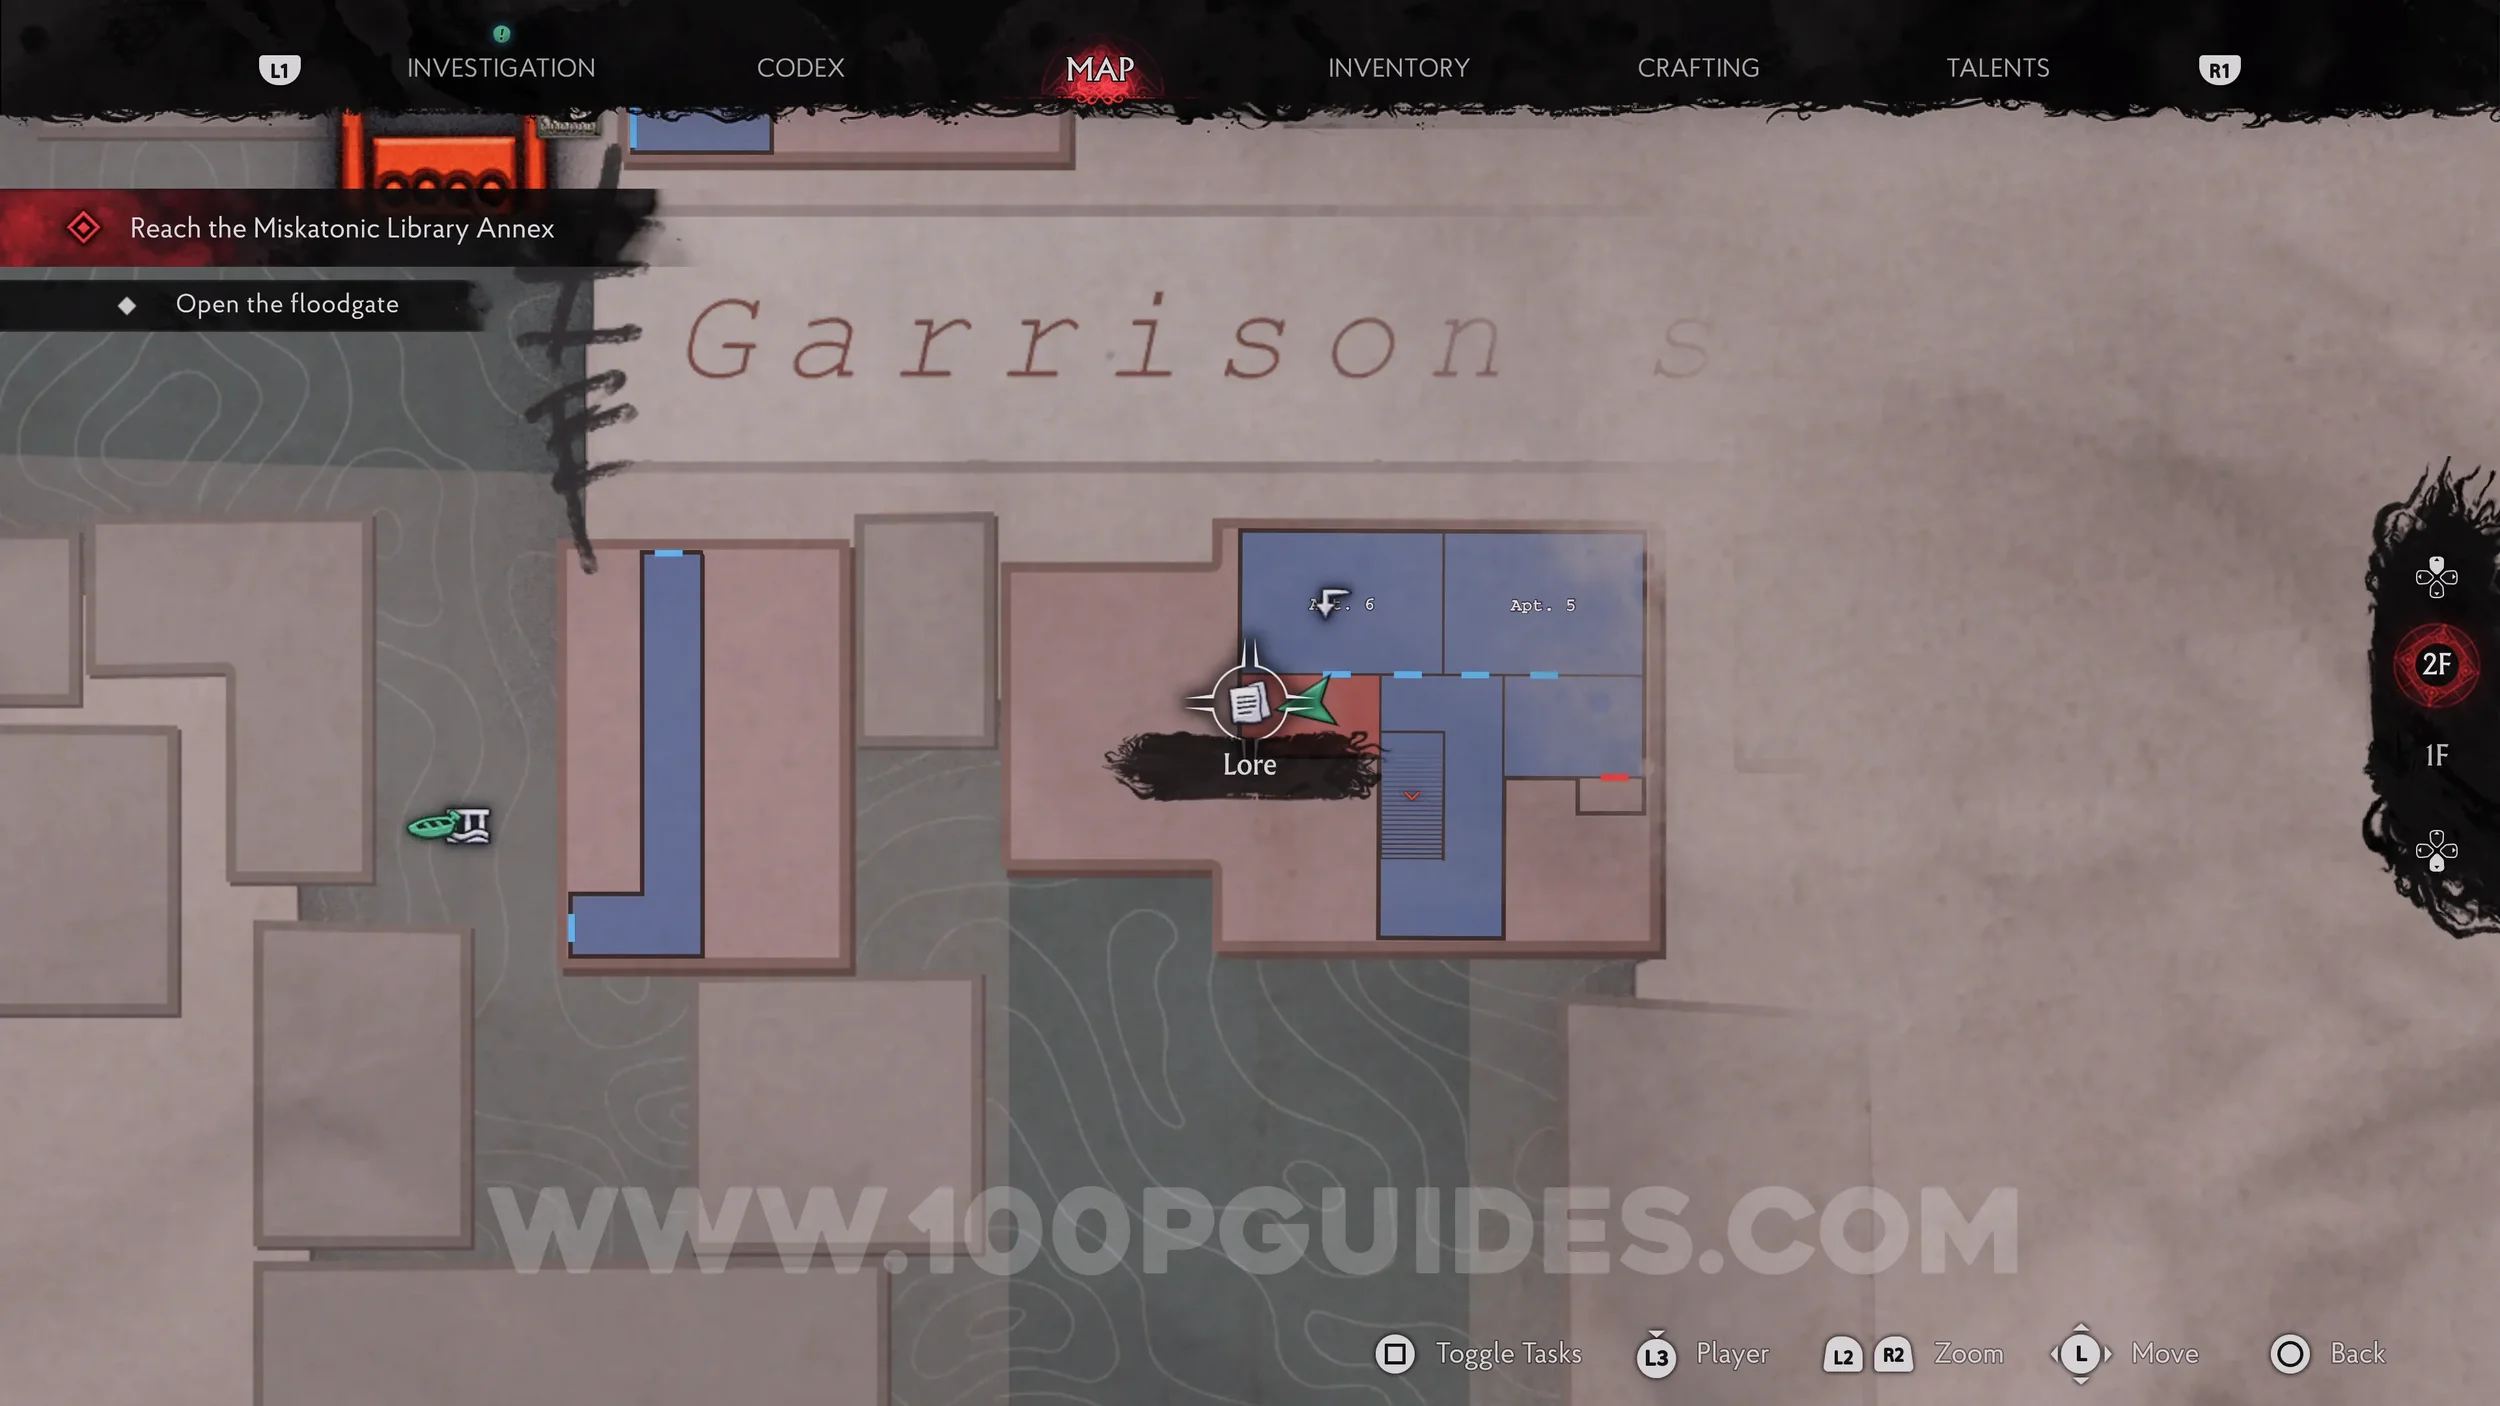
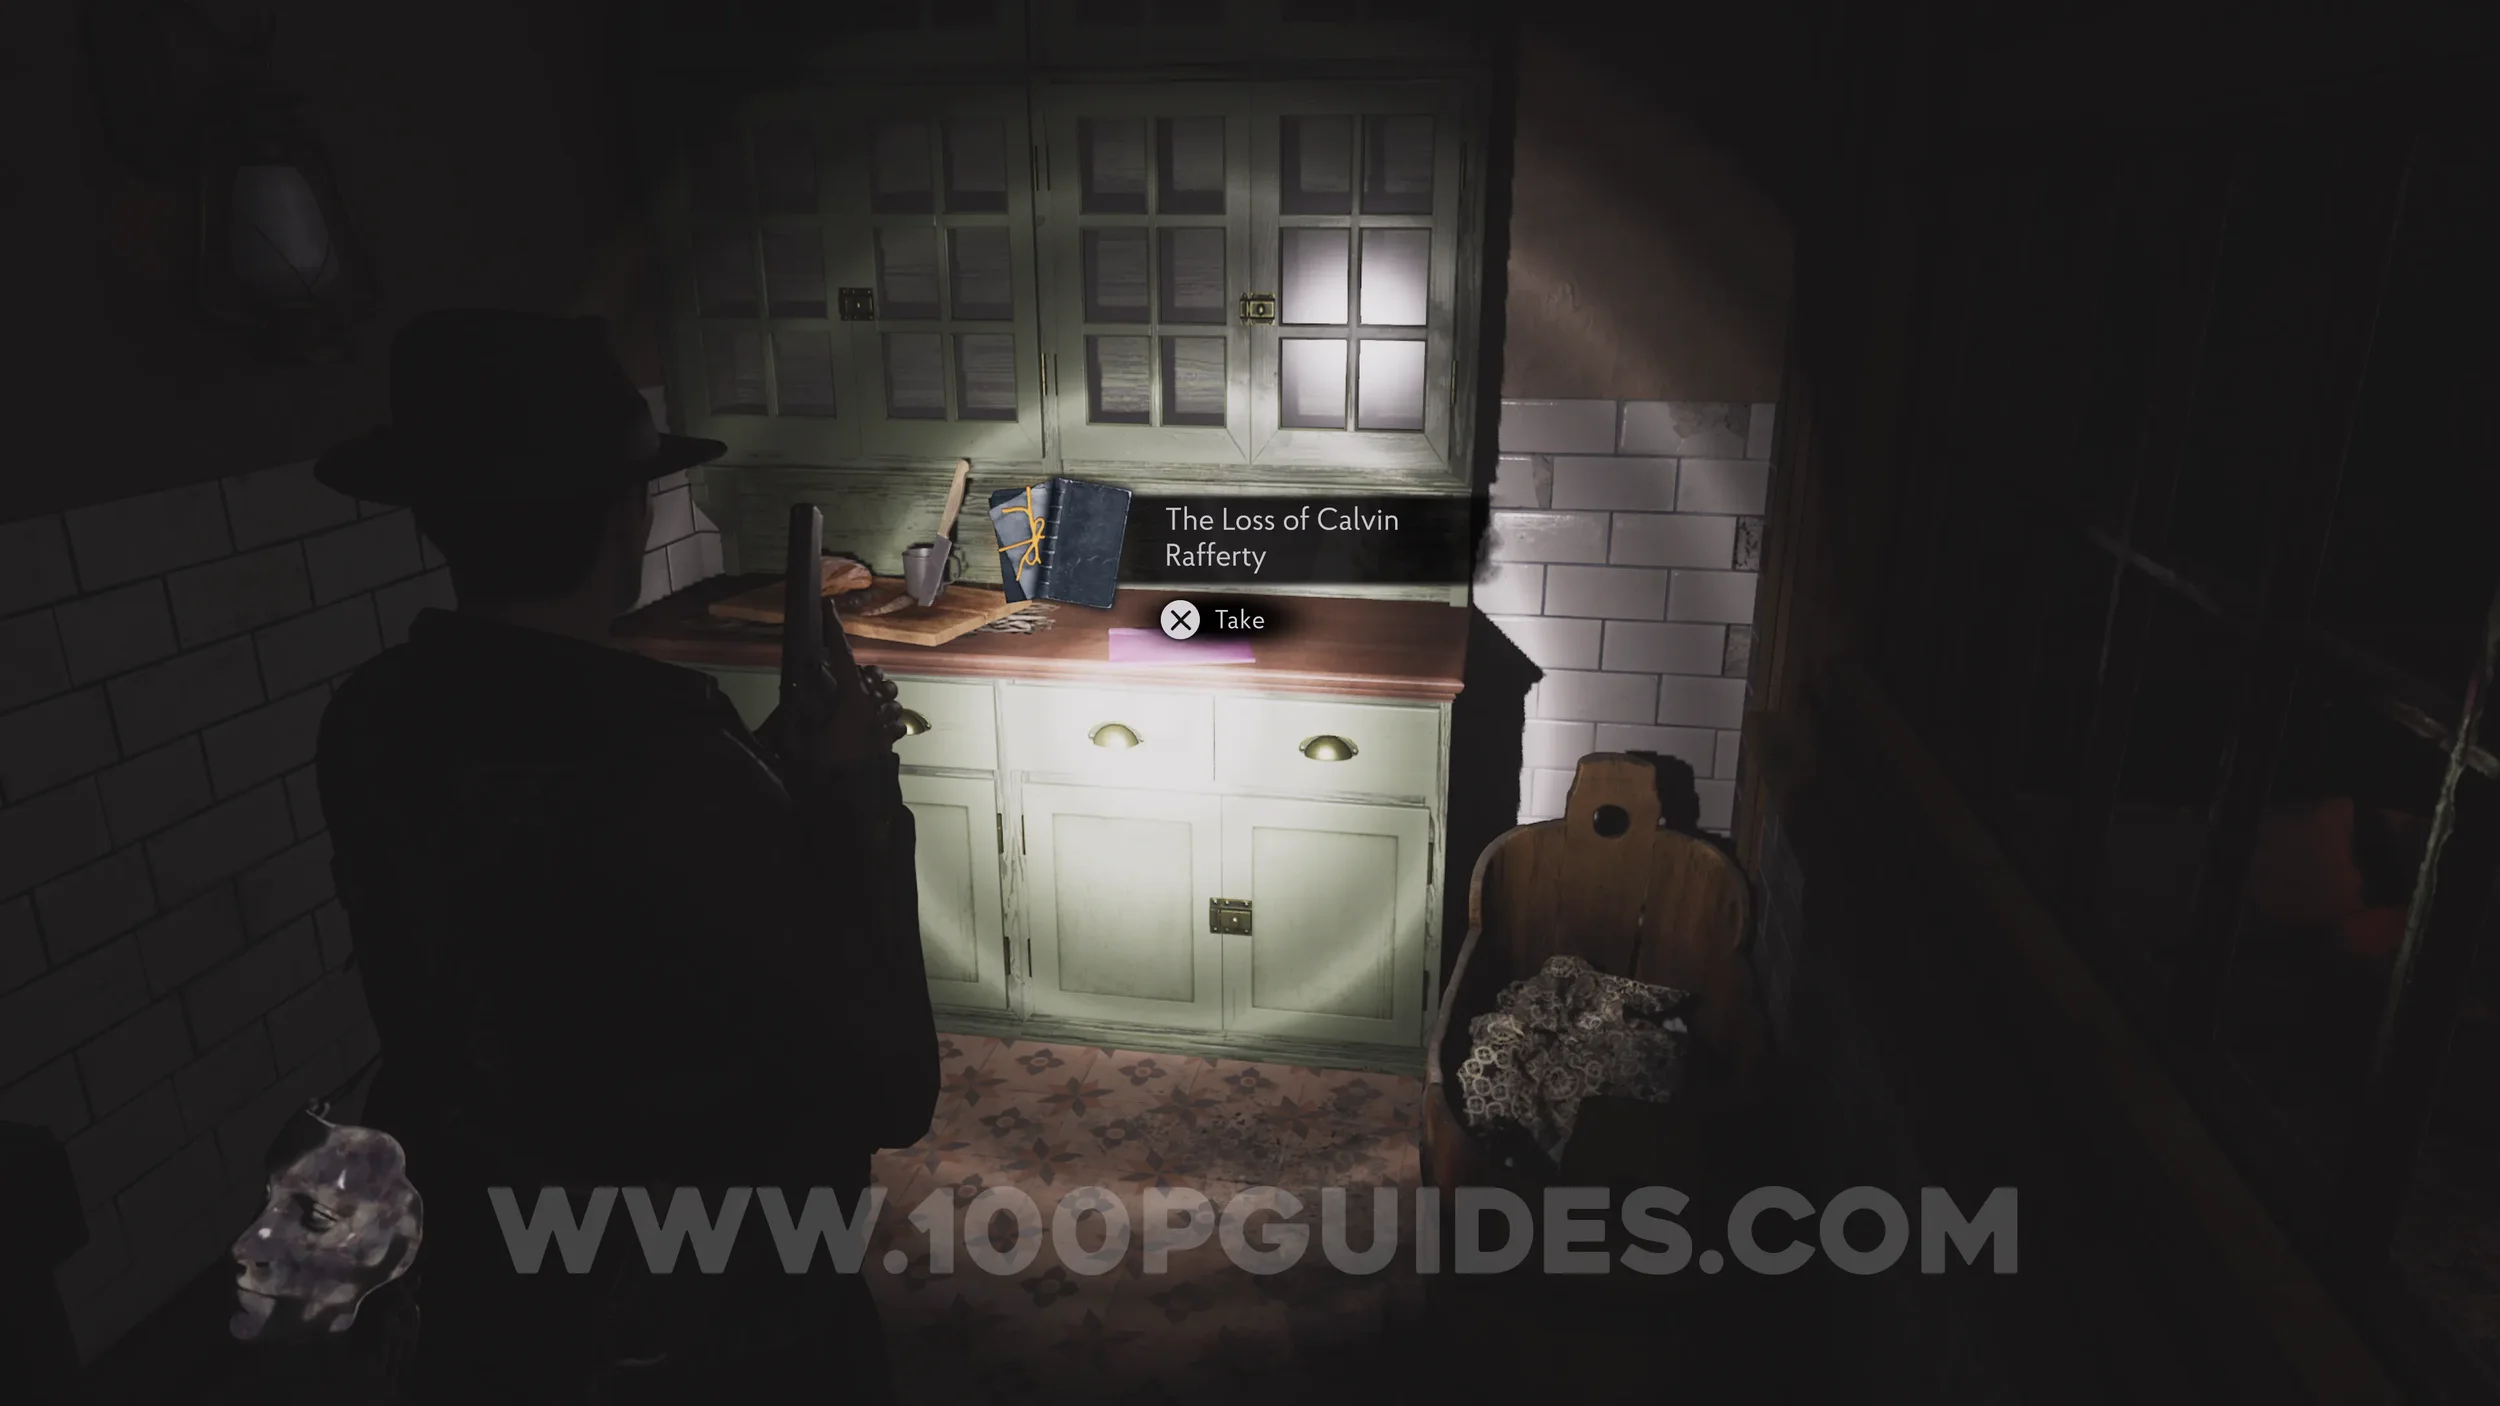
Ex Oblivione Codex: The Loss of Calvin. Chapter 1 - In the small room to the south of Apt. 6 in the Apartment Building next to the Radio Shop.
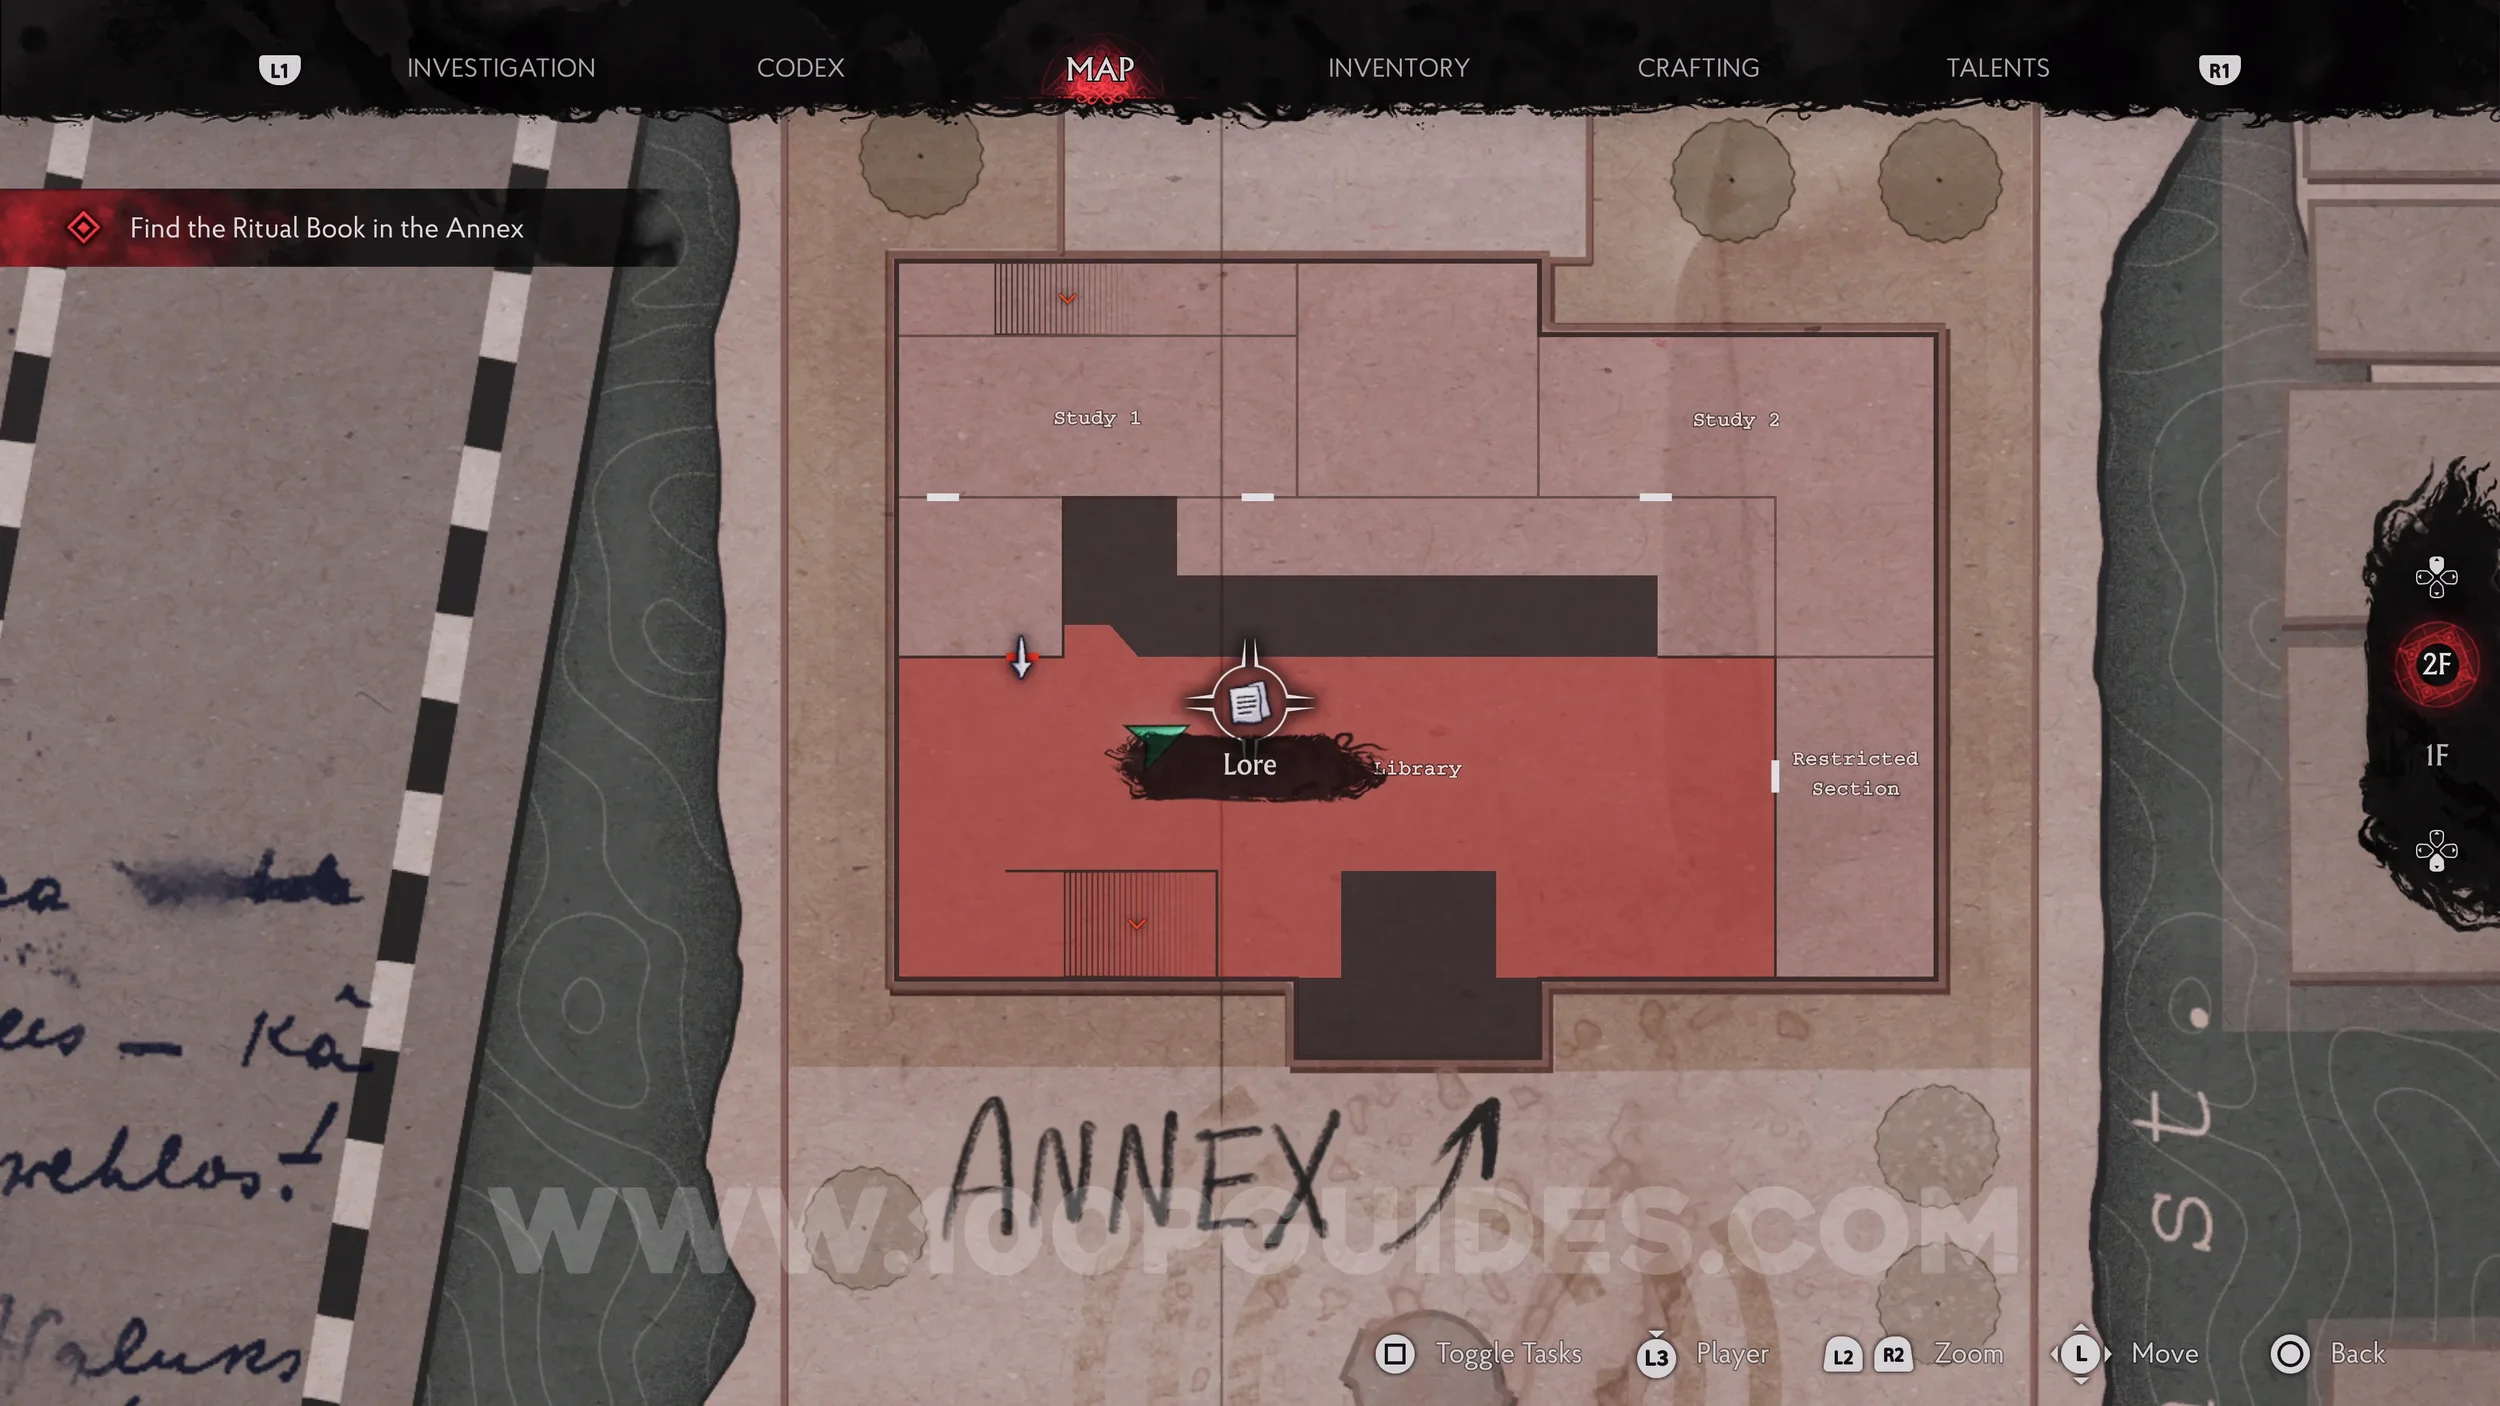
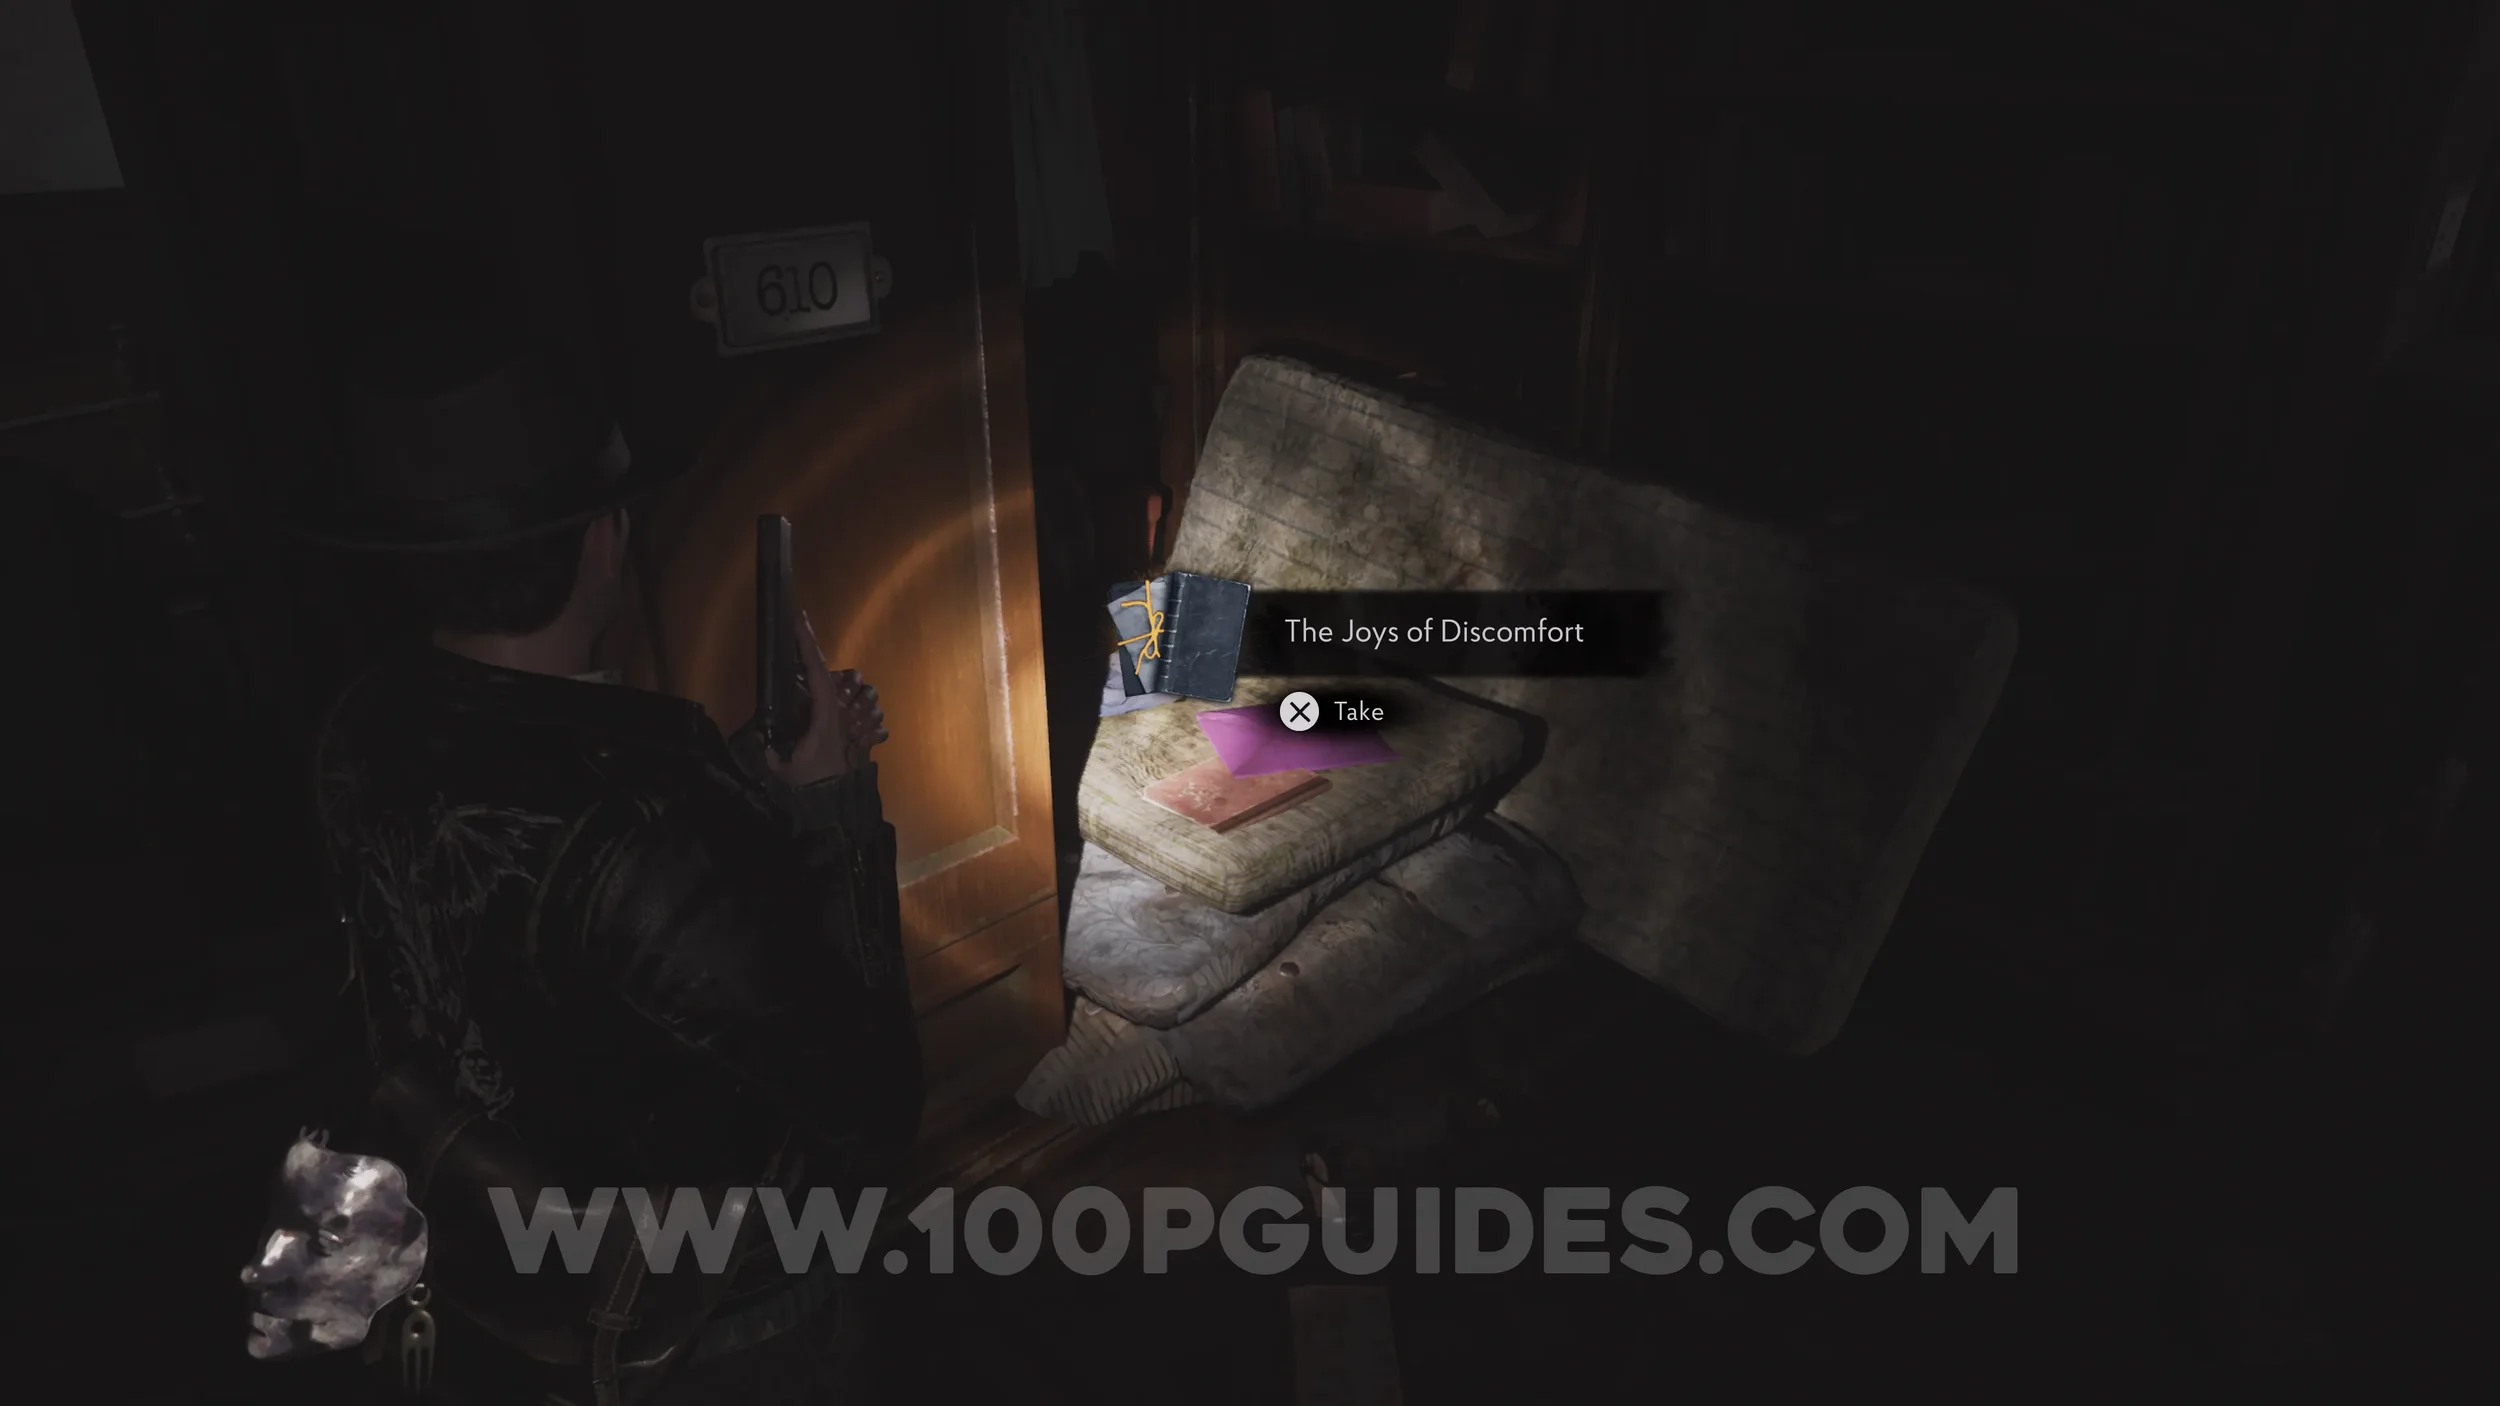
Ex Oblivione Codex: The Joys of Discomfort. Chapter 2 - On some mattresses in the Library on 2F of the Annex.
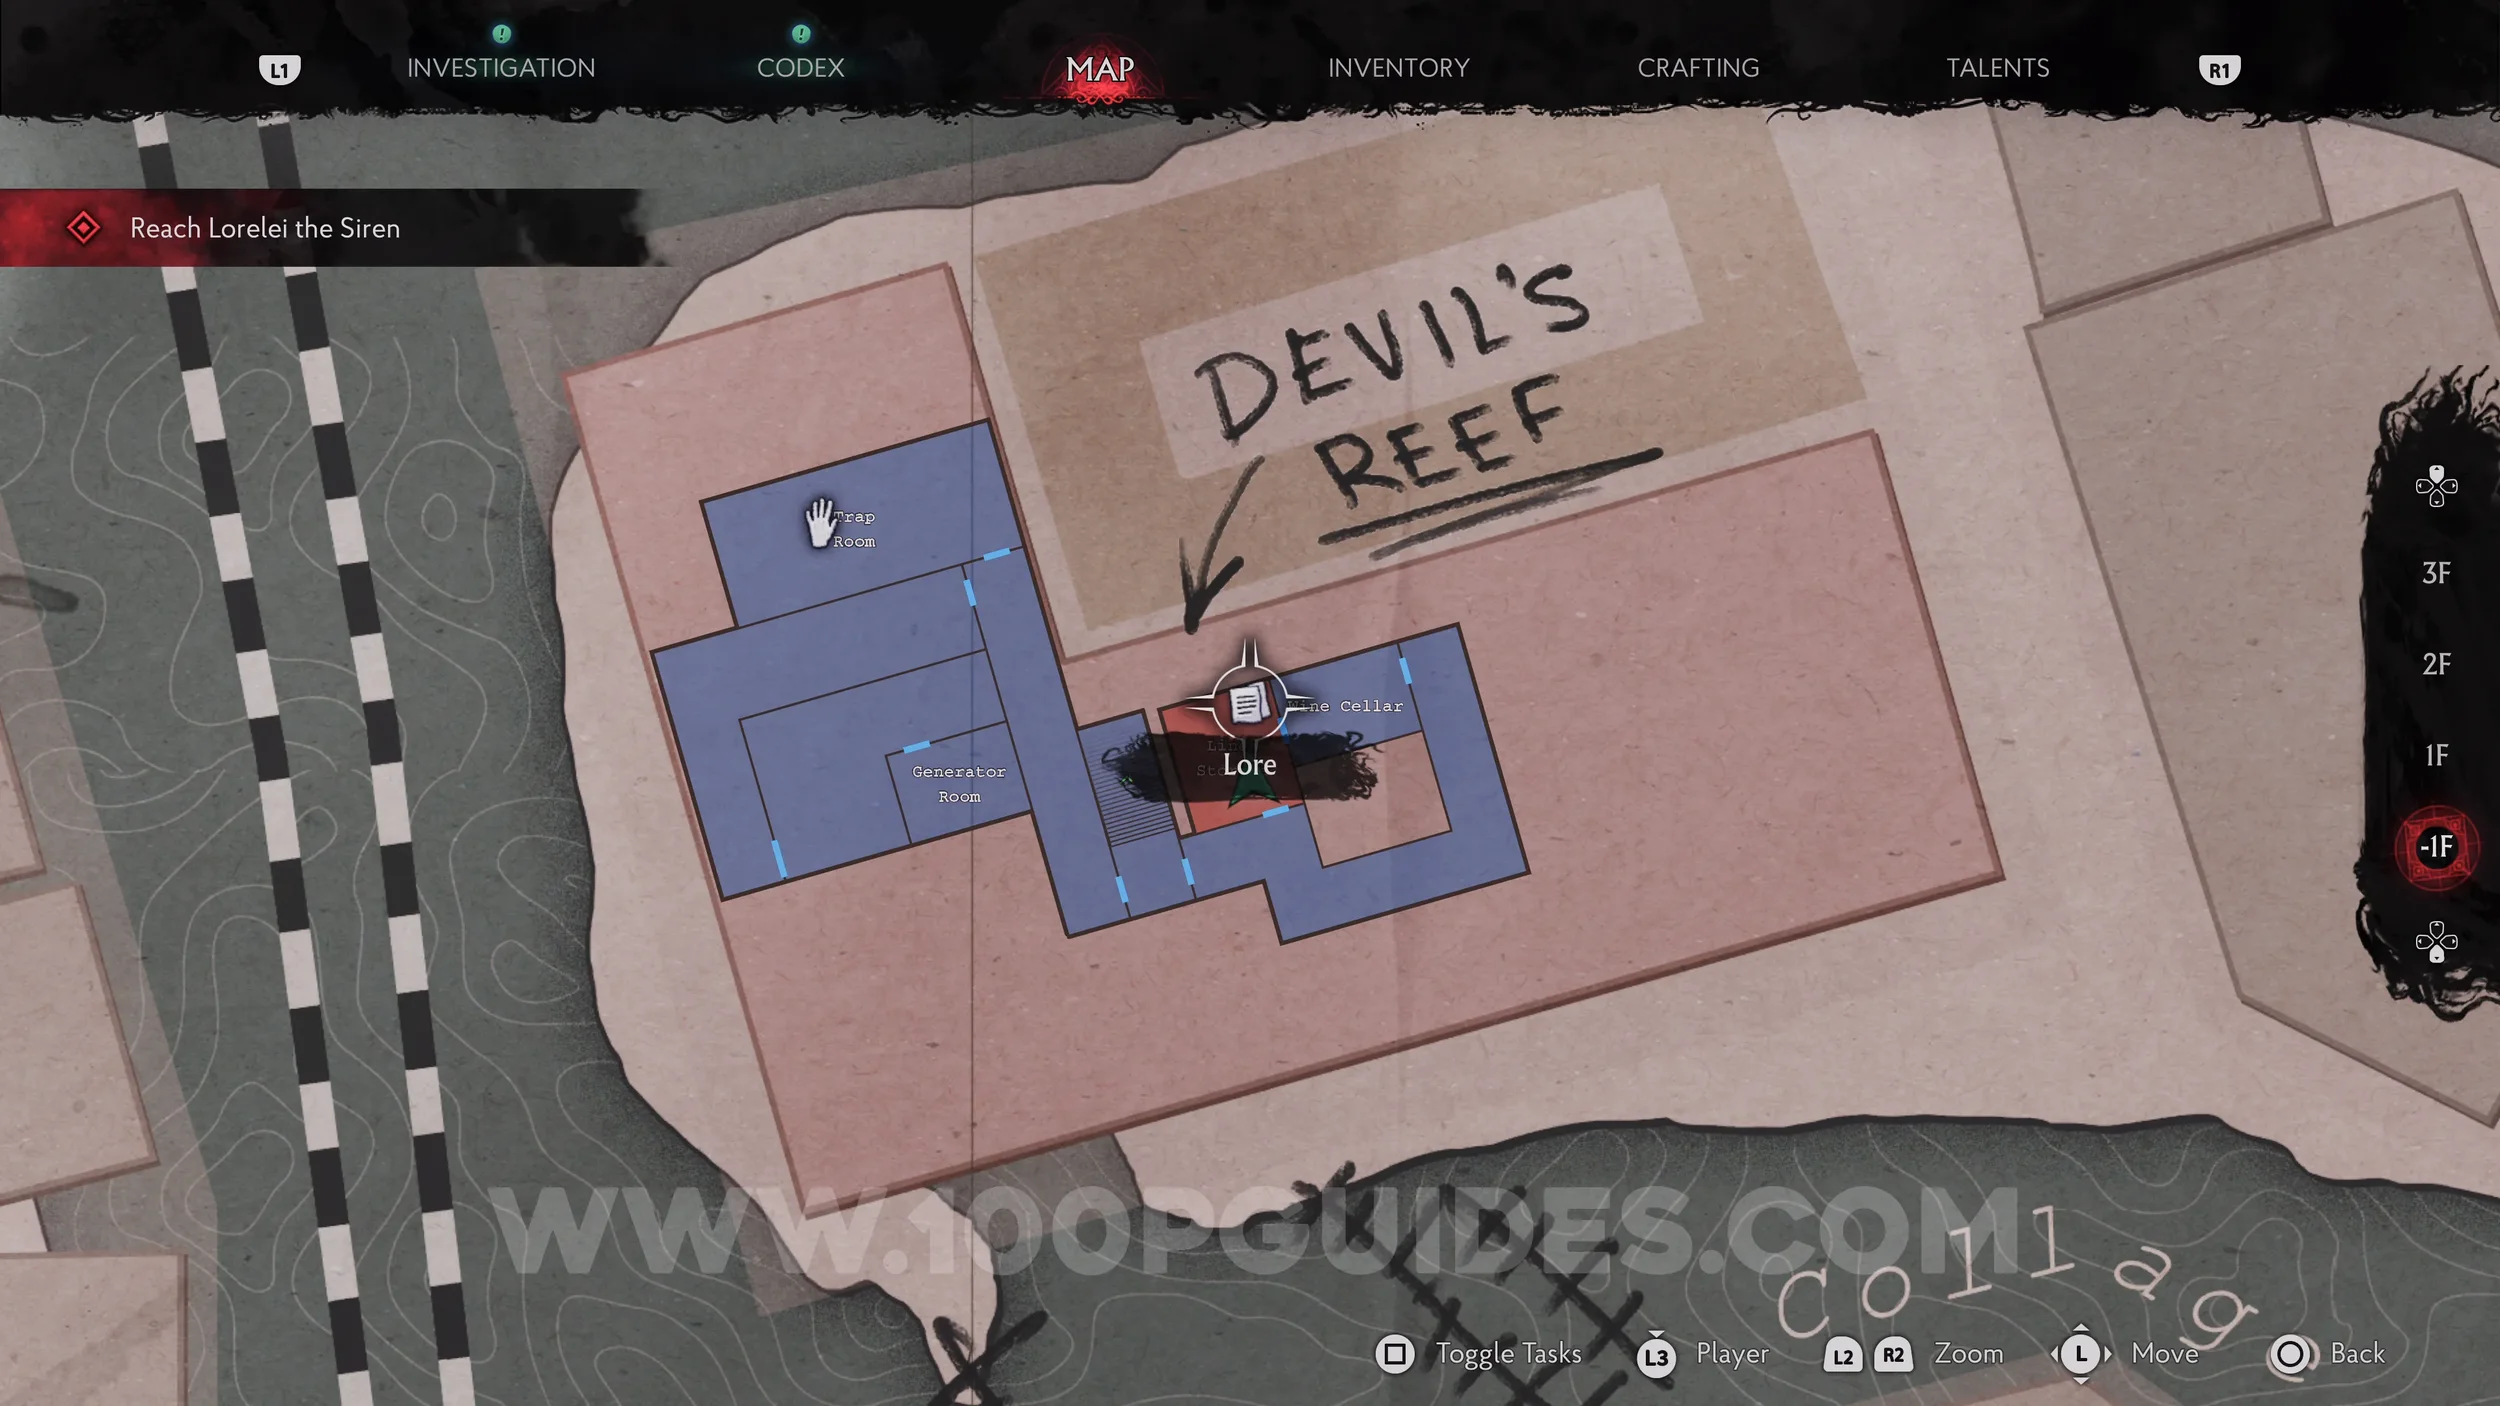
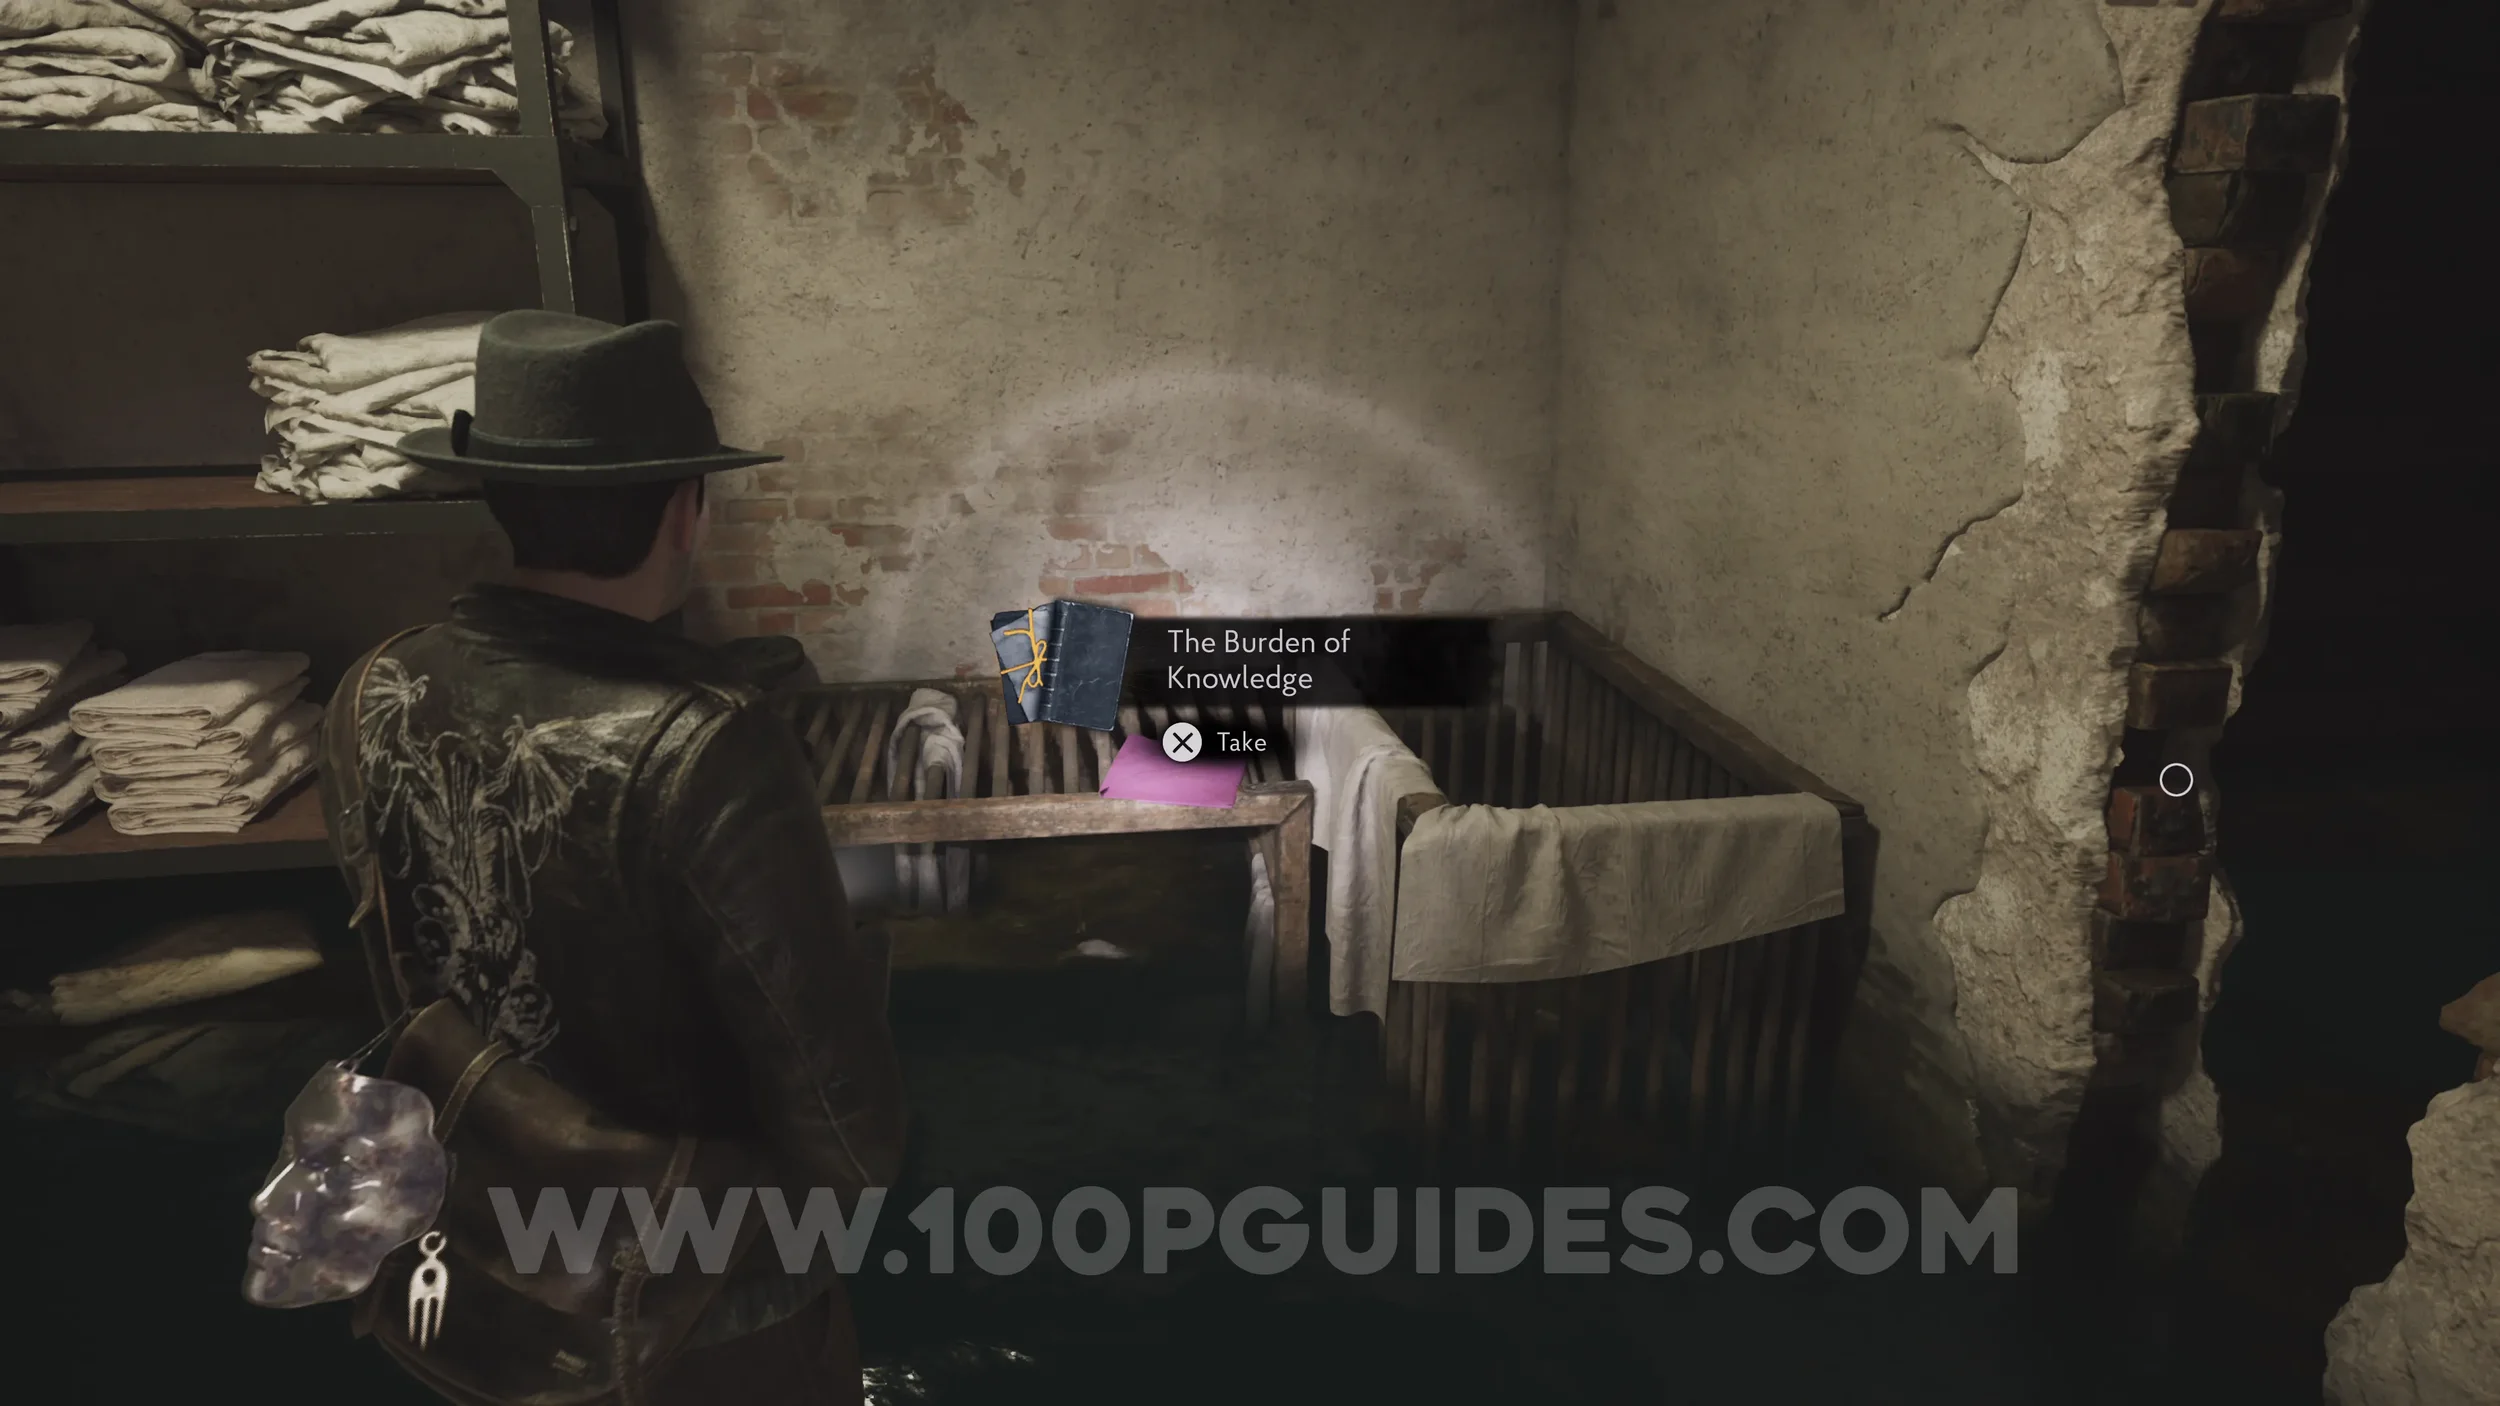
Ex Oblivione Codex: The Burden of Knowledge. Chapter 2 - In the Linen Storage room in the Devil’s Reef Hotel basement.
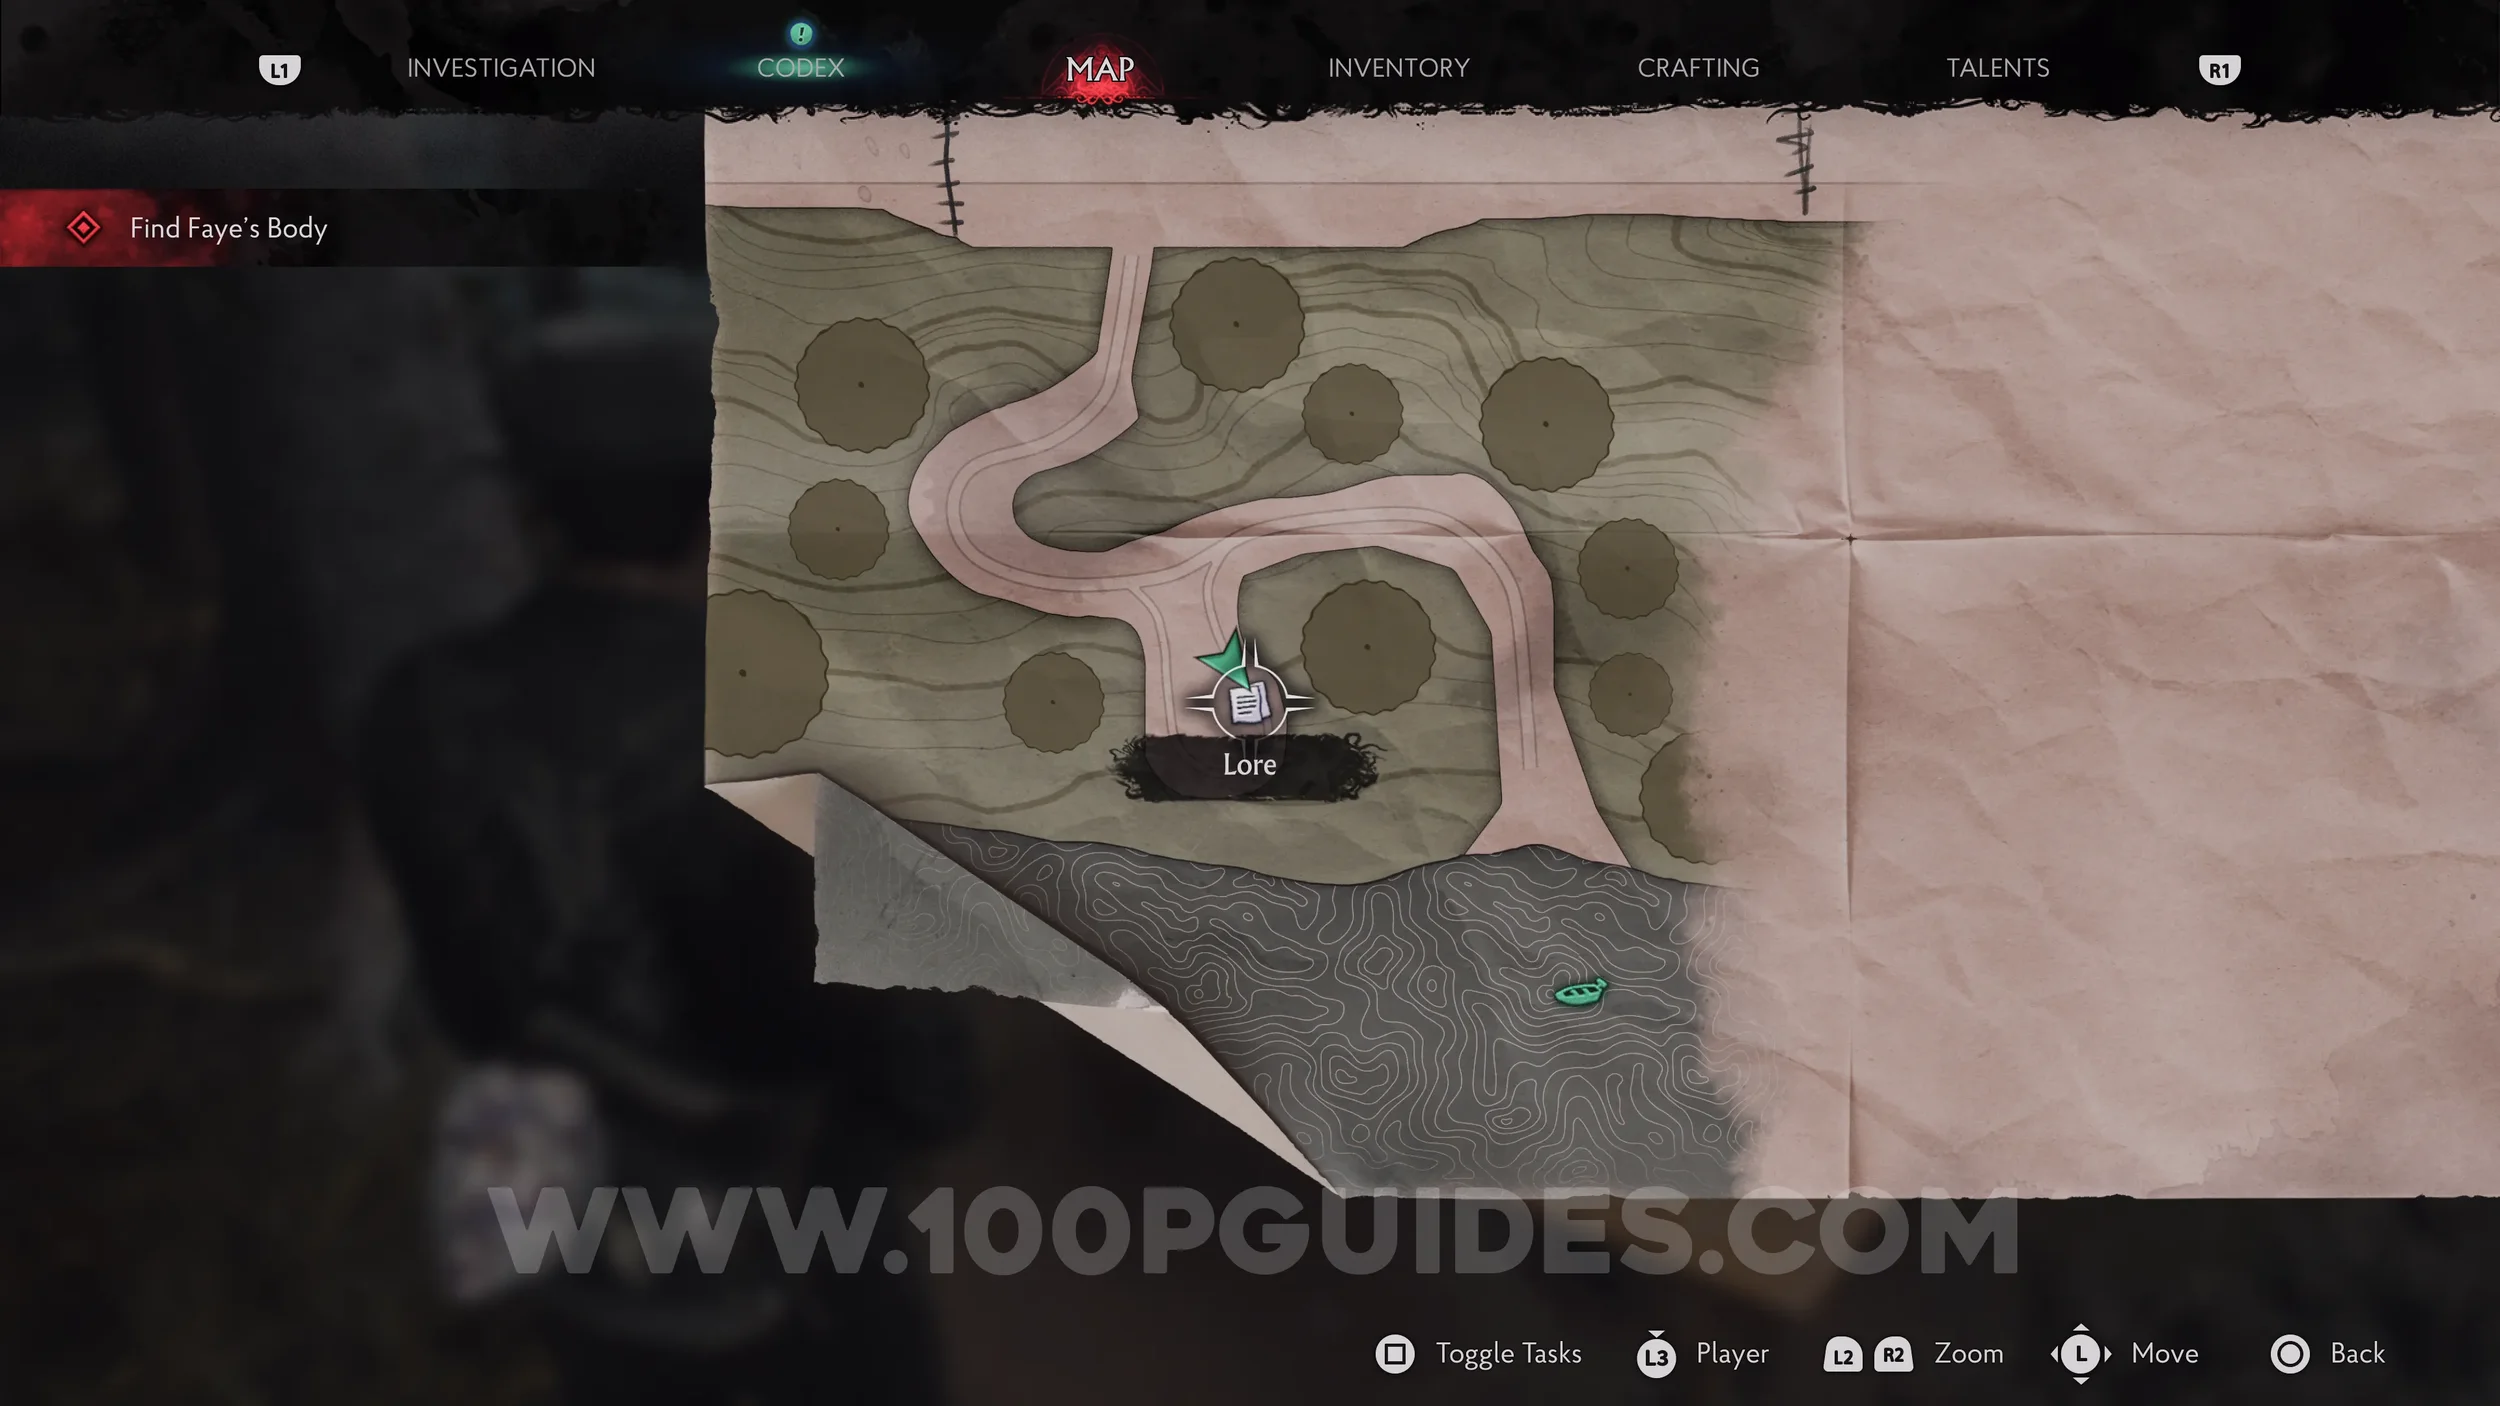
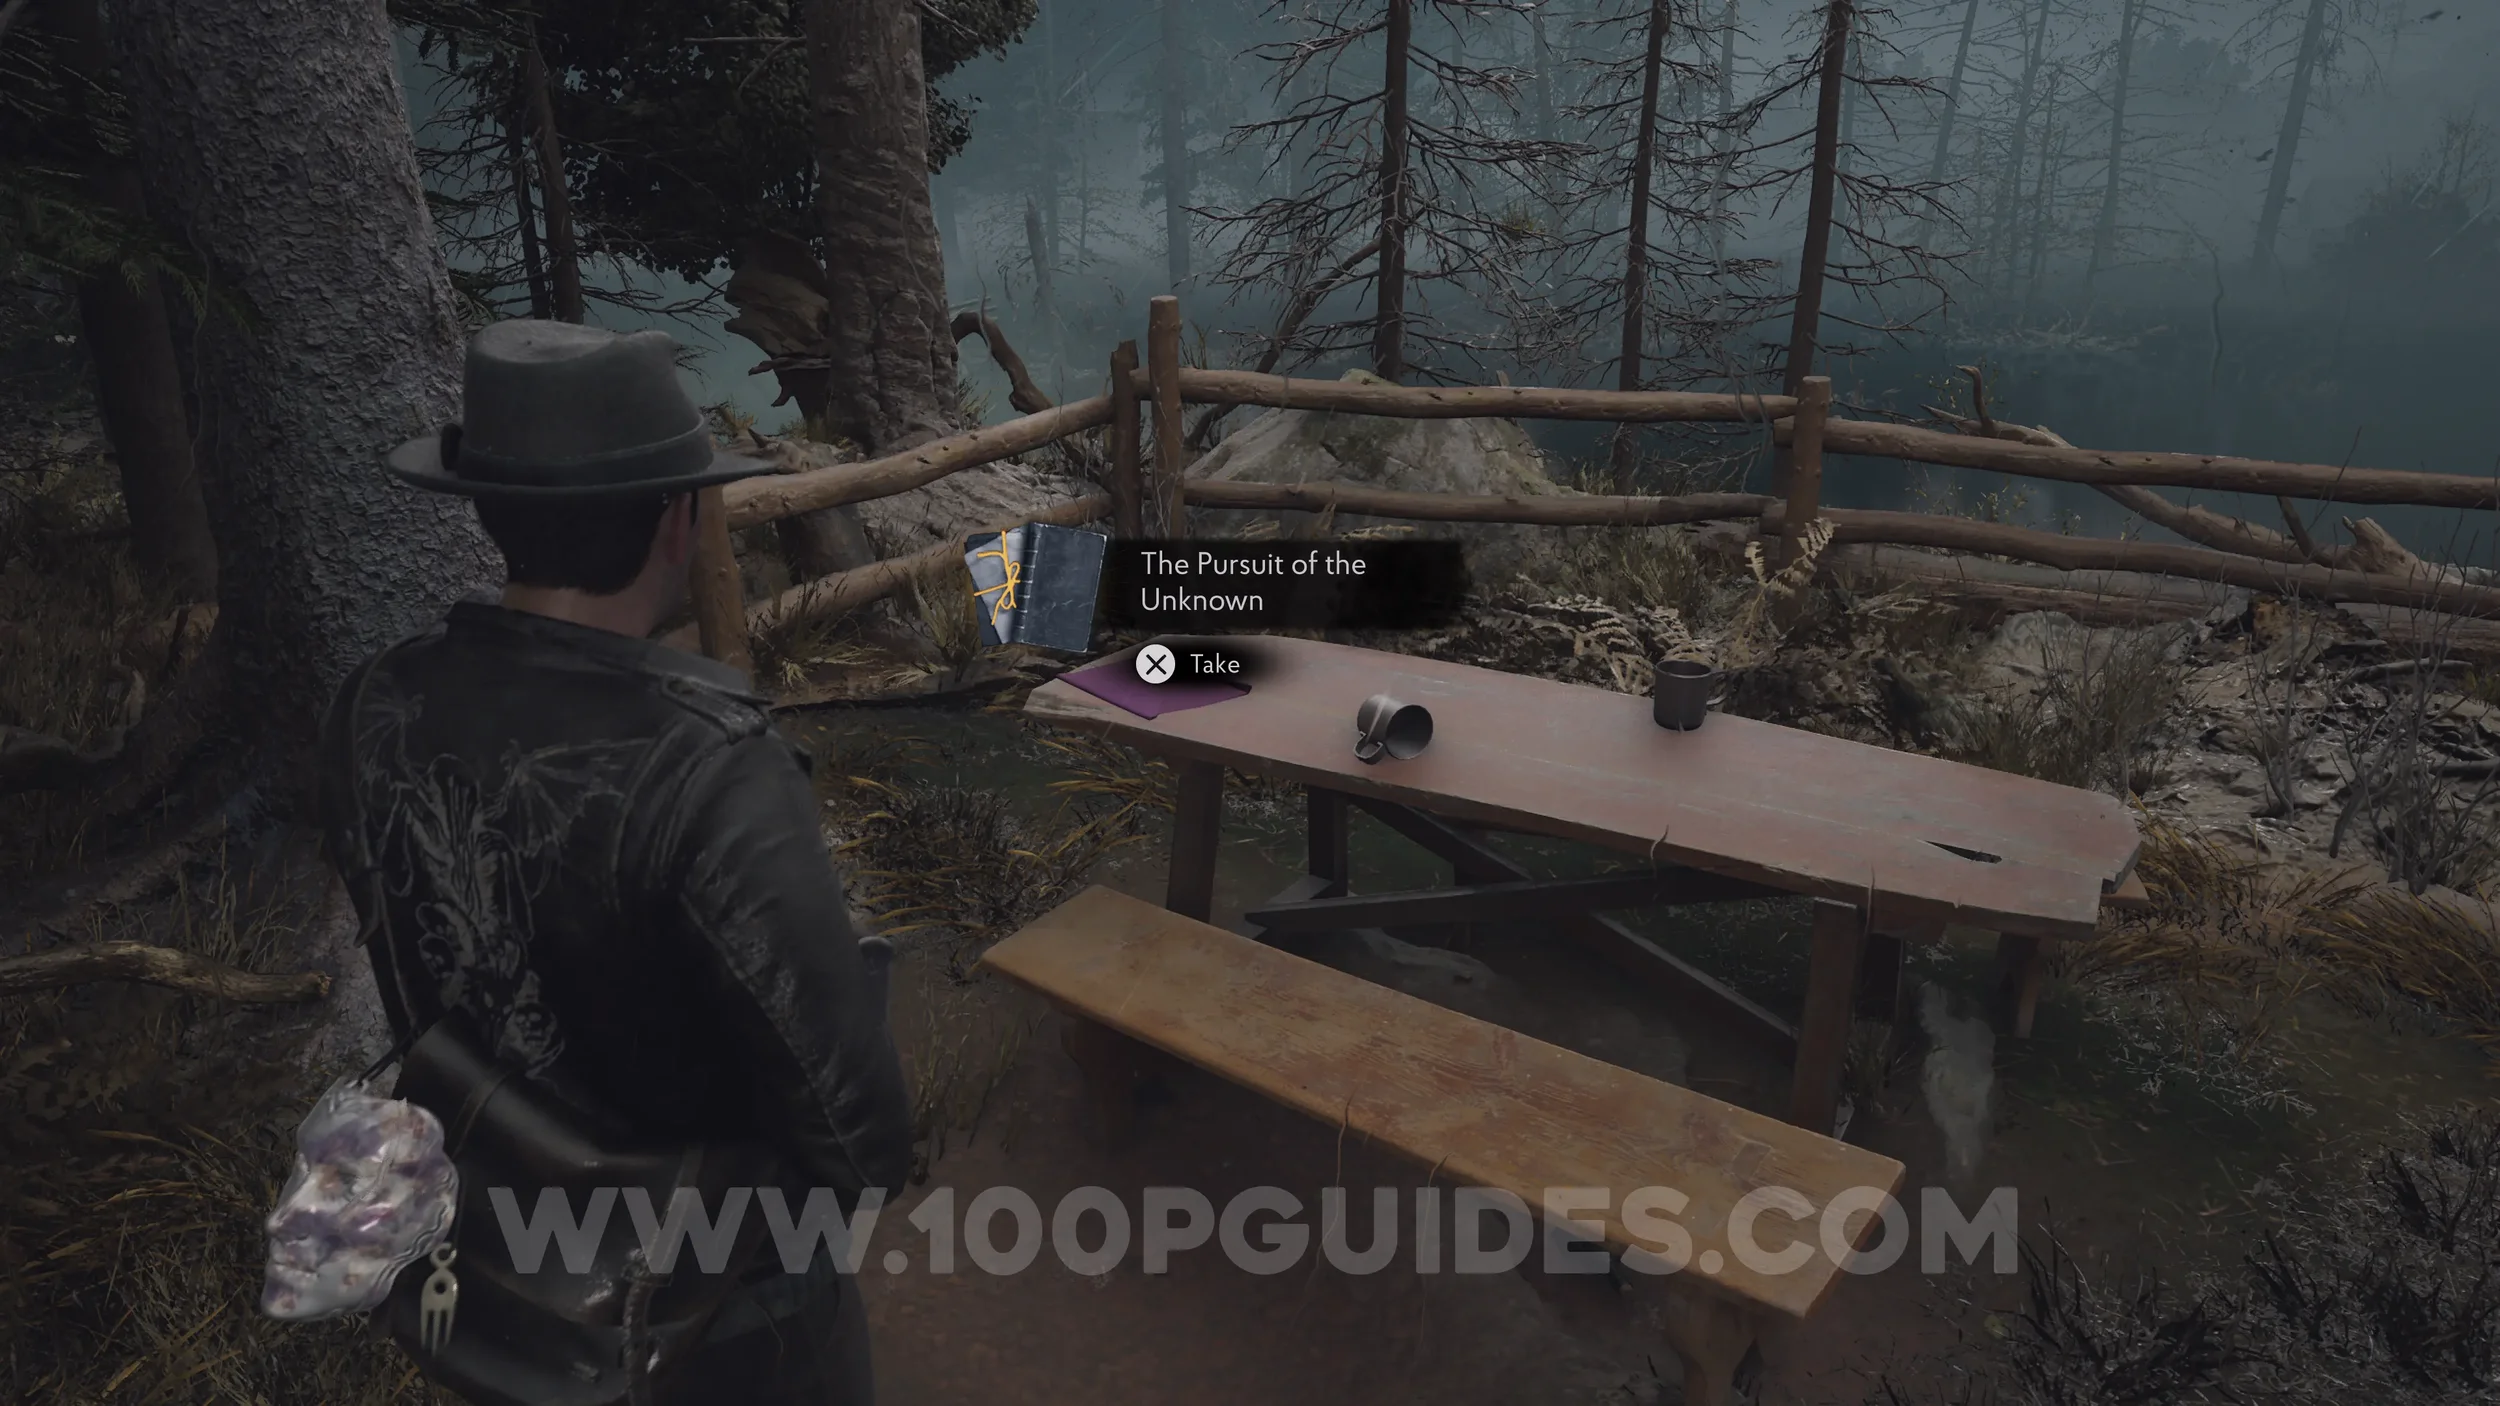
Ex Oblivione Codex: The Pursuit of the Unknown. Chapter 3 - On a wooden table in the little side area to the south of the path up to the hospital at the very start of the chapter.
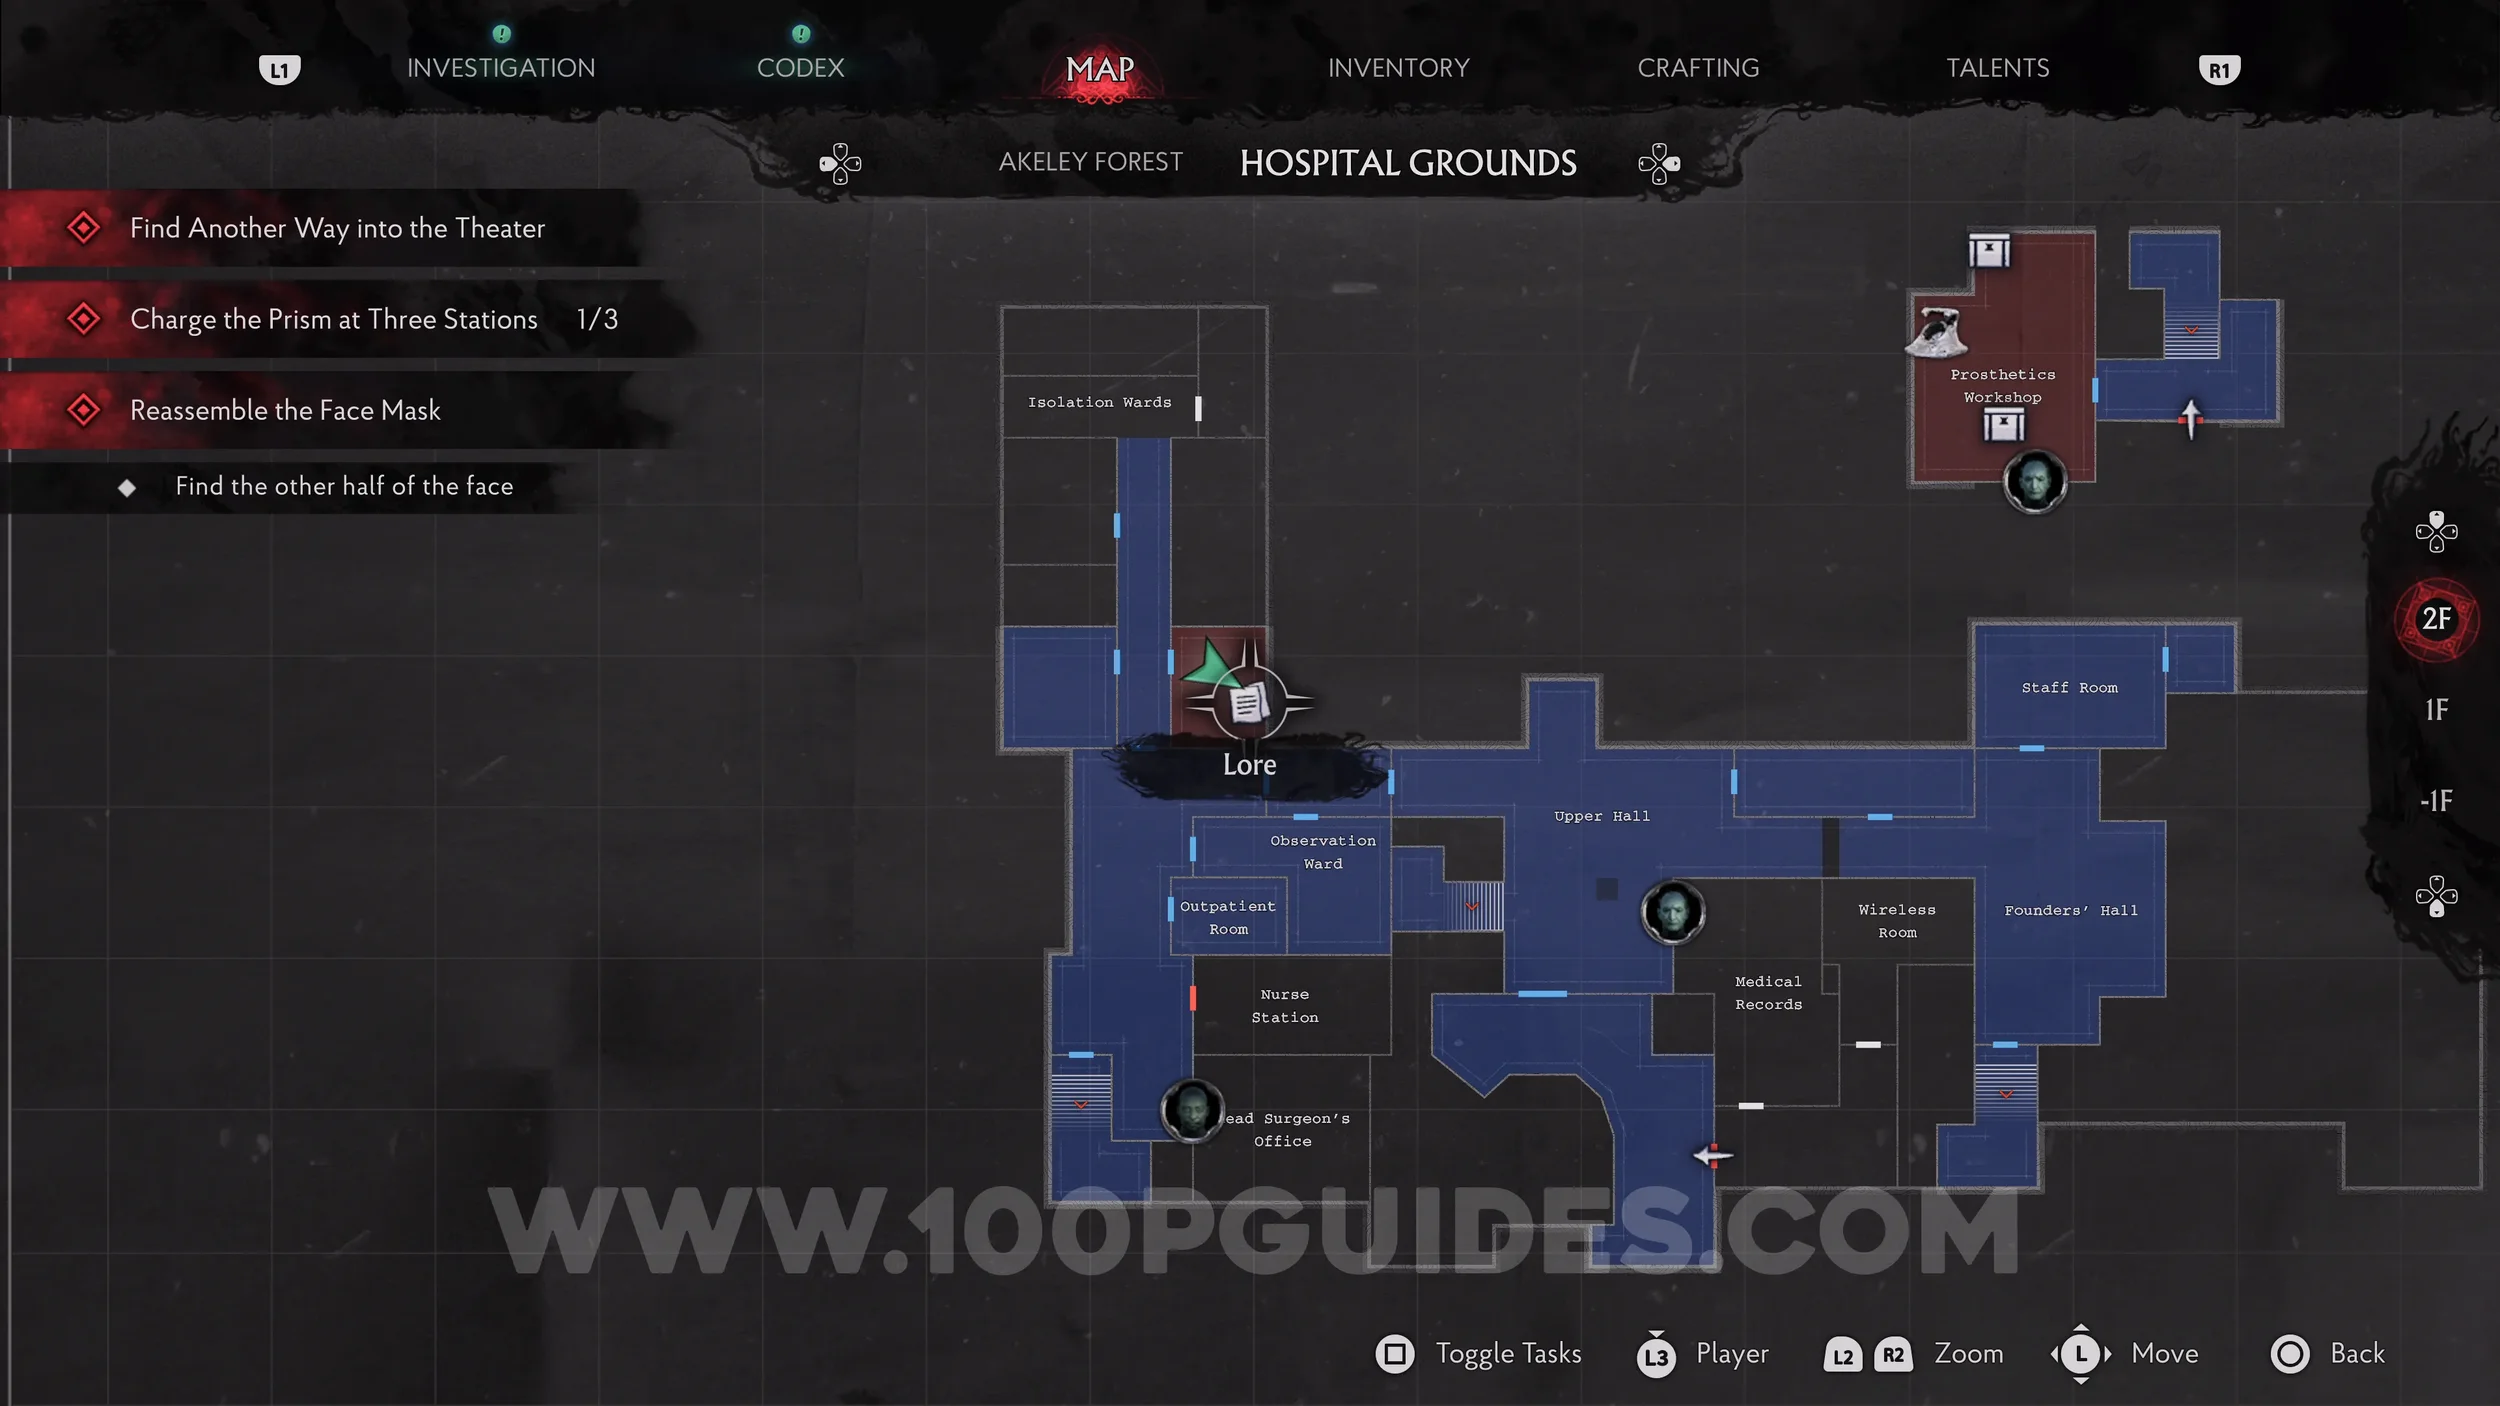
Ex Oblivione Codex: The View From Outside. Chapter 3 - In the first room on the right in the Isolation Wards in the Hospital.
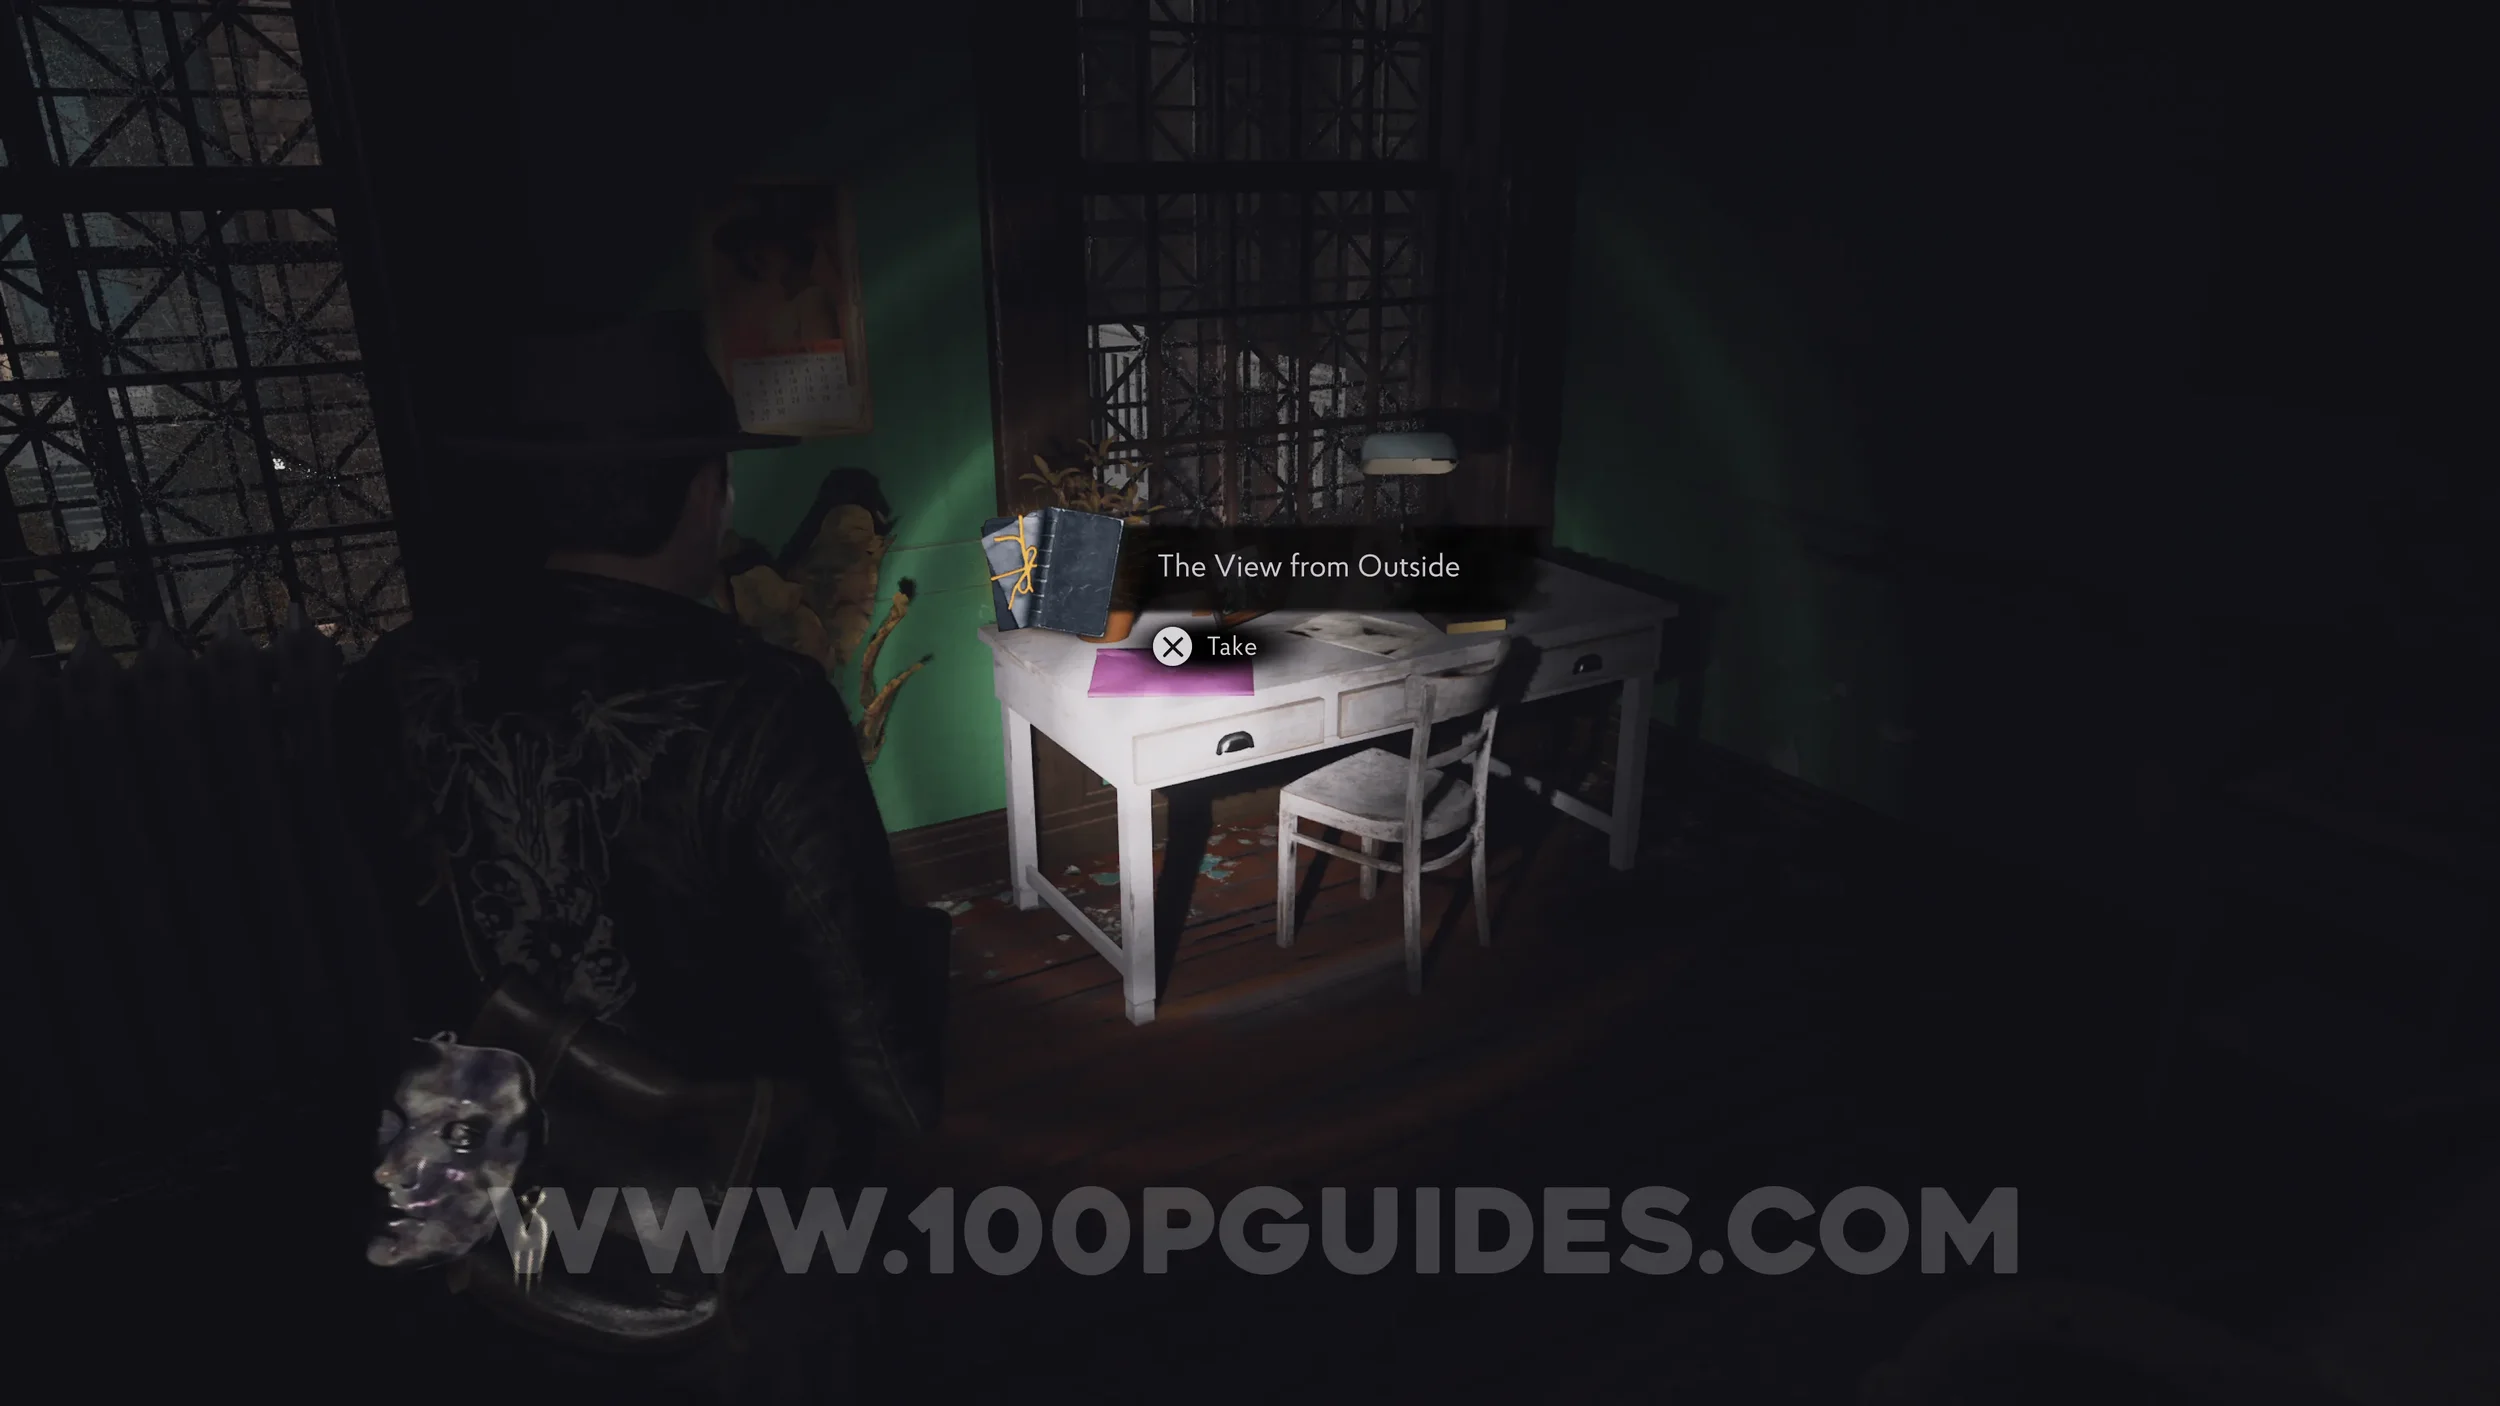
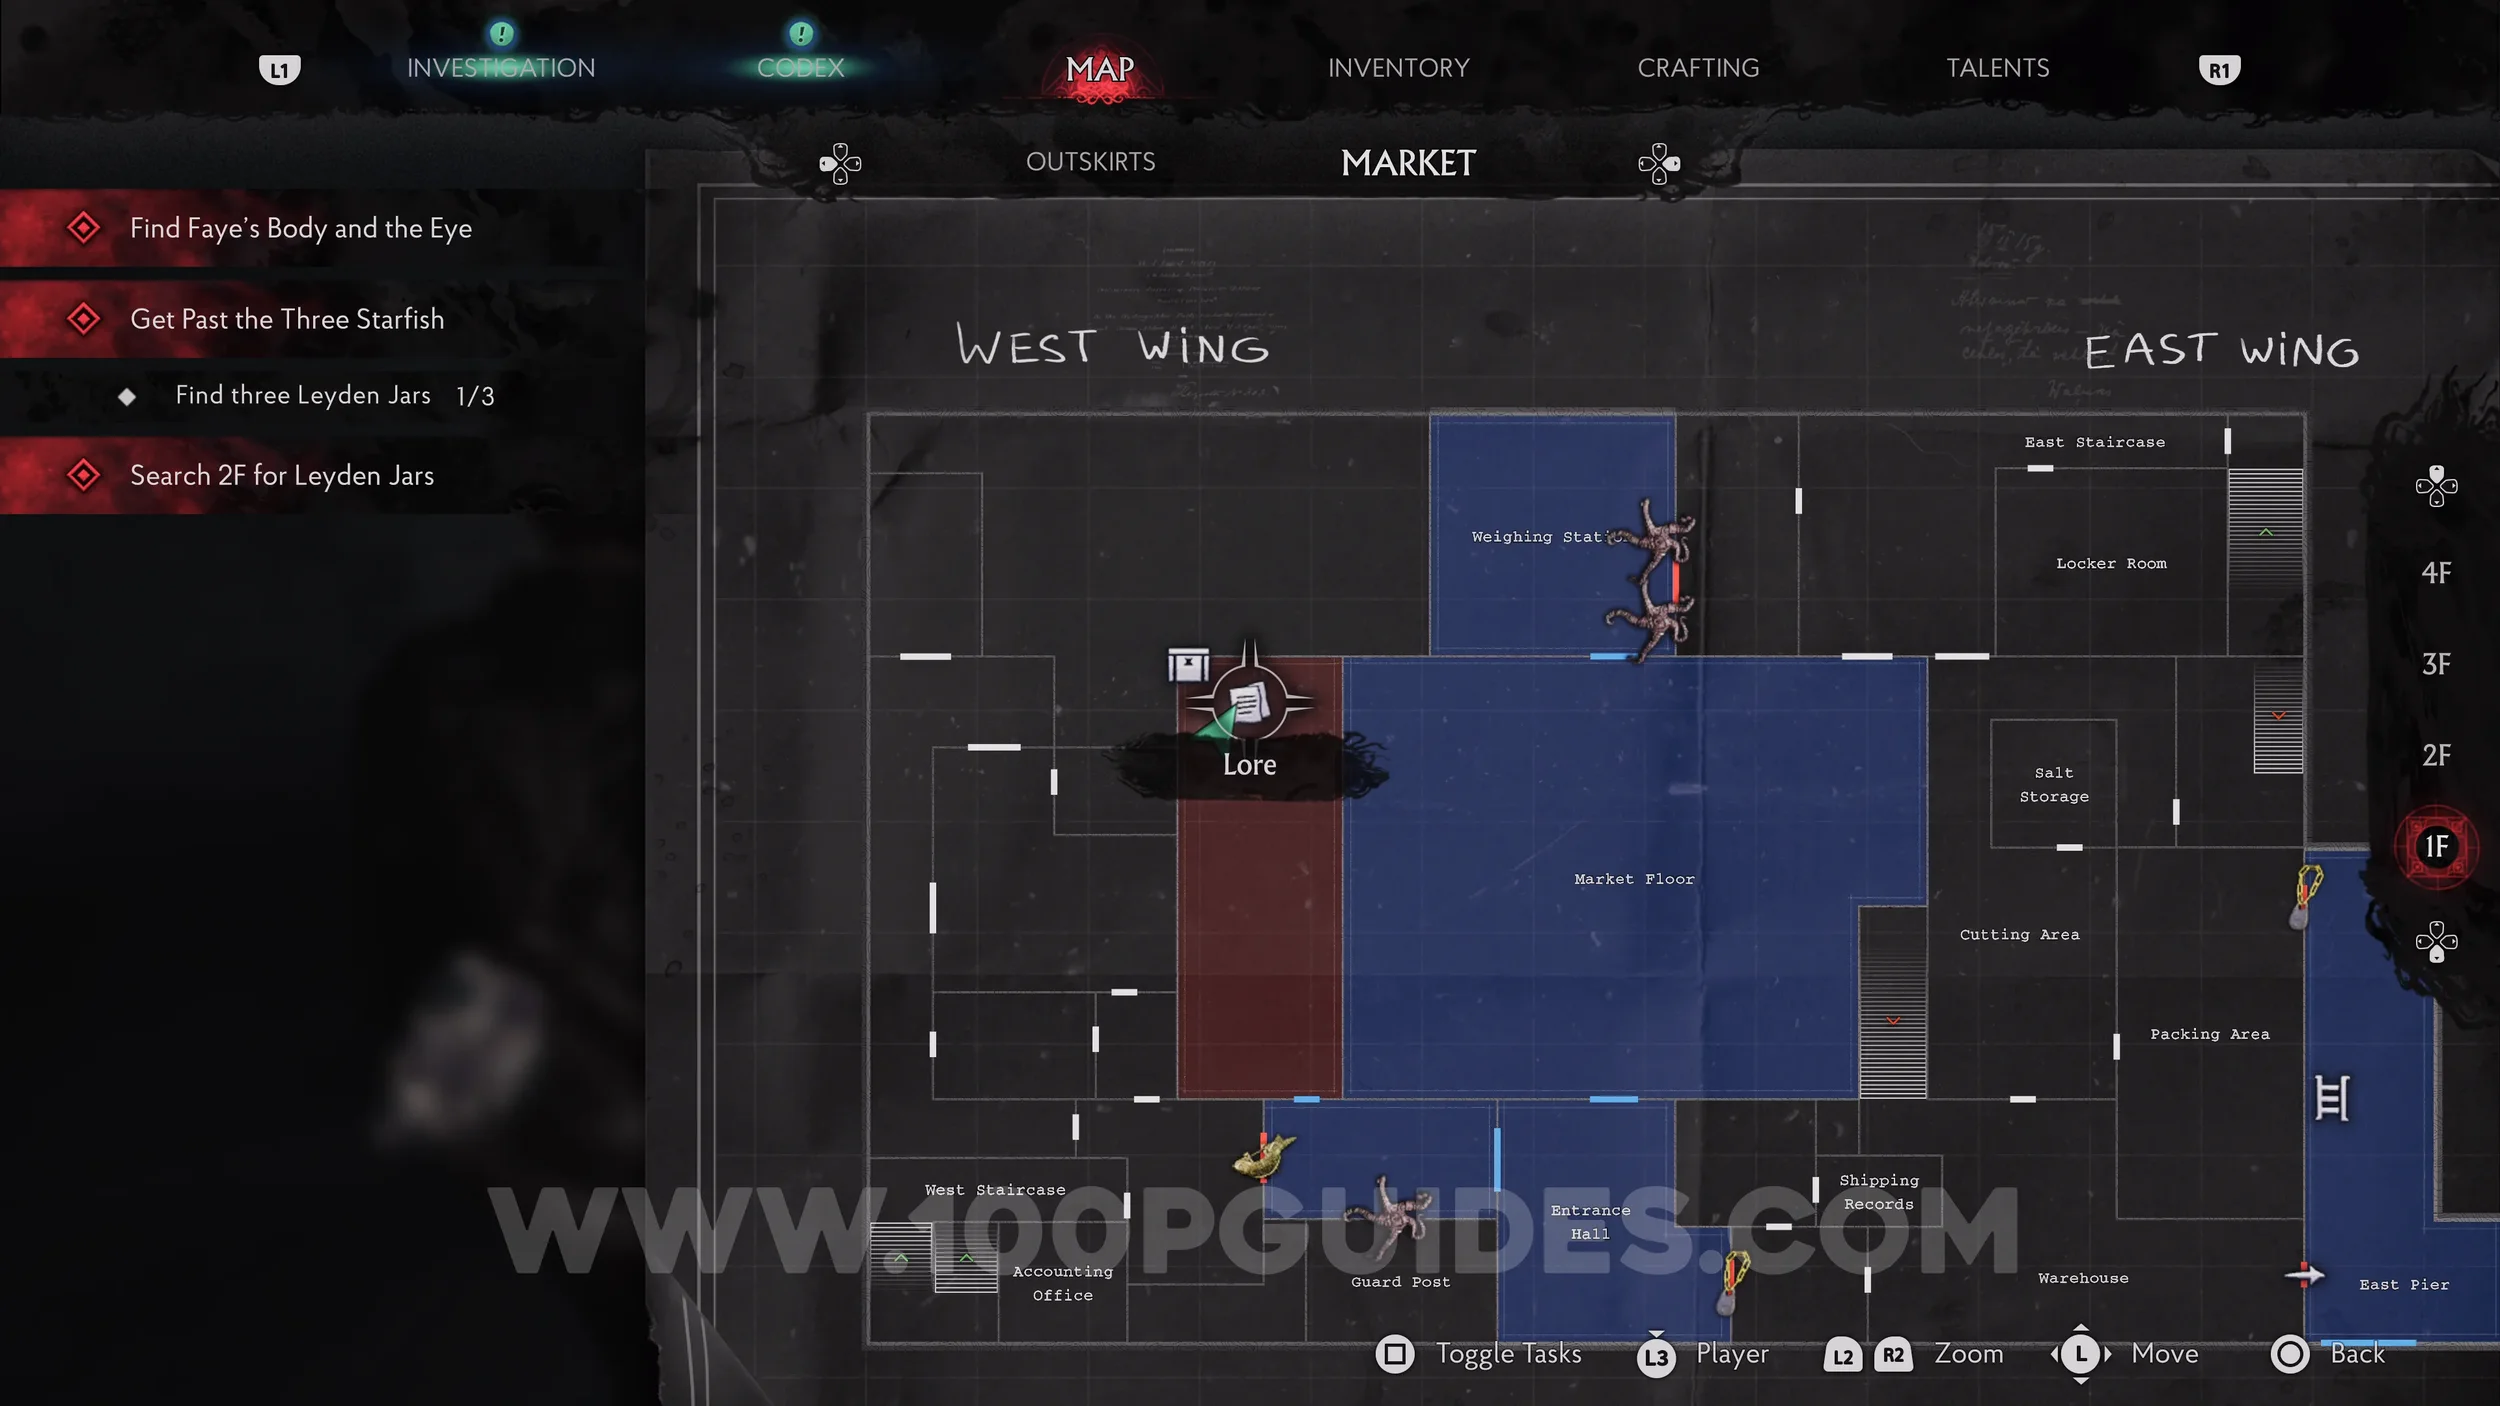
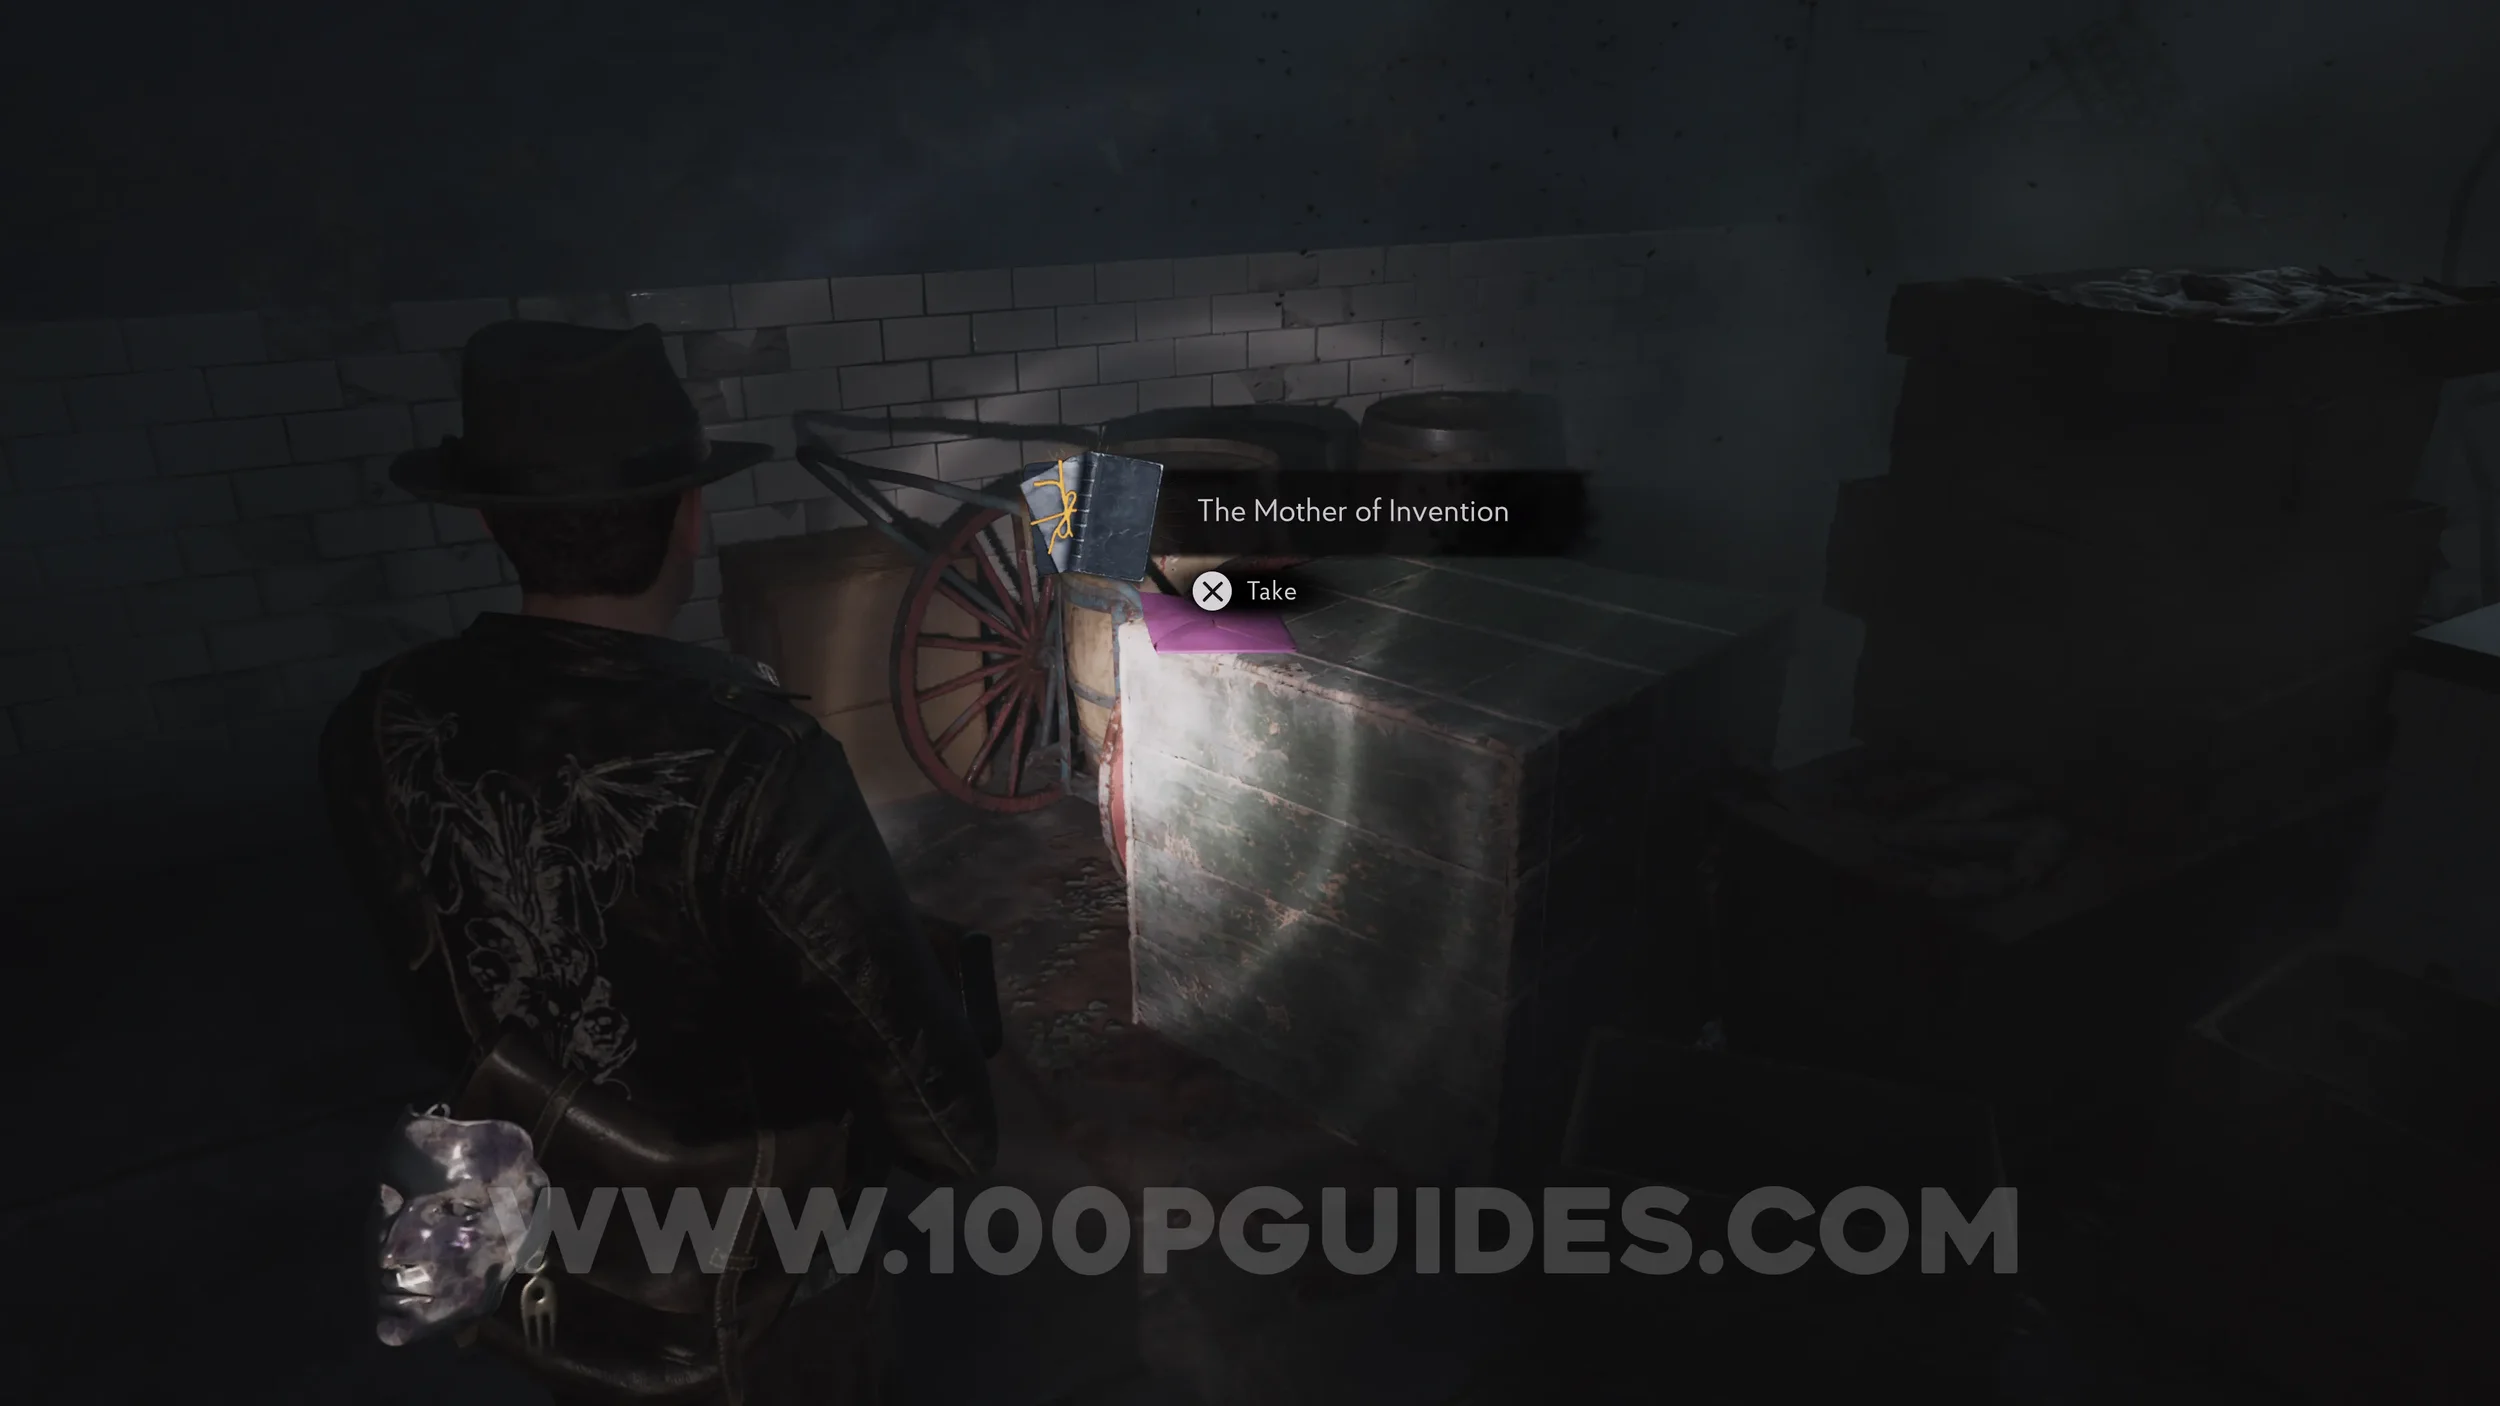
Ex Oblivione Codex: The Mother of Invention. Chapter 4 - In the area to the left of the Market Floor.
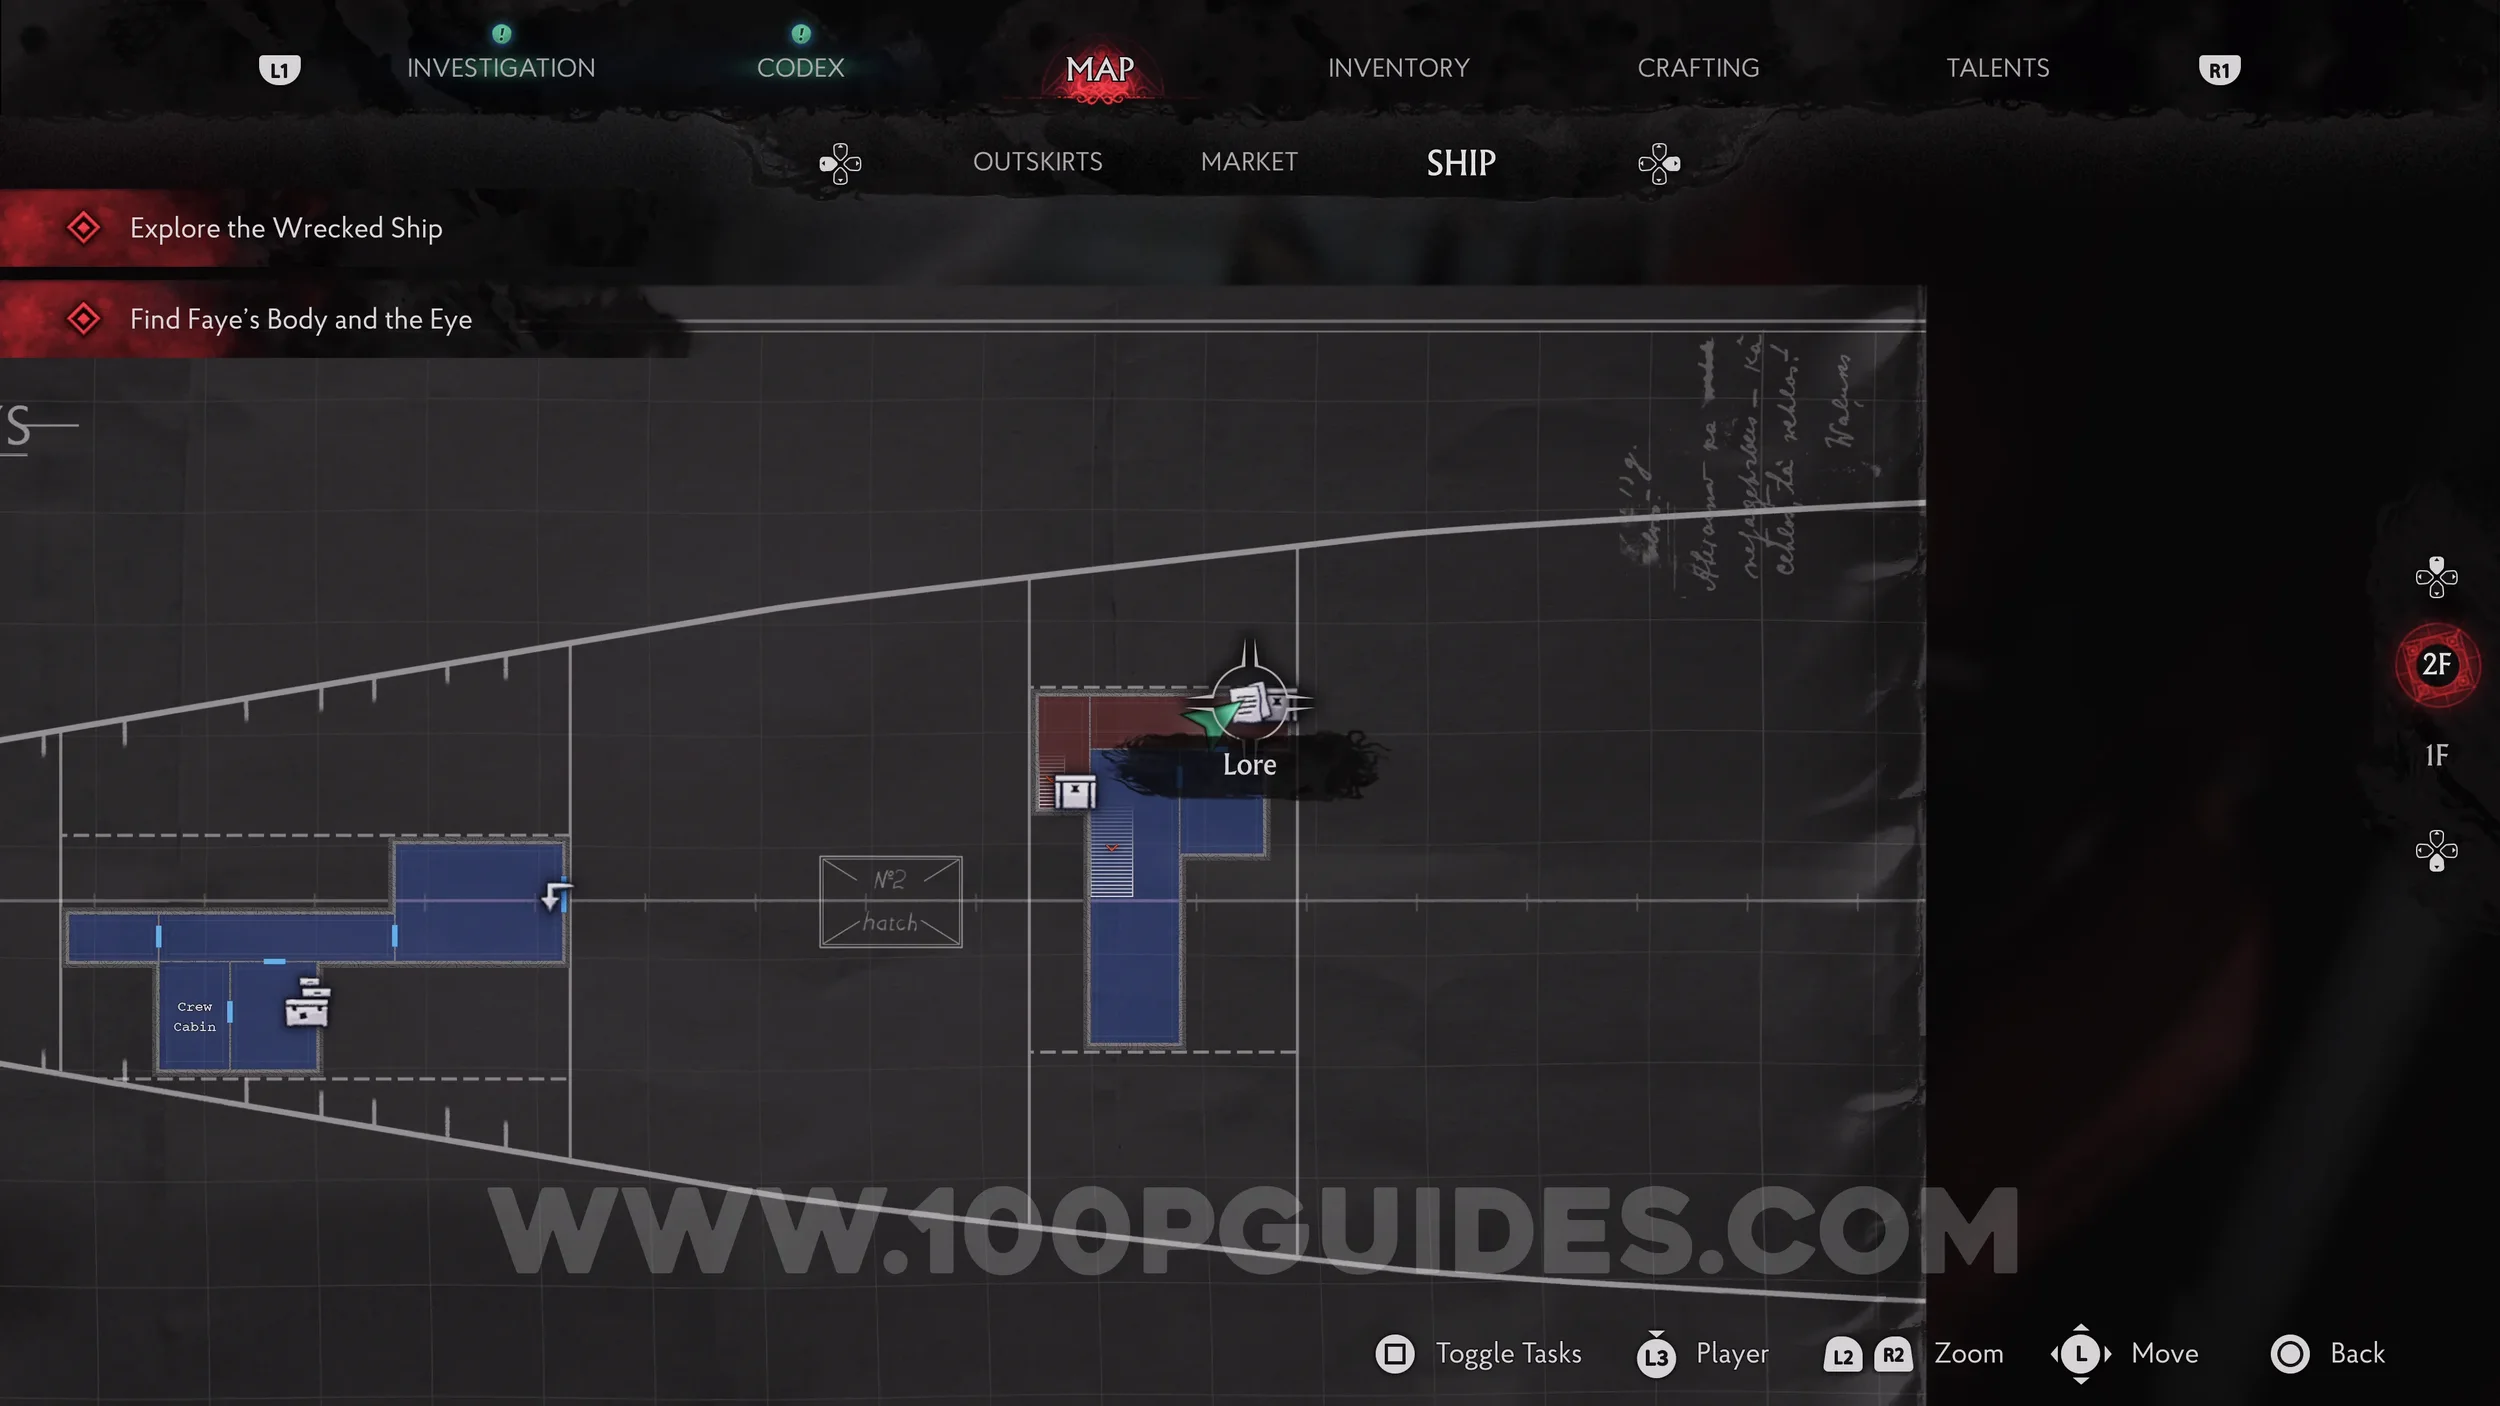
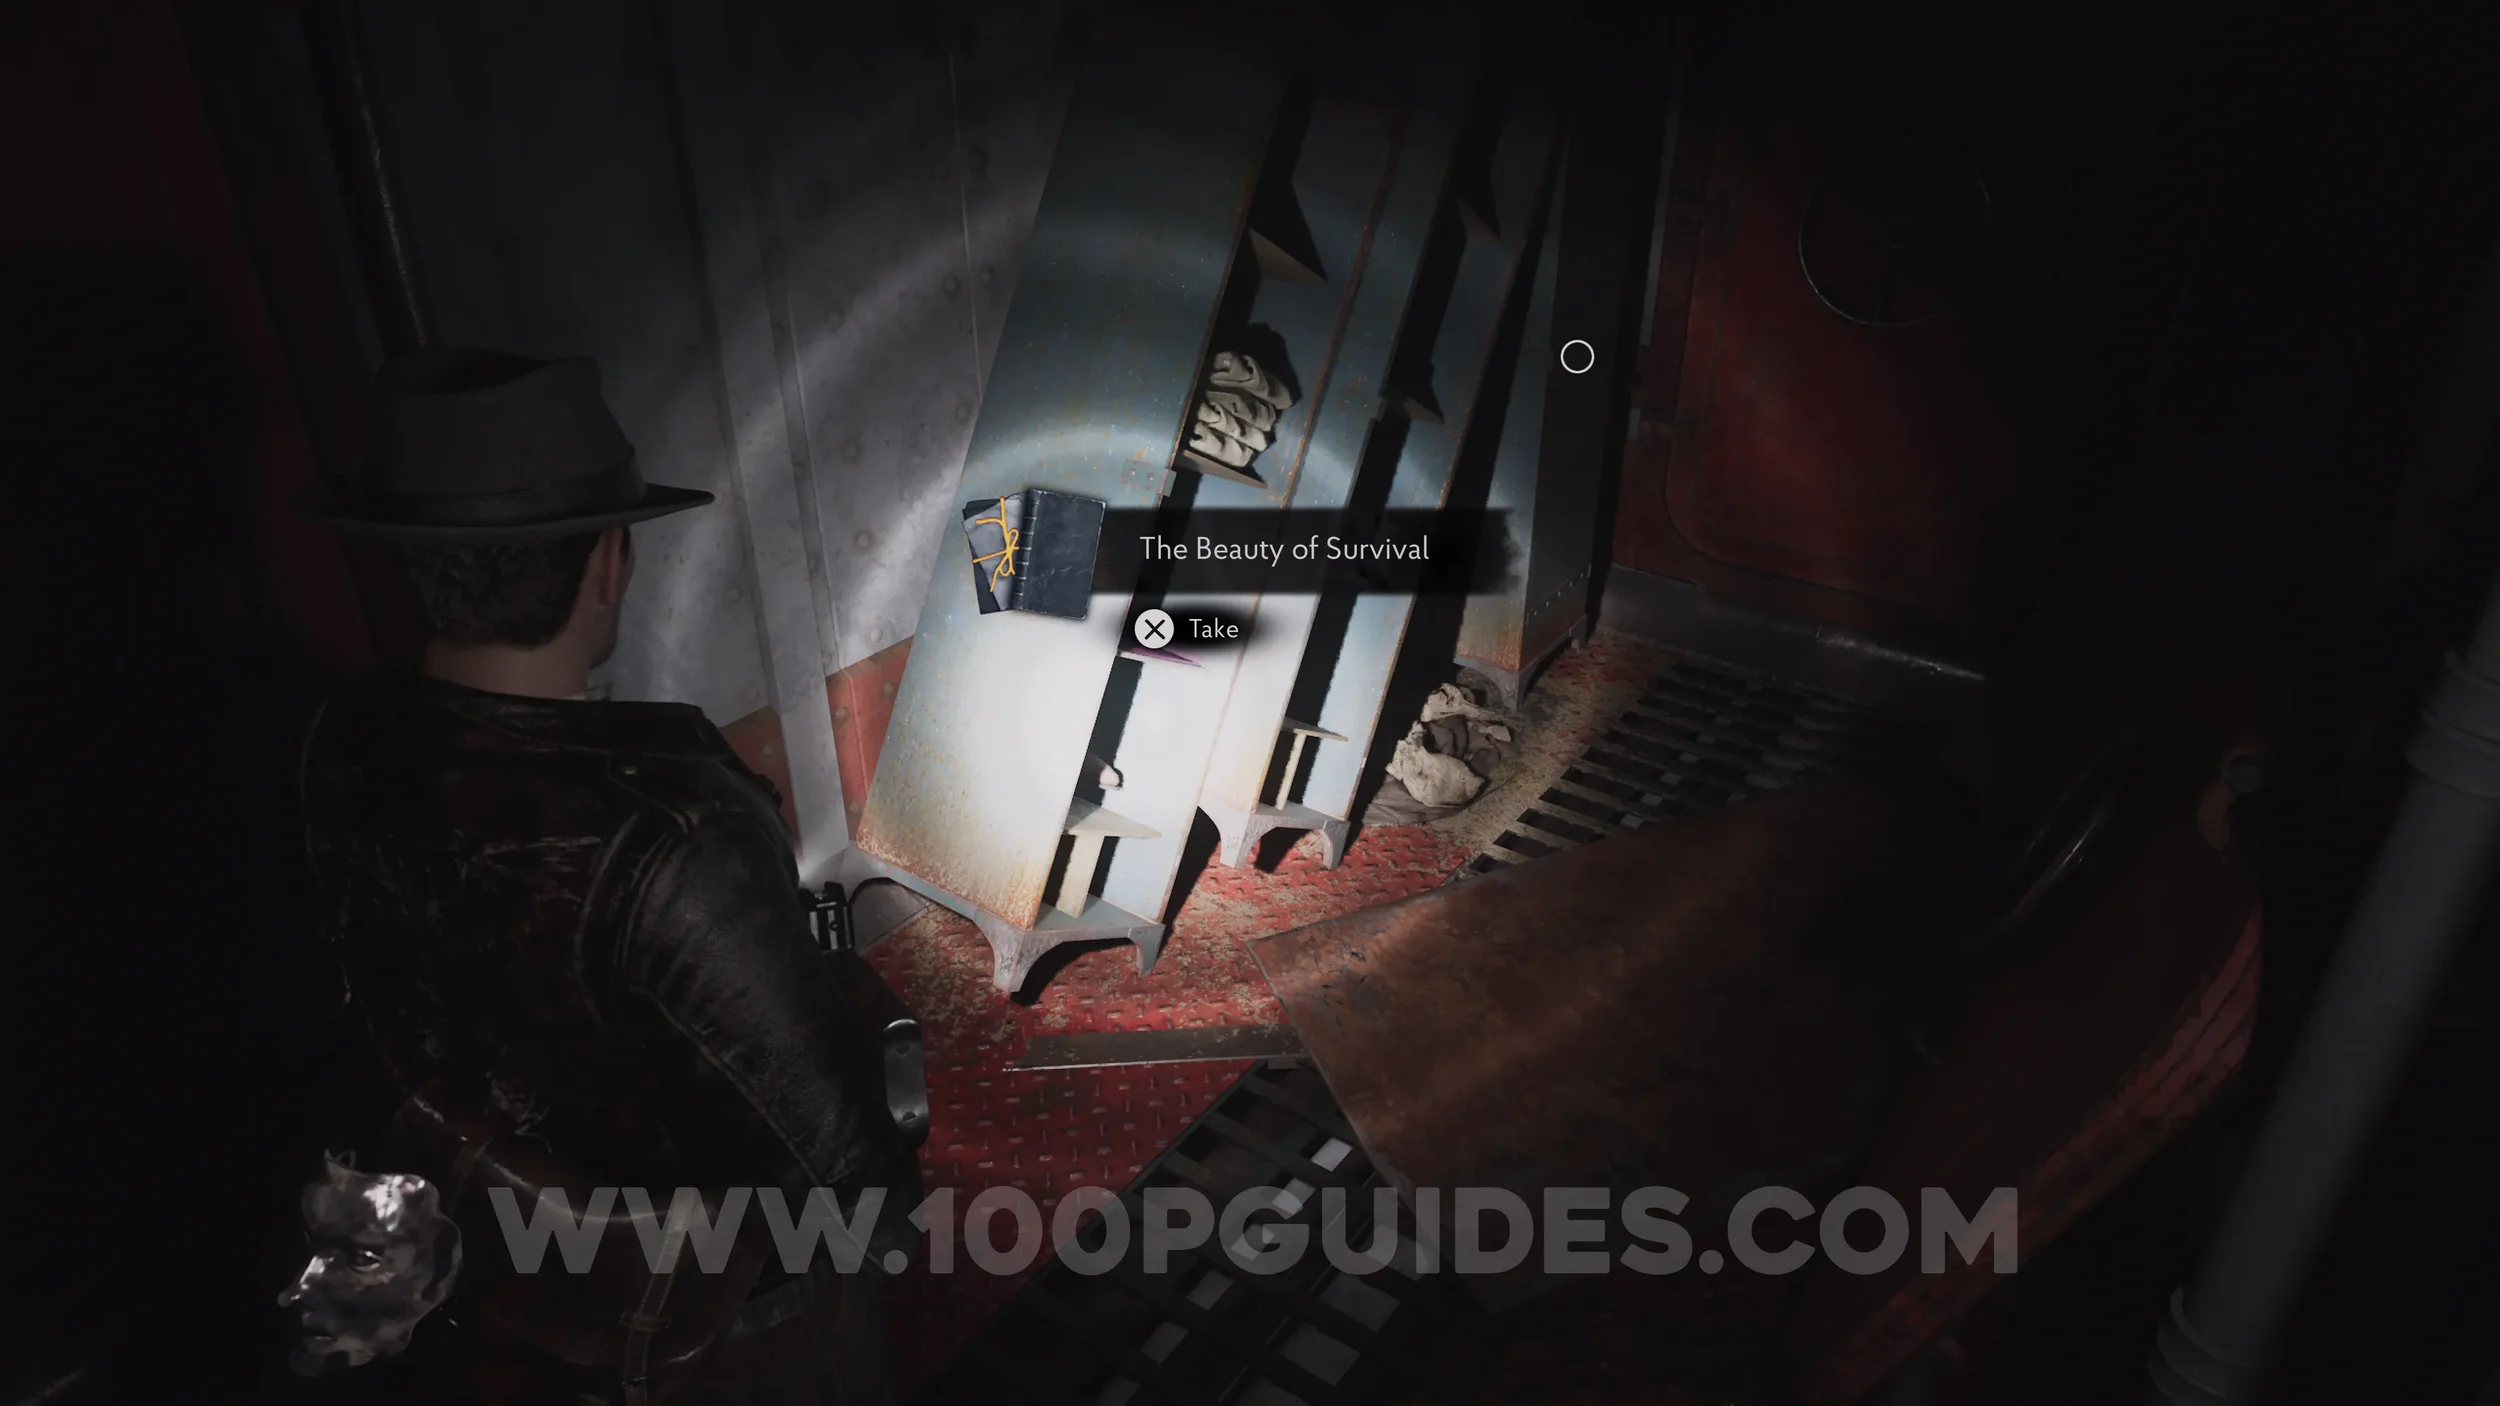
Ex Oblivione Codex: The Beauty of Survival. Chapter 4 - At the end of the chapter you'll have to go through the massive ship that has crashed into the Fish Market. Once on the ship you'll start on 1F, then go down to 2F and back up to 1F. The codex is in the first corridor as soon as you return to 1F.
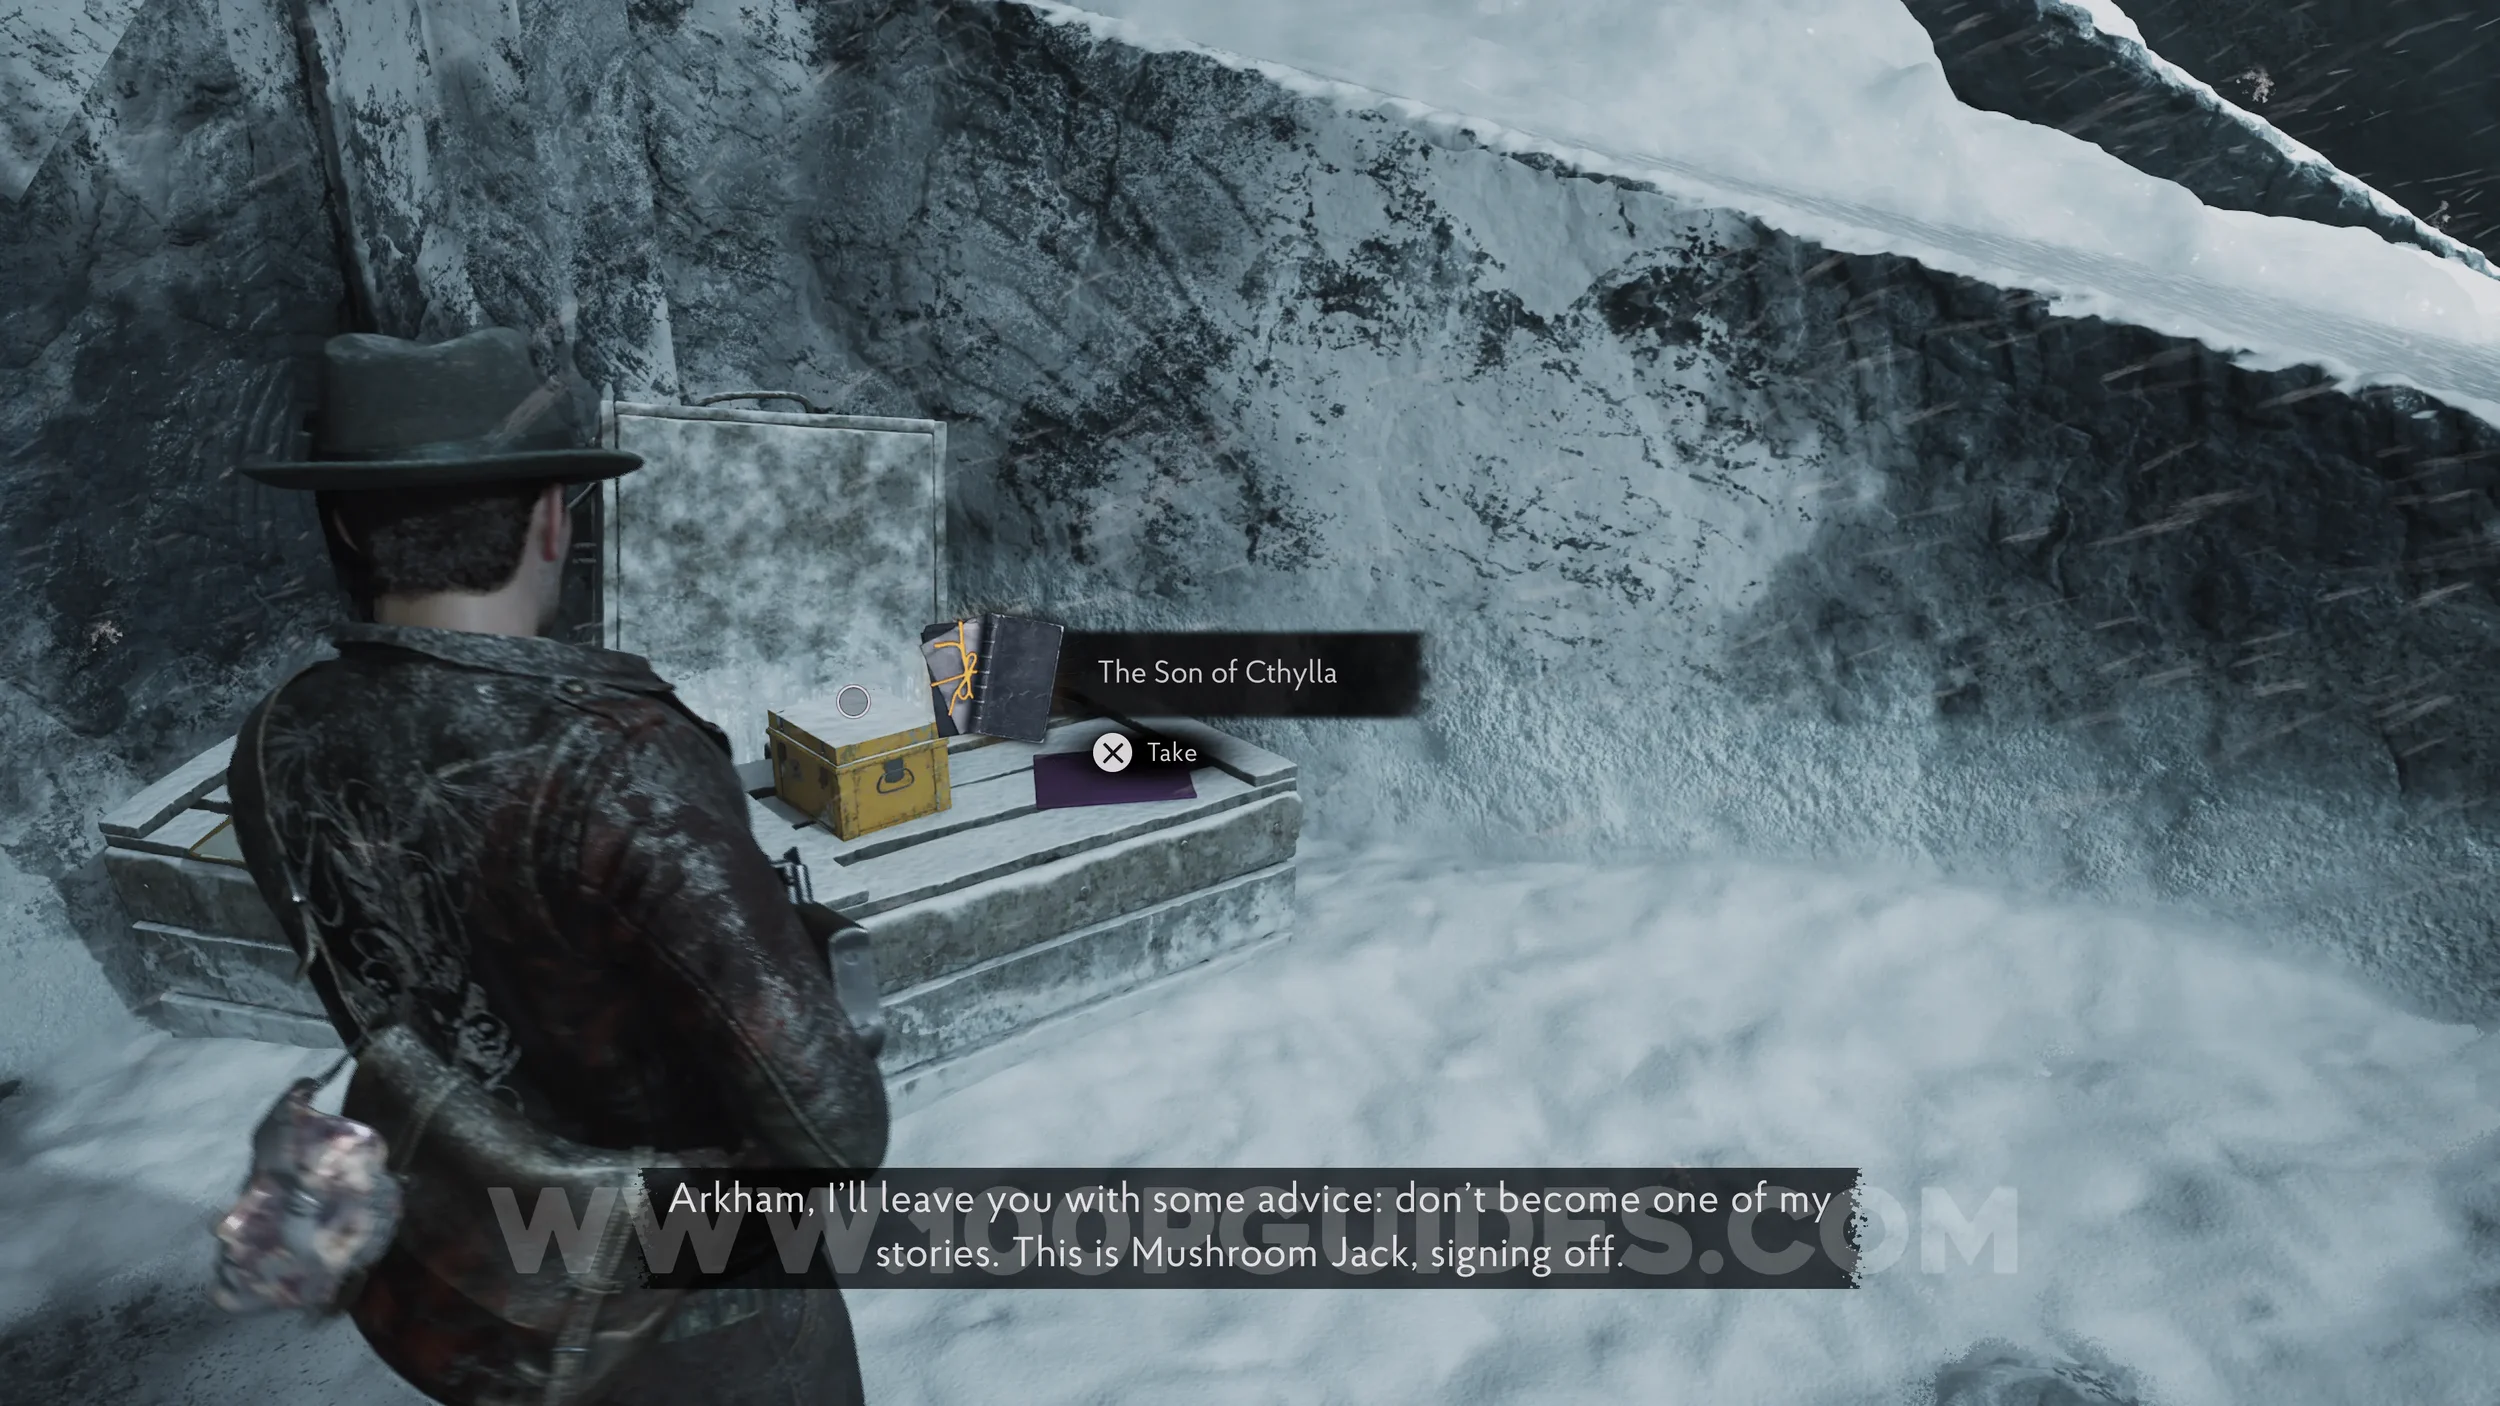
Ex Oblivione Codex: The Son of Cthylla. Chapter 5 - In the Portal Room.